


![A Perfect Zombie Apocalypse Starter Set? Civilians & Survivors Review | Wargames Atlantic [7 Days Early Access]](https://images.beastsofwar.com/2026/01/unboxing-wargames-atlantic-civilians-_-survivors-1_2-coverimage-225-127.jpg)
![Wild Australia Wargaming? 28mm Ned Kelly Gang & Victorian Police Review [7 Days Early Access]](https://images.beastsofwar.com/2026/01/unboxing-traders-galaxy-australiana-ned-kelly-gang-_-victorian-police-coverimage-225-127.jpg)


Fallout/Roanoke VA Mashup Table


Recommendations: 157
About the Project
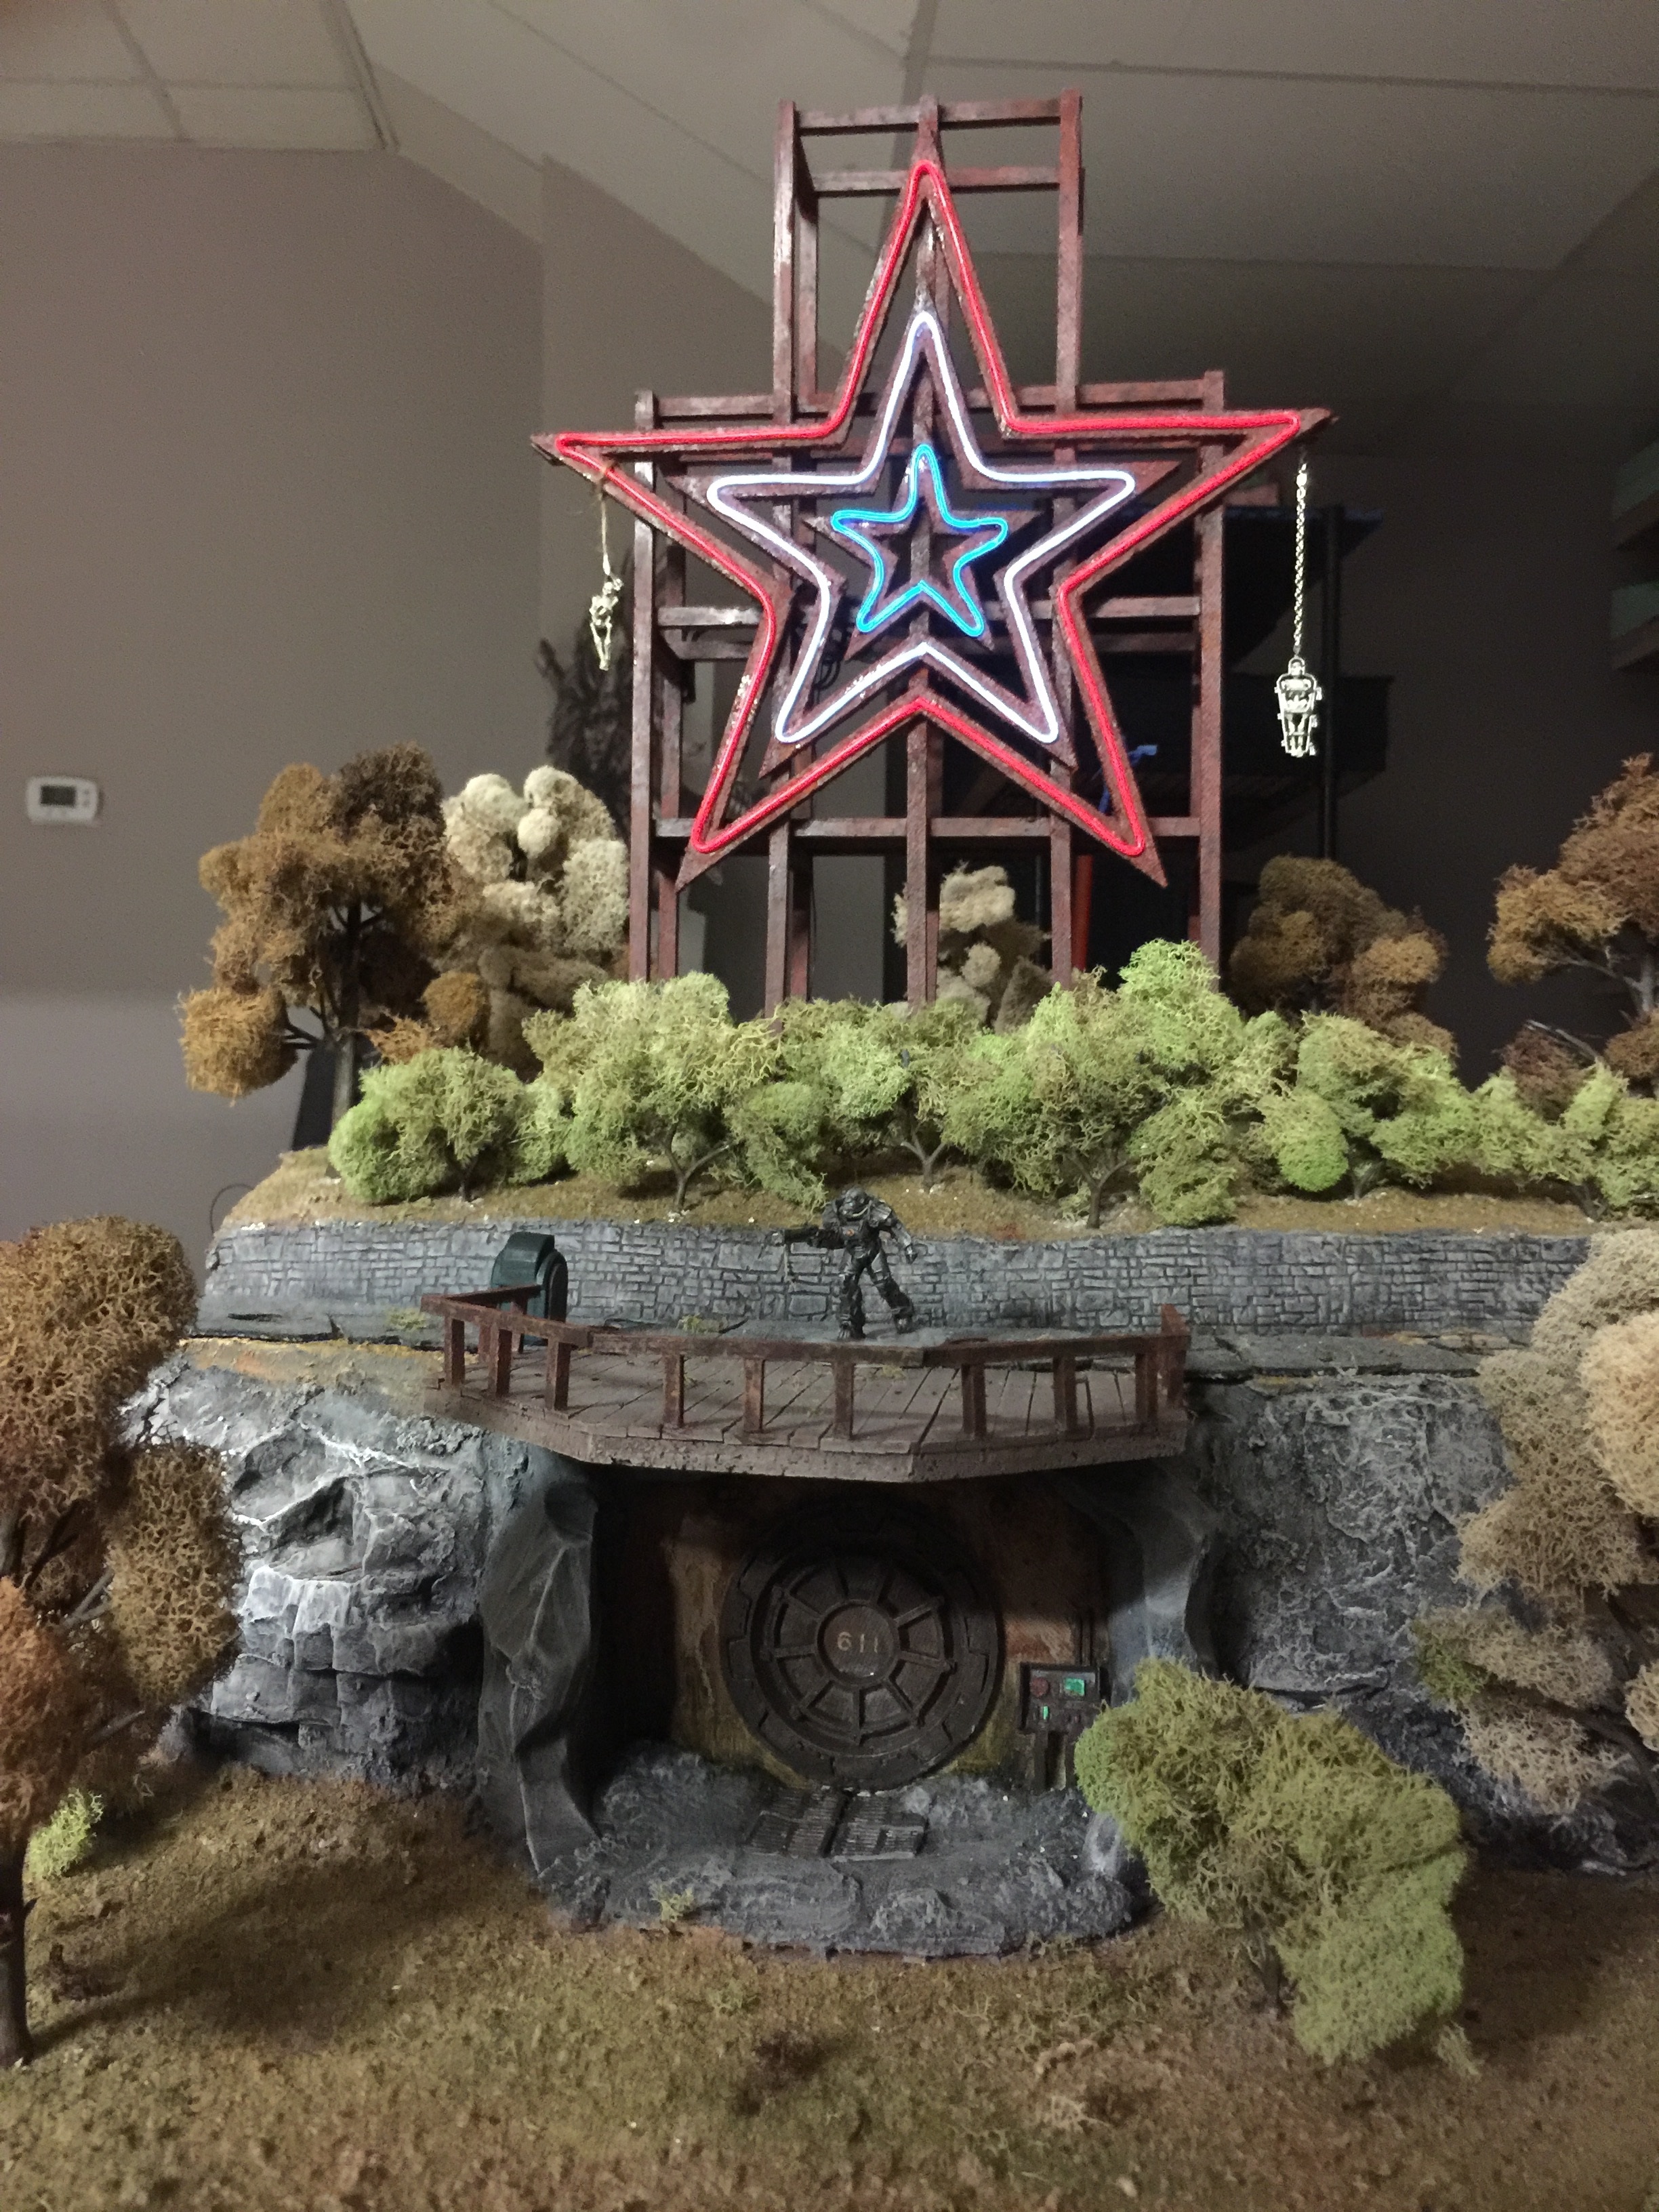
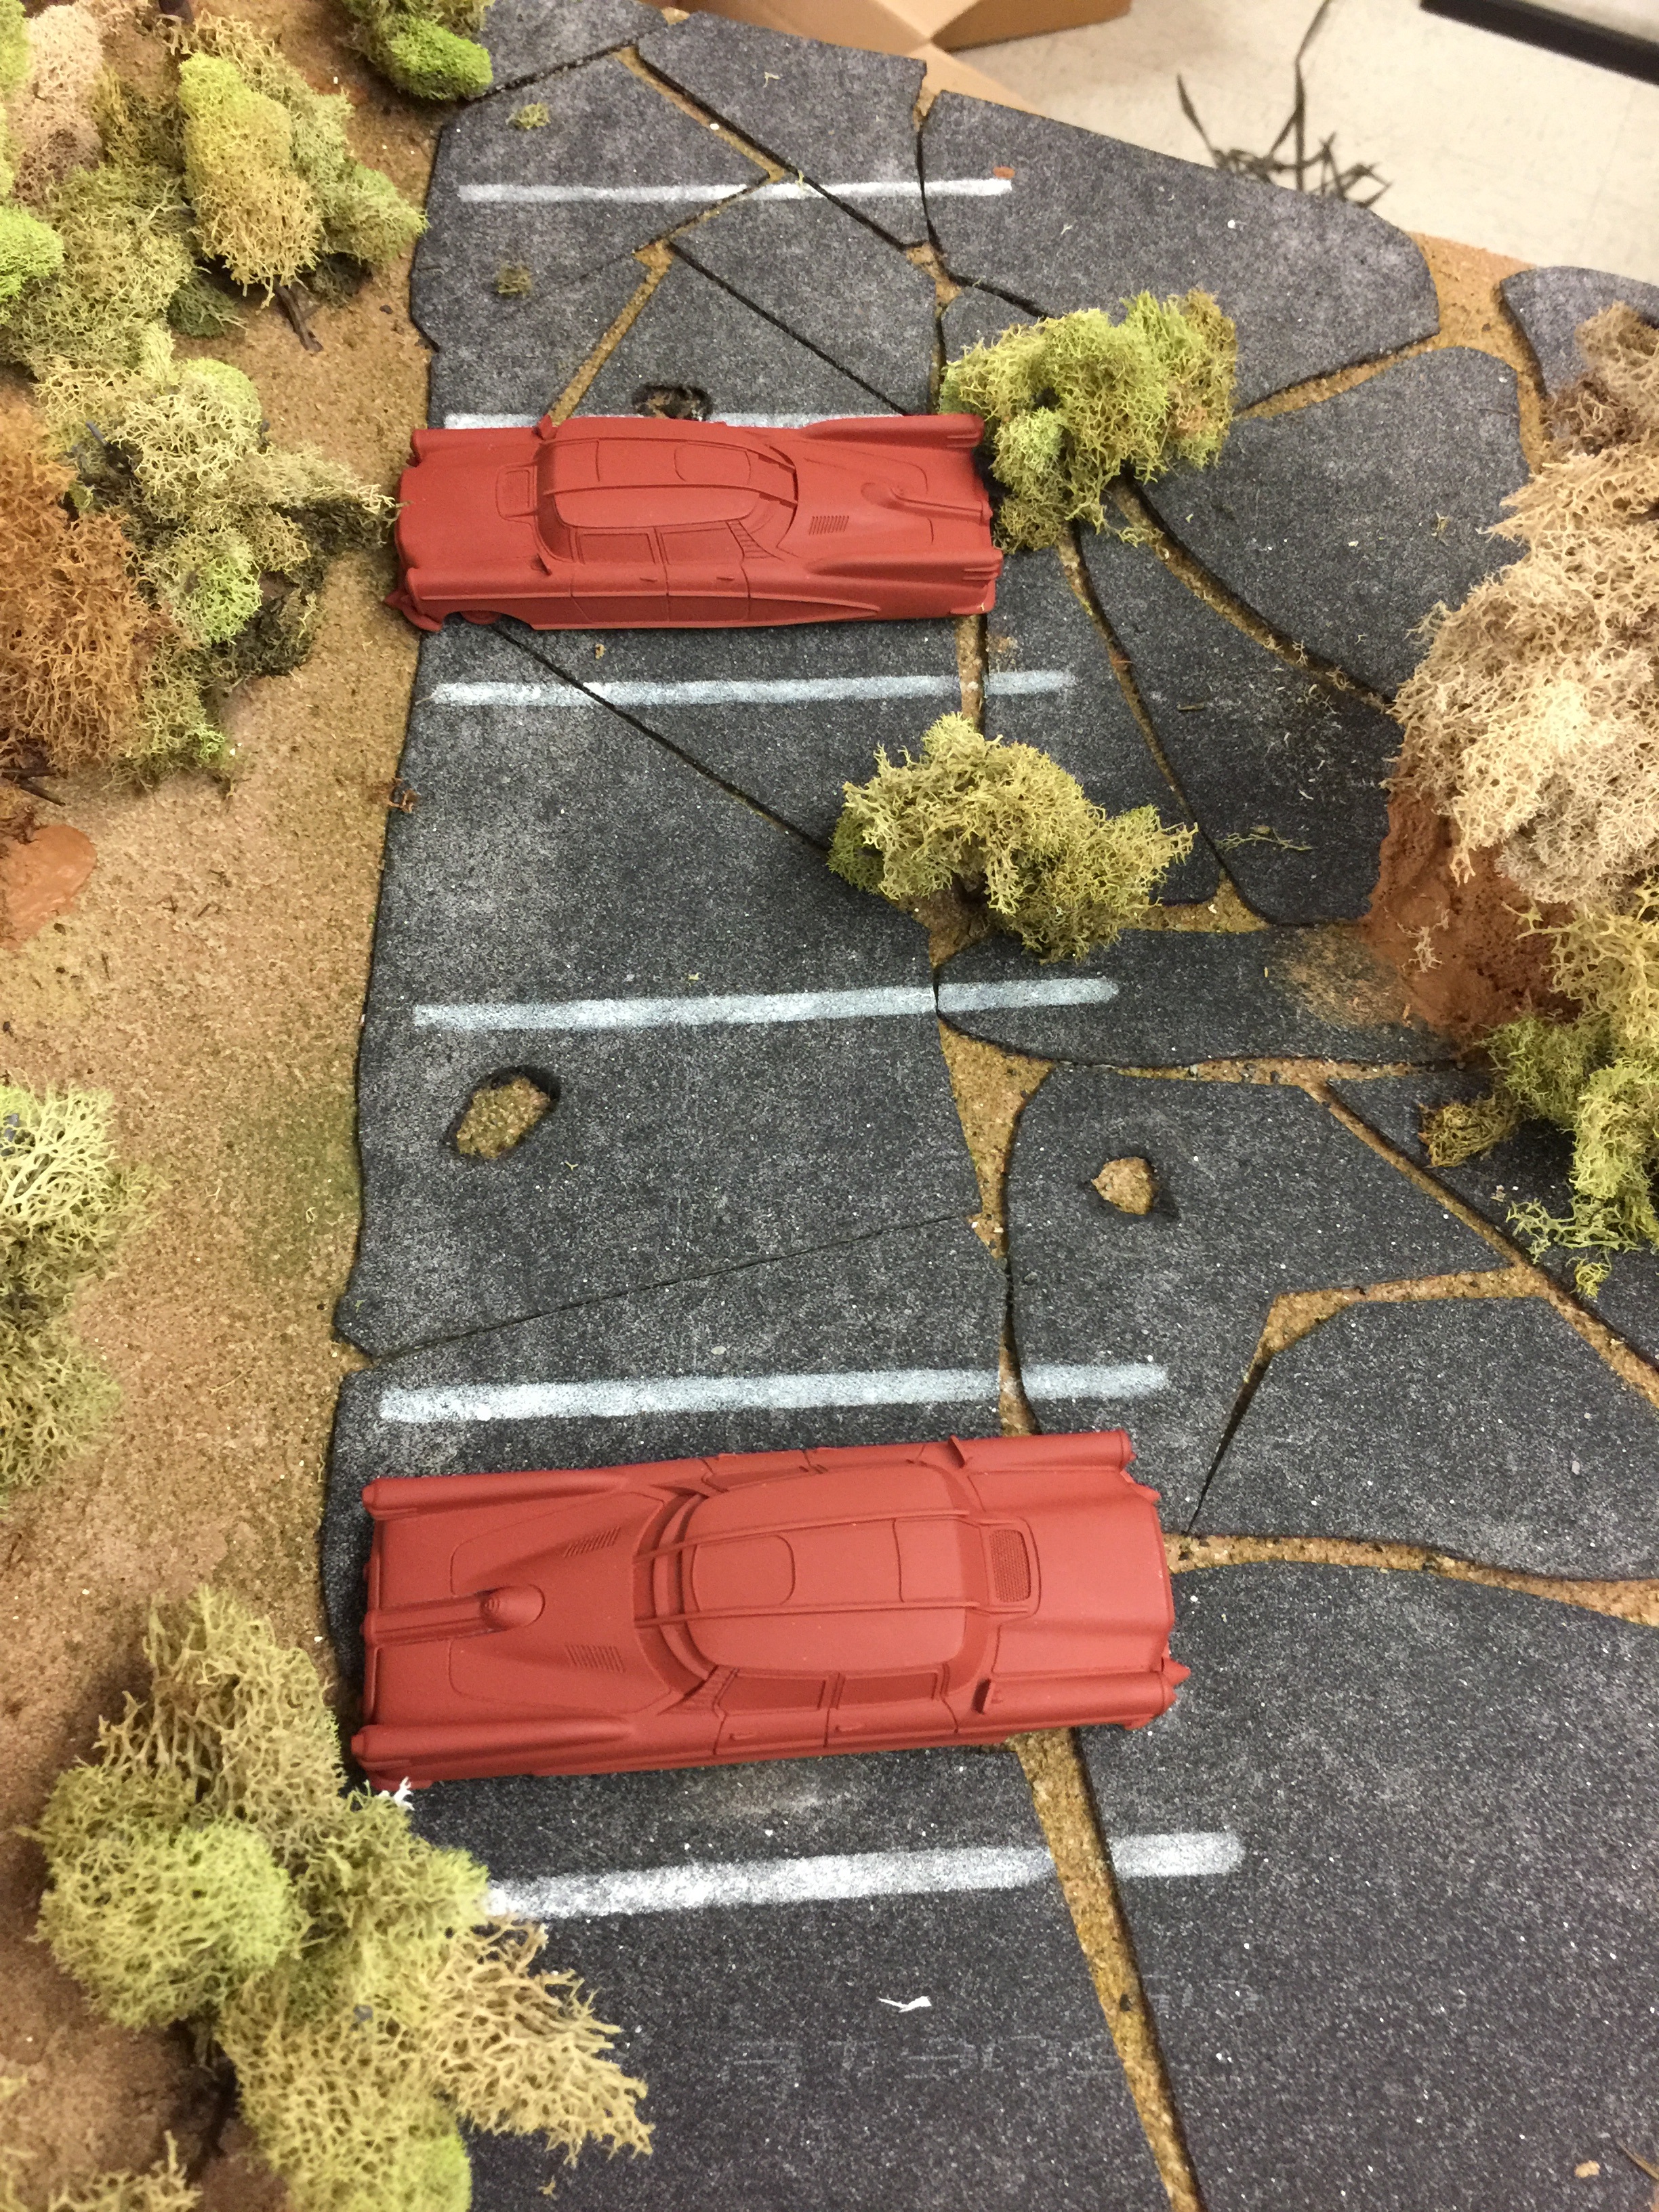
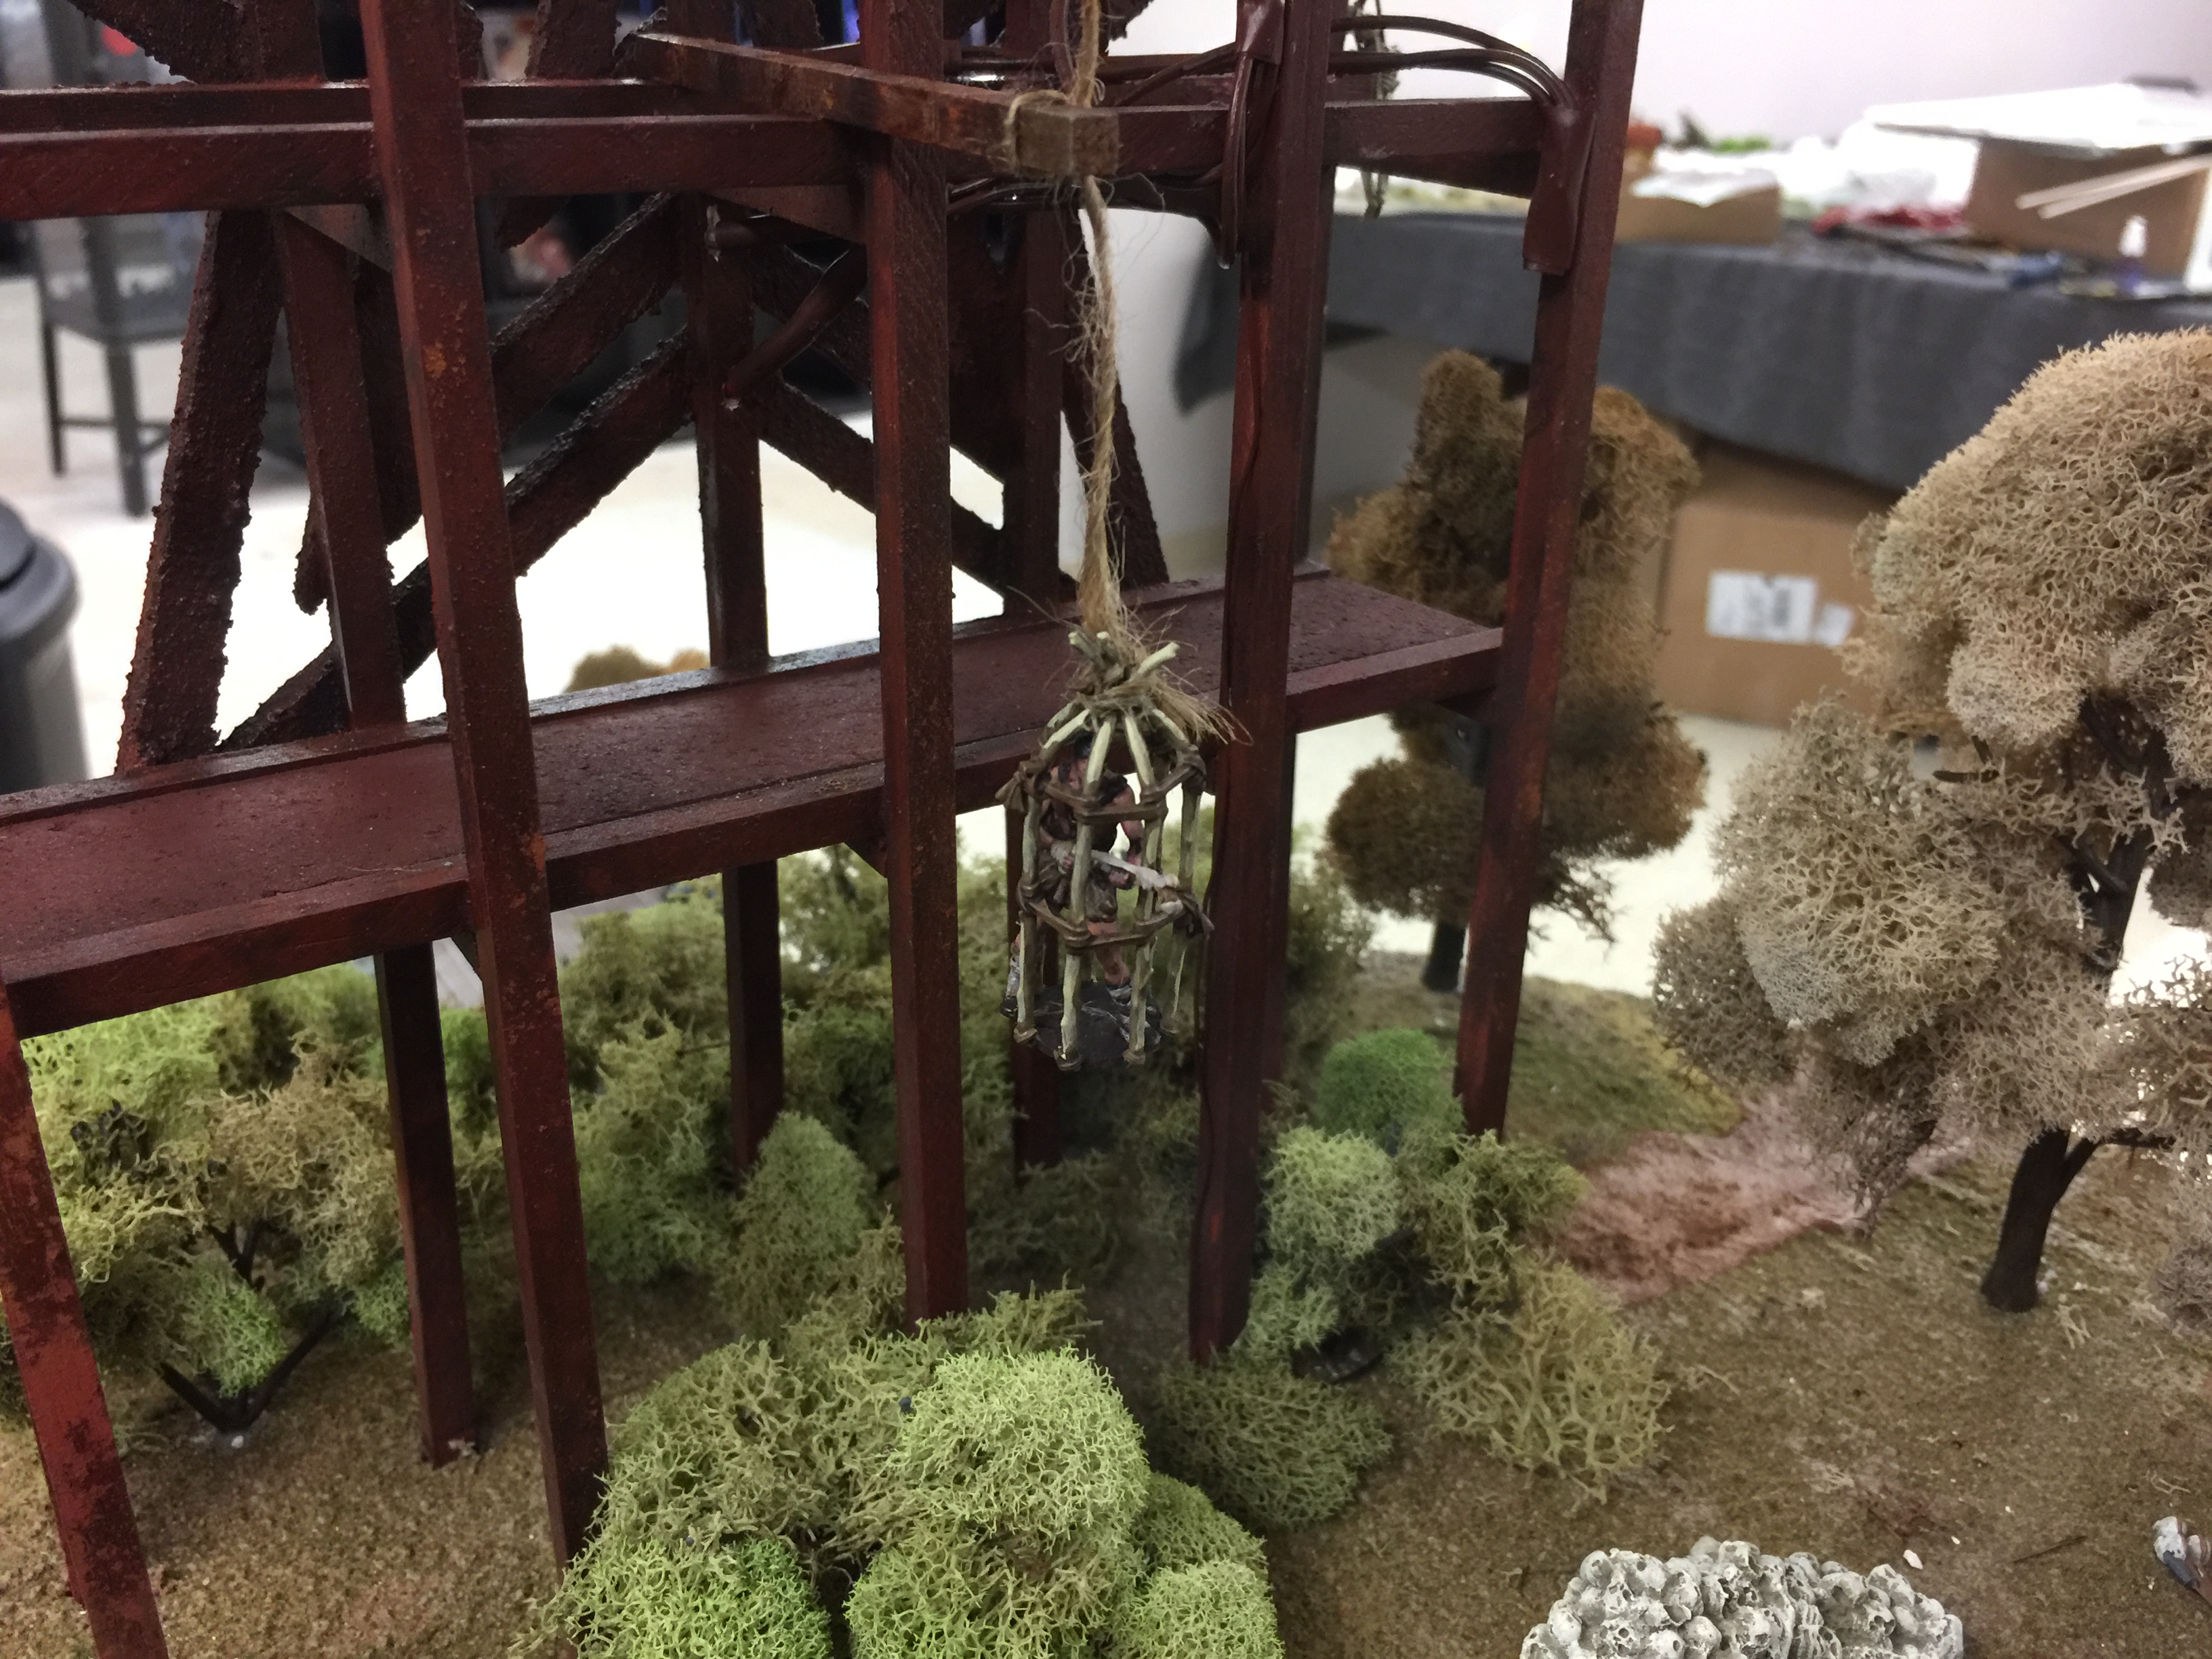
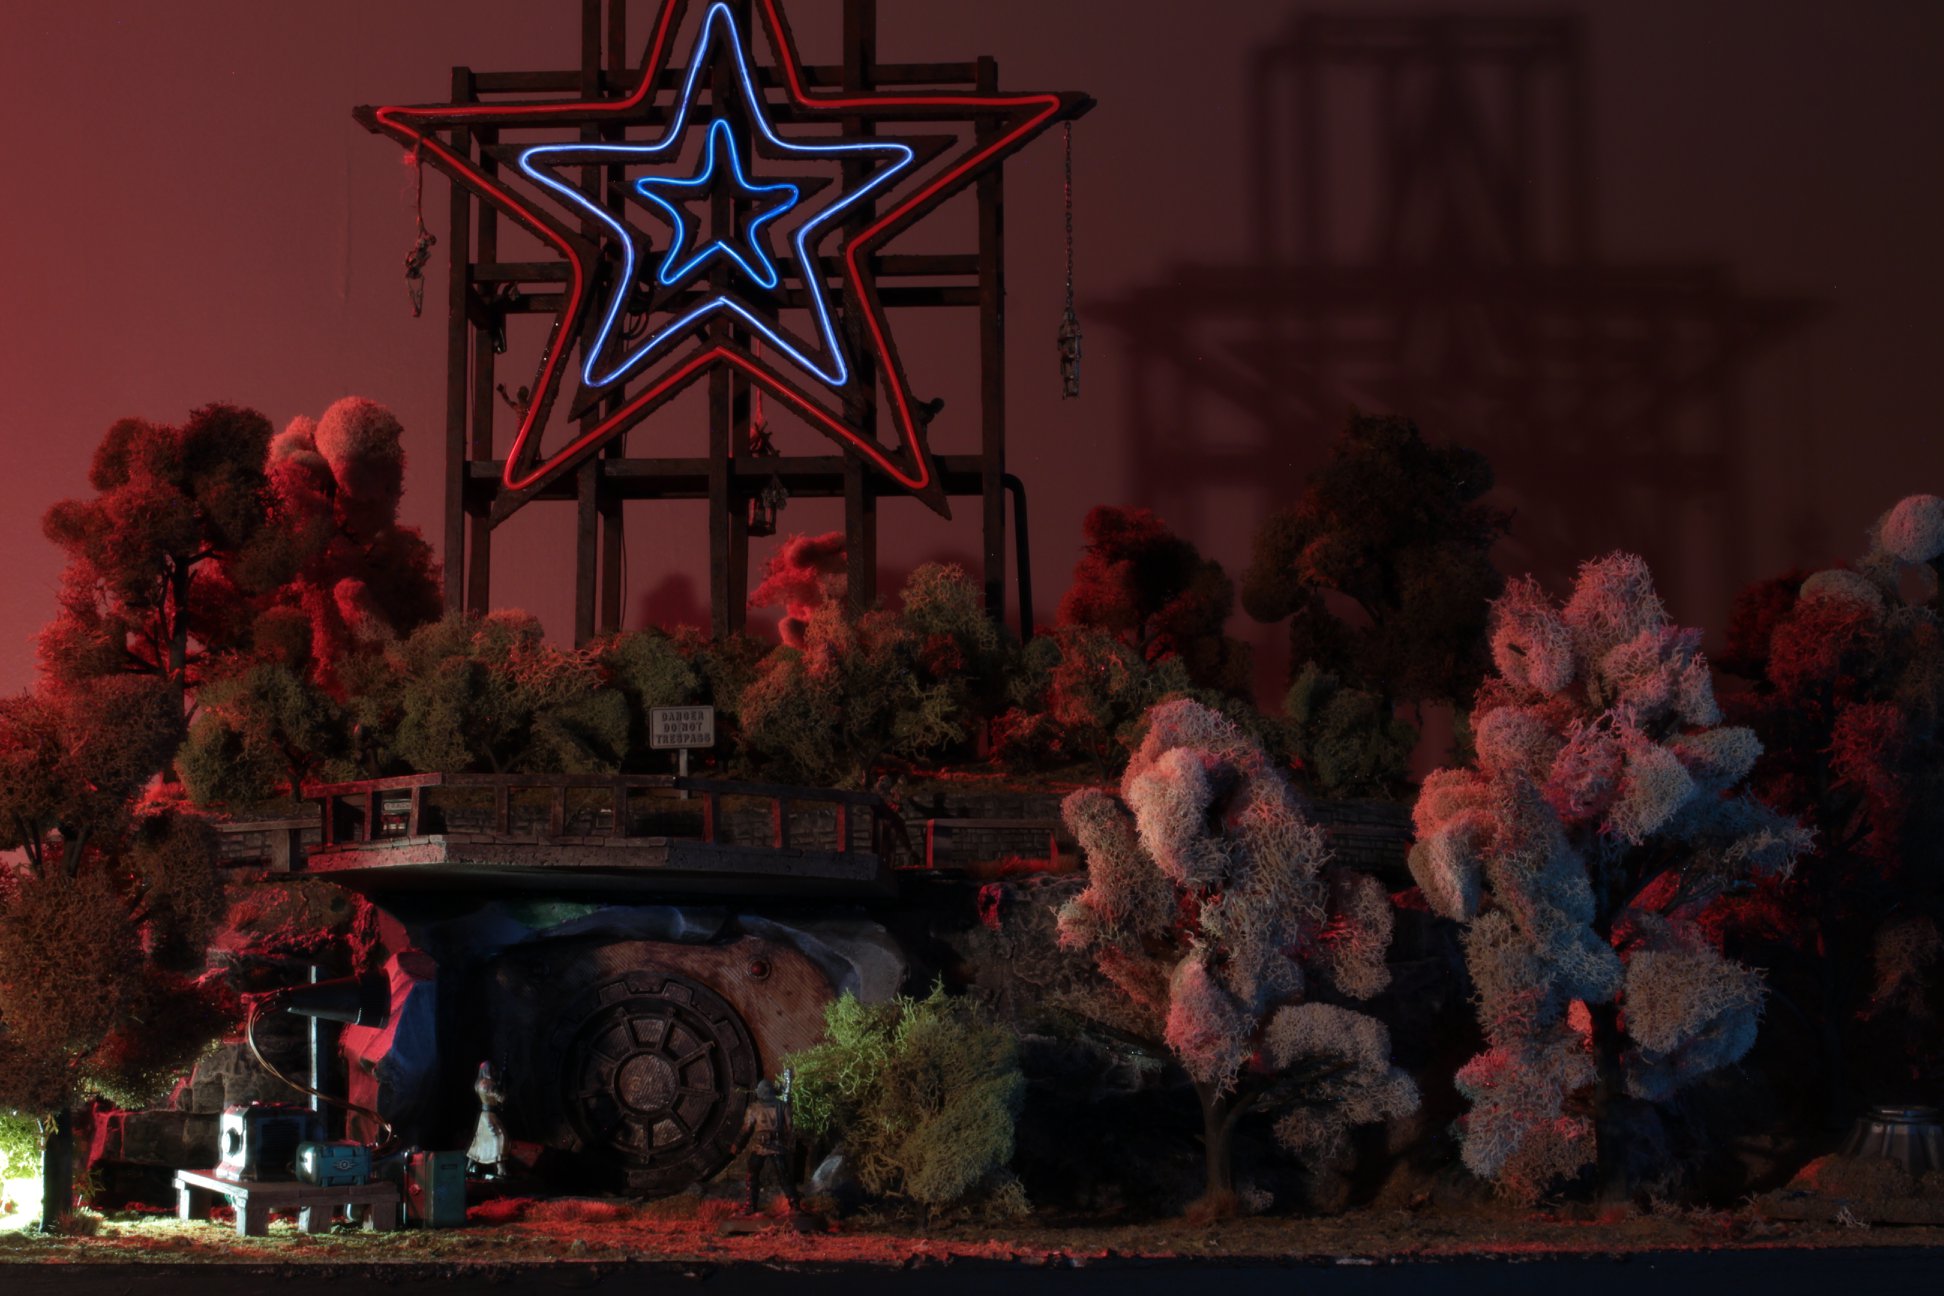
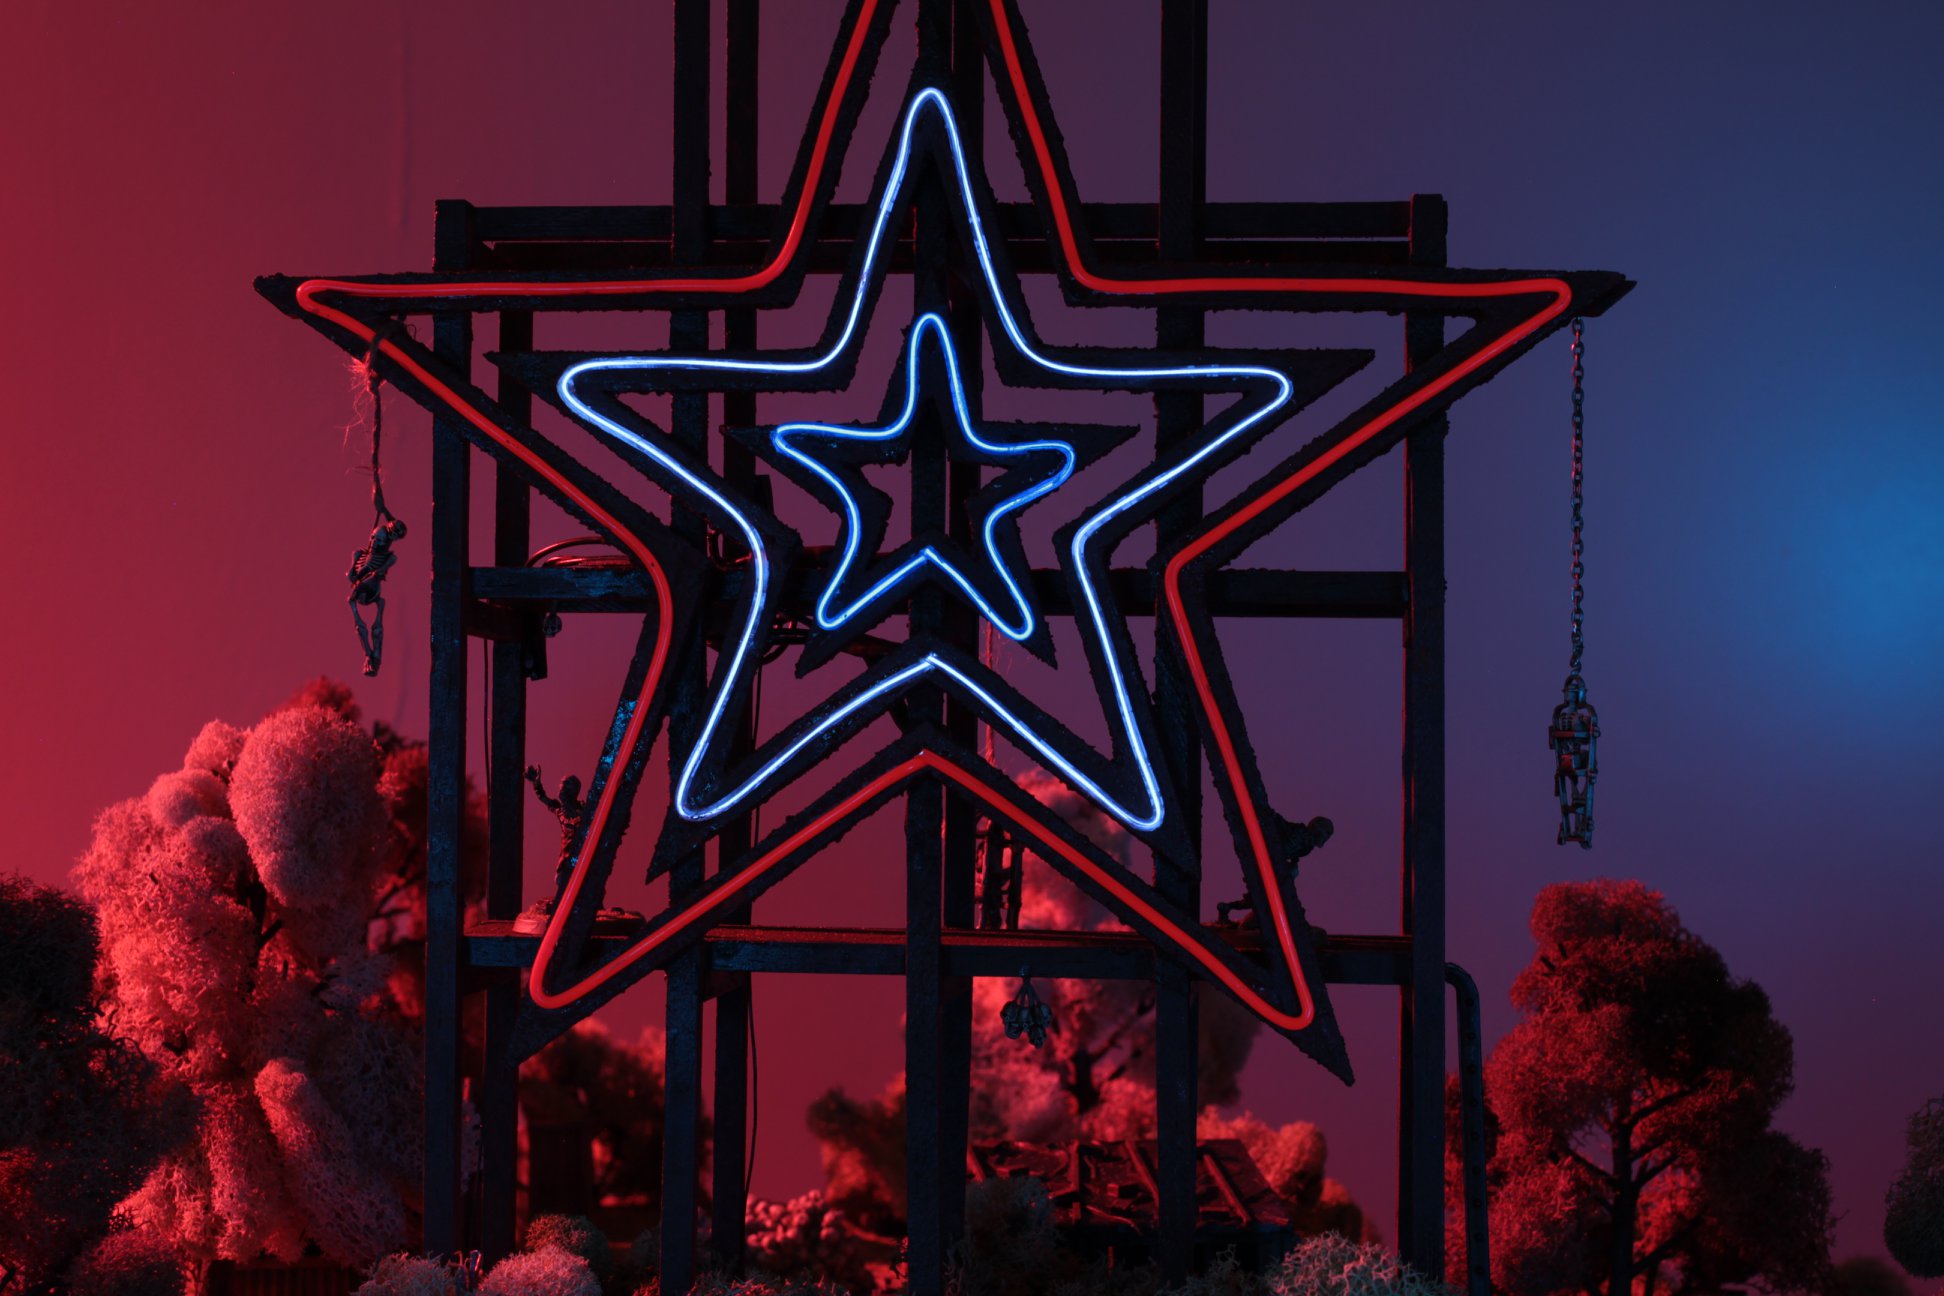
This is the entry for the Modiphius Fallout Design competition for Mishap Games. We entered it in the retailer best table category. ----------------------------------- It is a fallout-ized version of a local landmark: the Mill Mountain Star. The Star has been around for decades and the overlook area is a popular destination. A village of ghouls has sprung up around the Star, worshiping it and the beleaguered Mr. Handy that maintains the lighting. The ghouls have even captured a technician to keep Mr. Handy running. ----------------------------------- Information about the Star: https://www.visitroanokeva.com/things-to-do/attractions/roanoke-star/ You can see from the main photo that we cut the tree cover back significantly. ----------------------------------- Google street view map link to the Overlook Area: https://goo.gl/maps/Ea8uVWcusMz ----------------------------------- Rough differences with reality: -Went with the older red/white/blue scheme for the star lights. Felt more in tune with Fallout's patriotic tendencies -Reduced the number of lights in the star, didn't double up some of the colors. -Added rocks to the overlook as the vault entrance does't look right without rocks. -Tweaked the road sizes to accommodate Corvegas -Removed some detail that would have hindered game play, like the front porch of the bathroom, the bollards at the trail edge, and minor elevation changes. -Buildings have generally been smooshed and resized similar to the process the Fallout videos games use
Related Game: Fallout: Wasteland Warfare
Related Company: Modiphius Entertainment
Related Genre: Post-Apocalyptic
This Project is Completed
Trees and Brush


- Image 1: Planted the first few trees and cut up the asphalt into cracks and potholes. I went with the dead white and brown lichen for the trees and slightly greener lichen for the shrubs.
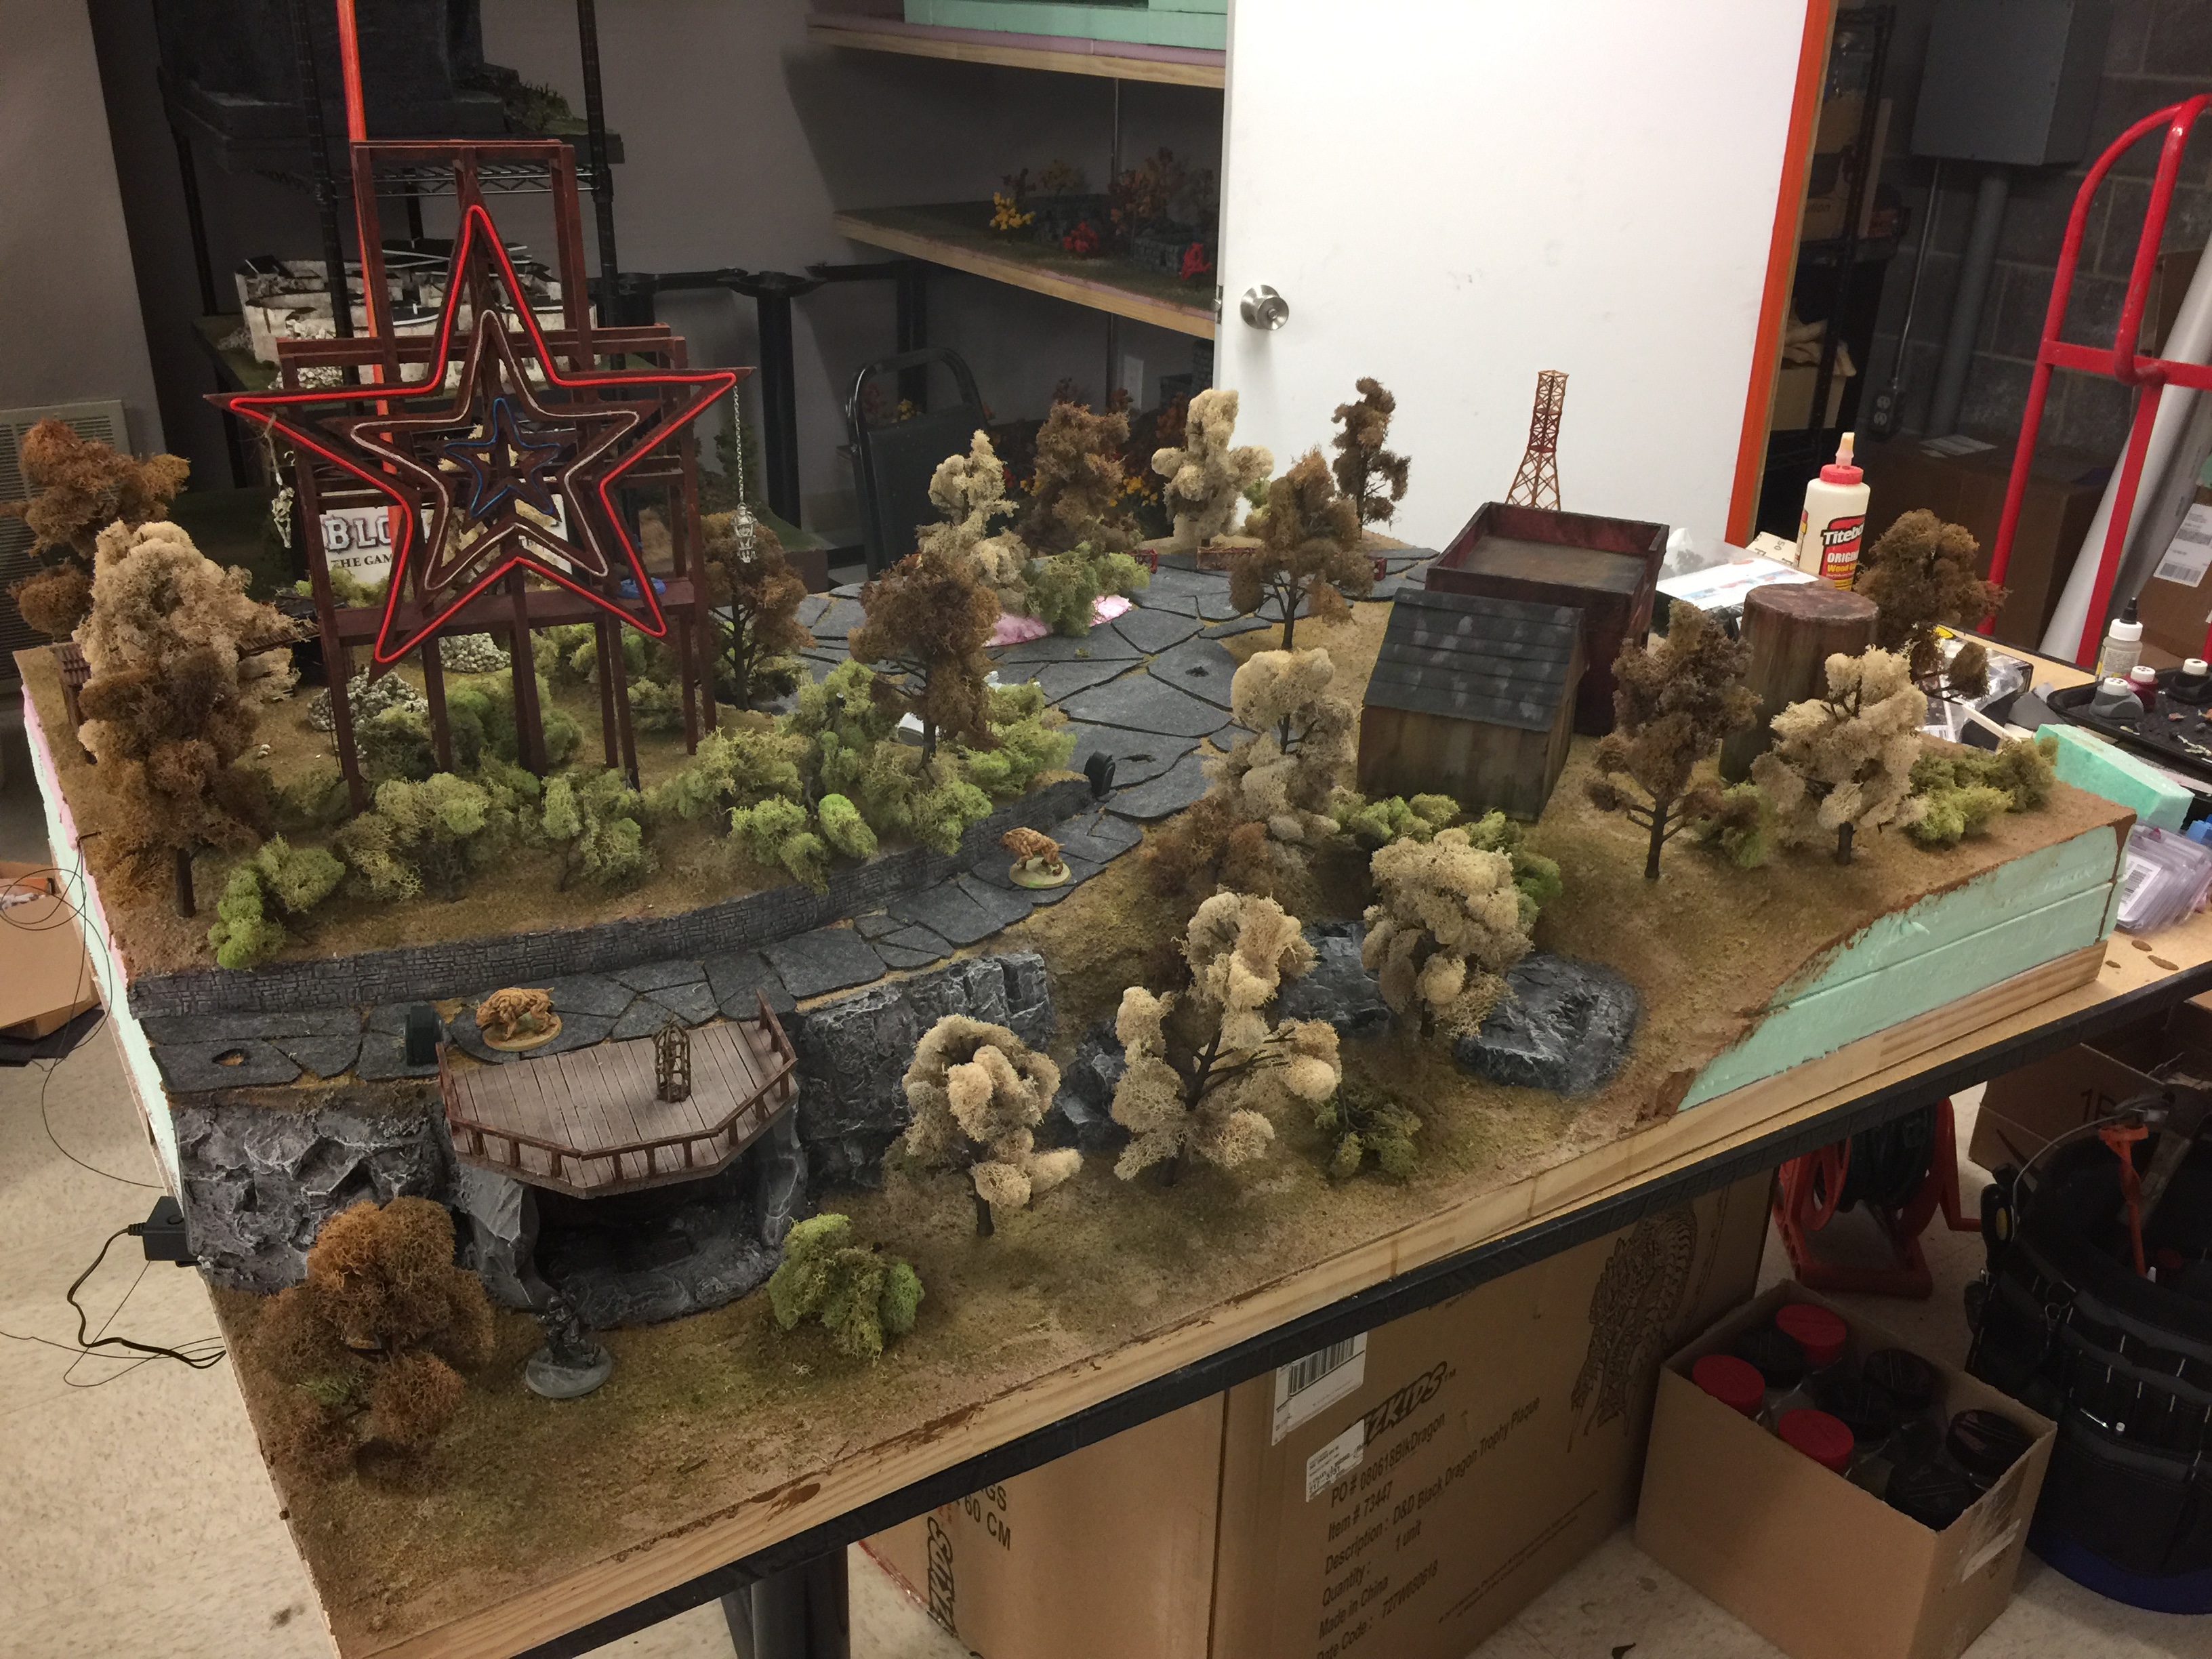
- Image 2: More trees, more shrubs, and a shot of the whole board.
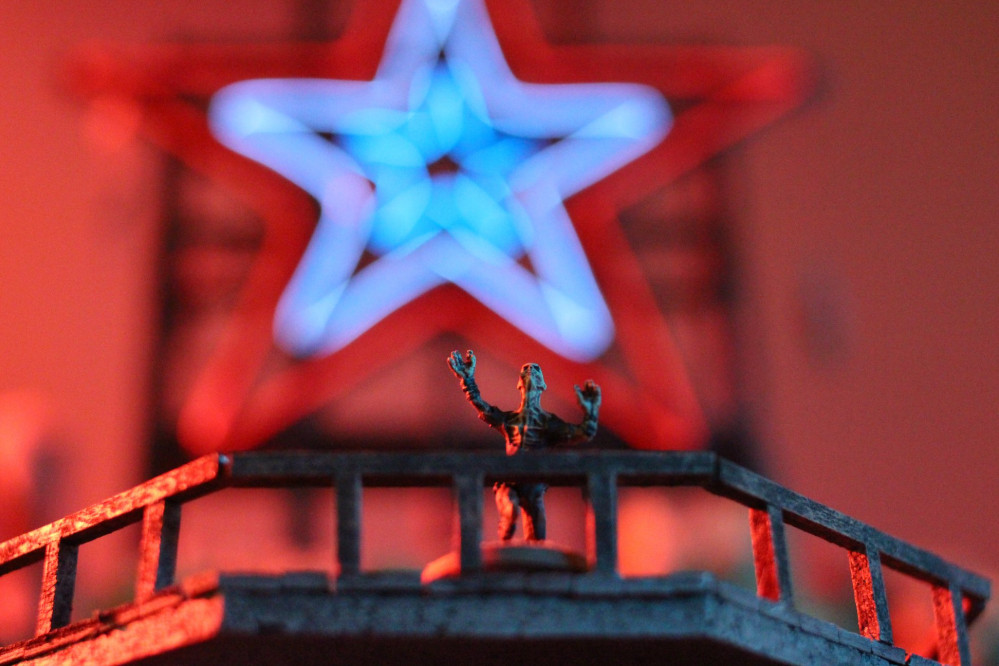
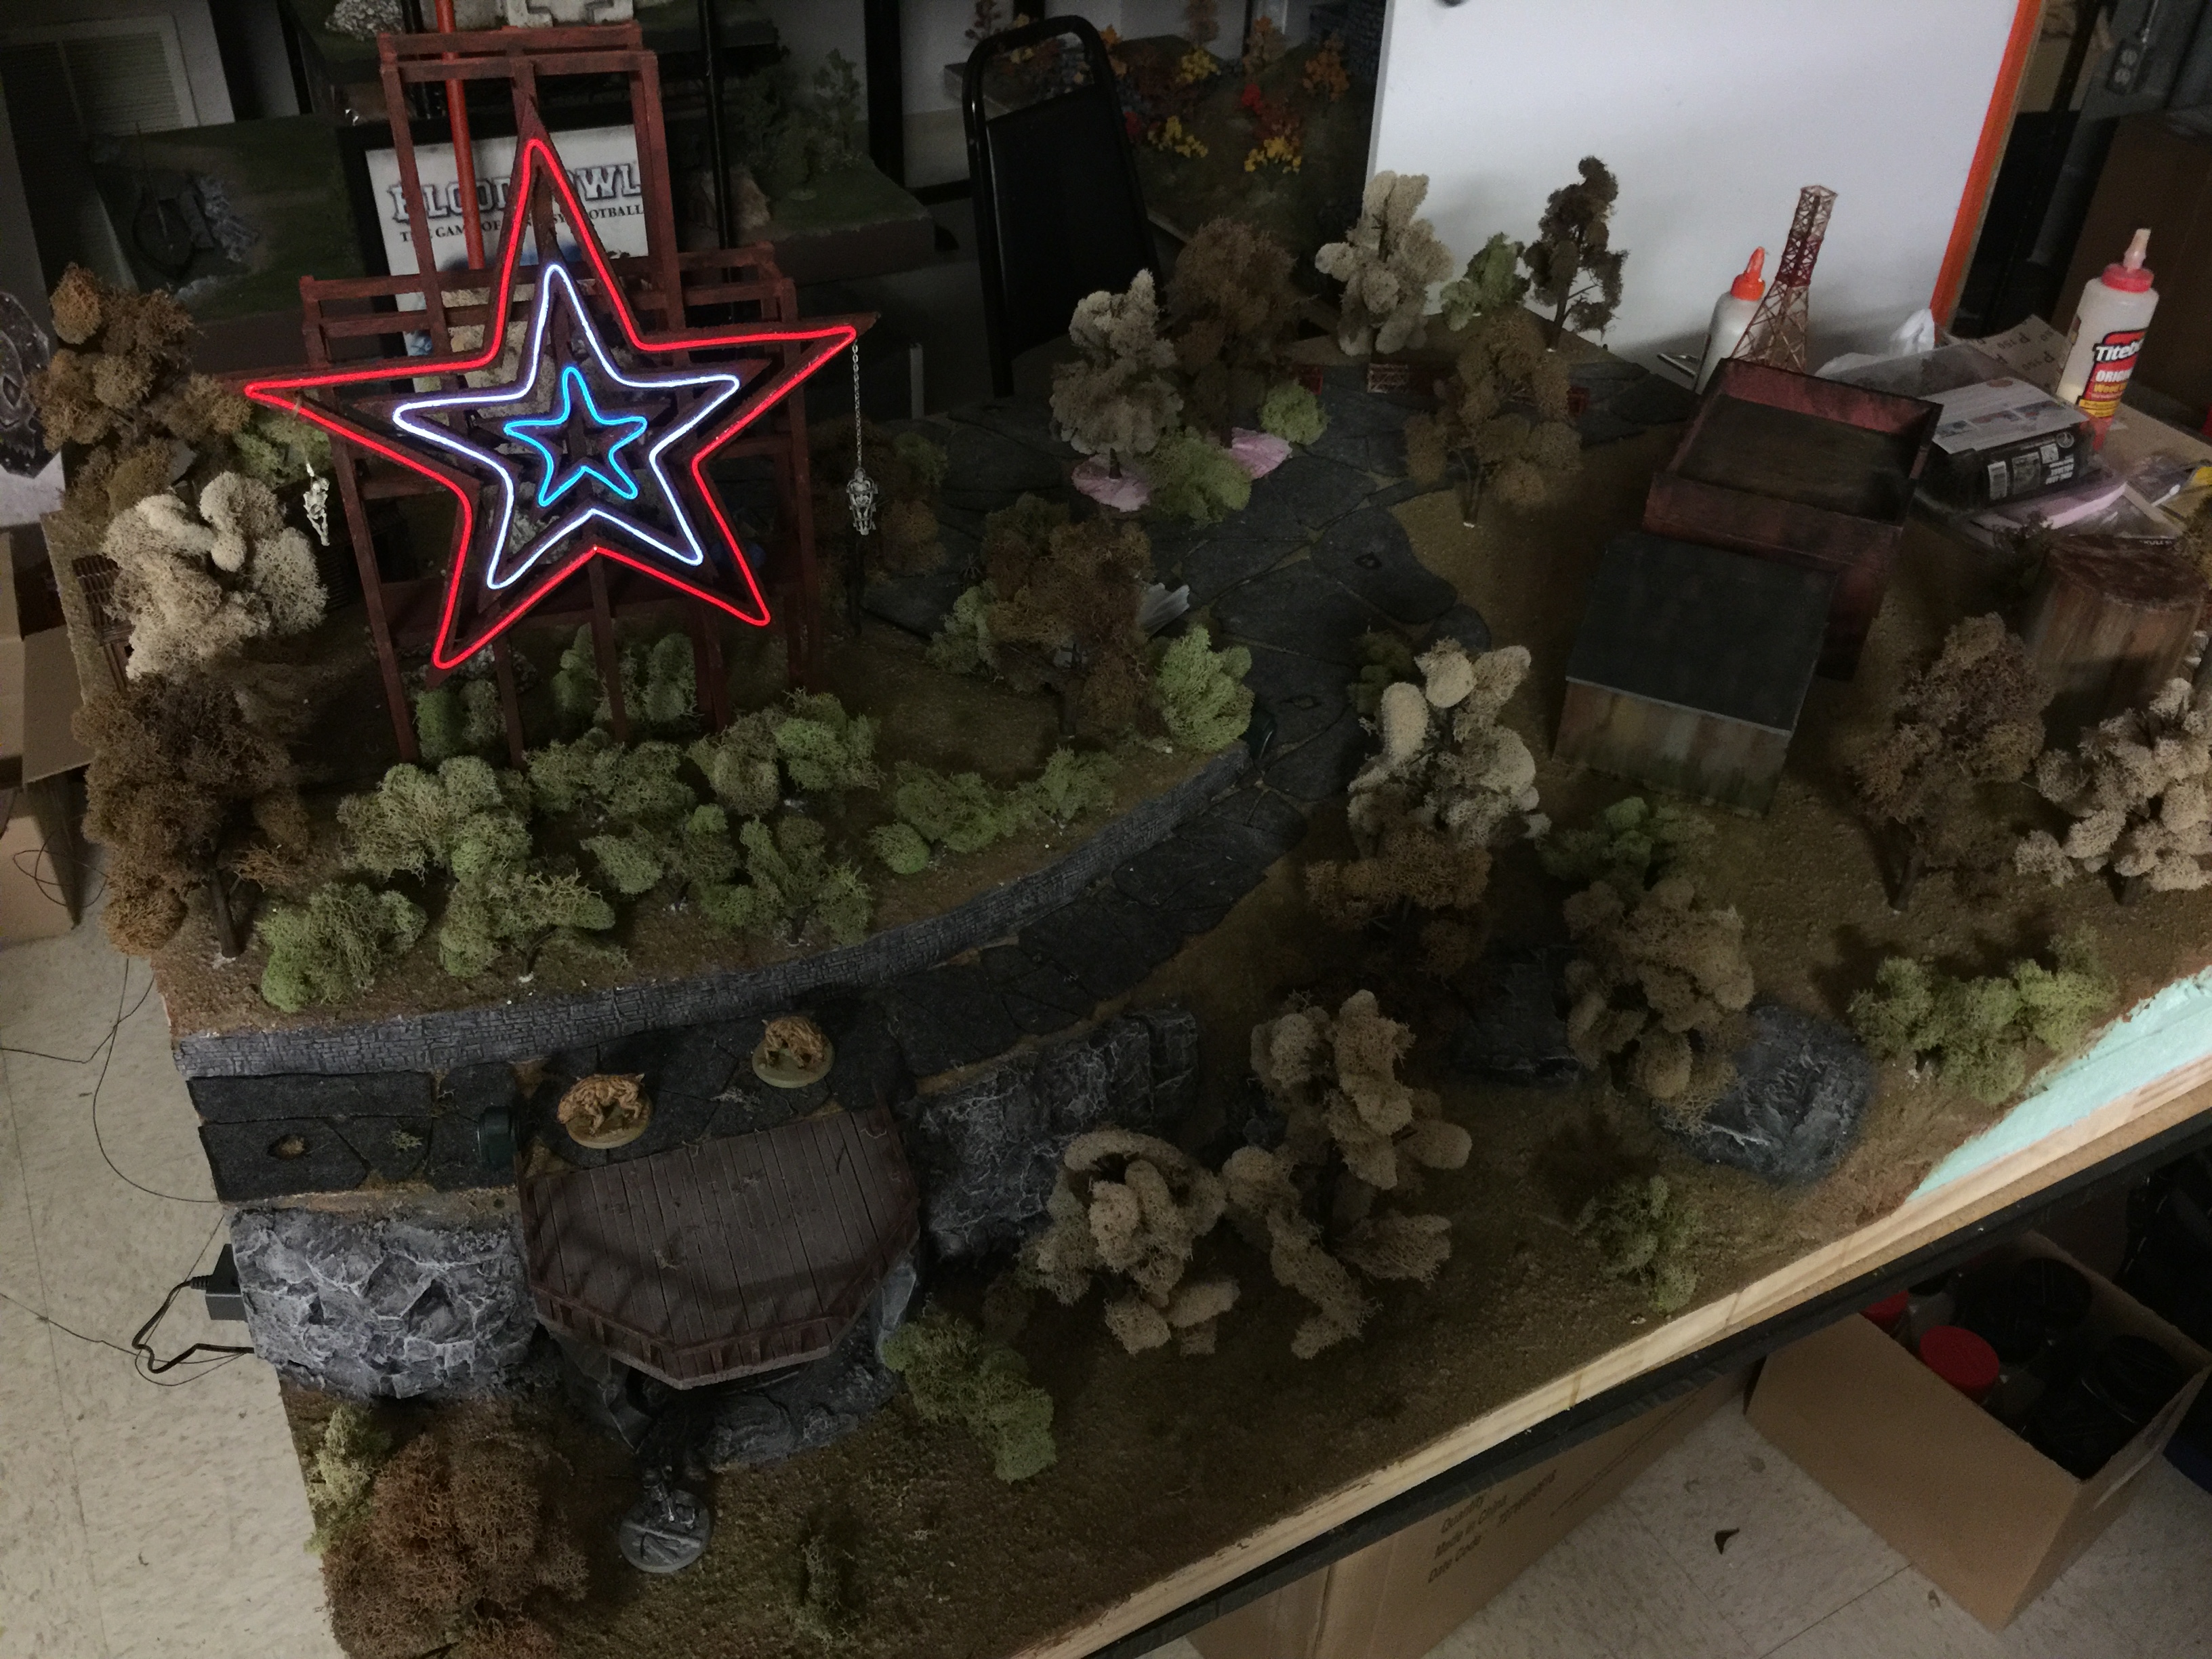
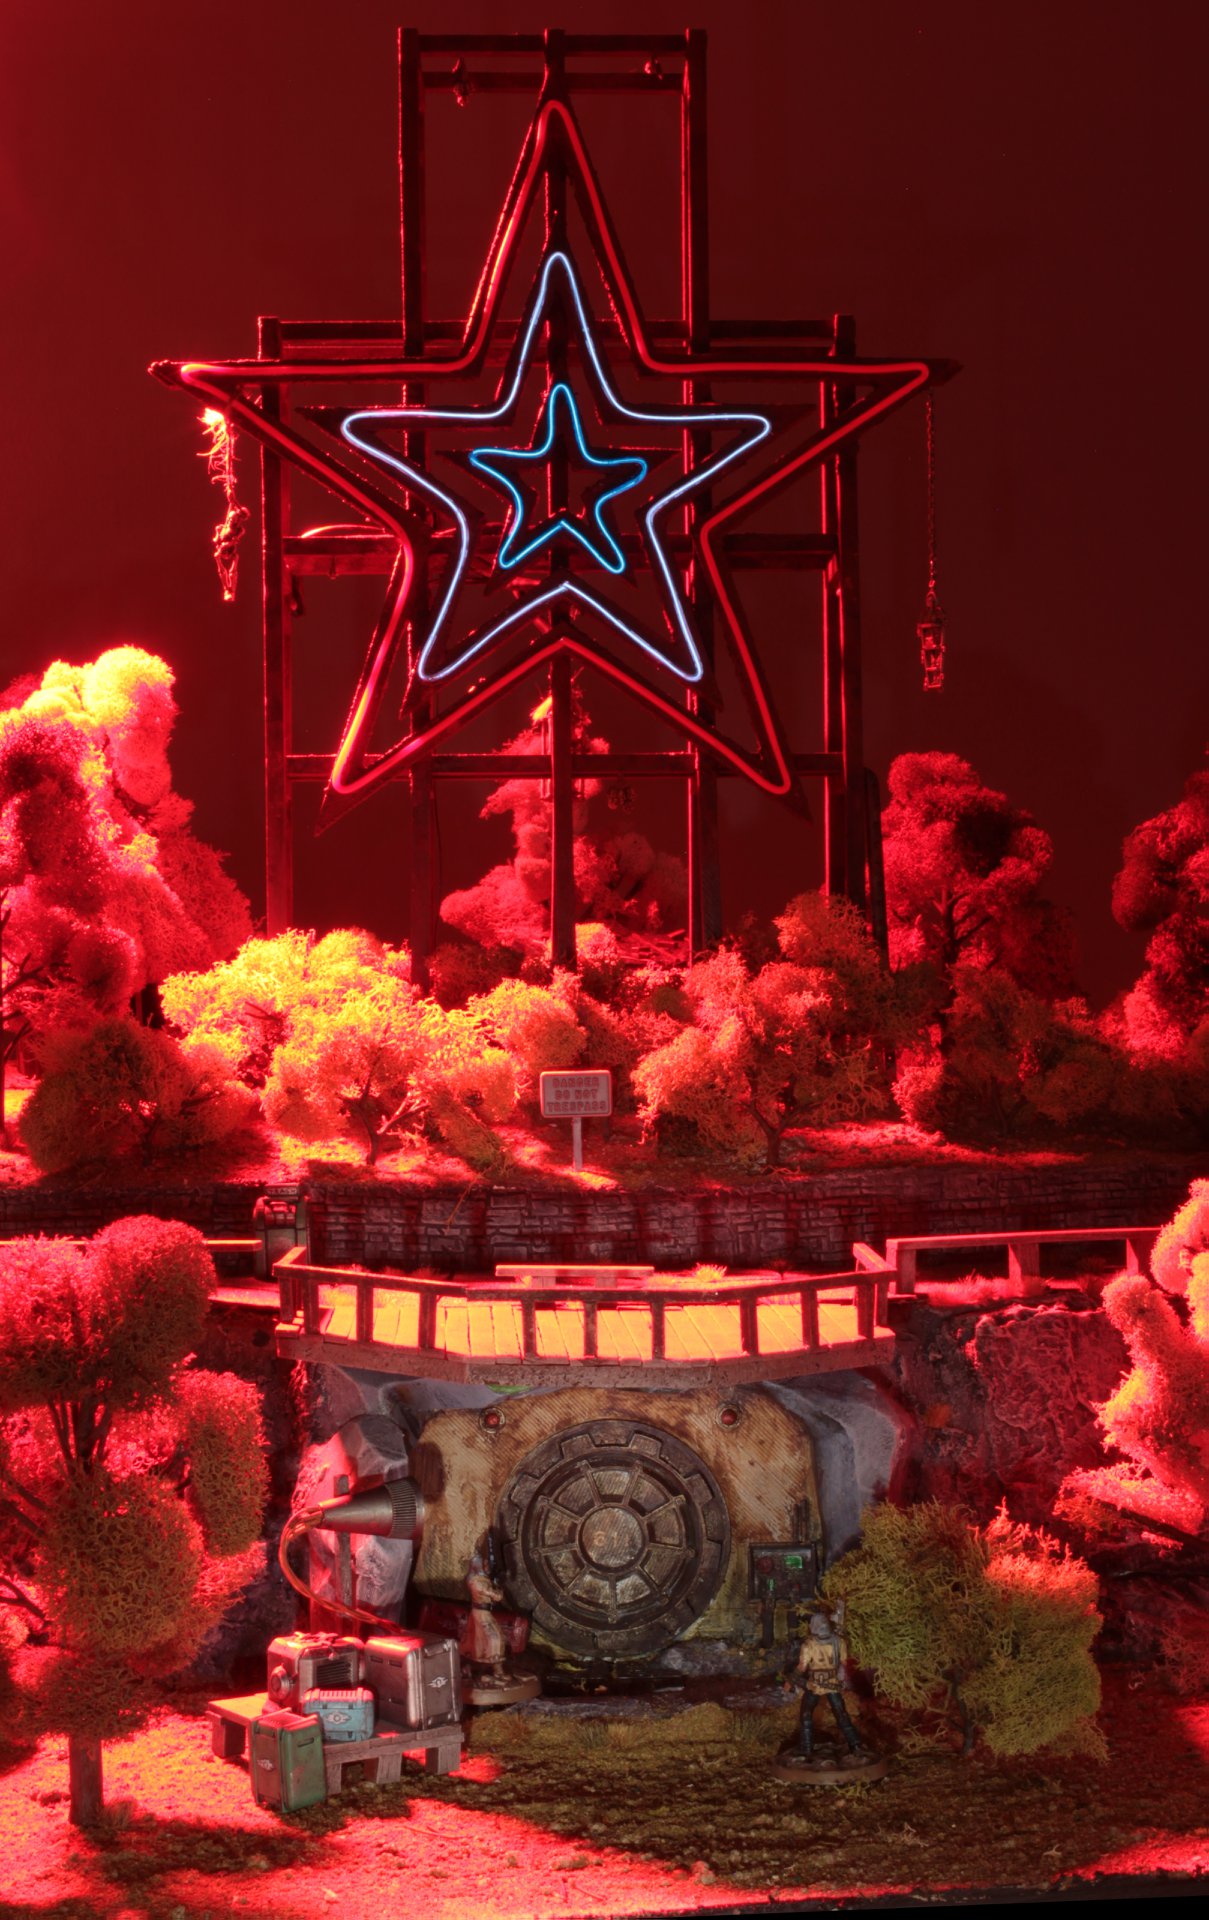
- Image 3: Darkening the lights really makes the star shine. Started hanging skeletons from the star as well
- Image 4: A nice progress shot of the vault and star.
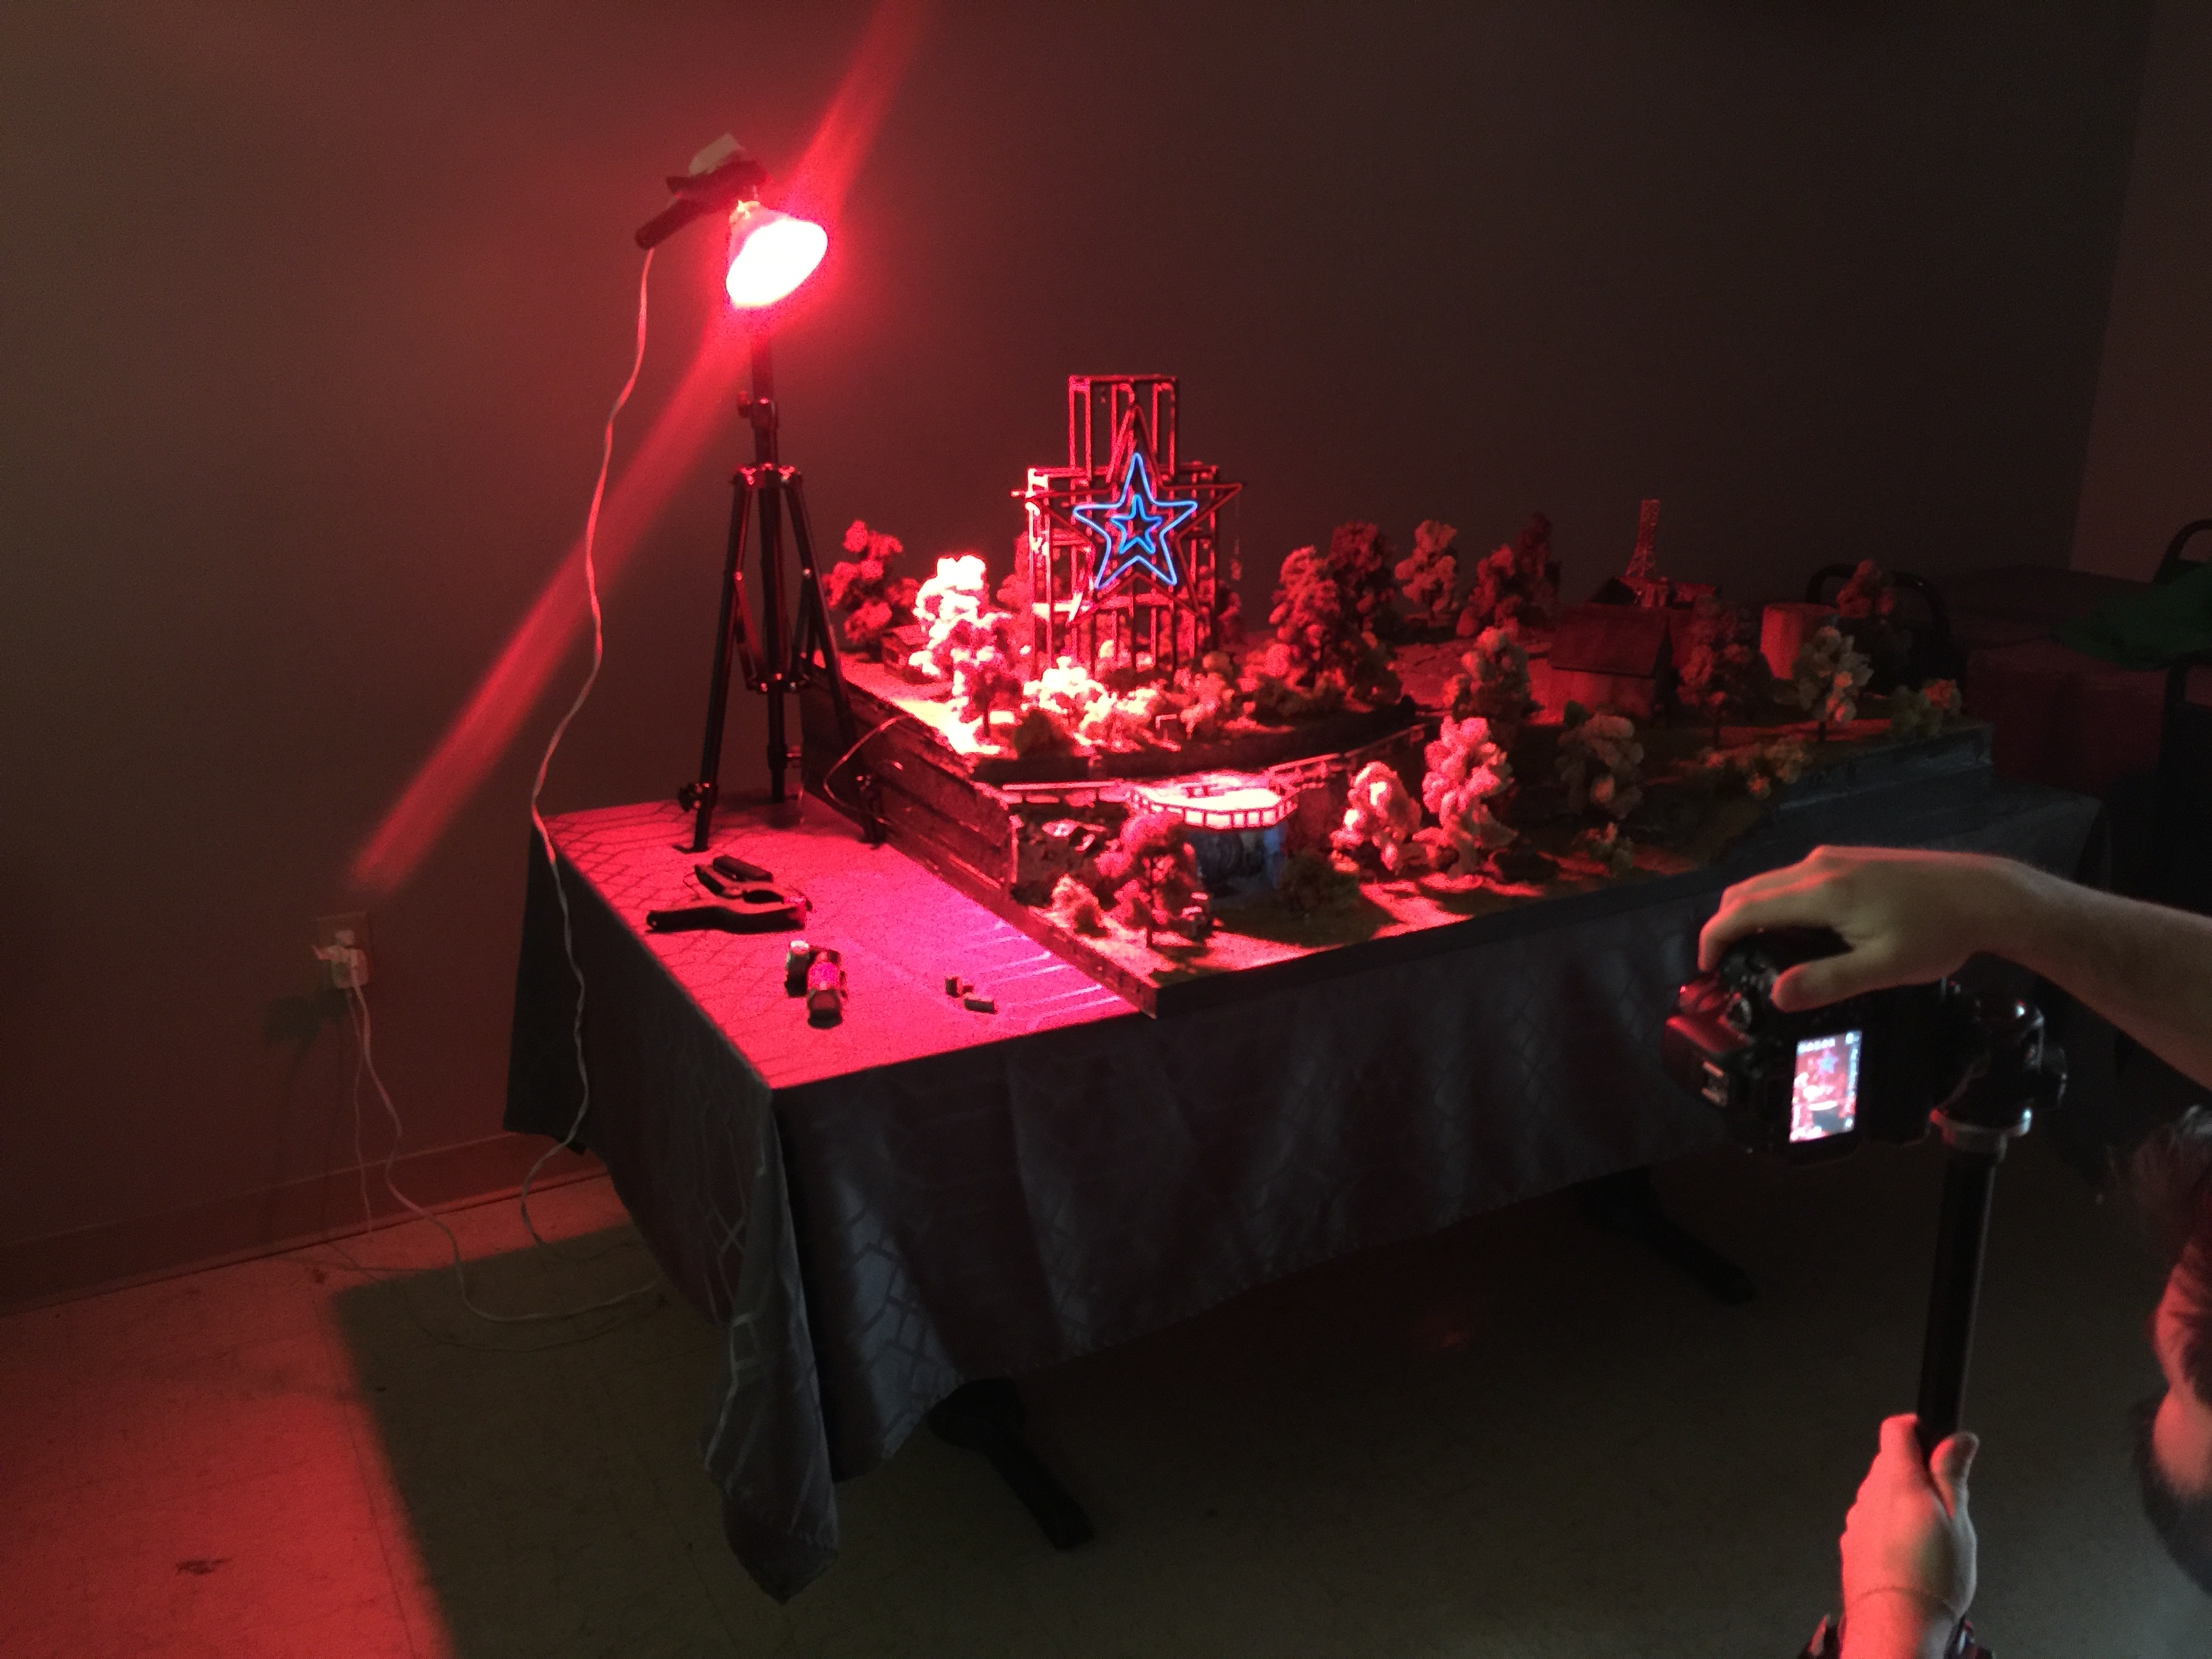
- Image 5: Looks better with the lights off
- Image 6: Actual drone photo of the star at night.
Final Details
- Image 1: Painted parking lines using a simple template cut from thin cardboard.
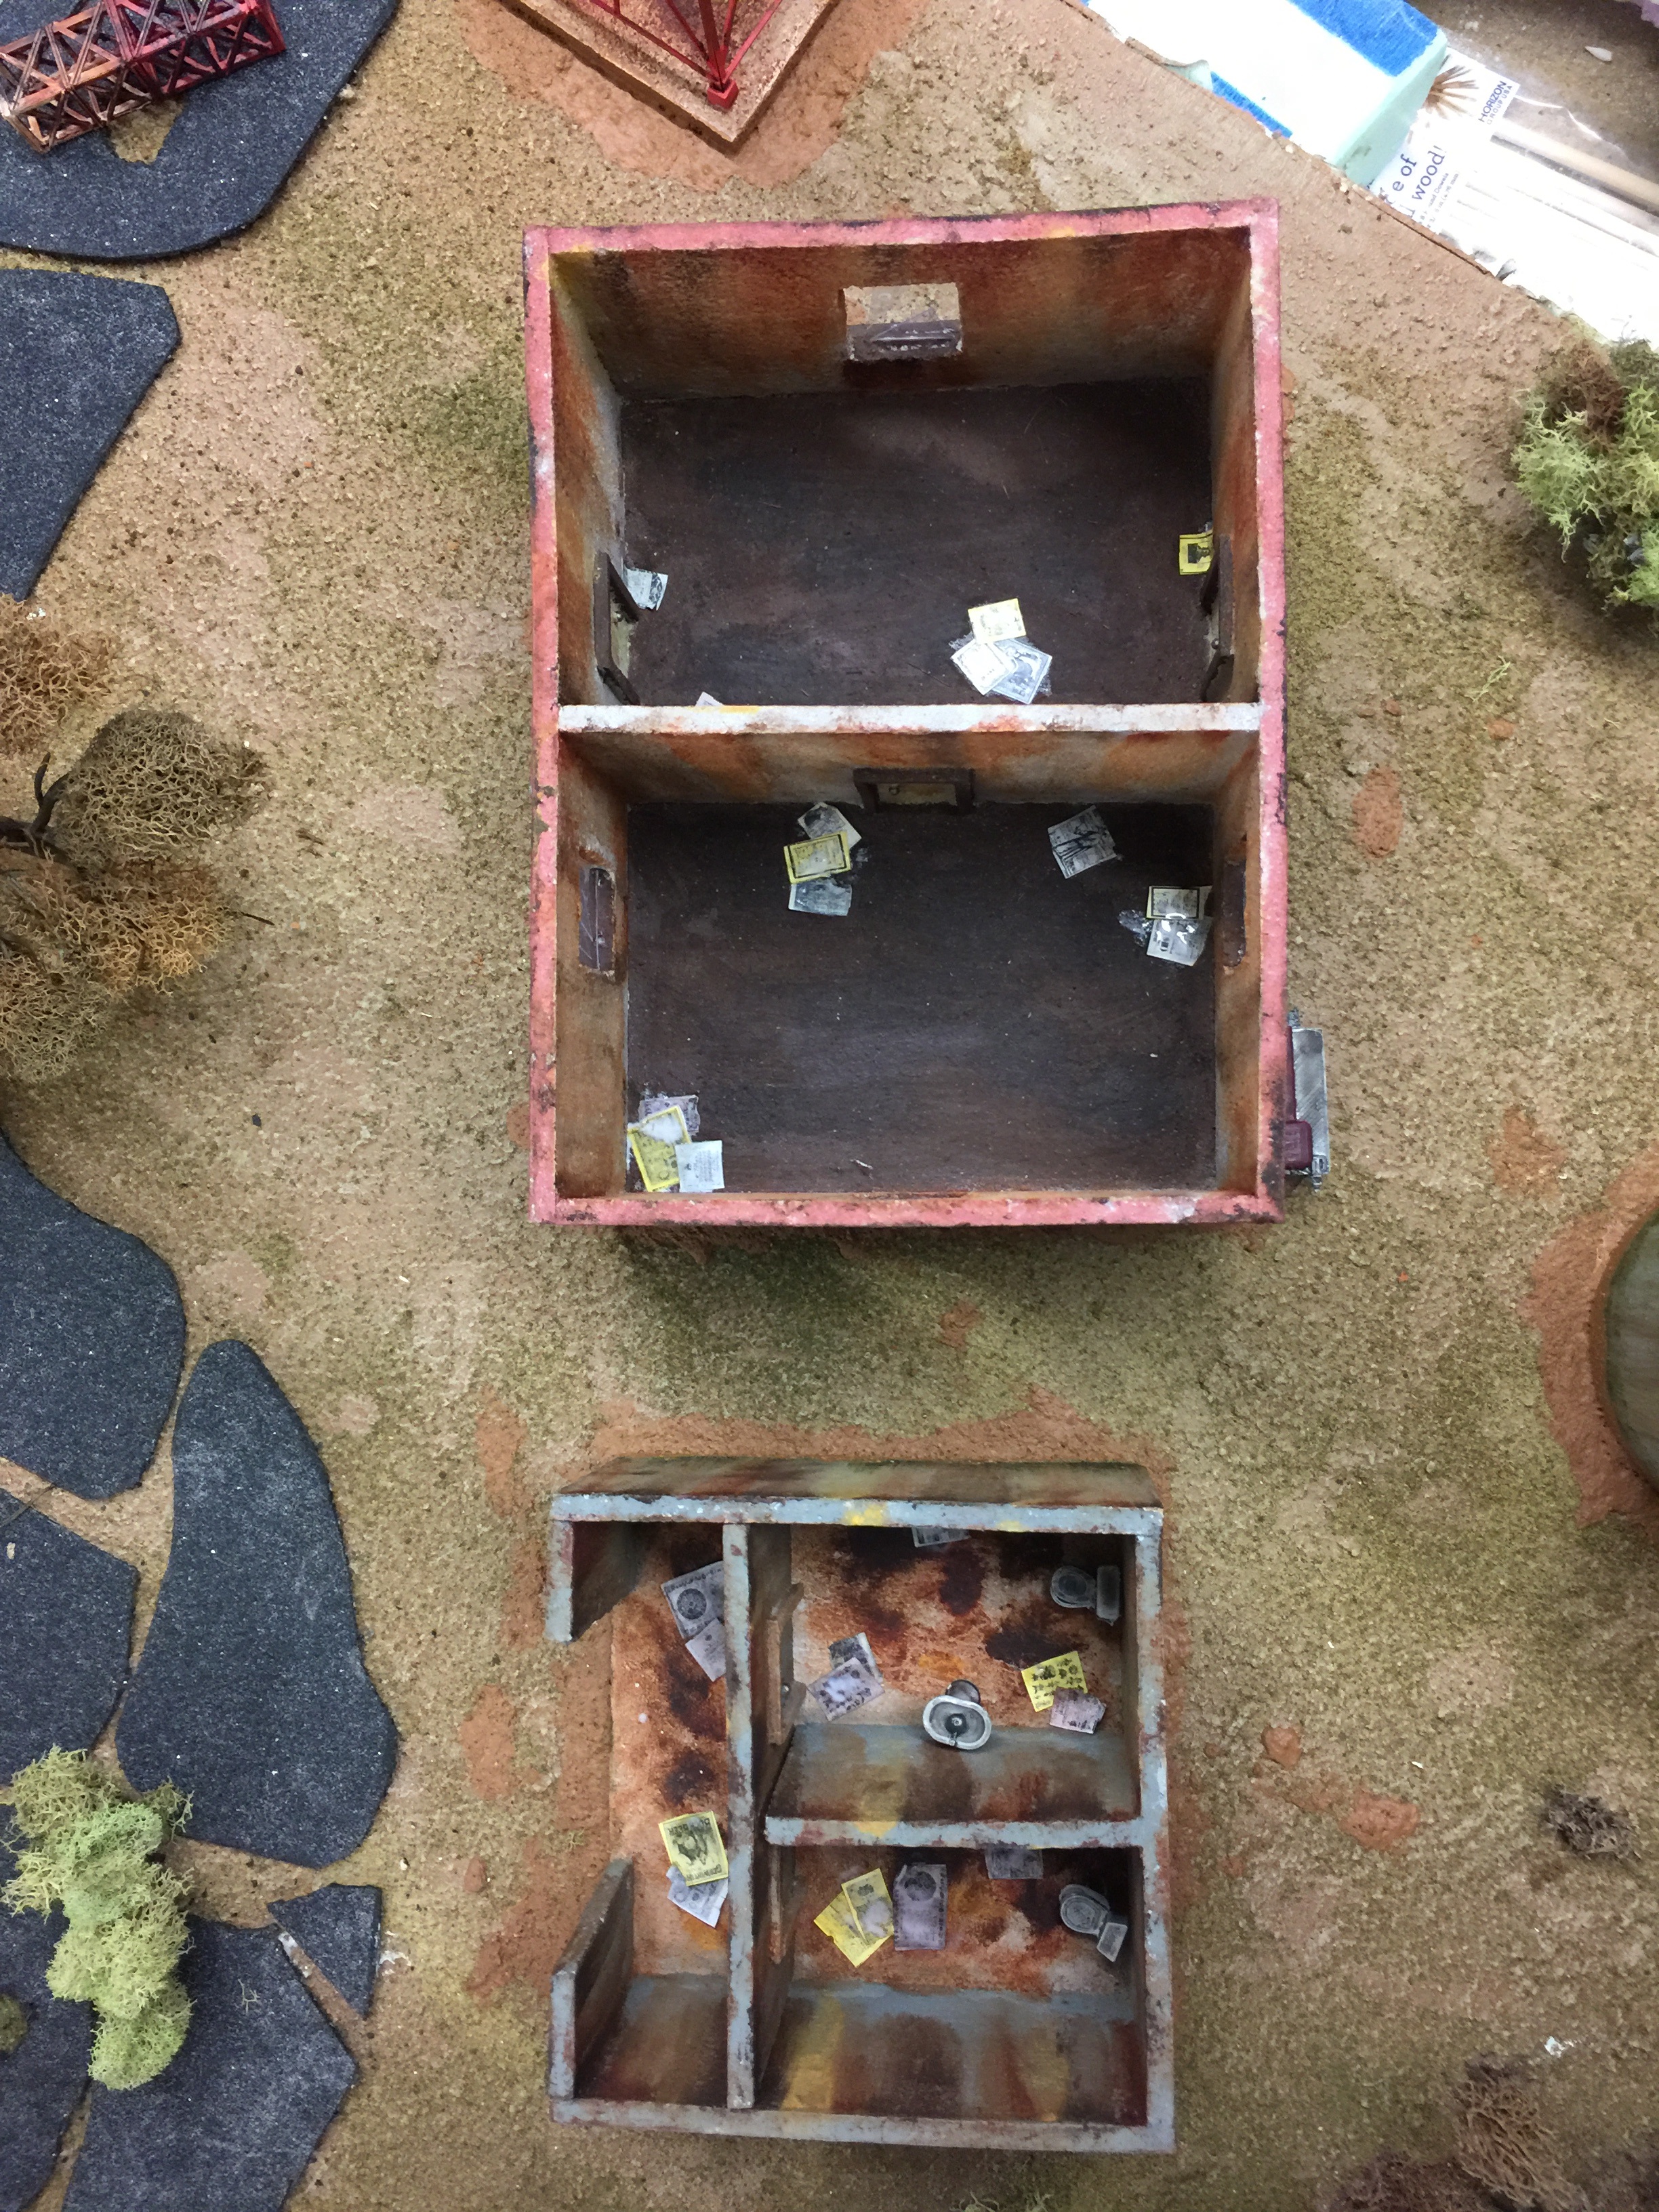
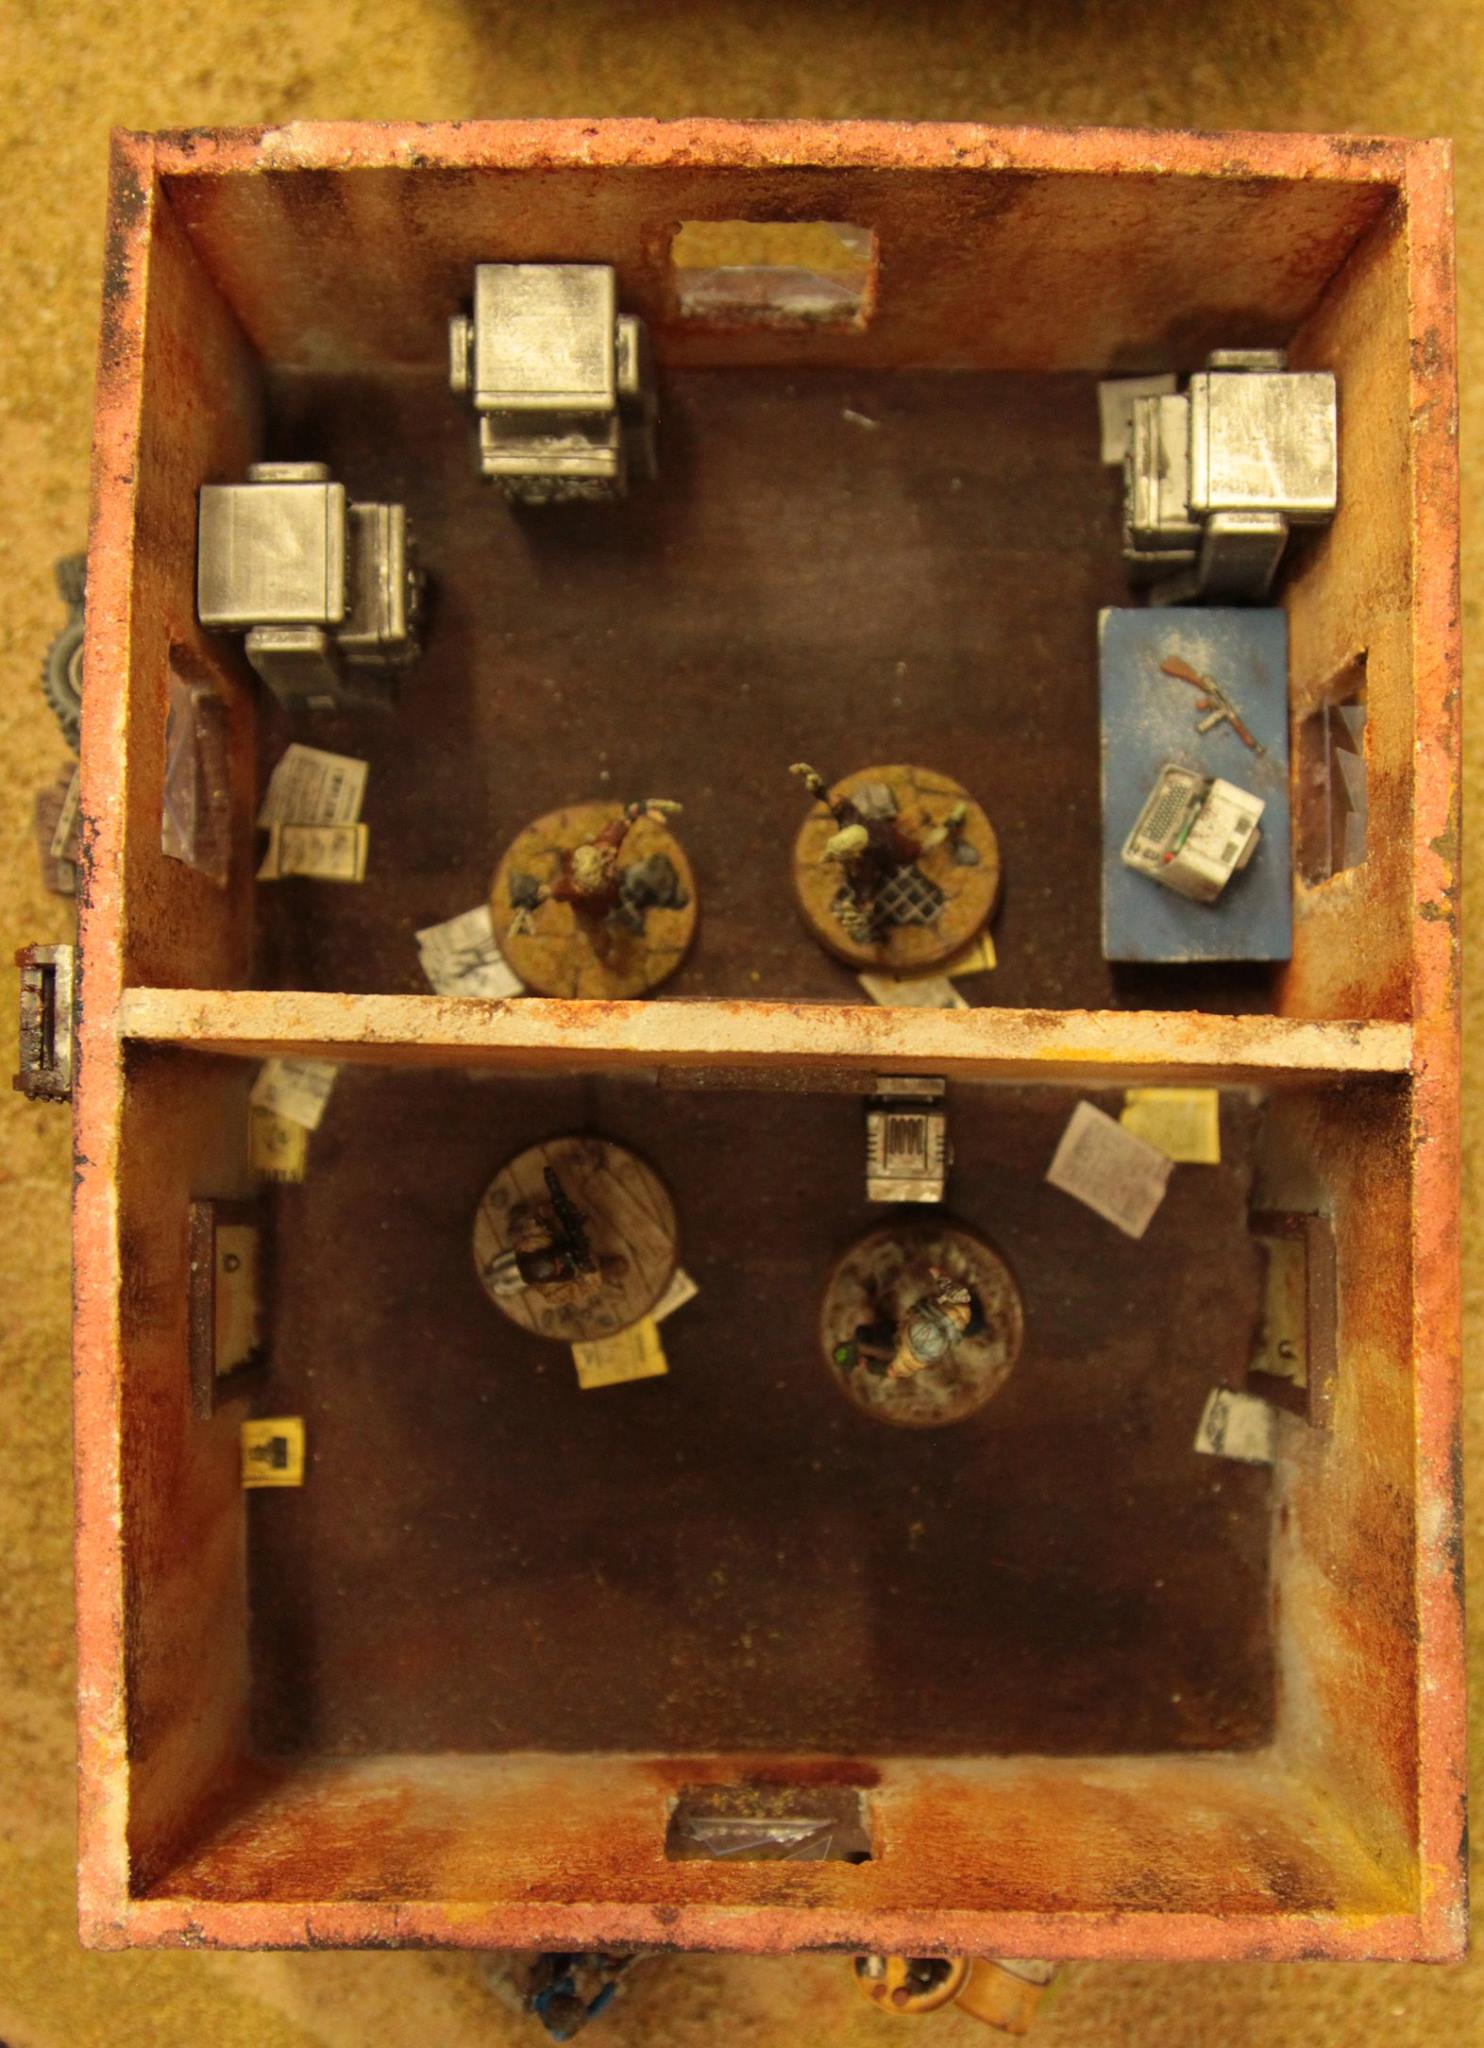
- Image 2: Added trash flyers to the floor of the buildings. Technique appropriated from here: http://www.richbuilds.com/articles/build-review-sarissa-precisions-residential-trailer-28mm-mdf-wargames-terrain/
- Image 3: The captured technician was mildly converted from the pvc model in the Fallout starter. The shotgun parts were carefully carved away and converted into a bone
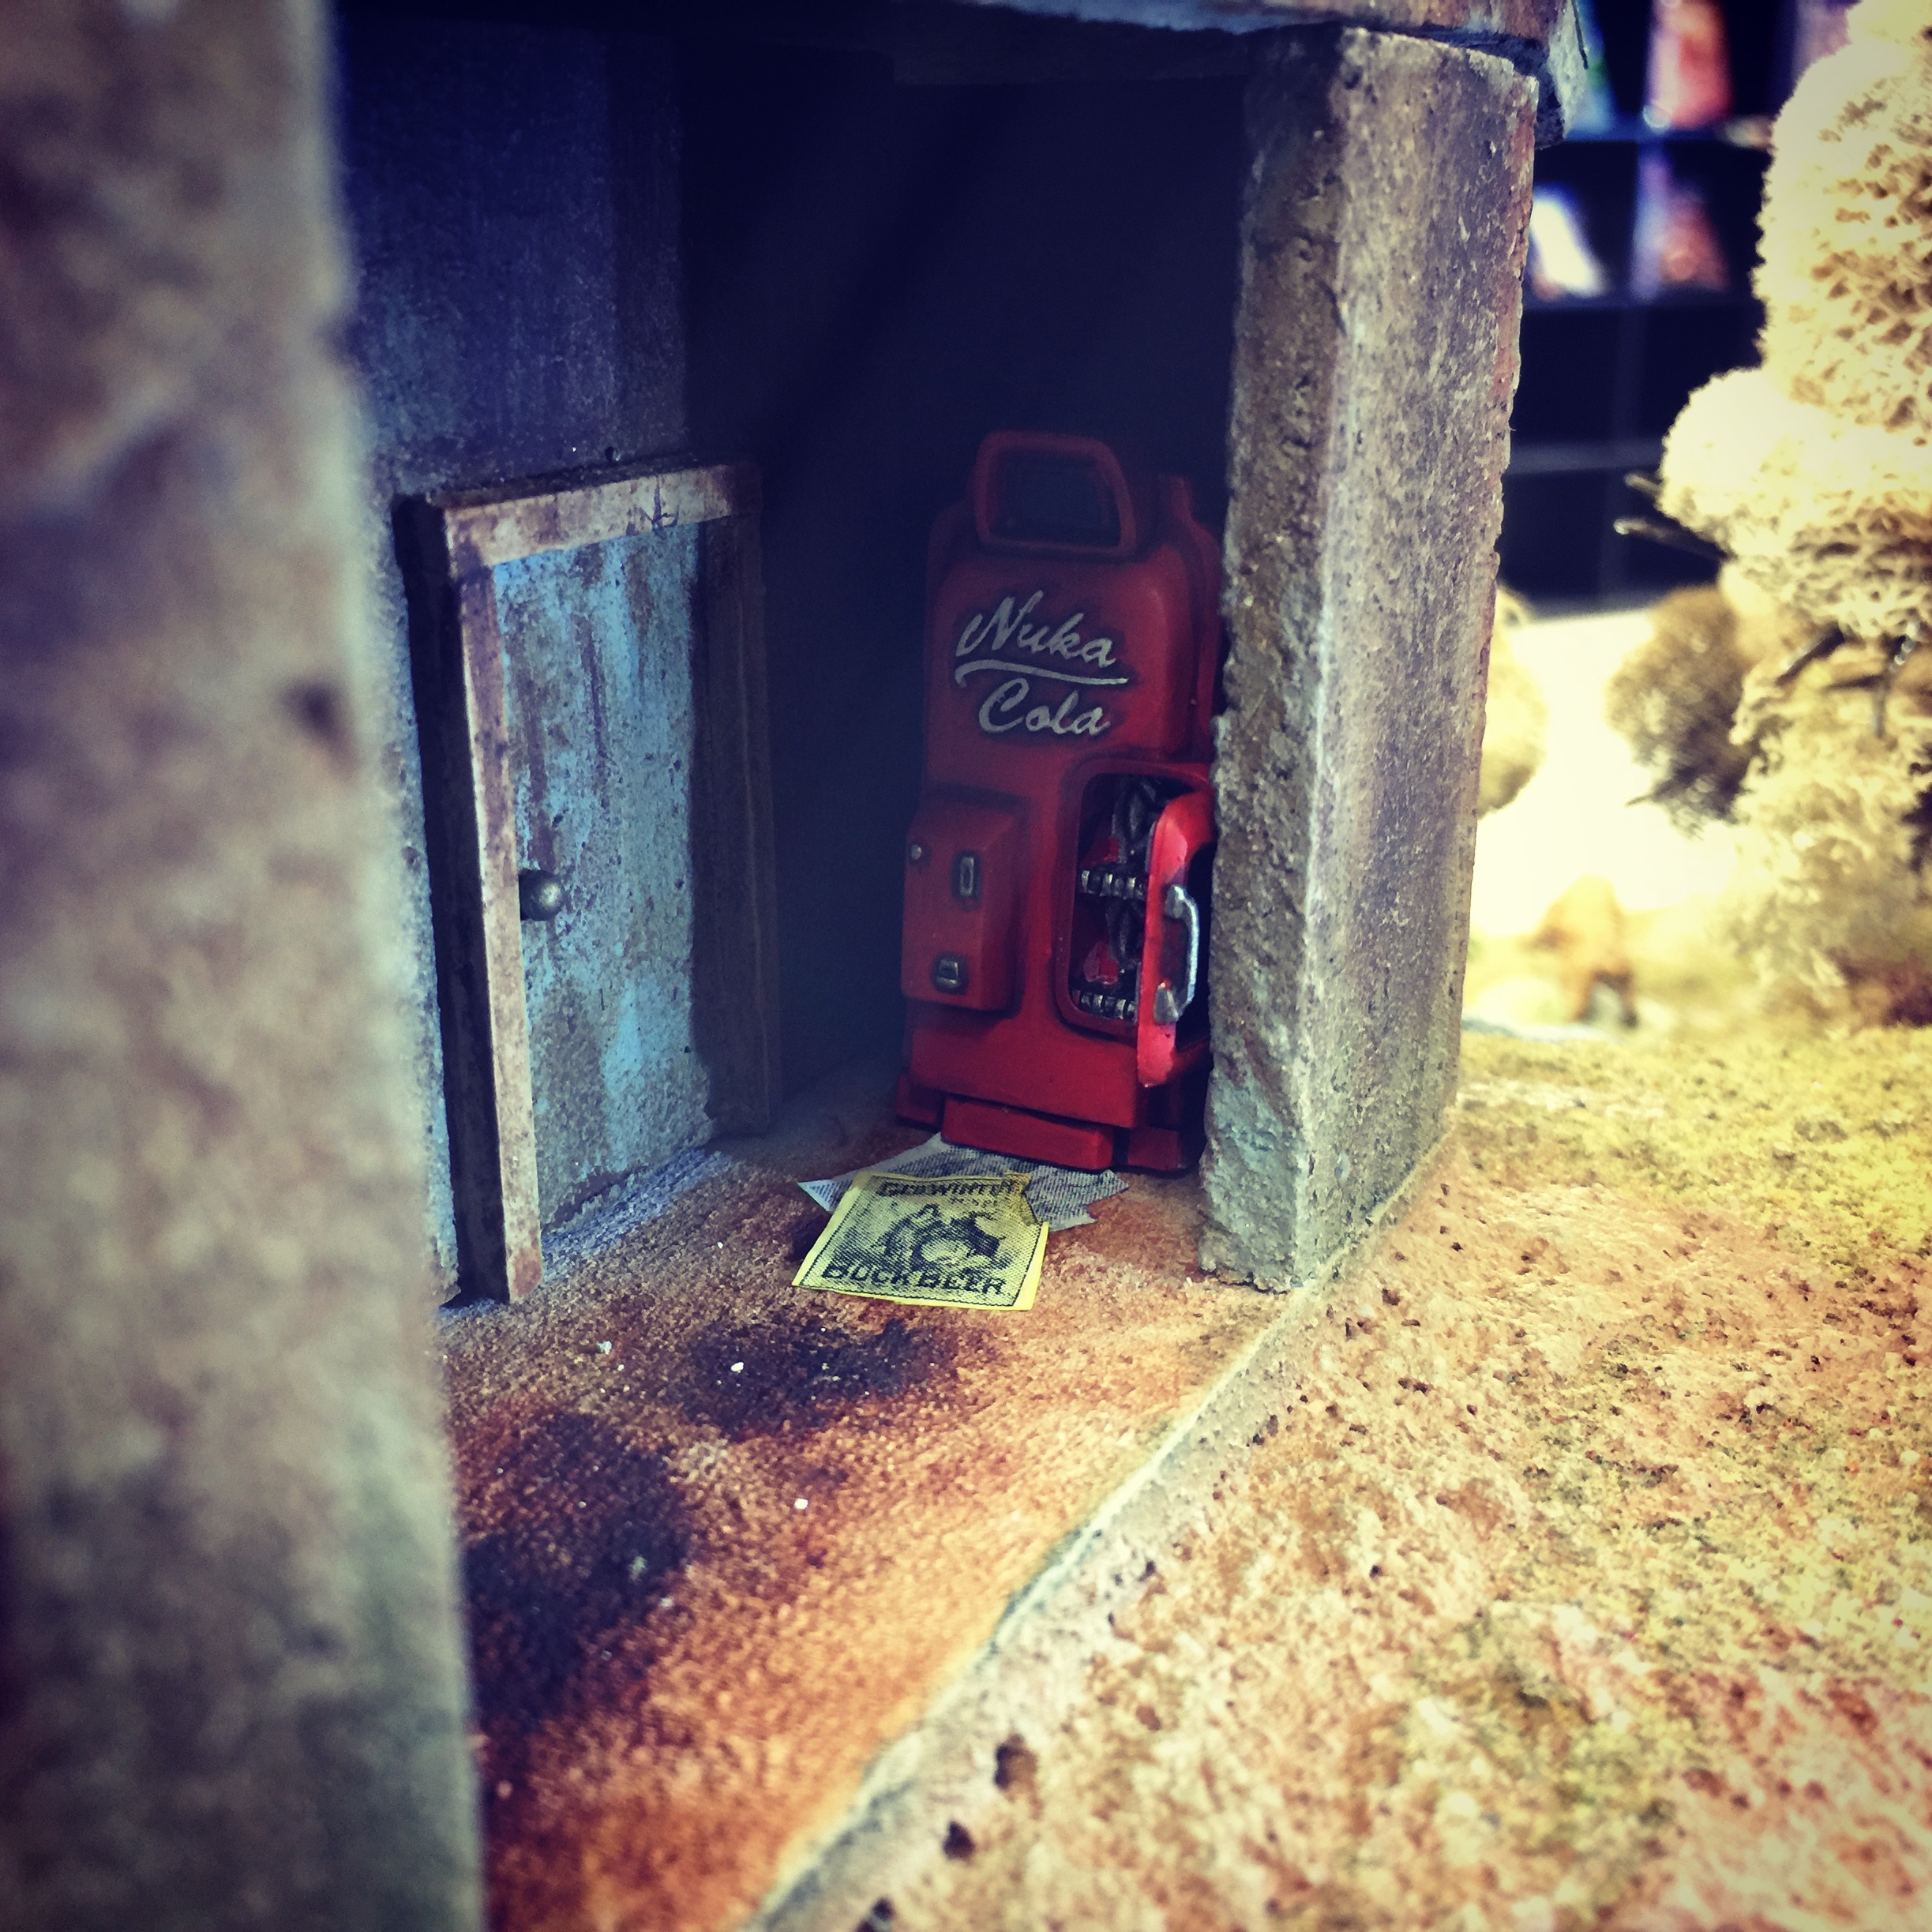
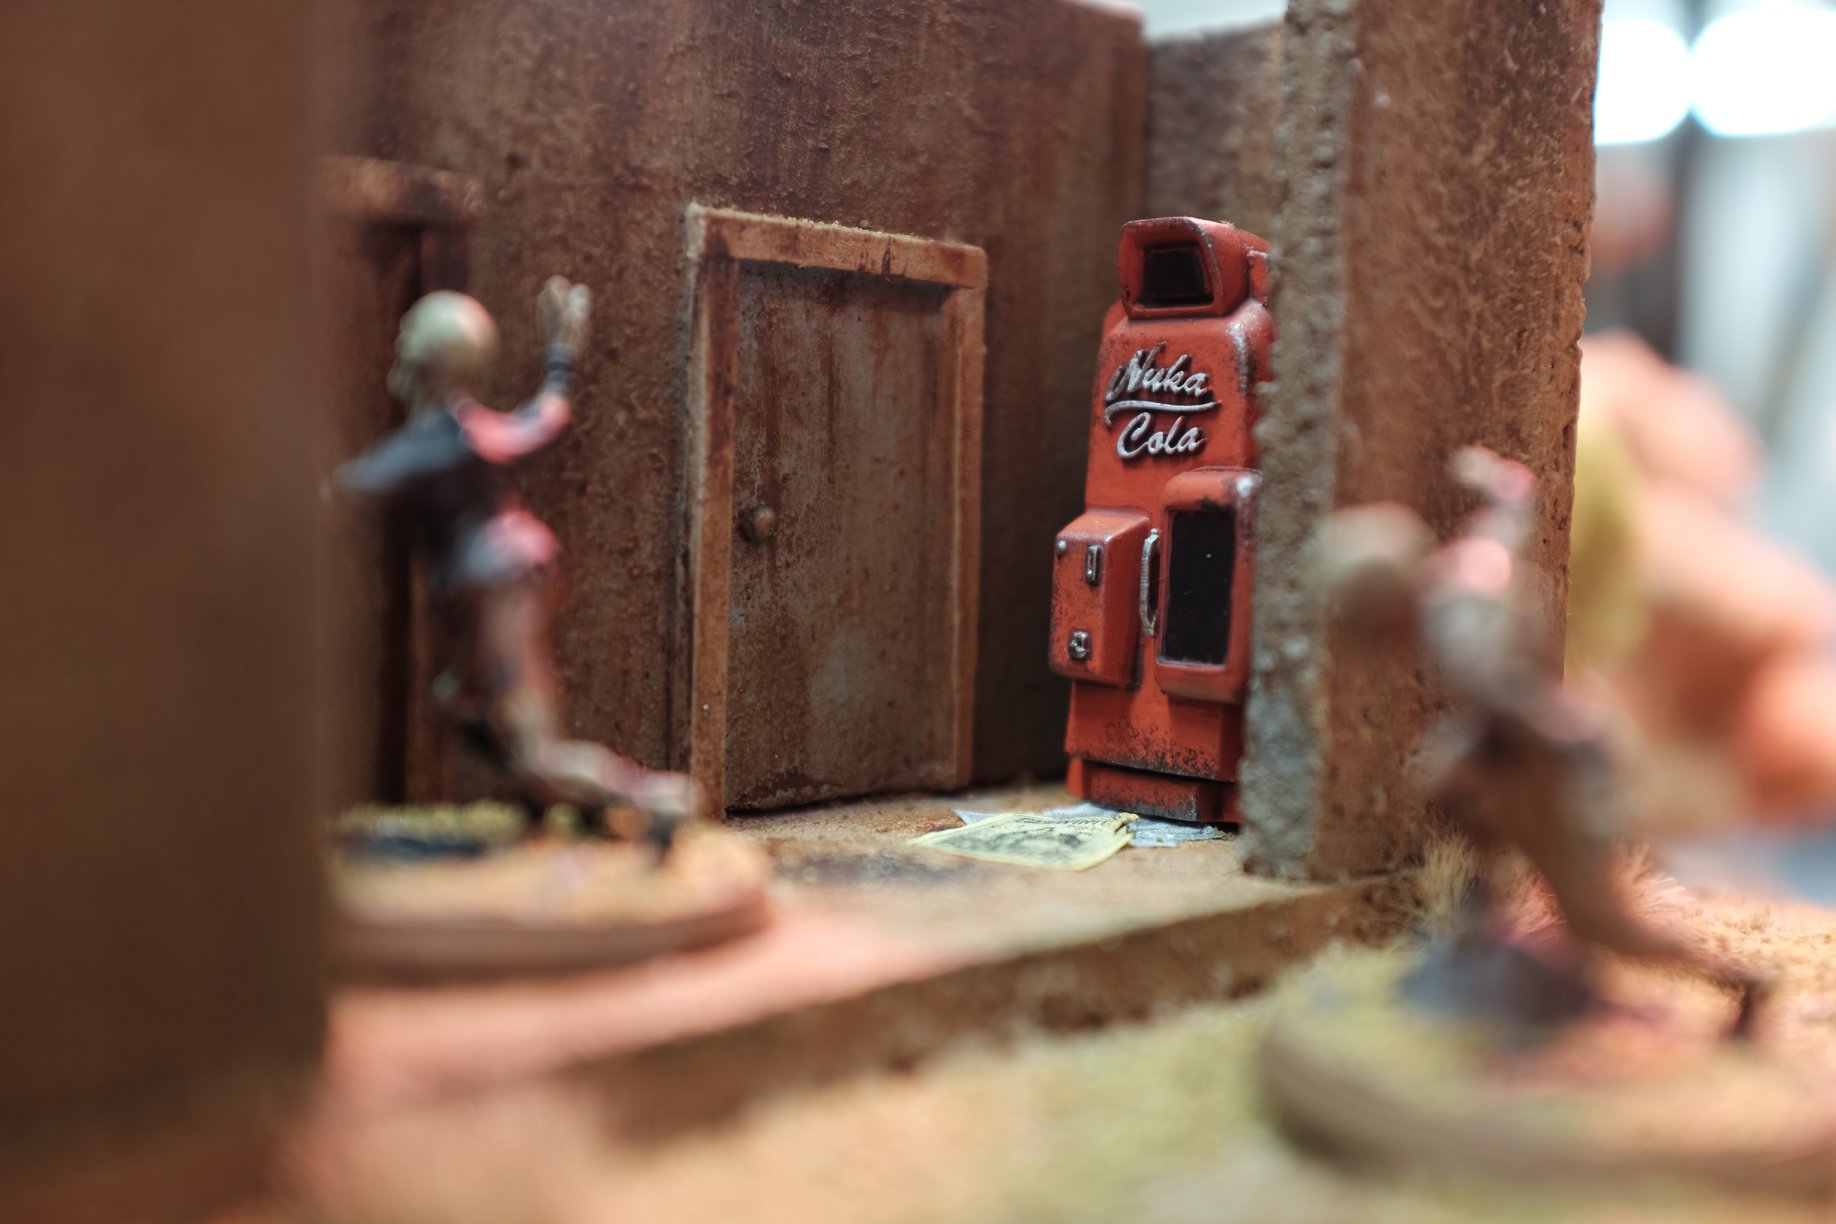
- Image 4: Testing placement of an unweathered Nuka-Cola machine.
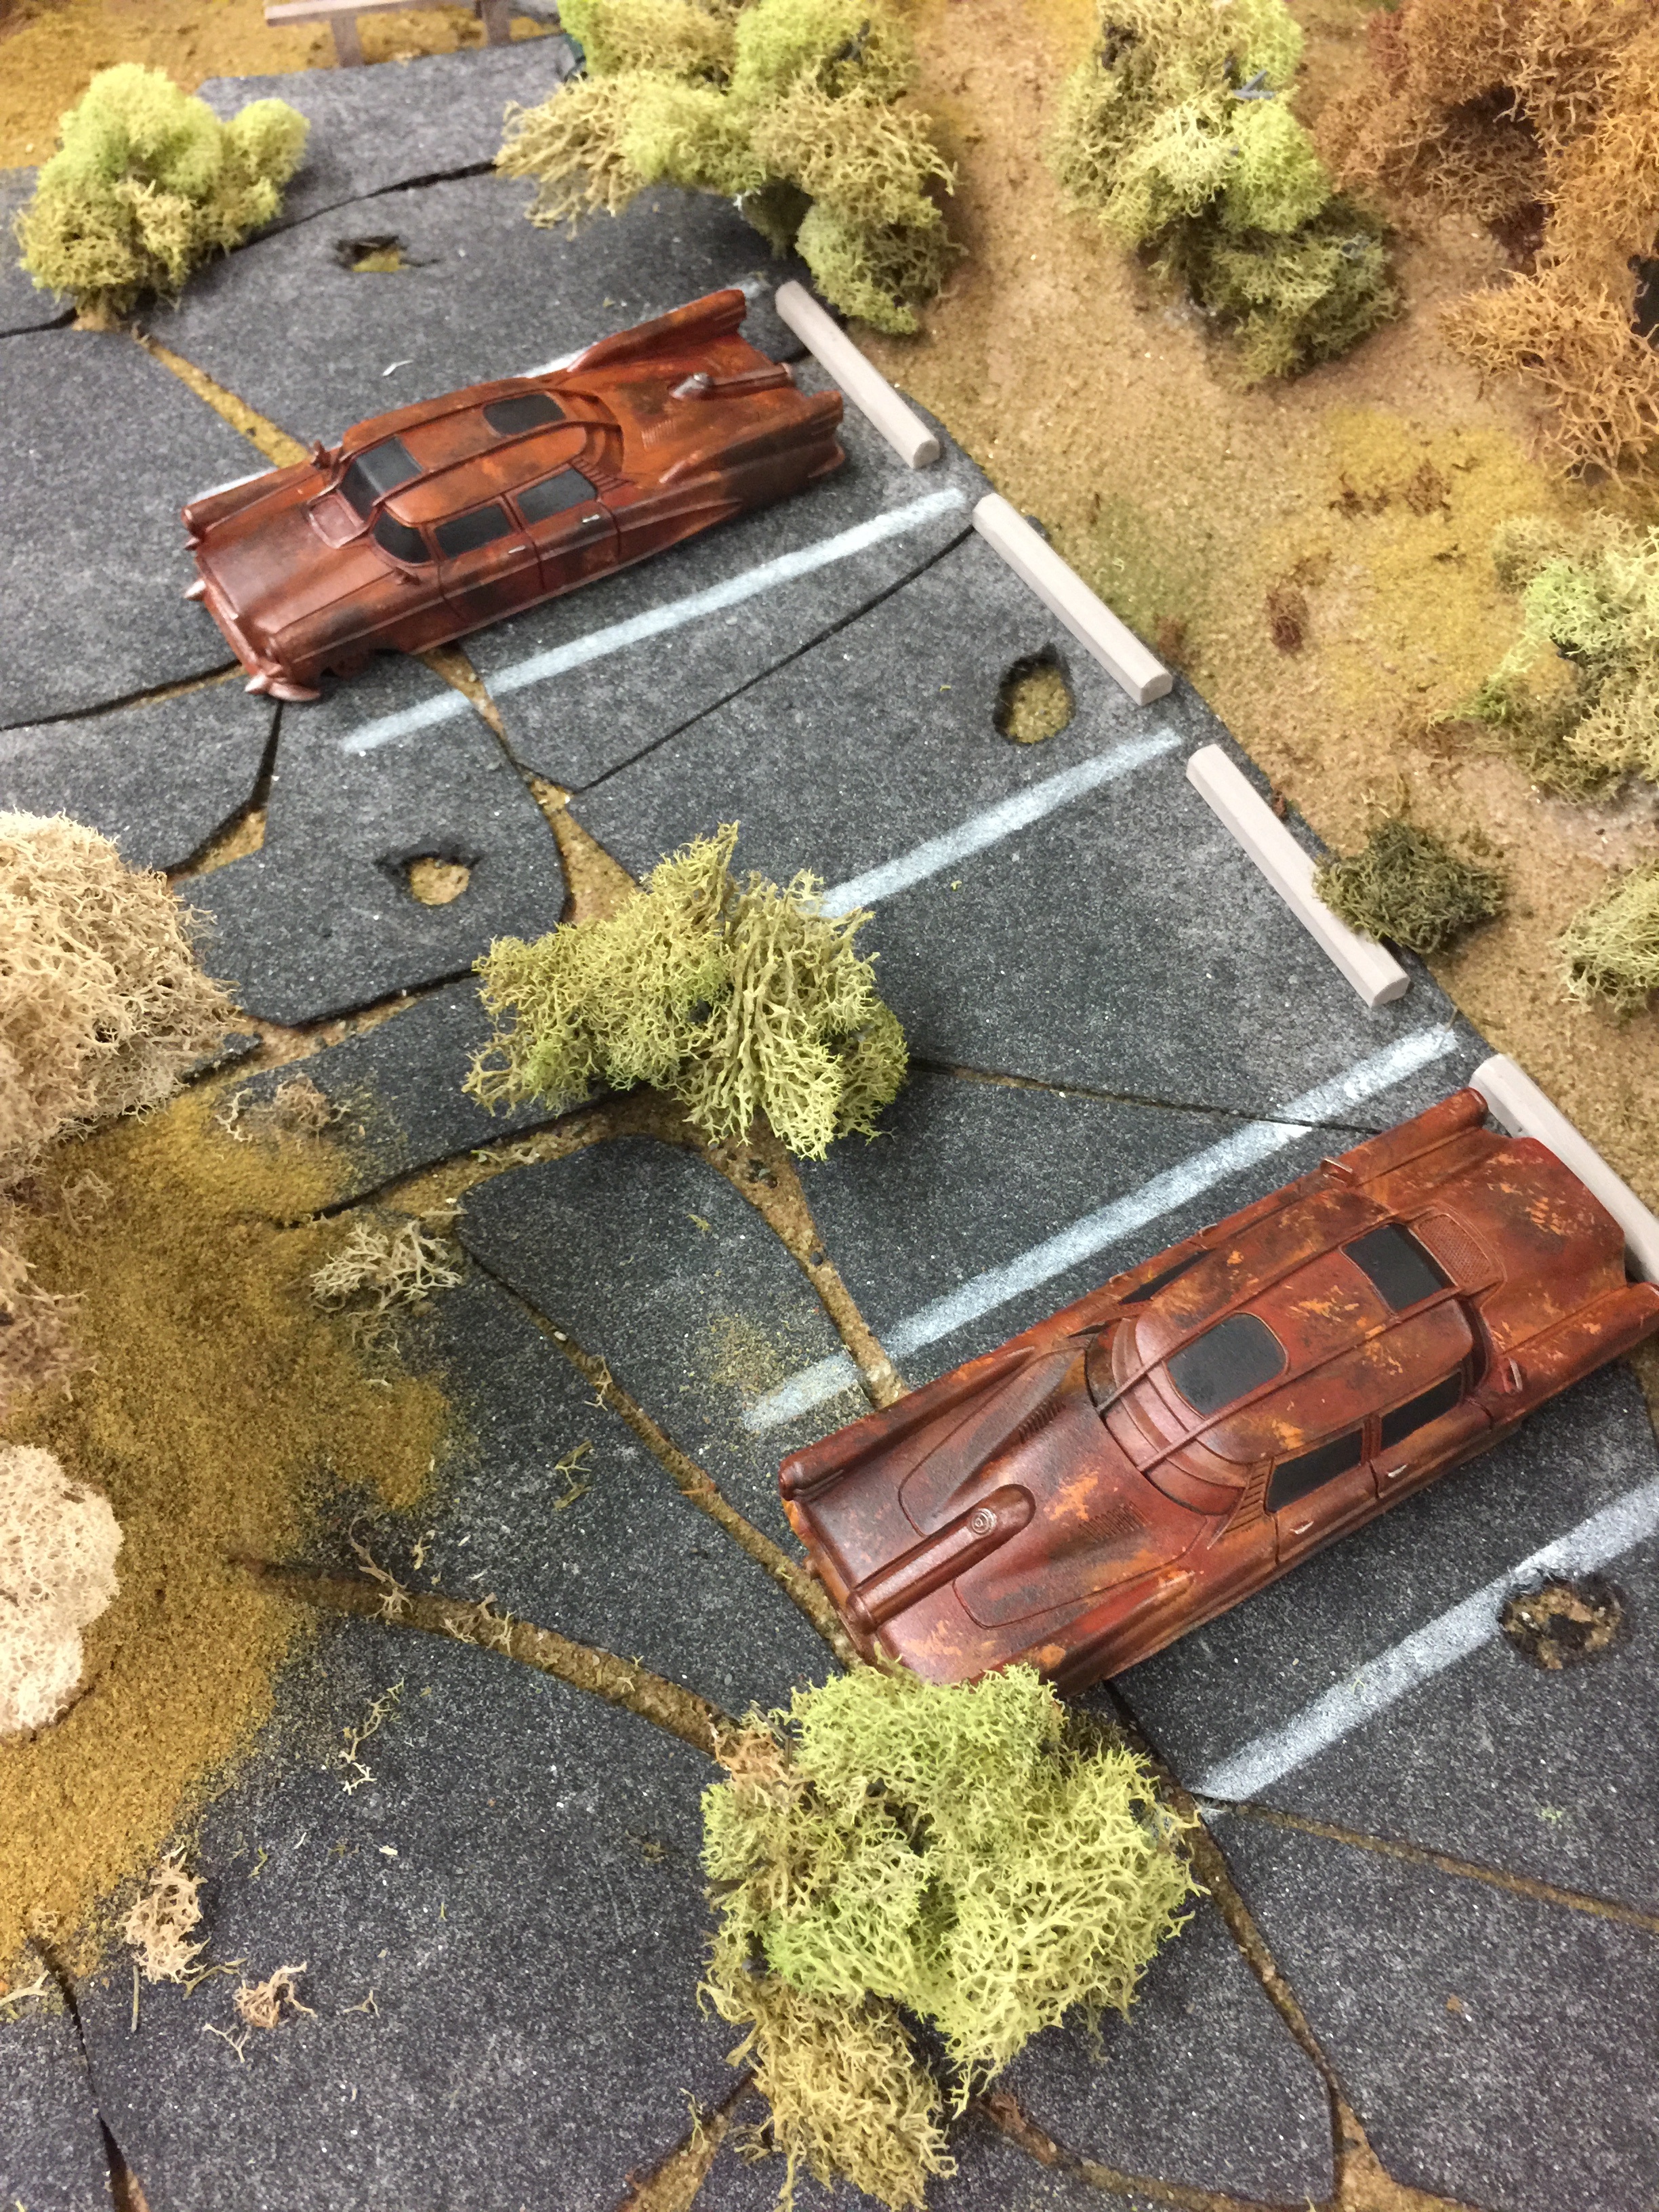
- Image 5: Weathered Corvegas now in place. Although they aren’t glued down and can be moved.
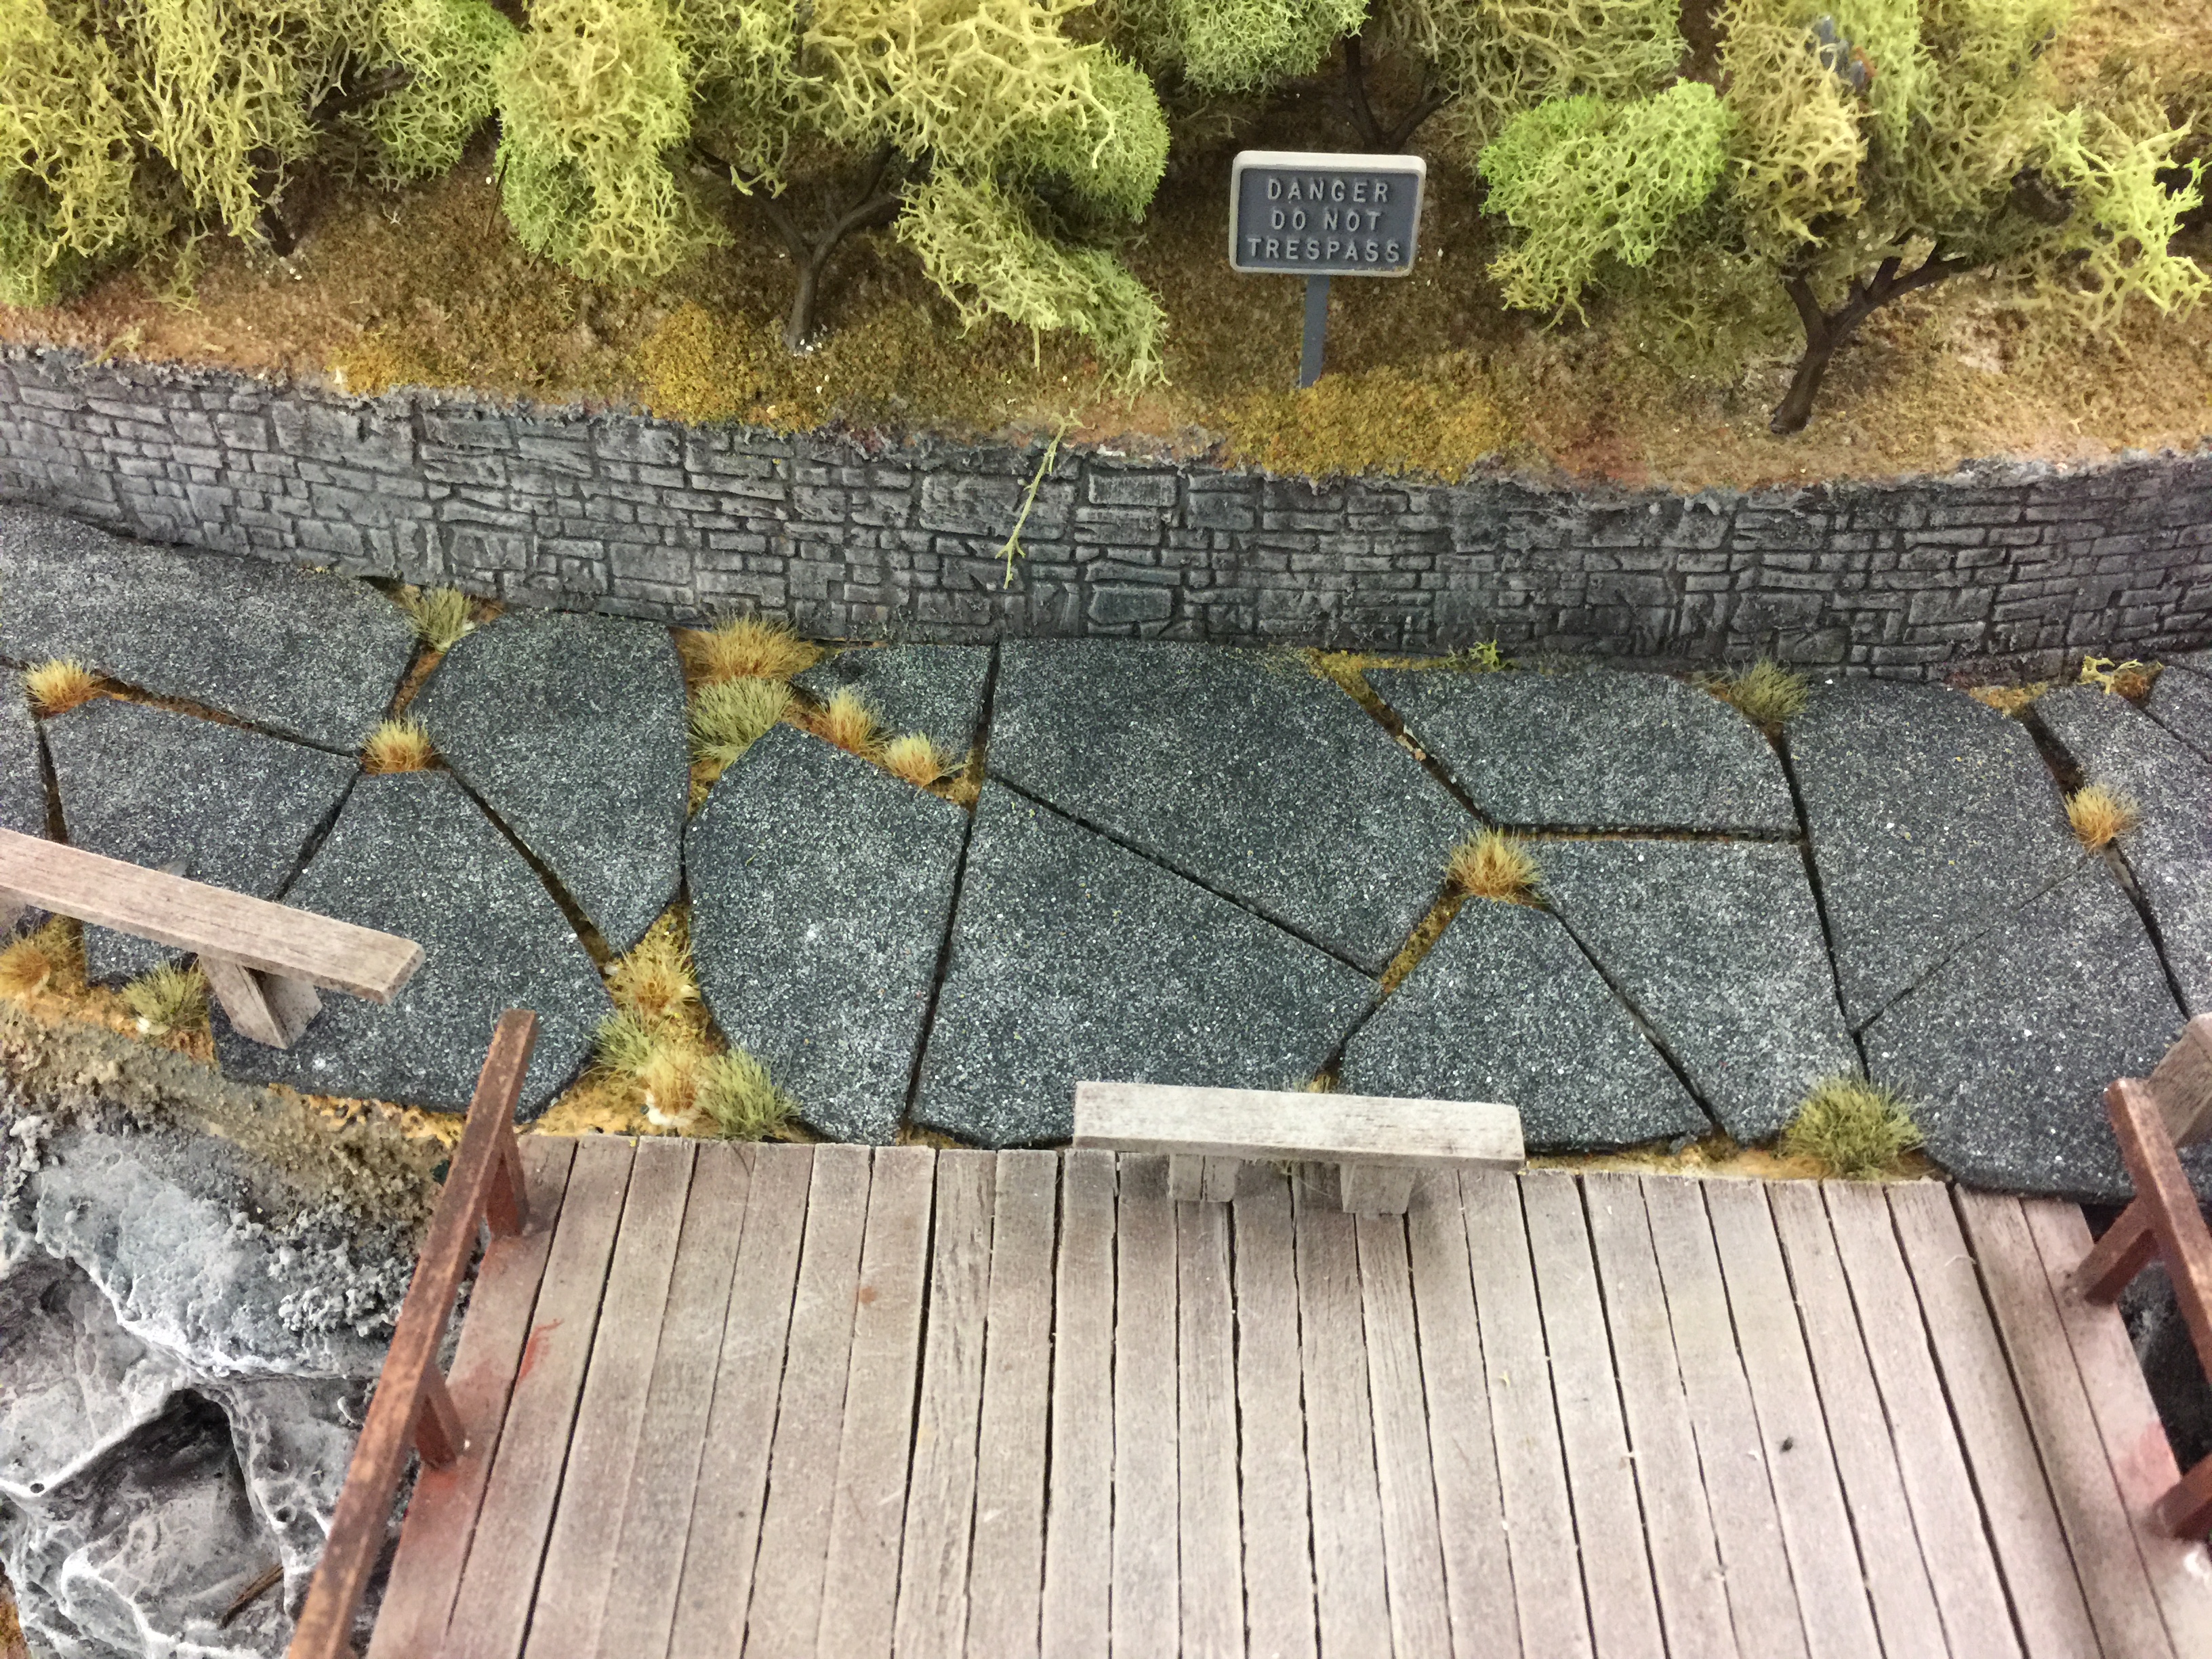
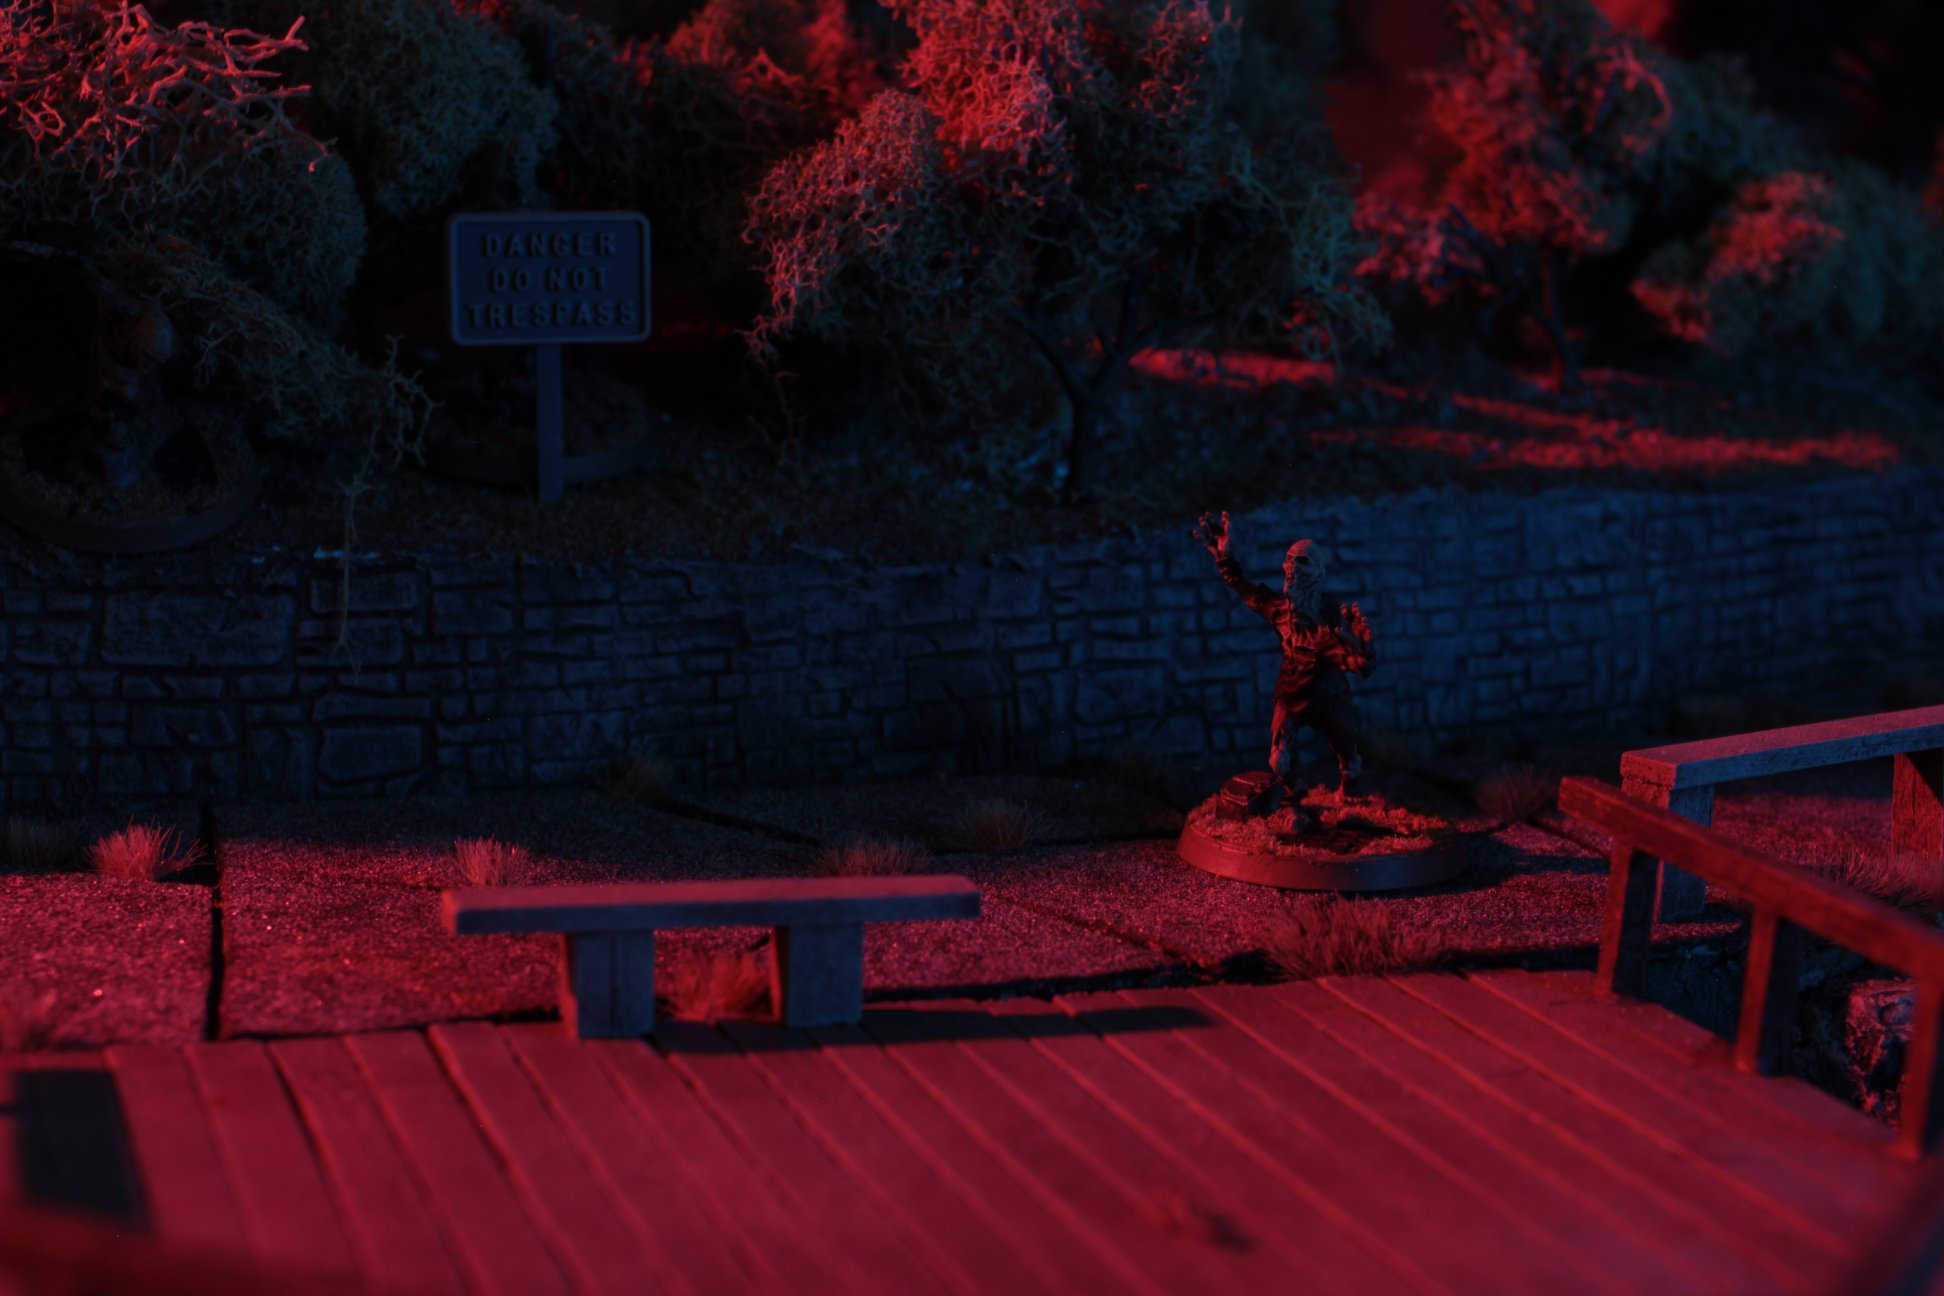
- Image 6: Planting tufts in the asphalt cracks. Also added a danger sign to warn people of ghouls. And you can see some of the railings in place as well.
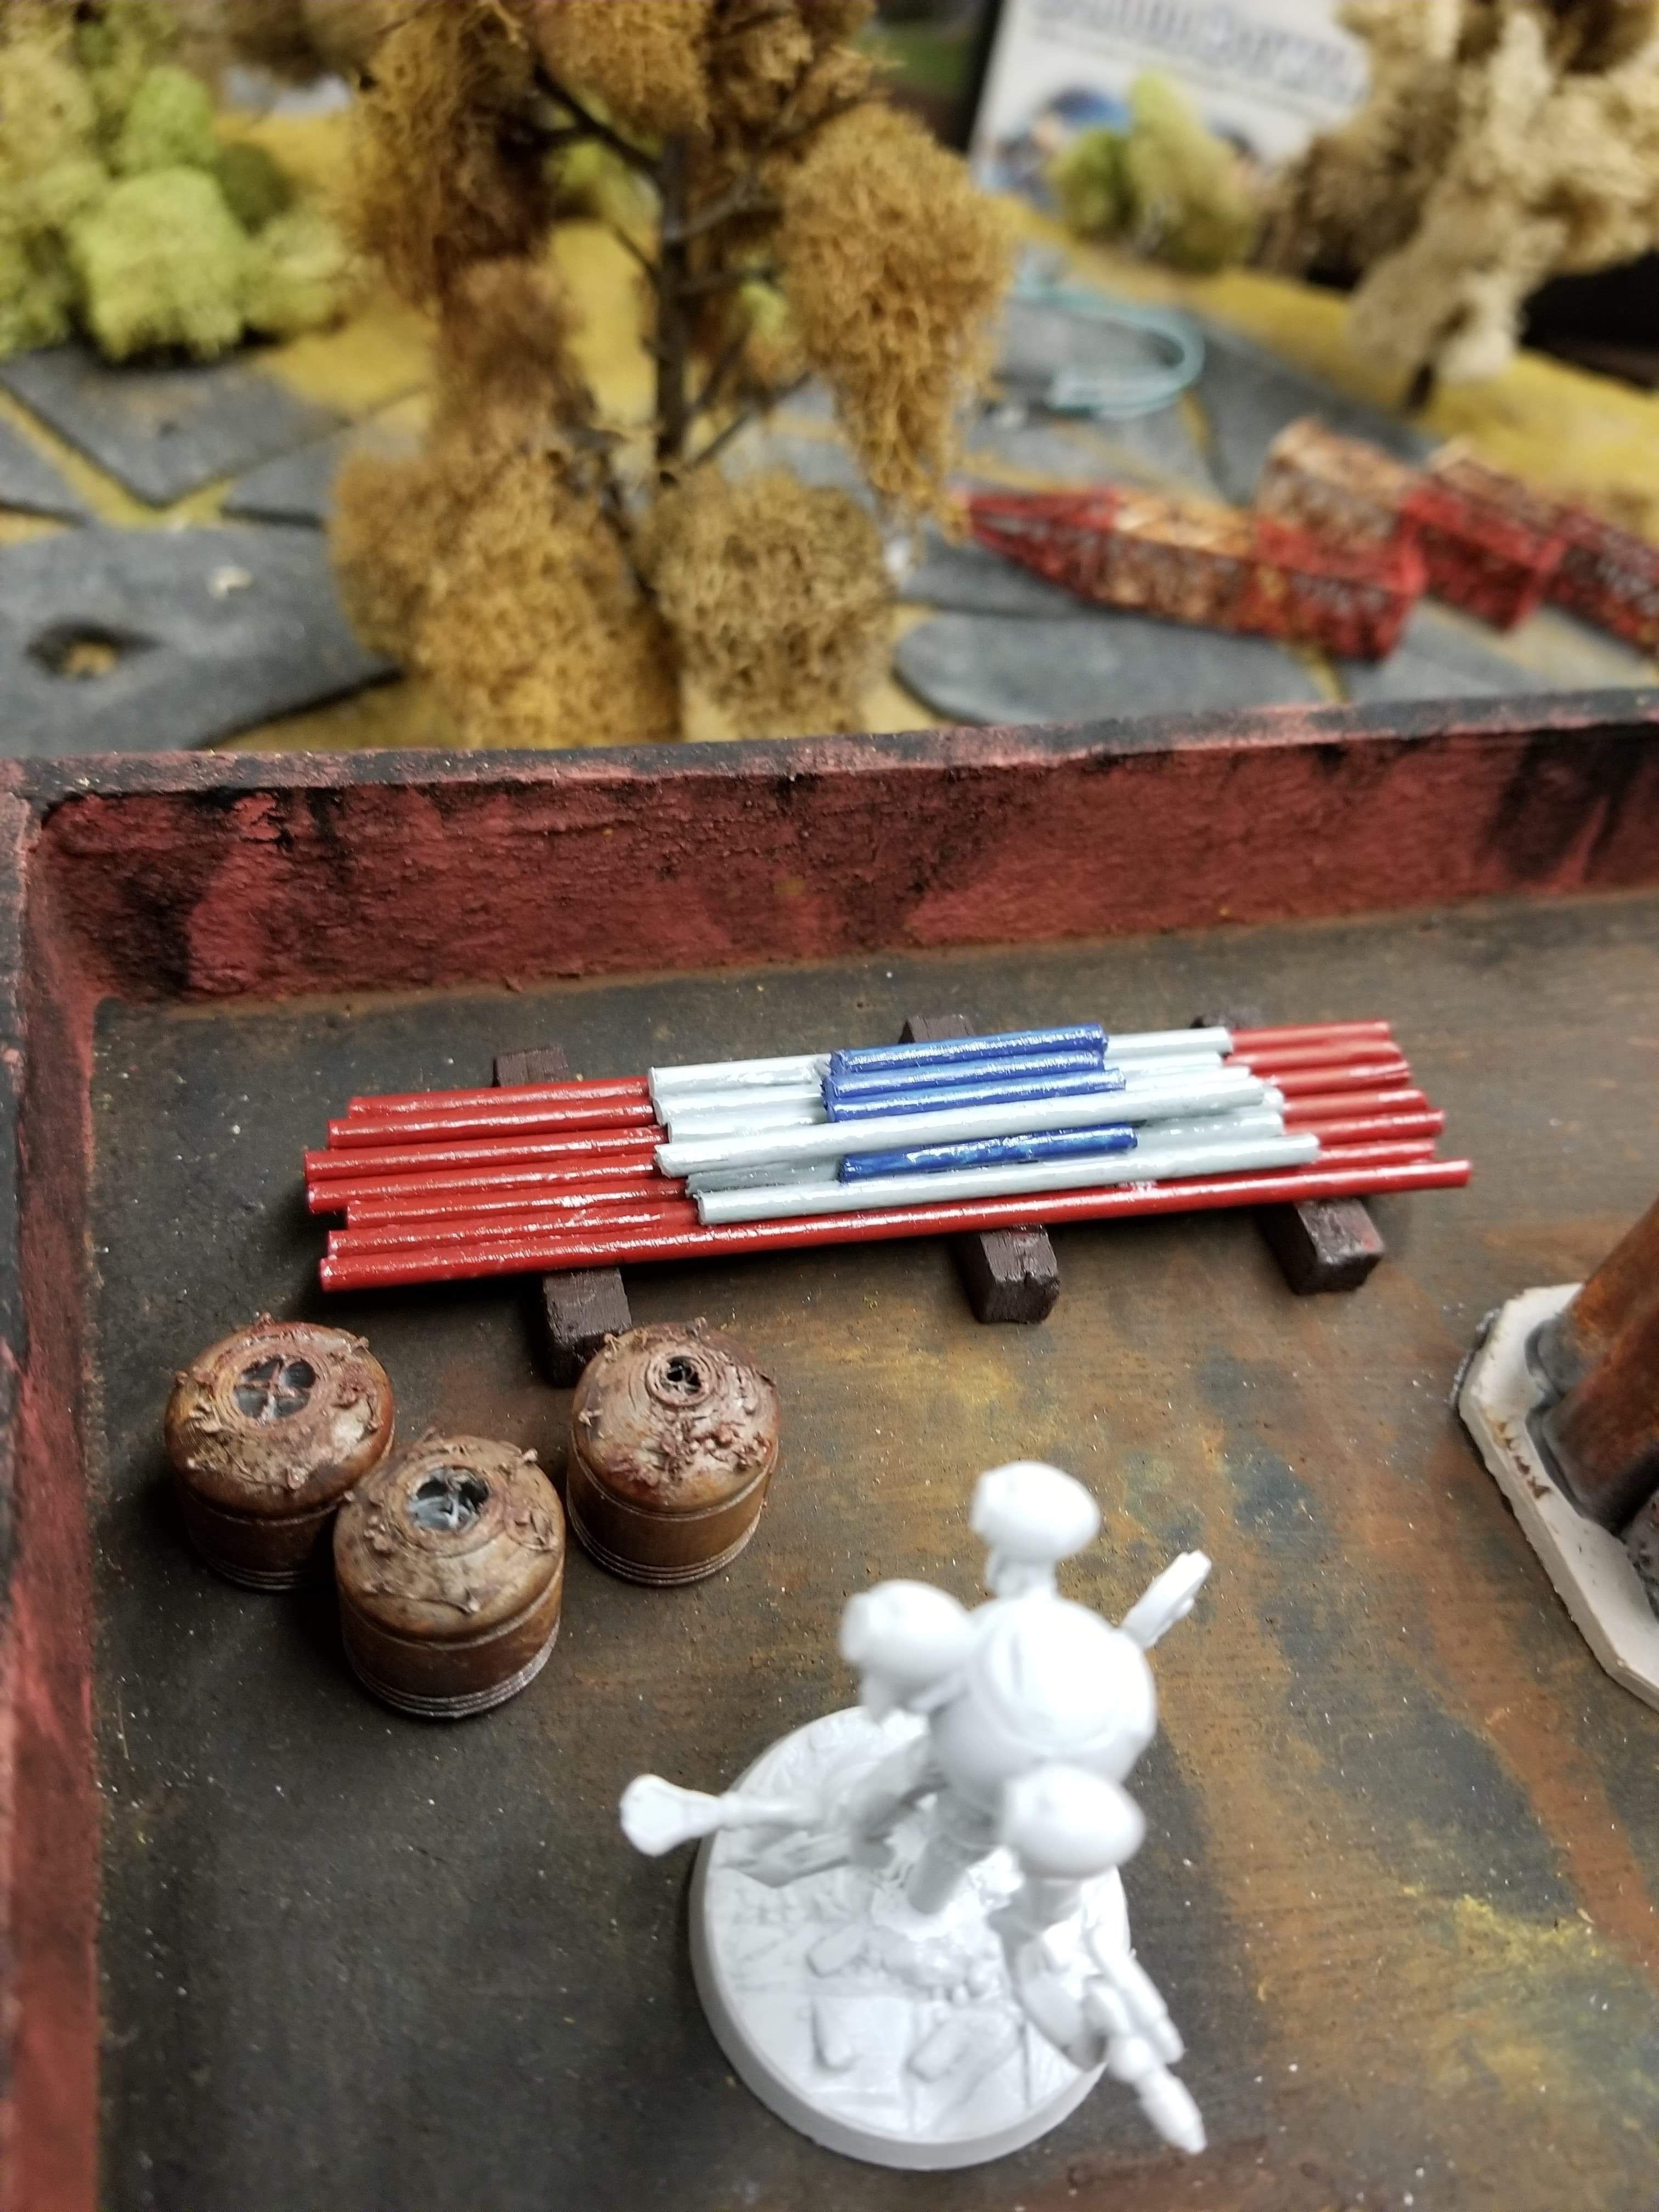
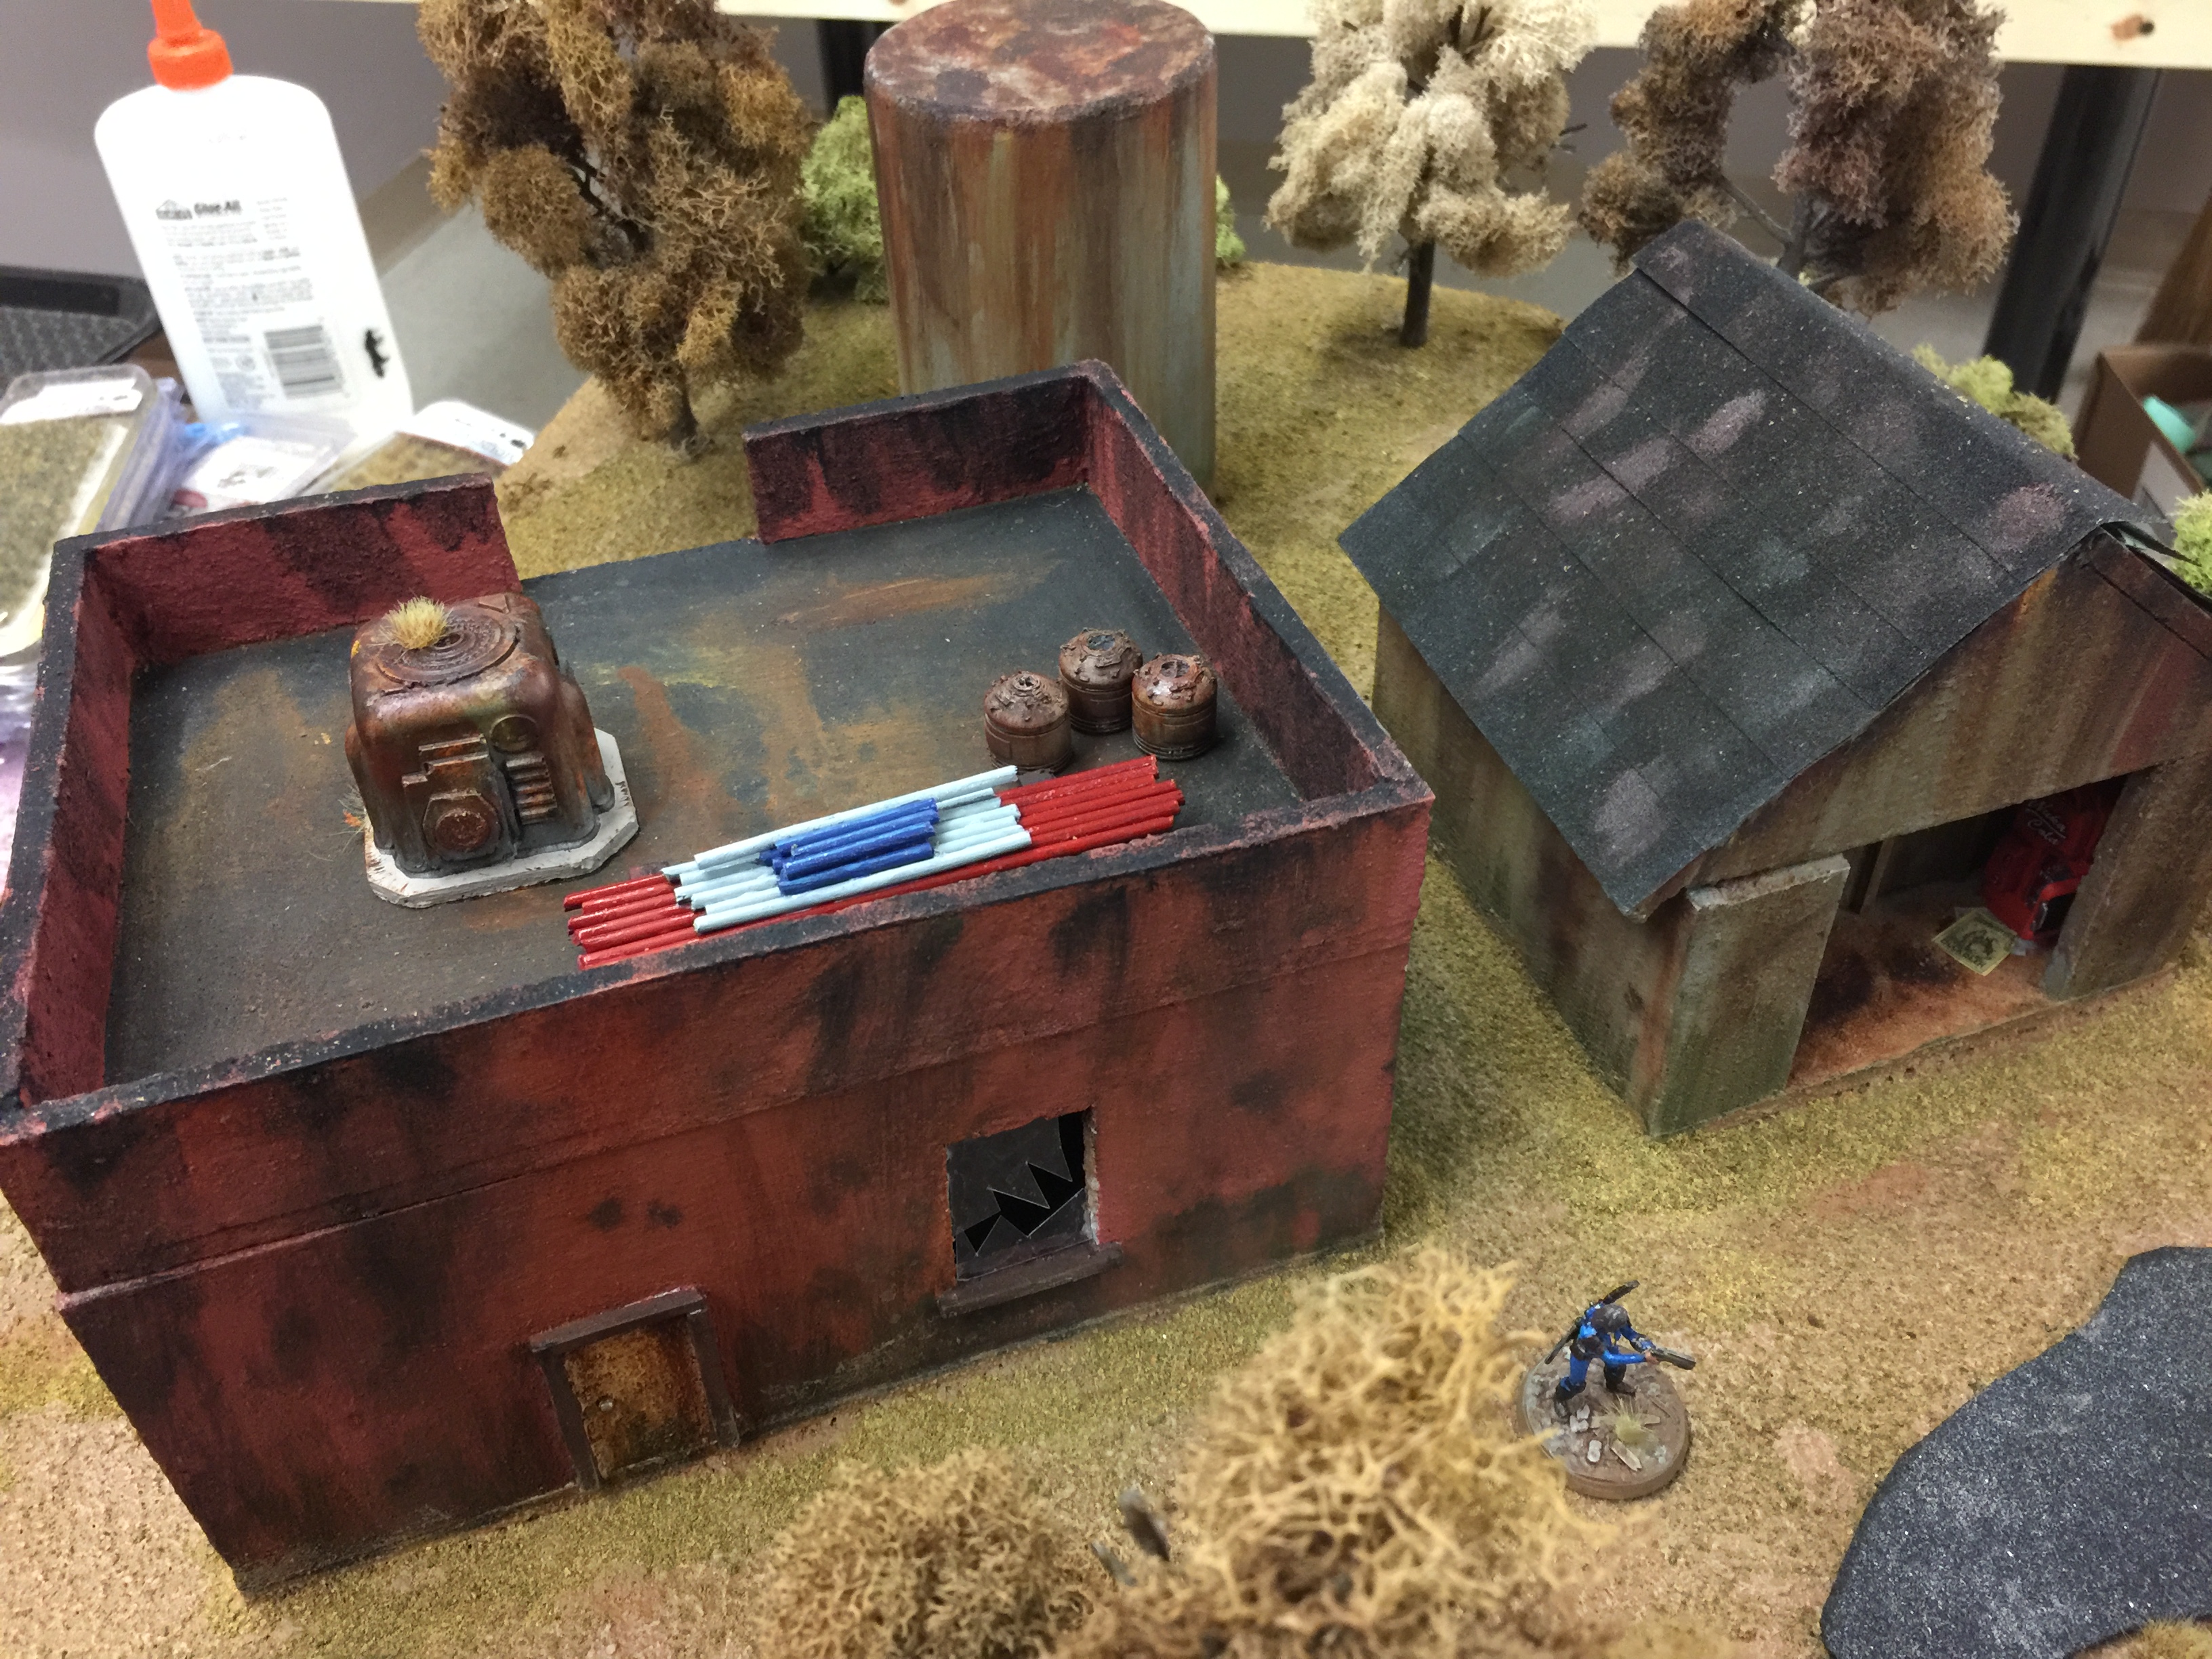
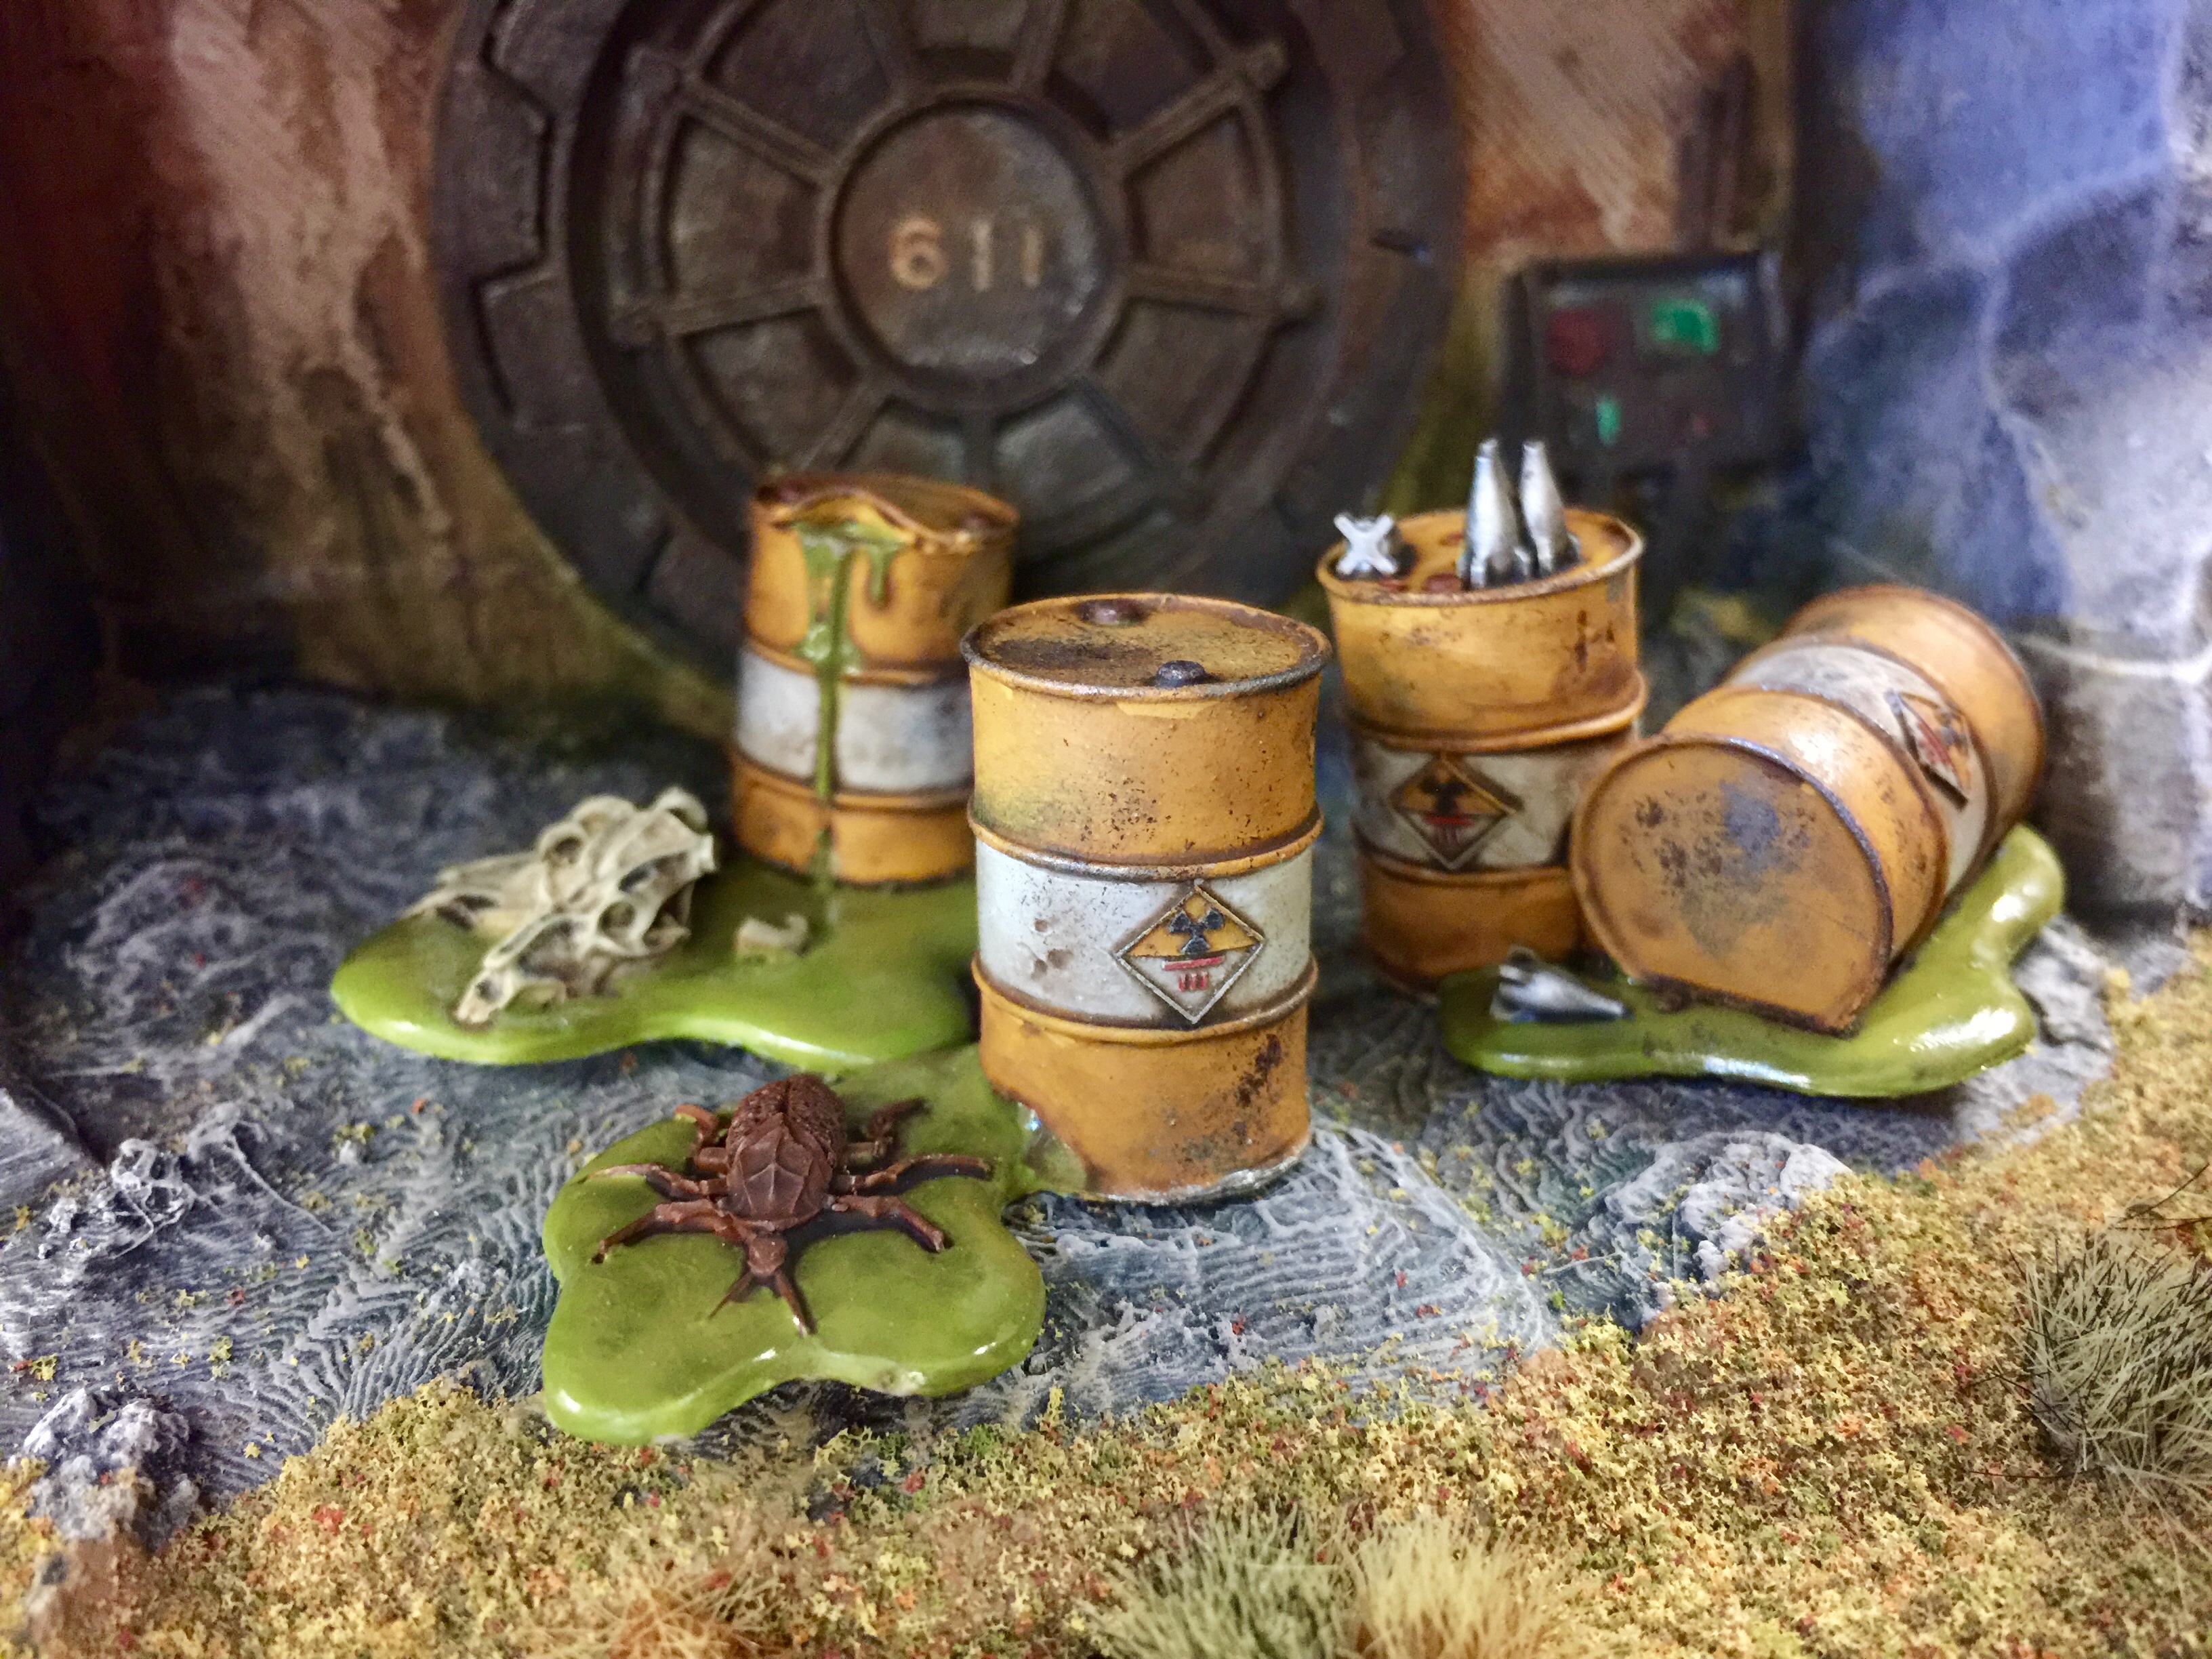
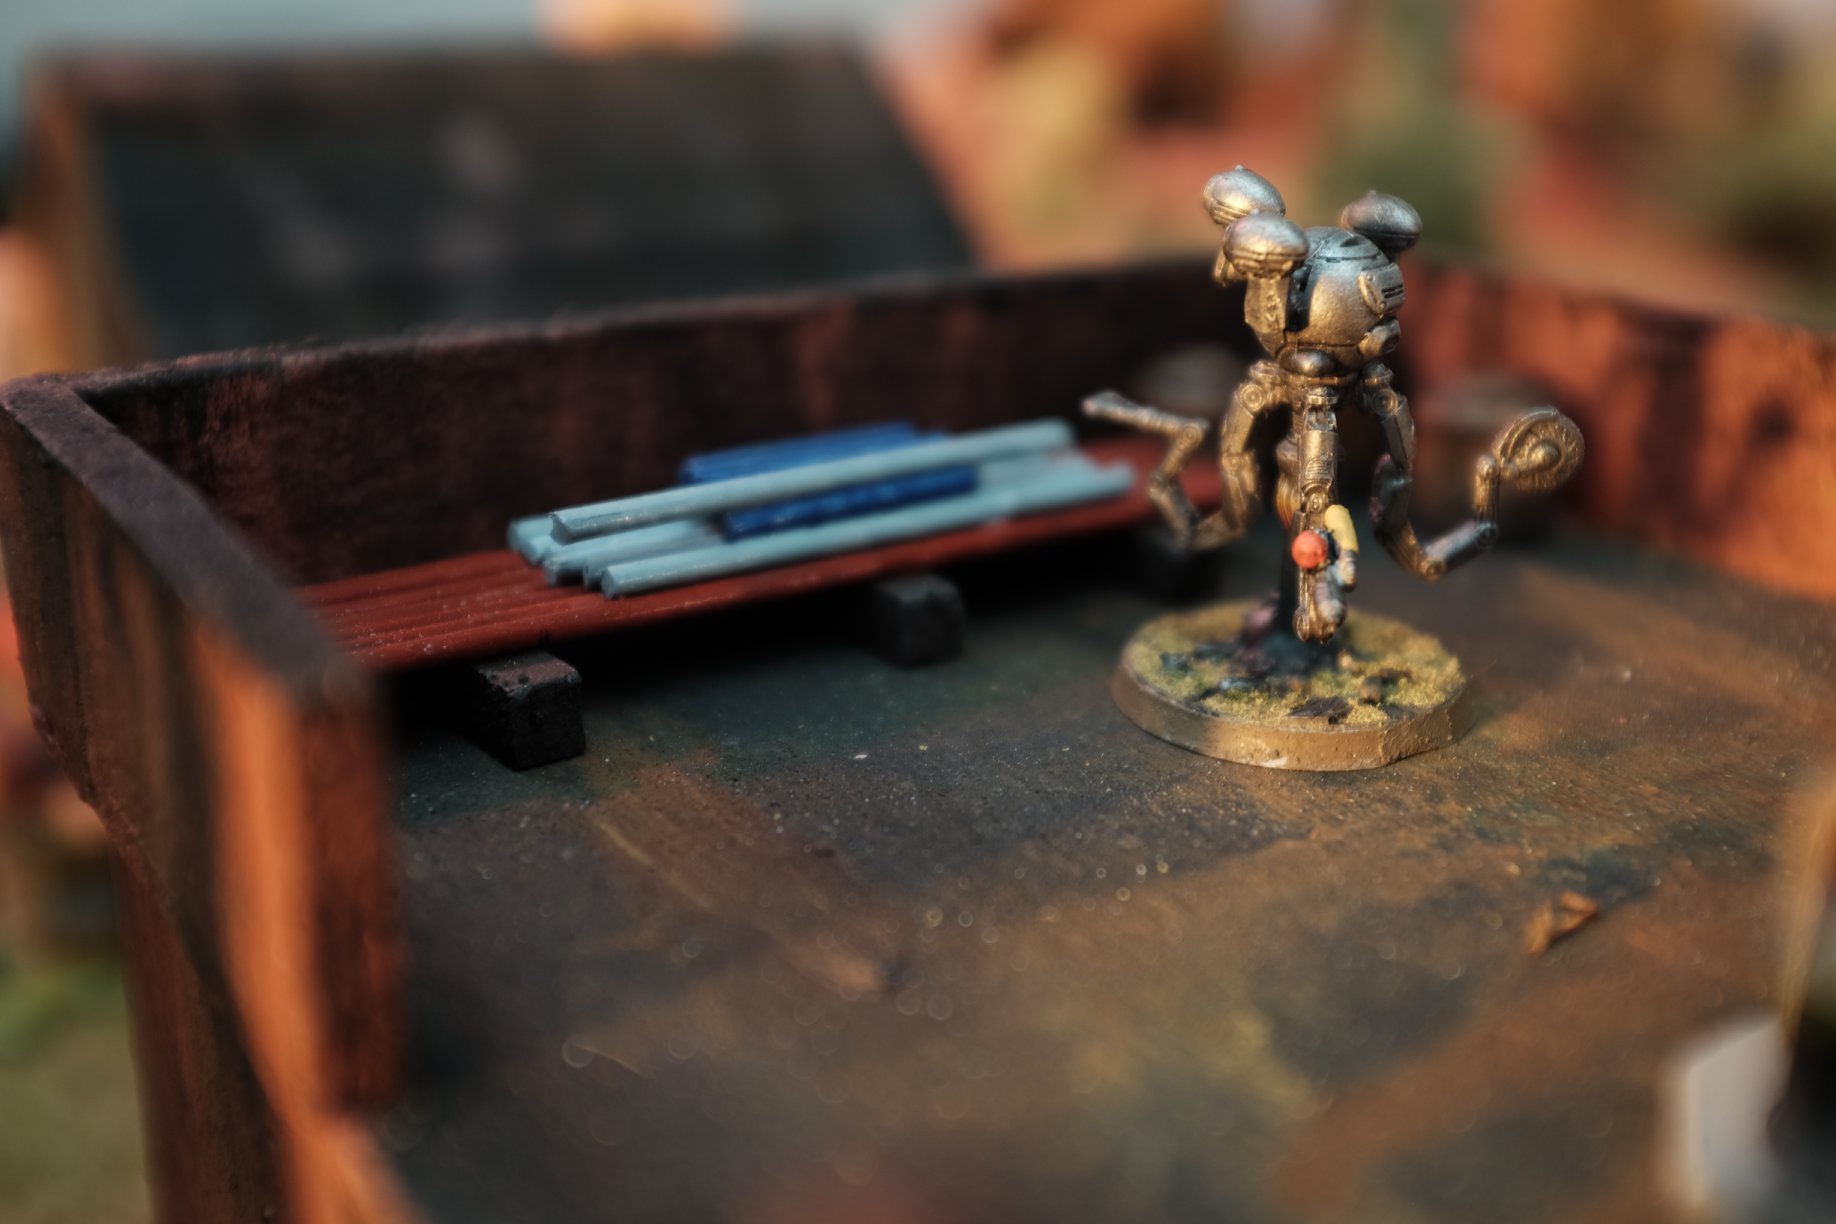
- Image 7: A stack of spare bulbs for Mr Handy on the radio building roof next to spent fuel canisters. Big props to my employee Jerrelle for helping out with this bit of terrain and throughout the whole board.
- Image 8: Weathered the fallen tower pieces. Never attached these s othey can move as well.
- Image 9: Attached the generator as a handle to remove the roof of the radio building. Also note the plastic added as shattered window glass.
Scatter Pieces
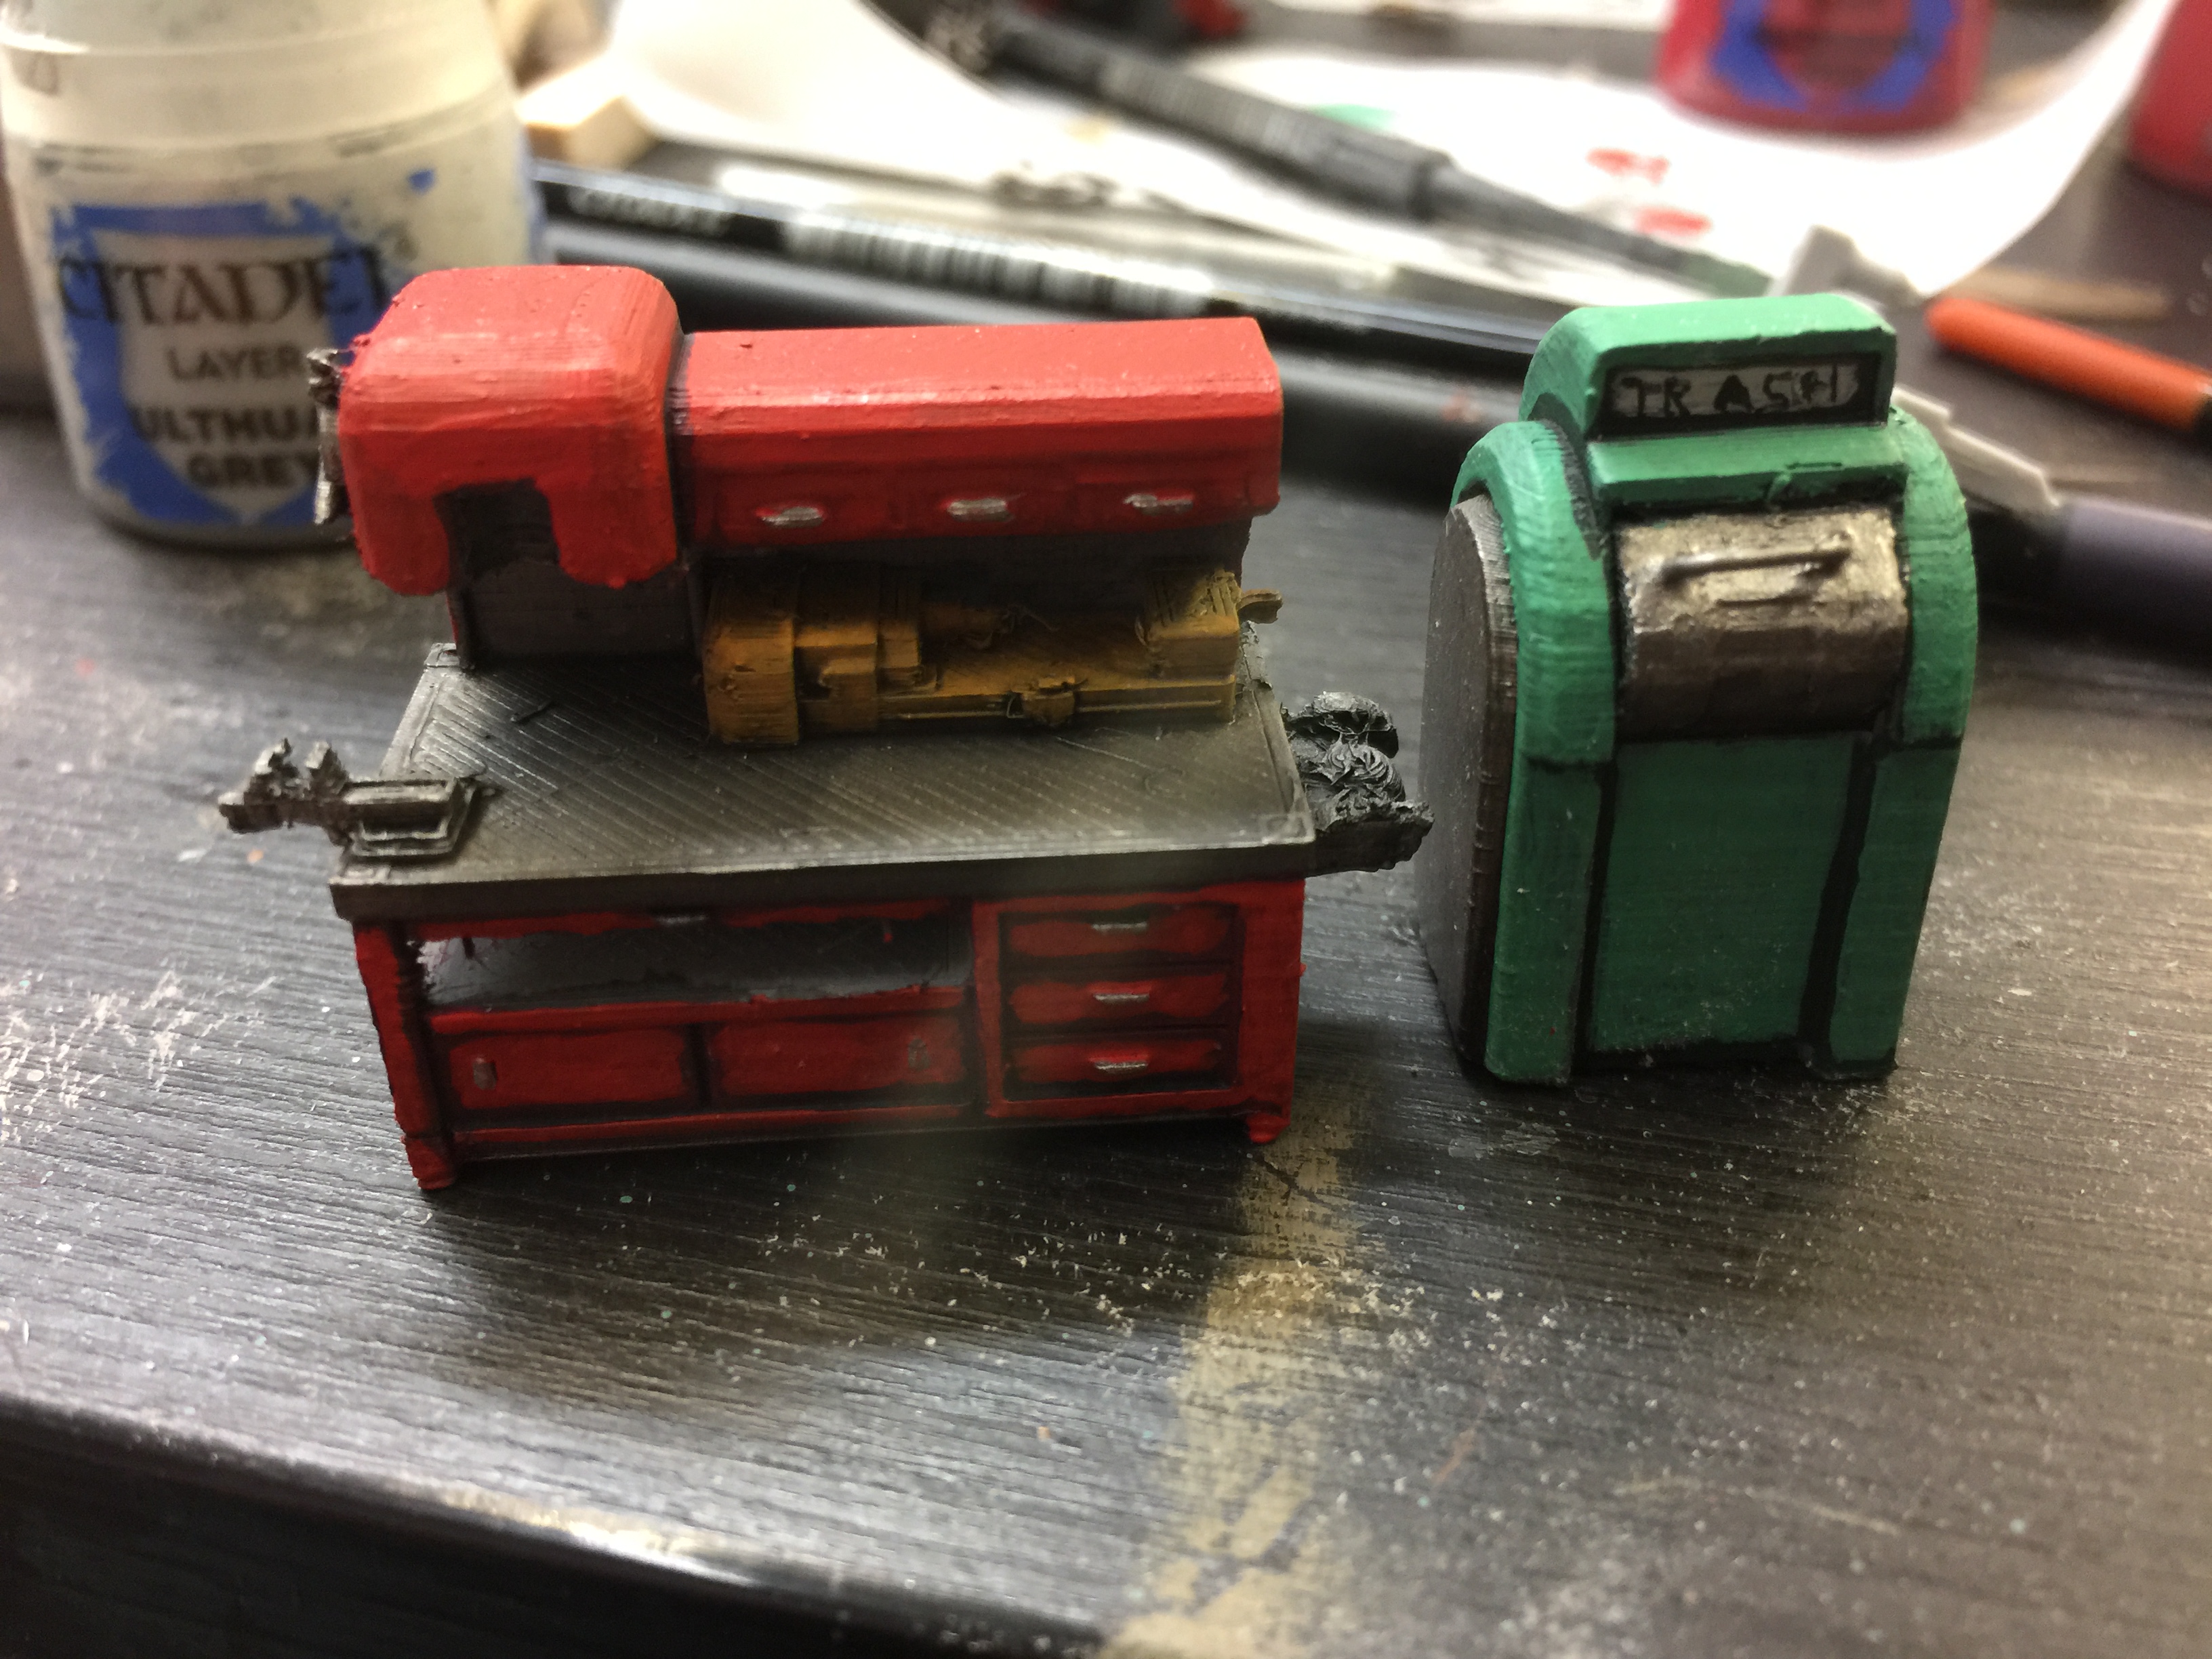


- Image 1: Used a fair amount of 3d printed pieces on this table. Here are the workbench and trash can in their pre-weathered glory.
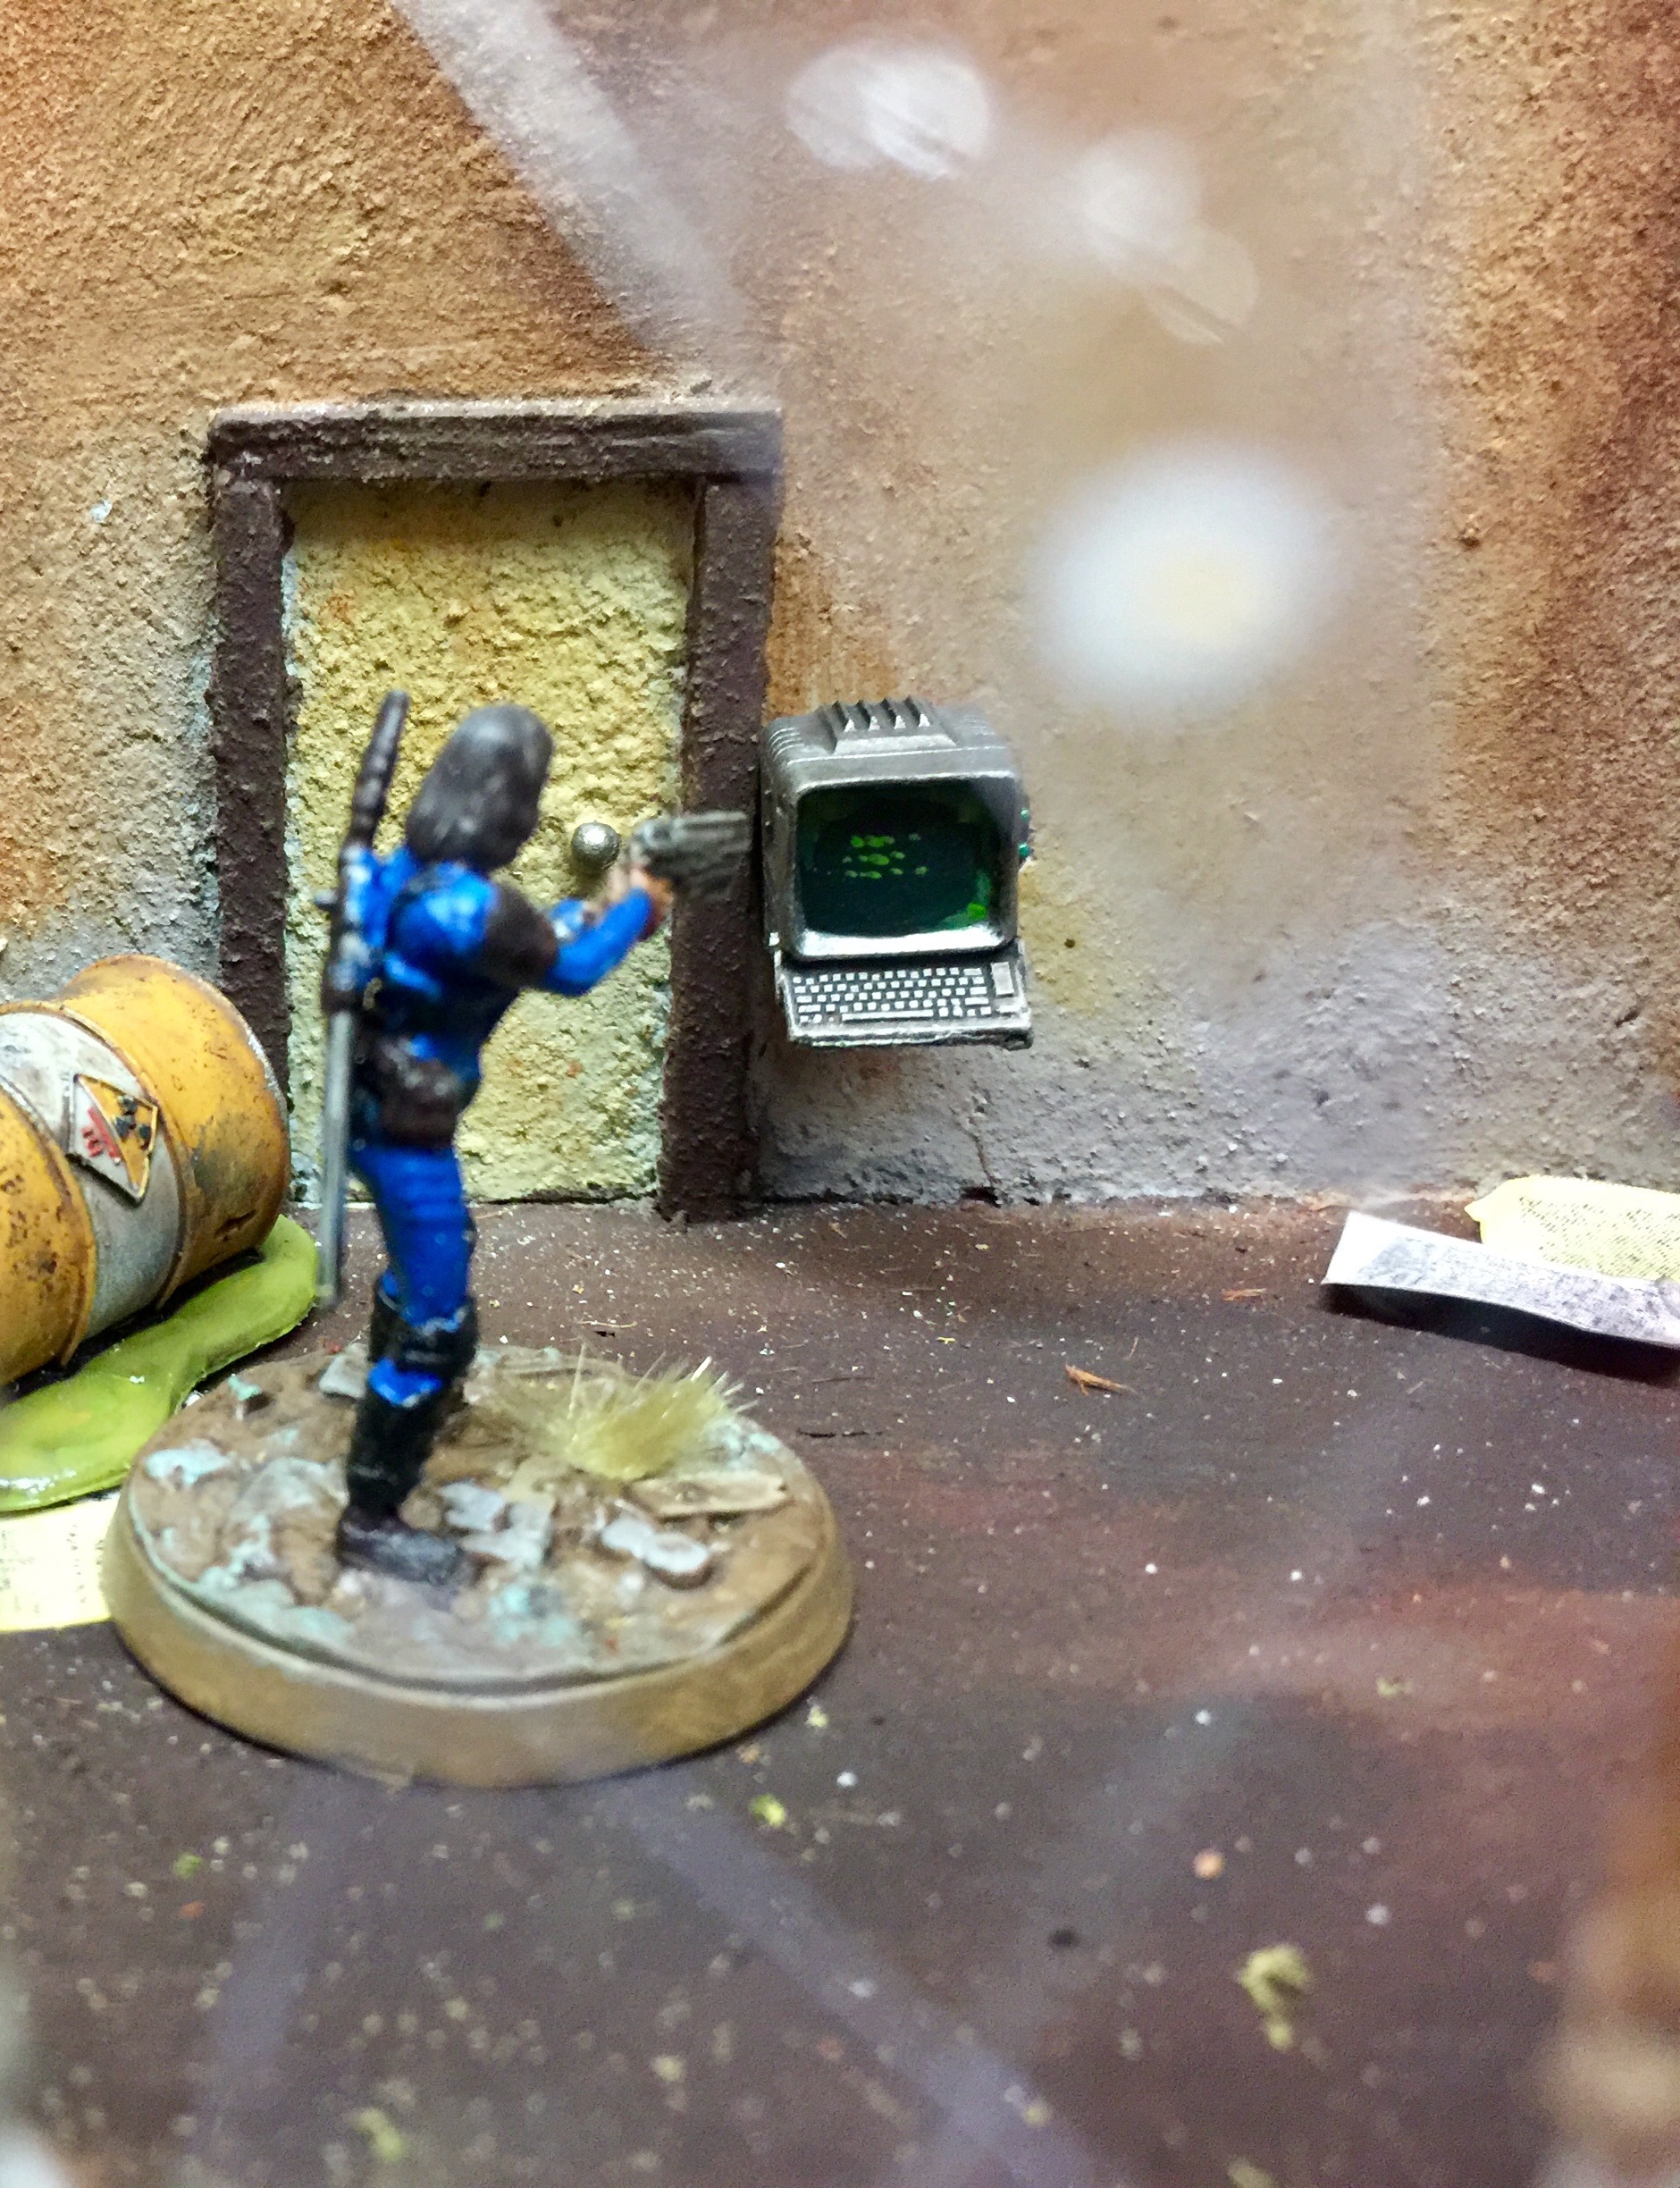
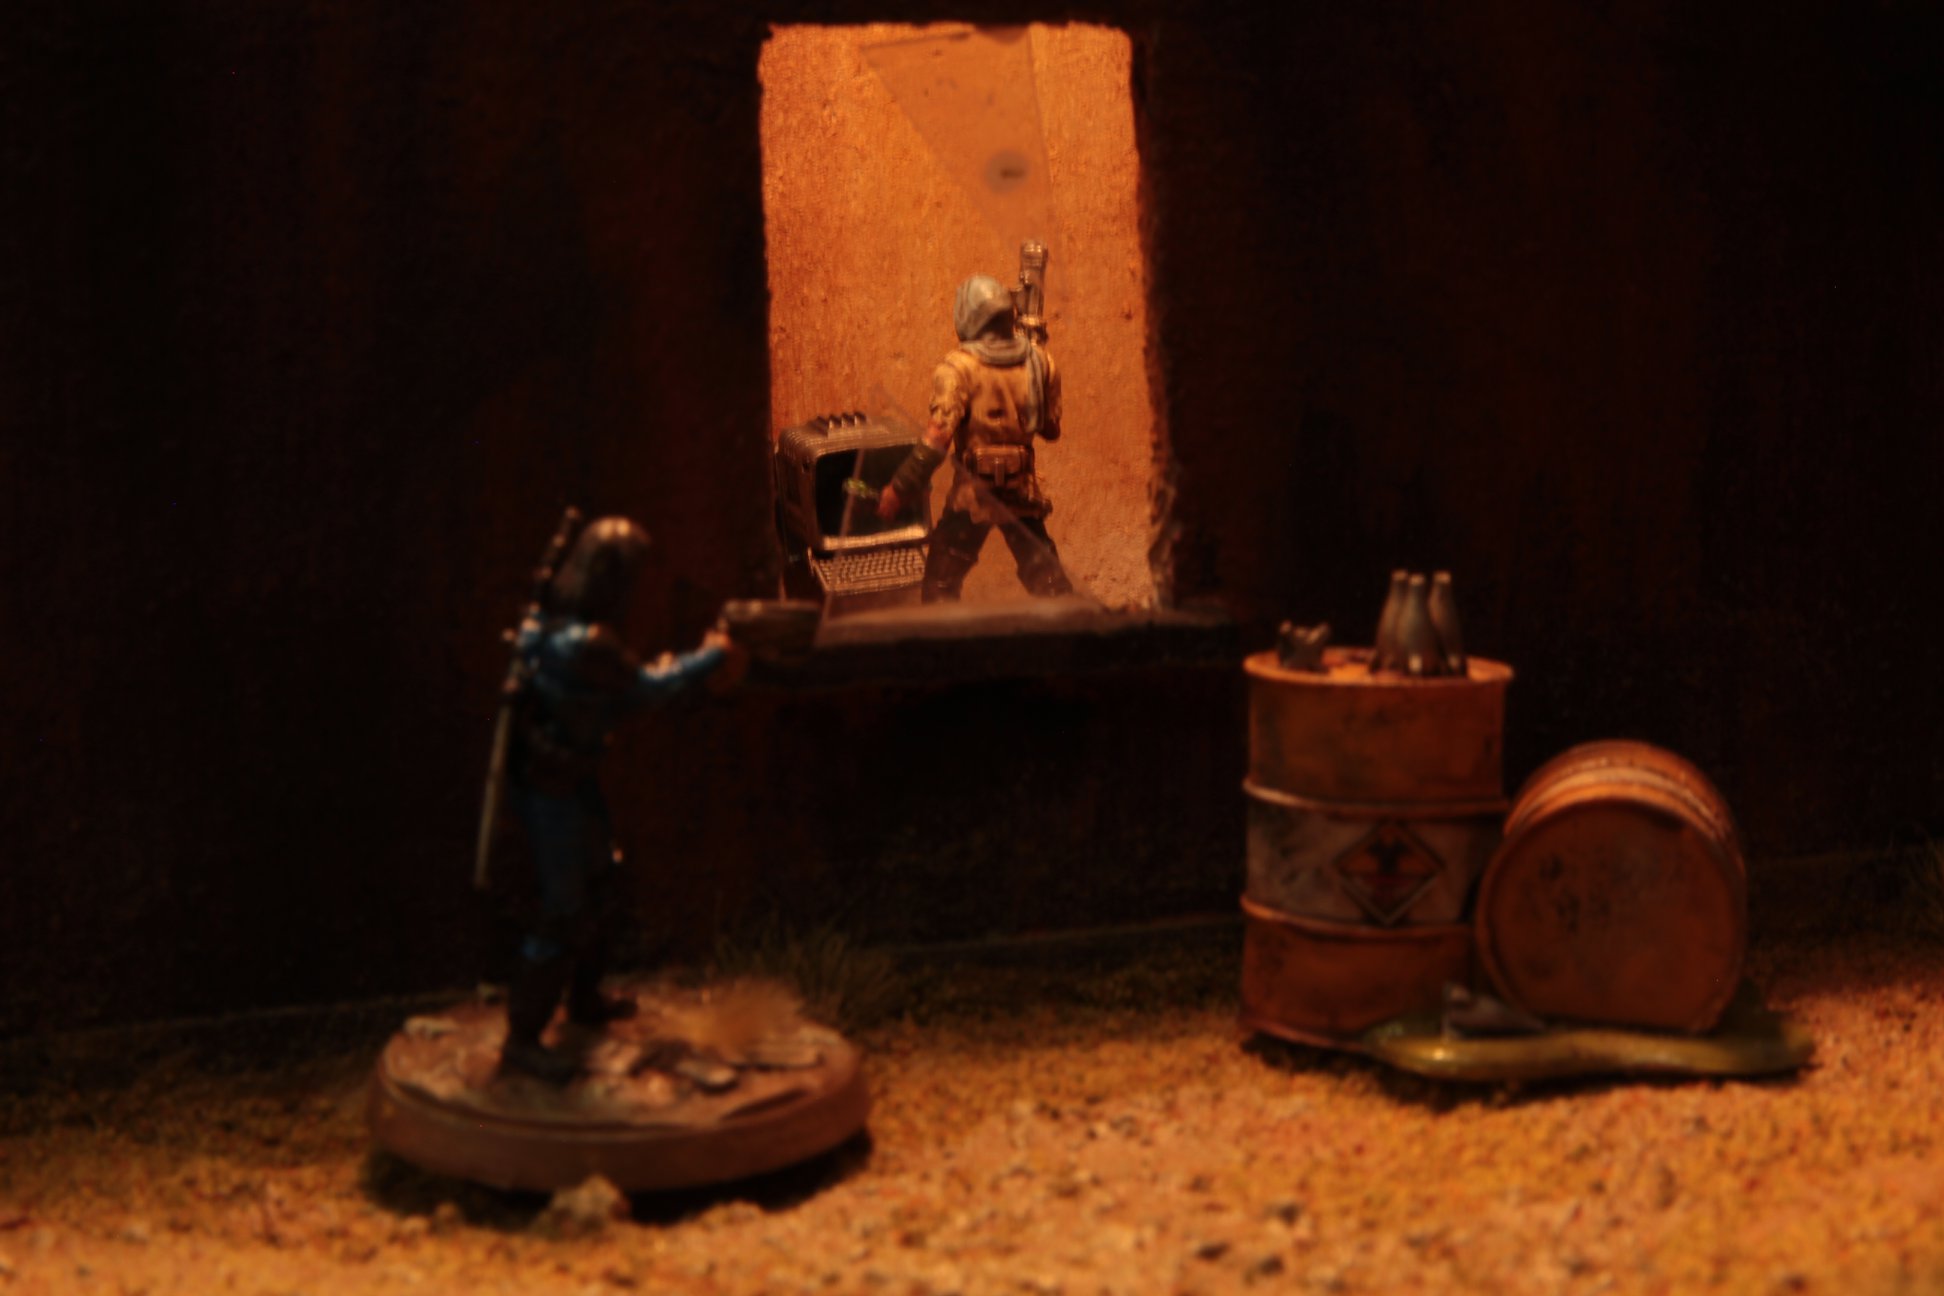
- Image 2: Nice scenic photo of a ghoul looking through the window at a computer.
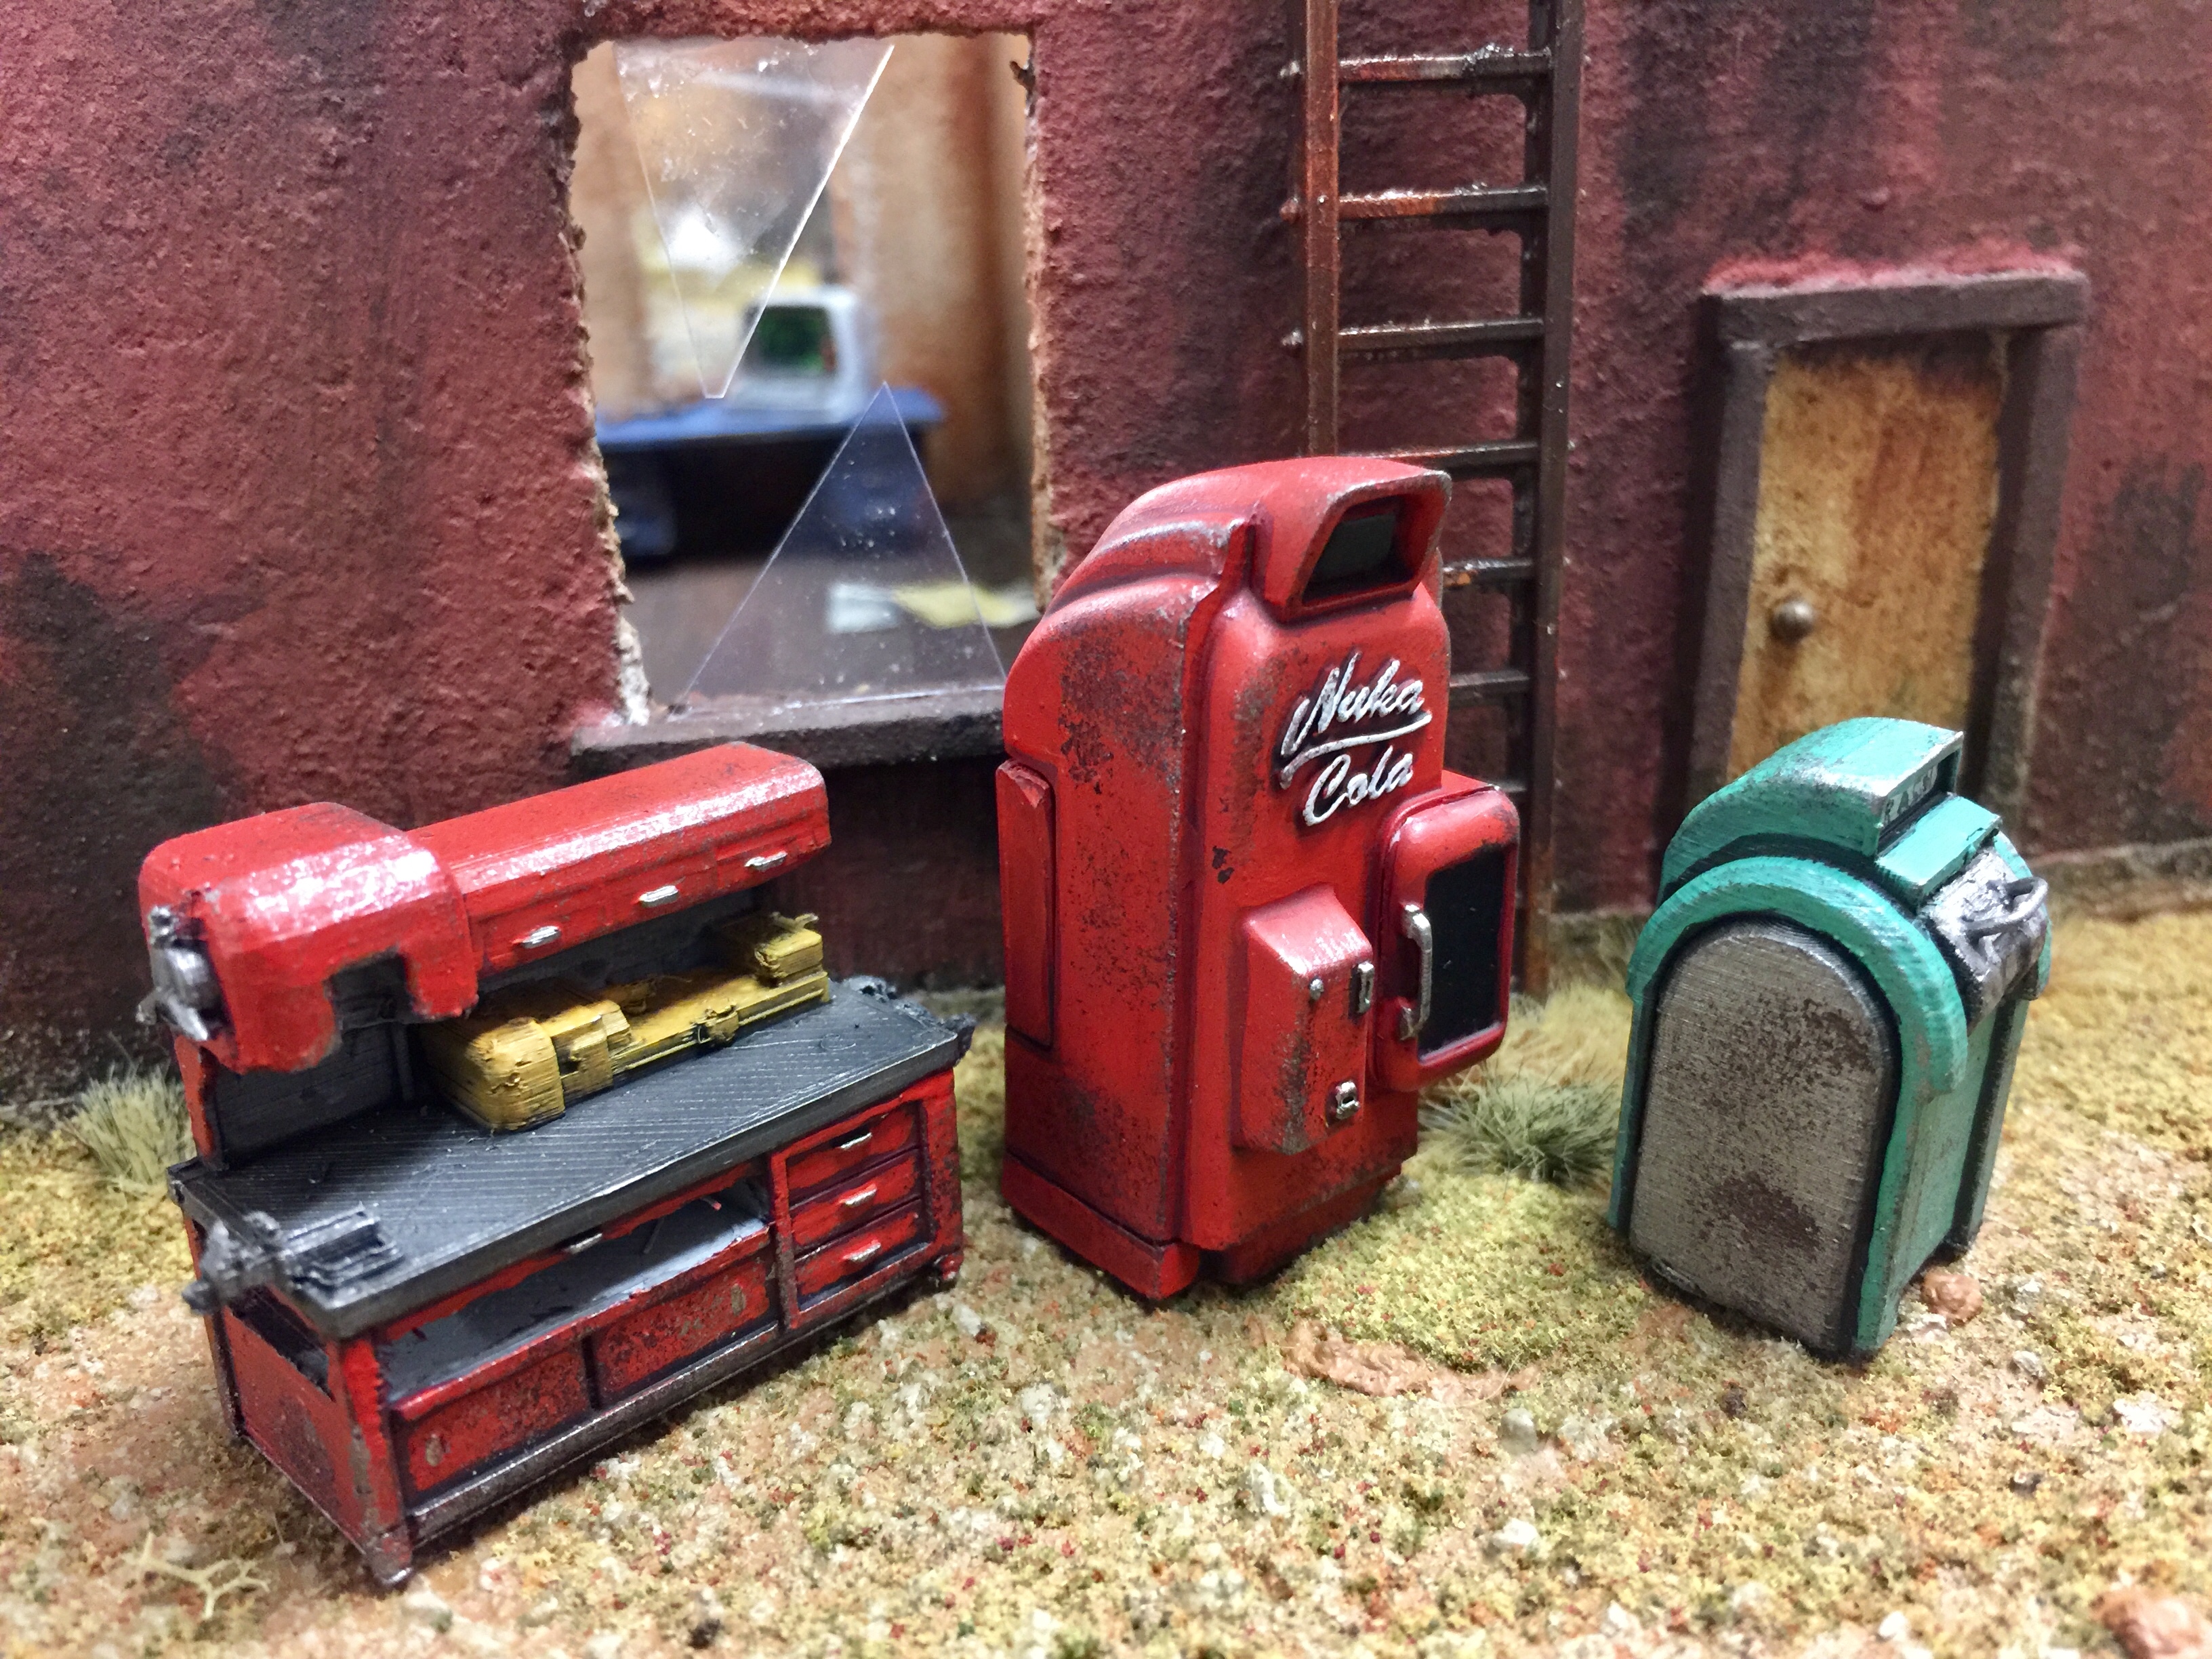
- Image 3: Breaking out the sponges for sponge weathering. The official Modiphius Nuka-Cola machines really weather well.
- Image 4: The fully complete and weathered barrels from the Modiphius scenery kit.
- Image 5: Blu-tacing on the Wall Terminal from the Modiphius scenery kit. The blur i the foreground is the window glass.
- Image 6: Spraying and painting some Modiphius crates. In case you want to replicate these vivid 50’s colors, you are looking for Baharroth Blue for the powder blue, Sybarite Green for the turquoise, Ironbreaker for the chrome, and Evil Sunz Scarlet for the cherry red.
- Image 7: Everything done? Time for a photo shoot!
Final Photo Shoot
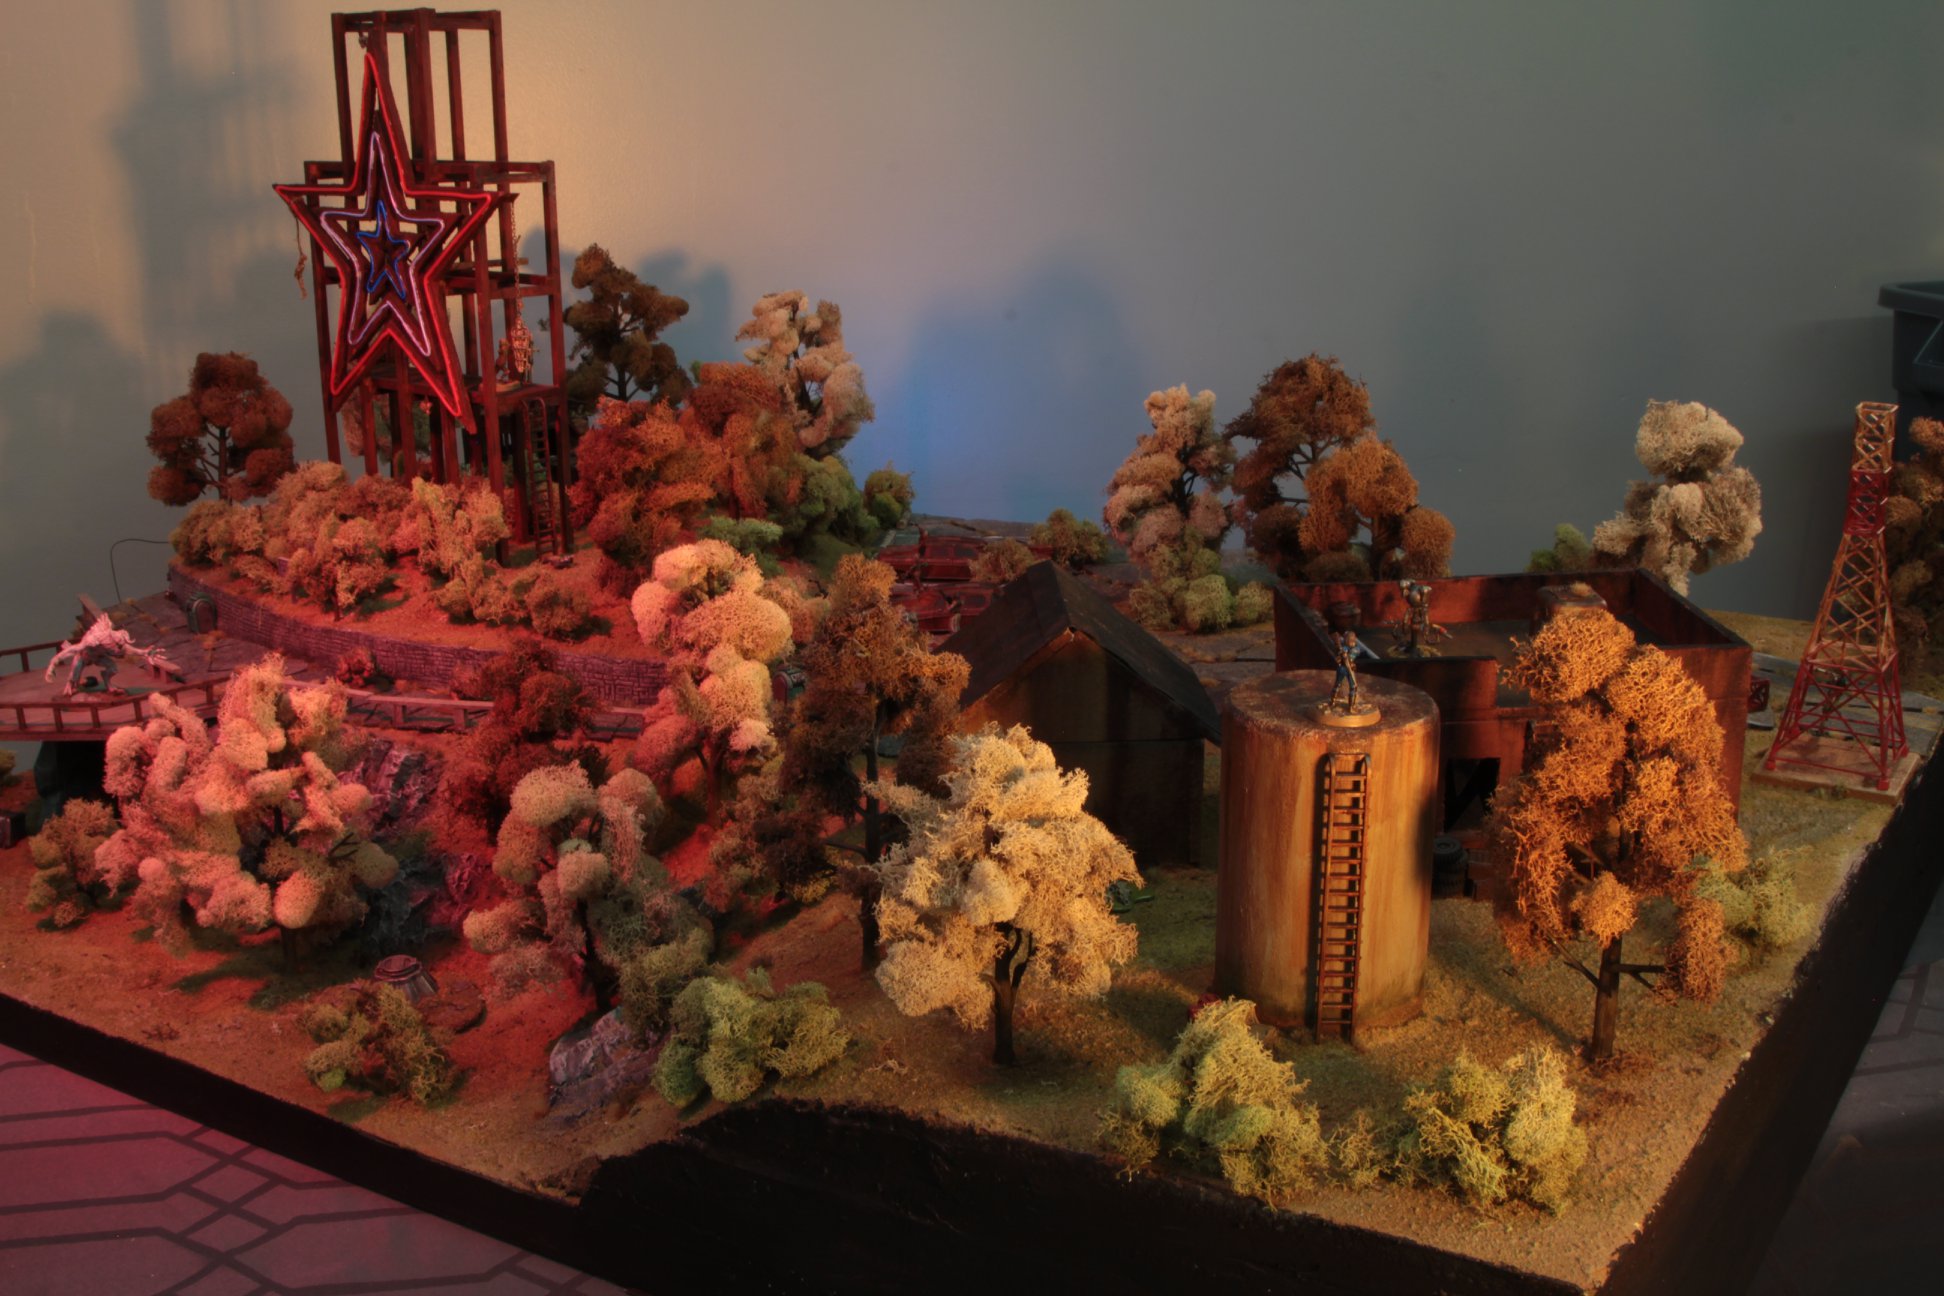

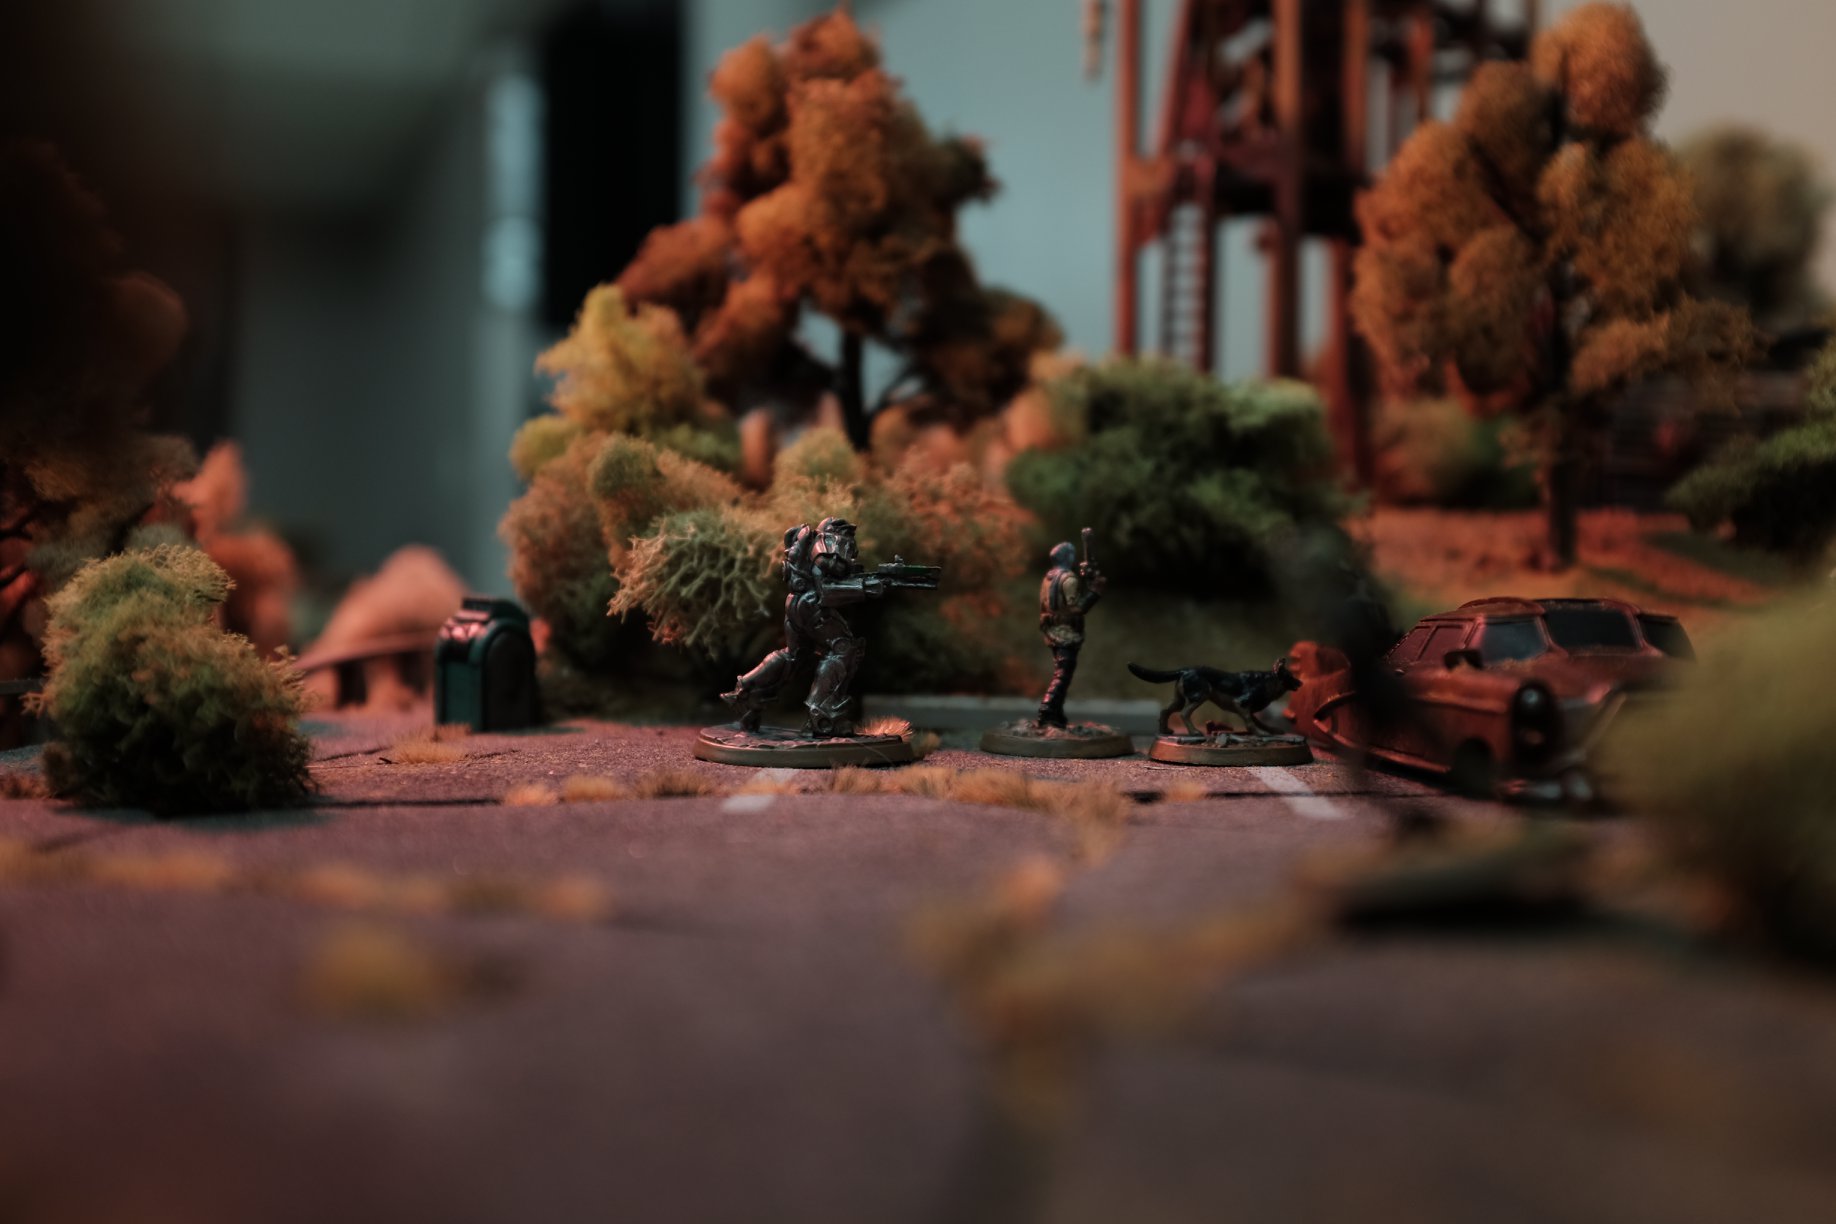

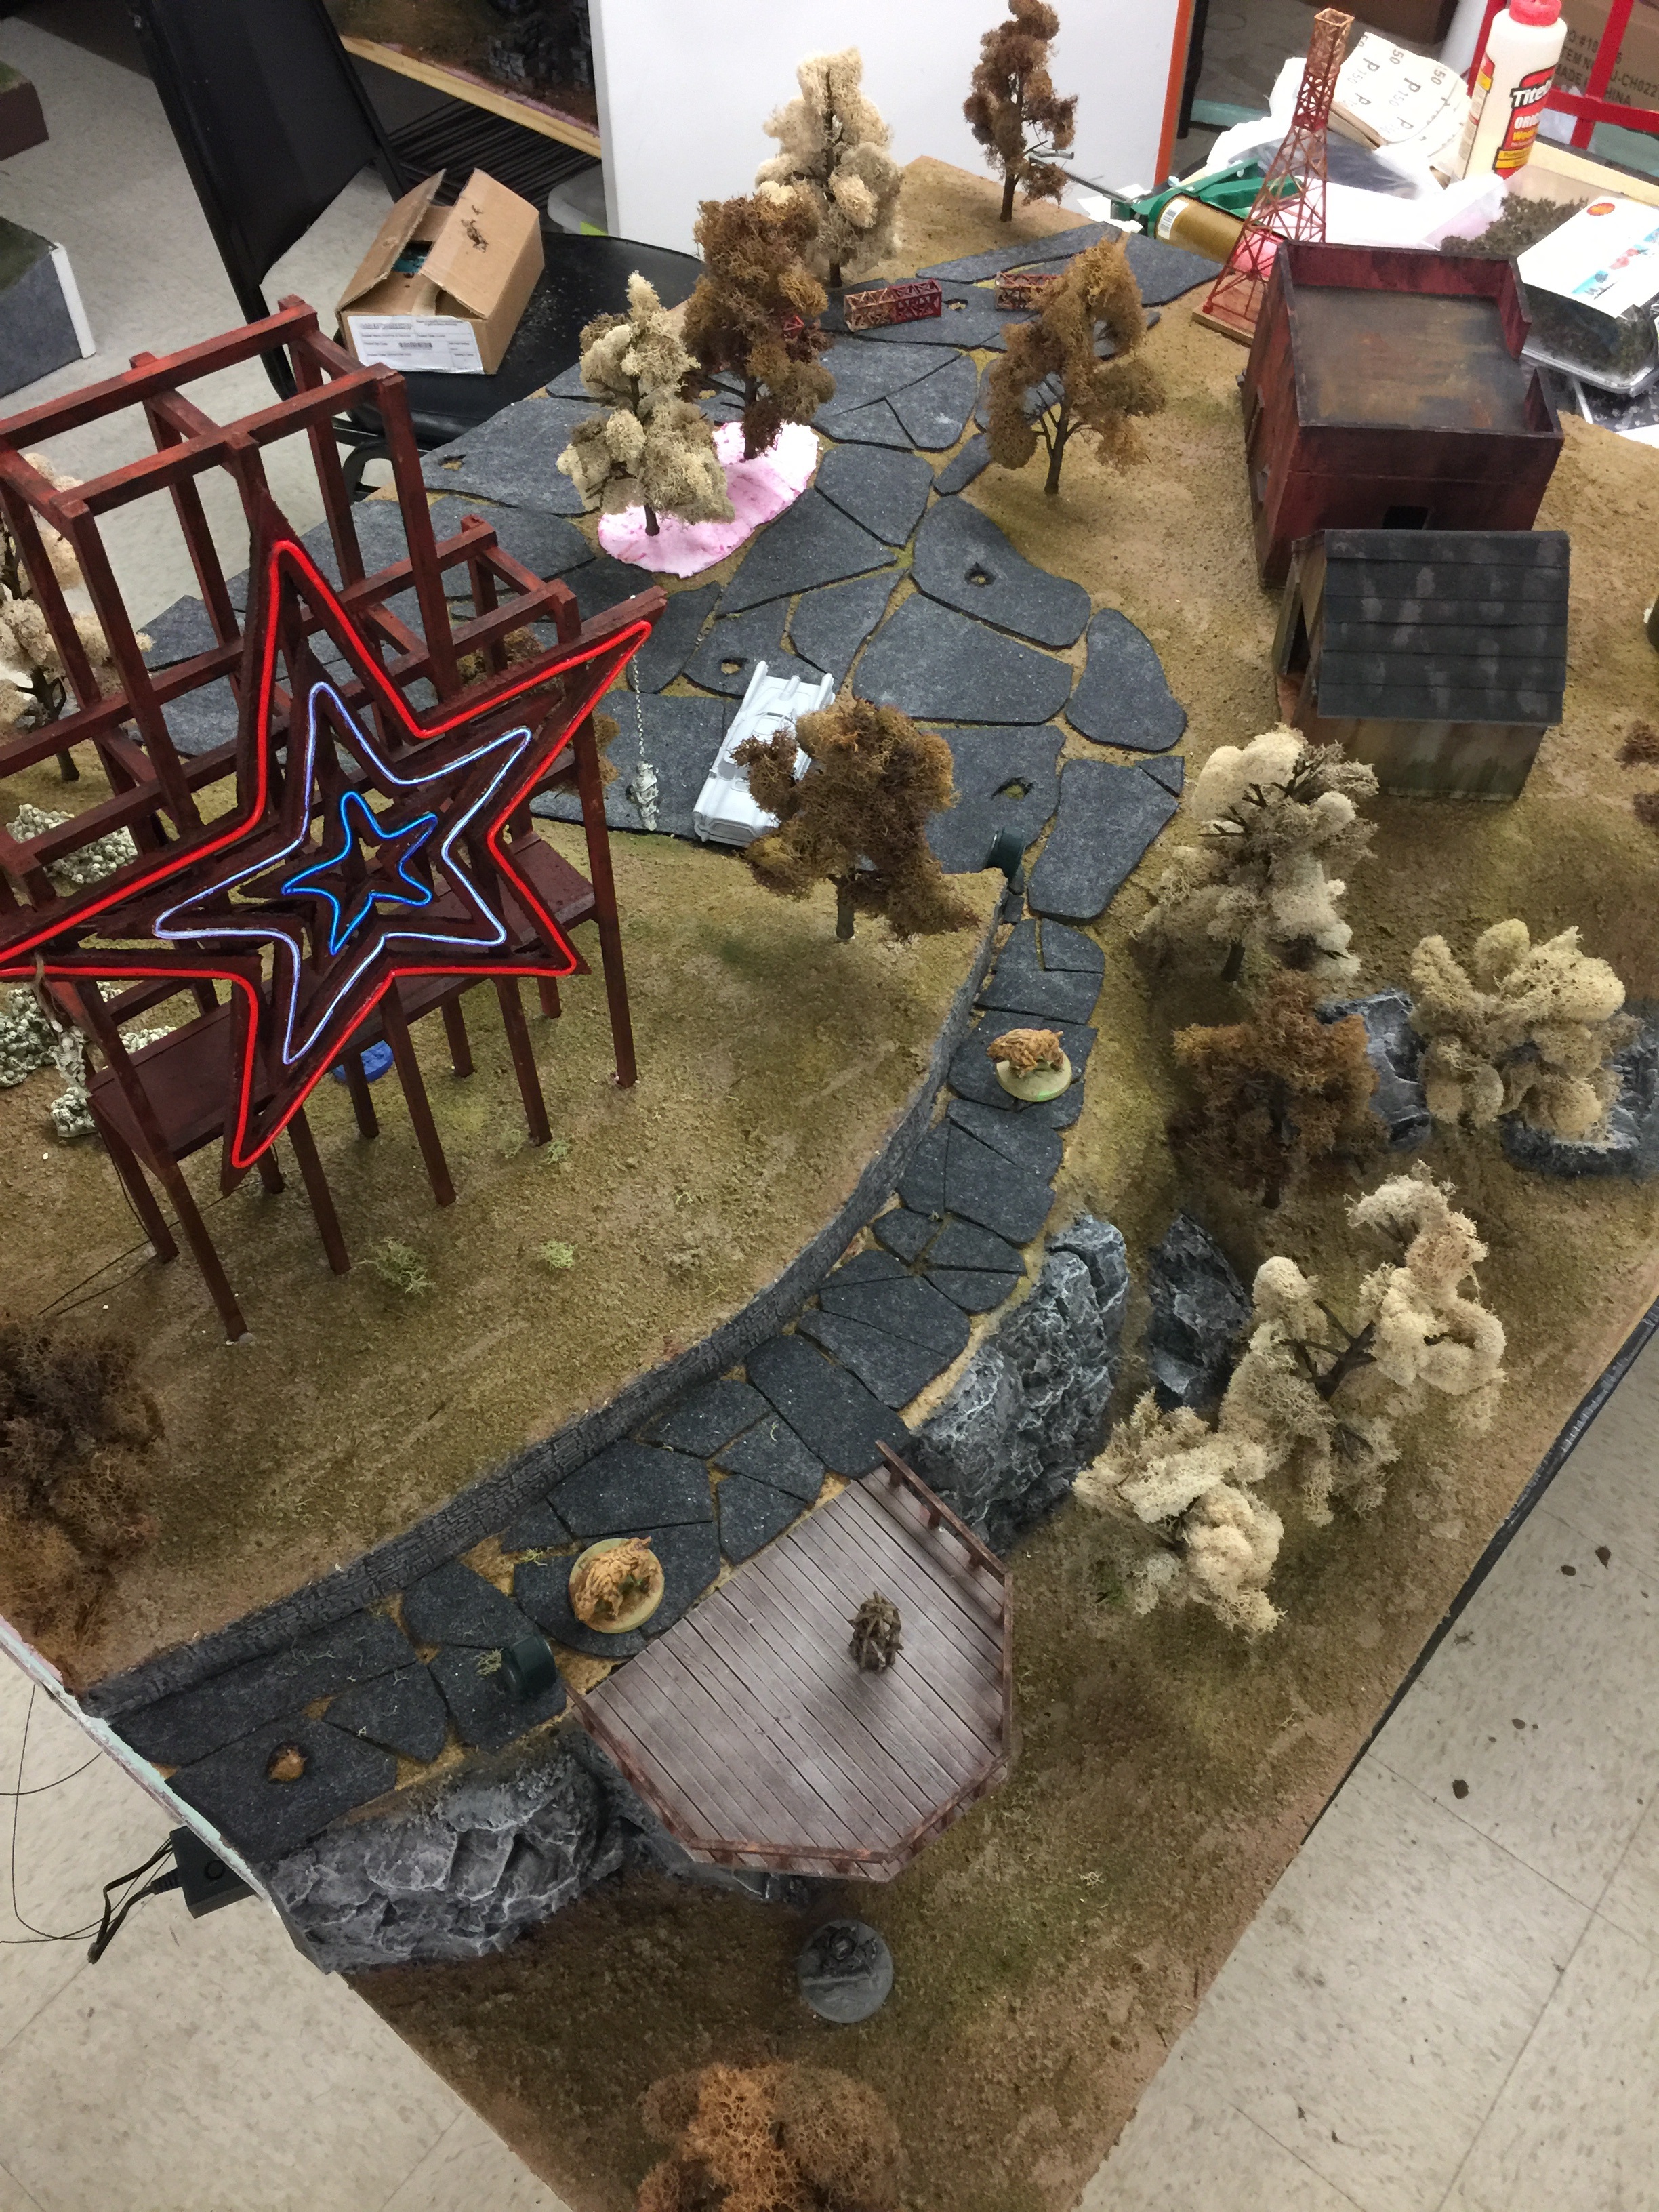
- Image 1: A shot of the table to give an overall feel of the layout.
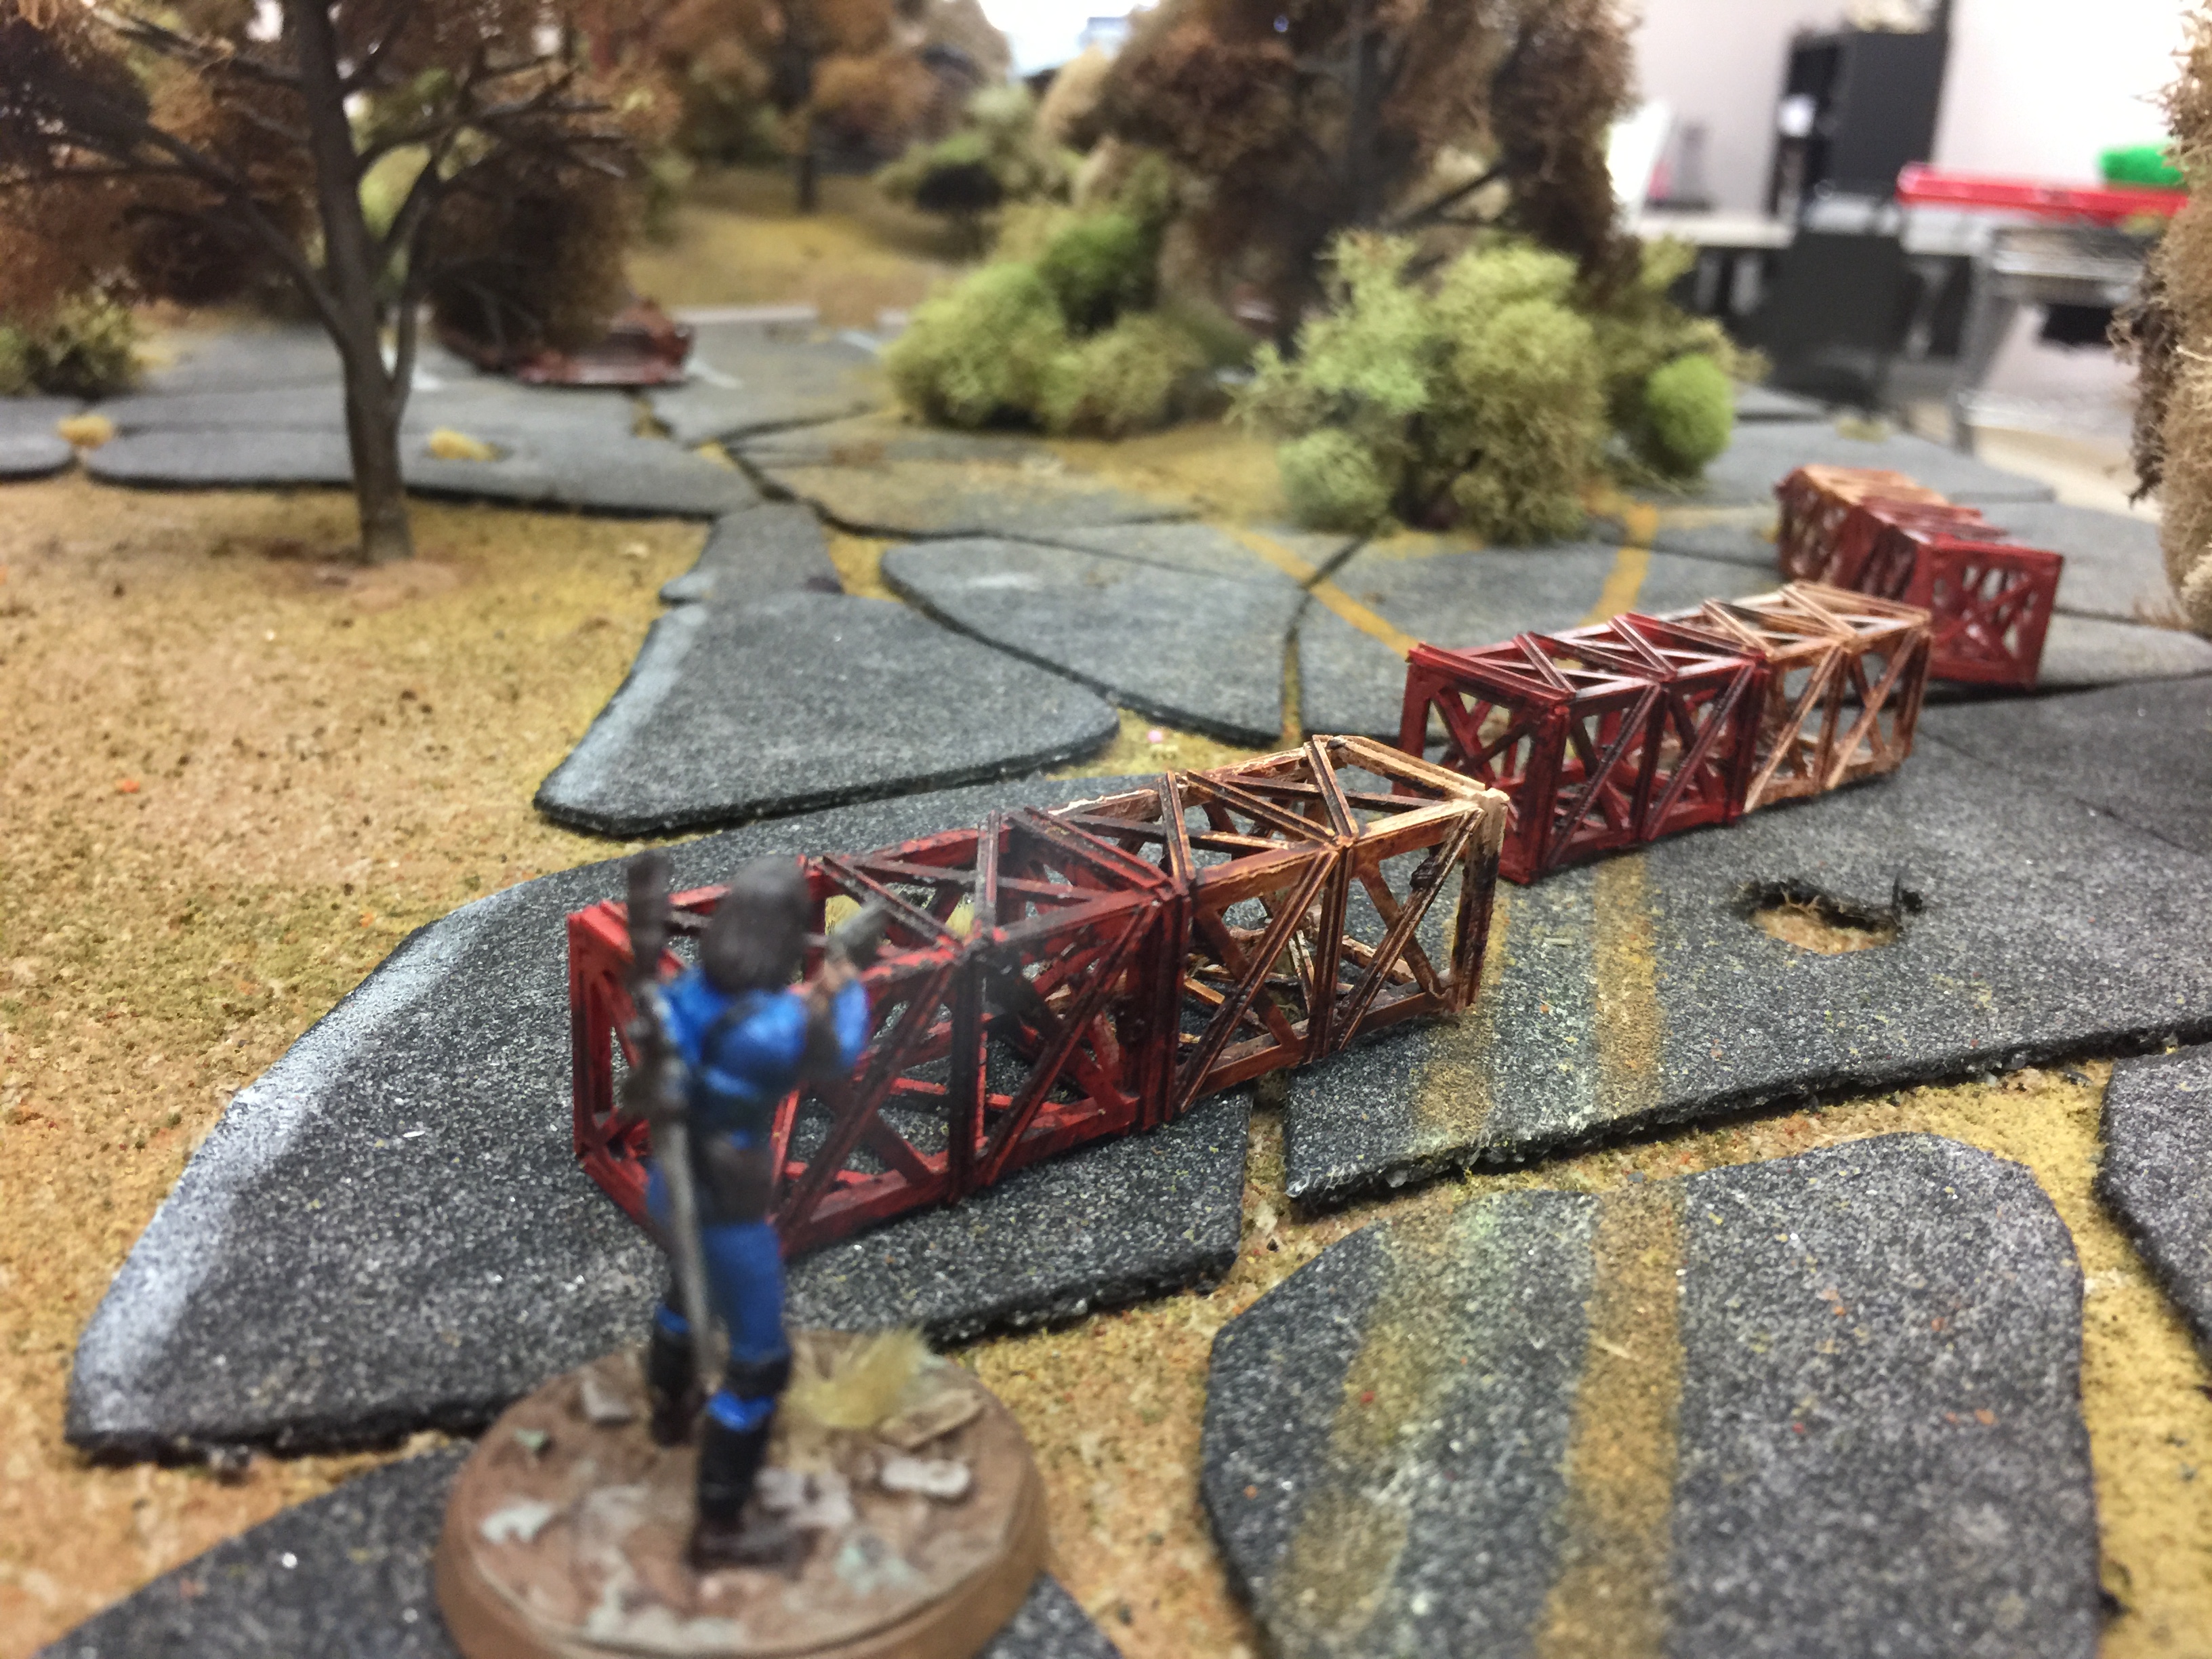
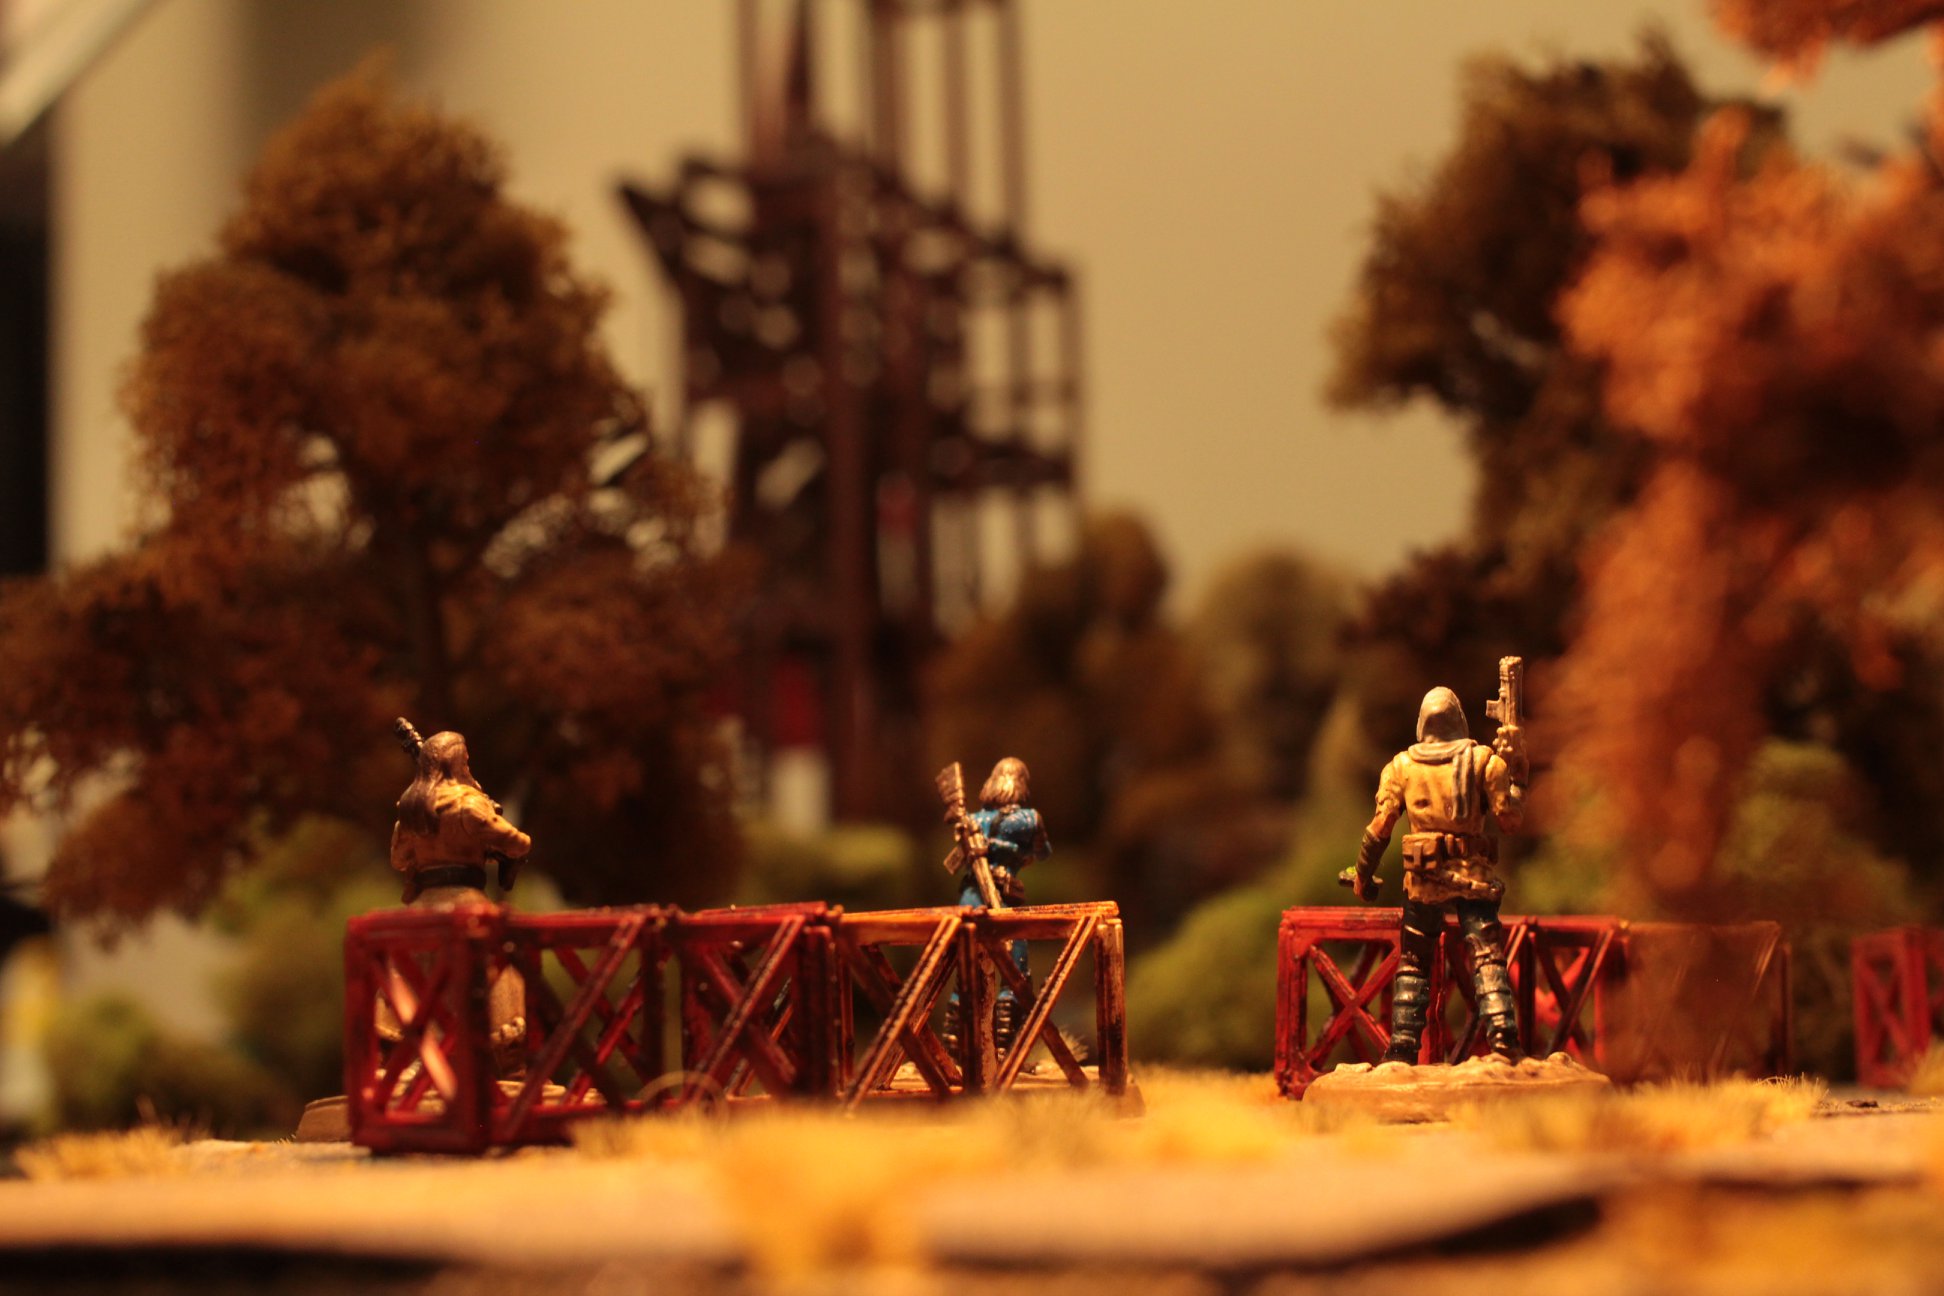
- Image 2: The settlers begin their trek to the Roanoke Star to rescue their technician friend. They clamber over the fallen radio tower, looking about uneasily. The dark superstructure of the scaffolding looms over them.
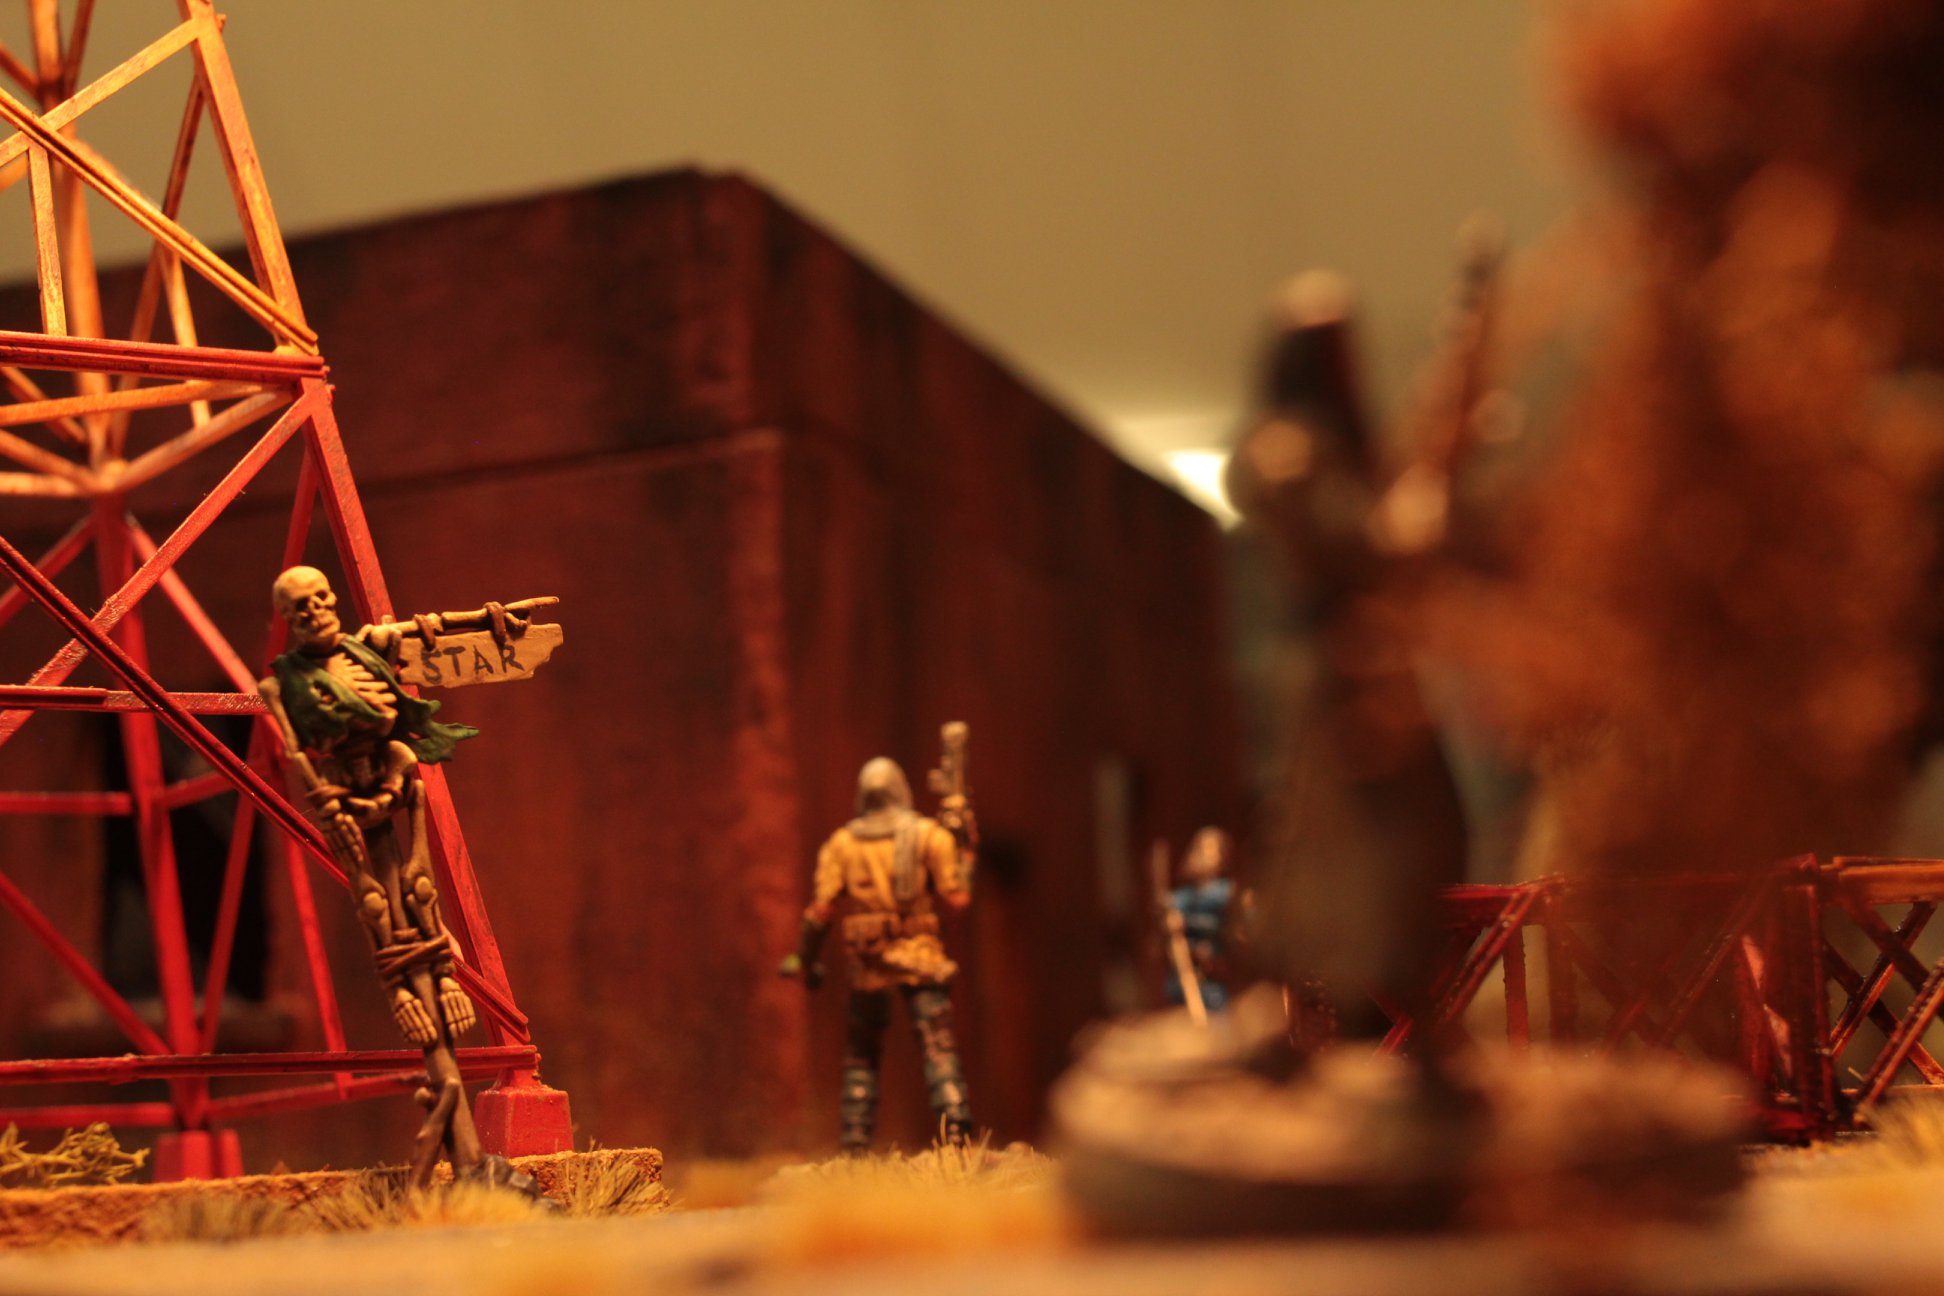
- Image 3: The grim sign points the way to the star. No doubt it is in this direction.
- Image 4: Hey Nora! Wait up!
- Image 5: Striding confidently across the parking lot. Skeletons hang ominously in the background from the tips of the star.
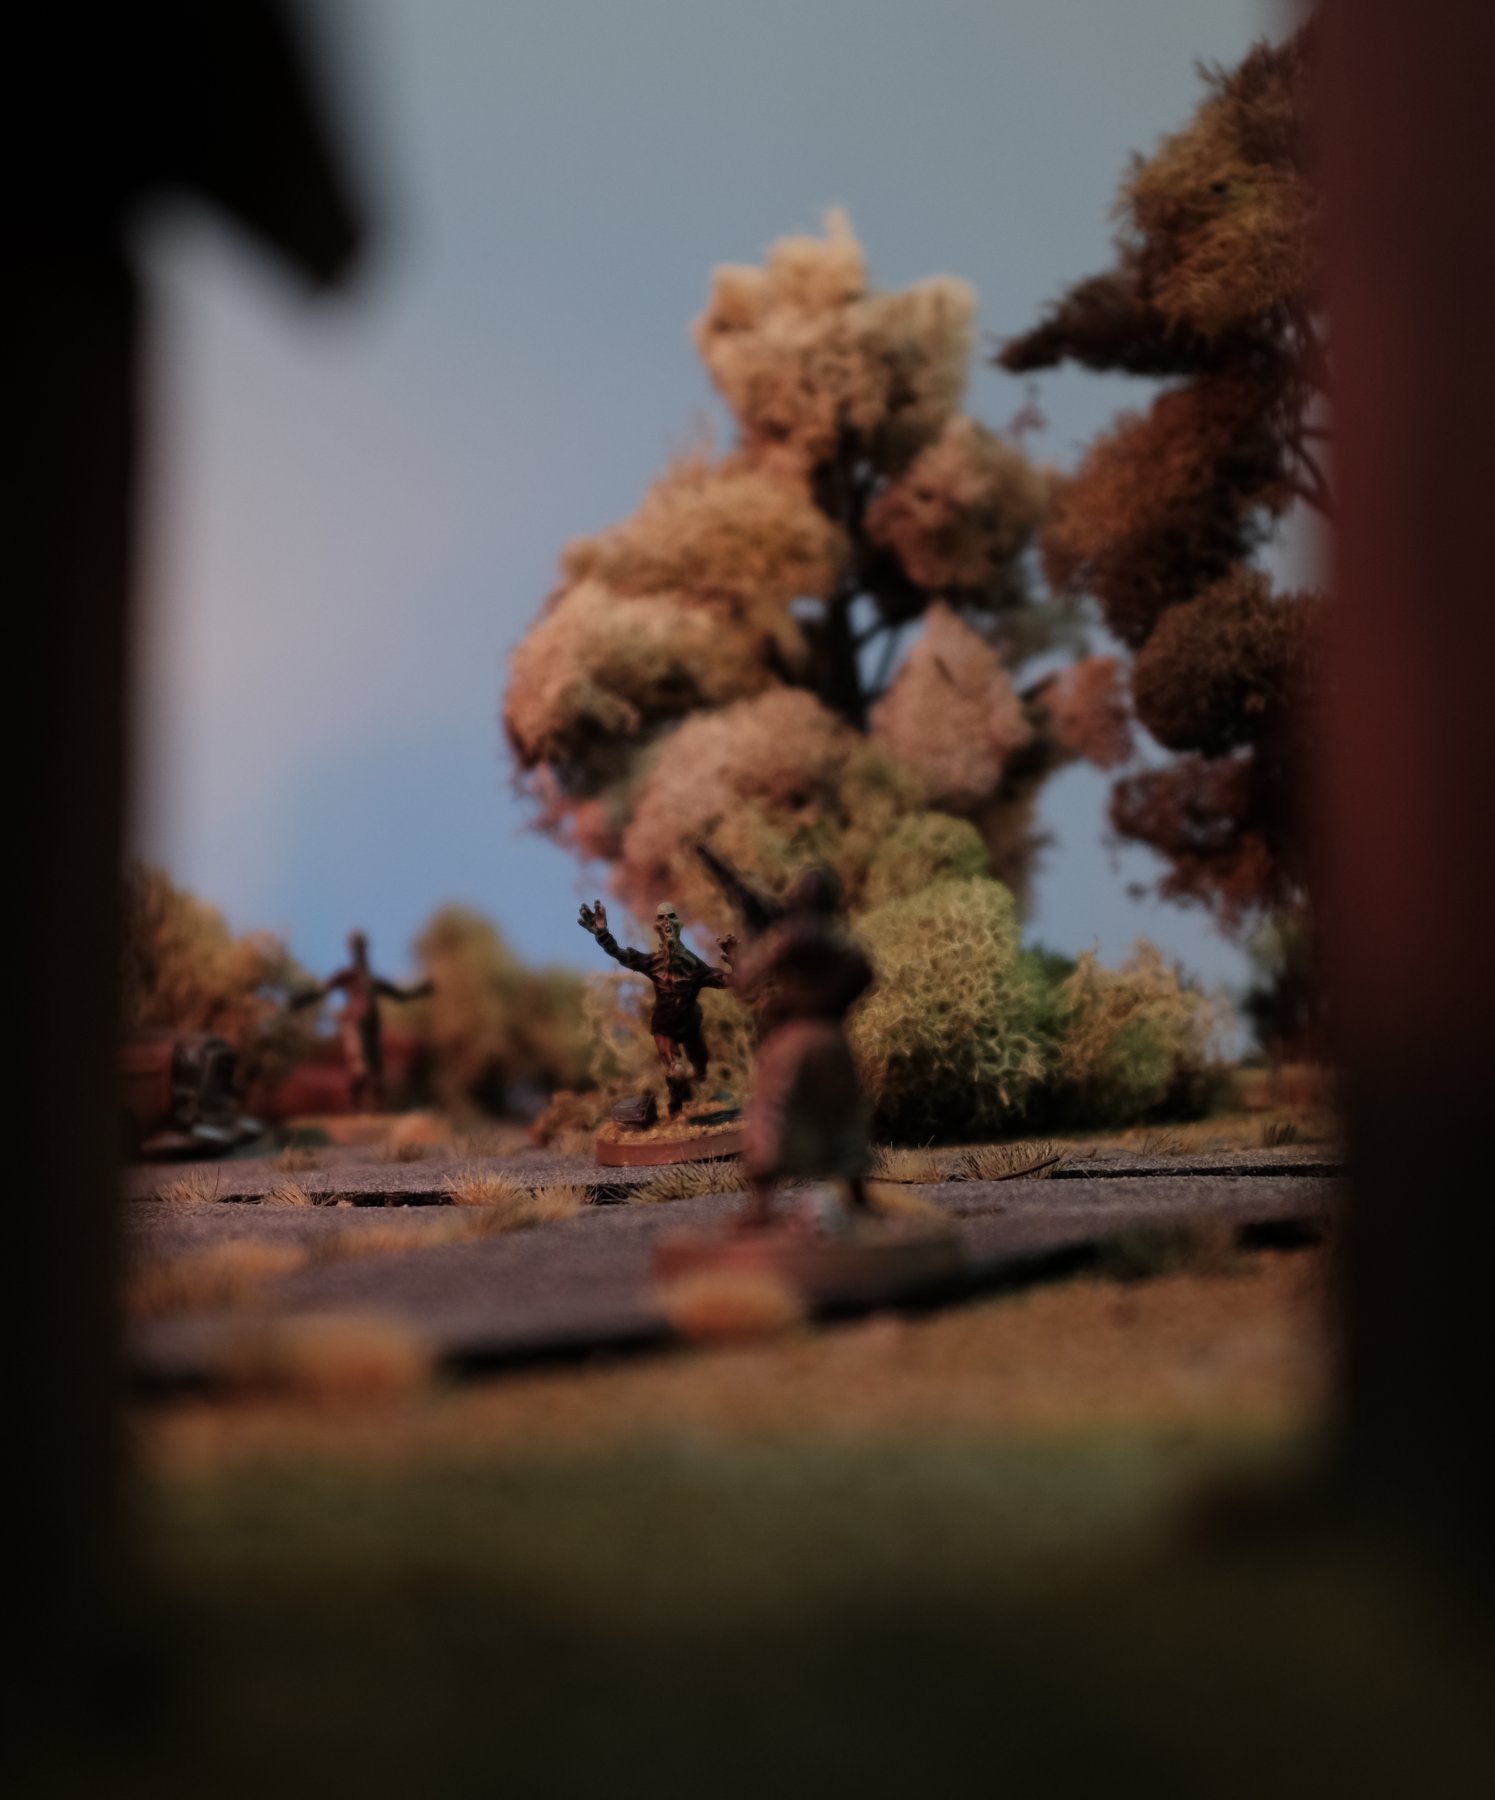
- Image 6: A lone ghoul patroller rushes at the settlers. Easily dispatched, but where are the others?
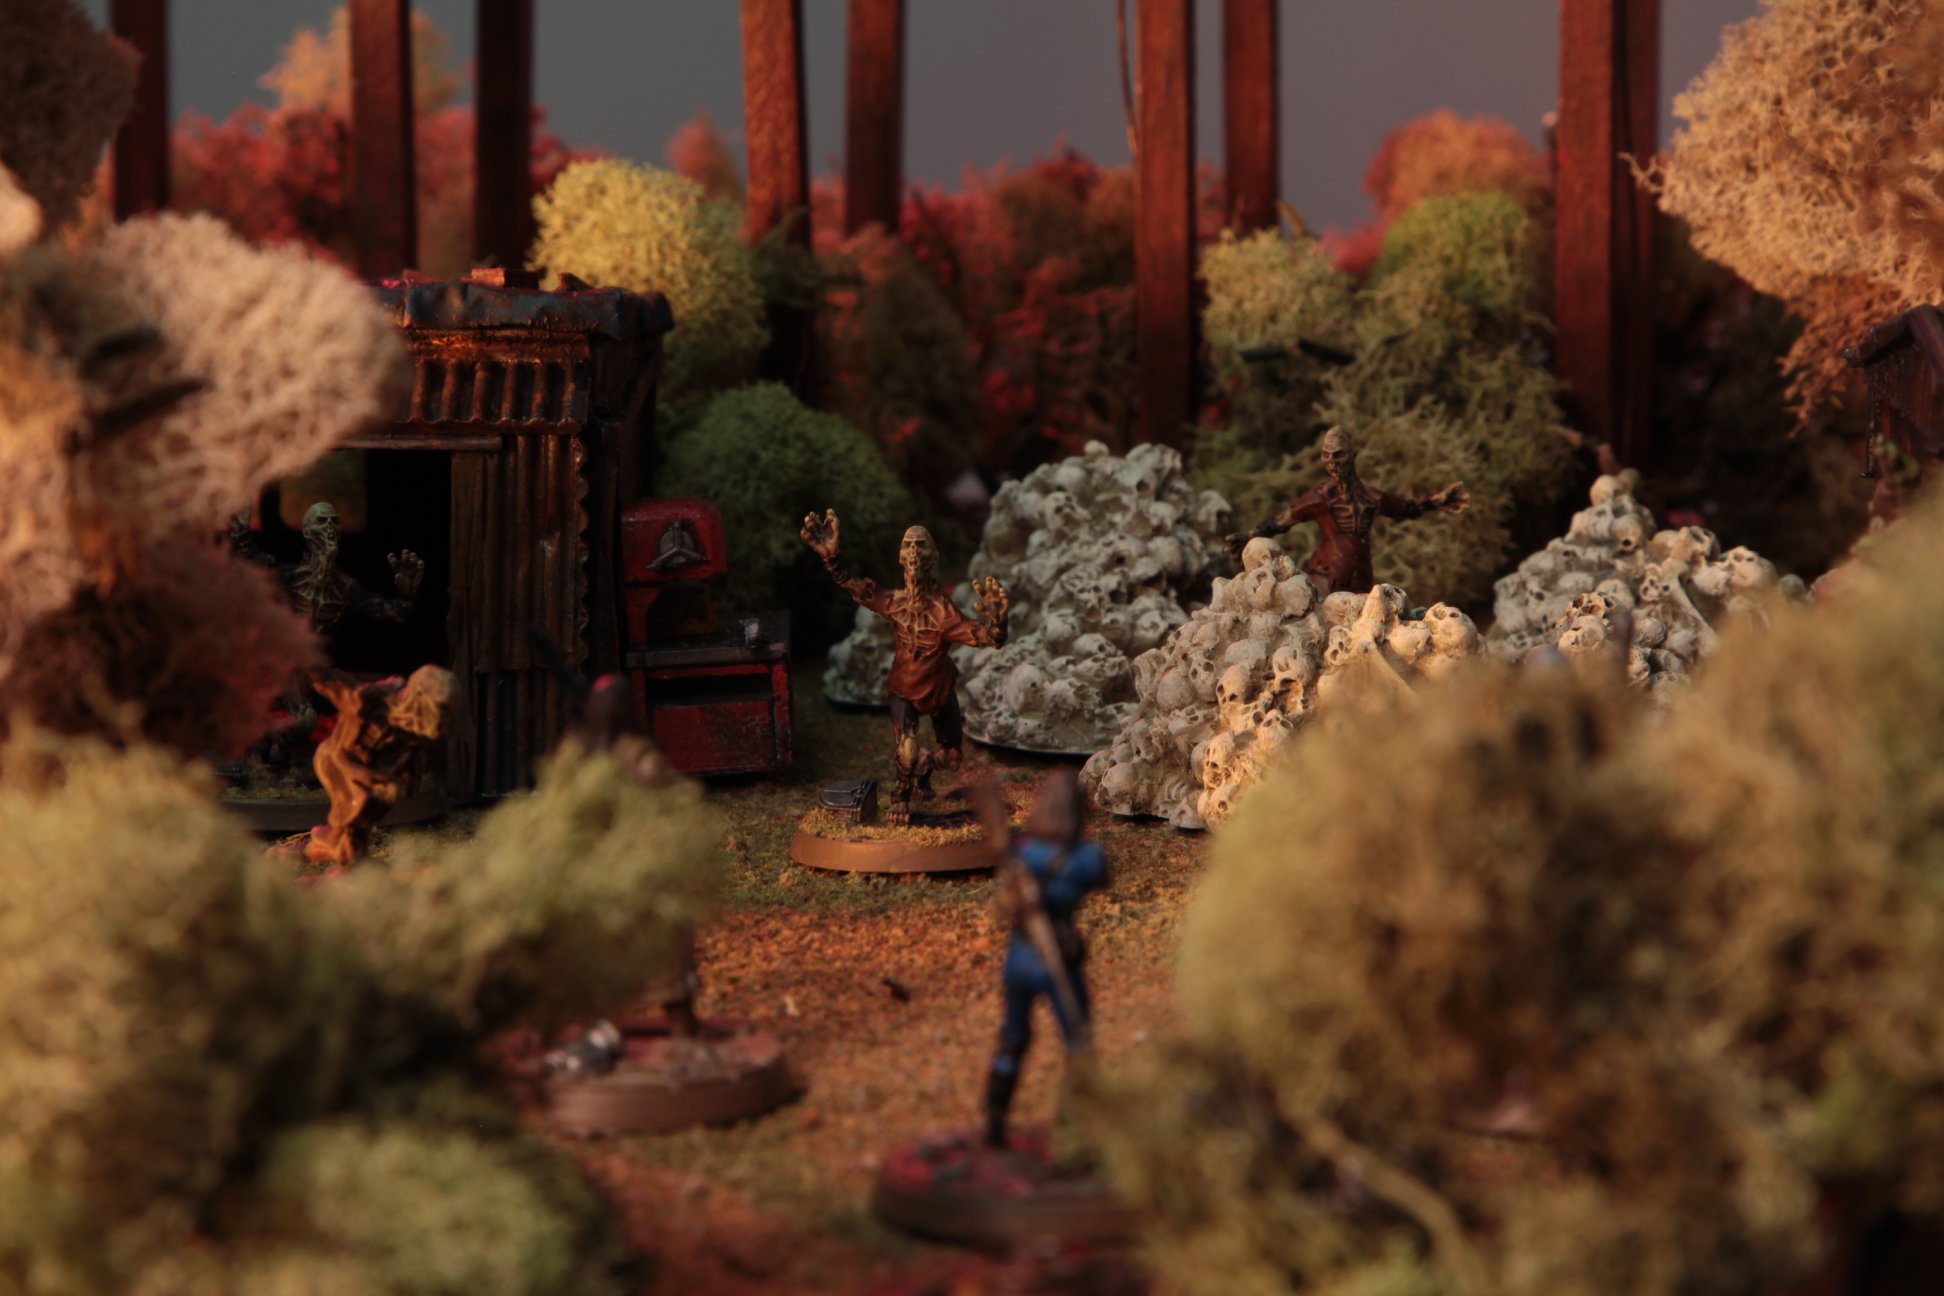
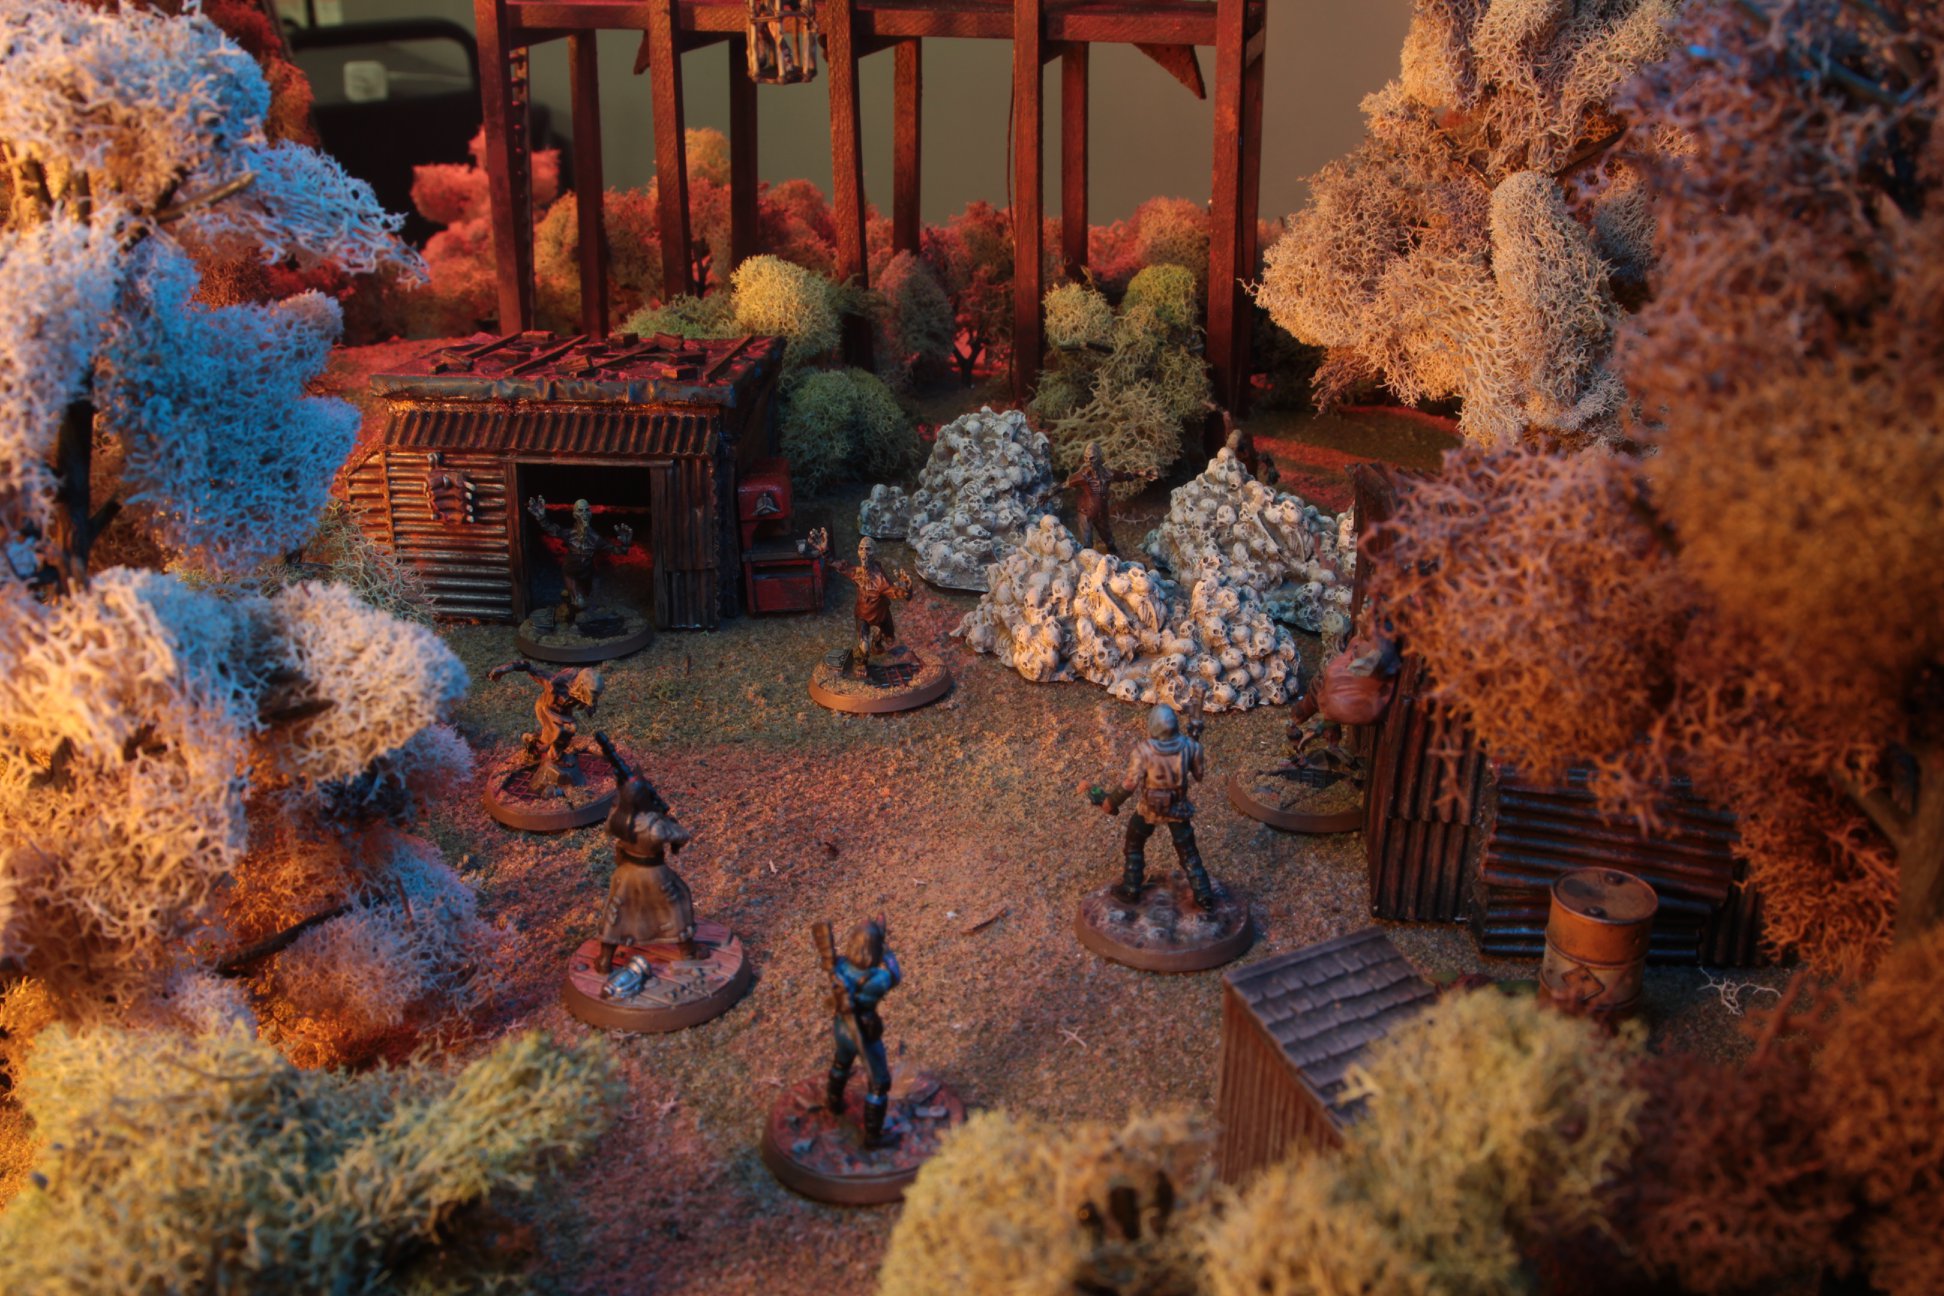
- Image 7: Reaching the area behind the star, the settlers find a run down set of shanties. While a workbench promises this could be a nice settlement, the piles of skulls hint at the current occupants. Suddenly, ghouls rush out from everywhere!
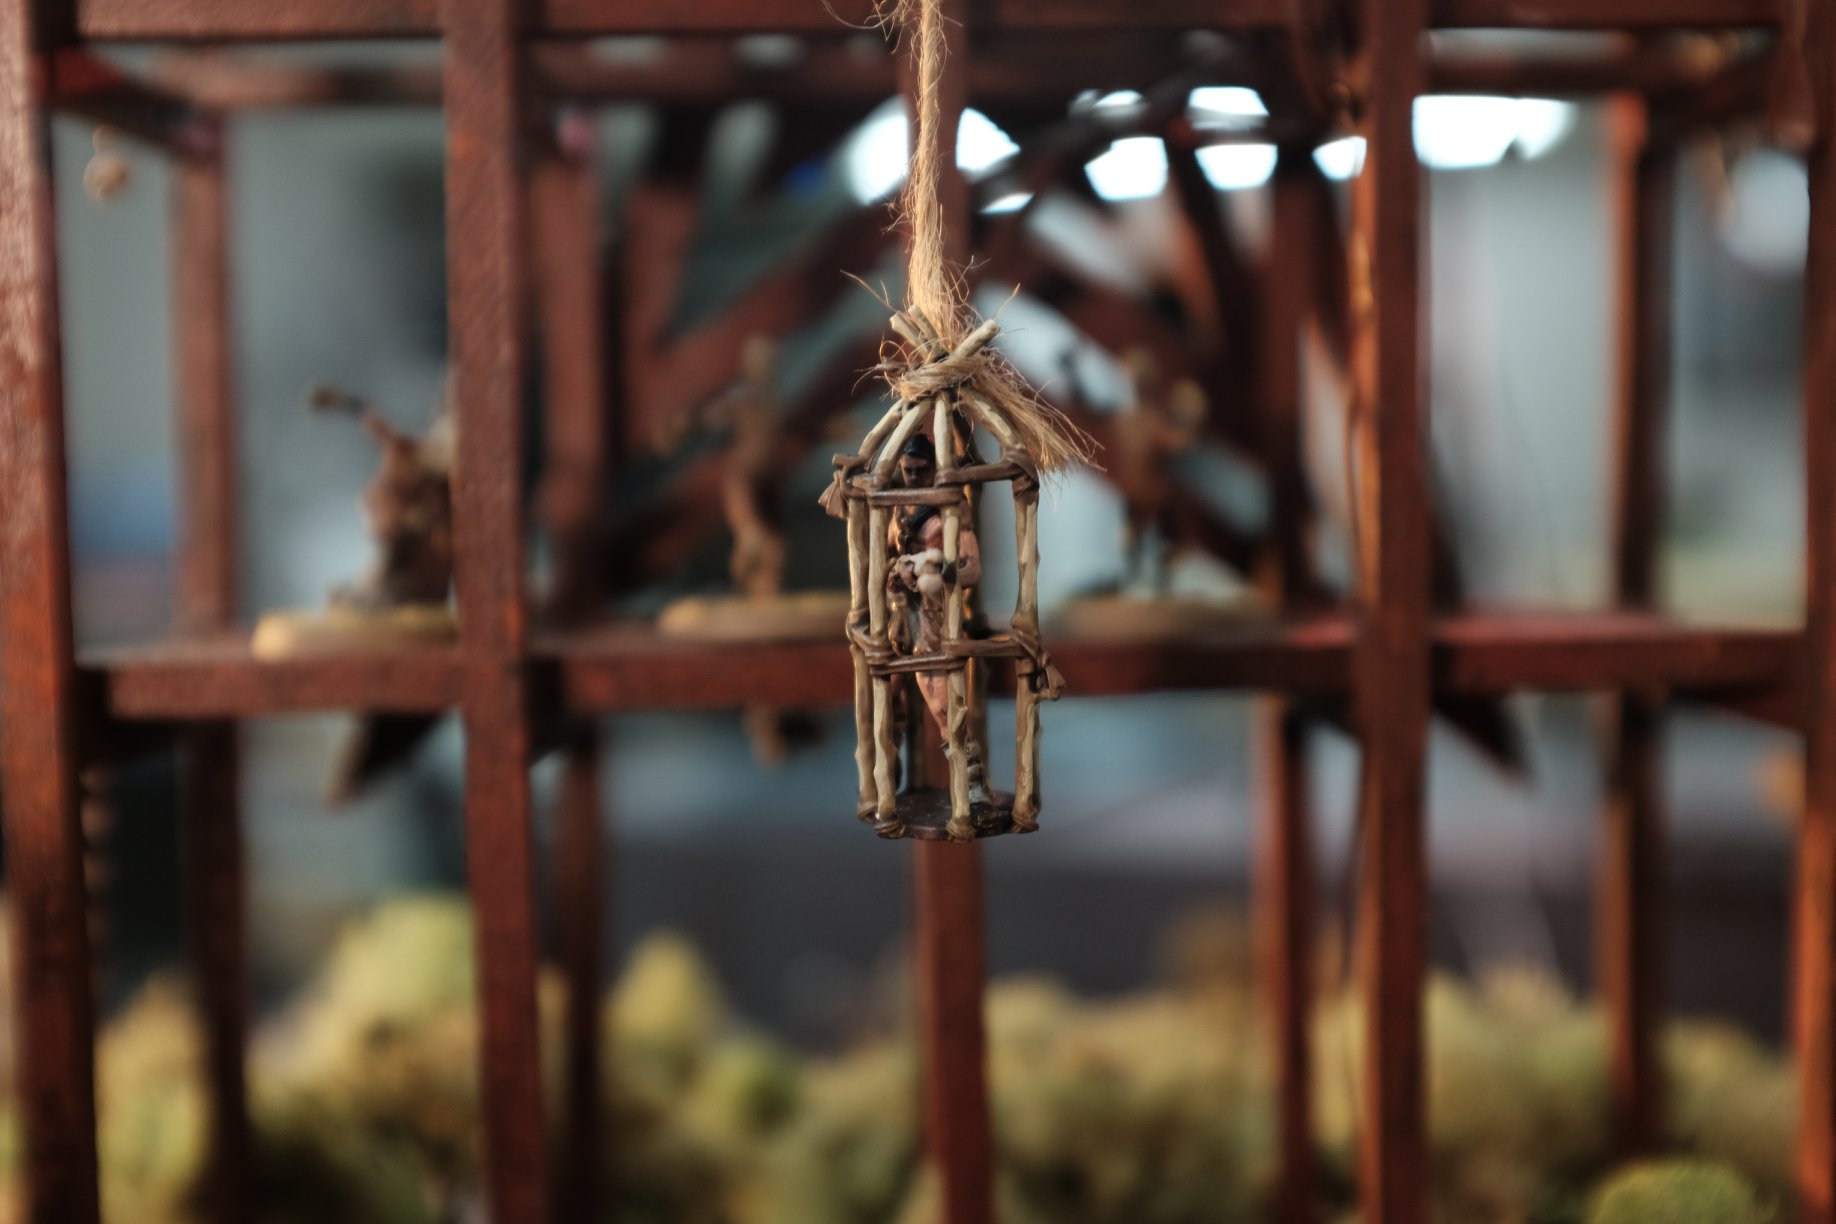
- Image 8: The settlers fight for their lives among the shacks. Sacks of meat festoon the tin walls, grim reminders of the fate that awaits should they fall. Their technician friend swings uneasily above the swirling melee.
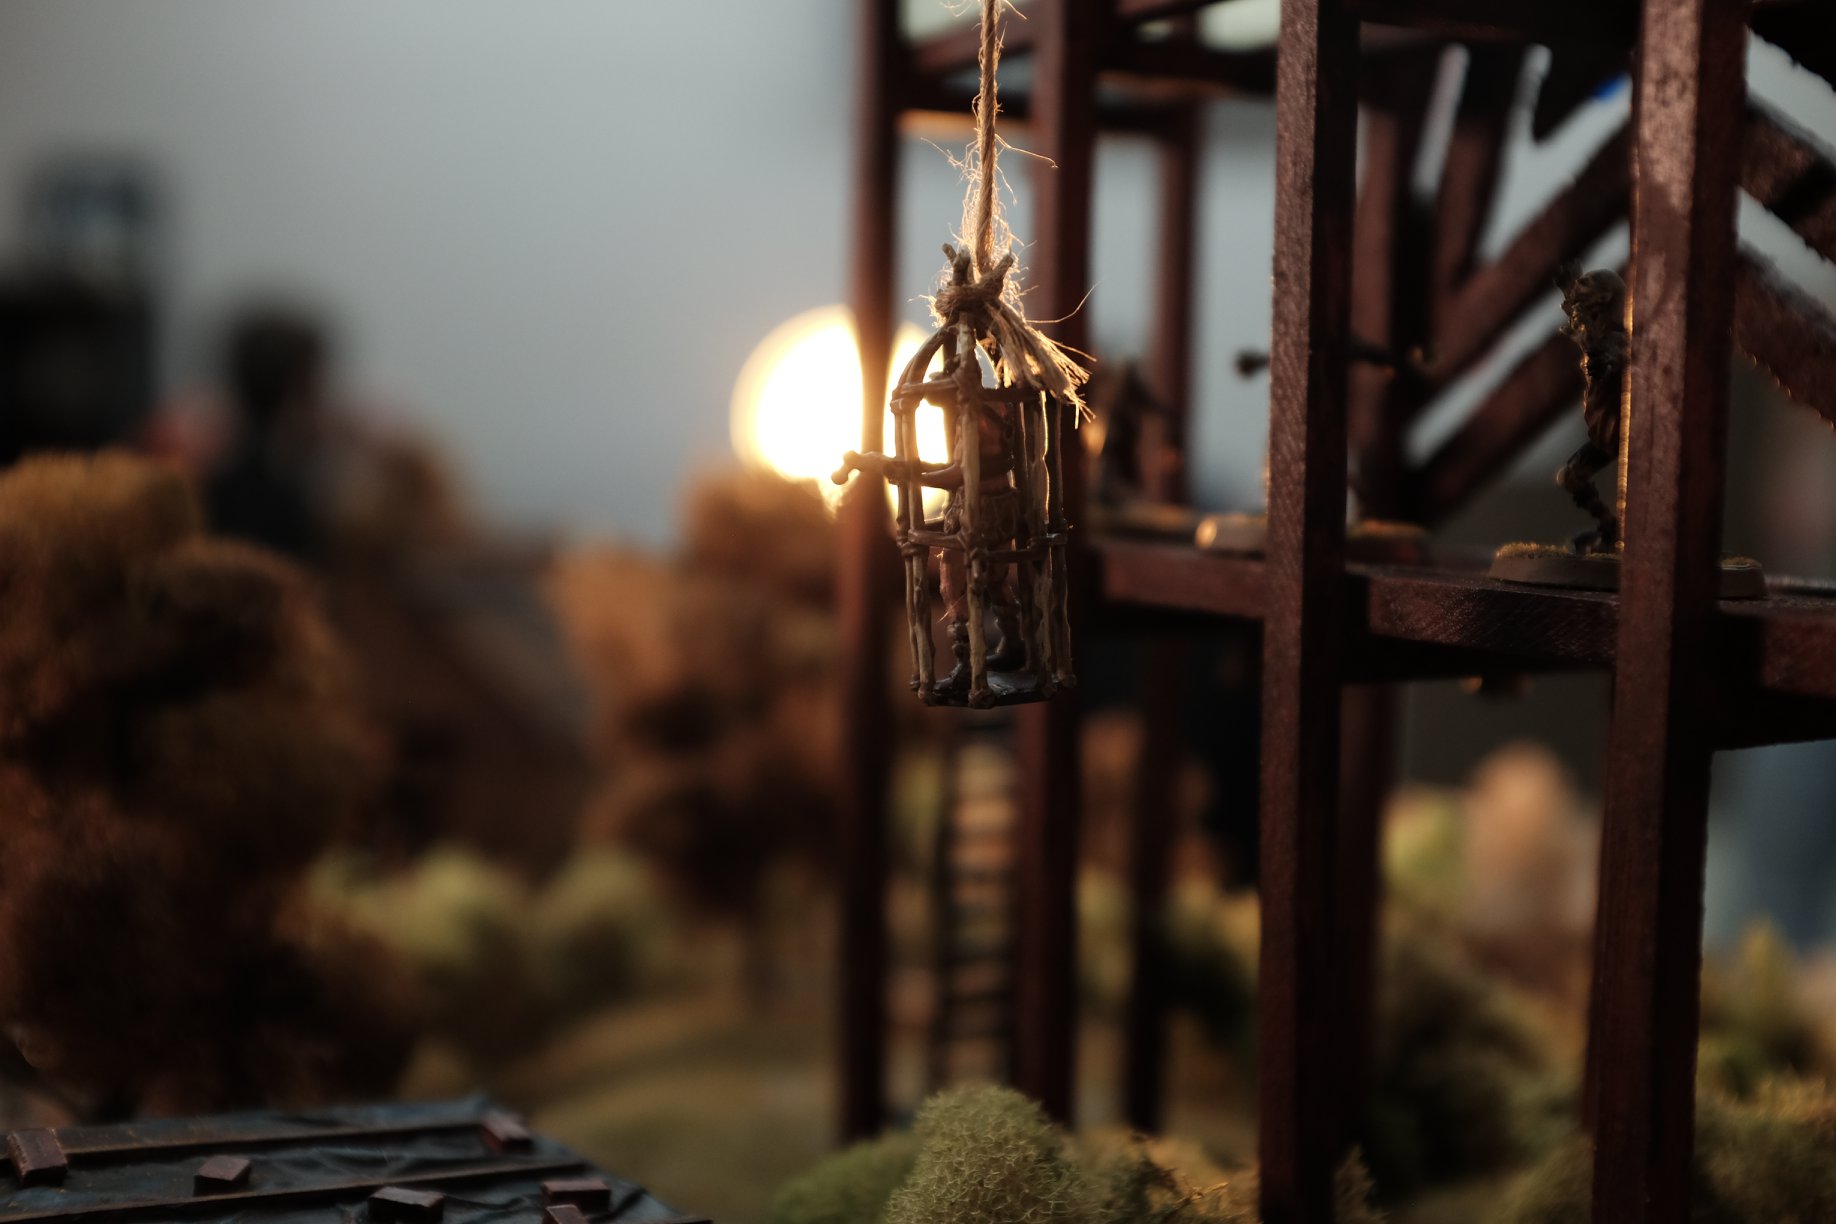
- Image 1: As the rudimentary cage twists in the wind against the sunset, the technician looks for a way out.
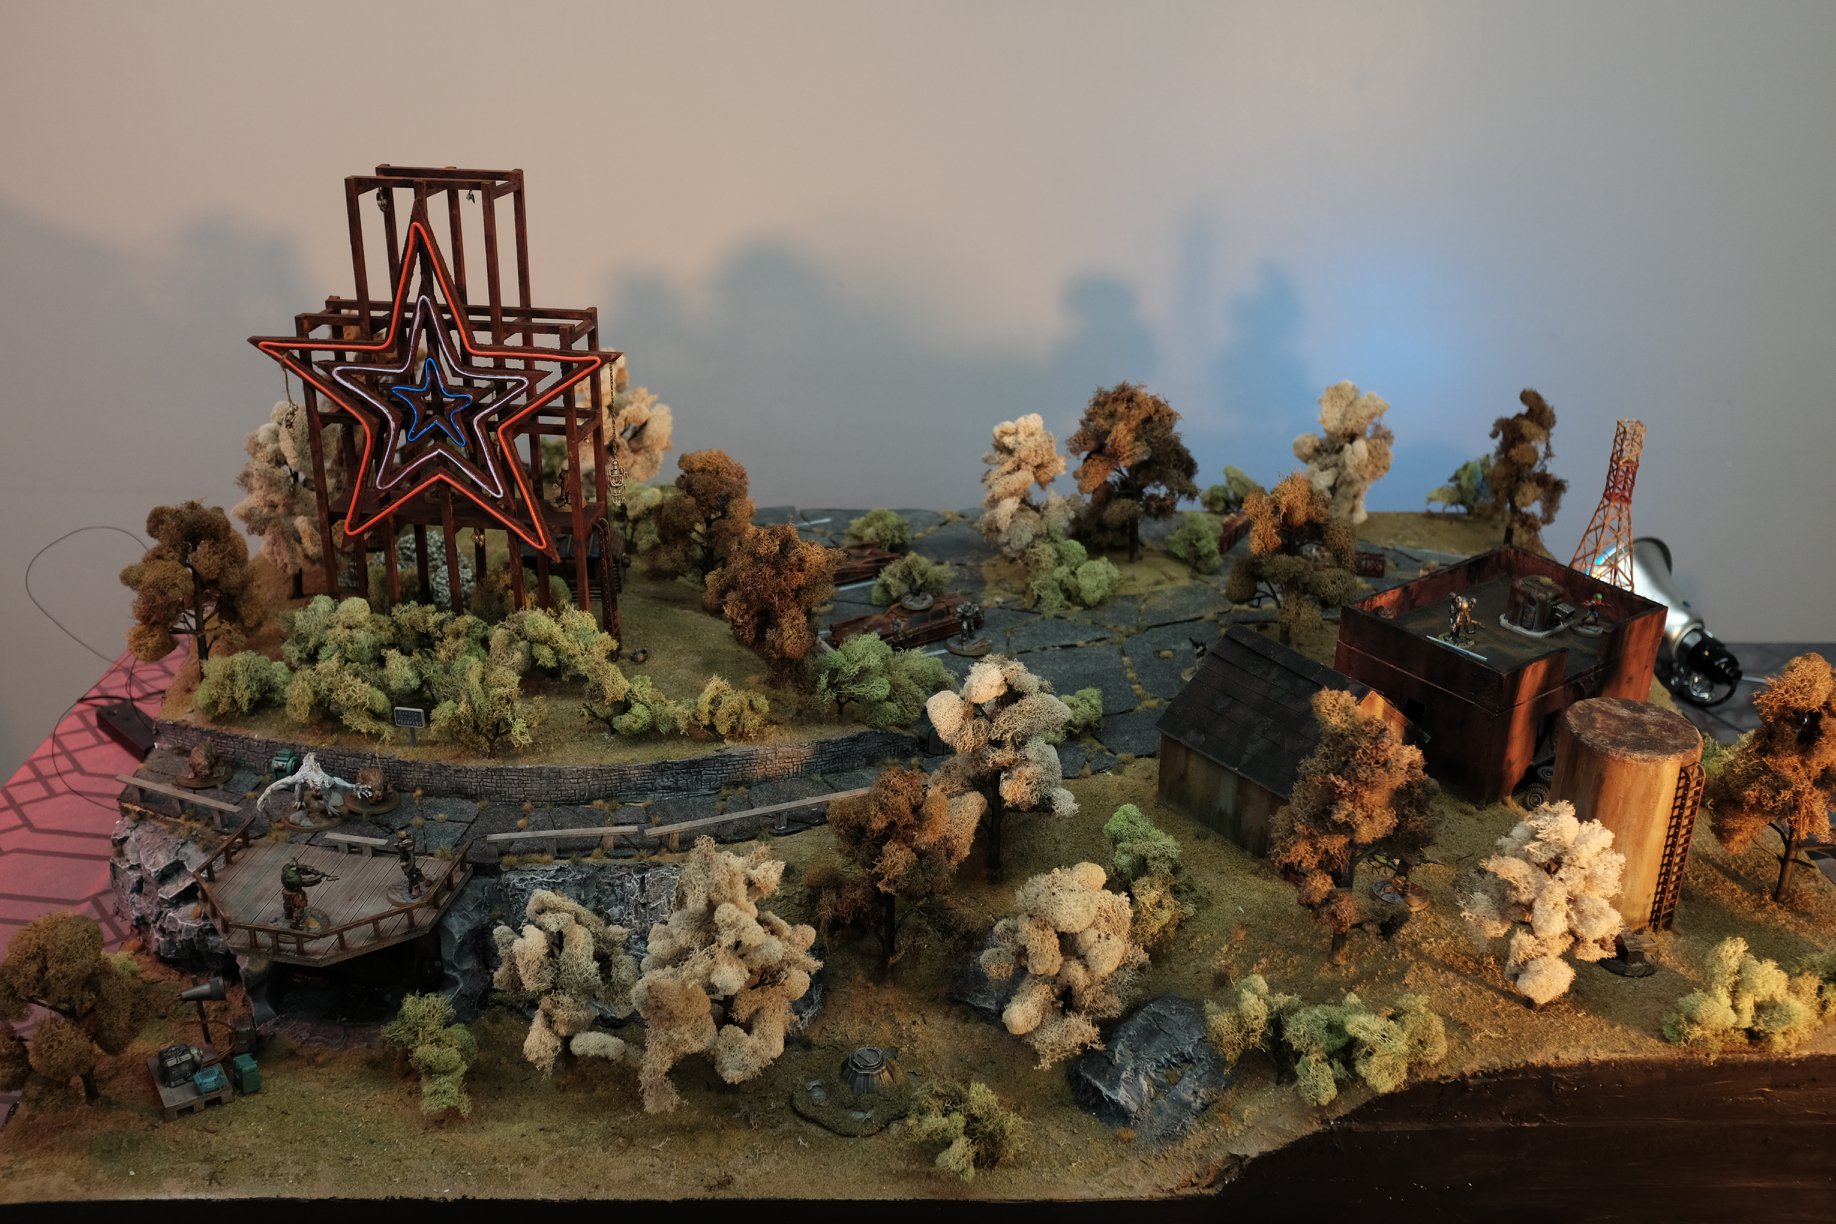
- Image 2: A simple shot of the board in regular light.
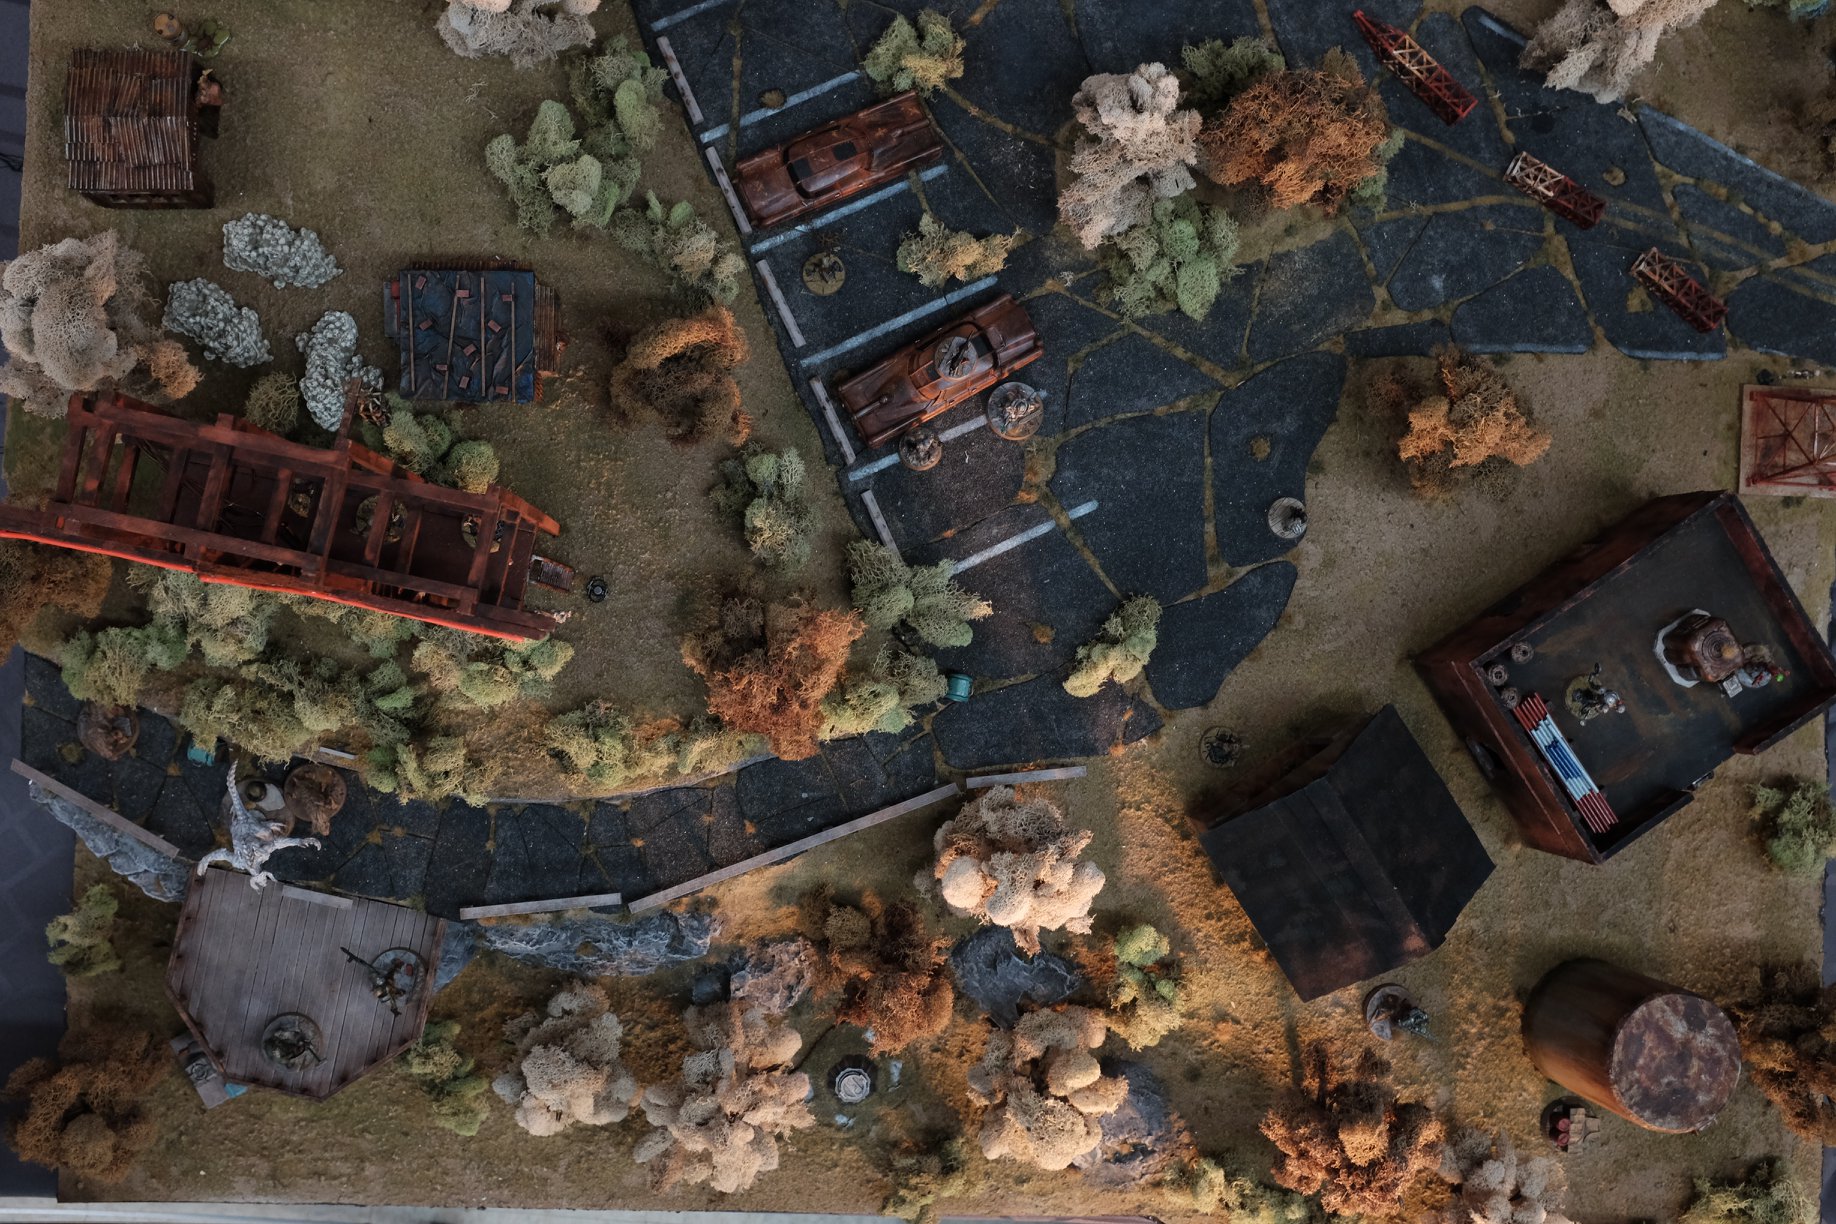
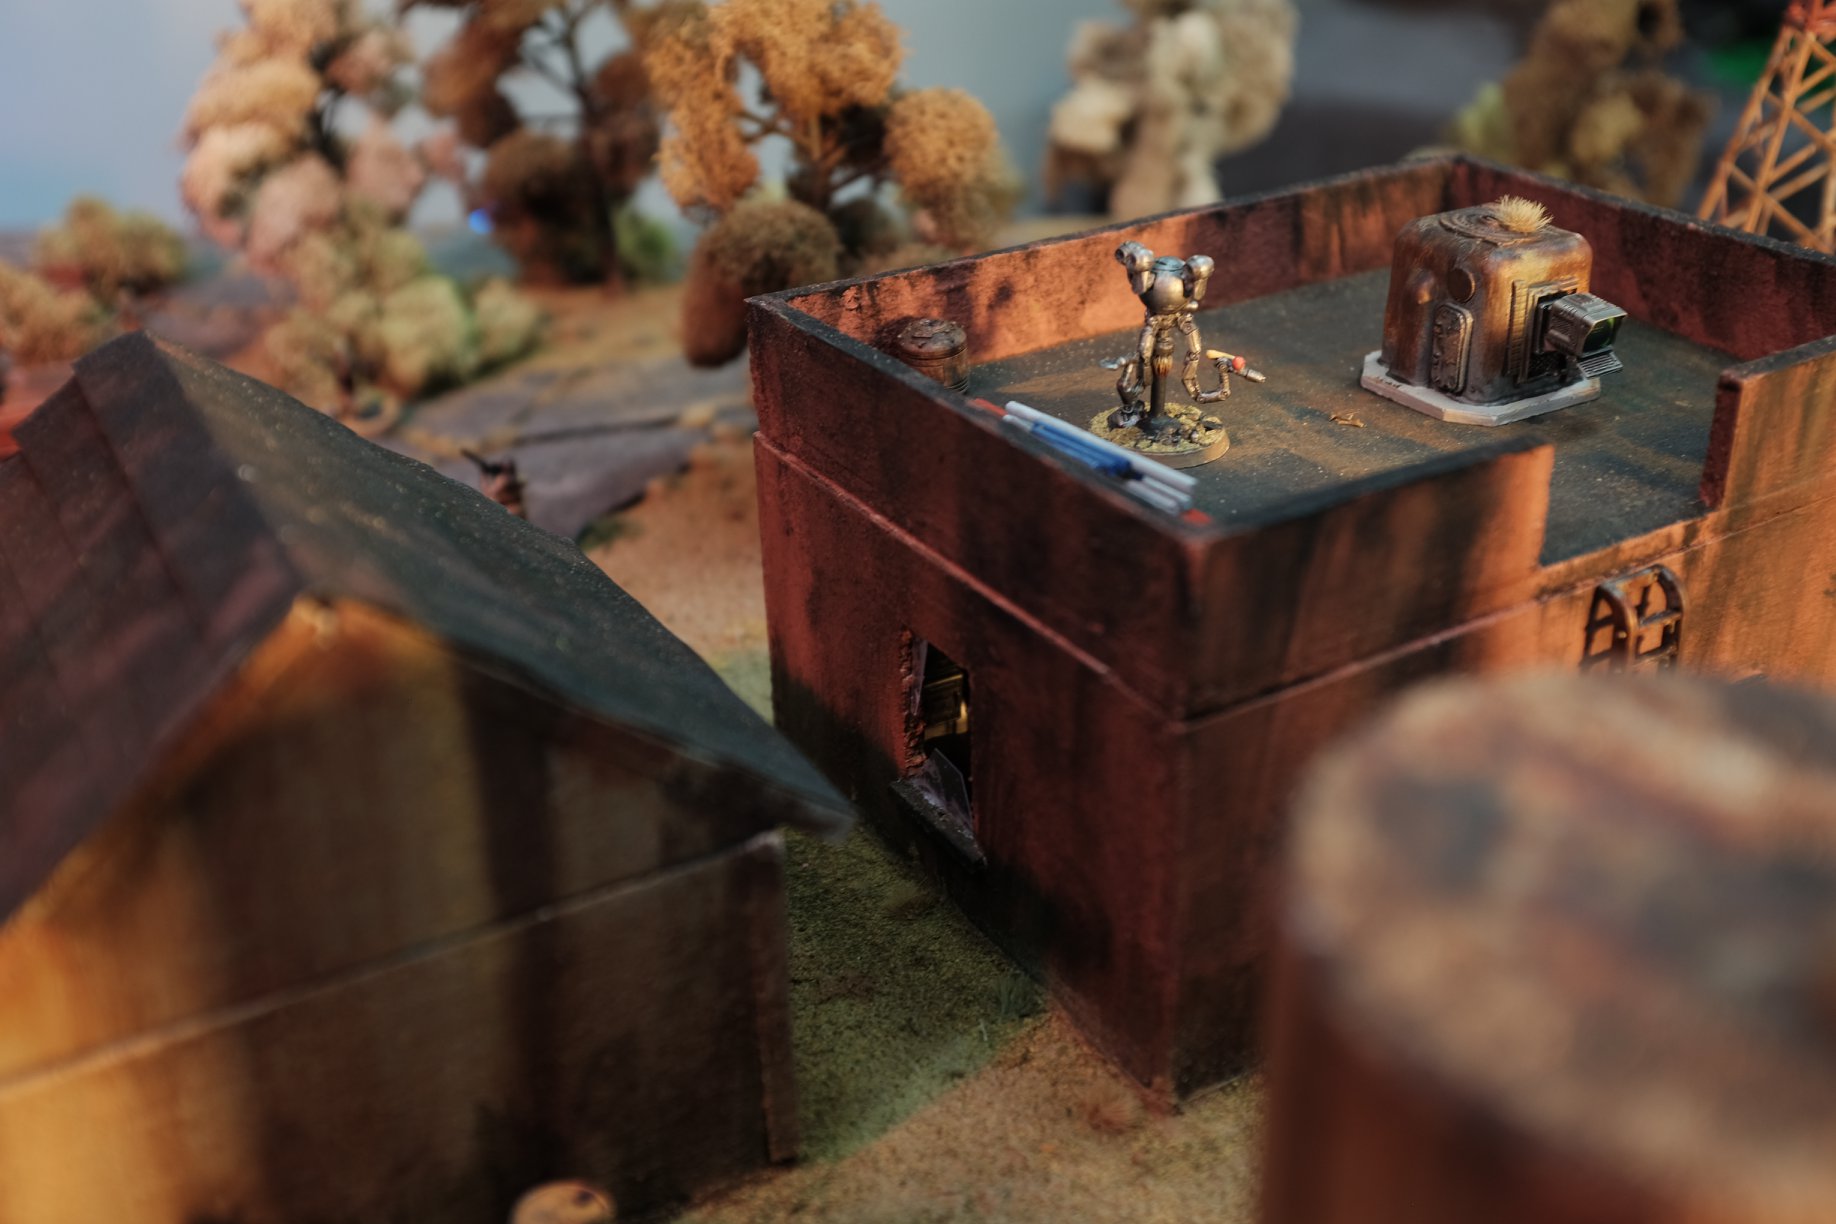
- Image 3: An overhead shot to get the layout. Lot’s of details to spot, including a bear trap at the base of the ladder to the star, a missile silo, and even an alien invader.
- Image 4: A ghoul rushes a settler as glimpsed between the two buildings.
- Image 5: Having dispatched the ghouls, the settlers investigate the vault hidden under the star overlook.
- Image 6: How has the star kept running all these years? Perhaps this Mr. Handy and his spare bulbs have something to do with it.
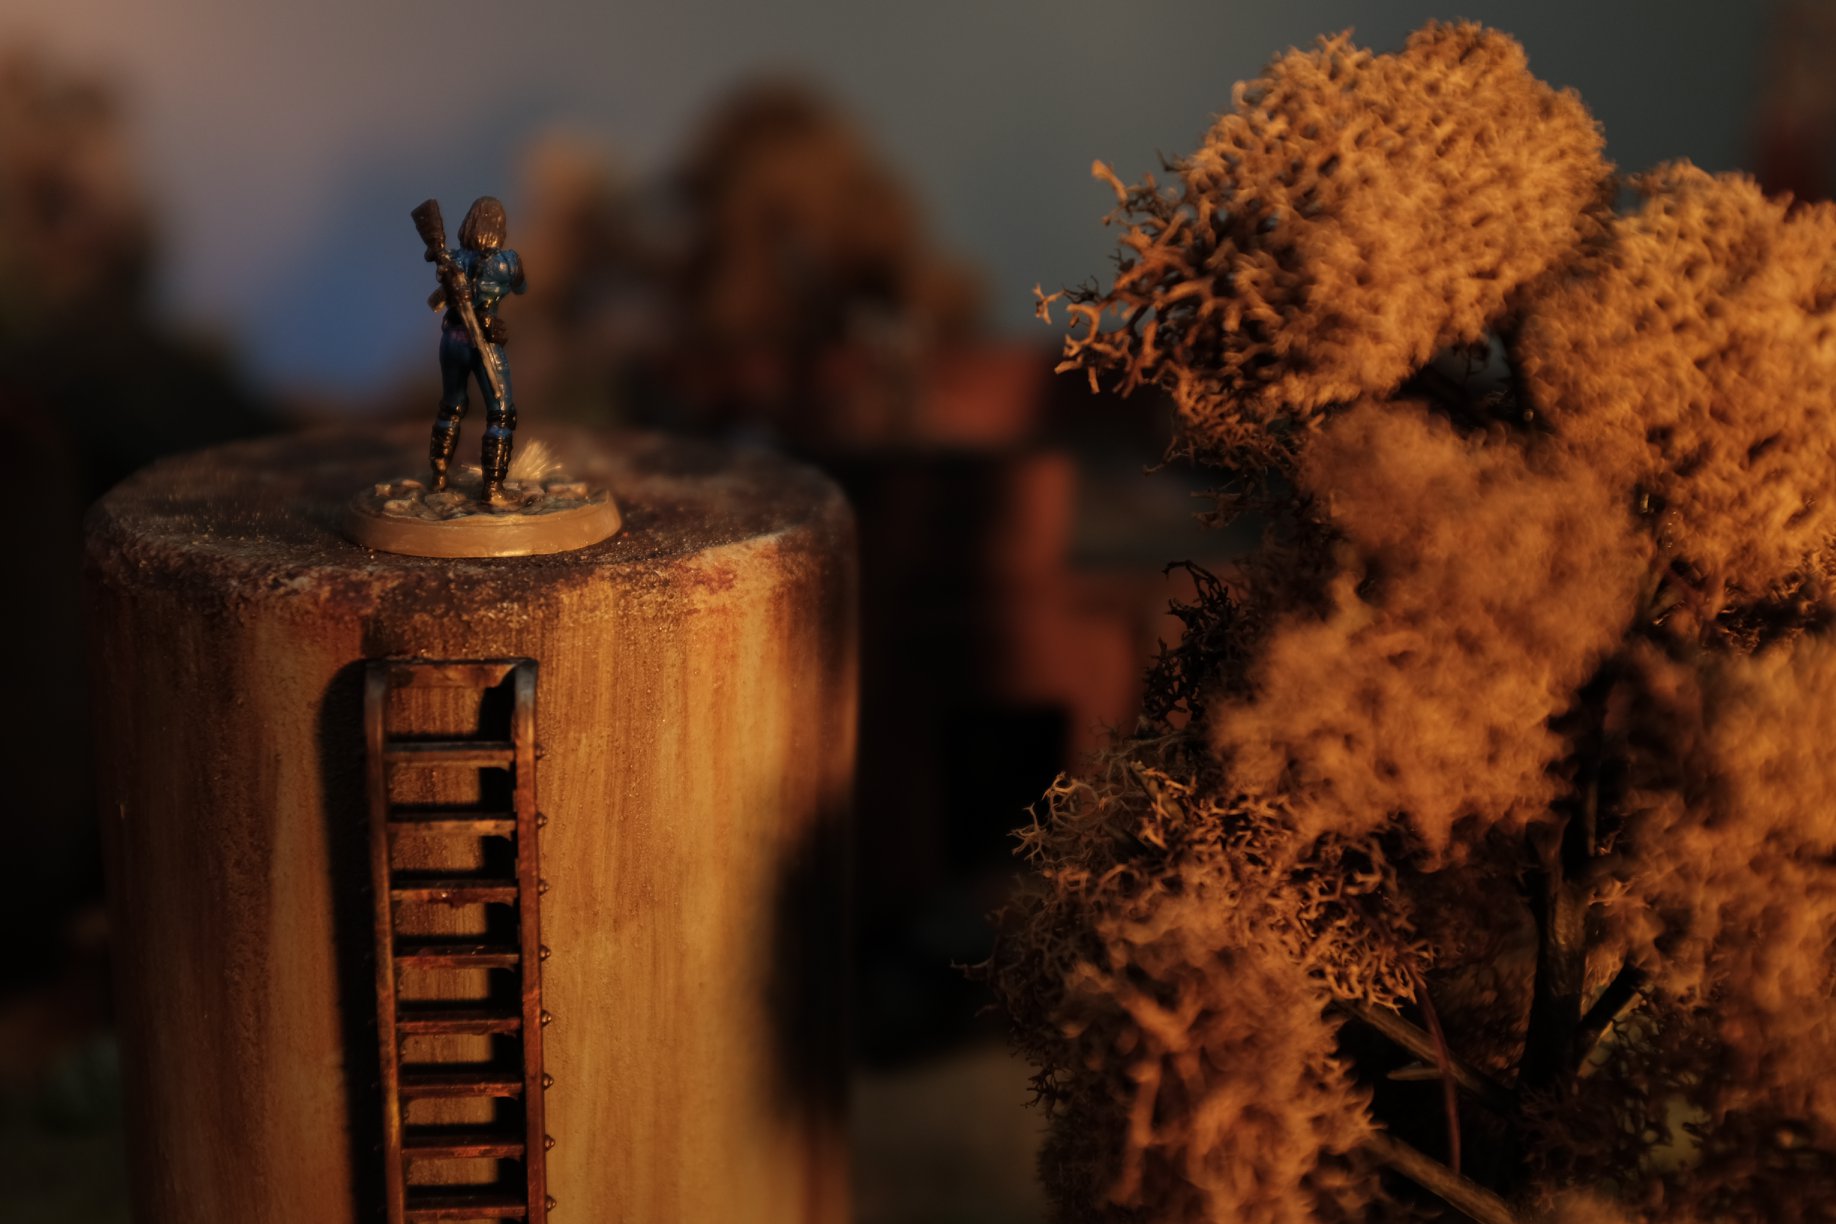
- Image 7: Nora surveys the area from the top of the water tower as the sun sets.
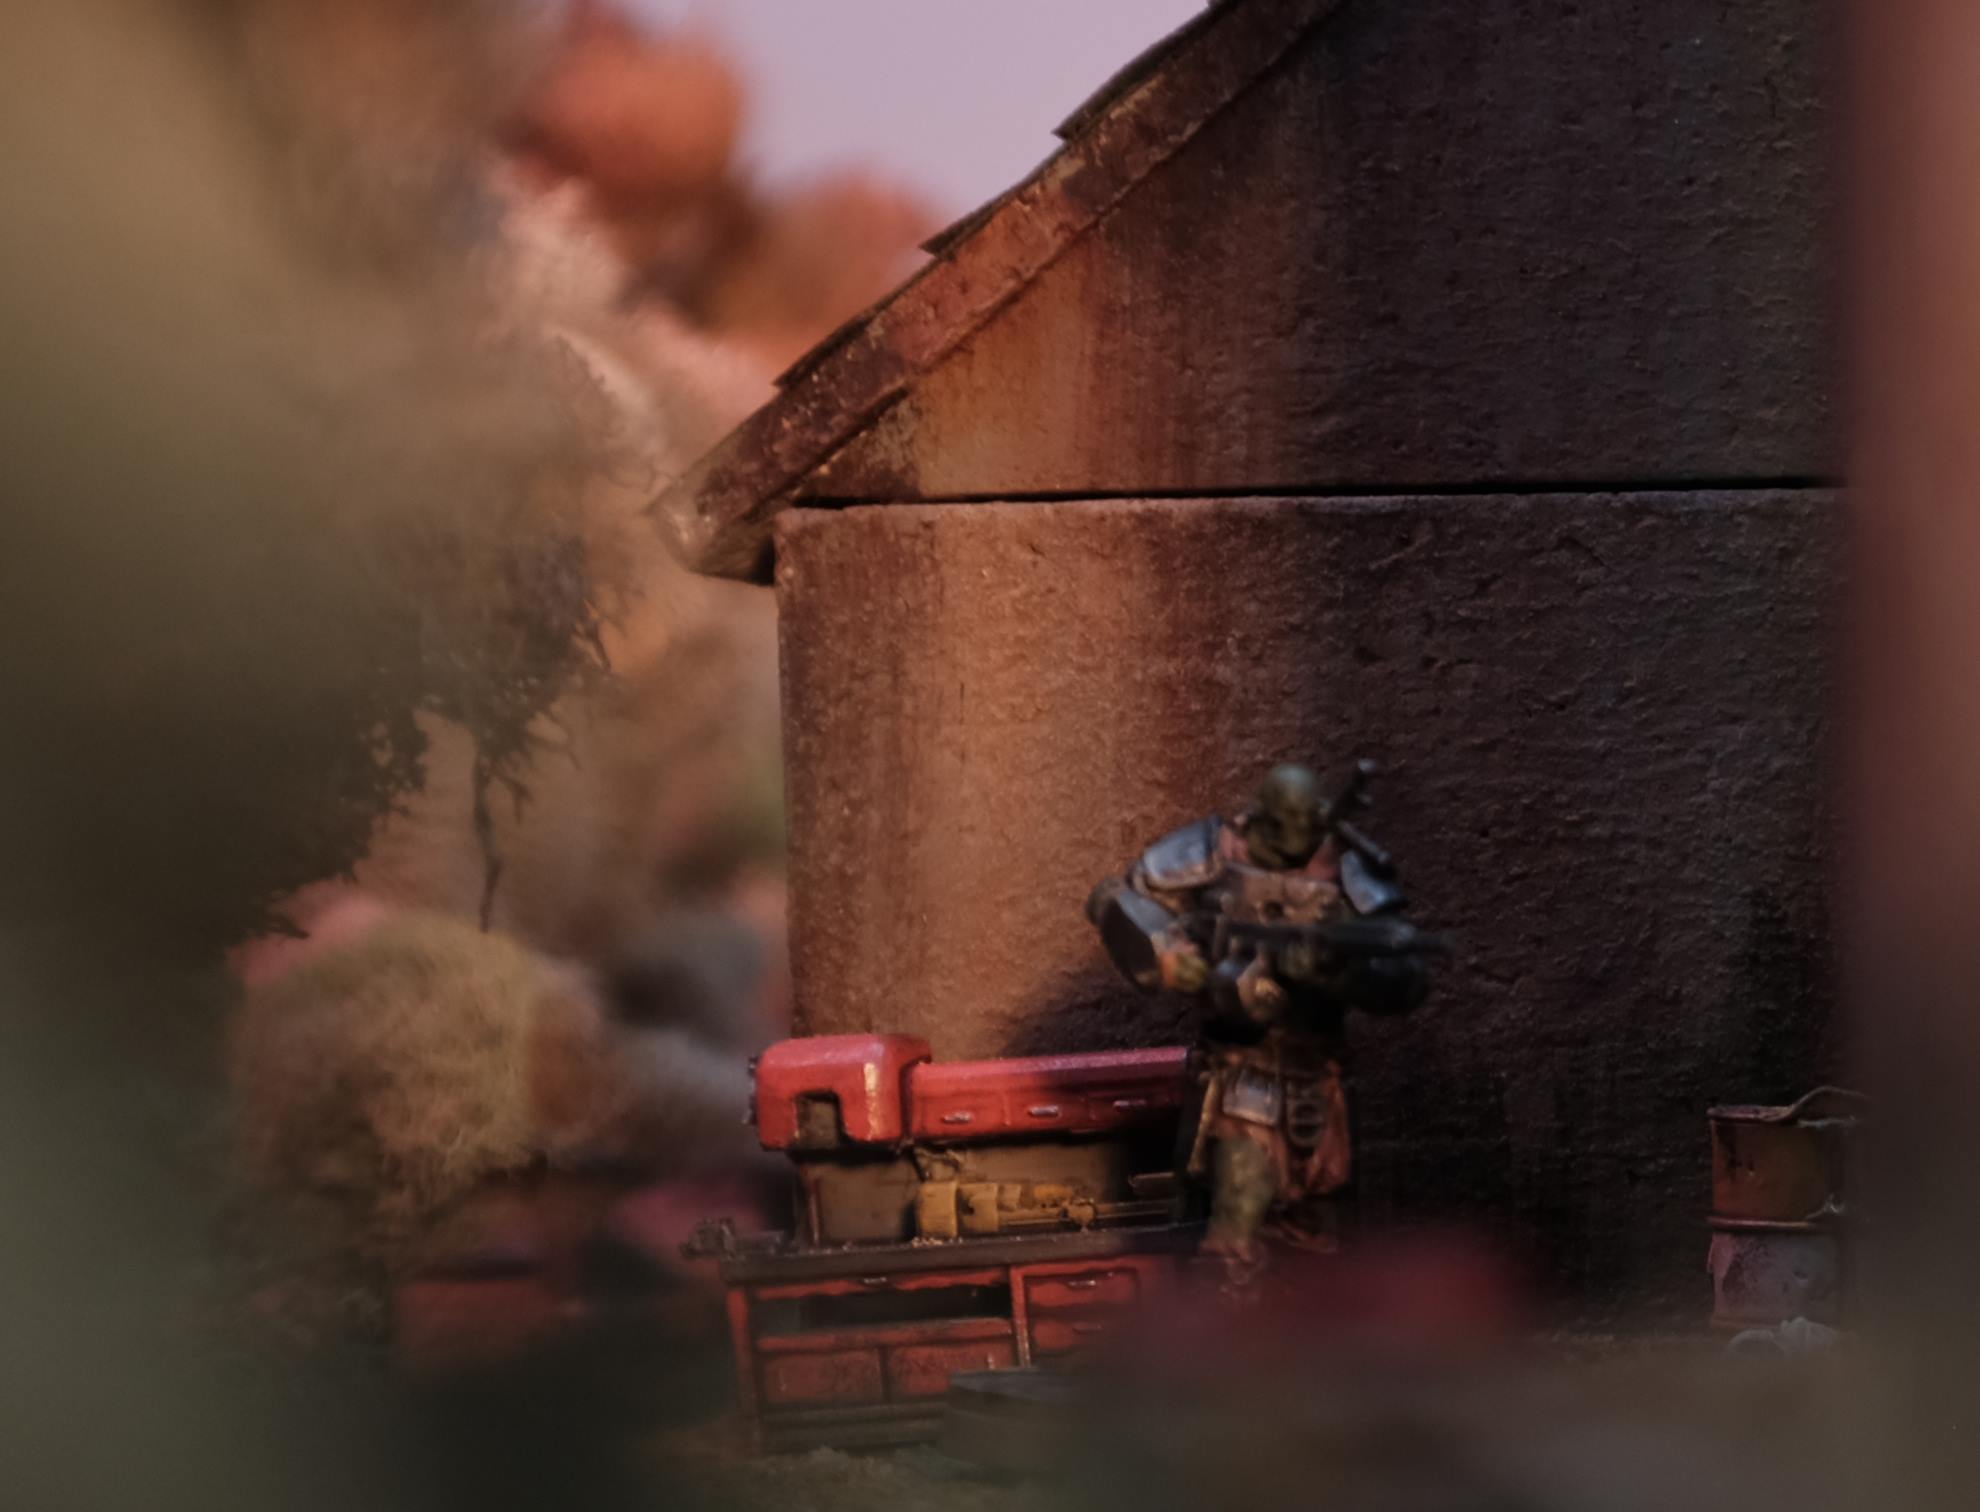

- Image 1: Nora spots a super mutant behind the bathrooms in the fading light.
- Image 2: Mr Handy oversees the area.
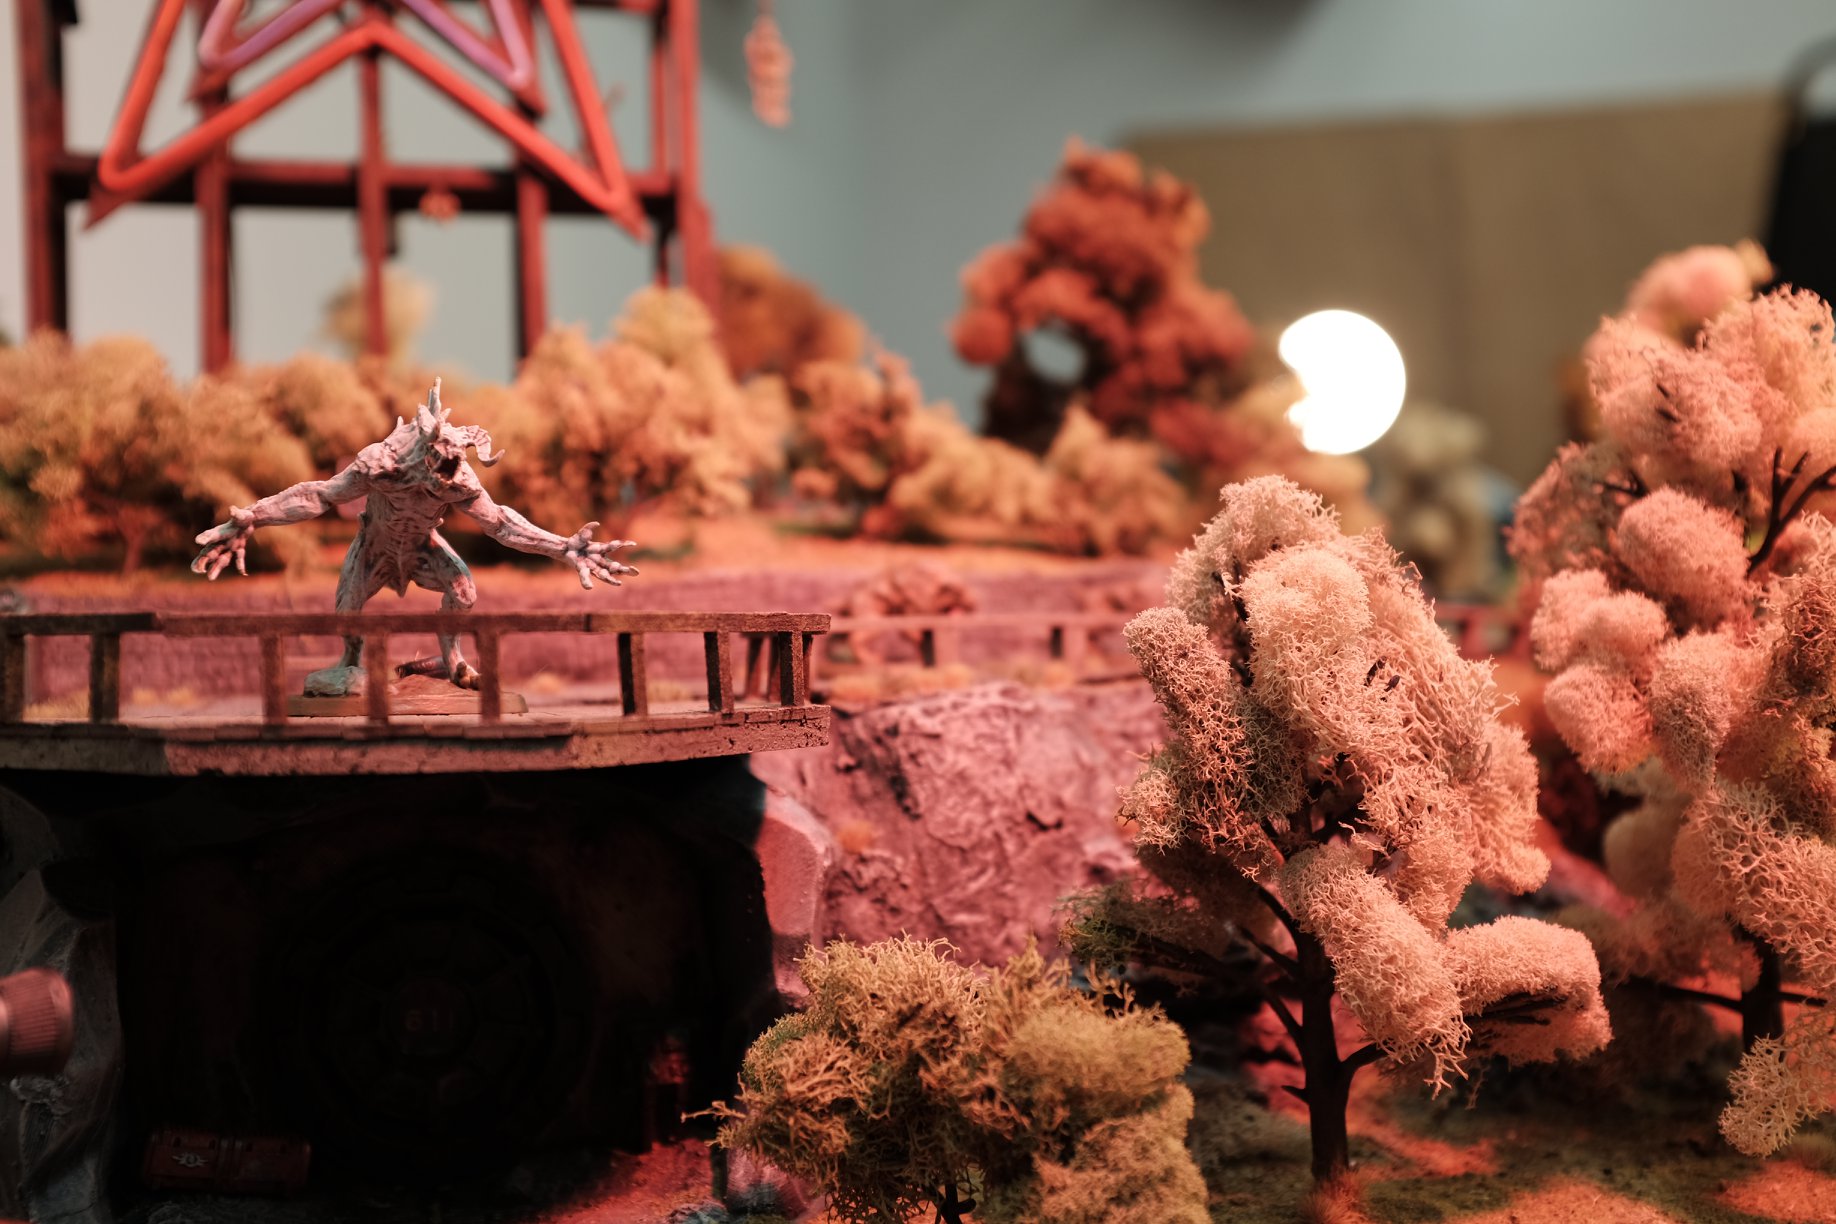
- Image 3: An albino deathclaw rages at the sunset.
- Image 4: Ghouls rush at whoever is unfortunate to be trapped in the bathrooms.
- Image 5: Ghouls run rampant over the scaffolding of the star.
- Image 6: The technician hangs uneasily as ghouls paw at him from the star platform.
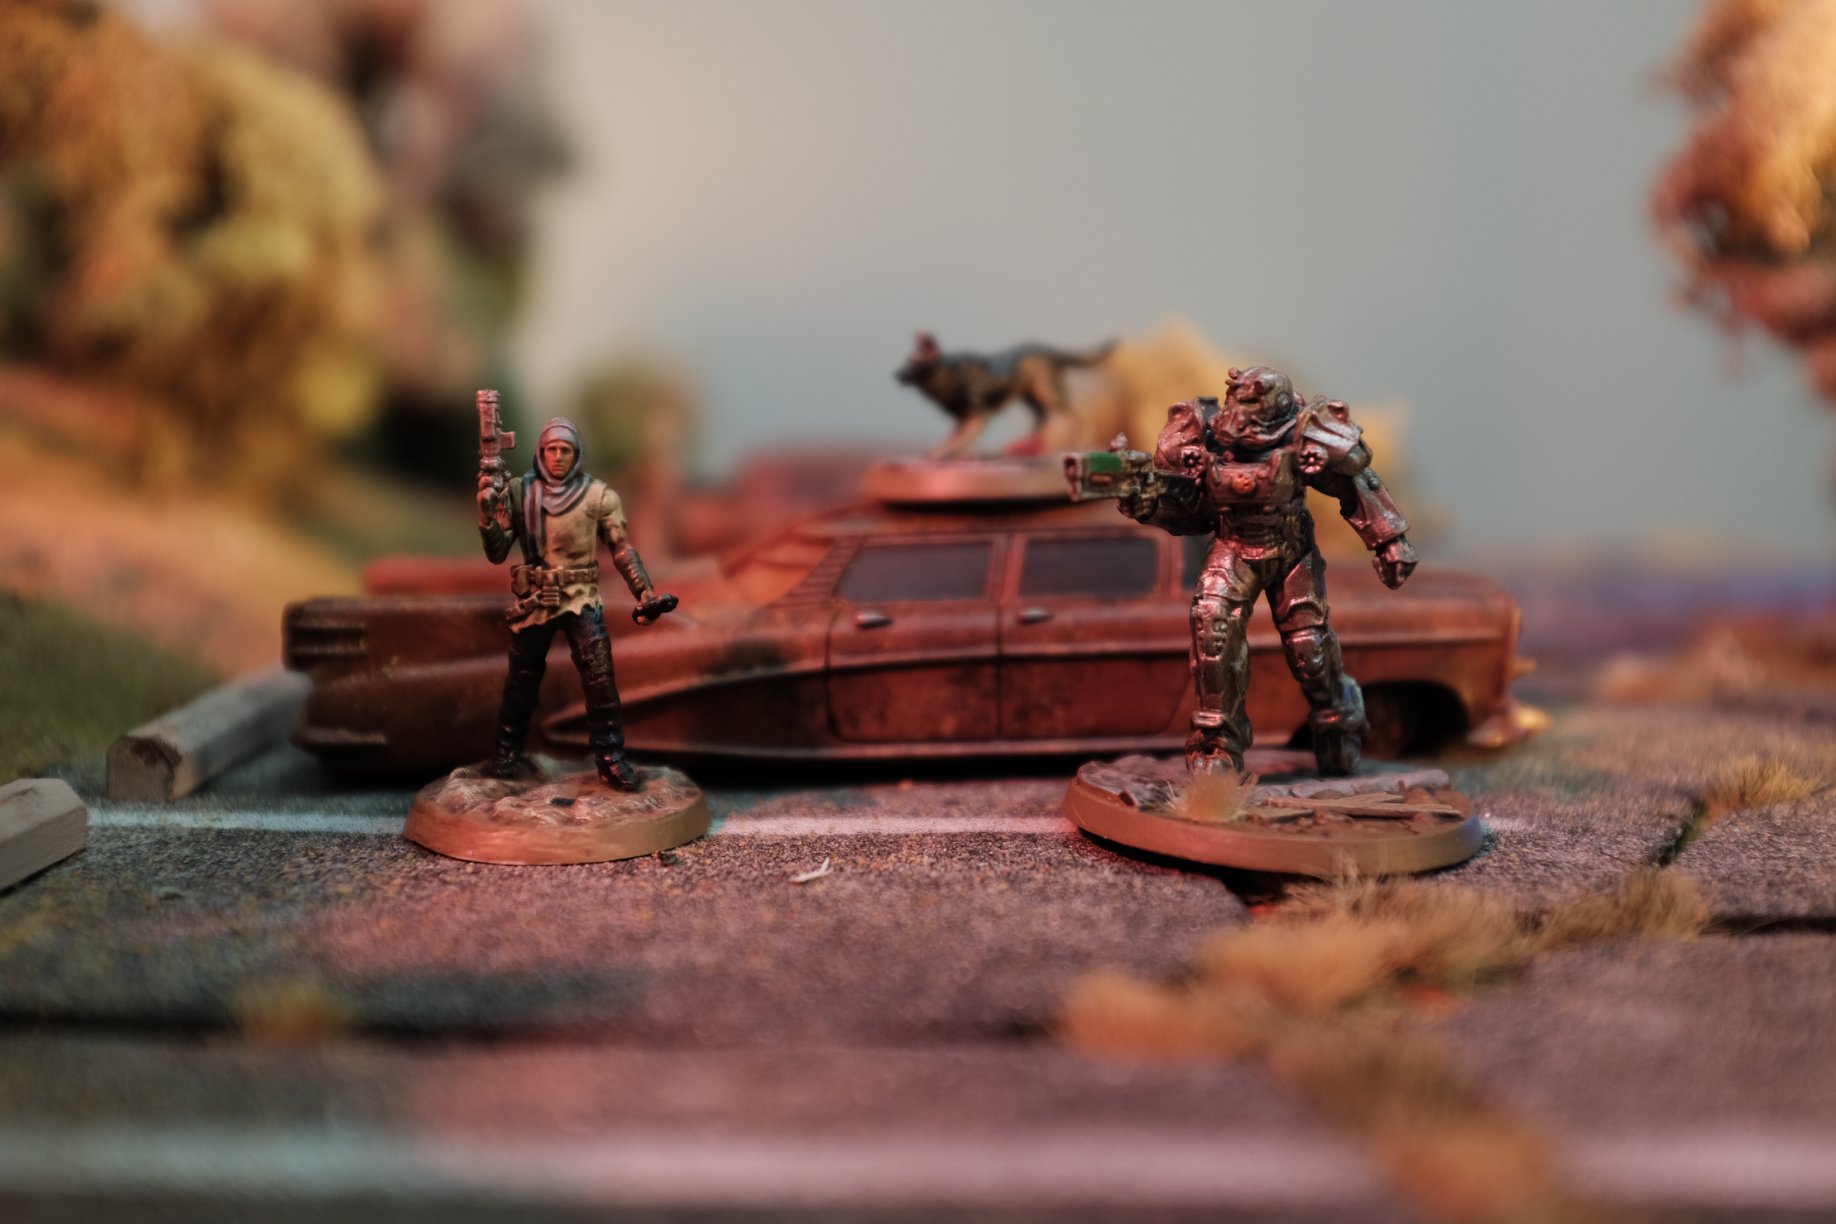
- Image 7: Settlers pose in front of a Corvega
- Image 8: Night falls. see if you can spot the ghouls!
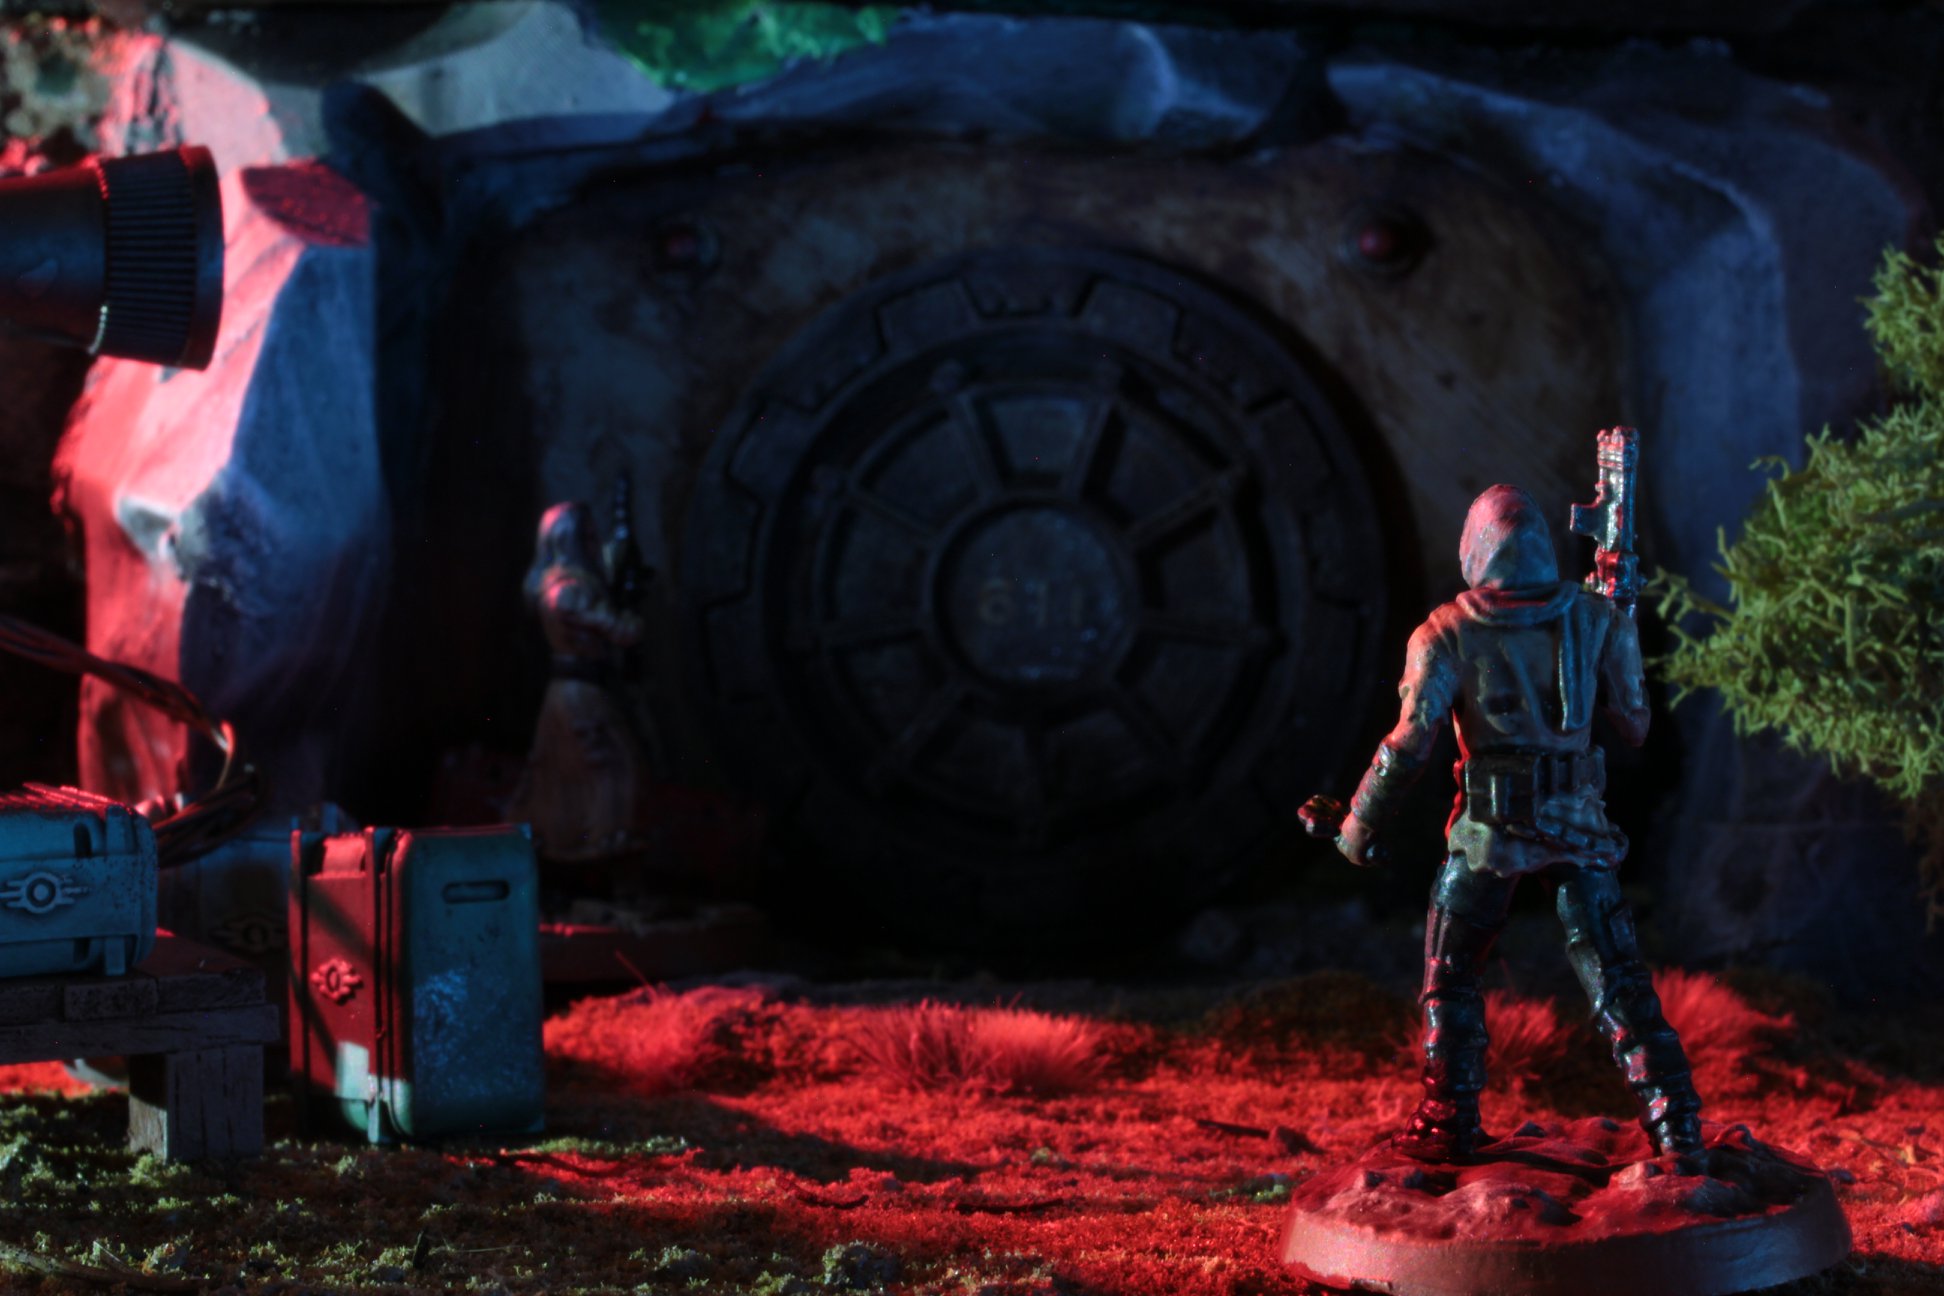
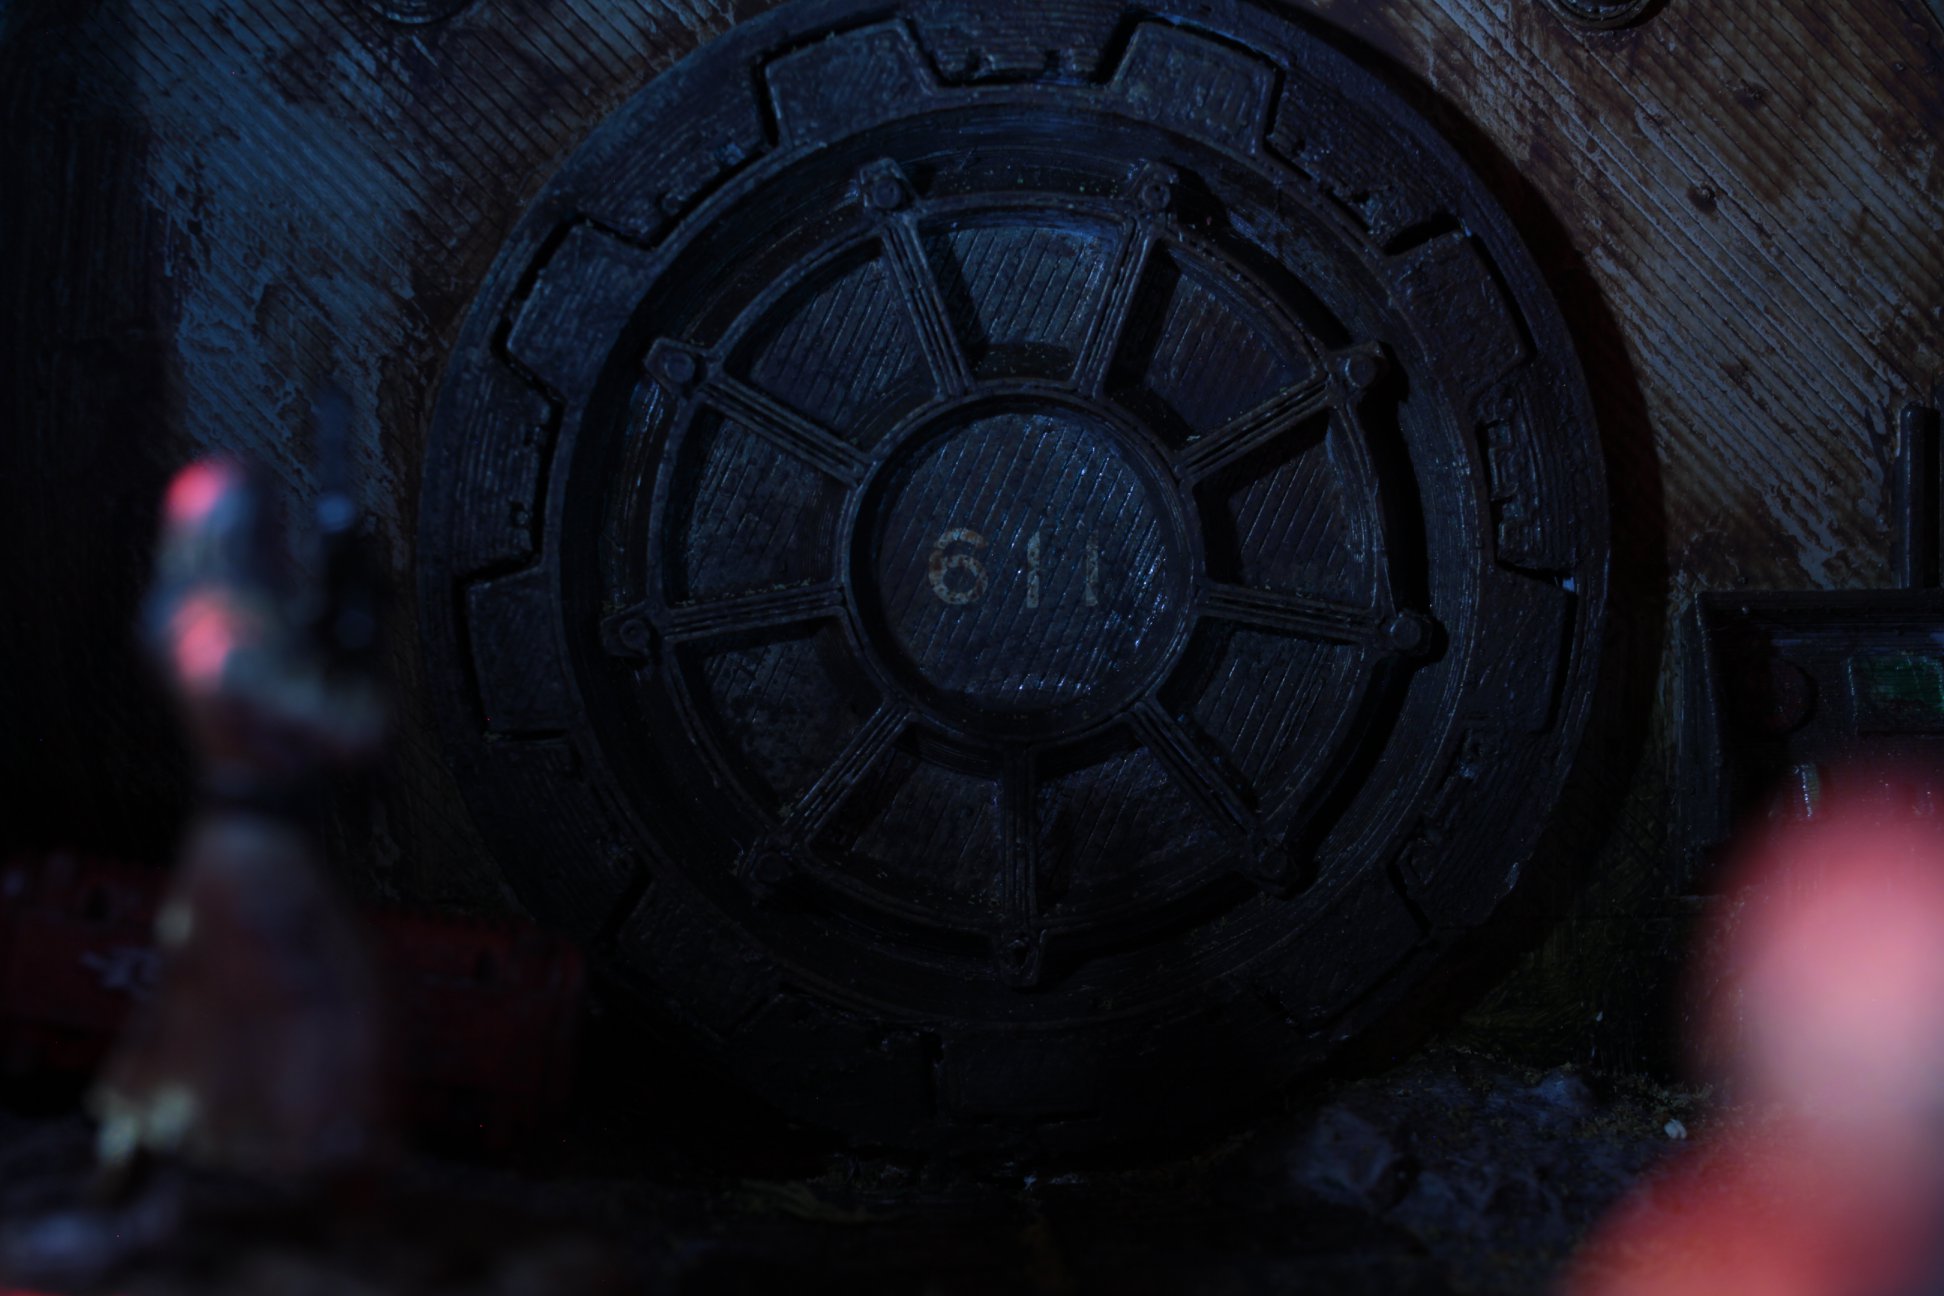

- Image 1: Approaching the vault entrance in the dark.
- Image 2: Vault 611? What could that mean?
- Image 3: At night, the ghouls rule the star
- Image 4: Even ghouls appreciate the view from the overlook.
- Image 5: Lanky shapes patrol the nighttime outline of the star, hunting for prey.
- Image 6: Nora peeks into a nighttime window as a settler attempts to open a door with a wall terminal. what could be inside?
- Image 7: Yup! More ghouls!