

![A Perfect Zombie Apocalypse Starter Set? Civilians & Survivors Review | Wargames Atlantic [7 Days Early Access]](https://images.beastsofwar.com/2026/01/unboxing-wargames-atlantic-civilians-_-survivors-1_2-coverimage-225-127.jpg)
![Wild Australia Wargaming? 28mm Ned Kelly Gang & Victorian Police Review [7 Days Early Access]](https://images.beastsofwar.com/2026/01/unboxing-traders-galaxy-australiana-ned-kelly-gang-_-victorian-police-coverimage-225-127.jpg)


The Wolves of Caliban


Recommendations: 549
About the Project
I've been planning this for a while, but when I spotted the Spring Cleaning Hobby Challenge I thought I'd actually move this forward and out of private mode. I plan on plotting the progress of the painting and development of my Space Marine Chapter, my bit of Gaming in the Gaps.
Related Game: Warhammer 40,000
Related Genre: Science Fiction
Related Contest: Spring Clean Hobby Challenge (Old)
This Project is Active
Printing progress
Whoops I think I got carried away!
So I’d printed replacement doors, new sponsons etc and then I stumbled across something else entirely a Anvilarium Pattern Landraider. I decided that I was going to have a go at printing it.
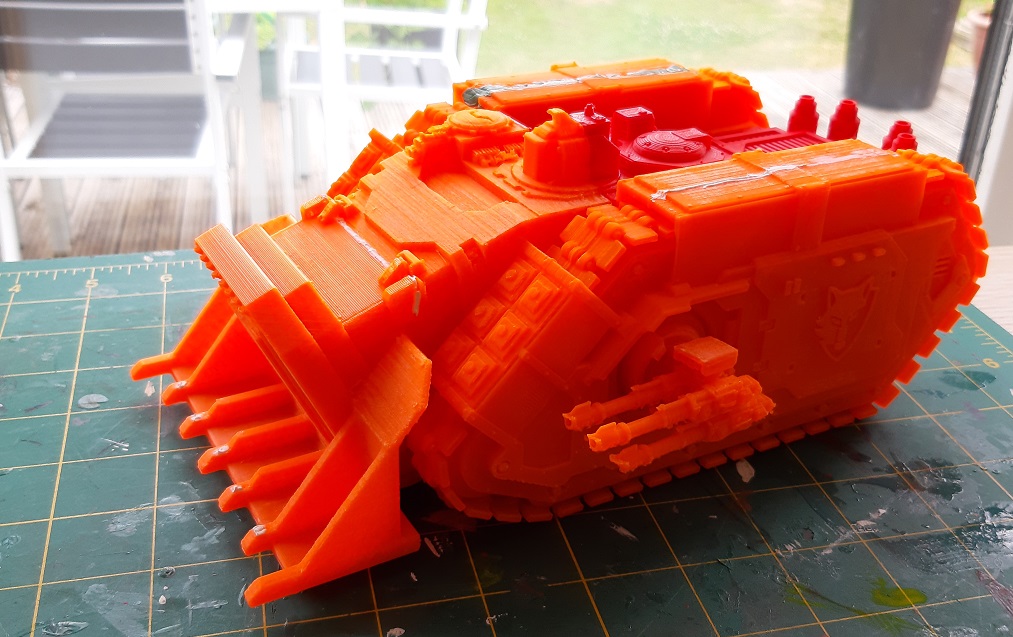 This is the assembled beast, yes it is big!
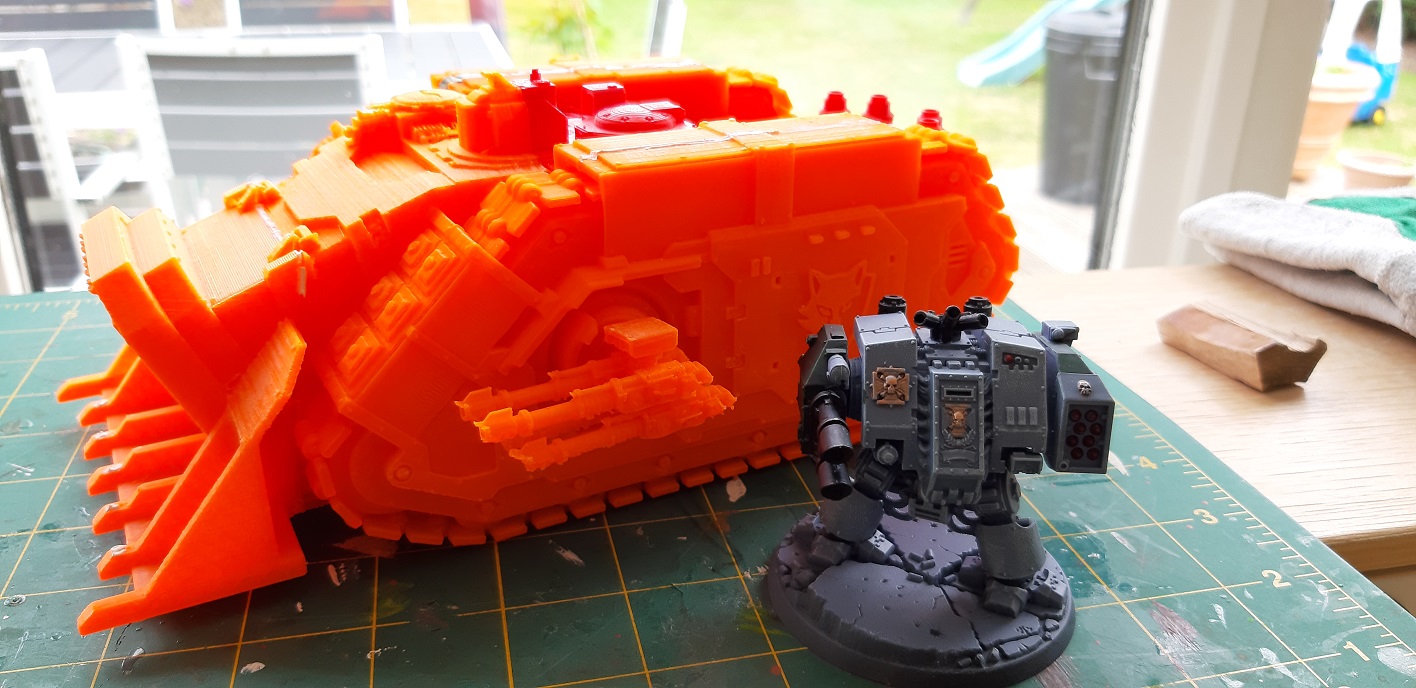 Yes very big, that is a dreadnought standing next to it.
More 3D Printing
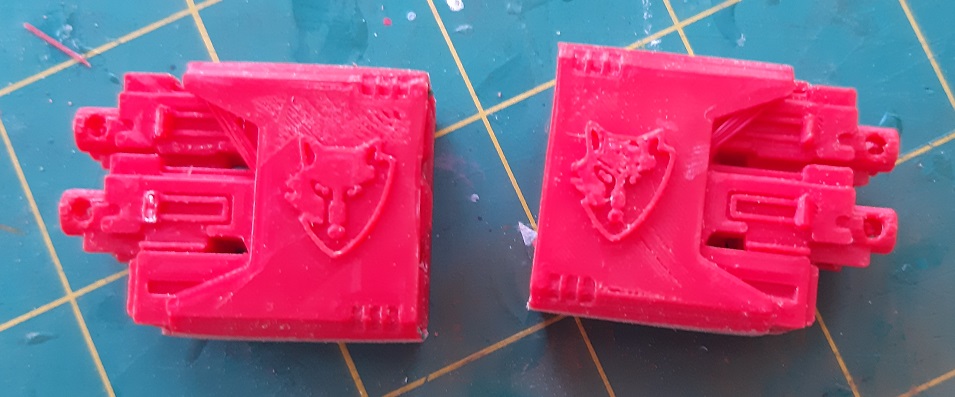
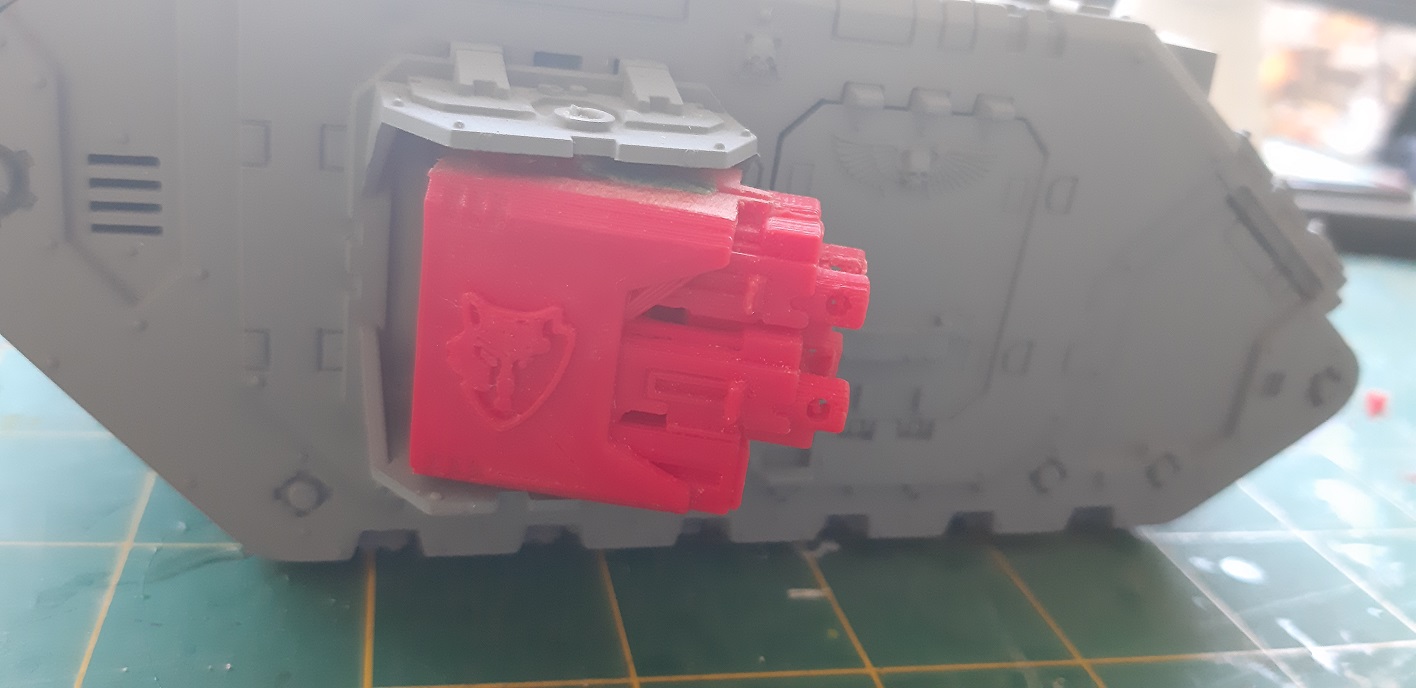
Whilst preparing one of the extra Land Raider Crusaders for painting the Hurricane Bolter assembly started to come apart – this was one of the metal versions of this kit and to be honest I didn’t feel like pinning it to pieces. So I went hunting for a sponson to 3D print to replace it. I came across a number of options but settled on the Prometheus variant on thingiverse.
I sliced it up and added the Wolves of Caliban shield on the side to finish it off.
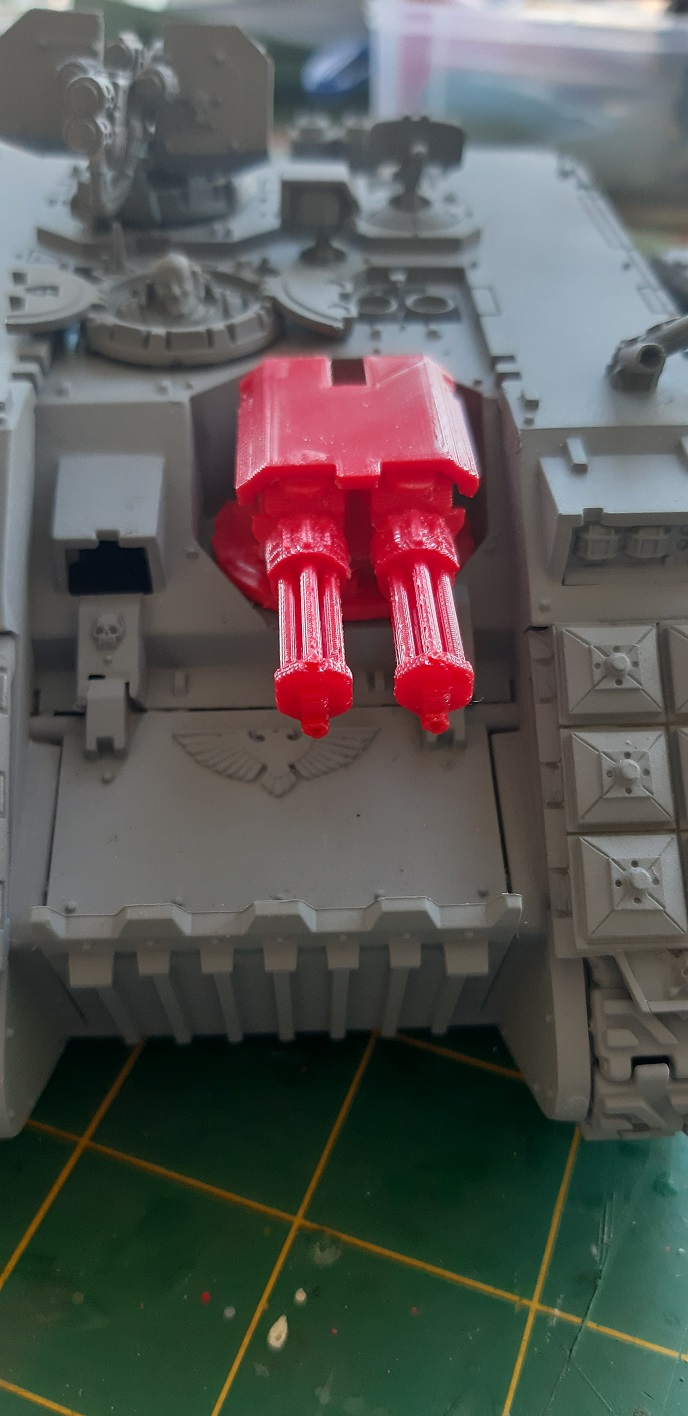
Whilst hunting I spotted a Twin linked assault cannon which I decided to use on the same Land Raider to give it a few differences.

3D Printing parts
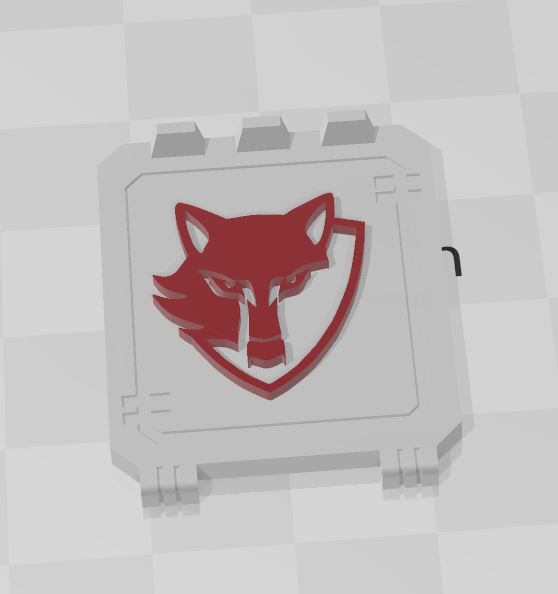 Needed some new doors to fit onto rhinos and landraiders. Found a black door on thingiverse and added the stl version of the Wovles of Caliban logo. This is the Rhino door in 3D Builder.
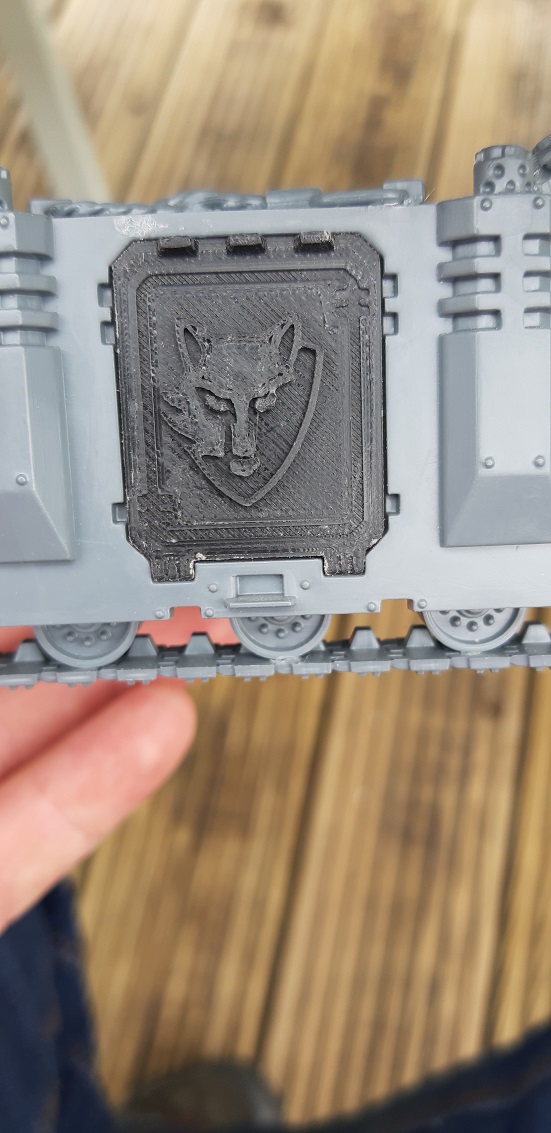 The rhino door in place ready for undercoating along with the Rhino - just need some AP Space Wolf Grey to arrive.
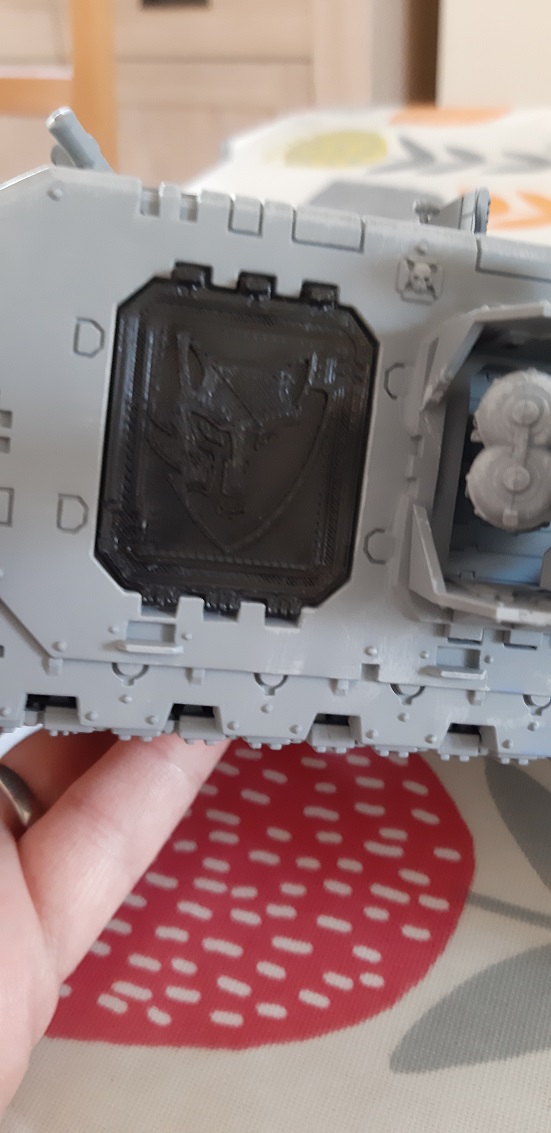 And the Landraider version in place as well.
Arrival of the Primaris
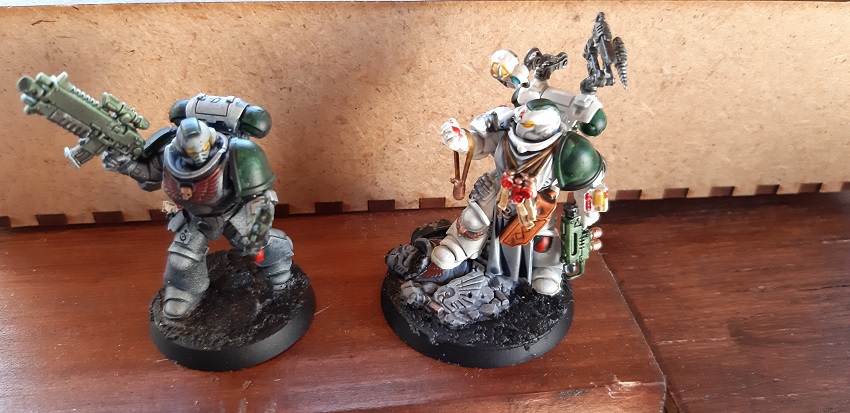
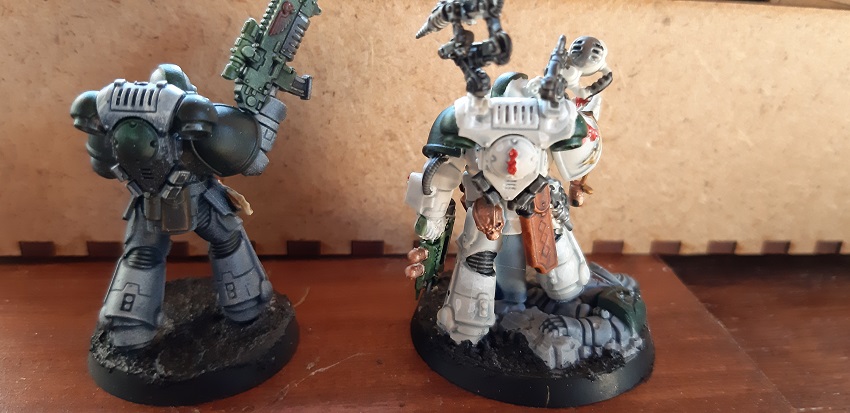
Whoops – I’ve not done anything on this Spring Clean in 12 months, but whilst painting the other day I decided to paint some more 40K. I had a couple of Primaris Marines sitting awaiting to be painted so I got on with them. The Intercessor was given a Zenithal highlight, the first time I’ve really followed through with it and got somewhere. Contrast paints help leave the undercoat colours coming through. So a base of Black, followed by 45degree of grey and then Wraithbone from the top. Space Wolf Grey for the main part, Dark Angels Green for the shoulder pads, Blood Angels Red for the chest eagle, Creed Camo for the bolter.
Yes this colour scheme is different to that planned and tested, but close enough that I think I can blag it for some gaming in the gaps!
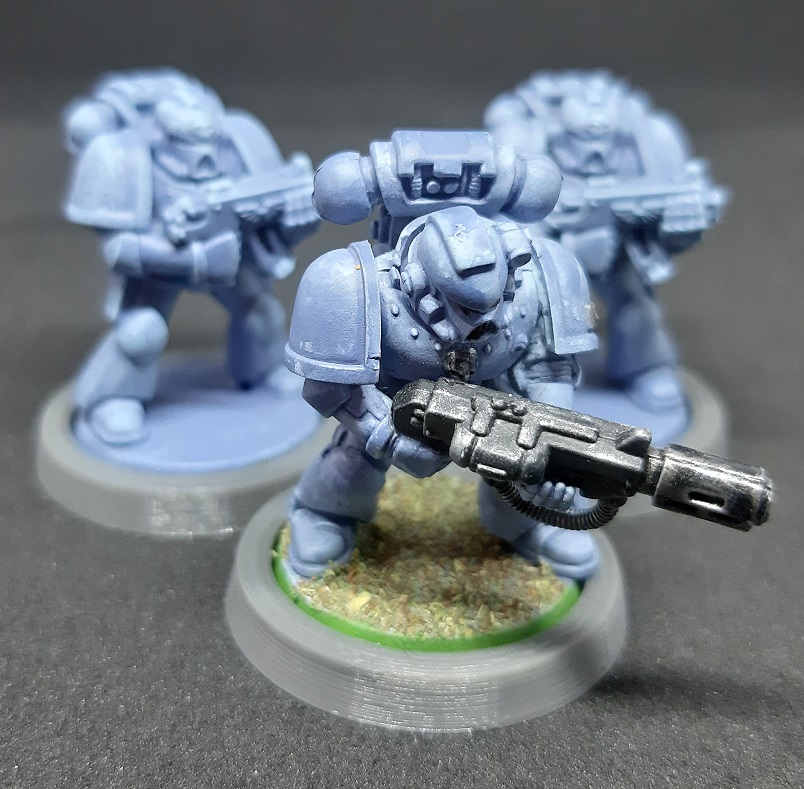
Test Miniature Part 3
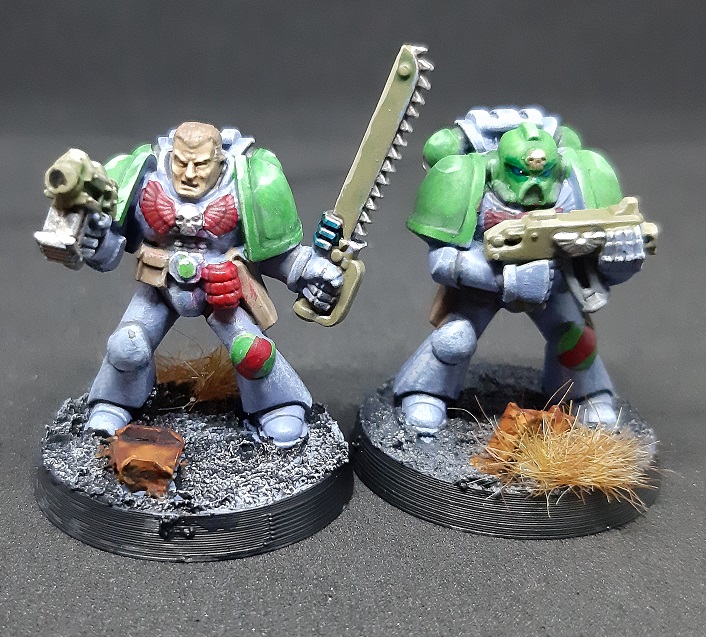
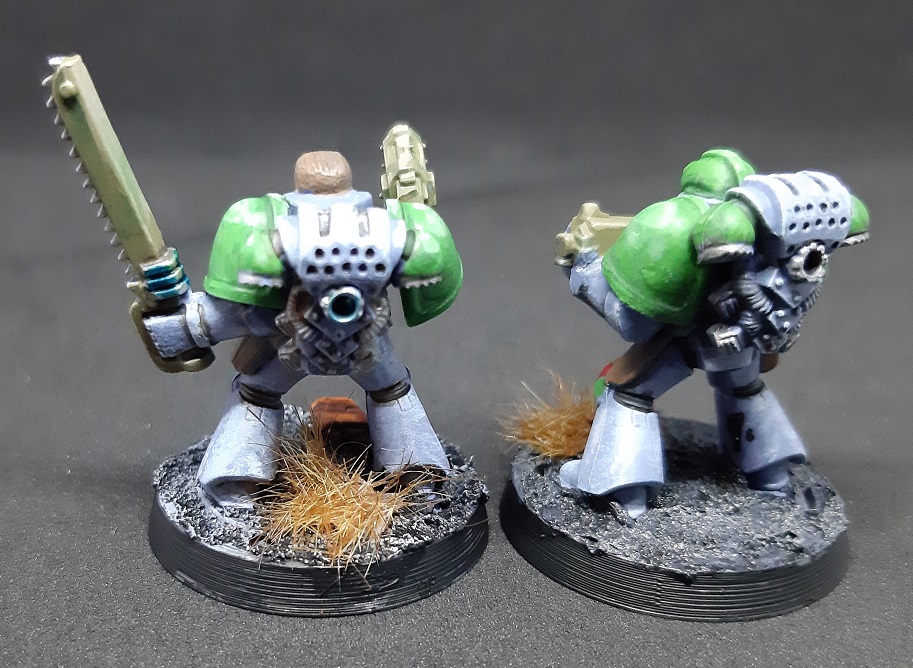
So I finished off basing the test miniature with the Vallejo Black Lava/Asphlat. I put a light drybrush of Ash Grey to pick out the highest parts once it had dried. To finish it off and add to the city type feel I chopped a bit of plastic “I” beam gave it a base of Vallejo Boltgun Grey and then used the Model Mates Rust Effect paint to really rust that piece of iron. A bit of dead grass (Warpainter 10mm), I went with half of a piece that they provide and use a drop of superglue rather than relying on the self-adhesive on the grass. I then pondered on the ring of the base and decided to go with black to blend in with the top of the base. I feel that I have achieved the aim of the figure not merging into the base too much. I sat down last night and cracked on with a sergeant figure (he has a bolt pistol and chainsword). I’ve finished basing him, but I’m not happy with the aquila on his chest. I went back to the box of figures to pick out the rest of the squad and realised how many of them have bolt pistols and chainswords – I think I will need to replace some backpacks with jumppacks to make good use of them.
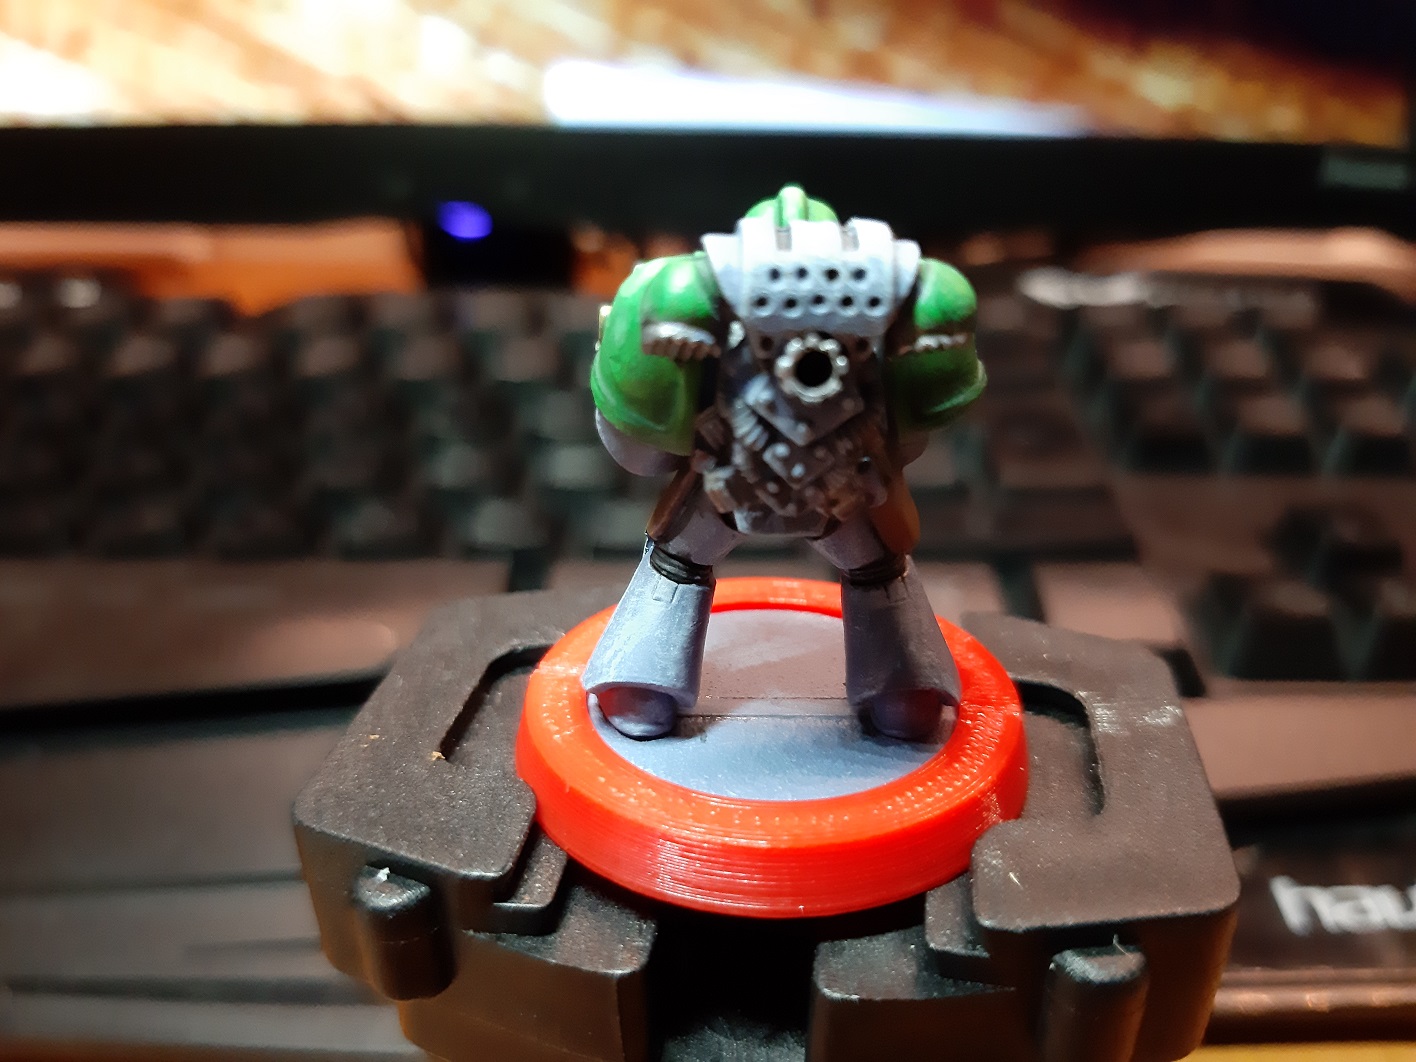
Problem Number 1 - Argh!
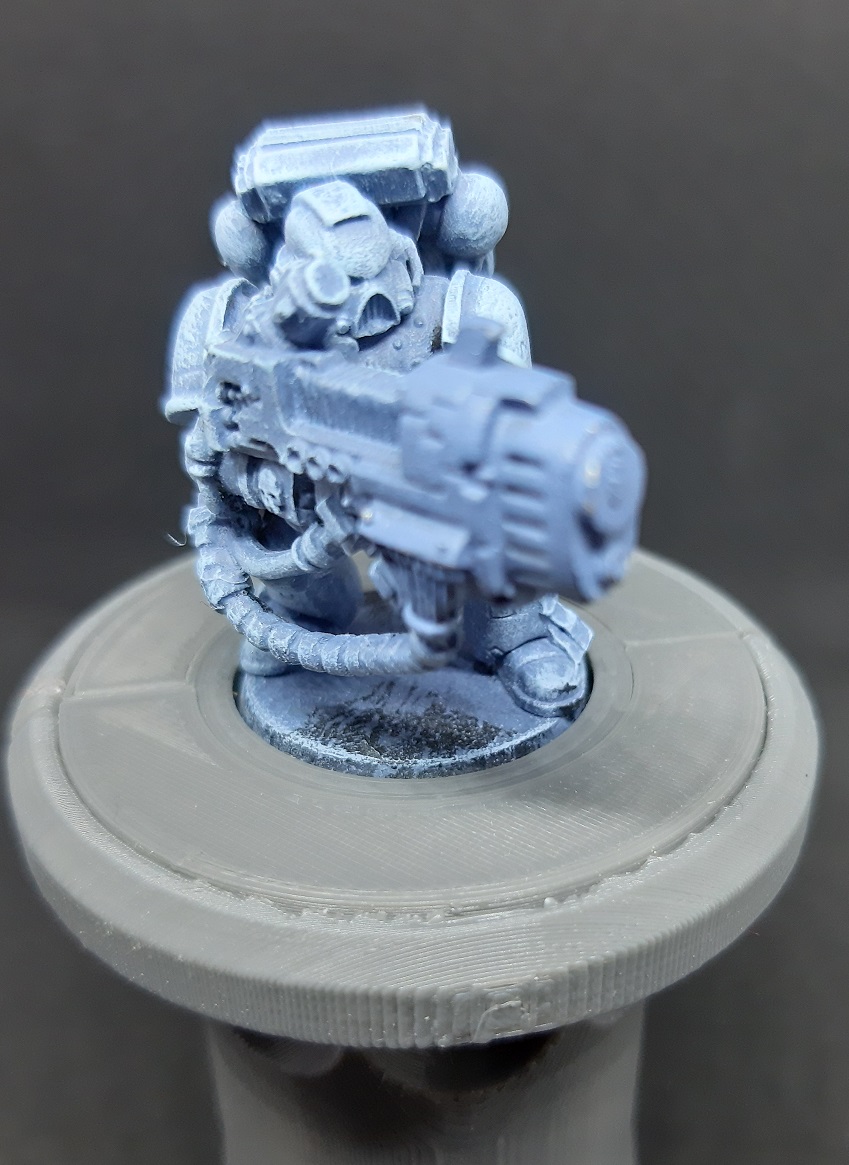
Having been painting away at the test peice I have grown more and more annoyed at the height difference between the base and the adapter I put round the side. The adapter was 3mm high whilst the base is about 2mm high and yes that 1mm difference was annoying me. So I returned to thingiverse and downloaded two more adapters to try with another figure. Today I printed out the two new adapters both of which registered 2mm high (with a 1mm base on one of them) on my printing software and the old one adjusted to 2mm high. Something went wrong with the prints and I got two disks out of the printer instead of 2 rings. Not sure what happened so I decided to re-slice the one that is more like a cup shape and it printed fine this afternoon. I was a bit dubious about a solid rather than a split adapter, but the miniature has dropped into firmly and isn’t coming out. There is a very slight difference in height, the outside is lower but it is easier to cover up with the basing materials than something that gets taller. Guess I need to get the printer busy printing my adapters.
For those interested I’m using this one: https://www.thingiverse.com/thing:3223936
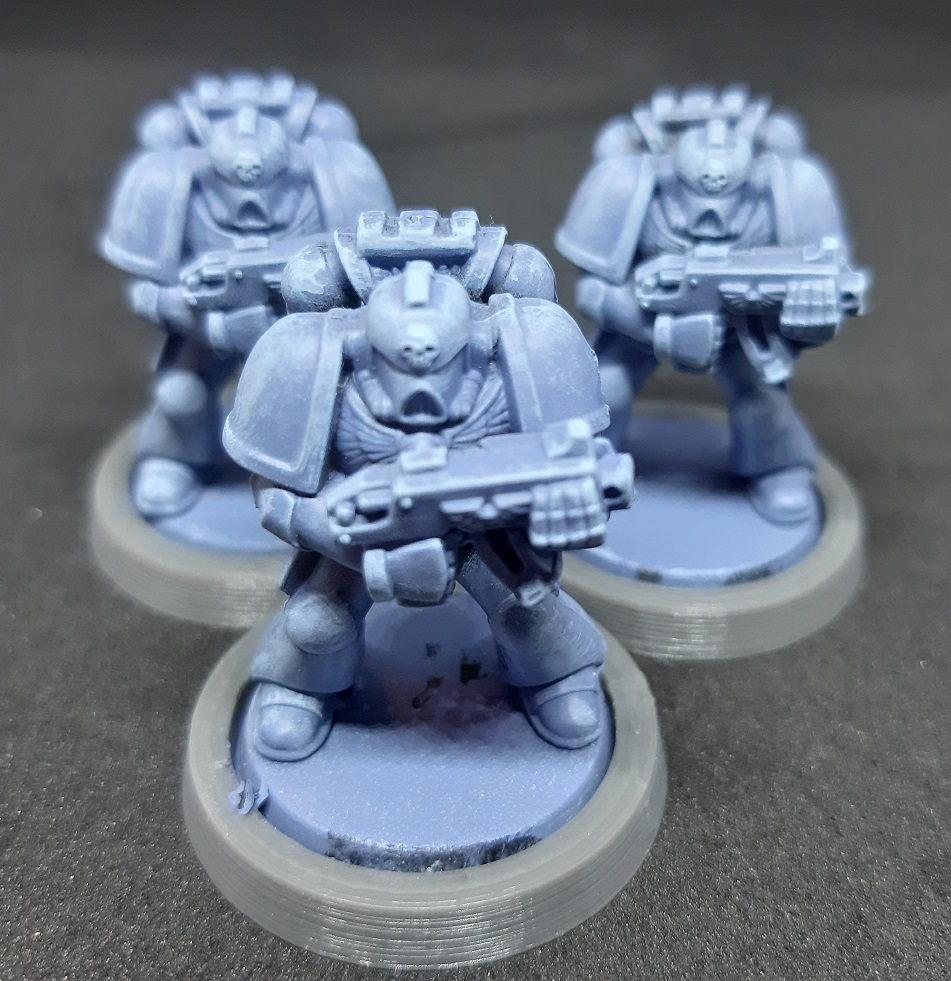
Test Miniature Part 2
Spent a bit more time this evening putting some more paint on the test miniature, the photos have been taken rather quickly tonight so they don’t really show the miniature off well.
So what did I add. The backpack for some paint with Mithral Silver (GW) and a Dark Tone put on top to tone it down. A dab of Old Gold from Miniature Paints on the skull on the helment. The squad marking and the aquilla on the chst were painted Vampire Red (Army Painter) and then the aquilla got a bit of Dark Tone. To be honest most of the aquilla is covered by the bolter. I decided to paint the eyes White and then go in with a Ghost Tint (Plasma Fluid) to try and get a bit of a glow effect, I think a very small got of white is needed now to finish them off.

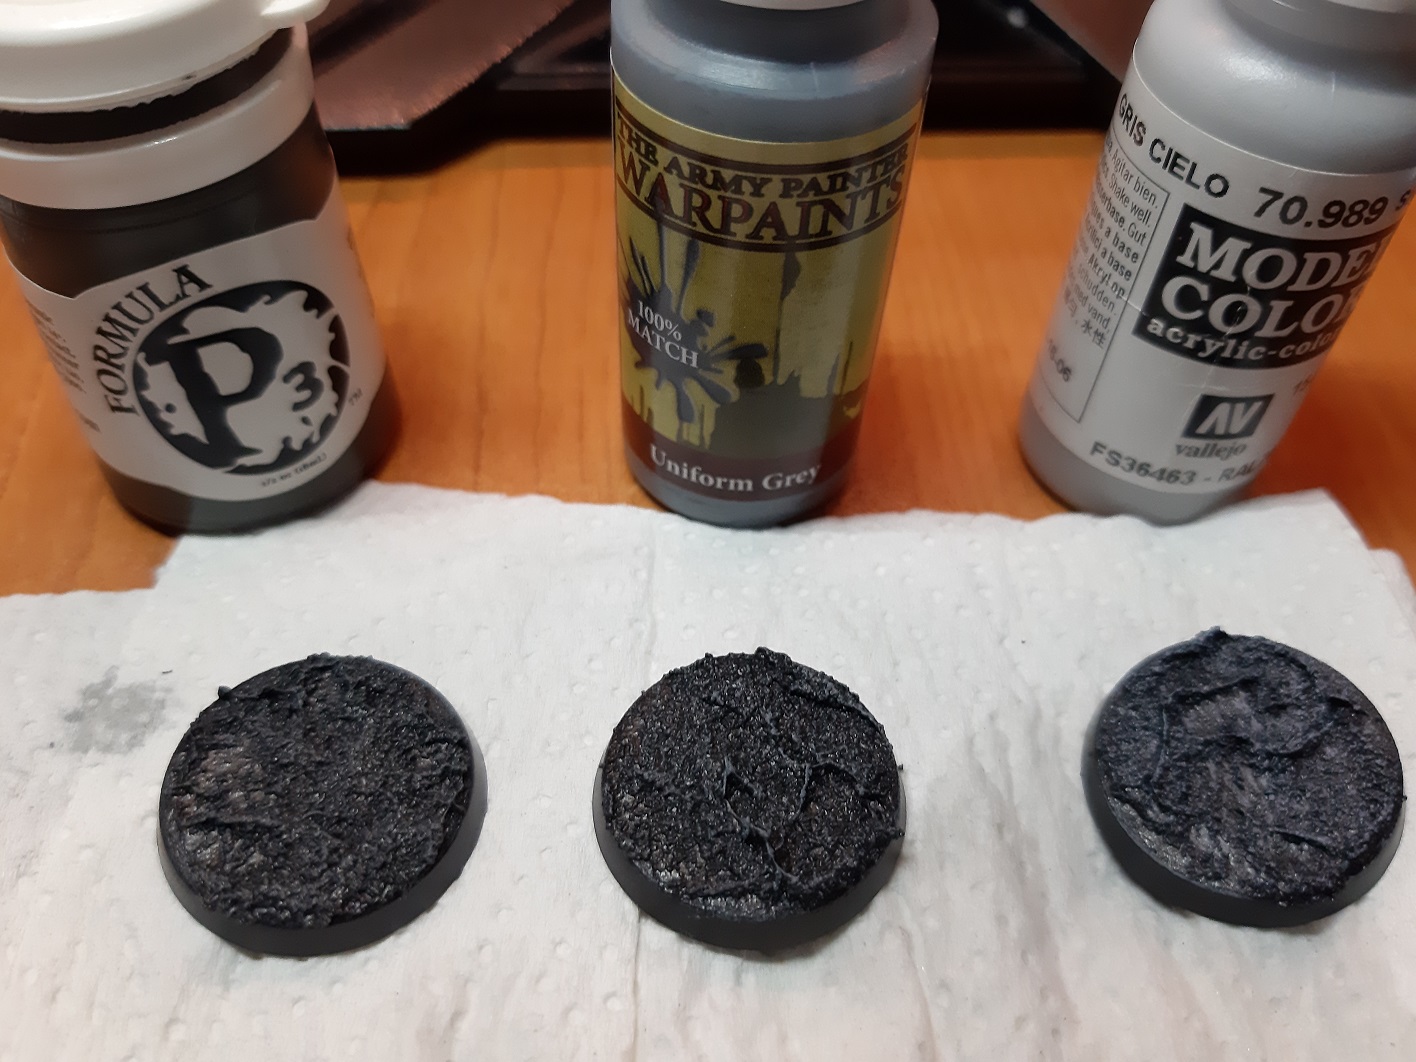
Problem Number 2 - Basing 2
So the Black Lava/Asphlat arrived and so I decied to do some testing to try and get the basics of the base sorted. Three spare bases were put to good use testing the colour.
 The bases with Black Lava/Asphlat put on.
Having allowed time for the paint to dry out, I picked out three colours to try a bit of drybrushing to bring out the texture. Some I went with Vallejo Sky Grey, Army Painter Uniform Grey and P3 Ironhull. After putting them on I remembered that Uniform Grey and Ironhull are virtually identical so I don’t think that gave me anything. I think the Sky Grey is my favourite so far.