


![A Perfect Zombie Apocalypse Starter Set? Civilians & Survivors Review | Wargames Atlantic [7 Days Early Access]](https://images.beastsofwar.com/2026/01/unboxing-wargames-atlantic-civilians-_-survivors-1_2-coverimage-225-127.jpg)
![Wild Australia Wargaming? 28mm Ned Kelly Gang & Victorian Police Review [7 Days Early Access]](https://images.beastsofwar.com/2026/01/unboxing-traders-galaxy-australiana-ned-kelly-gang-_-victorian-police-coverimage-225-127.jpg)


The Emperor Protects ~ Adepta Sororitas ~ A Sisters of Battle Project


Recommendations: 959
About the Project
***** THE EMPEROR PROTECTS ***** I've been a backstage member since 2012 and have never shared anything I've made. (HOW VERY DARE I?) After being one of the lucky few to acquire the Sisters of Battle box I thought it would be cool to attempt to track my progress of putting this brand new army (for me) together before they are let loose upon the battlefield to unleash fire and faith upon the heretics. Original project goal achieved. Limited Edition Sisters of Battle Starter Box complete! Stay tuned for incoming pile of shame purging & painting. YES!
Related Game: Warhammer 40,000
Related Company: Games Workshop
Related Genre: Science Fiction
This Project is Active
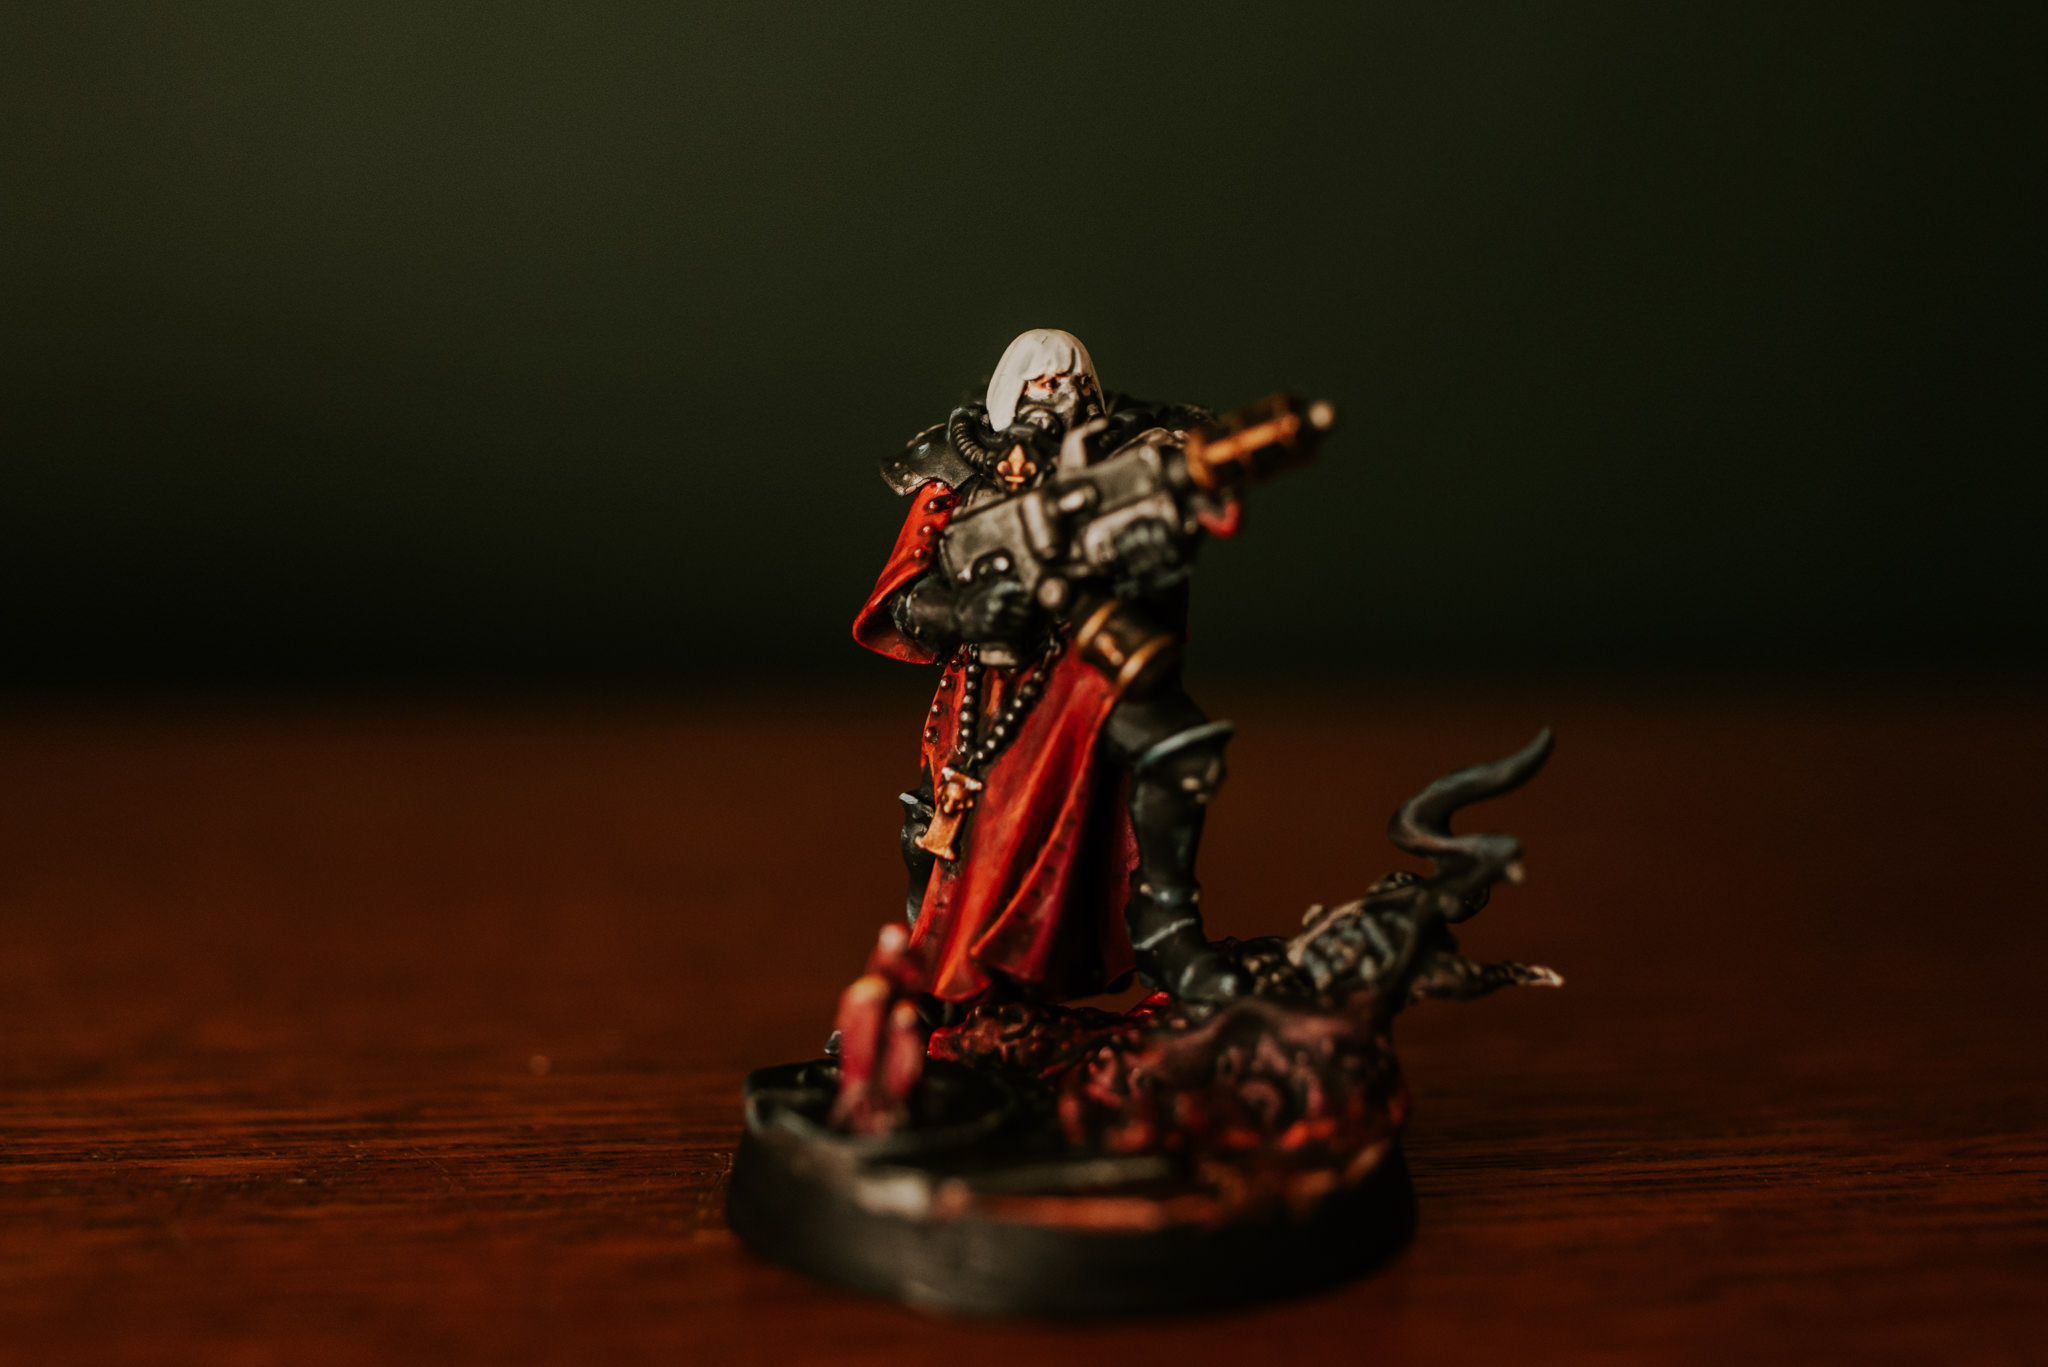
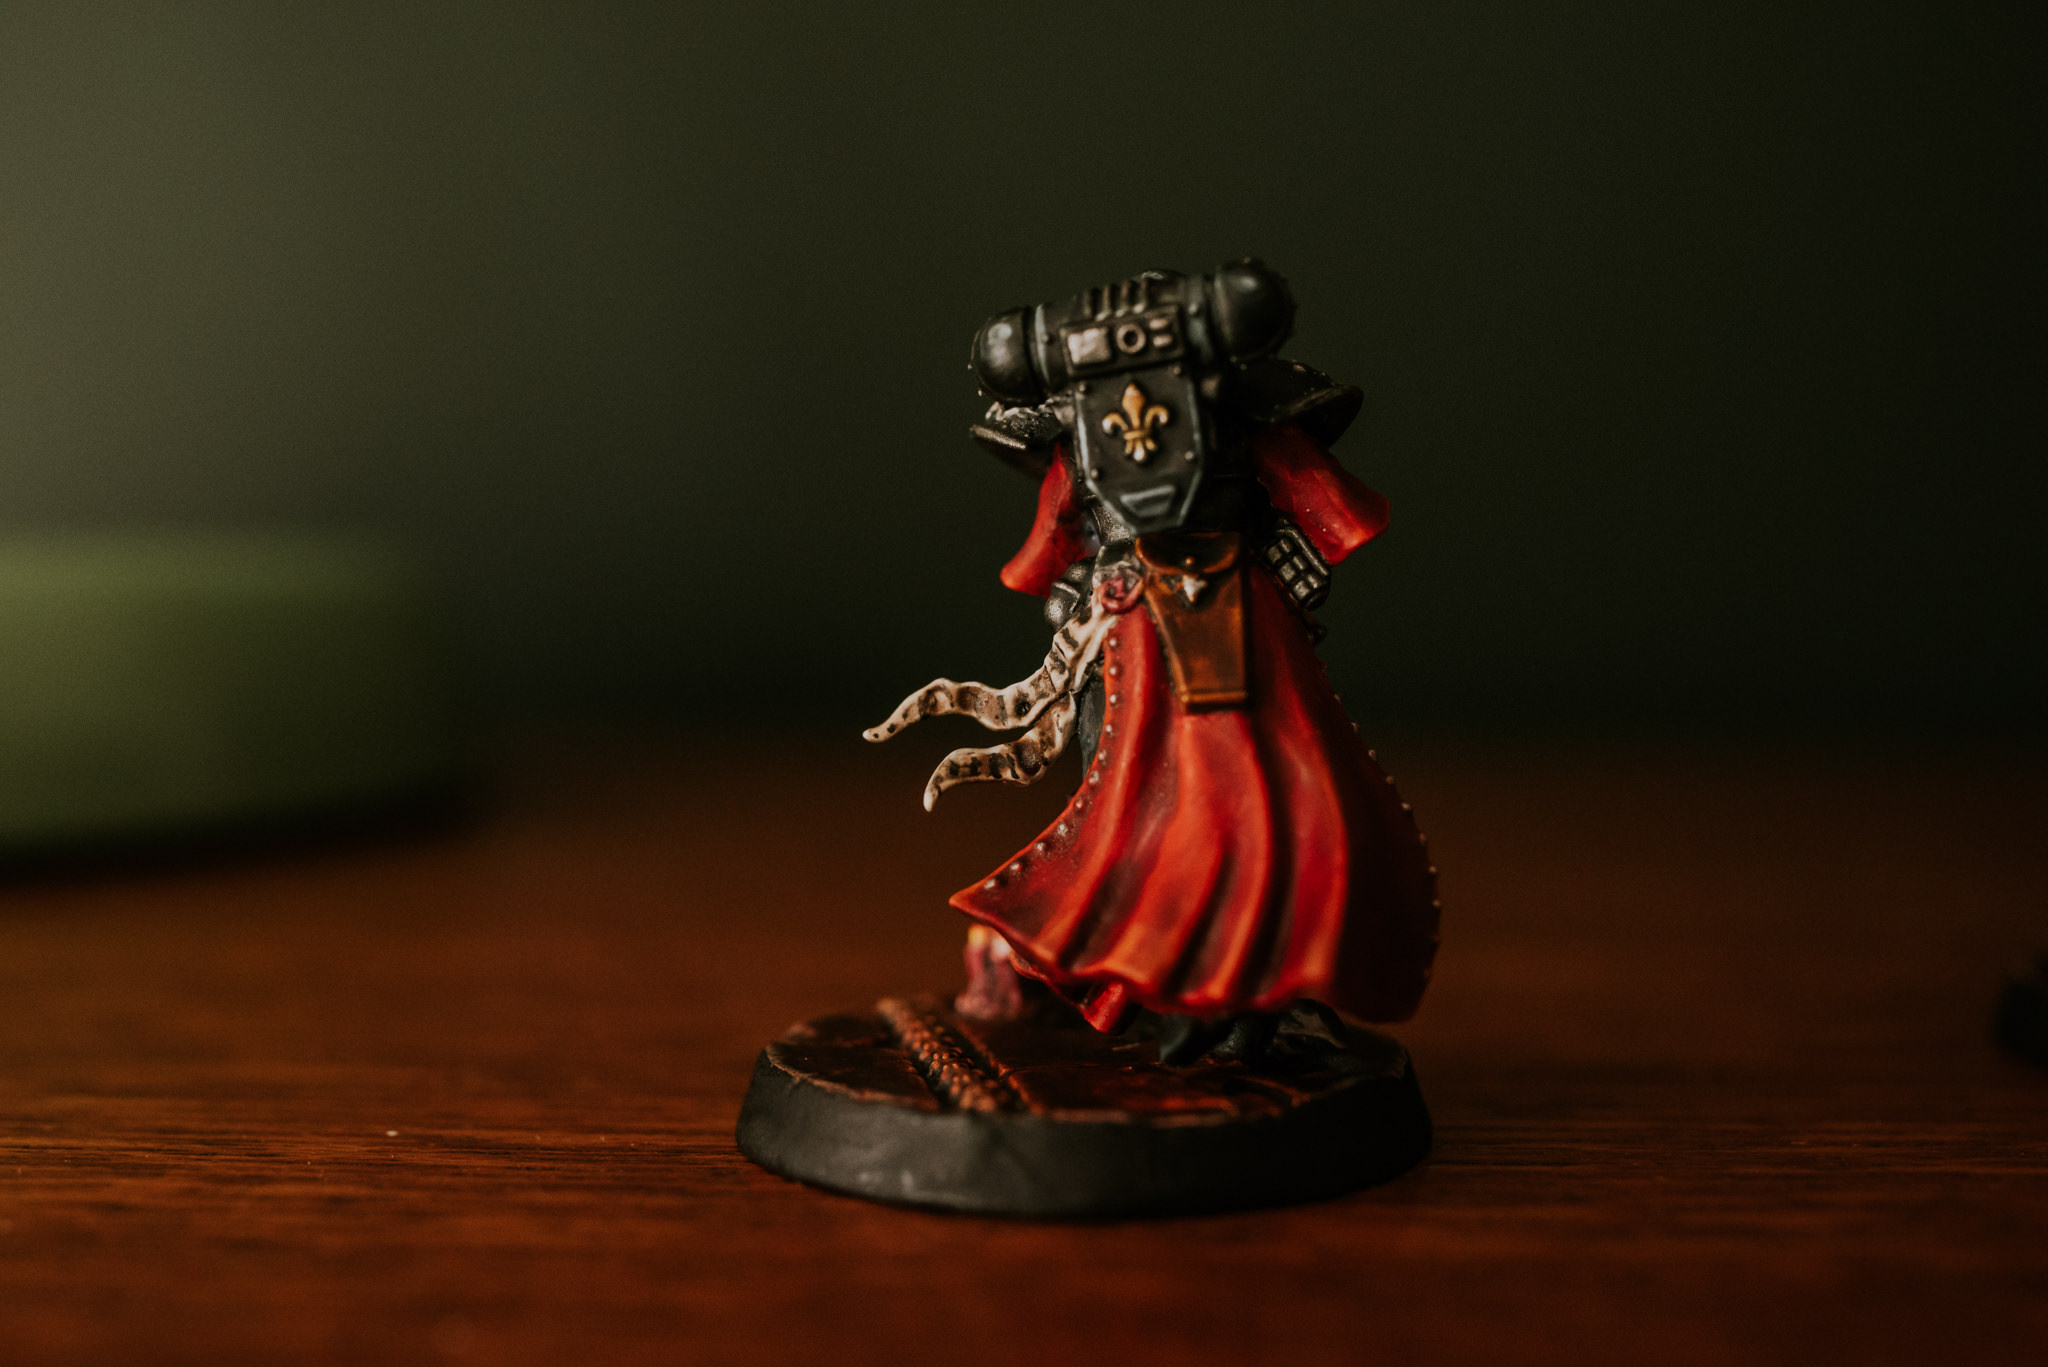
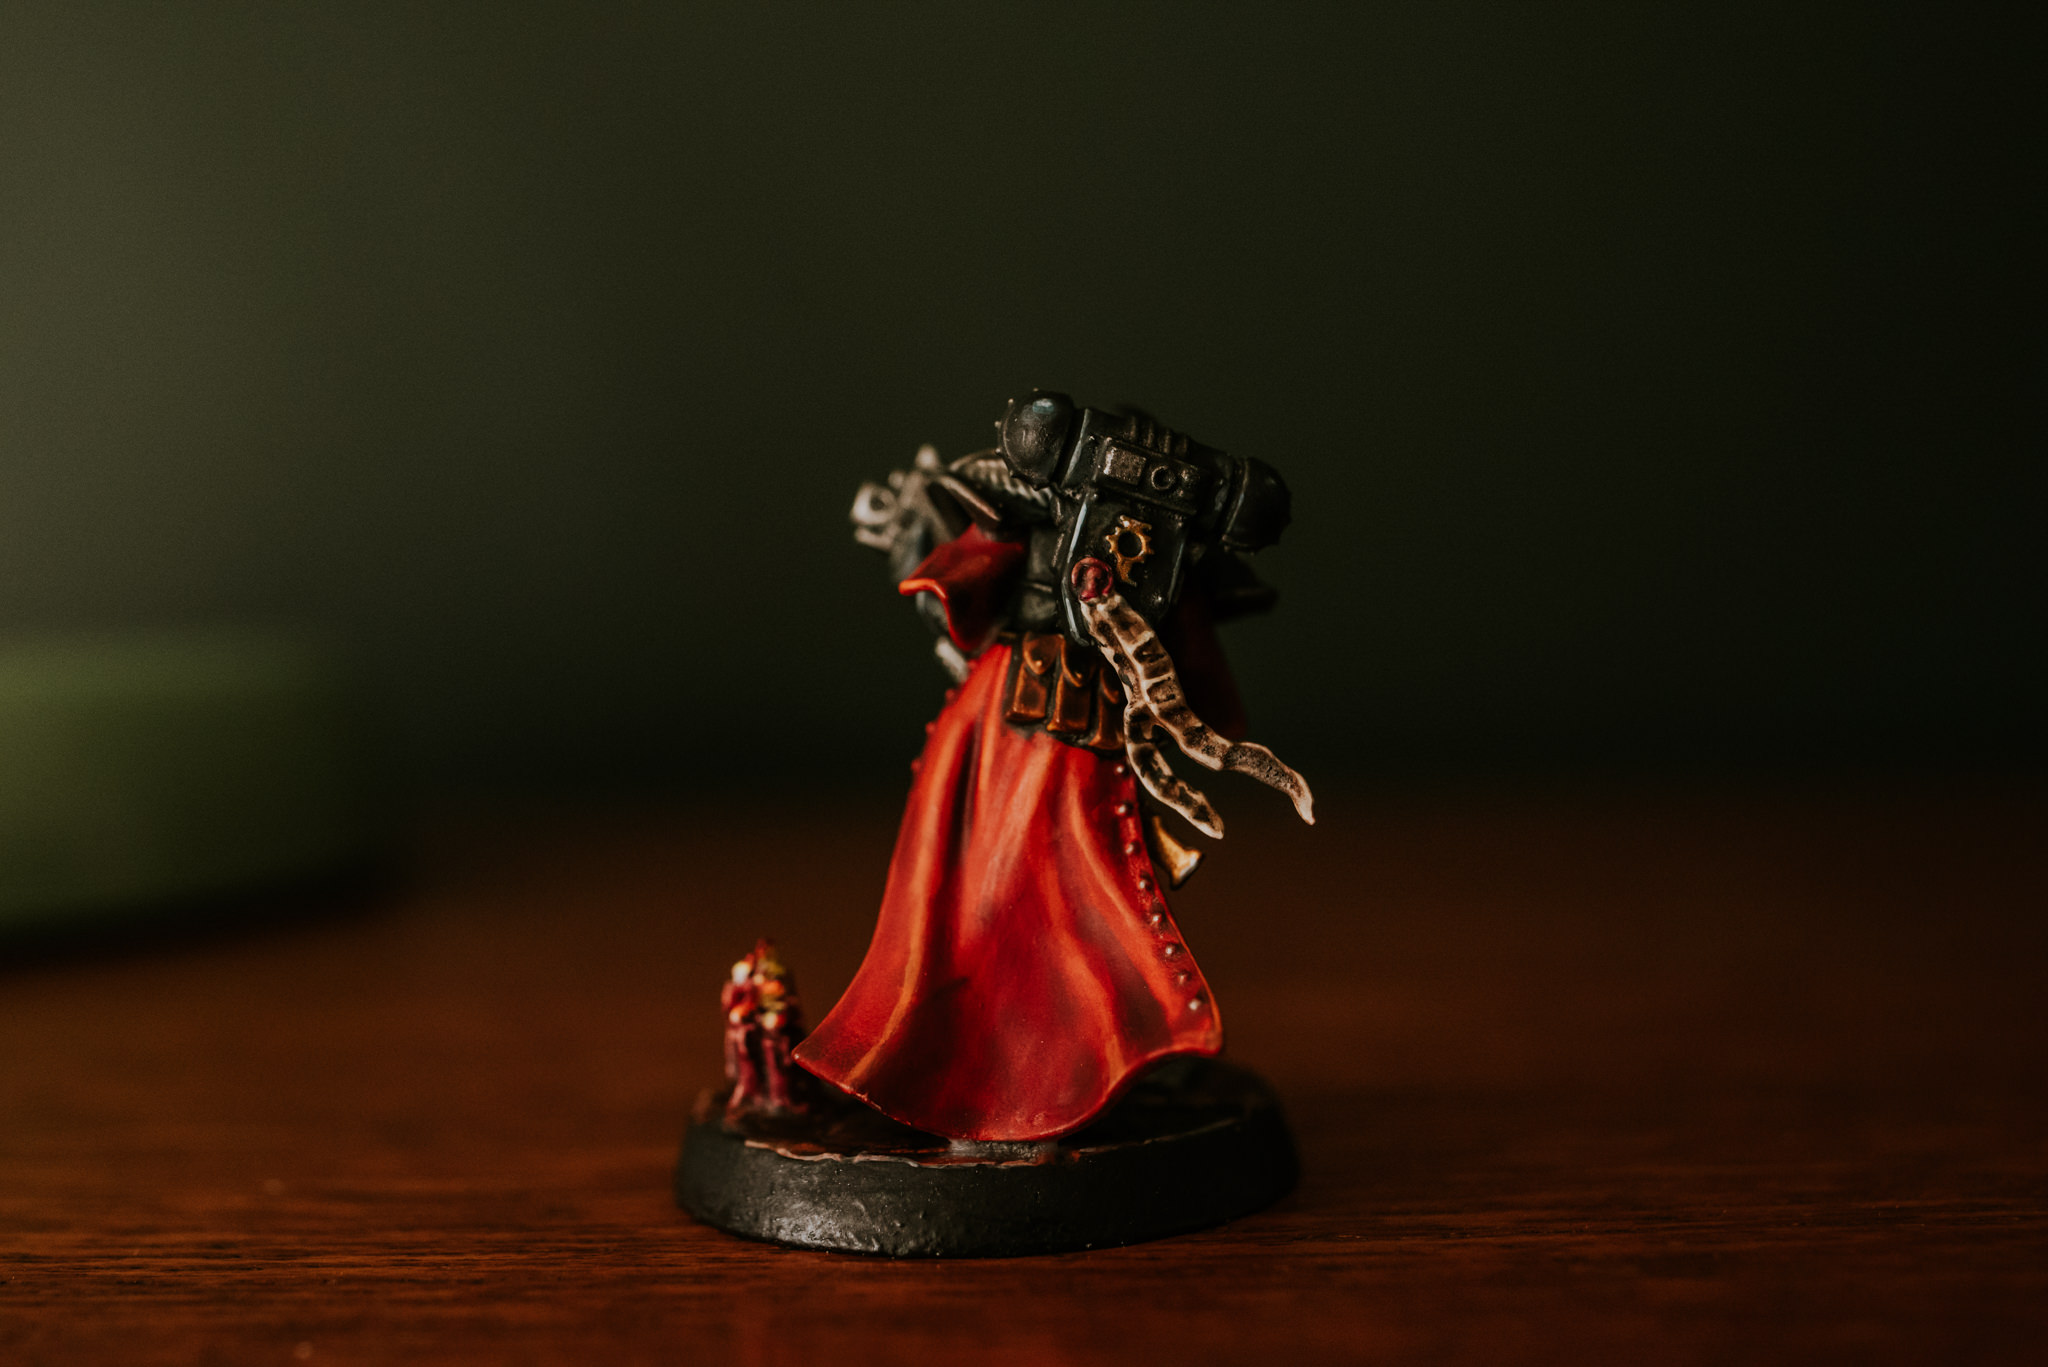
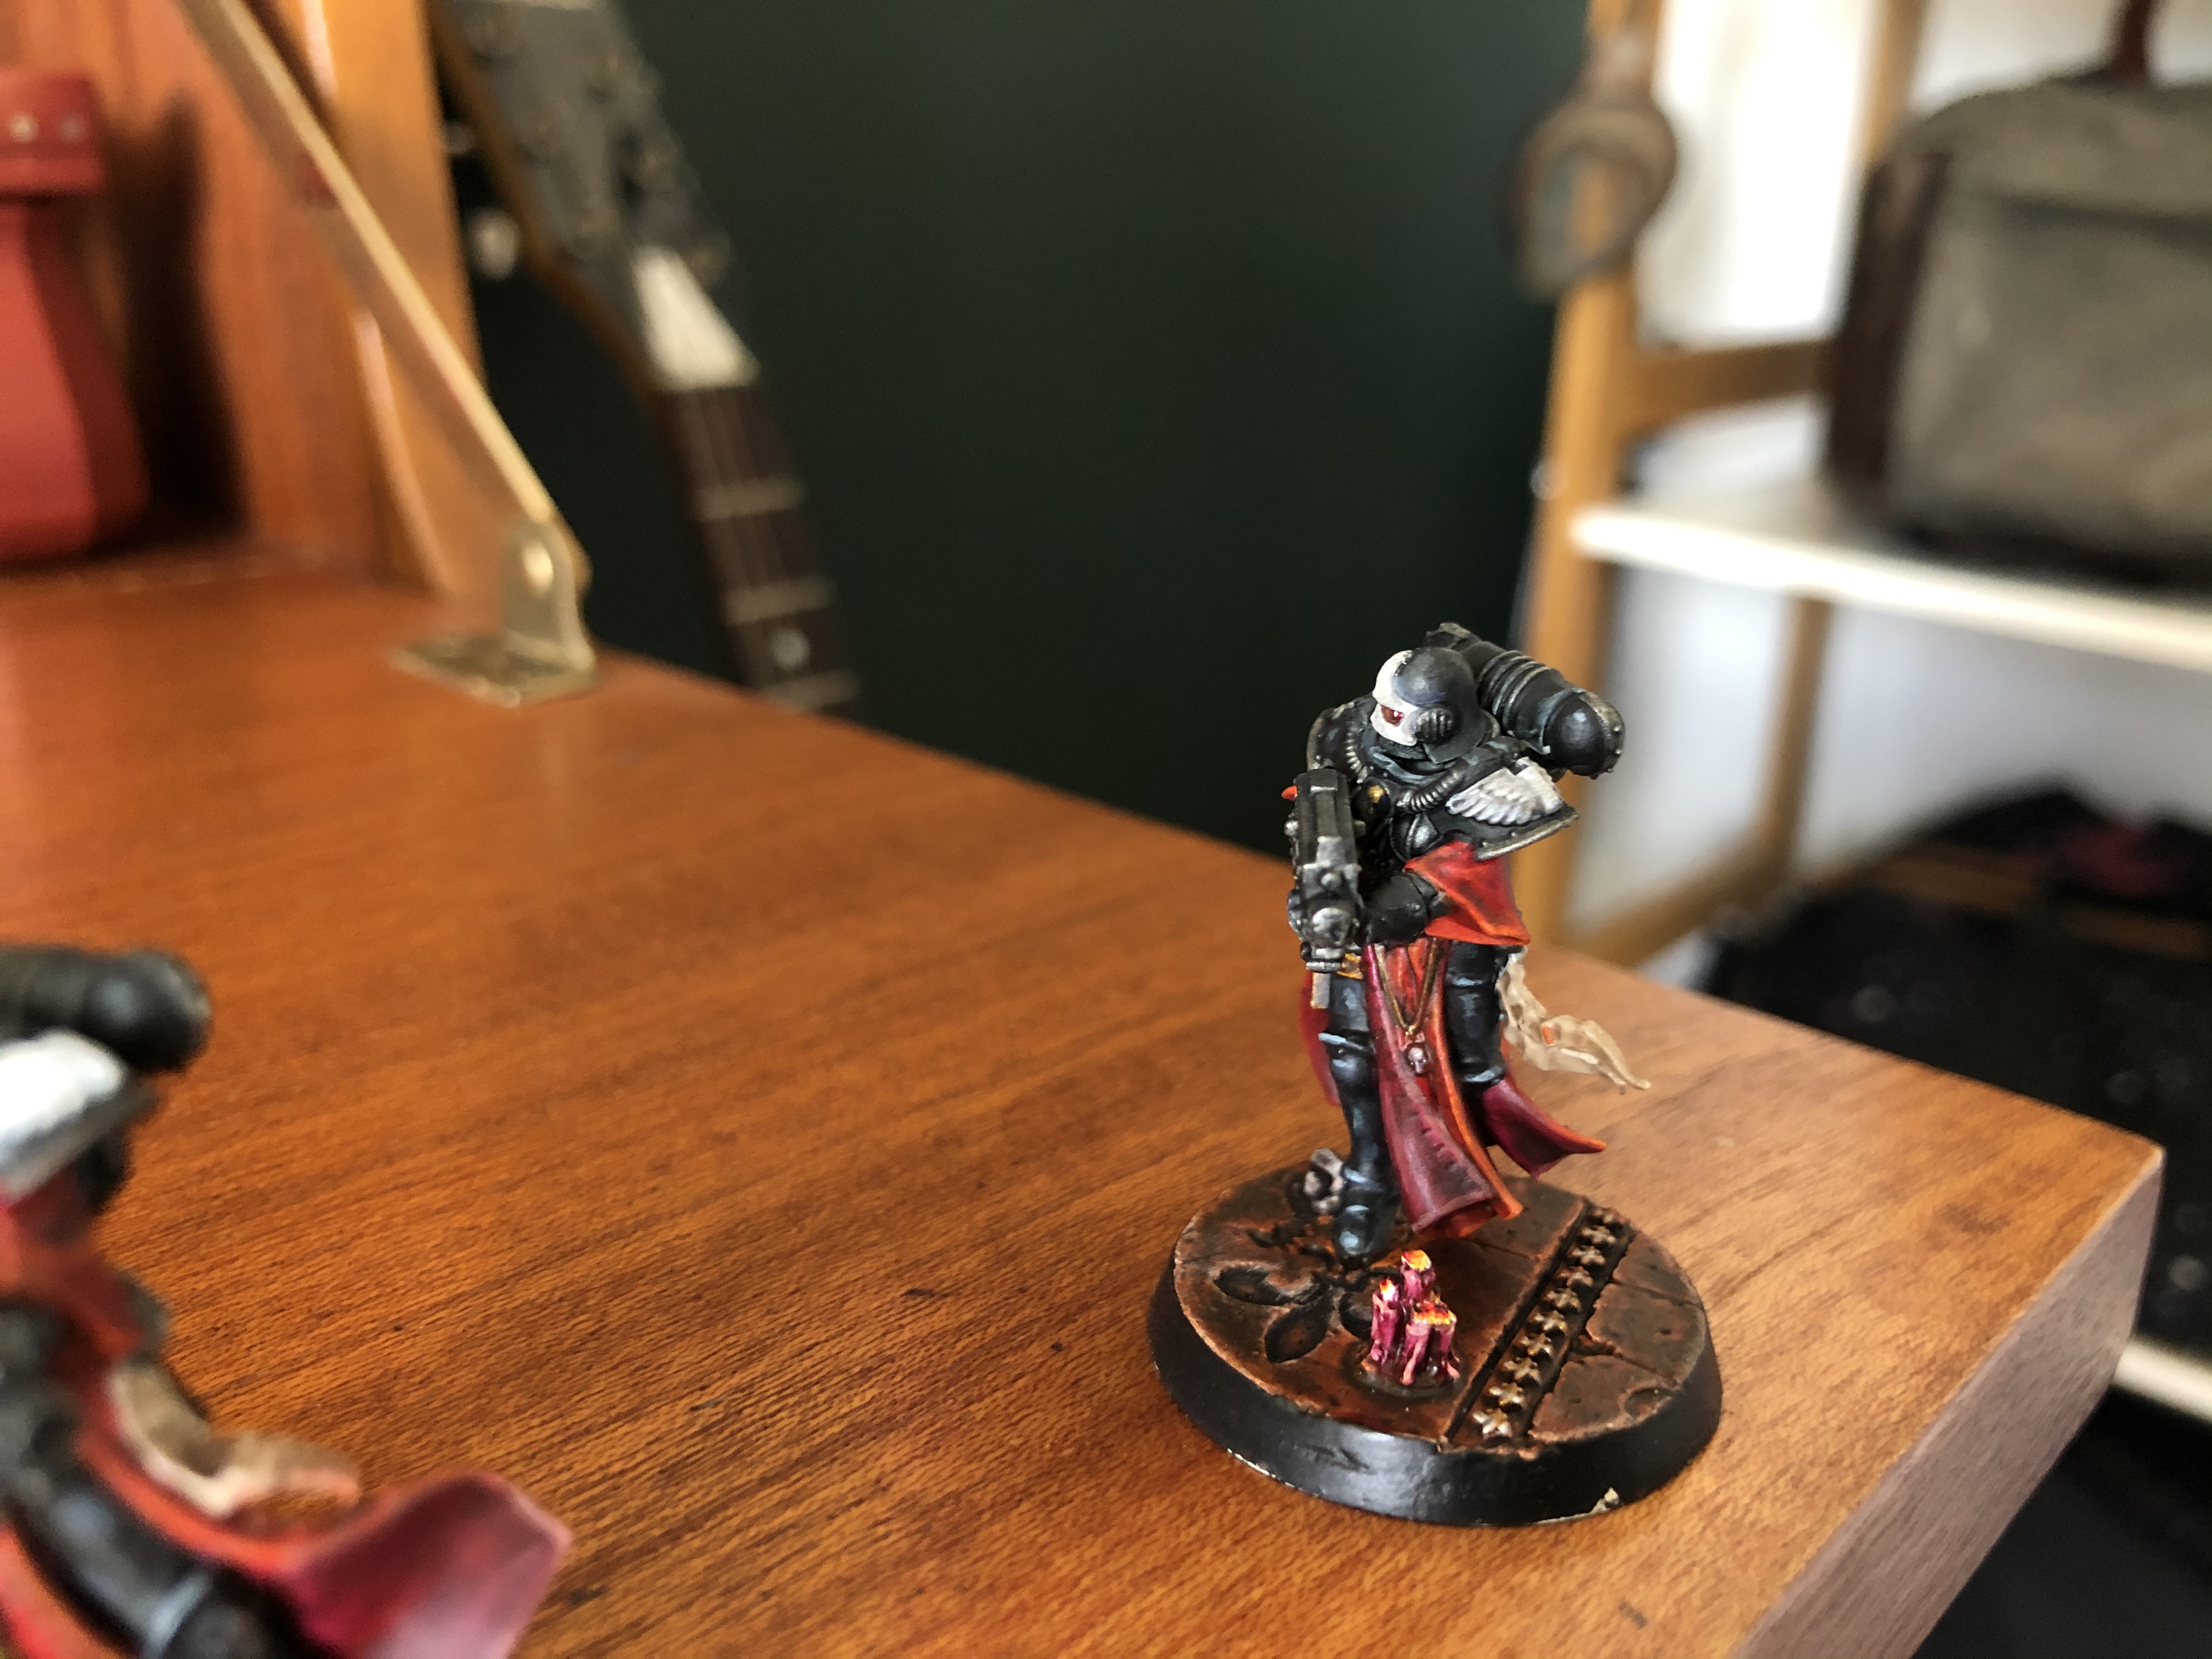
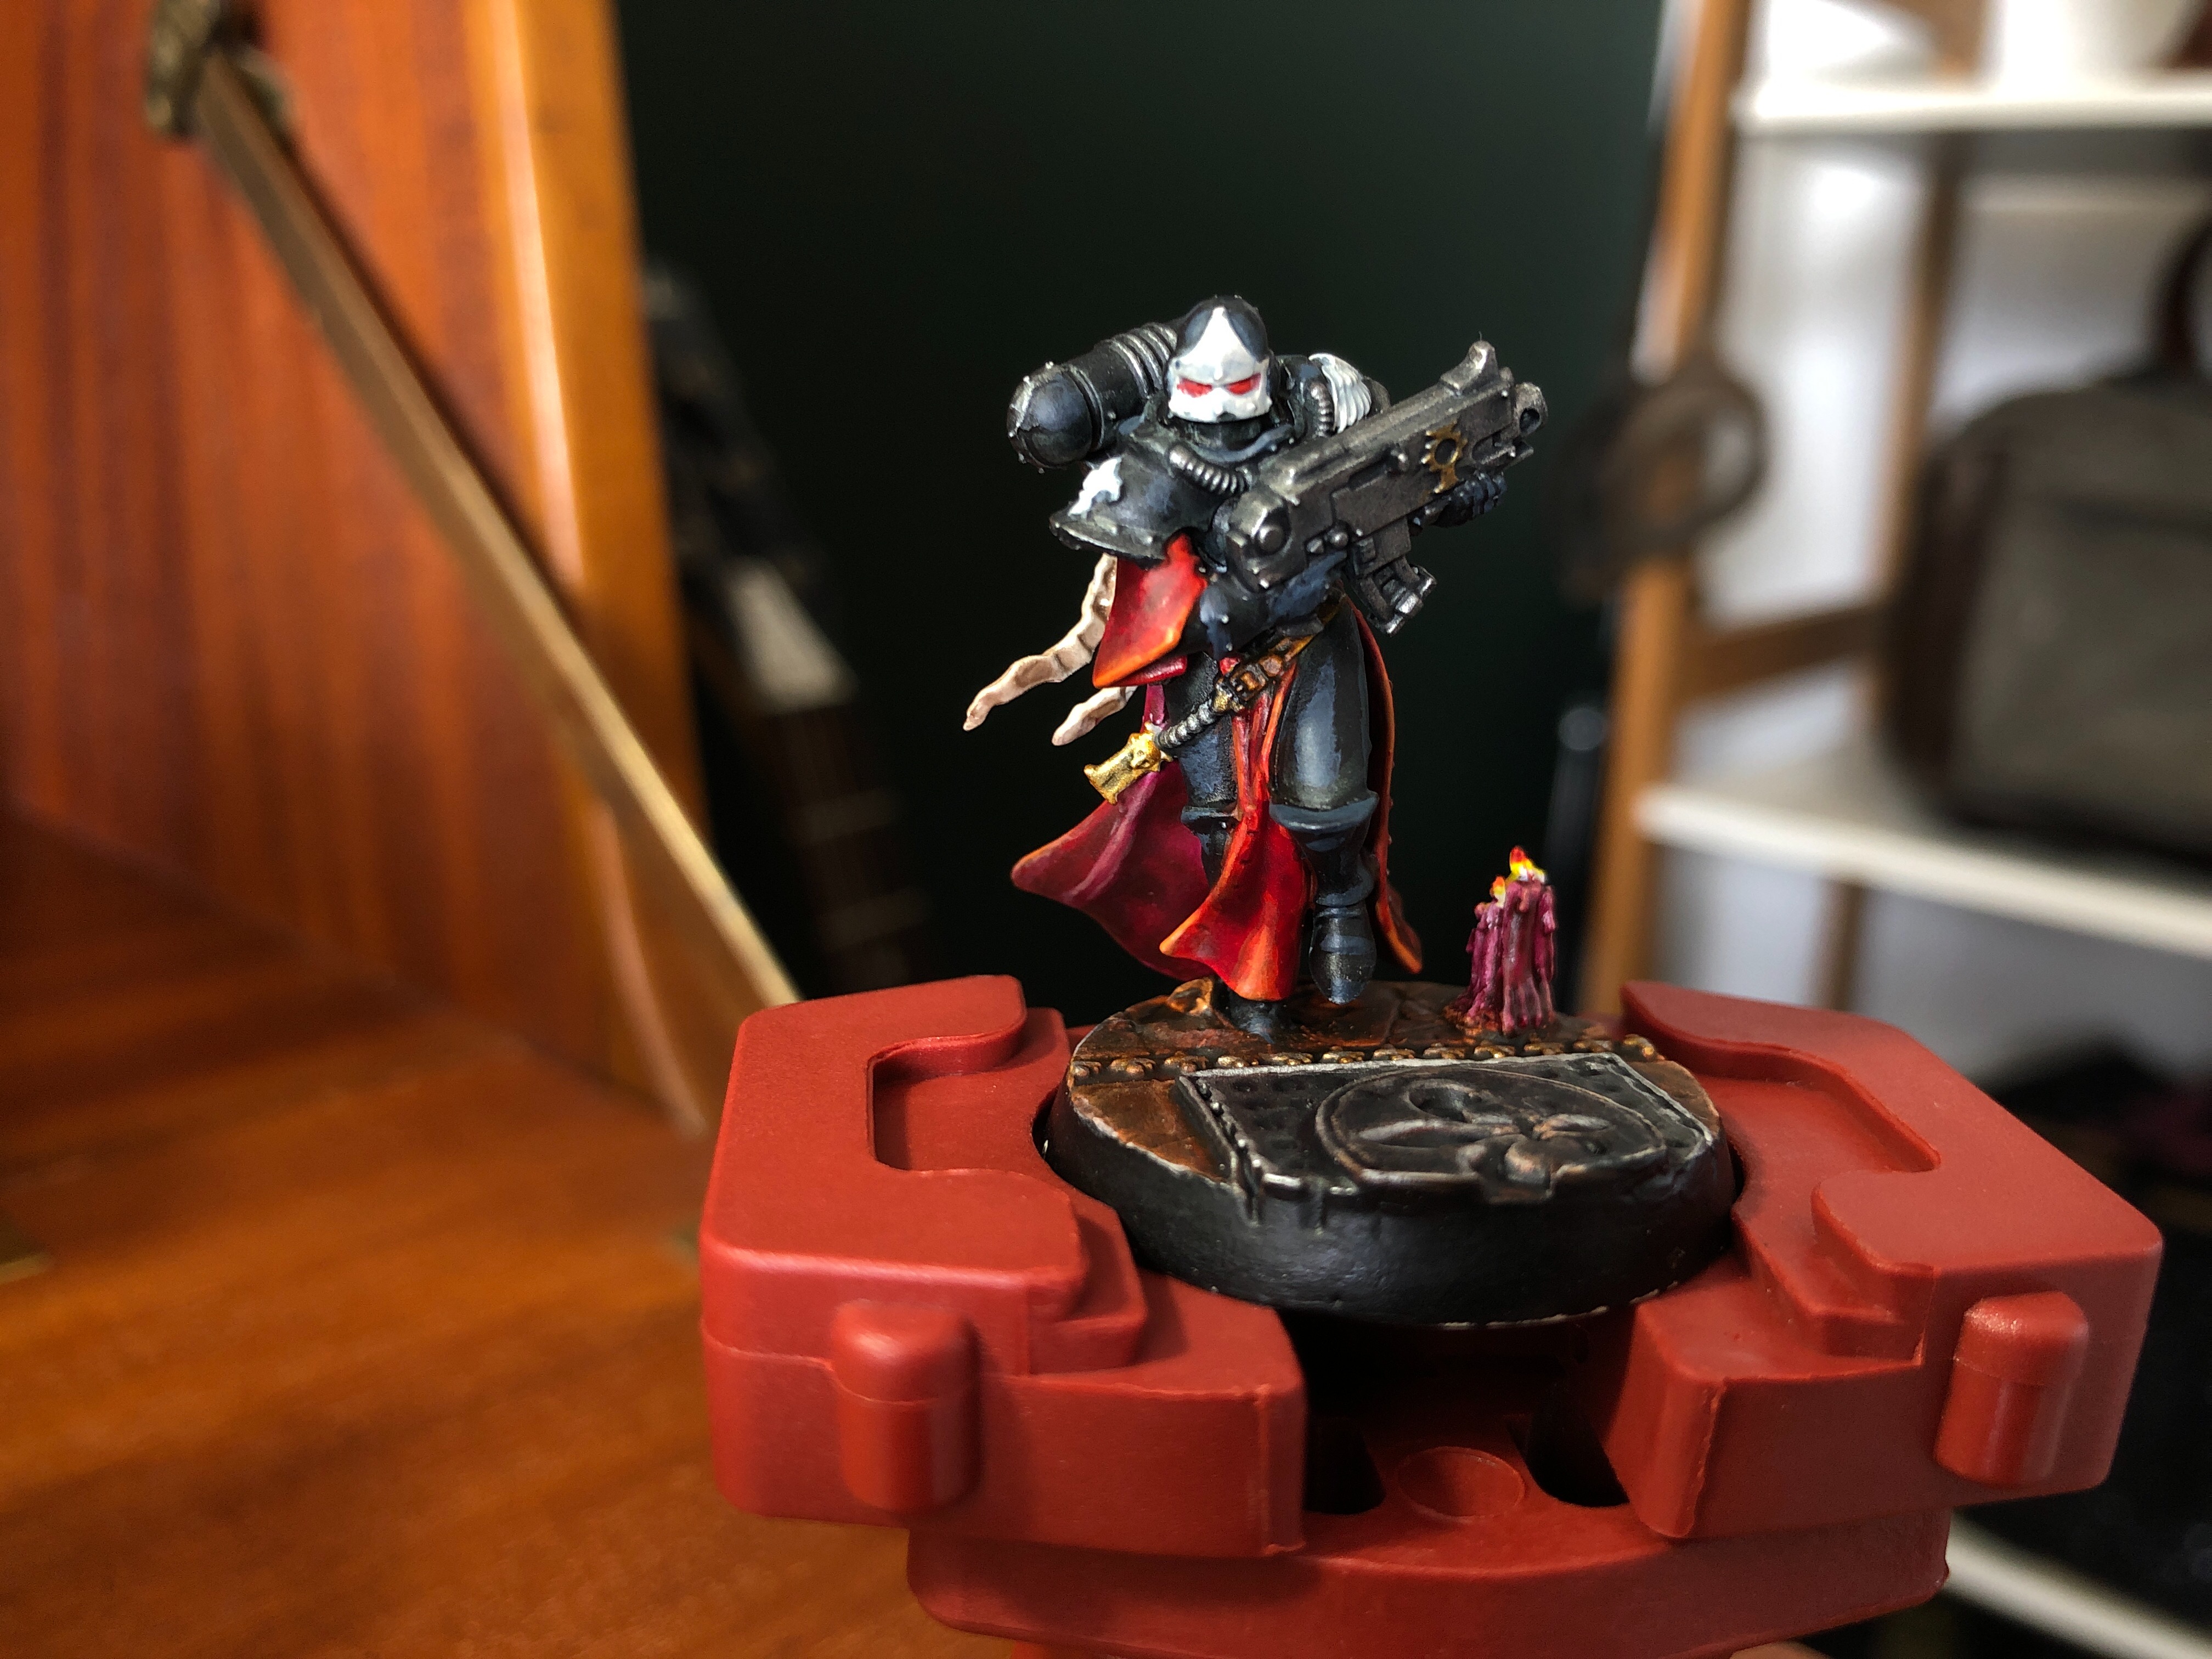
LONG TIME NO SEE ~ PAINTING ADEPTUS SORORITAS FACES
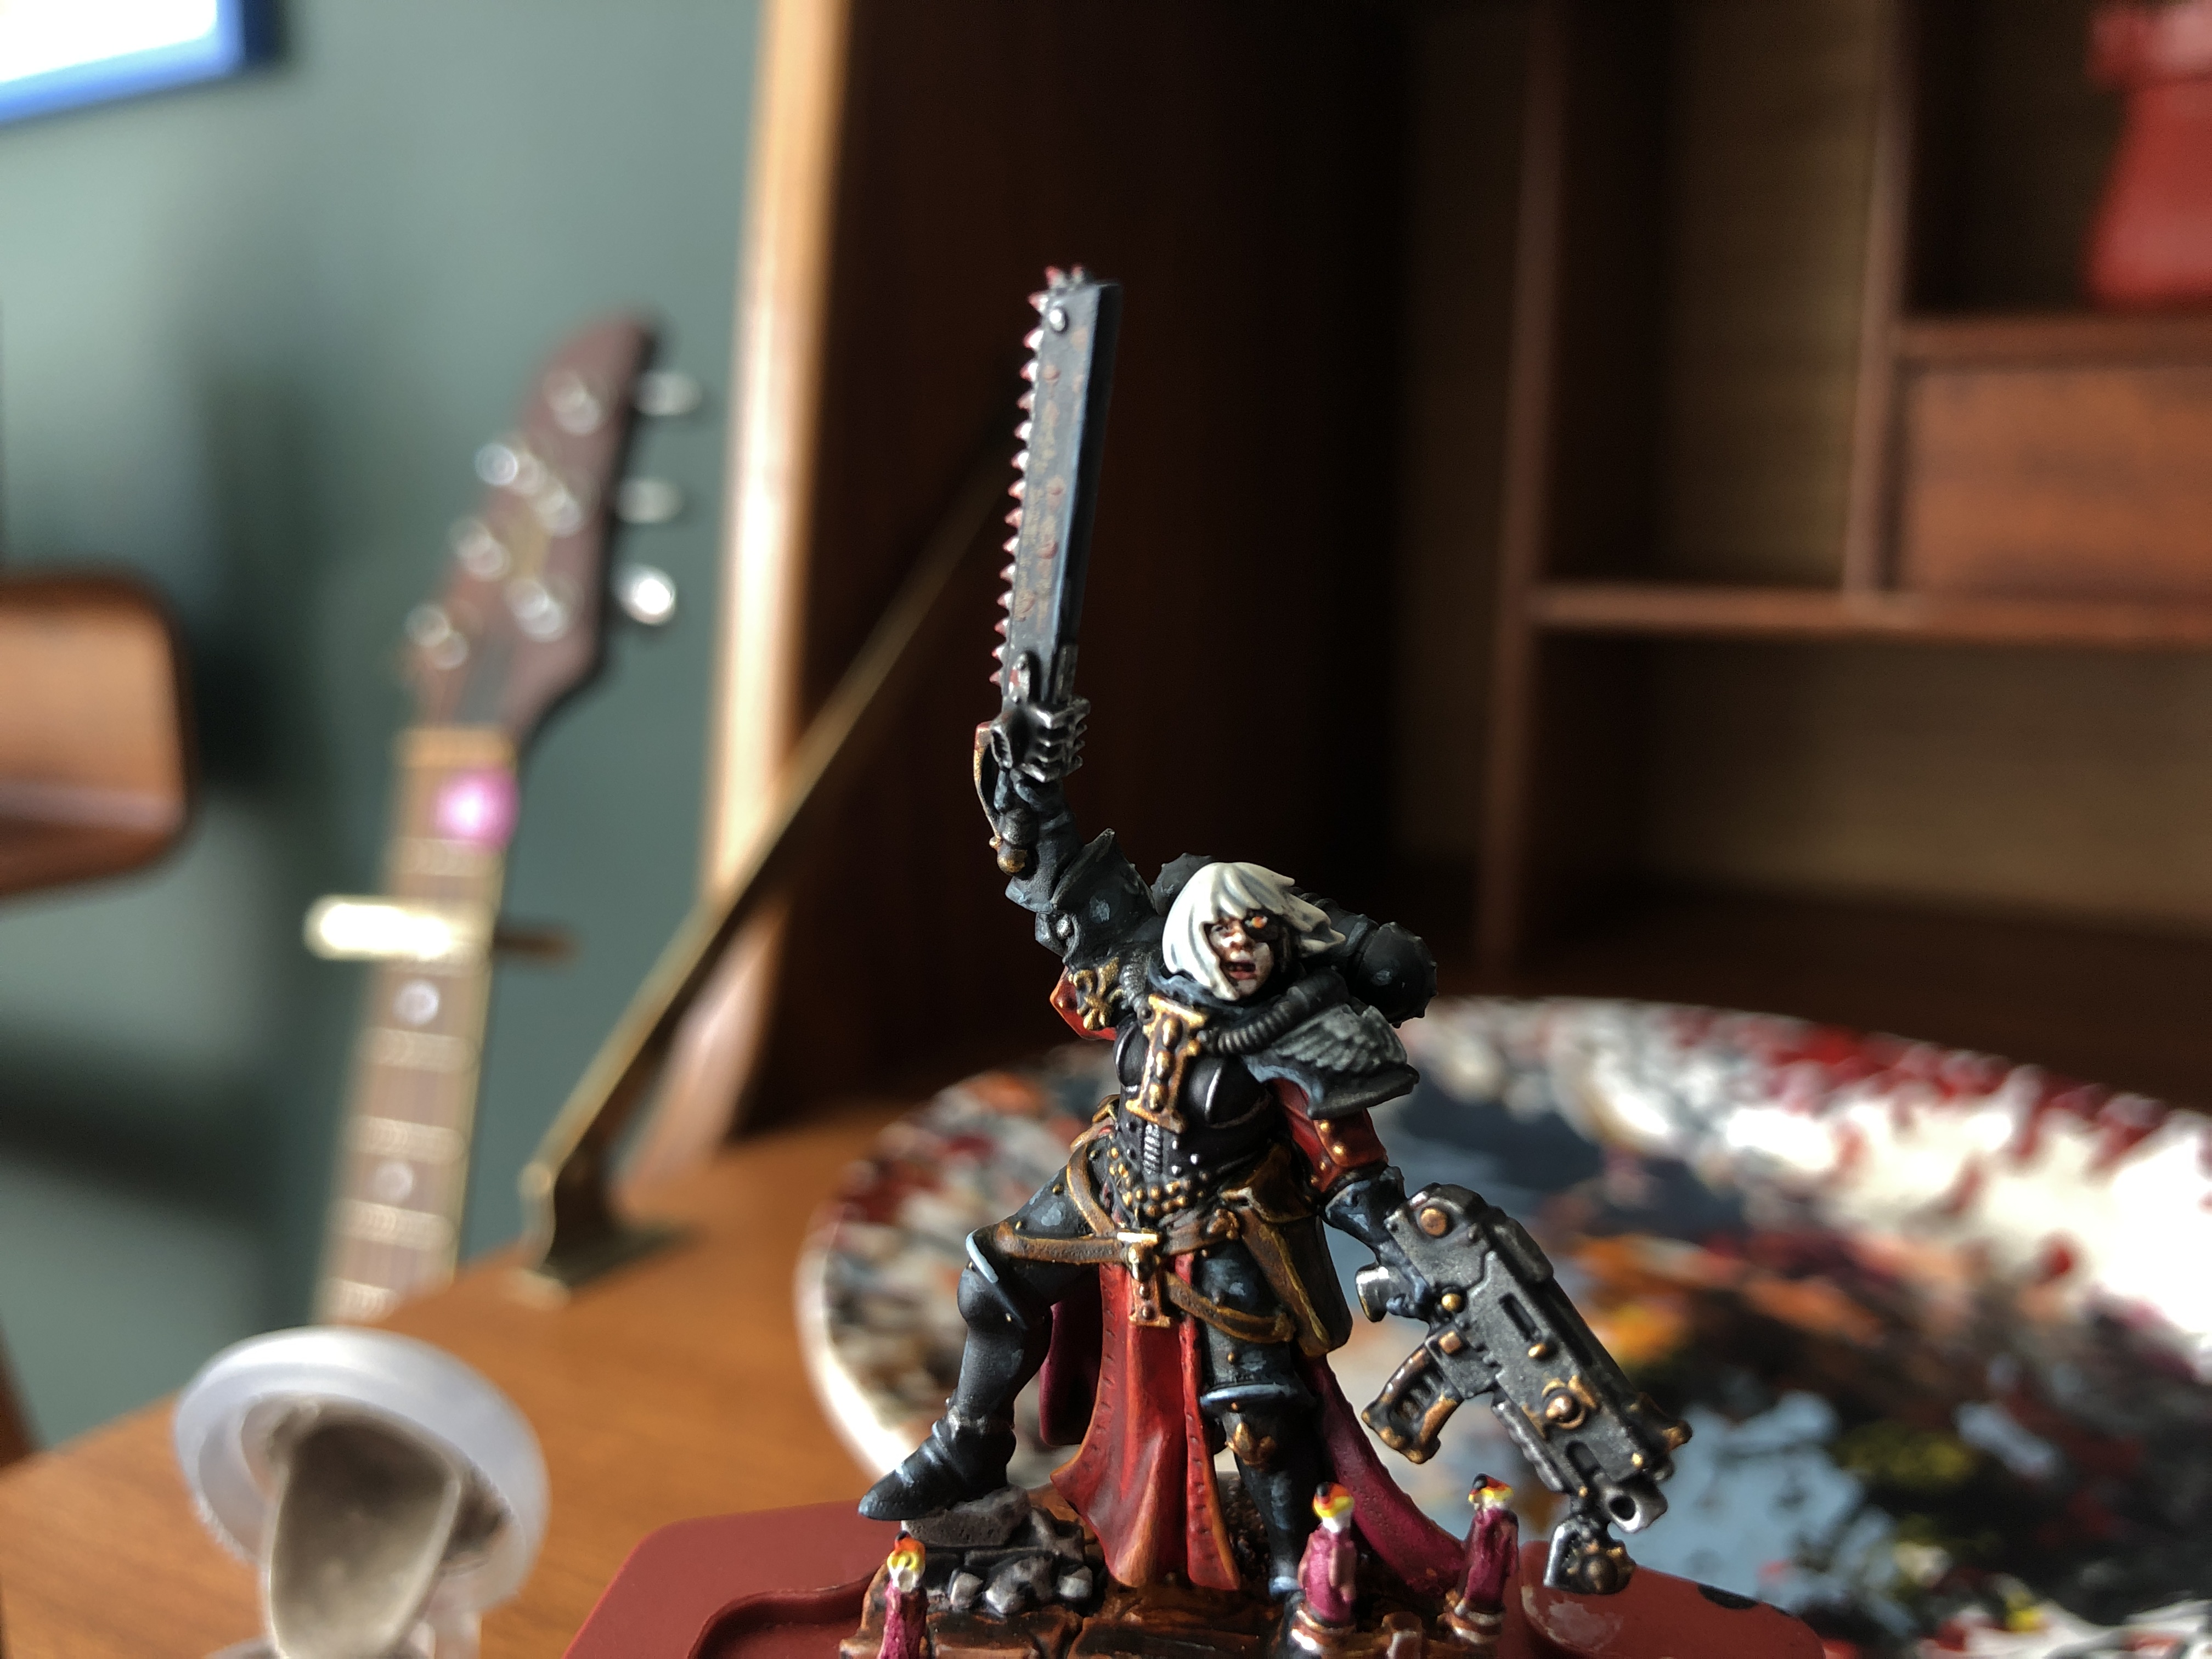
LOVELY LADY CHOPS
*****
After a big break from painting during lockdown while I built an entire website for my day job i’m back to procrastinating in my jammies. That means of course more painting of tiny toy nuns with guns. WIN! Without further ado let’s tackle them lovely lady chops.
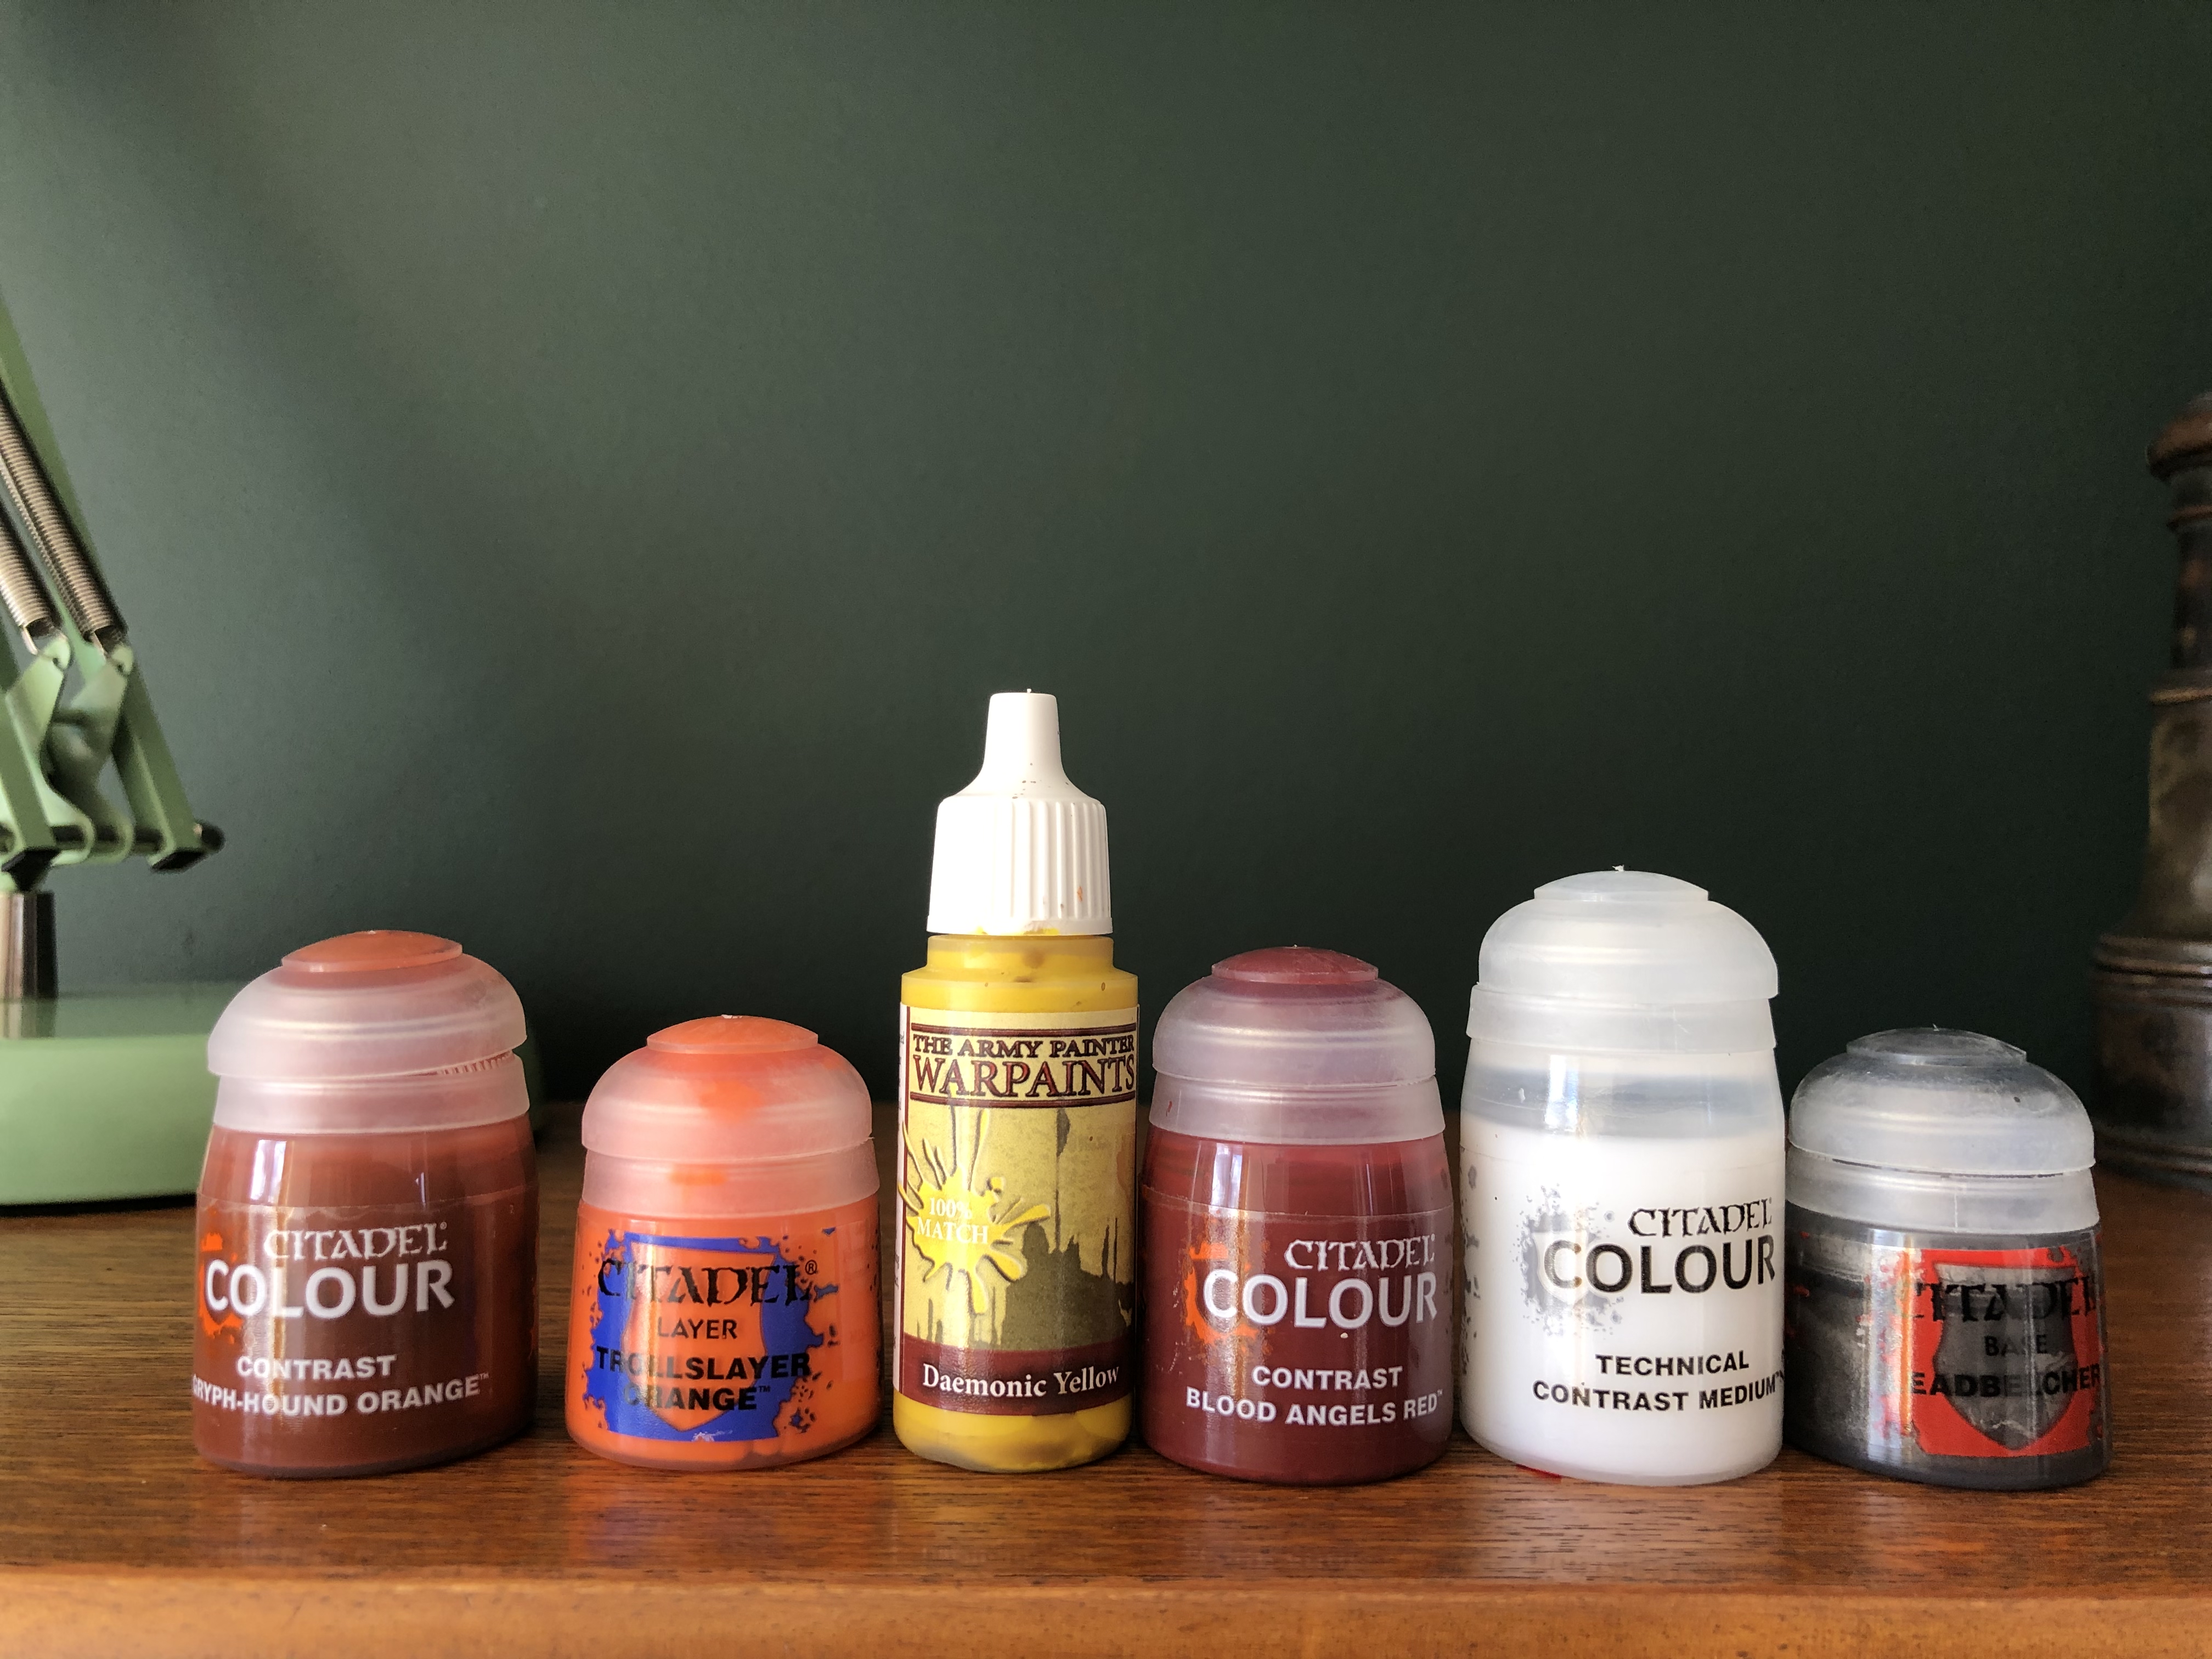
PAINT LIST
*****
• WRAITHBONE
• CONTRAST GUILLIMAN FLESH
• CONTRAST APOTHECARY WHITE
• ABADDON BLACK
• LEADBELCHER
• NULN OIL
• CONTRAST BLOOD ANGELS RED
• TROLLSLAYER ORANGE
• ARMY PAINTER DAEMONIC YELLOW
• WHITE SCAR
• RACKARTH FLESH
• ARMY PAINTER BARBARIAN FLESH
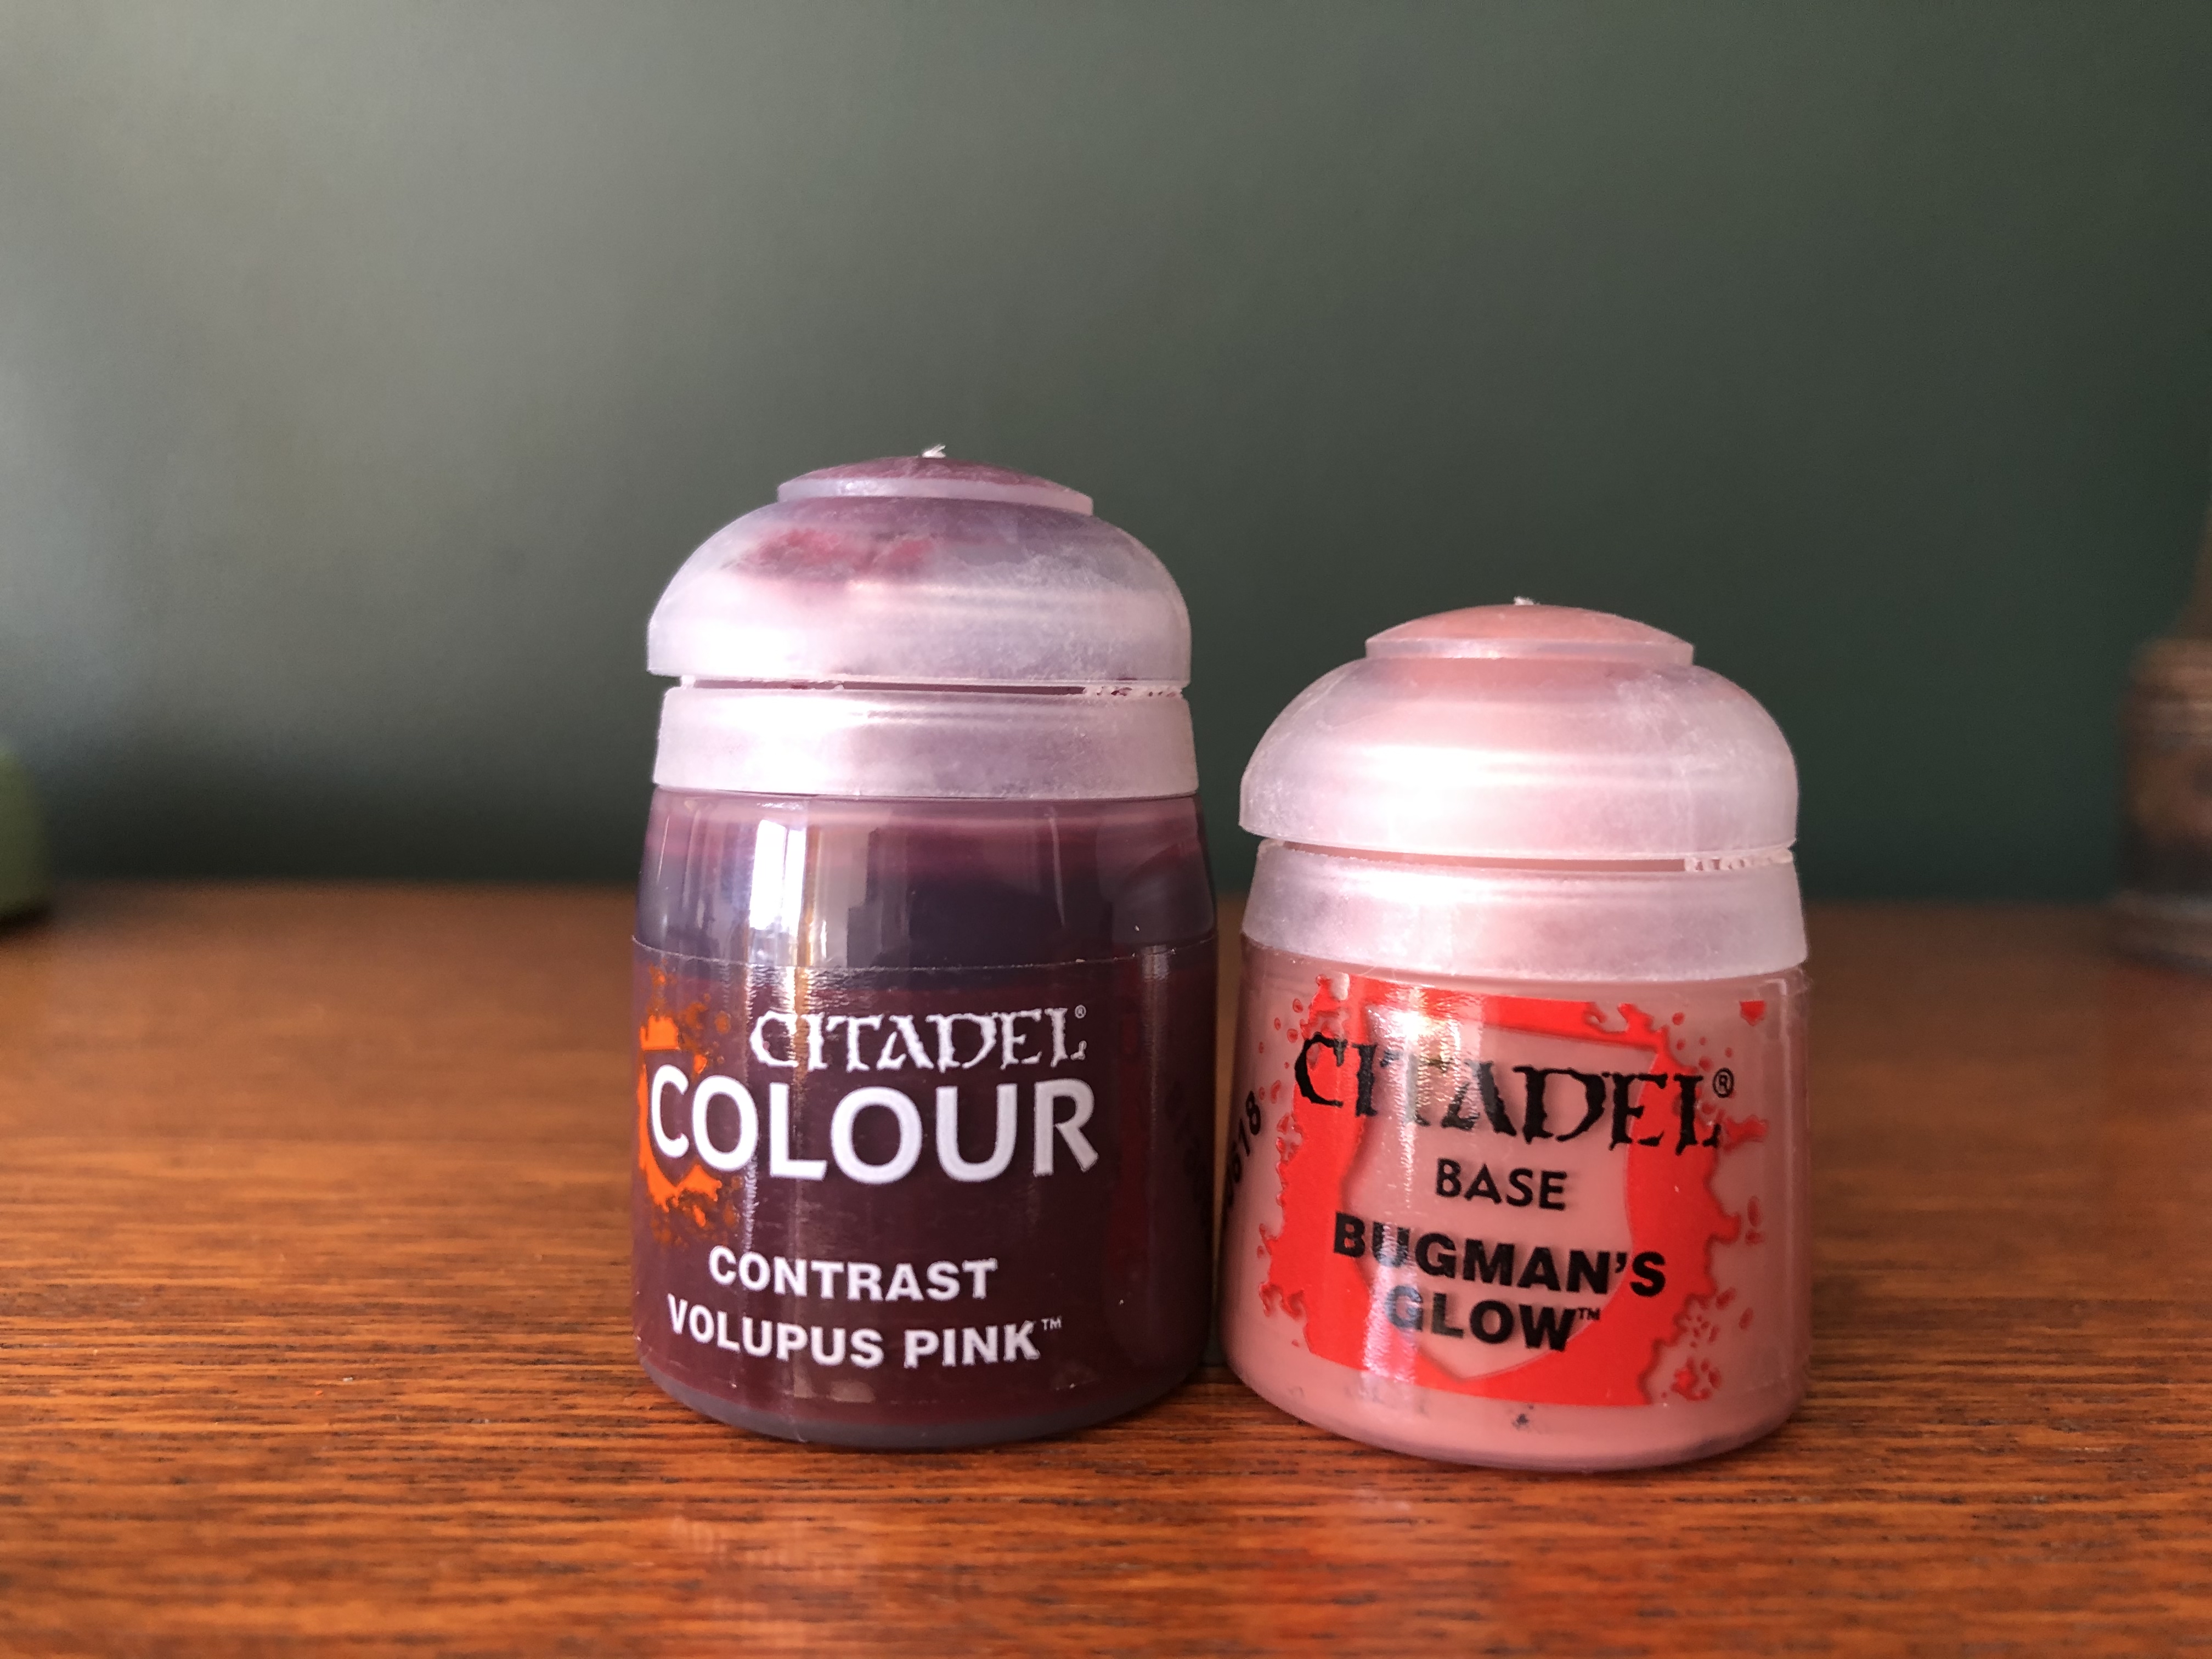
• CONTRAST VOLUPUS PINK

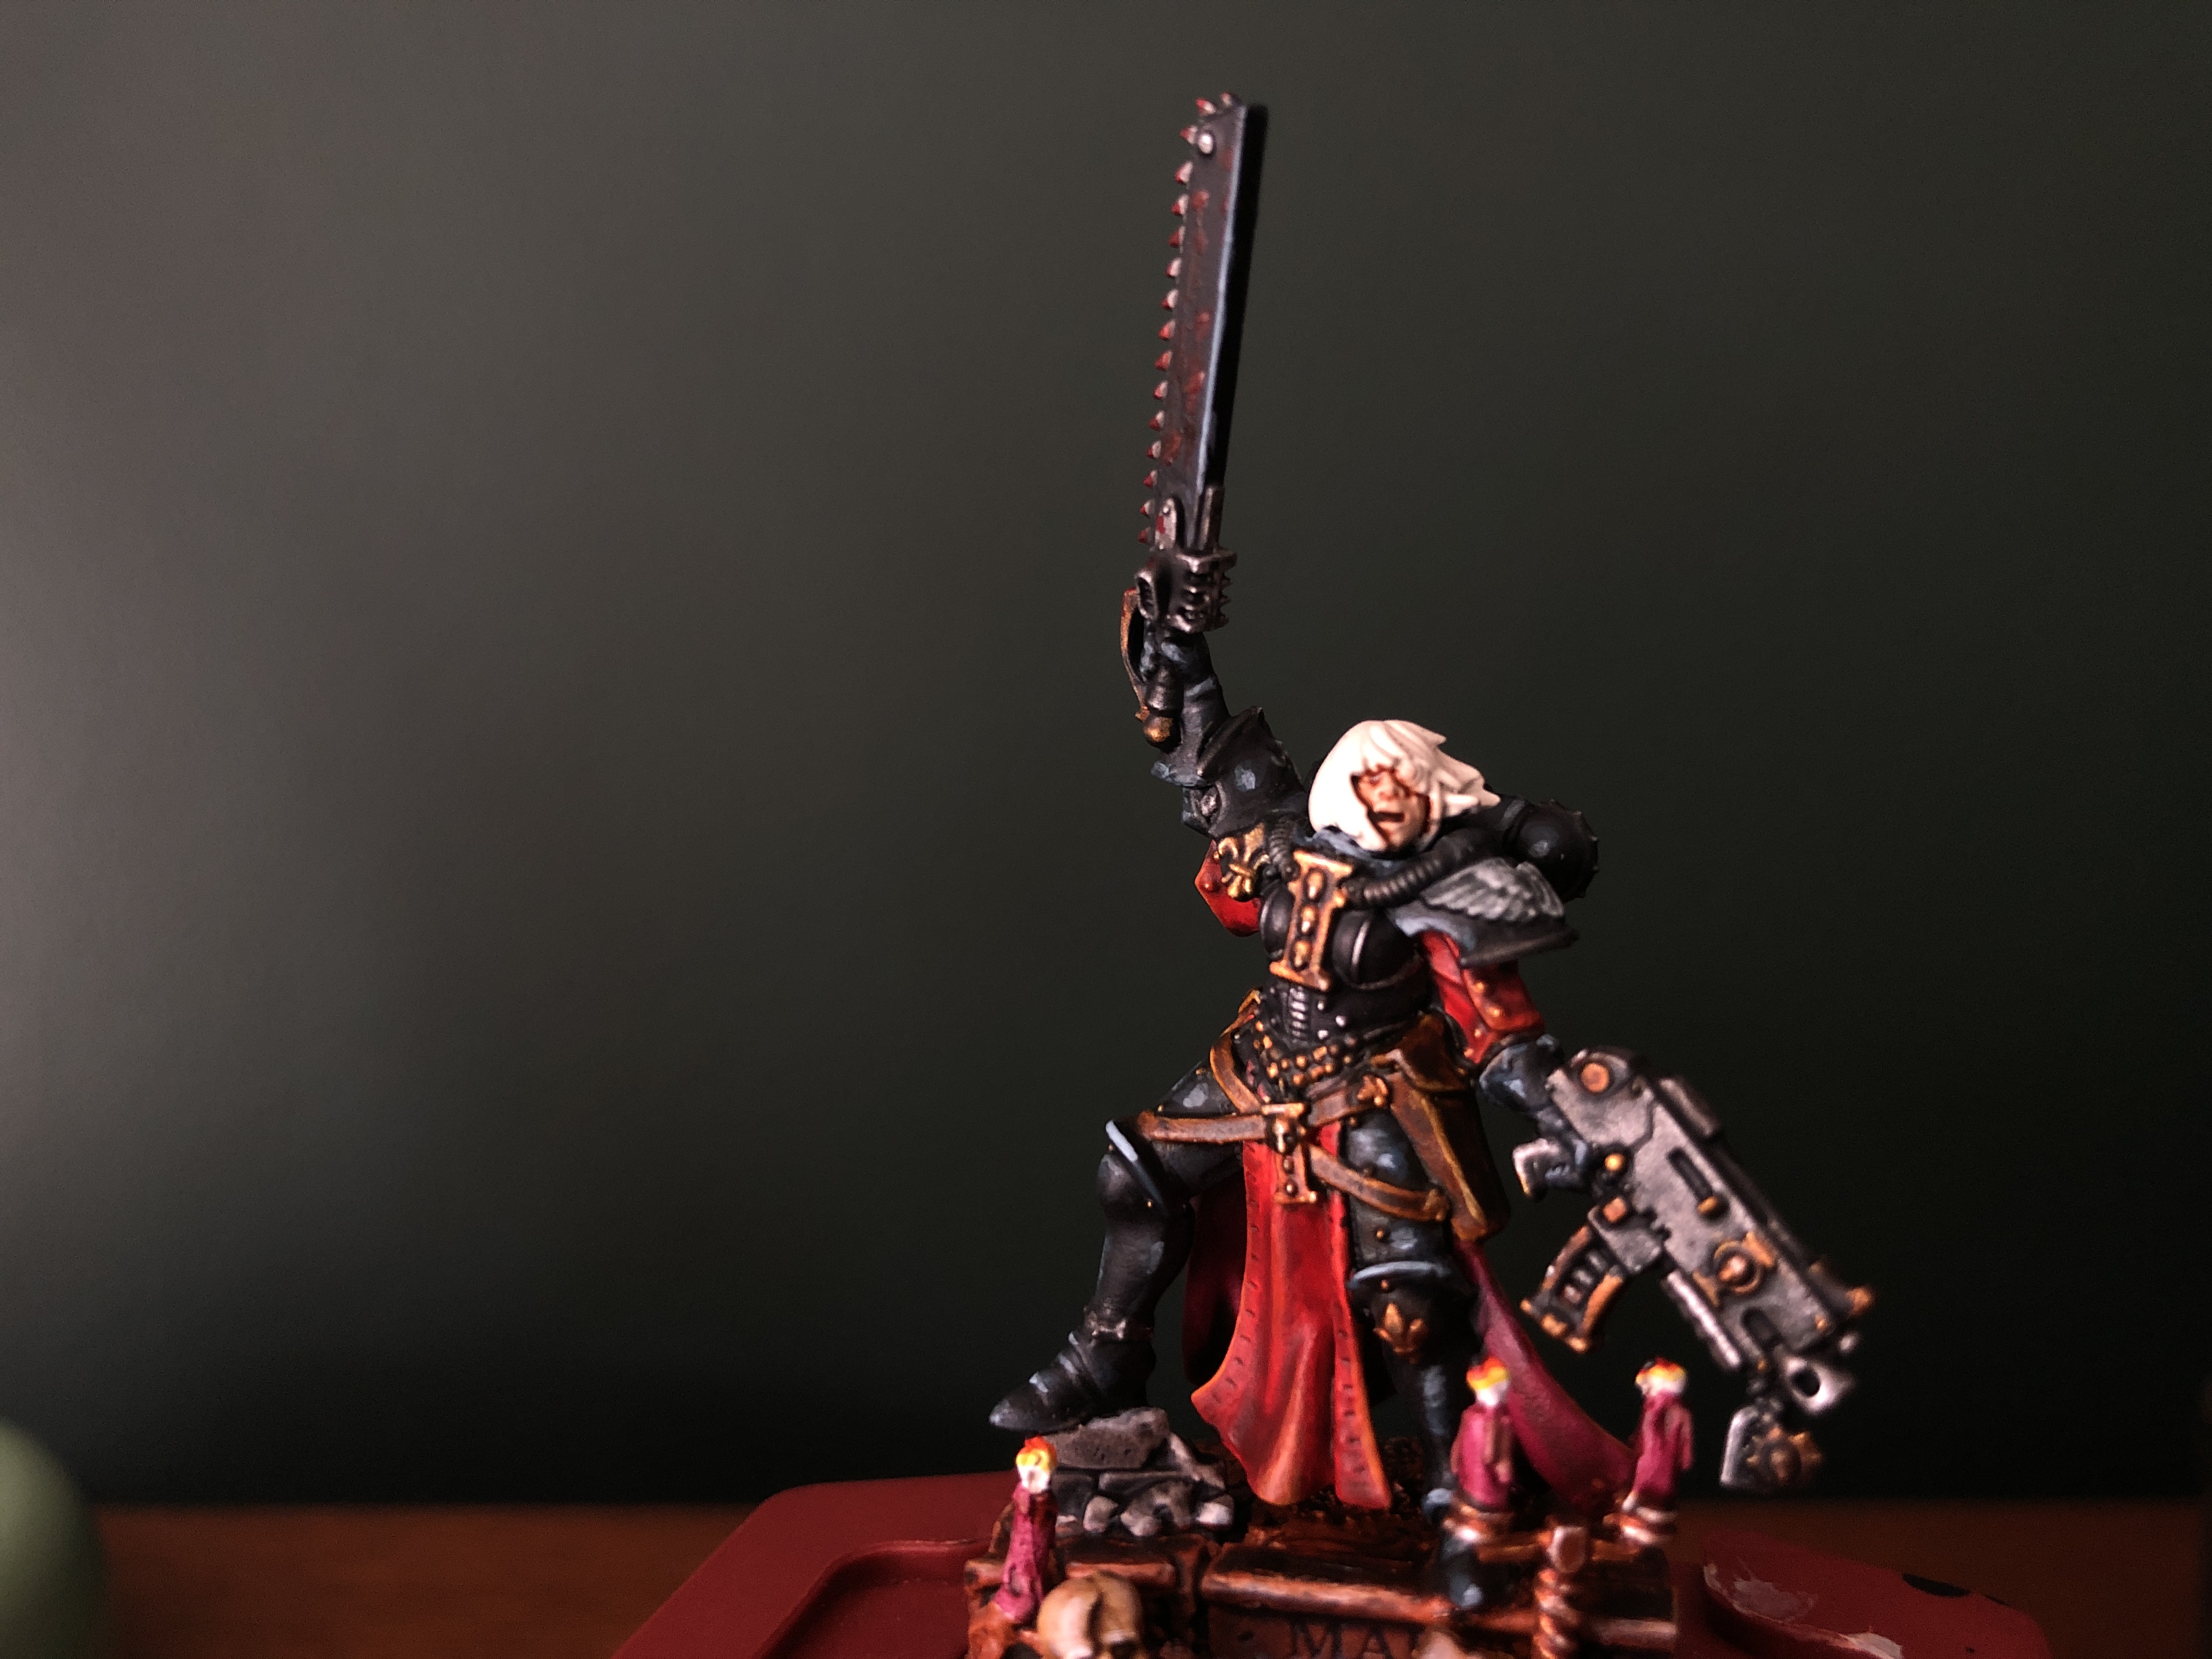
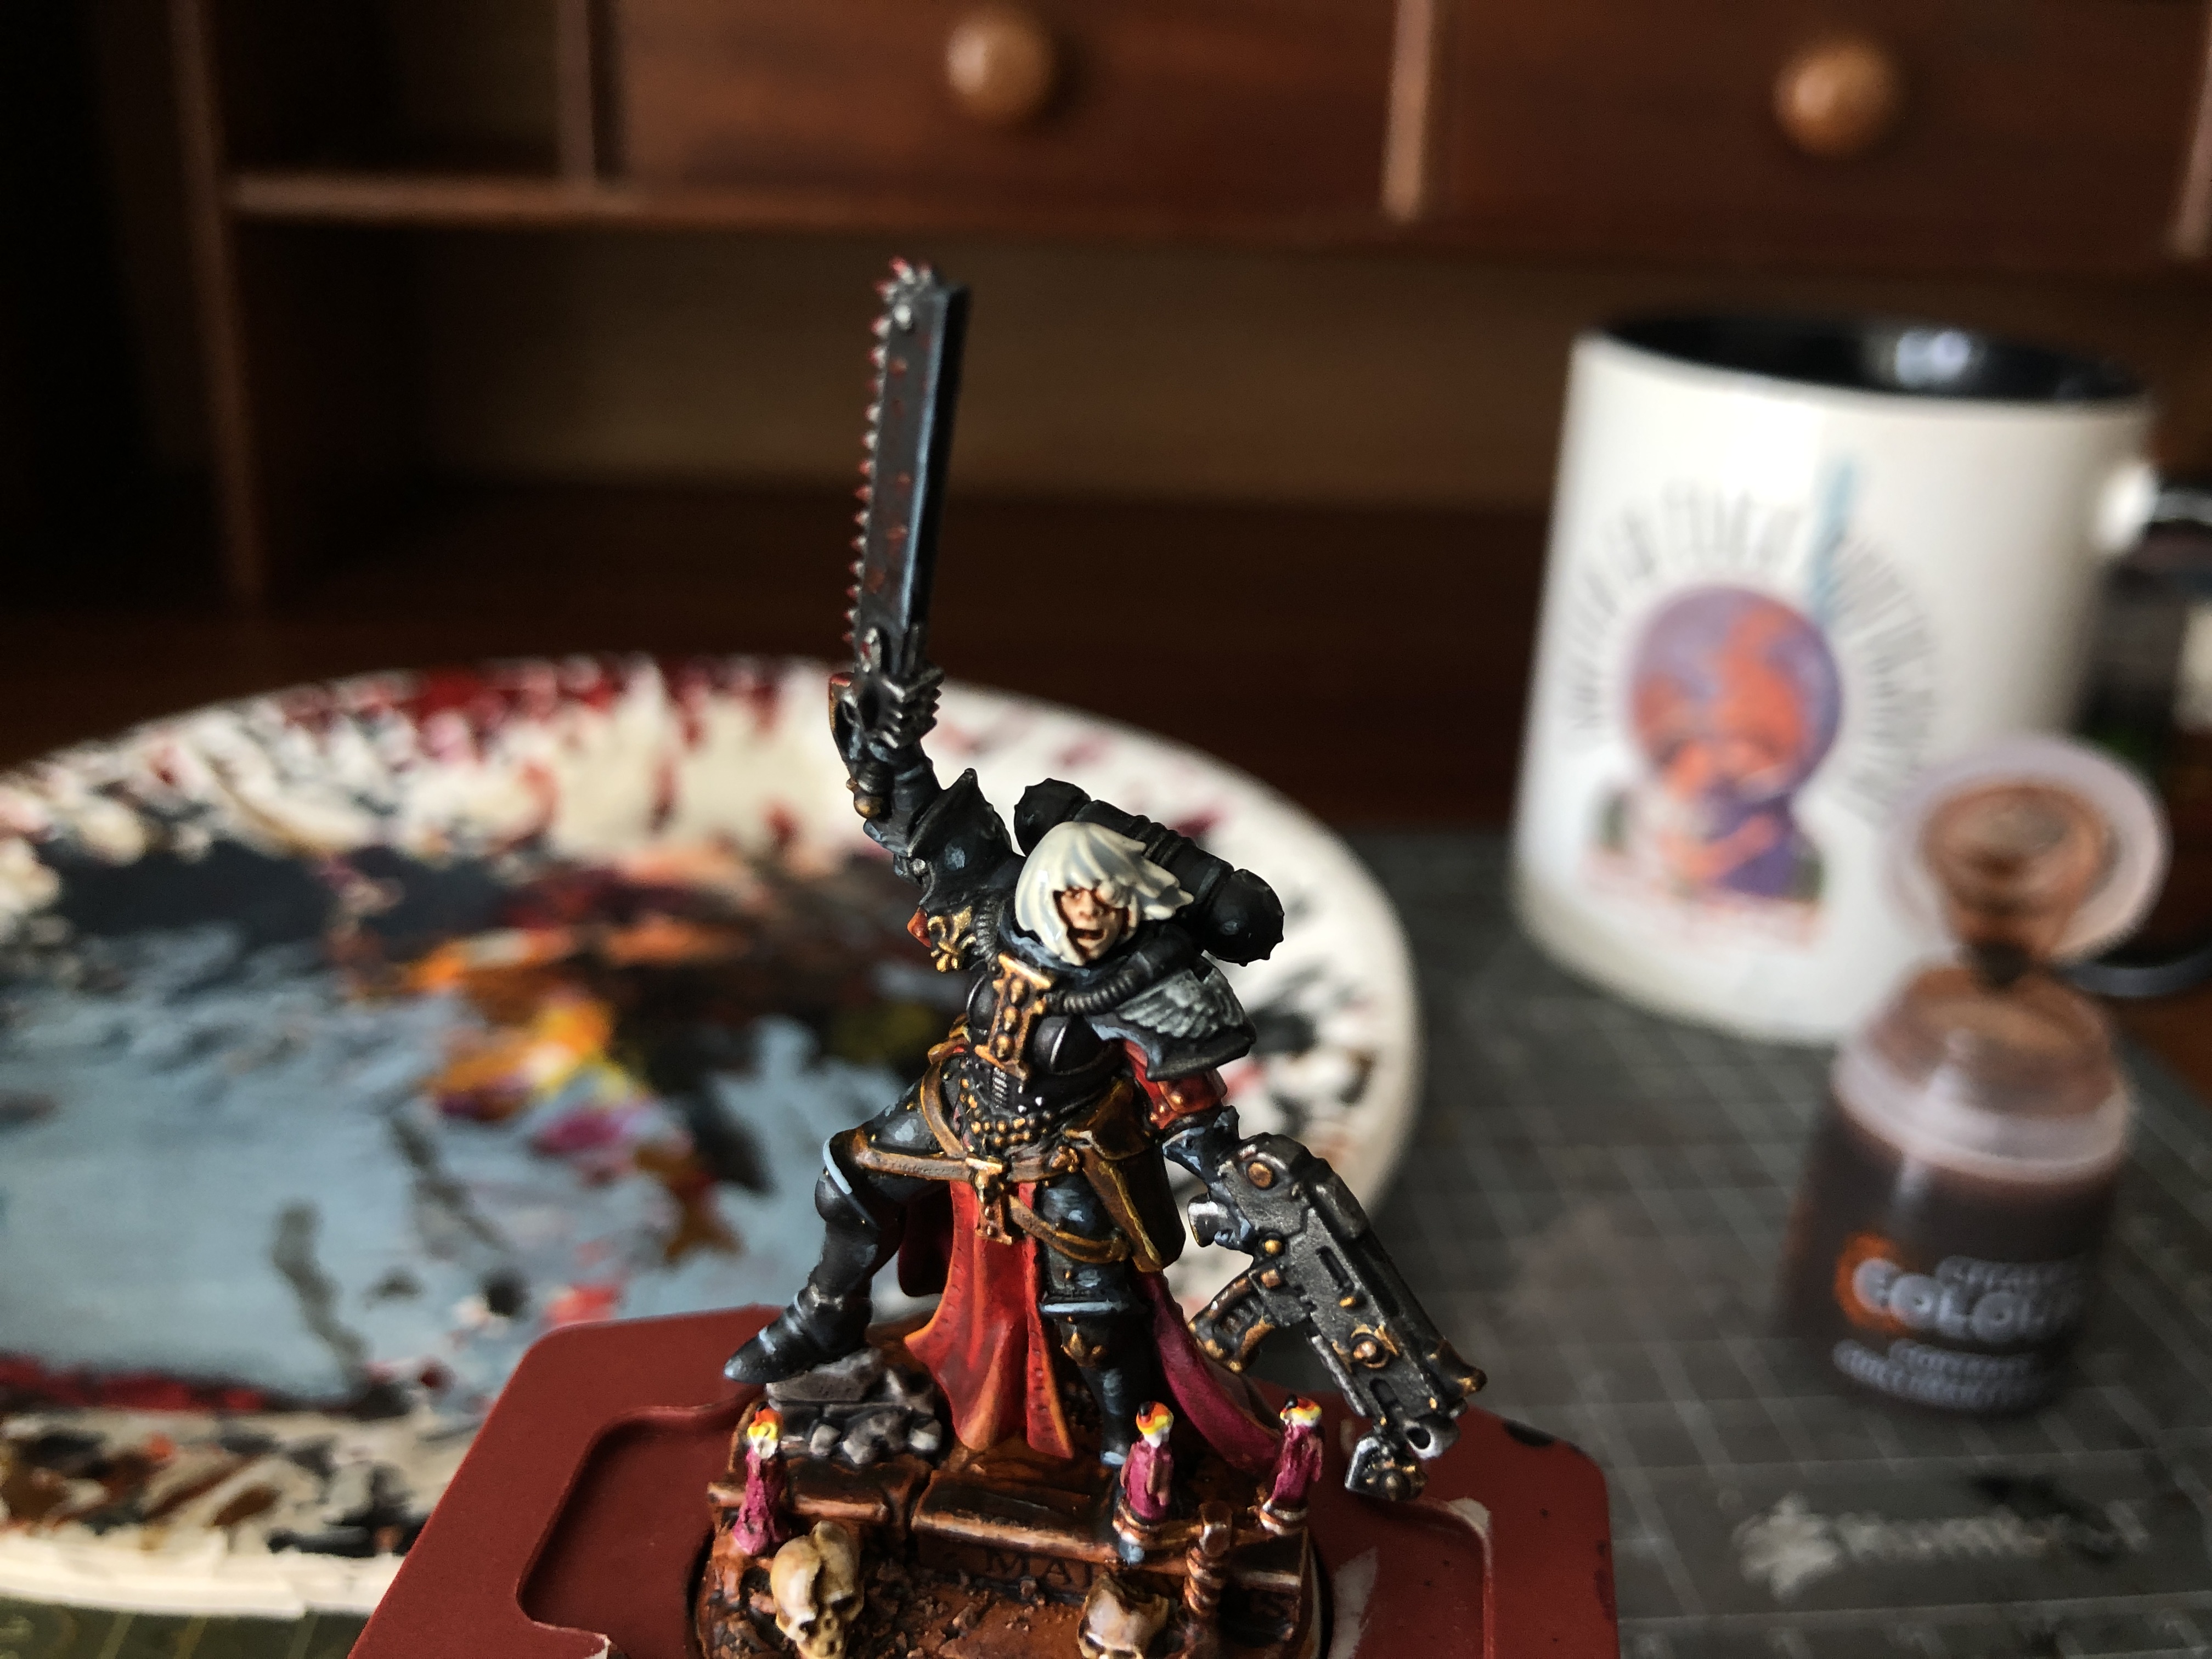

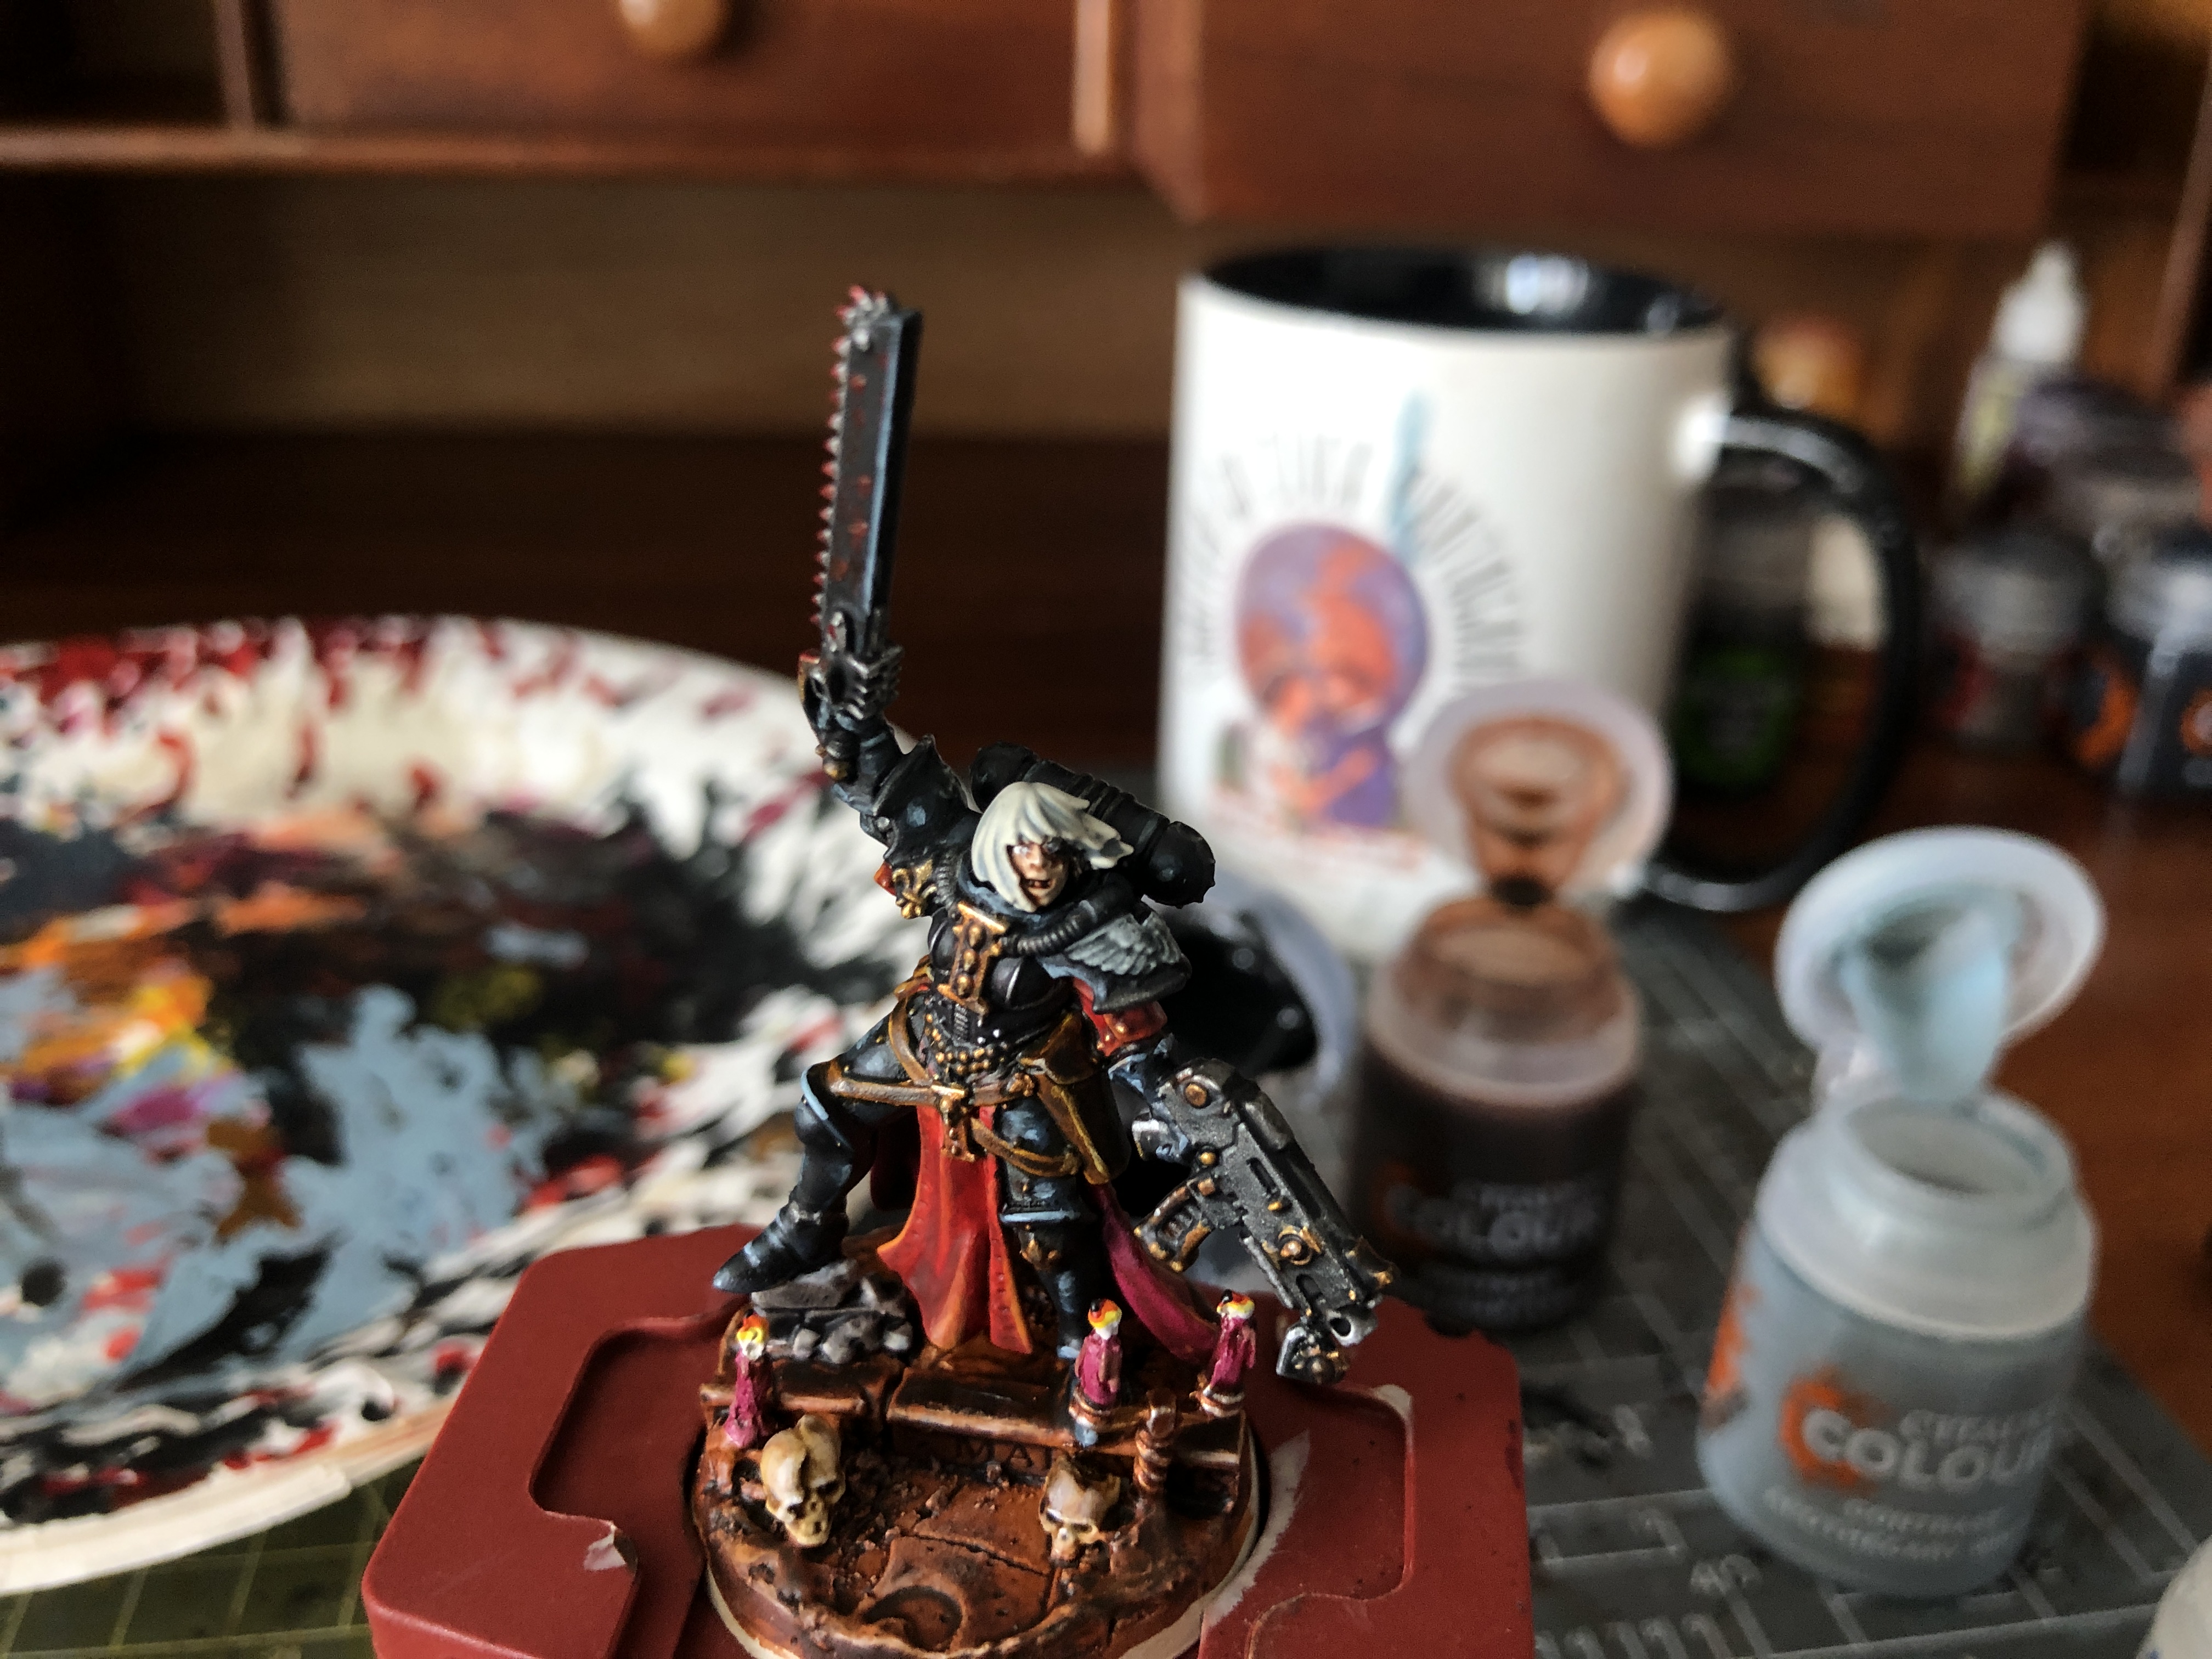
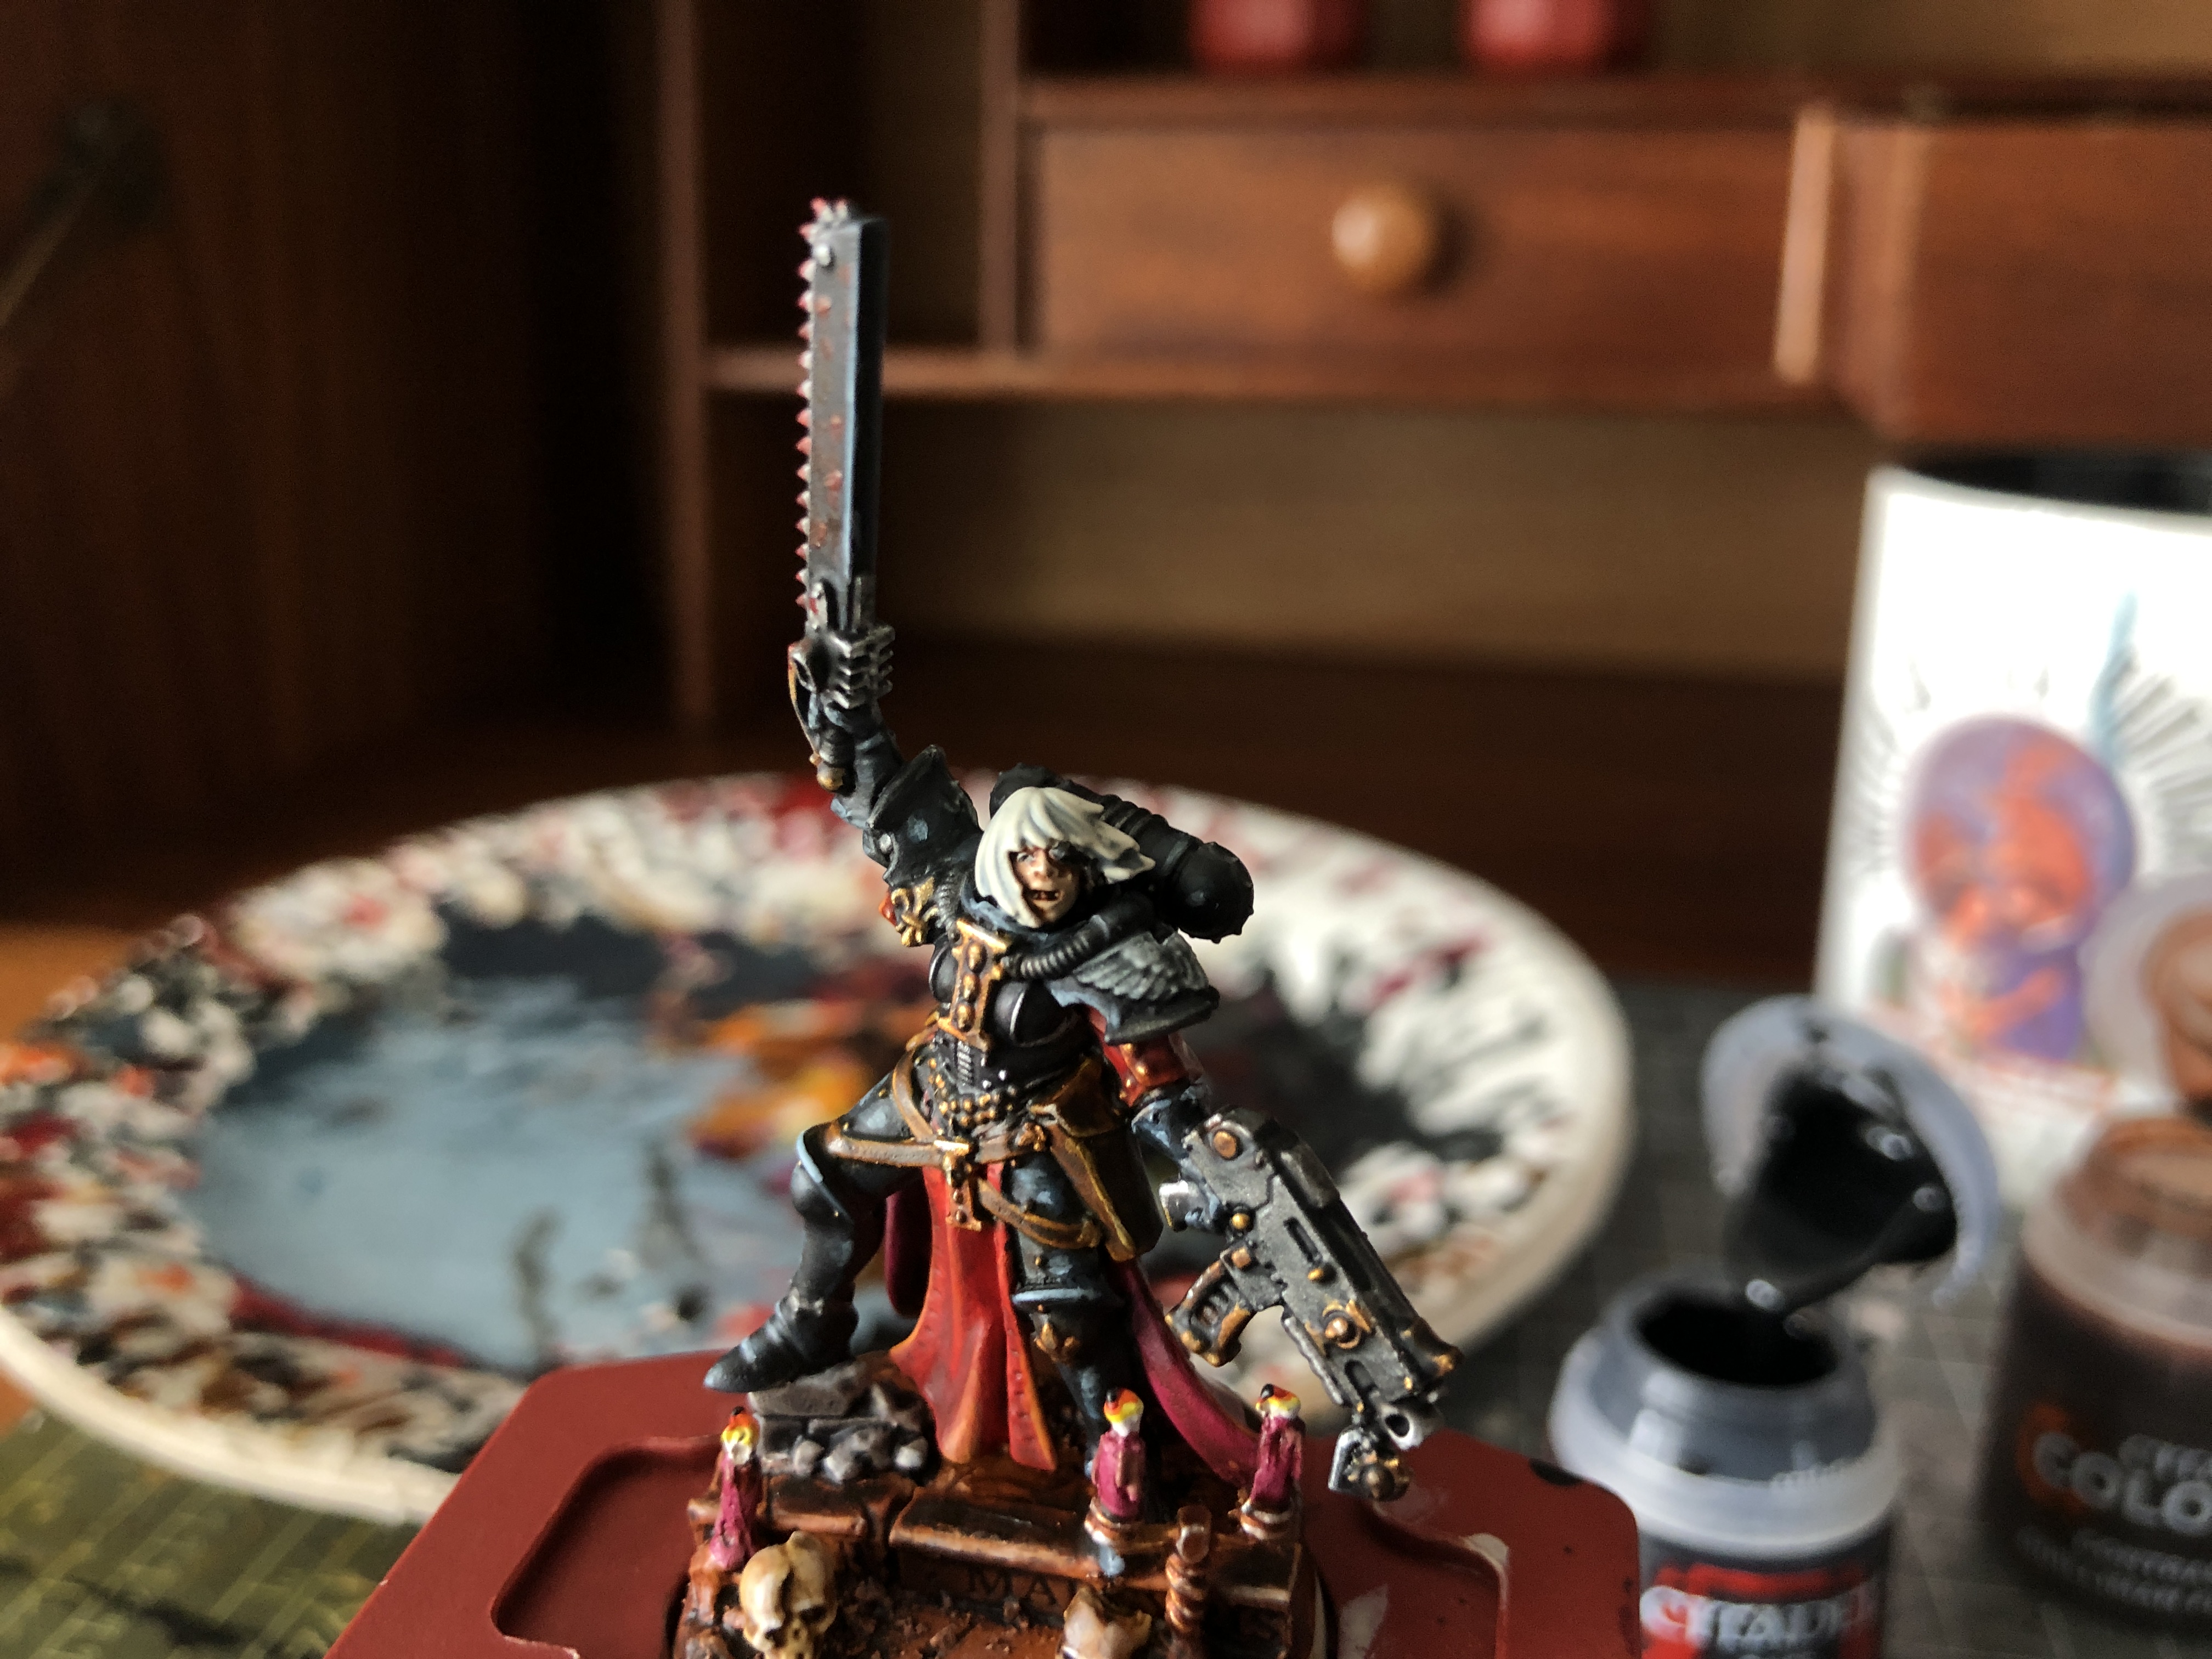
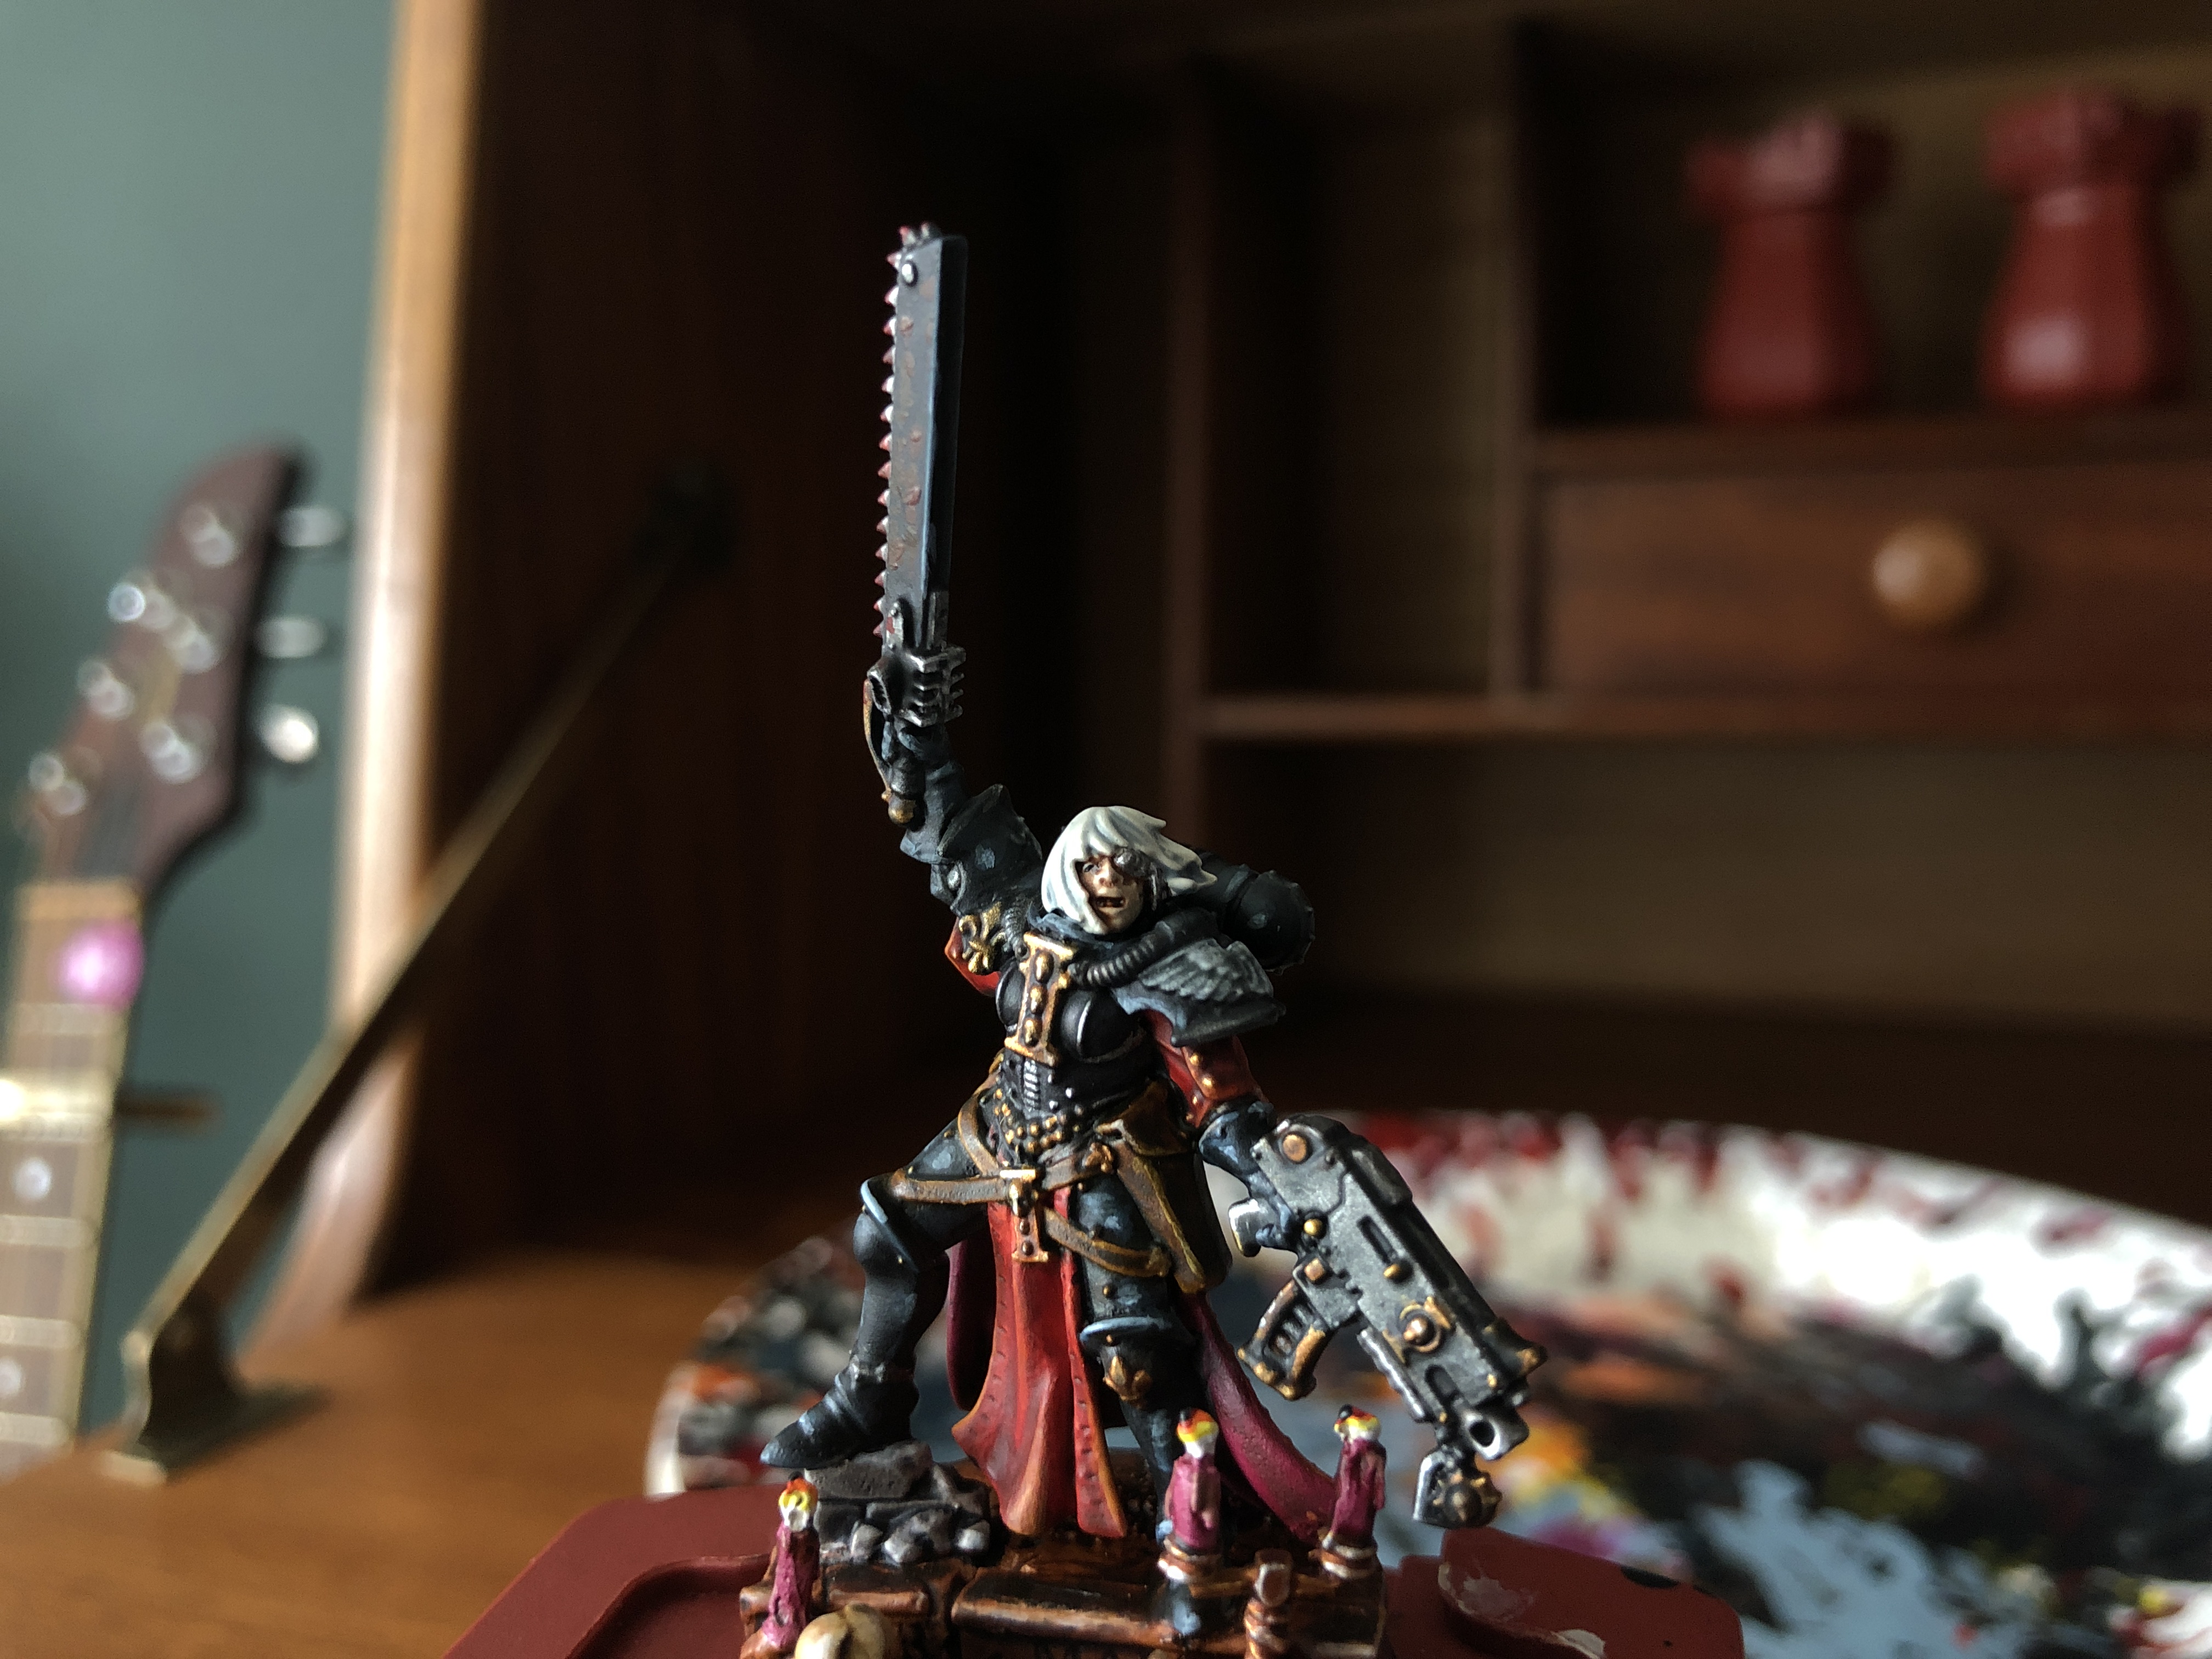
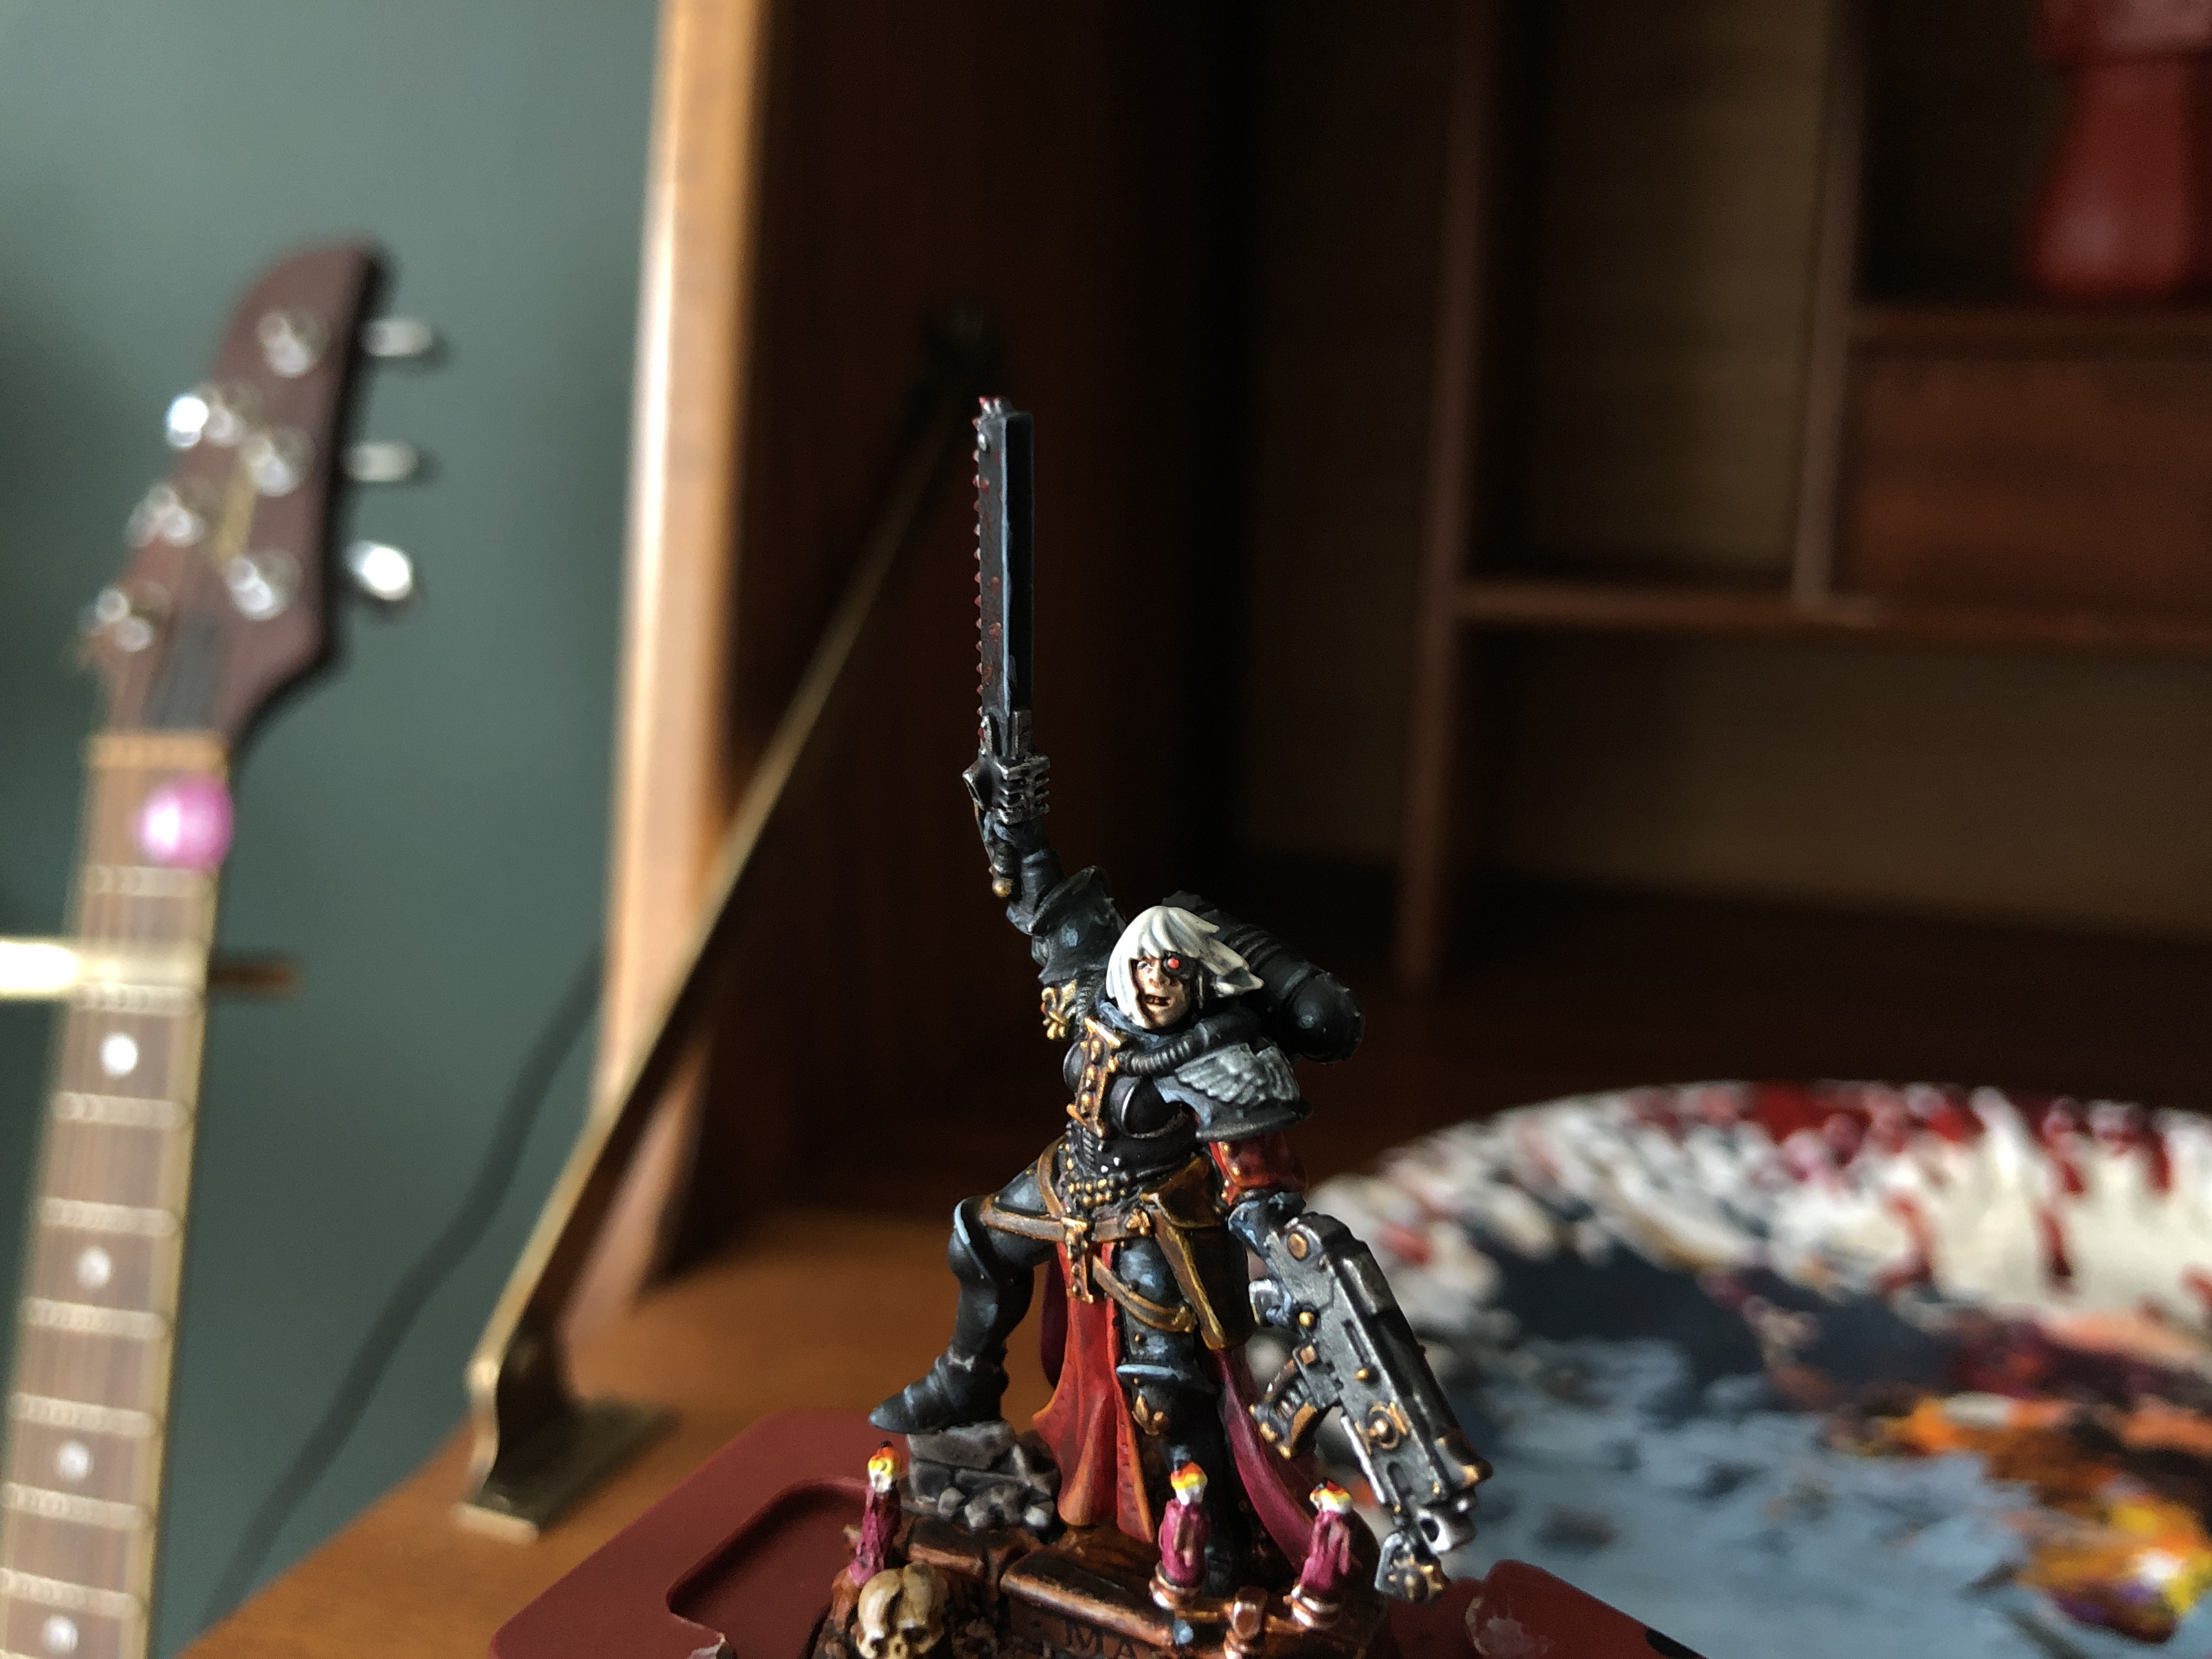

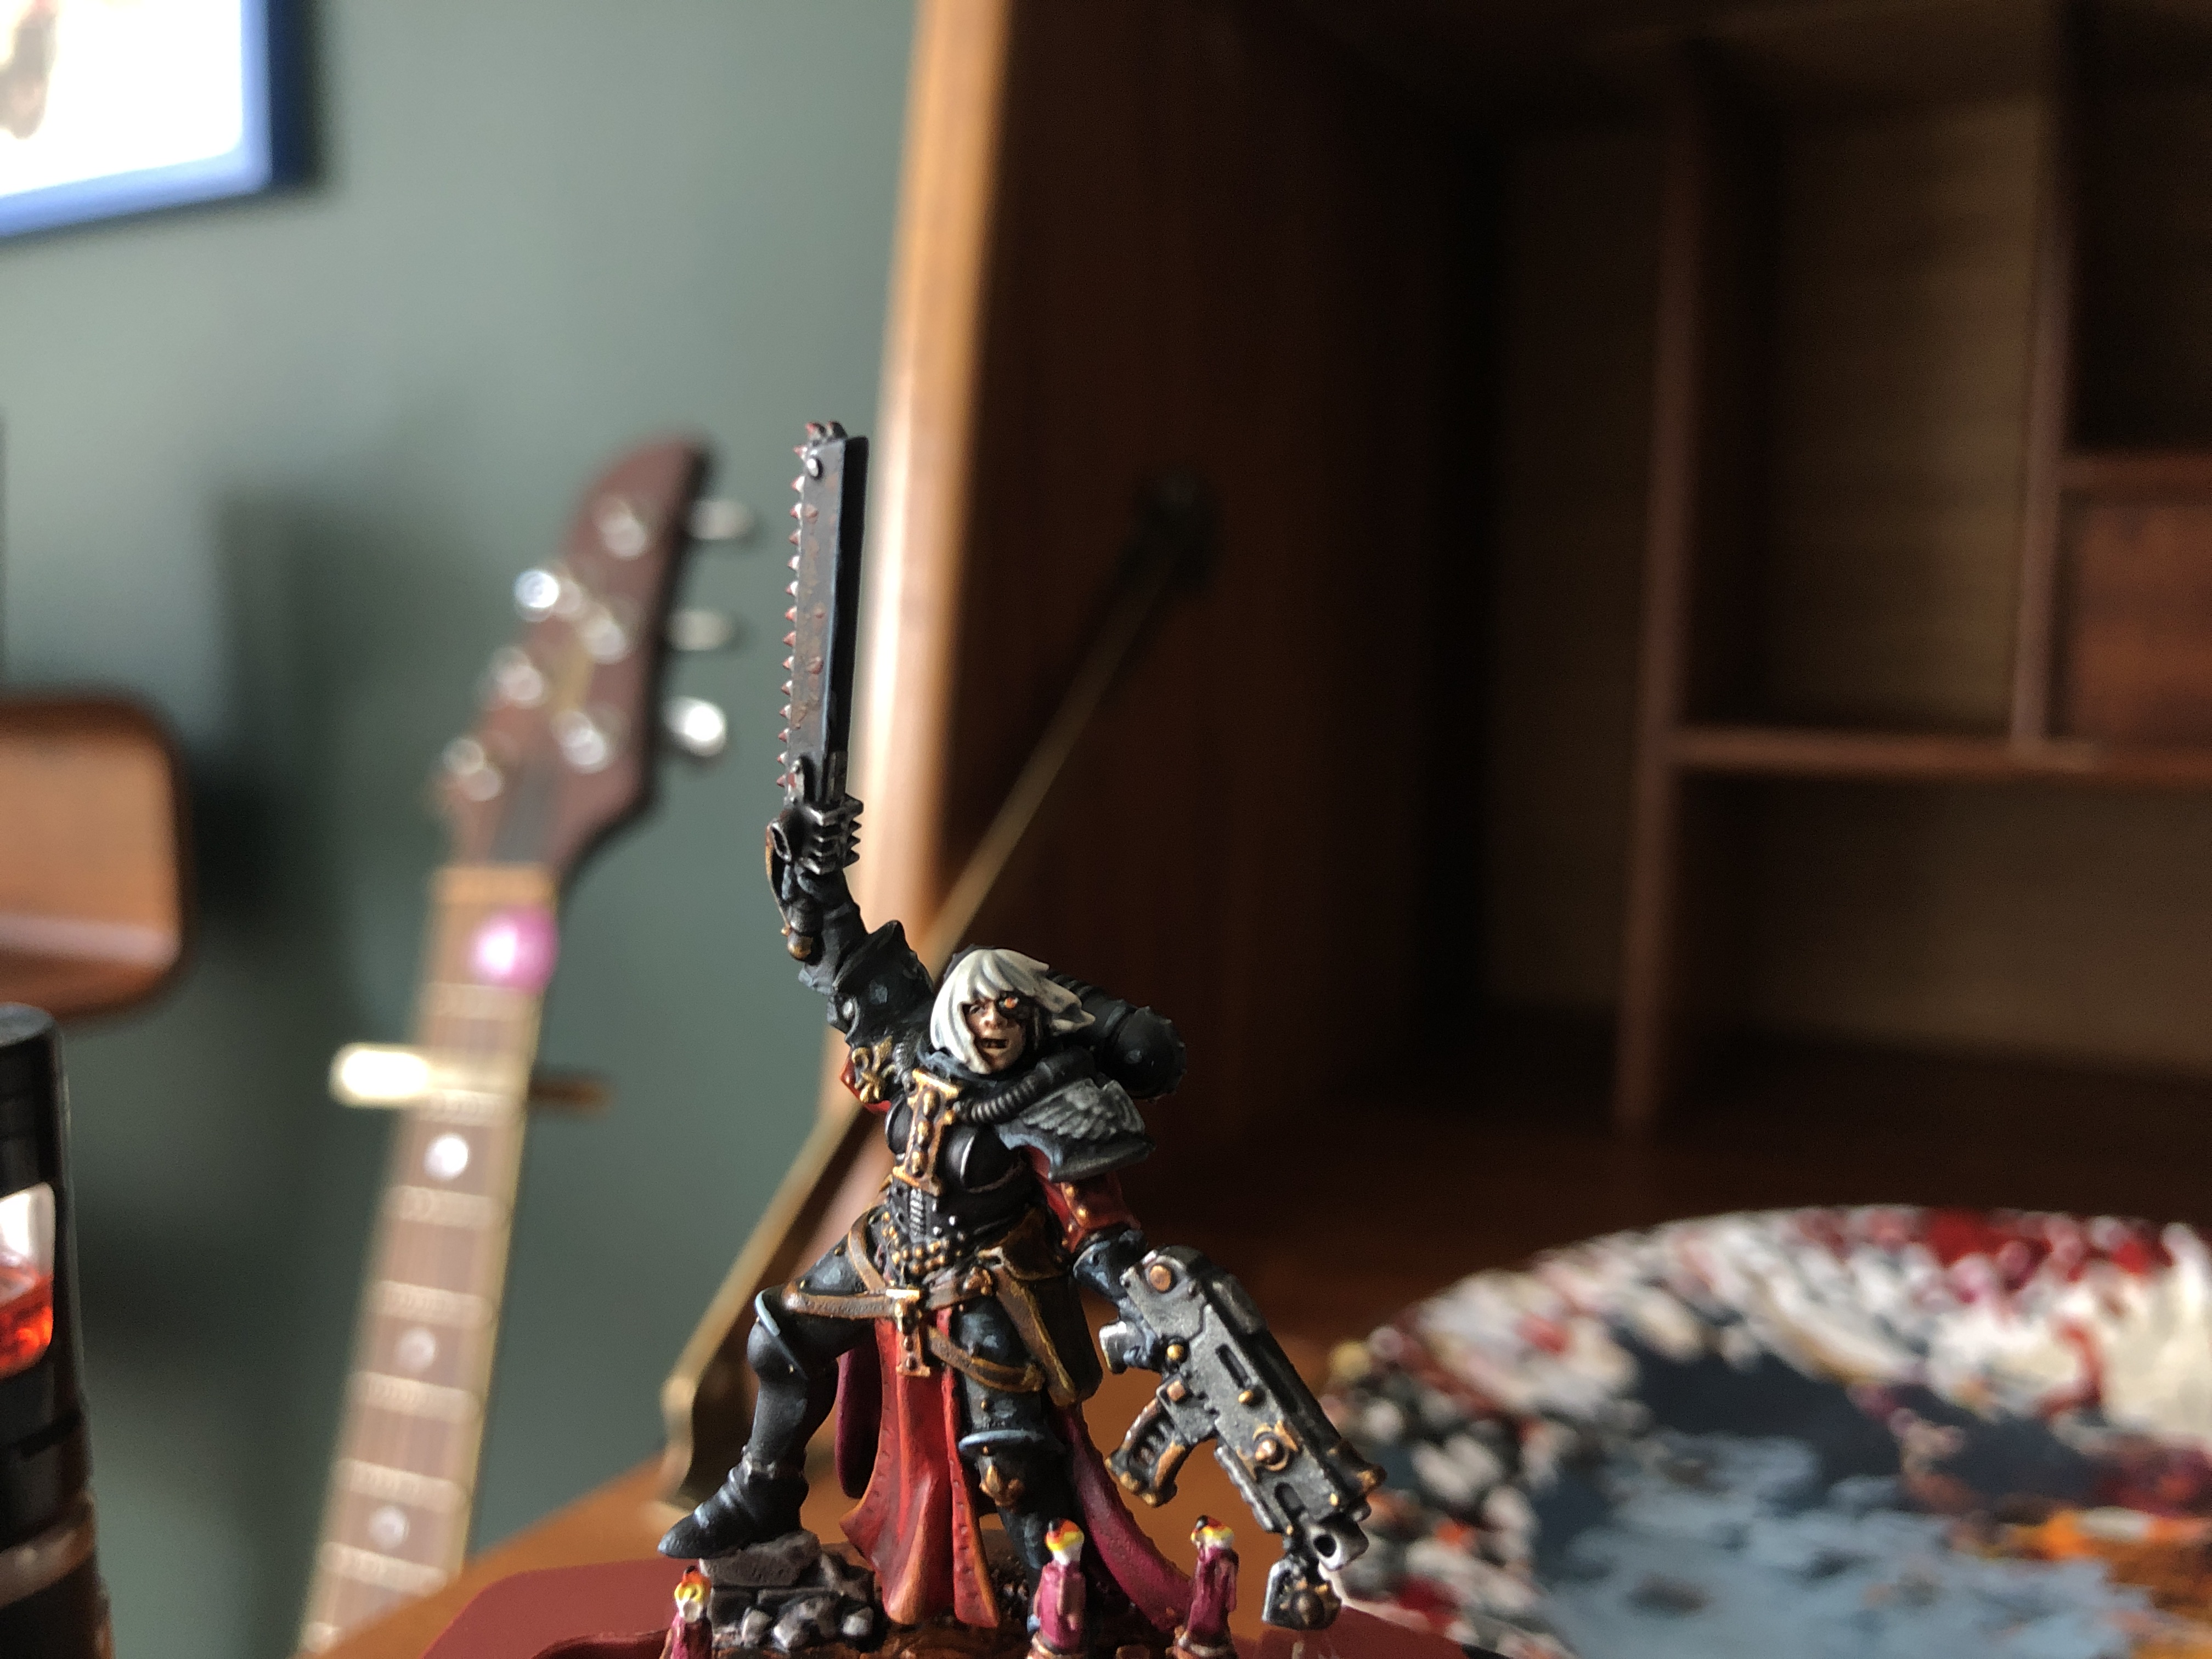


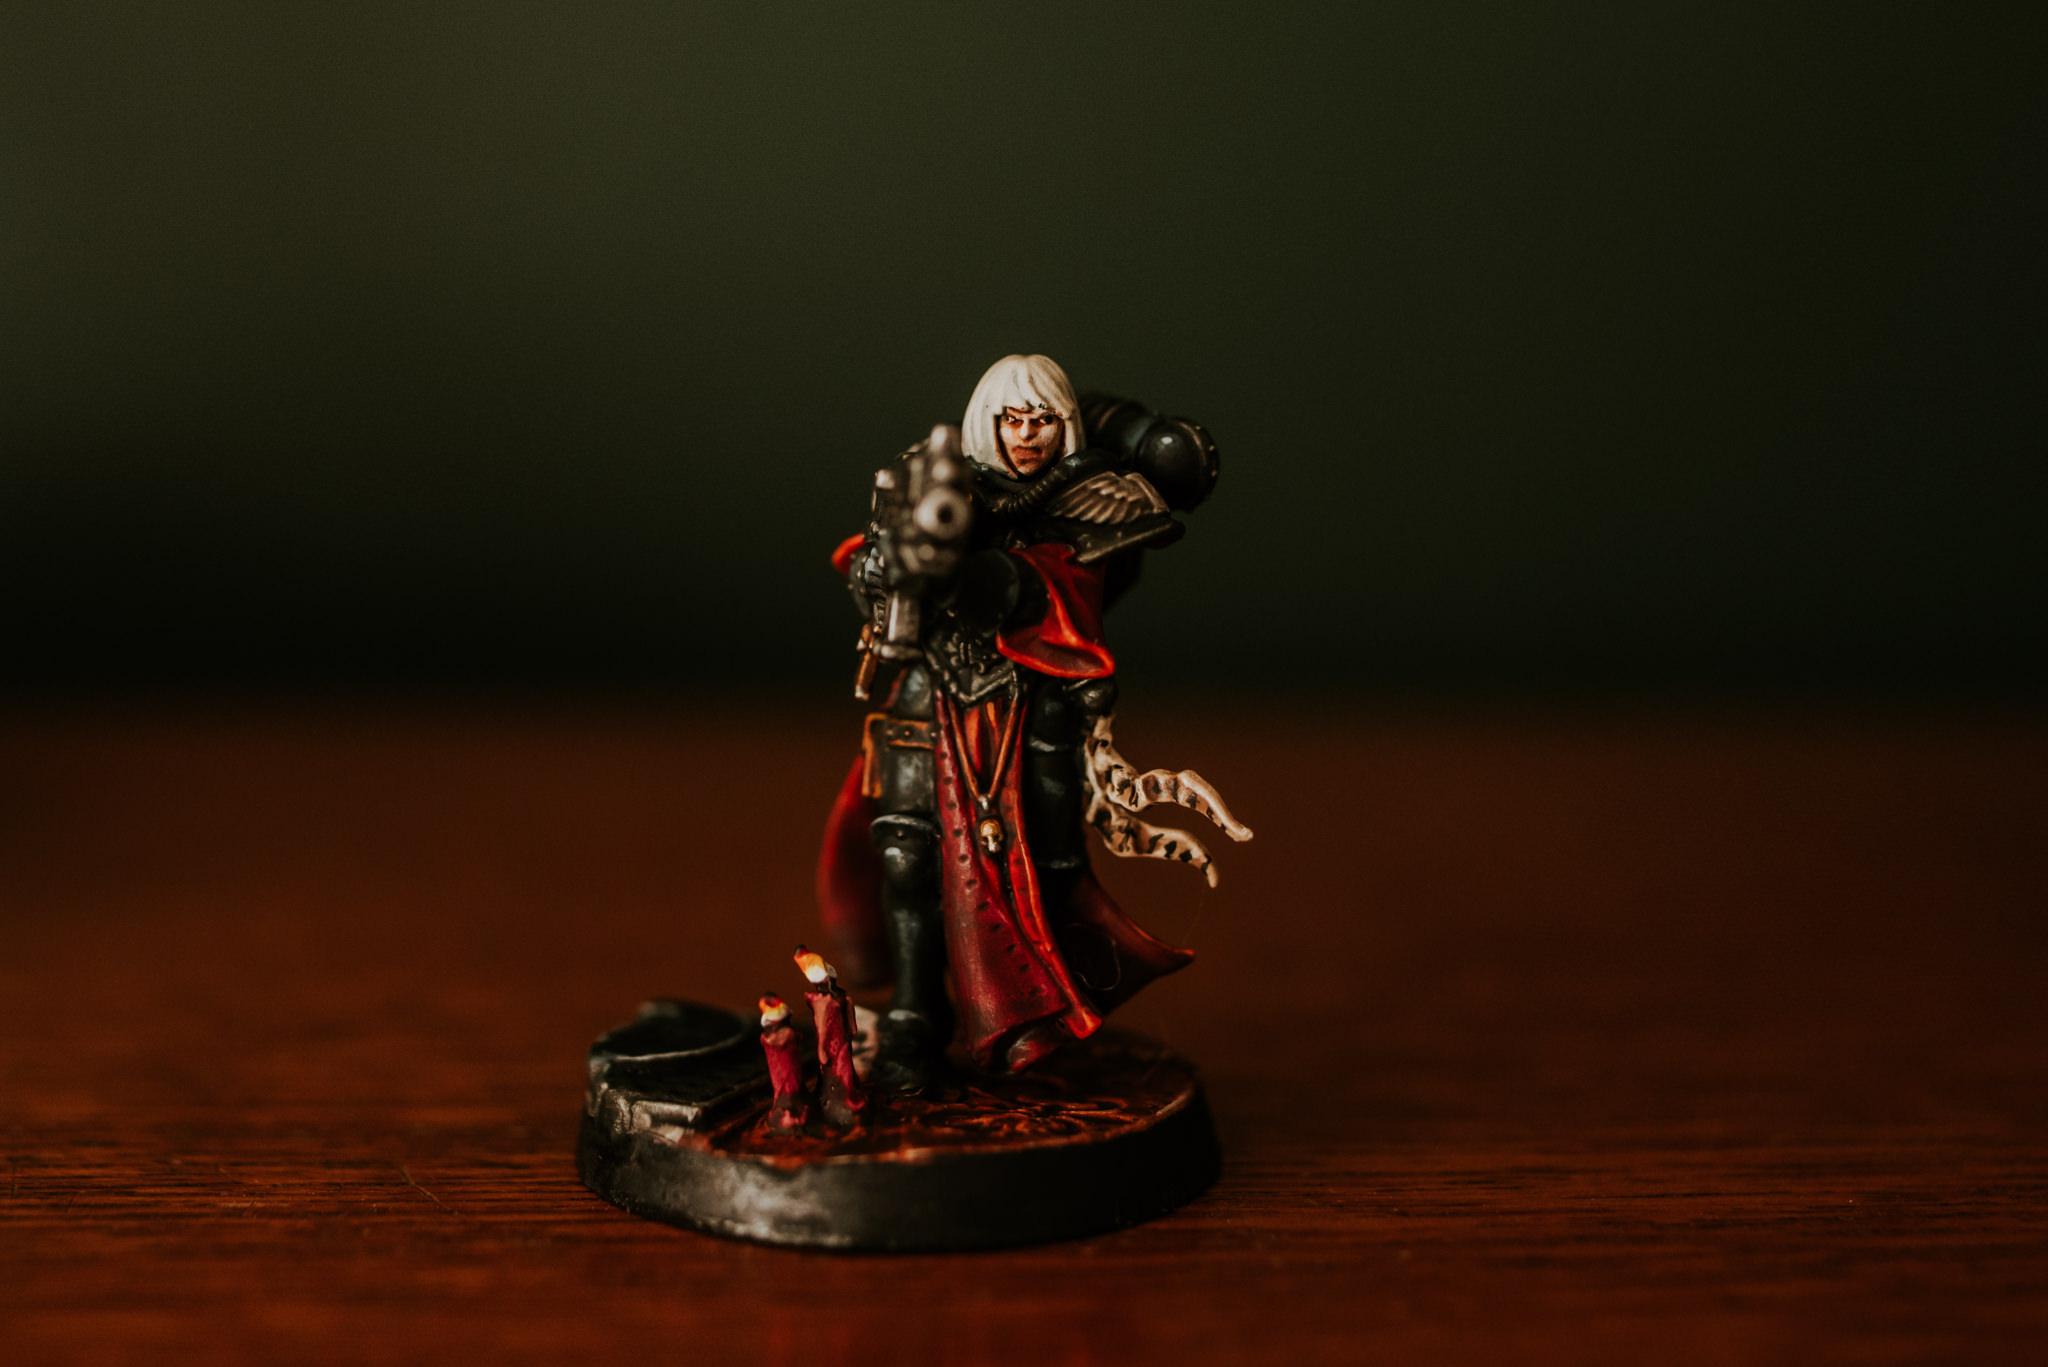
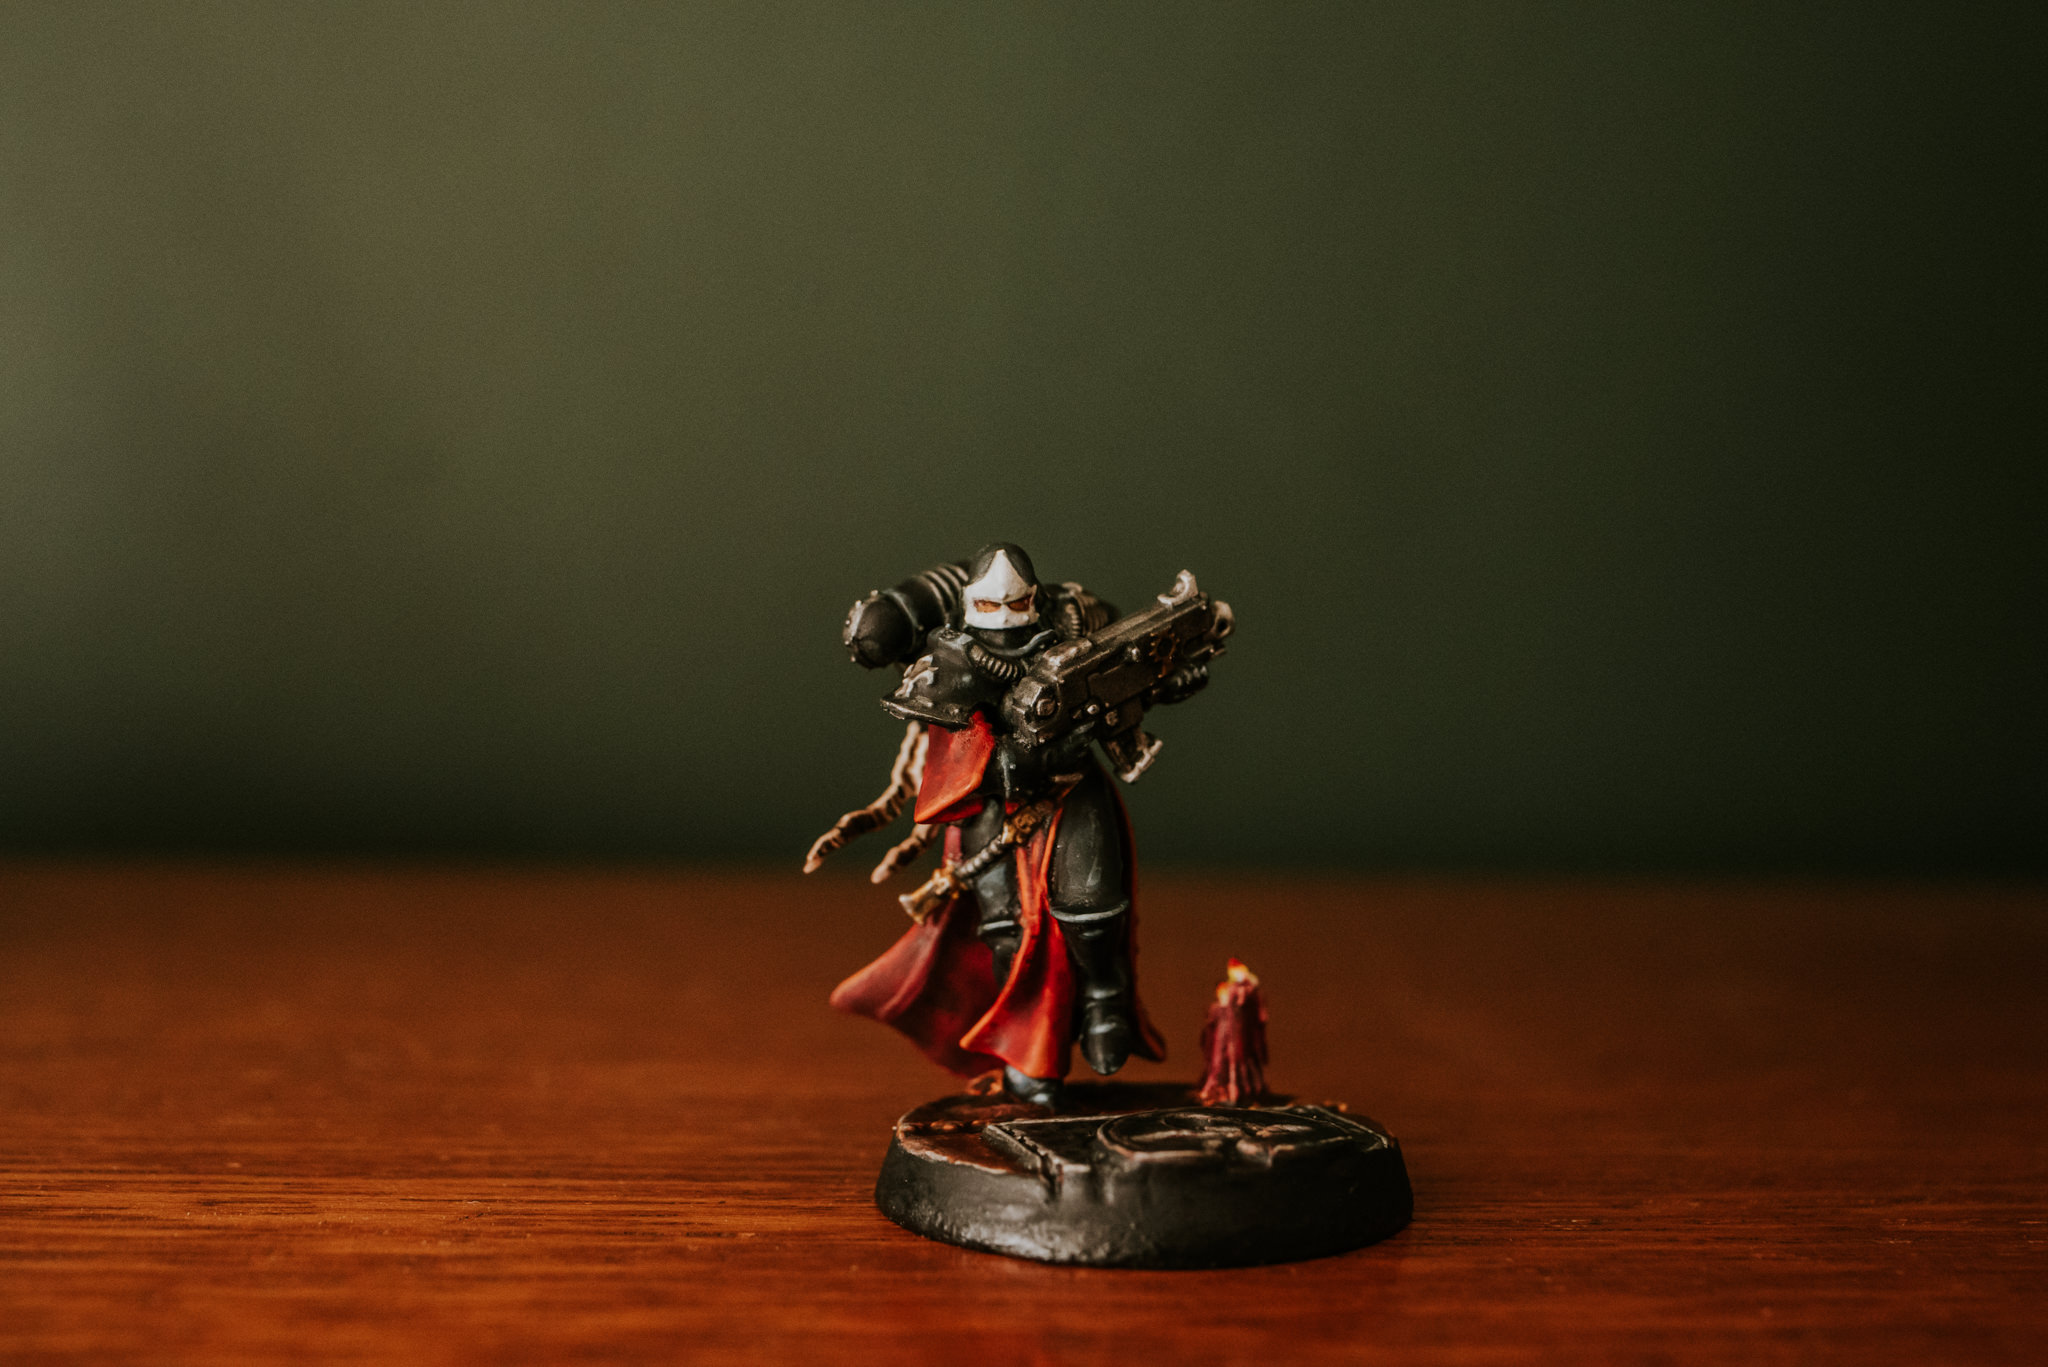
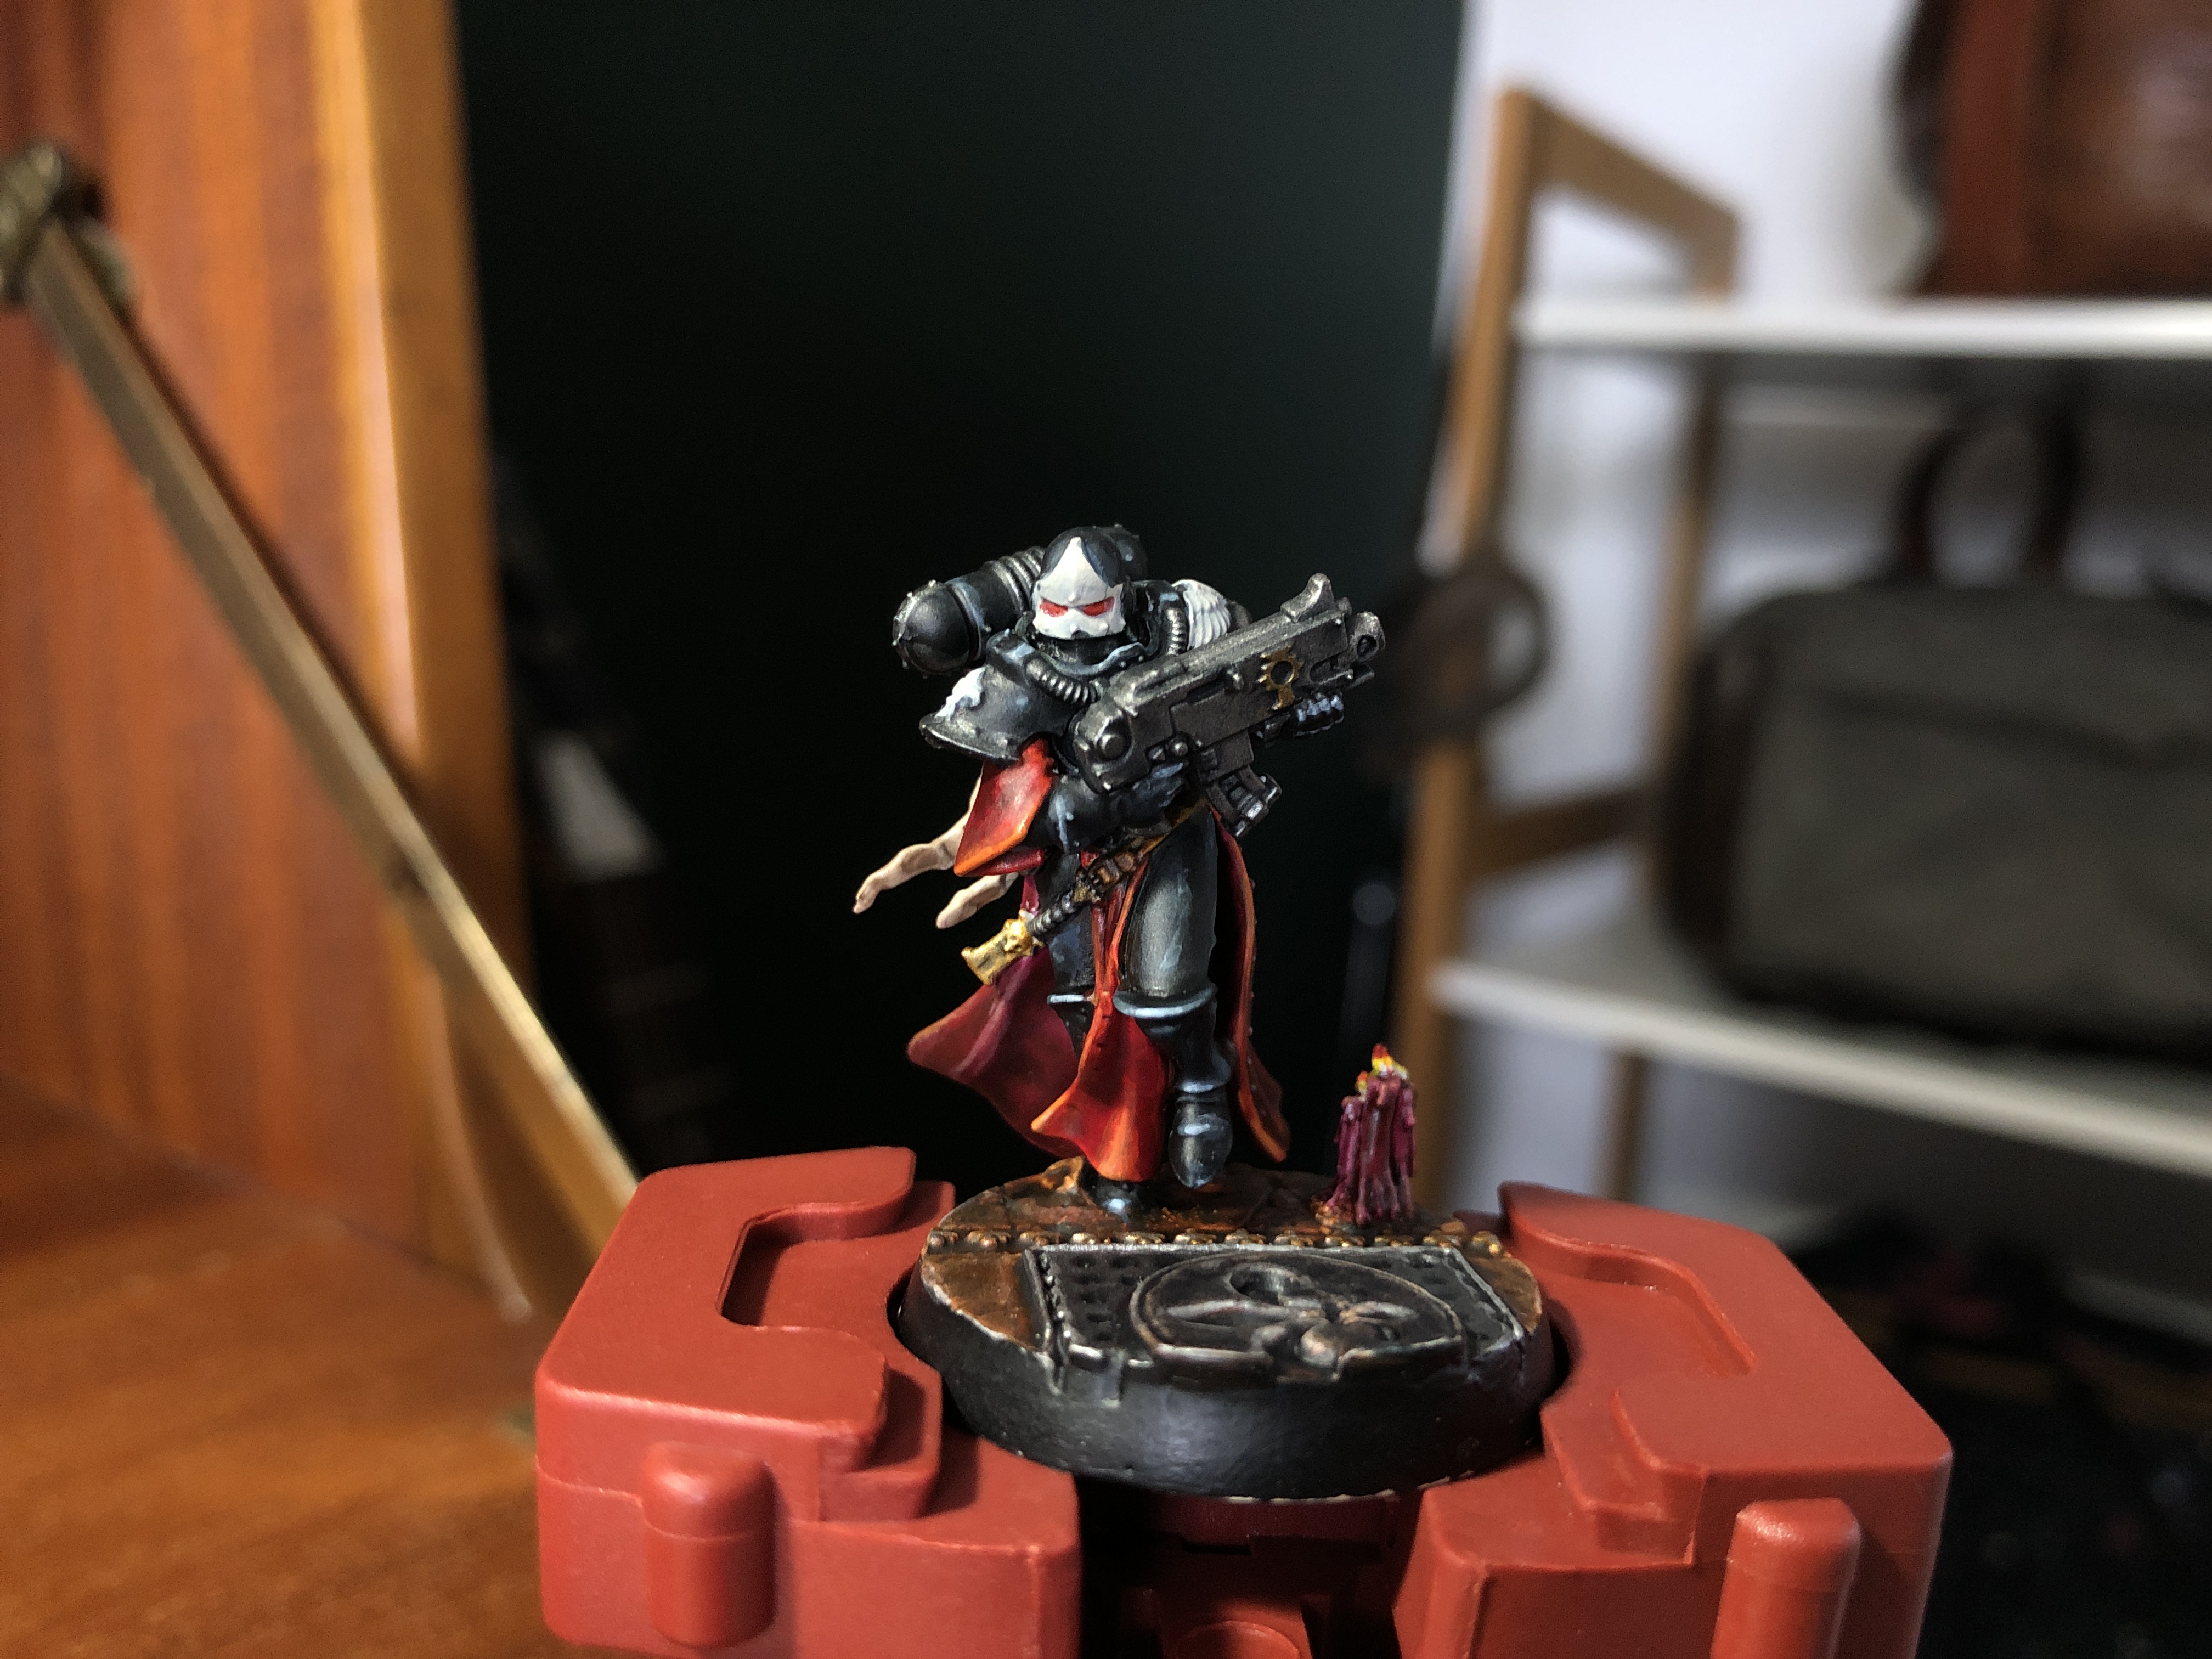
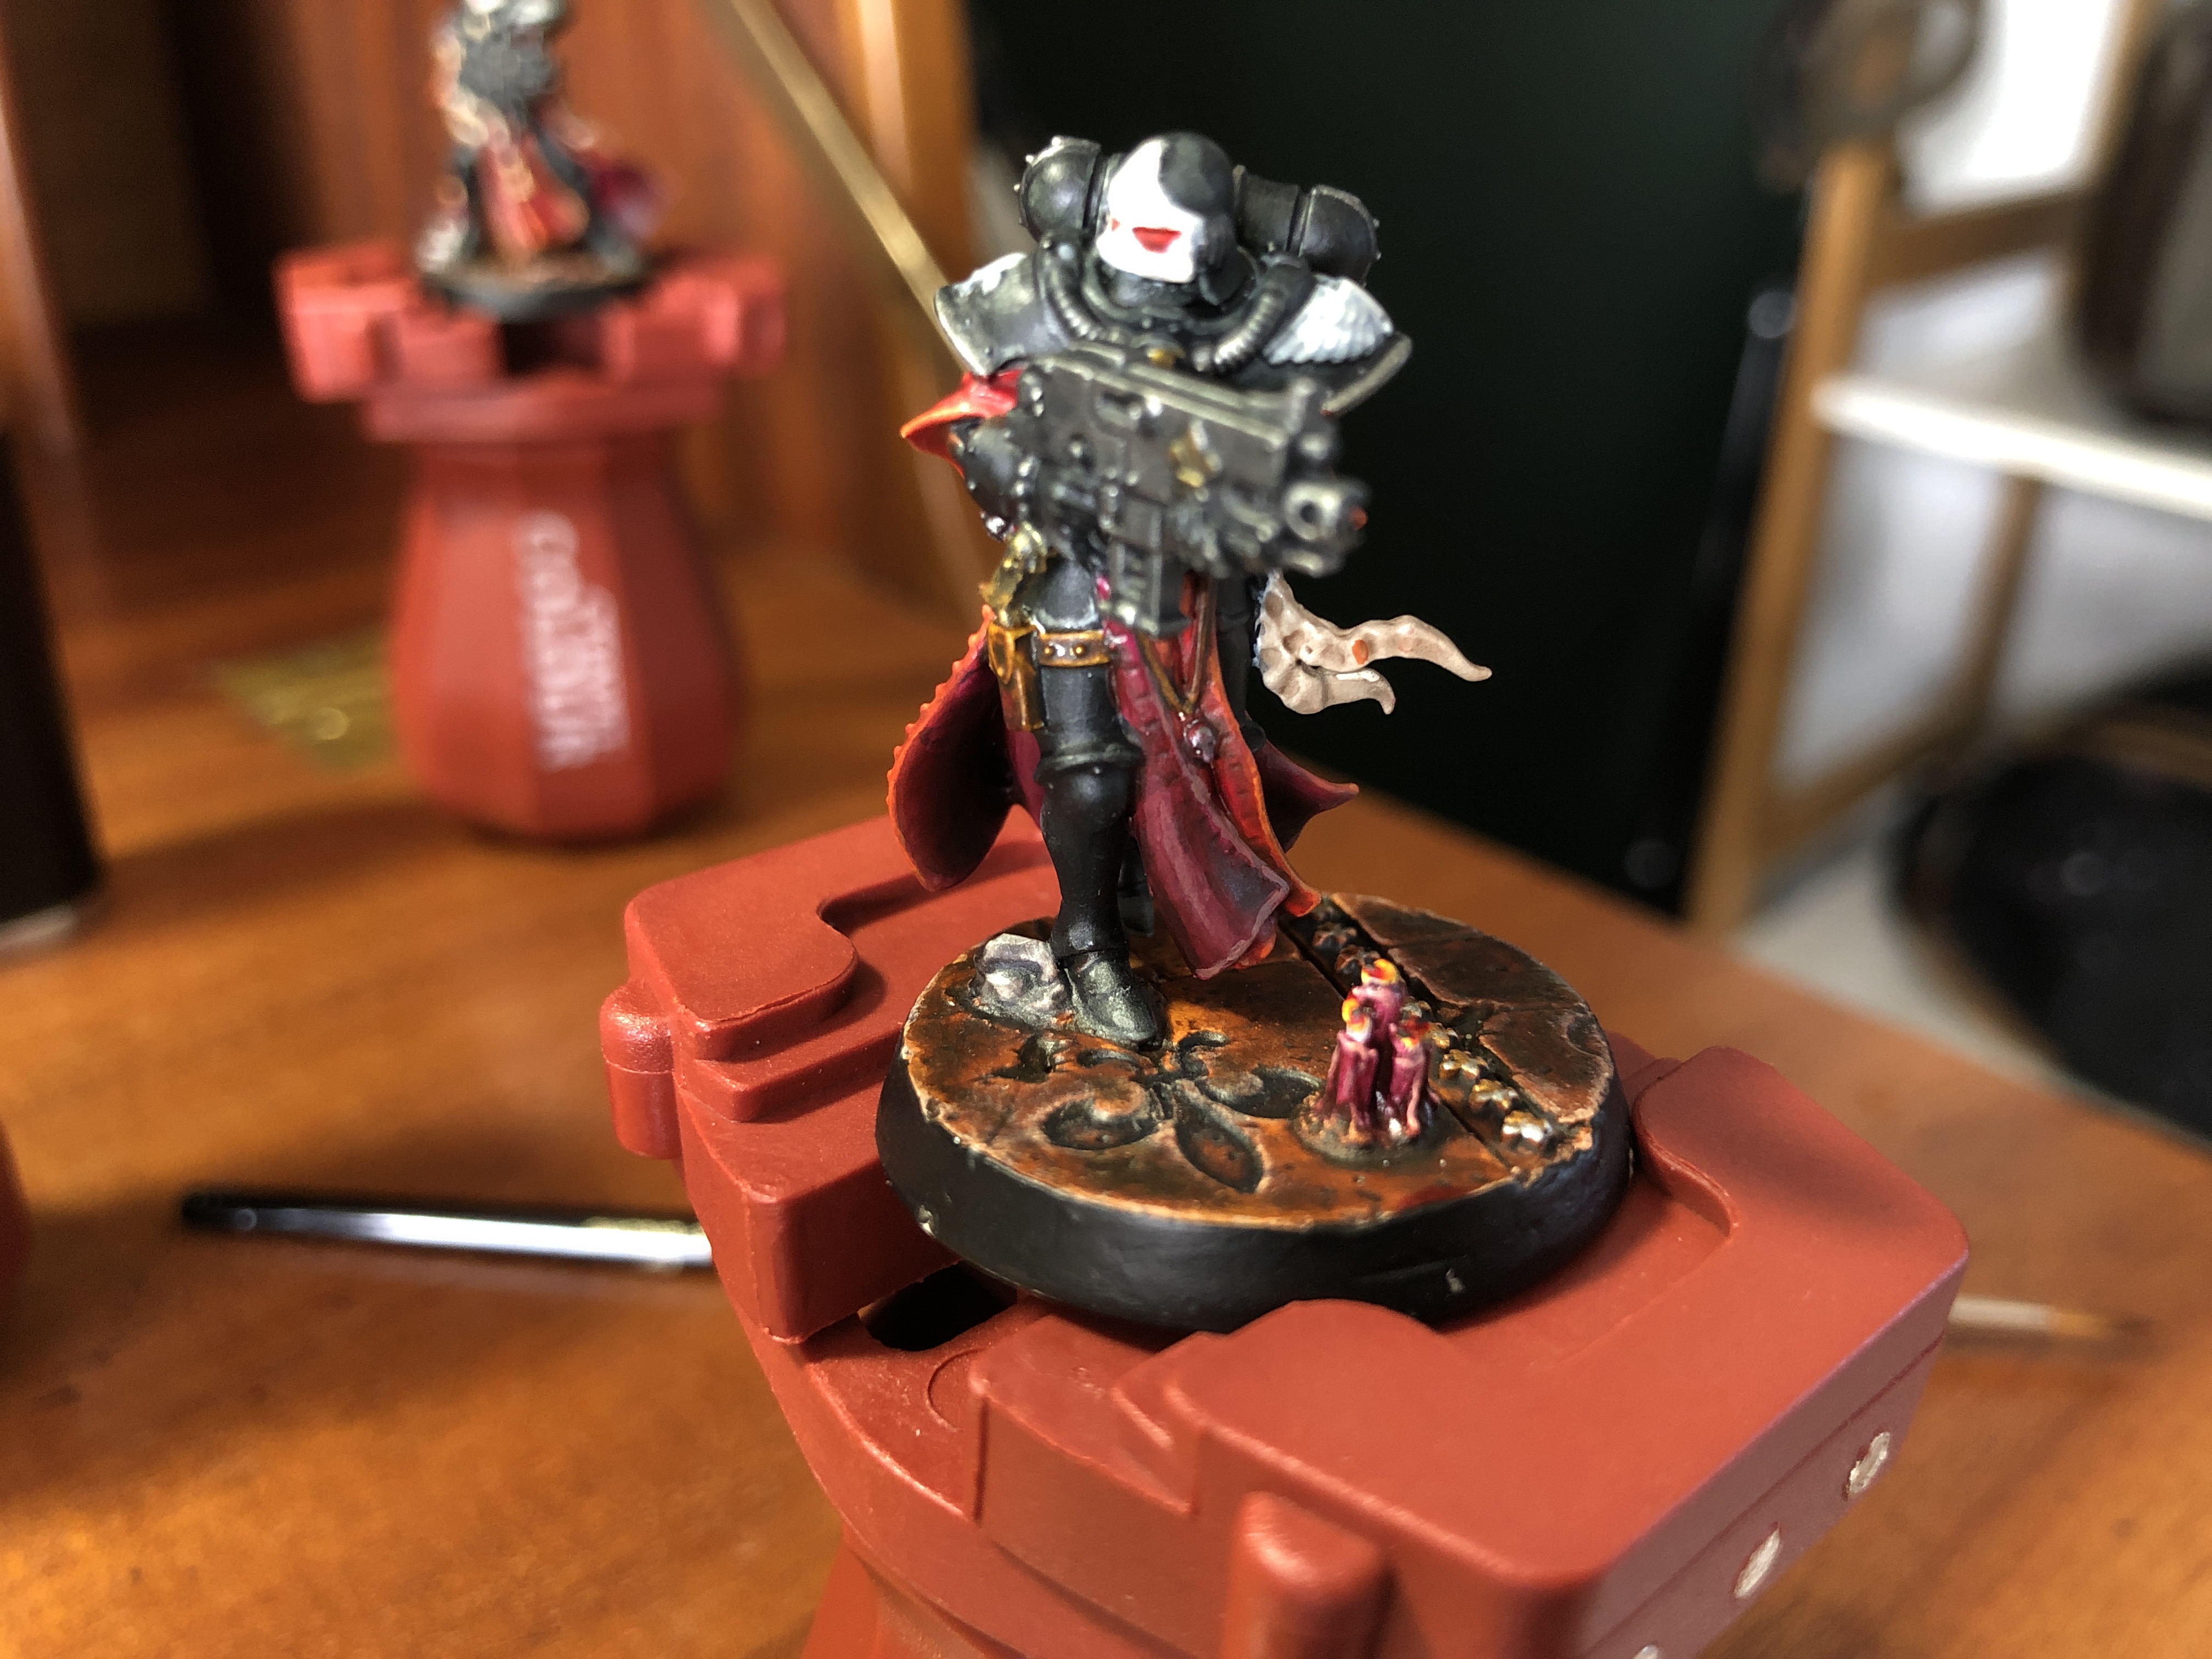
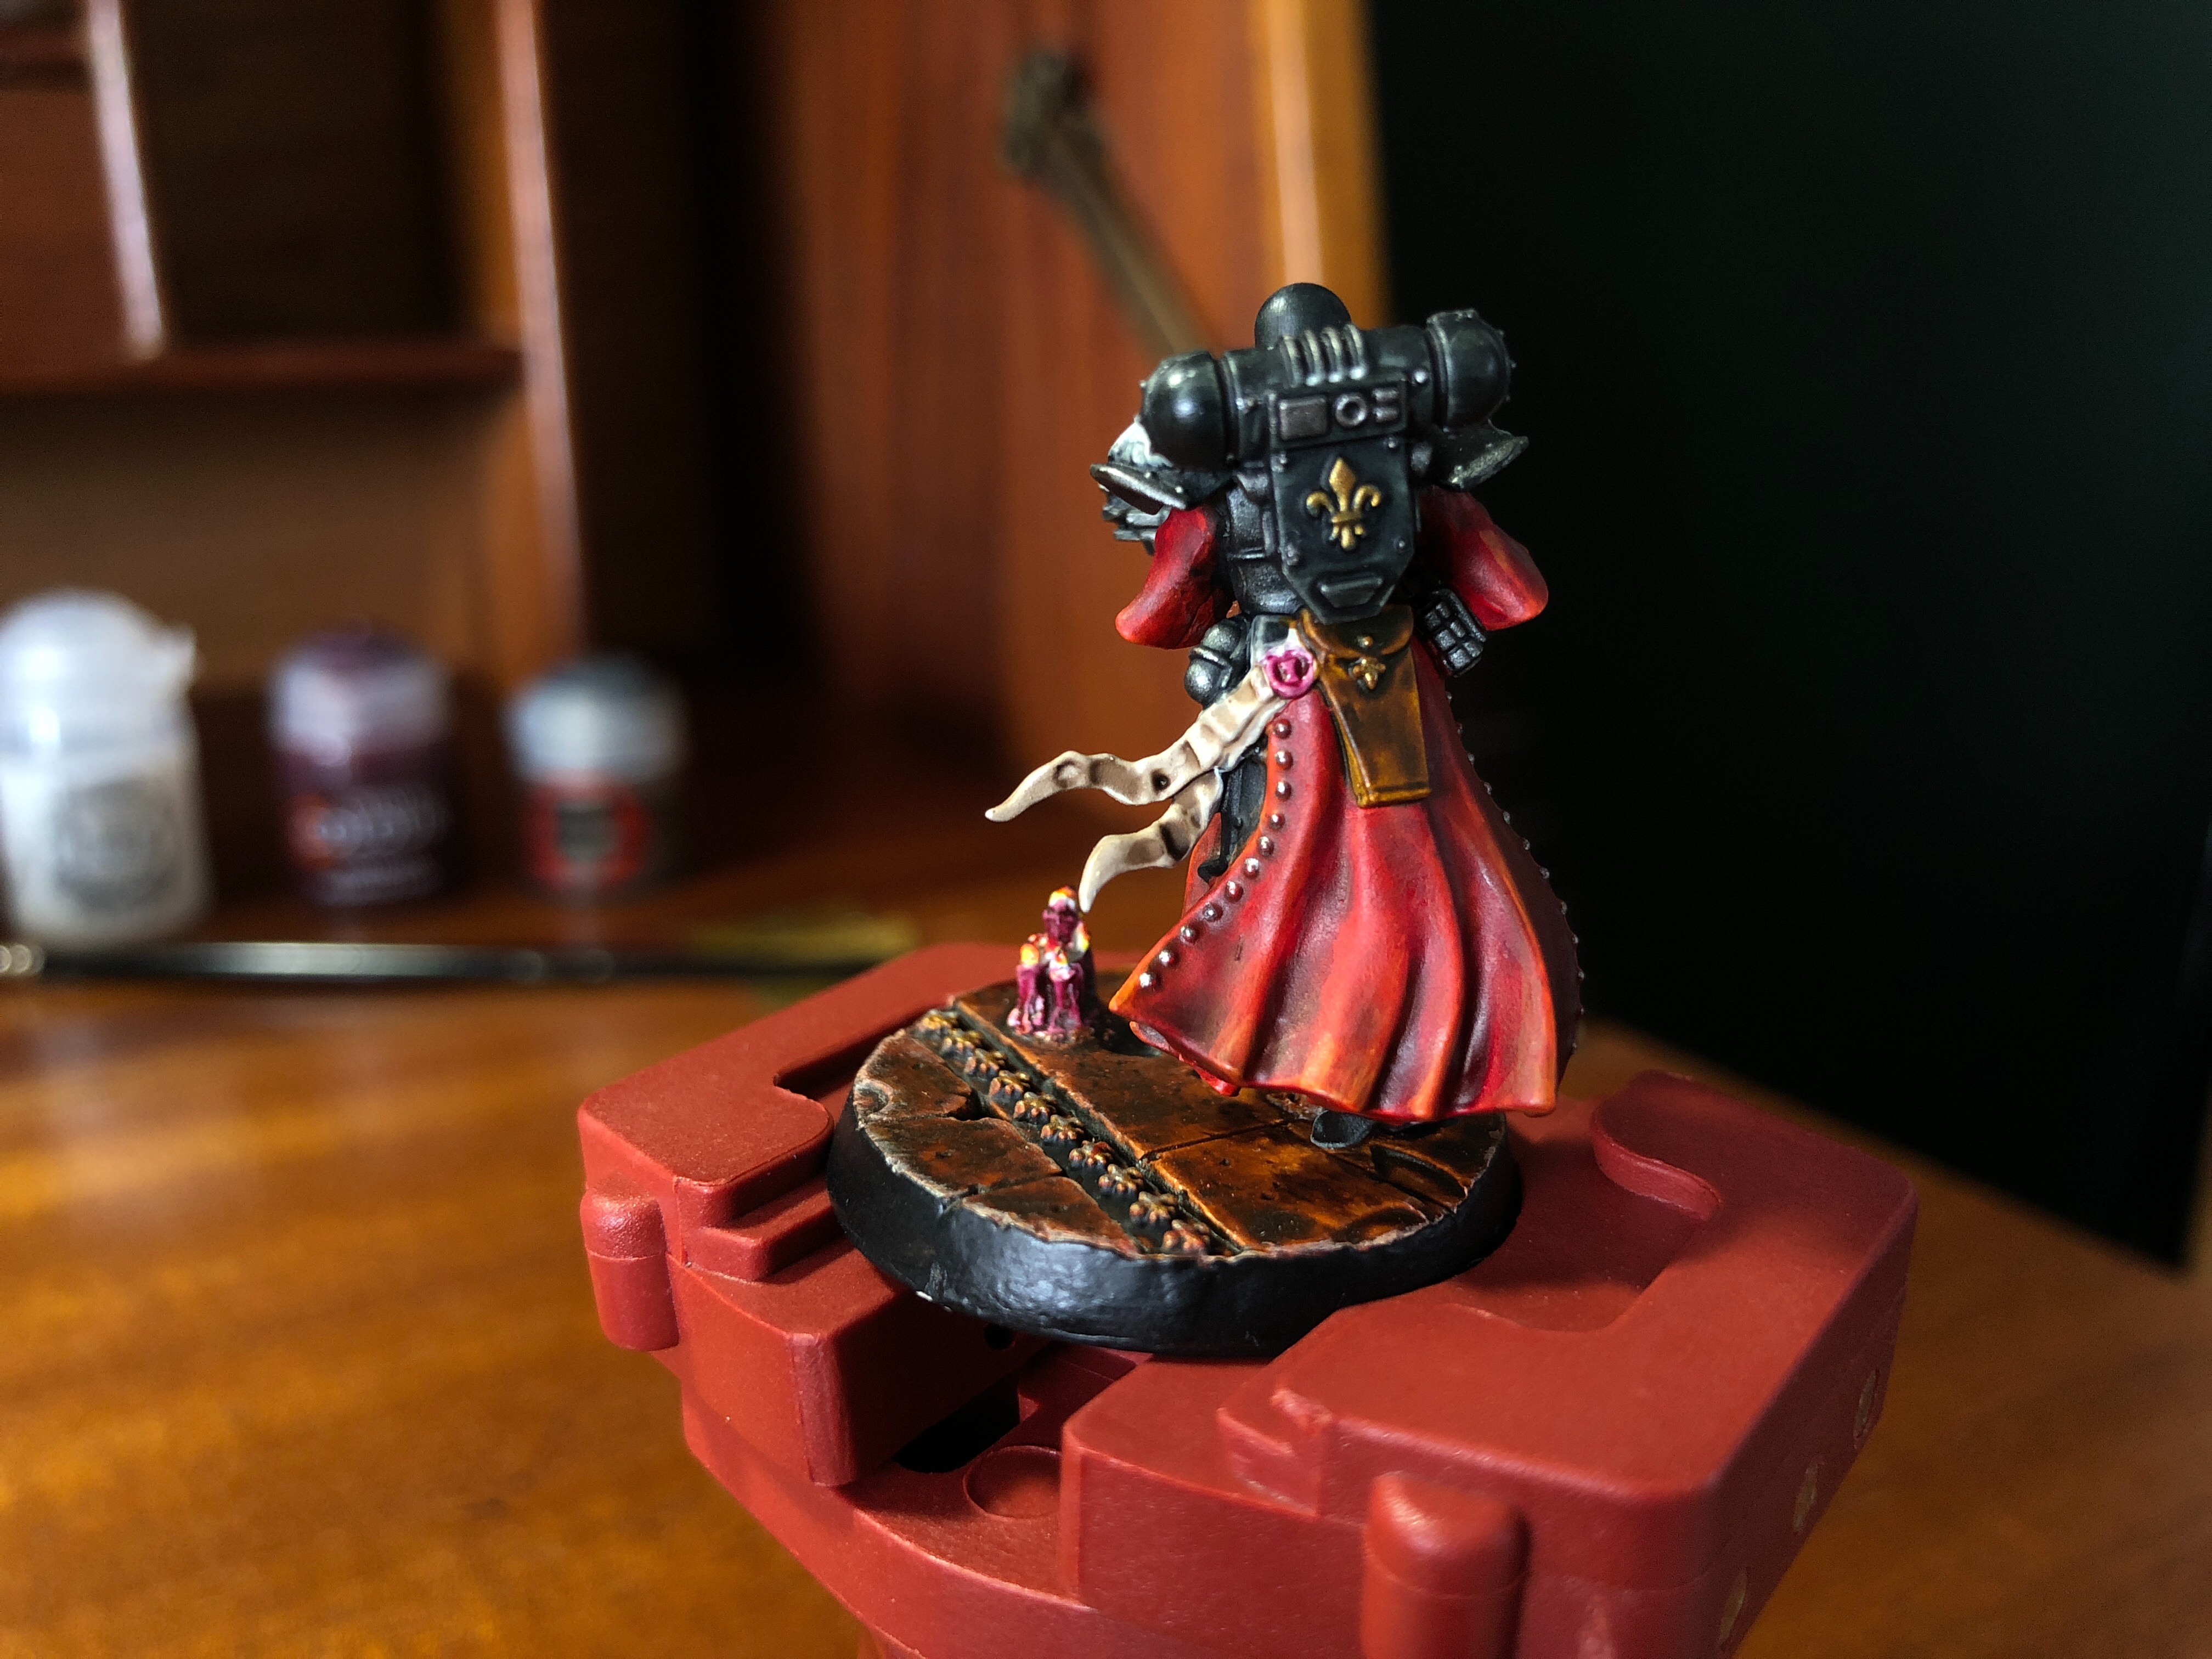
SISTER SUPERIOR
*****
I began like always with a base of Wraithbone before applying a single coat of Contrast Guilliman Flesh. While that was drying I applied a single layer of Contrast Apothecary White to the hair. Honestly this paint is so good for the hair I just leave it there without any further highlights. Just be careful to watch where it pools so it looks more natural.
While they are both drying I apply a watered down coat of Abaddon Black to the Bionic eye & cable taking care not to get any on the face. With the Guilliman Flesh dry it’s time to tackle that eye ball. At least there’s only one this time. Sheesh.
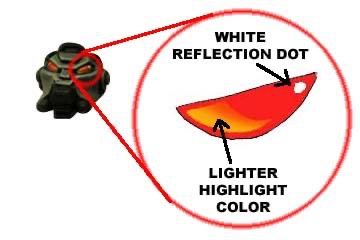
I begin by applying a single coat of White Scar. After that’s dry I use my shakey hands to apply a dot of Abaddon black to the middle. They’re never great but they’ll do.
I then applied a layer of Leadbelcher to the bionic eye & cable followed by a coat of old faithful aka Nuln Oil to shade the recesses of the metallics.
For the bionic eye lens I used a single coat of Contrast Blood Angels Red. Then applied a thin line of Trollslayer Orange to the lower part of the lens to add a highlight. I followed that up with a thinner highlight in the same place as the previous layer but this time using Army Painter Daemonic Yellow. I finished the lens by applying a tiny dot of White Scar to the top right for a reflection. Boom that’s done!
Ok back to the skin. I began highlighting with a single thinned down coat of Rakarth flesh. After this I mixed a 50:50 ratio of Army Painter Barbarian Flesh & White Scar & applied another highlight to only the upmost points of the Sister Superiors face. Like the nose, cheekbones and upper lip. I then used pure white scar to apply a specular highlight at the very top most points like the end of the nose. The absolute final part was using Contrast Volupus Pink on the lips. Even in the grim dark future of the 41st Millennium there is nothing like a good bit of lippy.
It ain’t gonna win any beauty contests but as always it’s mine & it’s bloody lovely.
COMING SOON
*****
Next up as promised I’m gonna post a tutorial on painting the simulacrum. I’ve actually fully painted the rest of the model already so there’s just that last bit to do. Wahoo! That will also mean I’ve finally finished painting all 13 of my standard Sisters of Battle squad members. So awesome photos of the finished squad coming after that. Awwwh yeah!
Much love
Eternity Gate
INSIDE OUT ~ A QUICK POST ON STARTING POINTS
PINK TO MAKE THE BOYS WINK
*****
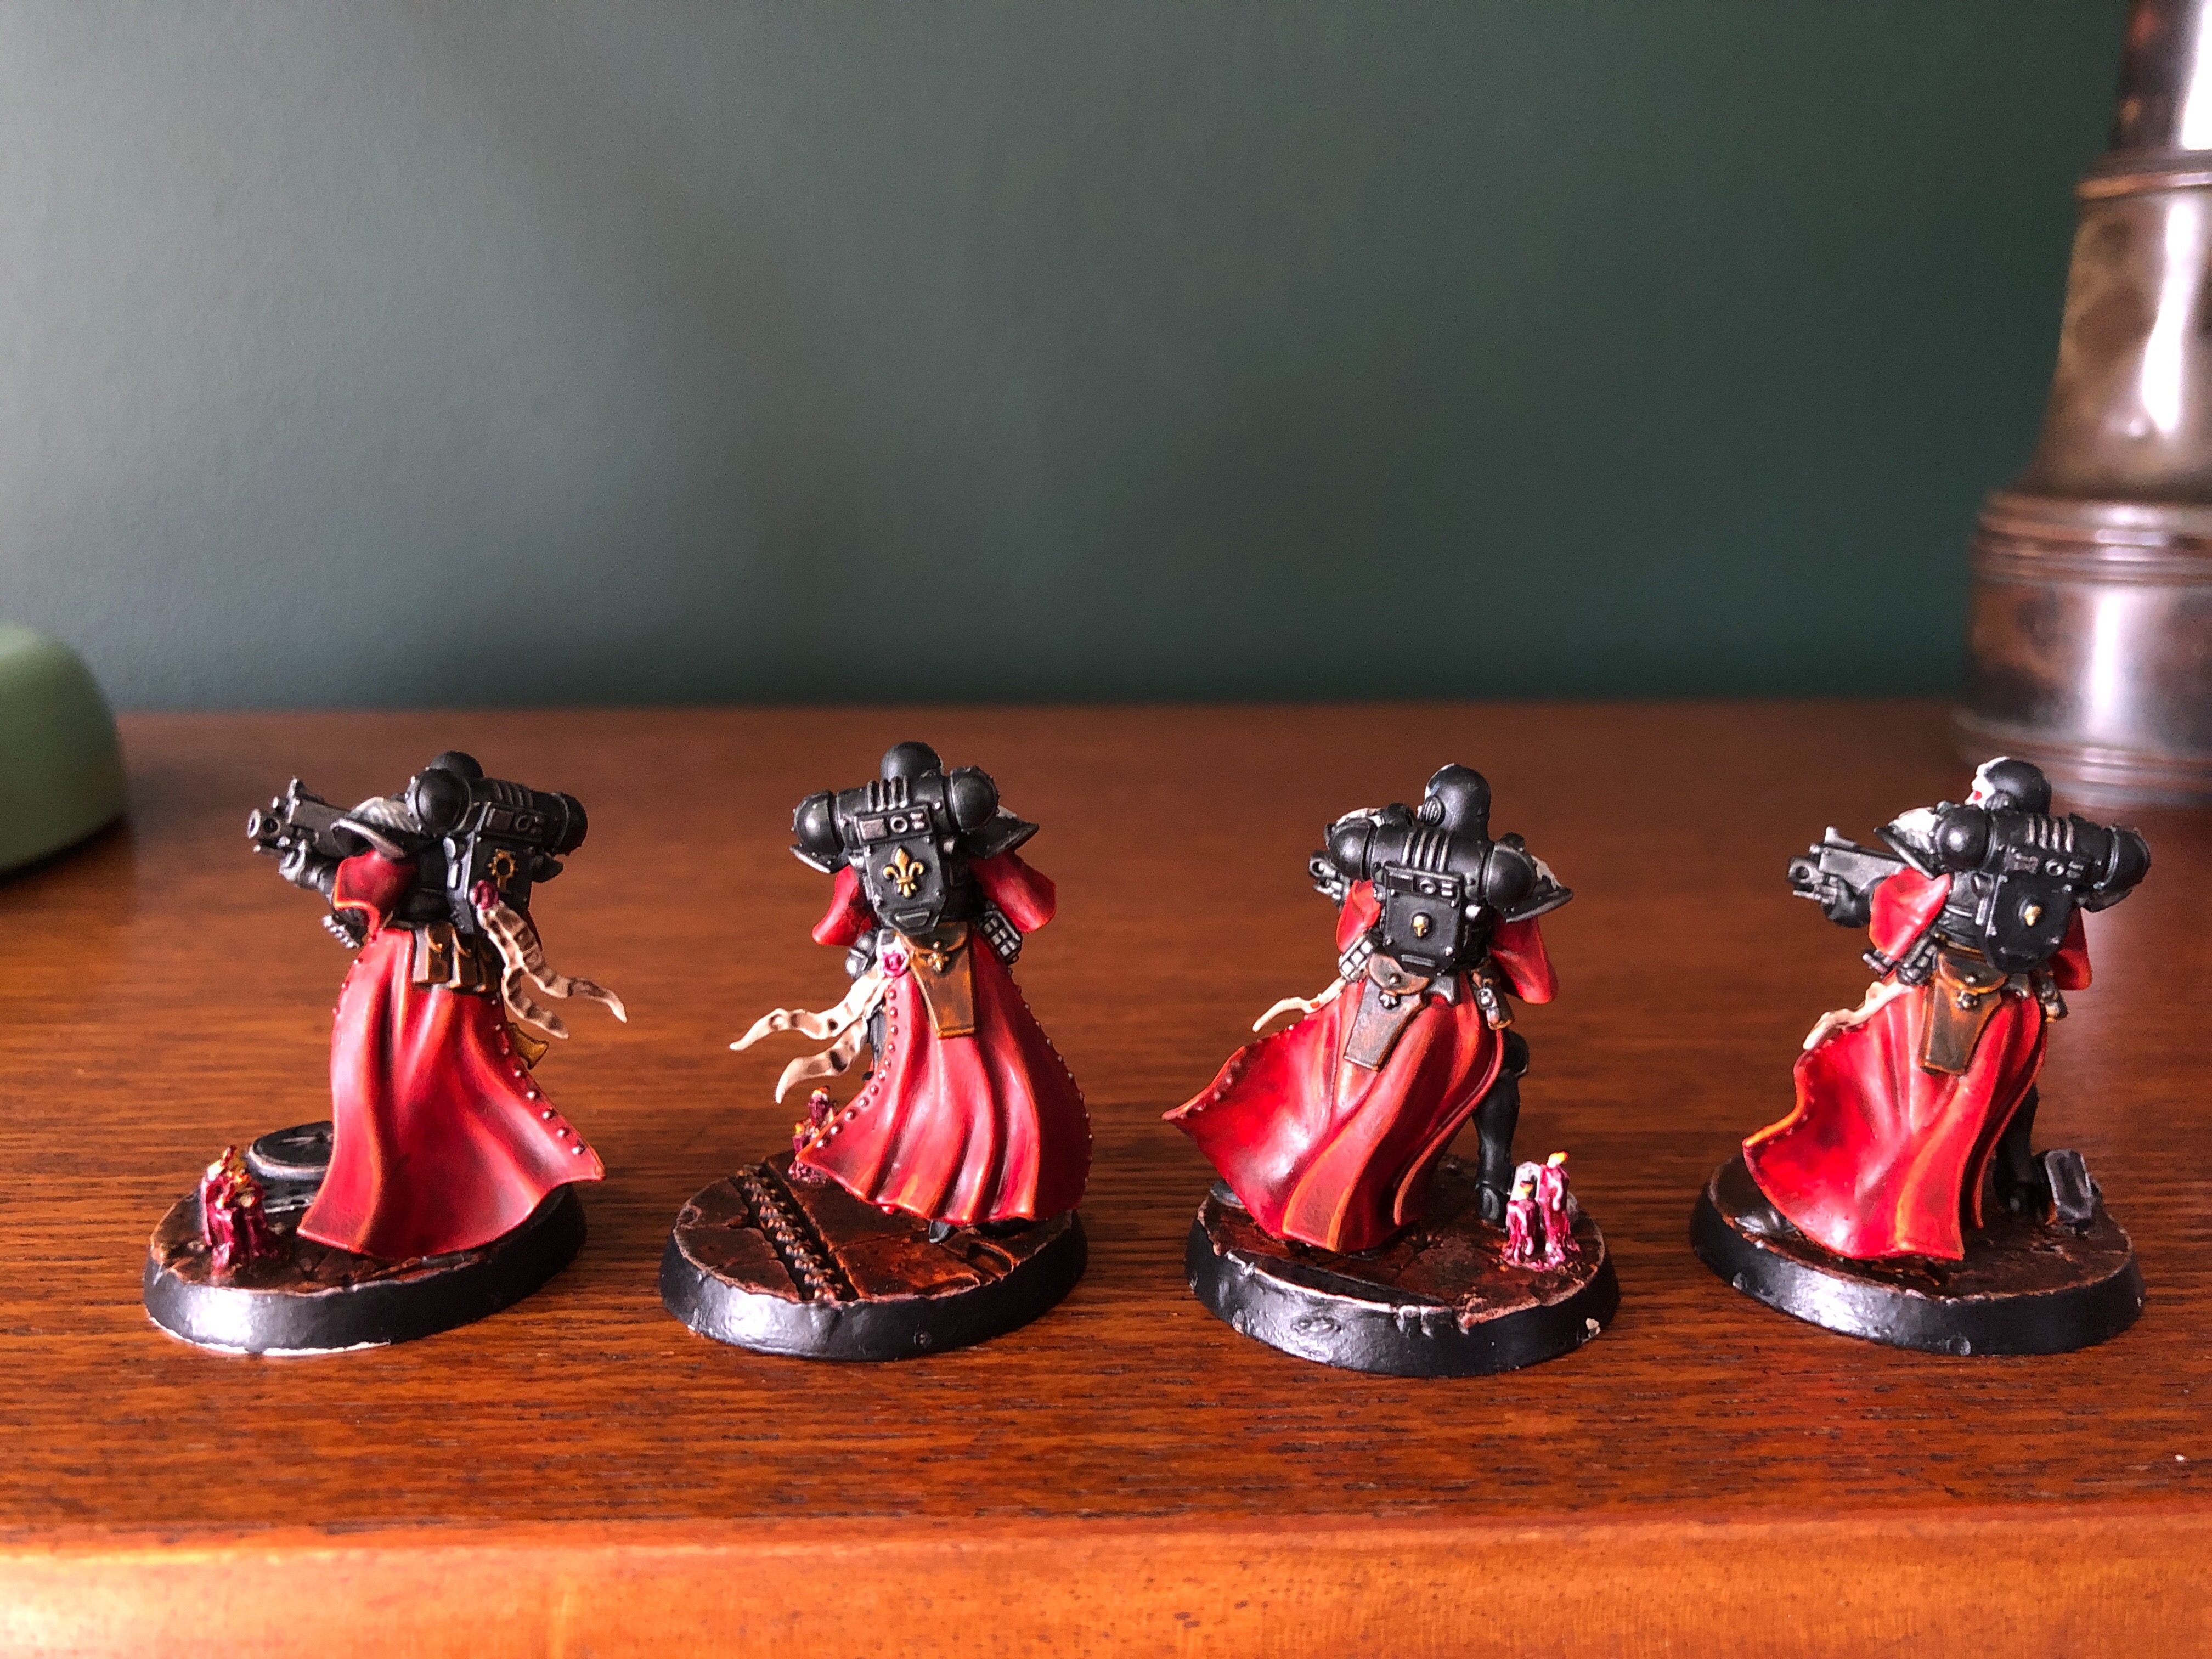
Afternoon you lovely lot. This is a very quick post as I start to paint my next four Adeptus Sororitas. I’ve posted a heap of guides on the way I’ve painted my sisters already, but after completing a few models I thought I’d explain how my starting point has changed.
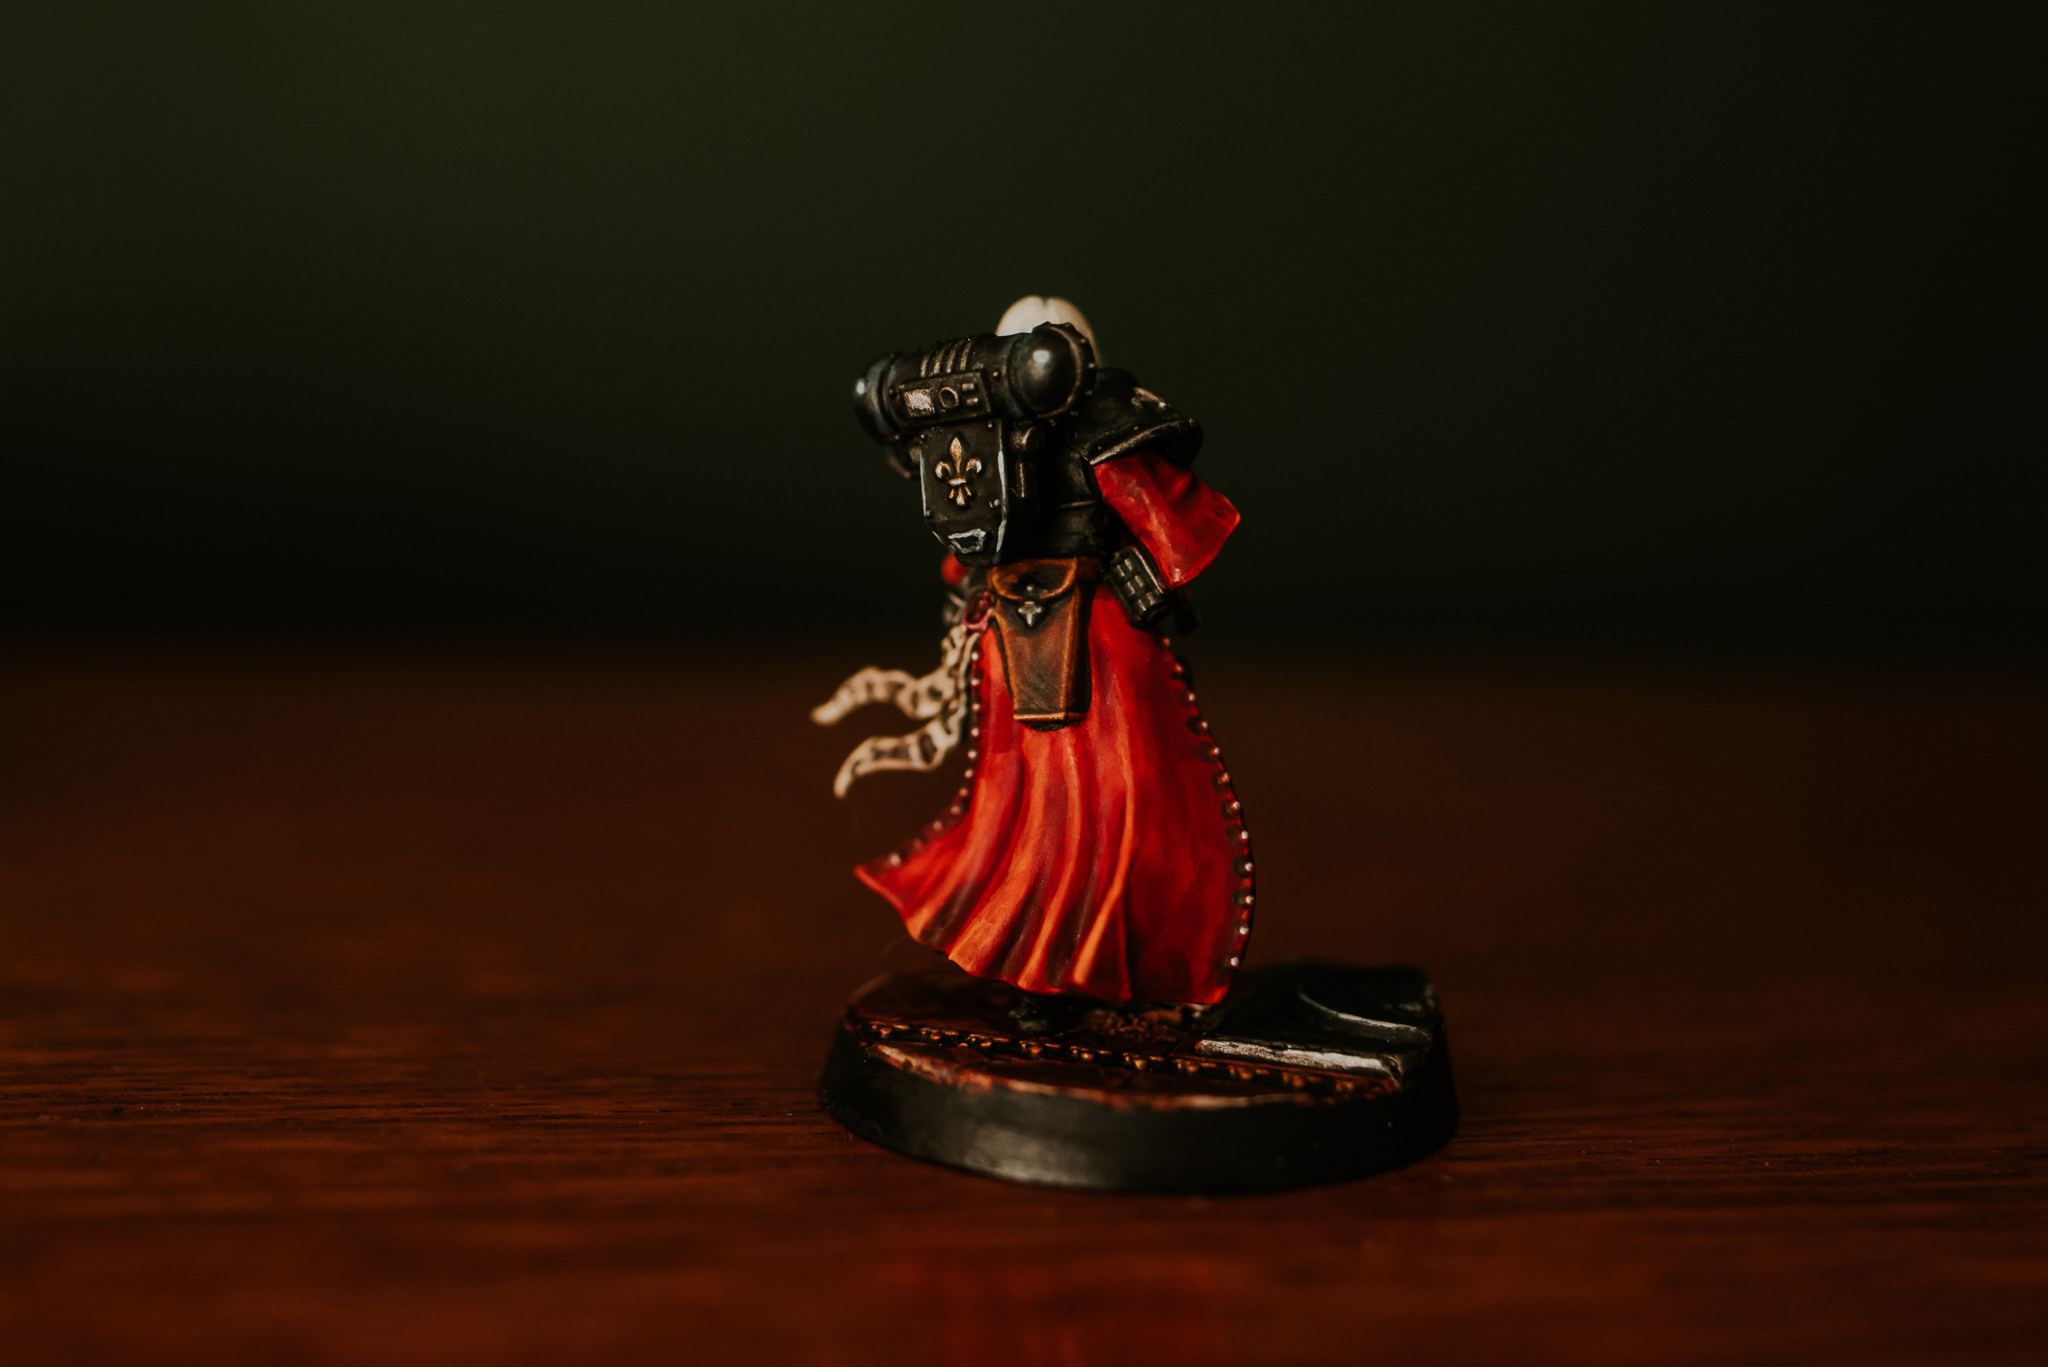
When I posted my guide before I began by painting all of the black armour on the models. But since then I’ve actually began by painting all of the insides of the robes. So in this case using two coats of Contrast Volupus Pink.
The reason I now start there is because SWEET JESUS is it hard to paint the insides of the robes neatly when you pre assemble like I do. You can see how messy they are from that initial colour. After I’ve applied the pink I then tidy it up with Wraithbone & move onto the next step.
Like I say just a quick post to say how I’ve altered my process a bit.
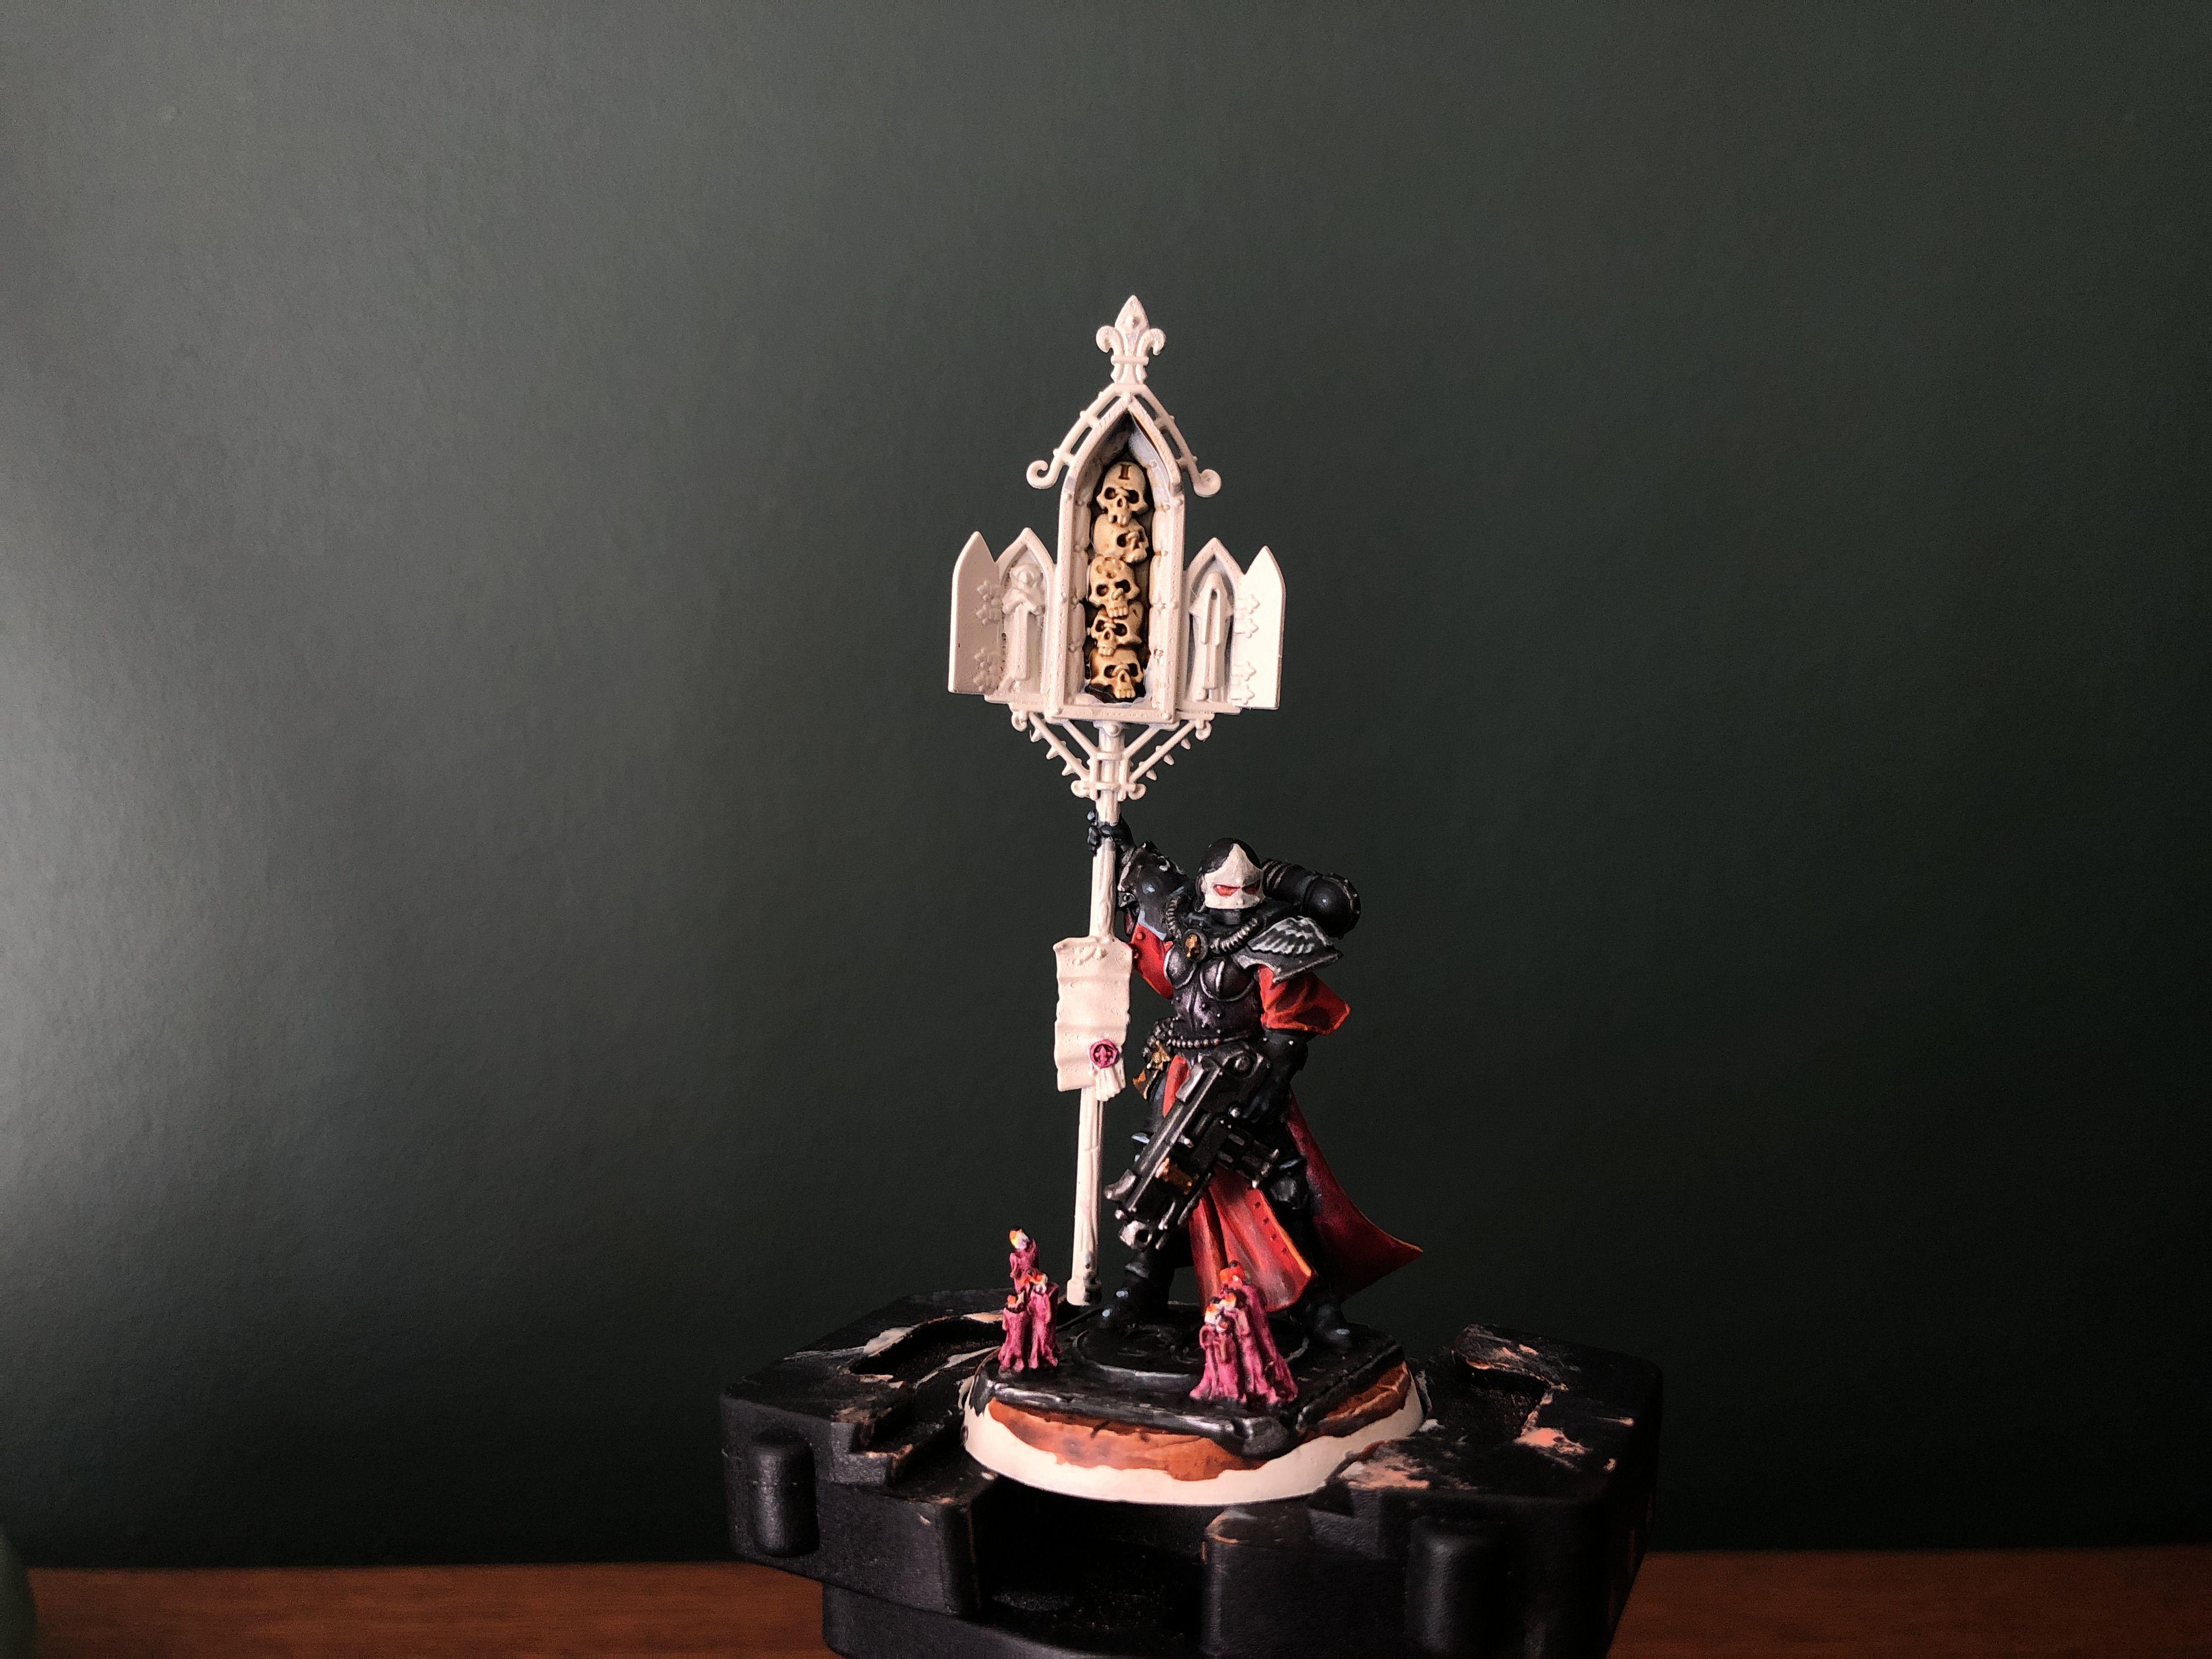
Oh & that mighty banner of skull laden awesomeness is definitely getting a tutorial of its own along with the much overdue face tutorial on the Sister Superior. YES!
See you on the next one
Much Love
Eternity Gate
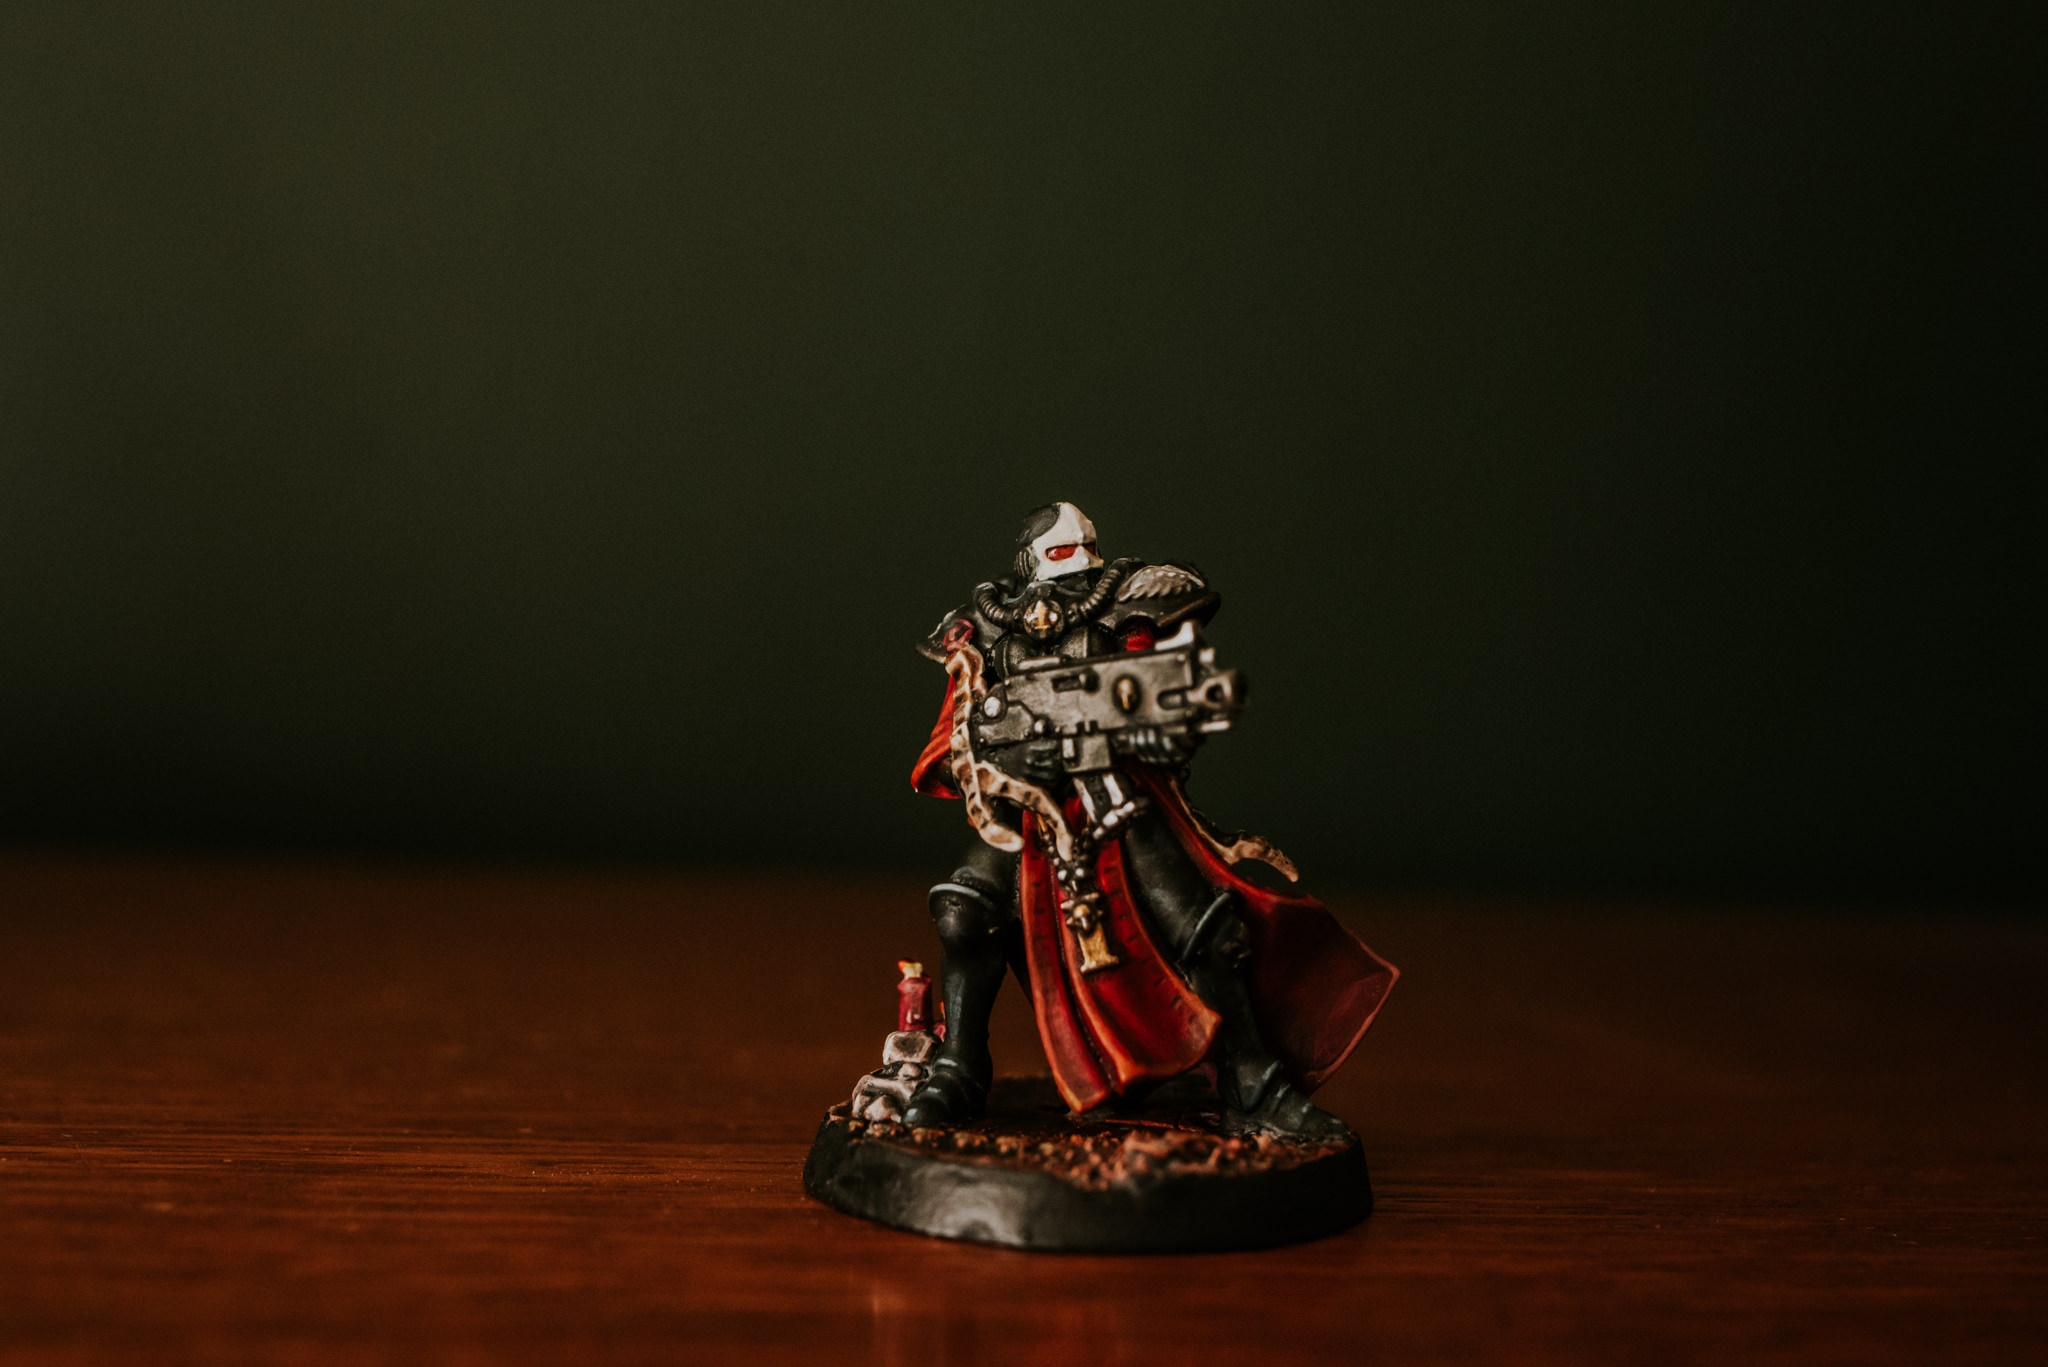
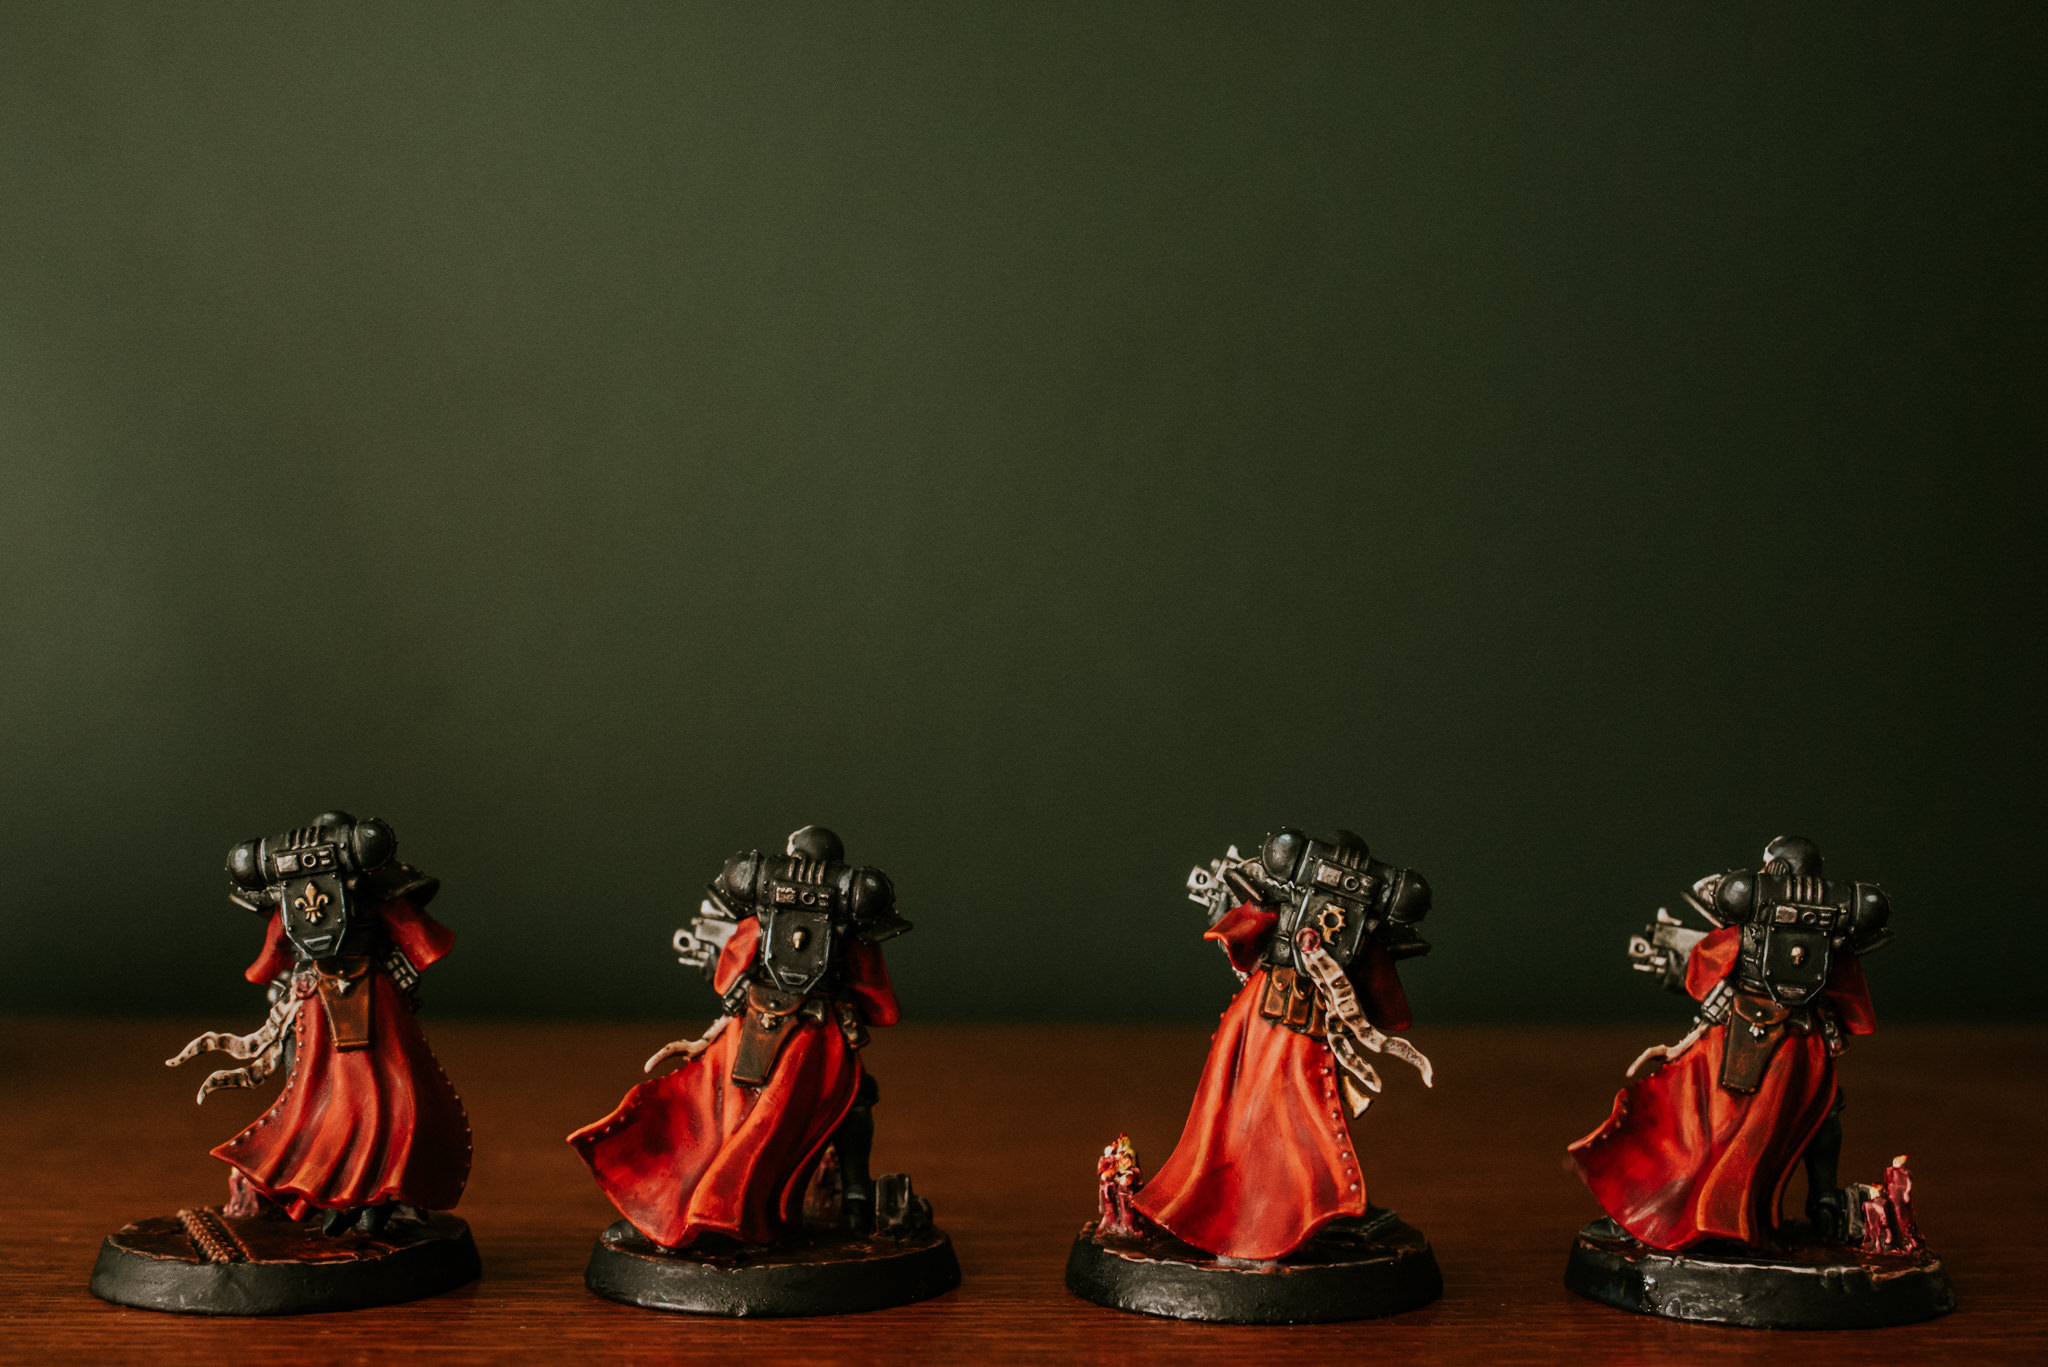
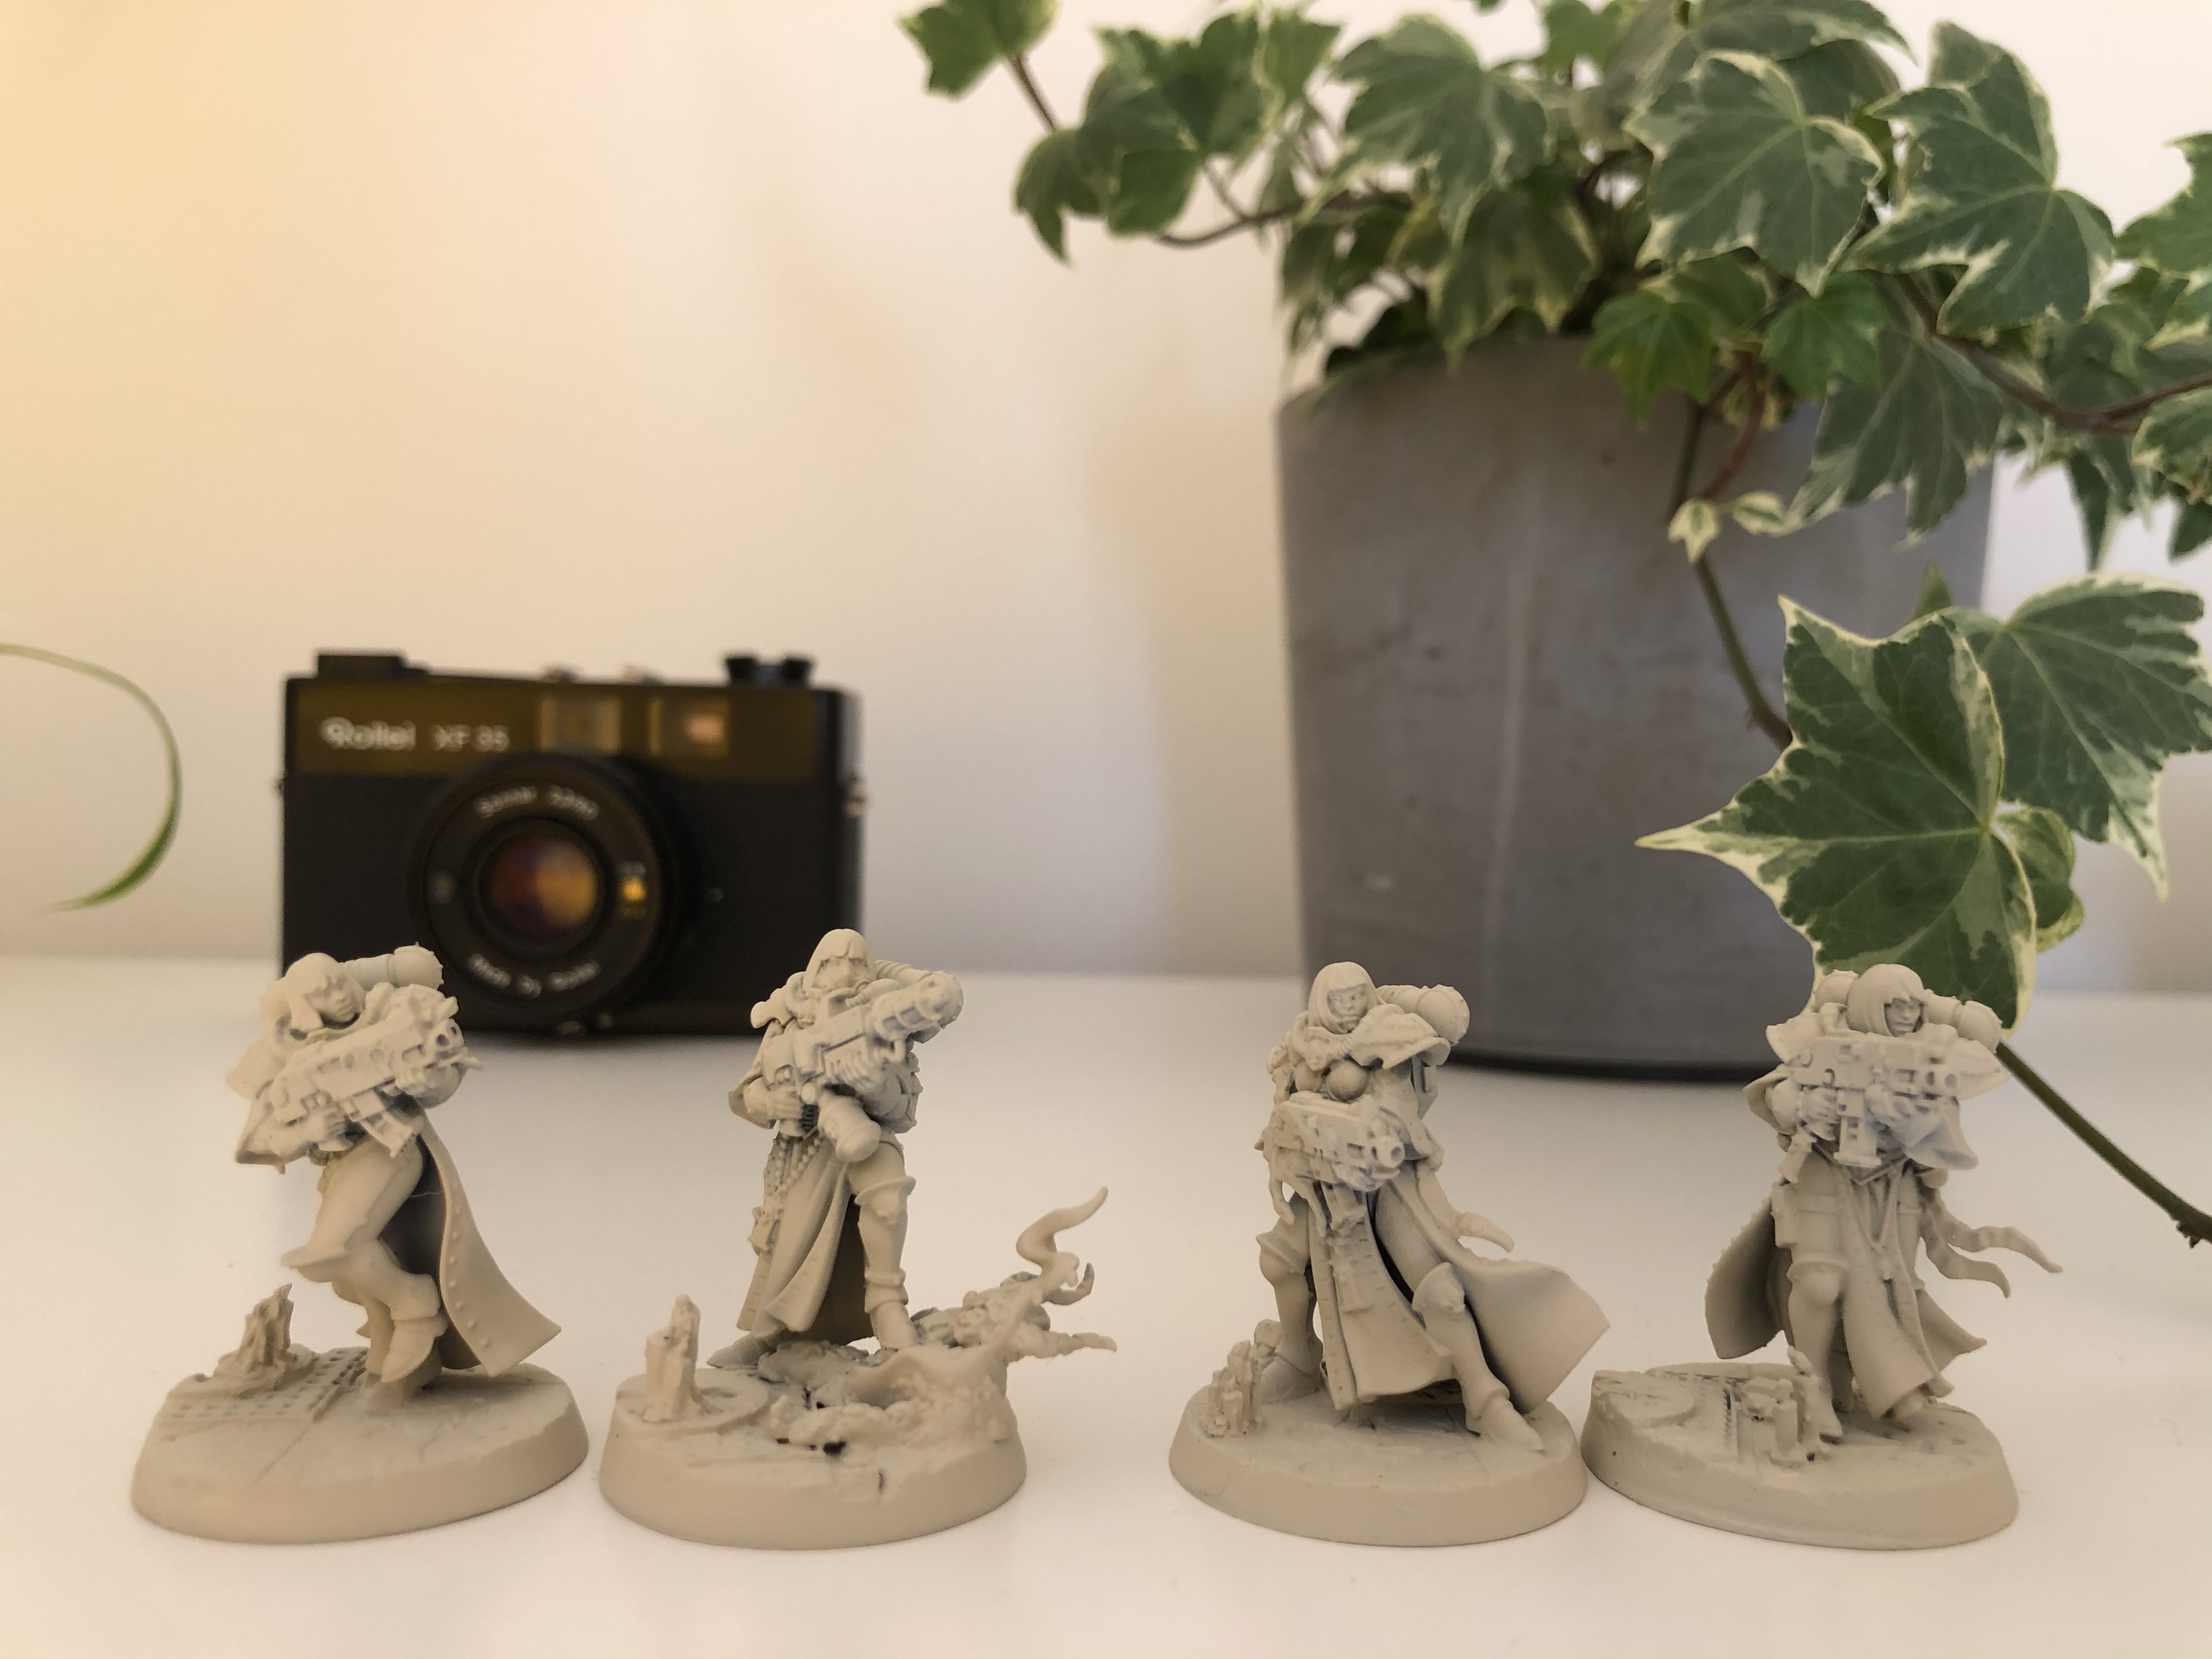
BACK IN BLACK ~ FOUR MORE SISTERS FOR THIS MISTER
IT’S BEEN A WHILE
*****
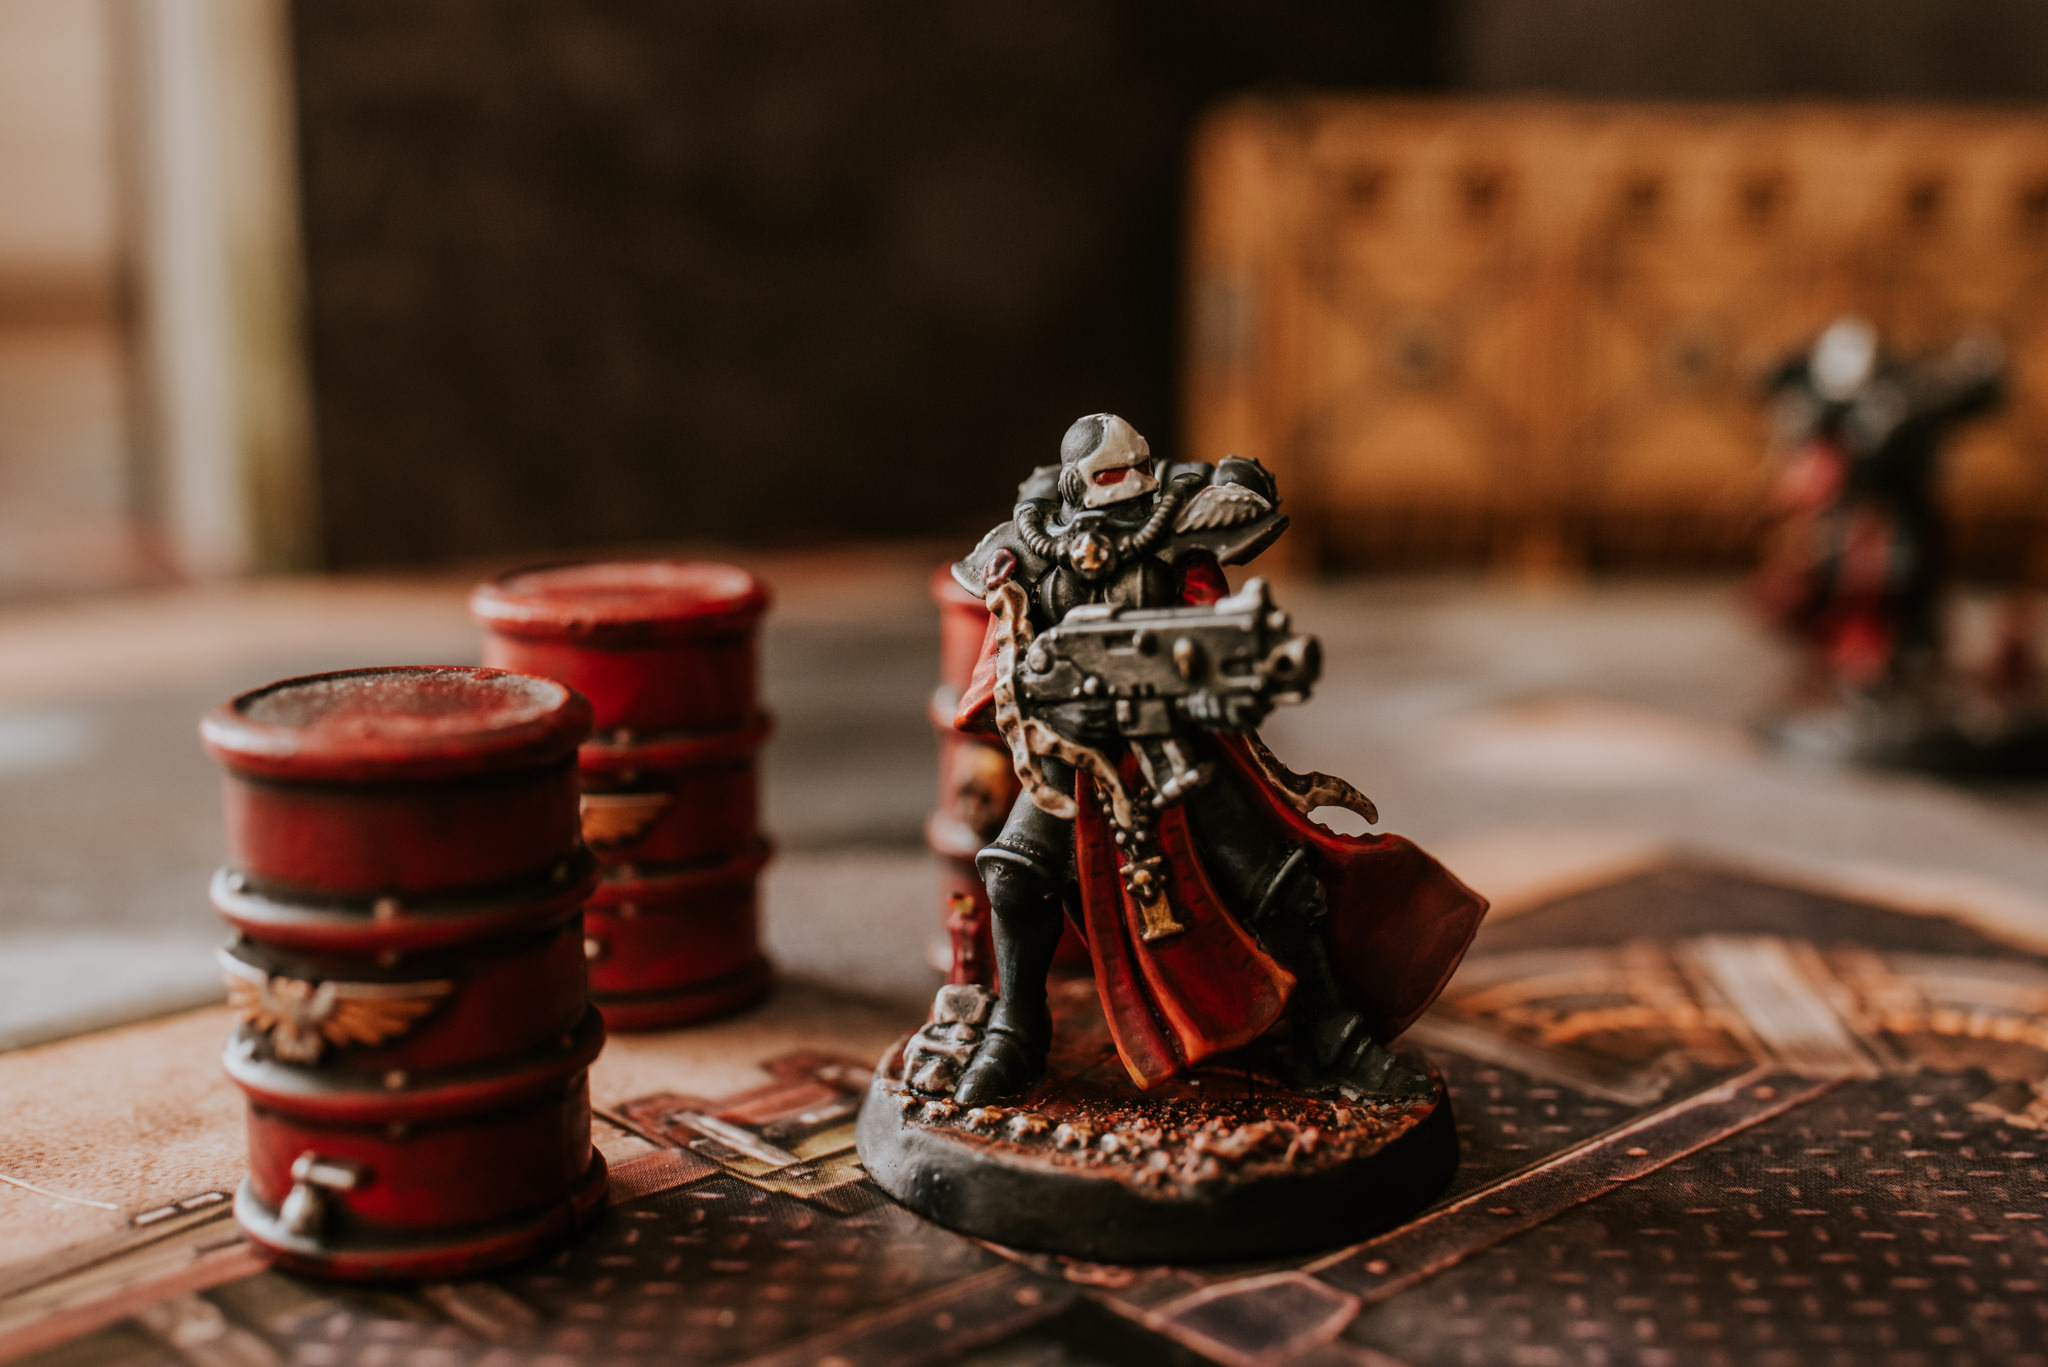
Hello there lovely people, it’s been a little while since I posted a project update but this time I wanted to paint the next four without sharing a tutorial. It’s been awesome during lock down to crack on & get the next four sisters ready to purge in the Emperors name.
I realise I promised a painting faces tutorial but i’m gonna do that with the next post as I’ll be tackling the final four Sororitas including the Sister Superior. What more perfect a place is there for a step by step than with the squad leader herself. YES!
Much Love
Eternity Gate


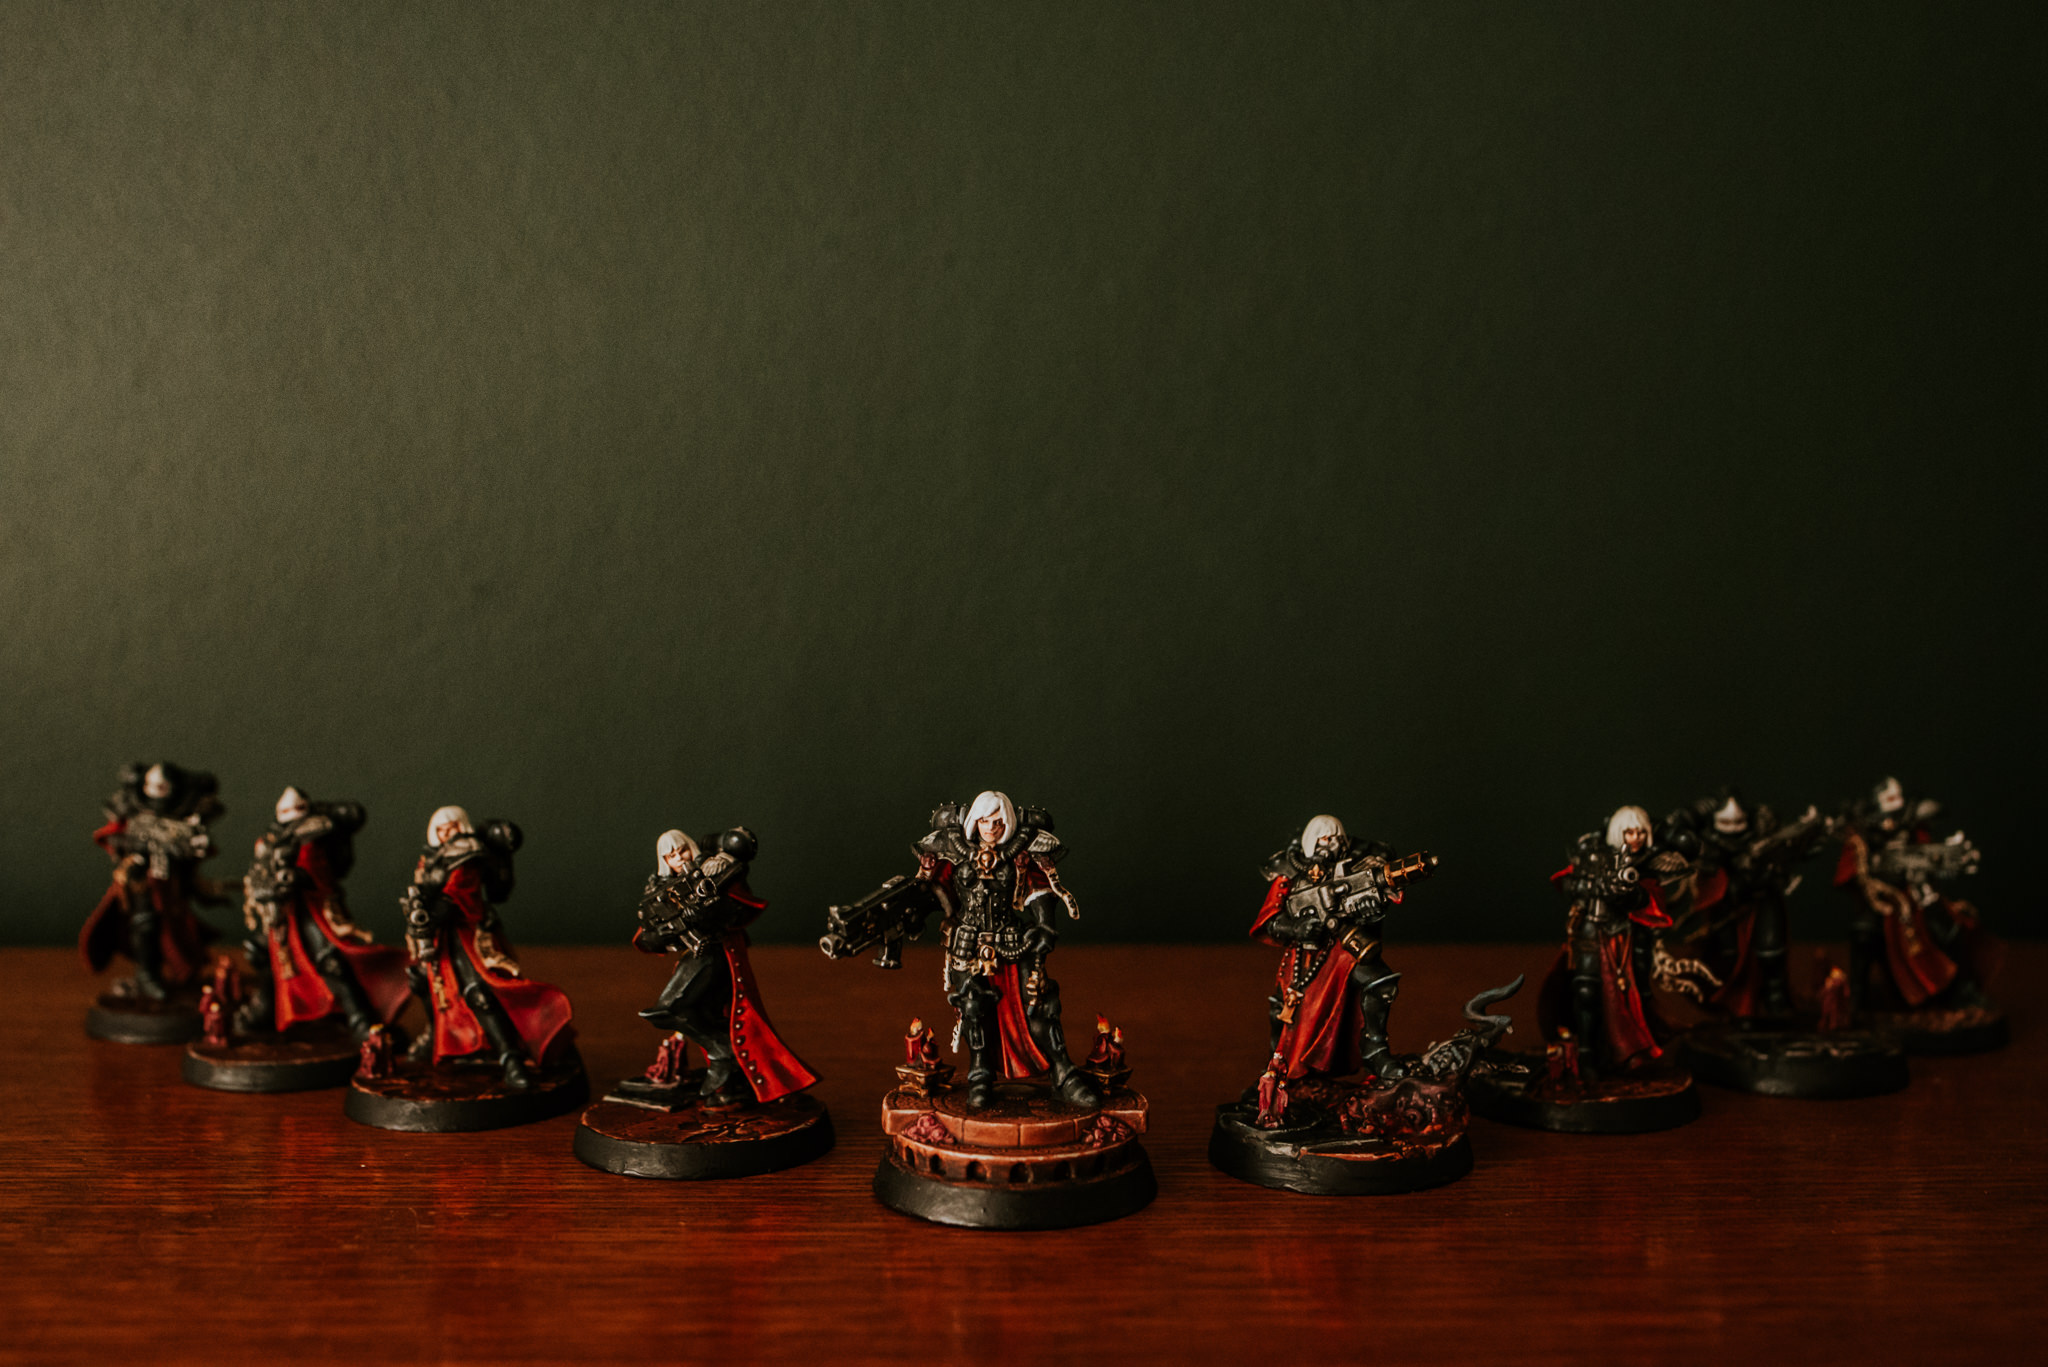
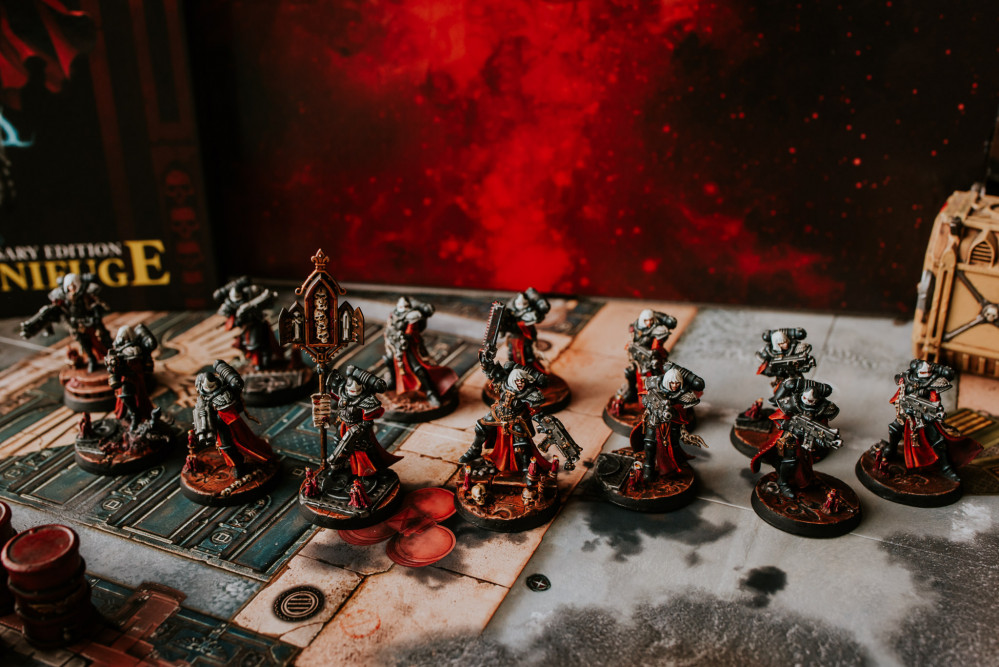
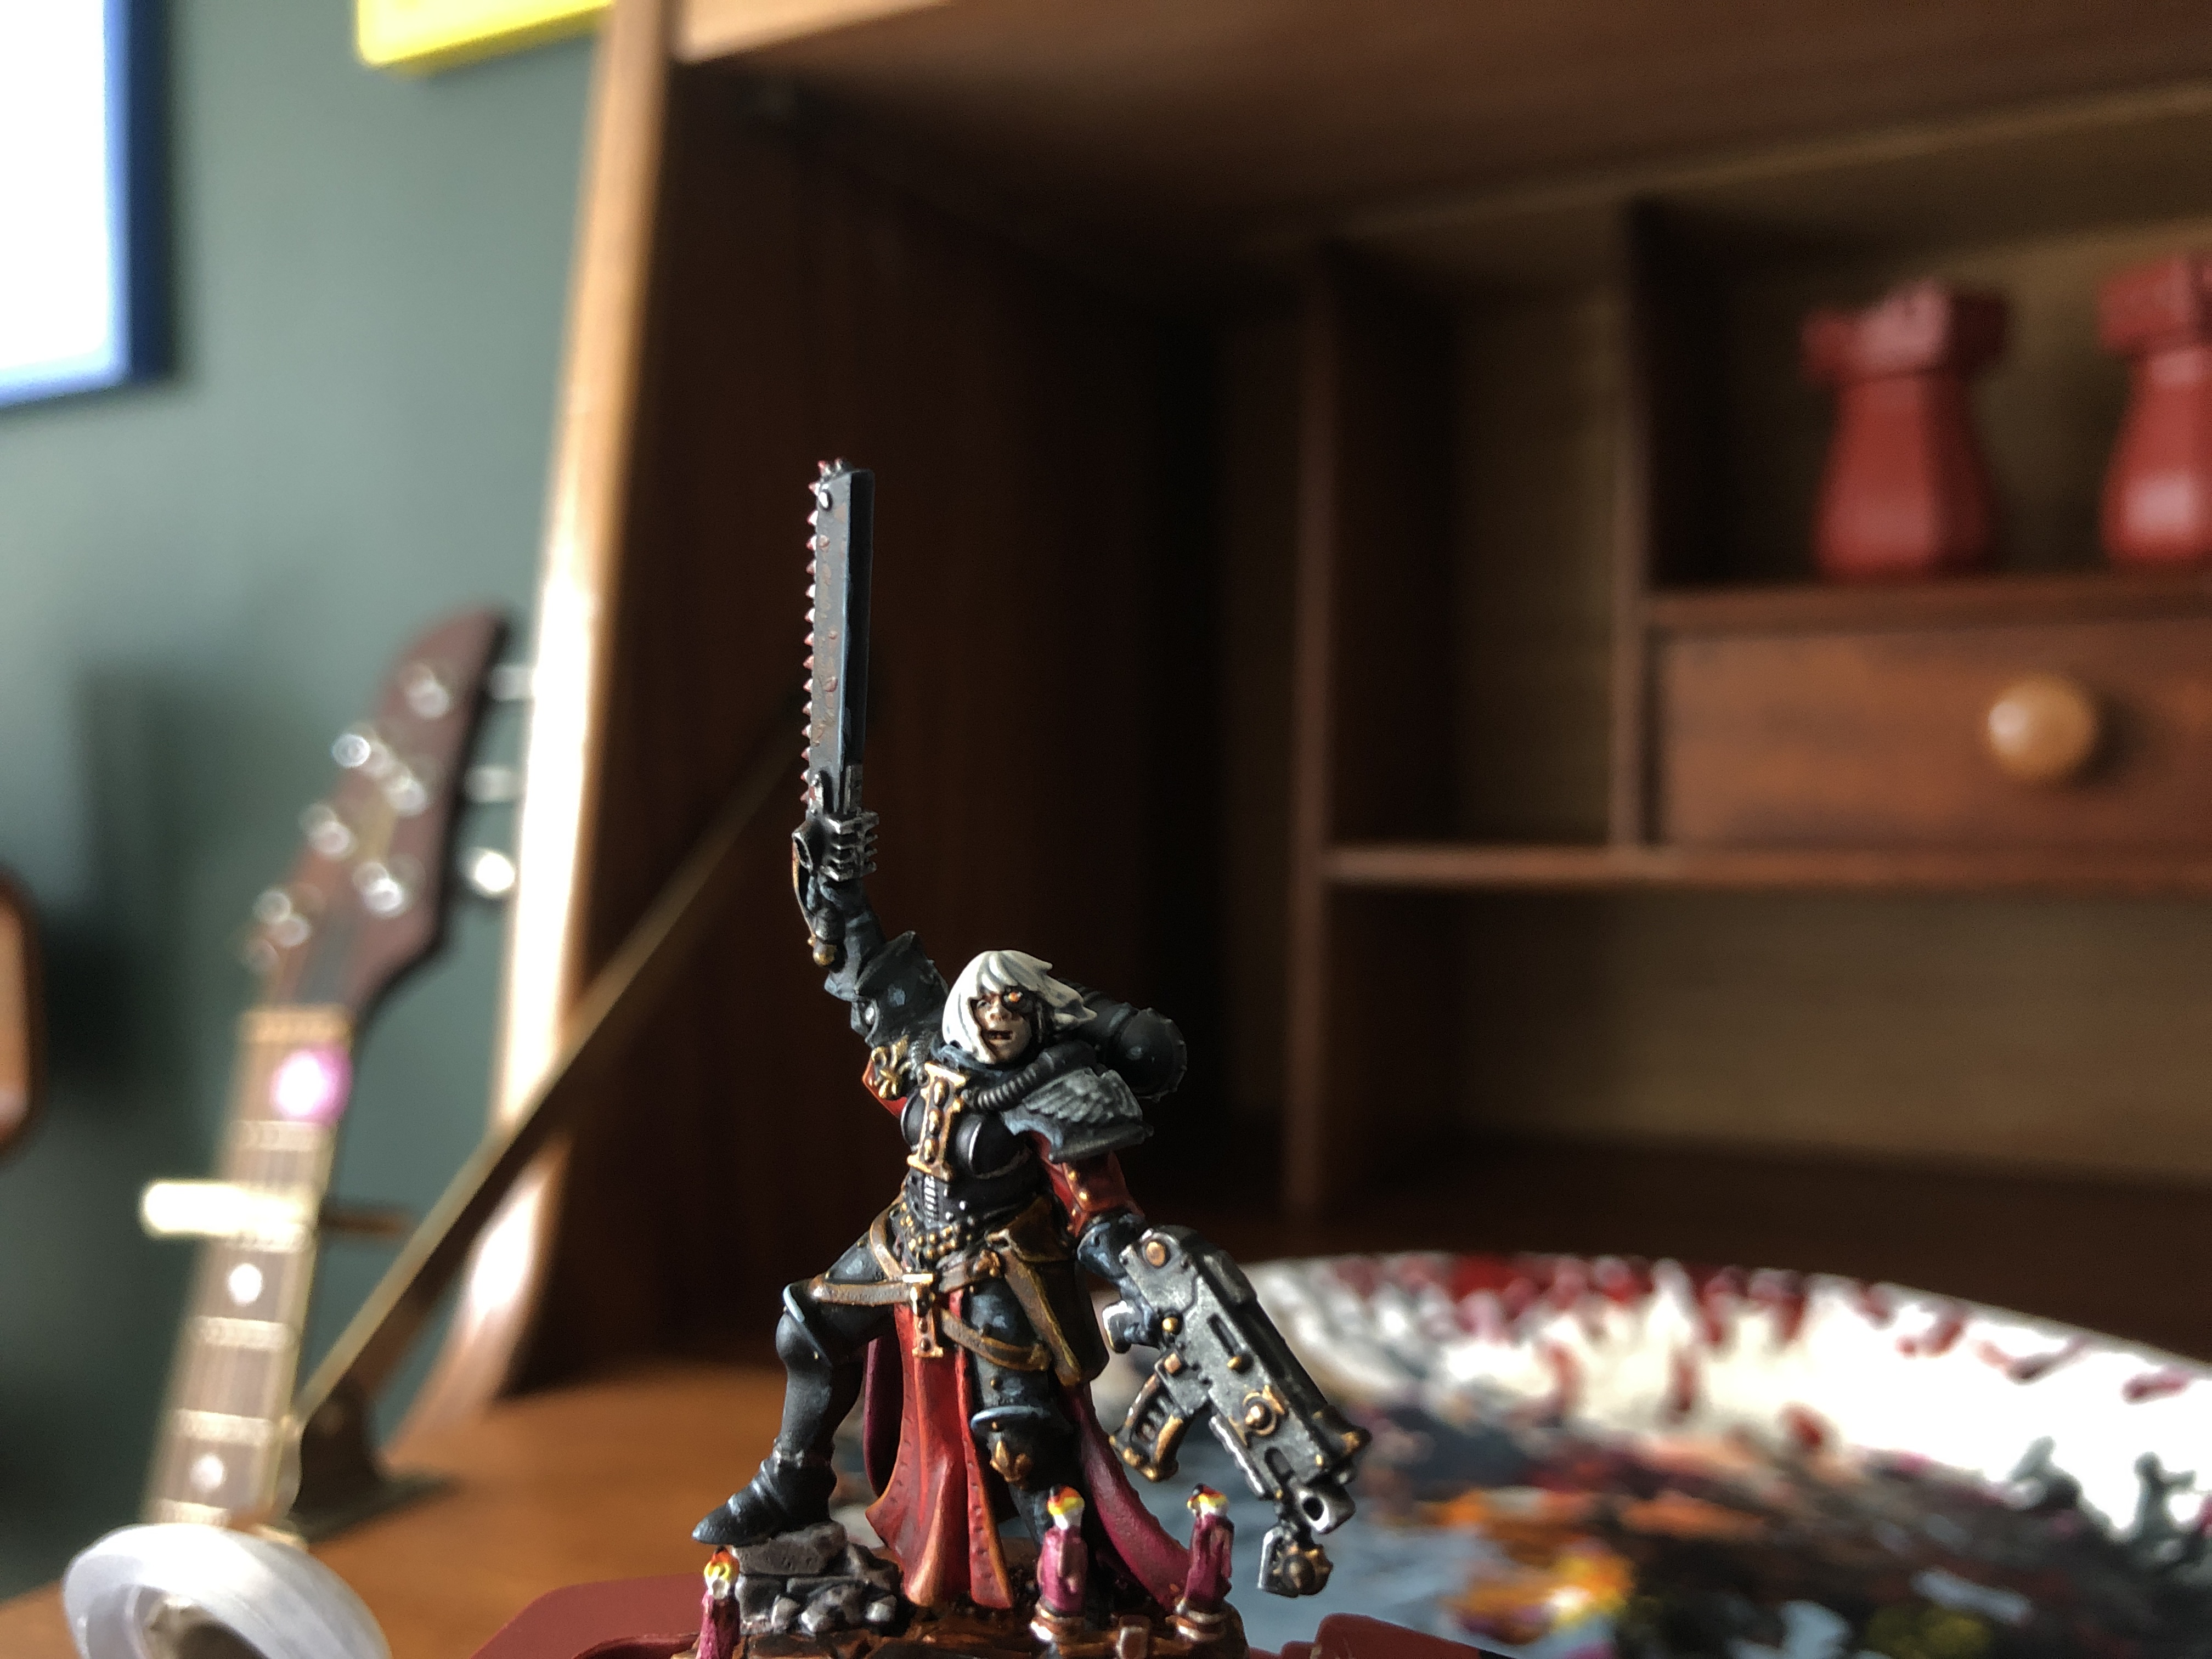
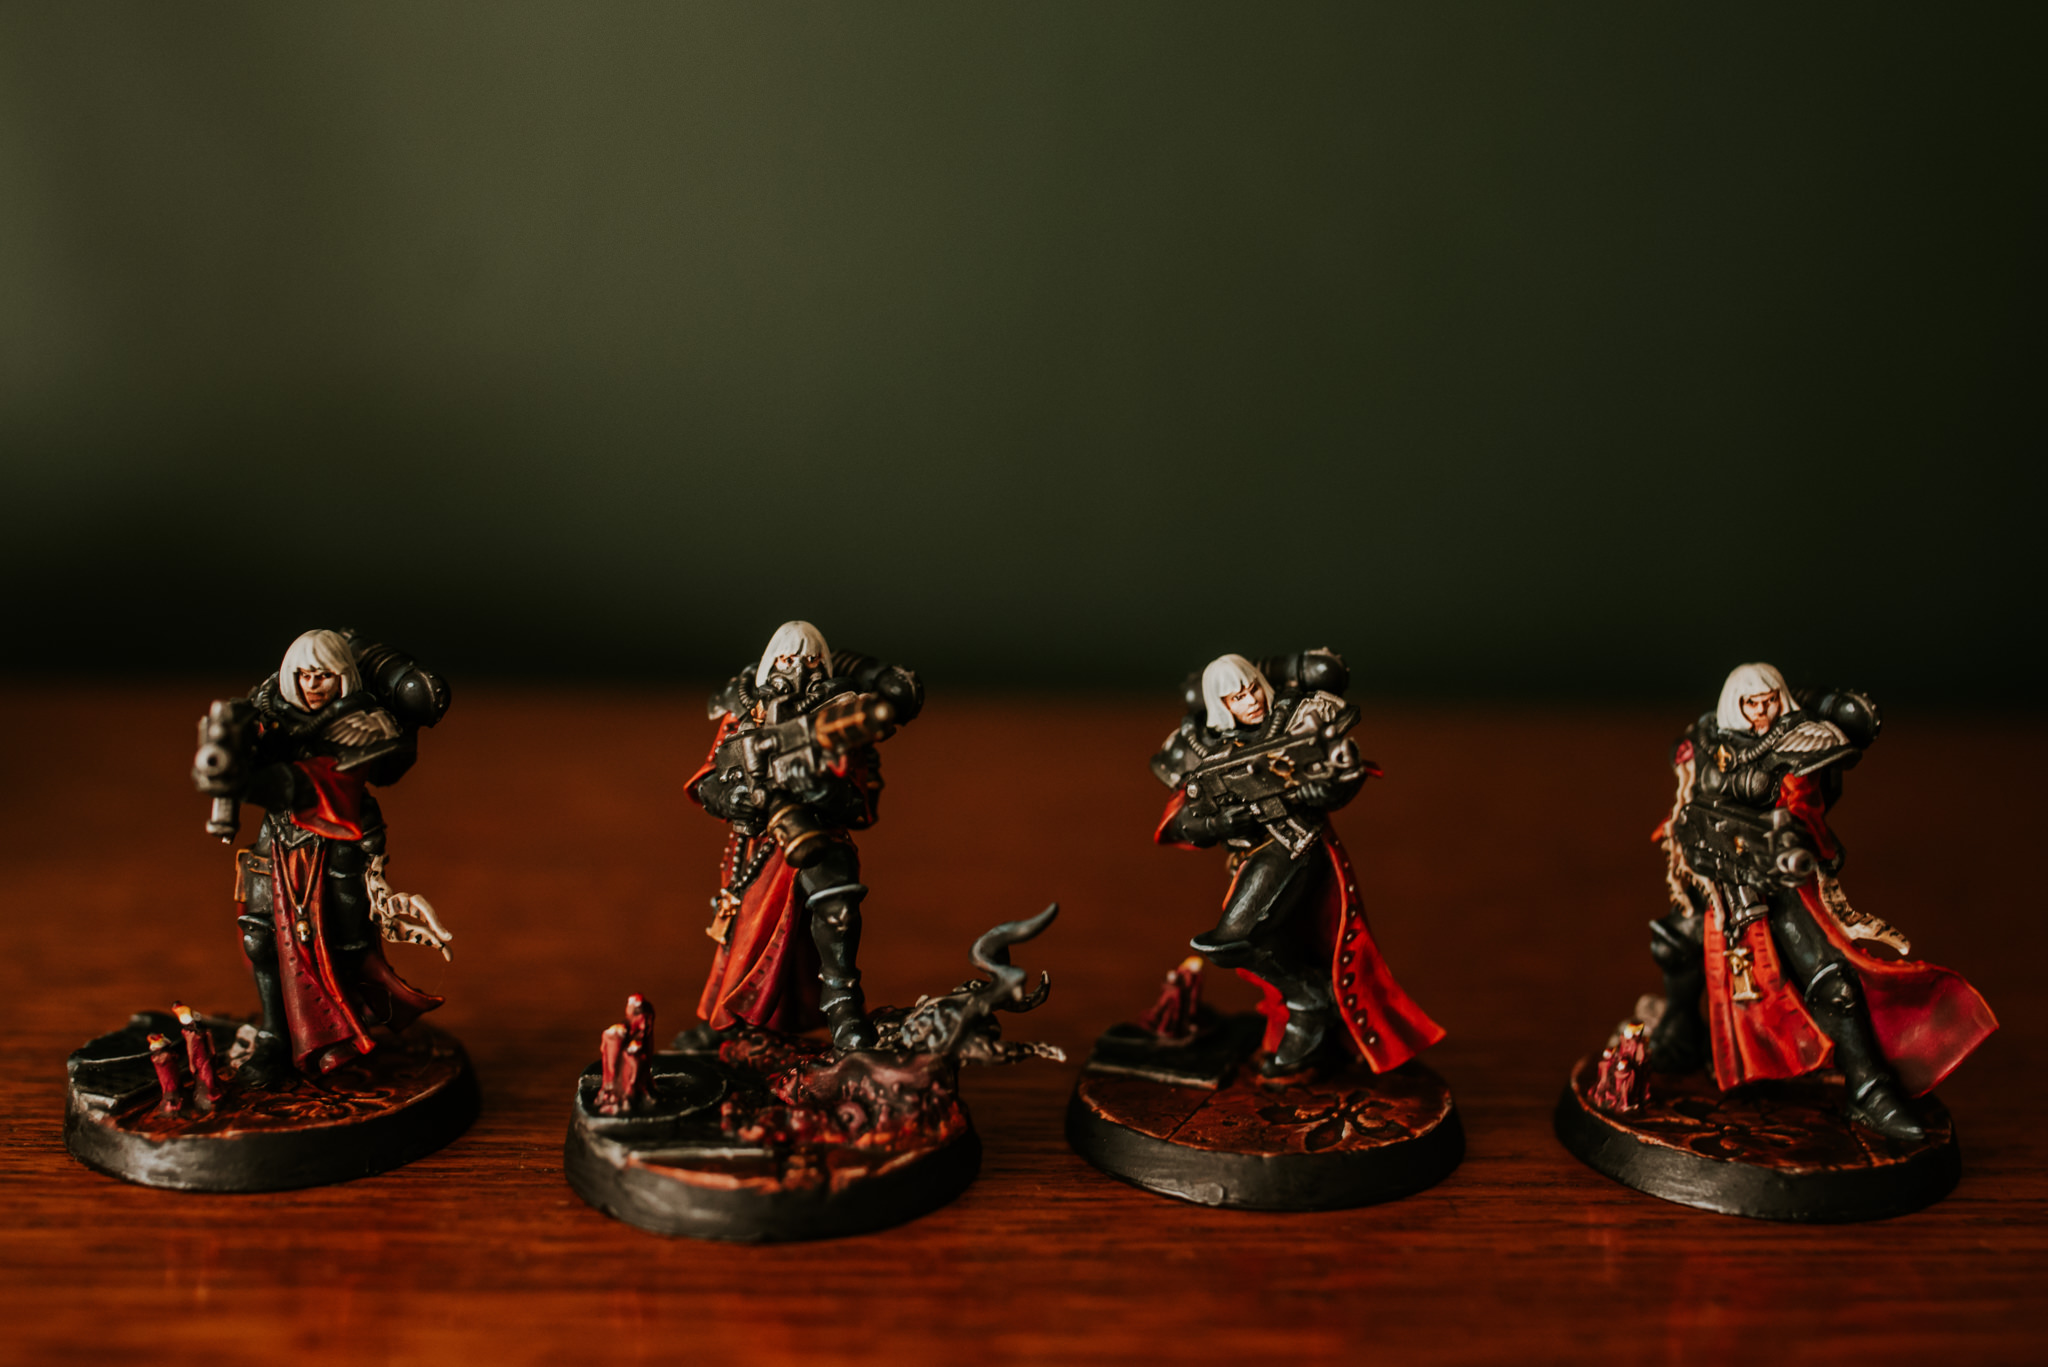
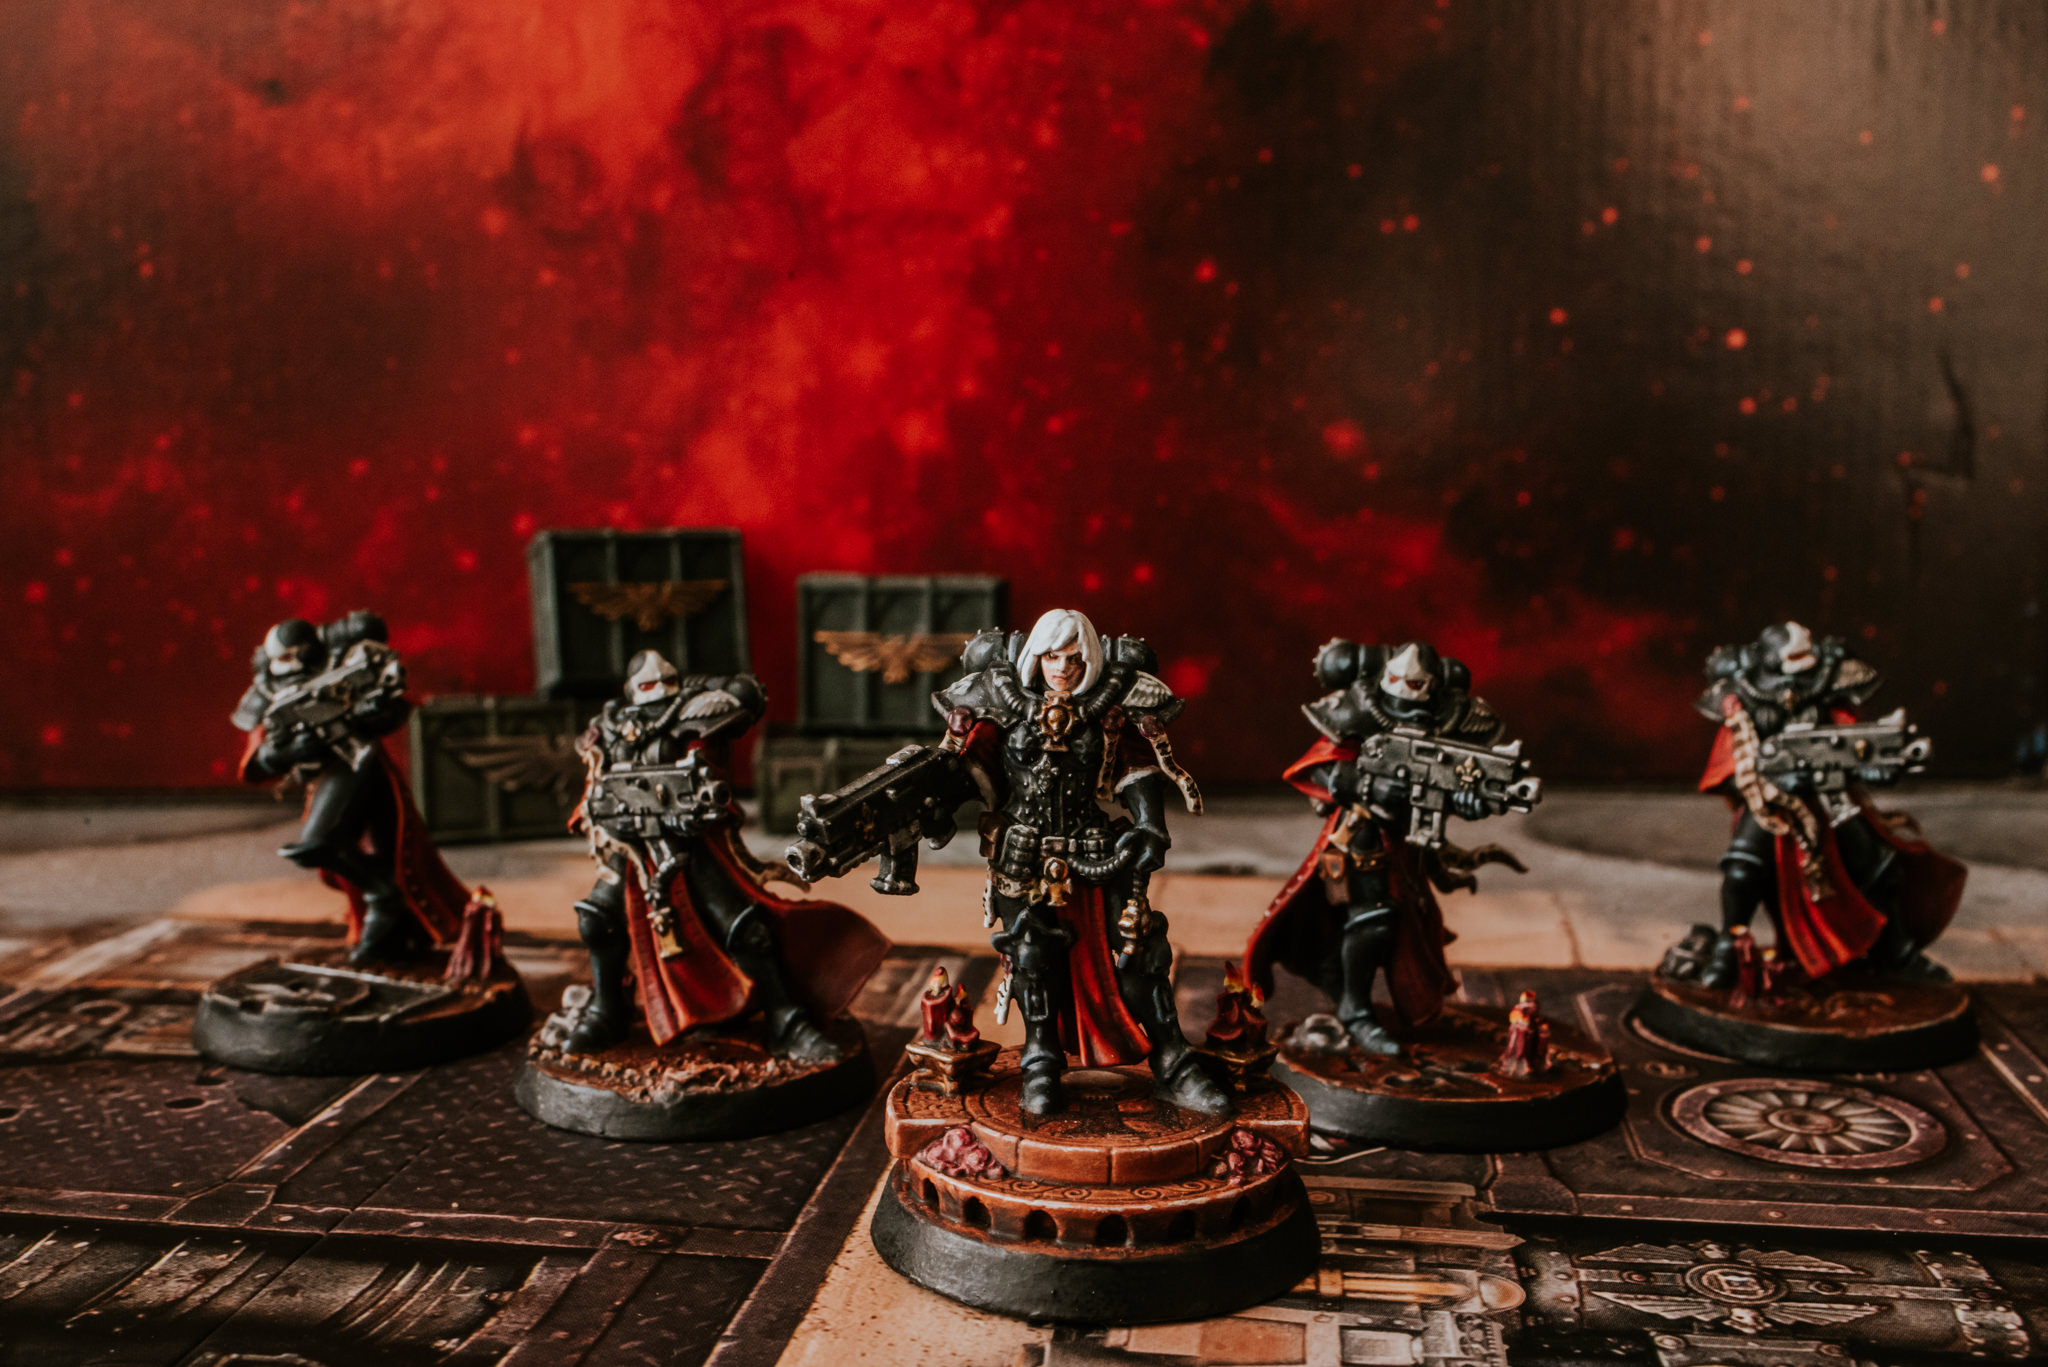
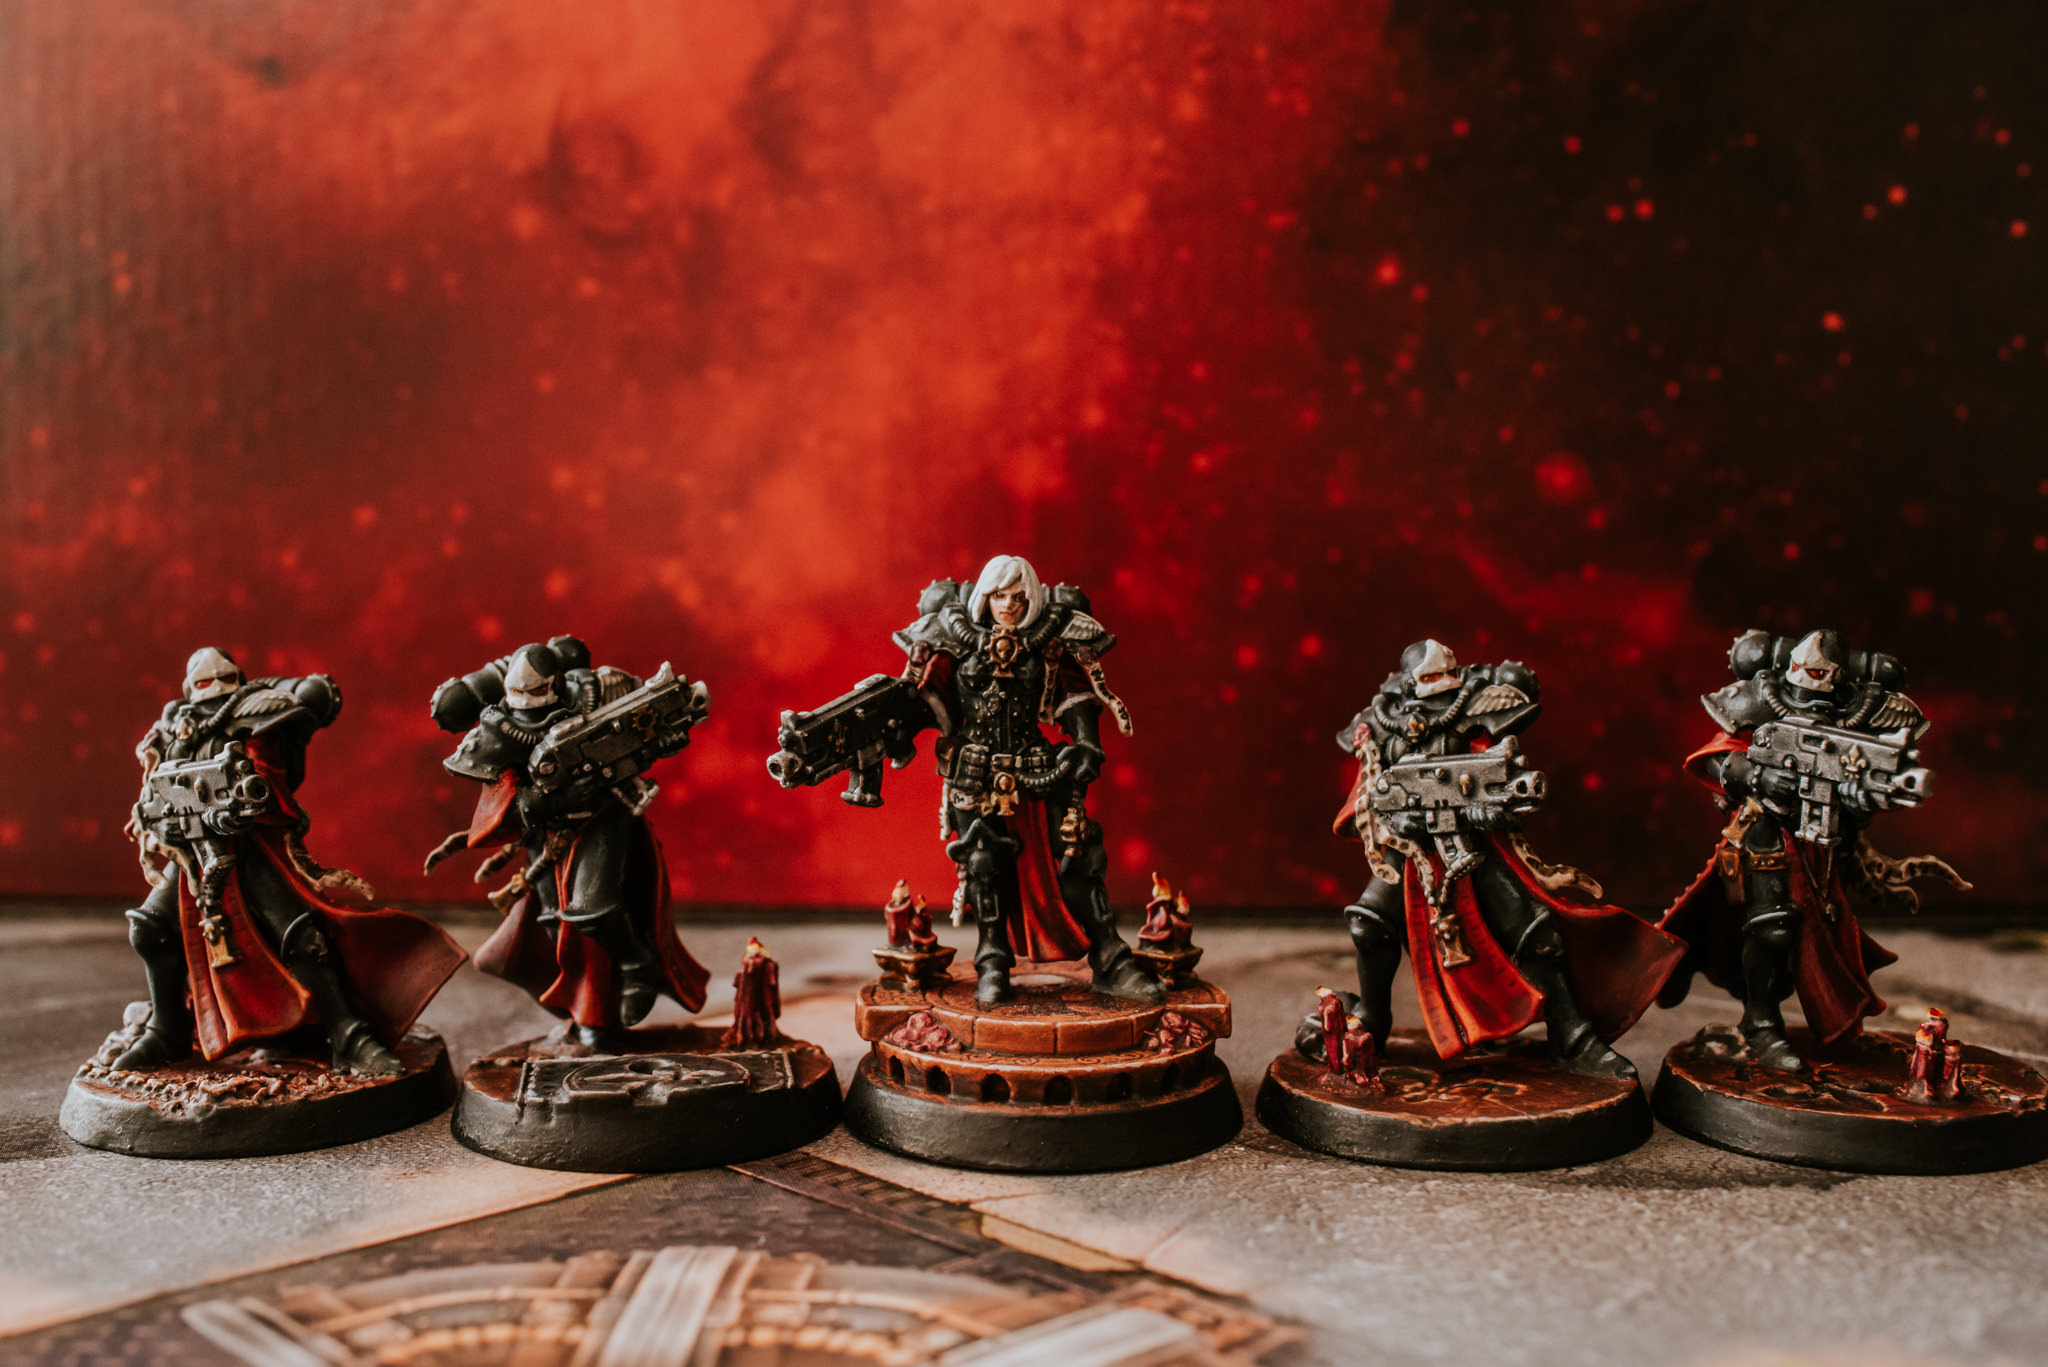
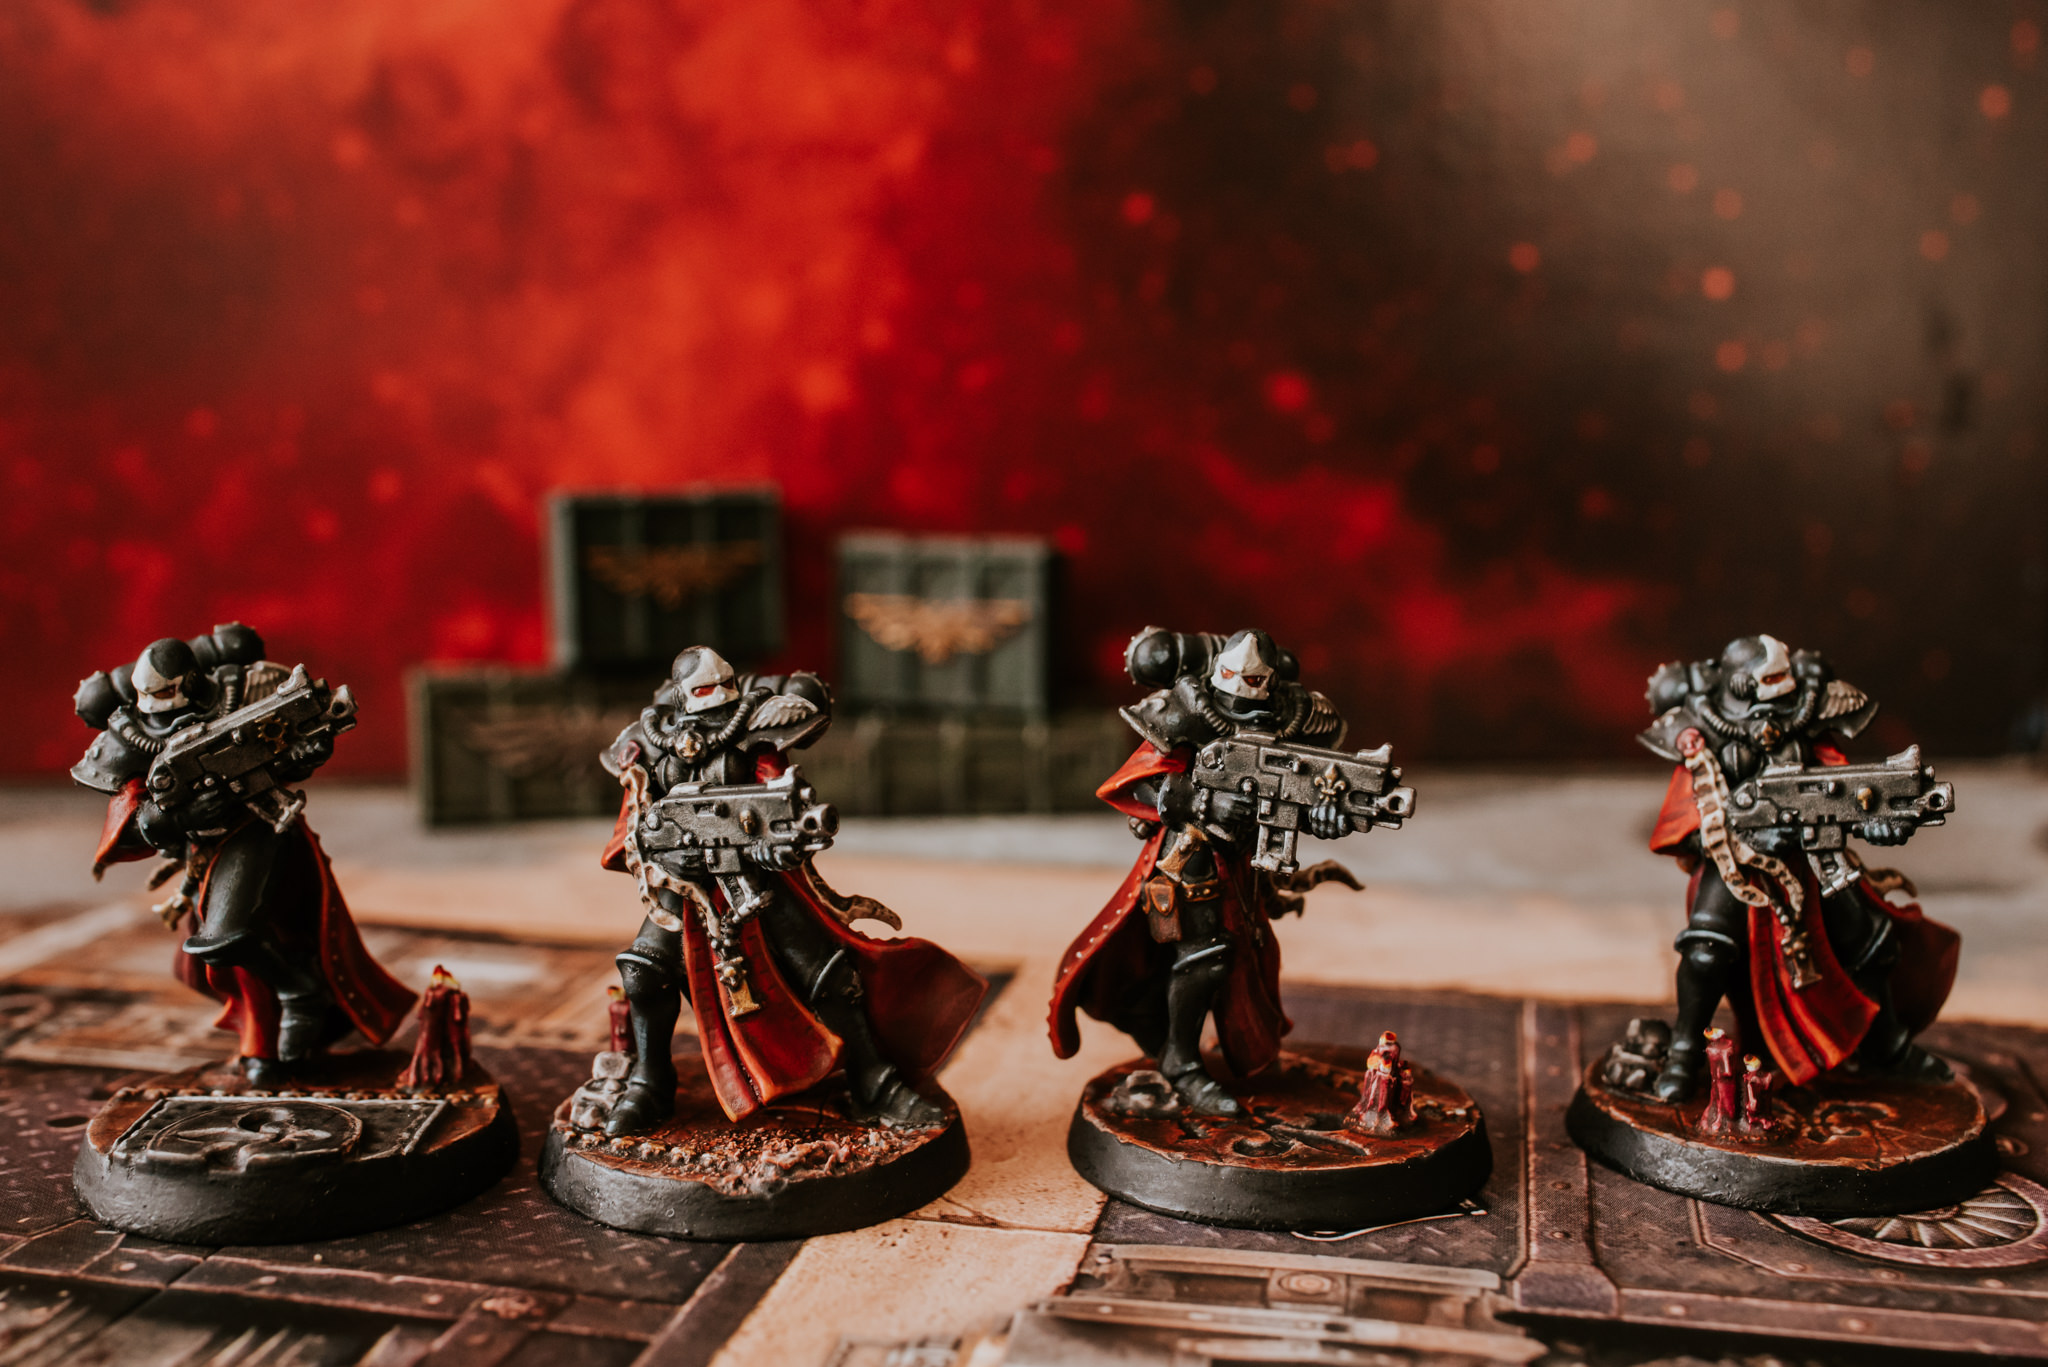
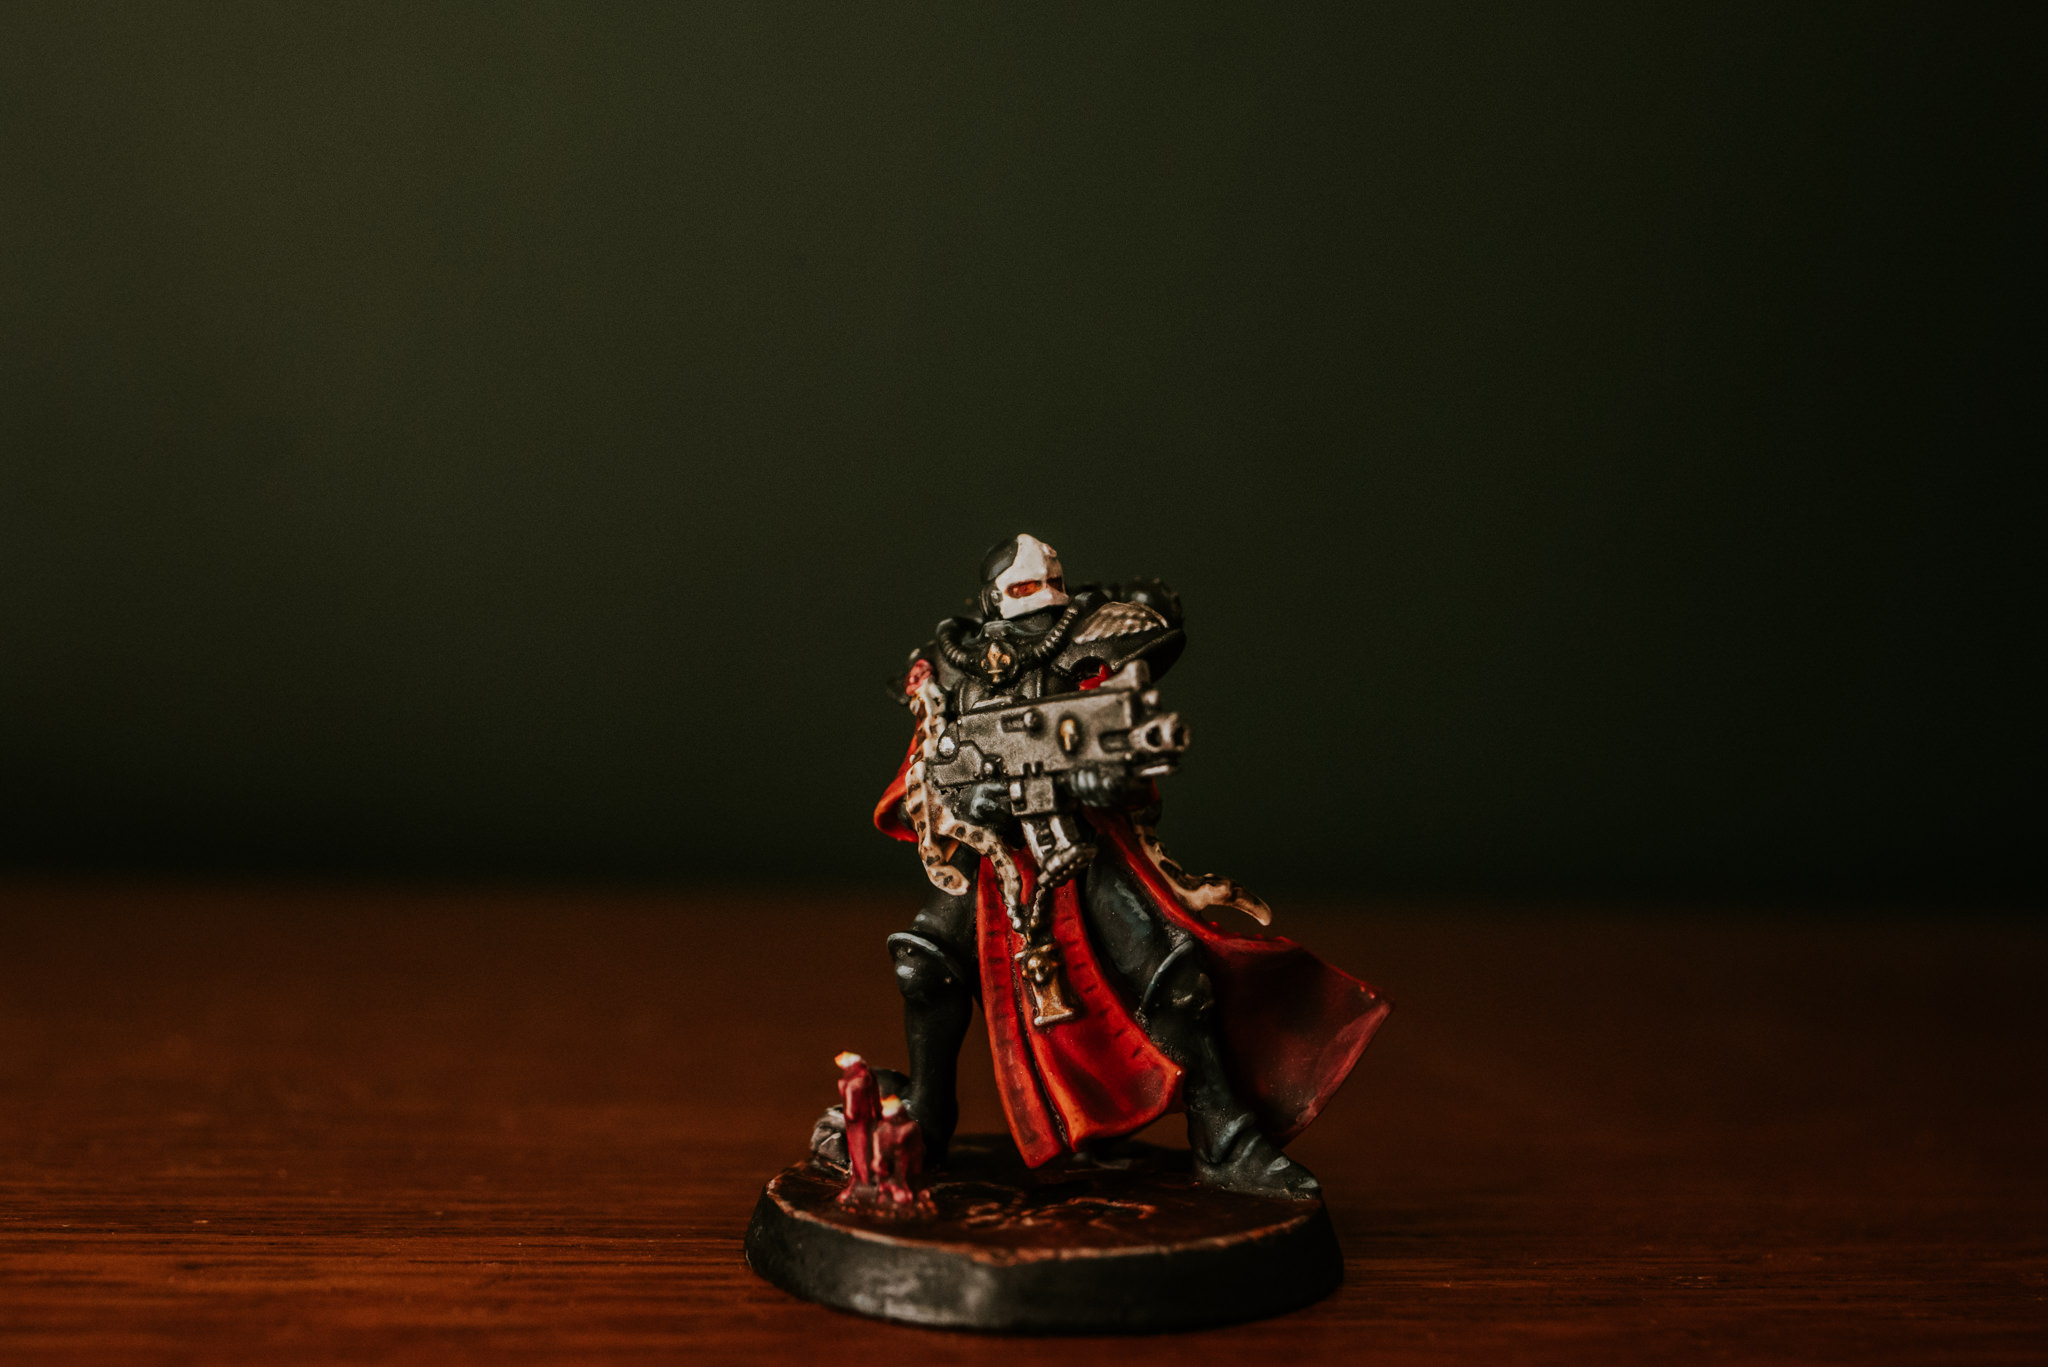
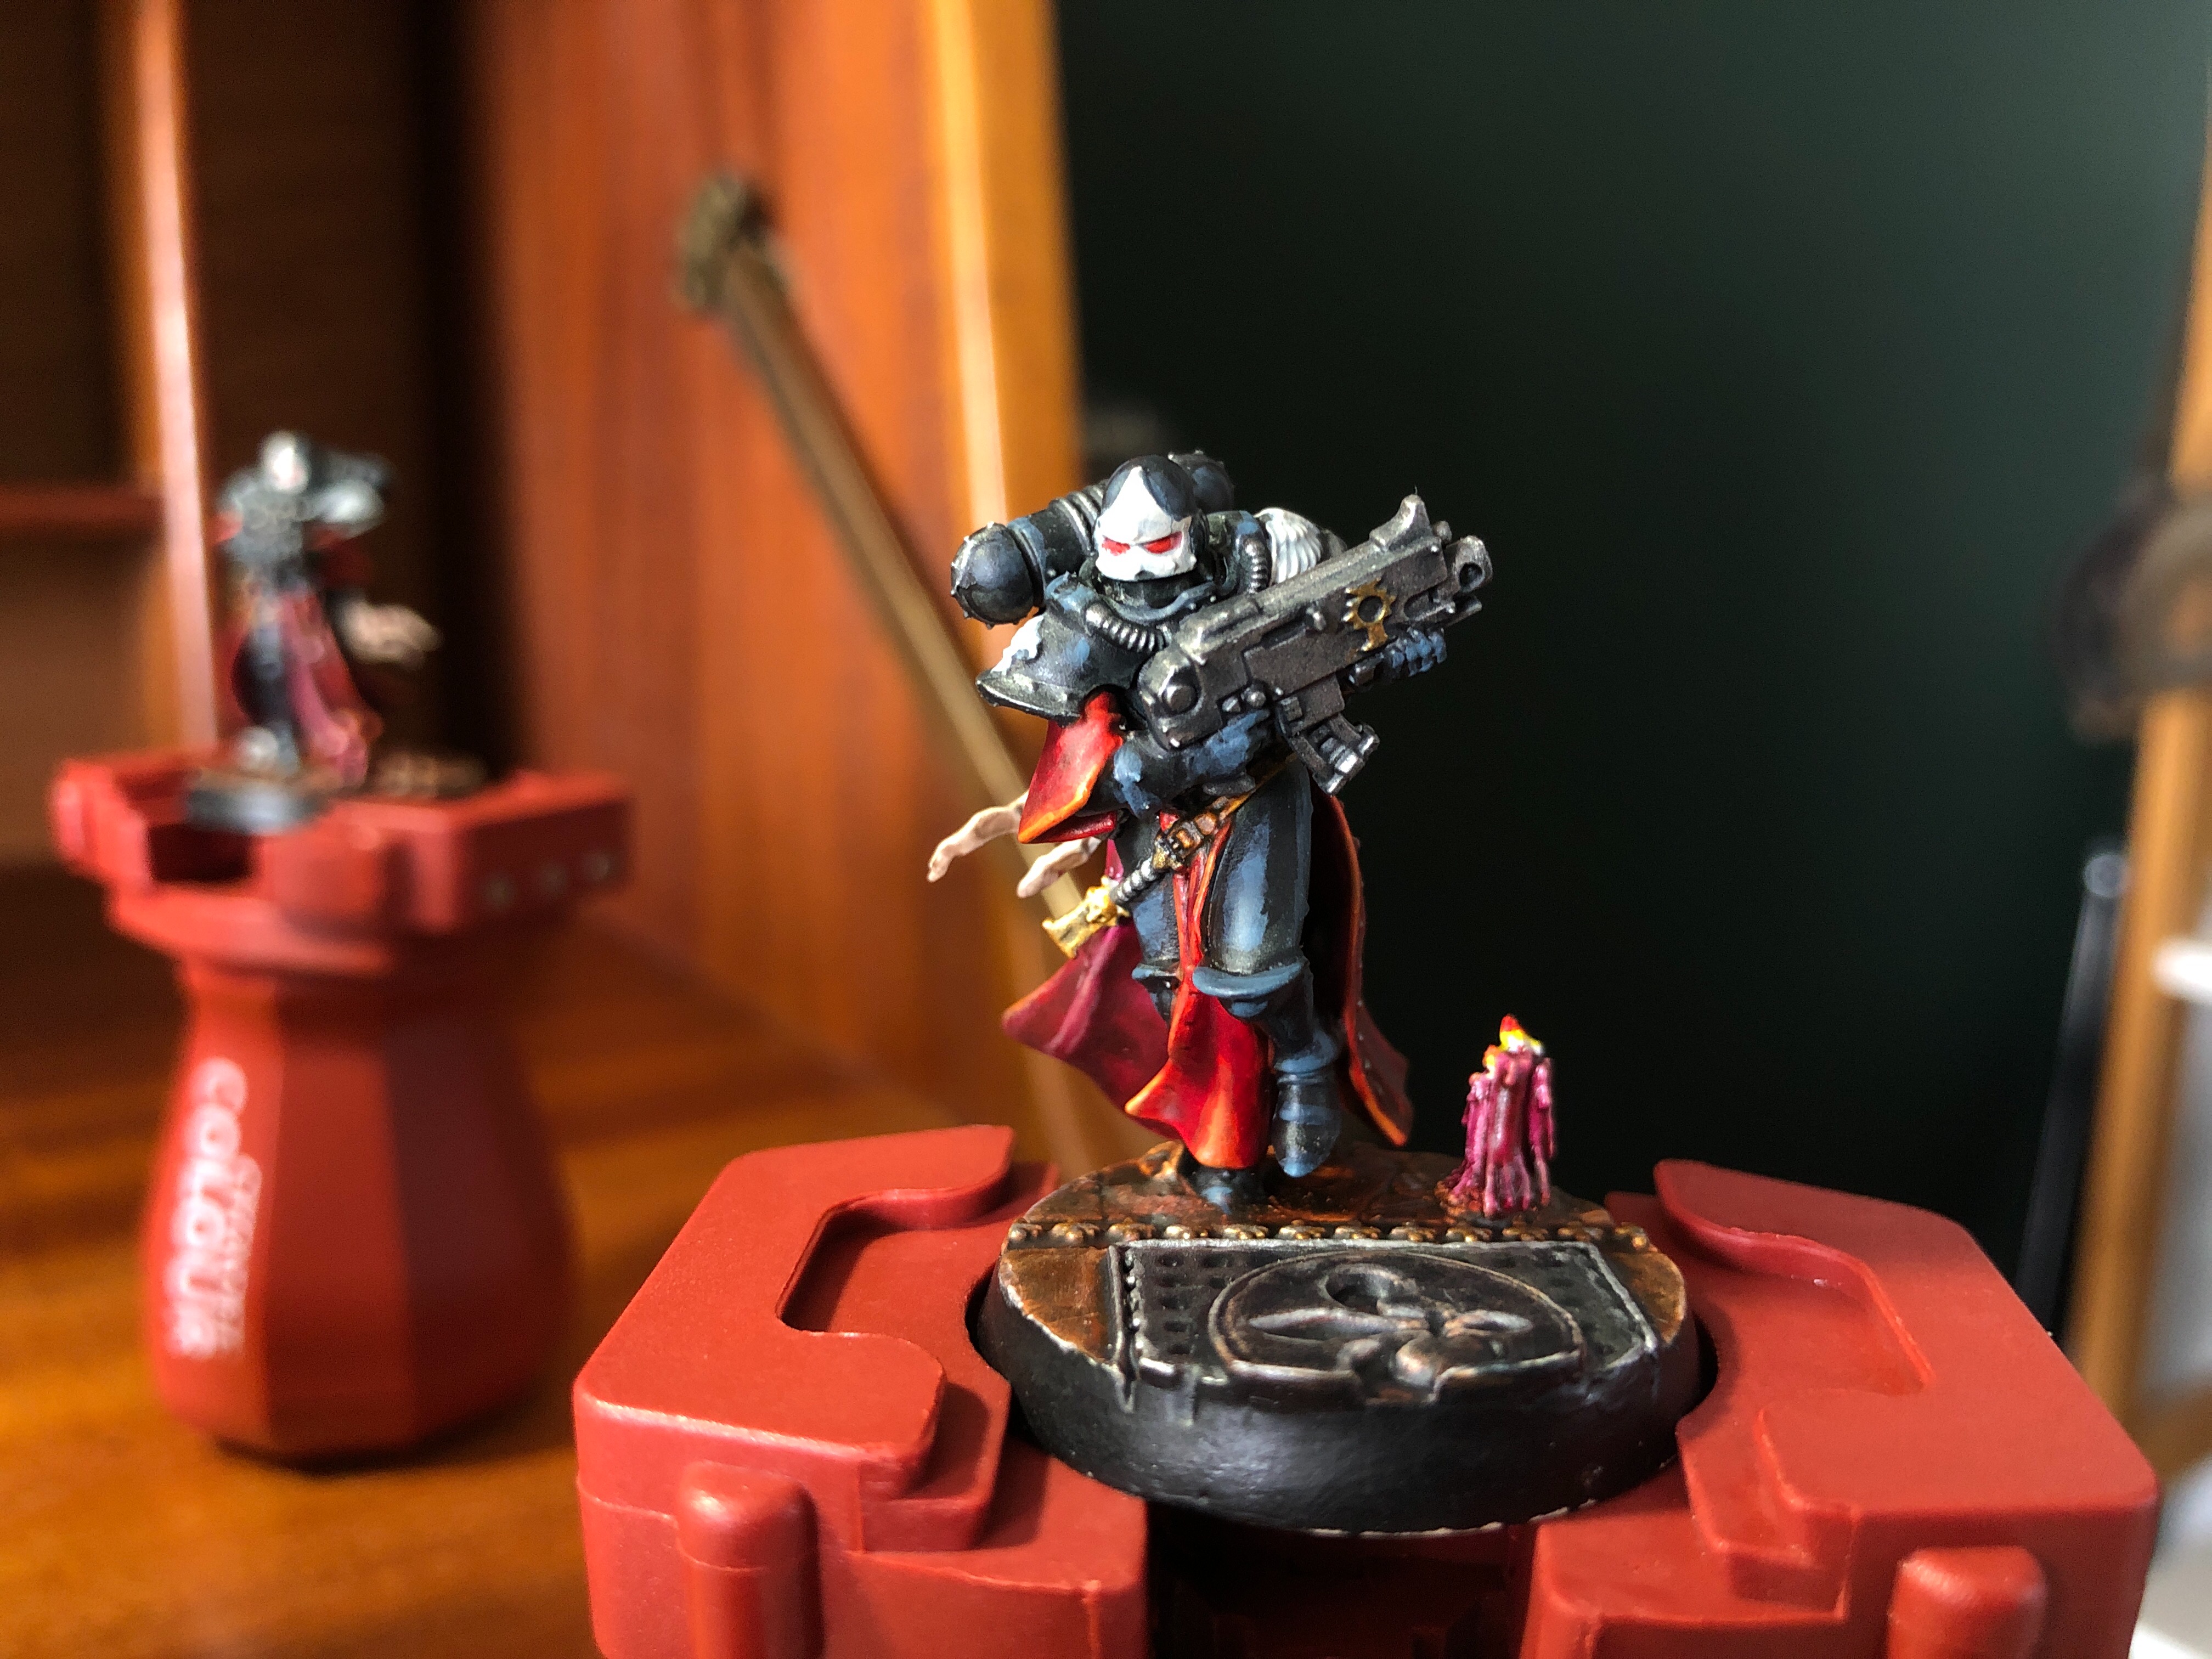
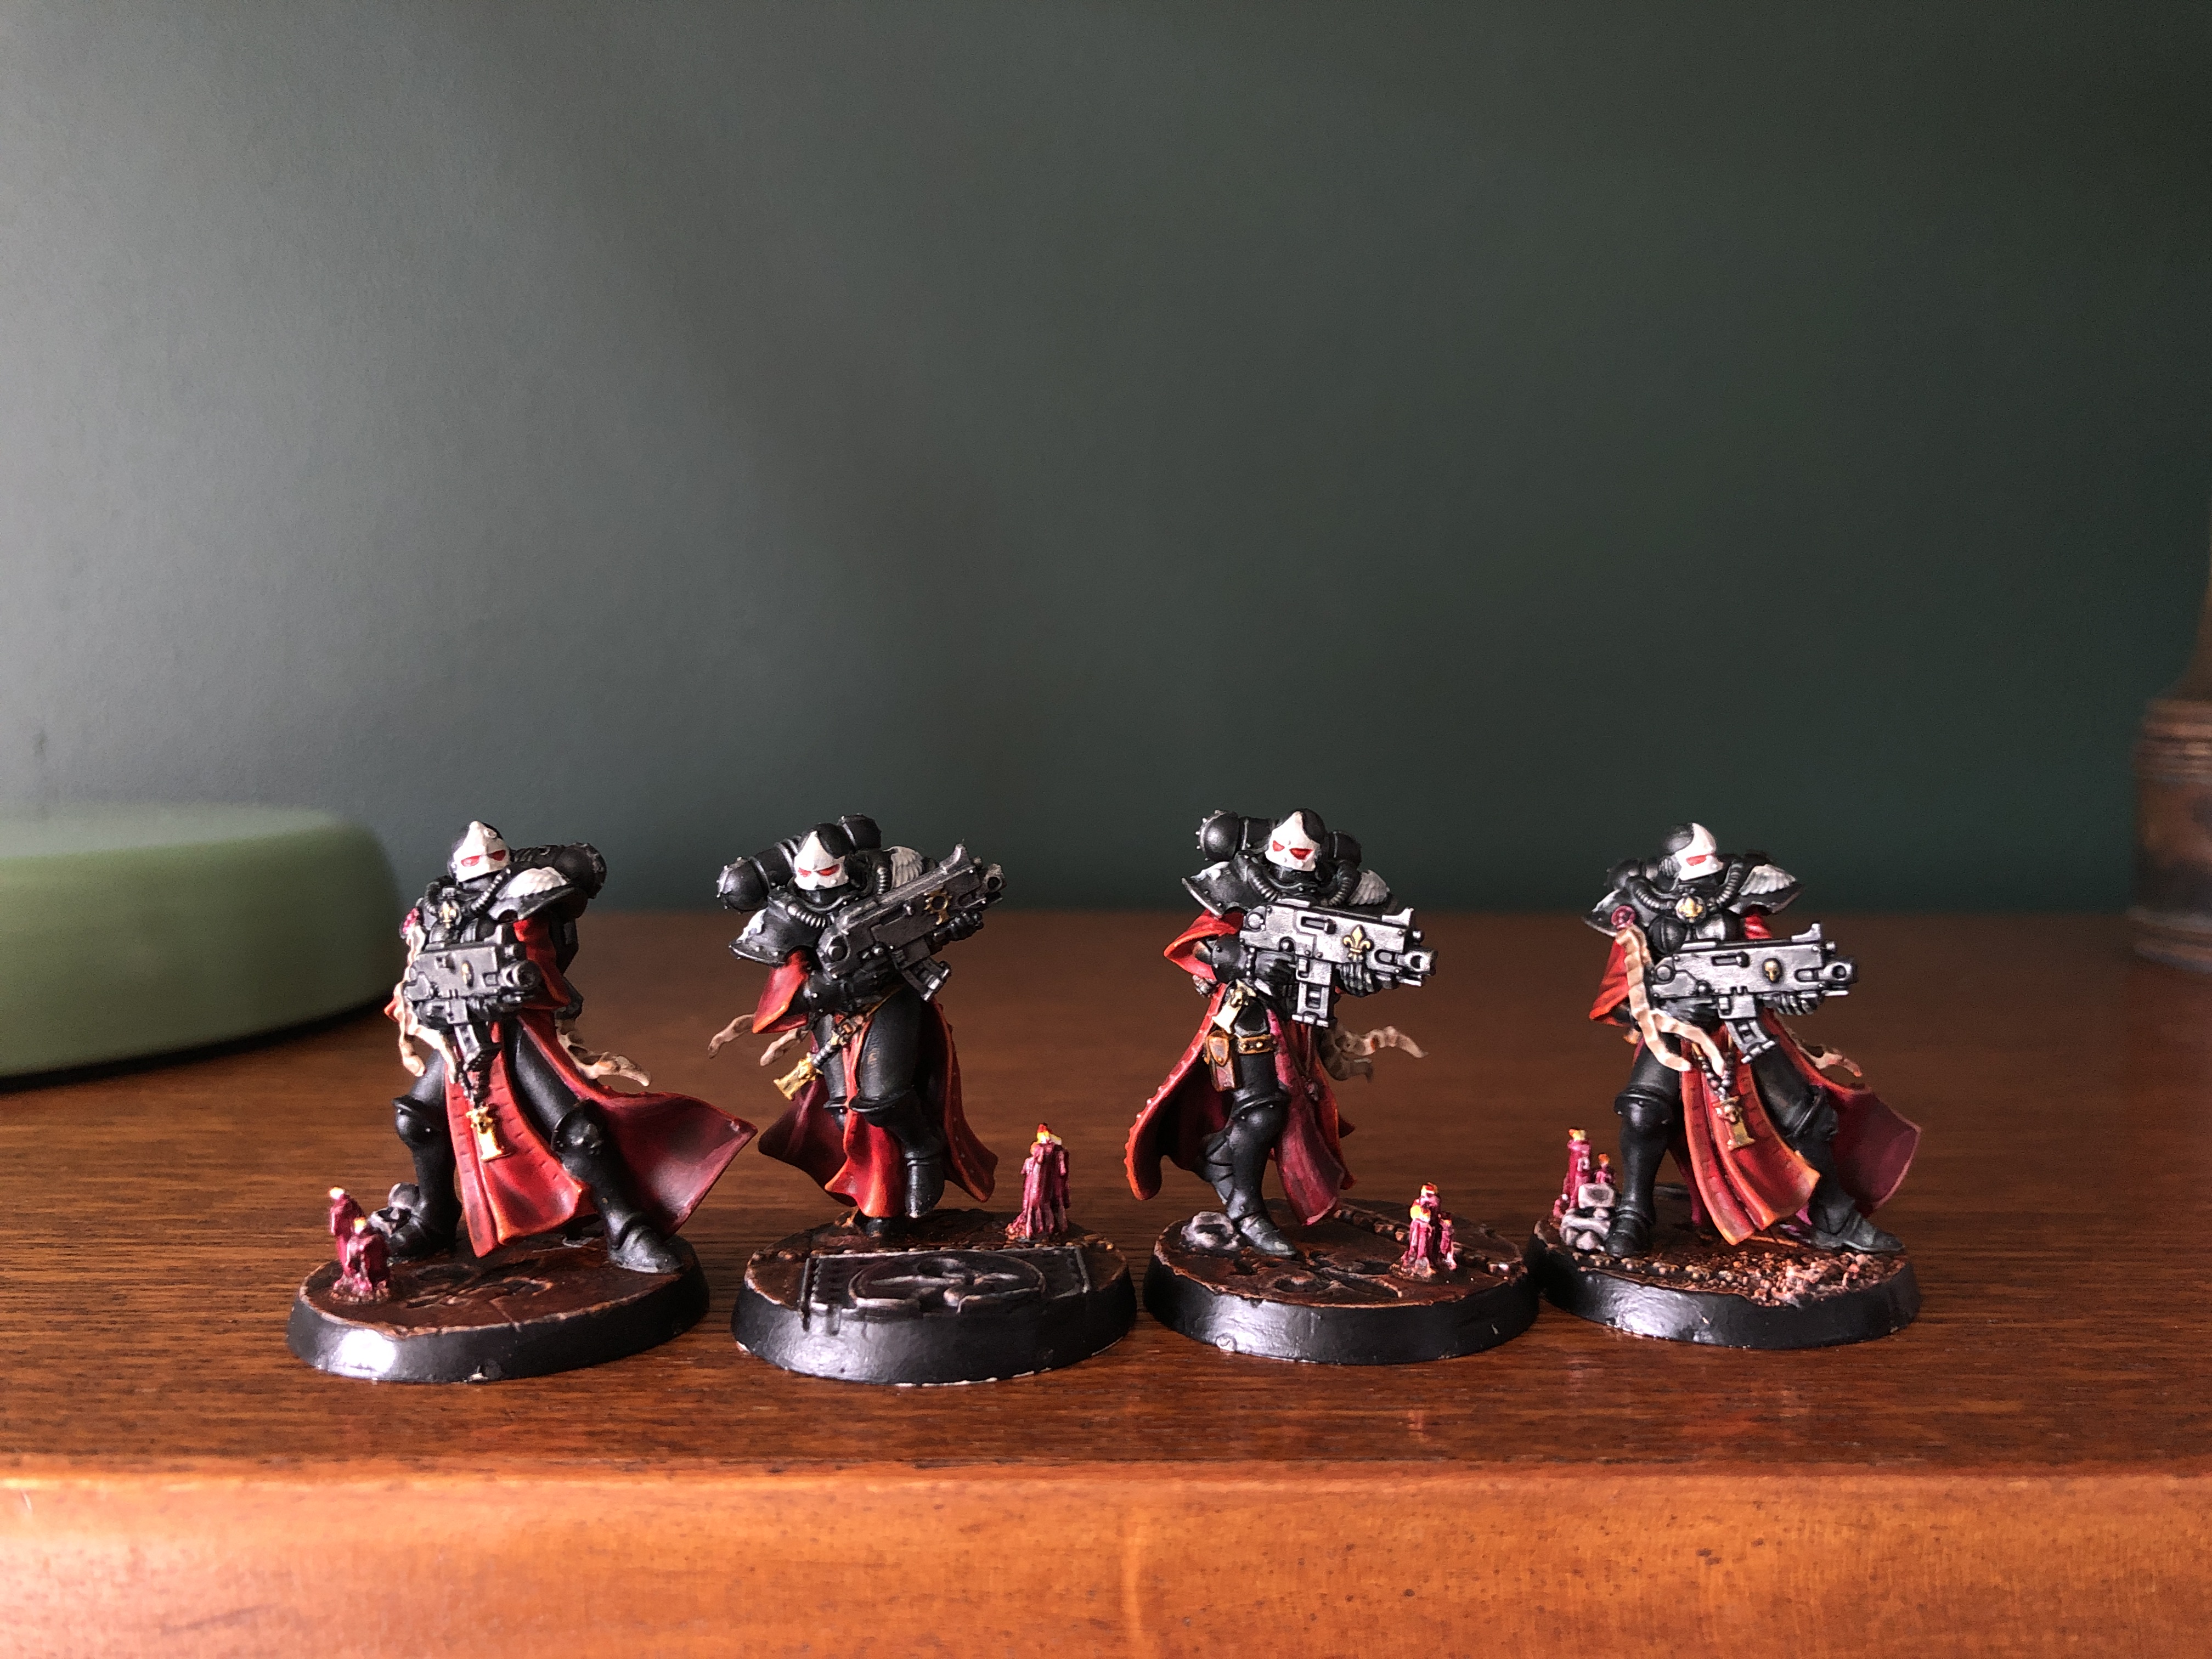
PURGE THE UNCLEAN ~ PRESENTING THE FIRST 5 SISTERS OF BATTLE
“There is no light but the light of the Emperor! There is no faith but faith in the Emperor! There is no truth but the truth of the Emperor!”
THE EMPEROR PROTECTS
*****
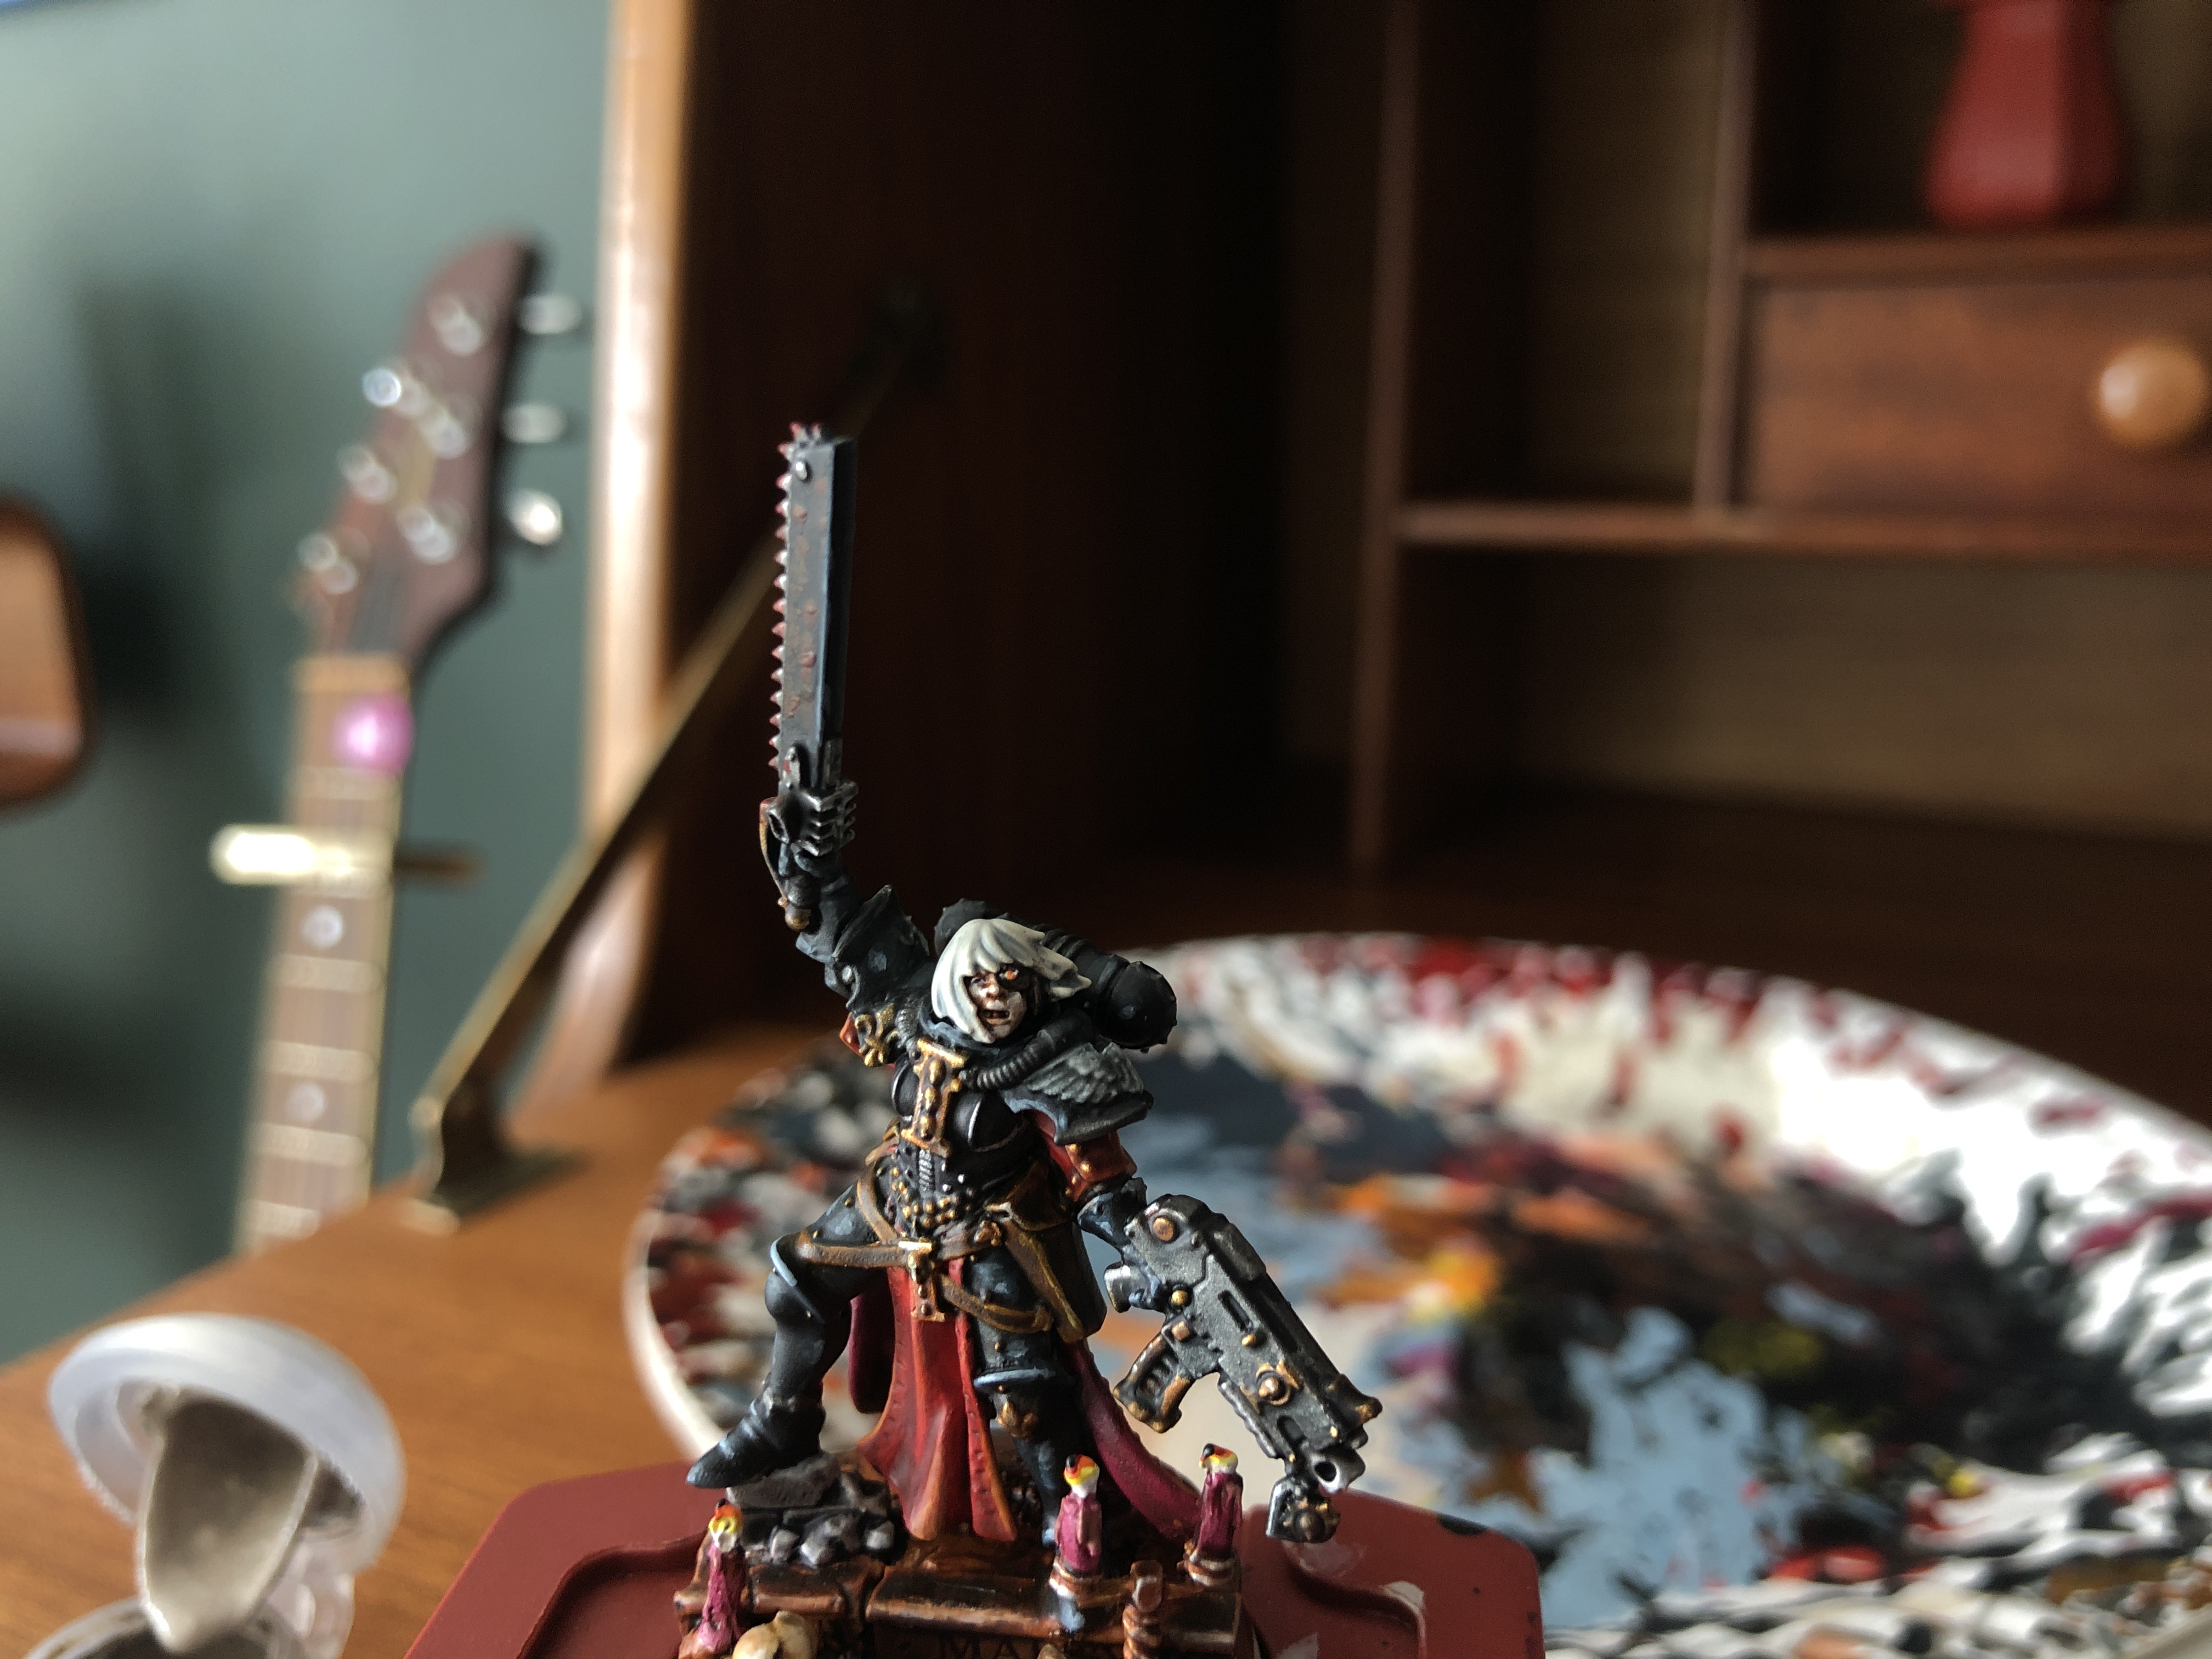
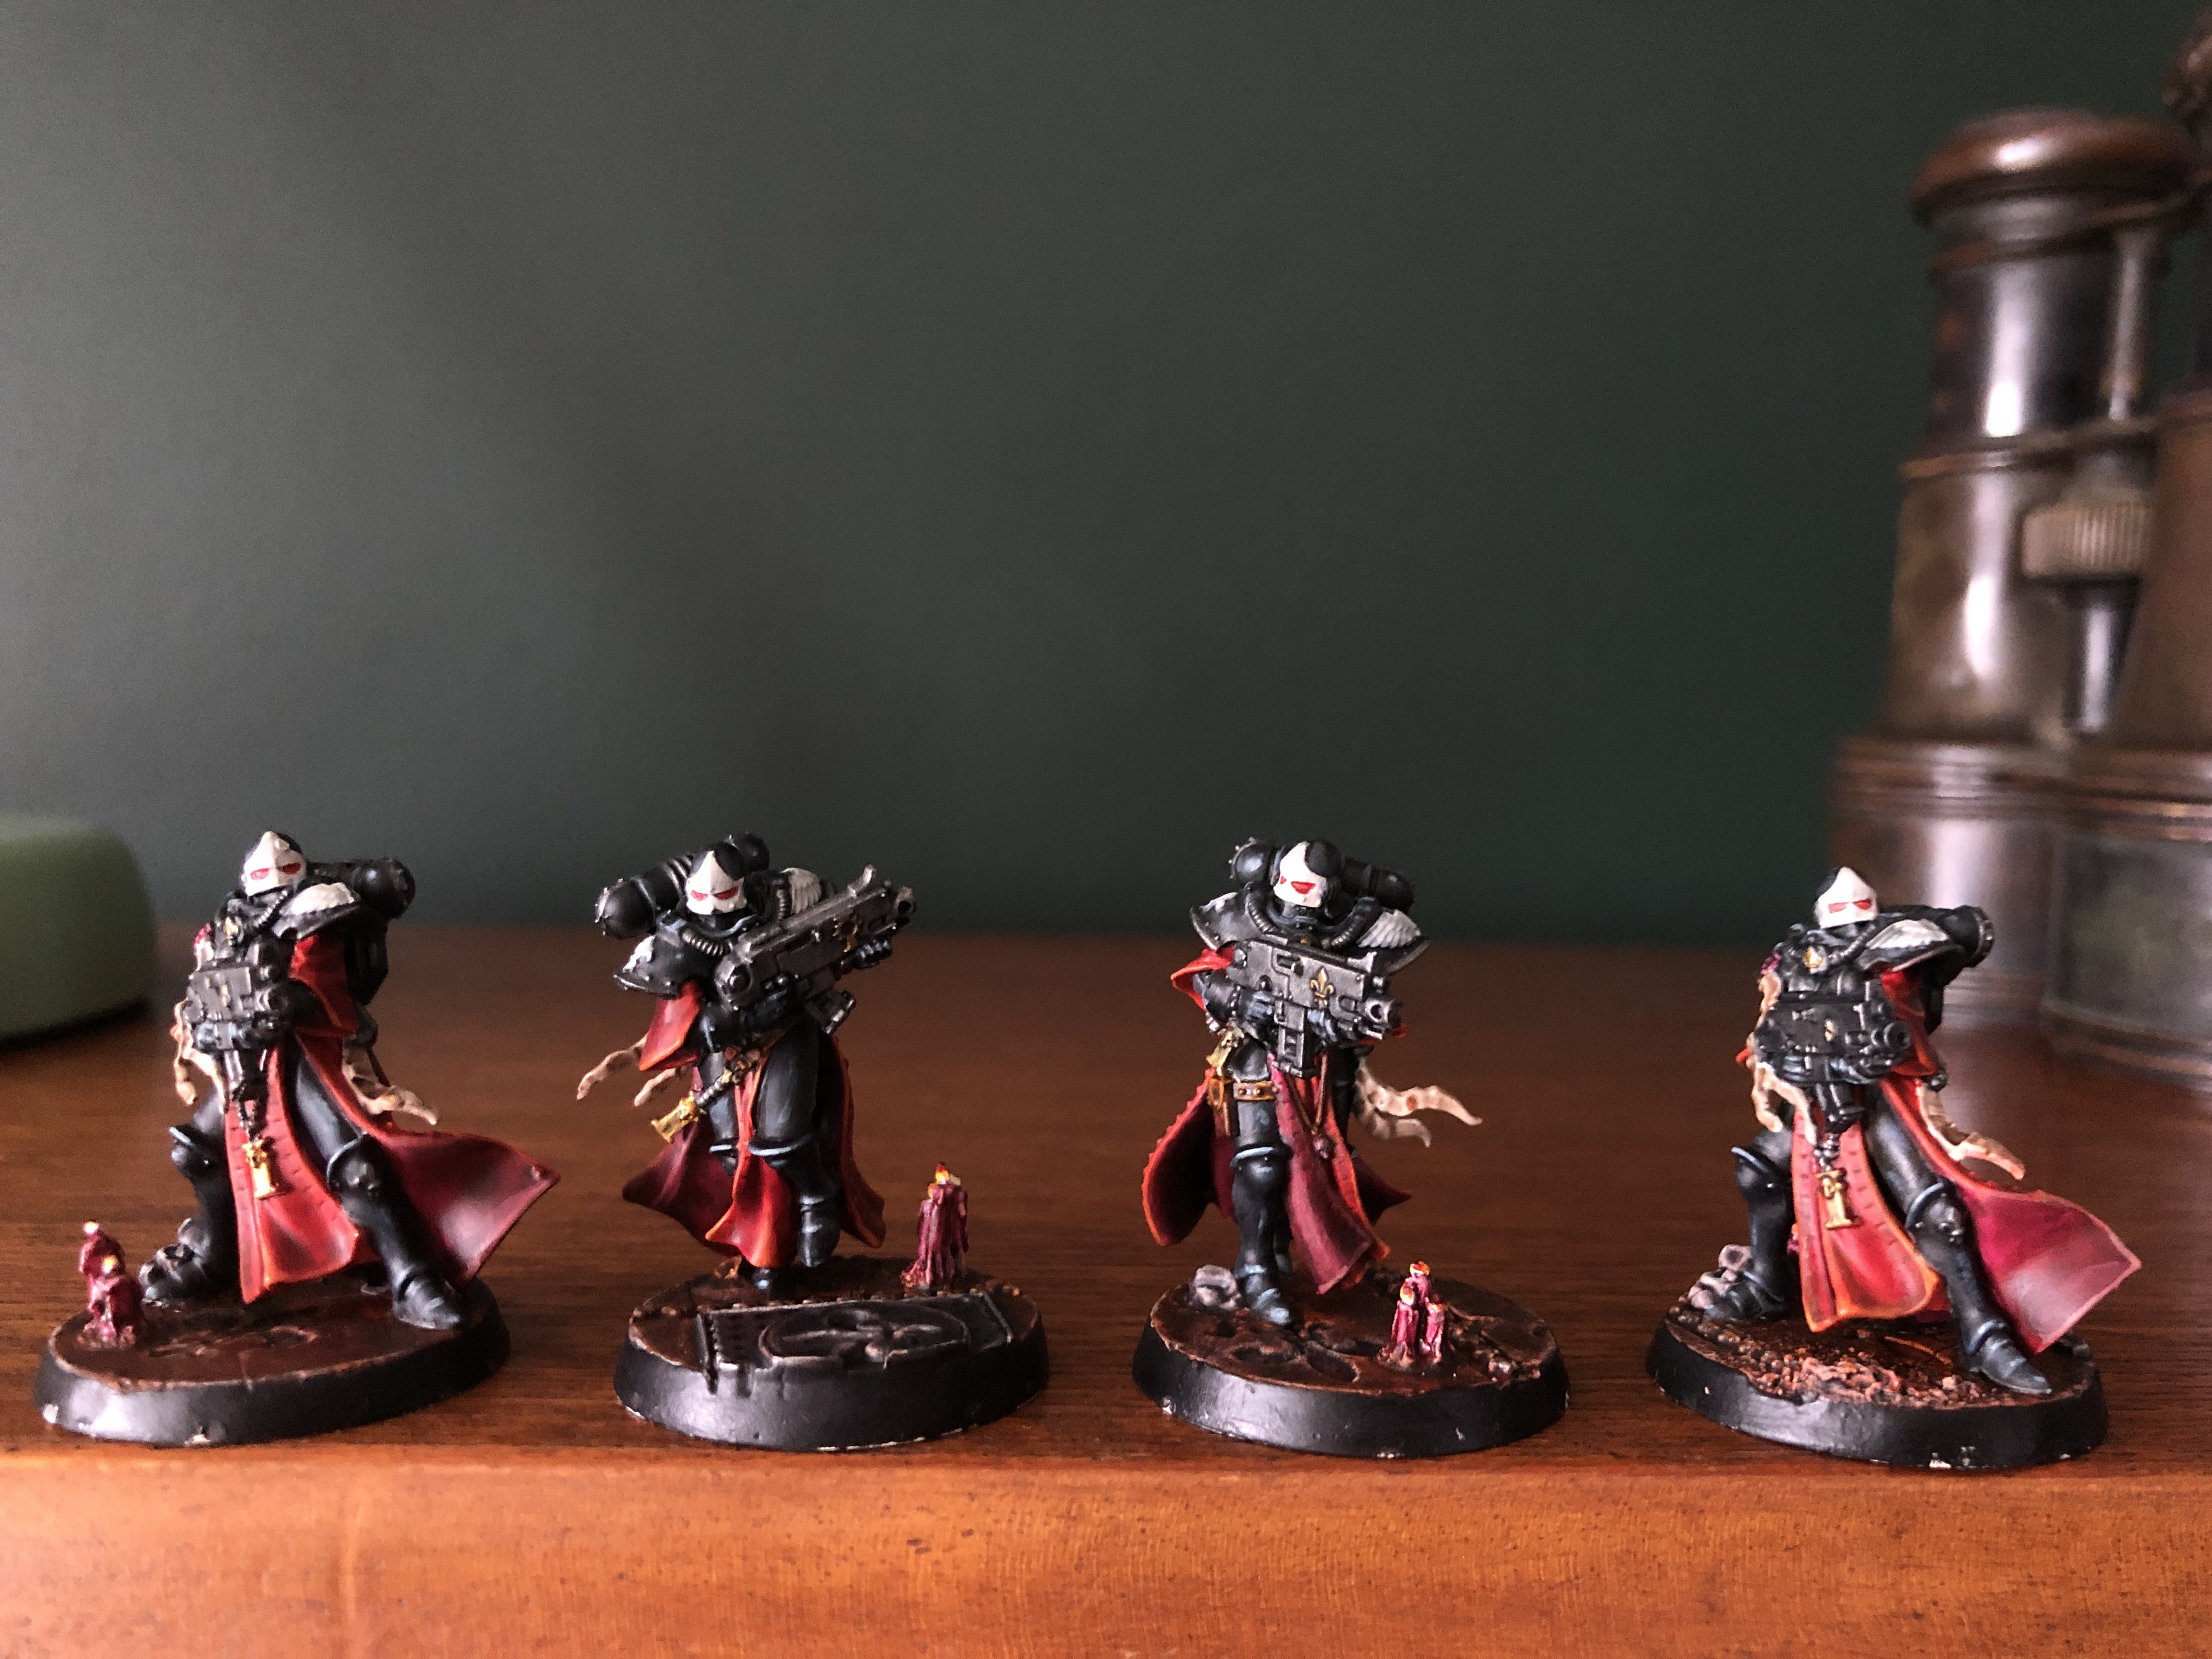
My first 5 sisters of the Order of Our Marytred Lady are complete at last. Yes there’s stuff I will improve on, yes the paints a little thick but HOLY EMPEROR am I proud of em. YES!


WHAT’S NEXT ON THE PAINT TABLE
*****
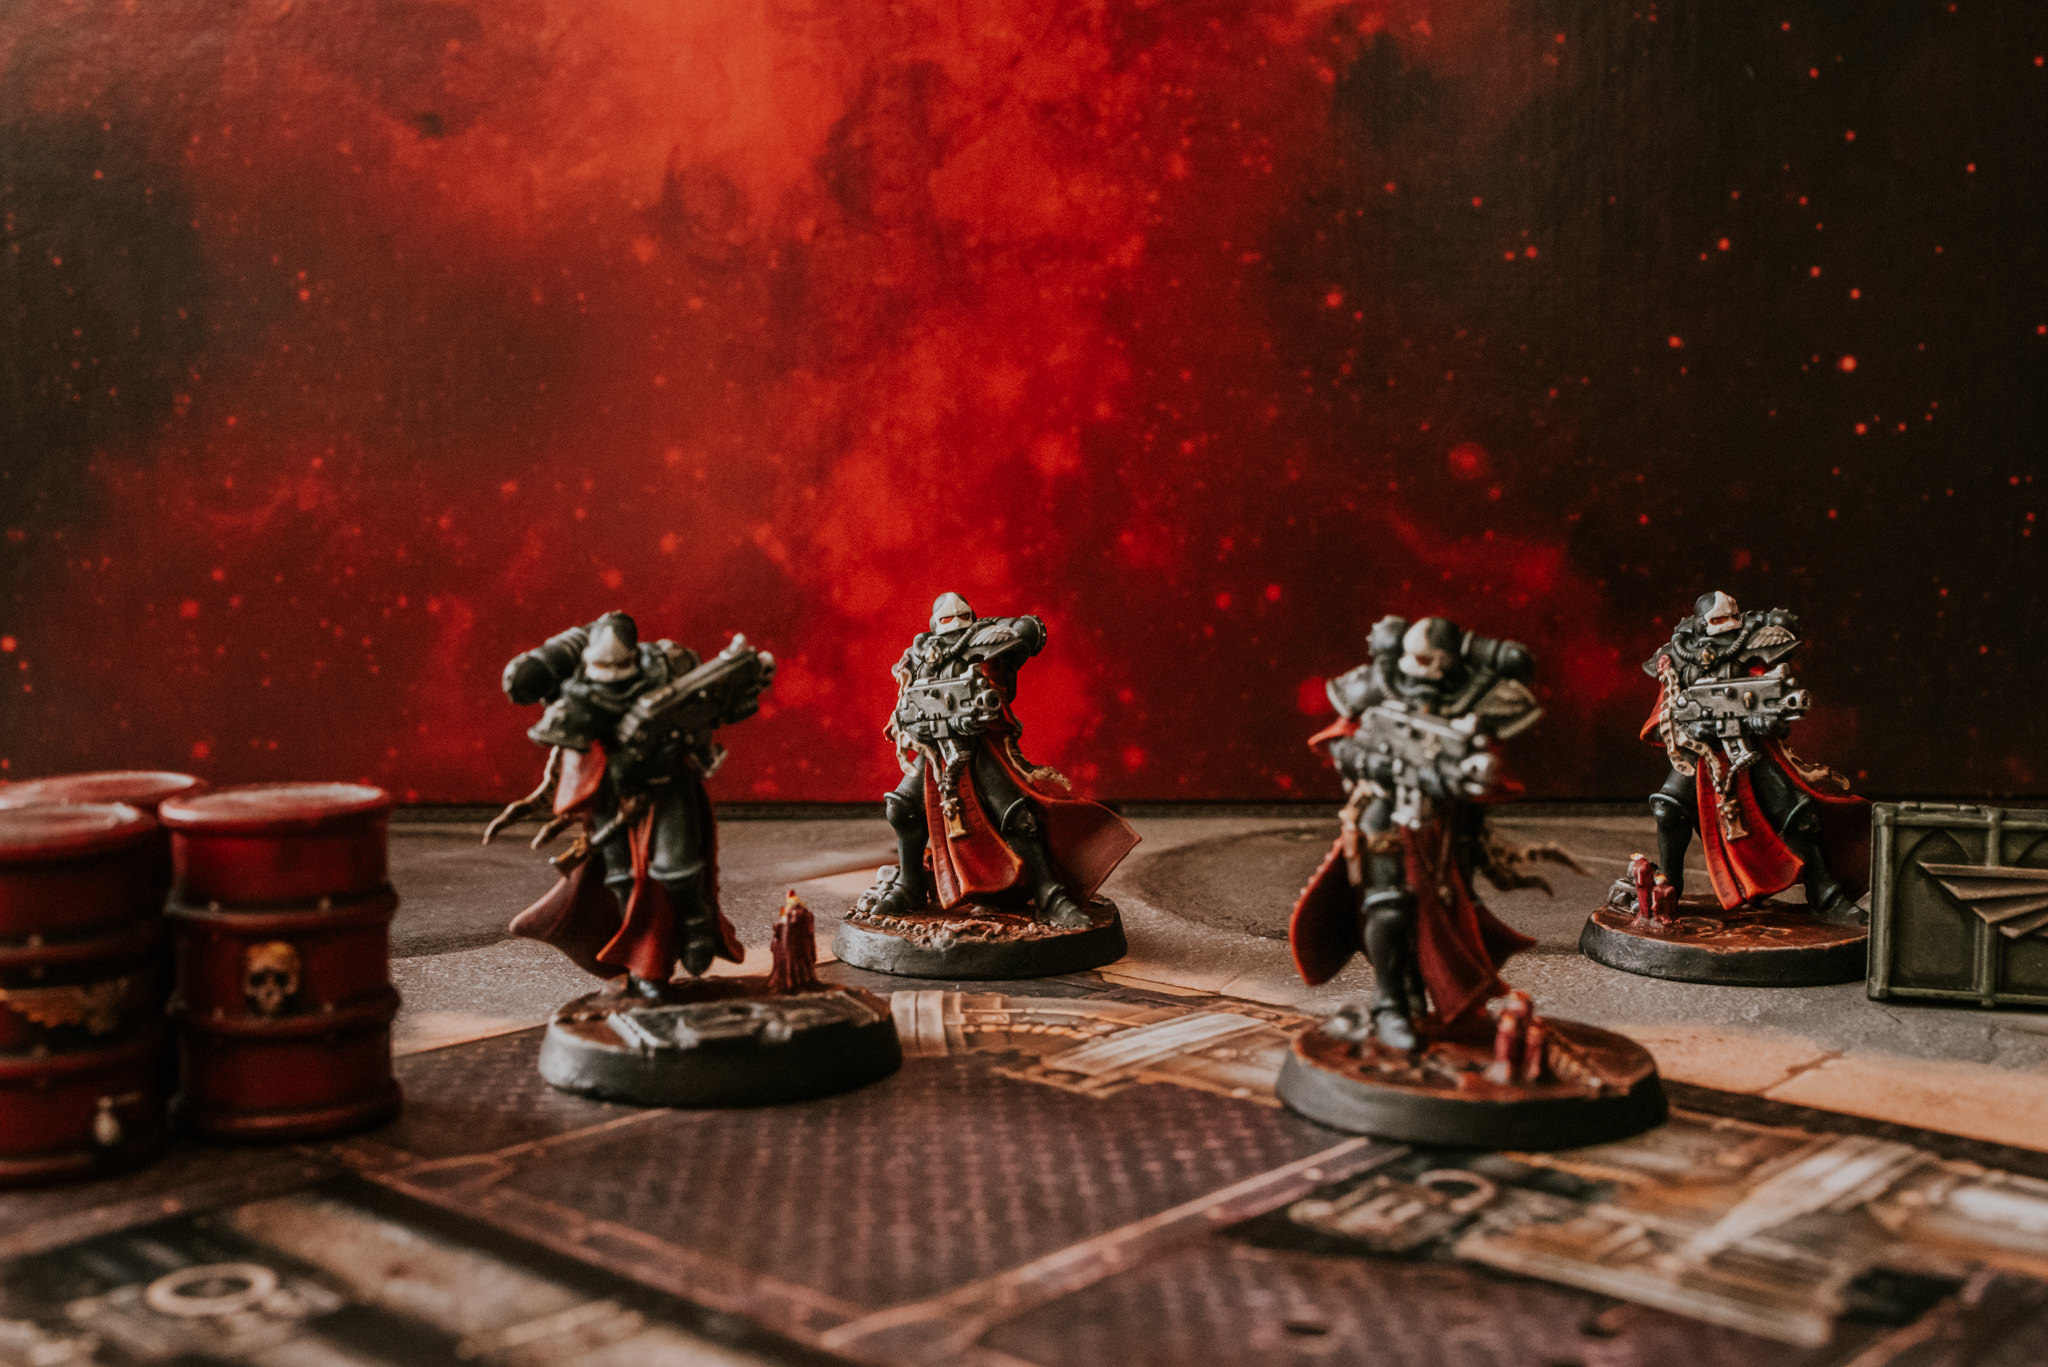
With my first 5 sisters complete I’ll be carrying on with the standard Sisters of Battle squad to try & get them all done to the same level. I’m not going to go through the same painting tutorials all over again but I’ll come back & hit you guys with some updates when I tackle something new that I haven’t covered yet. Here’s the next 4 to hit the painting table. Each one is without a helmet so I’m pretty sure the next time I come back I’ll be going over how I (badly) paint faces. haha
Thank you all for your continued support in this project it’s really given me motivation to carry on.
Stay safe lovely people.
Much Love
Eternity Gate
ABOUT BLOODY TIME ~ THE FINISHING DETAILS
FOUR DONE
*****
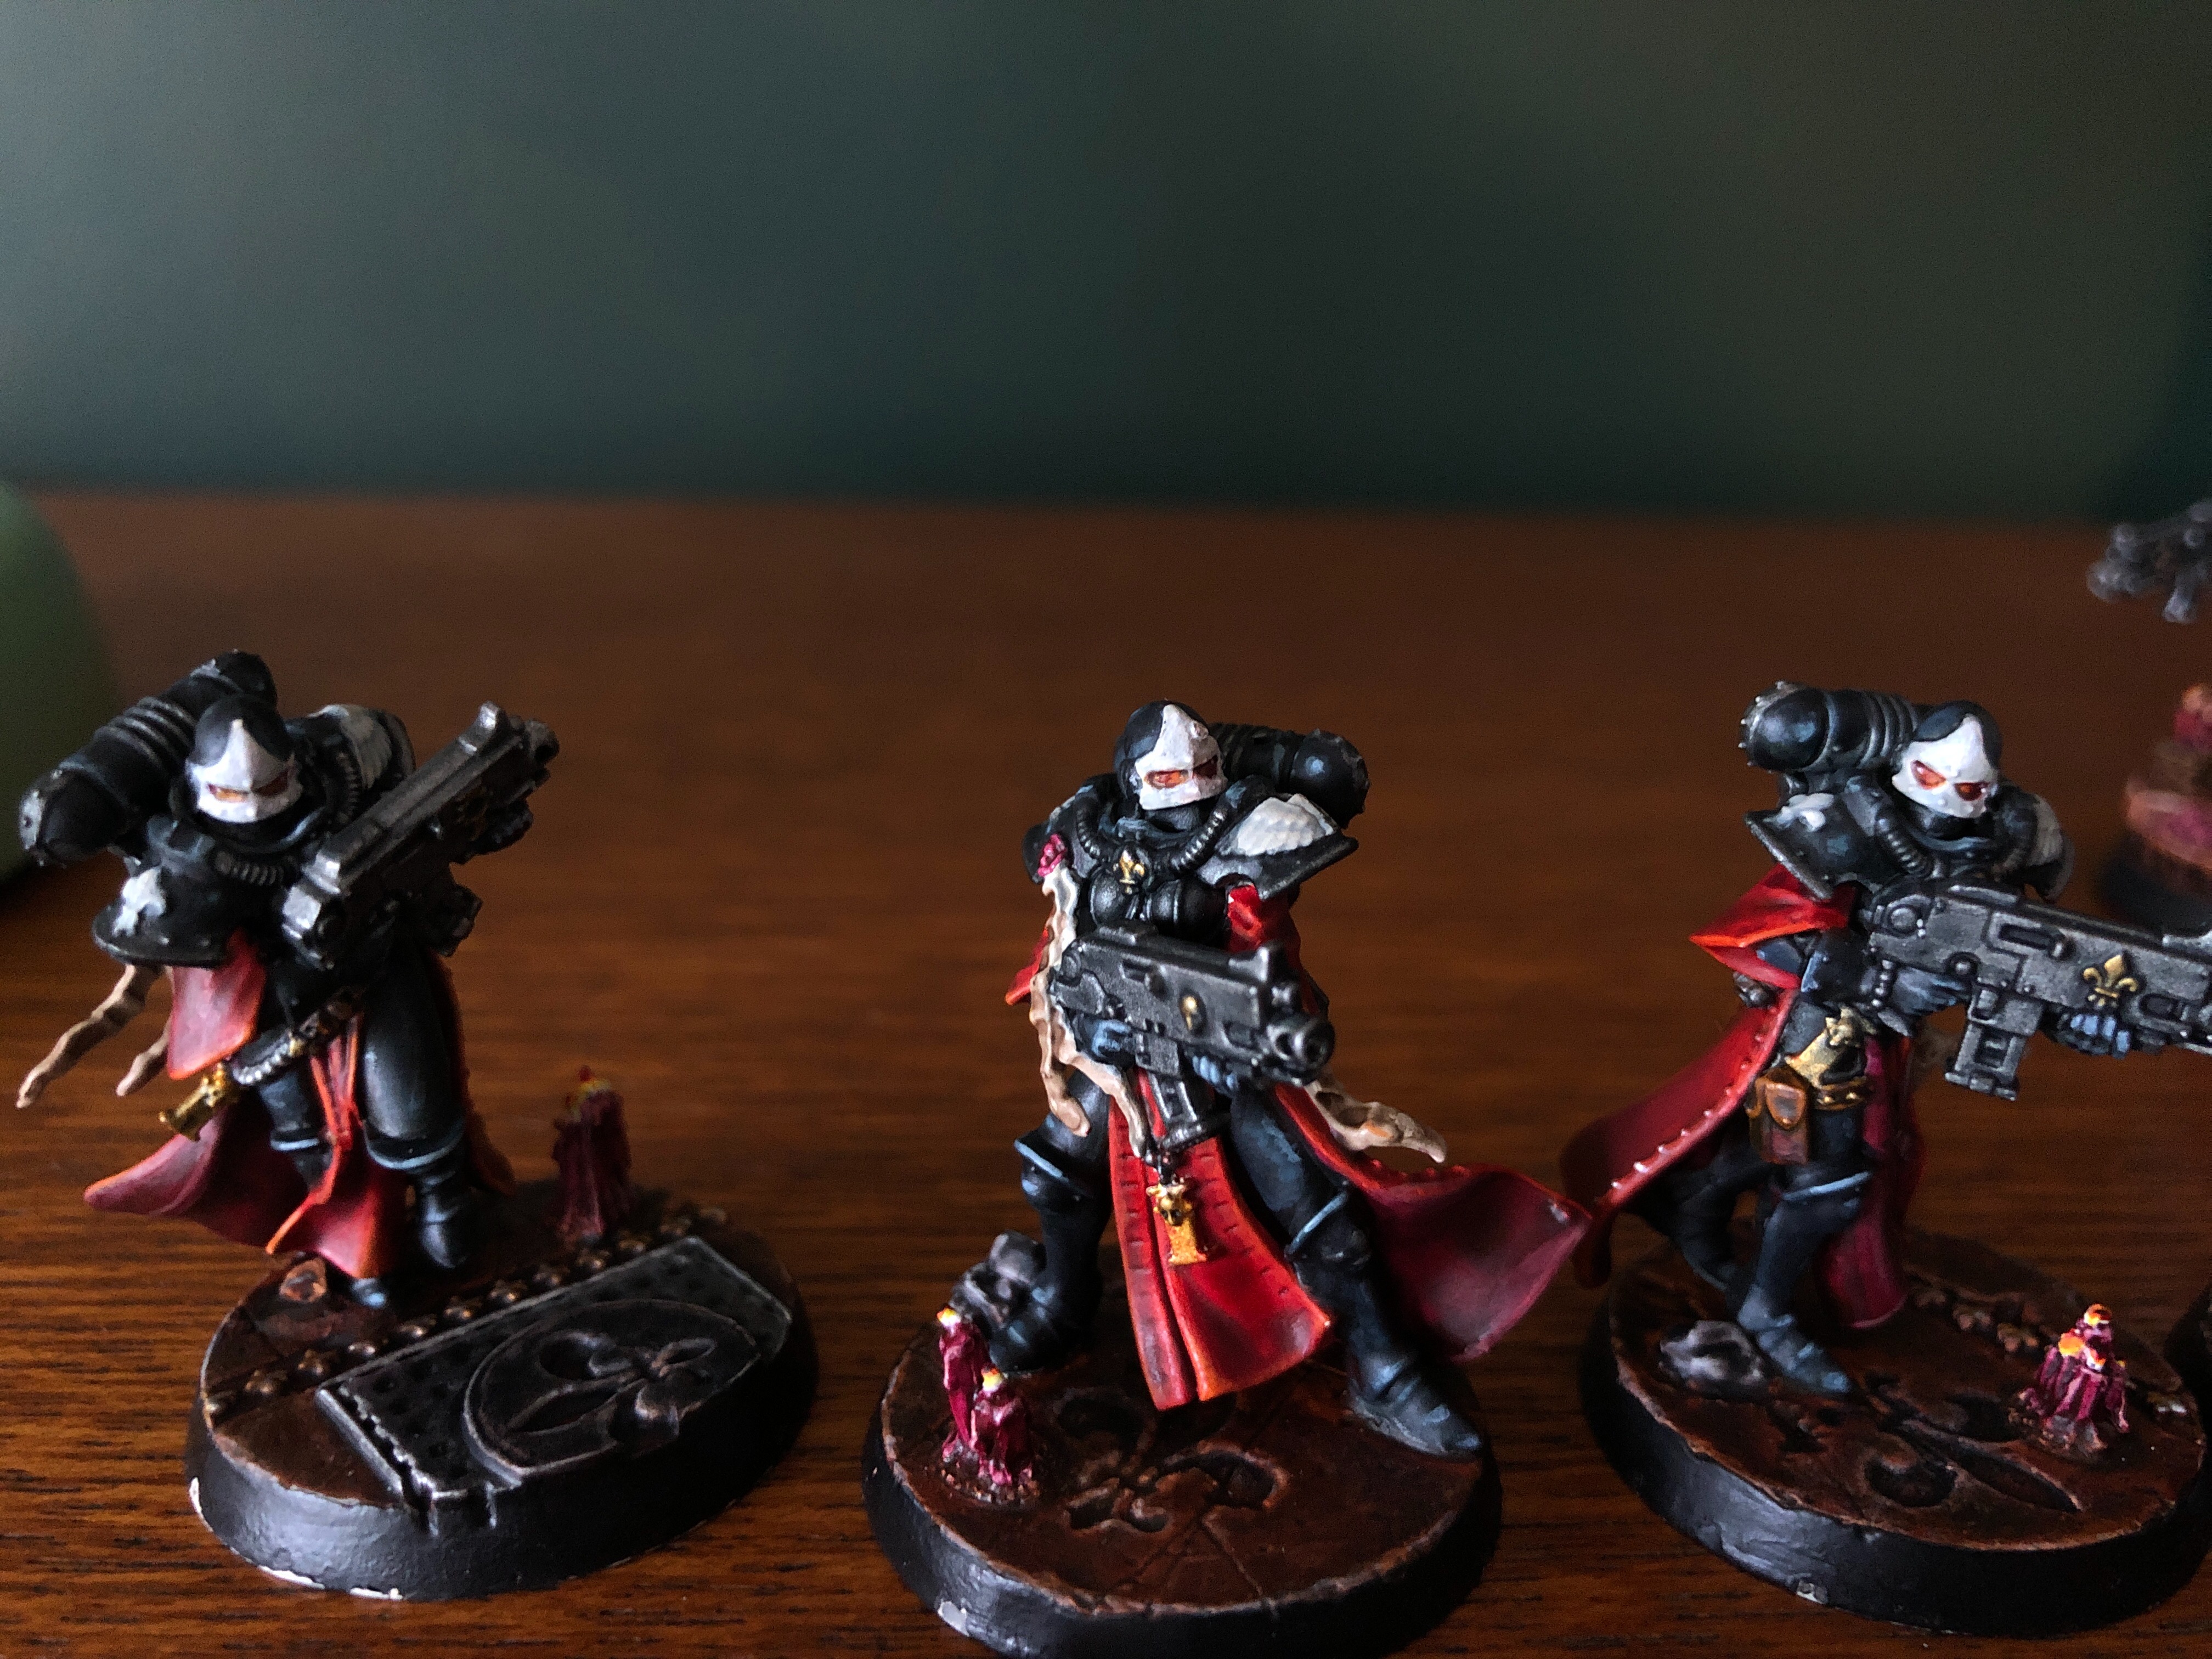
Hello there lovely people hope you’re all doing well & safe & more importantly getting a ton of hobby done. YES! I’d love to say I’m getting loads done but I’m still as slow as ever. But get this! I have finished my first four Sisters of Battle. YES!
This is the last little guide for these four ladies before I’m calling them done. I’ll be taking some proper photographs in the next update so keep your eyes peeled for that one. Anyway lets stop this procrastinating & get on with some painting.
PAINT LIST
*****
• WHITE SCAR
• NULN OIL
• AGRAX EARTHSHADE
• ARMY PAINTER SHINING SILVER
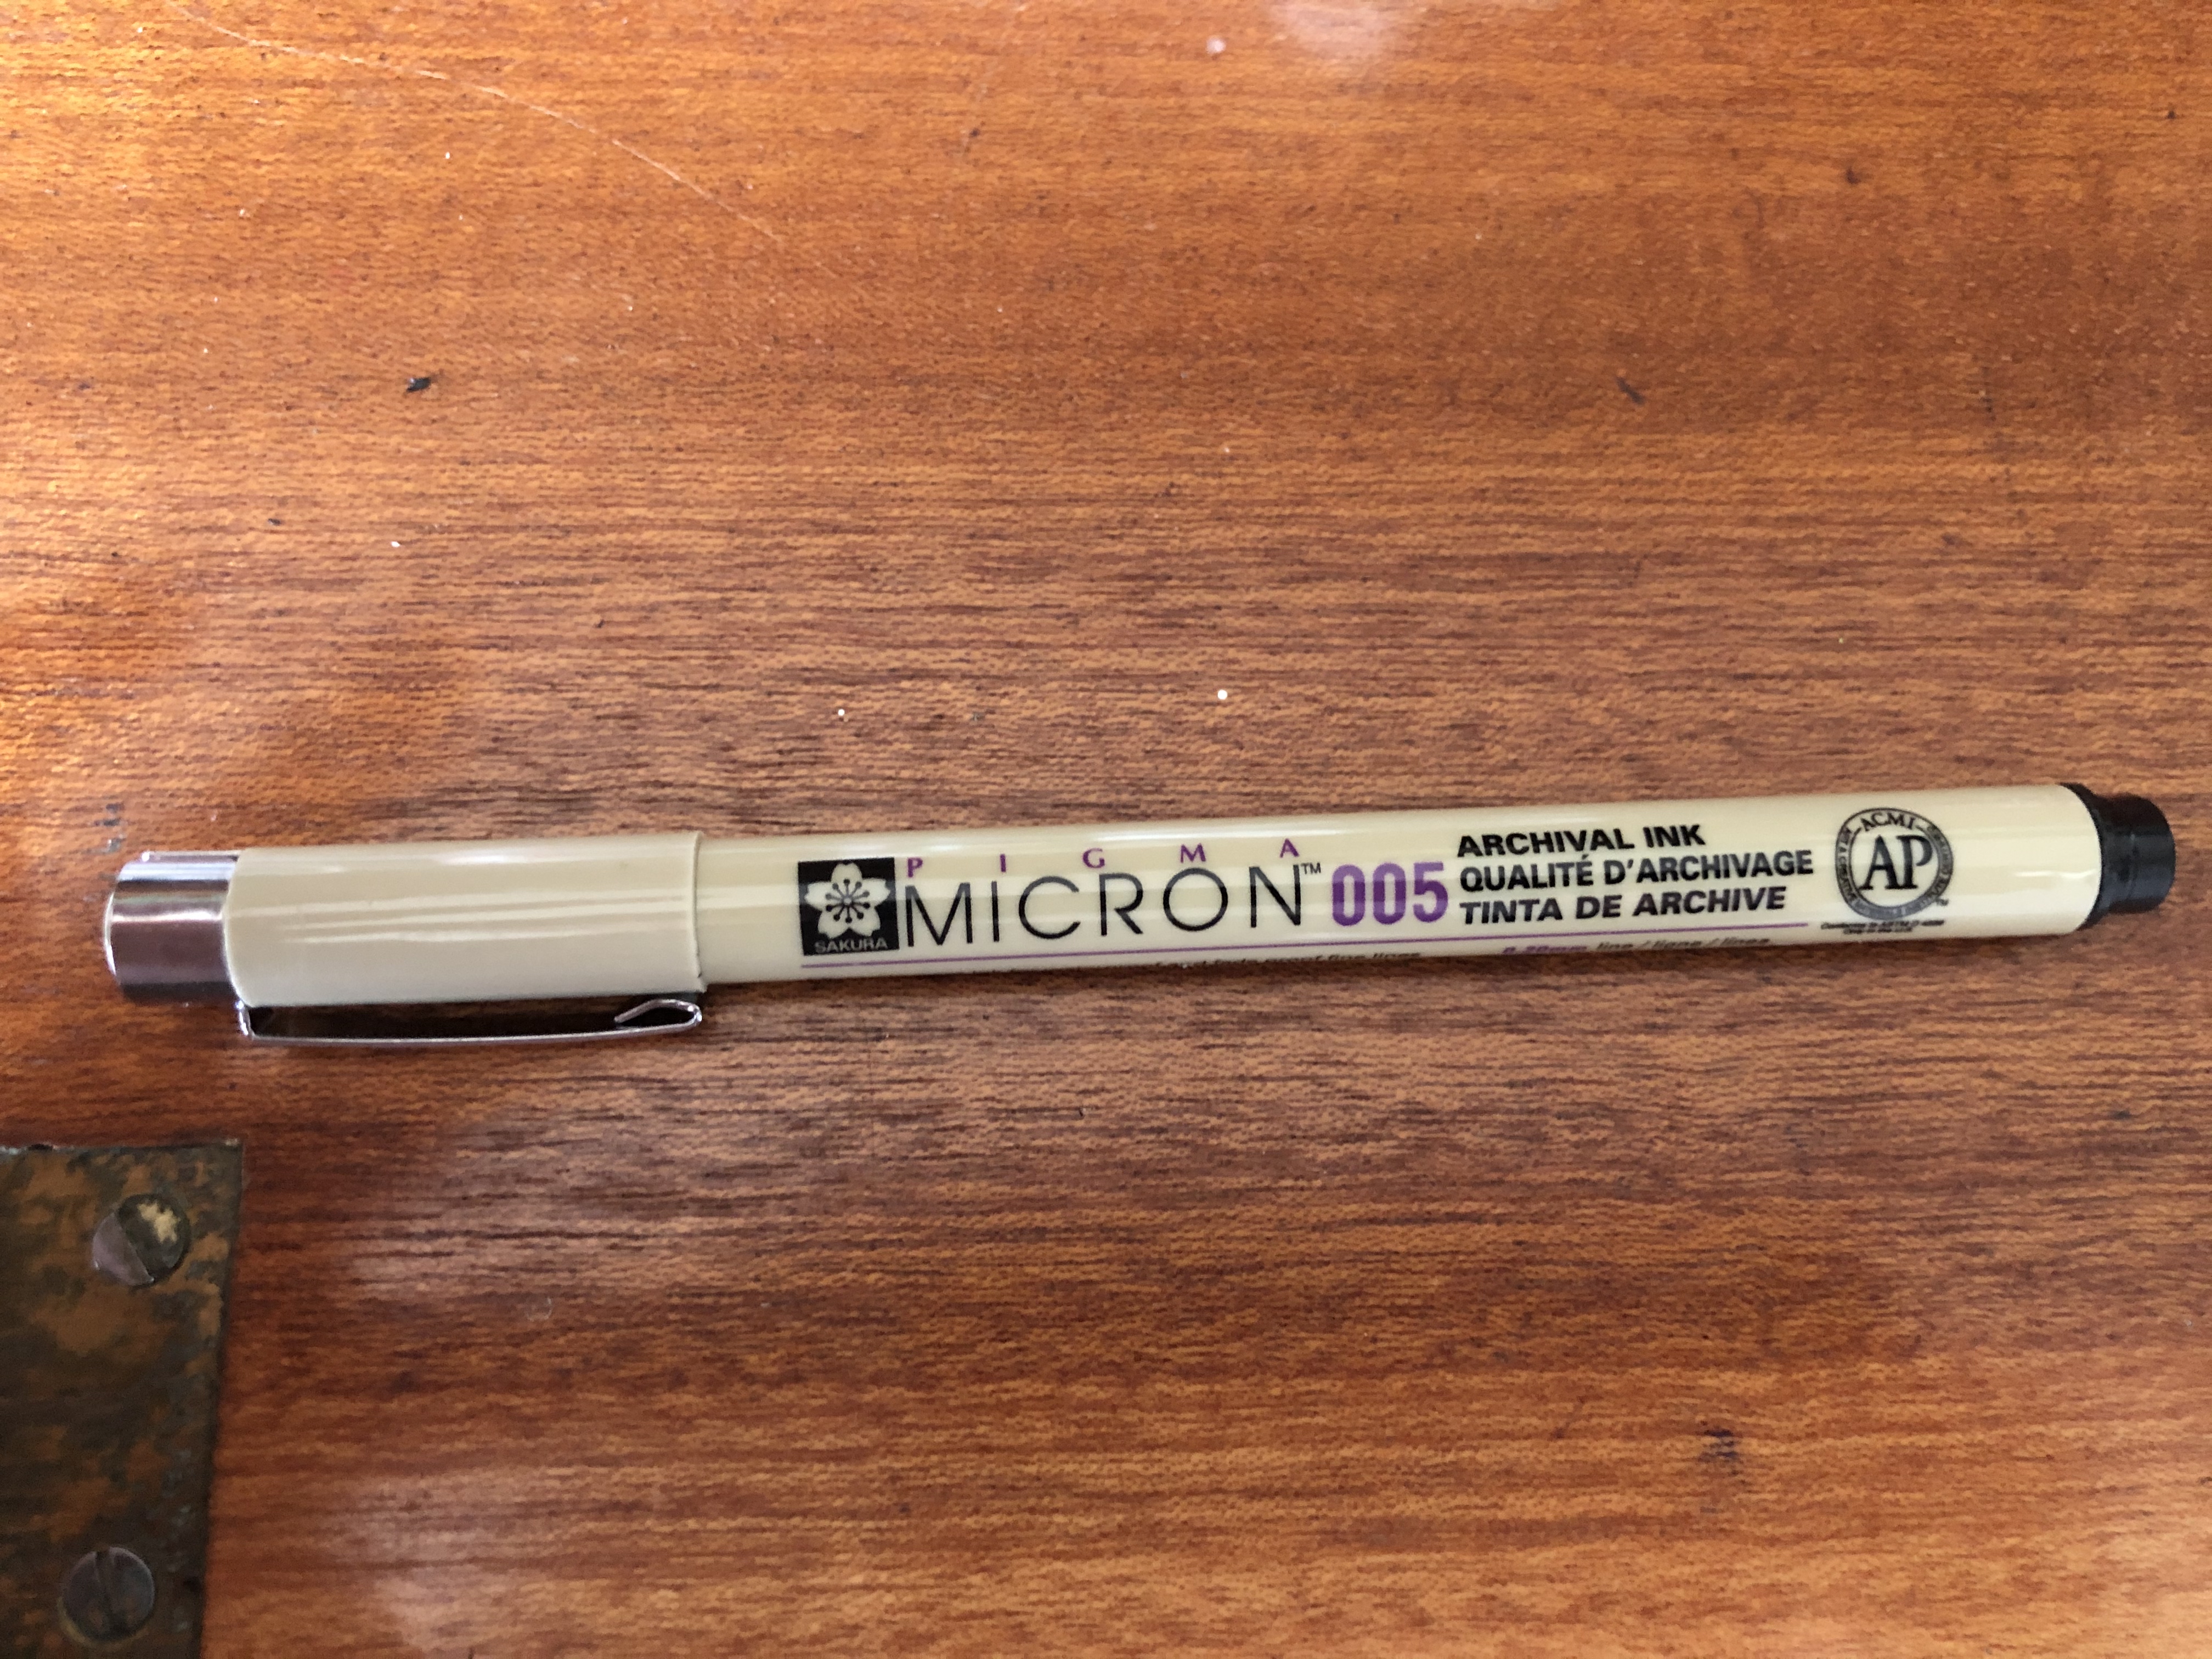
• MICRON PEN BLACK 005
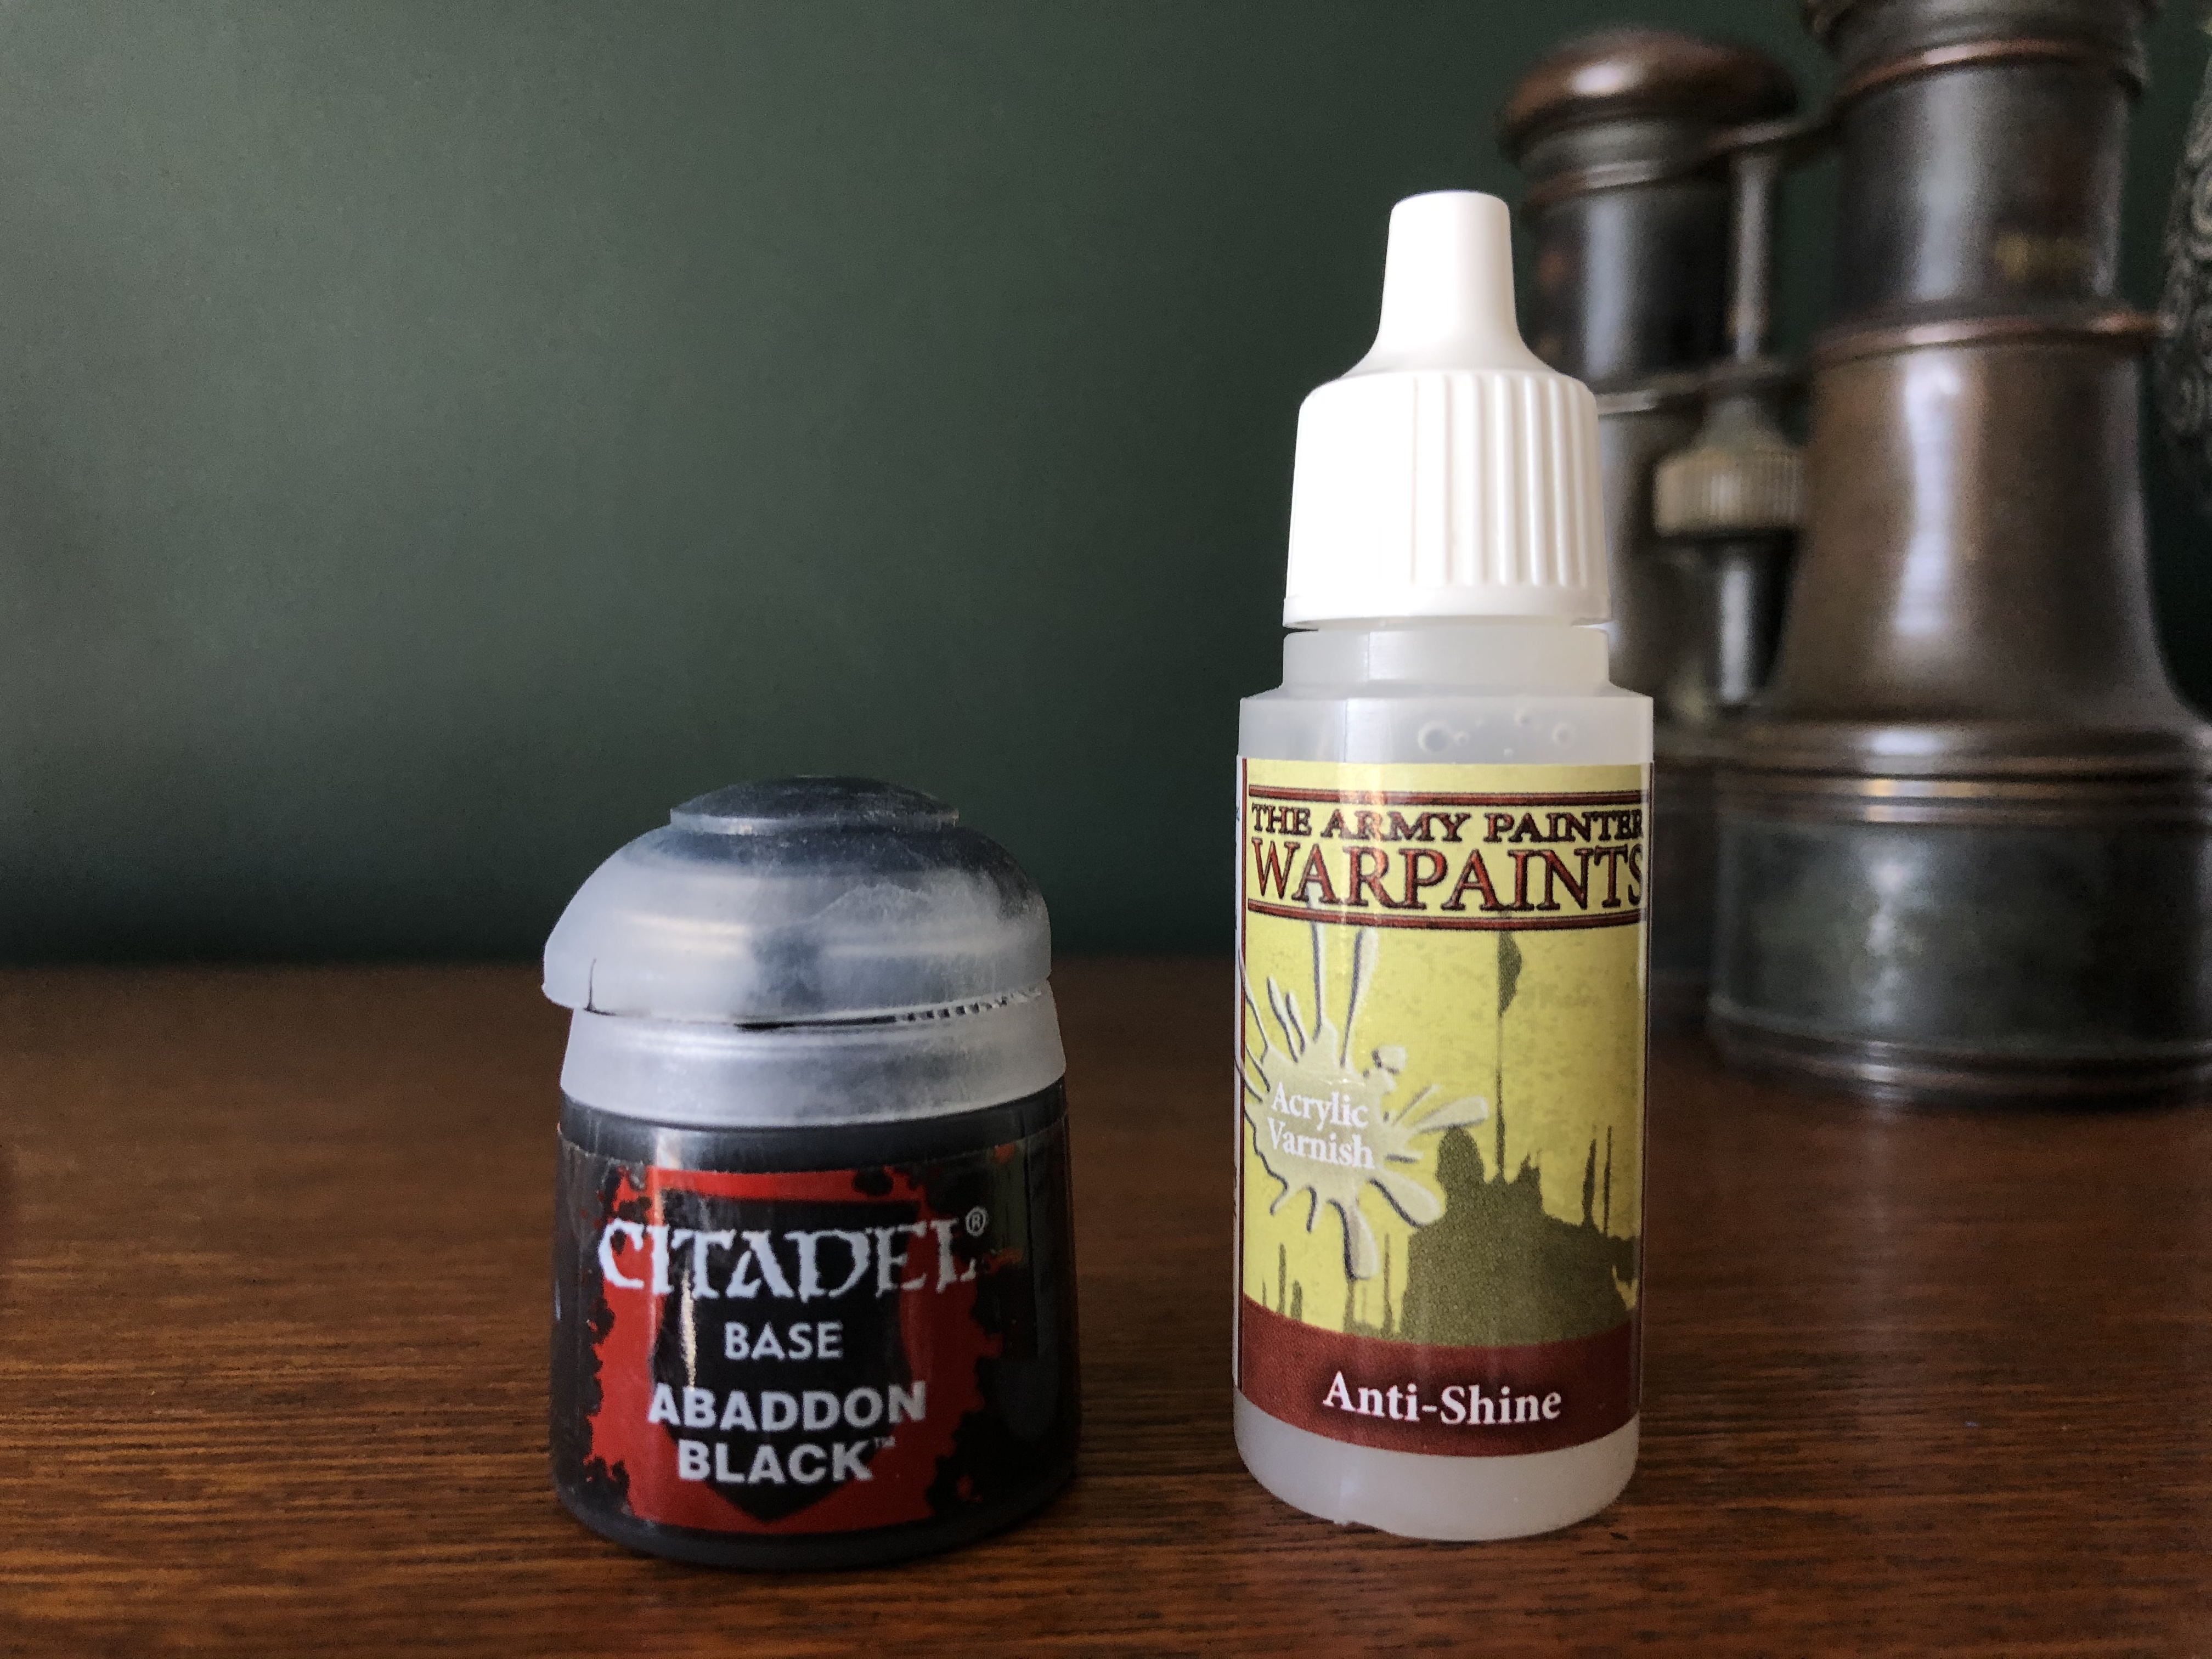
• ABADDON BLACK
• ARMY PAINTER ANTI-SHINE


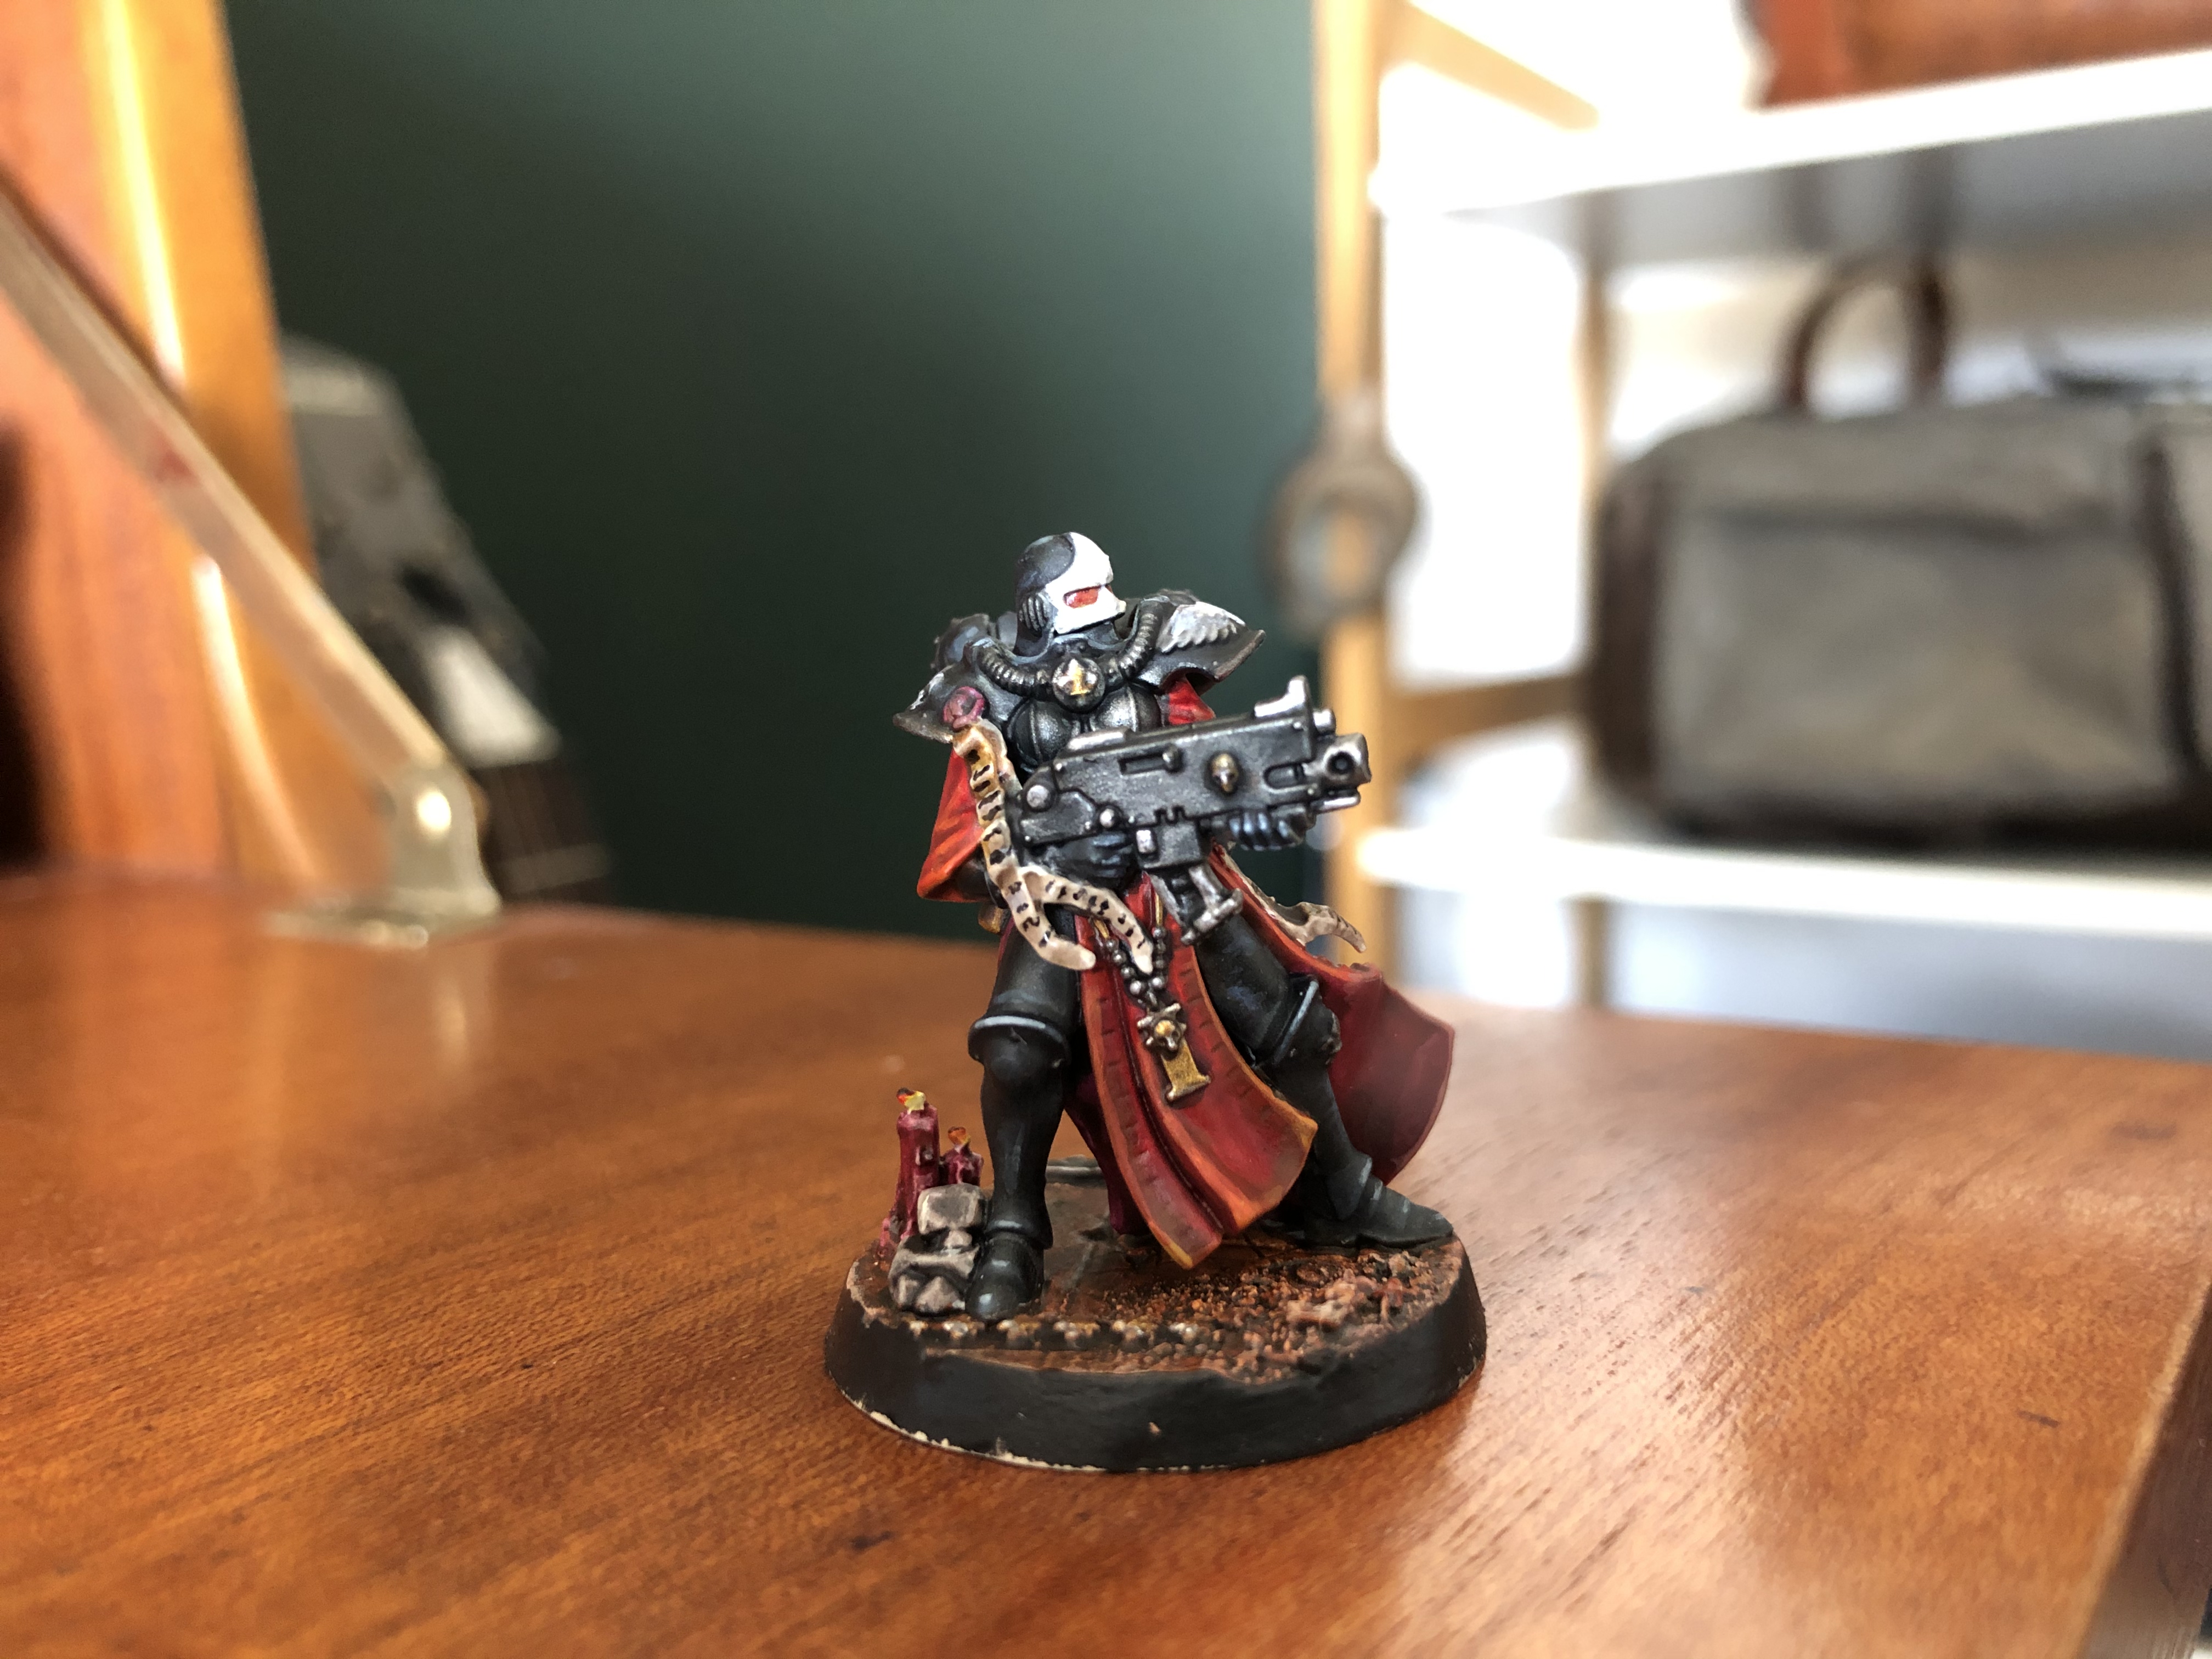
YOU GIVE ME WINGS
*****
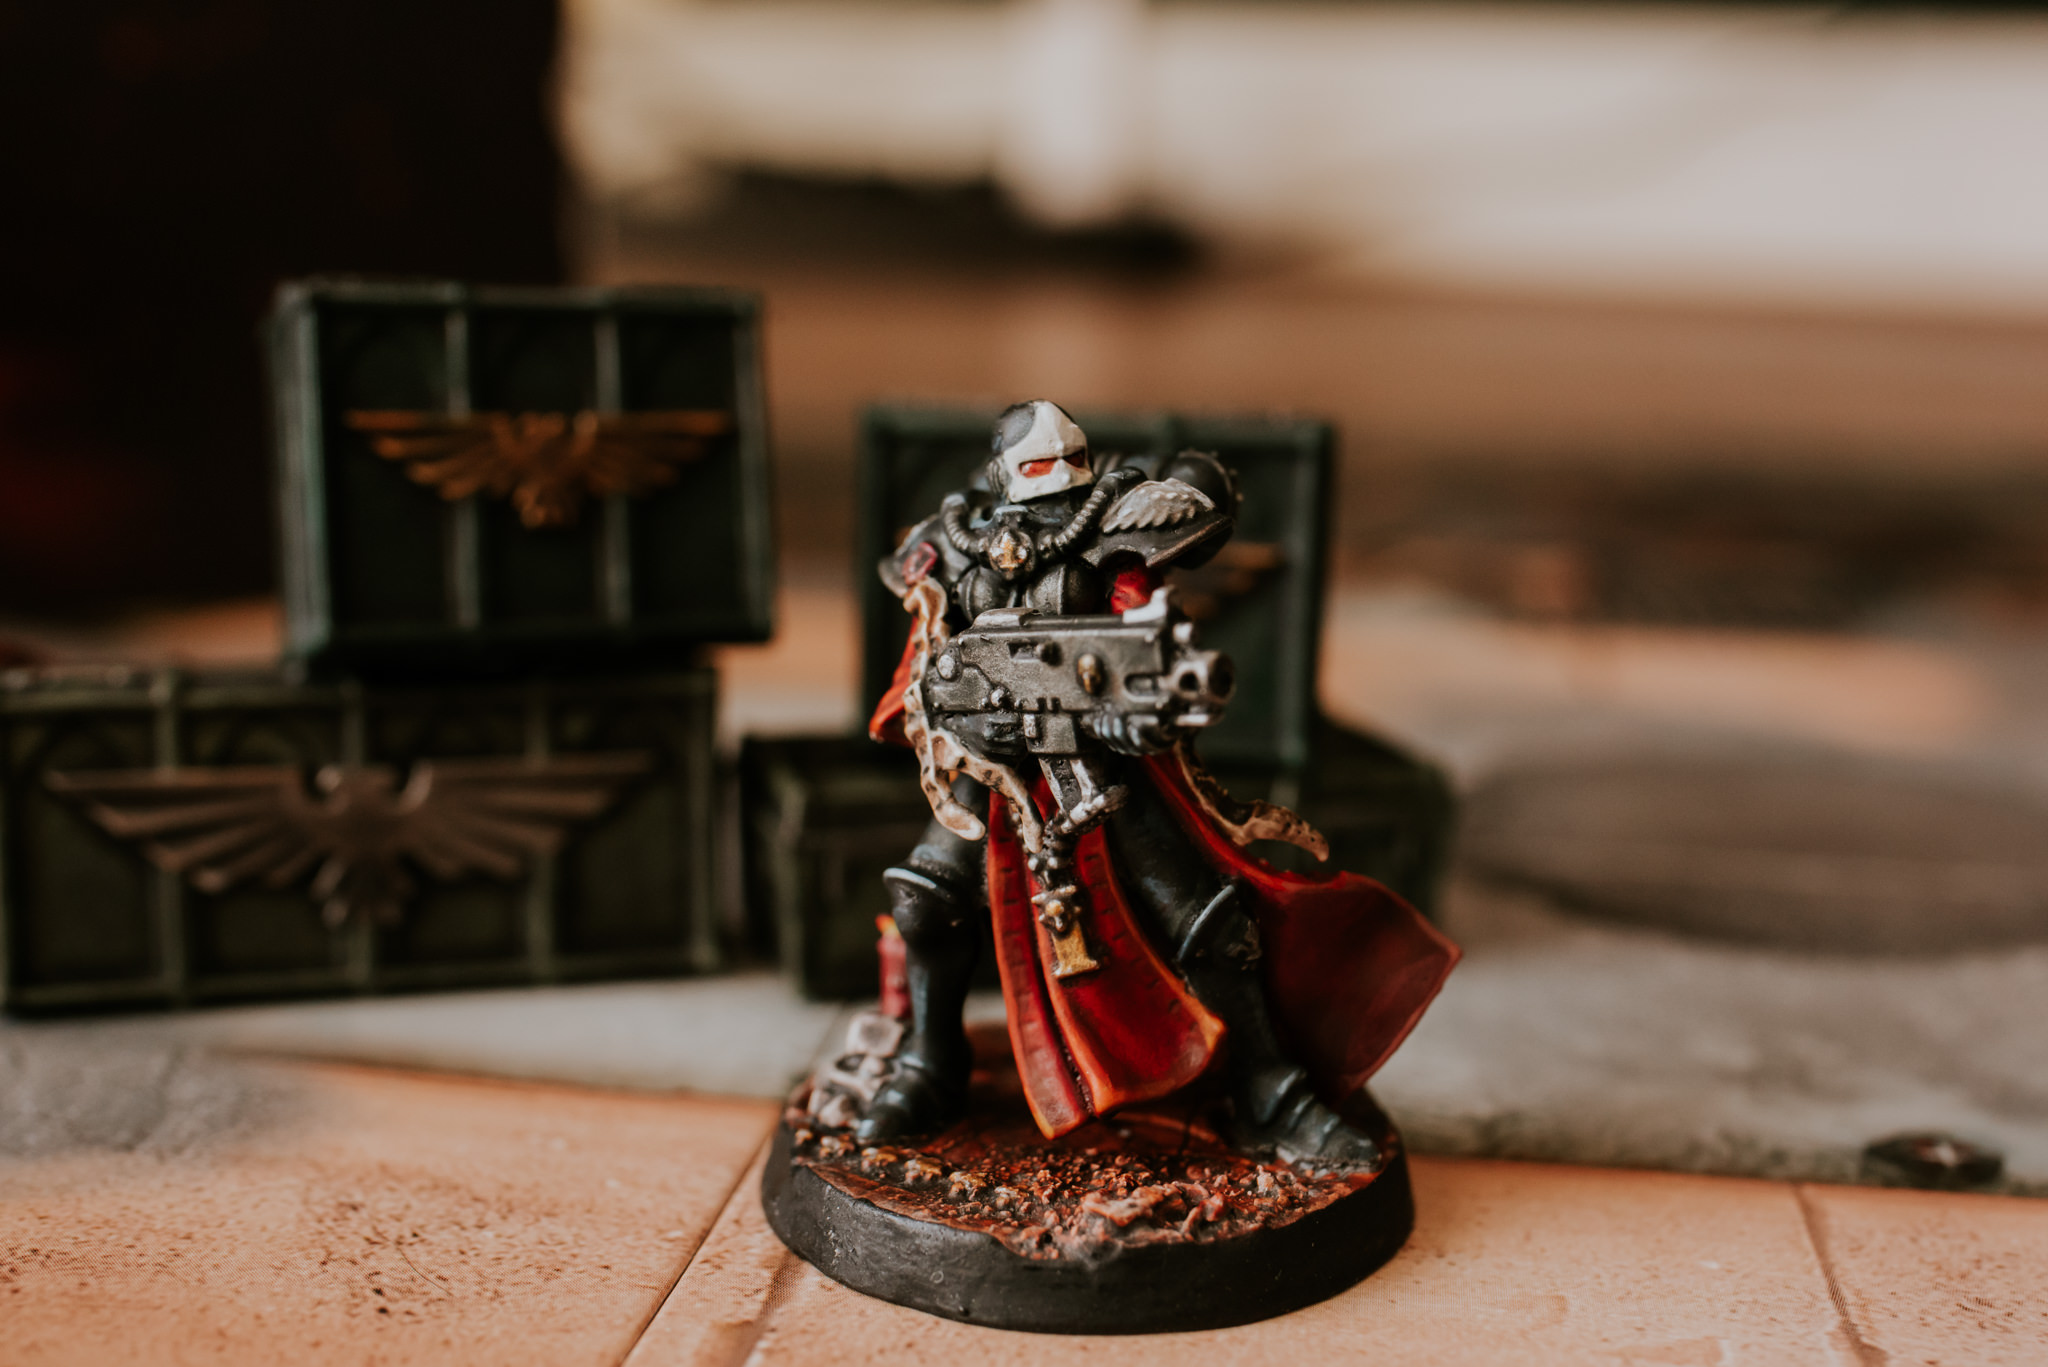
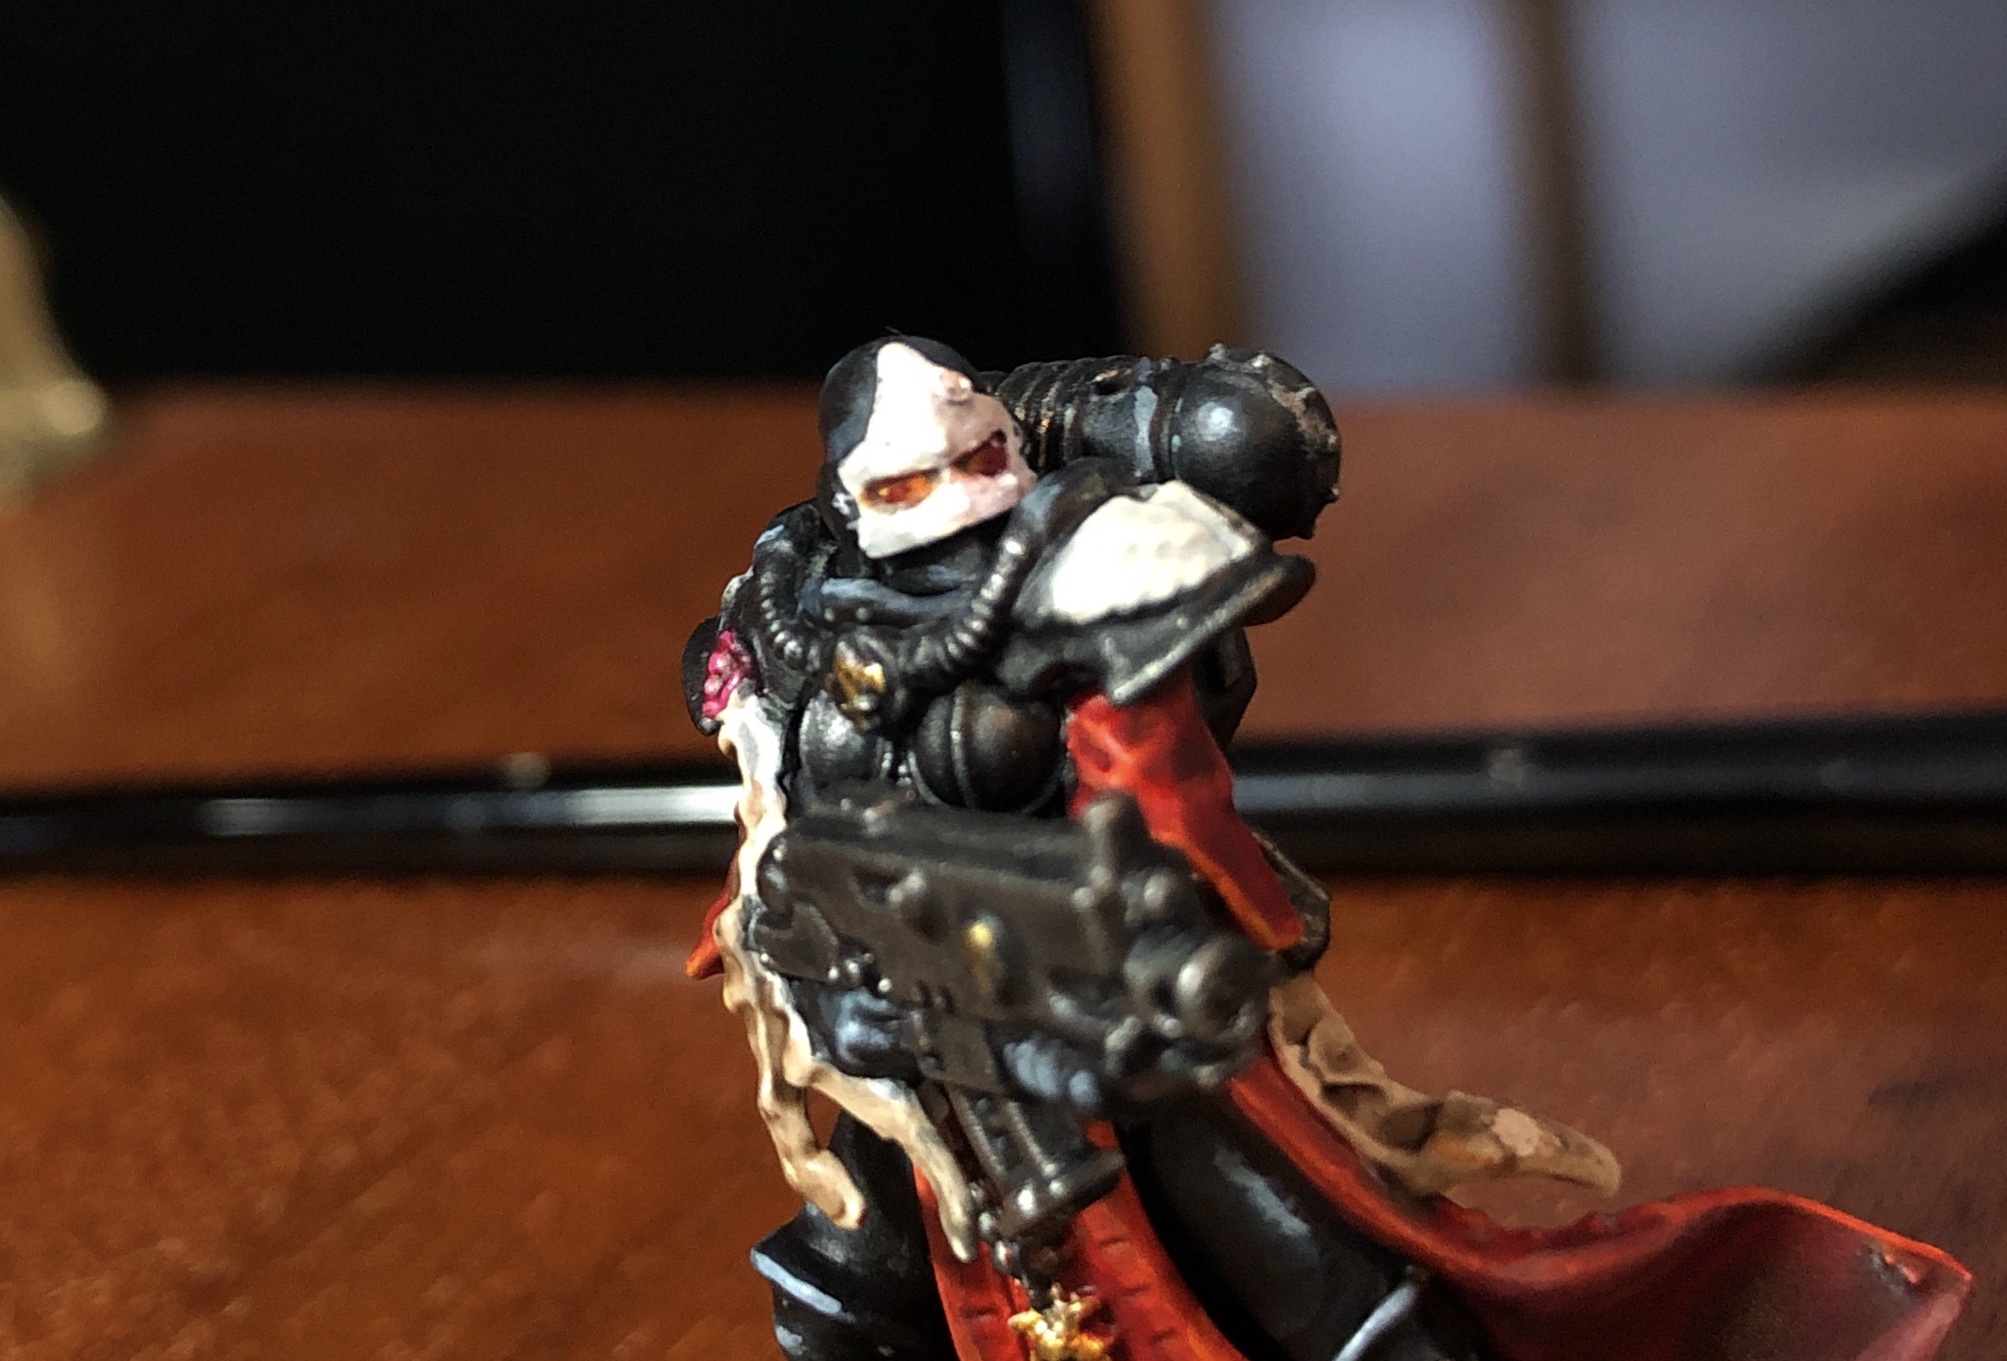
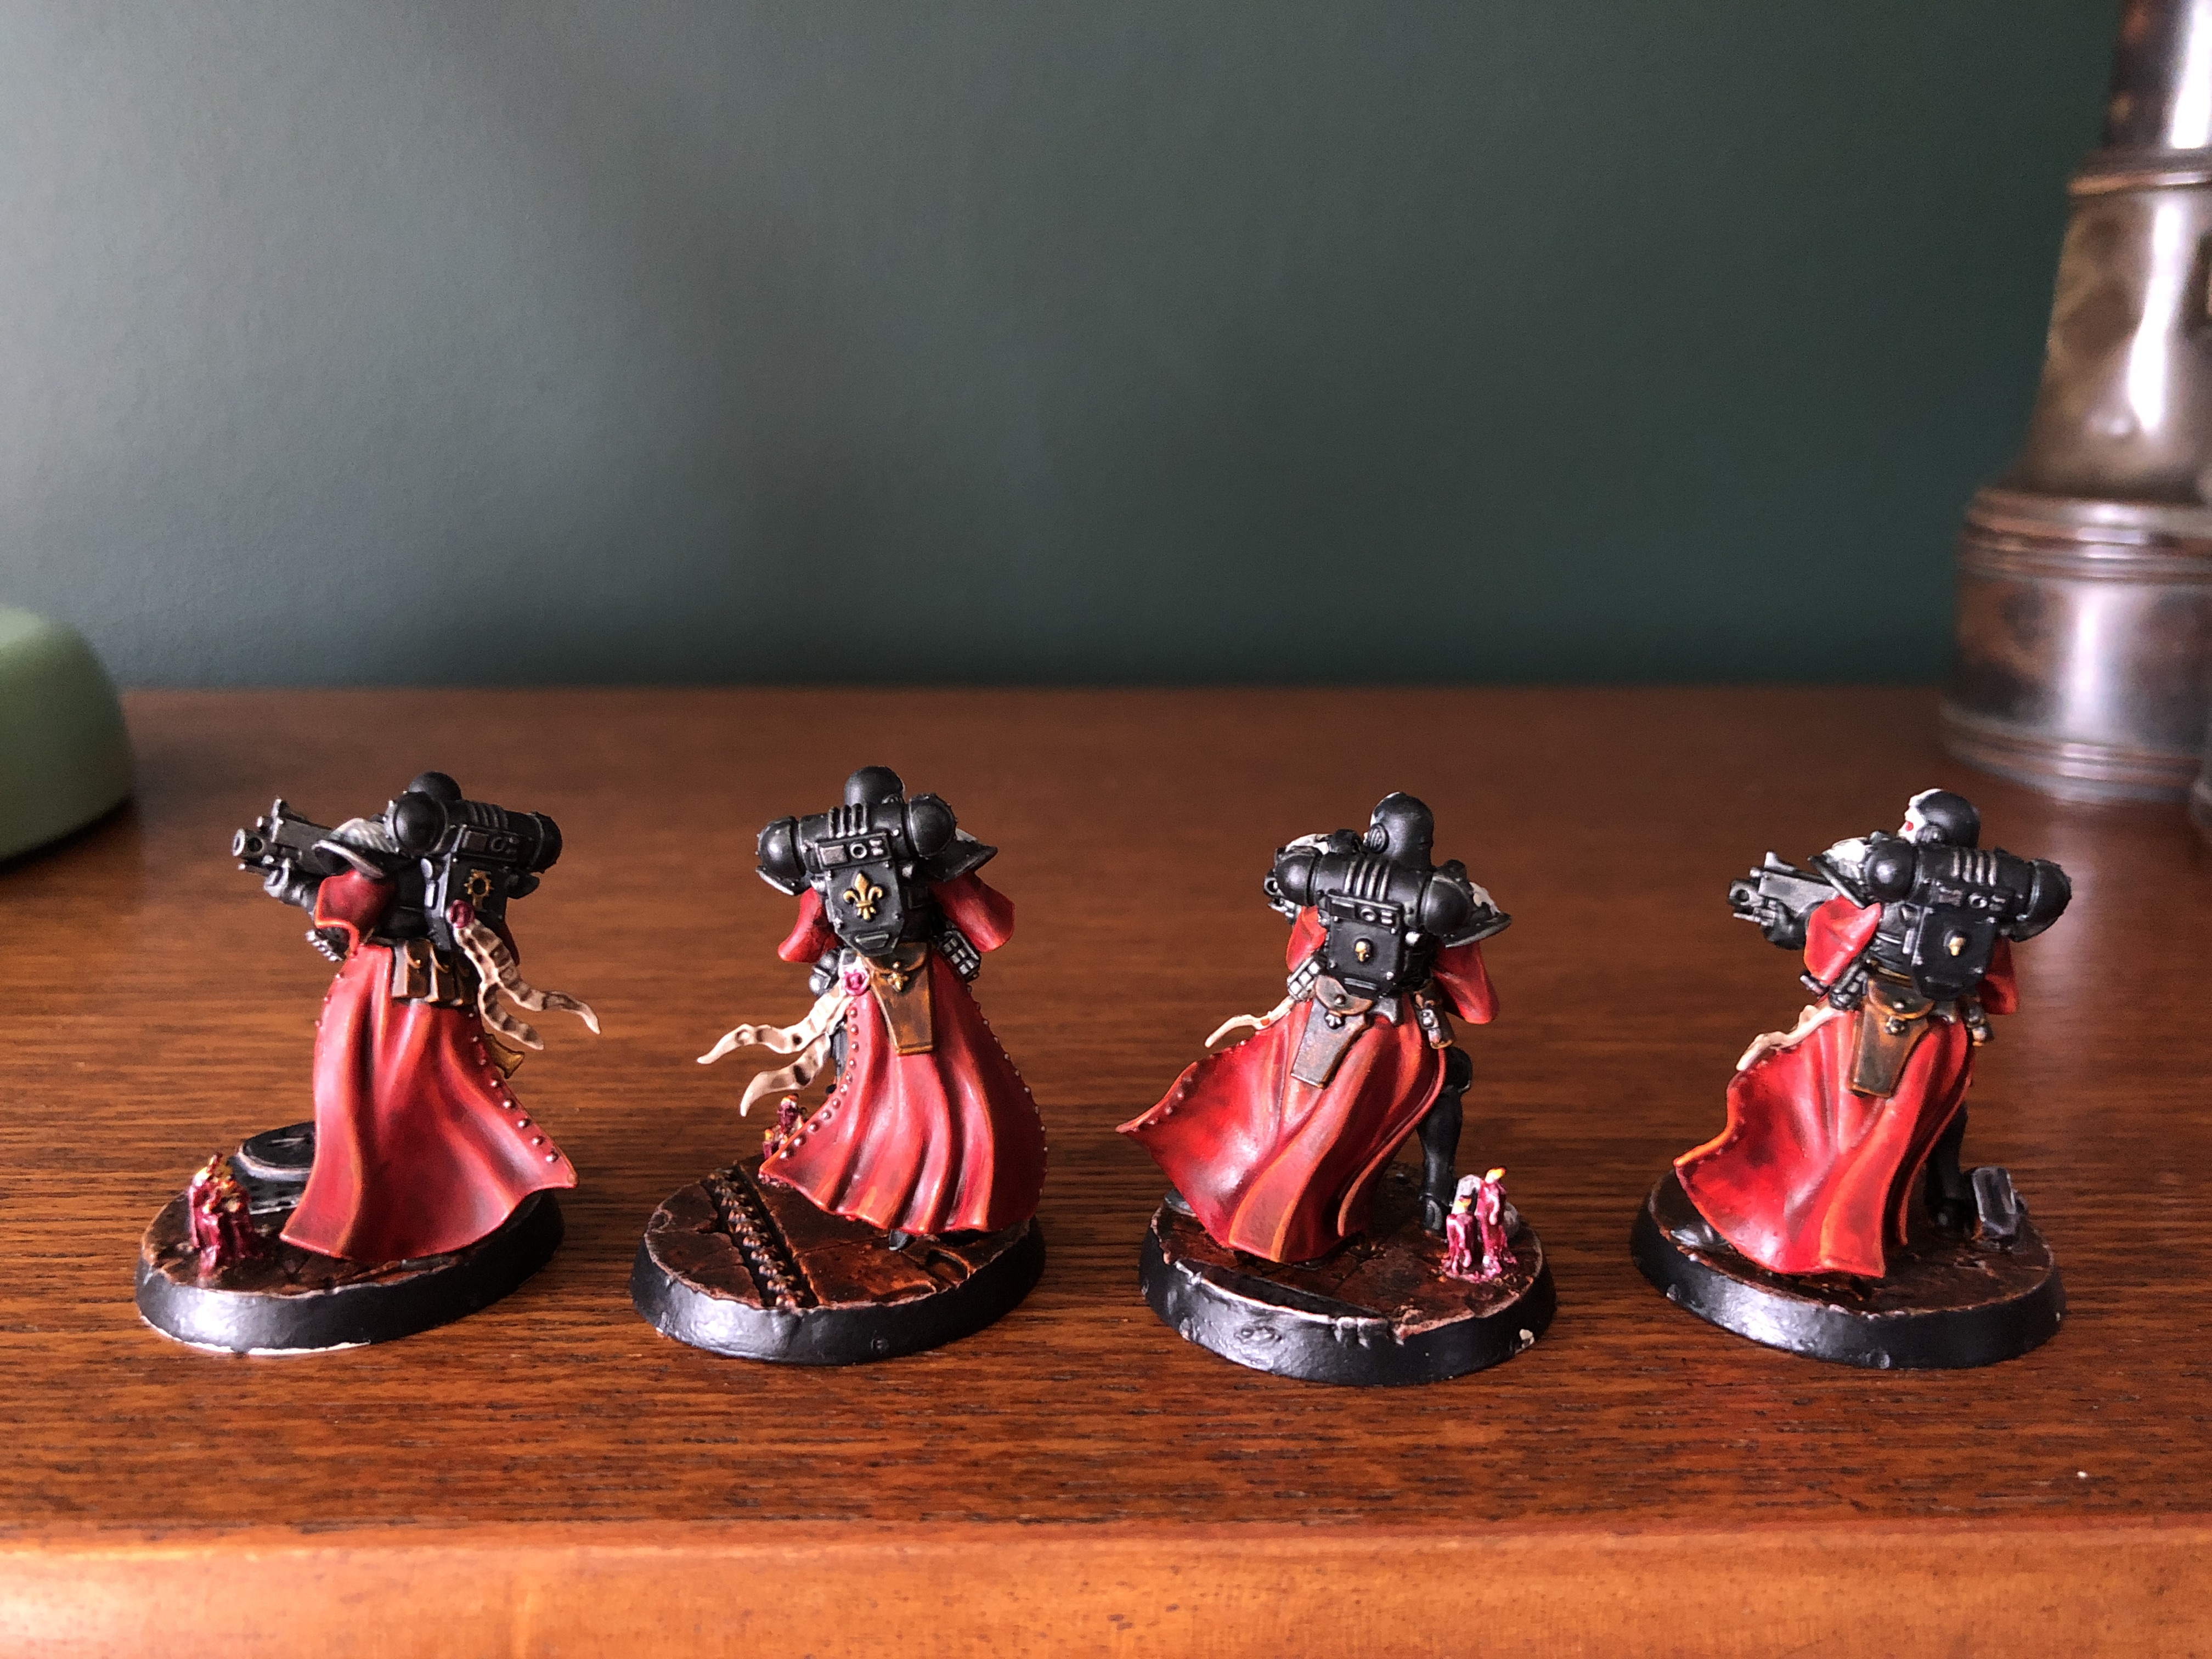
Remember a couple of updates ago I mentioned I wasn’t that happy with the Contrast Apothecary White appearance on the shoulder iconography. Well I redid that by first adding a layer of White Scar to the iconography & then a simple wash of Nuln Oil into the recesses. Done! I like the face mask having that difference in tone to the iconography so left that in the Apothecary white from before.

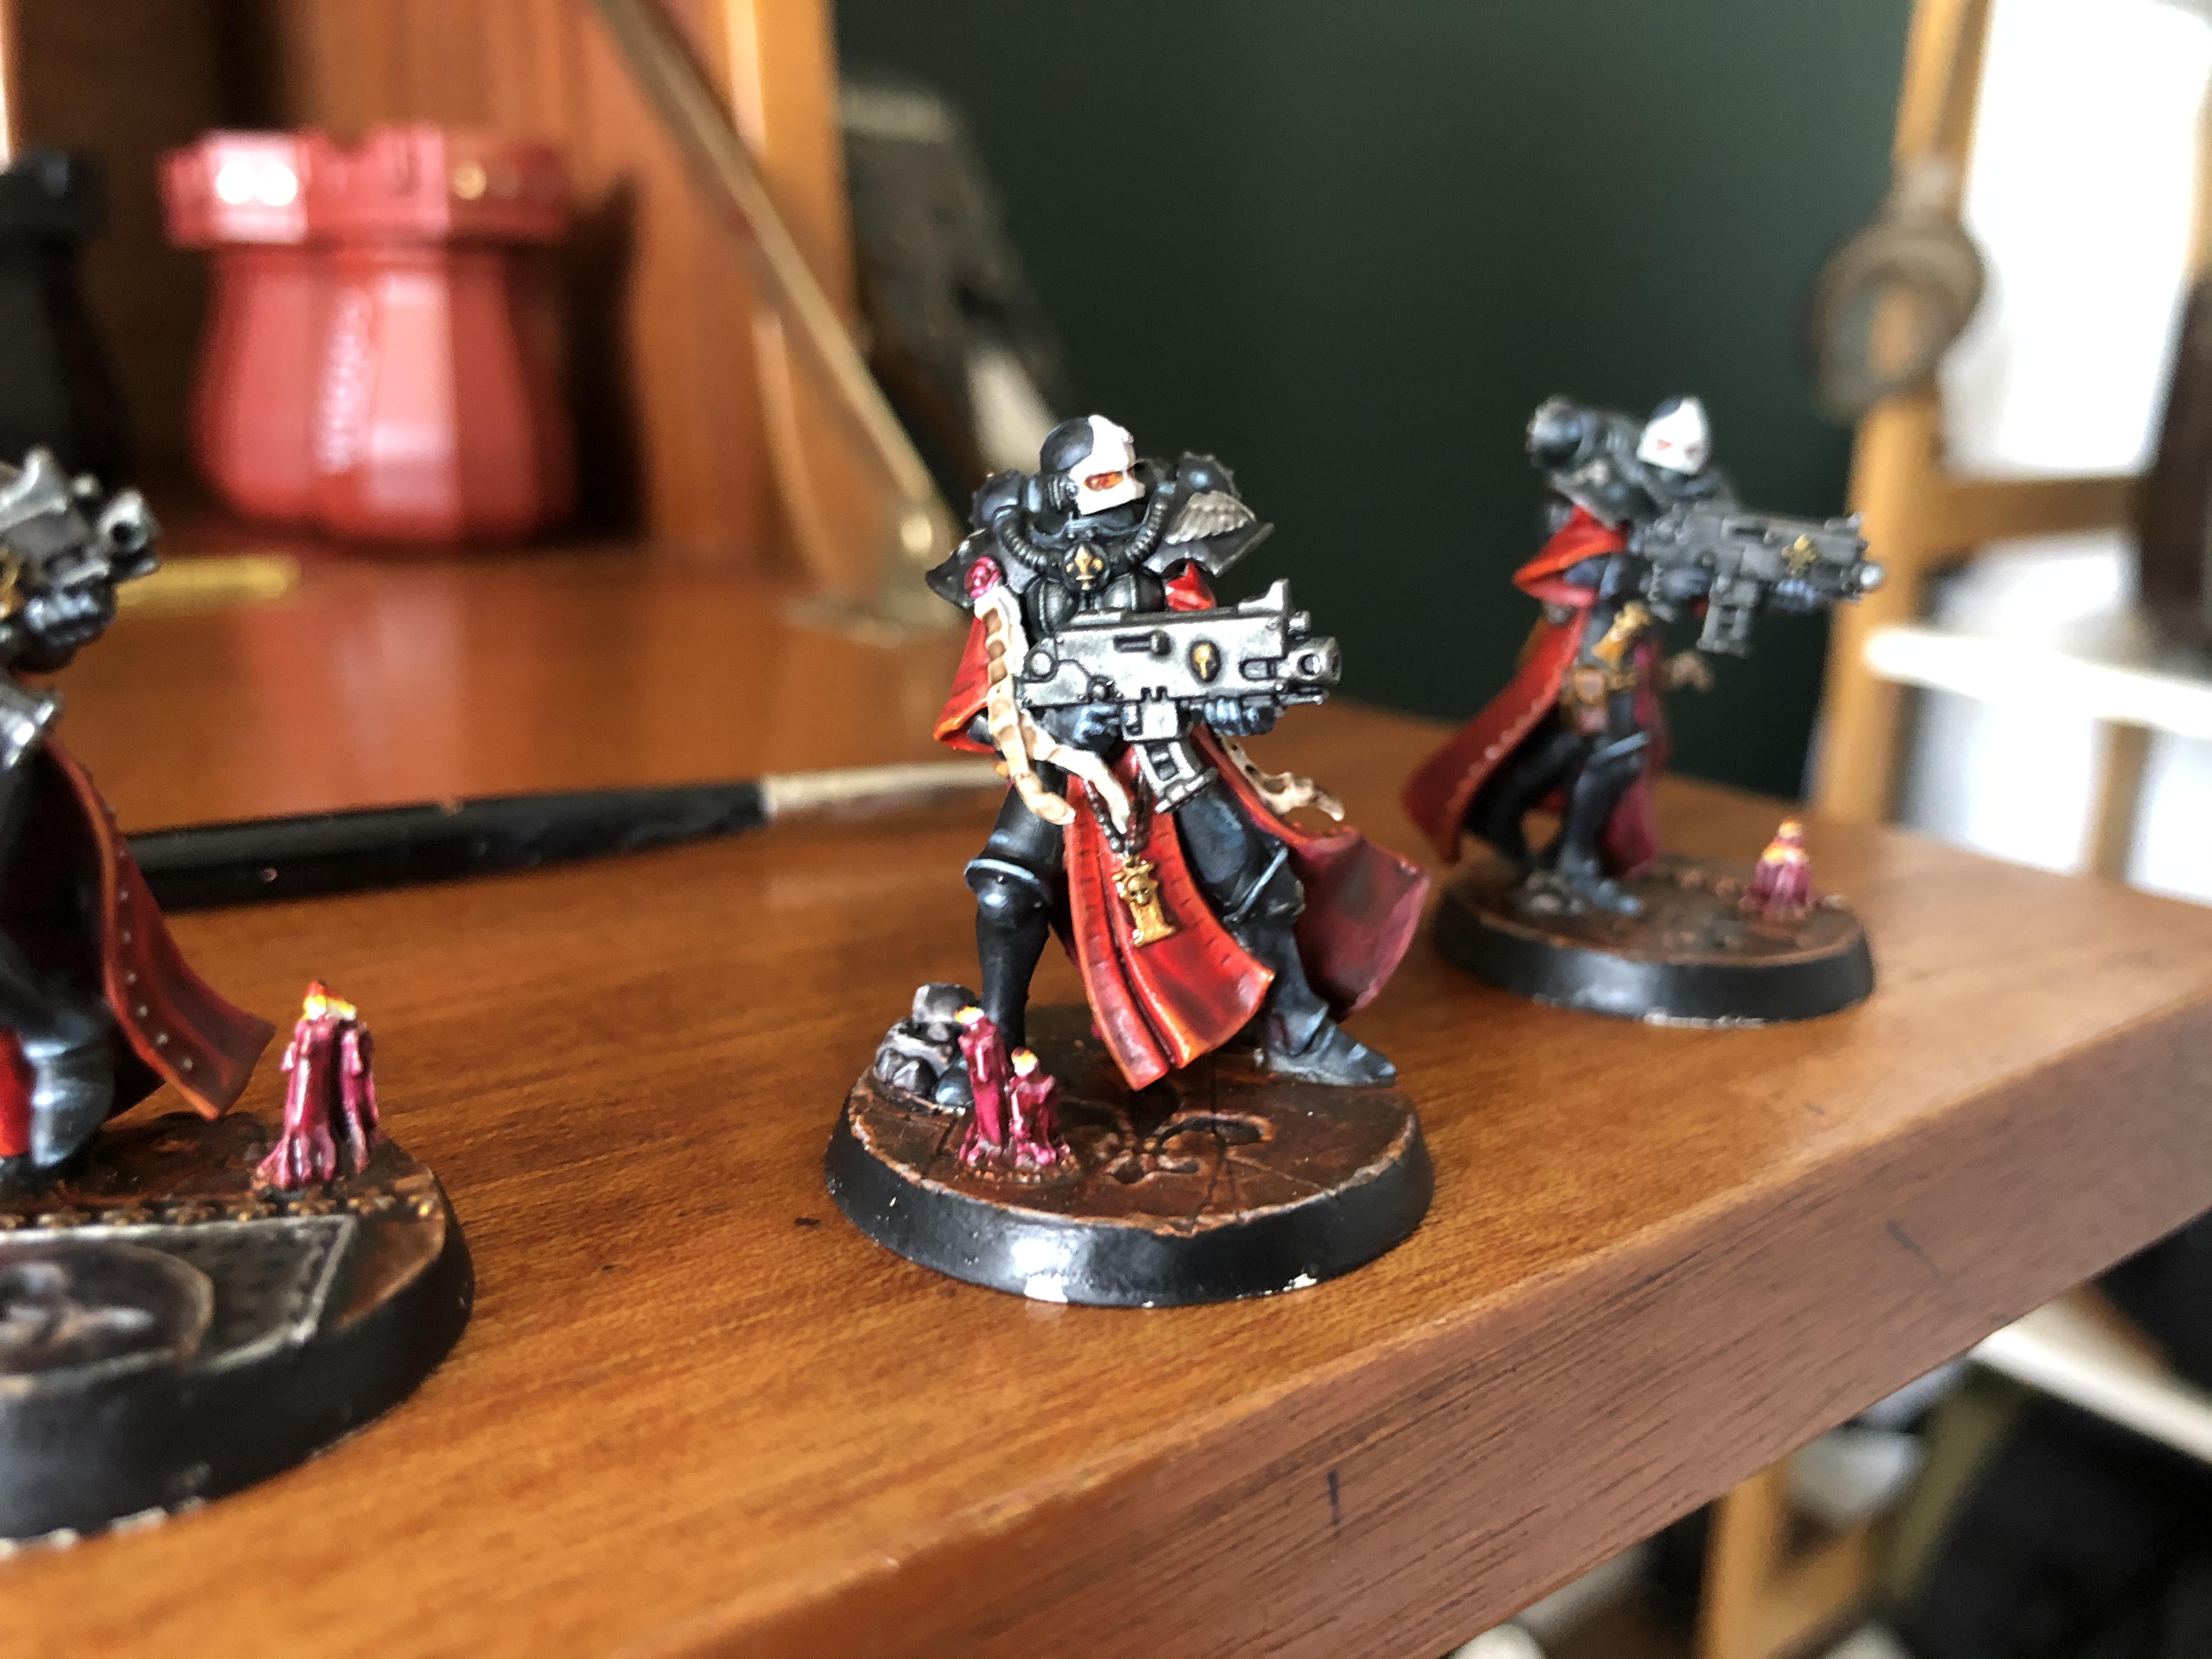
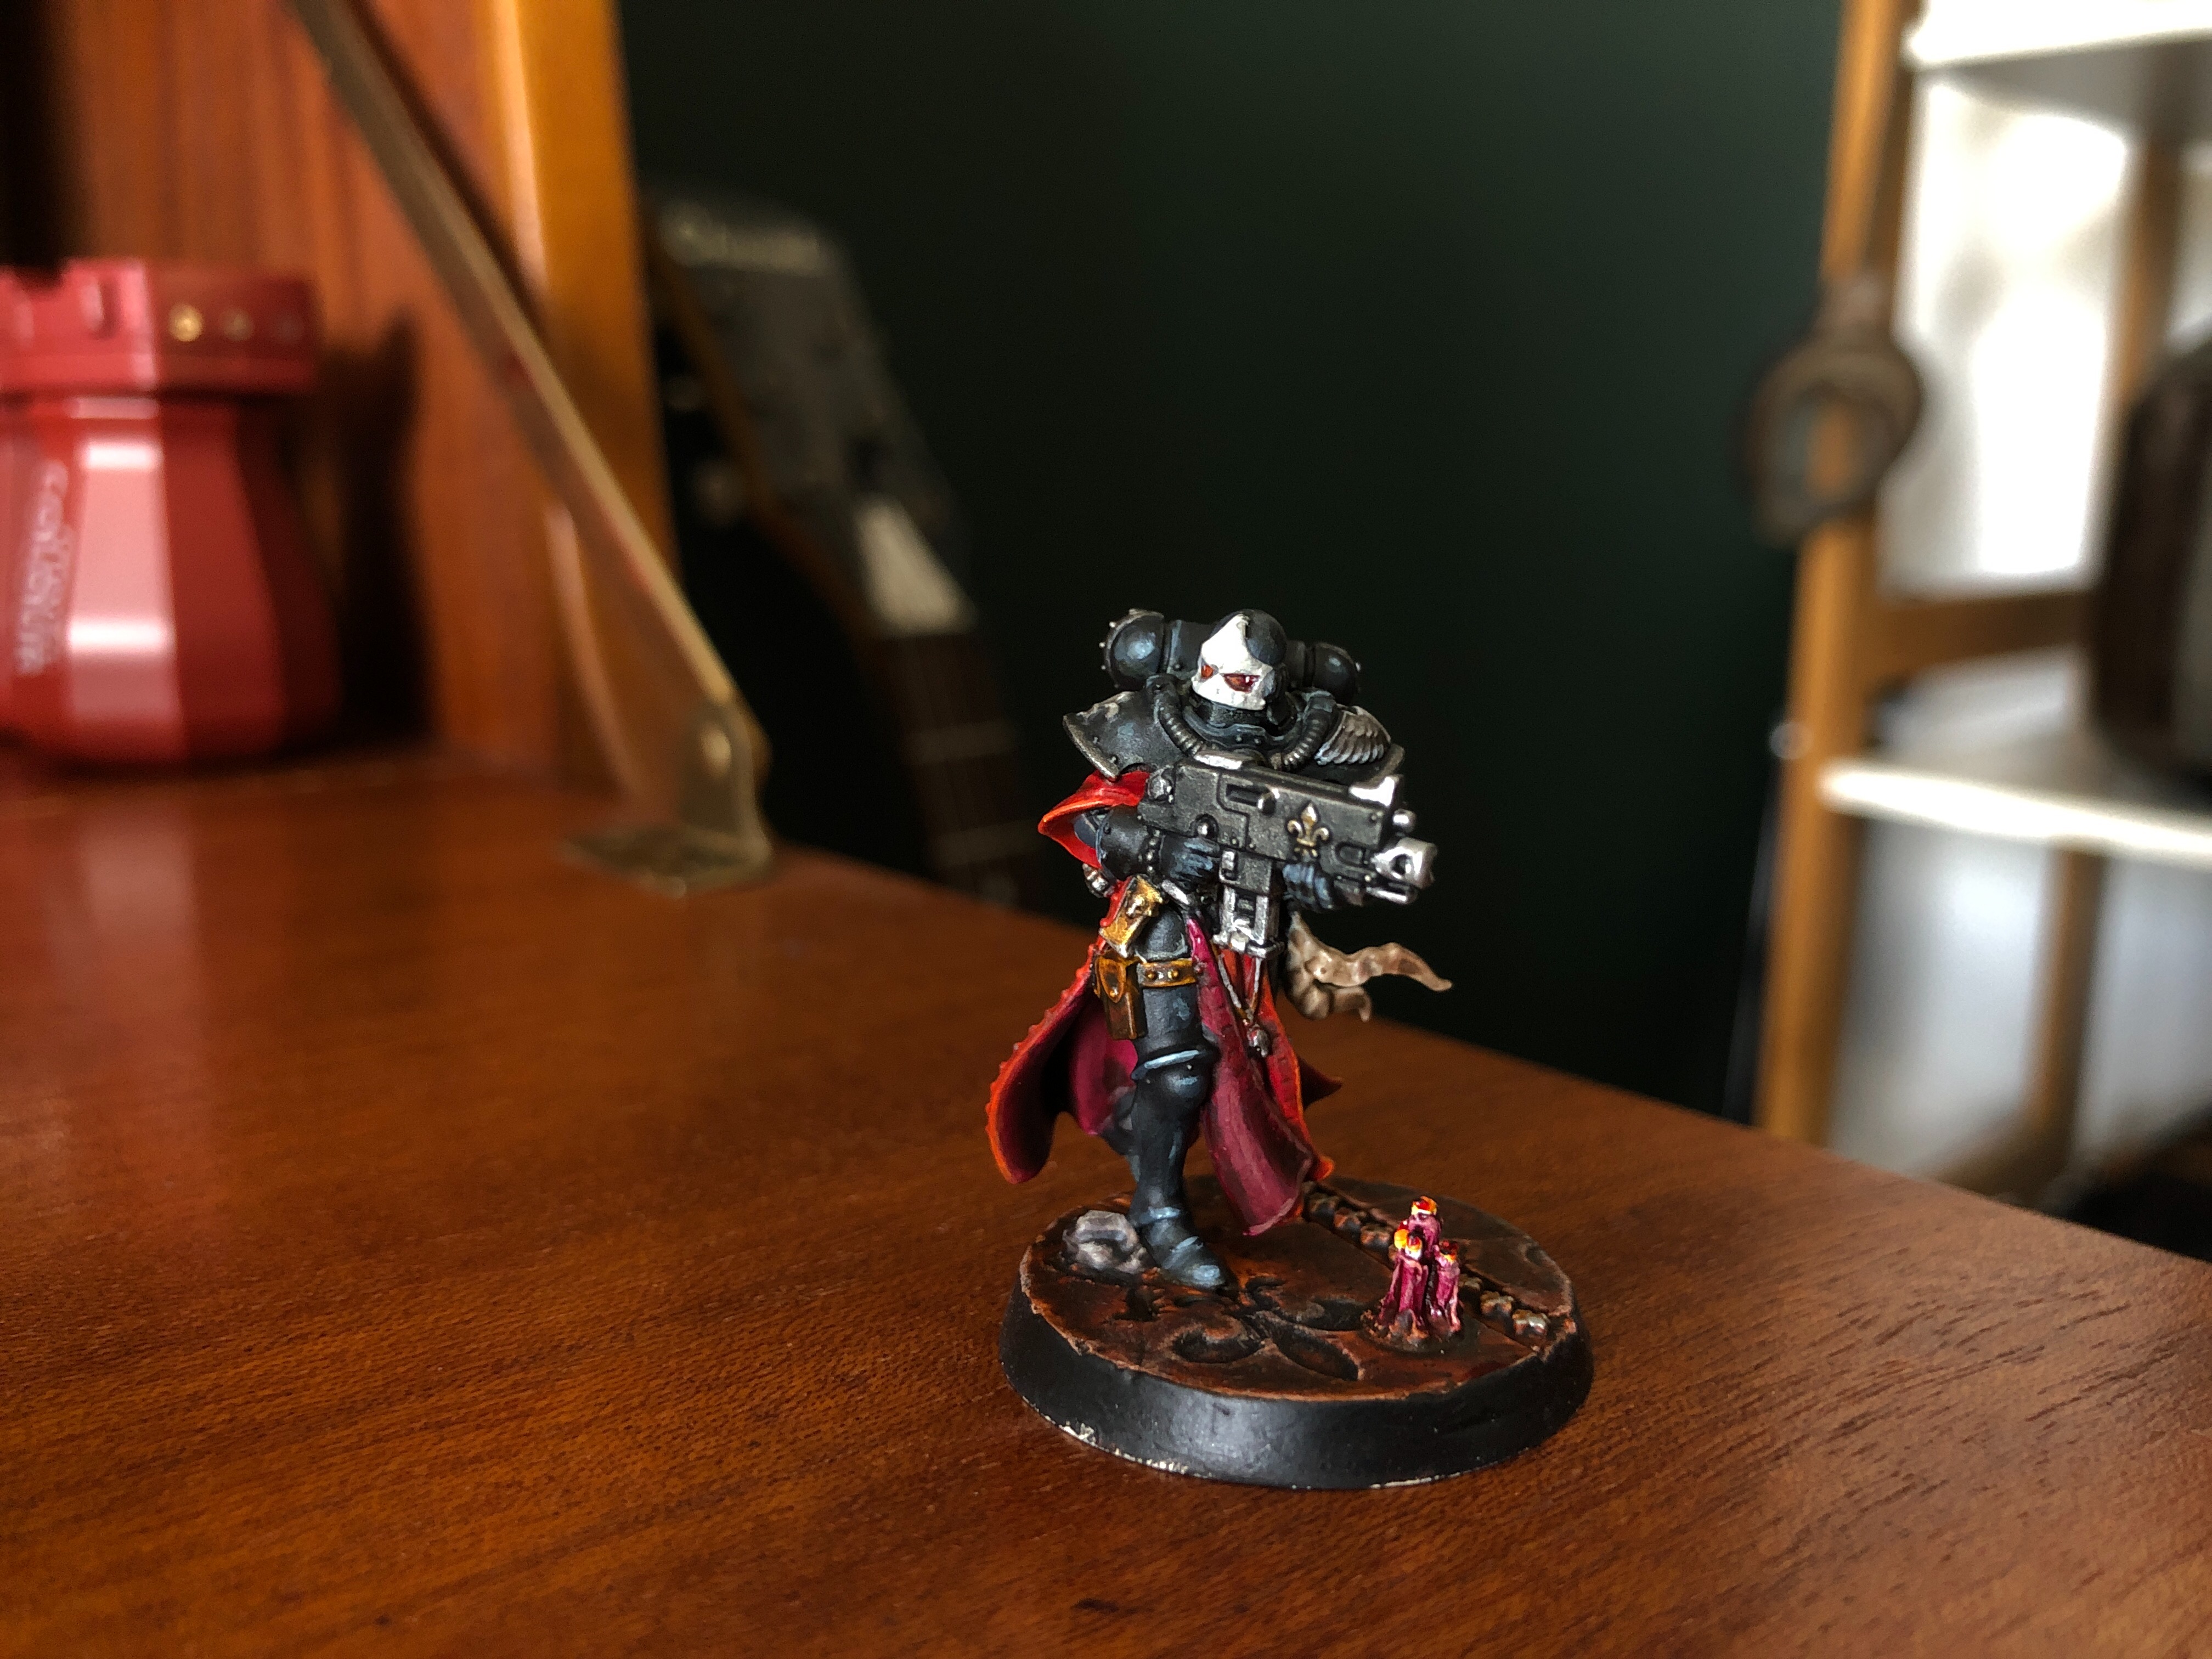
SILVER & GOLD
*****
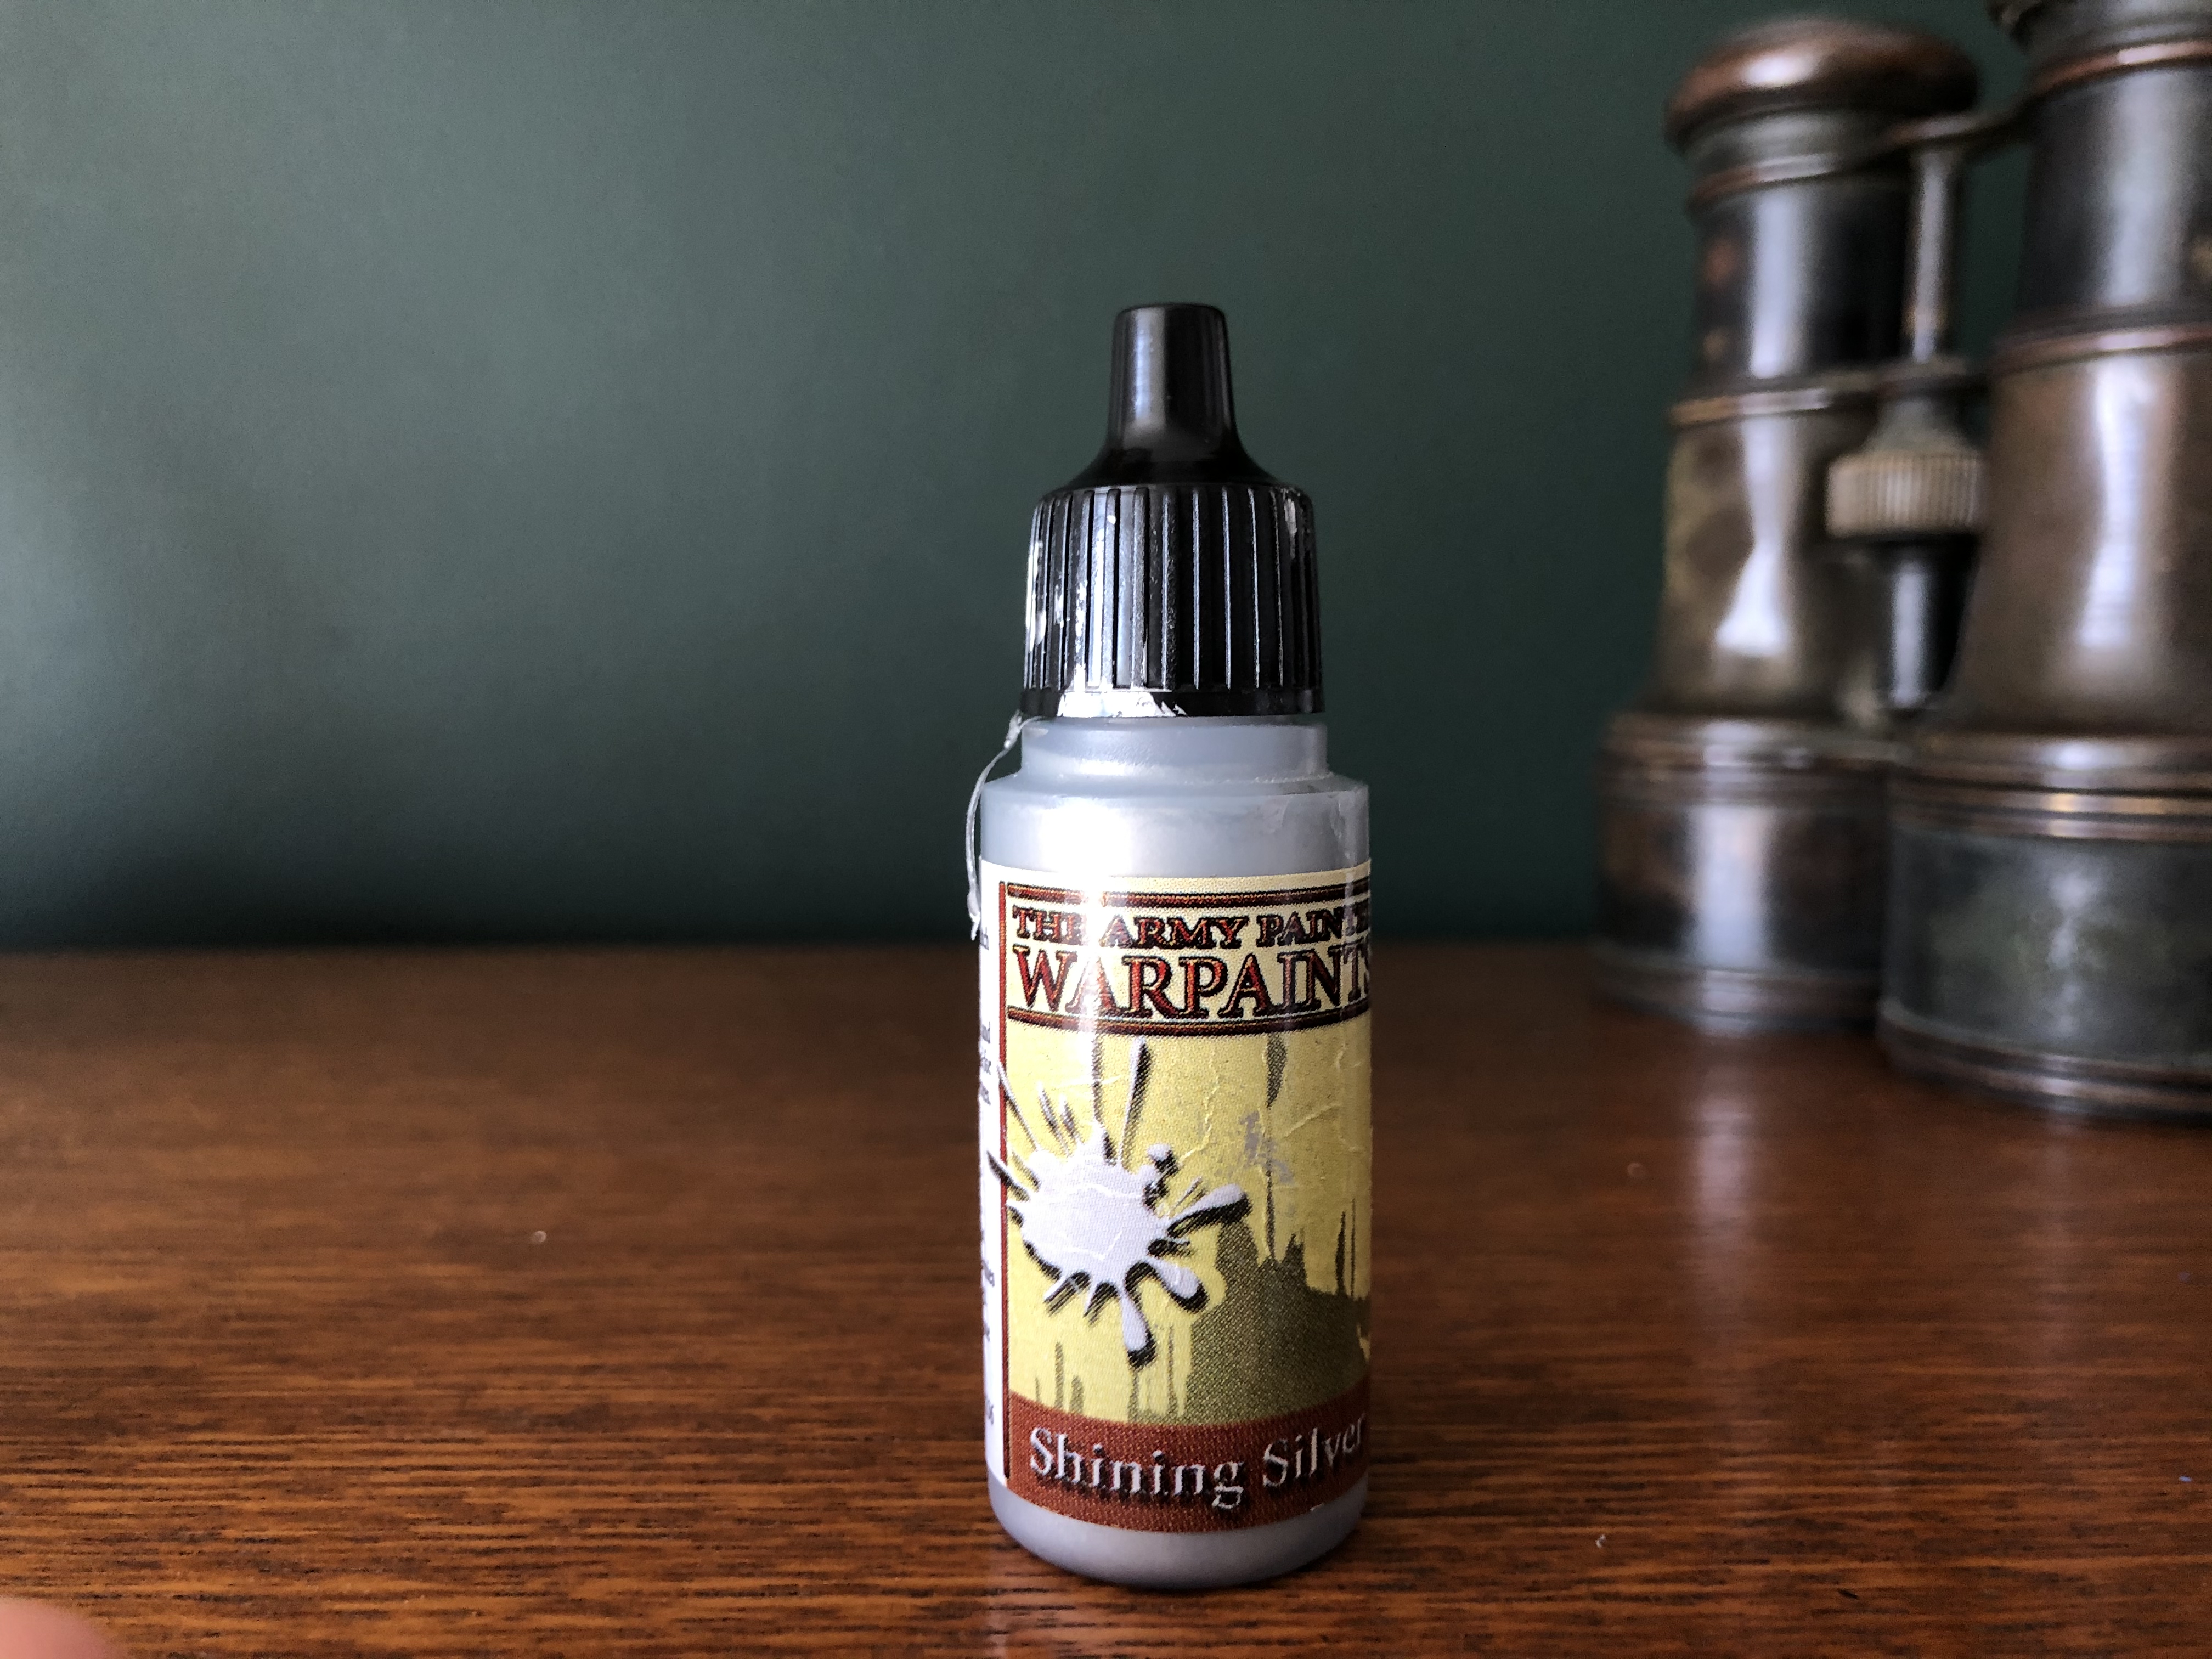
I hit all of the gold details on the model with a wash of Agrax Earthshade. I then used Army Painters Shining Silver as an edge highlight on the gold details. I then went on to apply Shining Silver to some of the details on the Boltguns to give them different tones of metal.

SCROLL ON
*****
I then used a Black 005 Micron pen to add some text to all of the scrolls on the models. Of course by text I mean squiggly lines. YES!
THE BIG FINALE
*****
Finally I redid my Abaddon black Victory lap around the base edge & called out for the Emperors protection by using Army Painter Anti-Shine Varnish across the whole model. Yes spraying would be way easier but I’m always paranoid about the dreaded frosting so this gives me more control.
HOLY MOLY WE DID IT
*****
Yes! That’s four more Sisters of Battle done & ready to purge. Of course I’m going to tease you guys & not post any photos of the full squad until the next update. They have to be seen in all the full Emperors glory. YES!
See you on the next one & please stay safe.
Much love
Eternity Gate
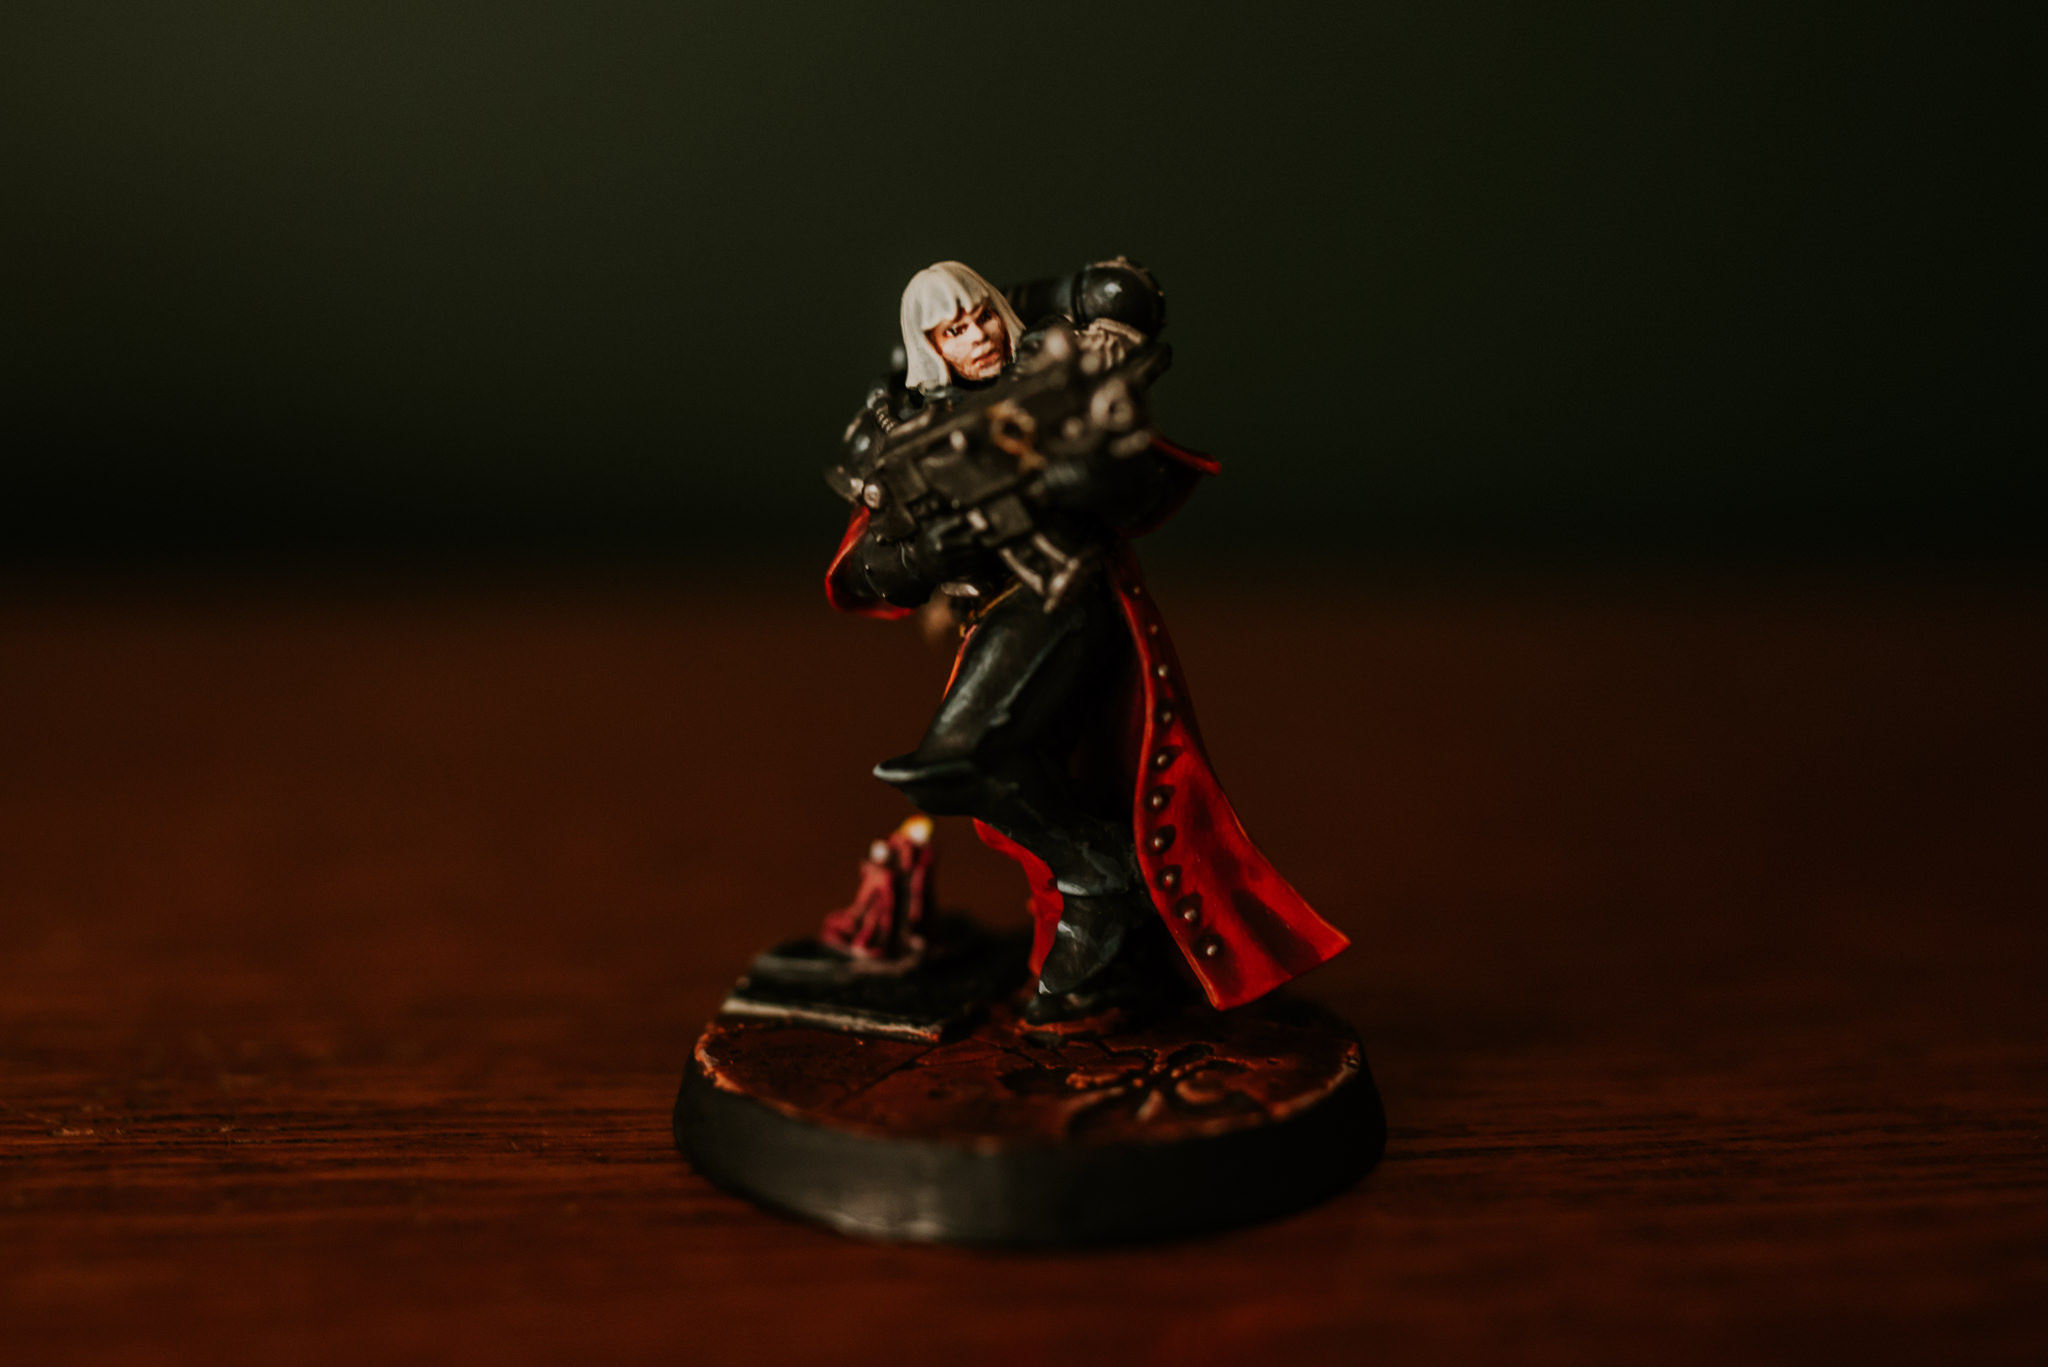
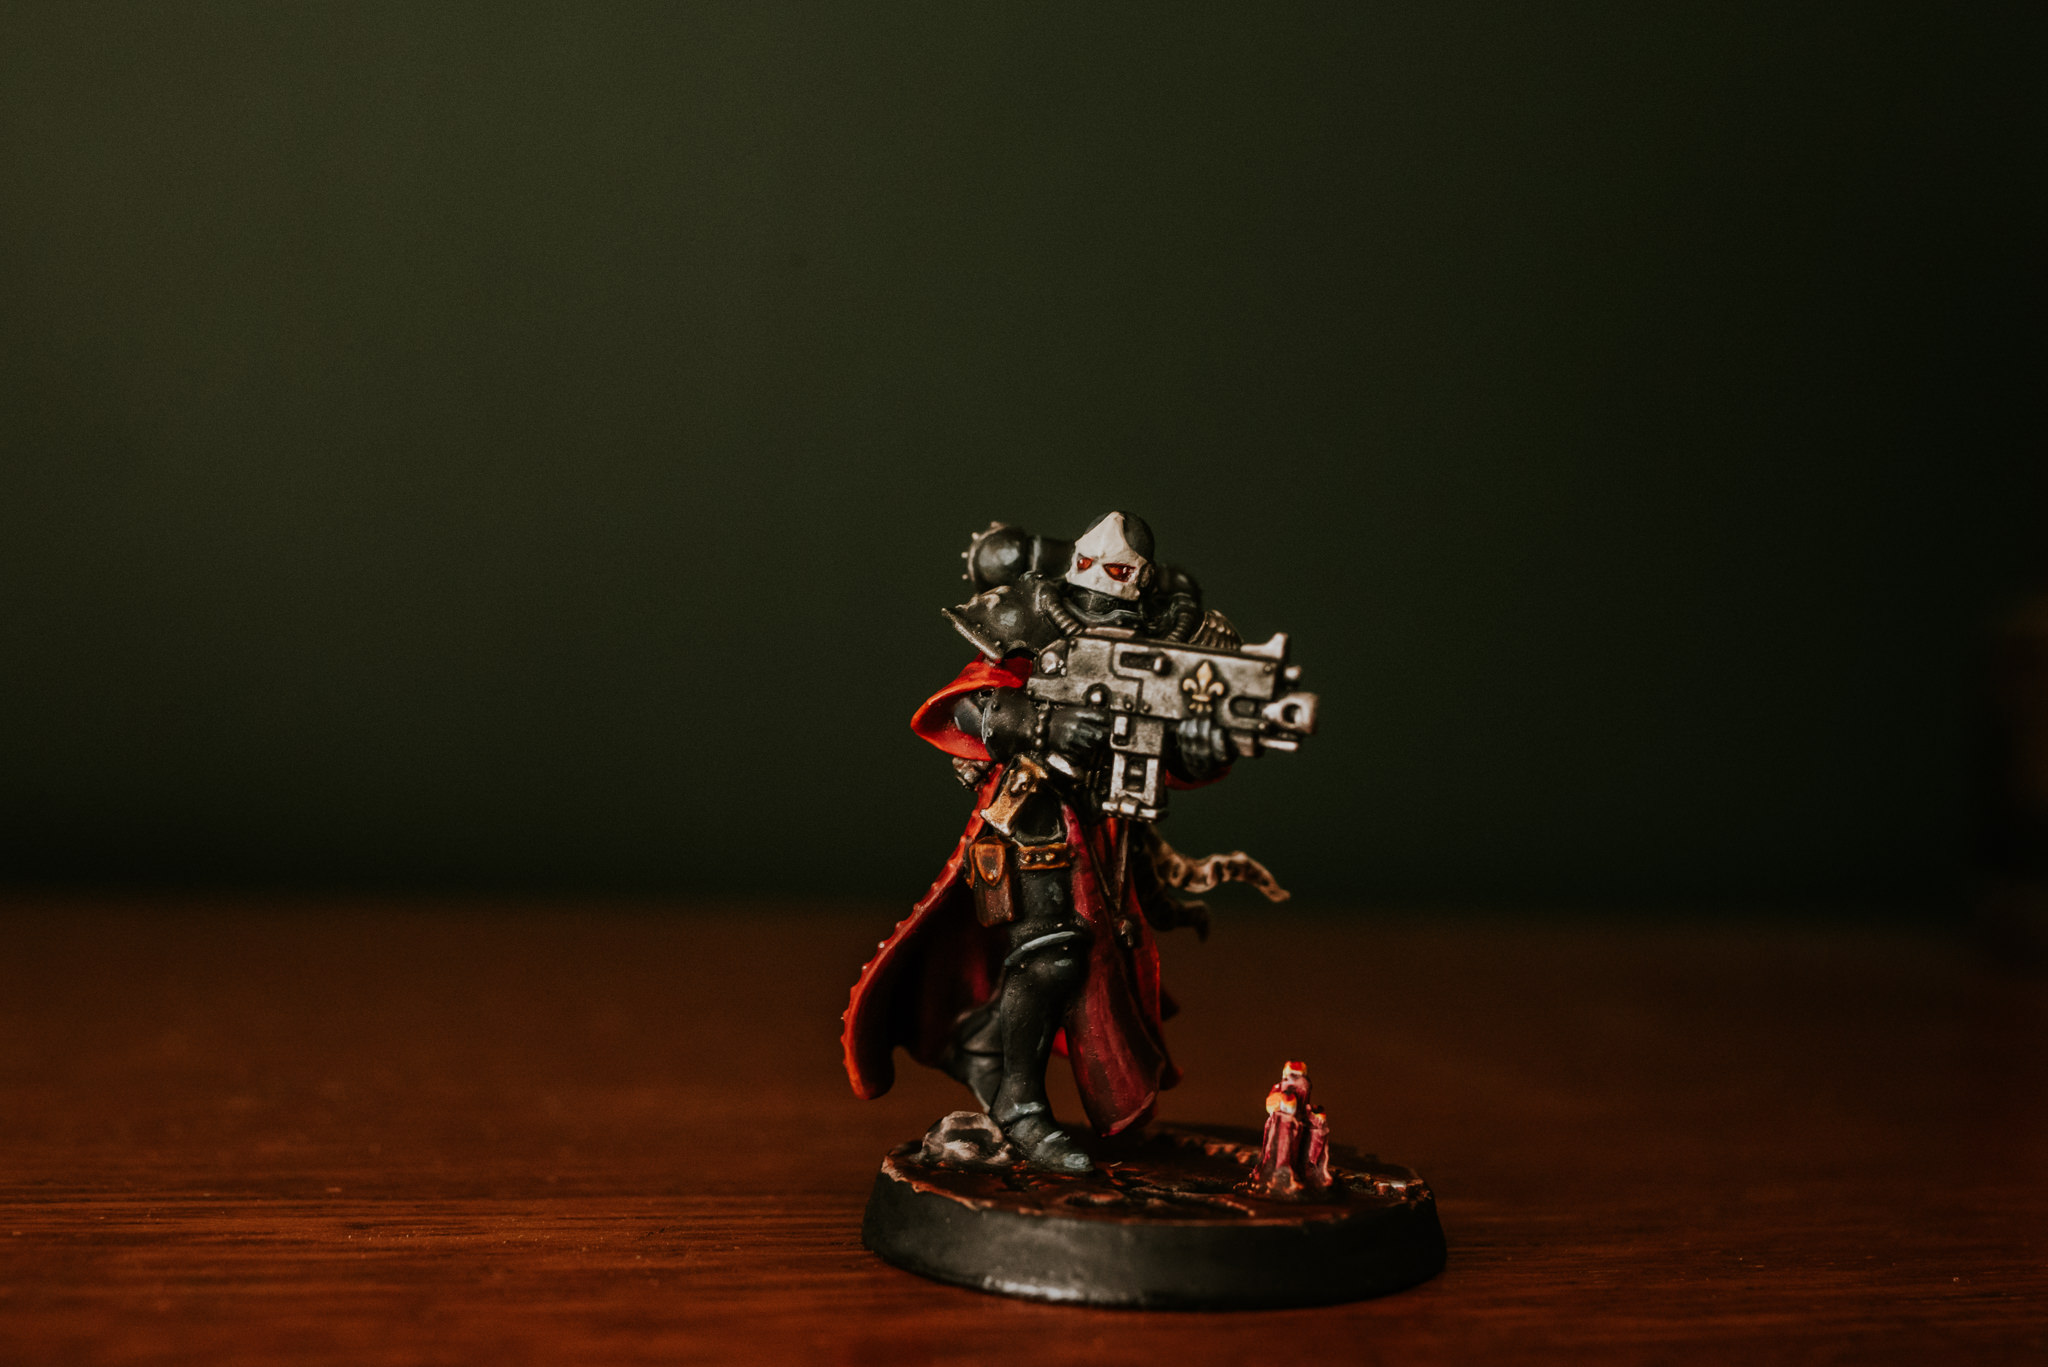
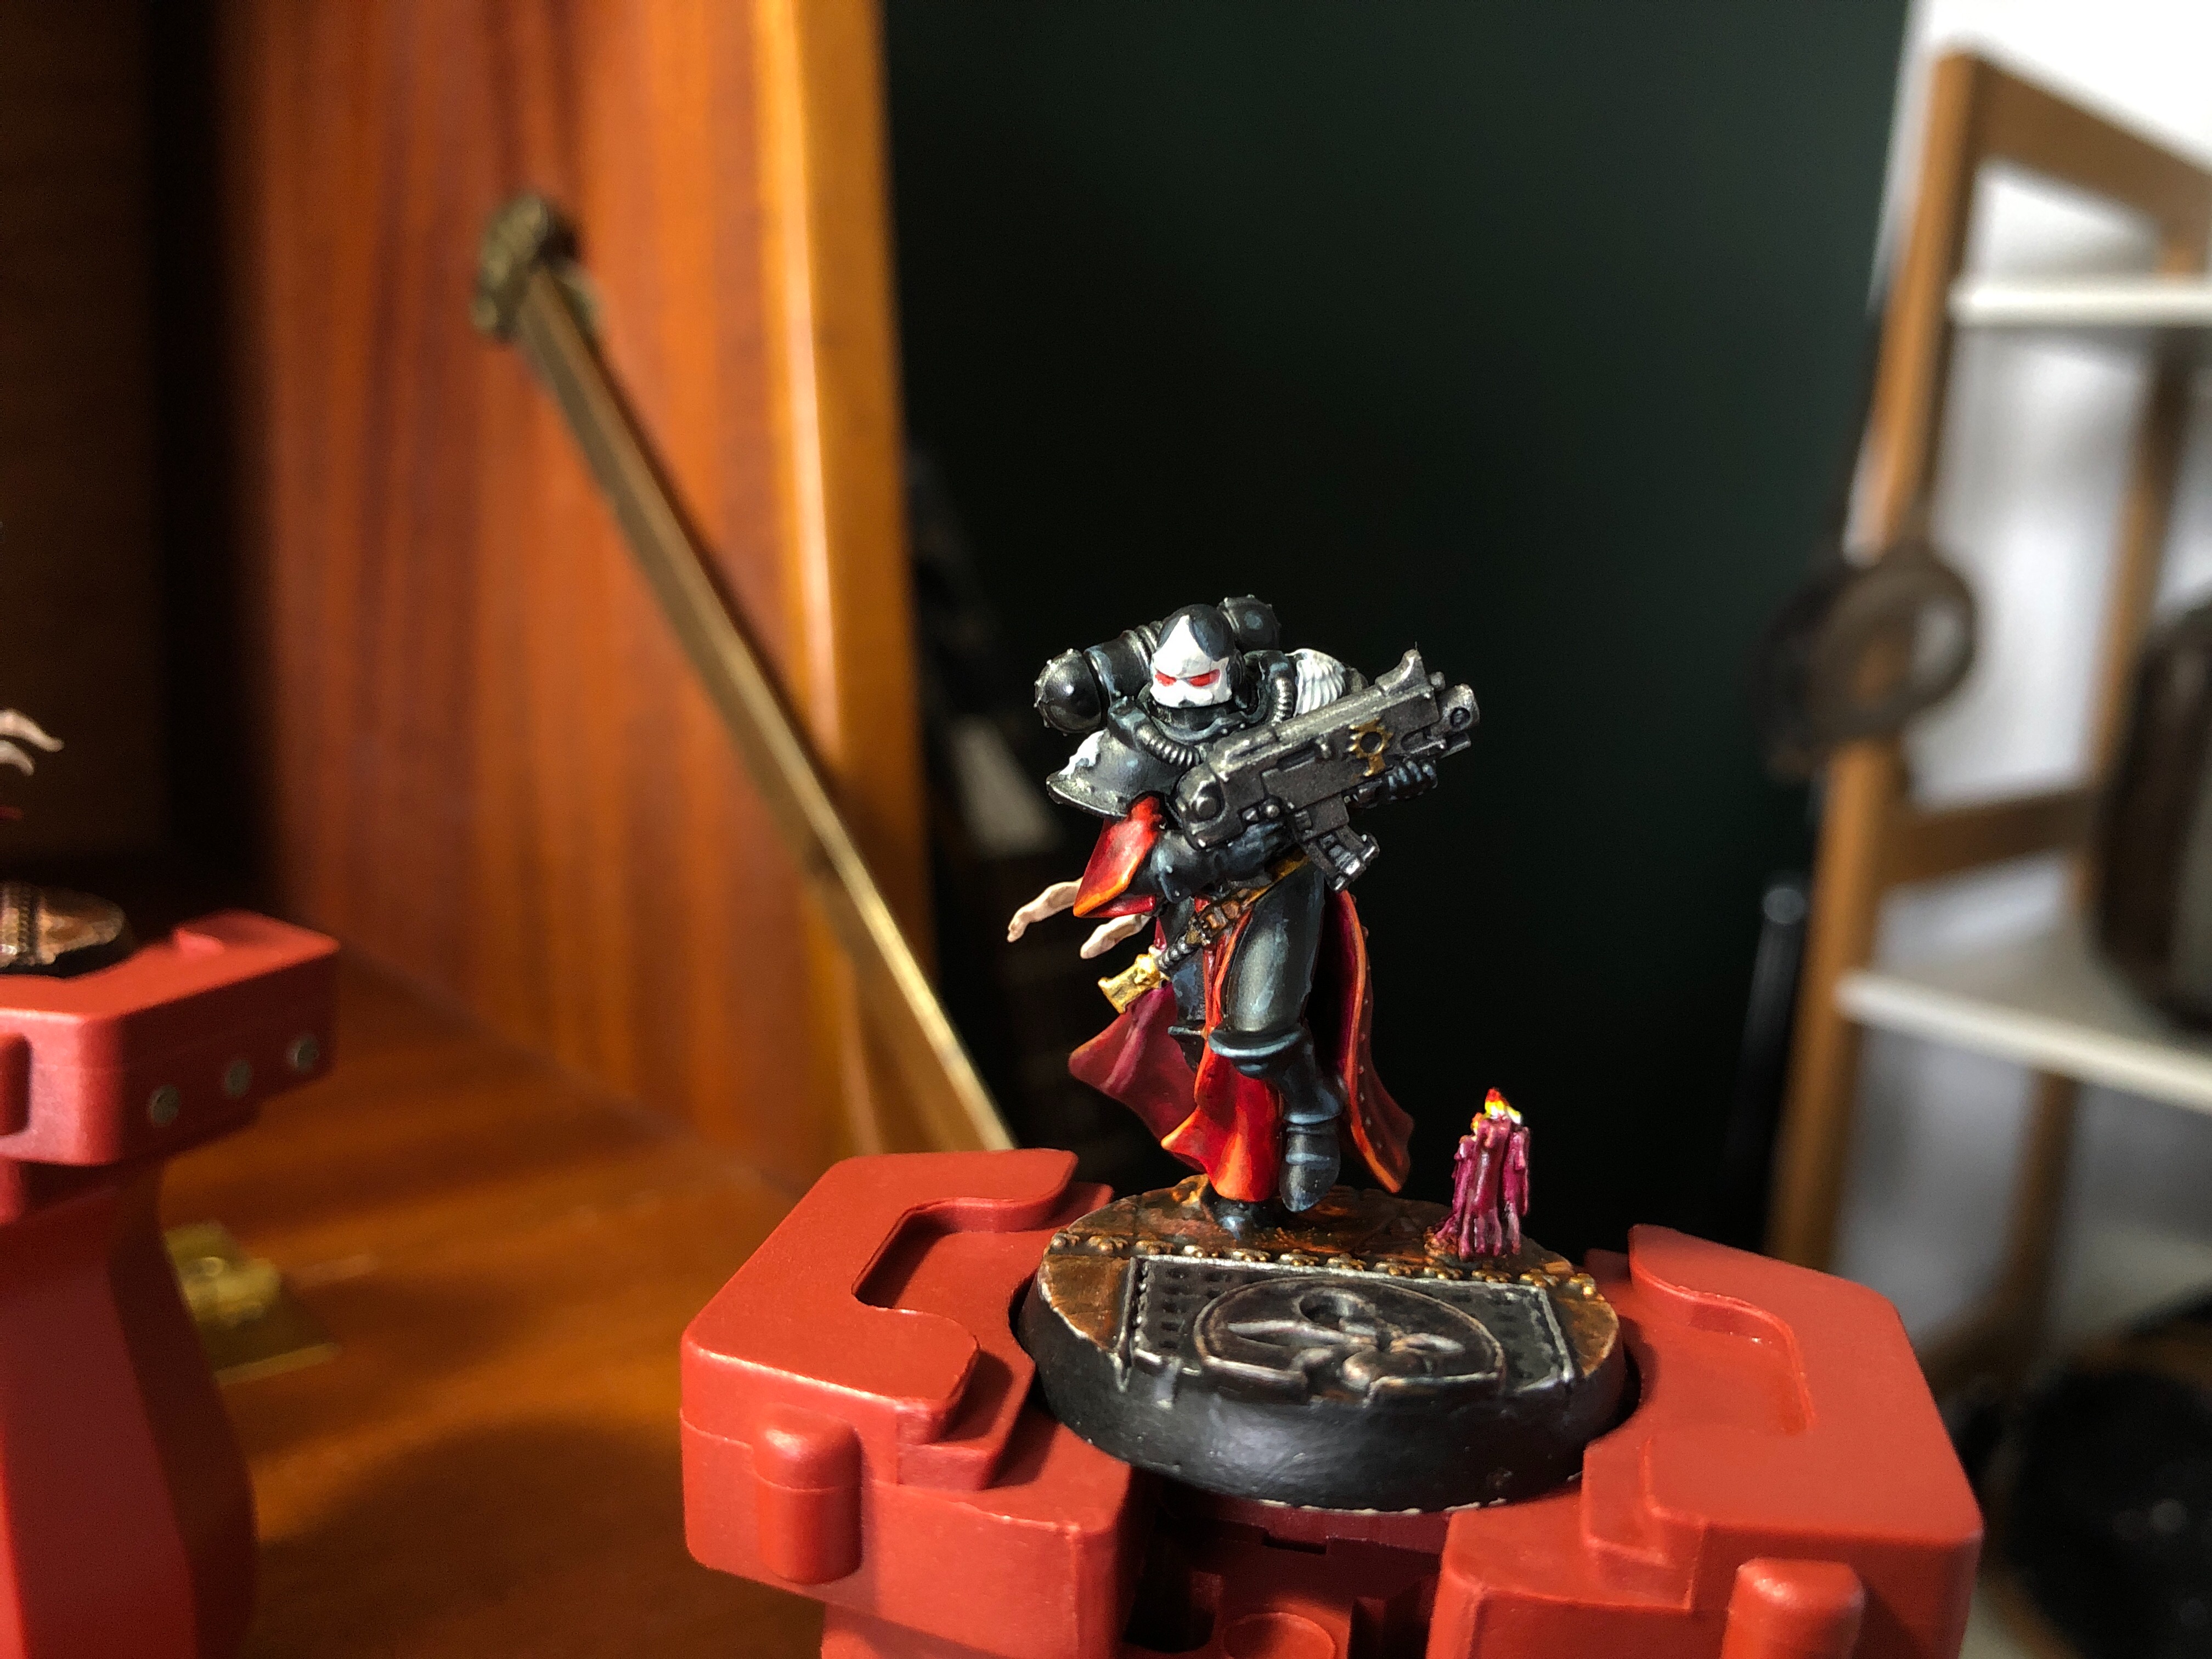
I GOT MY EYES ON YOU ~ PAINTING THE EYES (PRETTY BADLY)
EYE EYE CAPTAIN!
*****
Hey hey lovely peeps. Firstly just a short disclaimer regarding this post. I used a couple of guides that I found on Facey B with no credit for painting red eye lenses. I’ll attach these in the images but they’re not mine. Secondly my interpretation of those inctructions isn’t the best haha. As in they look pretty awesome to me but probably a bit crap to others. I could go over them & try again but jeez I want to finish this project one day & I’m happy to hopefully get better on the next batch of sisters. Anyway here’s the PAINT list. YES!
PAINT LIST
*****
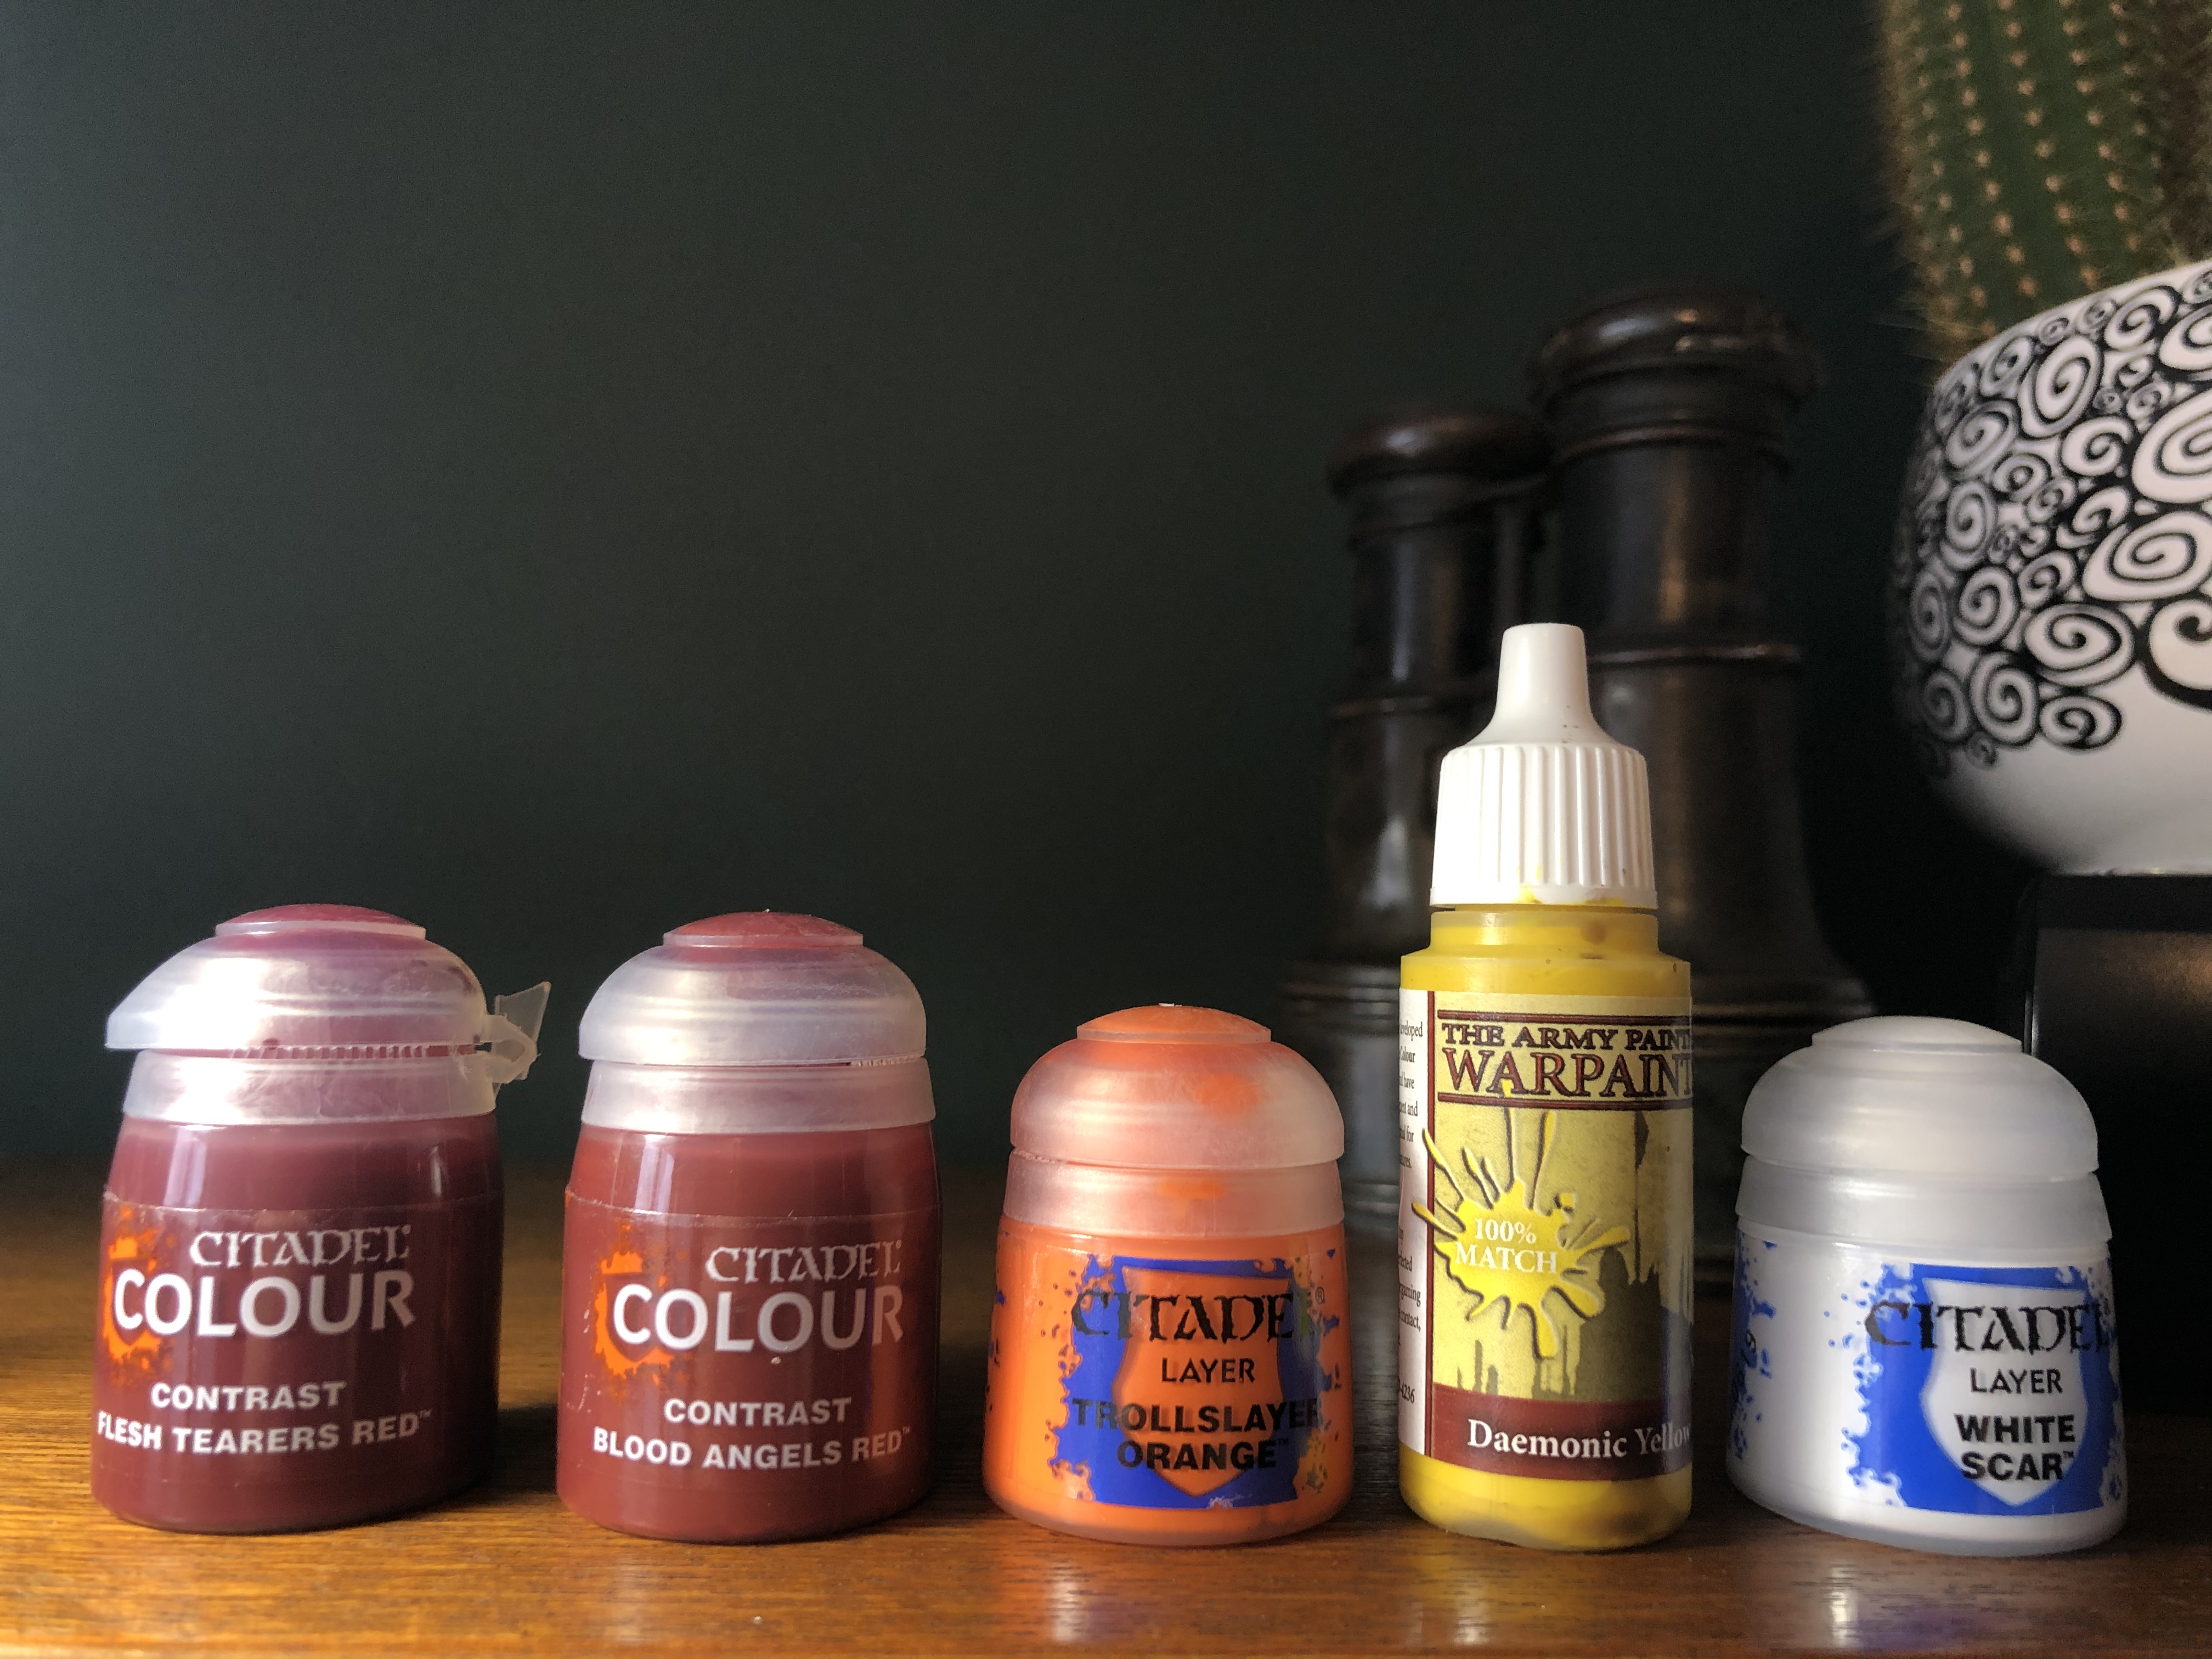
• CONTRAST FLESH TEARERS RED
• NULN OIL
• CONTRAST BLOOD ANGELS RED
• TROLLSLAYER ORANGE
• DAEMONIC YELLOW
• WHITE SCAR


NO STEPS THIS TIME
*****
Apologies I didn’t really see the point this time in taking a picture between each step as I’m using my phone. The close focusing is a bit crap so I’ll describe how I got to the end result.
First I started with a layer of Contrast Flesh Tearers red across the entire eye lens. When this had dried I applied a coat of Nuln Oil to give them that black outline around the edge.
After this I added Troll Slayer Orange to the bottom of the eye lens & towards the nose on each side. (I hope that makes sense haha)
I then applied a tiny coat of Daemonic Yellow to the very front of the eye lens closest to the nose to give that gradient of yellow, orange, red moving backwards.
Finally I added a tiny reflection dot of White Scar to the top back portion of the lens.

THAT’LL DO
*****
Not the best tutorial but hey at least I’m showing you the rubbish bits too haha. If you follow those guide pics in the images you’ll no doubt do a better job than me. Like I say though I’m happy to keep them as they are & hopefully will see an improvement in eye lenses at the project progresses.
See you on the next one guys!
Much Love
Eternity Gate
I WANT IT PAINTED BLACK ~ PAINTING THE BLACK ARMOUR
ALL BLACK EVERYTHING
*****
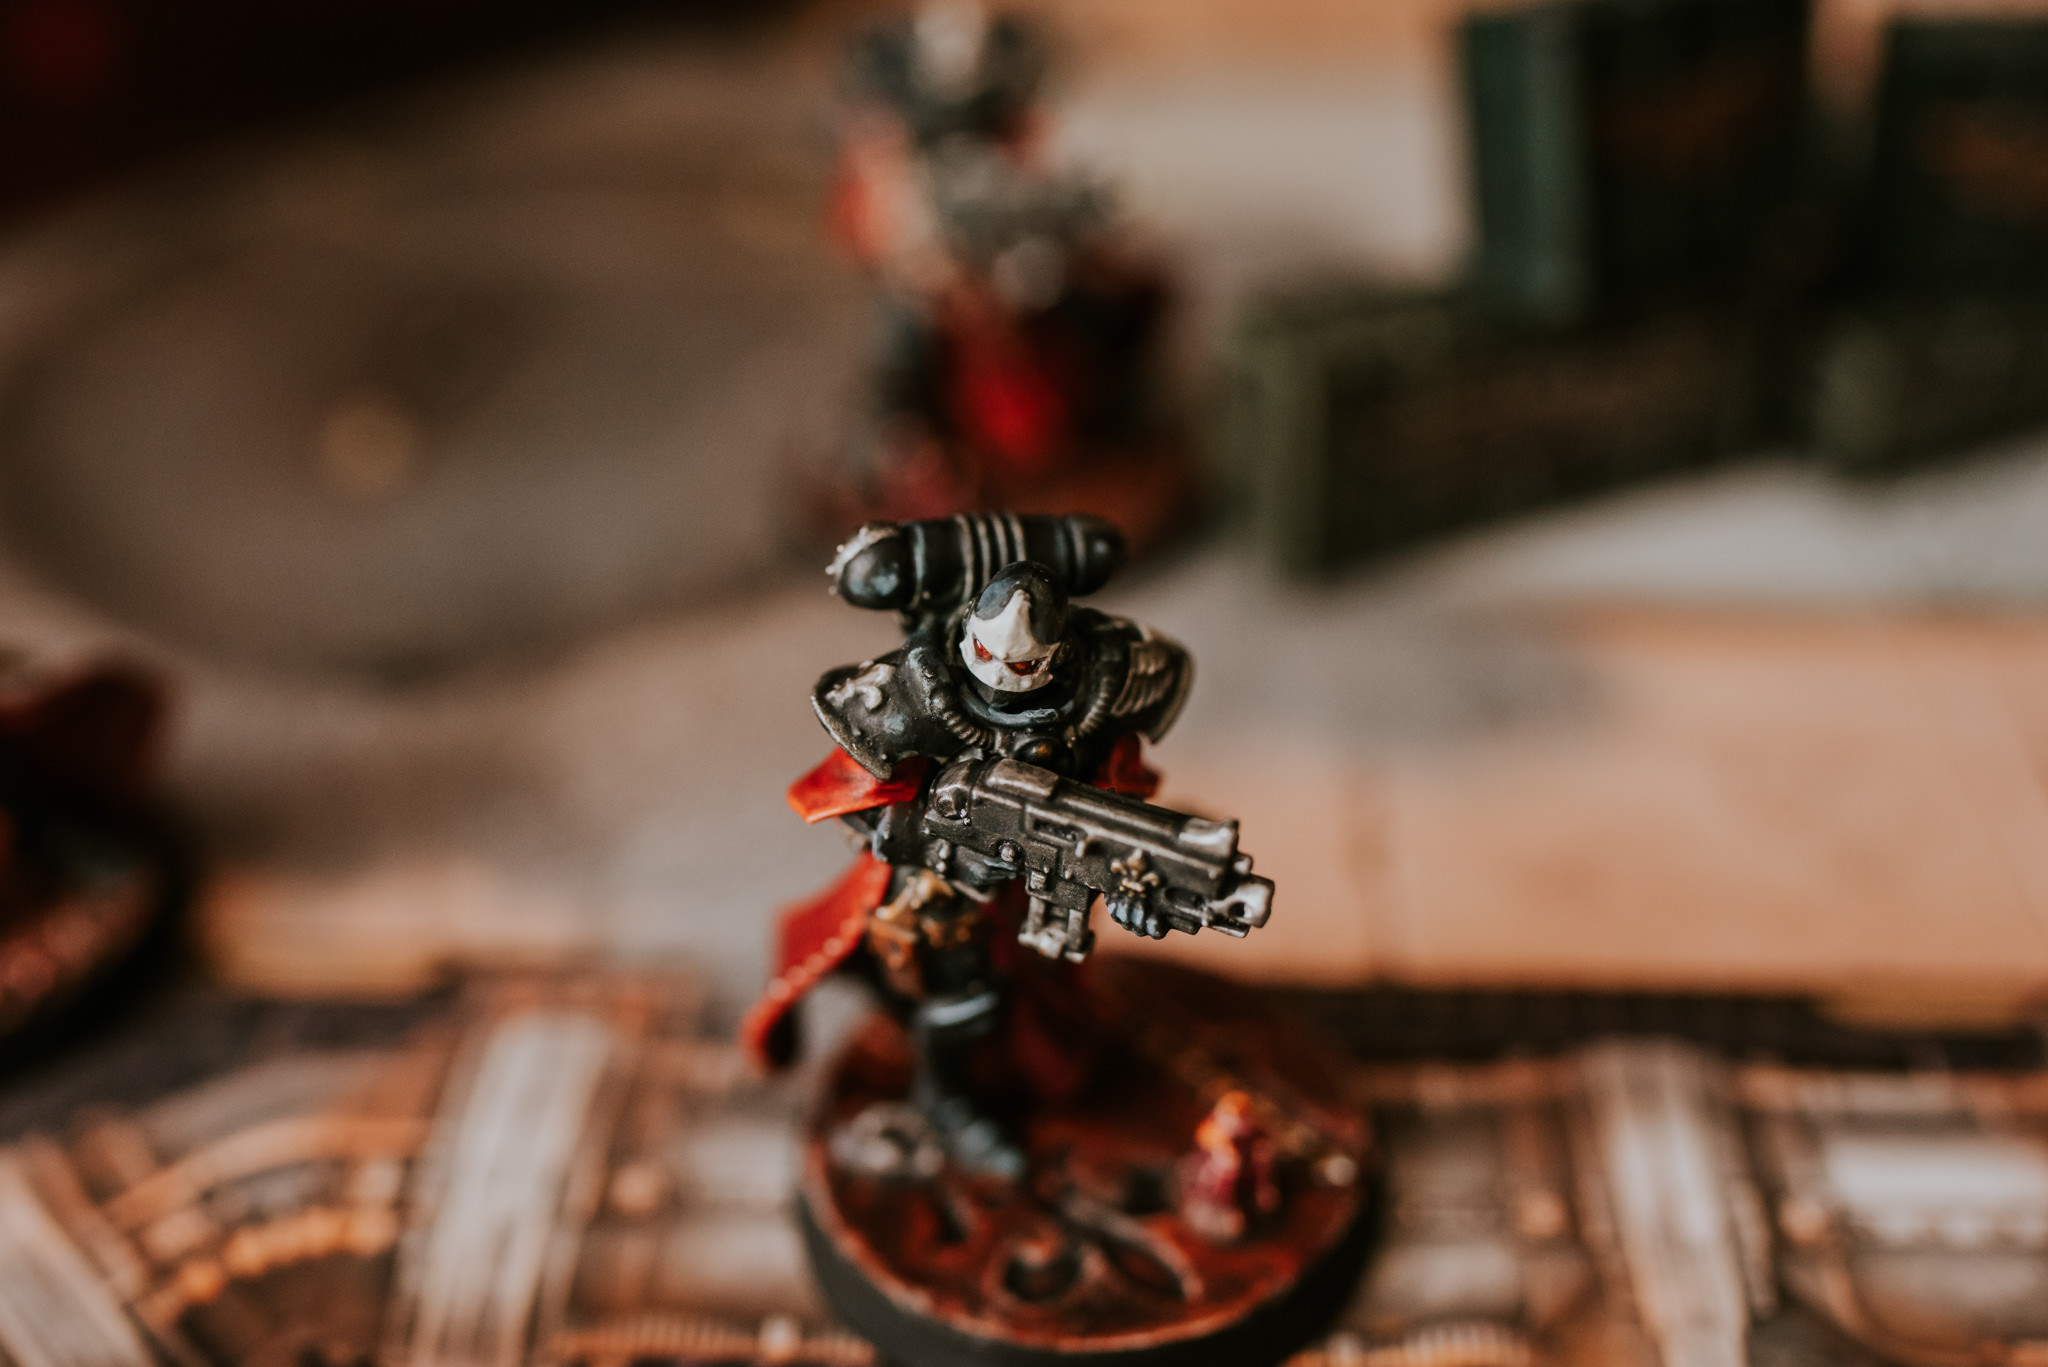
Wowza two updates within a couple of days. Someone actually took some time out to paint for a change. YES! Today It’s all about highlighting the black armour on my sisters of battle. Ooh I’m seeing the finish line now. Just a few more details to go & I’m calling the first 4 models from my box set done. Without further ado here’s the paint list.
PAINT LIST
*****
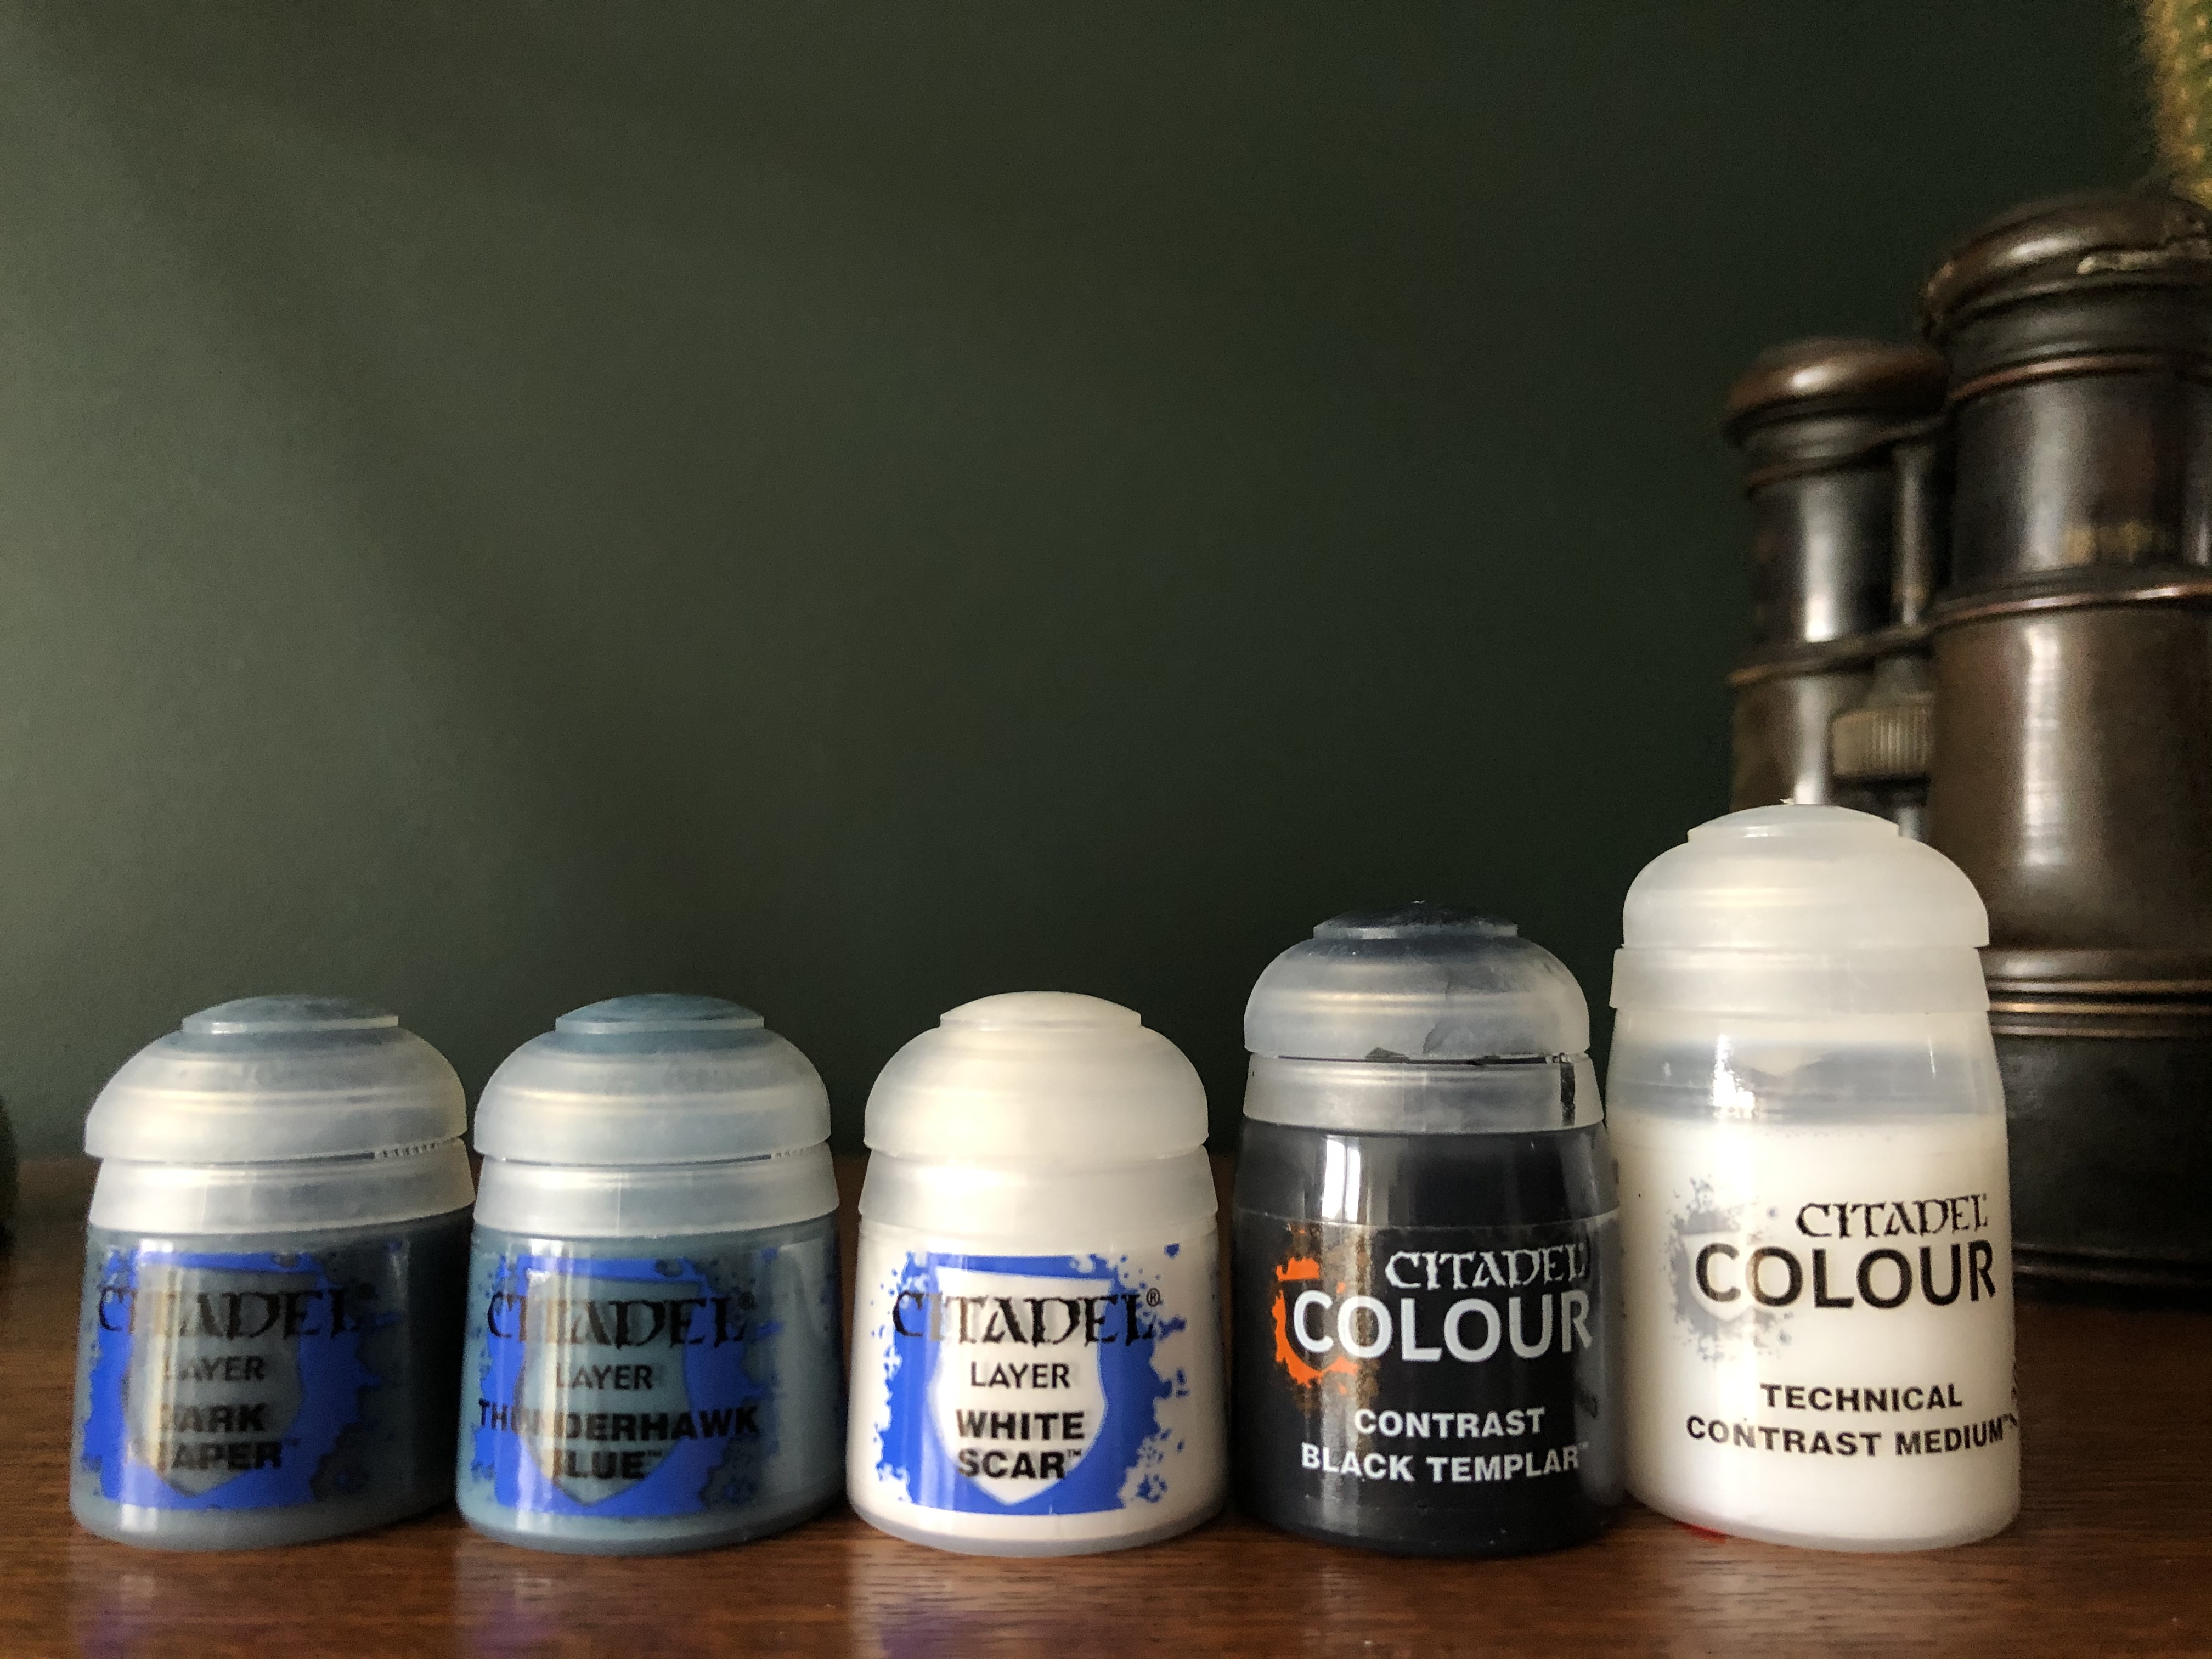
• DARK REAPER
• THUNDERHAWK BLUE
• WHITE SCAR
• CONTRAST BLACK TEMPLAR
• CONTRAST MEDIUM
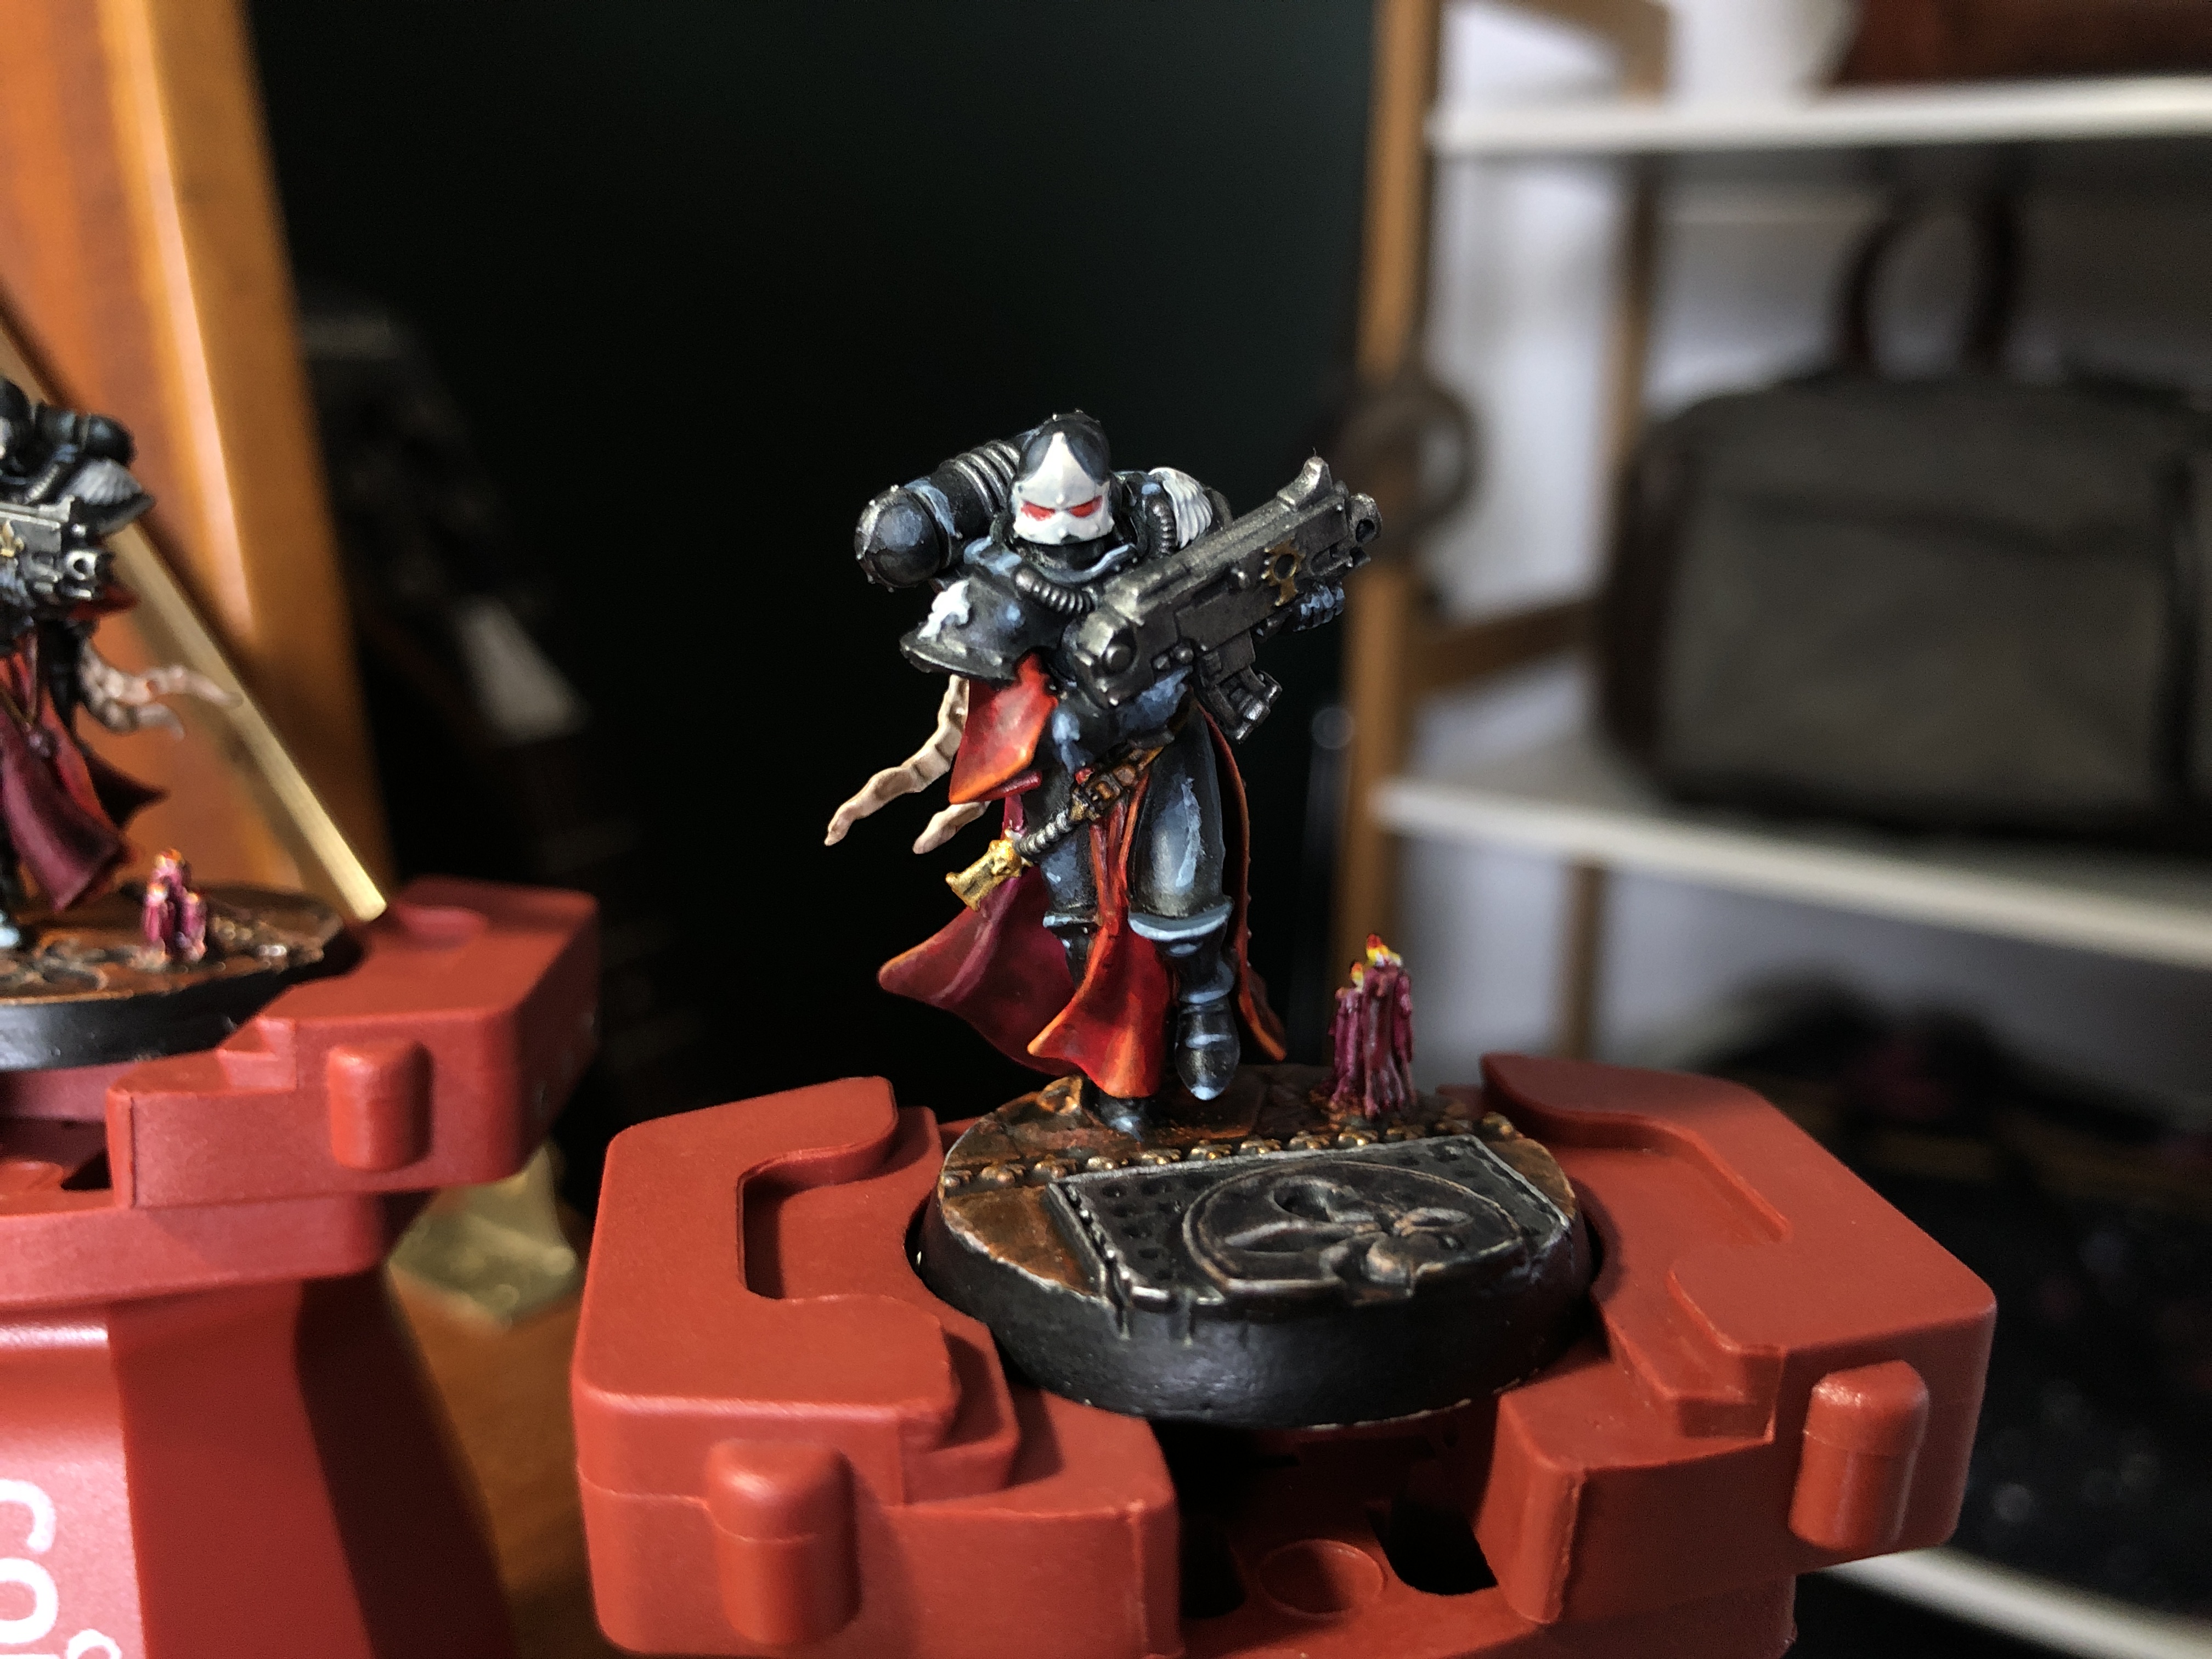
BLACKALISCIOUS
*****
Ok lets get started, I began by applying a wide highlight of Dark Reaper around all the outer edges of the armour panels including the feet, legs, backpack, hands & all that goodness. Don’t worry about being too neat at this stage as Dark Reaper is a great colour to add more depth to the true black base coat.
After that dried I applied a thinner highlight of Thunderhawk Blue to all the same panels leaving some of the Dark Reaper layer showing below.
I then mixed a 1:1 ratio of Thunderhawk Blue & White Scar to make a lighter grey. I applied this as a very fine edge highlight to only the most outer points of armour panels where the light would hit the surface the most.
With the highlights in place you can see it’s really contrasty so in this step I knocked those highlights back by mixing a 1:1 ratio of Contrast Black Templar to Contrast Medium. This was applied as a glaze over all those highlights we have just applied to the models.
Finally I used the same 1:1 ratio of Thunderhawk Blue & White Scar from the previous step to very lightly re highlight those top most panels of the armour. What I’m left with is a pretty smooth (for me) transition on the black armour. Hey presto that’s the black done. YES!


NEARLY THERE
*****
With the black done next time i’m going to be finishing all the remaining details on the models before they’re ready to hit the battlefield.
I’m really pleased with how they have come out so far. They’re not perfect but they’re mine.
See you on the next one lovely peeps.
Much Love
Eternity Gate
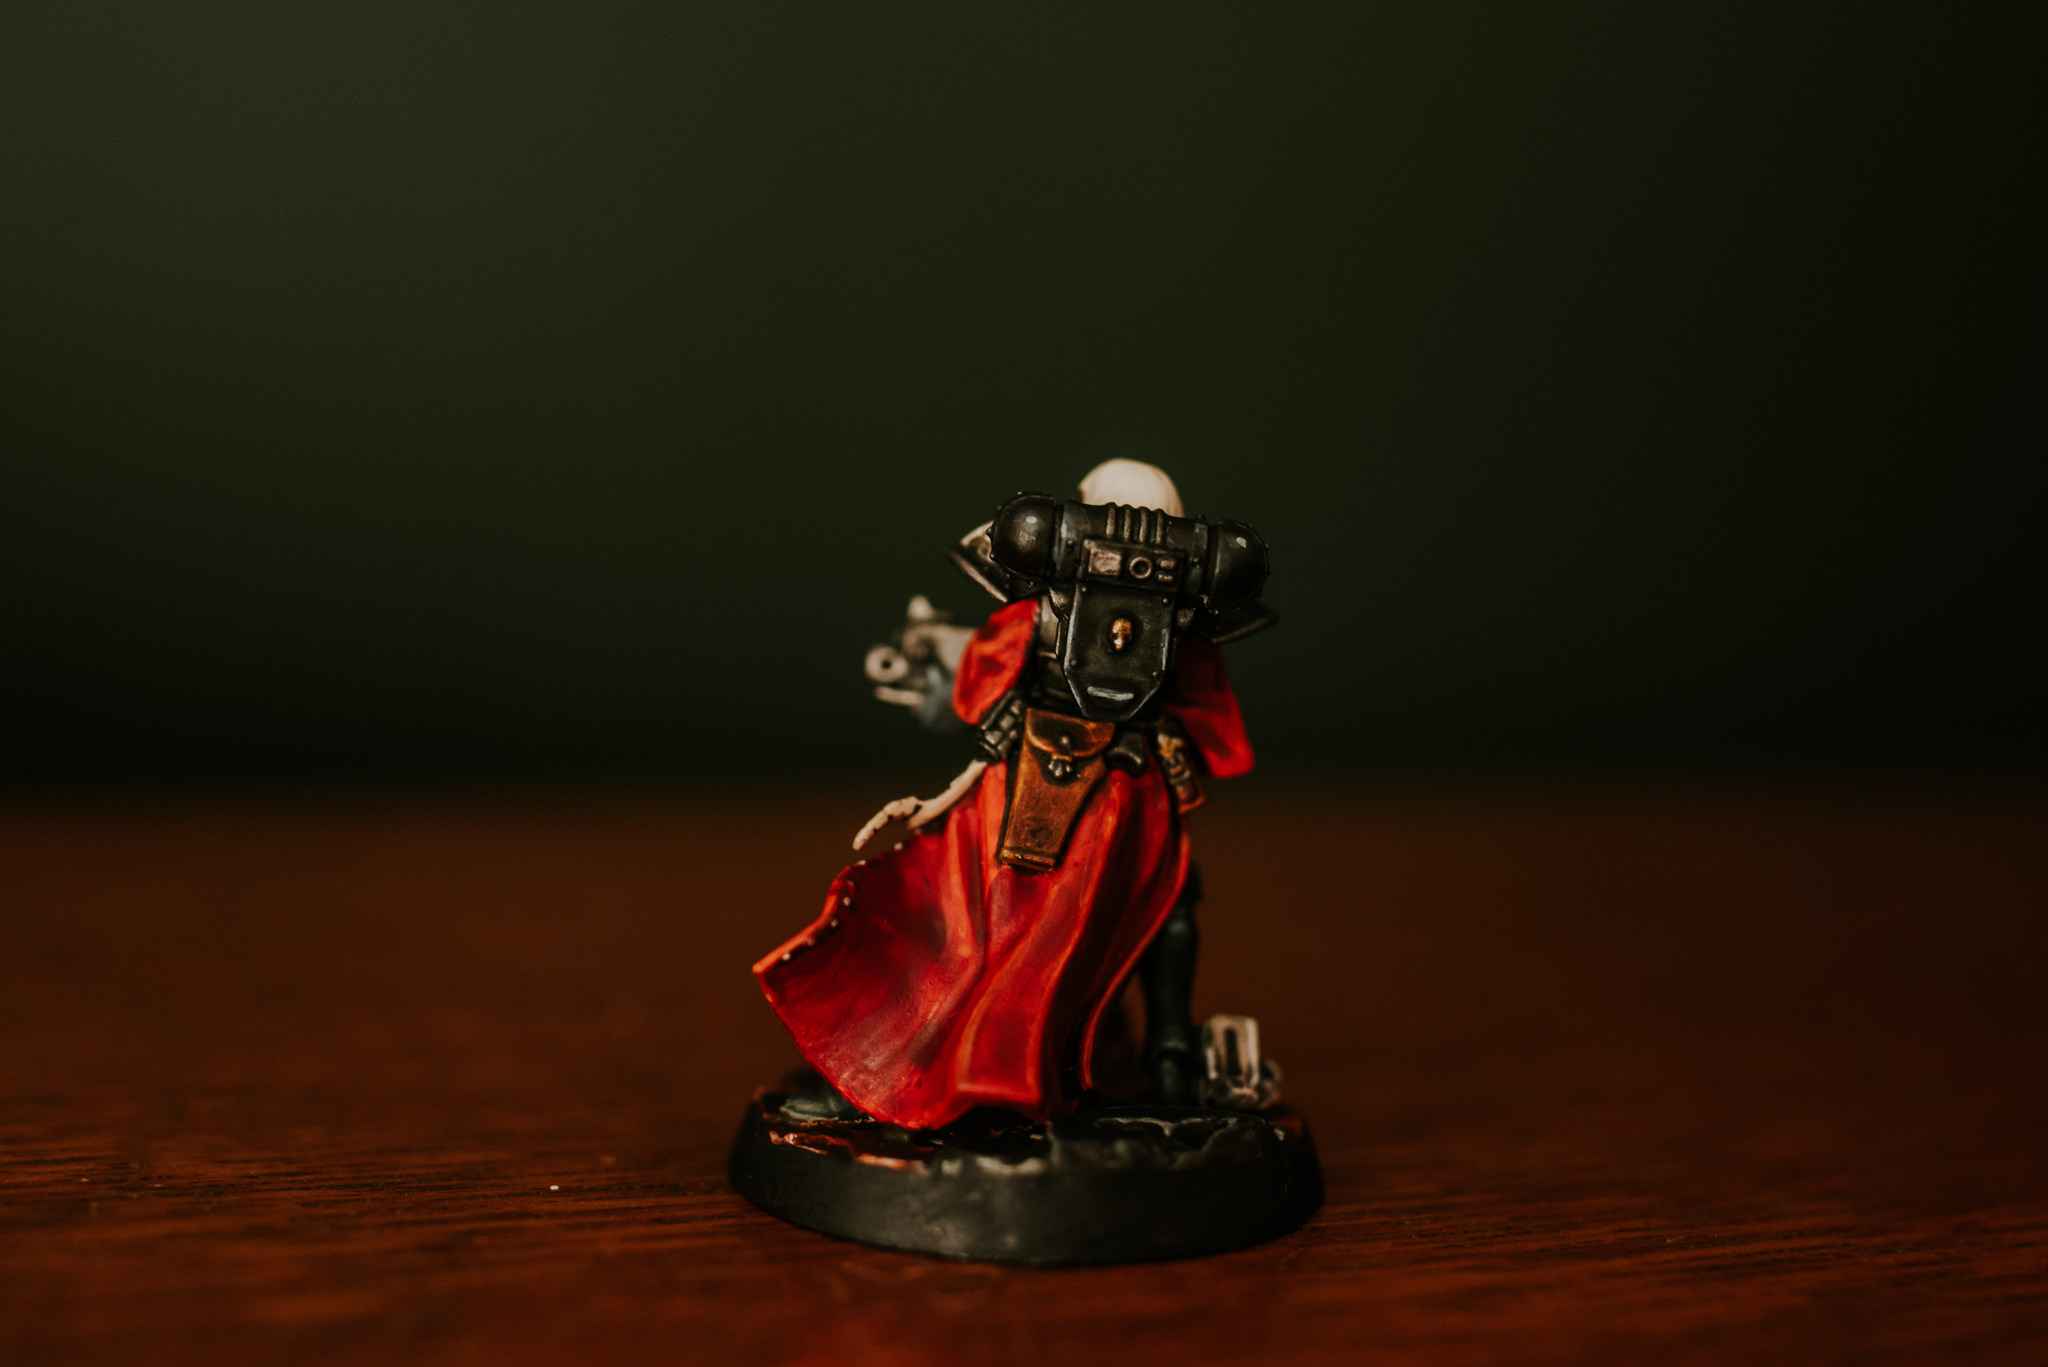
TOUCHING CLOTH ~ PAINTING THE ROBES
I BLOODY LOVE PAINTING RED
*****
Ey up my magnificent humans, I’m back today for another update where this time I’ll be applying highlights to the robes (I’m sure there’s a proper name for them) on my four Sisters of Battle. Without further ado here’s the list of colours for todays red centric badassery. YES!
PAINT LIST
*****
• CONTRAST GRYPH-HOUND ORANGE
• TROLLSLAYER ORANGE
• ARMY PAINTER DAEMONIC YELLOW
• CONTRAST BLOOD ANGELS RED
• CONTRAST MEDIUM
• CONTRAST VOLUPUS PINK
• BUGMAN’S GLOW
• LEADBELCHER
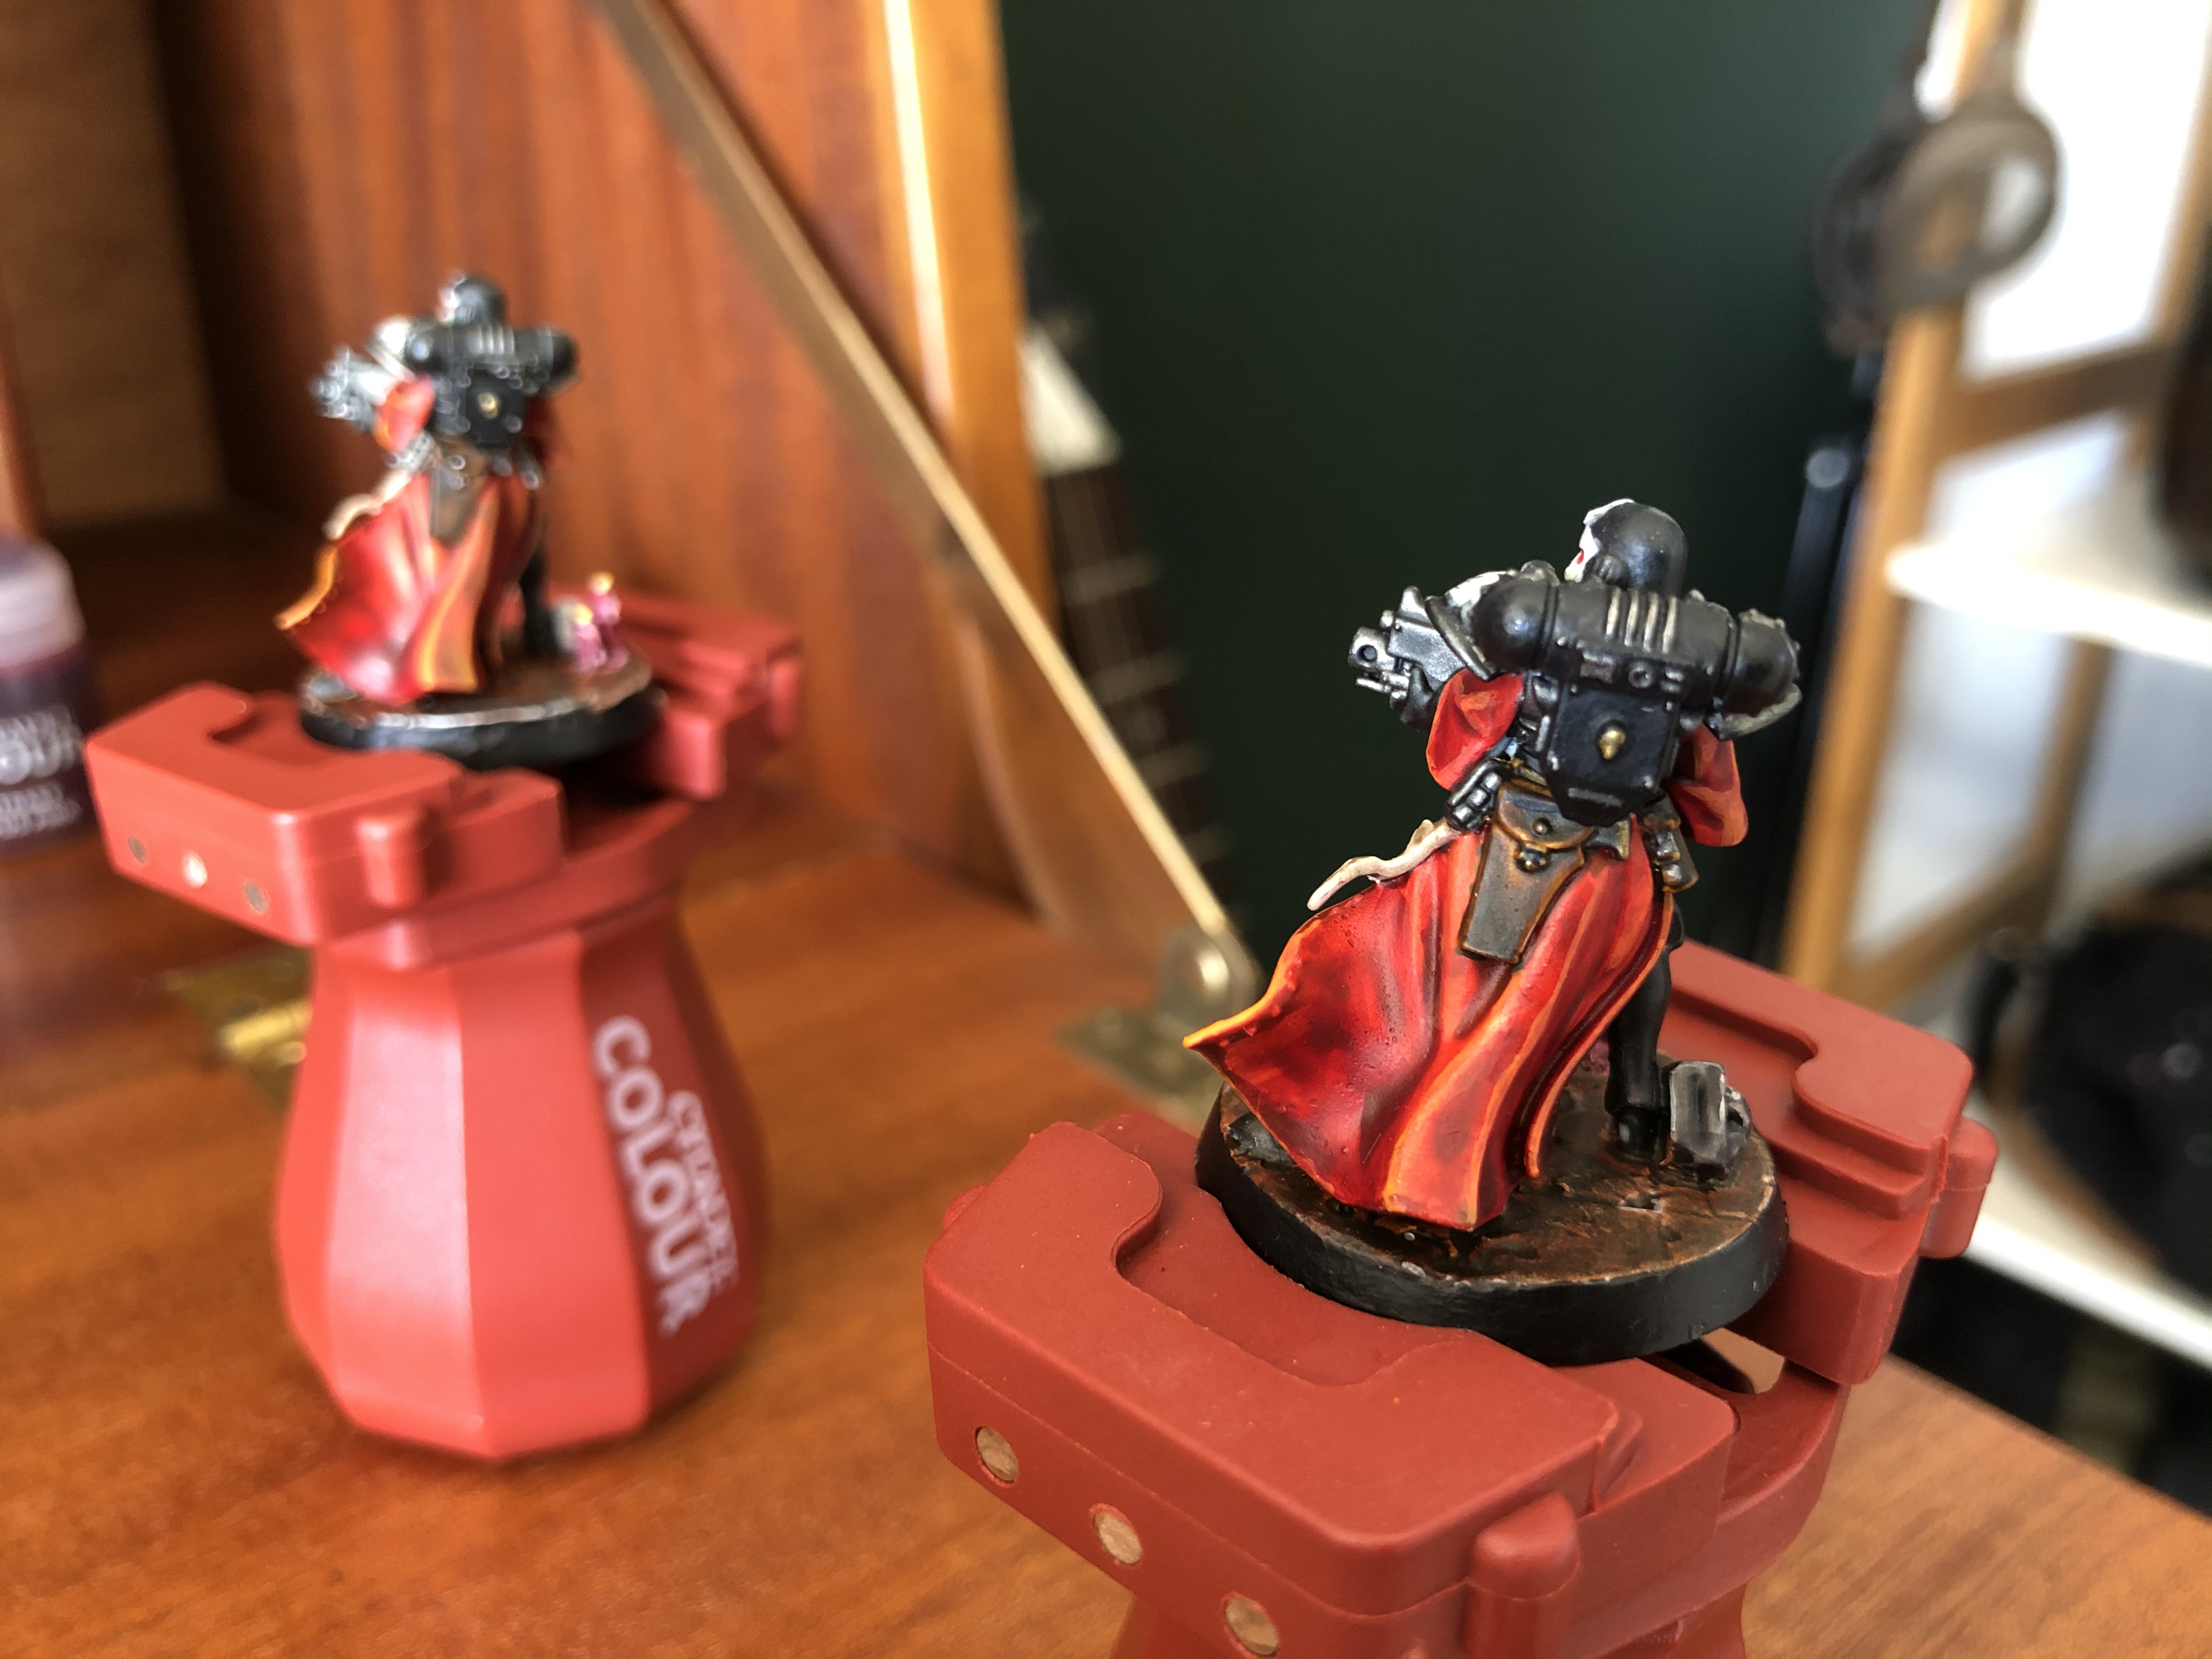

A TECHNICOLOUR DREAM-COAT ~ SEEING RED
*****
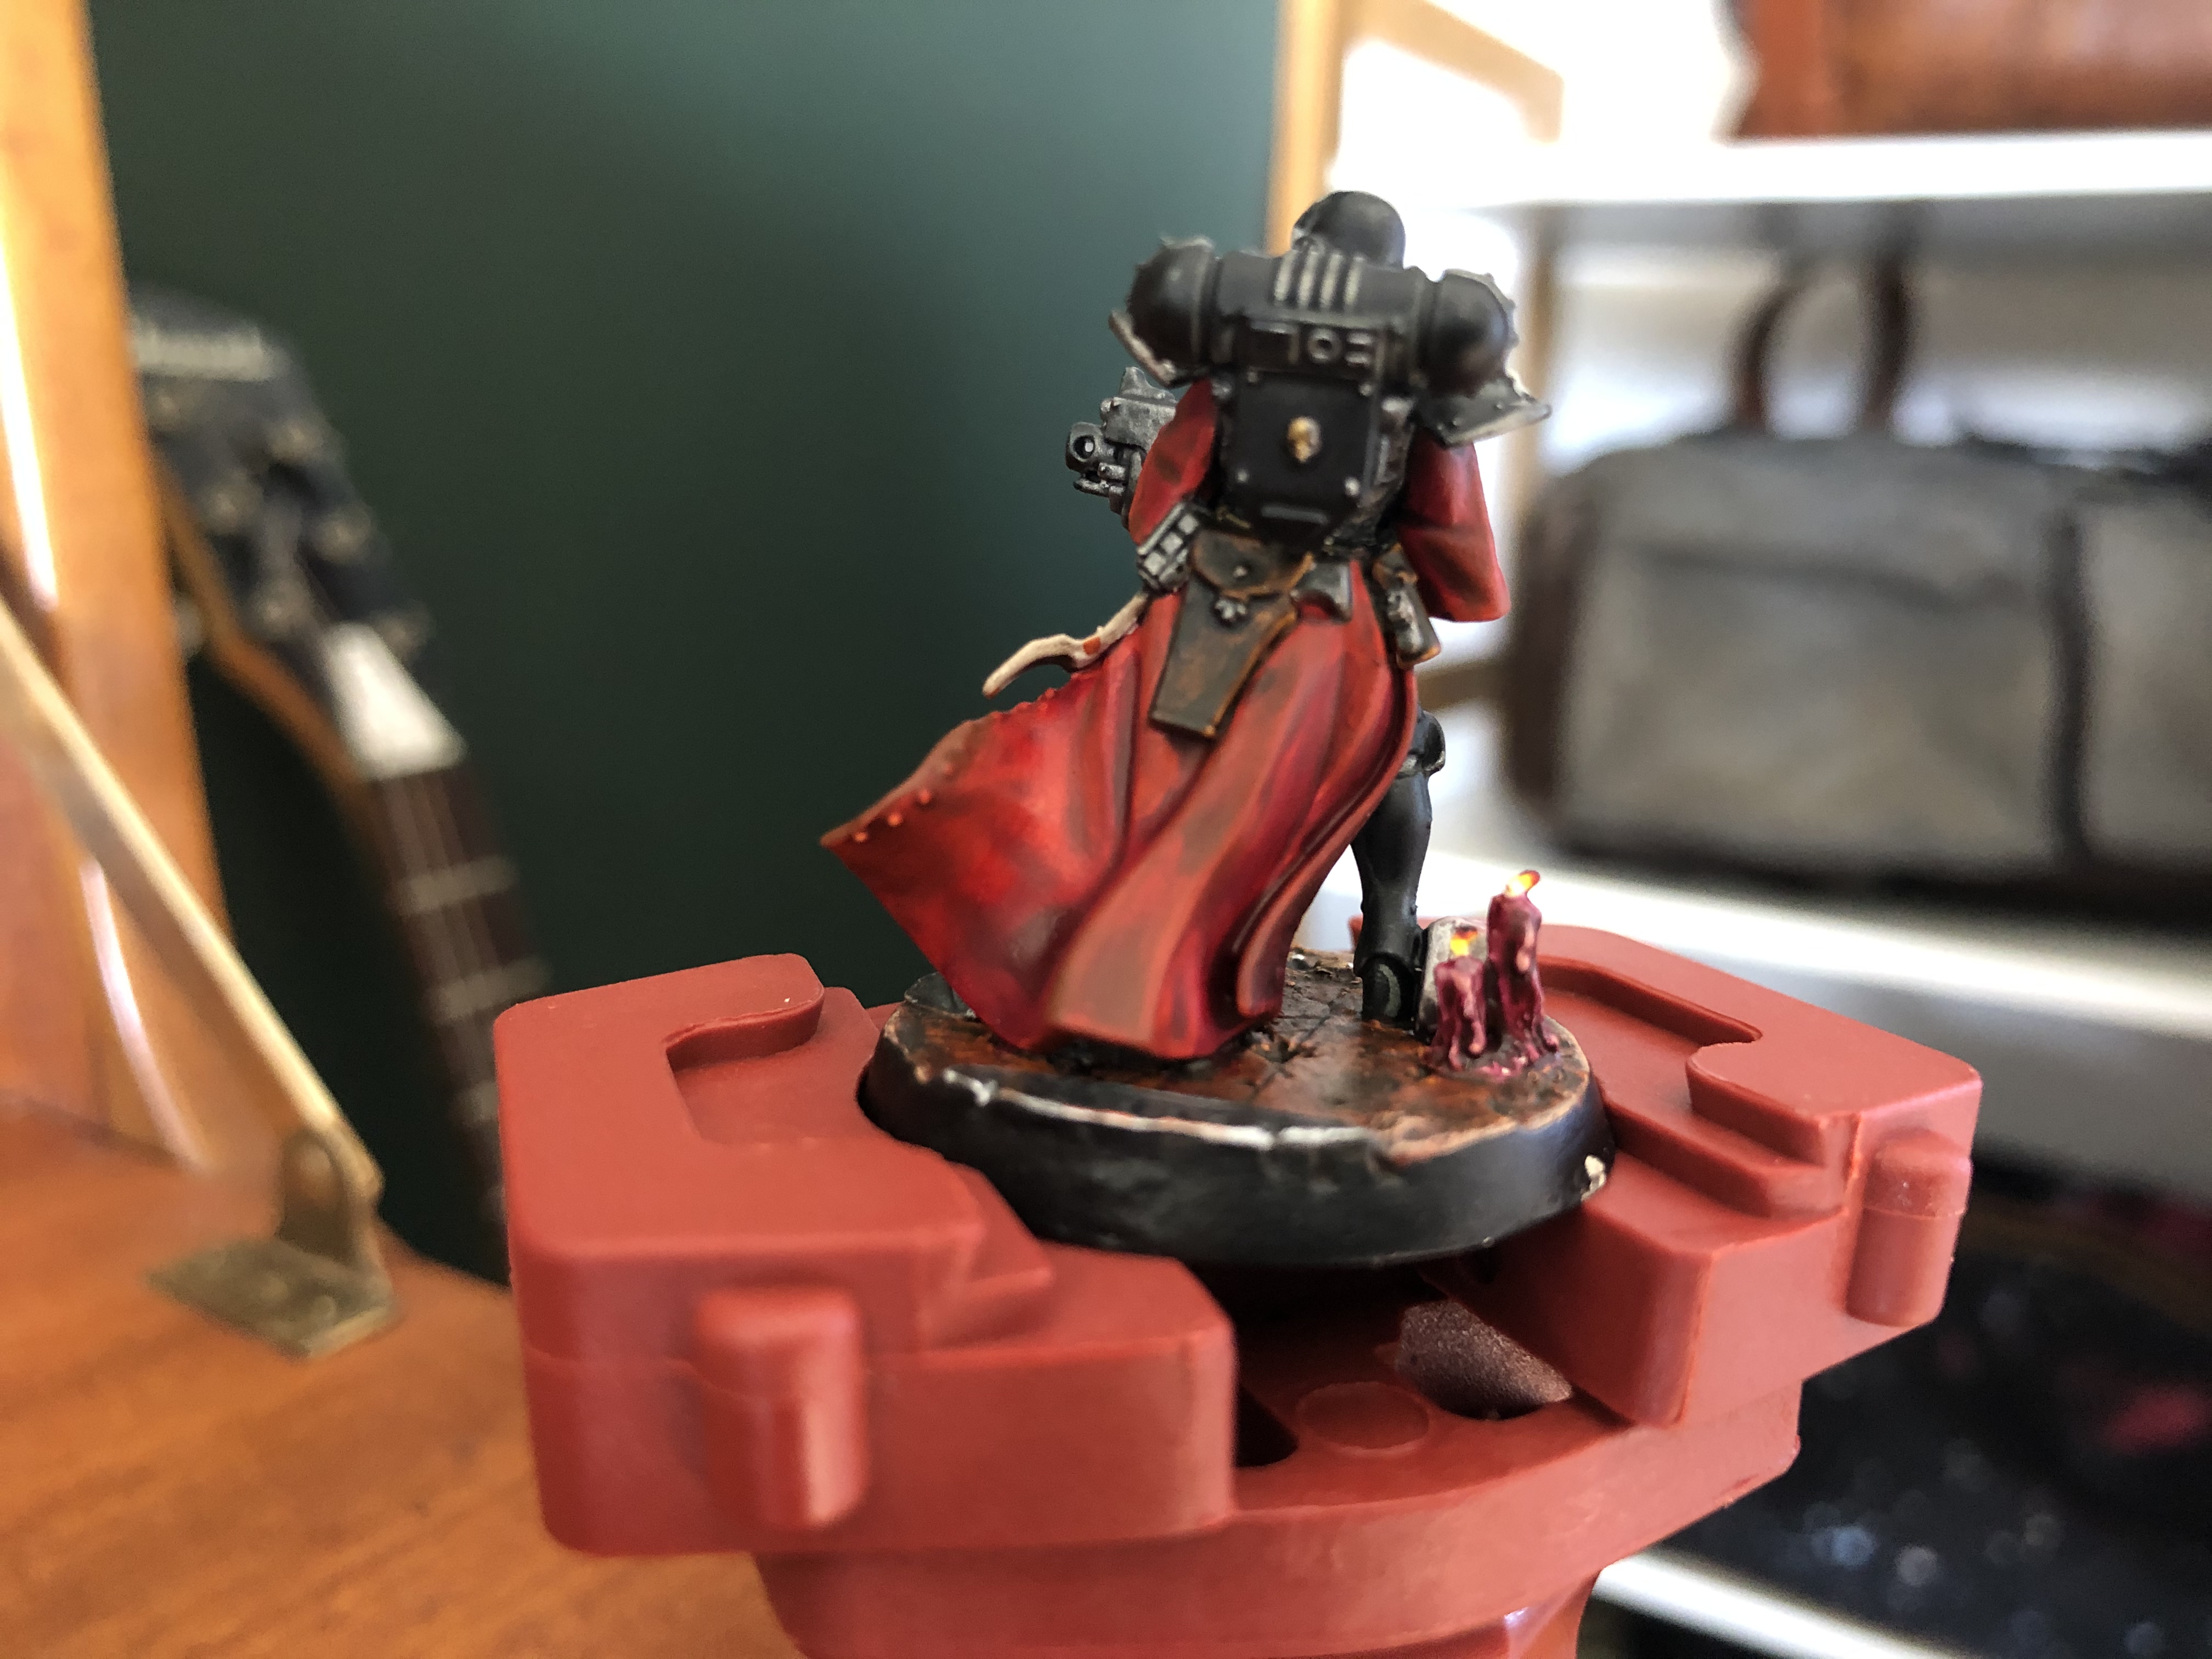
Are you sitting comfortably, then let’s begin. I started by using Contrast Gryph-Hound Orange to apply my first highlight to the upper folds of the robes including the sleeves. You don’t have to be too neat with this step as this is giving that subtle first wider highlight.
Once that’s dry I used Trollslayer Orange to add a thinner highlight to the very outer edges of all the material leaving that Contrast Gryph-Hound Orange showing below.
The final highlight on the very highest edges of material was a 5 part Army Painter Daemonic Yellow to 1 part trollslayer orange. That gives you a really bright orange to catch those very upmost edges. The initial layer of blood angels red we applied back in the base coating stage is really useful for figuring out where to apply these layers of highlights. As the paint naturally pools in the shadows while leaving the outer folds a lighter colour in which to focus your highlights.
Finally I mixed a 4 part Contrast Medium to 1 part Contrast Blood Angels Red to act as a glaze. I applied the glaze over all of the highlights we’ve just made to mute that Technicolour Dream-coat right back to a smoother gradient of Highlights. That’s the red robes done. YES!

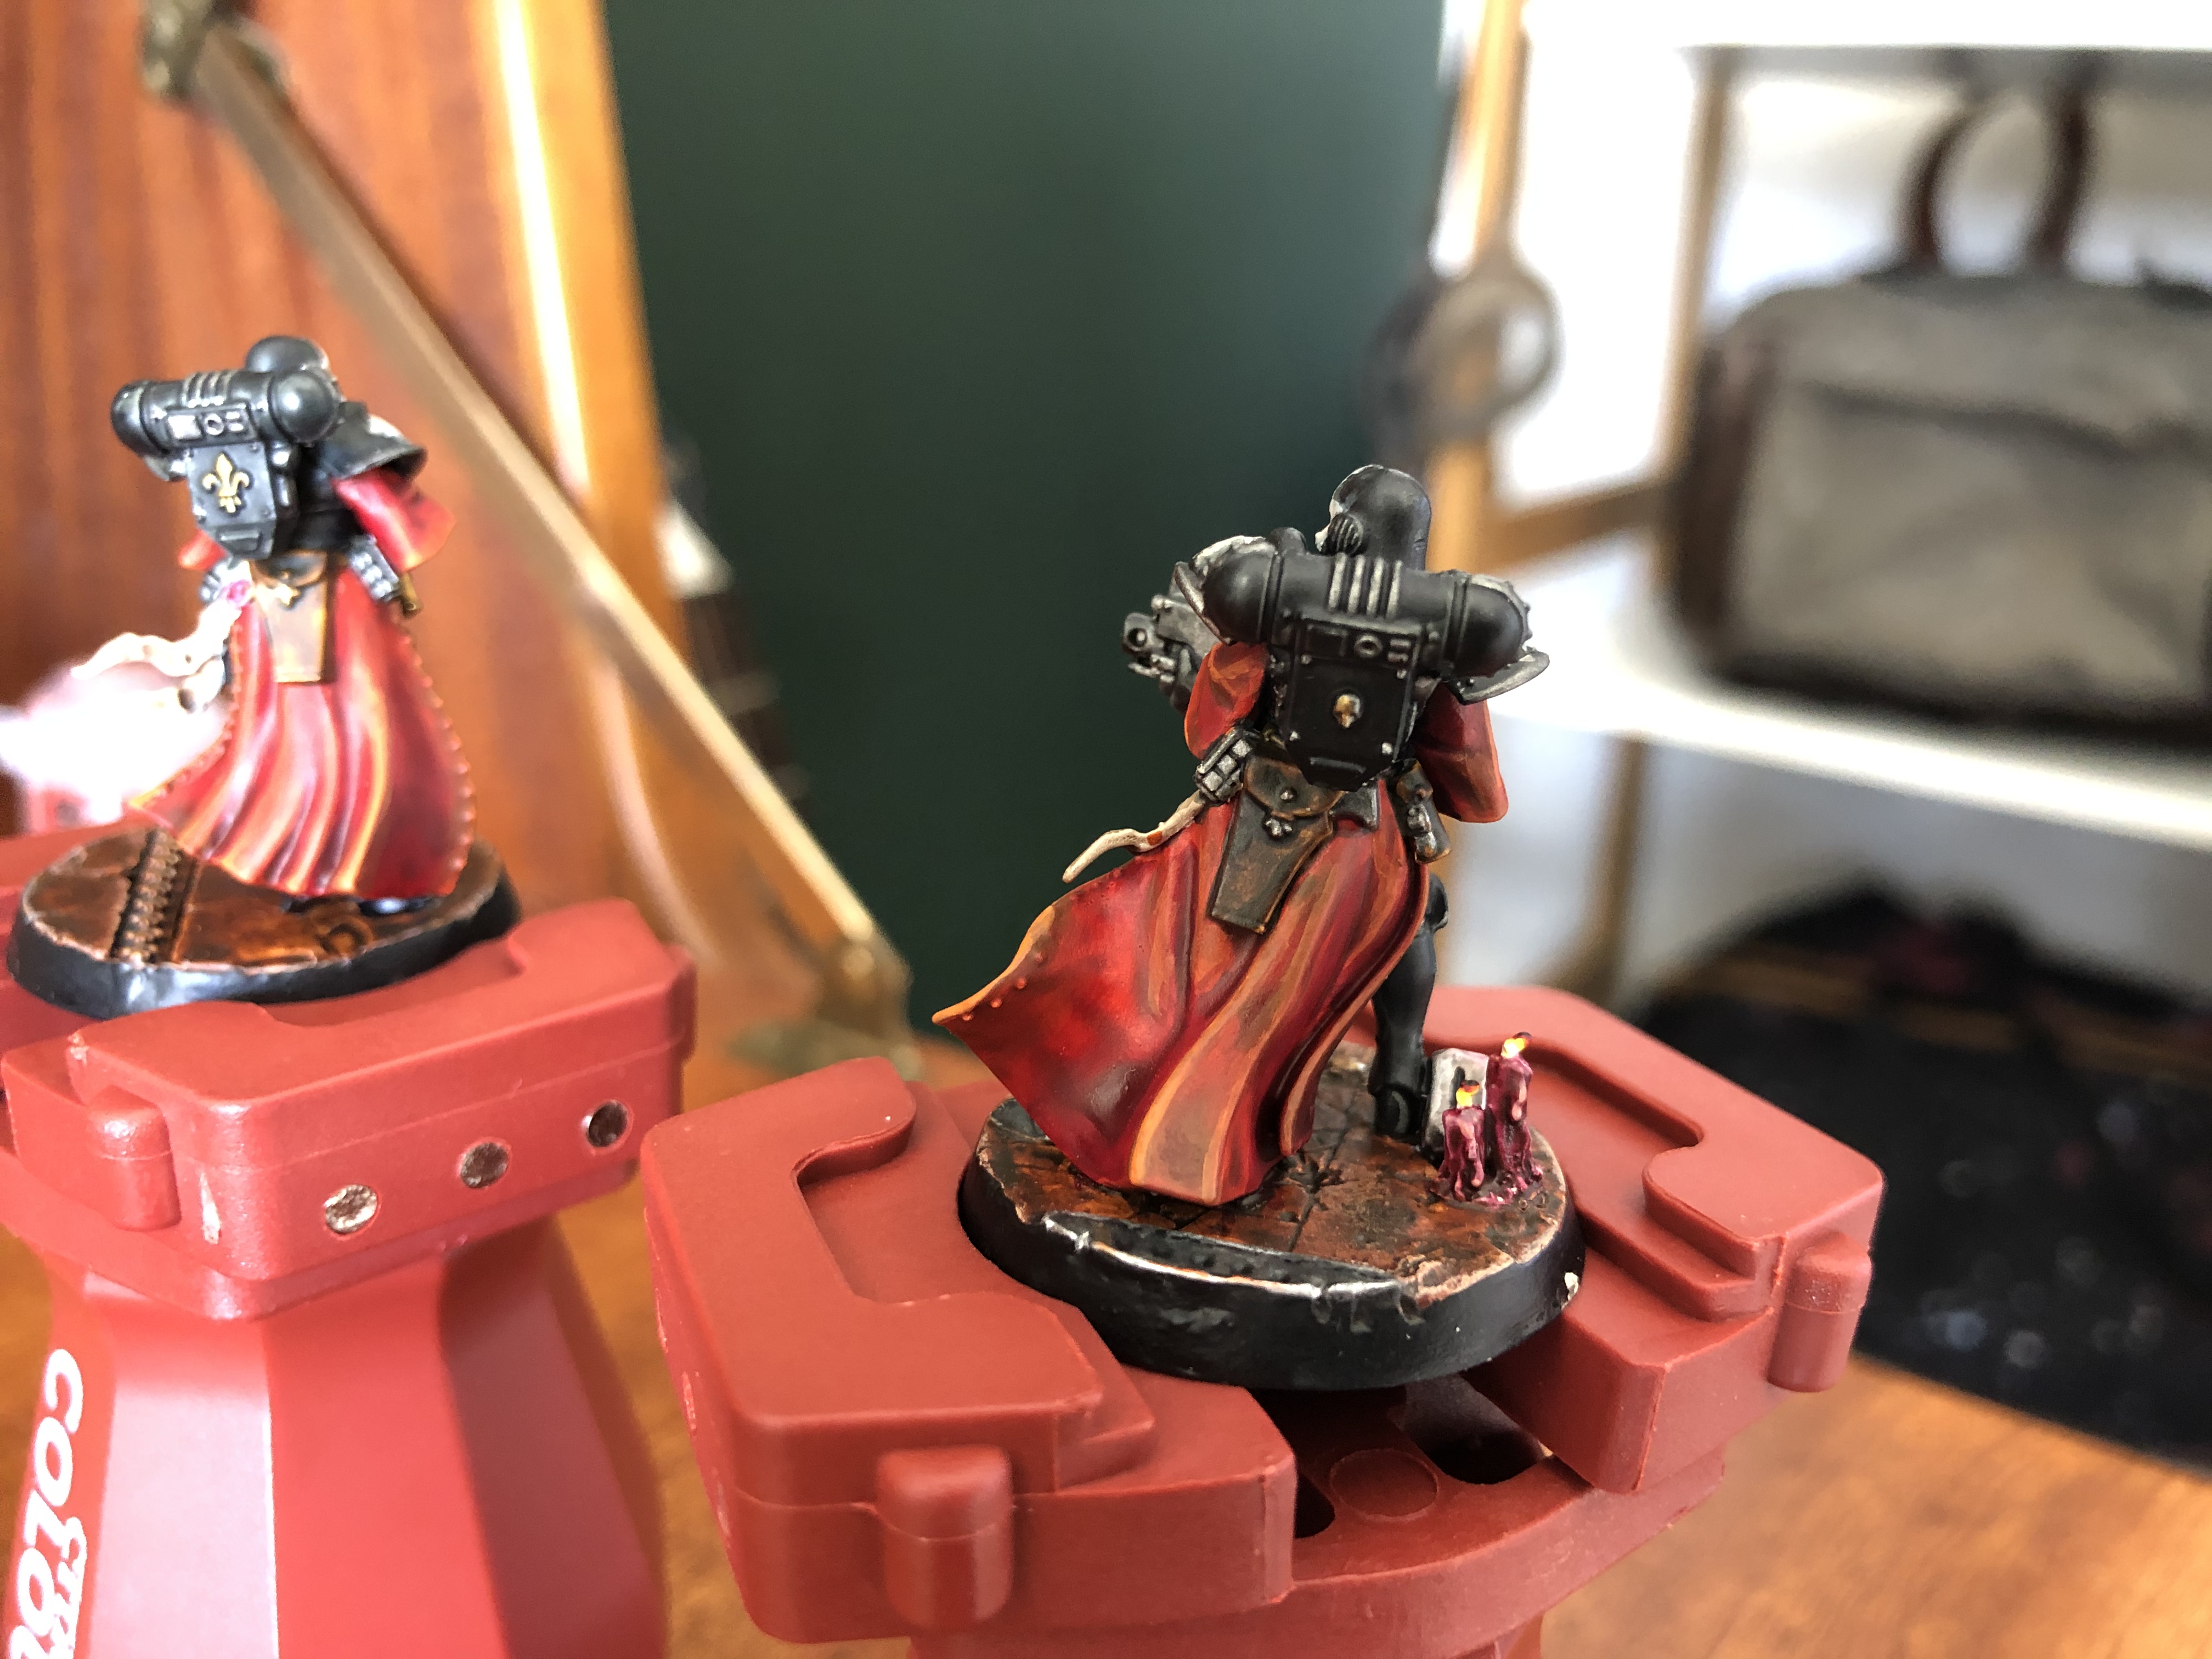
A TECHNICOLOUR DREAM-COAT ~ PINK TO MAKE THE BOYS WINK
*****
To highlight the inner folds of the cloak which began as Contrast Volupus Pink I used a layer of Bugmans Glow focusing once again on the outer folds of the inside of the cloak. There’s not many so do this sparingly.
After this highlight was in place I used Contrast Volupus Pink to mute those highlights back down so they blended with the base layer giving a subtle two colour graduation. As most of these areas fall into shadow that’ll do for the inside of the cloaks.
HOW RIVETING
*****
Finally I painted all the little studs on the robes with a careful layer of Leadbelcher.
NEXT TIME
*****
Well I’m bloody chuffed to bits with how those came out & I have to say I love painting red. Next time I reckon I will finally be highlighting that black armour but who knows I might change my mind. Haha.
See you on the next one lovelies.
Much Love
Eternity Gate


