


![NO Weekender Or Cult Of Games XLBS This Weekend [Updated]](https://images.beastsofwar.com/2026/03/No_Weekender_and_XLBS_this_Weekend-225-127.jpg)


The Millennium Falcon


Recommendations: 276
About the Project
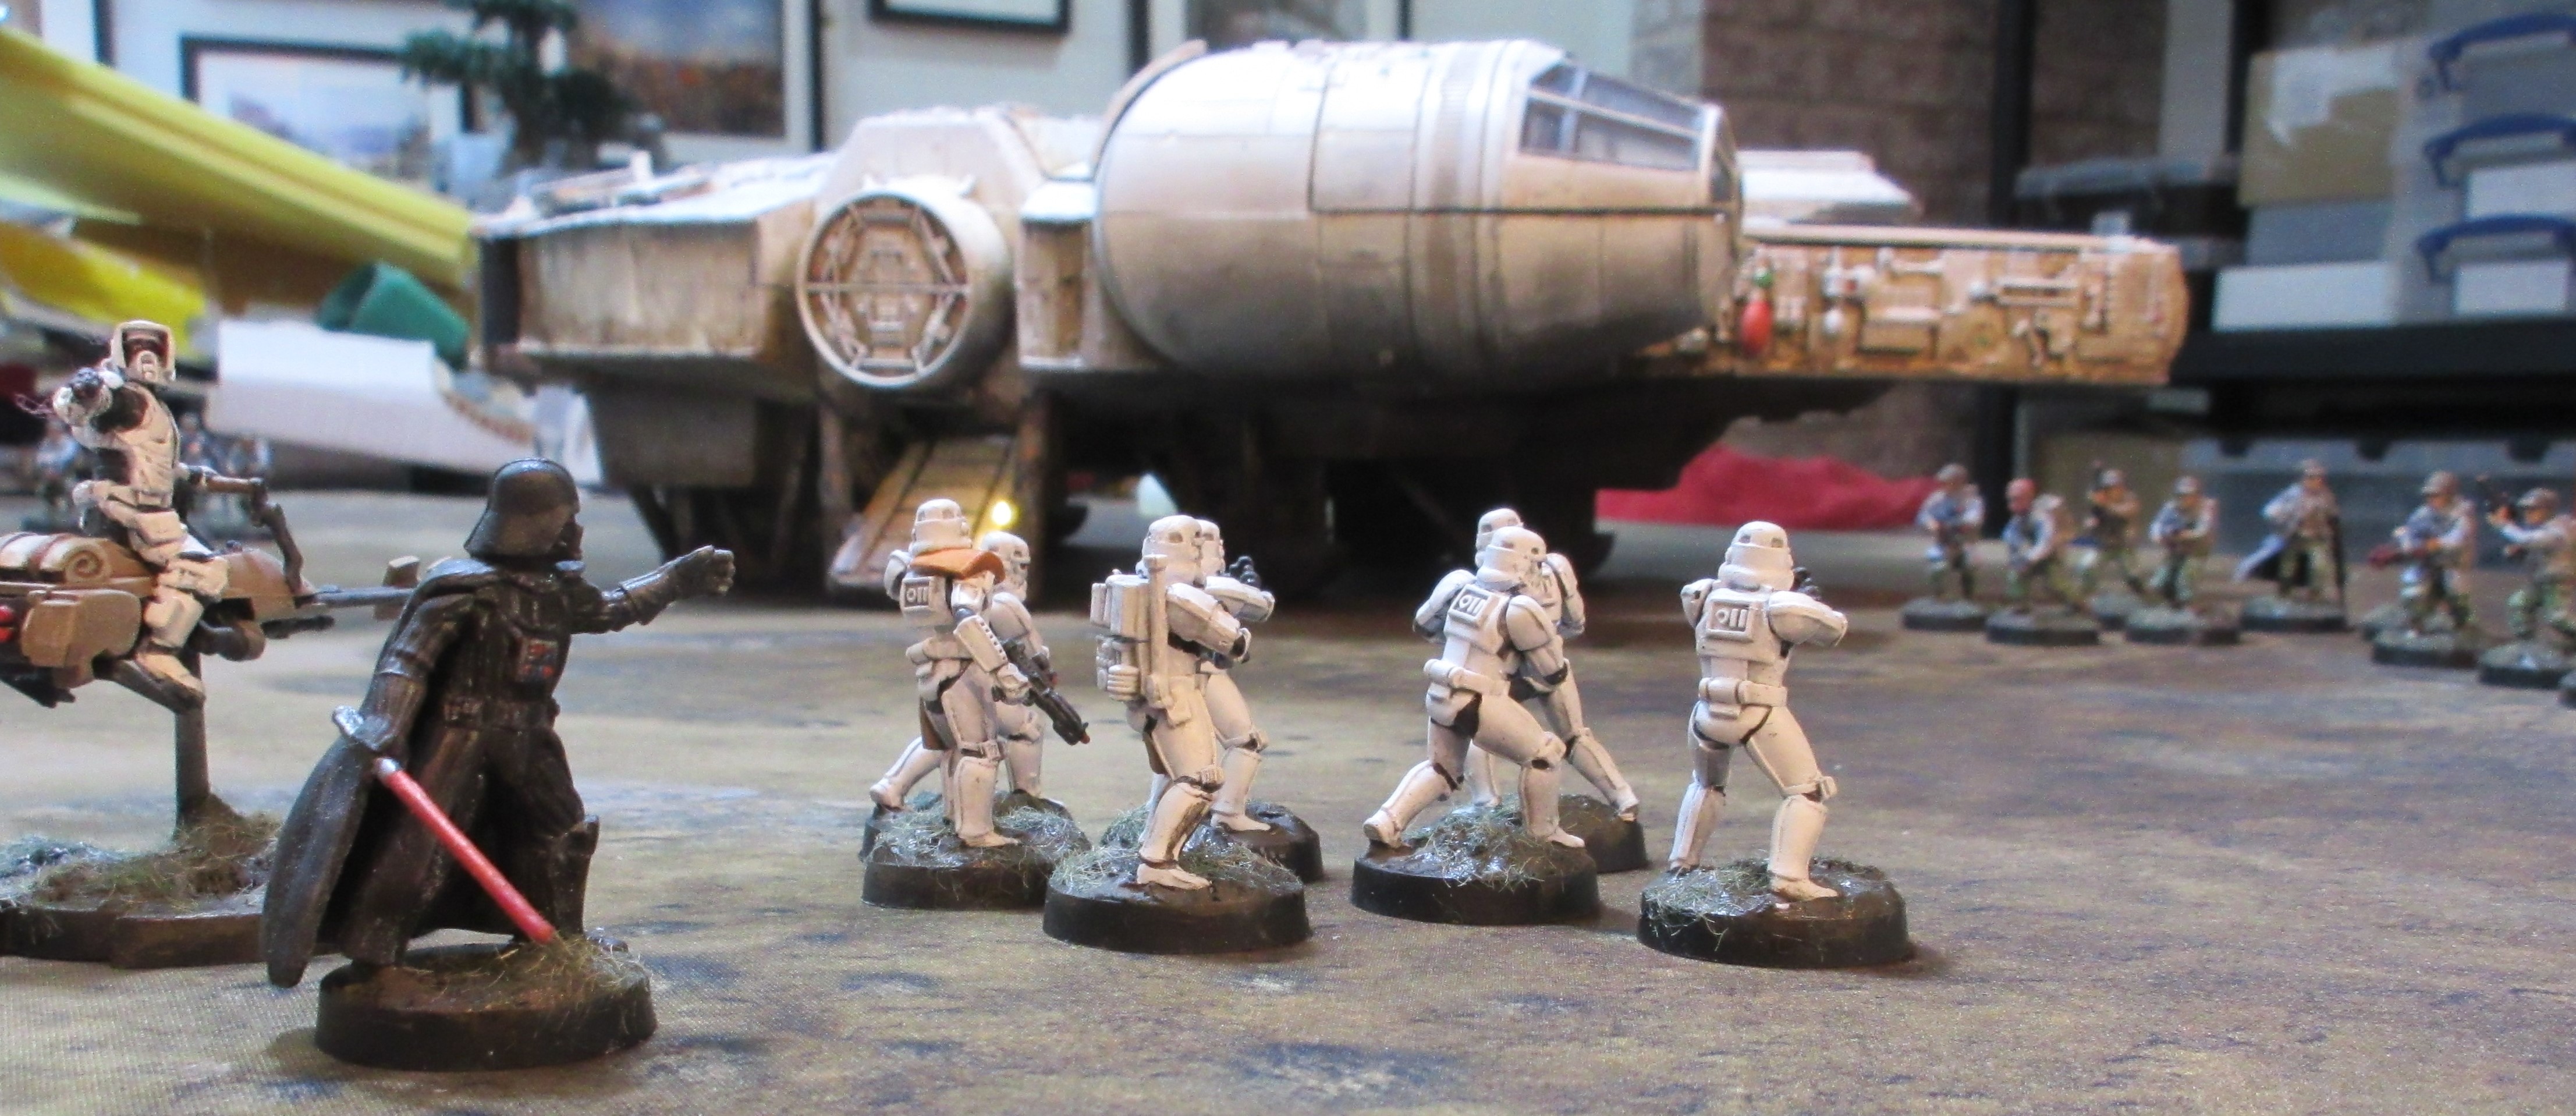
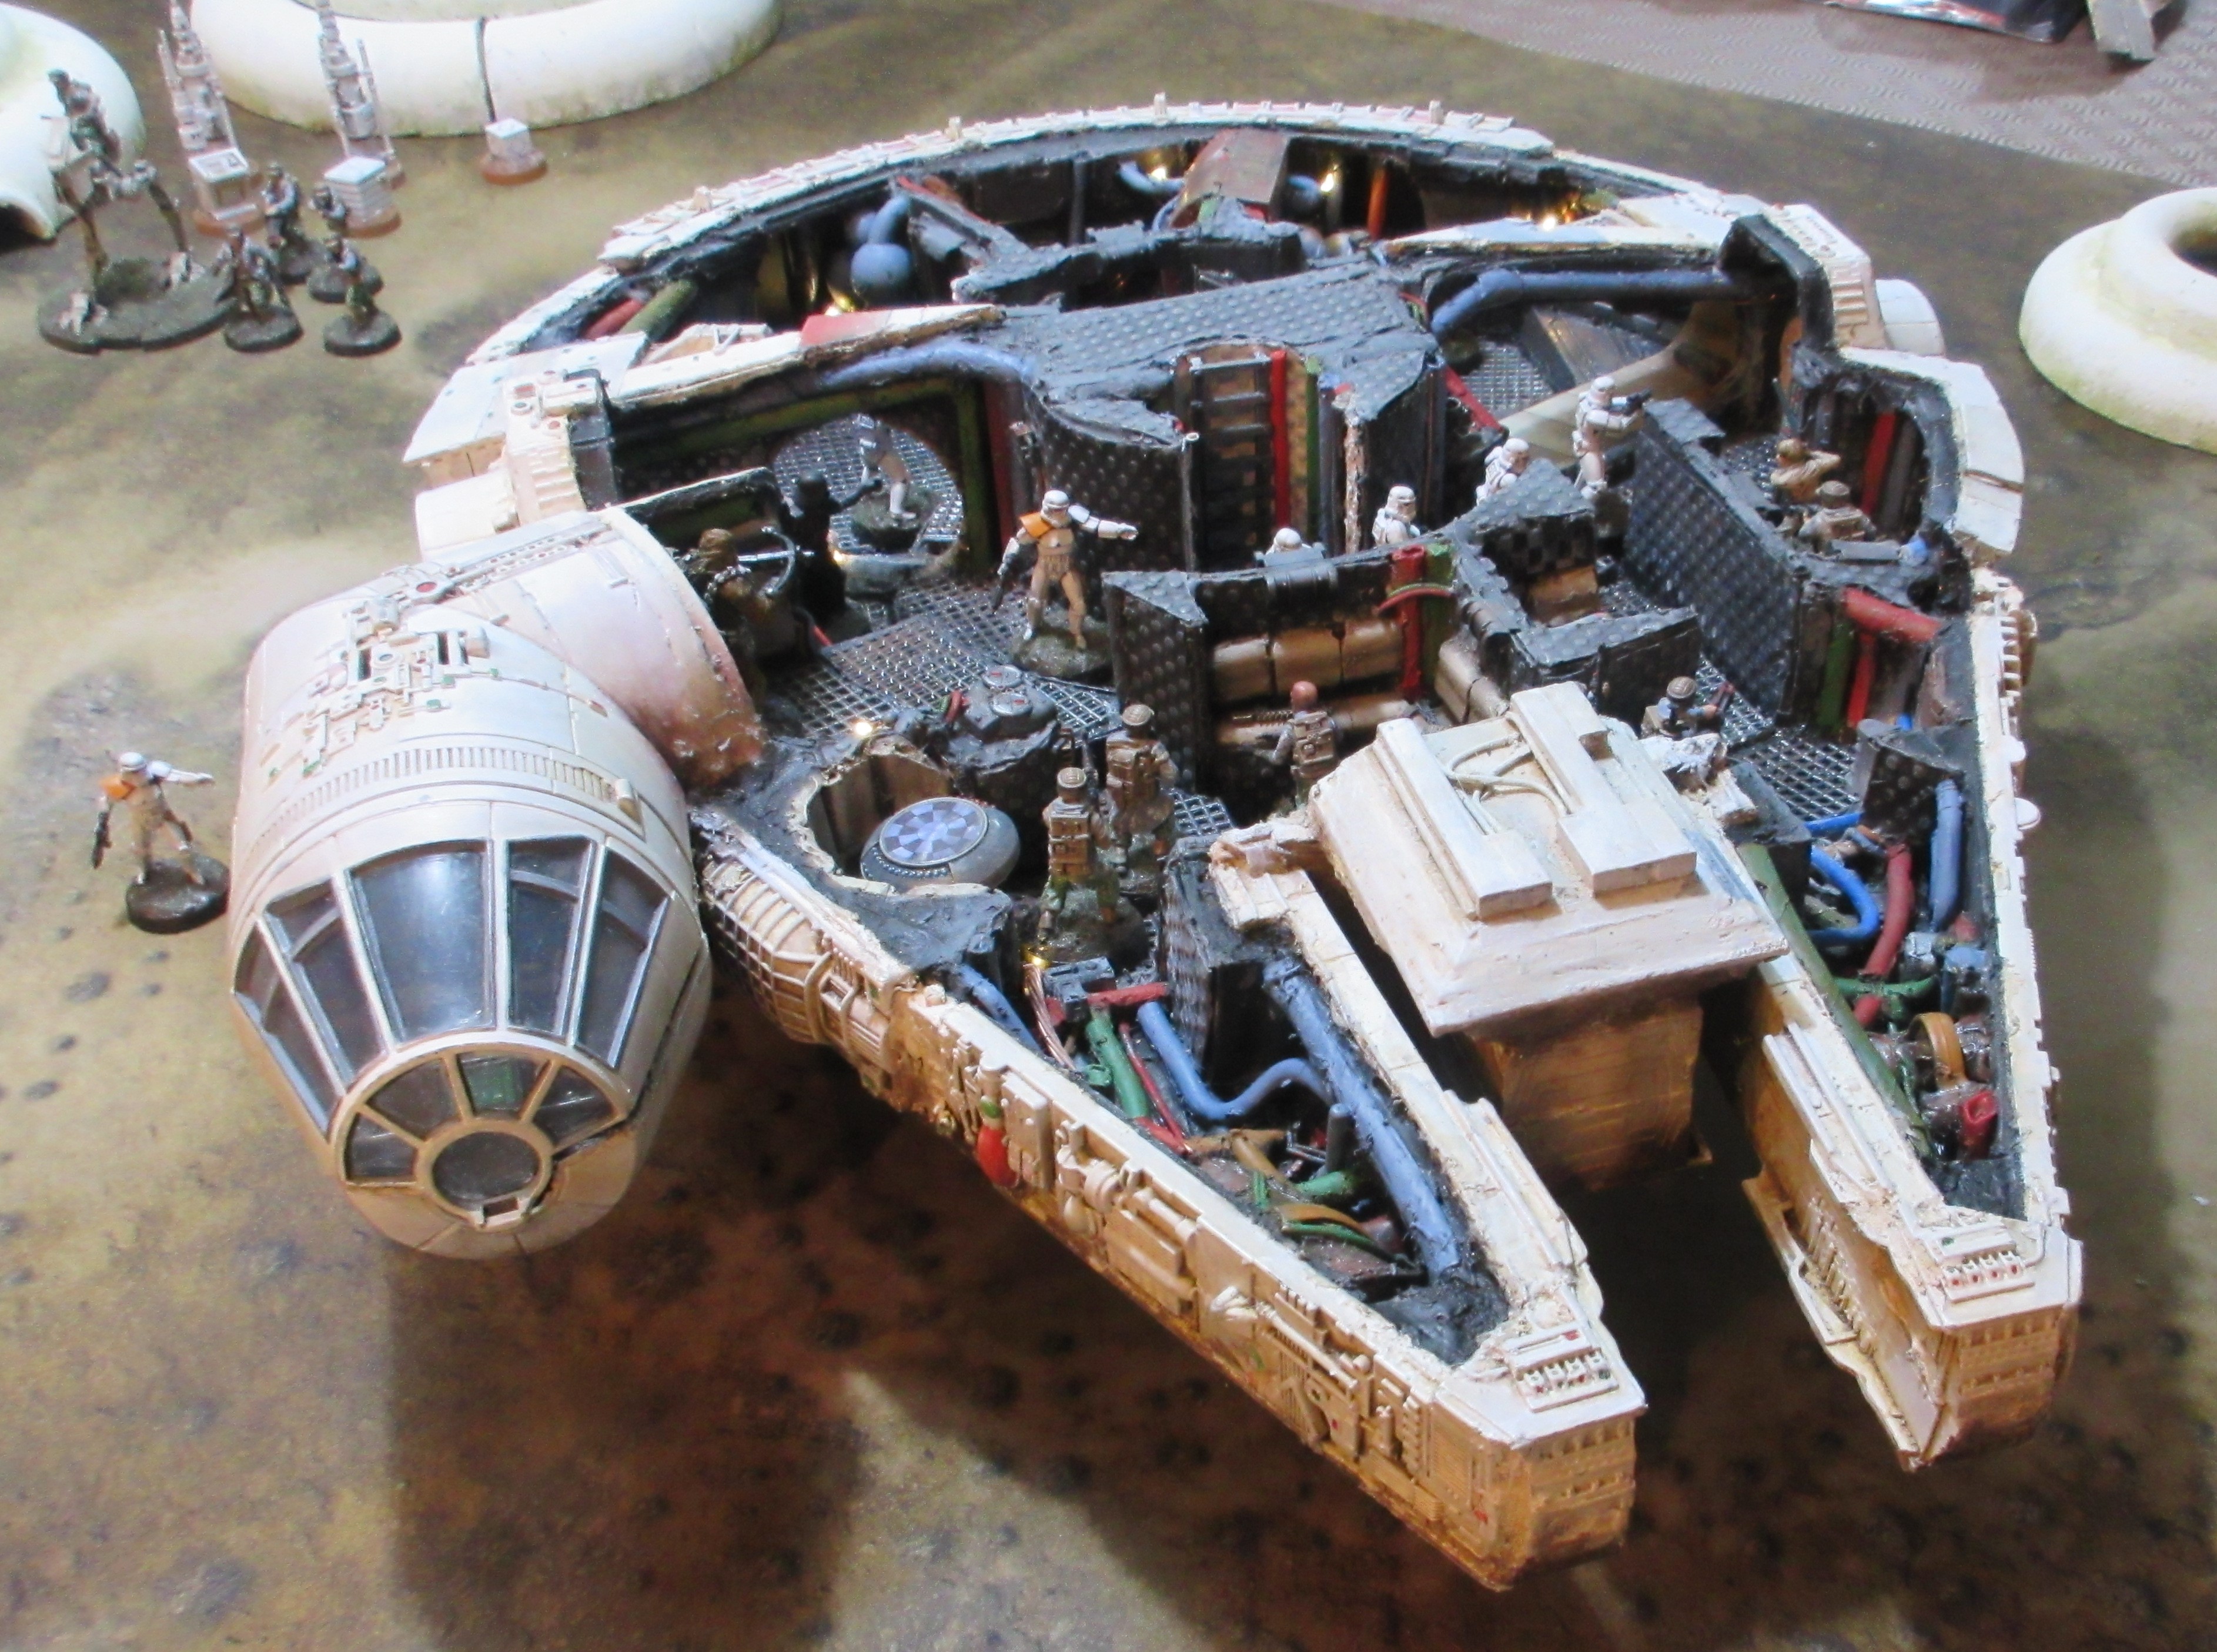
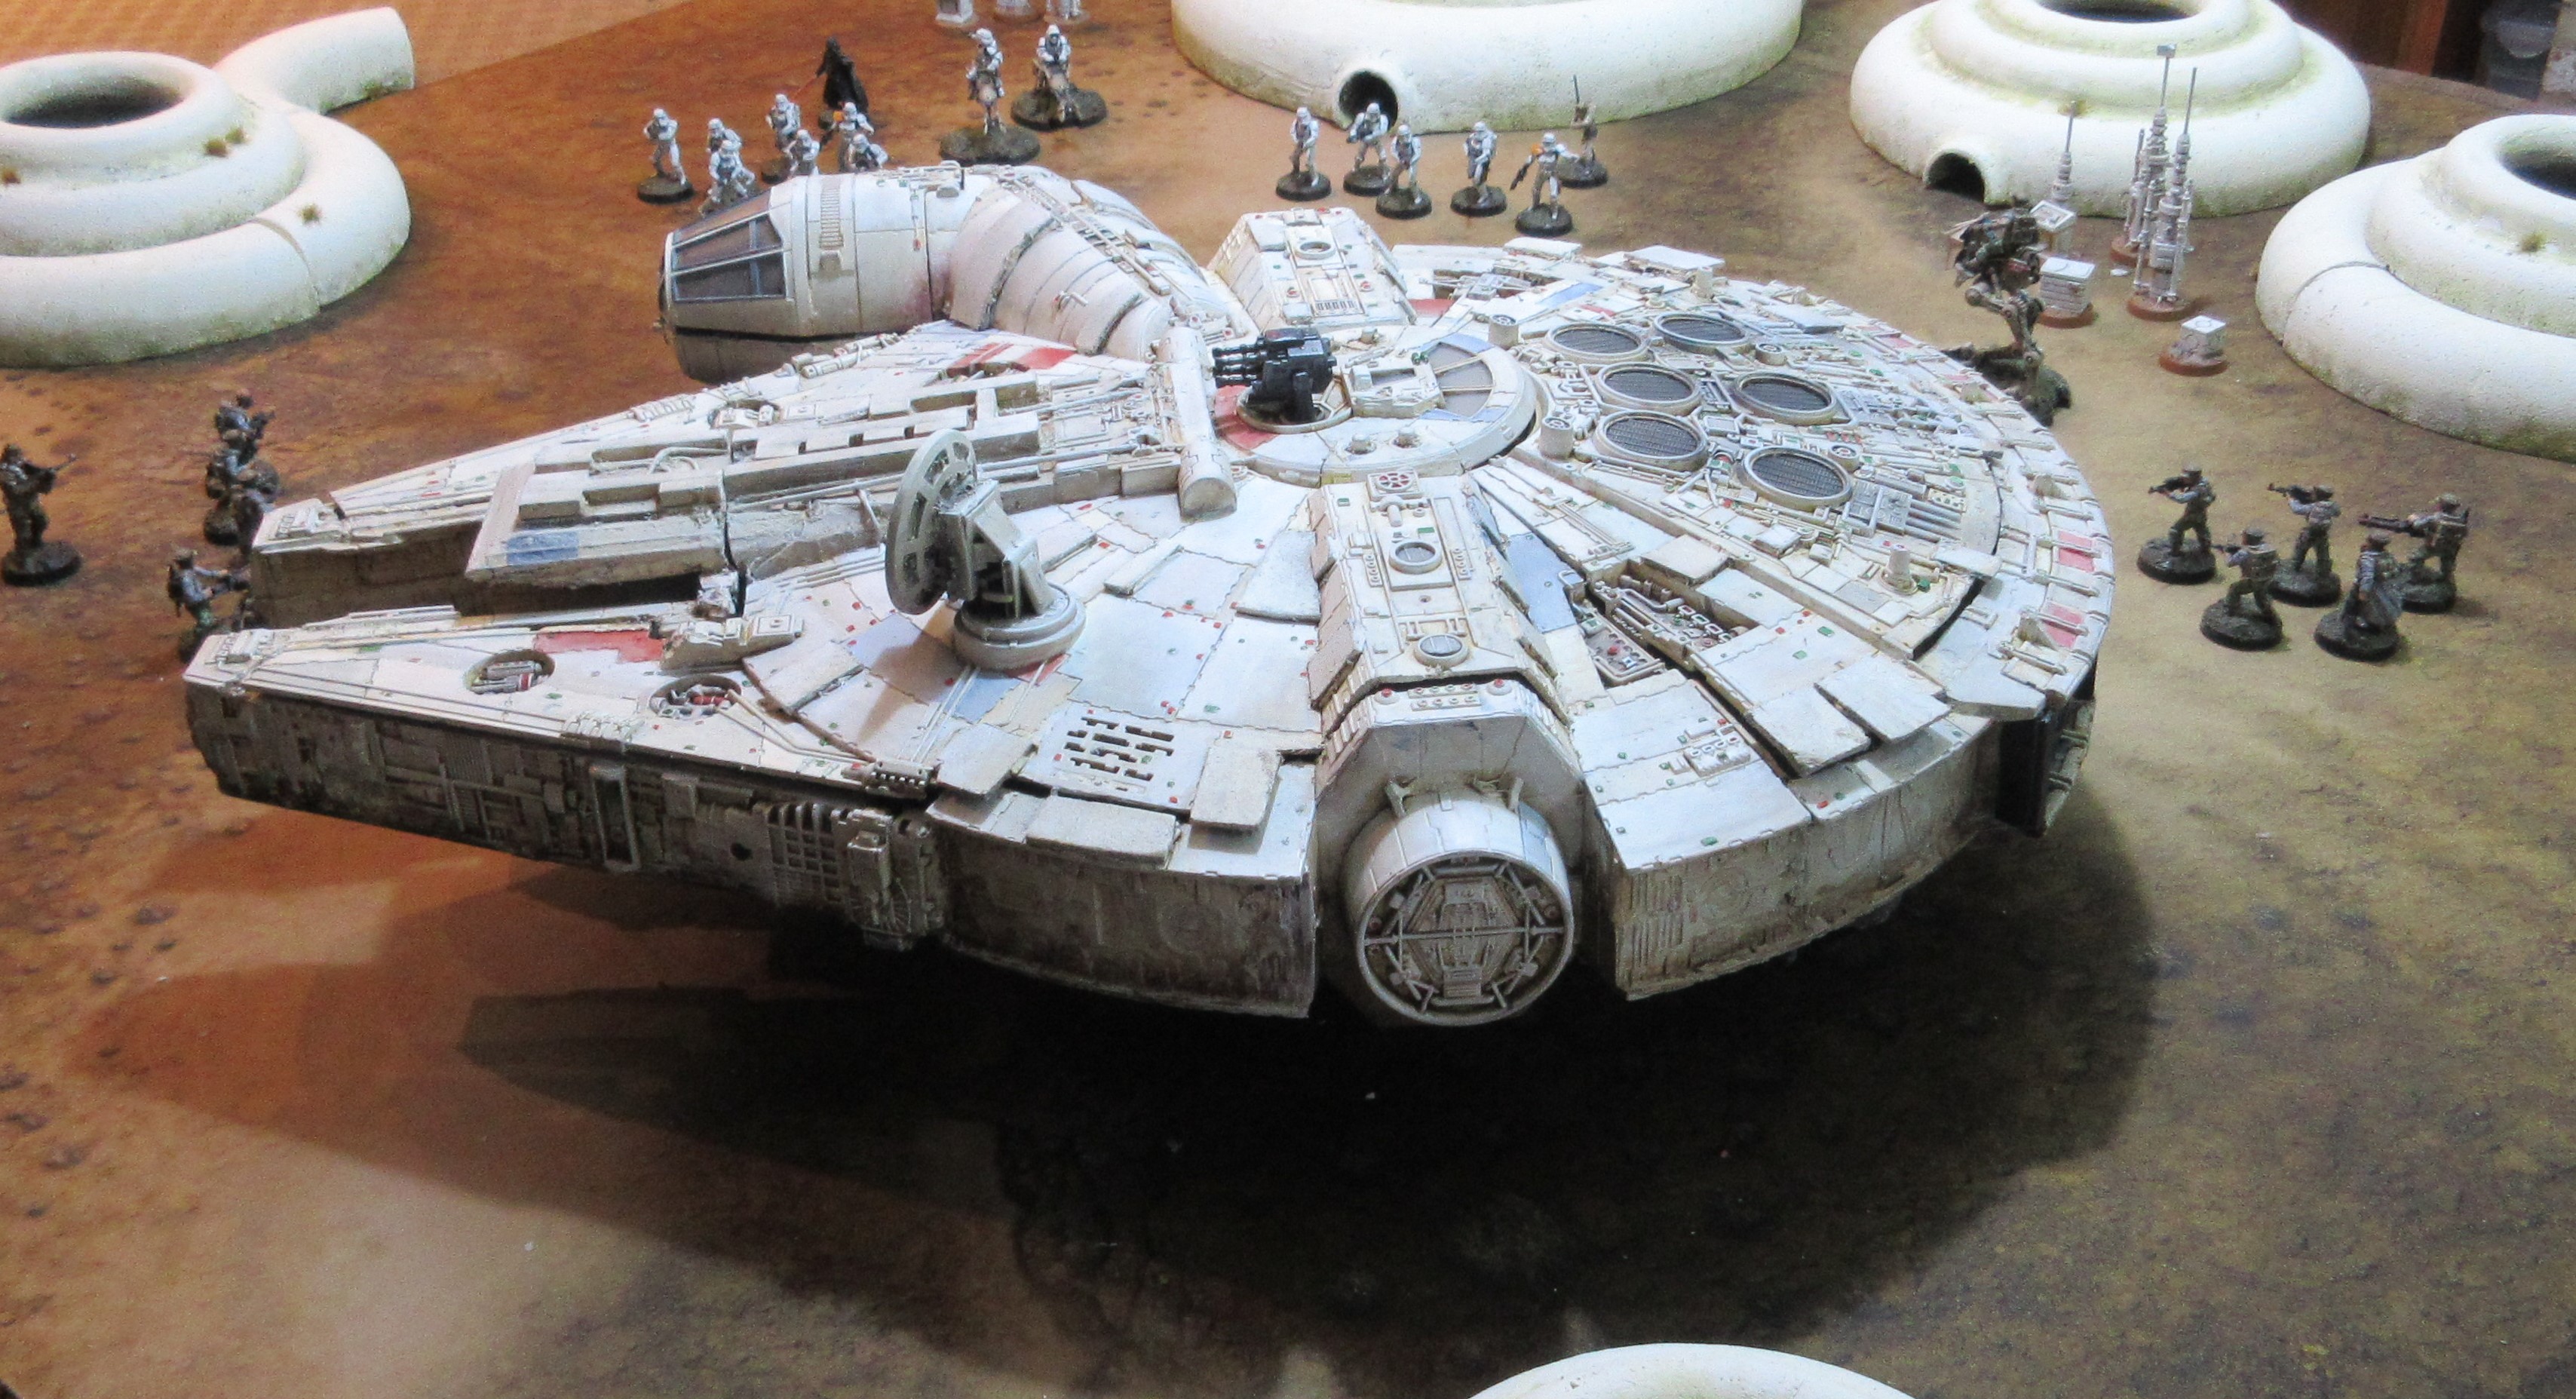
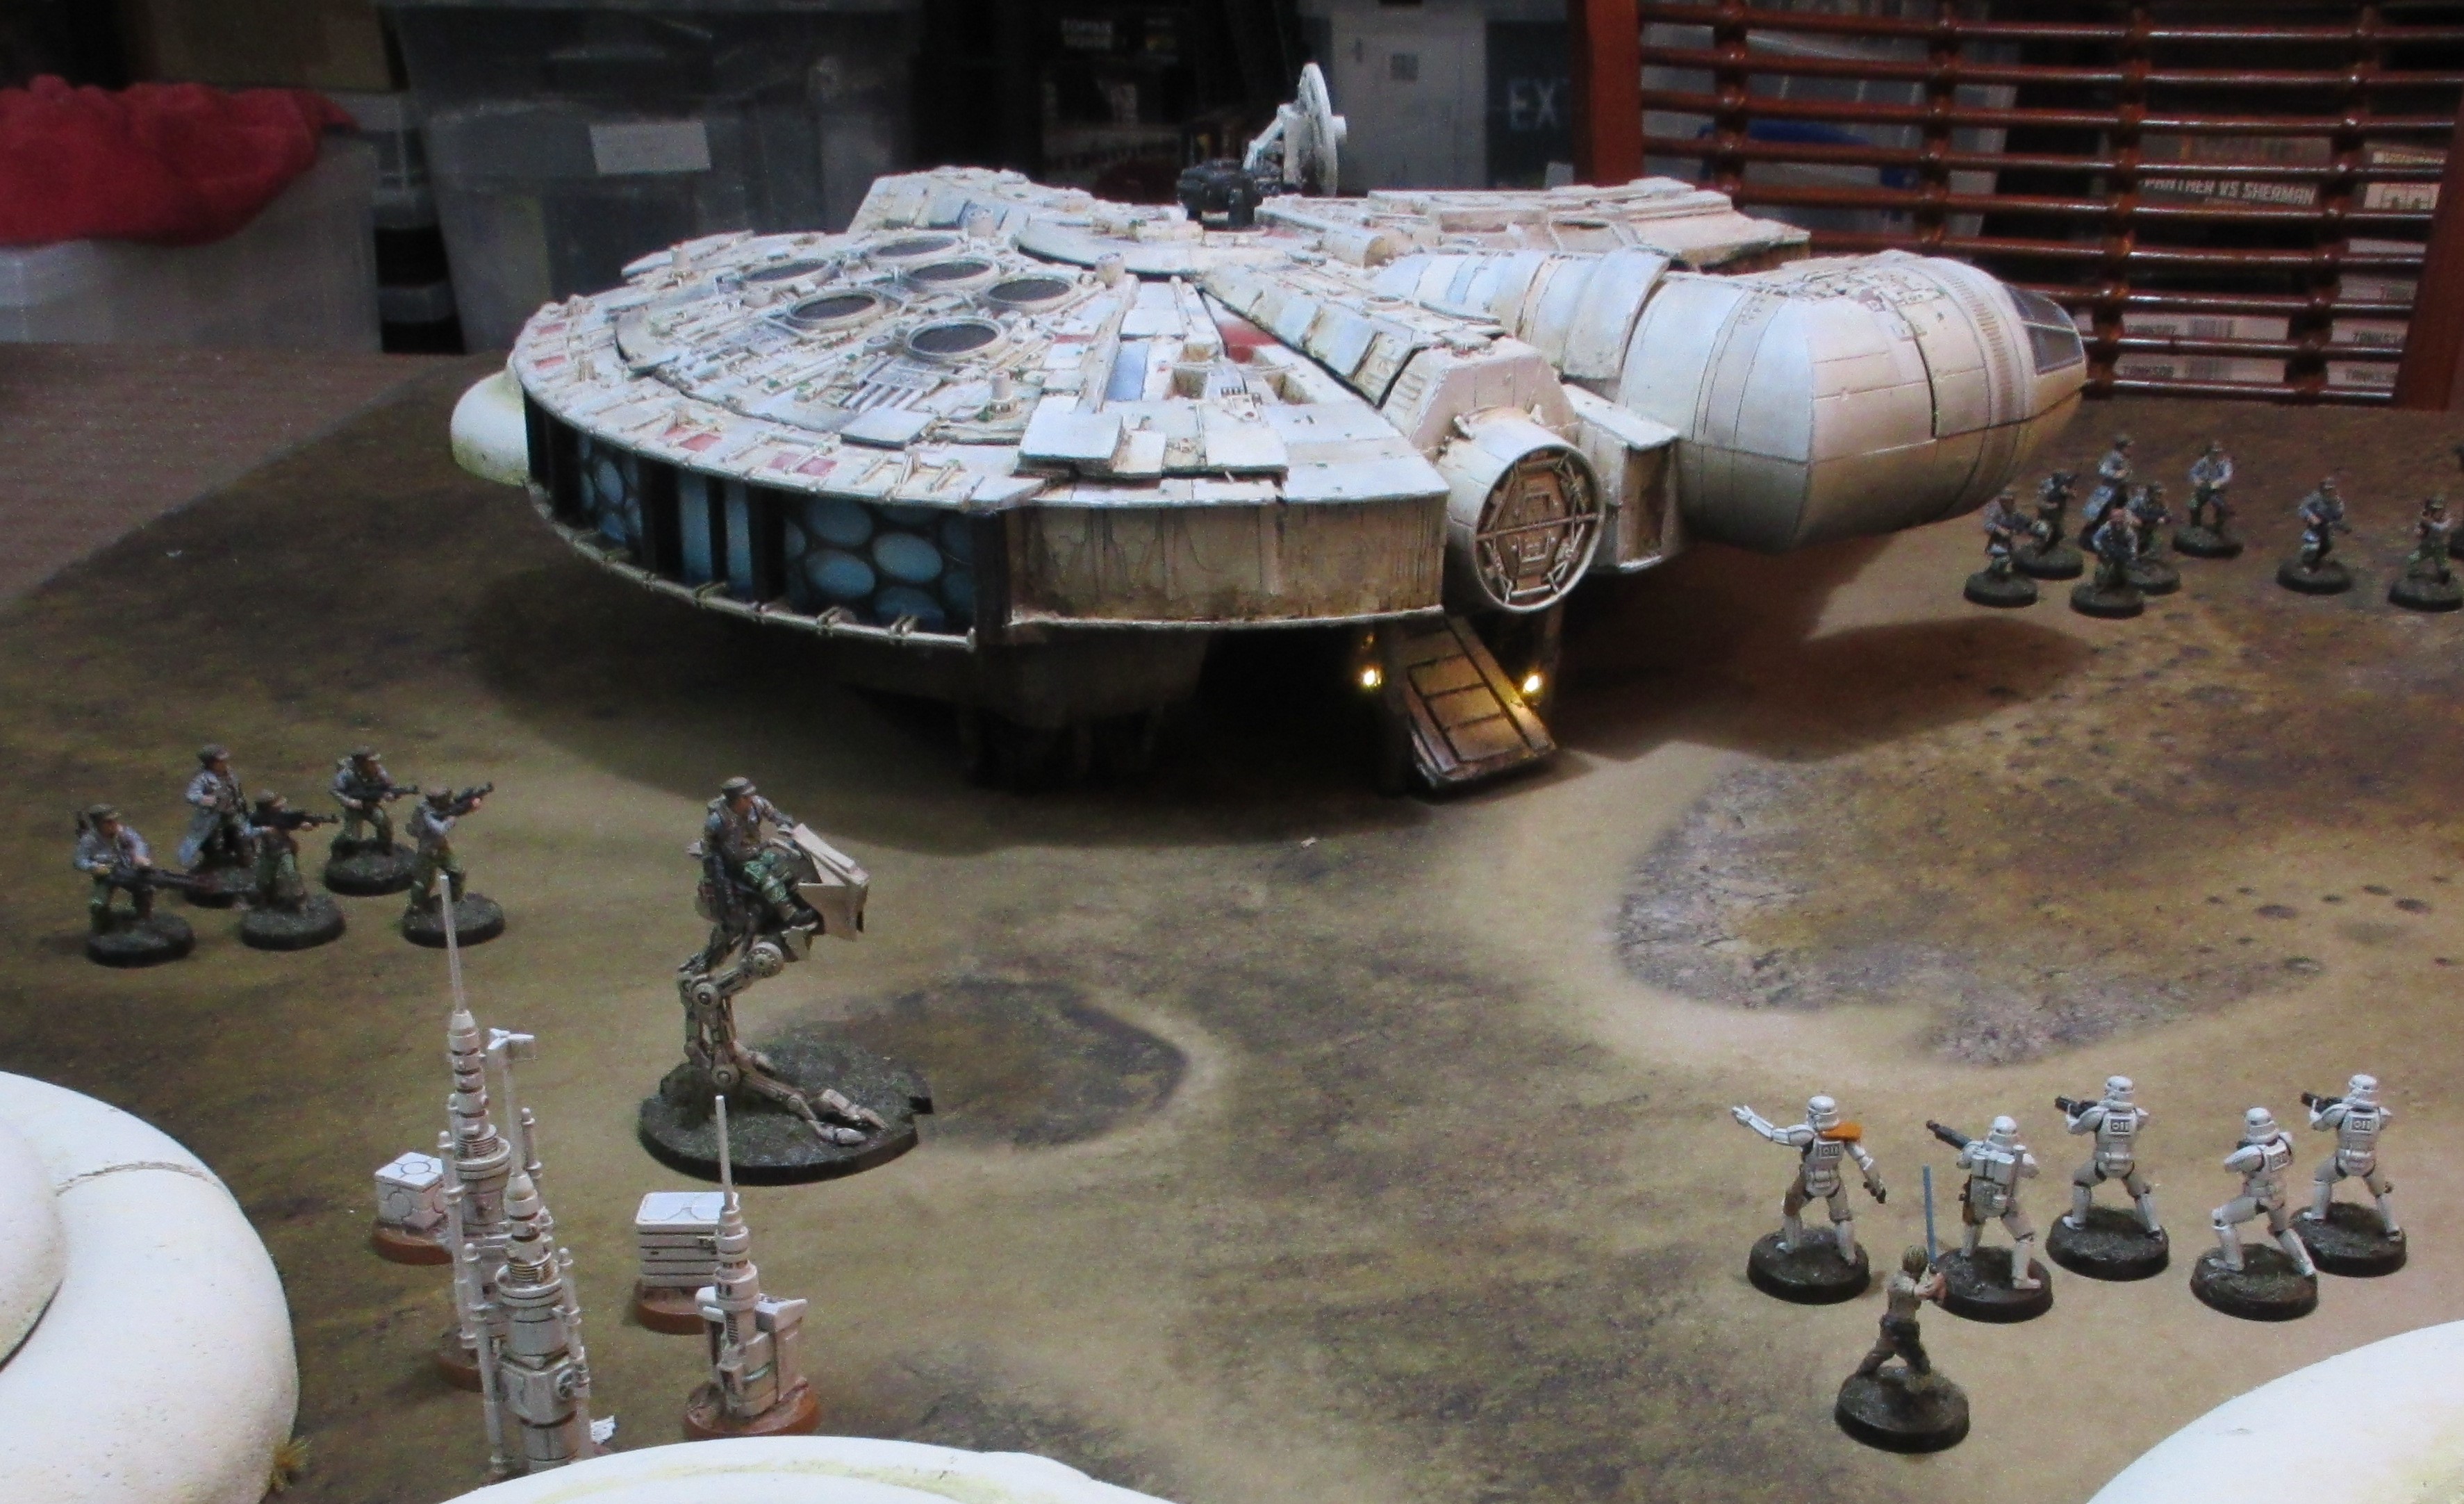
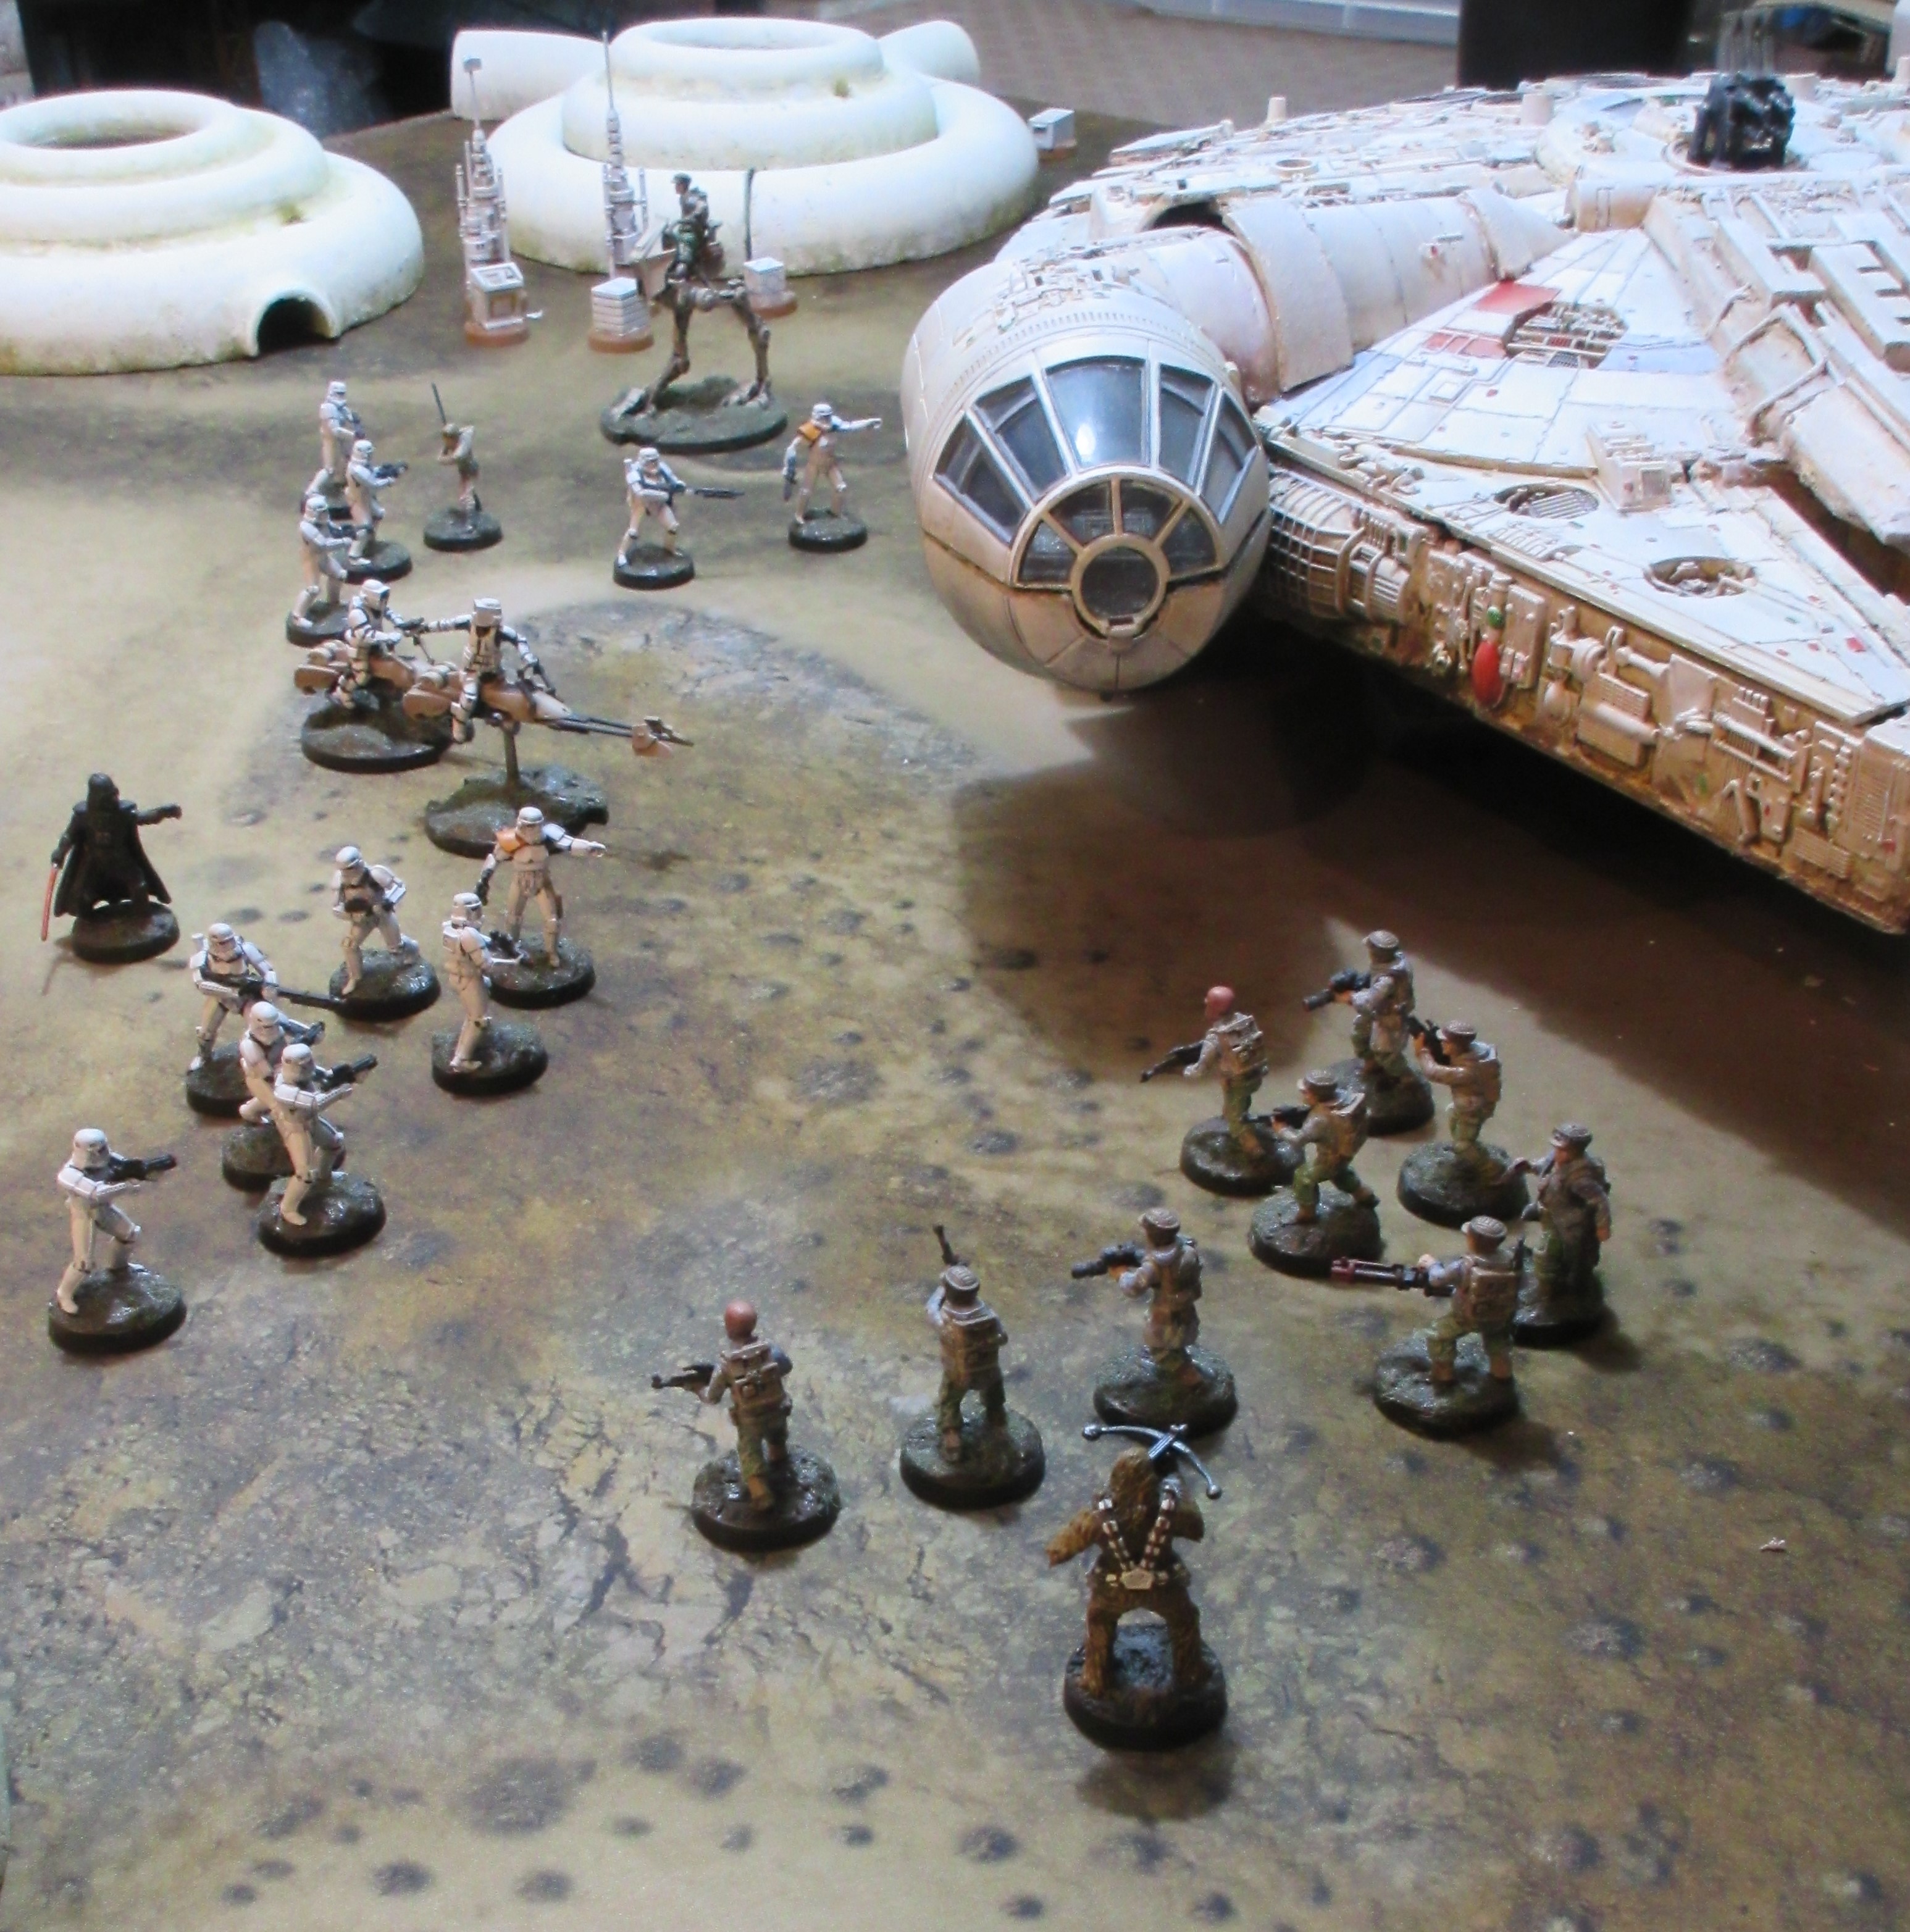
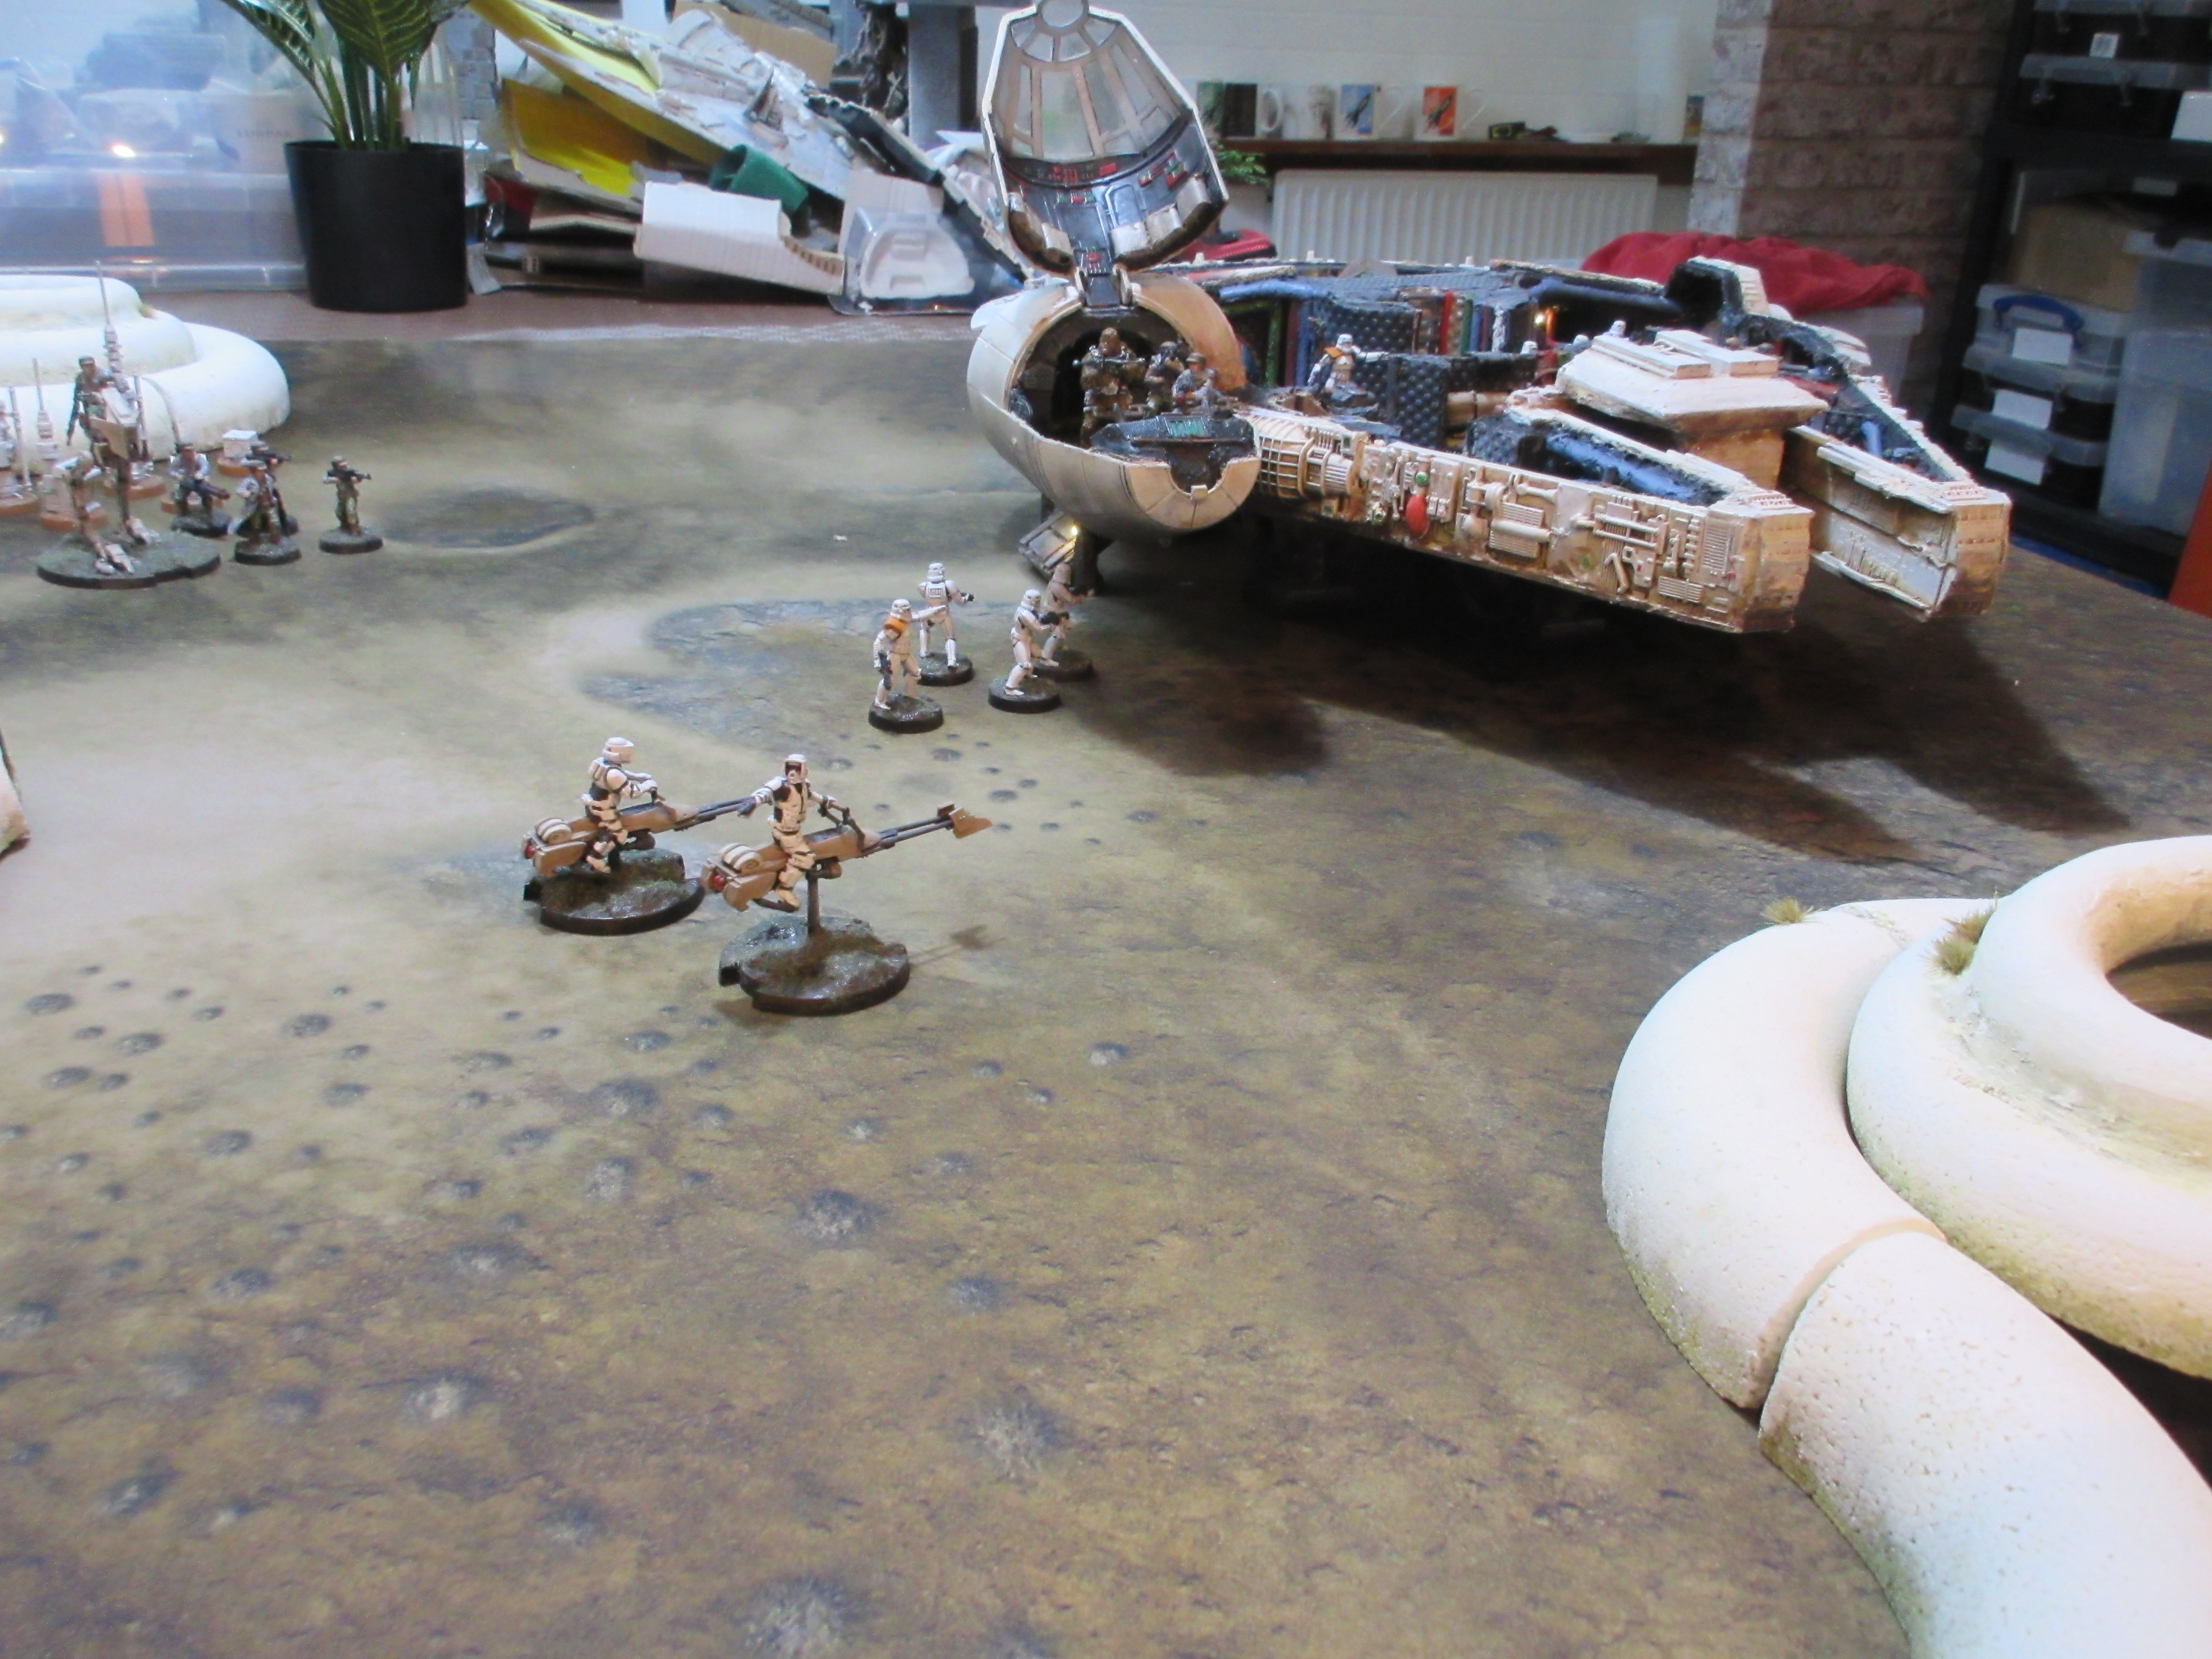
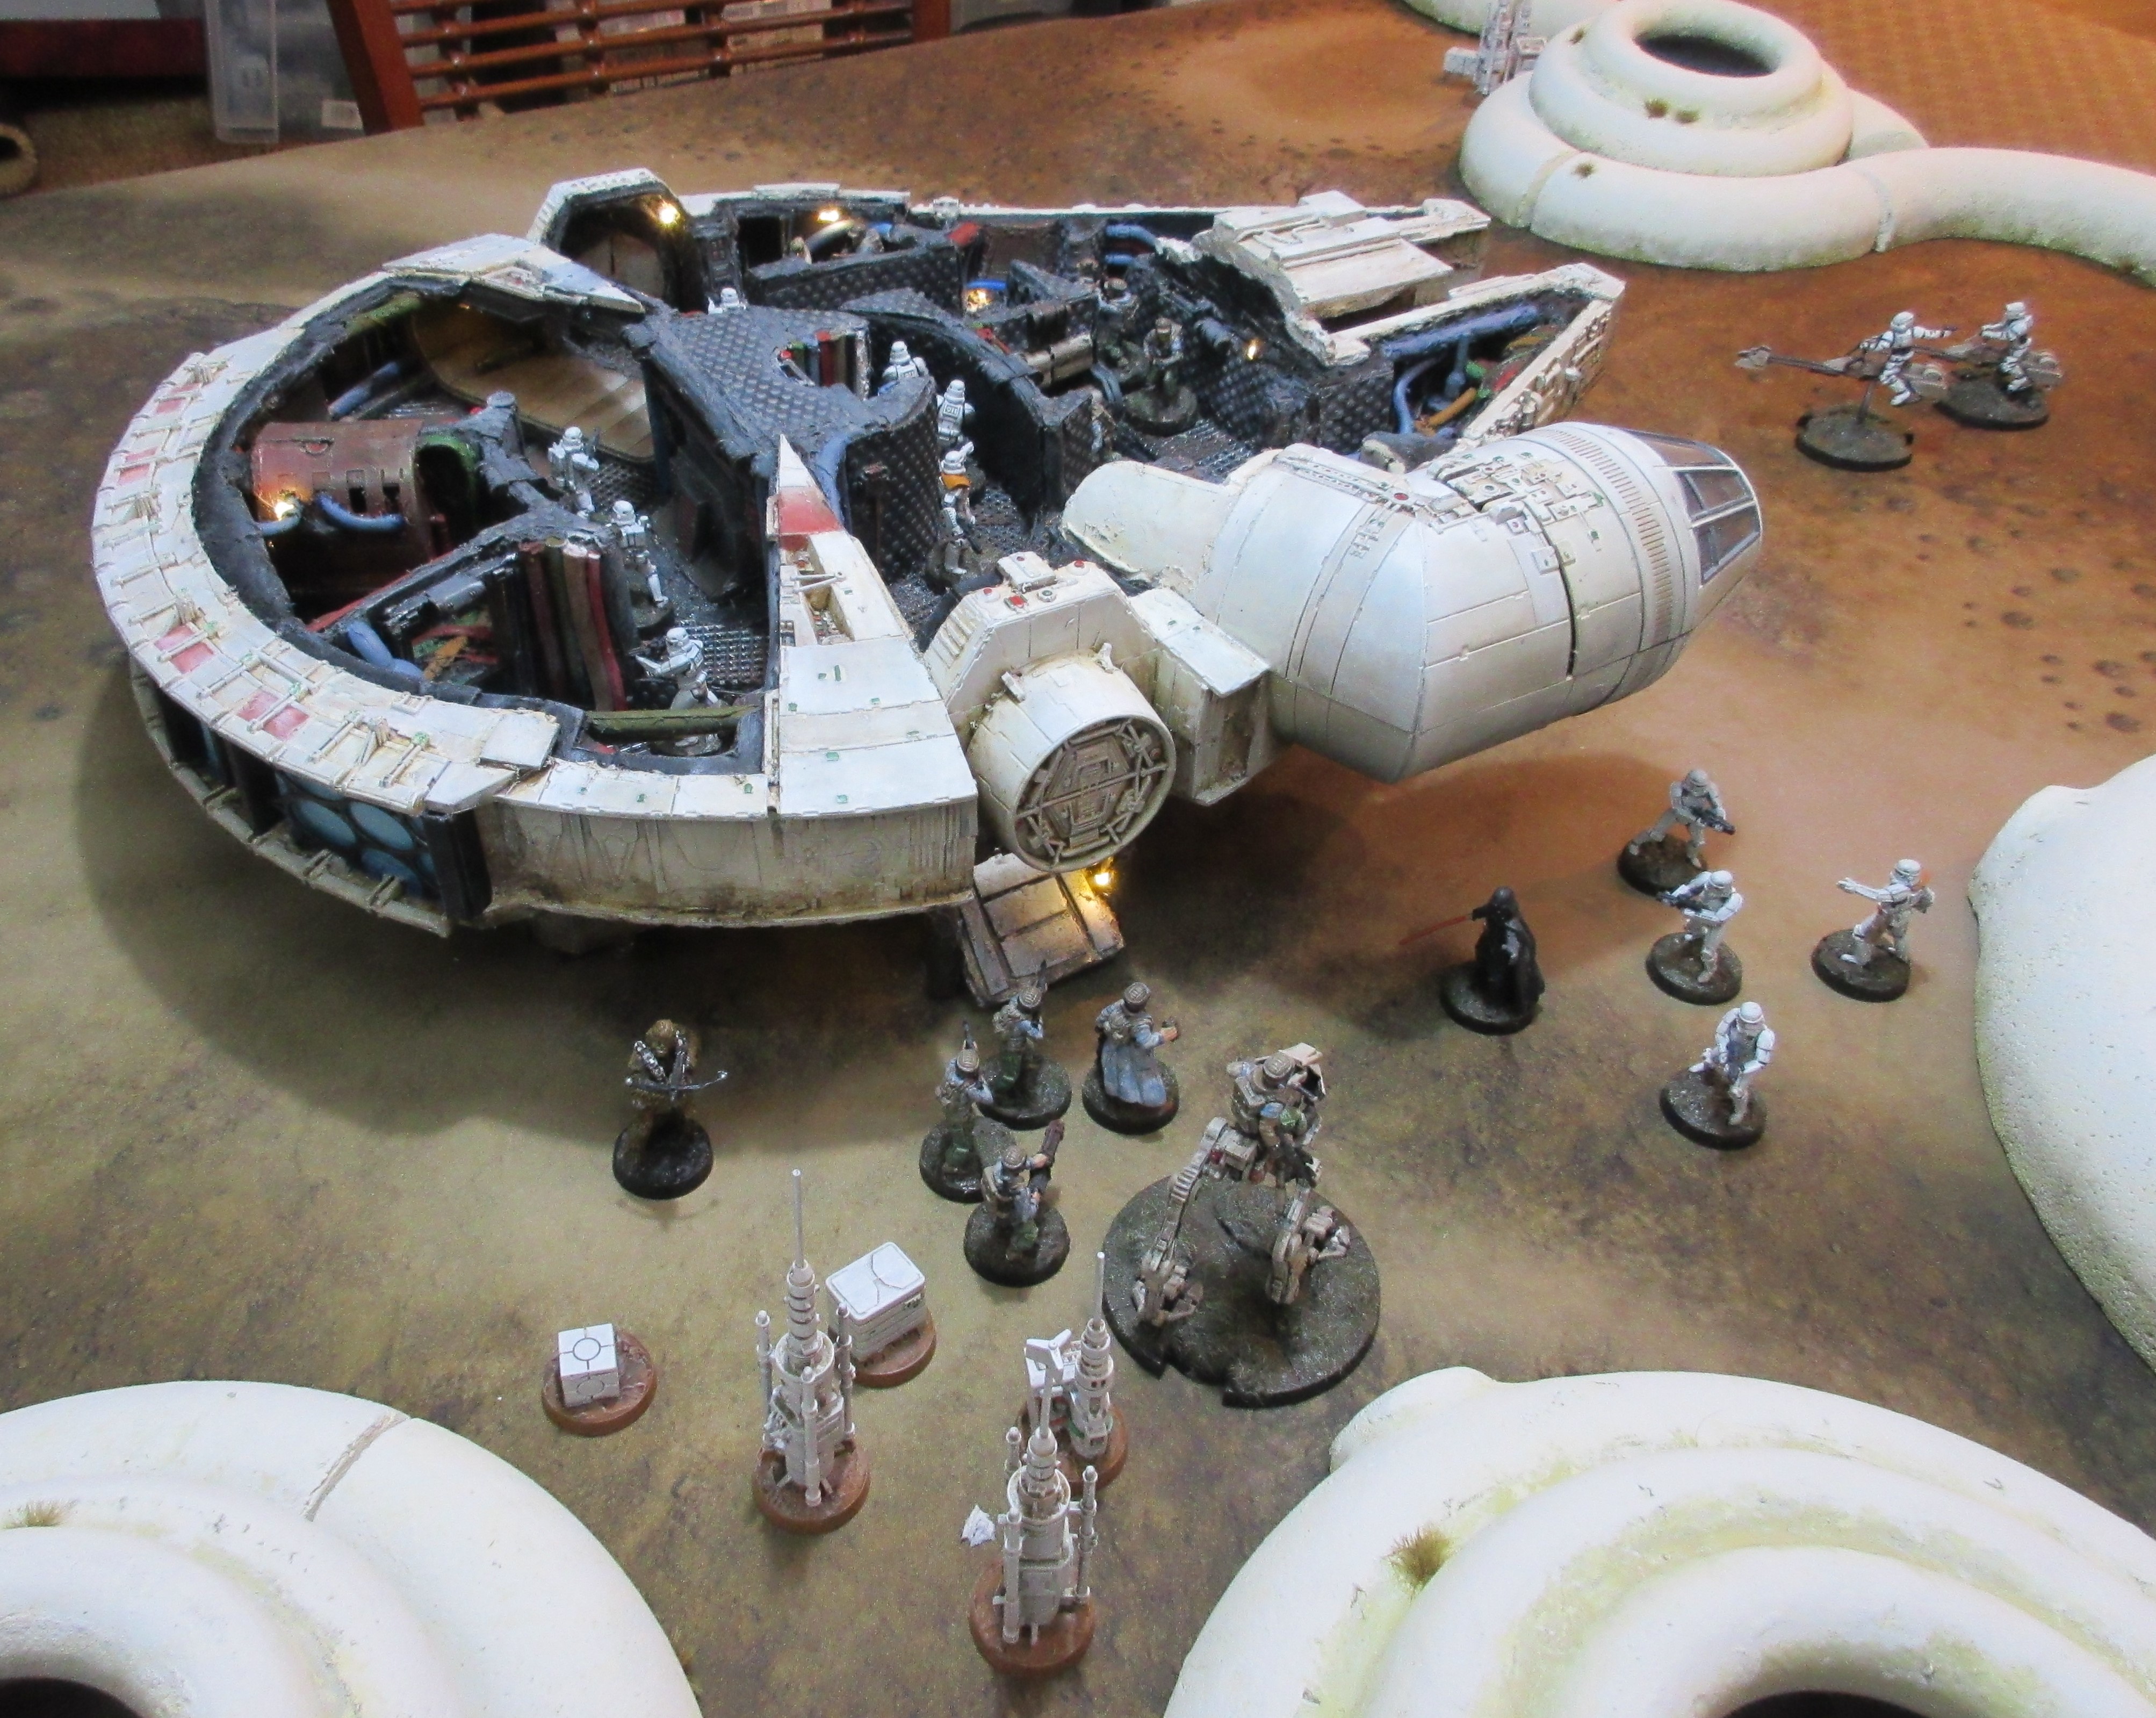
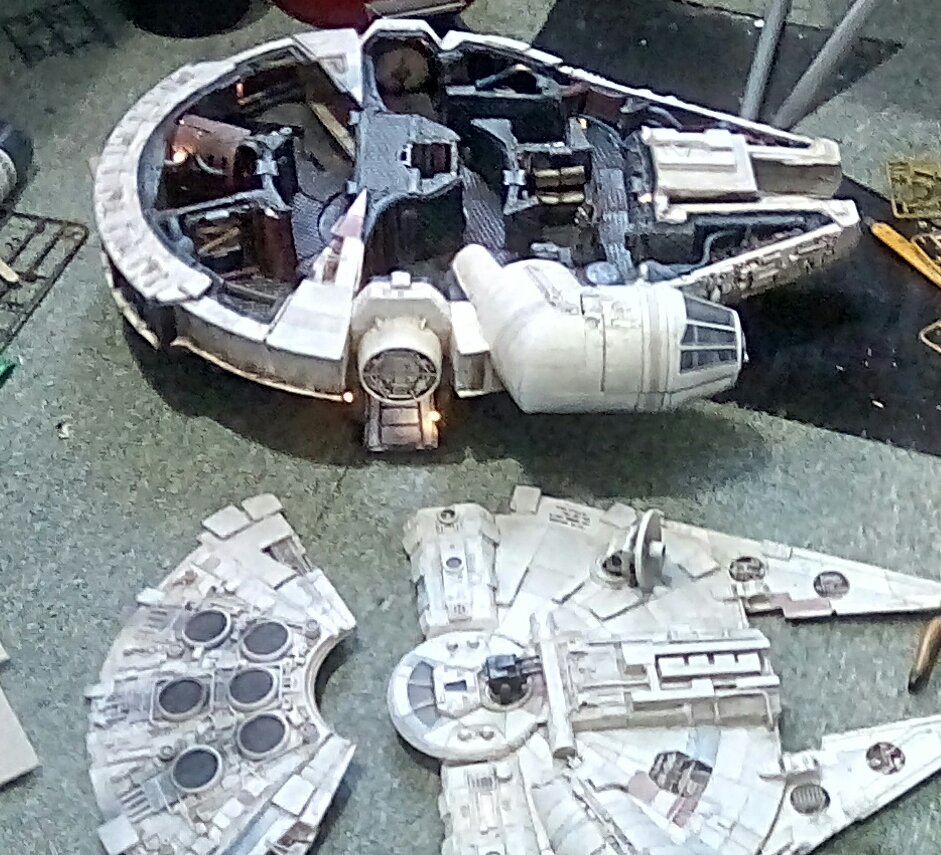
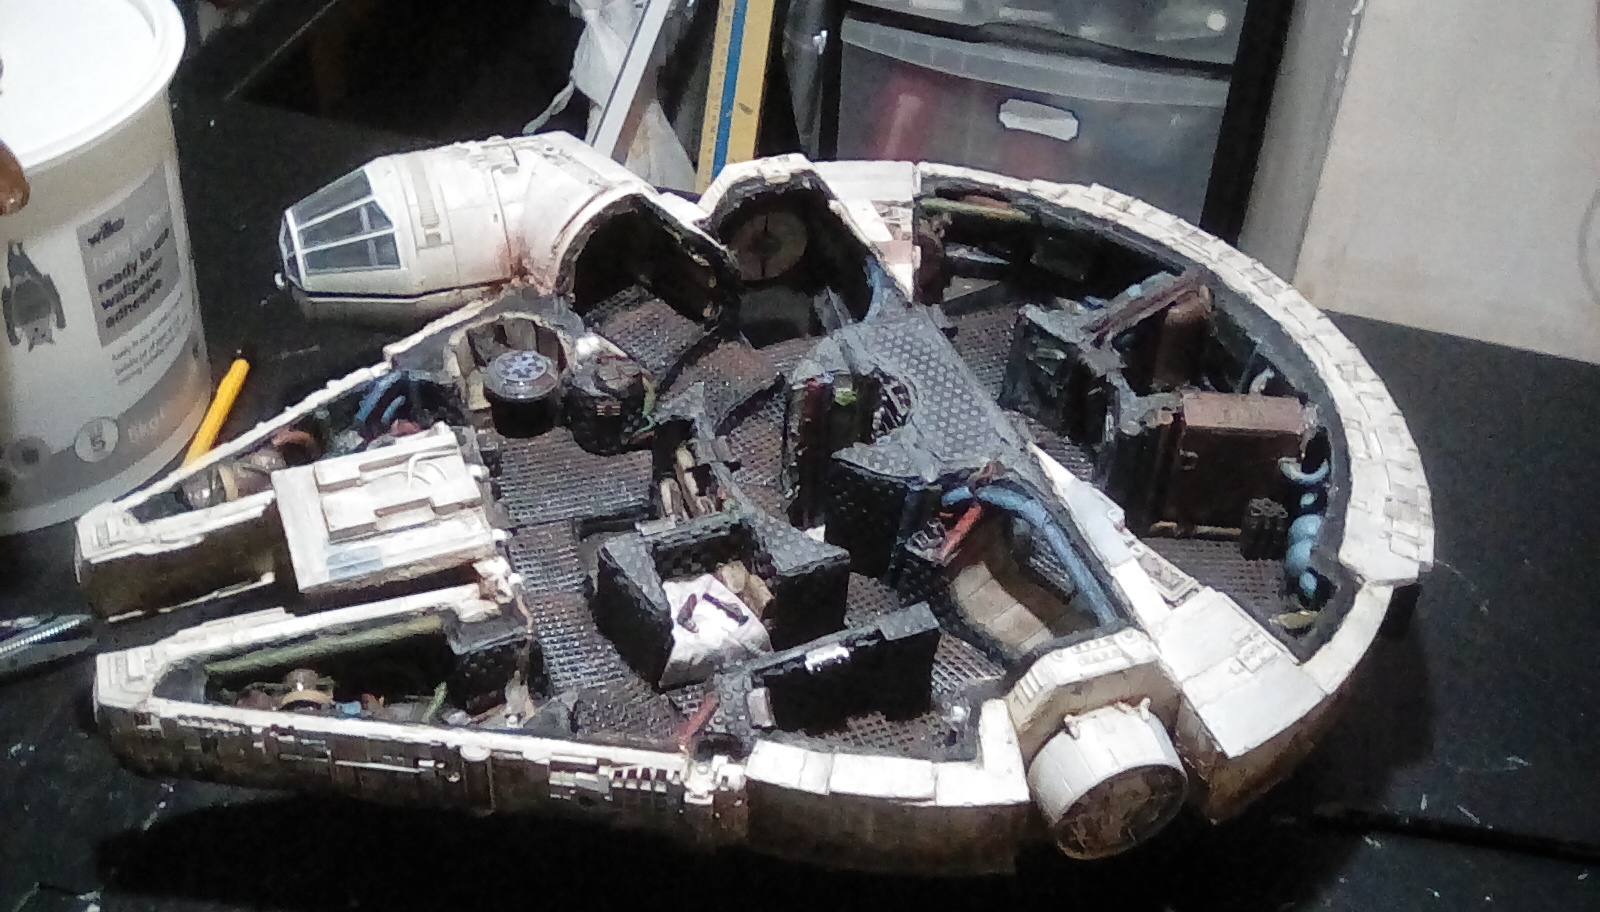
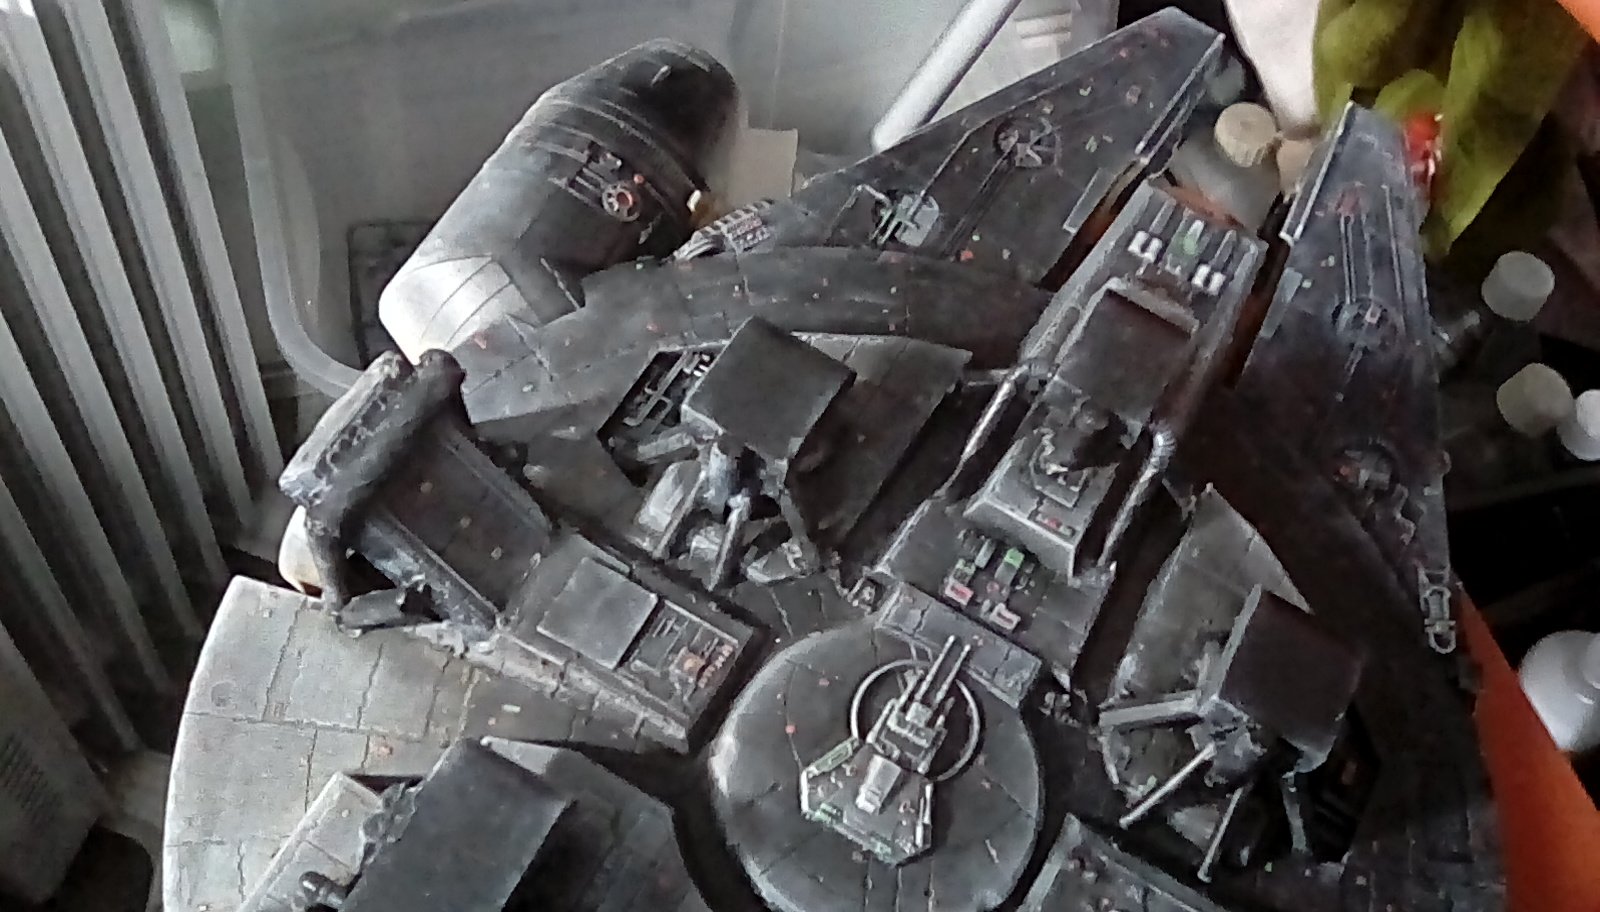
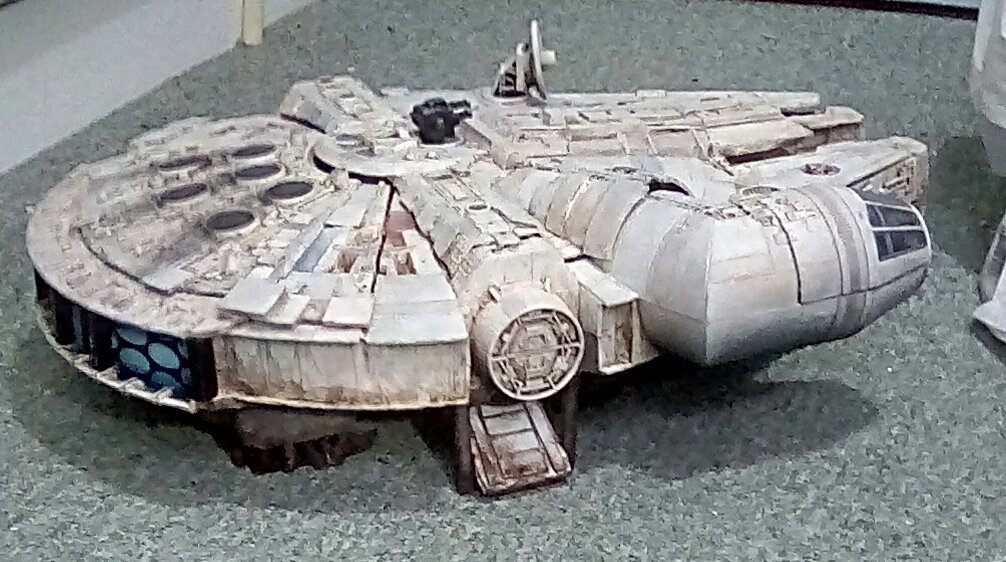
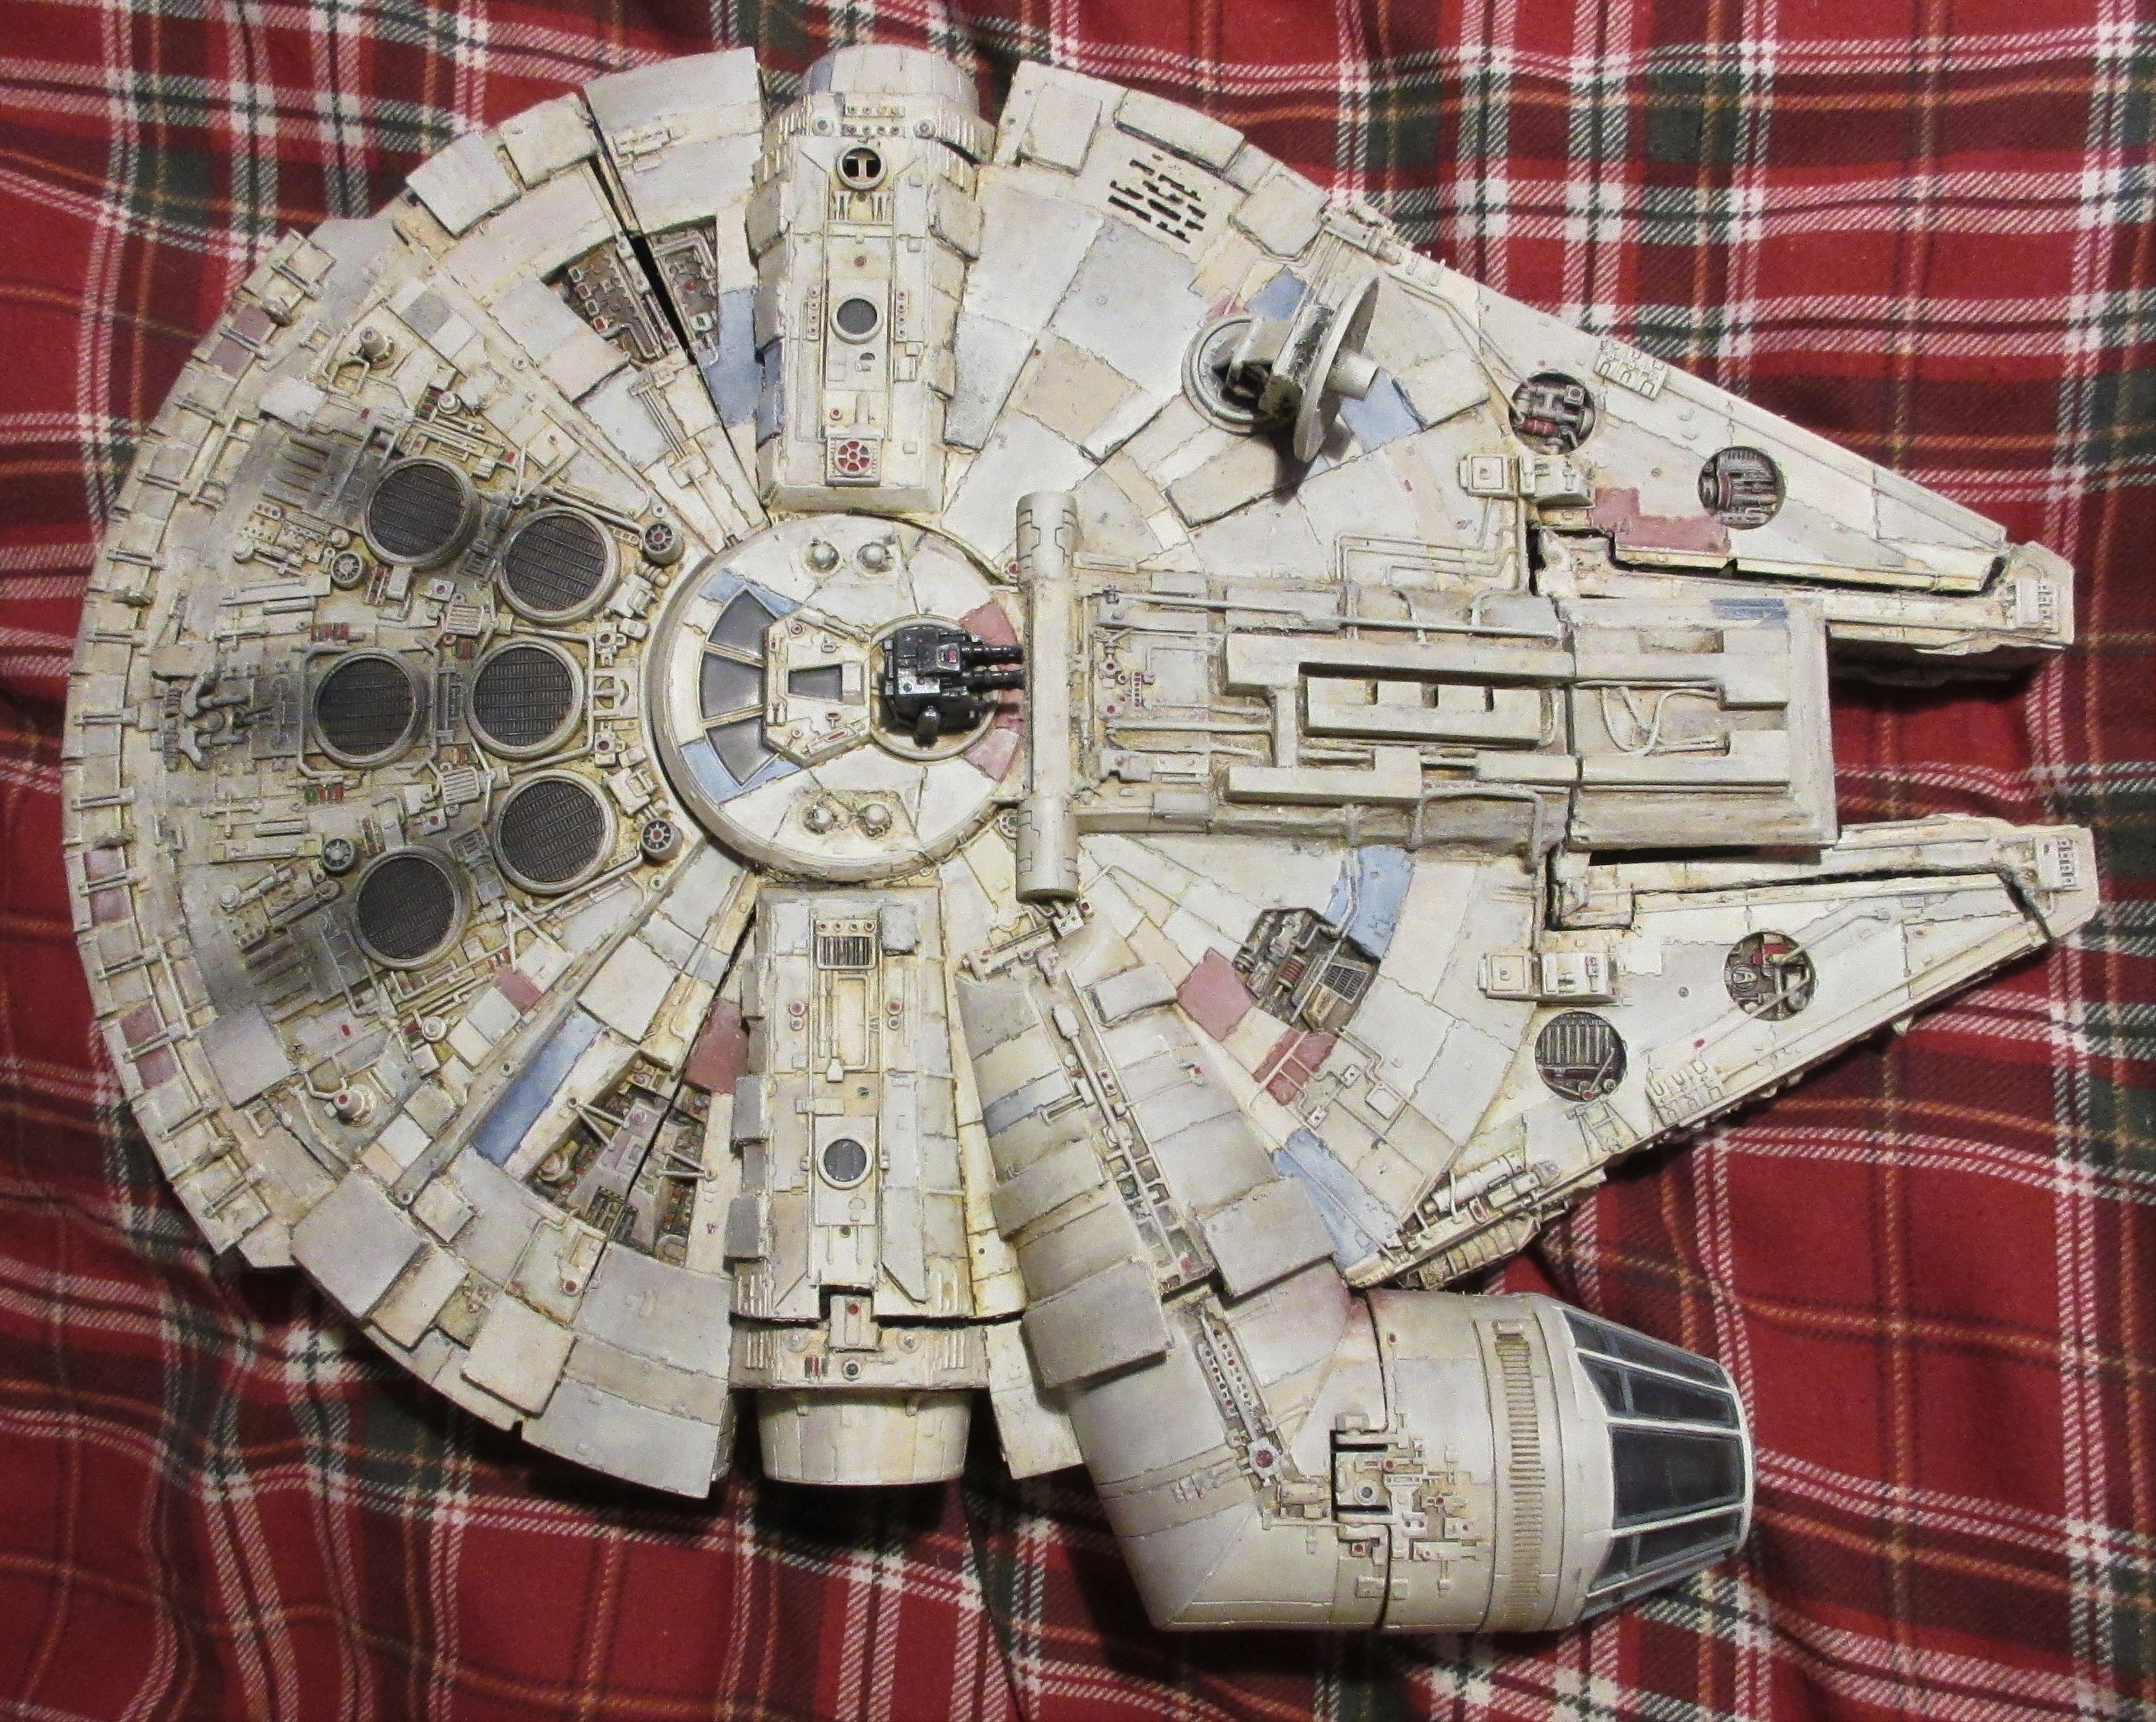
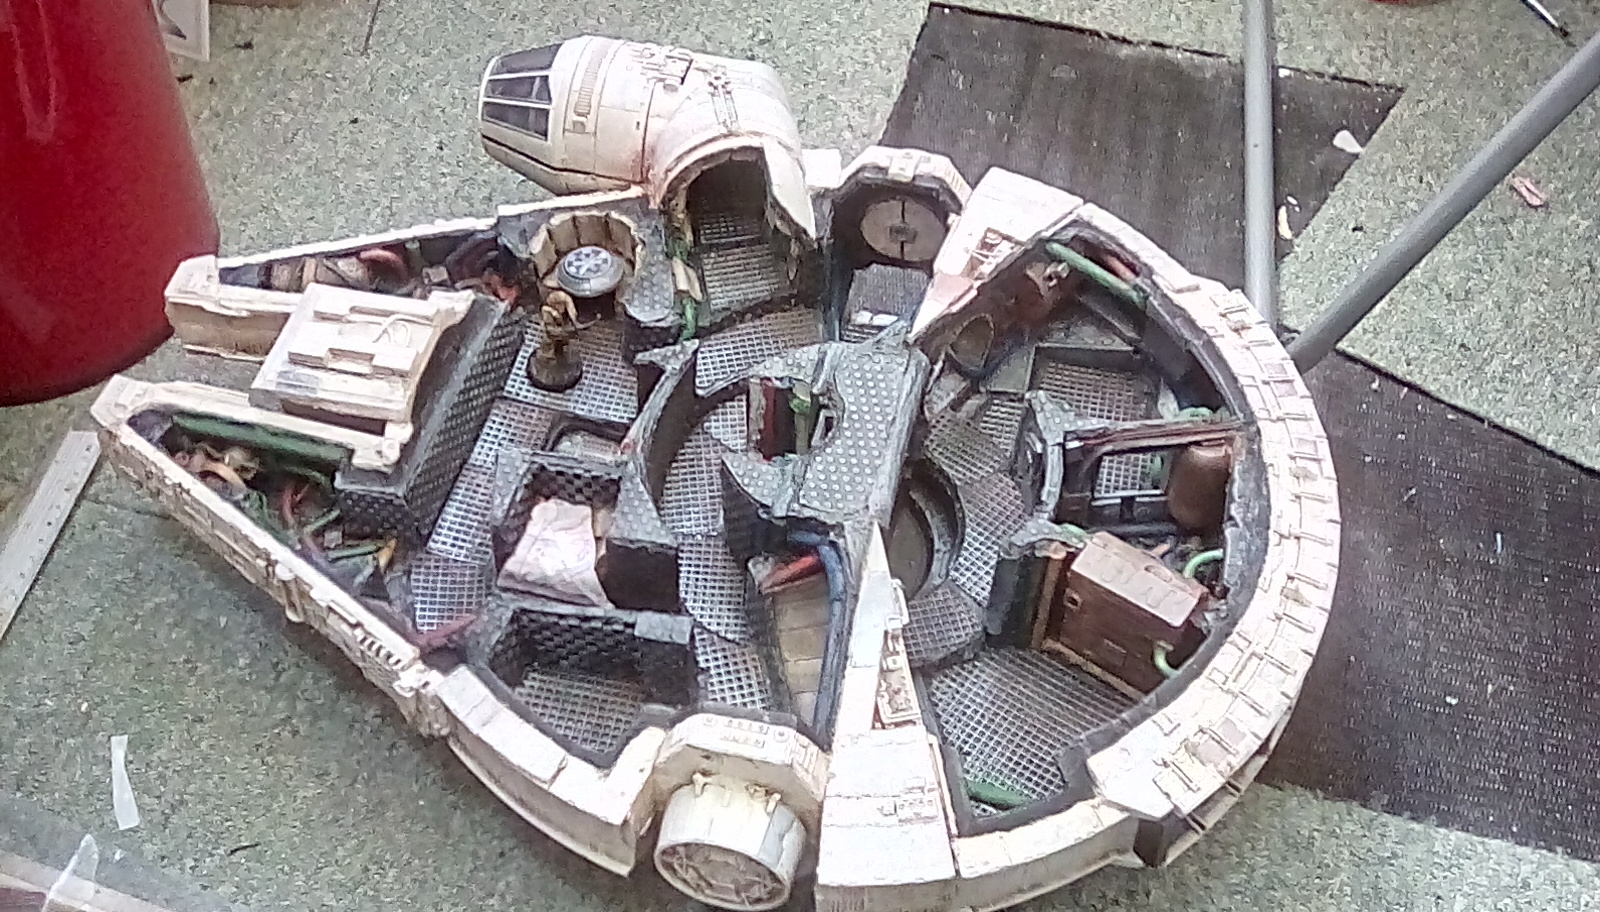
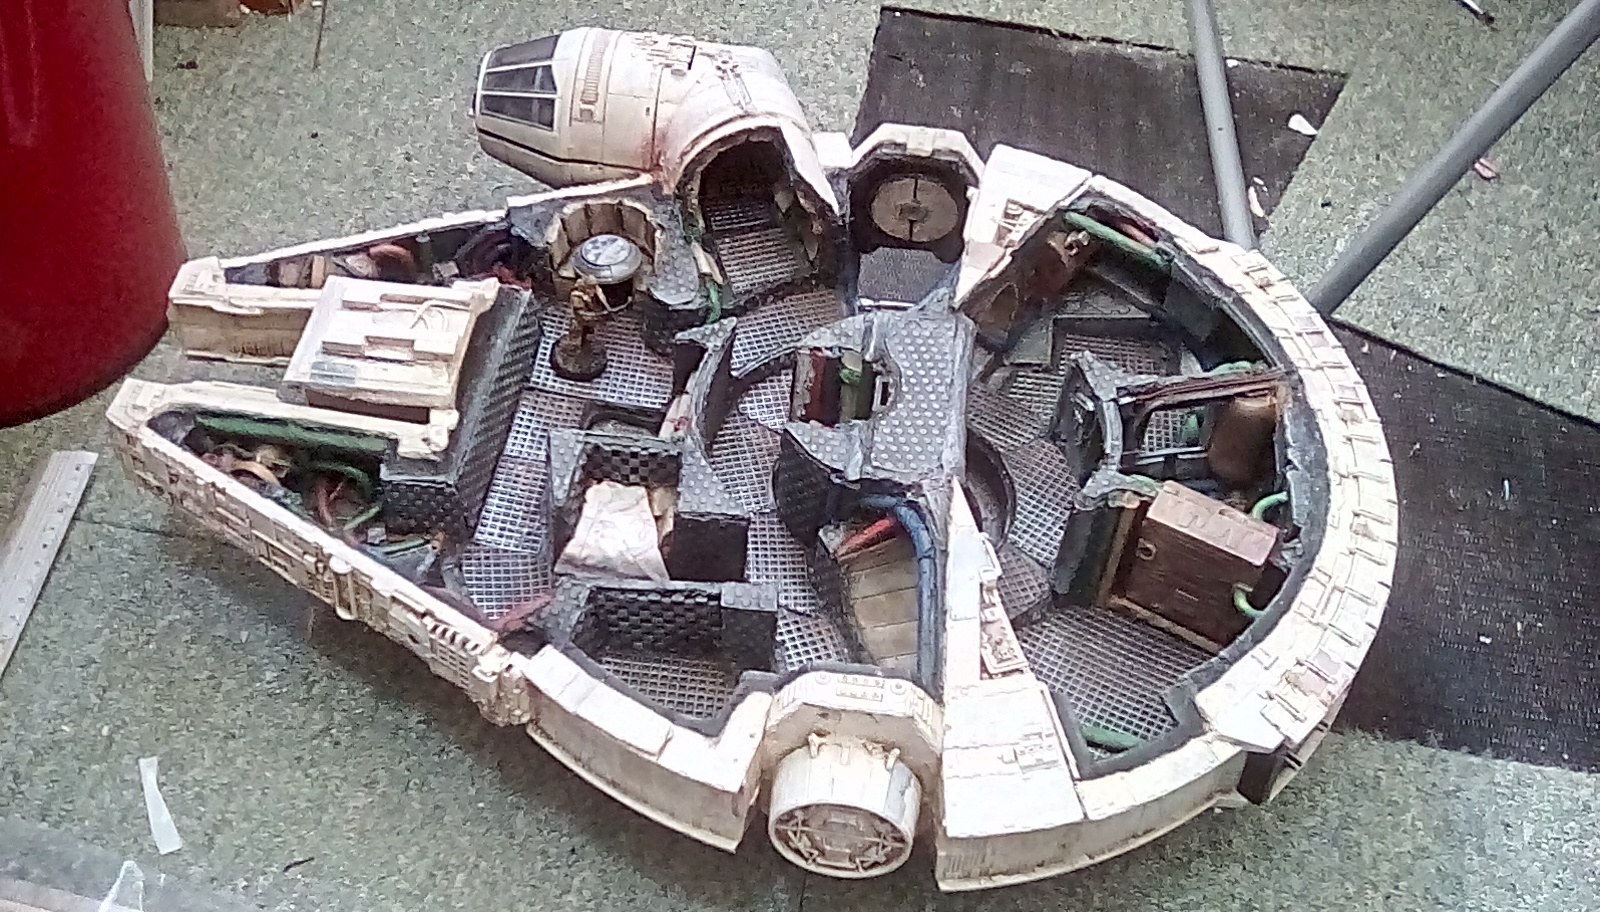
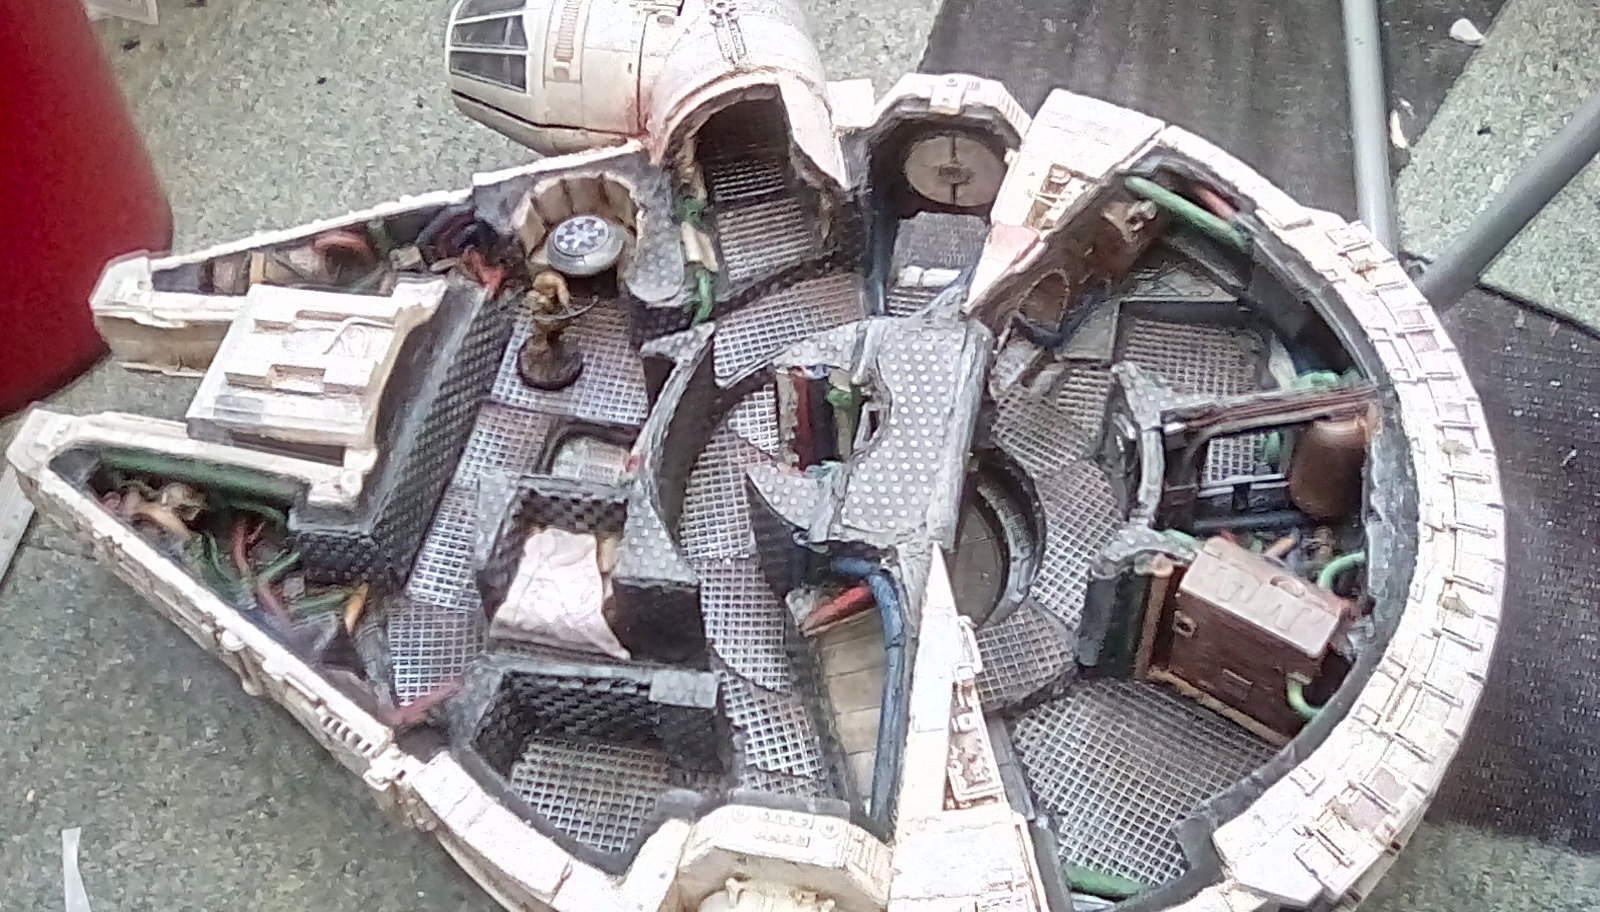
I am going to make a Millennium Falcon scenery set to use with Star Wars Legion figures, that includes internal rooms and corridors. I aim to show that with a bit of imagination and skill great results can be gotten on a limited budget.
Related Game: Star Wars: Legion
Related Company: Fantasy Flight Games
Related Genre: Science Fiction
Related Contest: Star Wars Hobby Weekend
This Project is On Hold
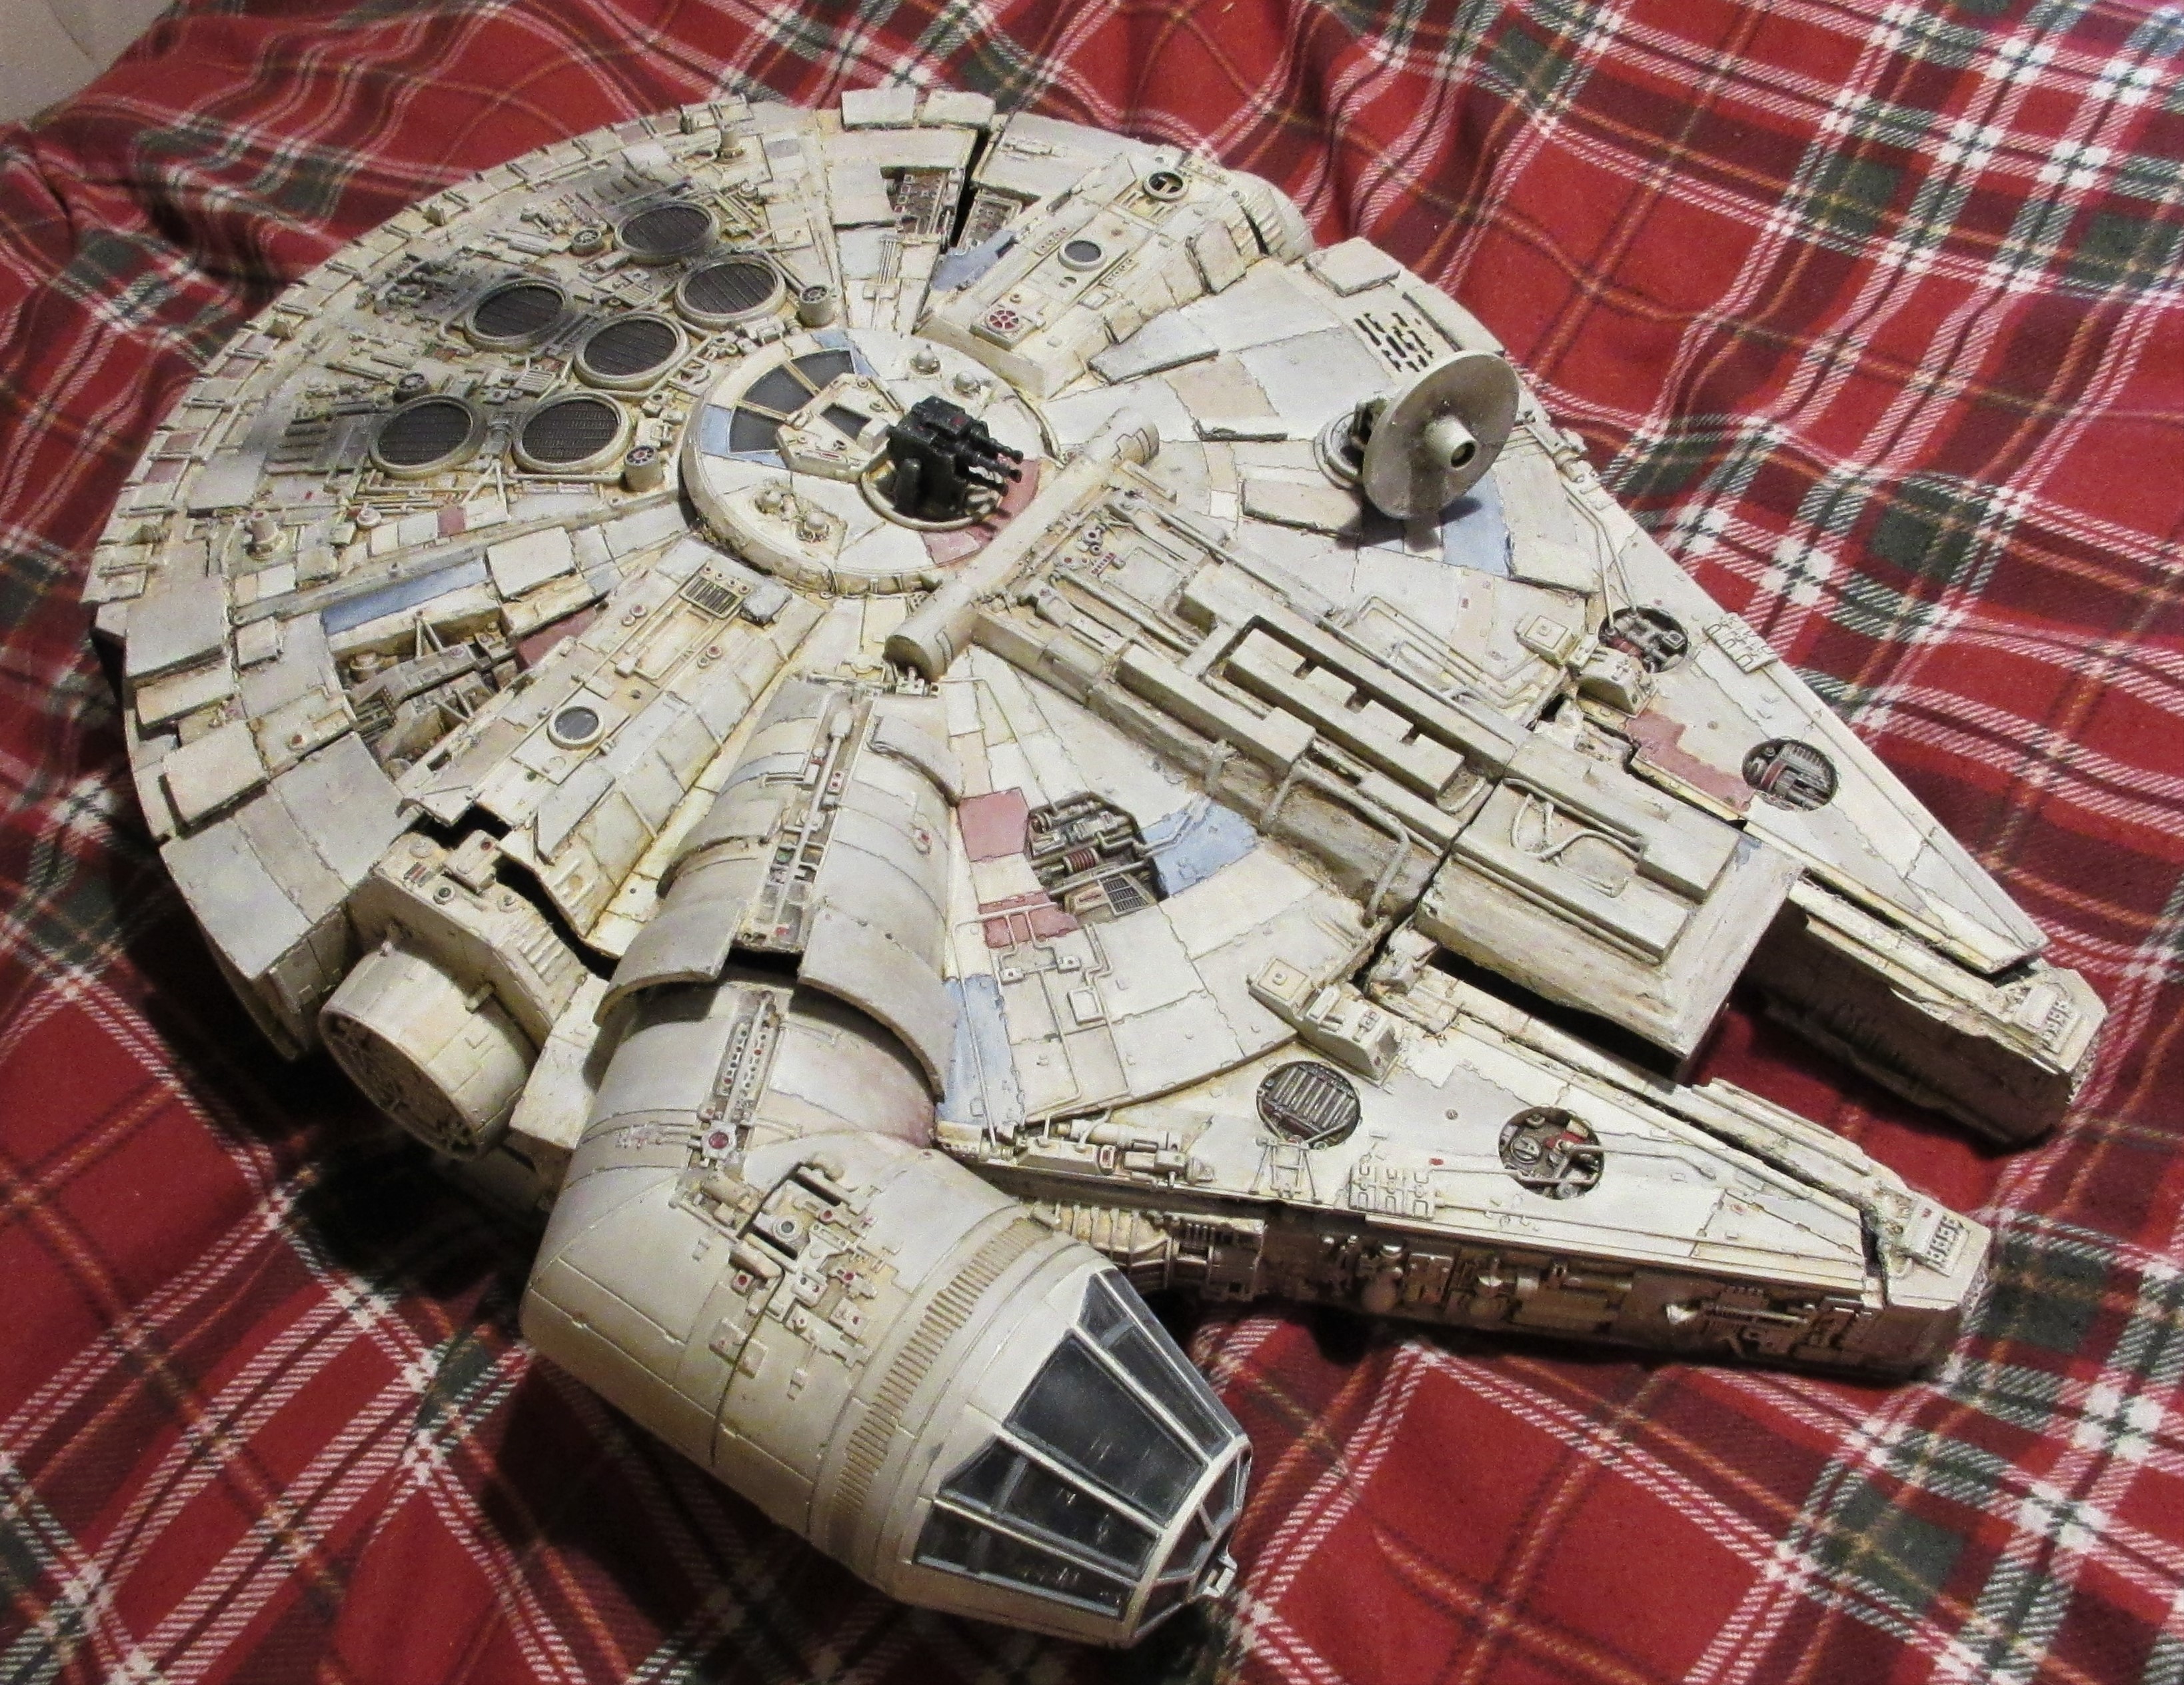
A Photo Gallery
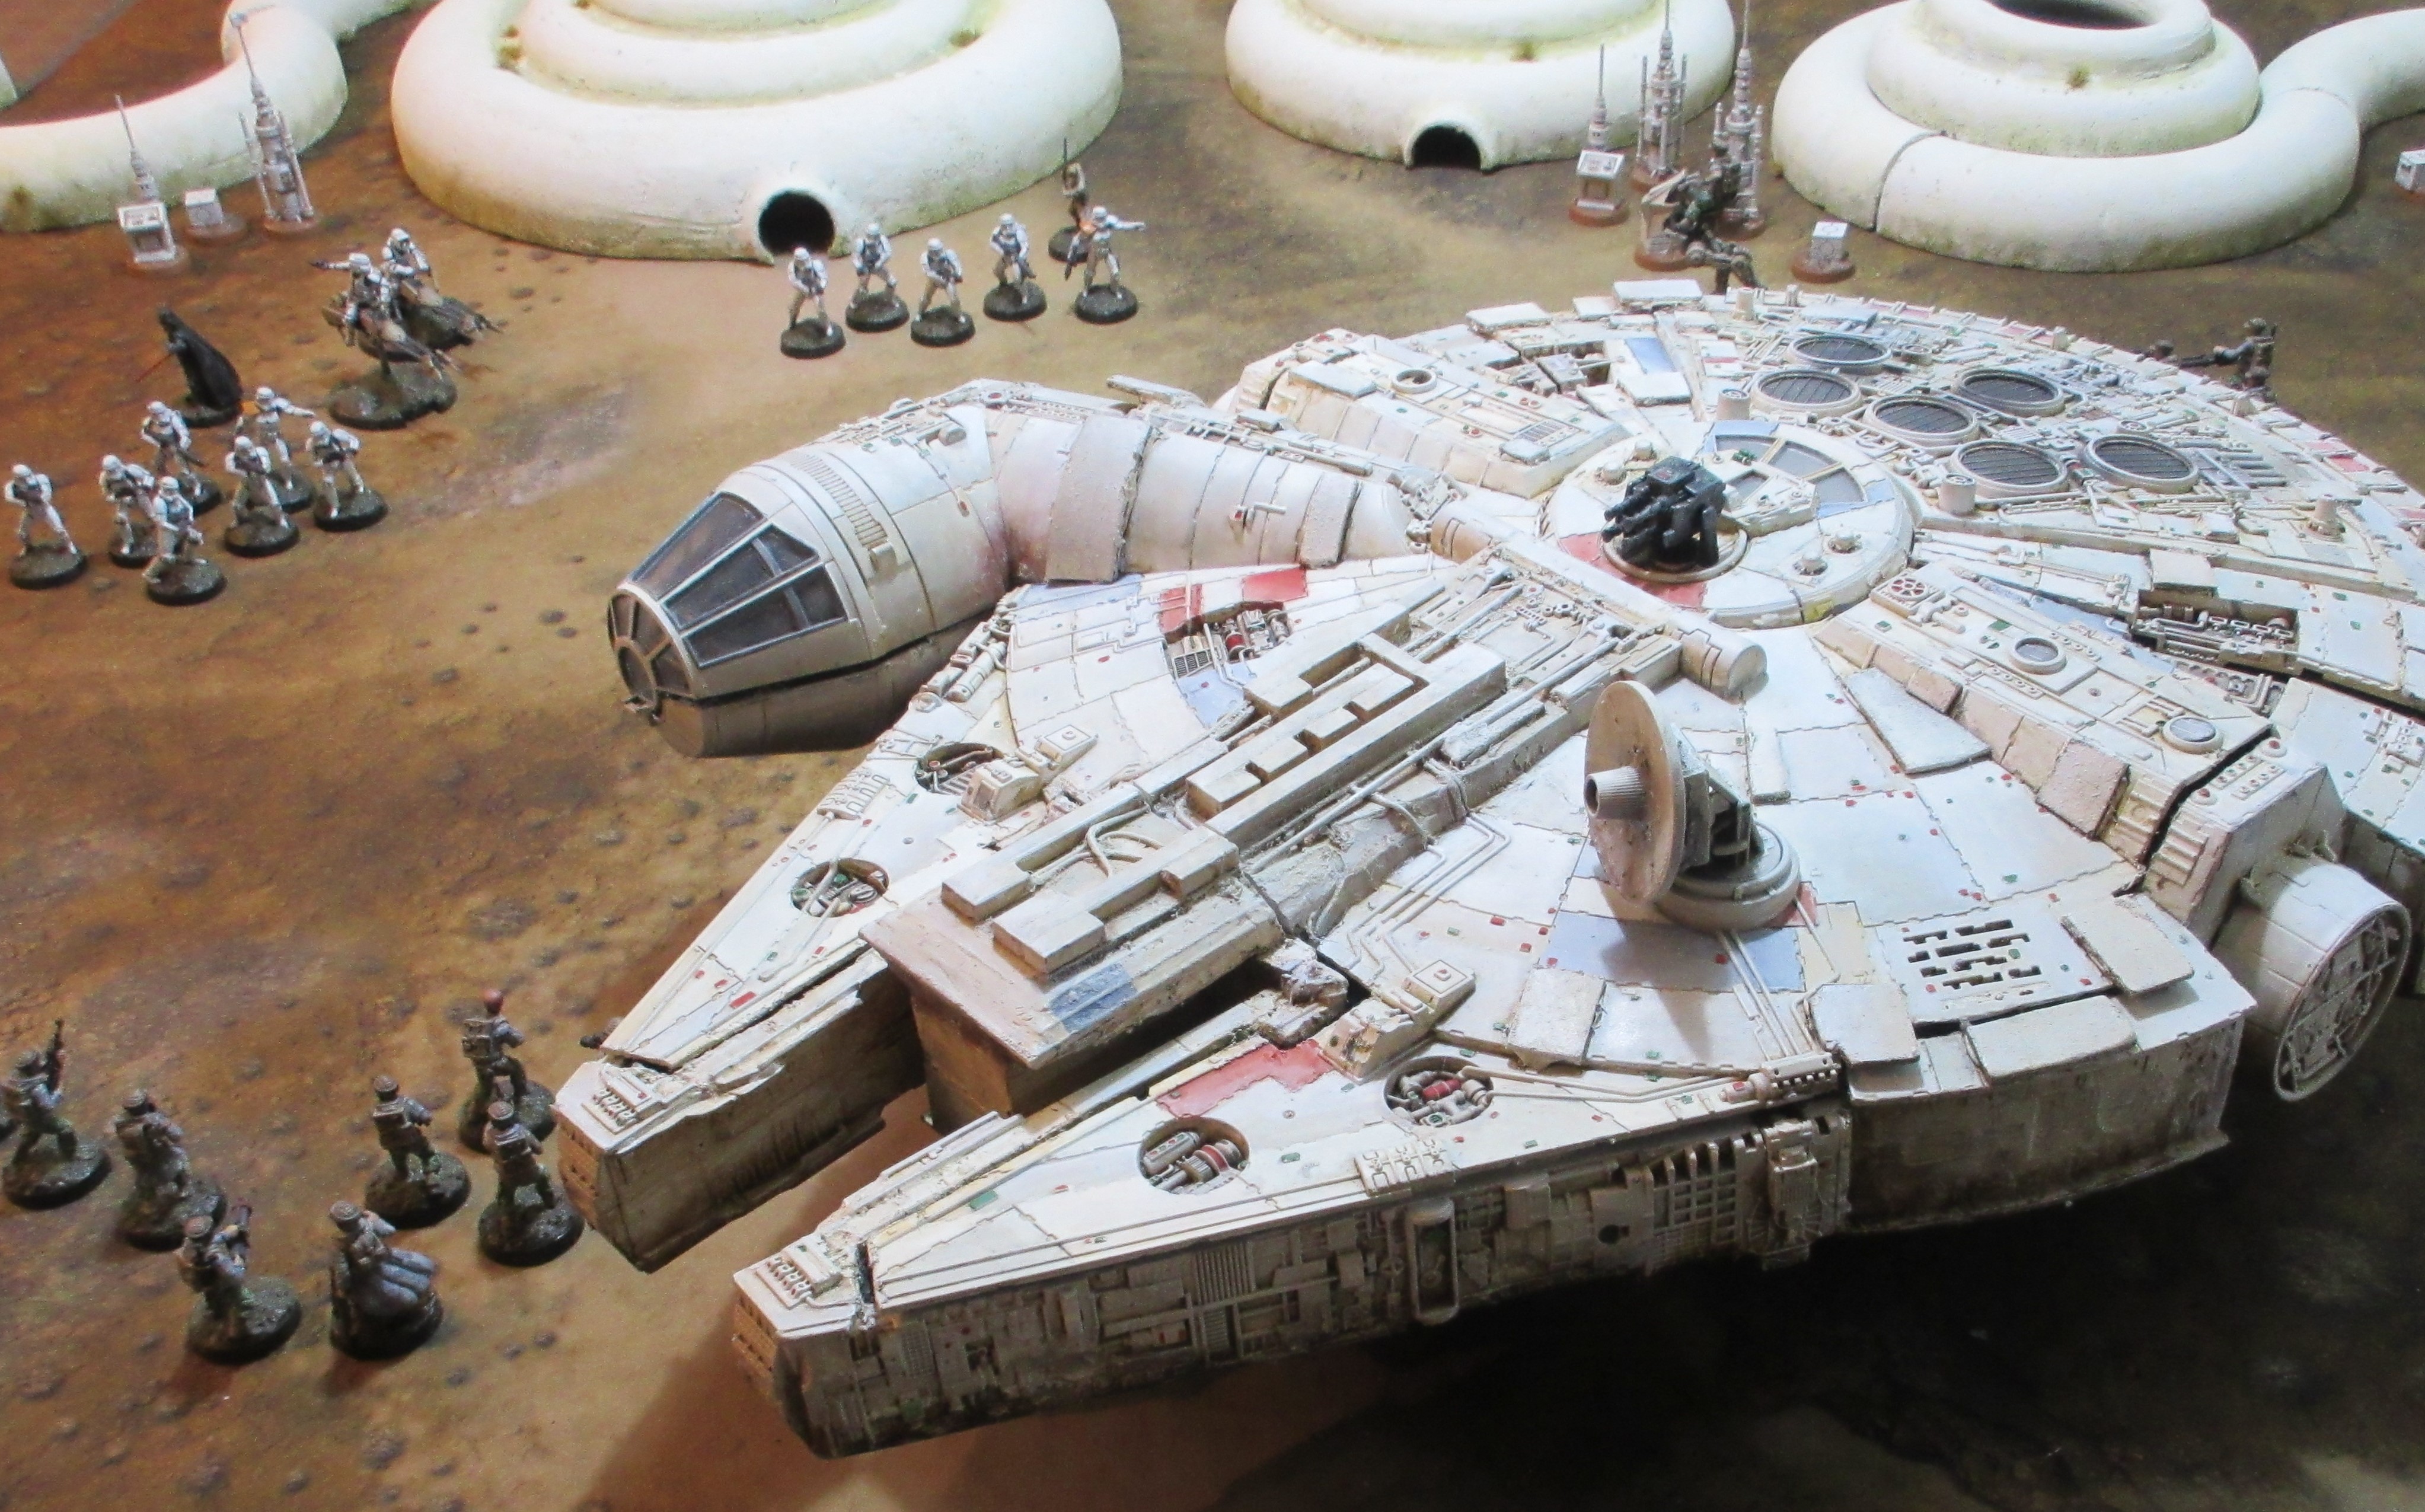
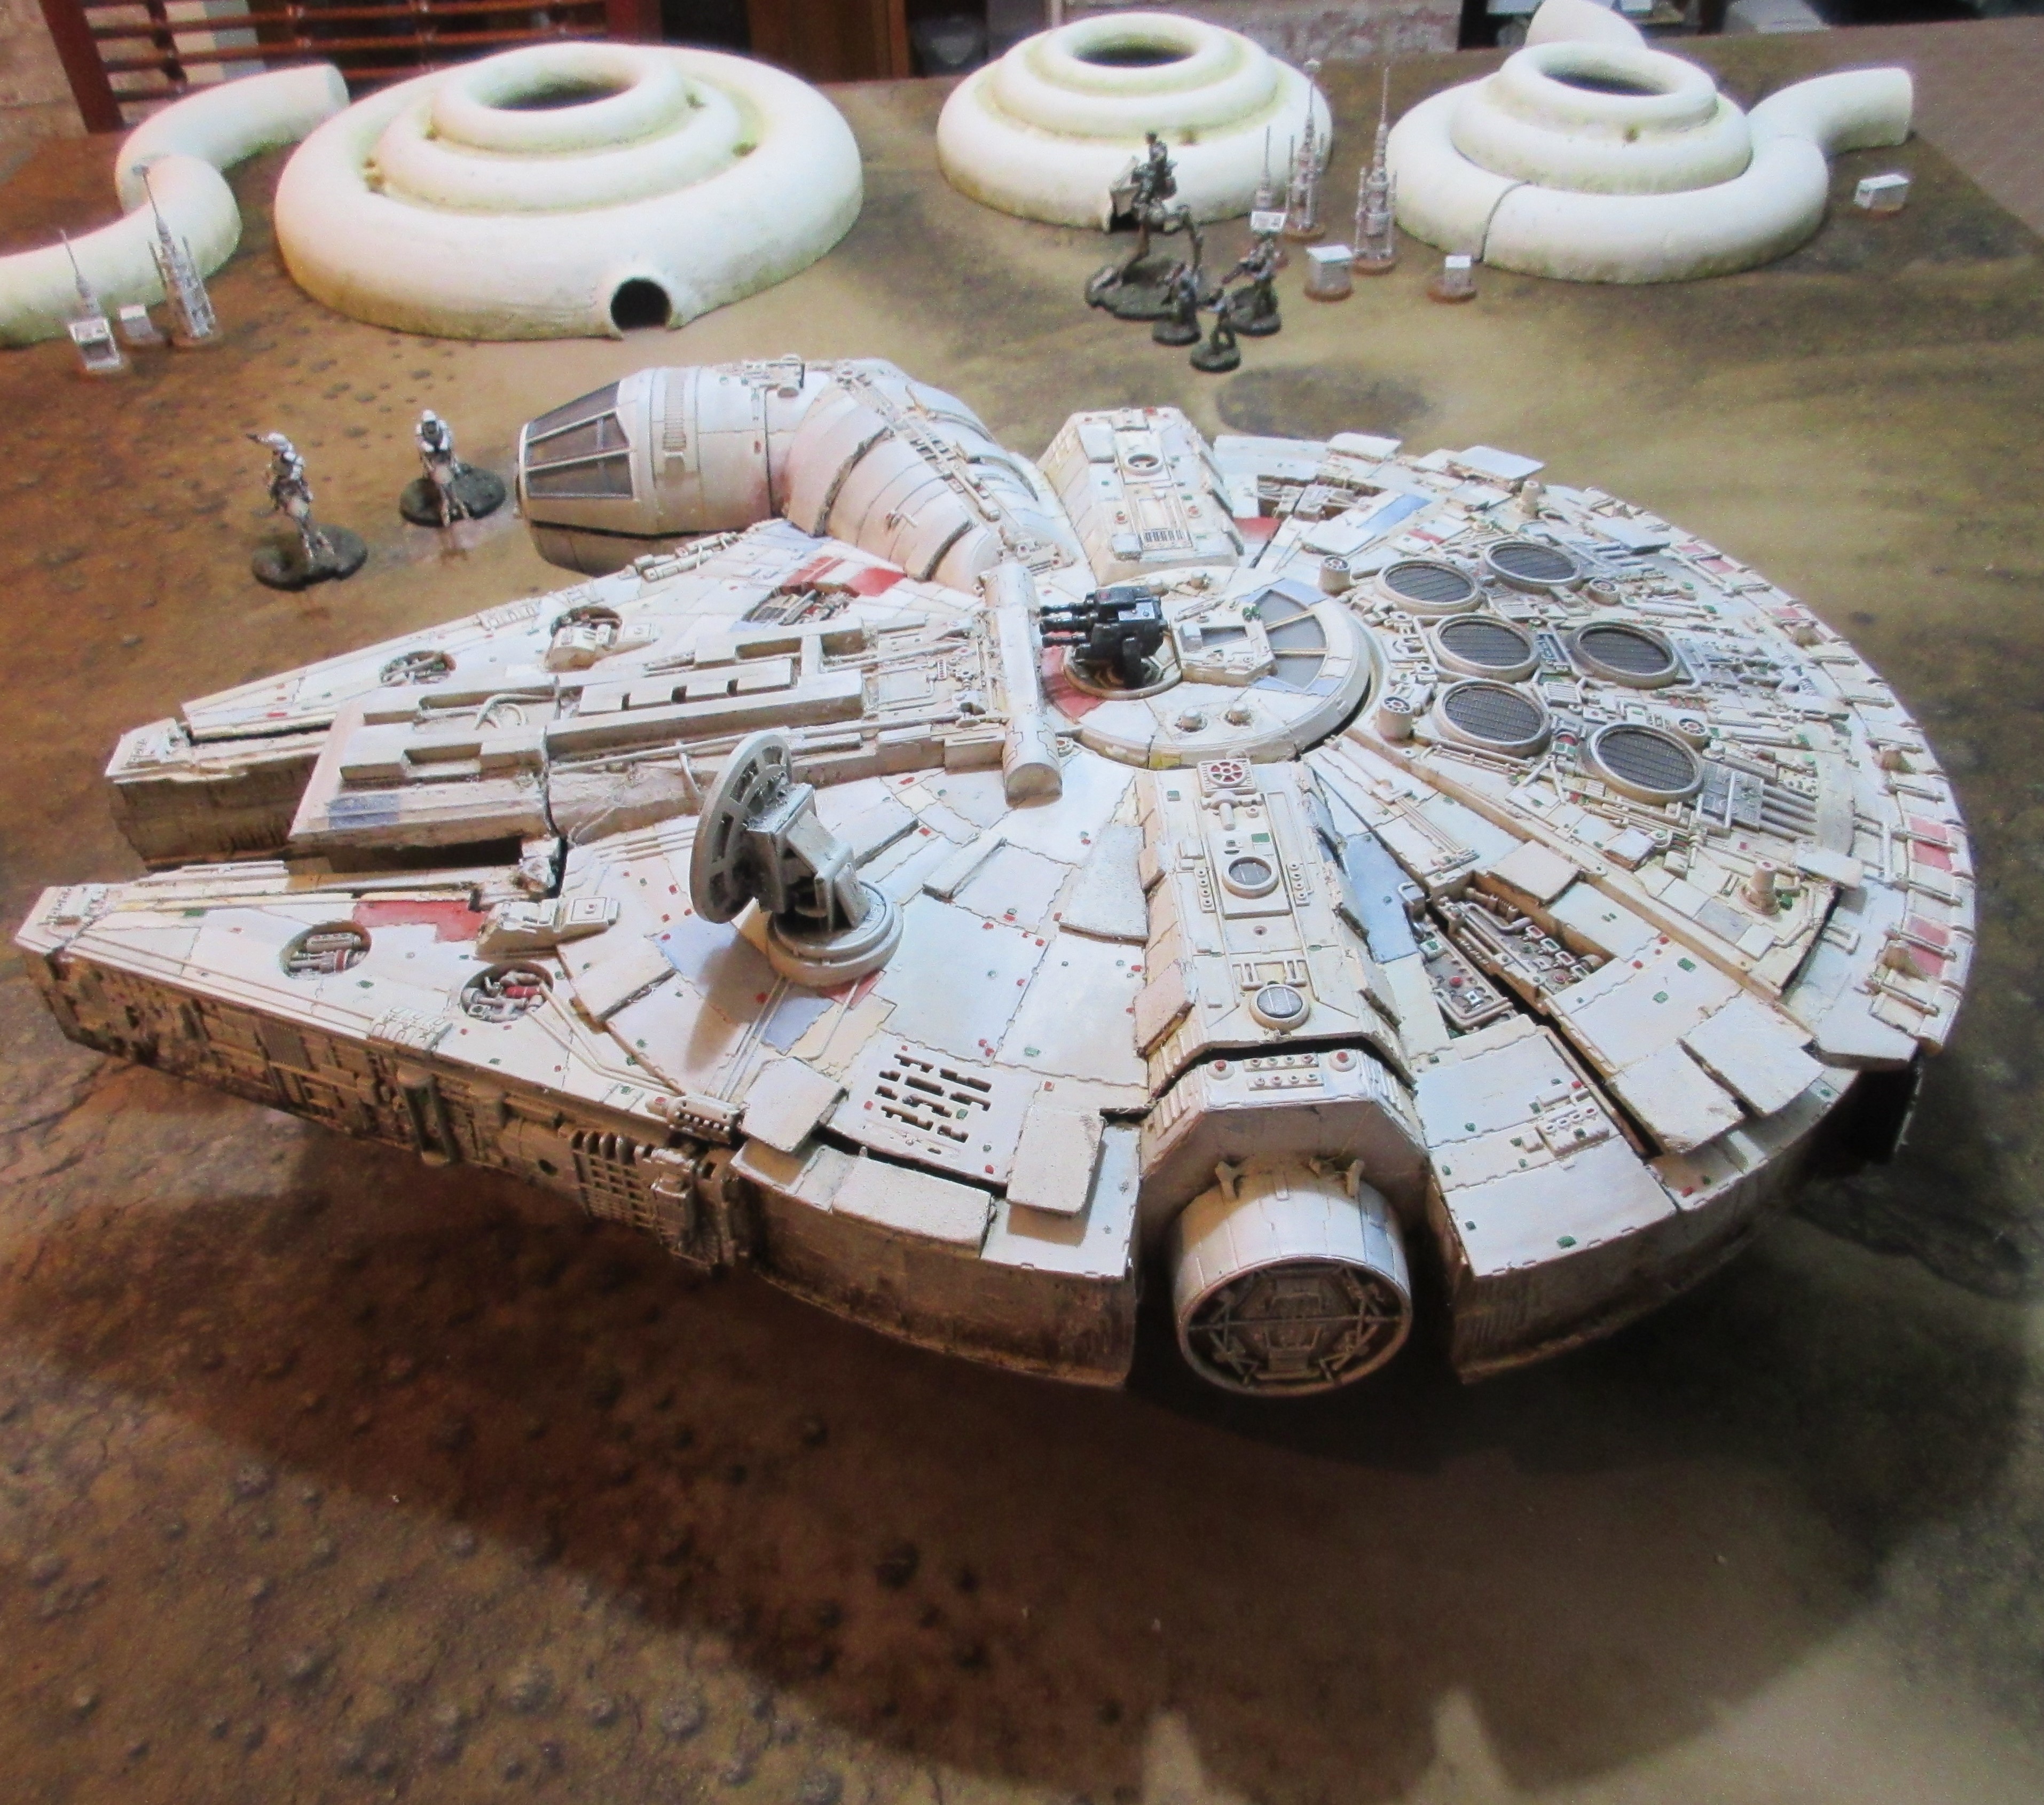
There’s still plenty of work to do – the next thing will be to tweak the roof so it fits better now I’ve finalised the height of the internal room walls and magnetise it so it snaps into place.
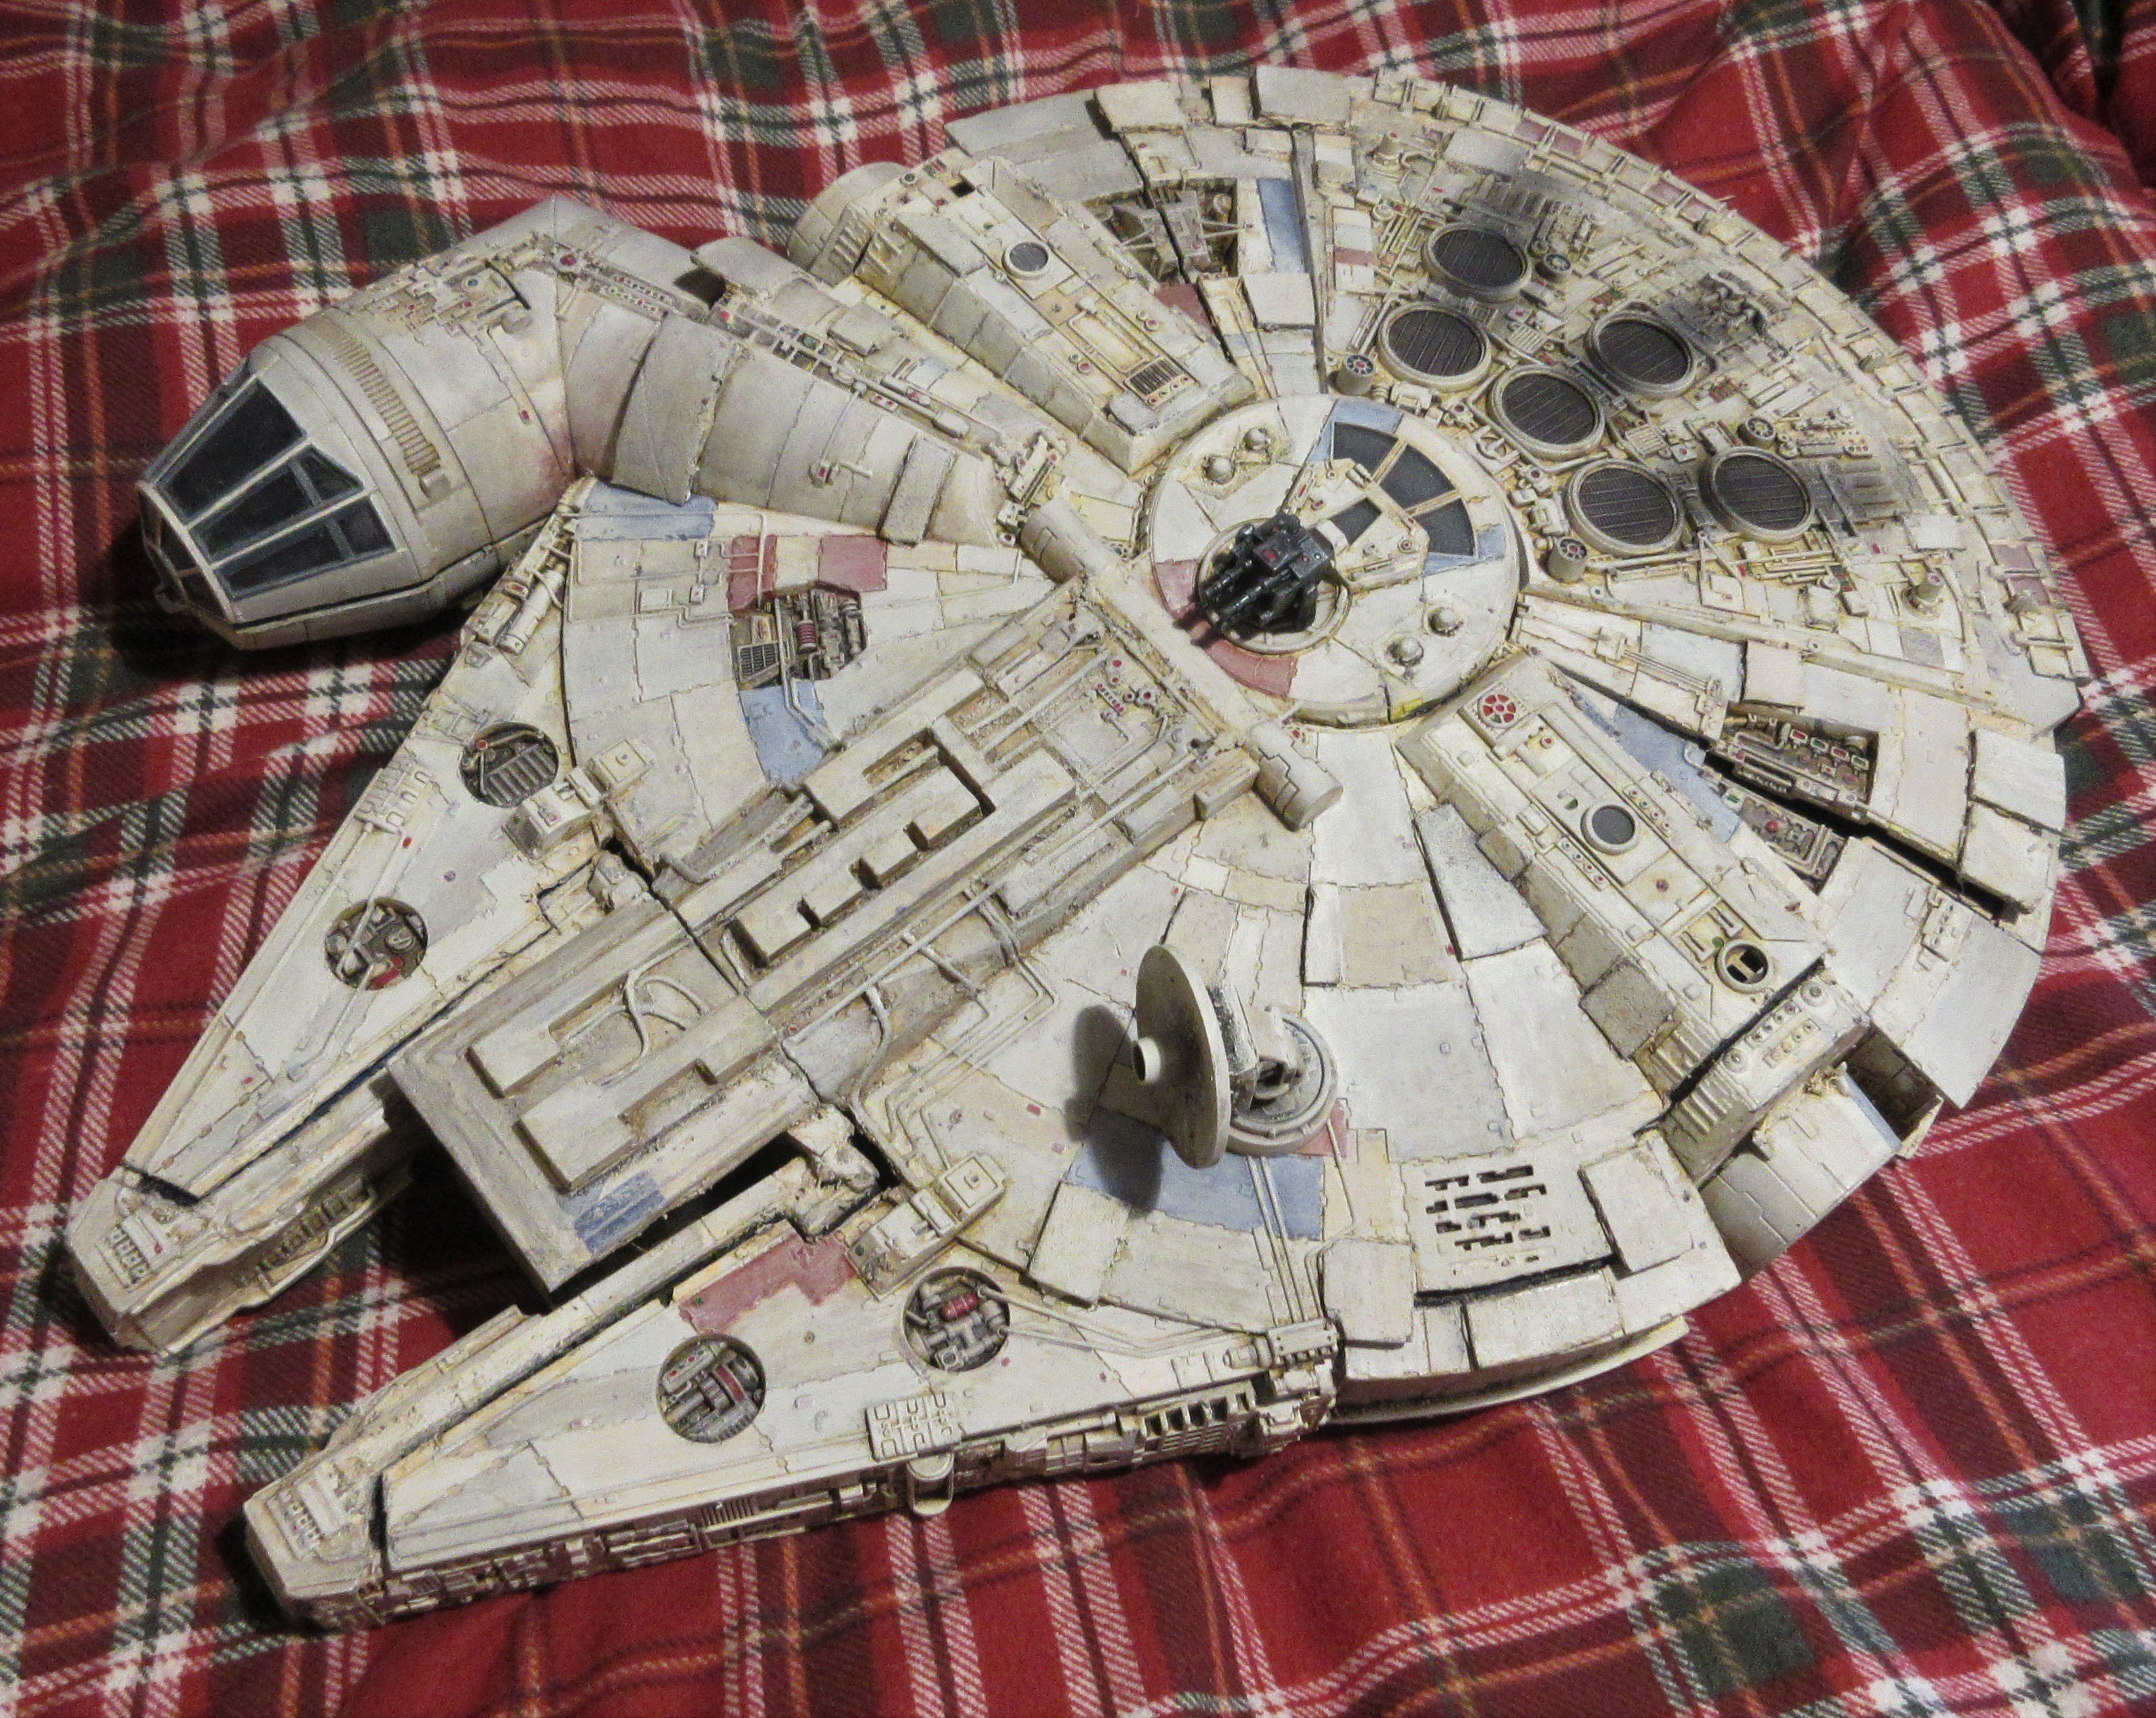
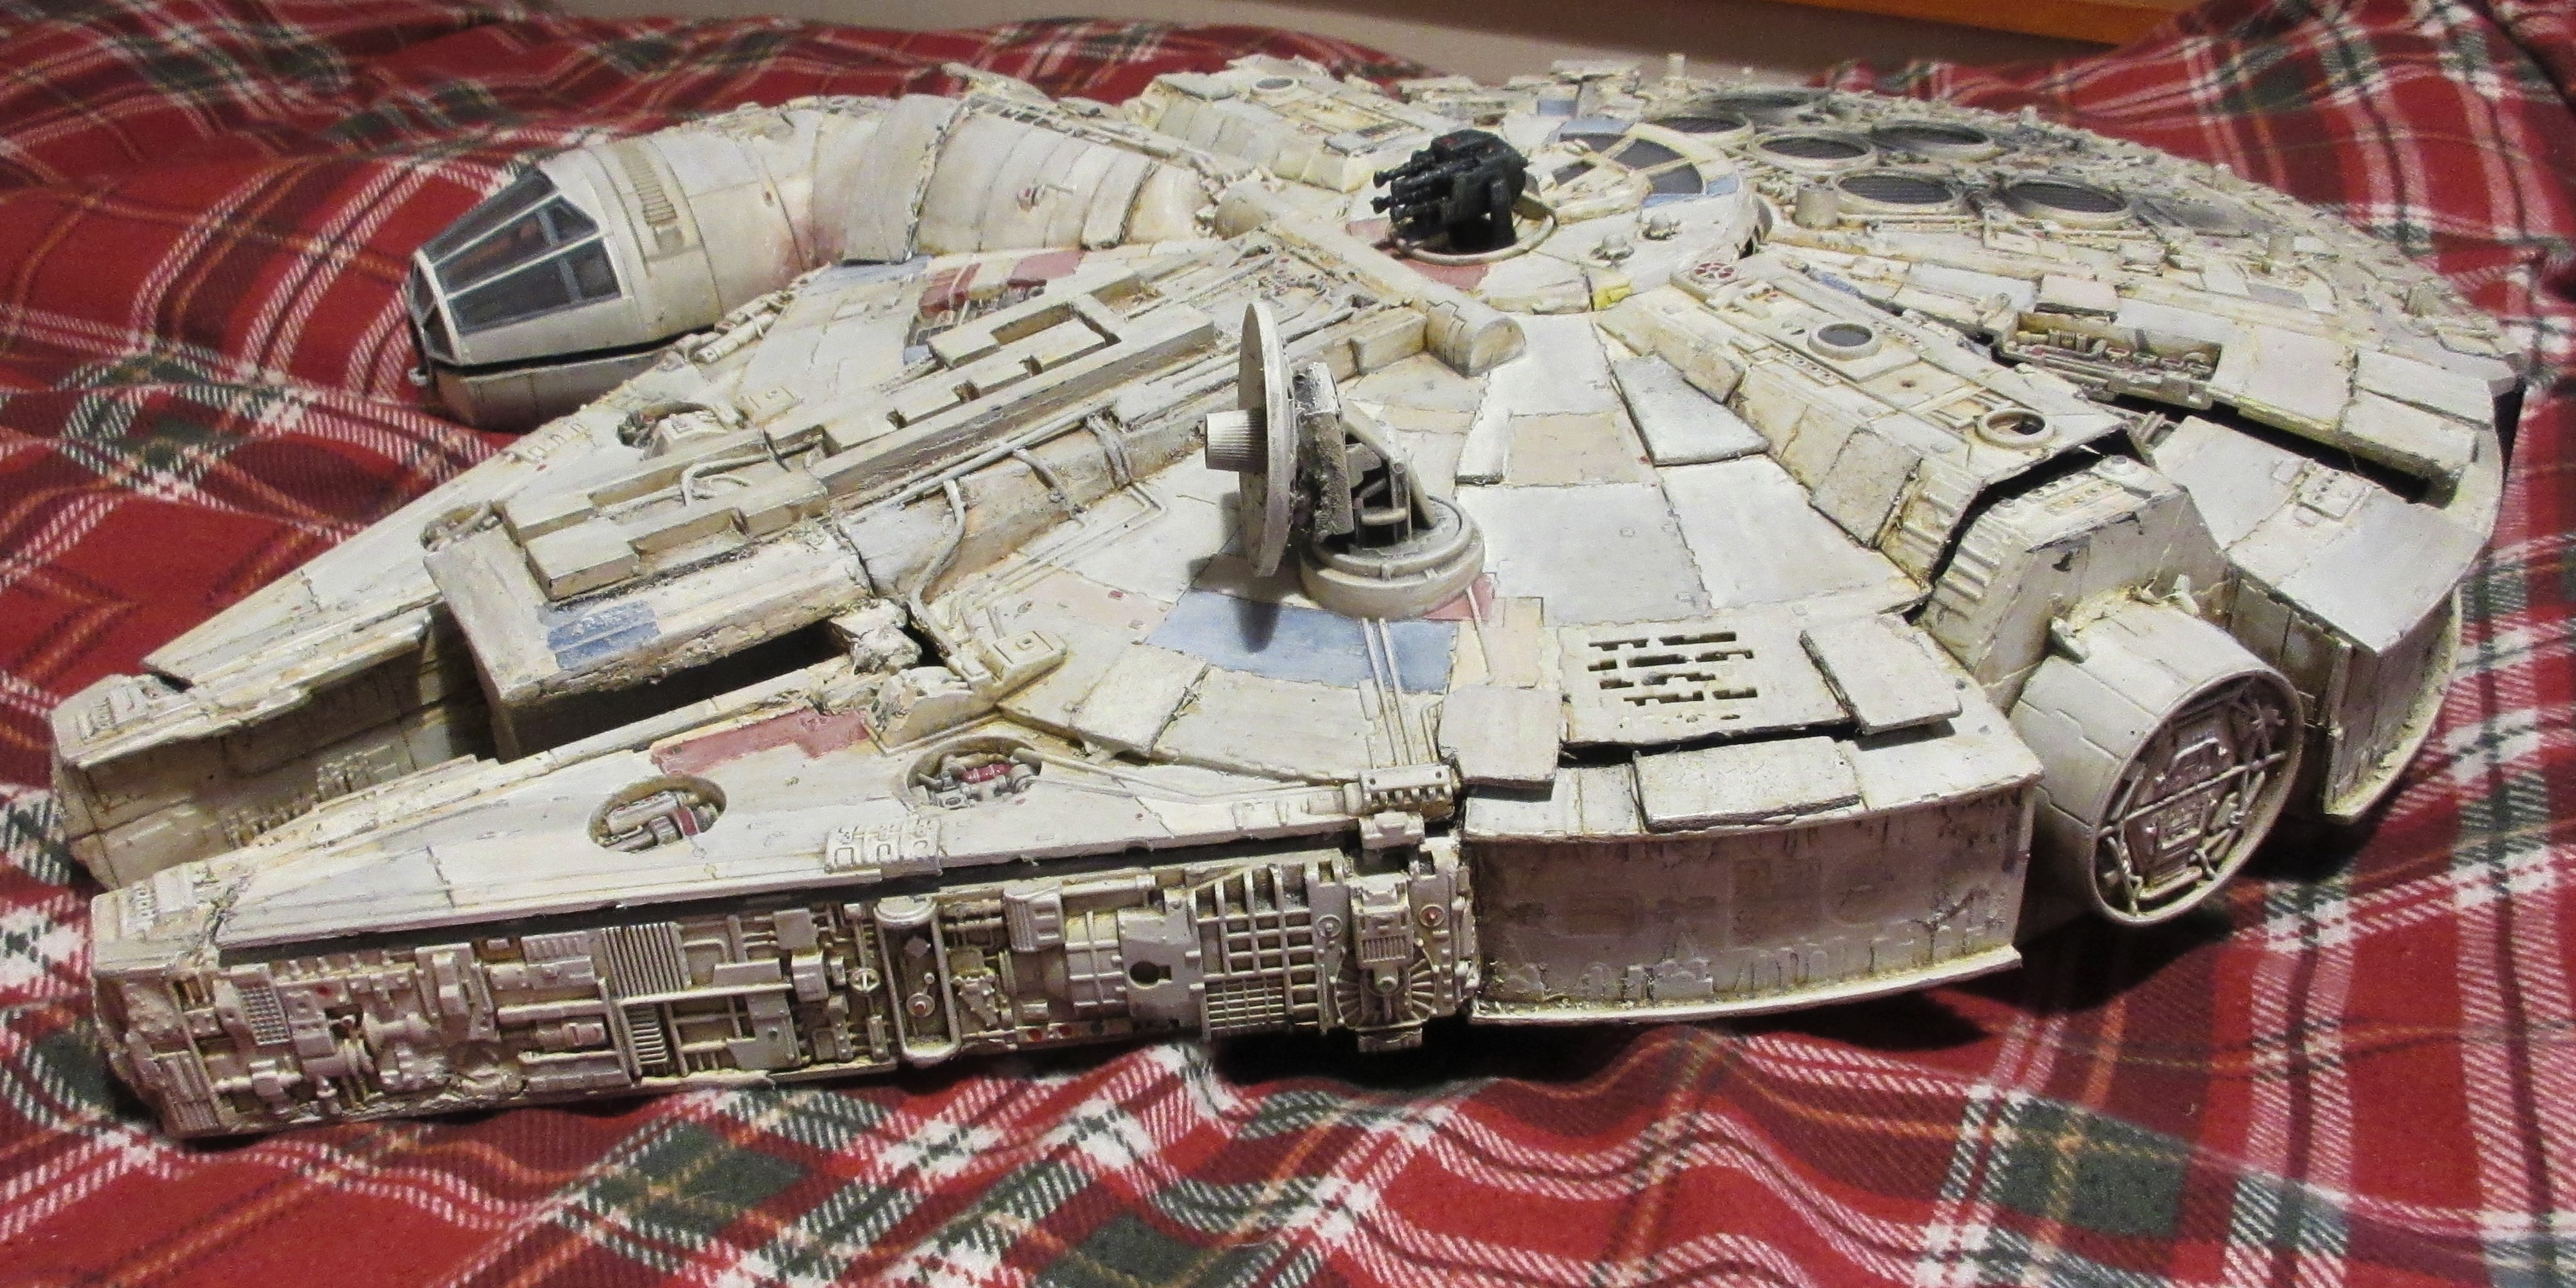
But for you lucky folks, here’s a few photos with a better camera of my work so far…
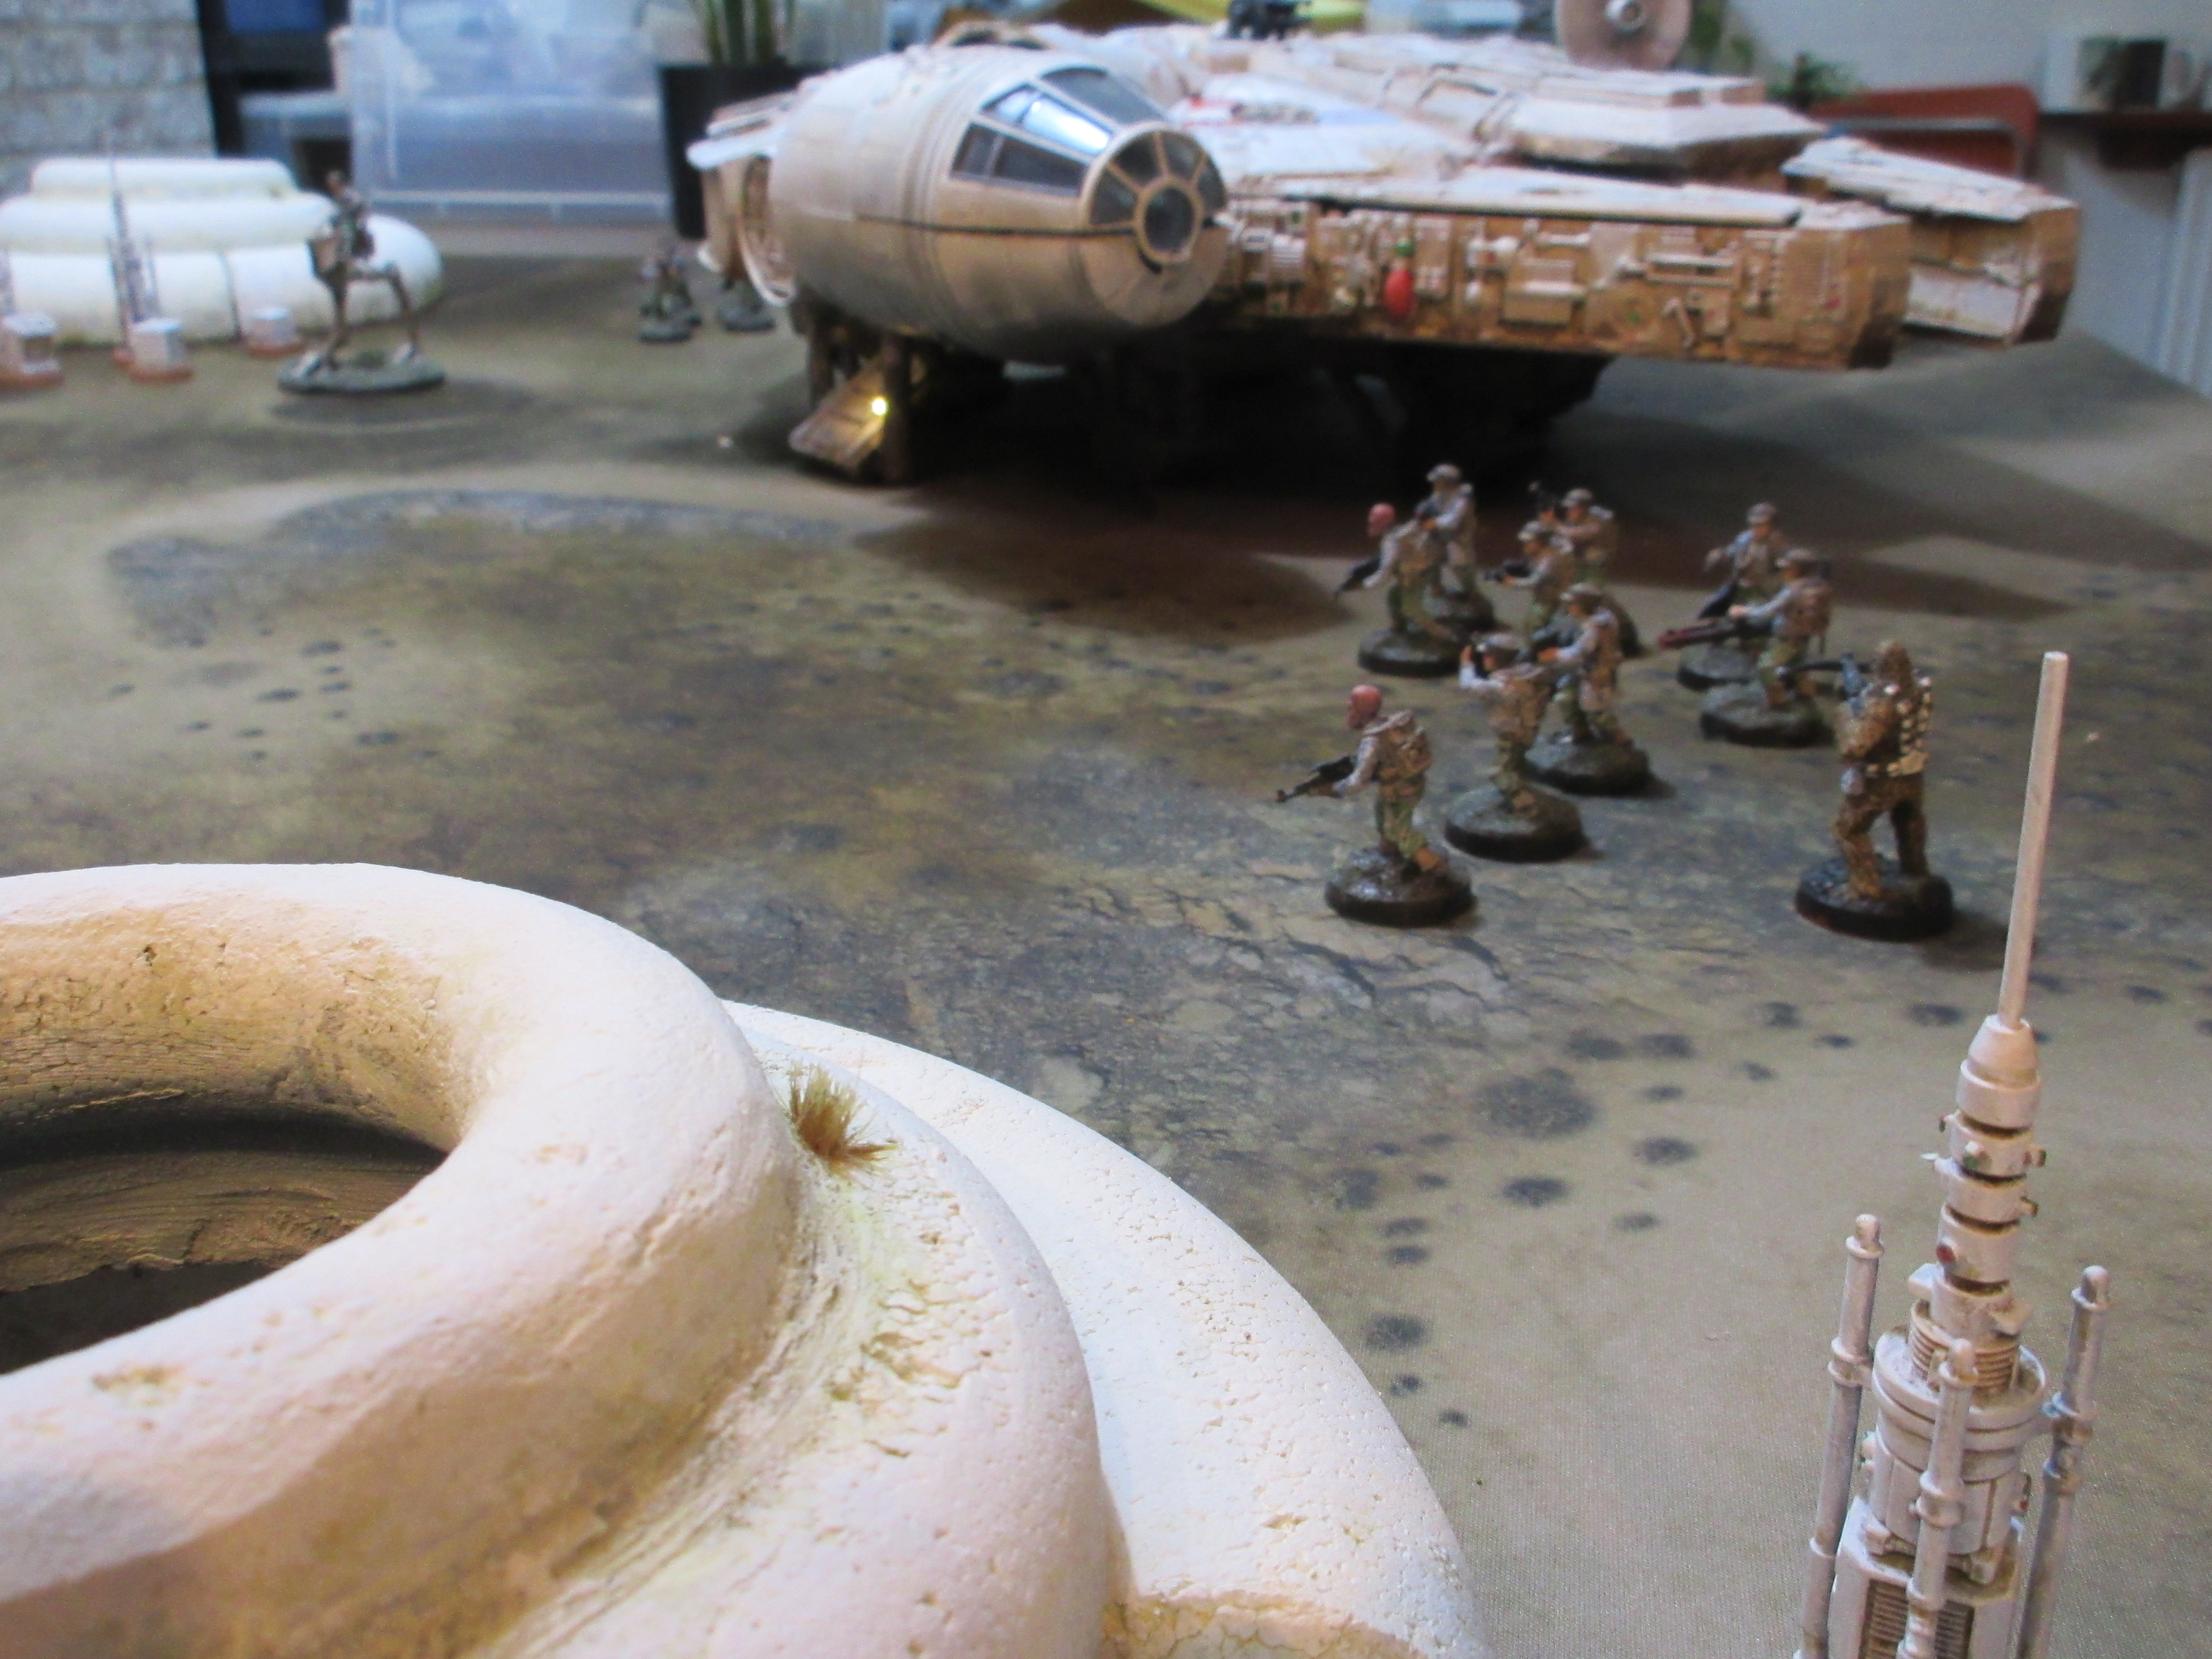


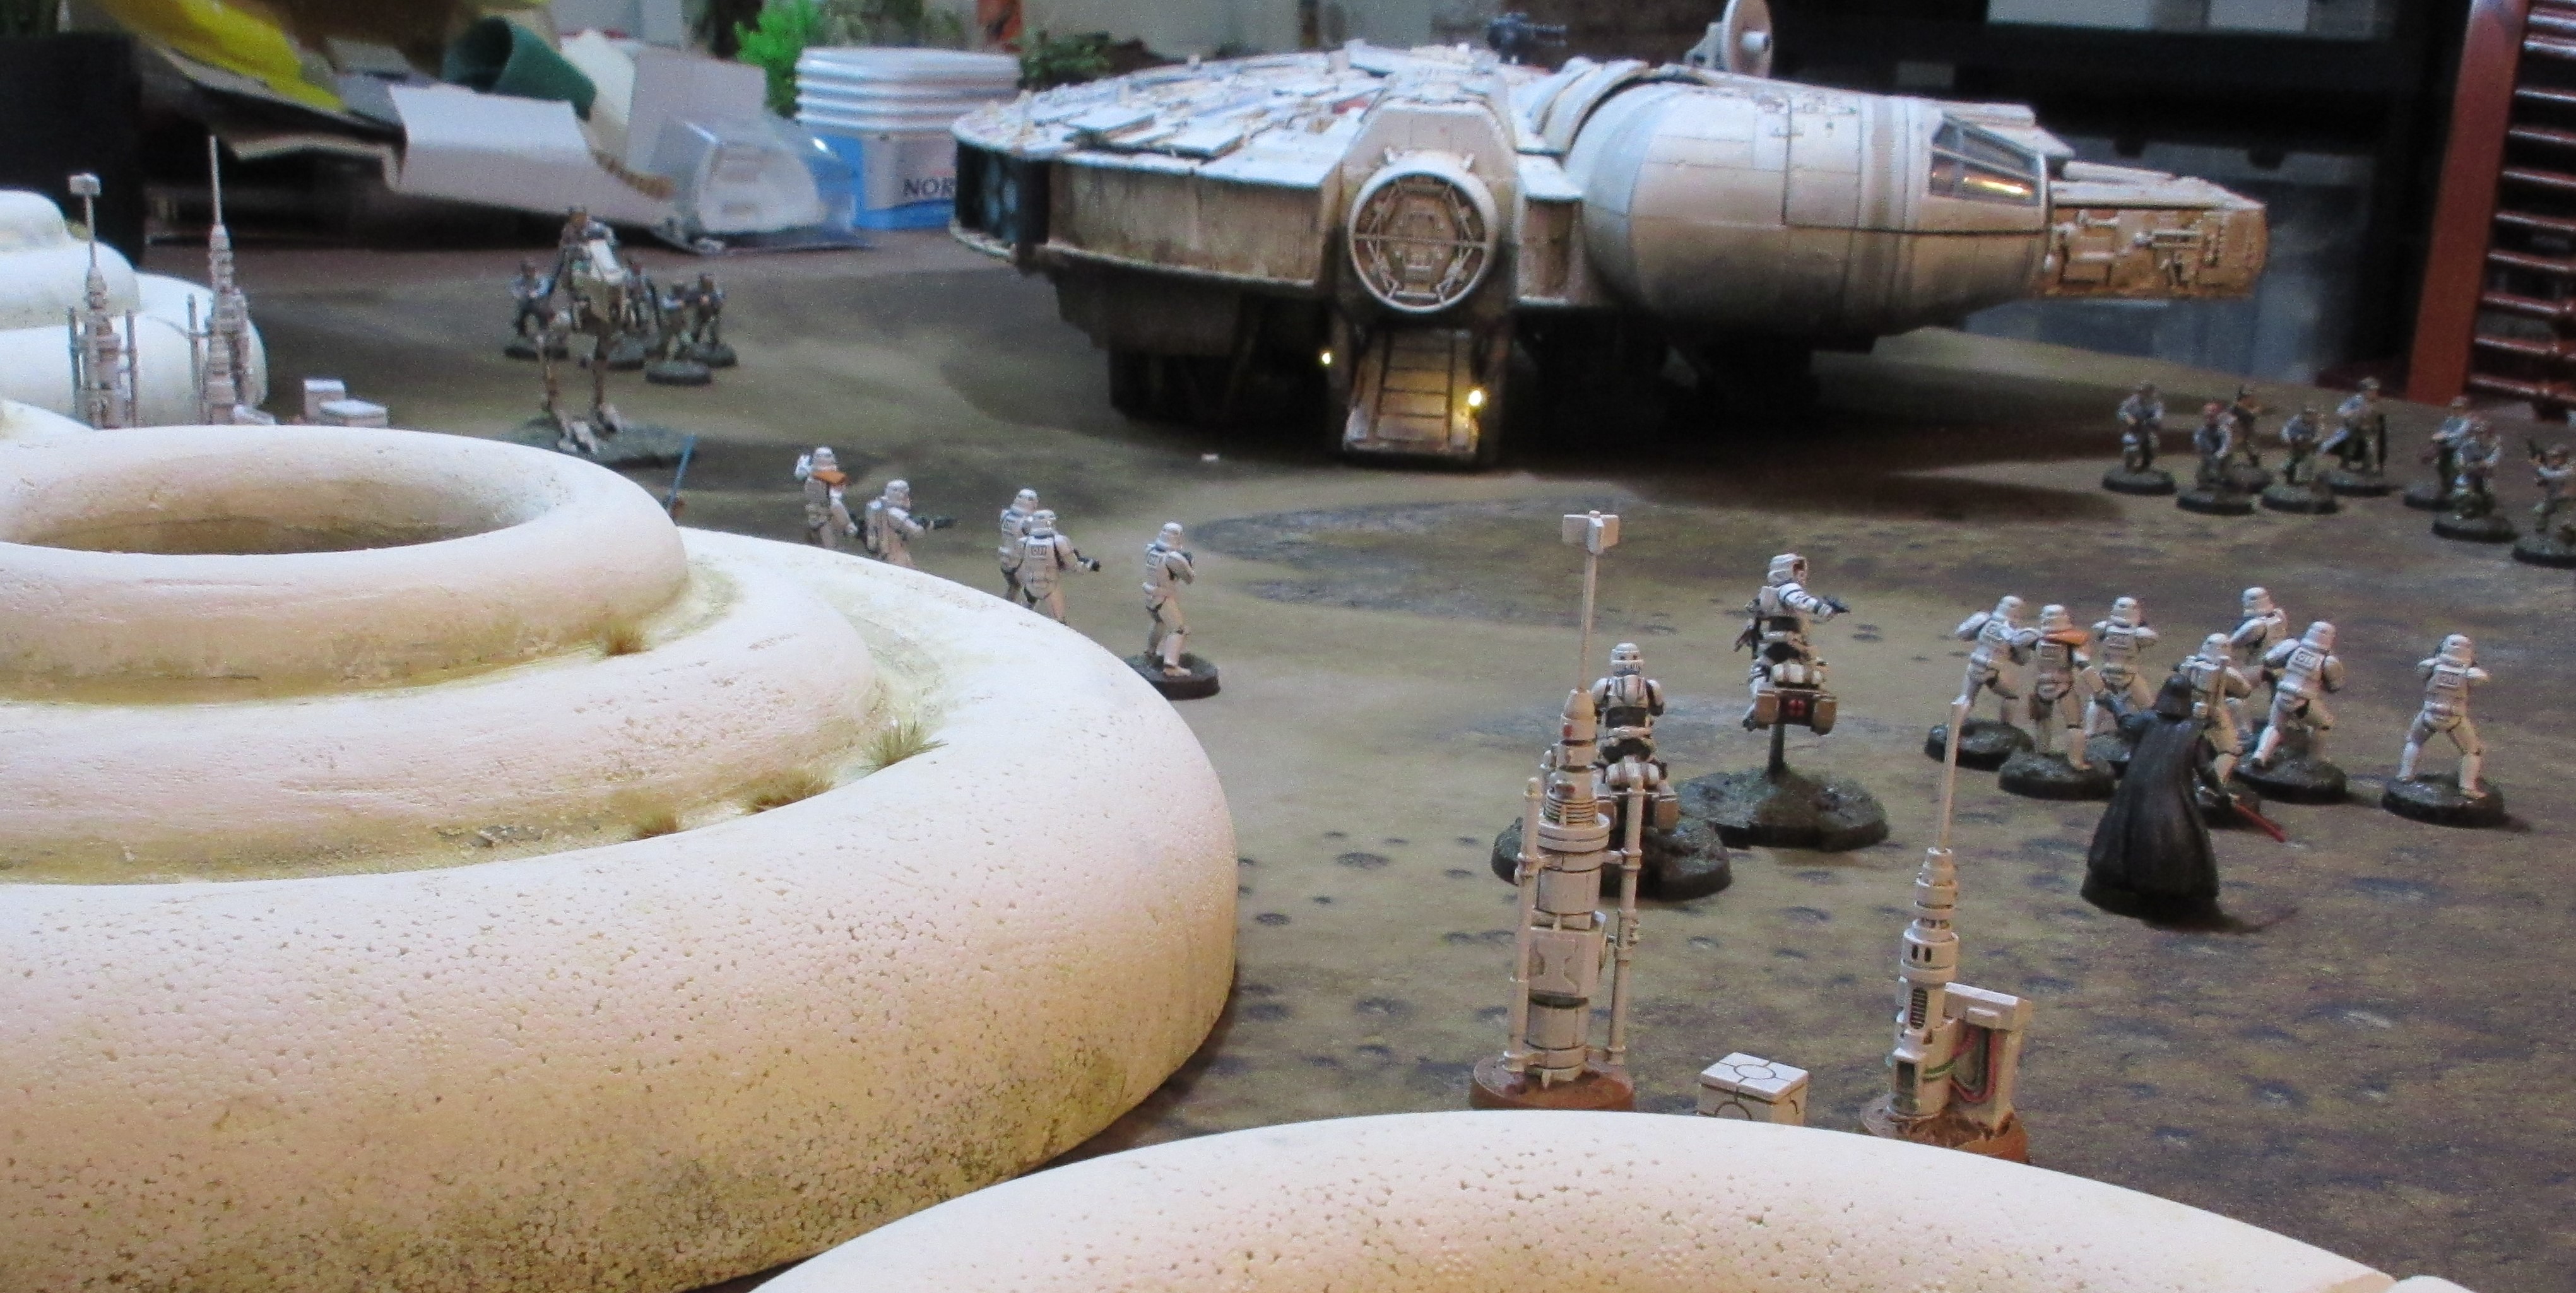
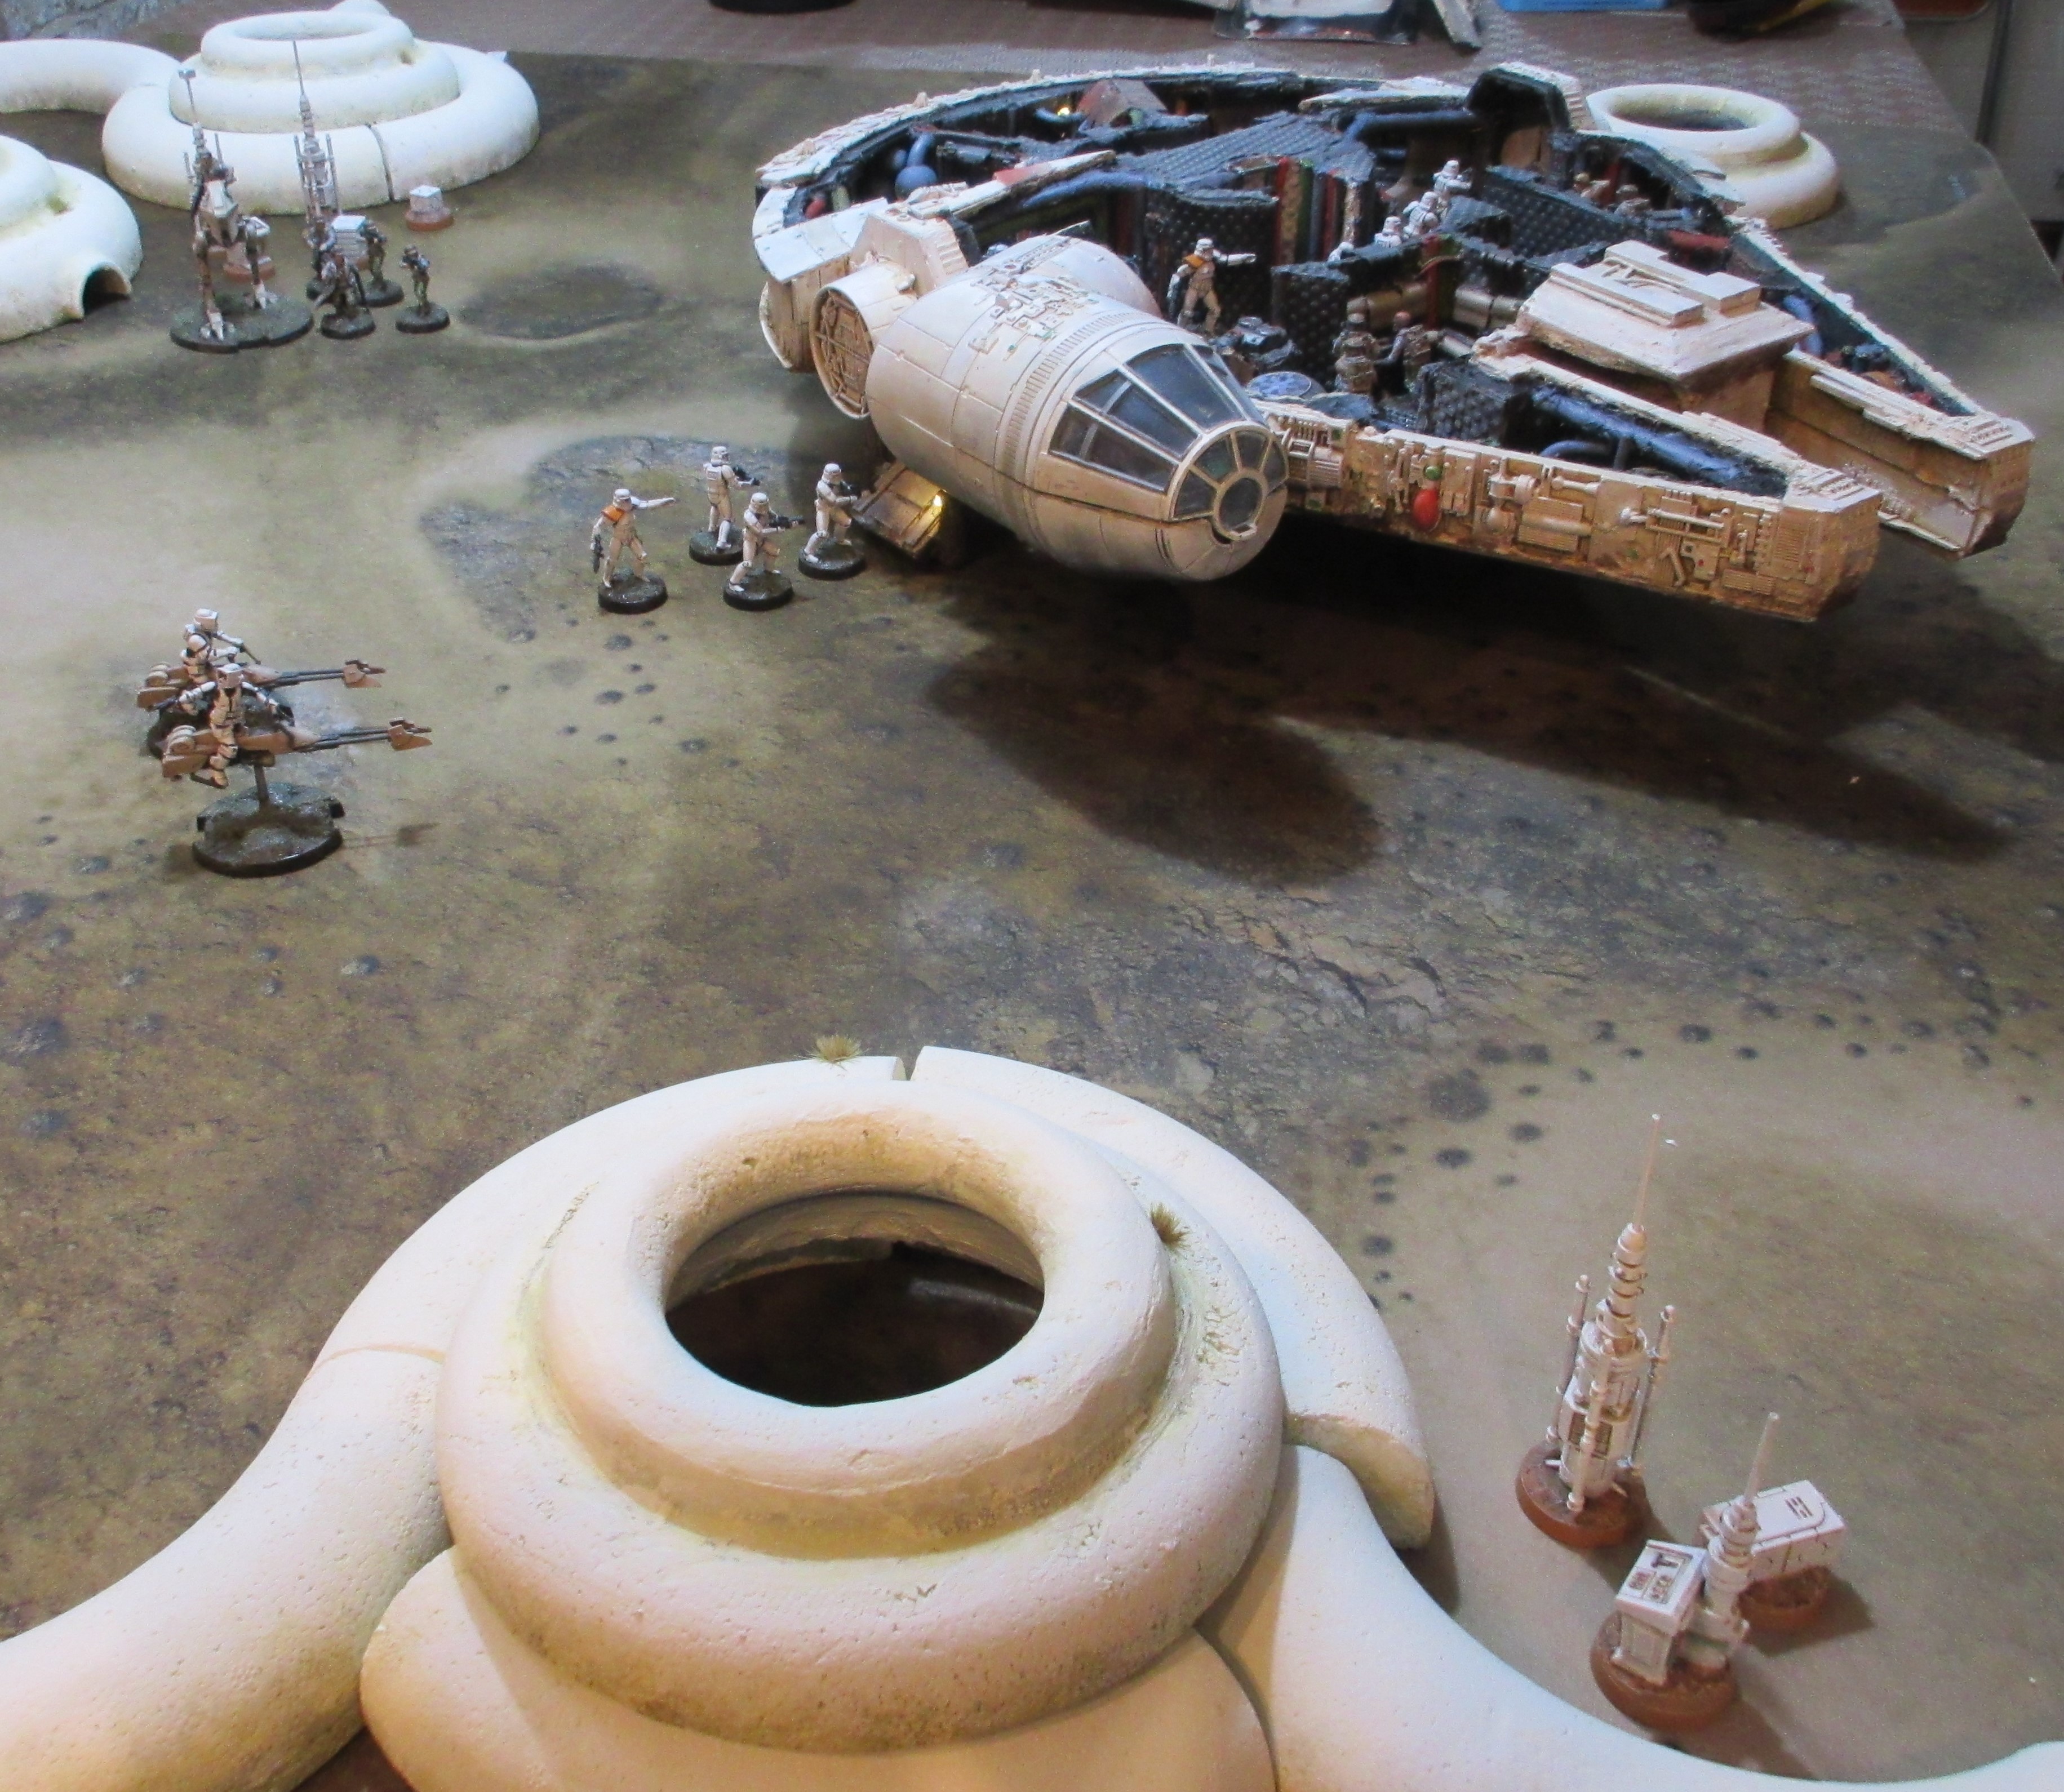


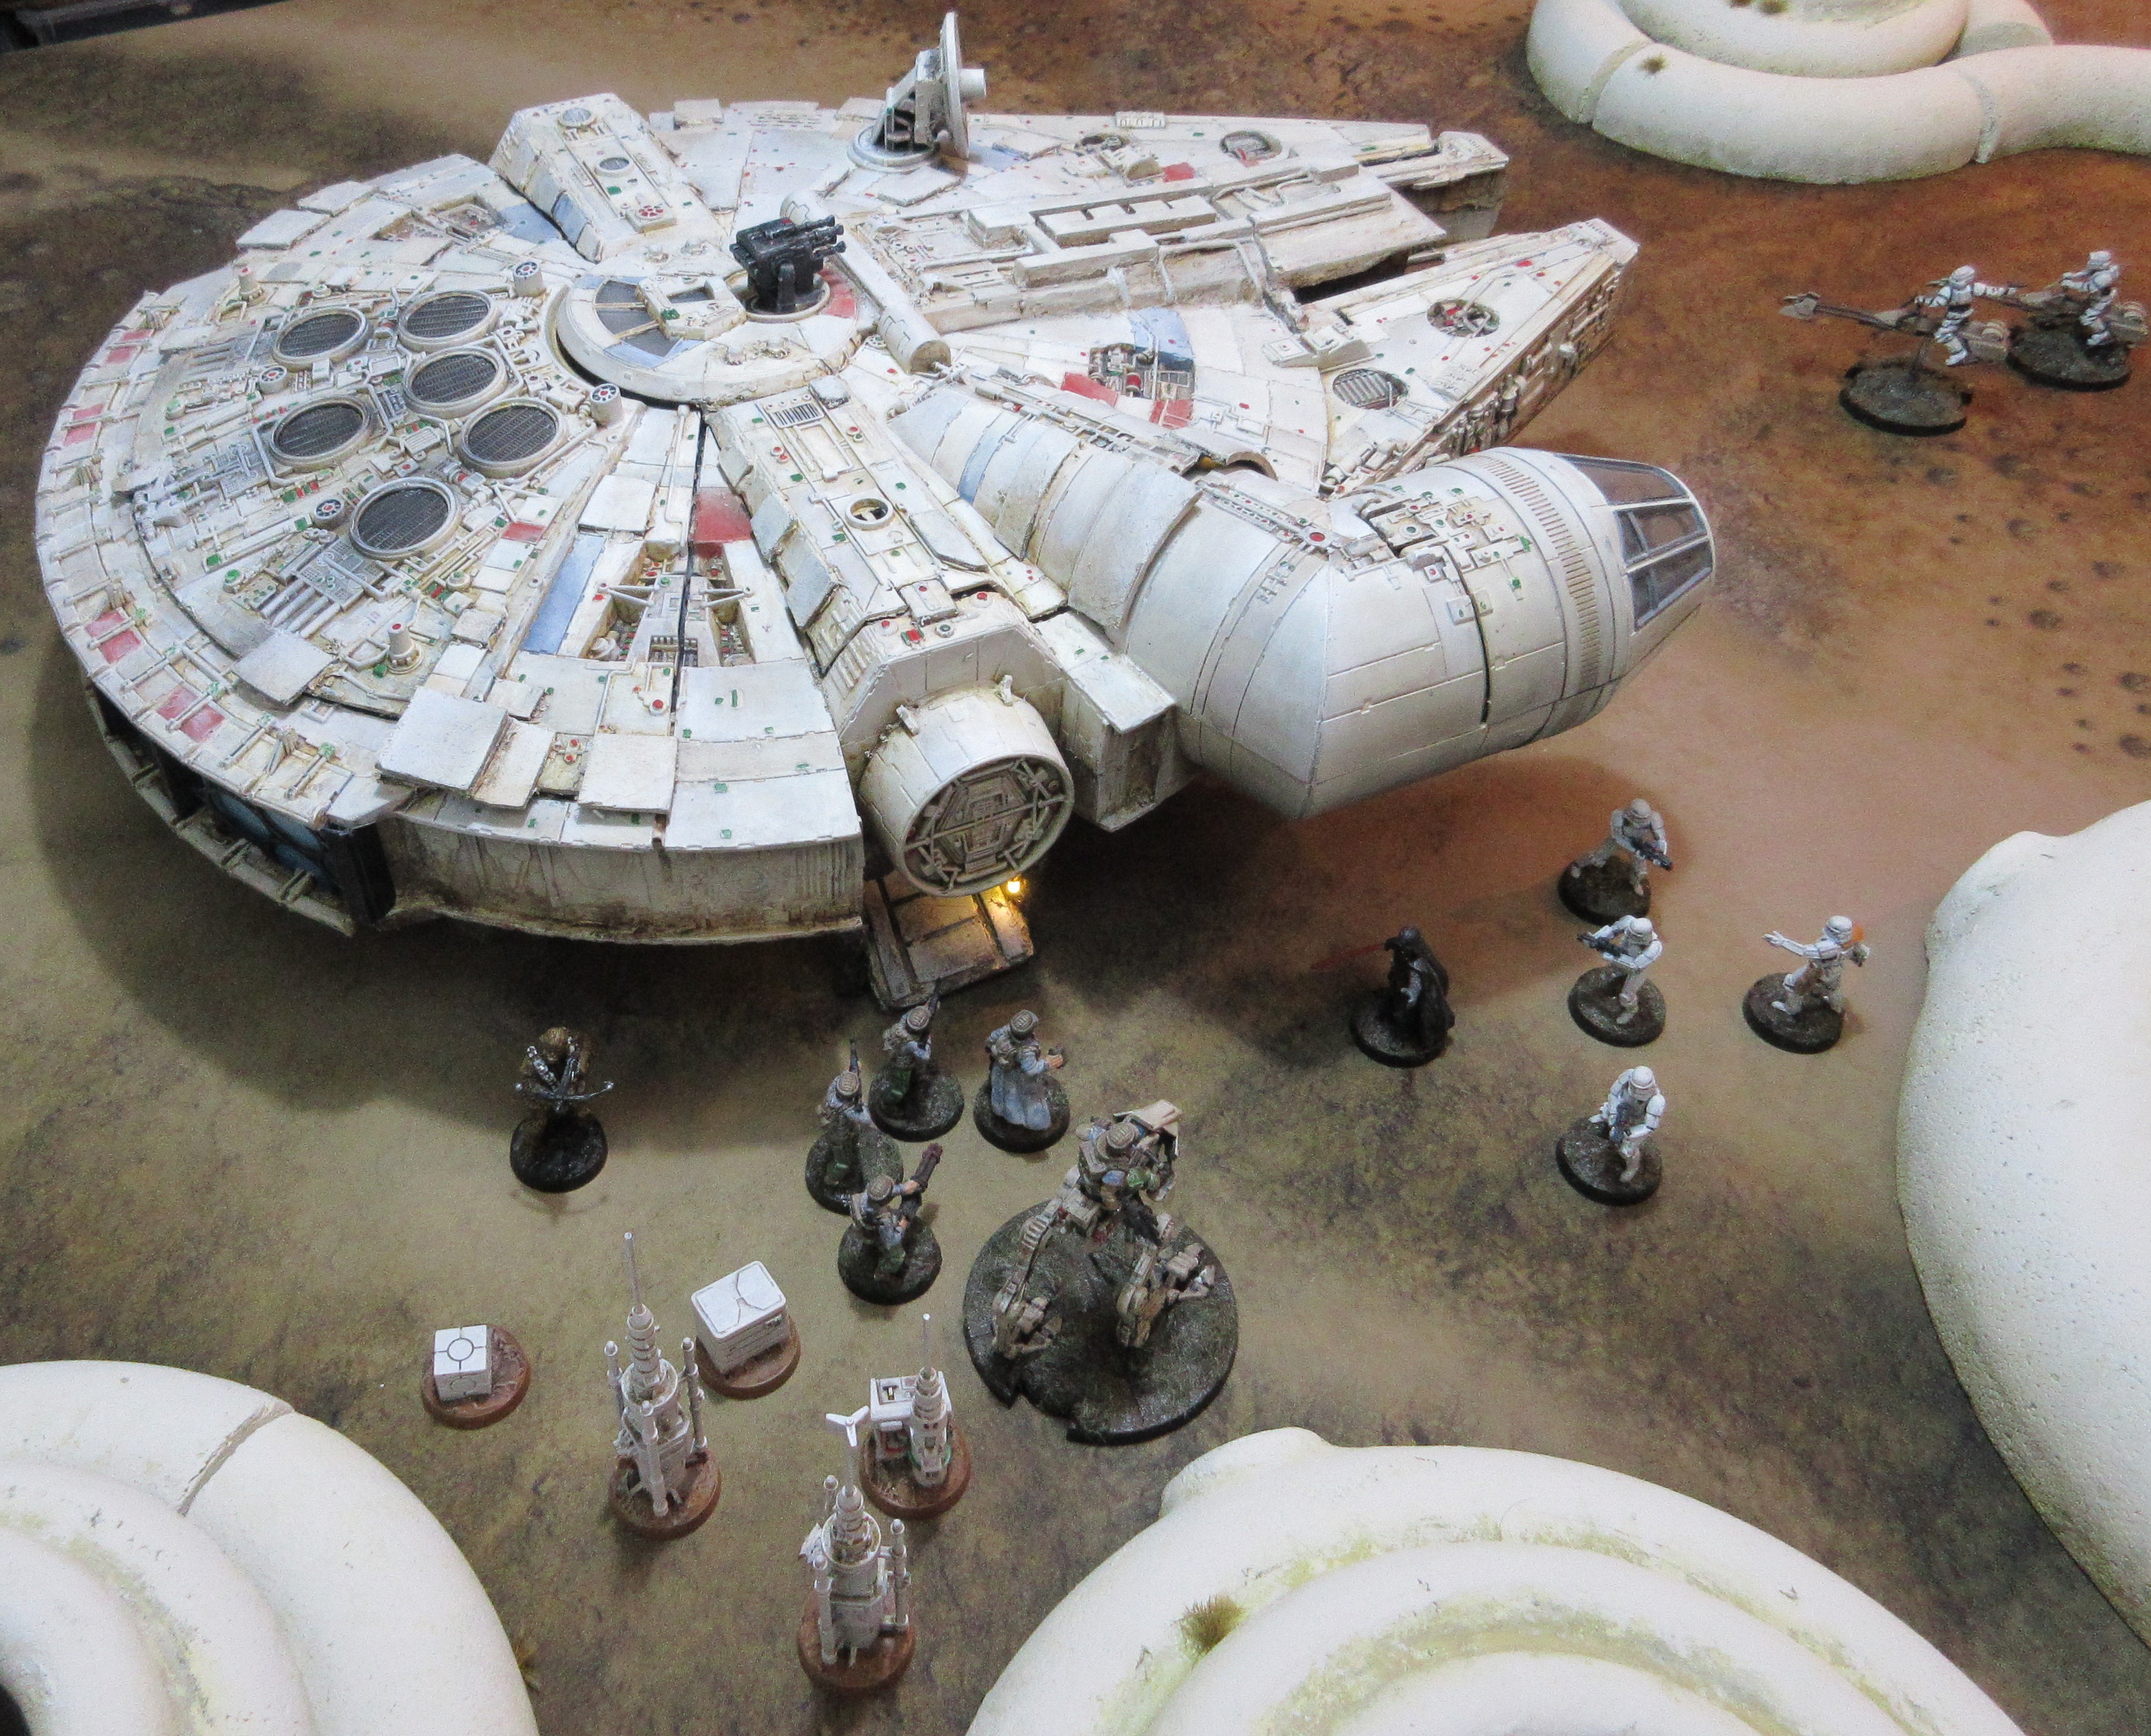
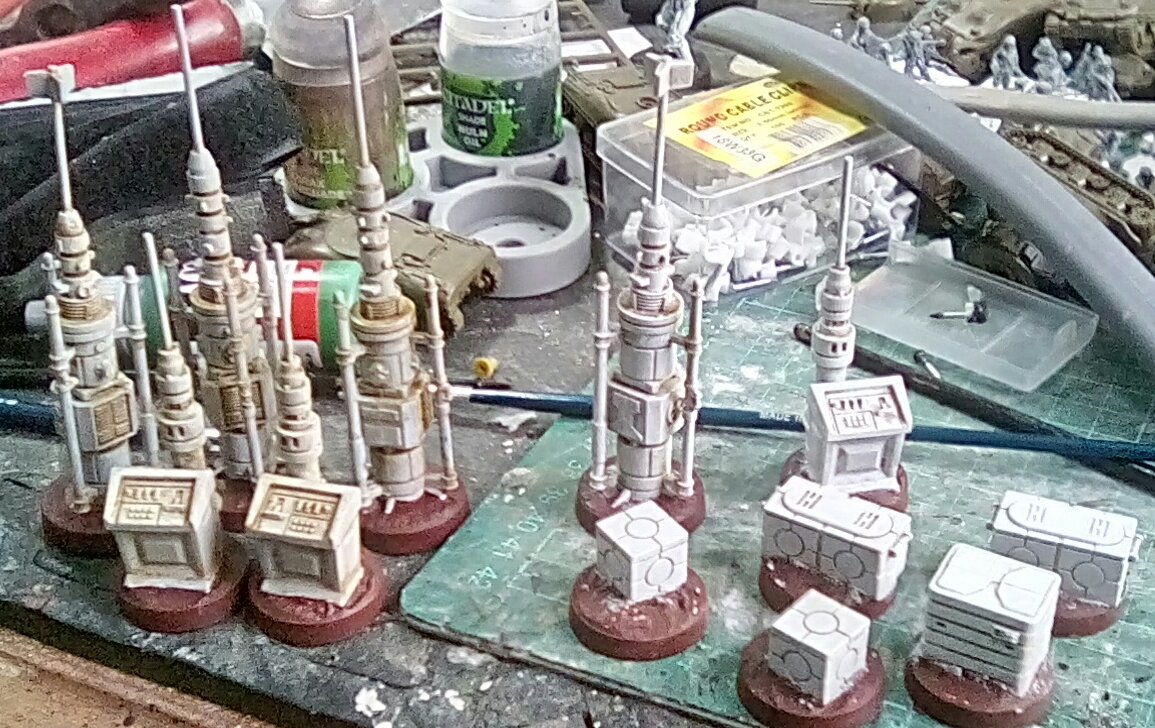
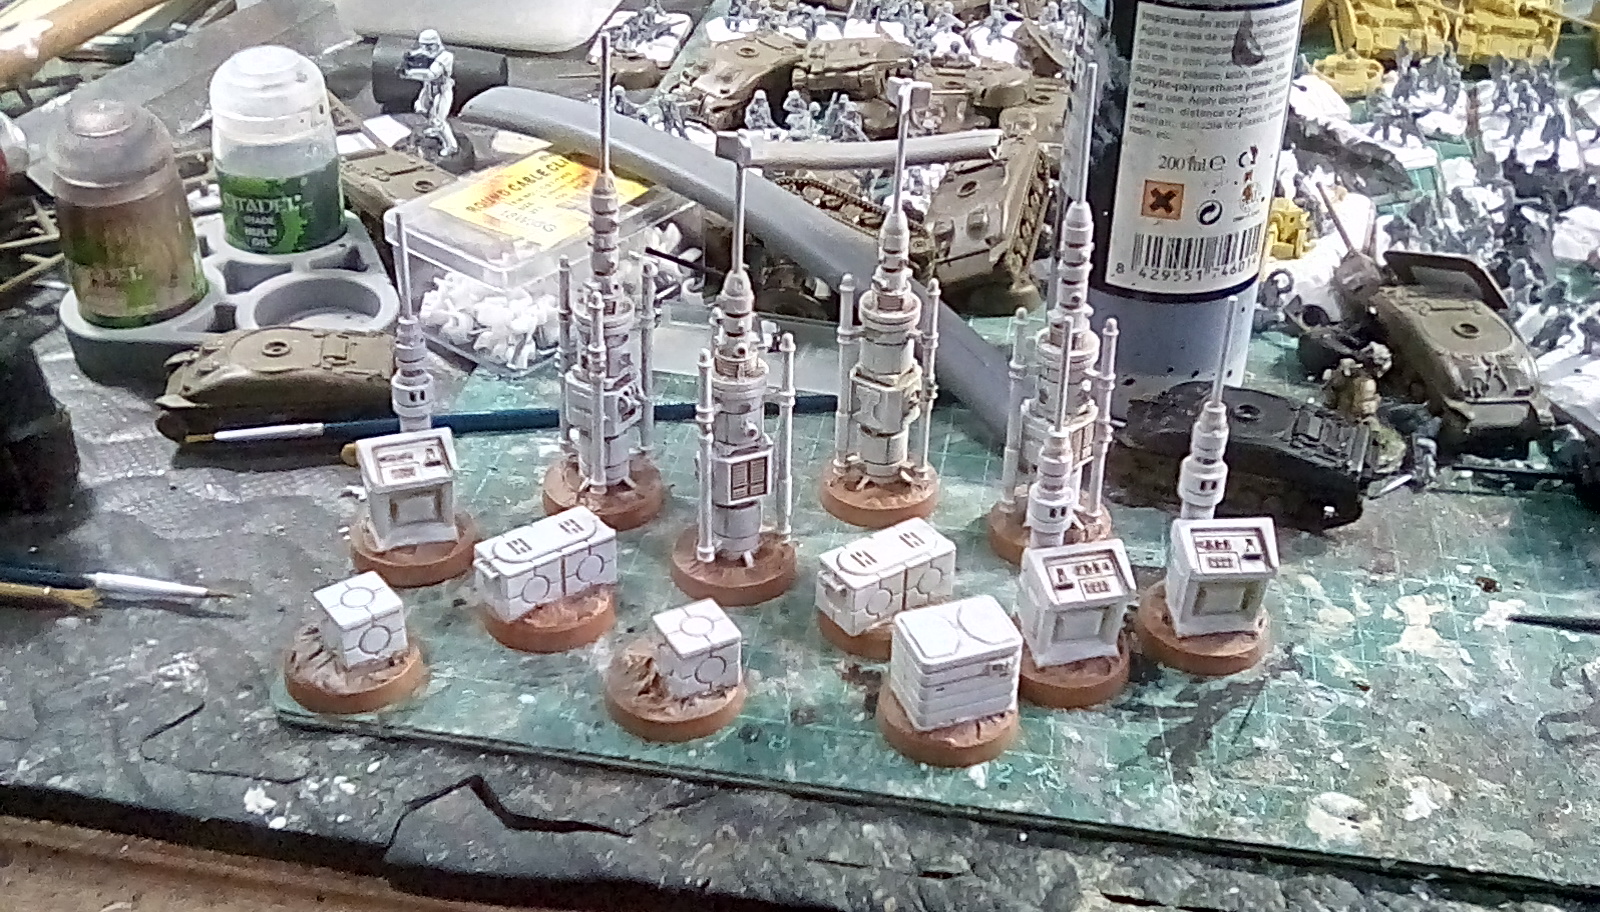
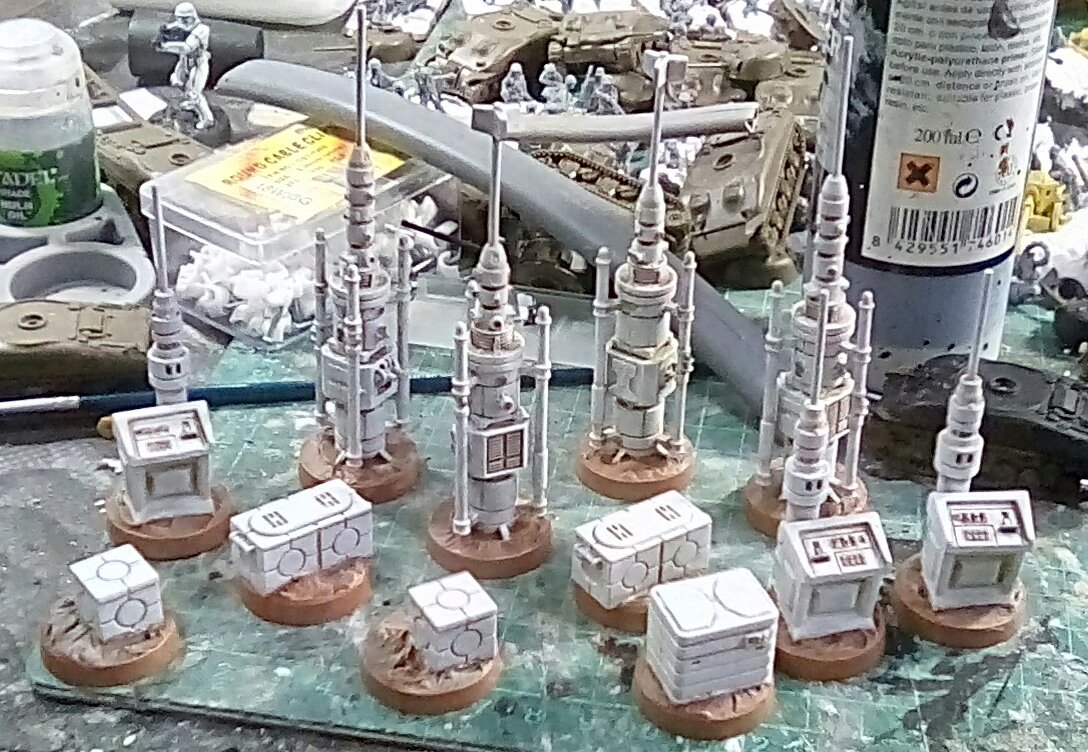
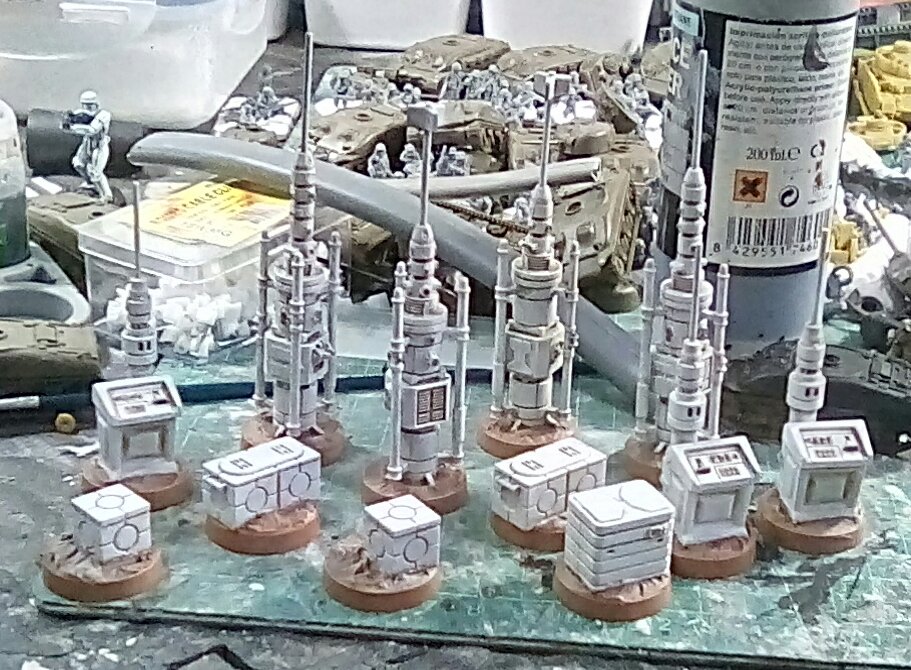
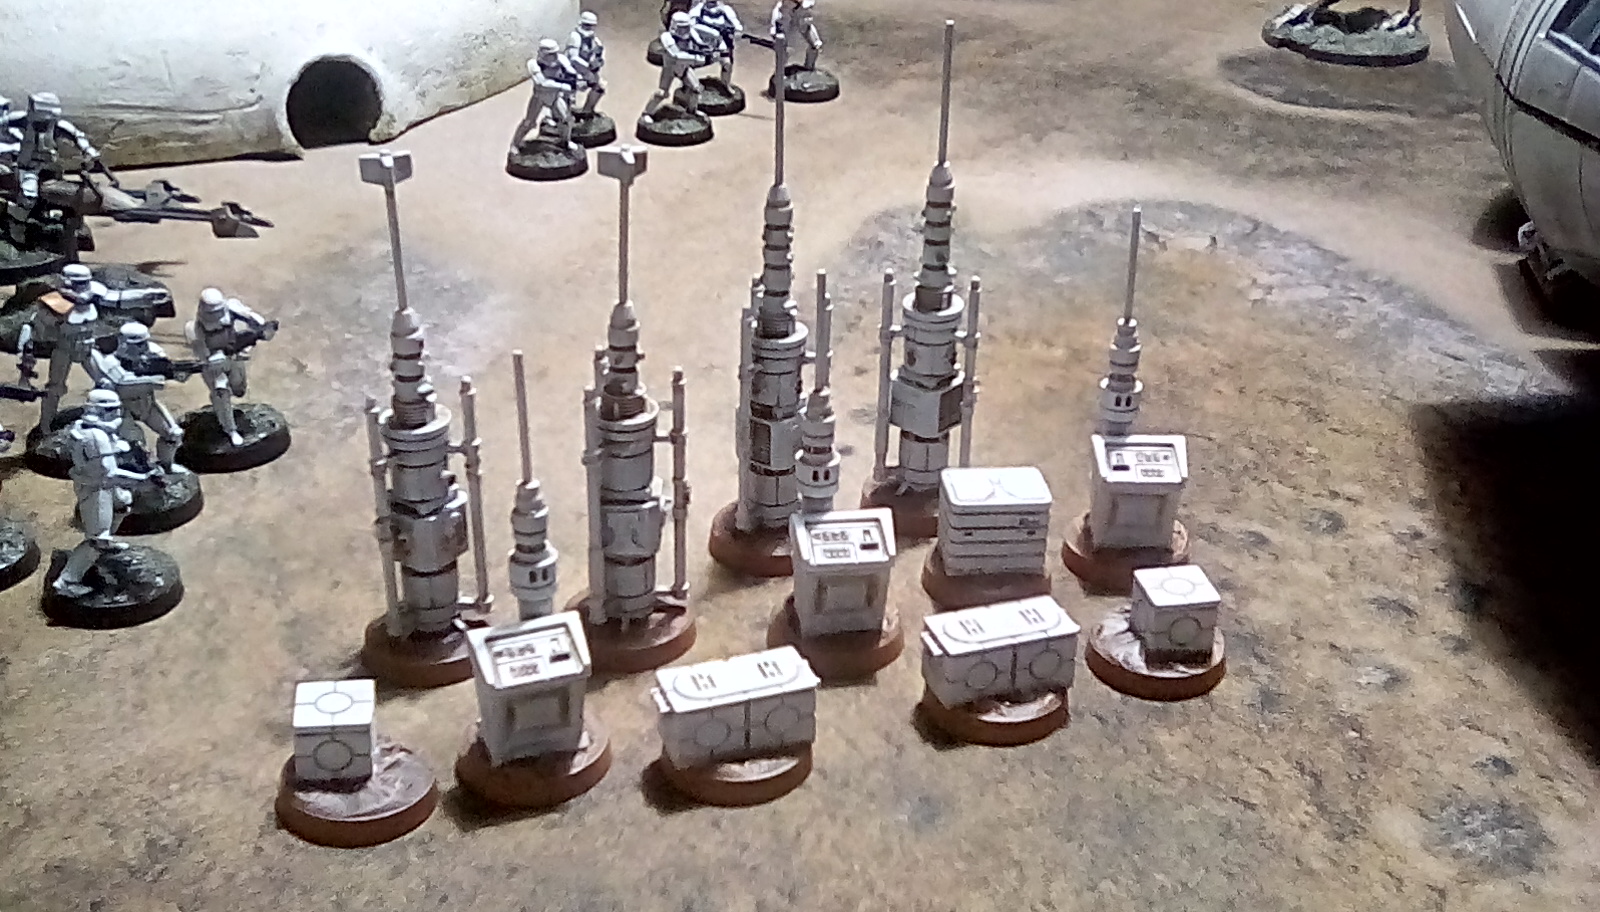
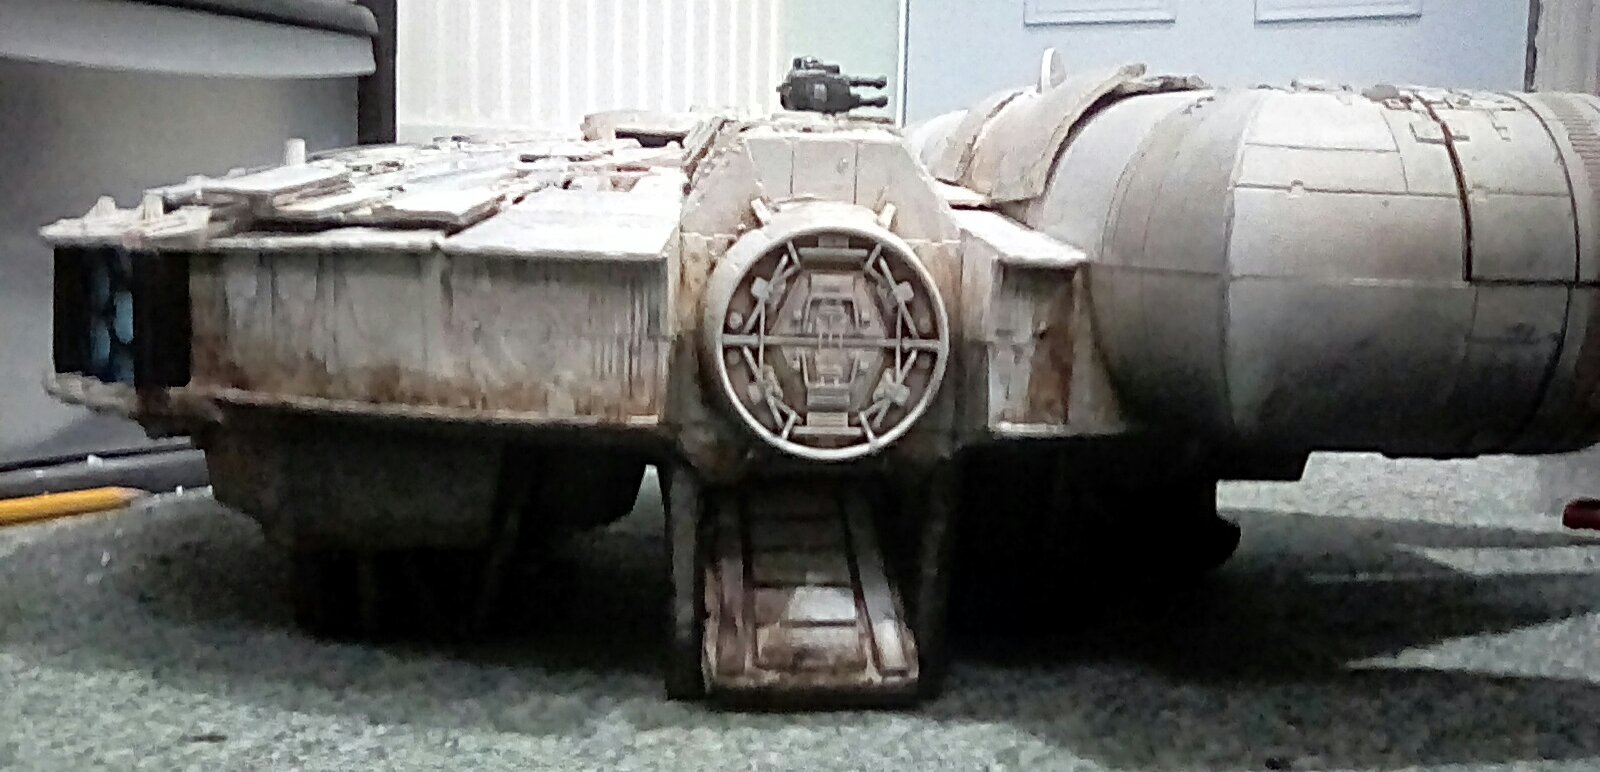
Painting the moisture farm.
This is just a brief little scenery side project.
I’ve decided to take some decent photos of the ship with a proper camera, and remembered I had some half finished FFG scenery. It was already assembed, based and primed black, so to finish this quickly I just Drybrushed the moisture farm grey and painted the bases maroon. Once dry I used Sepia wash in the recesses, then Drybrushed the lot white. Red and green display lights were painted in to add a little colour, but this was Drybrushed white again to add a little Tatootine dust. The bases were Drybrushed orange brown, the recesses given. chocolate brown wash, then Drybrushed bone white.

Let's talk about money, Honey....
So when I started the project of turning a broken plastic toy into a Millenium Falcon terrain piece for star wars legion figures, I said my aim was to do it as cheaply as possible without spending a small fortune. So what has it cost so far?
I’m Not going to include the value of things I had lying around anyway which would have just been thrown away if not used in this project. I am renovating a house so I have lots of bits and pieces lying around, and I appreciate that if people had to go out and buy wood, tools, etc. it would cost them more, but I very much made my design decisions based on what I had at hand for free.
Here’s a list of things I had to go out and buy… I’ll come back to this and add to the list later if I have to make any more purchases.
- £10 – one broken toy spaceship from Ebay
- £2 – Two A1 sheets of grey card from an art supplies shop.
- £5 – Half a bulk-buy box of hot glue sticks from ebay.
- 50p – a pack of pencils
- 50p – a pack of straws
- £15 – Three tins of spray paint (black primer, grey & satin white)
- £2 – about 1/5 of a large gun of vallejo sepia shade.
- £5 – guesstimate of how much the various valehjo paints I used cost
- £2 half price Christmas led lights in the January sale.
Currently I’m looking at having spent about £42 on this project, which isn’t bad considering how much table space it will fill and how much joy it will bring me and my friends who love star wars.
Internal lights - Part two
Today’s entry is really just me tidying up what I did yesterday.
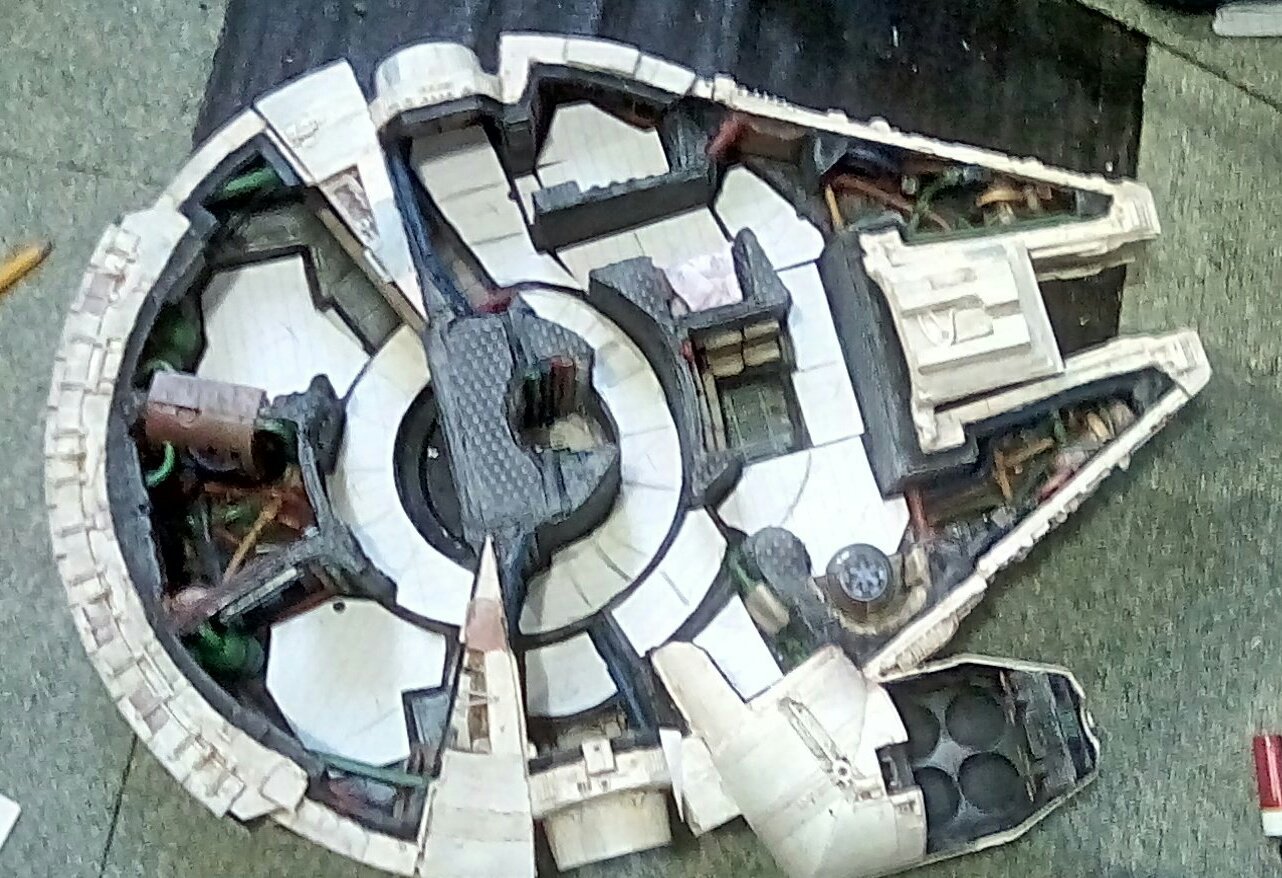
Bare lighting wire, wire clips and the now set solid hot glue are all primed black. Then various bits are painted to match in with the background as I see fit. A few more cables, made from off cuts of actual electrical wire, are glued in place strategically to hide and protect the more fragile copper wire of the led lights.
As the paints were already out the sides of the hull and too of the ship got a drybrushing of white,especially on any outside edges, to bring the overall colour of the ship to white/pale grey, while keeping the sepia in the recesses to create a really dirty look. I’ll probably be building up the intensity of the white gradually at the edges as time goes on by adding outer thin layer of white until I get to the colour I want.
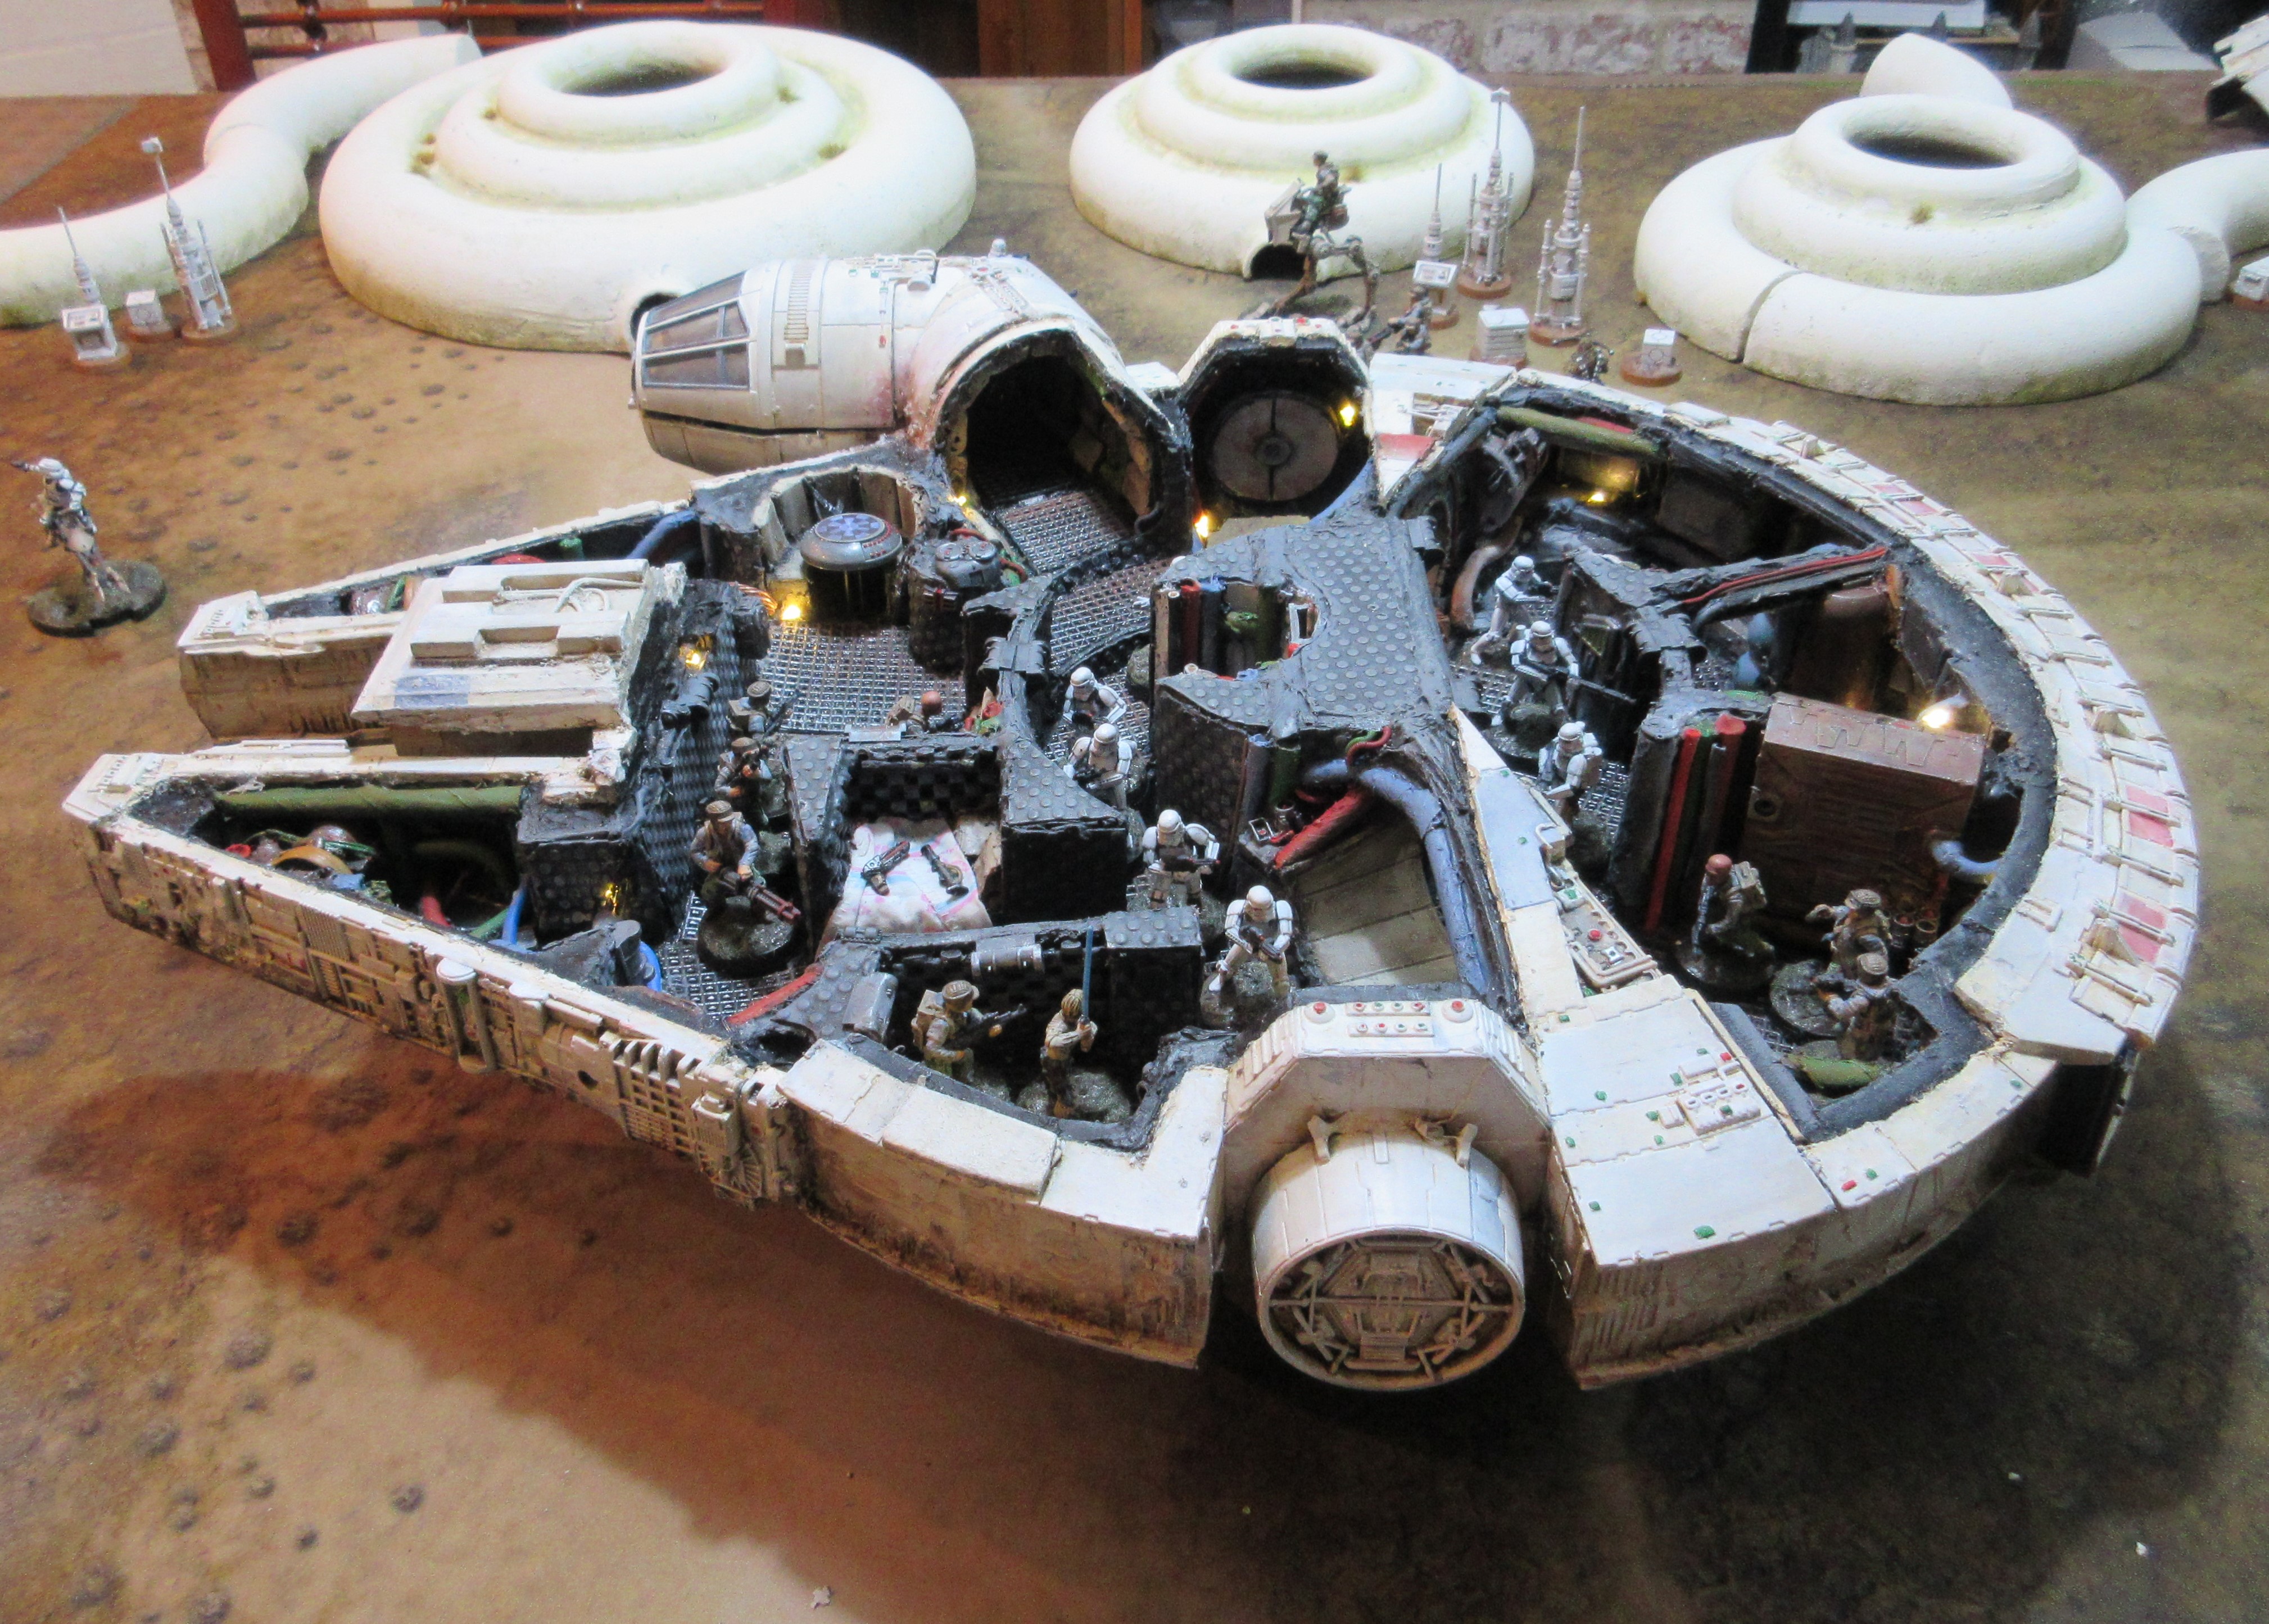
In an ideal world it I owned a 3d printer I would be making loads of gribbly bits to add to the inside of the ship walls, as I don’t have access to that yet I will be keeping an eye out for suitable spare model parts I can add as and when I find them. The aim is to make the ship look chaotic and jury rigged, but without reducing the corridors or standing space for miniatures.
I’m not quite finished adding details and textures yet, but I ‘he got to the stage where the ship can be used in a game and look good.

Not a bad lighting set up for the grand cost of £2!
Internal lights - part One
I talked to a friend who’s an electronic quiz about how to add real lighting to the inside of the ship, and he got over enthusiastic about transformers, drilling holes everywhere and really expensive components that just doesn’t fit with the aim of this project of building the Millenium Falcon while spending as little as possible.
So here’s the affordable way of doing it….
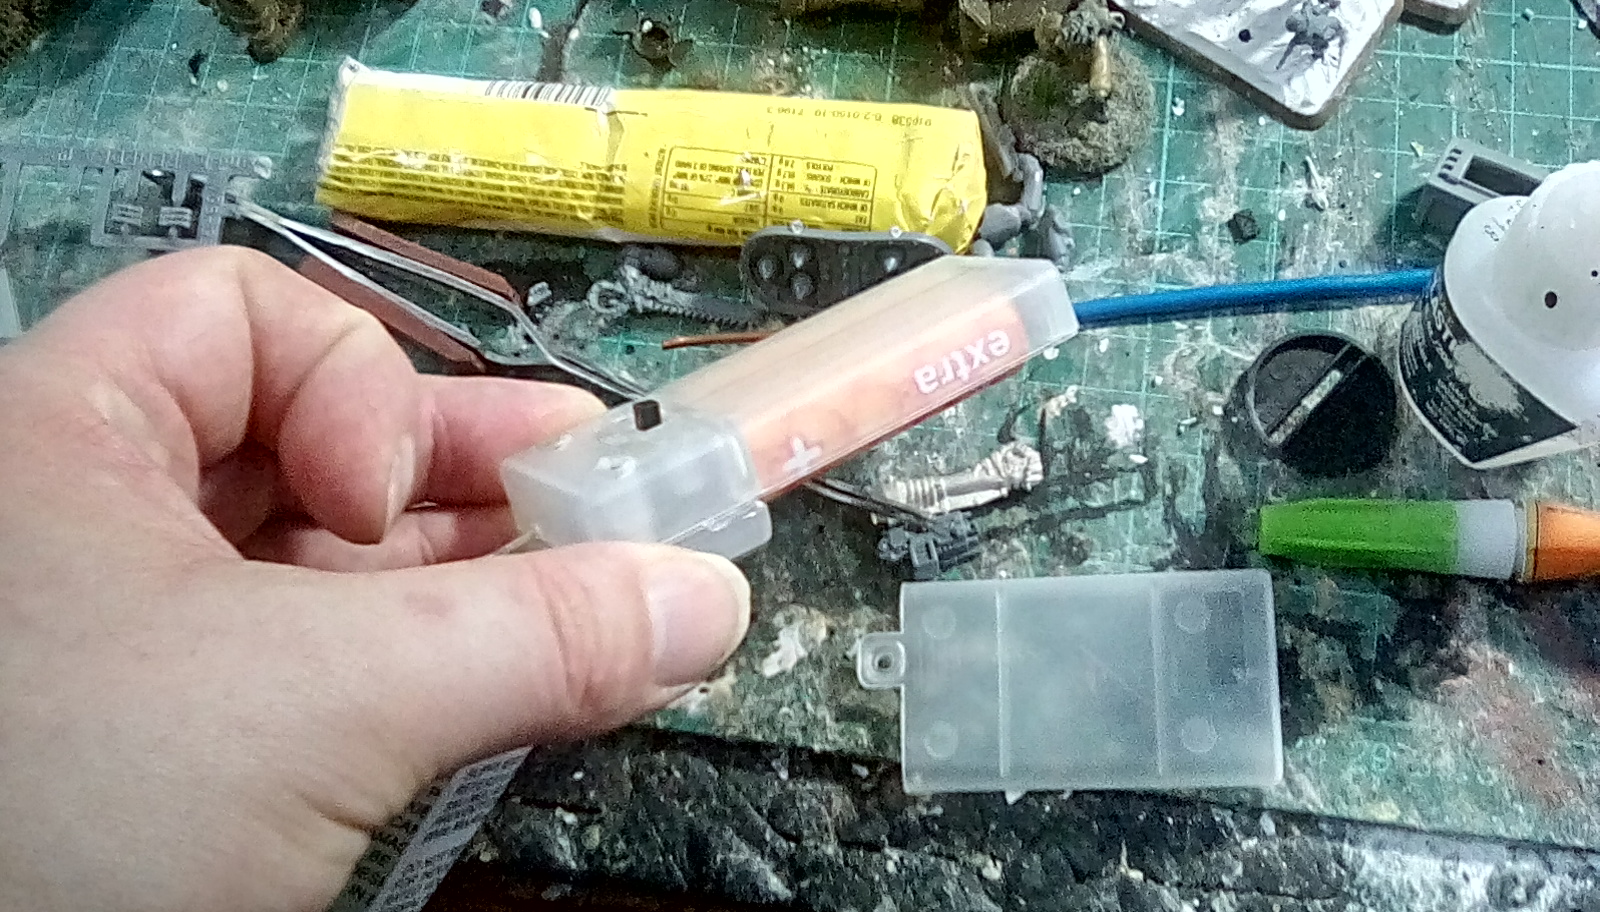
Nowadays you can buy led Christmas lights that run off 2 AA bateries. They cost around £4 in the run up to Christmas, or a quid in the January sales.
I did but a problem with the battery pack – the door to change the batteries was on the opposite side to the on/off switch, so I didn’t have a side to your to the underside of the ship. I fixed this by gluing the battery compartment closed then cutting a new access panel on the other side with a dremel.
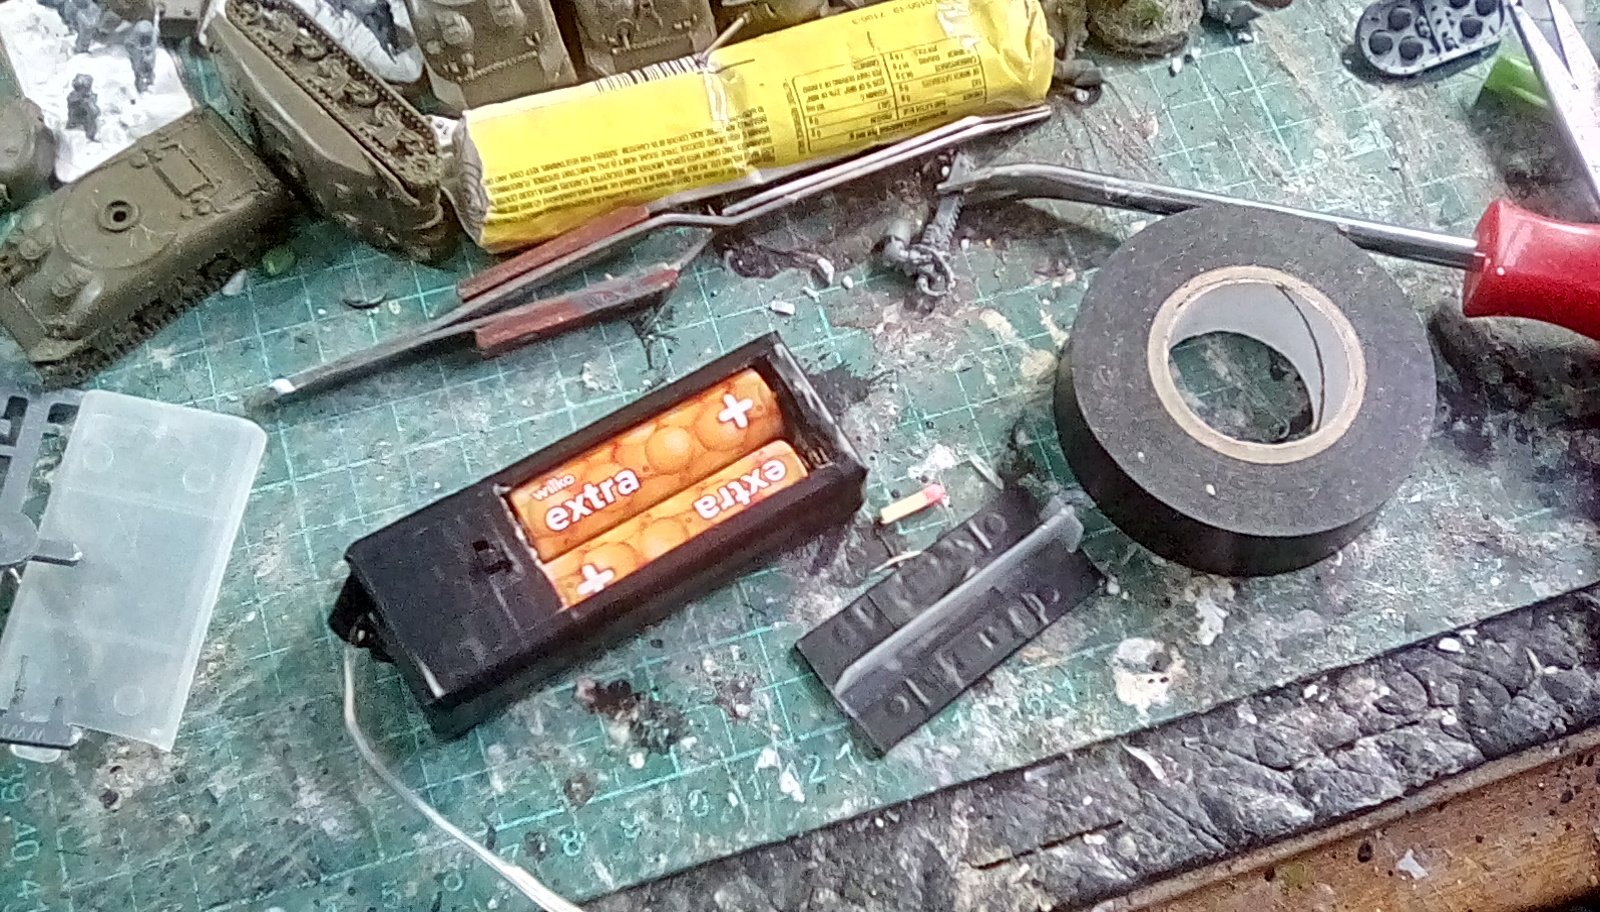
I wrapped the battery pack in black insulating tape and superglued it to the bottom of the ship.
The thin copper wires can be bent to shape and wrapped around things, so I led the lights up the ramp and into the ship, following the outside wall. I had to fix the wire in place, and had initially intended to glue small cable clips in place, but superglue would just not stick to them. Neither would contact glue. I had been trying to avoid using hot glue, as I was worried it might melt the very thin wire, but it was the only option that worked. I actually nailed a few clips in place to hold the wire where I wanted it, then used lukewarm not-glue to reinforce the clips and fix the wire where I wanted. Normally I let a bit glue gun get quite hot, but I kept turning it off whenever it got too hot to touch with my fingers.


In the next part, once the glue has fully set, I will paint the hot glue, cable clips and copper wires black, and disguise areas I am unhappy with as rust or by adding more “model” cables and details over the top of the real wire.
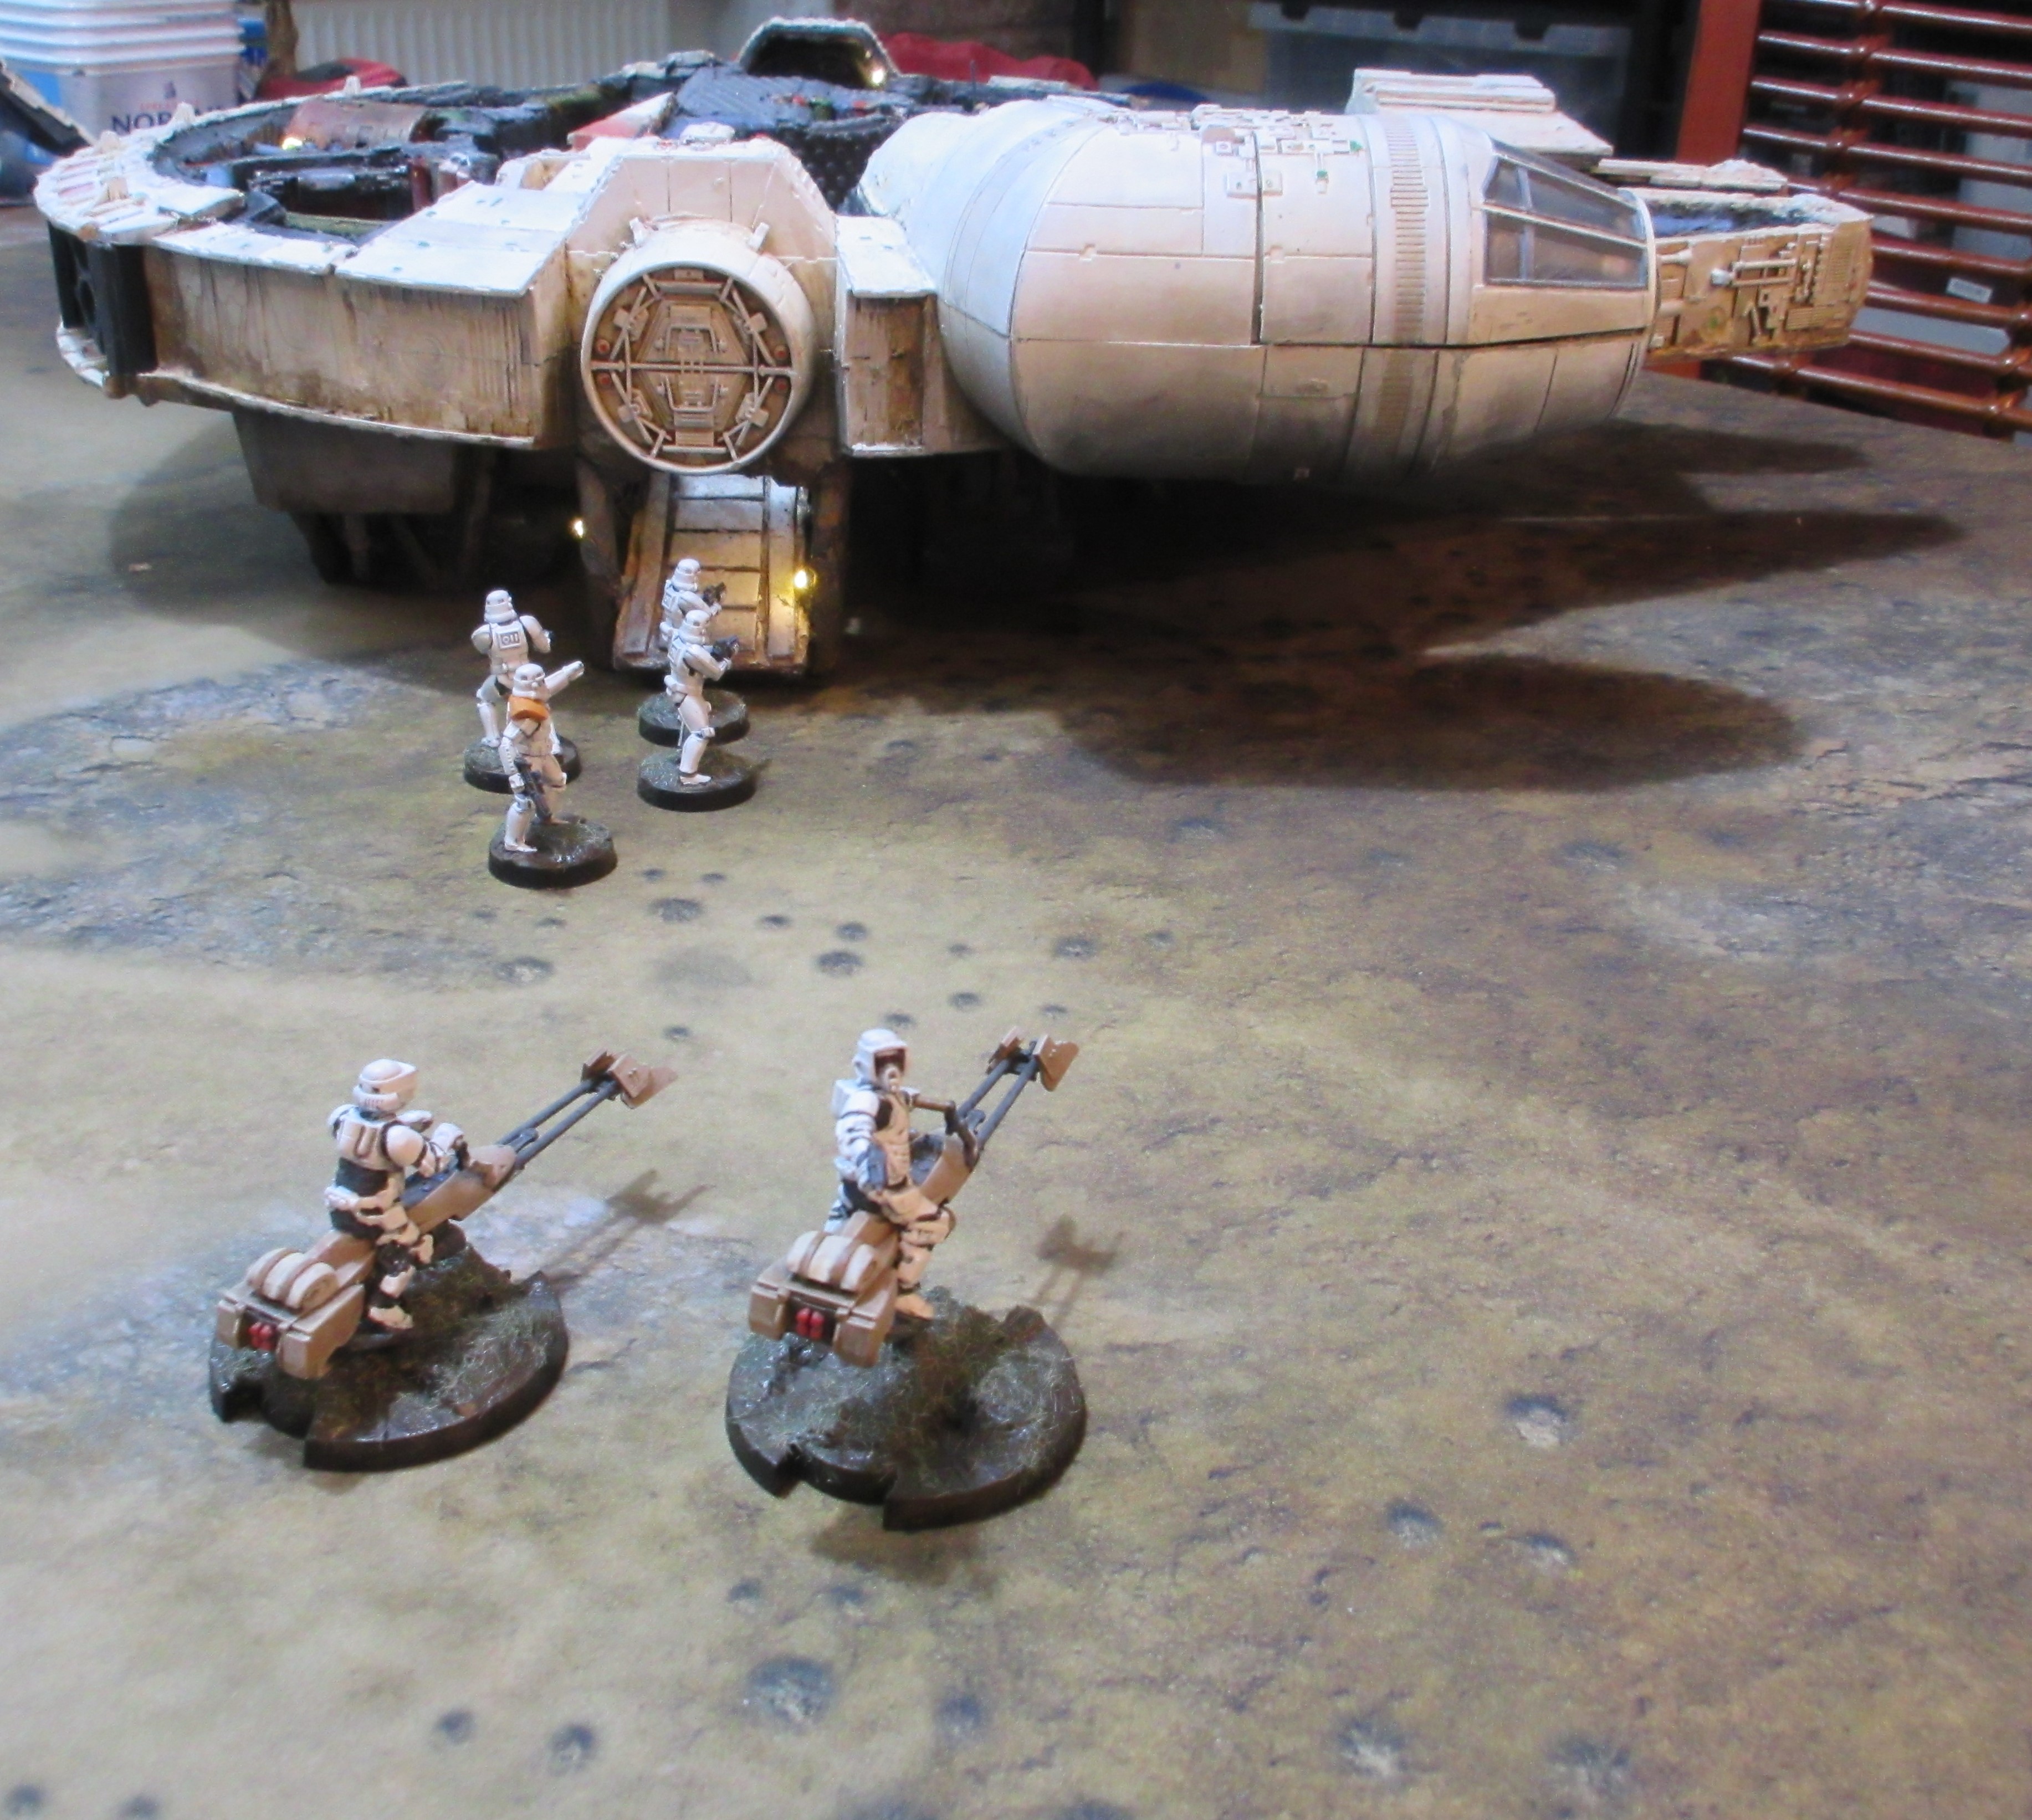
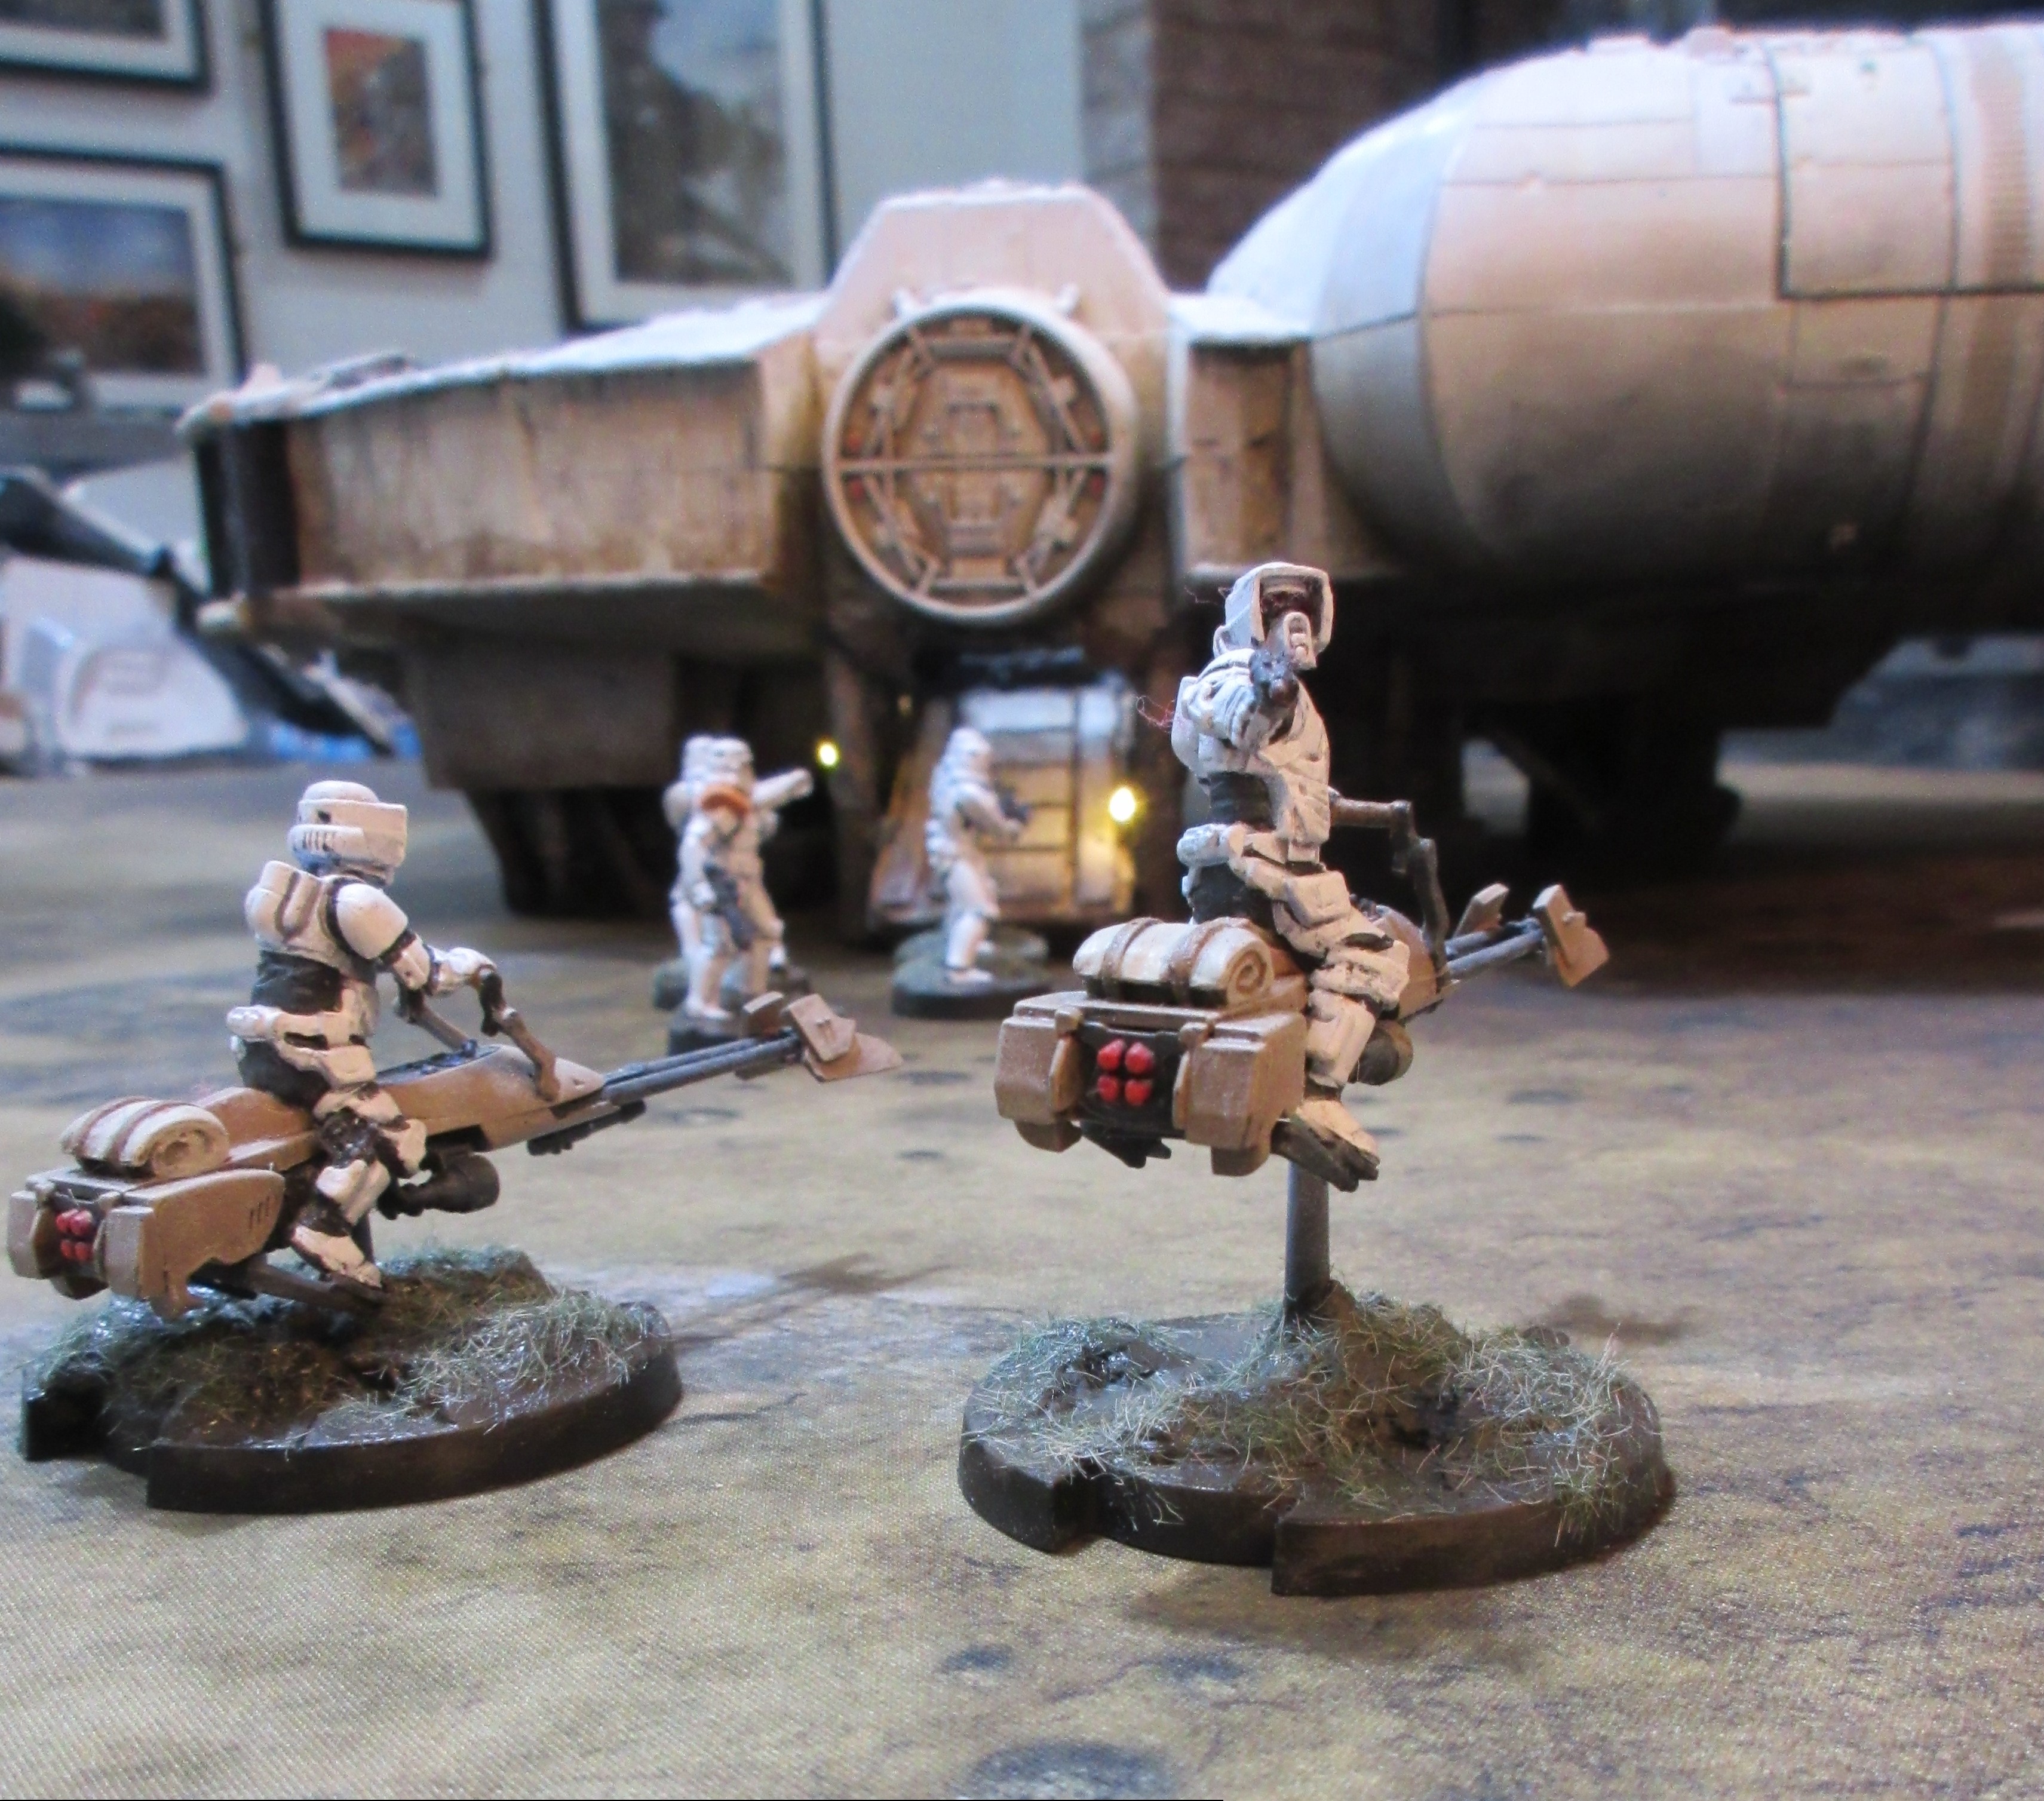
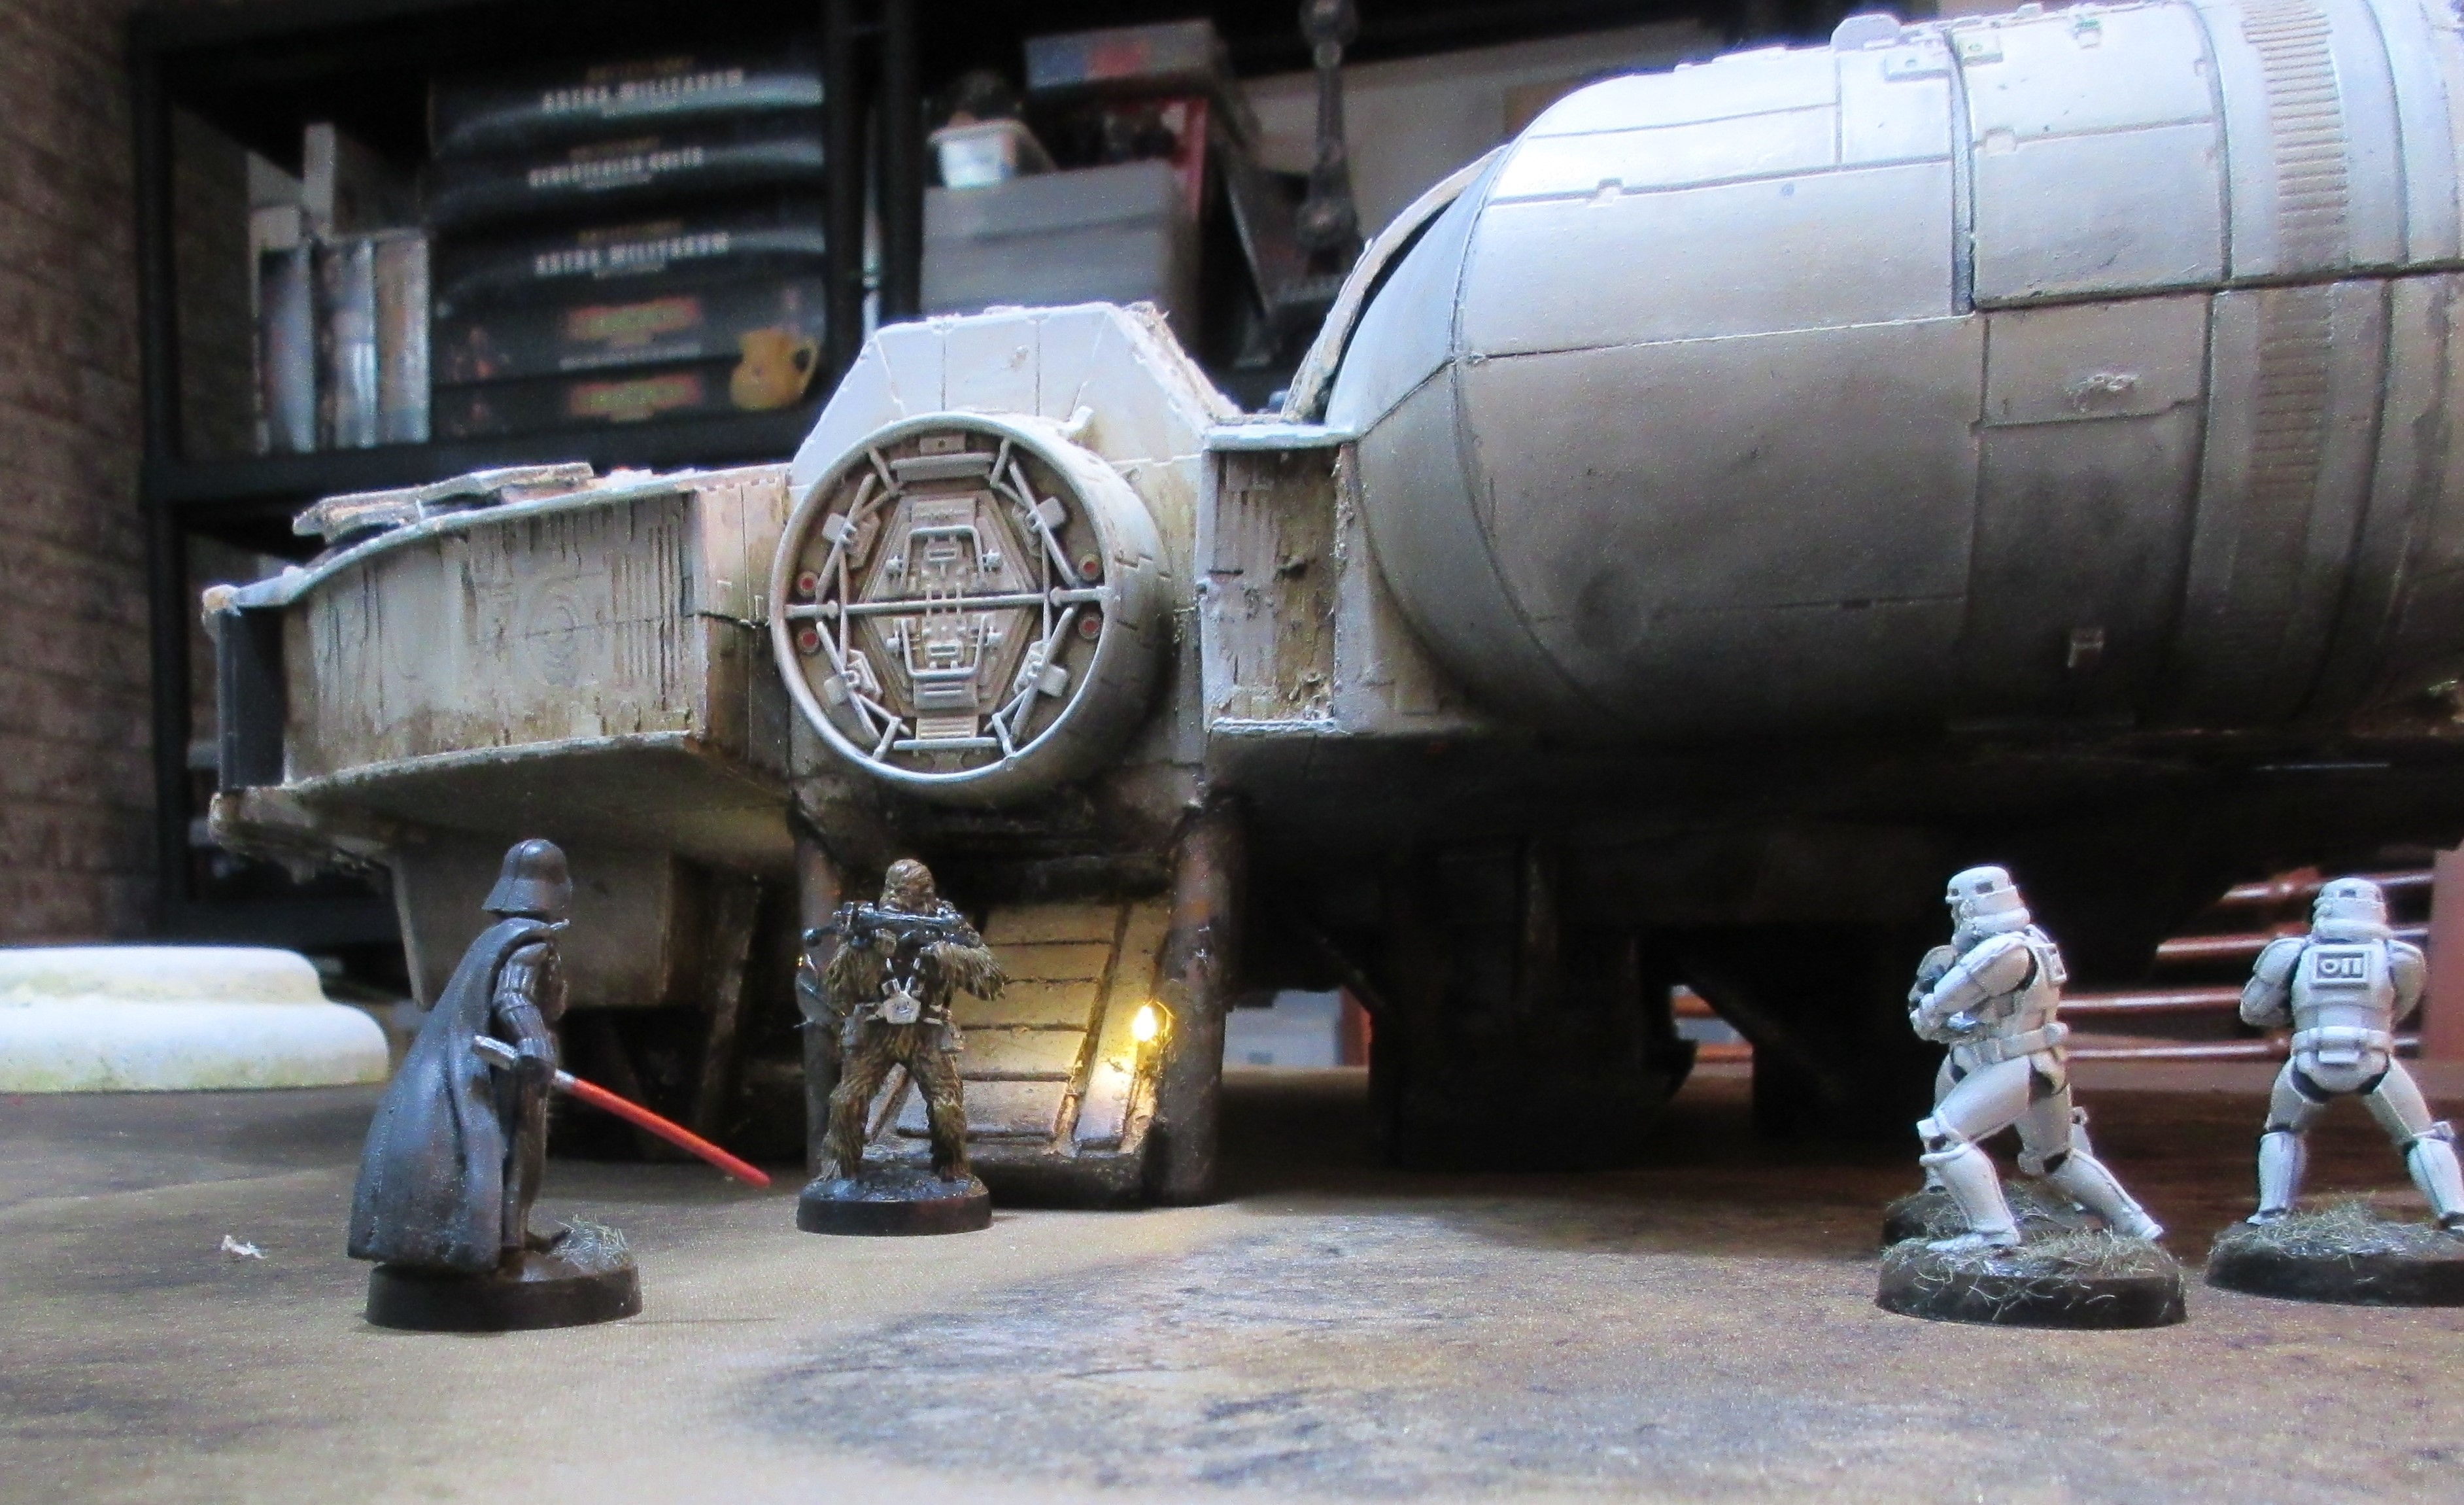
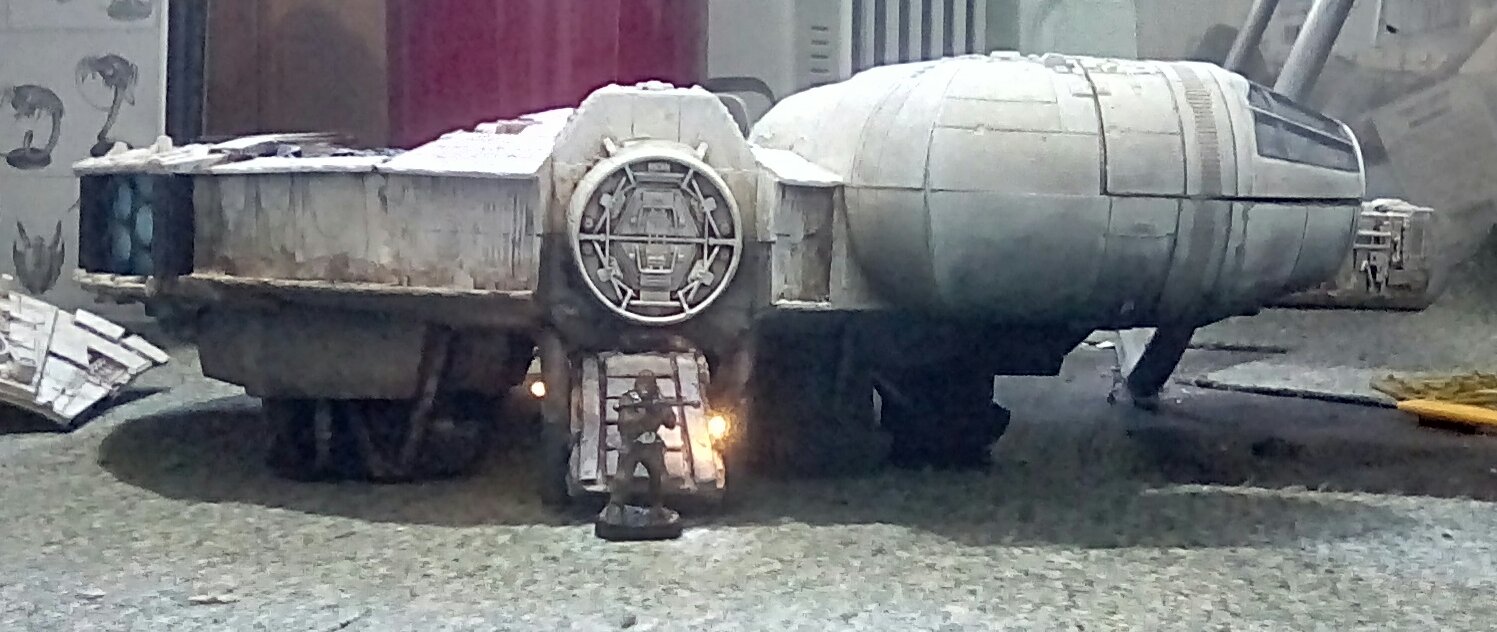
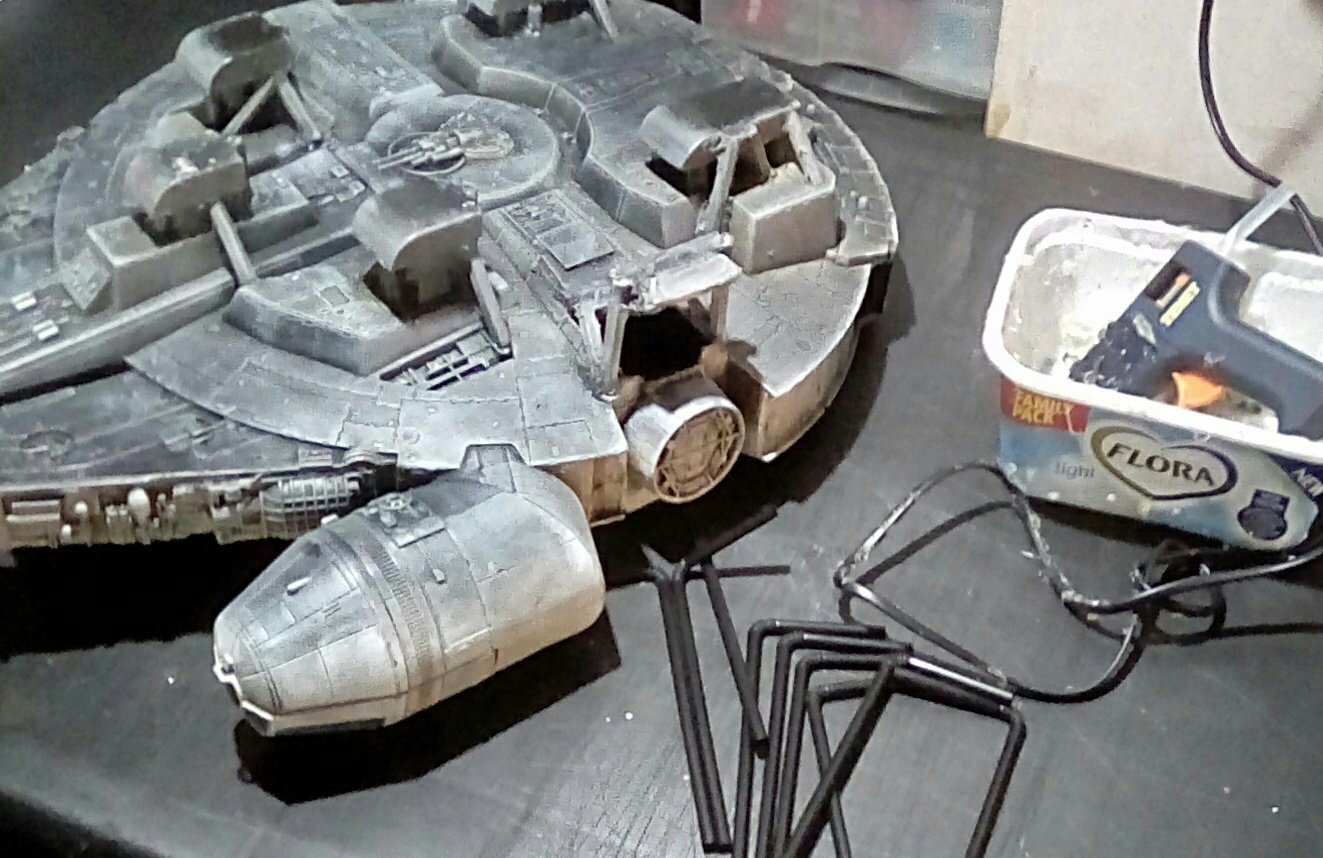
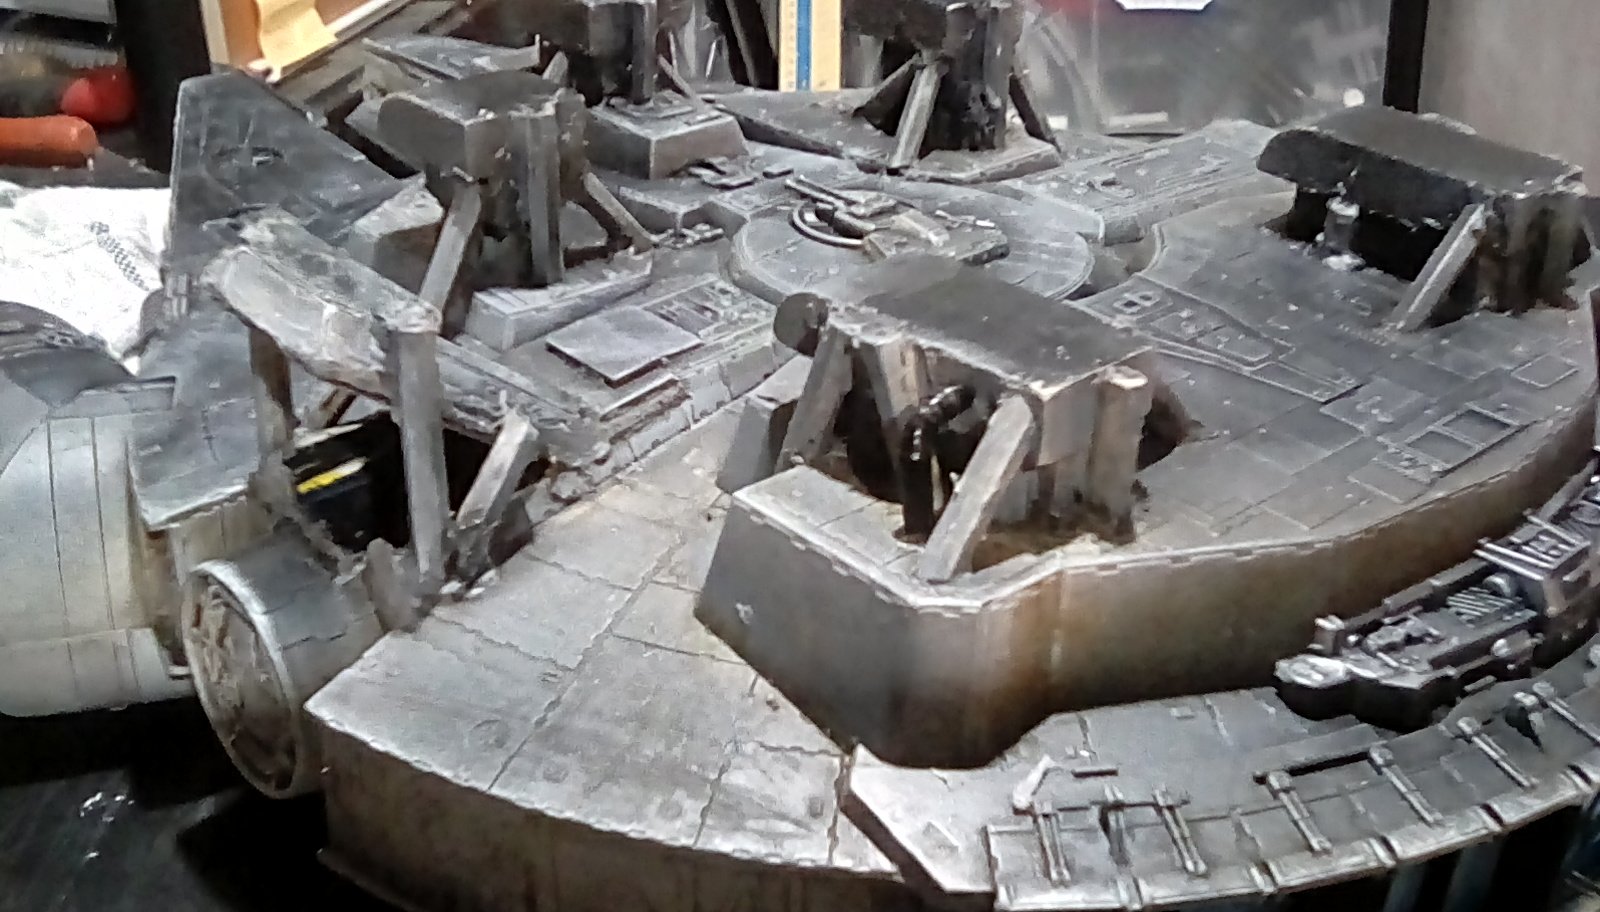
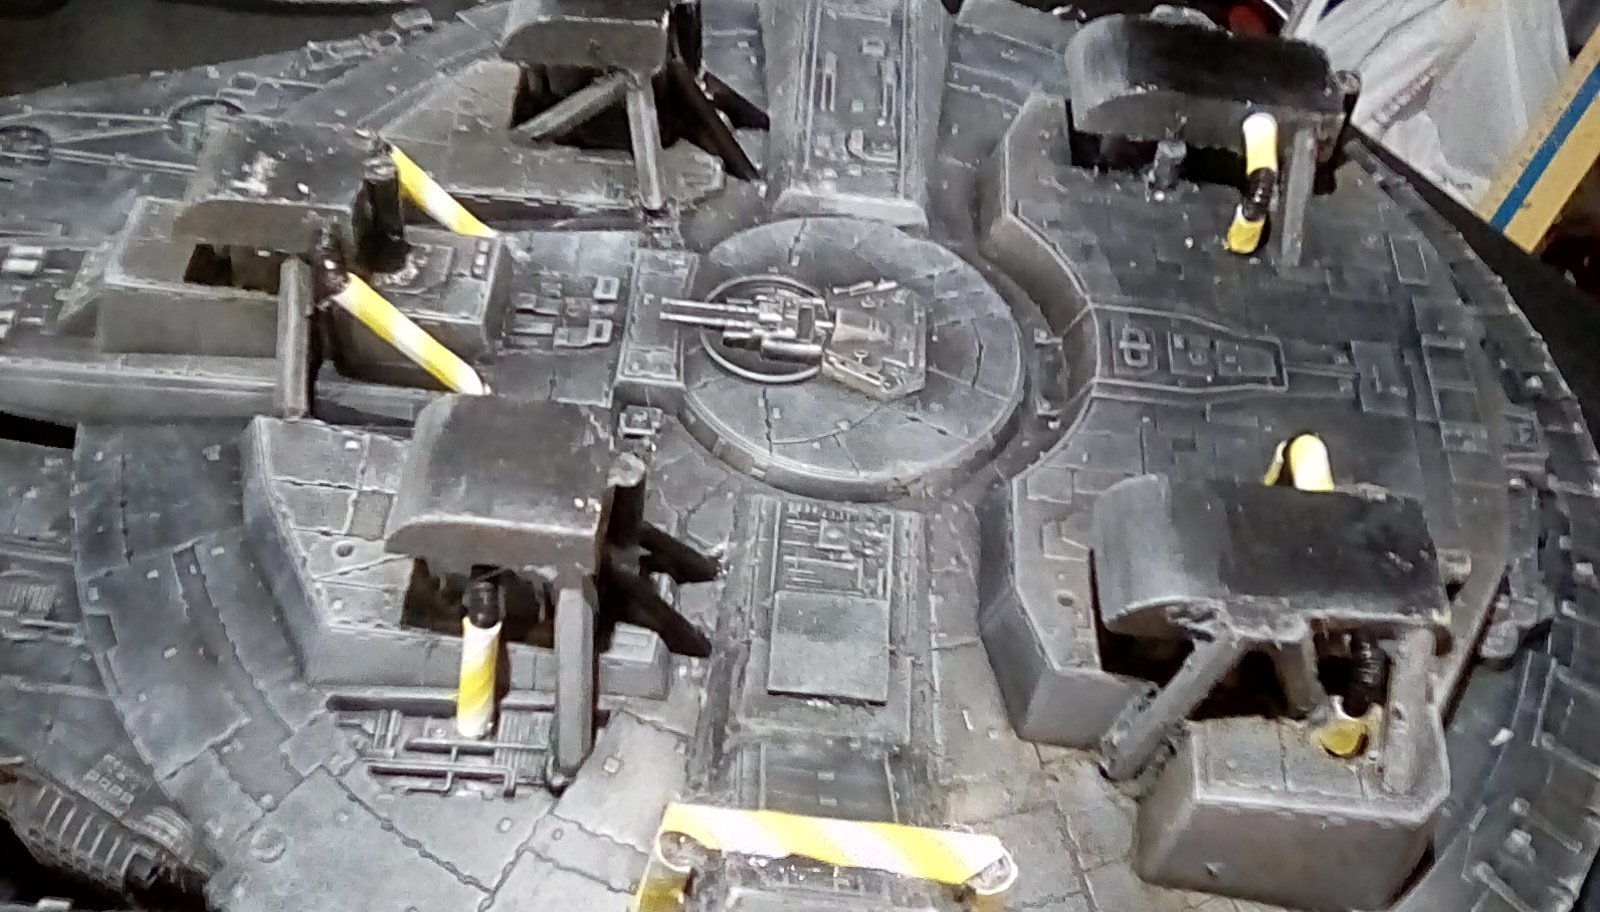
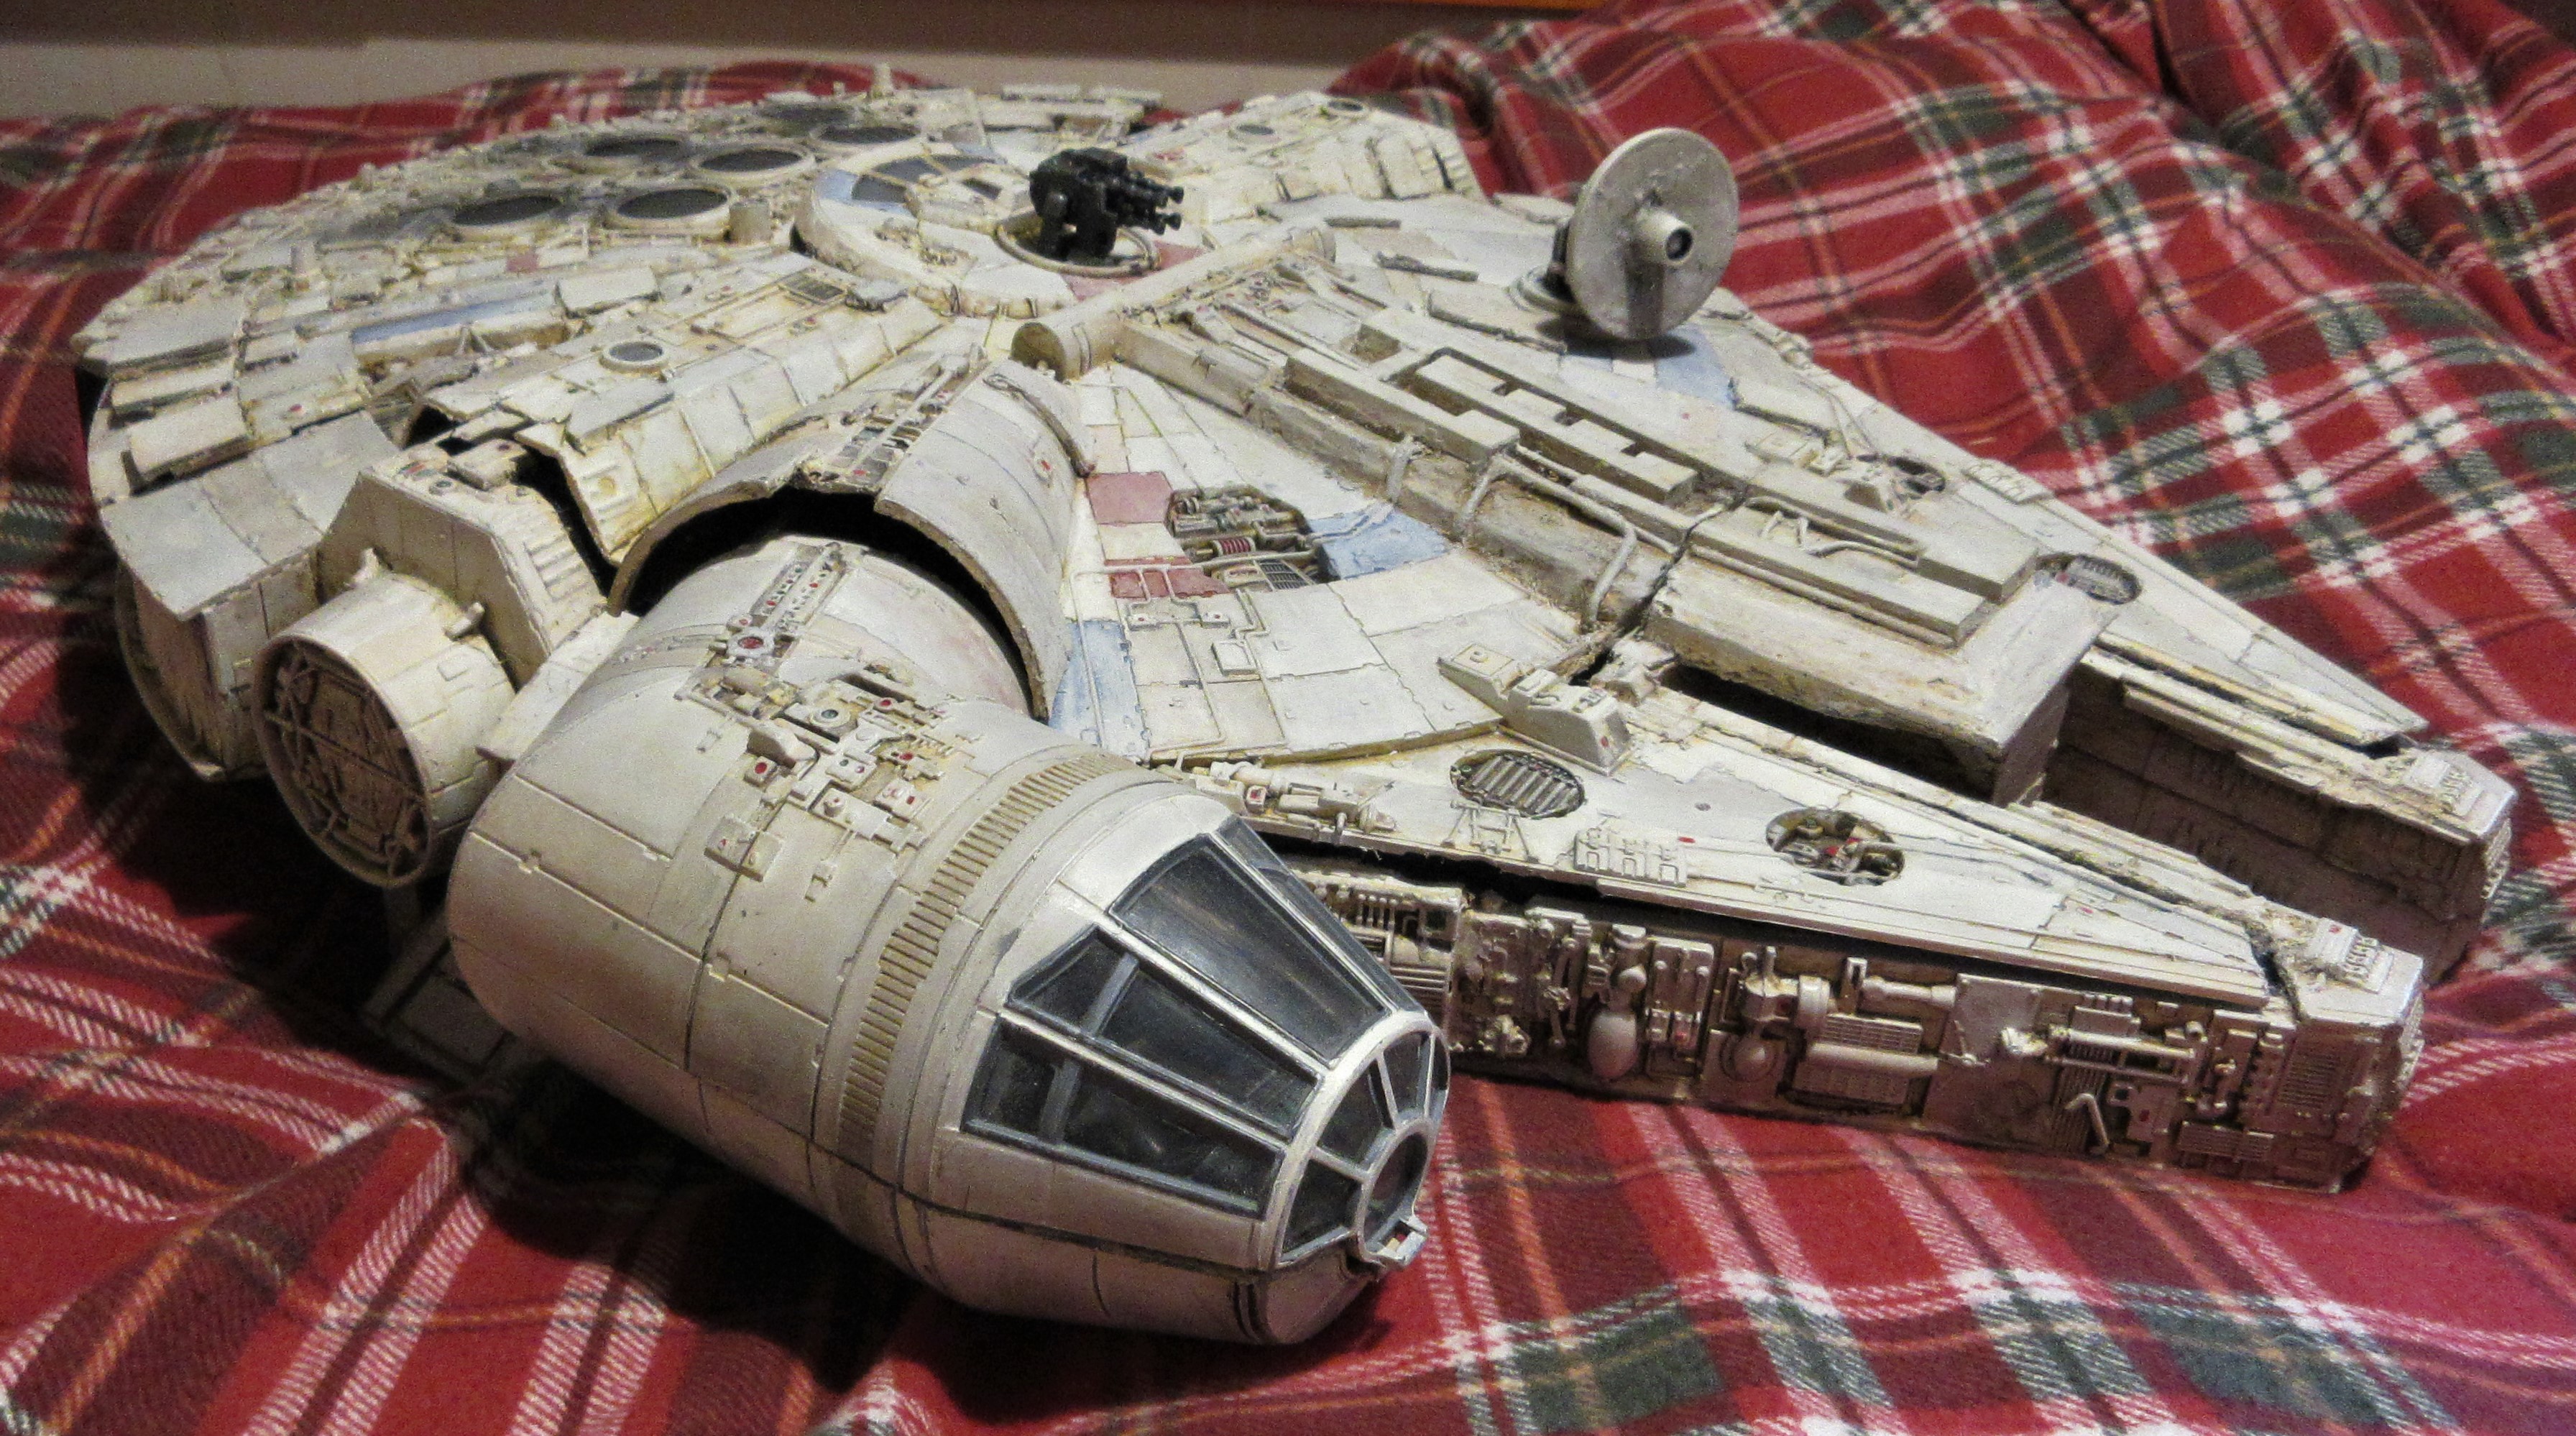
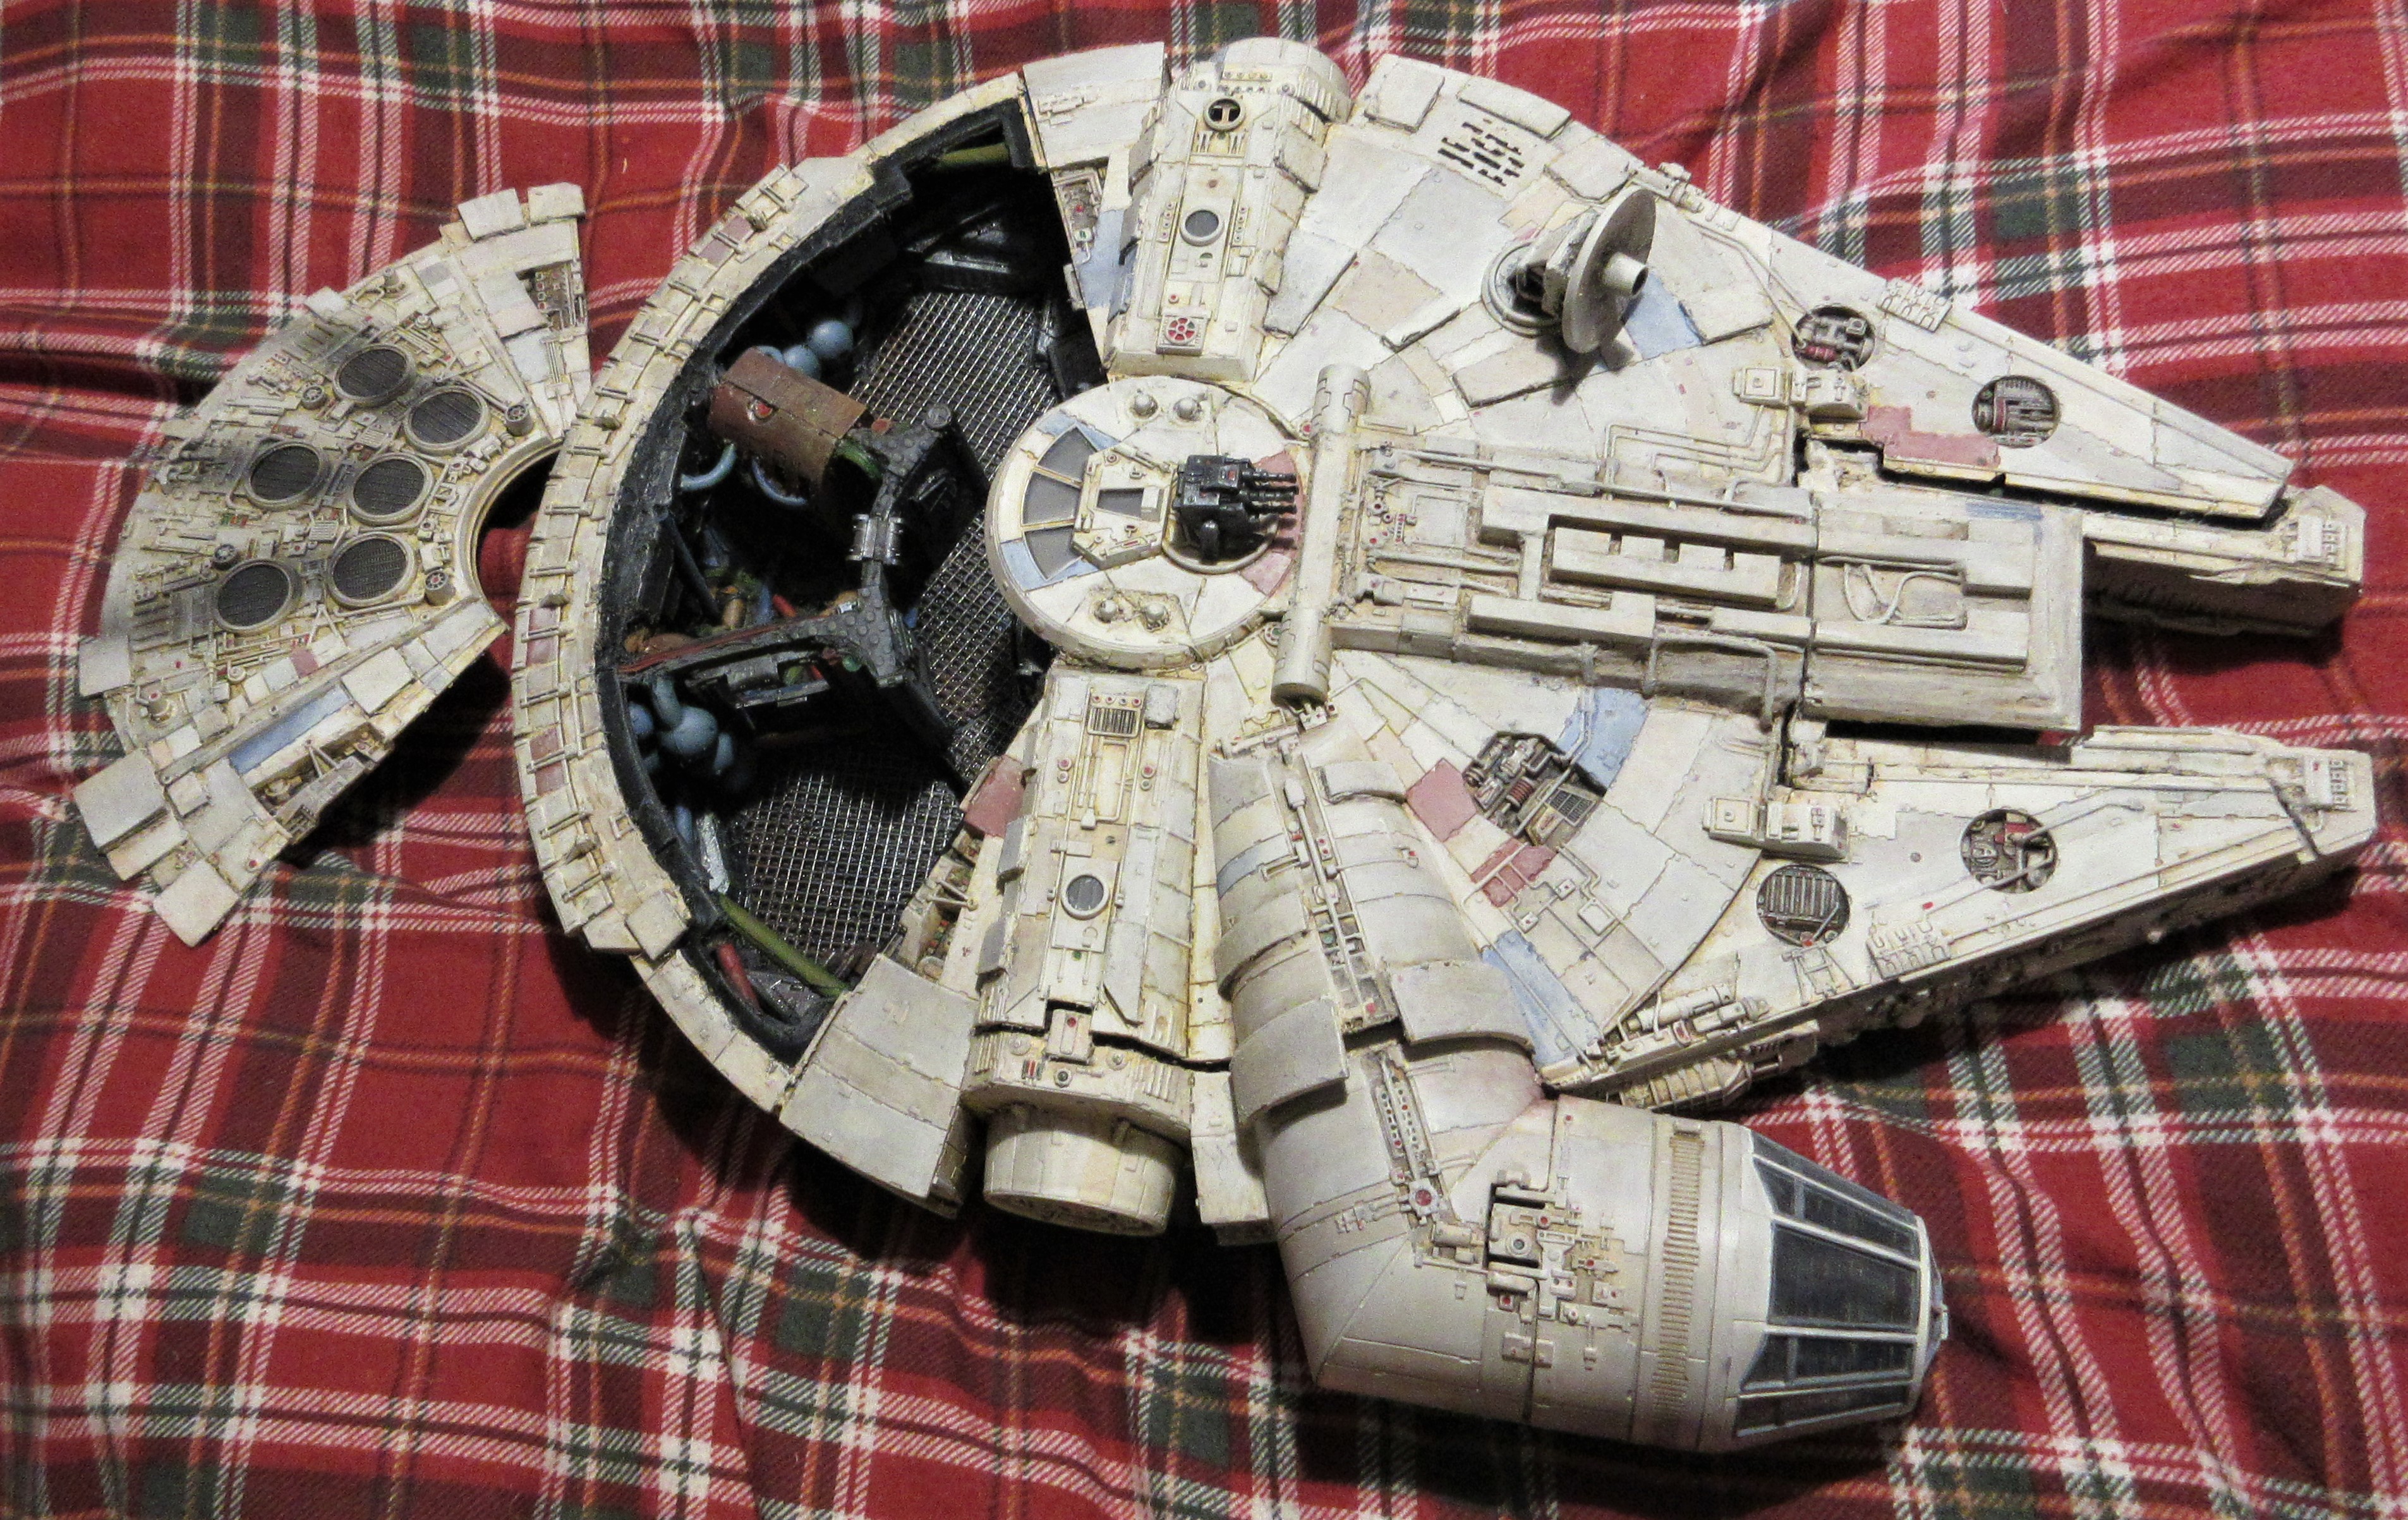
A Dirty Undercarriage
The legs and underside need messing up a bit to look like the dirty and grungy Millenium Falcon
First I managed to find some of the old time of plastic bendy straw. These are quite rightly no longer sold in the UK due to the environmental damage they cause, but my local gaming pub let me have a few they still had. I cut these down to add corrugated pipes to the legs – note that my earlier trick of filling paper straws with hot glue to strengthen them does not work with these as the plastic straws will just melt. Instead they are packed with the unused straw offcuts, with just a blog of hot glue on each end to fix them in place. I
Some of the paper straws I had left are used as sleeves to reinforce the straight sections of the plastic straws, and to wrap around any of the pencil woods I used earlier that I think will look better round than hexagonal. Then all the new material is primed black, and using a make-up brush Drybrushed mid-grey to bring it into line with what I’ve already painted.


I also added some dark shadow to the recesses of the hull while I had a black primer paint brush in my hand. I use flat red and sick green (valehjo paints) to add warning lights and stop the hull being featureless – the colours are subdued due to dumbfounded overblack, as I don’t want them too prominent from a distance.
The pistons on the legs and ramp are Drybrushed gunmetal grey, stippled with rust effect and bronze paint, then given “scratches” with a shinier natural steel paint (logically these “scratches” should run vertically, but quick horizontal lines always seem to look better).
Typhus corrosion is a GW technical paint I have never used before, but I had some (I think it came free with a partswork magazine) and it work well at adding grunge and texture to the bottom of the legs and leading edges of the side s of the hull. I just stippled off in with an old brush (which the paint finally killed off – don’t use your finest sable brushes with this stuff!)
Finally I use black paint to add shadow where the pistons meet the hull.
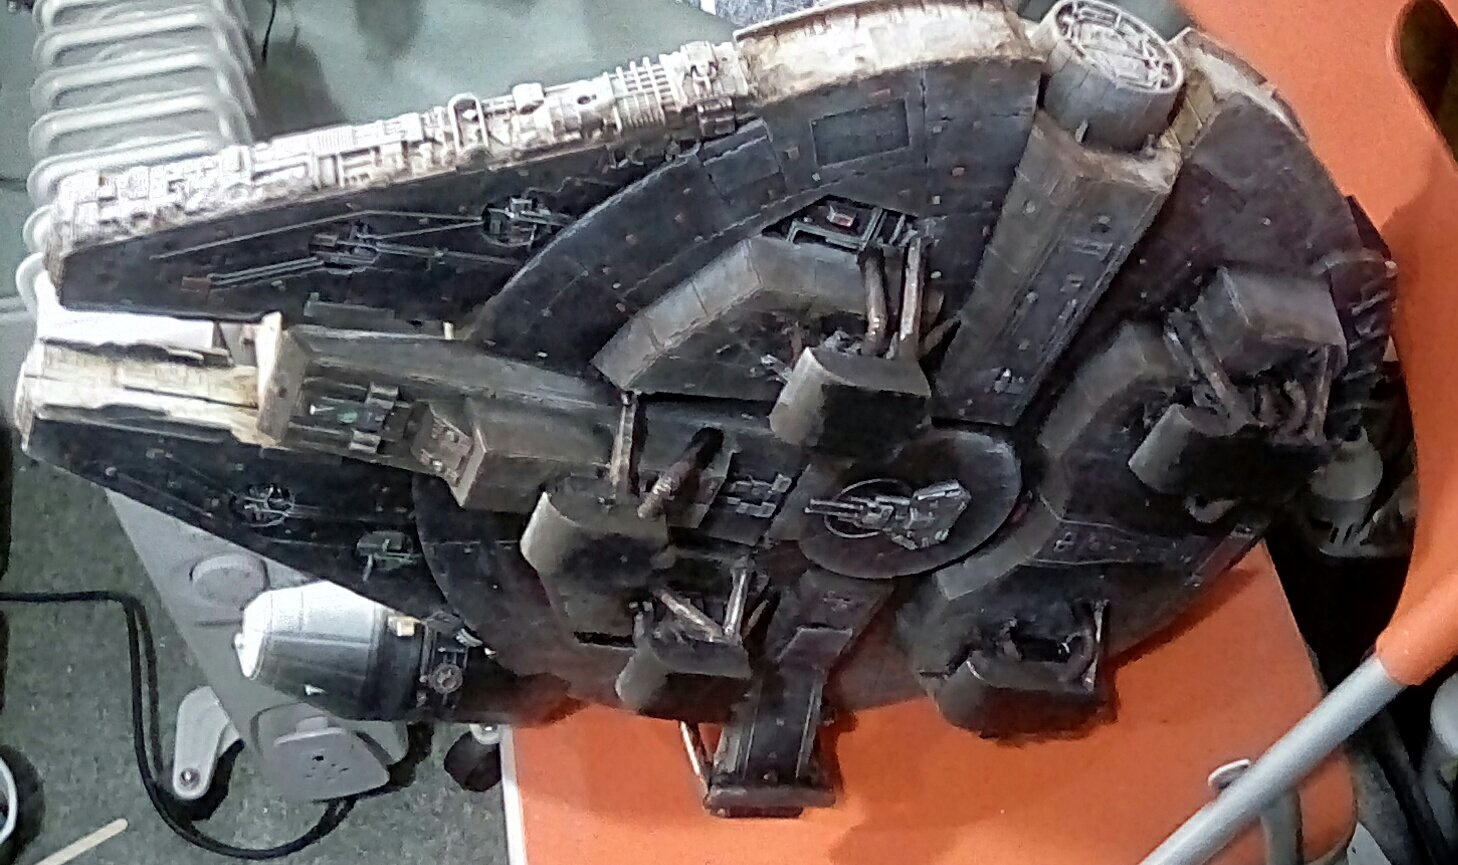


 Now the ship has a dirty, shadowy underside and a bit more grungy dirt ingrained on it's leading edges of the hull.
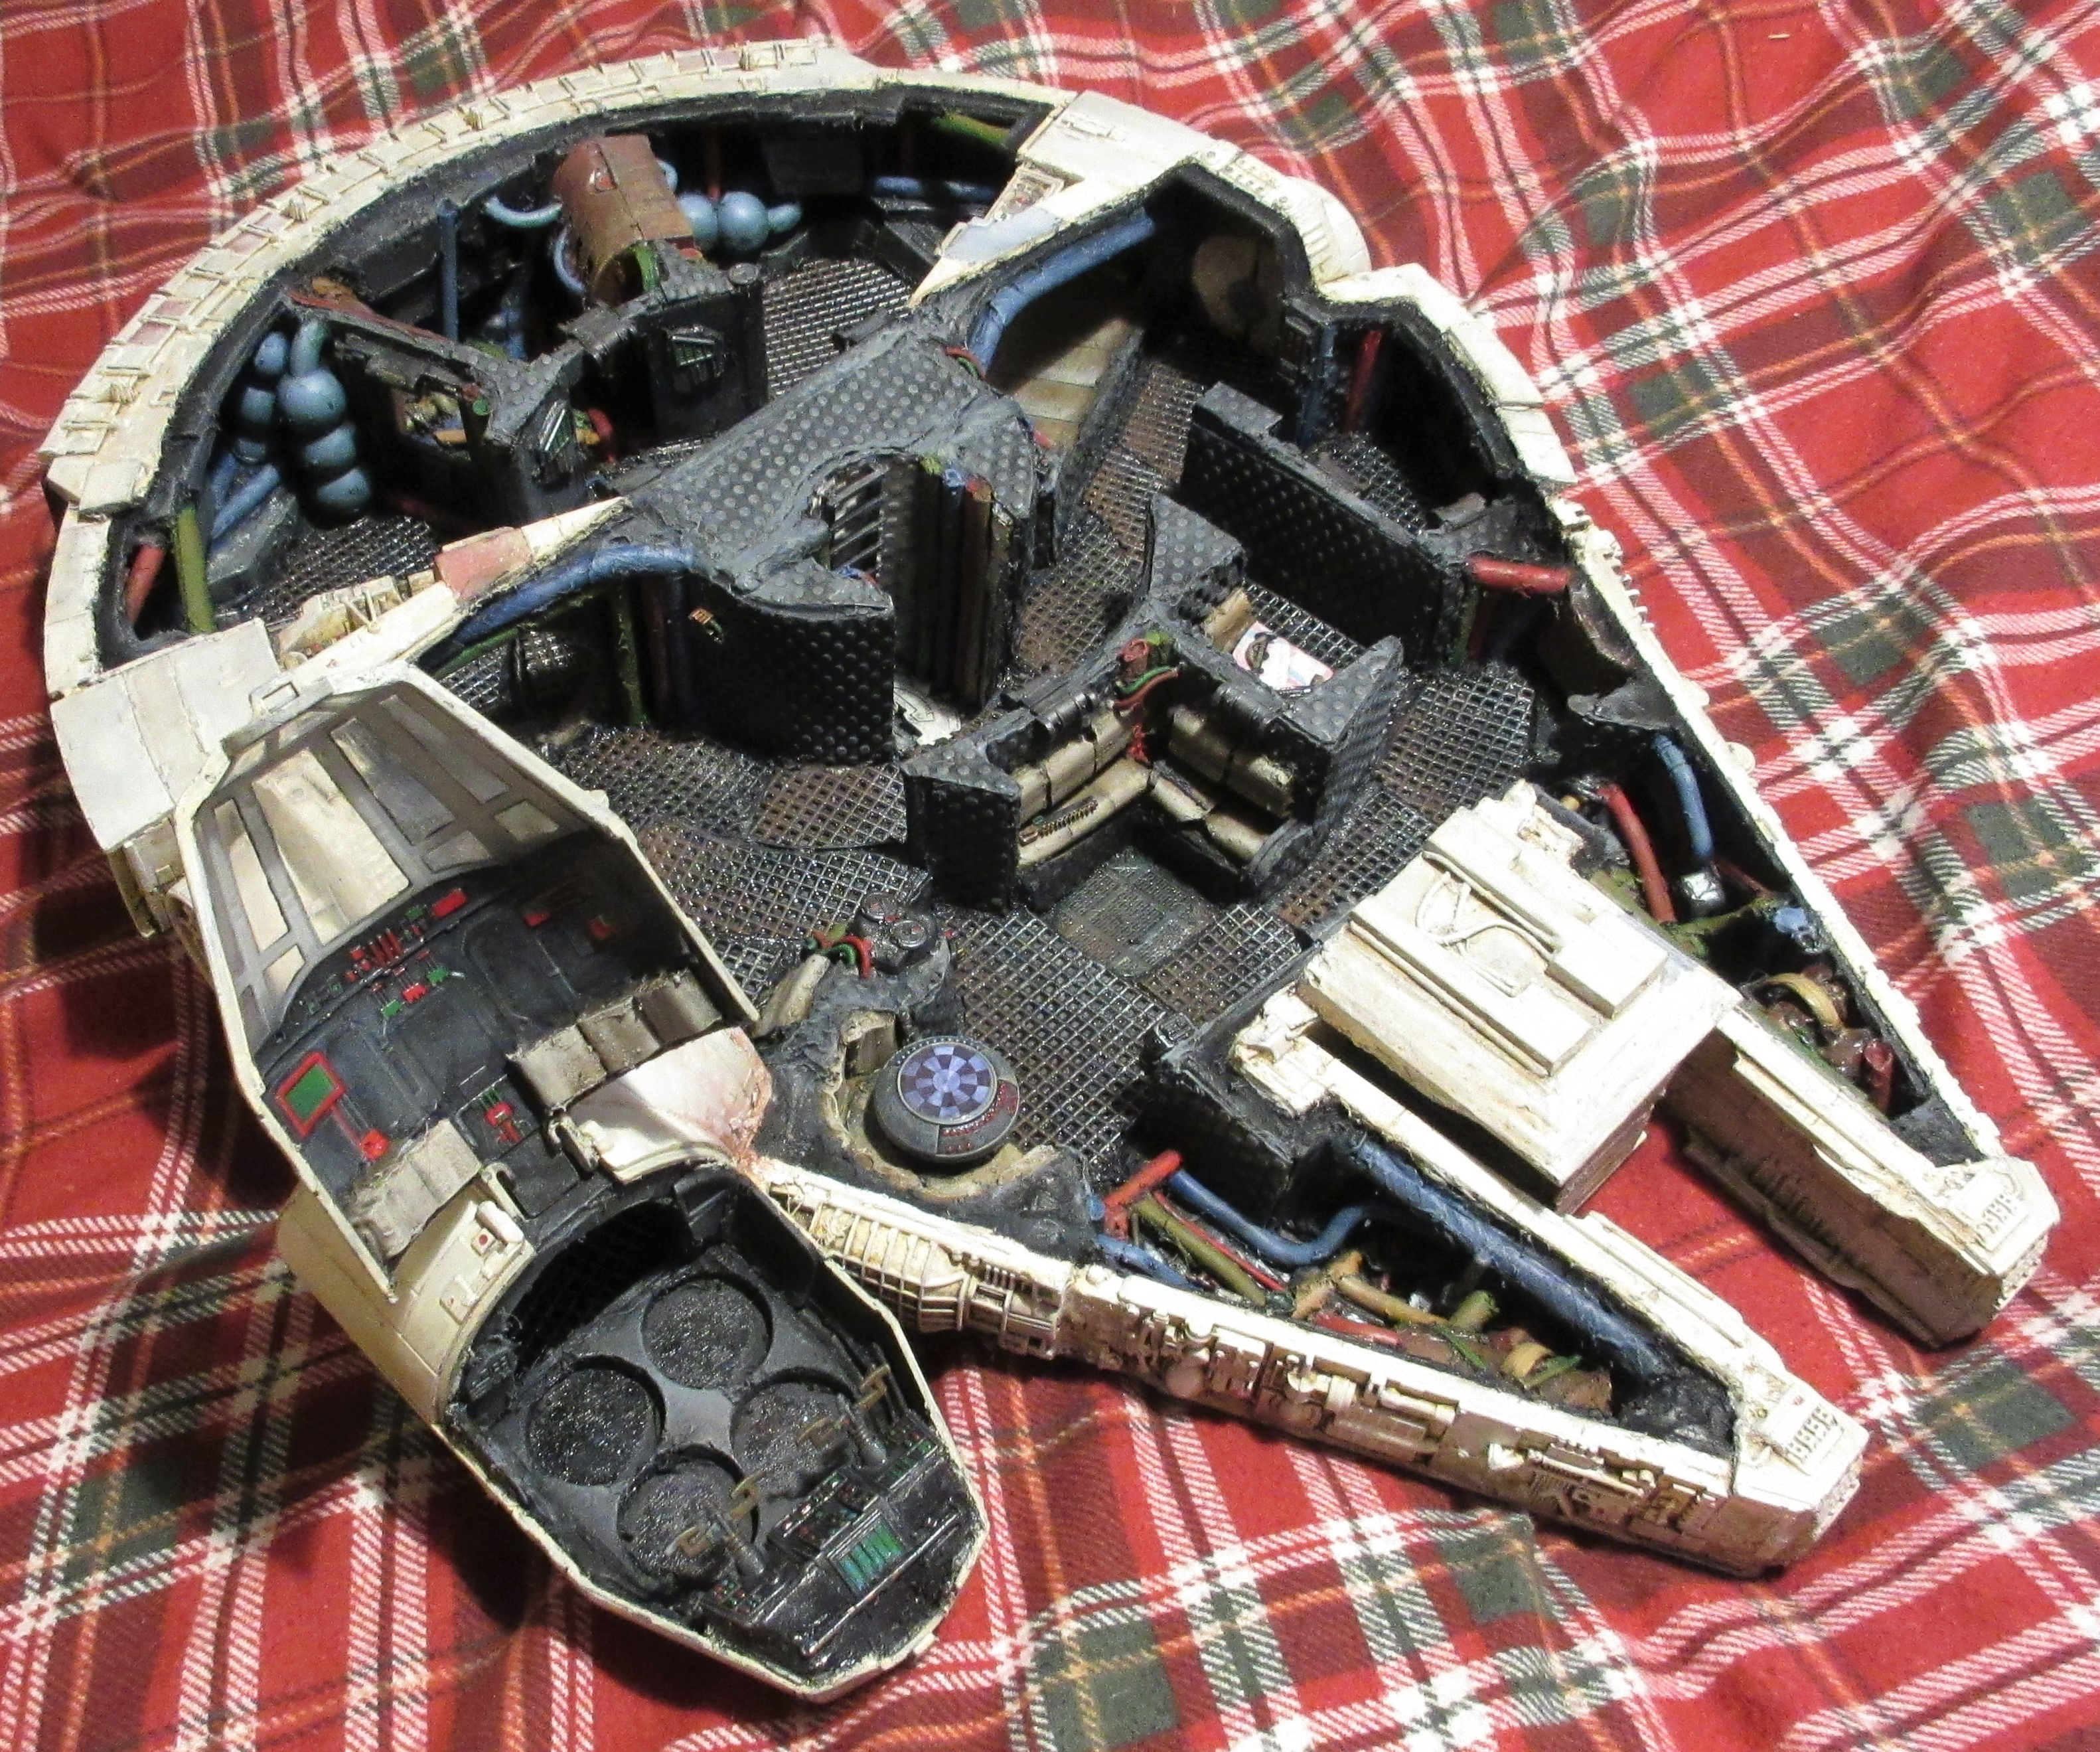
a few better pics....
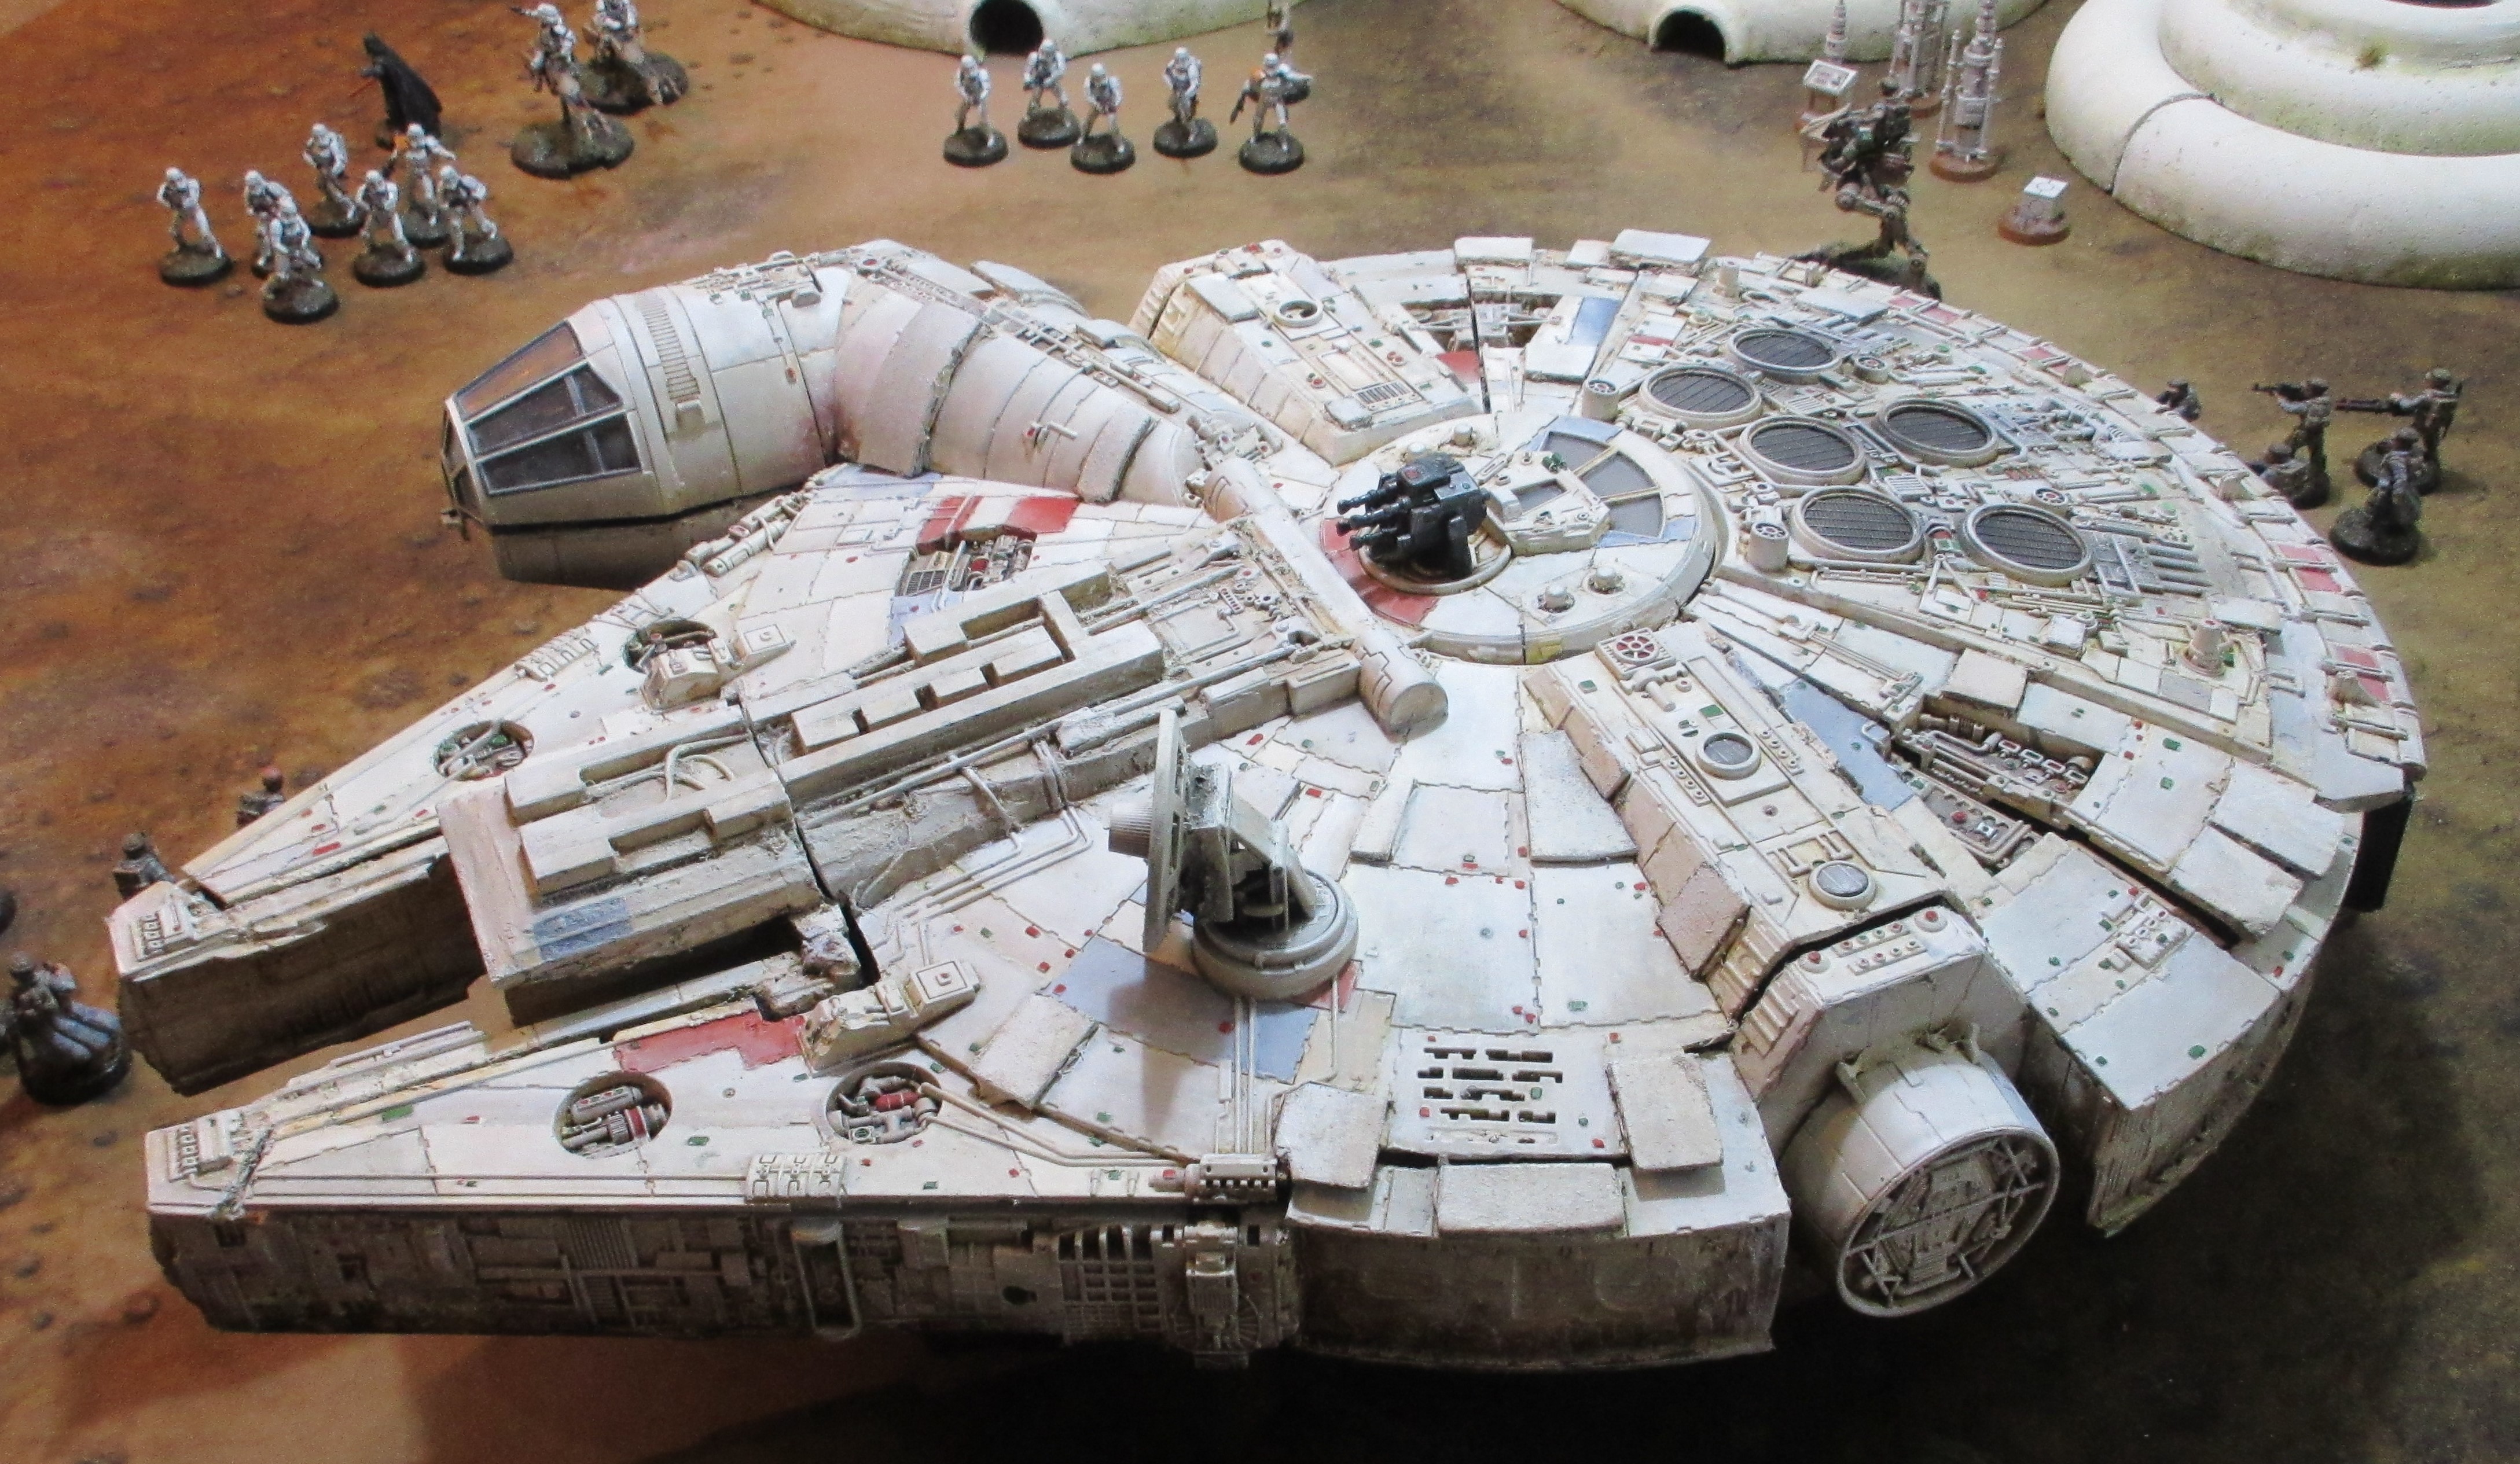
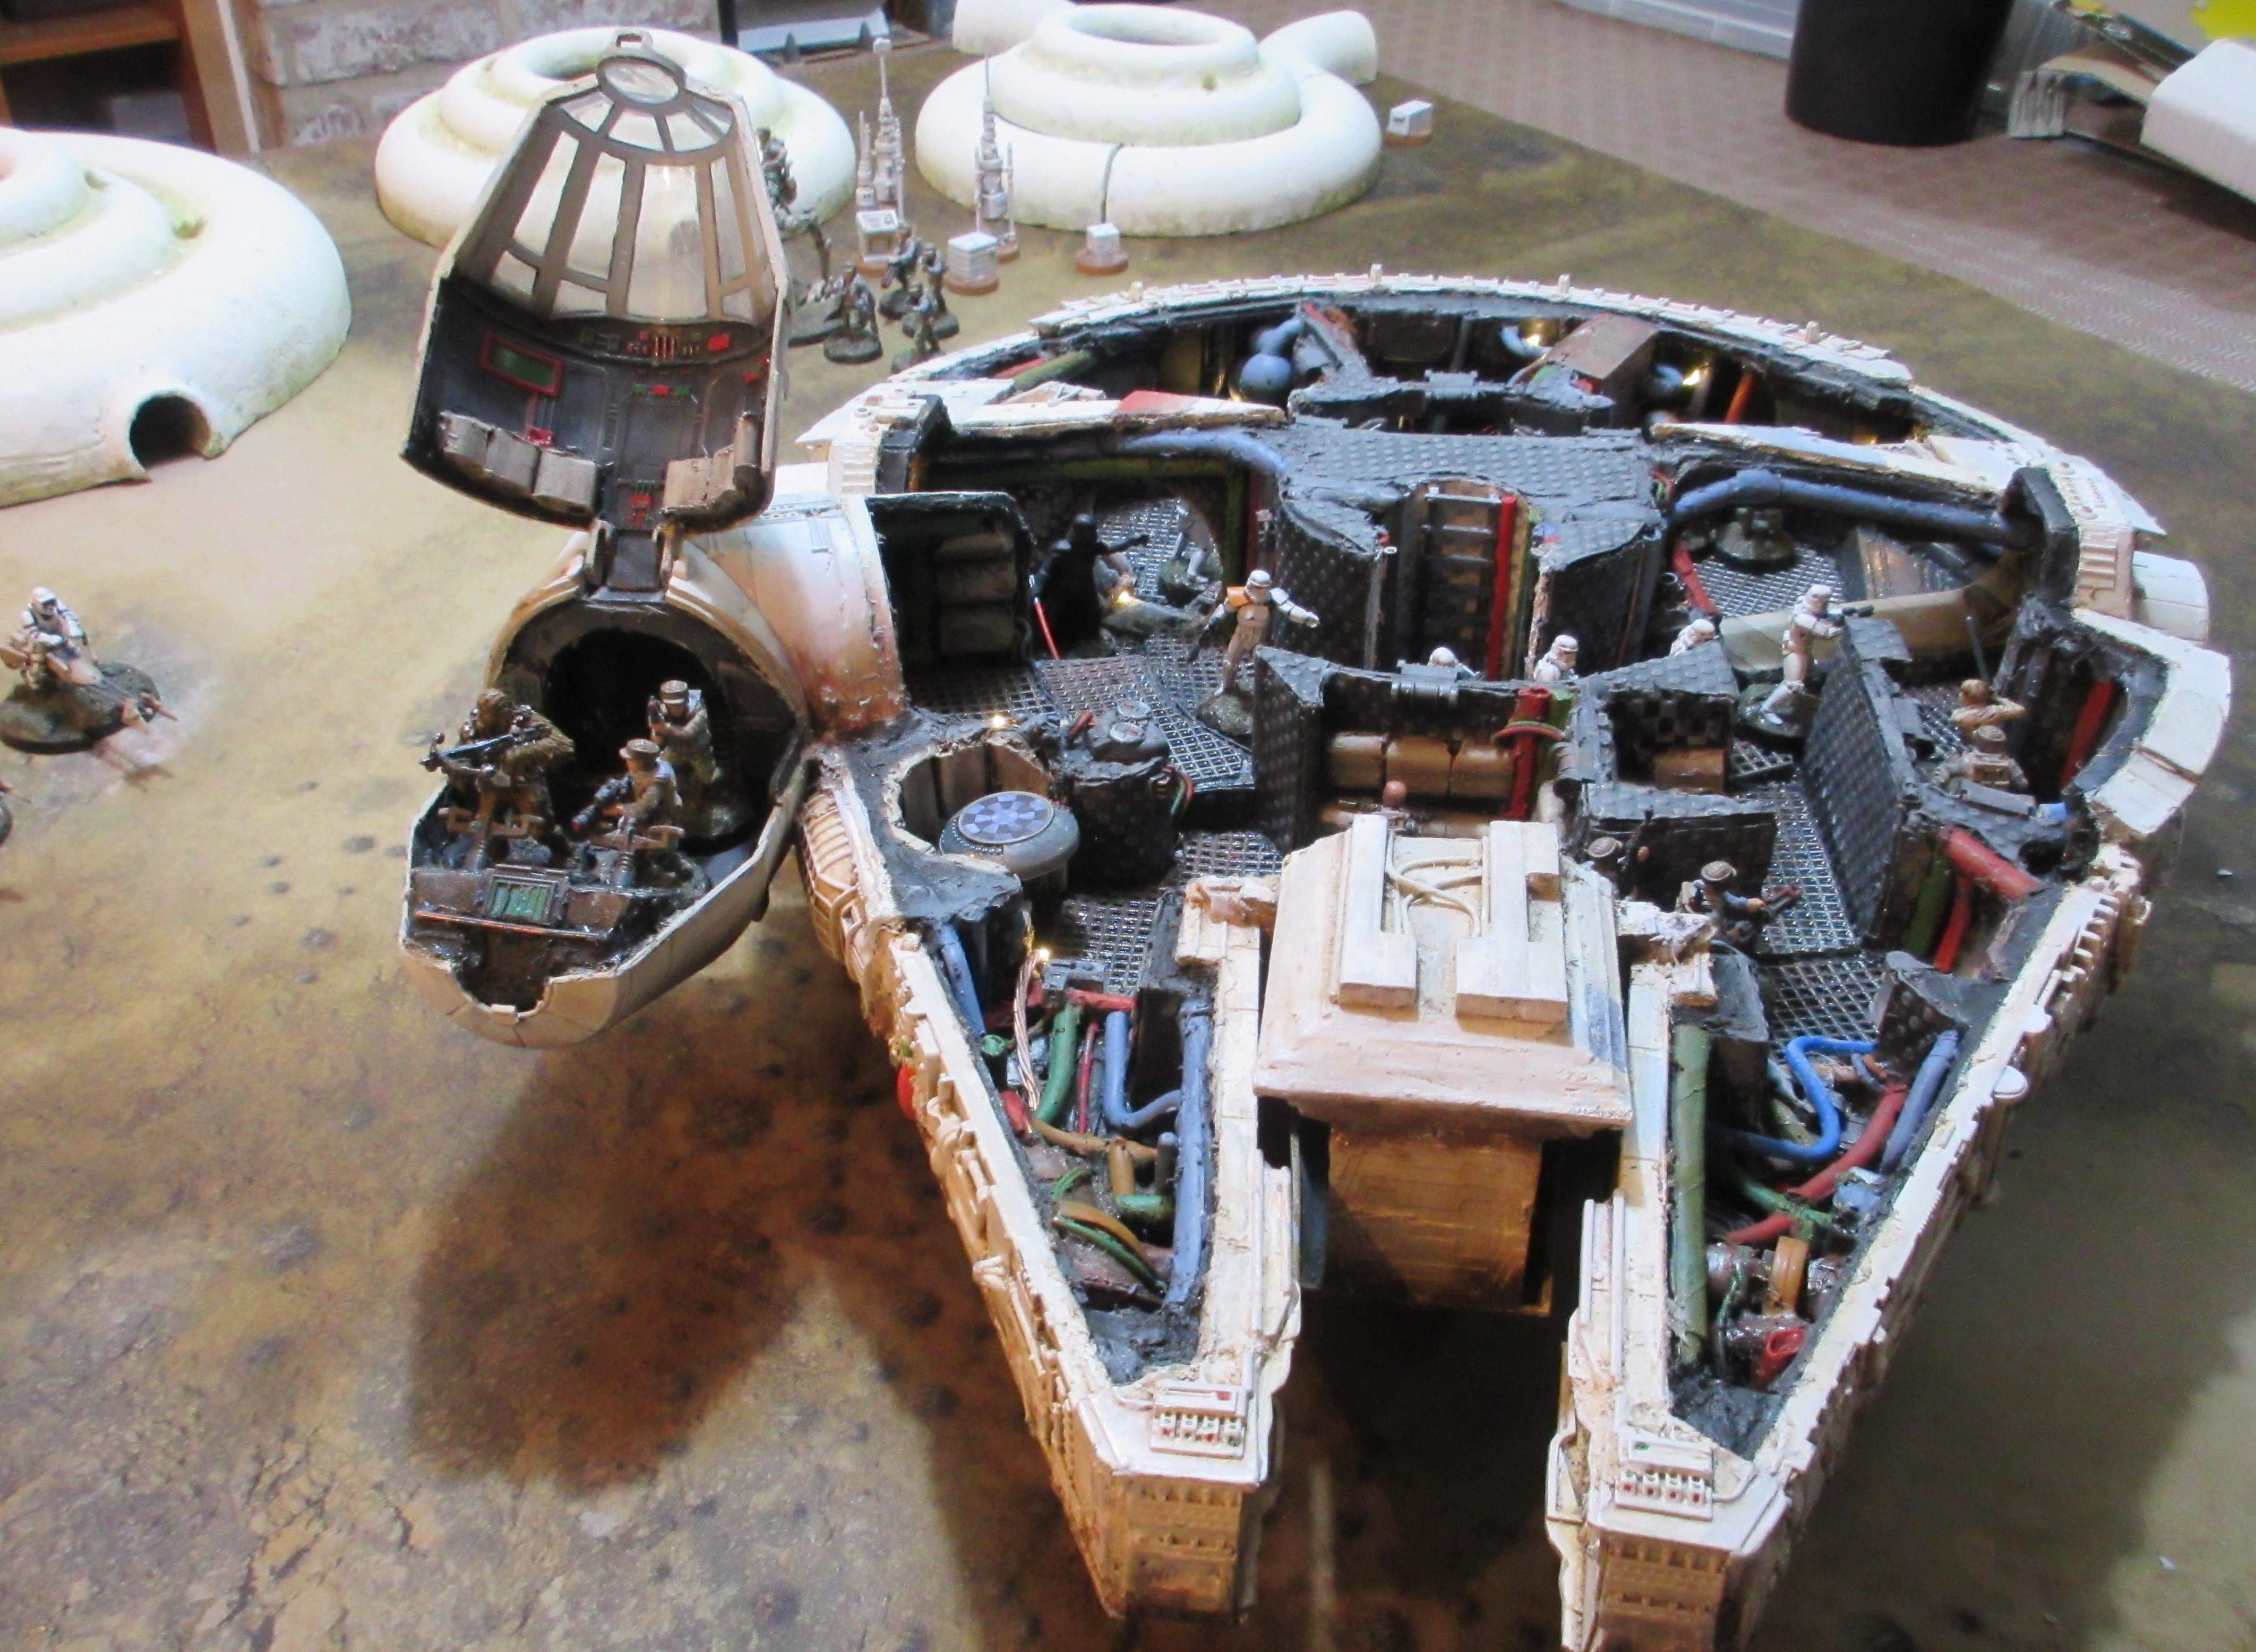
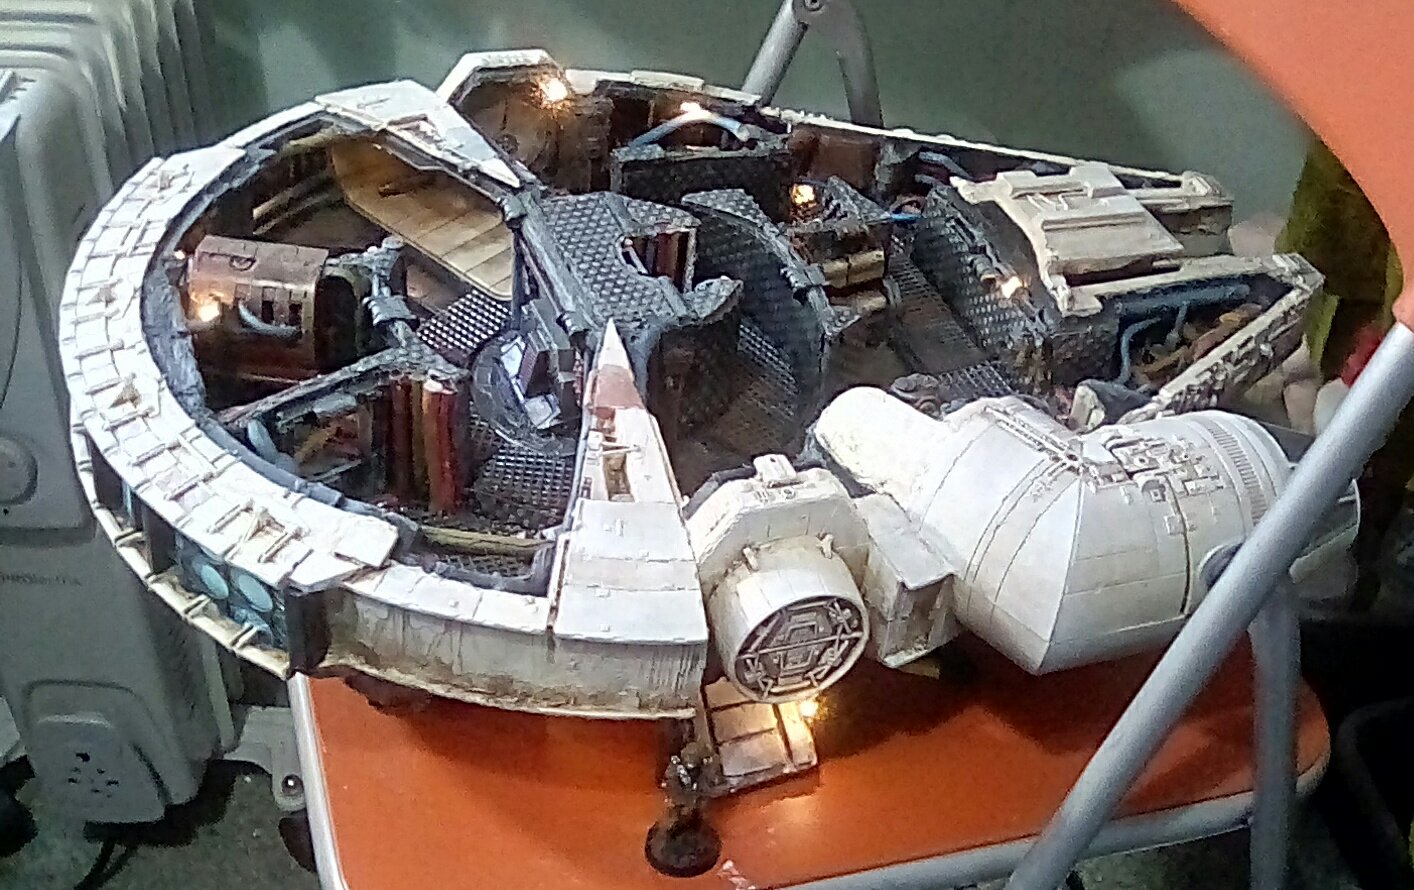
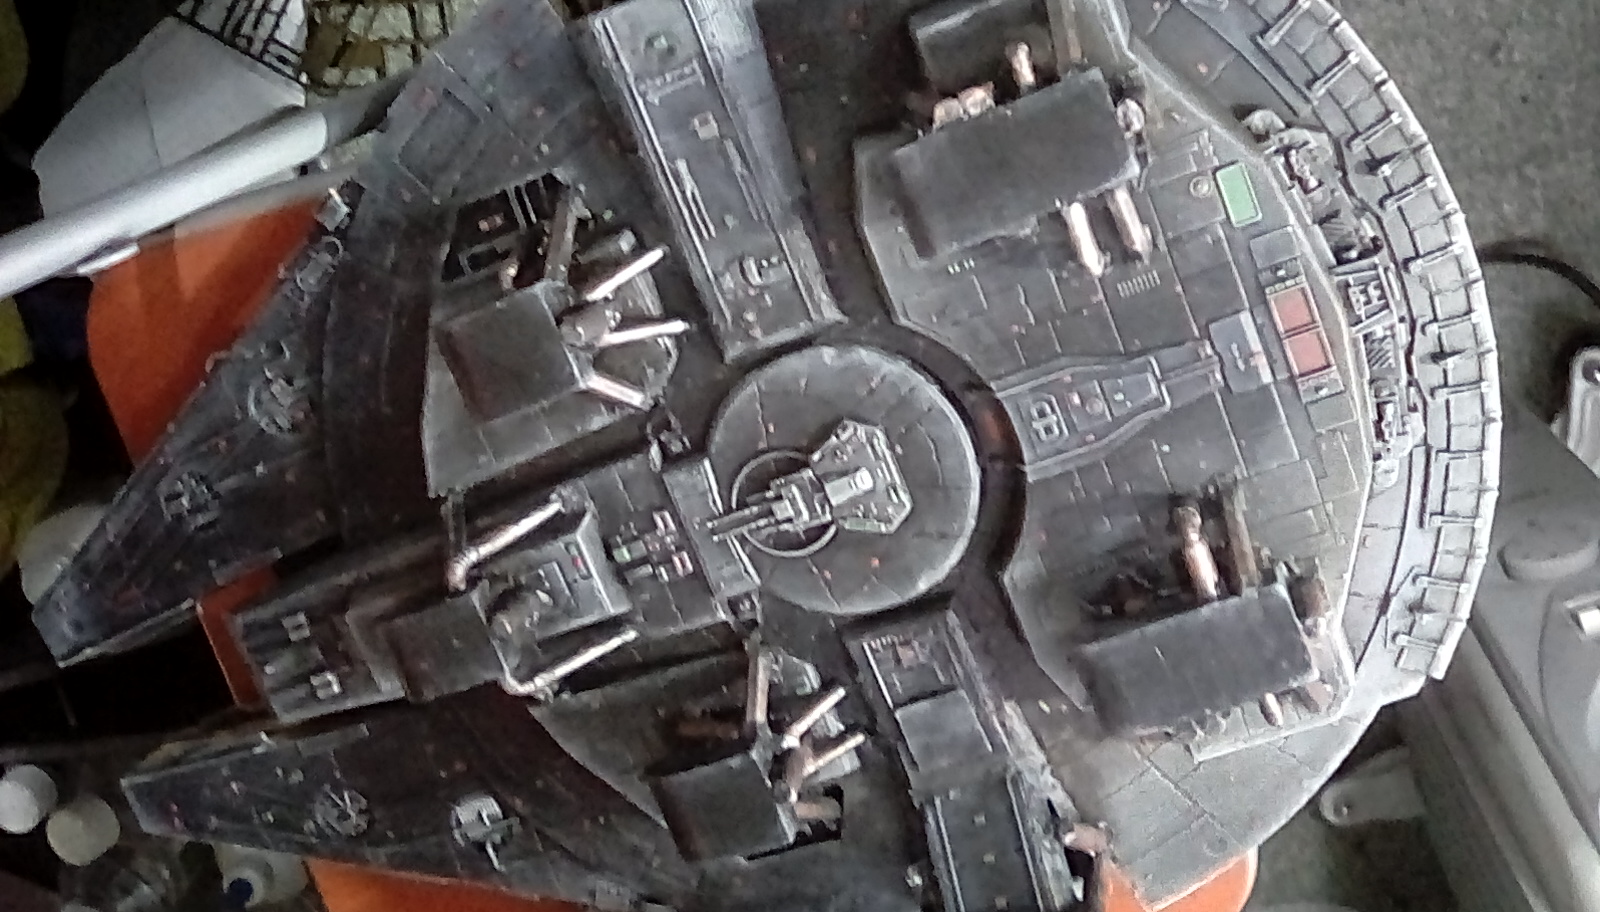
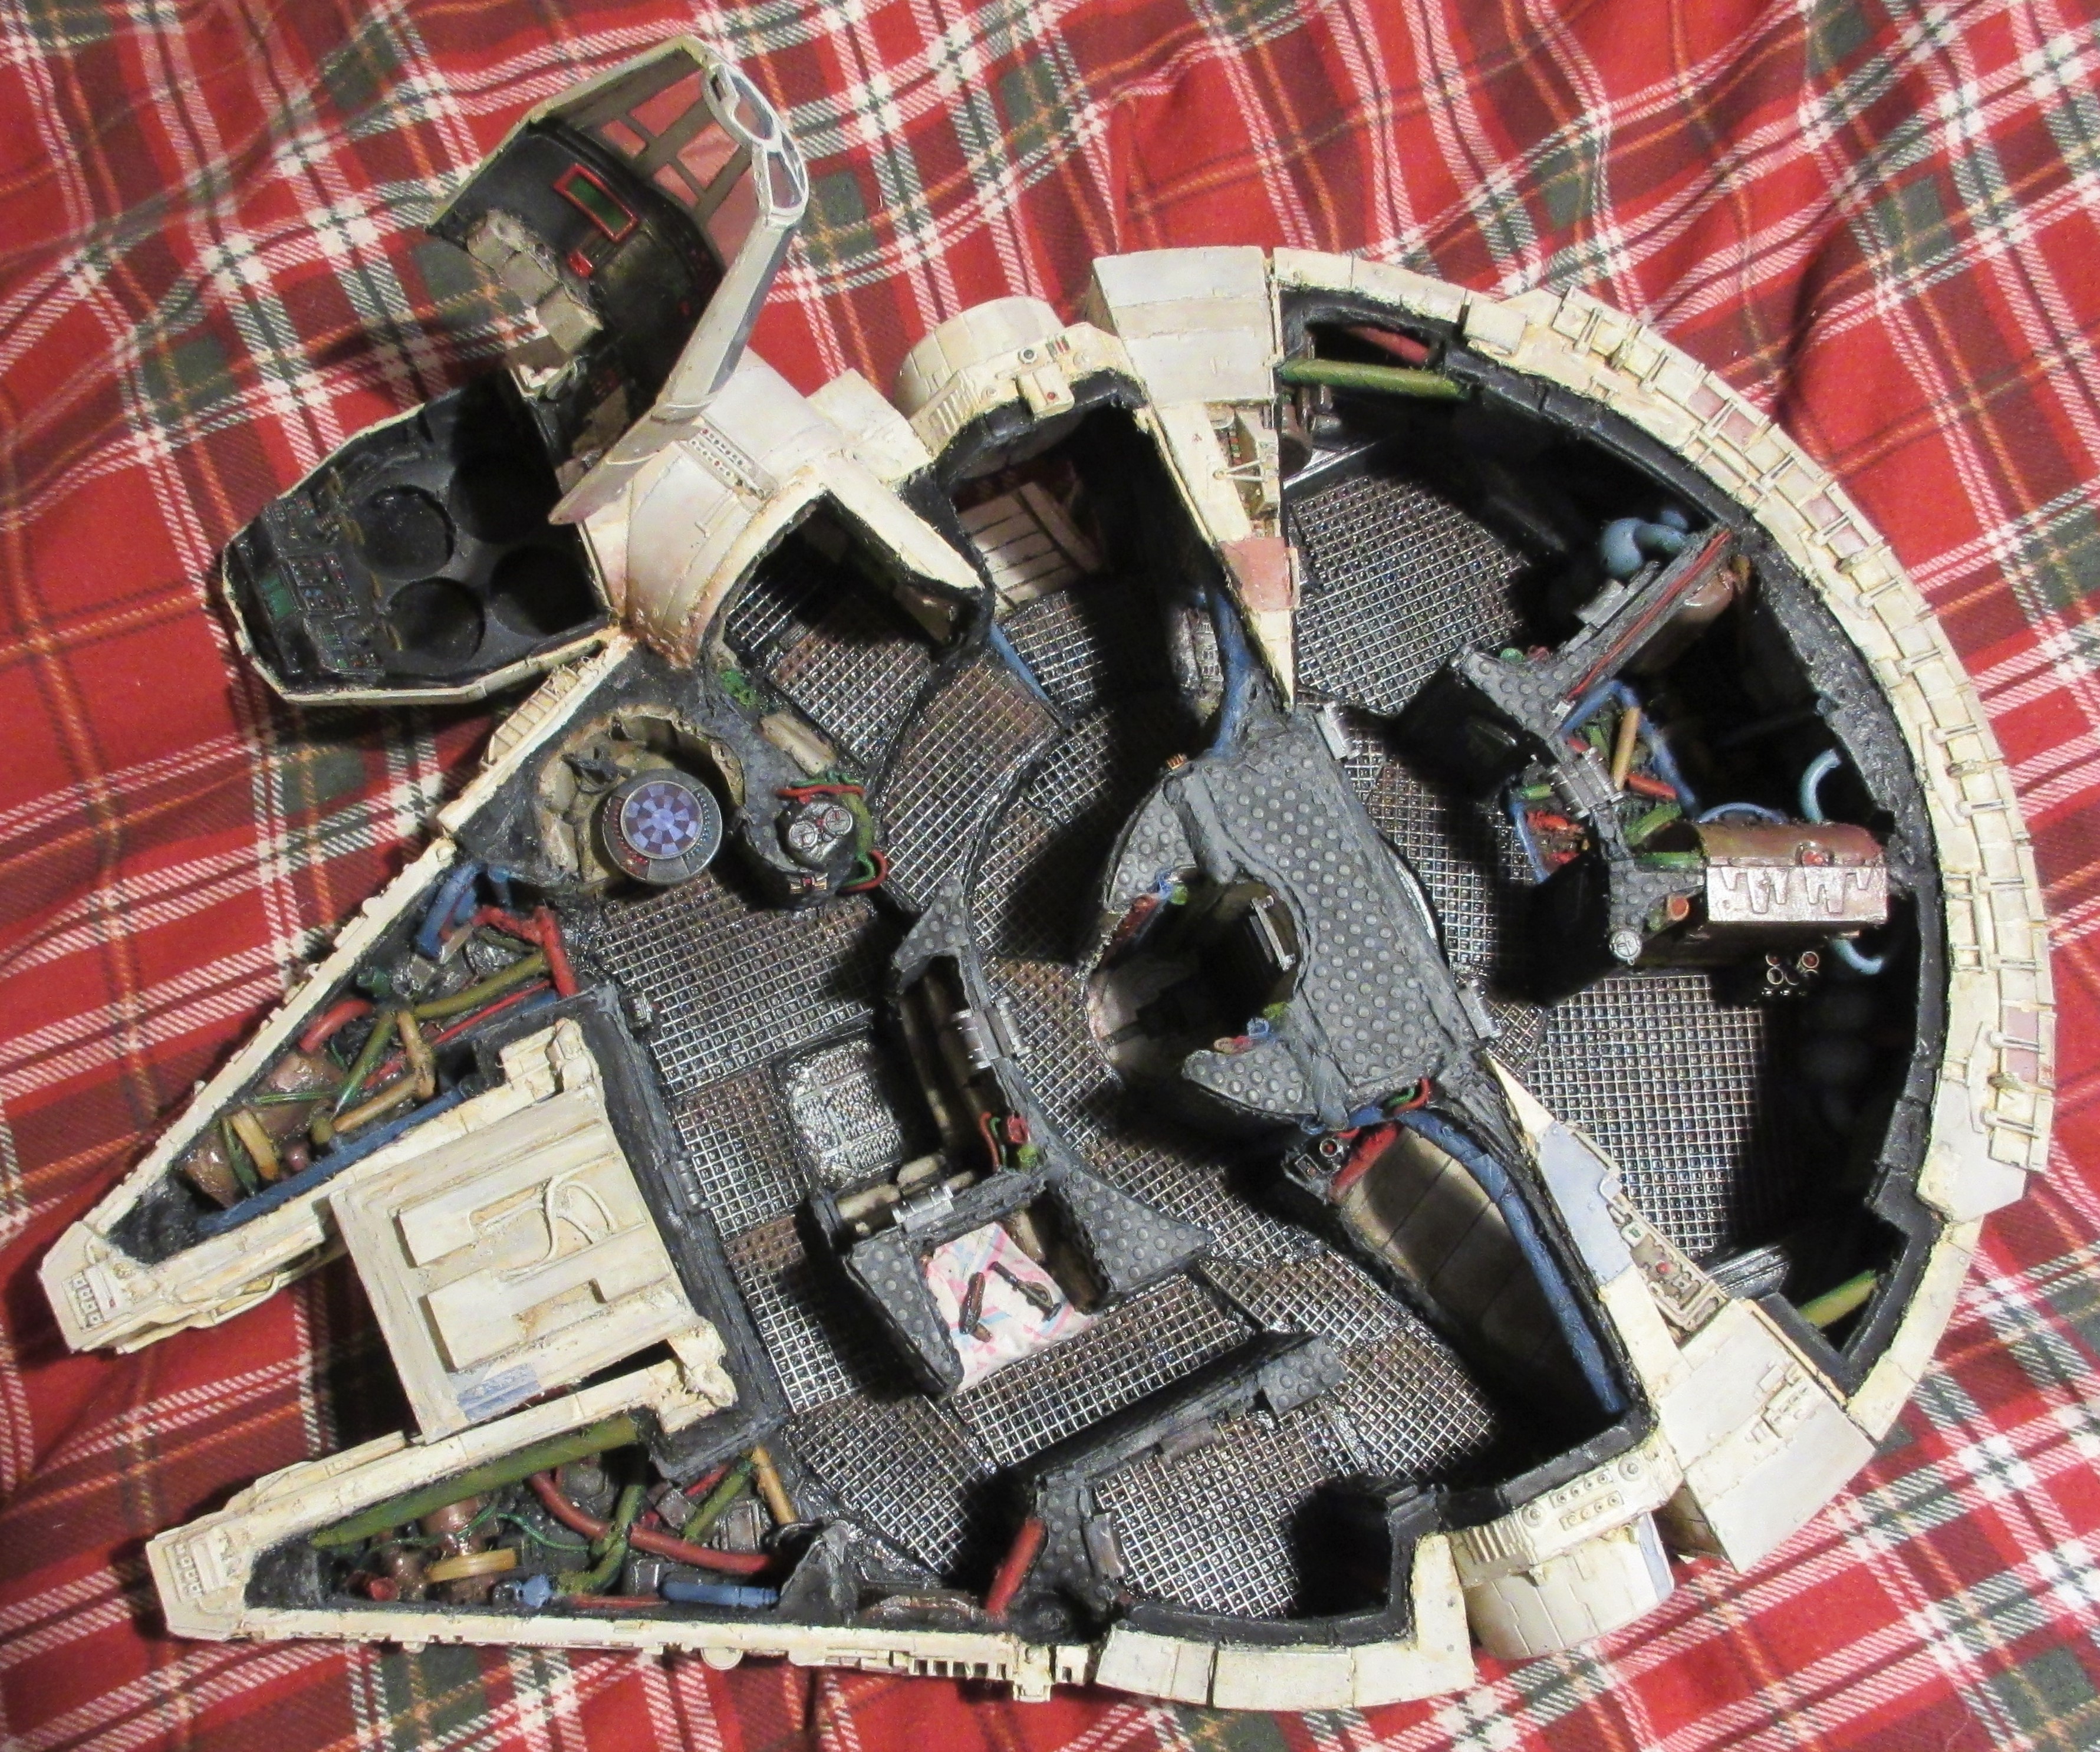
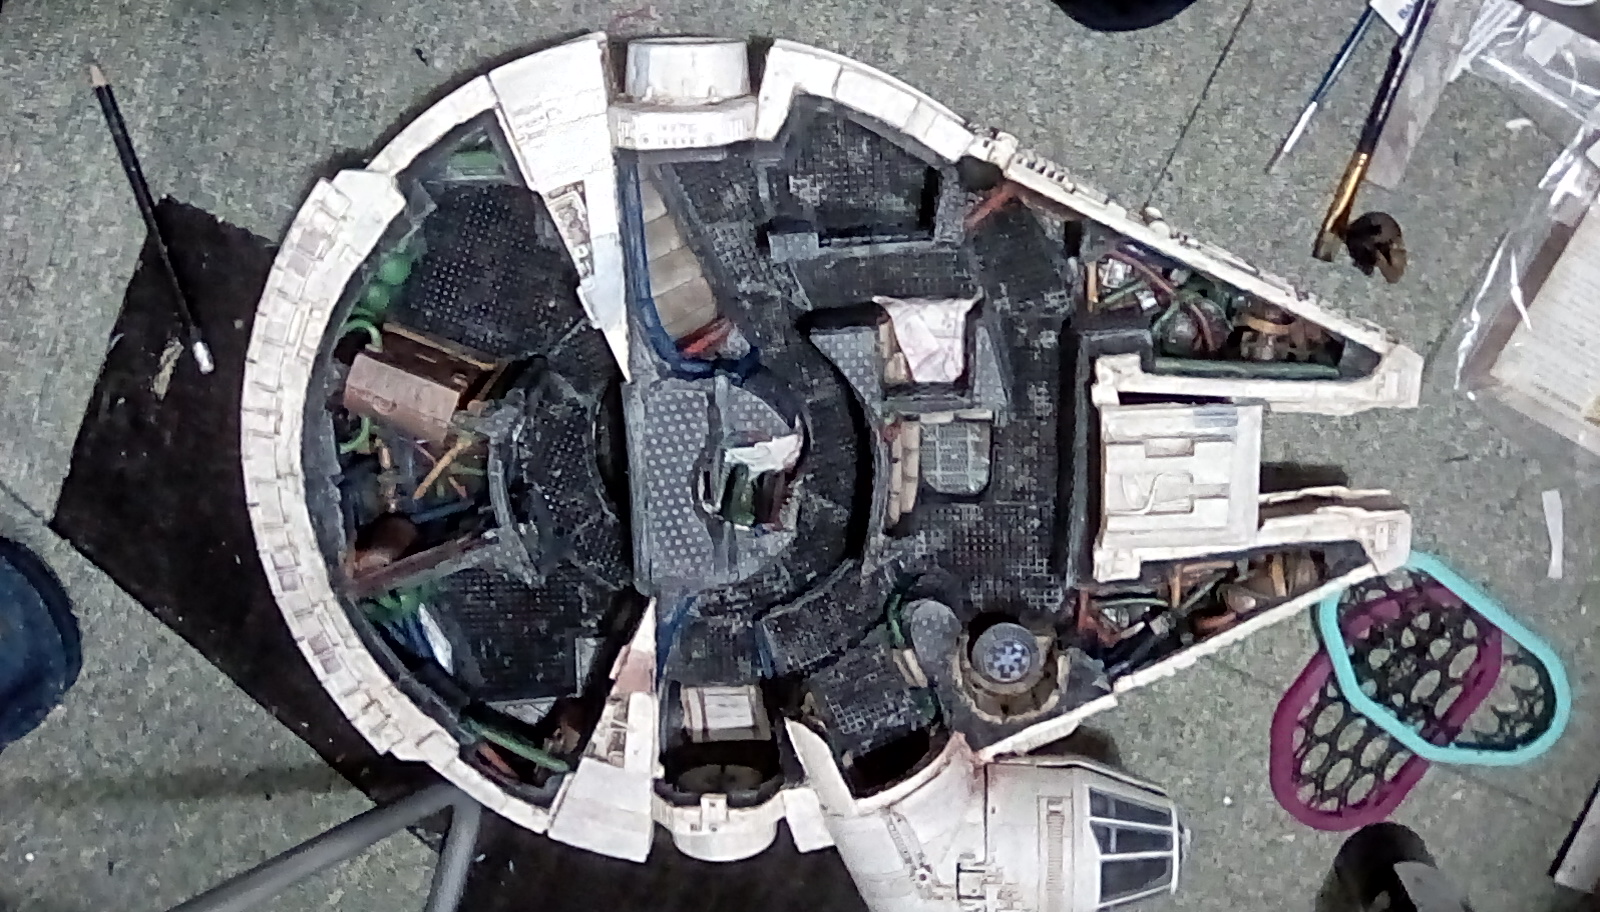
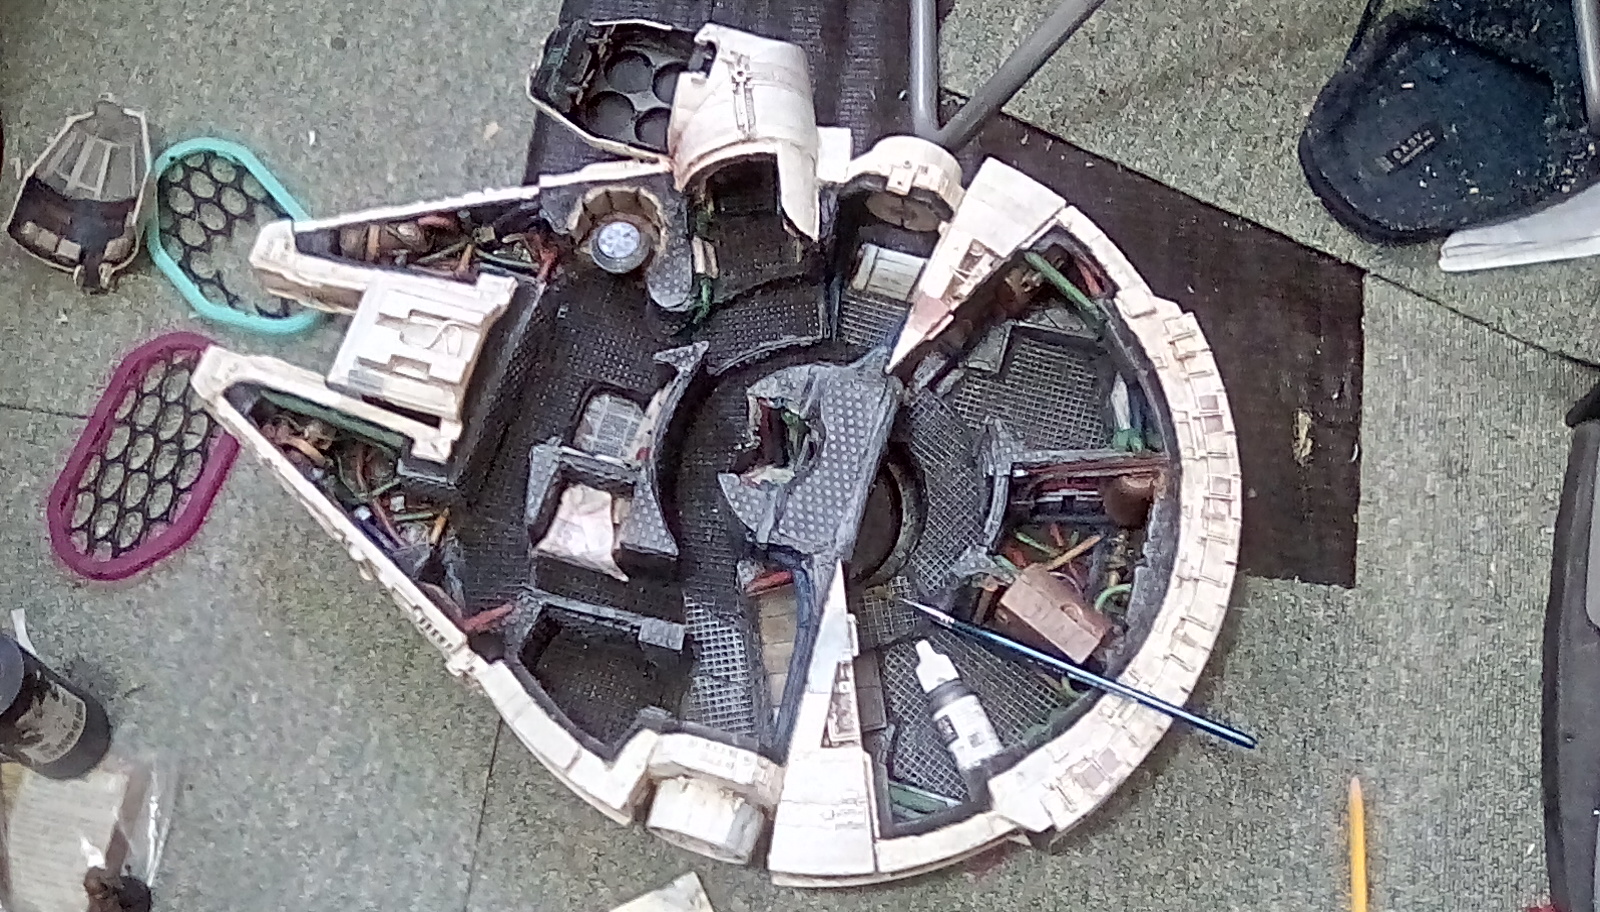
As I’ve raided the bitz box to add some details to the insides, and given some of the internal engine parts their first coat of blue to match the outside engine glow, I thought I would blow the dust off my laptop and take some better quality pics than is possible on my tablet. The ships not finished, but I’m getting there now.
The main parts of the ship stucture are nearly done now, but there’s still a lots of detailing left to do in order to hide rough edges and add interest.
THe next couple of entries will be some more work on the legs, and then seeing if my plan for installing really cheap but effective lighting will actually work.
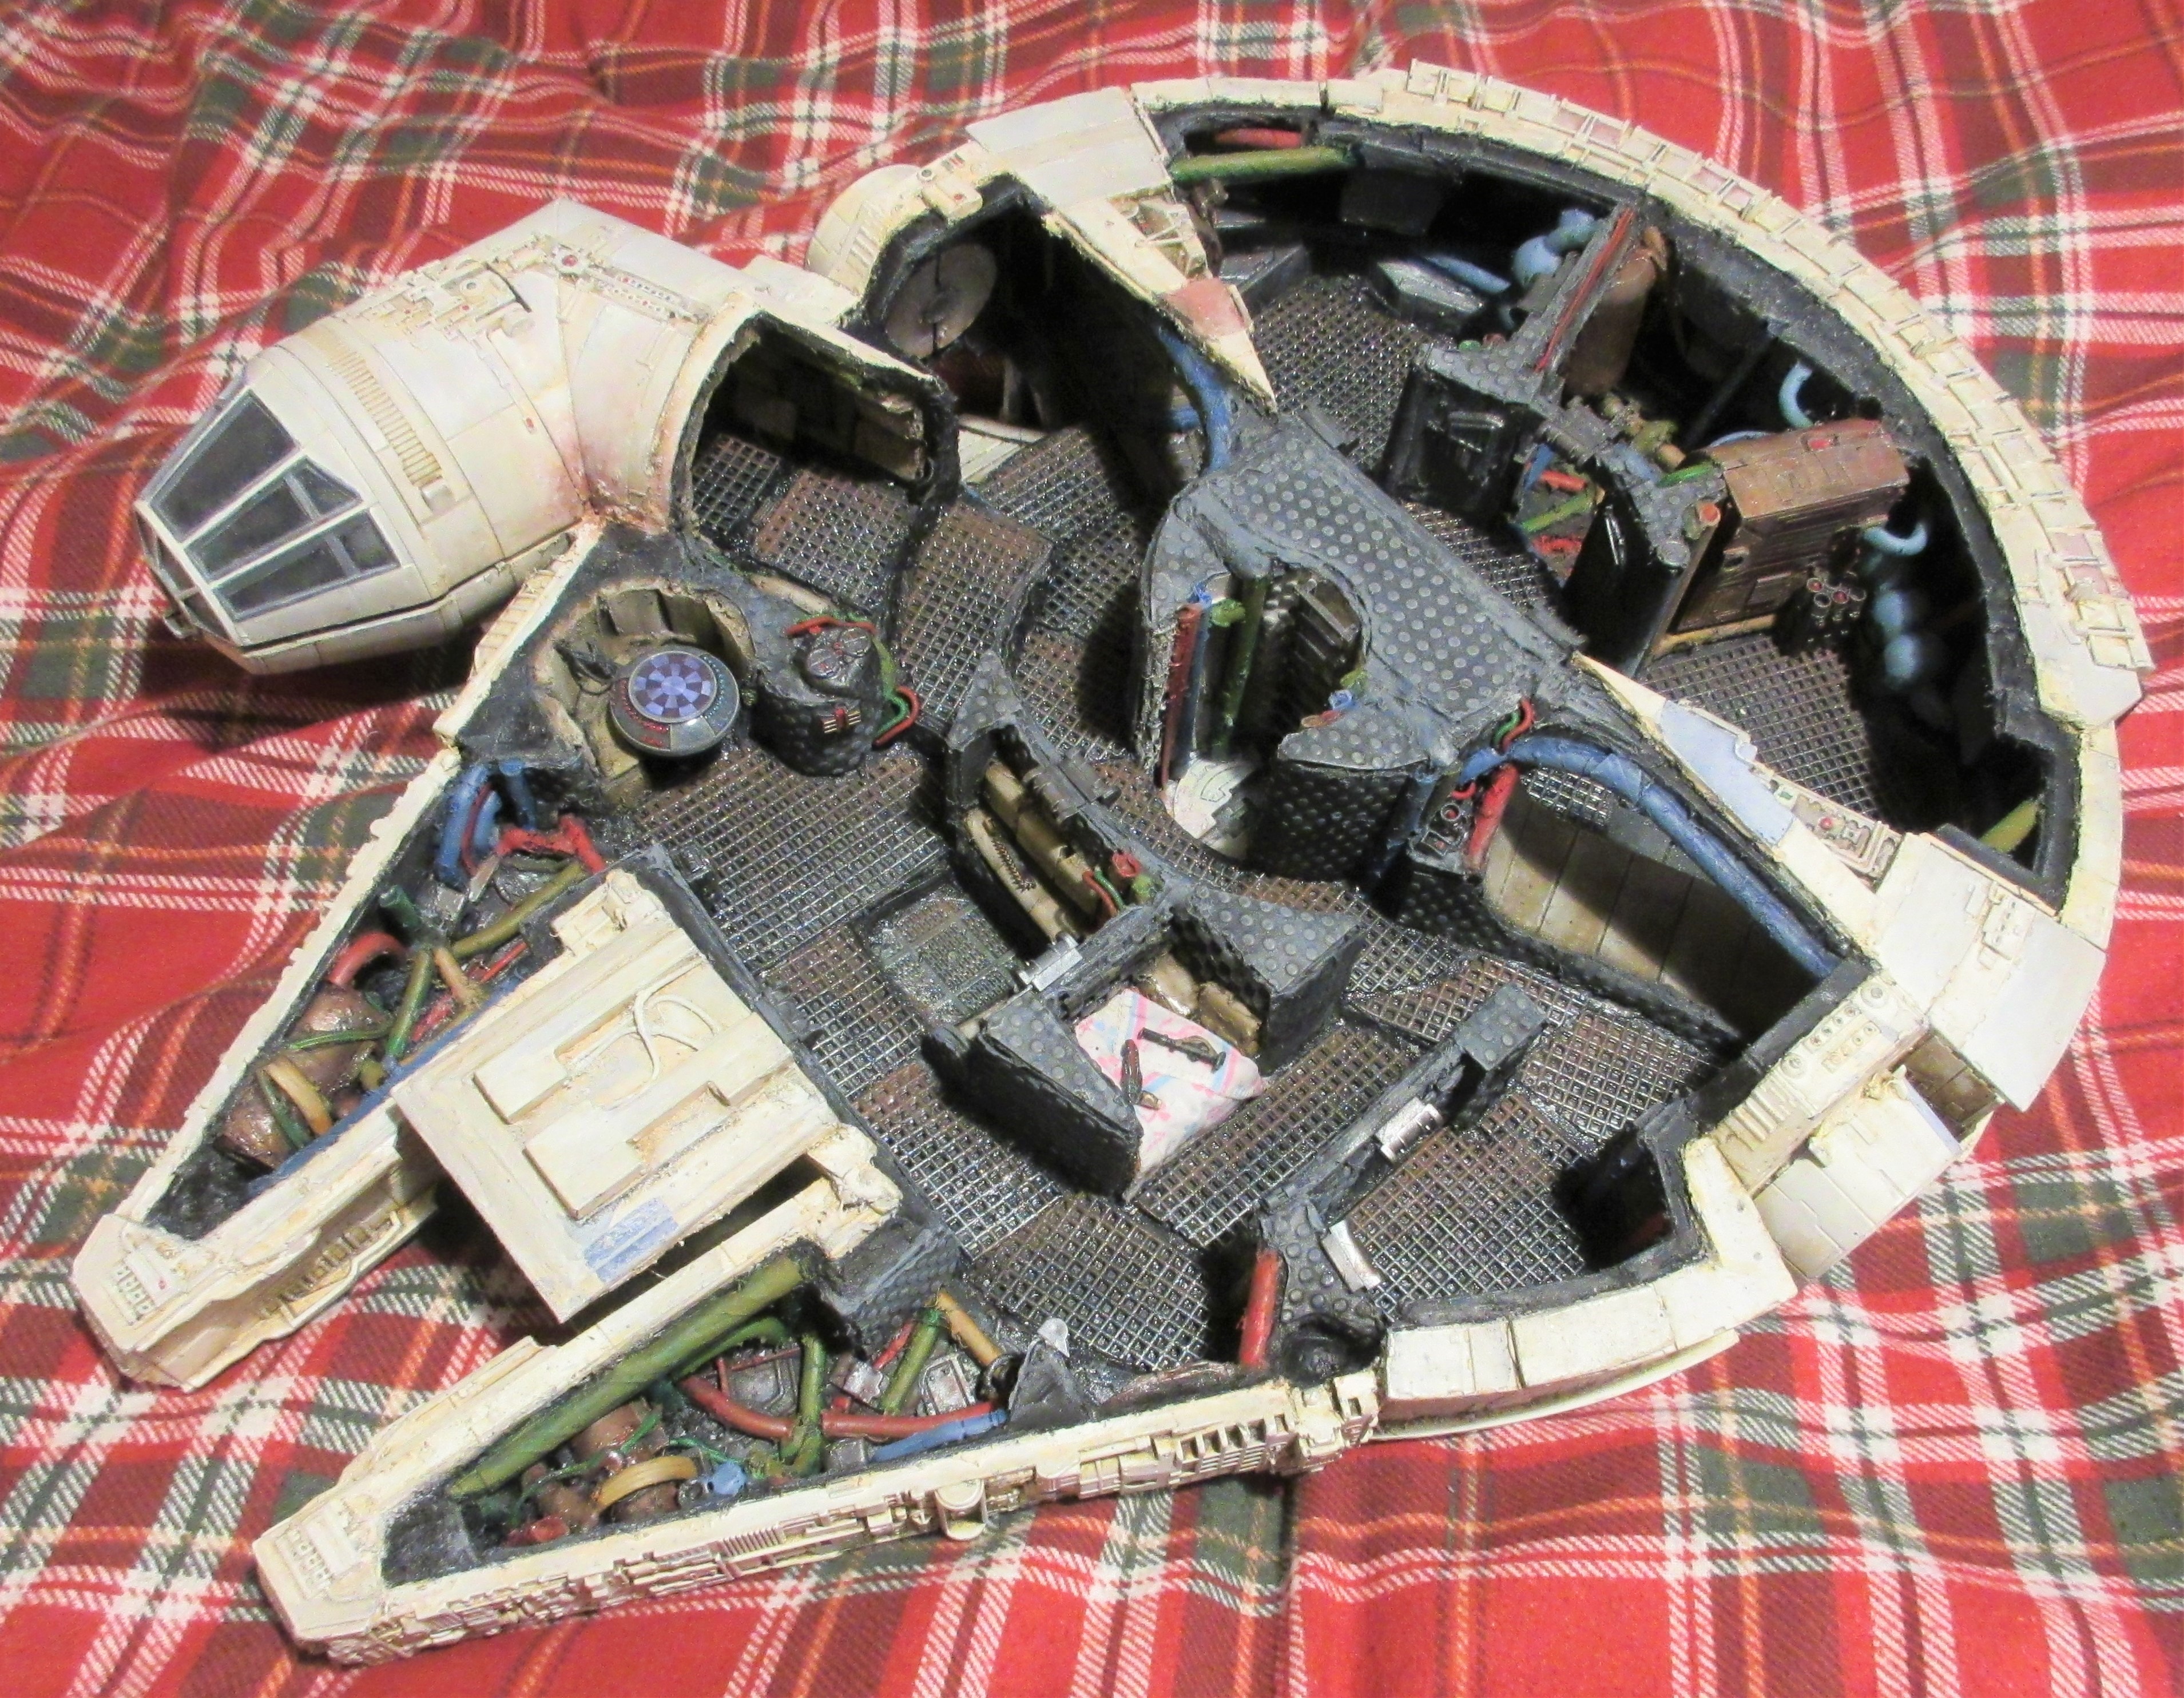


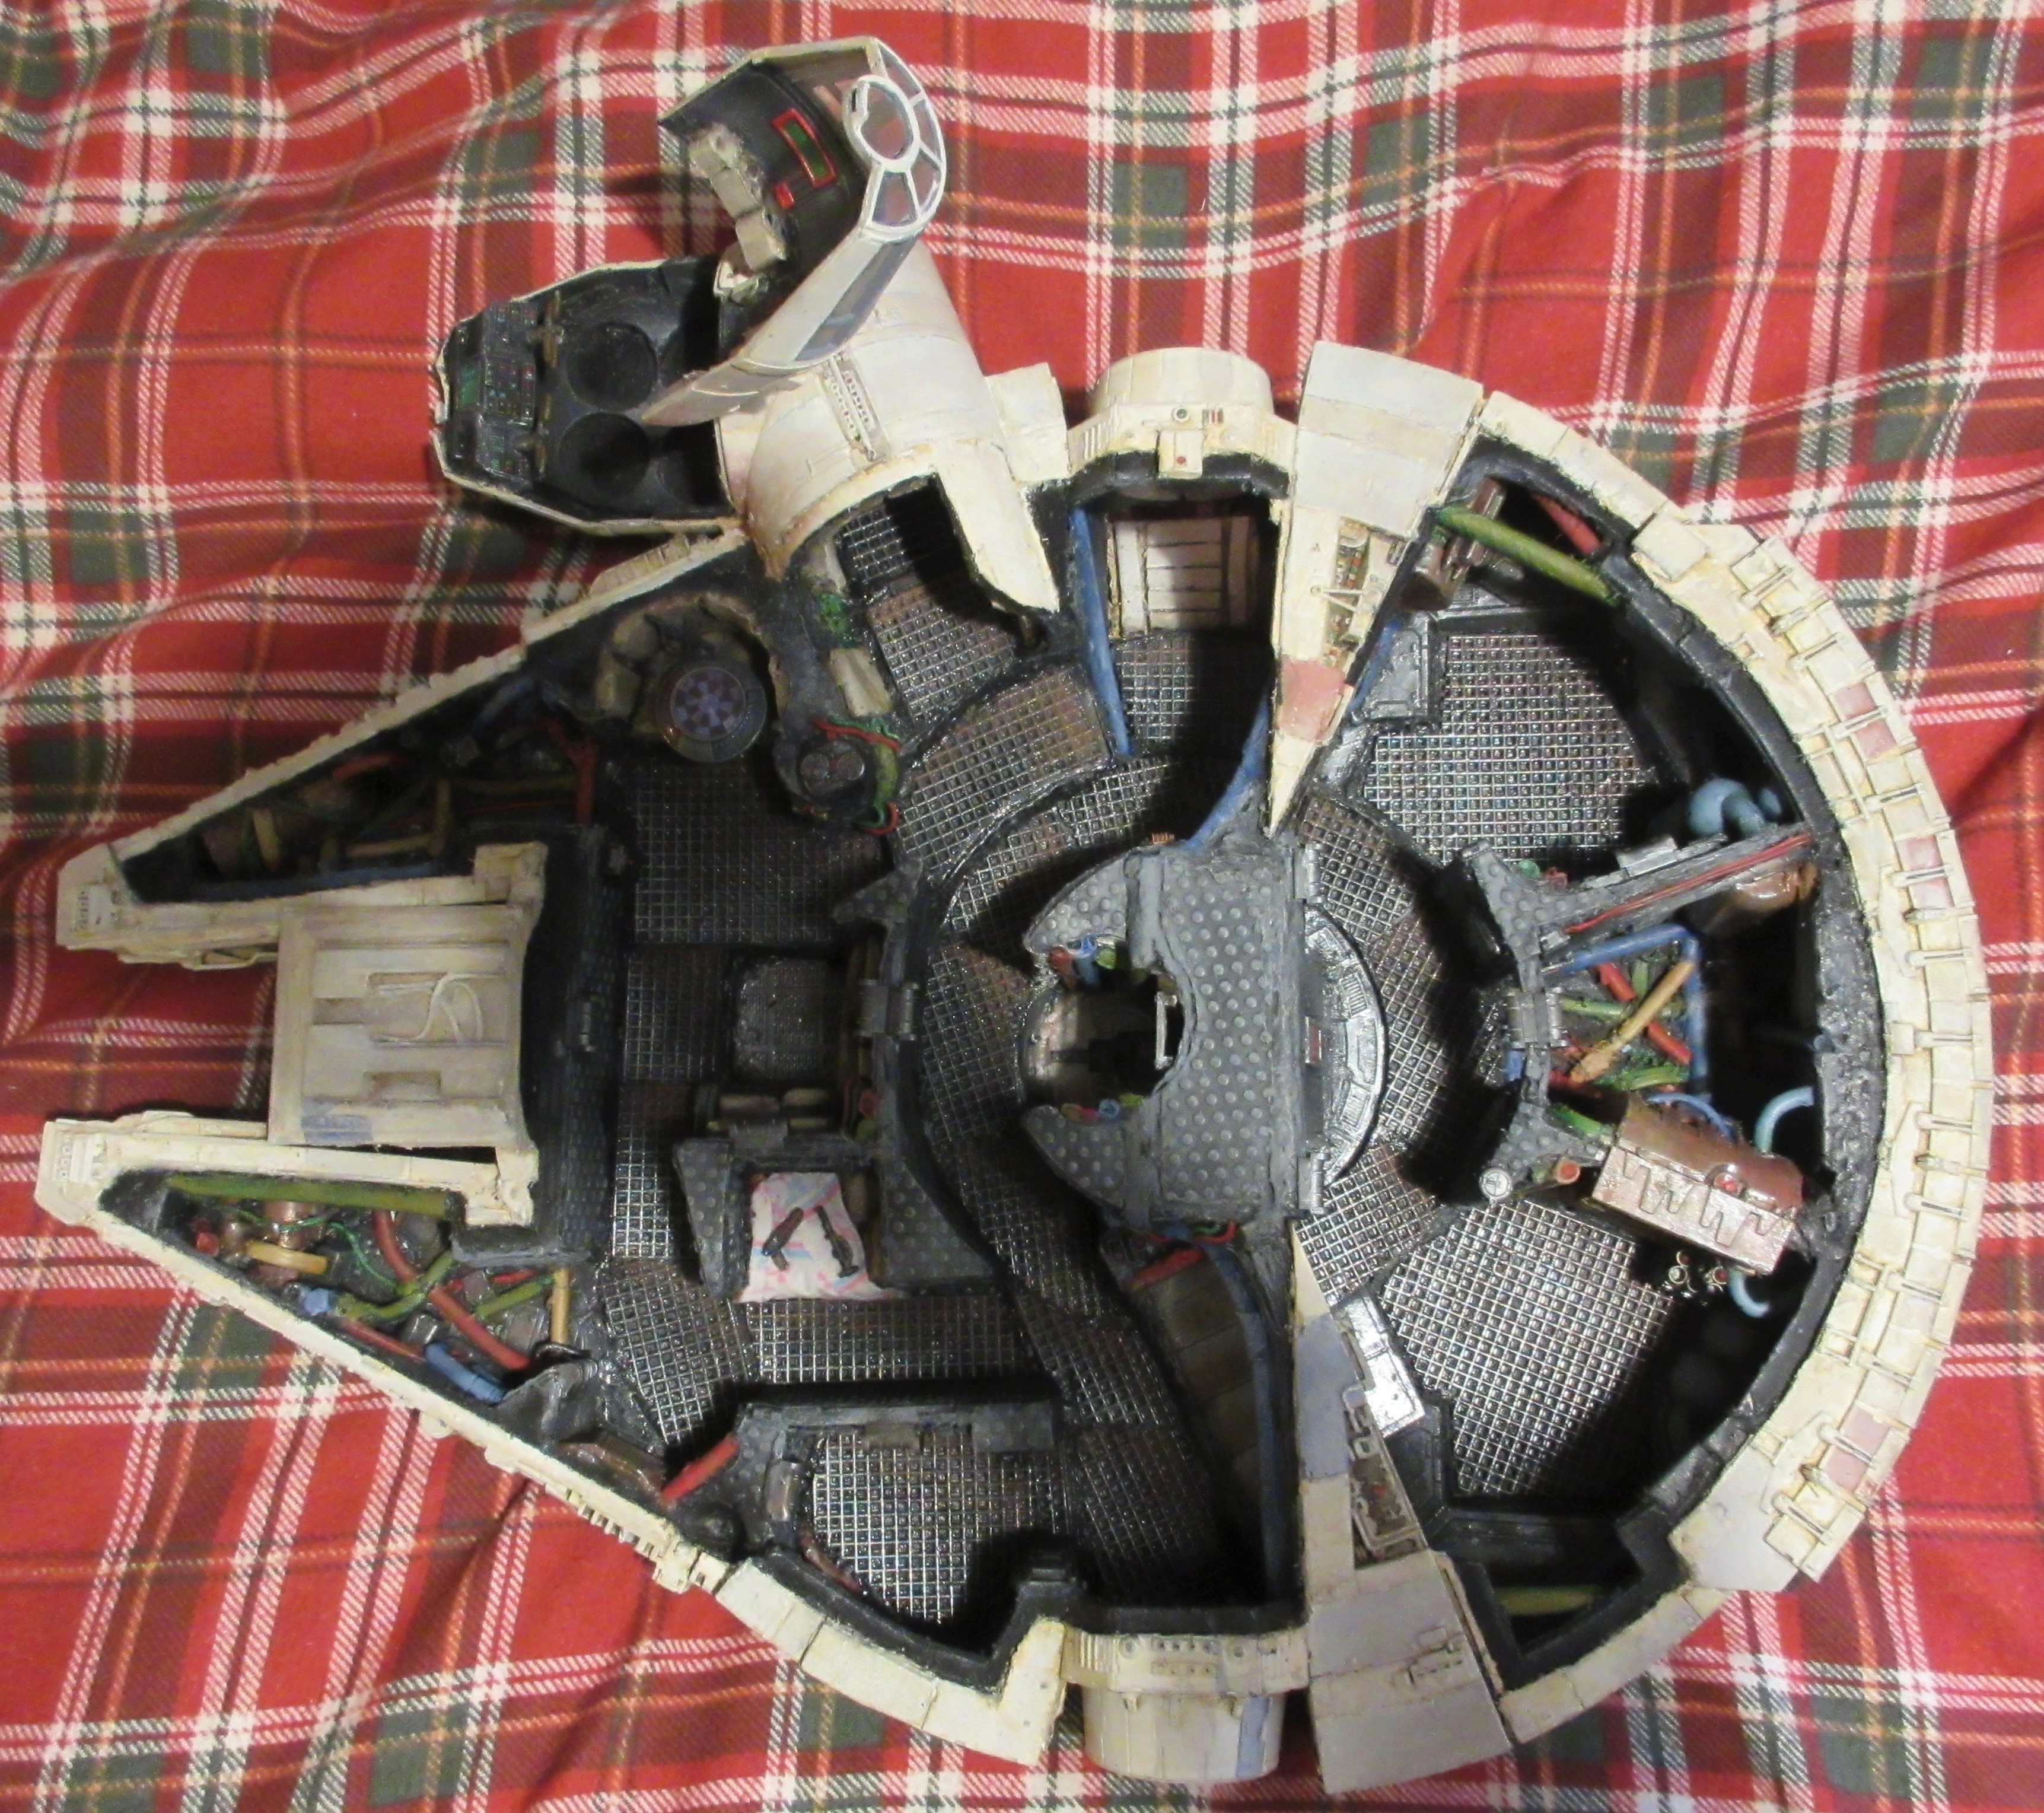
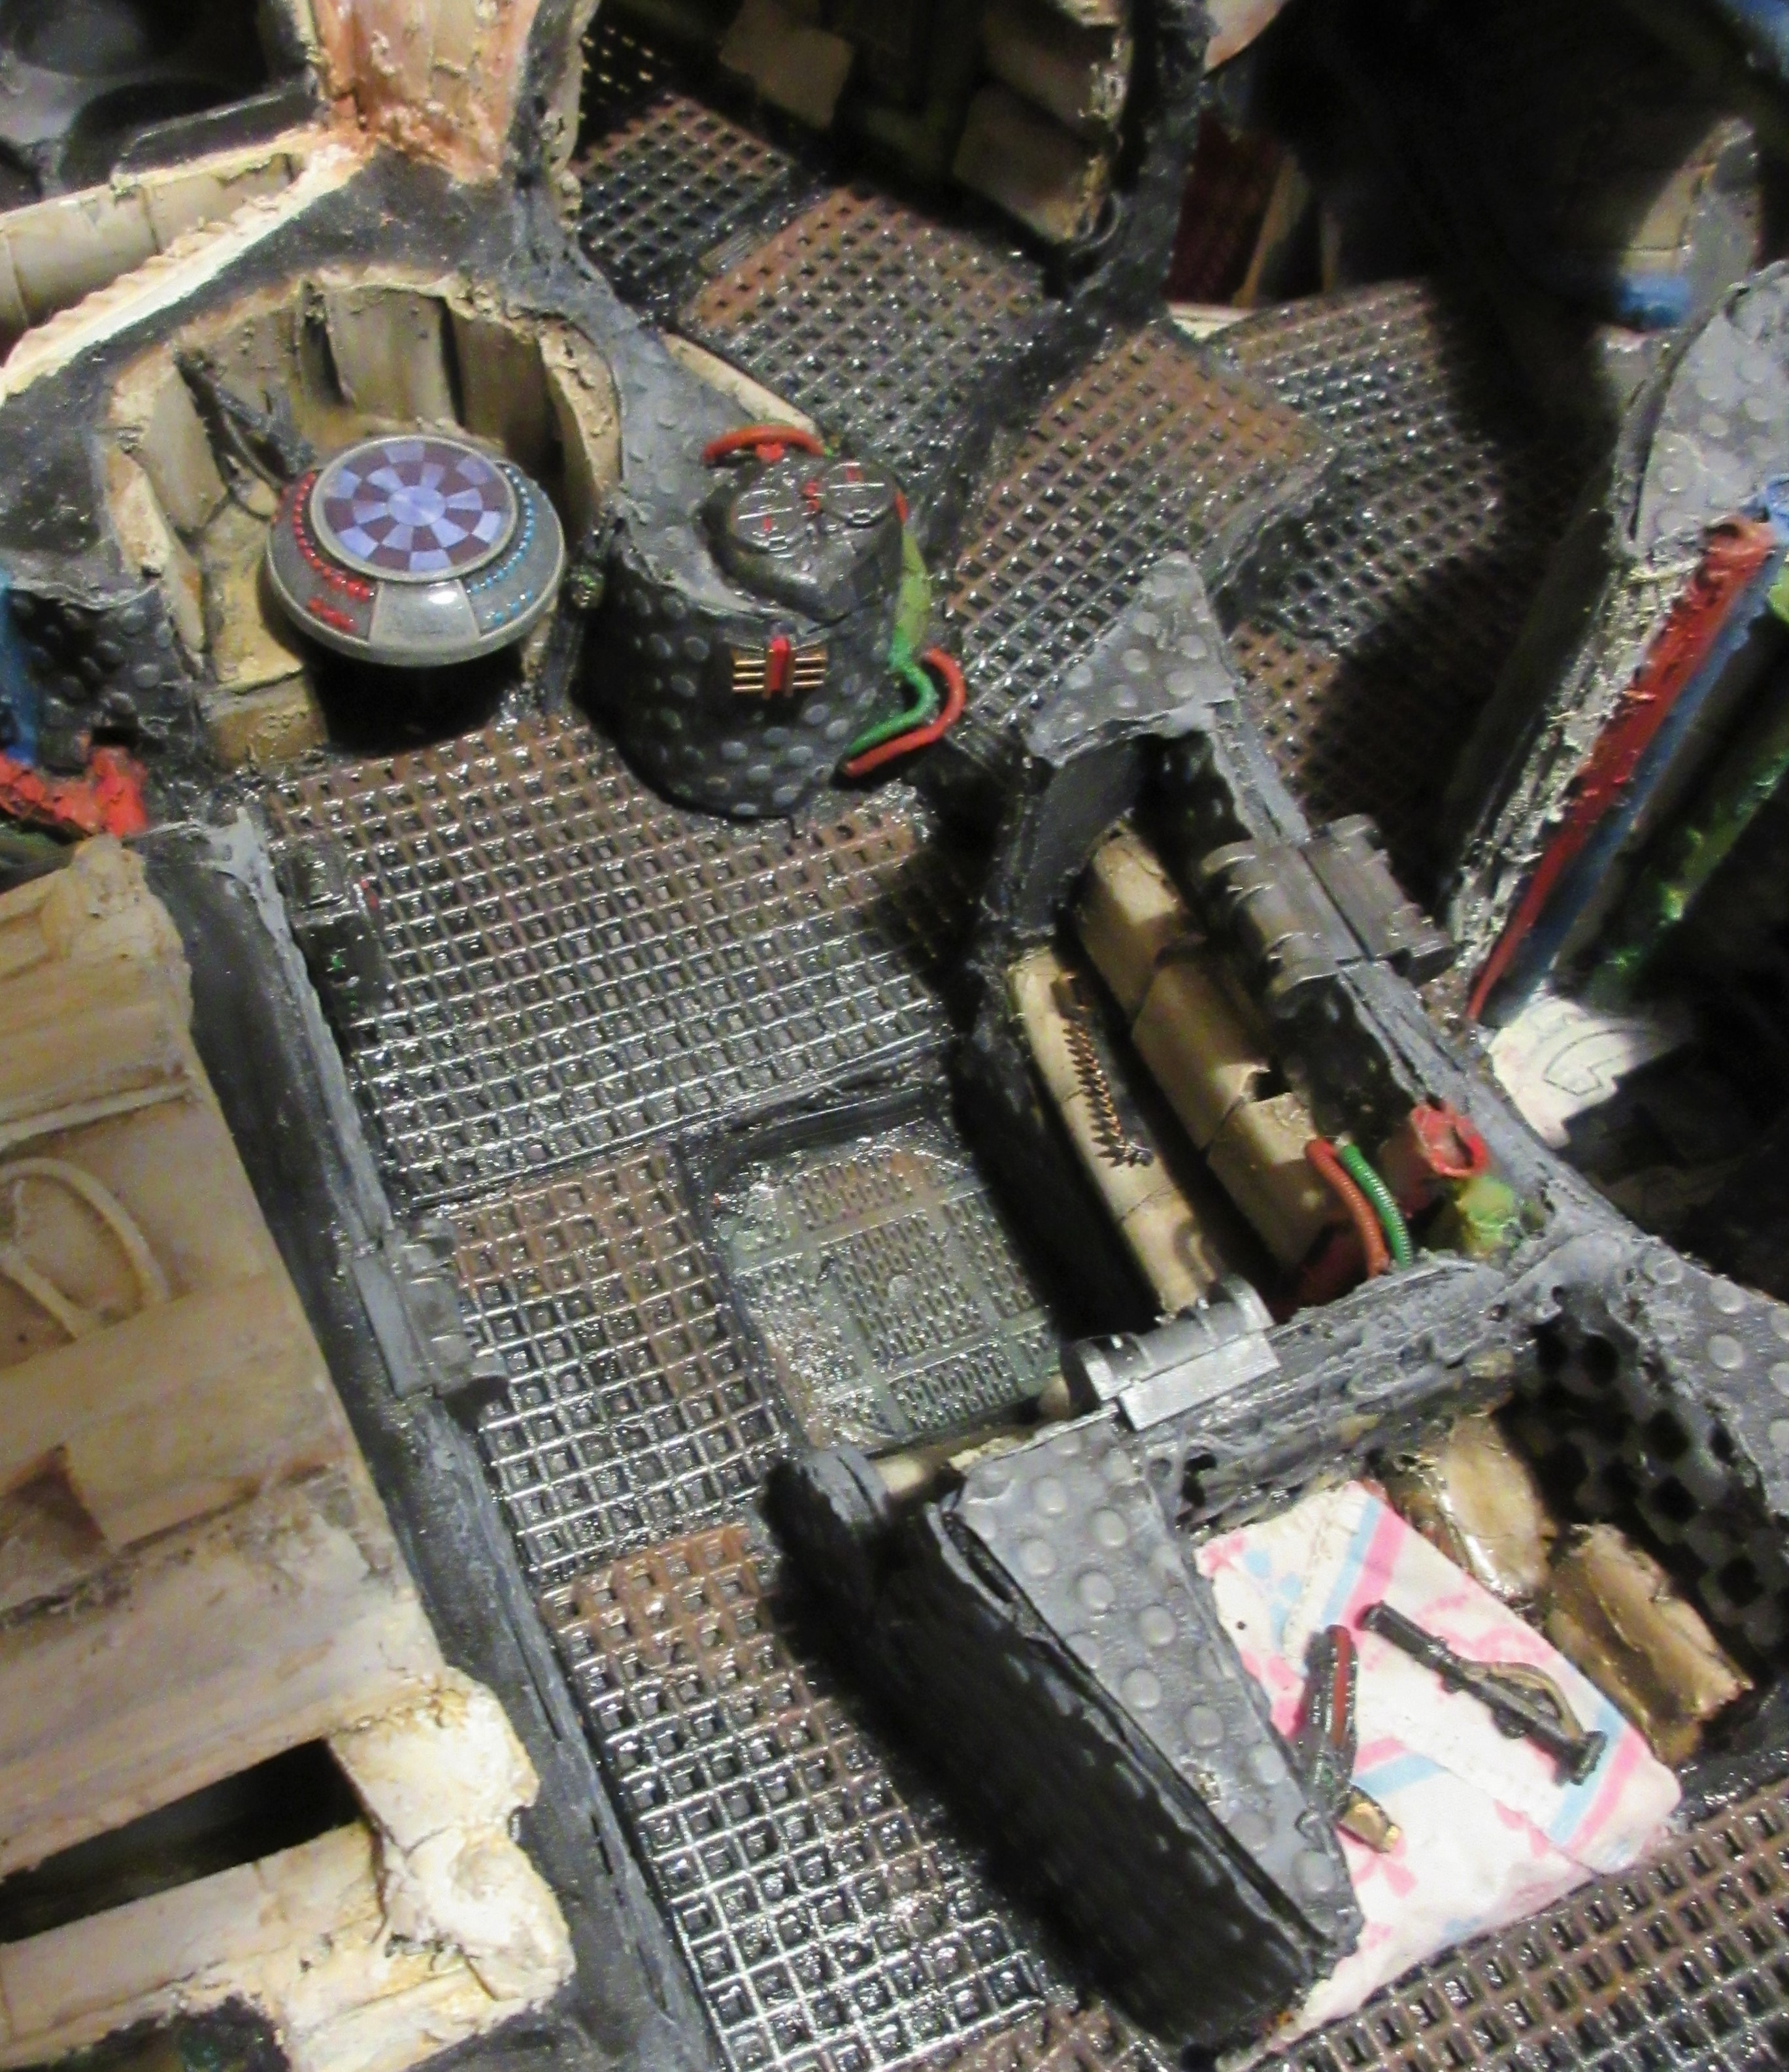
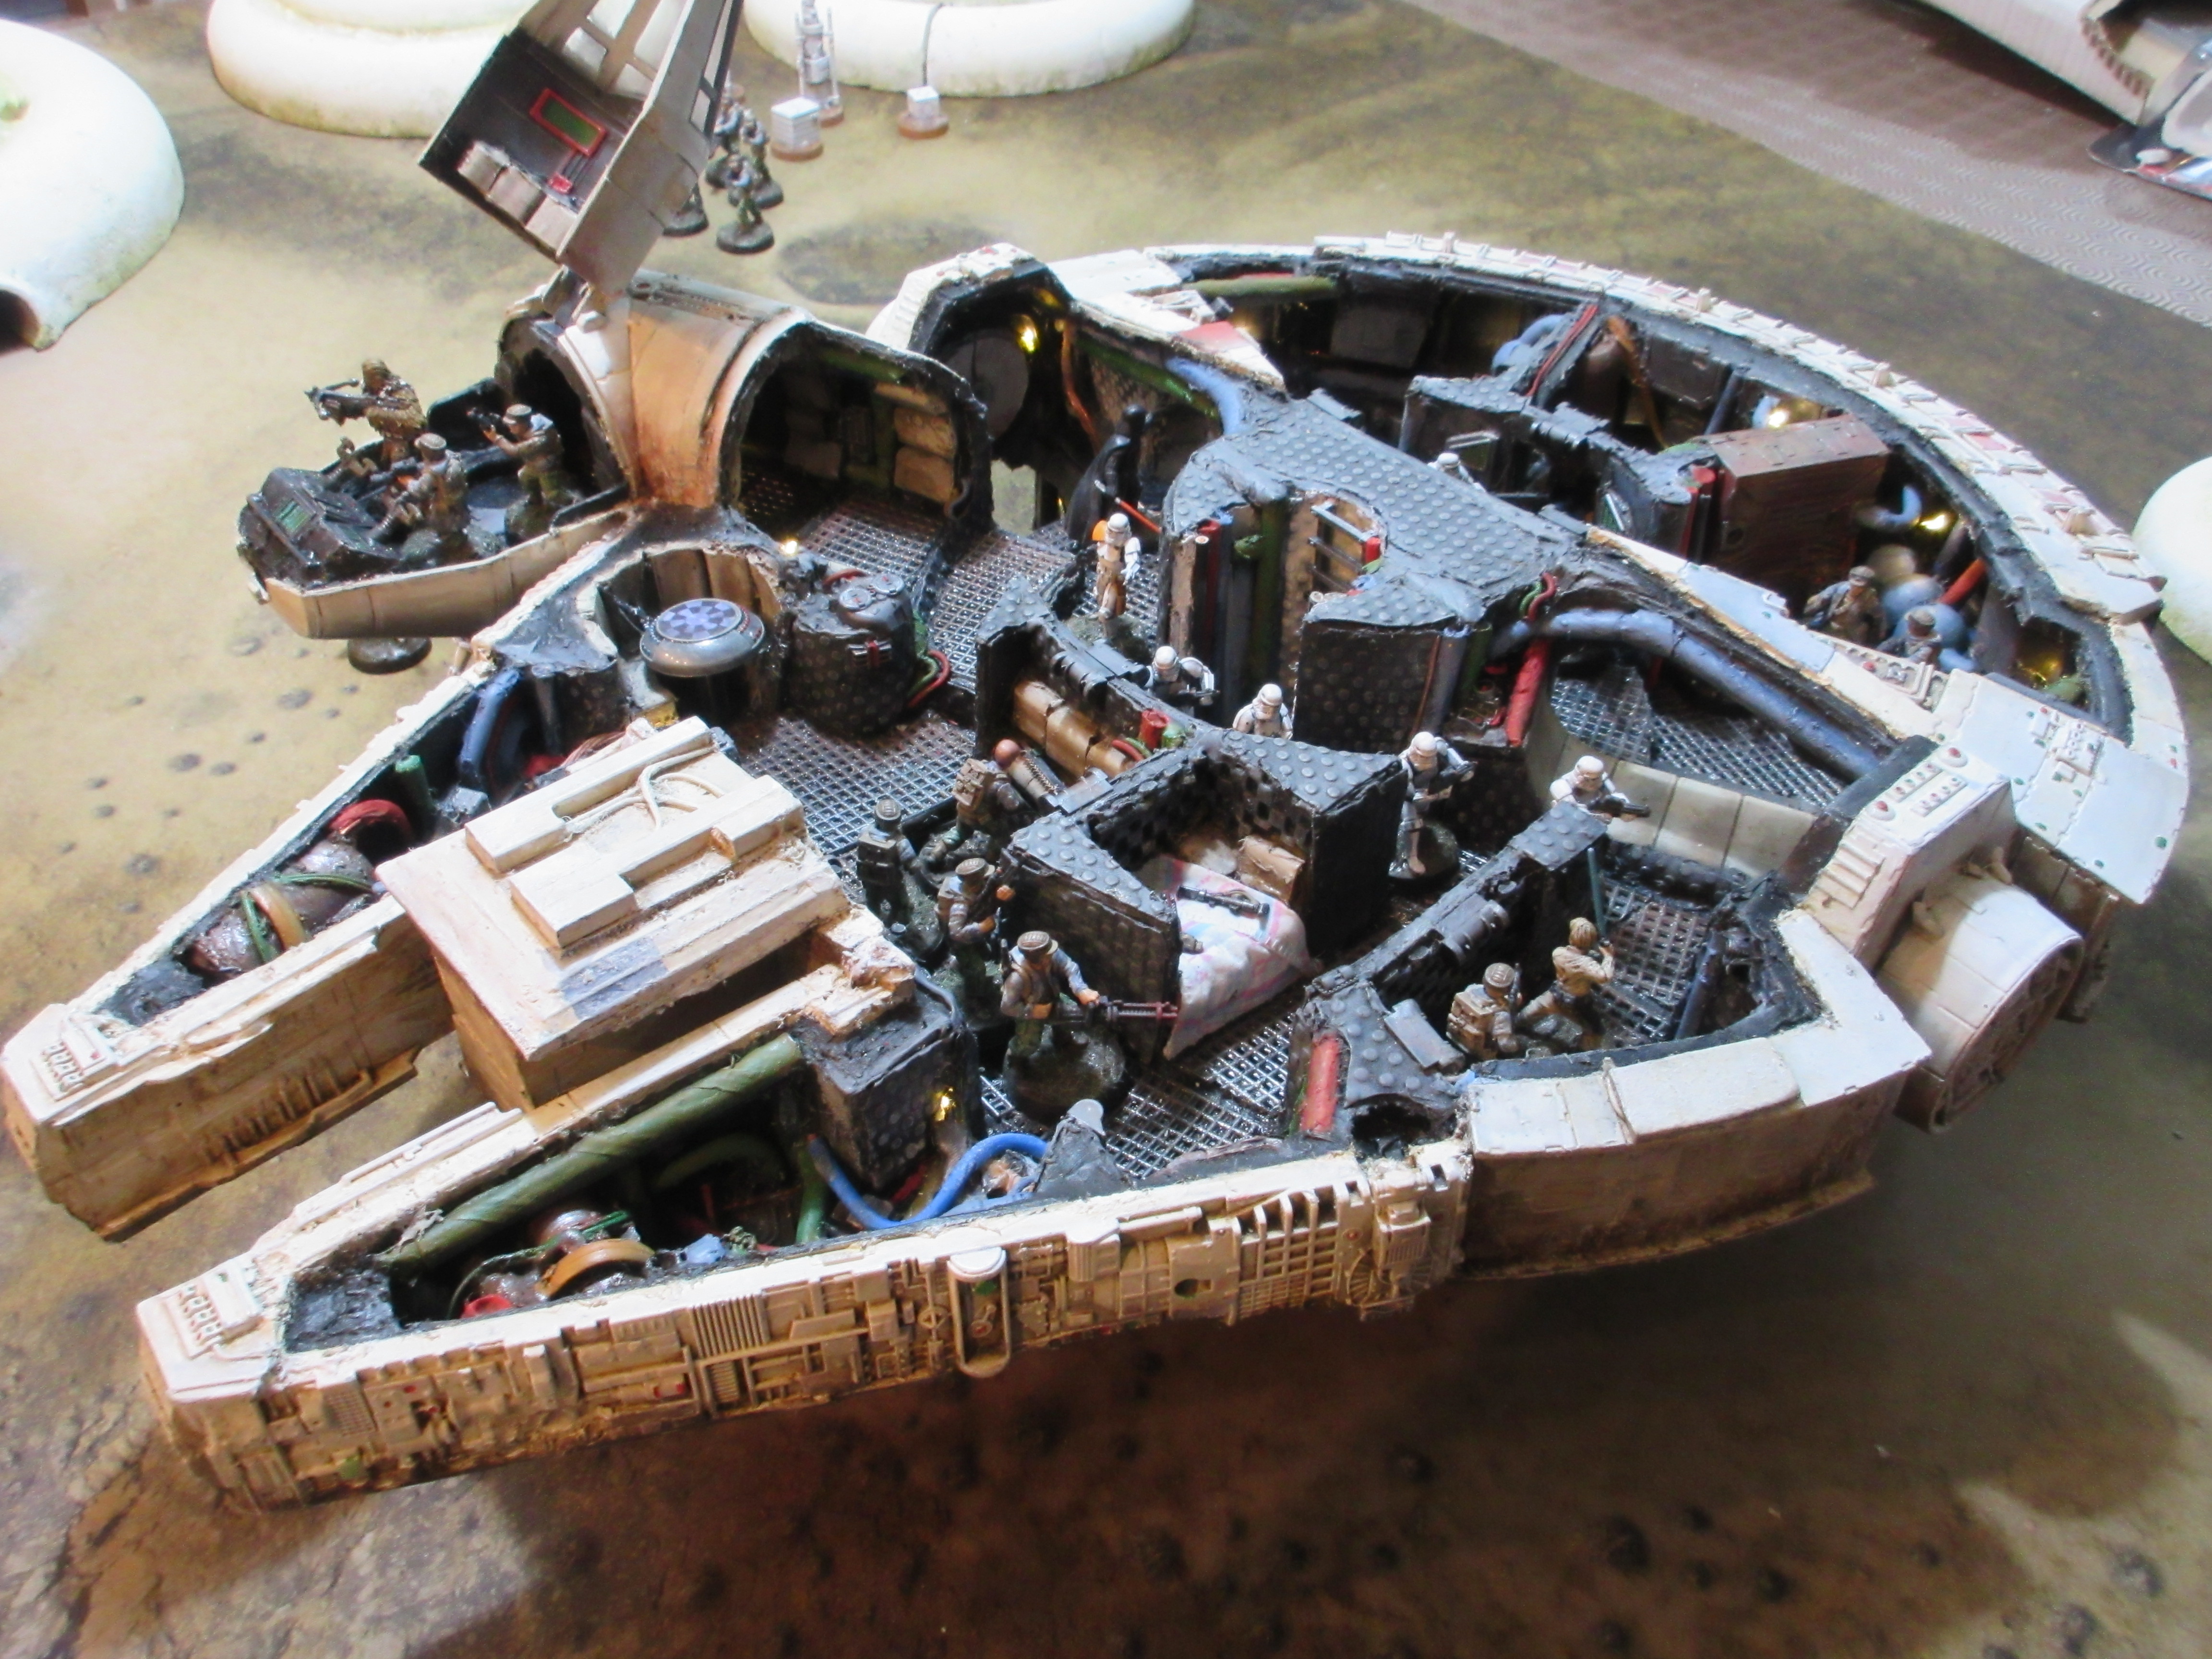
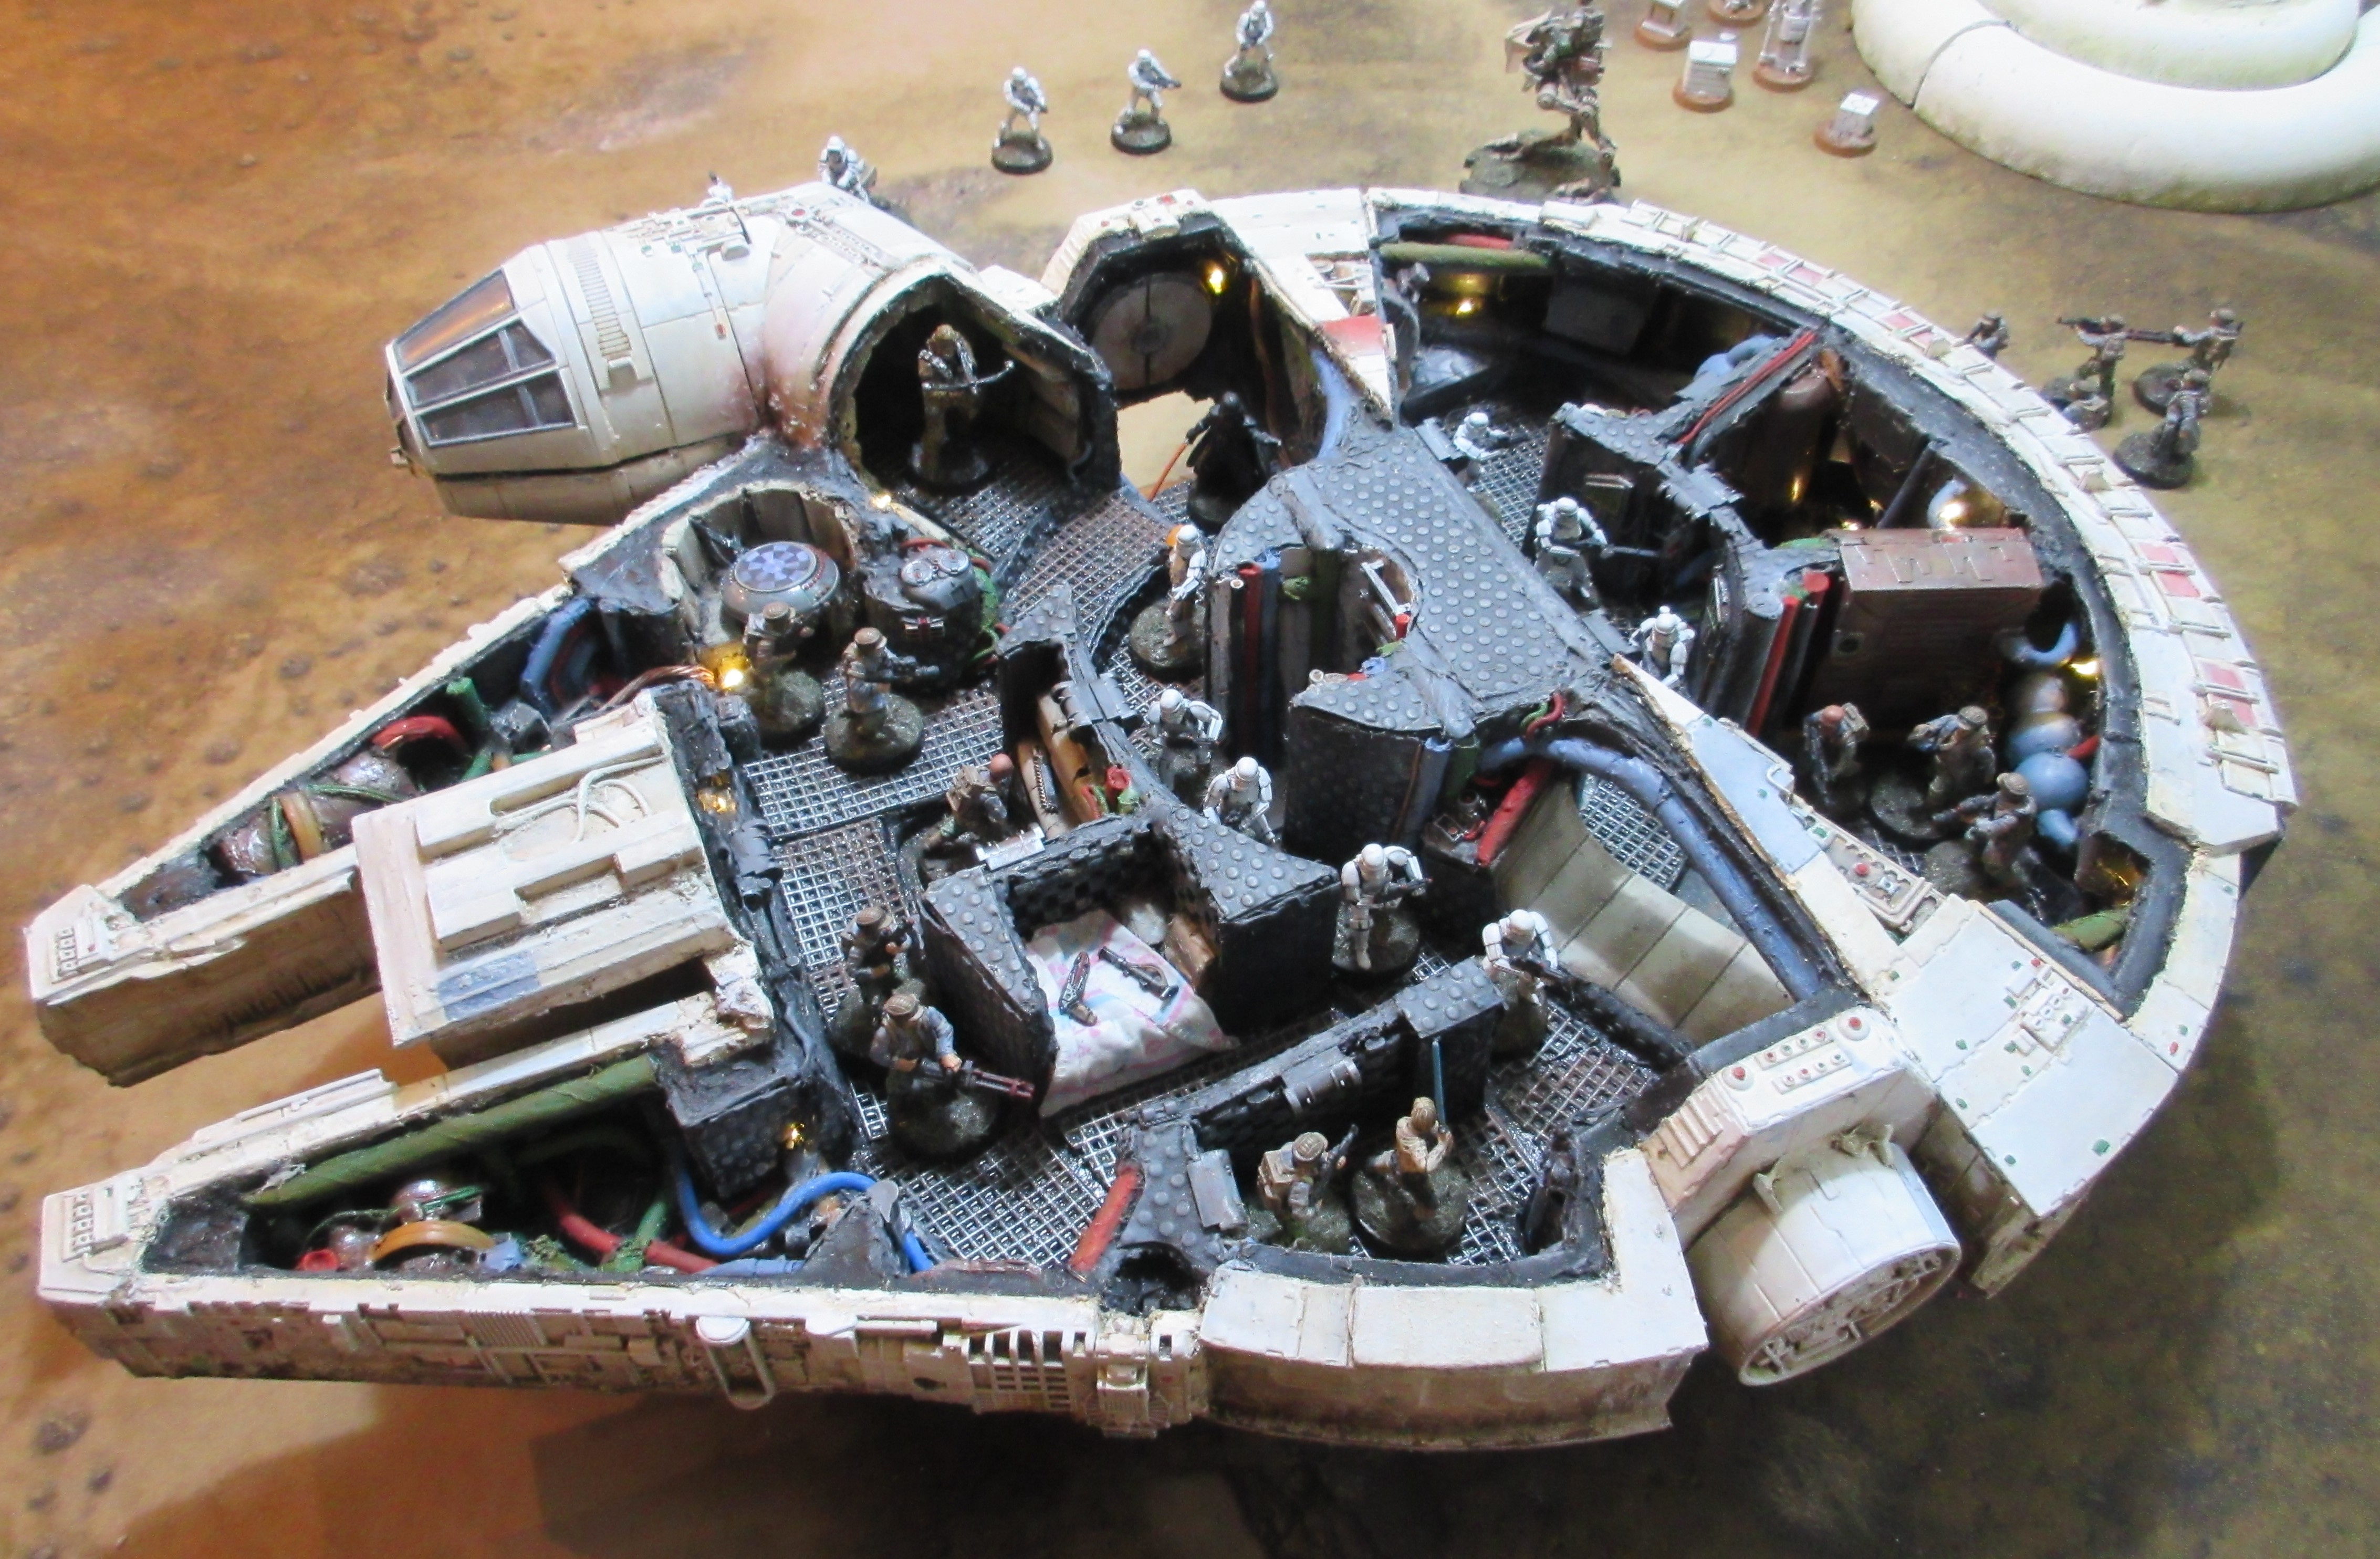
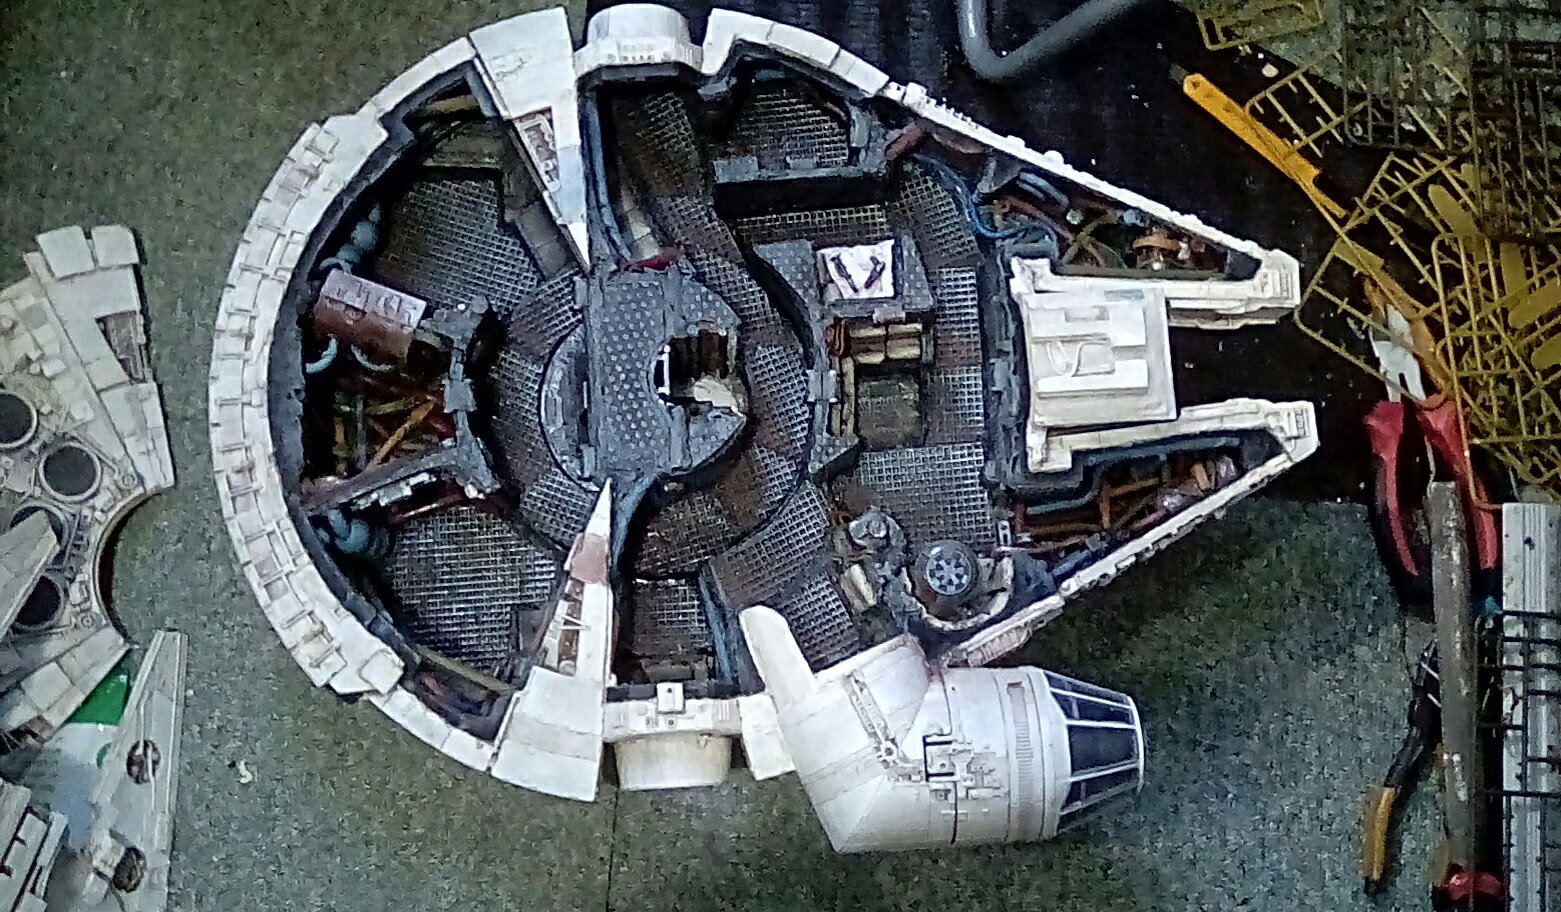
The internal floors
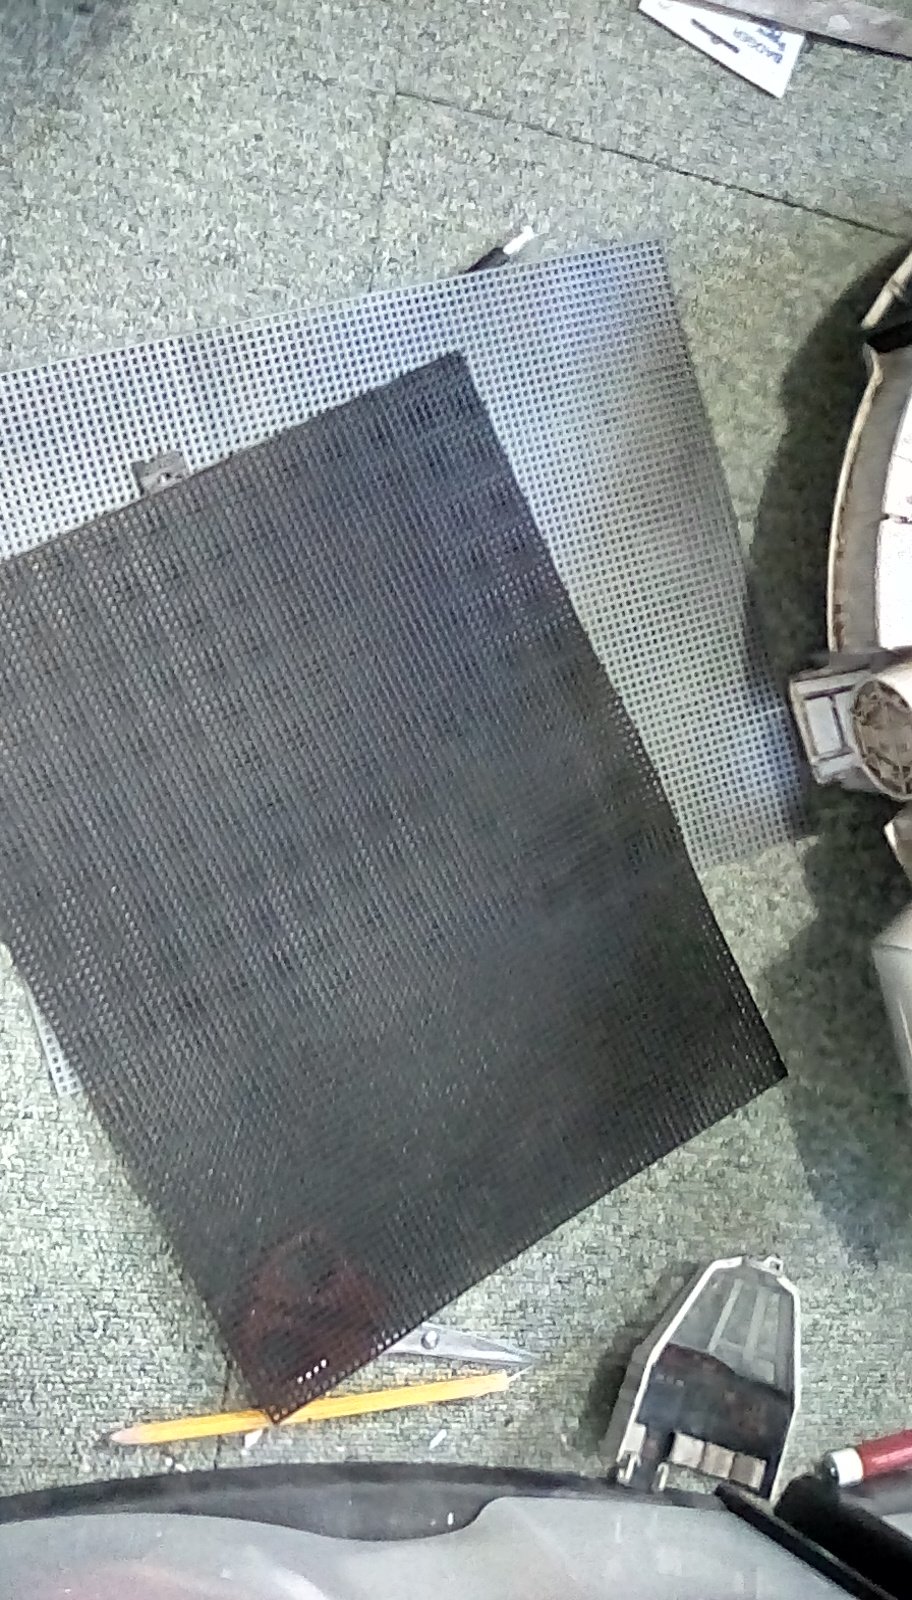
Next up is the simple but messy & time consuming stage where the cardboard floors and corridors get upgraded to look like metal mesh.
first make.paper to templates of all the flooring and corridors to be covered remembering that the paper needs to be able to lie absolutely flat.


I had picked.up 2 a4 sheets of plastic mesh from a local craft shop, the sort used to sew tappestries. As they are white I prime.these and then paint one side black with spray paint. Spray paint adheres much better to this kind of plastic than brushed on paint. Once dry I make the mesh flooring pieces by cutting around the paper templates with scissors and gluing them in place with a thick gel superglue. I use rubber topped pencils to push the mesh down in place, rather than my fingers, as some glue will leak through the holes in the mesh. Once dry the black.paint is touched up.by brush where the glue has seeped through.
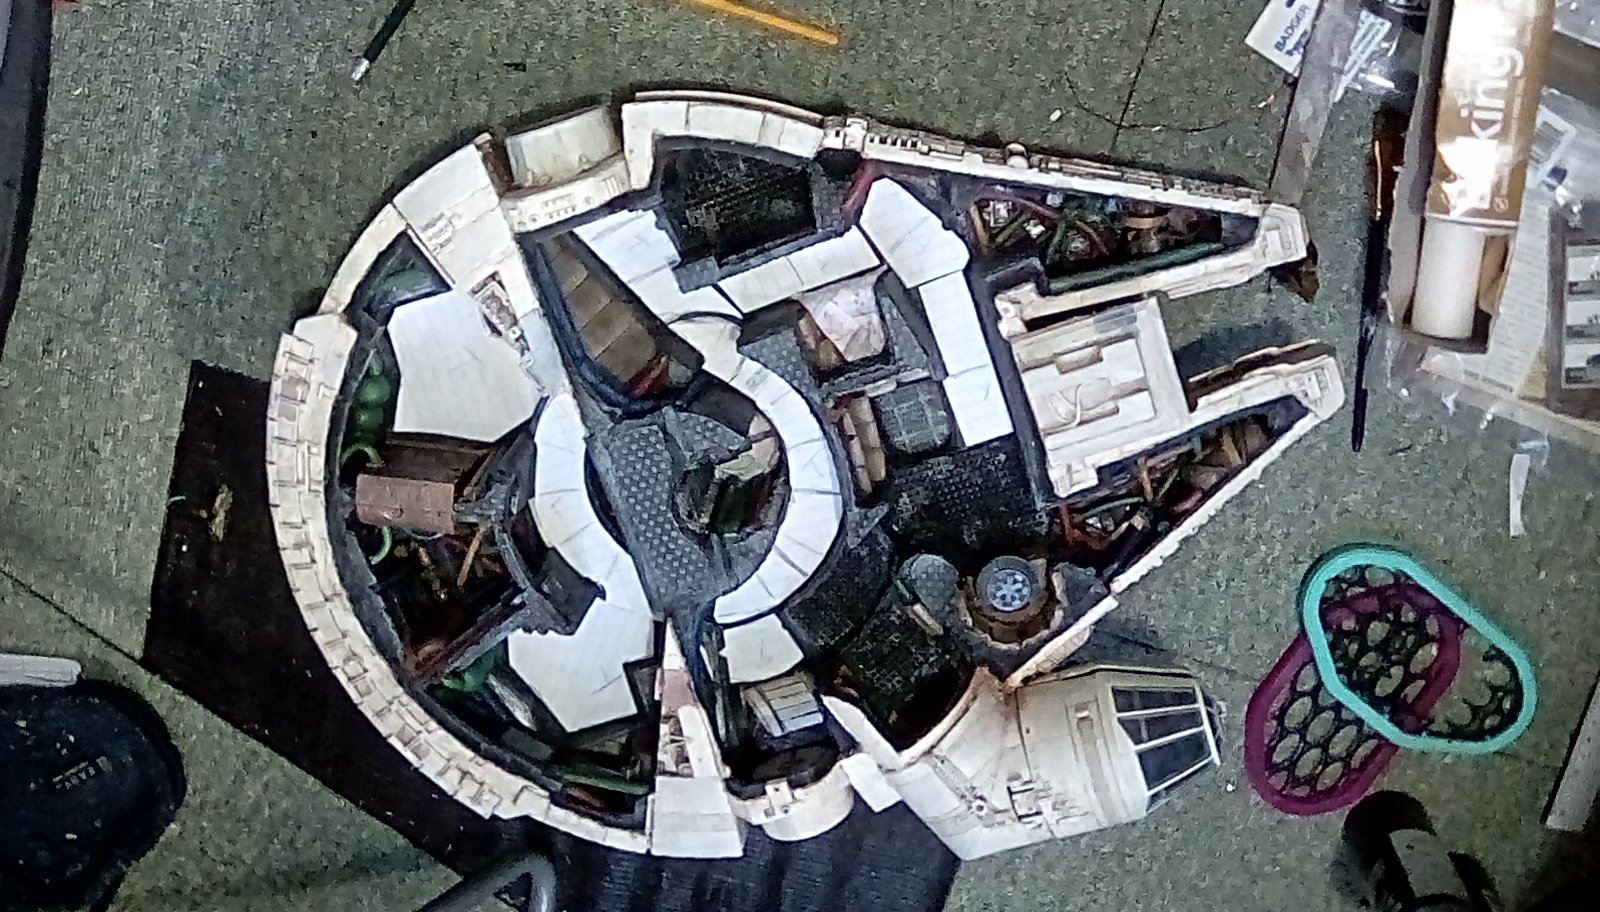
The mesh is then Drybrushed with gun metal grey to pick out the pattern and give it a metallic look. I chose the top left corner of each mesh panel to get highlughted with natural steel, and the bottom right corner to get painted with rust effect (all valehjo paints). This makes each panel distinct from.it’s neighbouring floor panels and helps the ship look old and rusty.

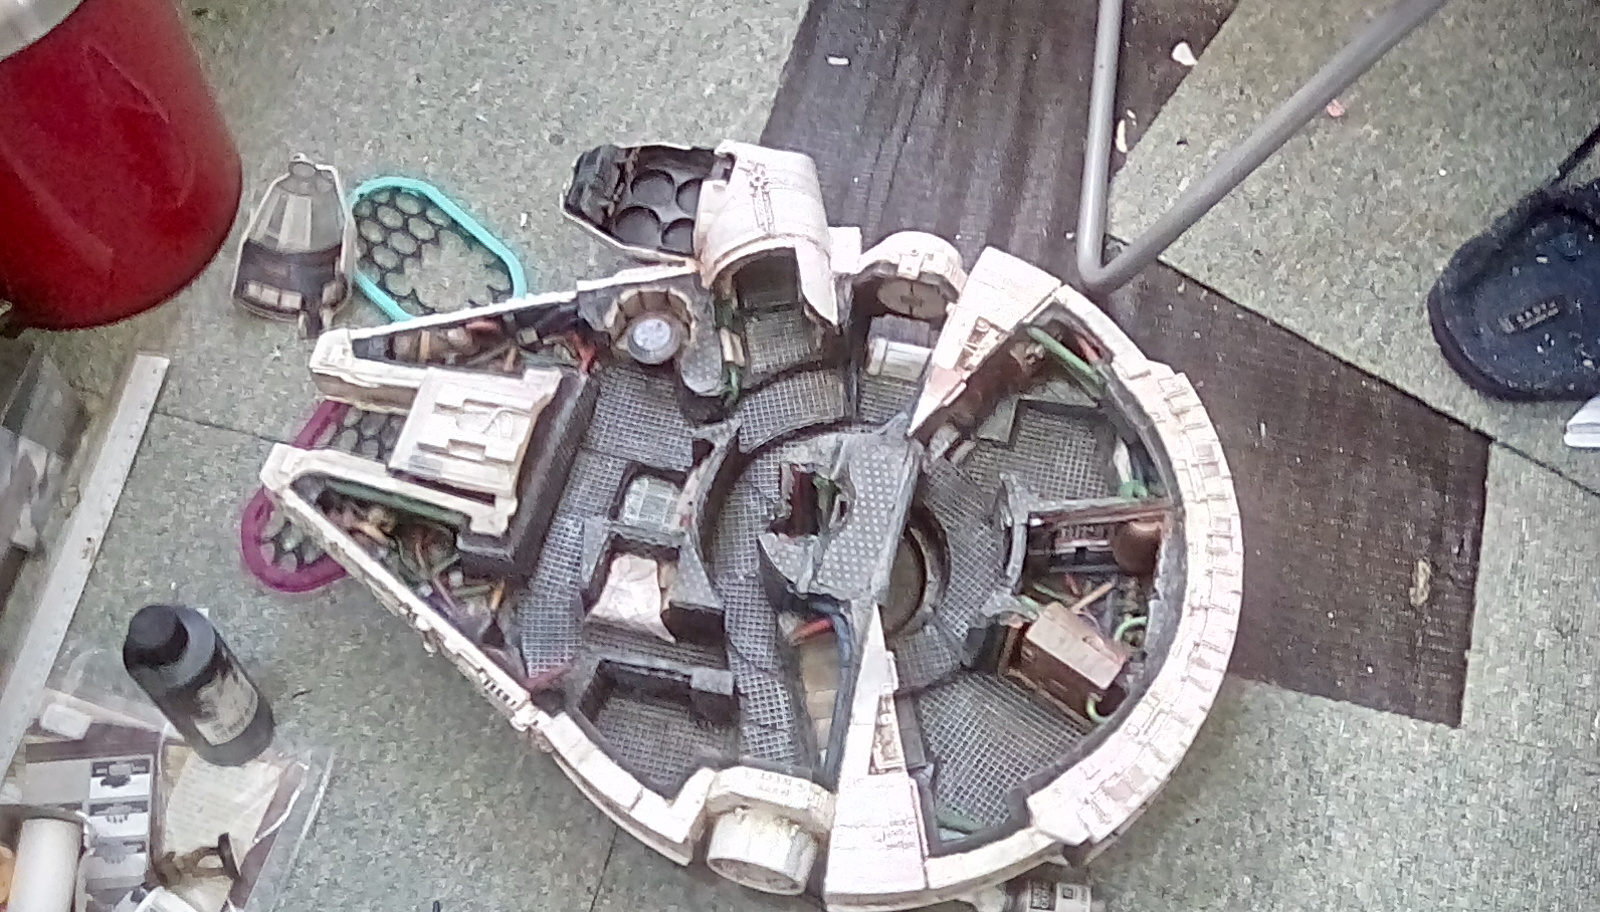
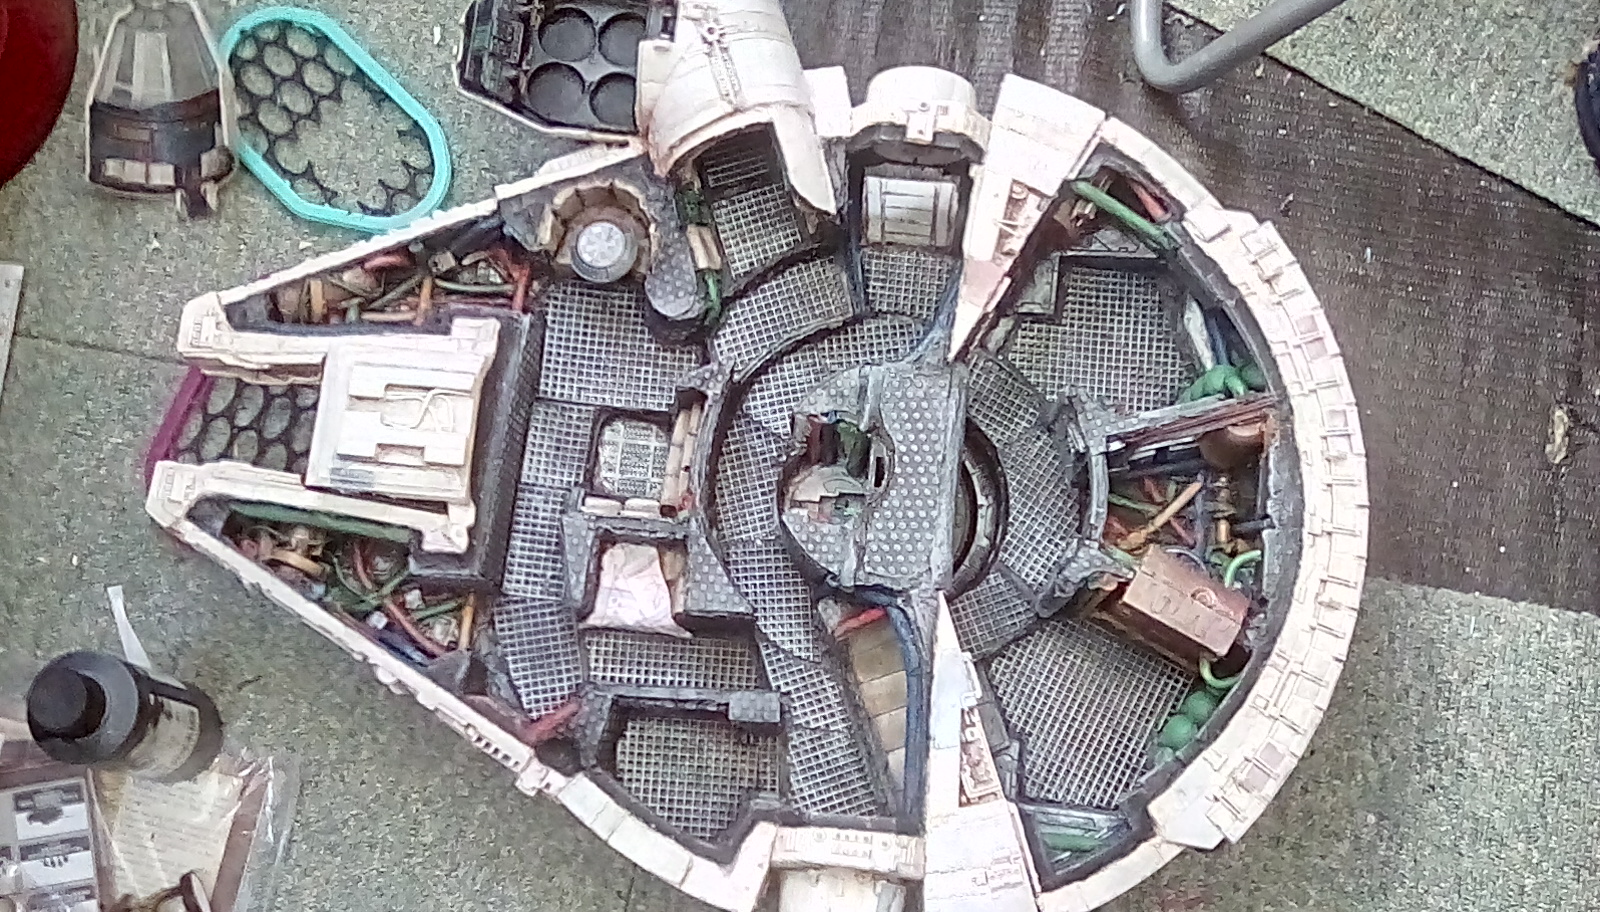


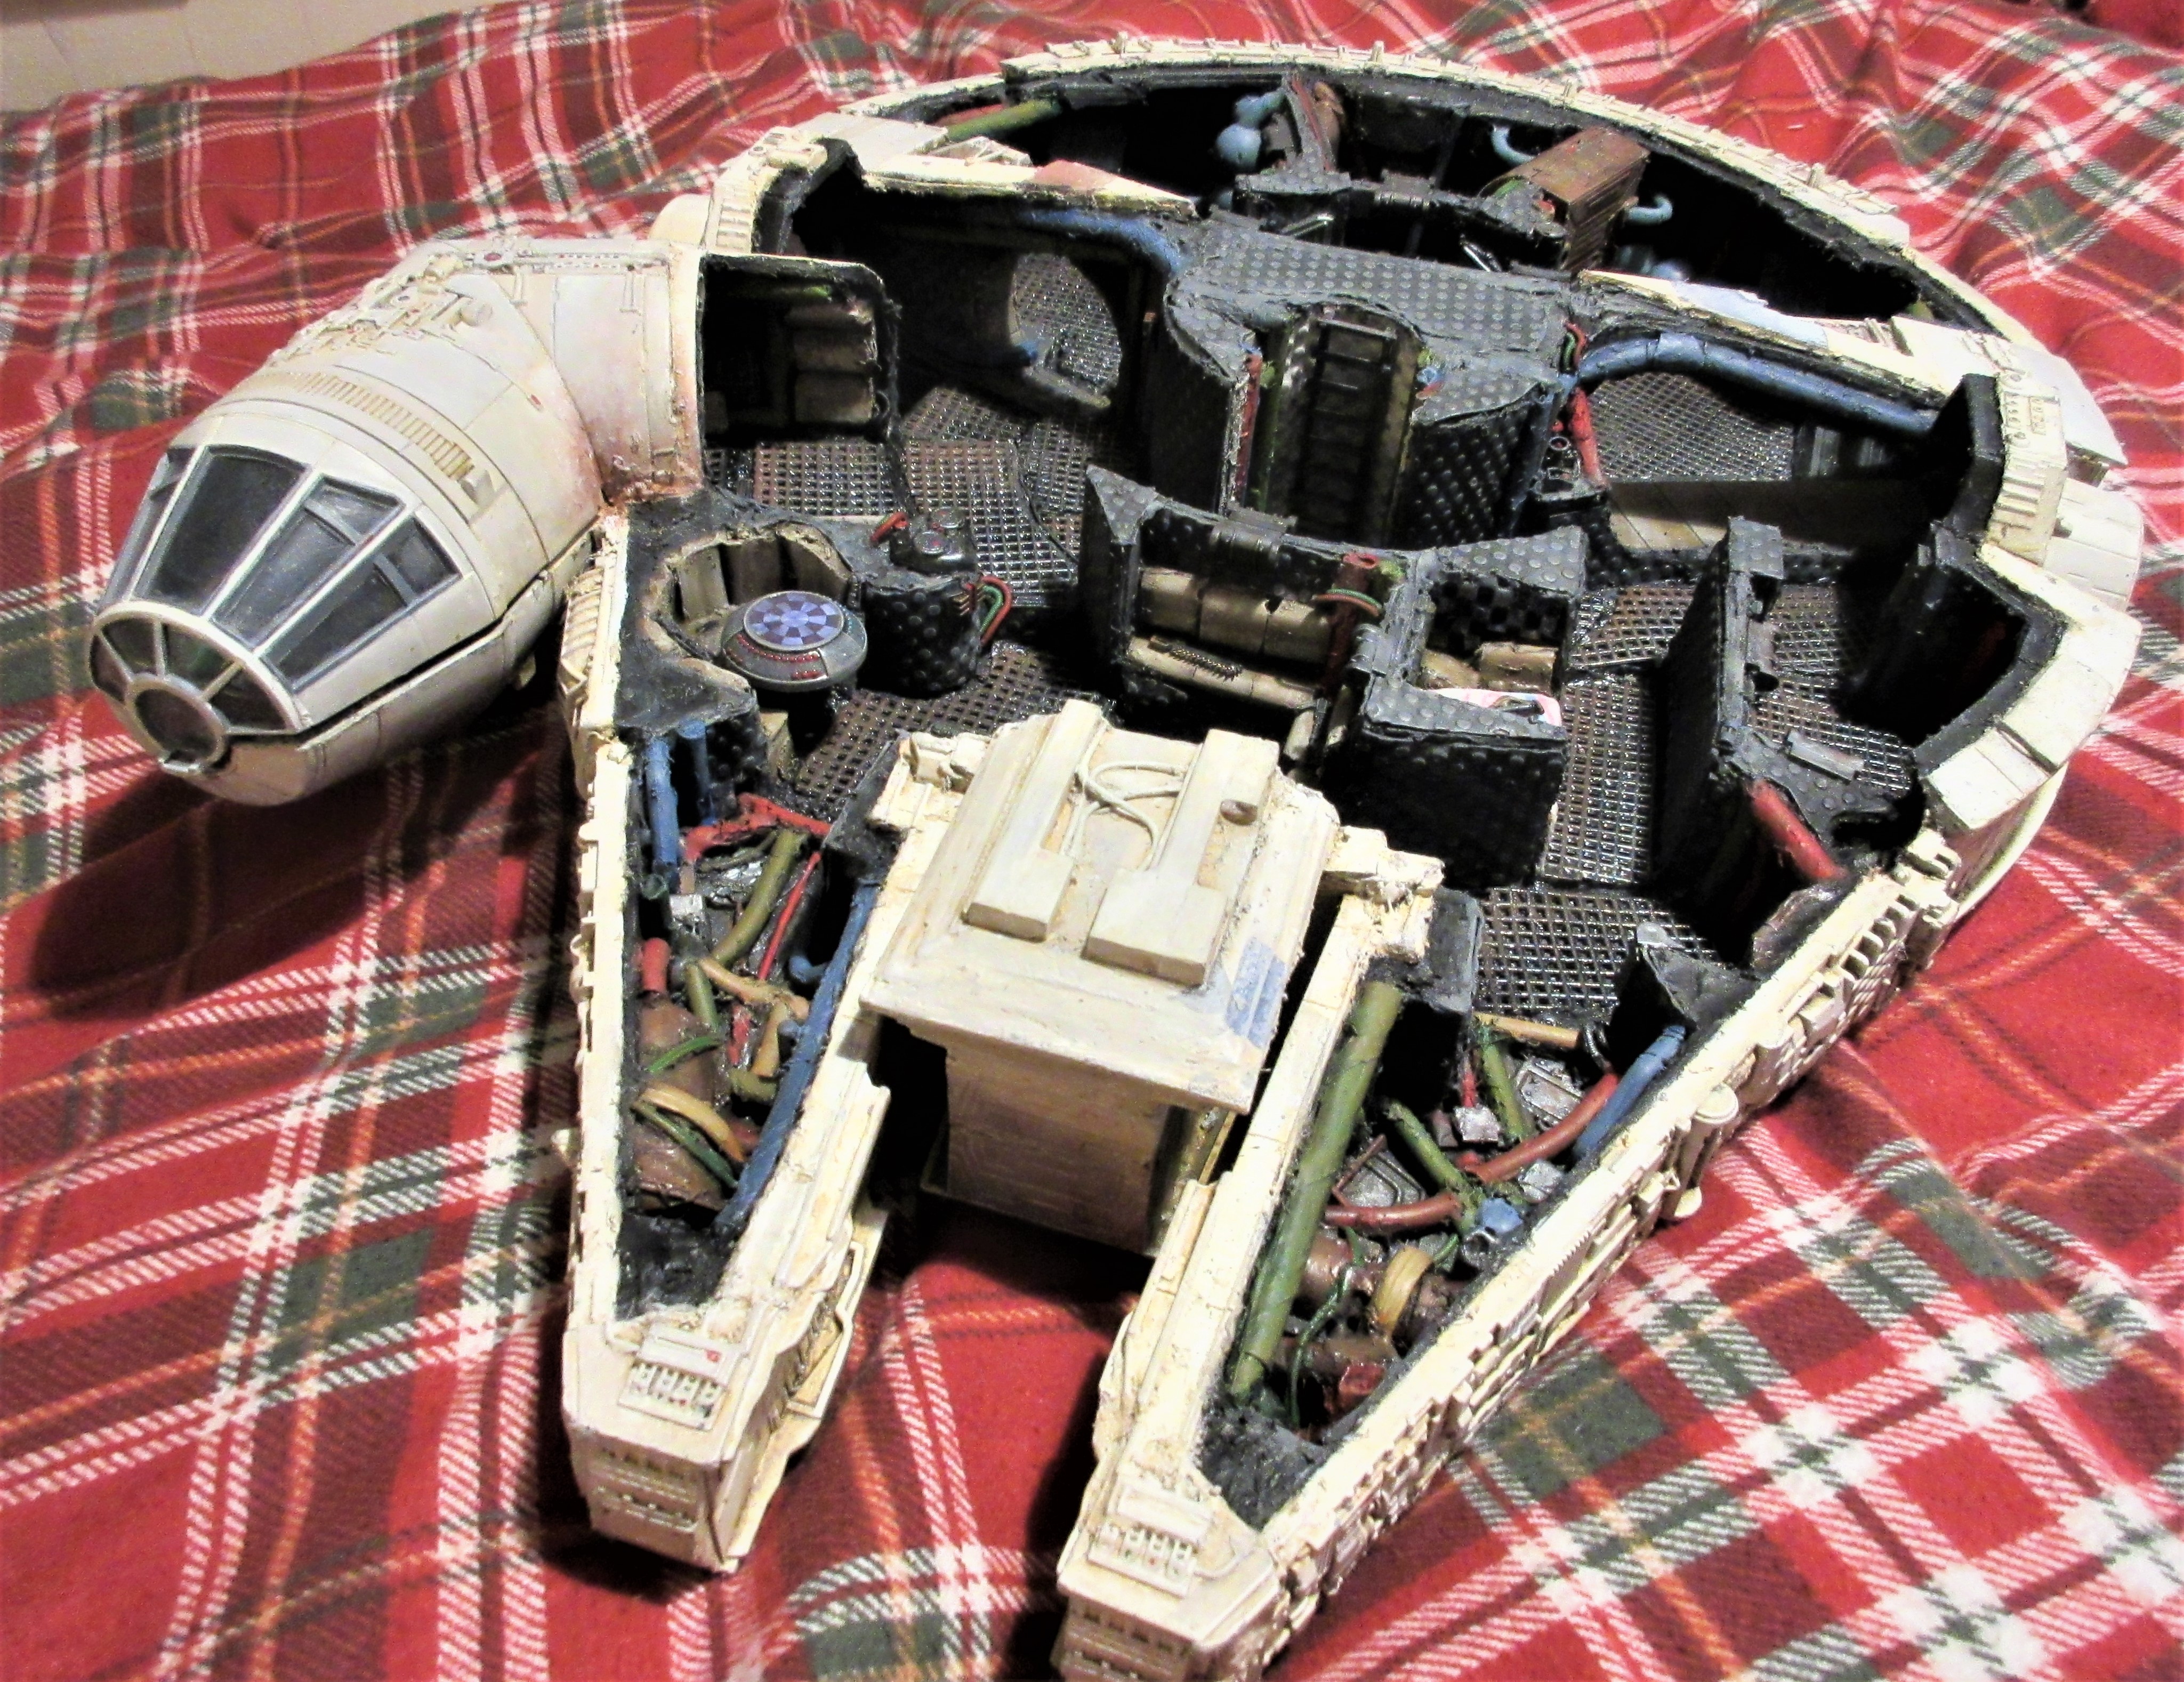
 The final metalic look of the flooring achieved.
There will actually be 2 stages after this, but I won’t photograph those as they shouldn’t look any different.
Firstly, once everything is dry I will cost all the mesh flooring in a generous coating of yacht varnish. Not only will this stop mini’s bases scraping the paint off the plastic.mesh, it will help seal the mesh to the card layer below and fill any loose edges the super glue may have missed.
Then I will redo all the rust areas left too shiny by the varnish, as rust should be Matt to look realistic.


