
![Atomic Tank – The Robot Wars Review | Fast-Paced 10mm Sci-Fi Wargame [7 Days Early Access]](https://images.beastsofwar.com/2026/01/unboxing-hydra-miniatures-atomic-tank-the-robot-wars-coverimage-225-127.jpg)
![246 Dwarves in One Box?! | Wargames Atlantic Dwarven Host Unboxing & Review [7 Days Early Access]](https://images.beastsofwar.com/2026/01/unboxing-wargames-atlantic-epic-fantasy-battles-dwarven-host-coverimage-225-127.jpeg)


Path of Conquest 2020 : The 100 Kingdoms – The host of the Iron Wolf


Recommendations: 347
About the Project
Getting in the #PathofConquest 2020 challenge. I'm going to build an entire 100 Kingdoms army, and I'll post here for each step I take.
Related Game: Conquest: The Last Argument Of Kings
Related Company: Para Bellum Games
Related Genre: Fantasy
Related Contest: Path of Conquest 2020
This Project is Active
The enemy
If you want to fight a Battle, you need an opponent. The Iron Wolf needs an enemy.
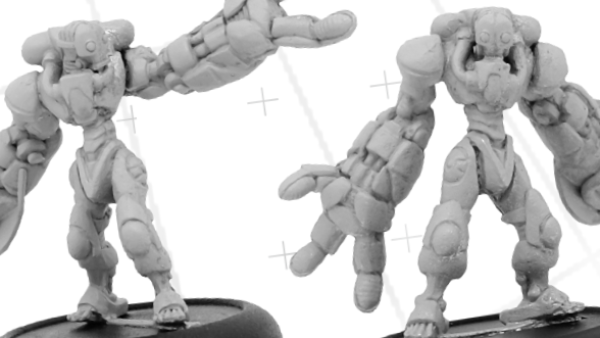
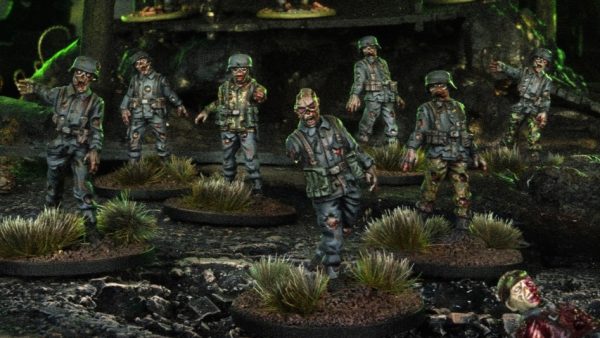
Since I already had two starter sets and a box of Marksmen Clones, The Spires would be perfect as the enemy.
I have to point out that the starter set is a really good offer. I bought the first one in France with a large discount for 68 € shipping included (£62) and got another directly from Para Bellum with a box of Steel Legion and a box of Marksman Clones as gifts, for 99 € (£91, shipping included). I even discovered later that there was a 10% discount code on underspire.net
If you want to start a 100 Kingdom or Spire army, that’s what you need.
I thus had enough to raise a 1400 pts Hundred Kingdoms army (if I add a miniature for the Imperial Officer, but it’s still possible to make a conversion with various parts of the minis you have in the starter set, and I didn’t include options like standard bearers that can help you to push up to 1500 pts), and a 1330 Spires army if you hire a High Clone Executor (you need him to hire the Marksmen).
 A really good deal
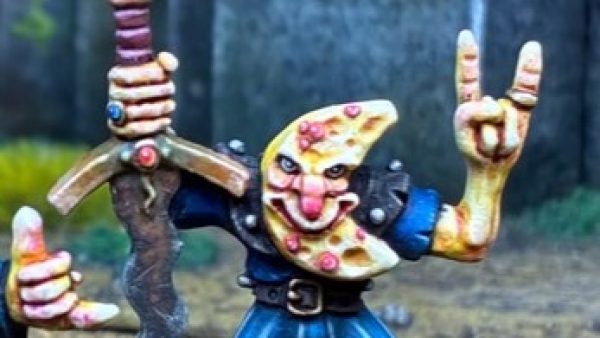
Back to the Spires : I didn’t want to spend much time painting them (it’s not my main army), but I still bought a High Clone Executor since I liked the miniature. I settled for a very simple color scheme for this army, and it would be mainly painted with contrast paints and drybrush.
I have a rule: I don’t play with a miniature if it is not painted.
It’s a simple rule, but it takes some energy to always abide by it.
I’m proud to say that my son (13) has played many battles in various miniature games, but has never played with an unpainted mini.
He got interested last week in Conquest and has asked me to play. He’ll probably play the 100 kingdoms, and I already have a small campaign with the Spires in mind.
The main goal is to have a visually different army from my 100K army, but still know they fight on the same battlefield (bases). I thus decided to use more “natural” tones, like brown and bone, to make those spires visually more organic.
I’m going to spend more time on the High Clone Executor, since he is going to be the warlord of this small army. I’m also going to add a few colors and change a few things depending on the rank of the miniature, as @Ulverbite did on his Spires army.
Drones will be bland (especially the Force Grown Drones), the brutes will have a few distinctive bits (their weapons mostly) but are still drones, the Marksmen Clones will have more colors, and the characters will get more attention and shiny colors.
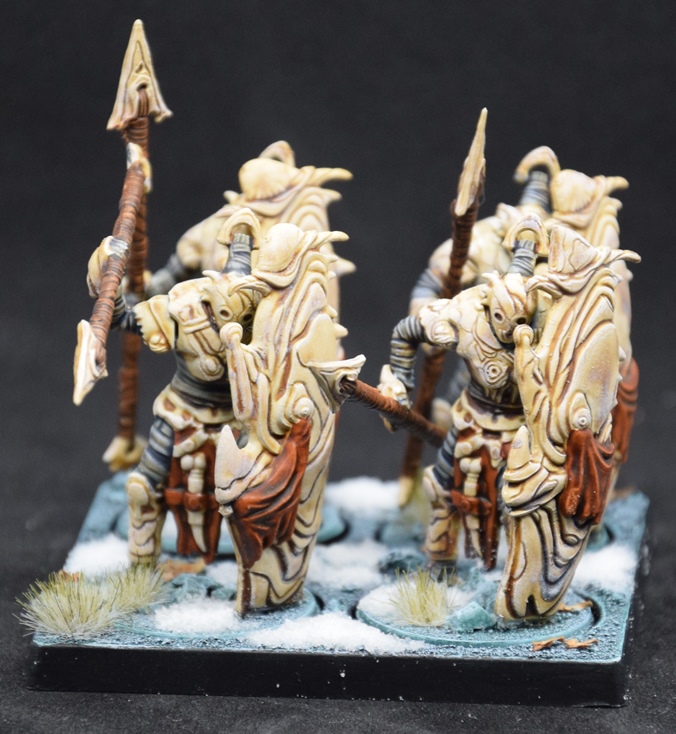
Thus, I tried the following color scheme:
– White primer (cheap spray, it’s a lot faster than the airbrush)
– Citadel Contrast Skeleton Horde (whole body)
– Citadel Dry Wrack White (whole body)
– Citadel Contrast Space Wolves Grey (legs and arms and a few other parts)
– Citadel Contrast Gore Grunta Fur (fabric)
– Citadel Contrast Wyldwood (handle of the spear)
– Citadel Foundation Macharus Orange (drybrush on the fabric and the handle of the spear, old citadel paint)
For the bases, I decided to use the same pattern I used with my 100K army:
– Citadel Wash Coelia GreenShade
– Citadel Dry Etherium Blue
– Base details: a few leaves and winter grass tufts, and some snow from Green Stuff World
Here is what it looks like.
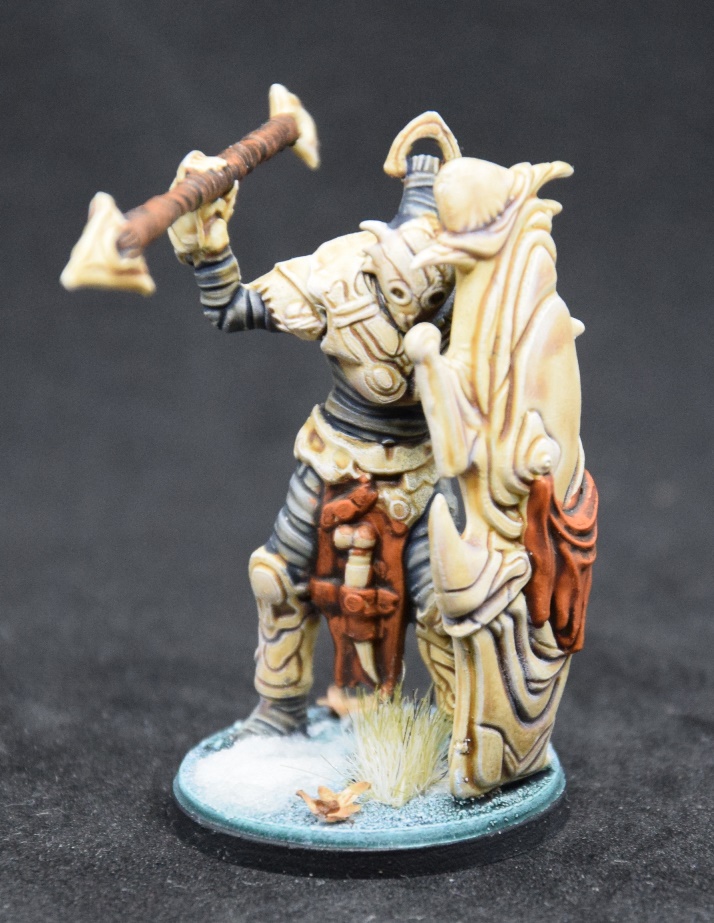
I then tried to do something similar on a Brute Drone, but I wanted to have them a bite different, since they are not “simple” drones and thus worked a bit on the weapons.

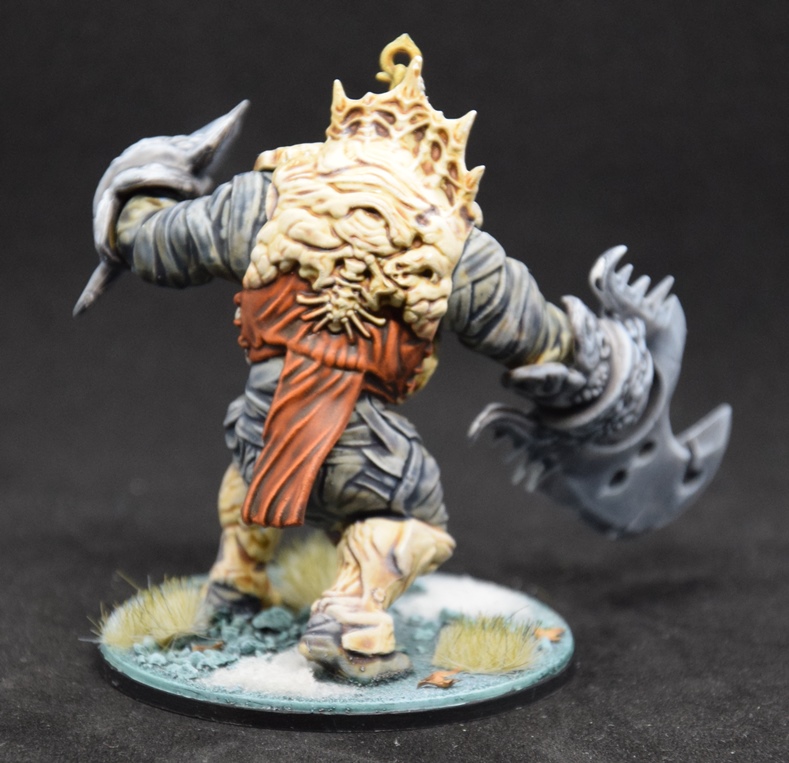
Next time will probably be a step by step on the Steel Legion : I have to paint my milestone 3 (and I hope the miniatures I ordered form OTT will arrive soon since I need them to complete milestone 3).
Changes
It’s time to change my plans.
I decided to modify Milestone 3. I’ve been reading the latest version of the rules (v1.0.3) to update what I knew about character rules. I first saw those changes on the Army Builder, and that’s what drove me to dig into it.
Here are a few problems I noticed :
1. Since the characters have their own stands, I will need special stands I don’t have right now
2. Having retinues is a very useful strategy, and helps to enhance visually the army, but I don’t have them right now
3. Visually speaking, I’m not satisfied with some of my miniature choices, and thus had to make a few changes
Now is time to bring solutions to those problems
1 and 2 : Stands for characters
I have 3D modelling skills, thus I decided to create my own character stands, since what I found of the internet was not satisfying. Nothing fancy, just plain stands, compatible with the official stands. Since characters can have retinues, I will need stands for 1, 2, 3 or 4 standard miniatures. I then designed them : you can find the links below.
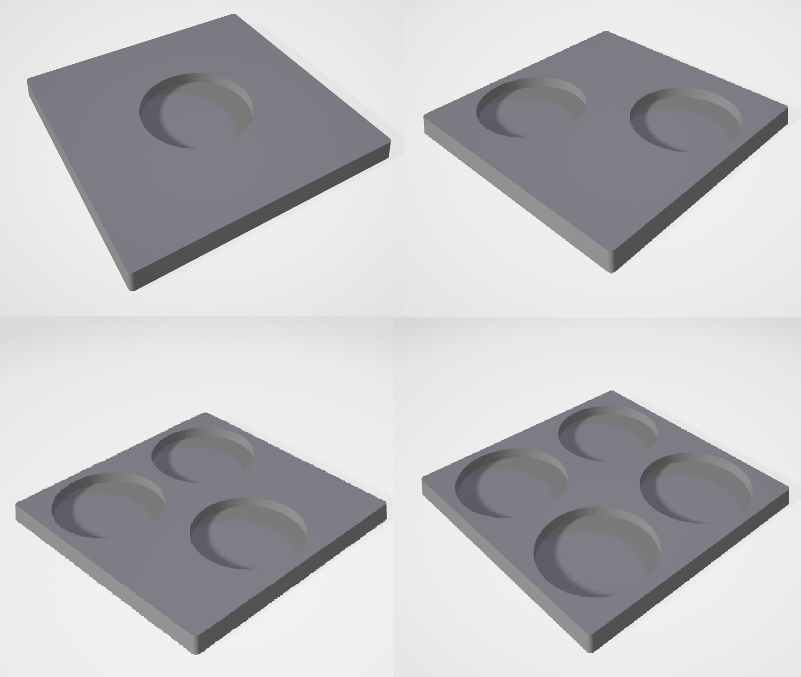 What the stands look like
3 : Choices
I reconsidered my army and a few things were now visible.
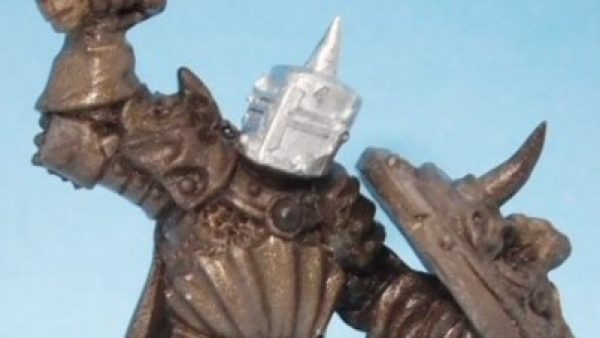
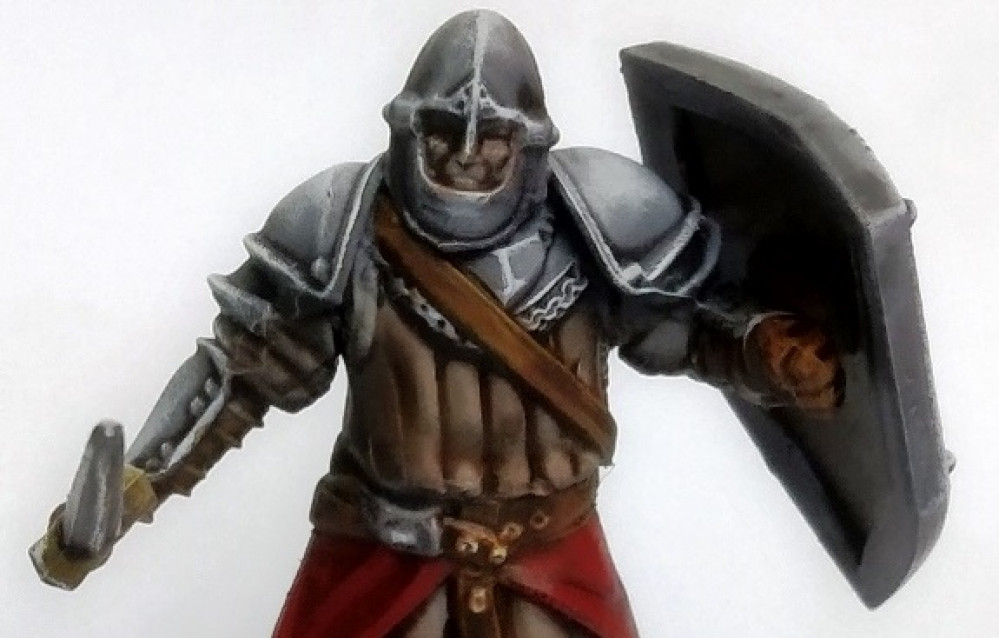
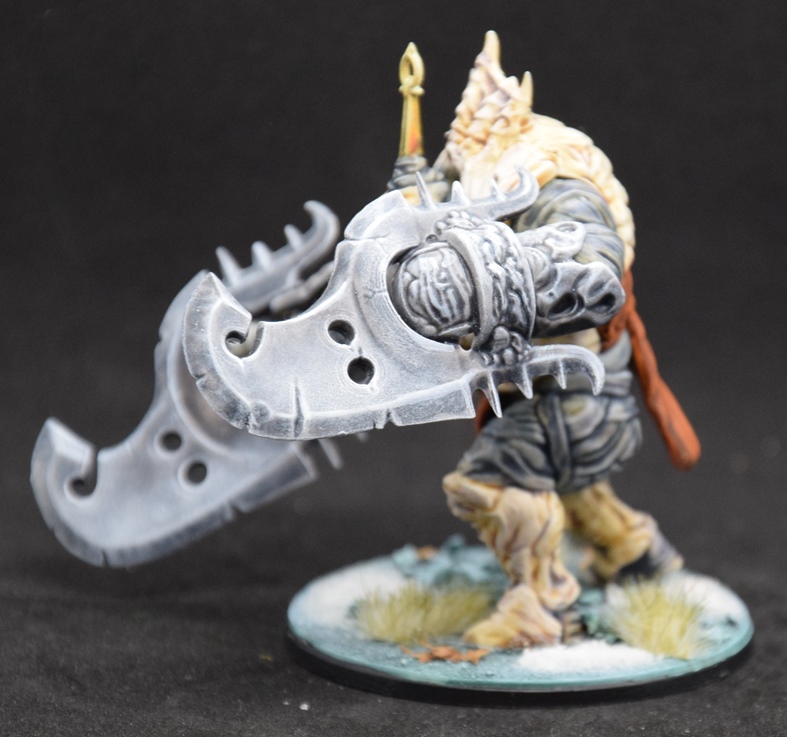
My “Lord” looks a bit… strange… in this army. He looks more like a seasoned veteran than a real Lord in fact (and I’m not satisfied with the print parameter I used, especially on the shield : I did better since then). In the same way, the choice I made previously for an Imperial Officer does not really satisfy me.
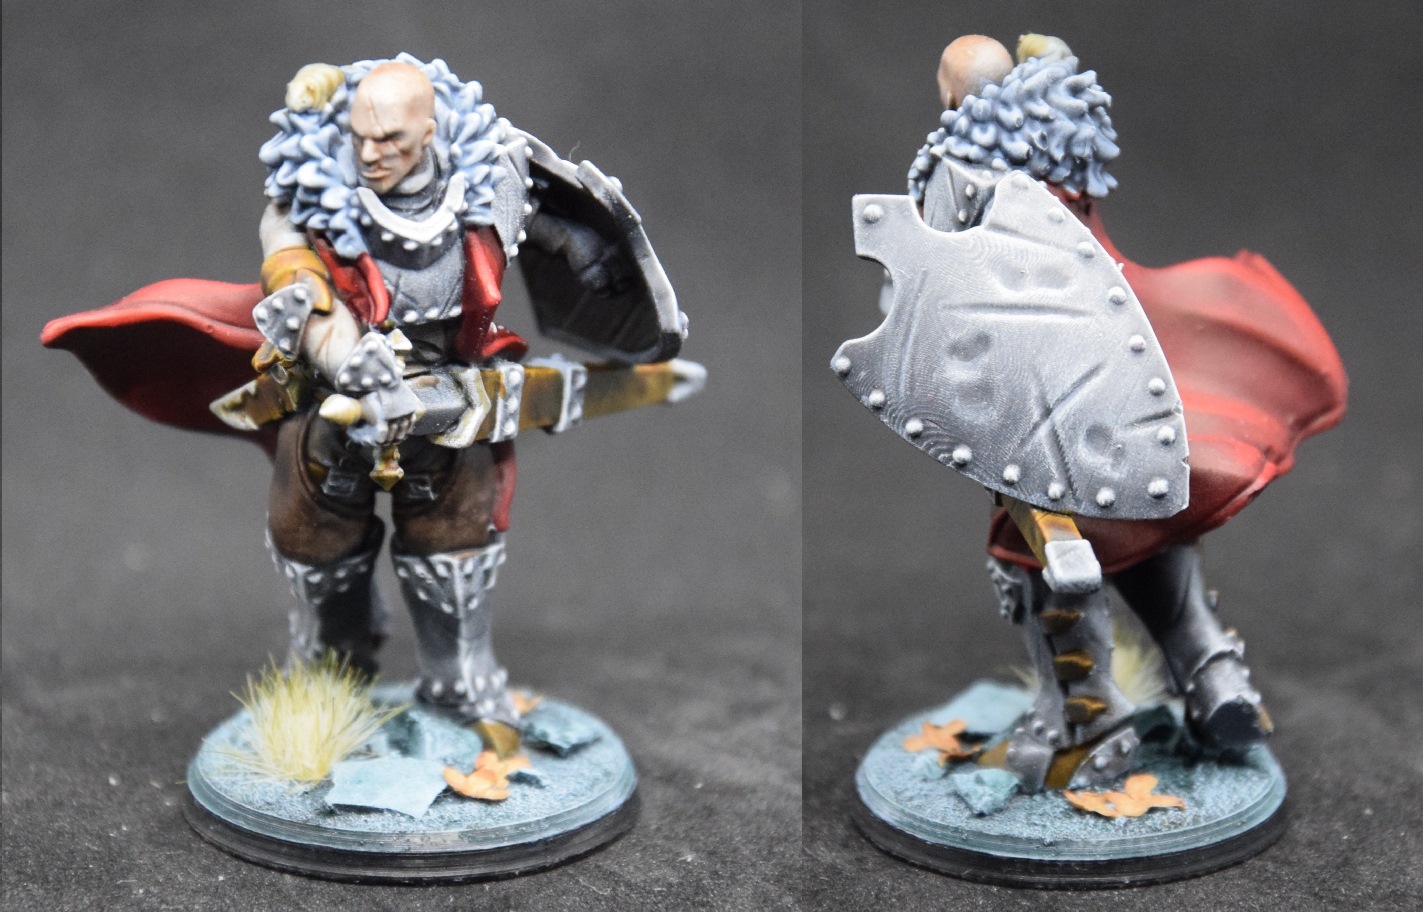 You're a Seasoned Veteran, now !
The men of the Iron Wolf live in a harsh environment, and Imperial miniatures should look more sophisticated. In the same manner, any leader for an Imperial regiment should be more “imperial”.
That’s why I ordered a few miniatures and changed my army list.
I removed the various Heirlooms and Weapon Arts I had given to my characters and instead chose a few upgrades for my regiments and some retinues for the Lord.
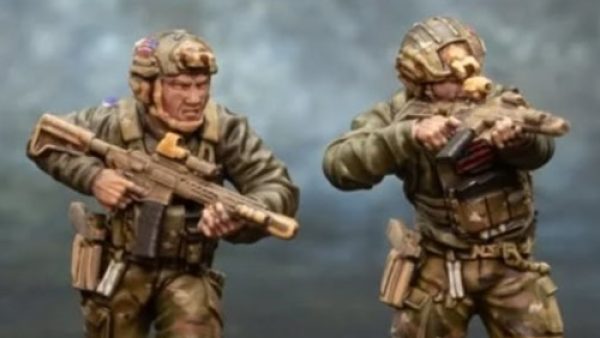
- First, I chose the Drillmaster for the Steel Legion. The miniature is just awesome and I wanted to paint it.
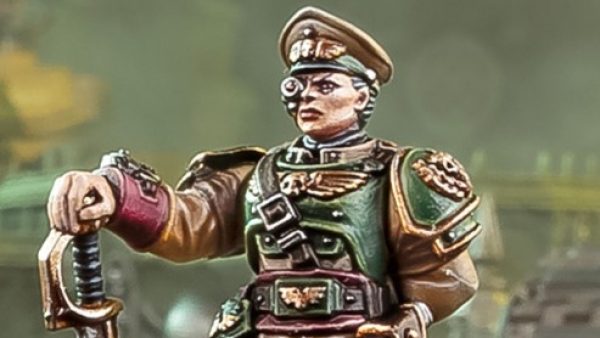
- Then I picked the official imperial officer, who looks more imperial than my first choice. The miniature I printed will end up as a leader for the a Men at Arms or the Steel Legion regiment, or as a retinue.
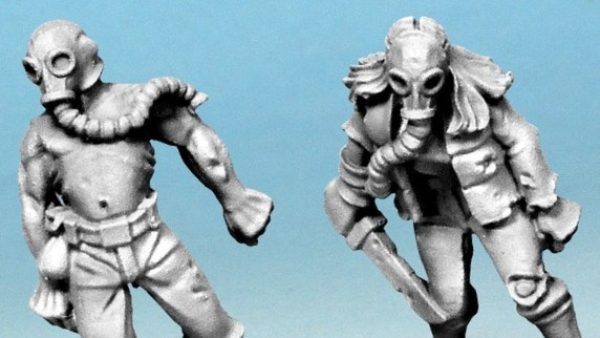
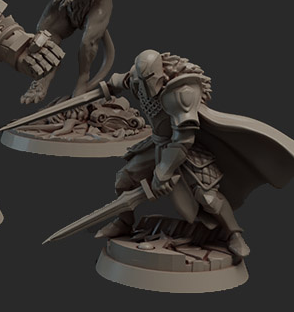
- I finally chose the seasoned veteran, because… his gritty look is awesome and I definitely want to paint this miniature !
For the miniatures I already had, I’ll use my former lord as a seasoned veteran, since it is already painted and he looks just like it. I’ll just add the new veteran to one of my other regiment (when I’ll have enough points), he’ll probably go with the Steel Legion.
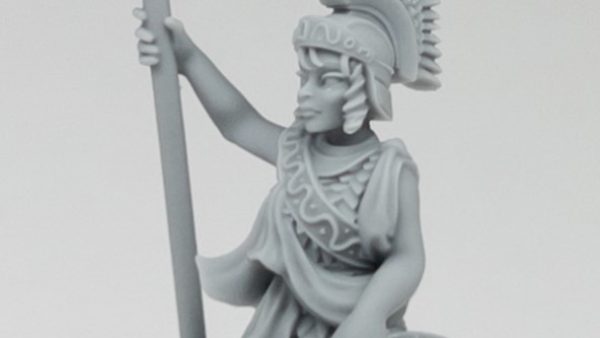
It meant I had to pick another Lord. Actually, I had already found him, and it’s what drove me to review the choices I had made. It’s another miniature from Titan Forge, and the wolf themed ornaments made me think “why the hell didn’t I pick this mini ?”.
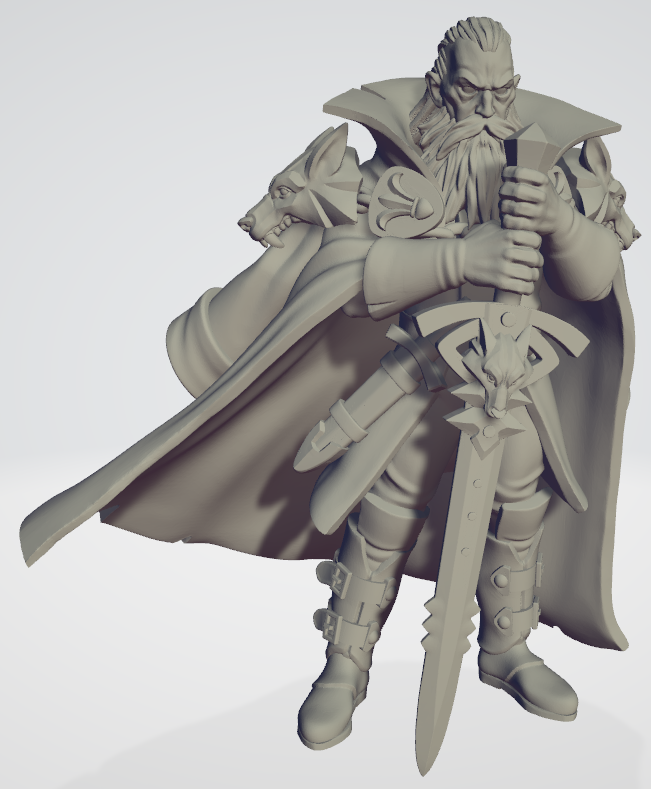 That guy looks awesome...
Planning for Milestone 3
As I wrote in my previous post, I’m back on track and this time, the goal is Milestone 3. (yes, I know, I’m a milestone late, but the lockdown wasn’t compatible with hobby time for me).
To get it right for Milestone 3, I decided to catch up with the 1200 points, as scheduled at the beginning of this Path of Conquest, which means a 400 pts increase.
And it will be possible with a major regiment : steel legion !
I ‘m about to get those miniatures with the starting offer on the Para Bellum website (with the starter set and another box of Marksmen for the Spires). It’s a very interesting value for price set.
In order to put the Steel Legion into my army, I must have an Imperial officer.
I got a 3D model which was perfect for this role, from Titan Forge (and remember, “3D printing is the sh*t”).
 More a fighter than a commanding officer, but it suits the mood of the army and I just like the miniature.
And instead of creating a totally new Men at Arms regiment, I decided to add a few miniatures to one of the already existing regiments (and the miniatures will be in the starter set).
This is what the army list looks like : army list on the Army Builder
Since it’s becoming a real army, I decided to add a few tactical thoughts.
– I have 3 light regiments, 3 medium, and one heavy : I don’t want to arrive too late on the battle field but I still need to be able to seize the objectives (light regiments can’t do that).
– The crossbowmen are perfect to deplete the enemy regiments as they arrive. Their V of 2 and the armor piercing rule makes them much more reliable than the militia bowmen, and much more effective against armoured opponents.
– The Militia will go as fast as it can to block the enemy before he reaches the objective, and expand the reinforcement zone as far as I can. It’s not the perfect regiment for this, but it’s the best I can do until I hire the mounted squires into the army (I have a plan for this).
– The two regiments of Men at Arms are here to seize the objectives in the long run, and block enemy regiments to let the Household Knights and the Steel Legion charge (flank them if possible) and wipe them out.
– The mounted Lord will go with the Household Knights, to add some impact
– The other Lord will be in one of the regiments of Men at Arms
– The Imperial officer will lead the other regiment of Men at Arms
Next entry in this project blog will probably either be a painting tutorial for the Steel Legion (if I get them soon enough since they are on the way) or a first look at “The enemy” (the spires from the starter set which I started painting yesterday).
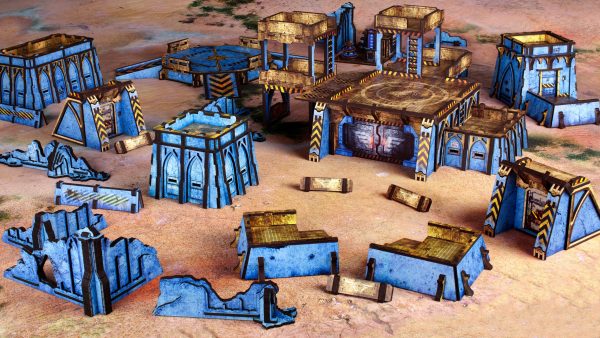
I also have some scenery in mind to get a proper battlefield, and play my first conquest battle (against myself because of the lockdown and the fact that there are very few Conquest players in France), but that’s another story…
Persistence is the key to victory...
OK, almost two months without an update.
The French lockdown has taken its toll on my hobby time (I’m of those who have to work twice as much during a lockdown).
But I haven’t given up.
So I’m back at it.
The enemy is going to sh*t his pants, the Iron Wolf is angry !
Since I’ve been painting miniatures, I’ve always been on the speed painting side because of the time it requires to paint those small things.
I’m not lazy, I’m smart : there’s a difference. 😉
I still like good looking miniatures. I’ve then used techniques optimising the ratio time spent/result.
Here is a quick tutorial on how I proceed when I have to paint an army, and this example will be on my “militia”, which means the pack of wolves.
First some general rules :
1. Zenithal highlight is your friend : trust it.
2. Have a standard paint scheme for all bases (not necessarily all miniatures). It brings the army together visually.
3. Have a plan
4. Test the plan
5. Optimise the plan
6. Follow the plan
Zenithal Highlight does not need an explanation, but I have to address one of the most important parts : which colors to use.
On my Men at Arms, I used a black primer and a white zenithal highlight. It’s simple, and it creates a great contrast between shadows and light, very useful when you do NMM.
On the wolves, I already knew I was going to use the Contrast Paint Space Wolves Grey for the fur. Despite the fact that fur is no metal, I decided ti keep the black primer instead of using a grey one. I then highlighted it zenithally with pure white.
For the bases, I already had my plan, which is very simple :
– After glueing the miniature, PVA glue with sand and small rocks
– Once dry, another coat of diluted PVA glue, just to make sure nothing is going to get away
– Then the airbrush, and finally the steps I already outlined in a previous post :
– Base: Citadel Wash Coelia Greenshade
– Base highlights: Citadel Dry Etherium Blue
– Base details: a few leaves (birch seeds from my garden) and winter grass tufts (Green Stuff World)
Then I had to think of a plan to paint the wolves. They were going to be grey wolves, but I had to put som red on them to bring visual coherency to the whole army (I have red on every miniature so far). The red would be in the eyes and slightly on the mouth, since no other parts were eligible for it.
You can see below the detailed stages for those wolves.
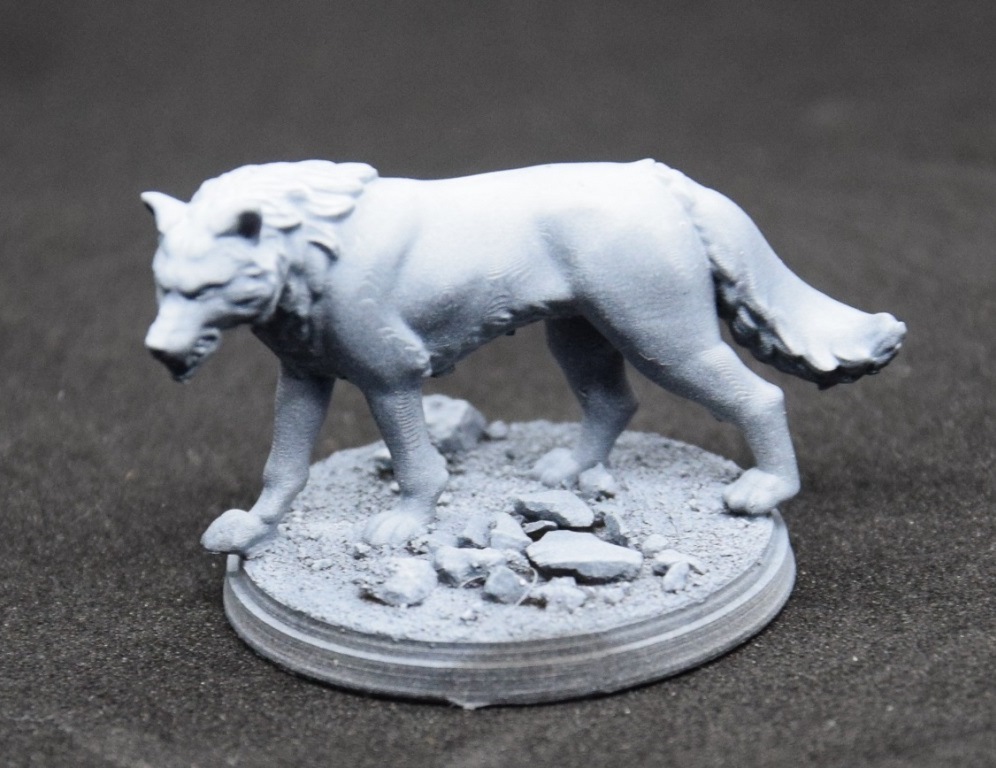 I primed the miniature in black and added a zenithal highlight of pure white.
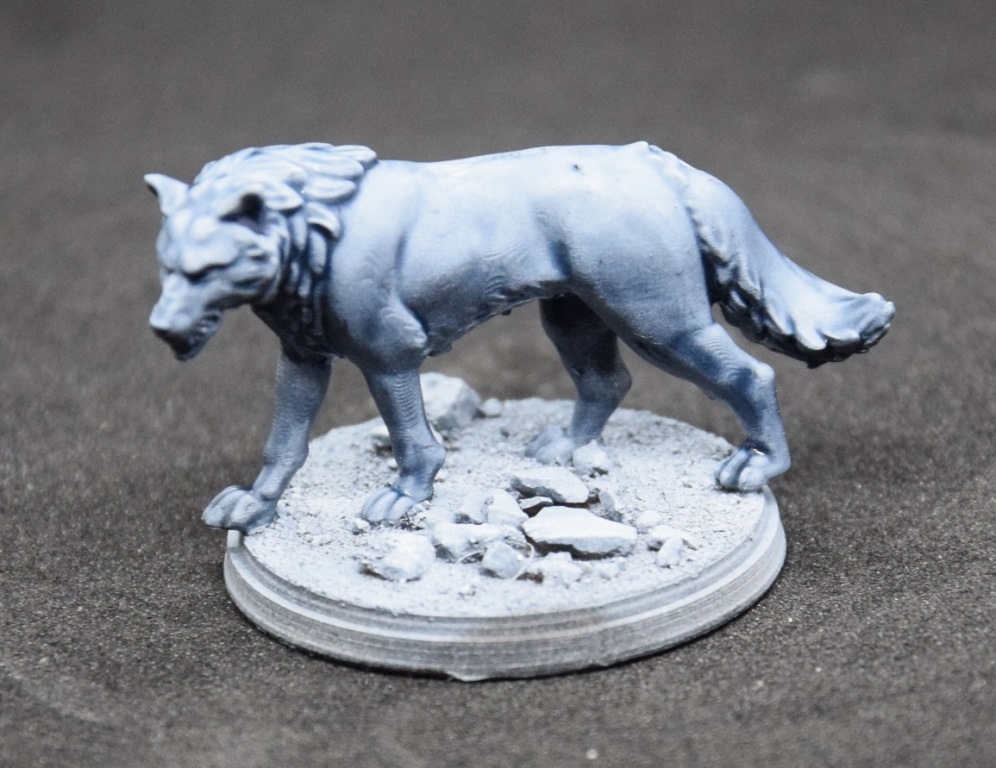 For the fur, I simply used Citadel Contrast Space Wolf Grey. It's a great way to efficiently add shadows, and keep the zenithal highlight.
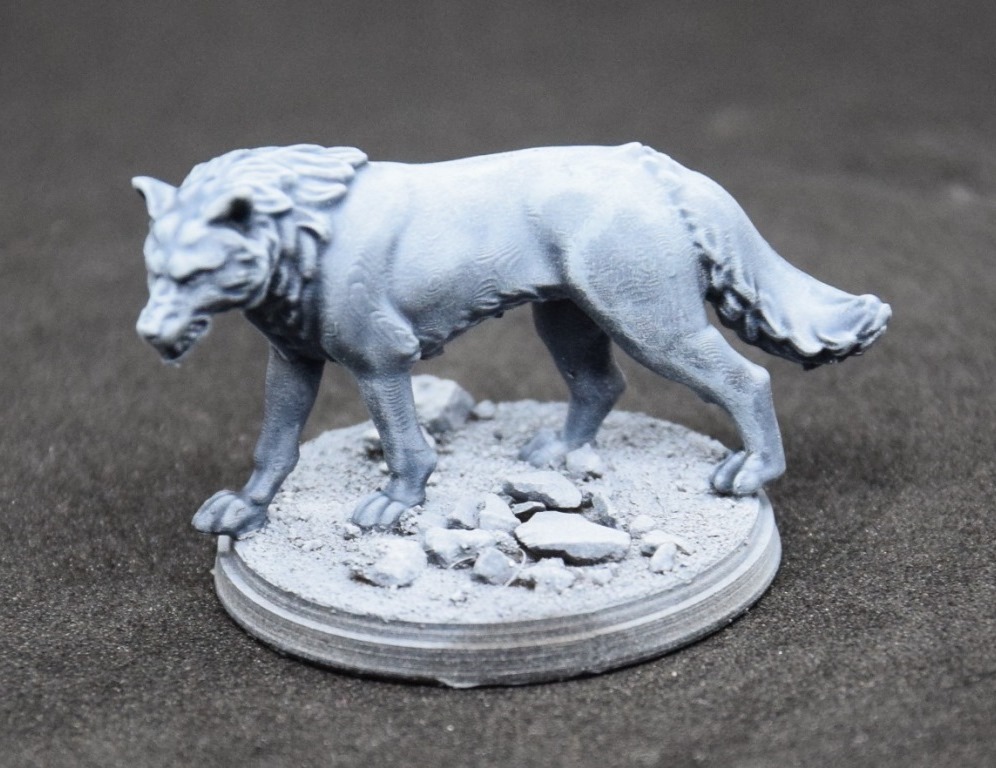 I then dry brushed the fur with Citadel Dry Etherium Blue
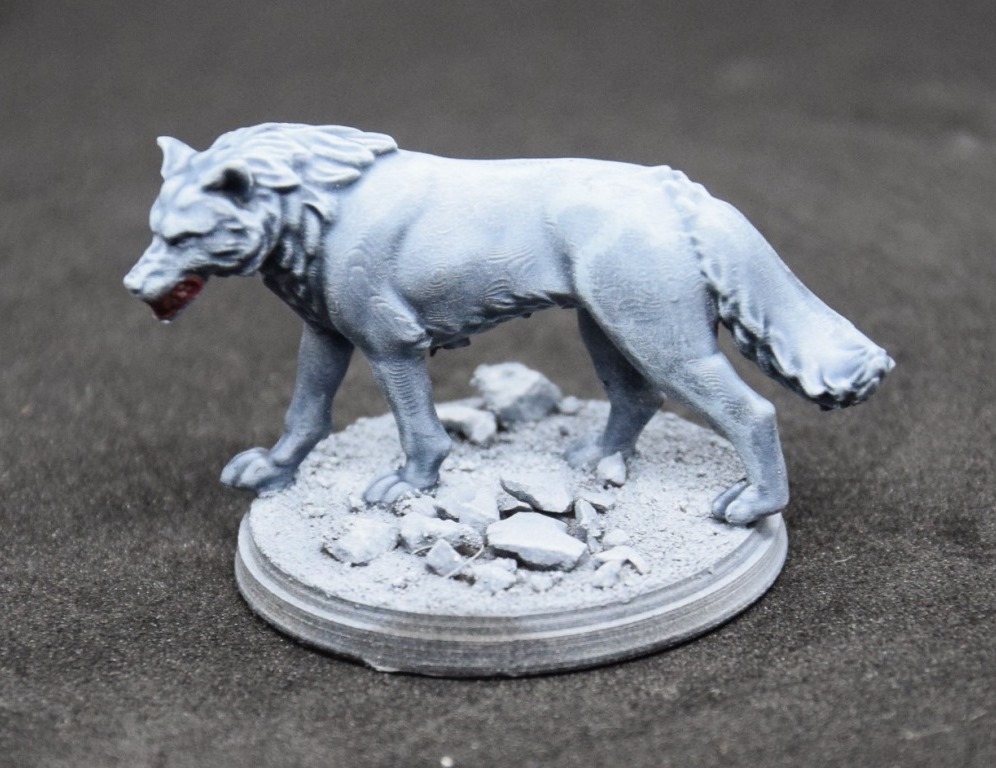 I painted the mouth with Citadel Contrast Flesh Taerers Red, since it's the same red I use on some of the fabric in the rest of the army
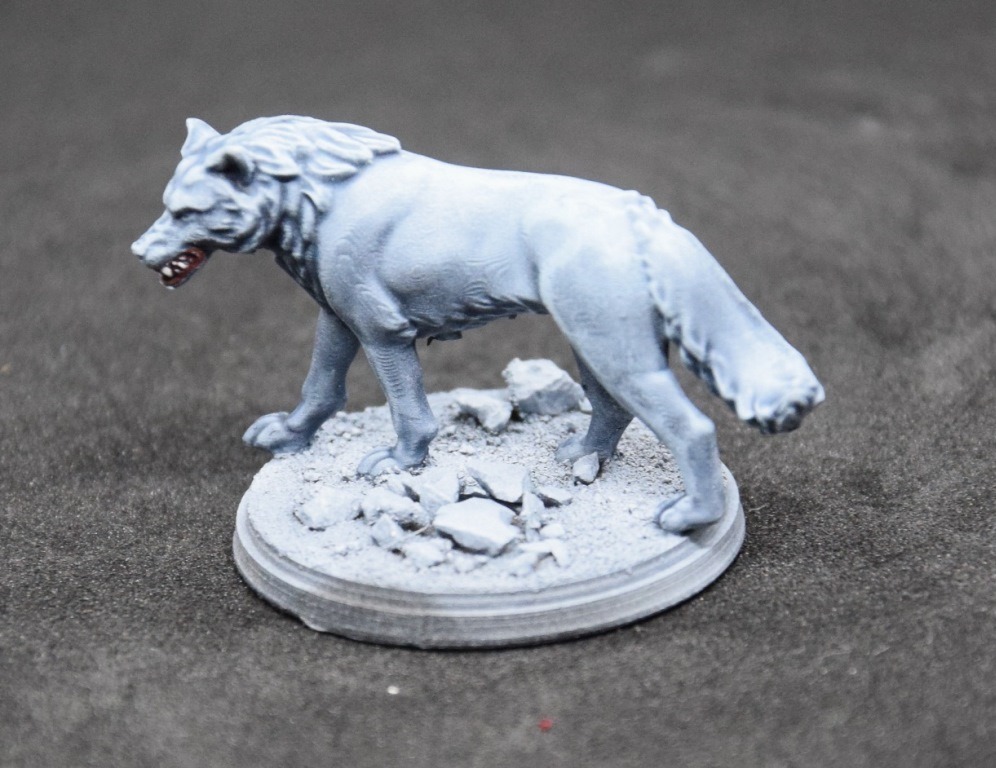 For the teeth, I dry brushed them with Citadel Dry Wrack White
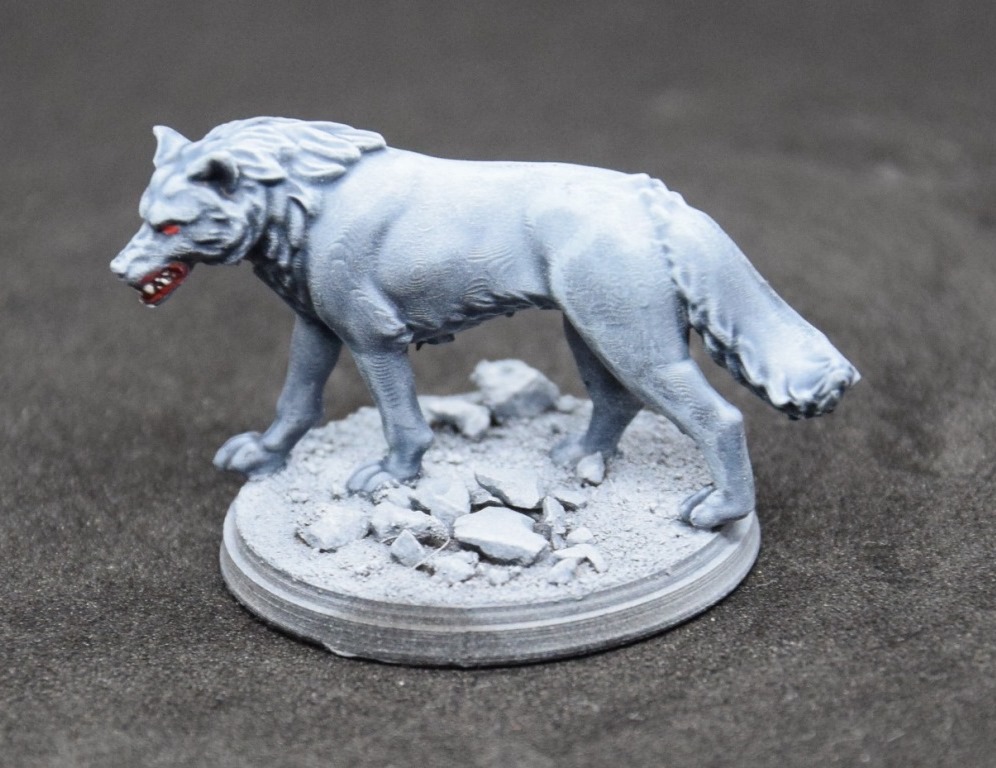 Then it was time for the eyes, with a base of Citadel base Mephiston Red (I added a few strokes around the mouth)
  I added a small dot of Citadel Foundation Macharus Solar Orange (it's an old reference)
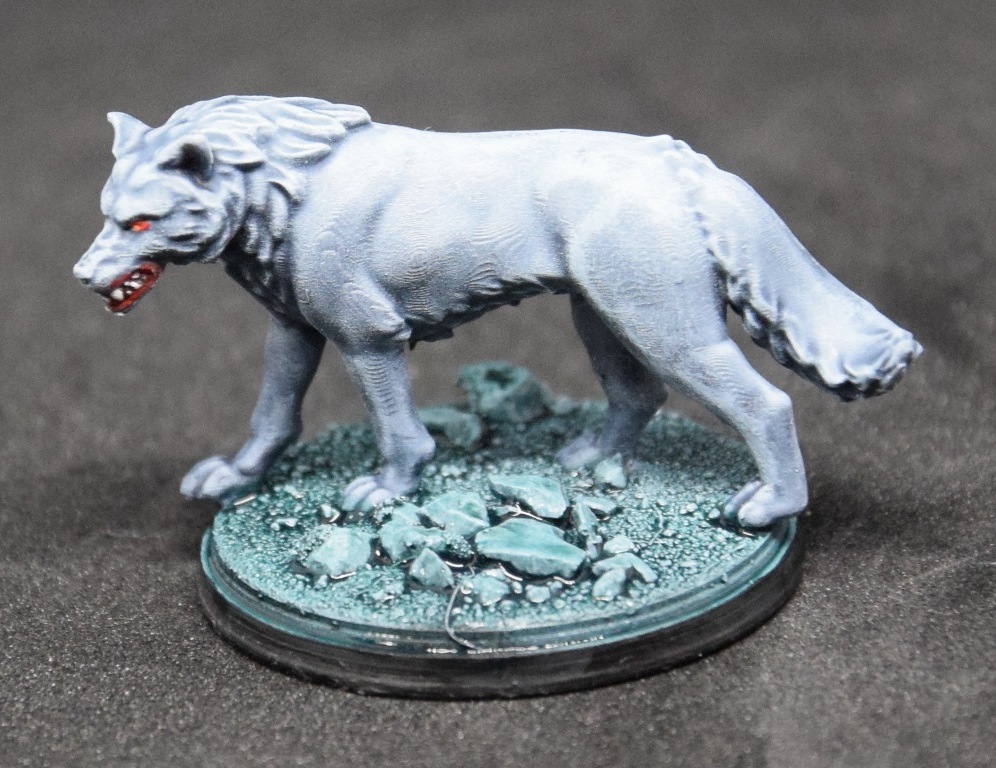 And then with the base with the borders in abaddon black and coelia greenshade.
Since I was satisfied with it, I decided to optimise the whole plan. Had I not been satisfied with it, I would have to start over again and change what I didn’t like. This is why you have to make a test before applying it.
To optimise the plan, I had to reorder the steps to gain some time. In this case, I was using twice the Citadel Dry Etherium Blue (for the base and for the wolves). I placed that step at the right place :
– Base: Citadel Wash Coelia Greenshade
– Fur : Citadel Contrast Space Wolf Grey
– Fur drybrush : Citadel Dry Etherium Blue
– Mouth : Citadel Contrast Flesh Taerers Red
– Teeth : Citadel Dry Wrack White
– Eyes : Citadel base Mephiston Red
– Eyes : Citadel Foundation Macharus Solar Orange (old reference)
– Base details: a few leaves (birch seeds from my garden) and winter grass tufts (Green Stuff World)
It might be a small difference, but it saves me time (which is very precious nowadays).
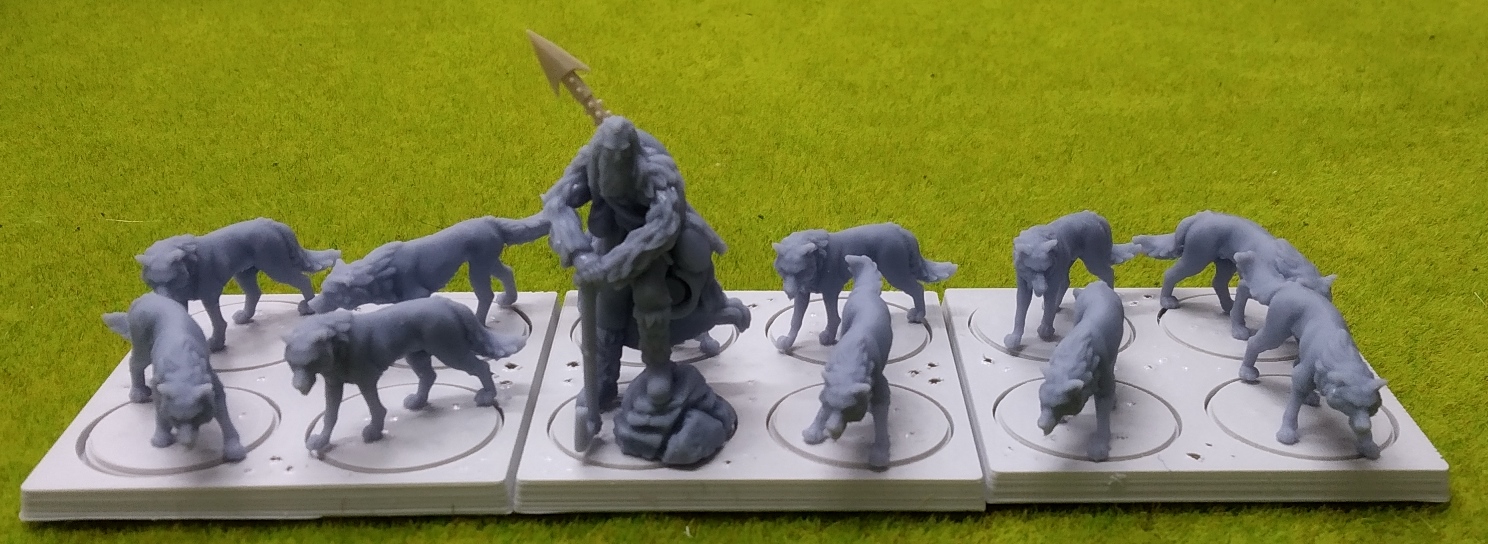
This a very simple and effective way to paint large units and it took me less than an hour to paint the whole unit (apart form the leader who has a slightly different paint scheme).
Next update wille be for the planning of Milestone 3.
Planning for Milestone 2
For the next milestone I decided to do things in a different way. Since I worked on the lore for my 100 kingdoms army, I’ve had a lot of ideas coming out of nowhere.
I also had a problem to take into consideration : cost. Conquest miniatures are great, but not cheap, and this month, my wallet is almost empty.
I still have in mind to buy a second starter set along with the Steel Legion, but I will wait for this..
Thus, I decided, for this second milestone to do things differently and add some very special units to my army. I limited myself (considering cost and available time) to 800 points for this second Milestone (300 points more than what I already had).
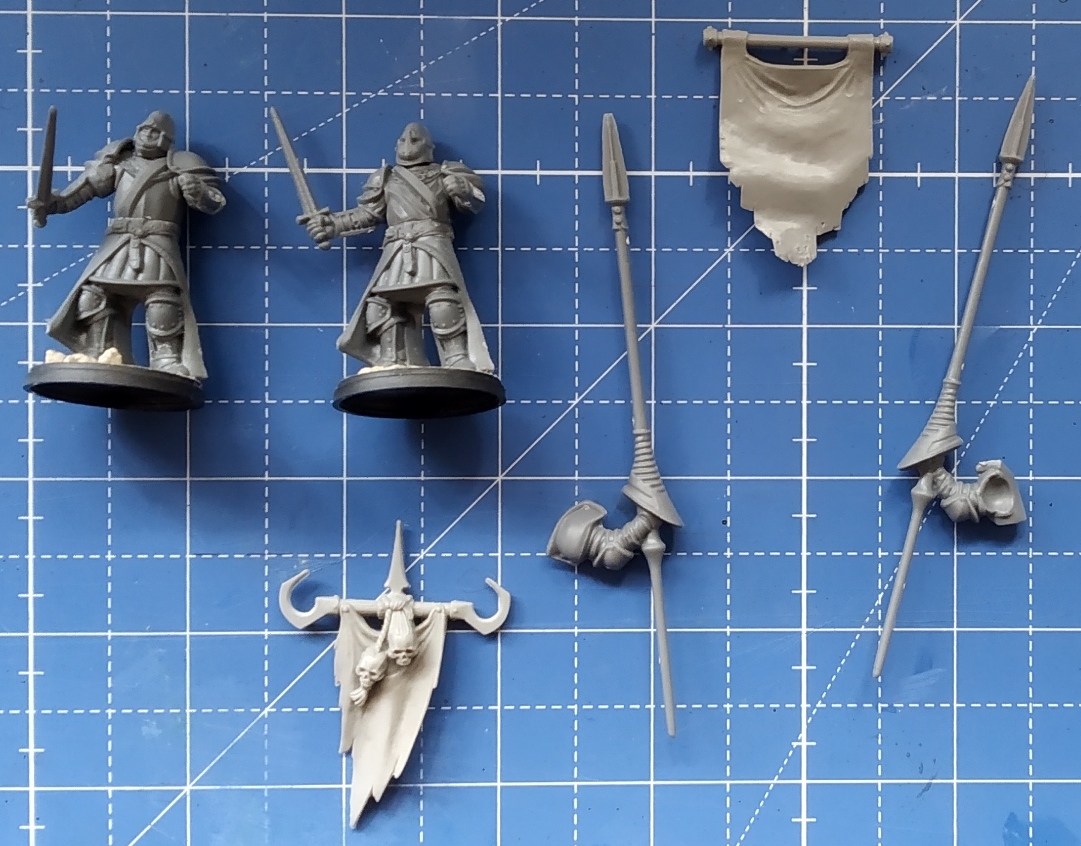
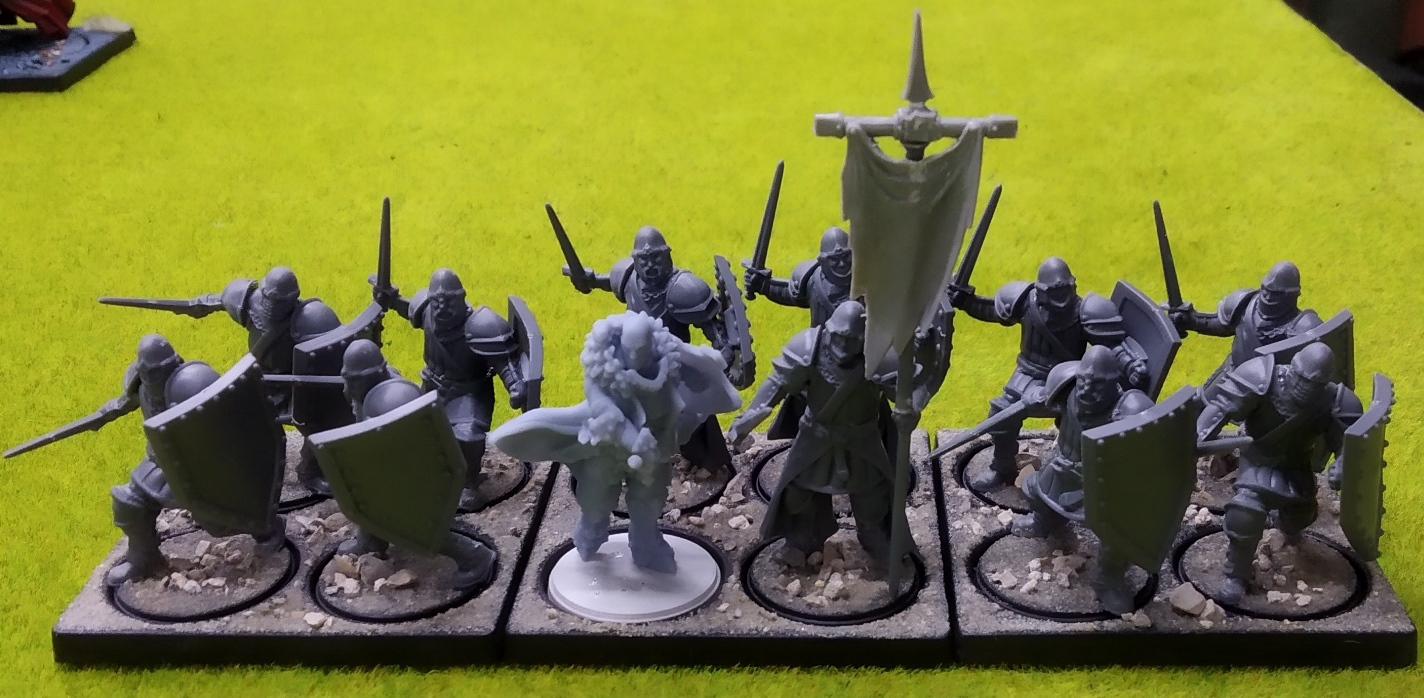
I already have 12 Men at Arms remaining from the starter set I bought. I built a standard bearer using spare parts for both units (the new unit and the previous one).
I used two of the men at arms, and spare parts from the household knights and my bitz box (for the standards, and I had to work on one). Here is what it looked like before assembly.
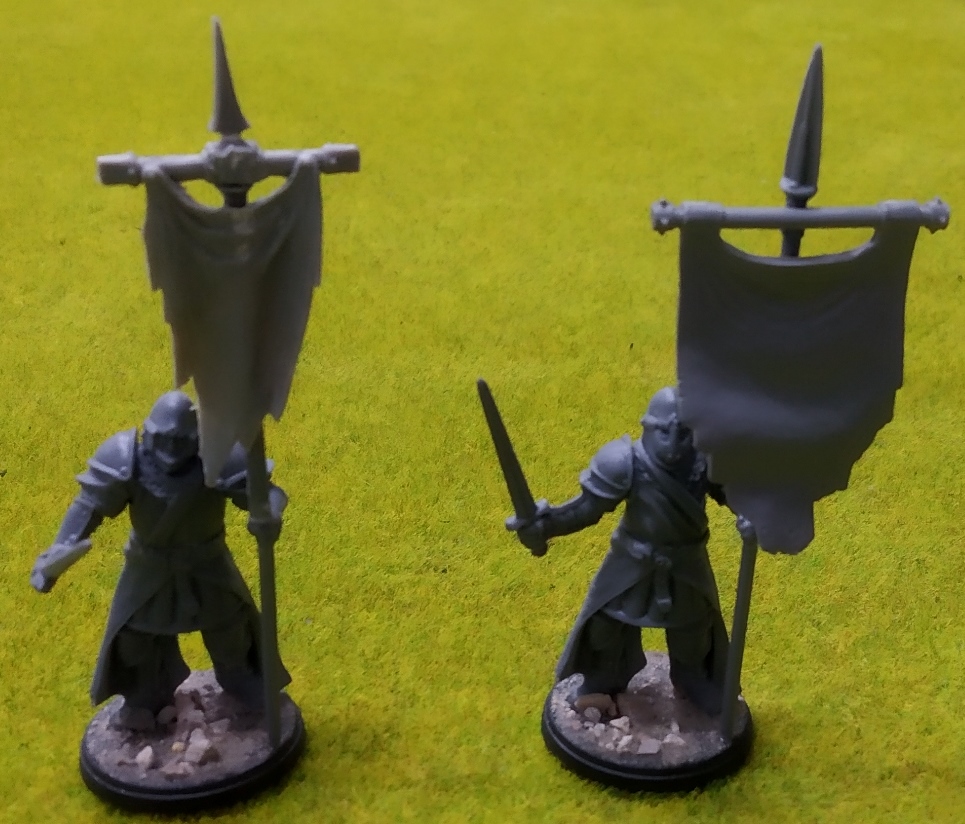
Here is what it looks like after 20 minutes of work.
I decided to add a noble lord (infantry), and a unit of militia. The noble on foot is there to provide some strength to one of the Men at Arms unit. I didn’t chose an Imperial Officer since the Iron Wolf is not really fond of the empire…
And for the militia, there are not many men in this Kingdom, and most of them dig for Iron. But what about a pack of wolves hunting those stupid trespass on the Iron Wolf’s land ?
I ended up with my 800 point army list : you can find it here.
And the trick is that I have a resin 3d printer…
I already had decided that the militia was going to be a pack of wolves led by a hunter (no standard bearer for the wolves, despite its usefulness, because it doesn’t fit the spirit of this unit, and I really wanted a hunter as a leader). I looked for suitable wolves models and found these : 3 wolves for 3$…
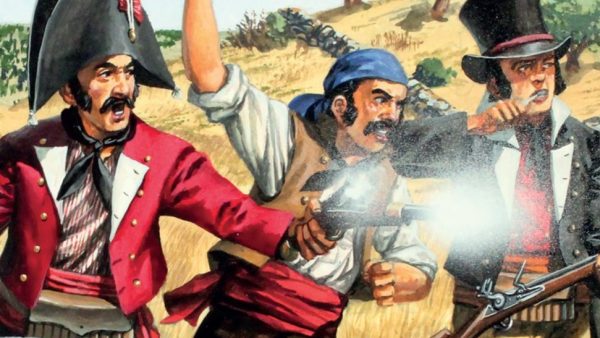
I also found a suitable hunter to lead the wolves : The perfect hunter to lead a pack of wolves
I had to remove his gun, but otherwise he looks just as wild as I wanted.
For the noble lord, I found this one : “Noble” lord…
His tough look and the fur on his cape fit perfectly with the lore of the army. He does not seem very noble, but he looks badass.
I bought the models (in fact, just the three wolves for 3$), scaled the miniatures (they were too small), and launched the print.
I also designed bases to print on my FDM 3d printer while the resin printer was printing the miniatures.
Thus, I’ll have two new units. Here is what the men at arms look like with the noble lord leading them.
But I must say that I really like the “Militia”…
In next update, I’m going to focus on the speed painting techniques I use to create a step by step tutorial for painting the wolves.
The lore of the Host of the Iron Wolf
Sometimes good ideas come out of nowhere, or from tiny details and expand into great stories.
That’s what happened with my 100 Kingdoms army. I named them “The Lions” at the beginning, because lions are great animals and I didn’t have a better idea (yeah, I know…).
I thought I was going to figure out the lore of the army later. I just didn’t imagine it would turn out like it did…
While trying to figure out the paint scheme for my army, I thought the shield of men at arms was a bit empty. Since it was about speed painting, I didn’t want to make a freehand for each one, thus, I wondered about water transfers.
I saw some sheets on sale on amazon to print my own, but I decided to go through my old box of water transfers, and I found a bunch of space wolves water transfers.
That’s when it came to me.
The Iron Wolf.
The name came out of nowhere and stuck with me, and I had since then glimpses of knights mounted on giant wolves (heavy cavalry), hordes of wolves led by huntmasters (militia), and so on…
And the Iron wolf would be no Jon Snow…
In a nutshell, the lore that follows came from the following simple facts:
- I don’t have much time to paint minis (I’ll use transfers sheets)
- I don’t like spending money when I can save it (I already have space wolves transfer sheets)
- Red is a good color (I like the contrast paint flesh tearers red), and is the color of rust
- I had just ordered snow for my bases from Green Stuff World…
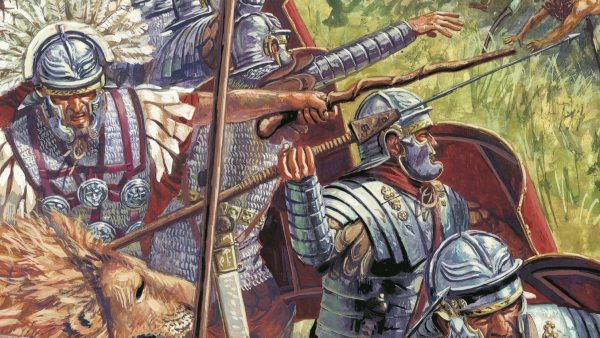
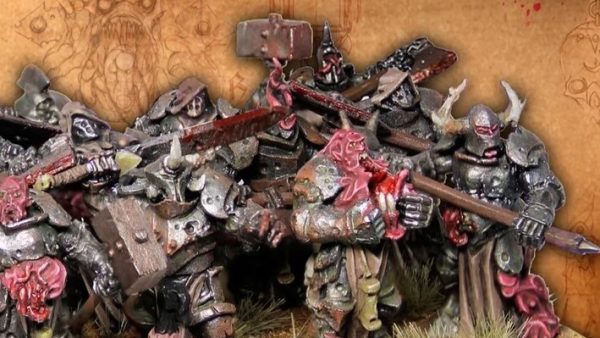
 The Host of the Iron Wolf at war.
There’s a kingdom, far in the east of the 100 kingdoms, where life is even harder than everywhere else. High mountains, covered with snow. Vast forests of pine trees. Pack of wolves, hunting those foolish enough to travel alone. Bears with a fur as dark as night and able to tear apart a knight in his armor with a single blow.
Nobody would live there willingly if it wasn’t for the mines. Hidden deep in the mountains lie vast quantities of iron, and it is the blood of the Kingdom, that made it so rich. Despite the harsh conditions, there’s a good living to make out of it, if you have what it takes to endure the climate, the beasts, the hard work in the mines, and, probably, worst of all, the Iron Wolf.
The Iron Wolf is nickname known throughout the Hundred Kingdoms. Old men tell tales around the fire in winter. Old women say to children to behave, or the Iron Wolf will come for them.
The Iron Wolf is a brutal Lord. Mercy is not a word he knows, and weakness is what he hates the most. He has no love for his people and accepts only one thing : strength. Nobody even knows how old he is. The Iron Wolf seems to be a title that the kings have given themselves, otherwise it would mean he is centuries old…
Rumour says he rides a giant armored wolf and he‘s probably the only person strong enough to wander alone in his kingdom. People have met him, and all those who can talk about it ended up fighting fo him on the battlefield. Probably because fighting in his army is the only thing that earns more than working in the mines. He is always looking for brave and strong men, and some of them end up as Nobles, fighting in his Wolf Guard.
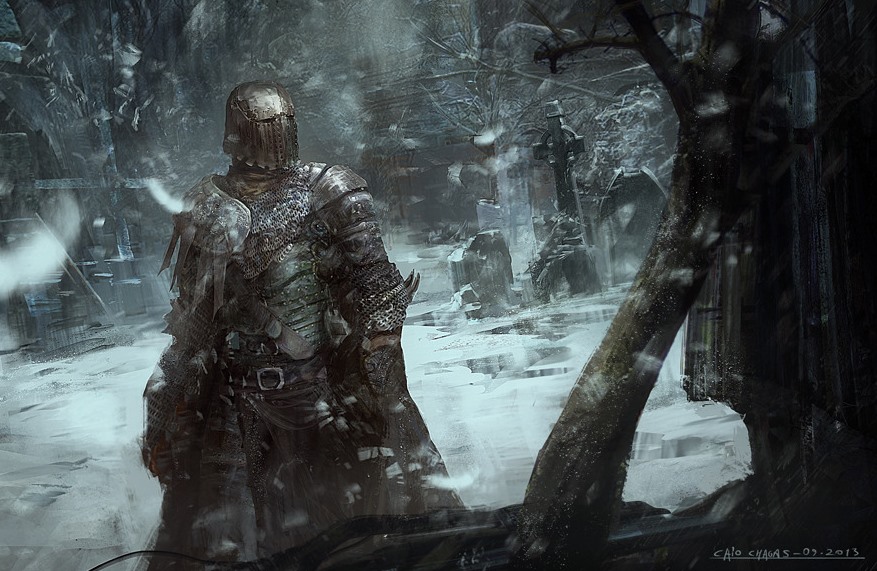
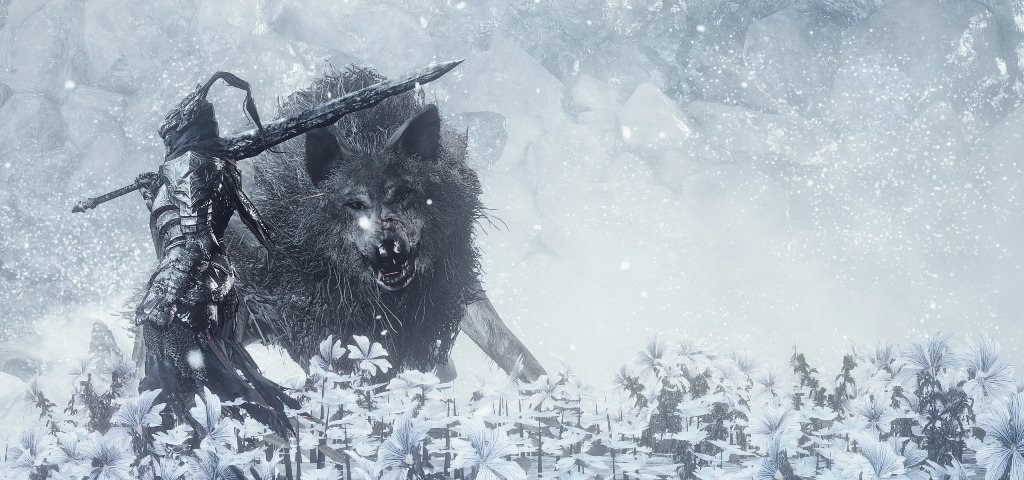 Guess who is the most dangerous...
It was even colder than usual.
Maria stumbled on a stone, hidden by the snow. And the wood she was carrying ended up on the floor.
“Mom, are you all right ?“ asked the boy.
Walder was her last reason to live. He was ten, and her last child. Mirella had died 3 years ago, after catching a bad cold. Brenn and Evan had died last year, deep under the mountains, while digging for the iron. And her beloved husband, Egron, had been killed three months ago in a tavern fight. Only Walder remained, and he was so small, so frail. She took him in her arms, then looked him in the eyes.
“Walder, it’s just that I am tired. Life has been unfair with us. Don’t worry, I’ll take care of you.“
Then she noticed.
Walder was paralyzed.
He was looking above her shoulder, right behind her.
She then felt the warm and foul breath of what was behind. She turned slowly and faced the biggest wolf she had ever seen. It had dark eyes, and could obviously kill a horse with a single blow. His head was just a foot from her face.
His fur was covered with an Iron armor, and an armored man was riding on his back.
A Knight.
He was also staring at her, and she could feel the coldness of his gaze.
She started to move away, driven by fear, but Walder moved forward.
He had his knife in hand and was facing the wolf and the knight.
She wanted to move, to protect him. But fear was stronger.
“Woman, you deserve to die“ said the man.
“You are weak, and you can‘t take care of that boy, because you can‘t even take care of yourself”.
Then he turned his head towards Walder.
“Do you expect to beat me with that knife, kid ?“
“No” answered Walder, his voice shaking.
“Then what are you trying to do with that ?“
“My dad said that inevitable death was no reason to stop fighting“.
The man didn’t move. The wolf didn’t either.
Then a strange sound broke the silence. The knight was laughing.
He stopped and looked again at Walder.
“Where is your dad ?“
“He died three months ago.”
Walder was still pointing his knife at the knight. Only the breath of the wolf was breaking the silence now.
“That’s a shame, but he left something valuable behind him…”.
The knight moved his hand and the wolf moved a few feet away.
“What’s your name, boy ?“
“Walder”.
“Walder, if you want to live, you have to get away from that weak woman. Come tomorrow morning at dawn at Fort Balgron. You‘ll get an opportunity to train. If you don’t die while in training, you‘ll become one of my Men at Arms.“
Then the knight turned away, and a few seconds later he had disappeared, hidden by the trees and the snow.
Maria realised then what had happened.
She had met the iron Wolf, and she had lost her son. She talked to him, tried to convince him not to do something stupid like going to Fort Balgron, but the boy remained silent.
Next morning, when she woke up, he was gone.
She never heard of Walder again and died three years later beaten up to death in the brothel she ended up in to survive.
Milestone 1 complete !
A quick update : I finished milestone 1 just before the Weekender got out last Friday.
There are a few things I could have done better, but I consider it finished and playable. I haven’t done the highlights on the armor (just the drybrush), and I didn’t do it either on the red clothes of the crossbowmen, and I‘ll still have the opportunity to do it later.
One thing I‘ll have to do is to put some water transfers of the shields of the Men at Arms. I‘ll explain which water transfers in the next update since it‘s closely related to the lore of my army.
Speaking of the lore, I‘ll have to put some snow on those bases…
Here is what it looks like now.
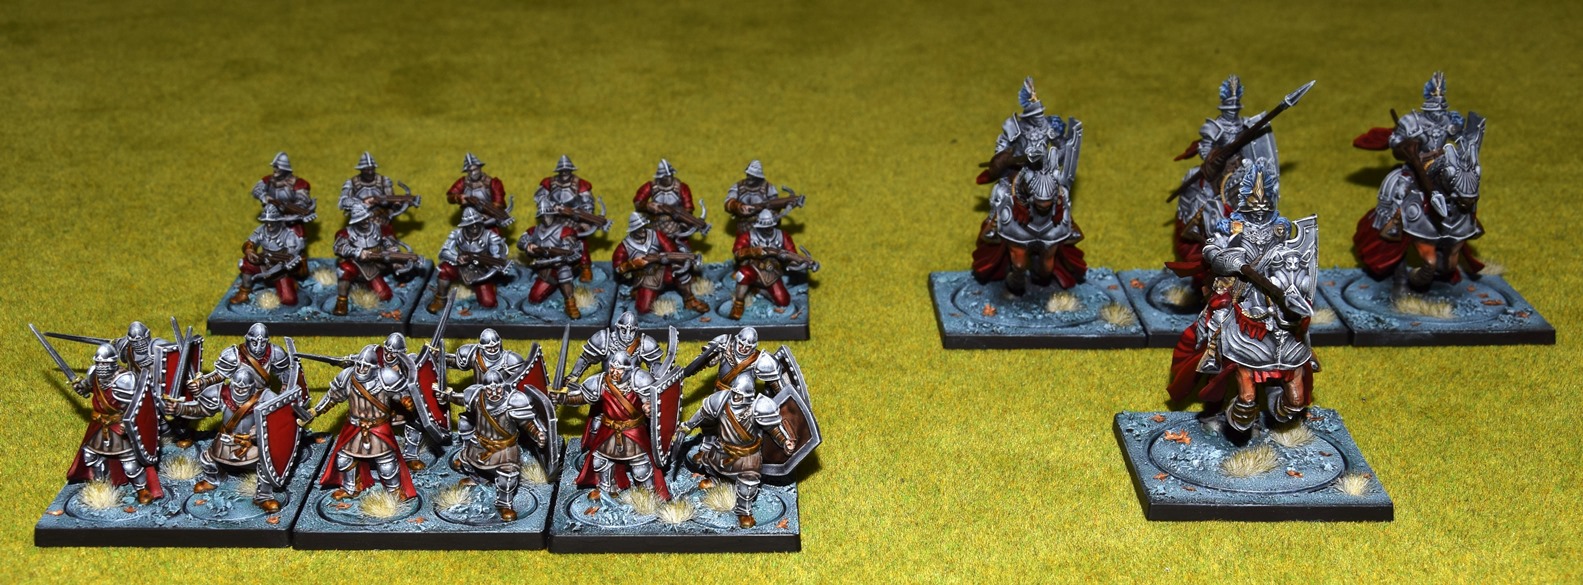 What it looks like.
Work in progress...
Second report in my progress on the Path Of Conquest.
First, I changed the name of the army: I first chose “The Lions”, but things happened (I’ll explain what in another update) and I have changed it for “The host of the Iron Wolf”.
You’ll know why later…
About the progress in painting, there’s one part I hate with miniature games: assembly. Cutting the parts off the sprue and removing flashes and mold lines. On those first 500 points, I thought it would take 3 hours or less.
It took more than 4 hours…
There’s a lot of work on those, especially on the mold lines which, in some cases, were really thick, and since the miniatures are bigger than others and come in many parts (especially the 100 Kingdoms cavalry), it took even more time.
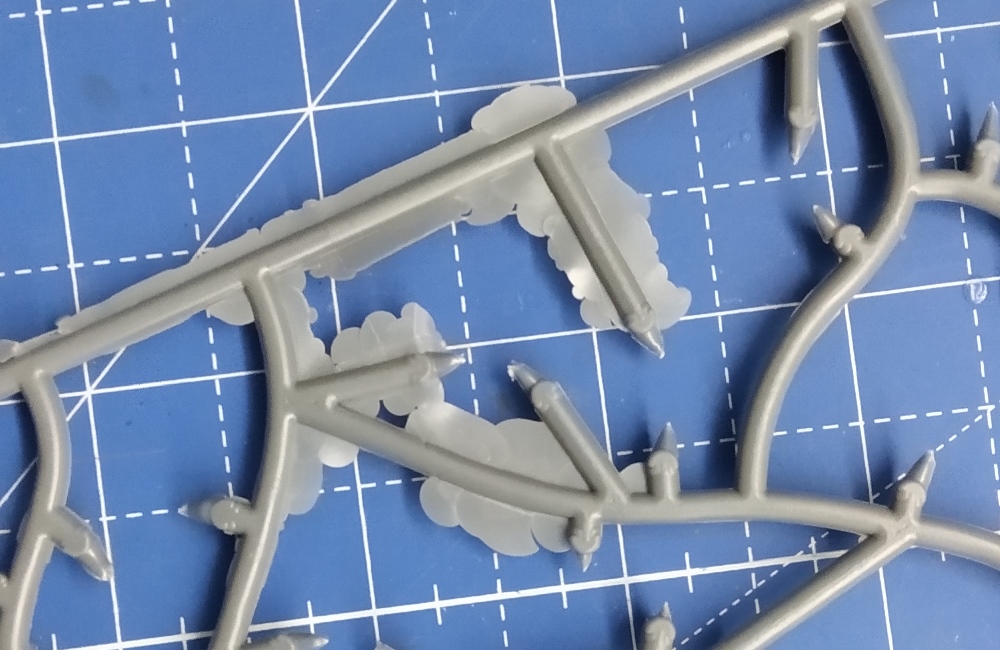 The reason why it took more time than expected...
But it’s done and here is what it looks like for now.
I went then to the next step: preparing the bases before priming. I simply use PVA glue with sand and rocks form various origins. Here is what I use for this.
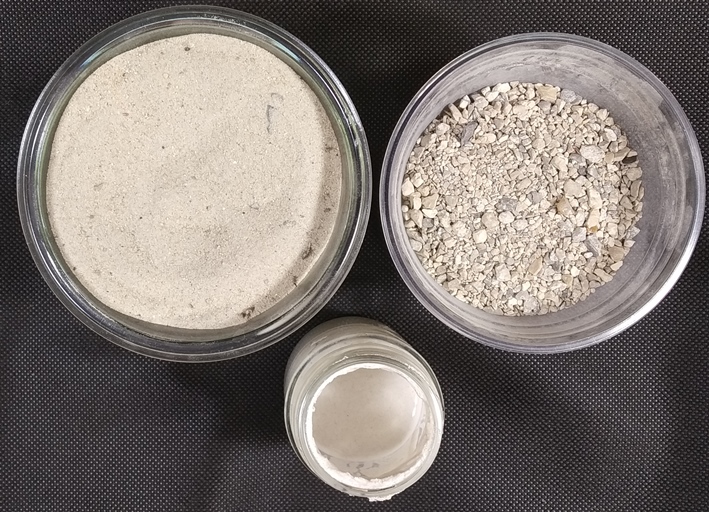 Basing material
I then apply a coat of diluted pva to make sure nothing will get off the base while painting it. It took about 1 hour to prepare all the bases.
I then primed the models with my airbrush. First with black (I found it simpler than trying to get a dark grey), then a zenithal highlight with the white primer. If done correctly, the miniature is ready for the NMM part which will be much easier thanks to the zenithal highlight.
The priming part took 1 hour.
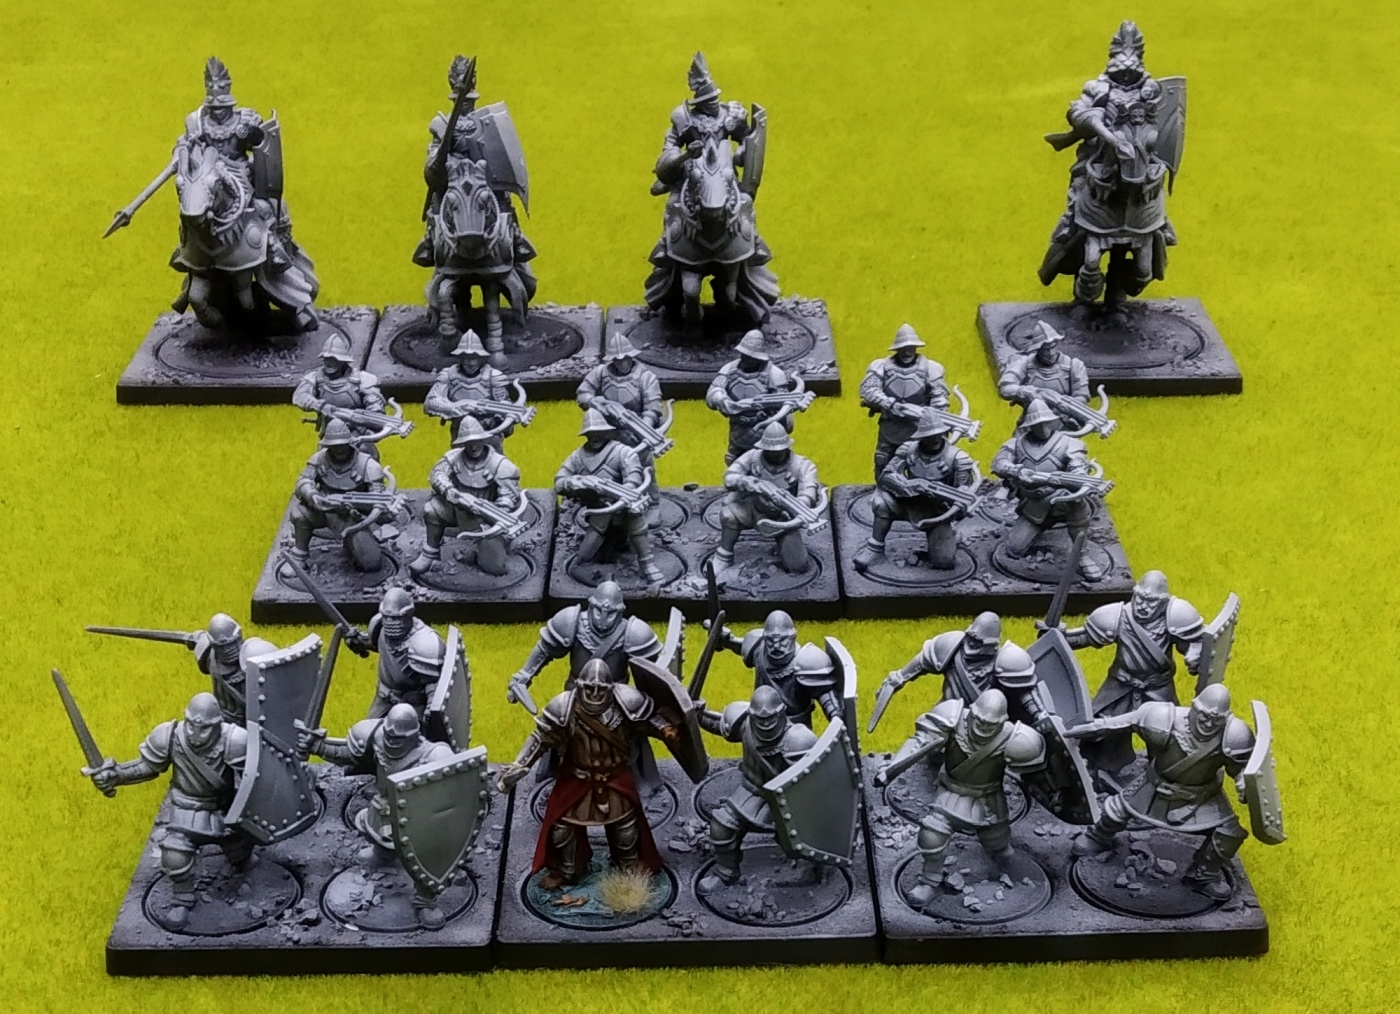 The primed ost !
So far, I’ve put 6 hours in. I intend to batch paint the entire army step by step (and I’m going to do that while playing D&D on Roll20 with my friends). The plan I outlined in the first post of this project is solid, and I intend to stick to it.
I also have another project going on, related to my 100 Kingdoms army. I’ll just put a picture below, you’ll understand that The ost of the Iron Wolf needs an opponent…
 The spires