![A Perfect Zombie Apocalypse Starter Set? Civilians & Survivors Review | Wargames Atlantic [7 Days Early Access]](https://images.beastsofwar.com/2026/01/unboxing-wargames-atlantic-civilians-_-survivors-1_2-coverimage-225-127.jpg)

![Wild Australia Wargaming? 28mm Ned Kelly Gang & Victorian Police Review [7 Days Early Access]](https://images.beastsofwar.com/2026/01/unboxing-traders-galaxy-australiana-ned-kelly-gang-_-victorian-police-coverimage-225-127.jpg)


Collins Doesn’t do Savage Frontier


Recommendations: 1009
About the Project
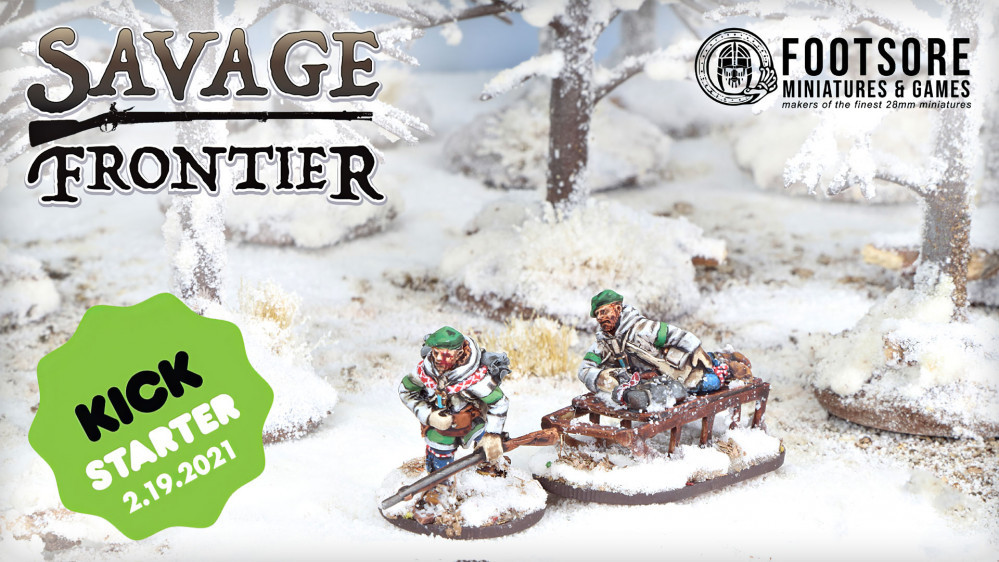
The Kickstarter isn't even over but my mind has been getting super excited over it and wants to build a table ahead of time!
Related Genre: Historical
This Project is Active
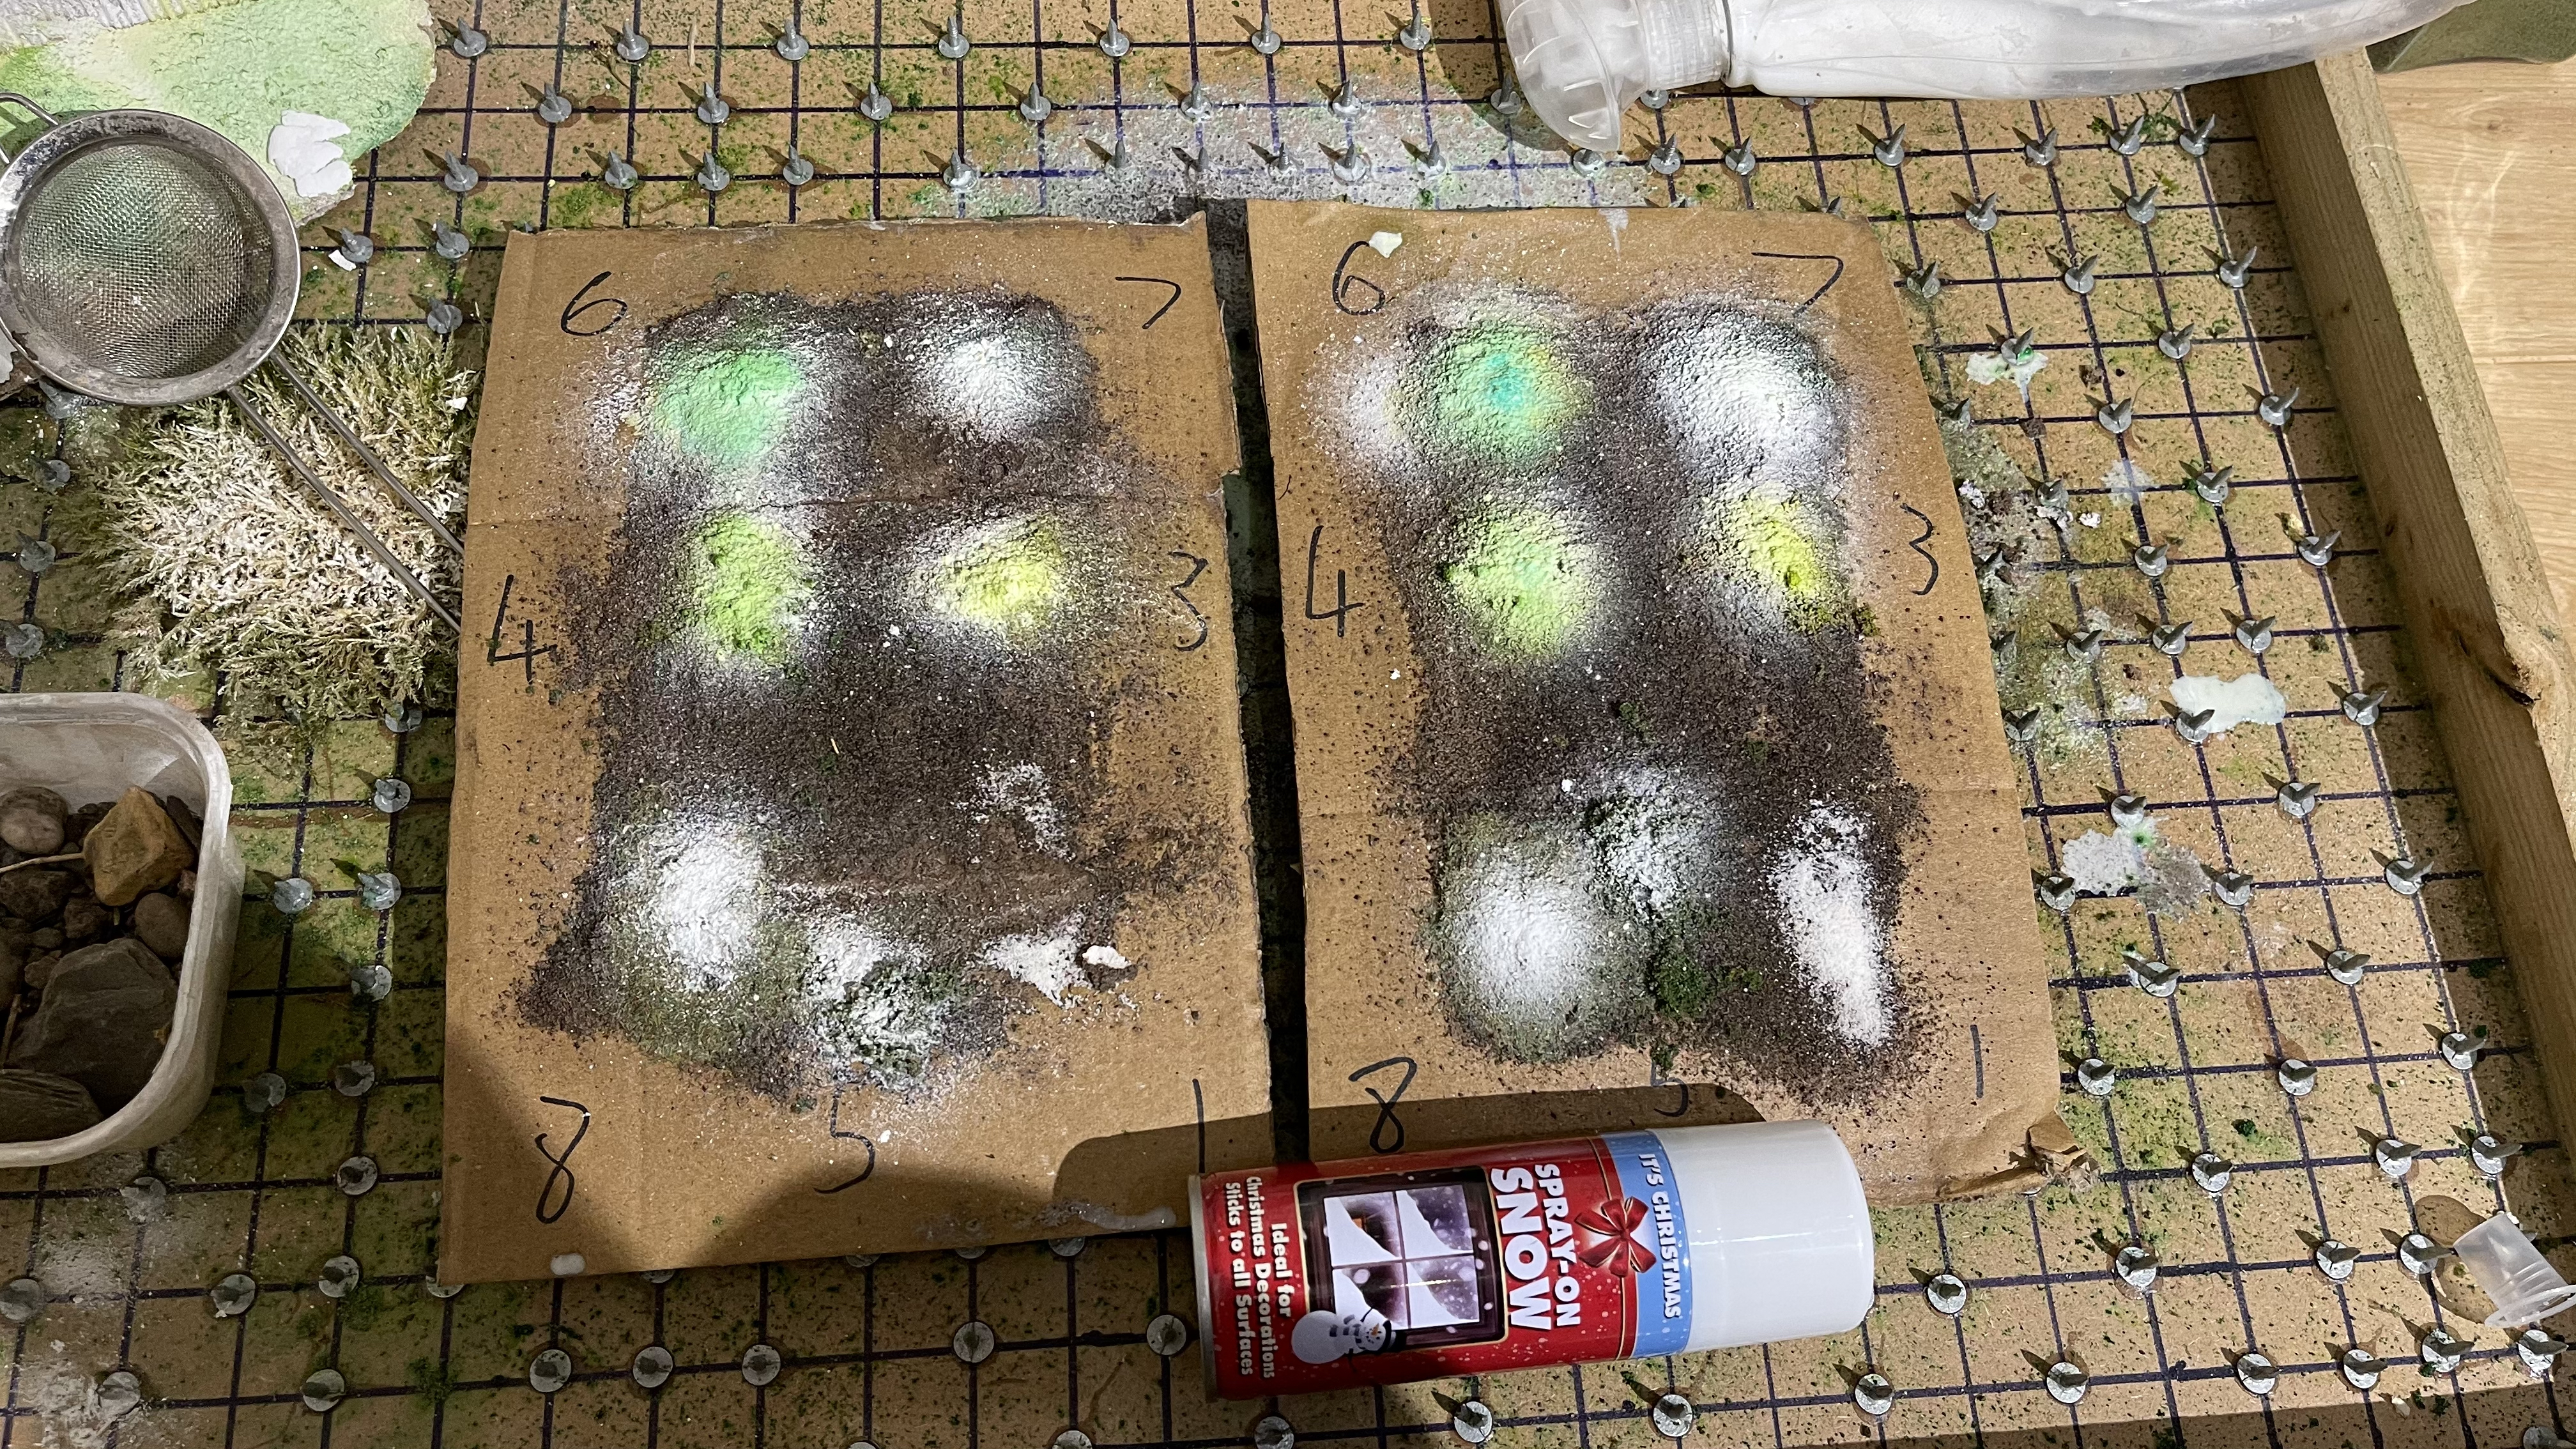
Testing - part 4 The Christmas snow cans
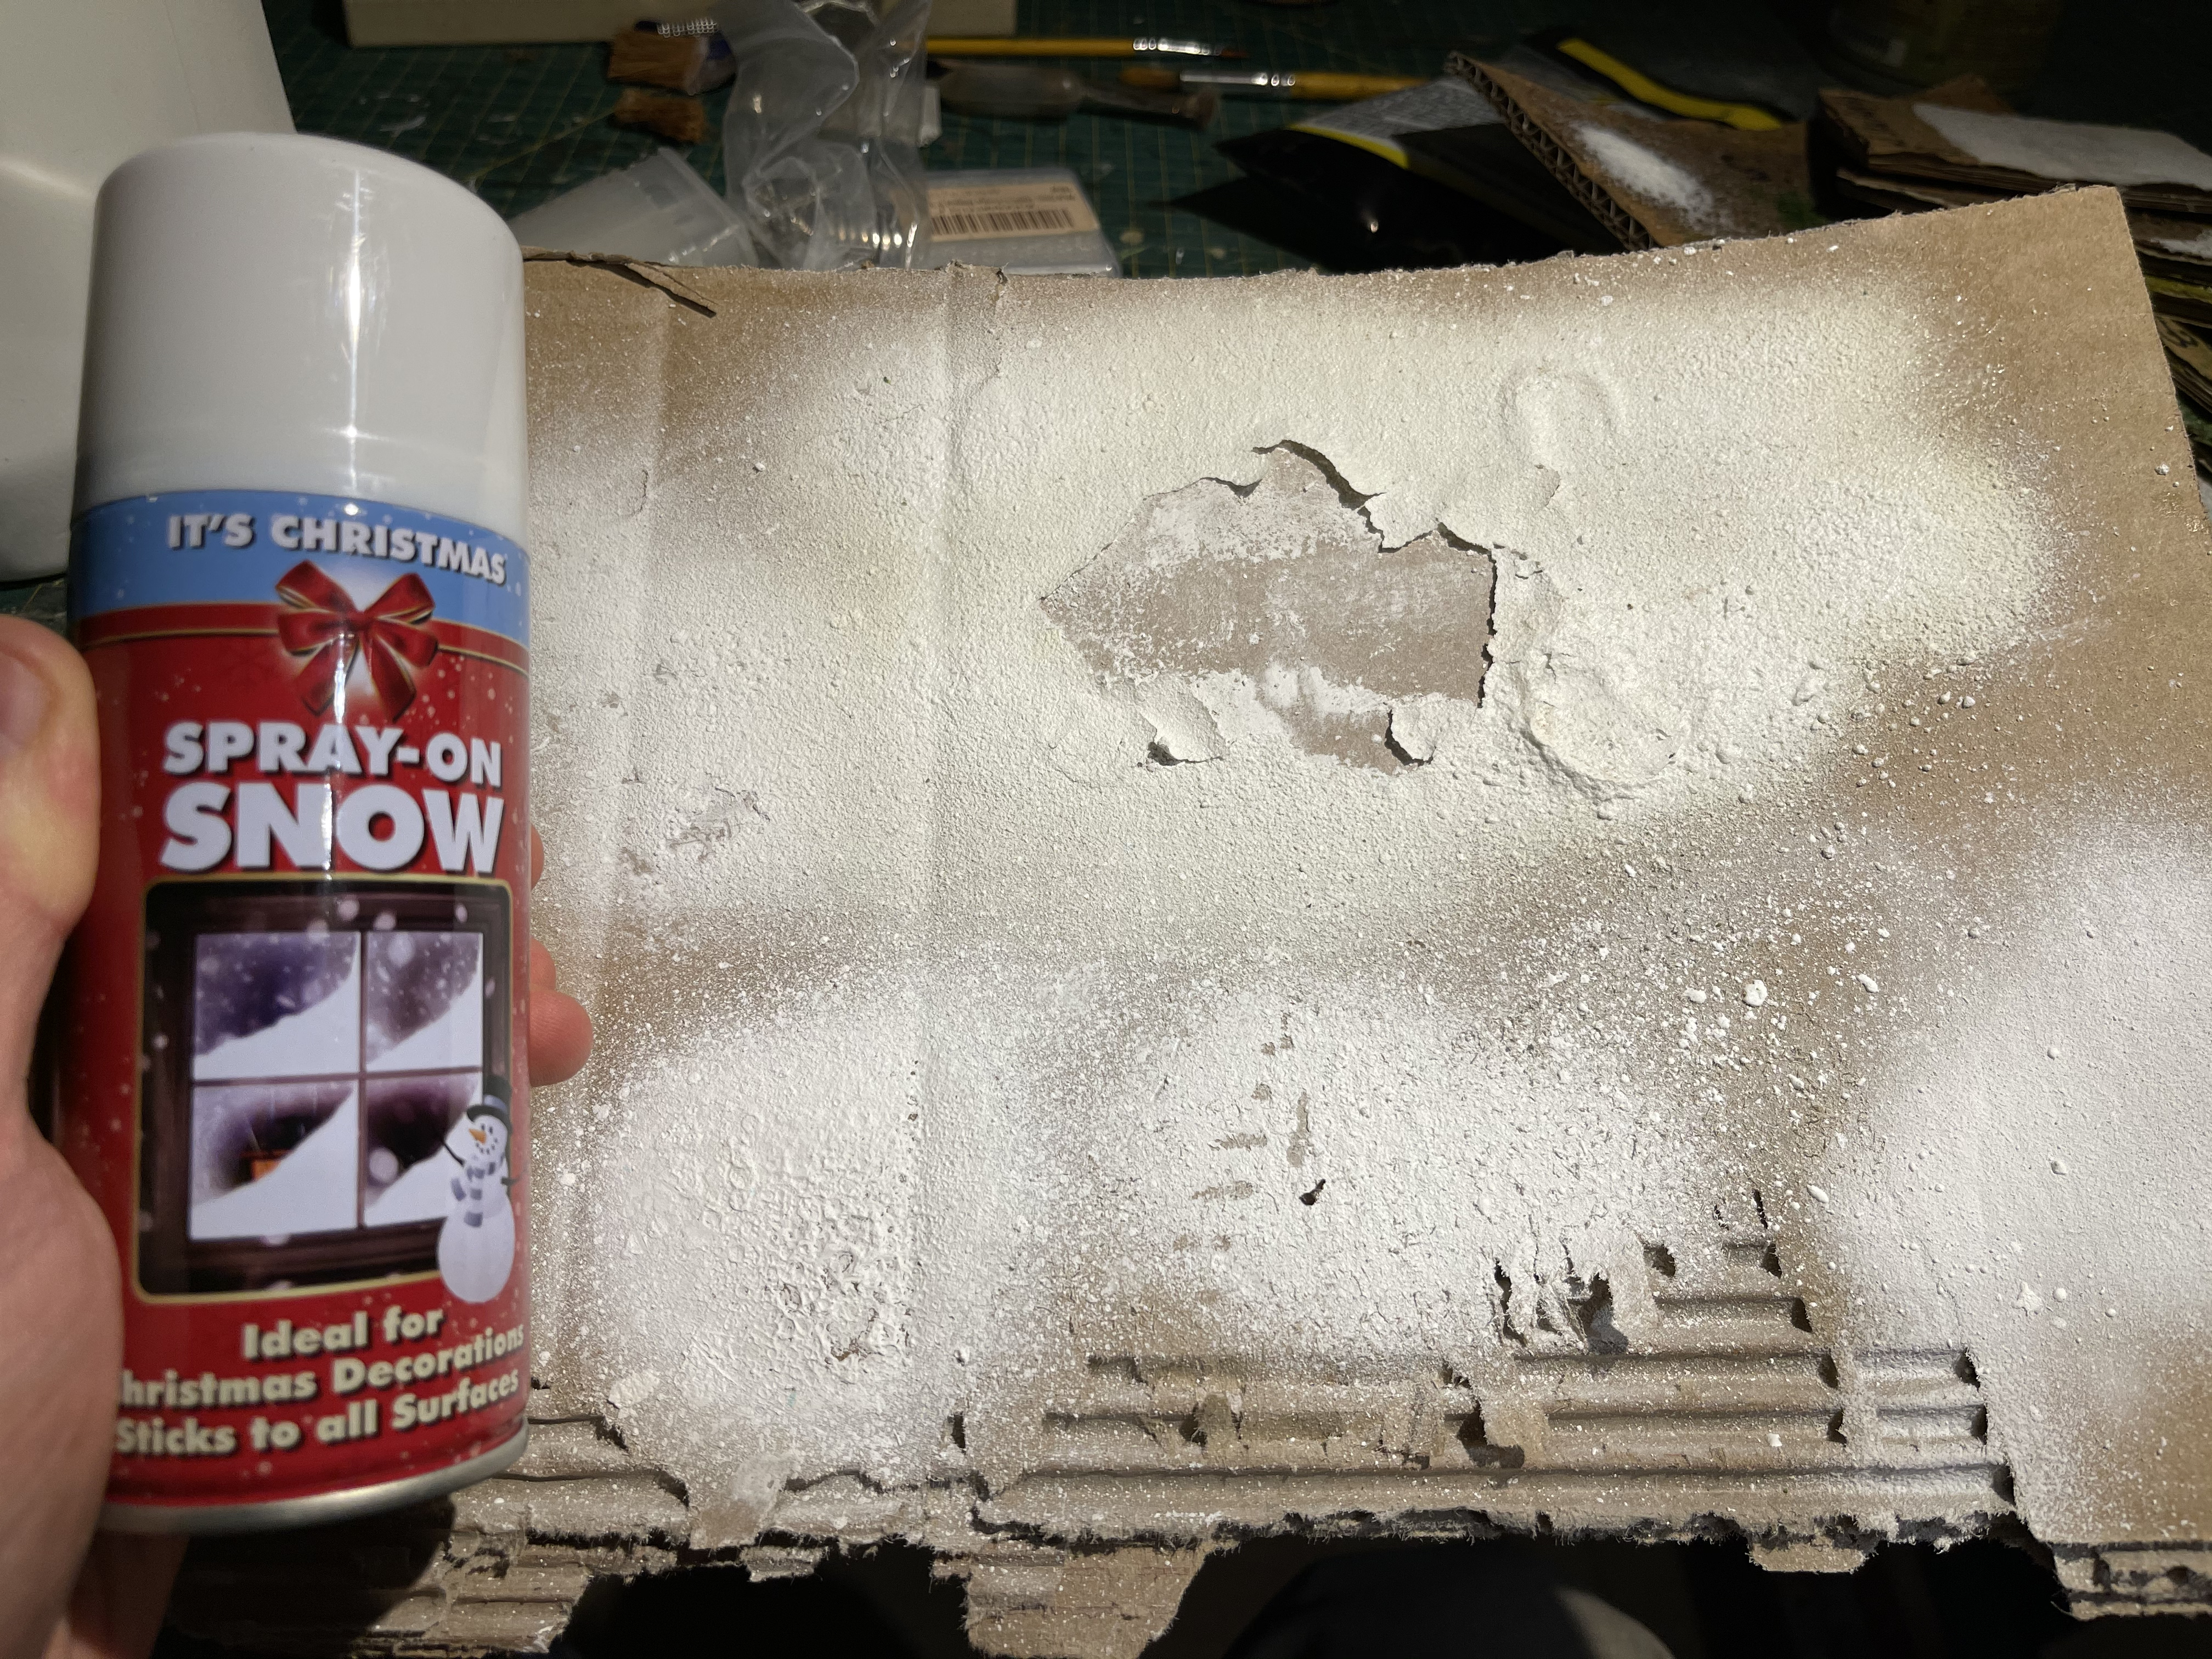
Another product i’ve been trying is this spray snow.
IT comes out the can quite nicely but I am not sold on it to be honest. it doesn’t hold its shape and is very very fragile. I haven’t tried sealing it down yet though so i’m not sure if its a total fail but I am leaning towards snow flock more than this stuff to be honest.
will still give it a fair crack though
Update!
I’ve now done two tests using the spray can snow.
One was to spray it and then seal it with watered PVA. The other was to spray seal it with watered PVA and then spray the snow on top.
Both times the snow took on the green dye from the flocks beneath.
I really need to find another flock to work with, this geek gaming foam flock is not the one for this project.
Testing - part 3... the varnished phase
 Left = Time Delay seal spray. Right = Immediate seal spray
So Facebook suggested adding in a layer of polyeutherane varnish to put a waterproof layer between the dyed flock and the snow flock.
I have no idea what is in this can of varnish but its what I had on hand and is easily available for me so I used that.
I did two tests here. one where I sprayed varnish and immediately sprinkled snow and sealed with PVA (Right hand side) and one where I had a time delay of 2 hours between spraying varnish and adding snow and sealing it (left hand side)
As you can see, the left hand side is still wet ion this image and the dye is still leaching out into the snow for the 3 geek gaming scenics foam flocks.
My next step is to change the material I am working with. Will likely pick up some more woodland scenics foam flocks and see how they work out.
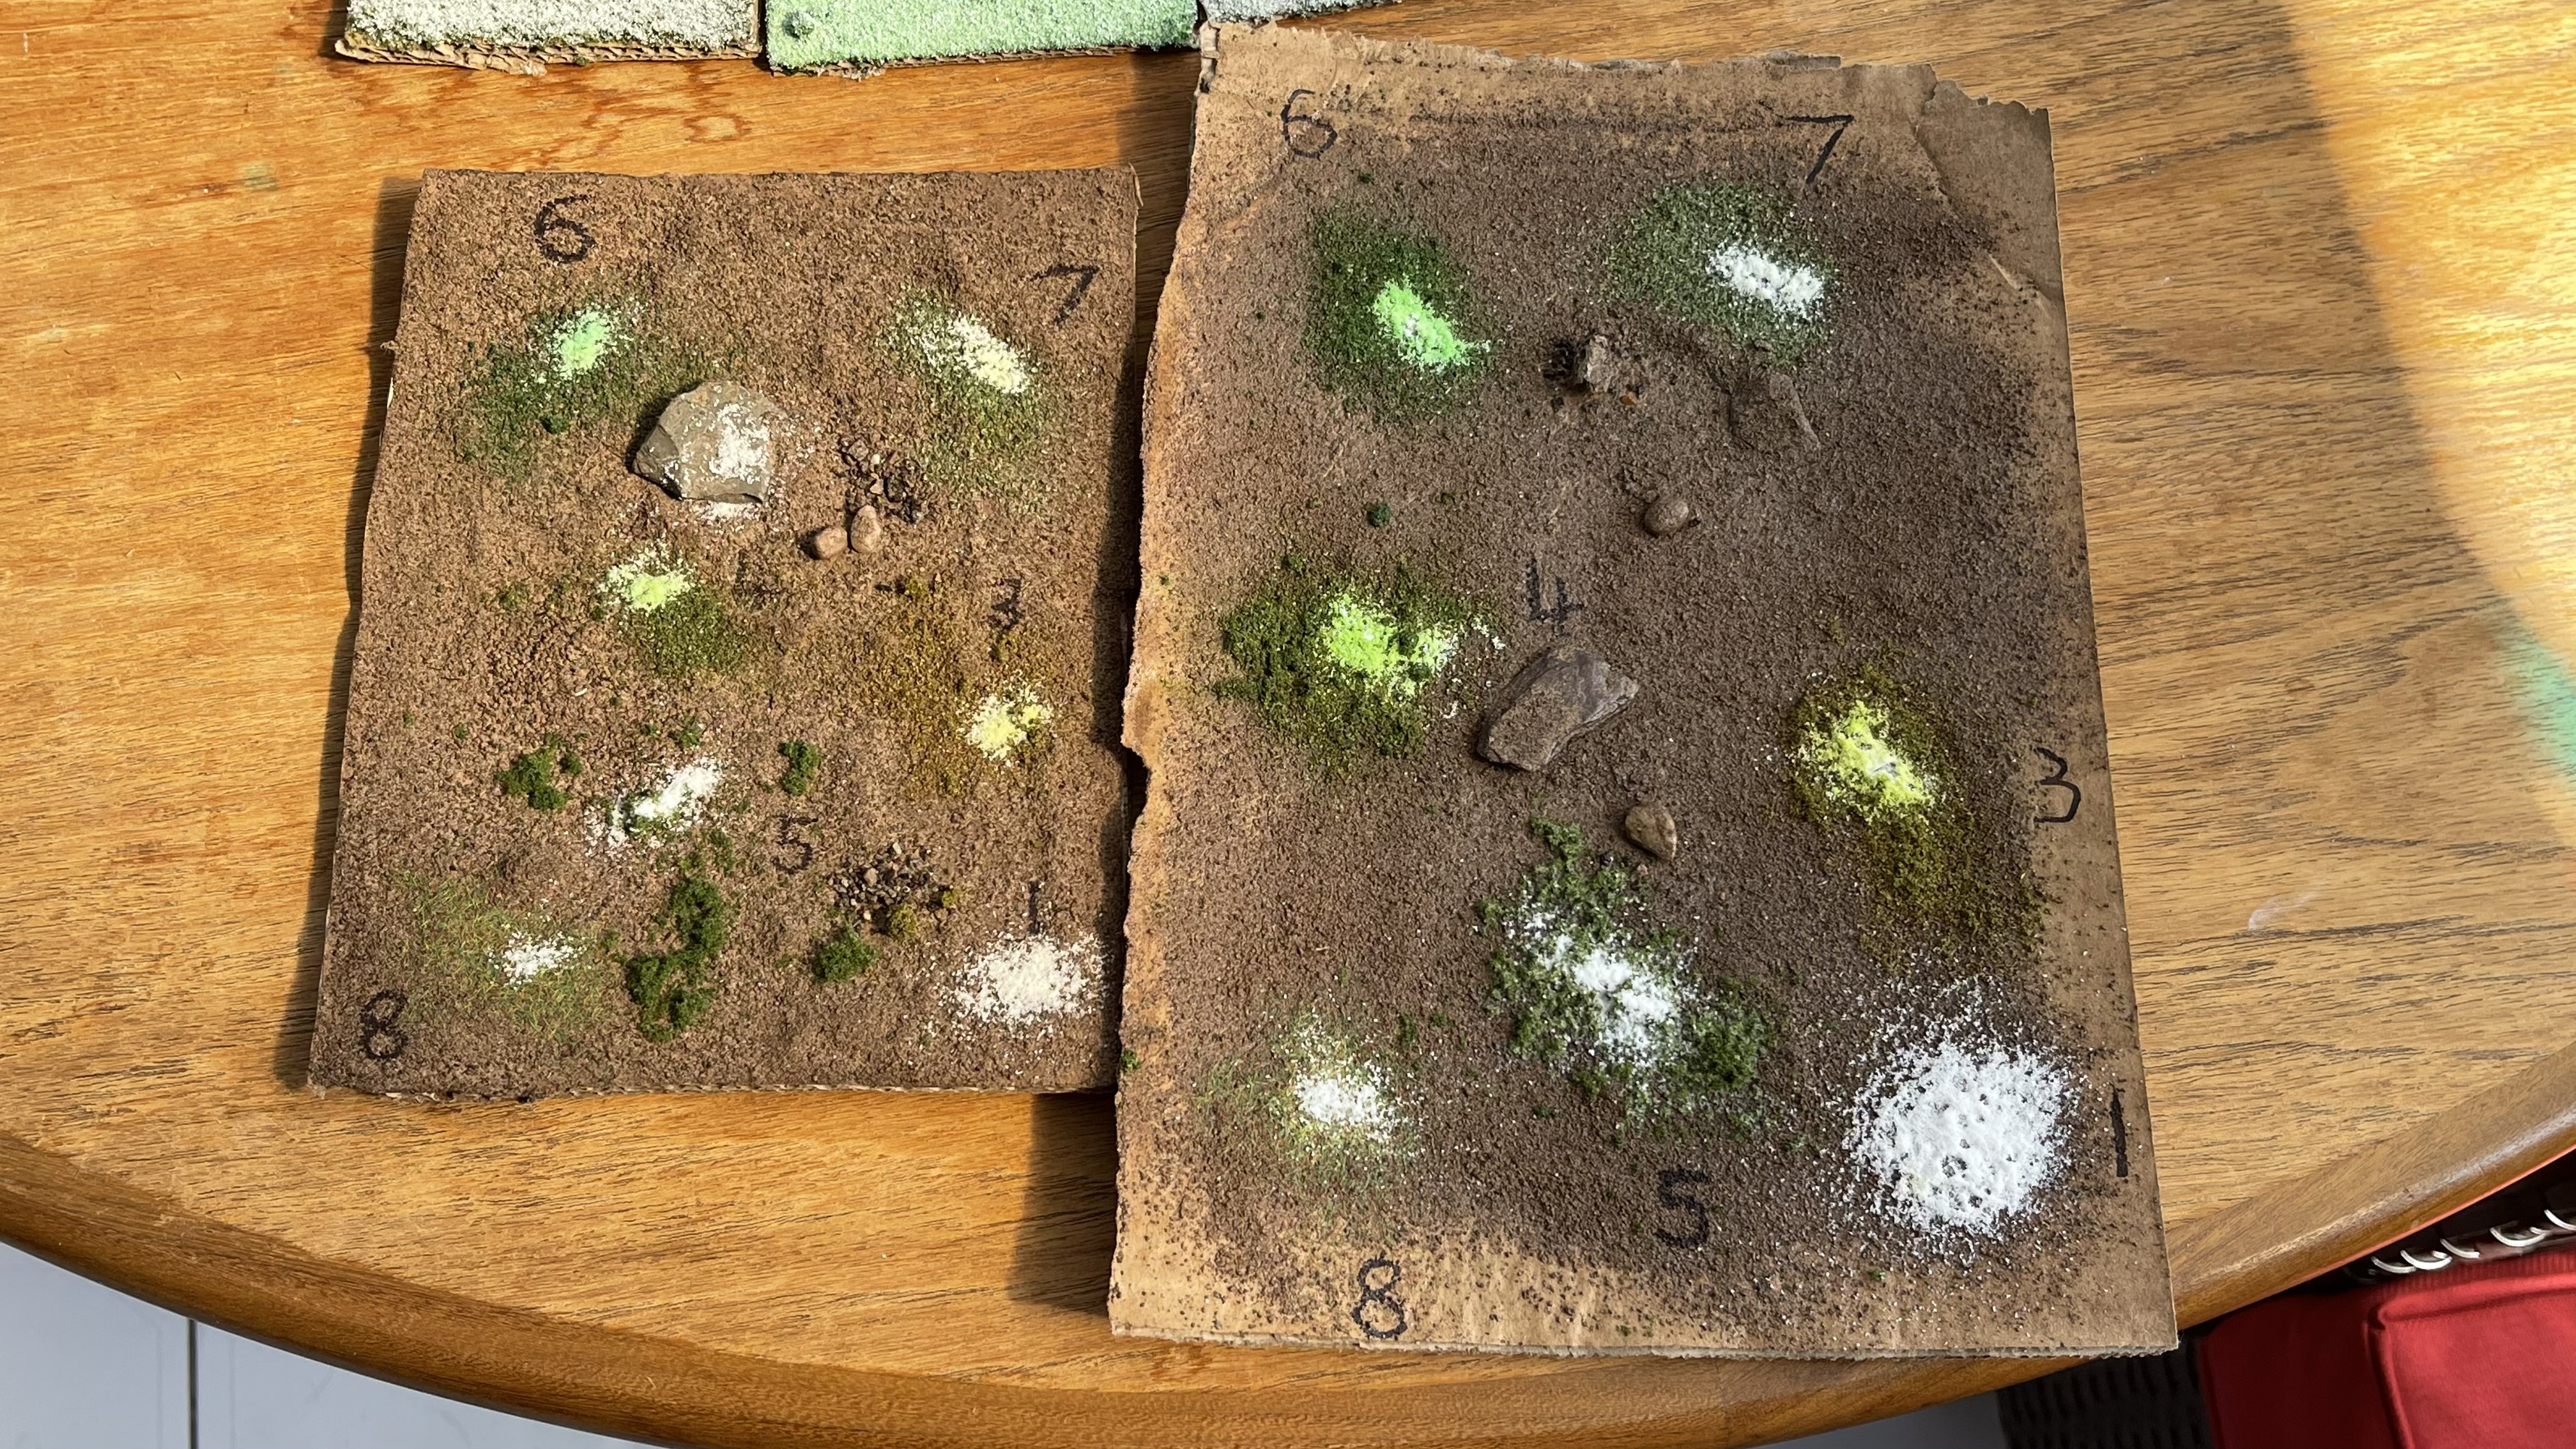
Further Testing - Flocking
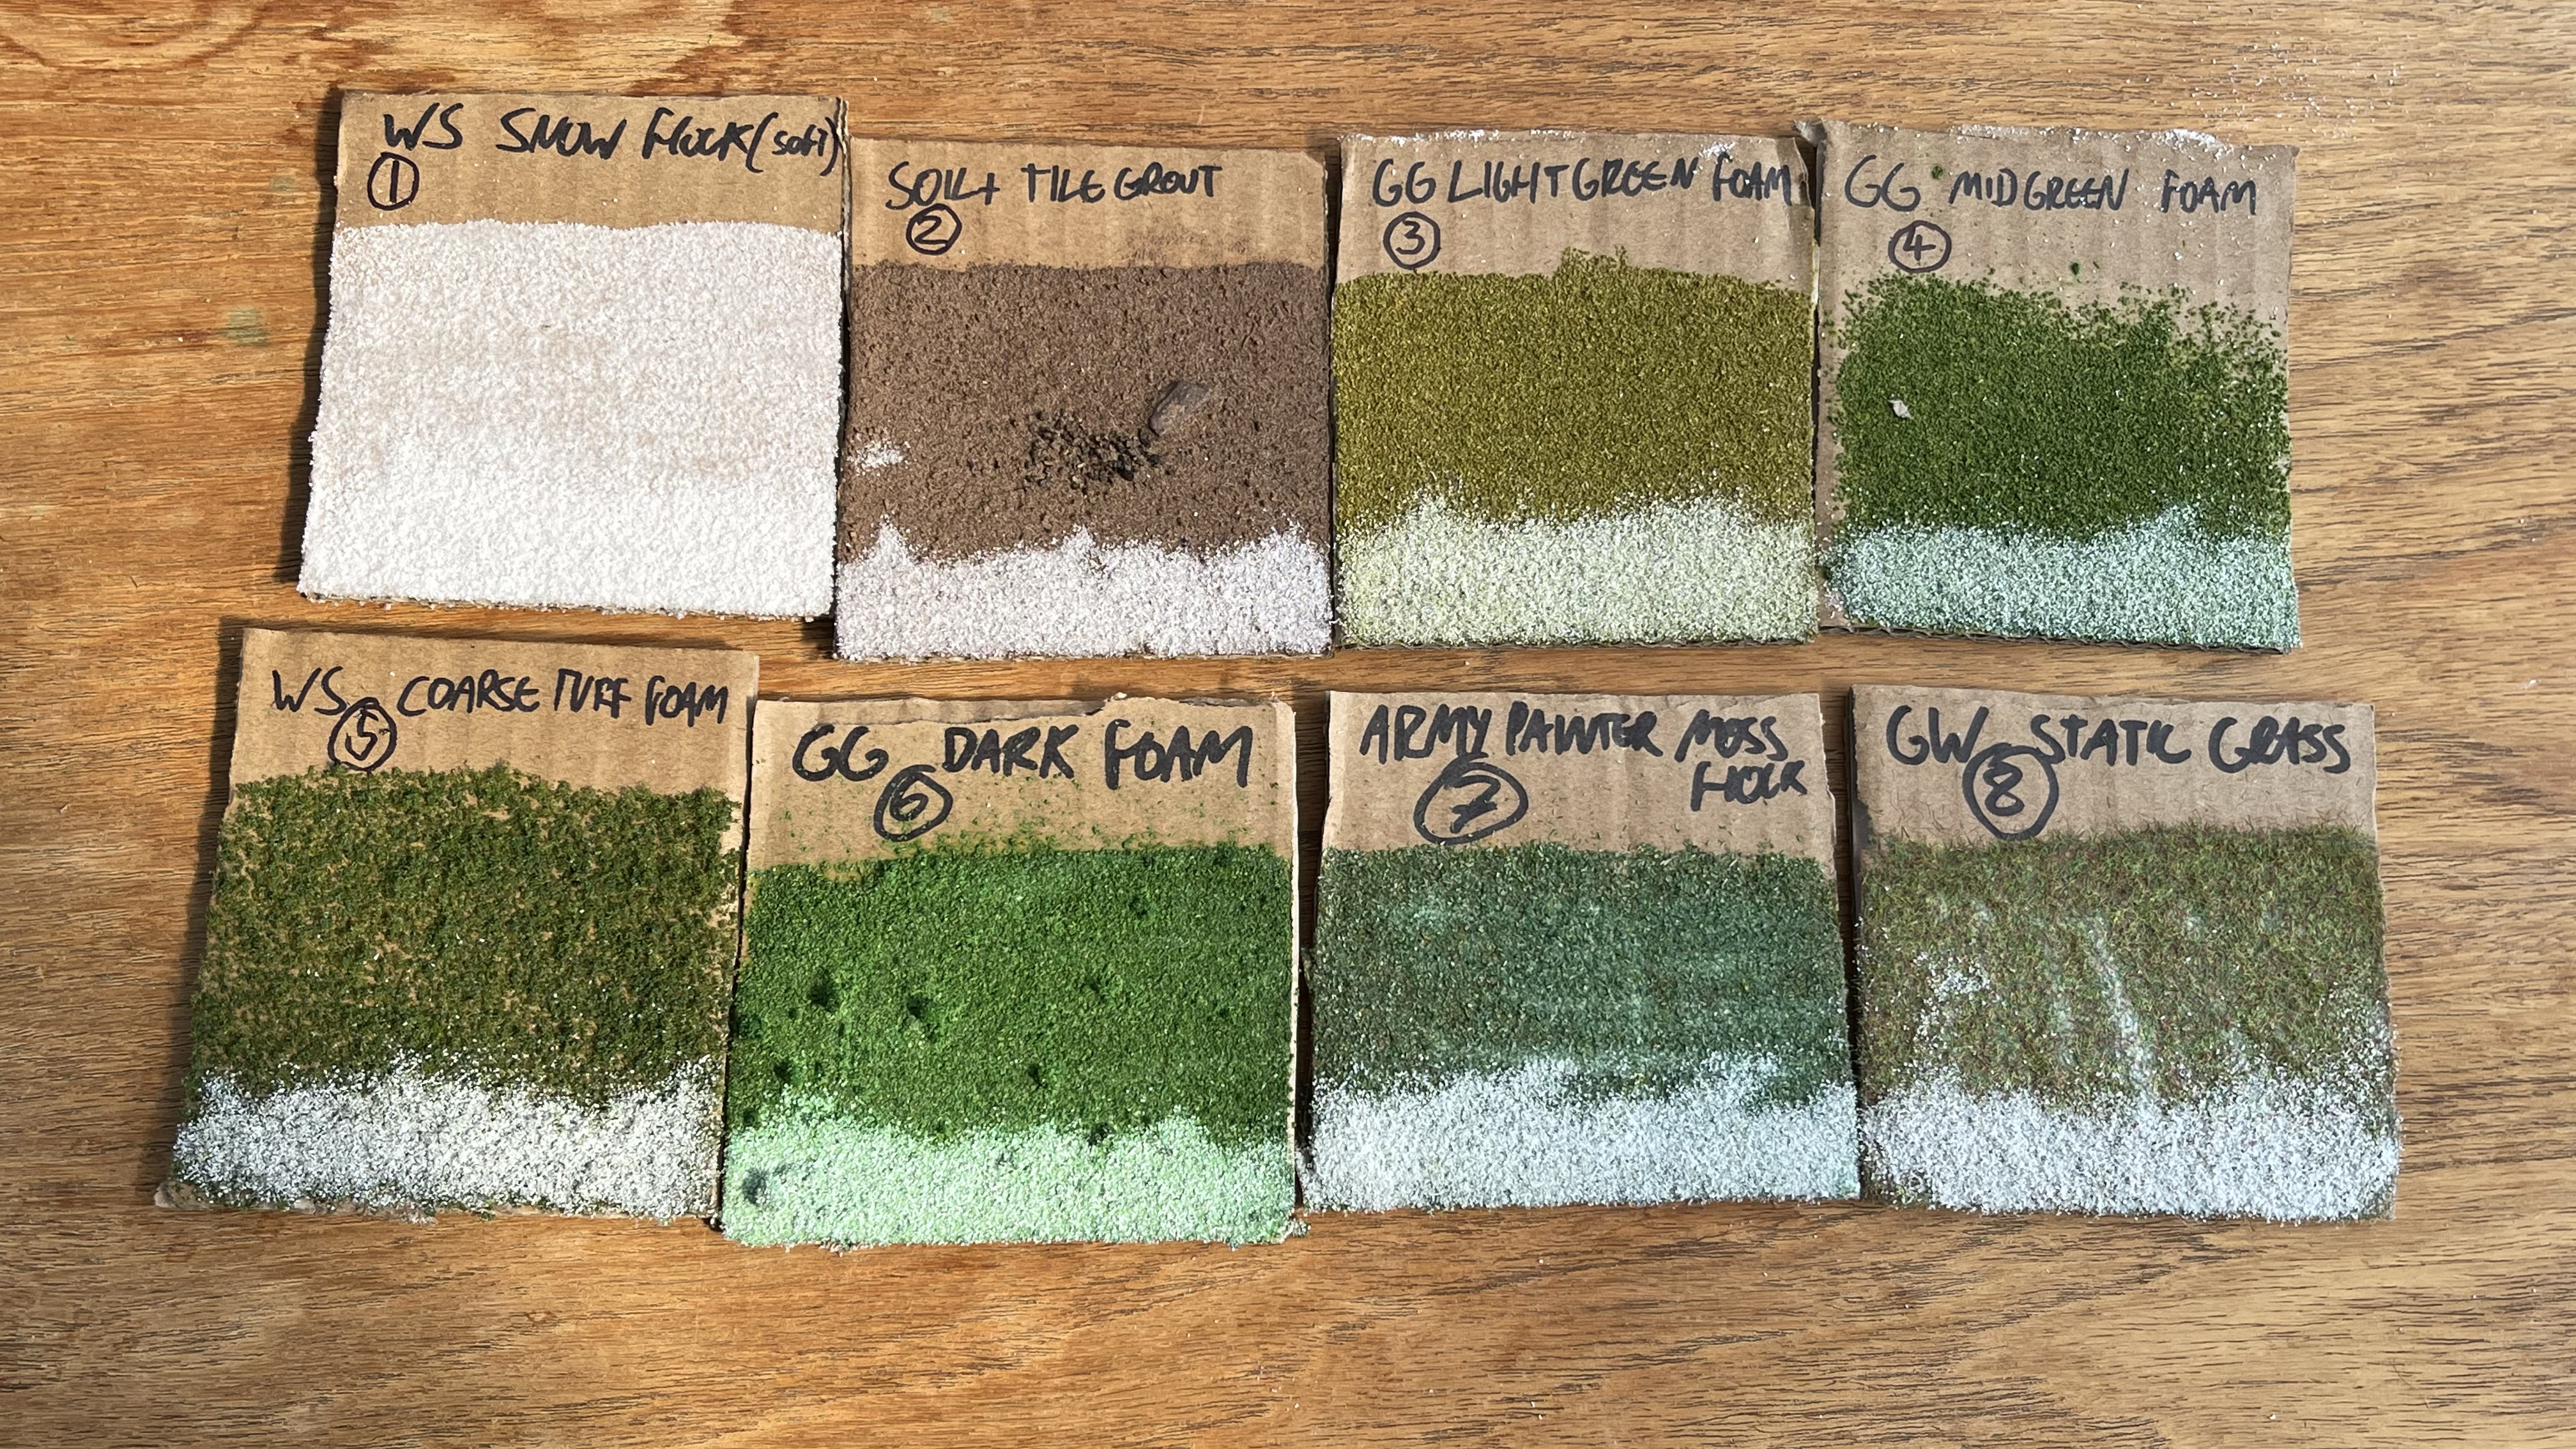 Sample References
- Woodland Scenics Soft Flake Snow Flock
- Soil & Brown Tile Grout in a 2:1 ratio.
- Geek Gaming Scenics Light Green Foam Flock
- Geek Gaming Scenics Mid Green Foam Flock
- Woodland Scenics Coarse Turf Foam Scatter
- Geek Gaming Scenics Dark Green Foam Scatter
- Army Painter Moss Green (sawdust) Flock
- Games Workshop Scorched Earth Static Grass
As this is going to be a snow board I tried adding some snow flock to each card to see what would happen. I cannot remember how I affixed it, before, during or after sealing with watered down PVA
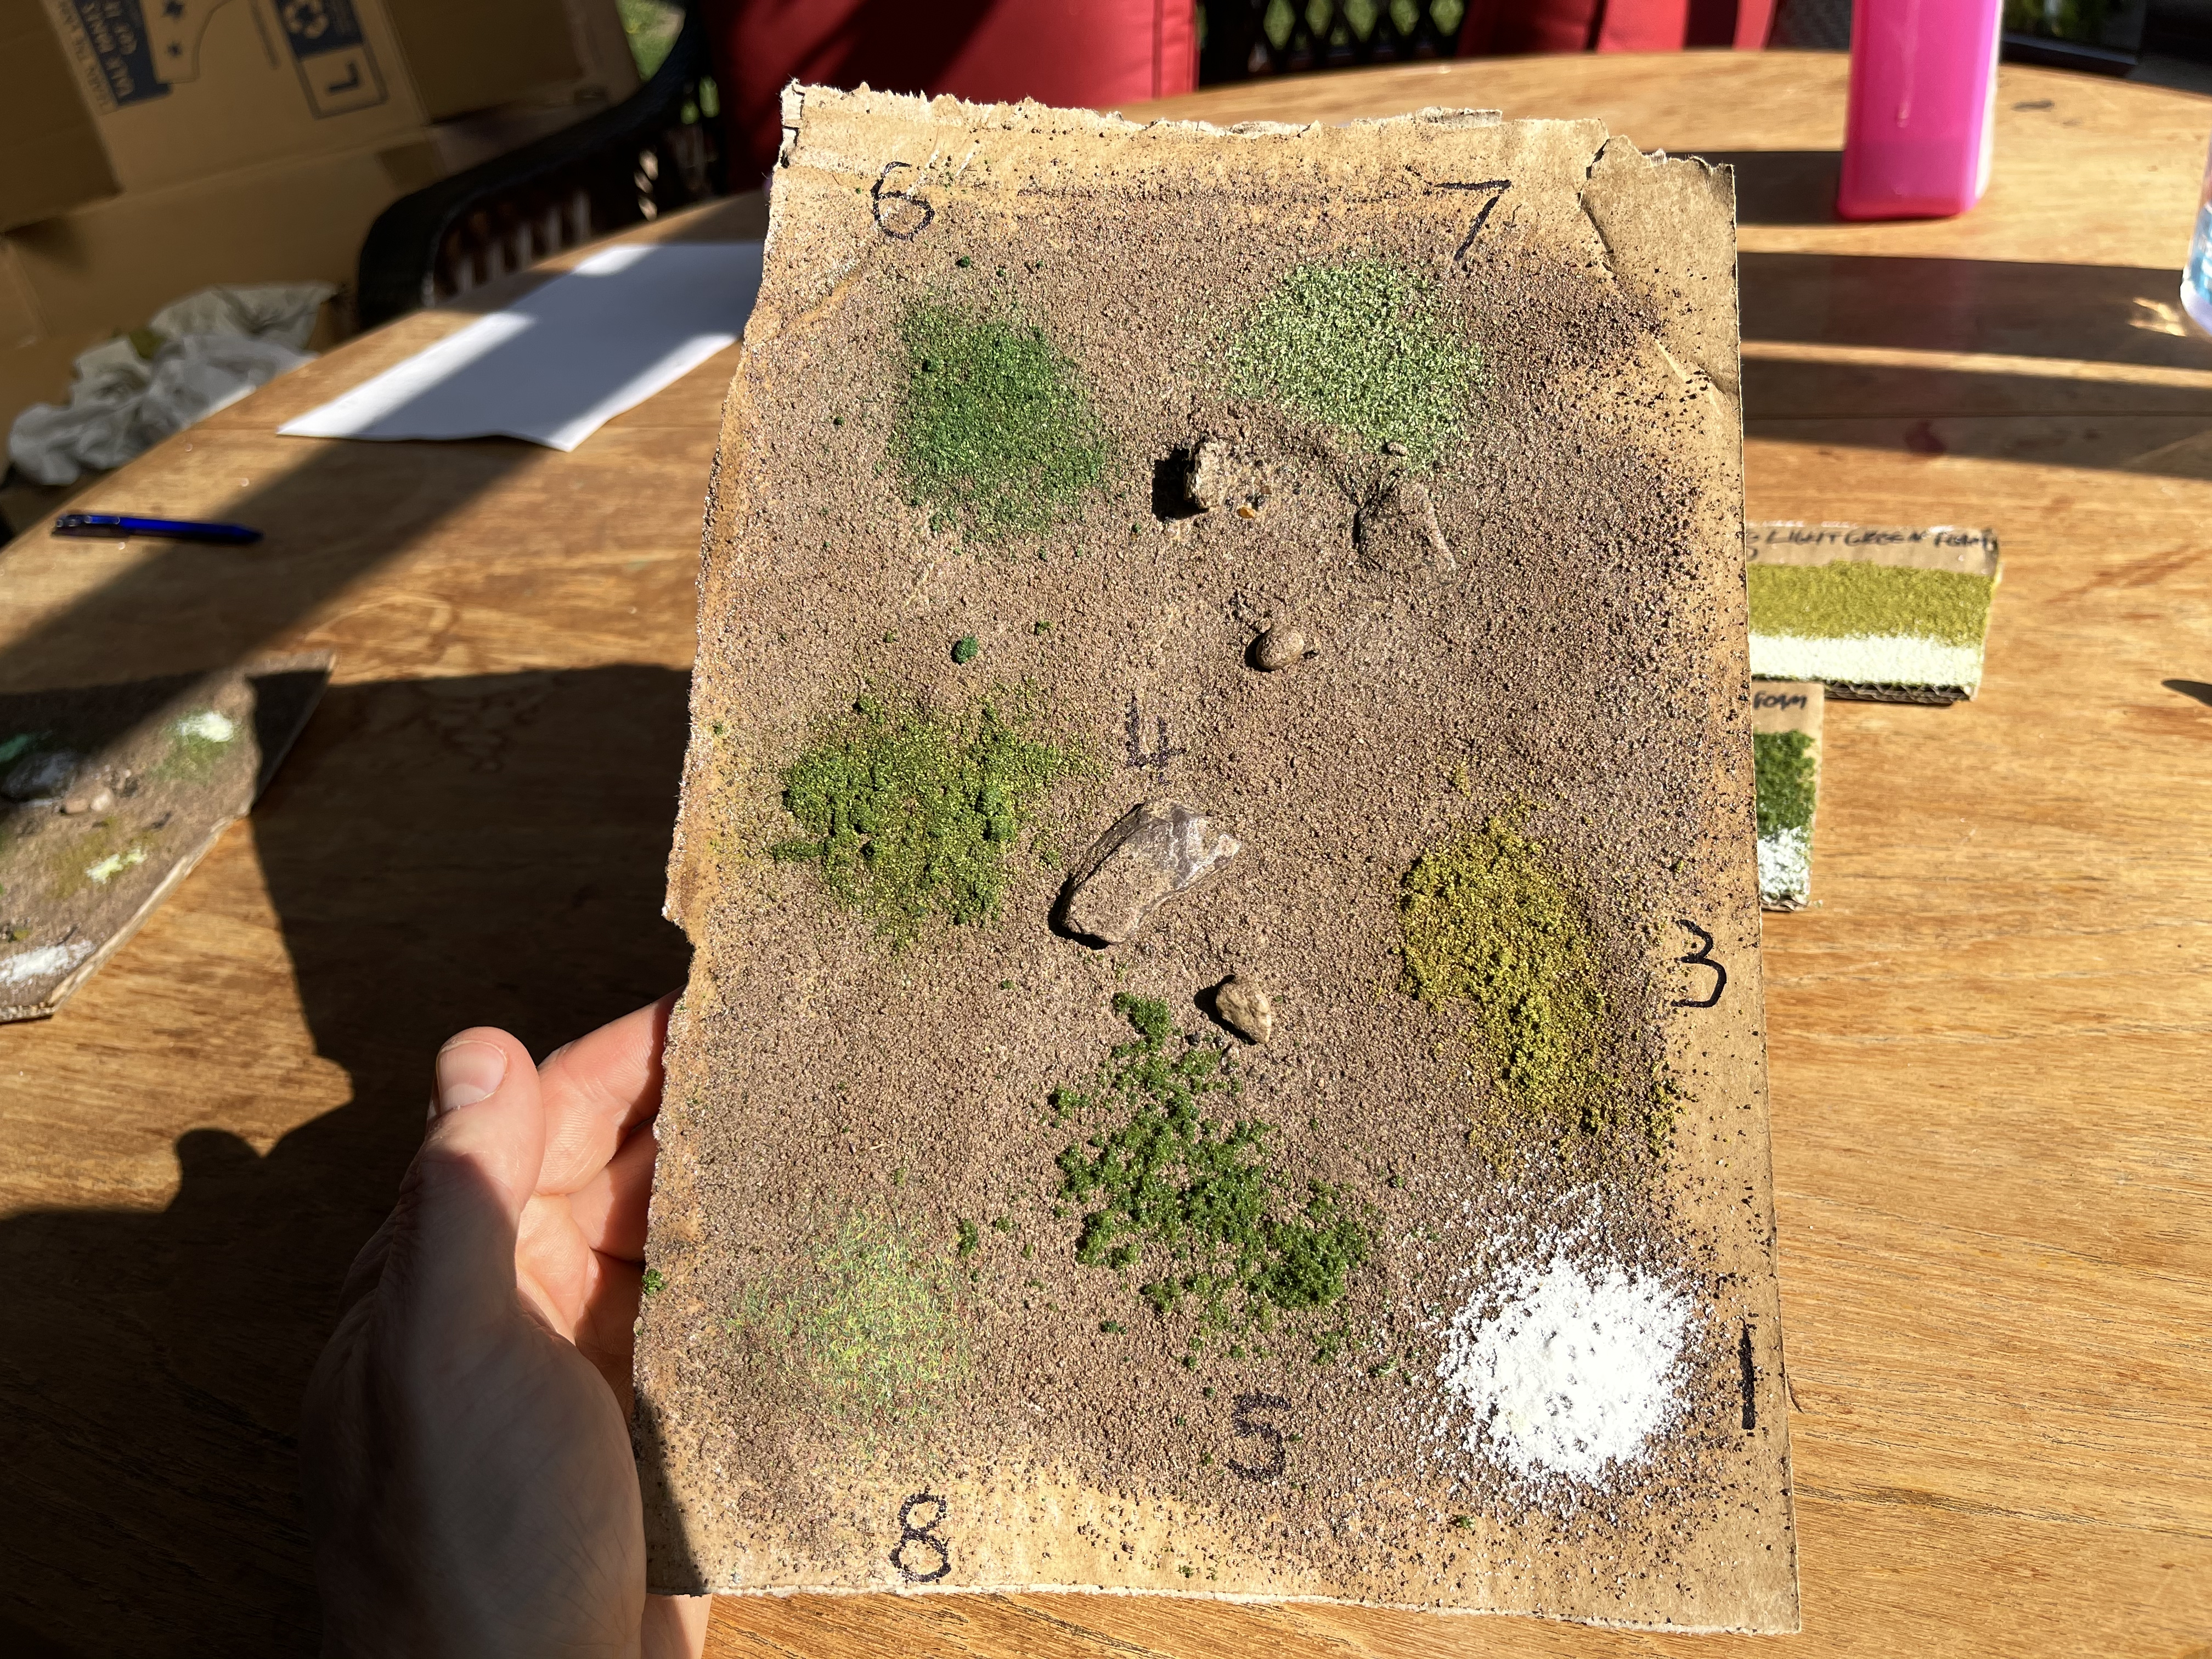 Done by Layer
Here what I did was take the previous test (soil and tile grout) and sprinkle on the various flocks.
They were then sealed with watered done PVA. note, I did not added PVA layer beneath them. It worked very well although I got some squirt marks (see the snow flock) where big drops of water moved the flock on impact
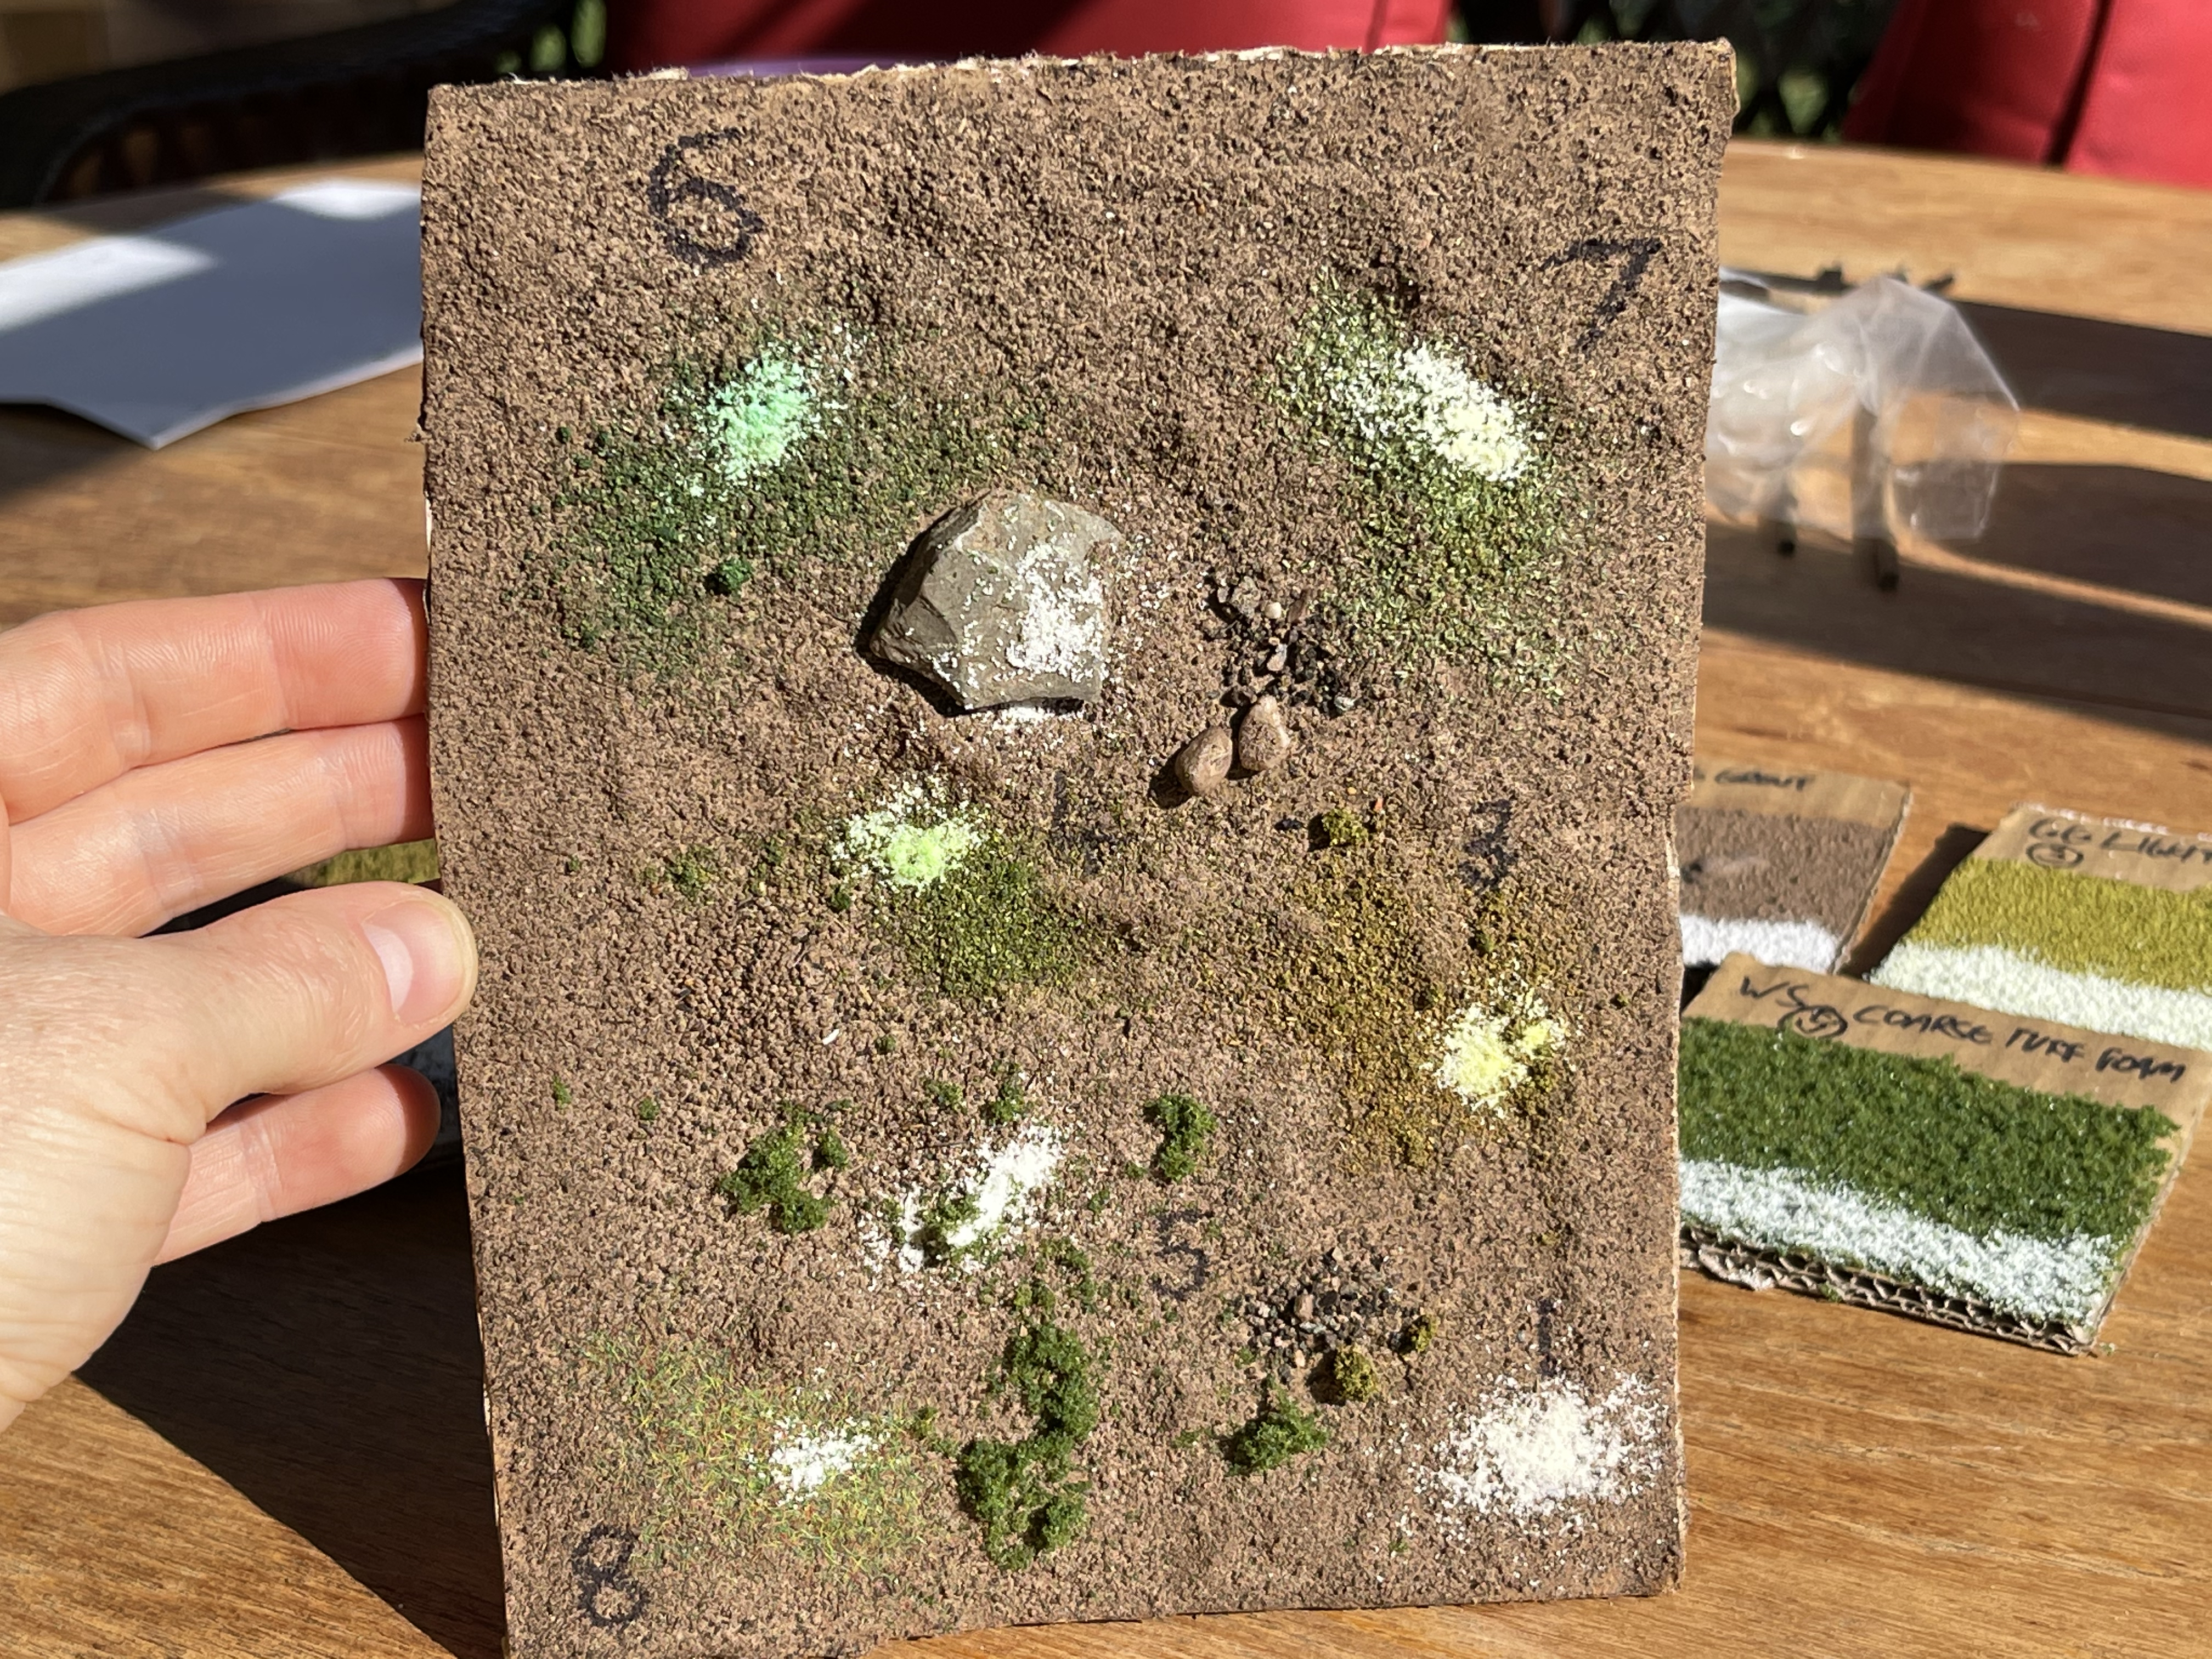 Green flock and Snow flock all in one go
As I am an impatient soul I knocked up a second test piece. This time it was all done and sealed in one go. So it went a bit like this:
- PVA
- Soil & Grout mix
- Flock
- Snow
- Spray seal with watered down PVA
As you can see the flock dye leached into the snow. Now I have seen yellow snow (never eaten it mind you!) but I’ve not seen green snow.
This is a good lesson in what not to do, or as you can see from 5 & 8 choose your flock material very carefully.
 Left = all in one go. Right = sealed in layers
I then went back and added snow flock to the original layering test and sealed with watered PVA.
Because PVA reactivates when wet the dye from the previous layer was drawn up into the snow flock… FAIL!
Will need to come up with a new way to add and seal snow flock onto the ground covers. Facebook suggests polyeutherane varnish.
So this layer test went:
- PVA
- Soil & Grout Mix
- Seal with watered down PVA
- Flock
- Seal with watered down PVA
- Snow
- Seal with watered down PVA
More steps and still didn’t stop the dye leaching.
Testing the groundwork
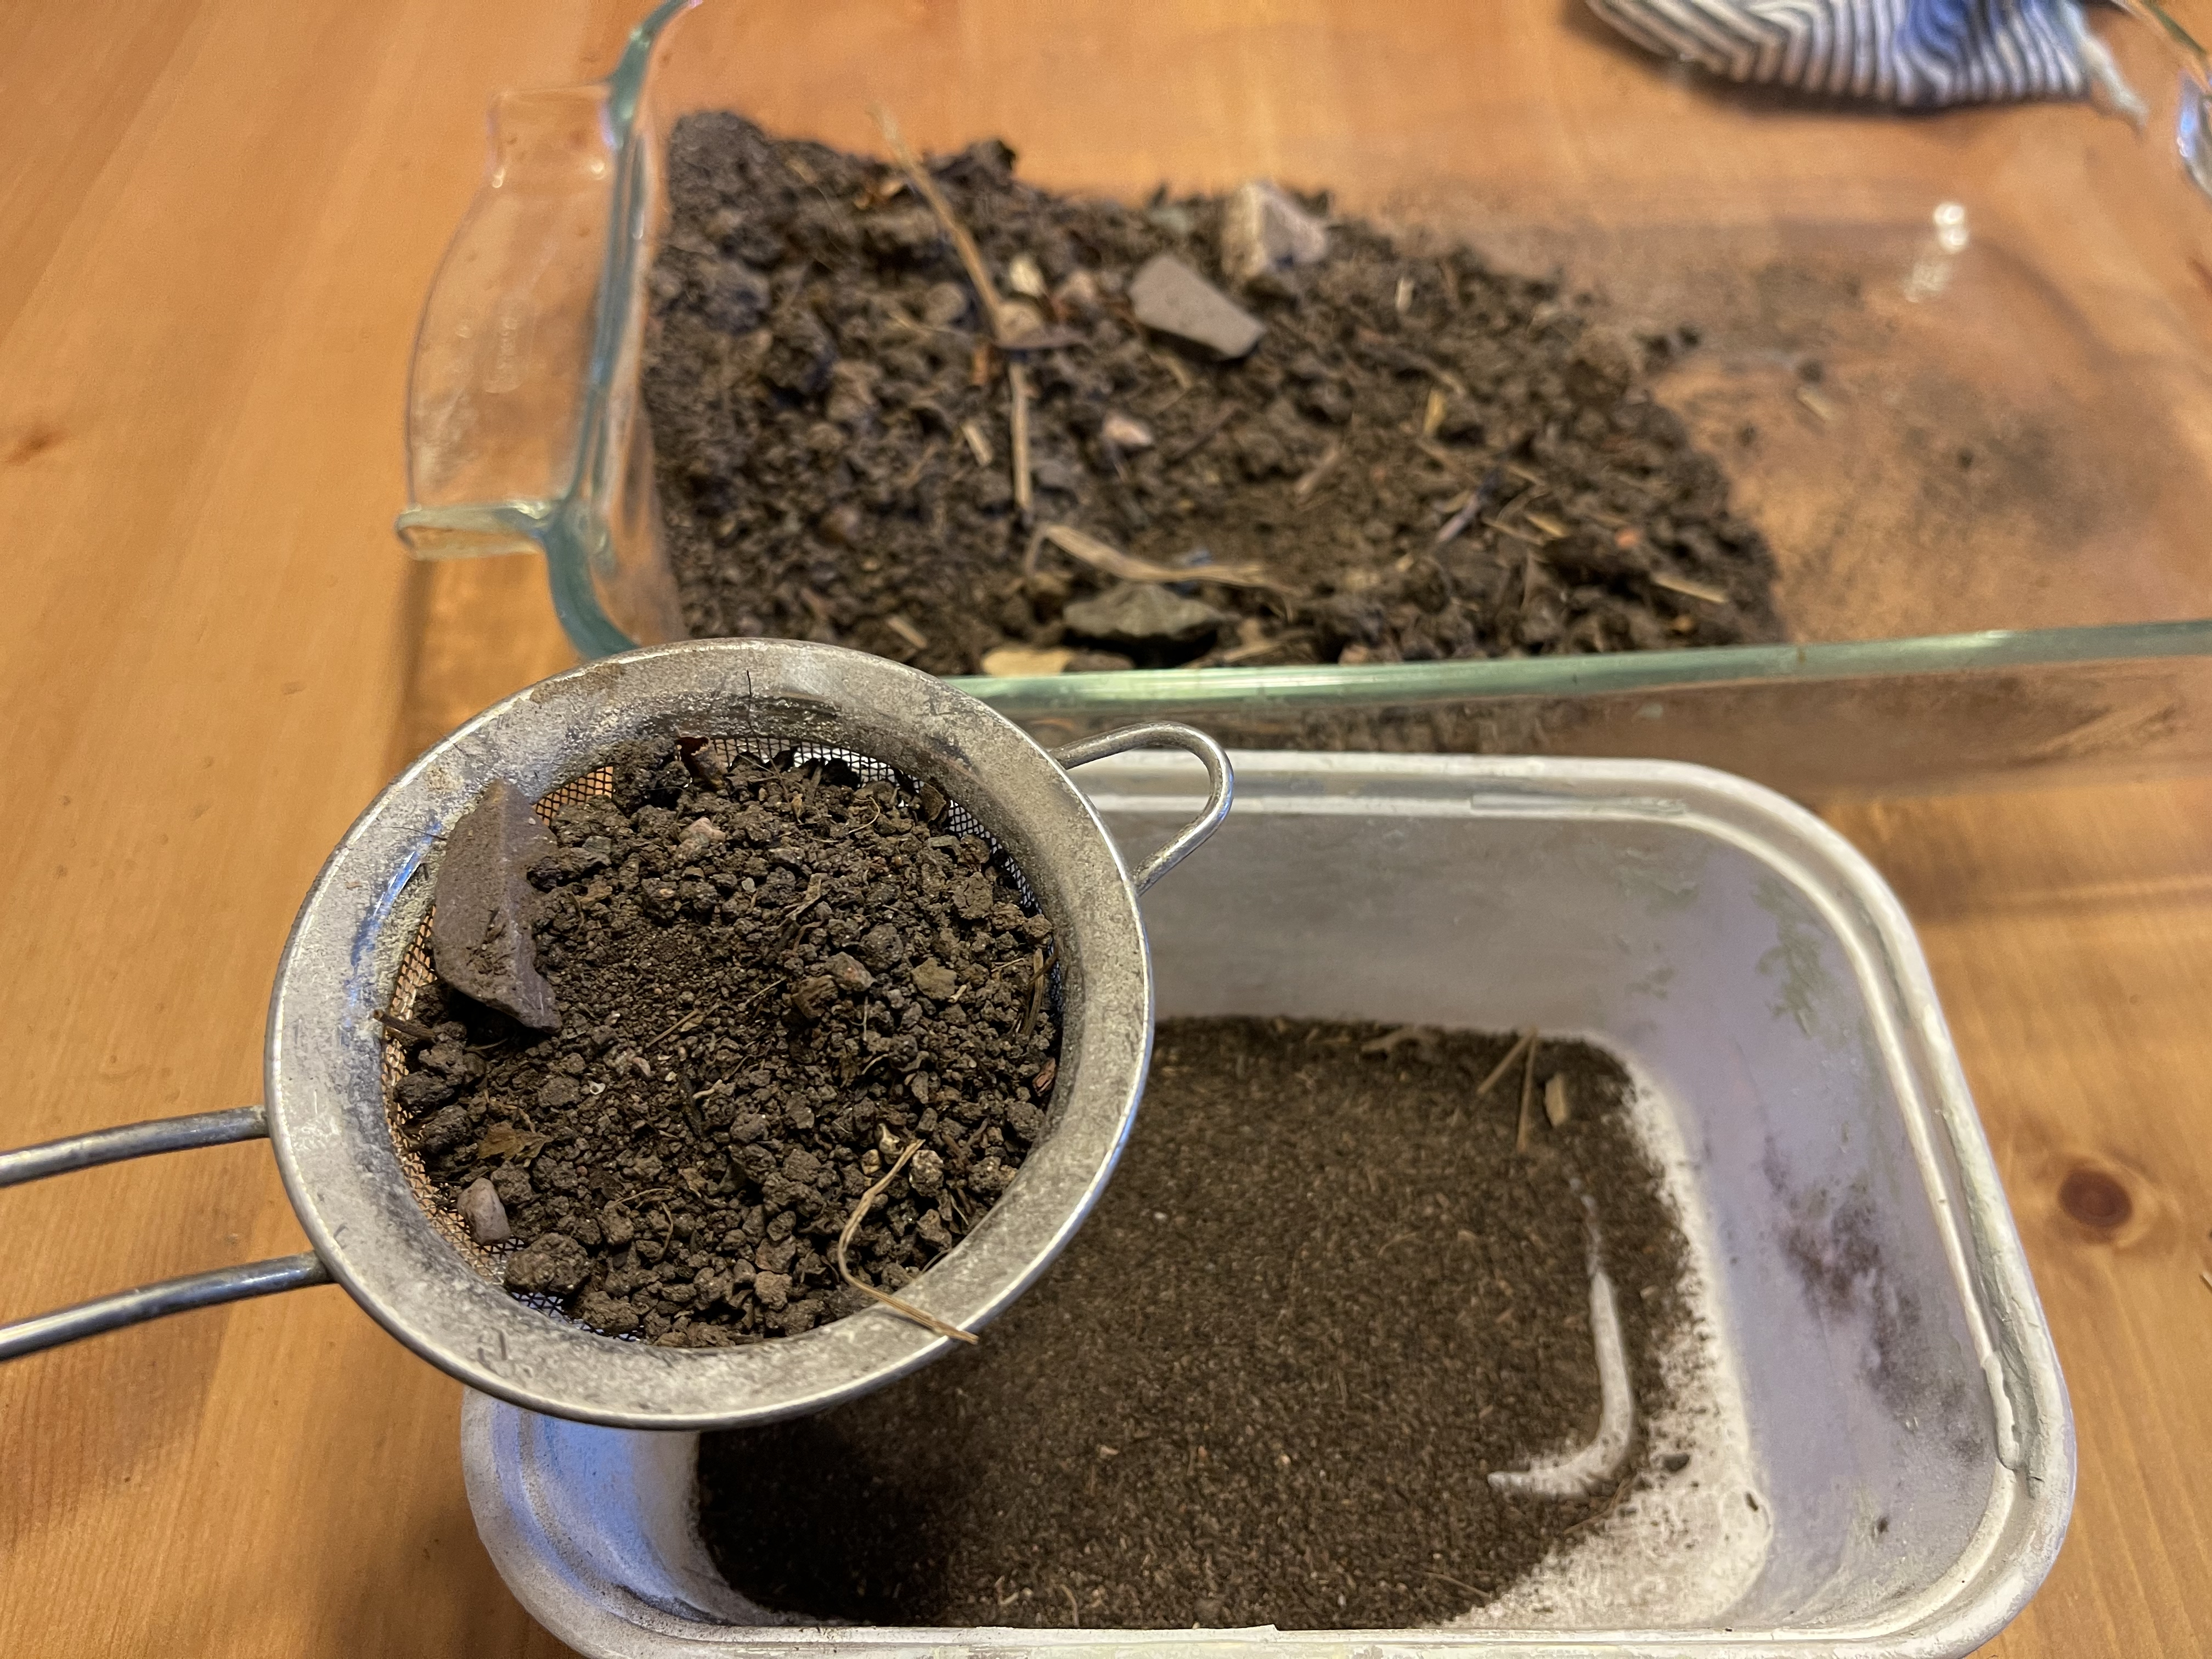
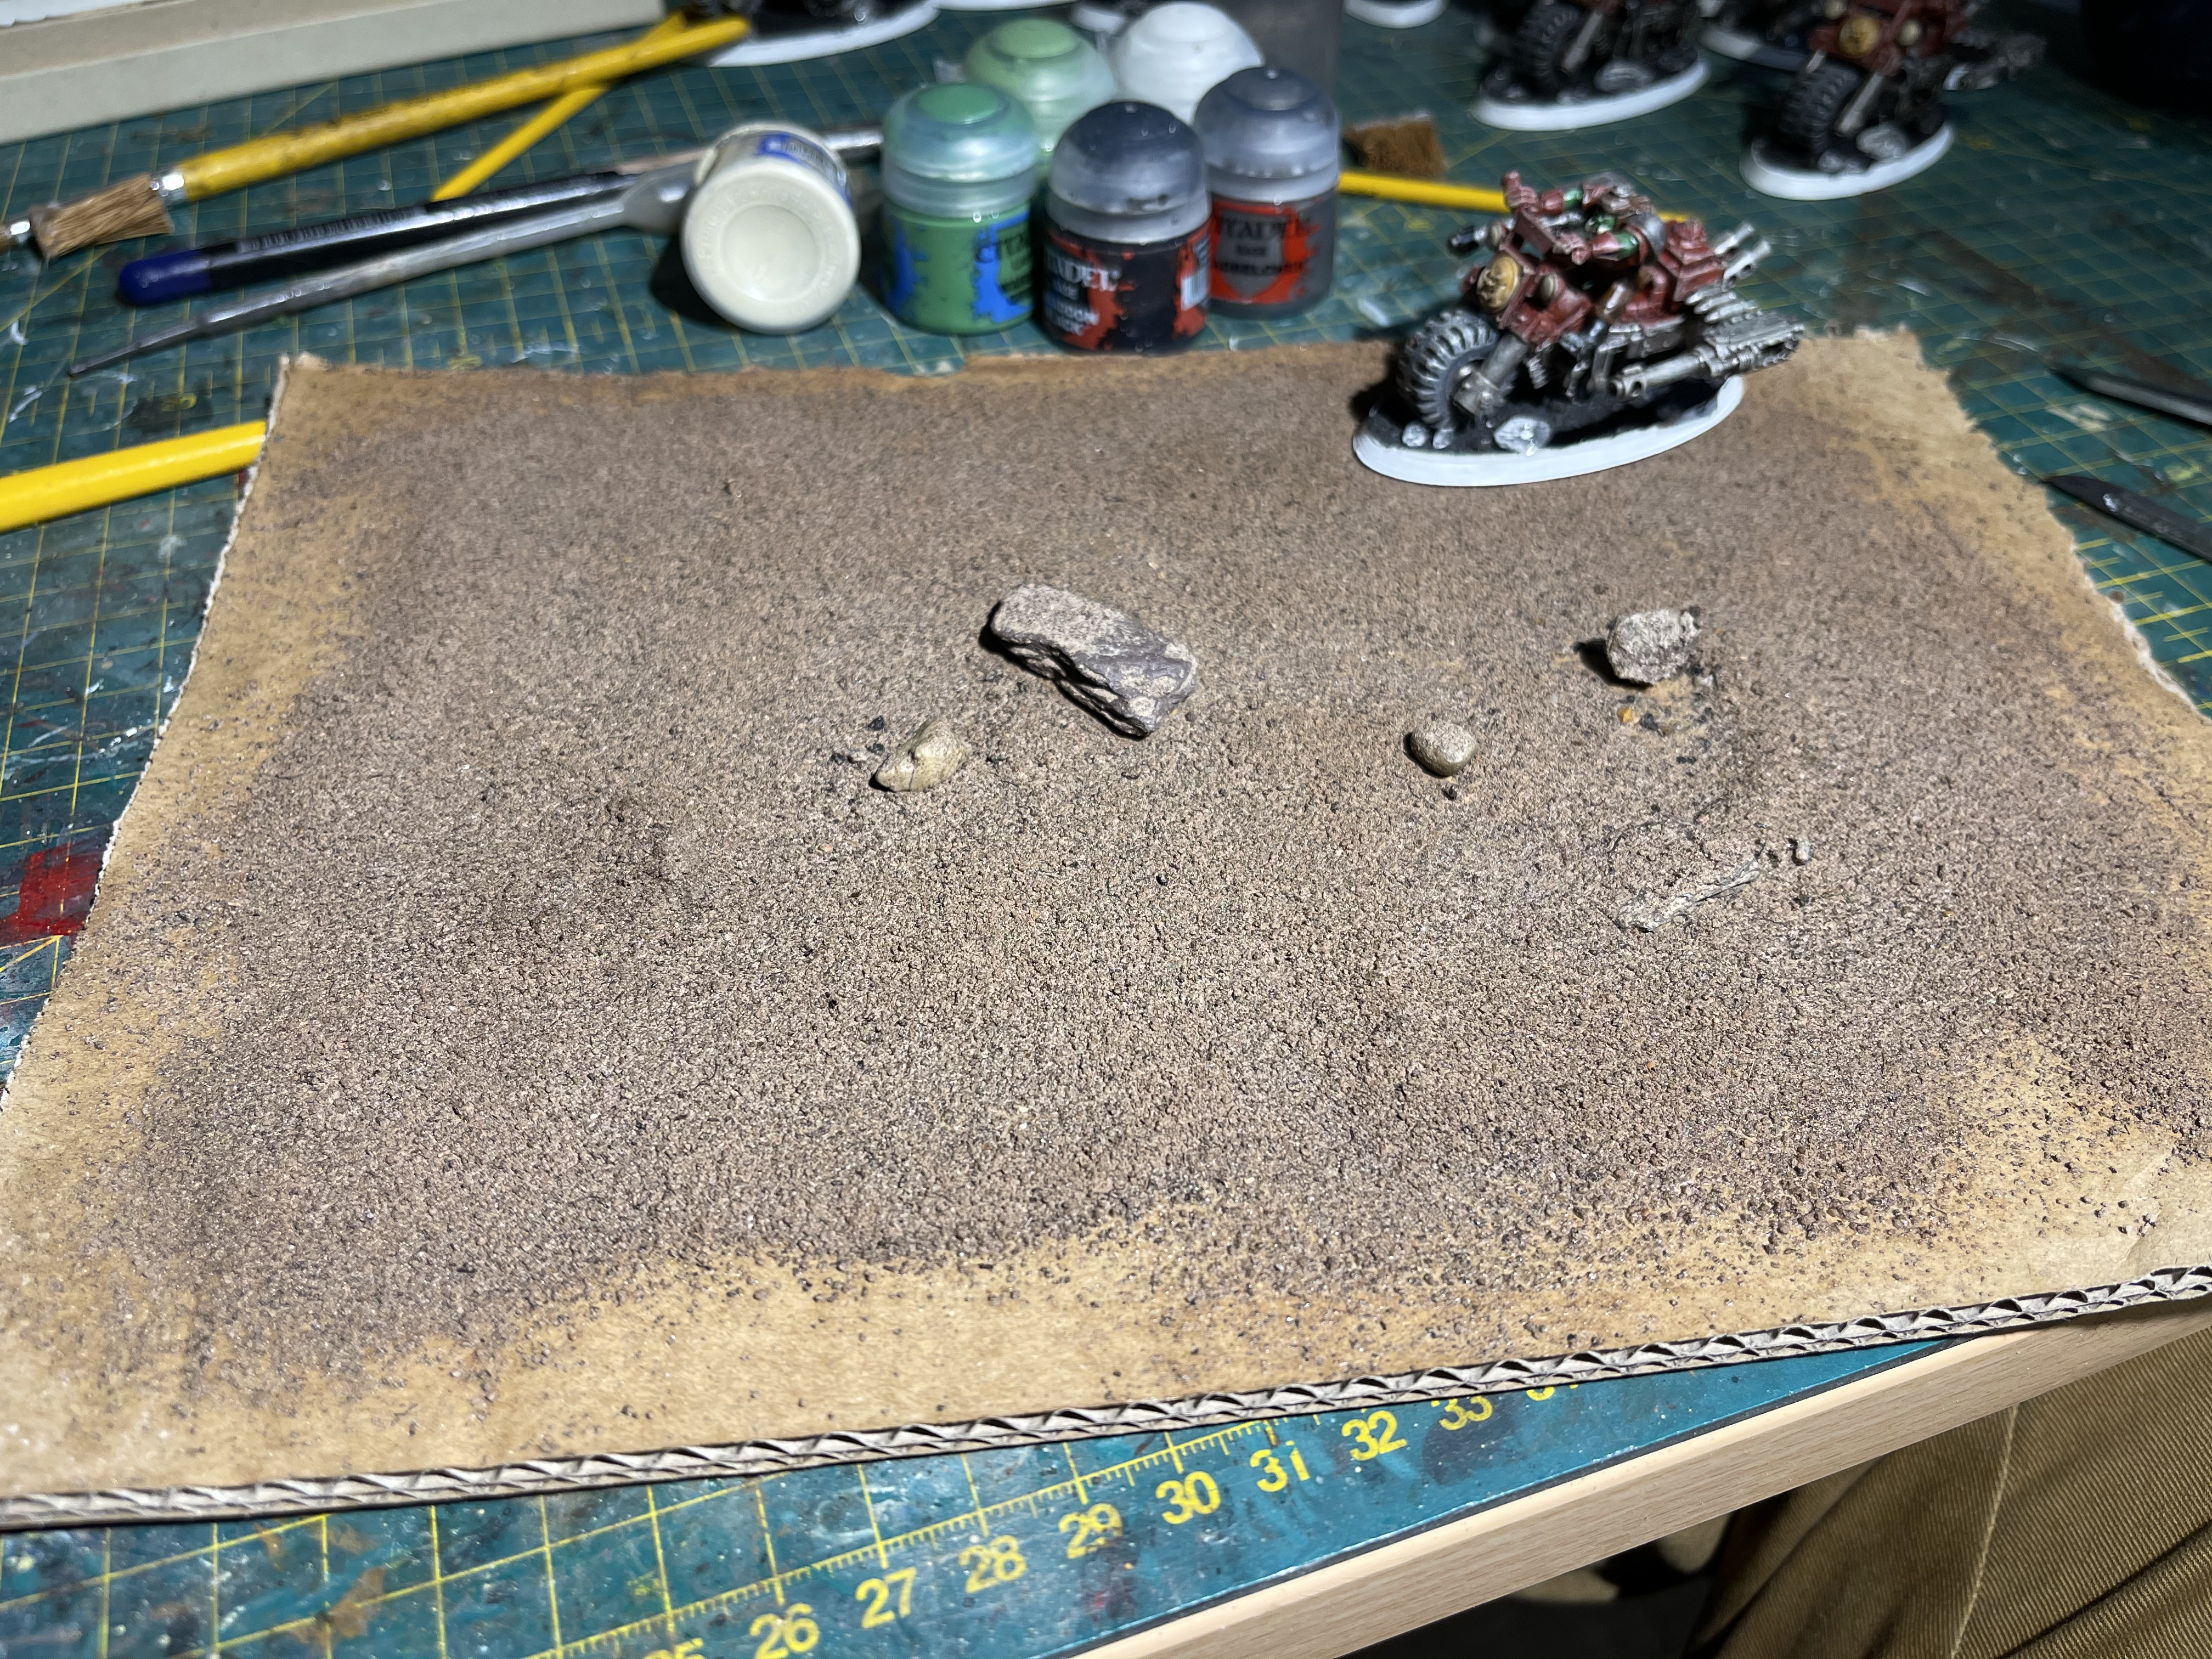
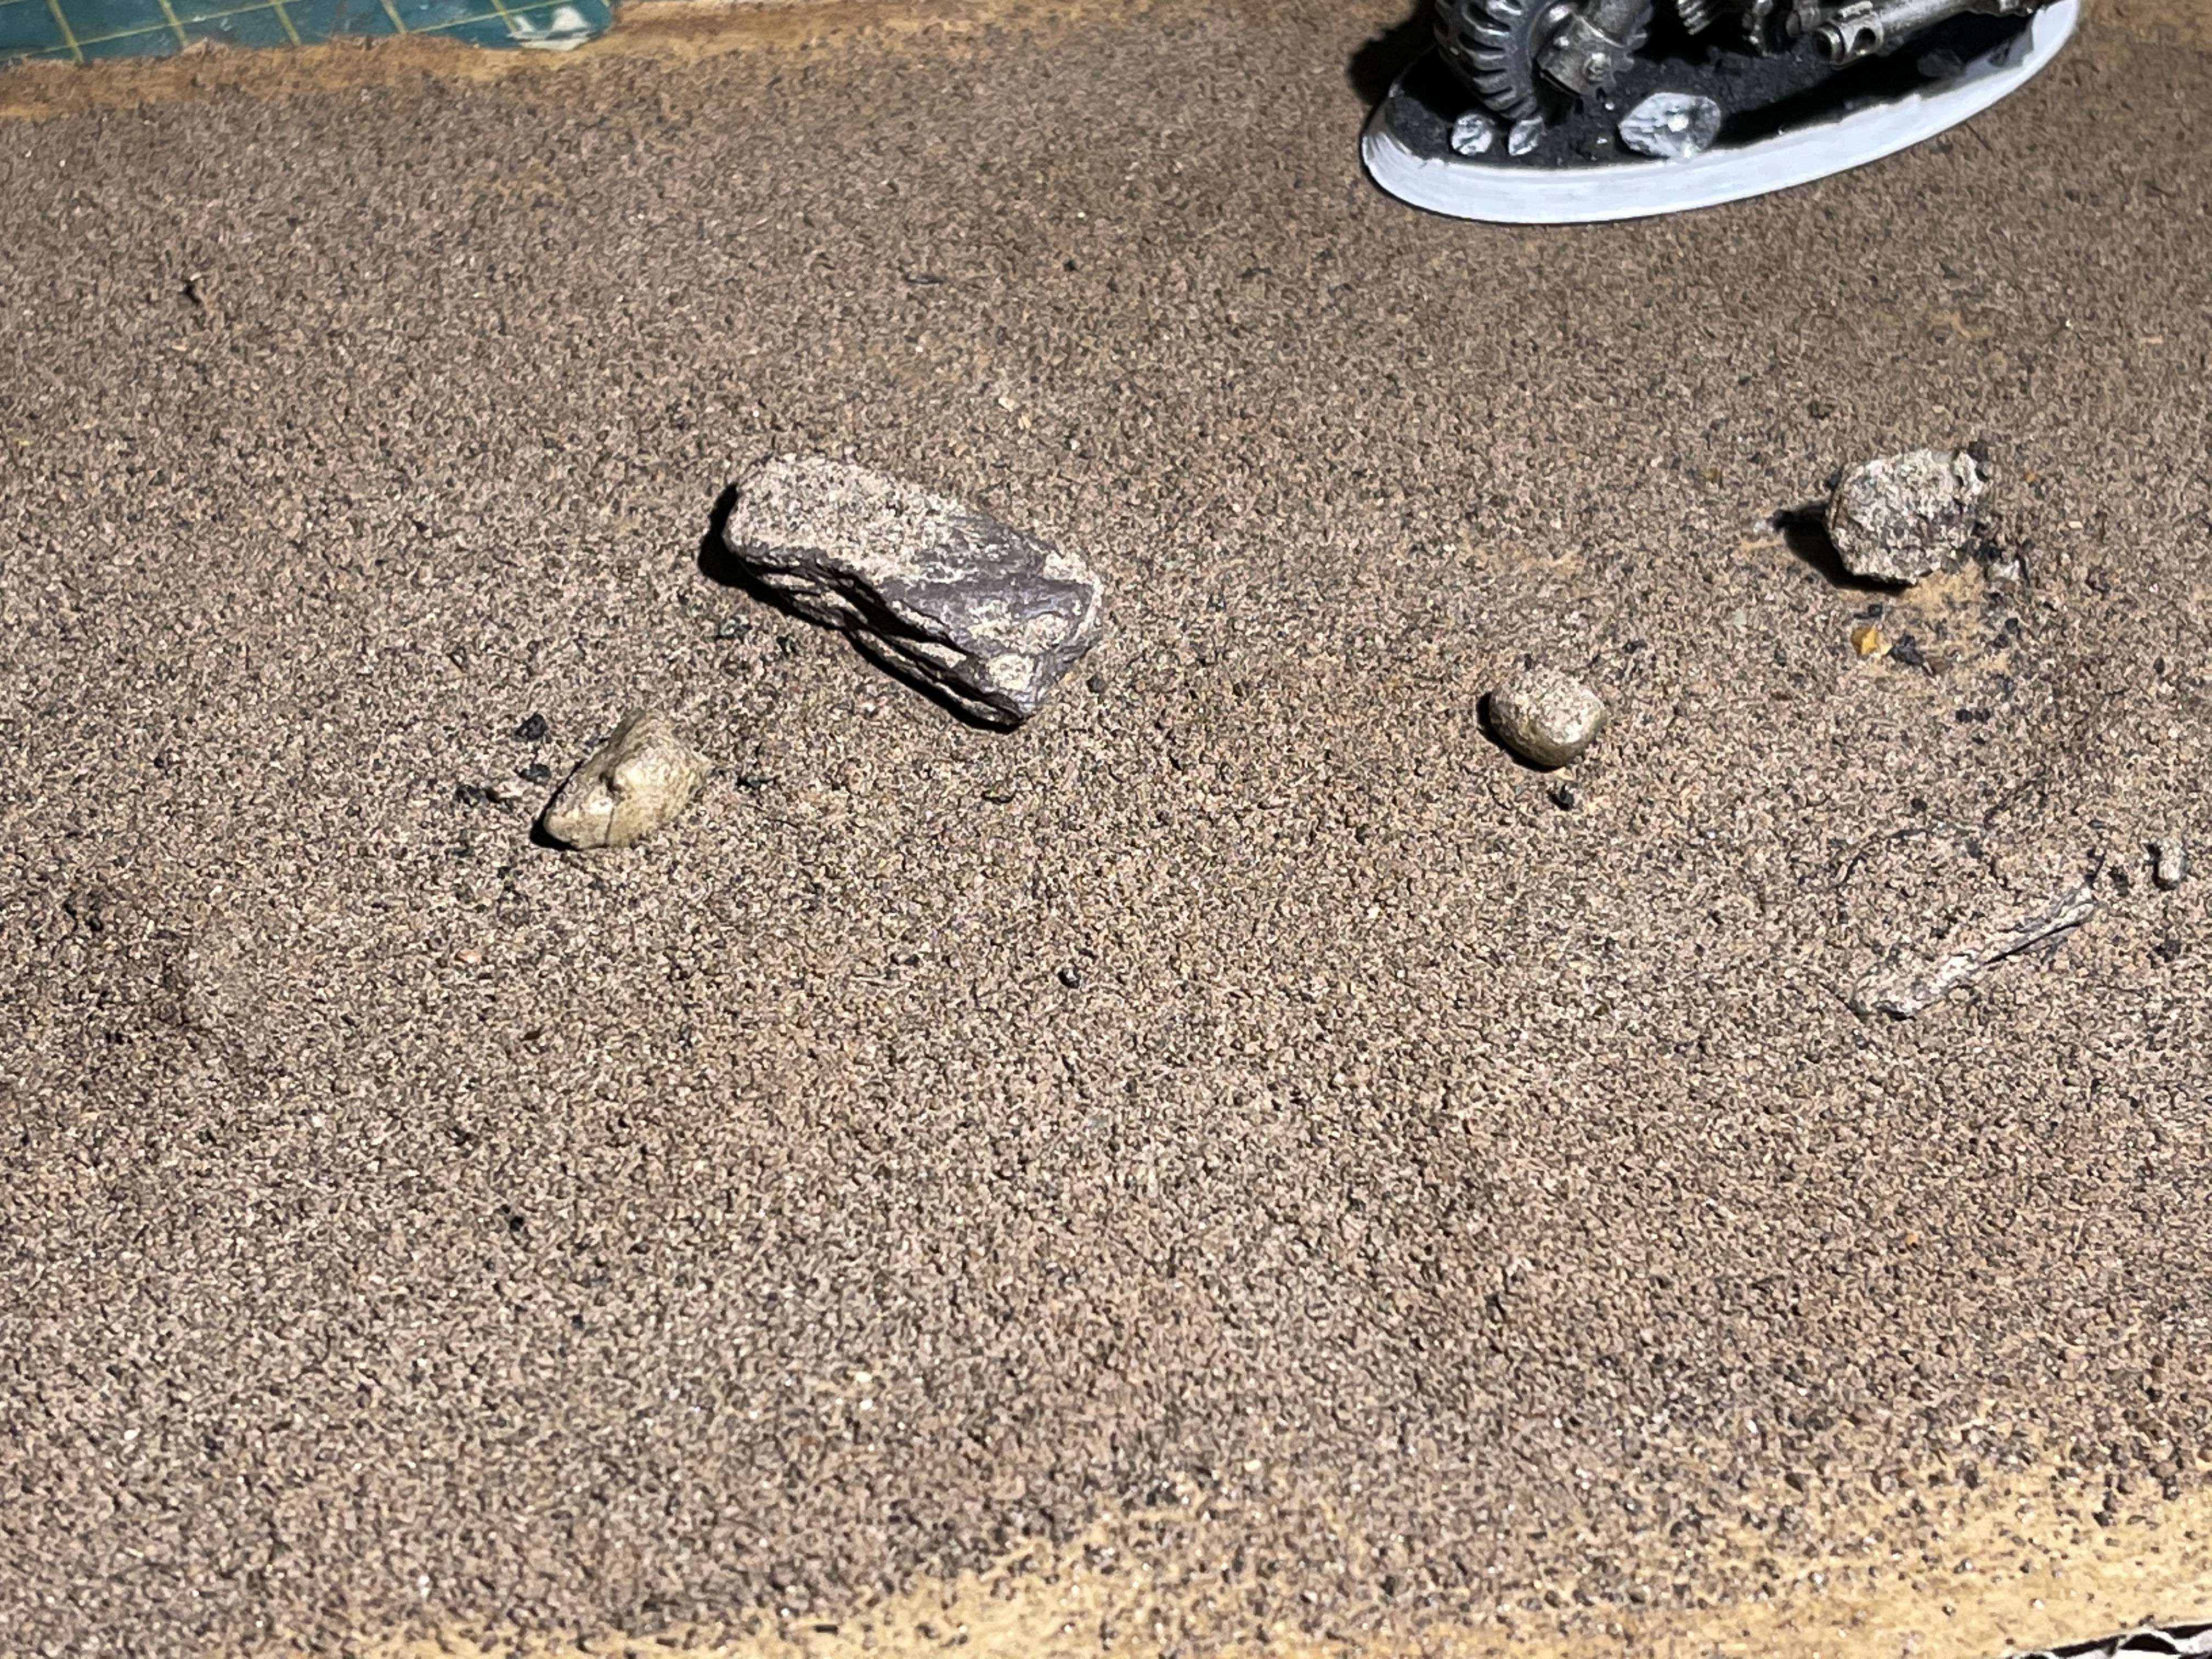
So to get the soil sorted I went into the garden and dug a hole…
I baked a pot full of it in the oven at 200 degrees centigrade… Fan adjusted of course.
To separate out the different grades I used 3 different sieves, but my wife thinks I only used one ‘hobby sieve’ so lets just keep schtum about that shall we.
I added tile grout to the mixture in a 1:2 grout:soil ratio.
Neat PVA on the base board (cardboard for the test), place stones and bigger gravel then a sprinkle of the soil/grout mix everywhere else. once done it is sprayed with watered down PVA.
It dried rock hard in the airing cupboard but warped. not worried about that, it was expected as cardboard isn’t a good basing material. I’m more interested in the colour it came out.
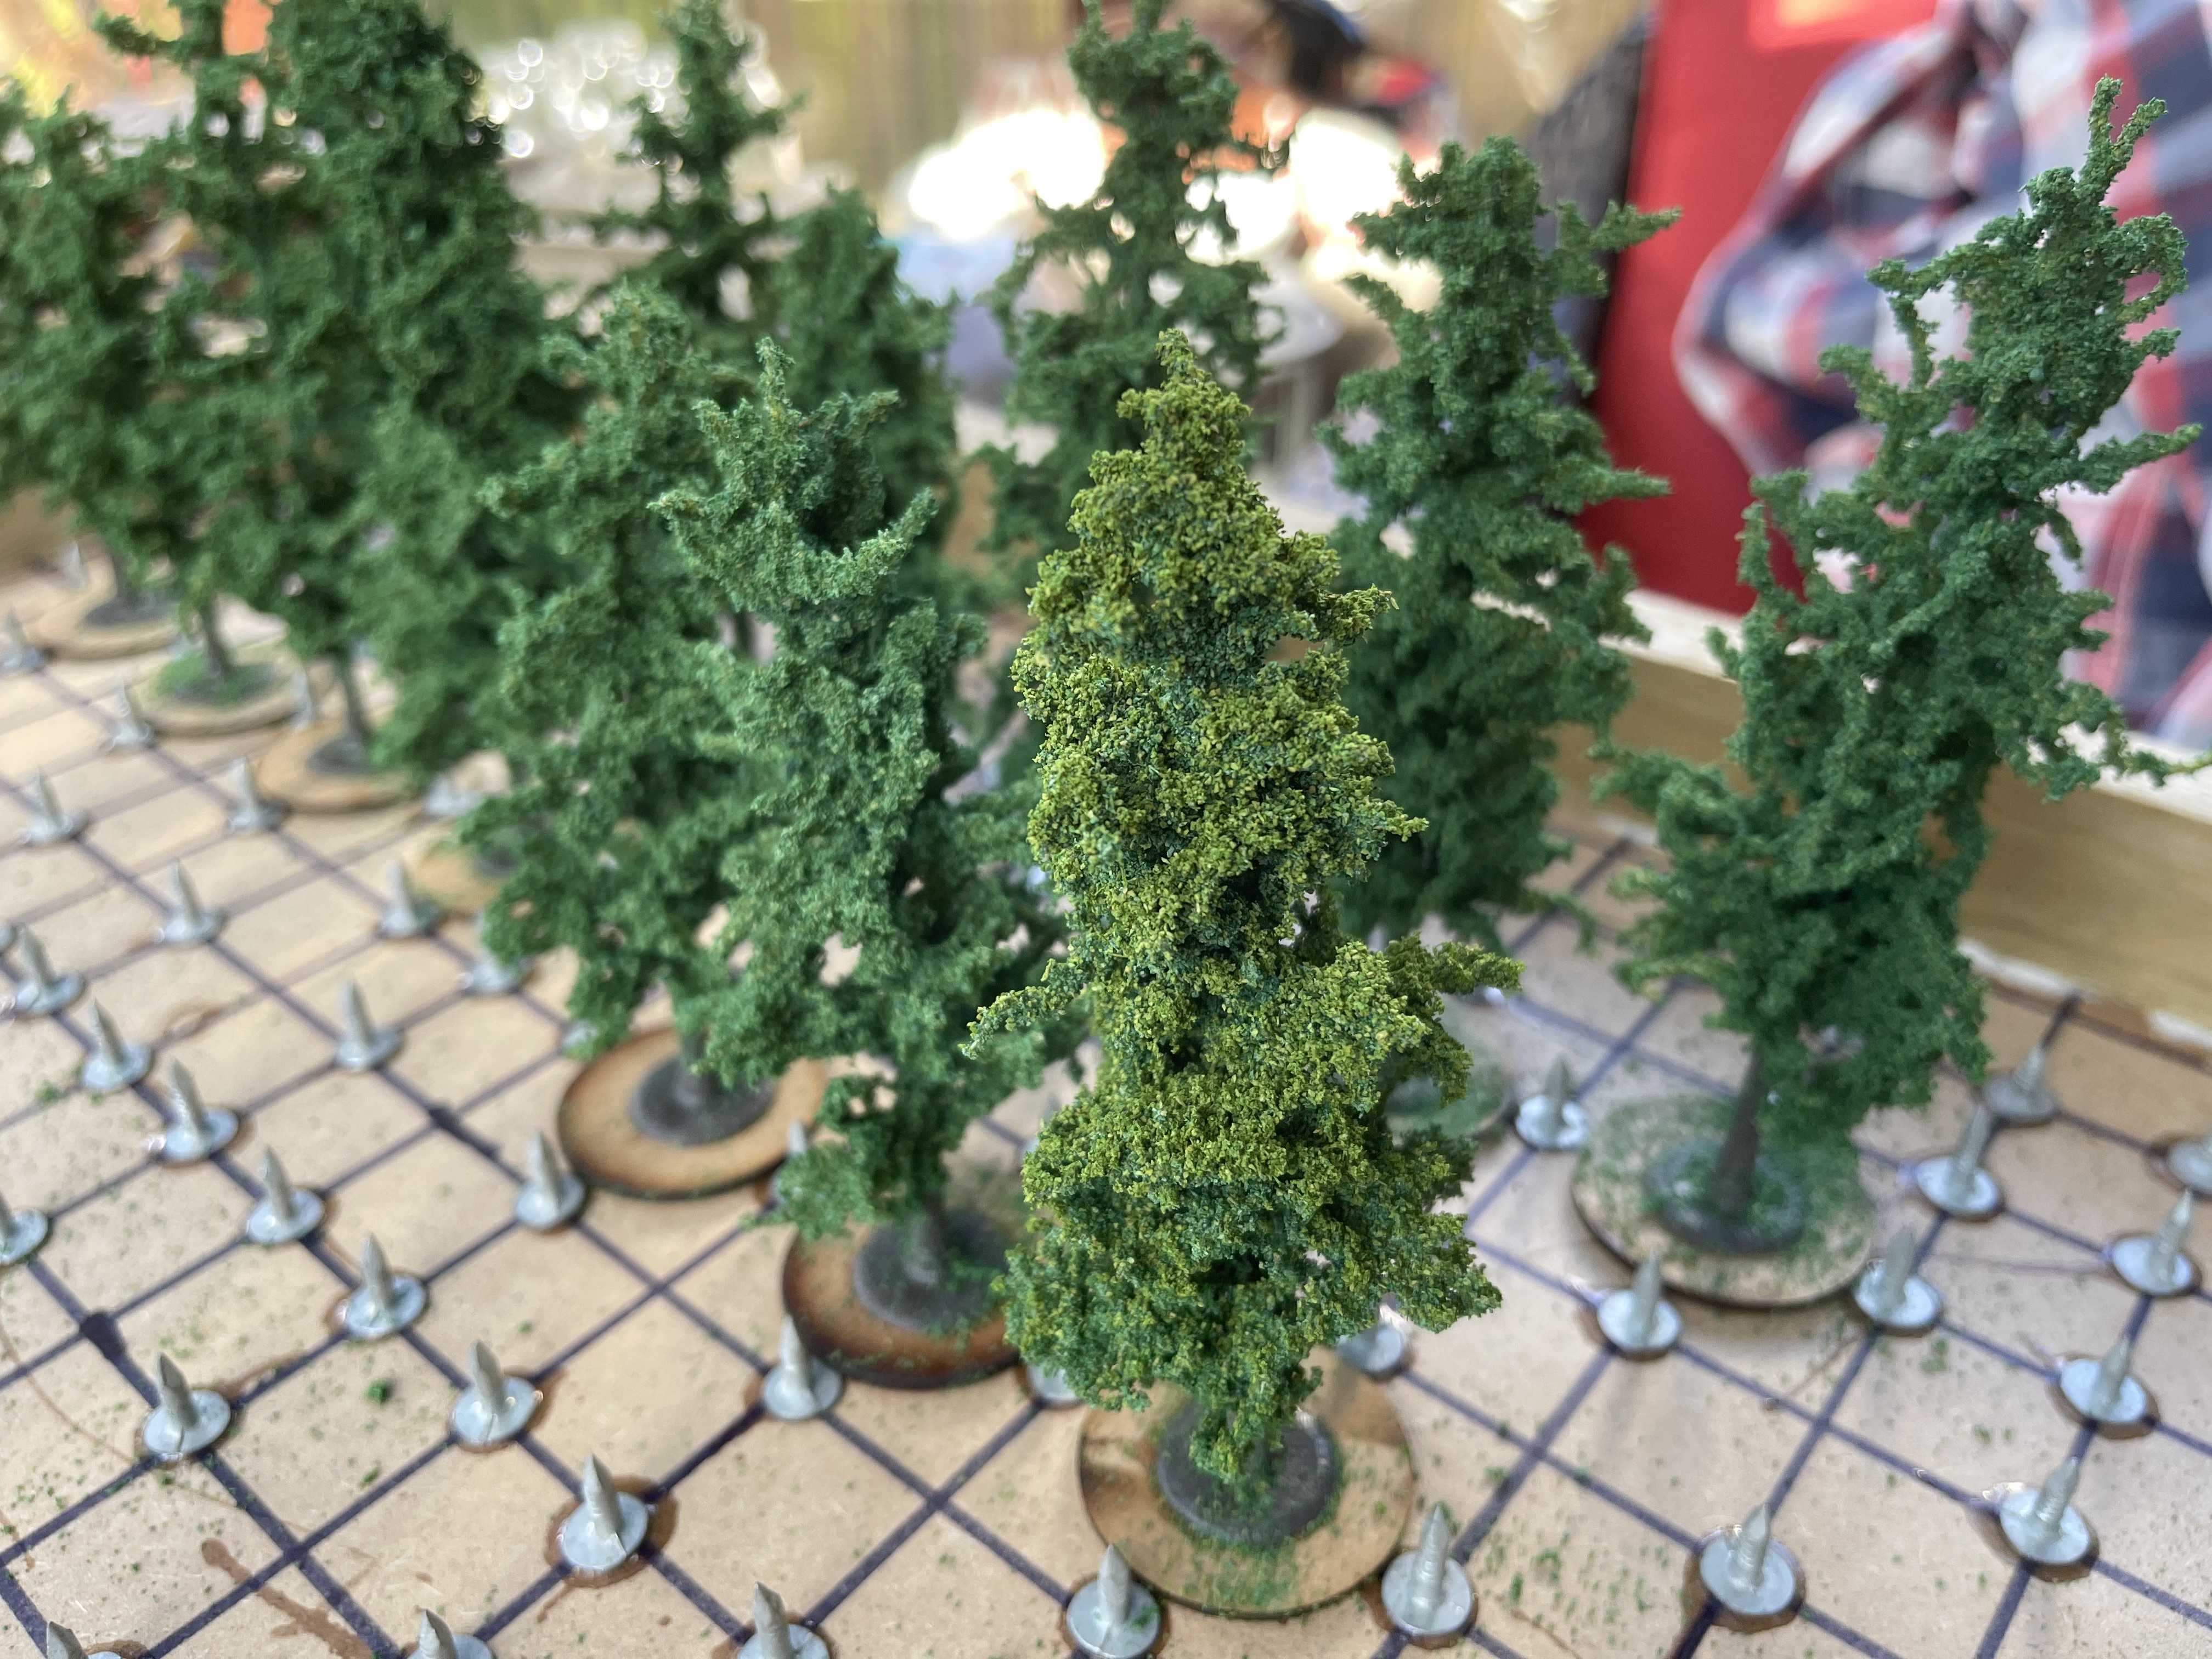
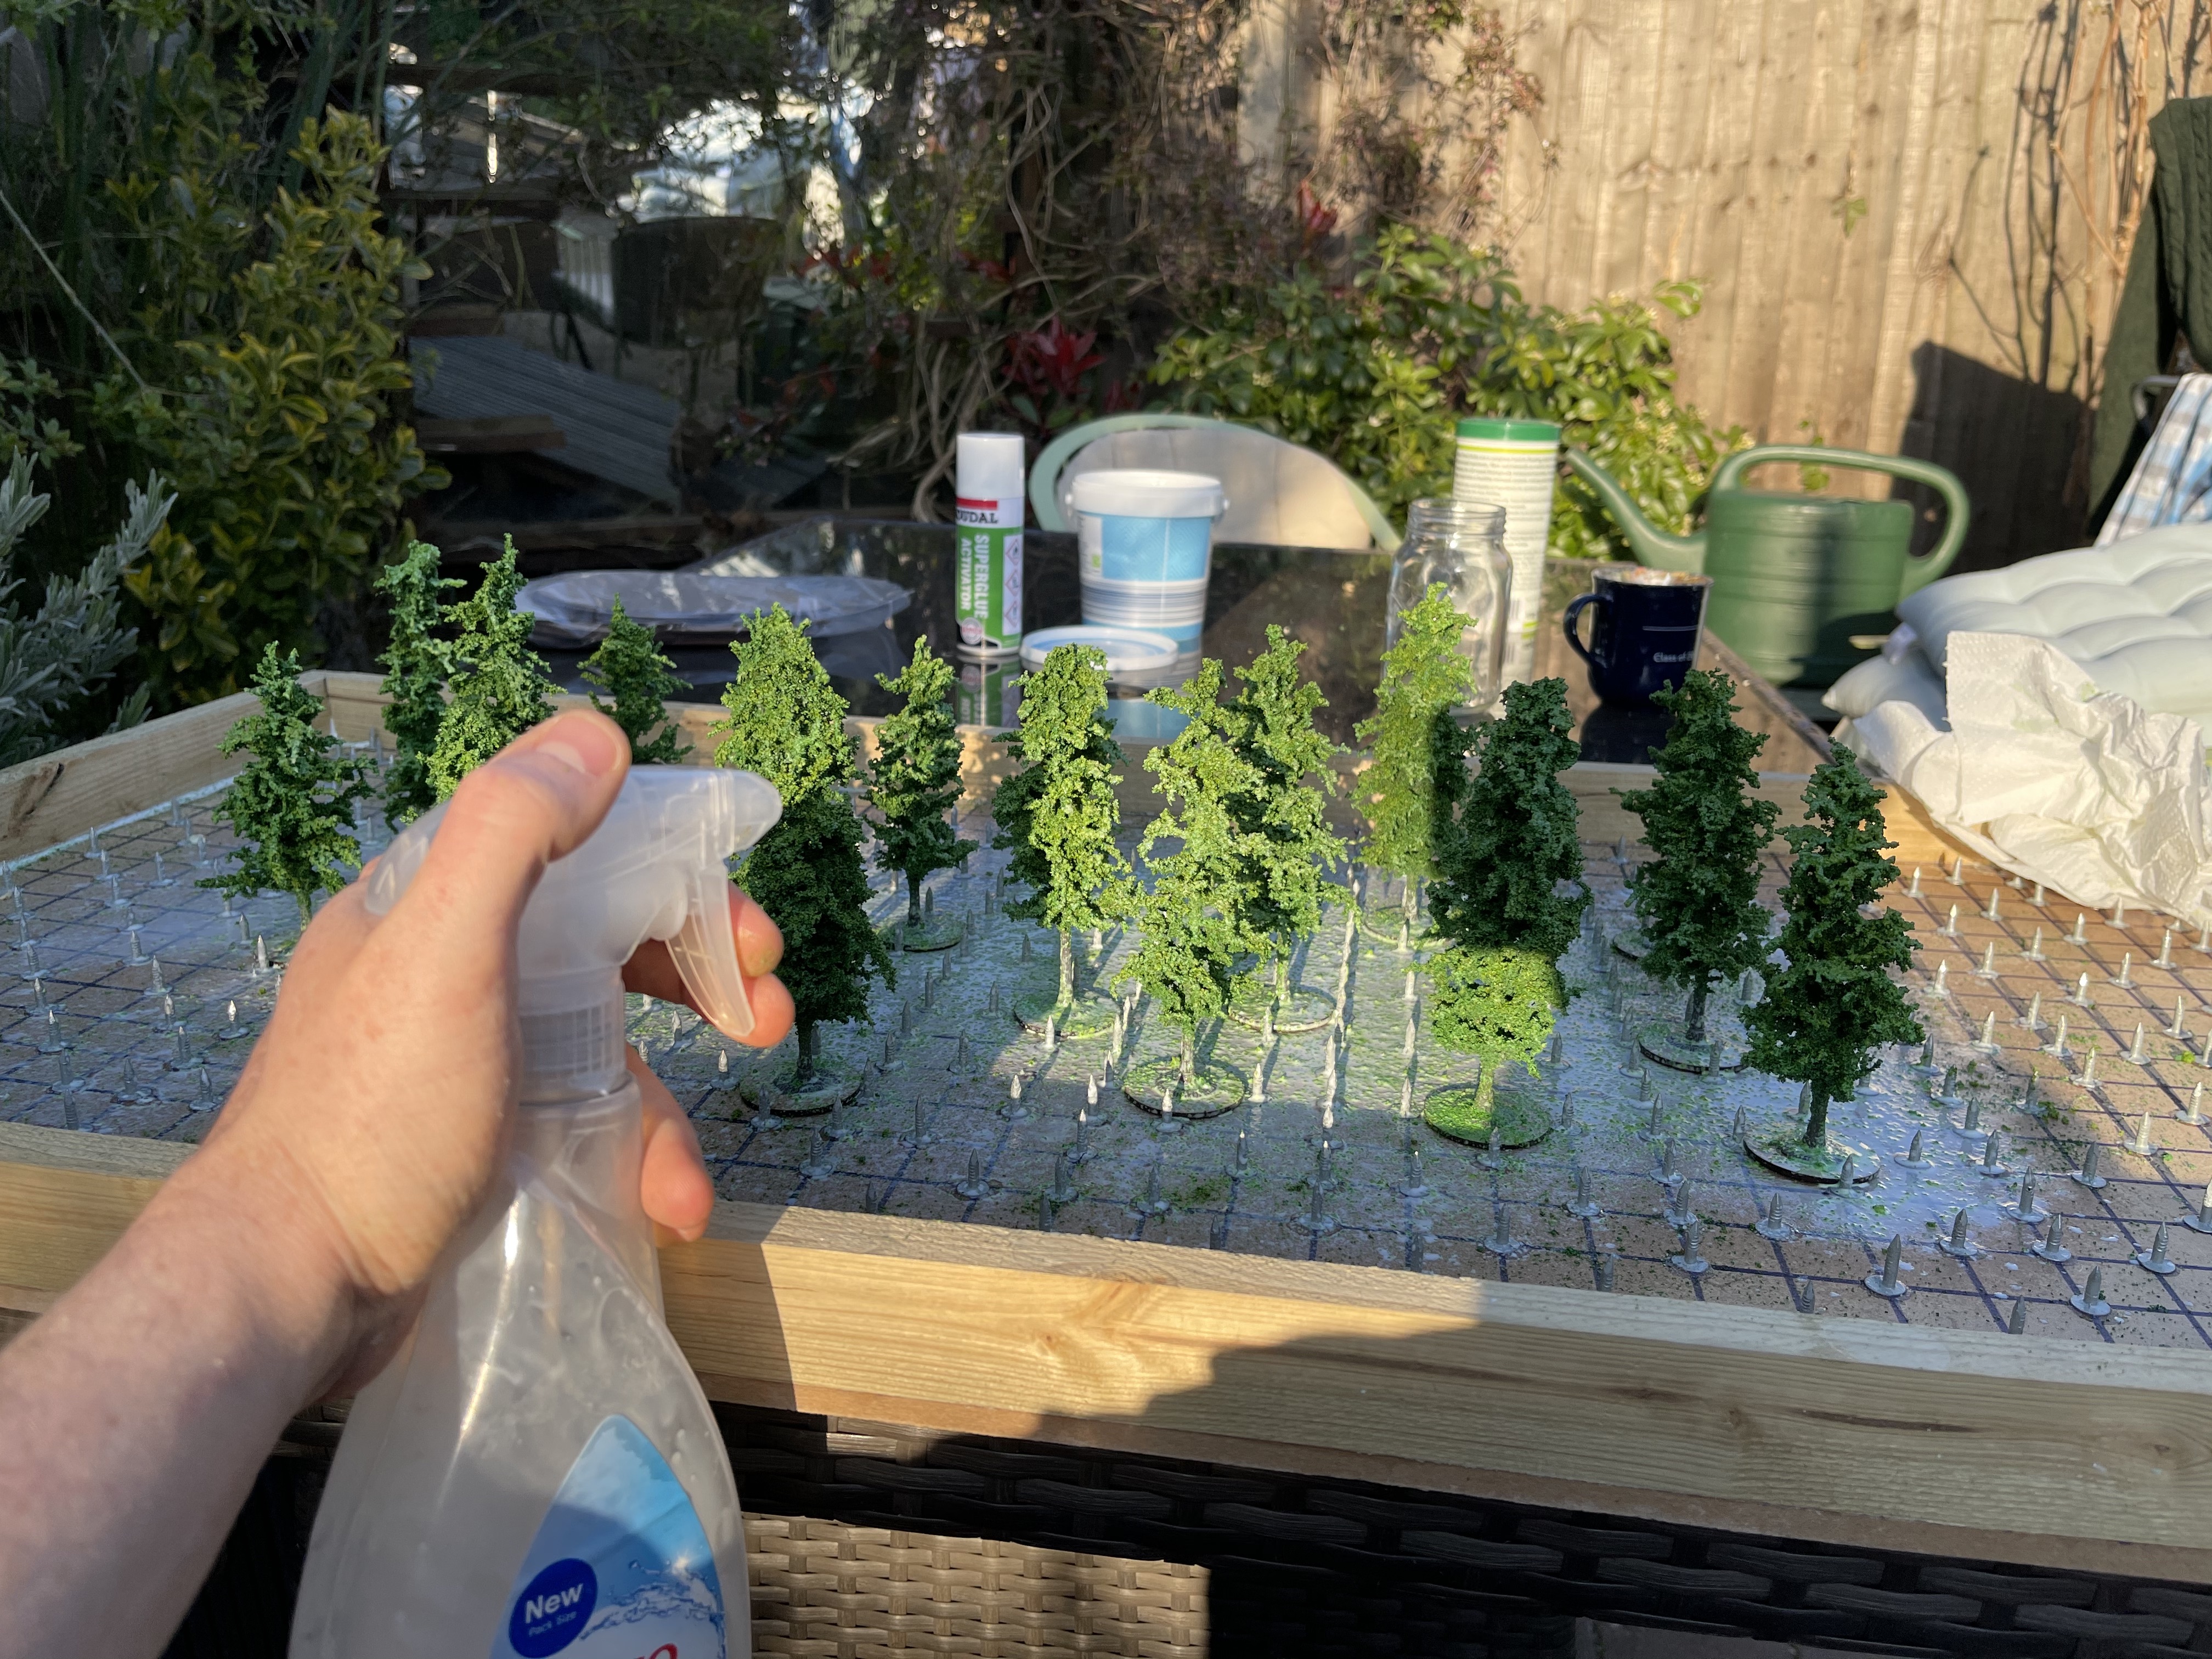
Pining for some trees
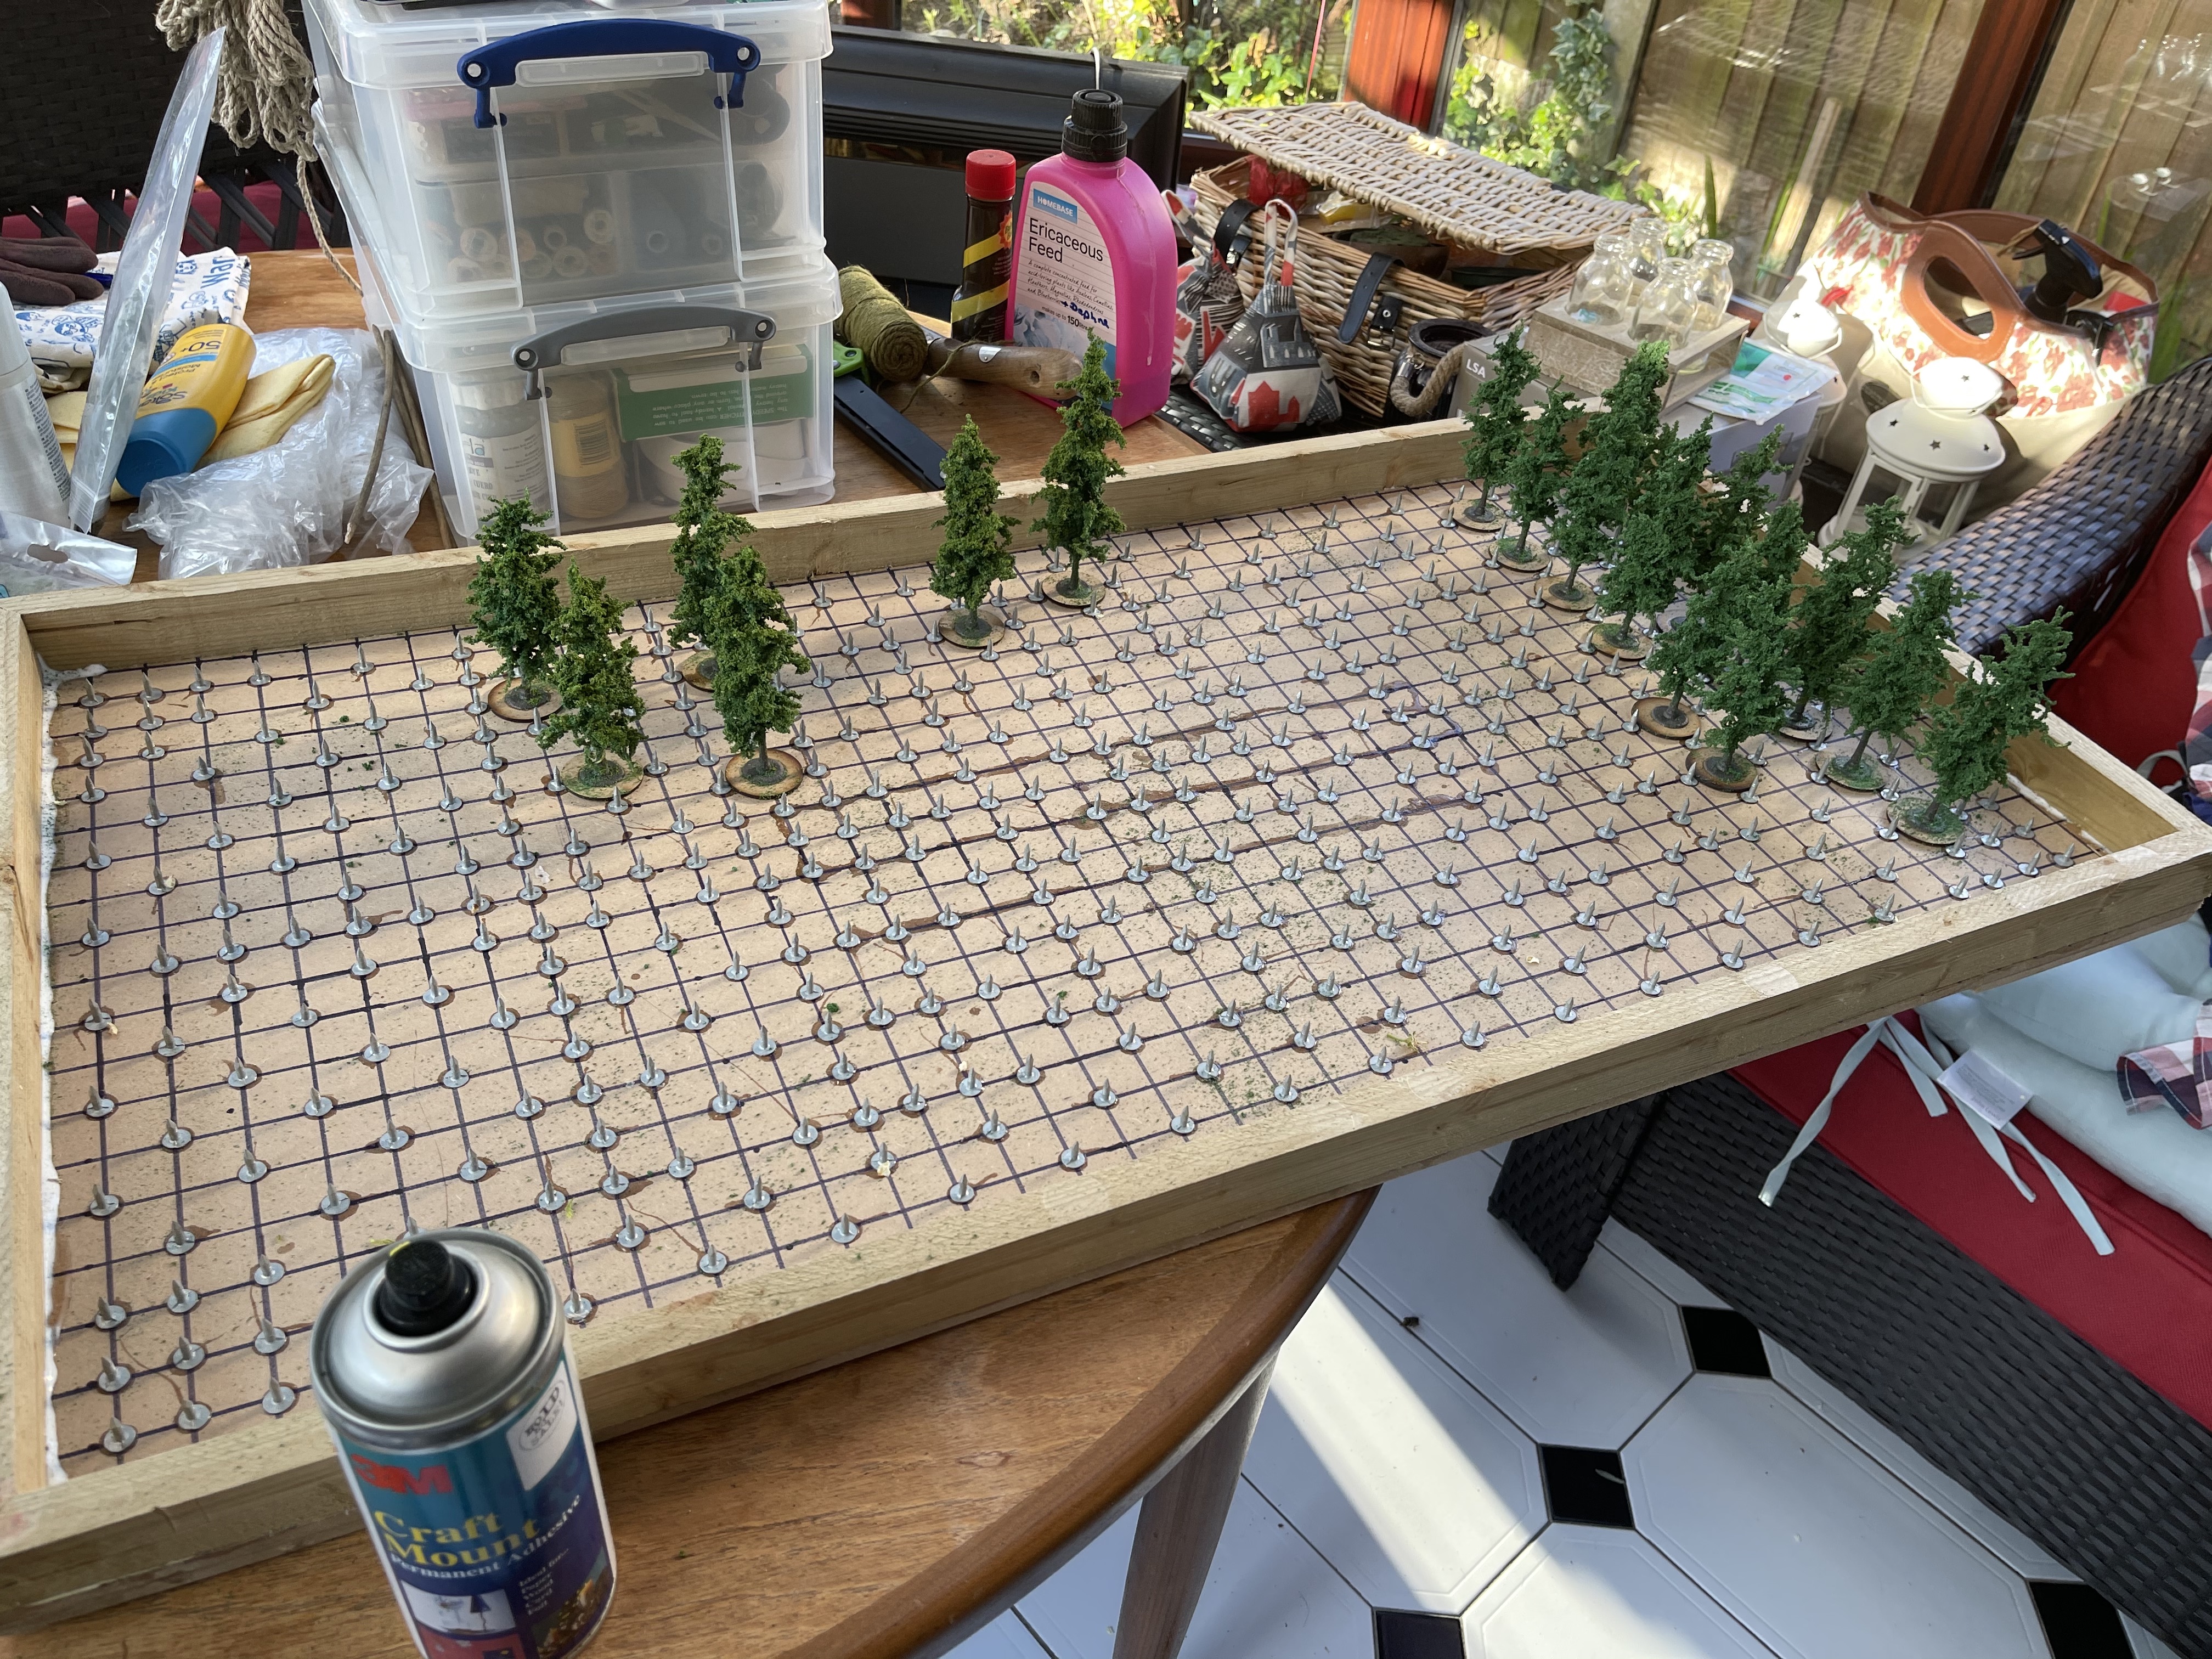 3M spray then sprinkle with foam flock
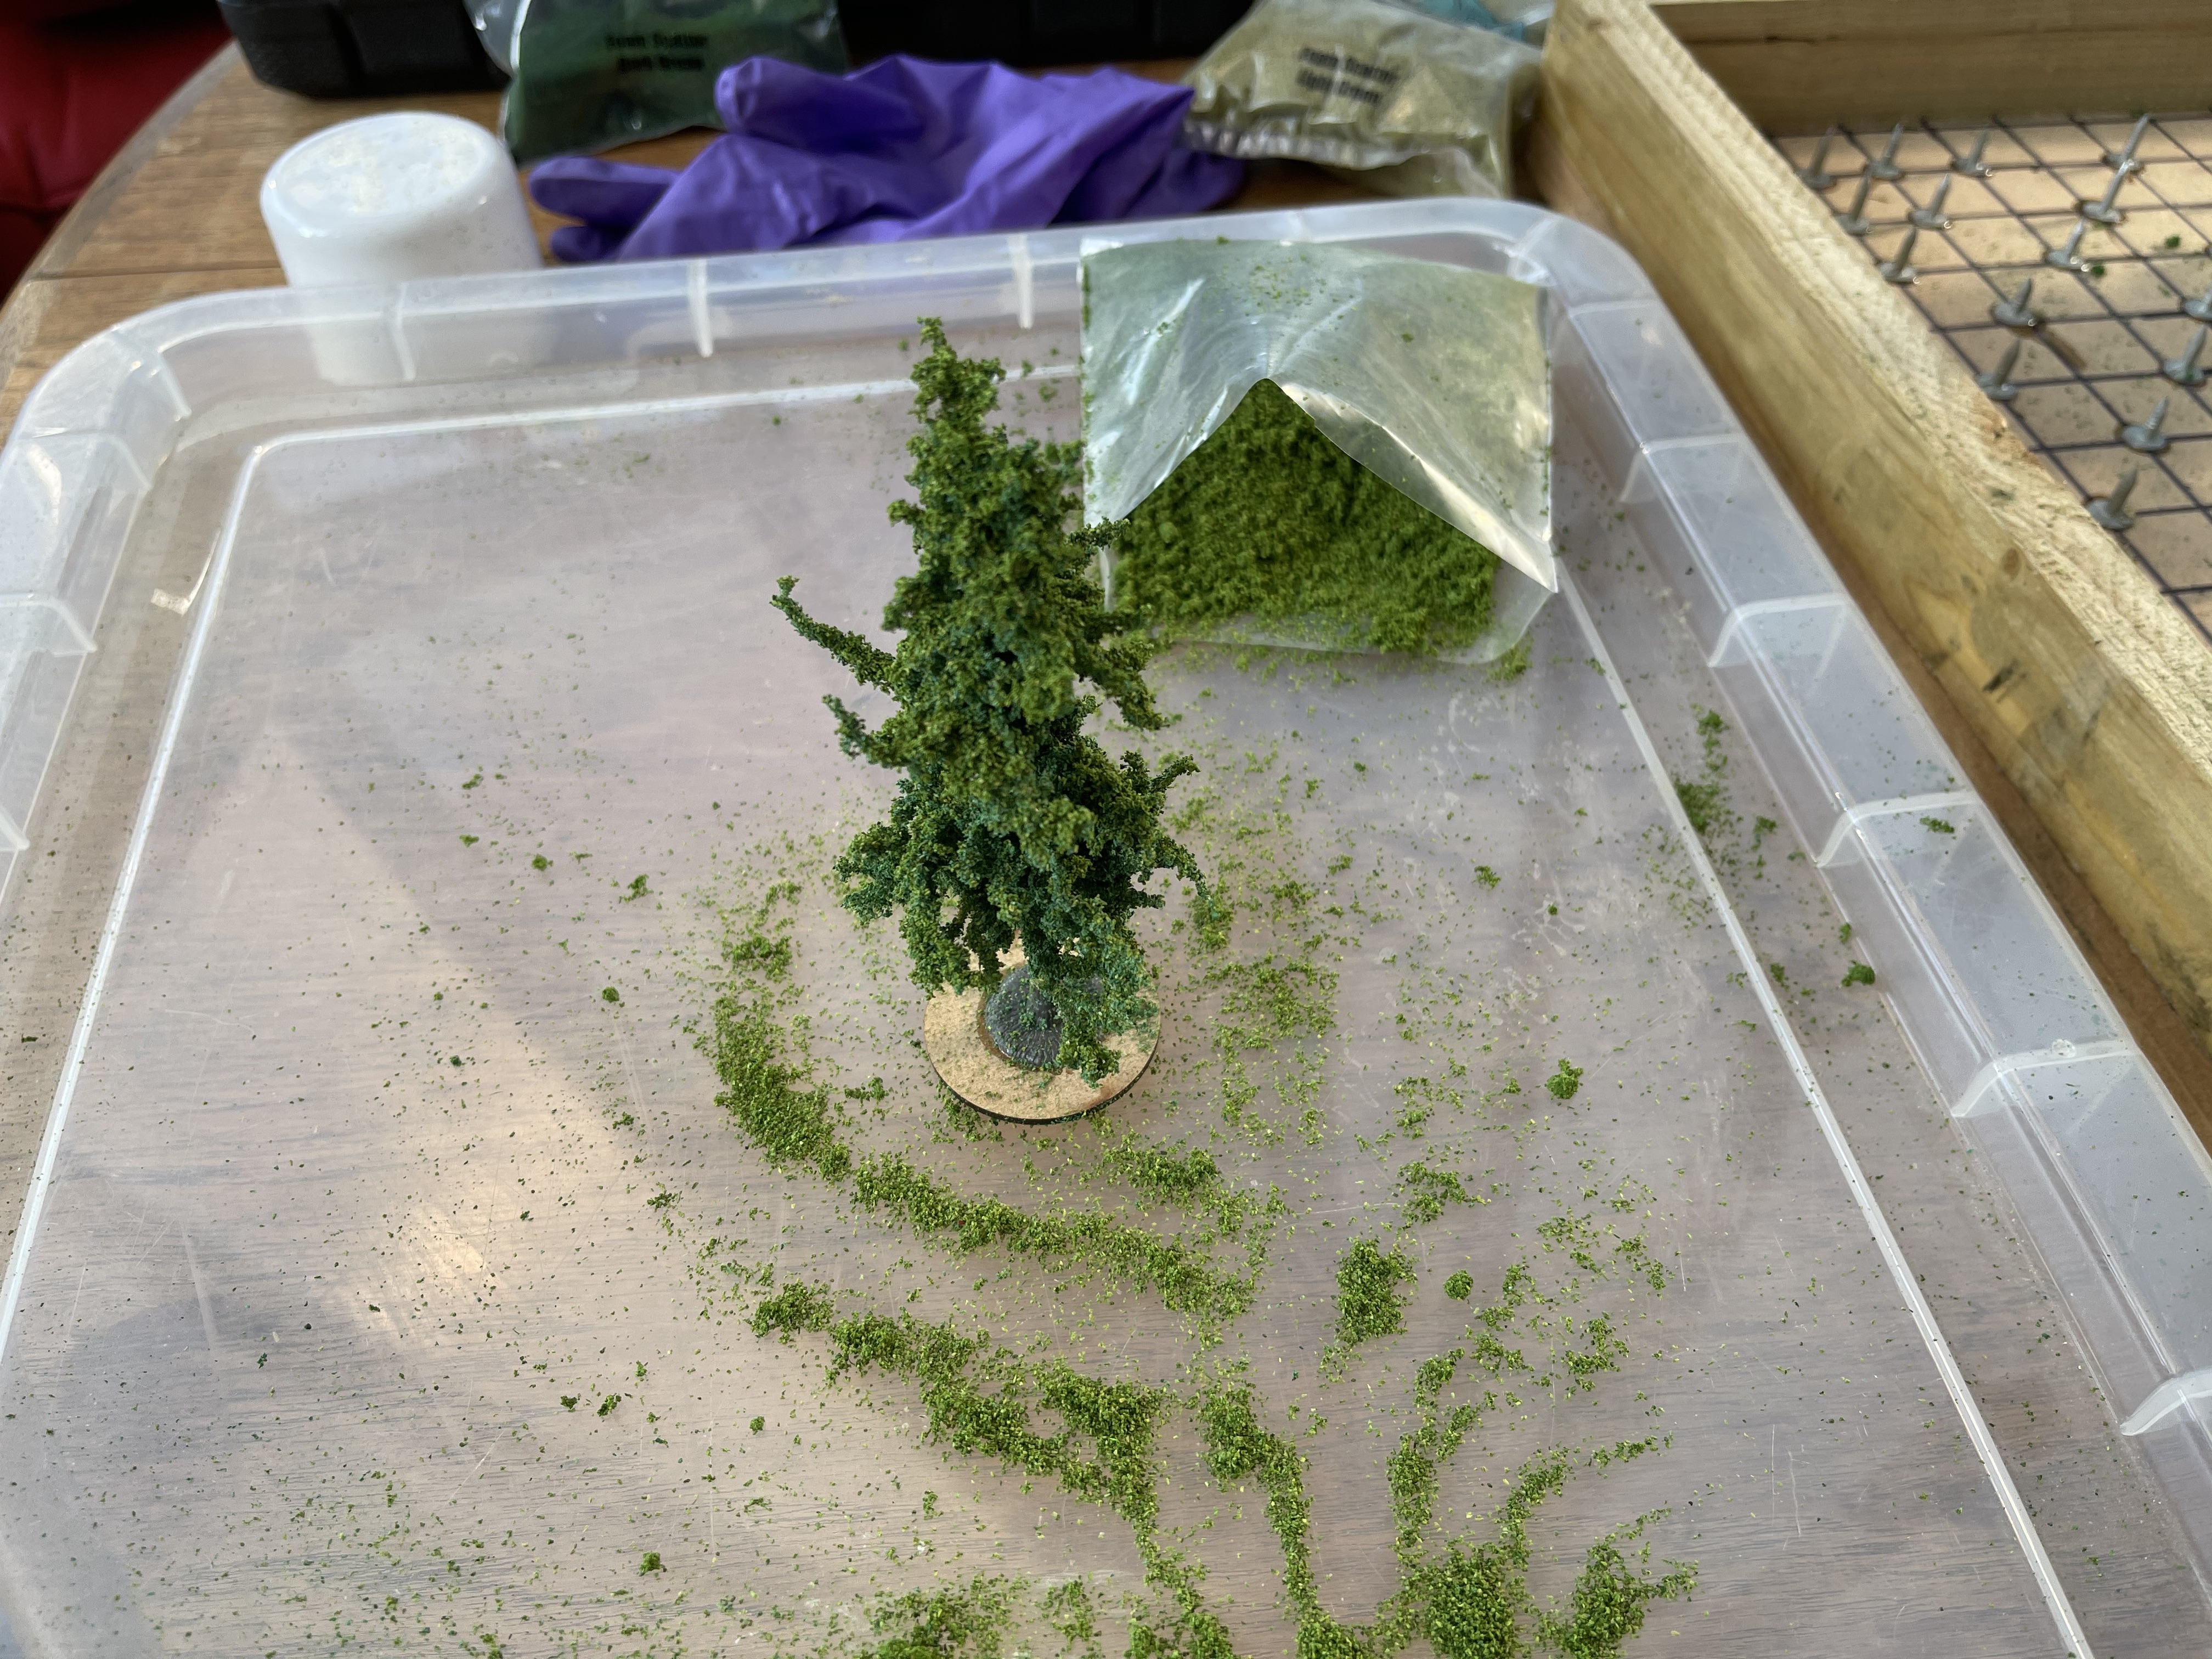 sprinkle over something to make collection for reuse easier
 spray with watered down PVA and Matt Varnish mix
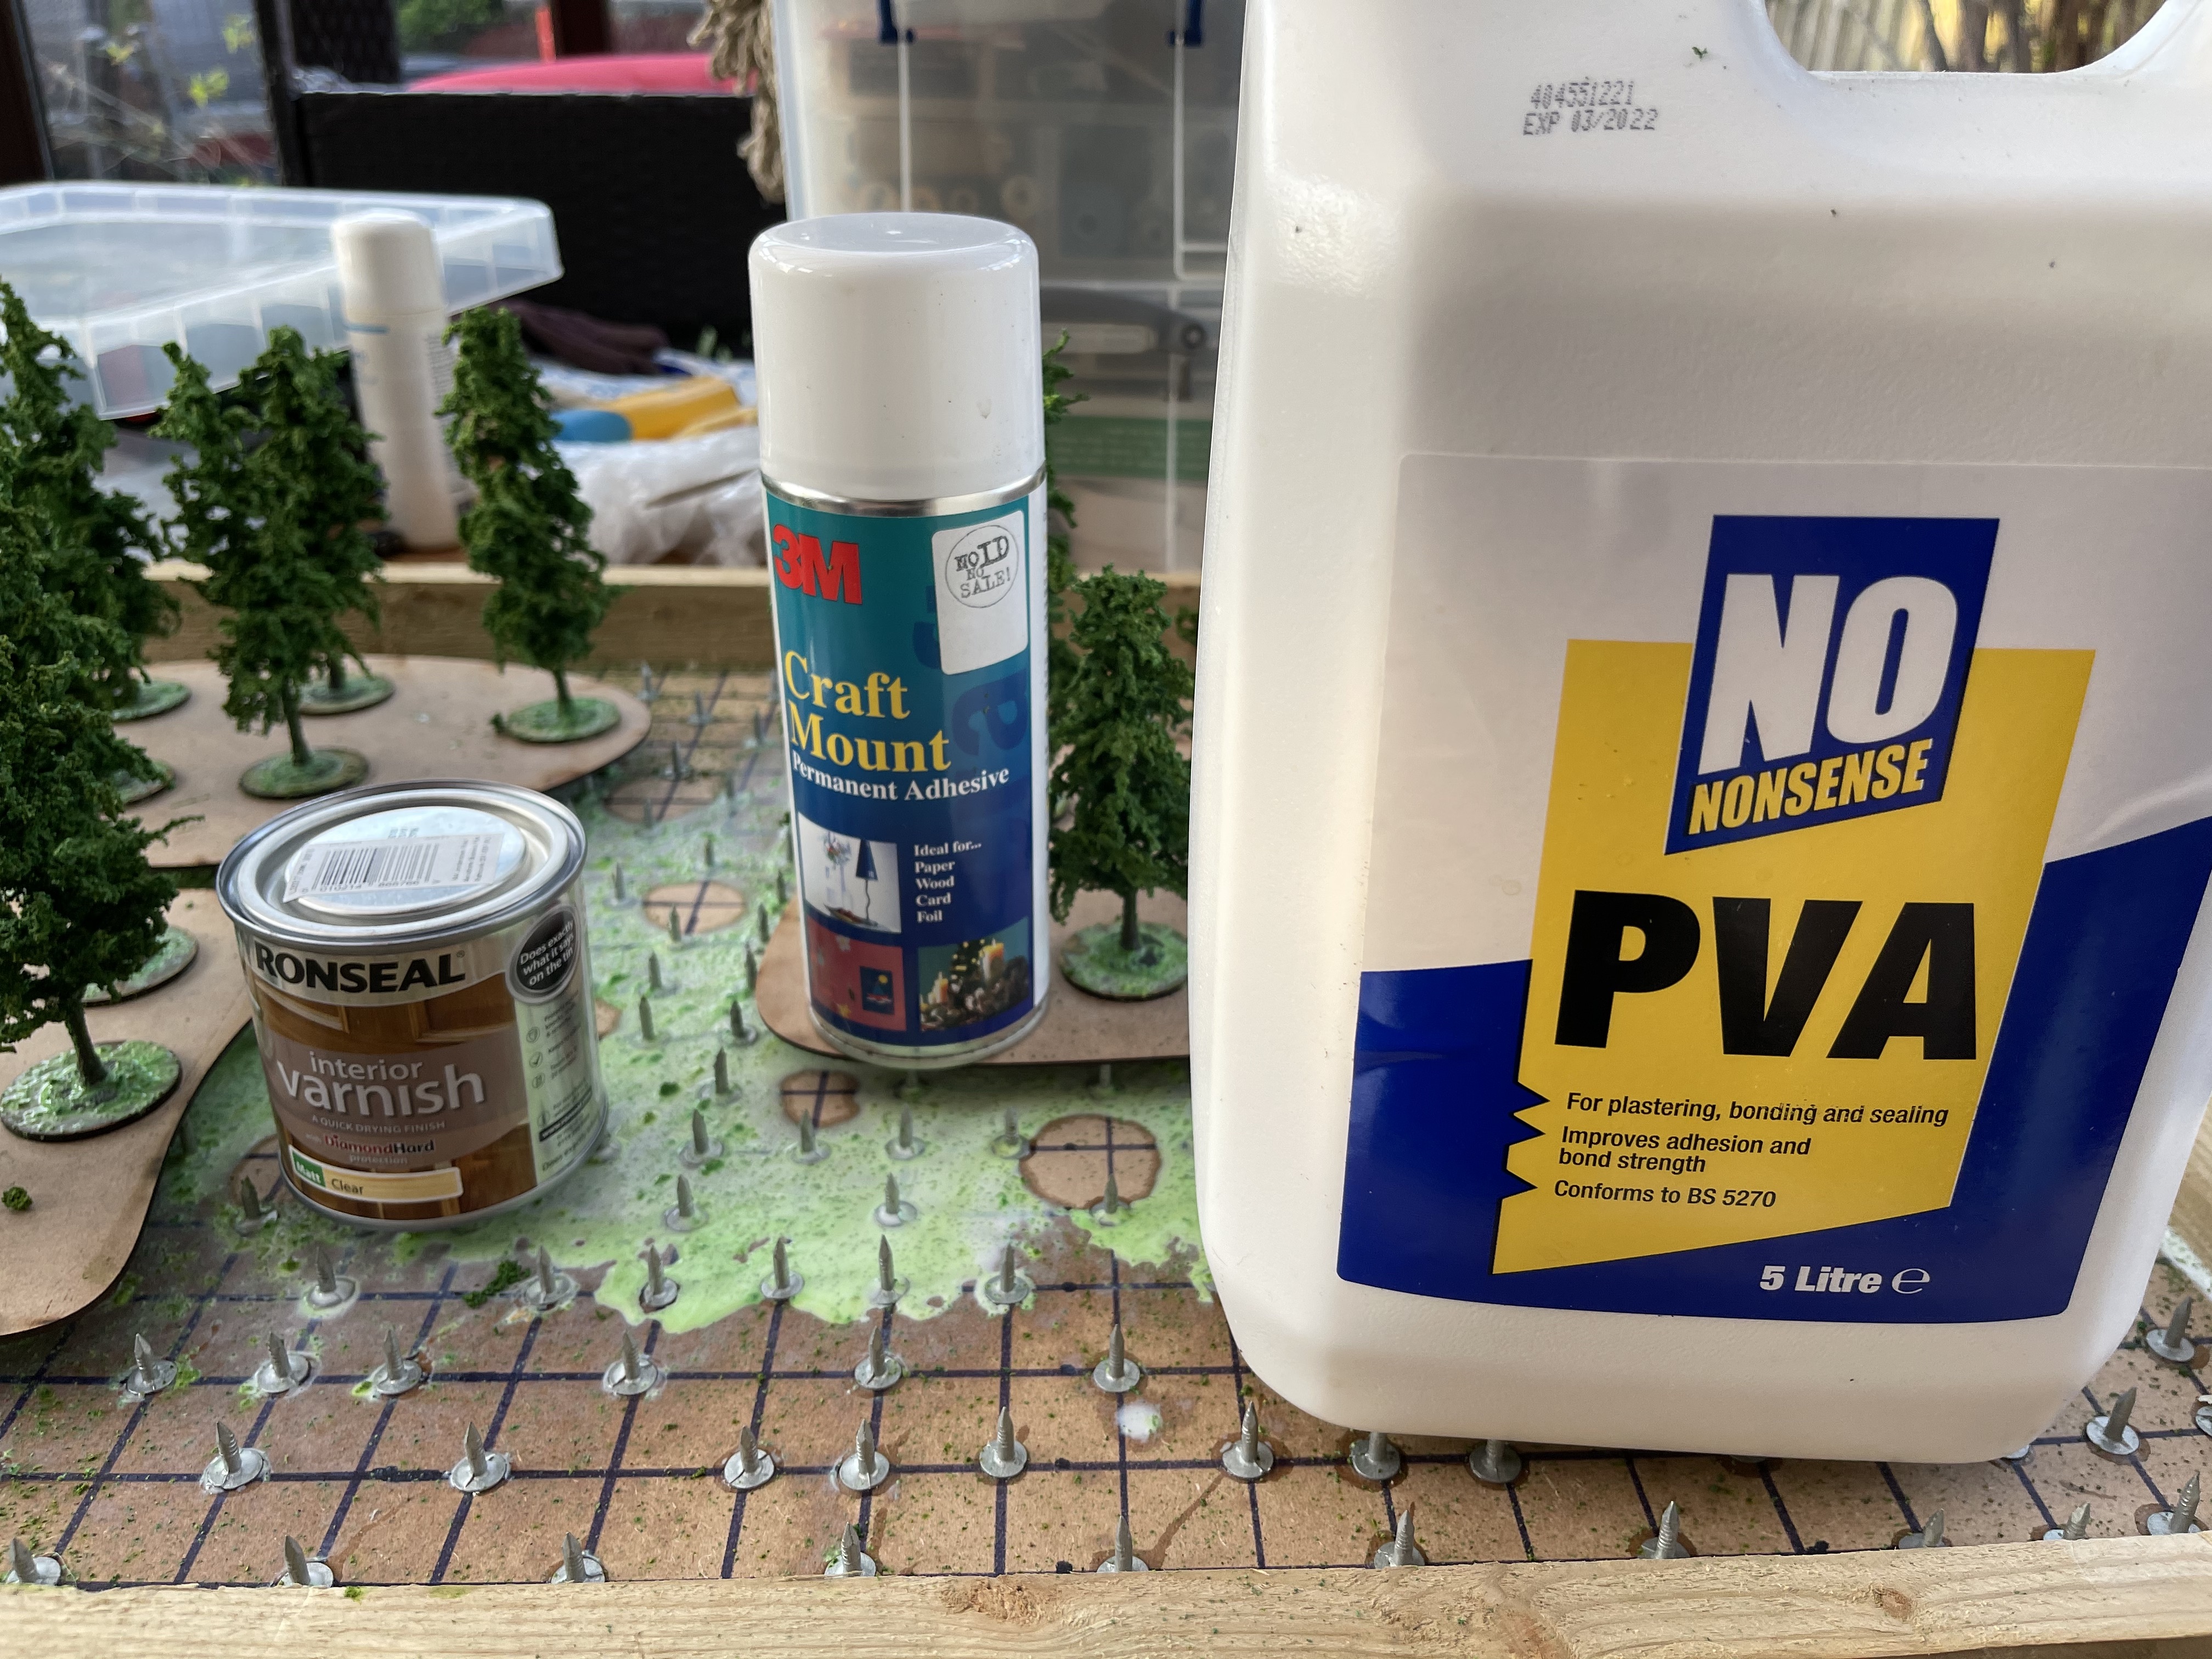
I have take the moss covered trees and sprayed them with 3M glue. Then sprinkled dark green foam flock from geek gaming scenics both from below and above to cover all sides of the moss. A second light spray with glue and the mid colour flock.
Finally a 50:50 mix of matt varnish and PVA glue in a spray bottle that is watered down enough to be able to be sprayed.
Worked out quite well when dried.
farting about
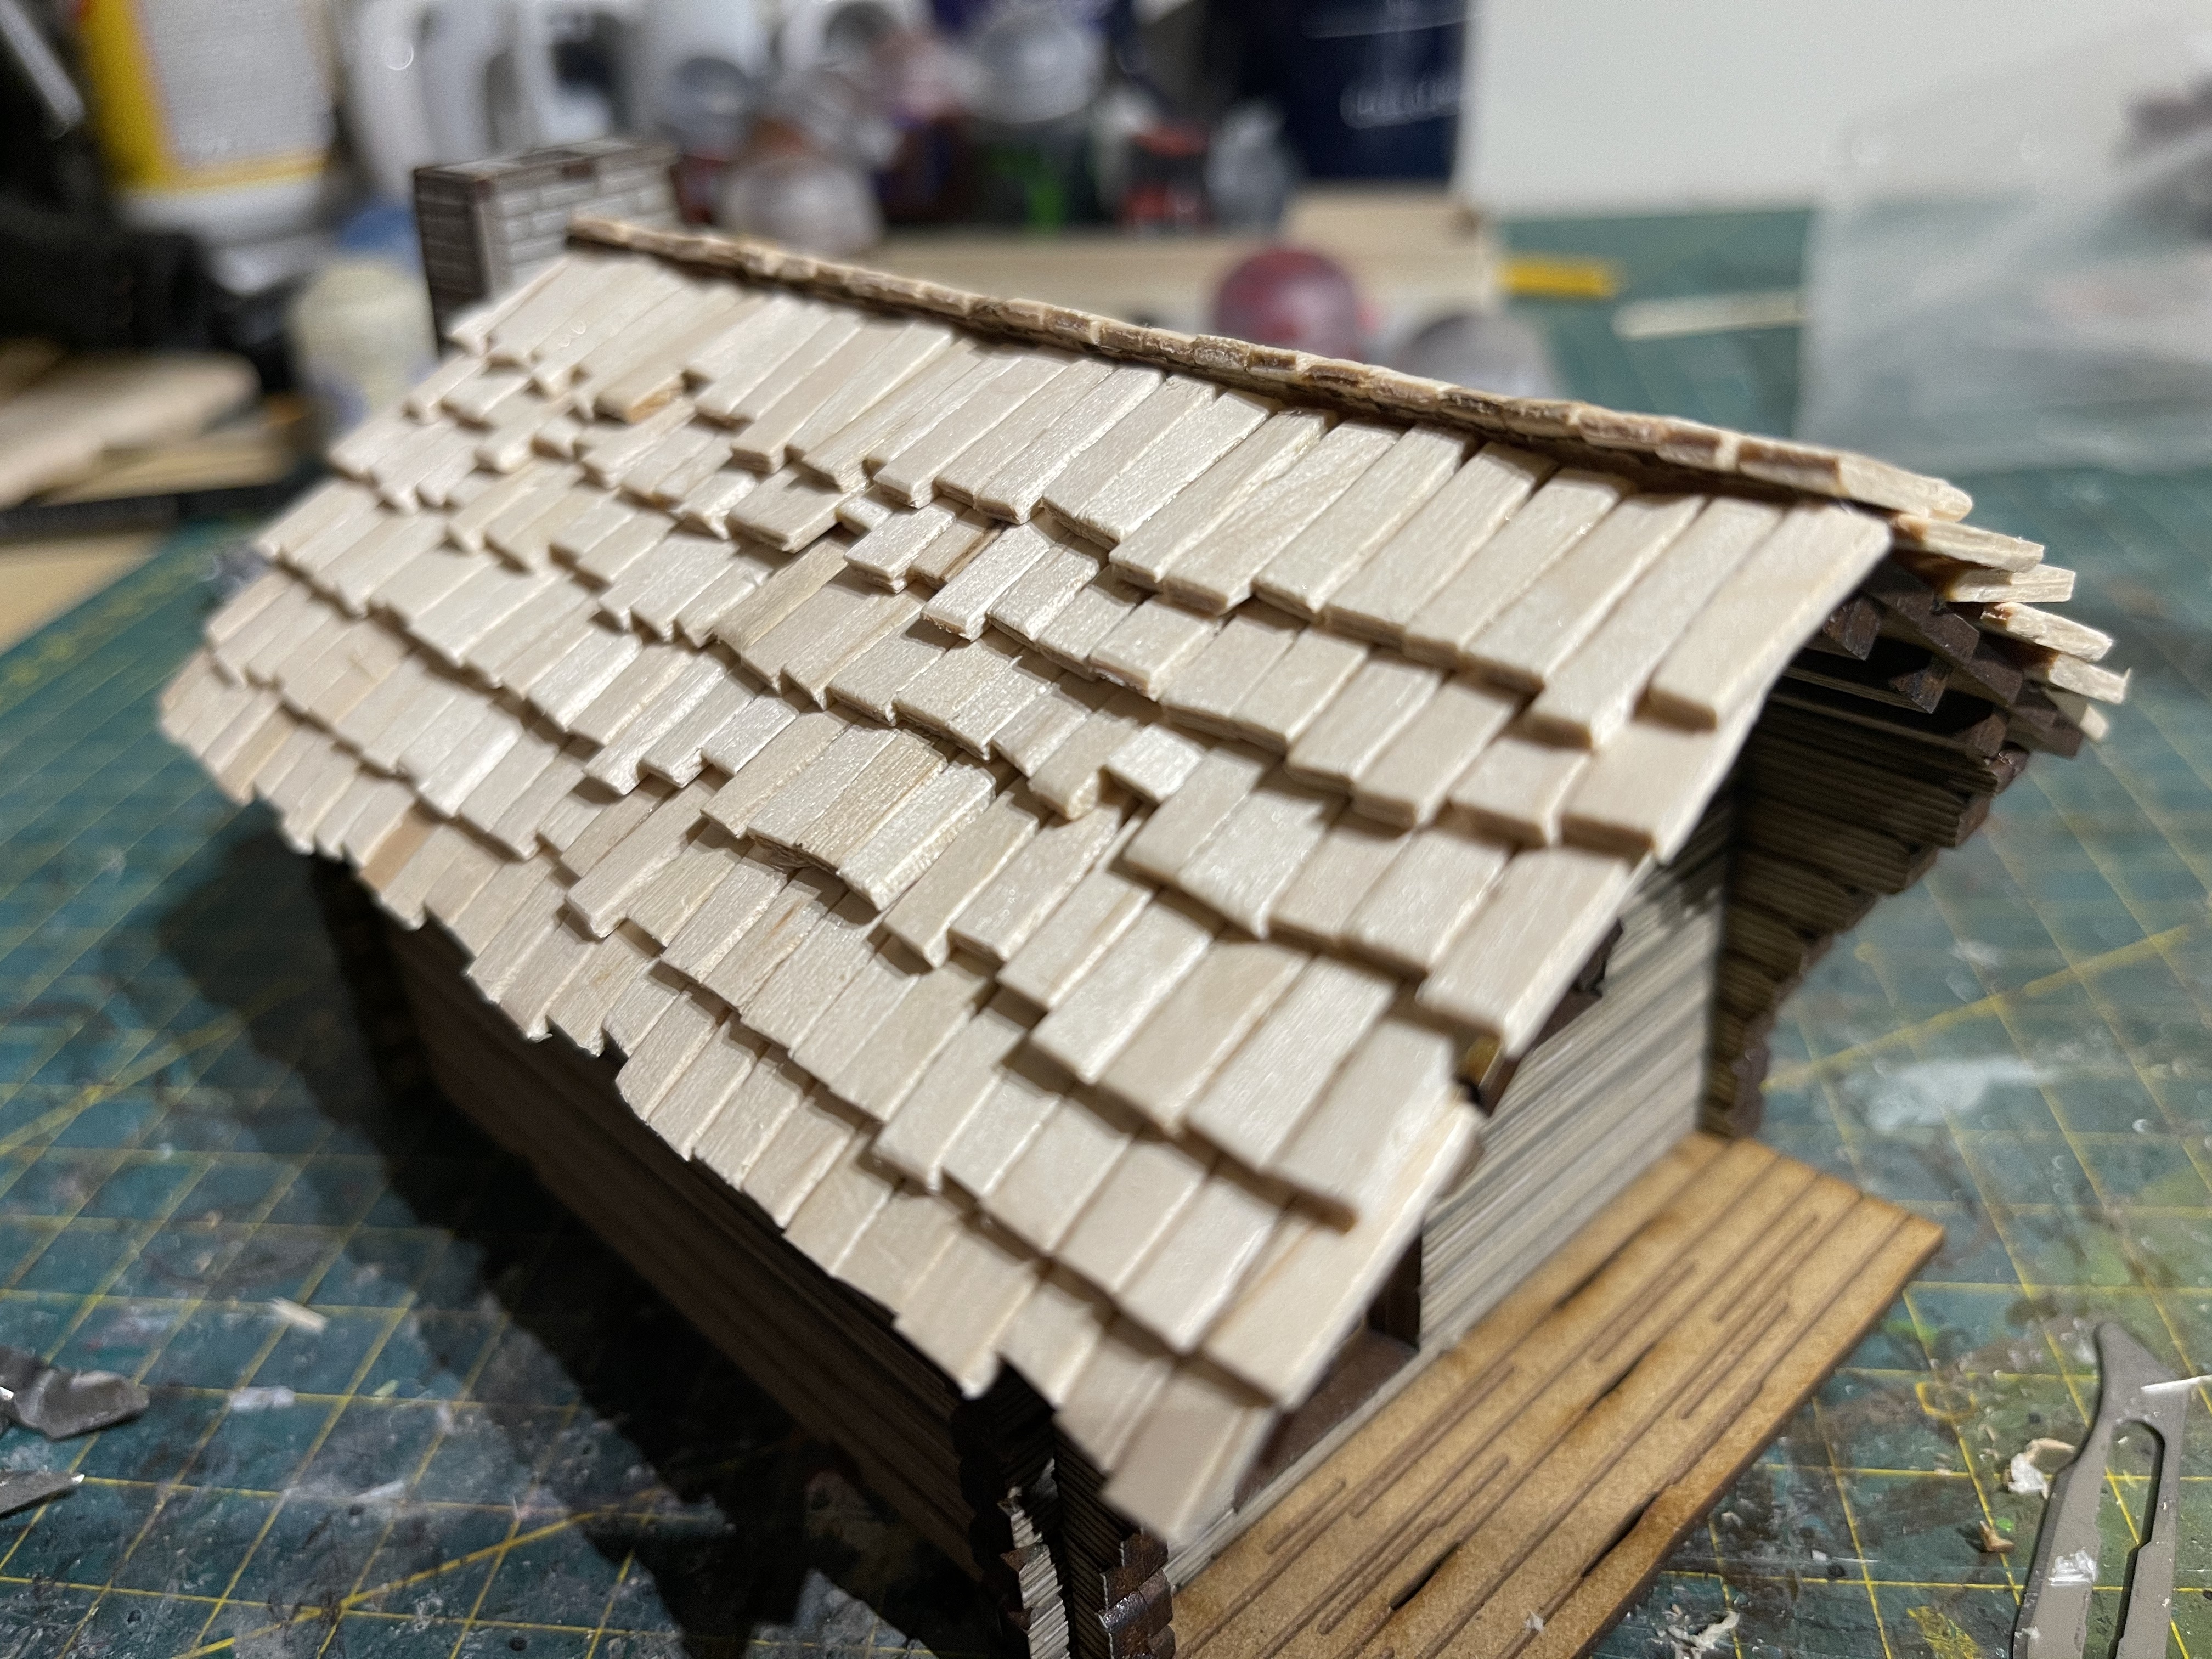
 Painted the roof tiles with soft tone dip
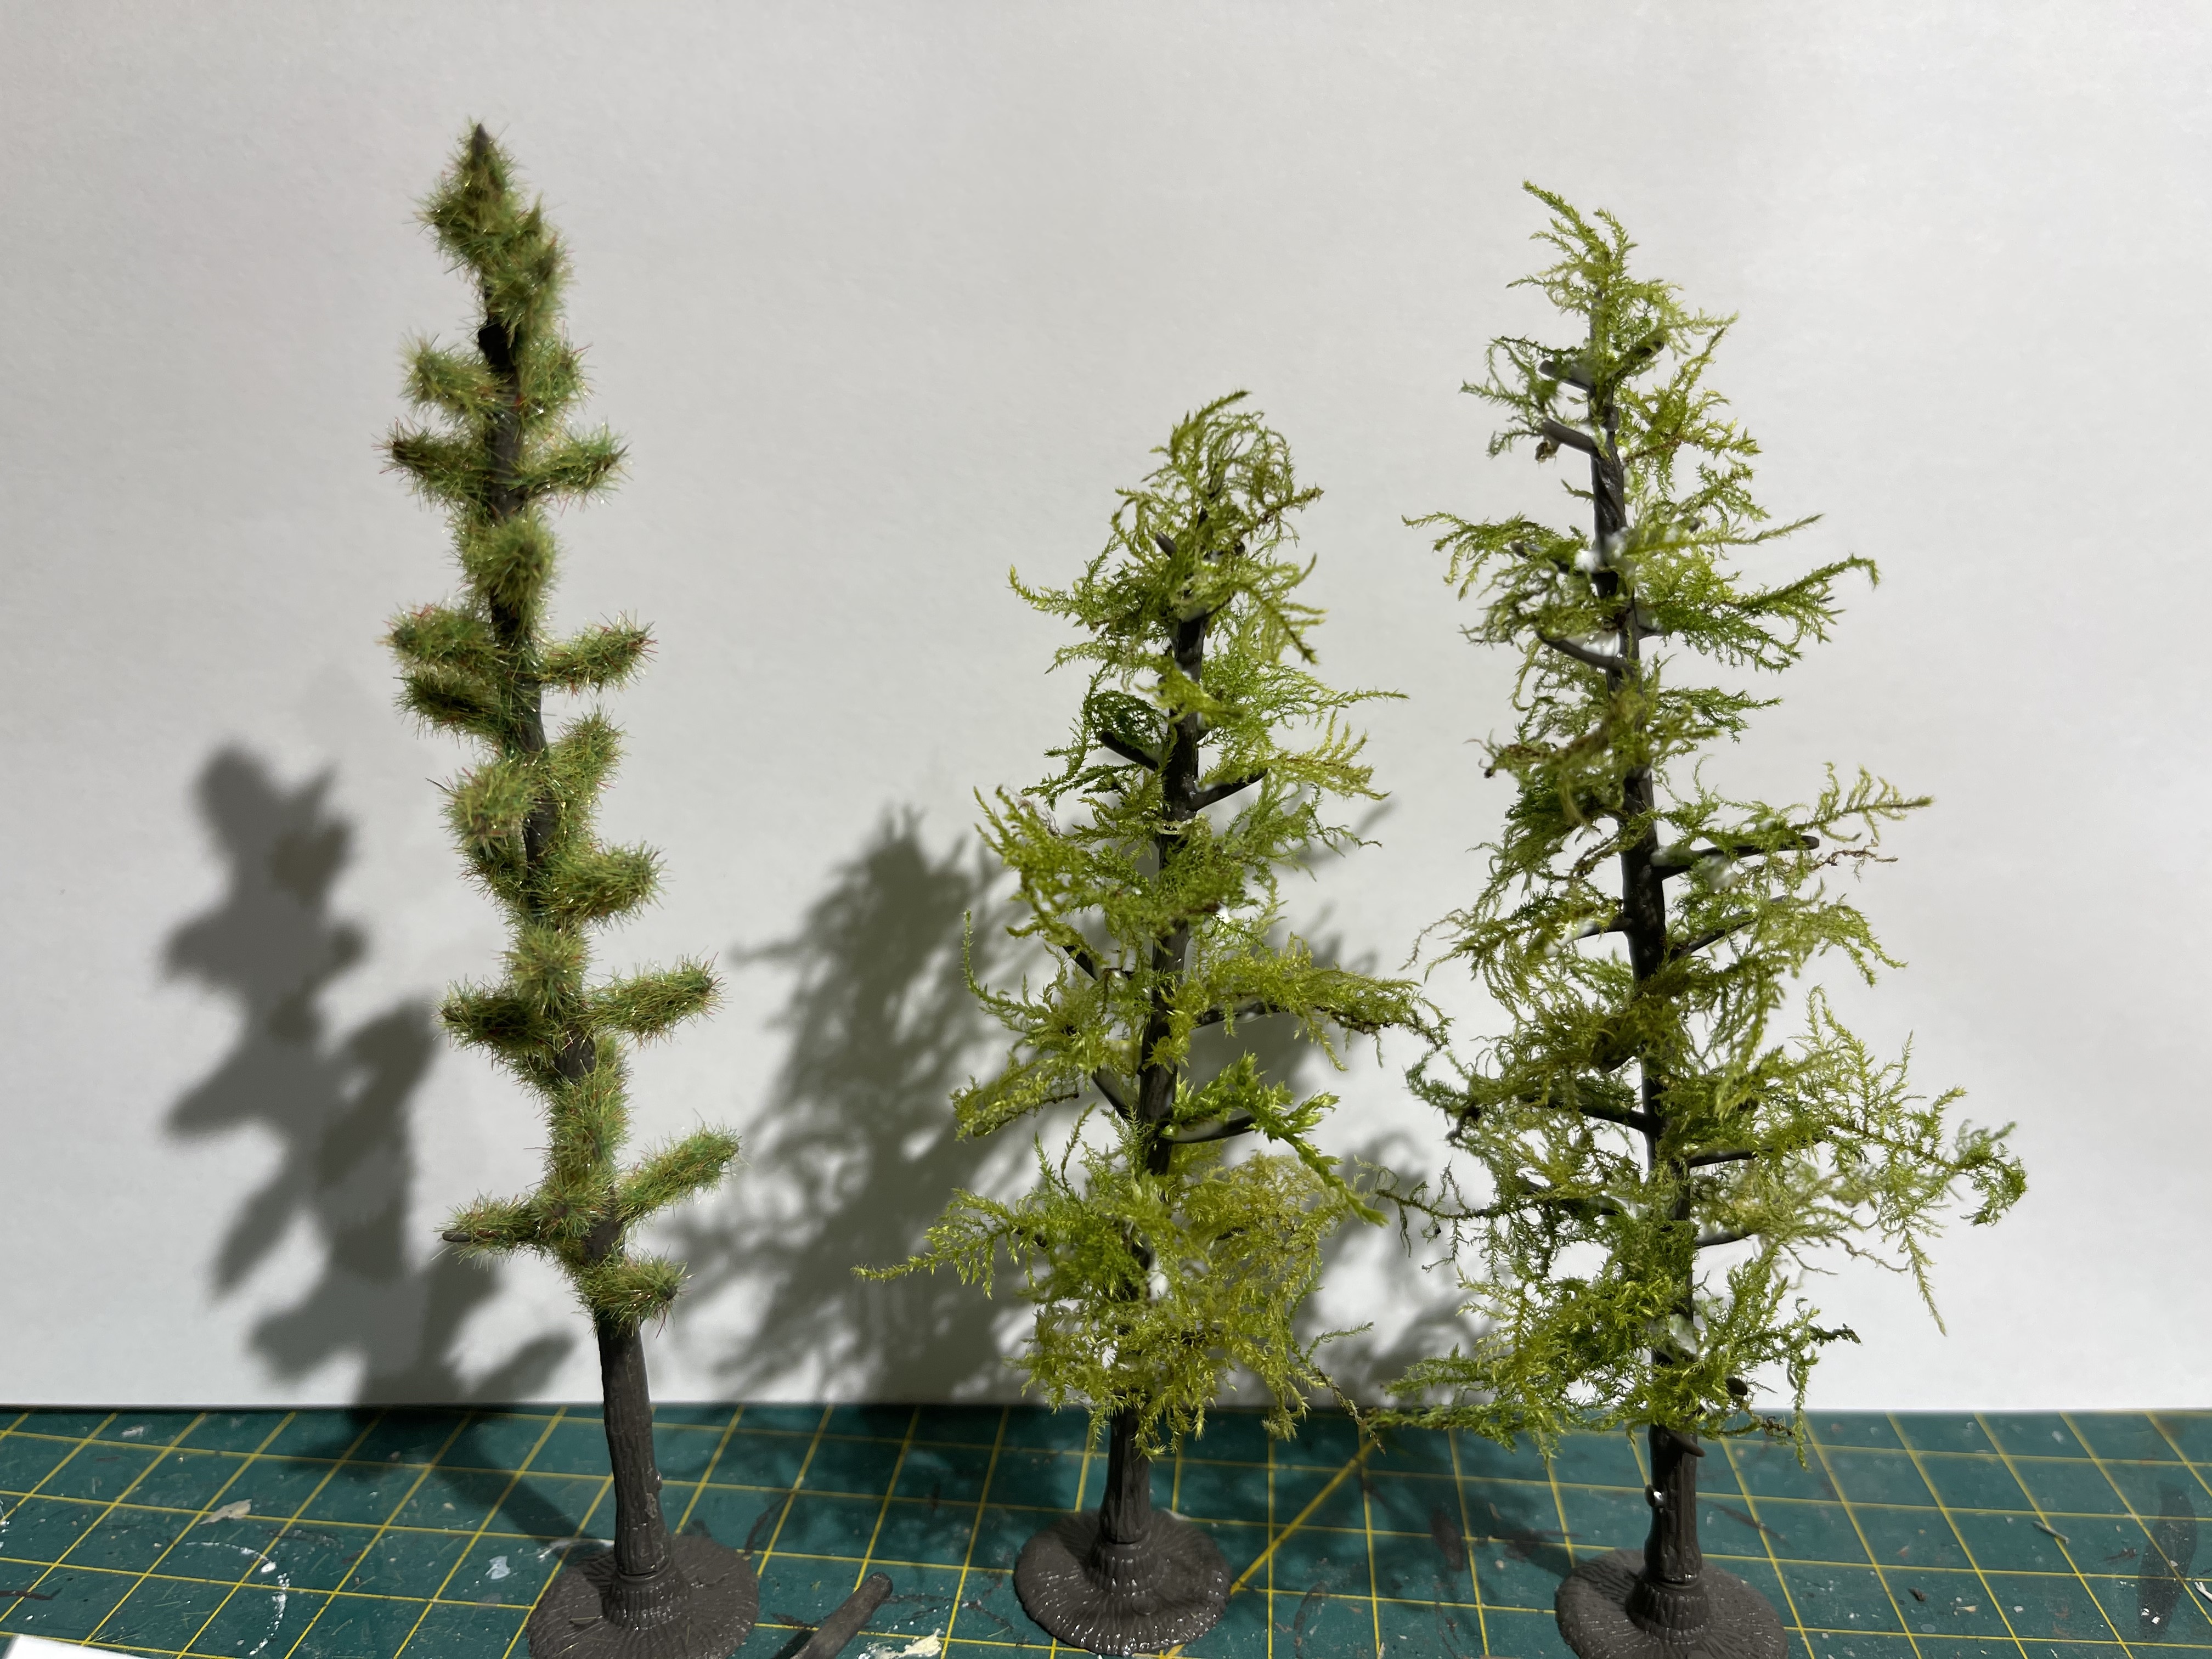
I have done some substructure tests for the fir trees.
after seeing a few people play with static grass I thought I would give it a go. admittedly I don’t have 10mm to start it off, just the normal 3mm from GW and its reasonable for me to say it failed and looks pants.
so I can either go and spend some money on the right static grass or I can default to my previous successes.
Moss from the garden. firstly, its free so bonus! and secondly I don’t need to worry about wastage. some bits of it are better than others but if I don’t use it I can either bin it or put it aside for making ground scatter.
I will end up spraying it with 3m contact glue, sprinkle with foam flock and then seal with watered down PVA and varnish. worked a treat for my afghan deciduous trees.
test of layout
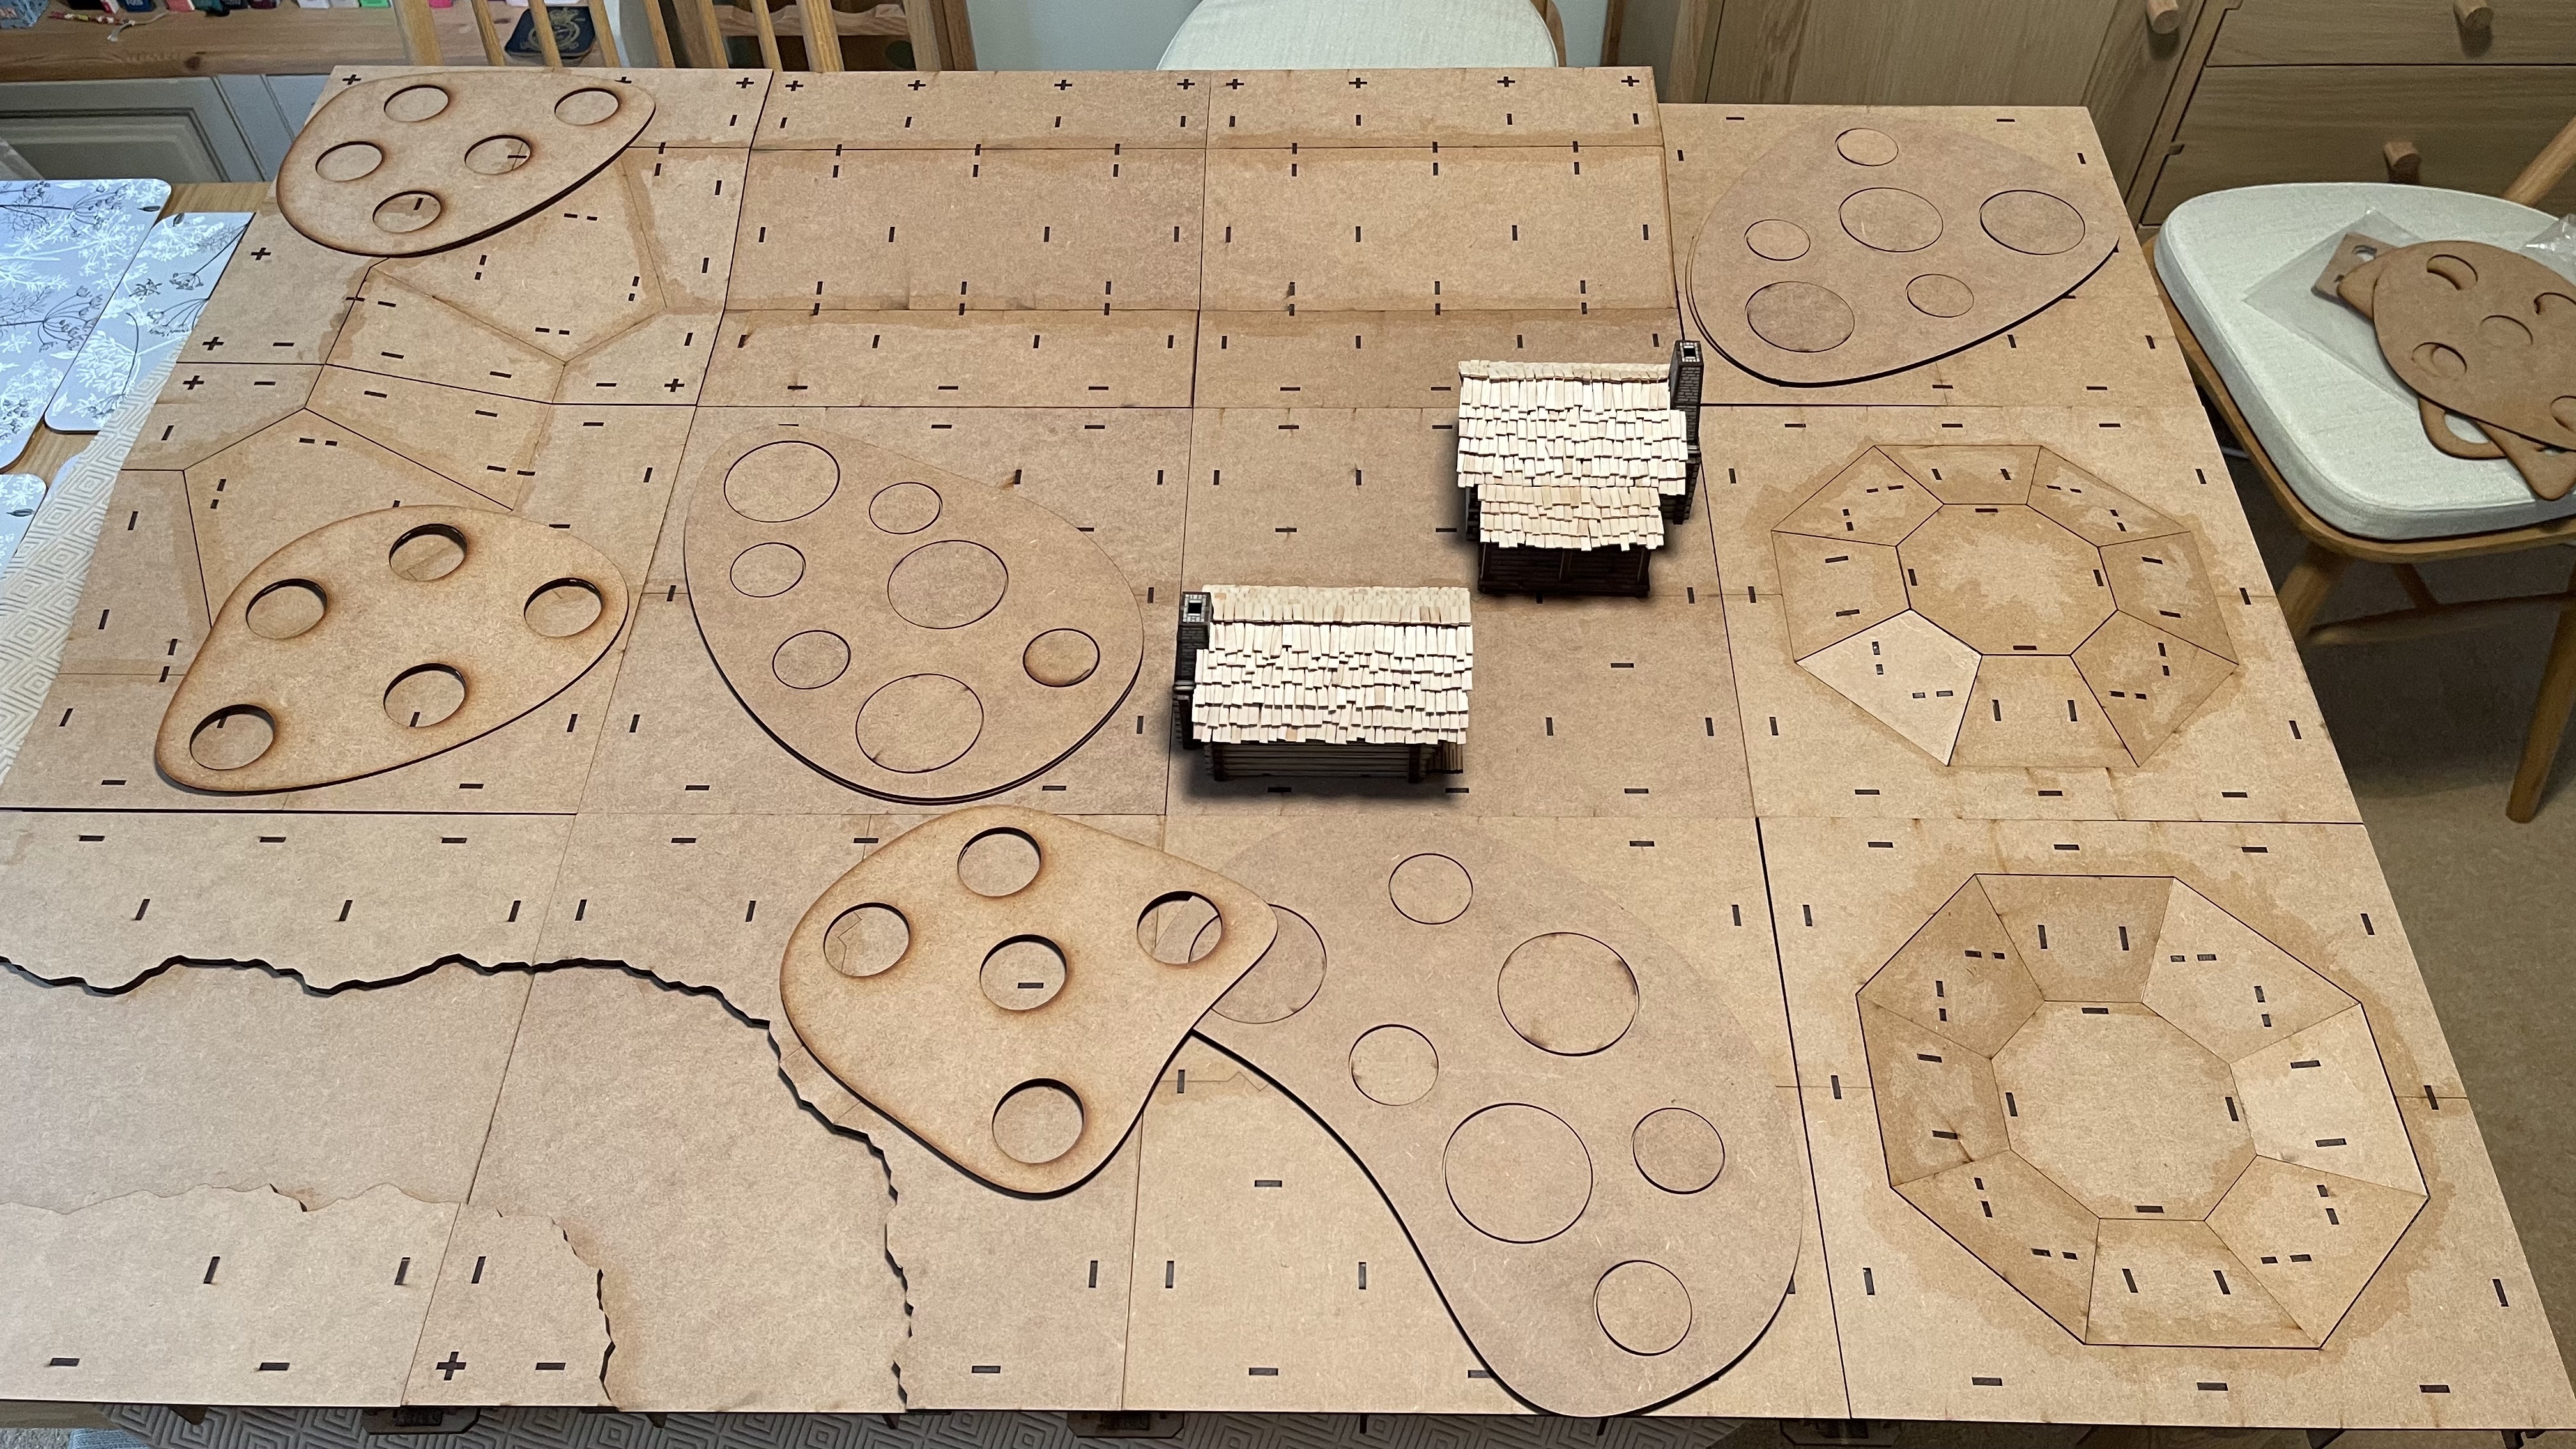
For me to make this a nicely modular board I am going to have to get a few more of the hills, corners and flats etc. the river won’t be going anywhere at this rate either. that’s not something I had considered when buying it.
I am really impressed by the sturdiness of the tiles though.
I have plans to redo my afghan terrain using these tiles now too as it would be so much easier to use going forwards.
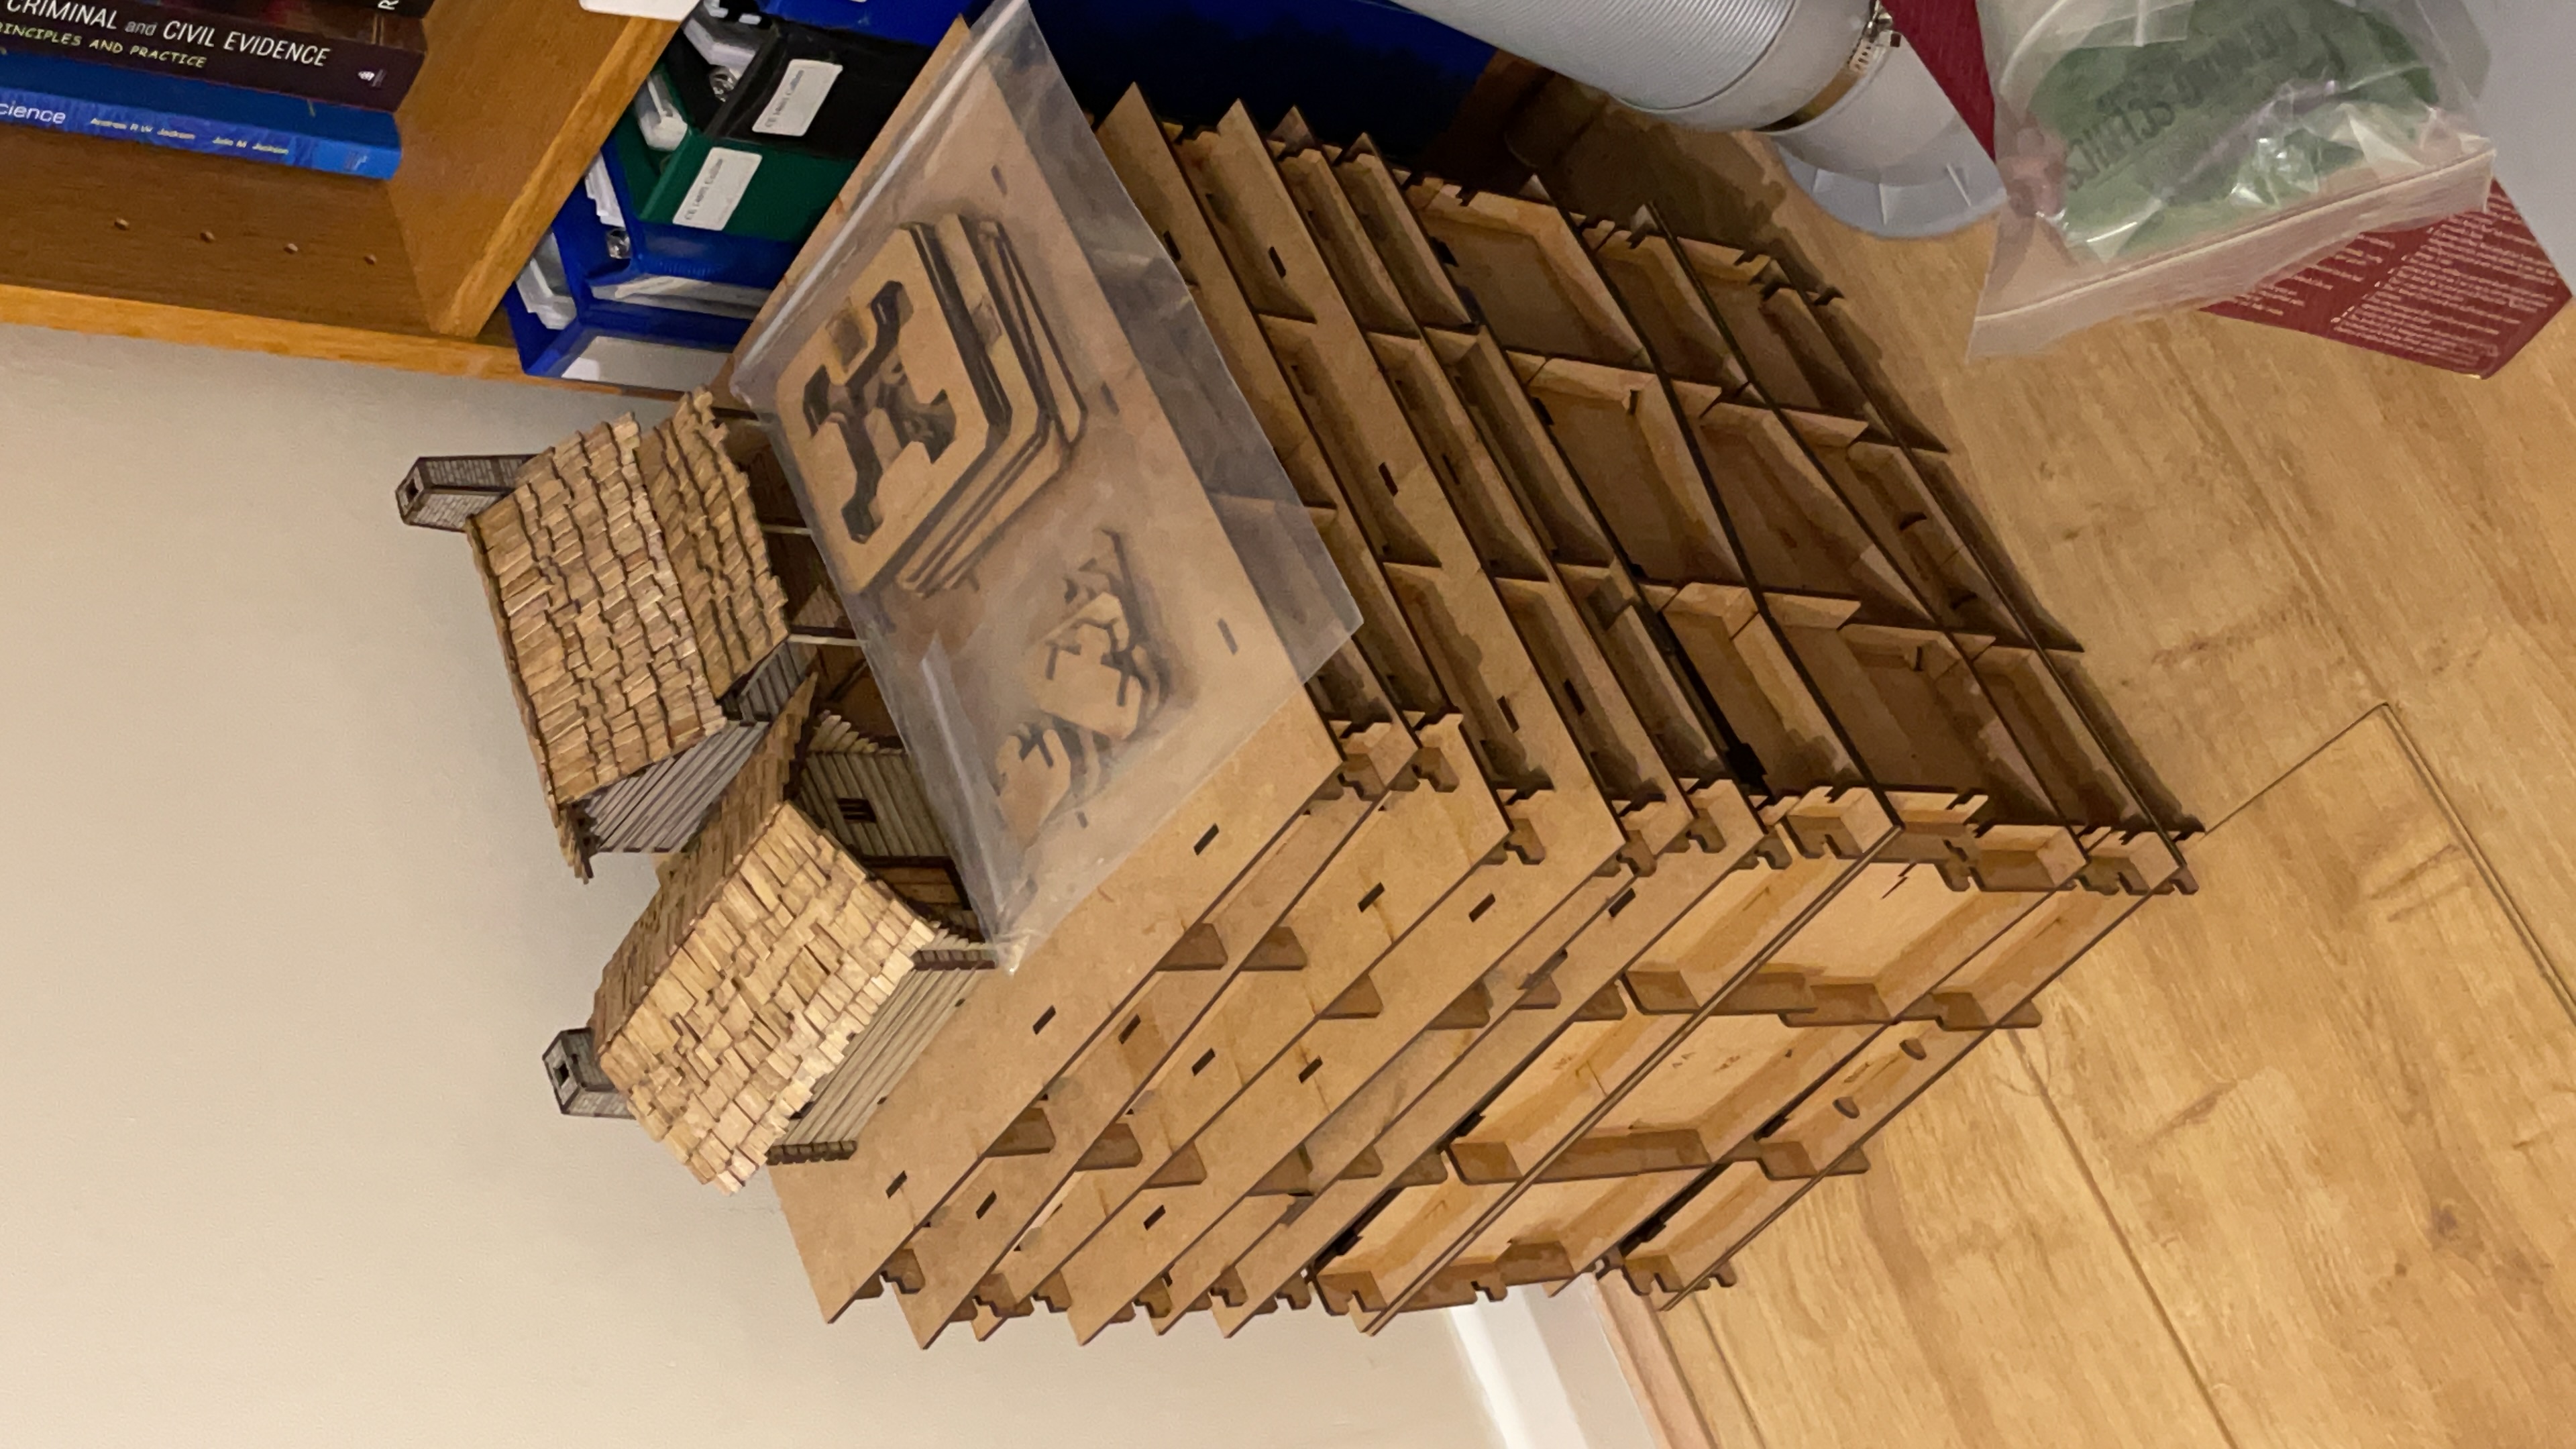
Anomalia tiles arrived and doing the roofing
 Box of HDF and a few questions from my wife
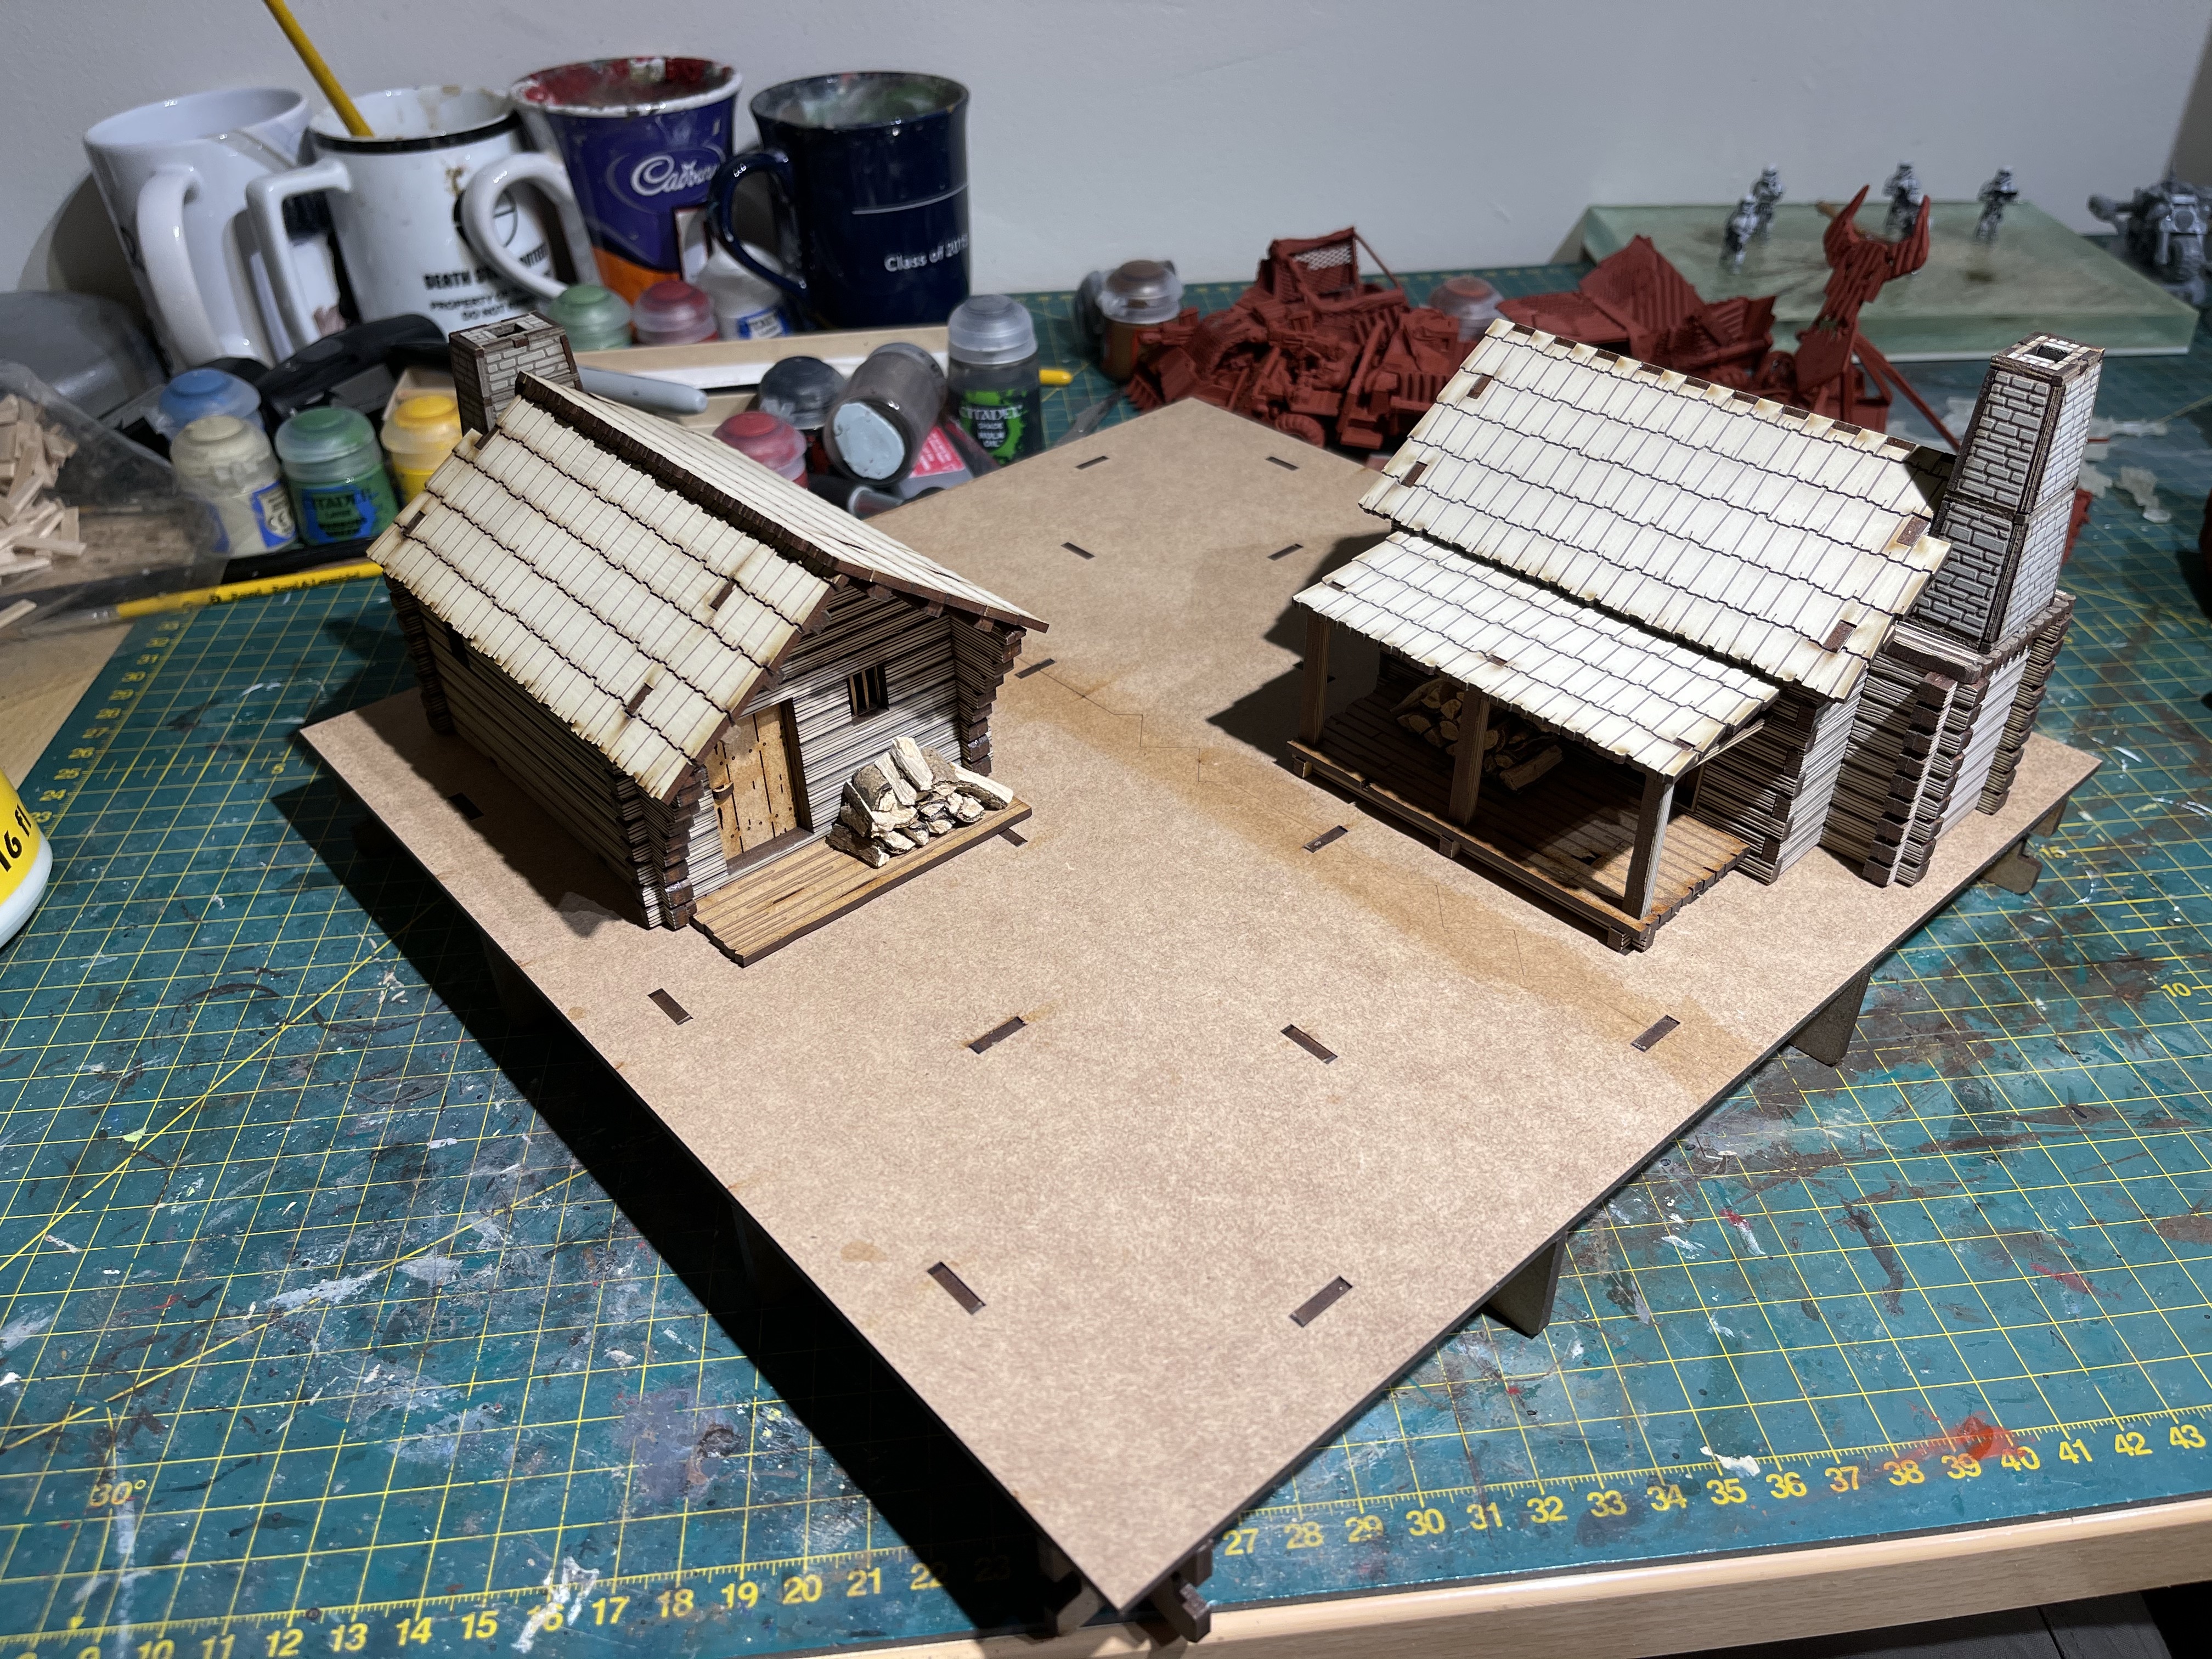 the proposed layout for the settler outpost tile
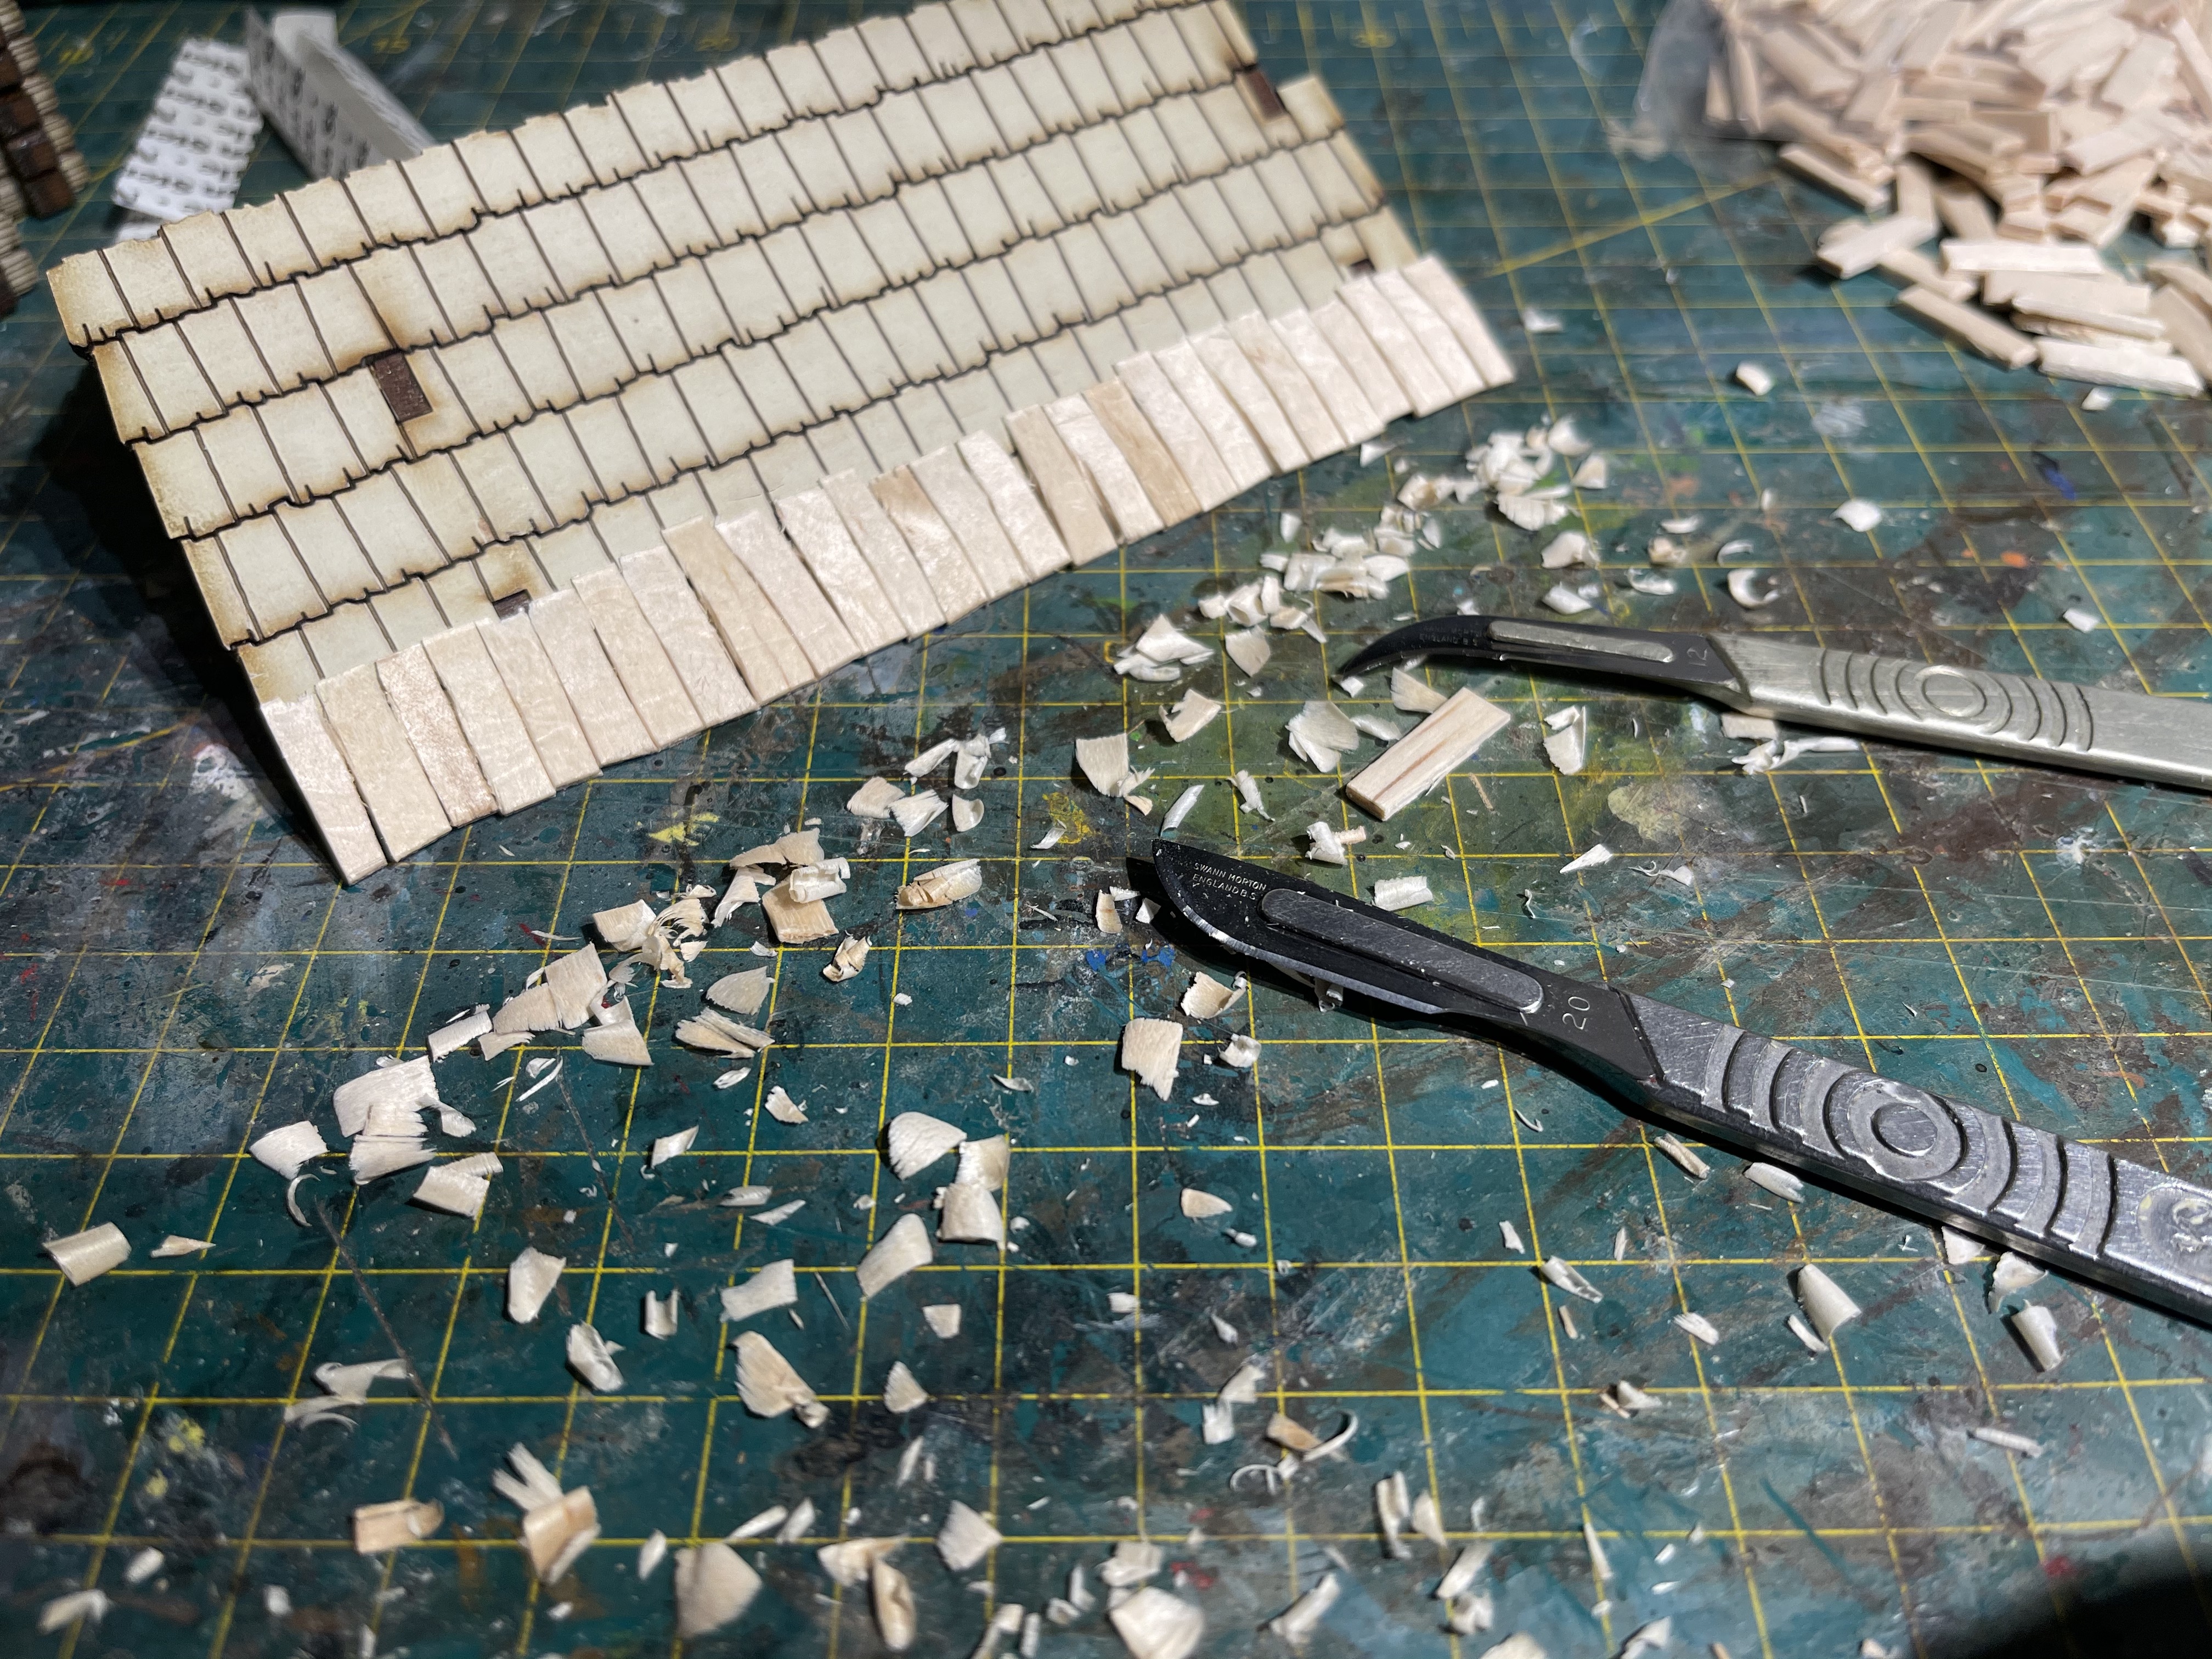 cutting down the top of the first layer of shingles
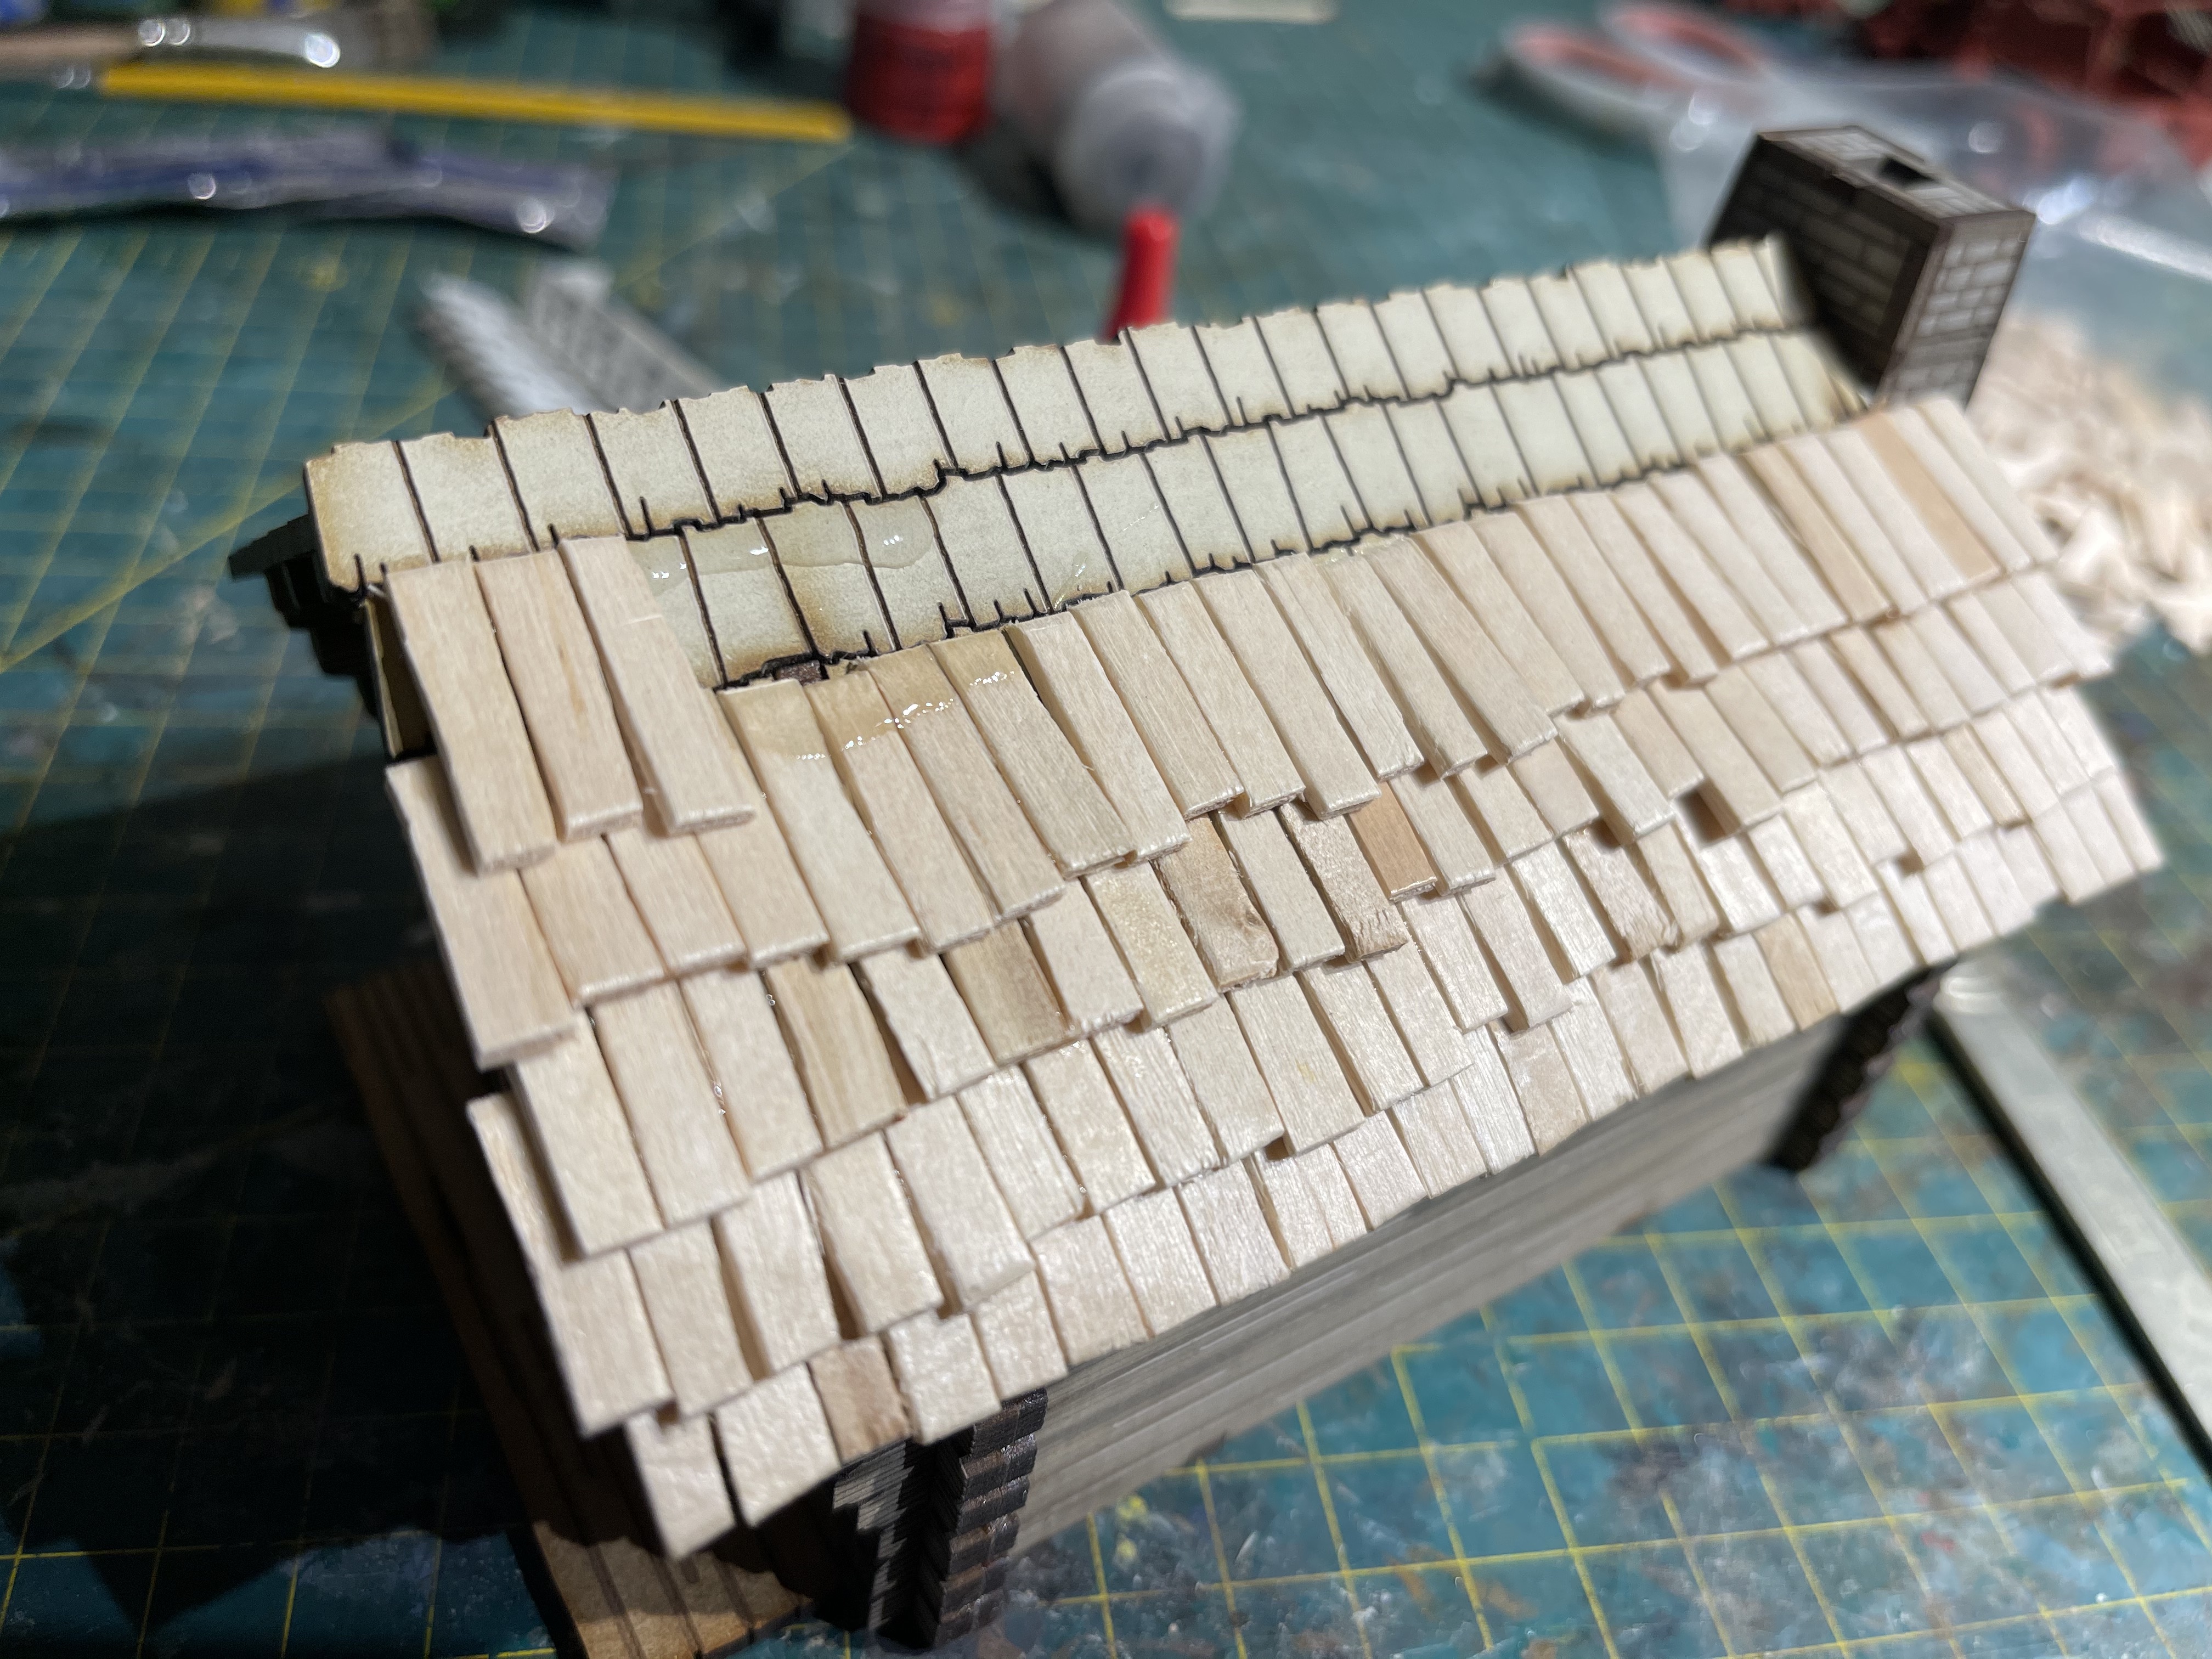 offset each layer for it to work as a roof
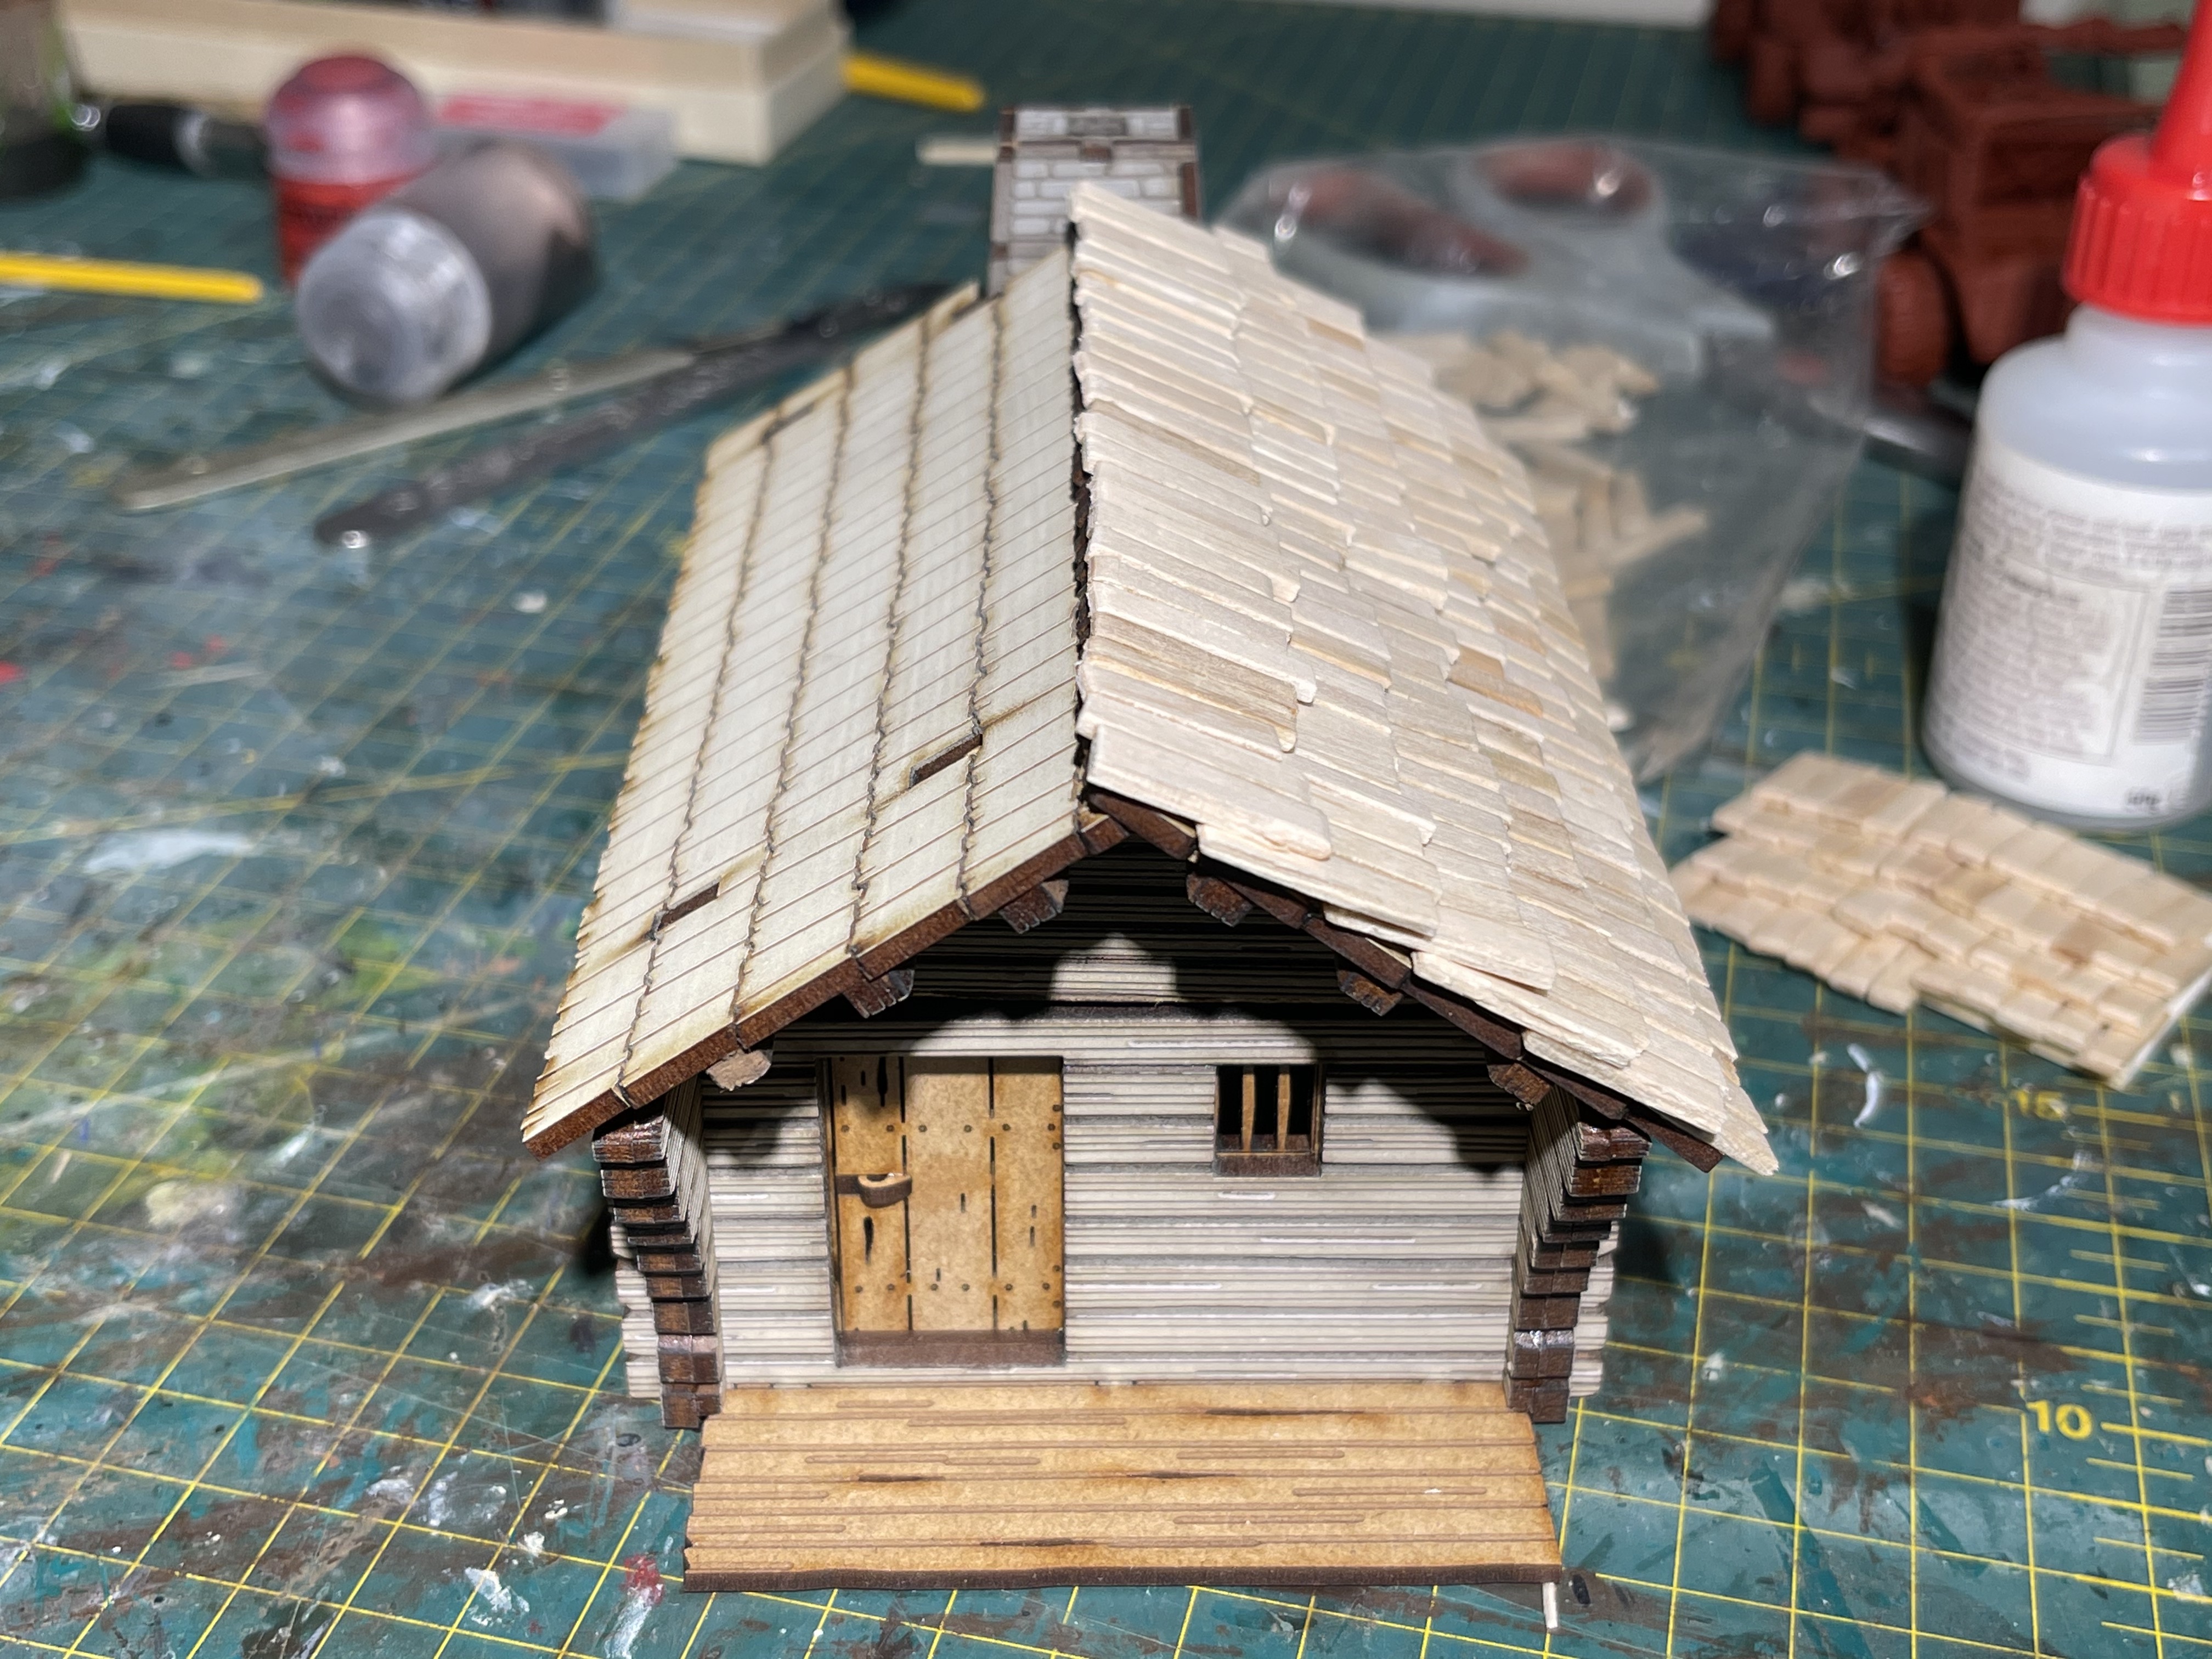
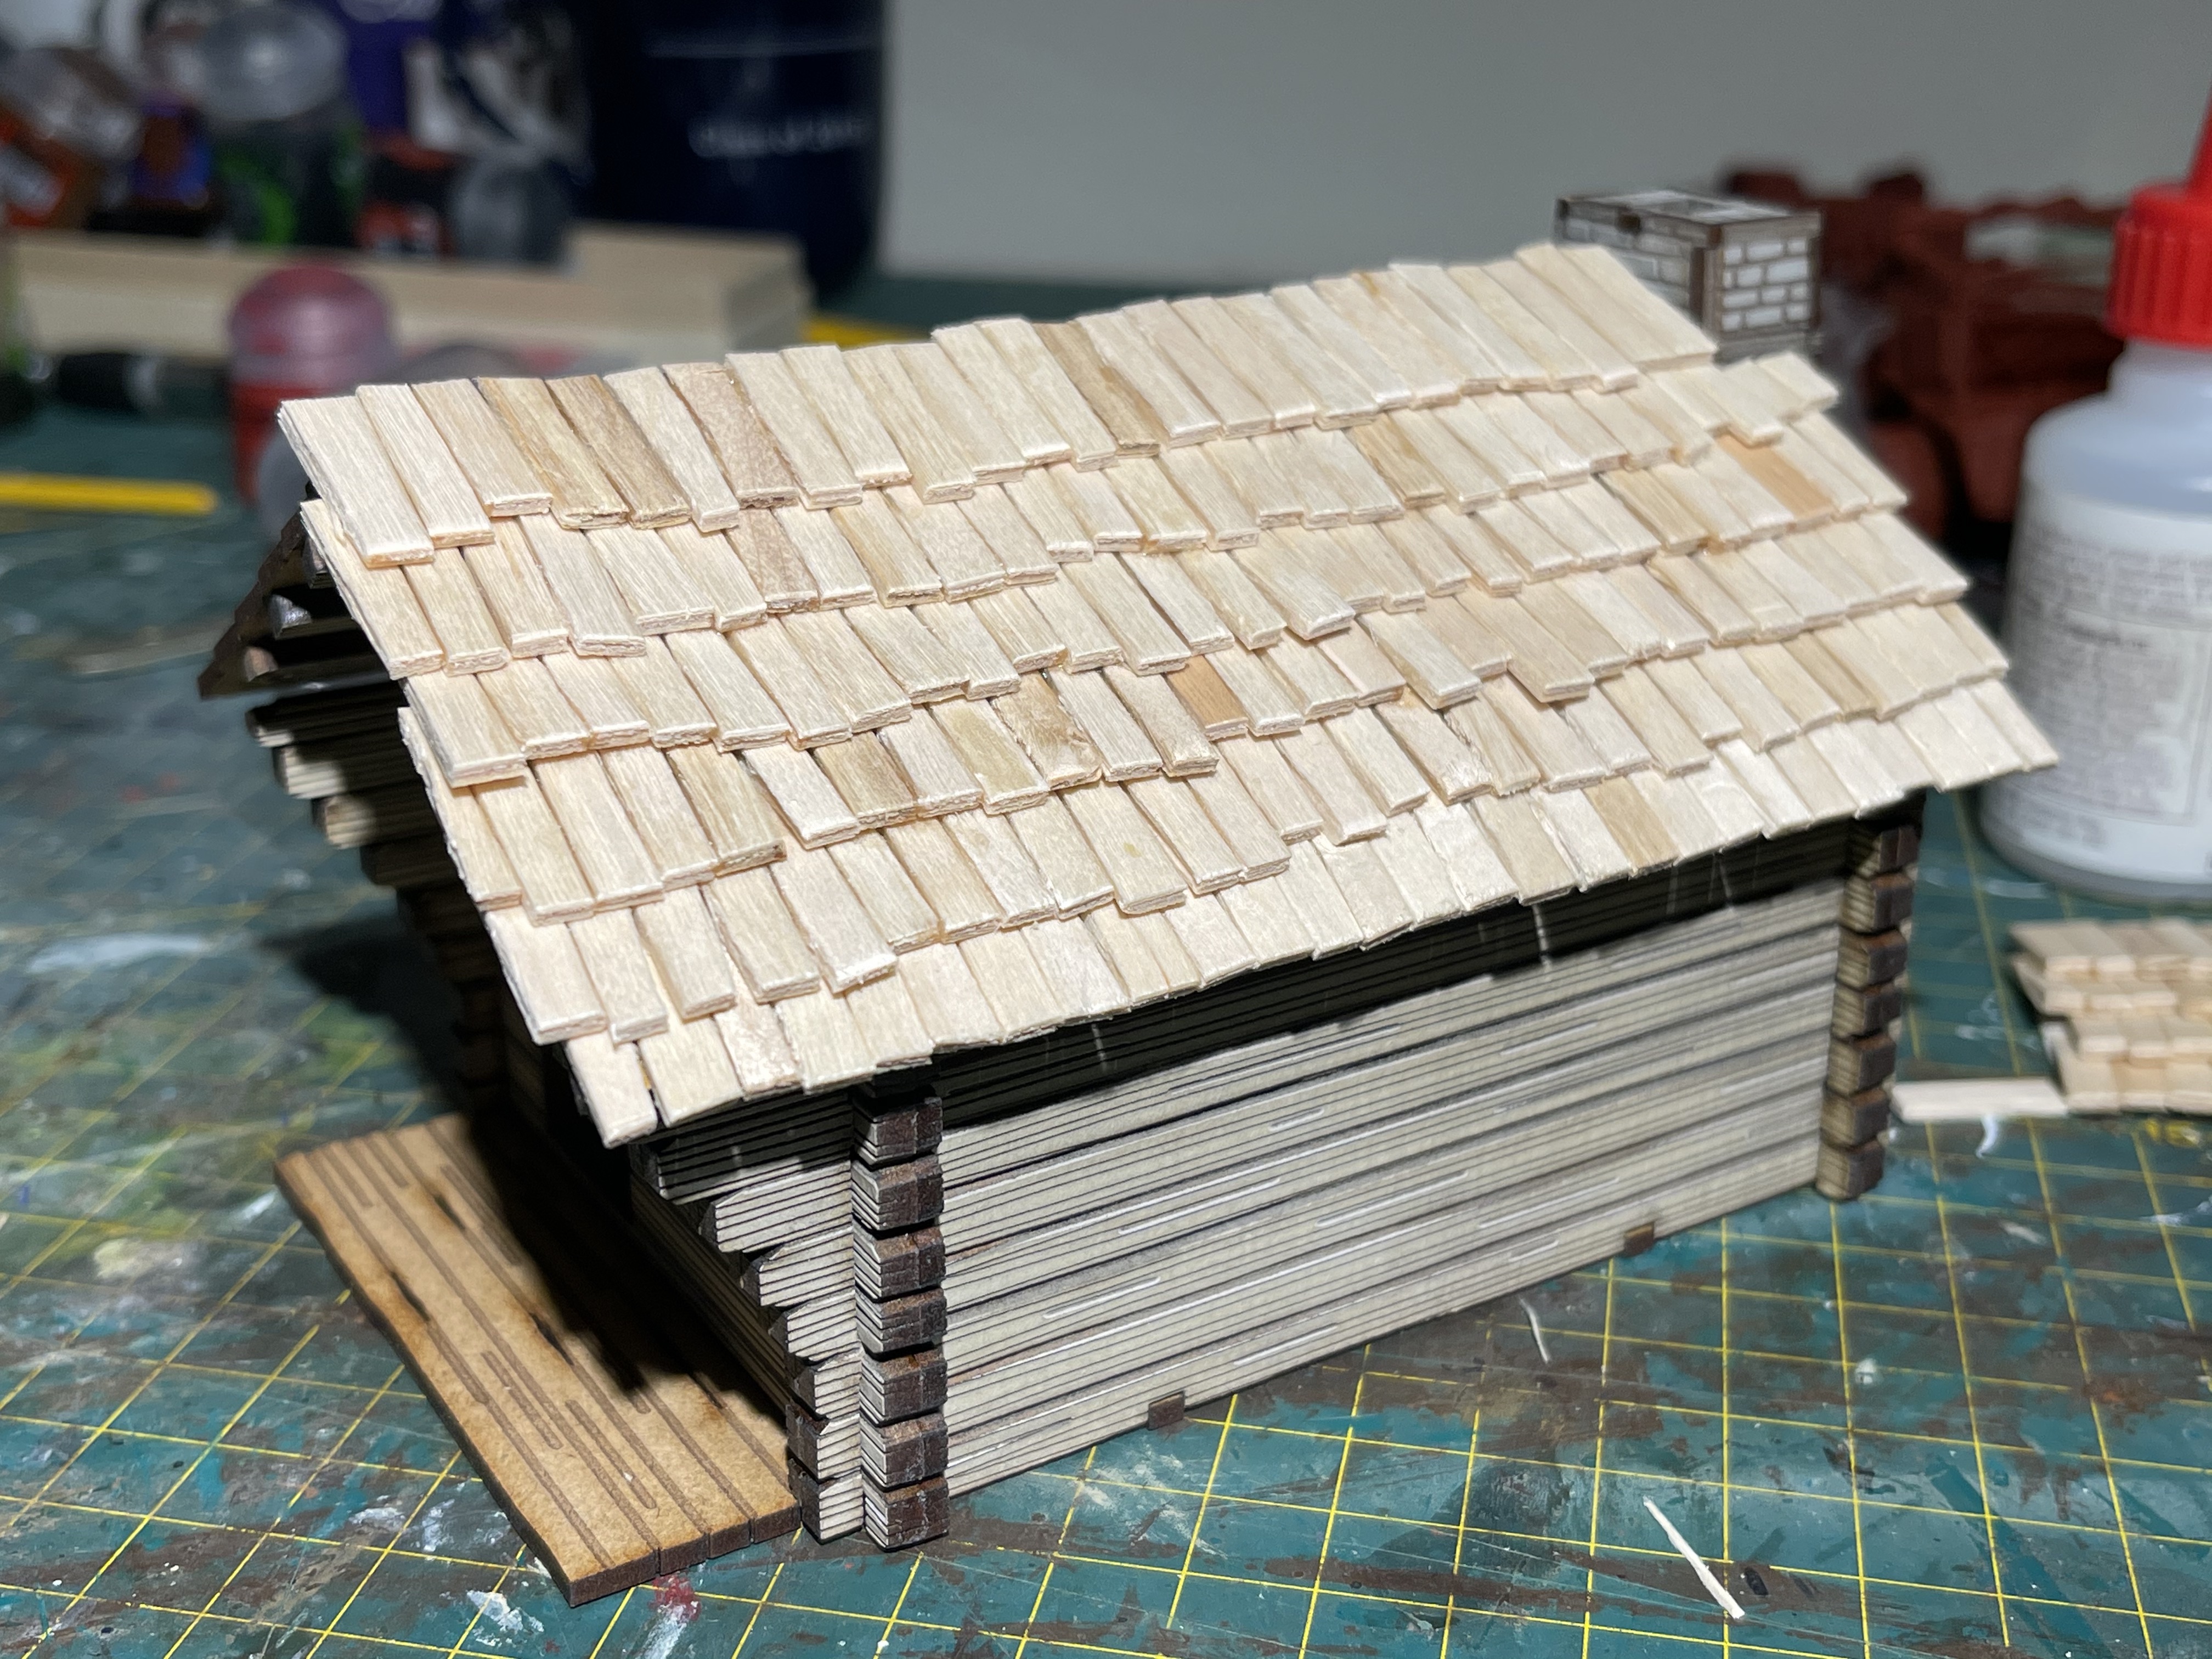
 tying it in under the previous layer for weather proofing
so I committed to redoing the roof on both the huts now. I still need to find a way to dull it down (army painter dip perhaps).
I discovered that what I thought I would need to do both of the roofs was only just enough to do one! there is more popsicle stick chopping coming up in my future.
I kept the overlap at the top as that is how they did it. the top boards from the prevailing weather side extend above the Ridgeline to stop water entering the house at that point. This did also dictate the layout on the tile somewhat as both roofs need to be orientated the same direction for it to make sense.
The Anomalia tiles were not hard to build, just time consuming. I used PVA (Mod Podge as that’s what I had) to glue them and now they strike me as being pretty study to be honest. whether I love them when done remains to be seen but so far I am happy with them.