


![A Perfect Zombie Apocalypse Starter Set? Civilians & Survivors Review | Wargames Atlantic [7 Days Early Access]](https://images.beastsofwar.com/2026/01/unboxing-wargames-atlantic-civilians-_-survivors-1_2-coverimage-225-127.jpg)
![Wild Australia Wargaming? 28mm Ned Kelly Gang & Victorian Police Review [7 Days Early Access]](https://images.beastsofwar.com/2026/01/unboxing-traders-galaxy-australiana-ned-kelly-gang-_-victorian-police-coverimage-225-127.jpg)


How to be an Armoured Farmer, building Hobart’s Funnies in Glorious 15mm (and maybe 28mm if they arrive in time!)


Recommendations: 2233
About the Project
Right then, having avoided any sort of Spring cleaning challenge in the past, I have decided to use this year's one to get something done that I have been gathering bits for over the past few years and finally finish and assemble all of my Hobart's Funnies. To get technical these are Armoured Vehicle Royal Engineers (AVRE) tanks, using the Churchill chassis as a base. I will also throw in some Sherman Crabs (Flail tanks). I have gathered a few books for reference so that I can paint and mark them up for one of the Armoured Assault Squadrons Royal Engineer (either 77, or 79) that landed ashore at Sword Beach and were the very first to see action on that beach; Plus the Sherman Crabs of A Squadron 22nd Dragoons. Whilst I want to be able to use the finished tanks in games depicting the D Day Landings (in Flames of War and Chain of Command at 15mm) I also want then to be versatile enough to be able to be used in later engagements that the 79th Armoured Division took part in (which is pretty much everything!). I hope you will find this of interest if you ever want to branch out into what the modern day Royal Engineers affectionately call being an armoured farmer.
Related Game: Flames of War: The World War II Miniatures Game
Related Company: Battlefront Miniatures
Related Genre: Historical
Related Contest: Spring Clean Hobby Challenge (Old)
This Project is Active
Have you had a wash yet?
Before starting any cutting out and gluing bits of shiny it is always good practice to give it a wash in warm soapy water. This ensures that any mould release oil/agent is cleaned off the surface and won’t interfere with either your glue of choice, or your paint. This is especially necessary if you are a proponent of the Duncan Rhodes method of “two thin coats”.
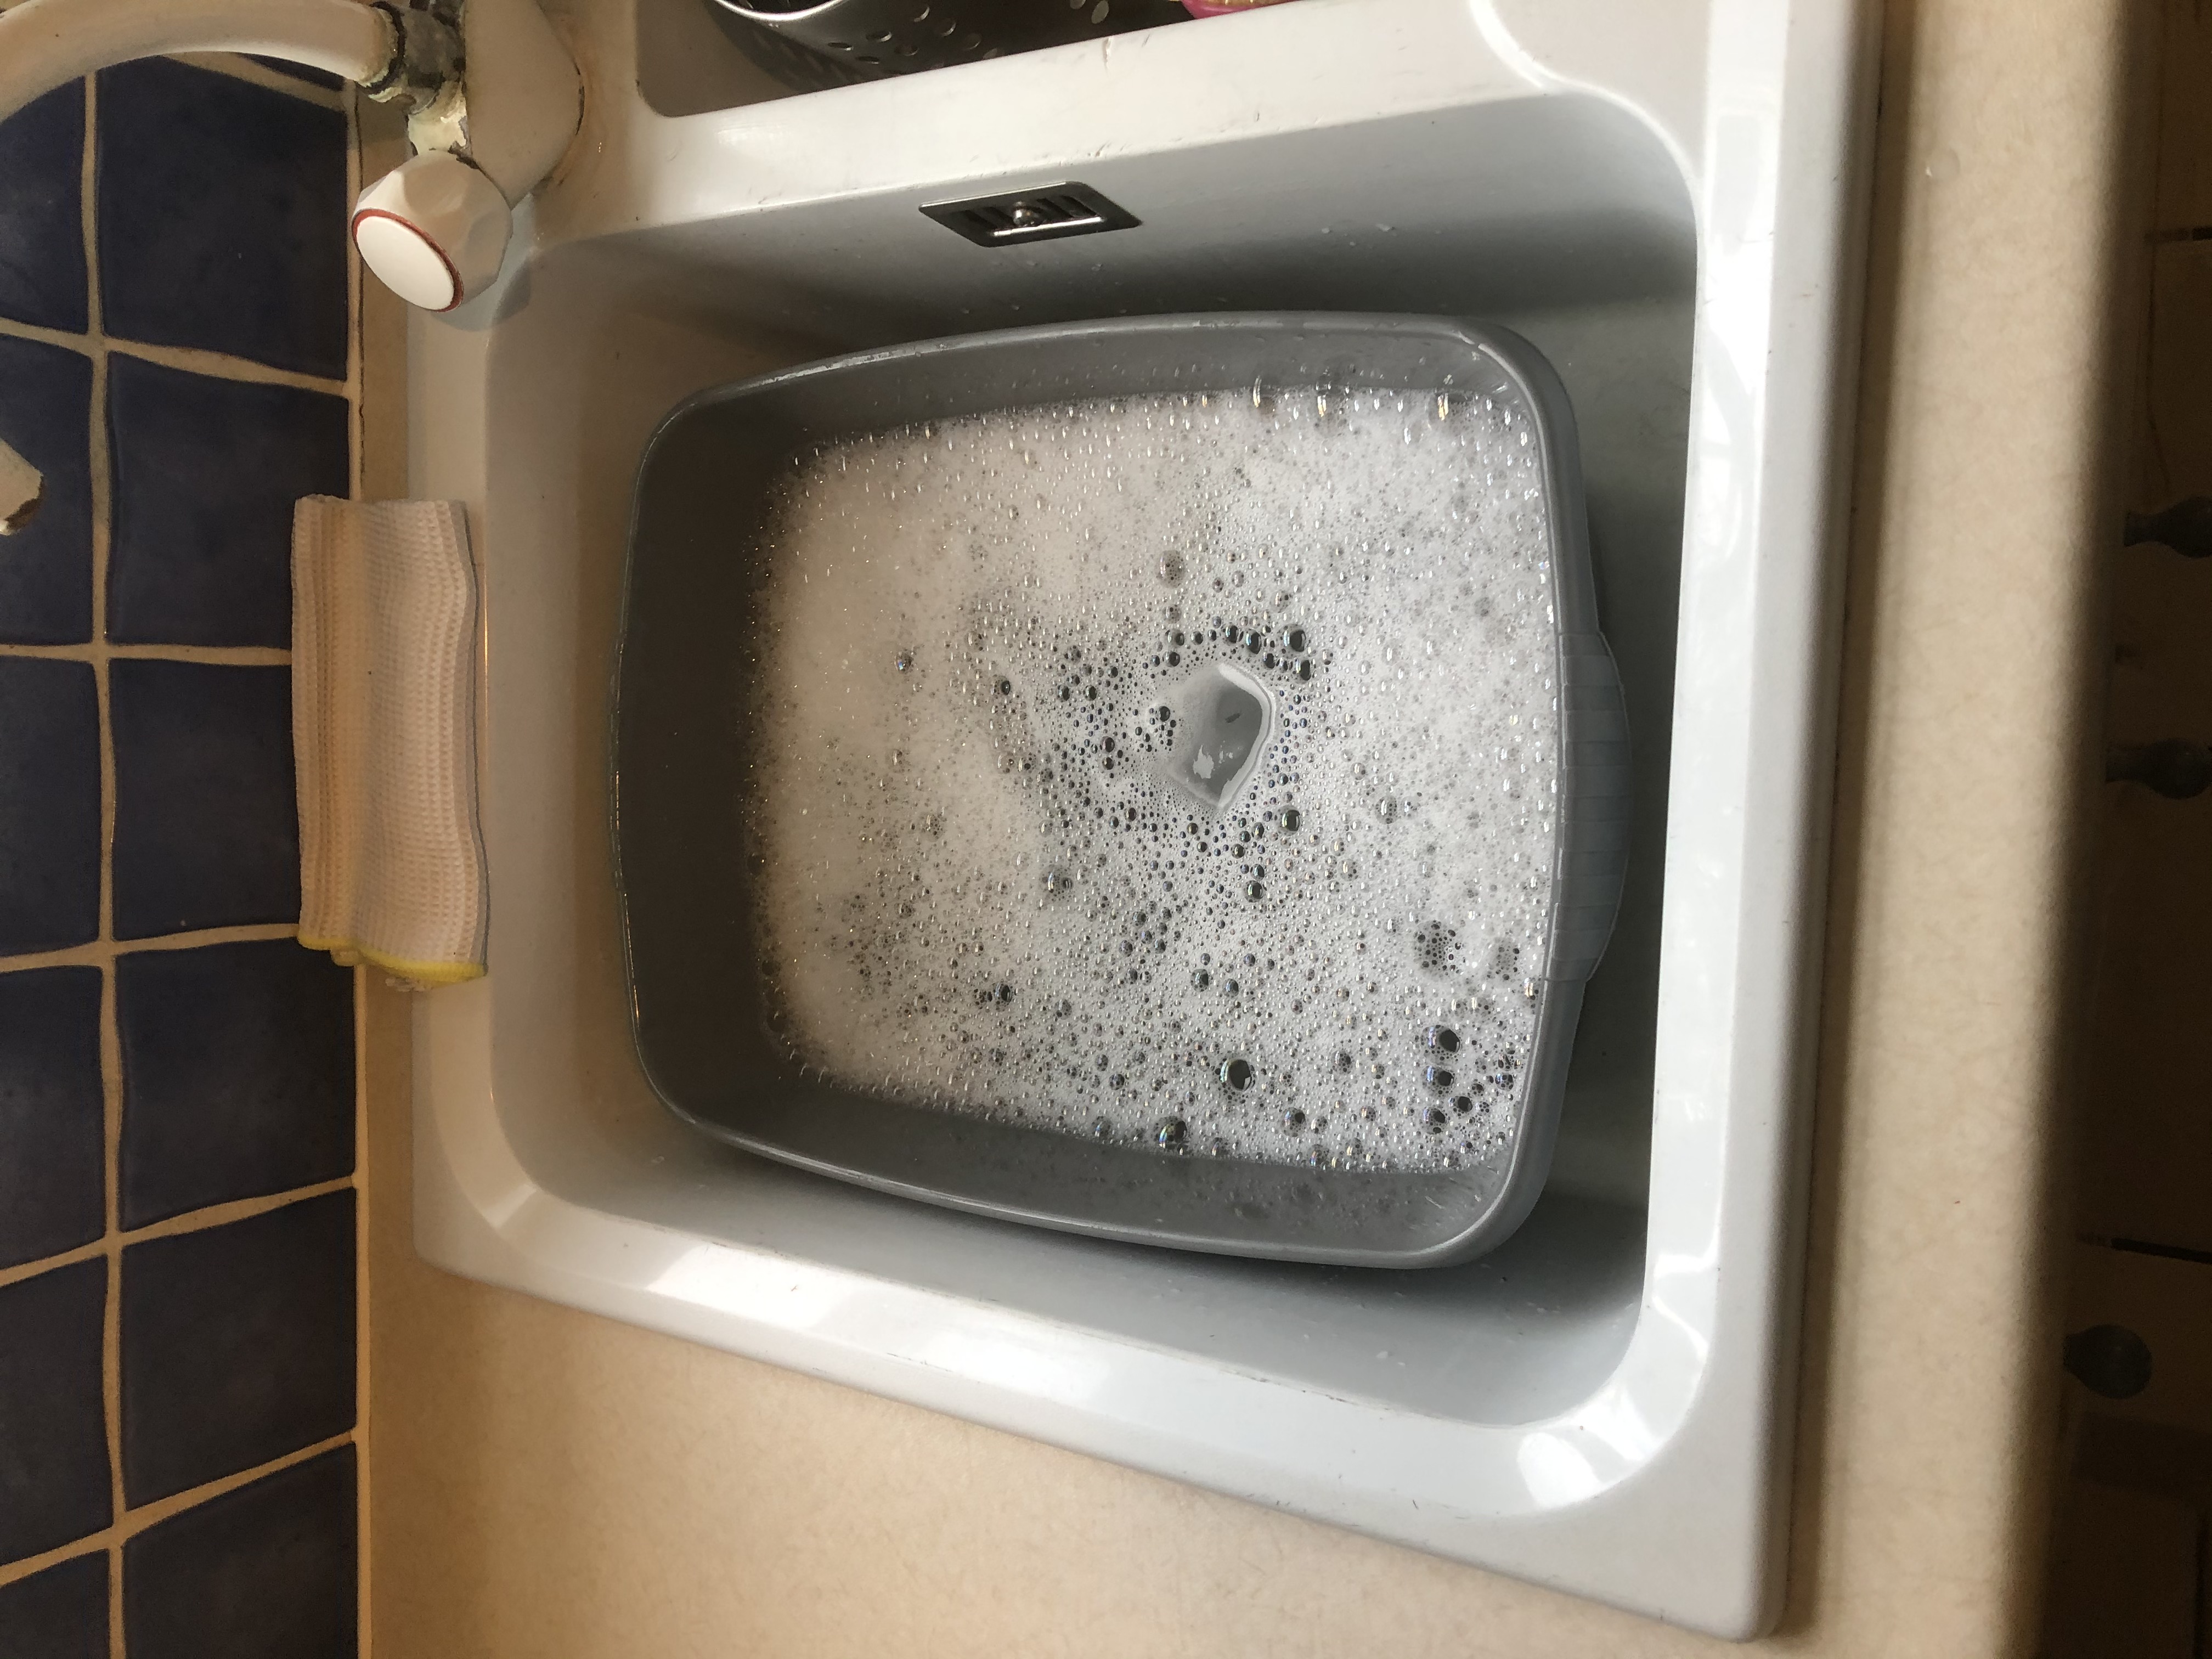 Said bowl of soapy water and a trusty old toothbrush
 Make sure you scrub all surfaces to be sure and don't forget to rinse with clean cold water afterwards to remove any soap & bubbles.
The Heavy Stuff
And for the heavy stuff I have a Dremel. I mainly use it for trashing scenery and conversion stuff (as well as round the house). For this project I am going to see if I can’t use it to remove the resin plugs from the bottom of the Churchill ARKs. I will use the razor saw for the close up work and then this bad boy for the meat of it. You can see that I also have grinding disks, cutting saws, as well as smaller detailed grinders. The other key kit is safety related, a good quality face mask and eye protection. I have some better safety glasses (they are my old Army ballistic glasses, that I was issued for going to sandy places) but I also use these for work.
Brucey top tips!
If you are going to use a Dremel style tool try it on a bit of sprue or resin plug first. See at what speed it best cuts, and don’t be tempted to whack it on a spinal tap level 11, as you’ll most likely melt it into the model, or worst still skip it across all of your lovely details.
If you are cutting, grinding, or filing resin, wear a mask. The one in the photo is the minimum grade I would recommend, it is an FFP3 grade which is suitable for working with asbestos, which is probably the worst sh*t you can mess with, so will be good enough for hobbying. They are easy enough to get hold of in most DIY shops and aren’t that expensive.
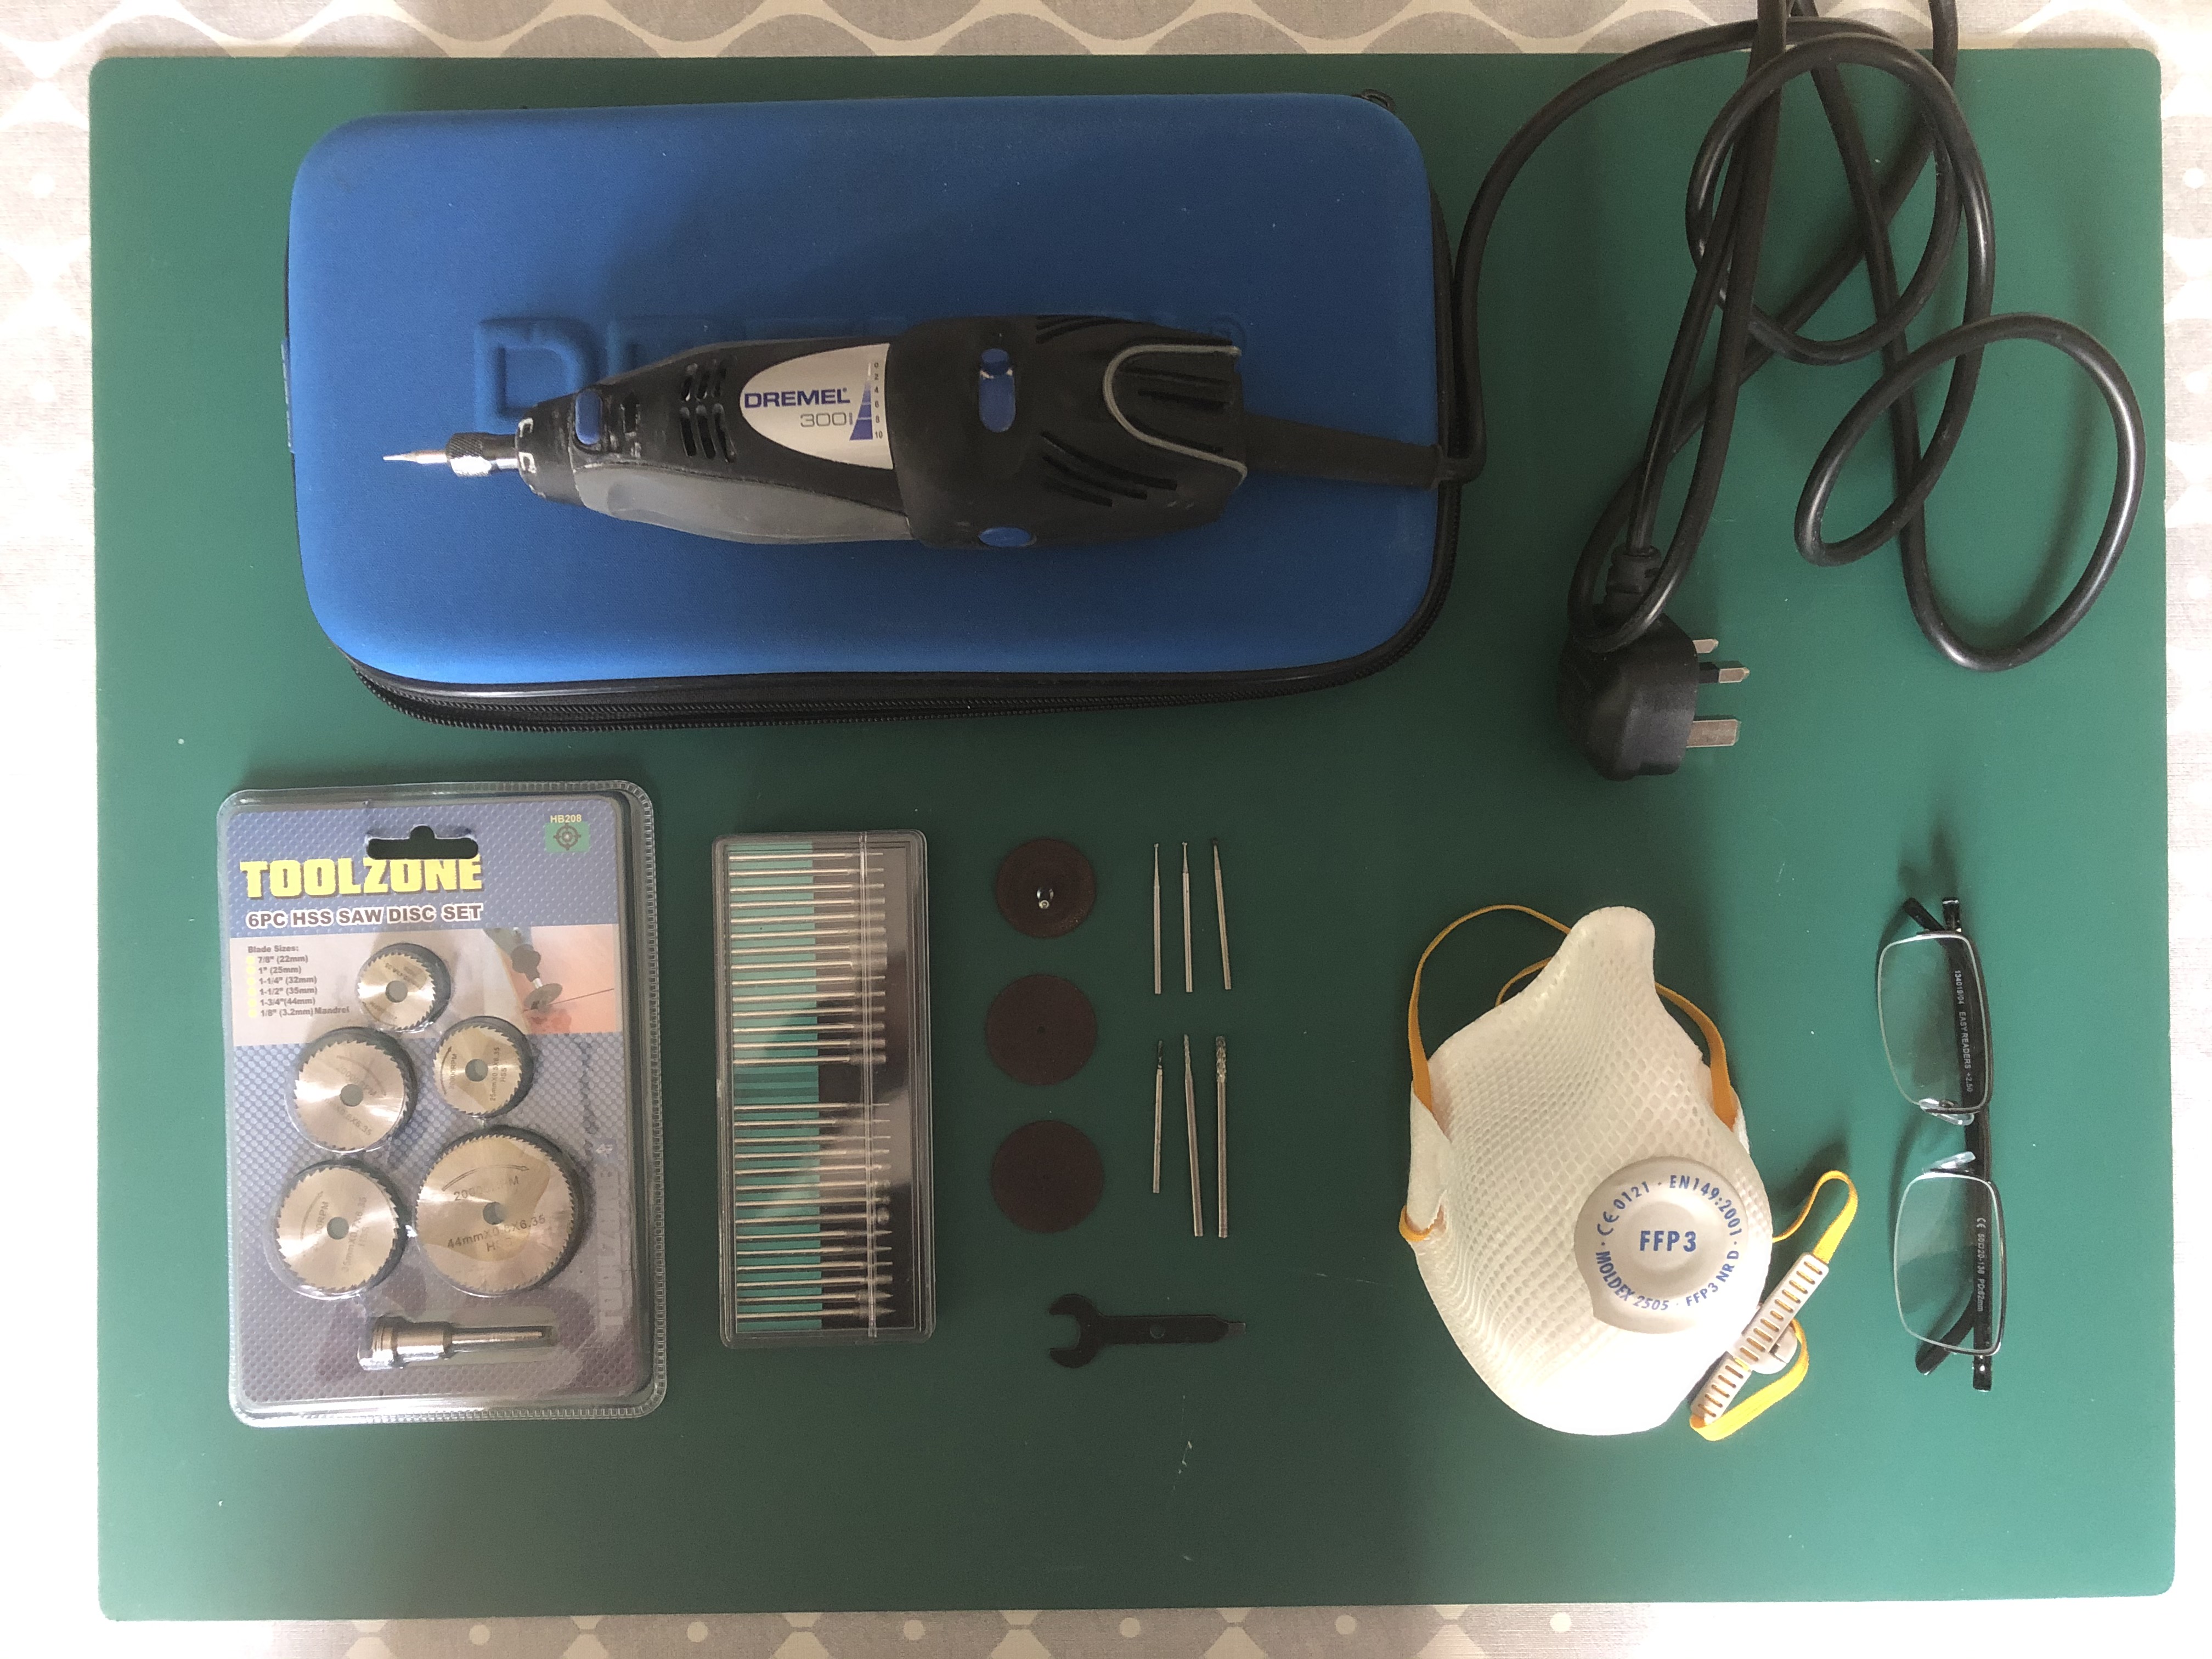 Big Boy Toys!
Episode Two - The Seven Ps'
Prior Planning and Preparation, Prevents P*** Poor Performance!
In short, gather your tools and prep your models (well maybe not that short, as it’s six words (and a conjunctive) but then again the seven Ps’ also has one, so technically it’s the seven Ps’ and an A; but GYTAPYM isn’t as catchy) and now I’m rambling so it’s sort of losing its punch.
Anyway, before I start anything I like to have everything I need close to hand. if I had a dedicated hobby space that would be easy but all I have is the kitchen table, plus the added hindrance of an eldest son who likes to permanently borrow my stuff, so it can be a bit of a task in itself!
I have split this into basic tools and the heavy duty stuff.
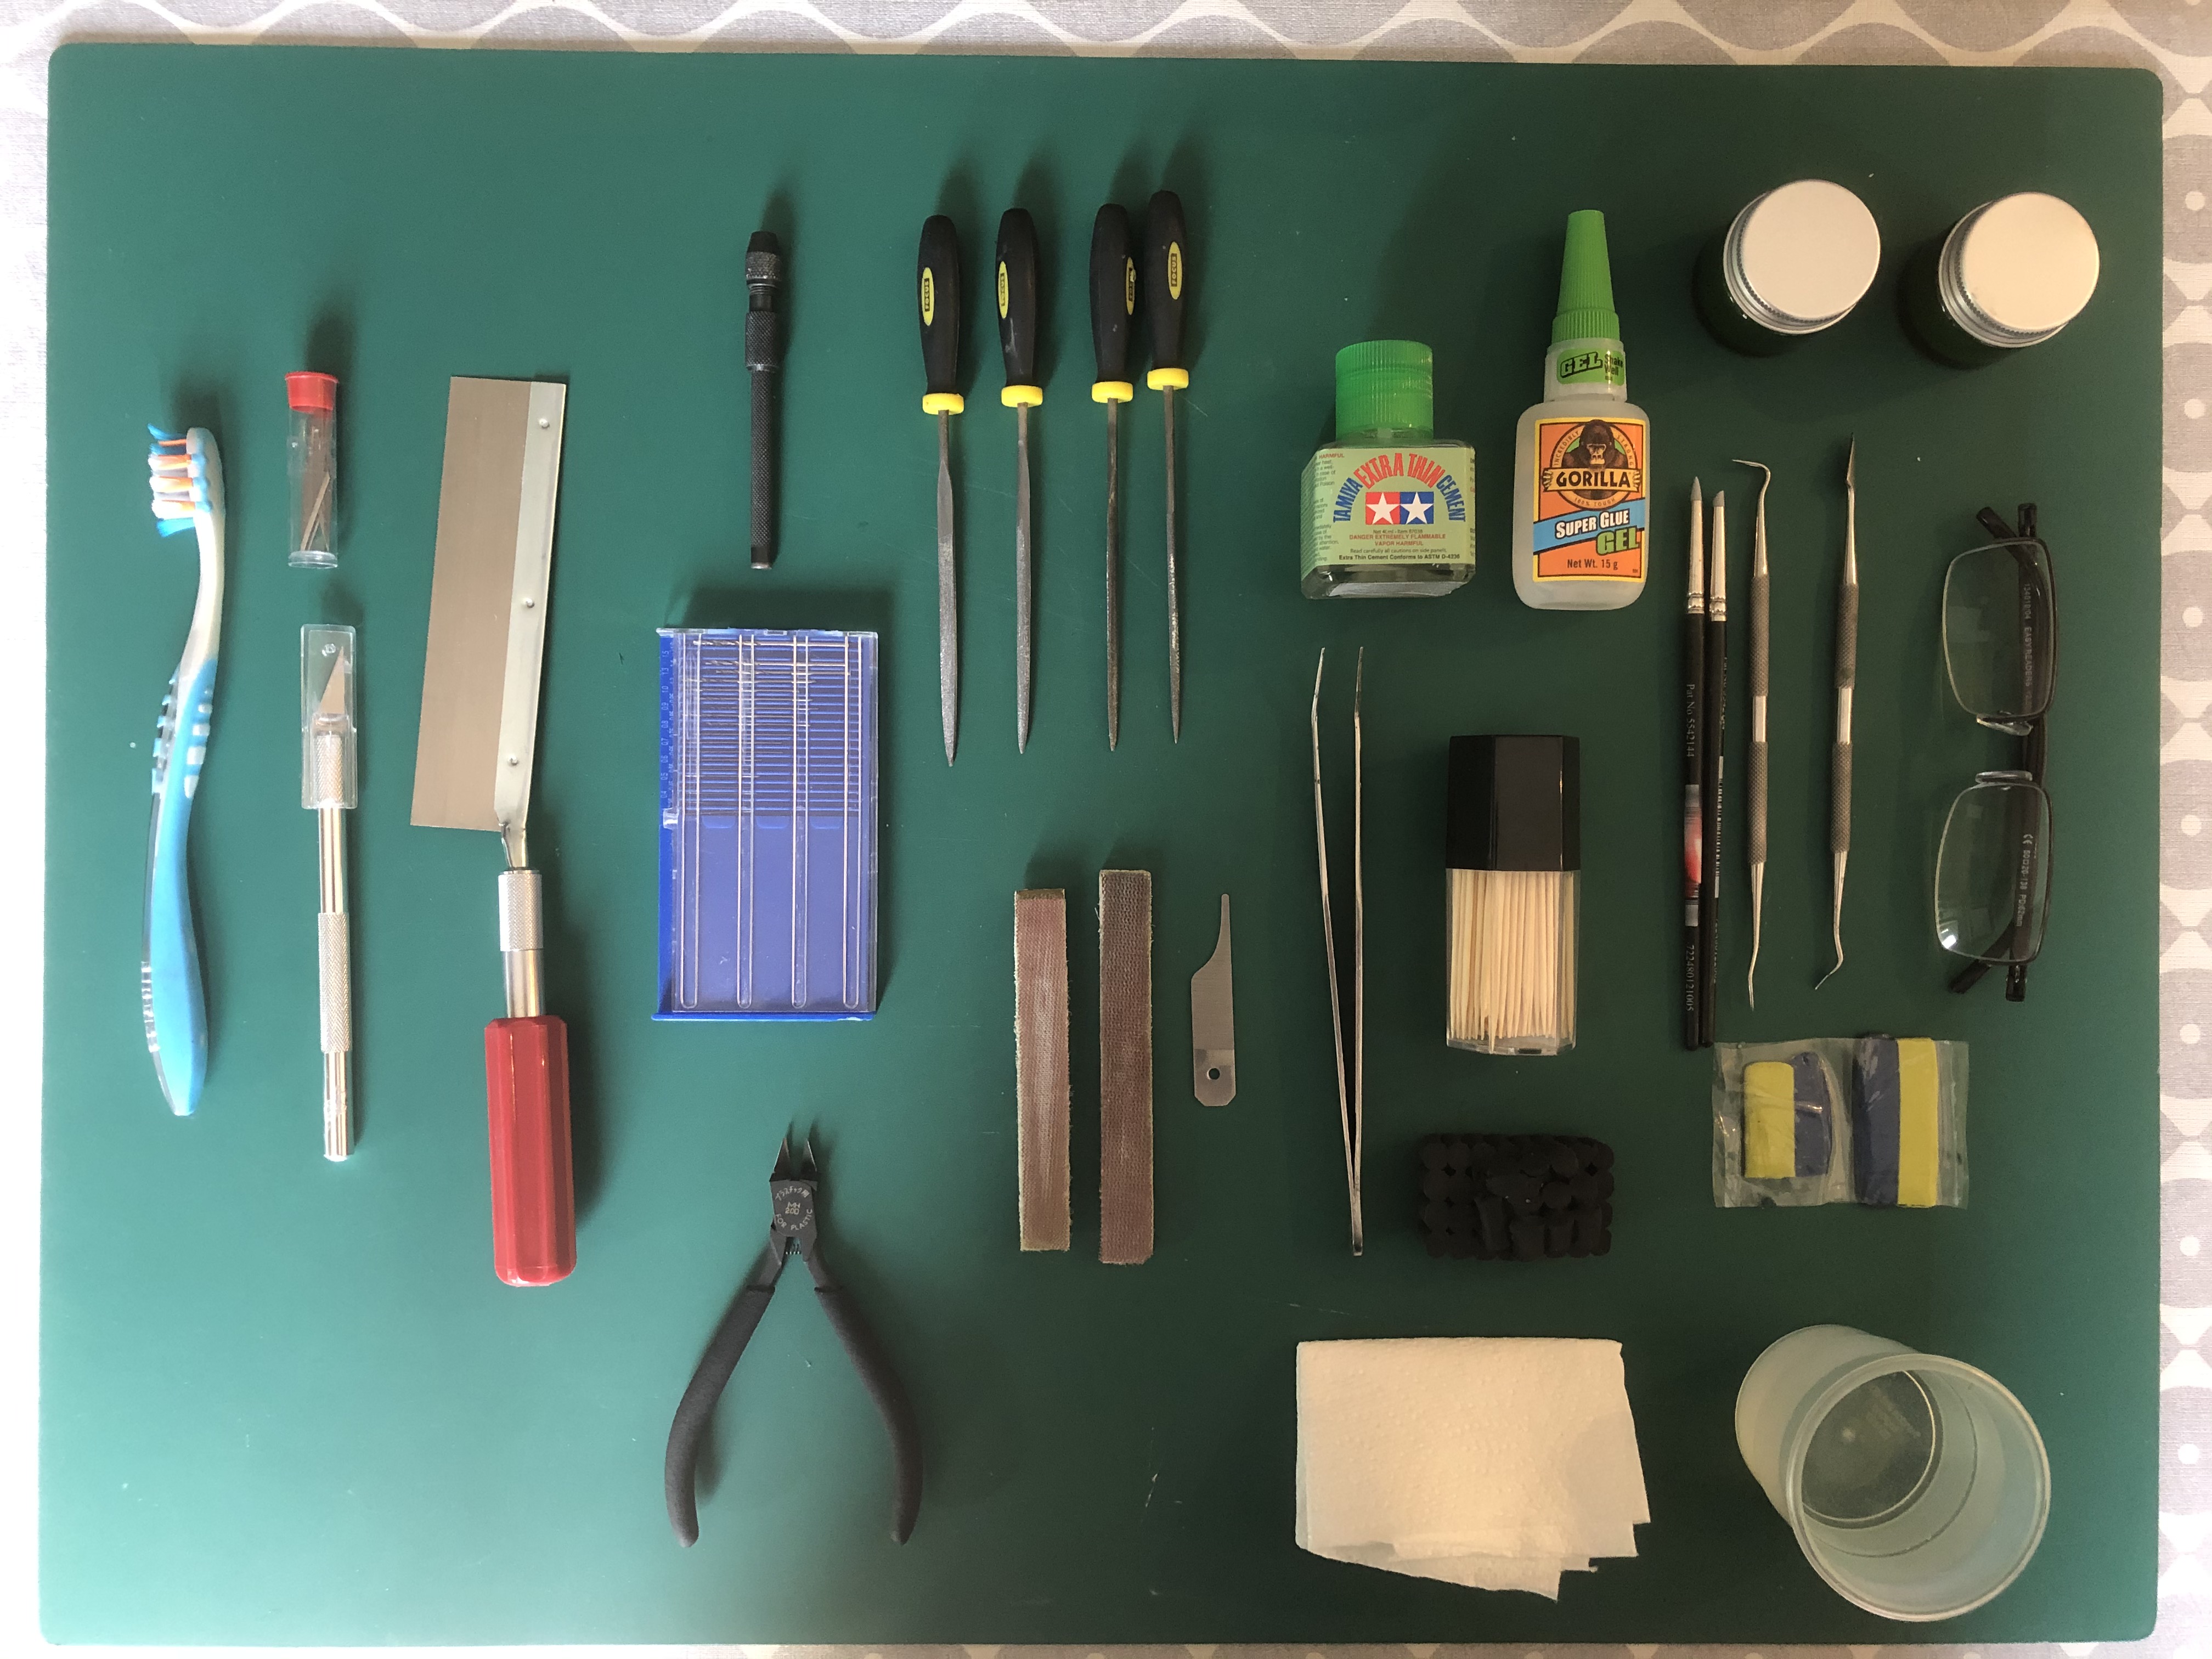 The basic tools
Starting from the left we have:
Old toothbrush for cleaning the release agent off the sprues.
Craft Knife and spare blades for cutting stuff.
Razor saw for removing resin plugs and large conversion action.
Pin Vice and micro drill set for gun barrels mainly.
Cutters for cutting (these ones are from Tamiya, the best i have ever used and well worth the extra cost).
A selection of small files of differing profiles for filing 😉
Two home made sanding boards from 600 and 800 grit sanding pads.
A GW mould line scraping tool (it’s ok for most stuff but I usually still use a craft blade).
Glues, Tamiya extra thin for plastic and Gorilla super gel for everything else.
Cocktail sticks for applying super glue to small parts.
Tweezers for fiddly/tiny stuff.
Plasticine for weighting down the hulls of plastic tanks to give them a bit of heft. Tanks shouldn’t move about when someone close to the table breaks wind!
Kitchen towel for when I invariably spill something.
My own mix of Polystyrene filler made from leftover Tamiya glue and bits of styrene sheet melted down into it. I have a thick and a thin mix to suit small and larger mould gaps.
Sculpting tools, I have found that the metal ones are great for getting the clay/green stuff on and the soft tipped ones best for smoothing it down.
The ubiquitous Green stuff, to be honest, I don’t always use it. I normally go for Milliput but I couldn’t find mine (probably have to buy some more). there are may grades of Milliput but I tend to stick with the white as it sands down very smooth.
Something wet to spill and for the kitchen towel to soak up! (I also use it for any filling/sculpting).
Finally, and I have @Silverfox to thank for these, a pair of cheap magnifying specs. These ones are only 2.5x magnification but when you’re getting an old fart they are a godsend! A wise and sage tip from the US Military.
Project entries for technophobes!
Apologies for the first episode in my spring cleaning challenge being on pdf. I tried a couple of times to upload it but I think my efforts in pleasing Lloyd by keeping the photos large may have scuppered me. Hopefully the future entries will be of a more manageable size!
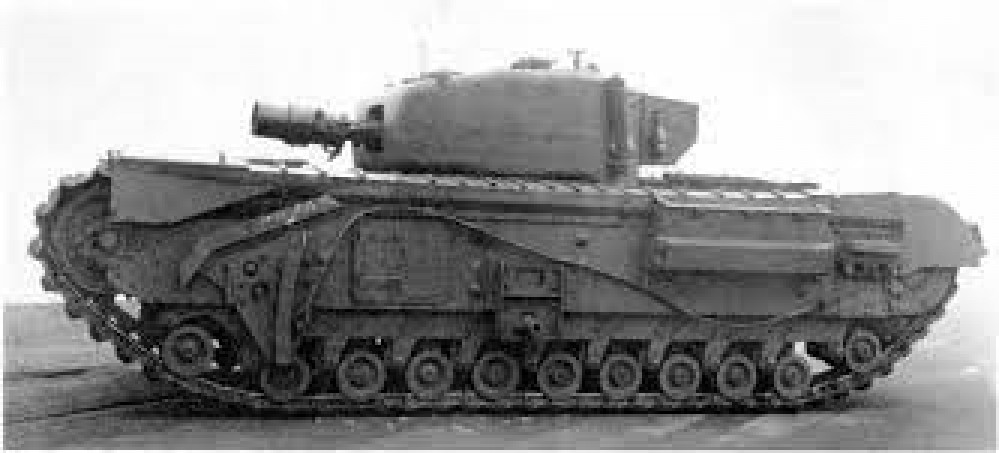
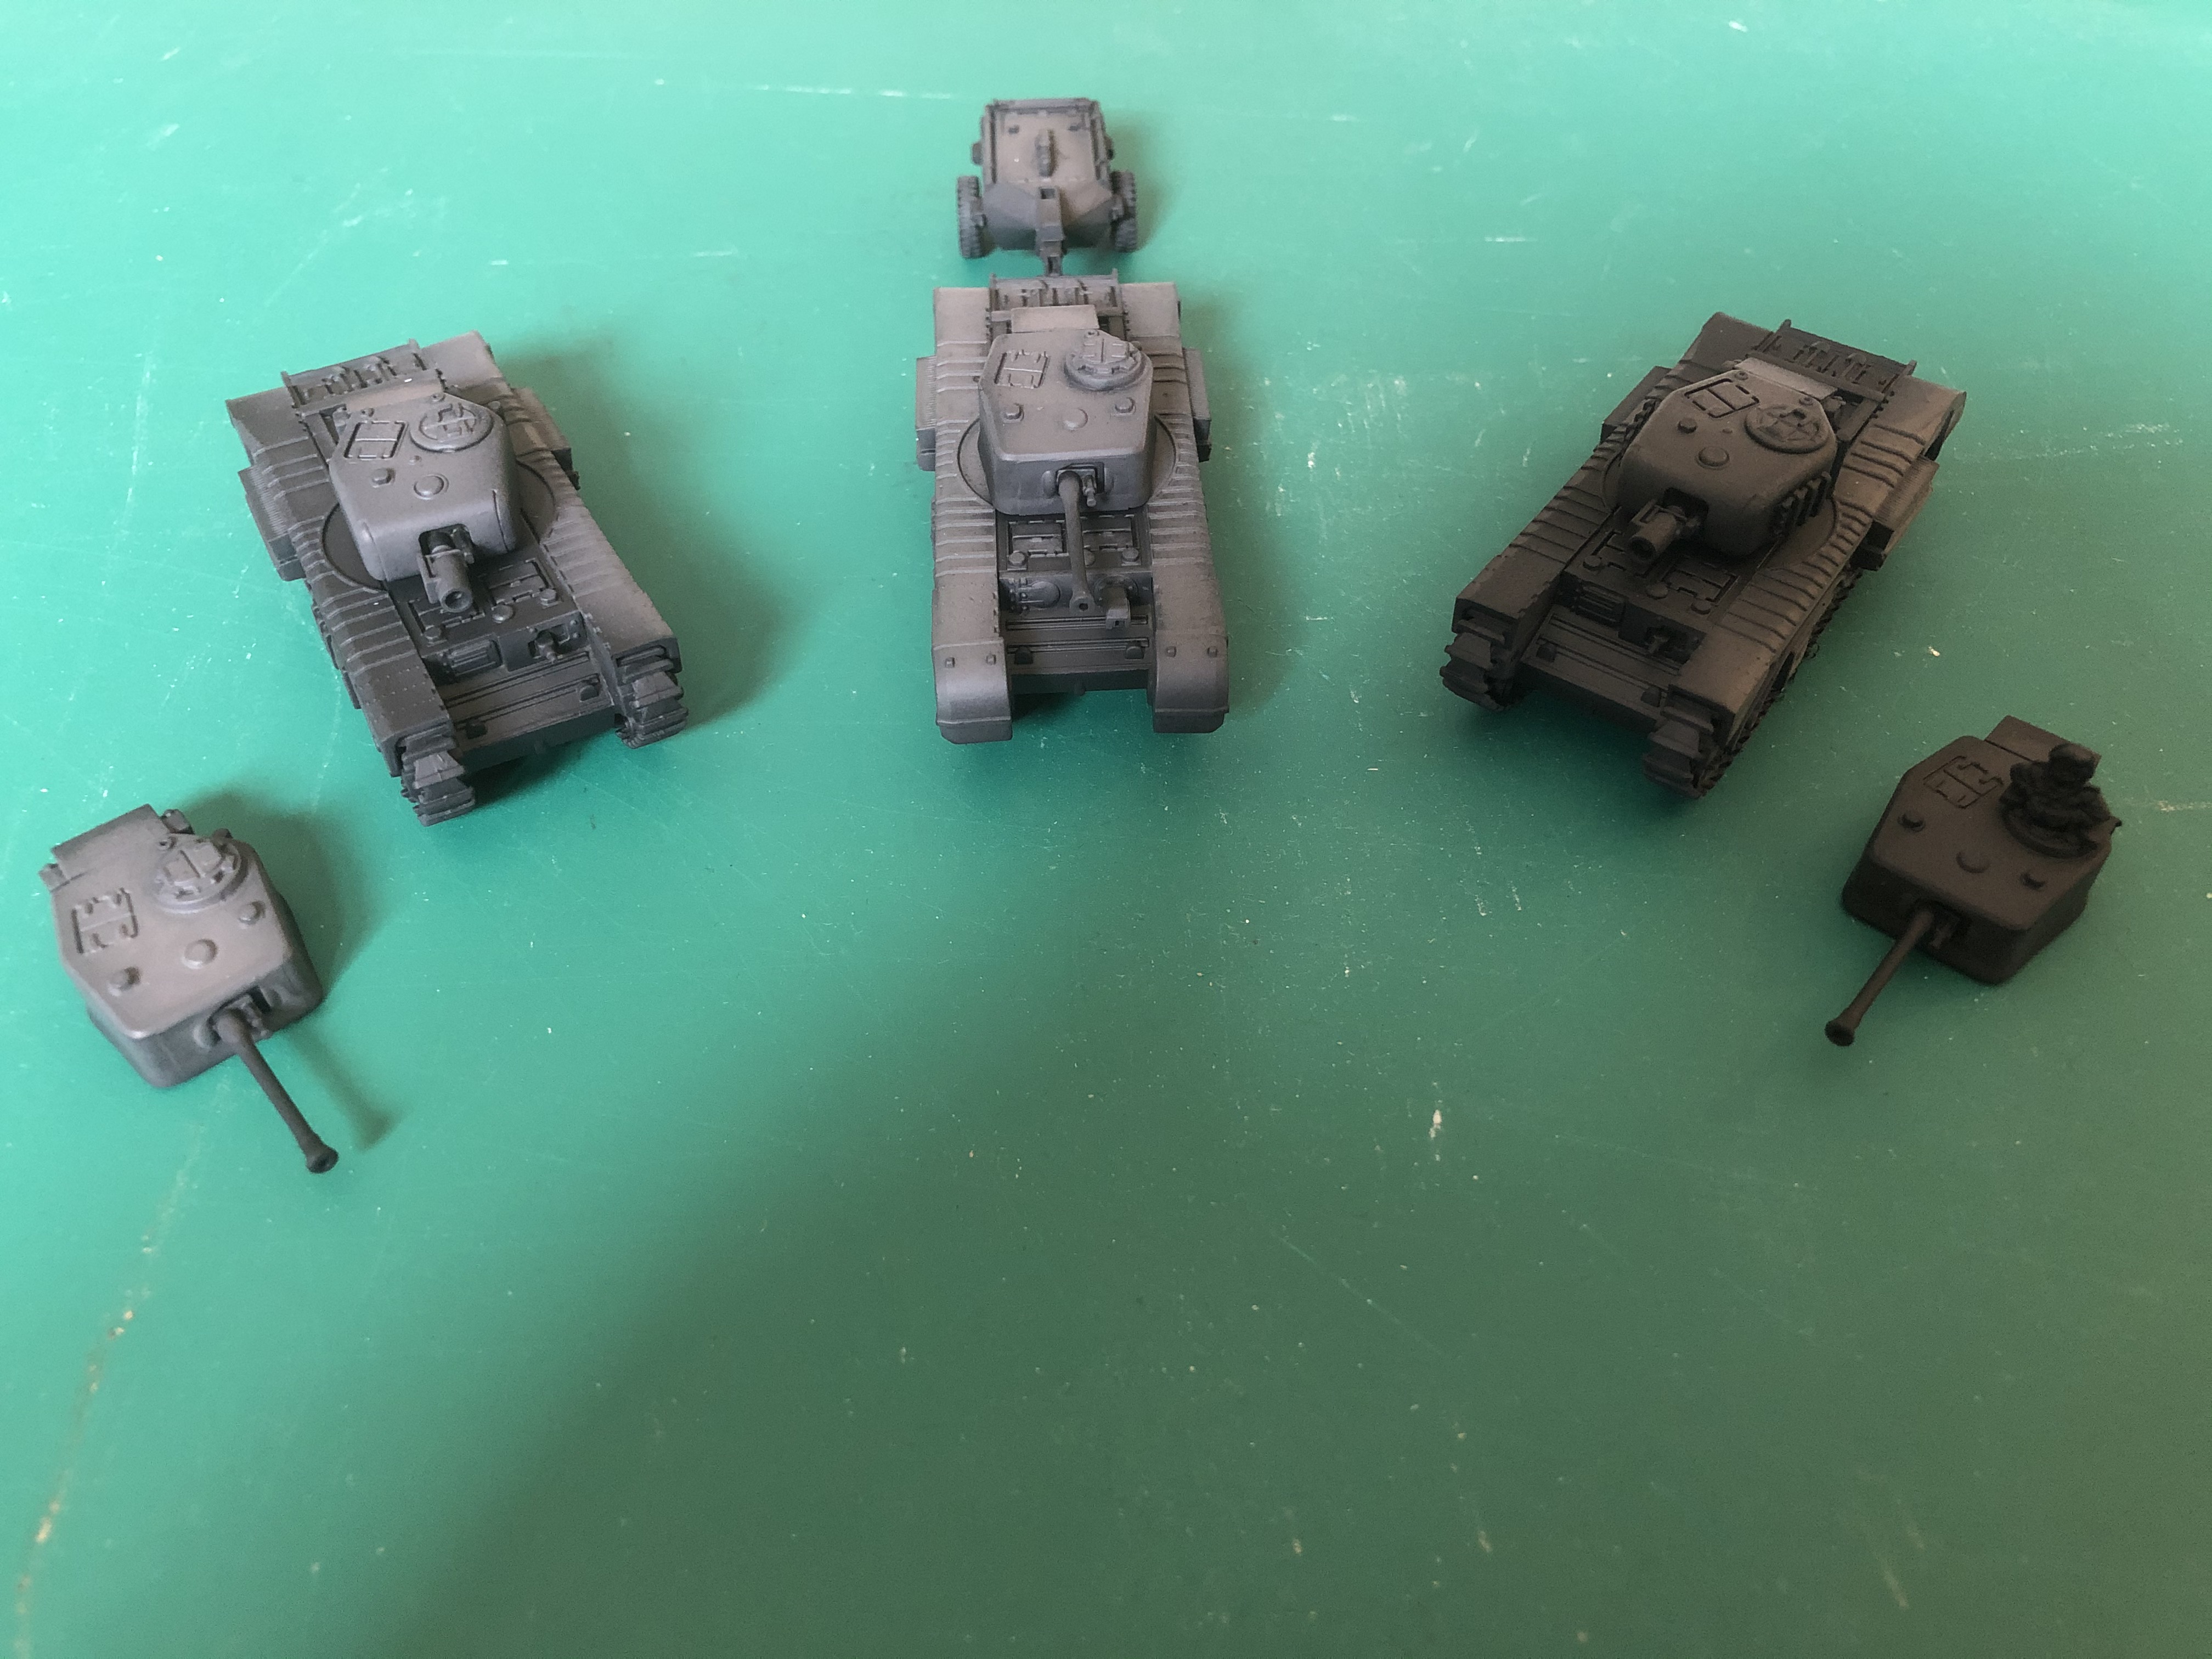 Gratuitous image of AVRE tanks and Churchill crocodile to see if it uploads!