![Wild Australia Wargaming? 28mm Ned Kelly Gang & Victorian Police Review [7 Days Early Access]](https://images.beastsofwar.com/2026/01/unboxing-traders-galaxy-australiana-ned-kelly-gang-_-victorian-police-coverimage-225-127.jpg)


On The Waterfront: Spring Clean Challenge


Recommendations: 1151
About the Project
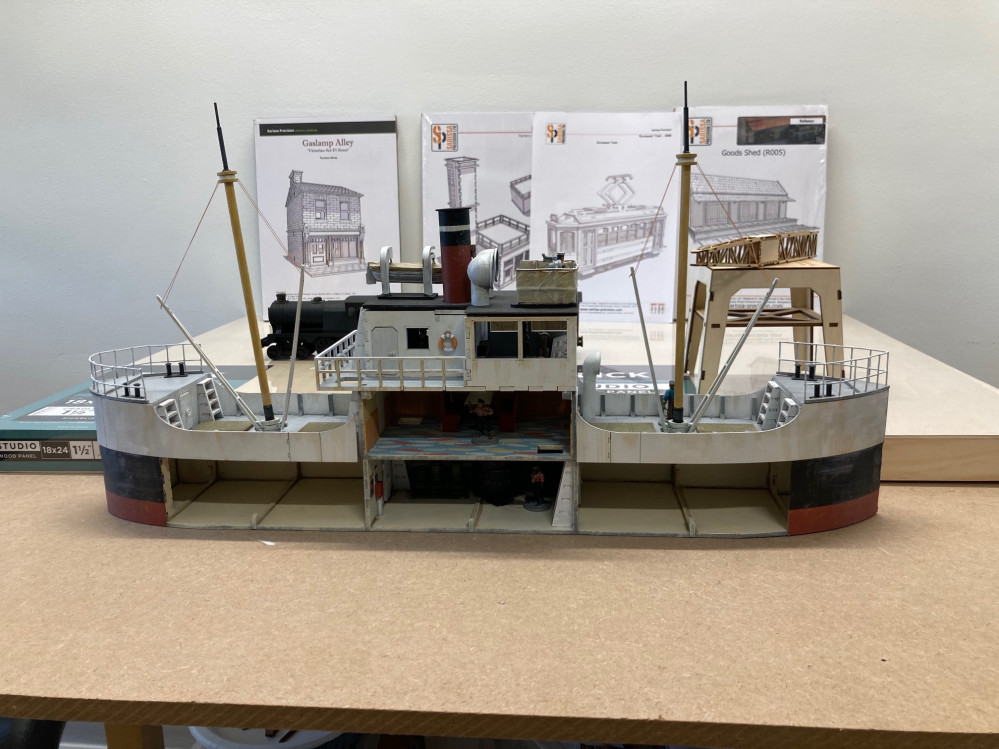
During the 2020 Spring Clean Challenge I converted and finished the Sally 4th "Tramp Steamer". In 2021 I plan to build a 3x3 Waterfront Pulp gaming board. With a 1x3 water area or dock for the Tramp Steamer and 2x3 of land for offloading cranes, sheds, trains, trams, buildings etc. I plan to use what I have, a lot of unfinished or unopened SP kits that I have collected in the past 6 years.
Related Game: Pulp Alley
Related Company: Sarissa Precision
Related Genre: Pulp
Related Contest: Spring Clean Hobby Challenge (Old)
This Project is Completed
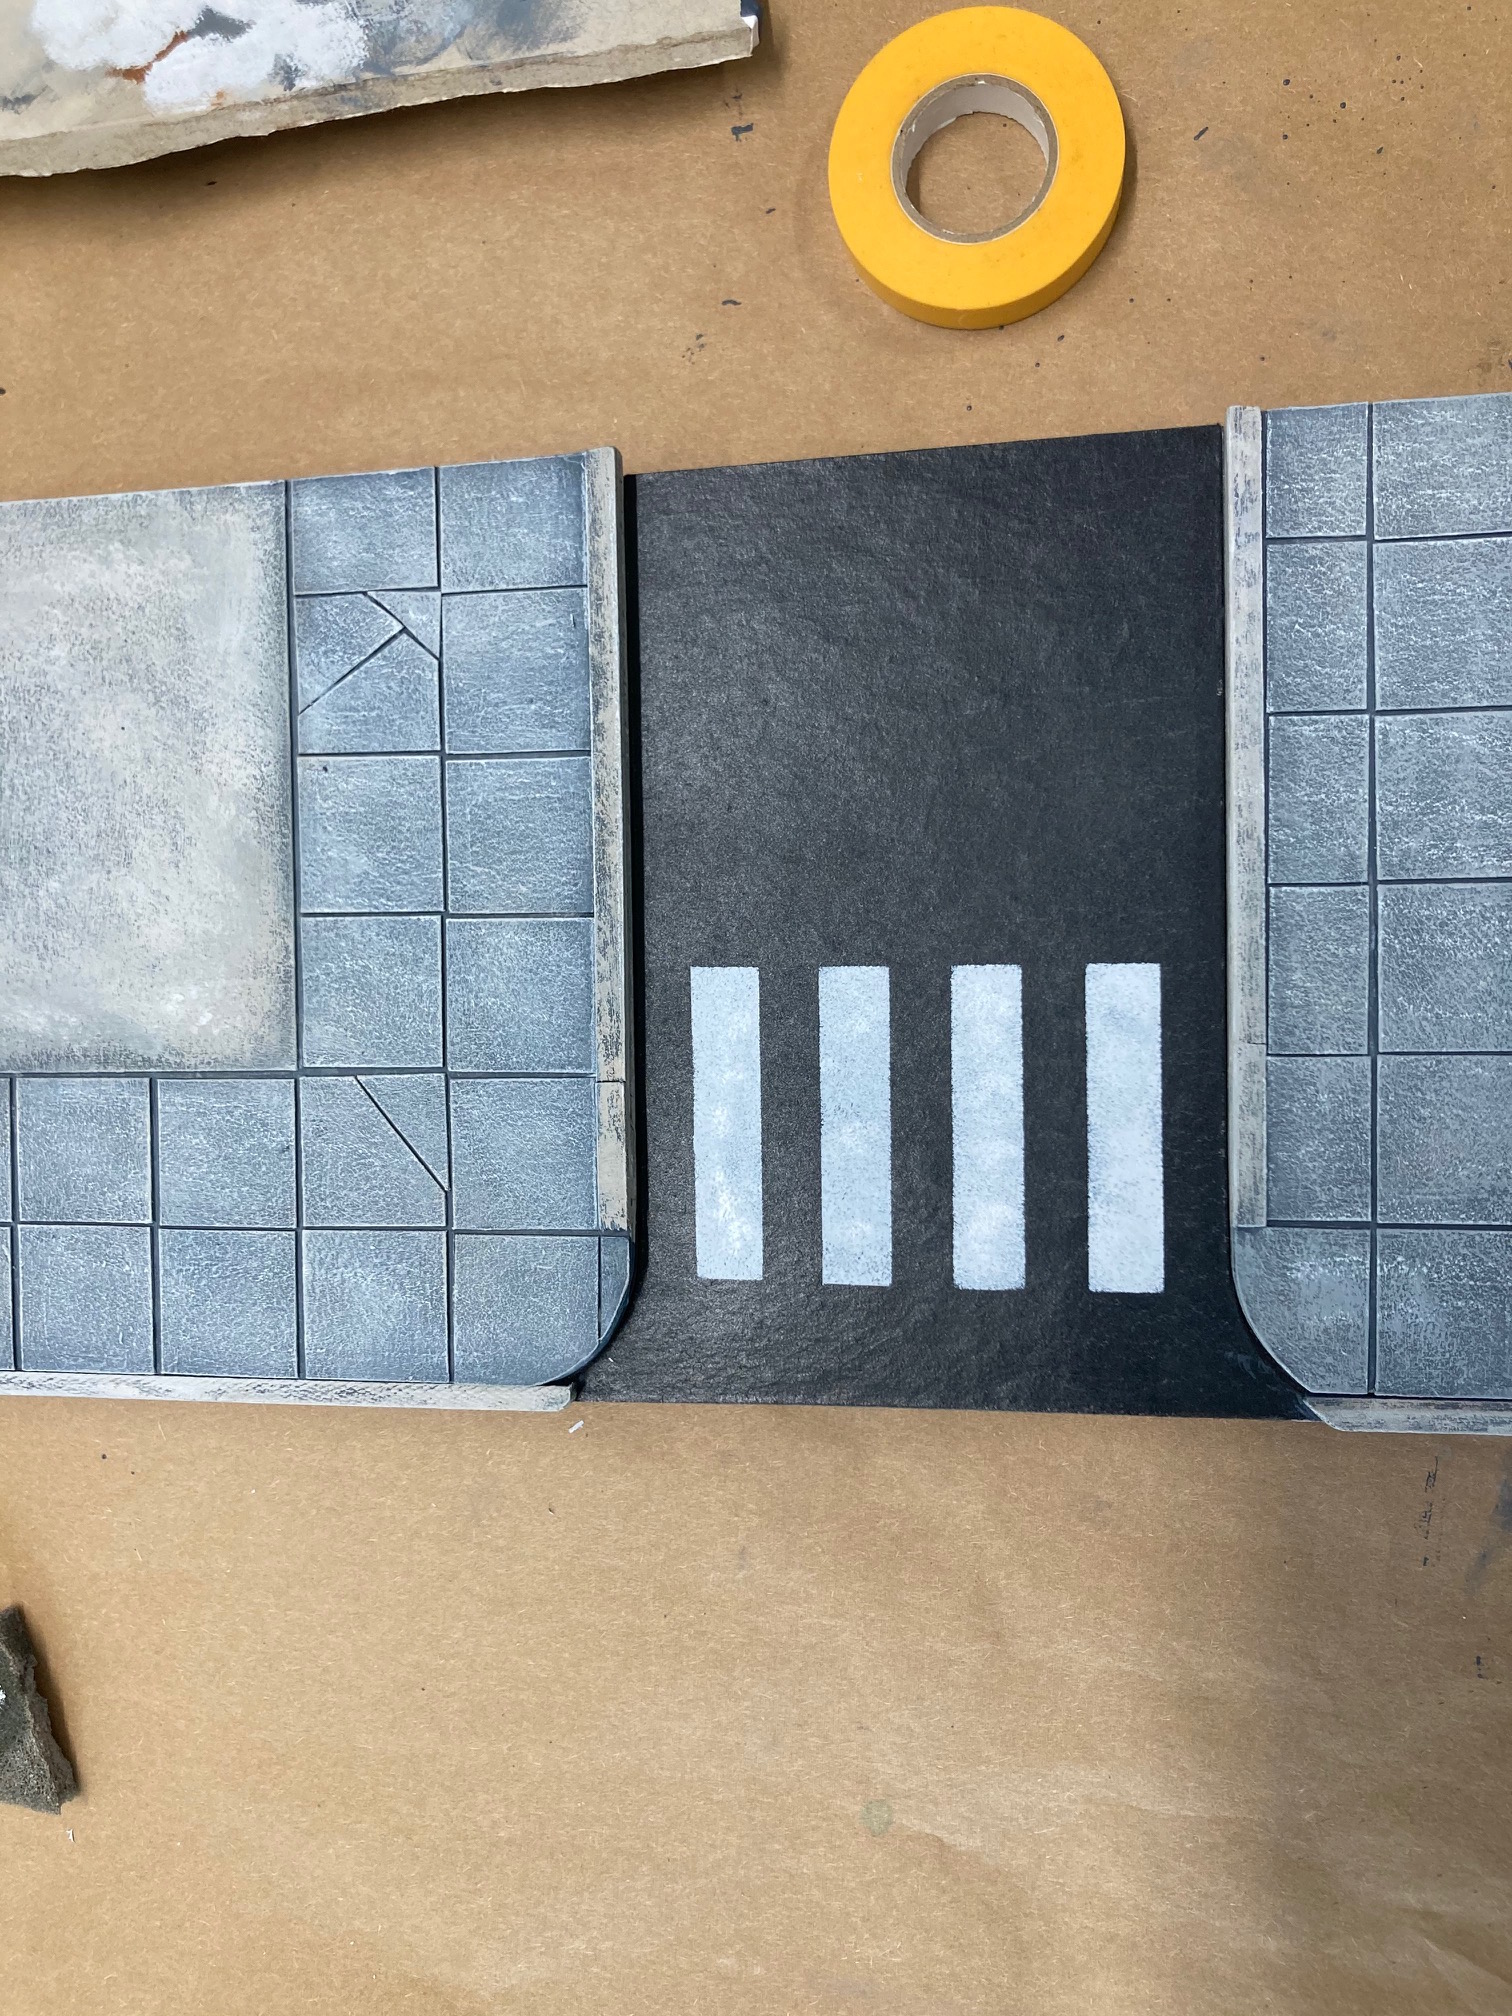
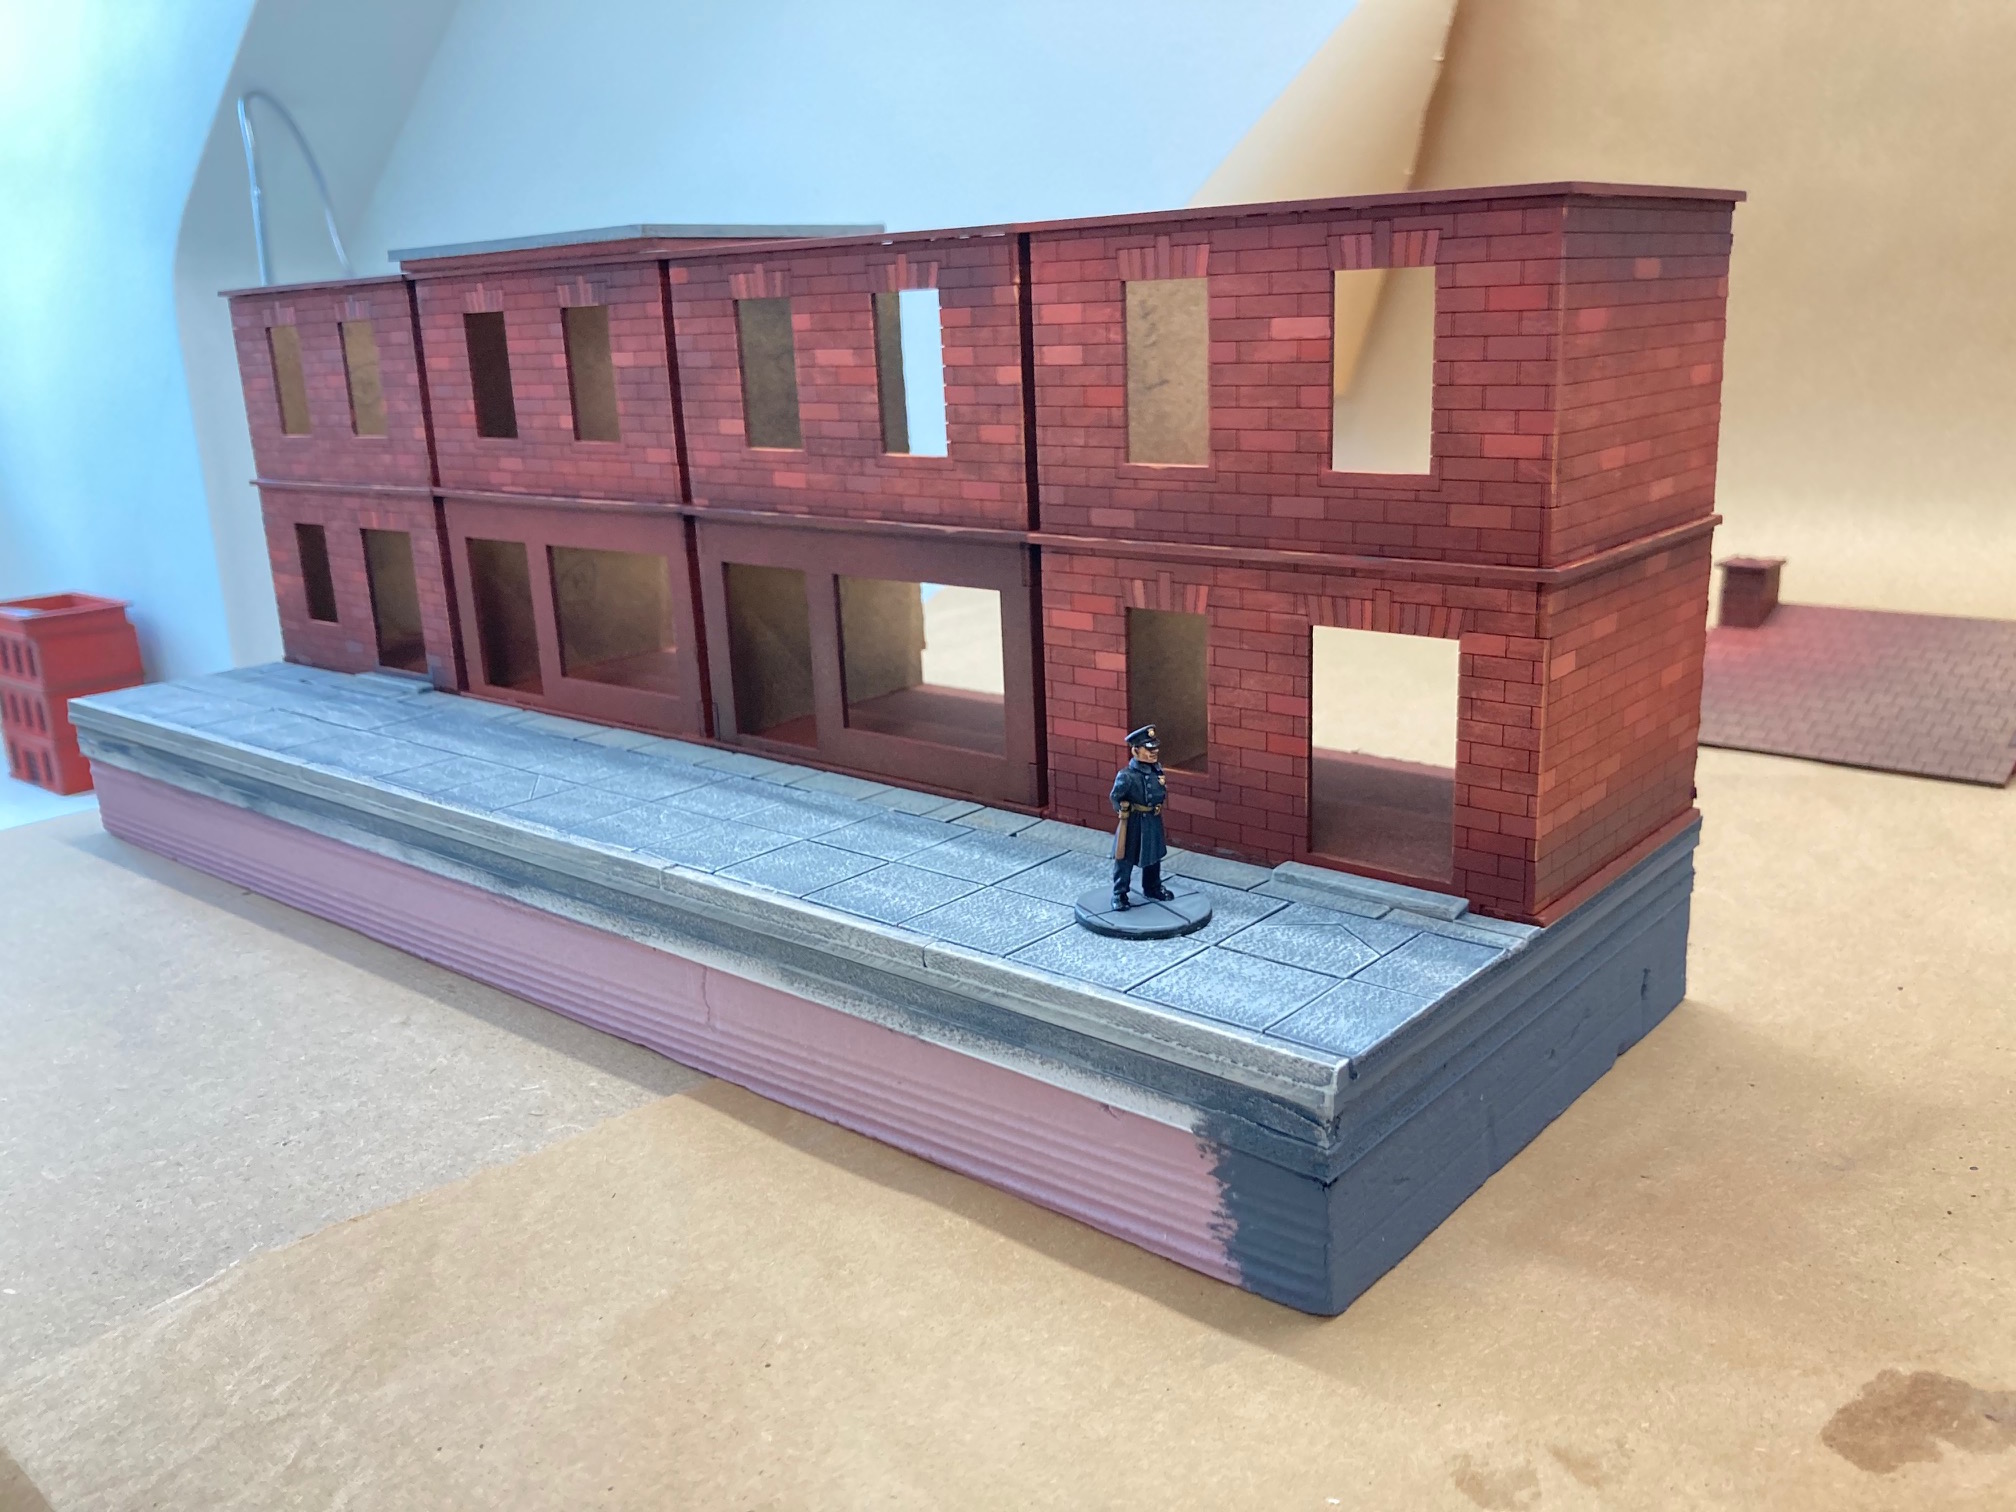
Modularity Sidewalks & Stripes
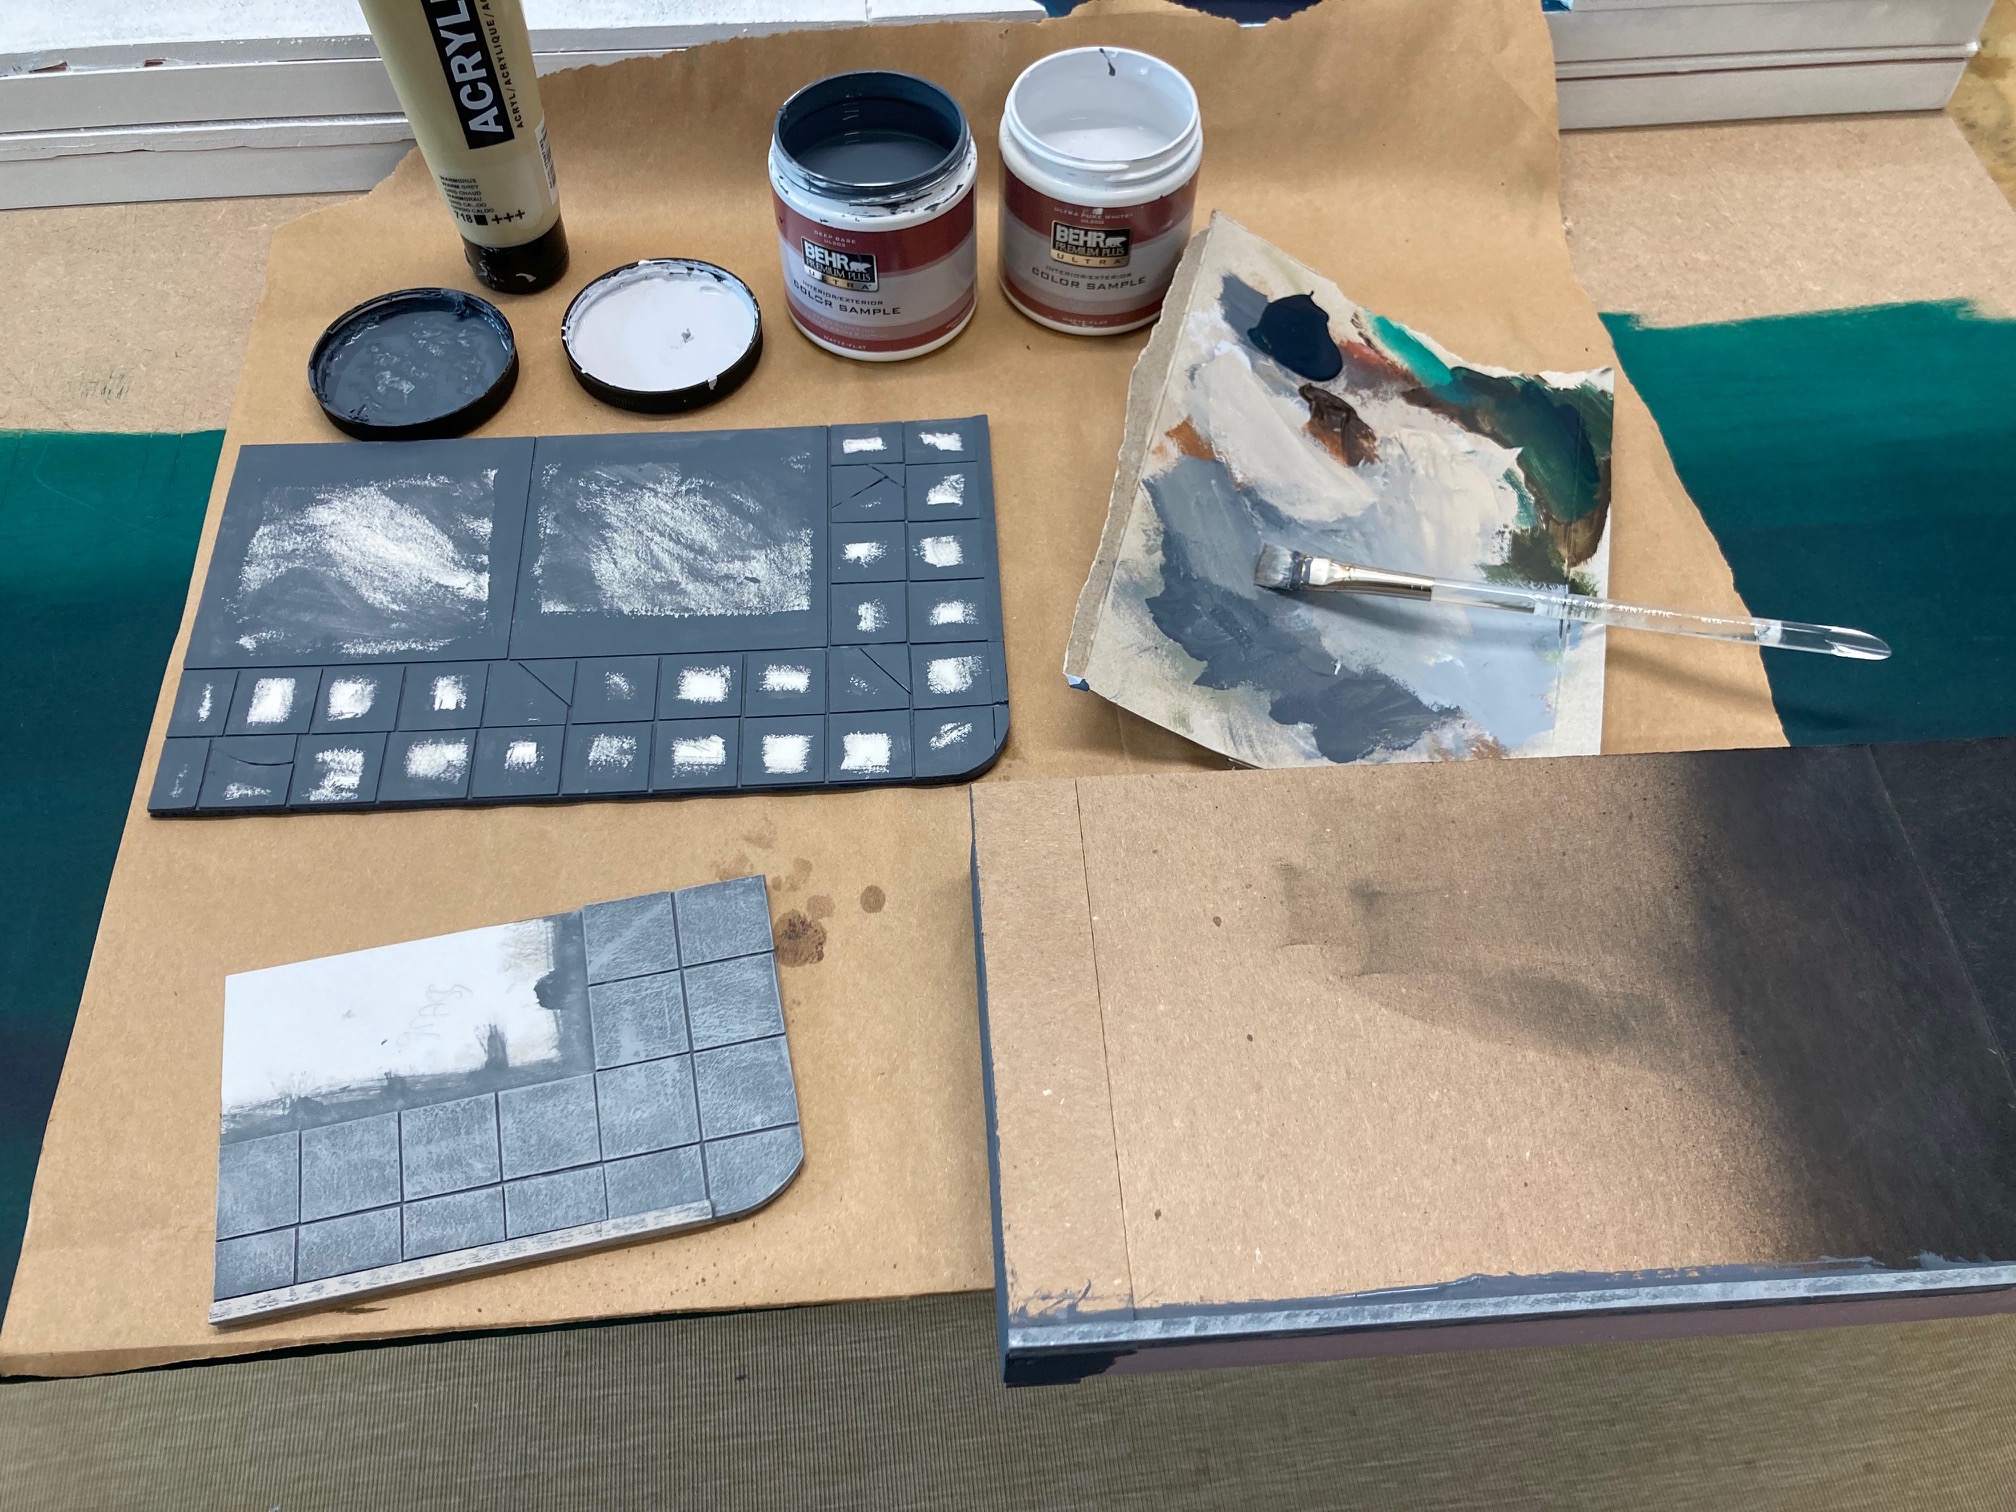
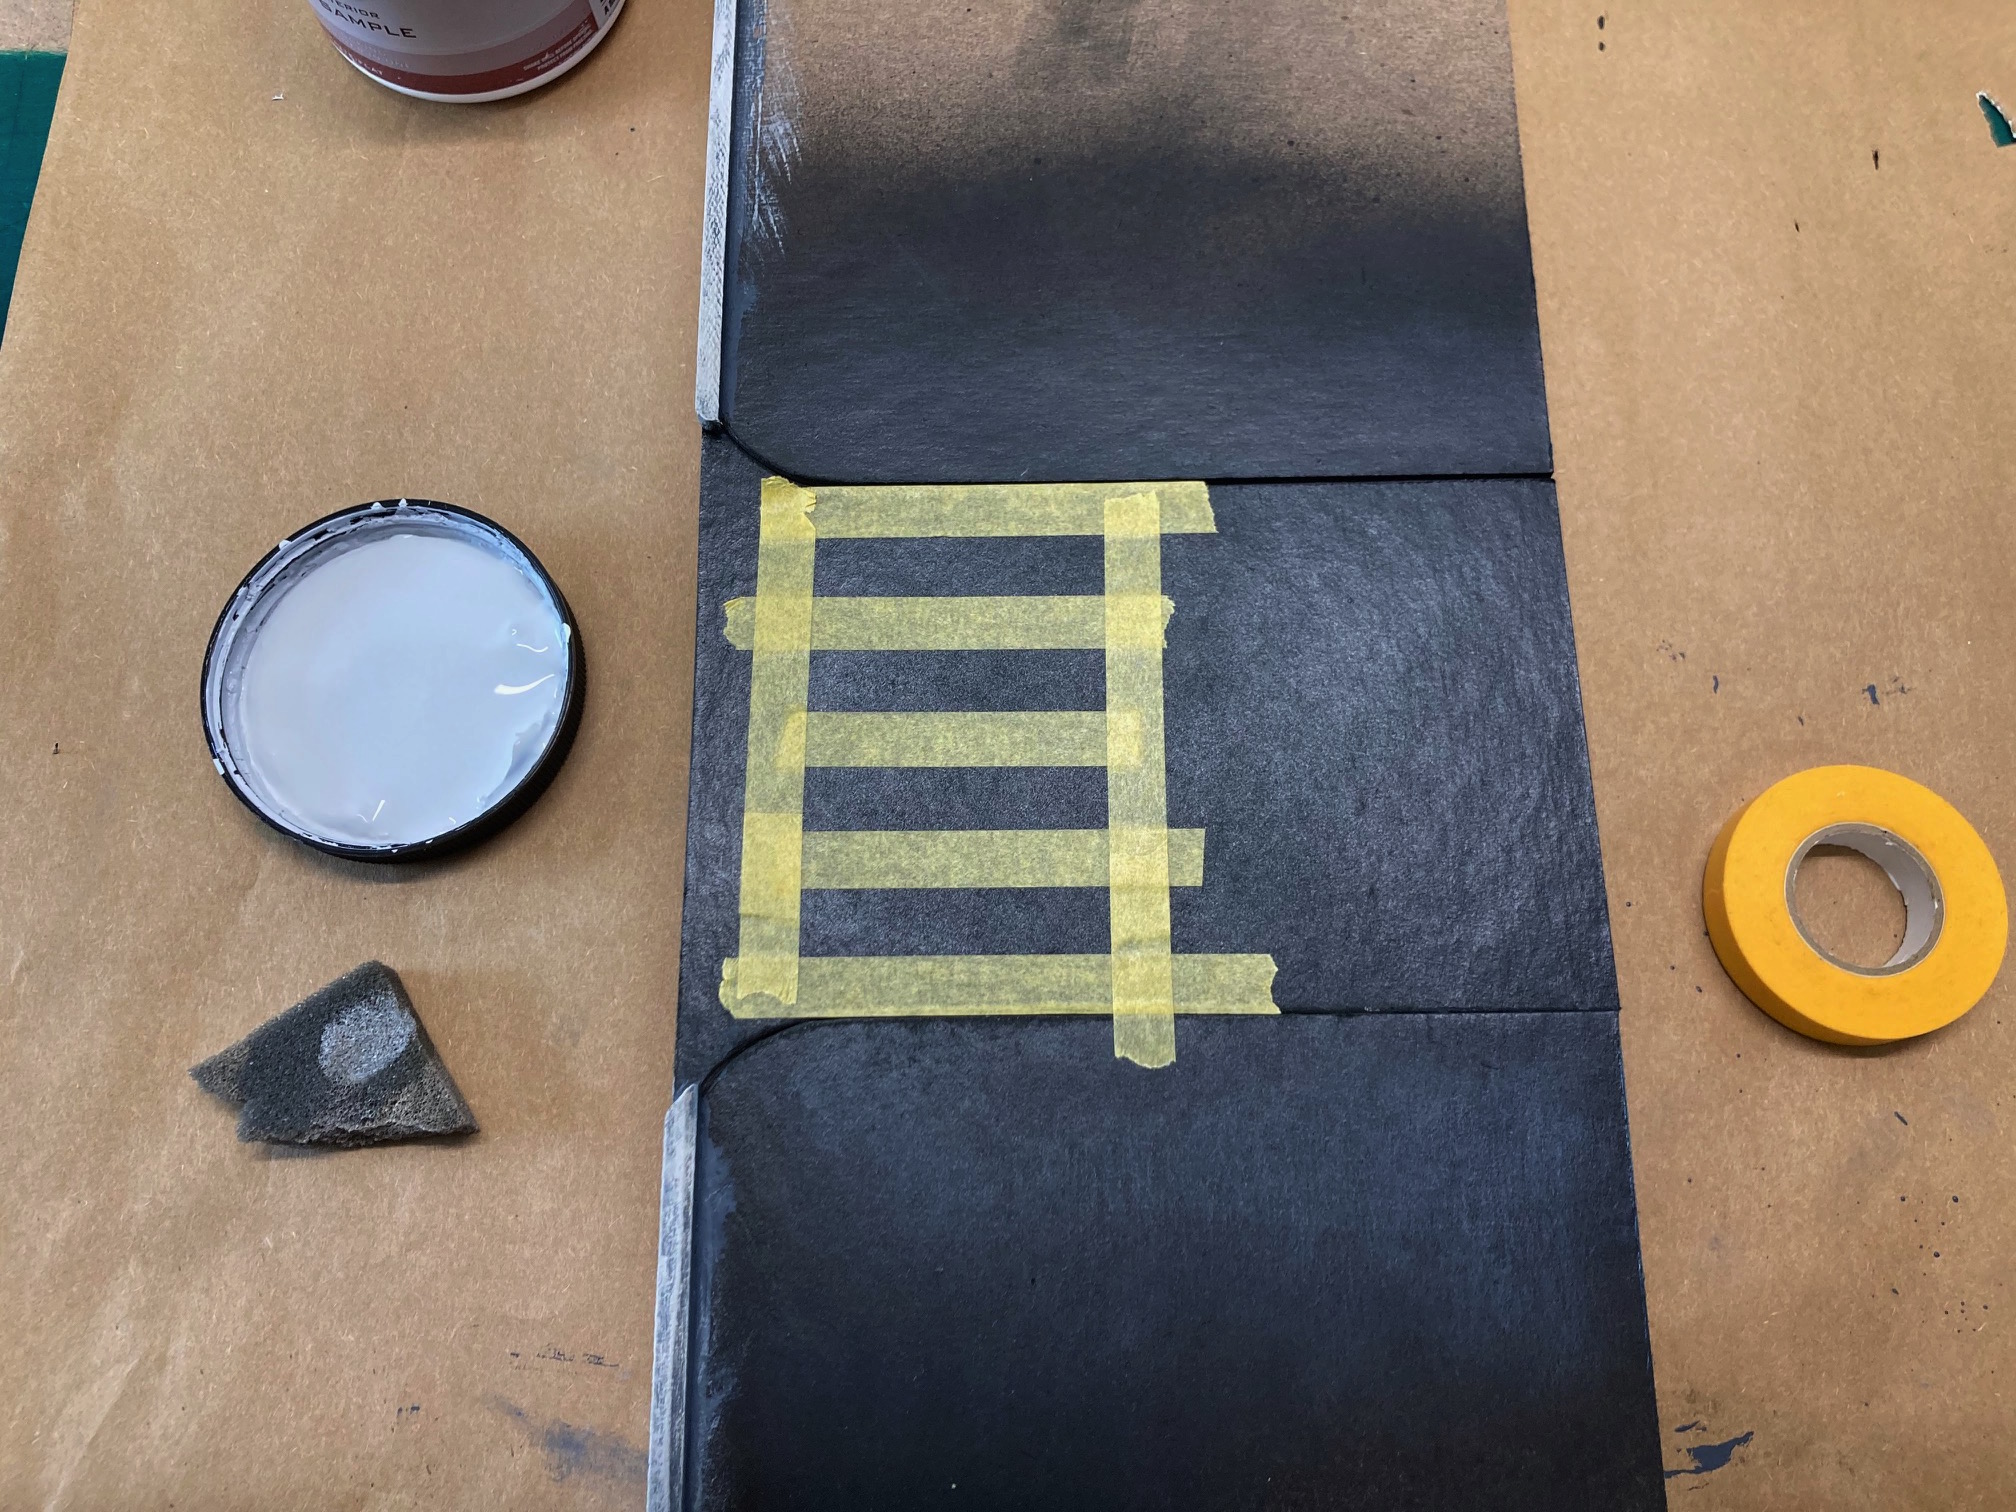
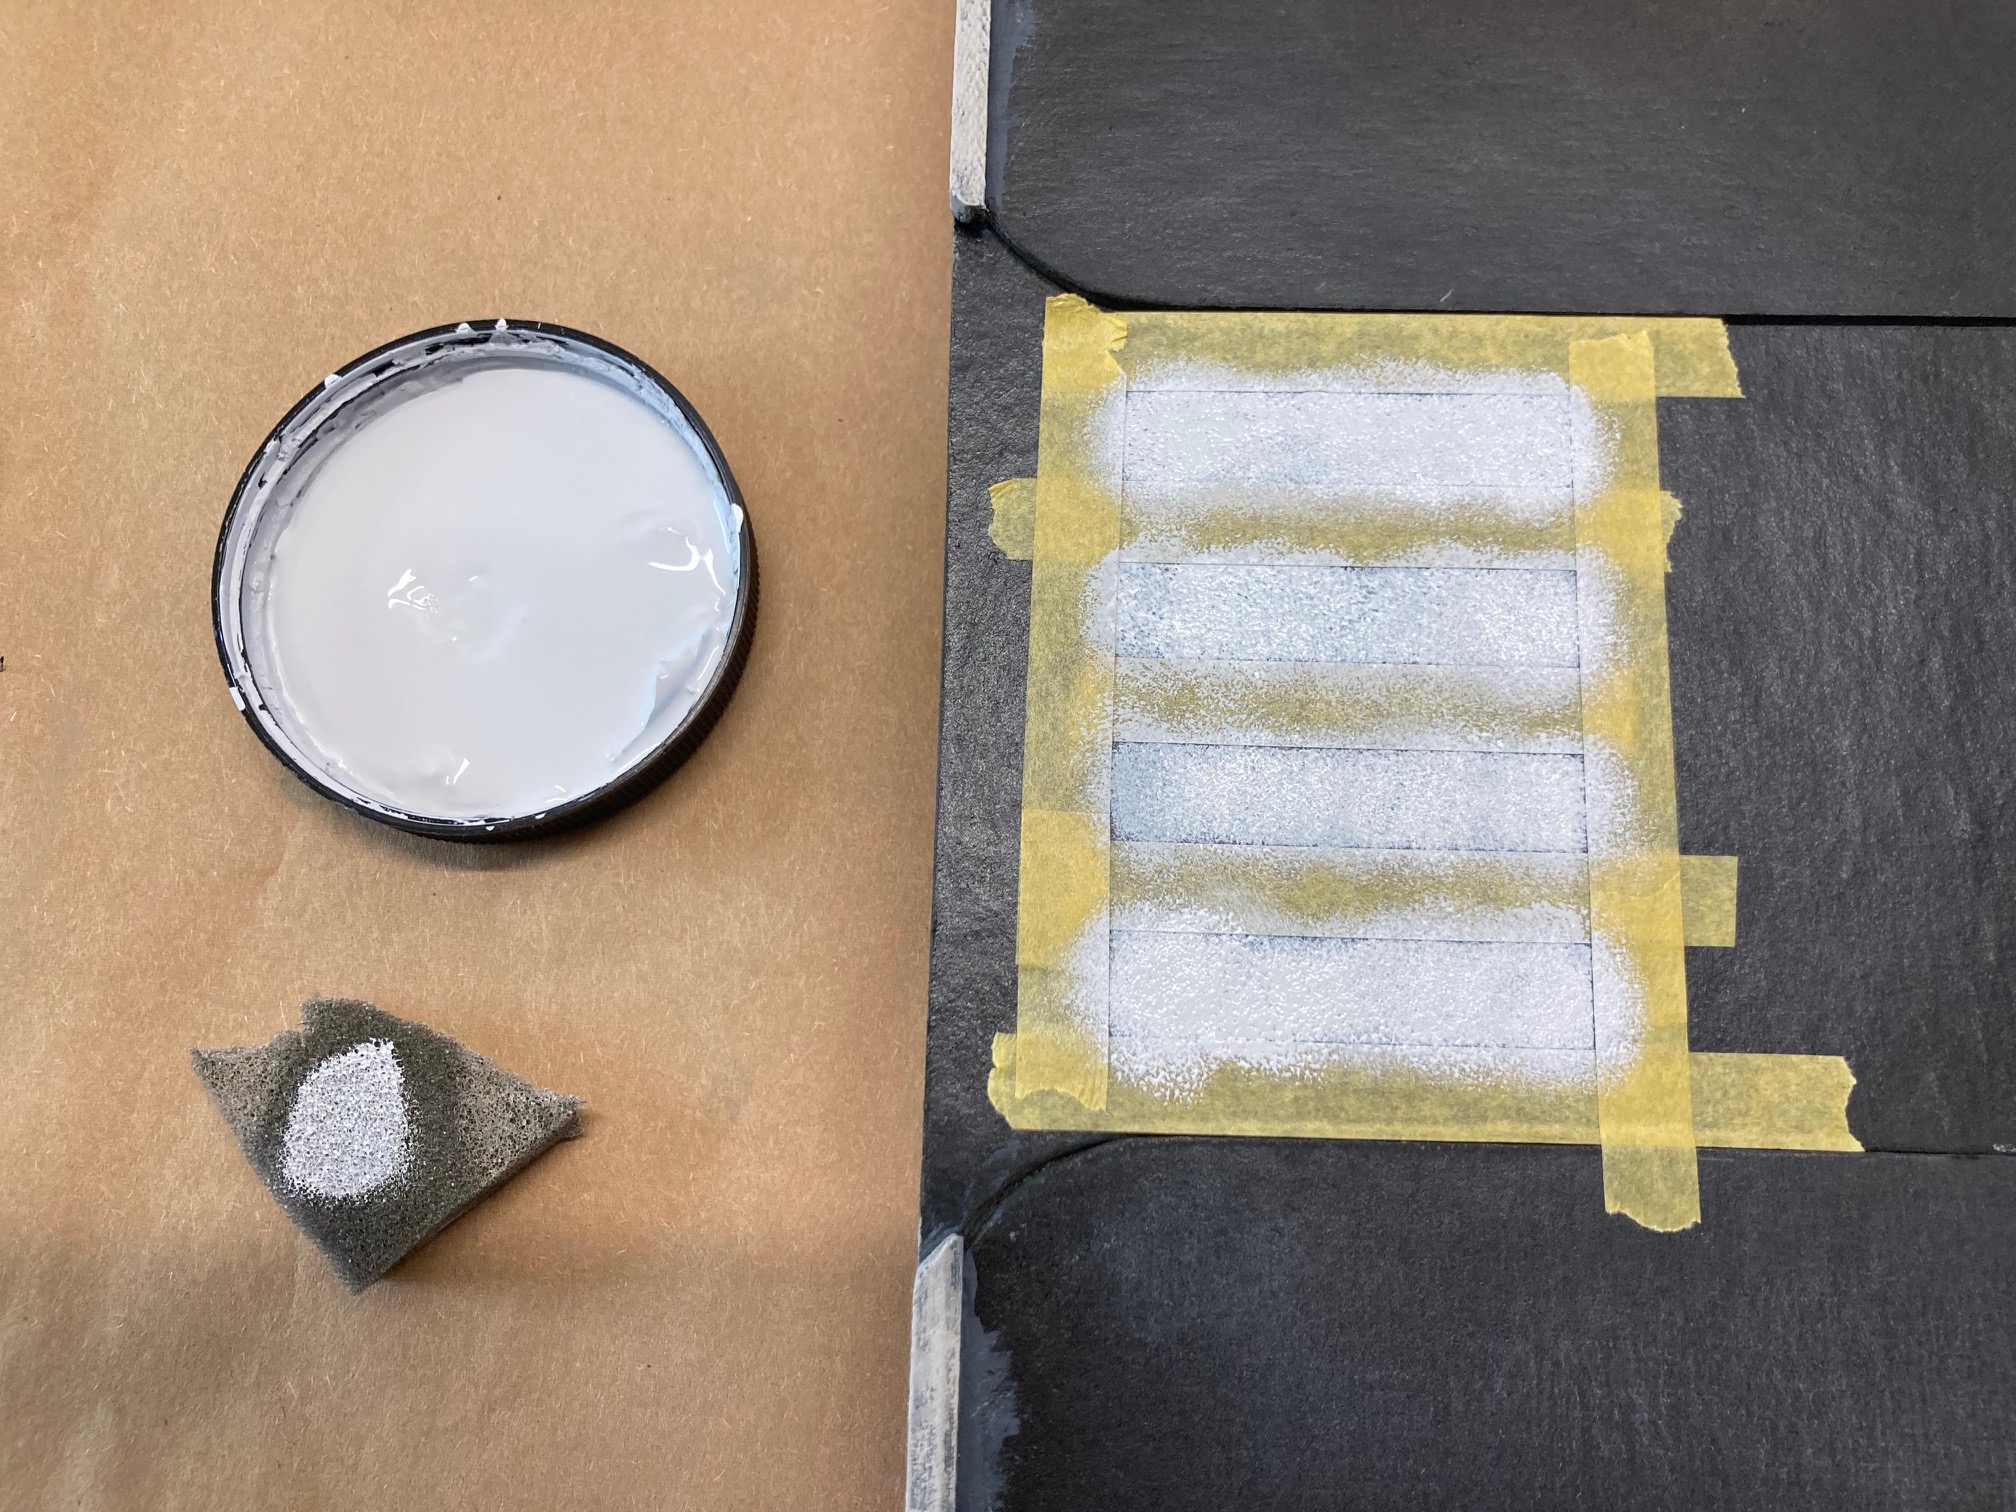
Moving on to the modular city block boards. I used the same method to paint the sidewalks as I did for the Concrete. I call it dry rub method. It’s not dry brush. I never “clean the brush at any point. I also try to keep a chisel point on the brush. I mix from dark to light colors on a piece of cardboard. As the layers dry they begin to add texture to the flat foam core. Looking a bit more like a sidewalk to me.
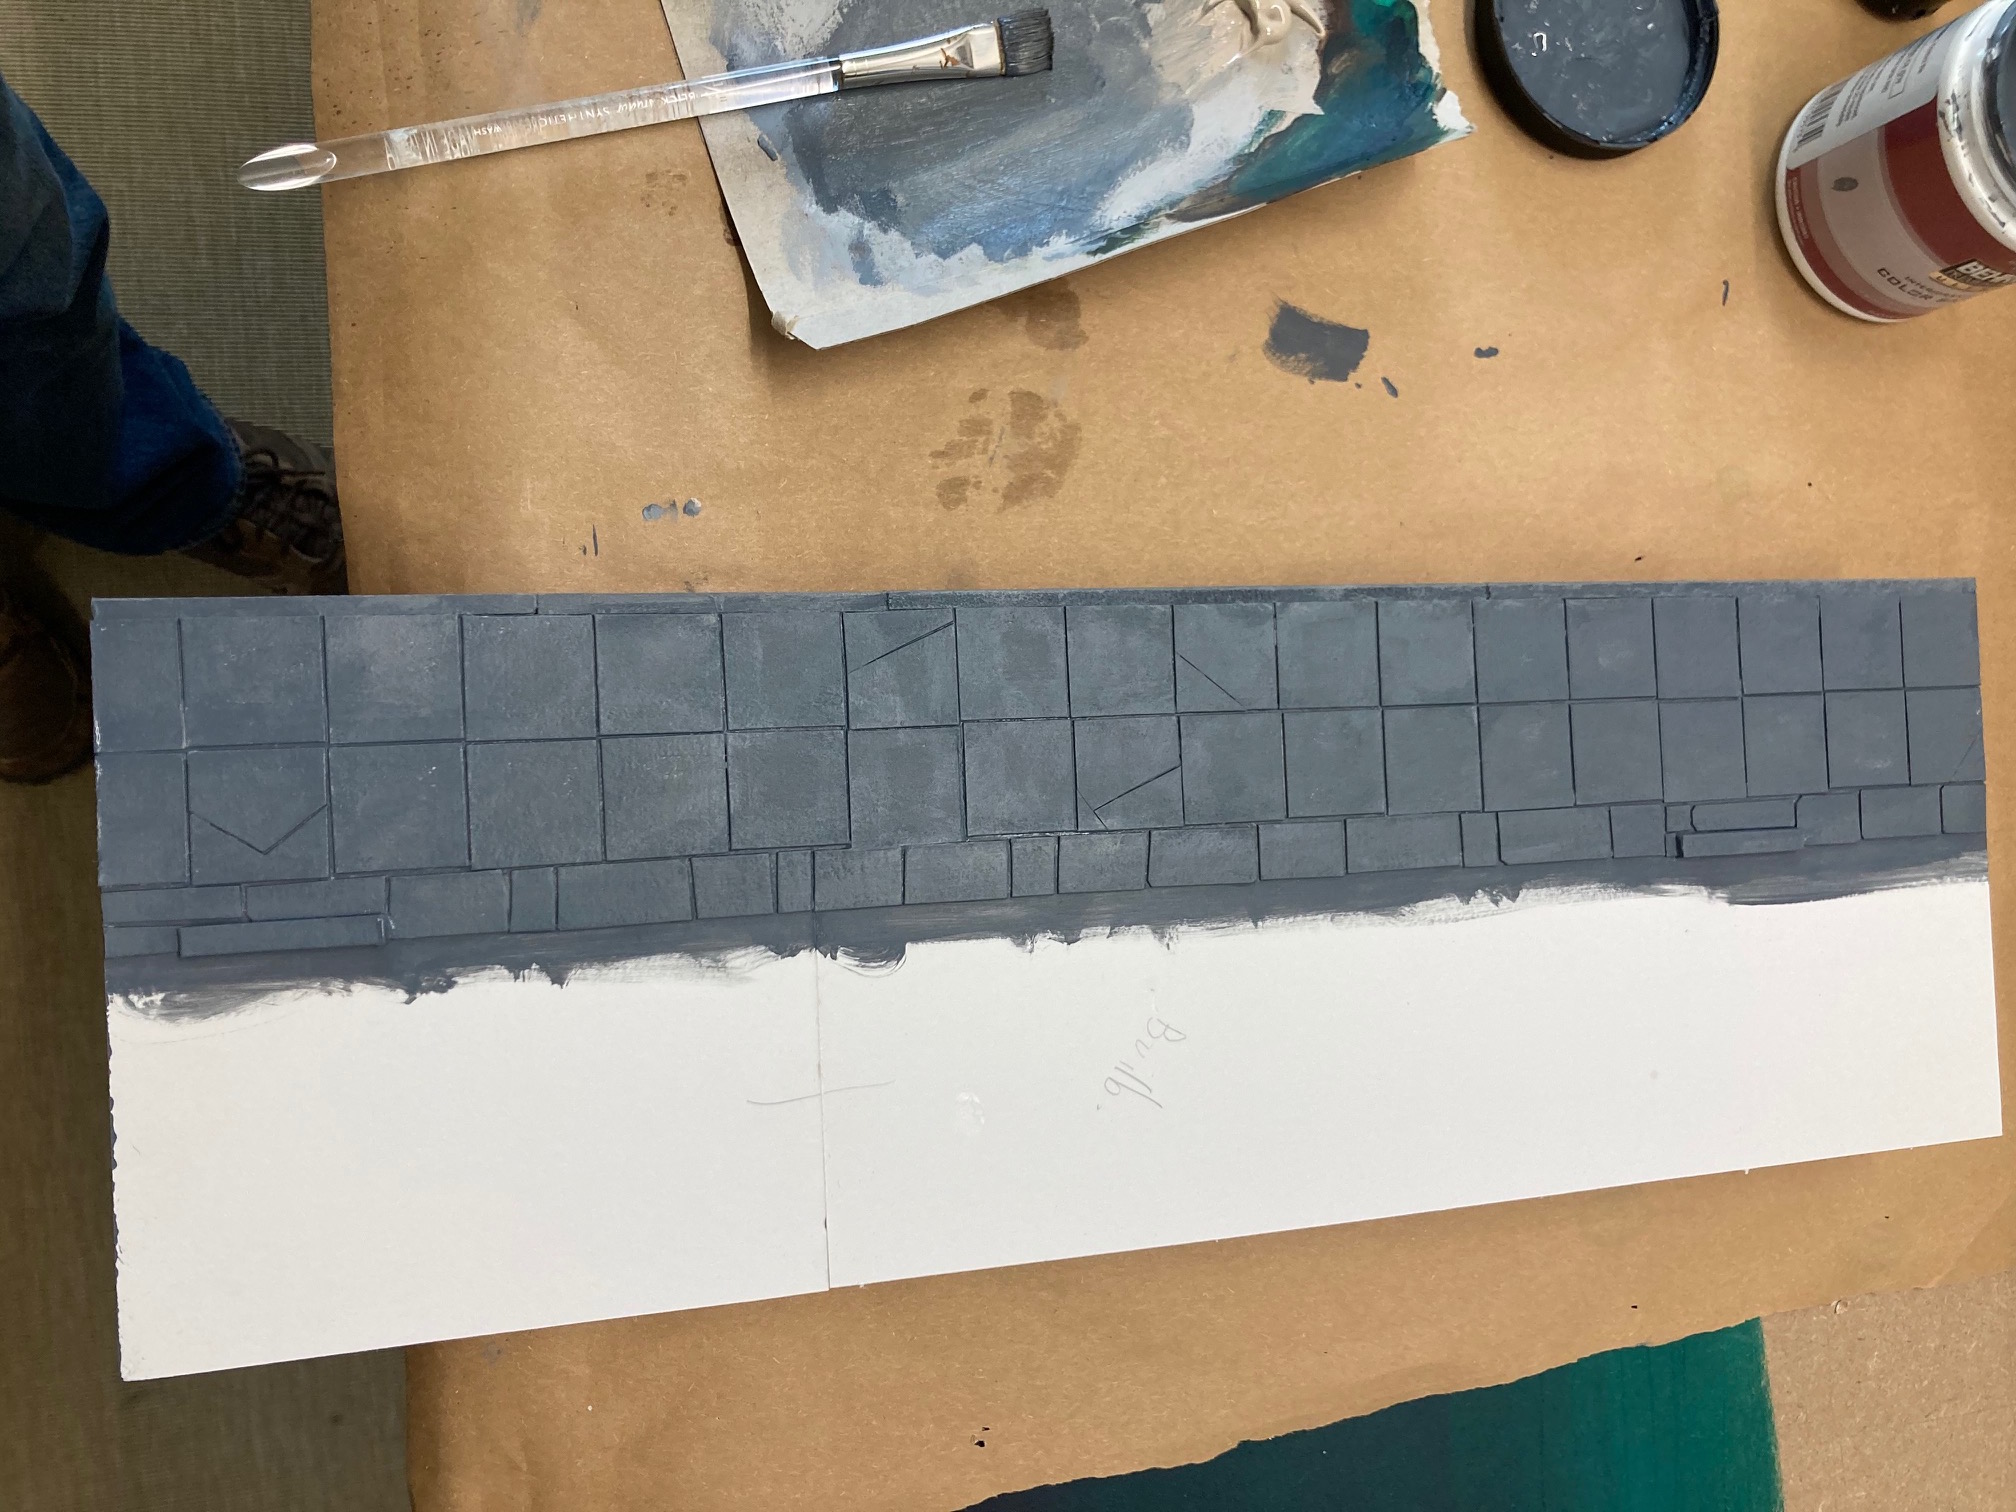
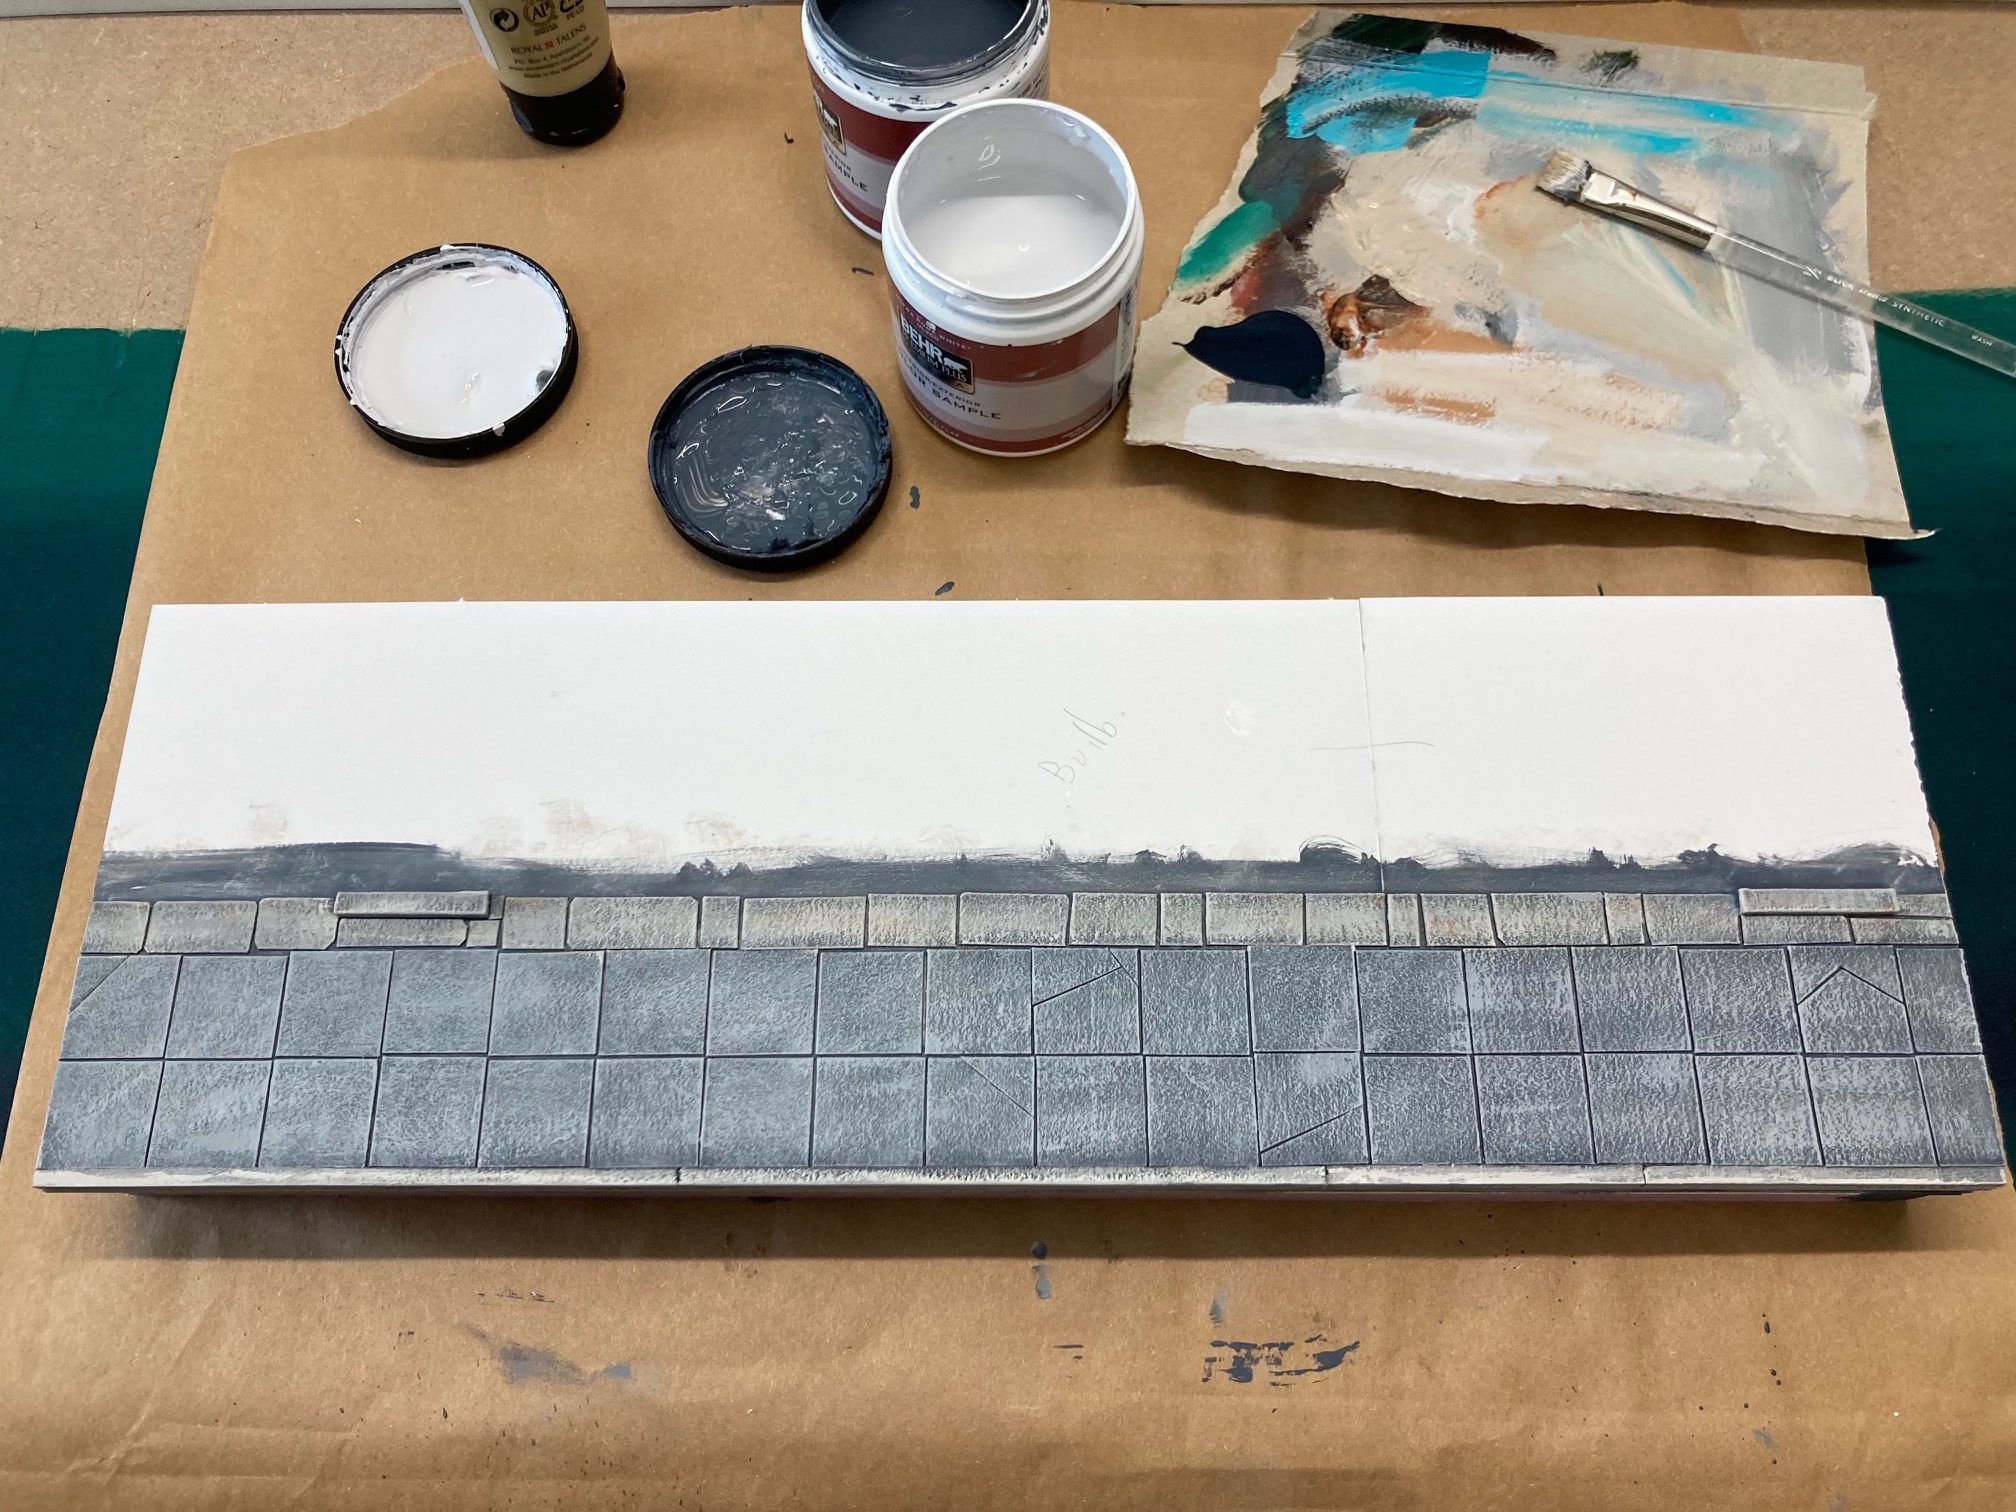

I then added a crosswalk by using 1/2 inch masking tape to mark out stripes and then sponging layers of grey white paint onto the surface.
I purposely made them larger then scale. I want them to stand out.
Thank you for stopping by,
Cheers
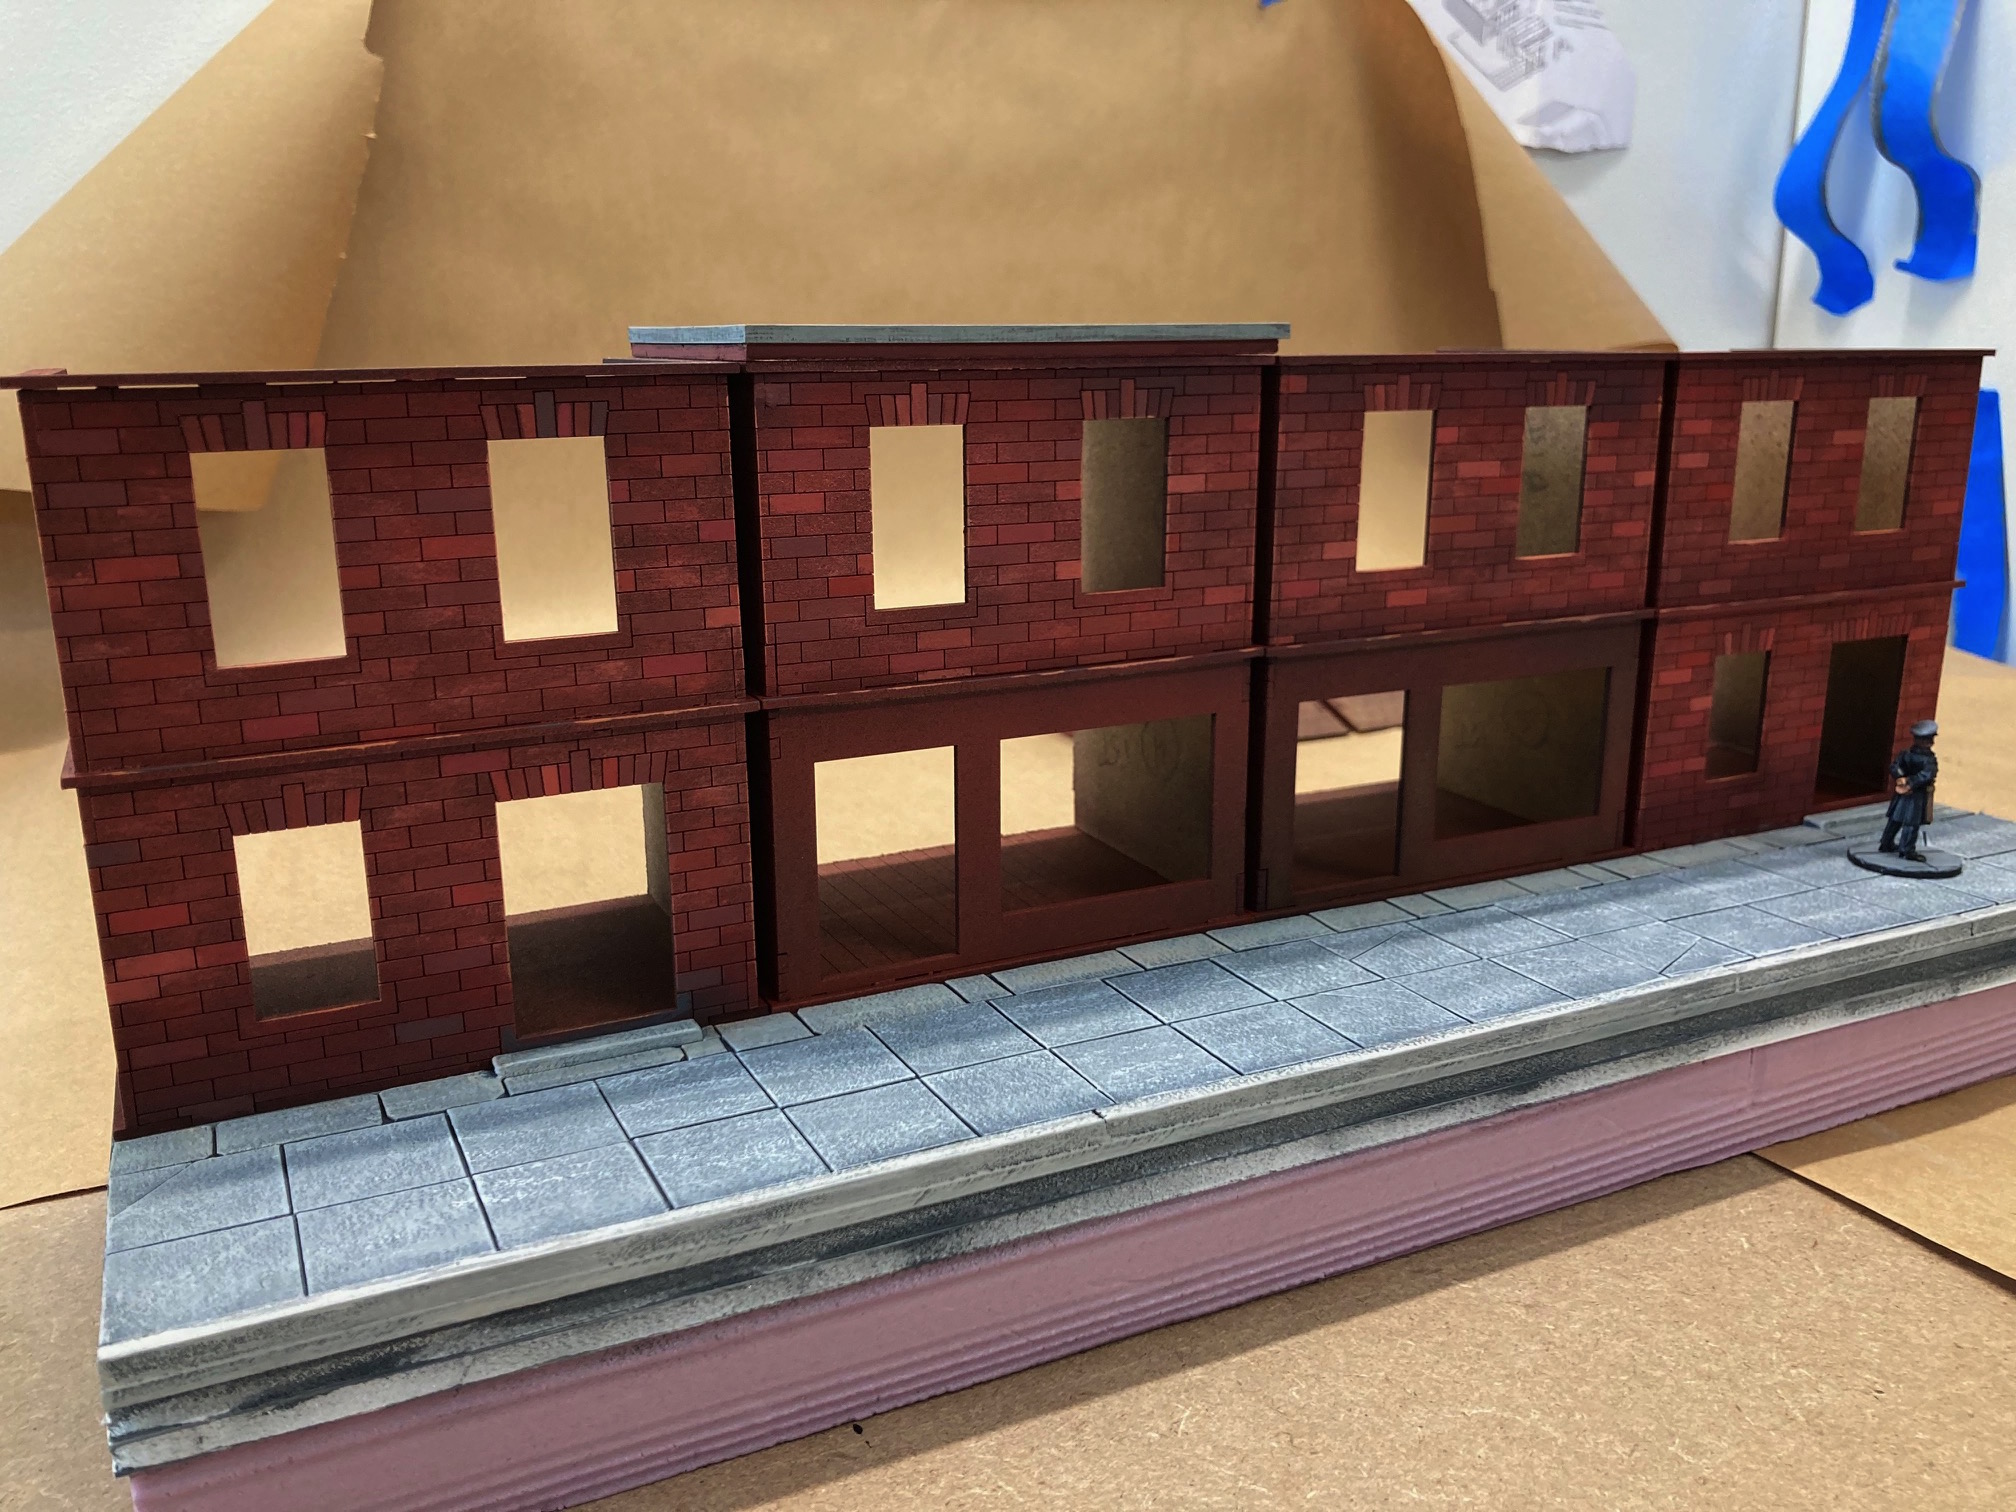
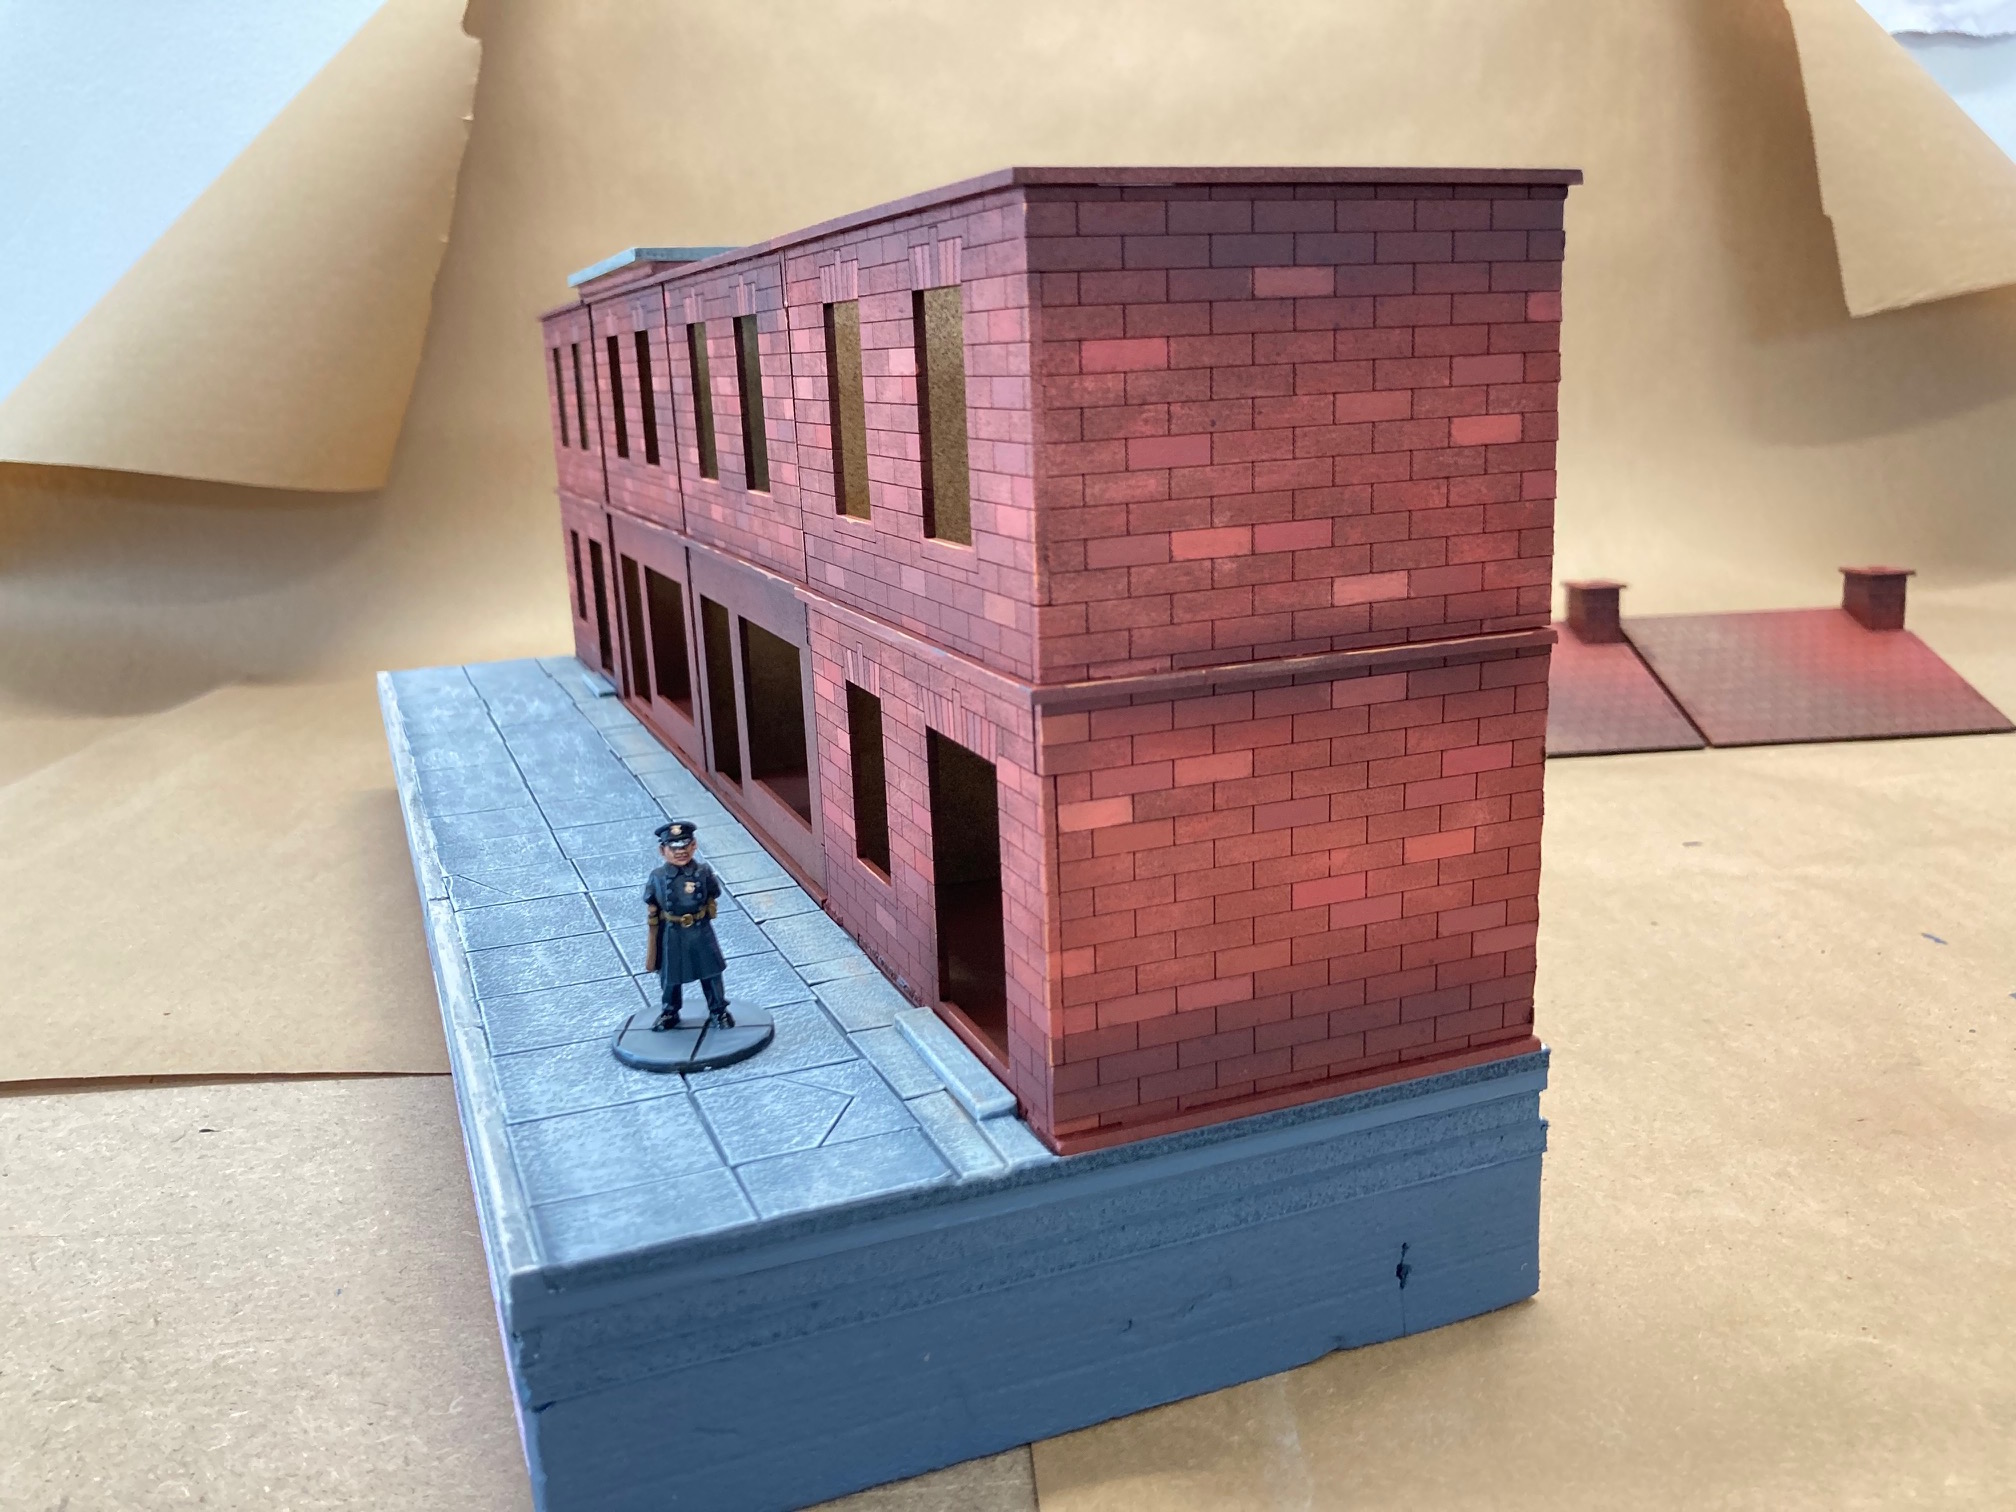
Low Relief City Block-Modularity Part 5

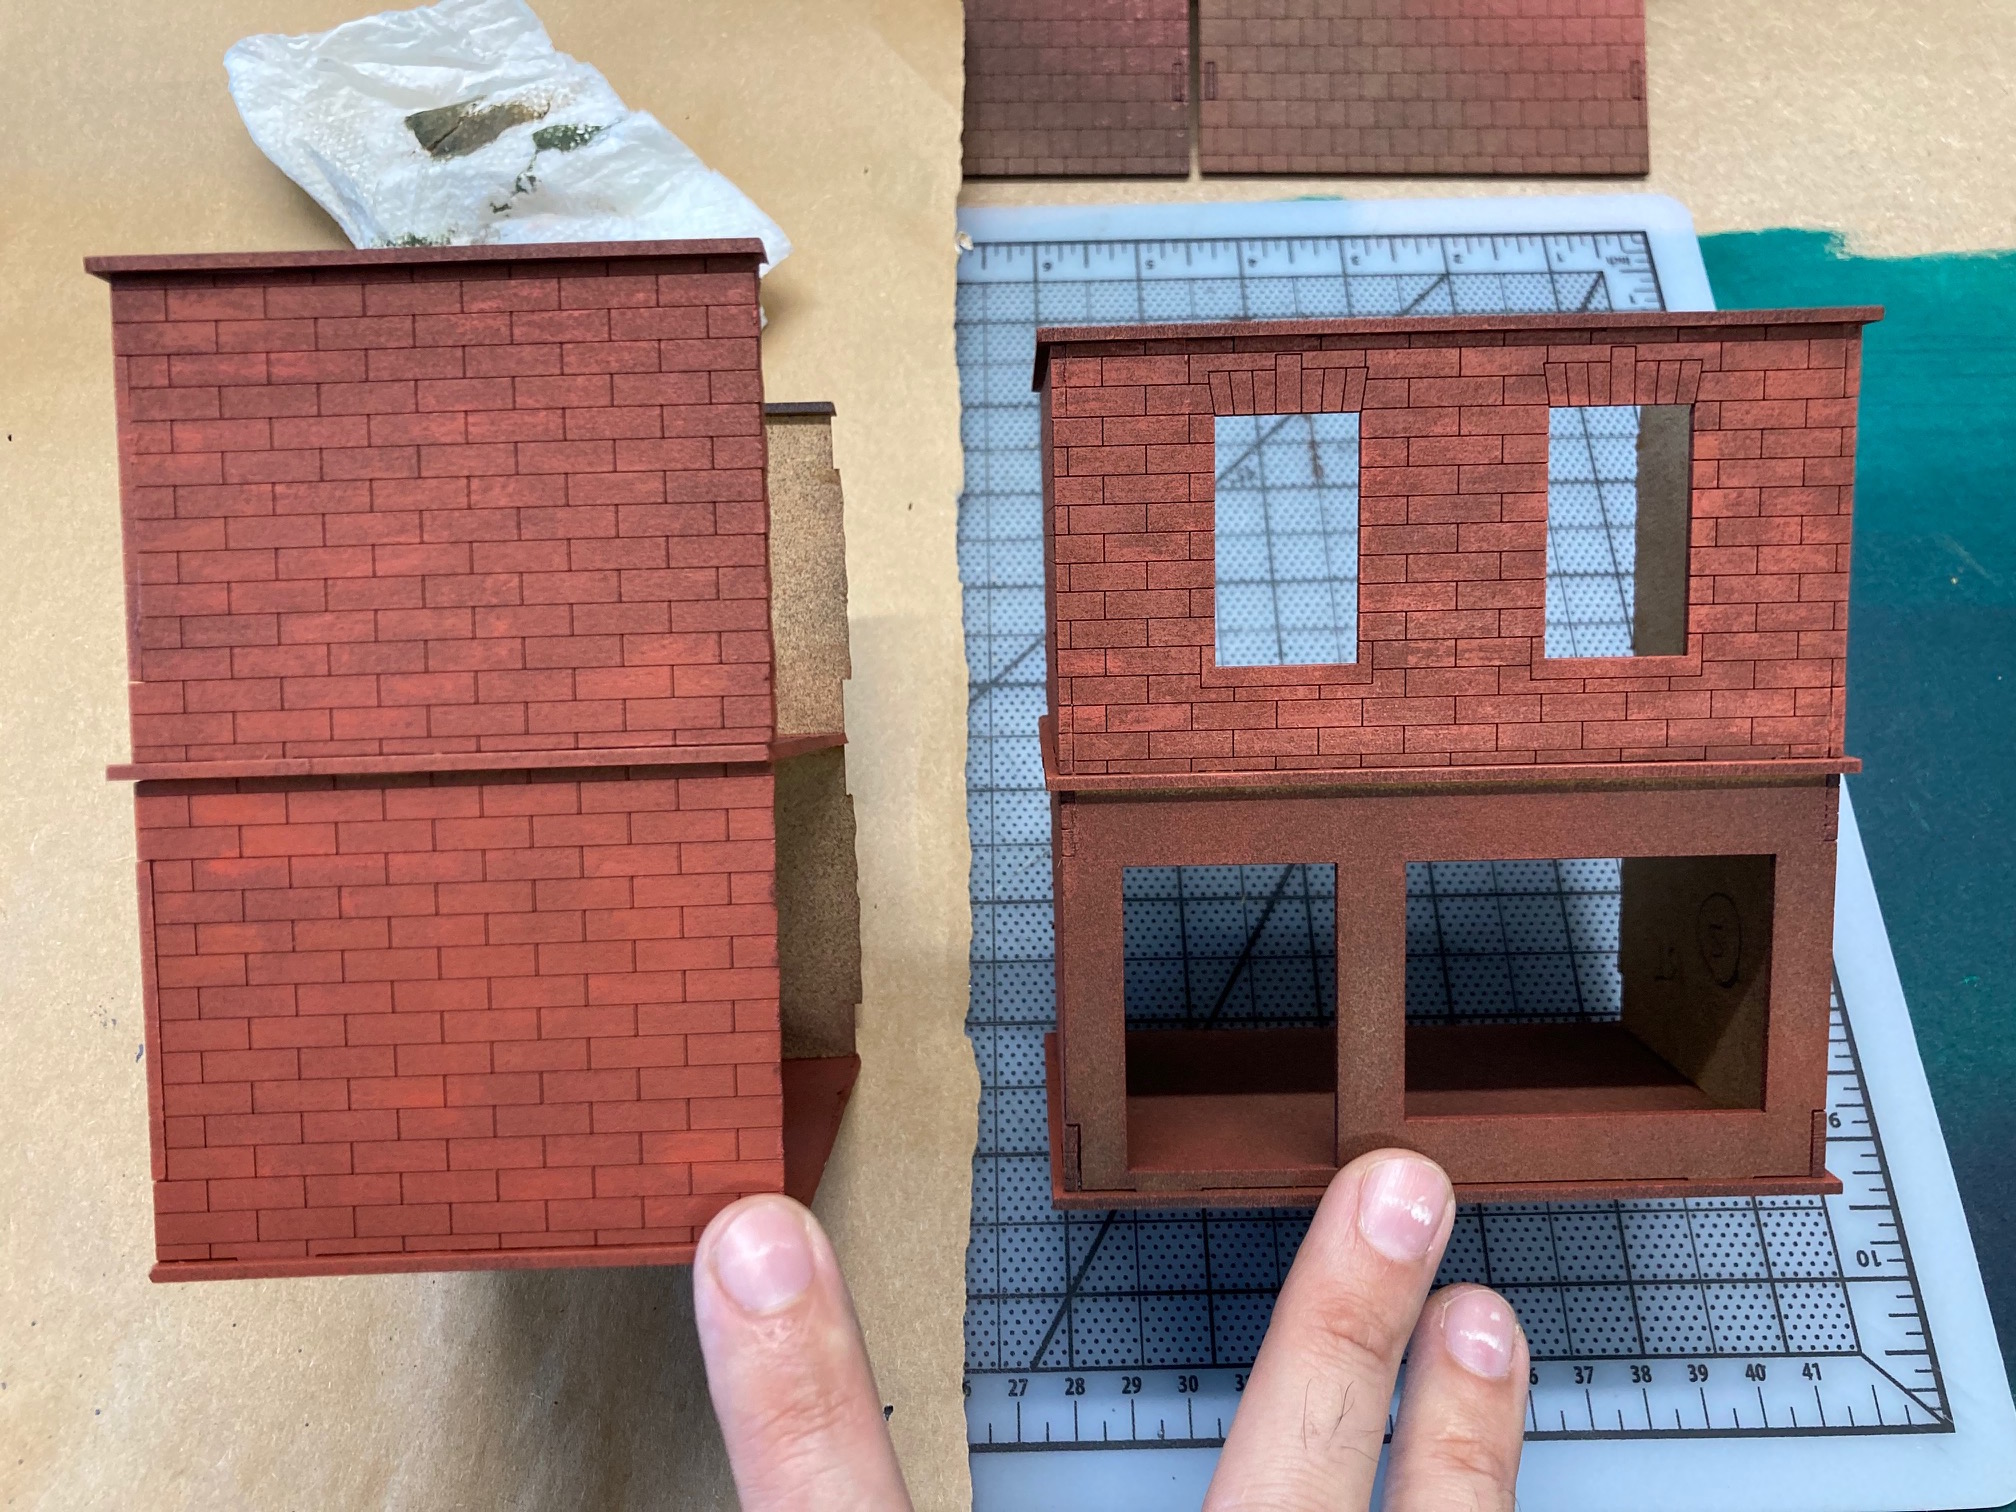
Base Color(s)
To start off I primed each building with Black chalk spray paint. I then lightly sprayed a Brick Red paint on all three sides. I then found 7 pots of brick like colors in my collection. I dry brushes random light strokes of the seven colors going from dark to light. Im only doing this to the sides of the first and last building. The rest just get attention to the front.
Cheers
Low Relief City Block-Modularity Part 6
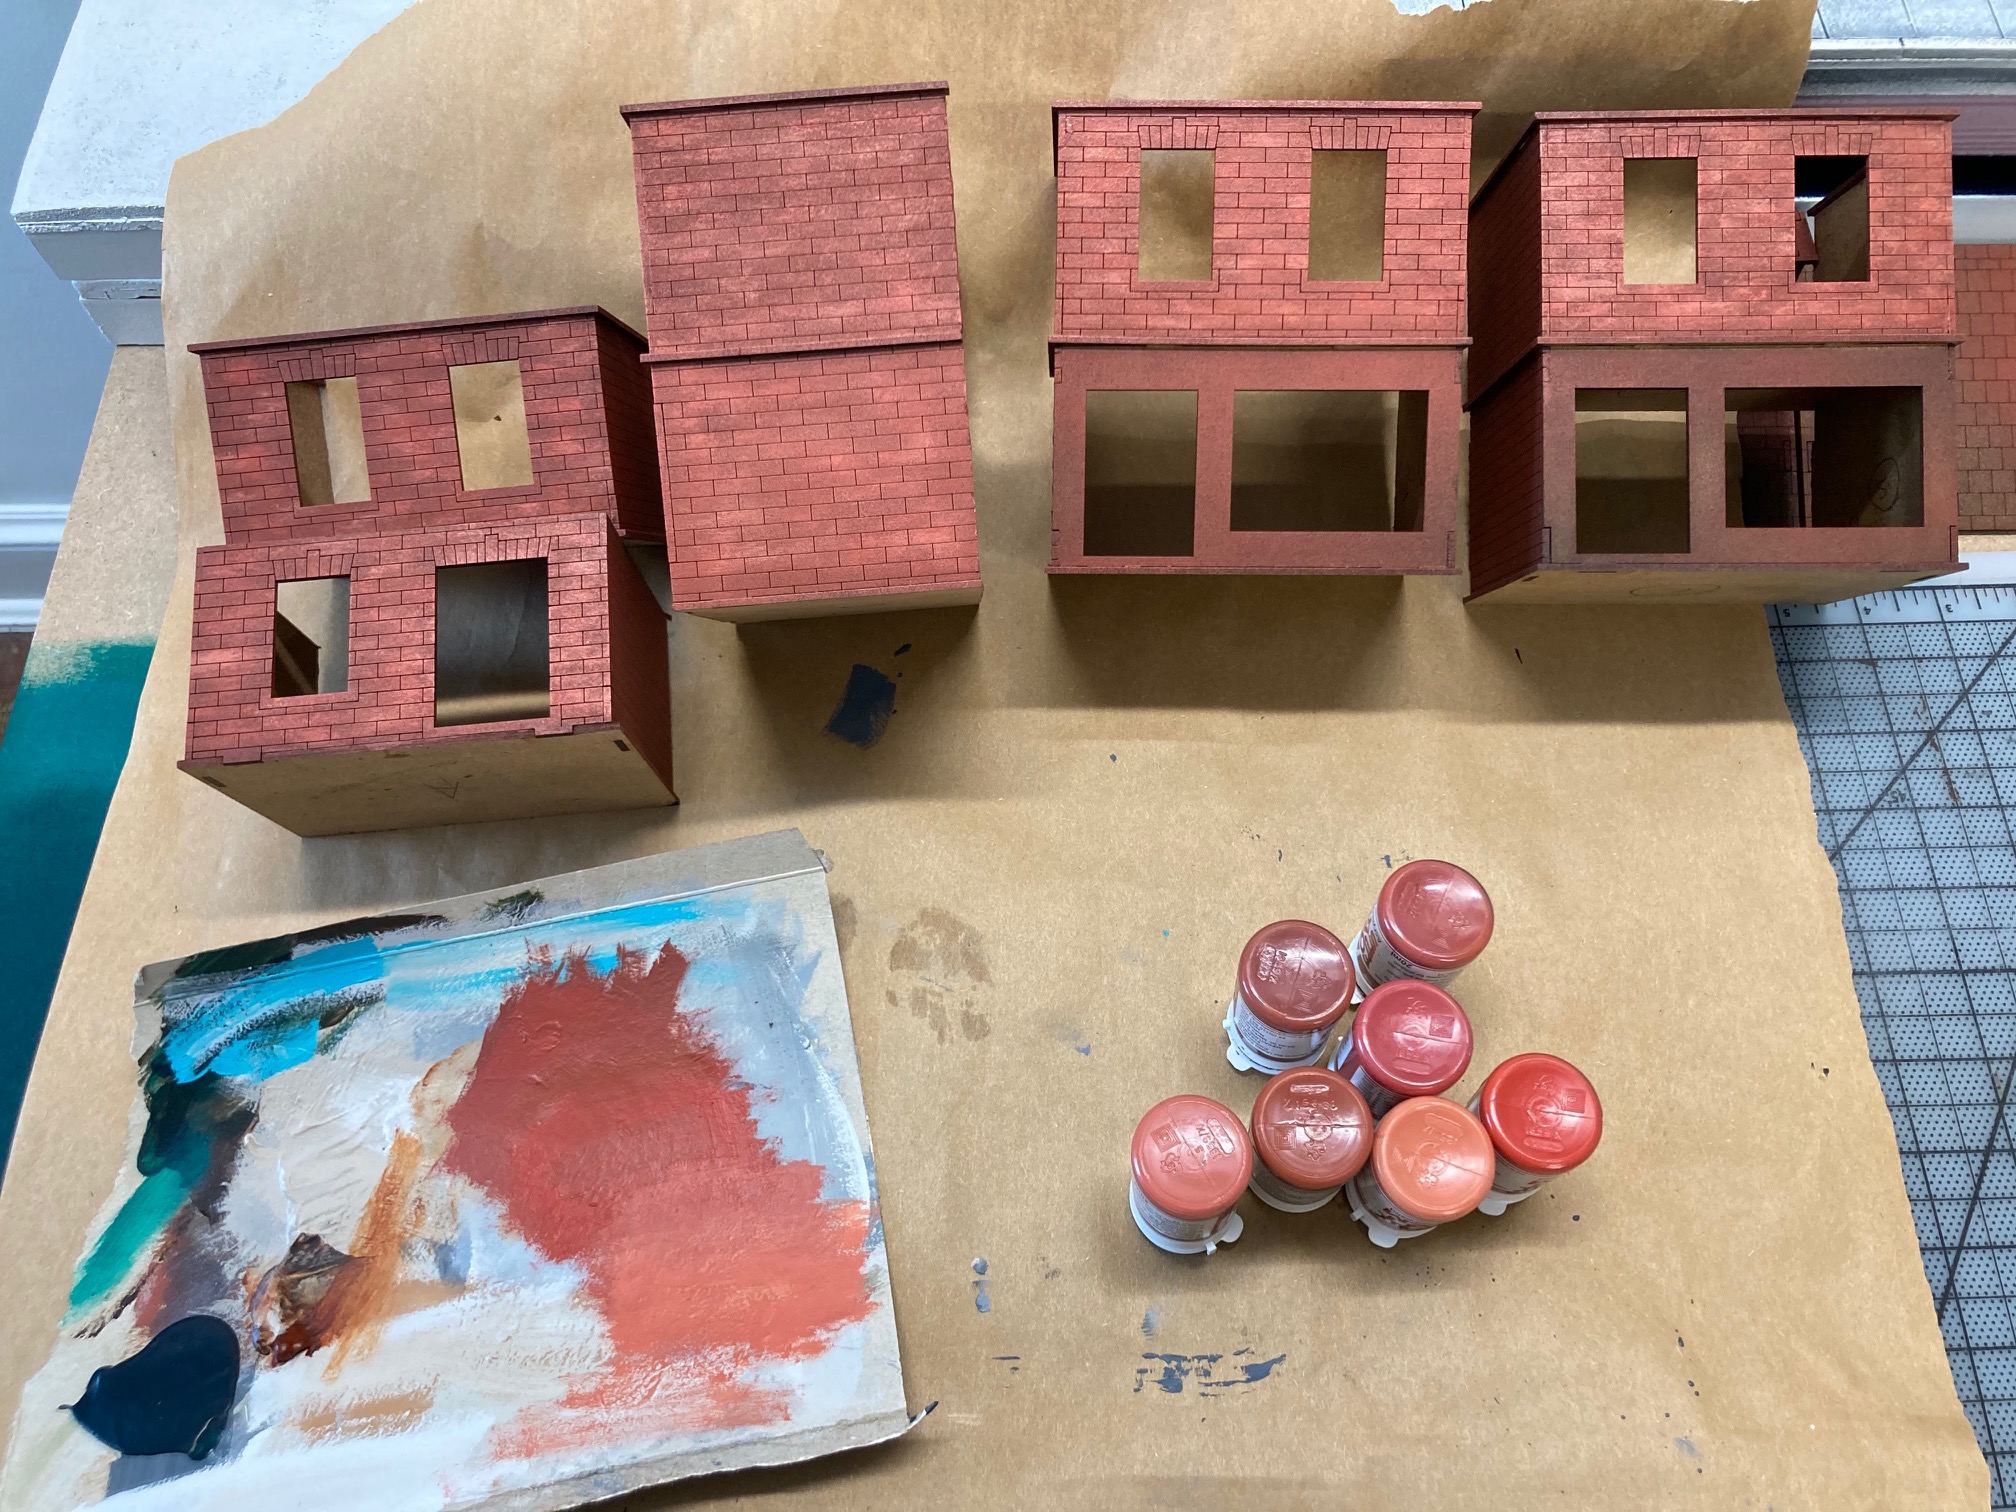
Mid Tone
Using the same 7 pots of paint I used for the Base coats, I picked out individual bricks and painted them in. I also painted the vertical bricks over the windows and doors.
Highlight
I then used Ochre to edge highlight each edge, doors, windows and walls. Finally a yellow edge highlight in short random spots.
Putting this aside now to work on TRAINS!!
cheers
A Bit Of Green
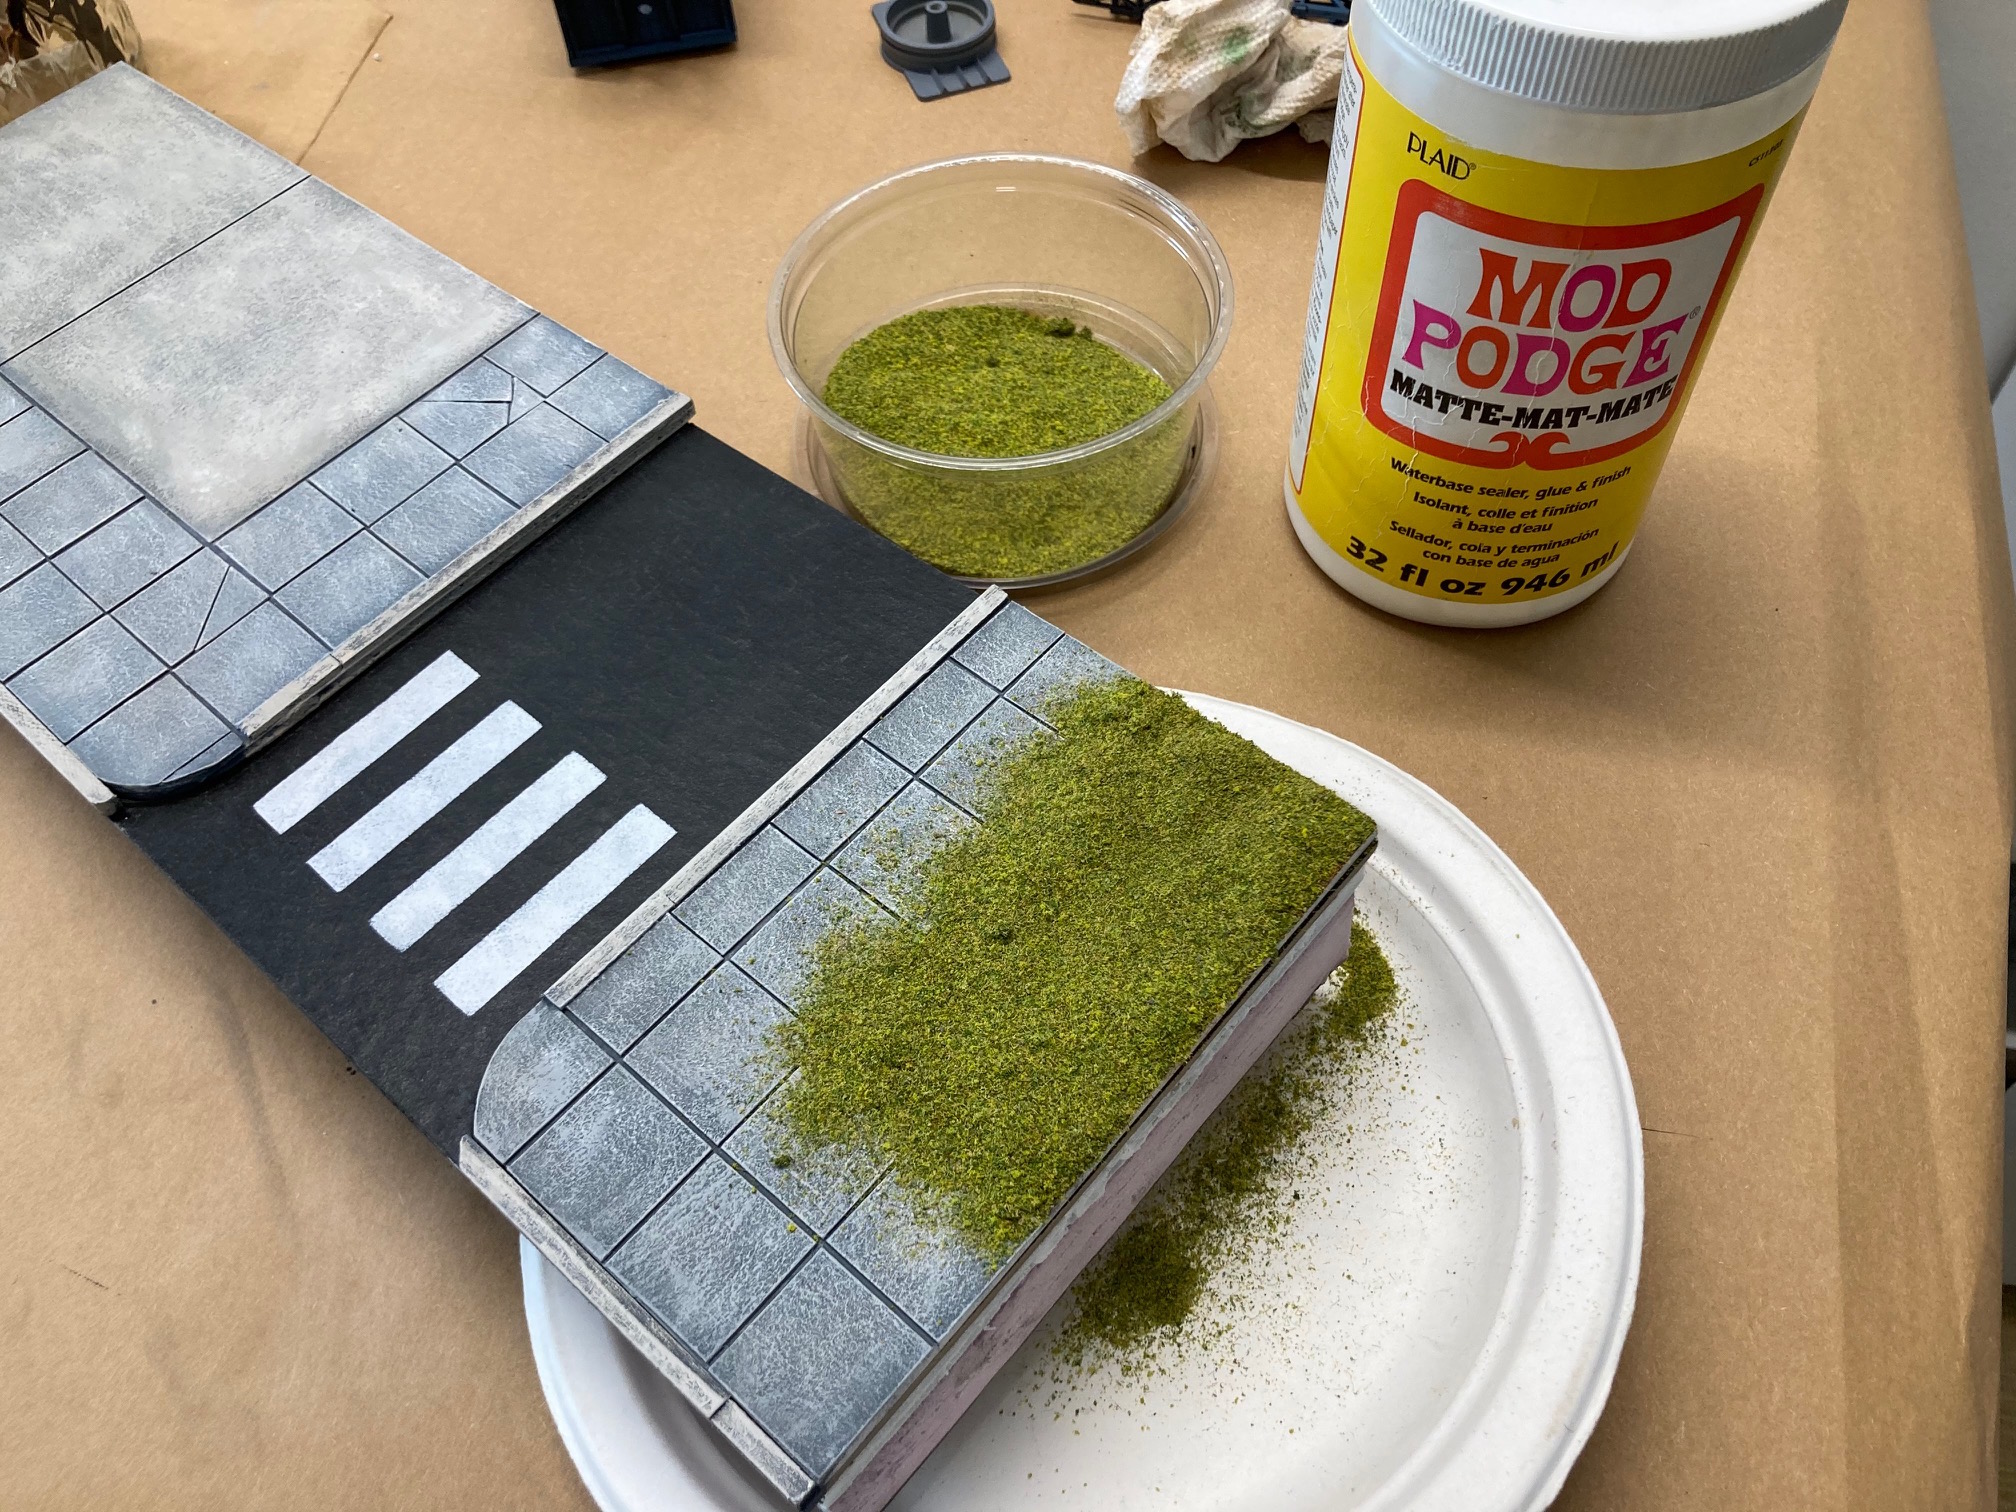
There is a small space for grass on the left side additional board. I can place a tree,bench, pillbox whatever on it.
I painted the rectangle dark brown. When the paint was dry I brushed on Mod Podge and house mix flocked the area.
~Cheers
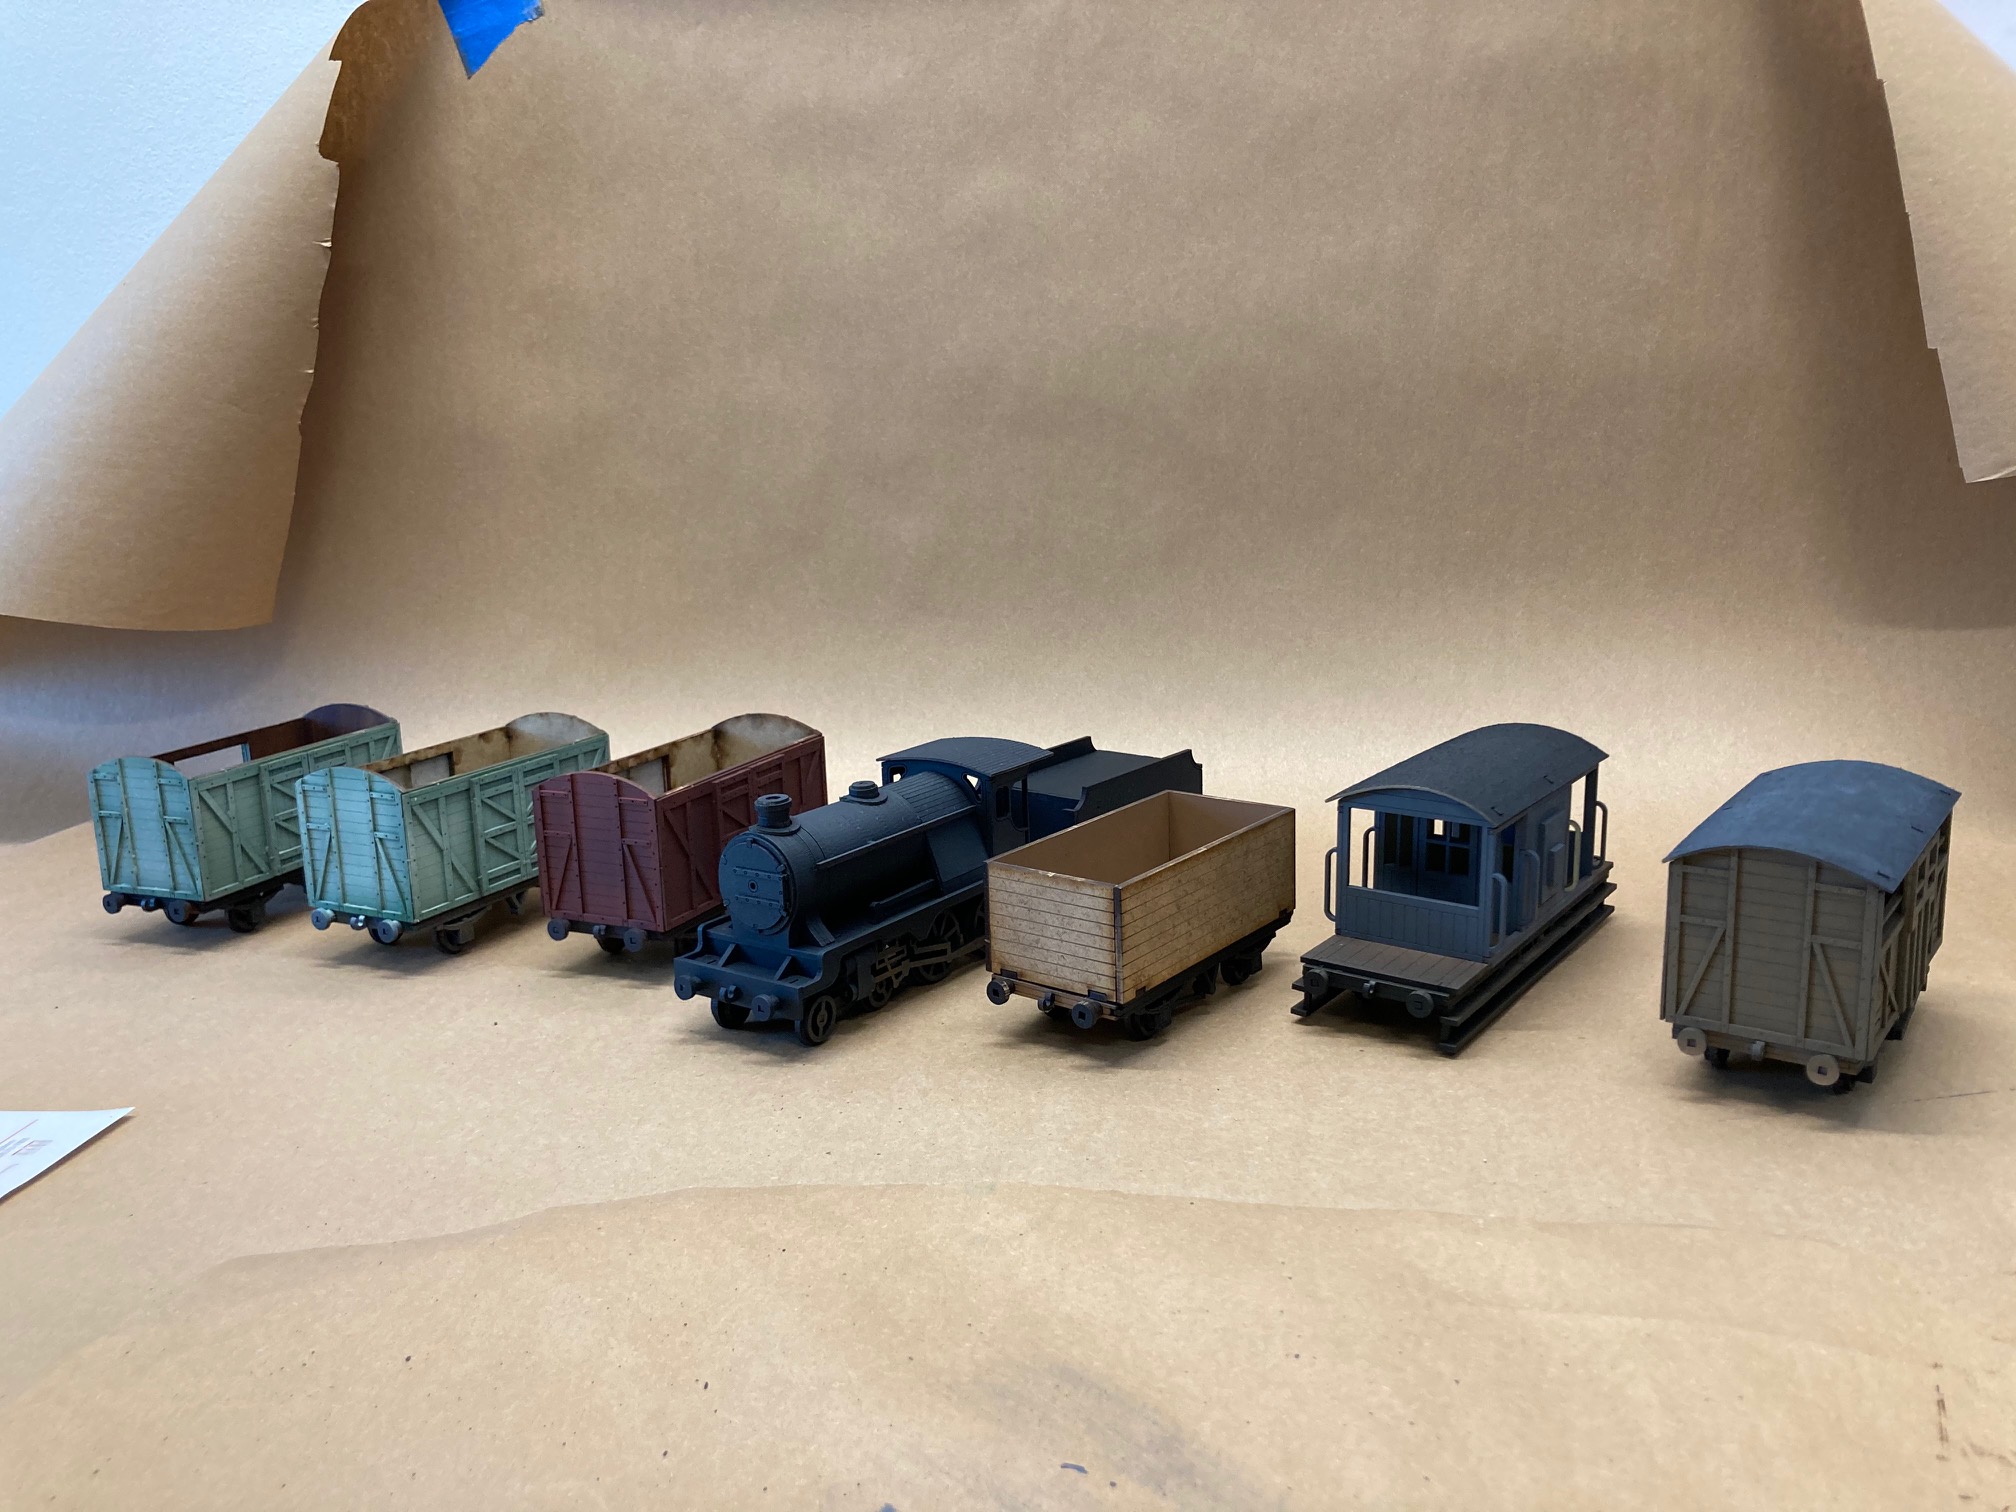
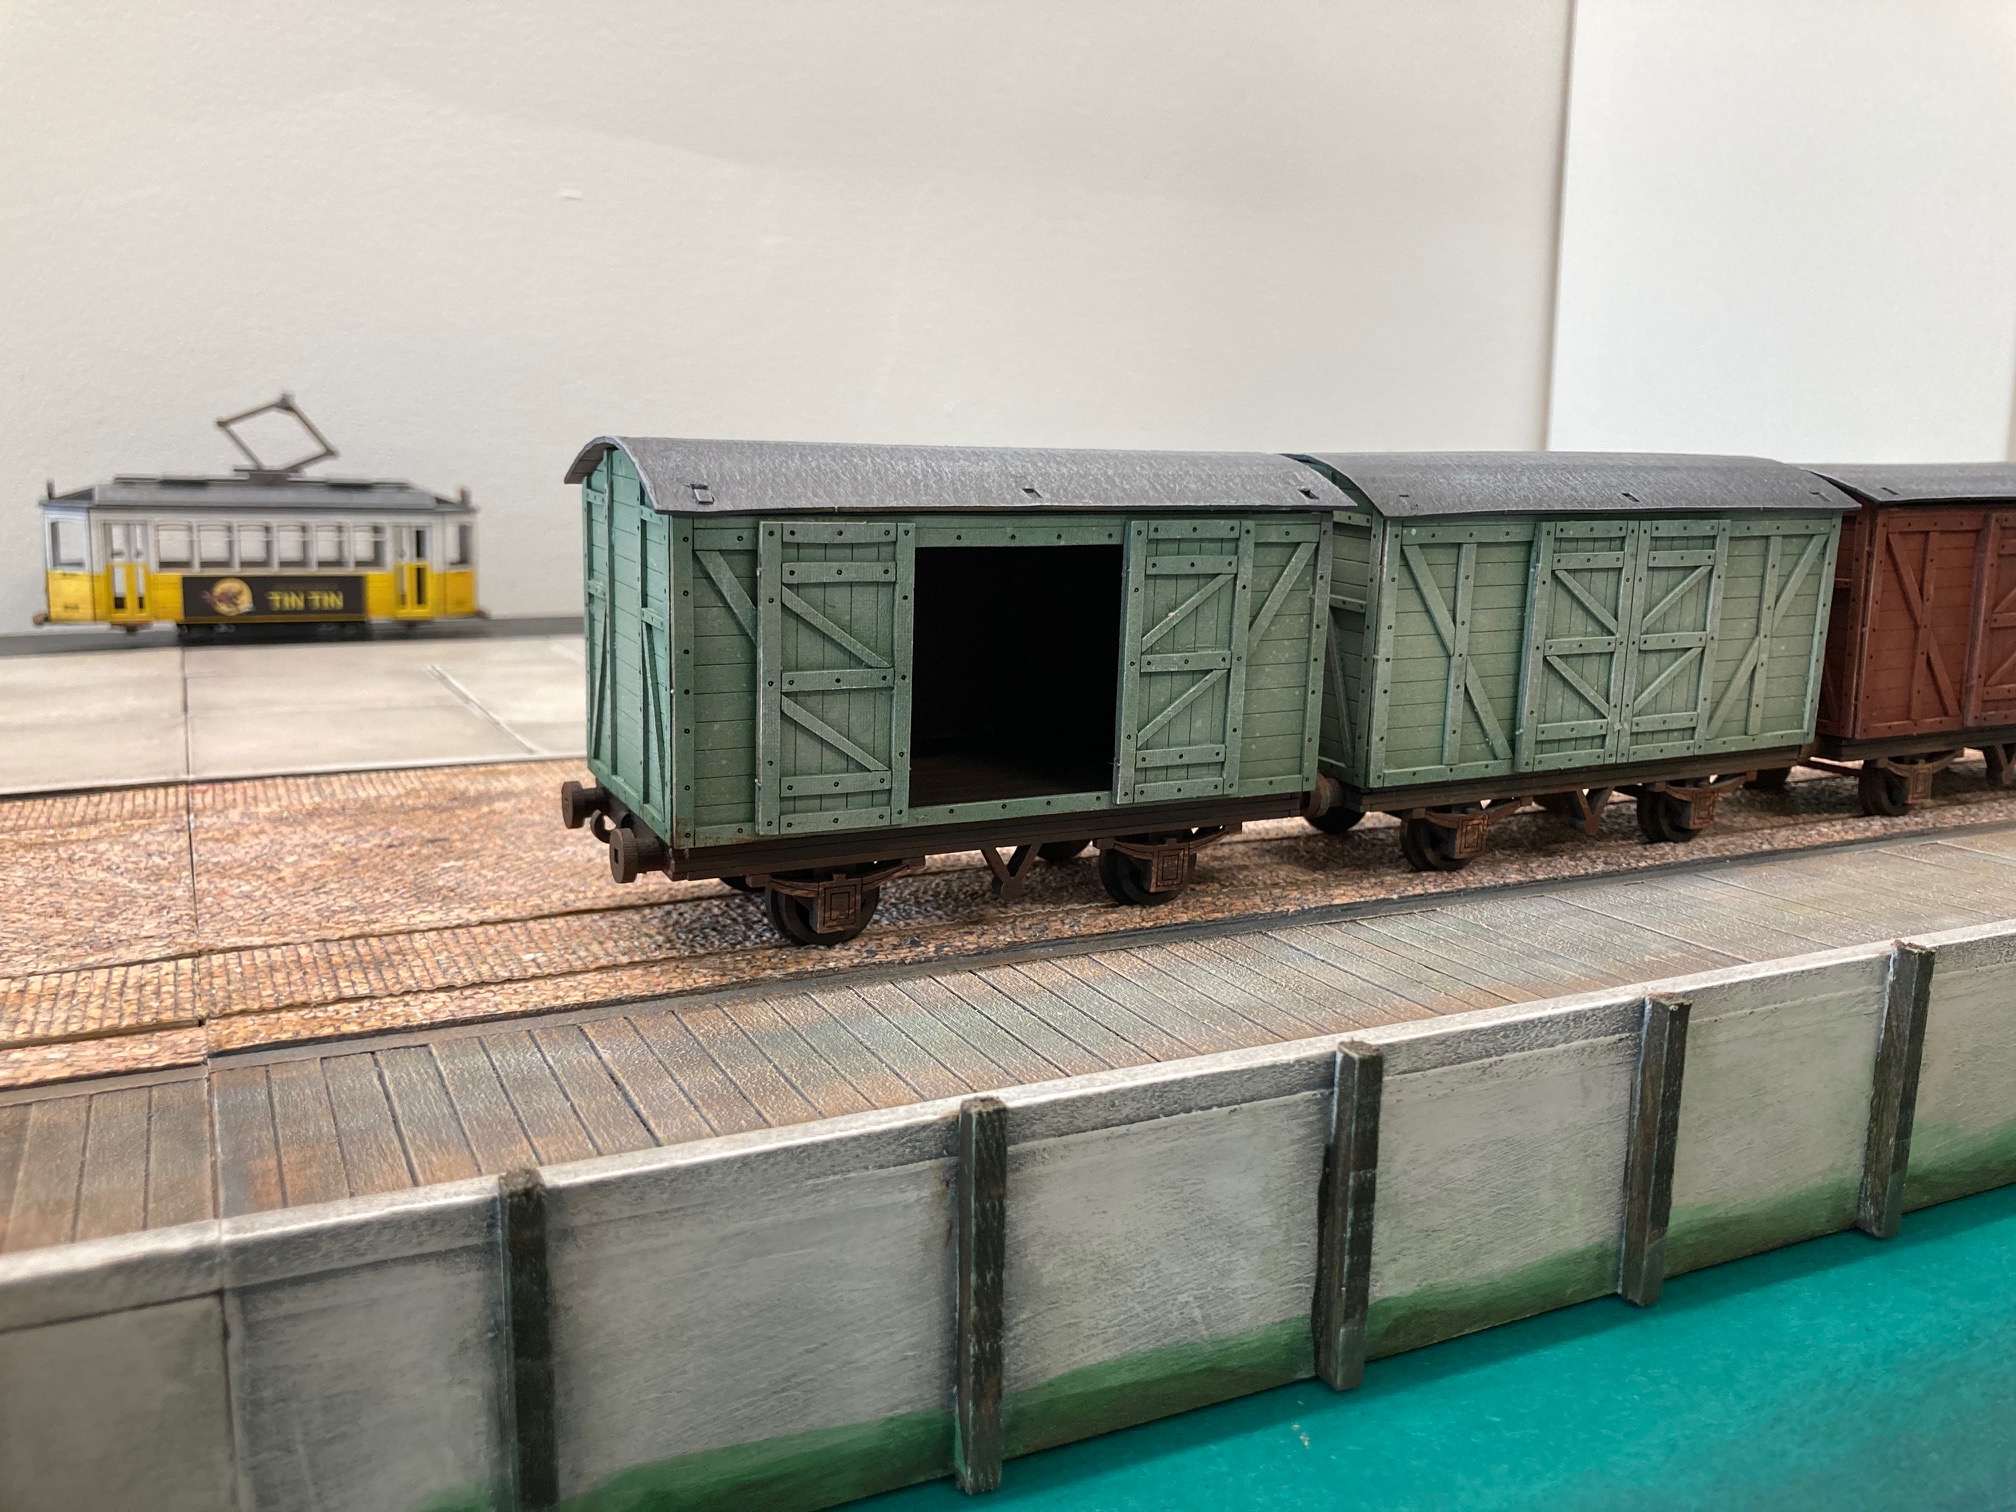
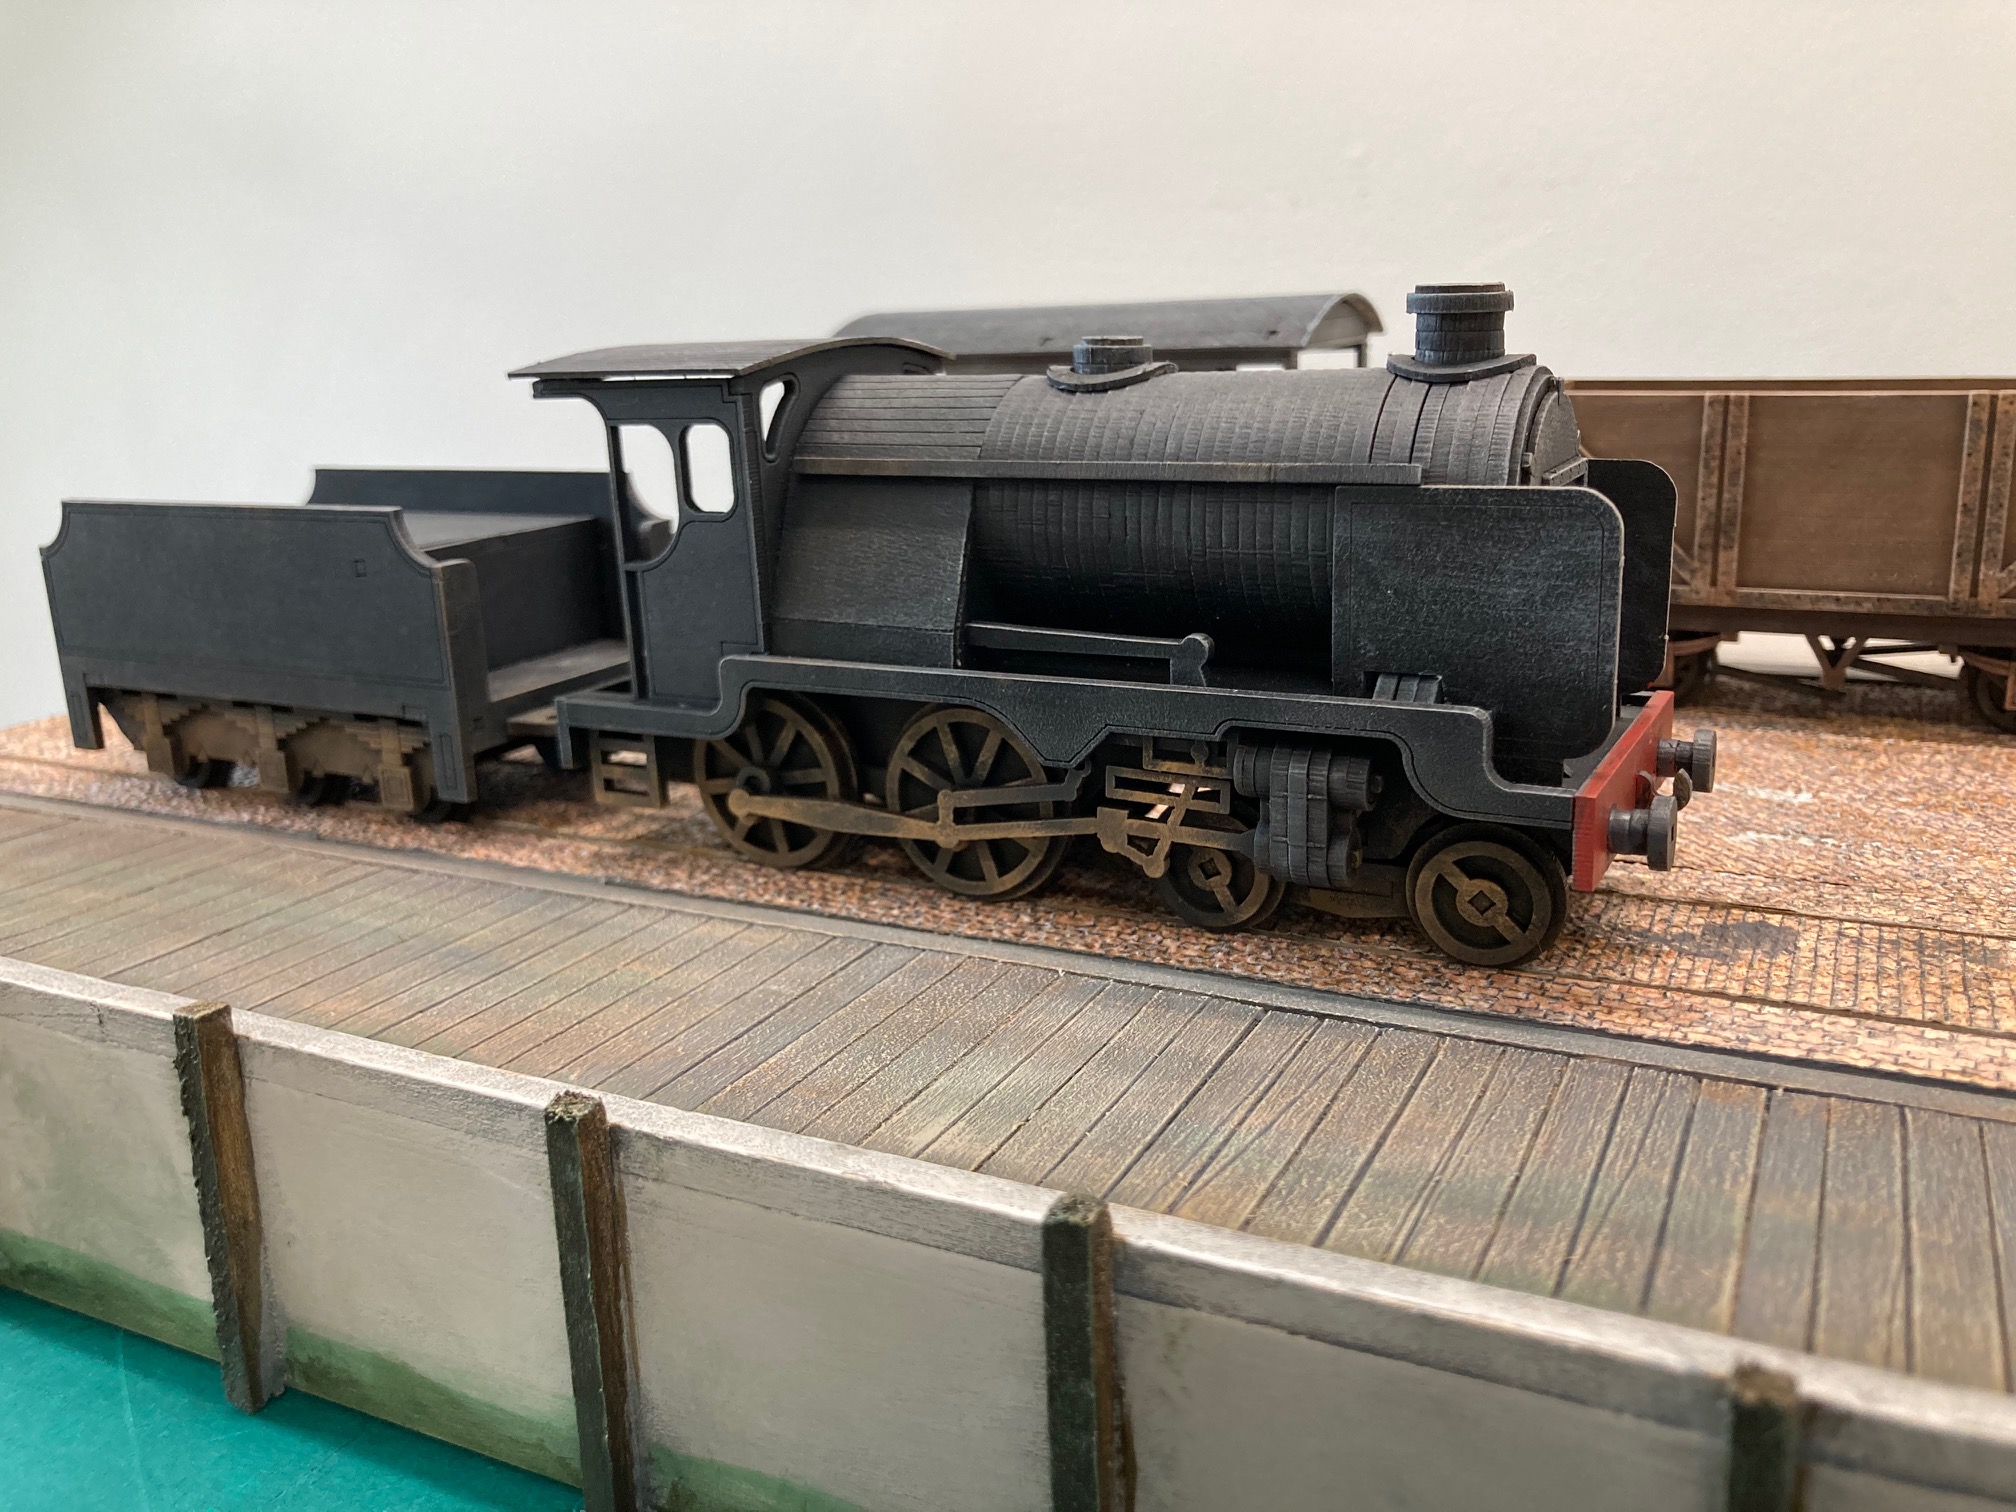
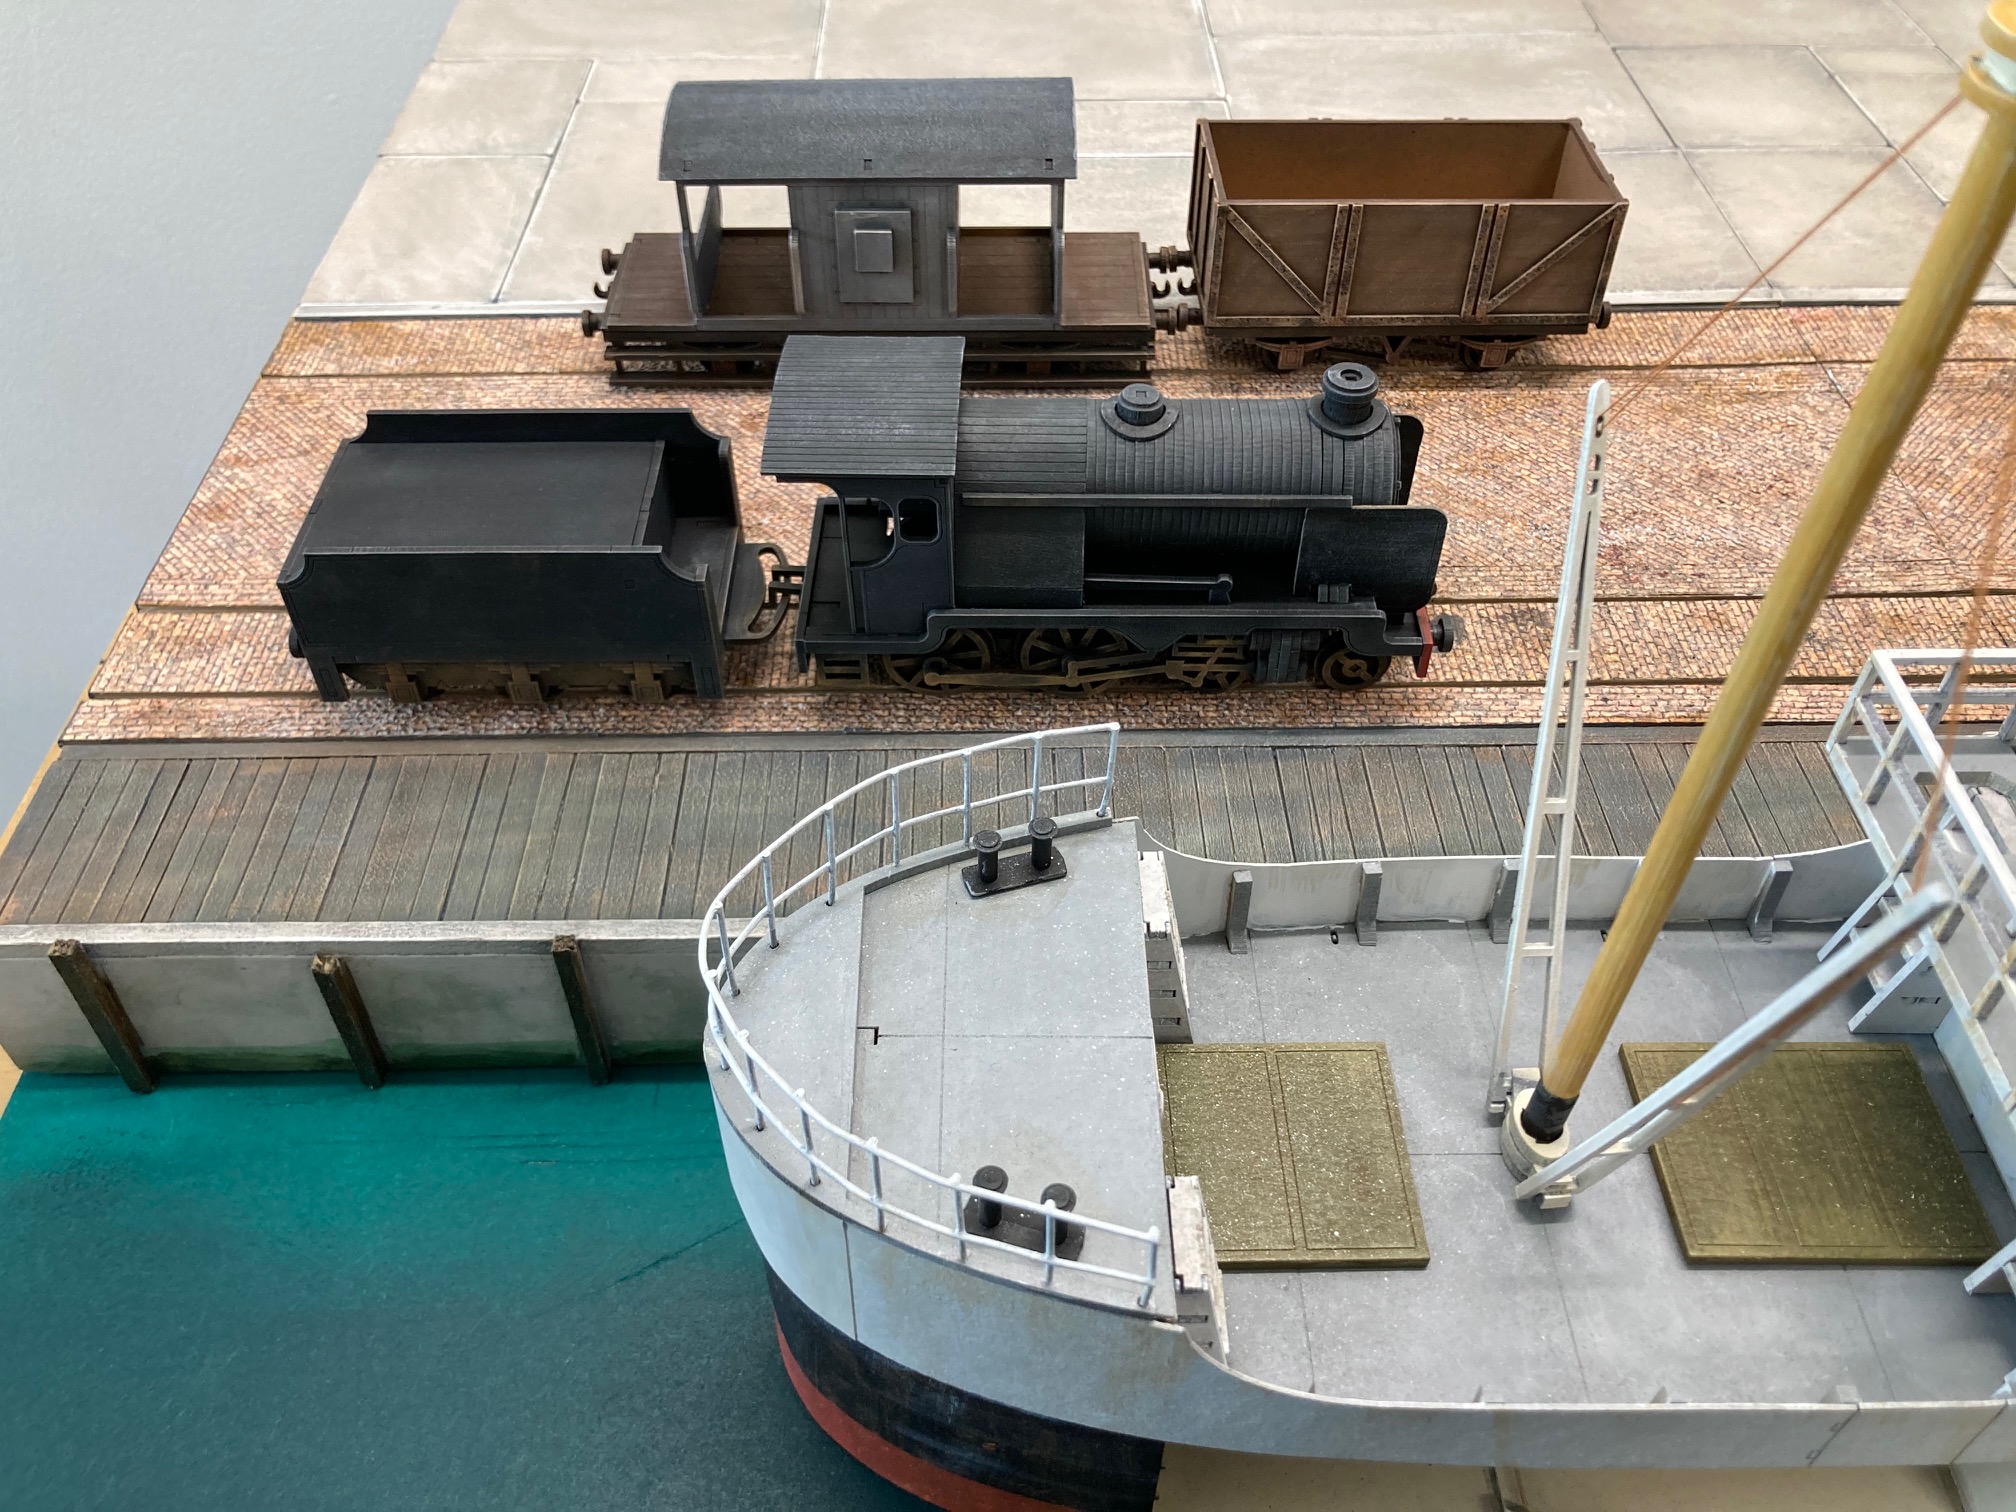
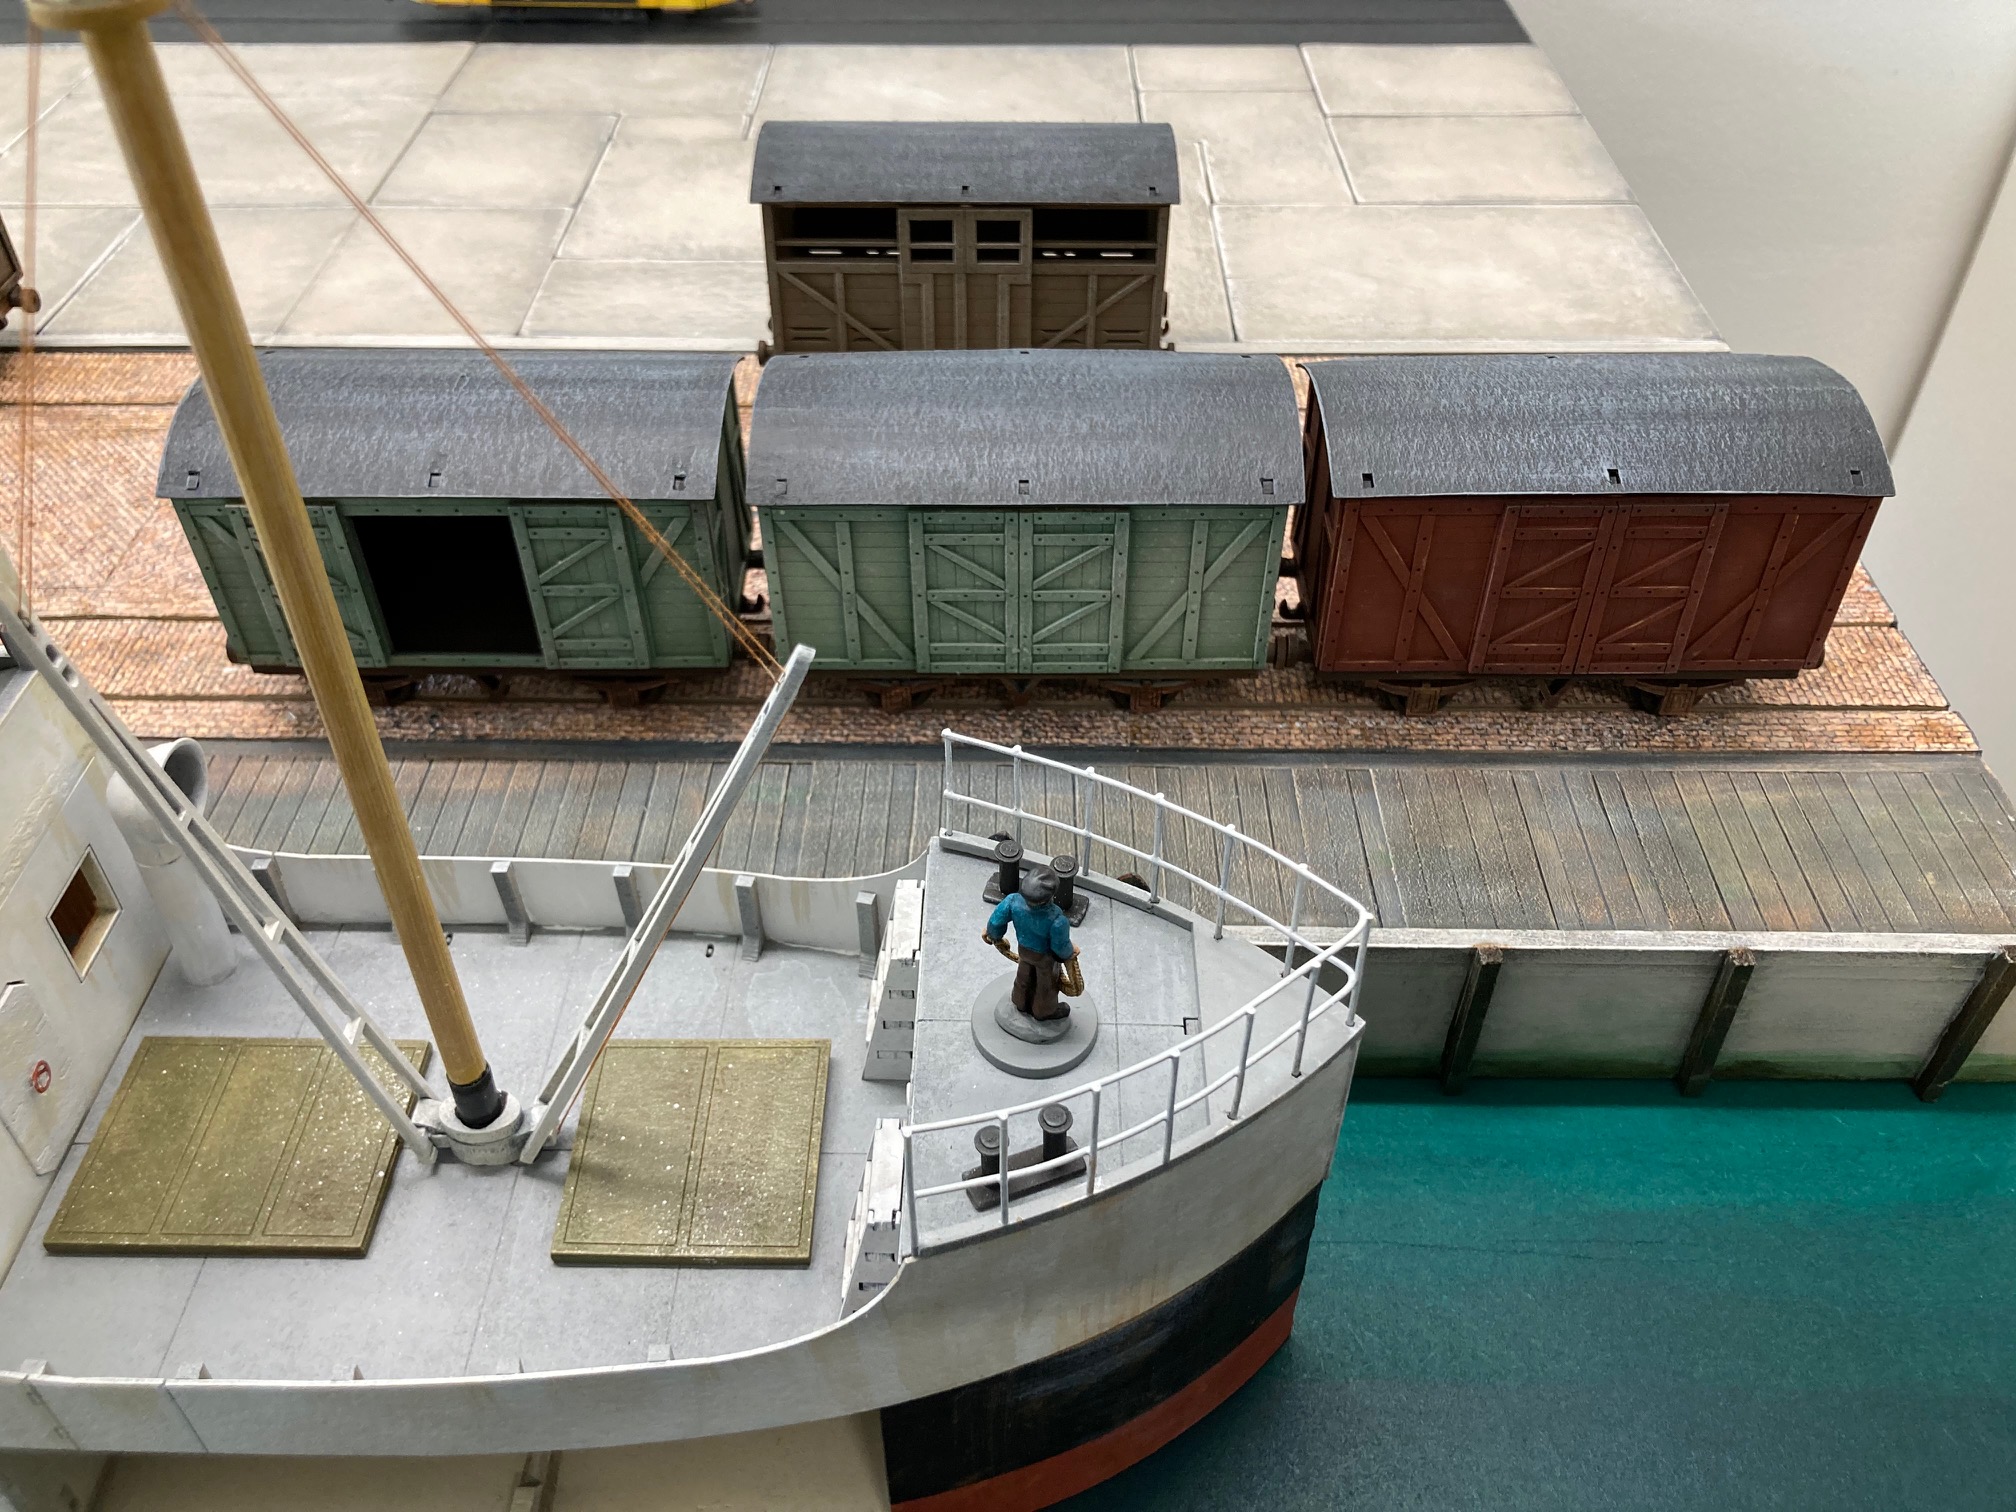
Rail Yard
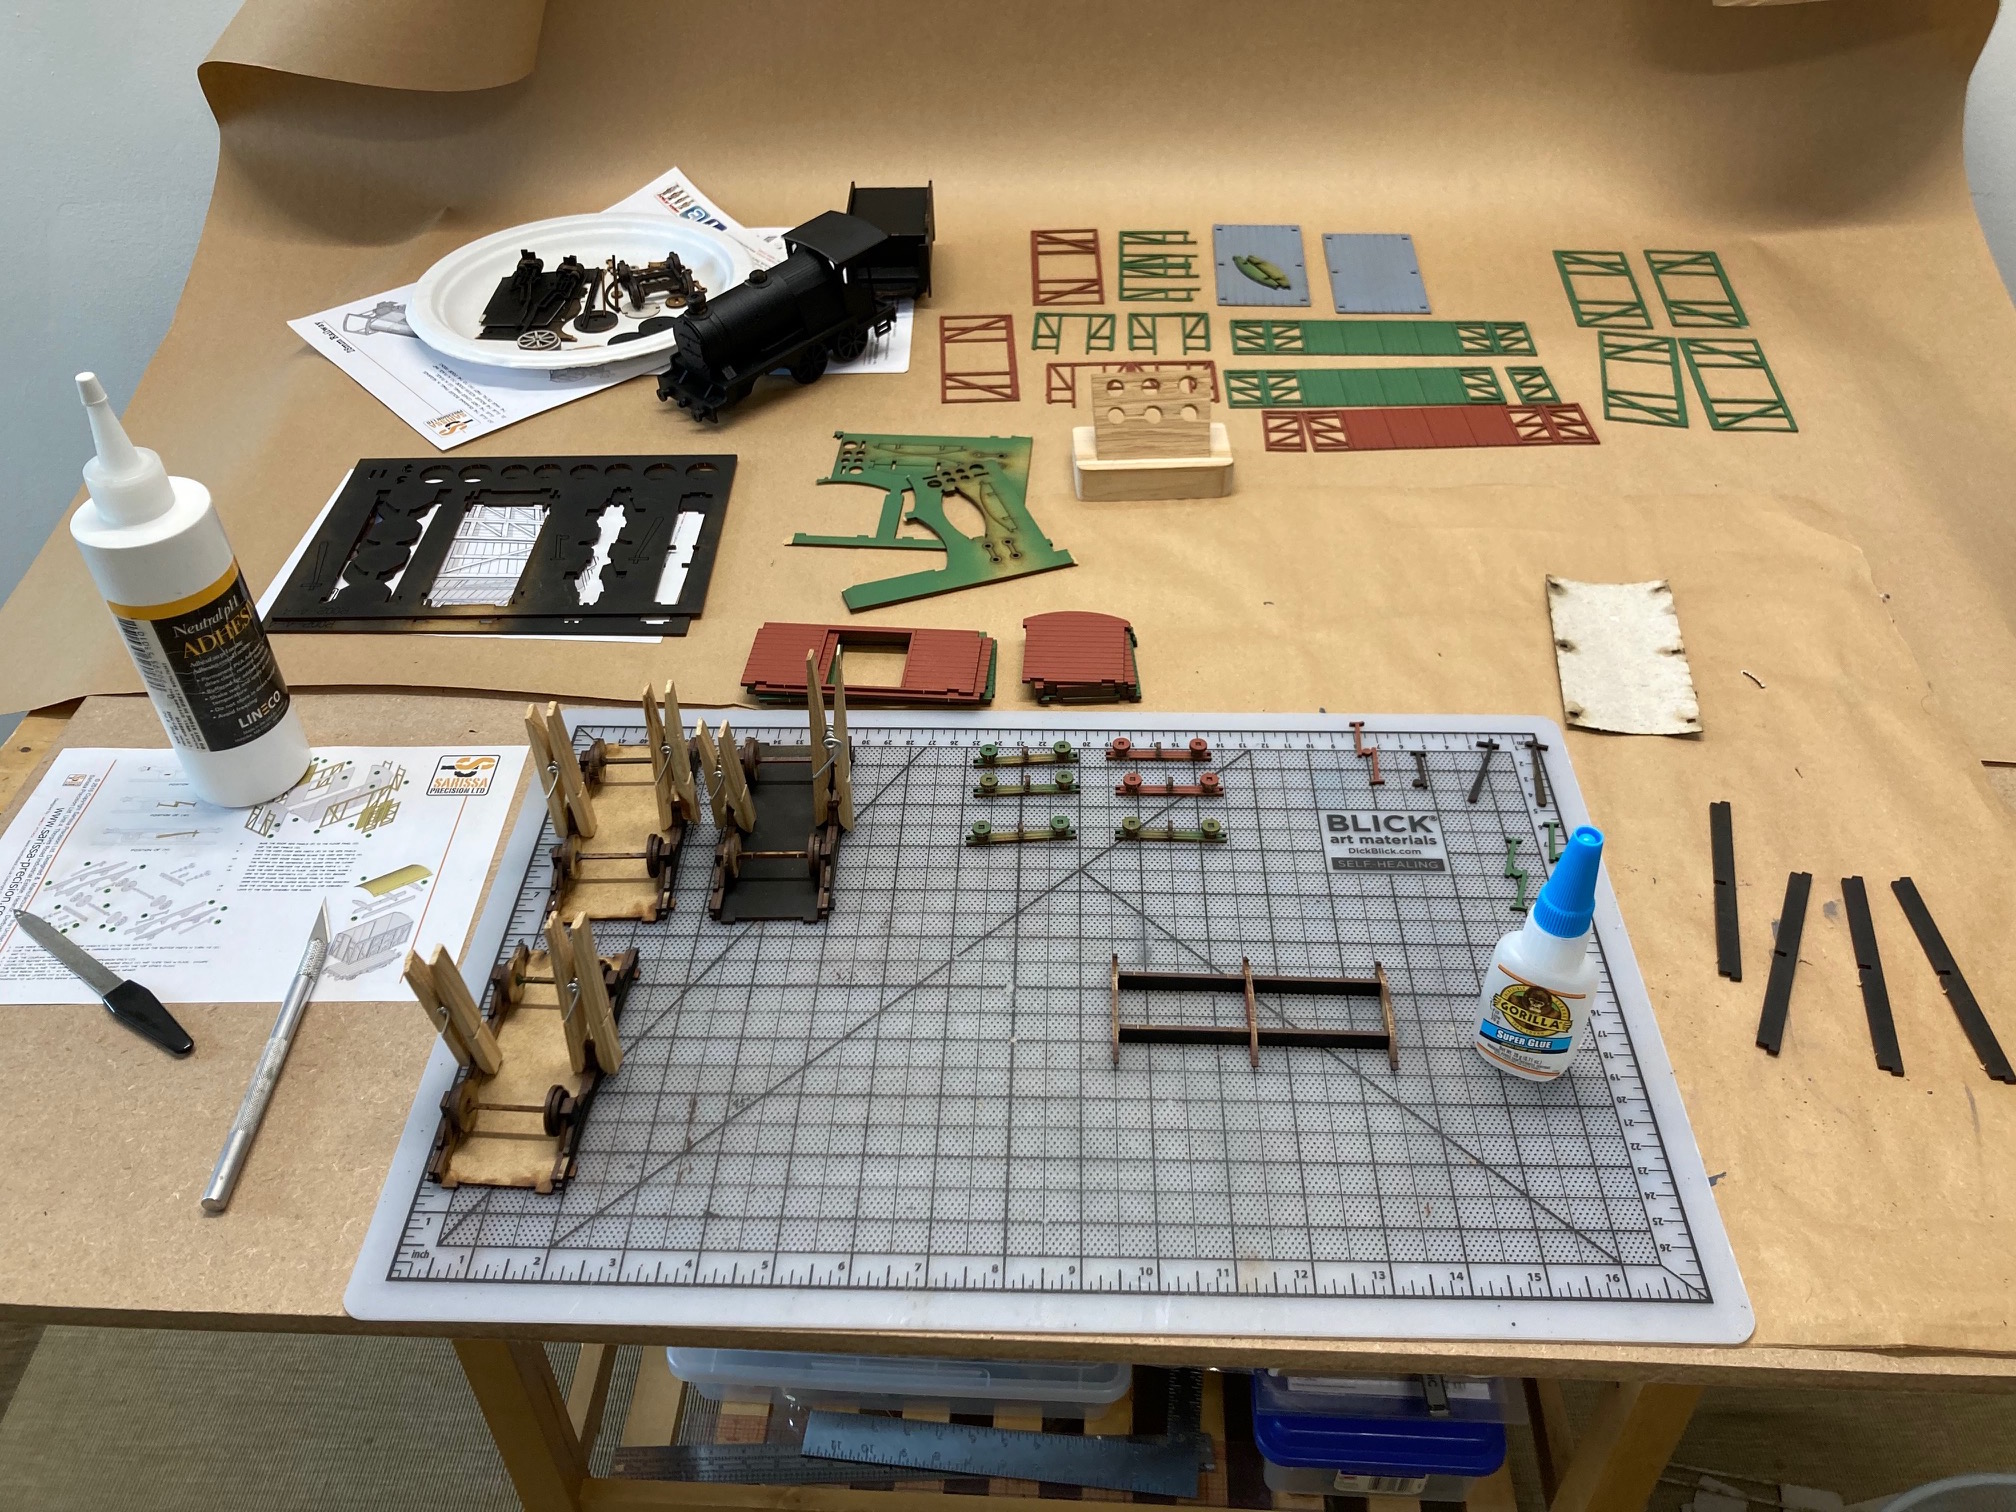
I started collecting Sarissa rail cars and engines a few years ago with the idea of building, converting and painting them to put on a shelf and stare lovingly at. Well like many other ideas that never happened. This gaming board gave me the perfect reason to commit to finish all those rail kits.
I assembly lined the processes. First I spay painted the sprue then built the kits. After assembly I noticed a Primary color theme happening. I didn’t like it. I got out my Air brush and sprayed two Good Wagons with Duck Egg. The airbrush started to spit out paint after a few uses. I like the effect. It gives it depth and texture. I may continue to add splatter to other pieces from this line. I also darkened the red Goods Wagon.
Cheers

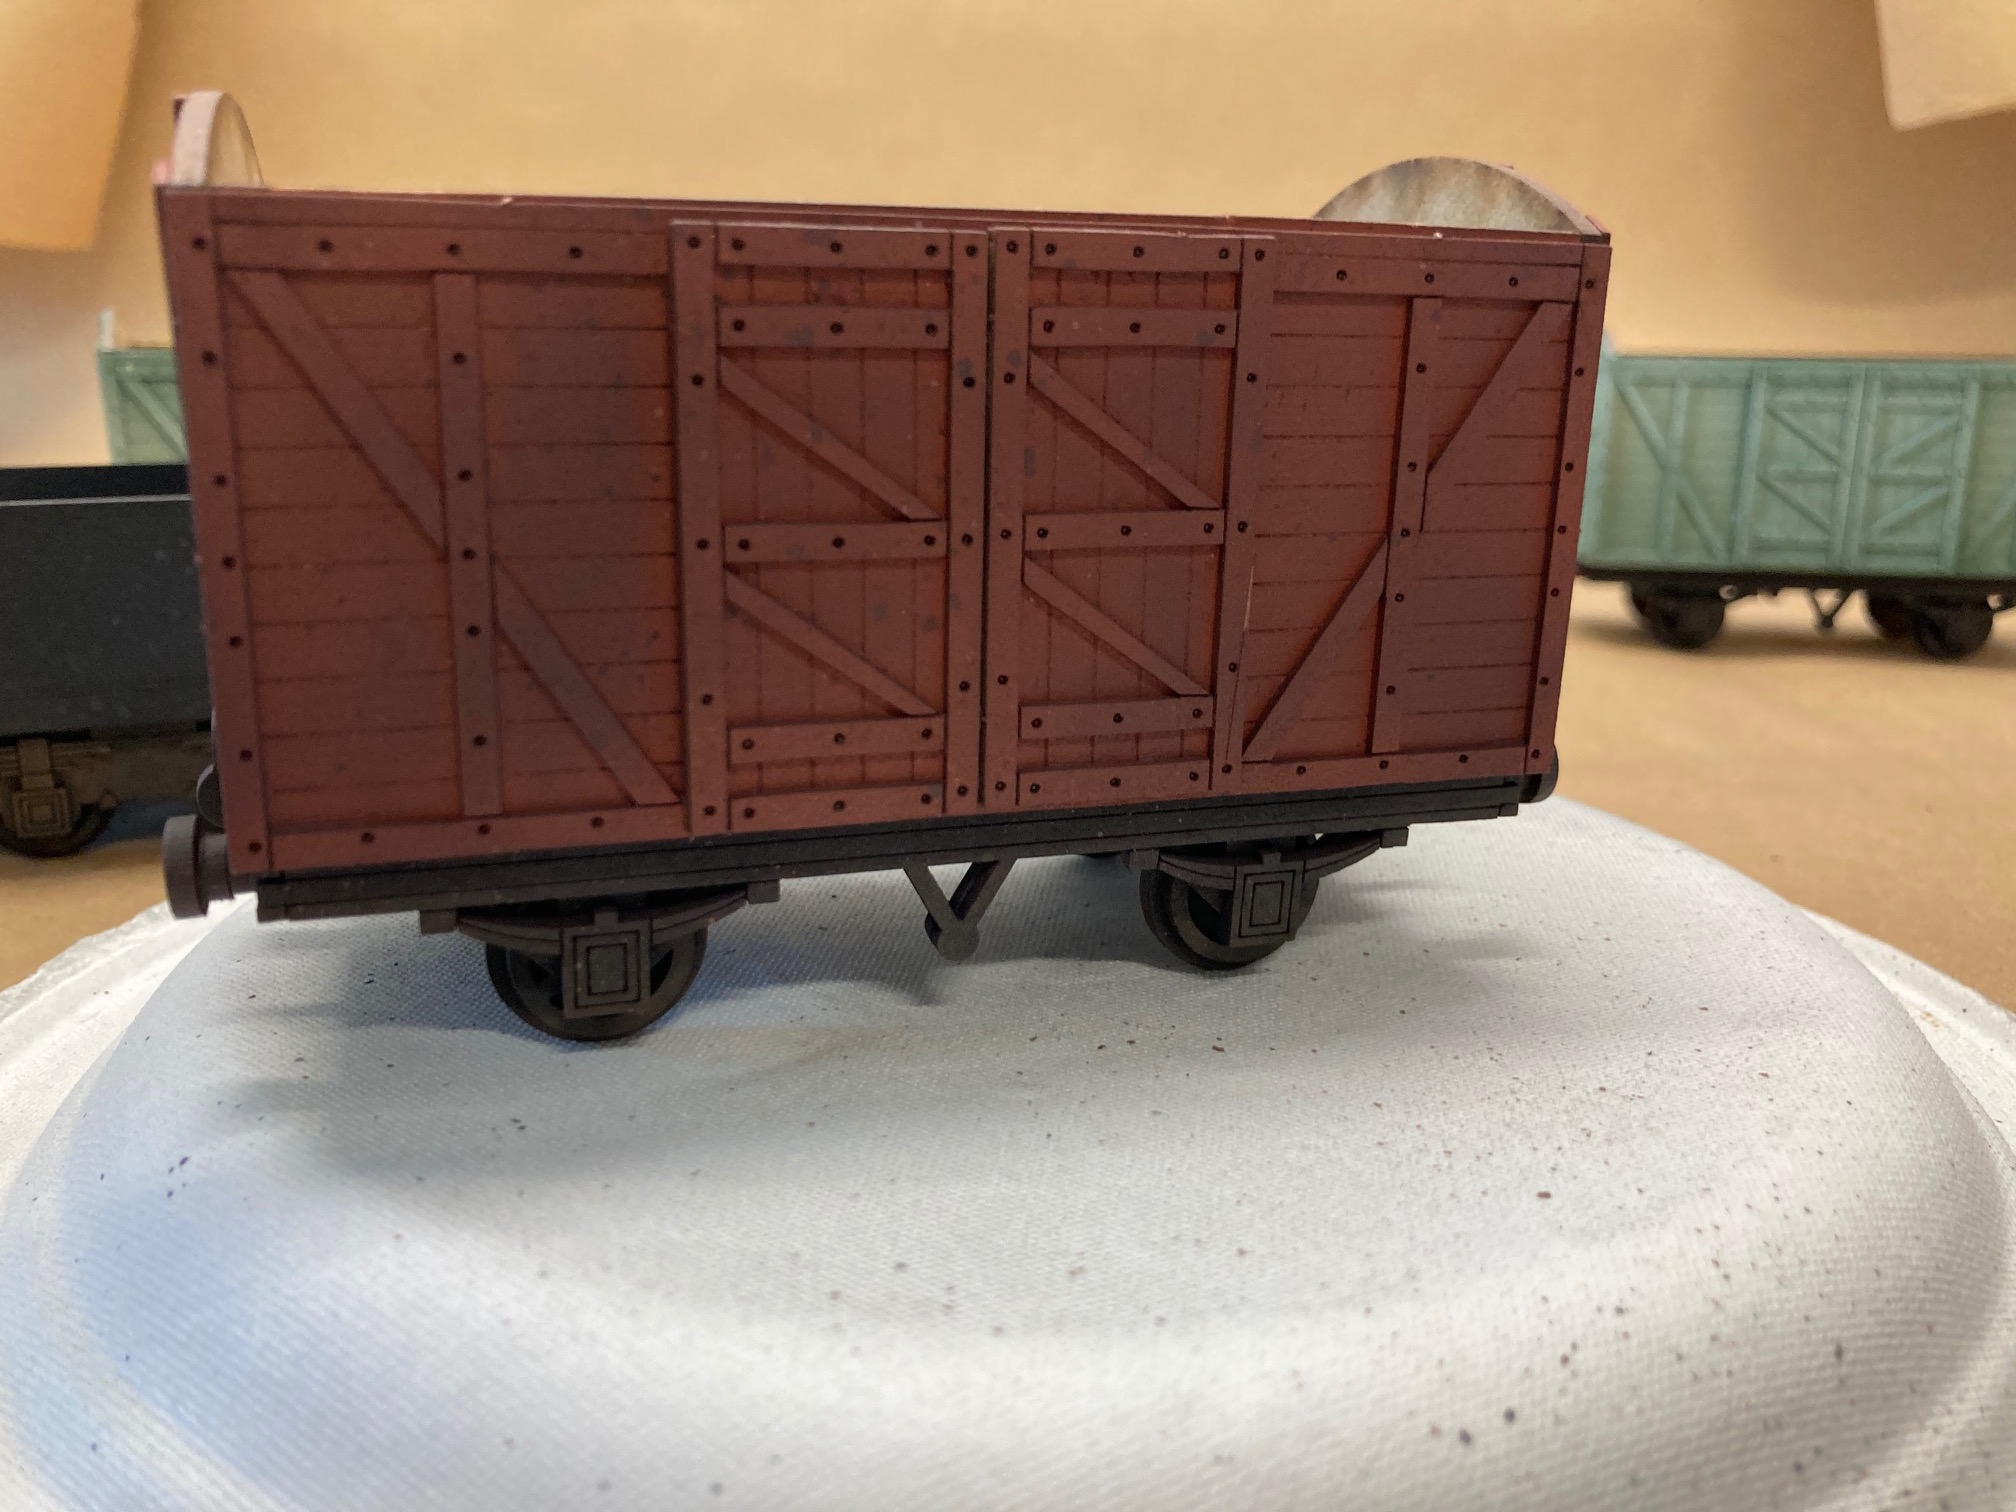
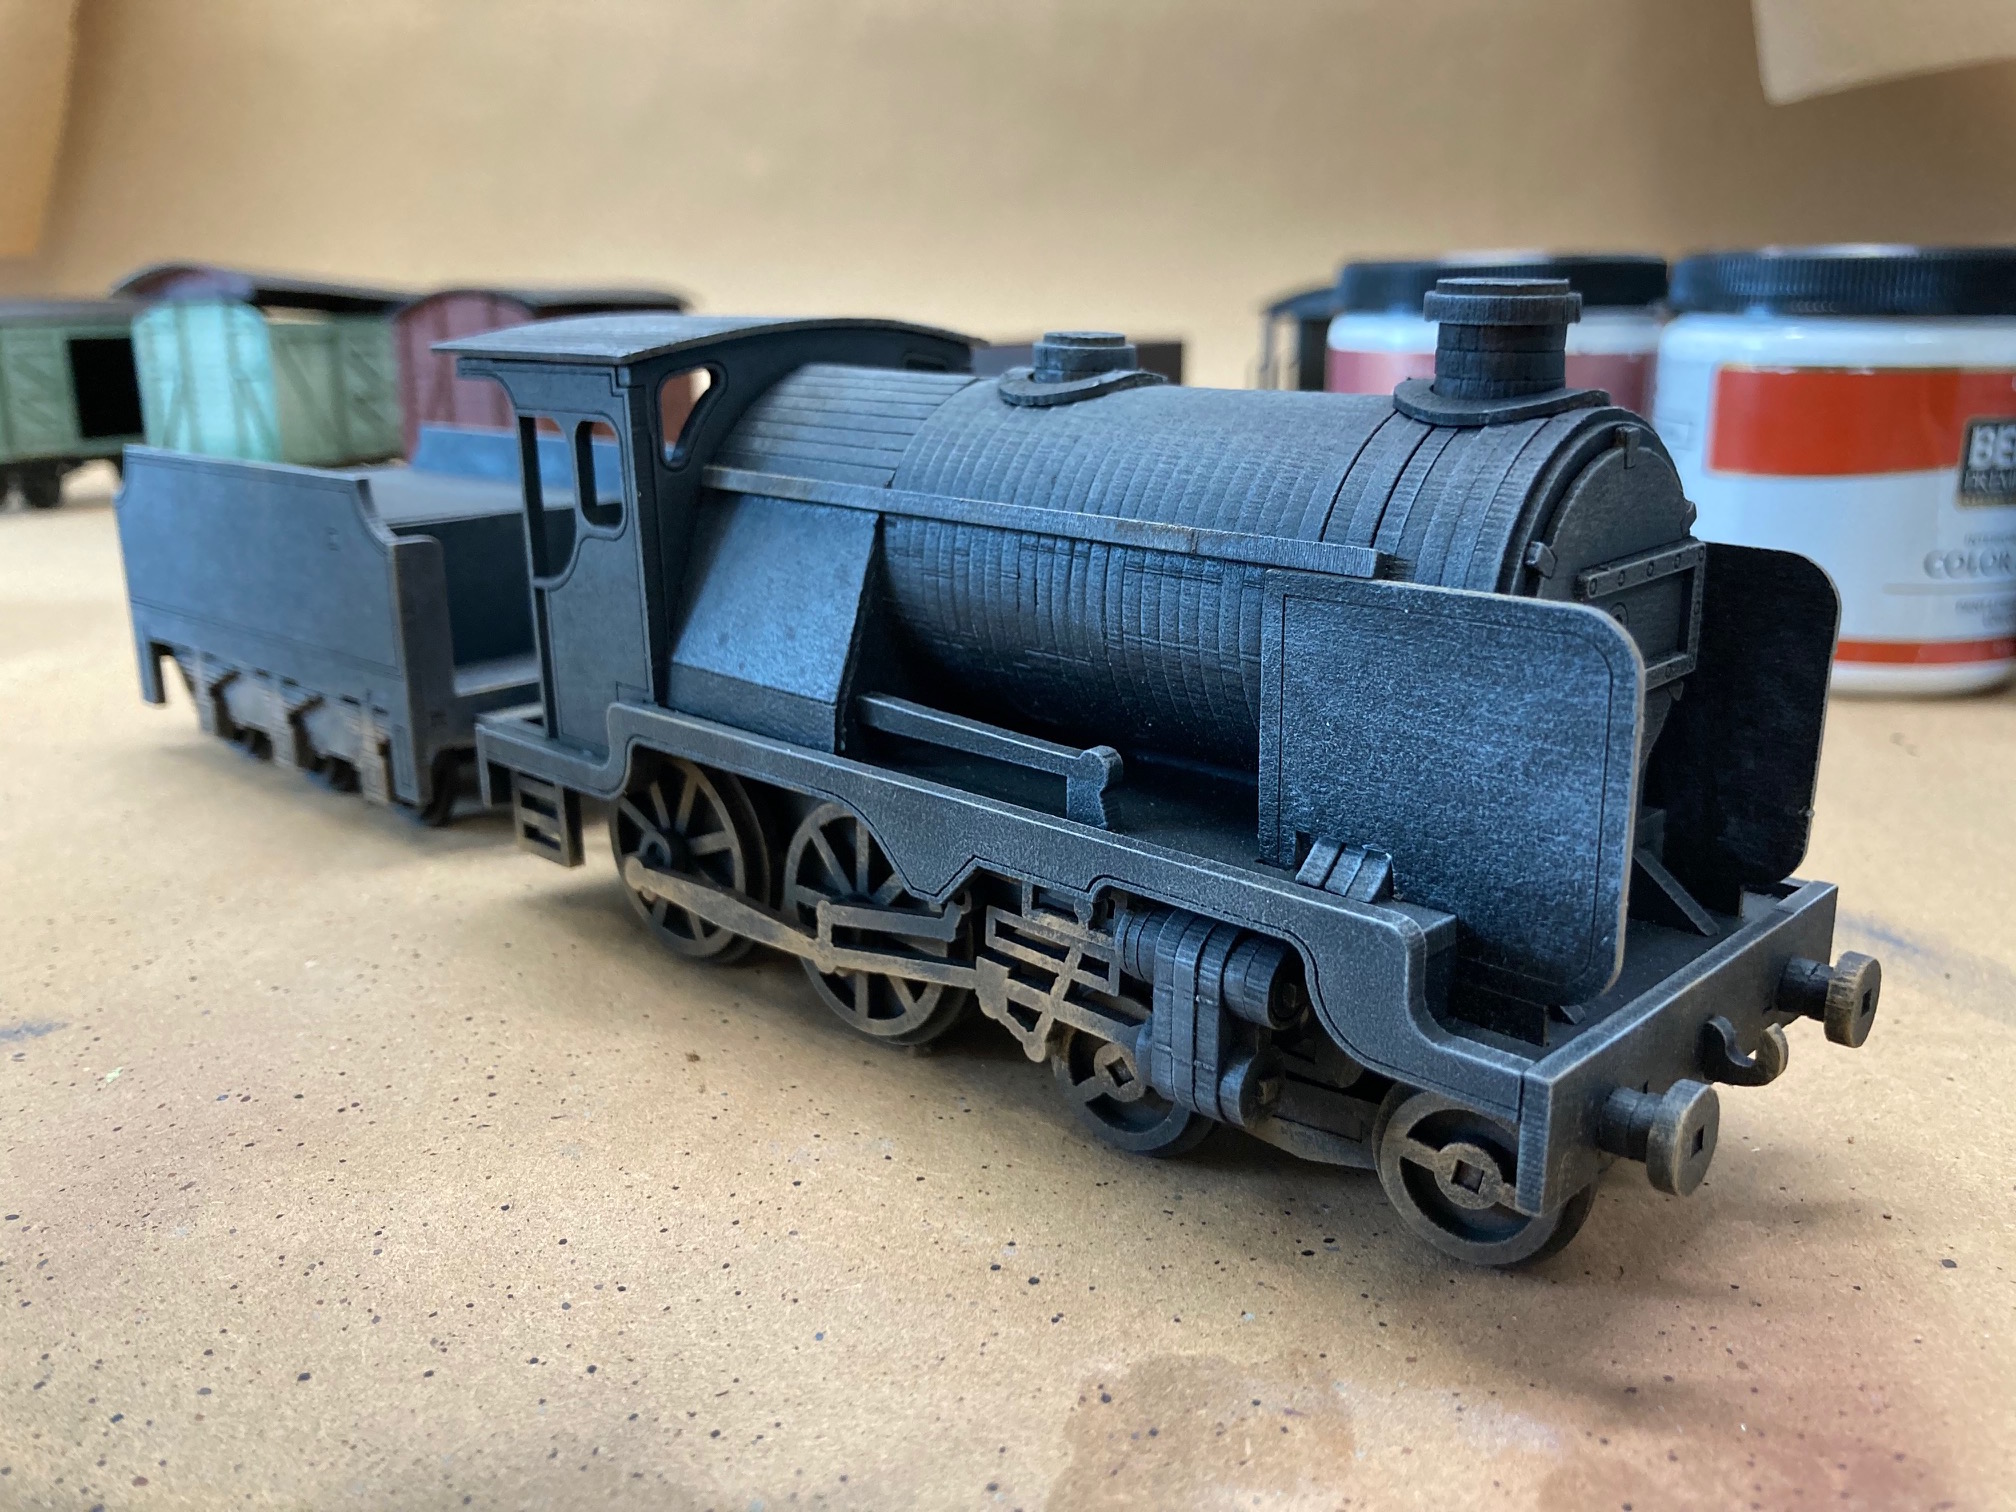
Finished the Trains (Block line of sight-Hard Cover)
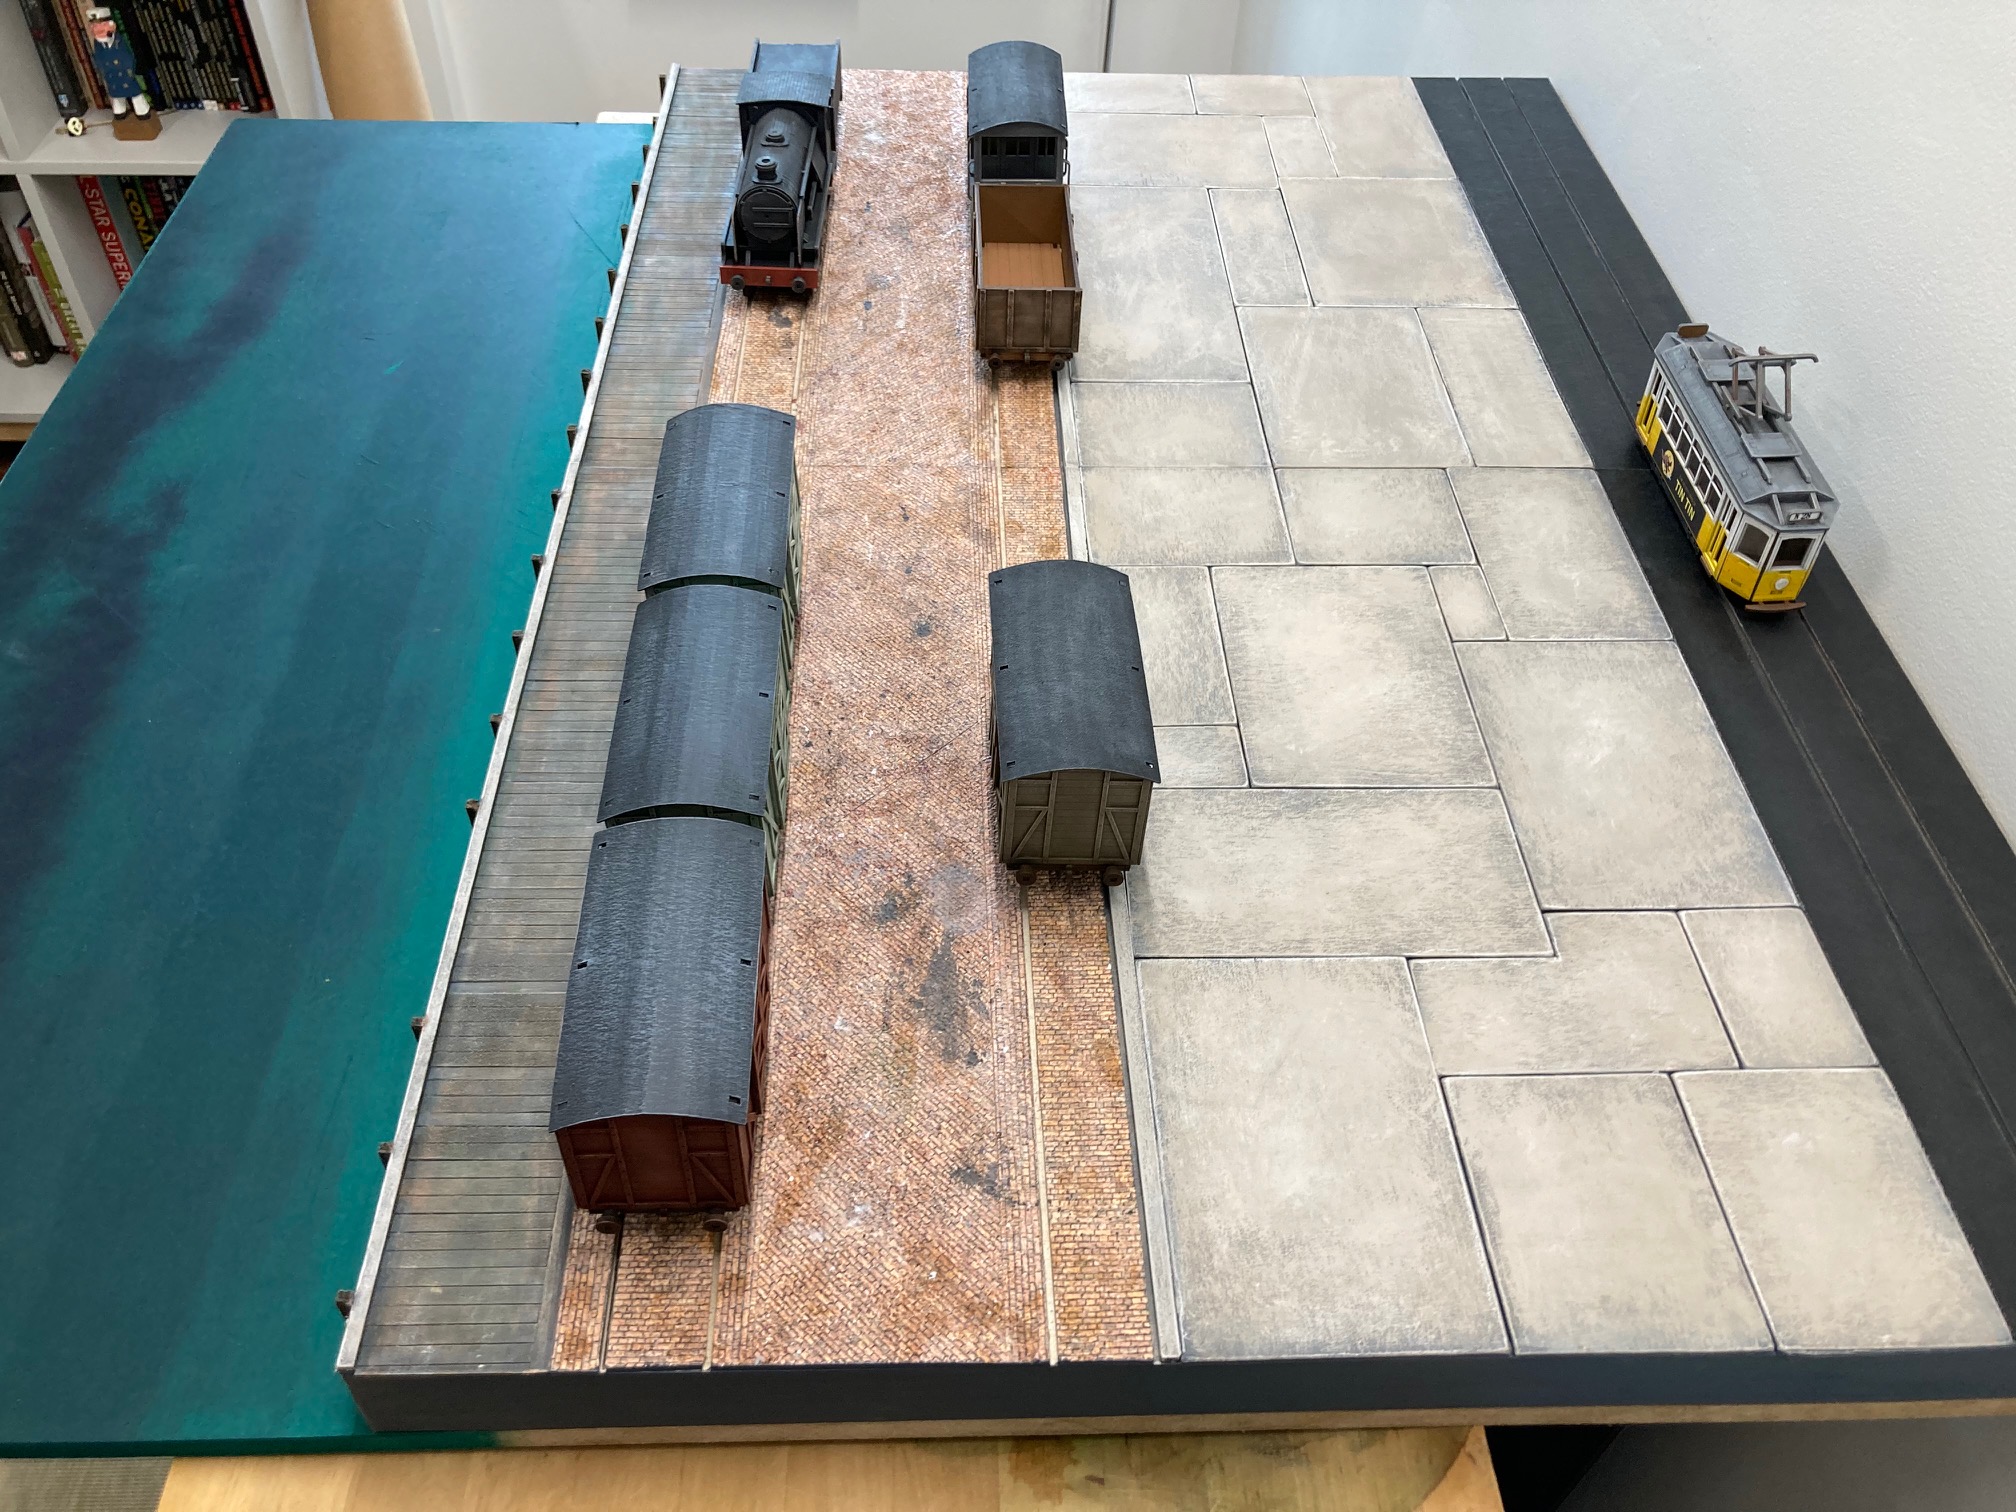
At this point I have realized something. I have a lot of Sarissa Trains! This is just one. I have other non-started and unfinished kits. So many that I should start it’s own Project log. Hmm
Any way, each train was dry brushed with Acrylic house paint. The same group I used for the board. The same brush too.
~Cheers

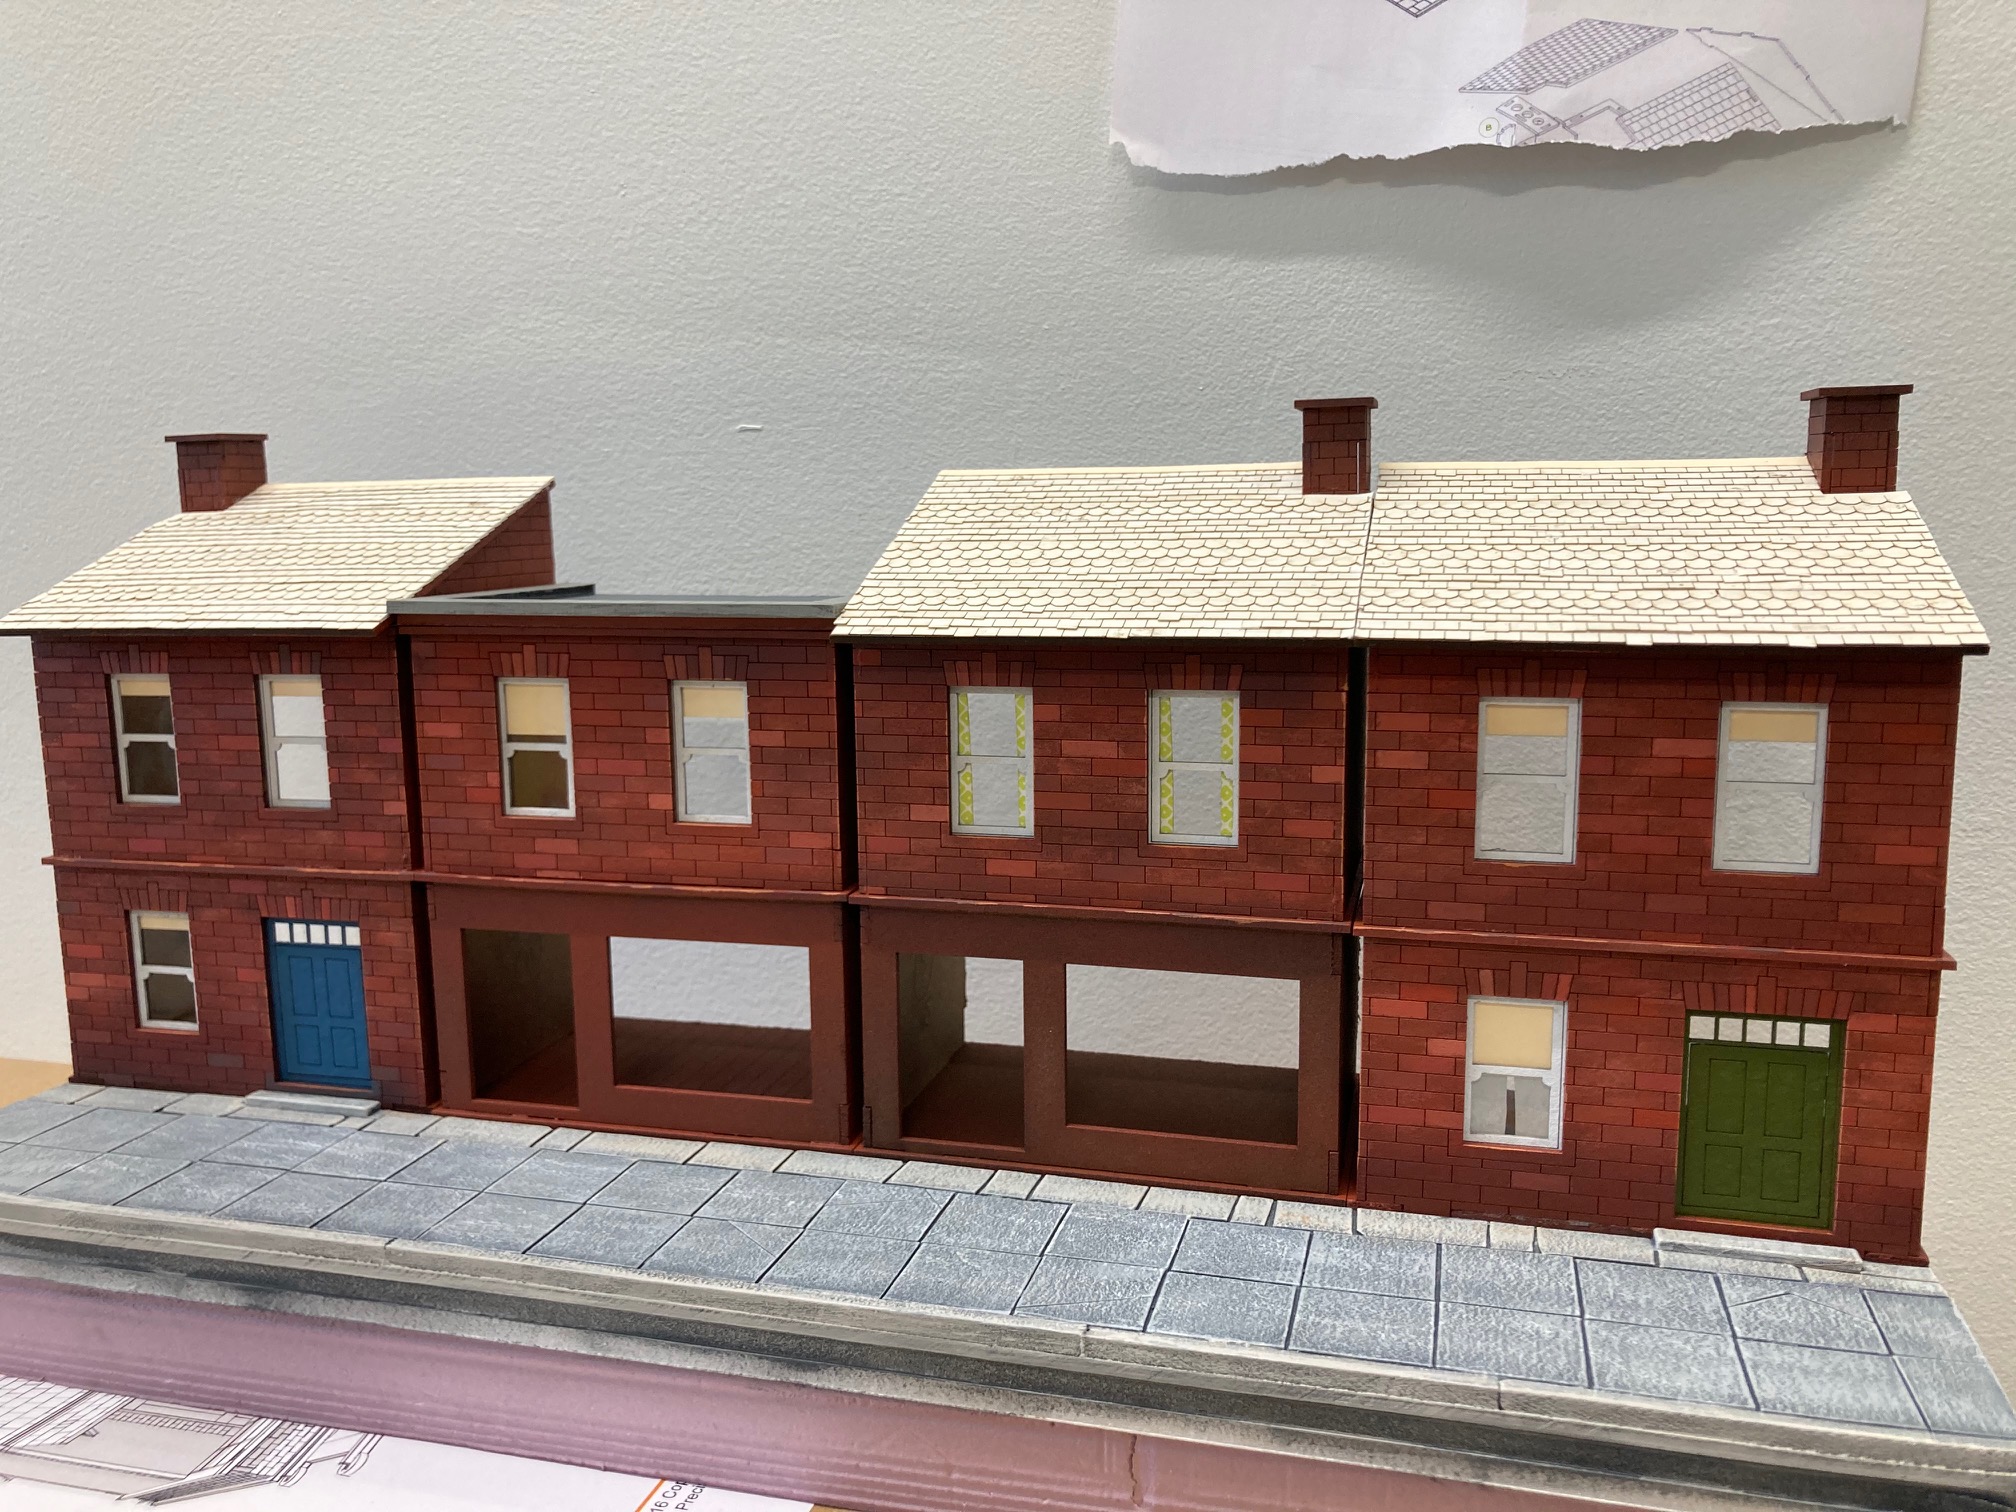
Window Treatment
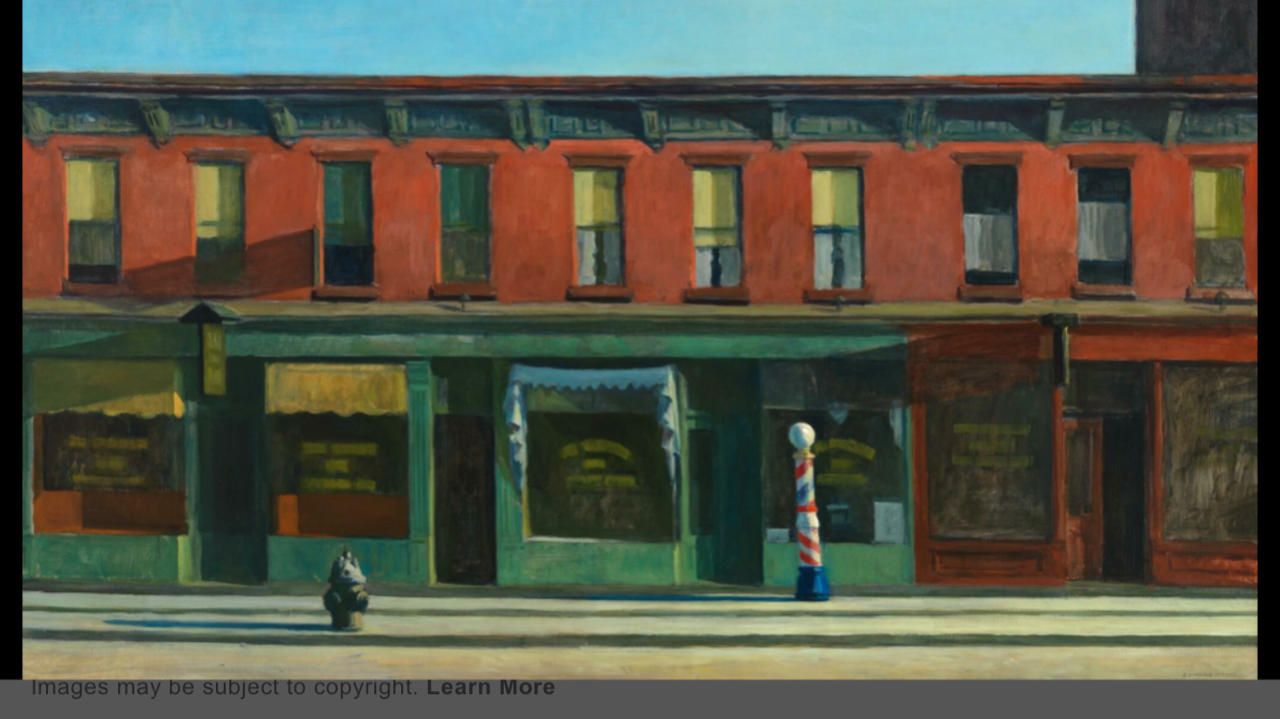 Edward Hopper - Early Sunday Morning
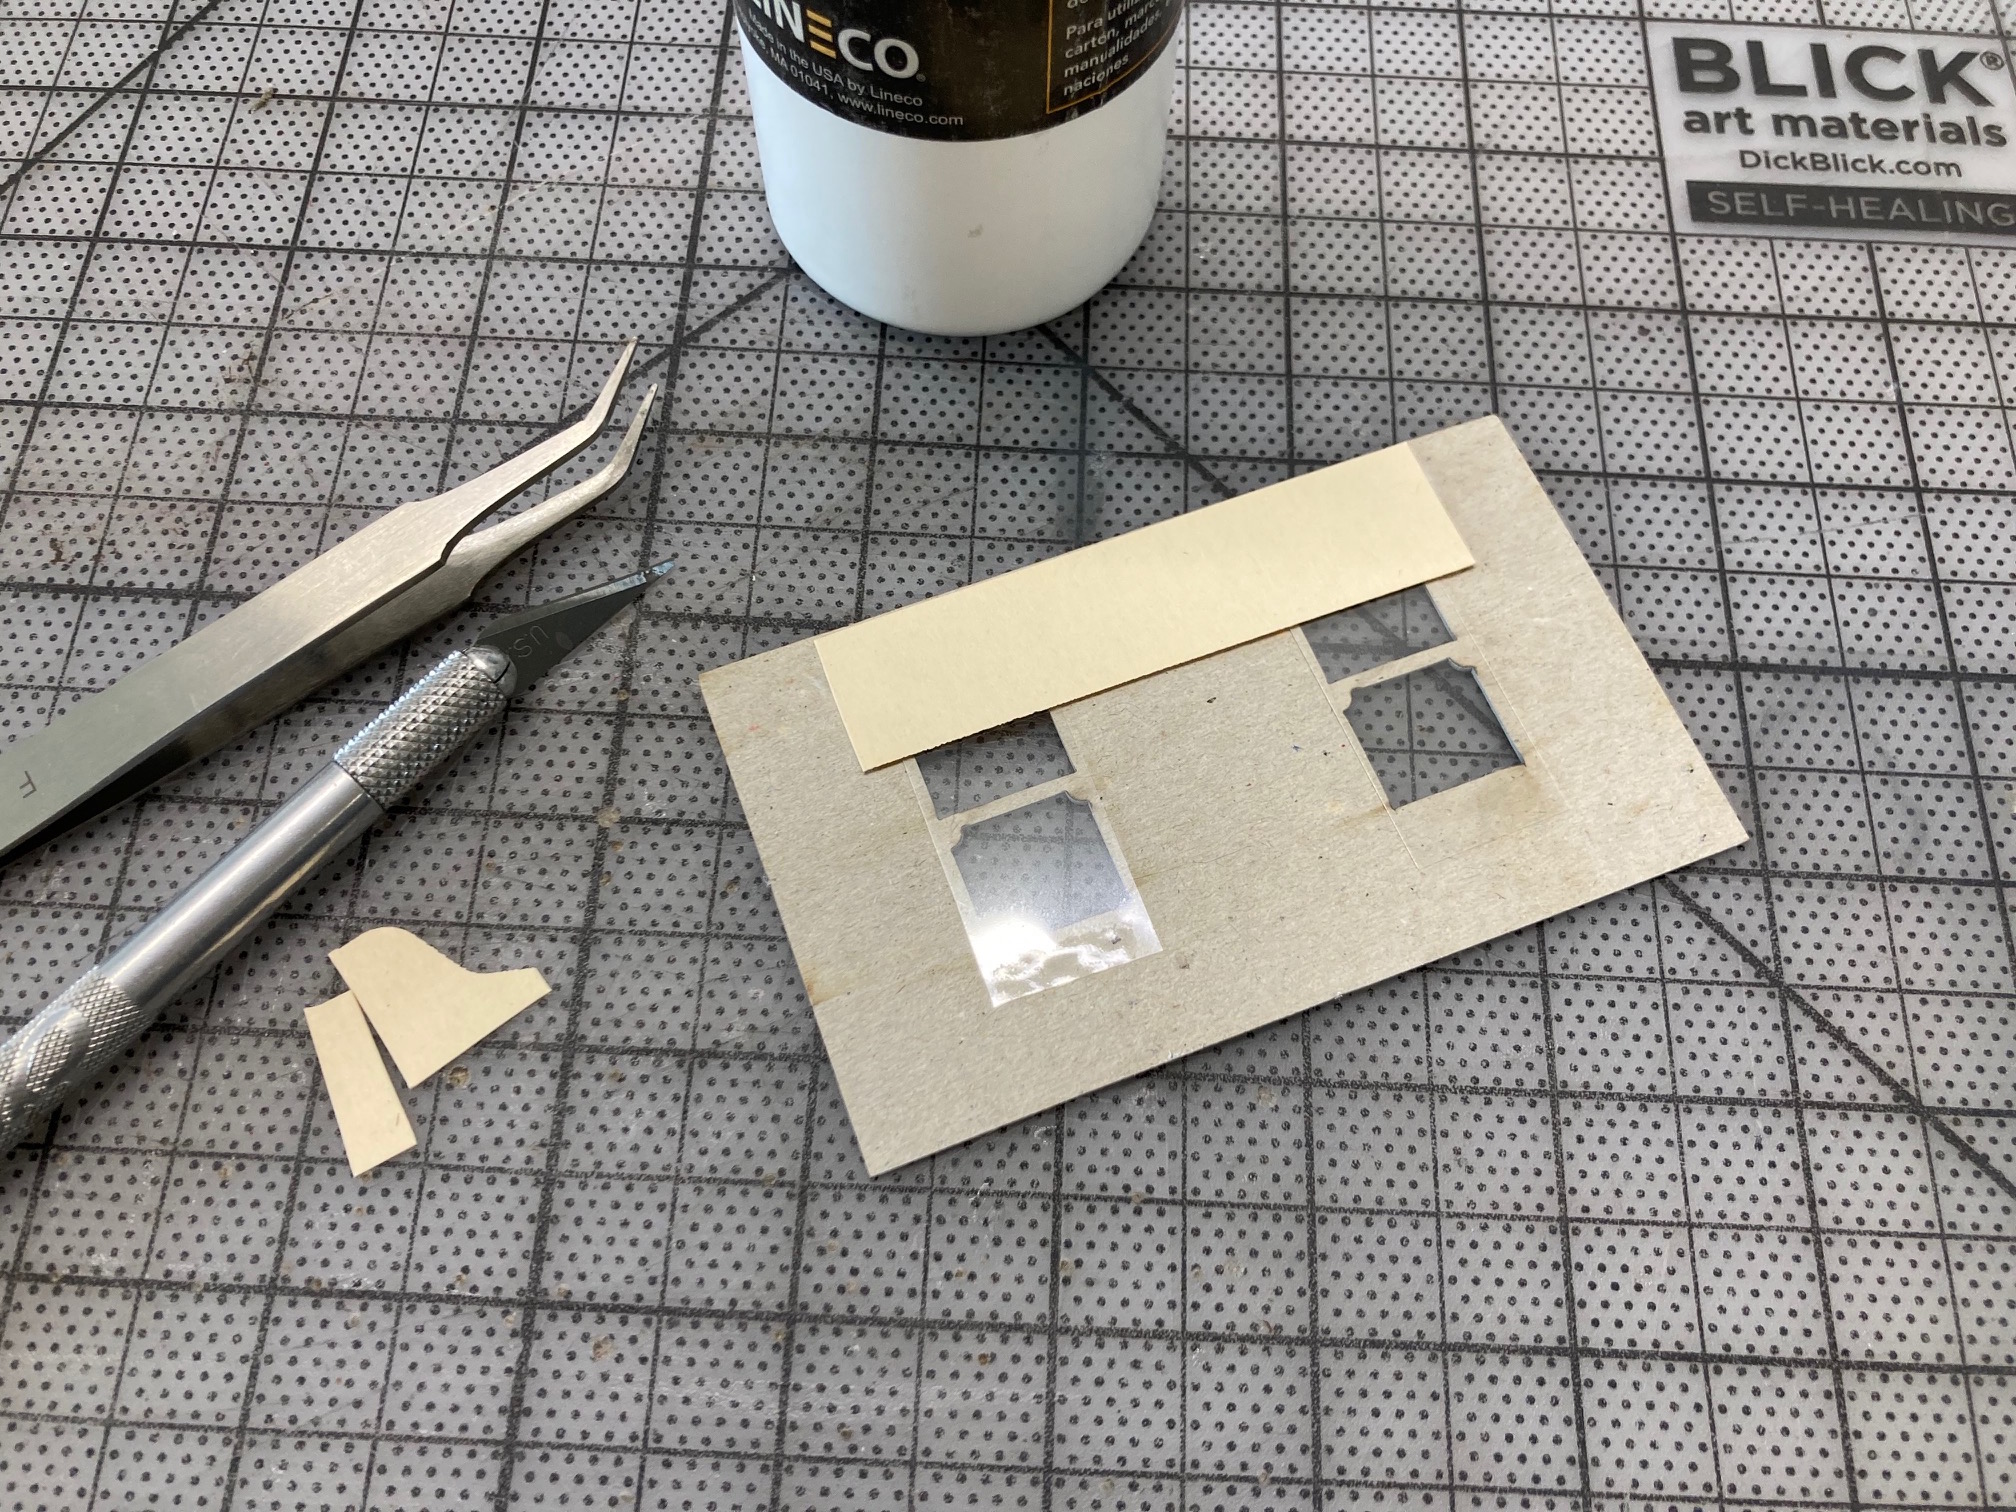


Windows: Inspired by Edward Hoppers’ Early Sunday Morning painting I added glazing to the windows and folder card for window blinds. I also added curtains on two windows. I didn’t want to go overboard with details.
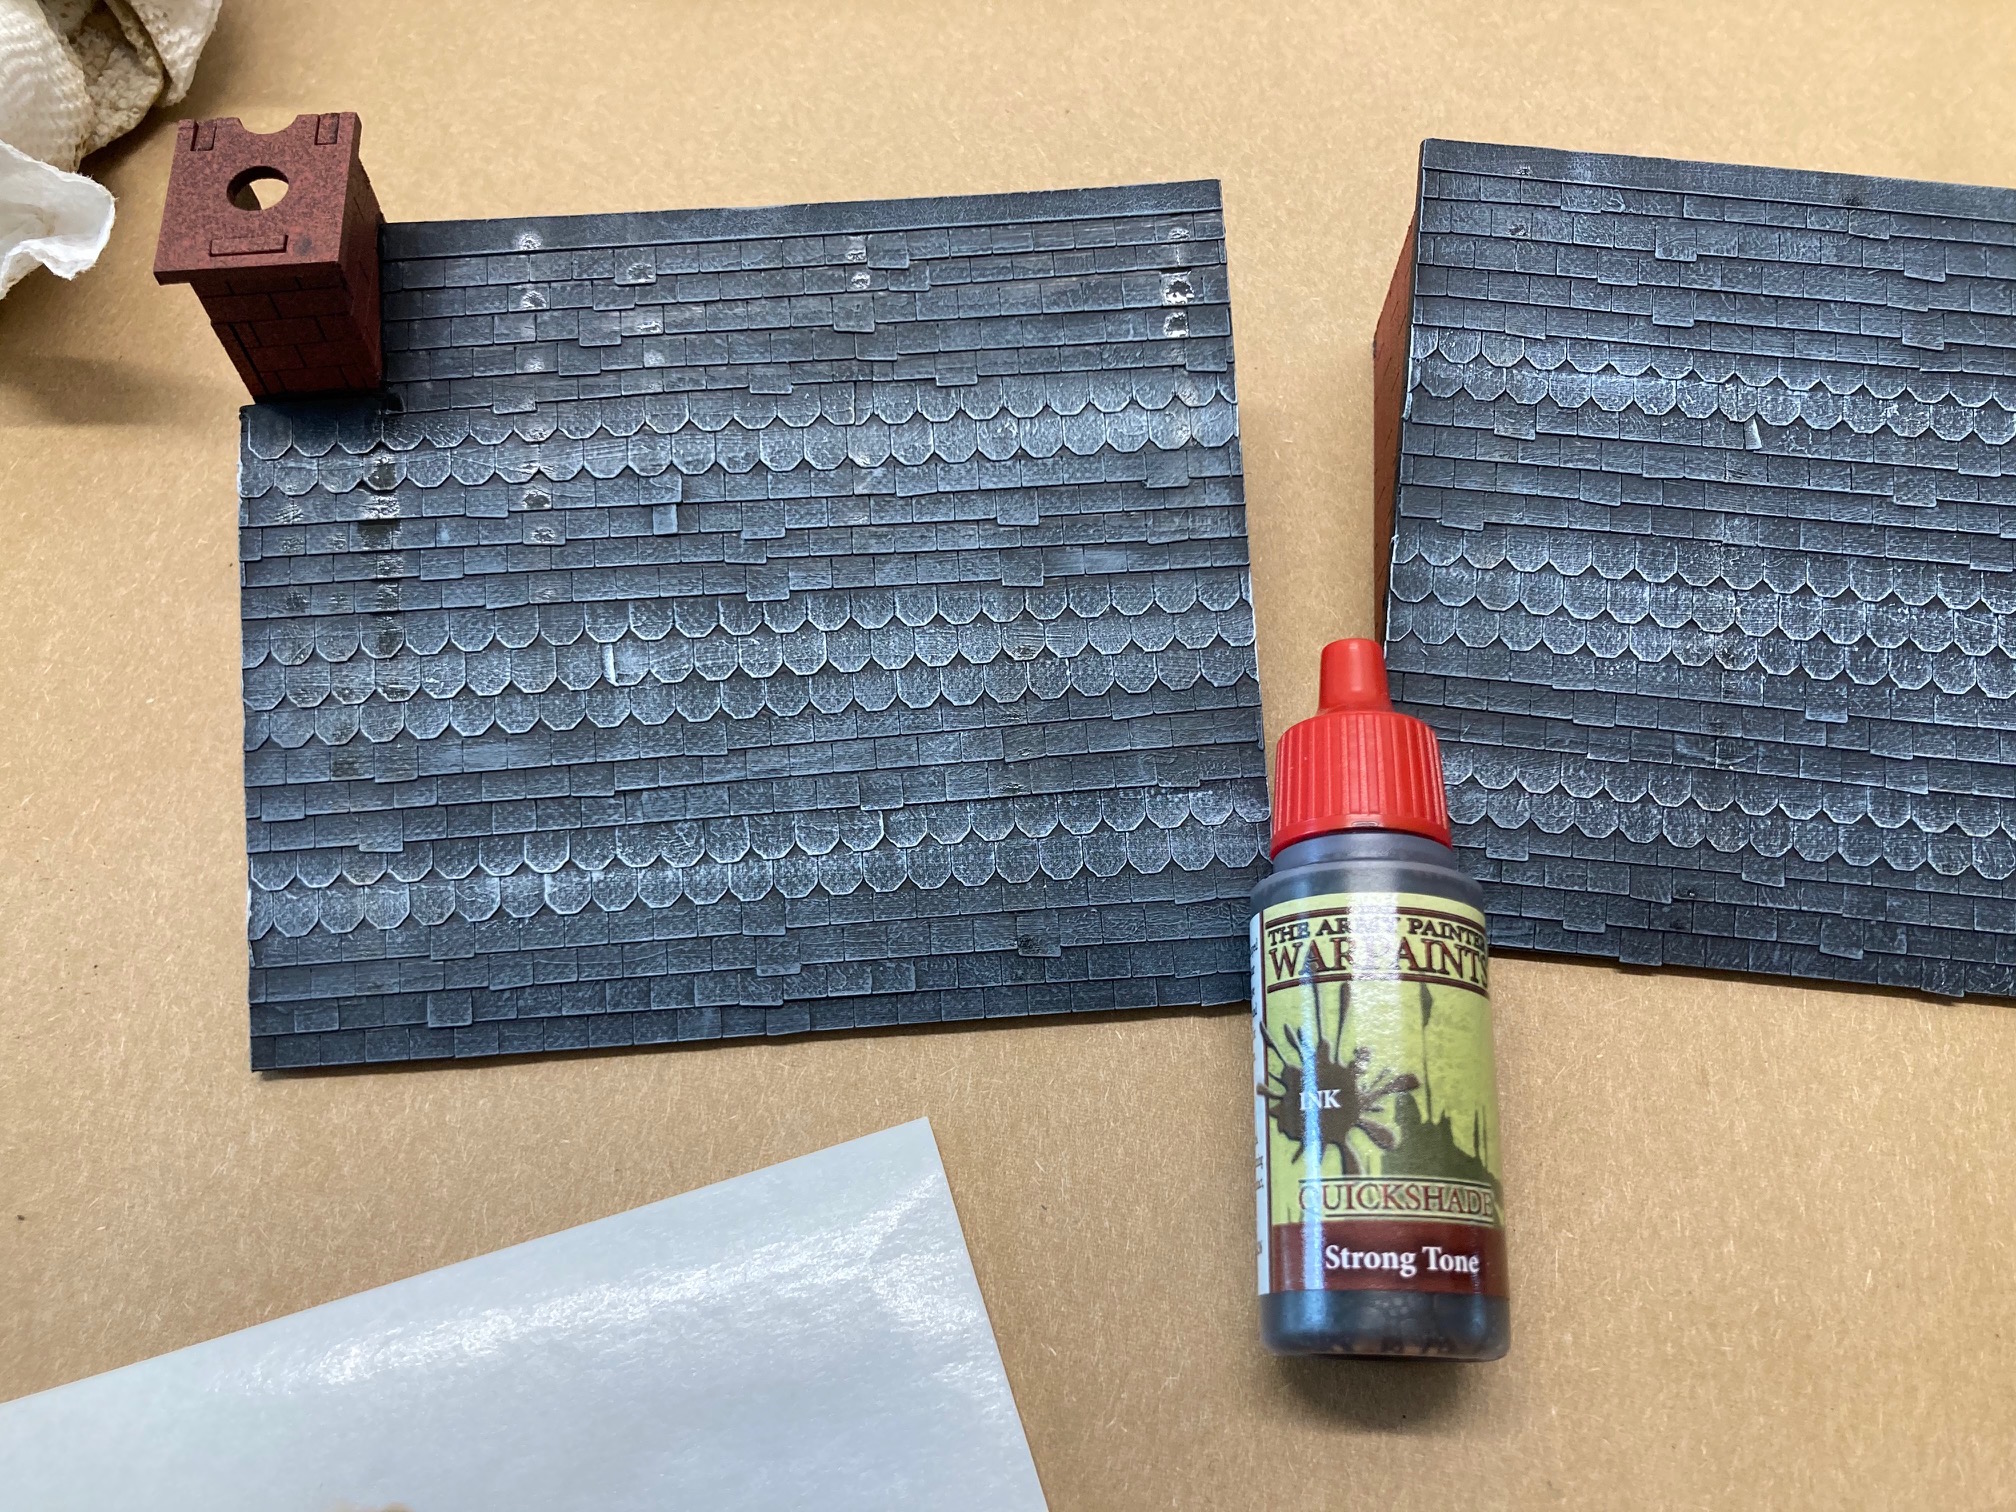
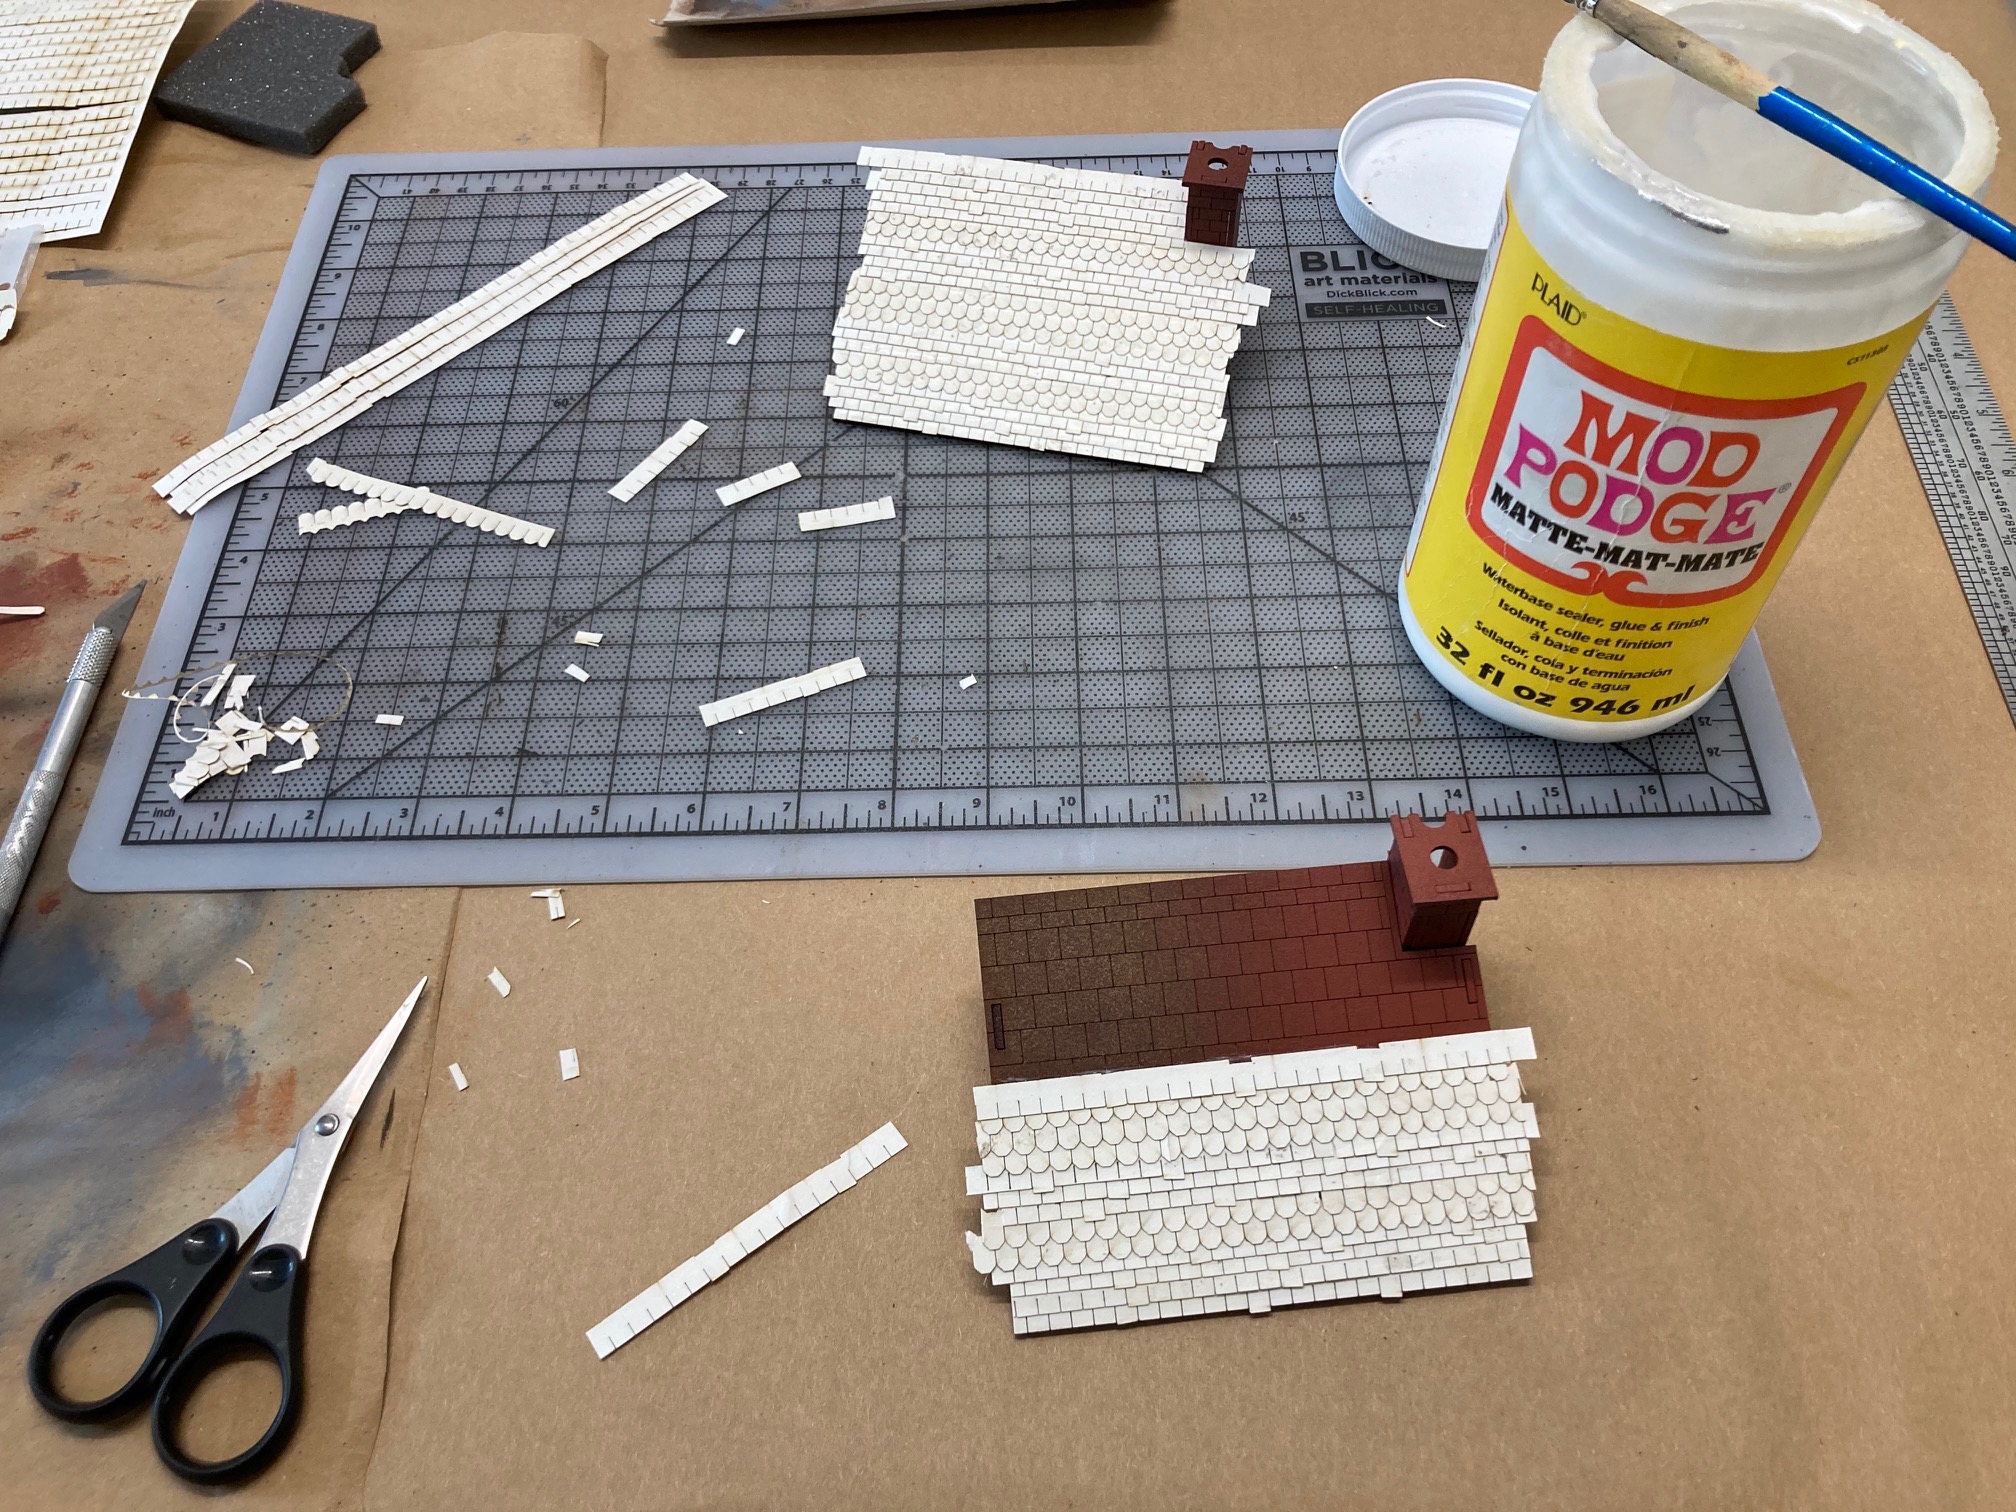
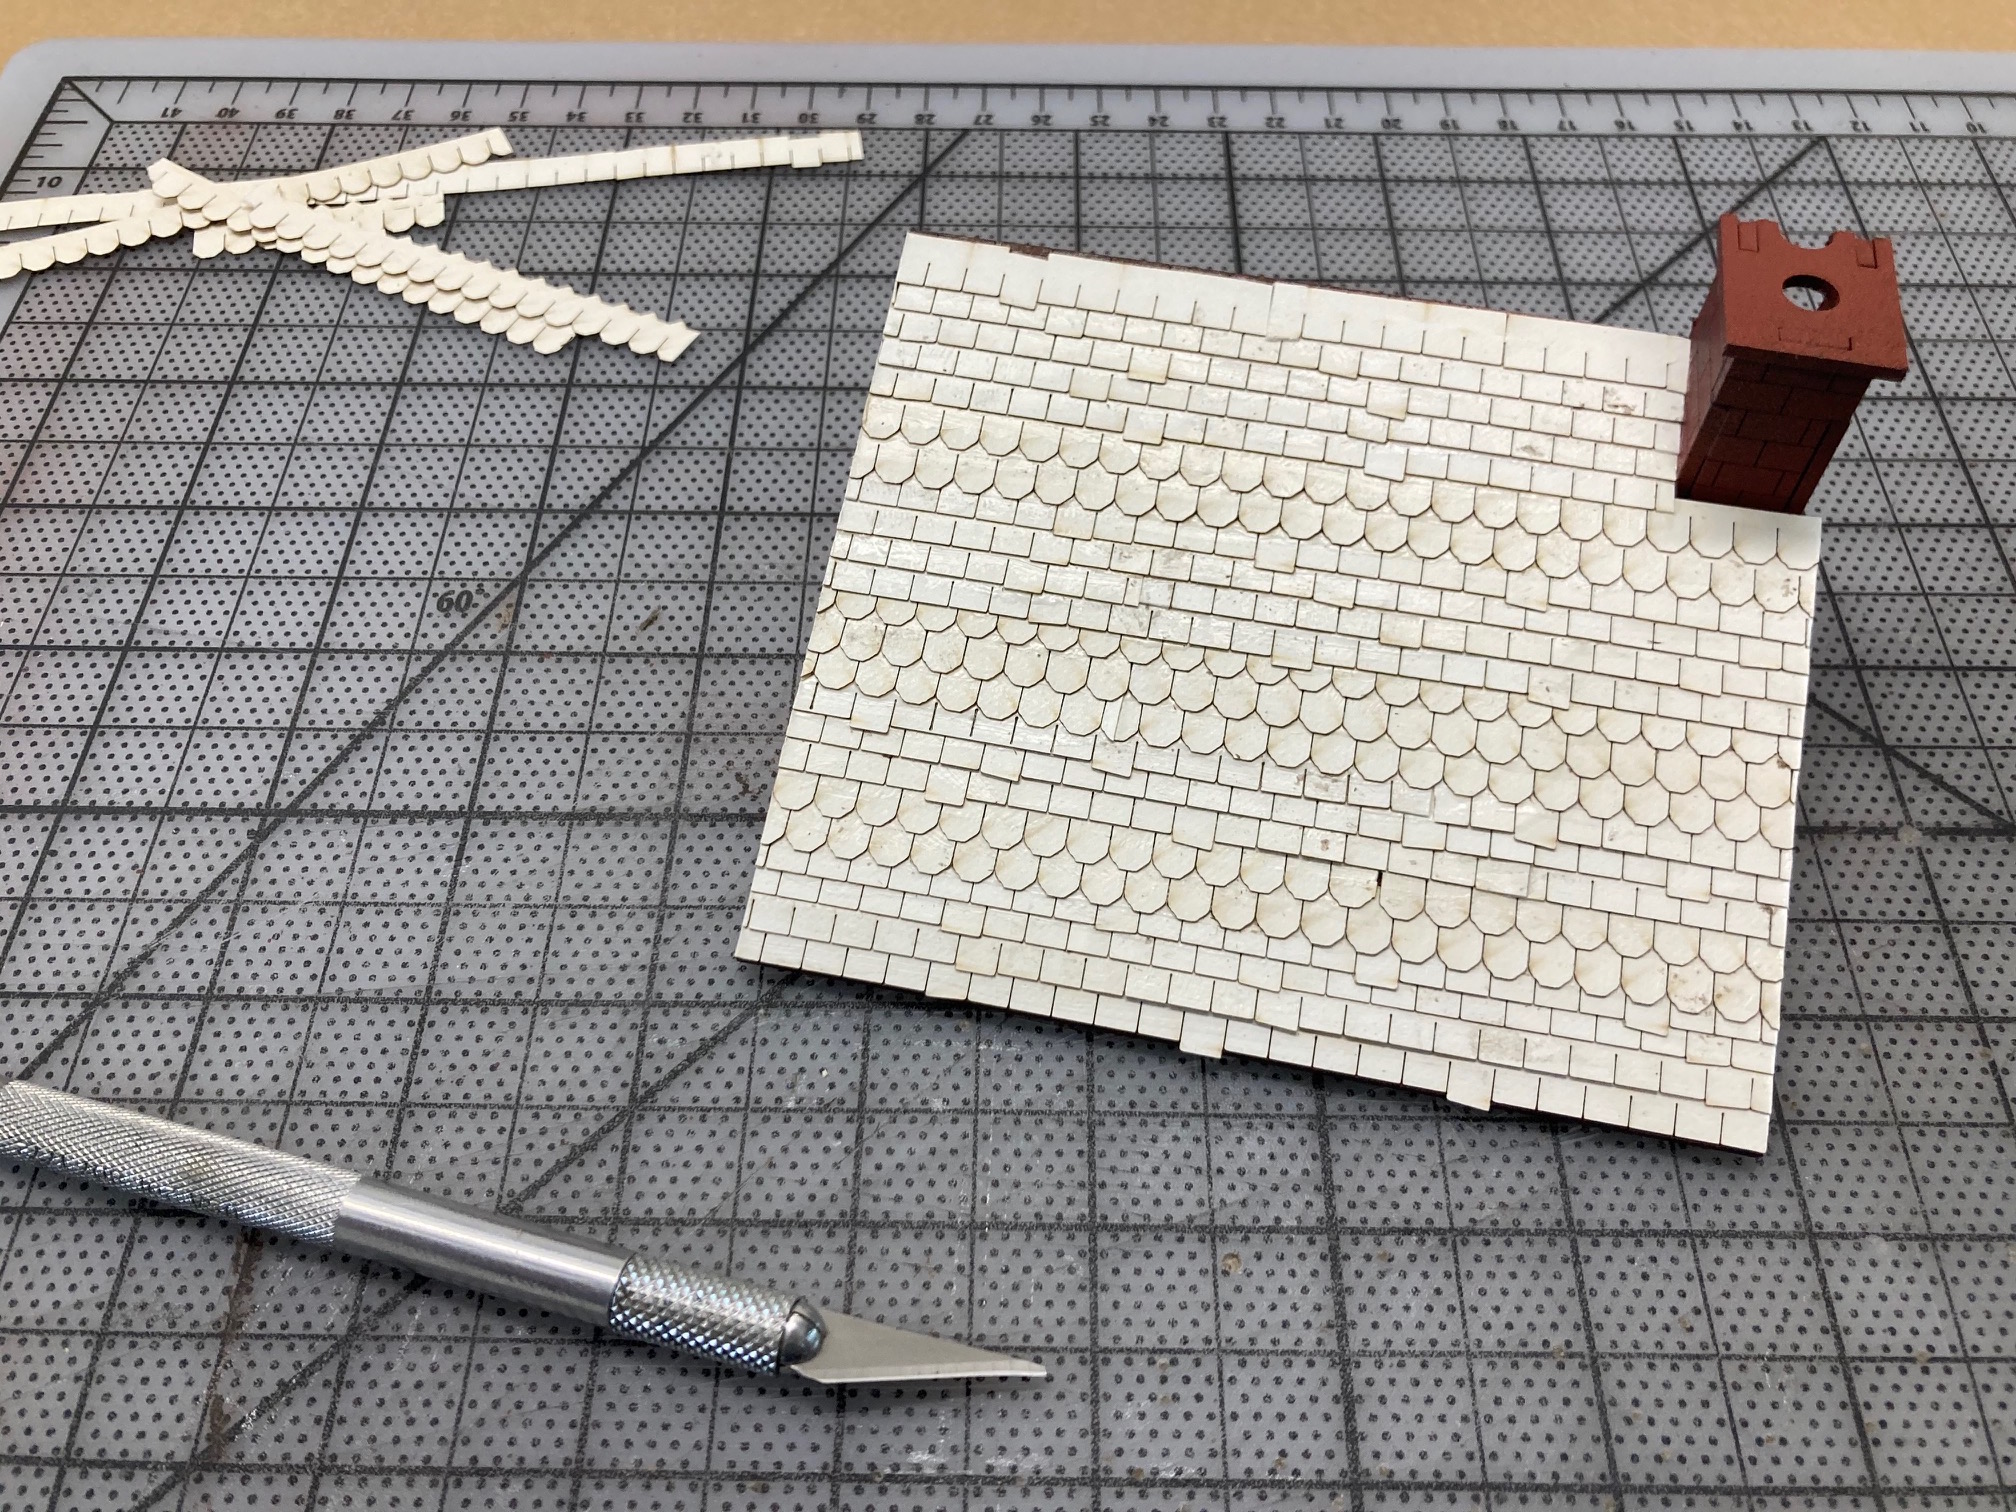
Roof: I used laser cut shingles to add detail to the roof. I added rows of different shape shingles to add a bit of character to the roof. After gluing all the rows I trimmed the edges with an x-acto blade.
Cheers
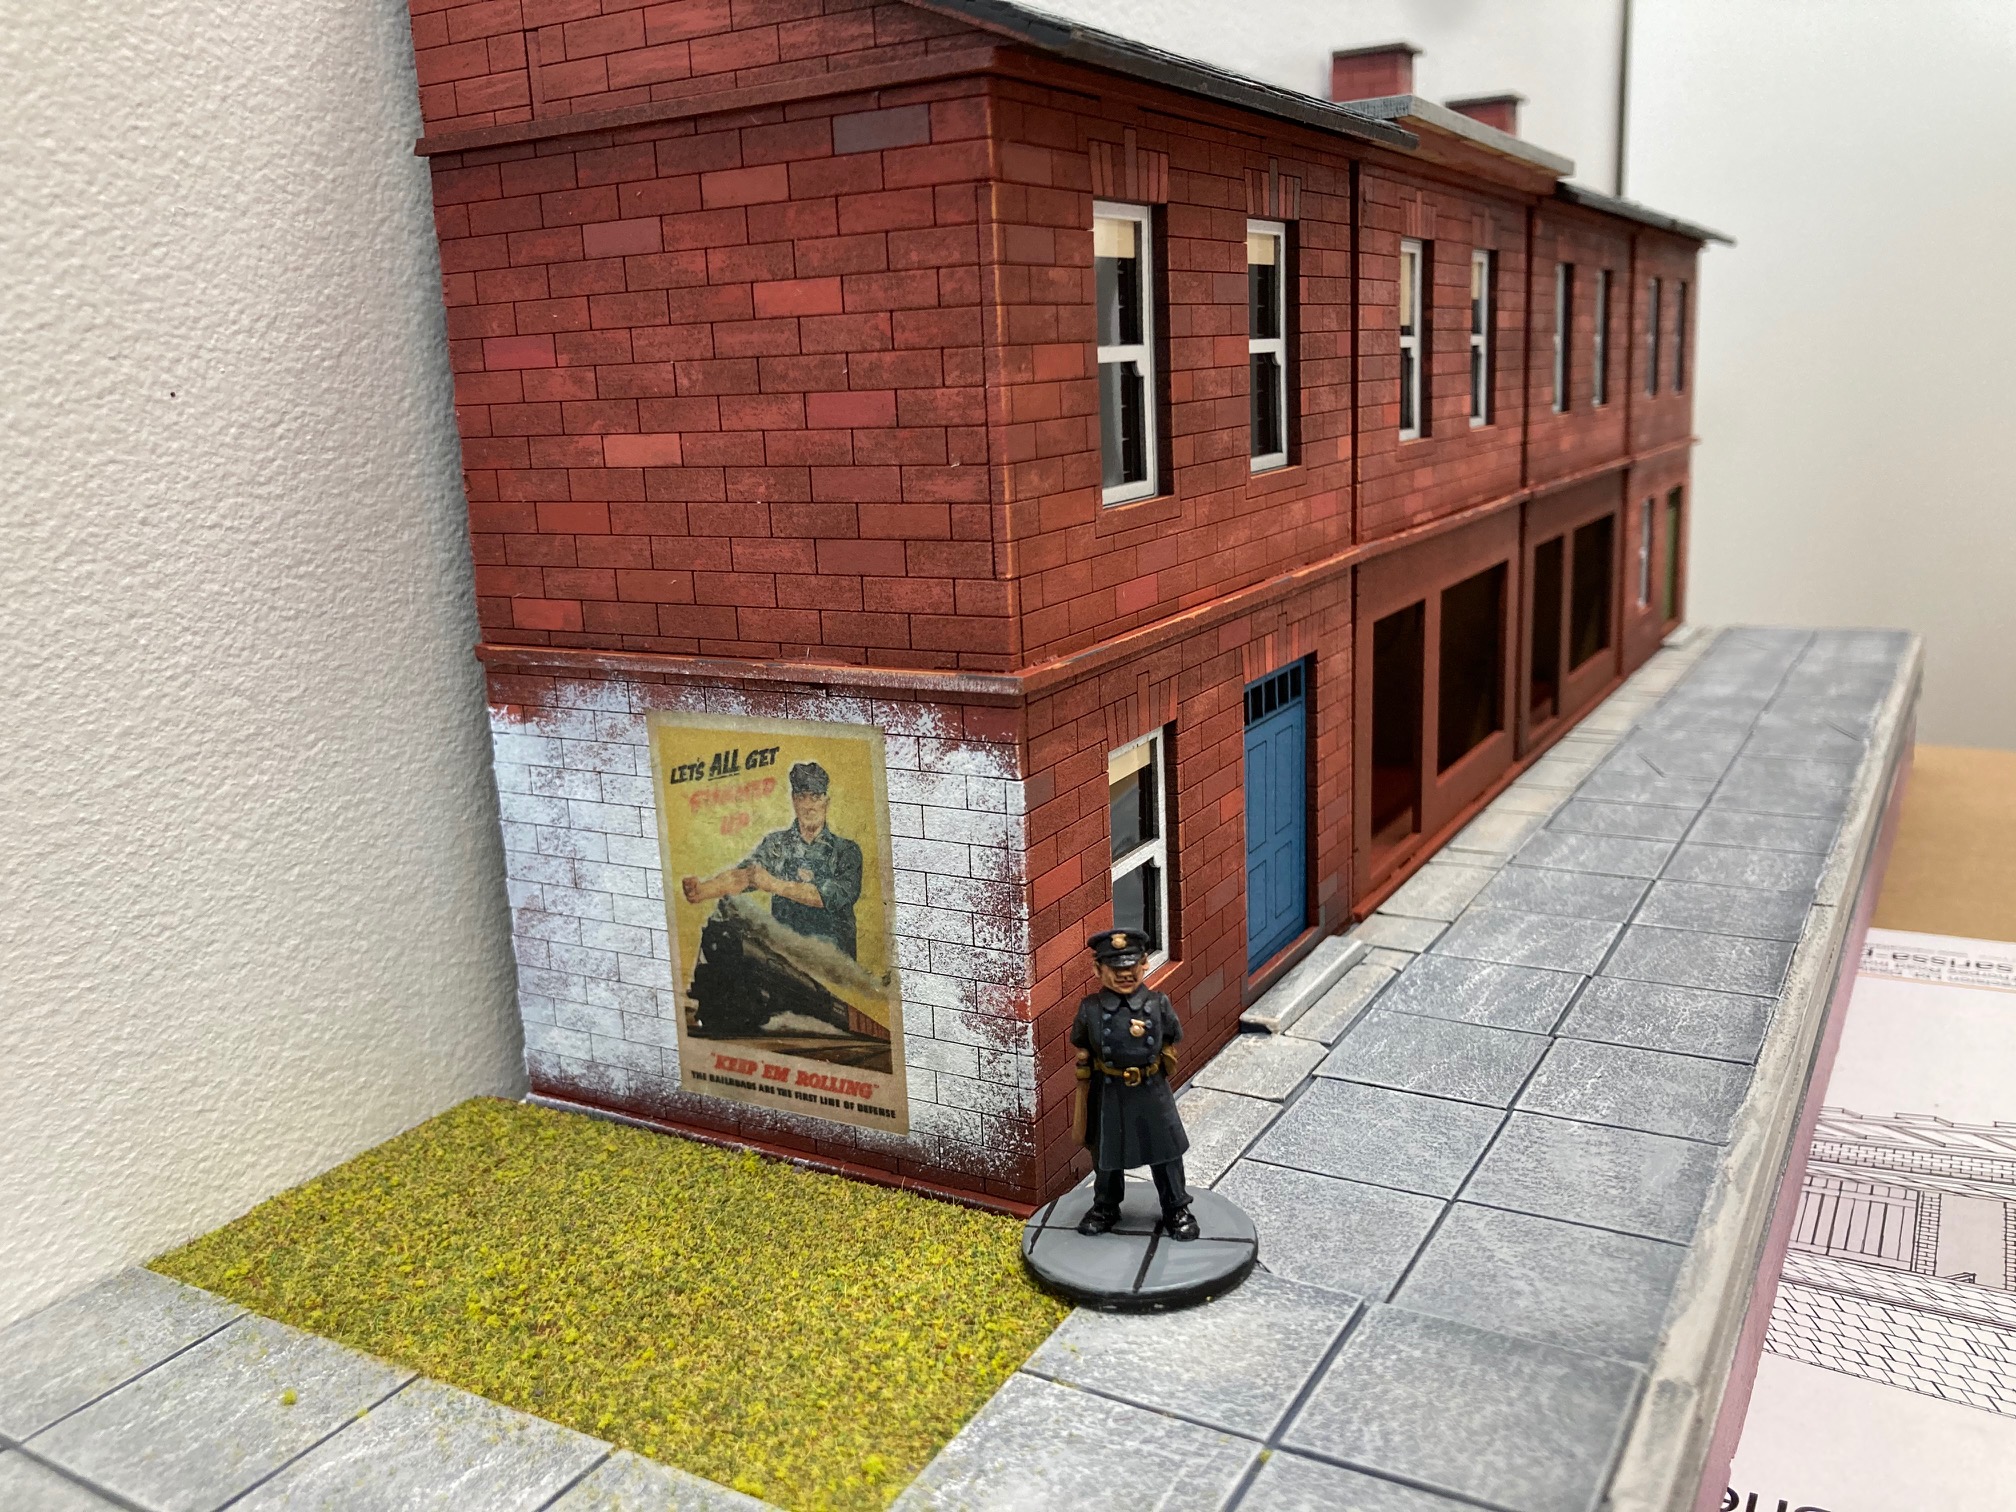
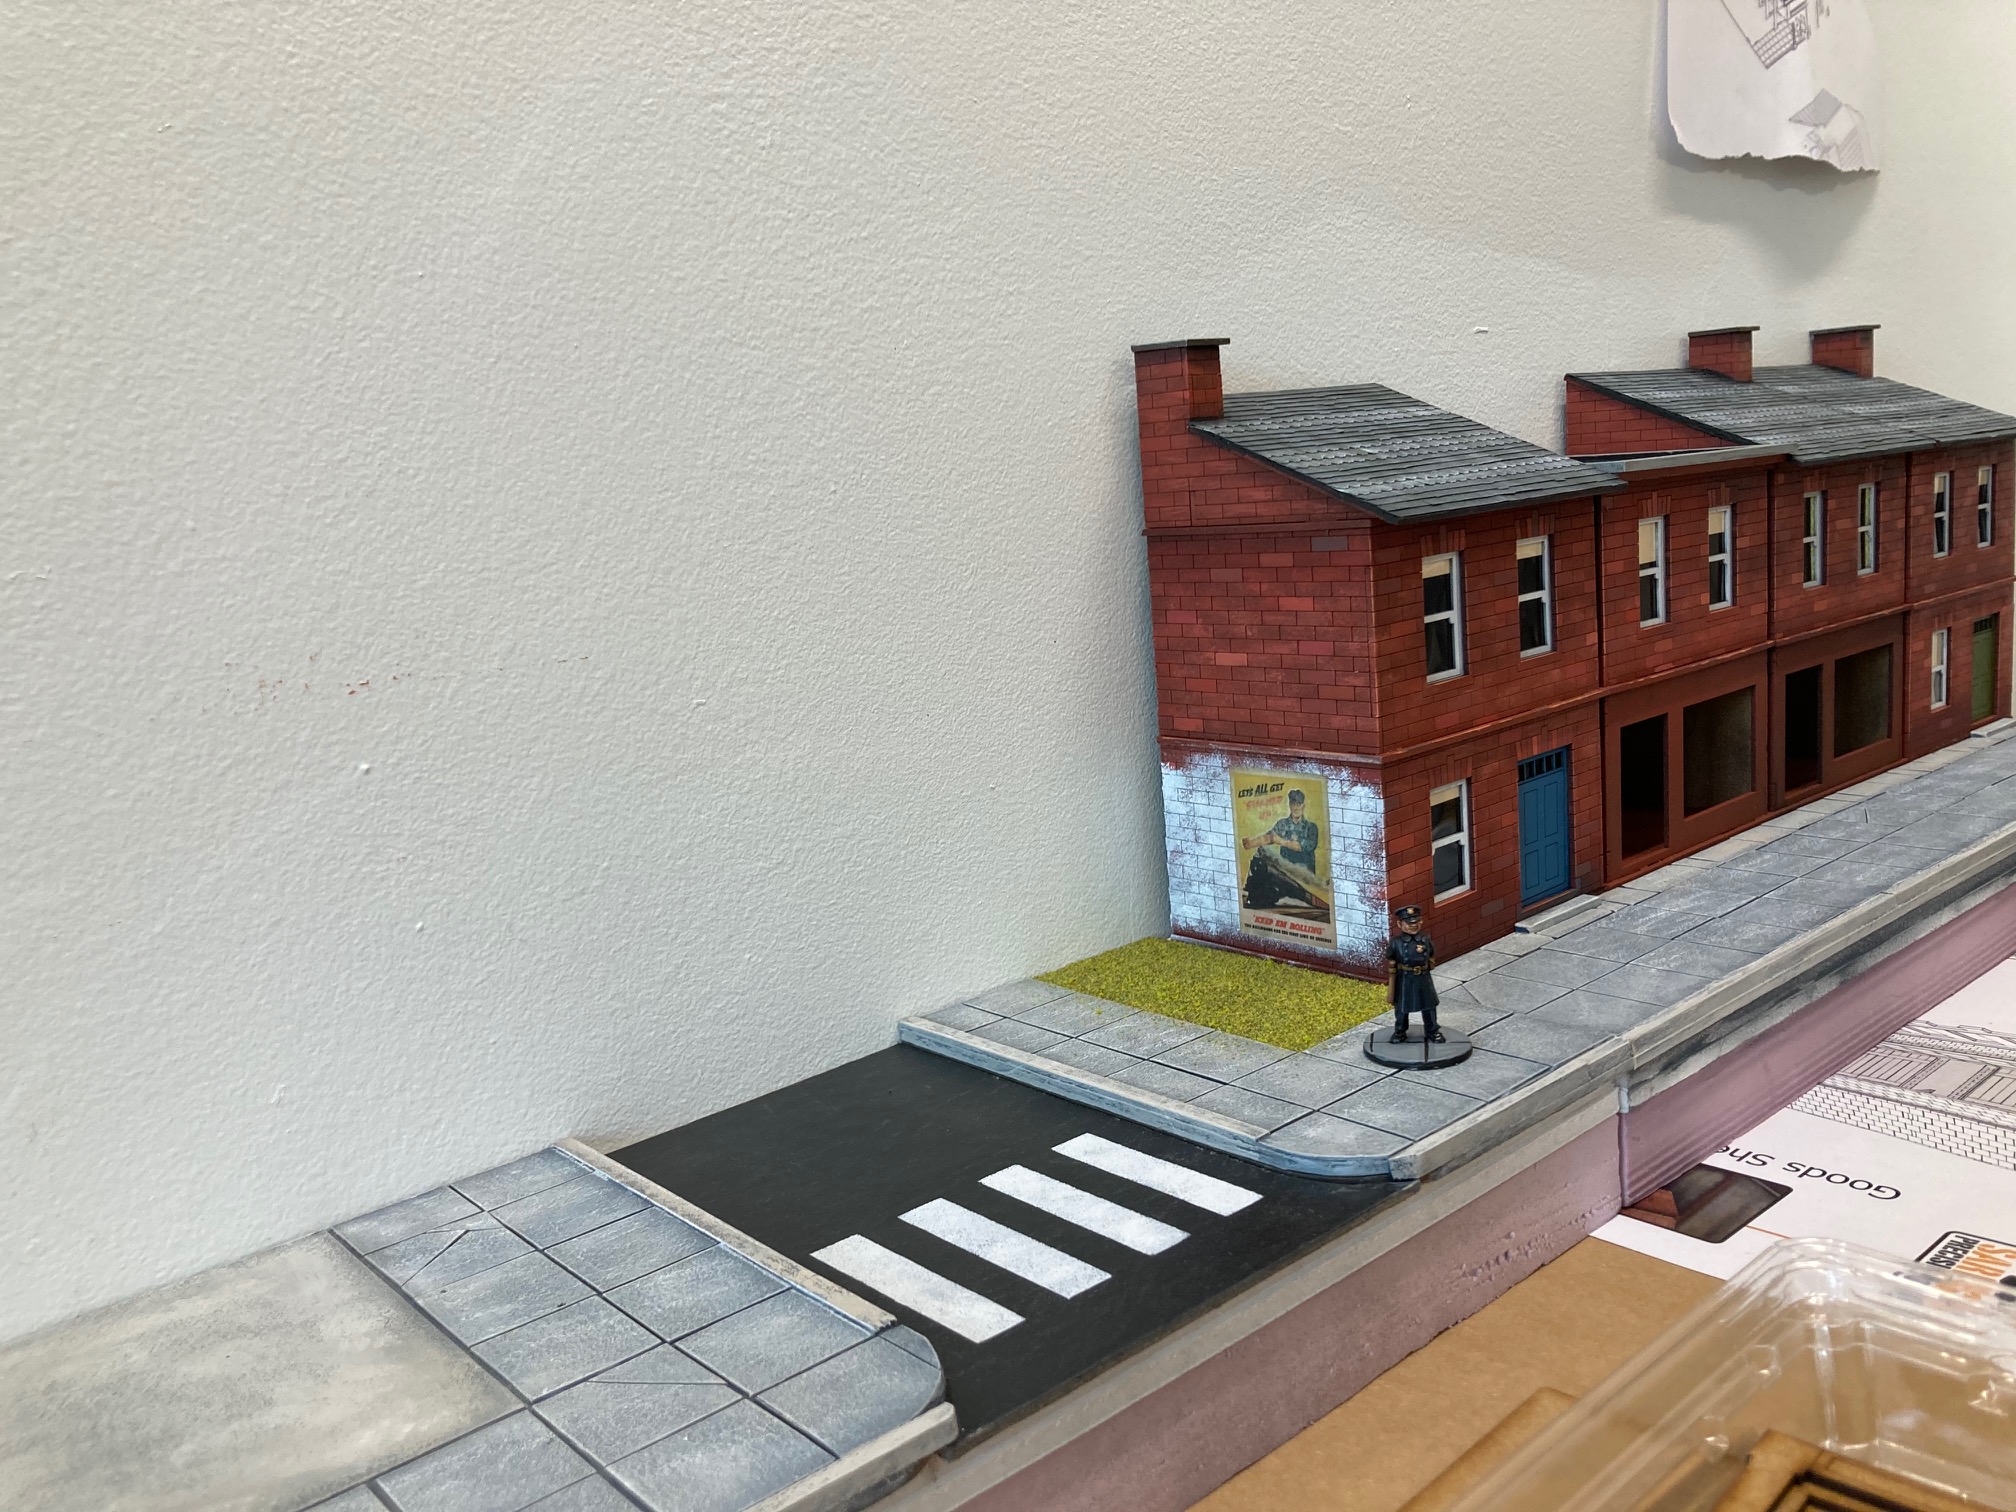
A Poster and Asphalt Shingles
Low Relief City Block
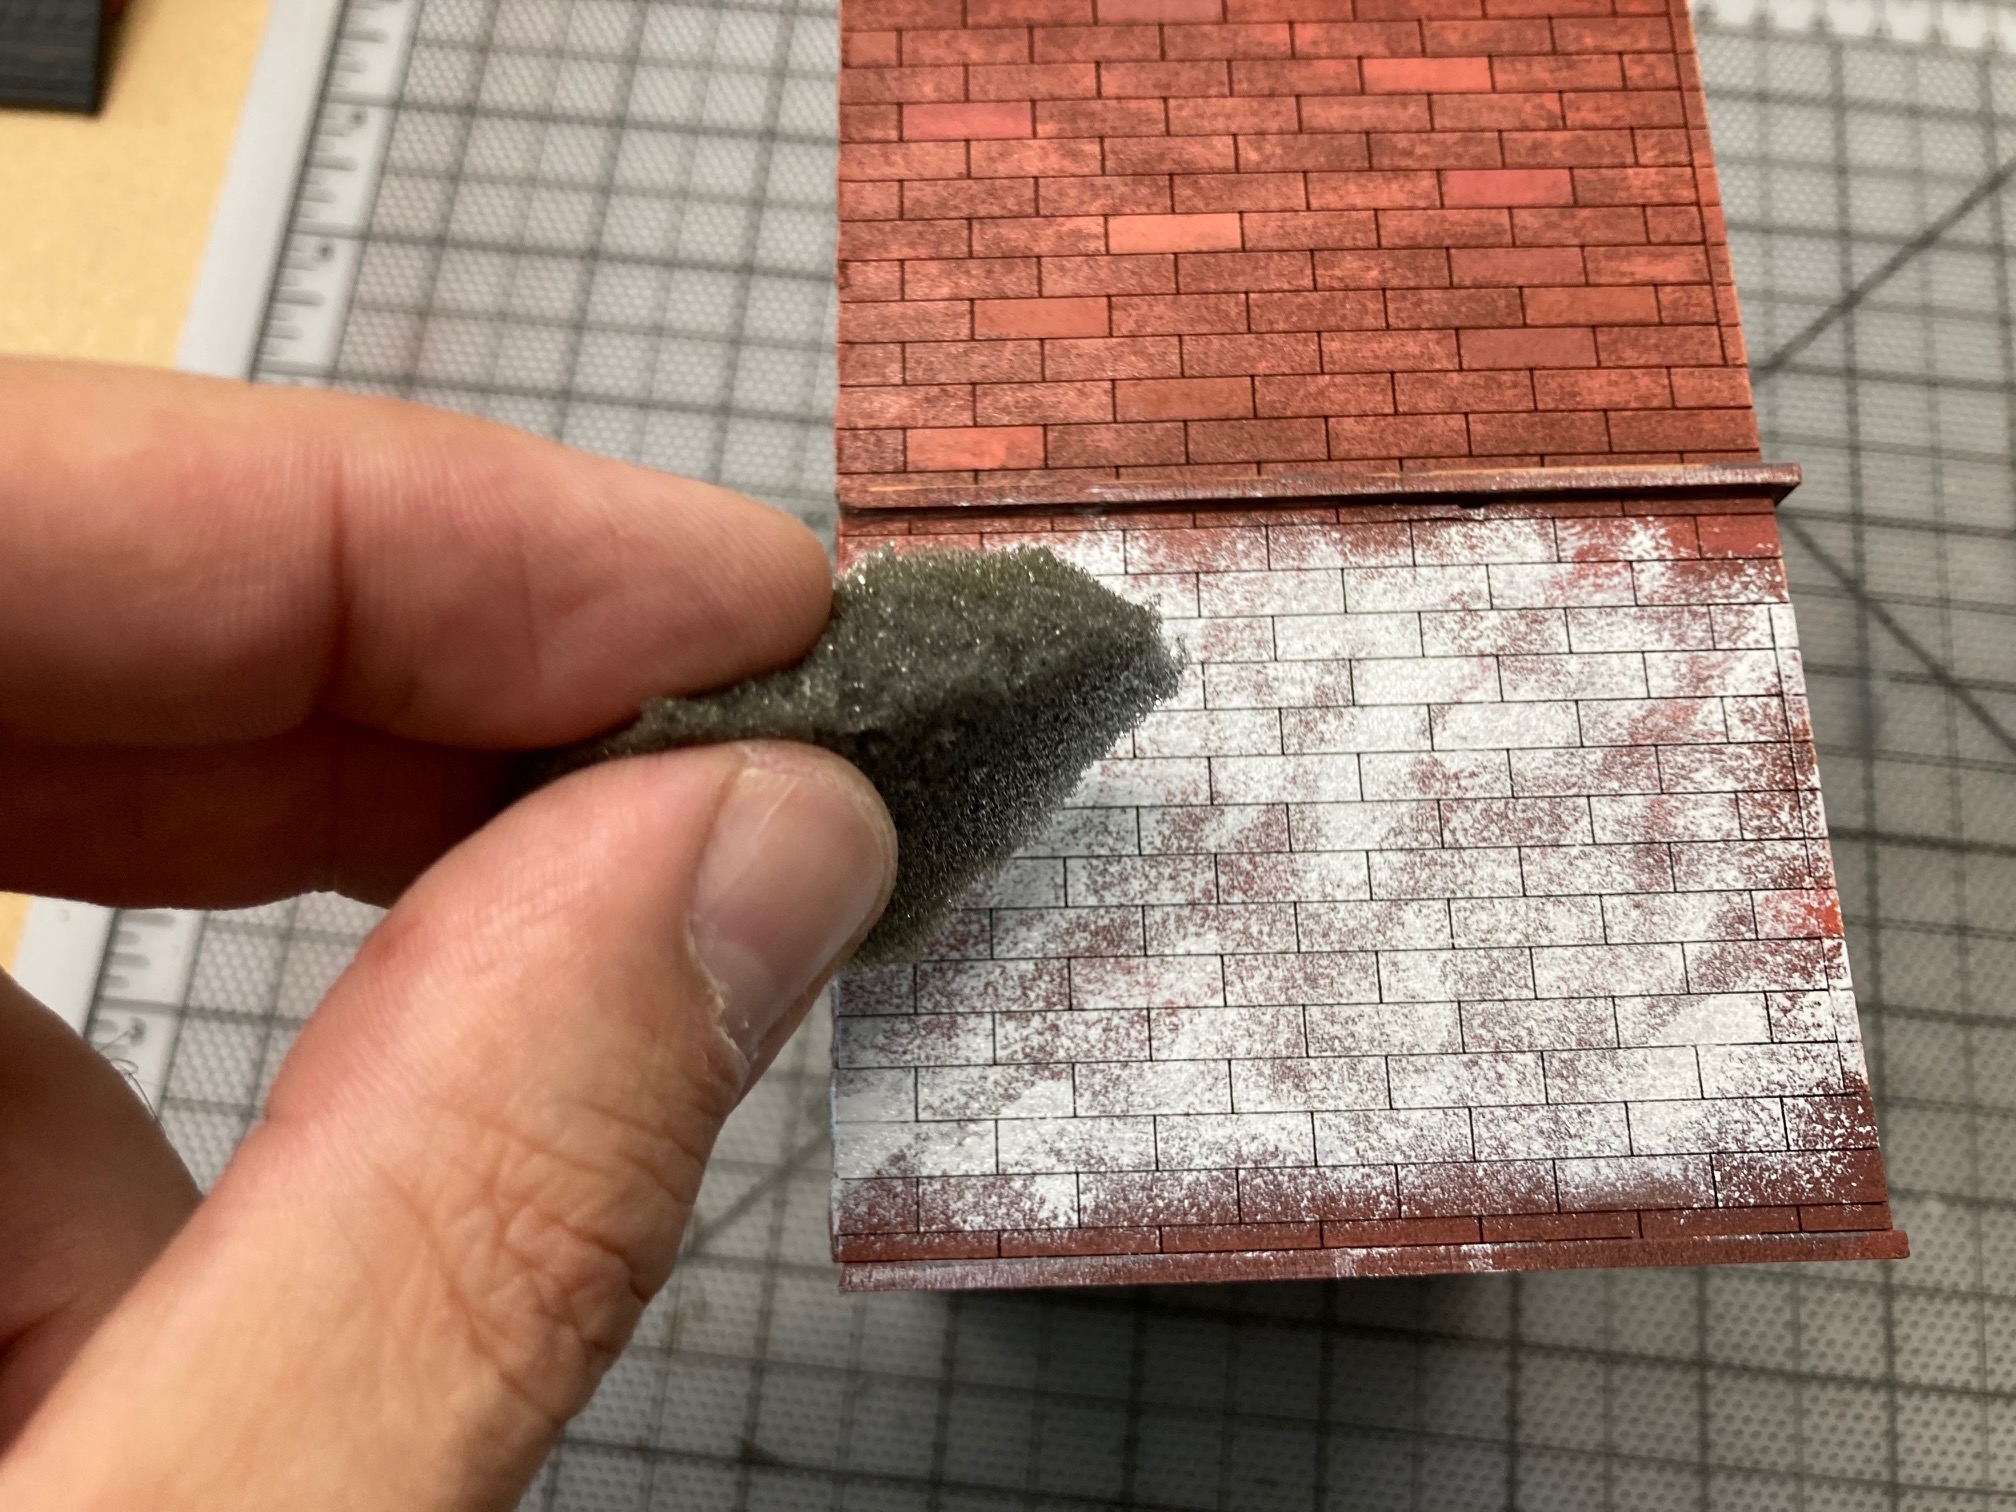
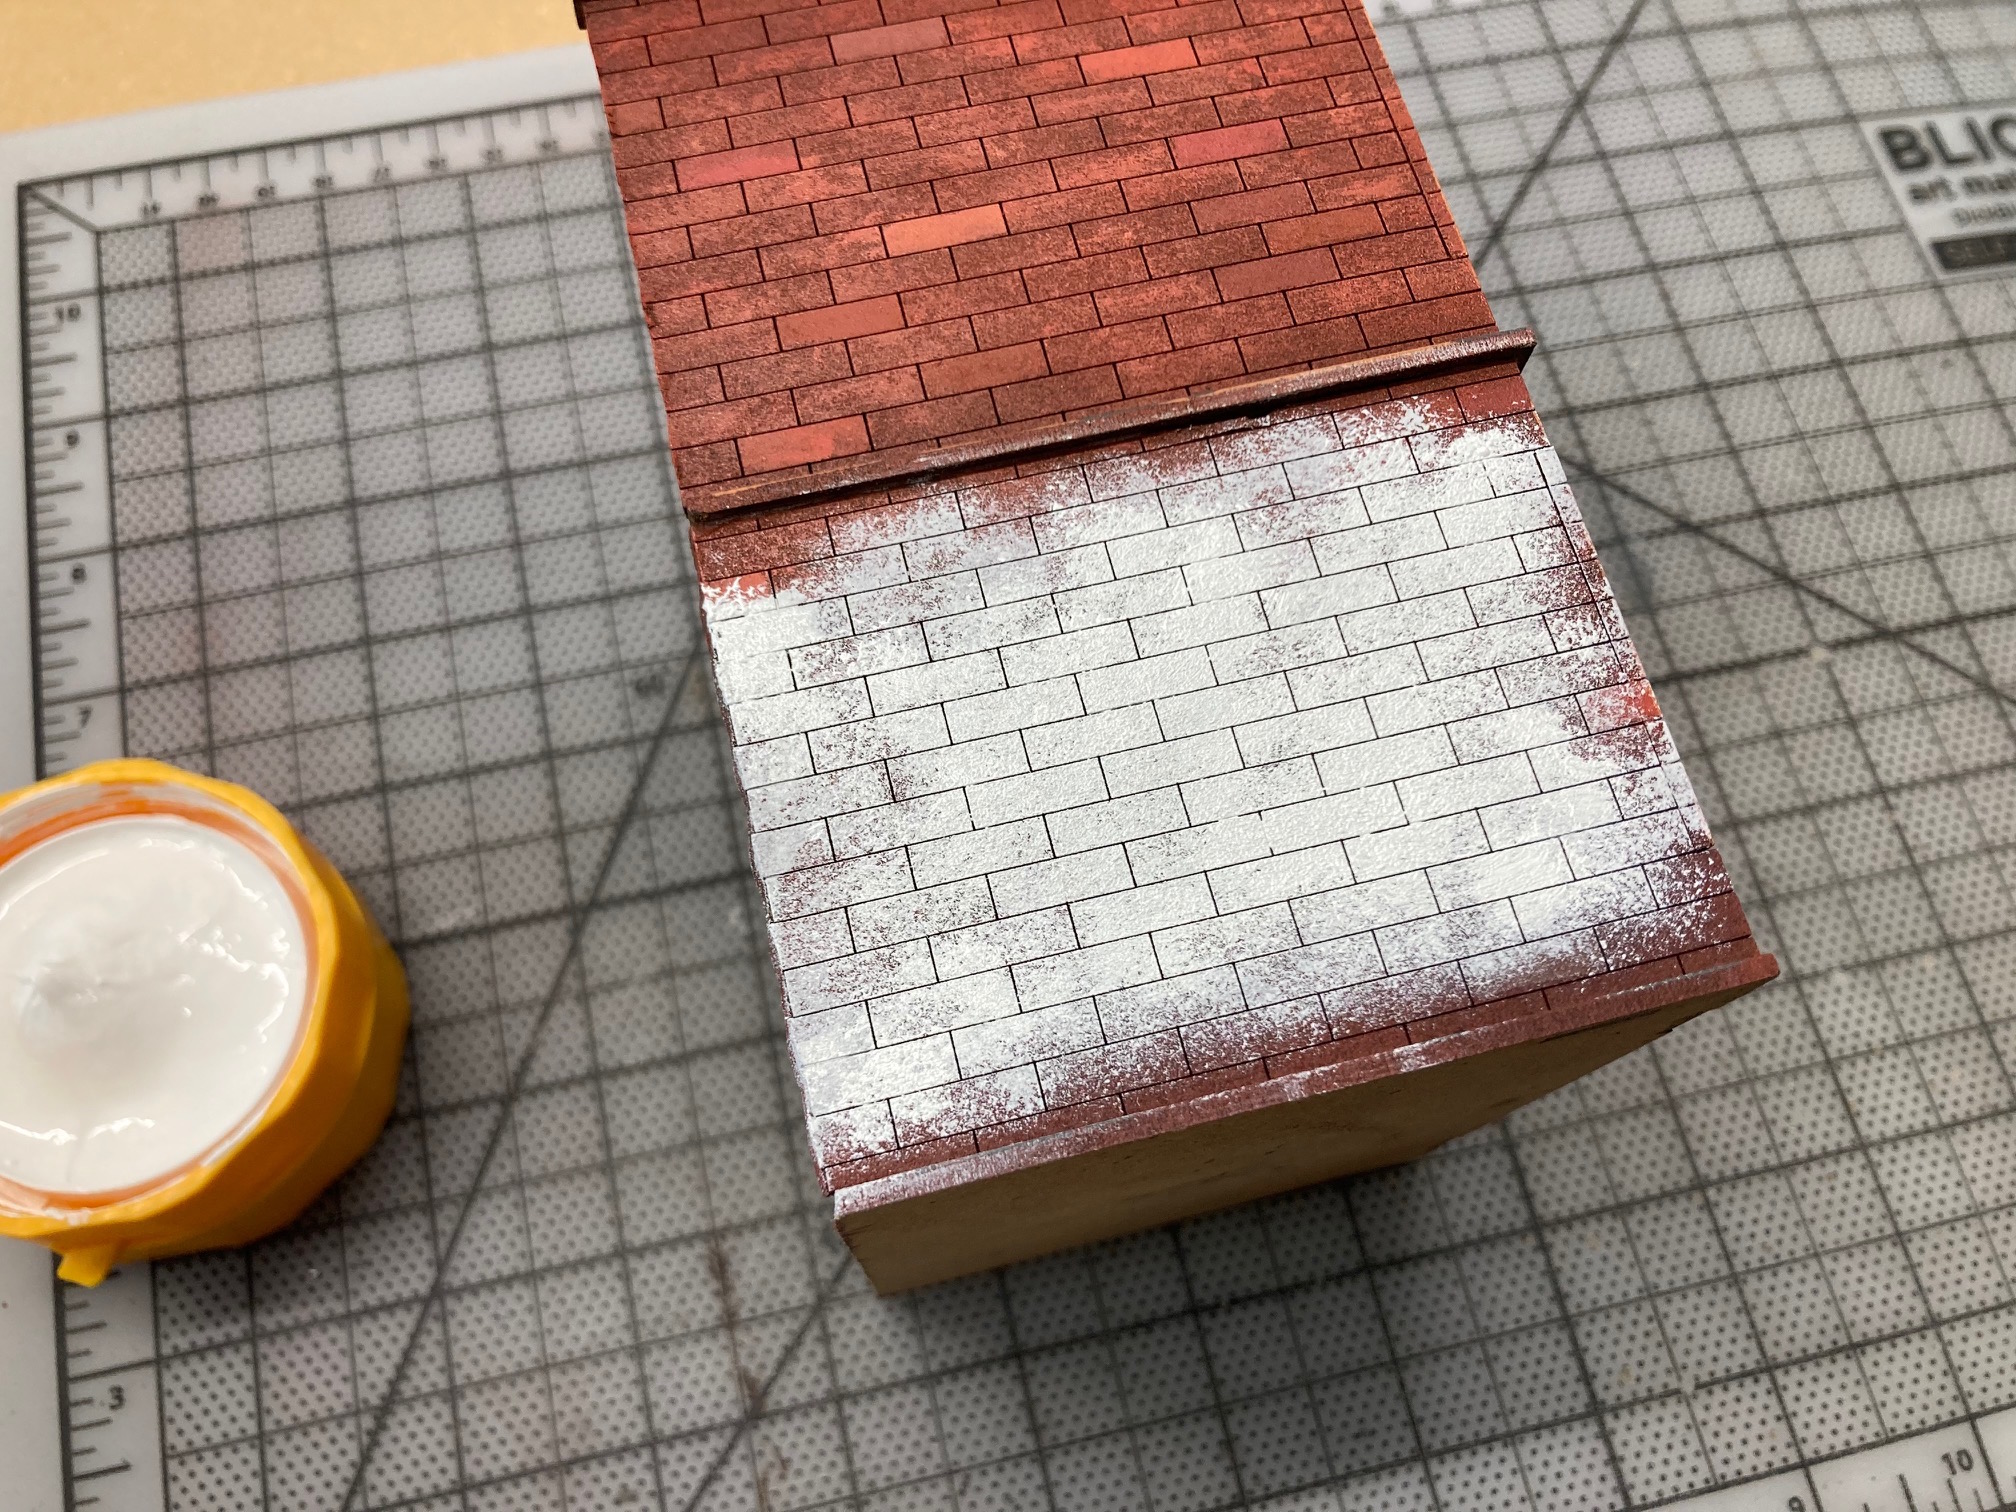
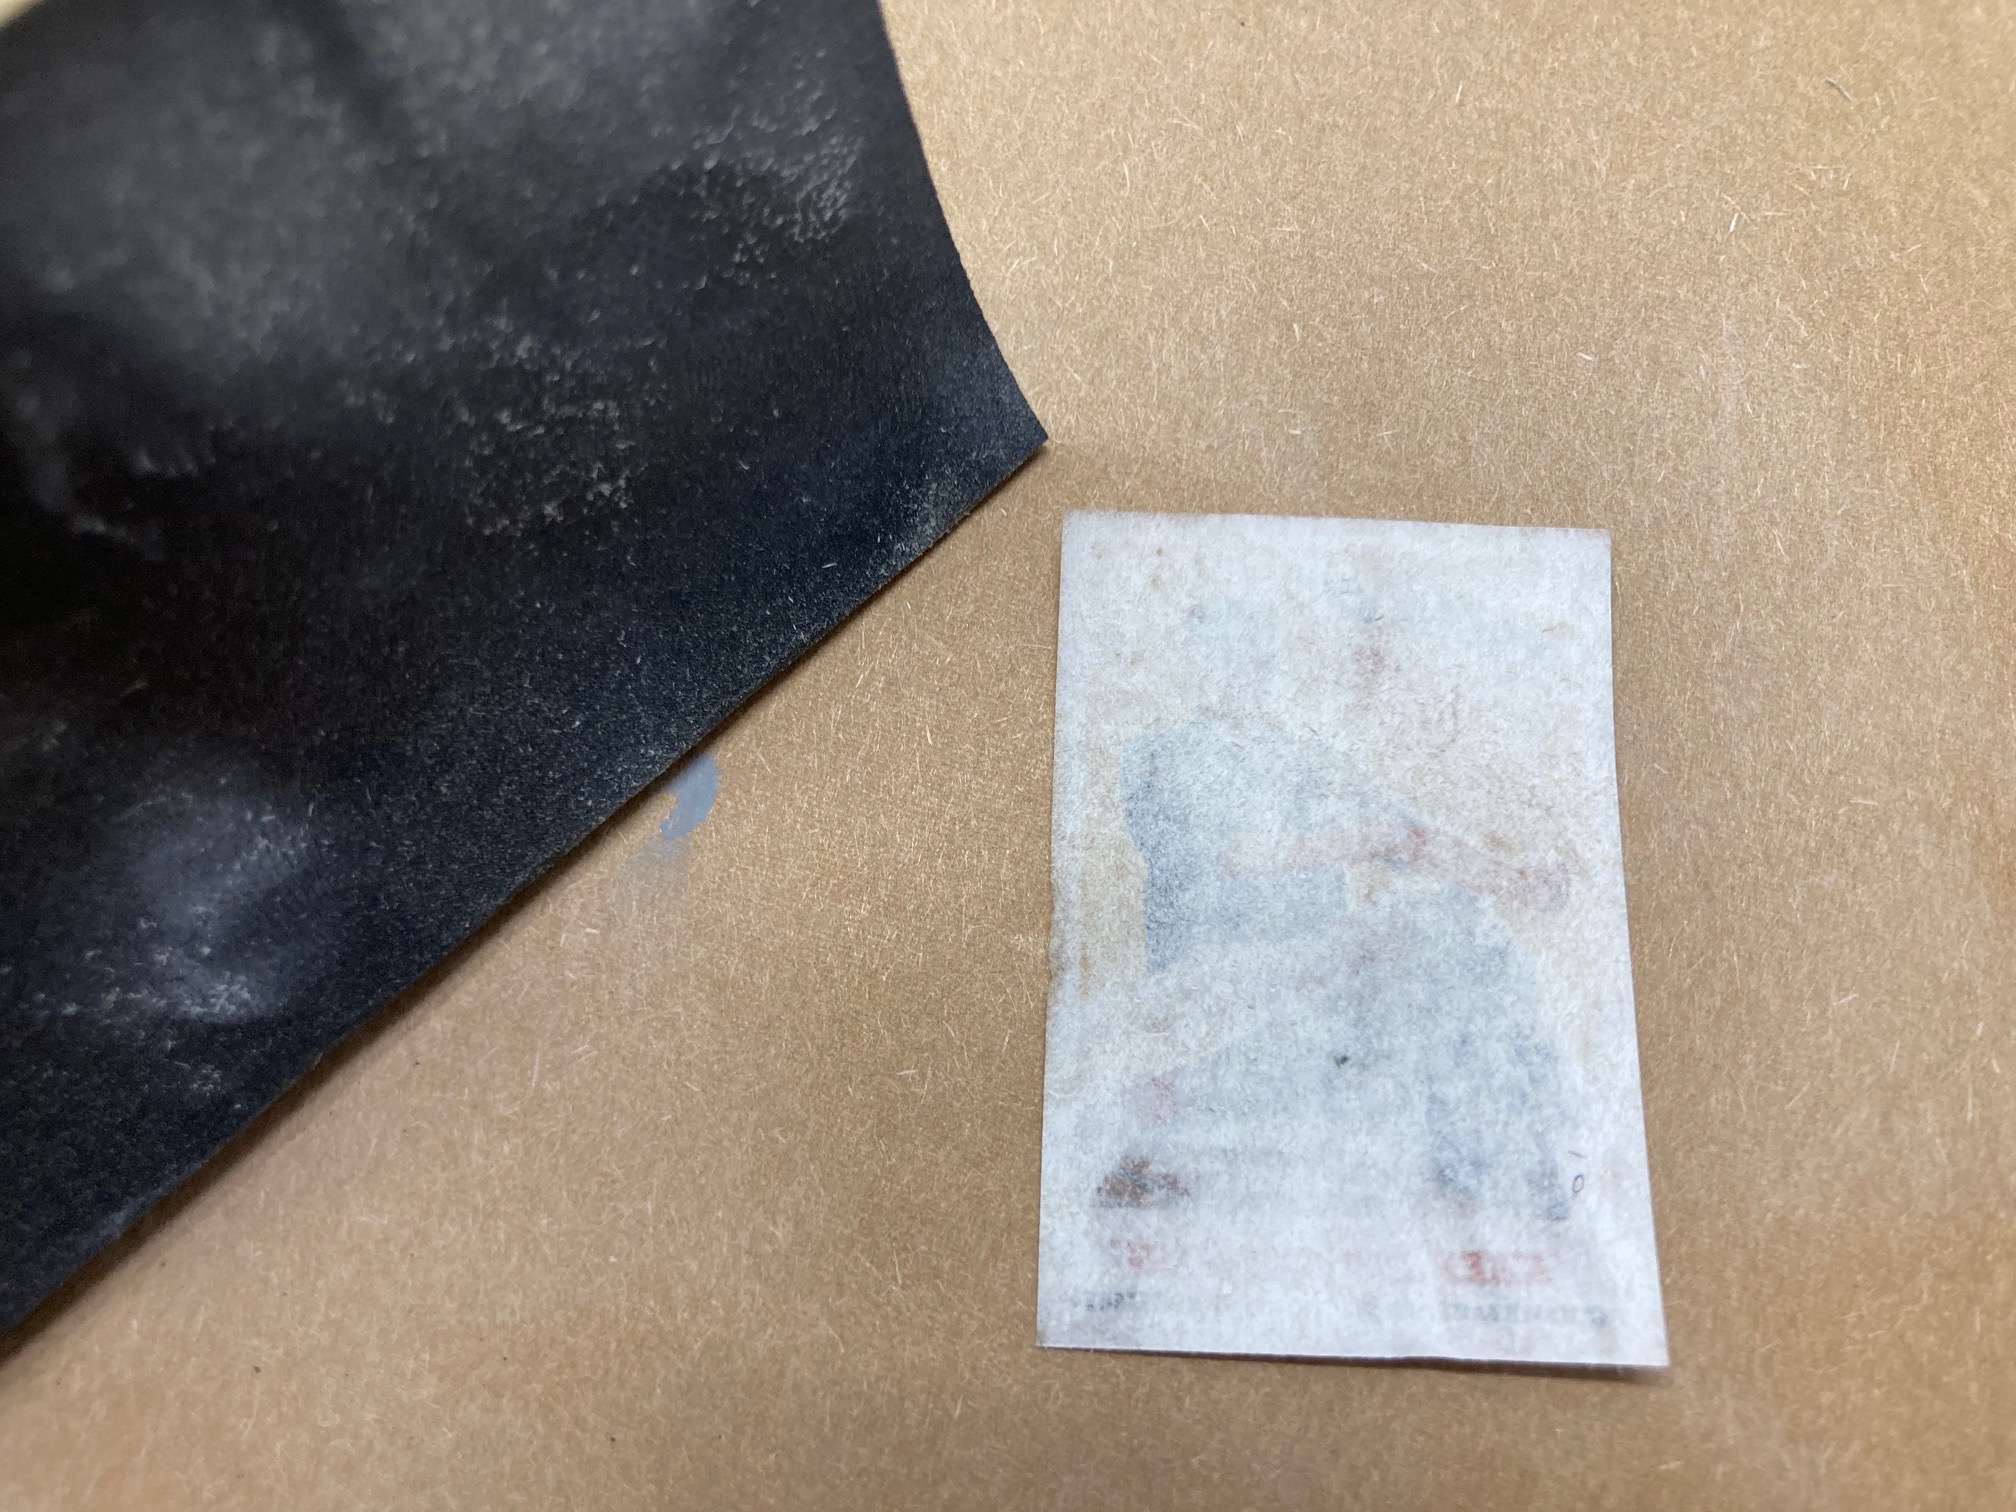
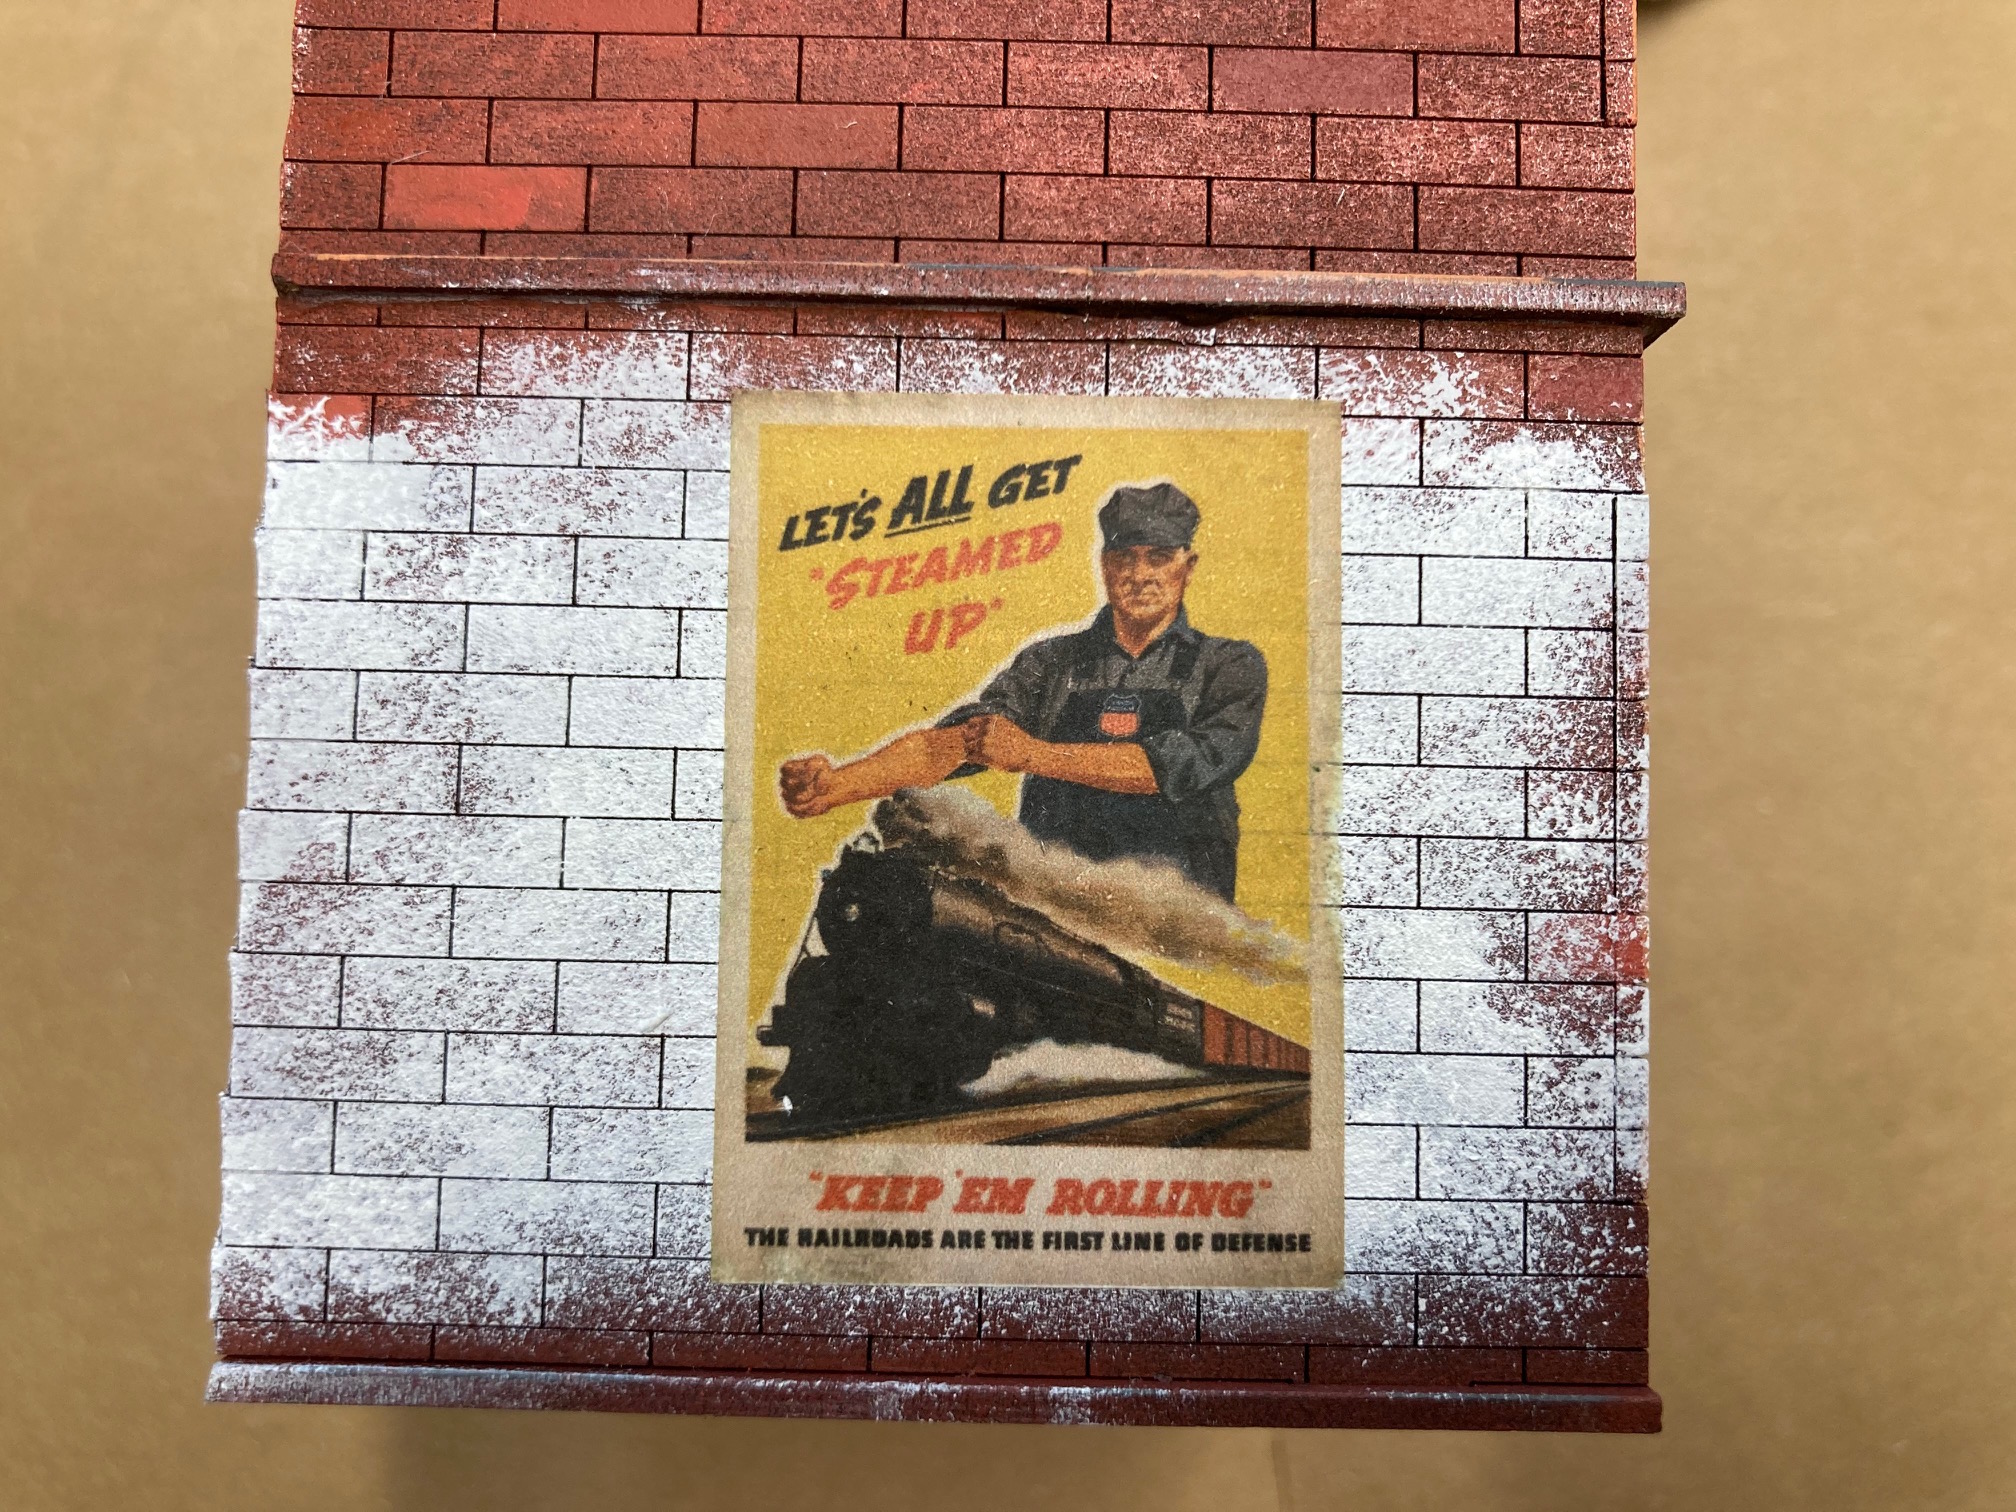
The left side wall seemed a bit dull so I choose a poster to add to it. First I sponged light grey then white onto of it to create the look of worn, peeling paint. While the paint dried I sanded the back of the poster until I could see the image. I then glued it with watered down PVA.
Asphalt Shingles
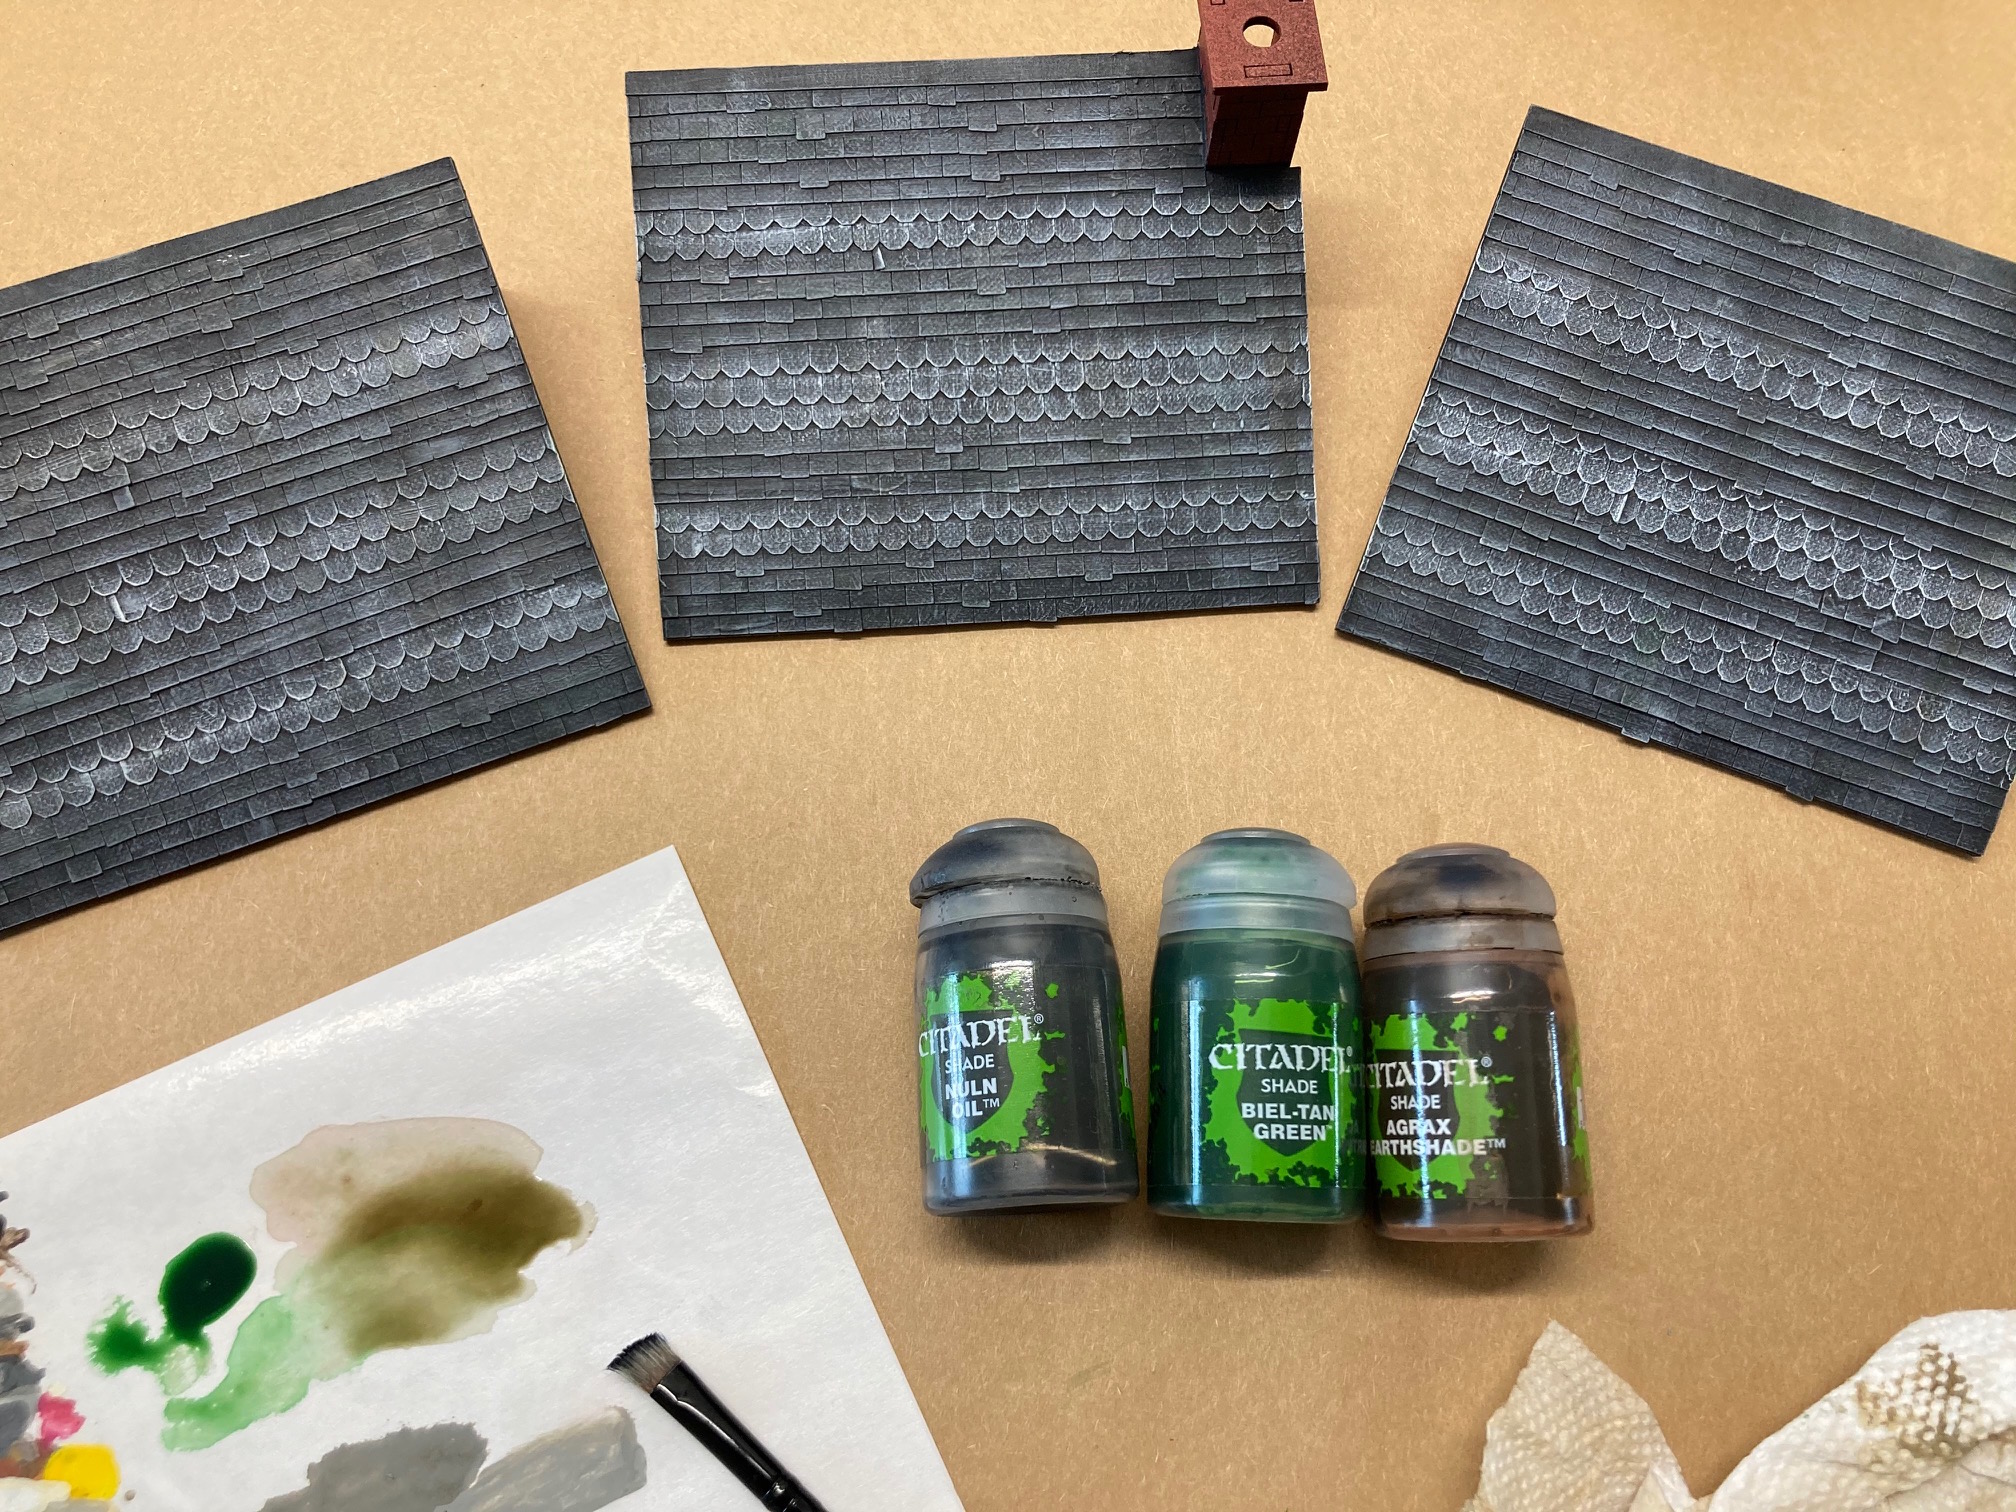
For the roofs I first painted them flat black. Then using the same grey from the concrete I dry brushed them up and down and at a 45 angle to. I then dry brushed light grey over the detail shingles to pop.
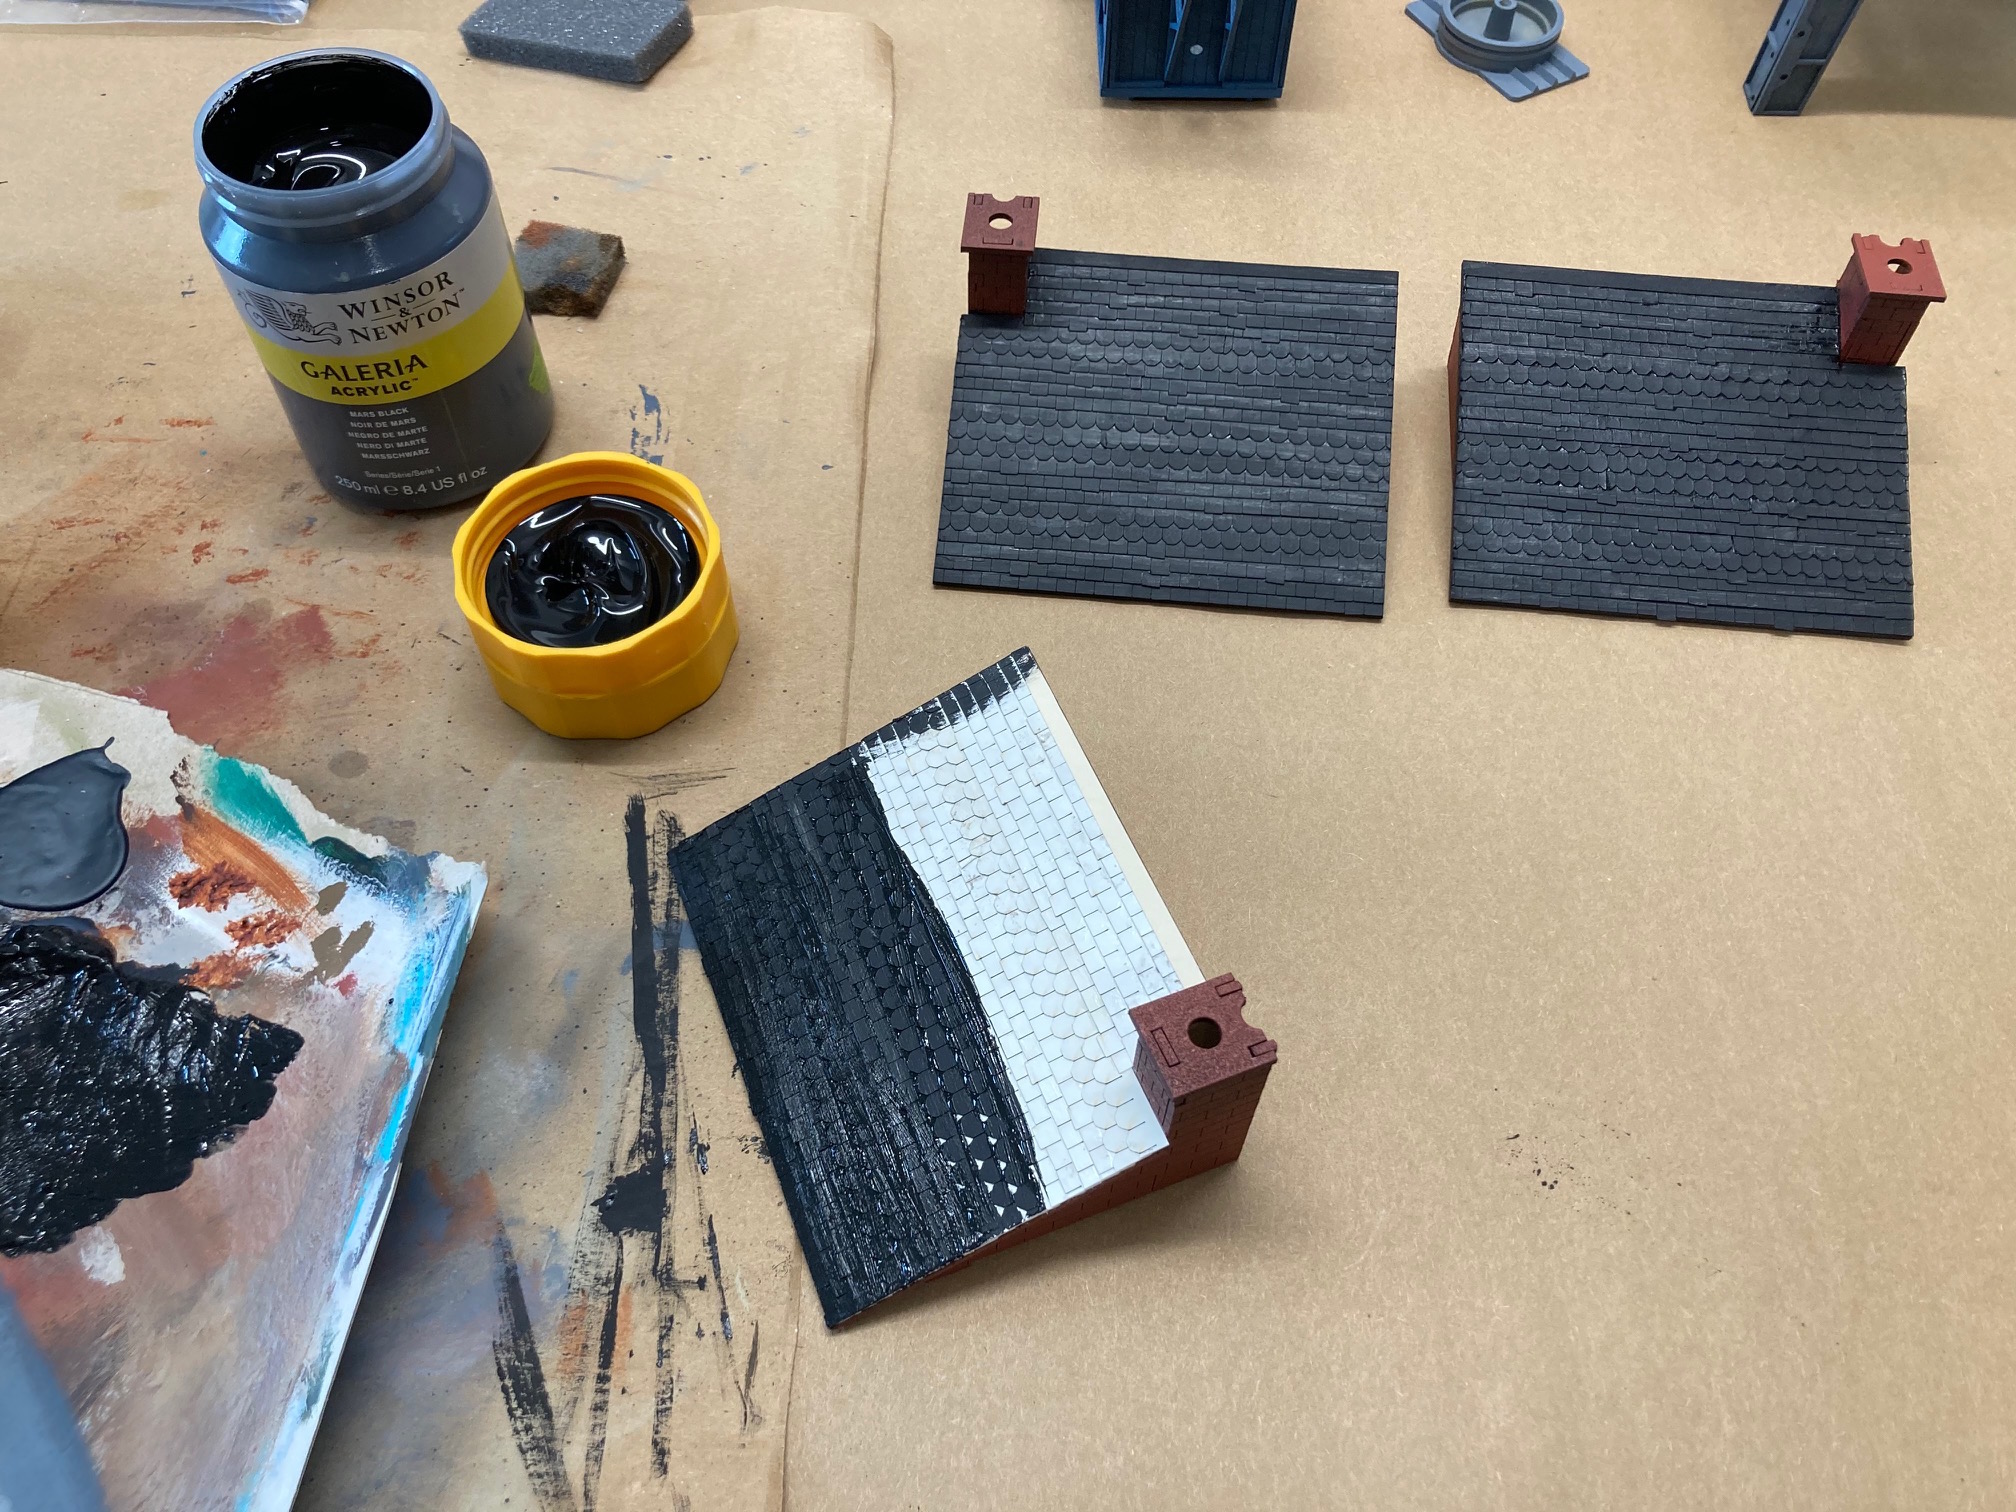
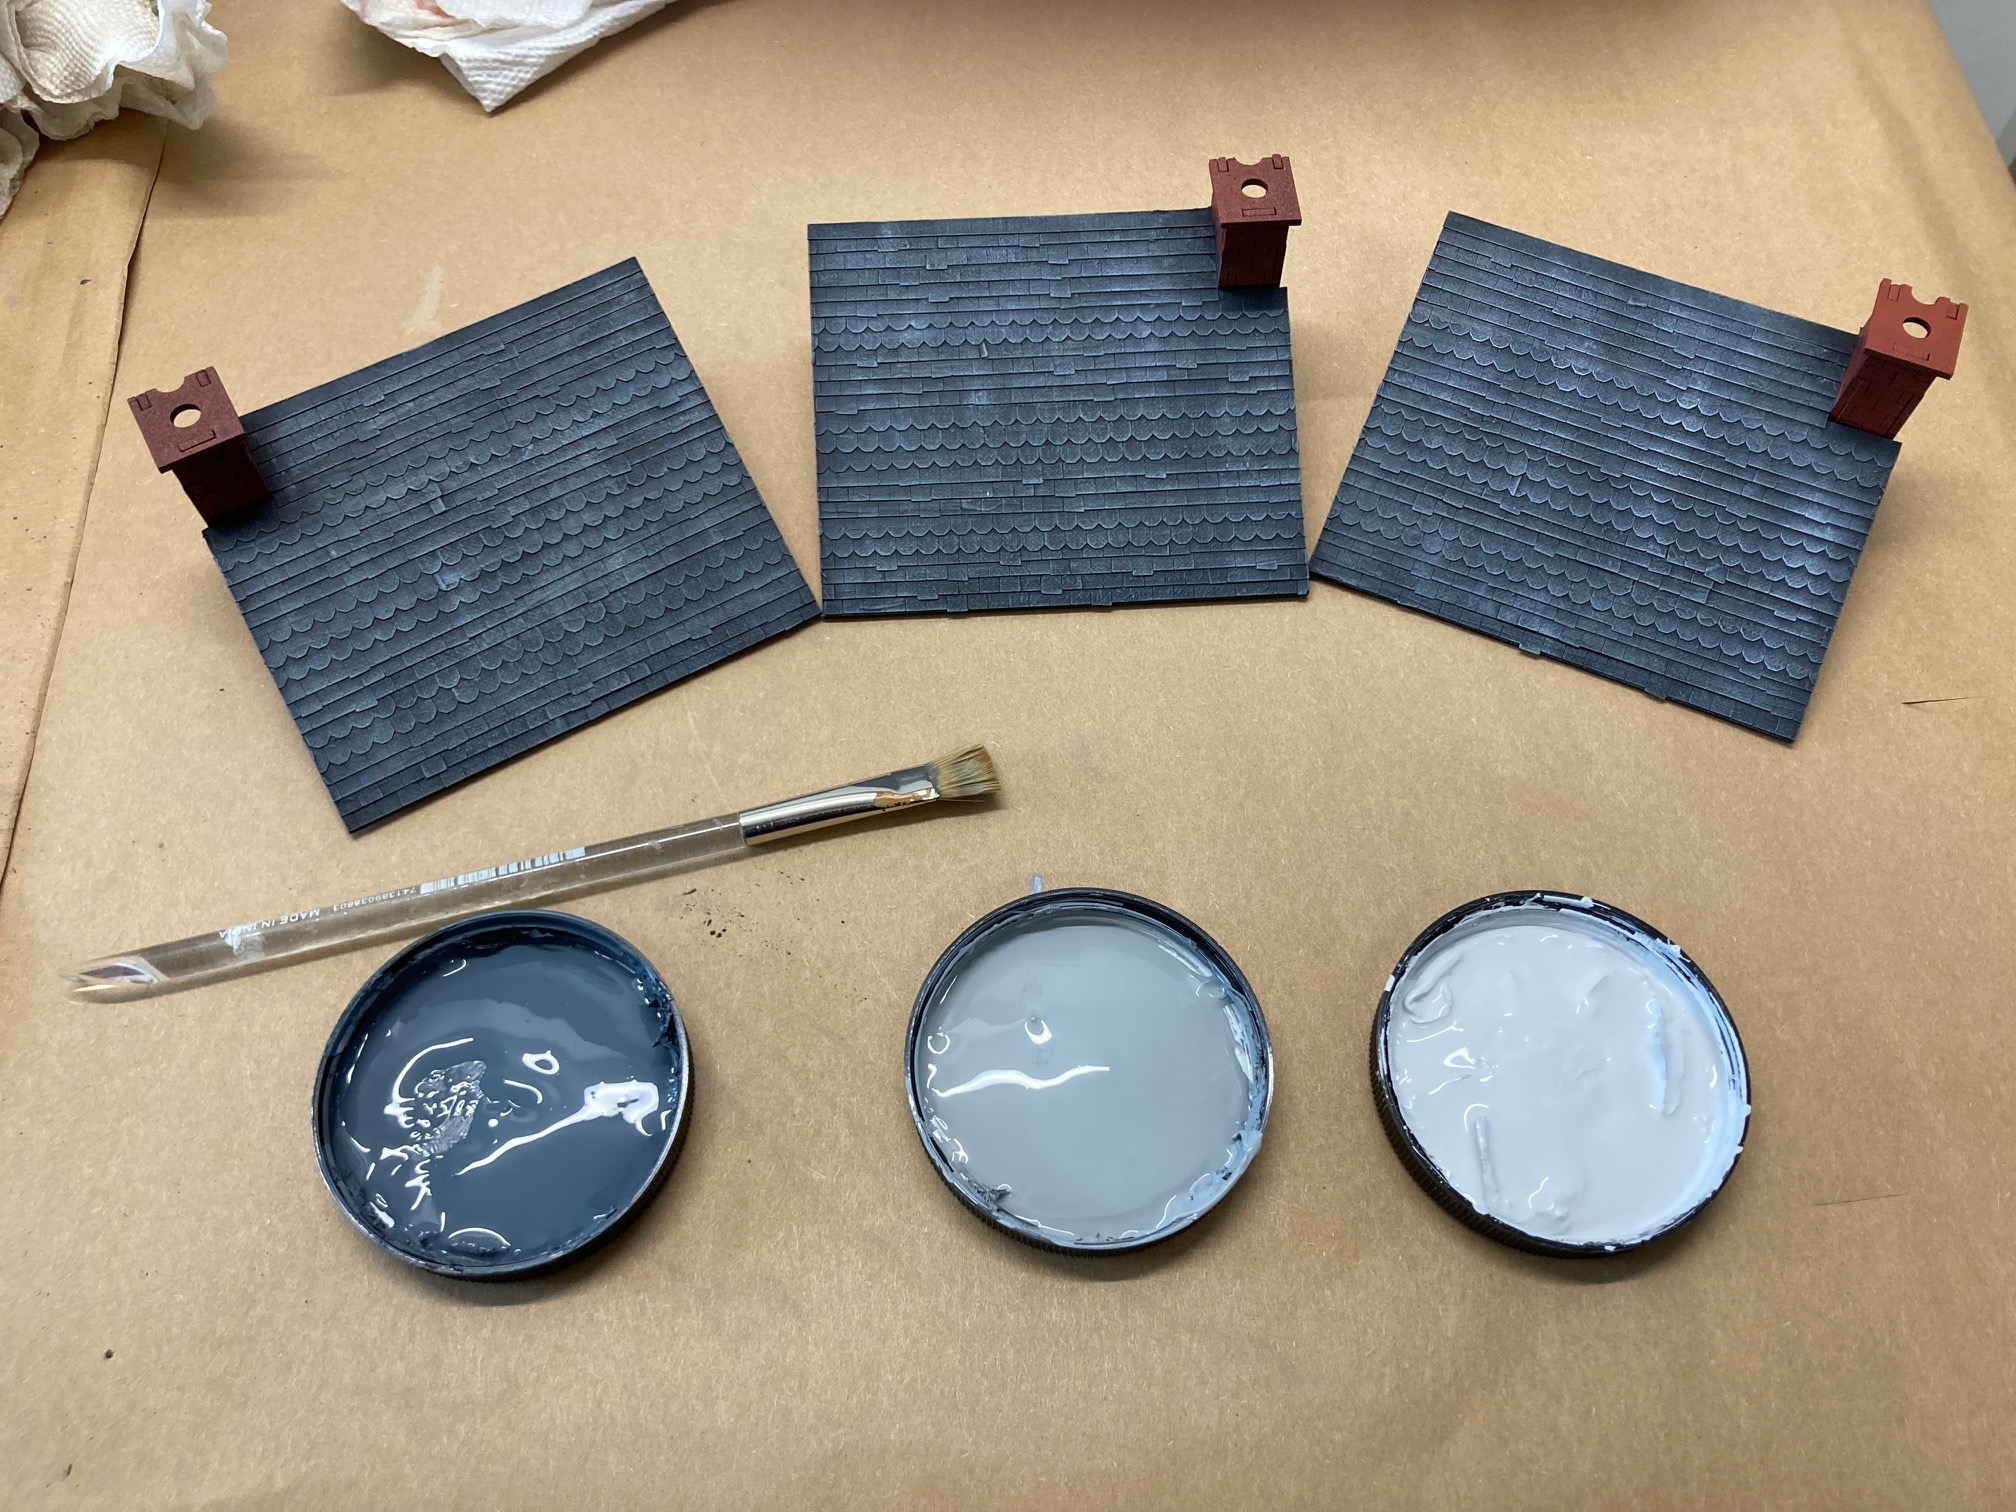
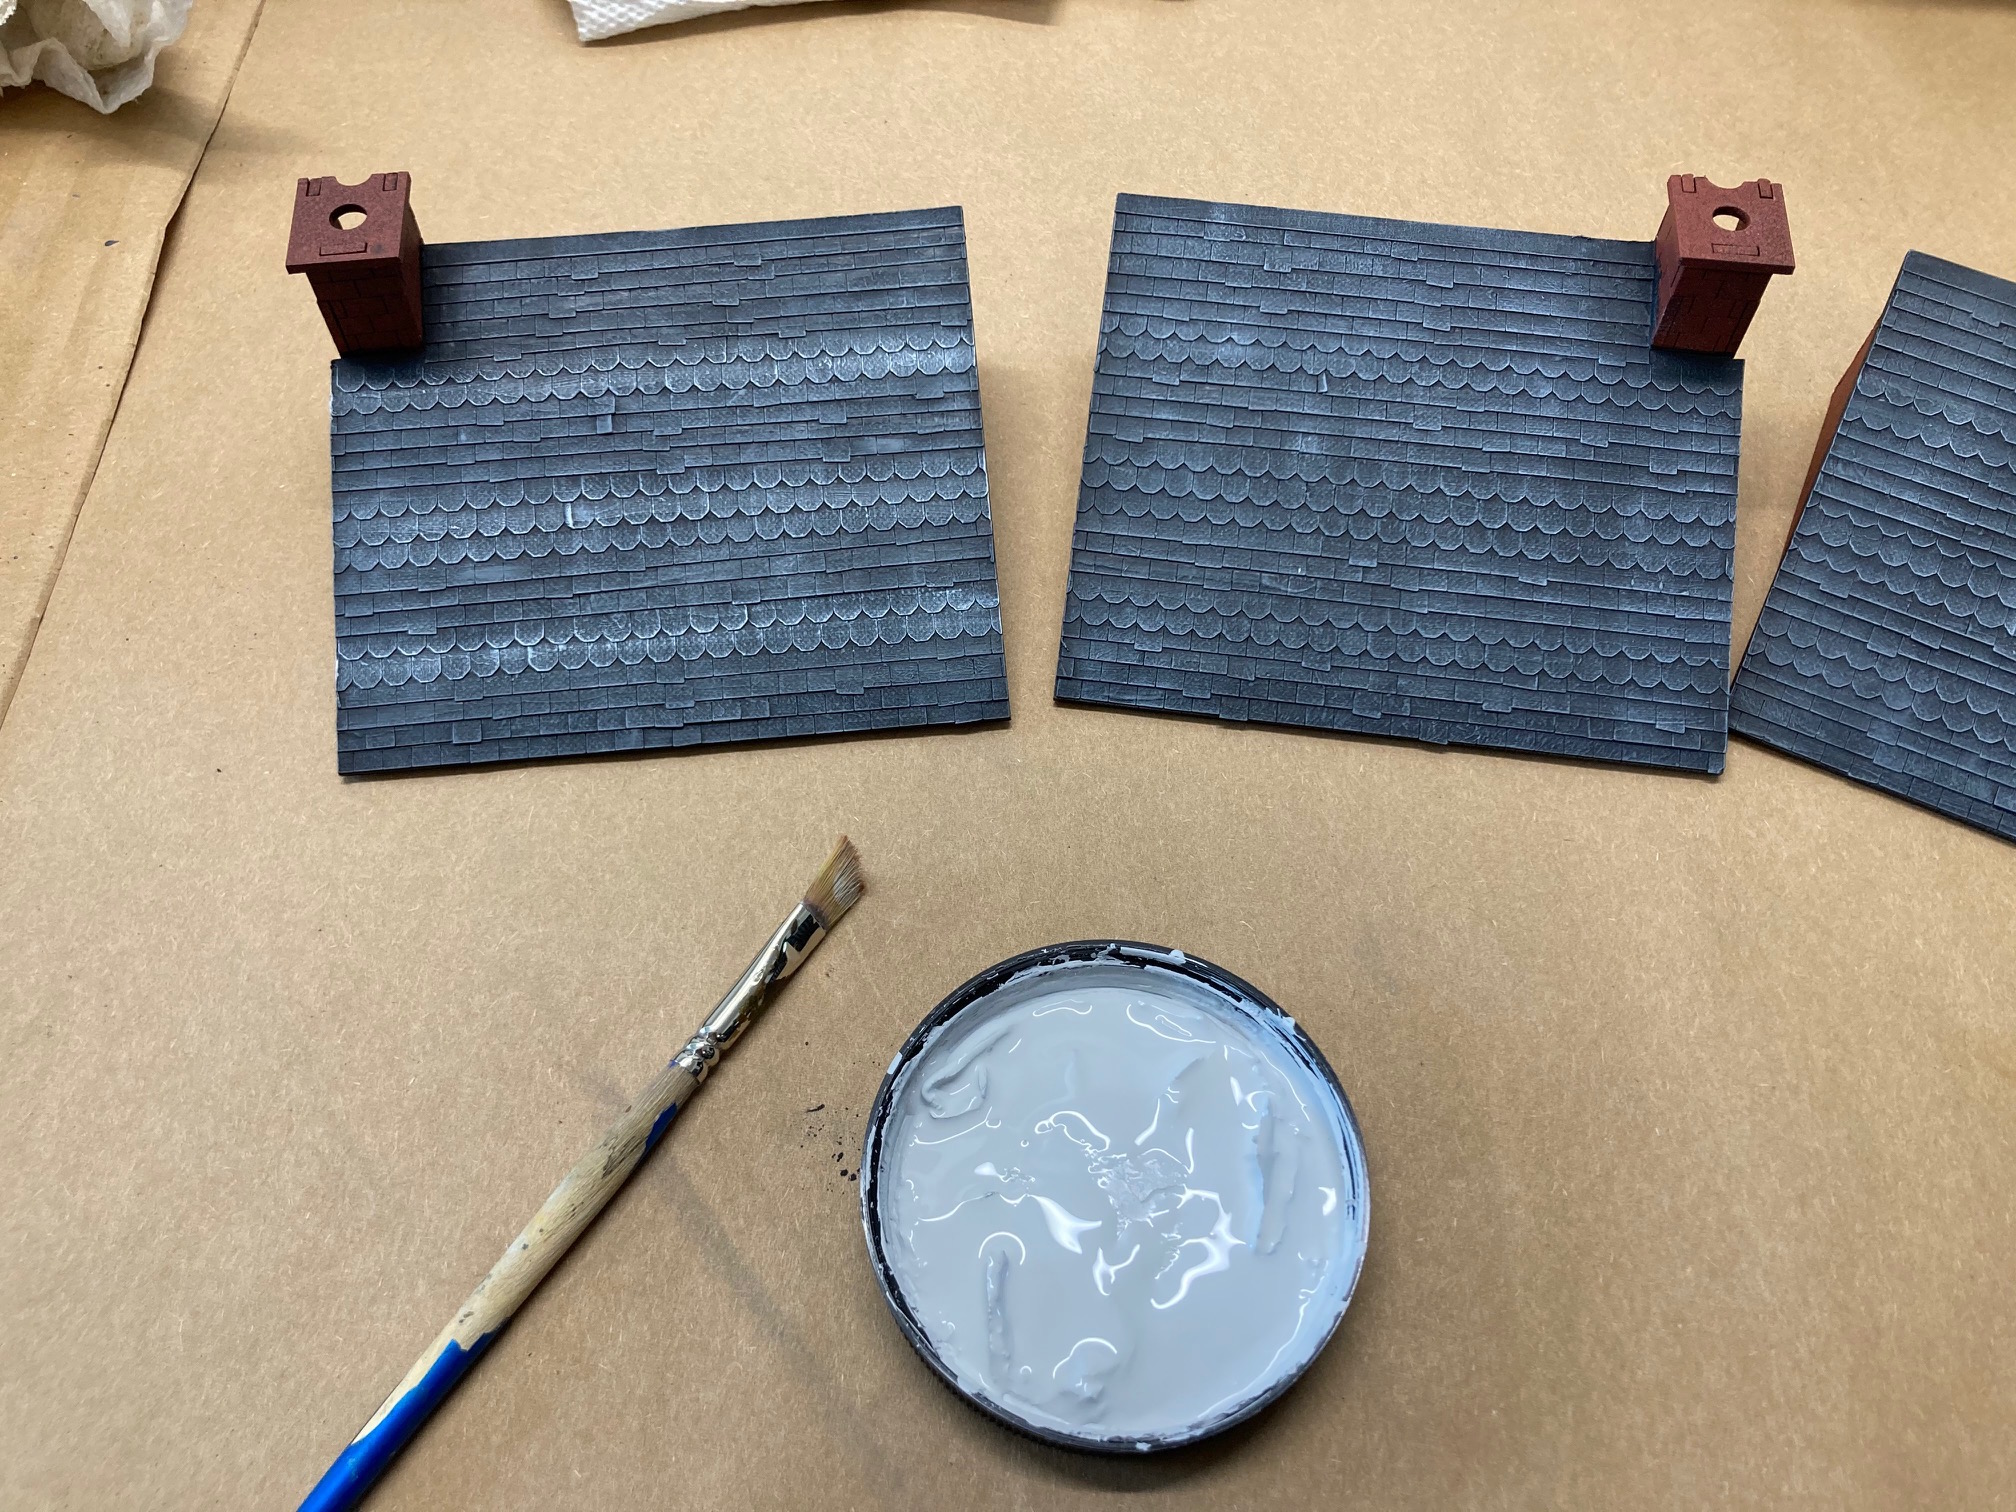
Then I got out the washes and added vertical streaks randomly.
Cheers