![How To Paint Moonstone’s Nanny | Goblin King Games [7 Days Early Access]](https://images.beastsofwar.com/2024/12/3CU-Gobin-King-Games-Moonstone-Shades-Nanny-coverimage-225-127.jpg)


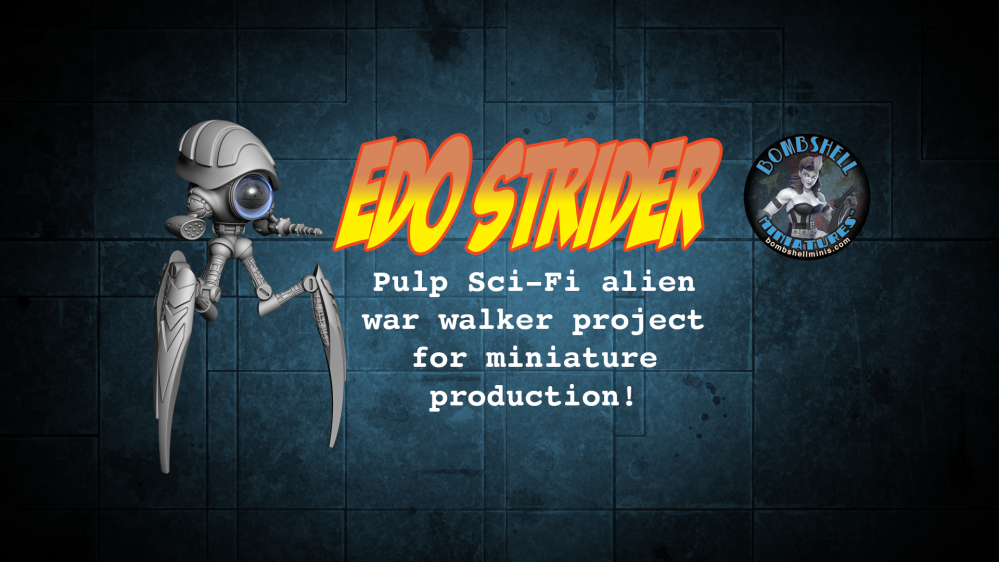
Edo Strider for Counterblast™


Recommendations: 71
About the Project
A detailed look at the production process of the Edo Strider. The workflow from concept to completion of the resin kit for the Counterblast Adventure Battle Game.
Related Game: Counterblast: Adventure Battle Game
Related Company: Bombshell Miniatures
Related Genre: Science Fiction
This Project is Active
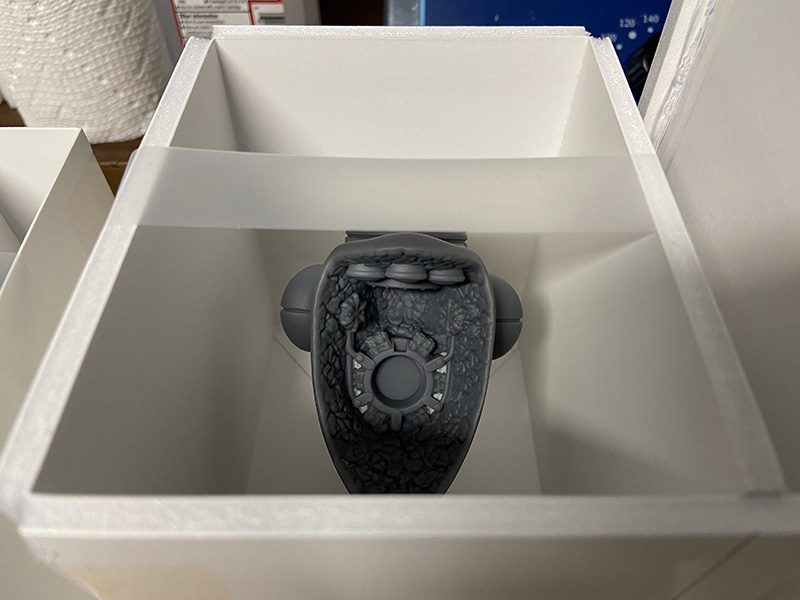
Moulding & Casting
Once the silicone cures, the moulds are unboxed and cut to remove the master prints. The incisions to split the mould open are cut in a zig-zag pattern back and forth to crreate “keys” that will allow the mould to fit back together in place. Without these keys the mold may not align properly and the castings would have a distinct step along where the part line runs around the piece.
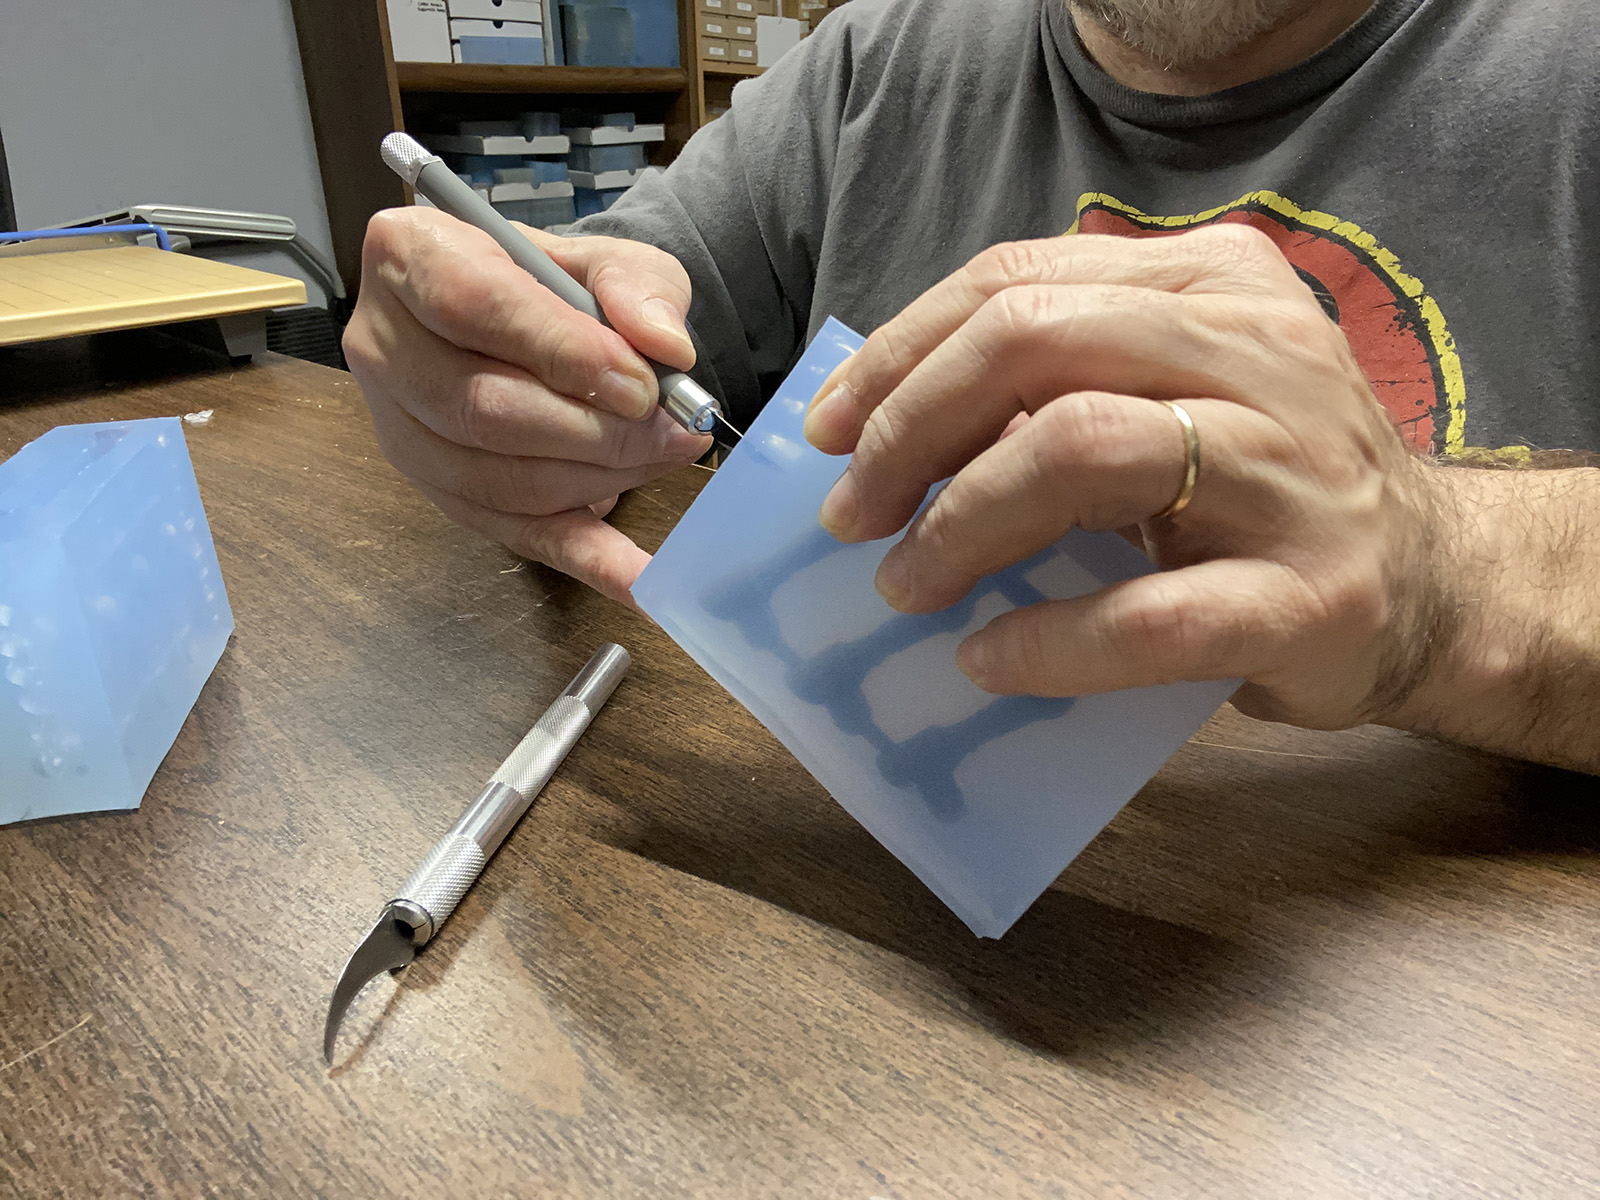 S-shaped cuts are made along the sides of the mould.
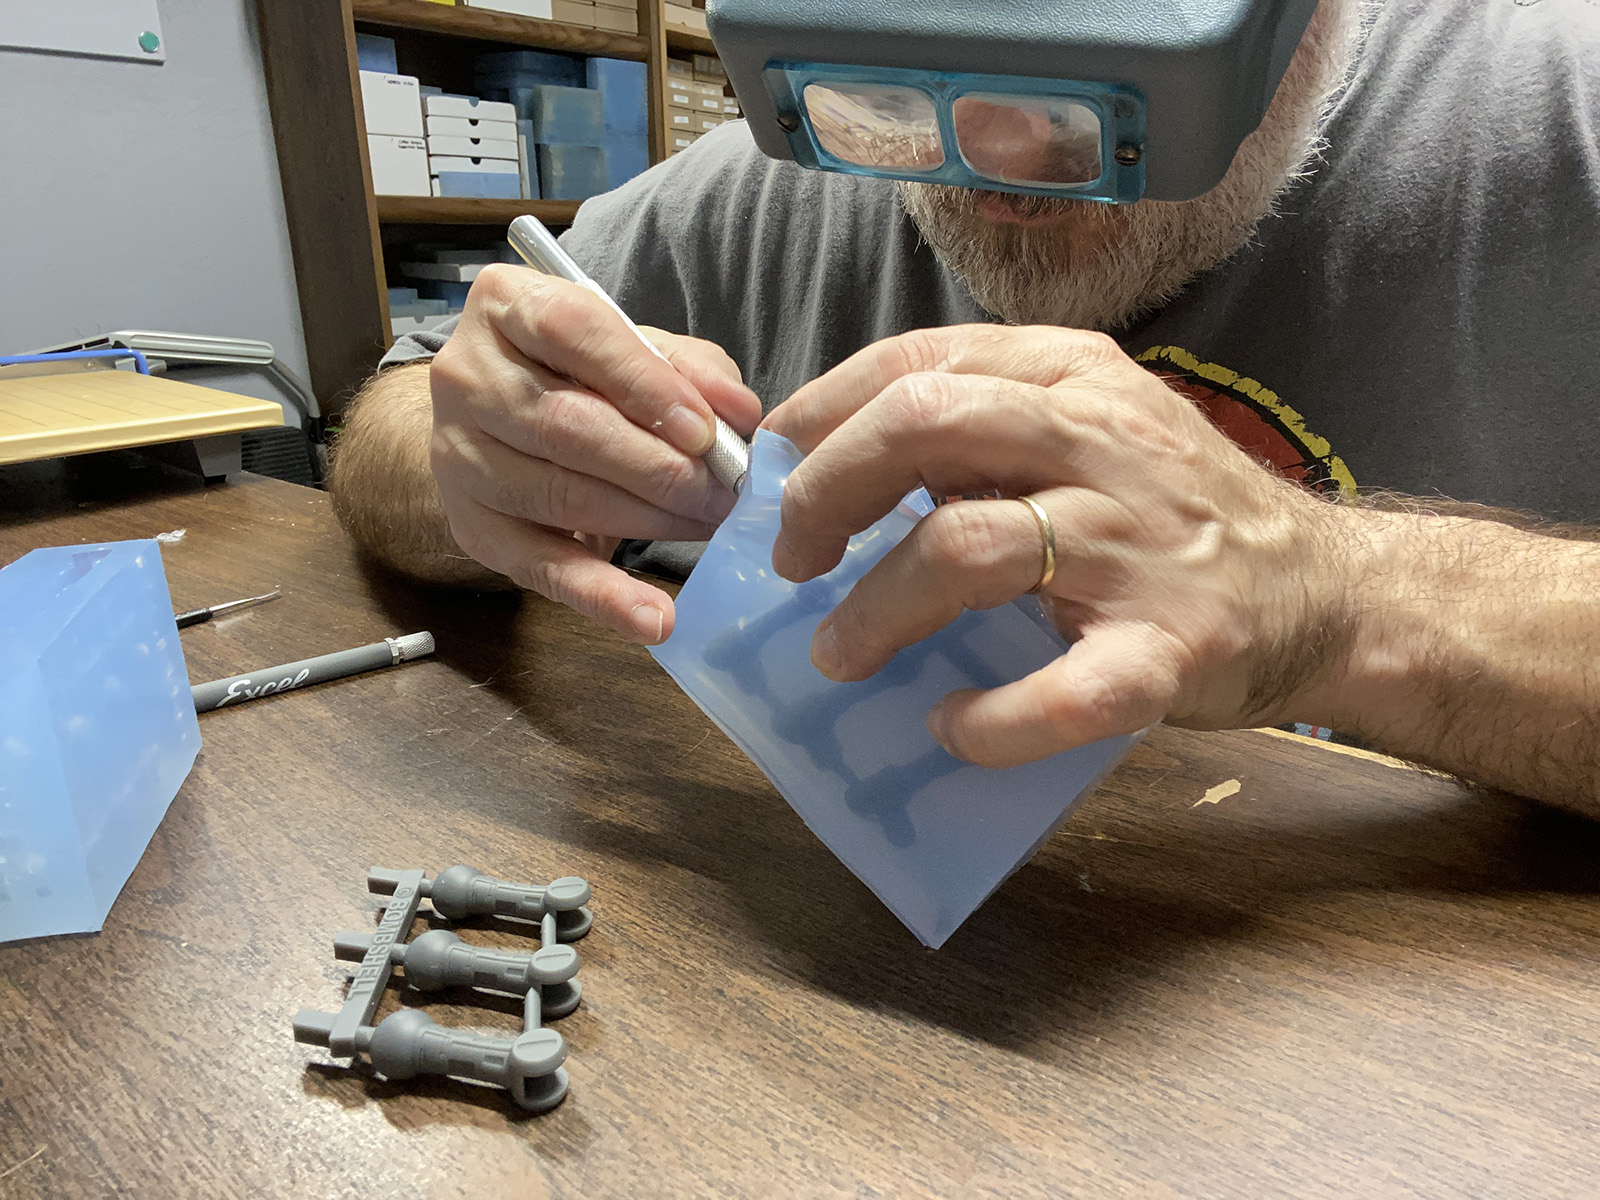 Cuts are then made further into towards the parts in a zig-zag pattern to open the mould.
Once all of the master prints are extracted a test run is cast to see how the parts come out. This is where I check to see how to fill the mould, where the resin flows properly and if the air escapes from the pockets where it should. Then if any adjustments need to made on subsequent runs, I can make those during the casting pours.
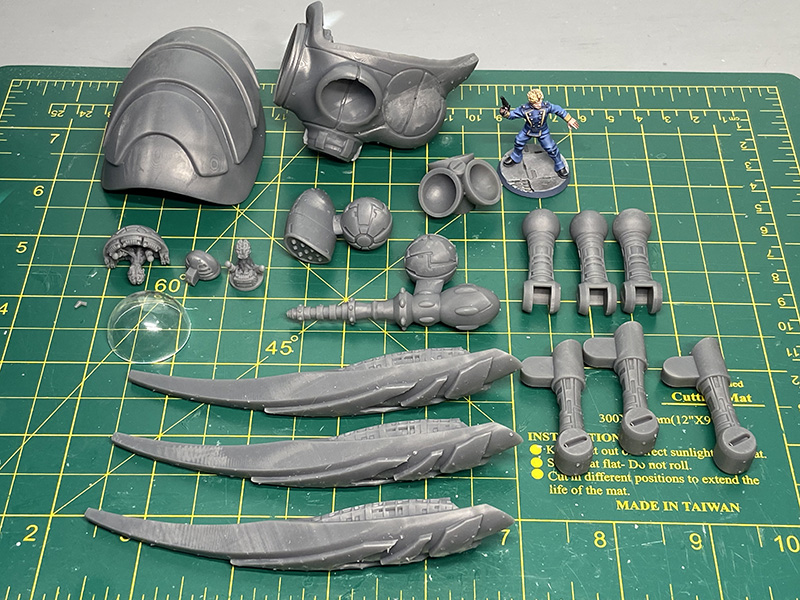
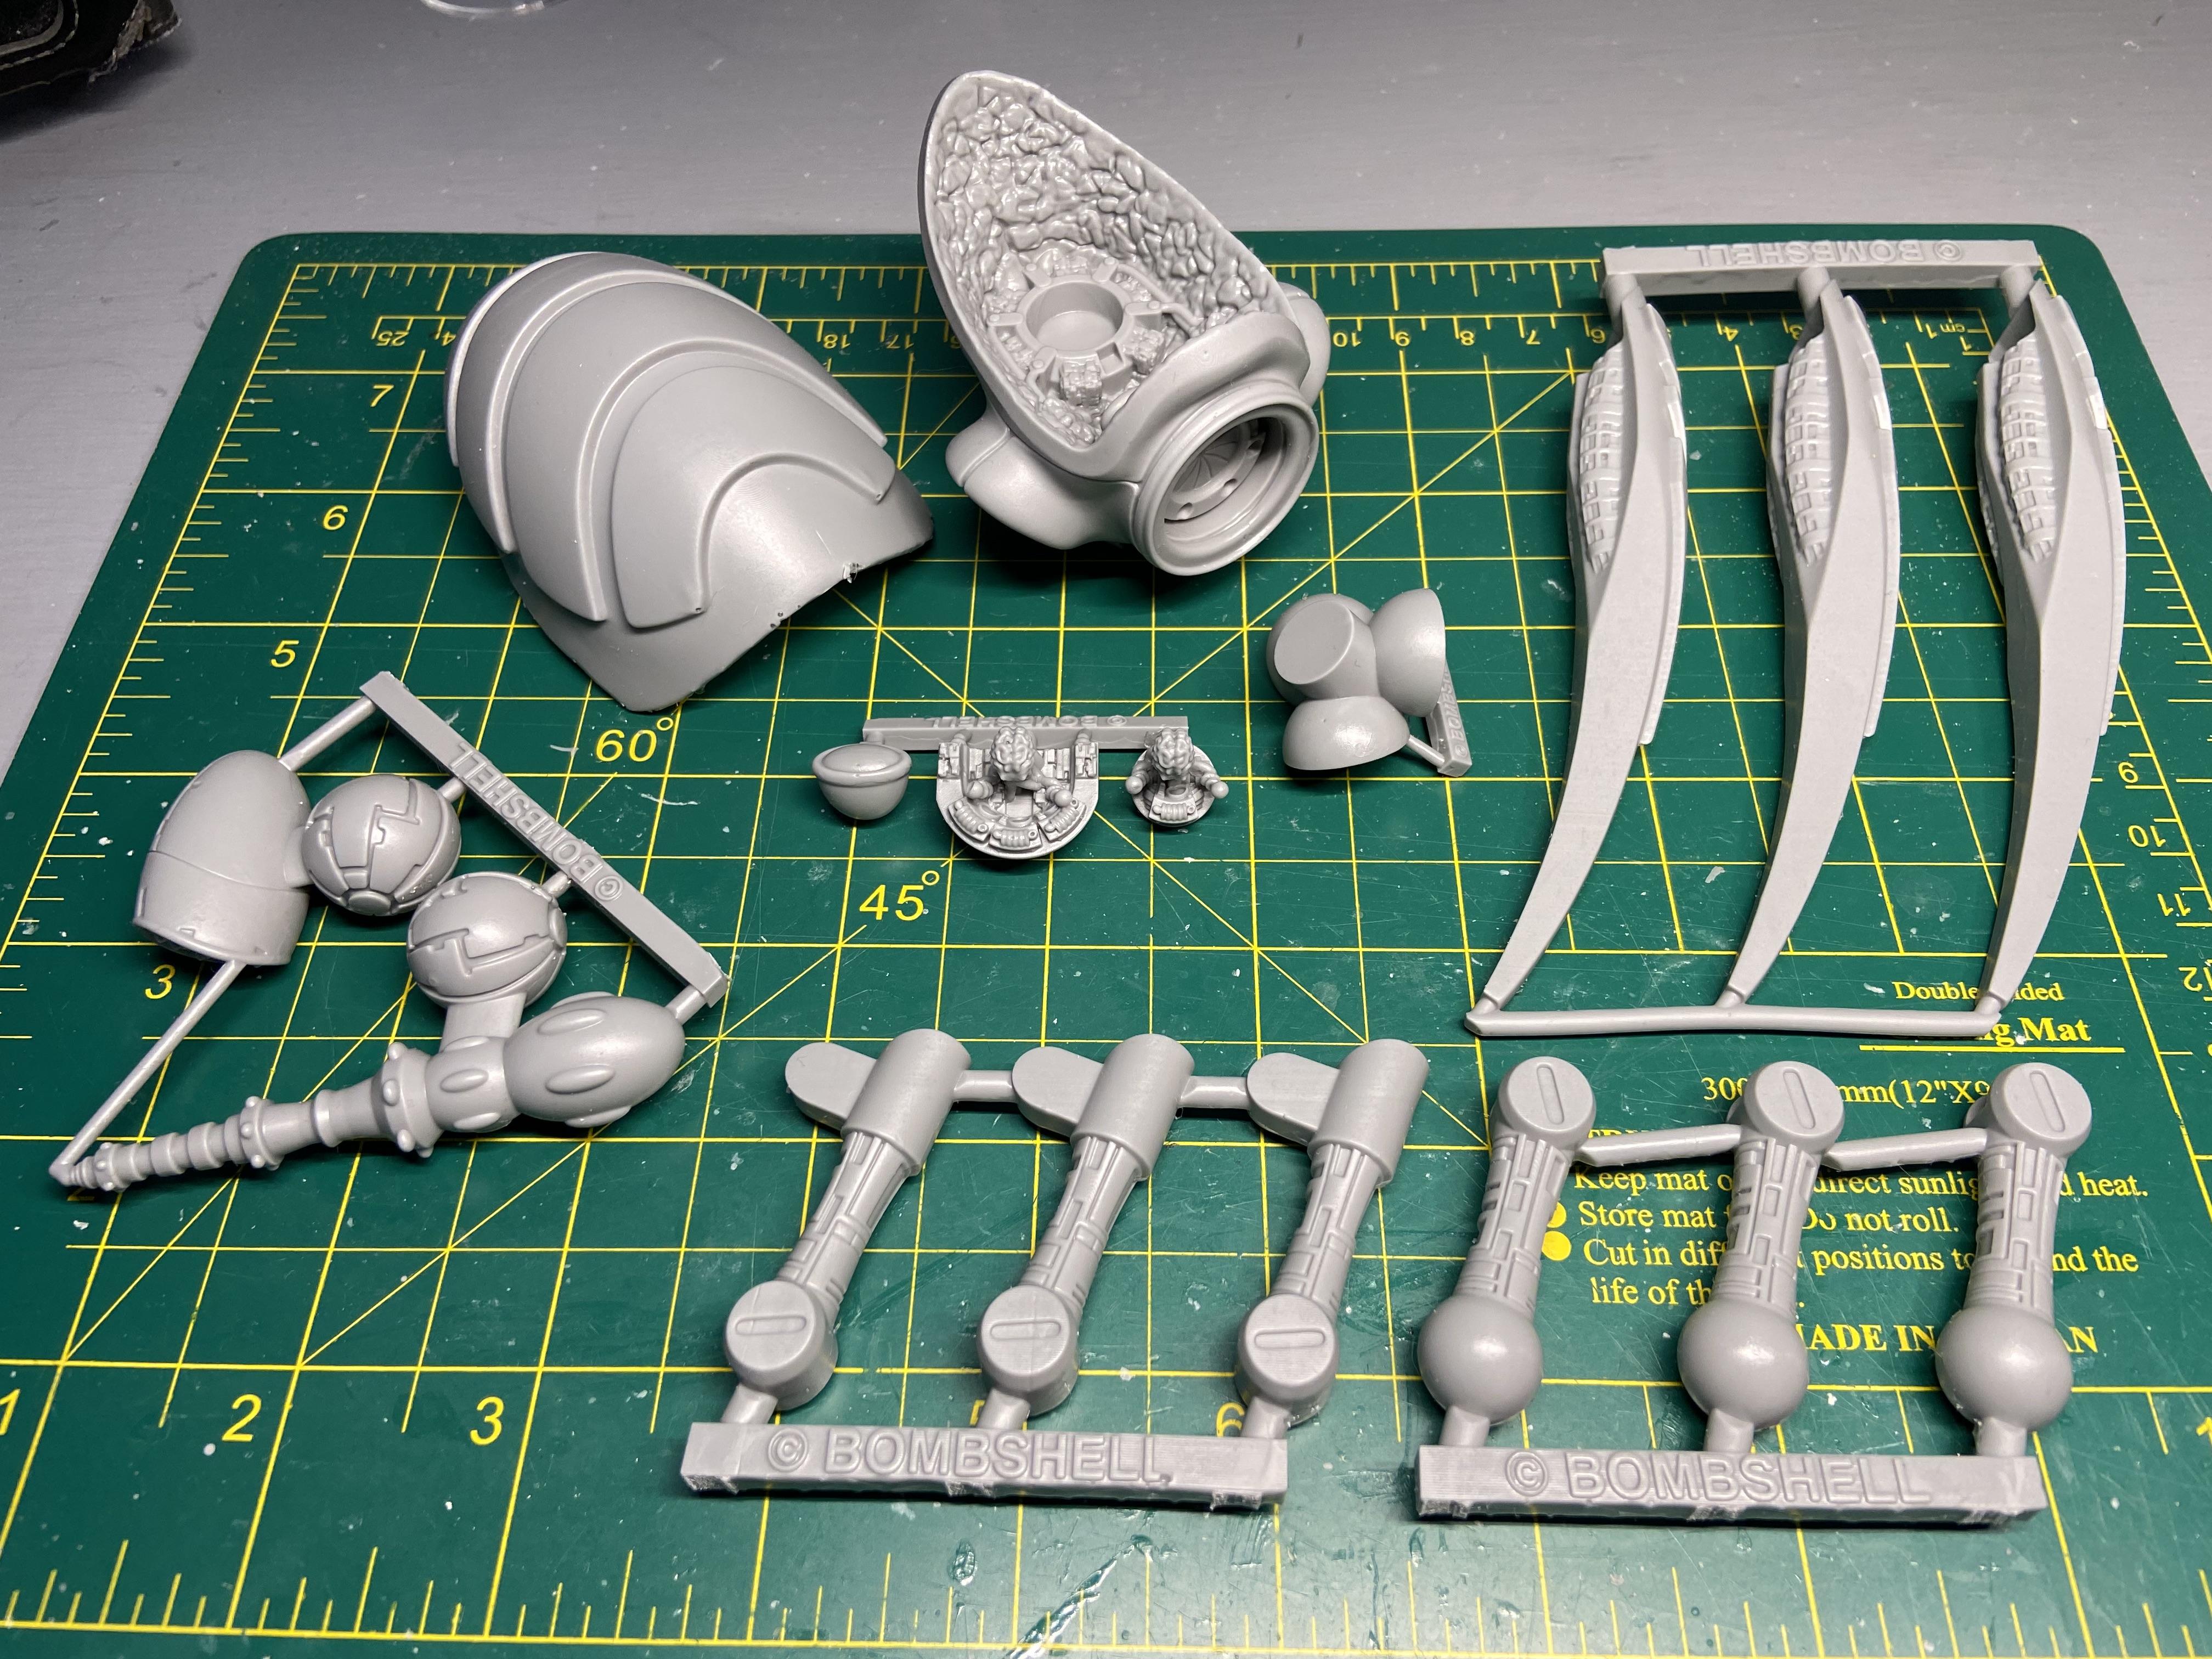 First casts from the new moulds.
Next up we will clean the parts and do a test assembly before painting.
Printing Production Sprues
Since the test prints came out so well the next step in the process is to create parts sprues that will be suitable for making silicone moulds. This requires the same work as it would if the parts were physical and needed to be glued together on a sprue. In this case the parts are attached together with sprues that will serve as the gates and vents of the mould and they will be printed all as one part.
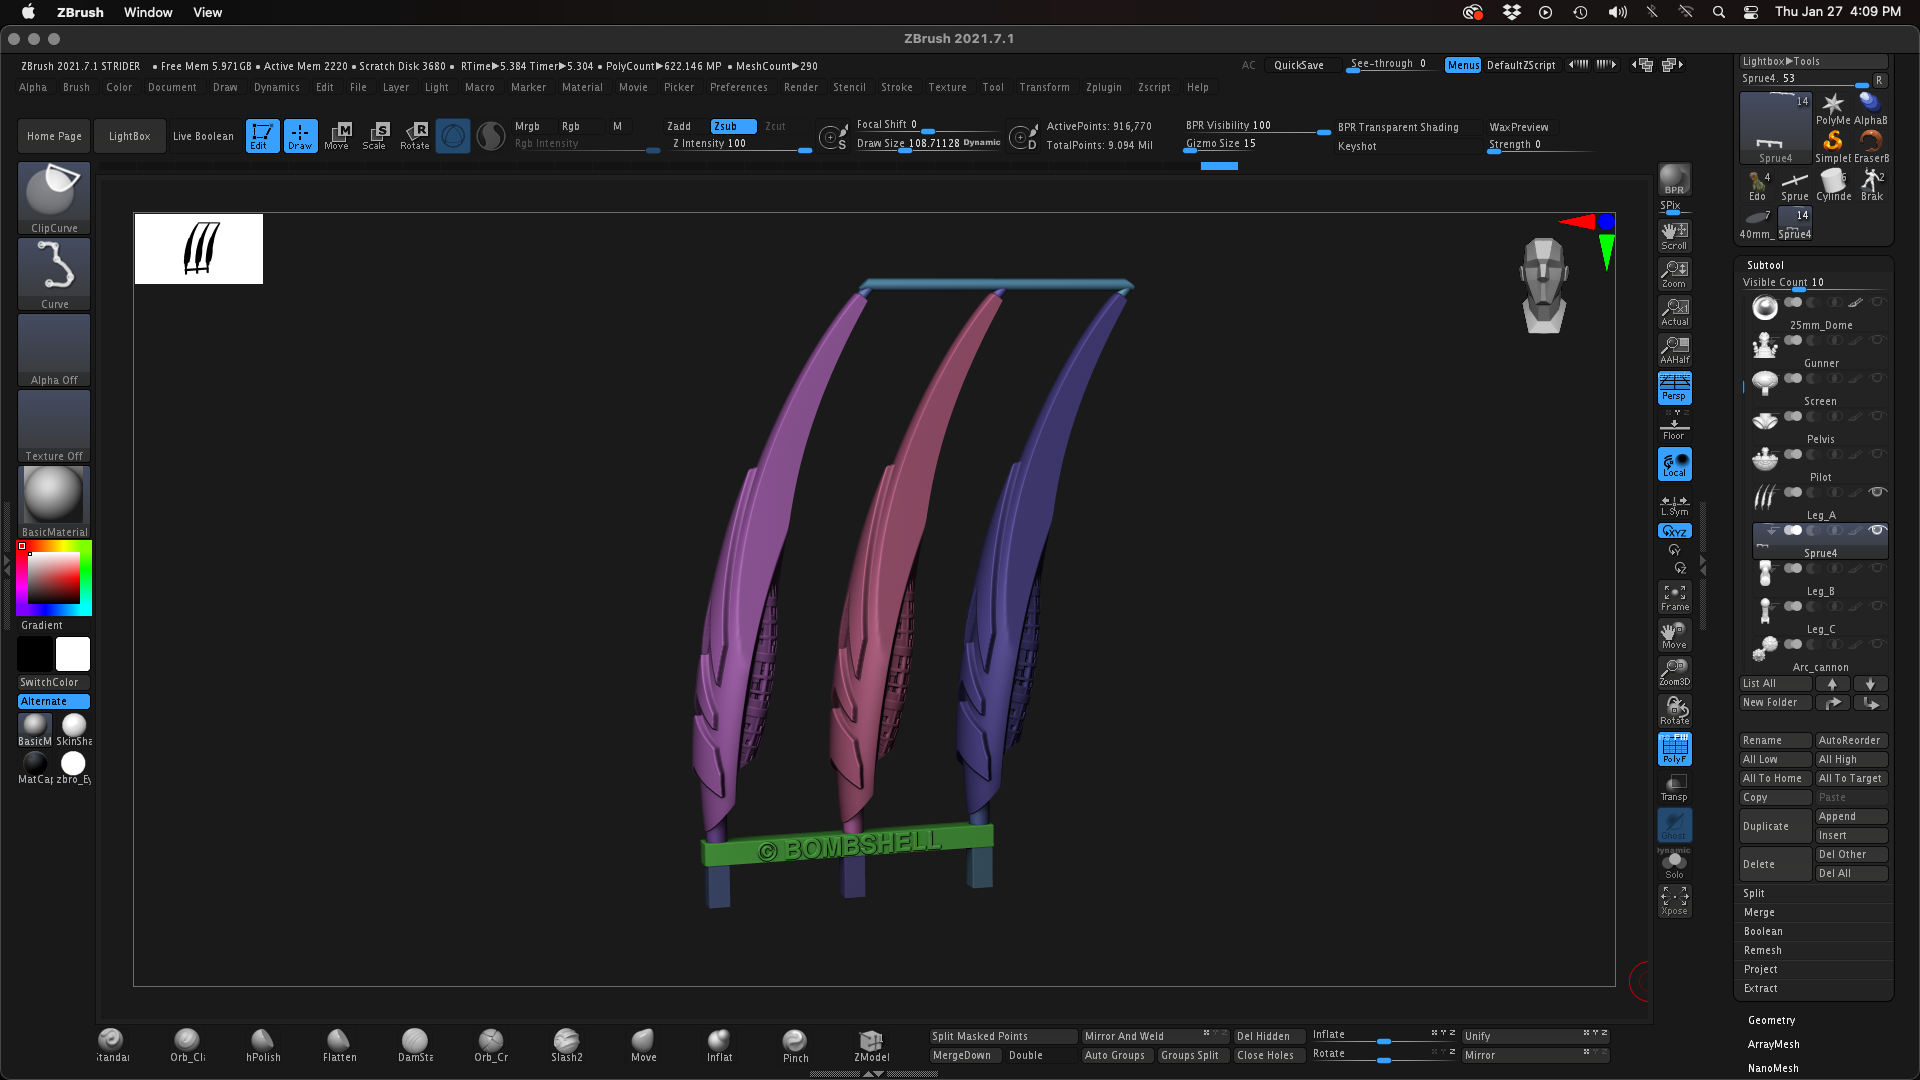
Once the production sprue parts are printed, they are cleaned and sprayed with a matte sealer to protect the resin prints from reacting with the silicone. Some printer resins contain chemicals that prevent silicone from curing properly.
After all the parts have been cleaned and sprayed they are boxed up and ready for the moulds to be poured. Depending on the demand, many duplicate moulds will be made for the production sprues to facilitate casting a number of parts at a time.

Next up will be pouring the silicone, cutting the moulds and running some test castings.
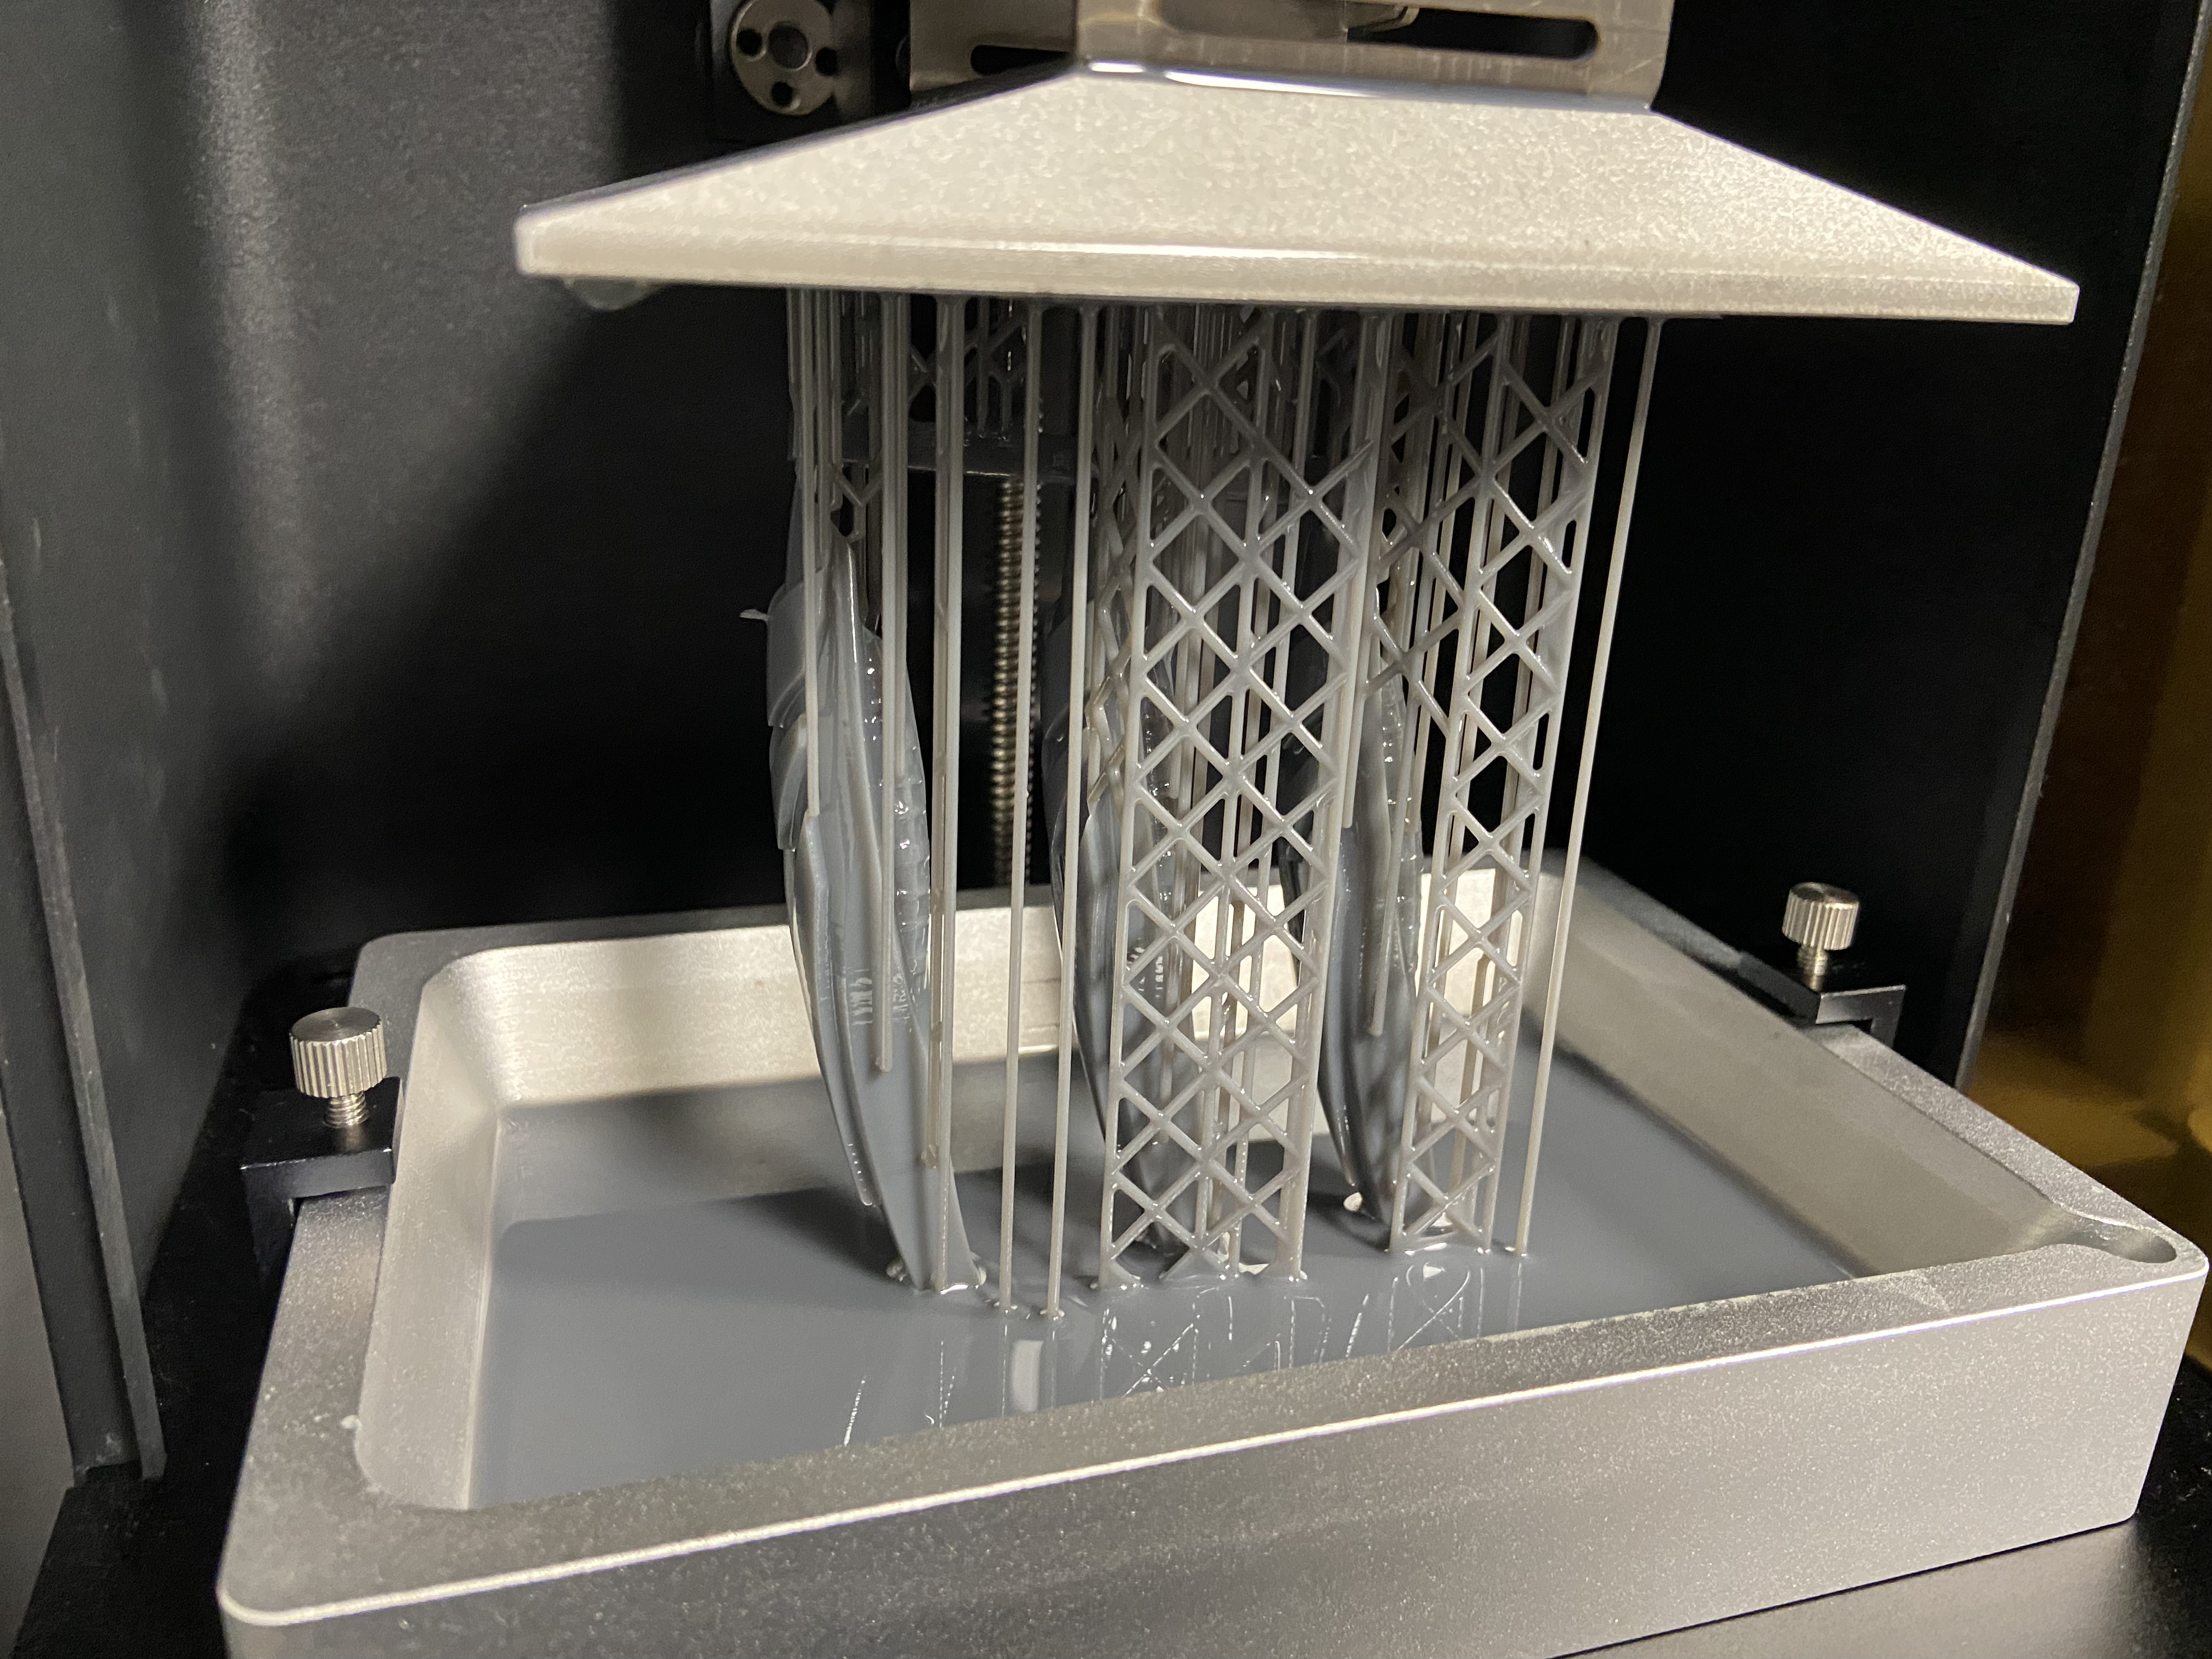
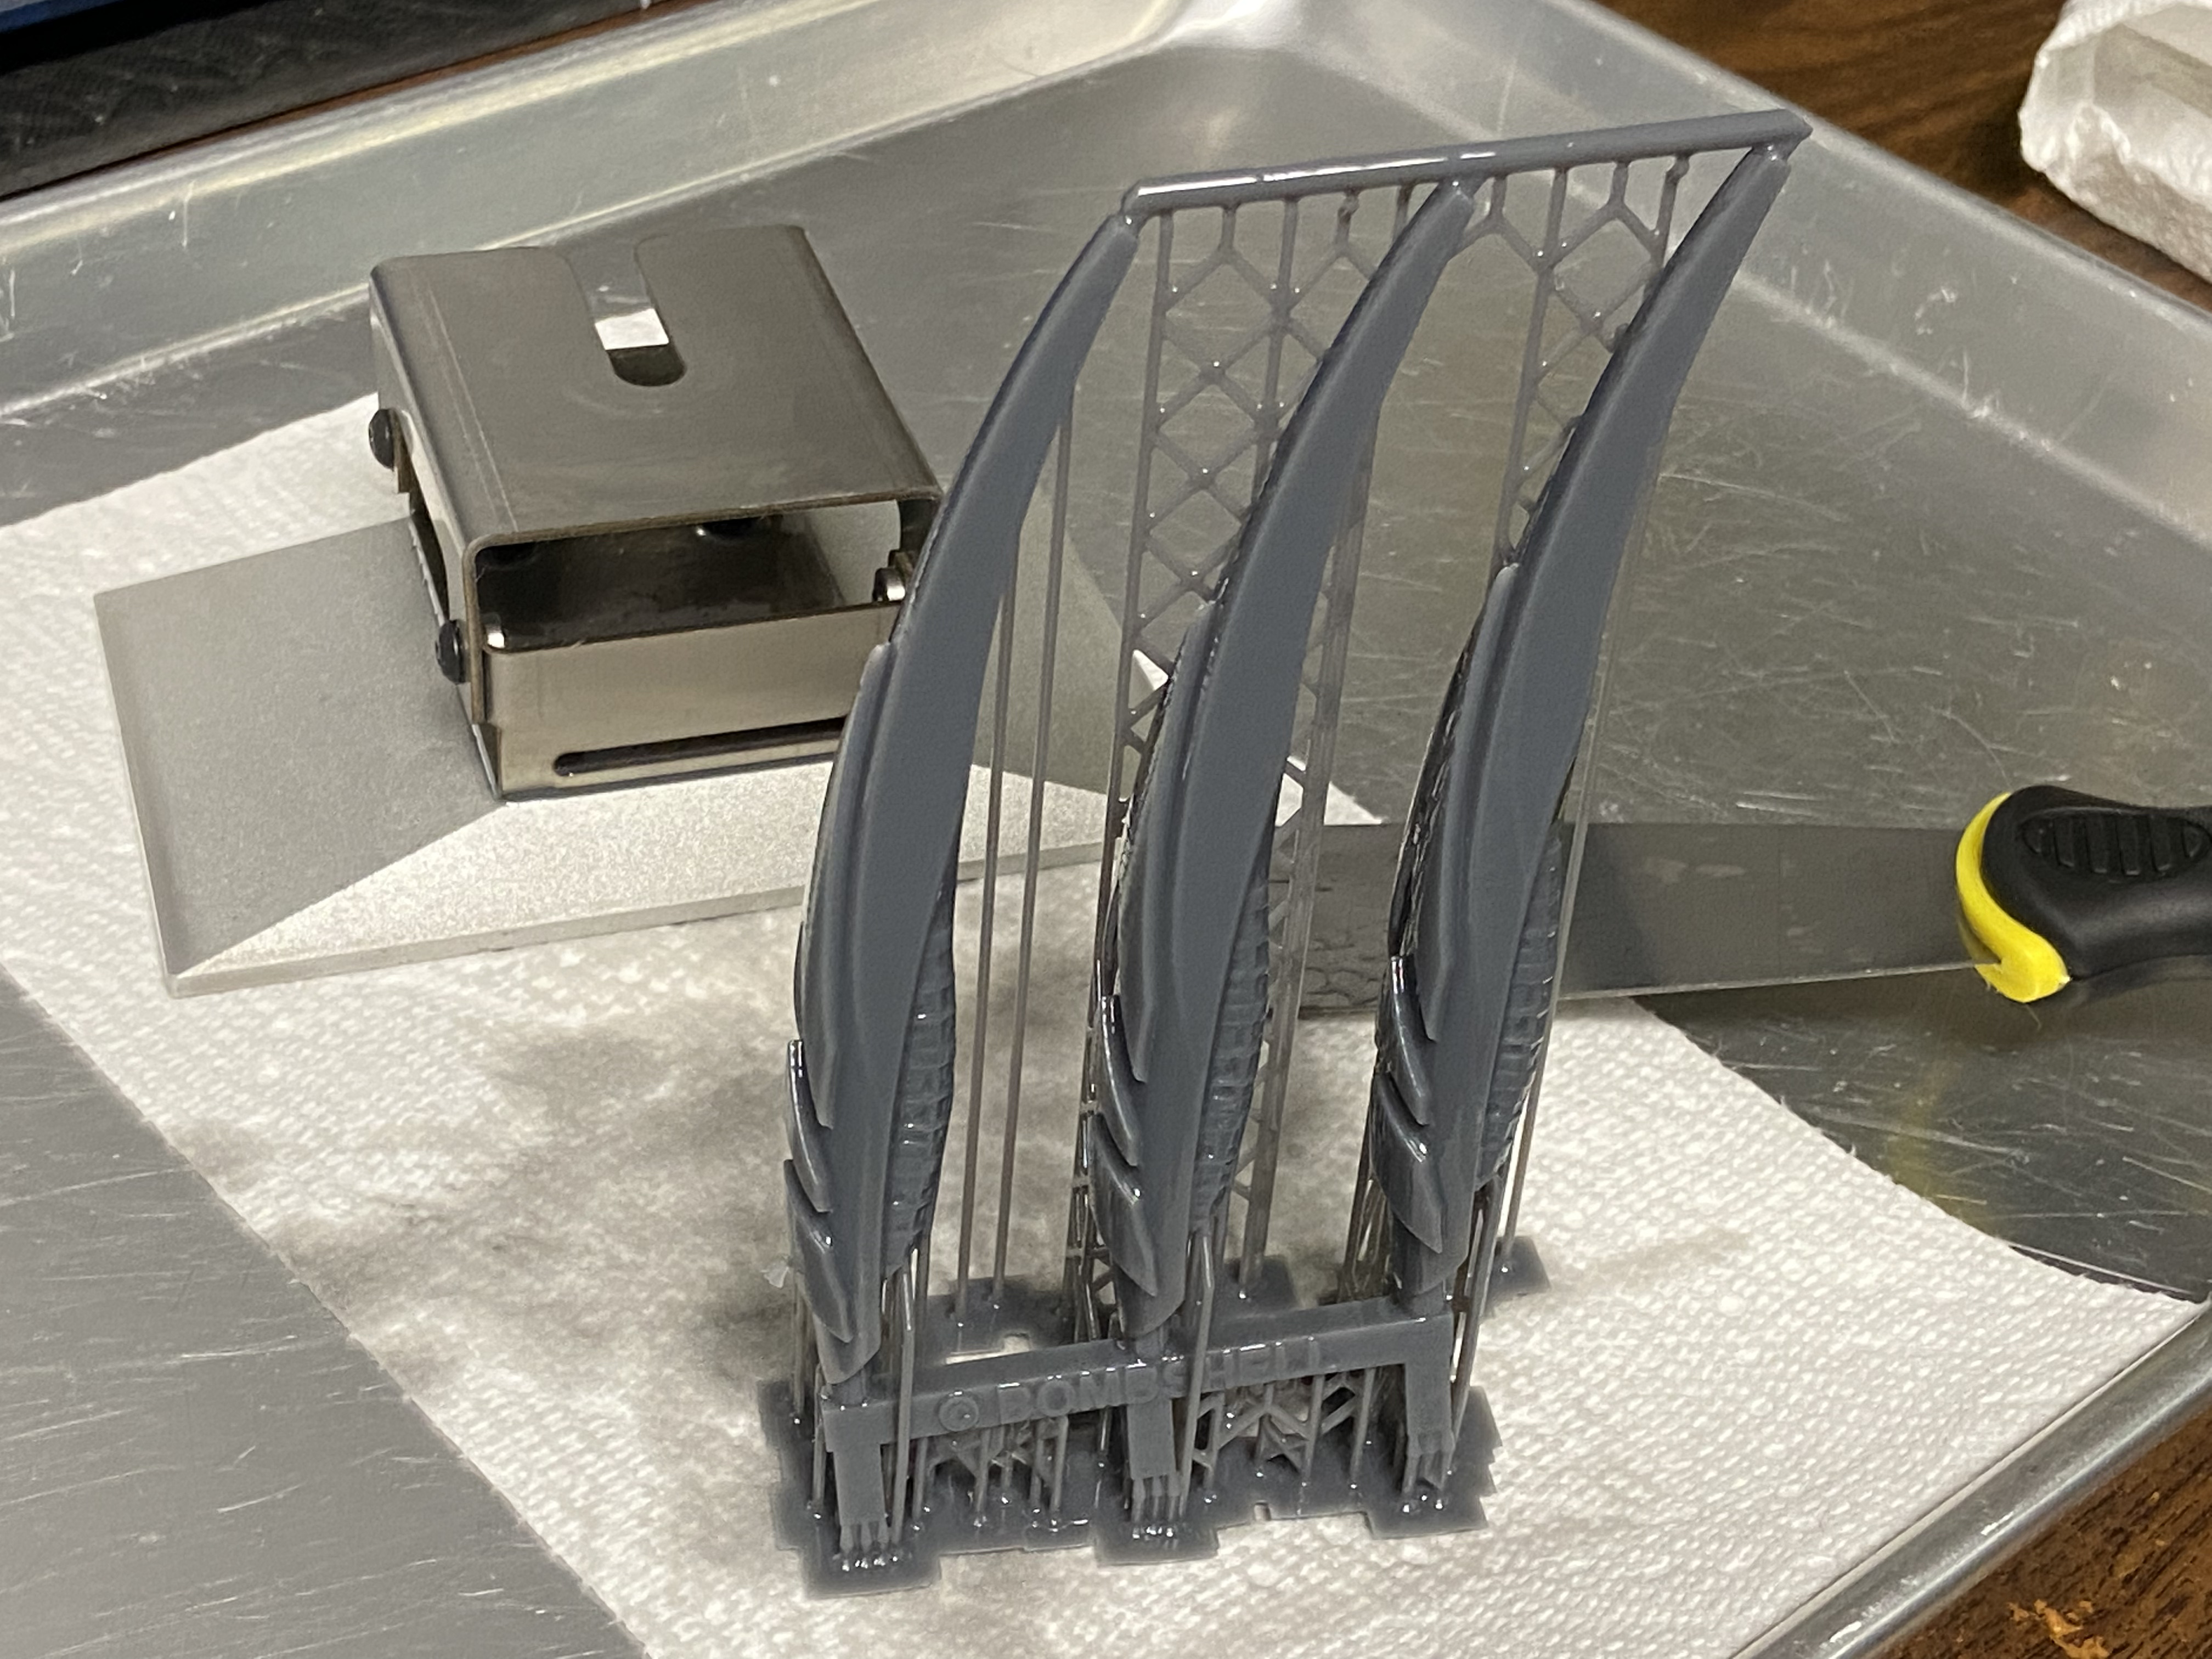
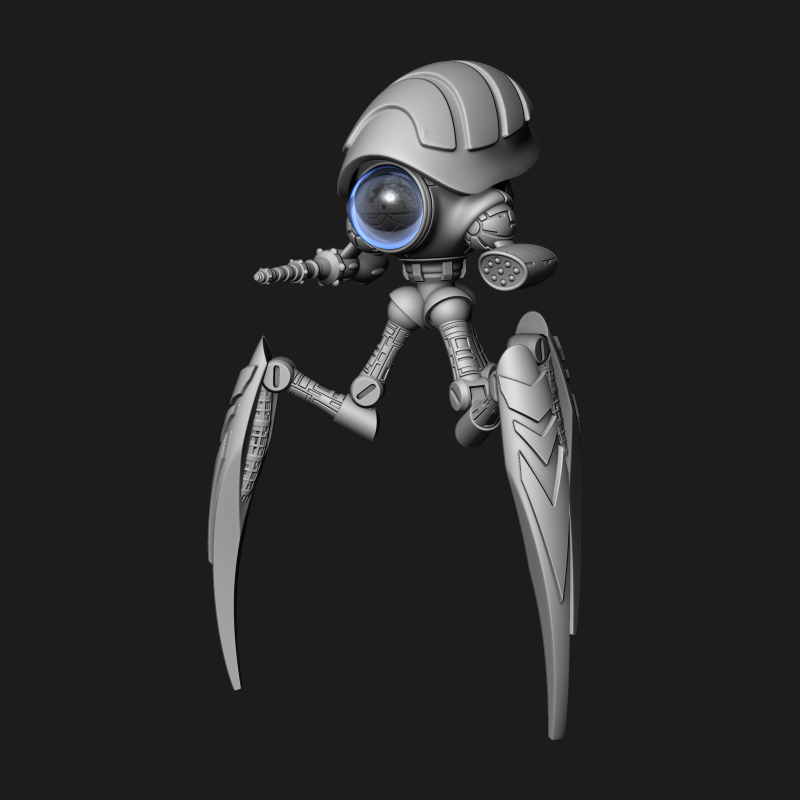
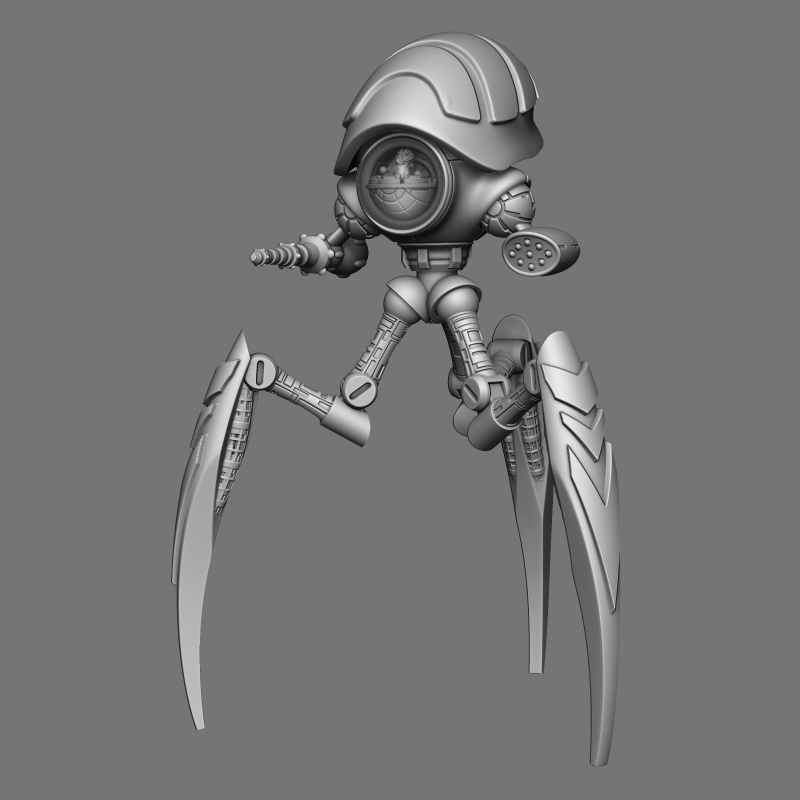
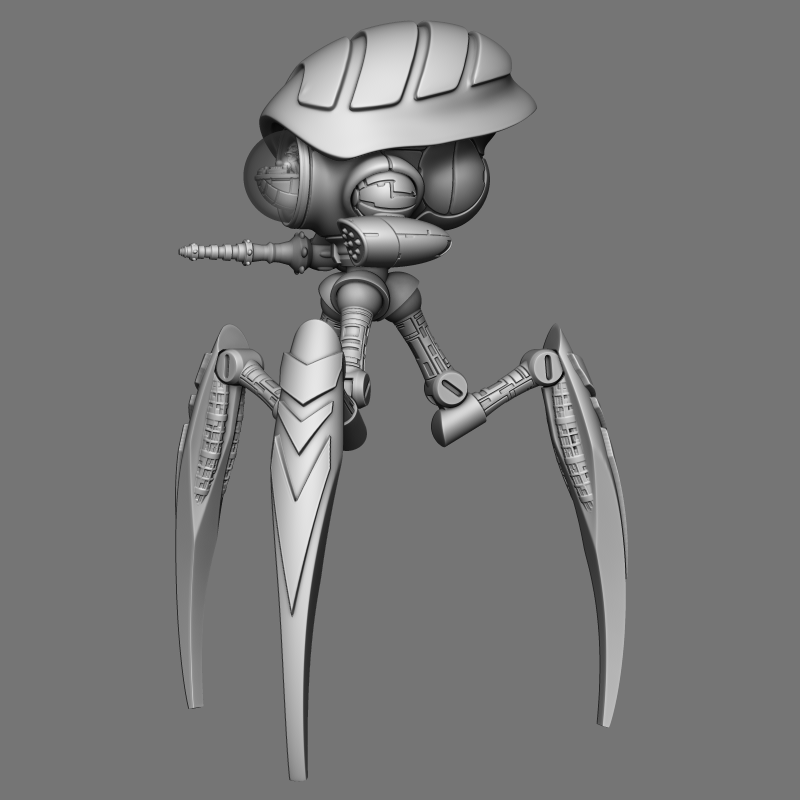
Test Printing the Parts
Once the parts have been exported from ZBrush I set them up to run a test batch to make sure all of the parts fit properly and the details showed correctly. I could also check the fit of the clear window dome for the cockpit. Since these were already manufactured as clear injection styrene parts, I needed to make sure they sit properly on the hull.

This also allowed me to assemble the printed parts and check the scale. It turned out to be an impressive model for the tabletop at over 7.5″ (19cm) tall!
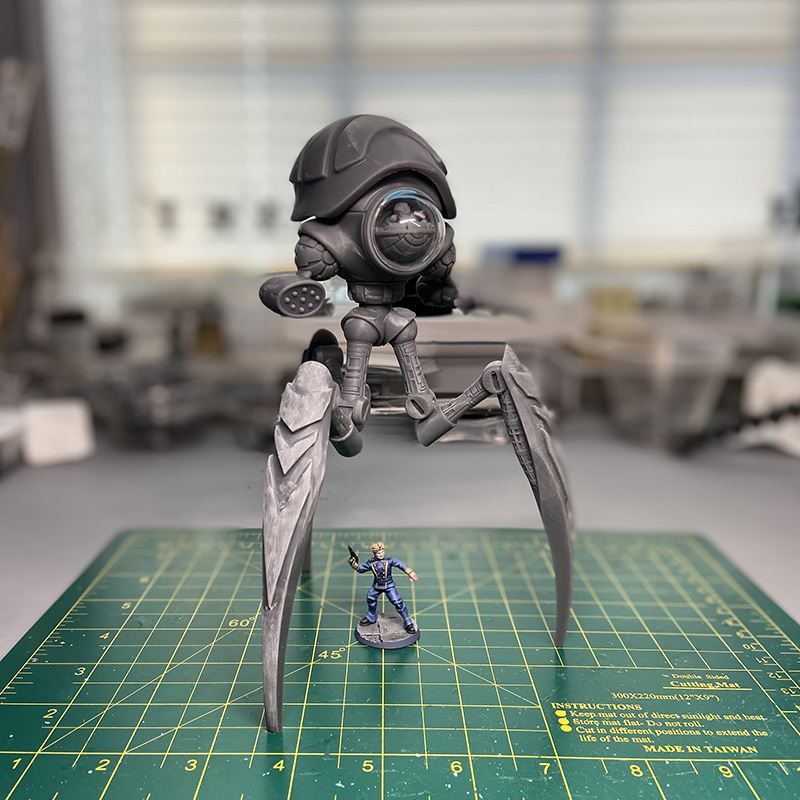
Next up I will be setting up the parts on sprues to facilitate making the silicone moulds.
Sculpting
So I decided to tweak the design a bit while working on the parts in ZBrush. I knew the Strider needed an Arc Ray Cannon but instead of the metal pincers I figured the next option would be an Arc Burst Missile pod. There may be some other options modeled at a later time which would provide for other load-outs. Some may even be magnetized.
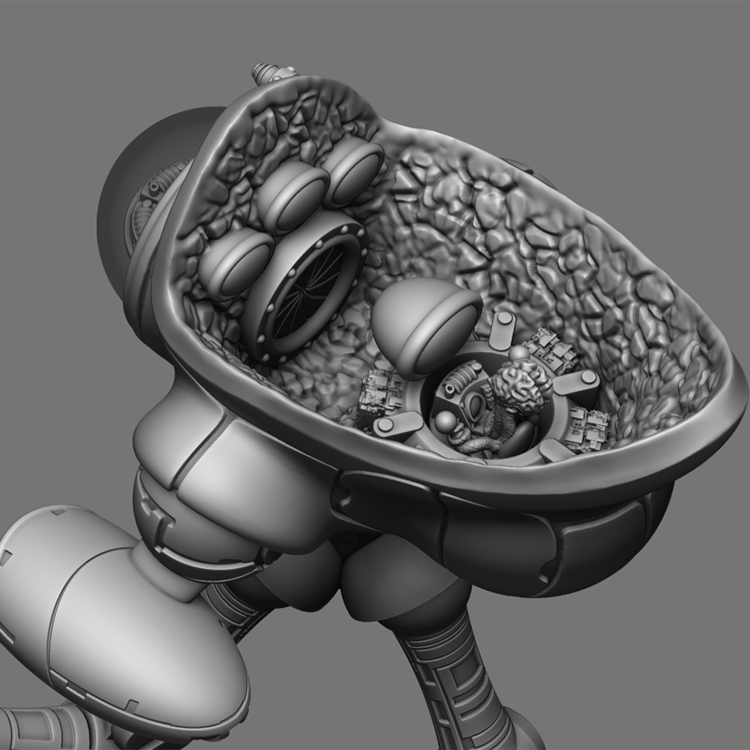
The other feature was to look at the crew and revise the requirements. In the original description there were three Underlings operating the Strider but in this instance I scaled them down to Spawnlings to fit inside a little better. Now there is only a pilot and gunner. I also measured the opening at the front of the main hull to make sure it fit the clear styrene domes that we had already produced.
Now that the parts are complete, I will prep the files to export them for 3D printing.
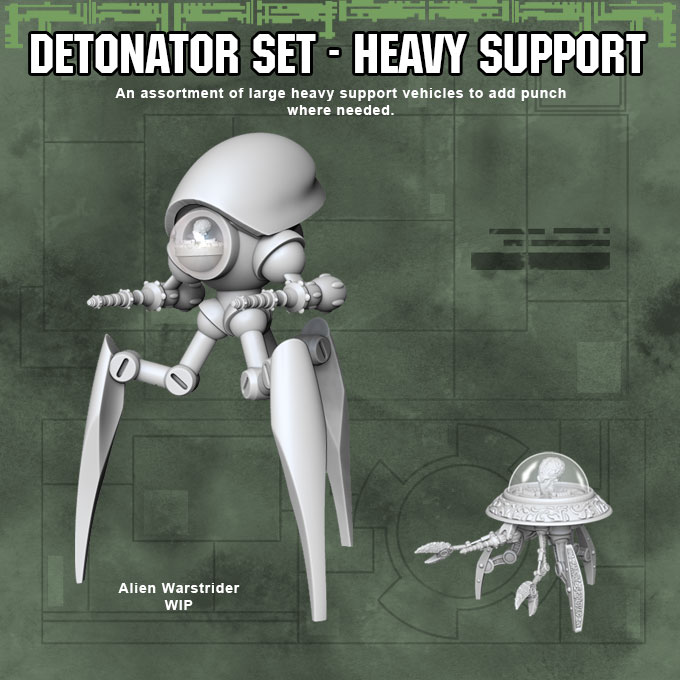
Concept
Back in 2014 when the first edition of Counterblast was published one of the large war machines for the alien Edo faction was included in their army list but the model was never produced. Since then I have been able to upgrade our production facilities to handle a kit of this scale. Here is the original description in the first edition rulebook.
A larger and more powerful version of the Scutter, the Edo Strider can wade
its way into the thick of forces, laying waste to them with the devastating Arc powered burst attacks. Striders are piloted by a trio of Underlings working in unison to coordinate attacks via psionic link. One crewmate pilots the war machine while the other two focus on operating the weapon system consoles. The Strider comes equipped with devastating Arc Burst rockets in addition to its Arc Ray Cannon and powerful metal pincers.
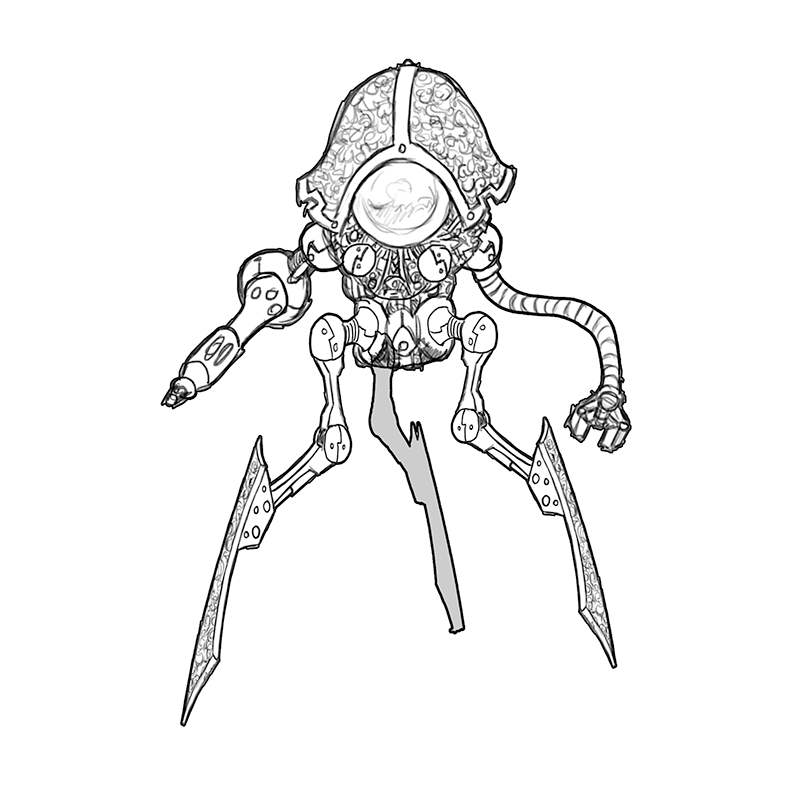 Concept art for the Strider
Since then I ran a Kickstarter for the BIKES & BOTS models in 2019. It was only for digital STL files but included the Strider. Since then I have reworked the files a bit and tweaked a couple of things. Now the plan is to print the parts, make silicone moulds and produce the model as a resin kit suitable for skirmish games like Counterblast, Stargrave, and Rogue Stars.