


Infinity Japanese Secessionist Army


Recommendations: 51
About the Project
My first army for Inifnity was the Japanese Sectorial Army(JSA). This project covers my JSA collection.
Related Game: Infinity
Related Company: Corvus Belli
Related Genre: Cyberpunk
This Project is Active
Expanding the army
Preparation
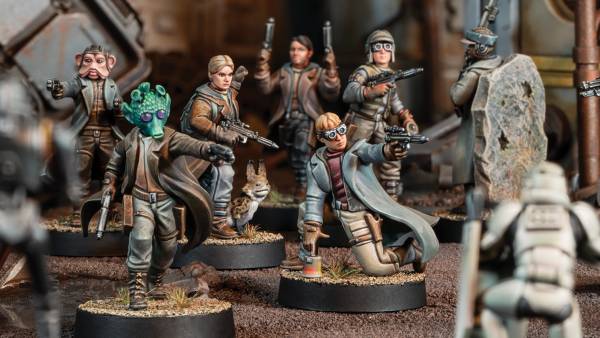
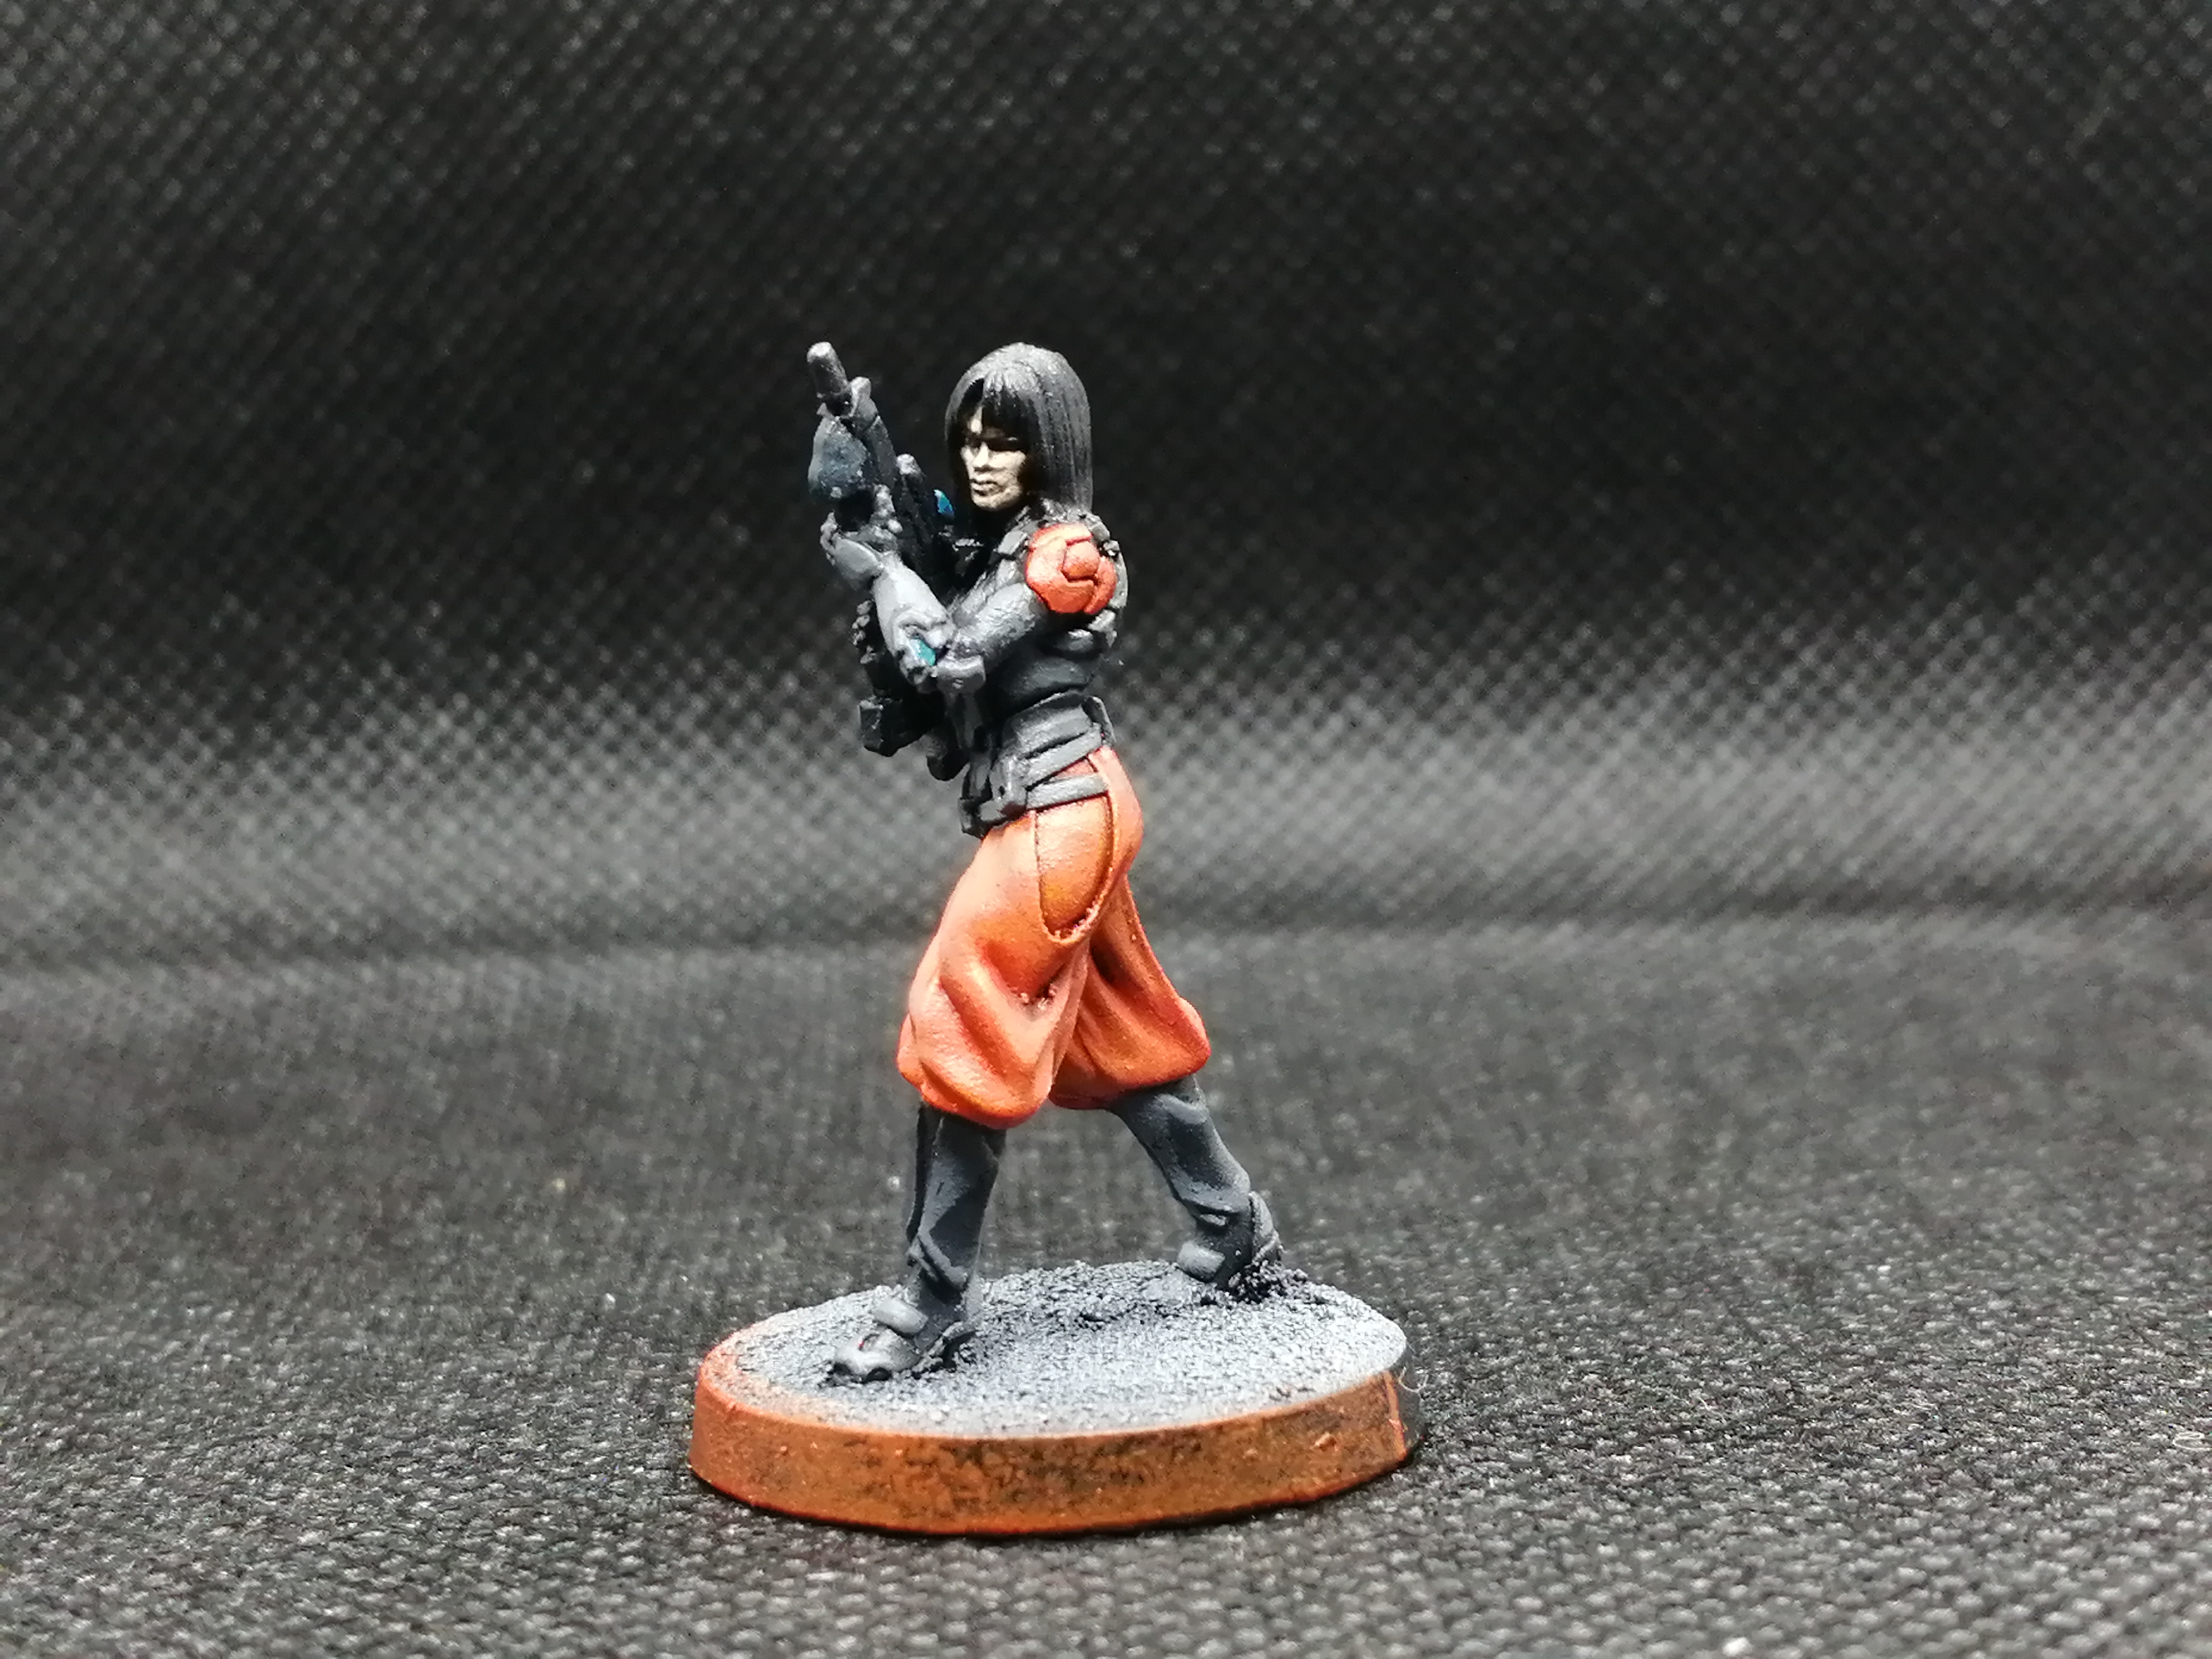
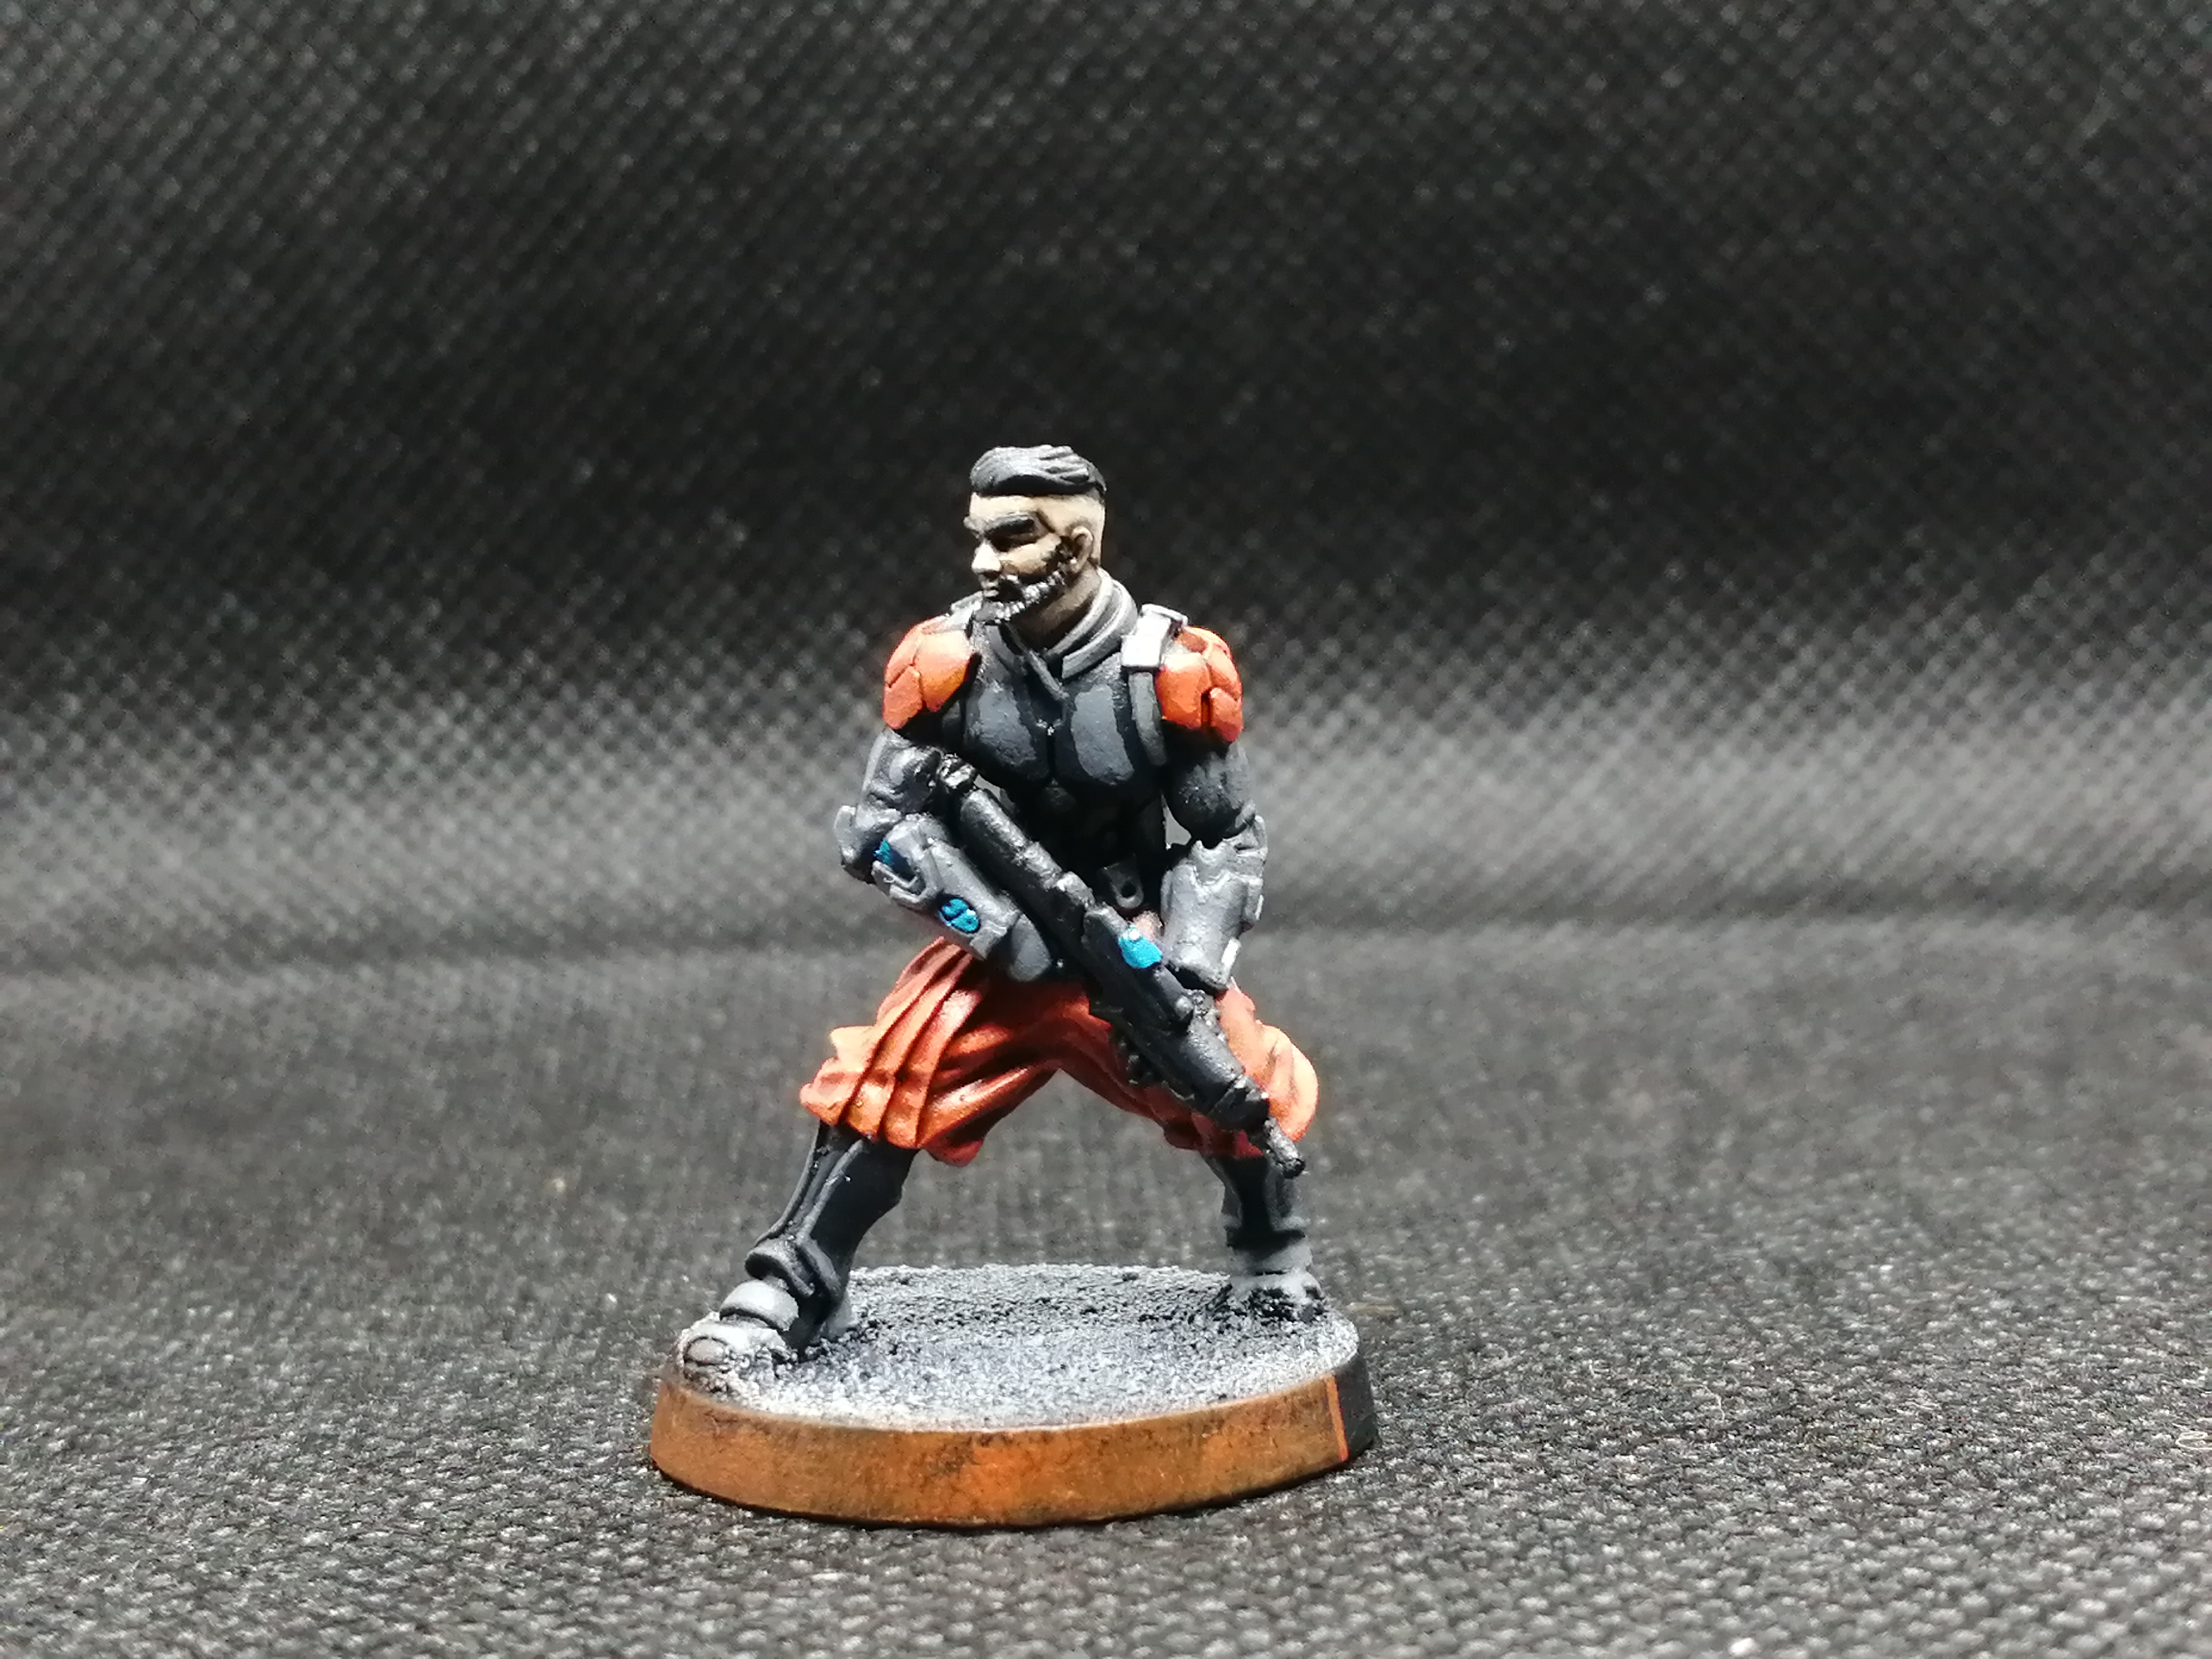
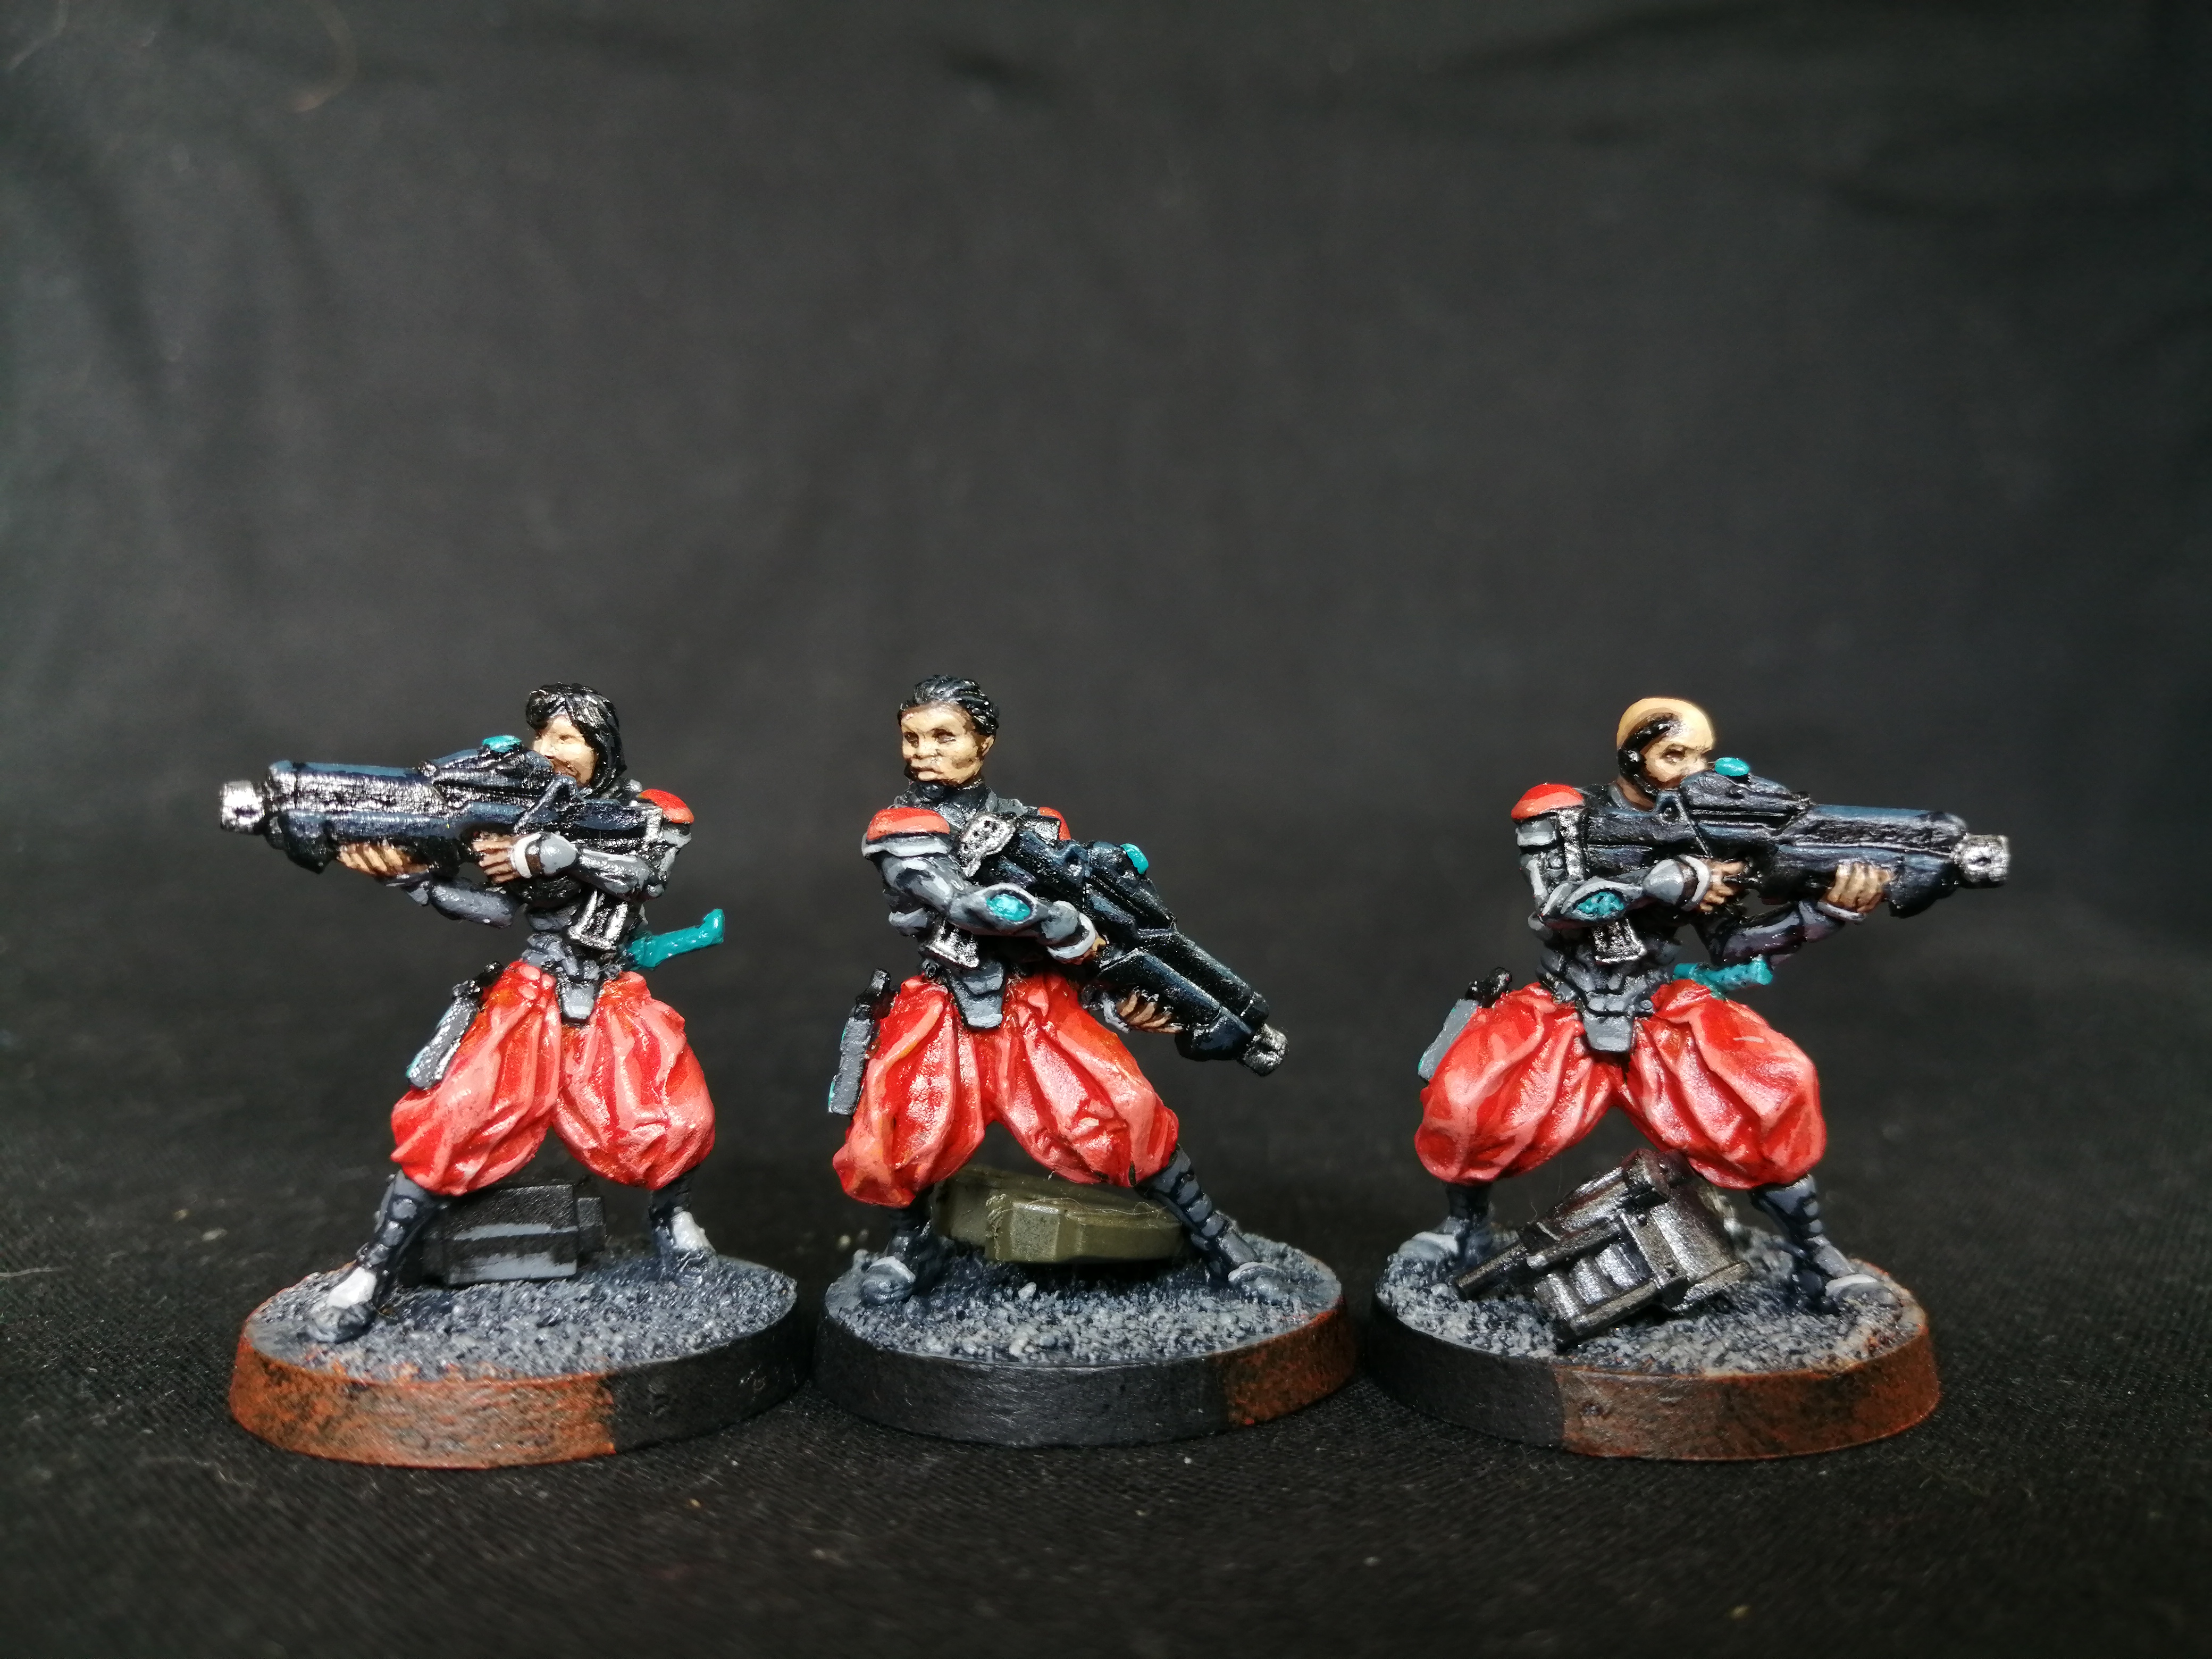
With the time now right to expand my JSA army I decided to start by adding two more keisotsu who are the ‘basic grunts’ of the JSA force and a couple of specialists, a doctor and an engineer.
As the uniforms of the models have many similarities it made sense to paint these models as a batch paint, adding some extra details to the specialists to differentiate them on the tabletop.
As stated before I had no record of how I painted my previous models, so this was going to be a case of matching as well as I could the scheme I had already used.
The models are all metal and were cleaned and assembled and based. A simple sand texture was applied to the bases with PVA before priming everything white.
Base coats and shading
The following base colours were applied to models. All colours are Vallejo Model Color unless otherwise noted.
All models
Boots, armour – German Grey
Trousers, shoulder pads – Orange Red
Hair, gun – Black
Skin – Chocolate Brown
Boot details, straps, forearm bracers – Basalt Grey
Engineer
Helmet, backpack, pouches – German Fieldgrey
Face mask – Basalt Grey
Doctor
Cap, backpack, pouches – Luftwaffe Uniform
With all the base colours down I applied Citadel Agrax Earthshade over all the models for some shade.
Highlights and details
I applied only a single highlight colour to each colour unless otherwise noted here.
All models
Boots, armour – Basalt Grey
Trousers, shoulder pads – Bright Orange
Hair, gun – Dark Grey
Skin – Cork Brown then a second highlight of Basic Skintone
Boot details, straps, forearm bracers – Neutral Grey
Engineer
Helmet, backpack, pouches – Khaki
Face mask – Neutral Grey then a second highlight of Sky Grey
Doctor
Cap, backpack, pouches – Intermediate Blue
The final step was the addition of some accent colours to various small details to add visual interest.
Keisotsu
Gun muzzles – Neutral Steel
Forearm details, gun details – Light Turquoise
Engineer
Trouser rivets, pouch strap attachments – Neutral Steel
Forearm details, gun details, pouch details, neck pipes – Light Turquoise
Doctor
Medikit, pouch strap attachments – Neutral Steel
Cap badge – White with a rising sun symbol freehanded in Vermilion
Forearm, gun and pouch details, trouser clips – Light Turquoise
Basing and finishing touches
For basing I painted the bases in German Grey then applied a drybrush of Neutral Grey and then a lighter drybrush of Sky Grey.
The base edges were painted back and then I applied Orange Red with a sponge to the front 180 degree arc of each models base as a models arc of sight is really important for Infinity’s game mechanics.
Overall I am happy with the colours and feel the models sit well against my older paint jobs keeping a unified look for the force.
Some old models
With the recent Durgama Campaign I have had a renewed interest in my long uncompleted Infinity army.
One of the problems I face, is having painted these models years ago when I was far less organized as a hobbyist, I do not have records of what colours were used where. Apart from knowing they are all Vallejo Model Color, the rest is a mystery. I think this lack of record keeping is a large factor in my inability to complete projects and hopefully my project blogs here will help make this a problem of the past.
I still need to paint at least 100 points worth of models to get a full army painted and I have many more models before my collection is fully painted.
As a first step I thought I’d take some decent photos of what I have done and post them here.
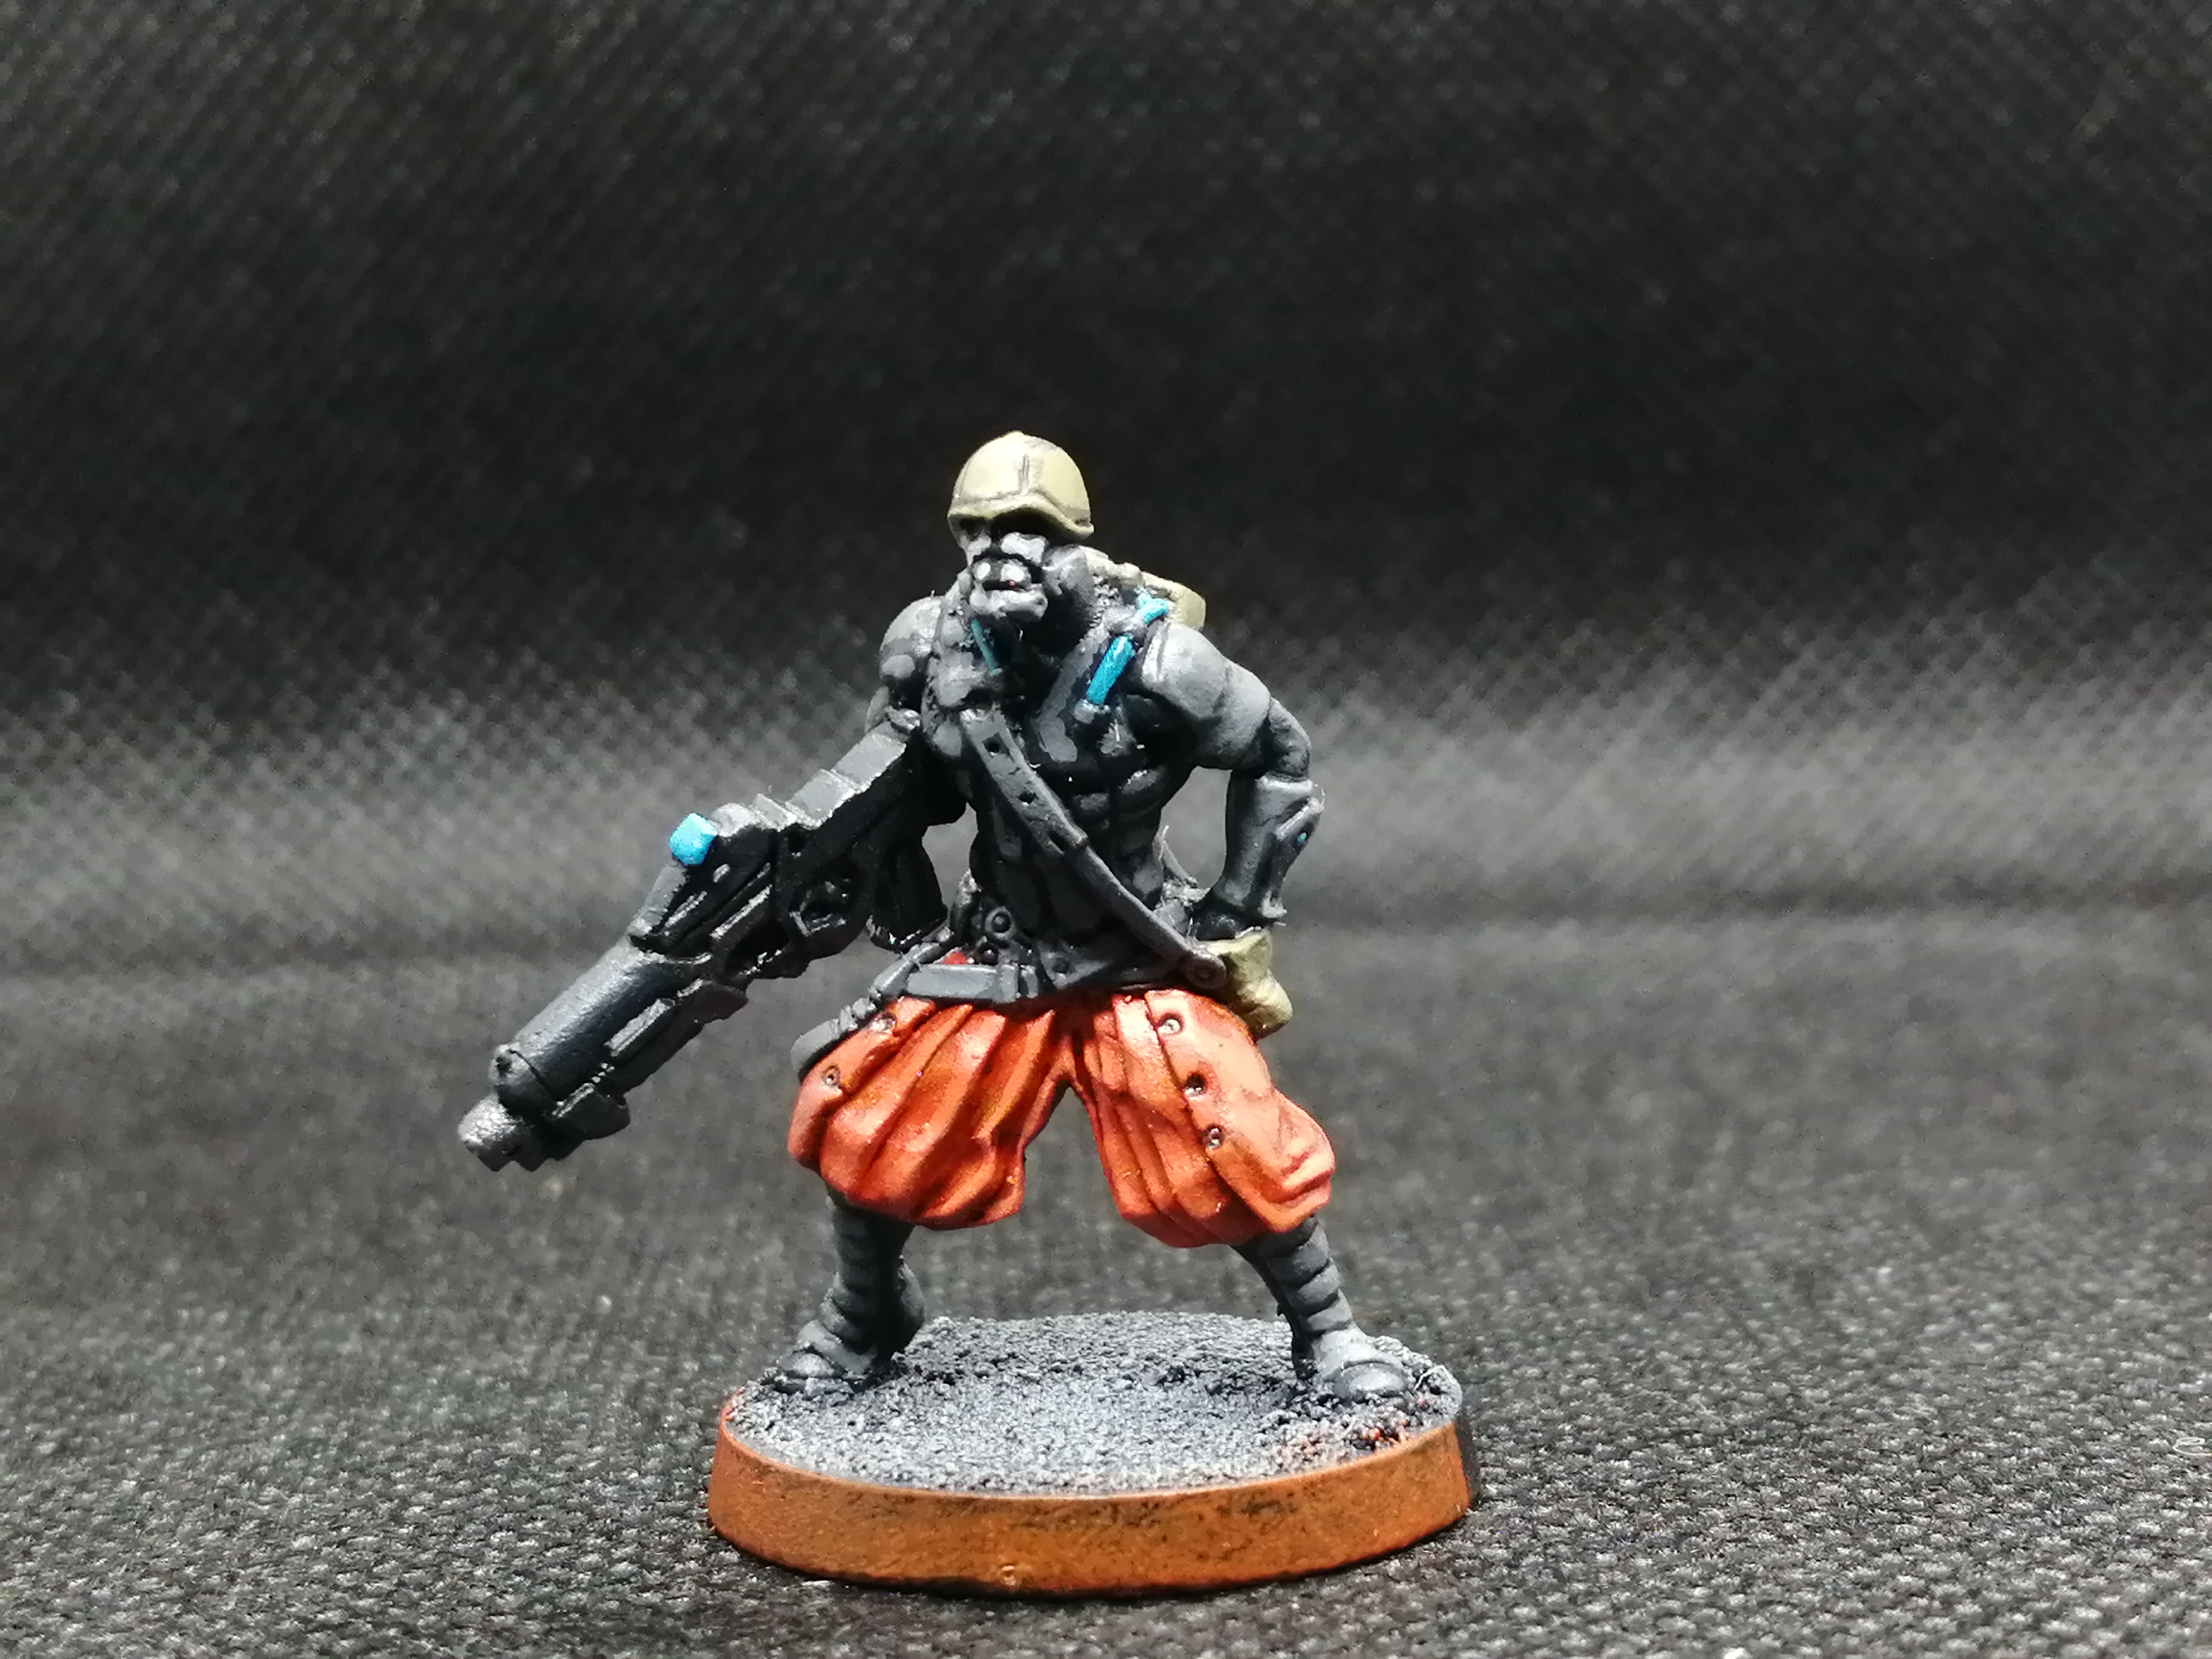
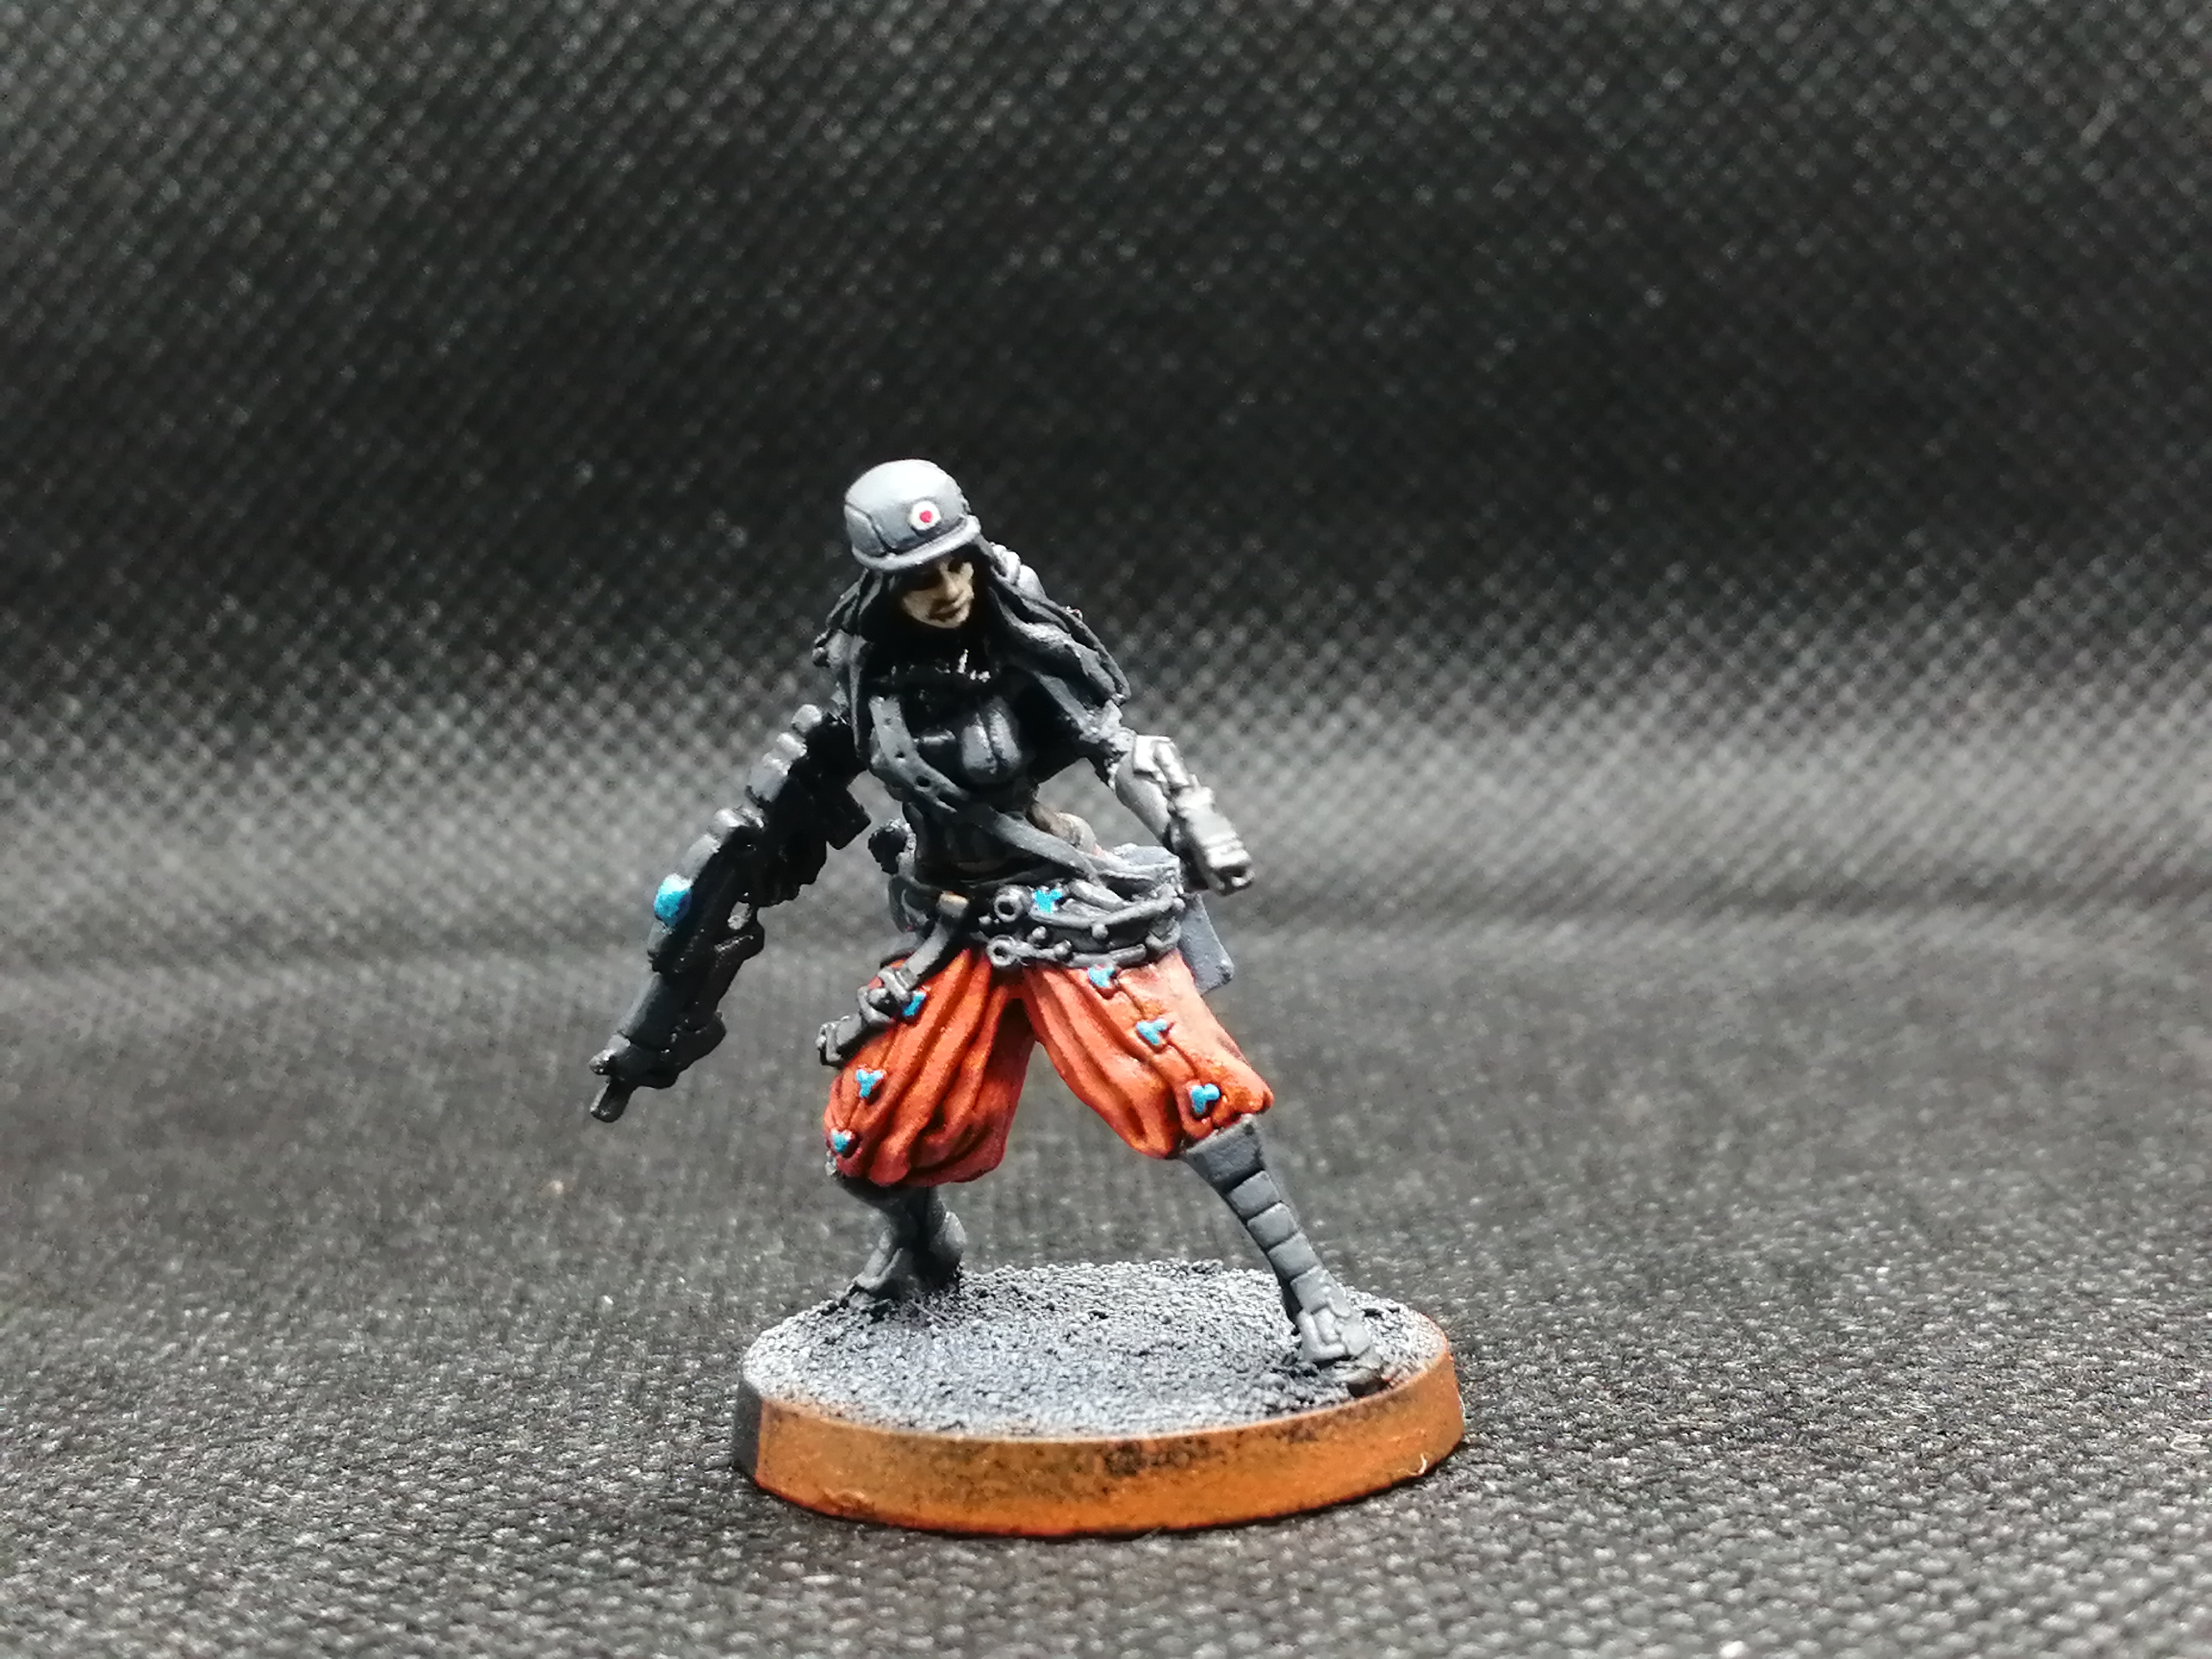
 Three keisotsu line troopers with combi-rifles. These can be fielded as various types of specialist as needed eg. medic, forward observer etc.
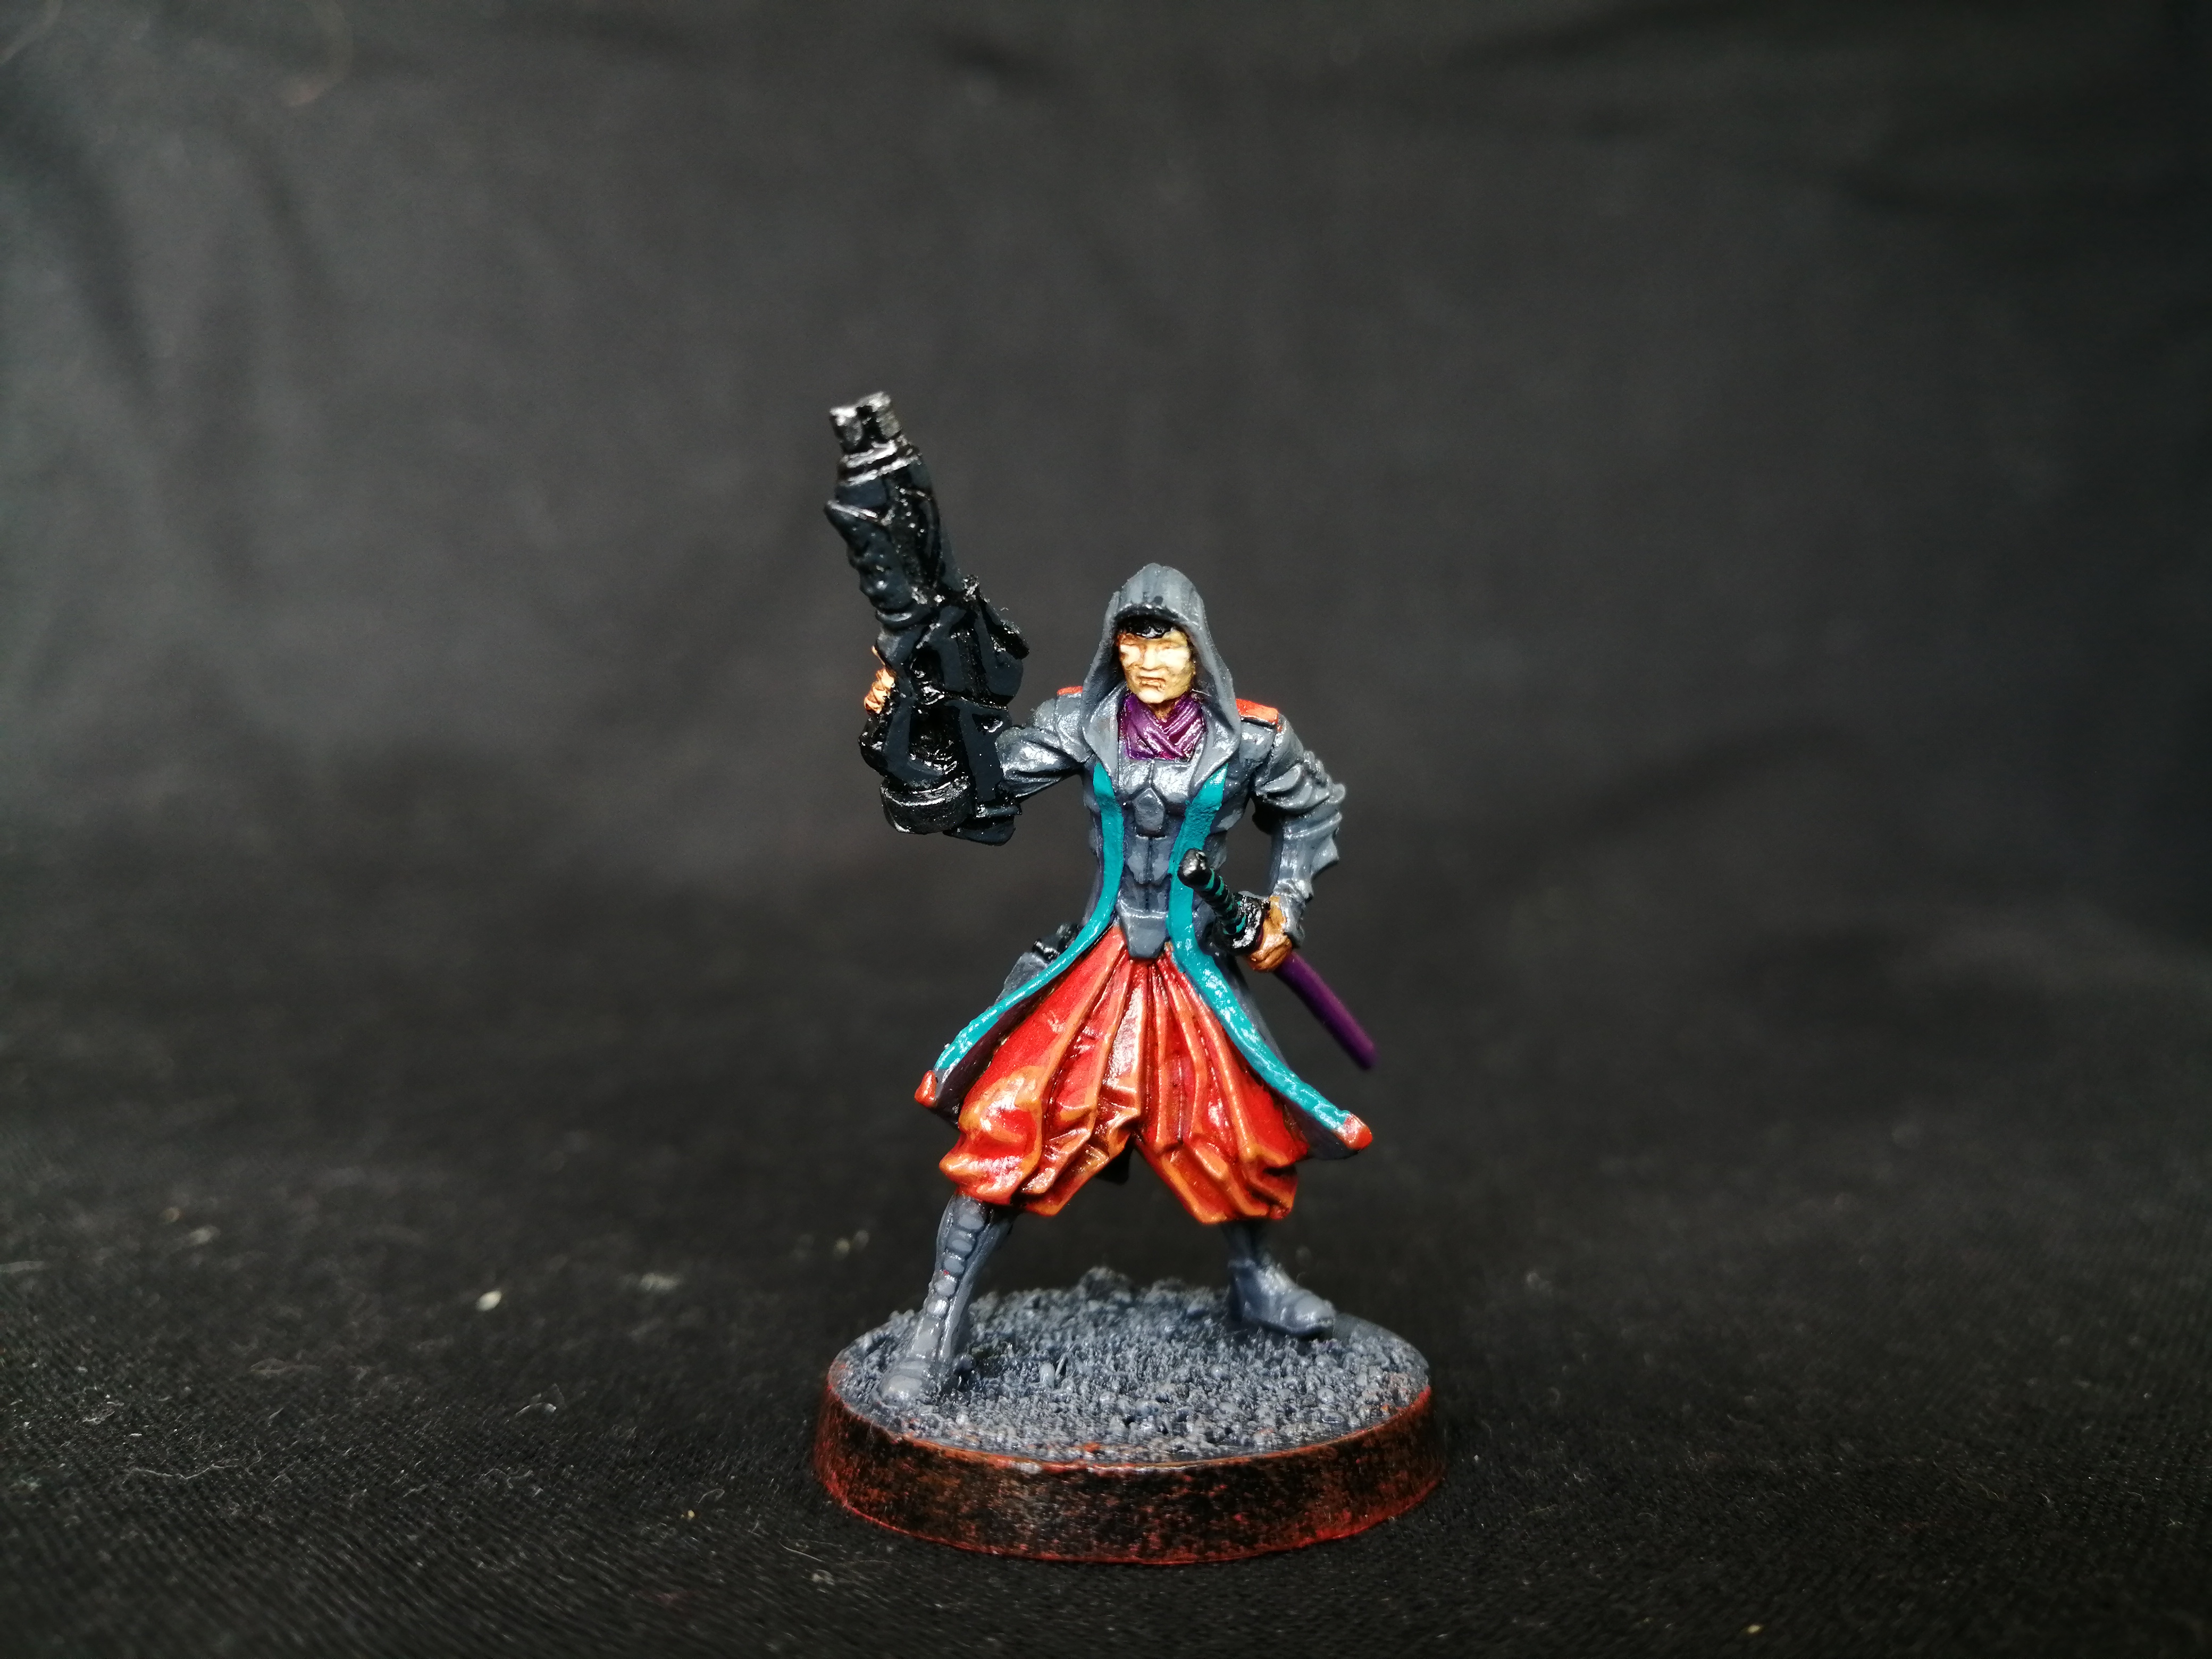 Kempetai with boarding shotgun.
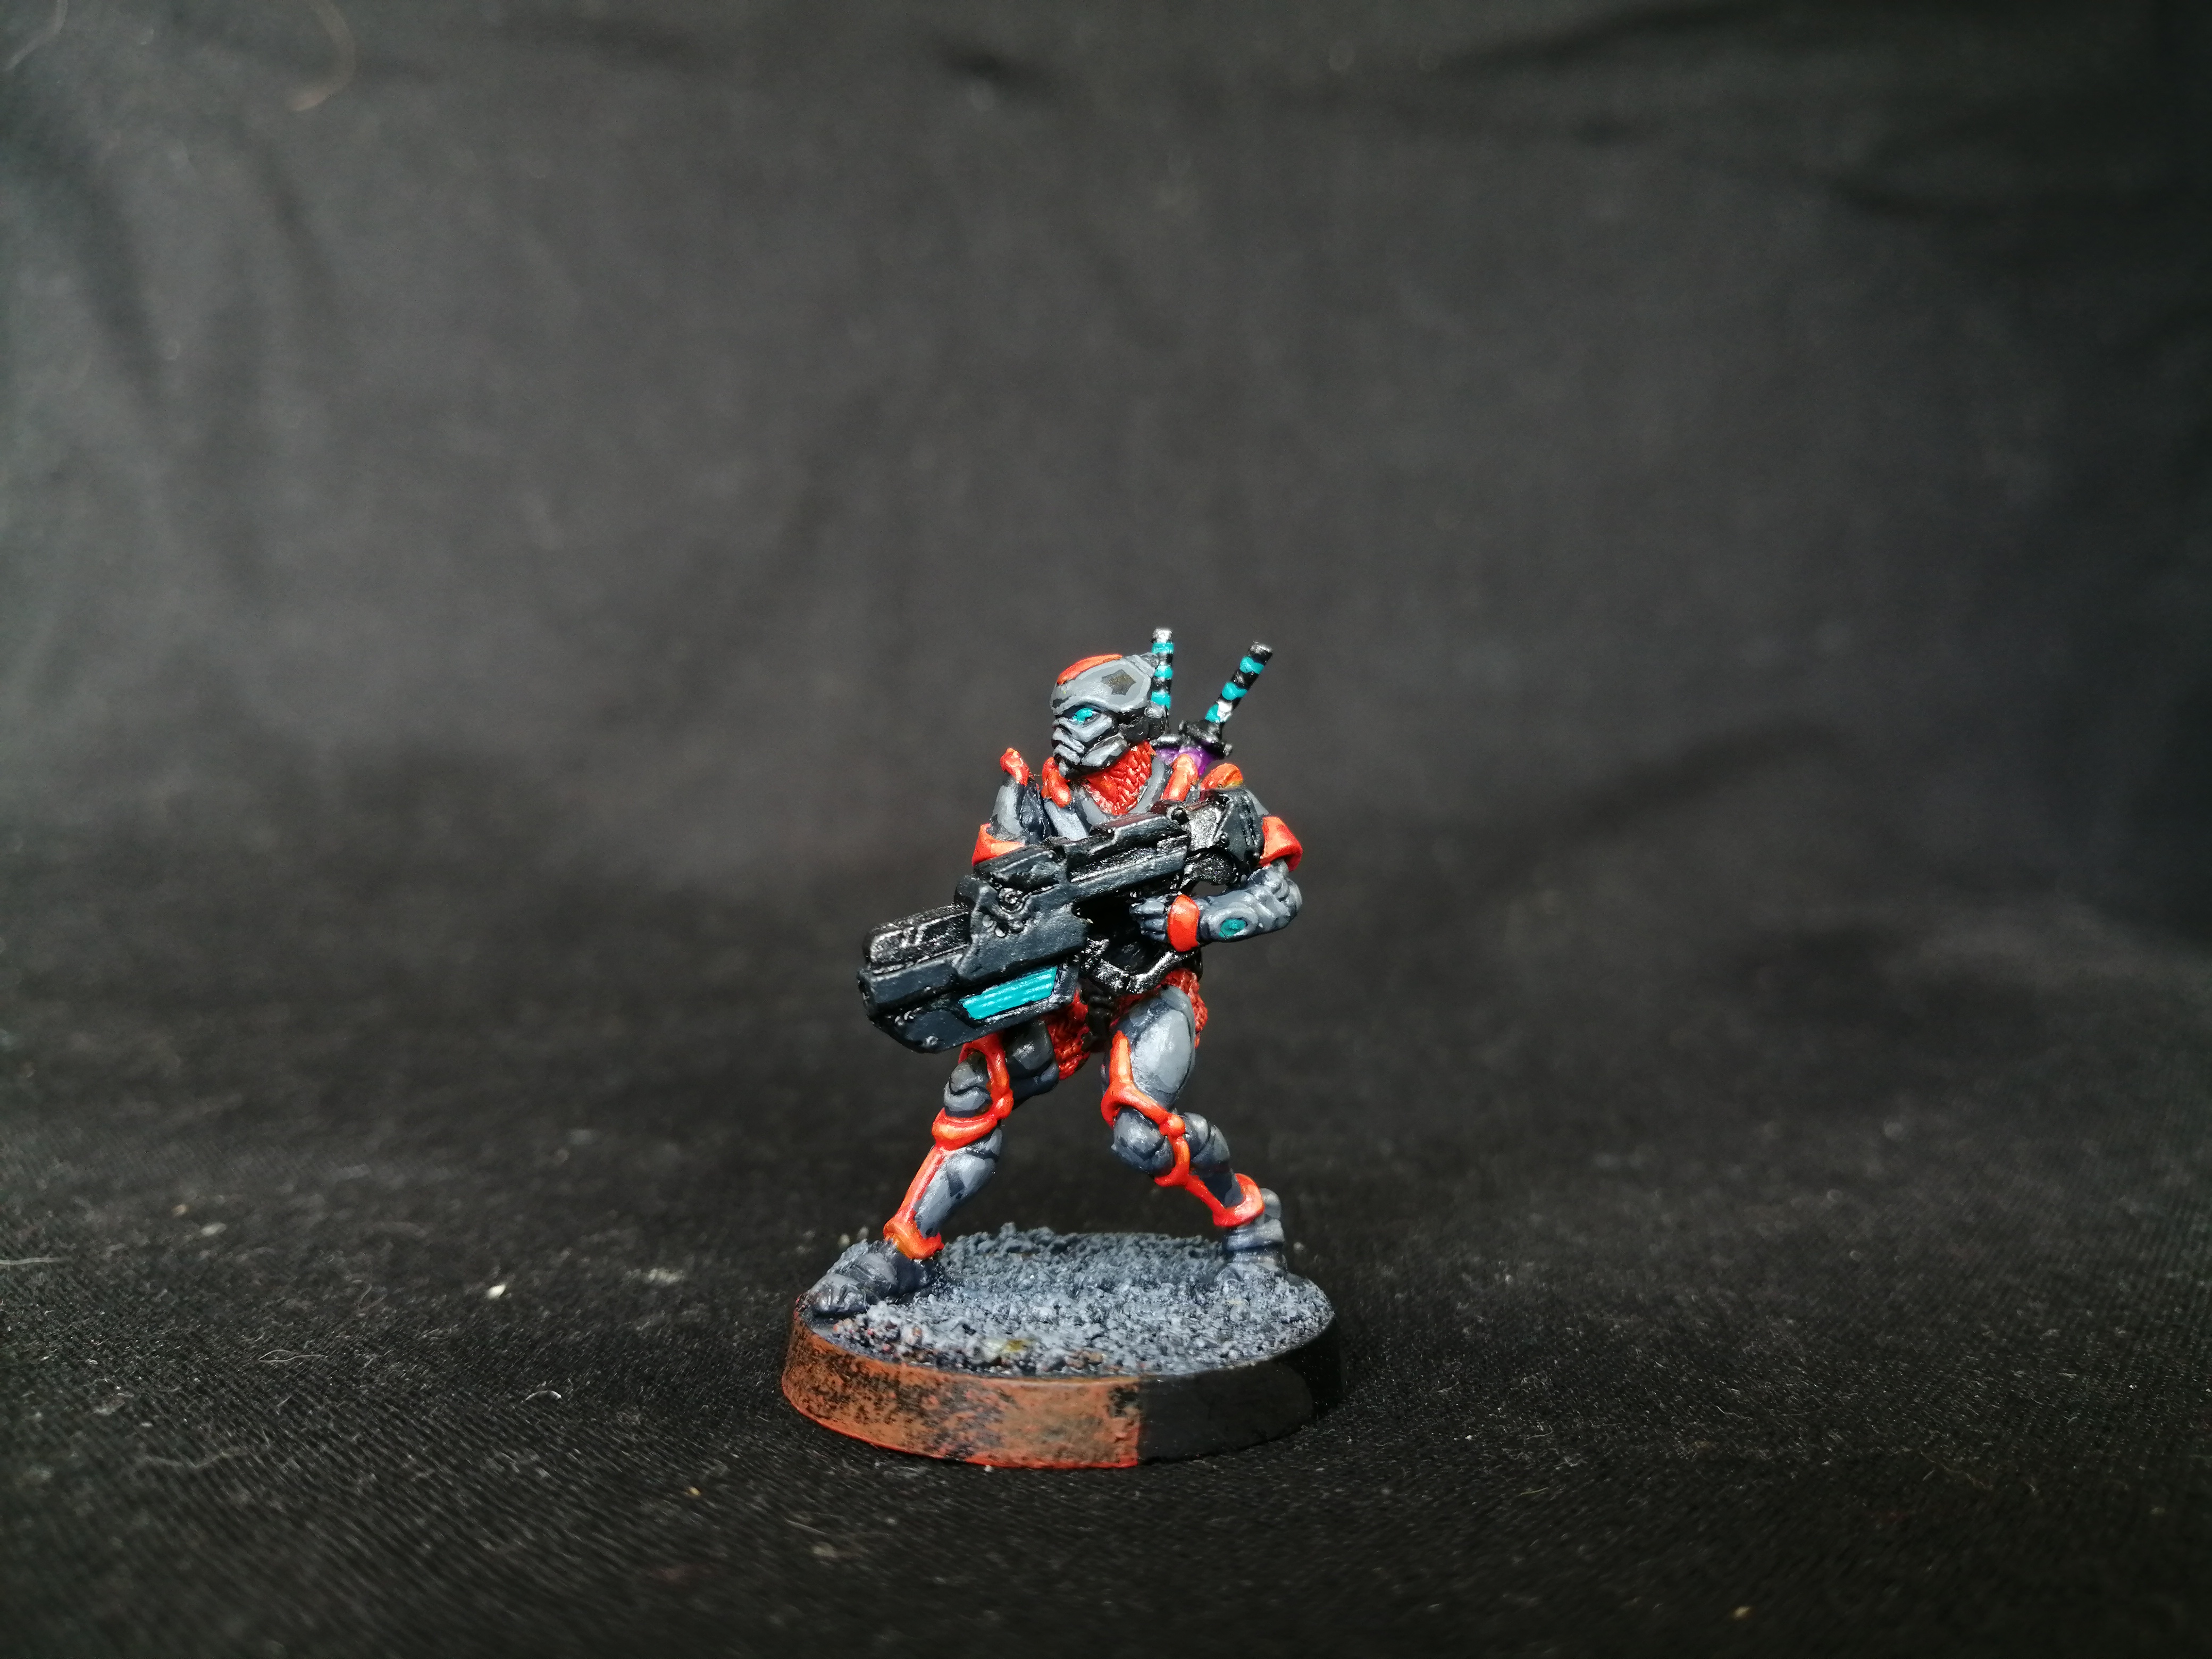 Domaru with chain rifle.
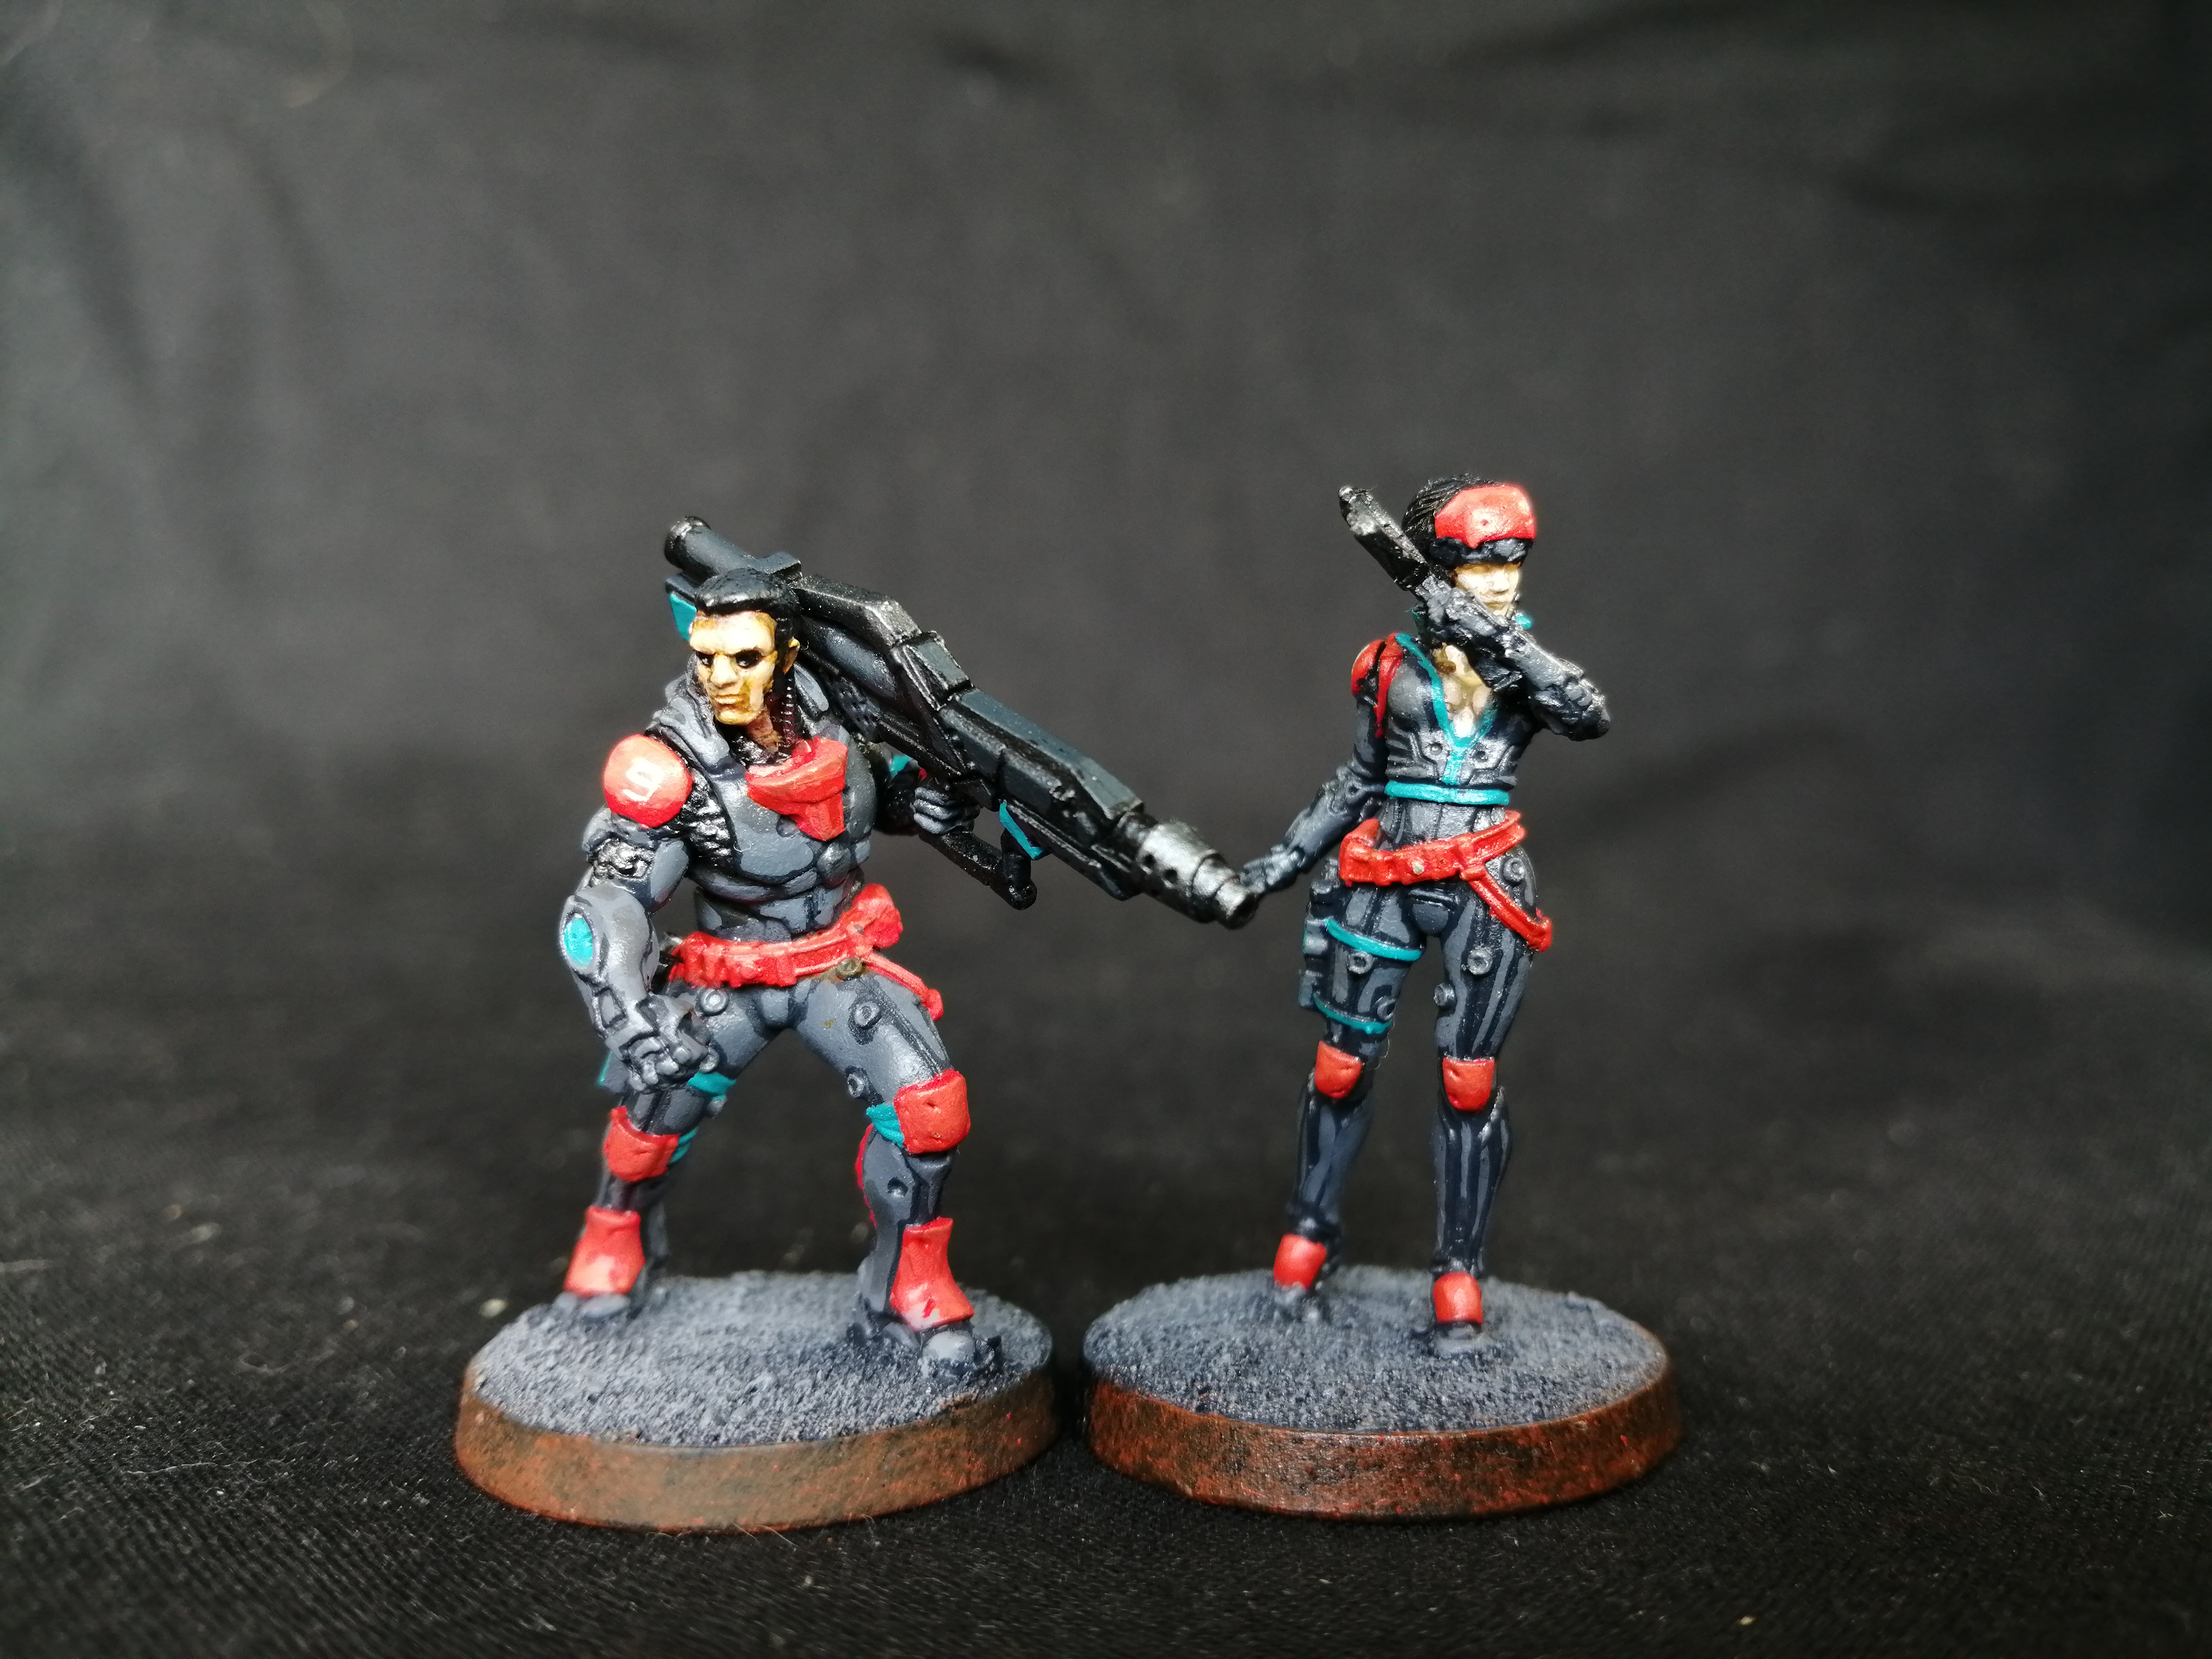 Ryuken unit 9 with missile launcher and SMG.
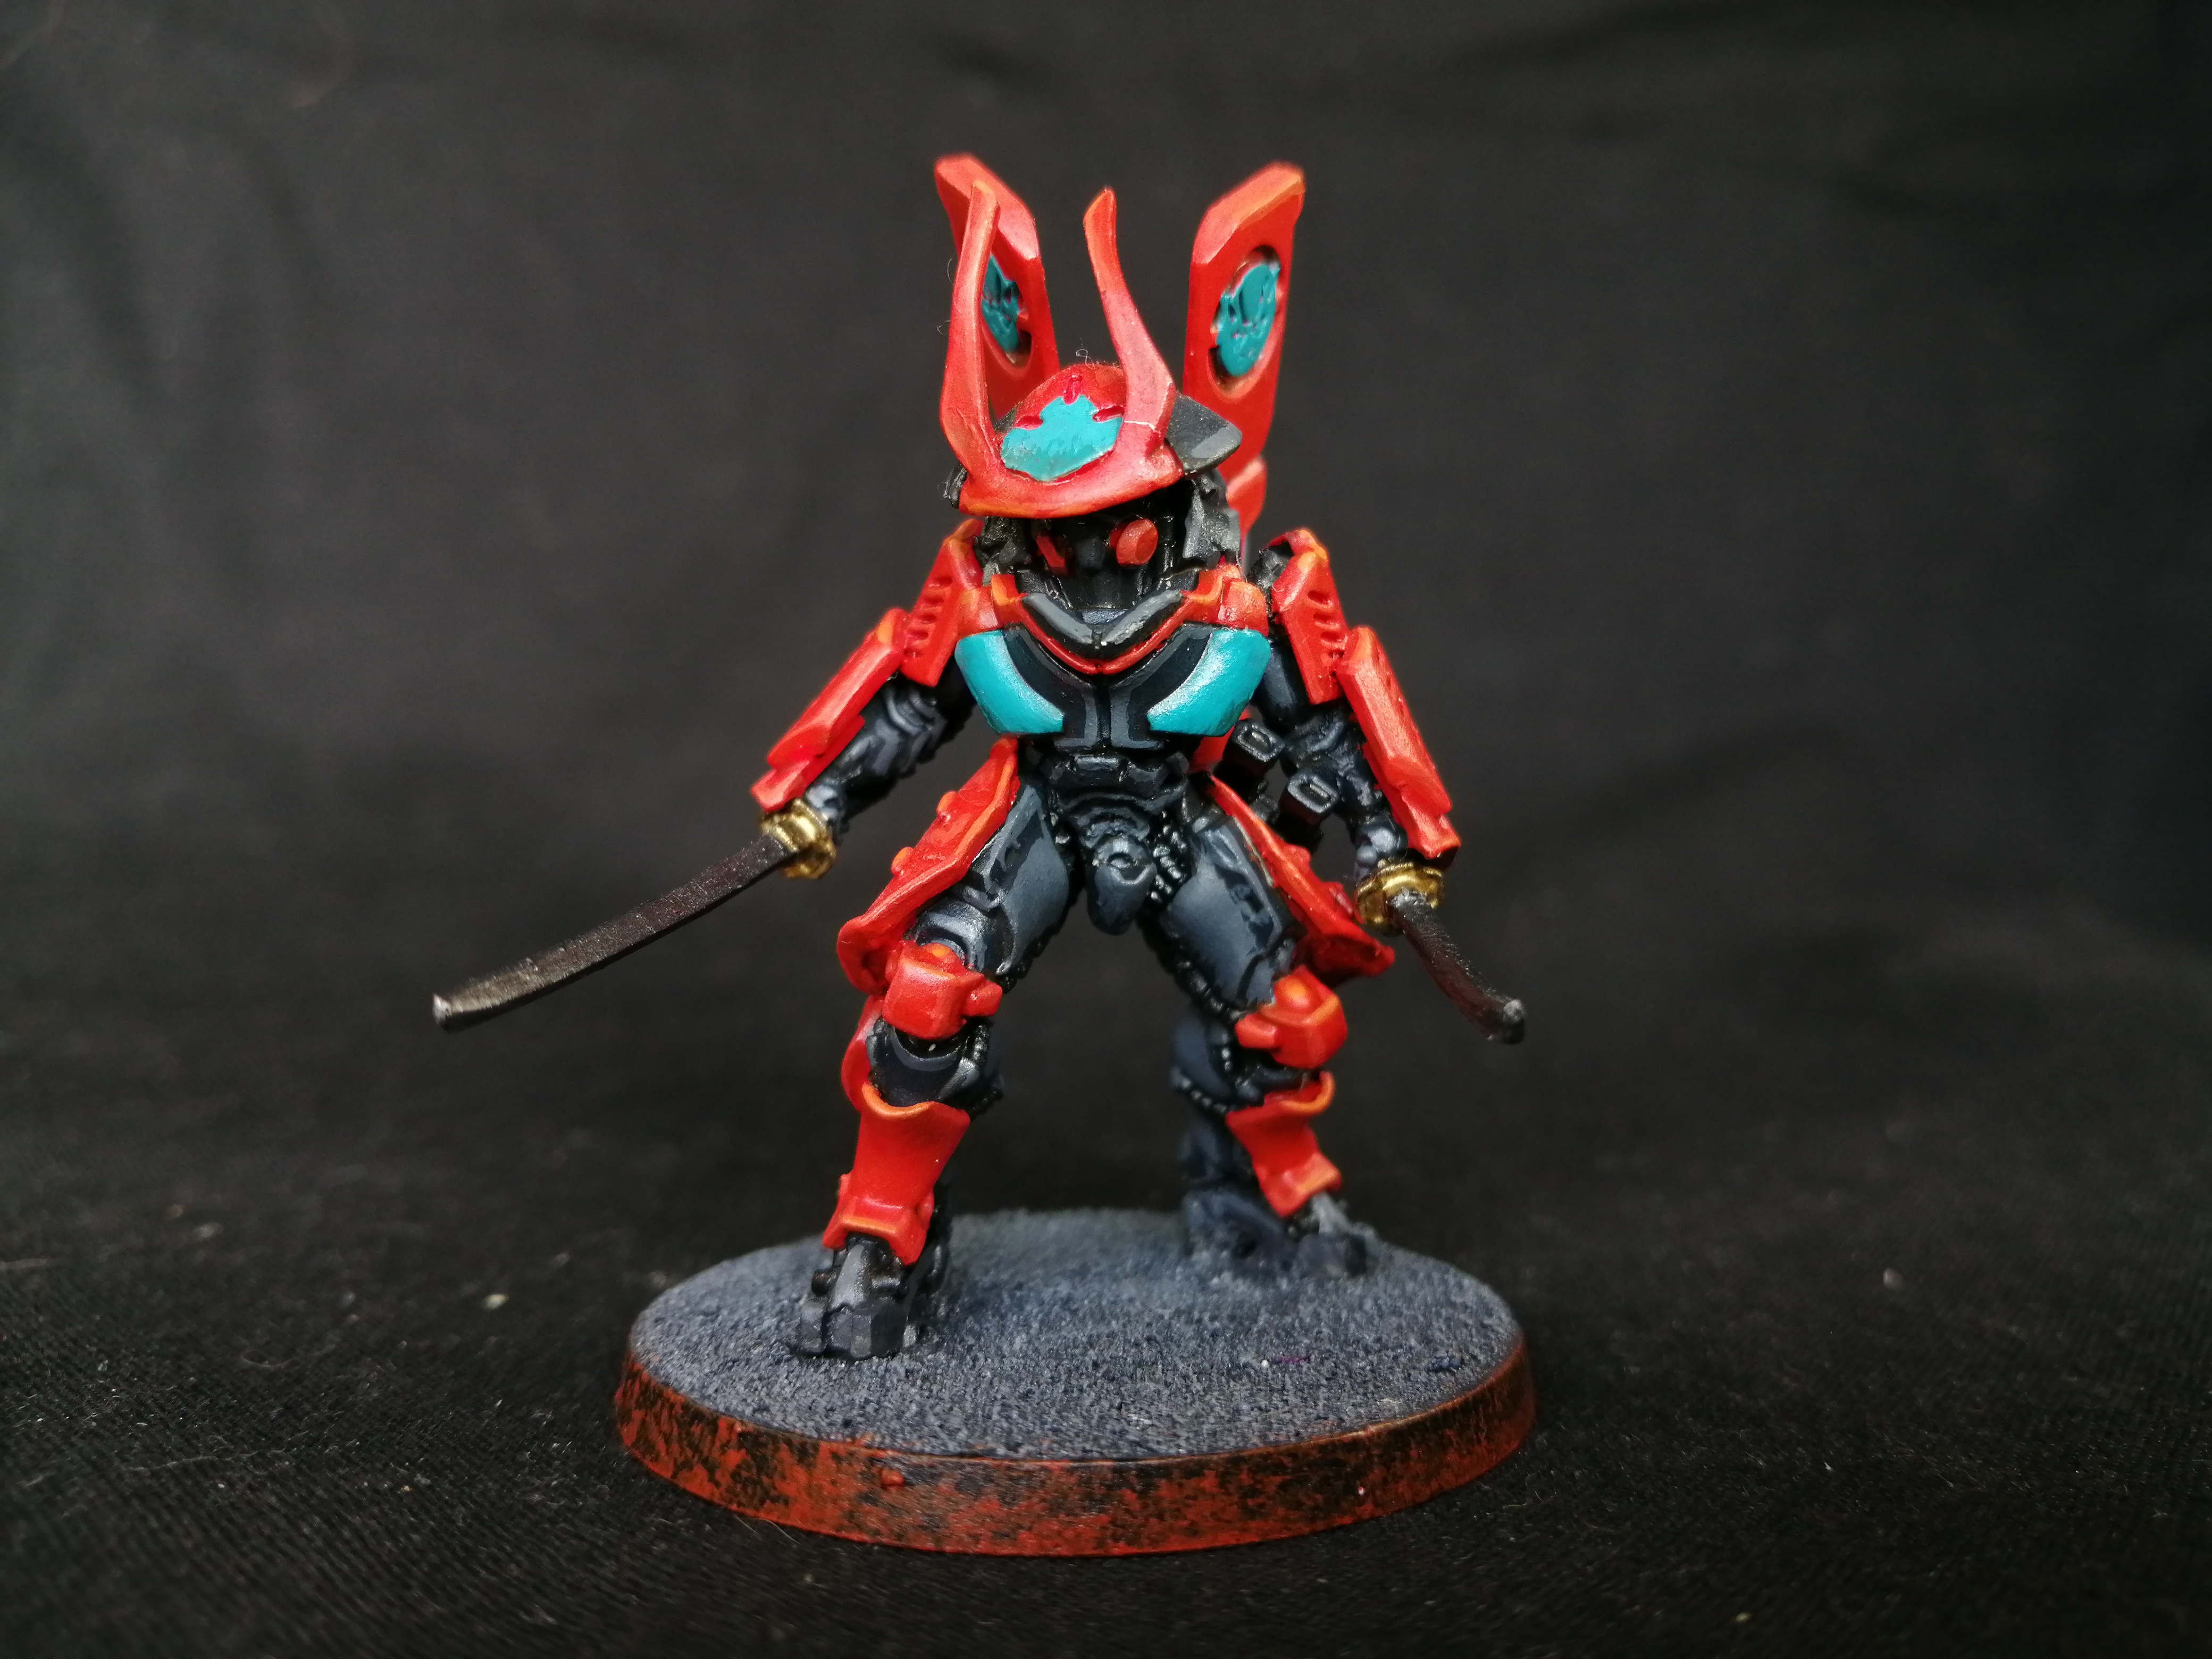 Daiyokai
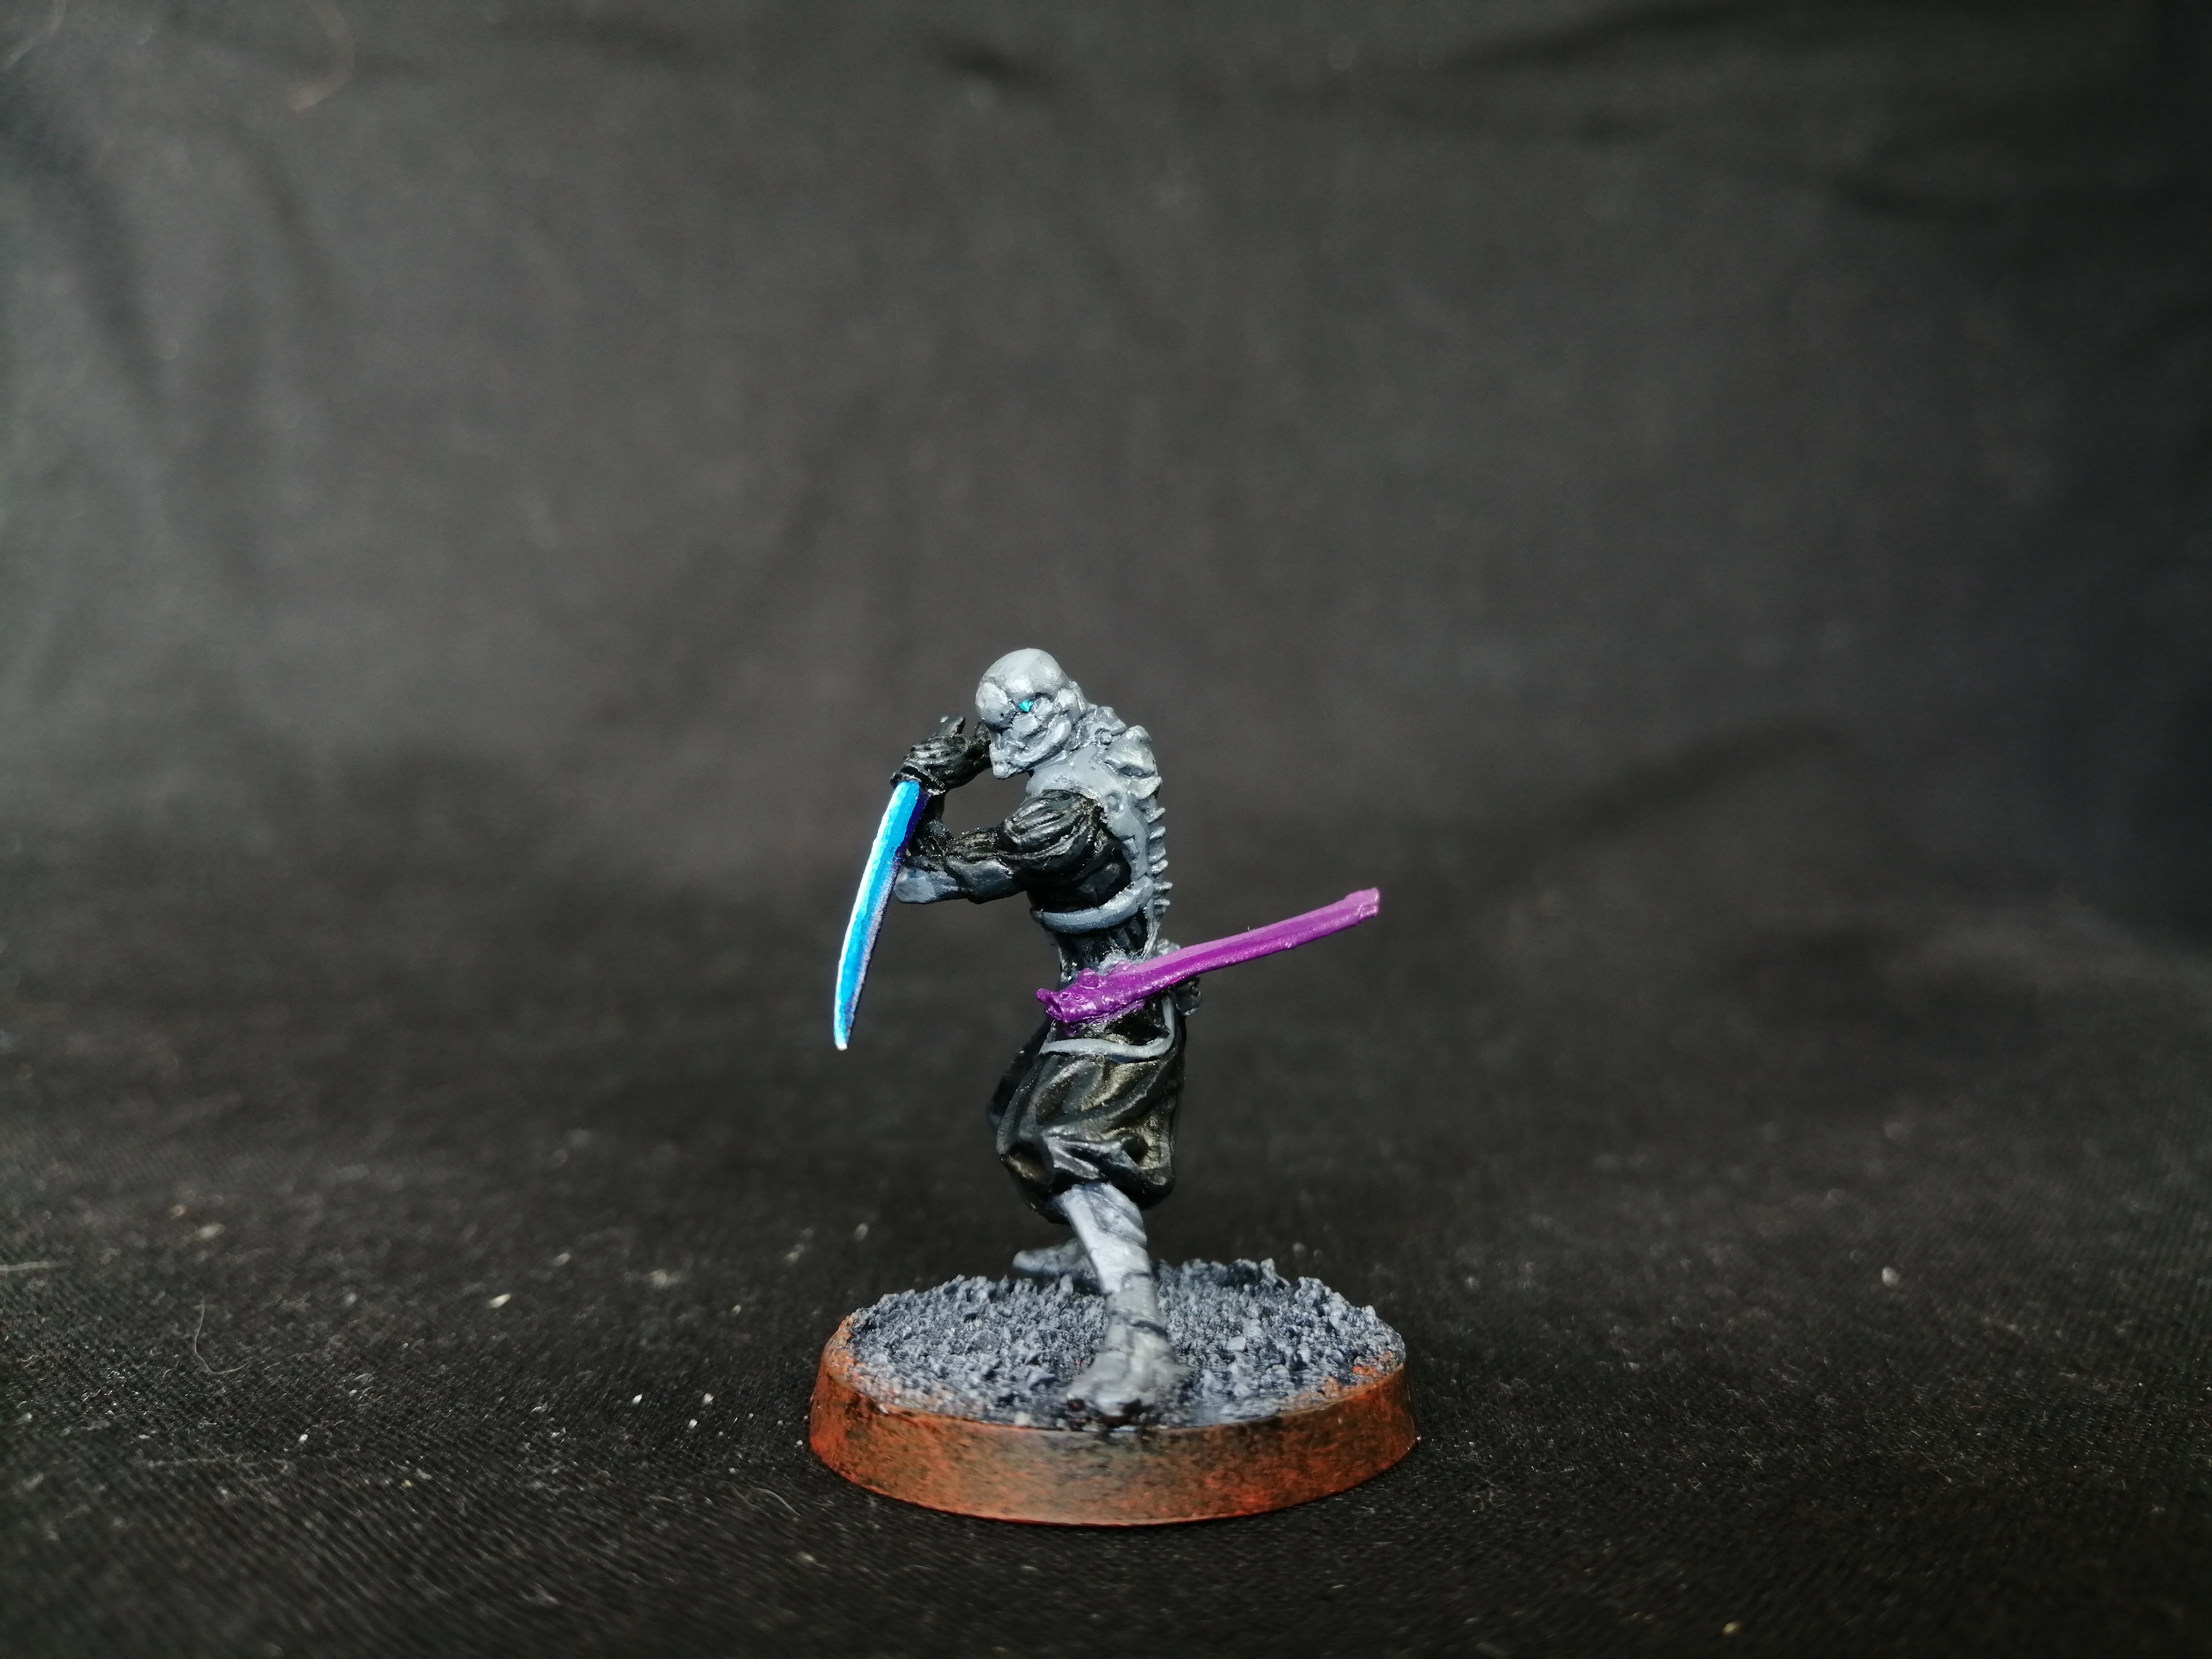 Oniwaban
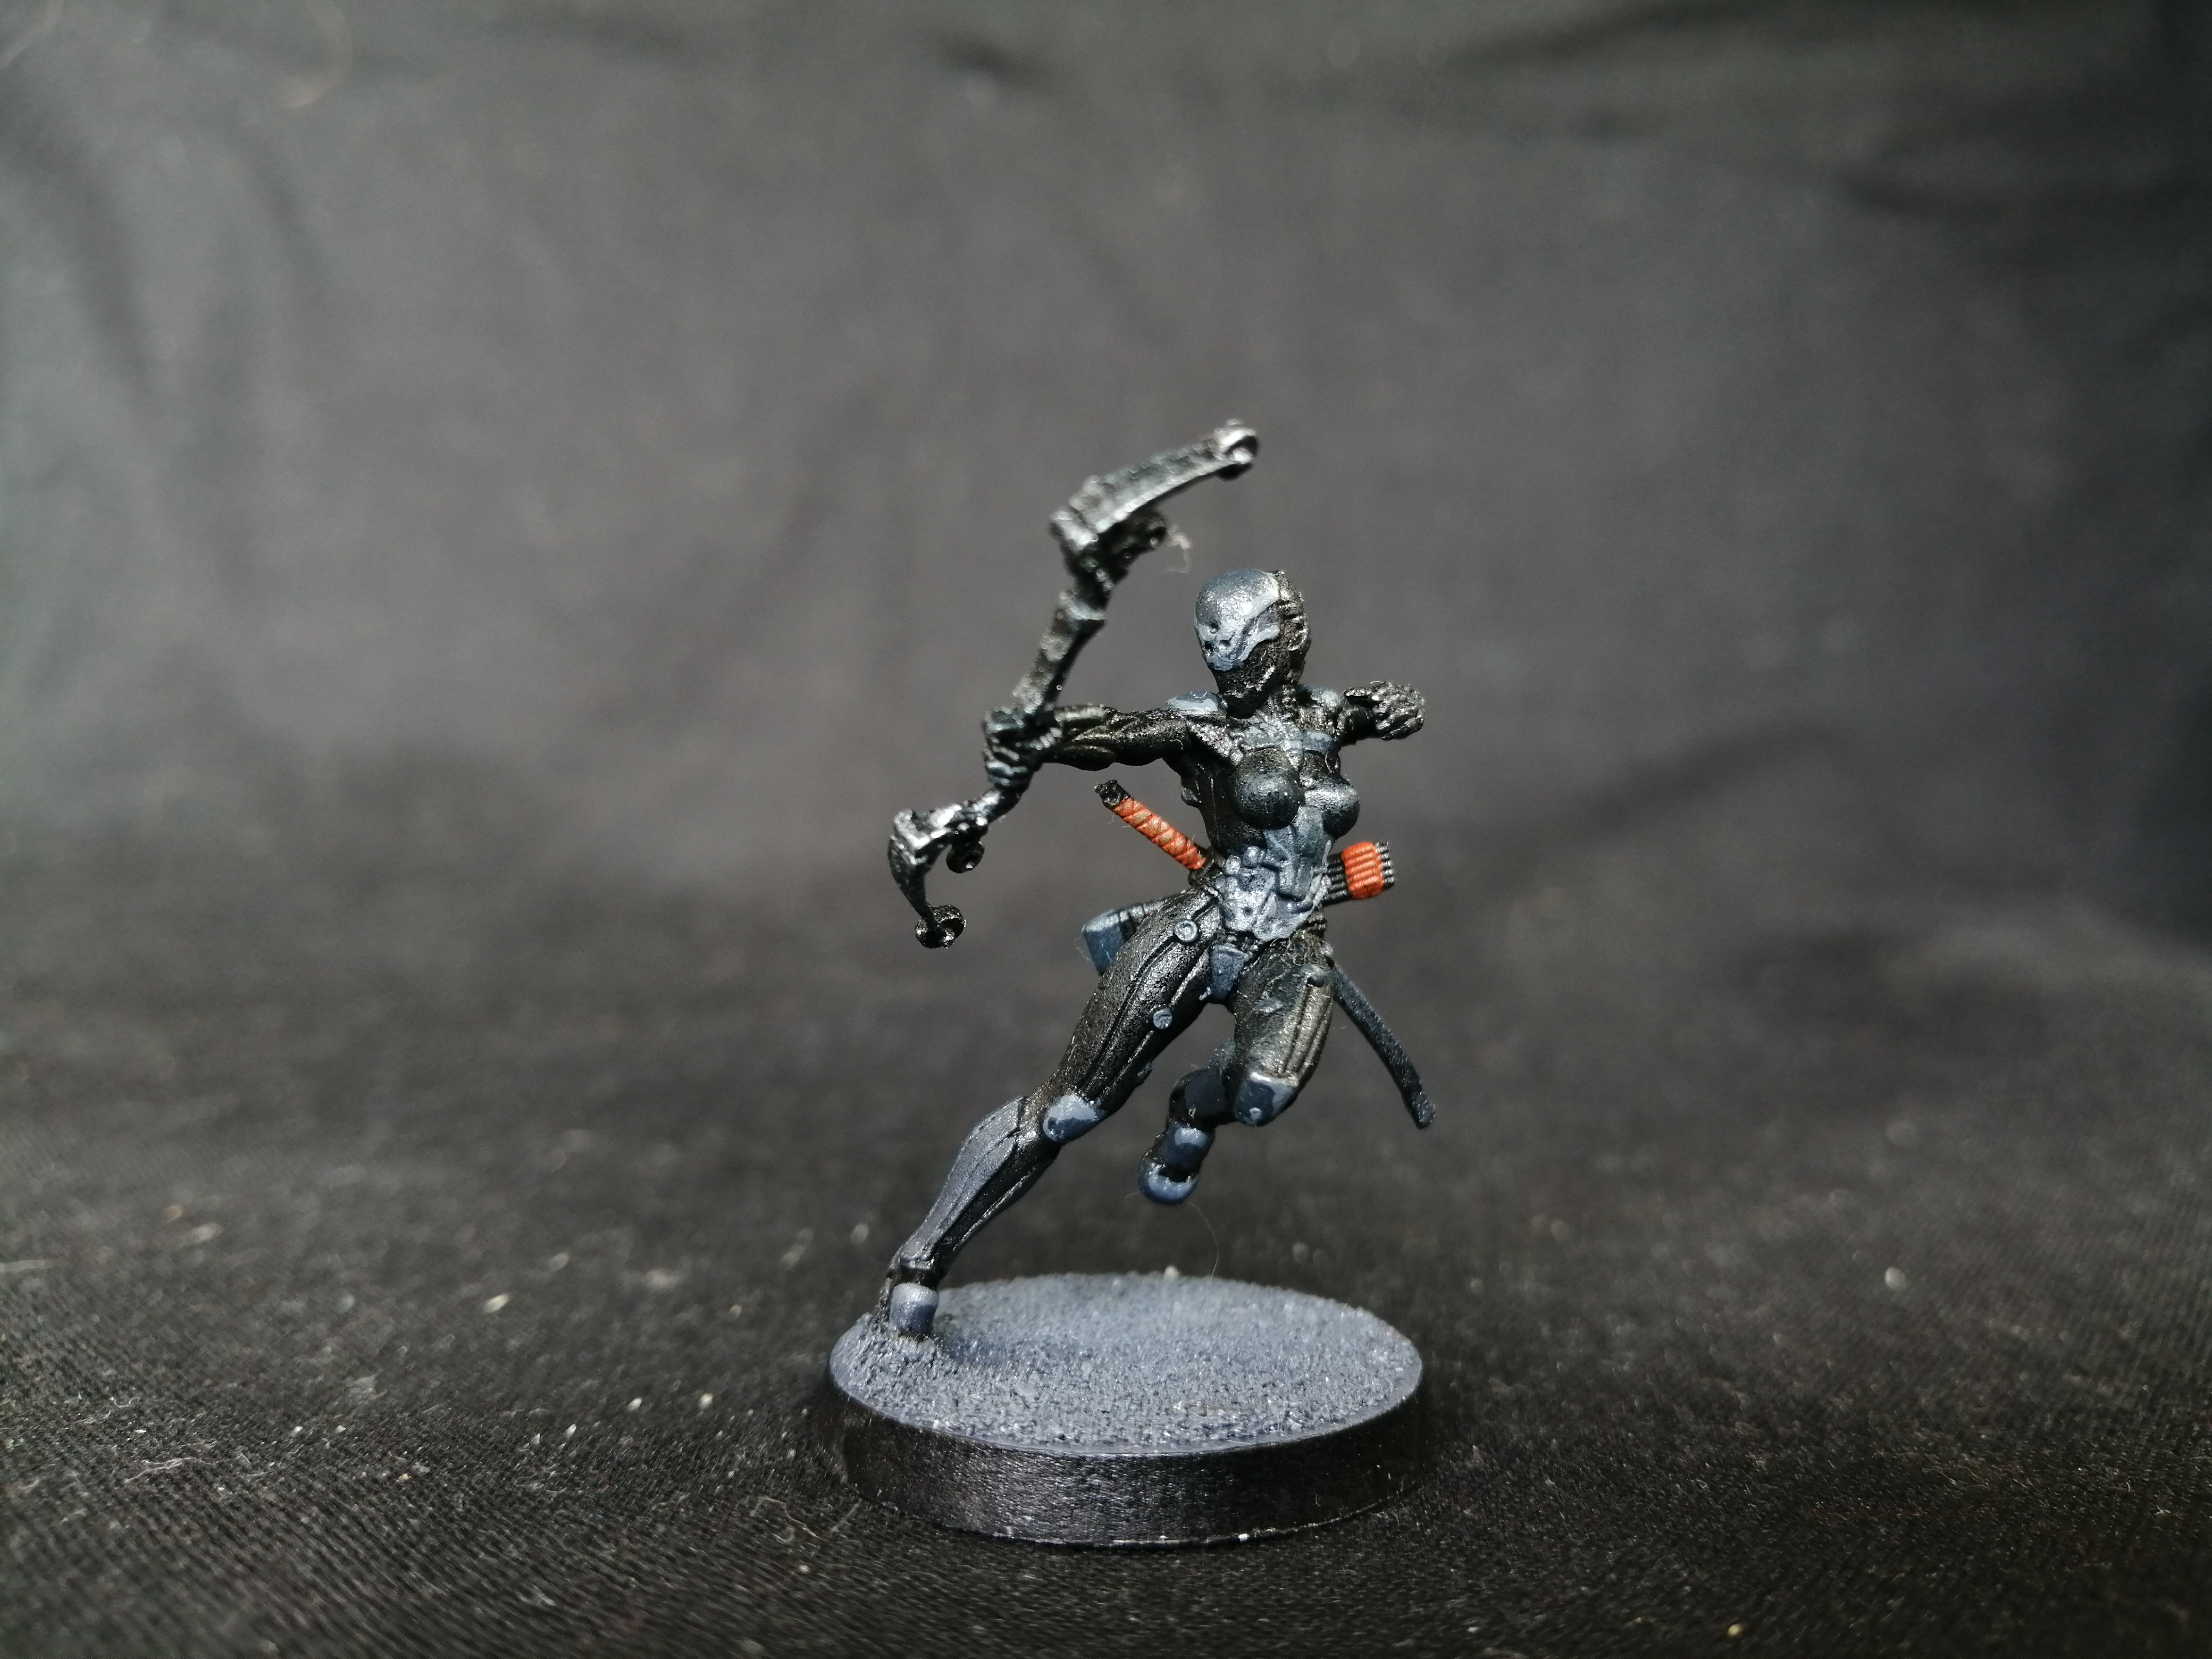 Ninja with tactical bow
Bespoke HVT choices
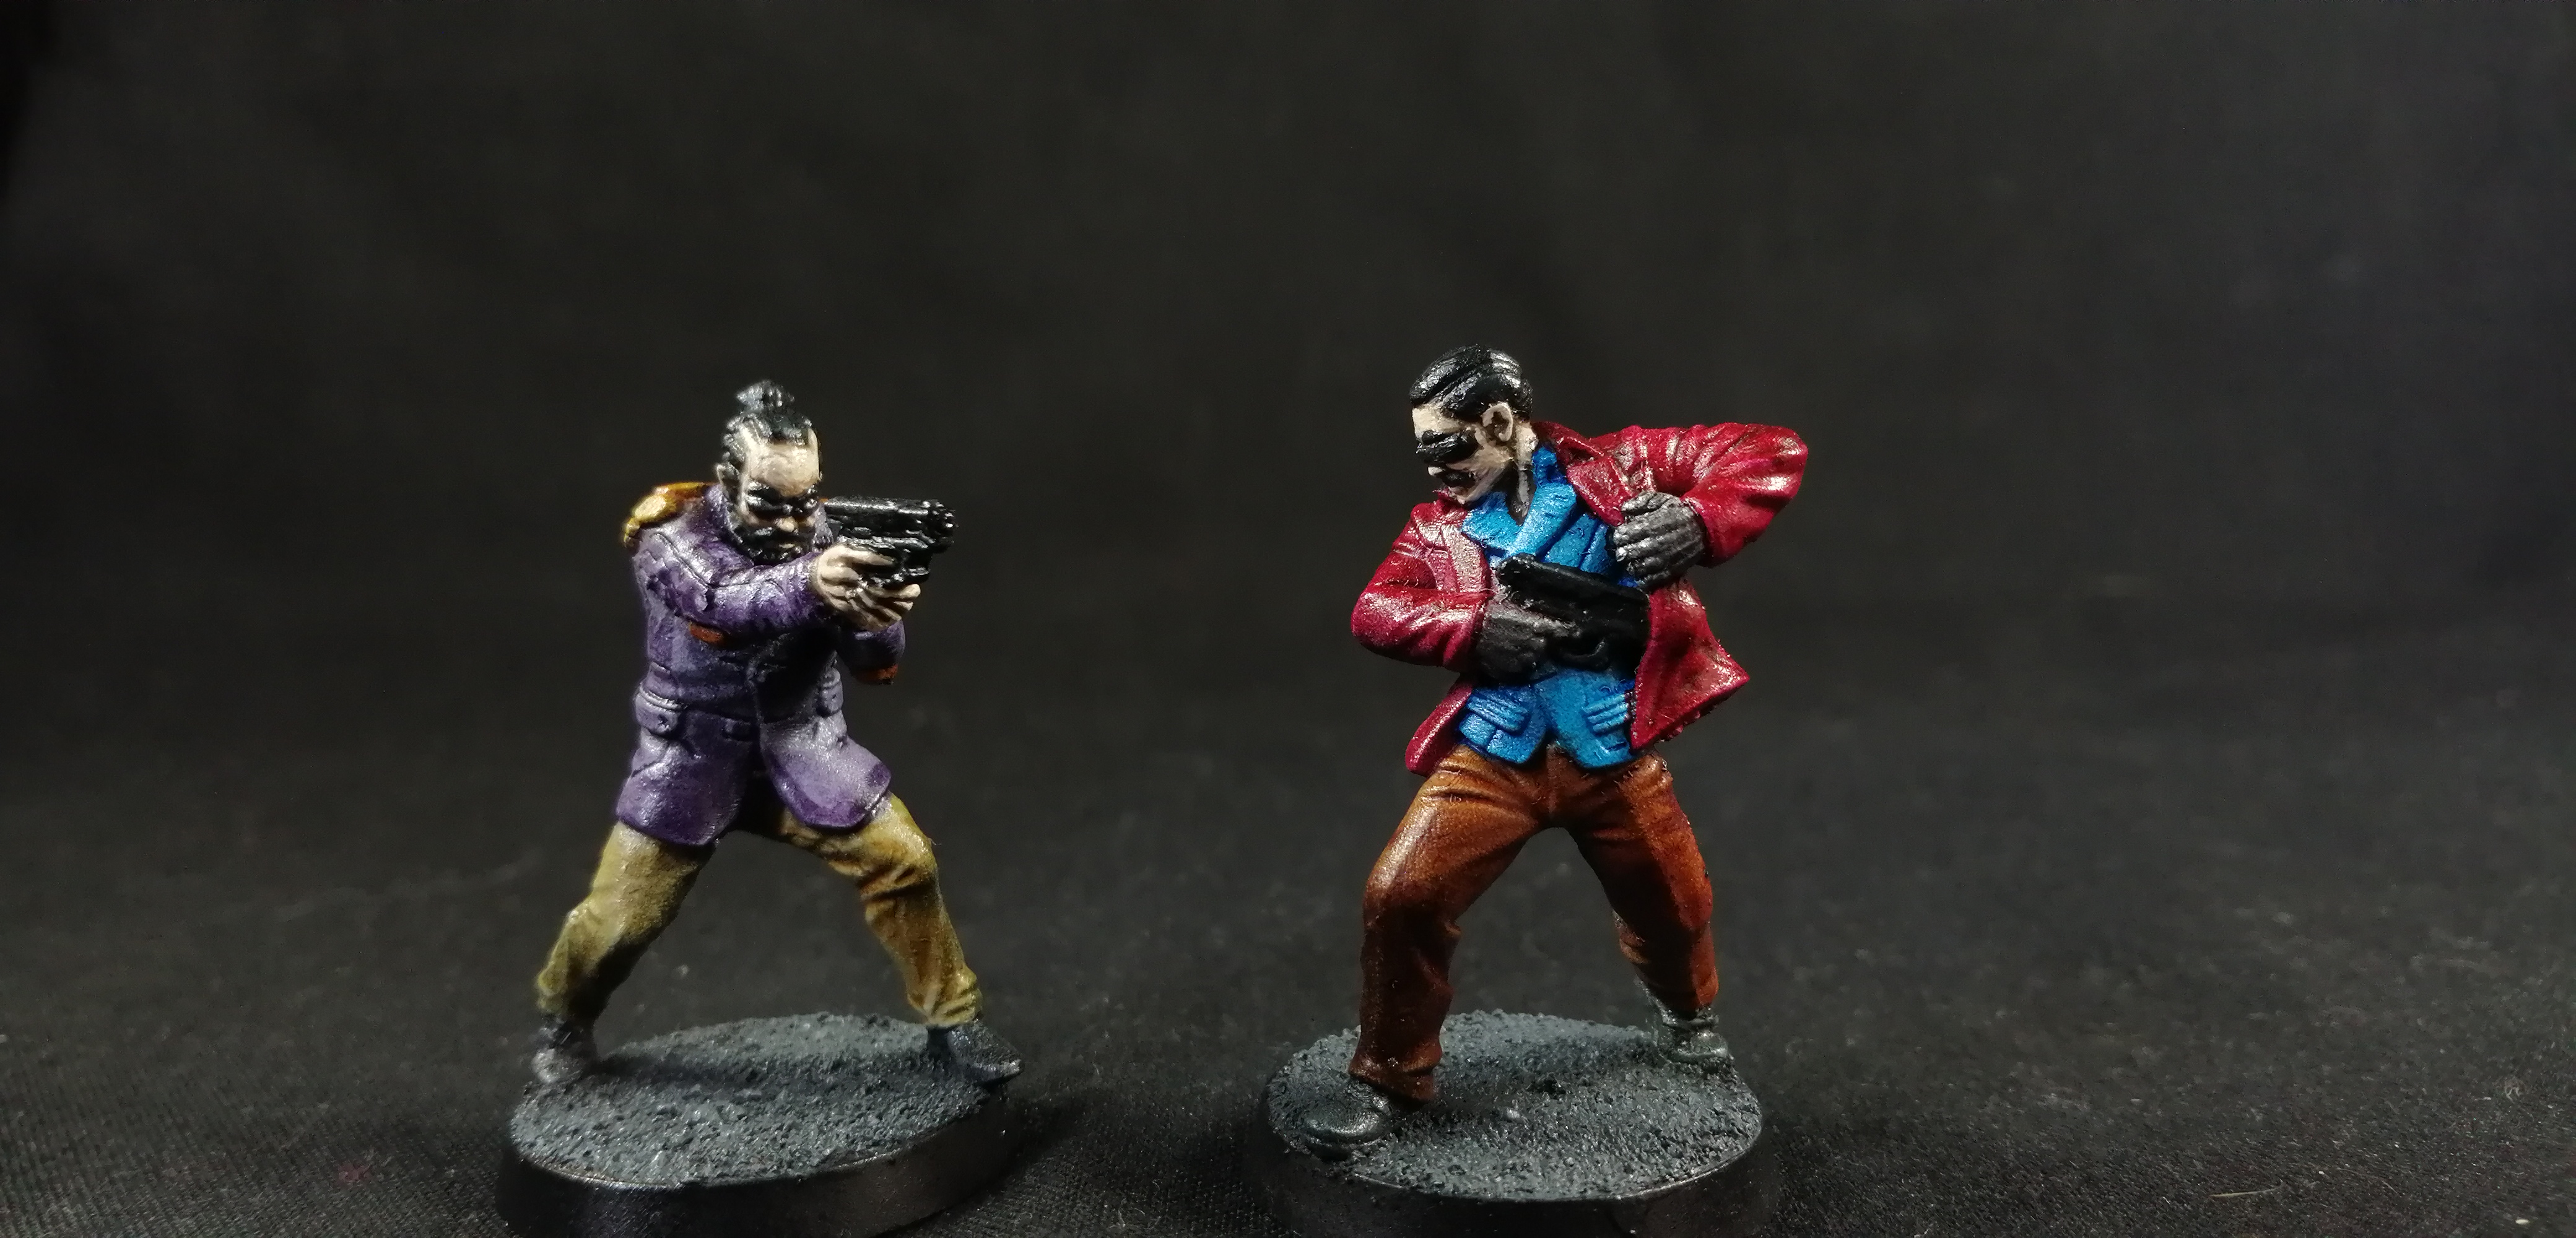
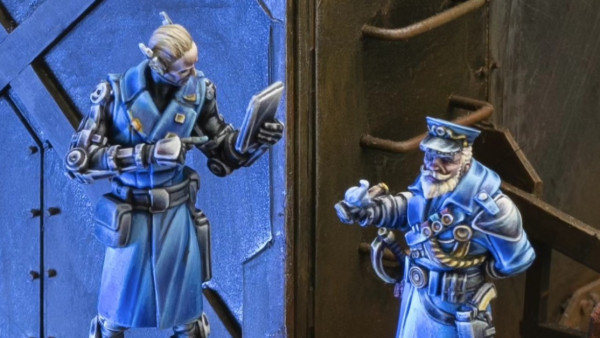
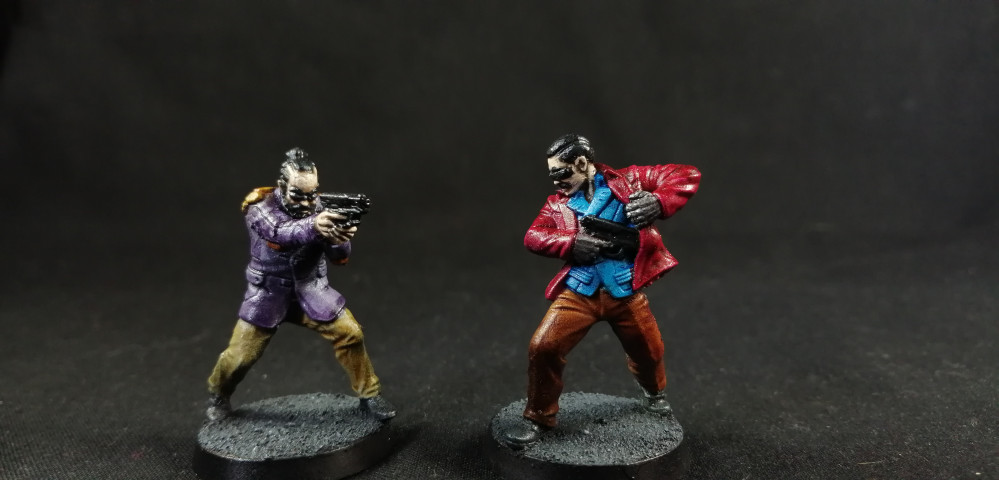
My friend David is a bit of a 3D printing buff, and often sends me random prints and oddities for Xmas etc.
Some time ago he sent me two cool Yakuza (Japanese gangster) models from the Unit 9 range from Myminifactory.
After a bit of thought I decided to paint the models up to use as HVTs (High Value Targets) in my Infinity games. These models are essentially a type of objective marker that can be used to score points in certain secondary mission objectives.
I started by priming both models with a zenithal prime using Vallejo Black and Grey primers through my airbush.
I added a final top down spray of white ink just to bring the highlights up as I was intending to use Army Painter Speed paints on the models.
All colours below are Army Painter Speed paints unless otherwise noted.
Top-knot
Jacket – Hive Dweller Purple
Shoulder/elbow pads – Sand Golem
Trousers – Pallid Bone
Shoes – Grim Black
Hair/gun – Vallejo Model Color (VMC) Black then VMC Black Grey highlight
Skin – VMC Chocolate Brown then highlights of VMC Cork Brown and VMC Basic Skintone
Quick-draw
Jacket – Slaughter Red
Waistcoat – Magic Blue
Trousers – Hardened Leather
Shoes – Grim Black
Hands – Gravelord Grey then Vallejo Model Color Oily Steel to define backs of fingers.
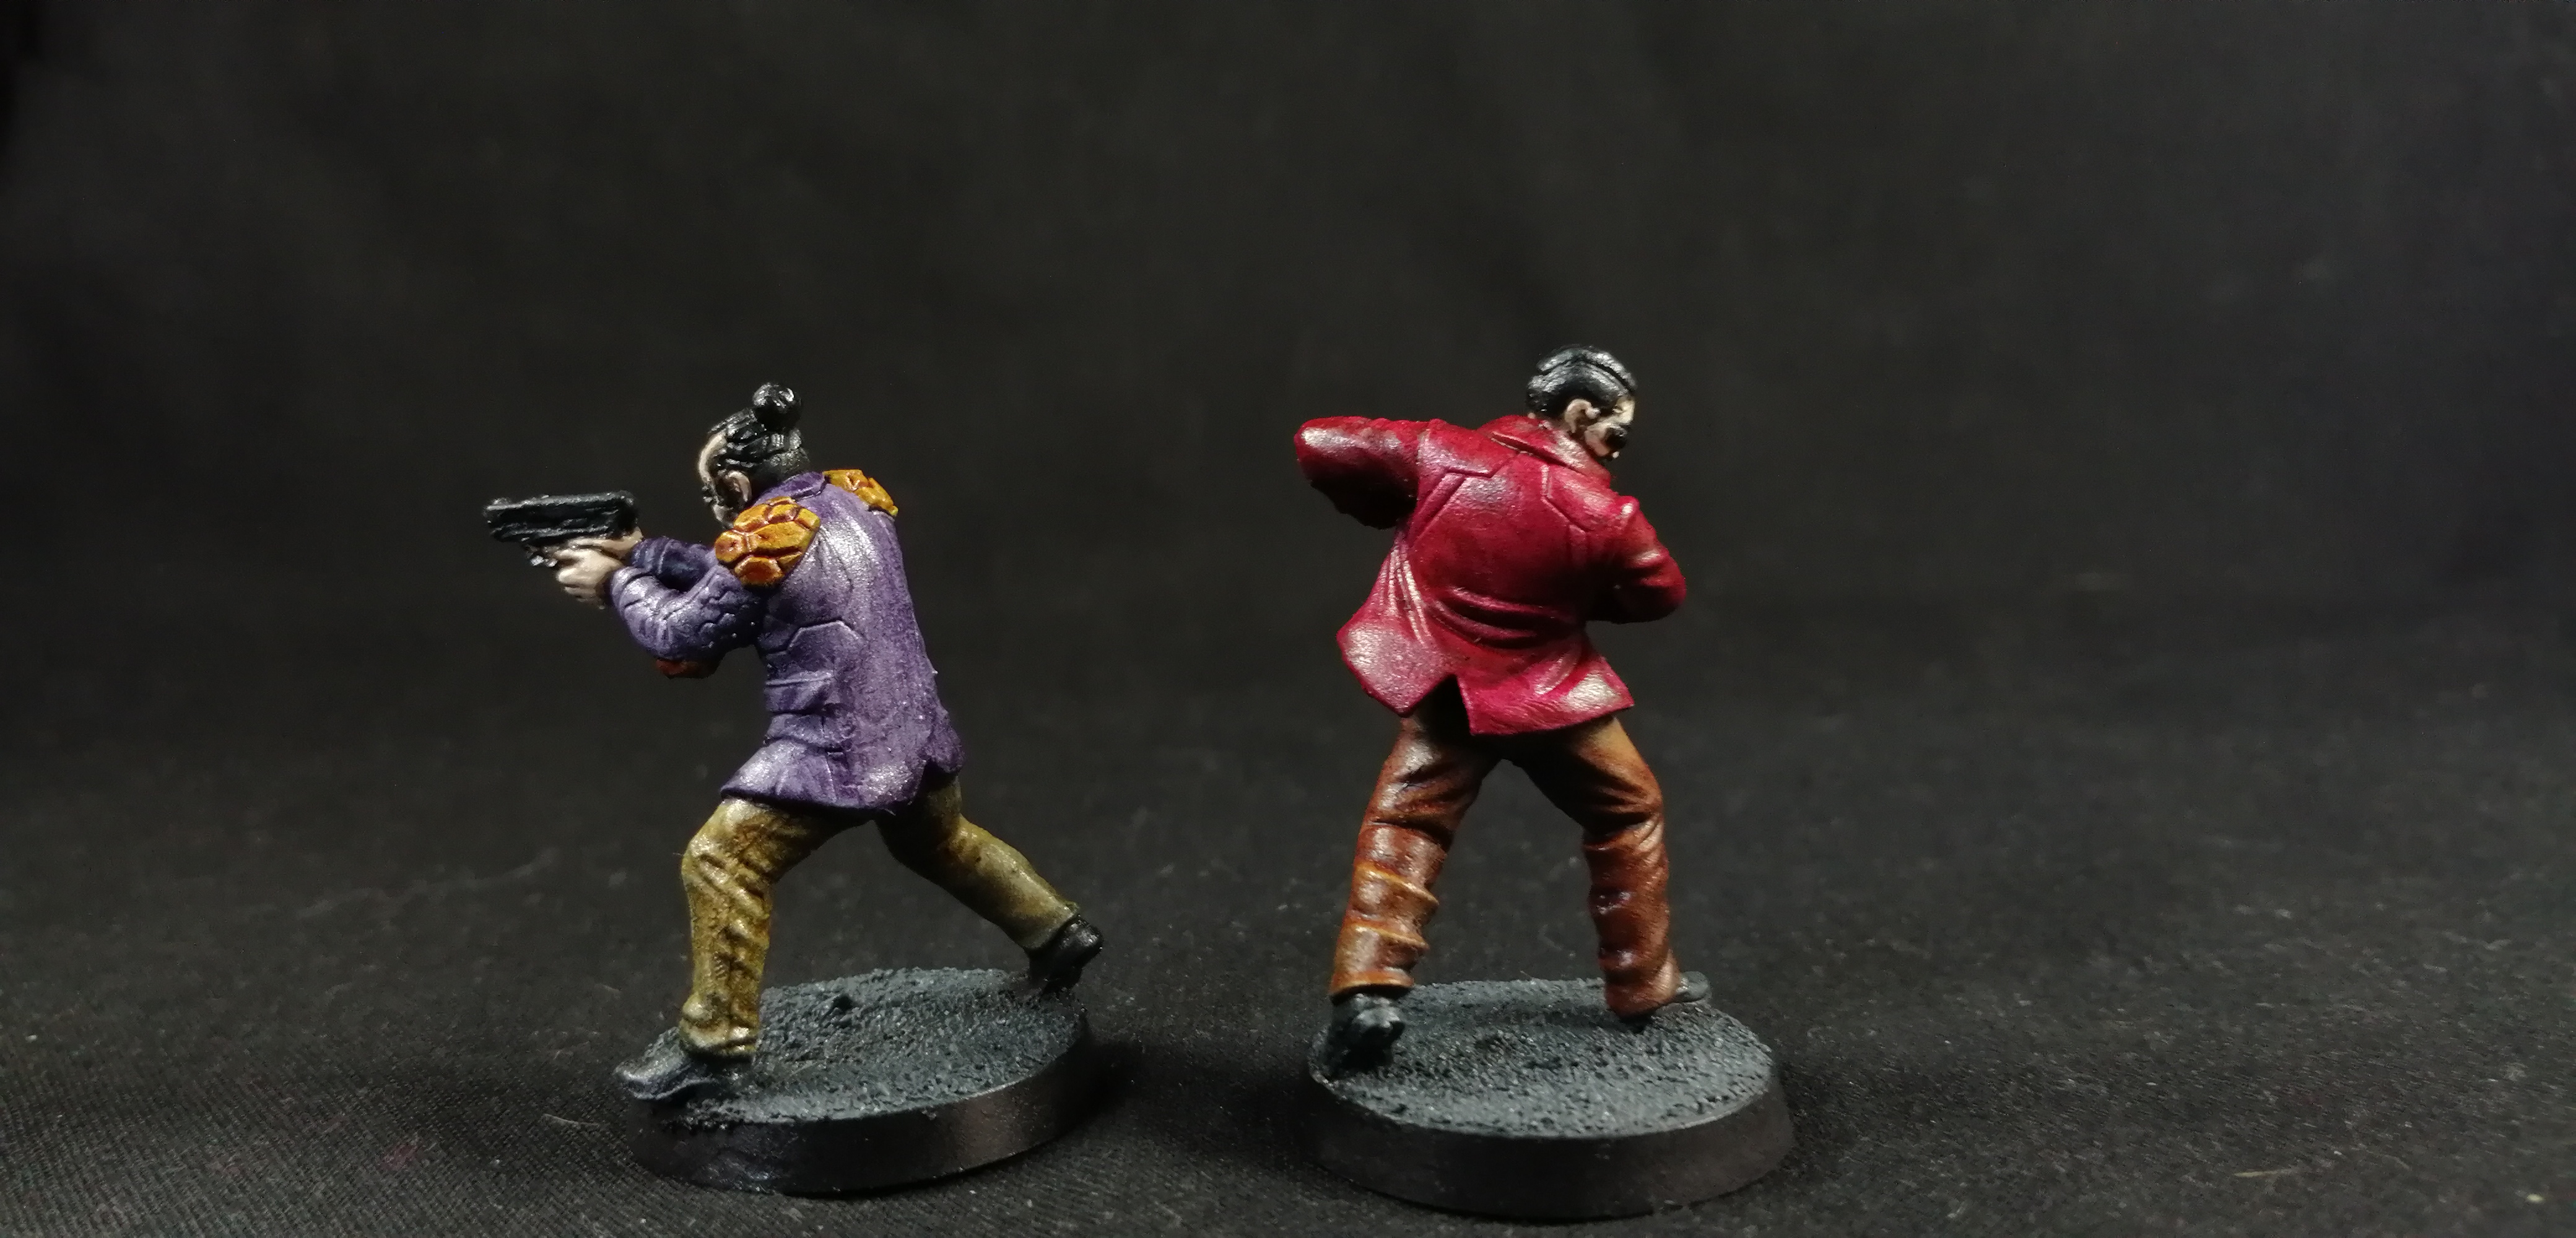
Finishing touches
With the base colours down on most of the models I painted some final details using Valljo Model Colour(VMC) paints
Hair/gun – VMC Black then VMC Black Grey highlight
Skin – VMC Chocolate Brown then highlights of VMC Cork Brown and VMC Basic Skintone
Glases – VMC Oily Steel
The bases were covered in PVA glue before applying fine sand.
When dry this was painted with VMC Black Grey then drybrushed first with VMC Dark Seagreen then VMC Neutral Grey to get a tarmac like finish.
The base edges as ever were painted VMC black and a generous coat of varnish finished the models off.