


![A Perfect Zombie Apocalypse Starter Set? Civilians & Survivors Review | Wargames Atlantic [7 Days Early Access]](https://images.beastsofwar.com/2026/01/unboxing-wargames-atlantic-civilians-_-survivors-1_2-coverimage-225-127.jpg)
![Wild Australia Wargaming? 28mm Ned Kelly Gang & Victorian Police Review [7 Days Early Access]](https://images.beastsofwar.com/2026/01/unboxing-traders-galaxy-australiana-ned-kelly-gang-_-victorian-police-coverimage-225-127.jpg)


Spring Cleaning A Garden of Morr Then Expanding Upon It


Recommendations: 227
About the Project
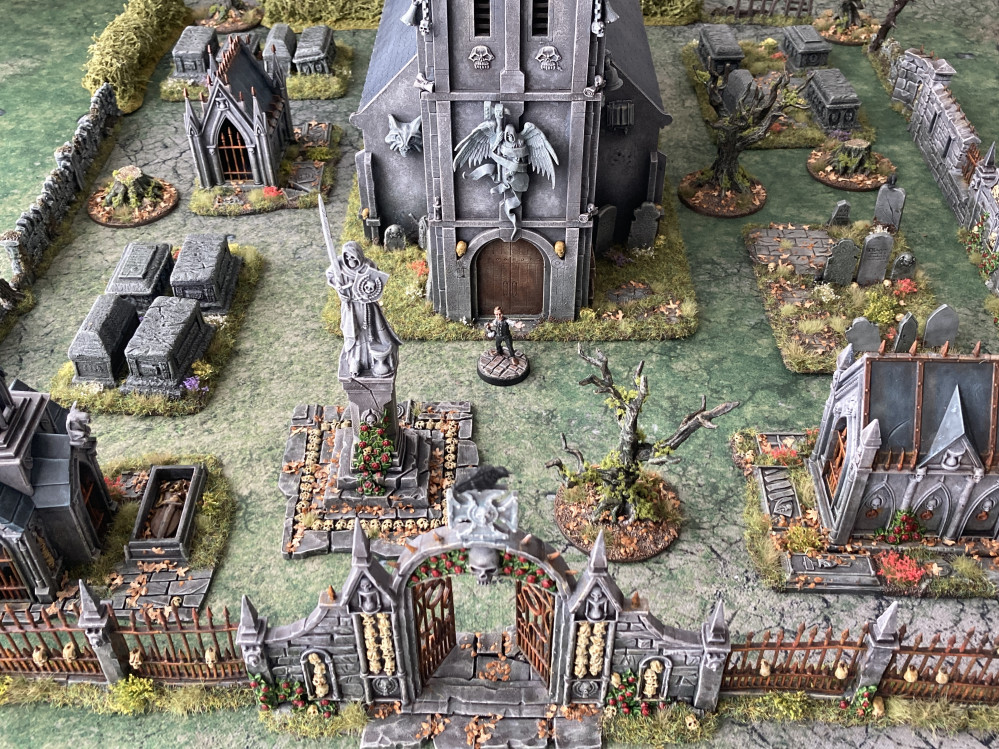
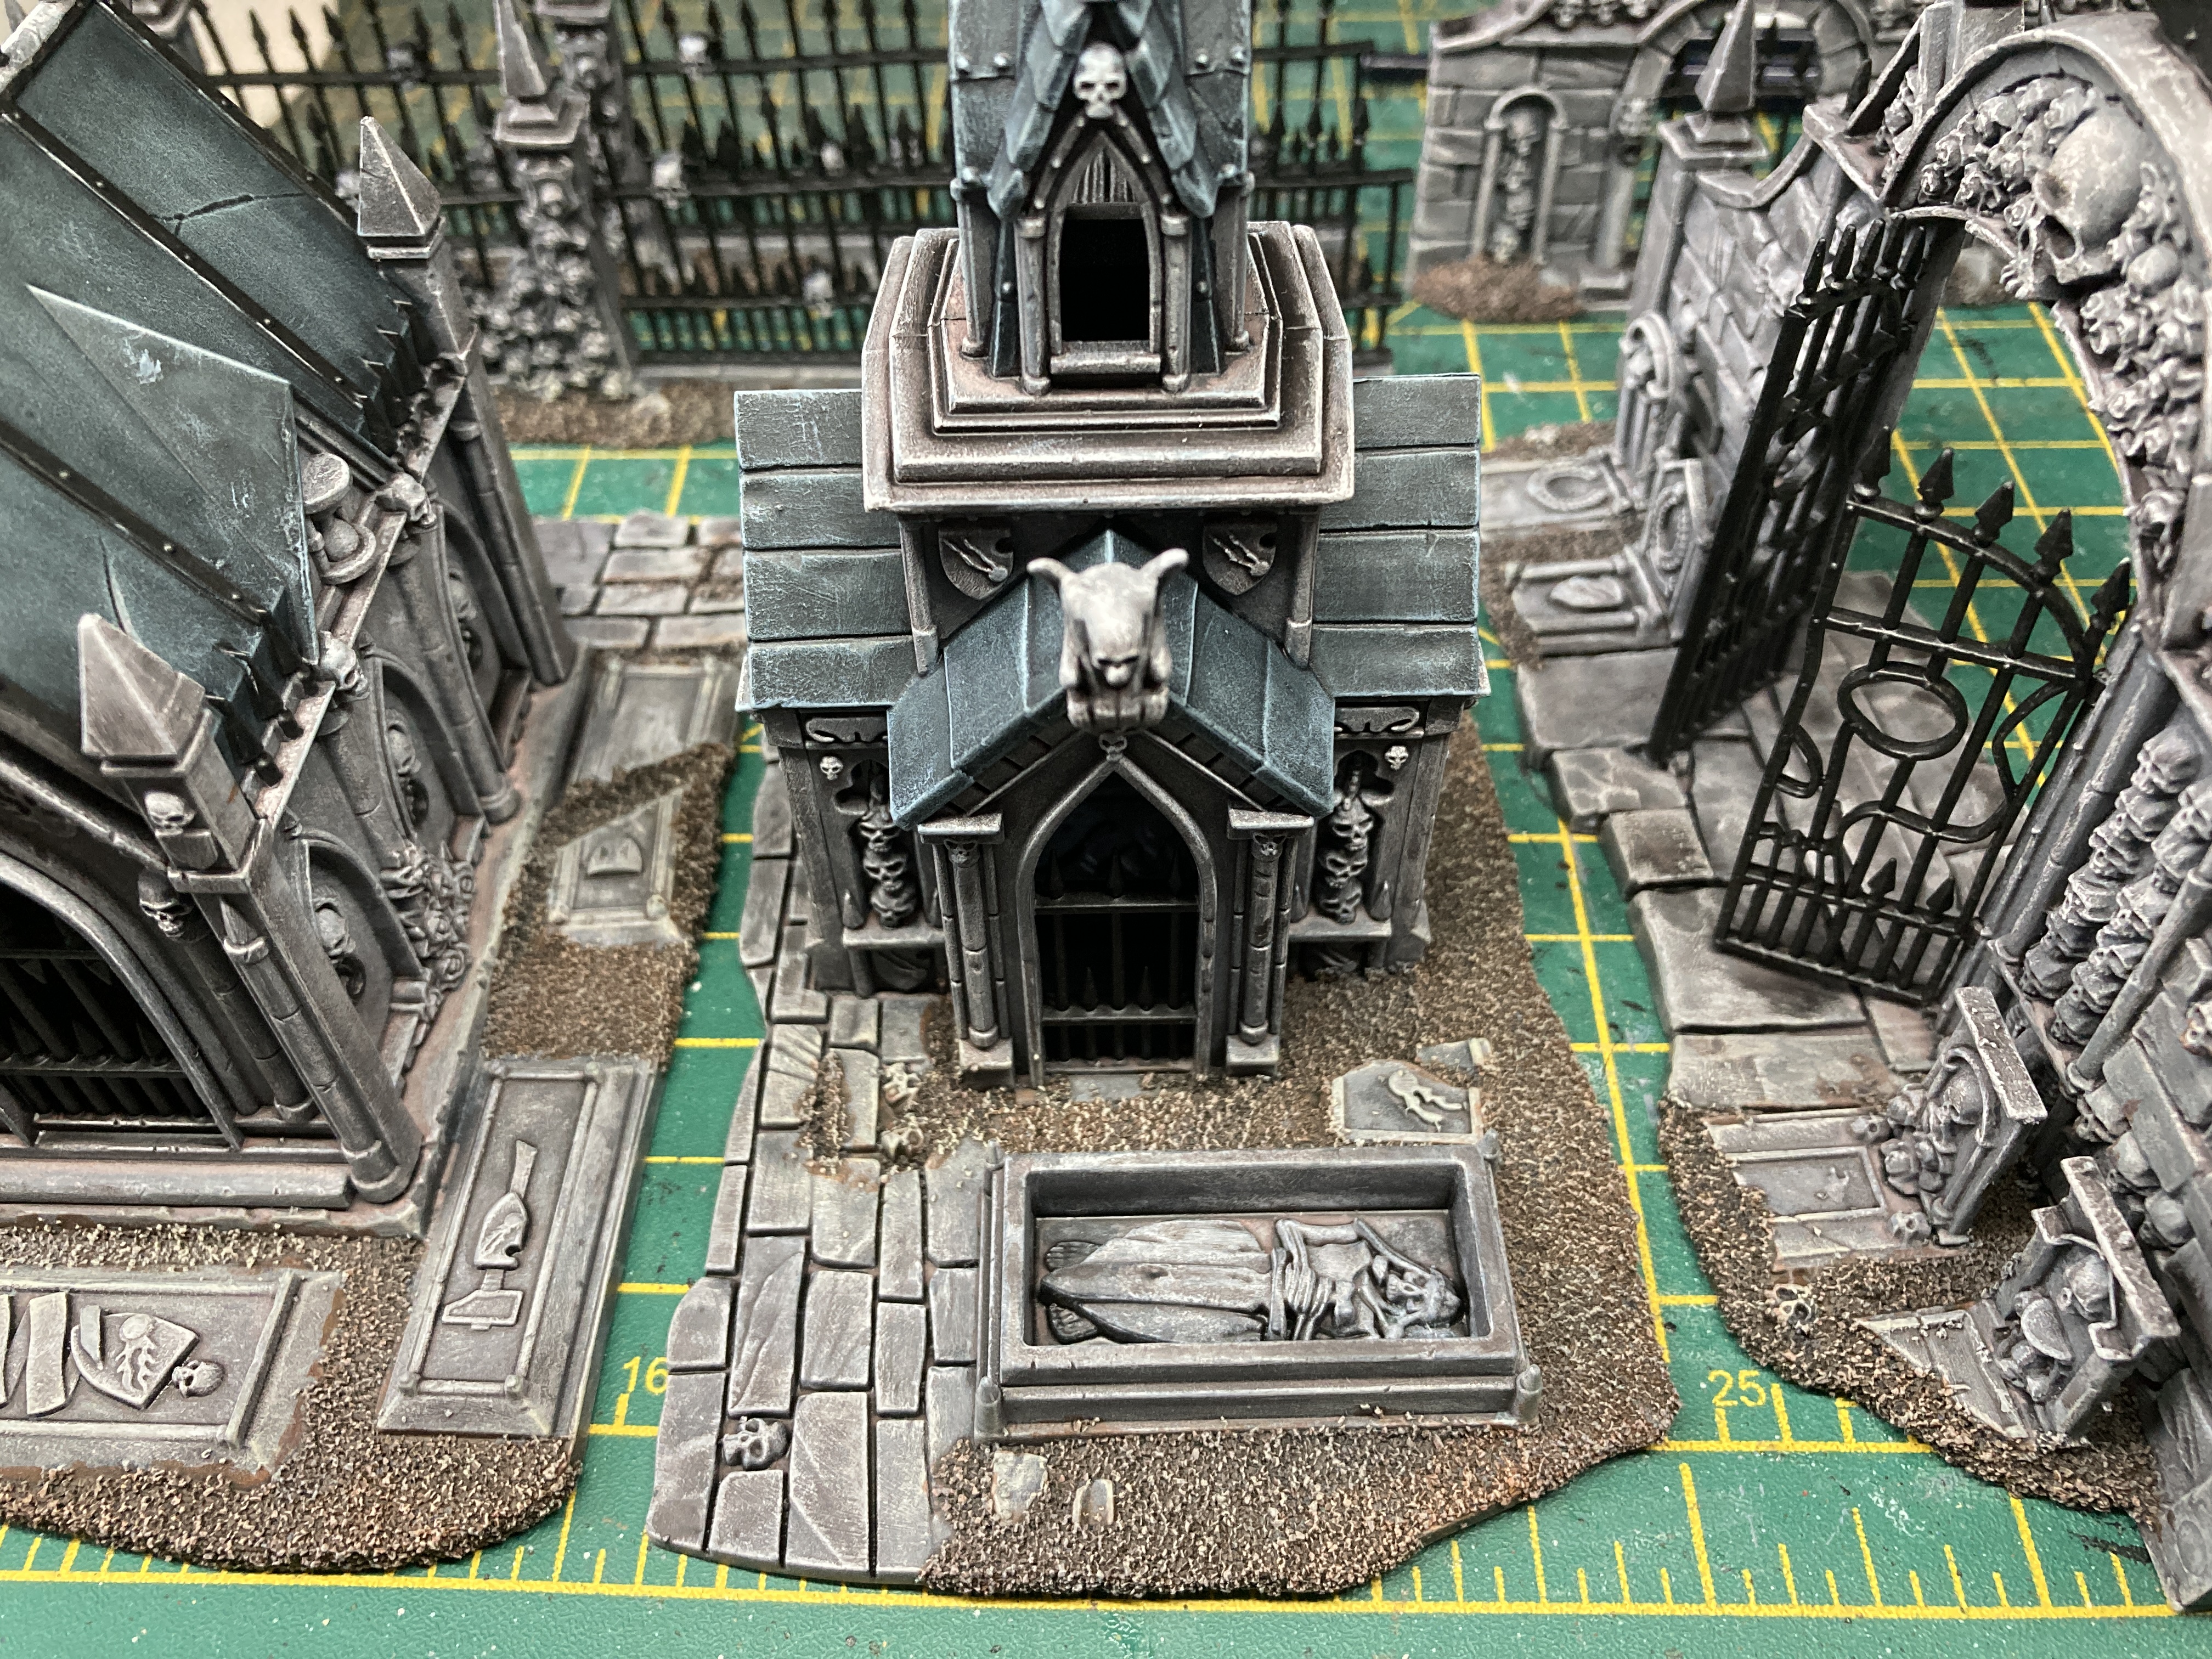
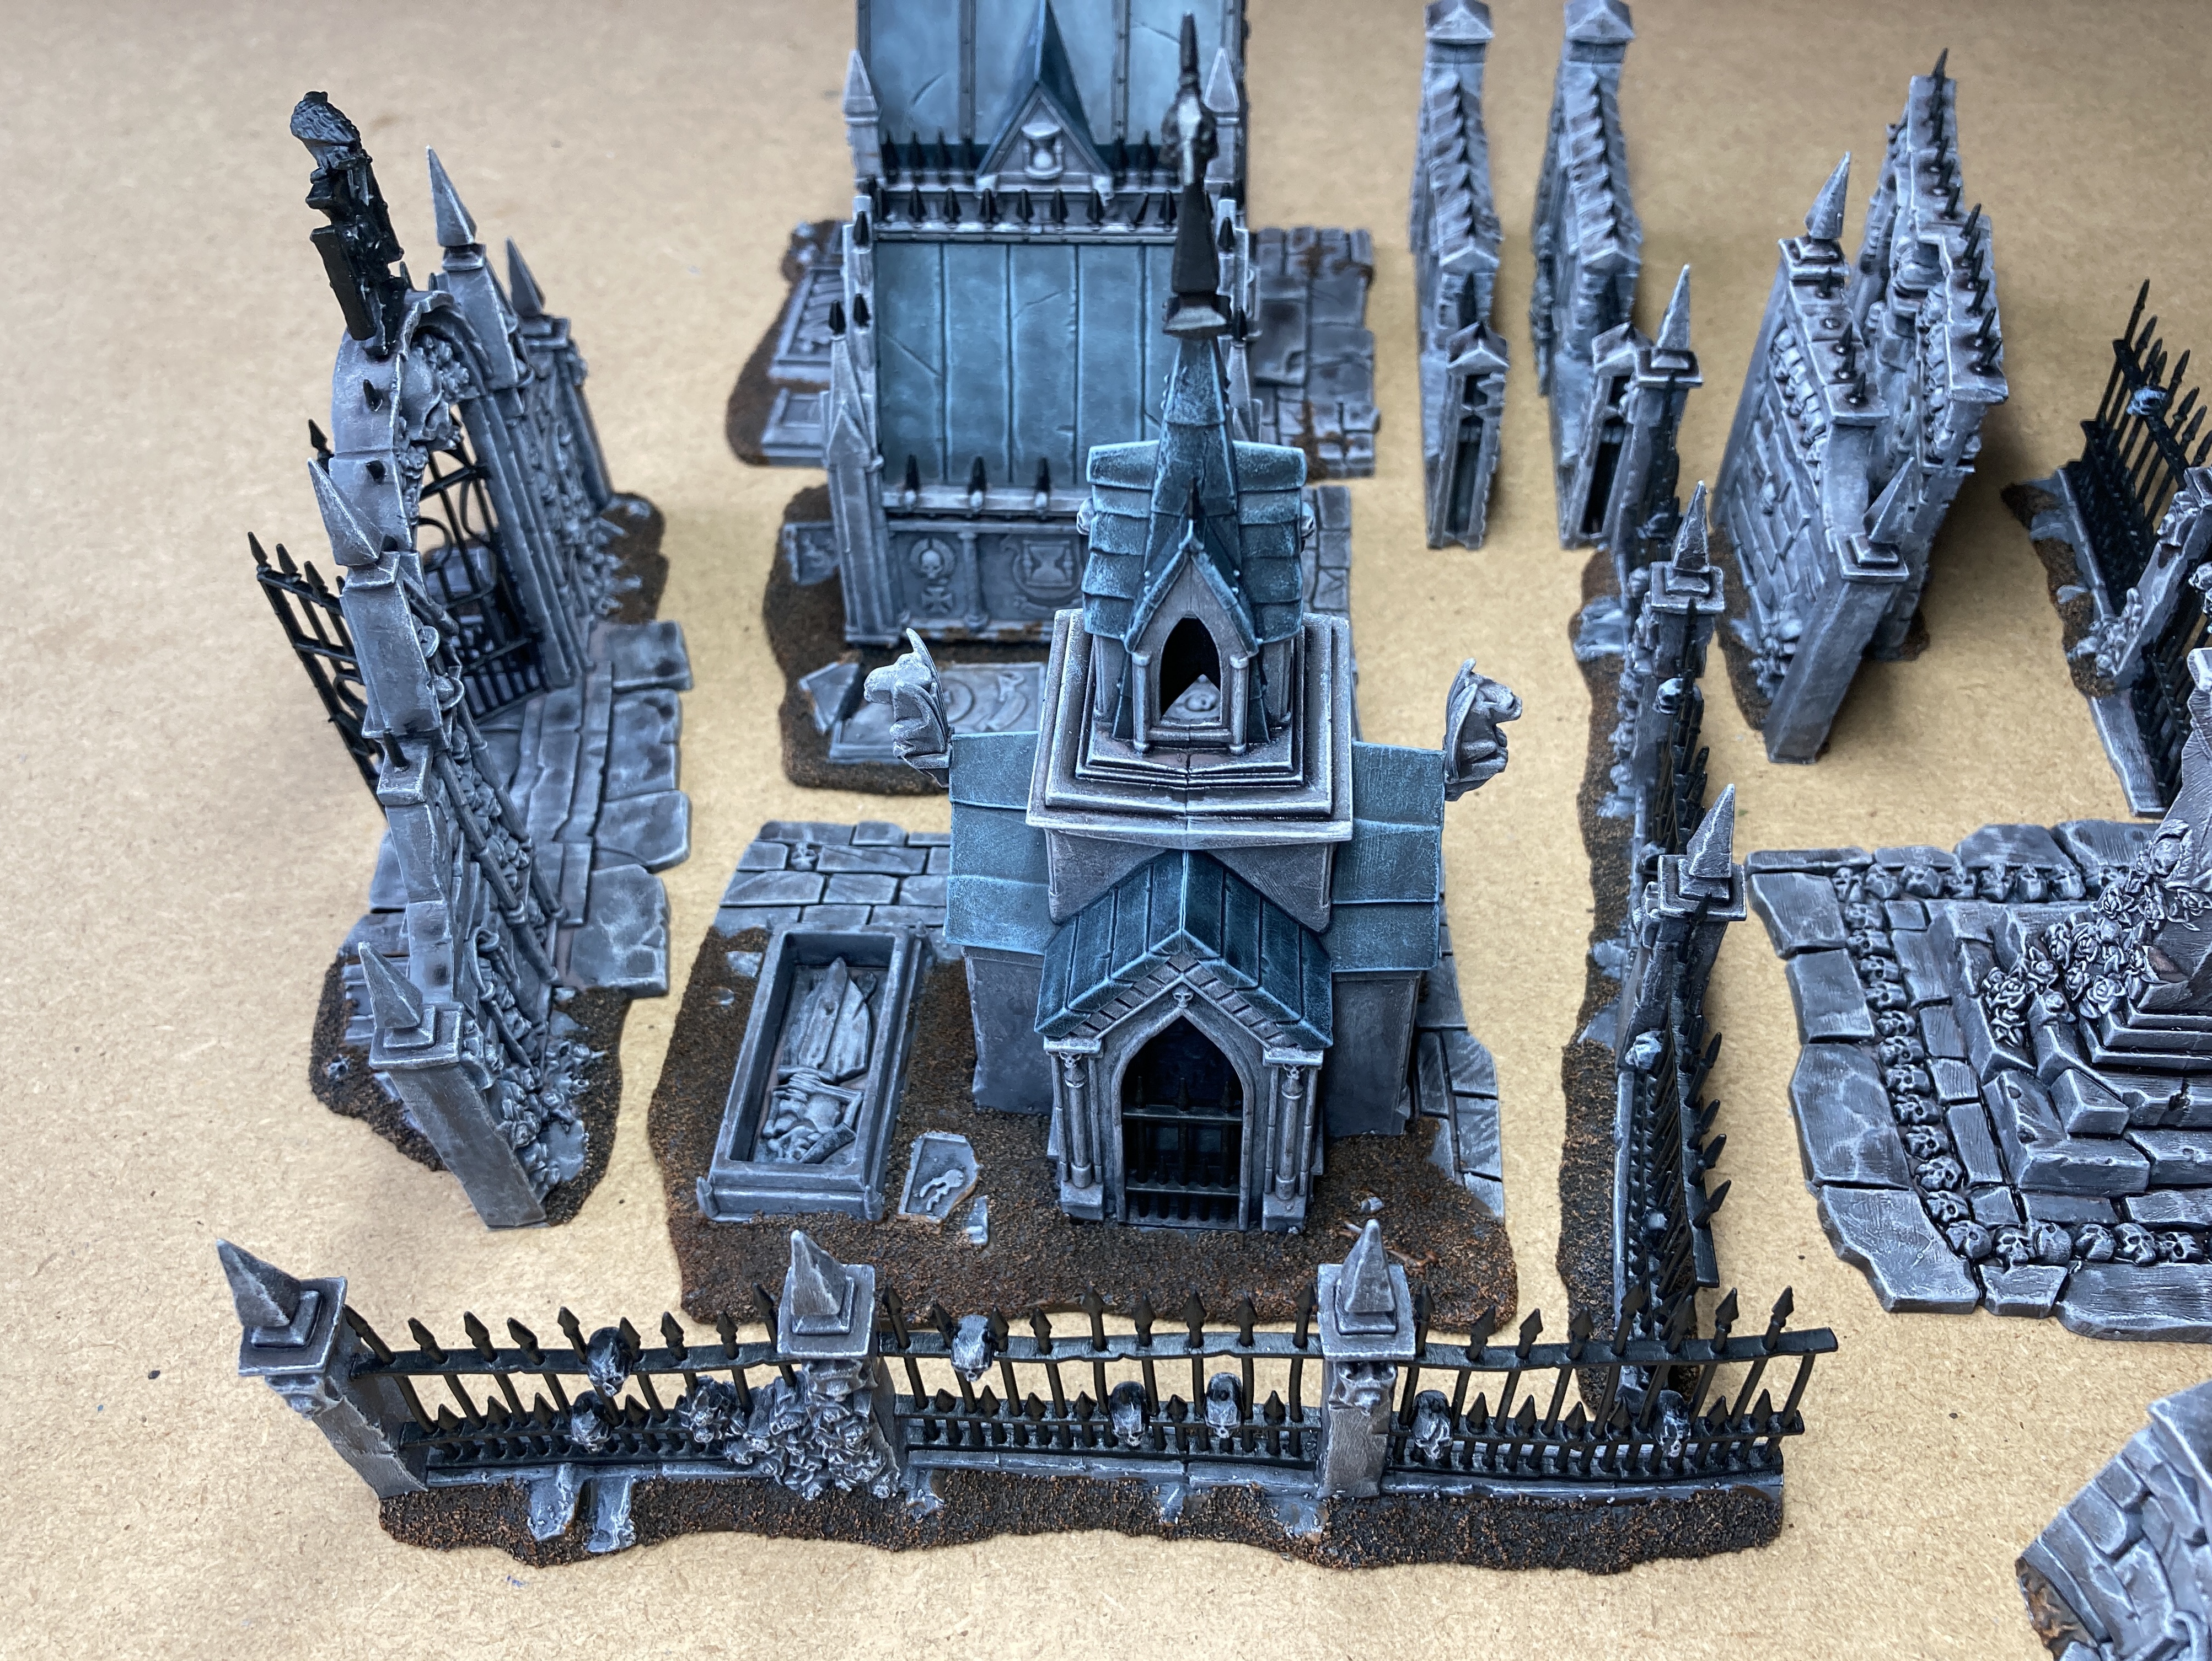
I bought The Garden Of Morr back in 2011 for Warhammer Fantasy Battle. Although it’s seen the table and many games over the years it’s never seen a lick of paint. I thought it was high time to get it painted. Once painted I want a whole 2x2, or even a 3x3 fantasy cemetery table for skirmish games which I plan to add extra pieces to that I’ll build myself.
Related Game: Warhammer Fantasy Battles
Related Company: Games Workshop
Related Genre: Fantasy
Related Contest: Spring Clean Hobby Challenge 2023
This Project is Active
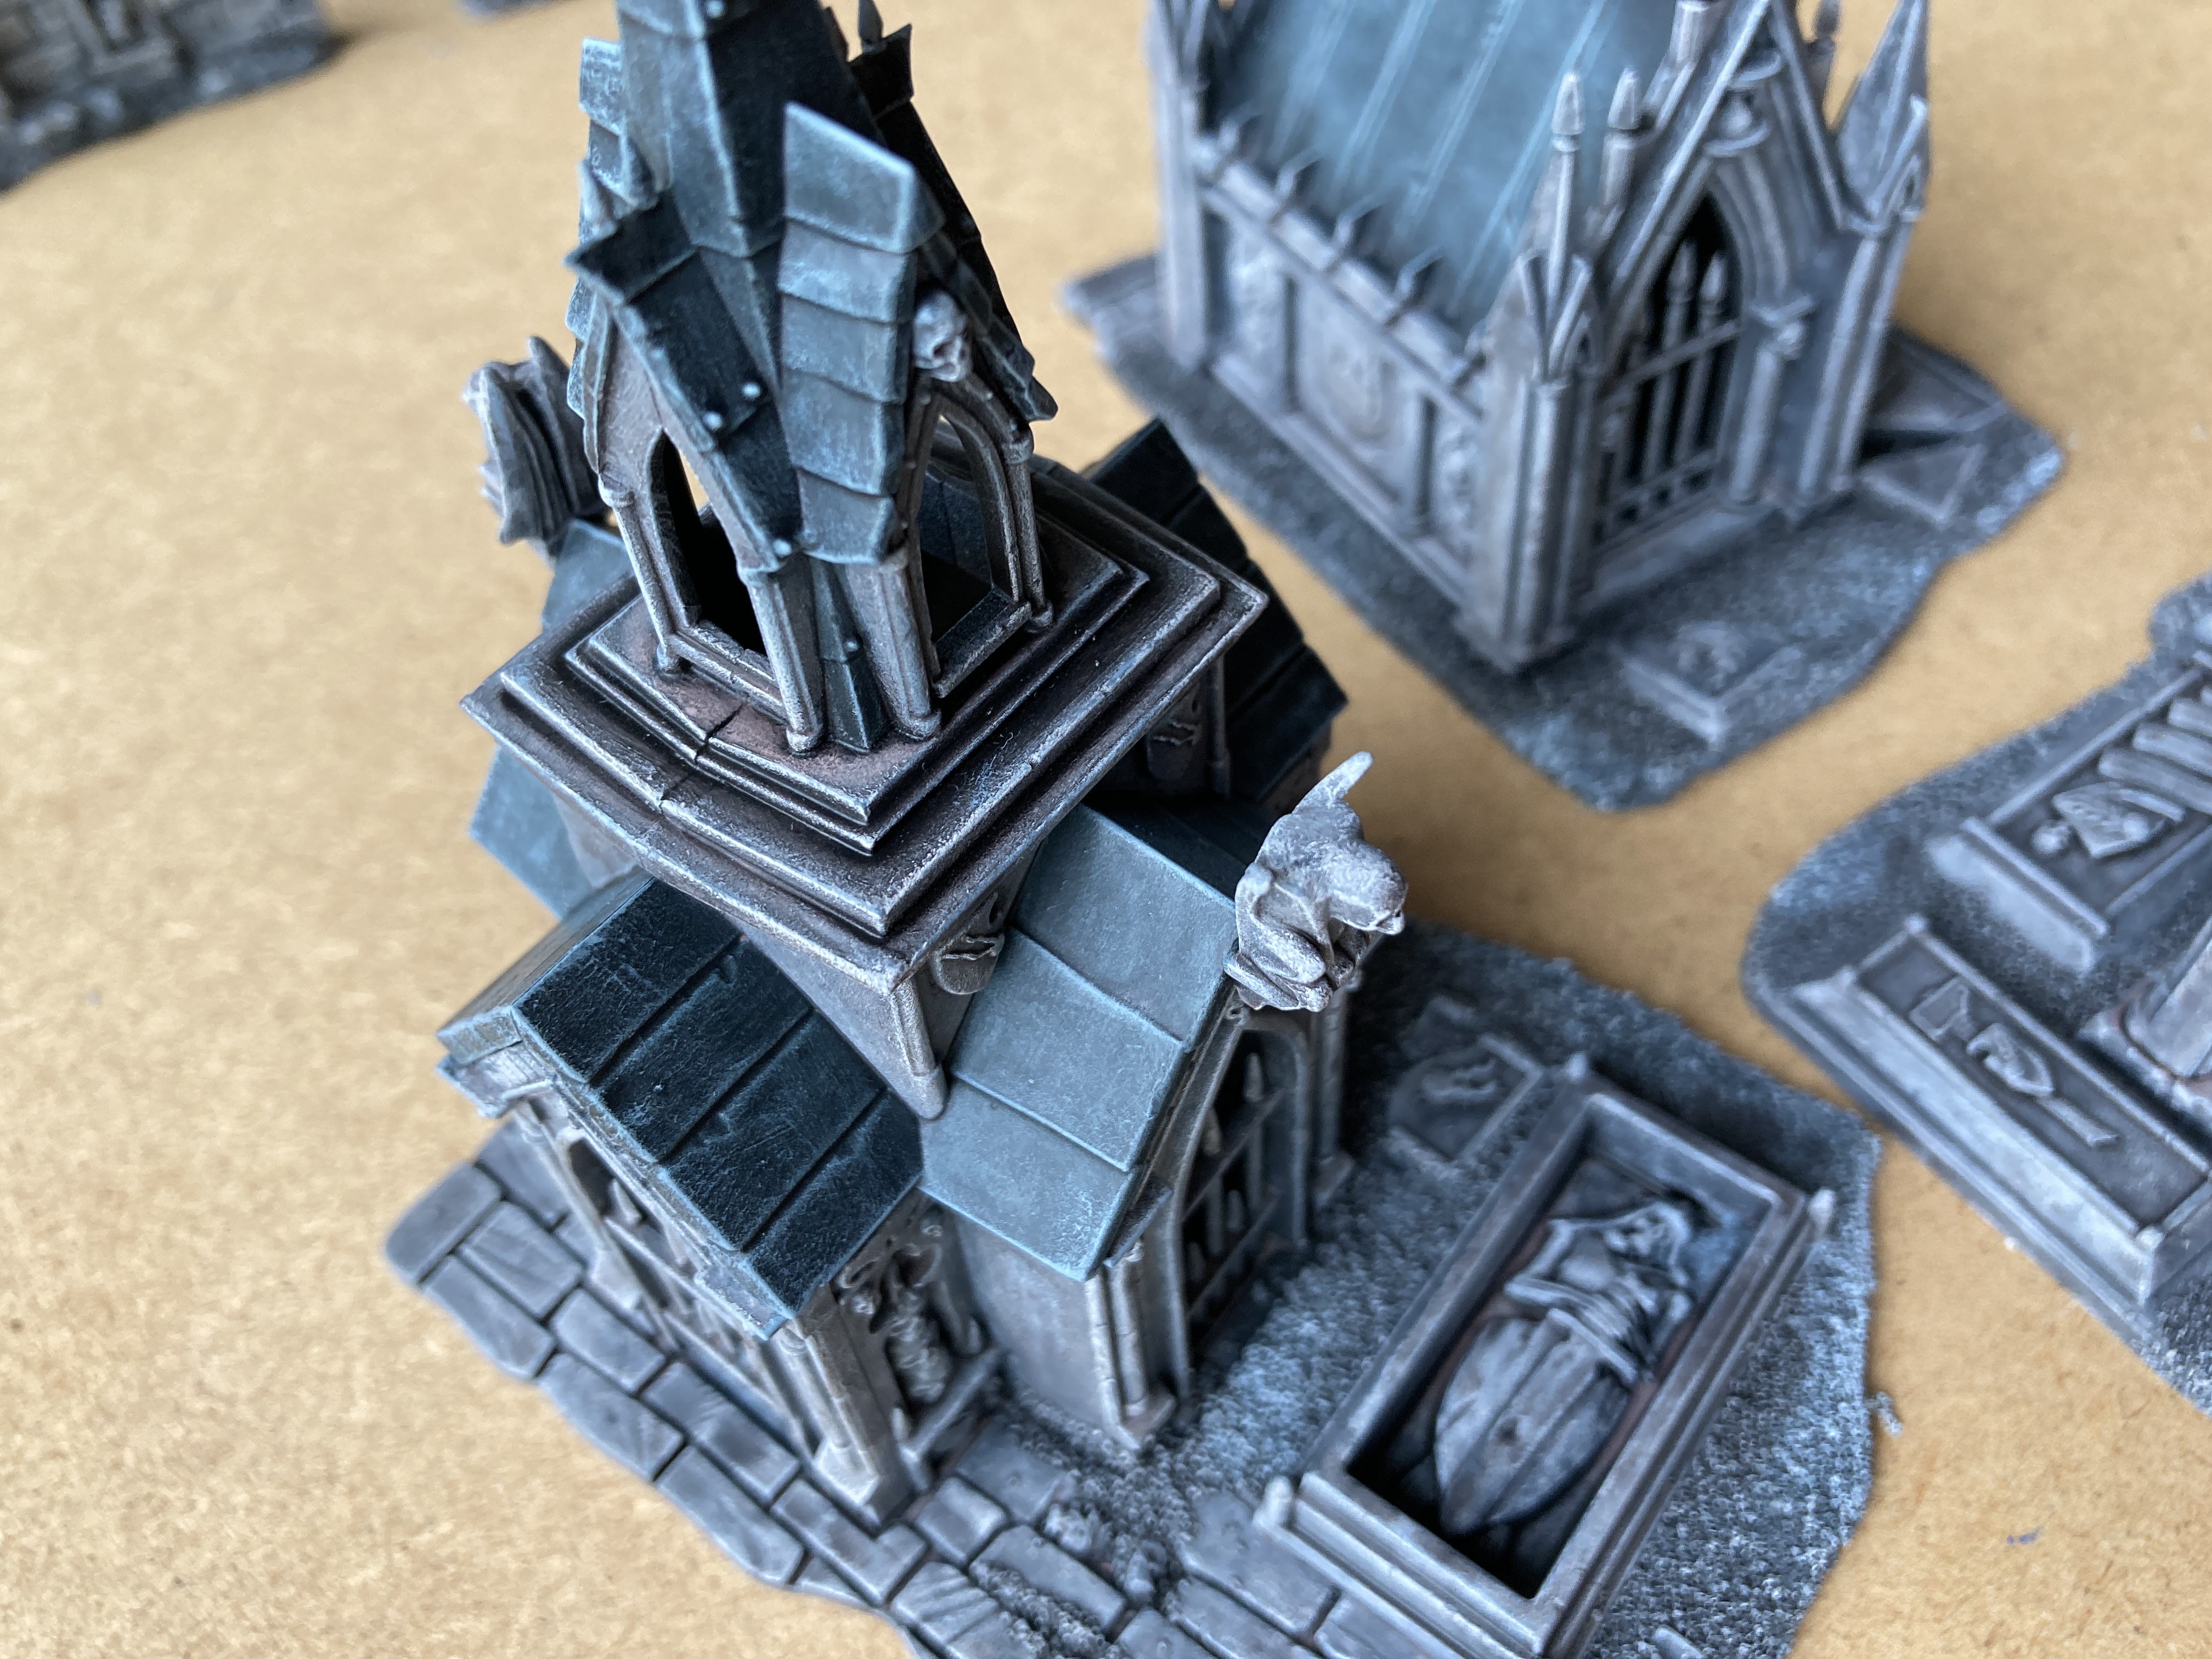
Fiddling With The Details
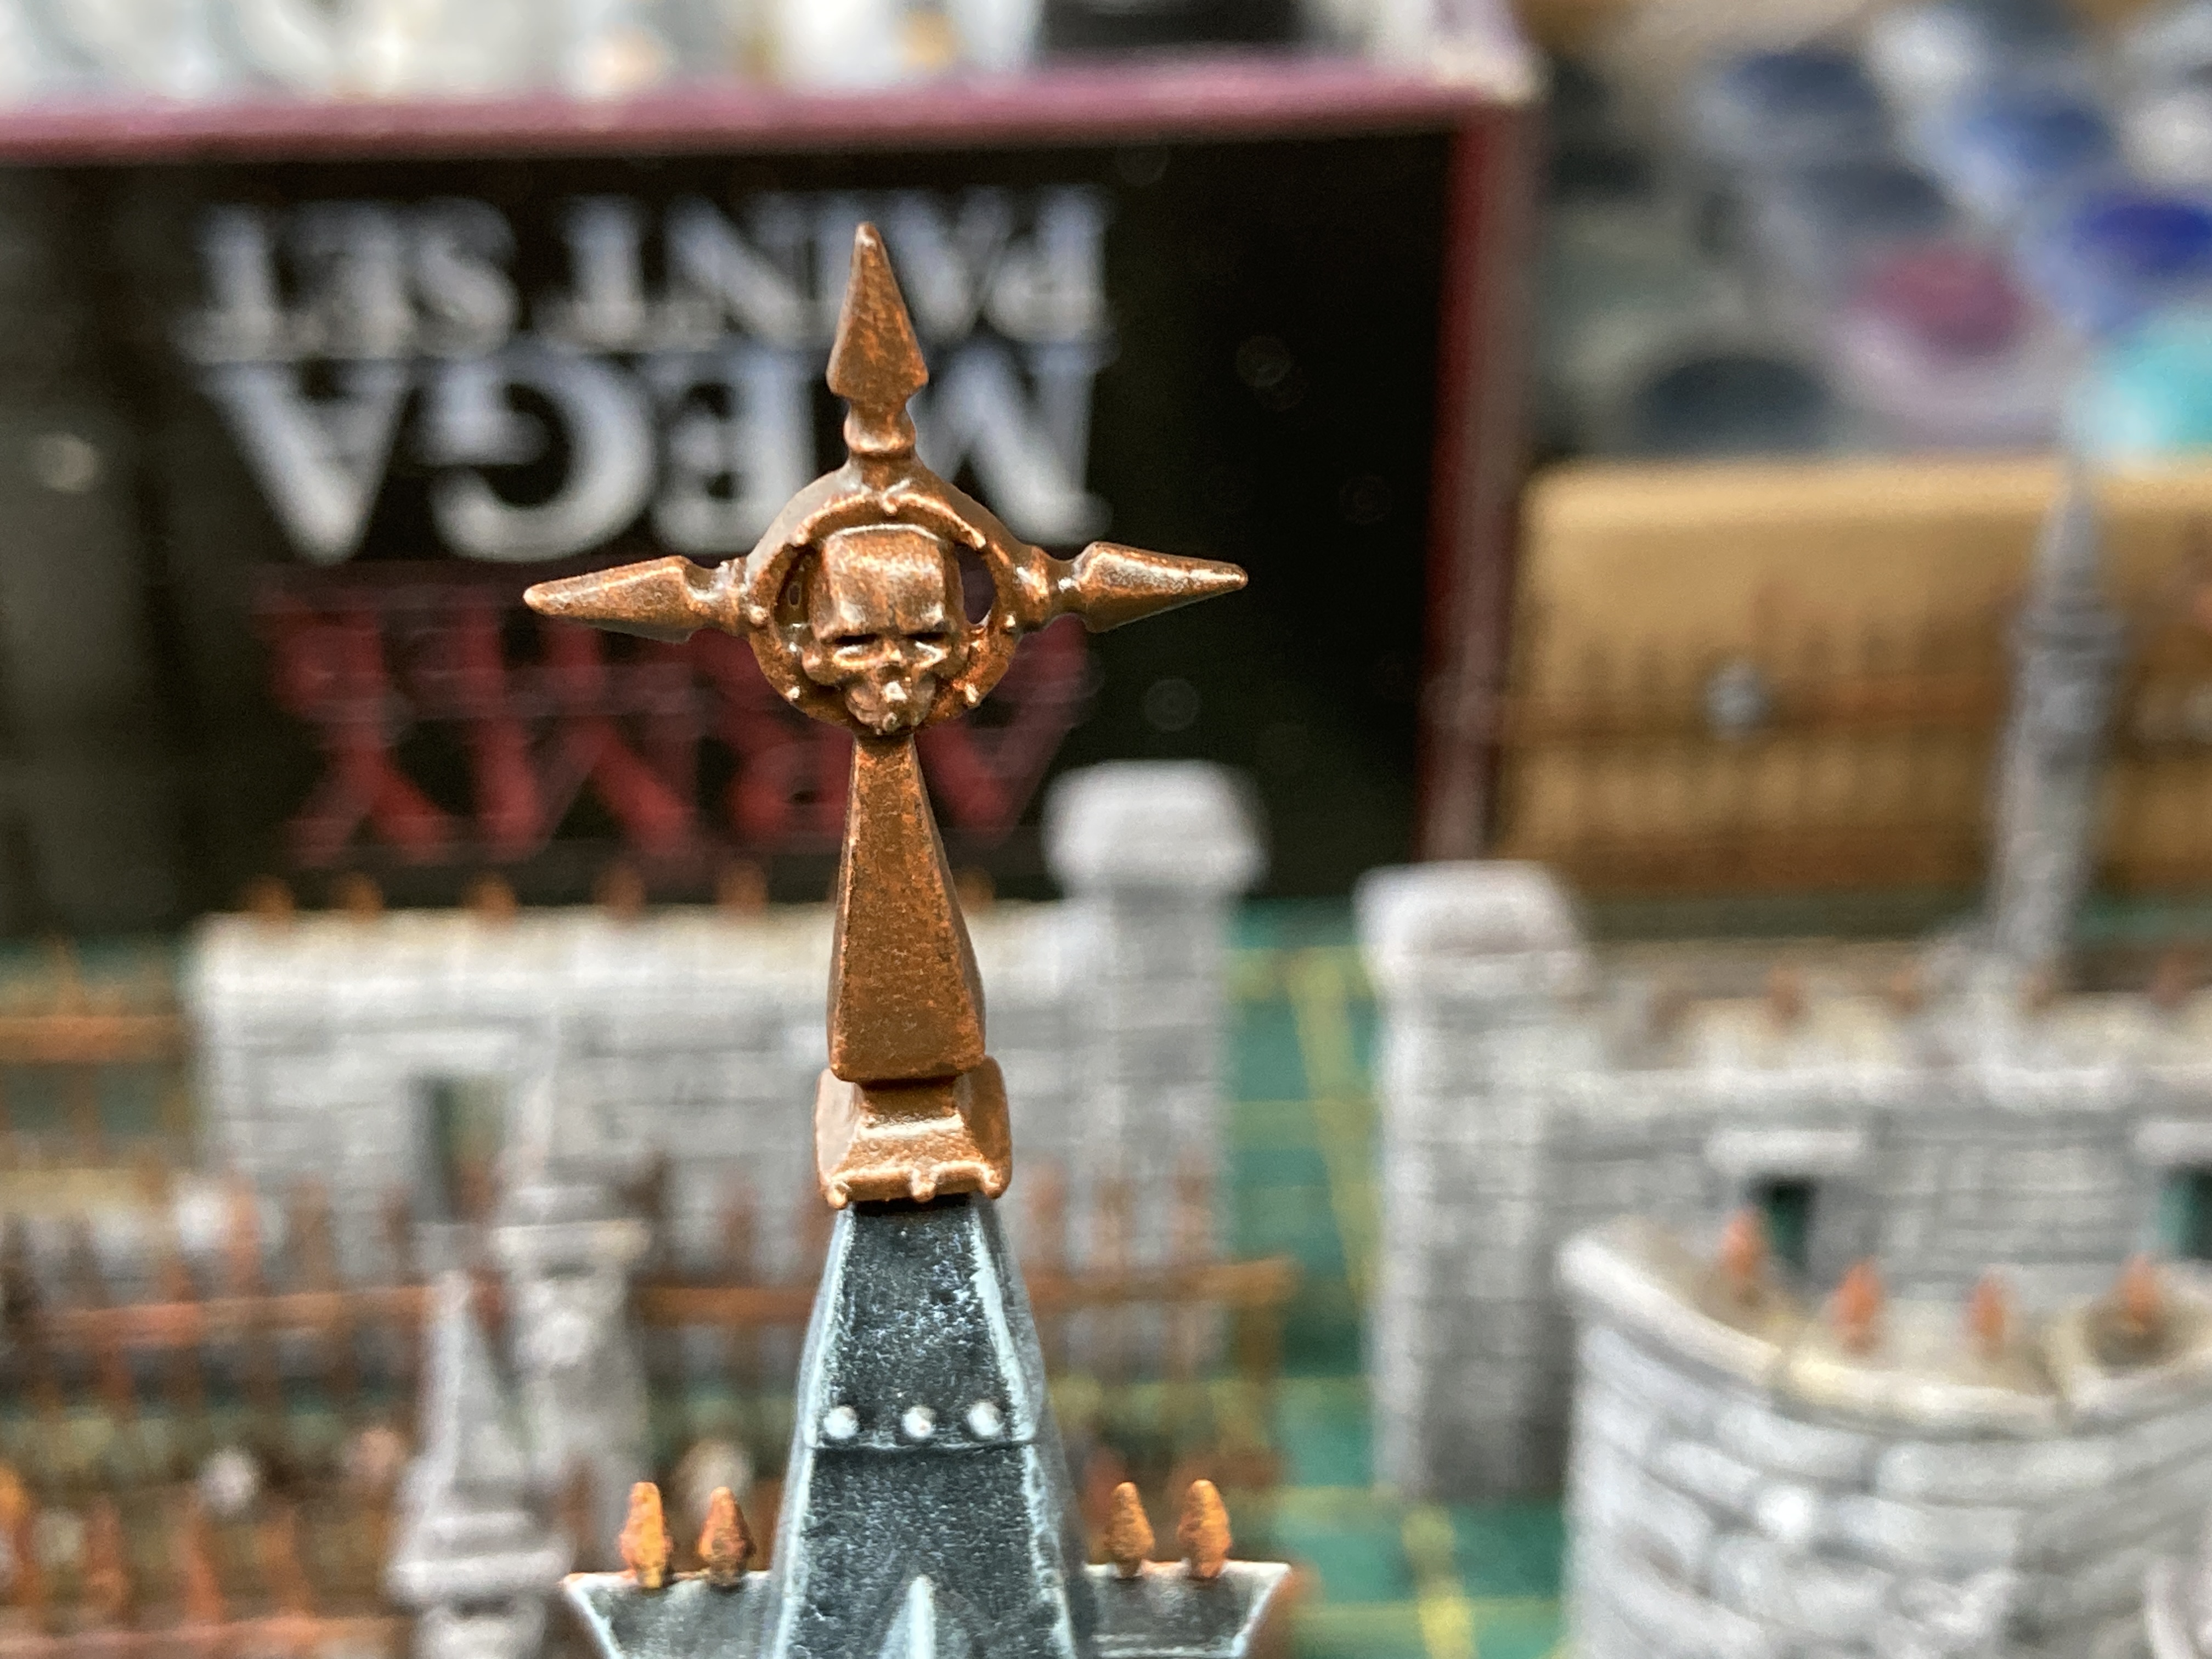
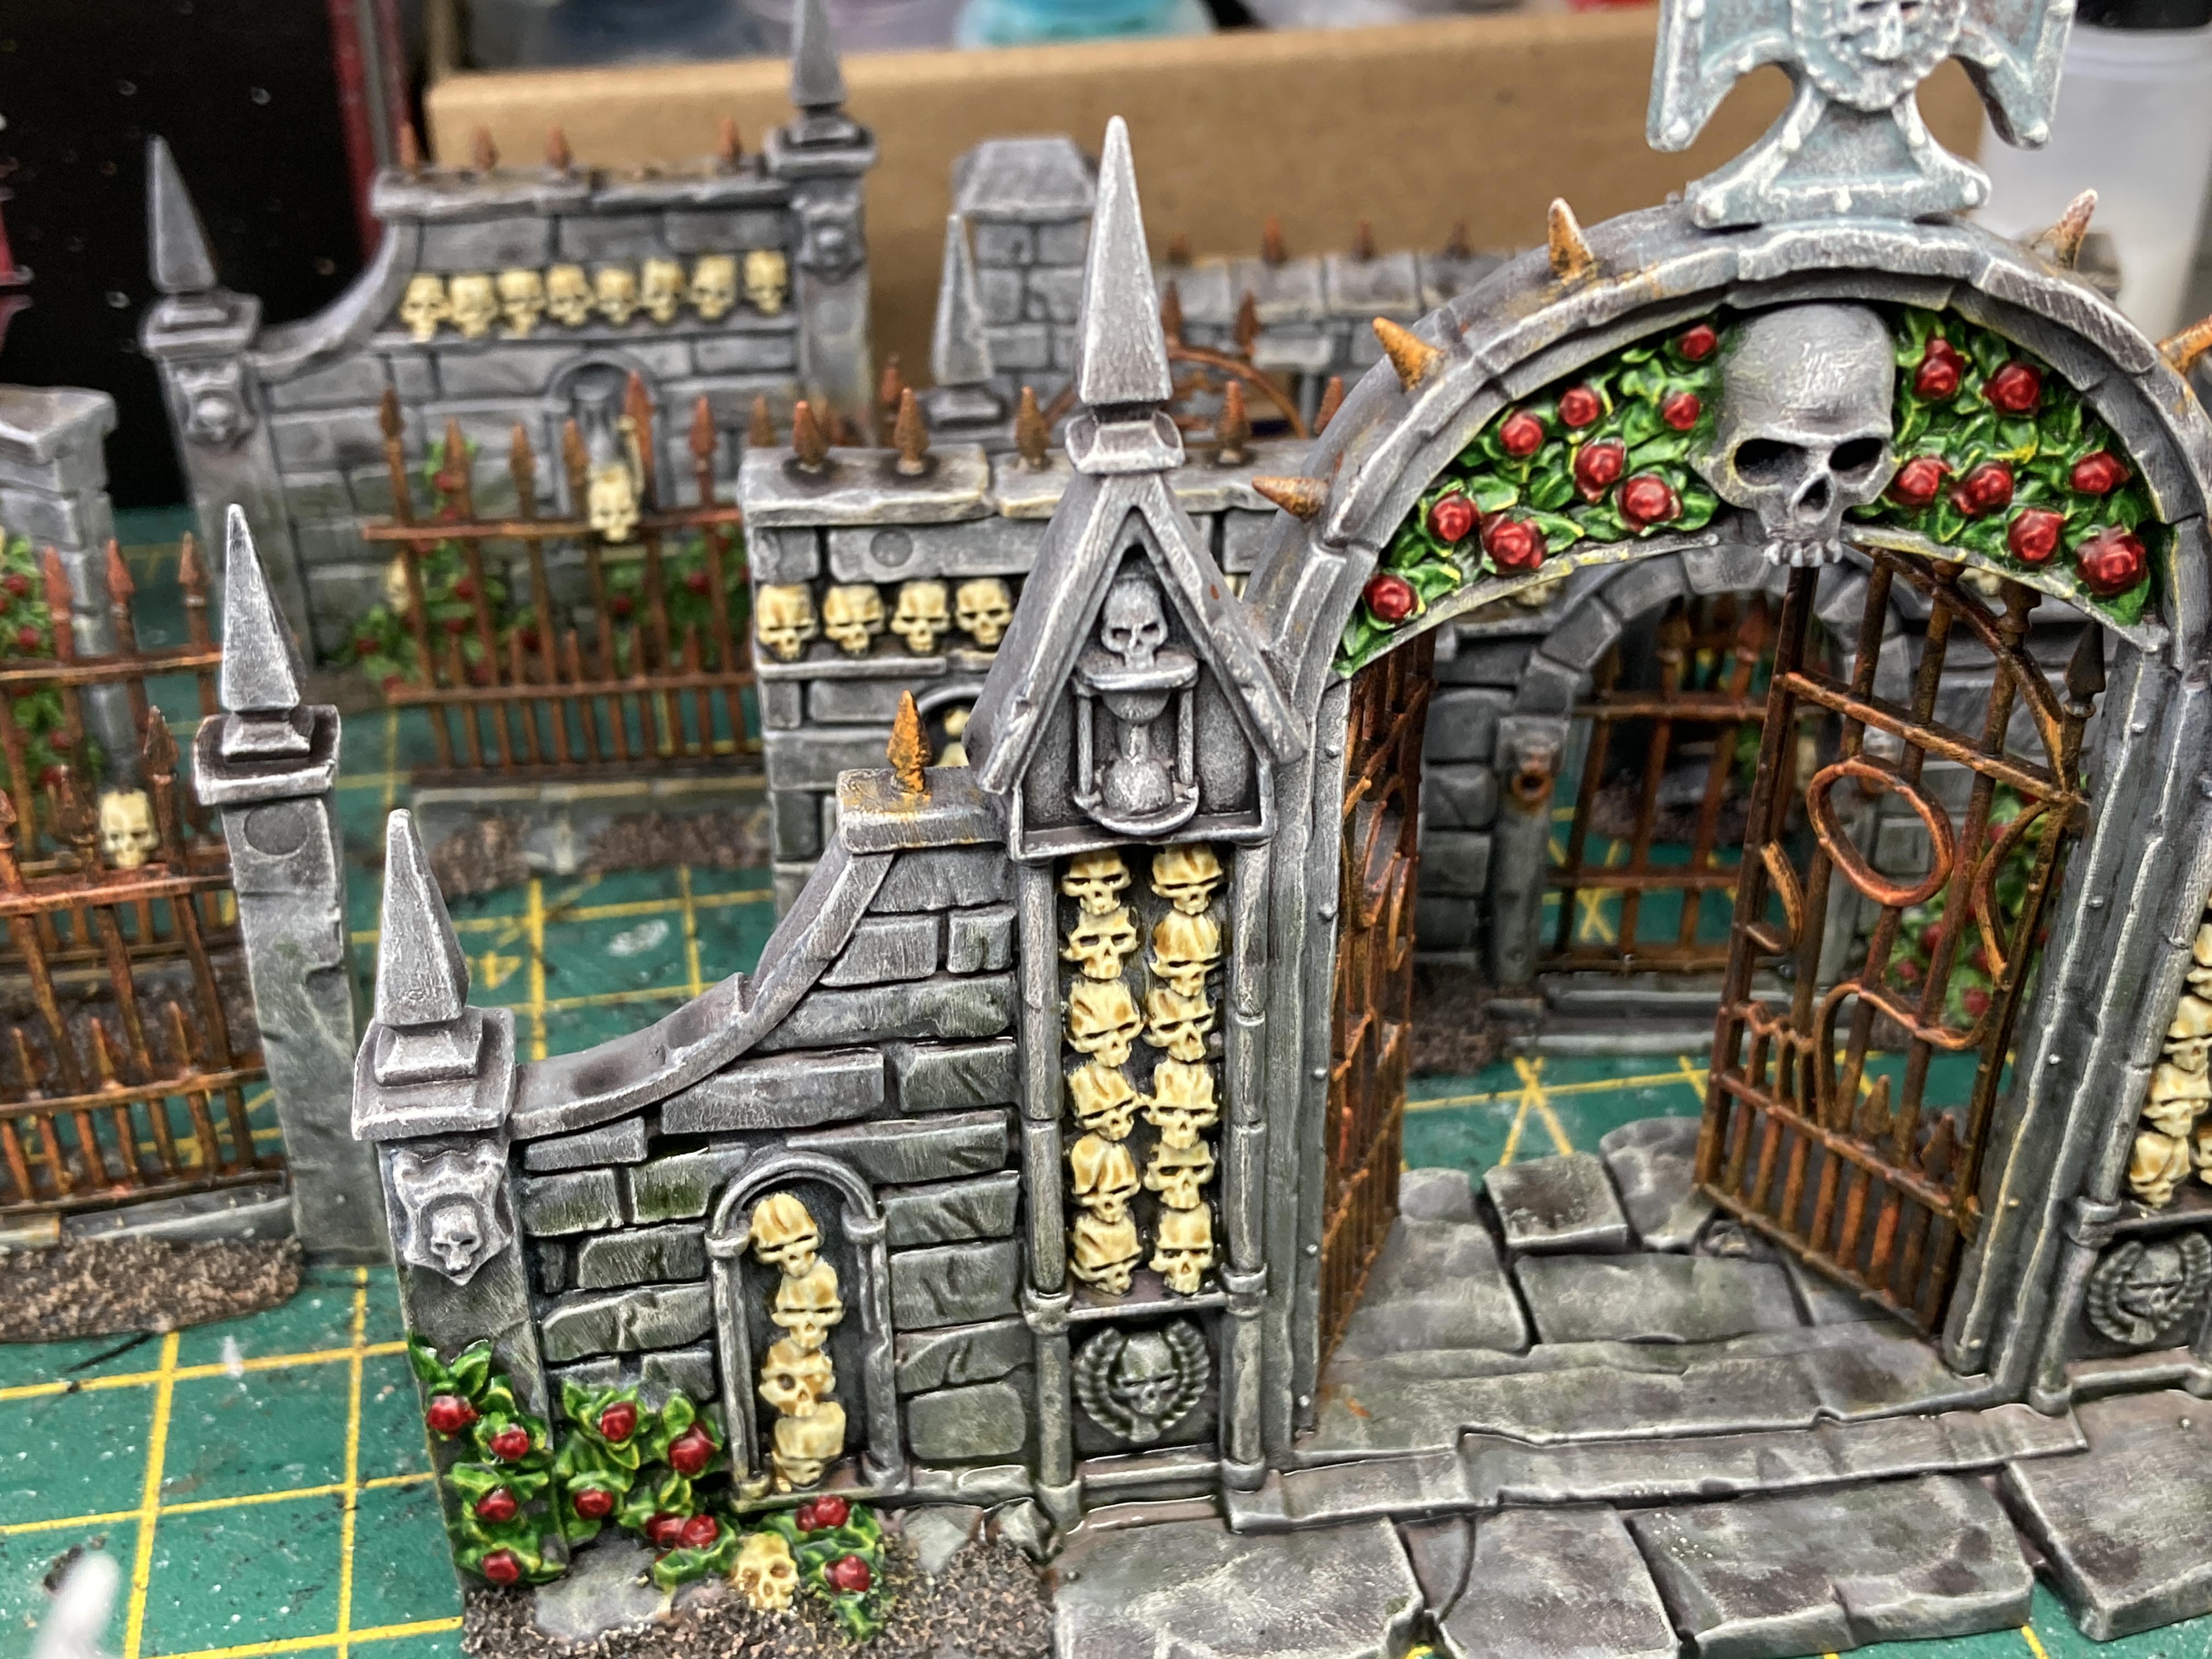
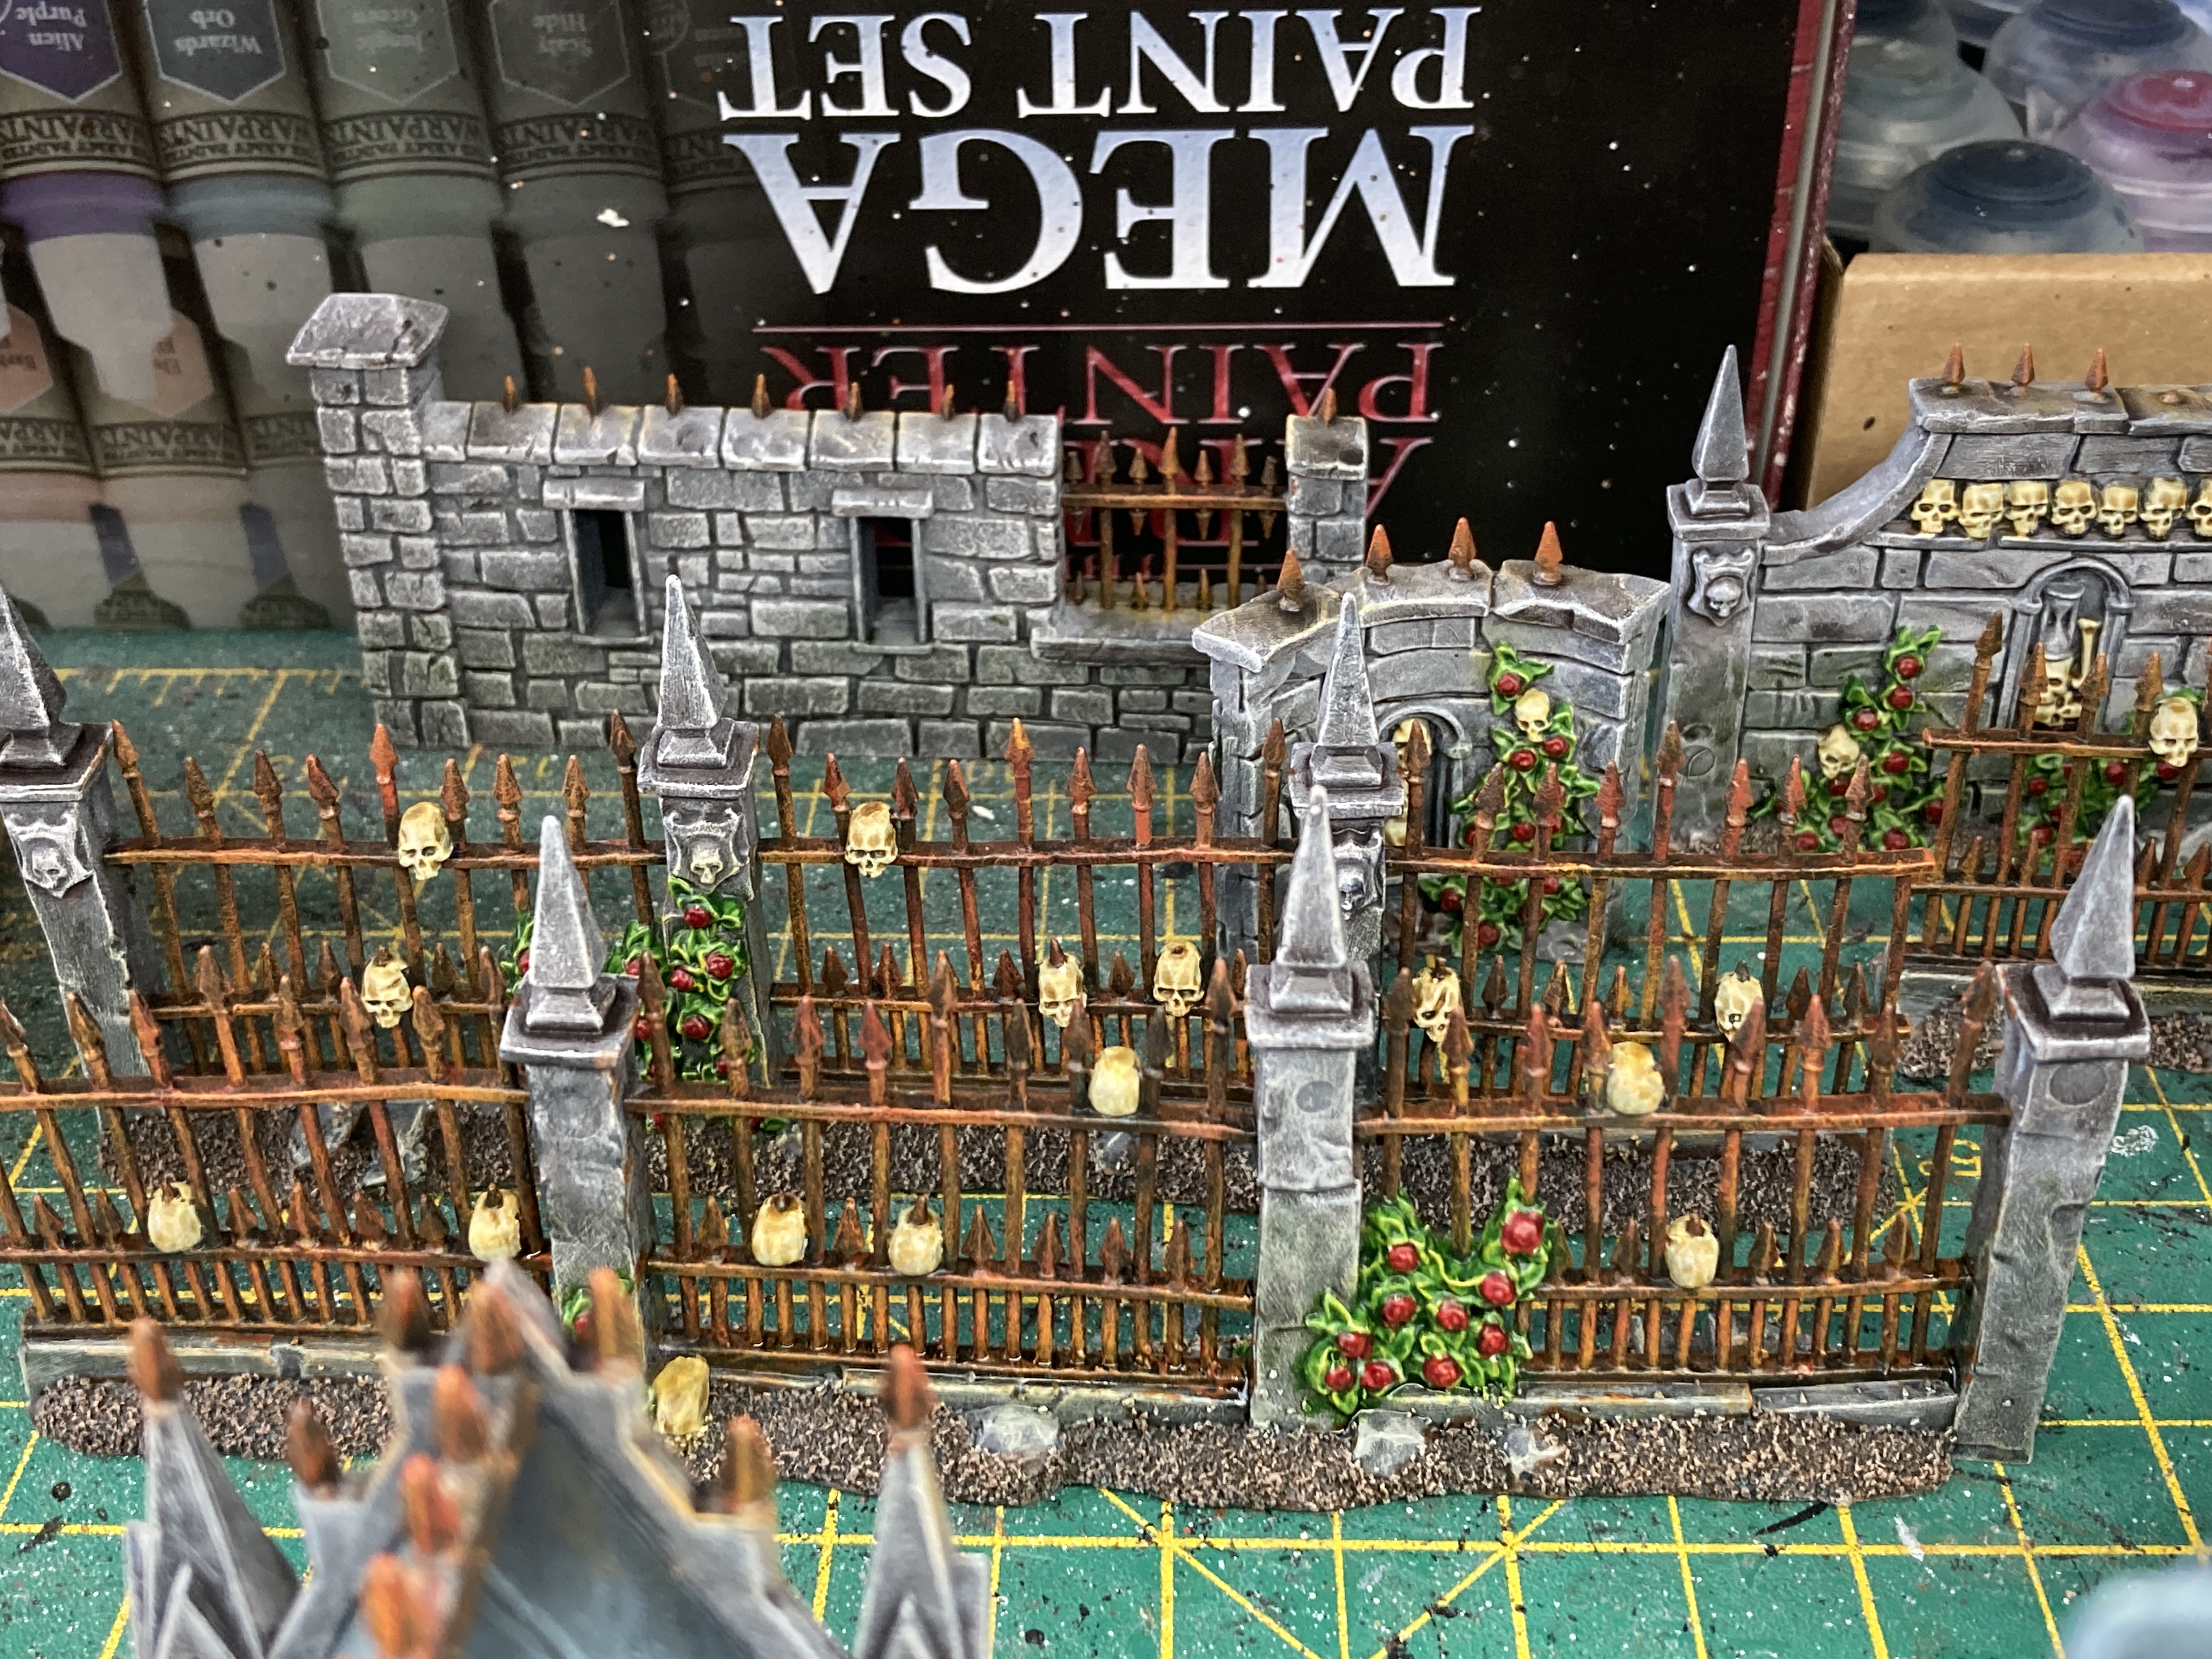
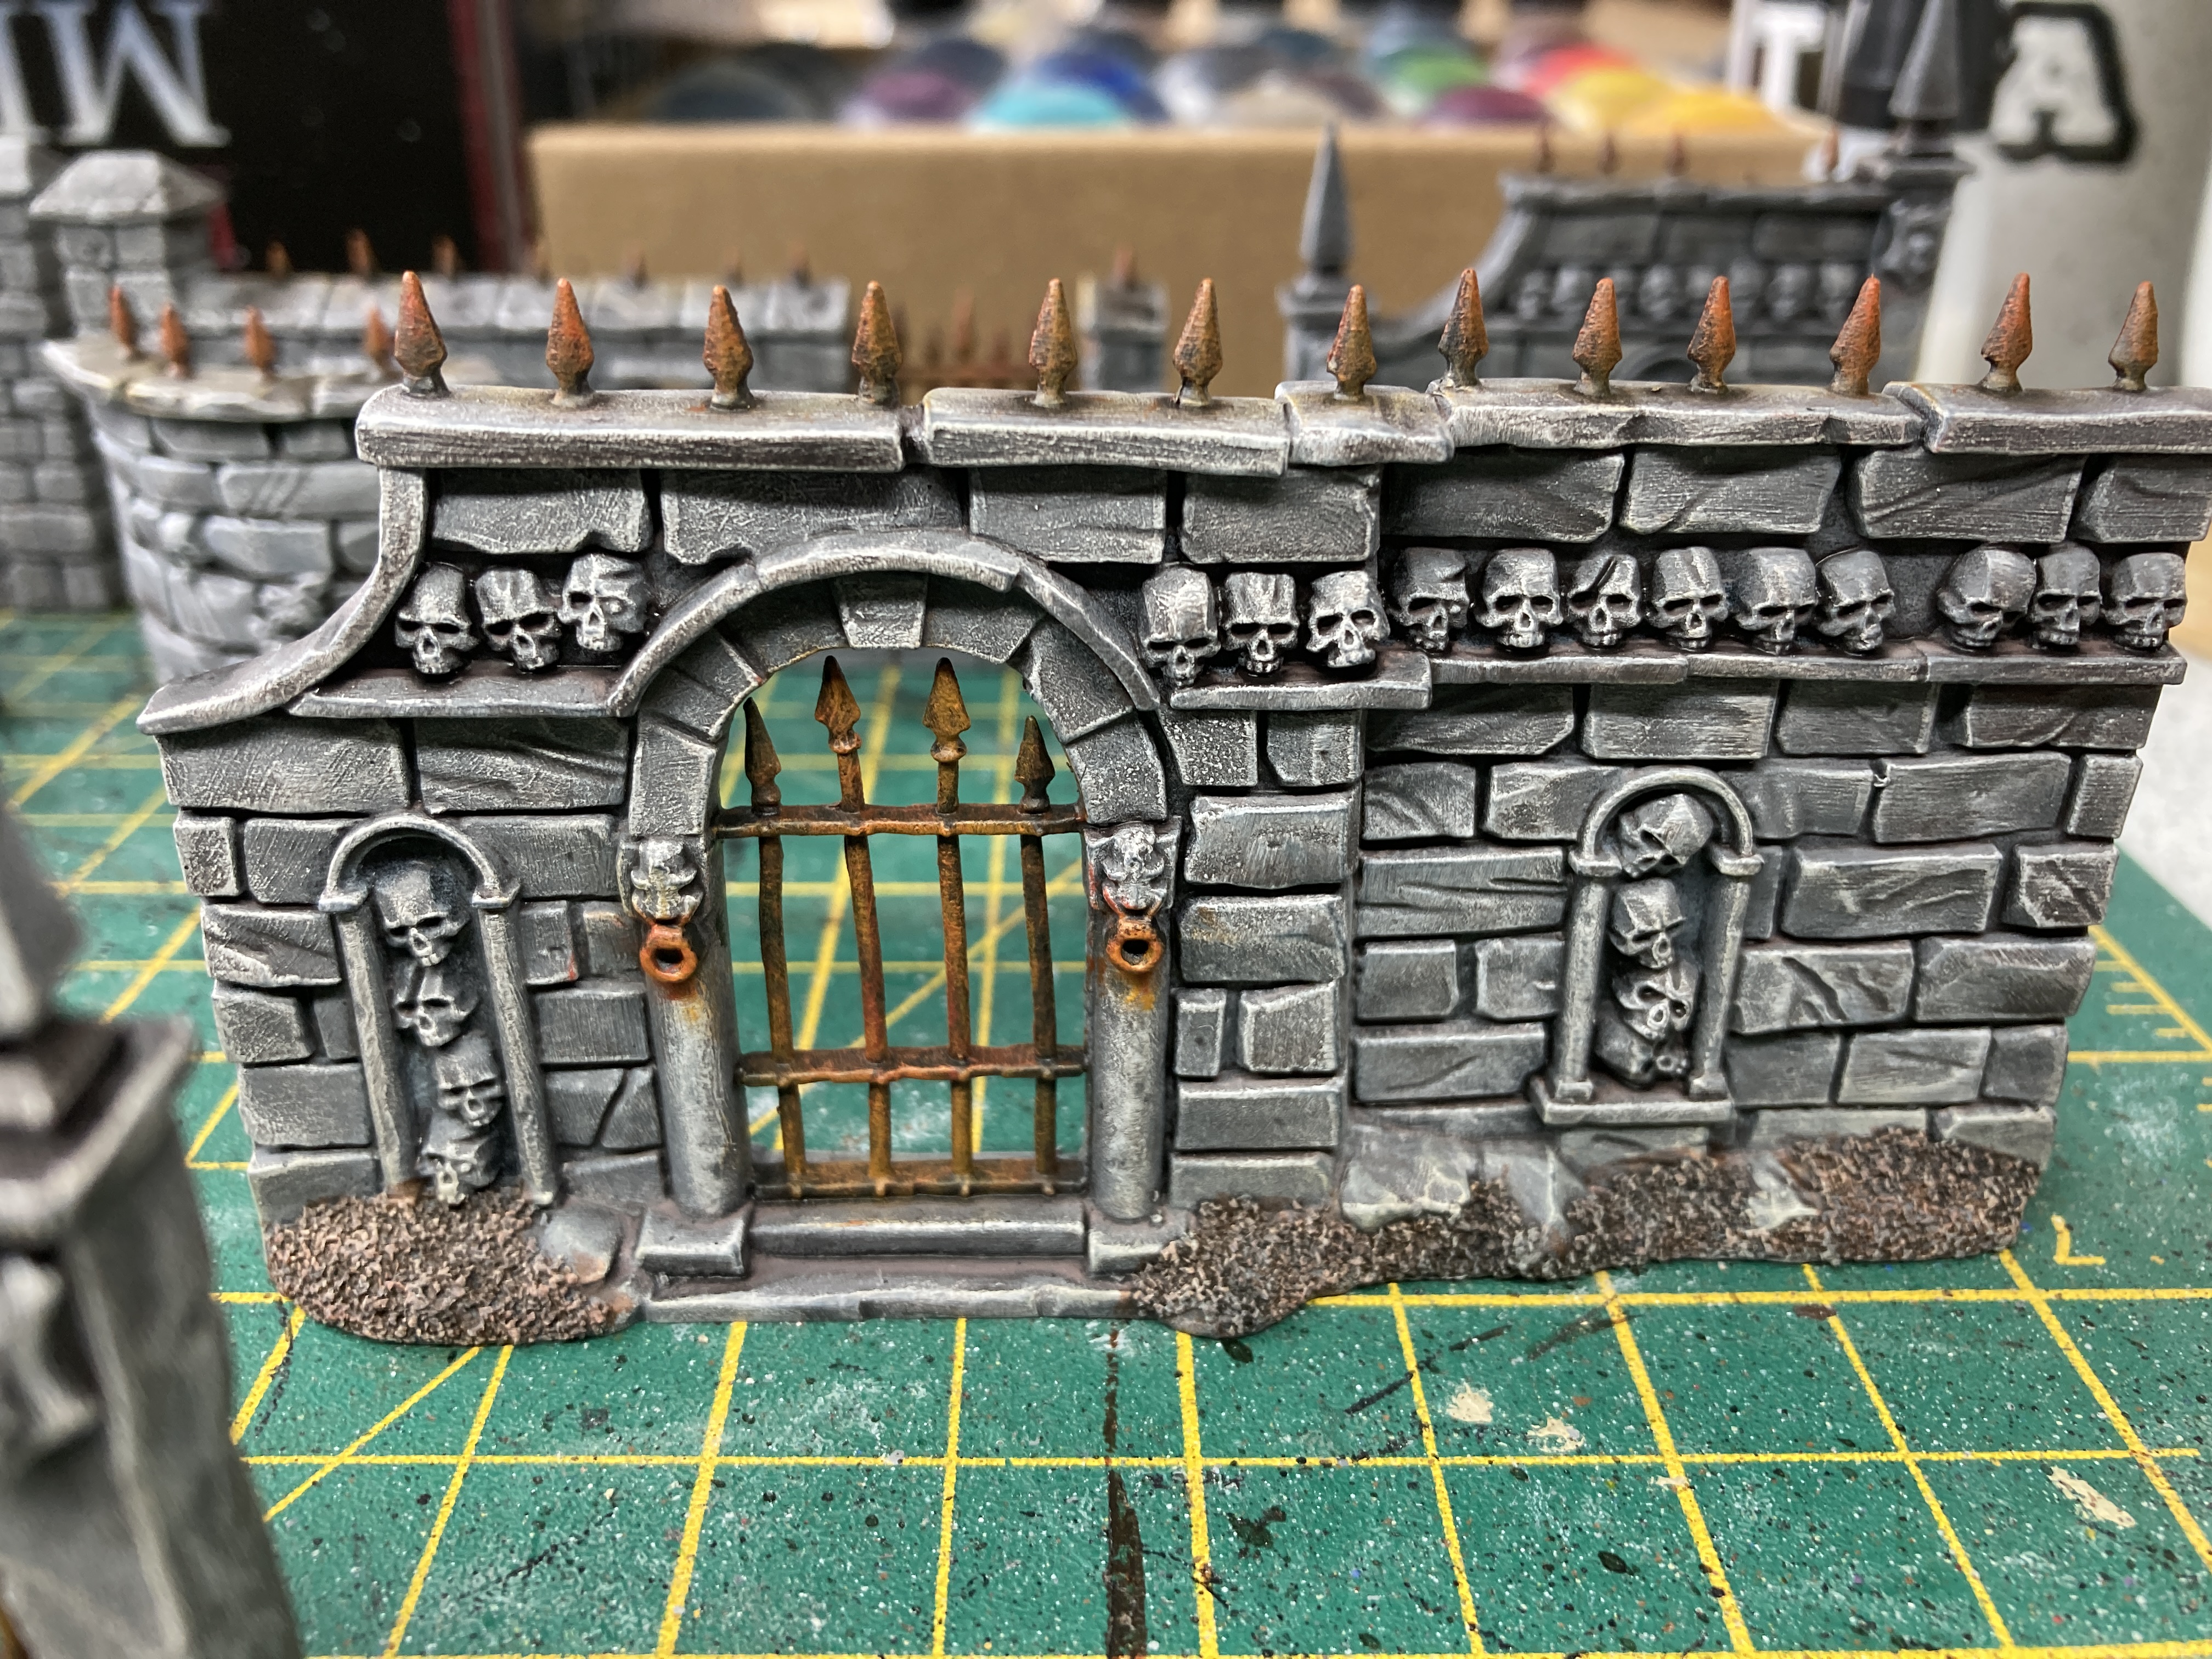
First up is the bronze work adopt the gates and the steeple. I first painted them in a metallic brass colour then stained it with a mix of Axrax Earthshade wash and Beast Brown paint (Army Painter) to mimic the colour of an old copper coin that’s gone brown, the first stage in oxidation.
Then I made a thin wash of scaly Hide and Wolf Grey (both from the Army Painter) thinned down with water quite a lot. This provided the blue/green corrosion. Finally I applied a light drybrush of white.

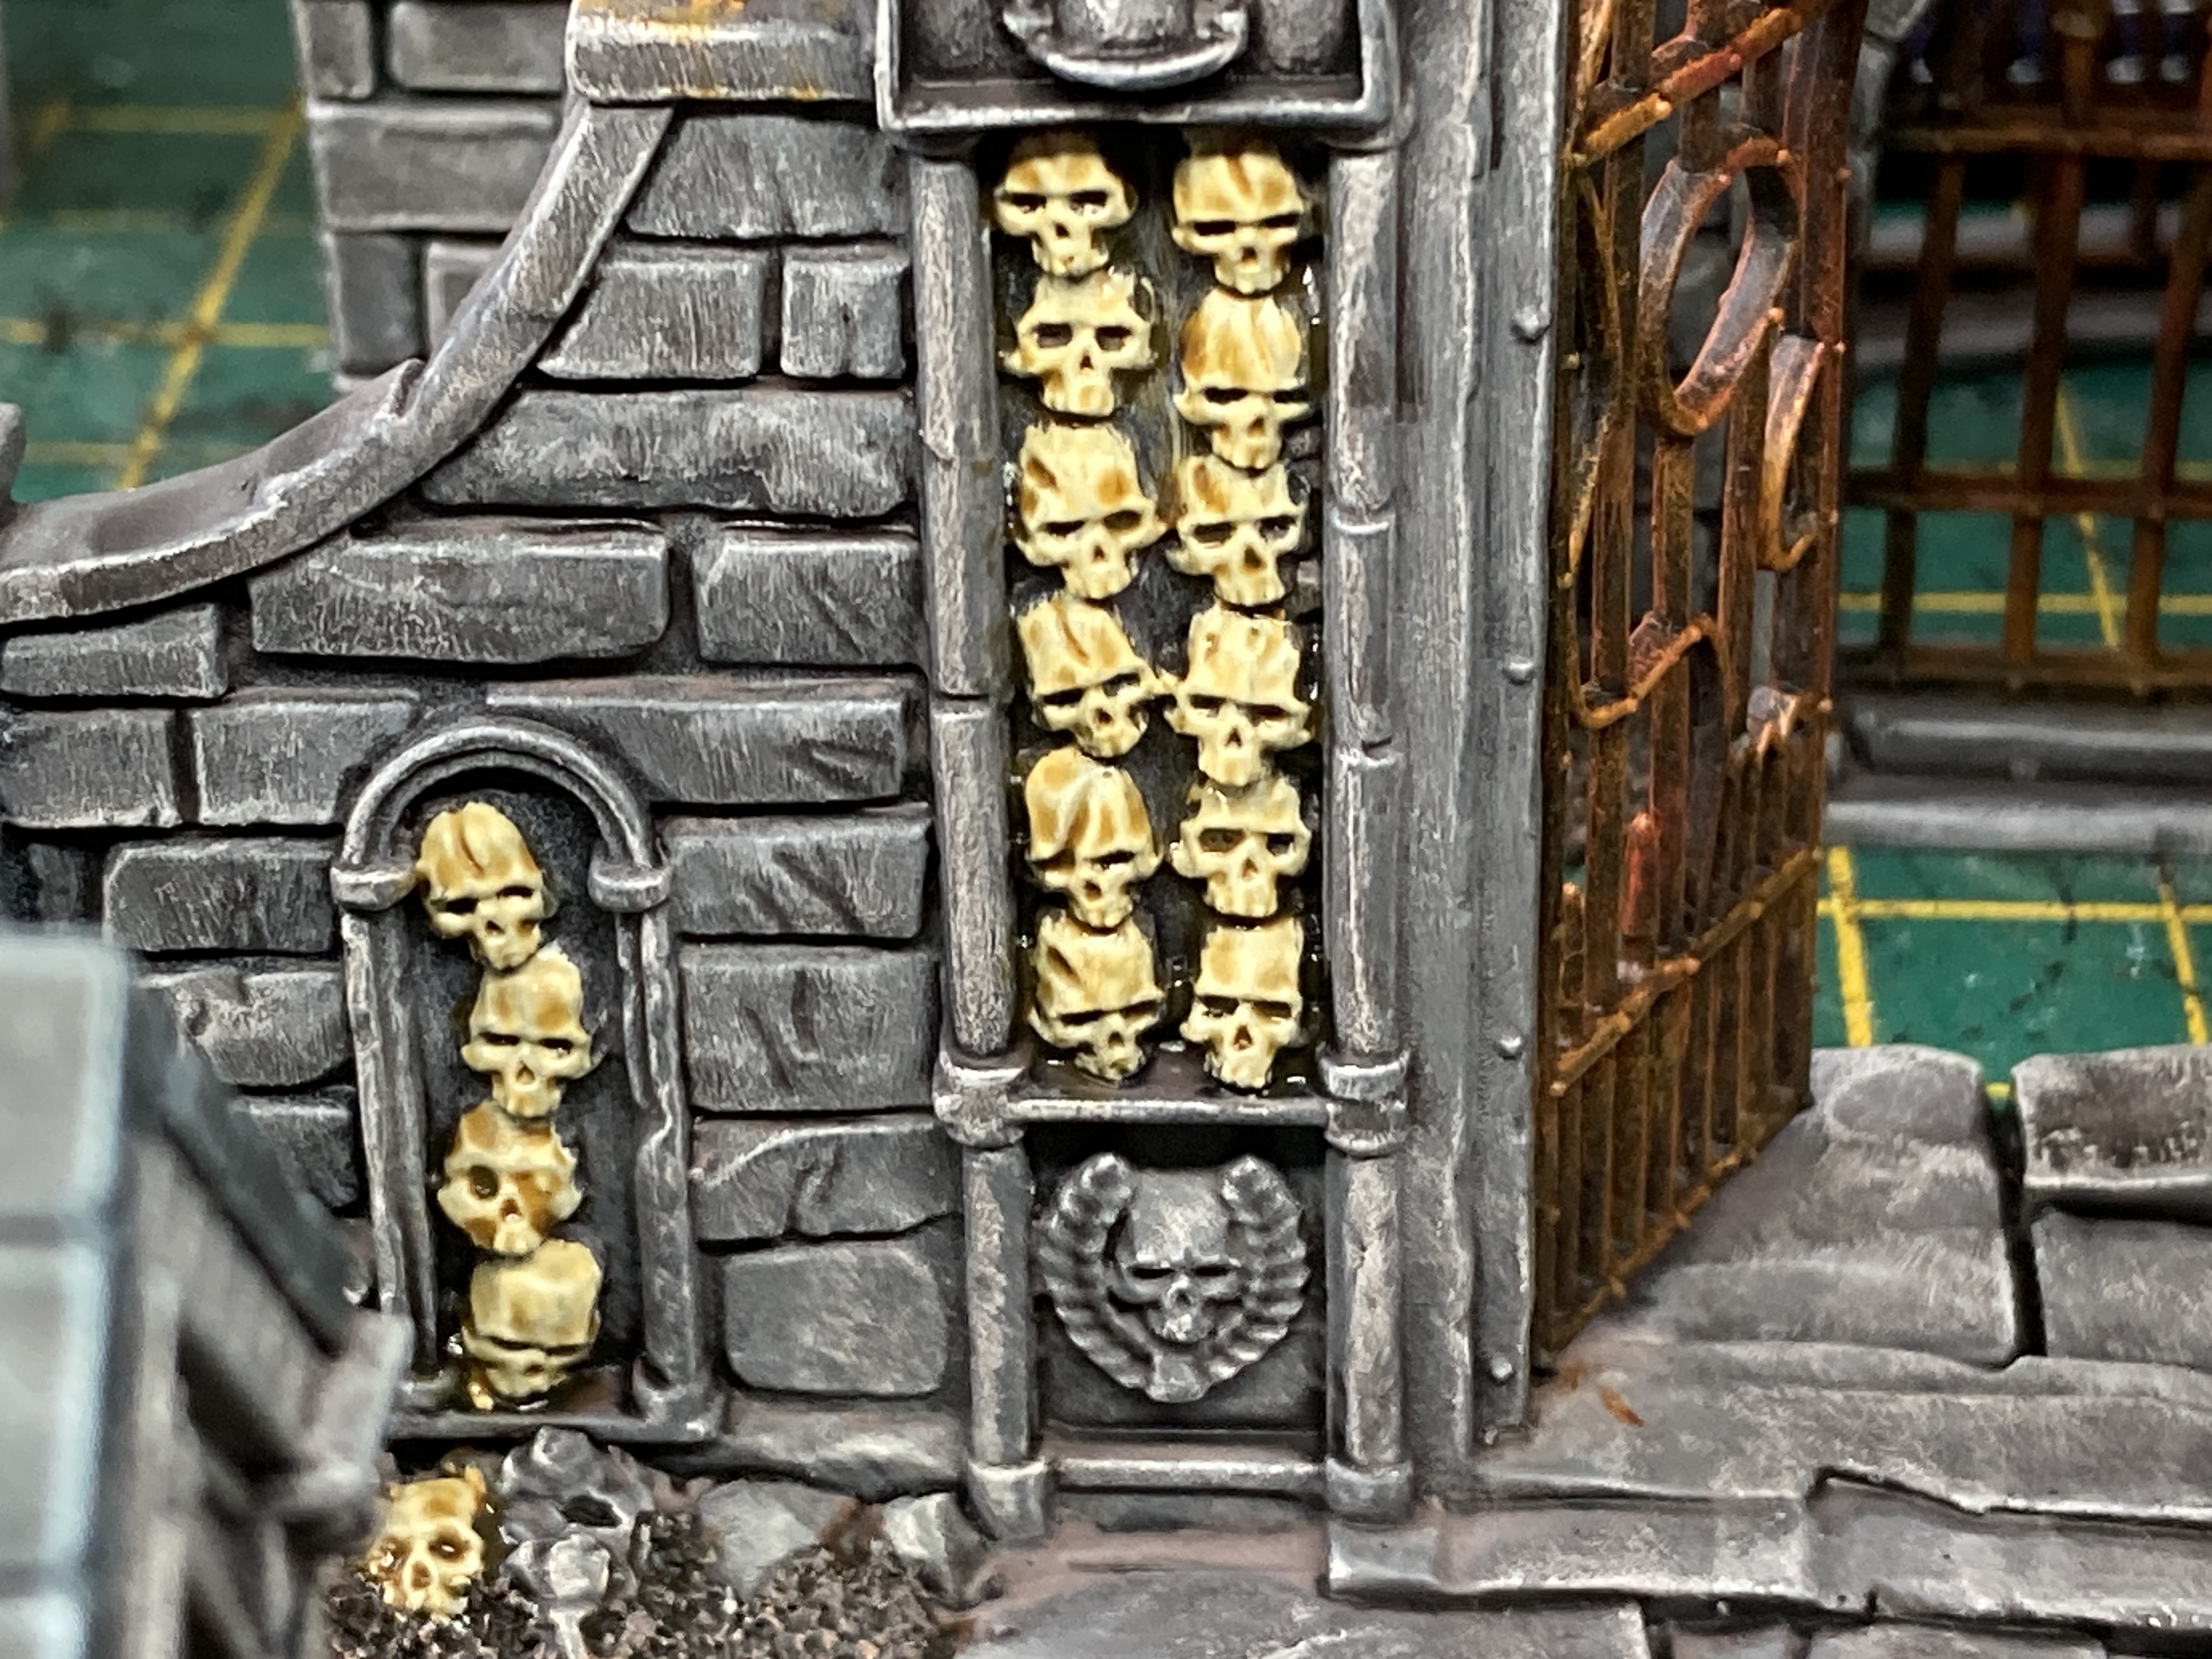
Next was the laborious part, painting all of the skulls. They were all first picked out in a light beige colour and then I applied the Contrast Paint Skeleton Horde. I thought about a further highlight but no. Time to move on.
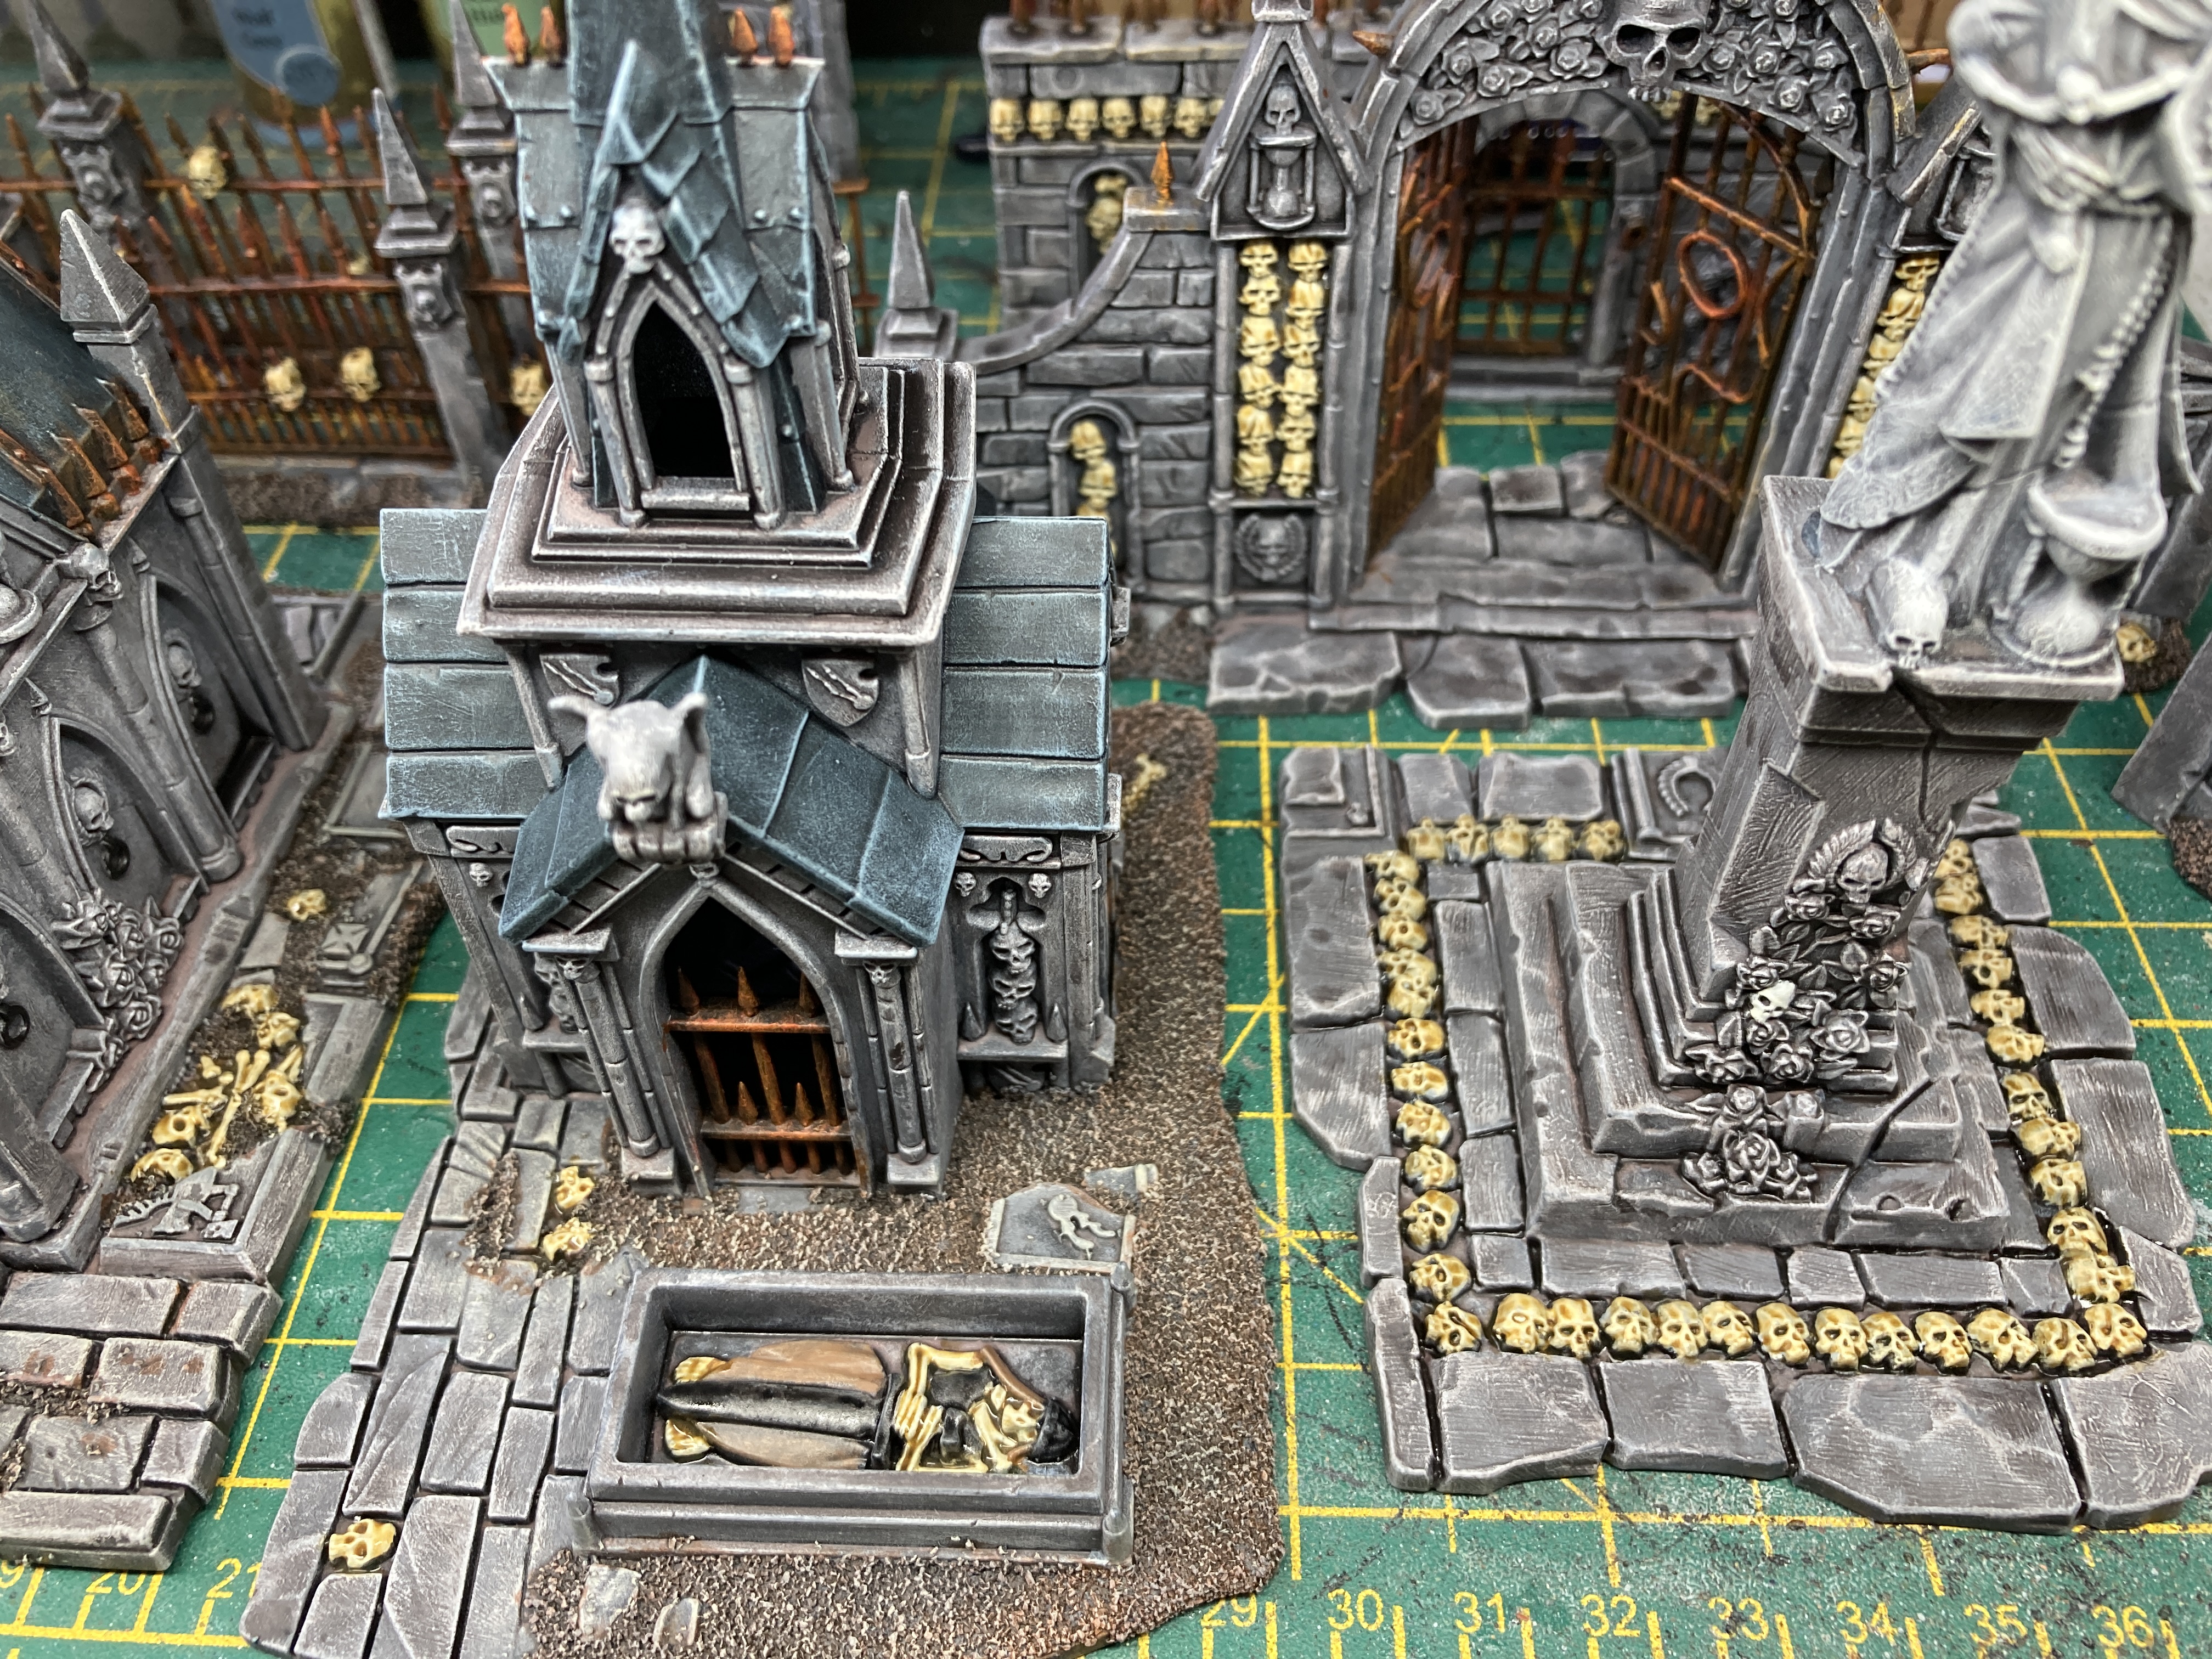
There’s quite a lot of flowers modelled on the set so it was now time to paint this. I again painted they all with a light beige colour before applying a Contrast. I prefer using beige rather than white as it gives a warmer feel.
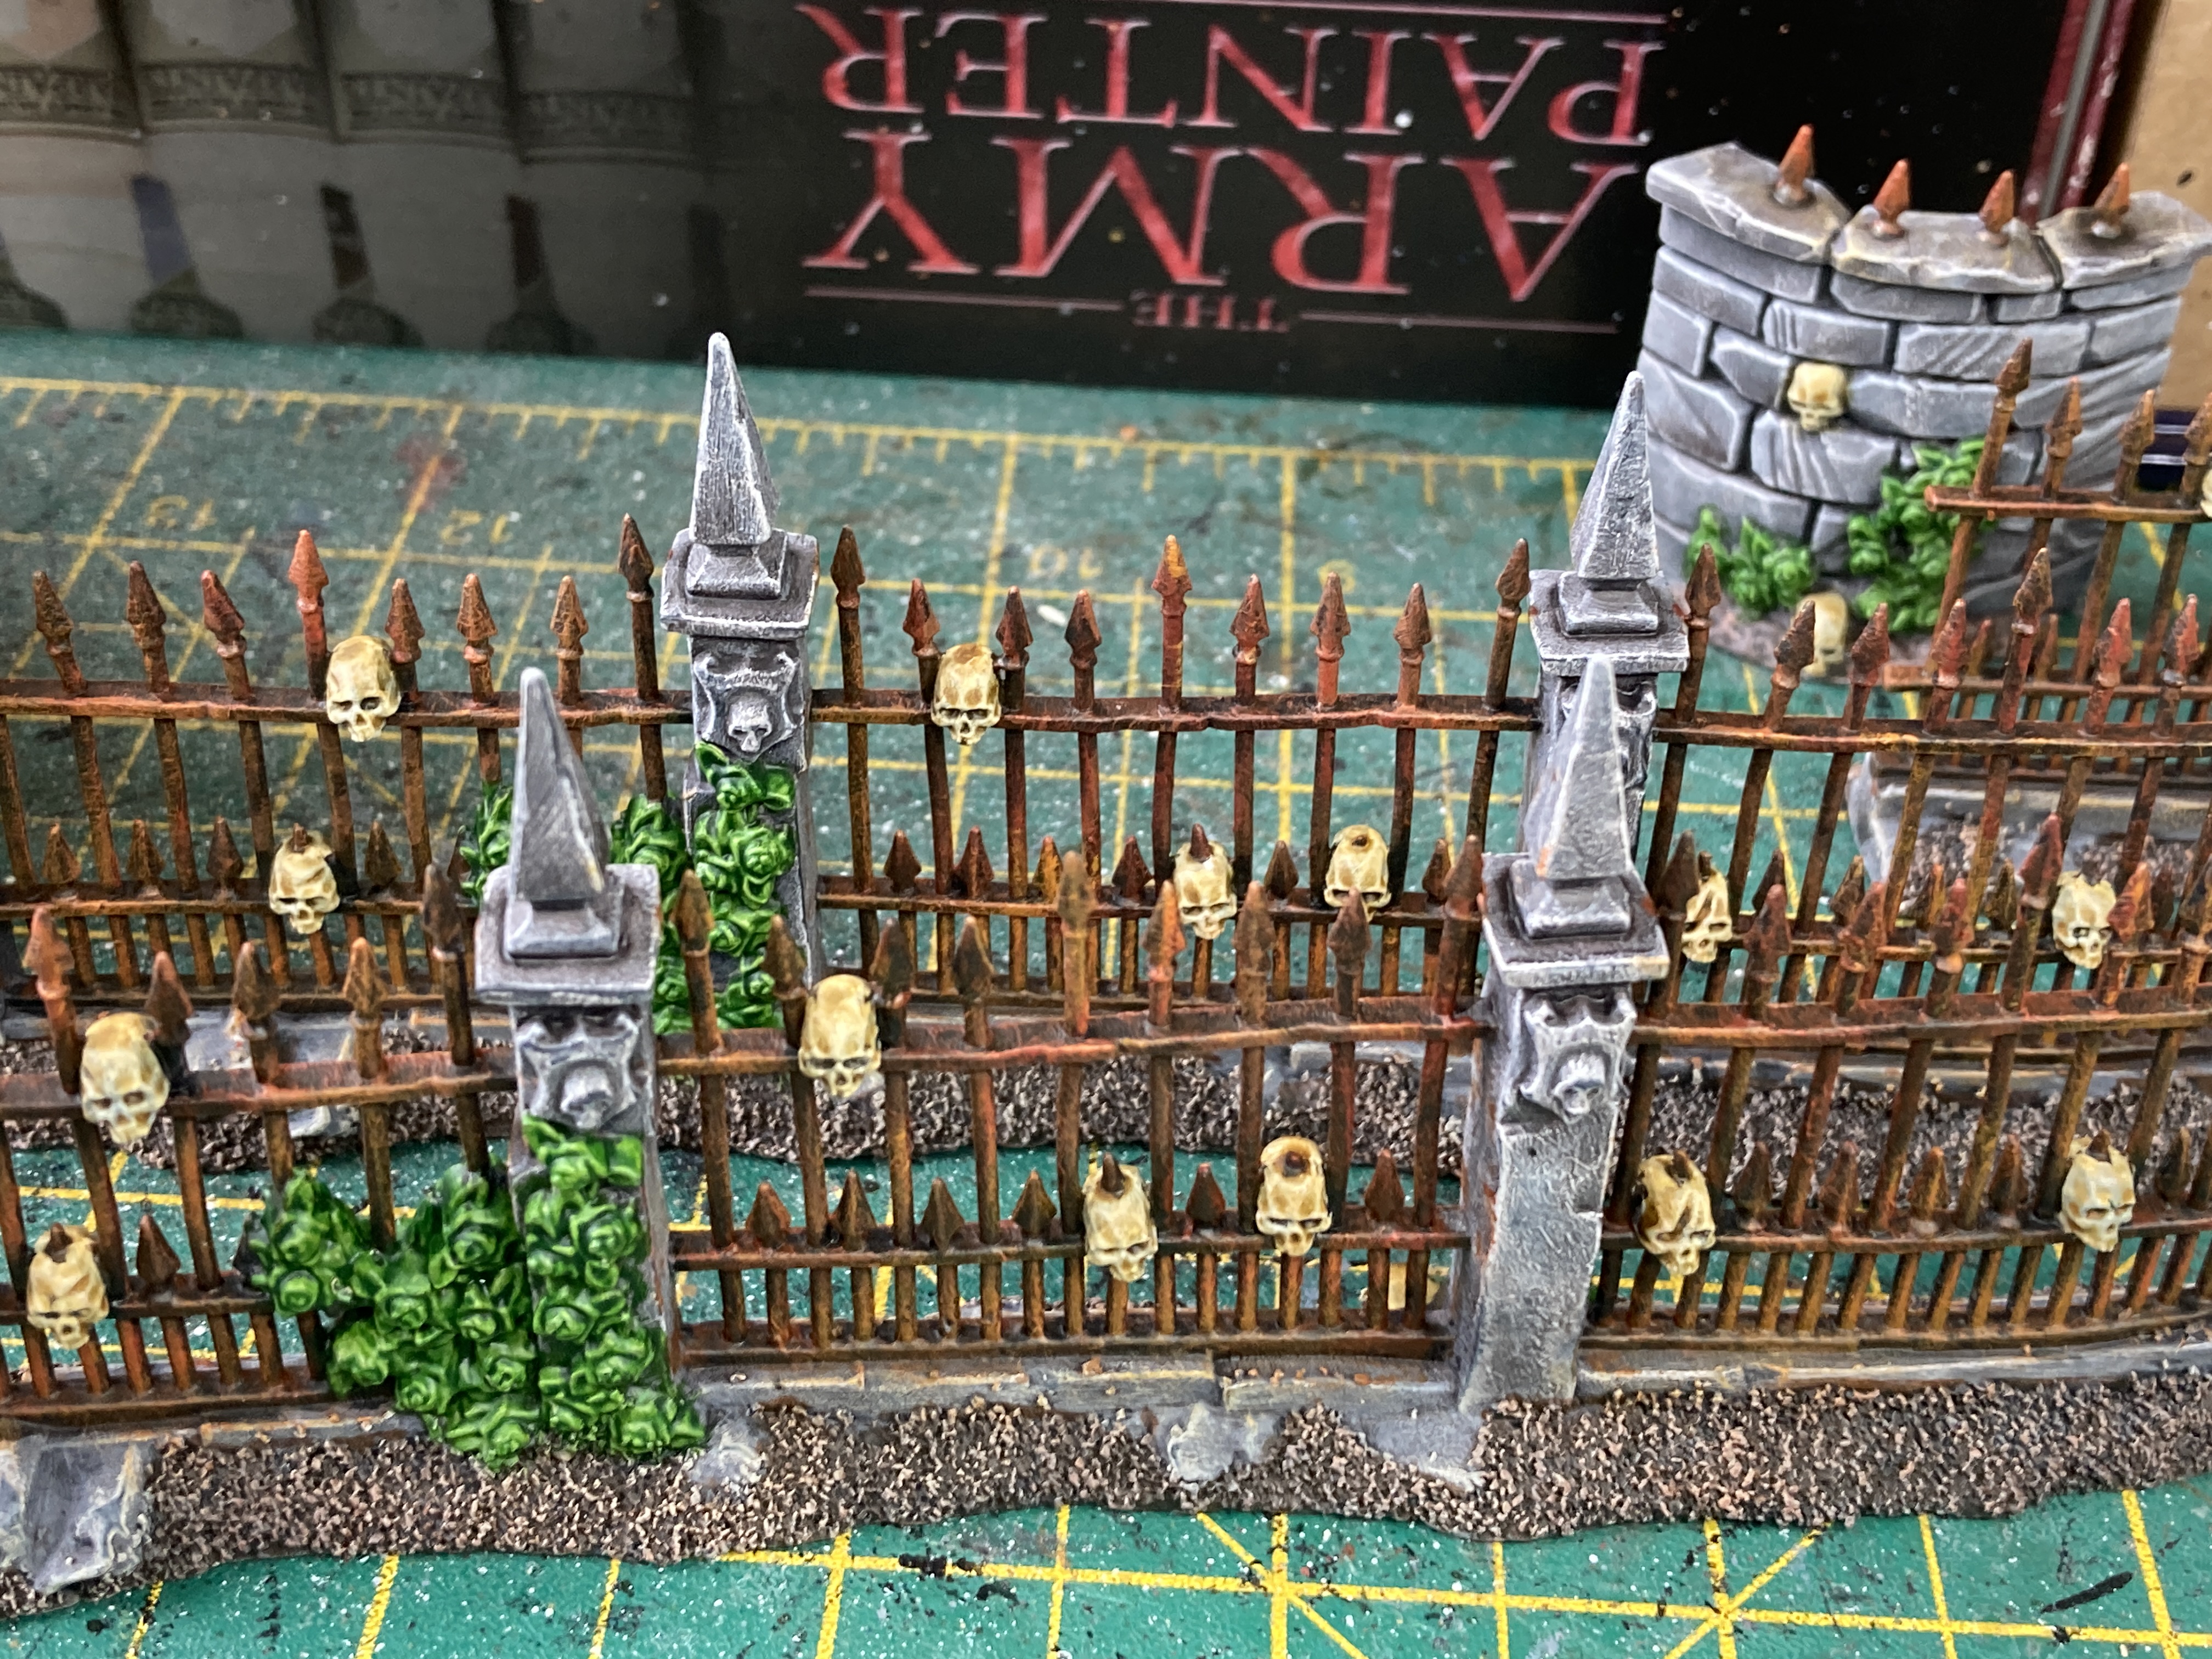
This time I mixed Ork Flesh with Mantis Warrior Green and covered all of the plants. I then gave a very light drybrush of light beige before giving a light drybrush of yellow, just to bring out the details of the leaves a little.
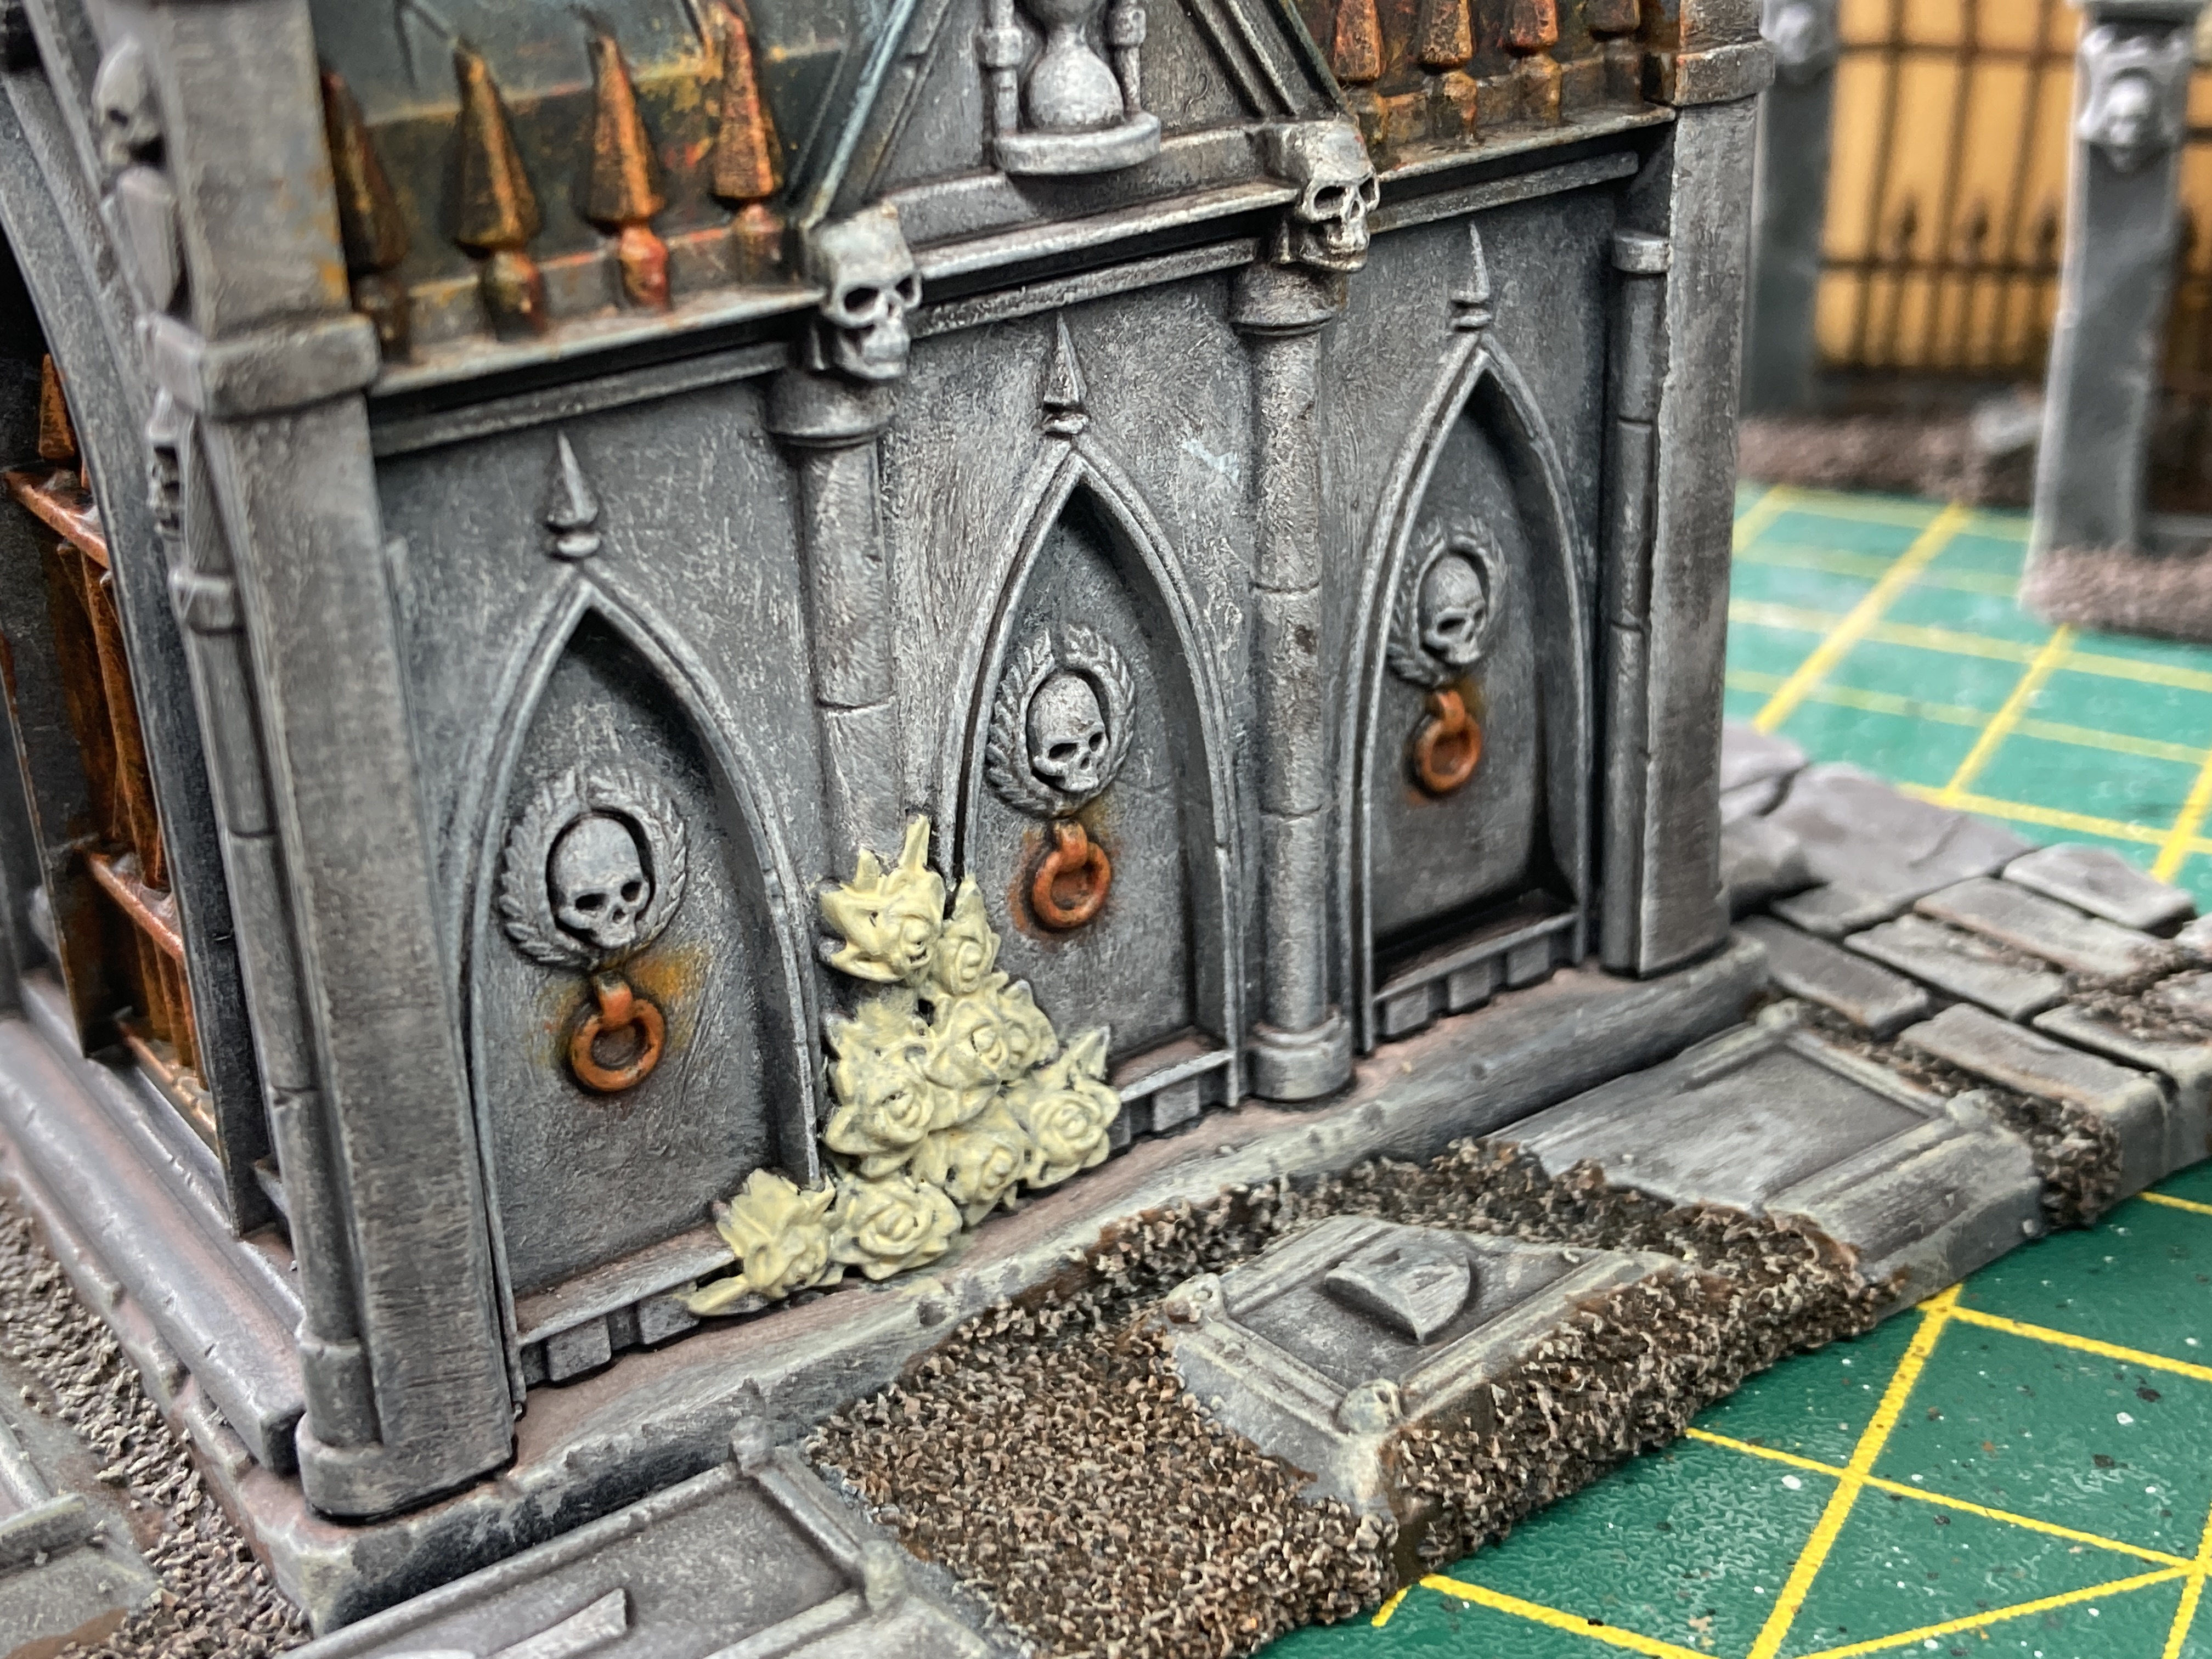
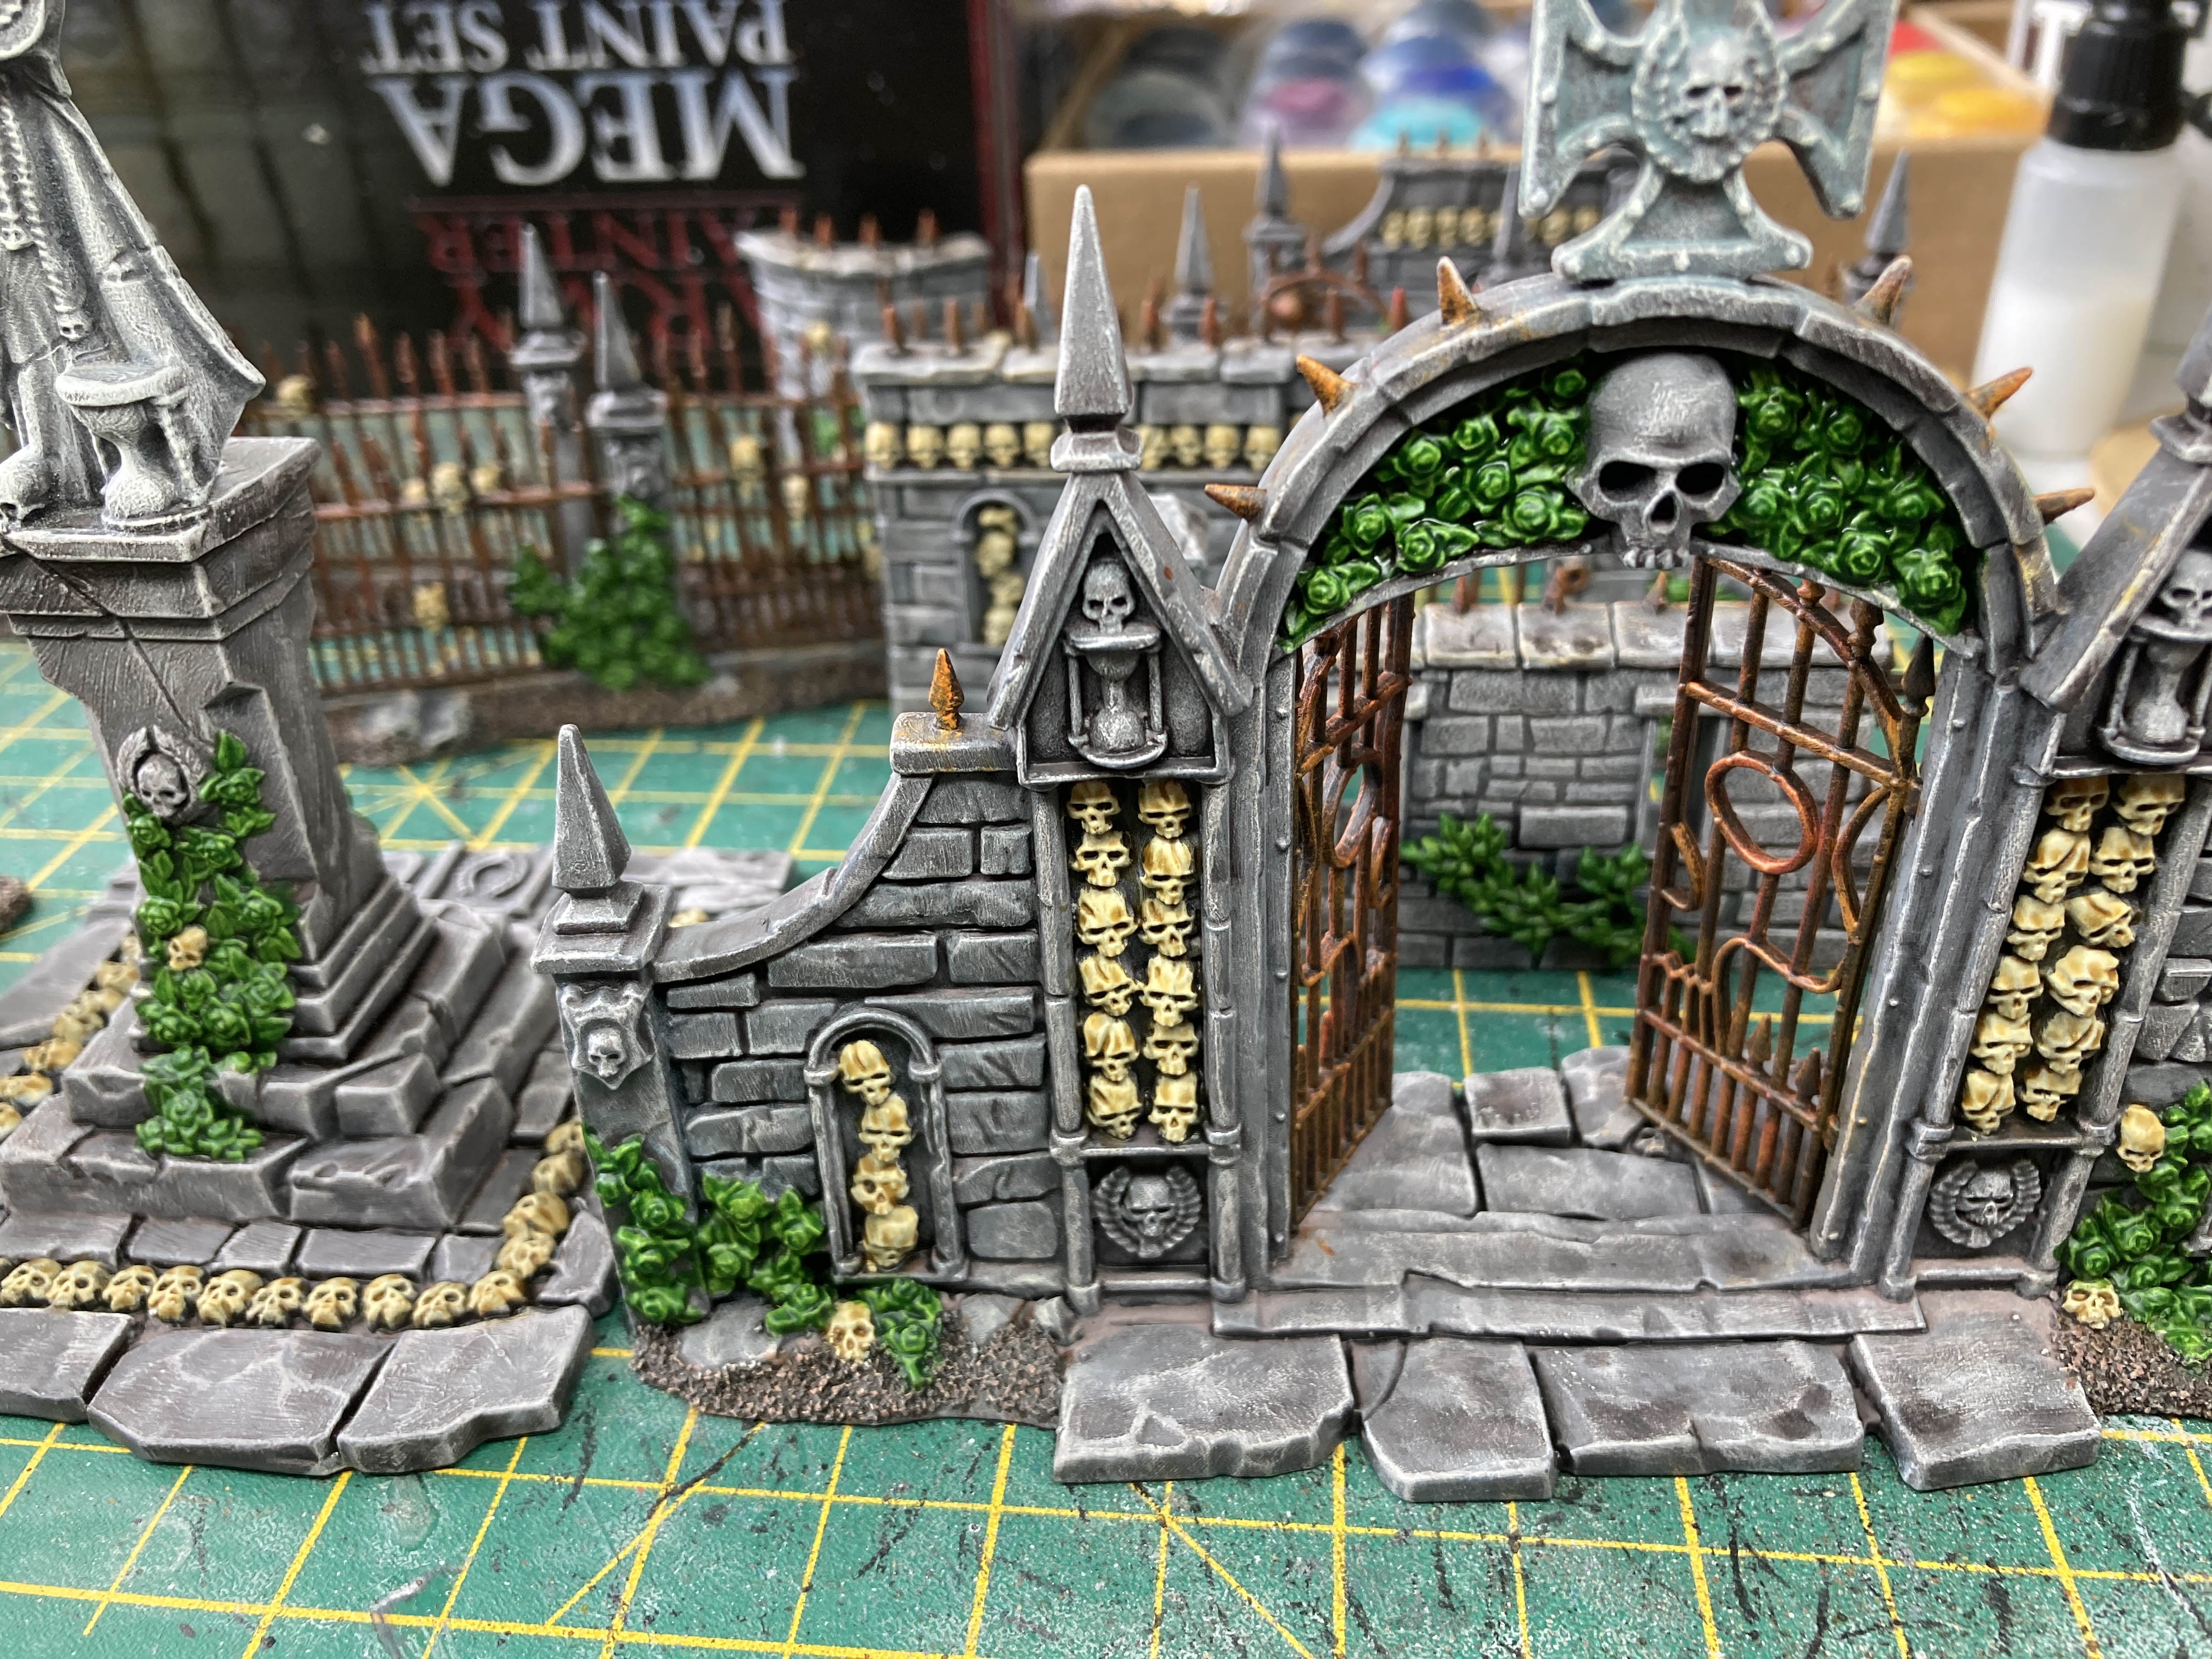
For the flowers I once again added a light beige to the flower heads, over the green then followed with a Contrast, Flesh Tearers Red. Simple enough.
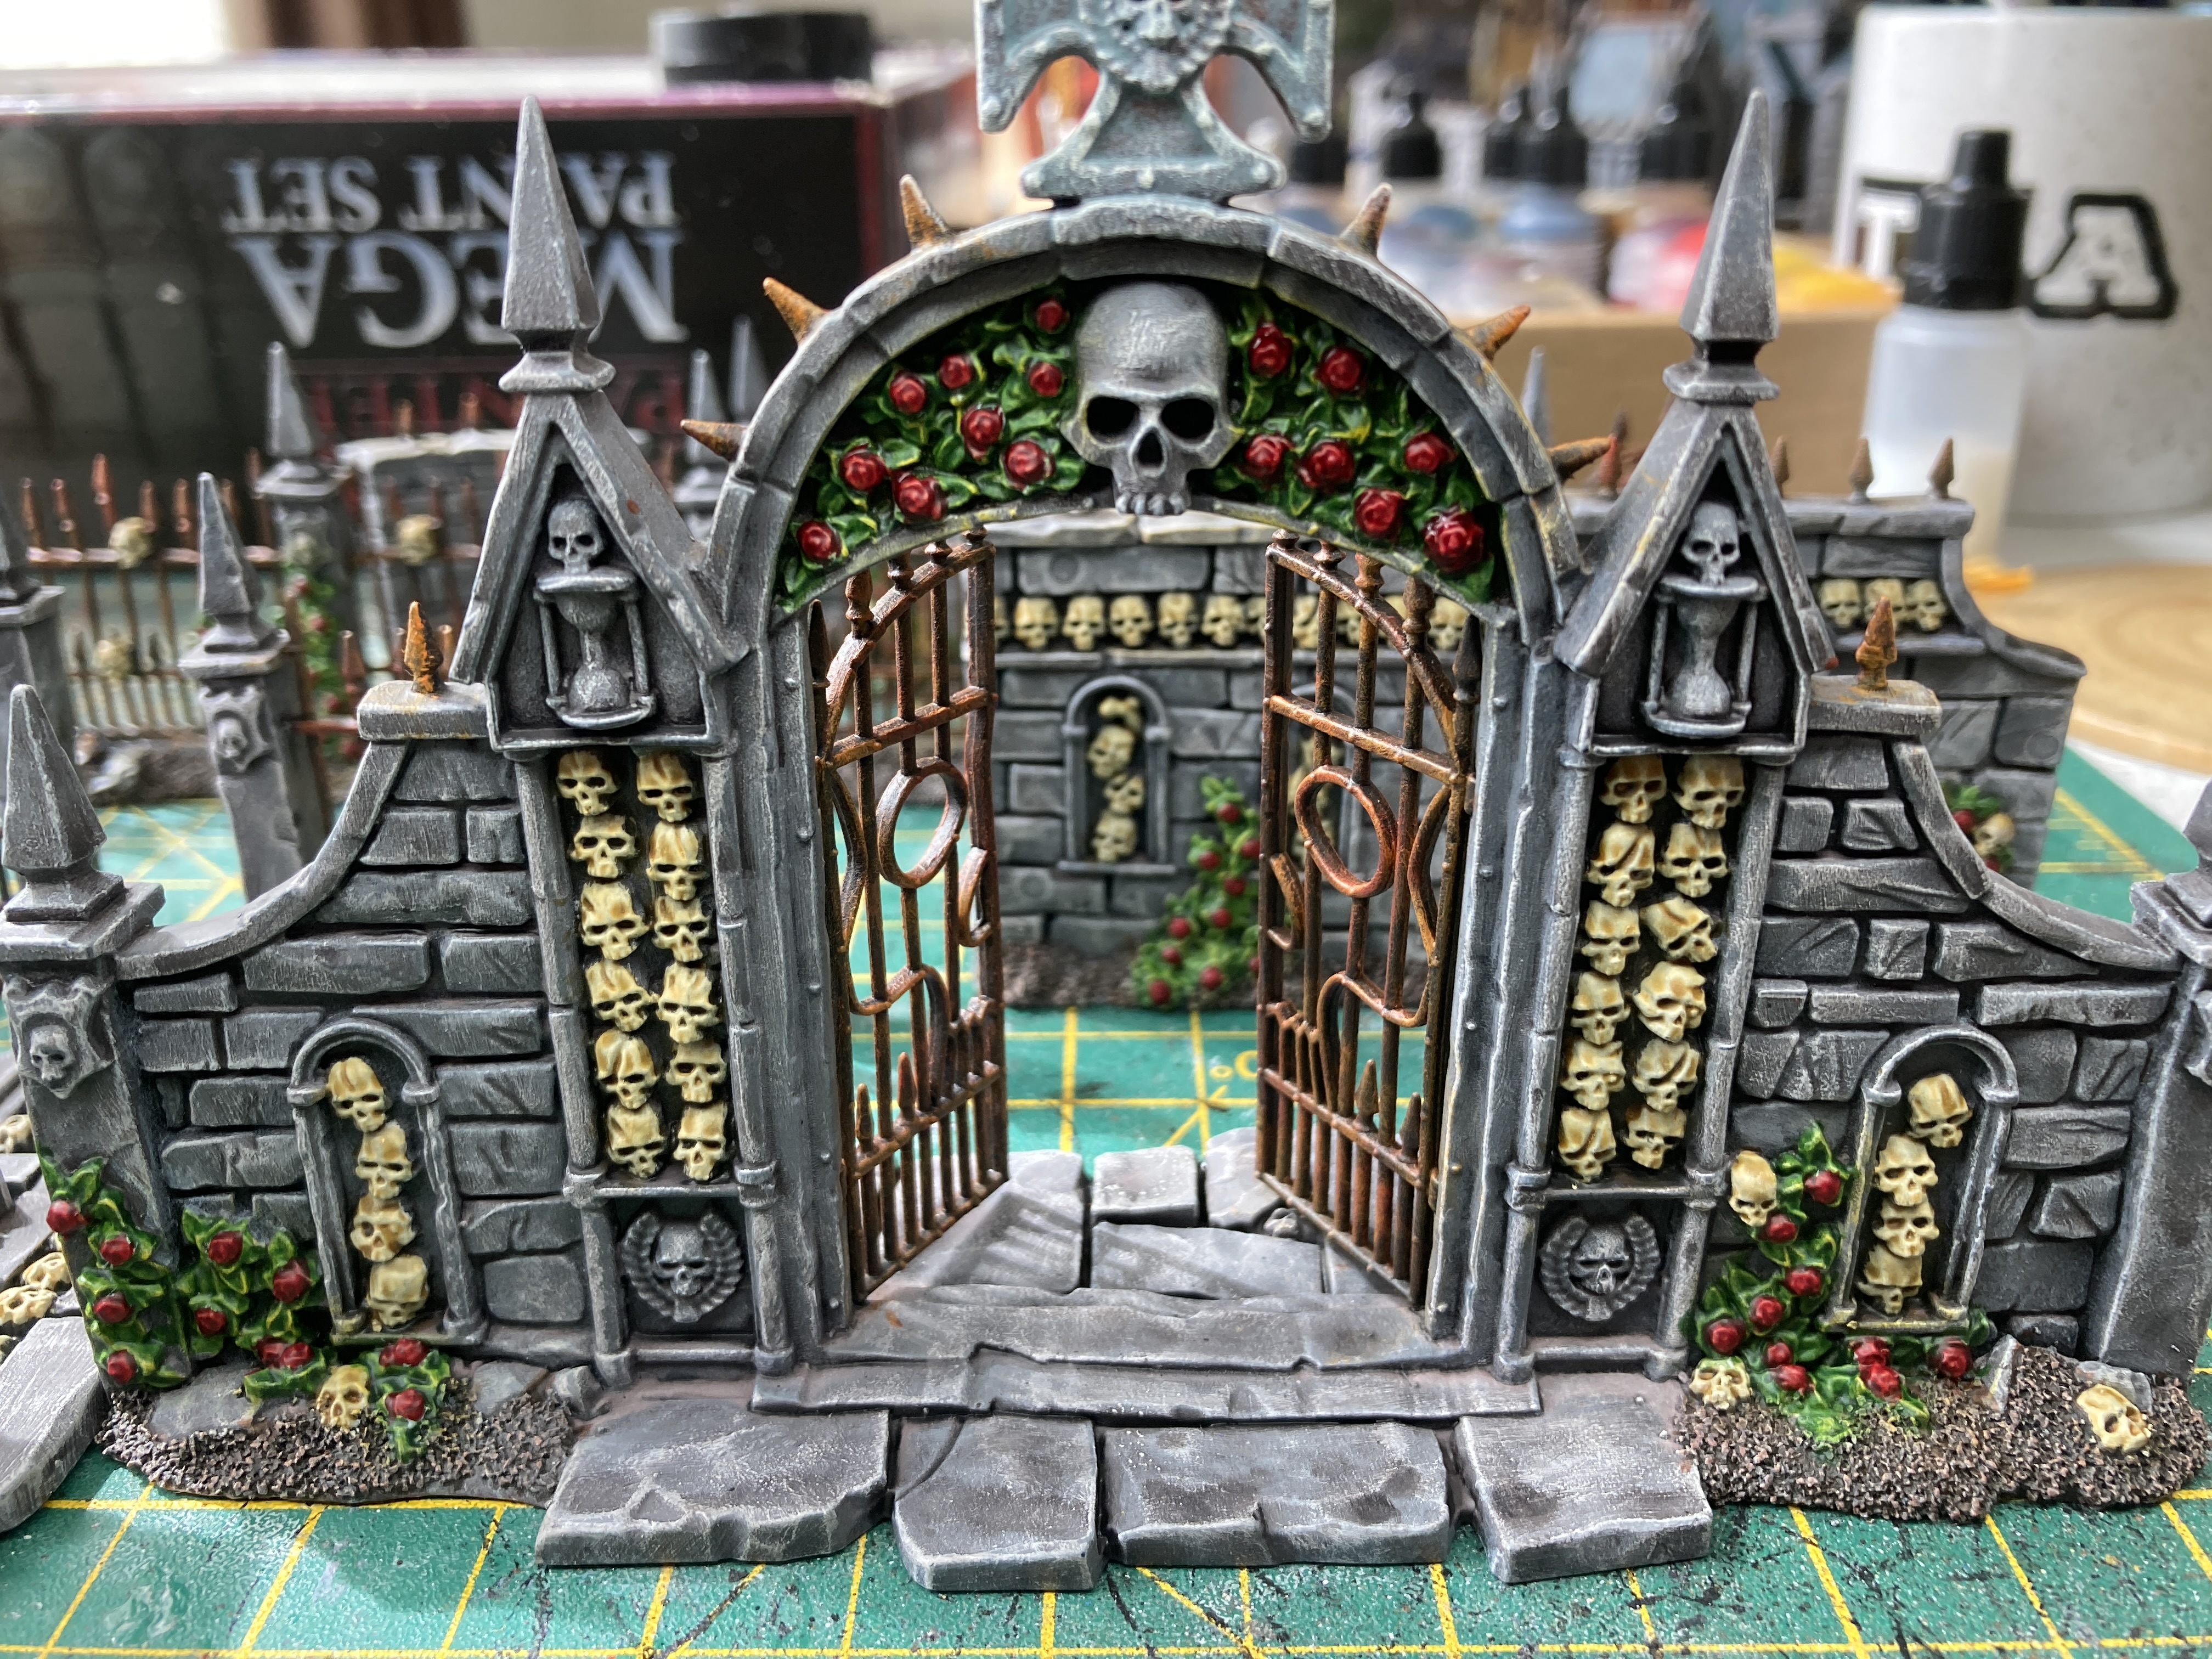
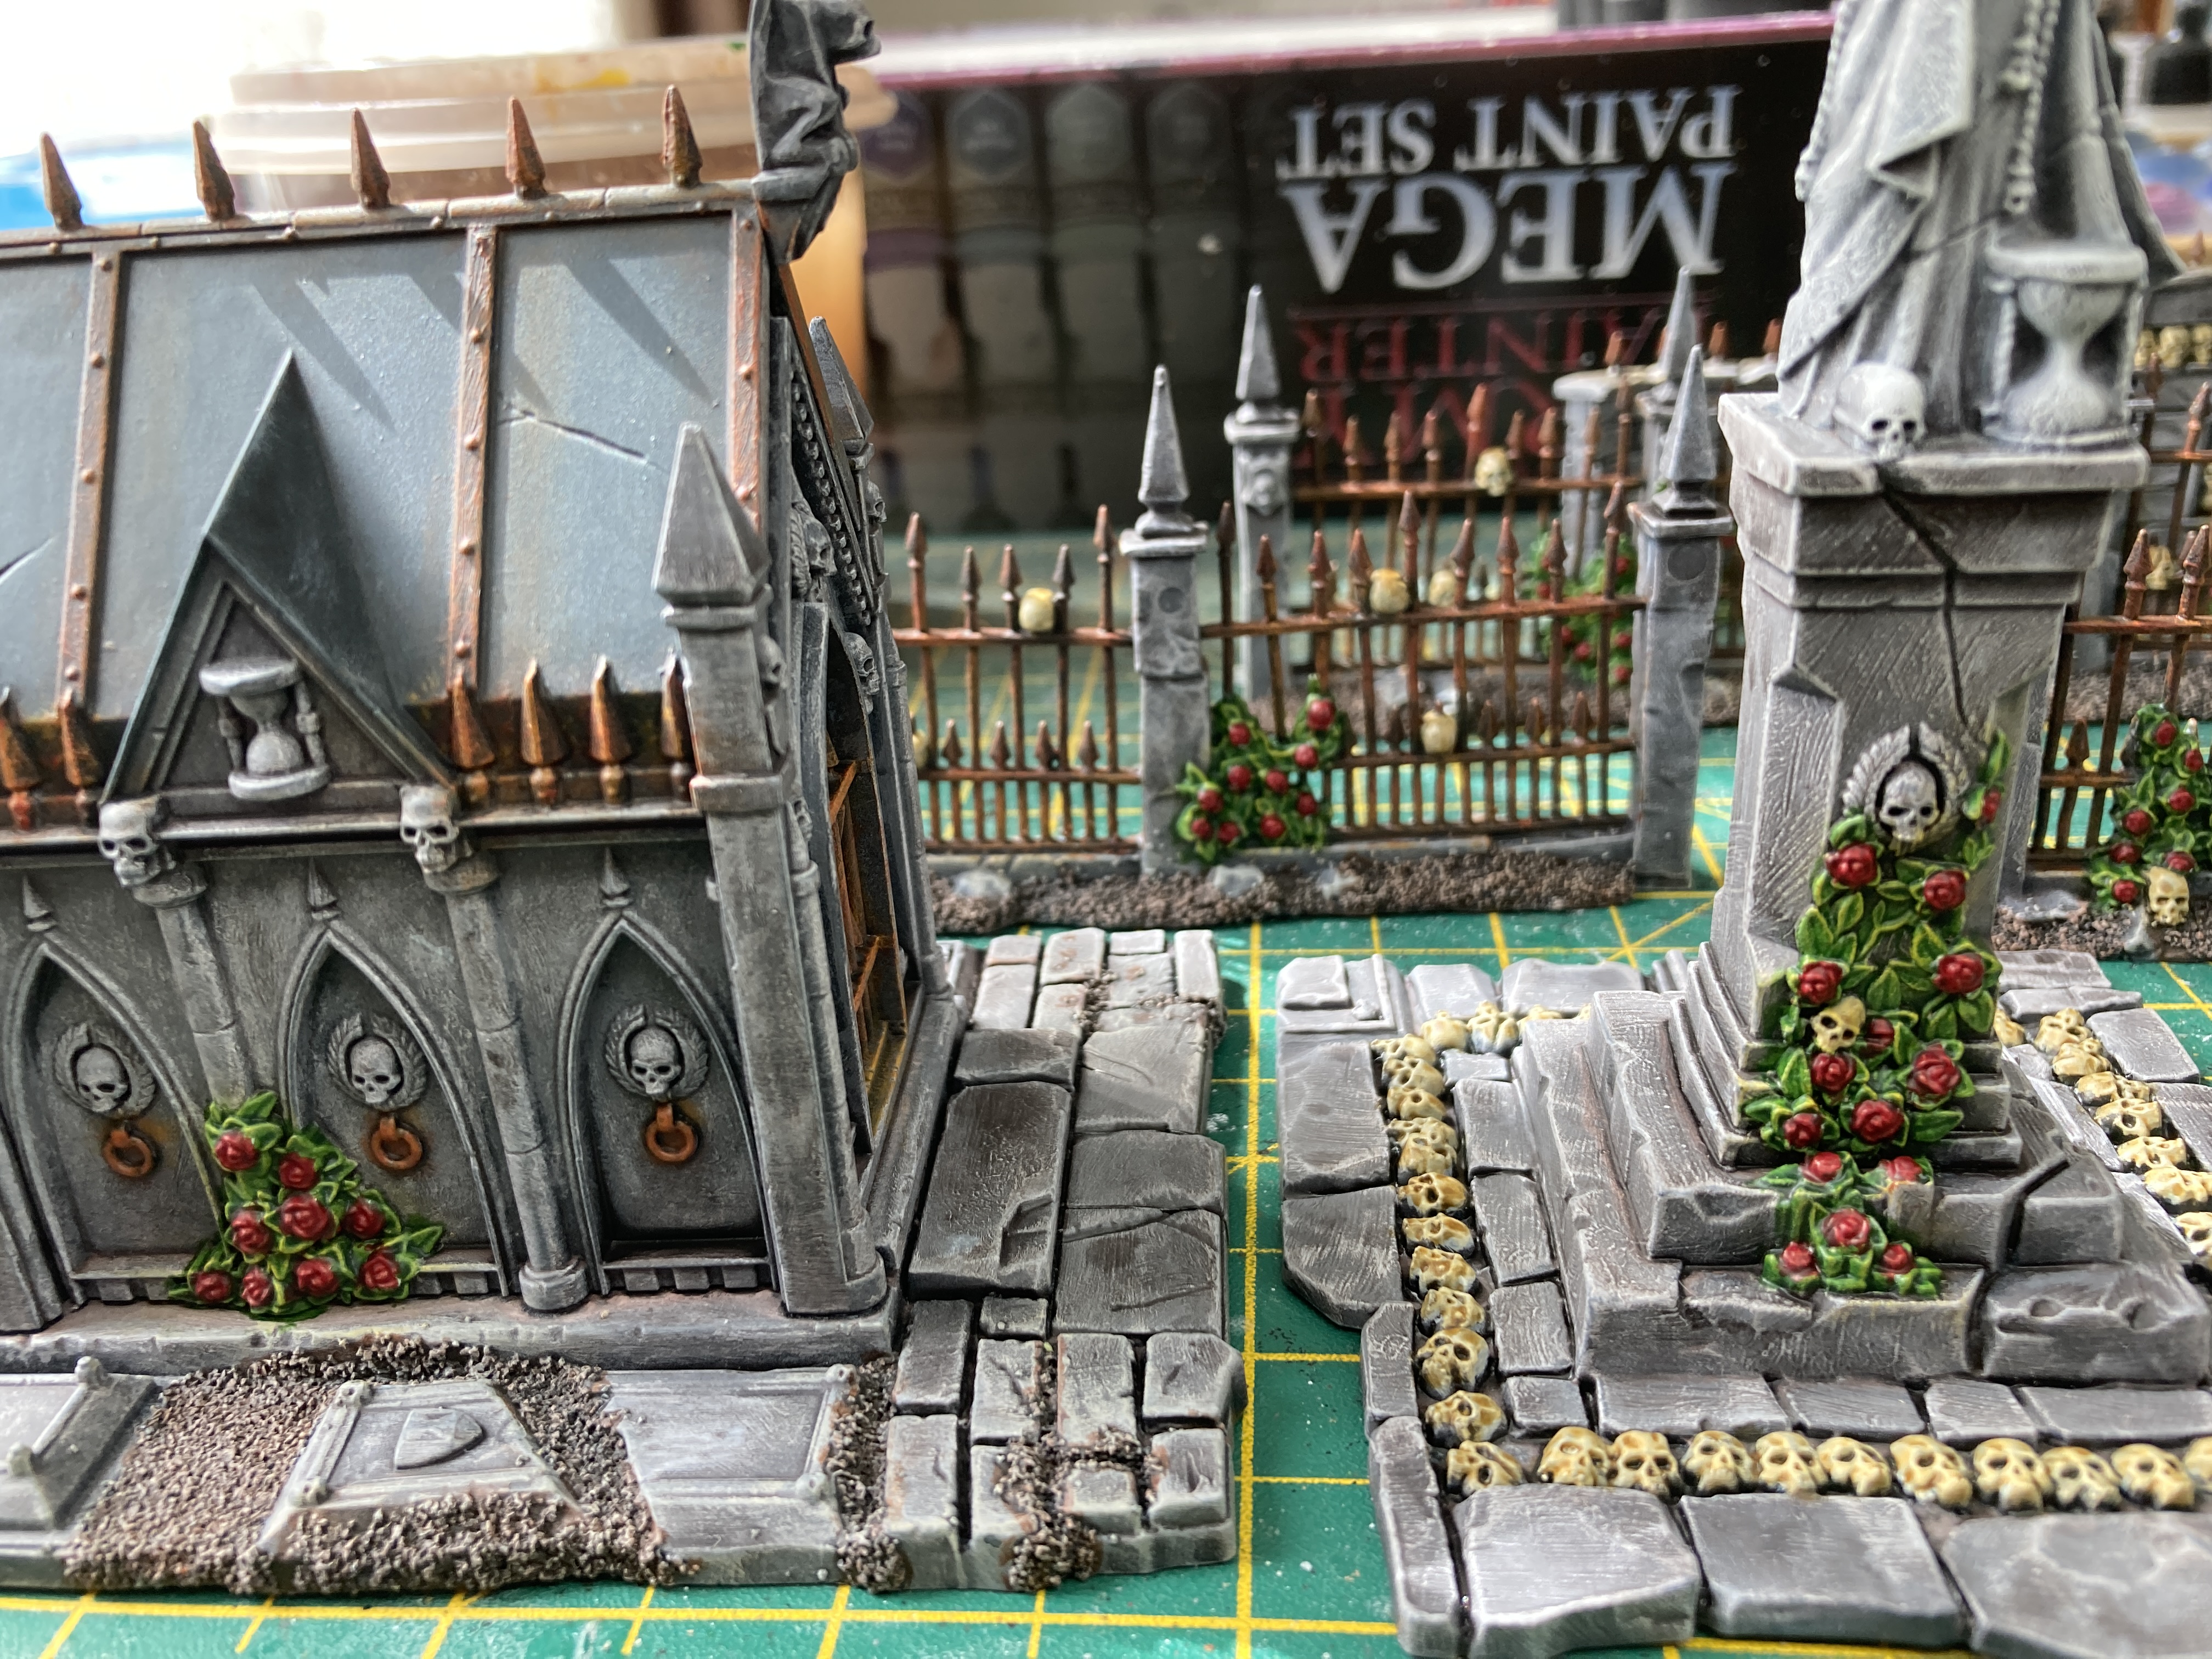
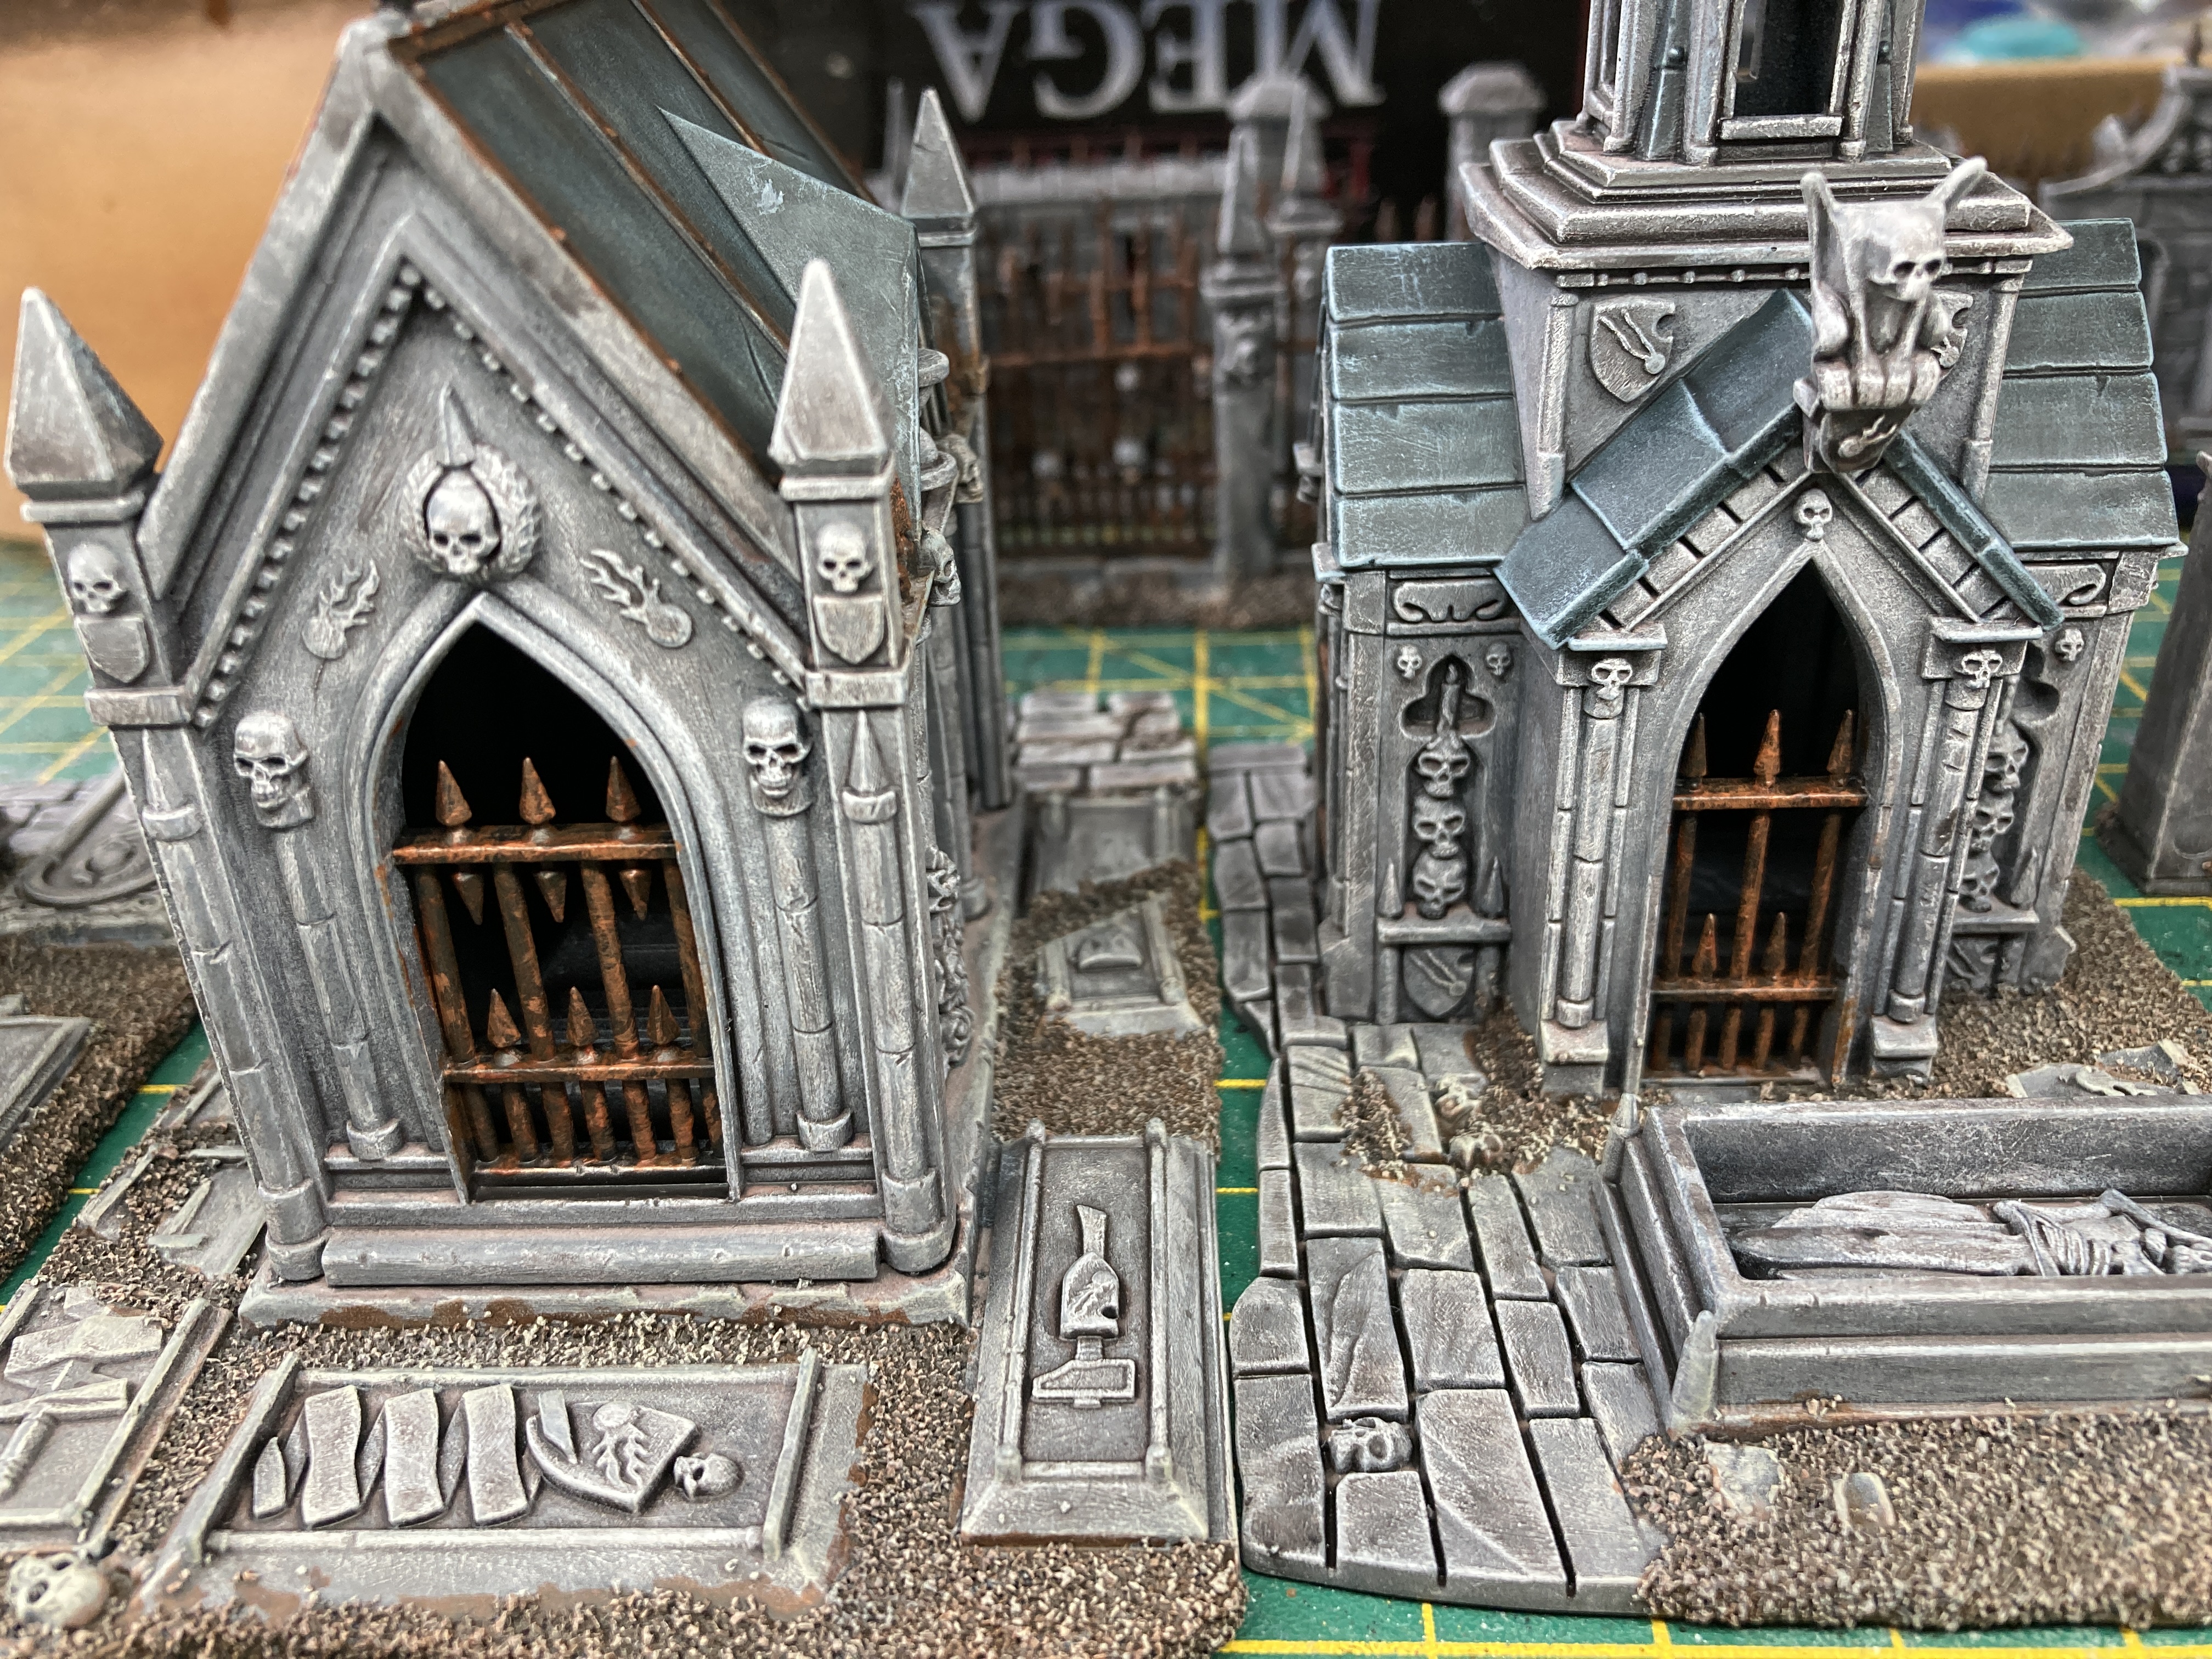
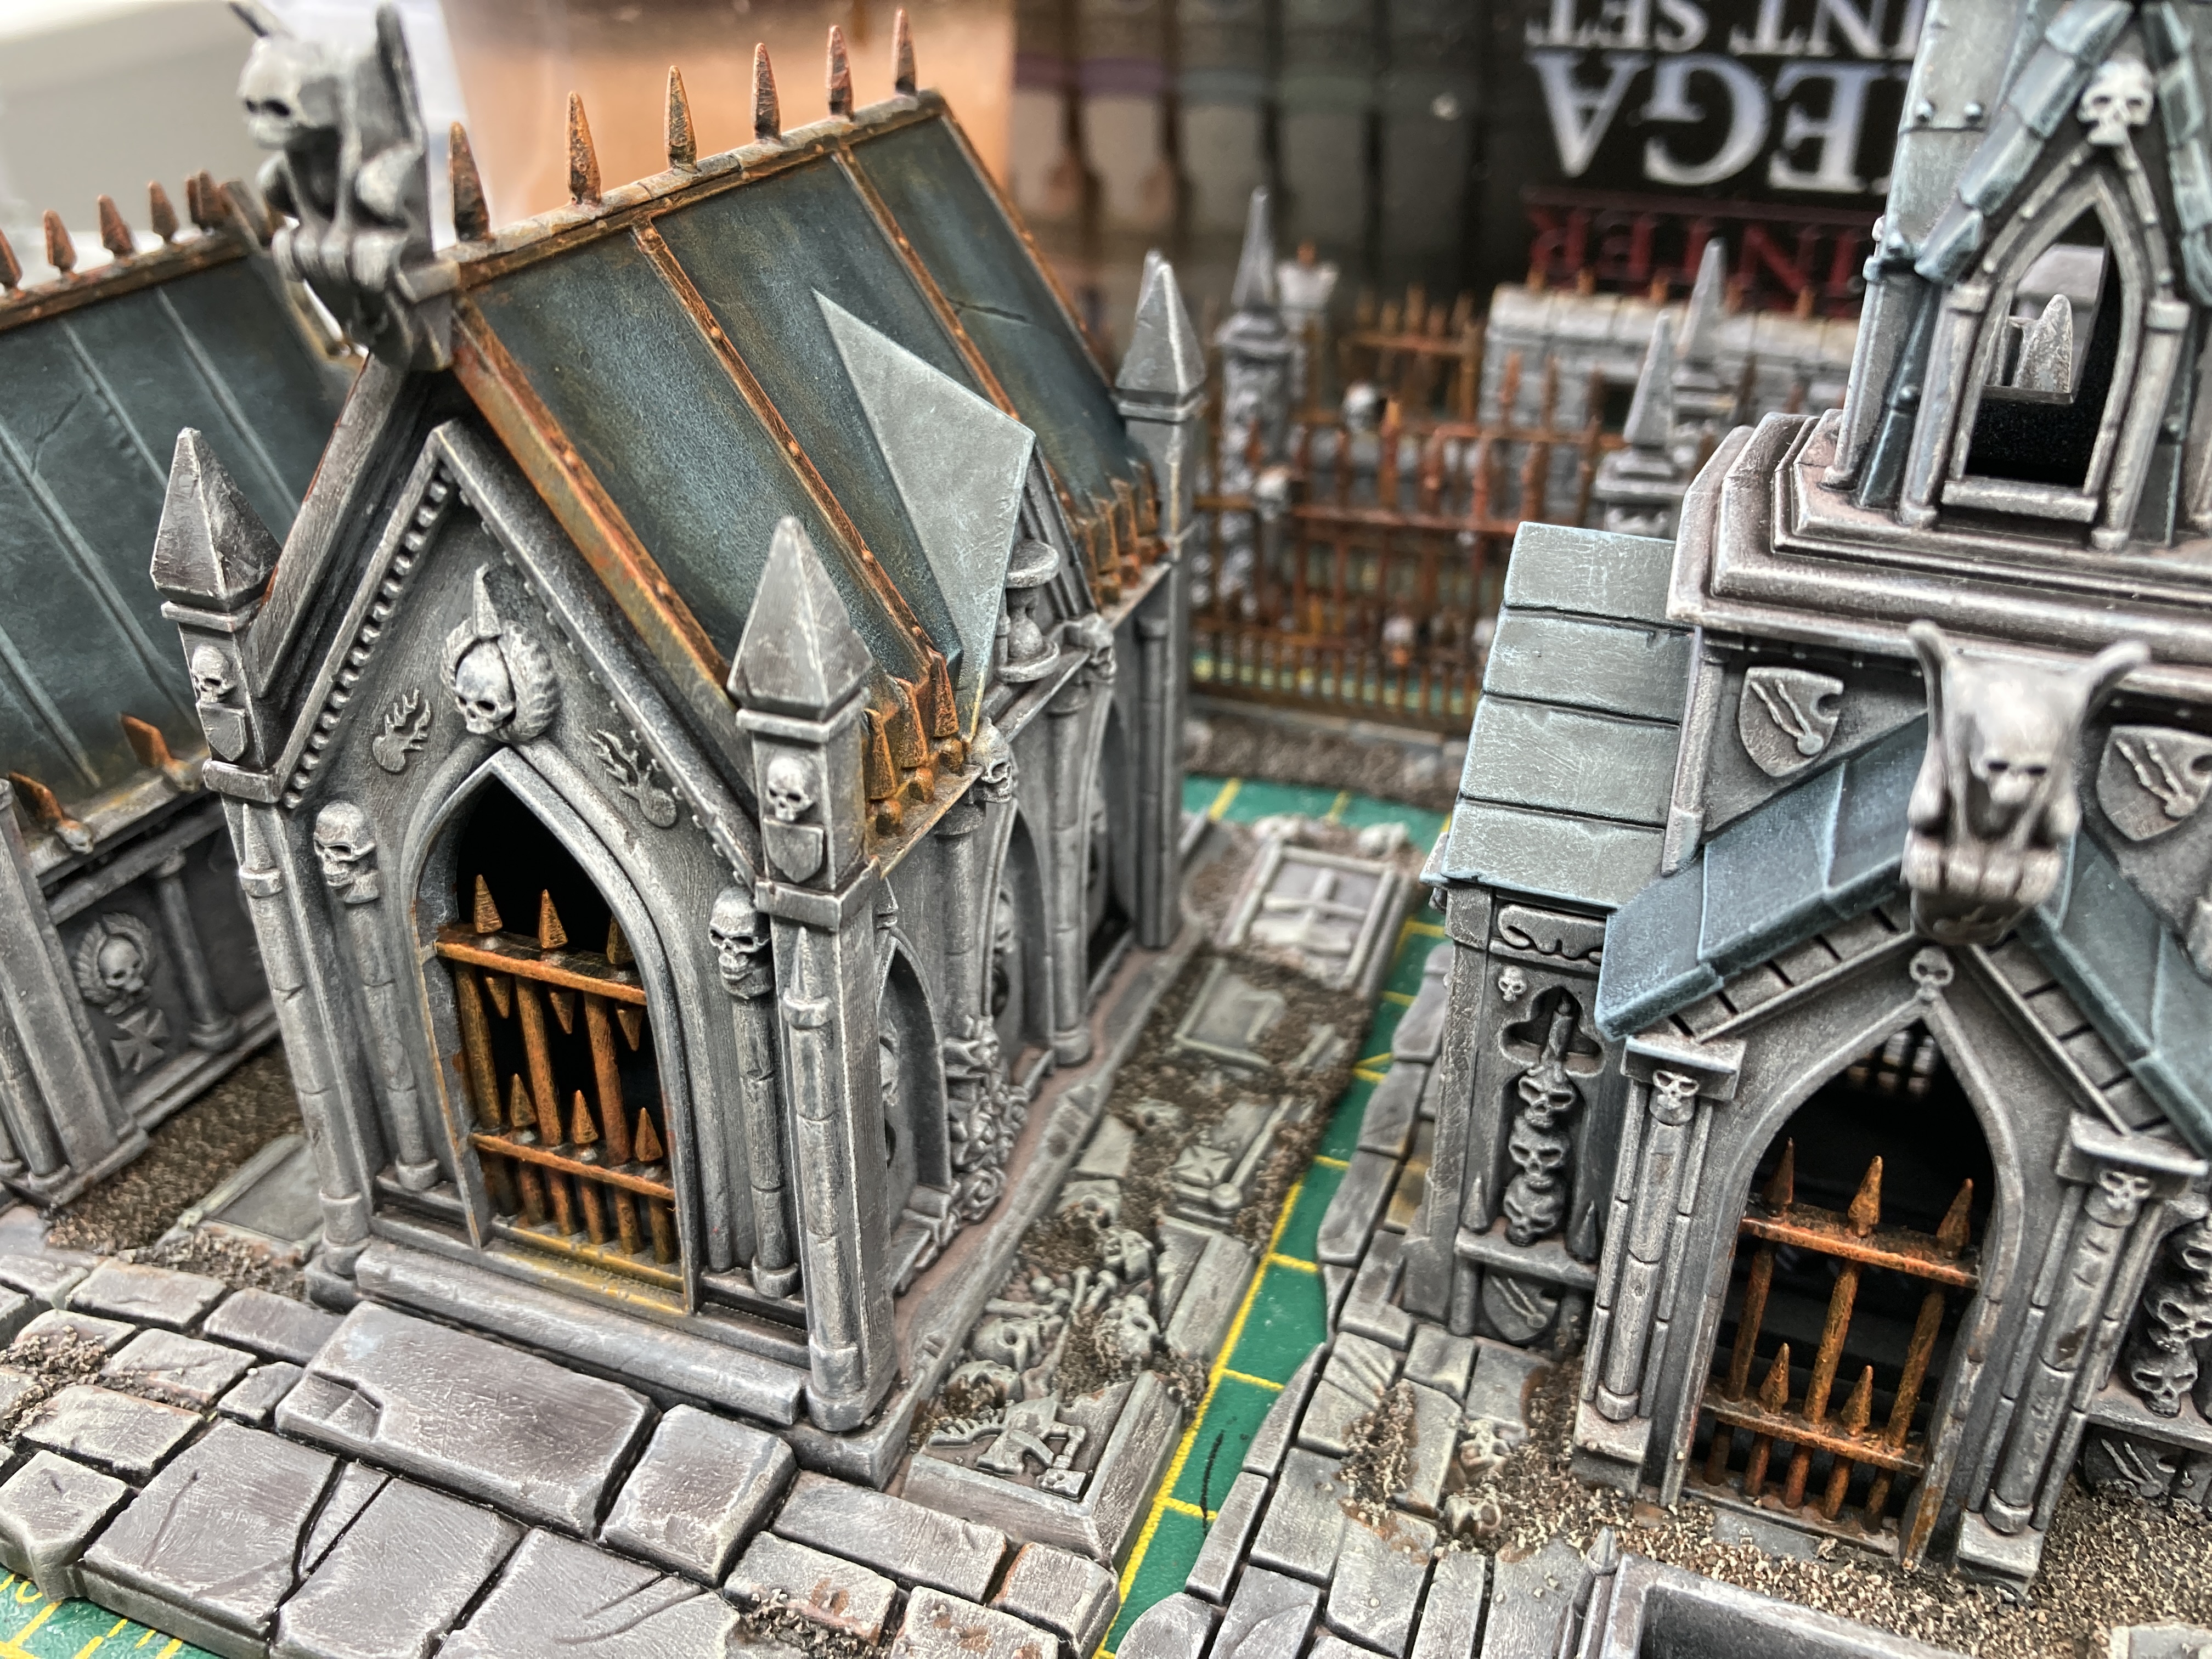
The painting is almost done. For the final phase I used army painter green ink and applied it to all of the stonework from the ground up to about miniature shoulder height to represent dampness and weathering.
So that’s it as far as the painting goes. Next I’ll be adding a load of grass and moss tufts and maybe some flock.
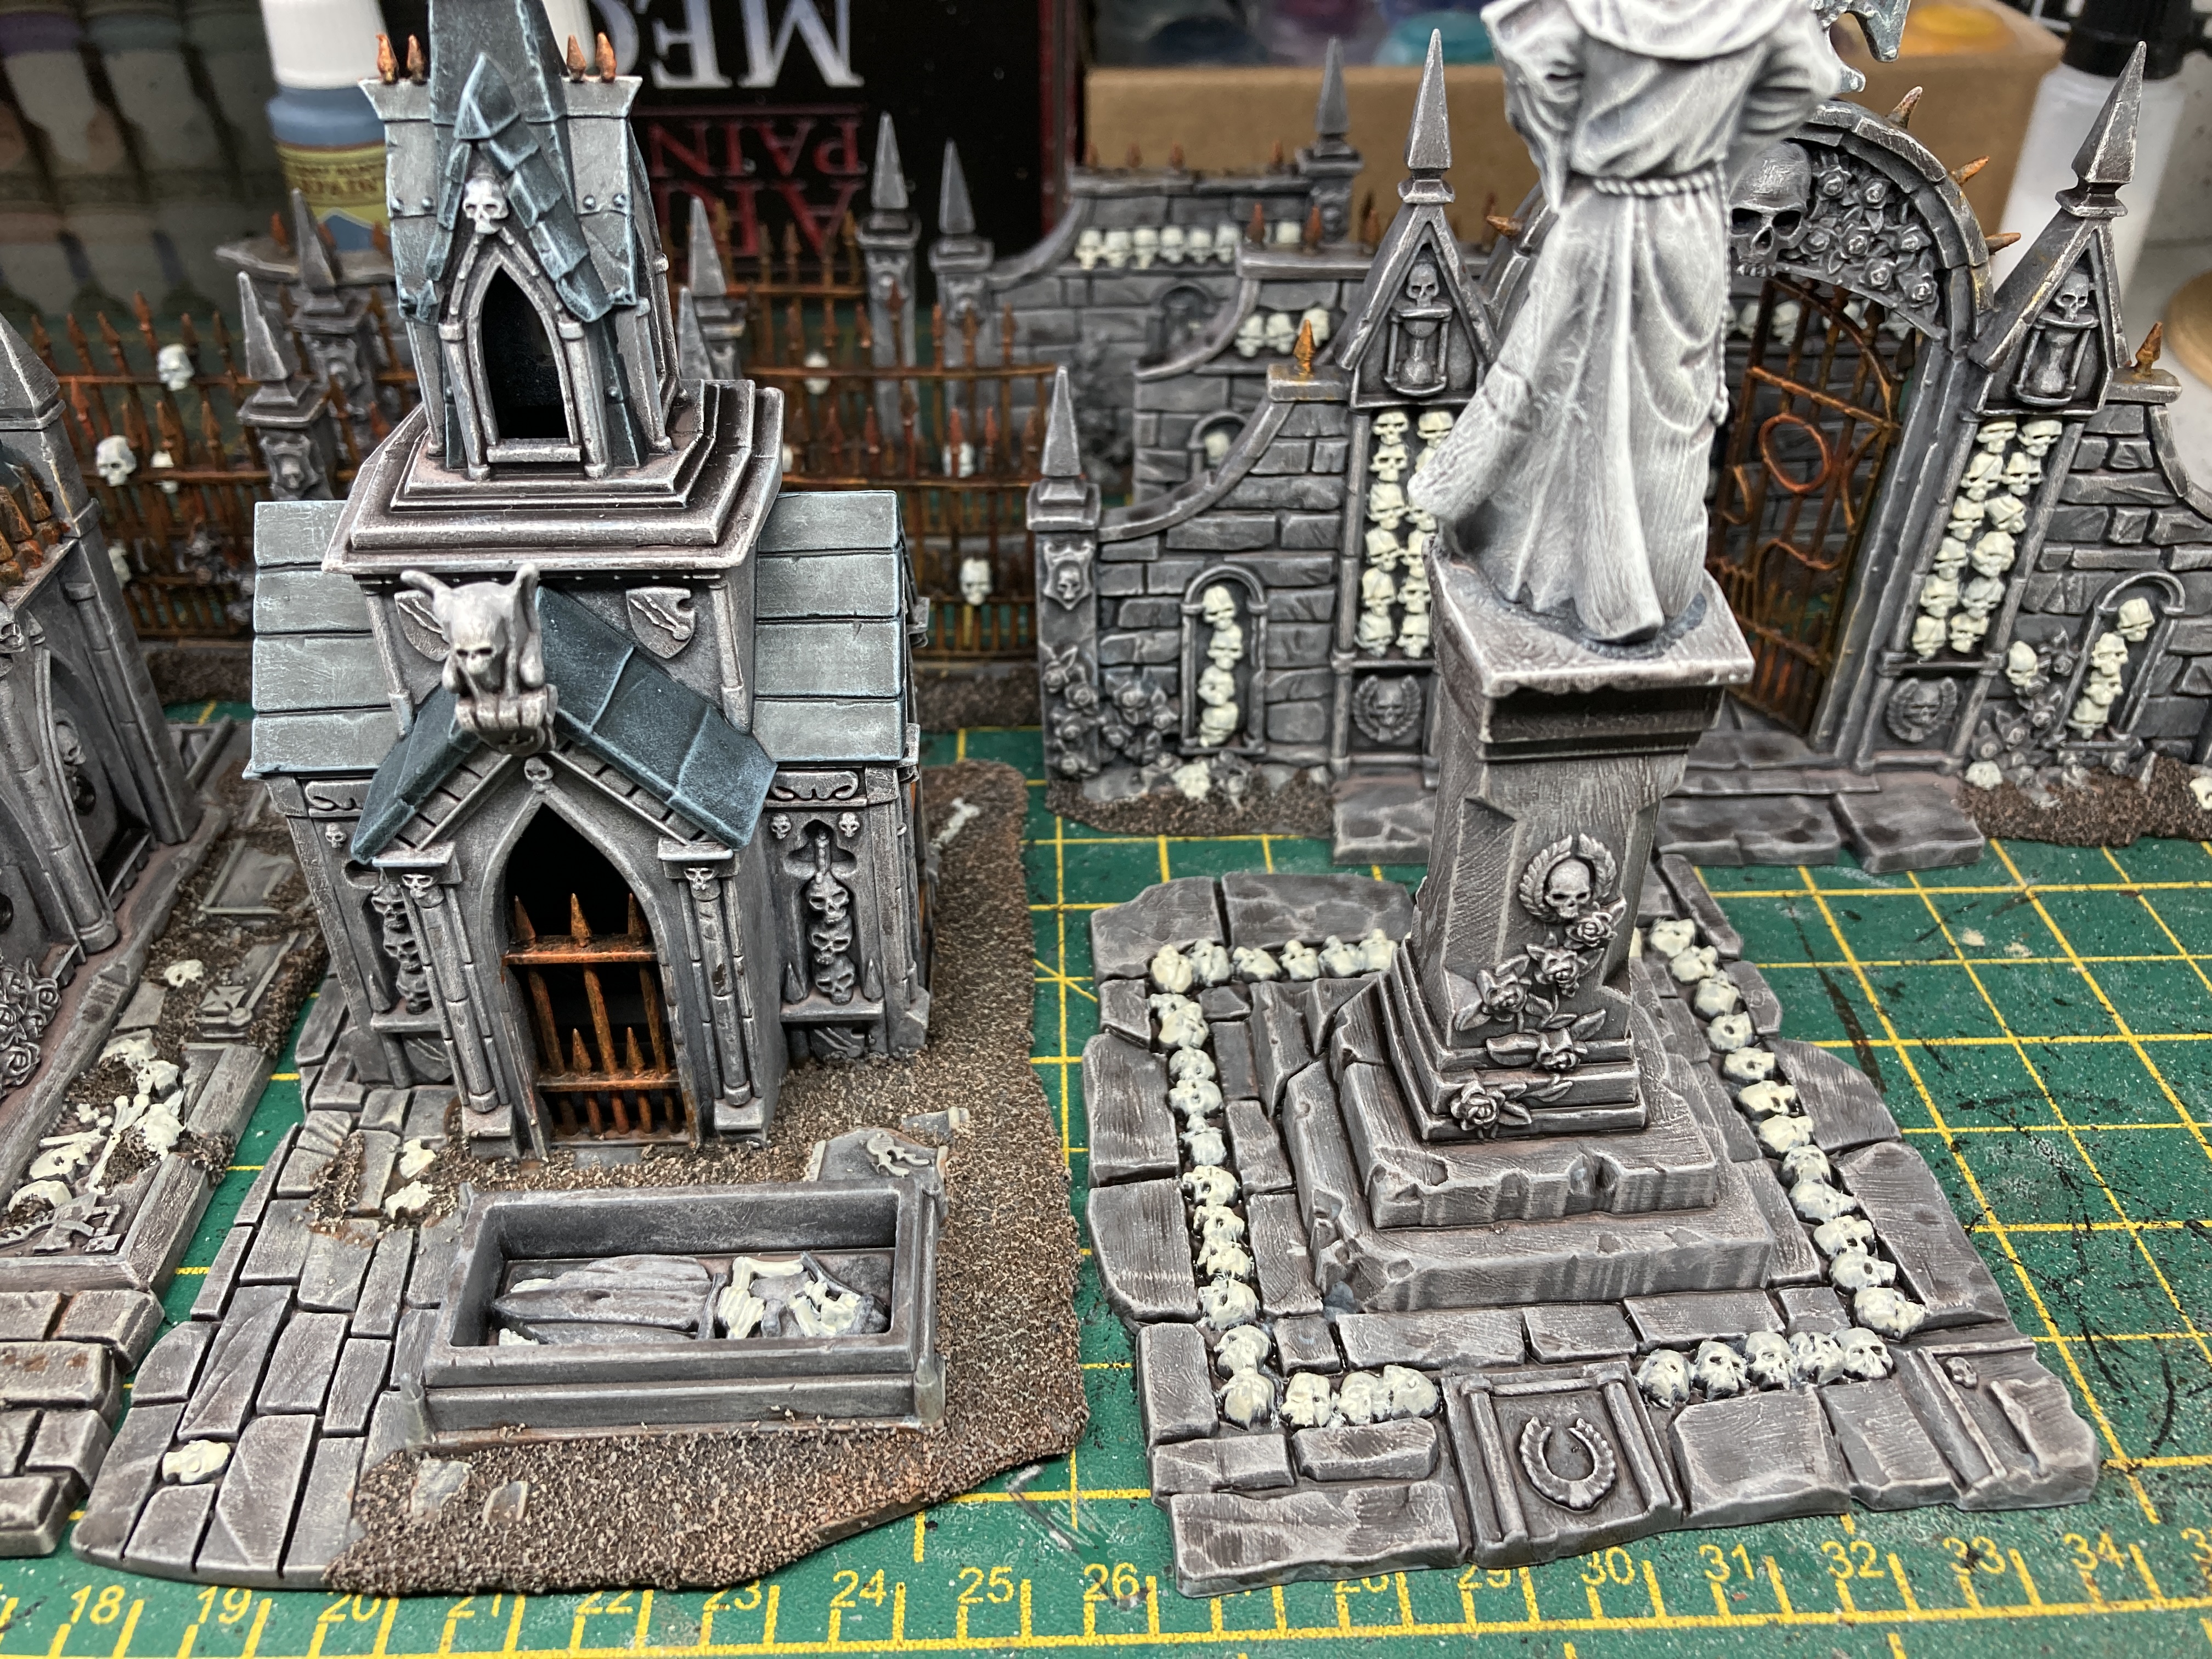
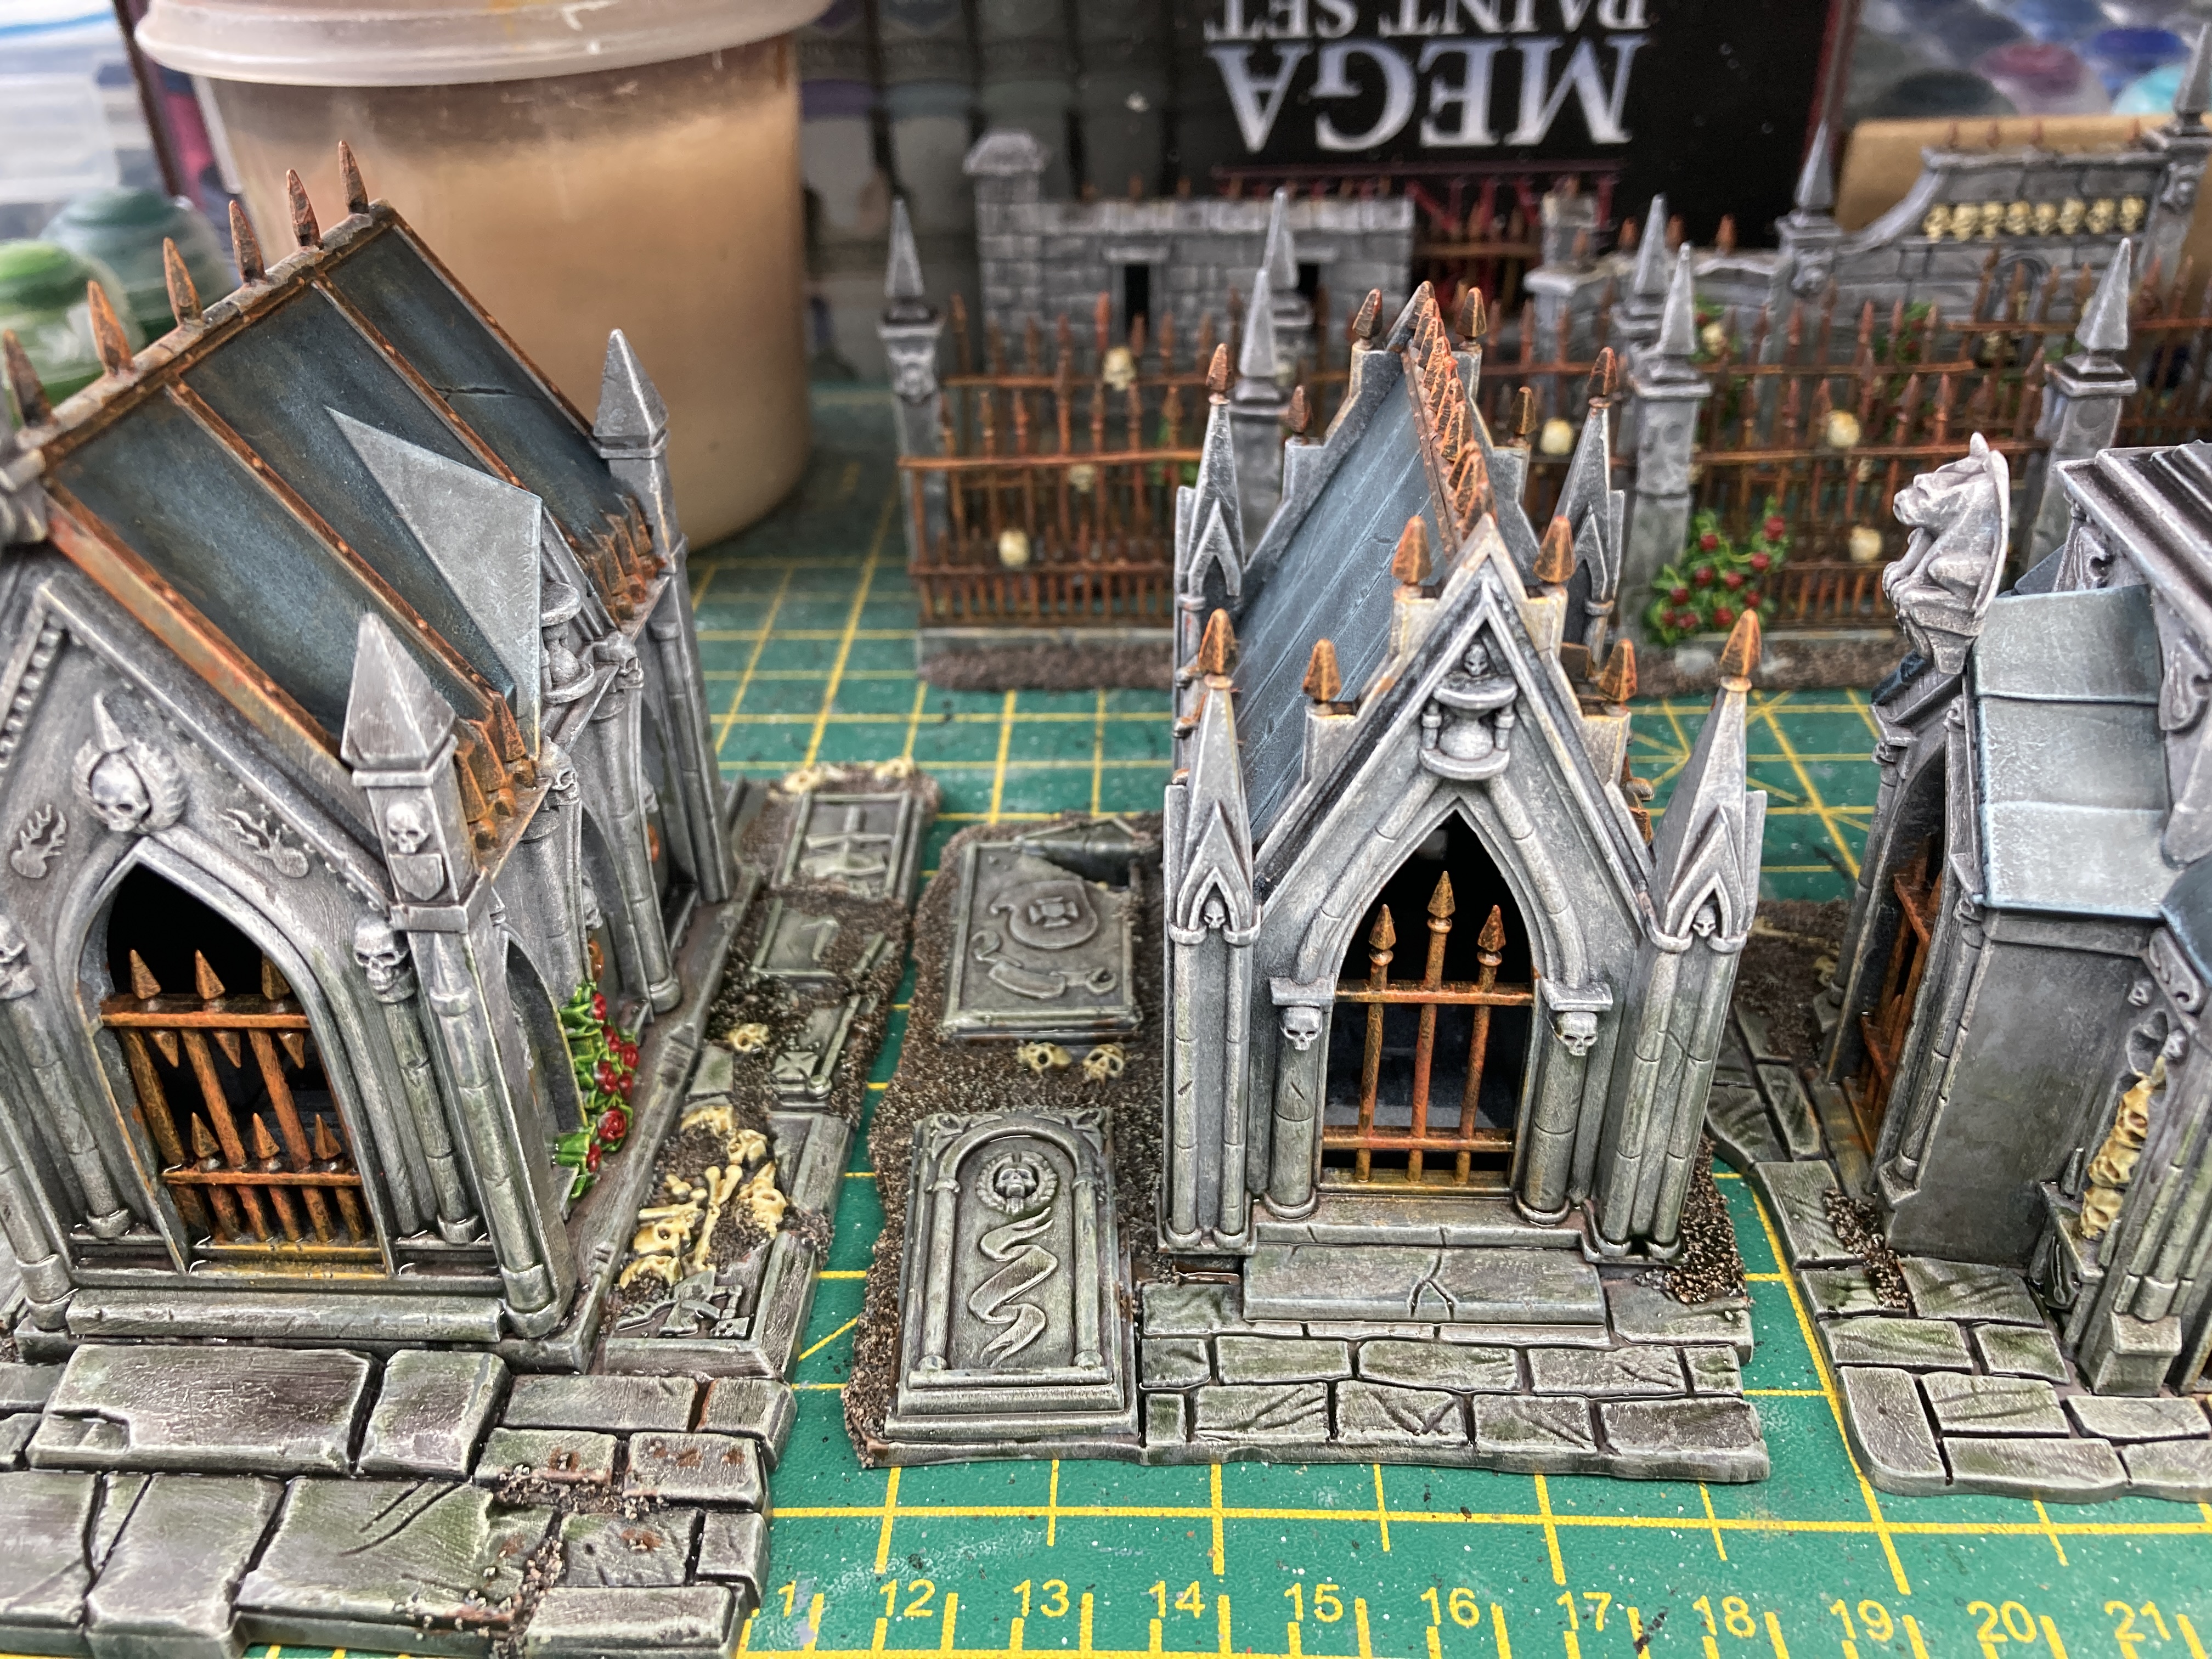
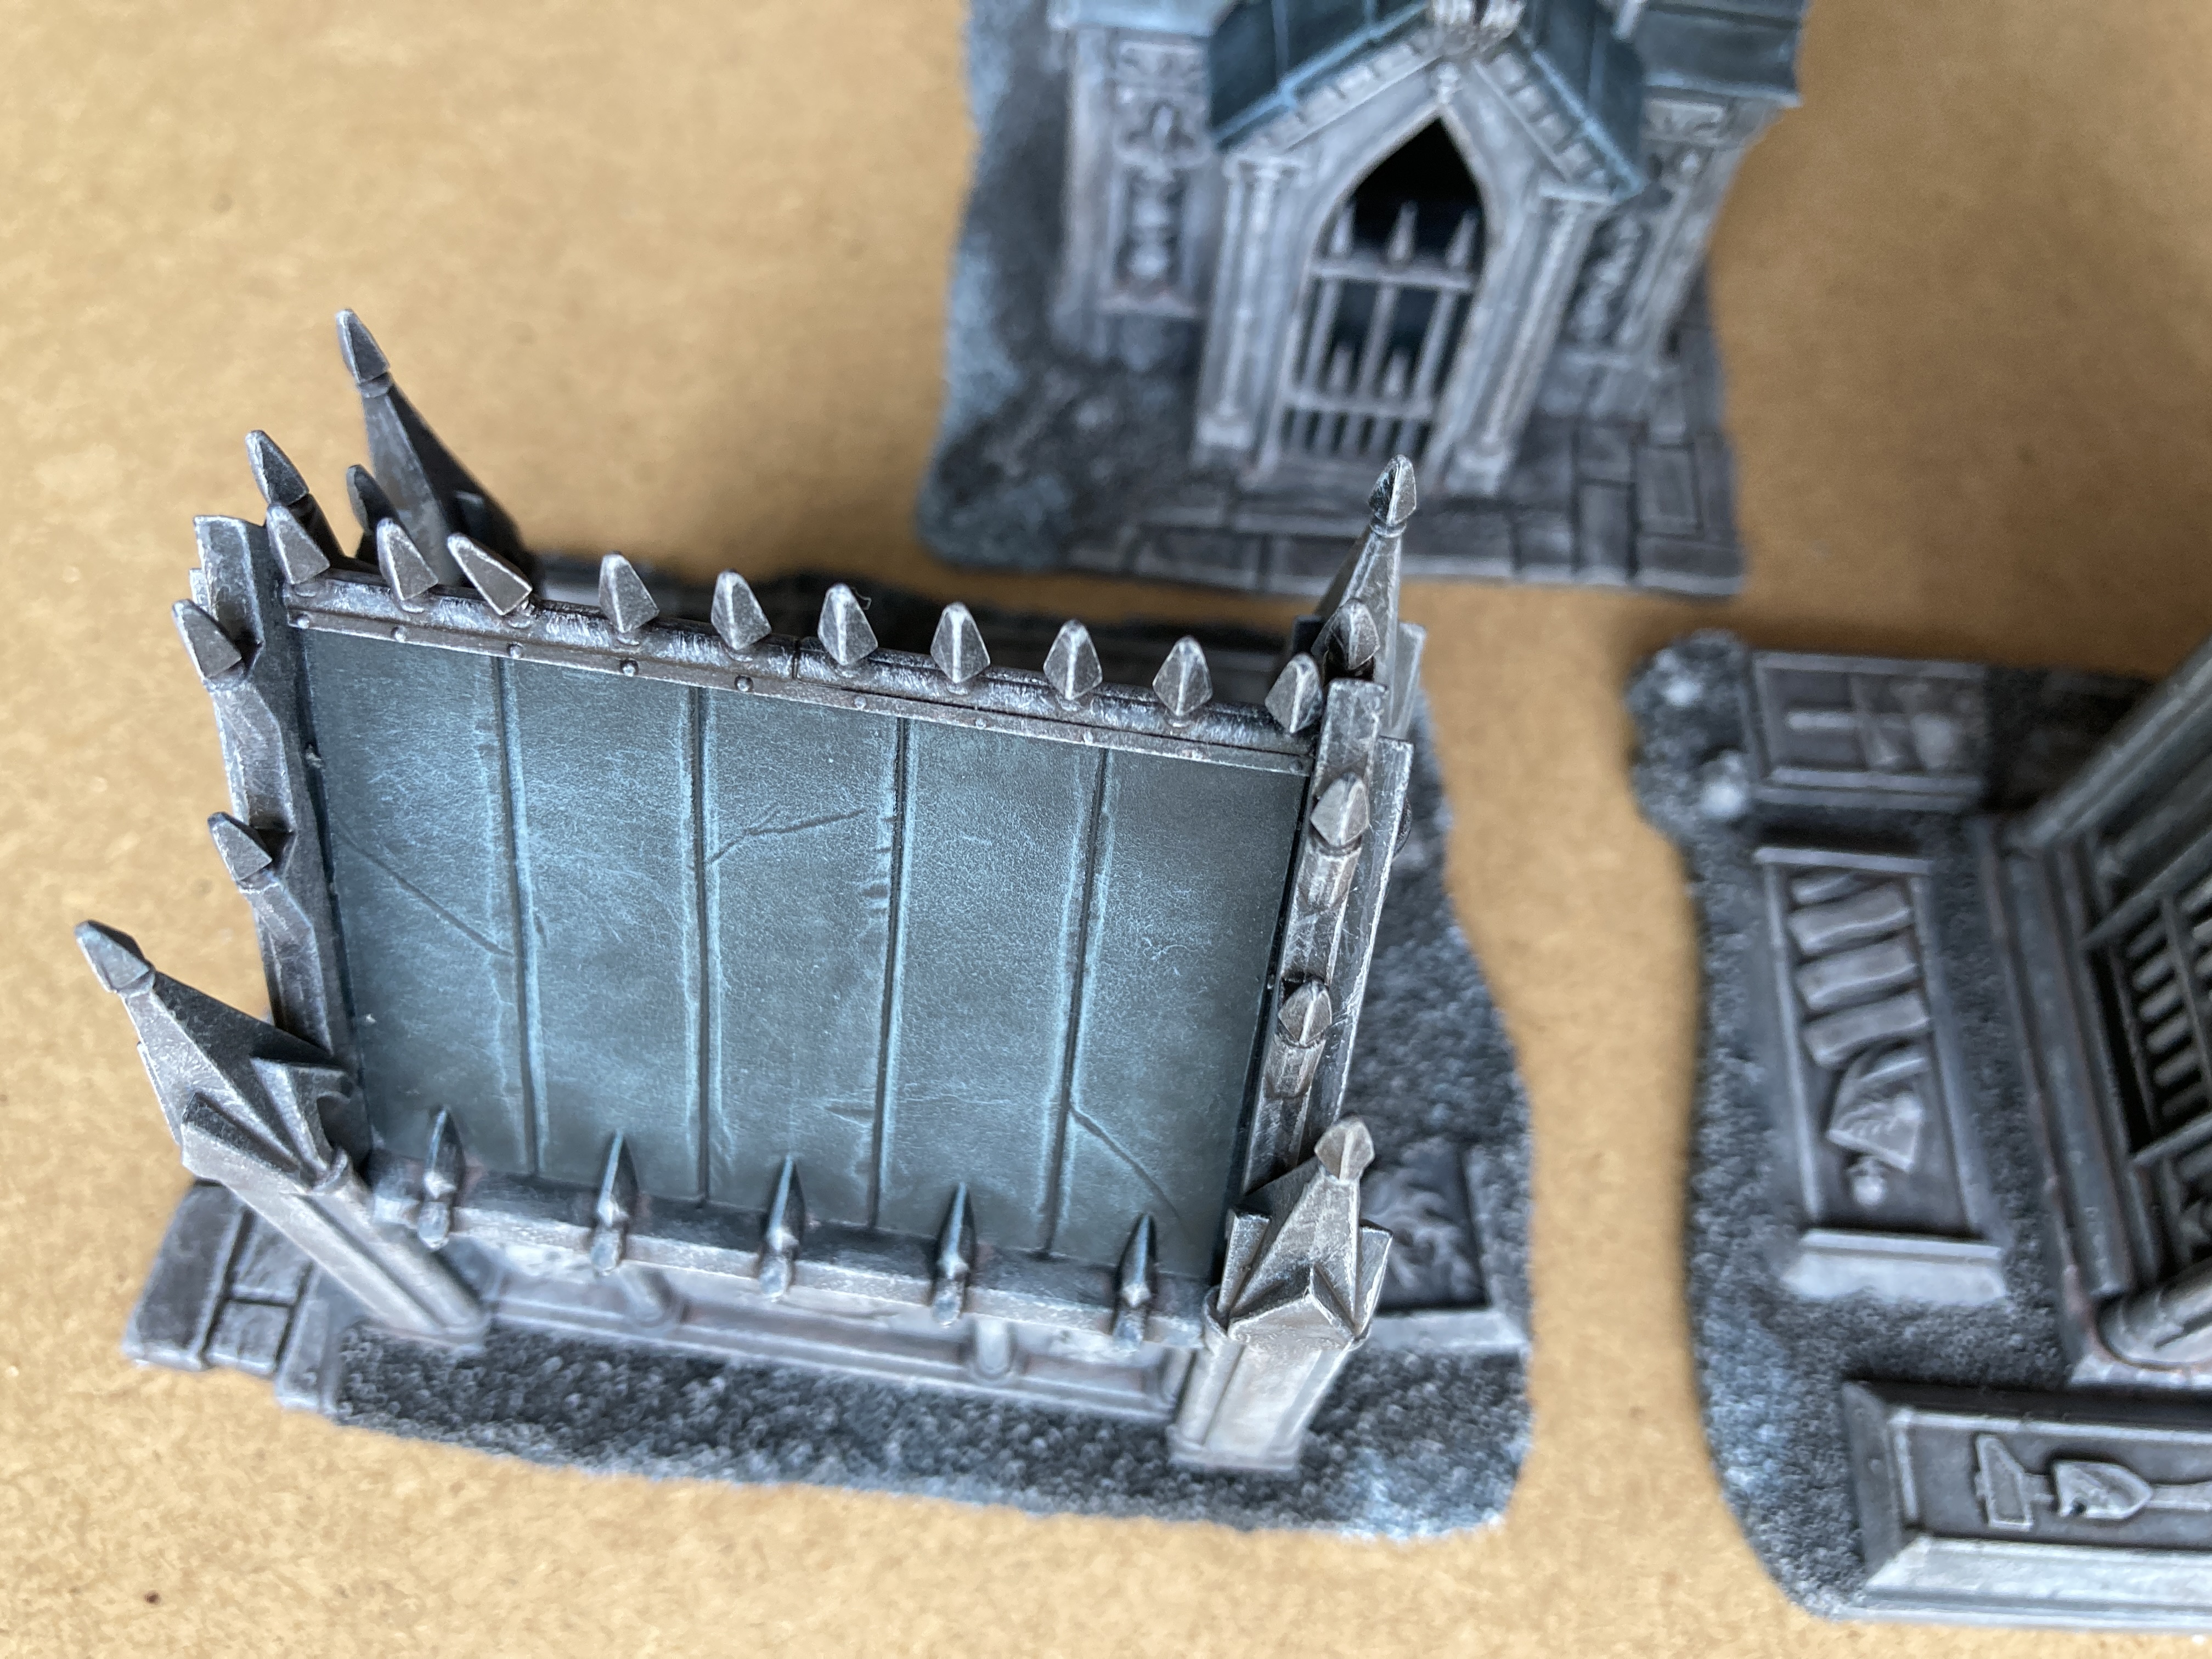
Roofs, Rust and Railings
For the roofs of the three buildings I used an equal mix of Leviadon Blue and Creed Camo contrast paint mixed with equal part thinner. Rather than use a shop bought thinner I make my own from acrylic matt medium and water.
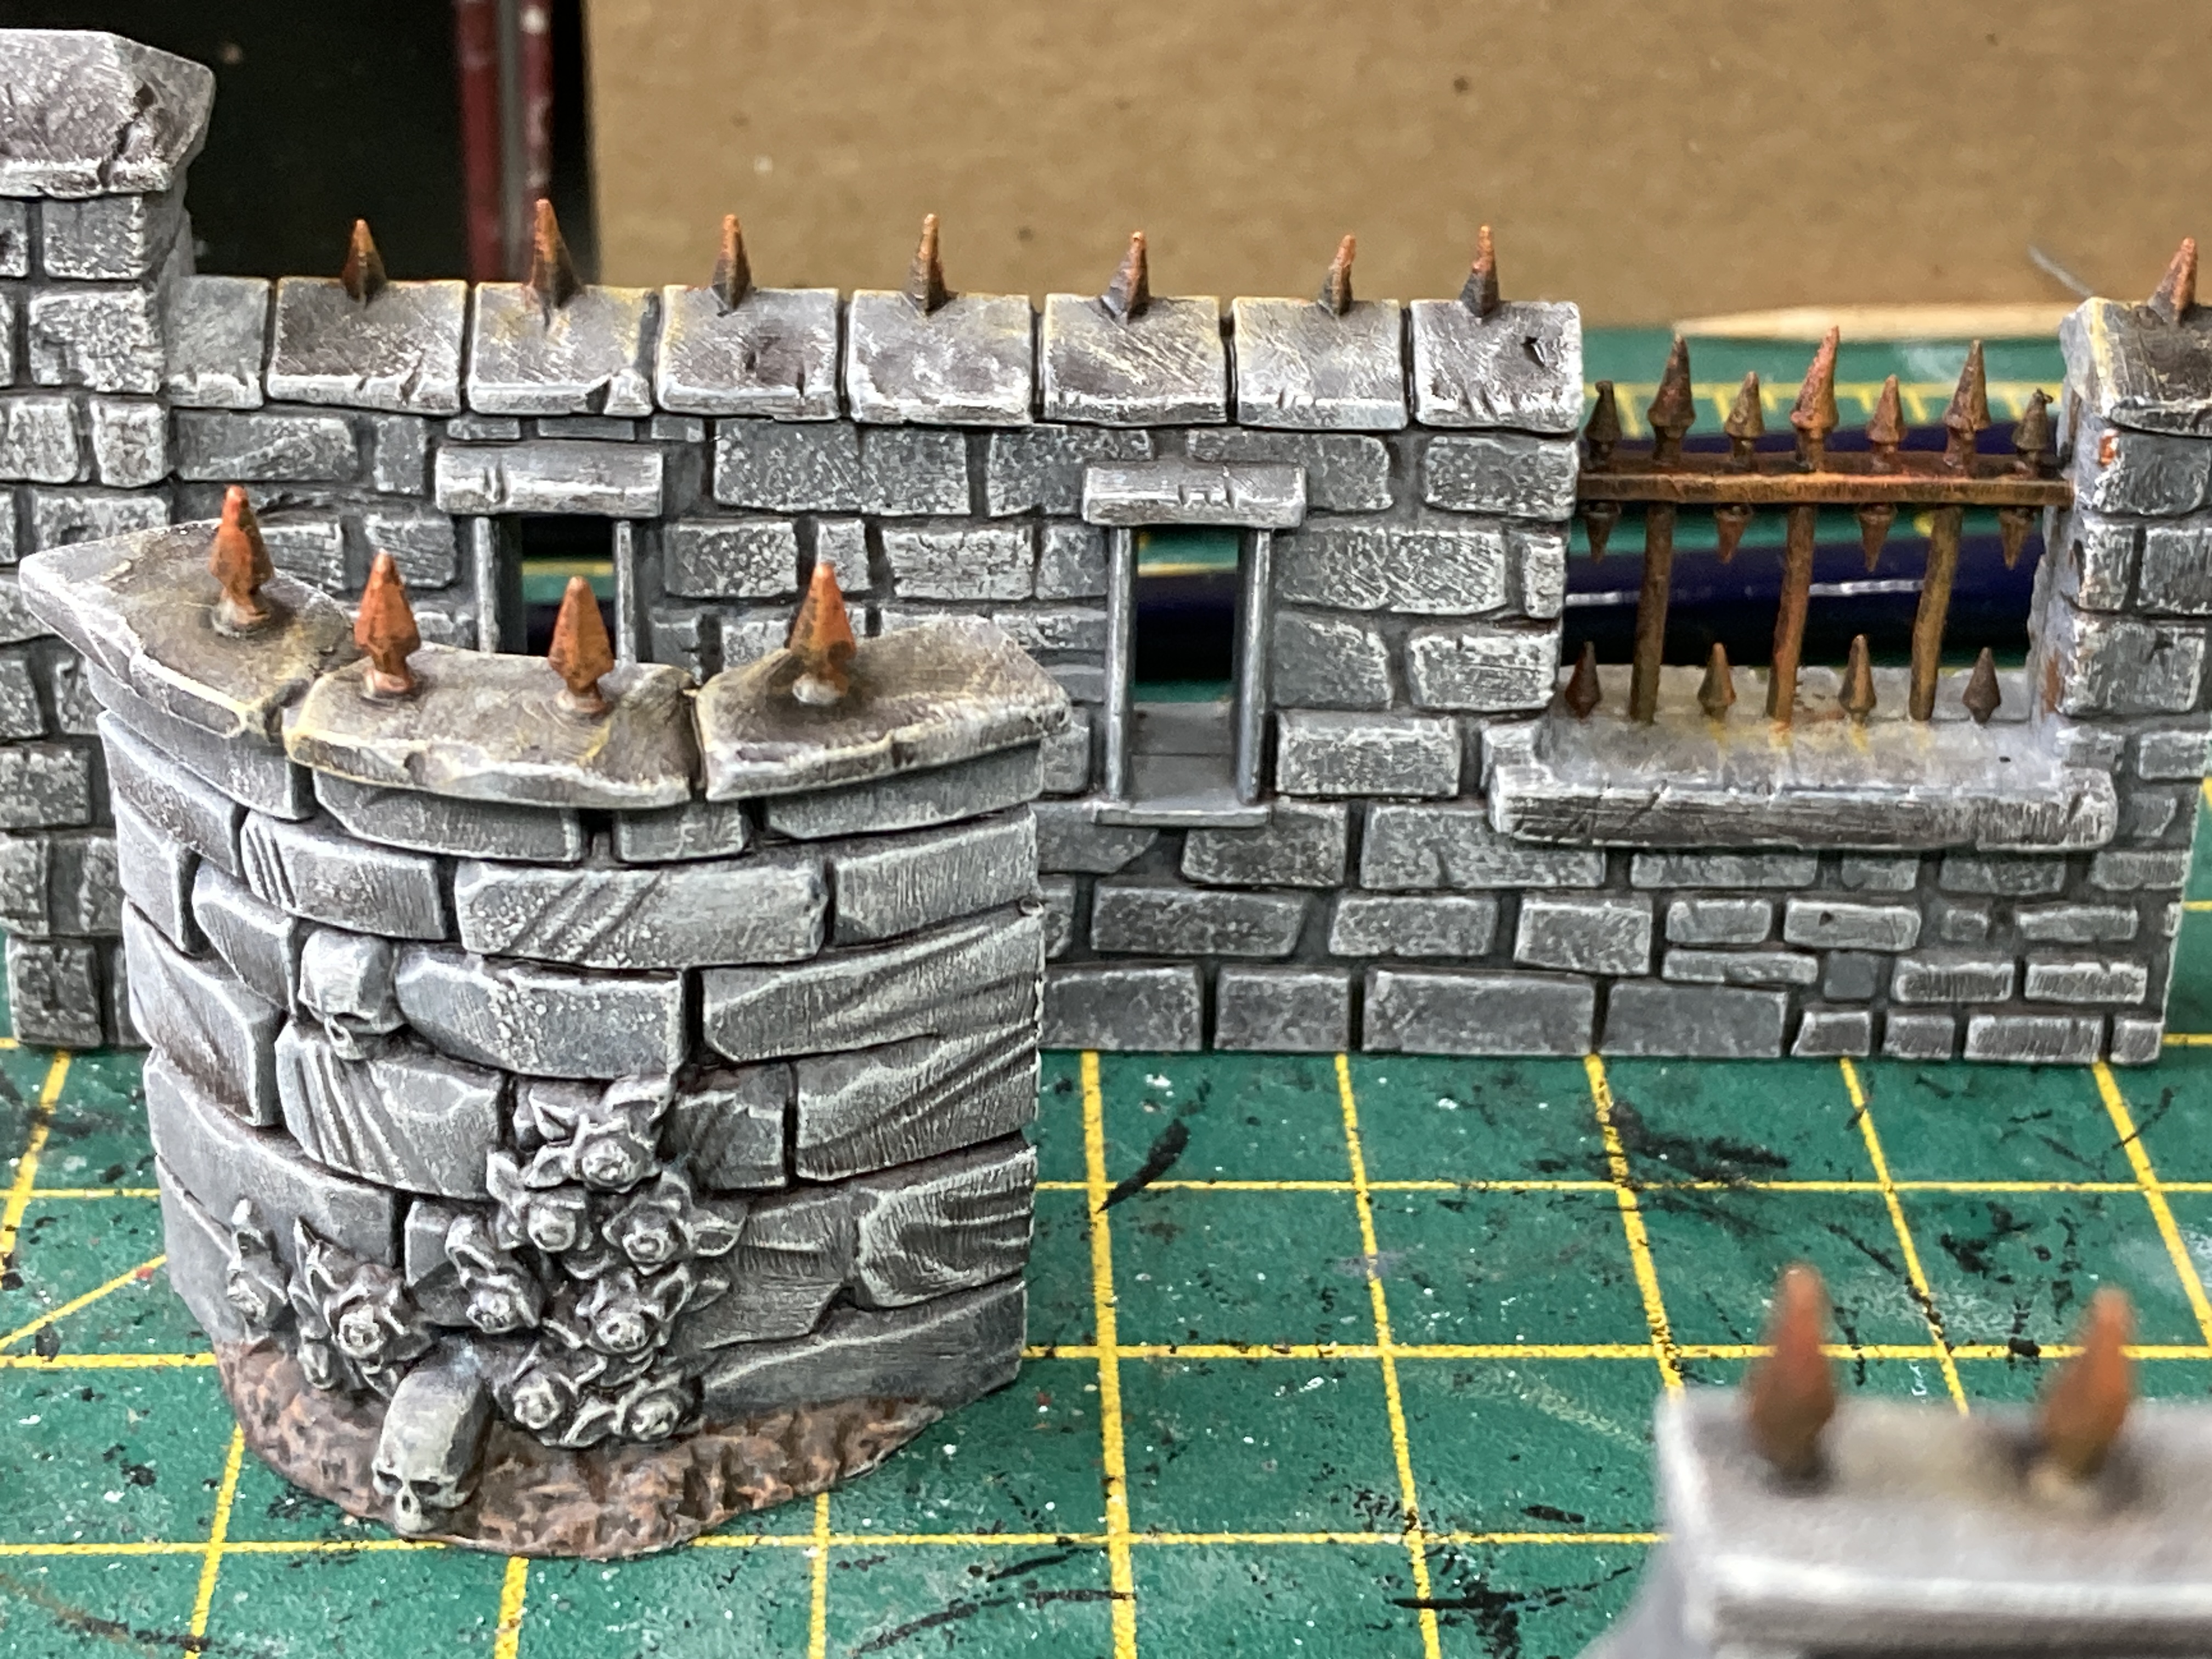
I applied two coats of this mix then once dry I lightly drybrushed with a light grey to bring out the details.
Next I gave the statue an additional drybrush to whiten it up a little to make I look like it was carved from a higher quality stone.
I then painted all of the ground earth with Gore-Grunta Fur contrast followed by a drybrush of a light beige.
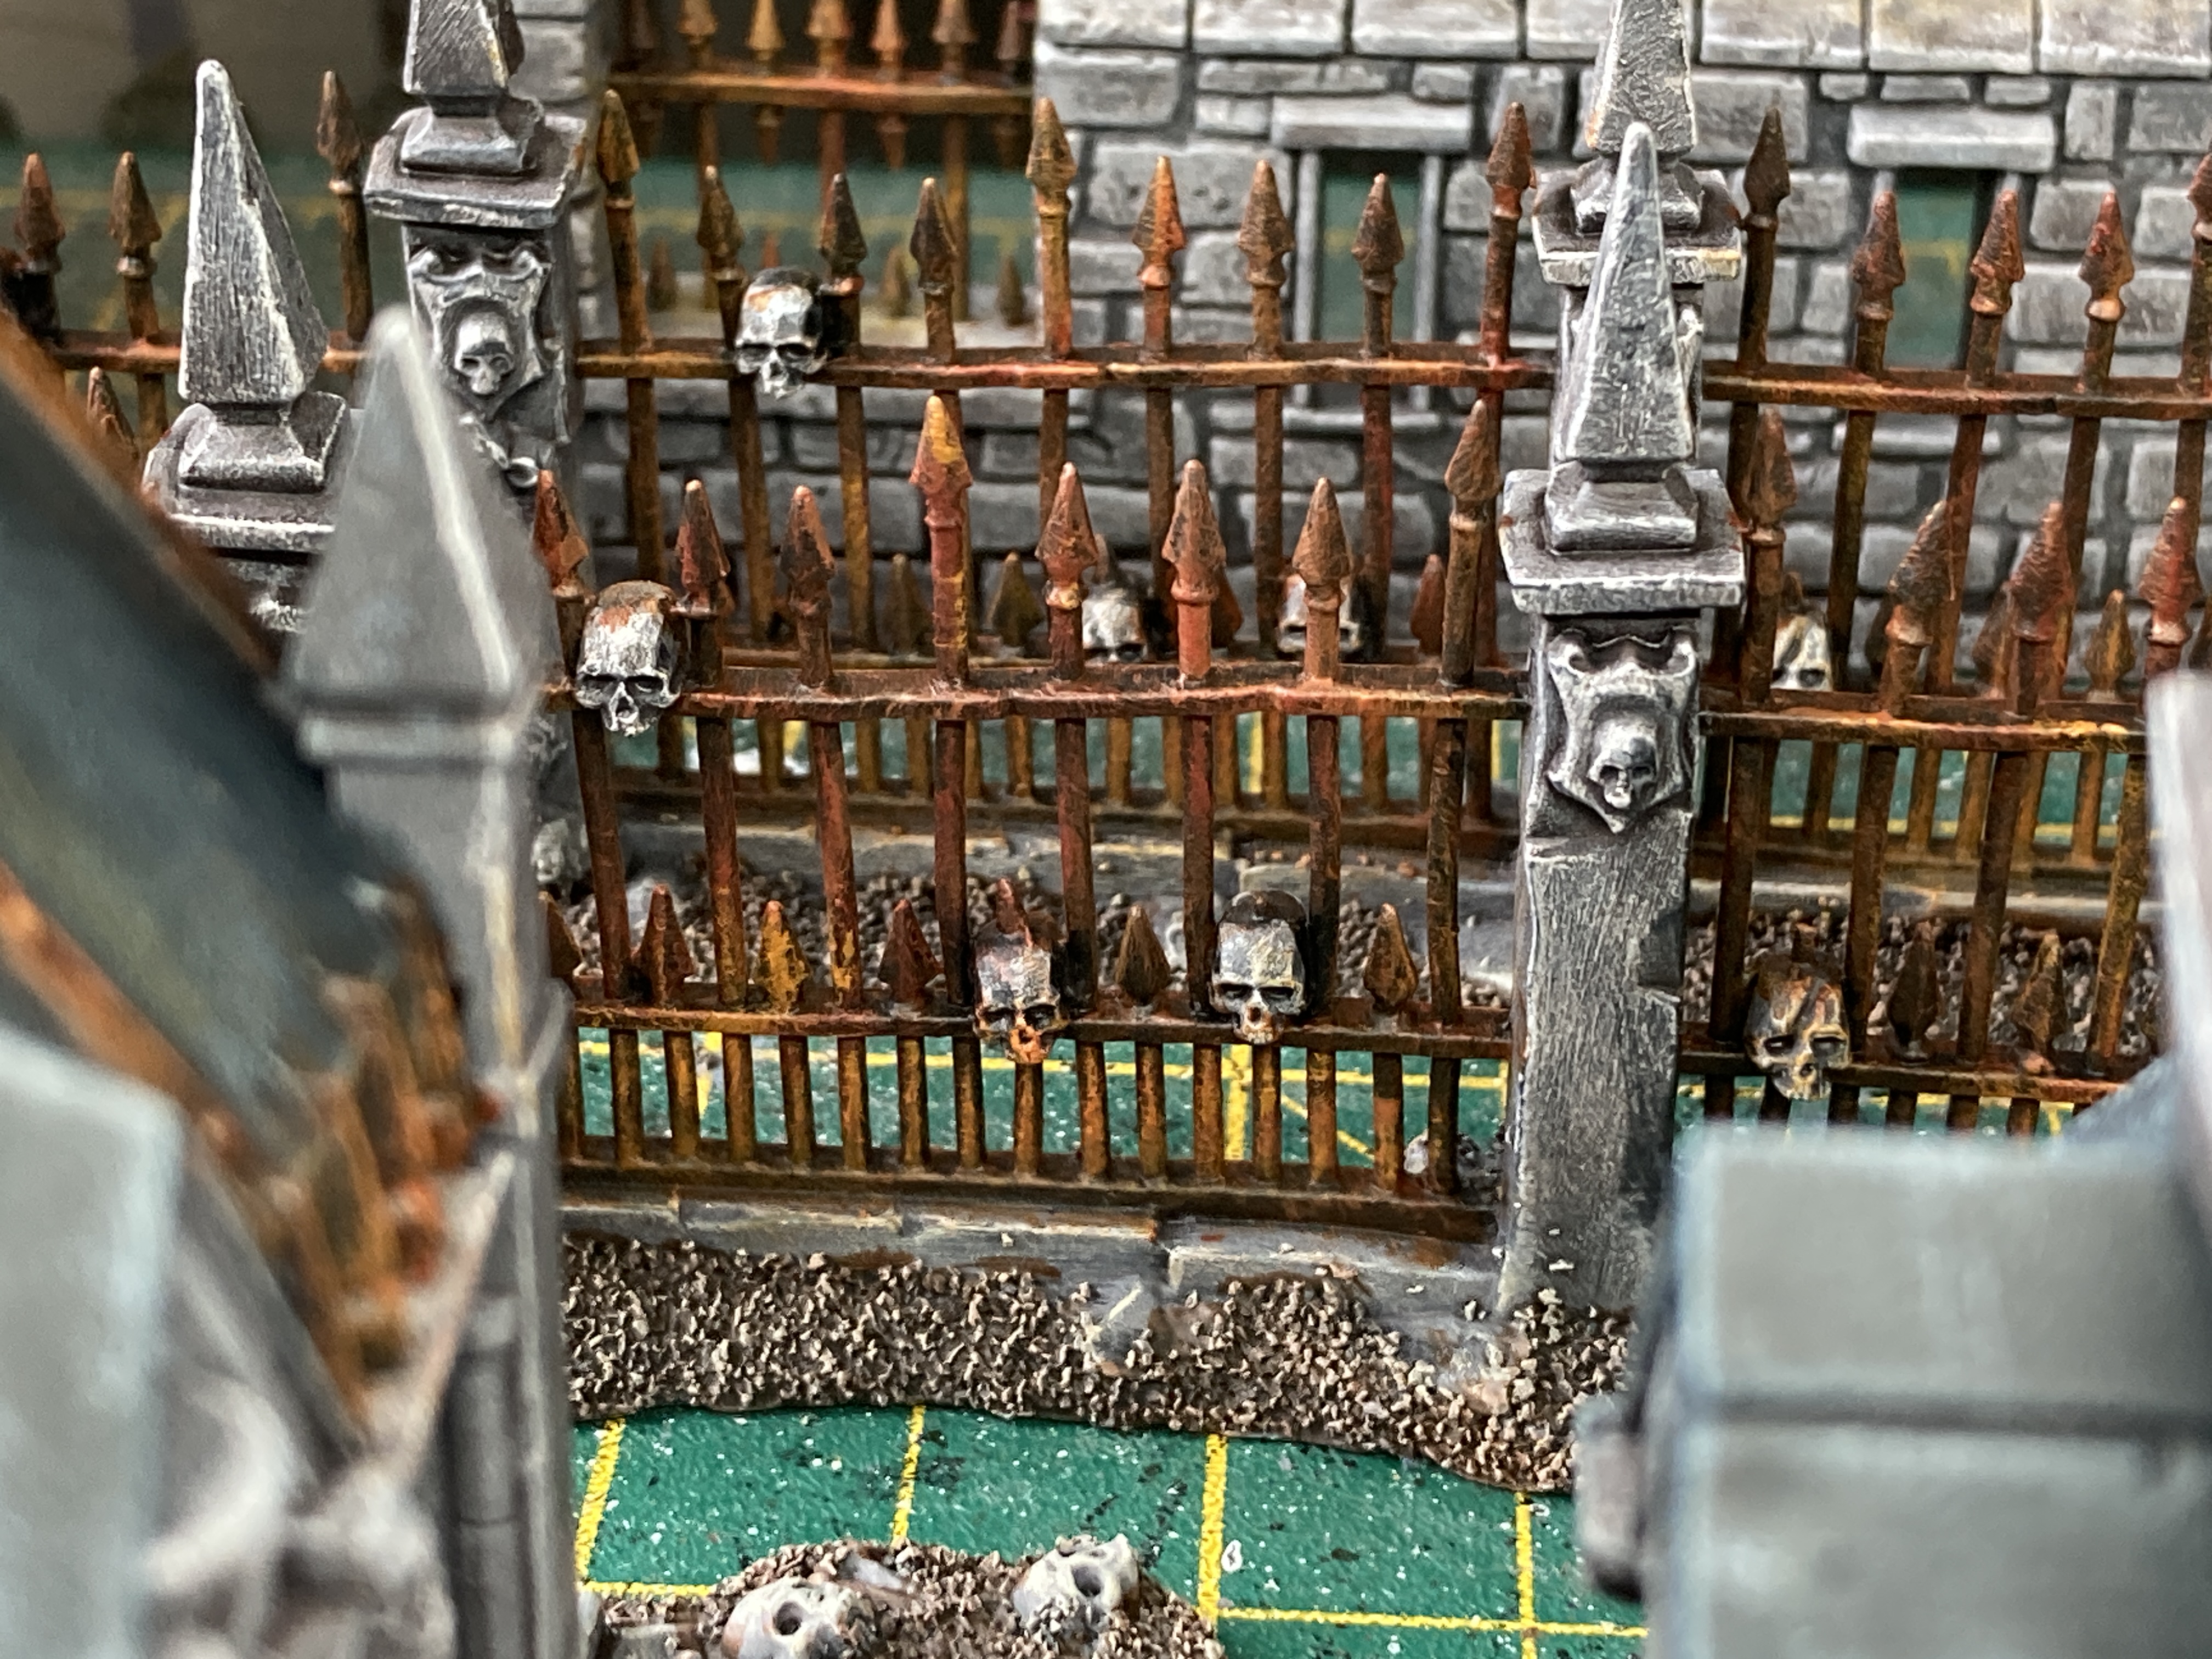
I then painted all of the iron work black. This was a little time consuming but certainly a necessity.

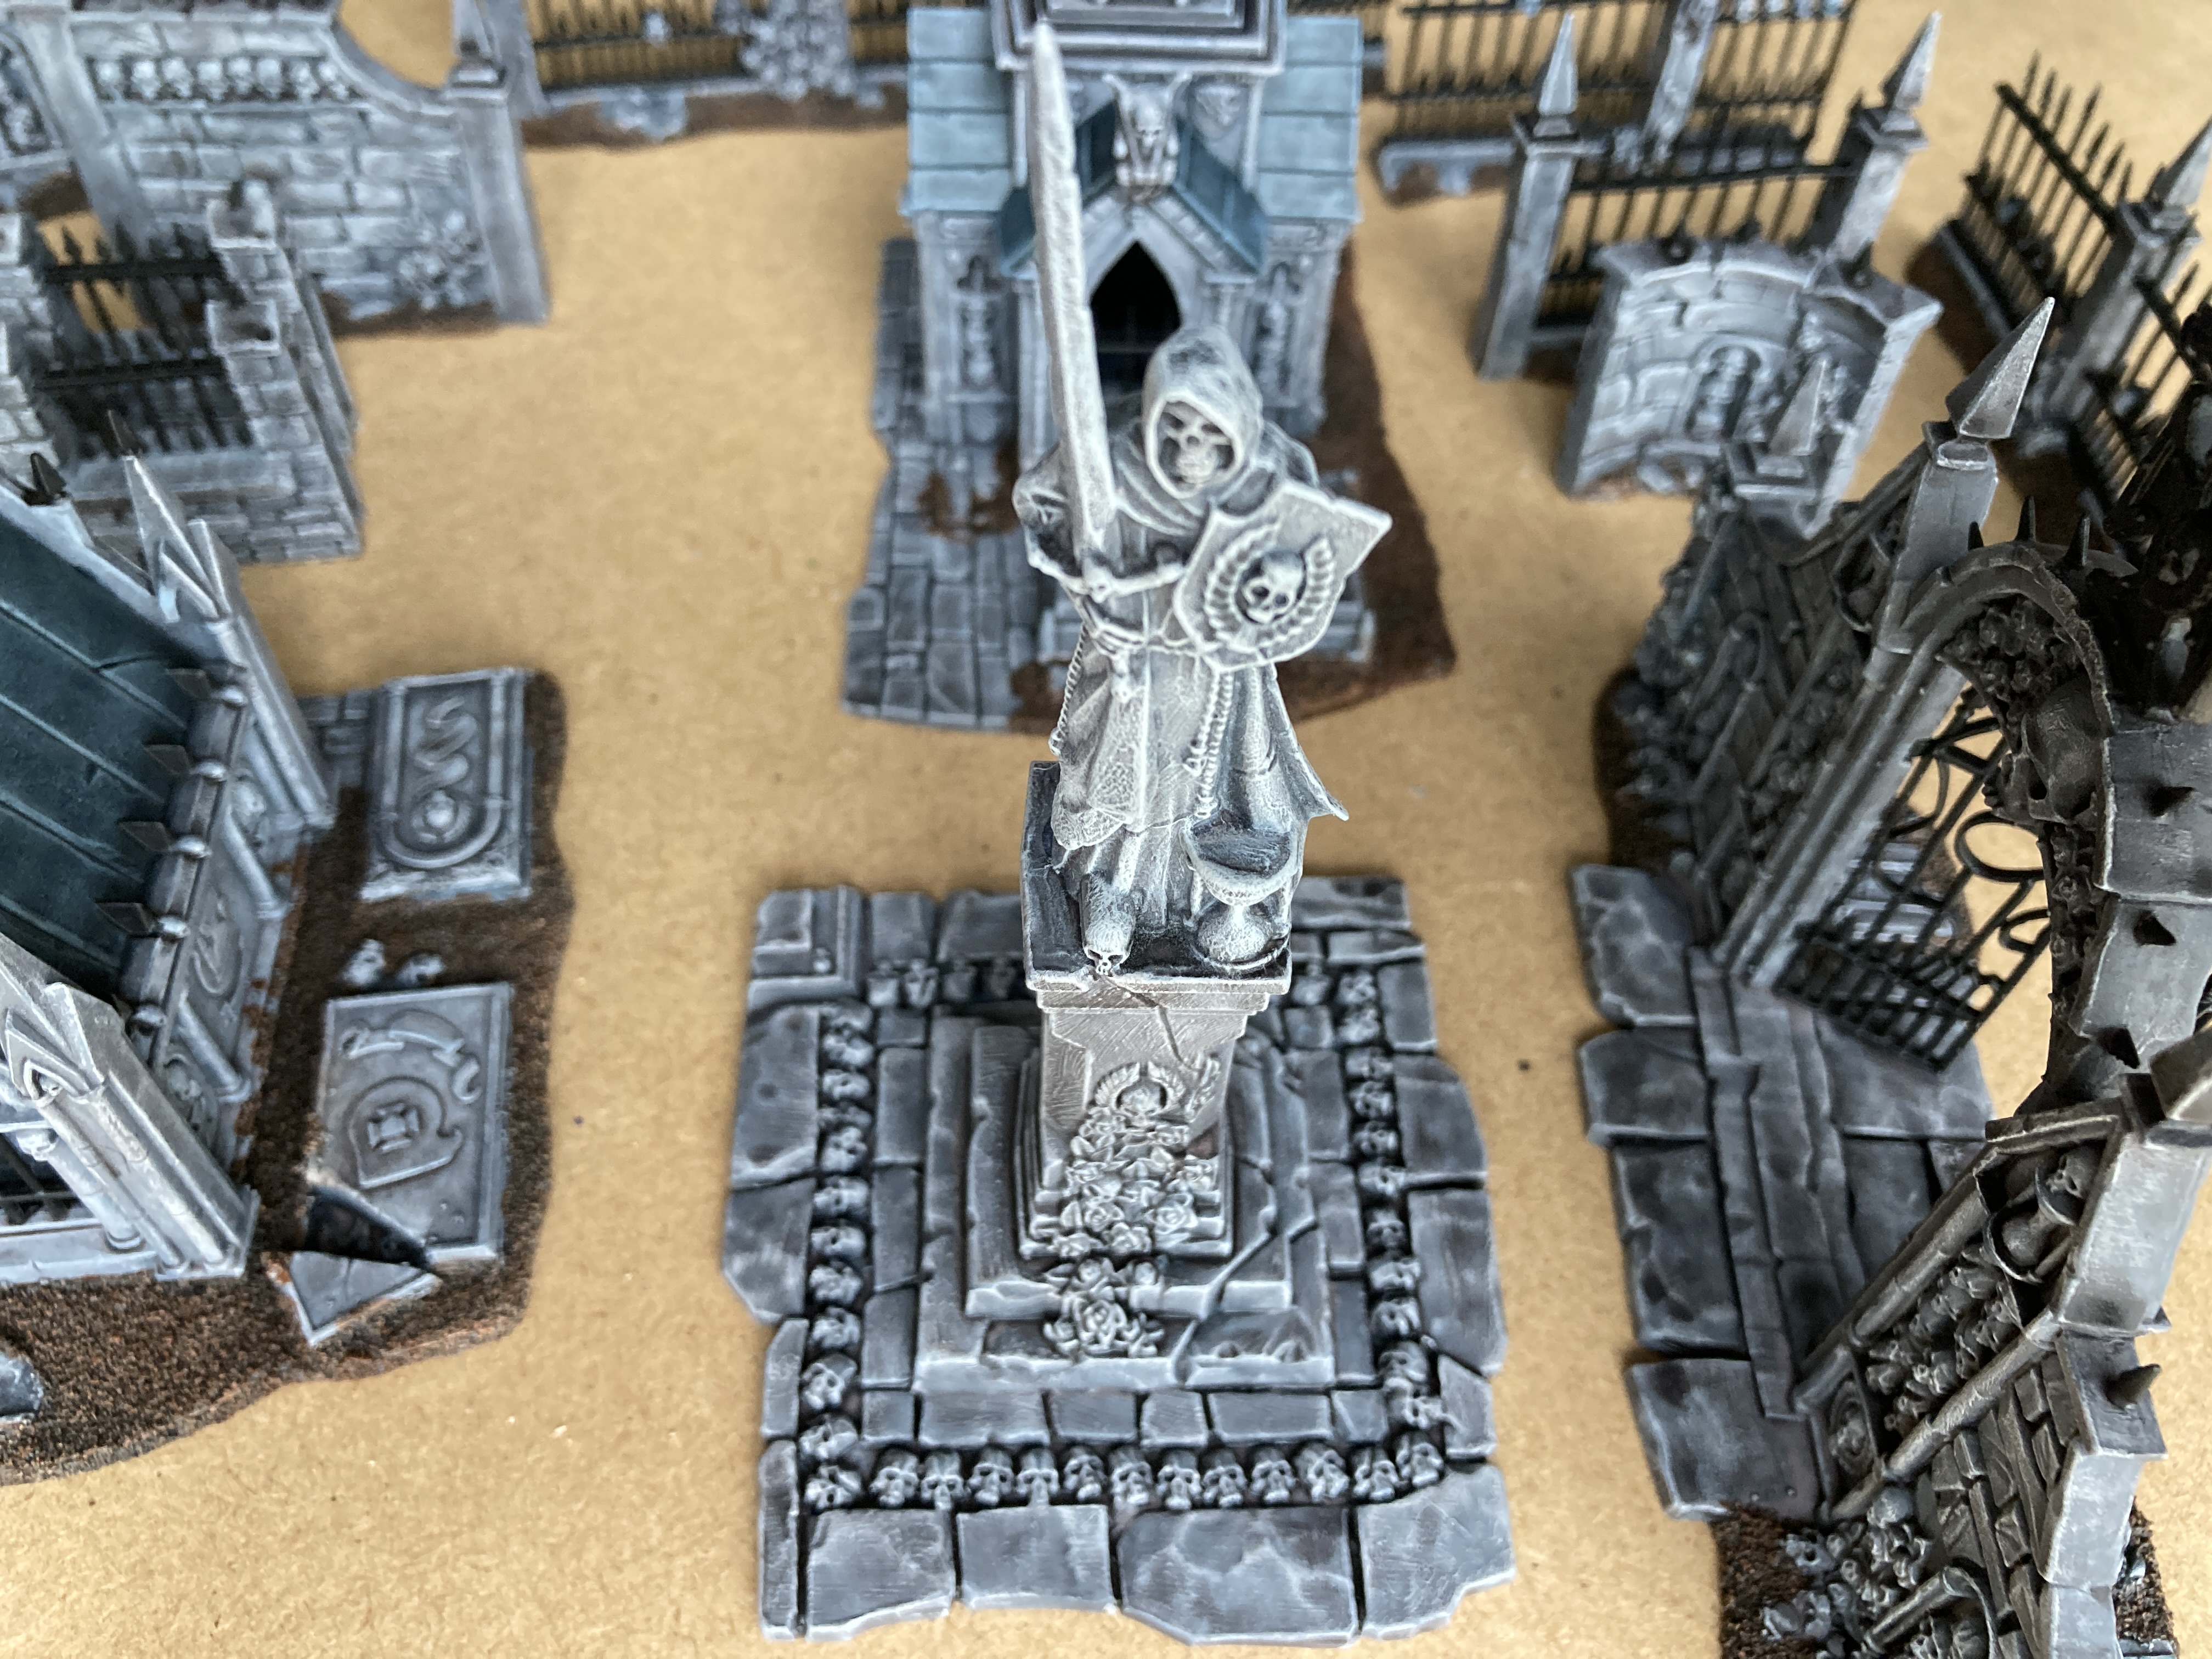
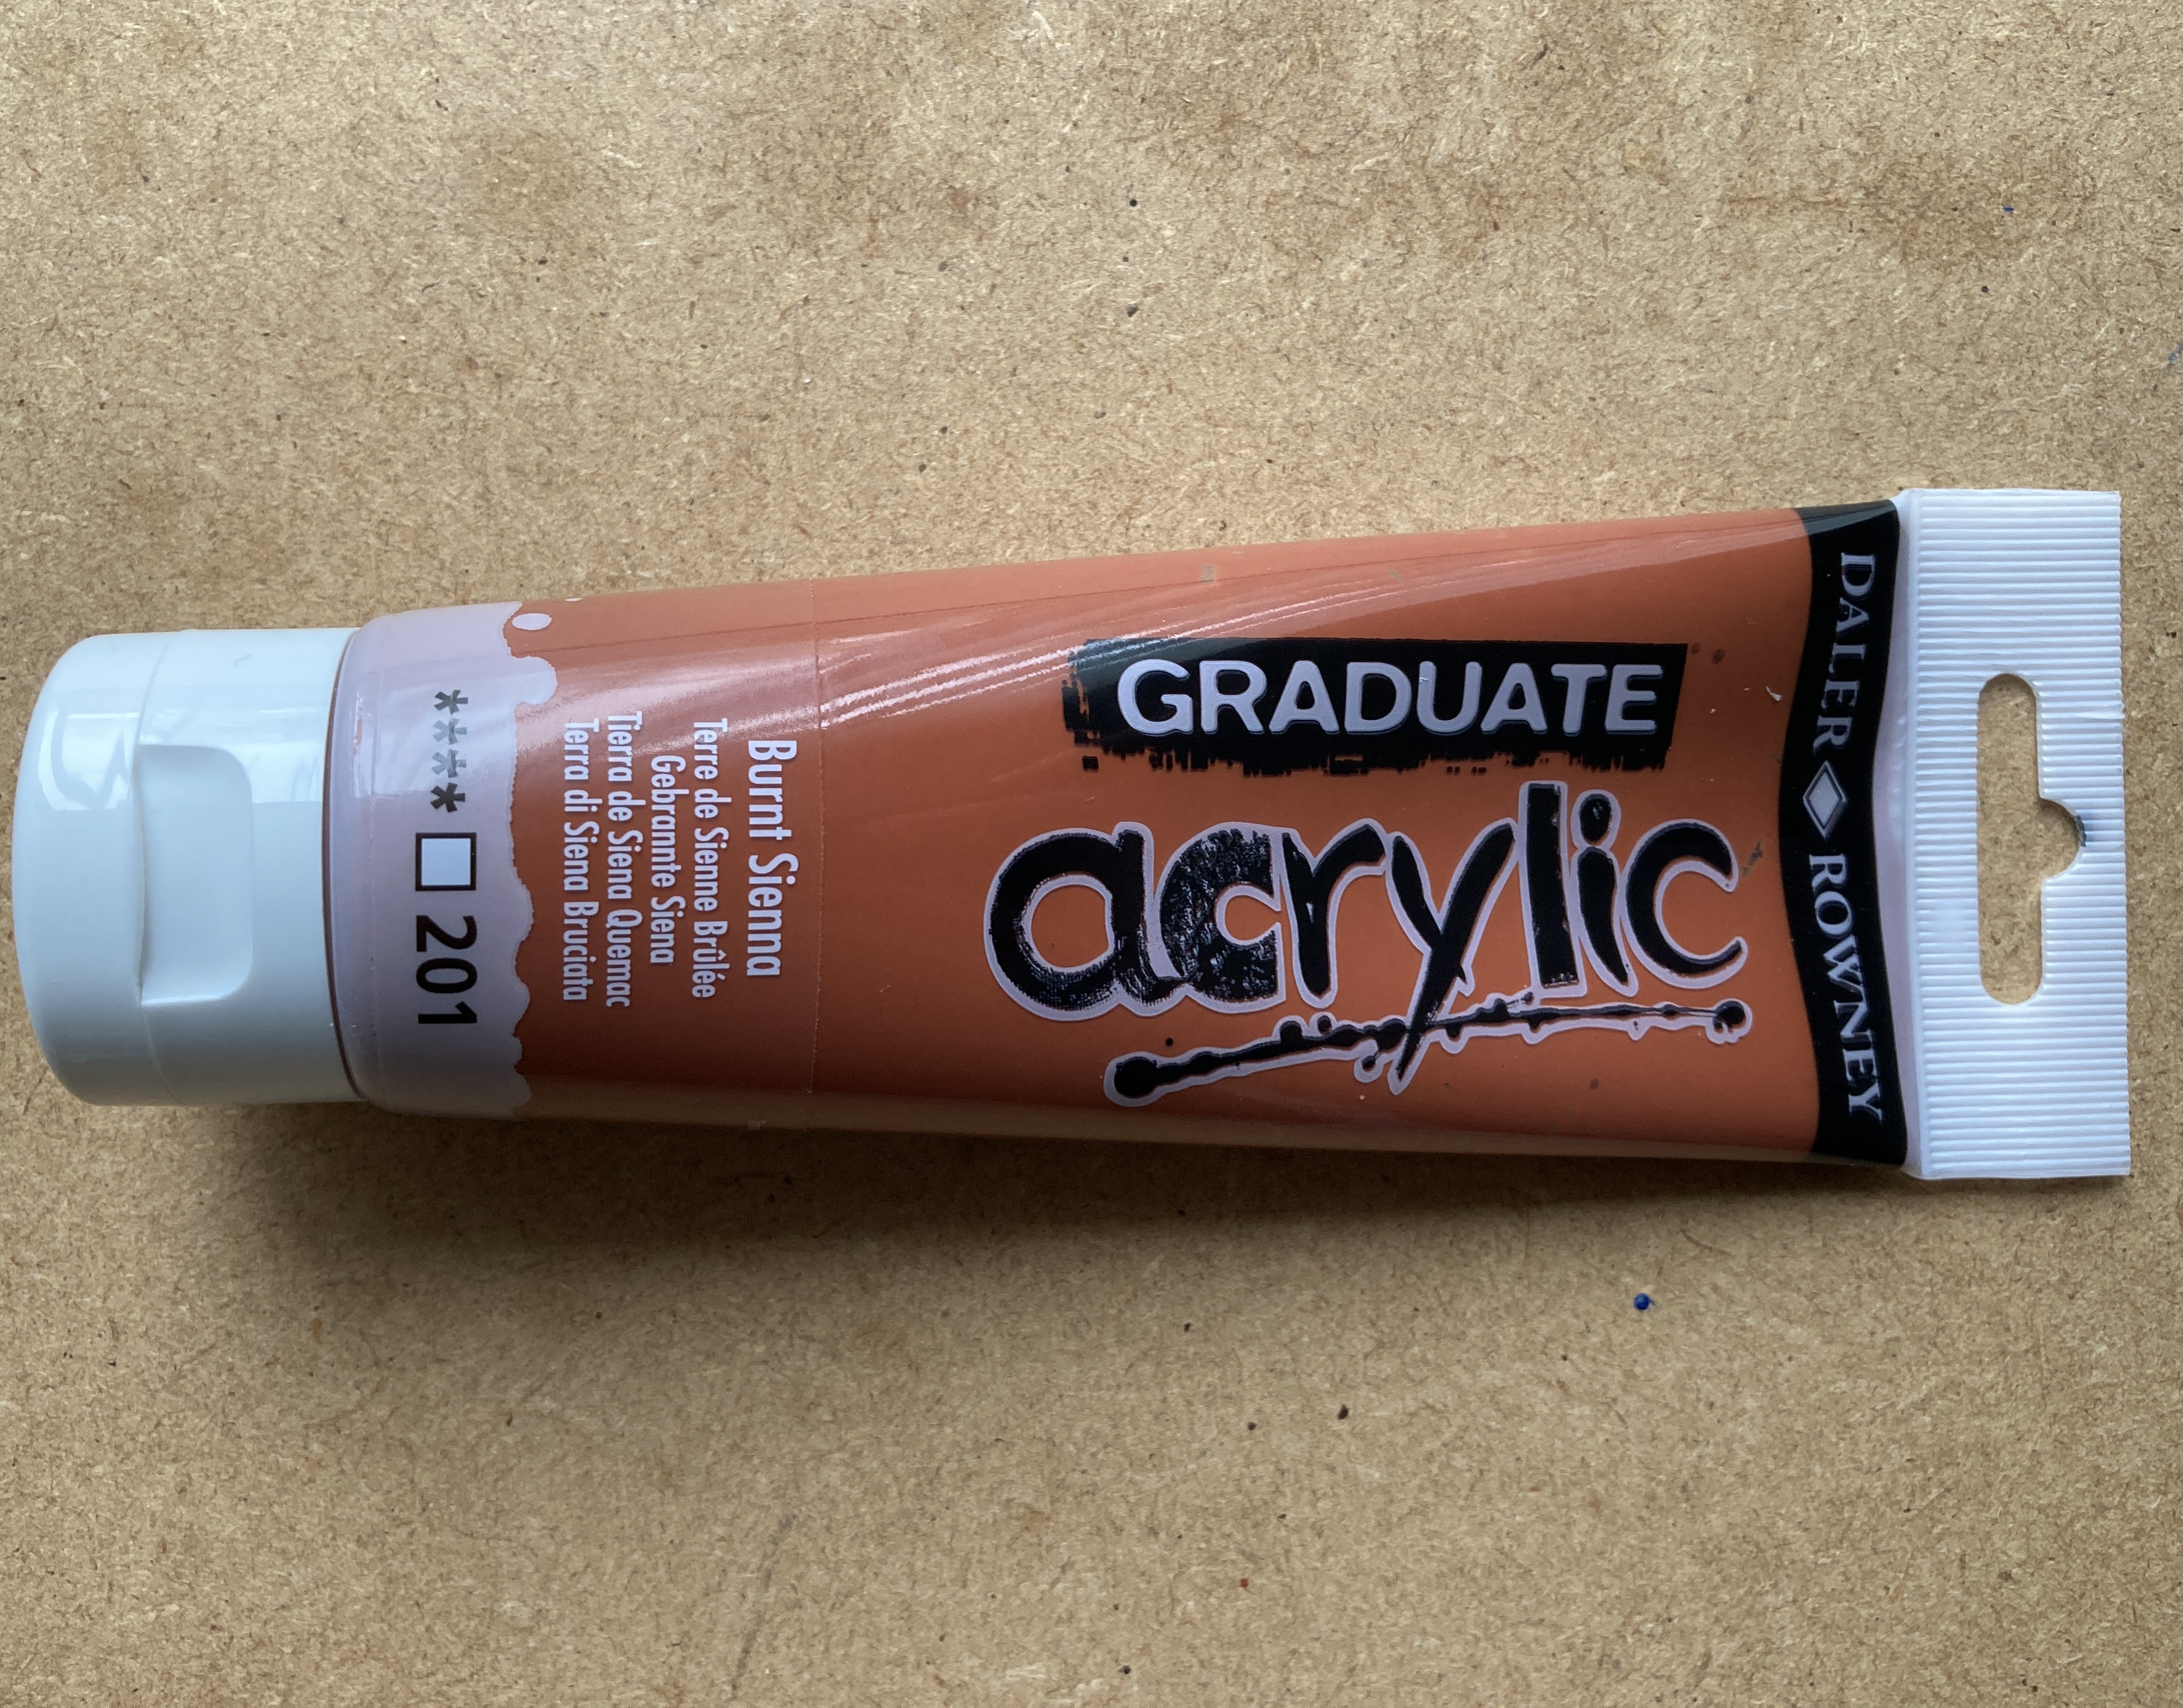
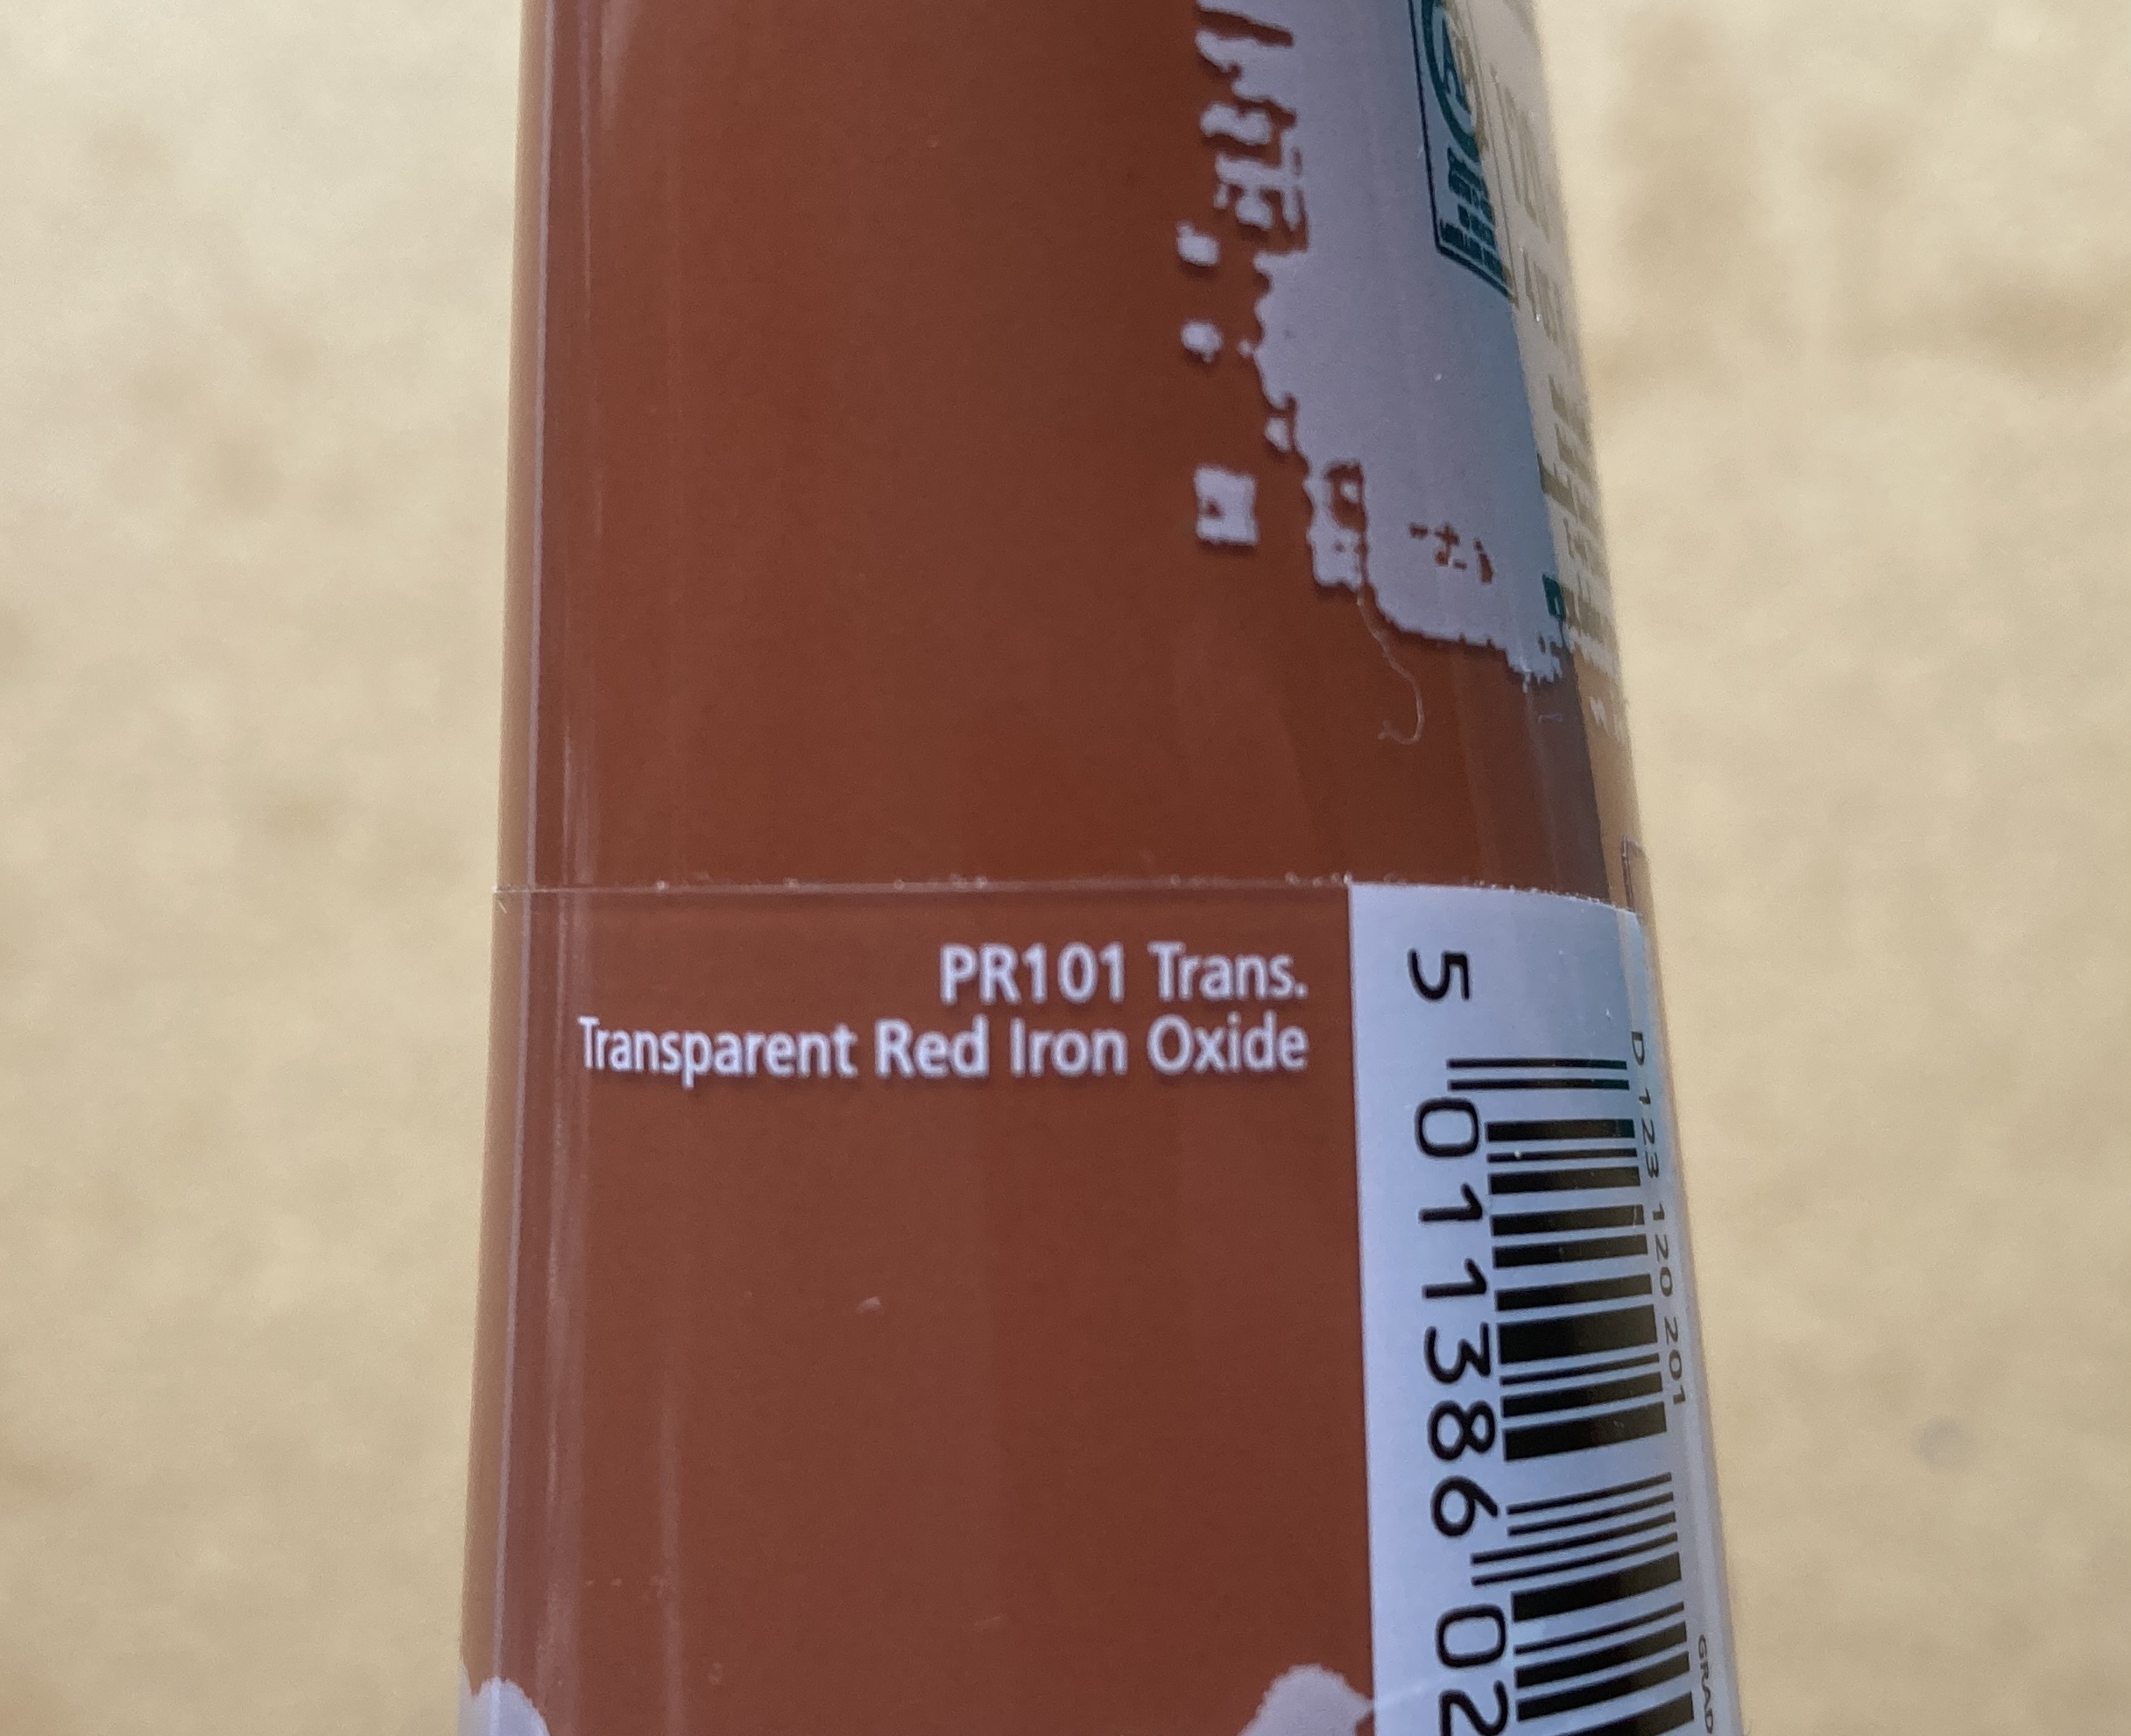
Next I started on the rust. The first paint was some cheap artist’s acrylic, burnt siena which actually contained red iron oxide as its pigment, ie rust. Unfortunately although it went on well enough when dried it faded and dulled quite a bit so I went over all the metal work again with Vallejo Red Leather Model colour which is pretty much the same colour.
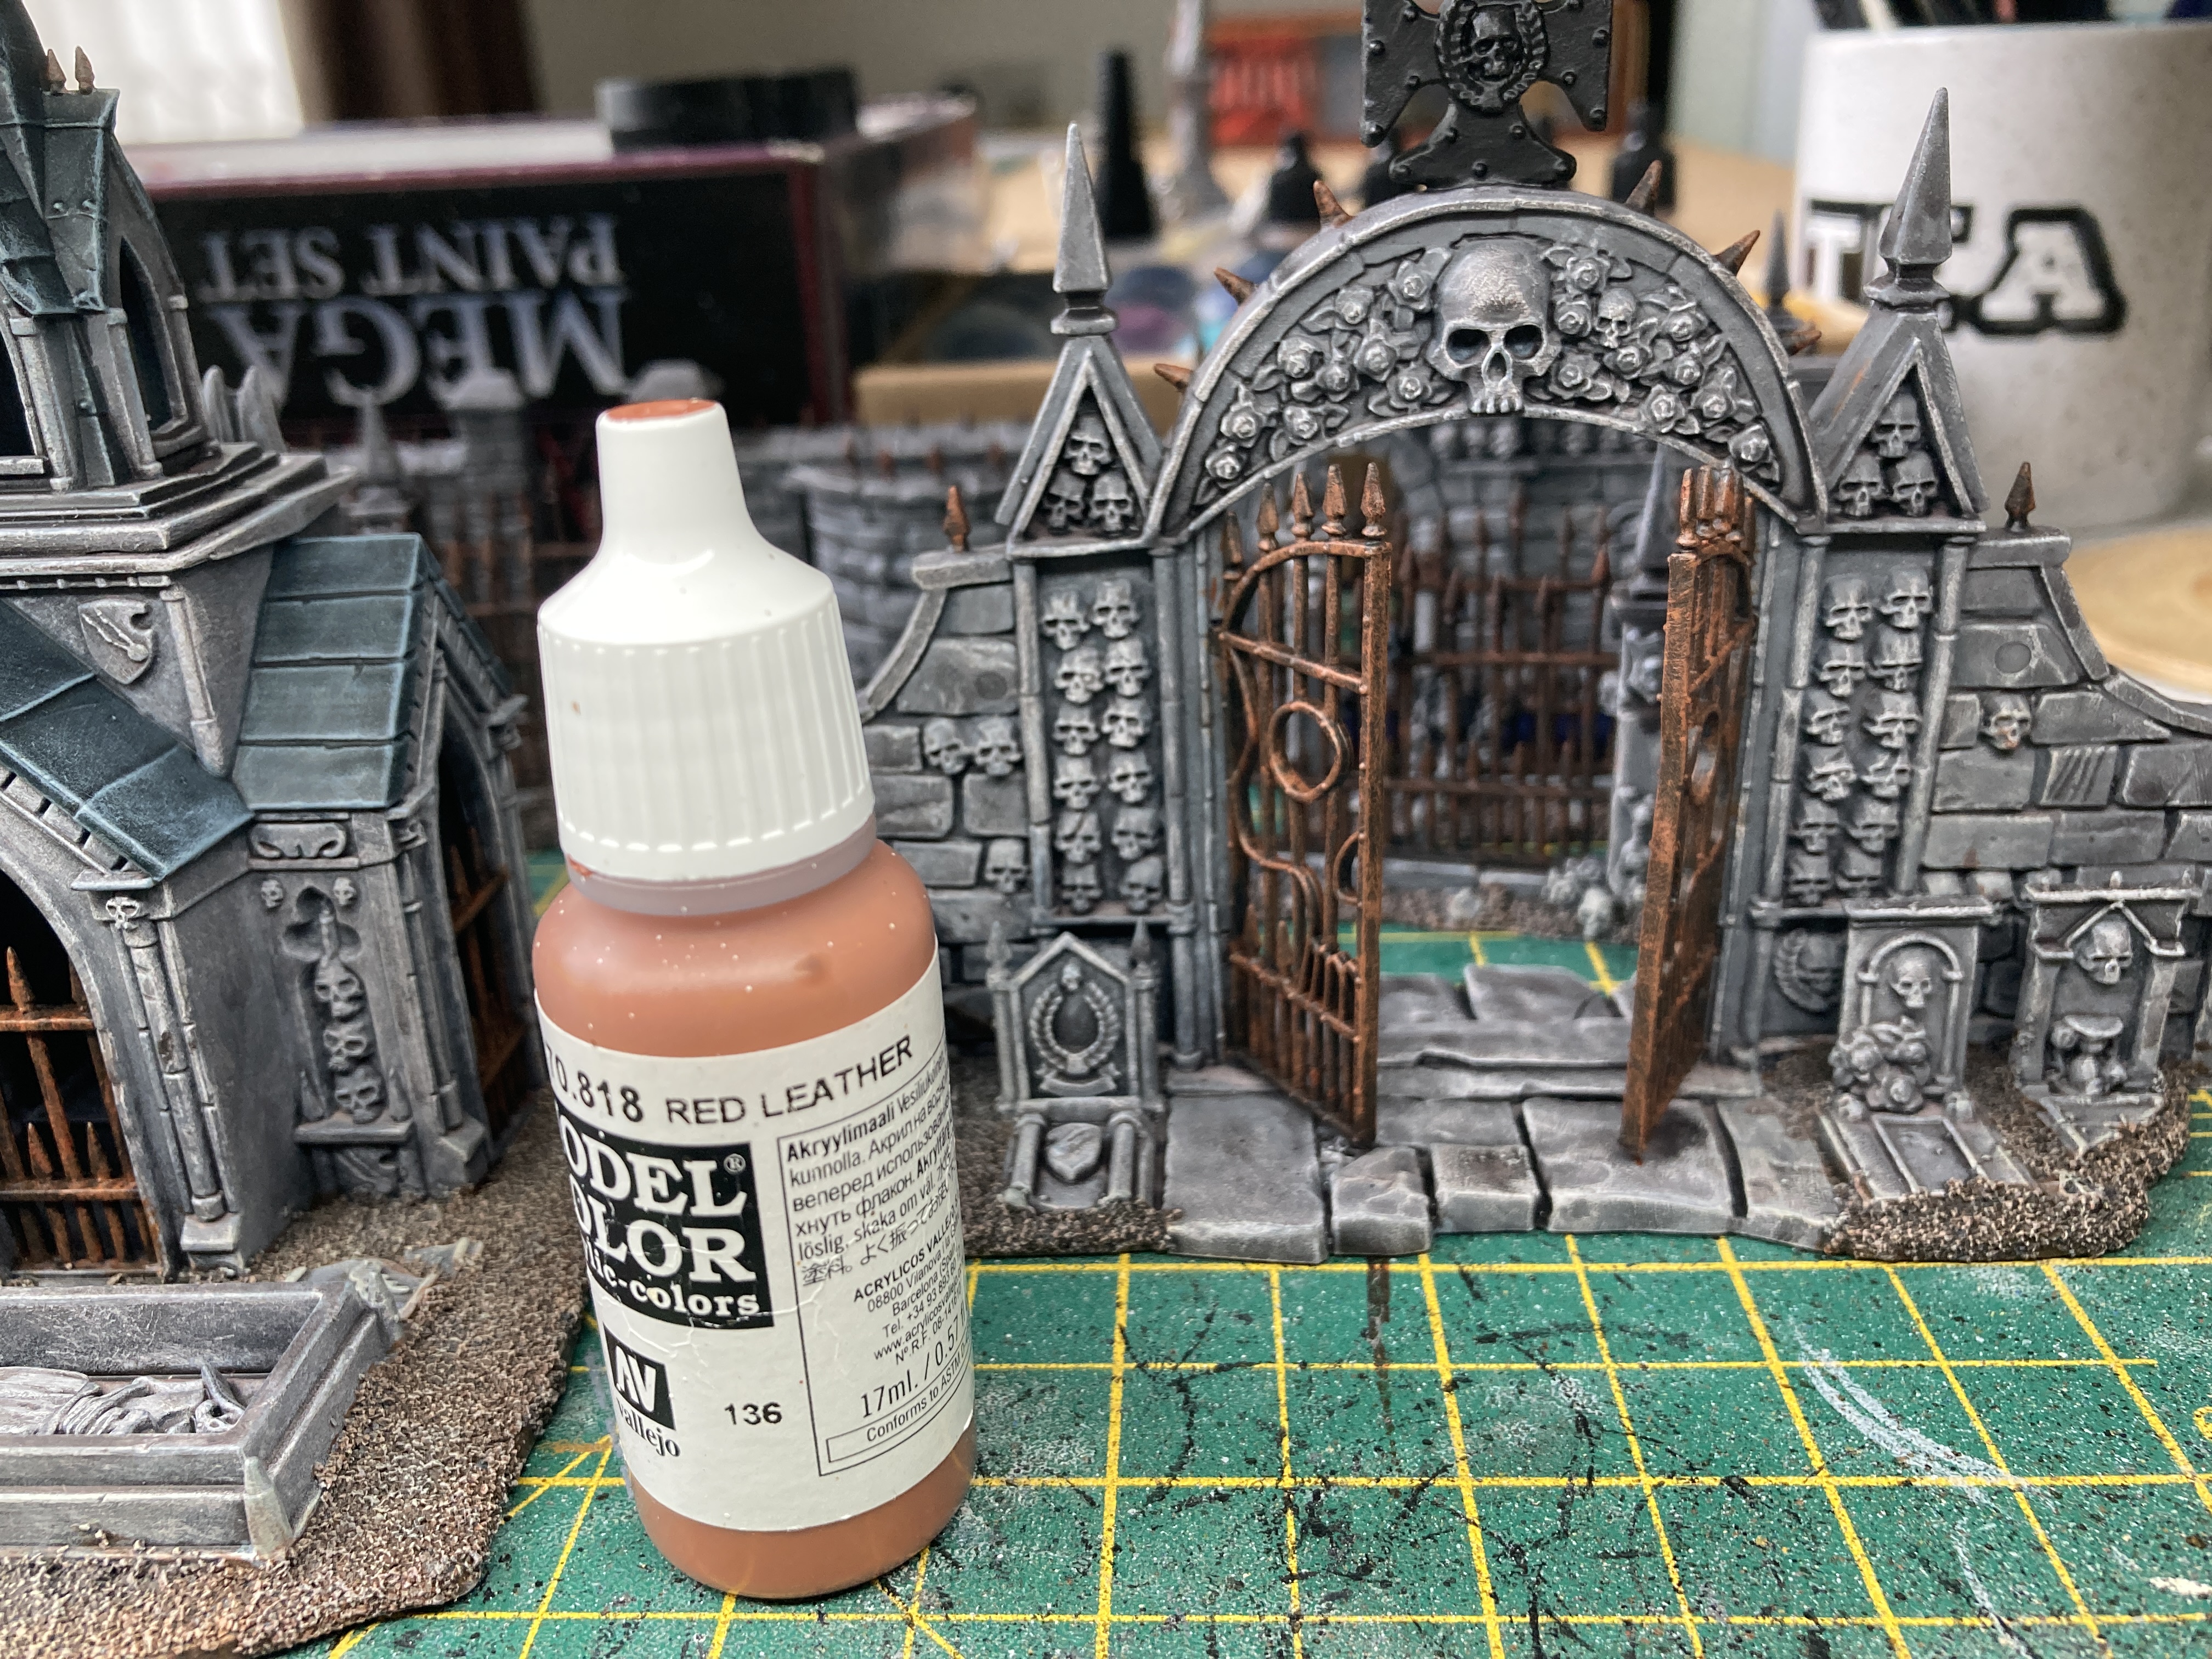
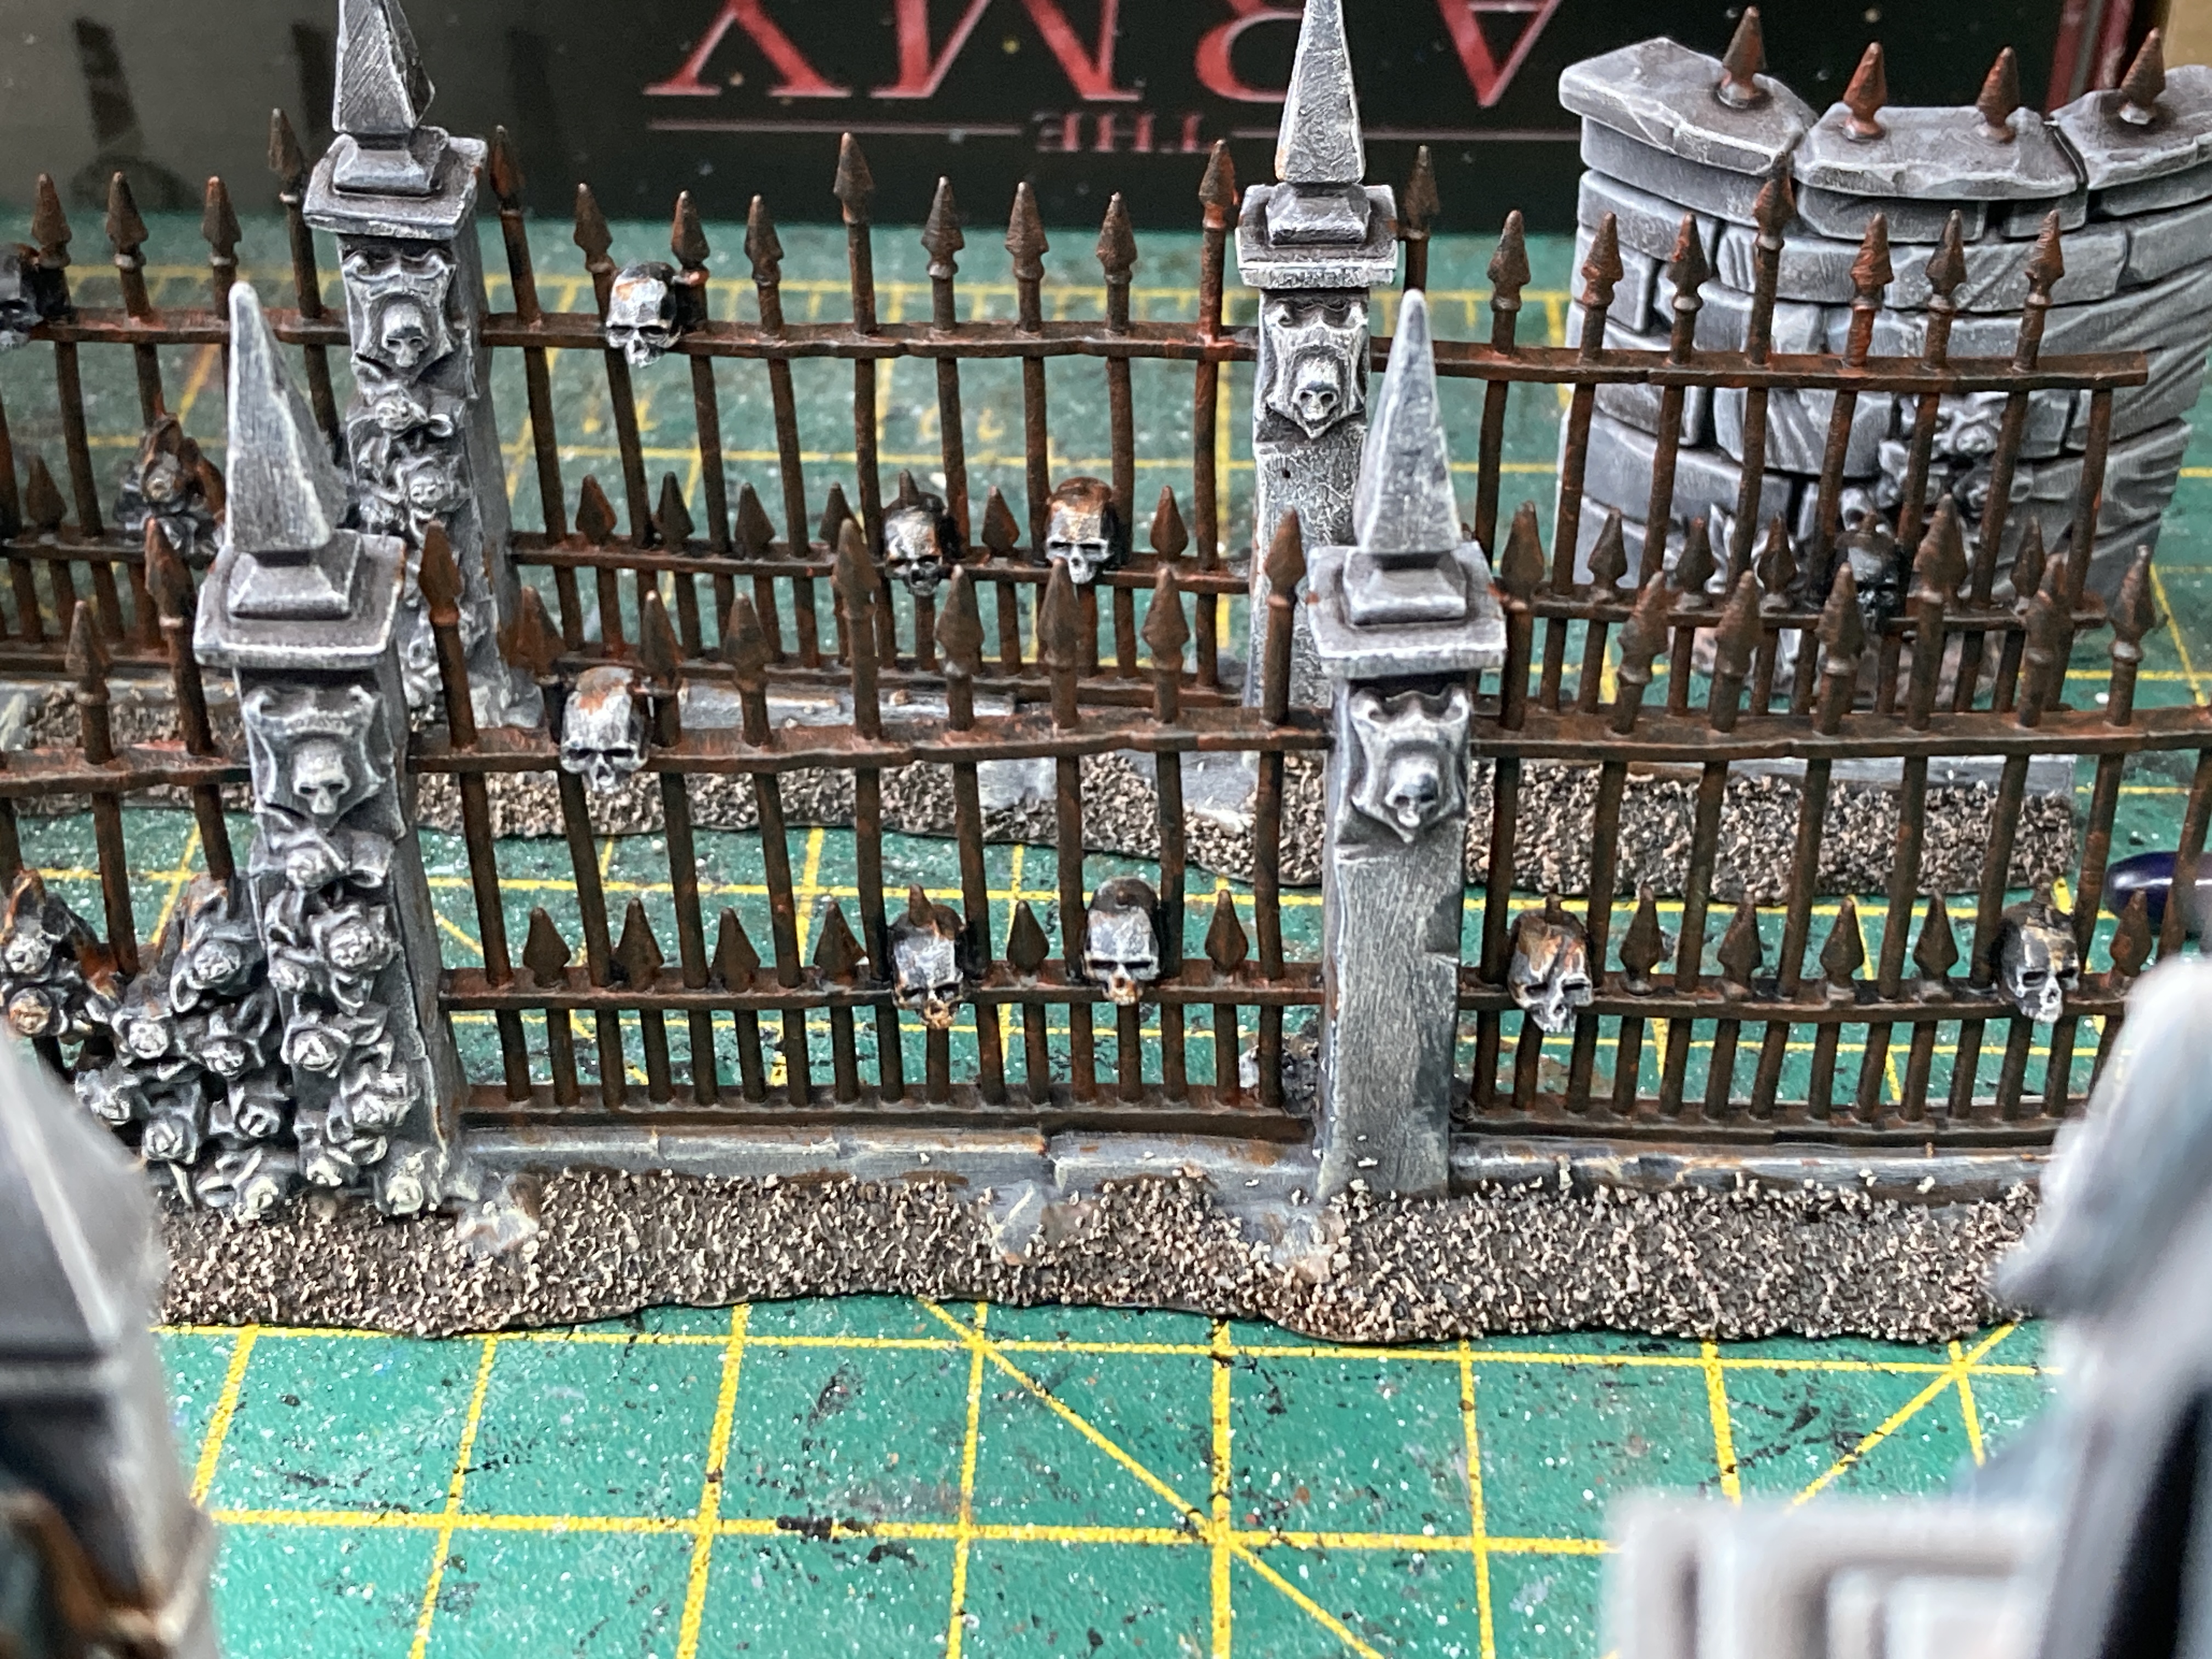
To finish of the rust effect I roughly drybrushed with Game Color Bloody Red and finally Game Color Orange Fire.
Starting Out and Getting Messy
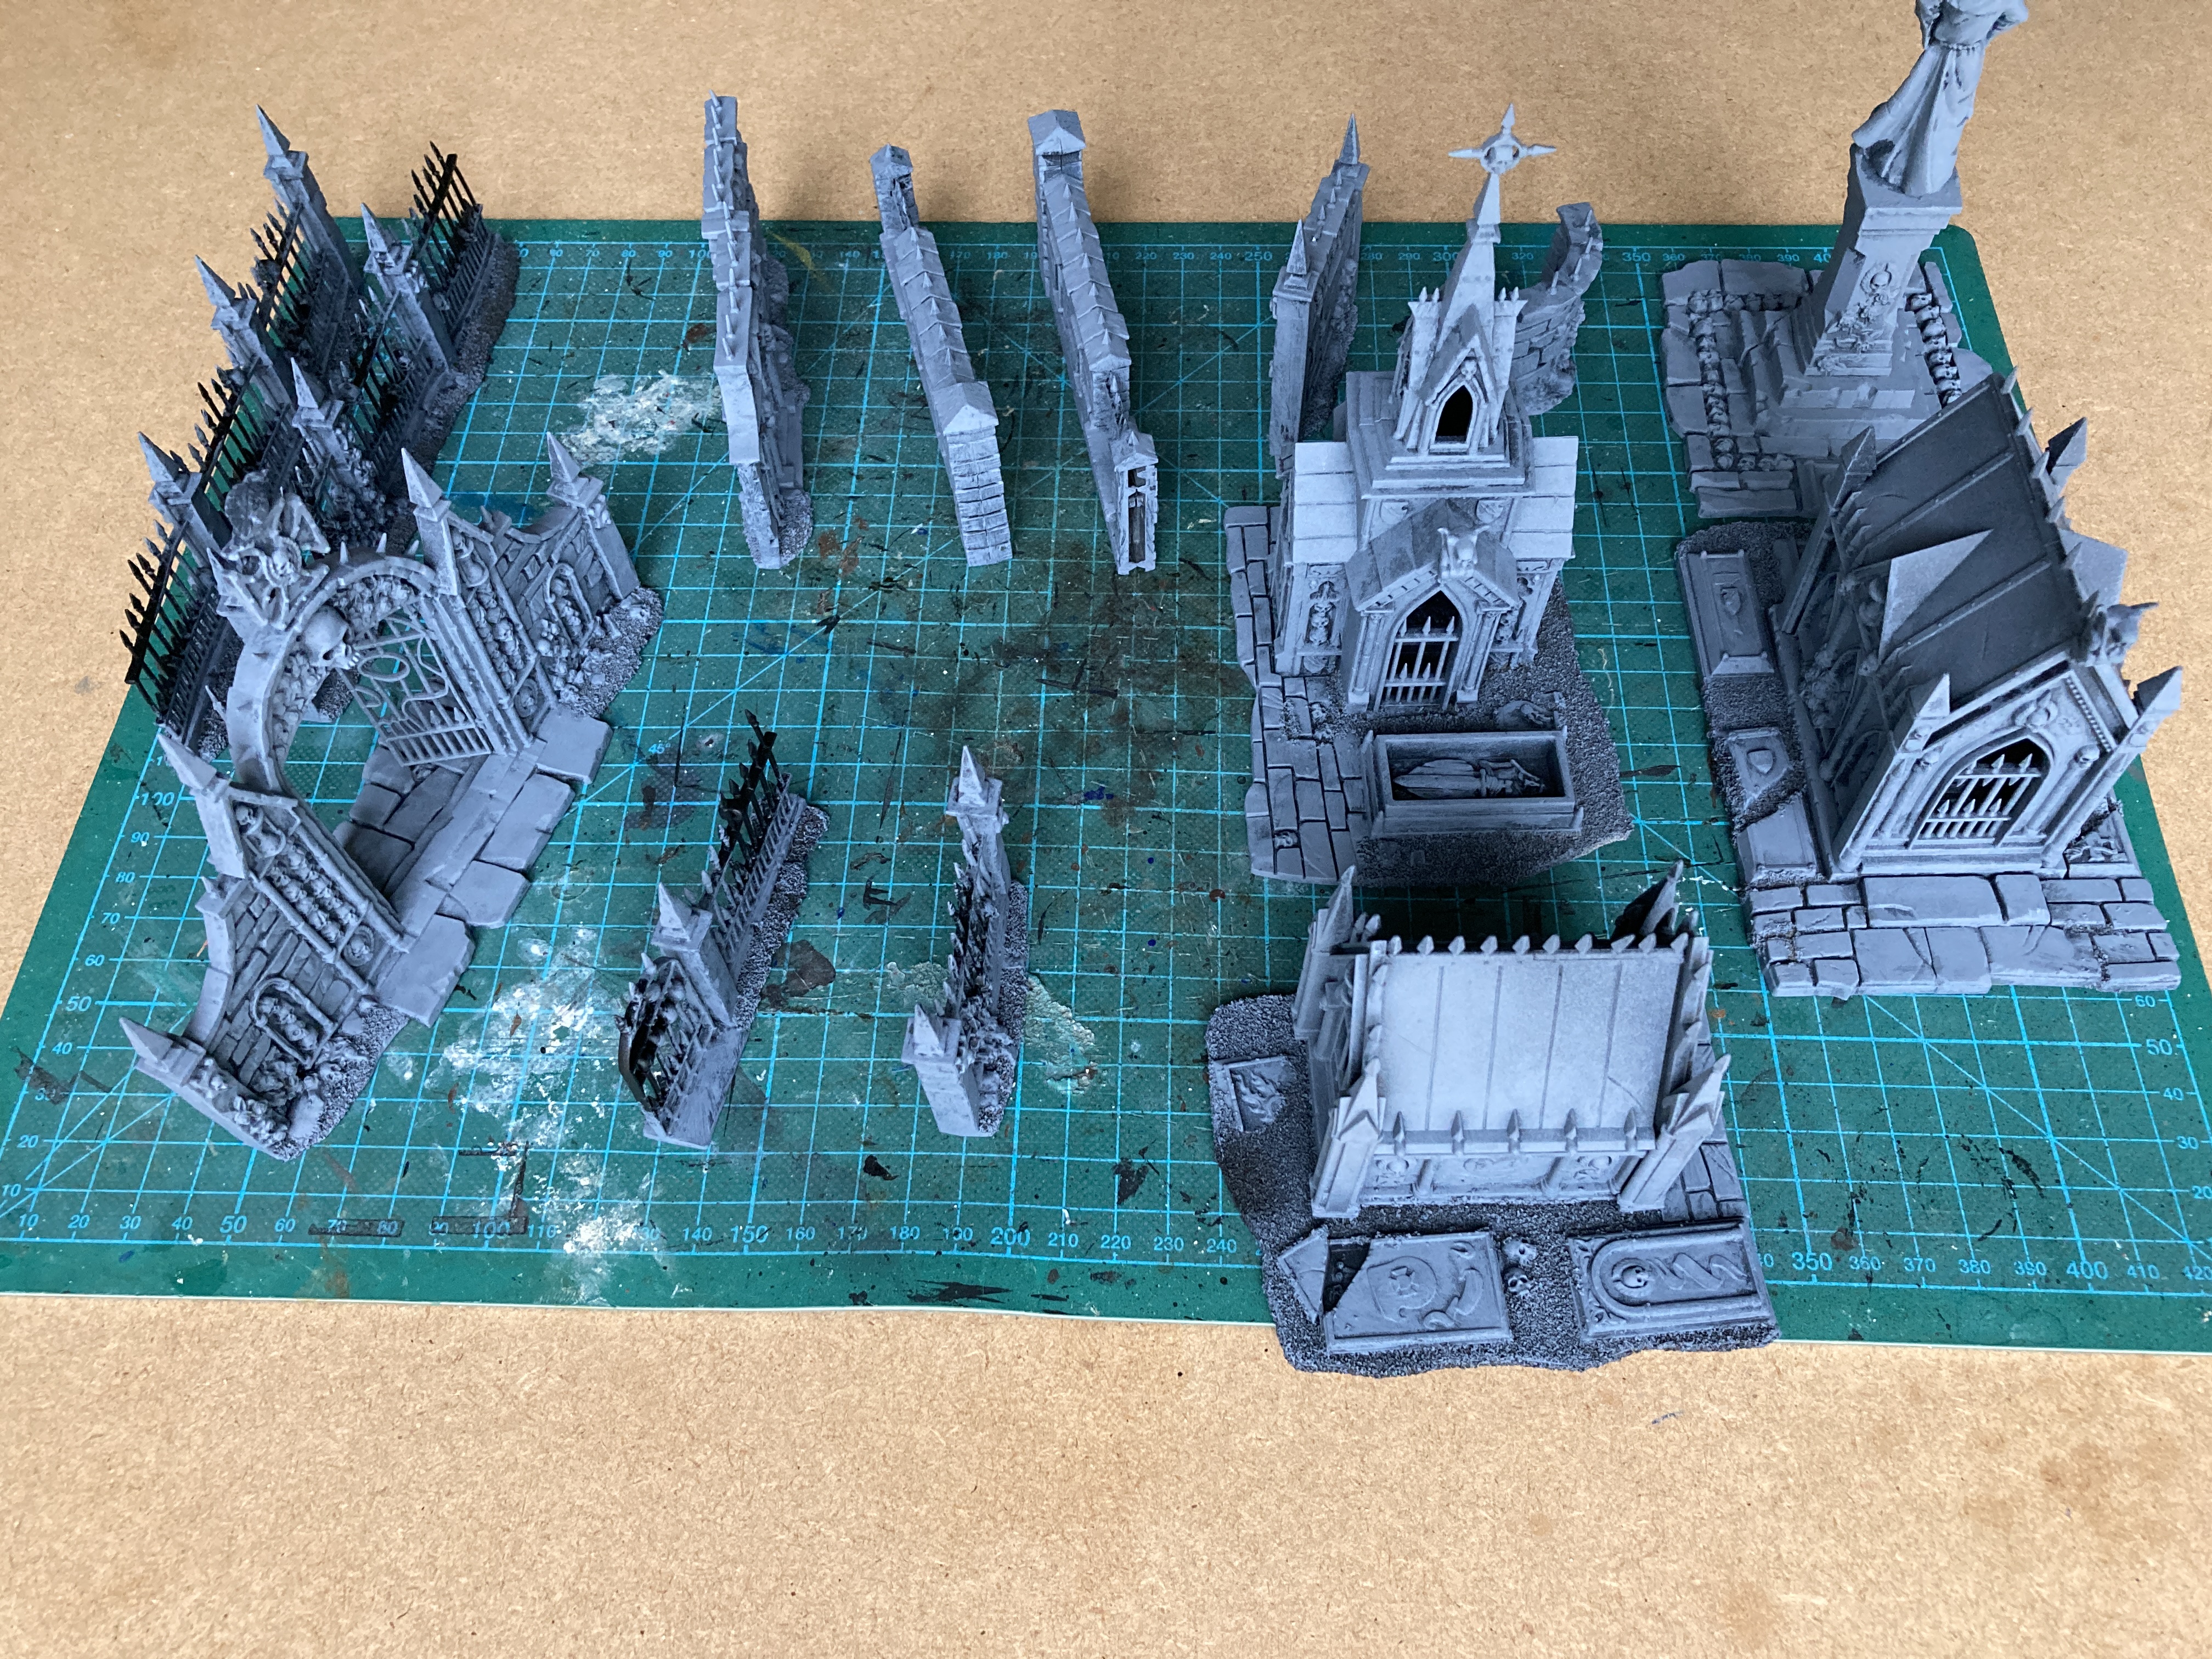
After cleaning the worst of the mould lines I added sand to all of the ground areas. There was some texture already modelled on but it just didn’t look very good.
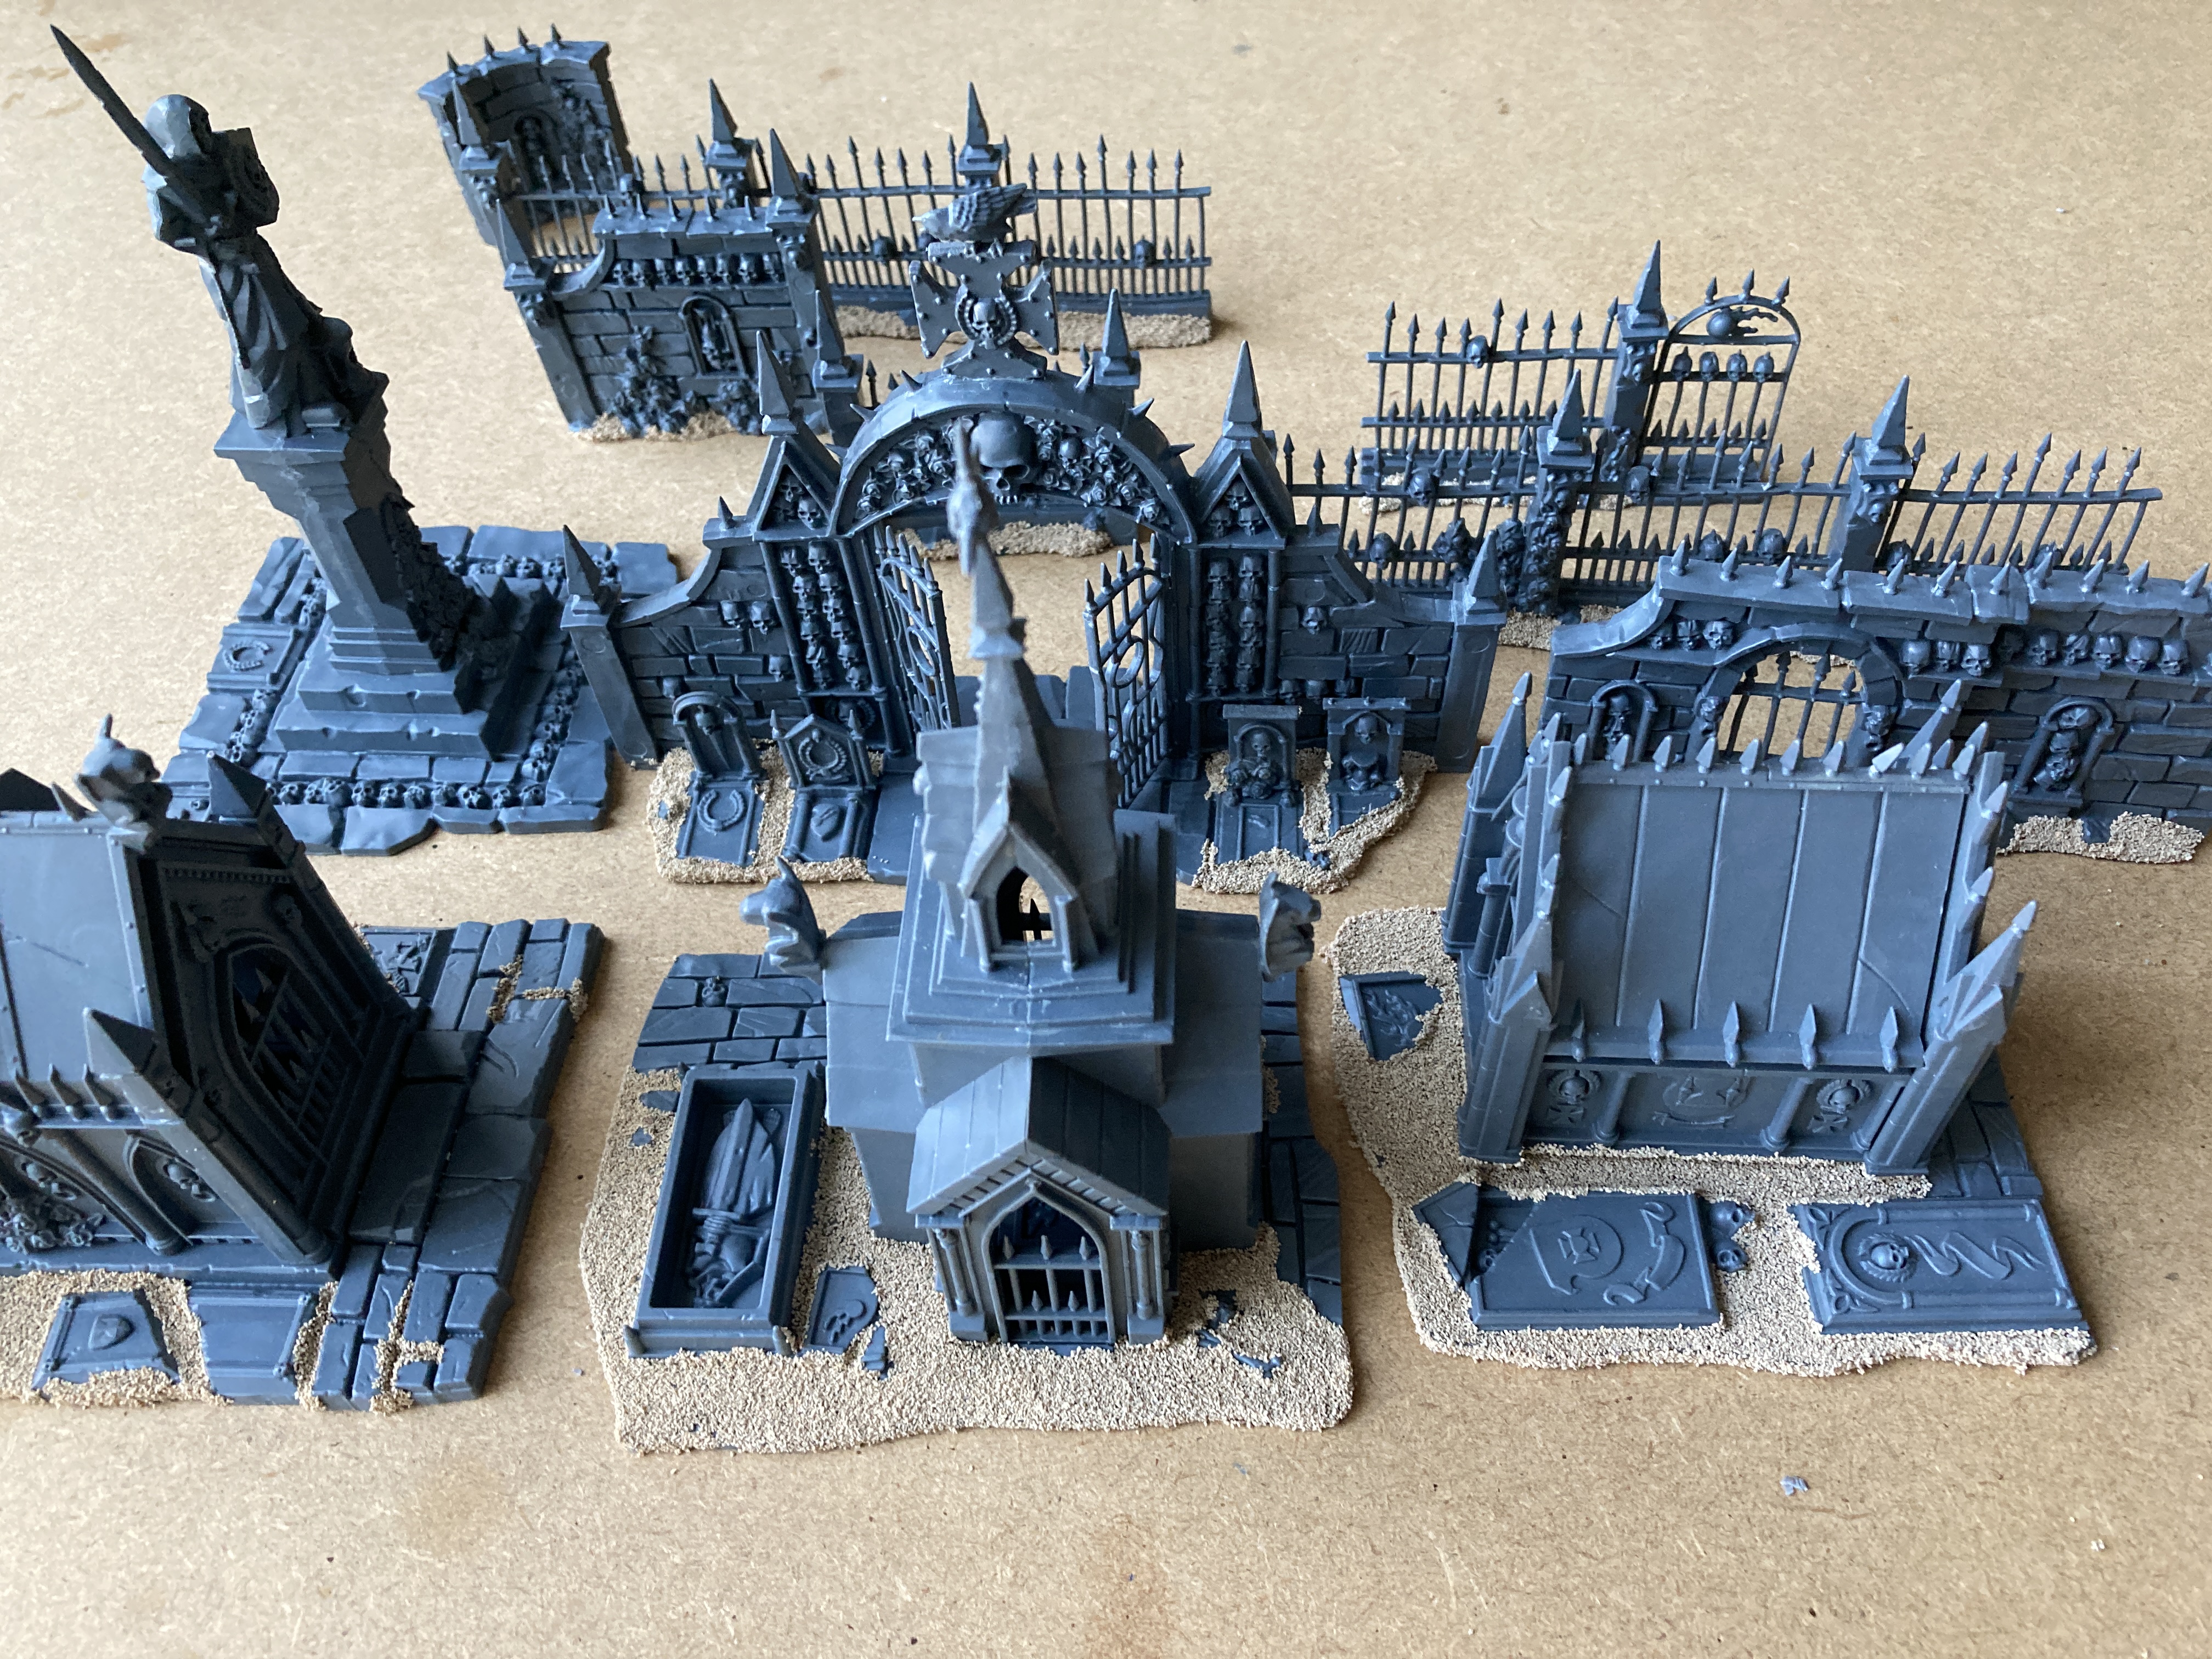

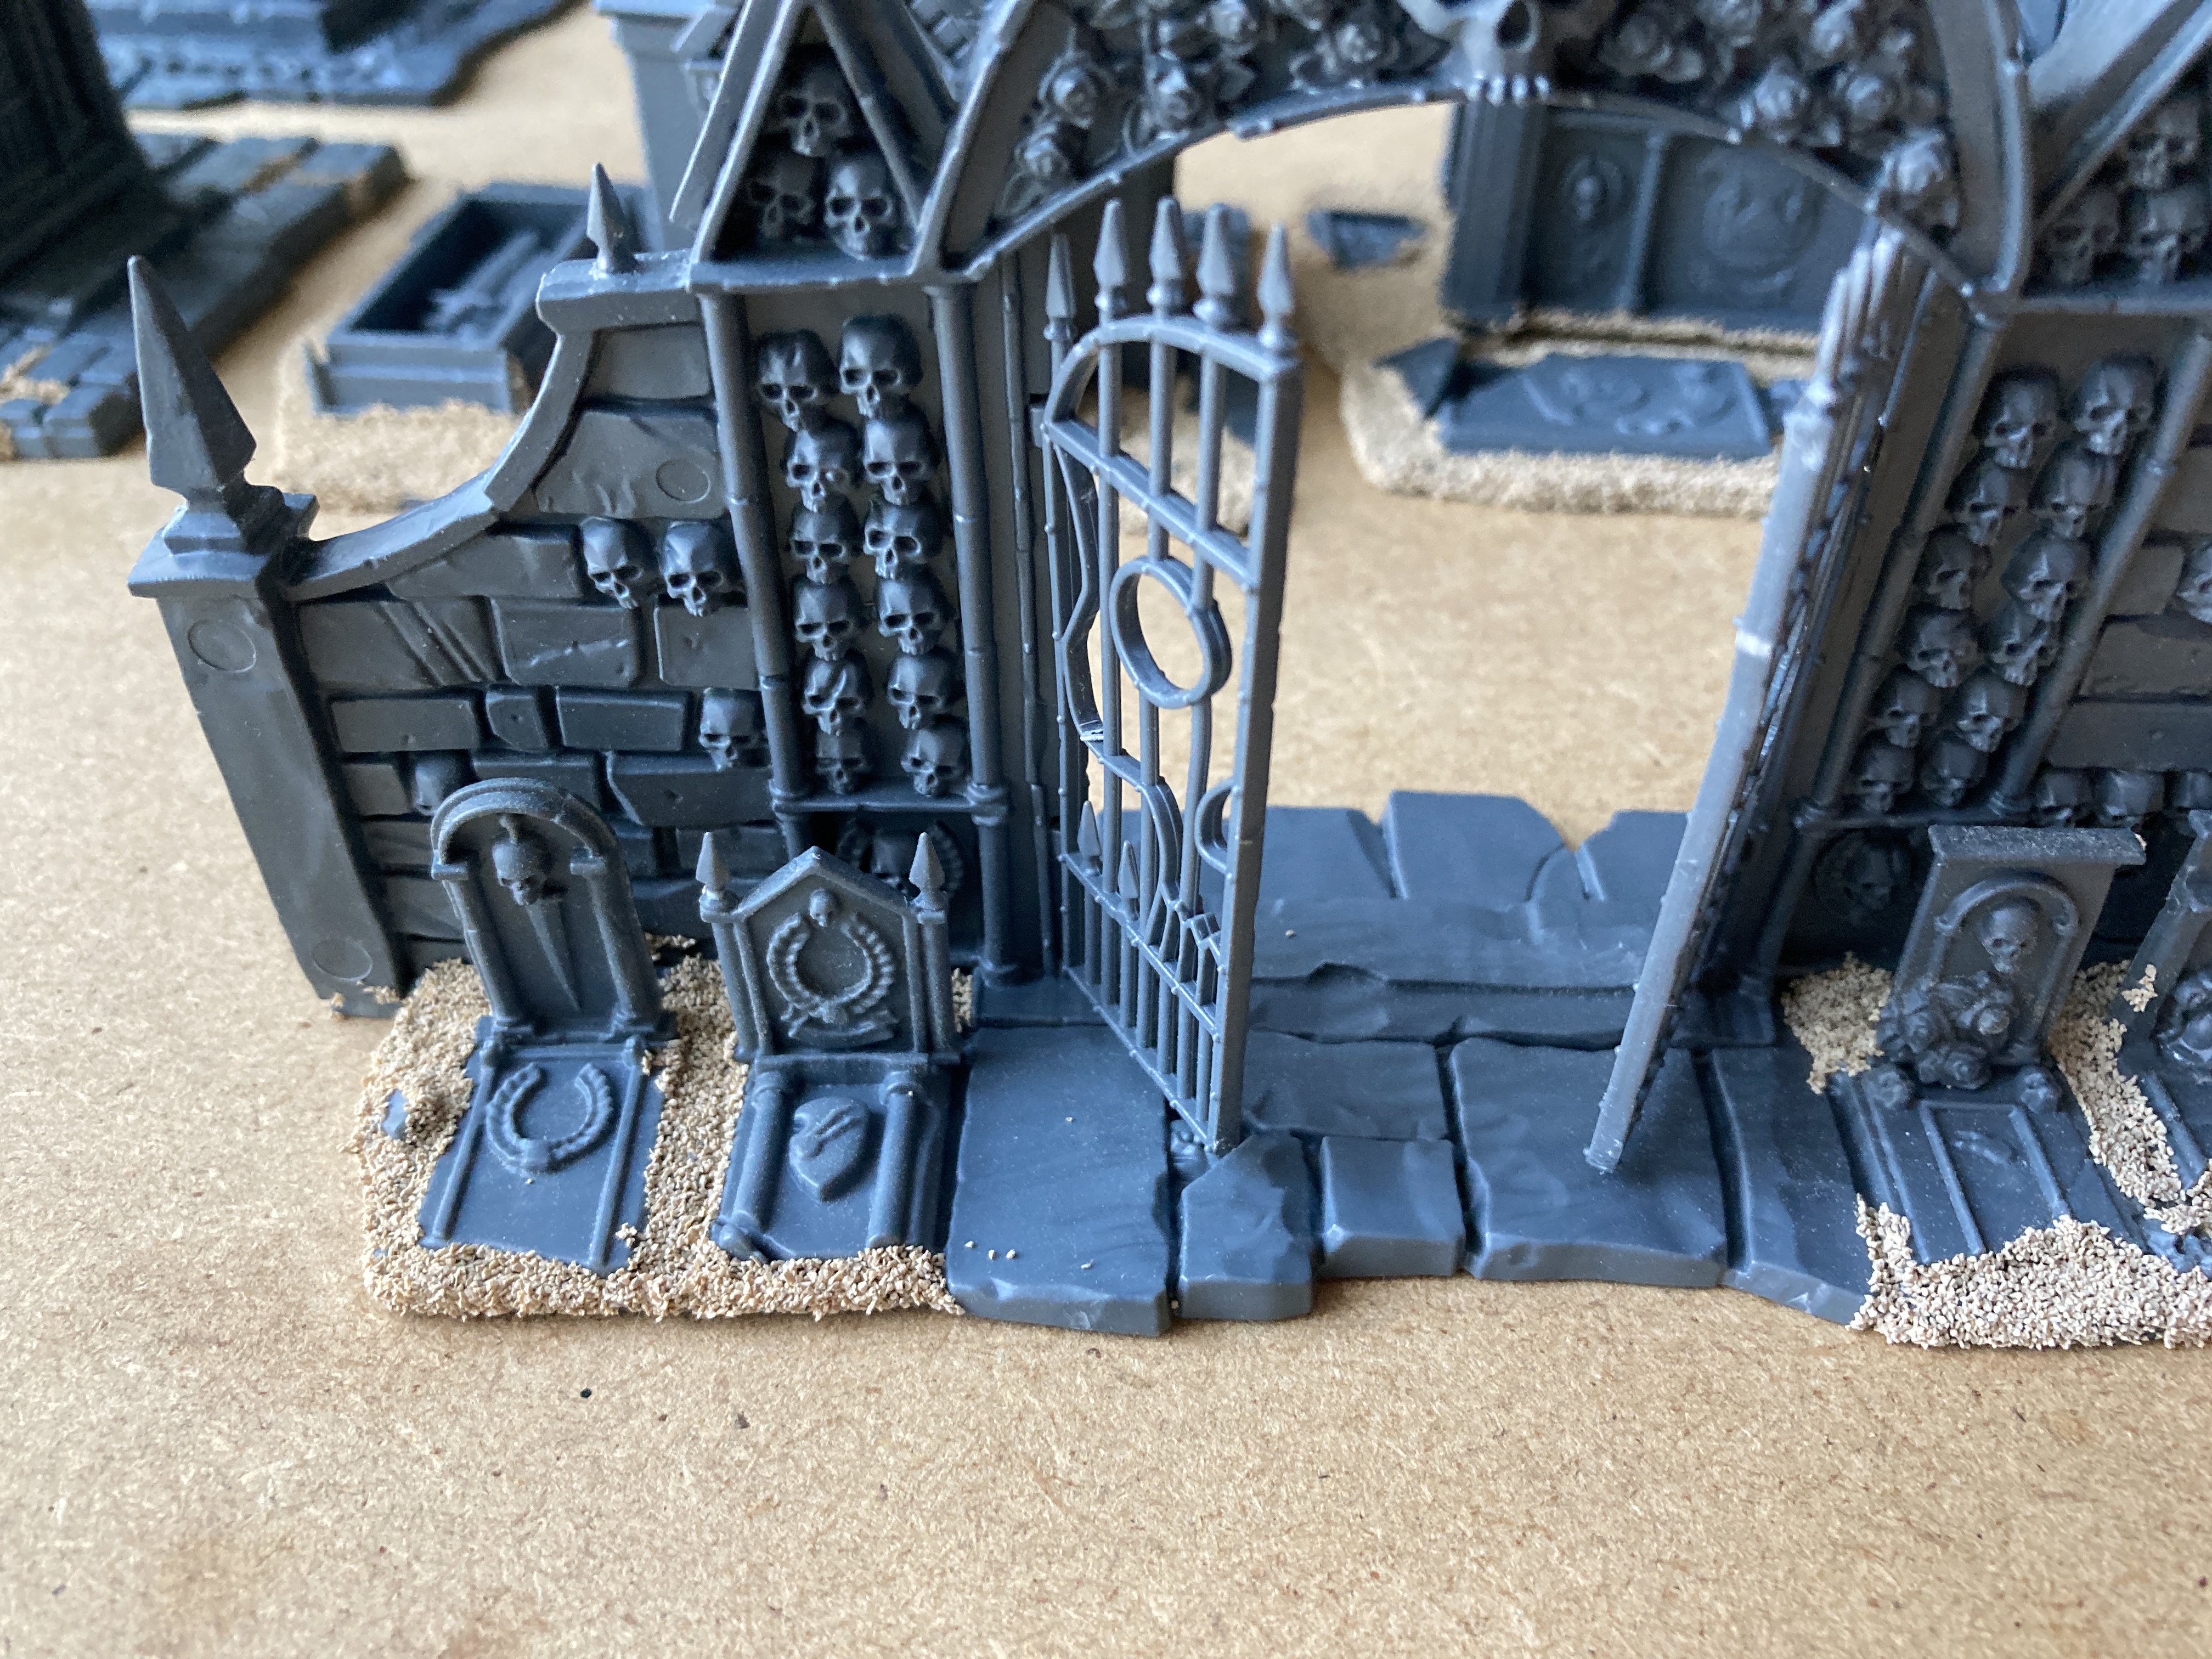
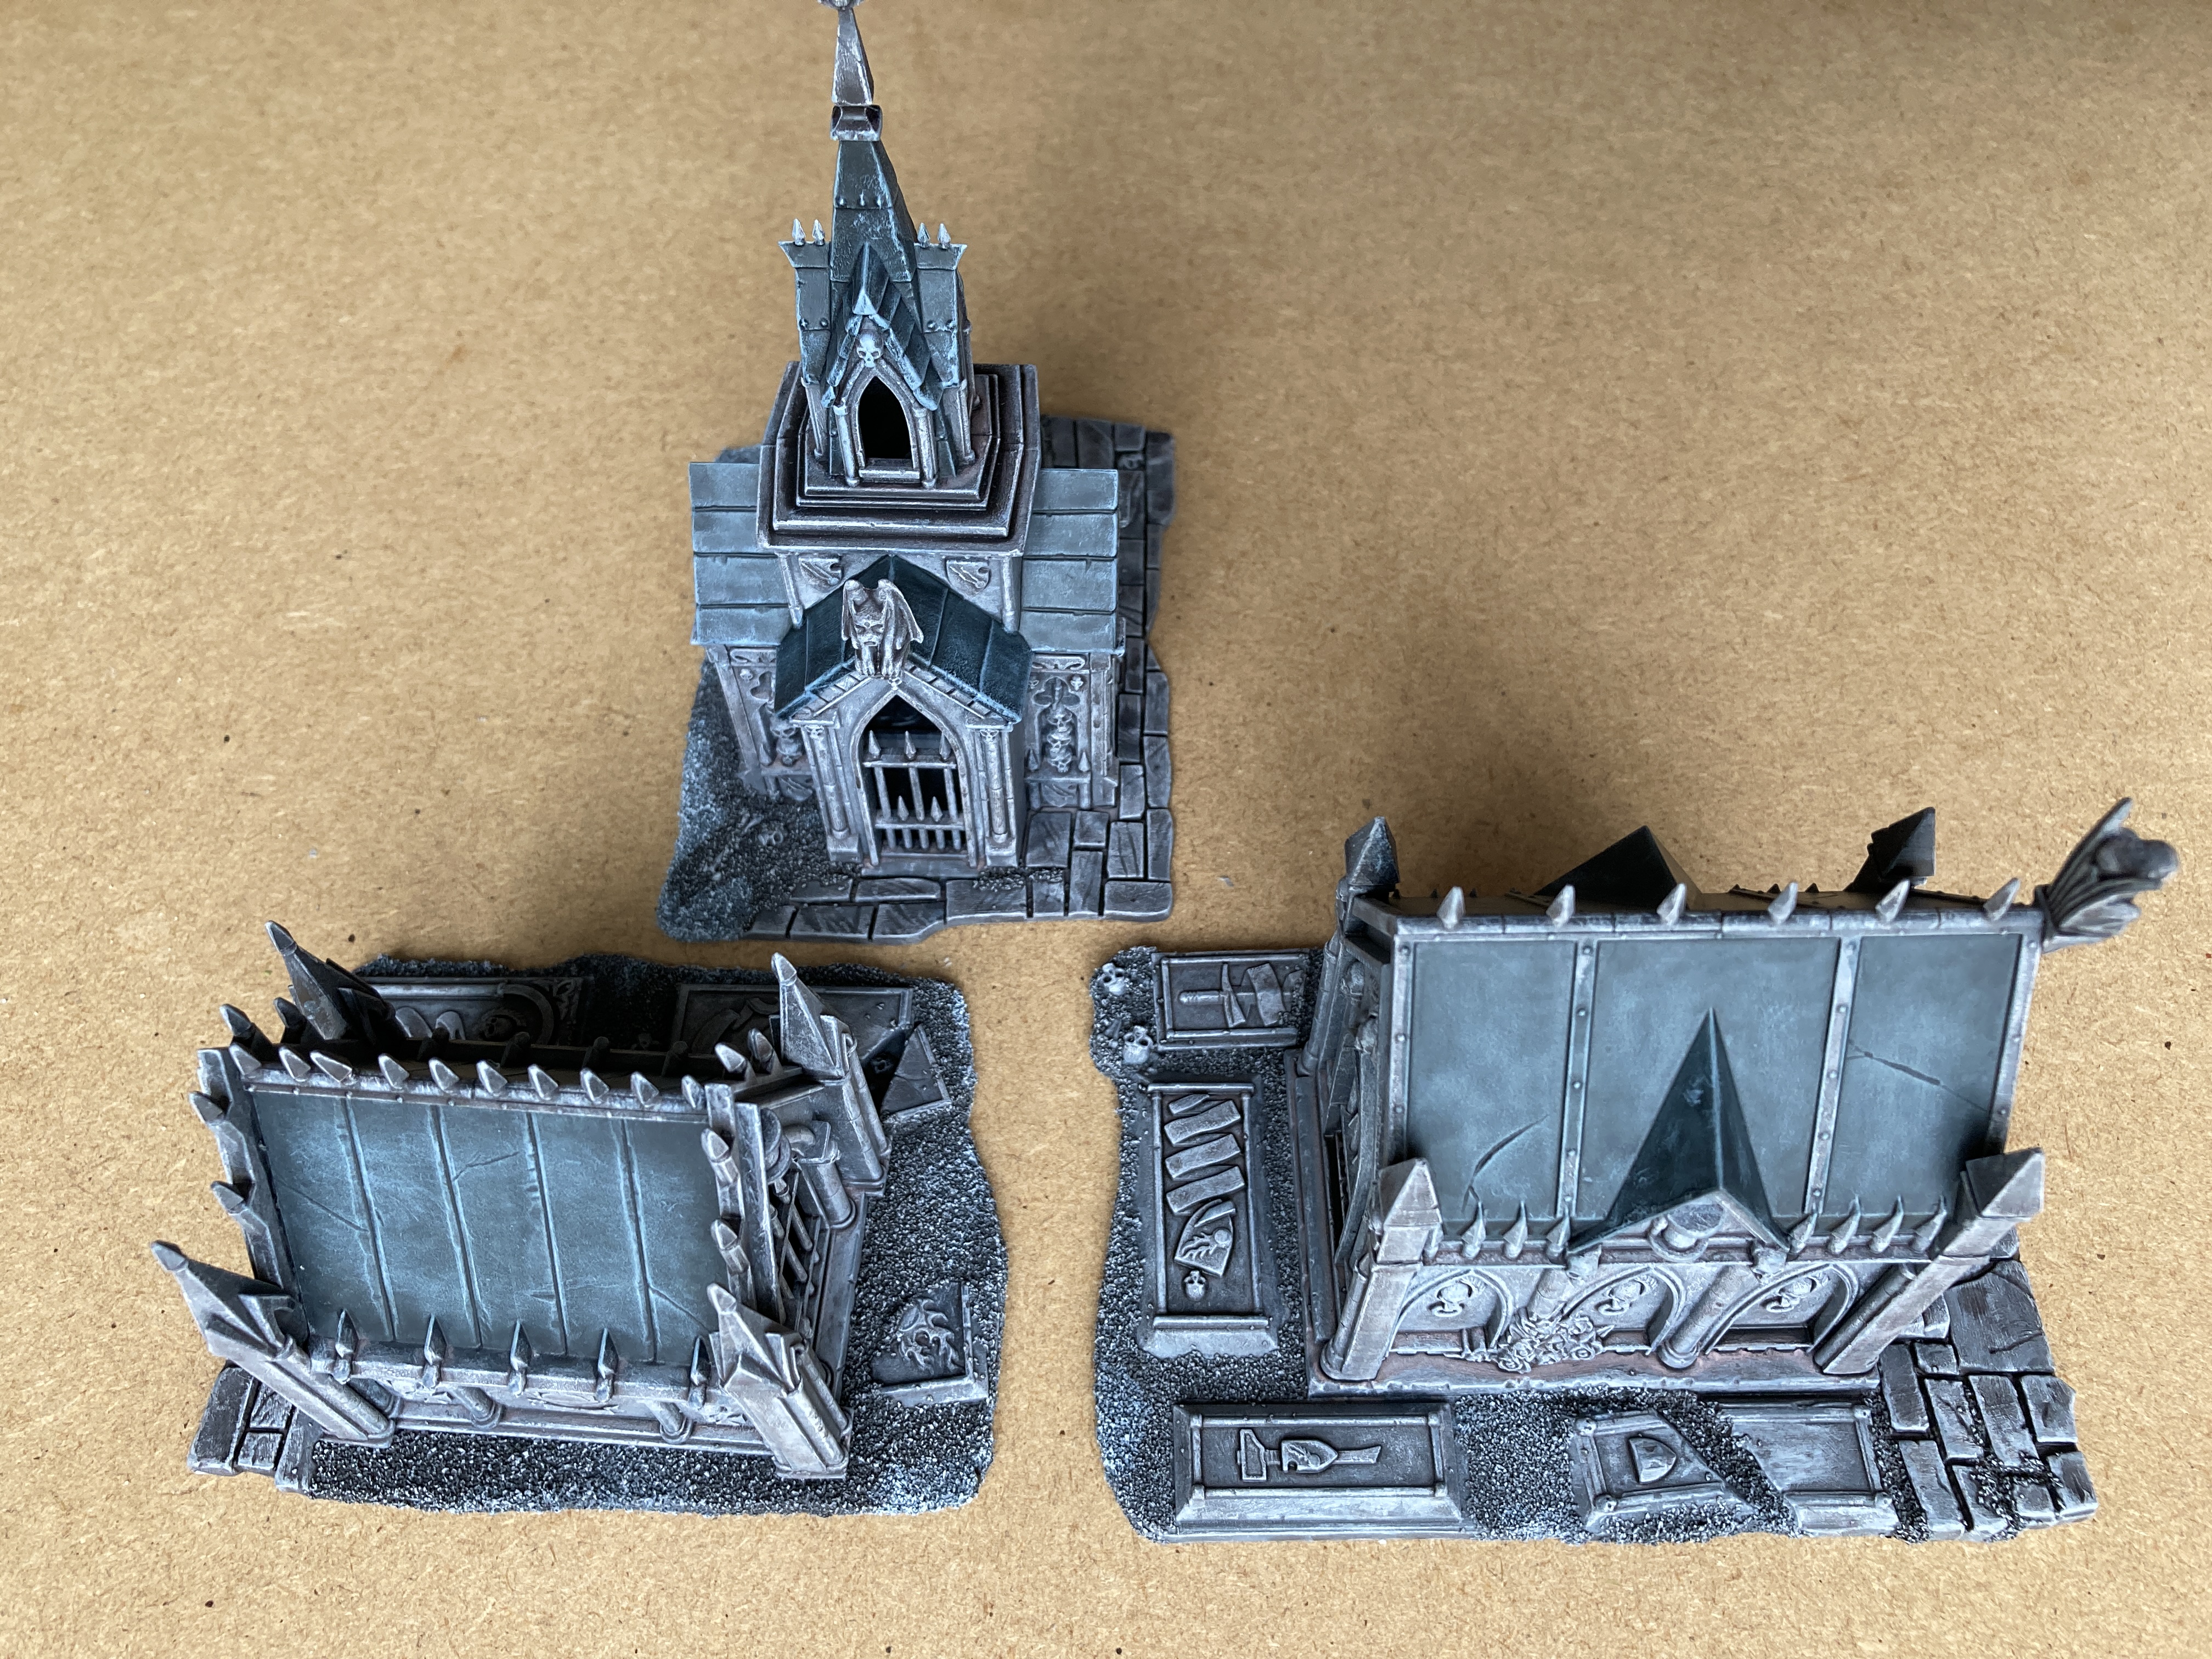
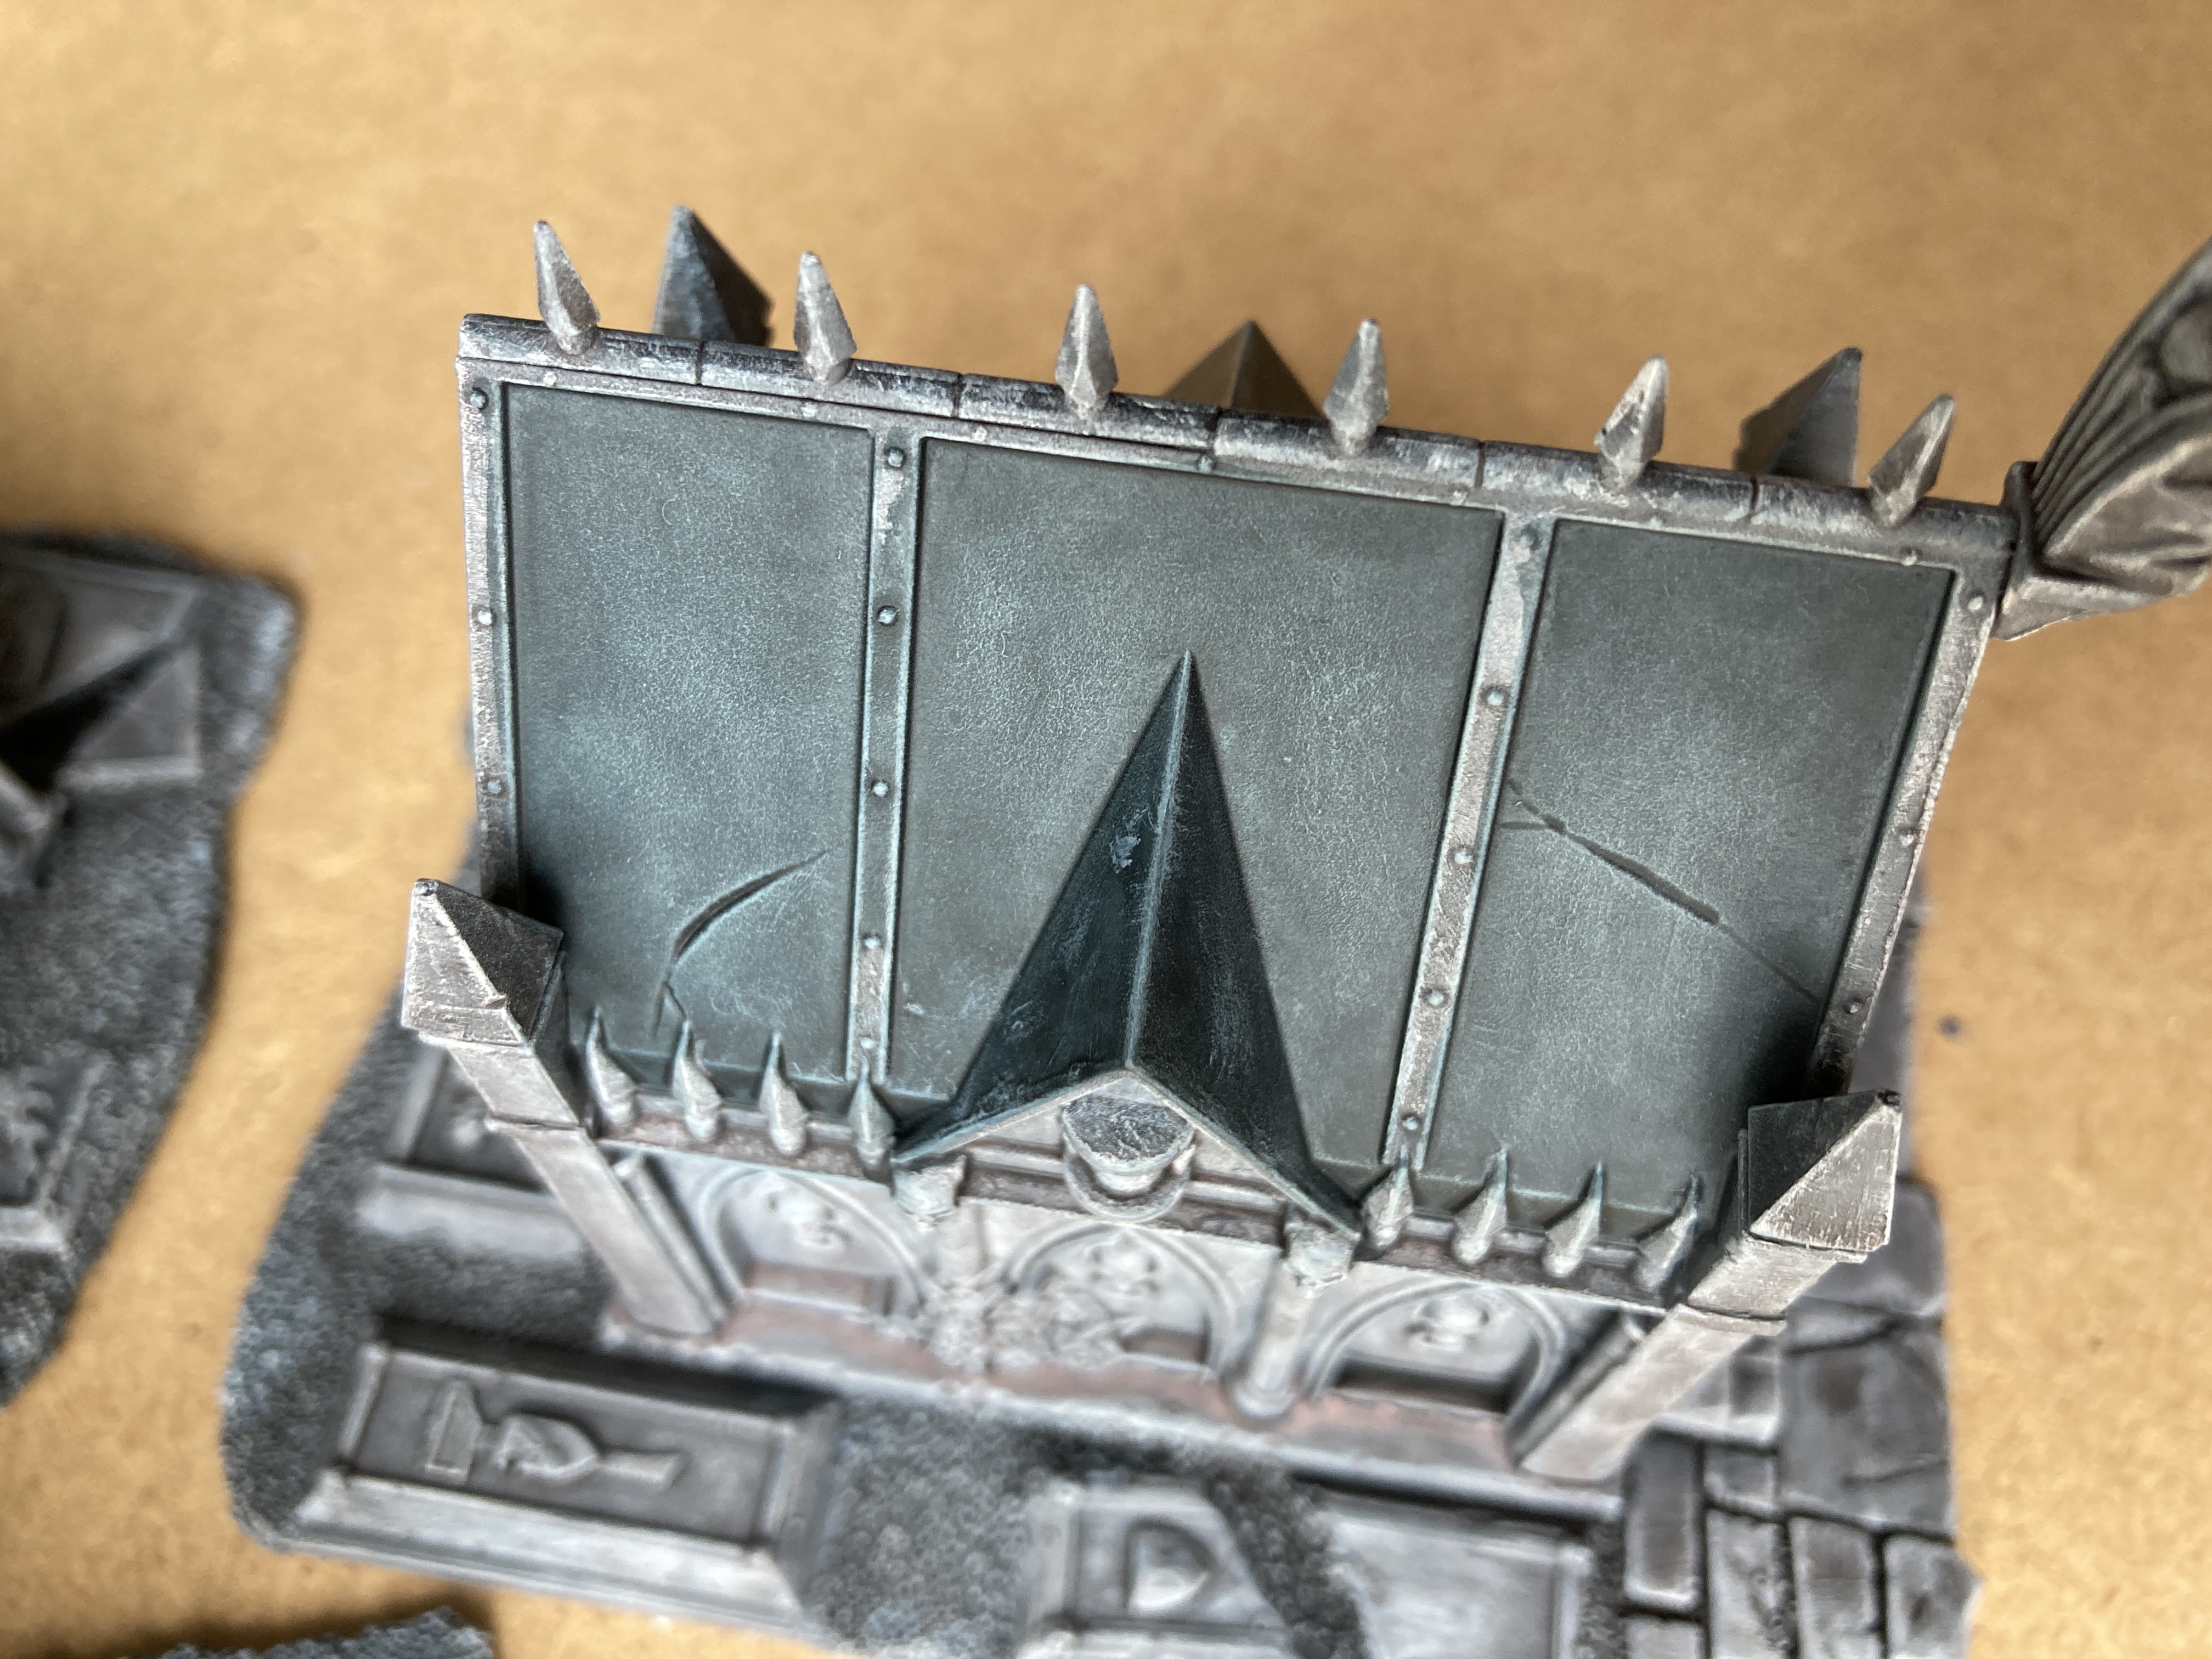
All of the pieces were then sprayed in first Halfords Black primer followed by a lighter dusting of Halfords Grey primer.
After a drybrush in white for all of the stone work it was time to get messy. I soaked all of stonework in a custom wash, a mix of browns and black cheap artists acrylic tube paint with plenty of water, matte medium and a small amount of washing up liquid (as a flow improver). The custom wash was something I made (plenty of) about two years ago so I don’t have an exact recipe.
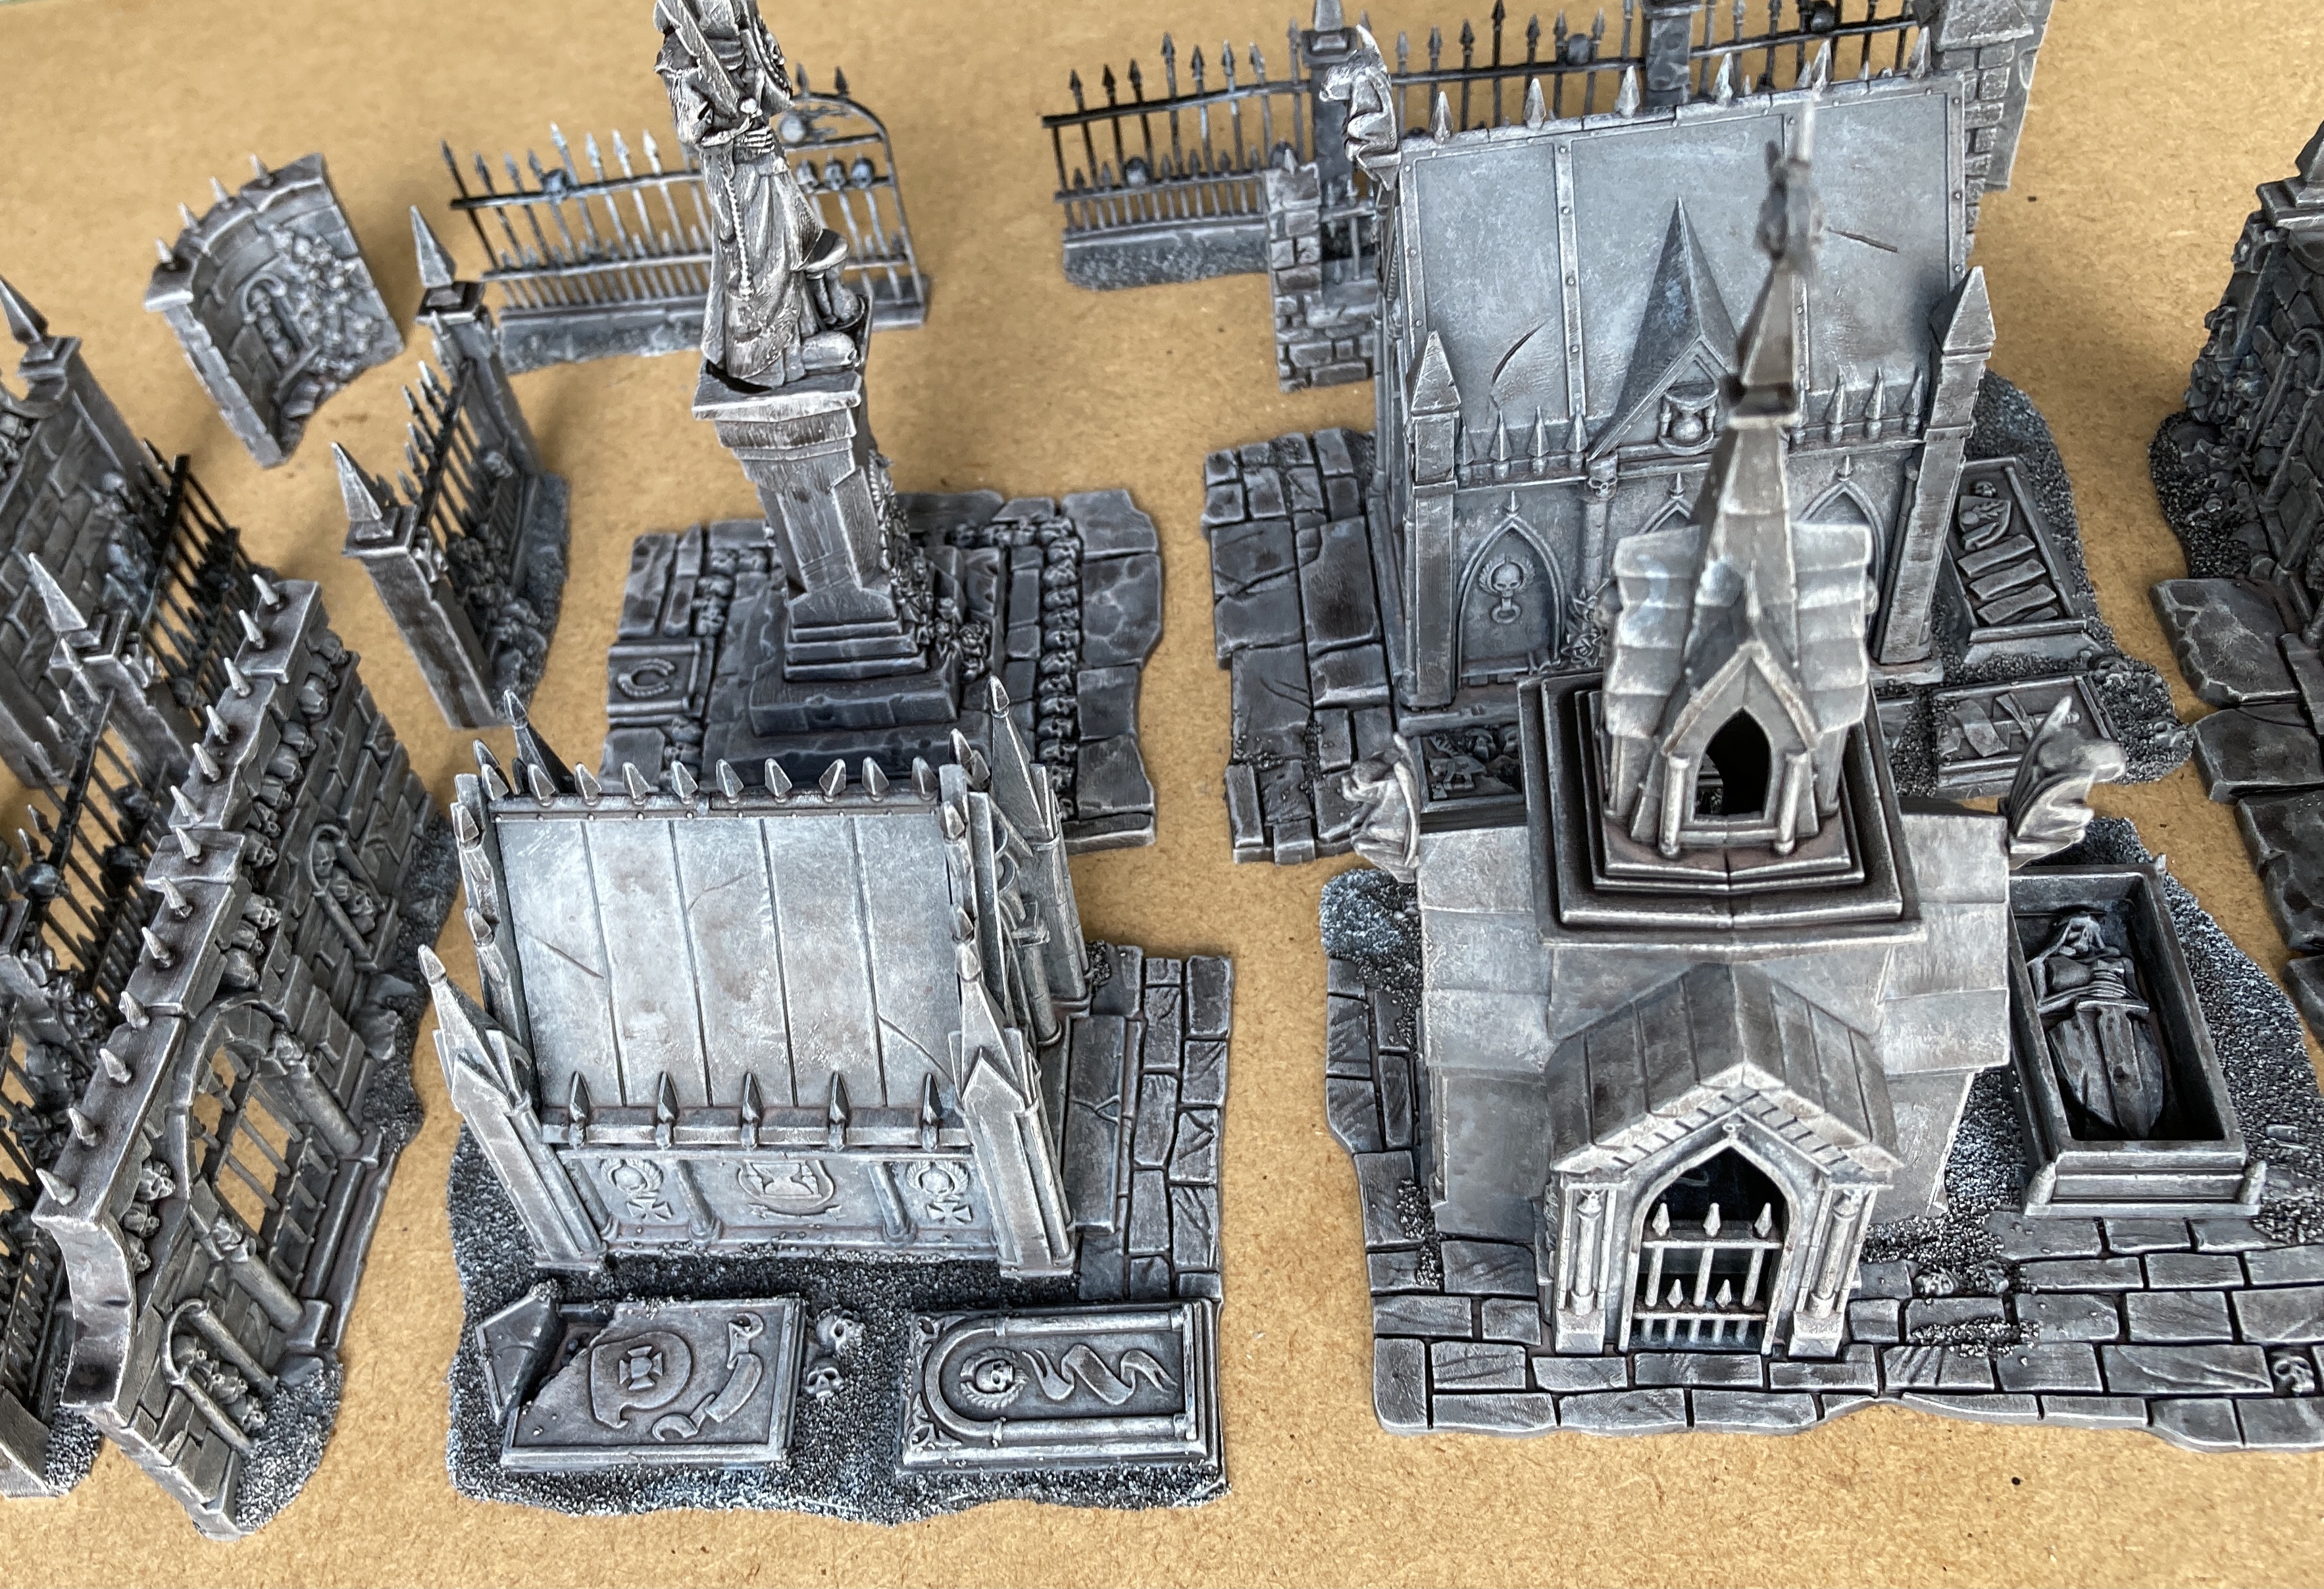 When dry the result was this.
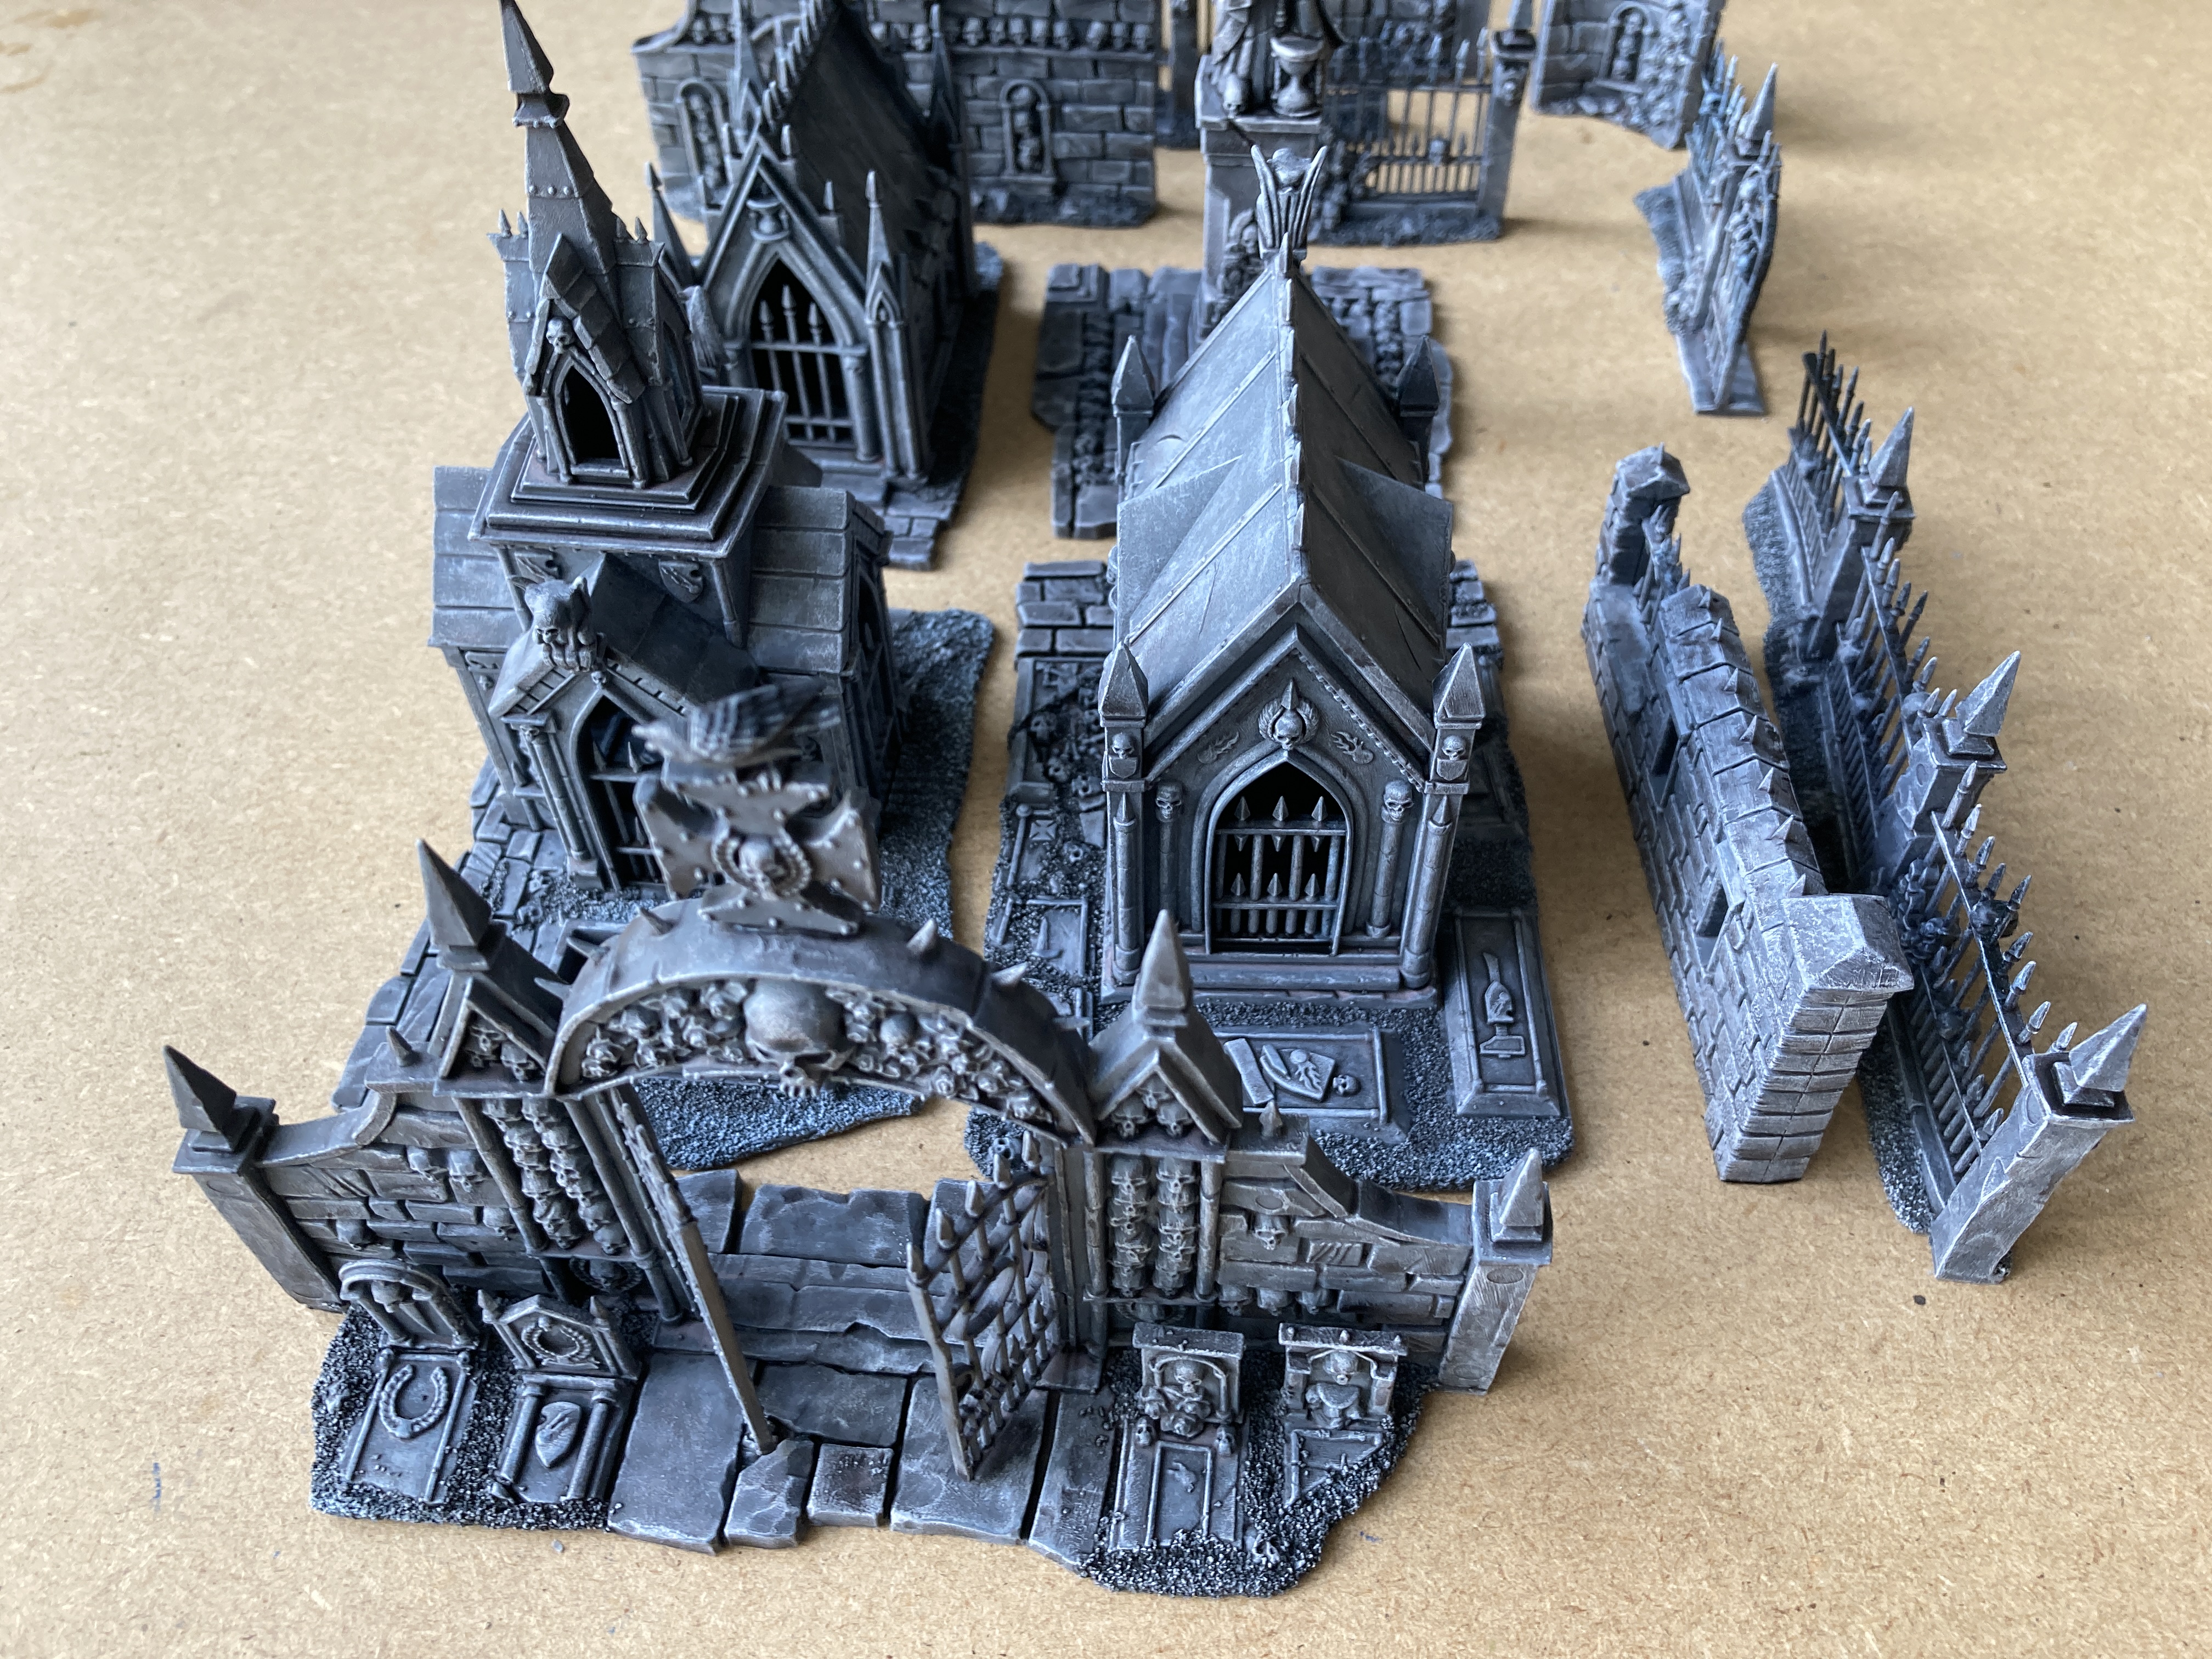

That’s all so far. Next I plan on painting the roofs of the buildings a blue slate colour, maybe using a contrast paint as I already have the highlights and shading done.
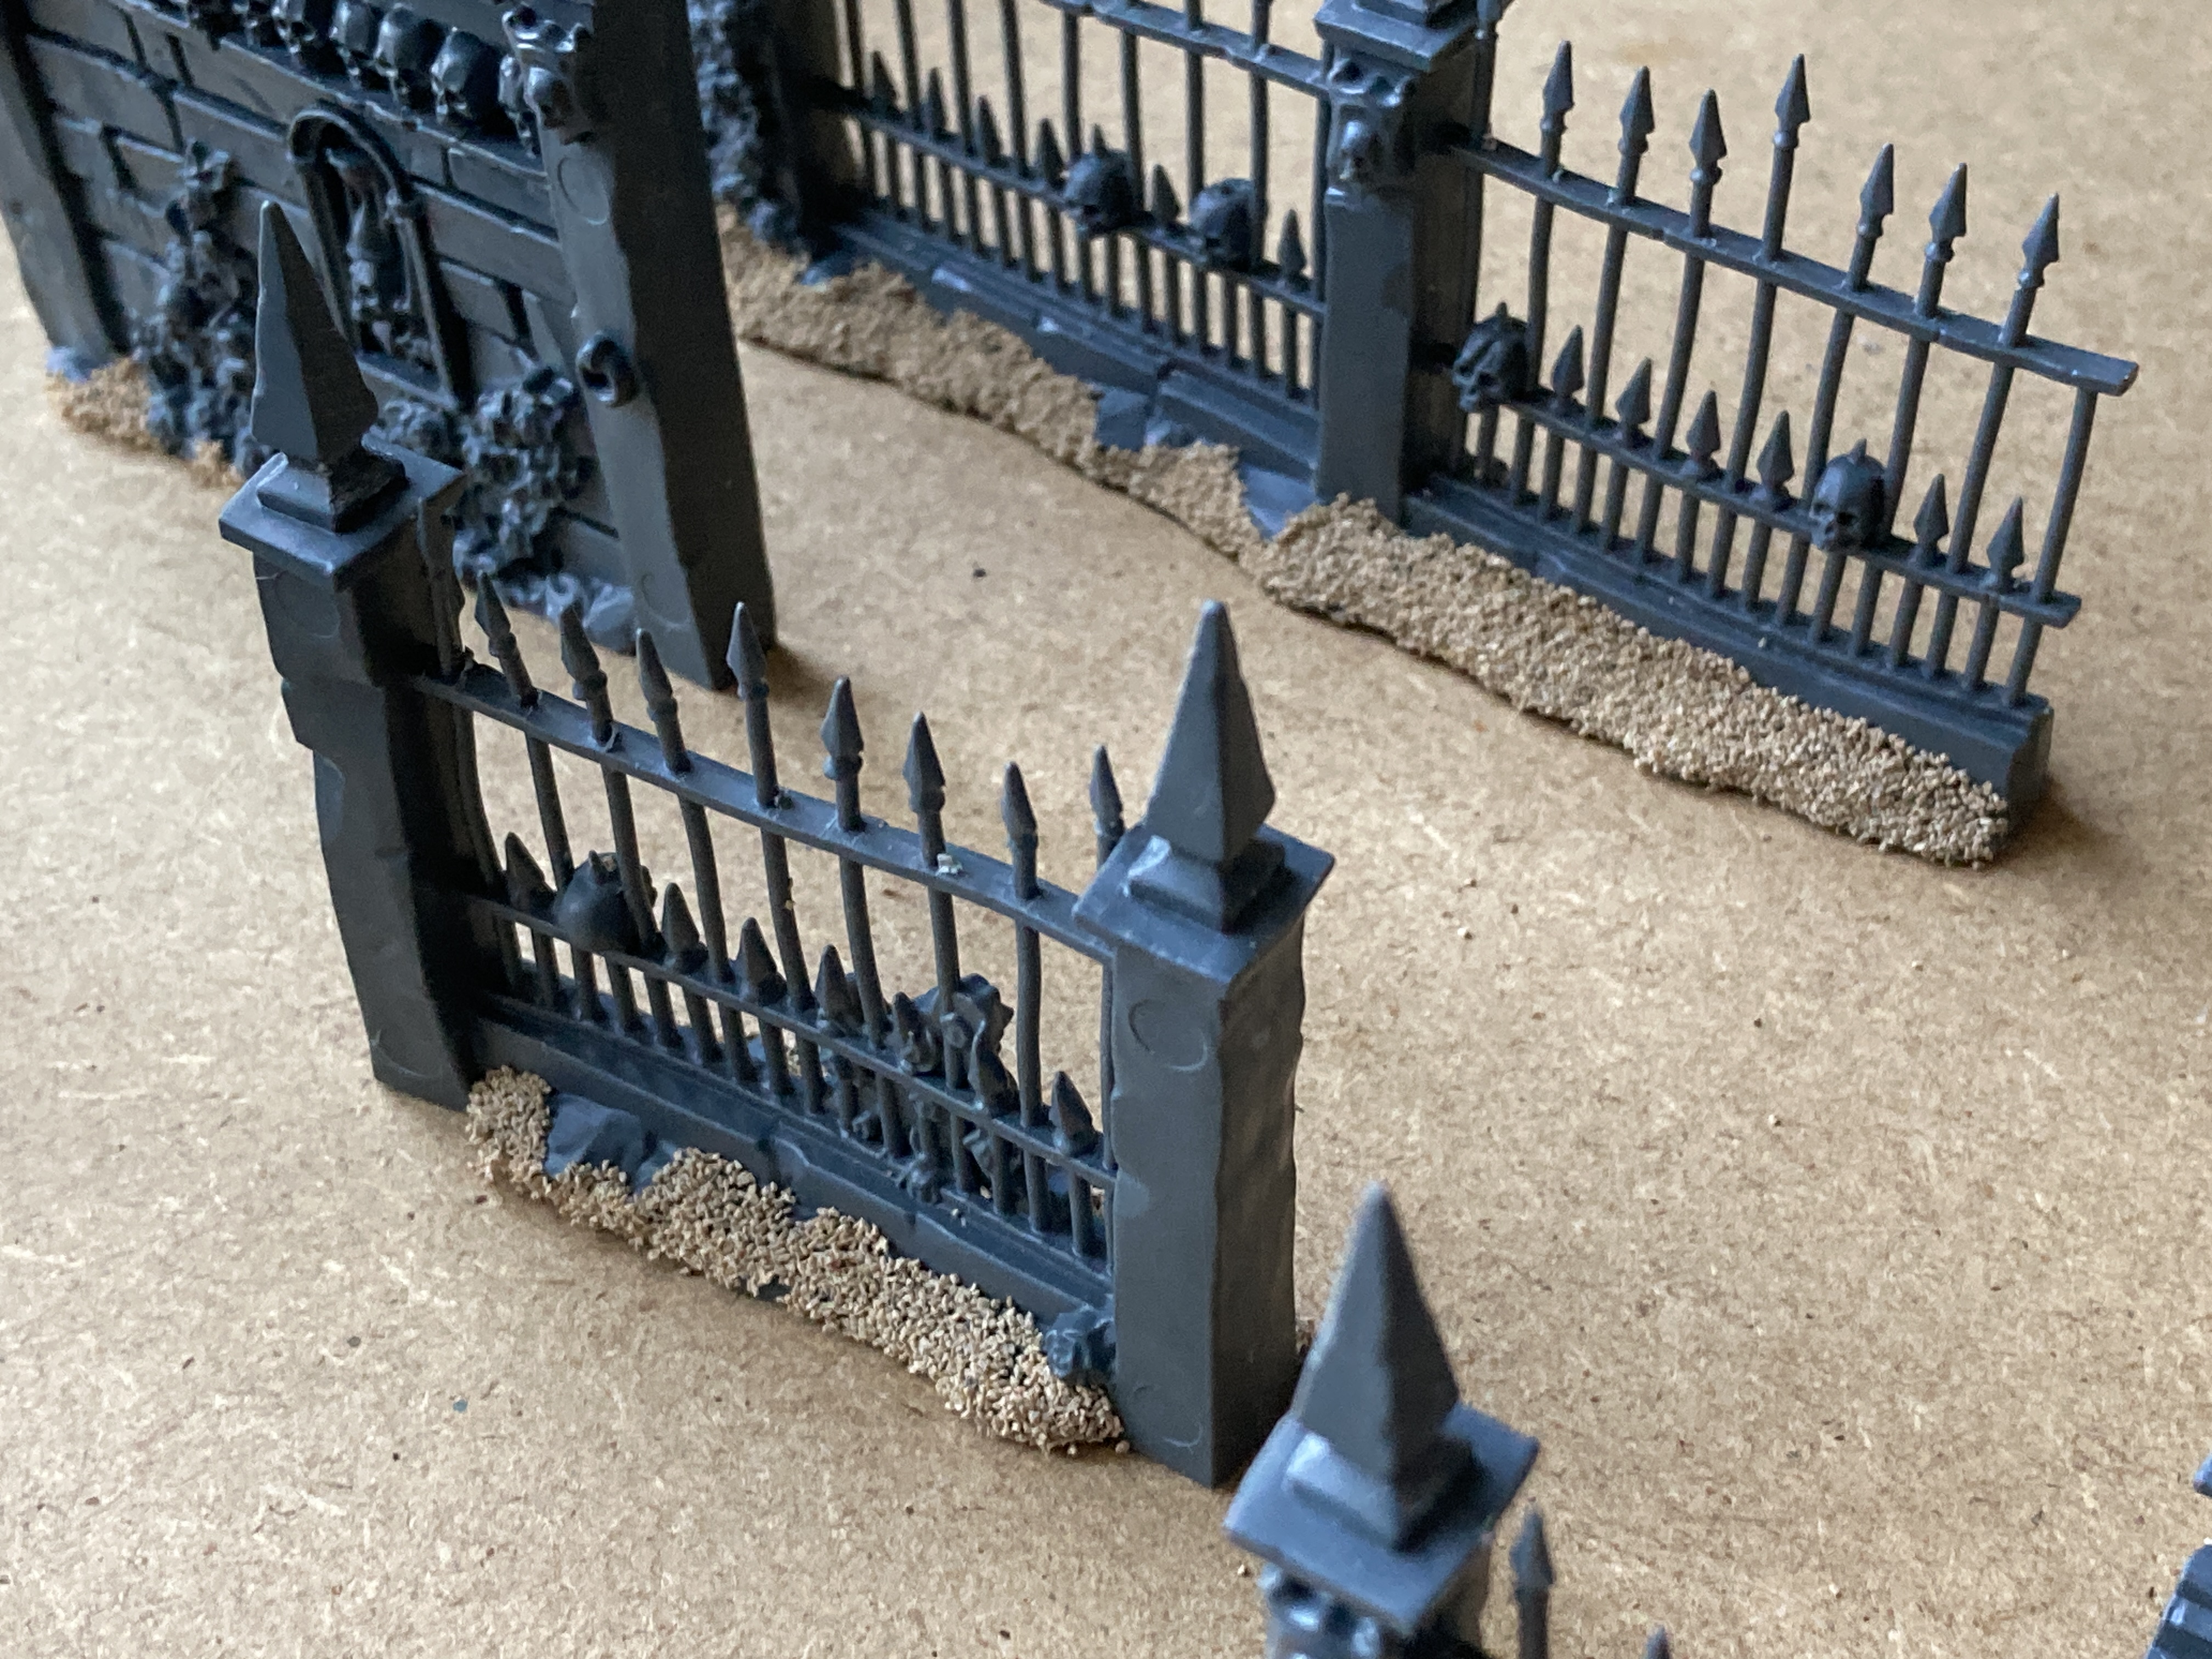
After that I’ll start work on all of the railings, spikes and the rest of the iron mongery.
A Box and Bare Plastic
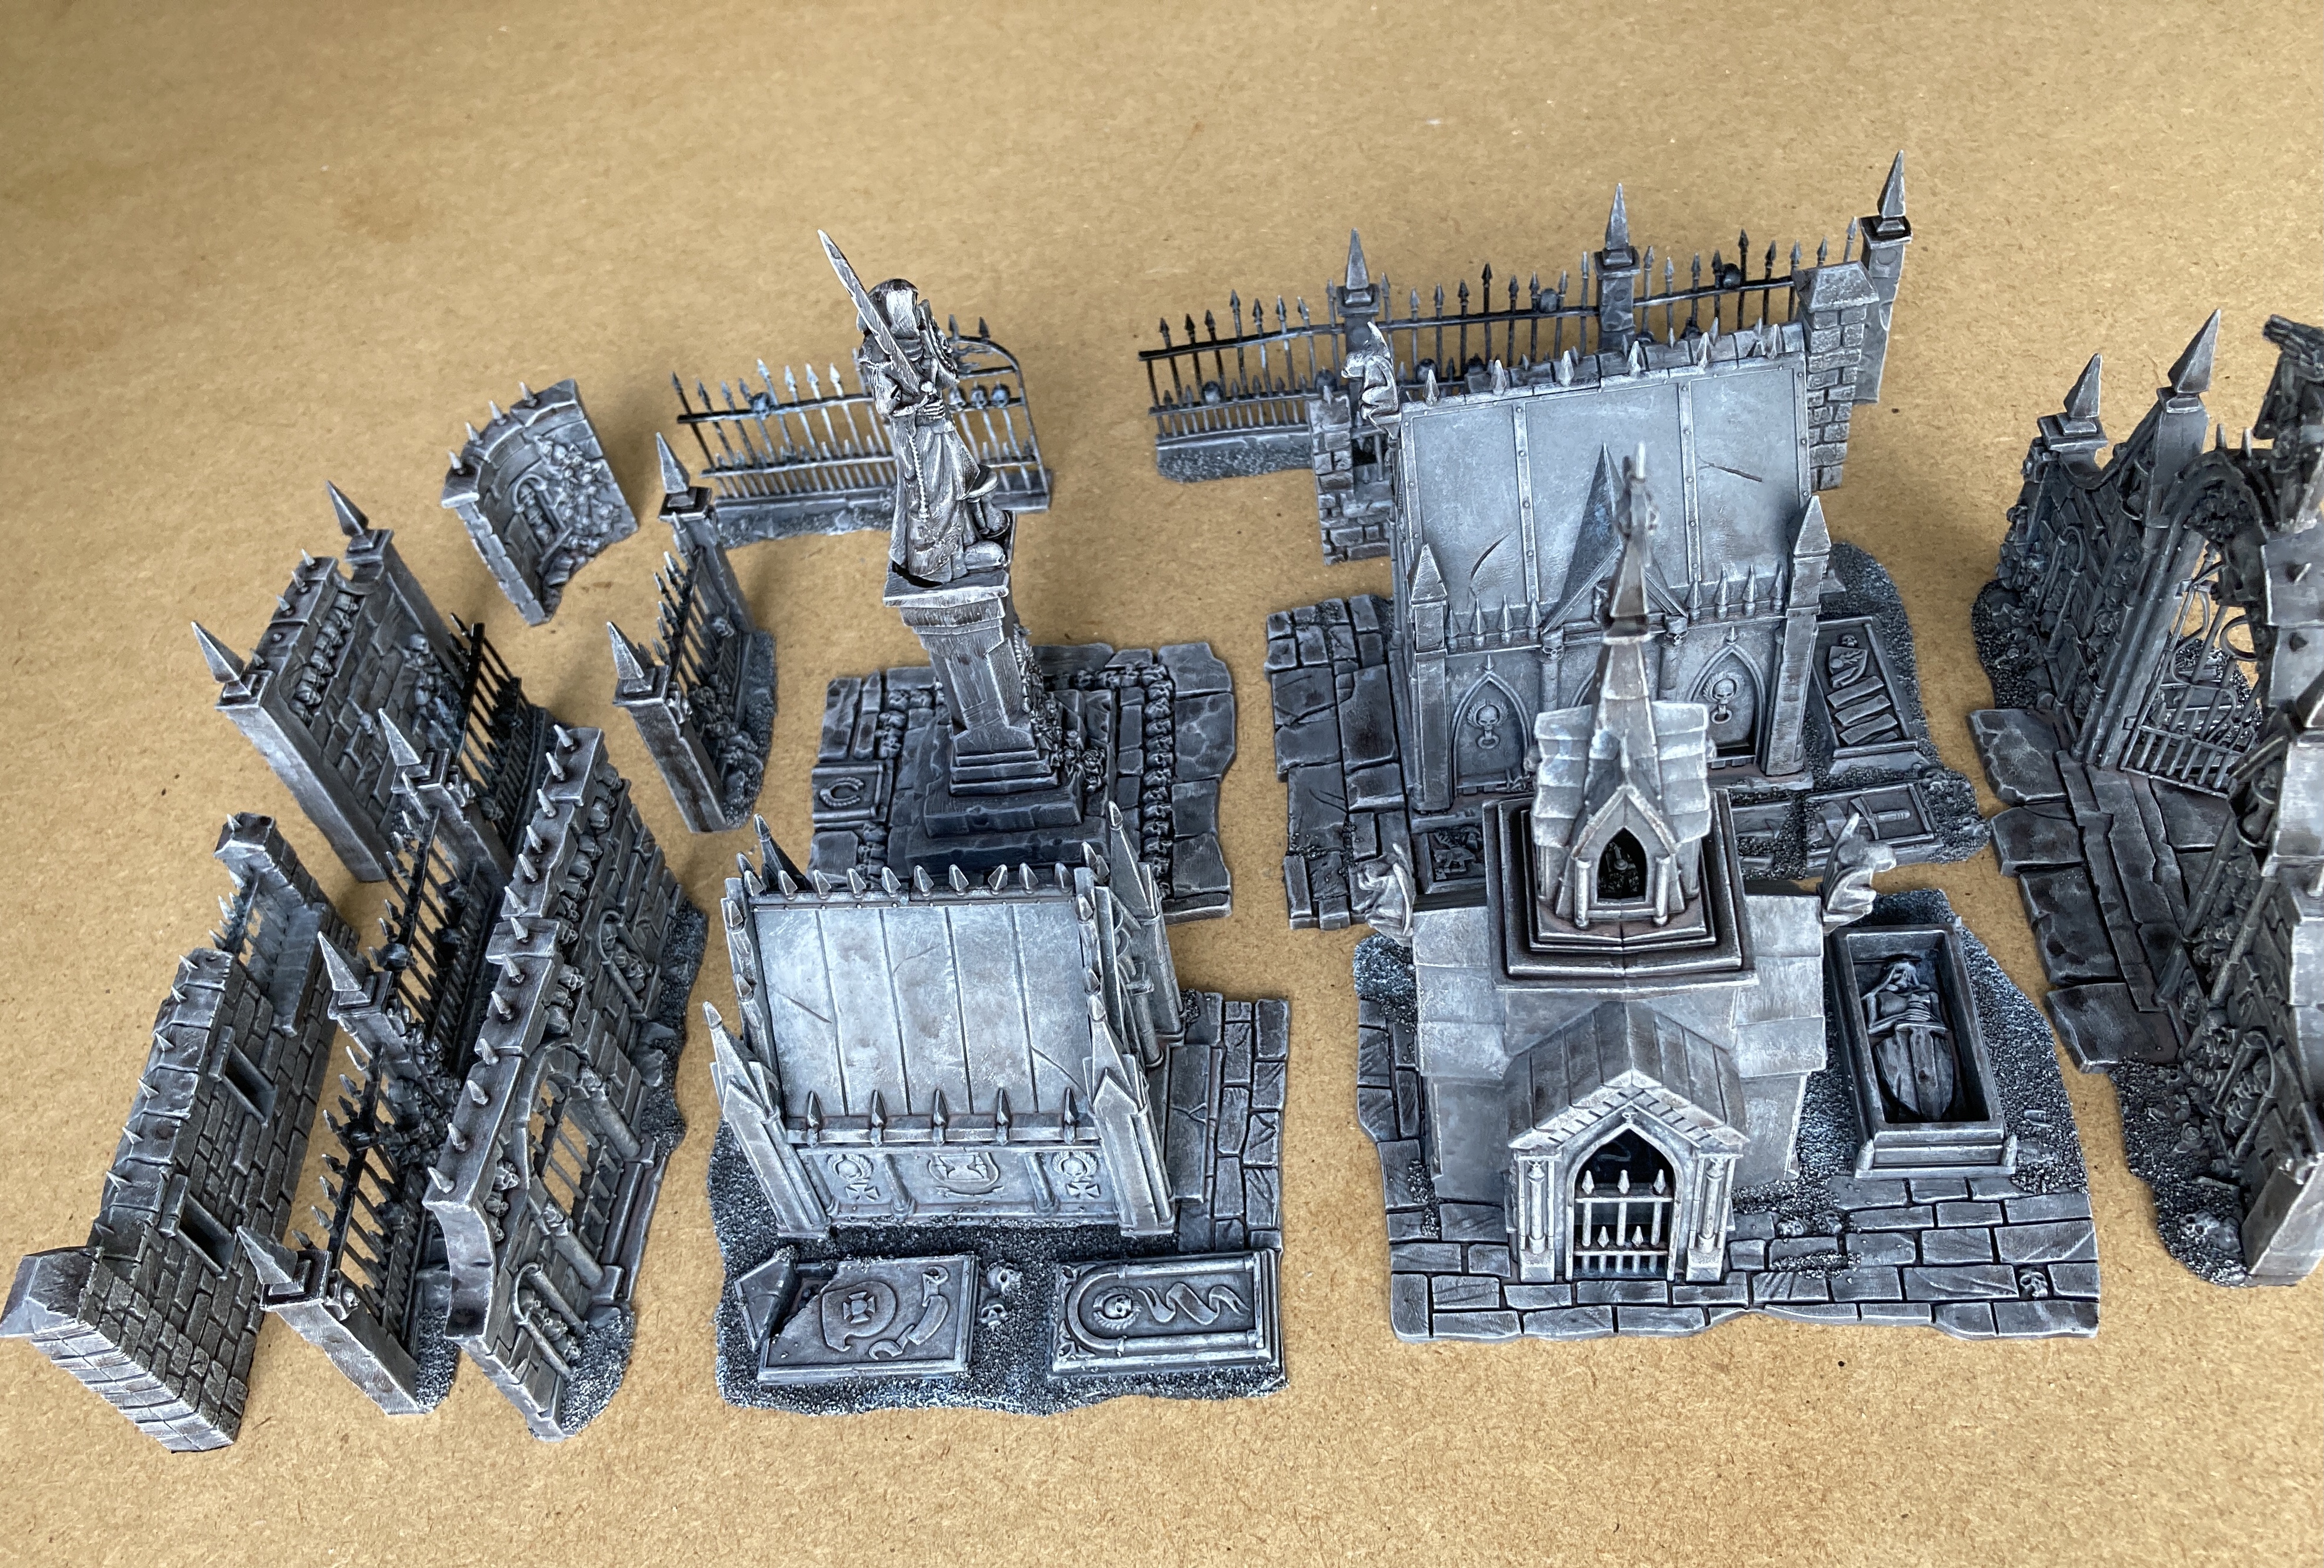
 I still have the box.
 The back of the box.
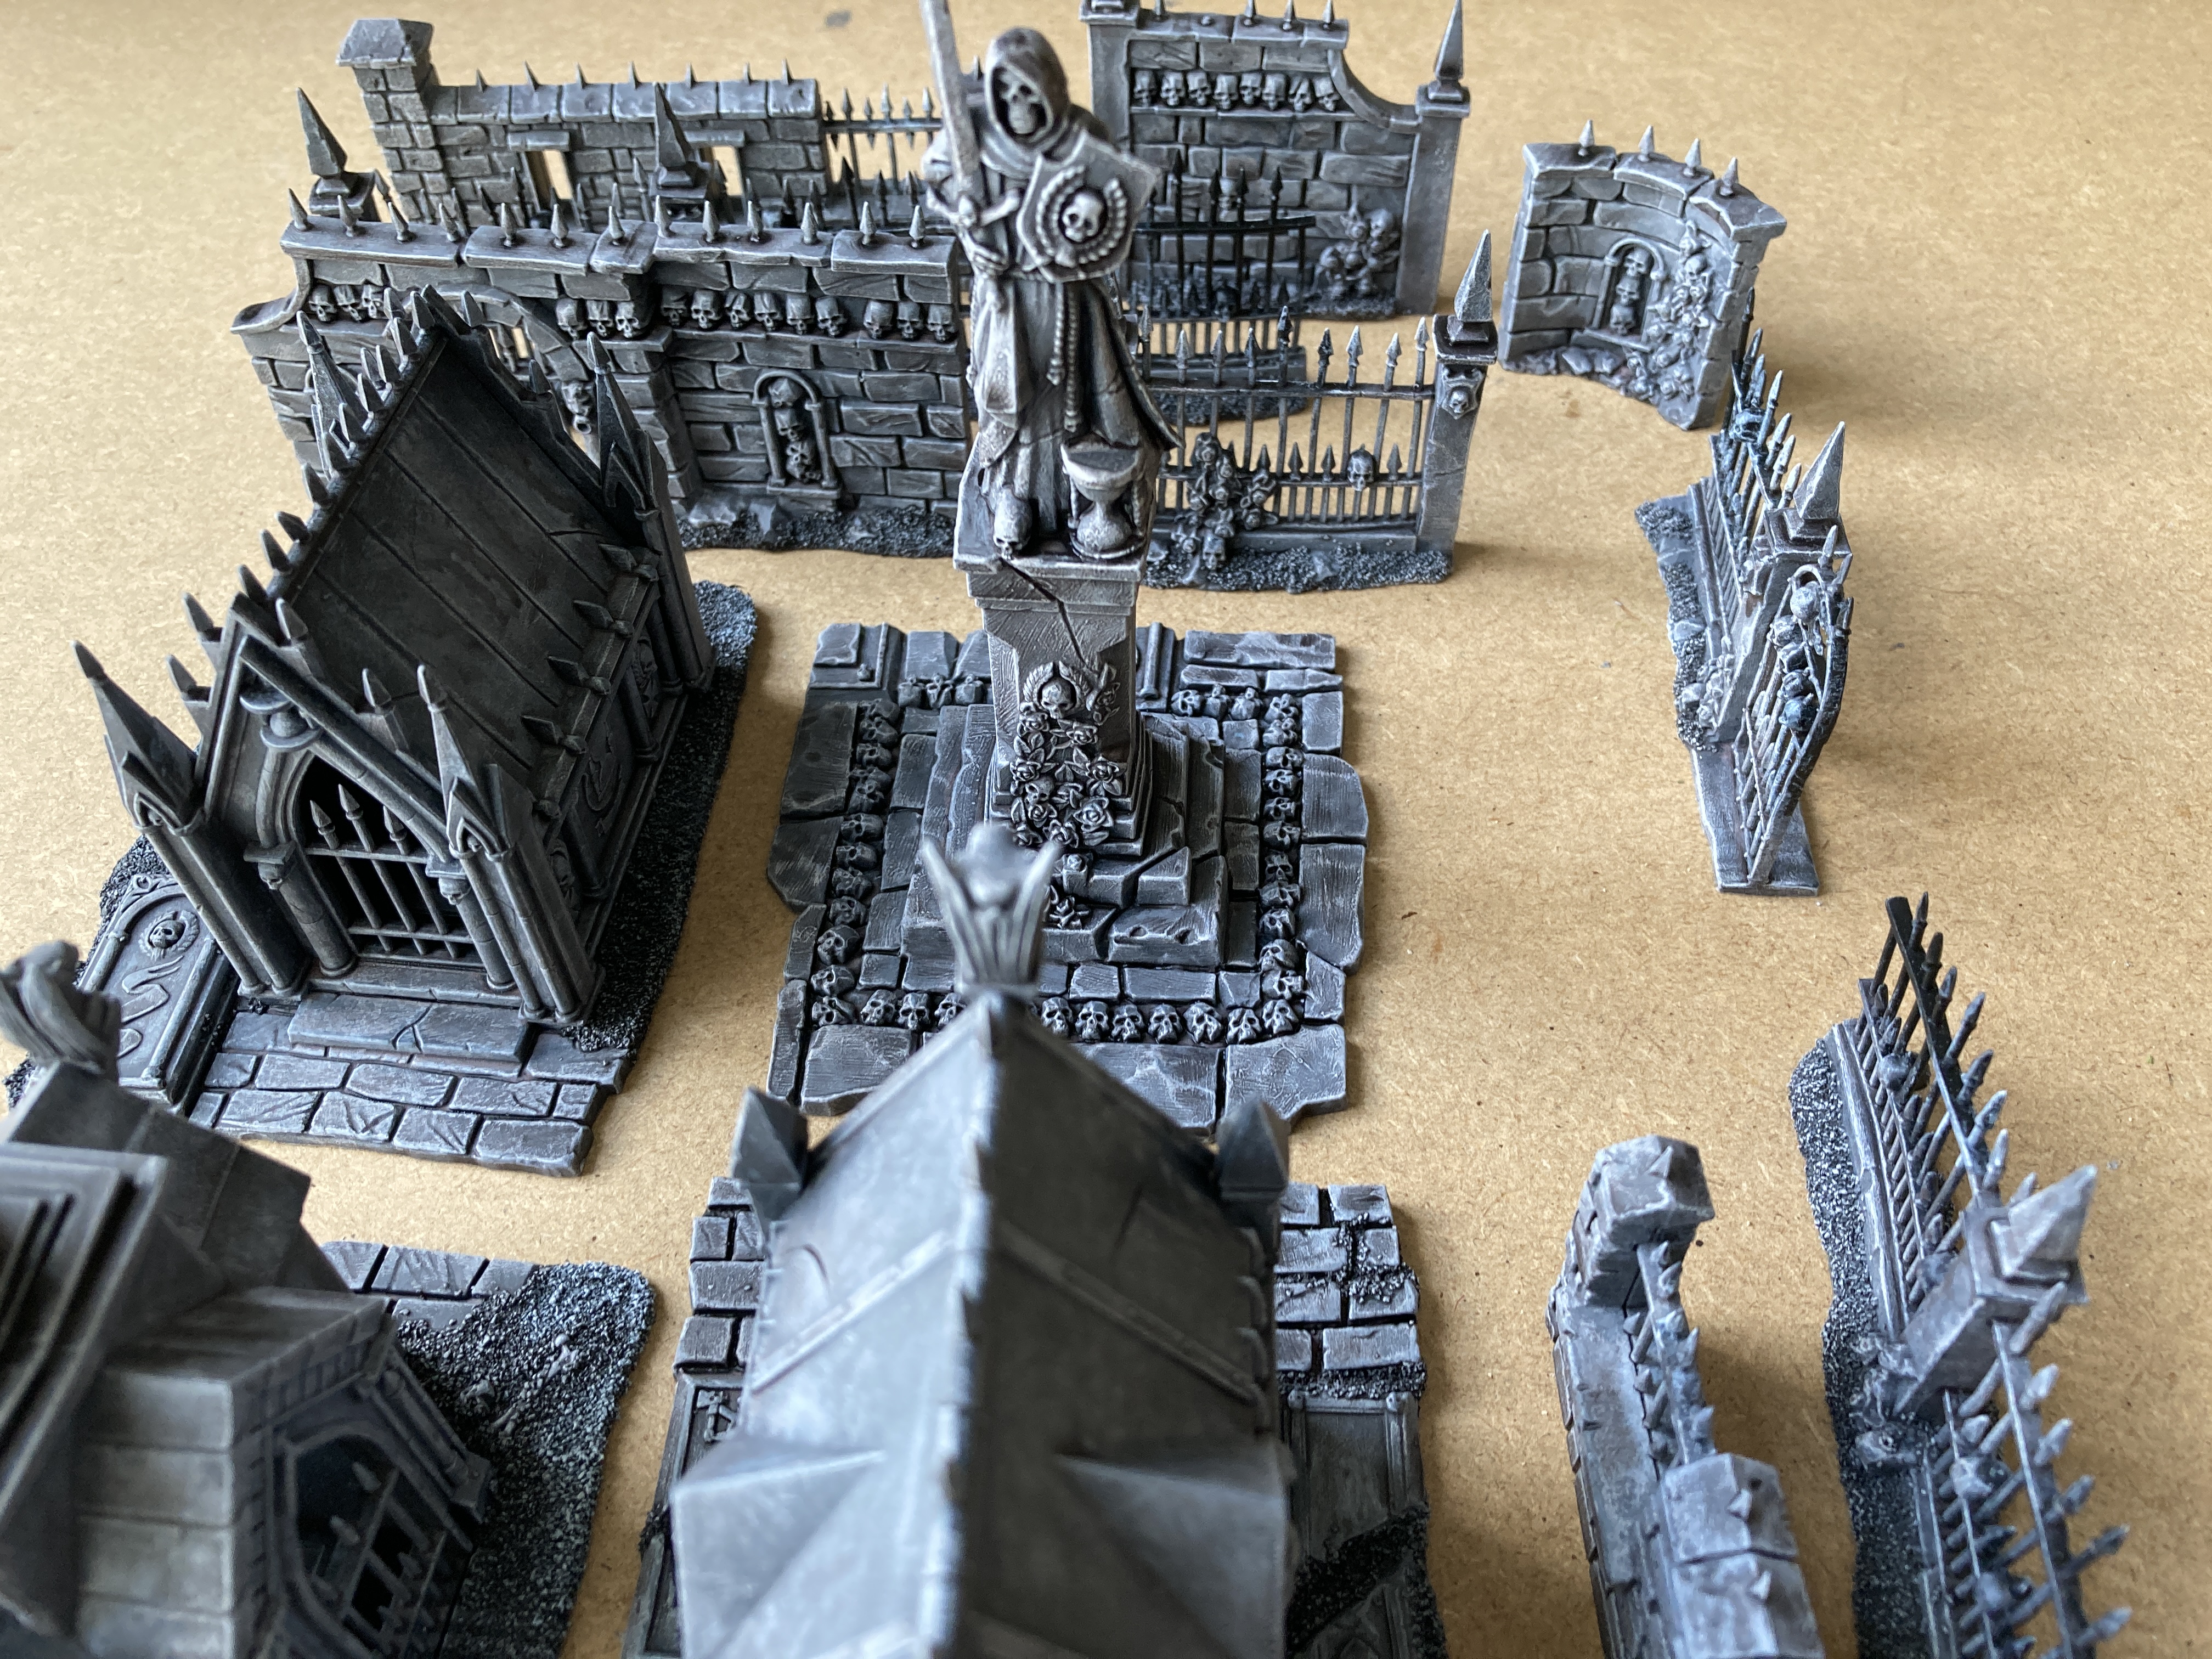
I really like this terrain kit and it’s seen many games over the years but so far I’ve never painted it. I even still have the box, now mostly used to carry miniatures to a friends house when I go to play a game. It’s currently filled with bubble wrap.
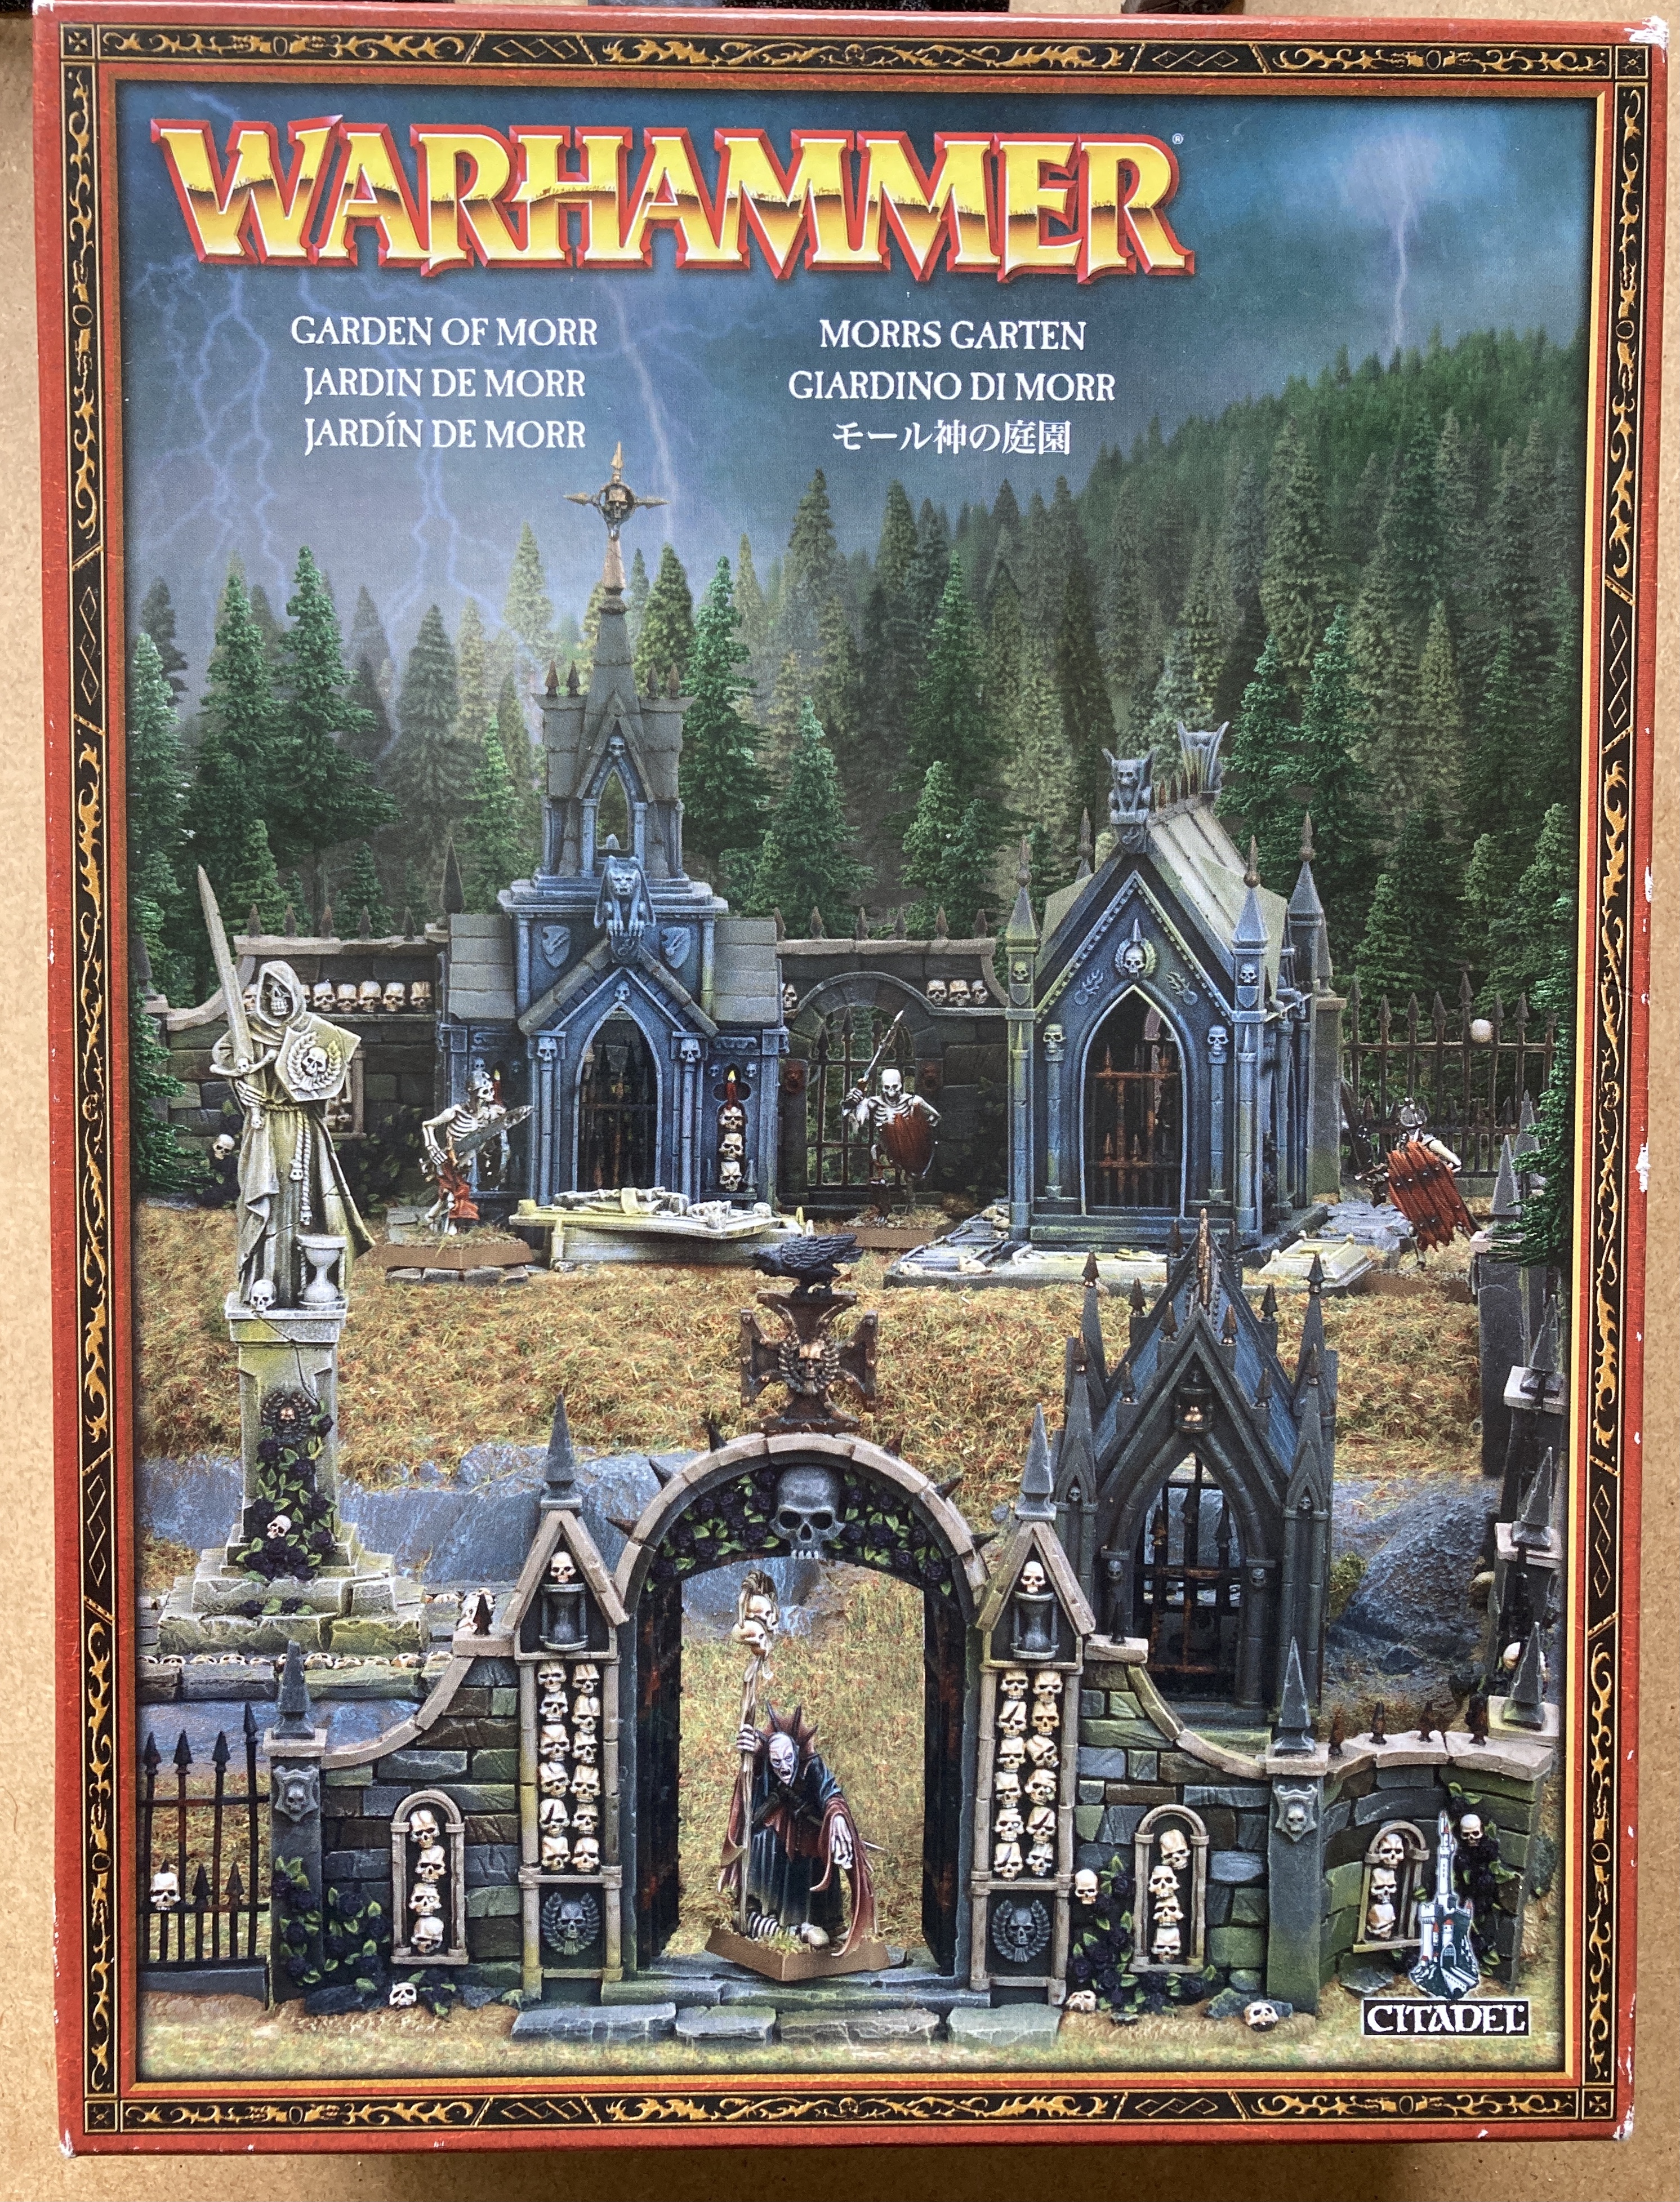
 Look 2011.
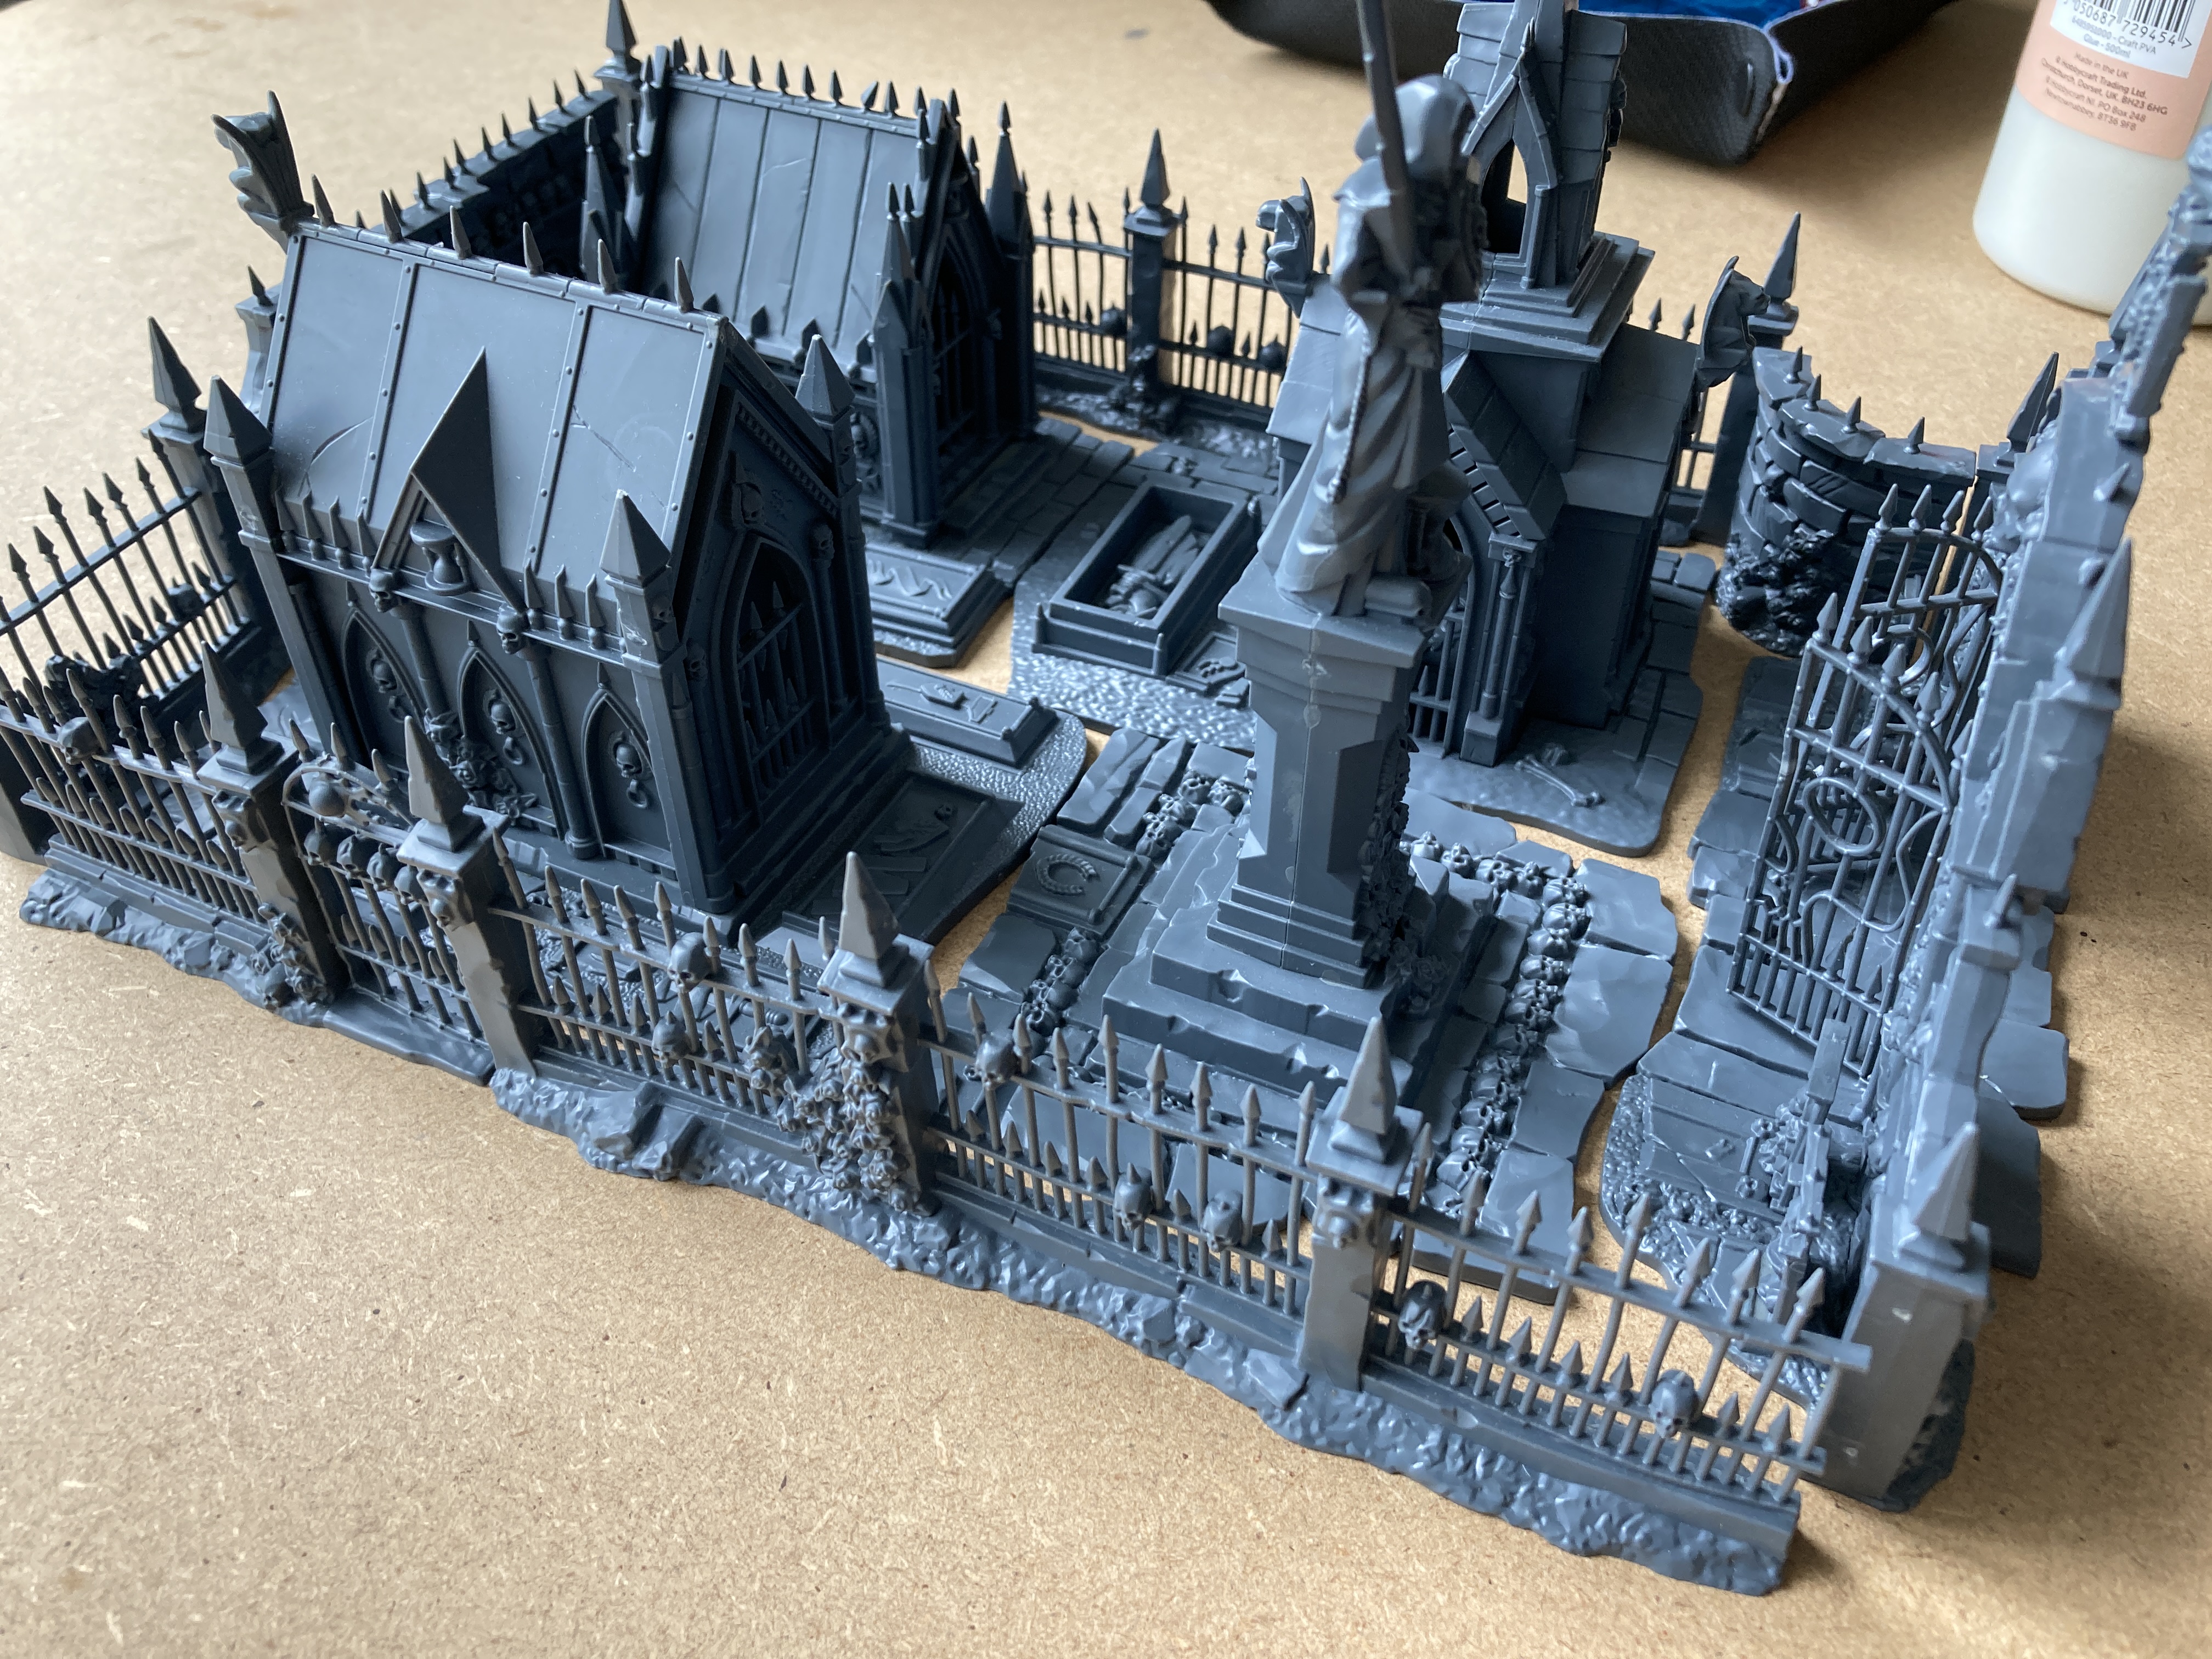 The contents. My Garden of Morr.


