


![A Perfect Zombie Apocalypse Starter Set? Civilians & Survivors Review | Wargames Atlantic [7 Days Early Access]](https://images.beastsofwar.com/2026/01/unboxing-wargames-atlantic-civilians-_-survivors-1_2-coverimage-225-127.jpg)
![Wild Australia Wargaming? 28mm Ned Kelly Gang & Victorian Police Review [7 Days Early Access]](https://images.beastsofwar.com/2026/01/unboxing-traders-galaxy-australiana-ned-kelly-gang-_-victorian-police-coverimage-225-127.jpg)


It’s going to be something…


Recommendations: 1226
About the Project
One day Gothic Horror, Victoriana, Steampunk and Medieval Fantasy all met up in my head. They started to fight it out which would be the subject of my project for Terrainfest 2024. Limbs flayed as the battle commenced and it was not long before they were all strewn across the floor in a tangled mess. This is my approach to this. Chuck it all in a pot, mix it up, and see what comes out.
Related Genre: Weird
Related Contest: TerrainFest 2024
This Project is Completed
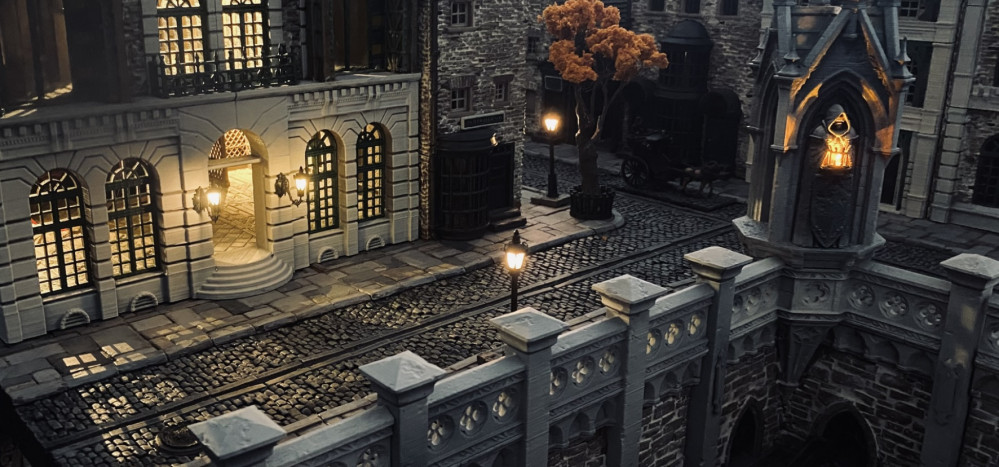
Adding more life
I am continuing to add small extra details to the layout. All the buildings are now done except for some of the lighting and the stained-glass windows for one of them.
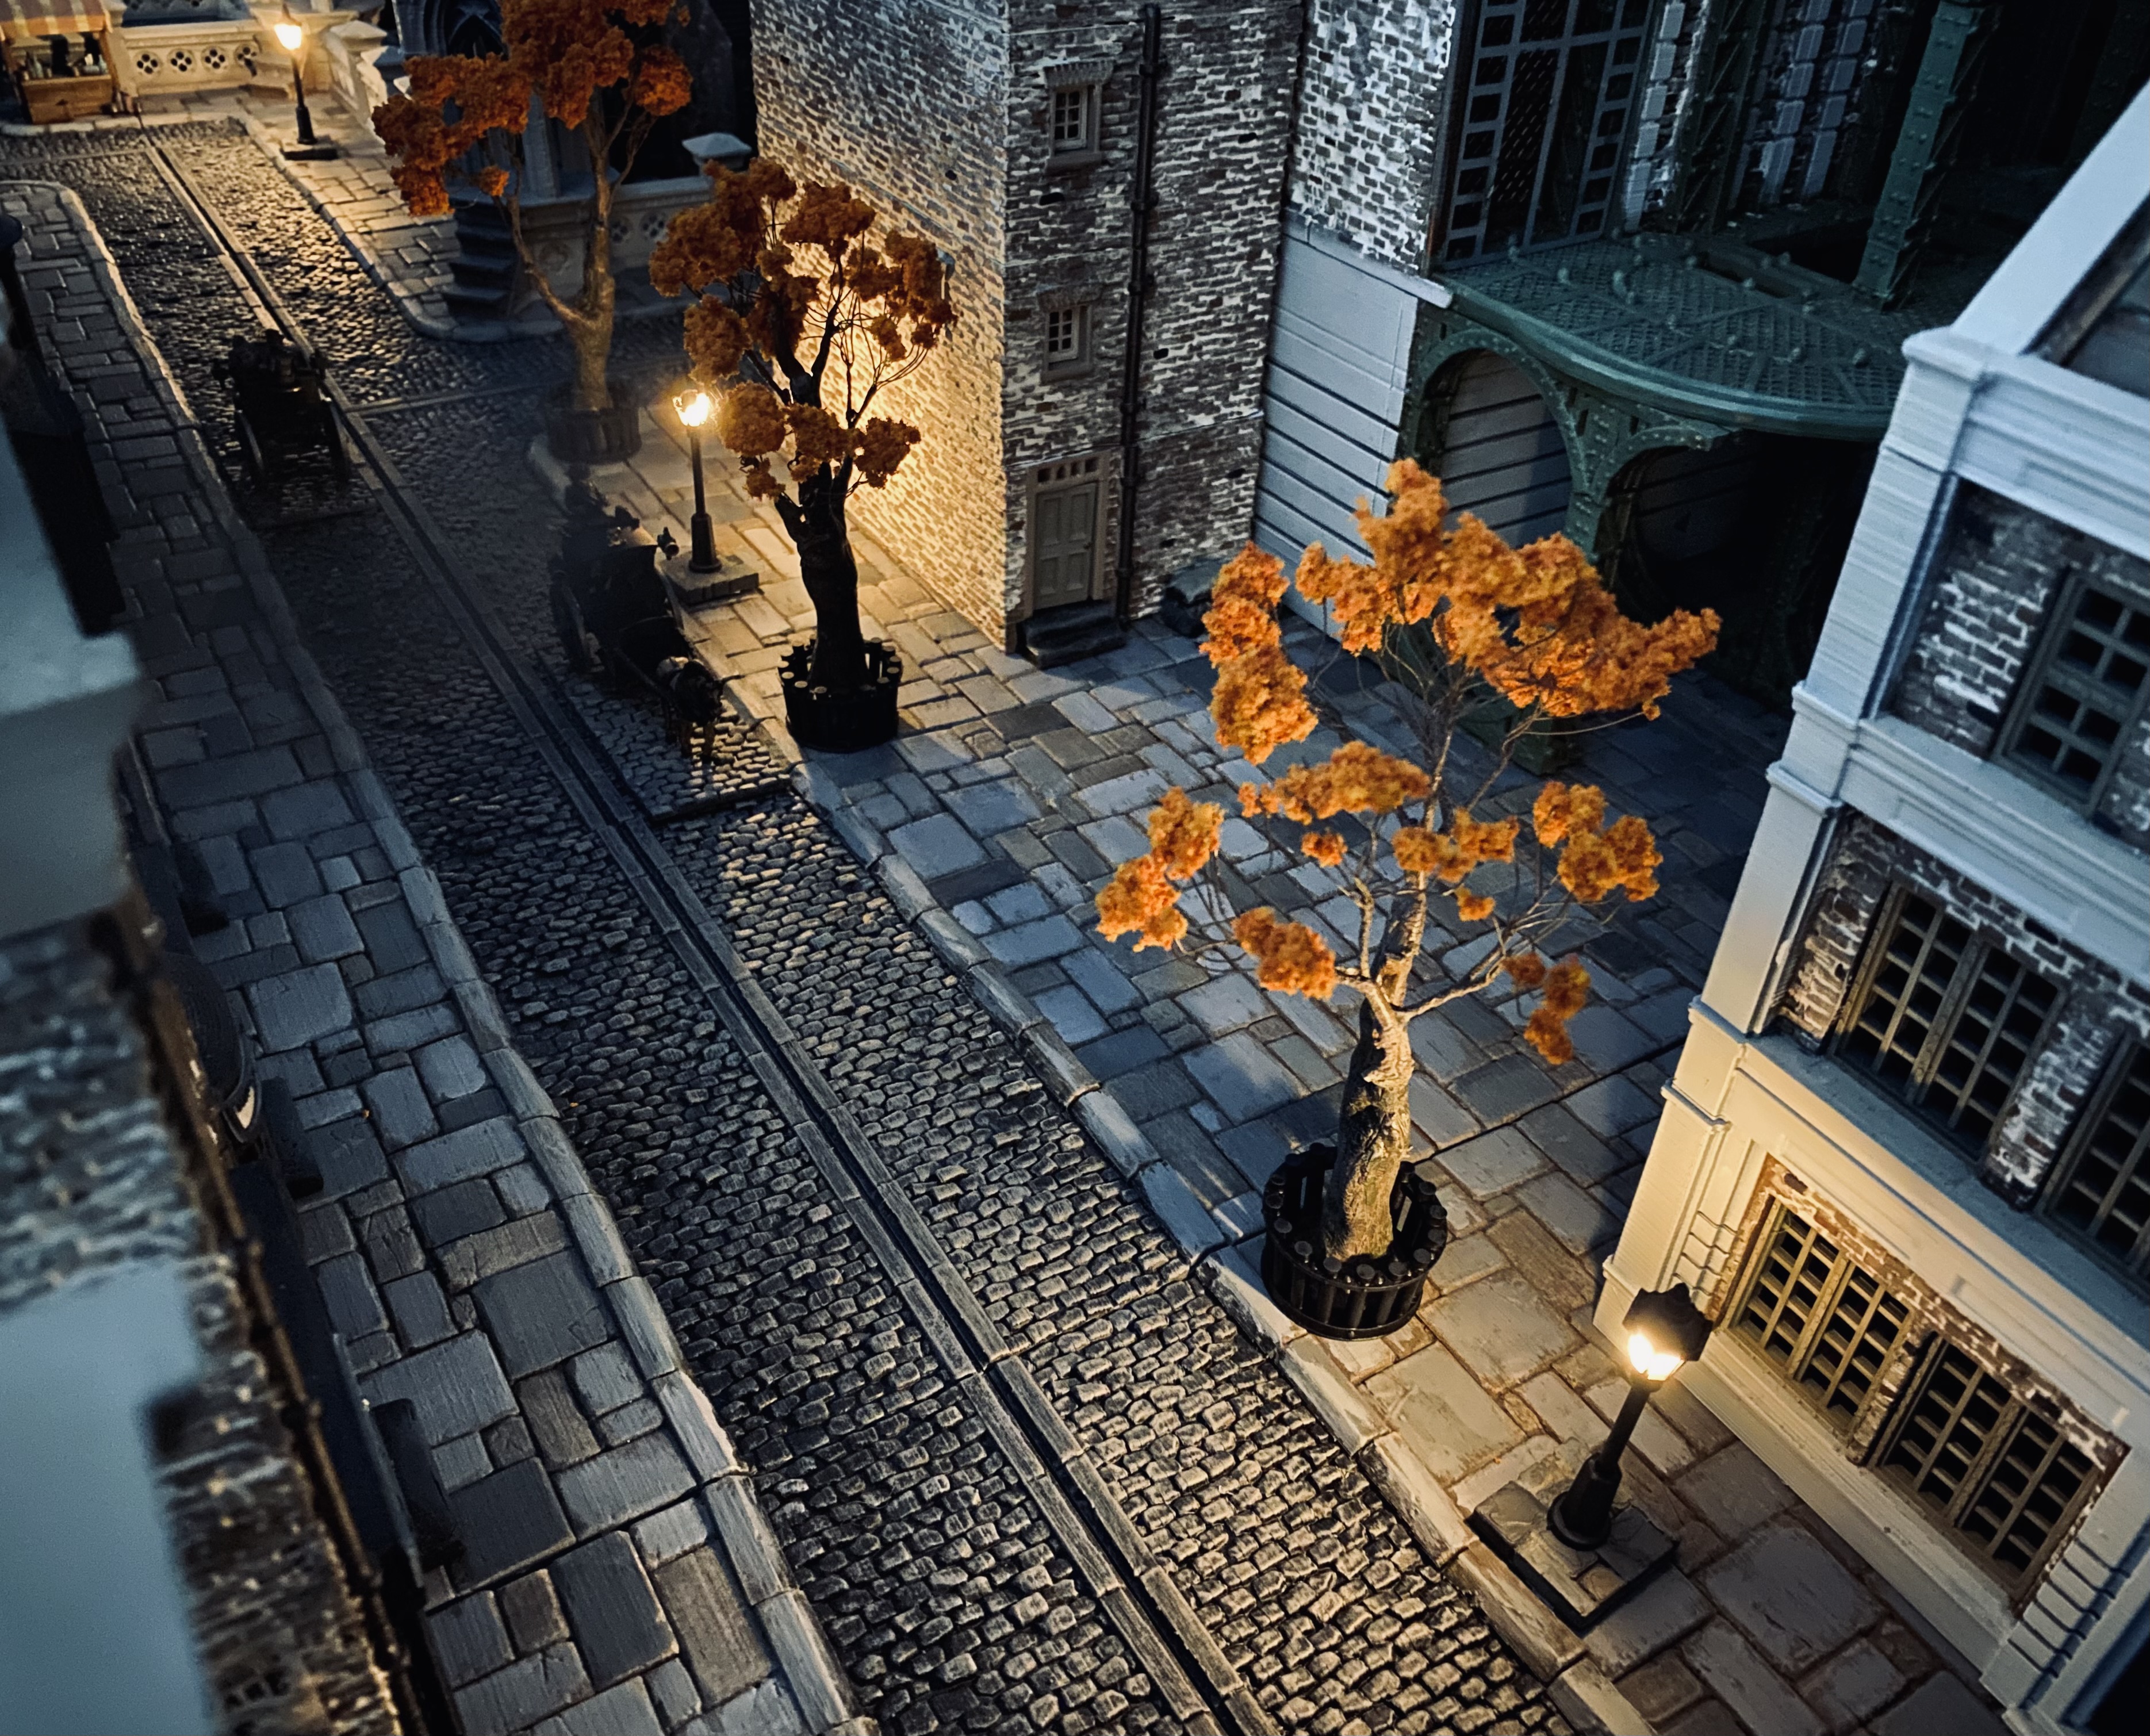
I wanted to add some trees to the layout to add fallen leaves to the ground. They have to have come from somewhere, right?
Twisted wire trees have been the thing for ages now and there is not much more that I can add to whatever has been said about them. mrstu has been working on some for his terrain project that can be found HERE. If you have not checked out his amazing Moonstone table build then go and check it out, it’s well worth a look.
Anyway, the principle is that you twist lots of strands of wire together and gradually ‘branch’ smaller clumps of wires off to form, branches. The thinner the wire you use the smaller branches you will end up with but the more individual wires you will need.
I based my trees on small steel washers to give them some extra weight. You can make extra small ‘branches’ at the bottom to represent roots, but for what I have in mind, those would not work for me.
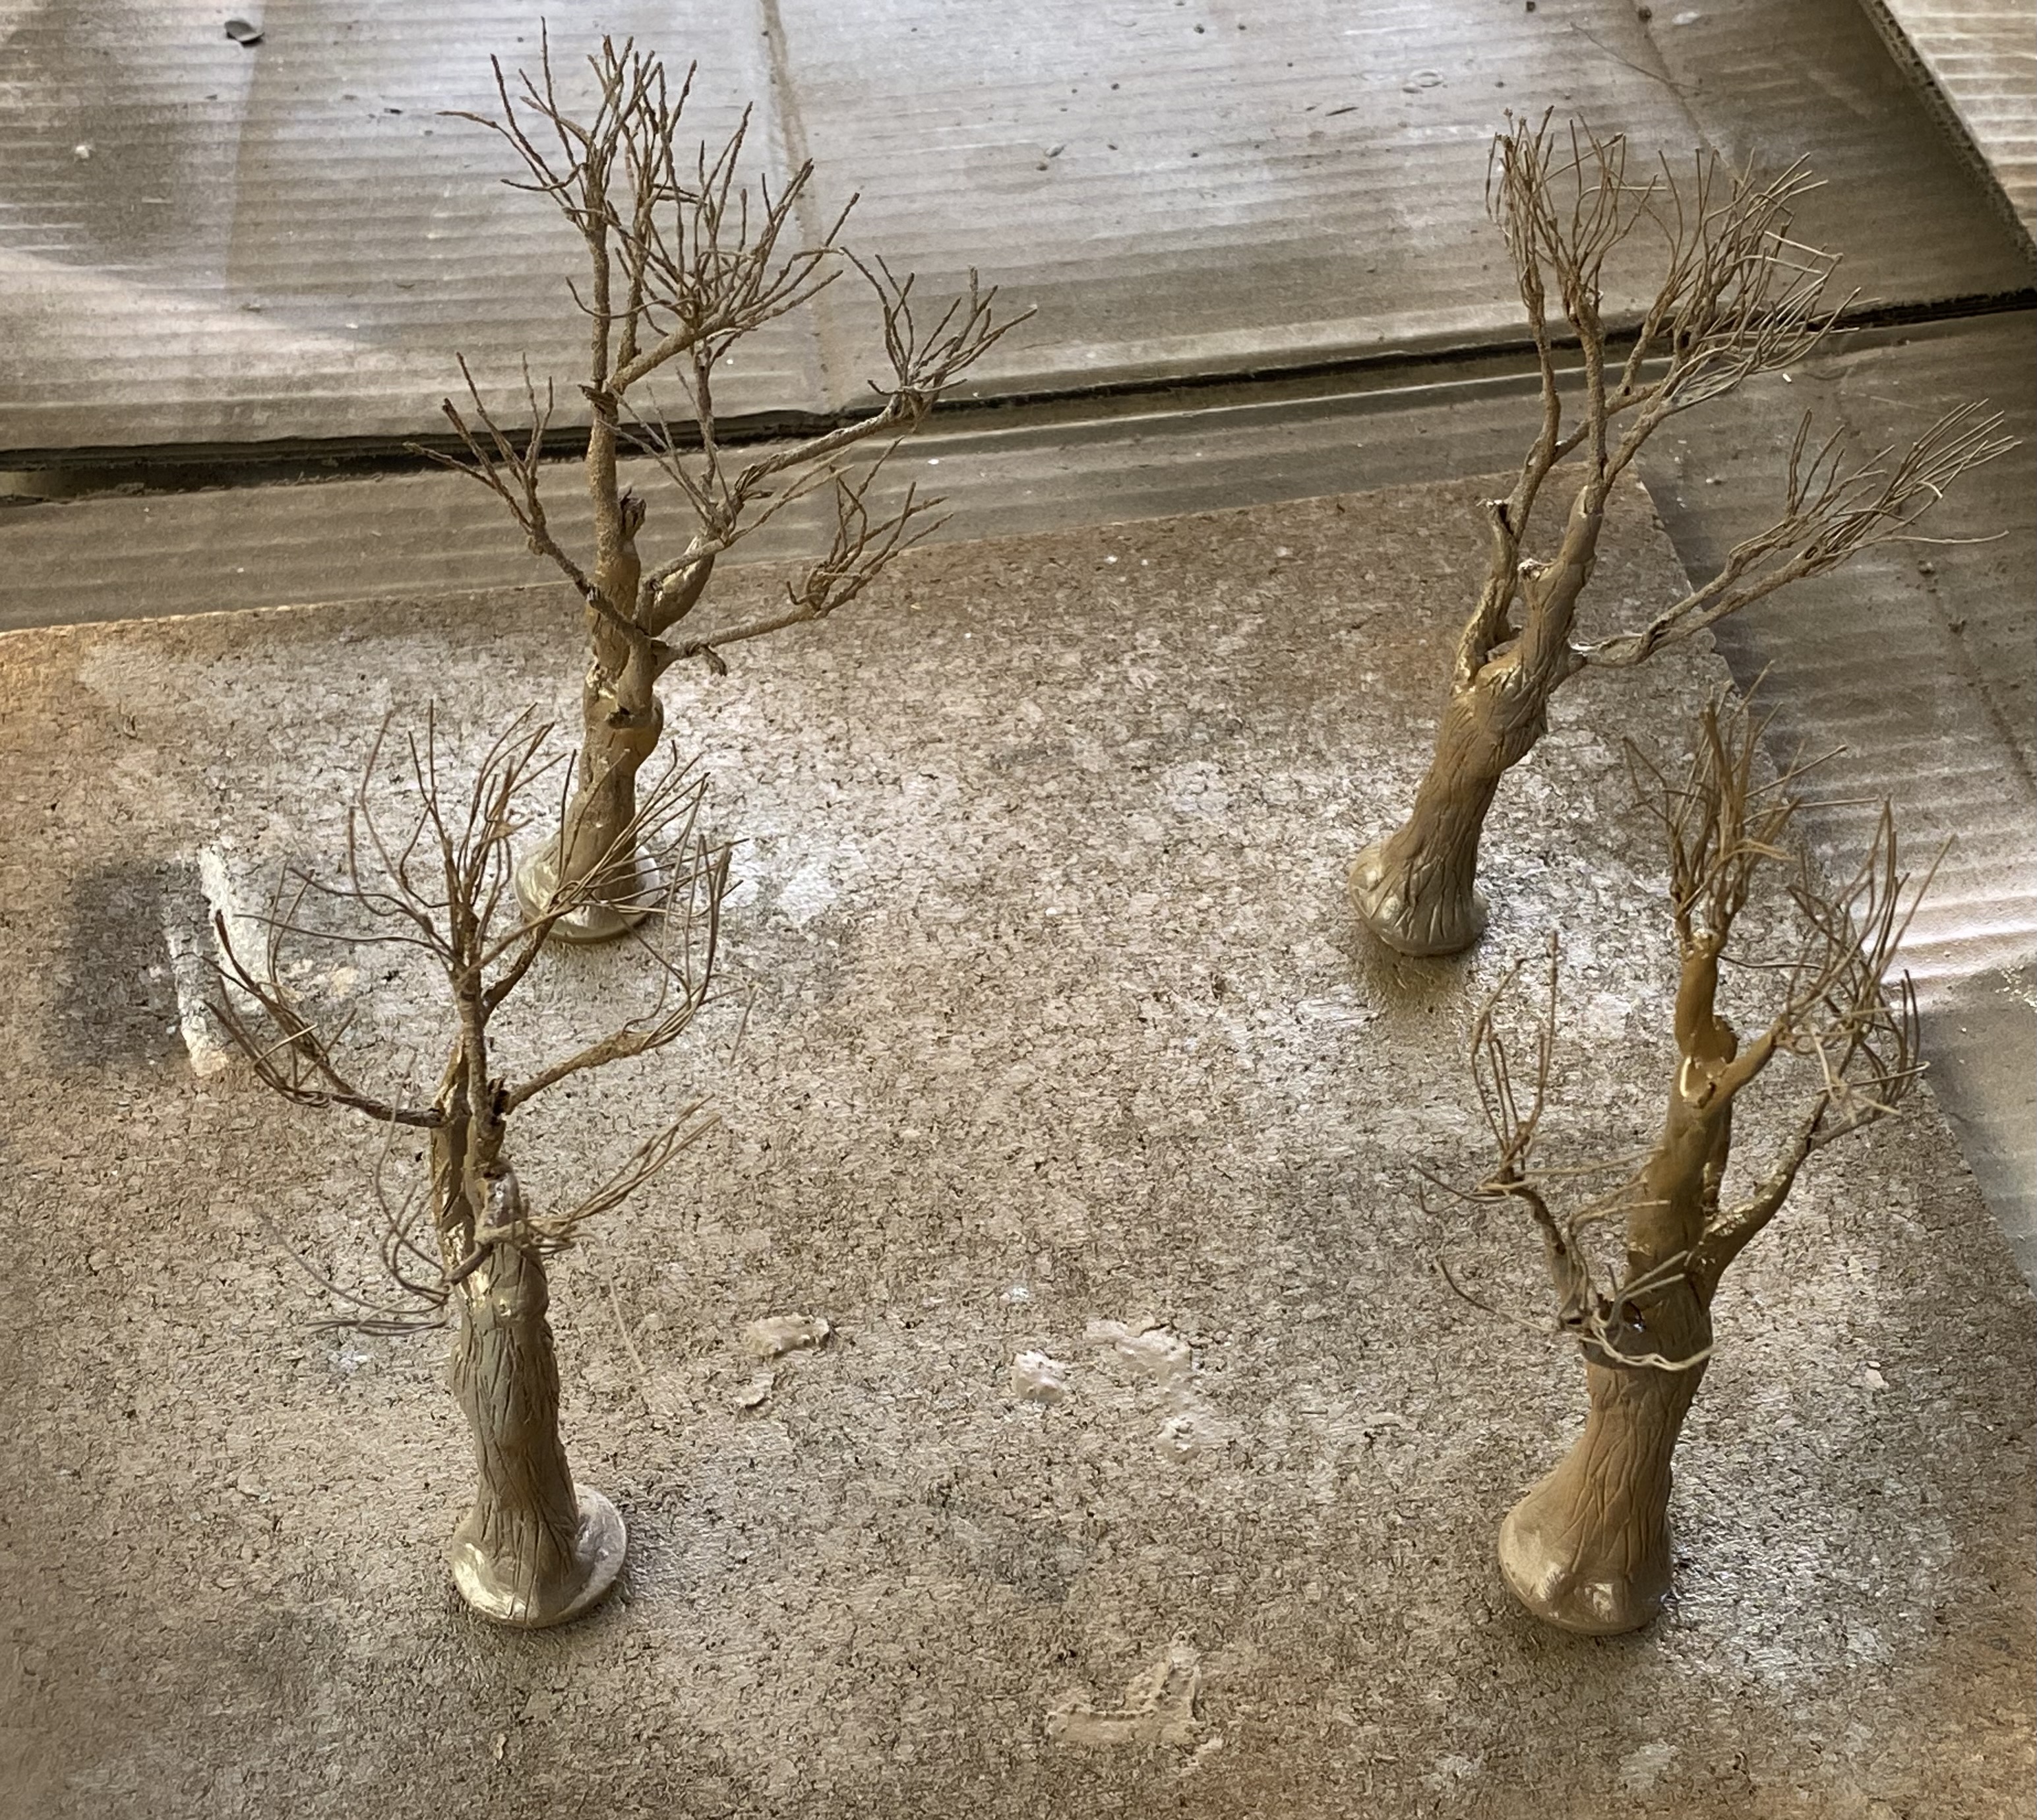 The basic structure is then sculpted over the wire frame using some form of modelling putty. I used milliput. I lightly scored in a rough texture so the trunks did not look to smooth. This is optional and really depends on the type of tree you are trying to simulate.
 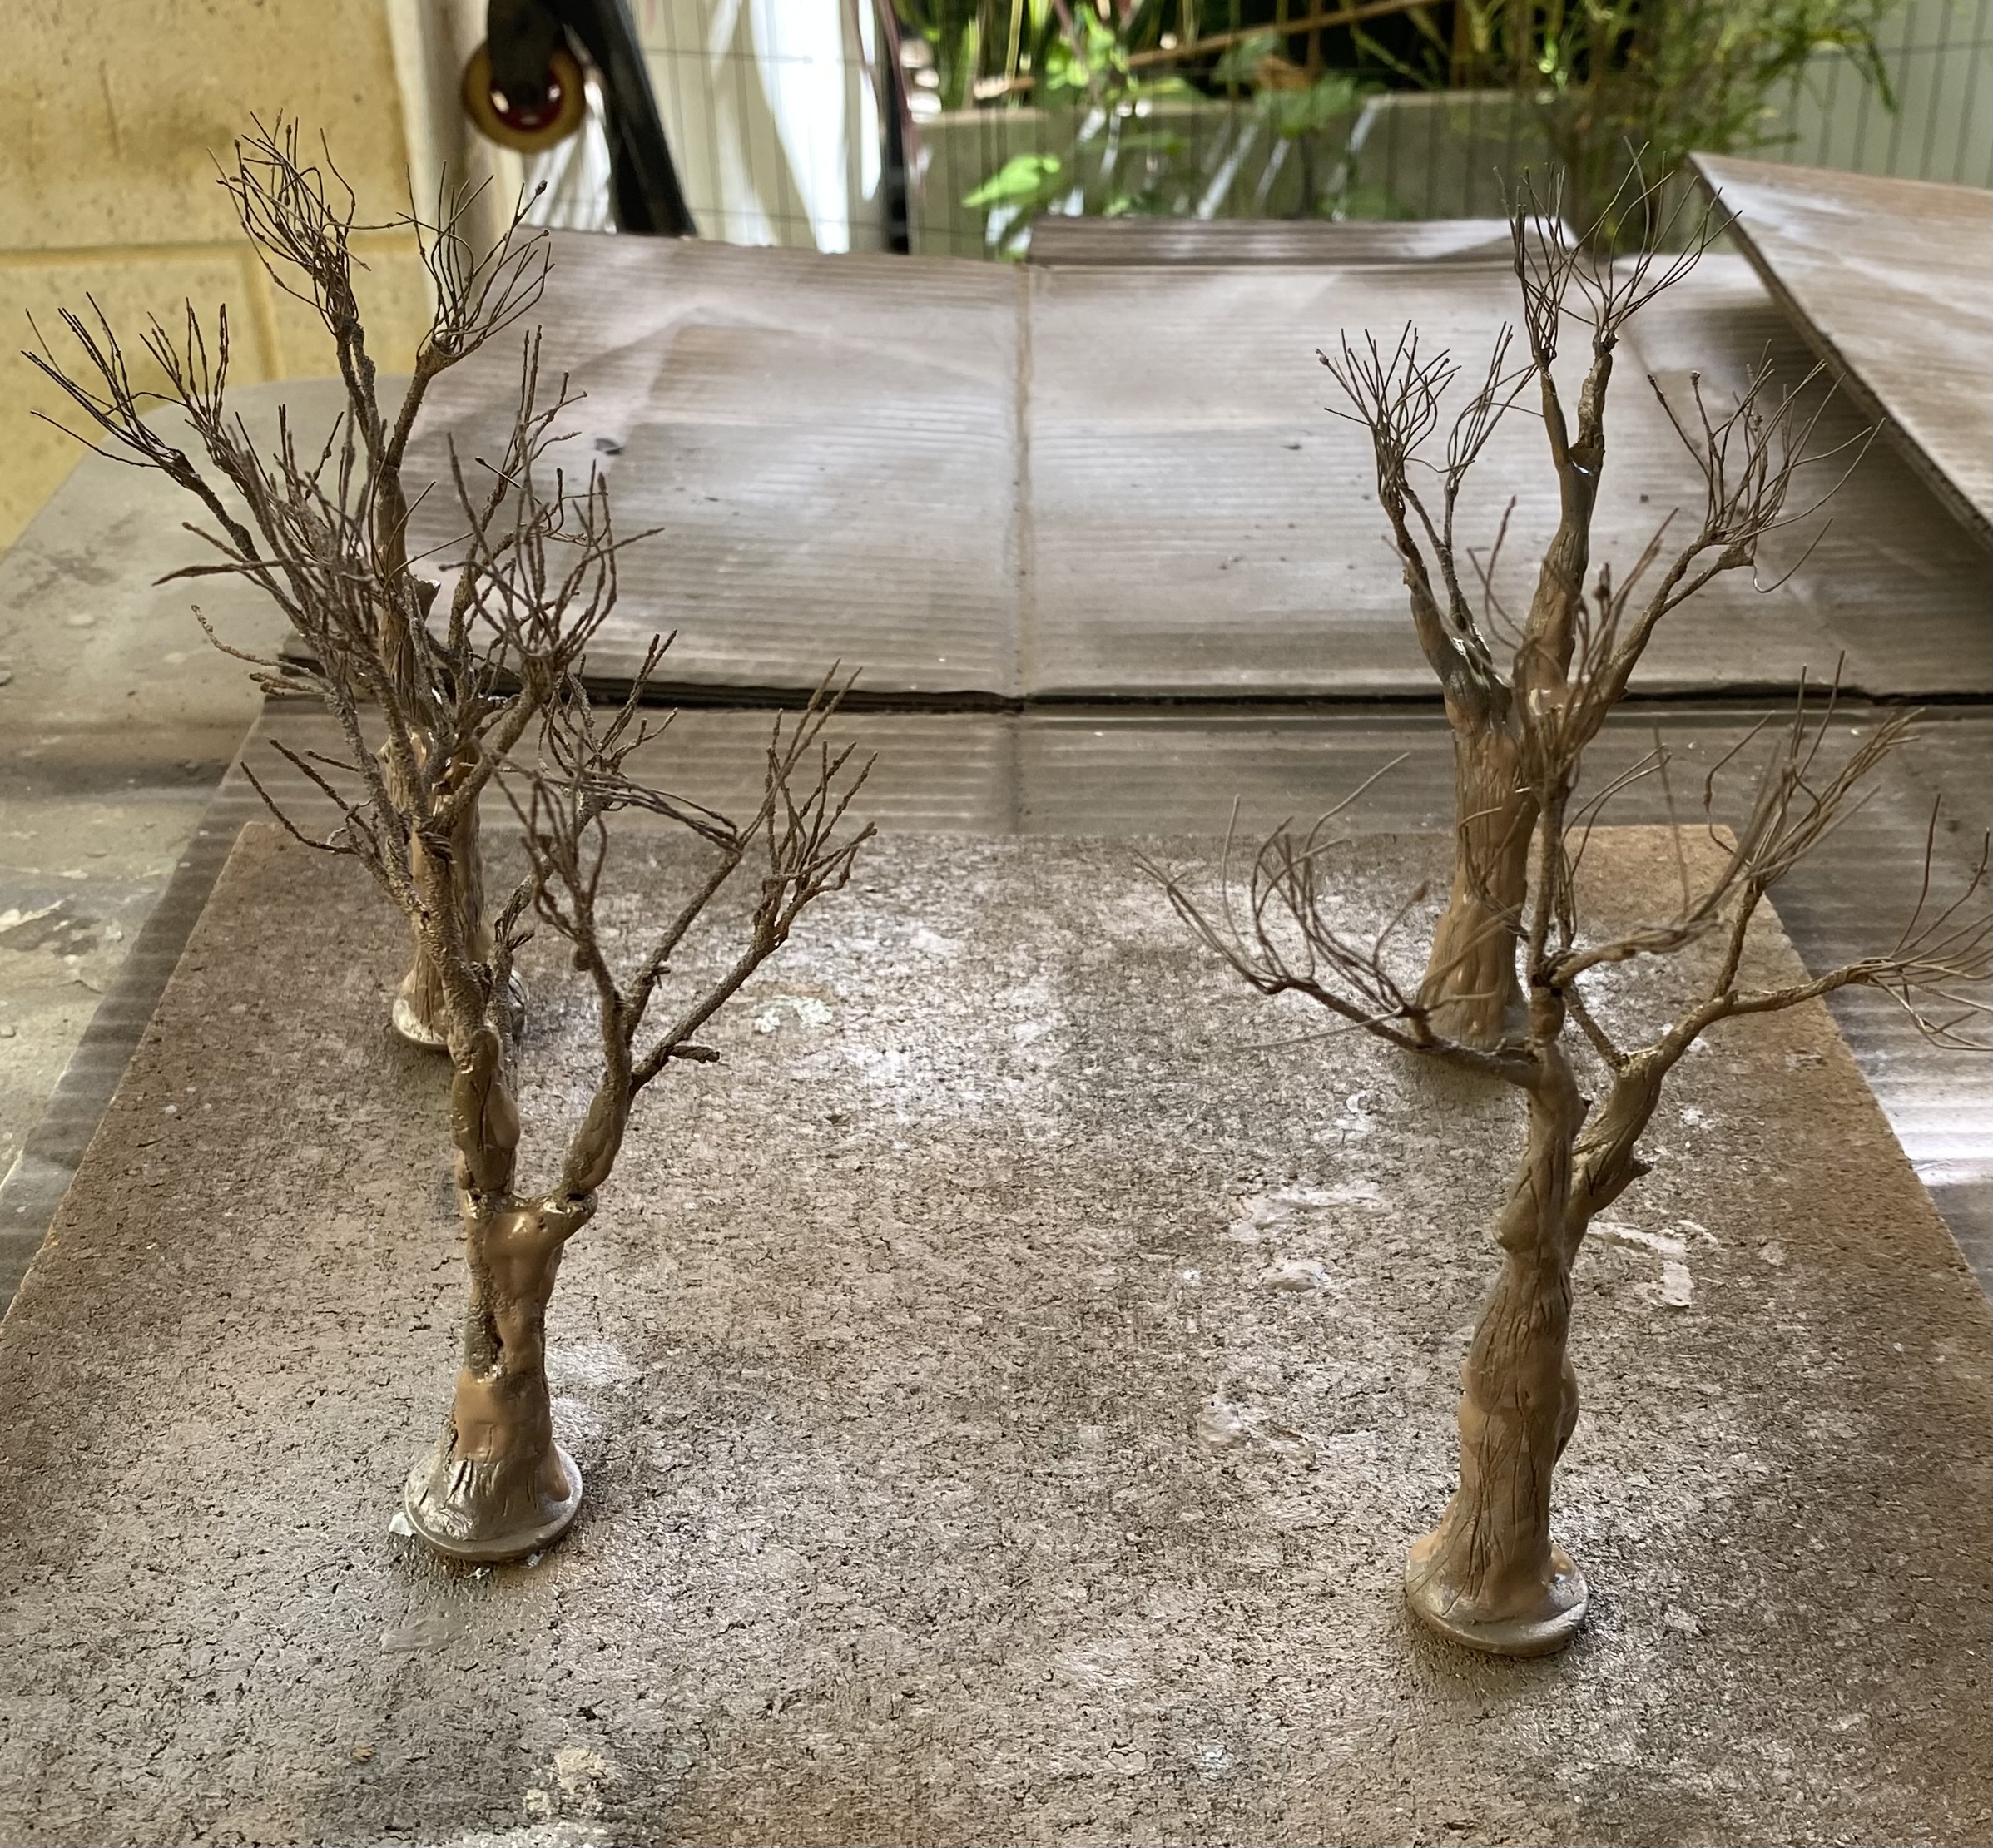 I undercoated the trees in Army Painter Leather Brown paint before splodging on some 'crackle paint' in different areas of the trunk.
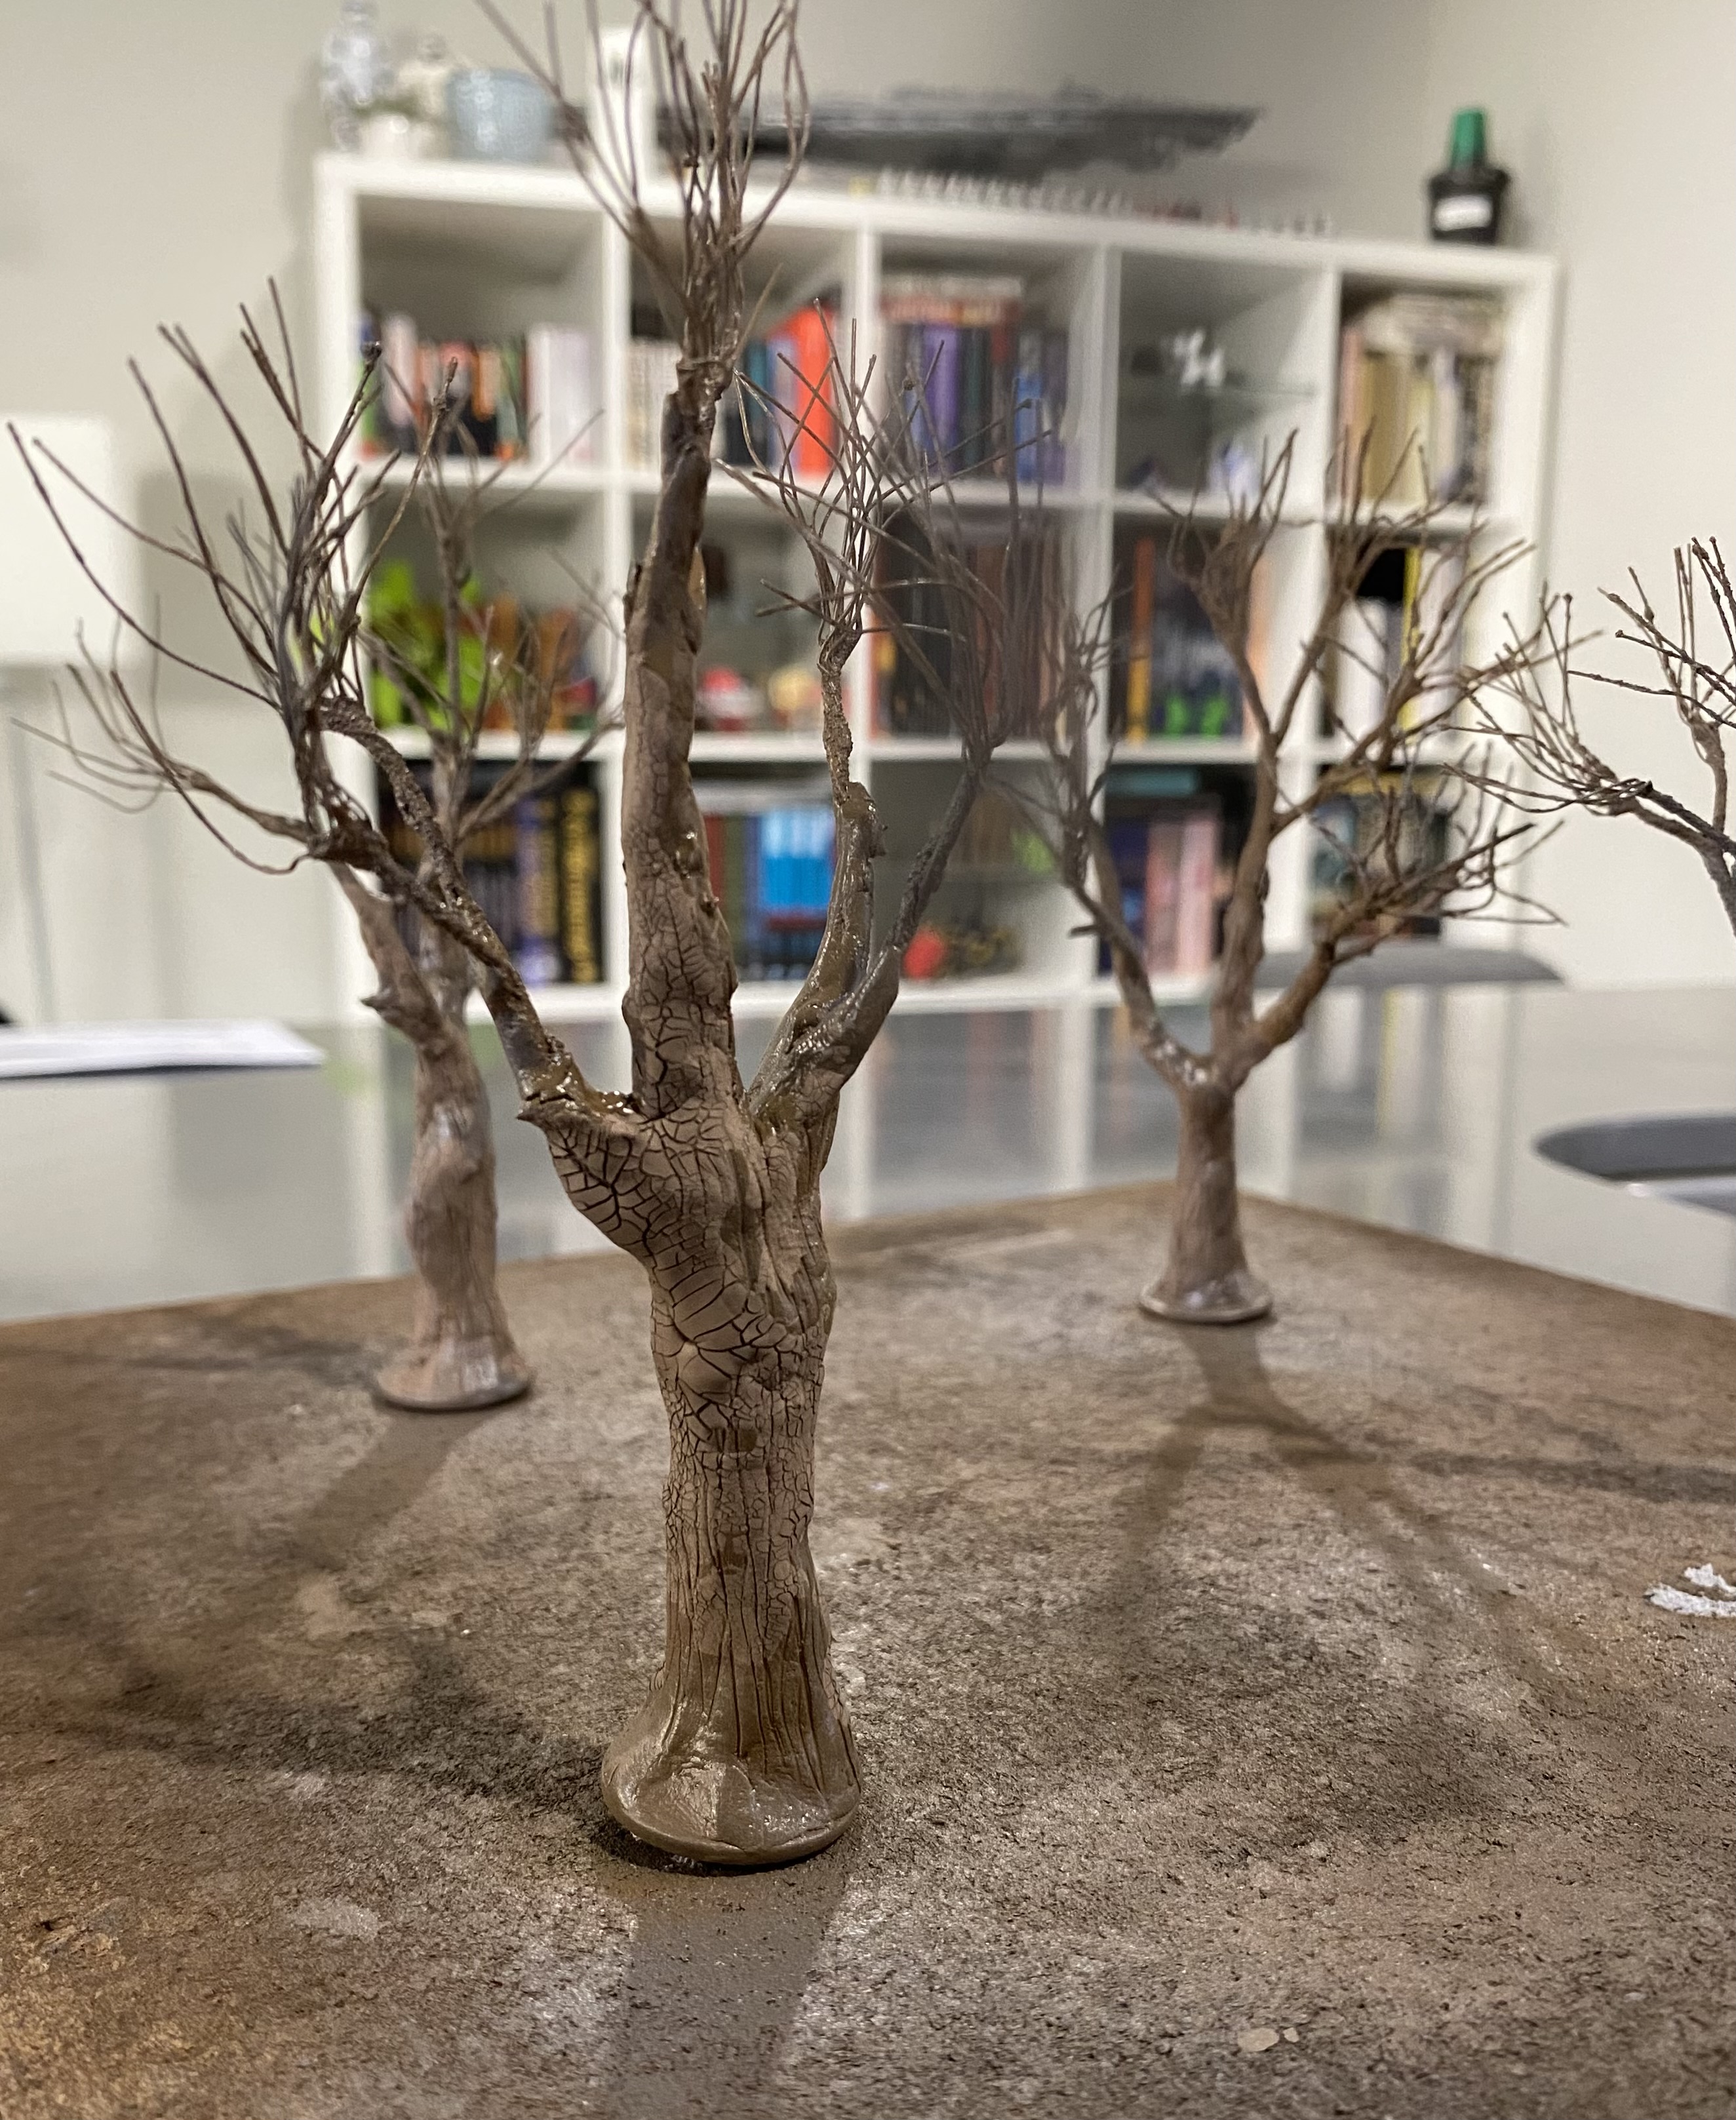 Once the crackle paint is dry it creates a nice, cracked bark like texture,
 The trunk was then roughly dry-brushed up with some greys, and greens before clump foliage was added.
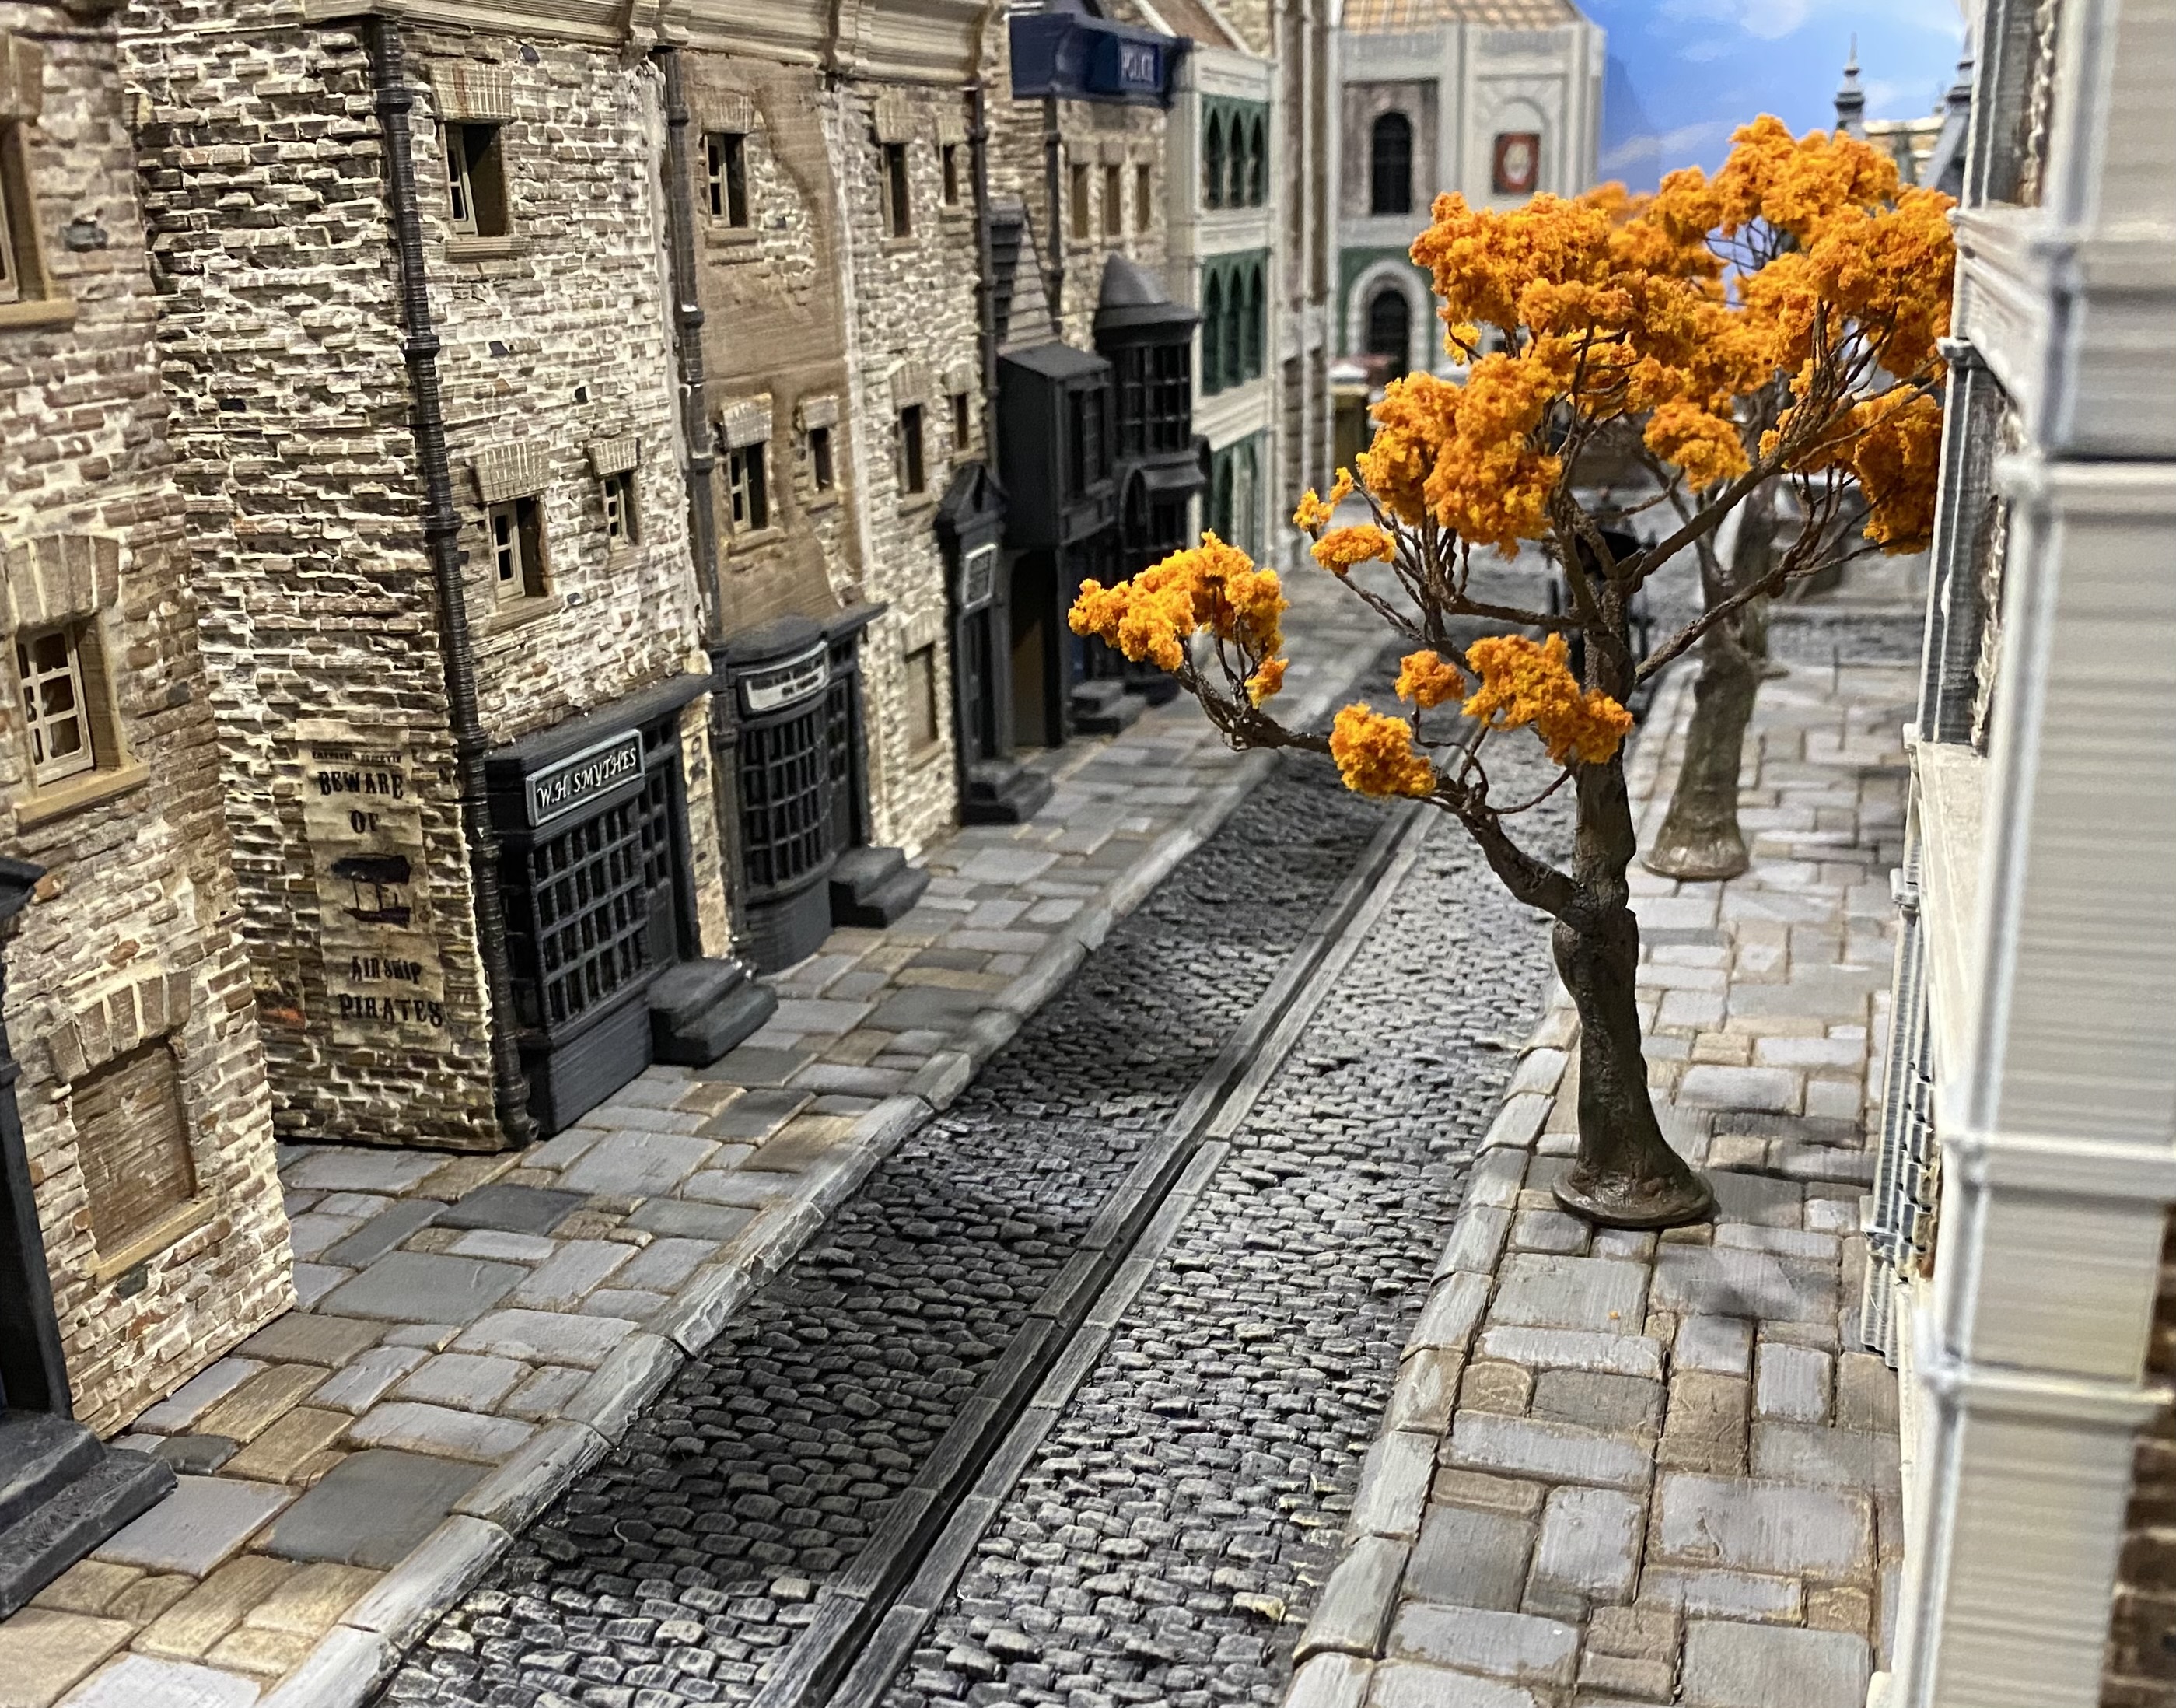 Because of the steel washers the trees can stand up perfectly fine on their own. They are not quite finished yet as there is a small detail I need to add to help them blend into the table better.
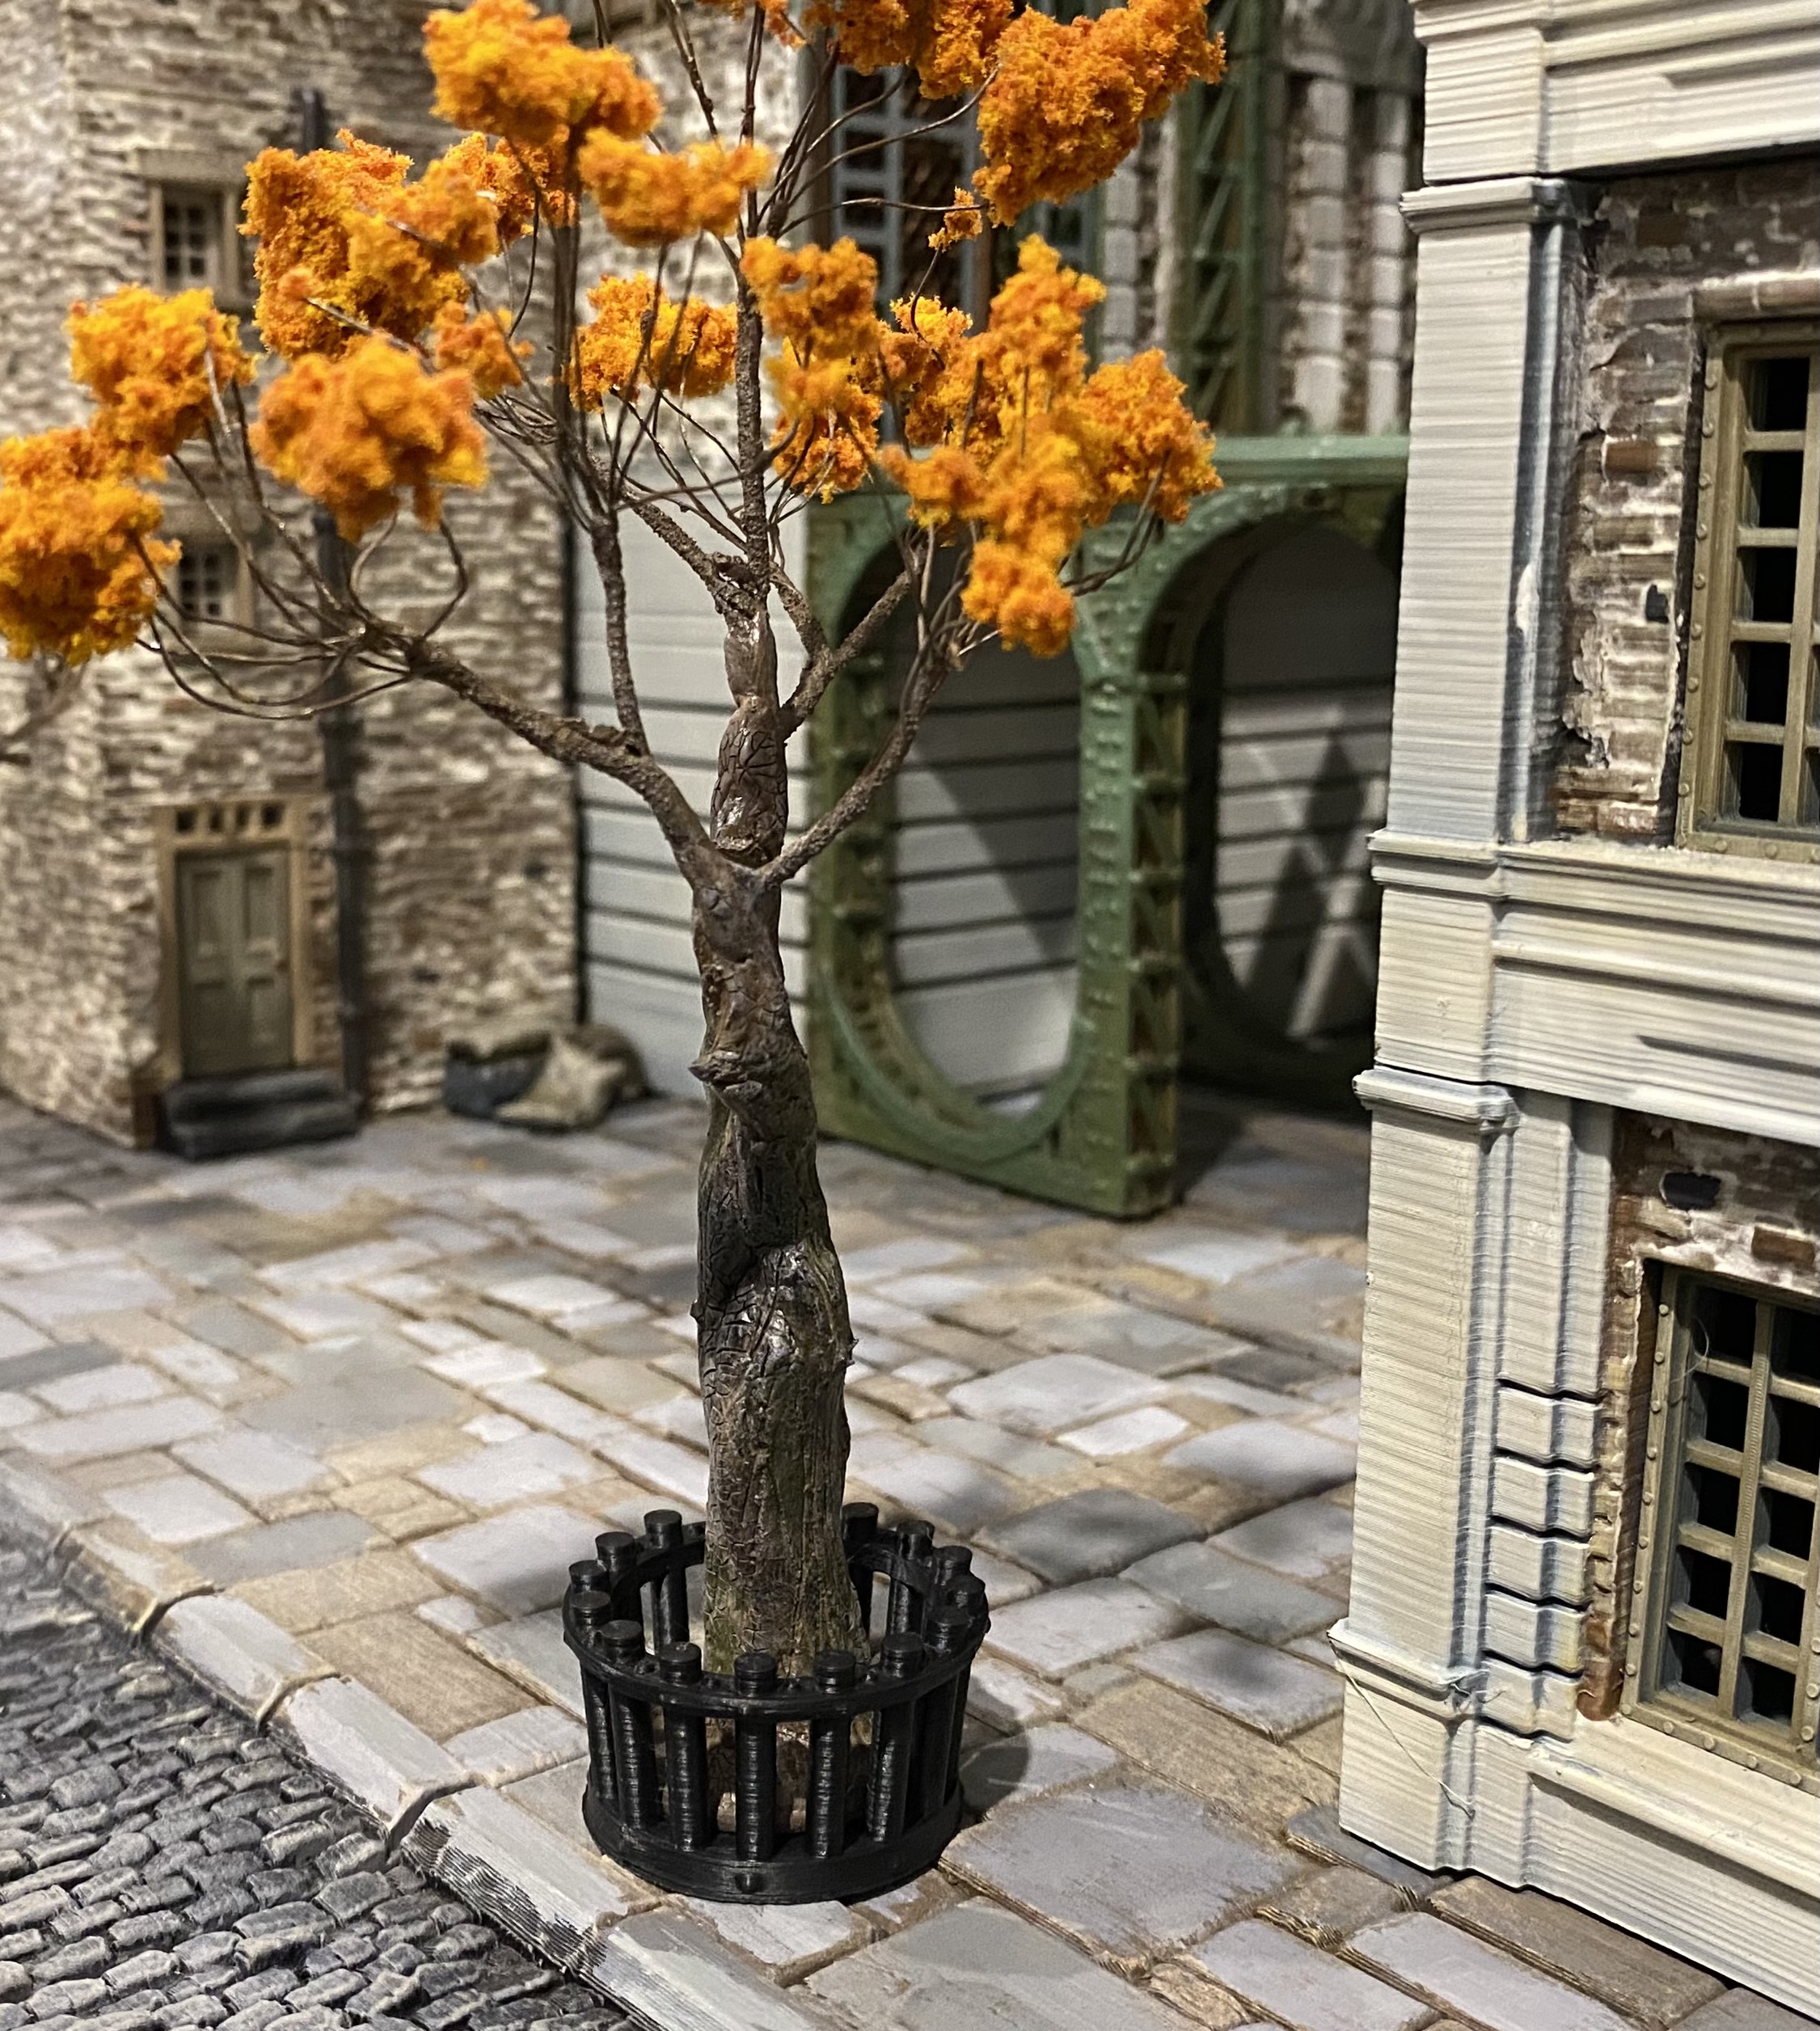
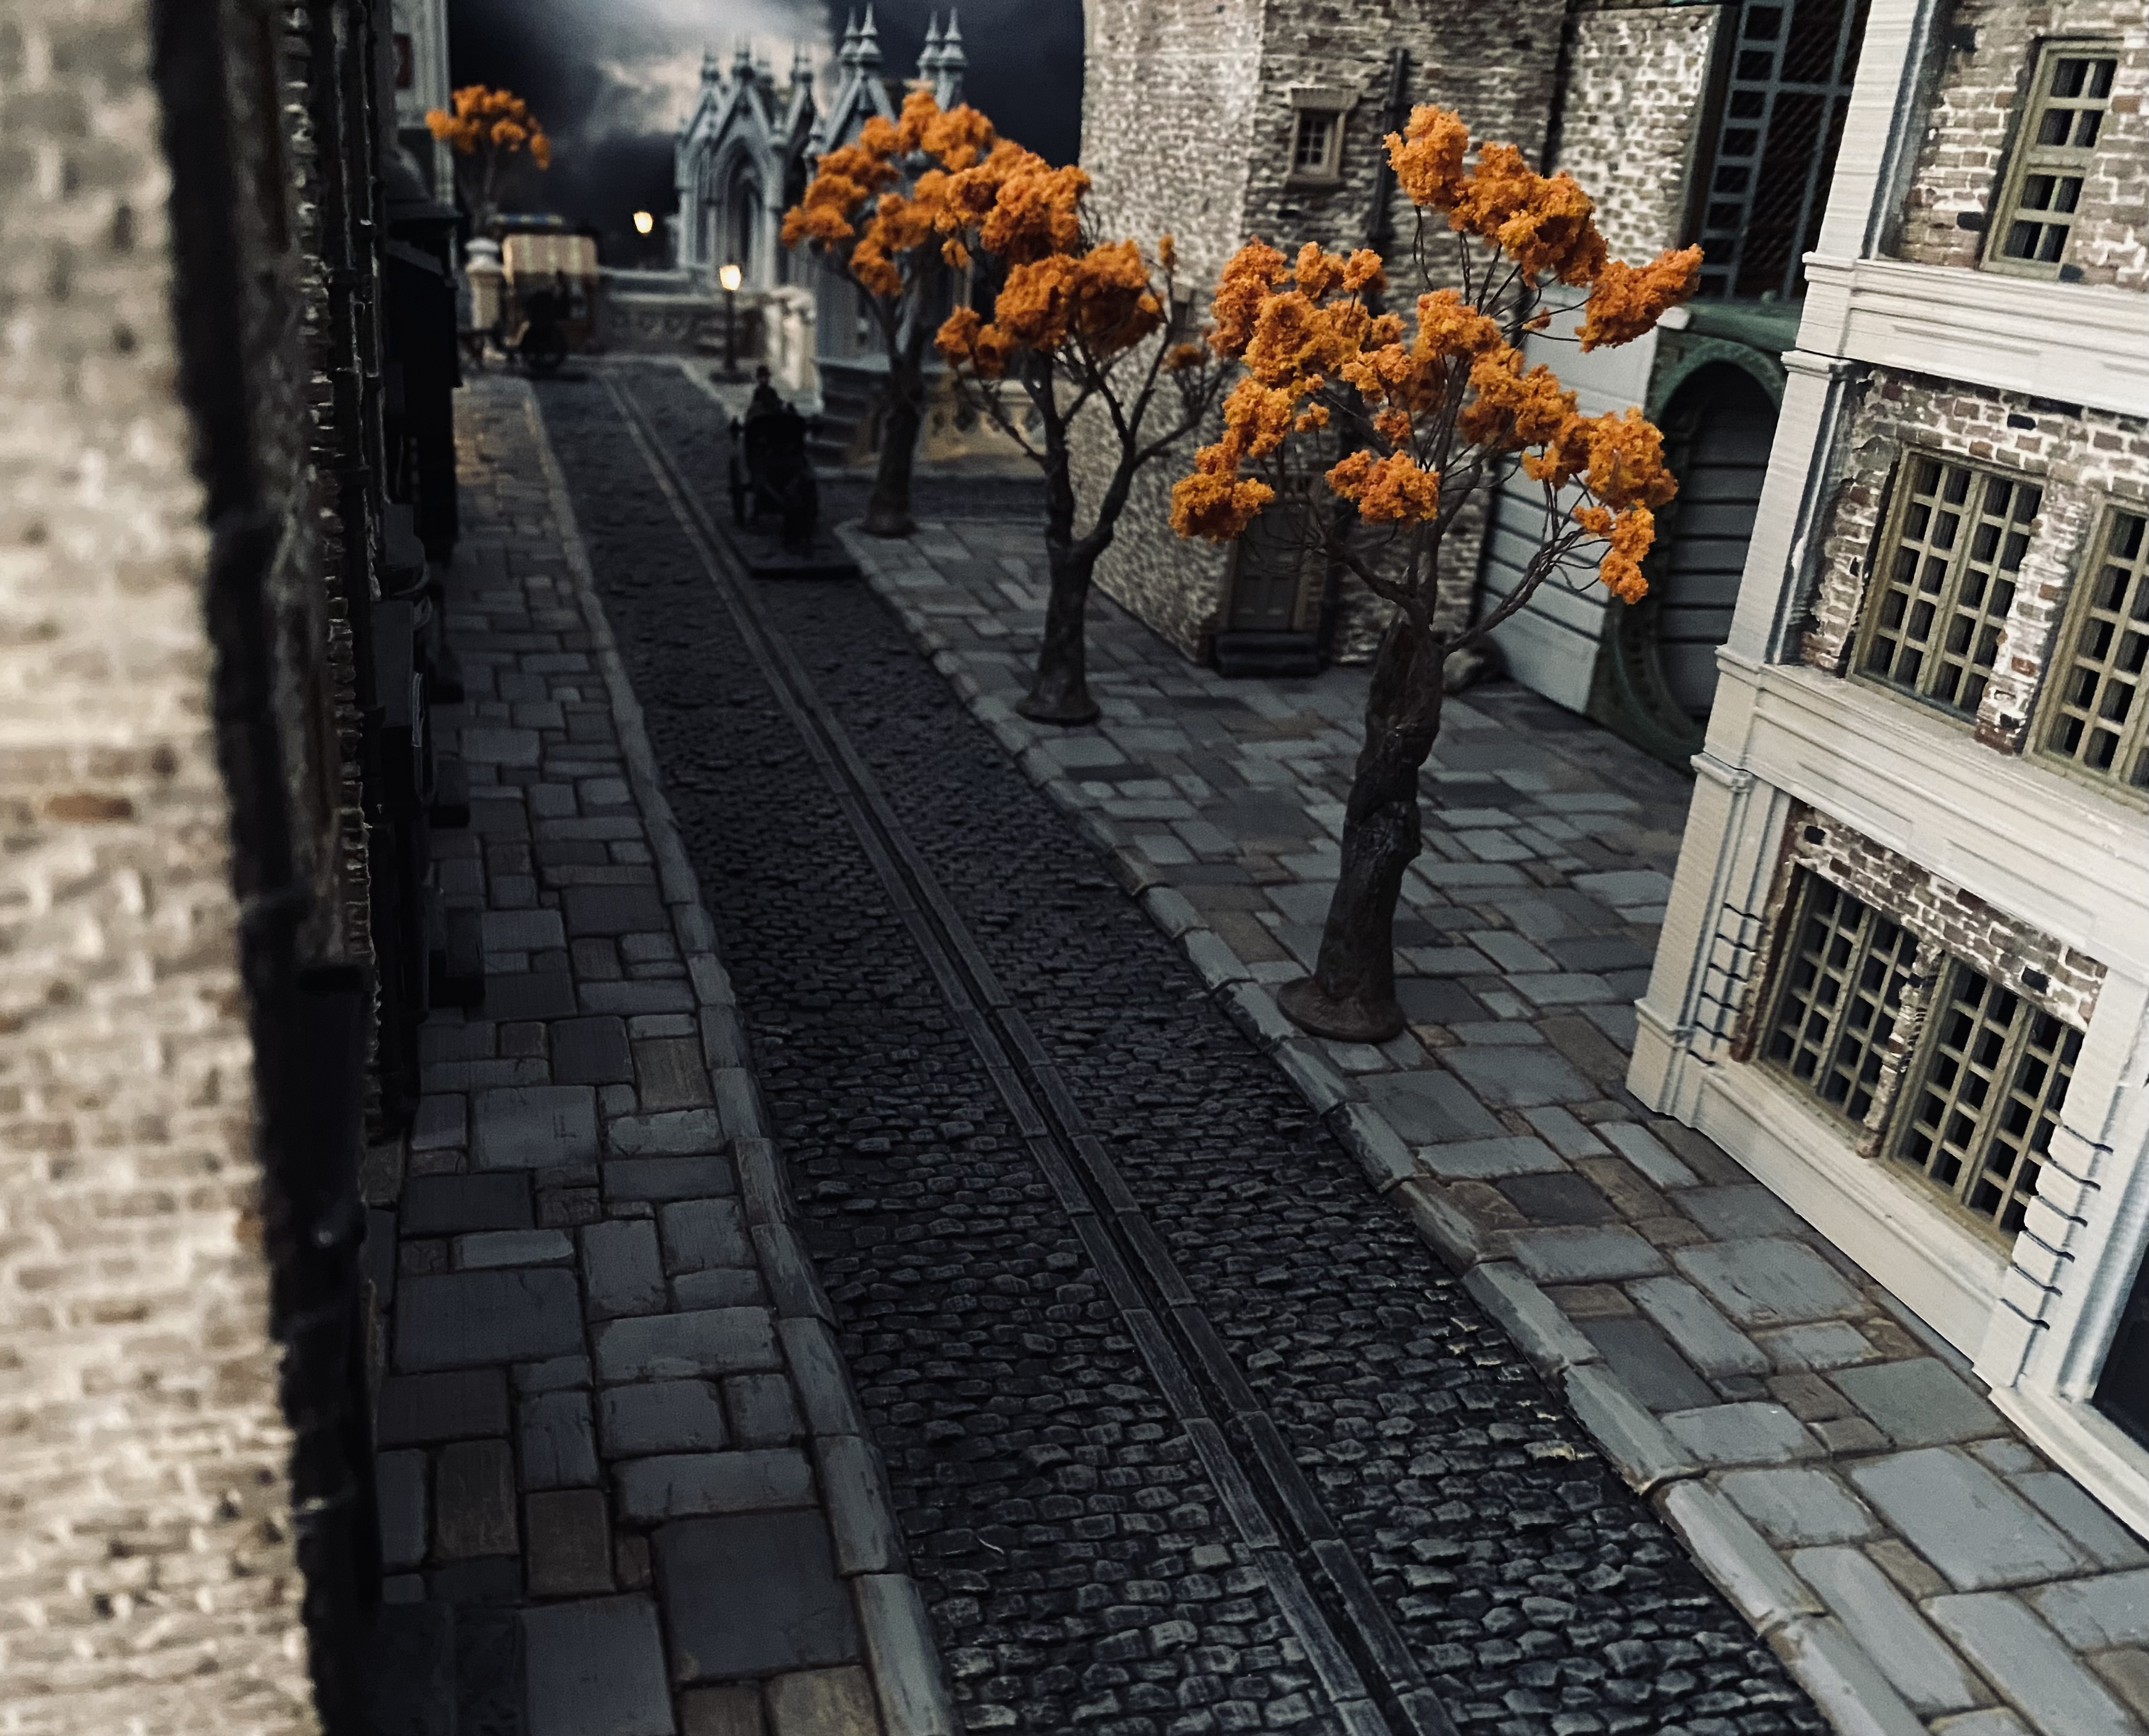
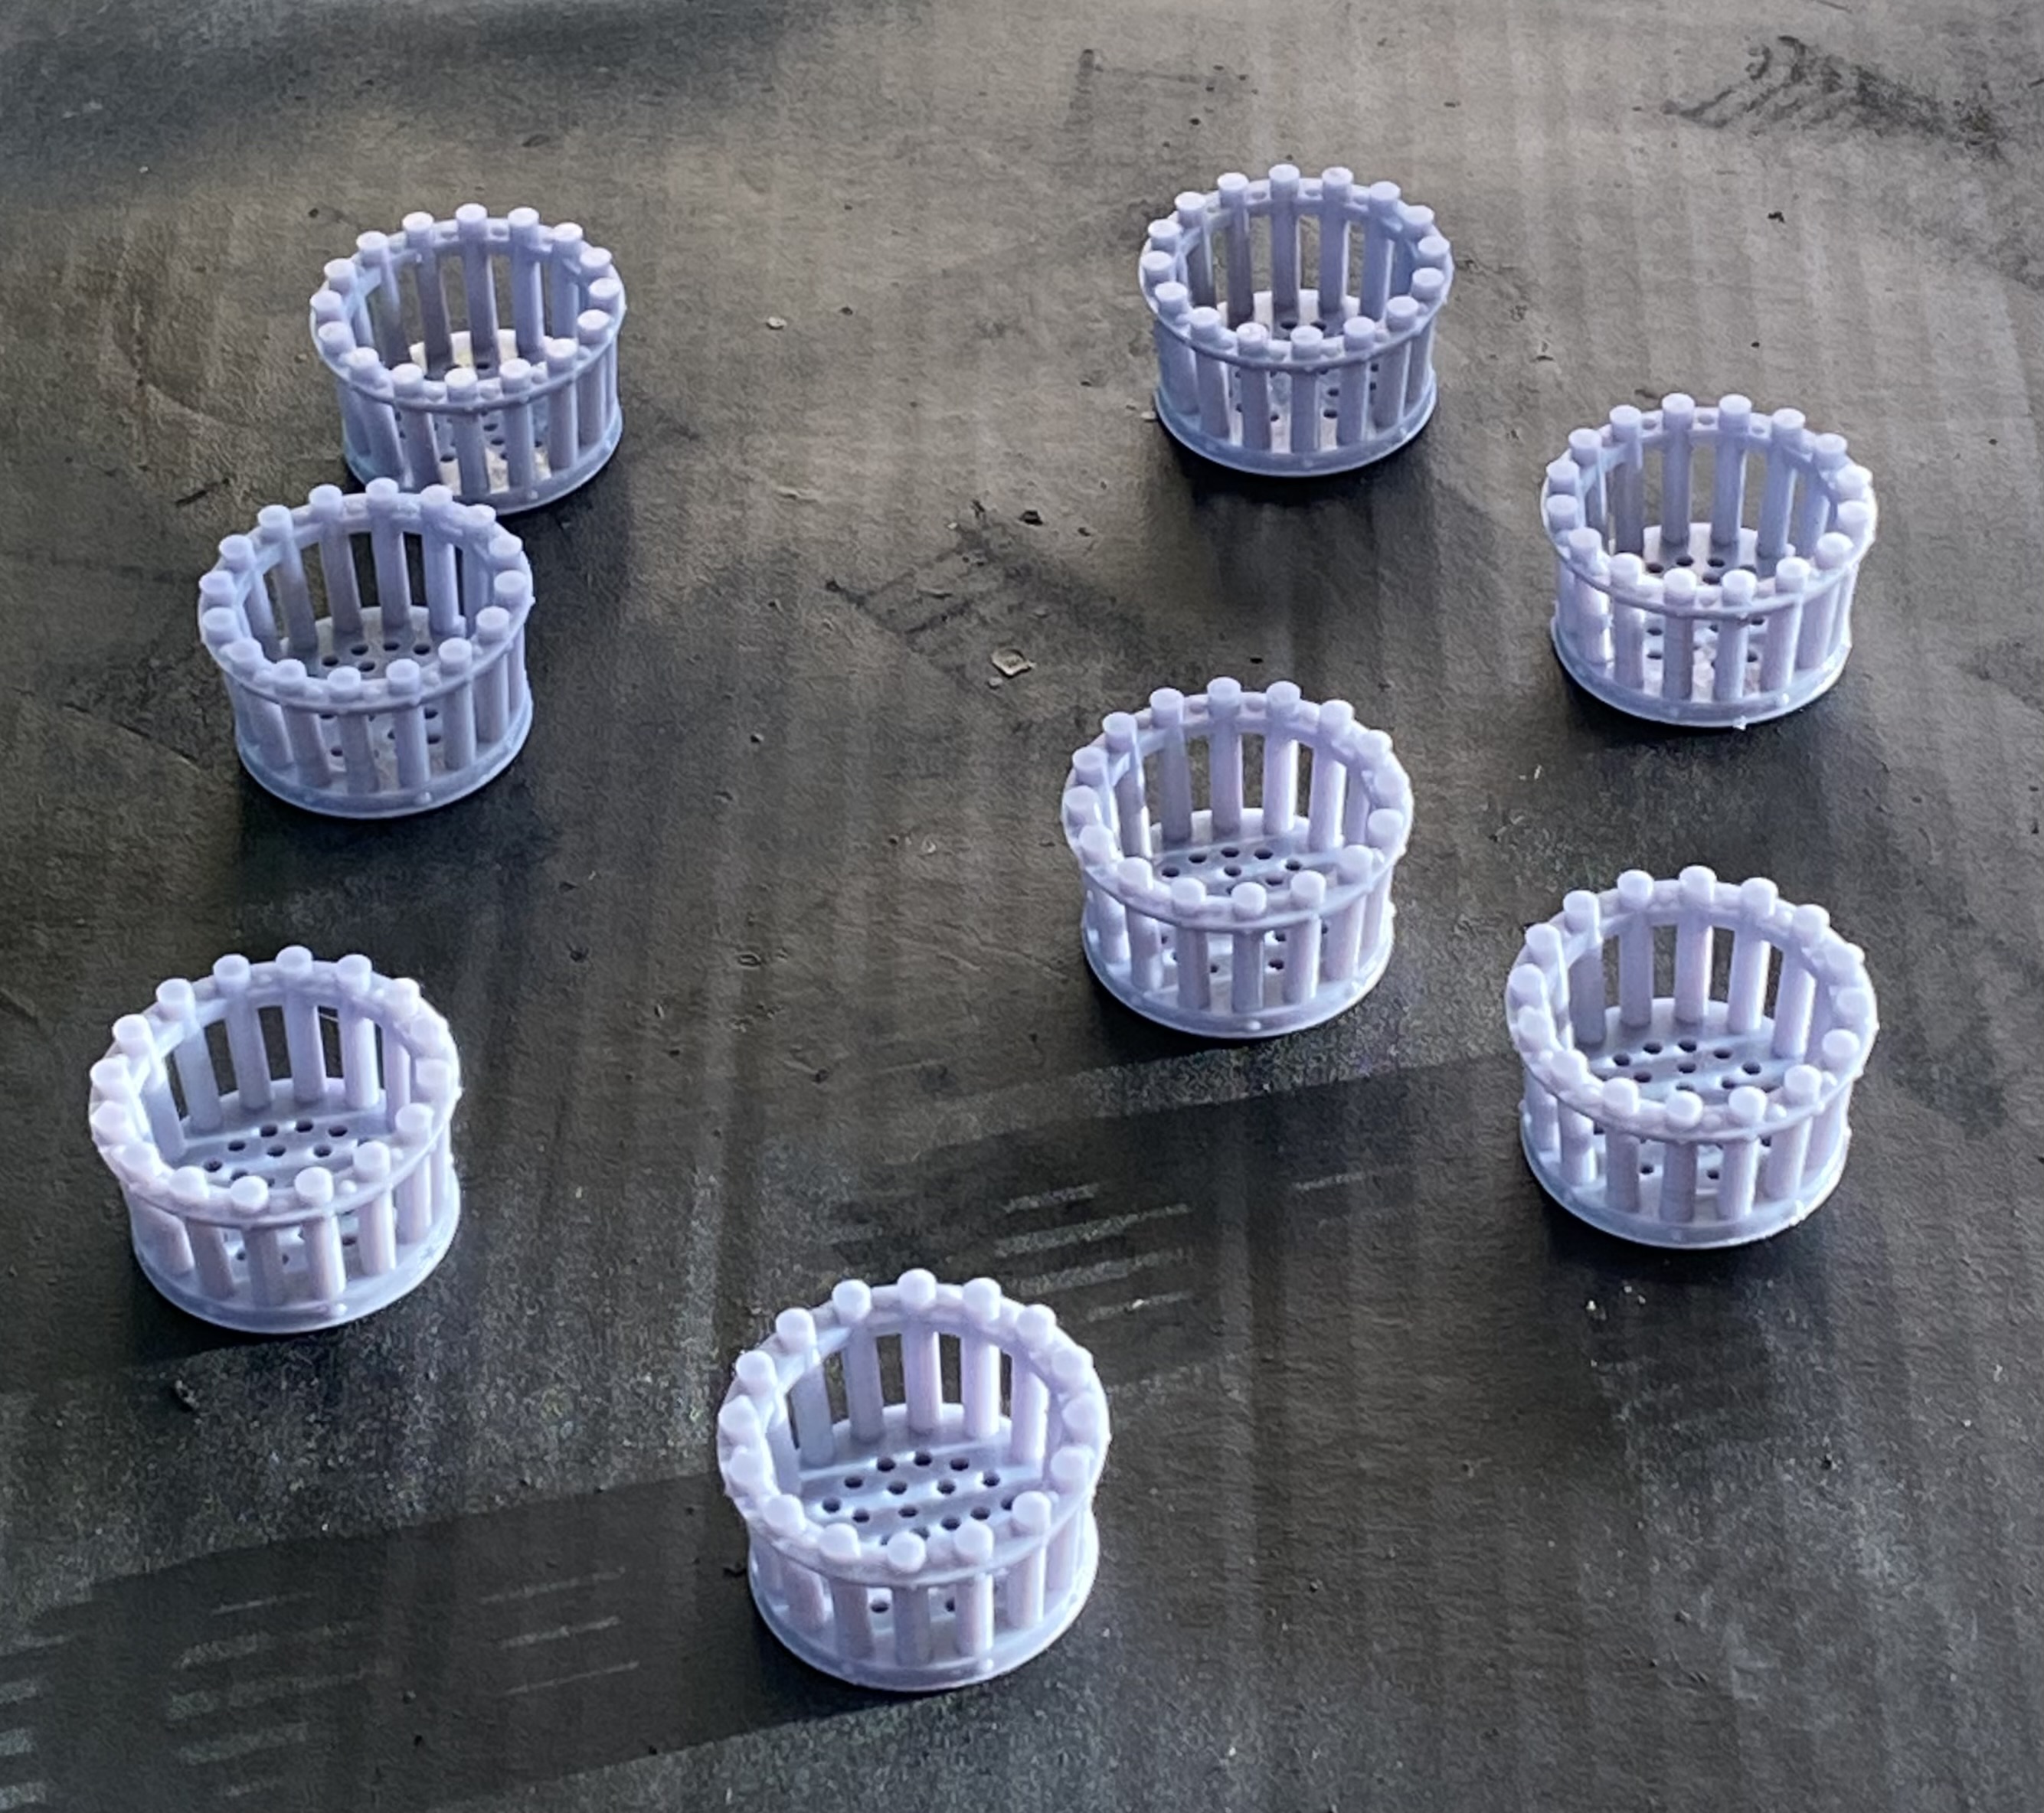
Spent a bit of time fiddling around and making a Tree Guard to go around the bottom of the tree. It helps hide the fact that the trees are on top of the flagstones and adds a nice decorative border.
This is the quick mock up to get the size right.
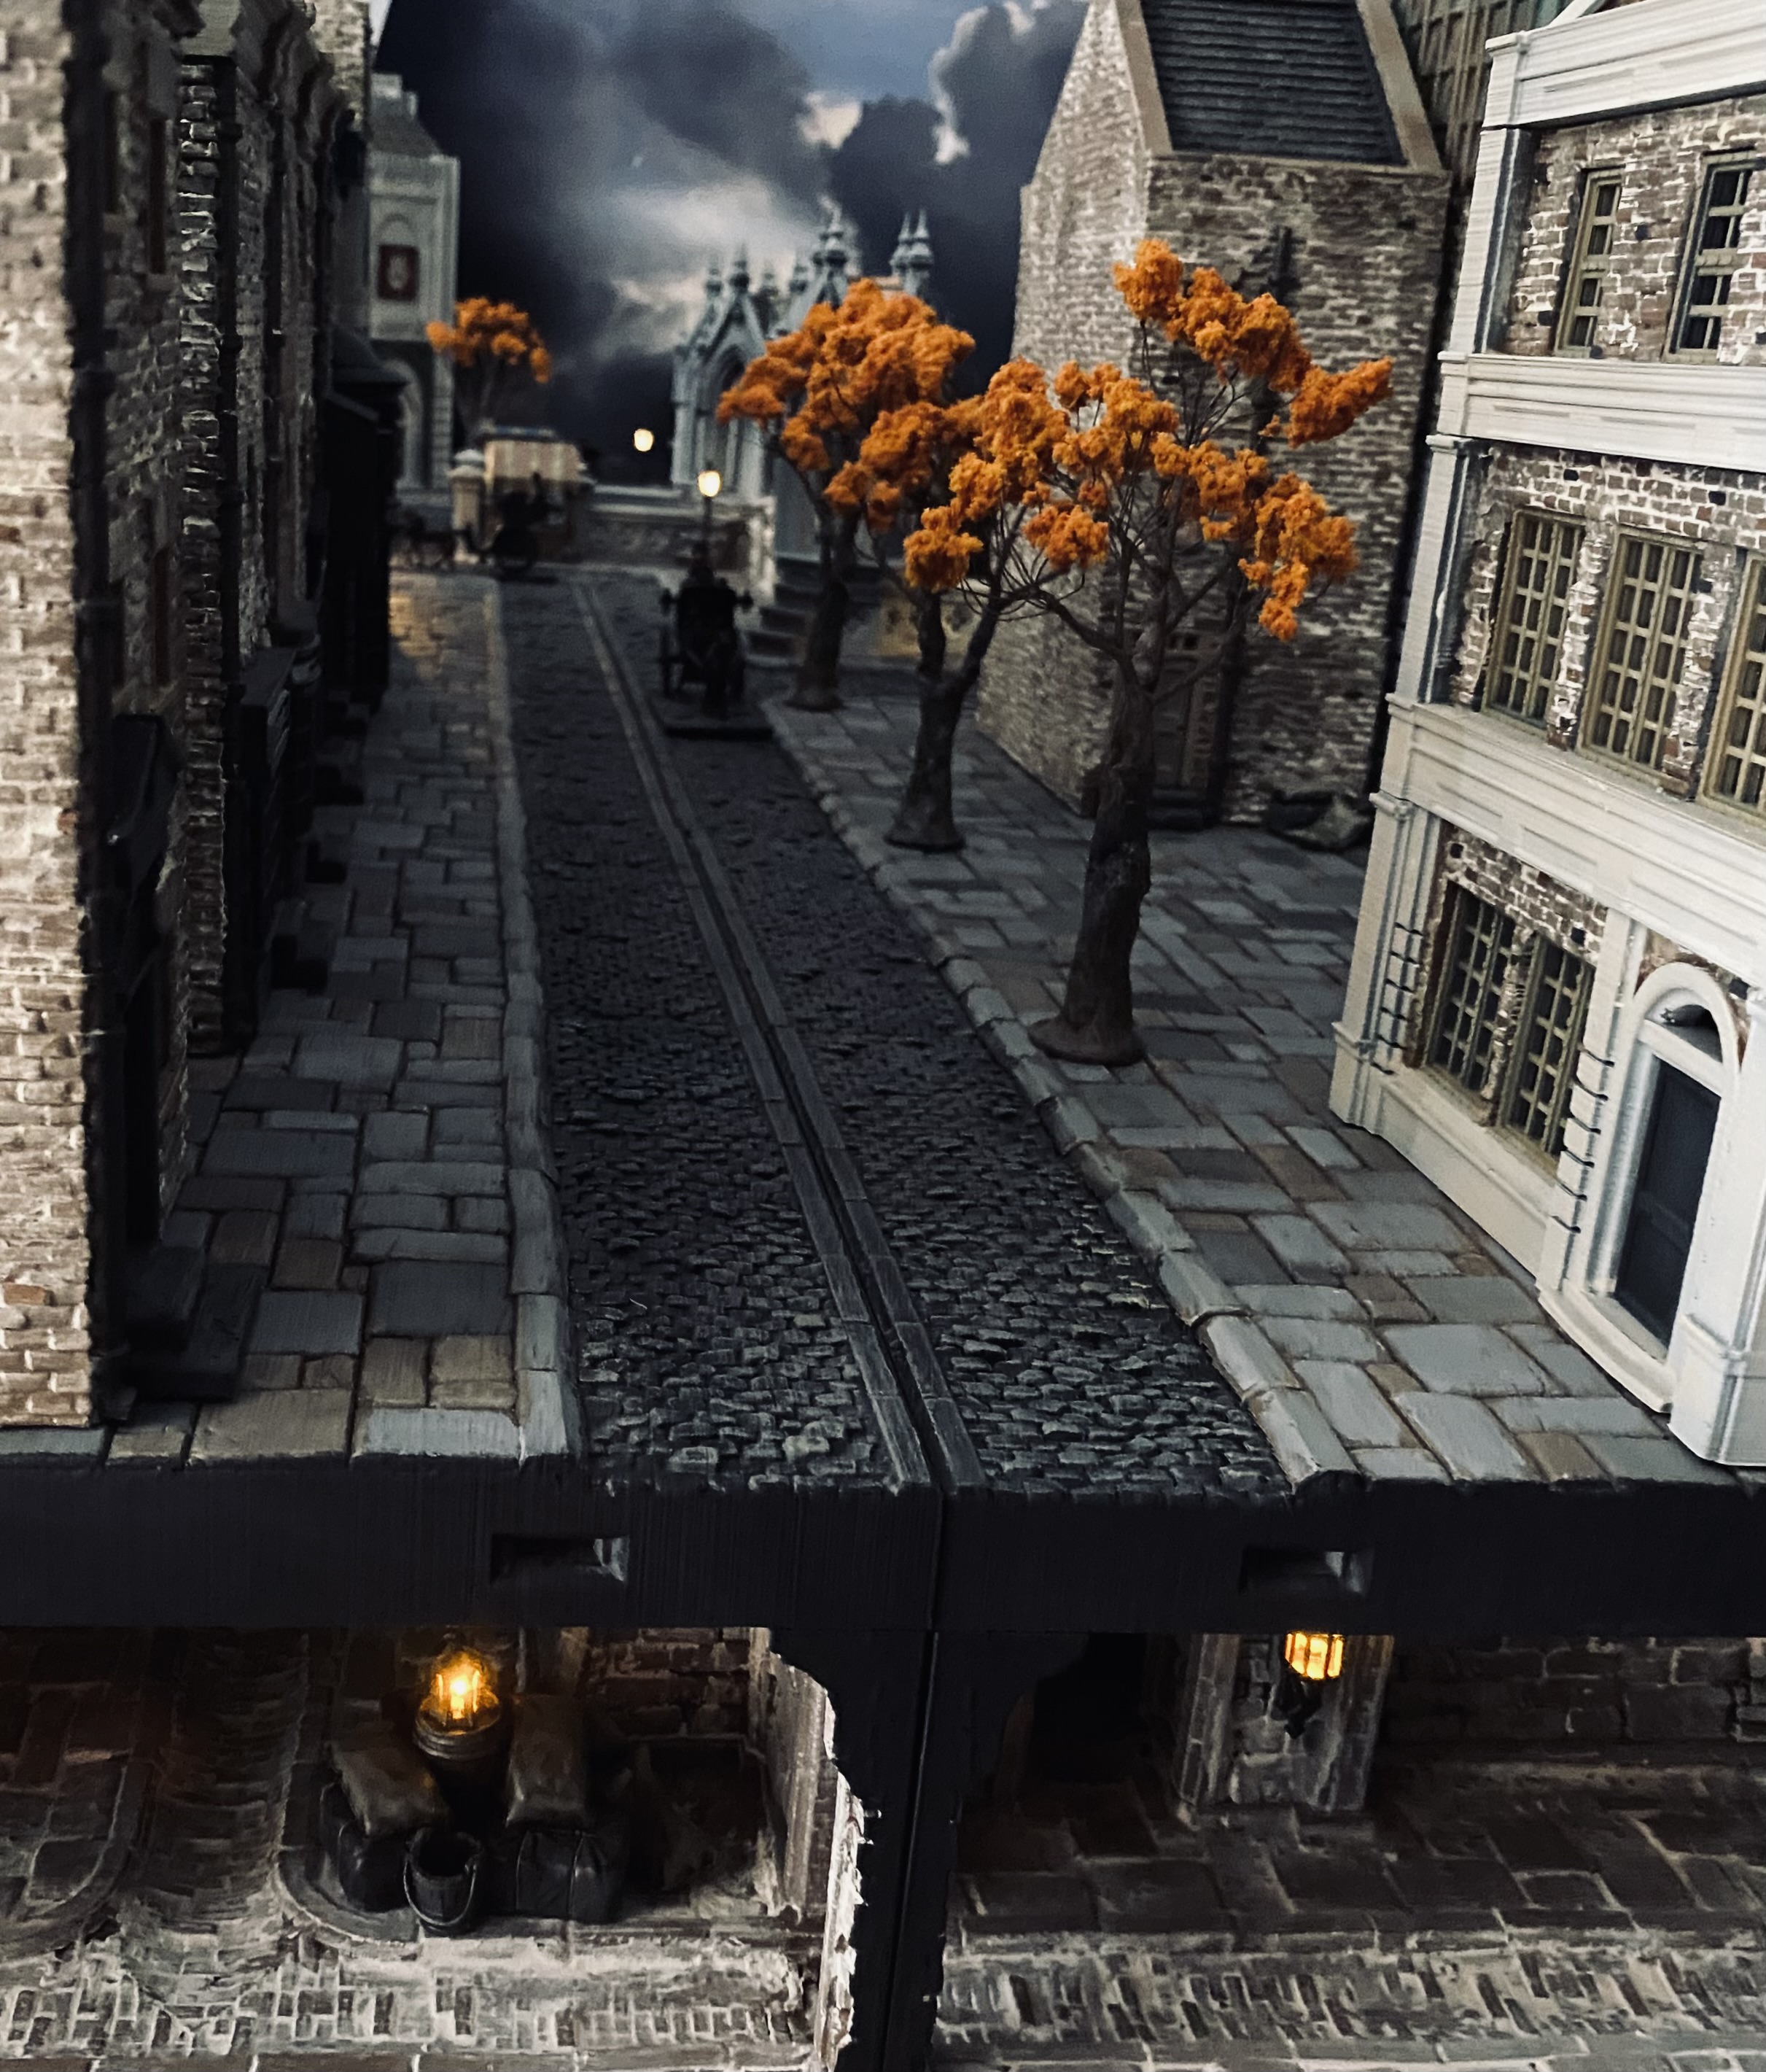
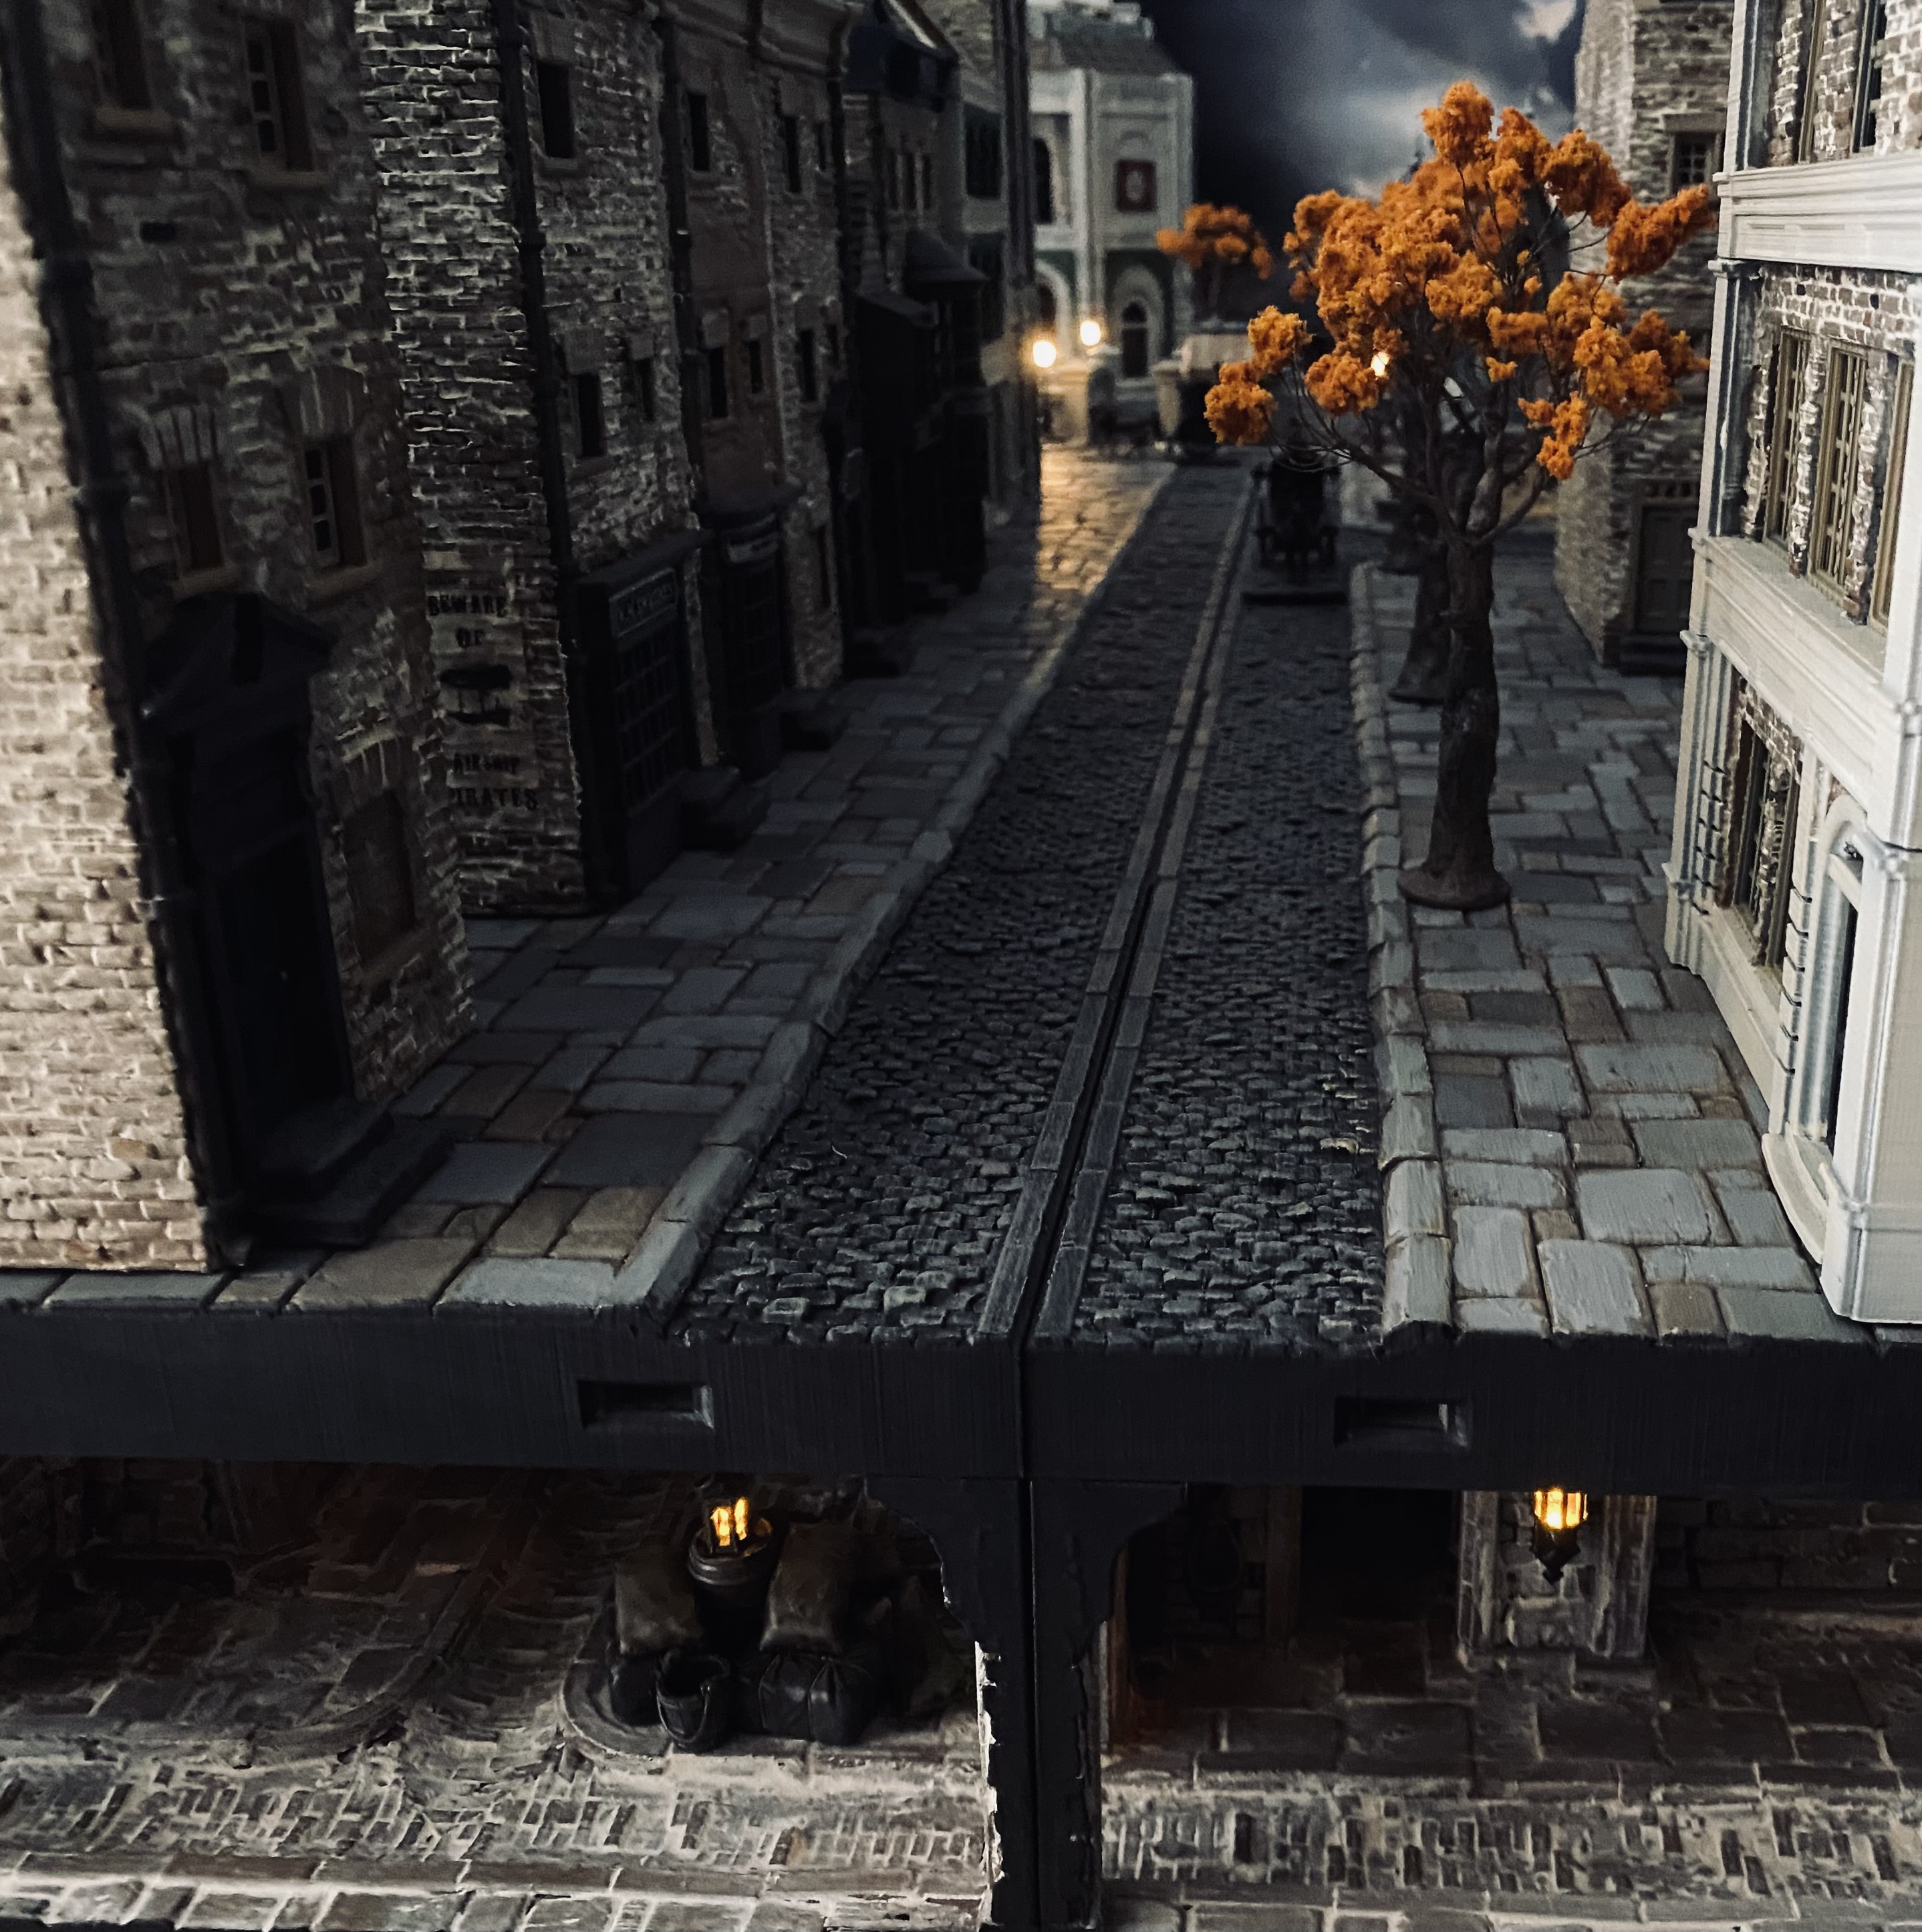
 Test shot to make sure trees fit in with the lighting. No Tree Guards added yet.
To-do list.
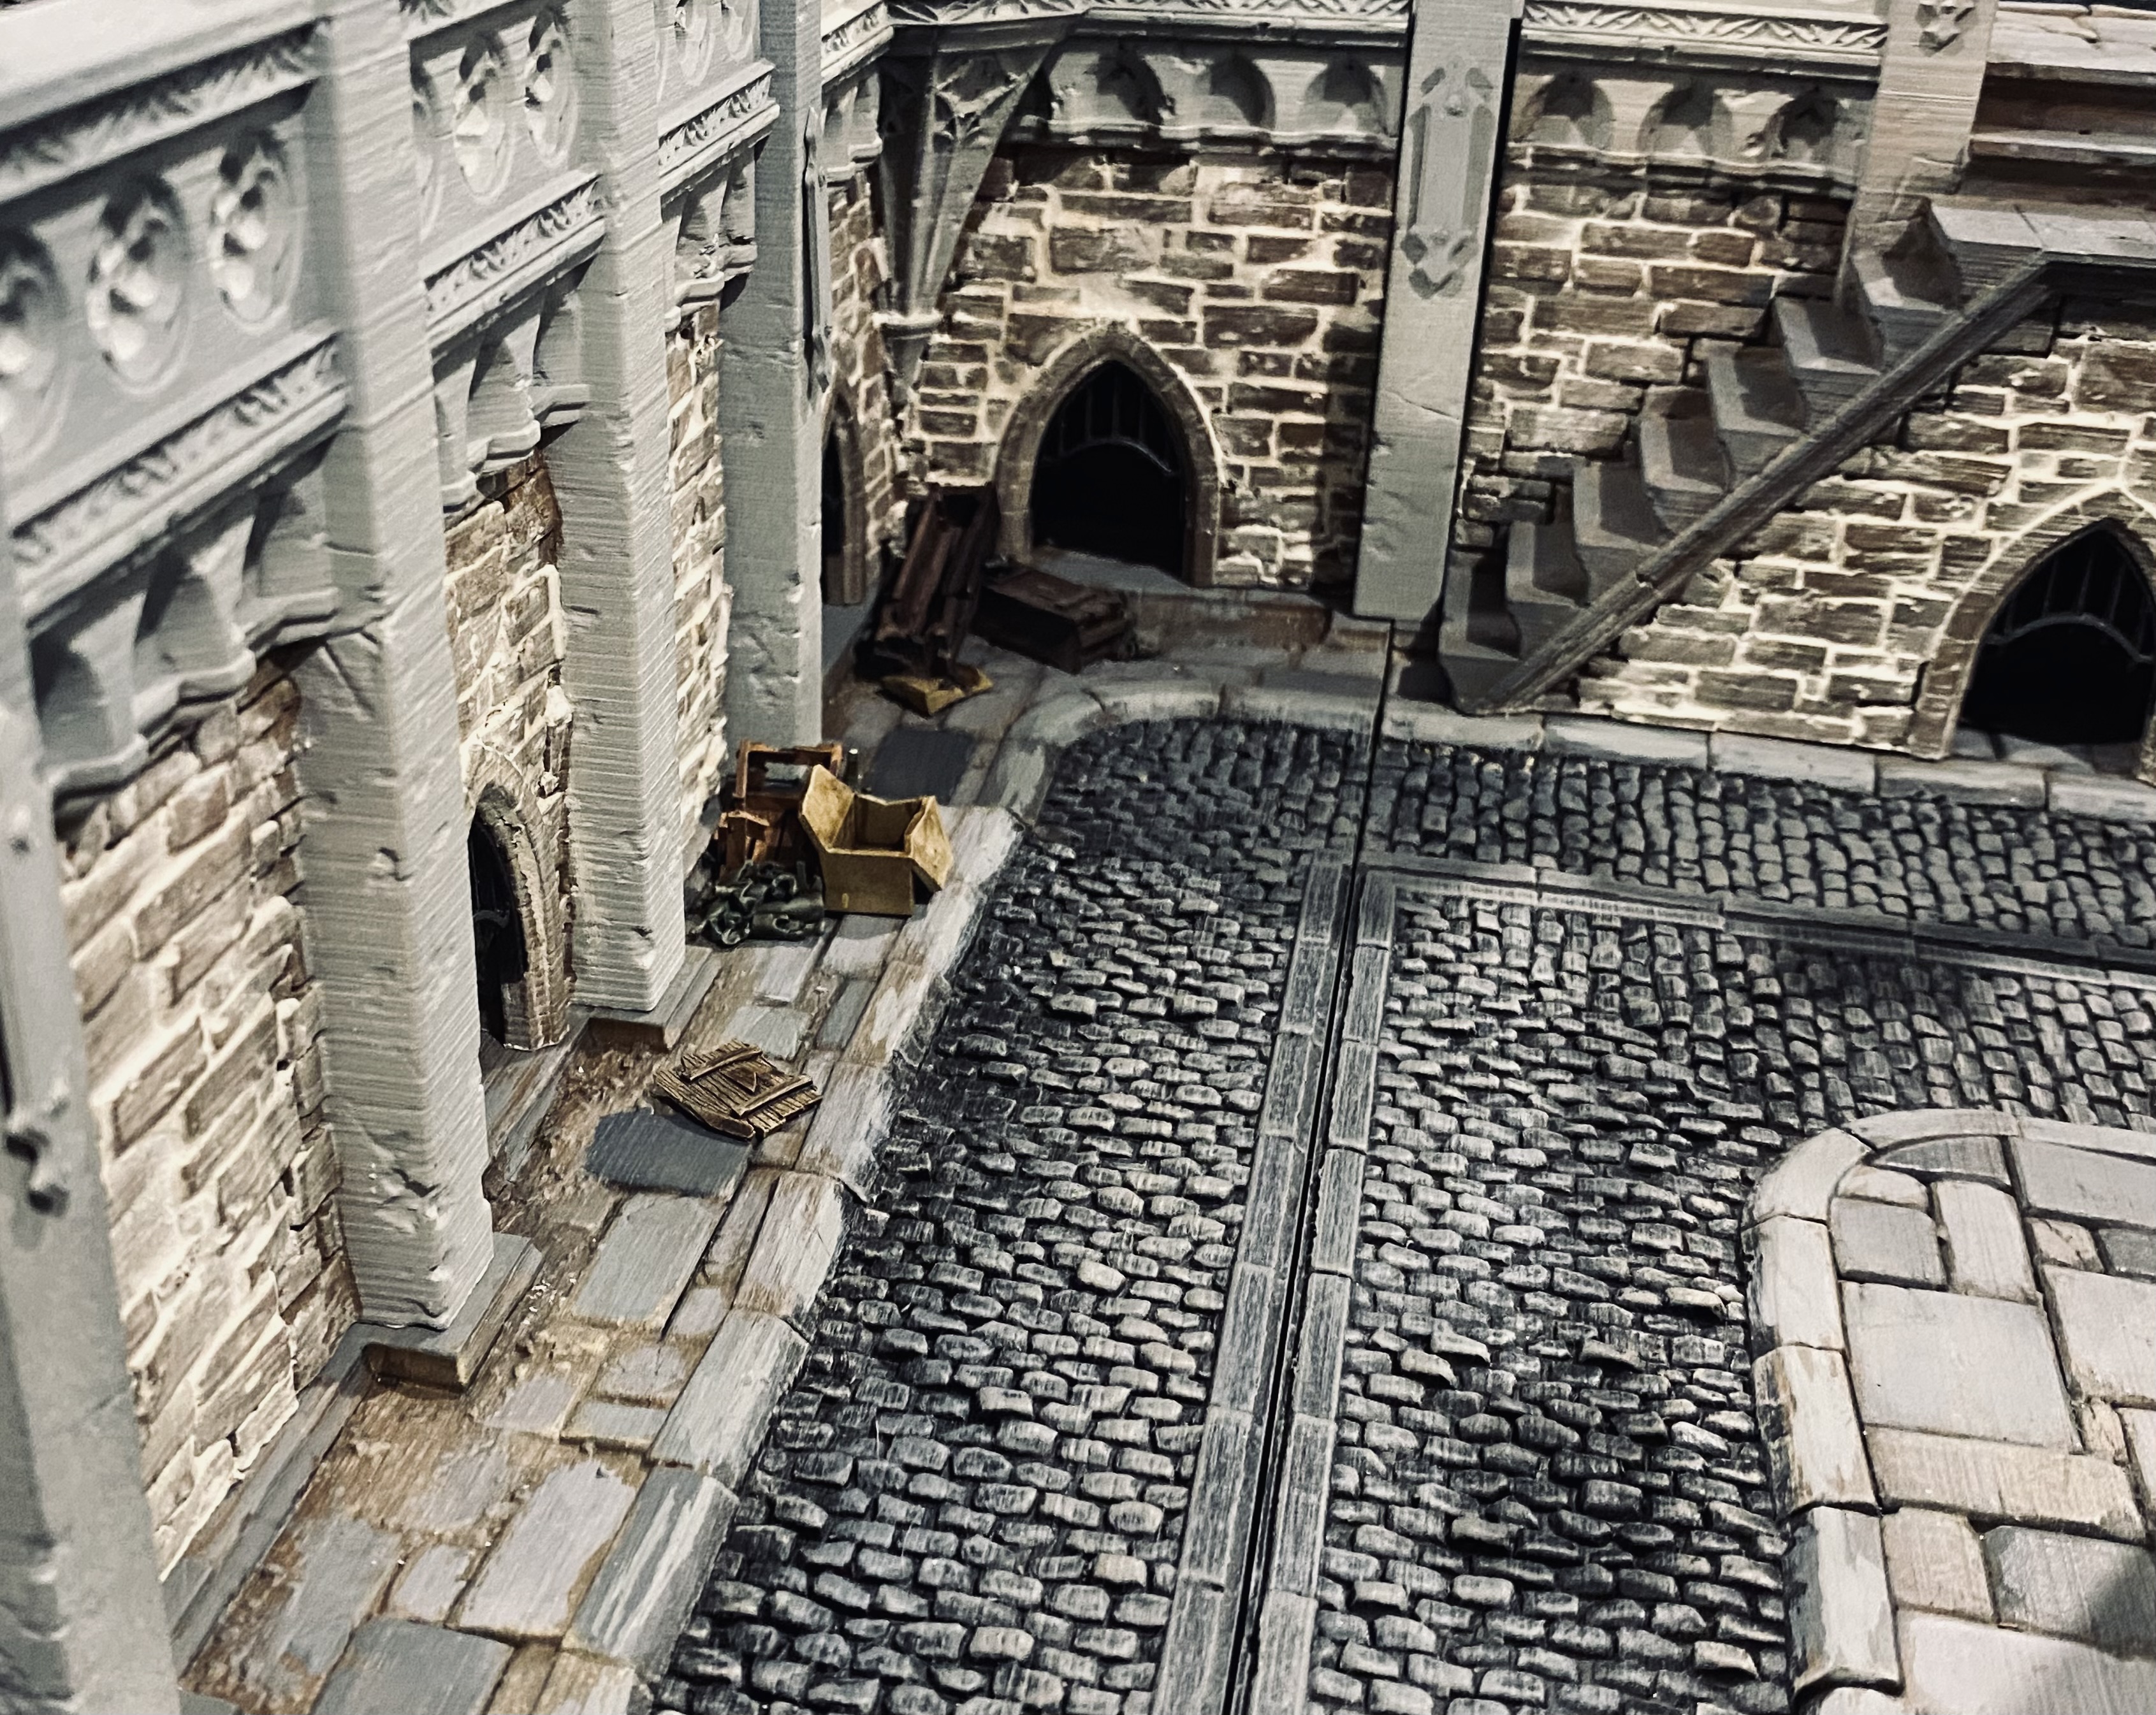
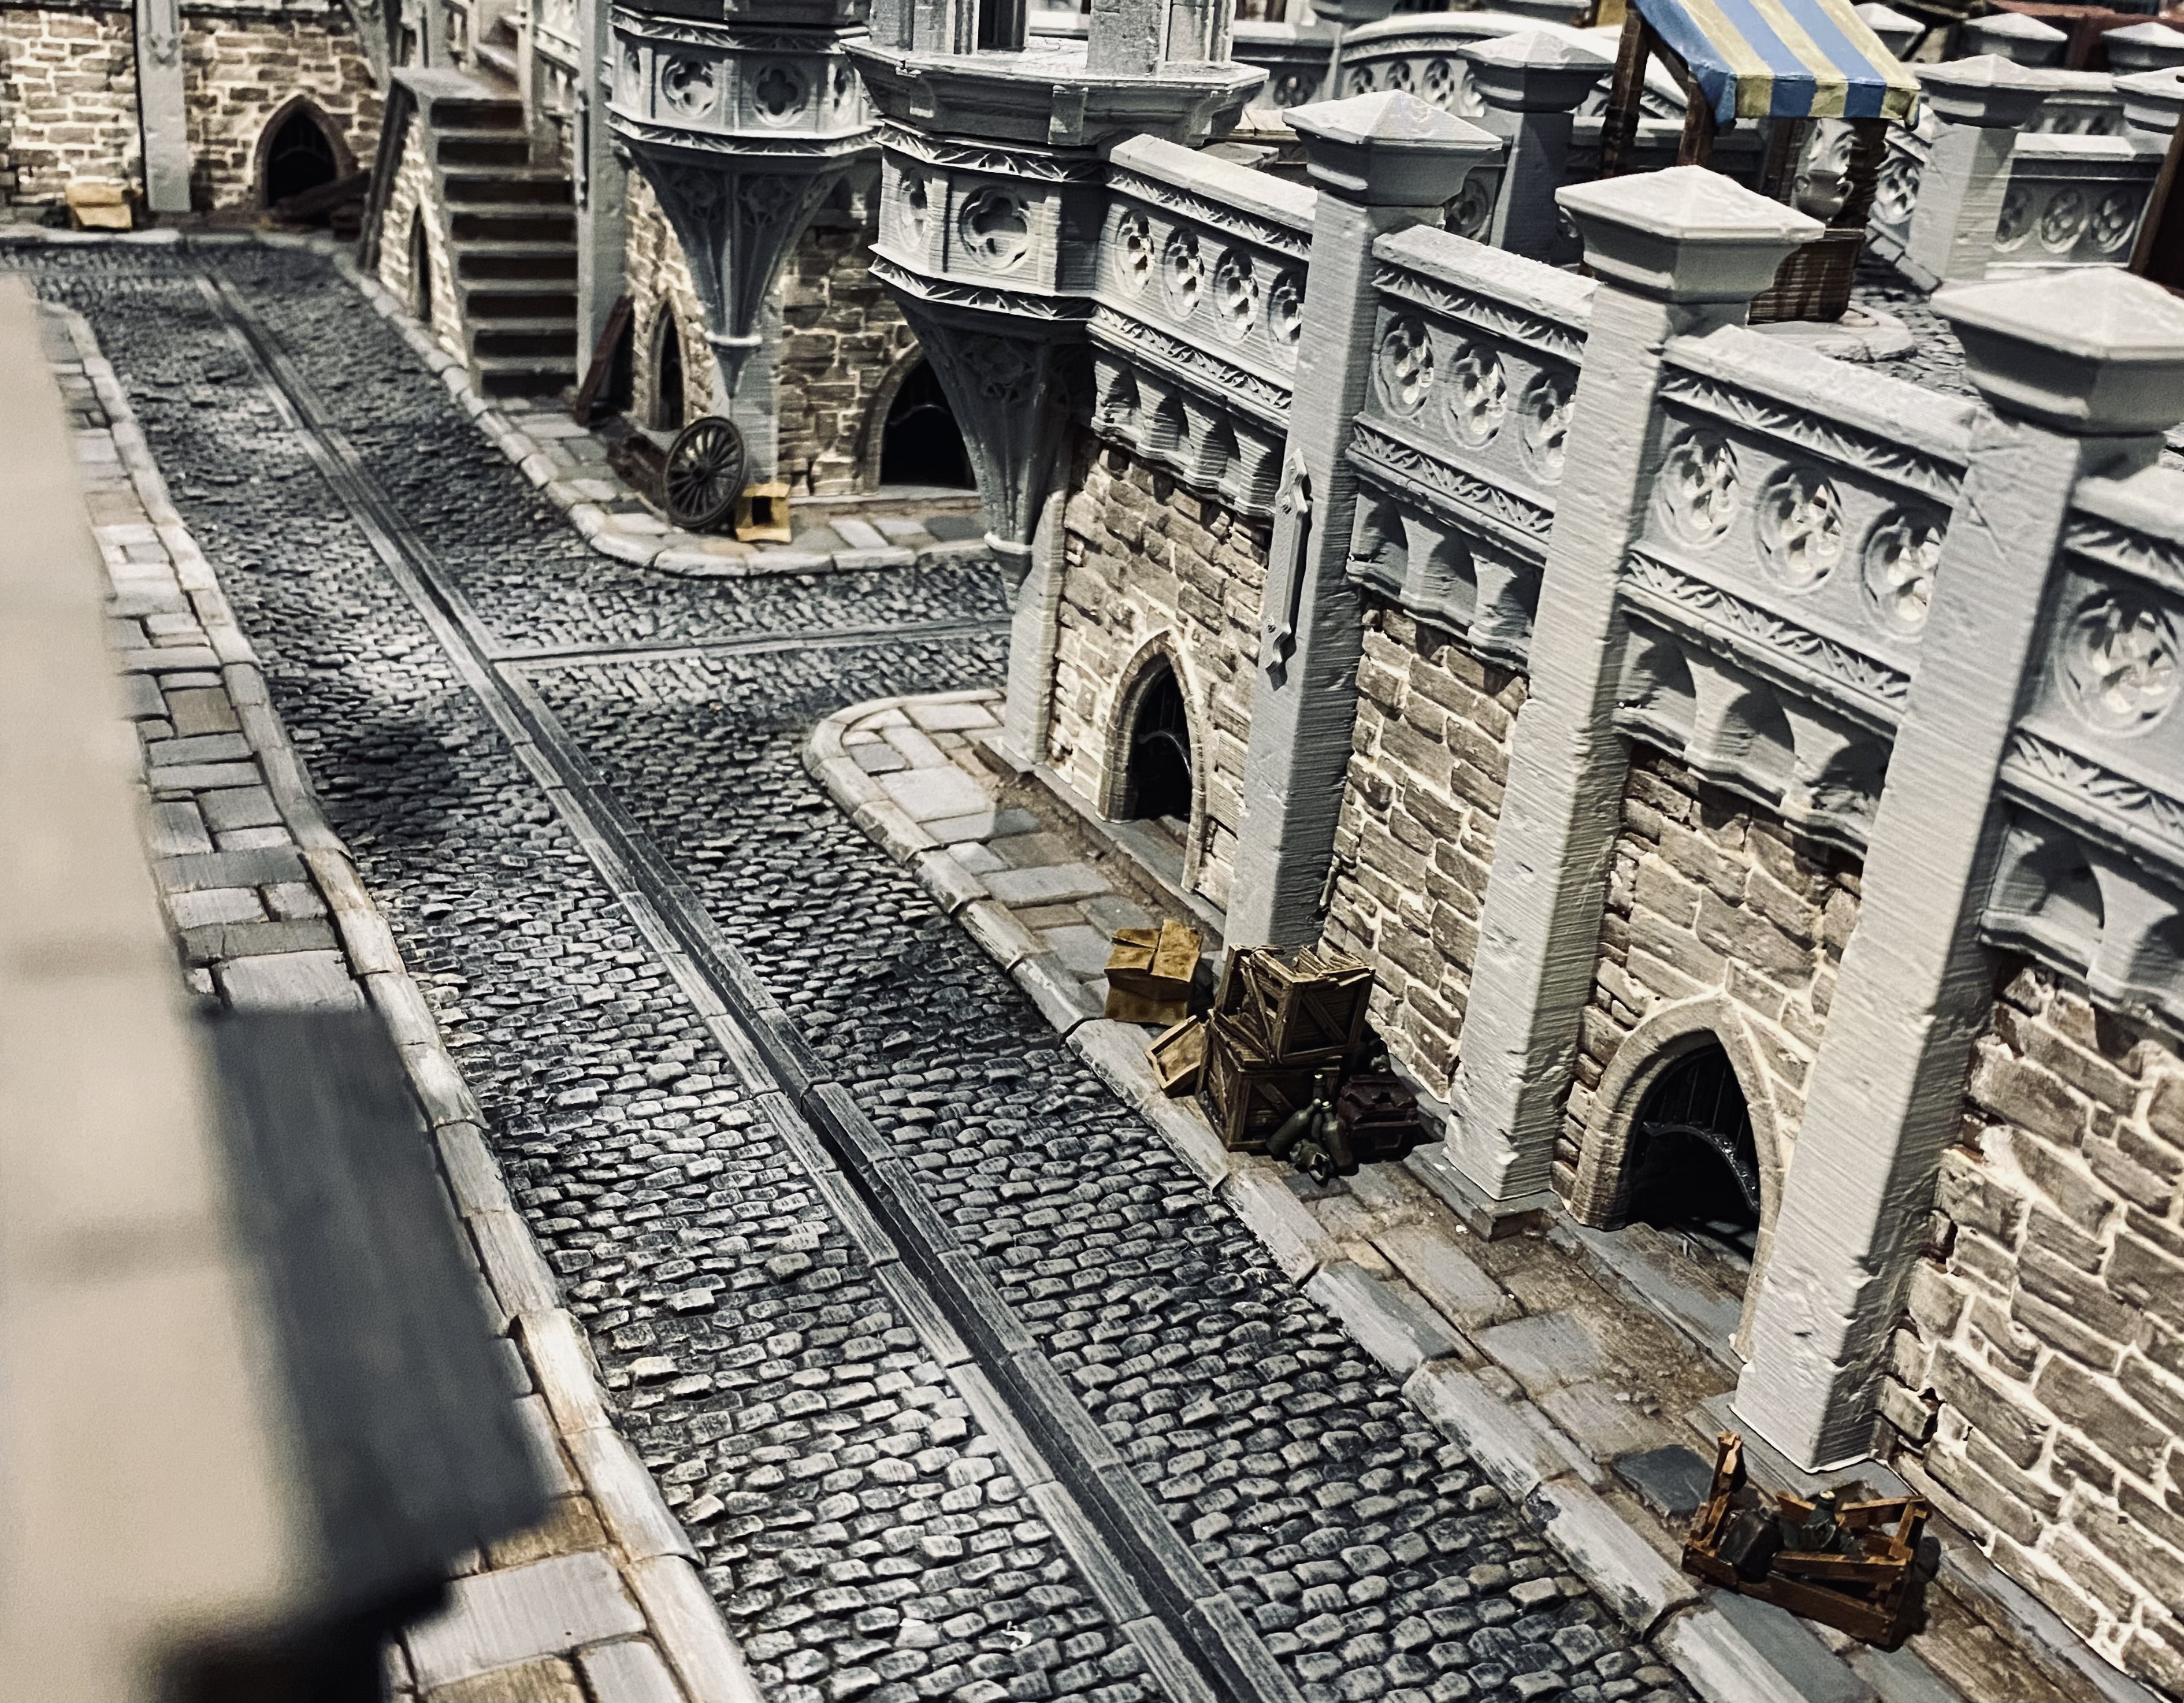
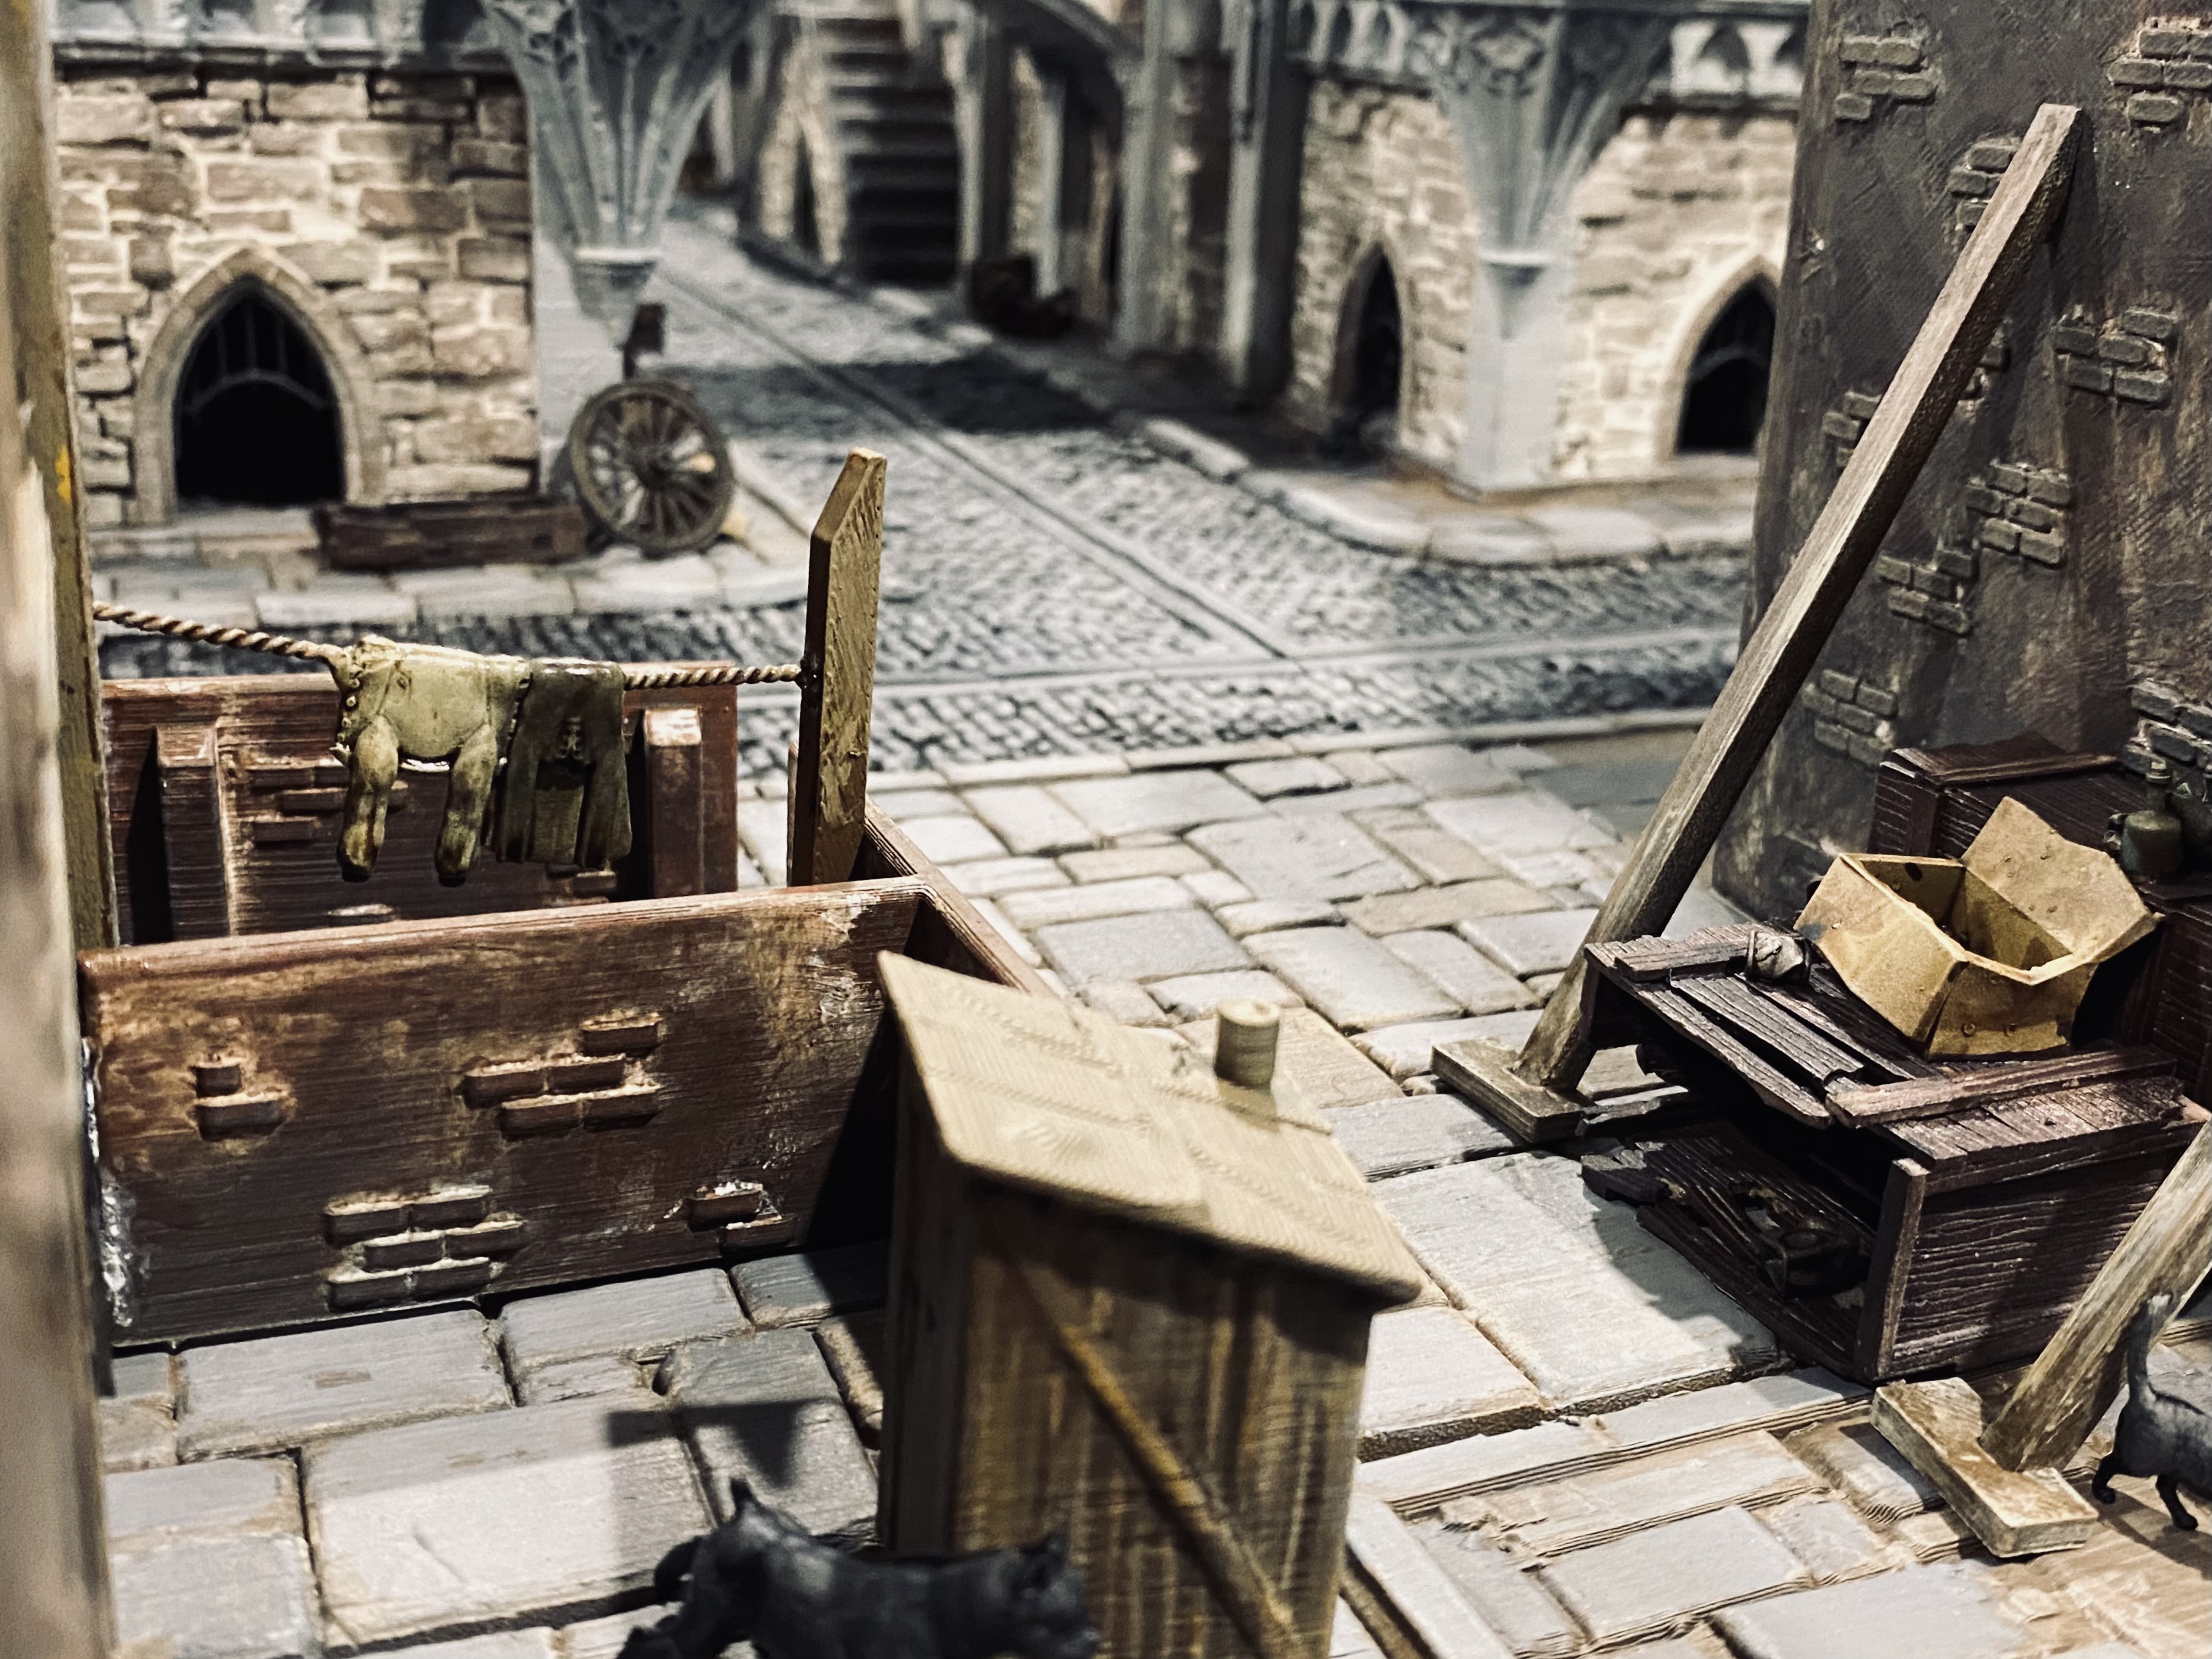
Factory district to paint up.Another corner building for the smaller raised area.- Market goods.
- Street Scatter and rubbish
- Internal lighting and wall-mounted lights for the Victorian buildings.
- Elements to give a ‘lived-in look’.
Tree Guards Done
I was pretty happy with my design for the Tree Guards and the filament-printed version came out okay. To spice it up a little more I decided to go with resin and printed some out. Painted with black spray paint and German Army Grey dry-brushed over them all as highlights.
After that, it was back to testing out how the street with the trees was looking with the lights installed.
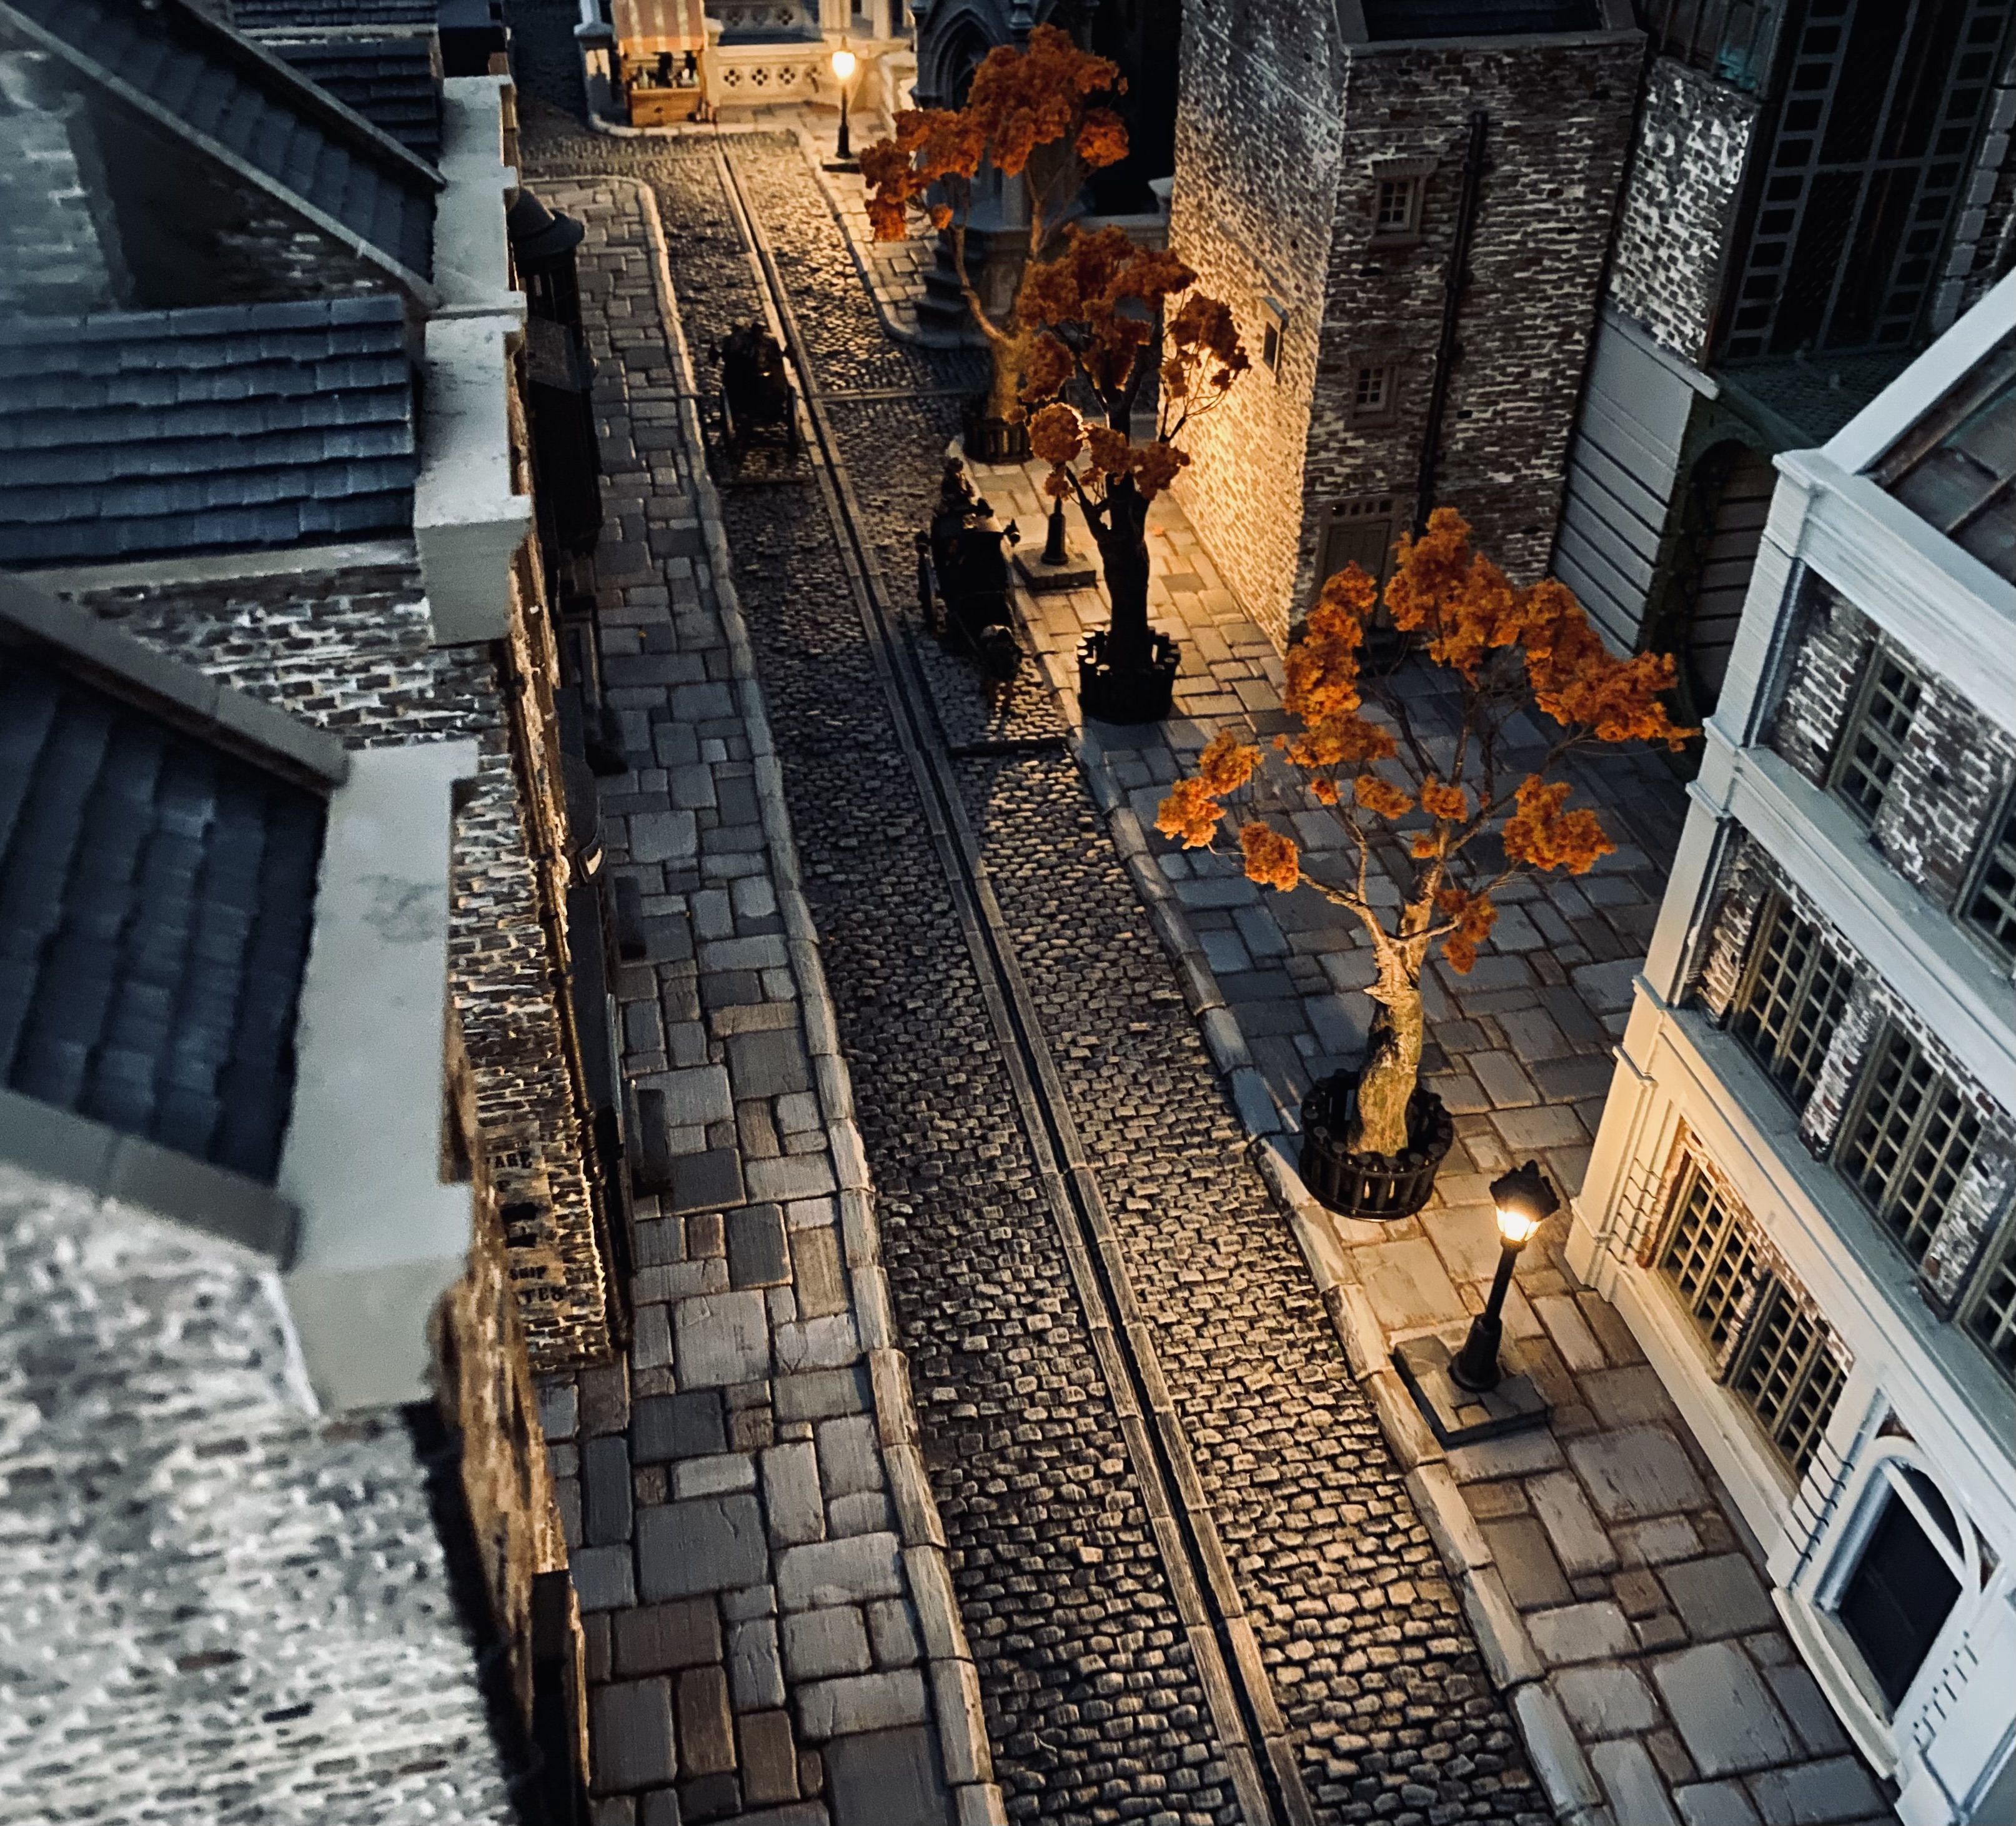
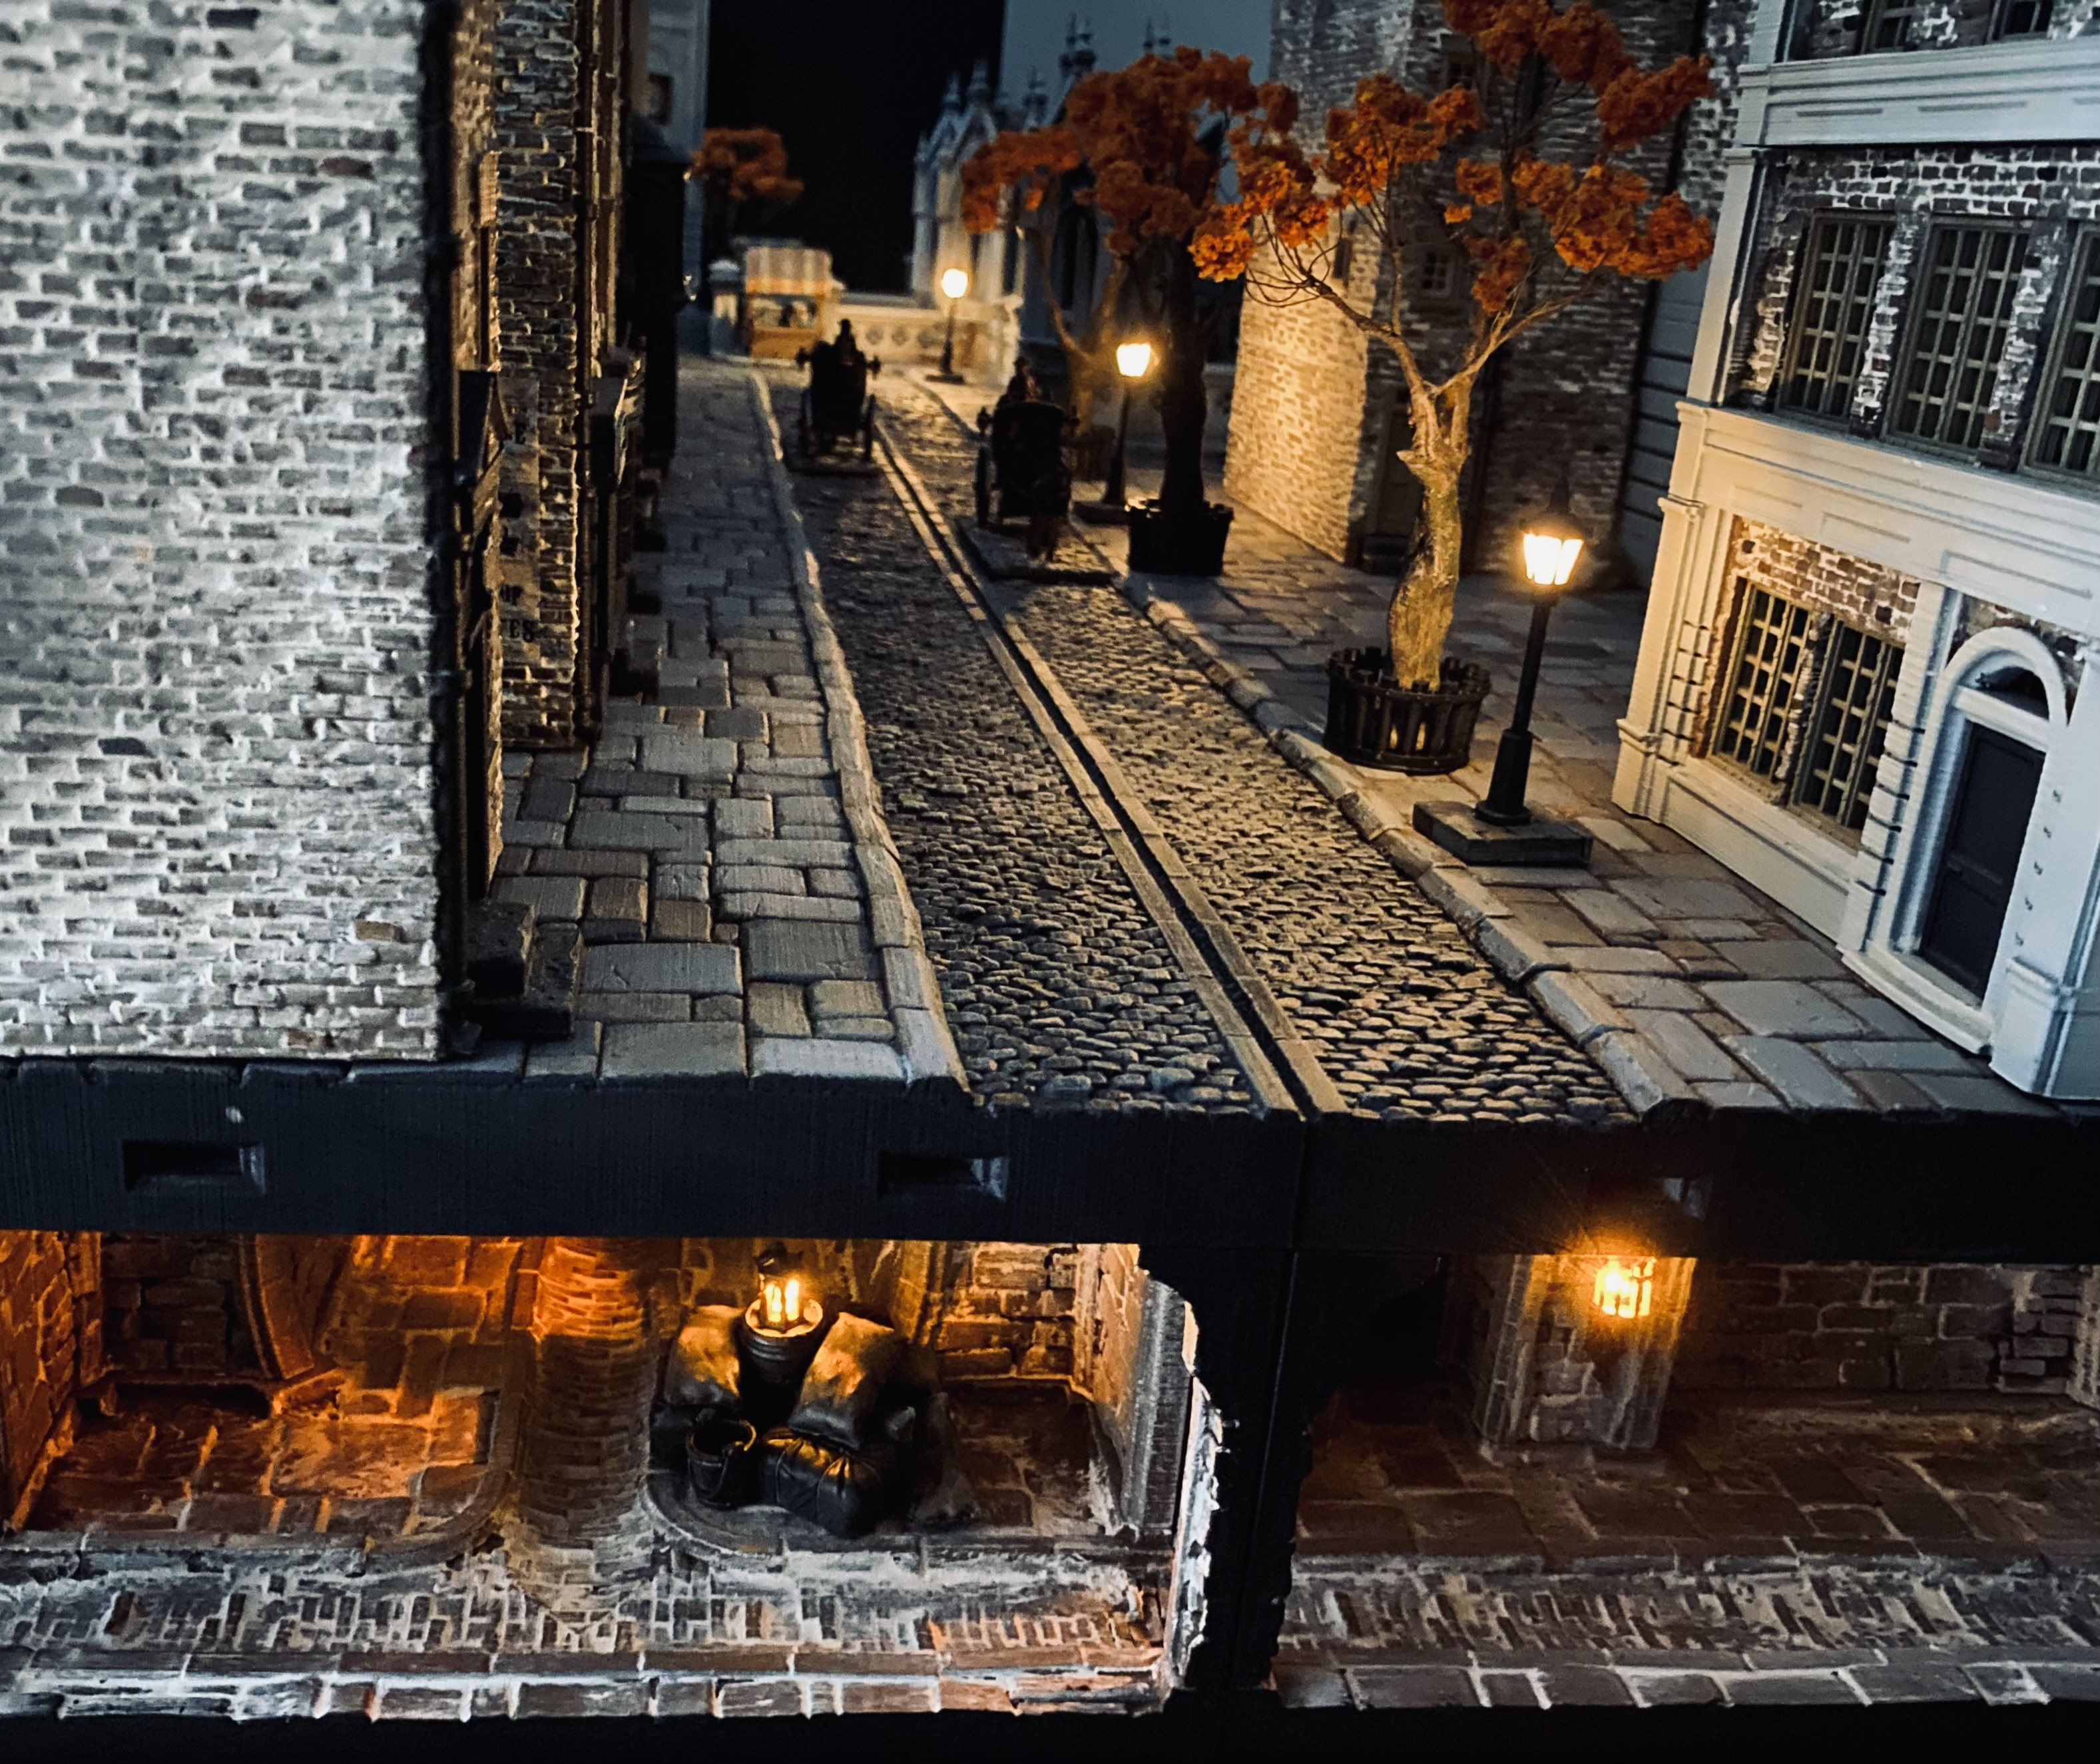

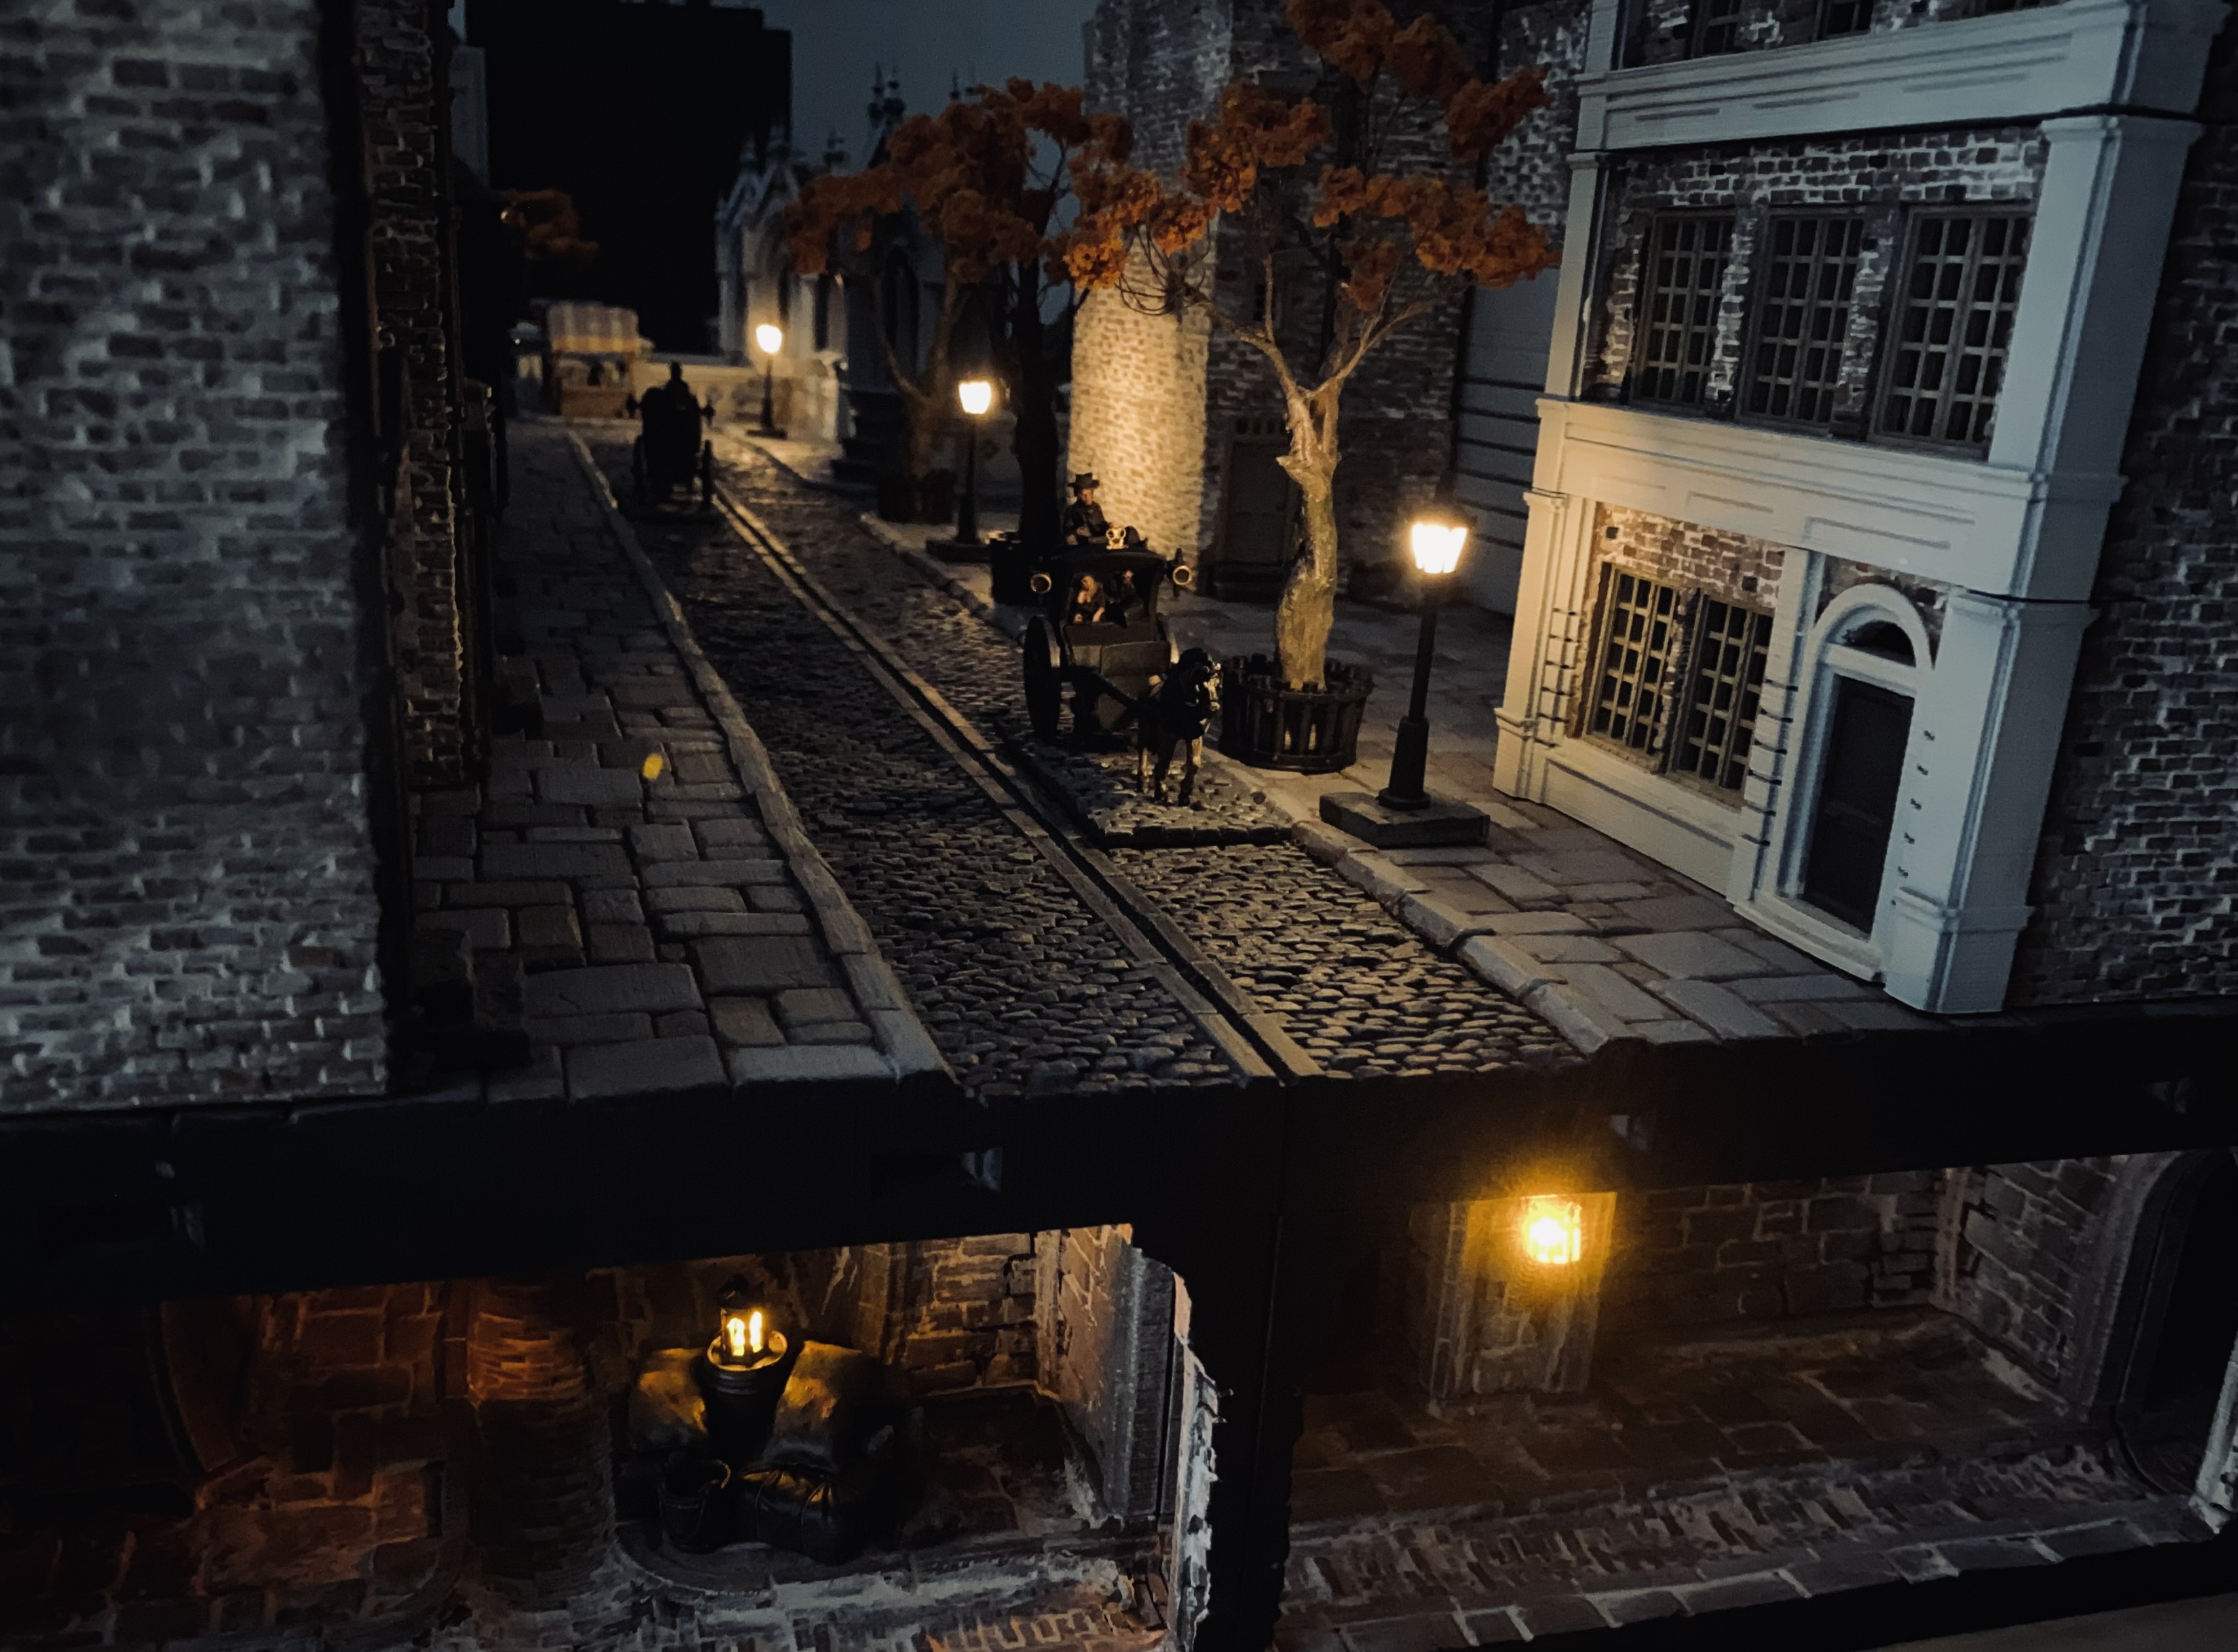 Just for the fun of it, I decided to see how it looked with the main light in my games room turned off too.
More little bits
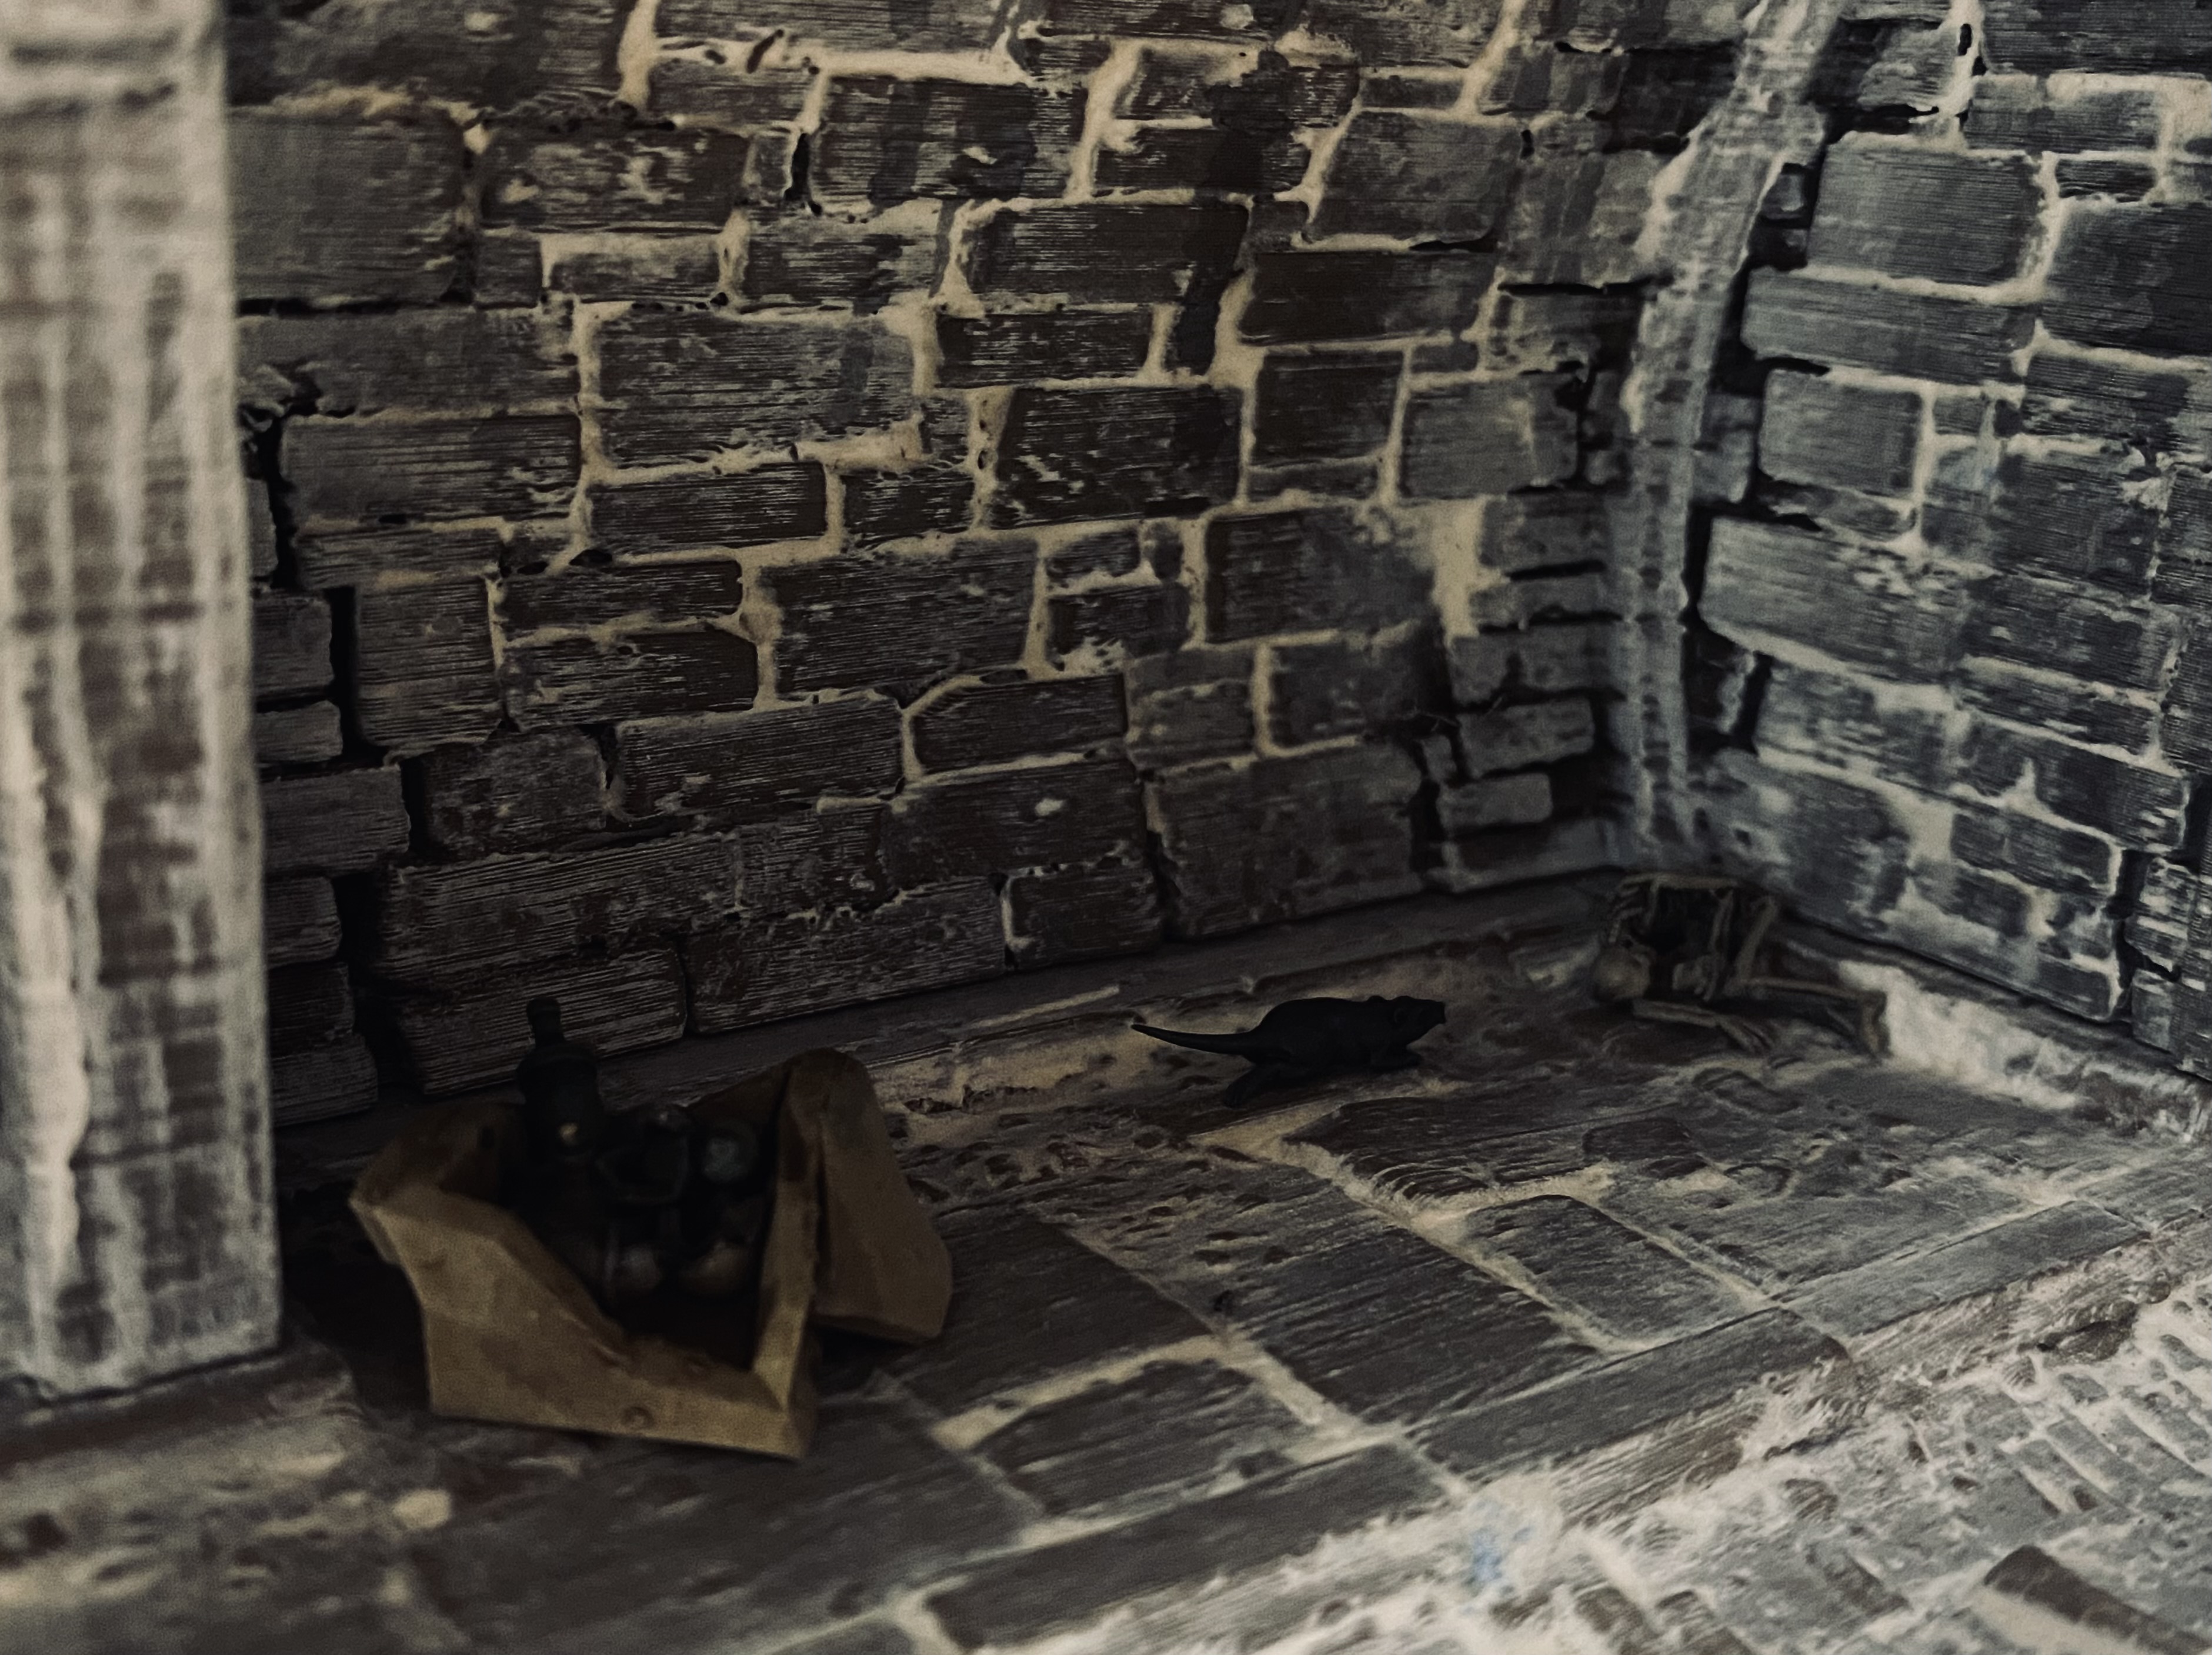
It’s not much of an update; I just painted a few extra little pieces to add some extra detail. A few cats and dogs and a skeleton in the sewers.
I am heading off on a family holiday at the end of the week so I’m not sure if I will get much more done on this before the end of the month.
I will try to squeeze in a little more when I get back if I can.


Rules.
Just a last-minute update before getting on a plane for our holiday.
I was lucky enough to get a copy of Glorious Adventures delivered, possible holiday reading, and thought I would take a couple of pictures of the rules sets I had in mind for this table layout.
Empire of the Dead has been covered by Denzien HERE so if you have not seen his project, I highly recommend heading over there to check it out.
I have been using GASLIGHT for some time with games featured in one of my other projects HERE
However, I do rather like the idea of Wiley Games Fistful of Lead rules after watching the fun Let’s Play HERE
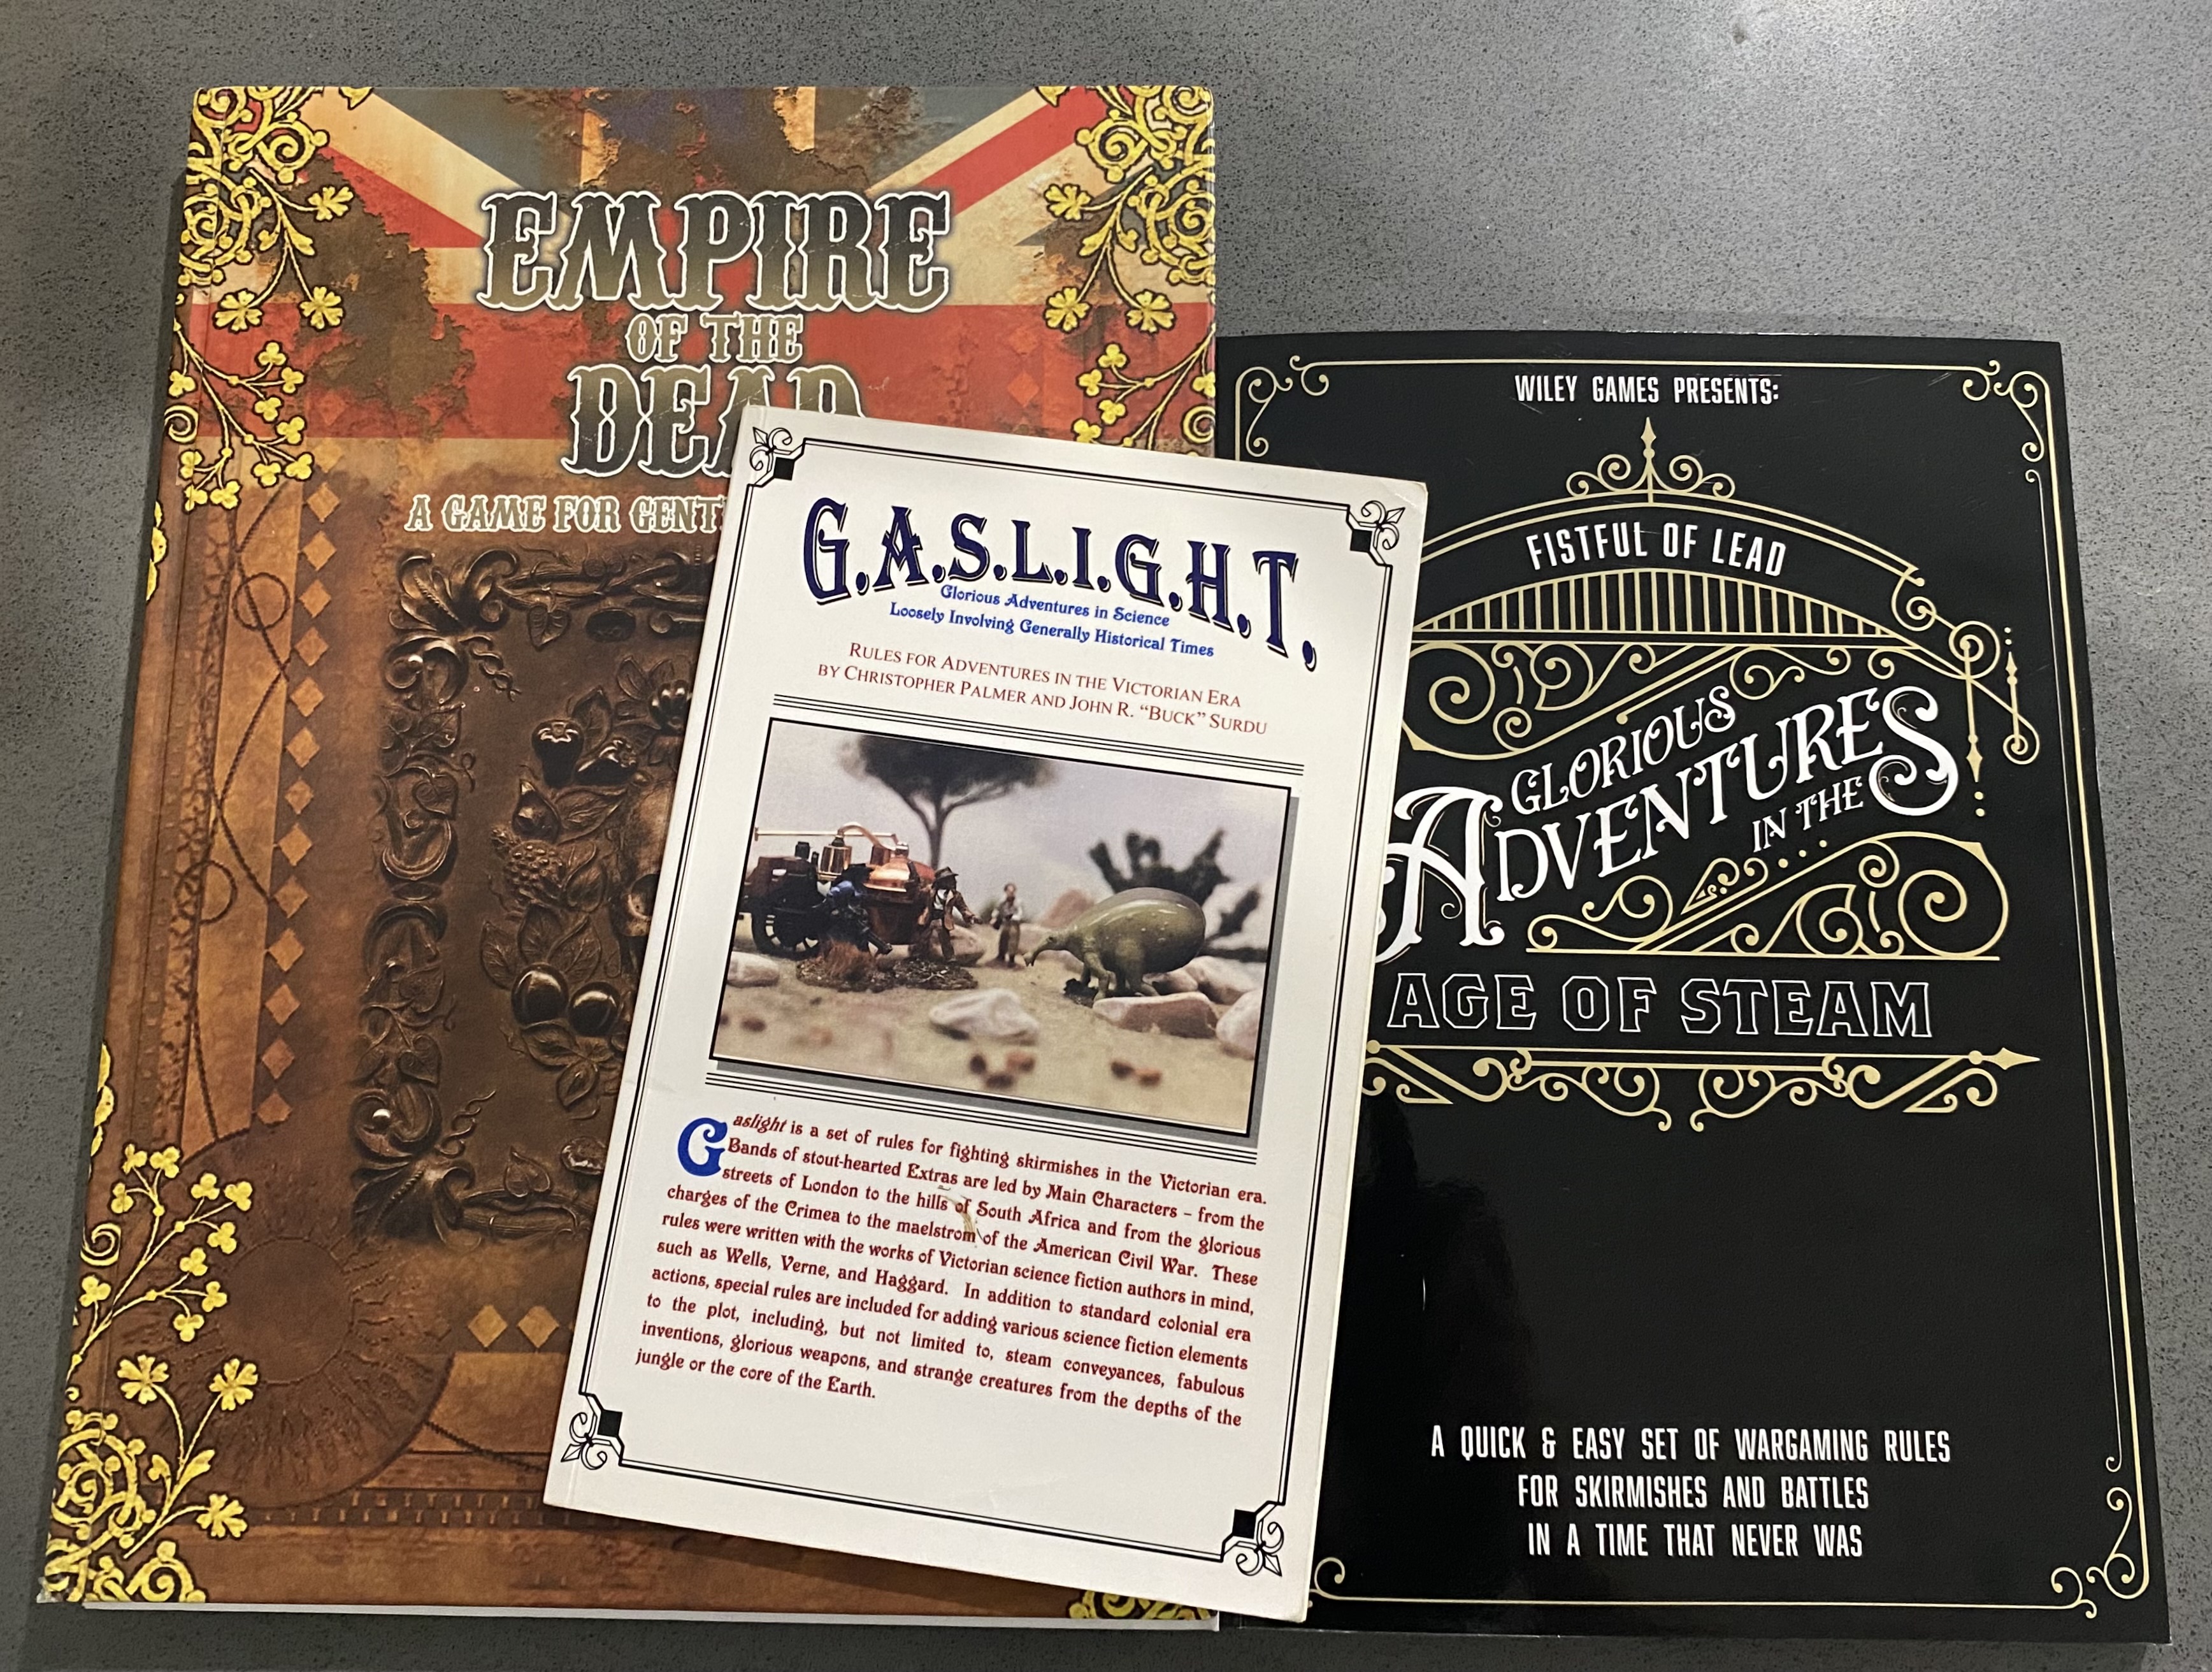 My primary rules choices.
 Other possibilities that I have in my collection
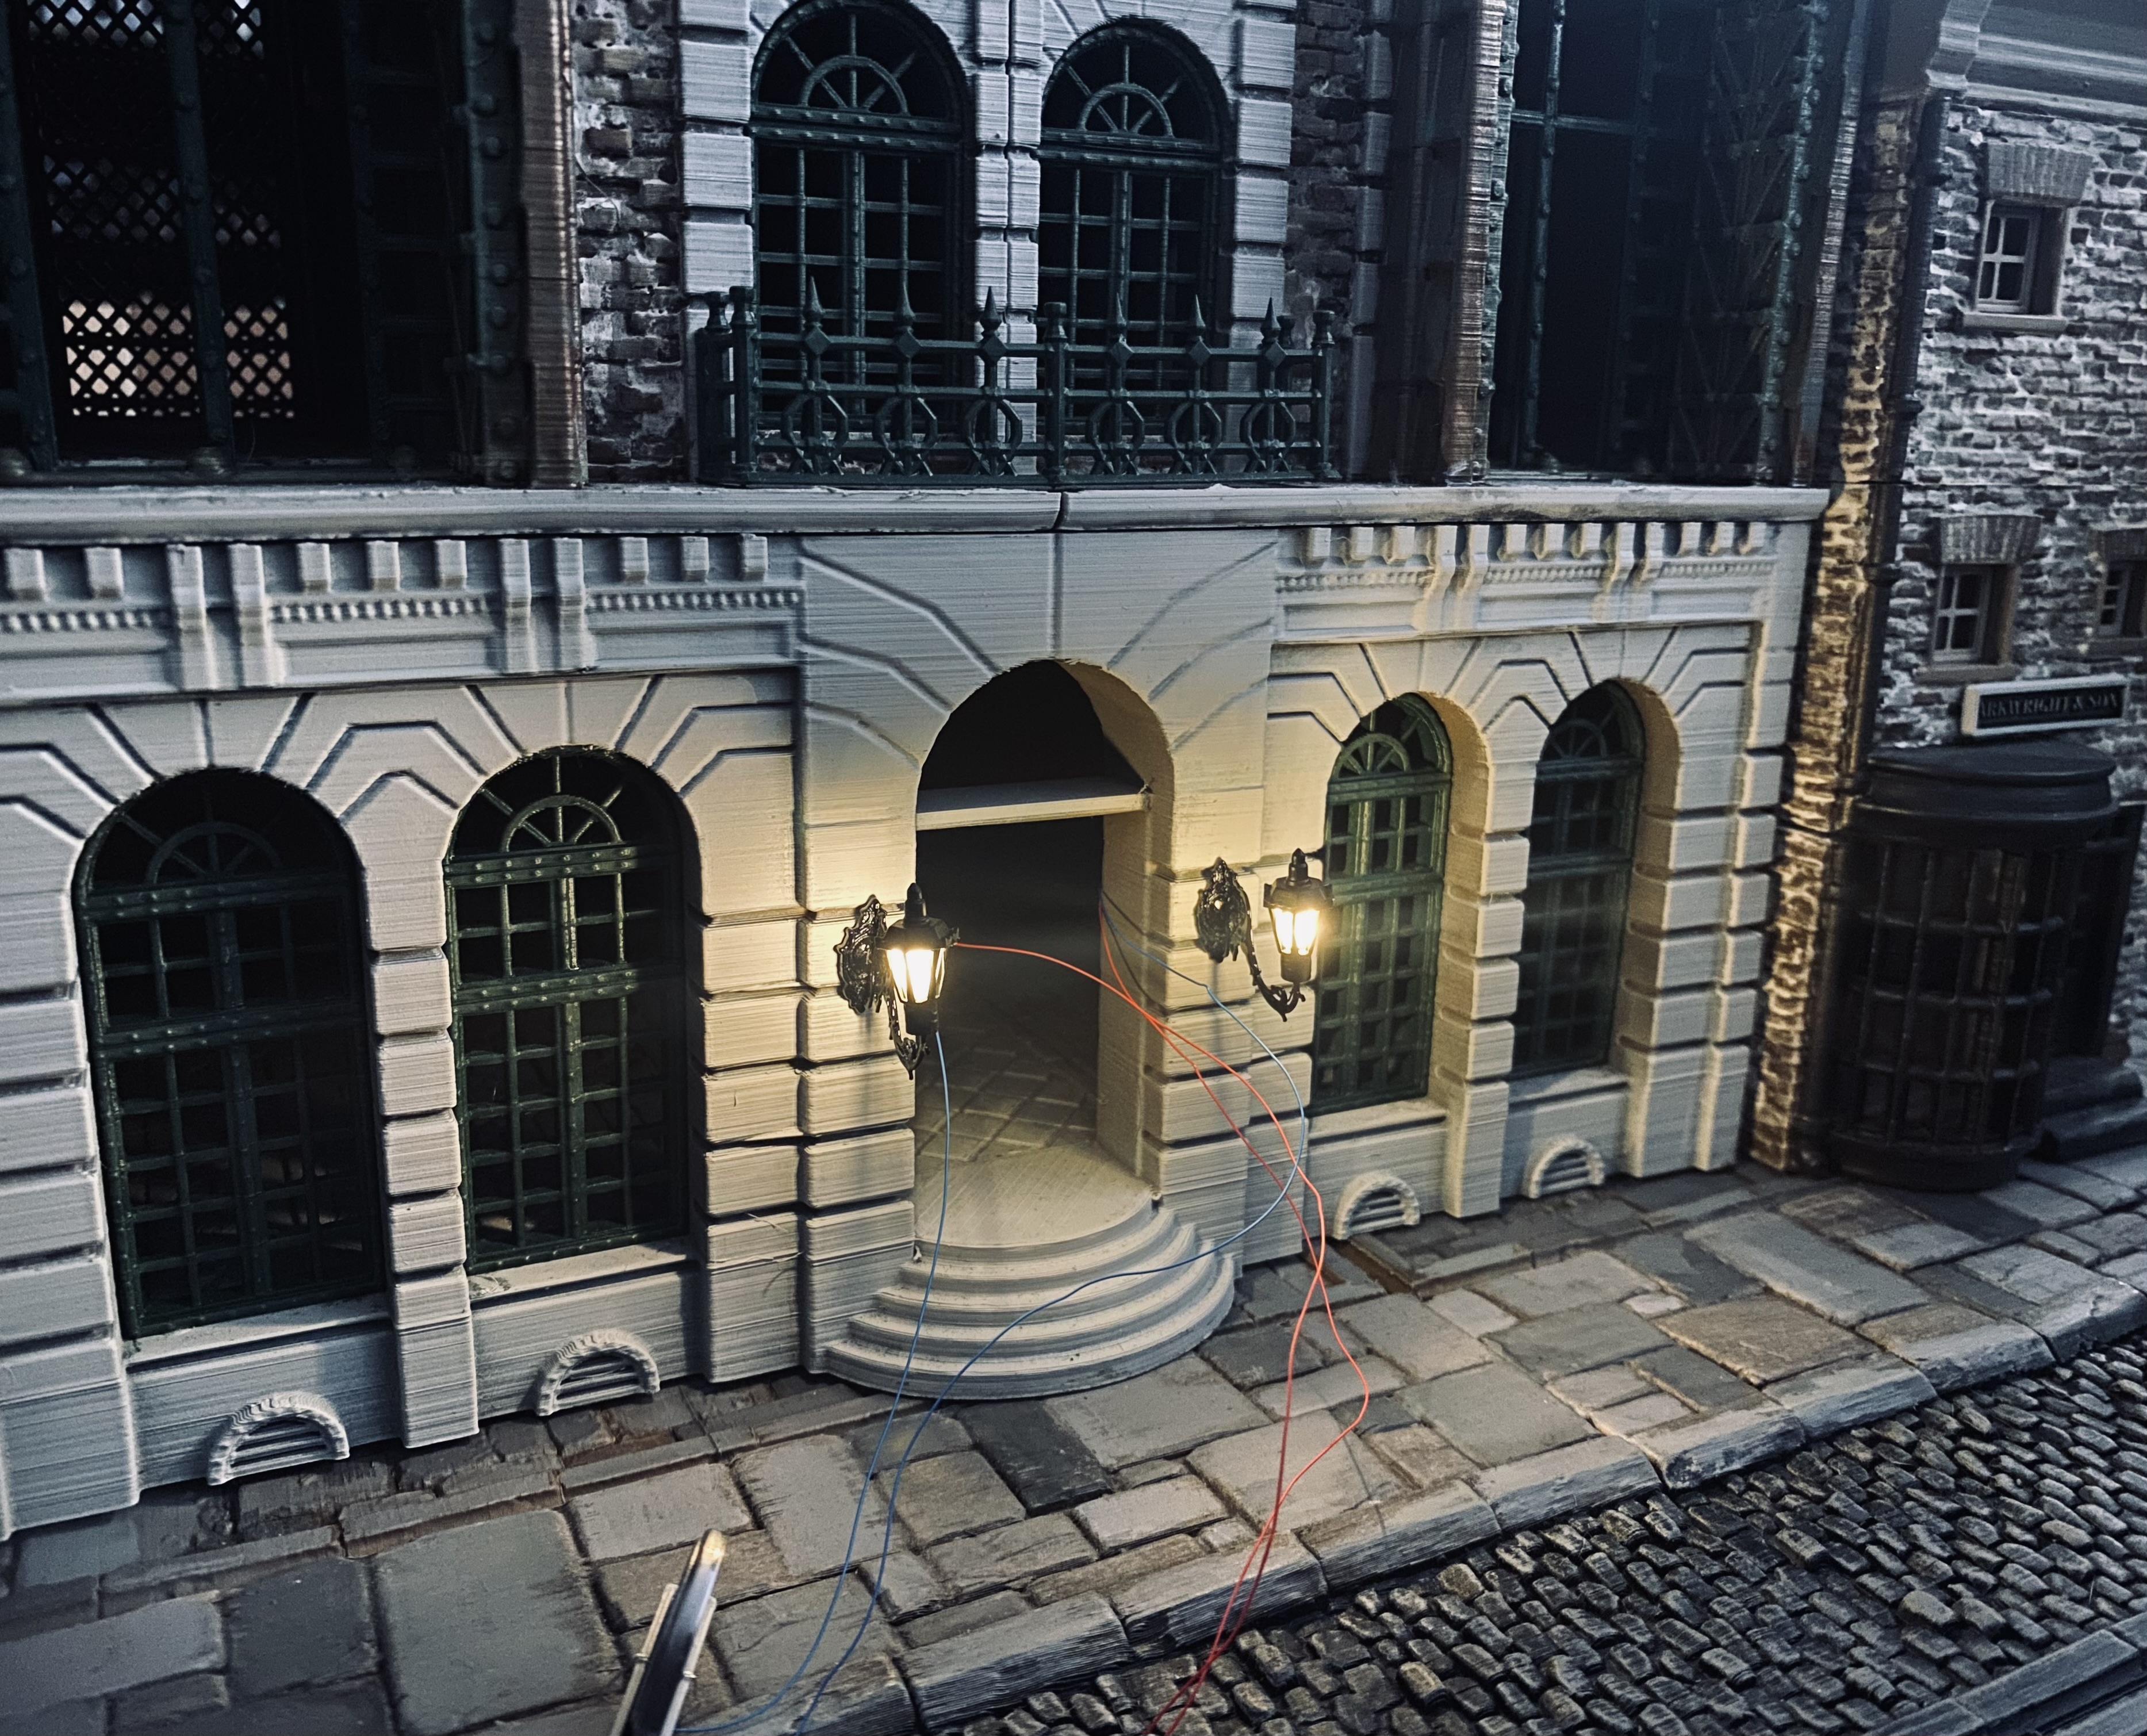
I also managed to make a start on adding lights to the Station. I went with more elaborate light fittings to suit the grander building style.
The wires and small battery holder will be fitted inside the building and the light fittings painted so they don’t look so ‘plastic’.
What a load of rubbish
Well, the family holiday didn’t quite go to plan. Everybody except me got ill, and we ended up having to get an early flight home. It’s not quite what we had planned but sometimes you need to accept that sometimes life deals you lemons.
So, I ended up turning a rubbish situation into, well, rubbish.
I printed out a load of random bits and pieces and glued them together to make small piles of scatter to litter the place with.
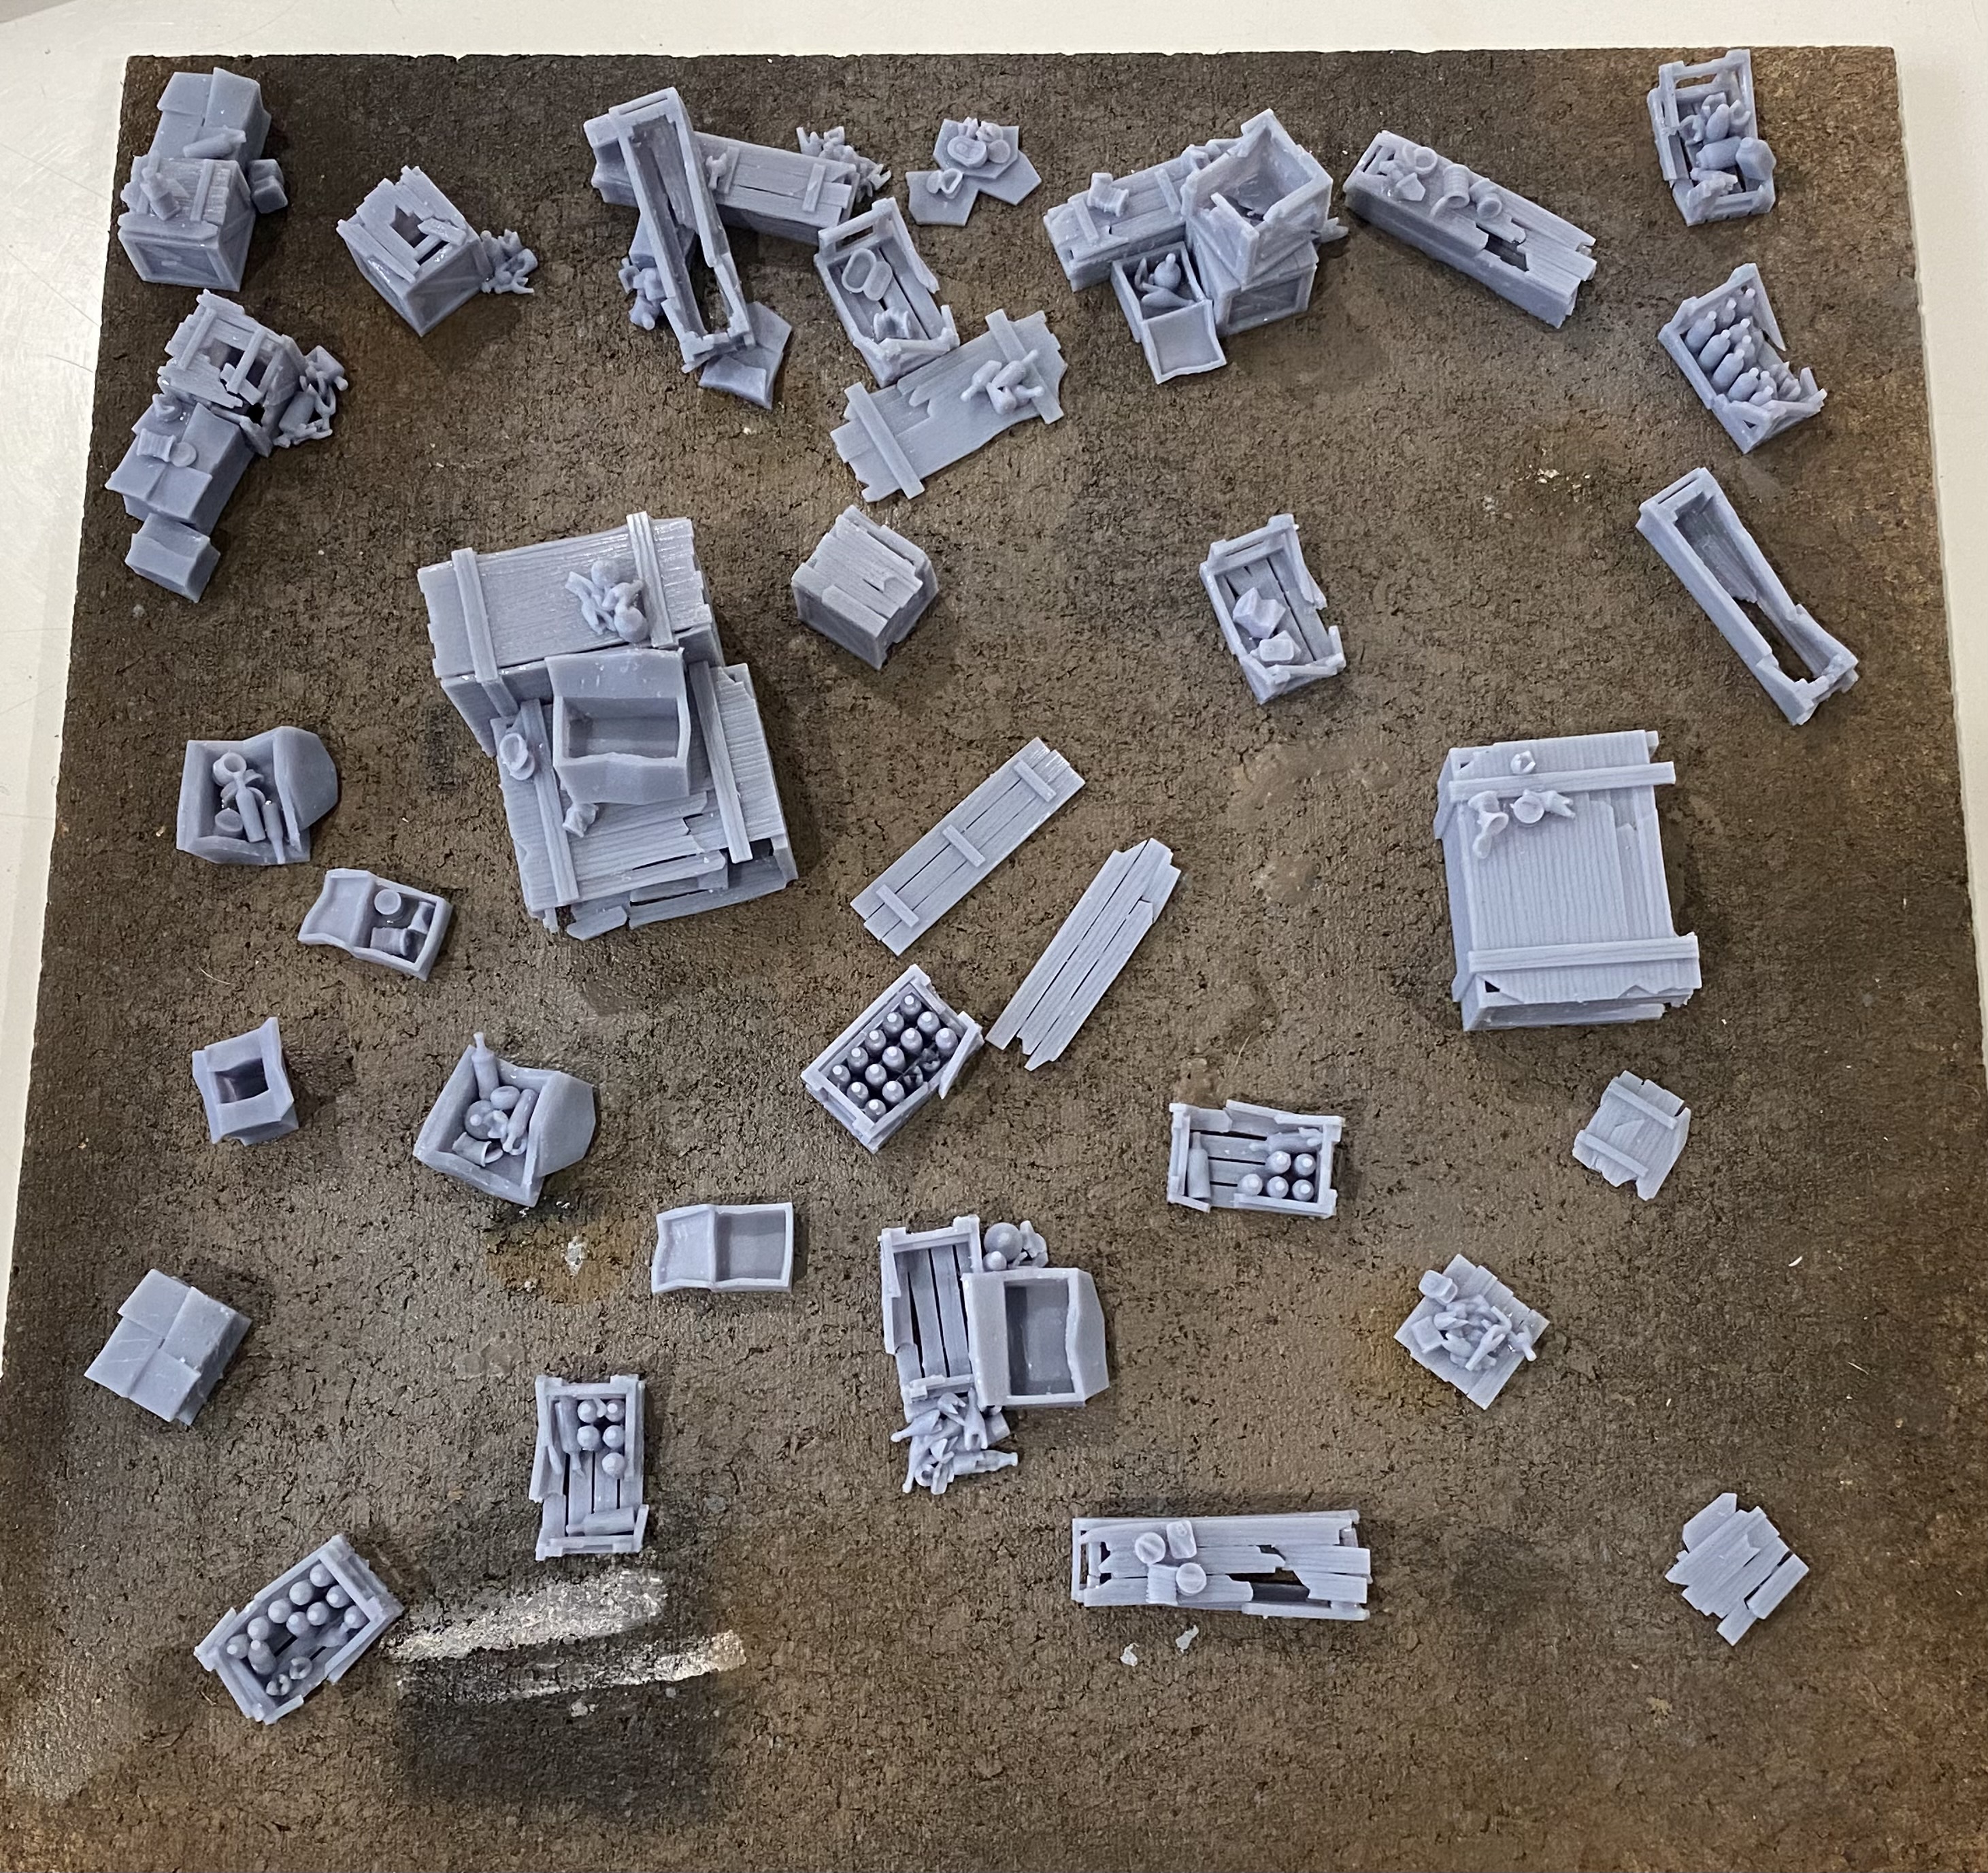
I spray painted everything with God’s own spray paint, Leather Brown, before giving it all a zenith of Zandri dust. After that, I just slopped on contract paints, wet blending them as I went without much care or attention to detail.
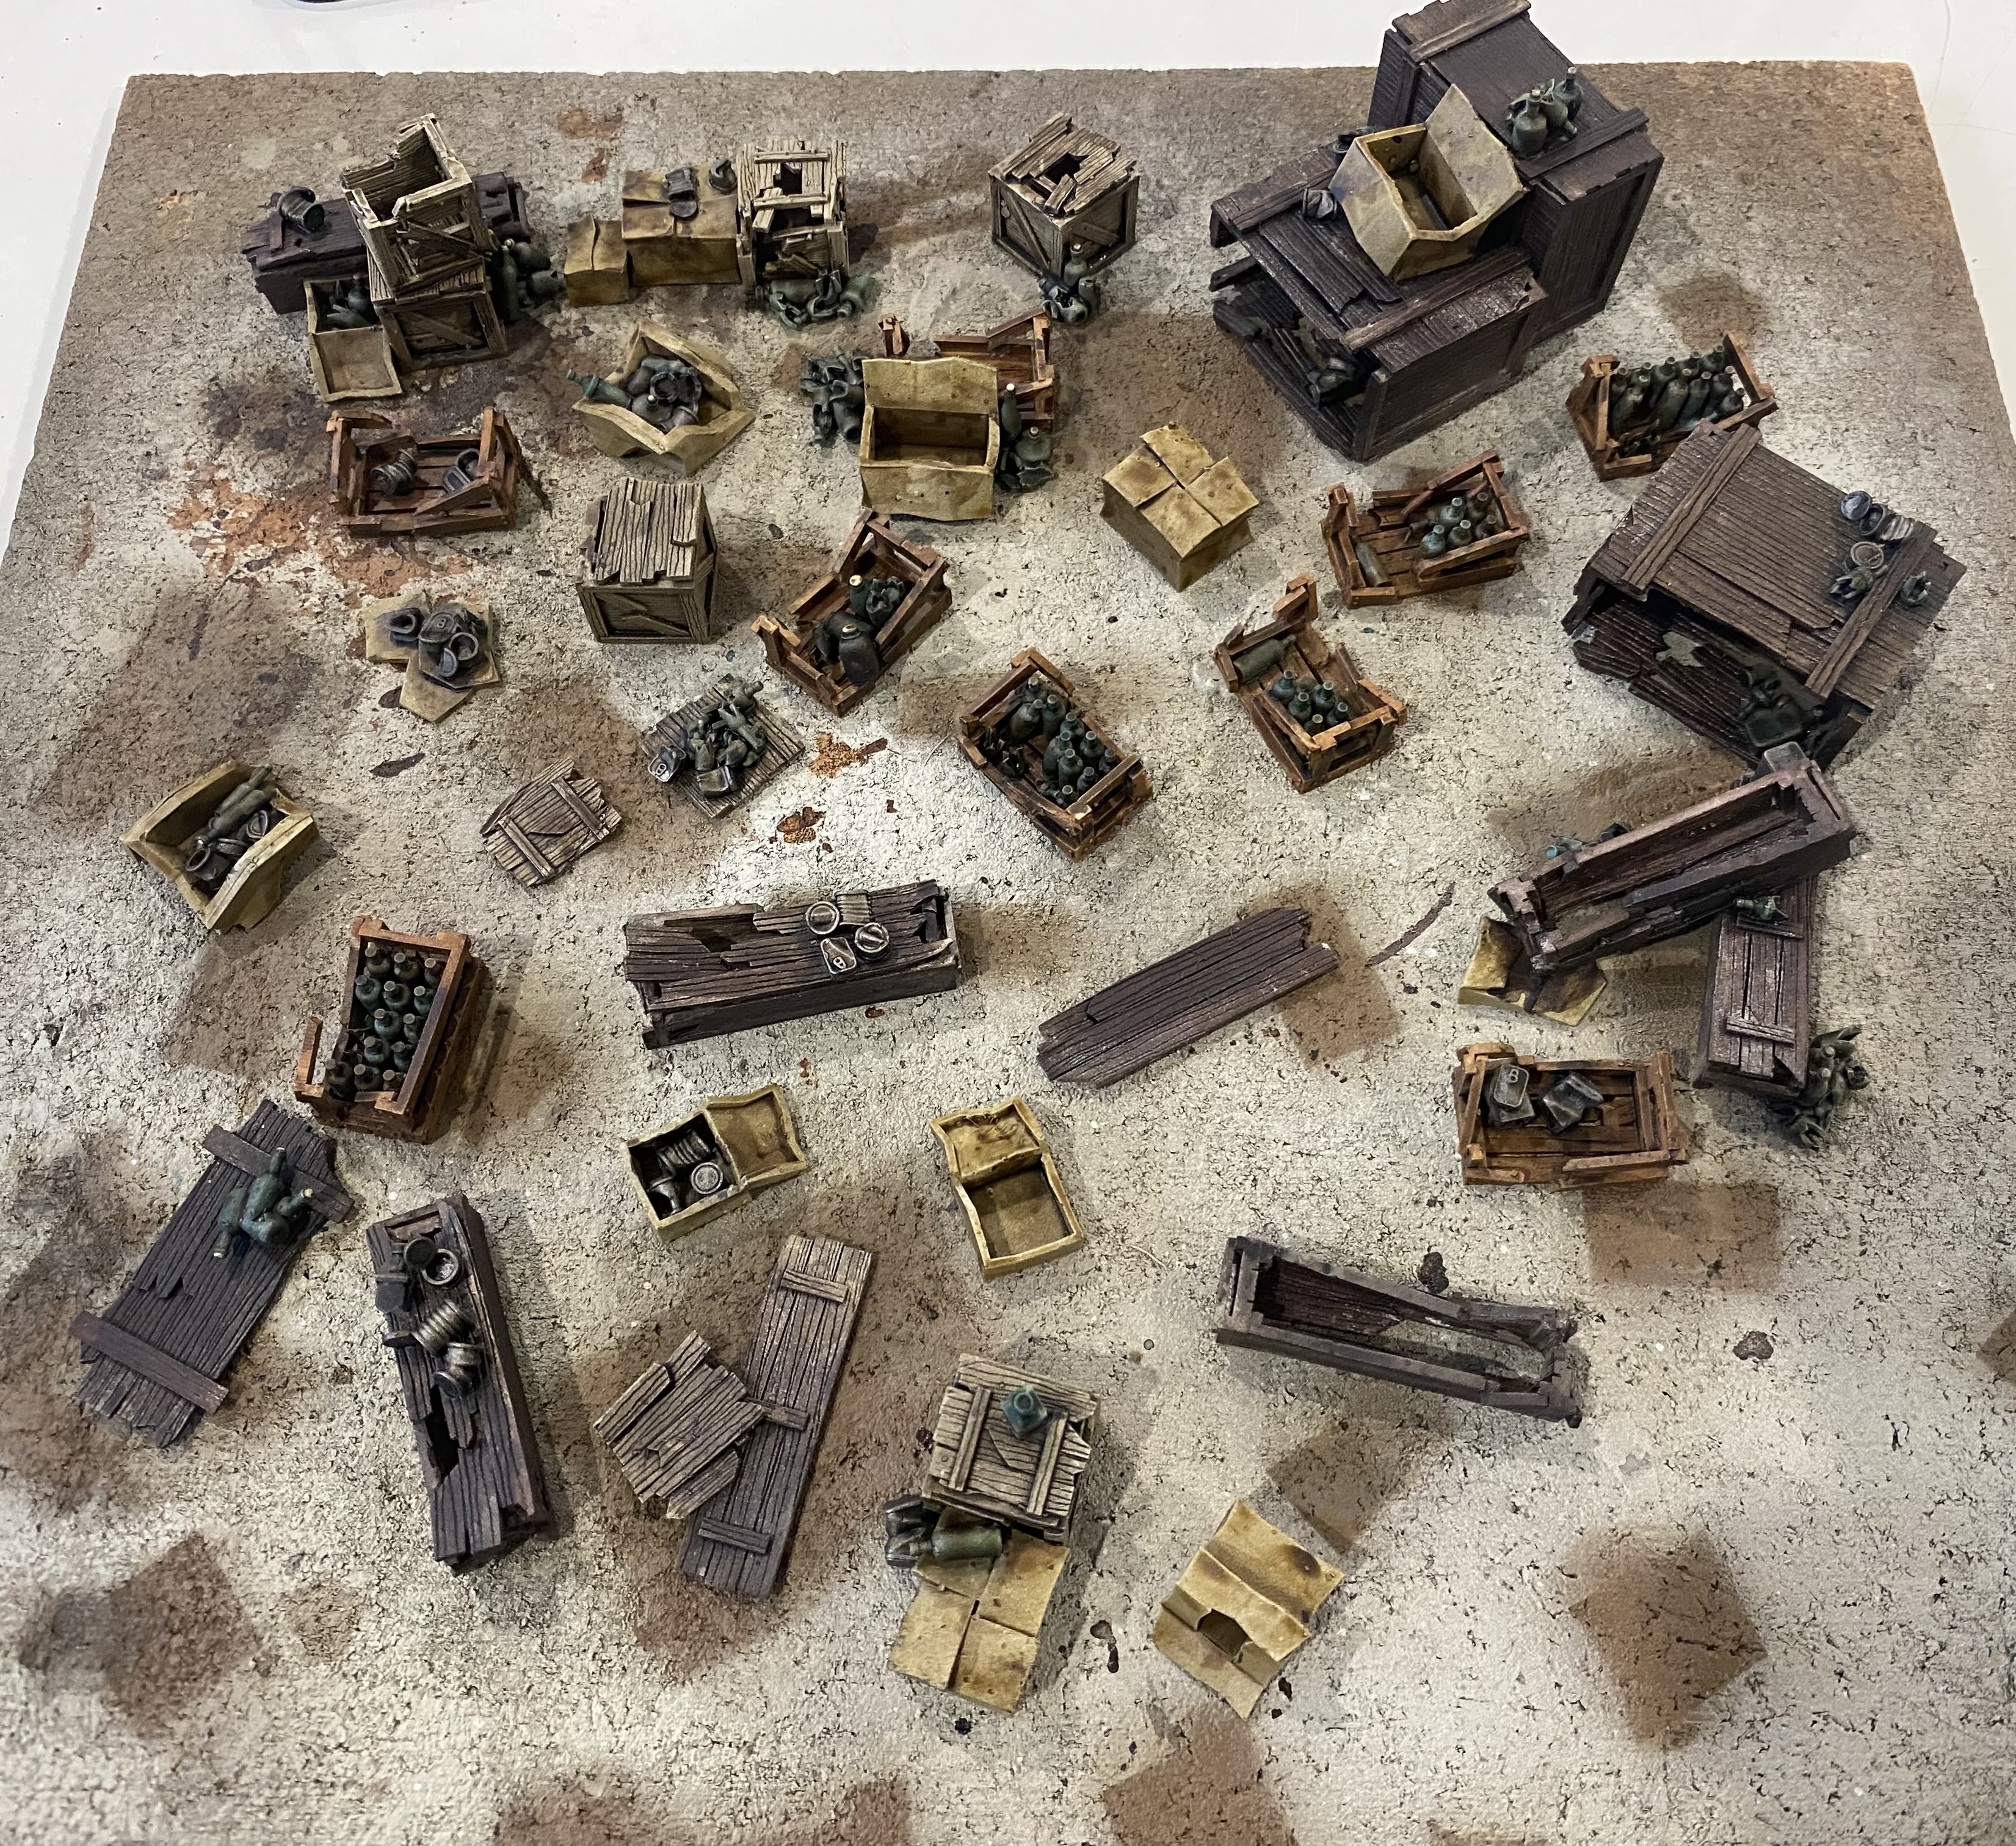
After that, it was just a case of scattering the scatter or littering the litter whichever floats your boat.

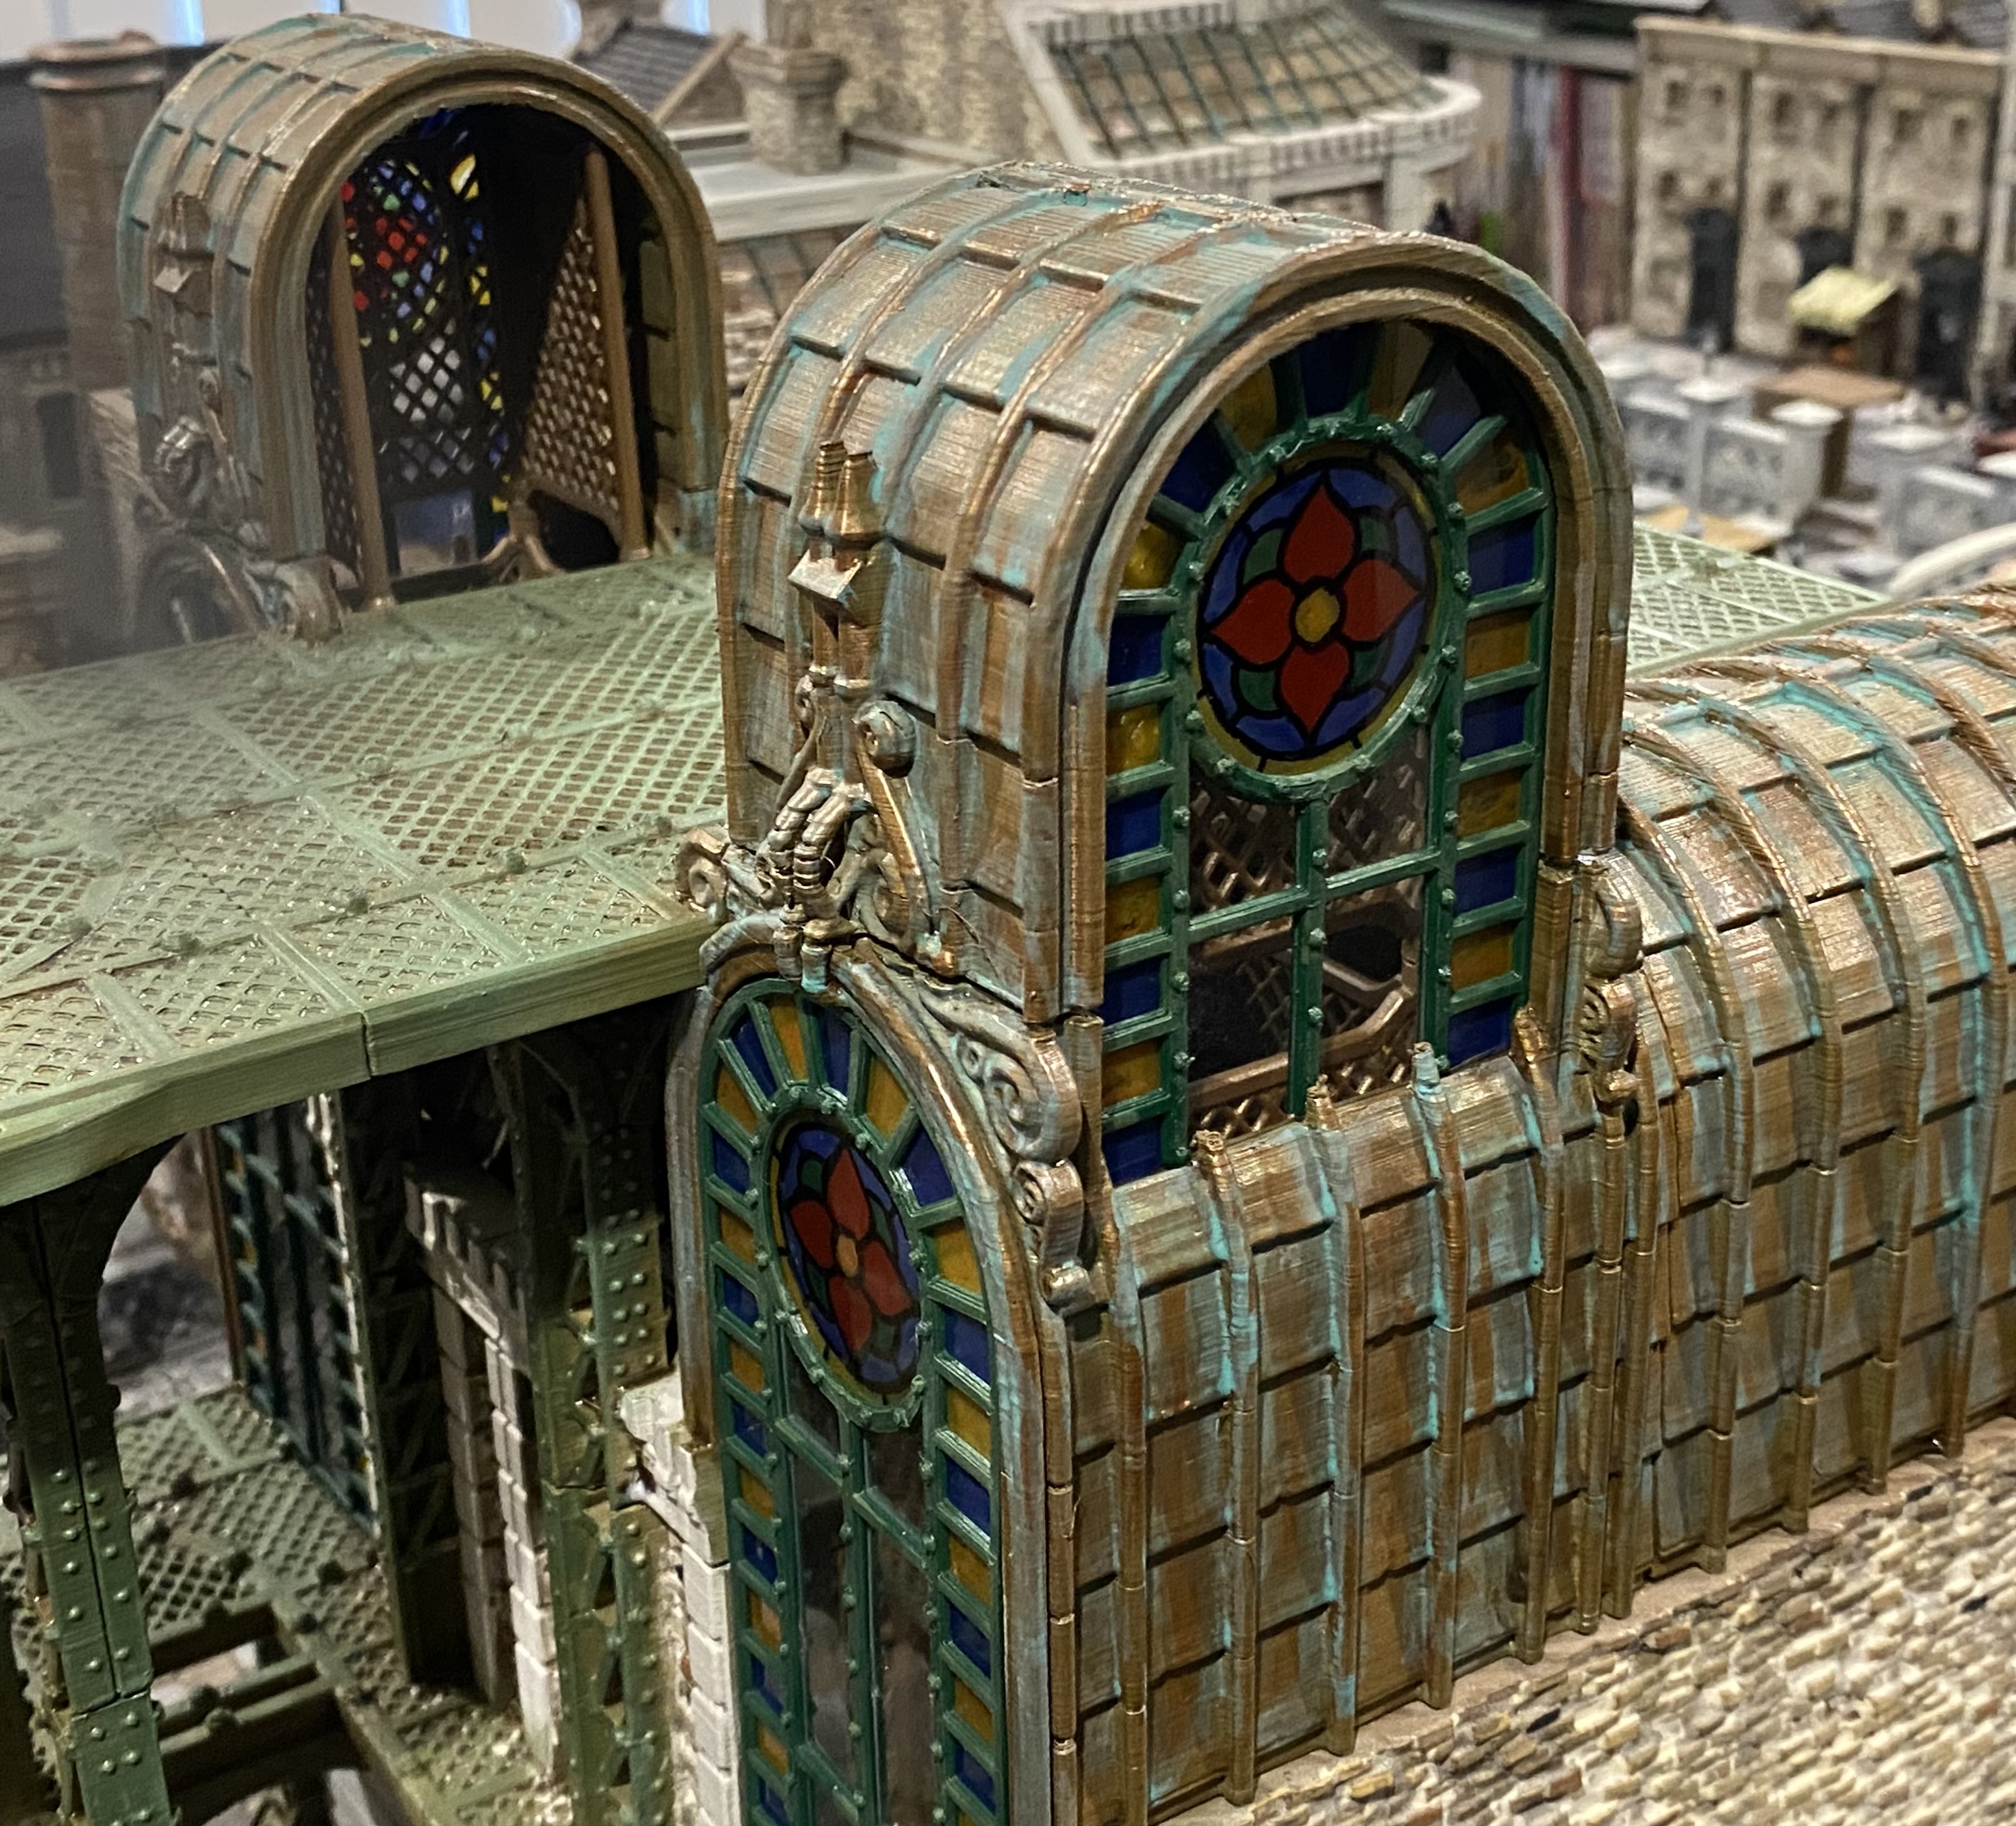
Aeronef Station.
I had been procrastinating over completing the large Nef station for way too long now and finally found the motivation to get it done.
The station has several really large windows that needed something to finish them off and I decided that some kind of stained-glass effect would fit the bill. I deliberately went with something that did not appear to be either too religious or too science fiction.
I settled on a simple flower design that I found on the internet at www.stainedglasshobby.com

I used clear plastic transparency film and a permanent marker to draw out the chosen design, and contrast paints to colour the segments. The ‘glass sheet’ for want of a better description, was then sandwiched between two frames.
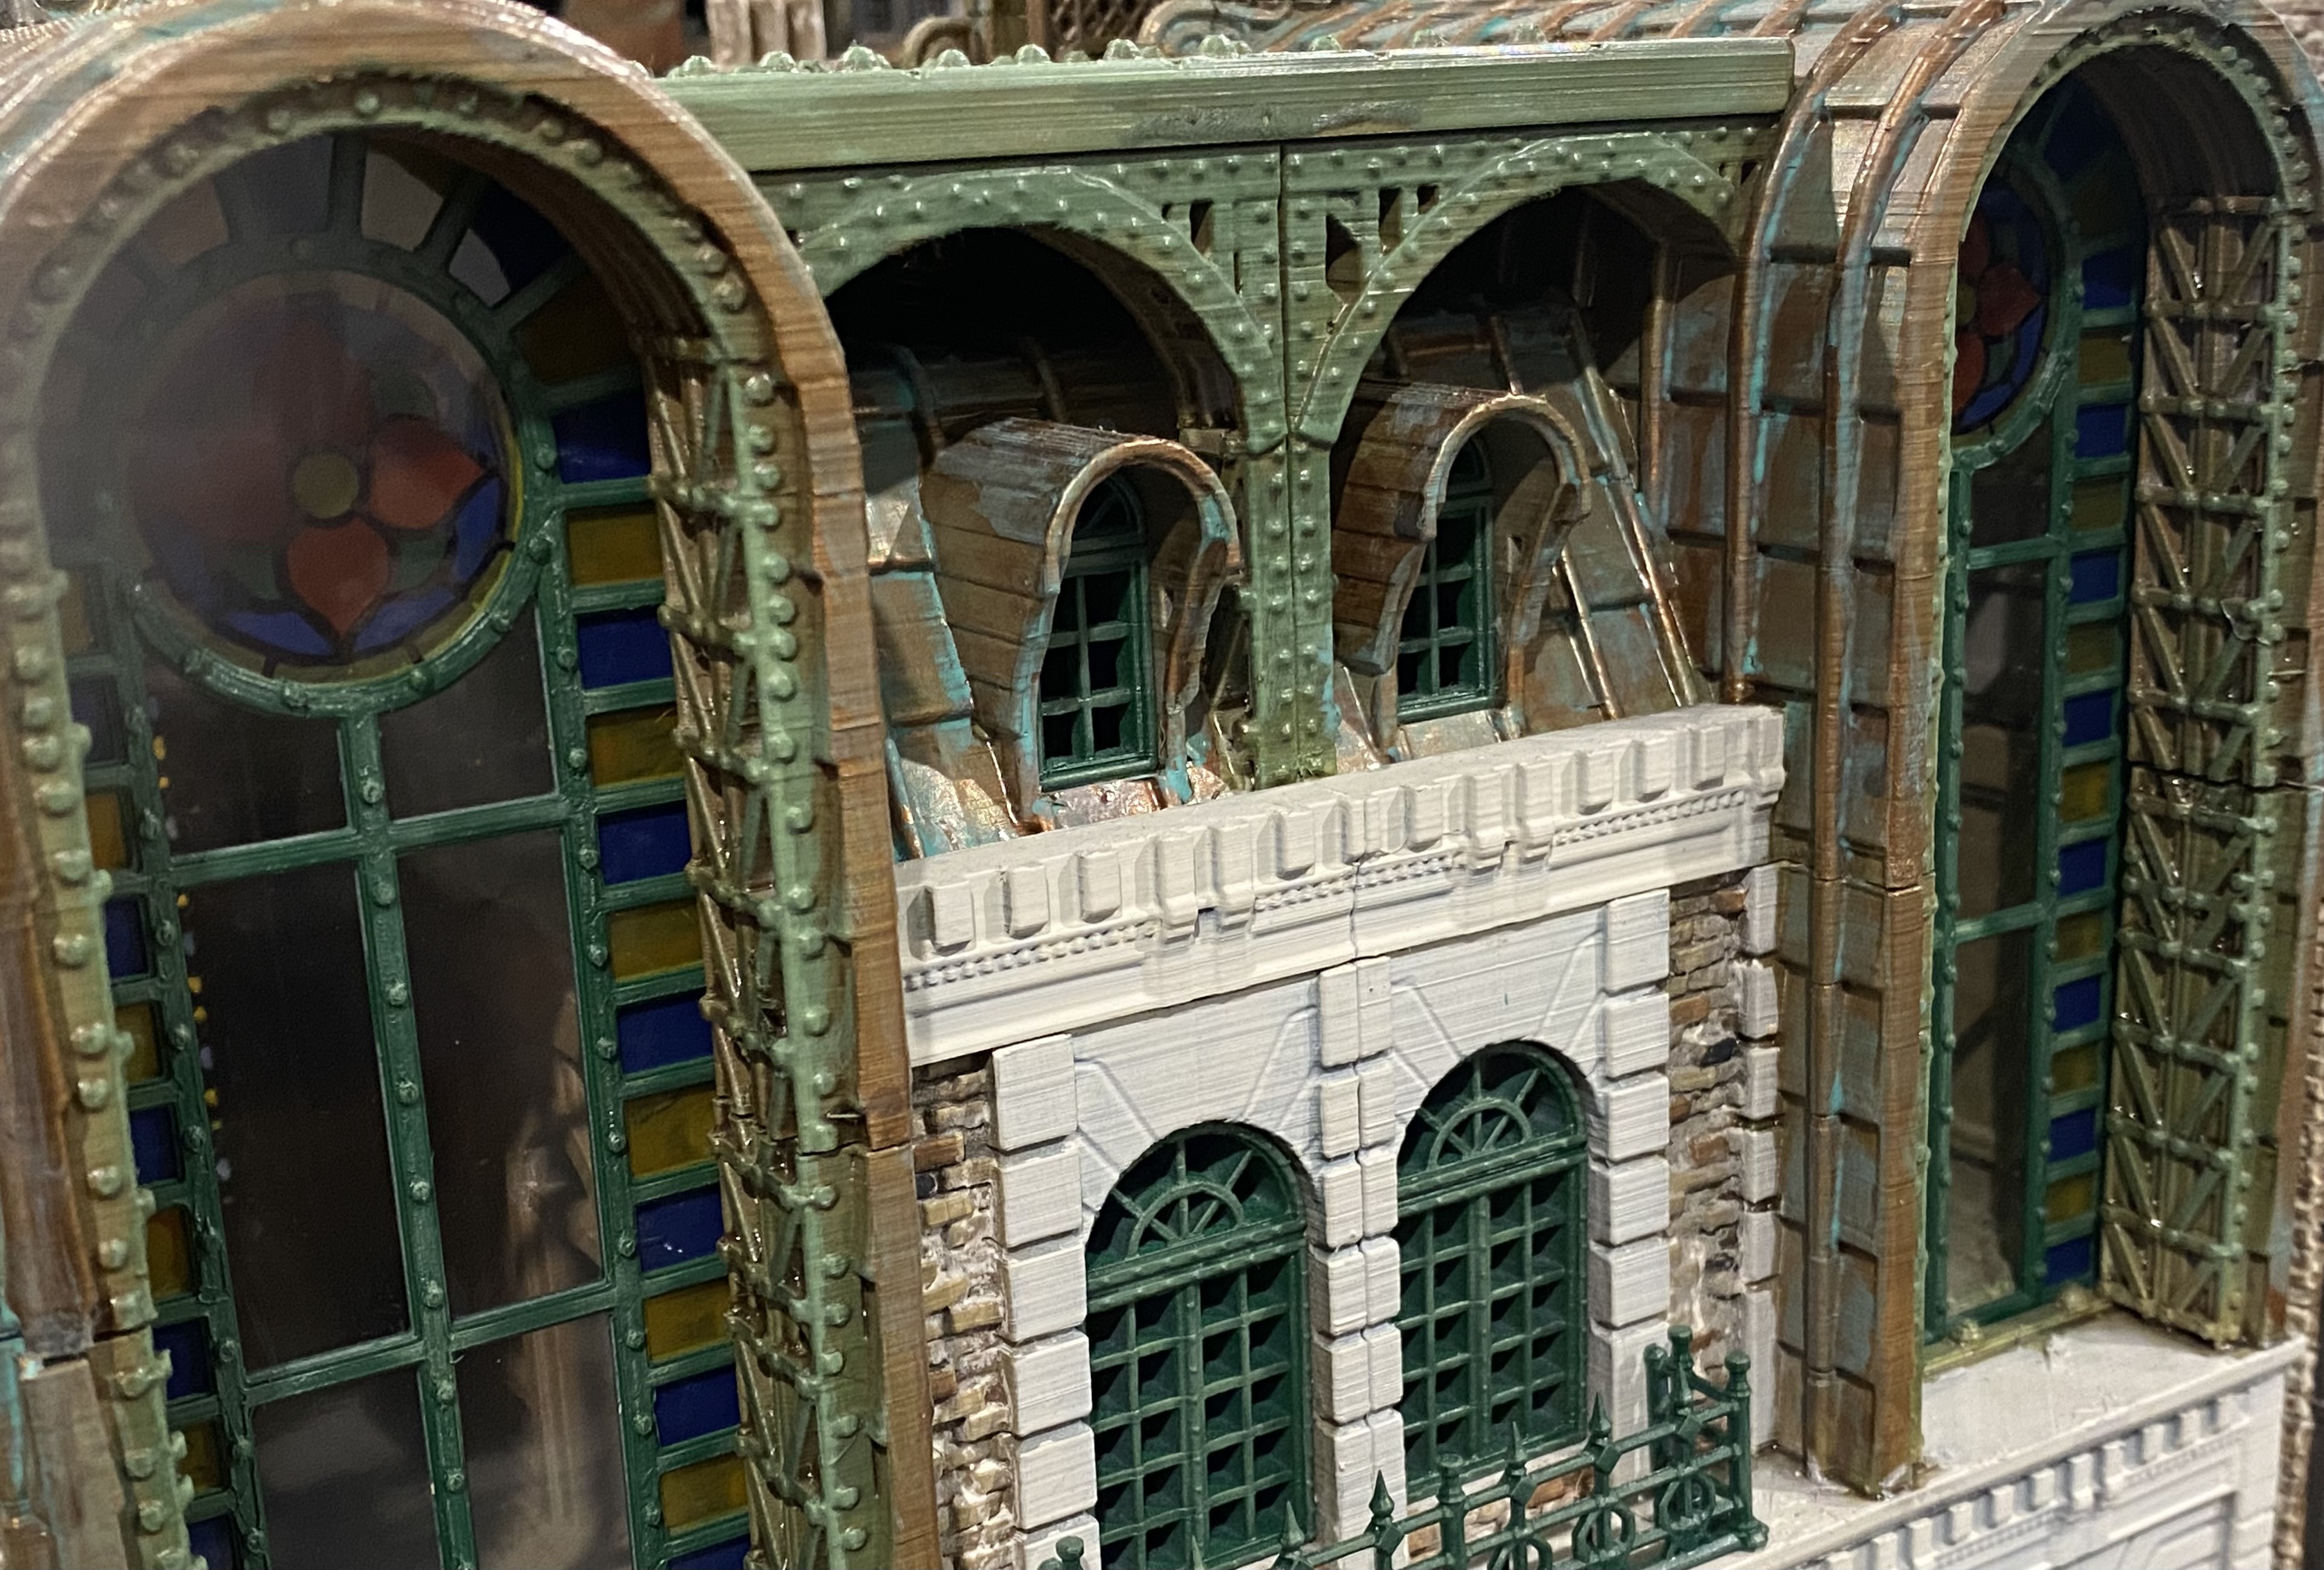
After that, it was time to properly install the lights. I decided to also add some interior lighting as the station is such a large building and I wanted to create some nice shadow effects across the table.
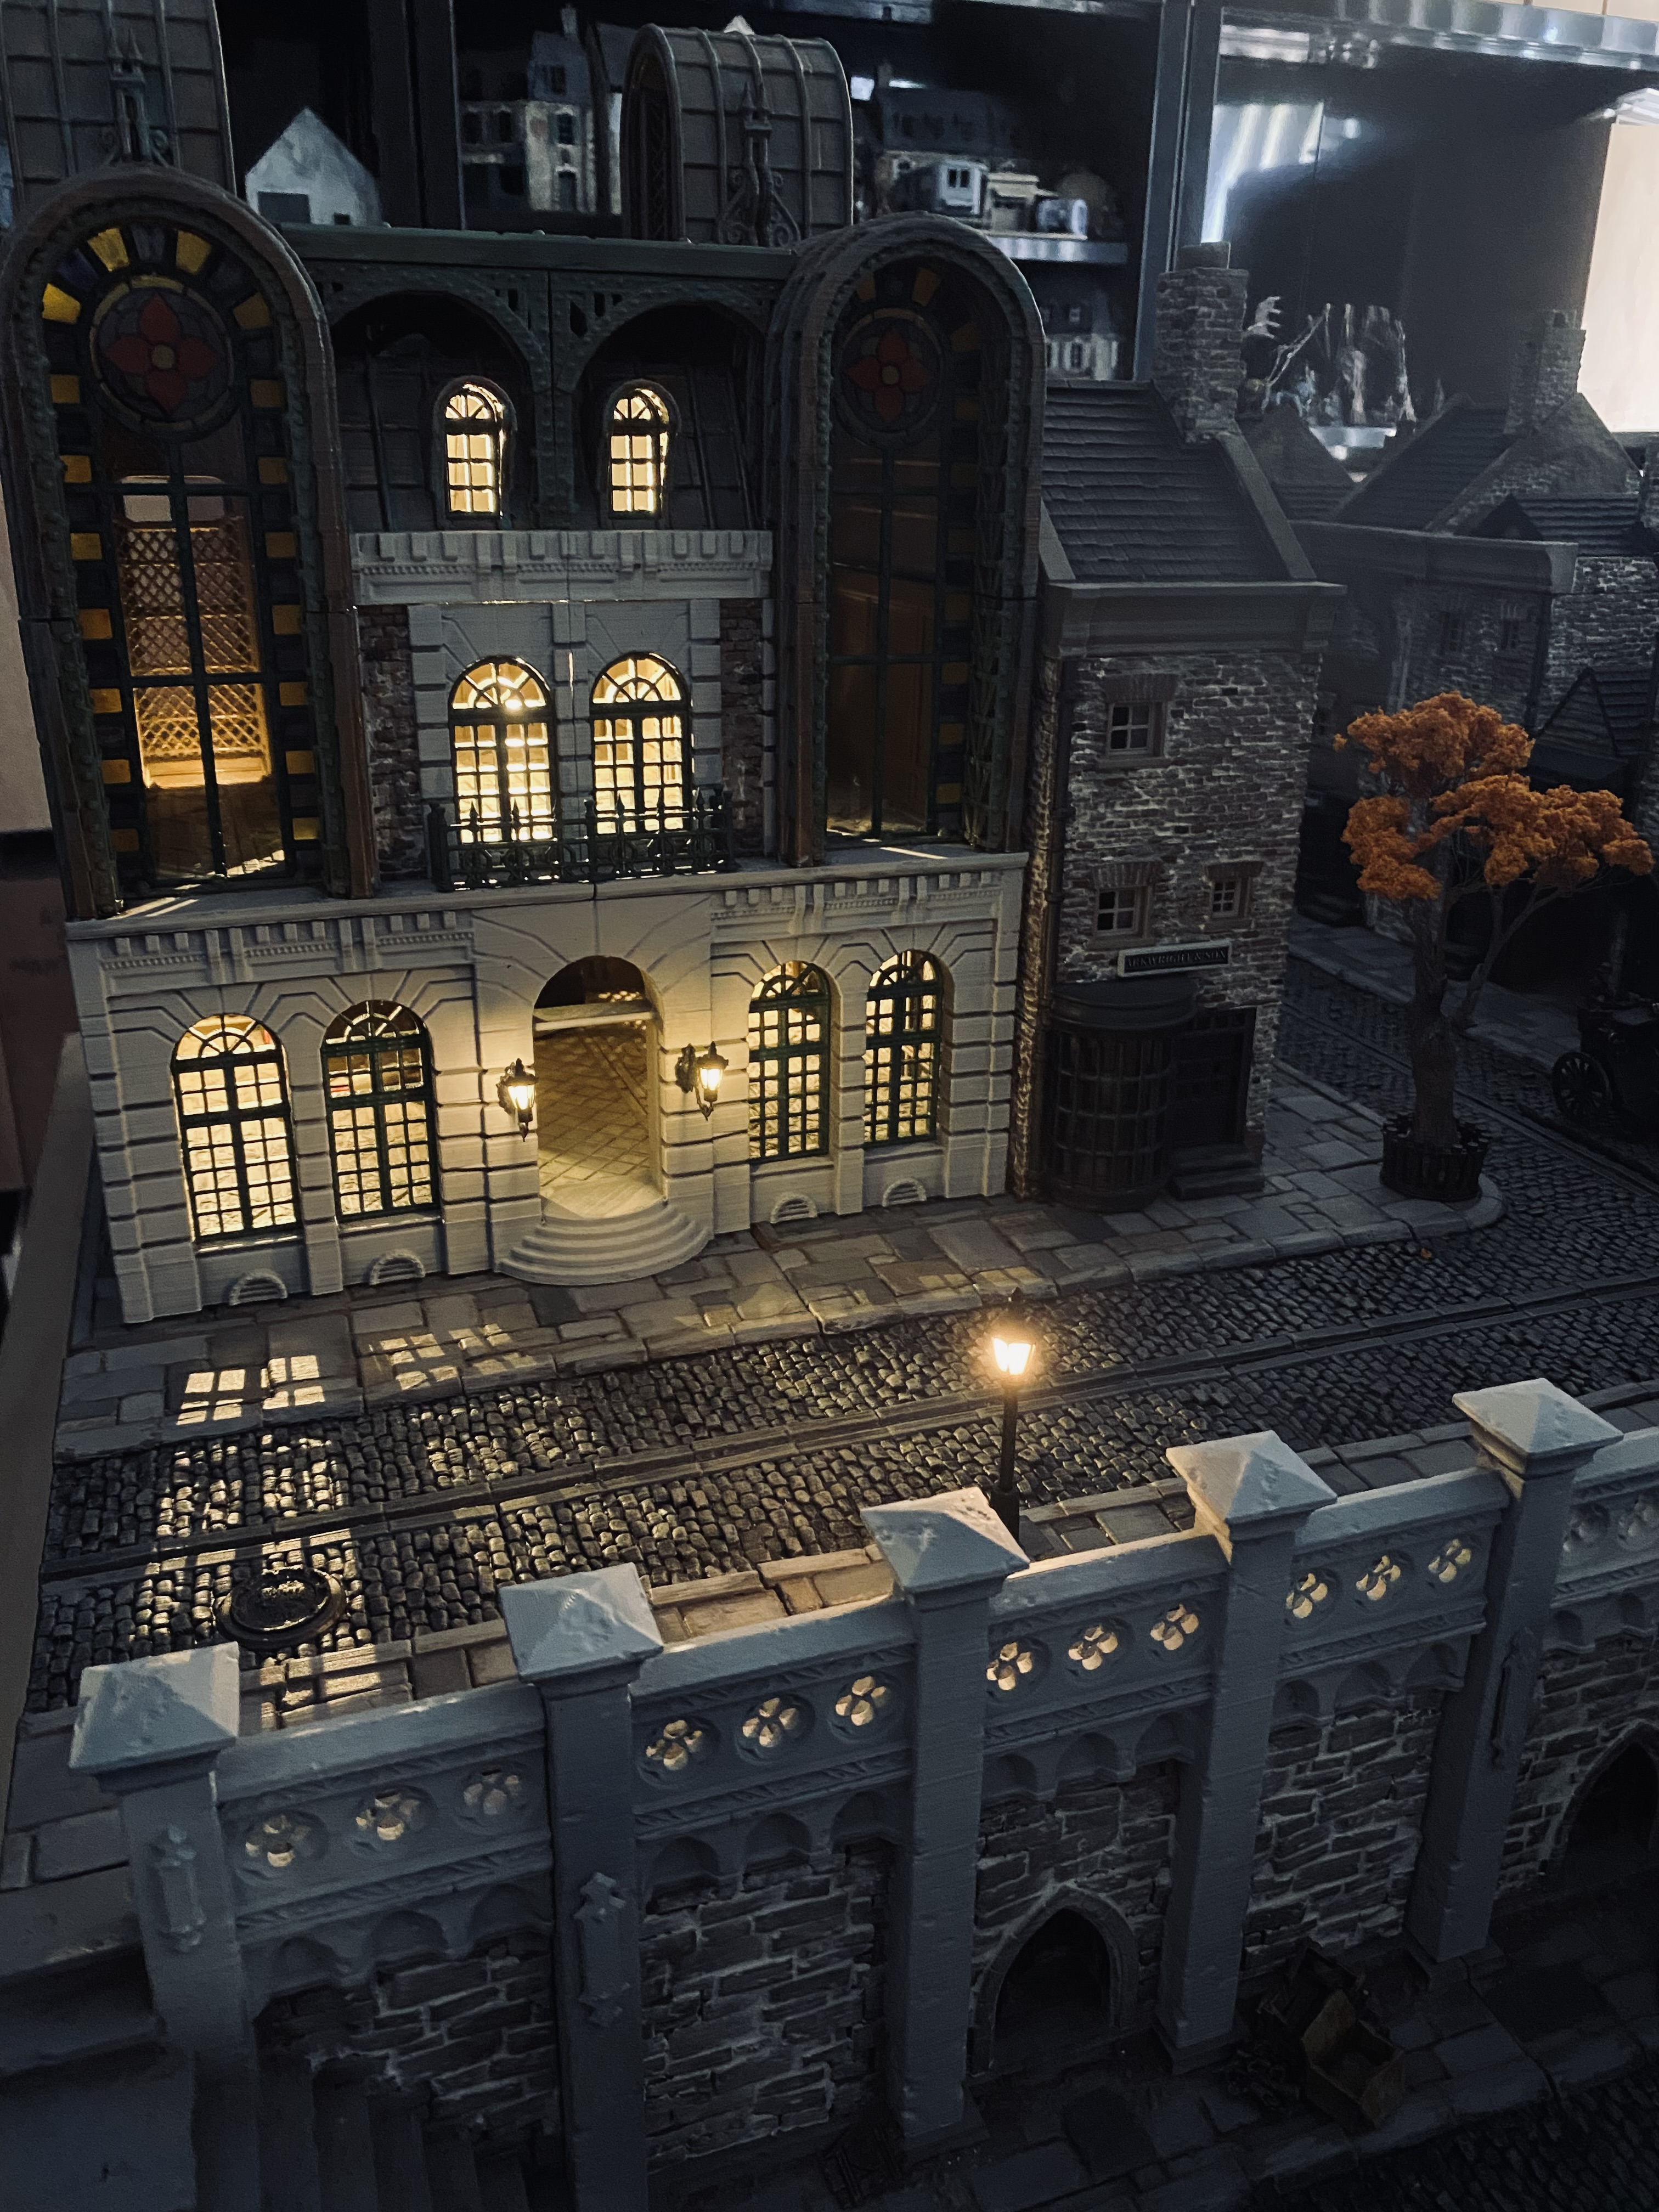

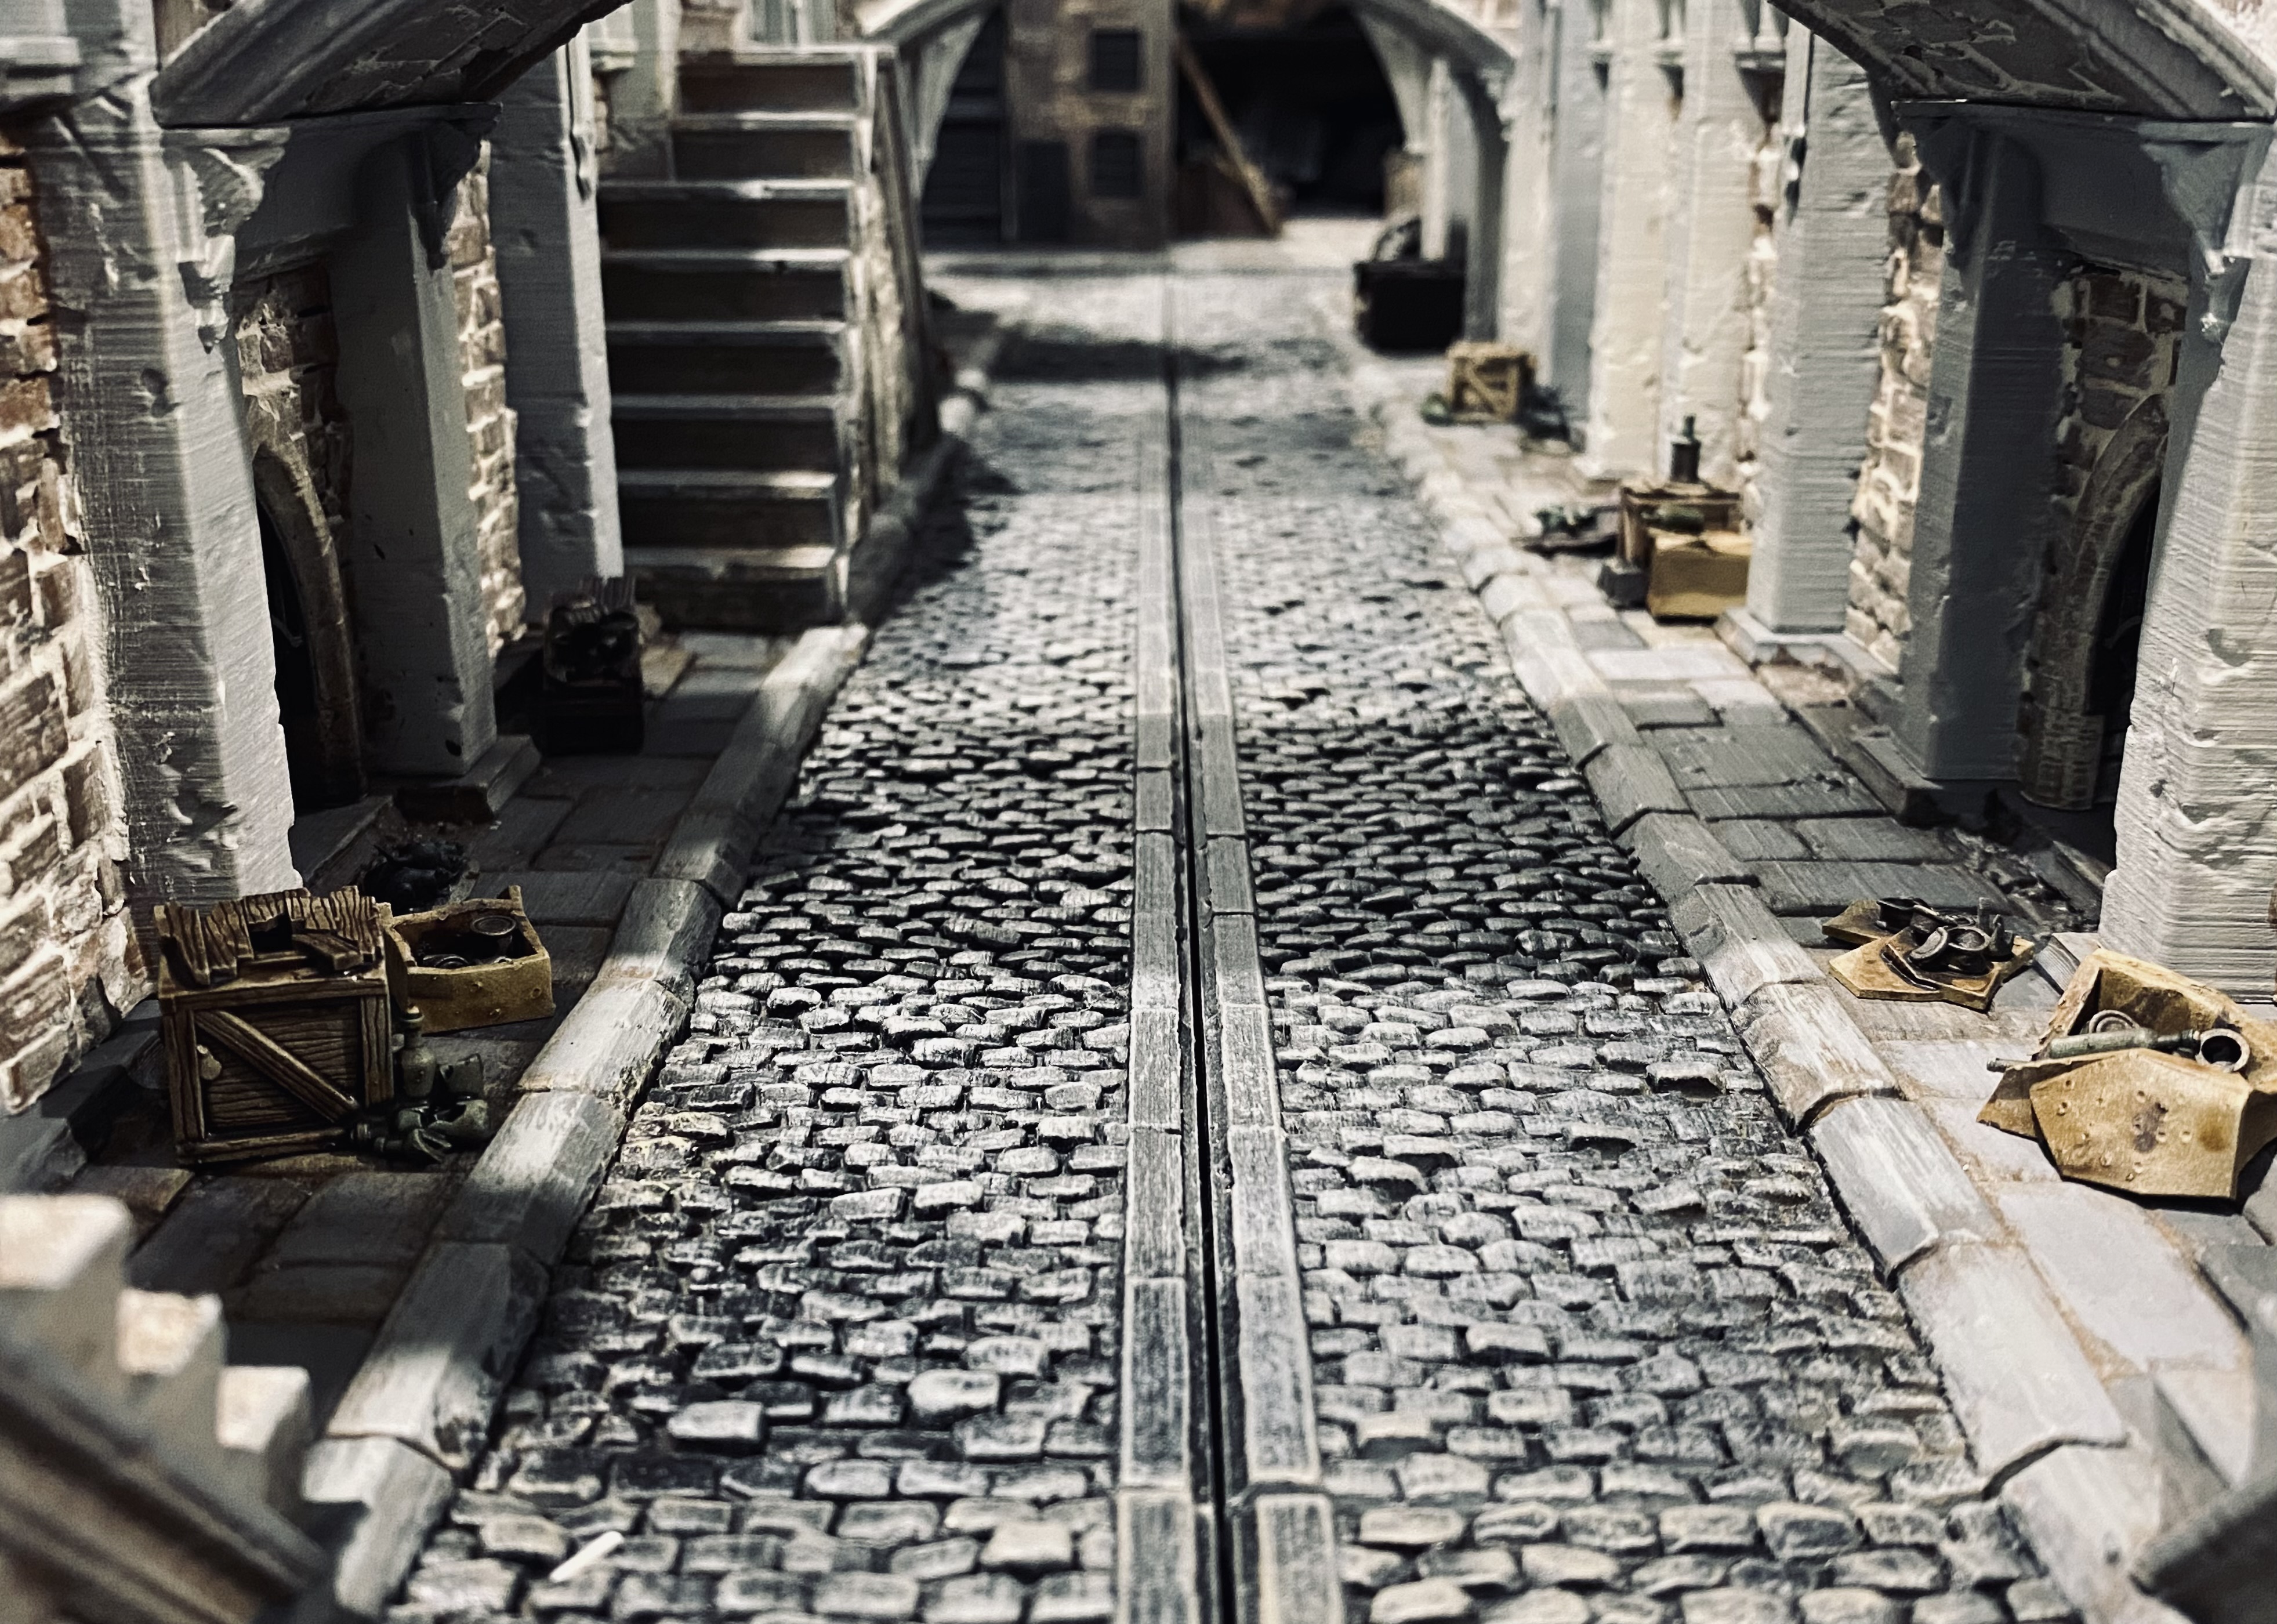
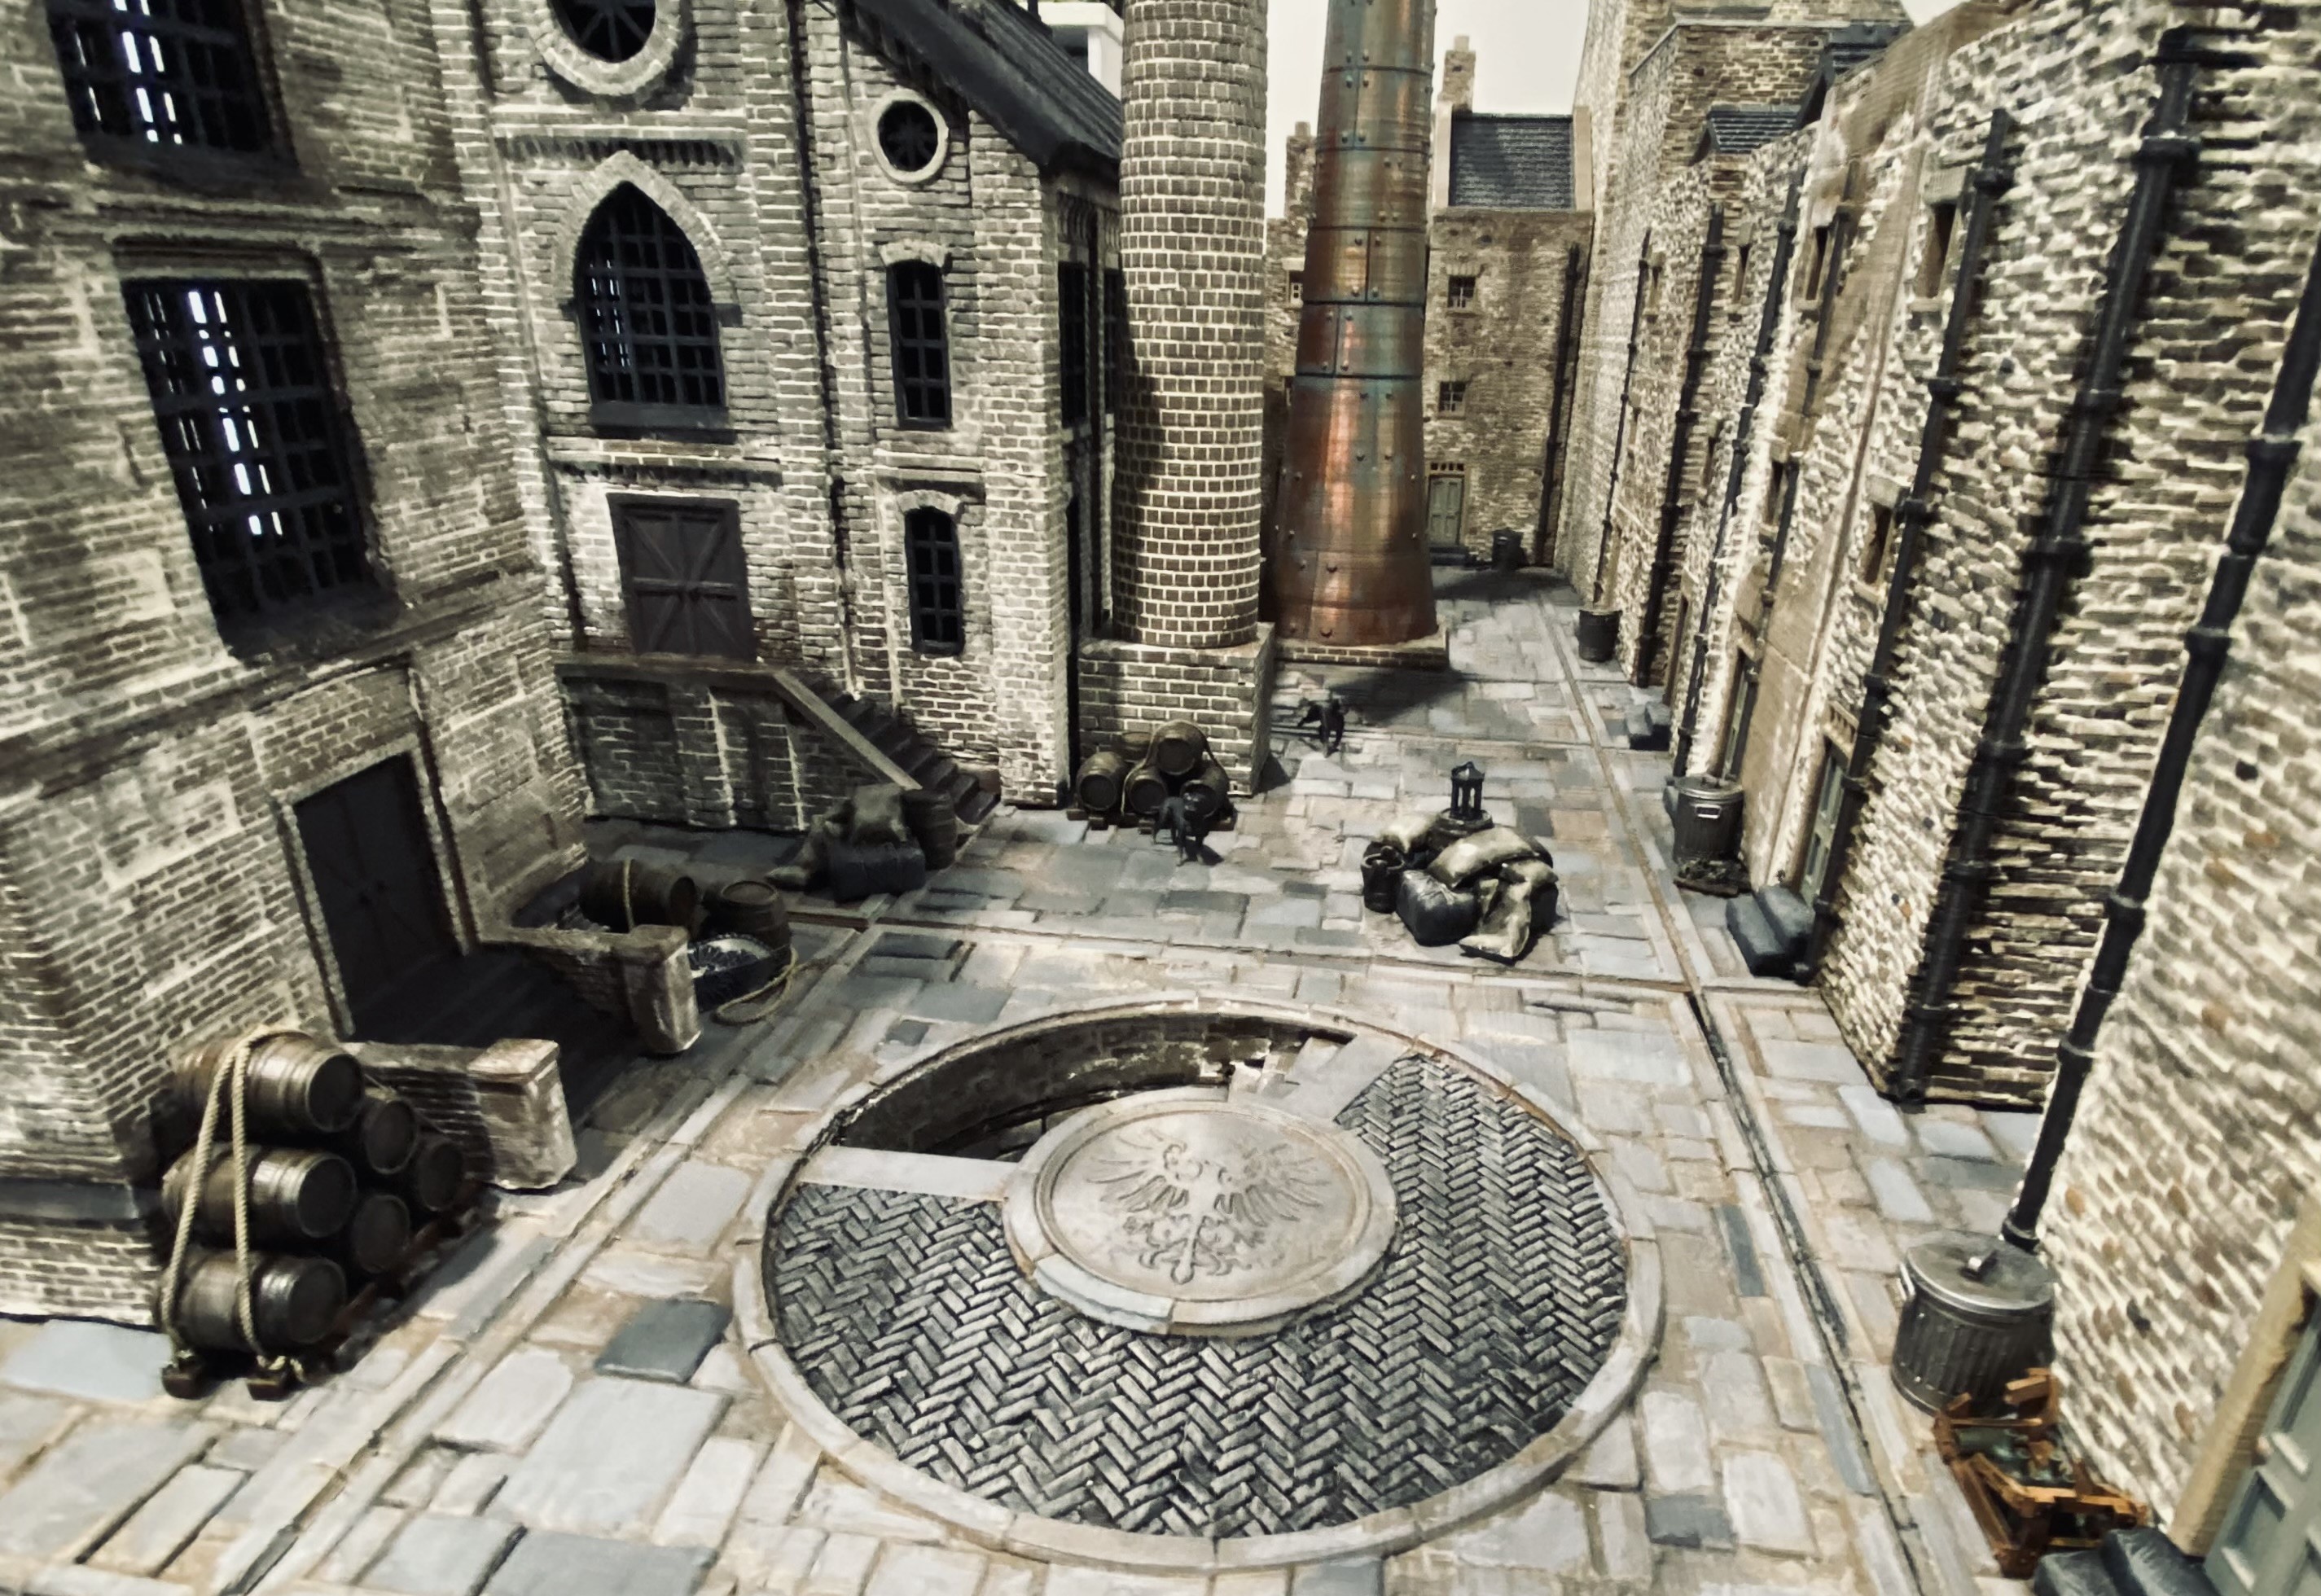
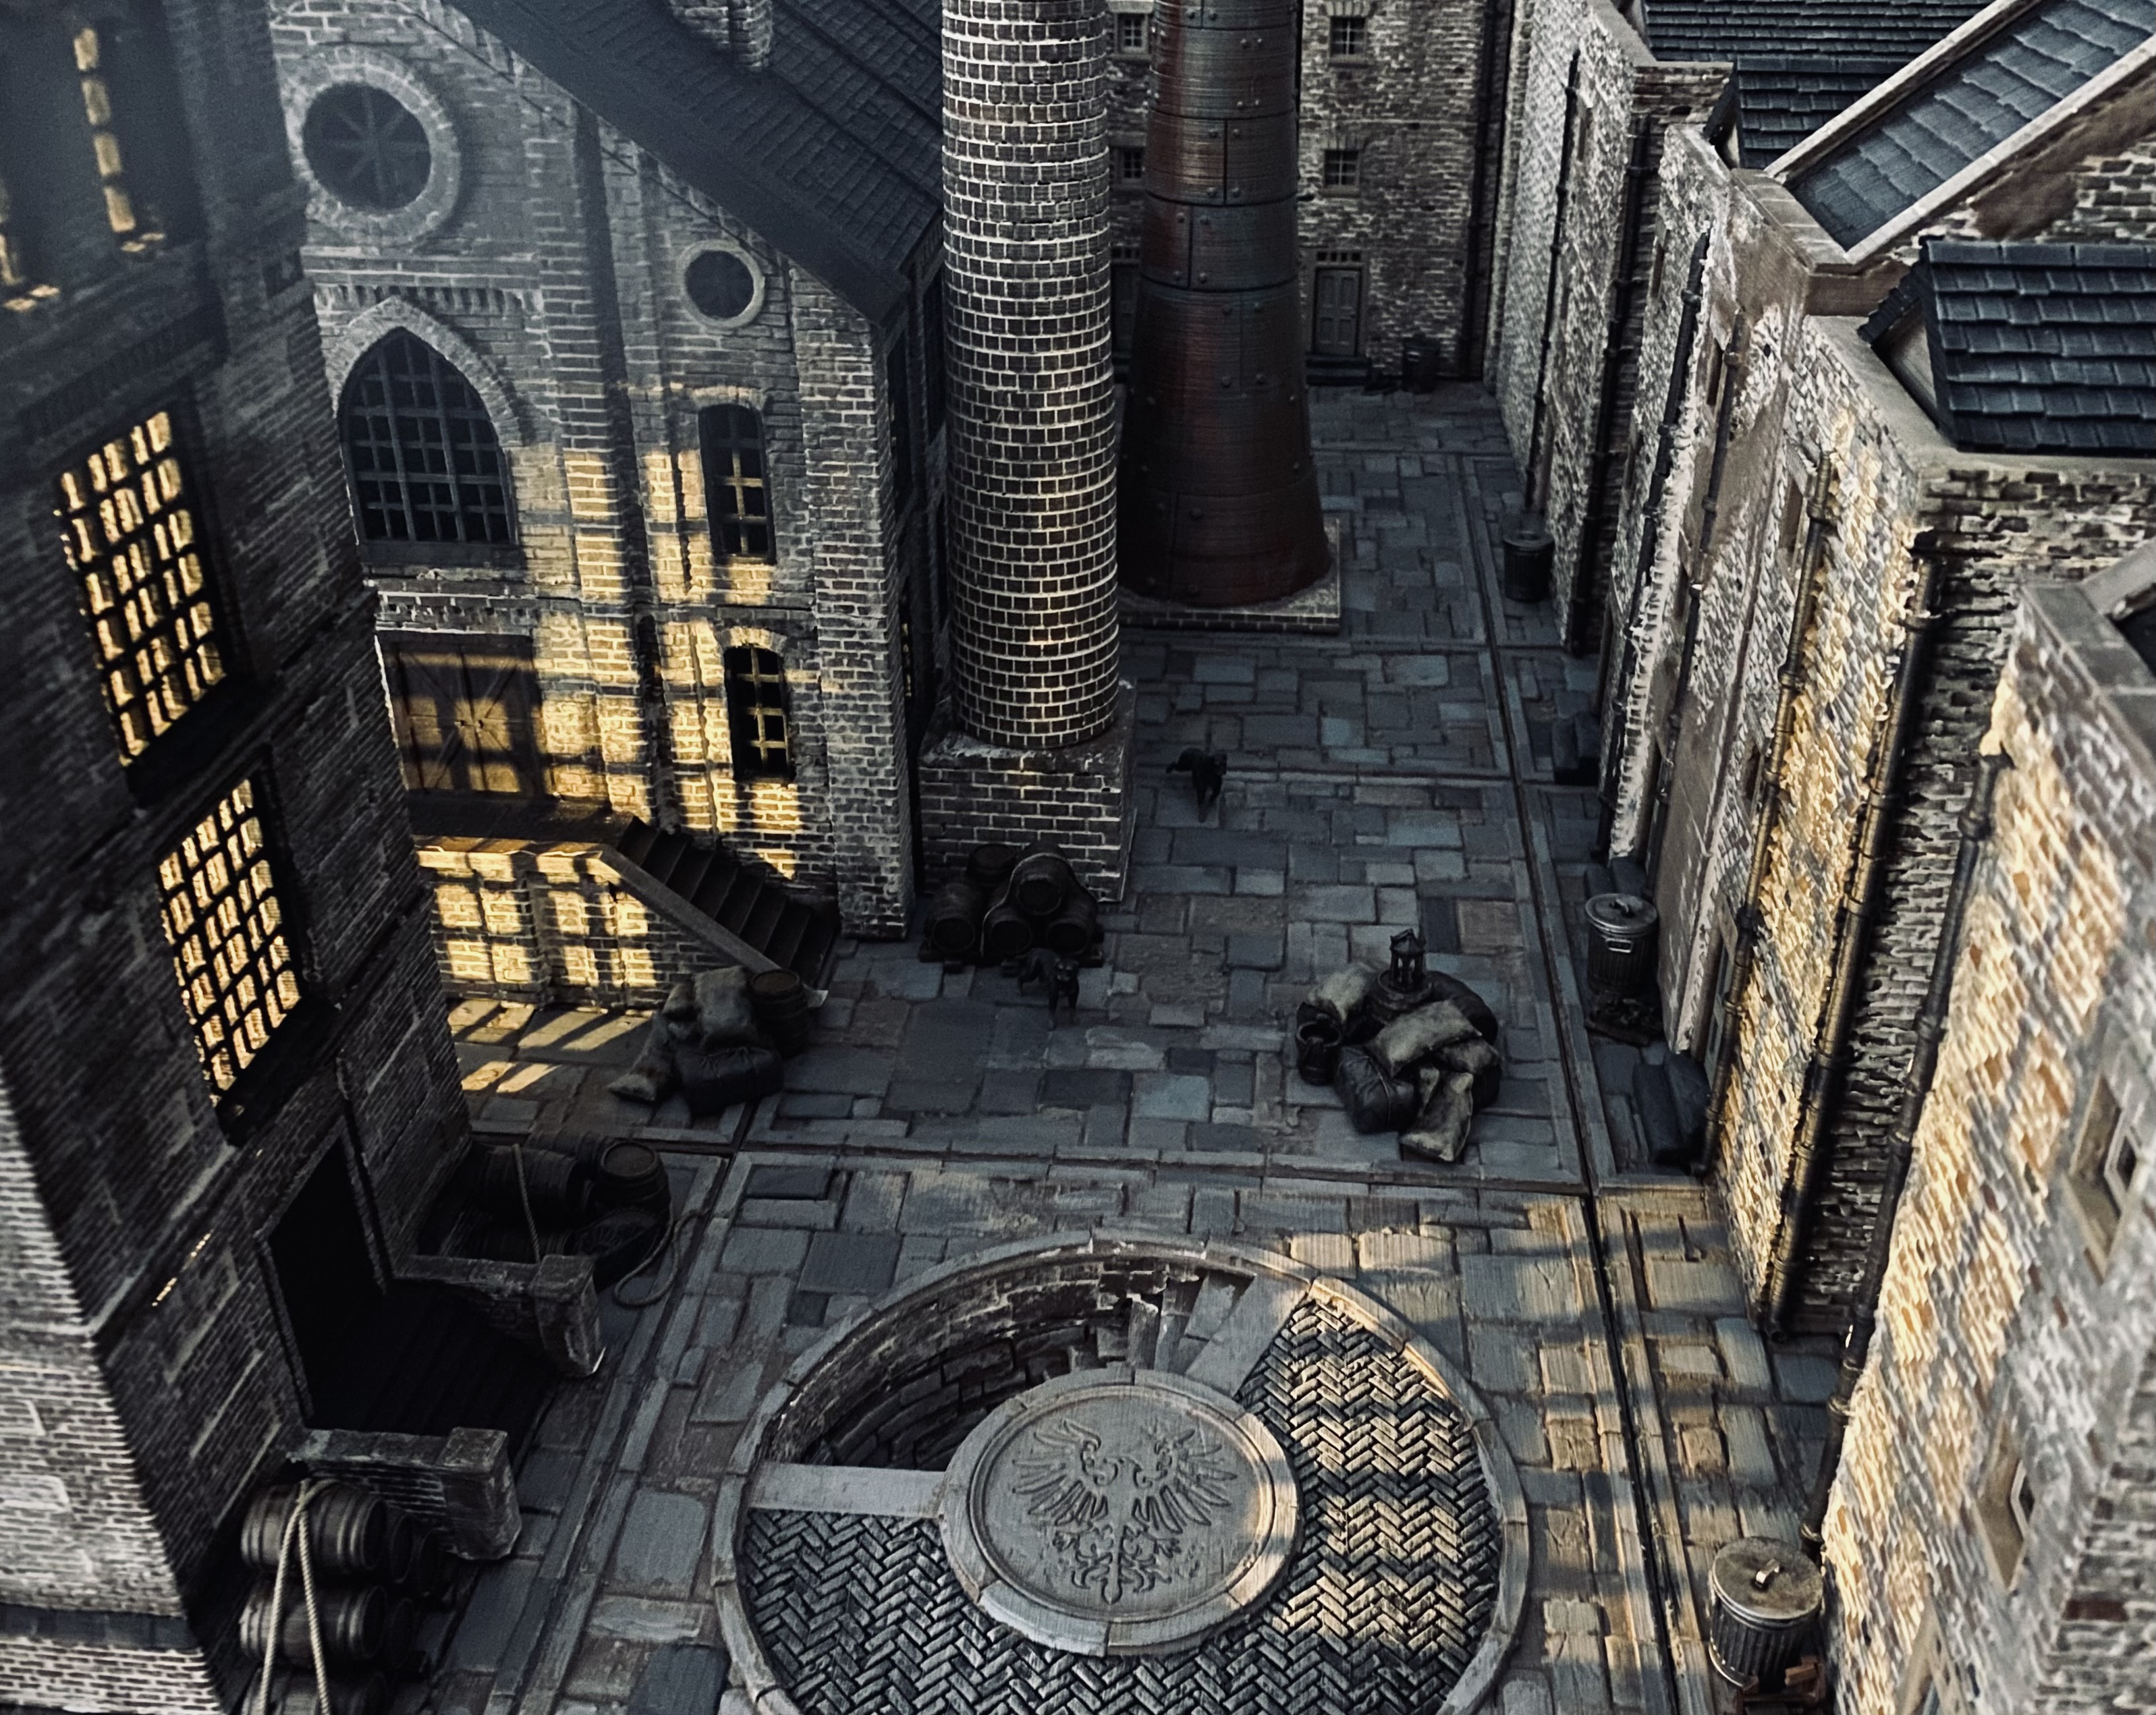
I was pretty happy with the shadows created by the lights shining through the windows onto the road and flagstones and thought it would be nice to create something similar in the industrial area of the set up.
The tower looked like a good candidate for creating some nice shadow effects, so I thought I would give it a trial to see how it looks.
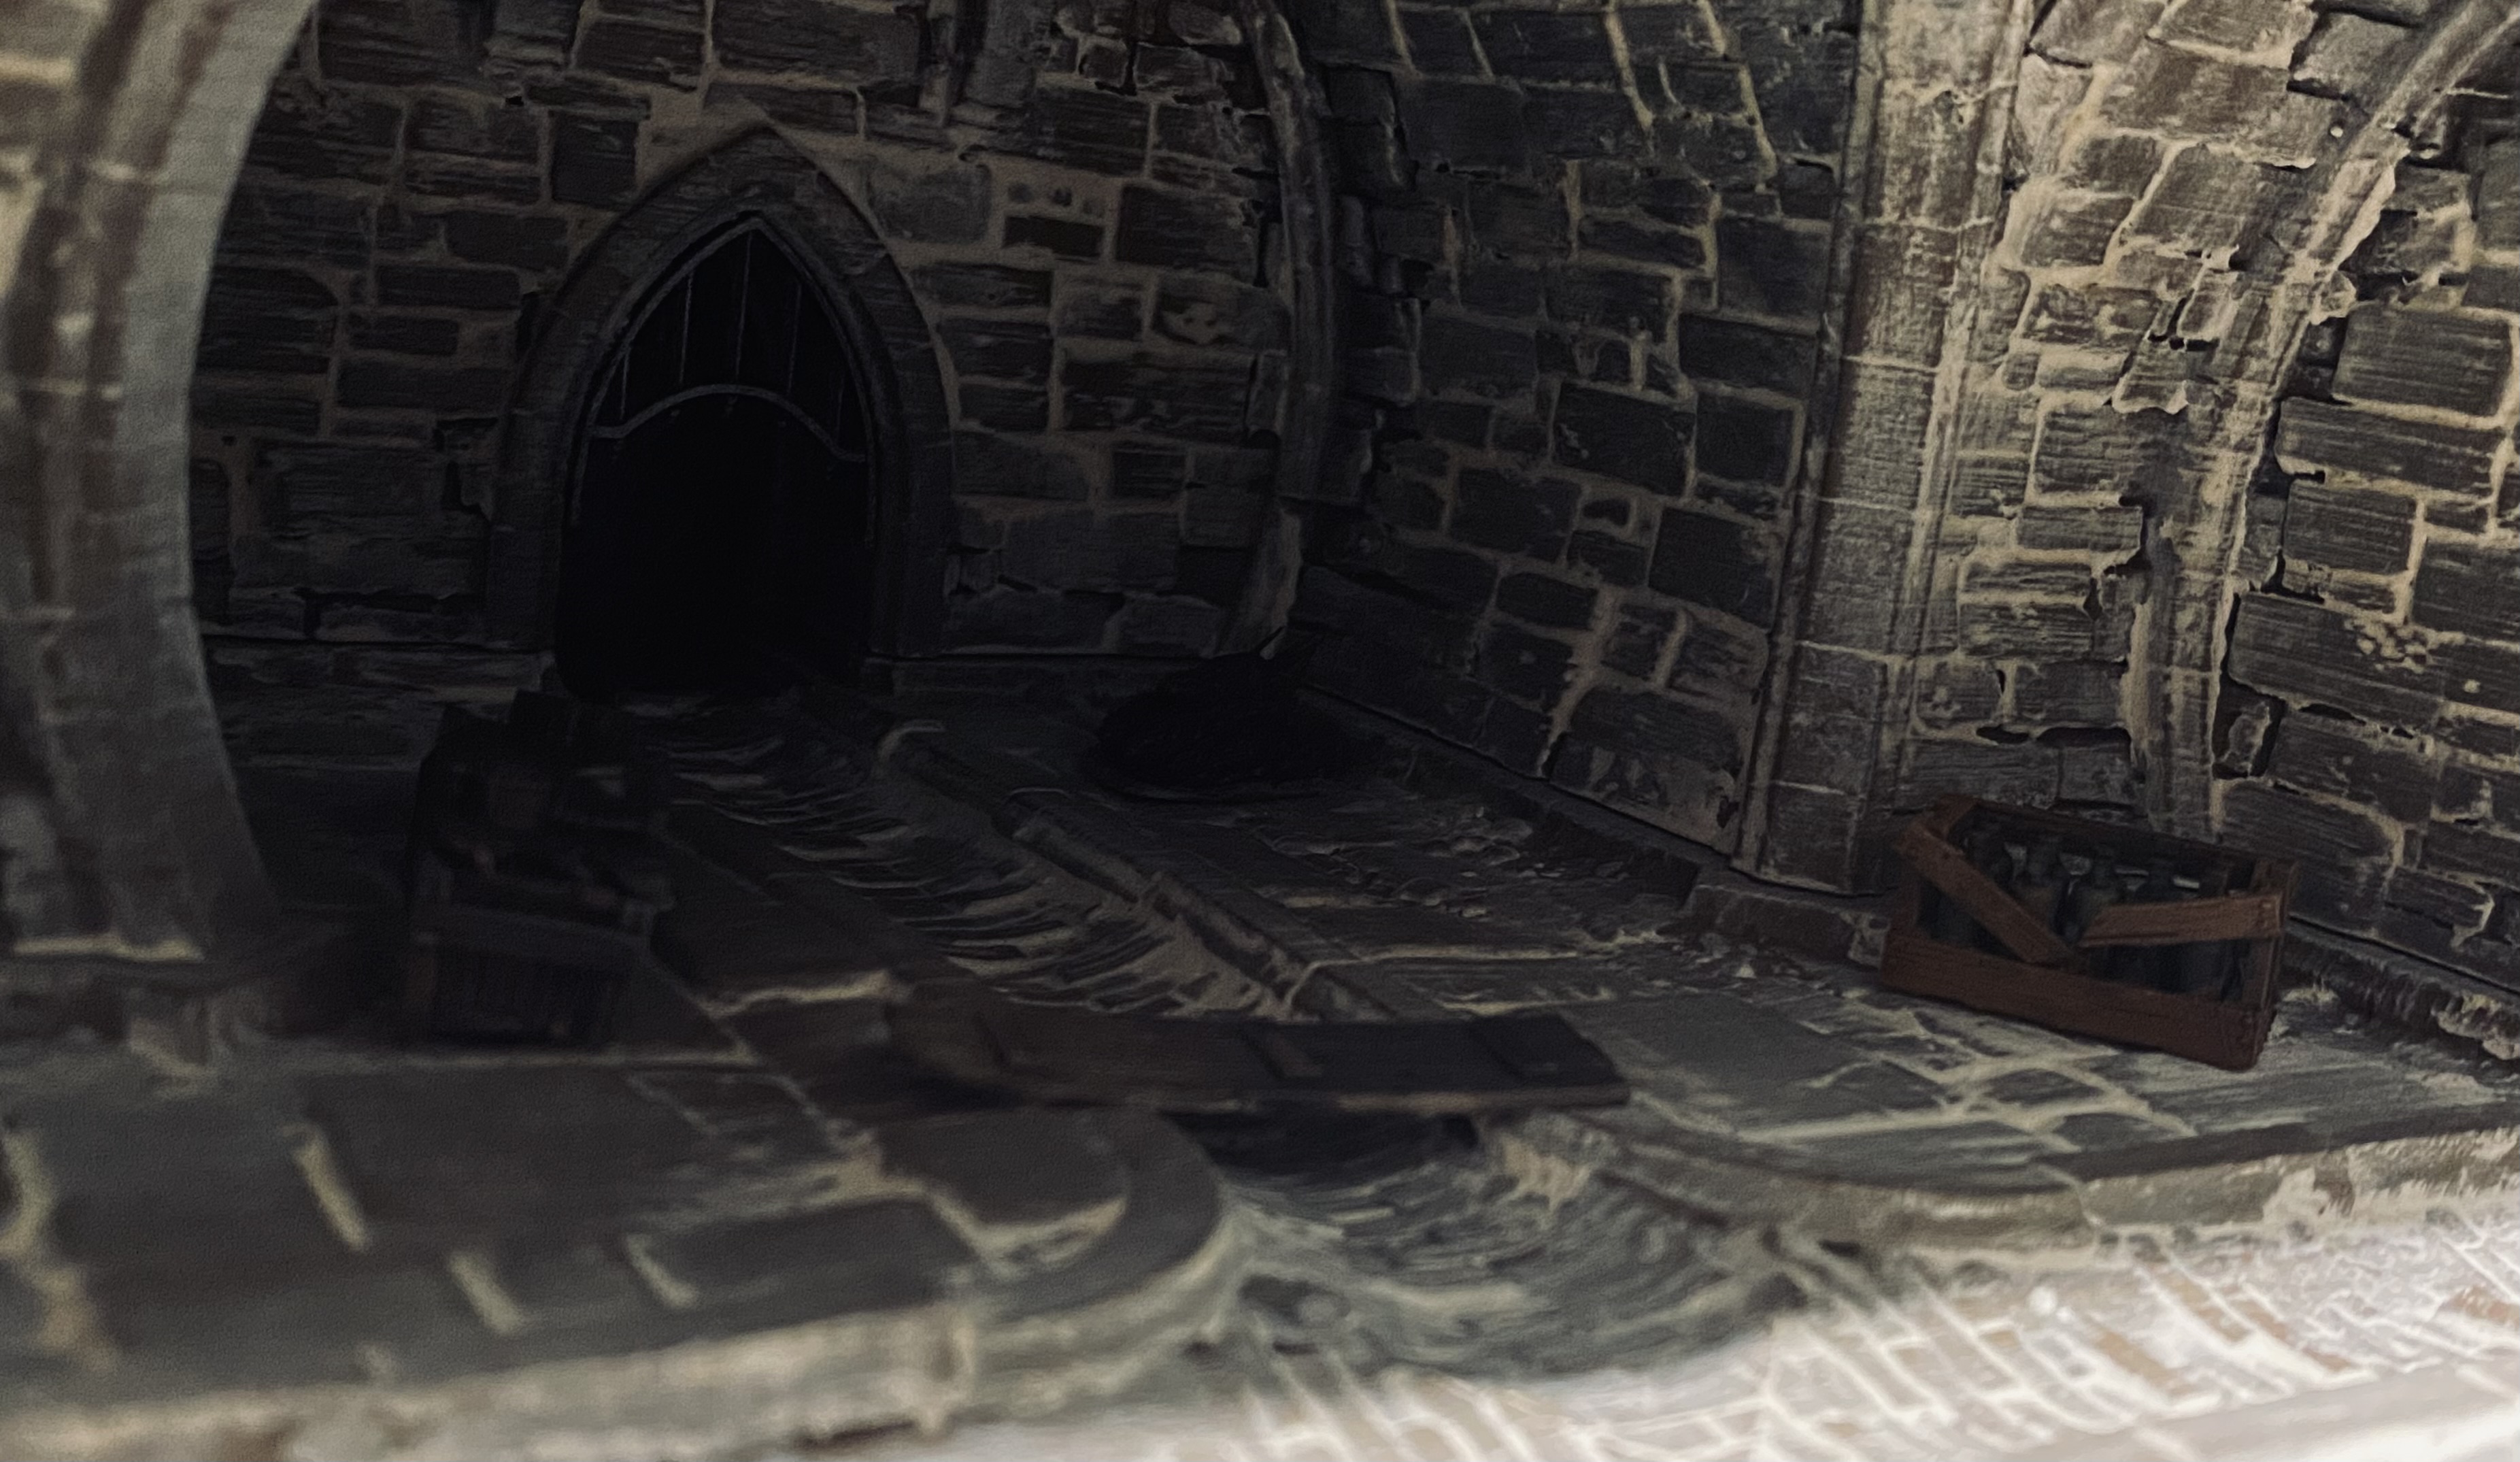
Going underground
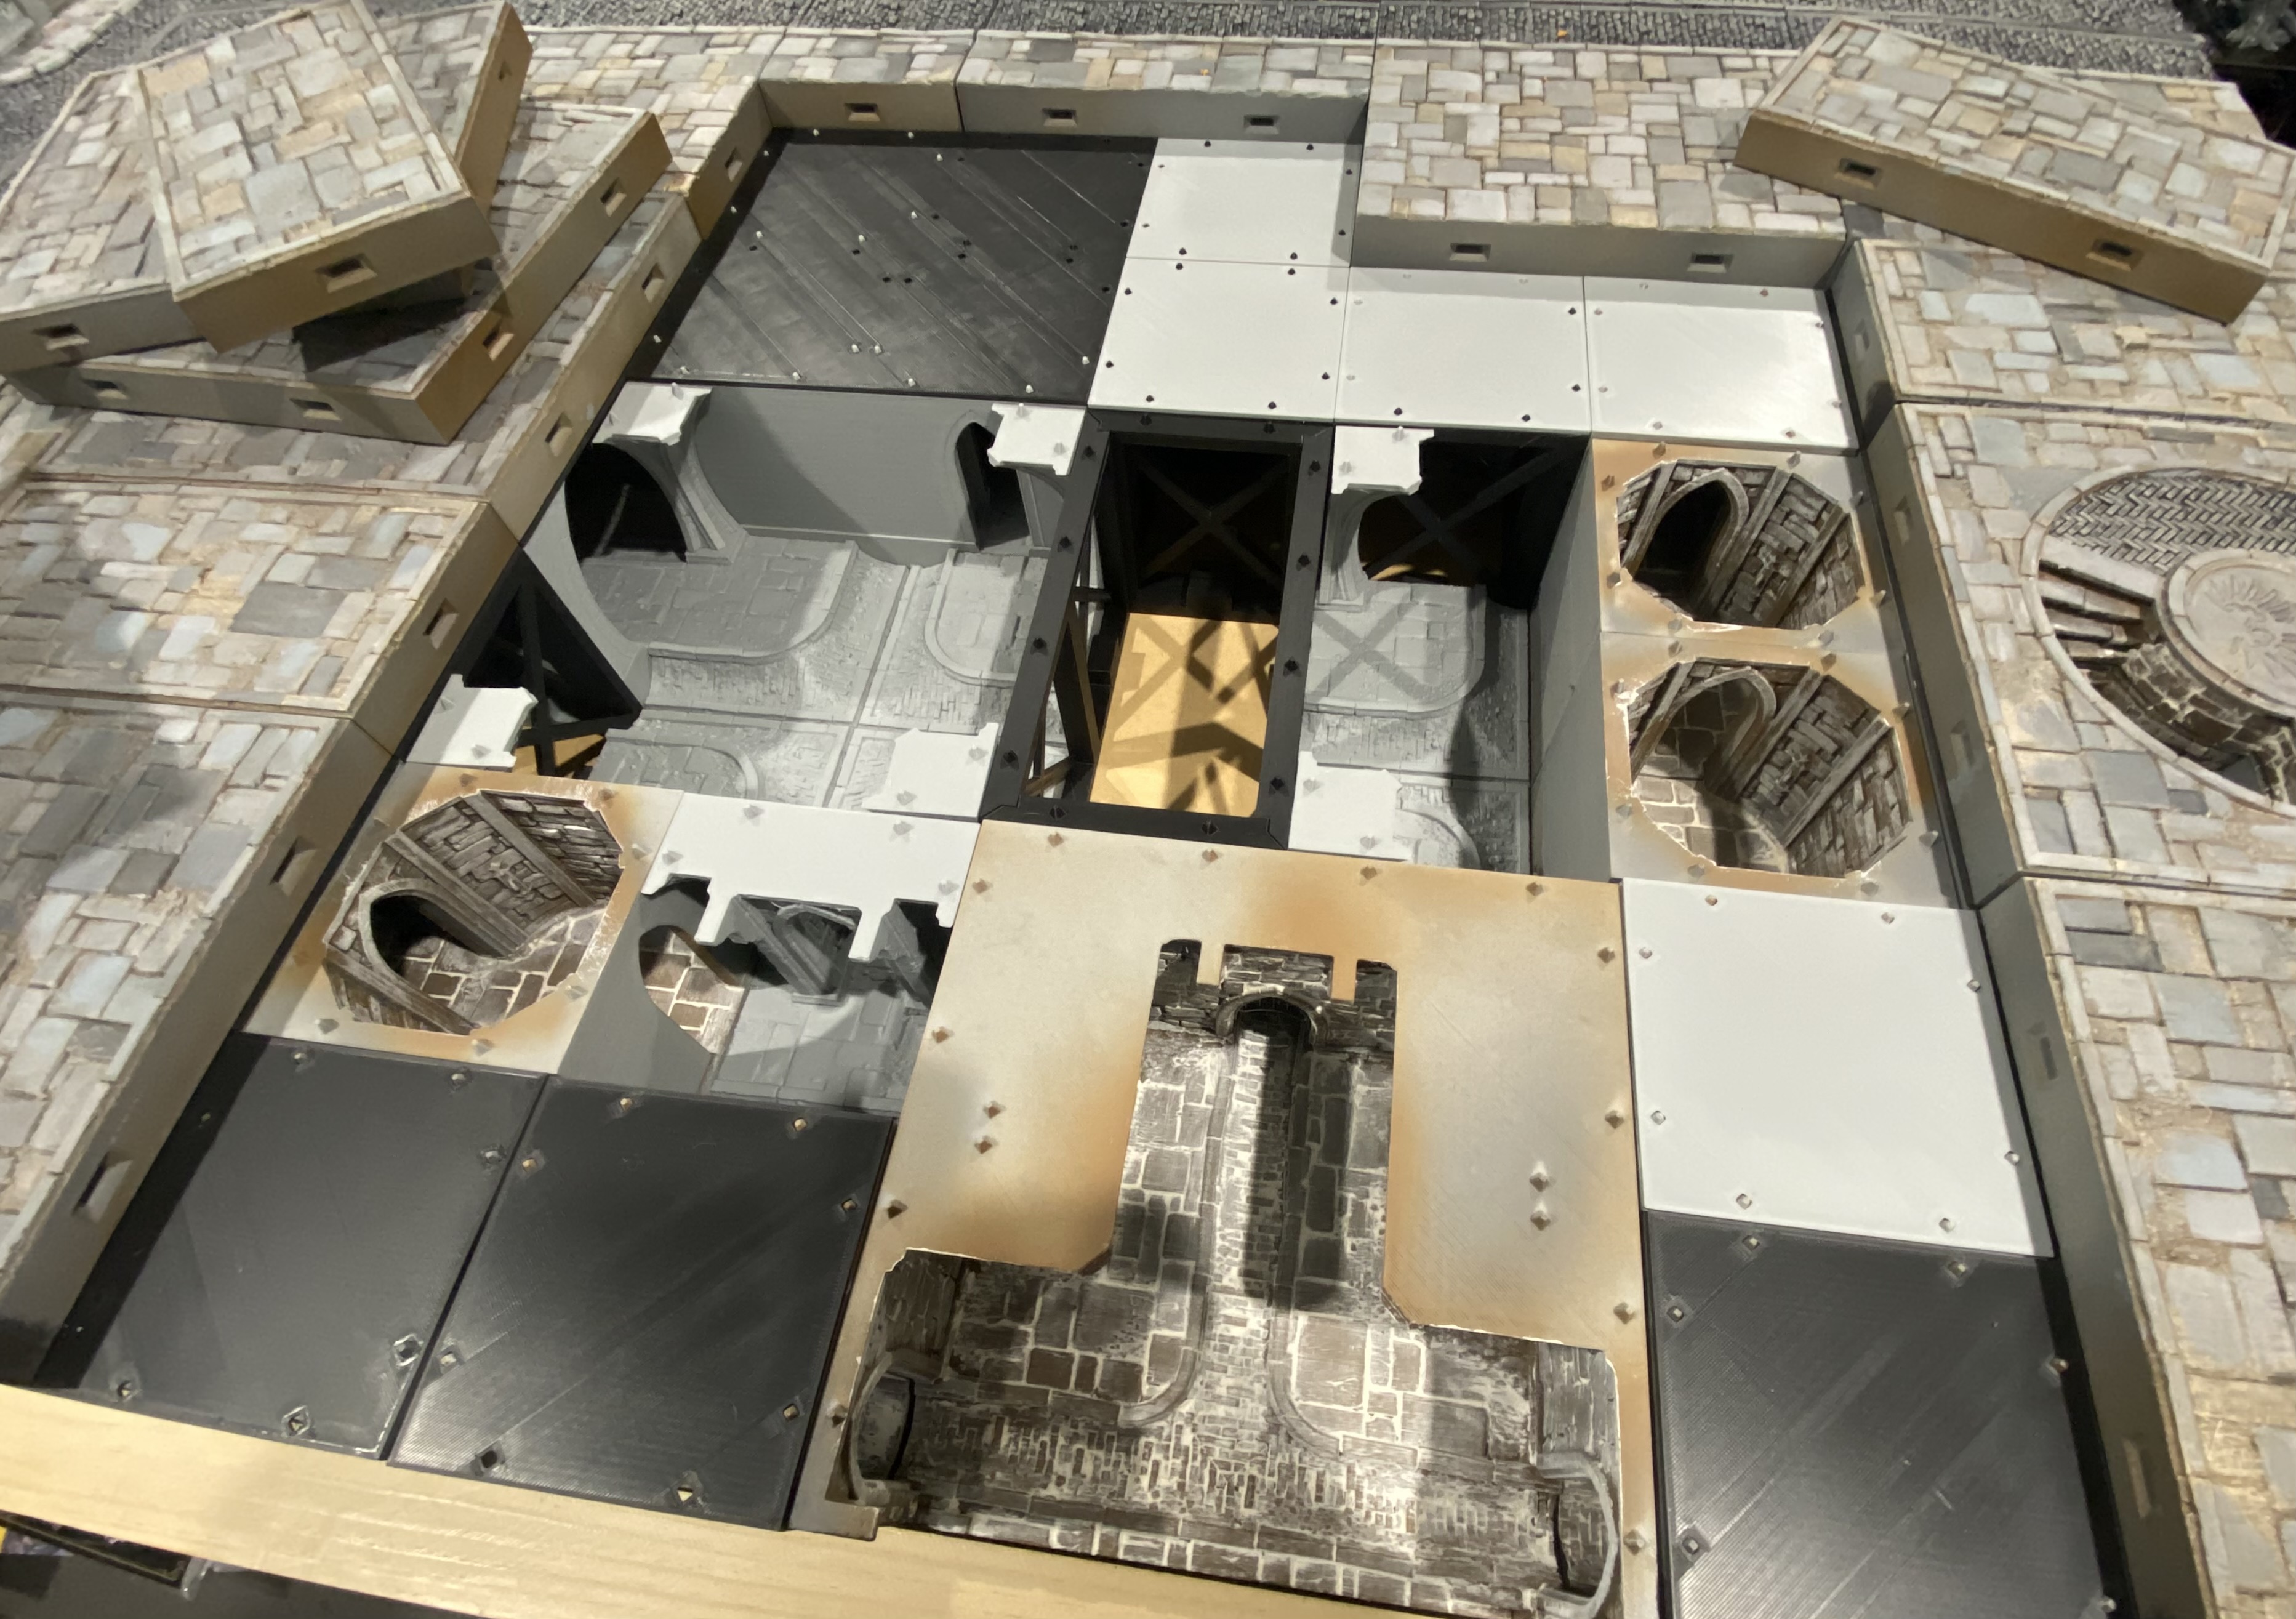
I realised that I had completely forgotten to post anything about the sewers beneath the layout. I had taken pictures but didn’t get around to sharing them, so these are a little out of sequence.
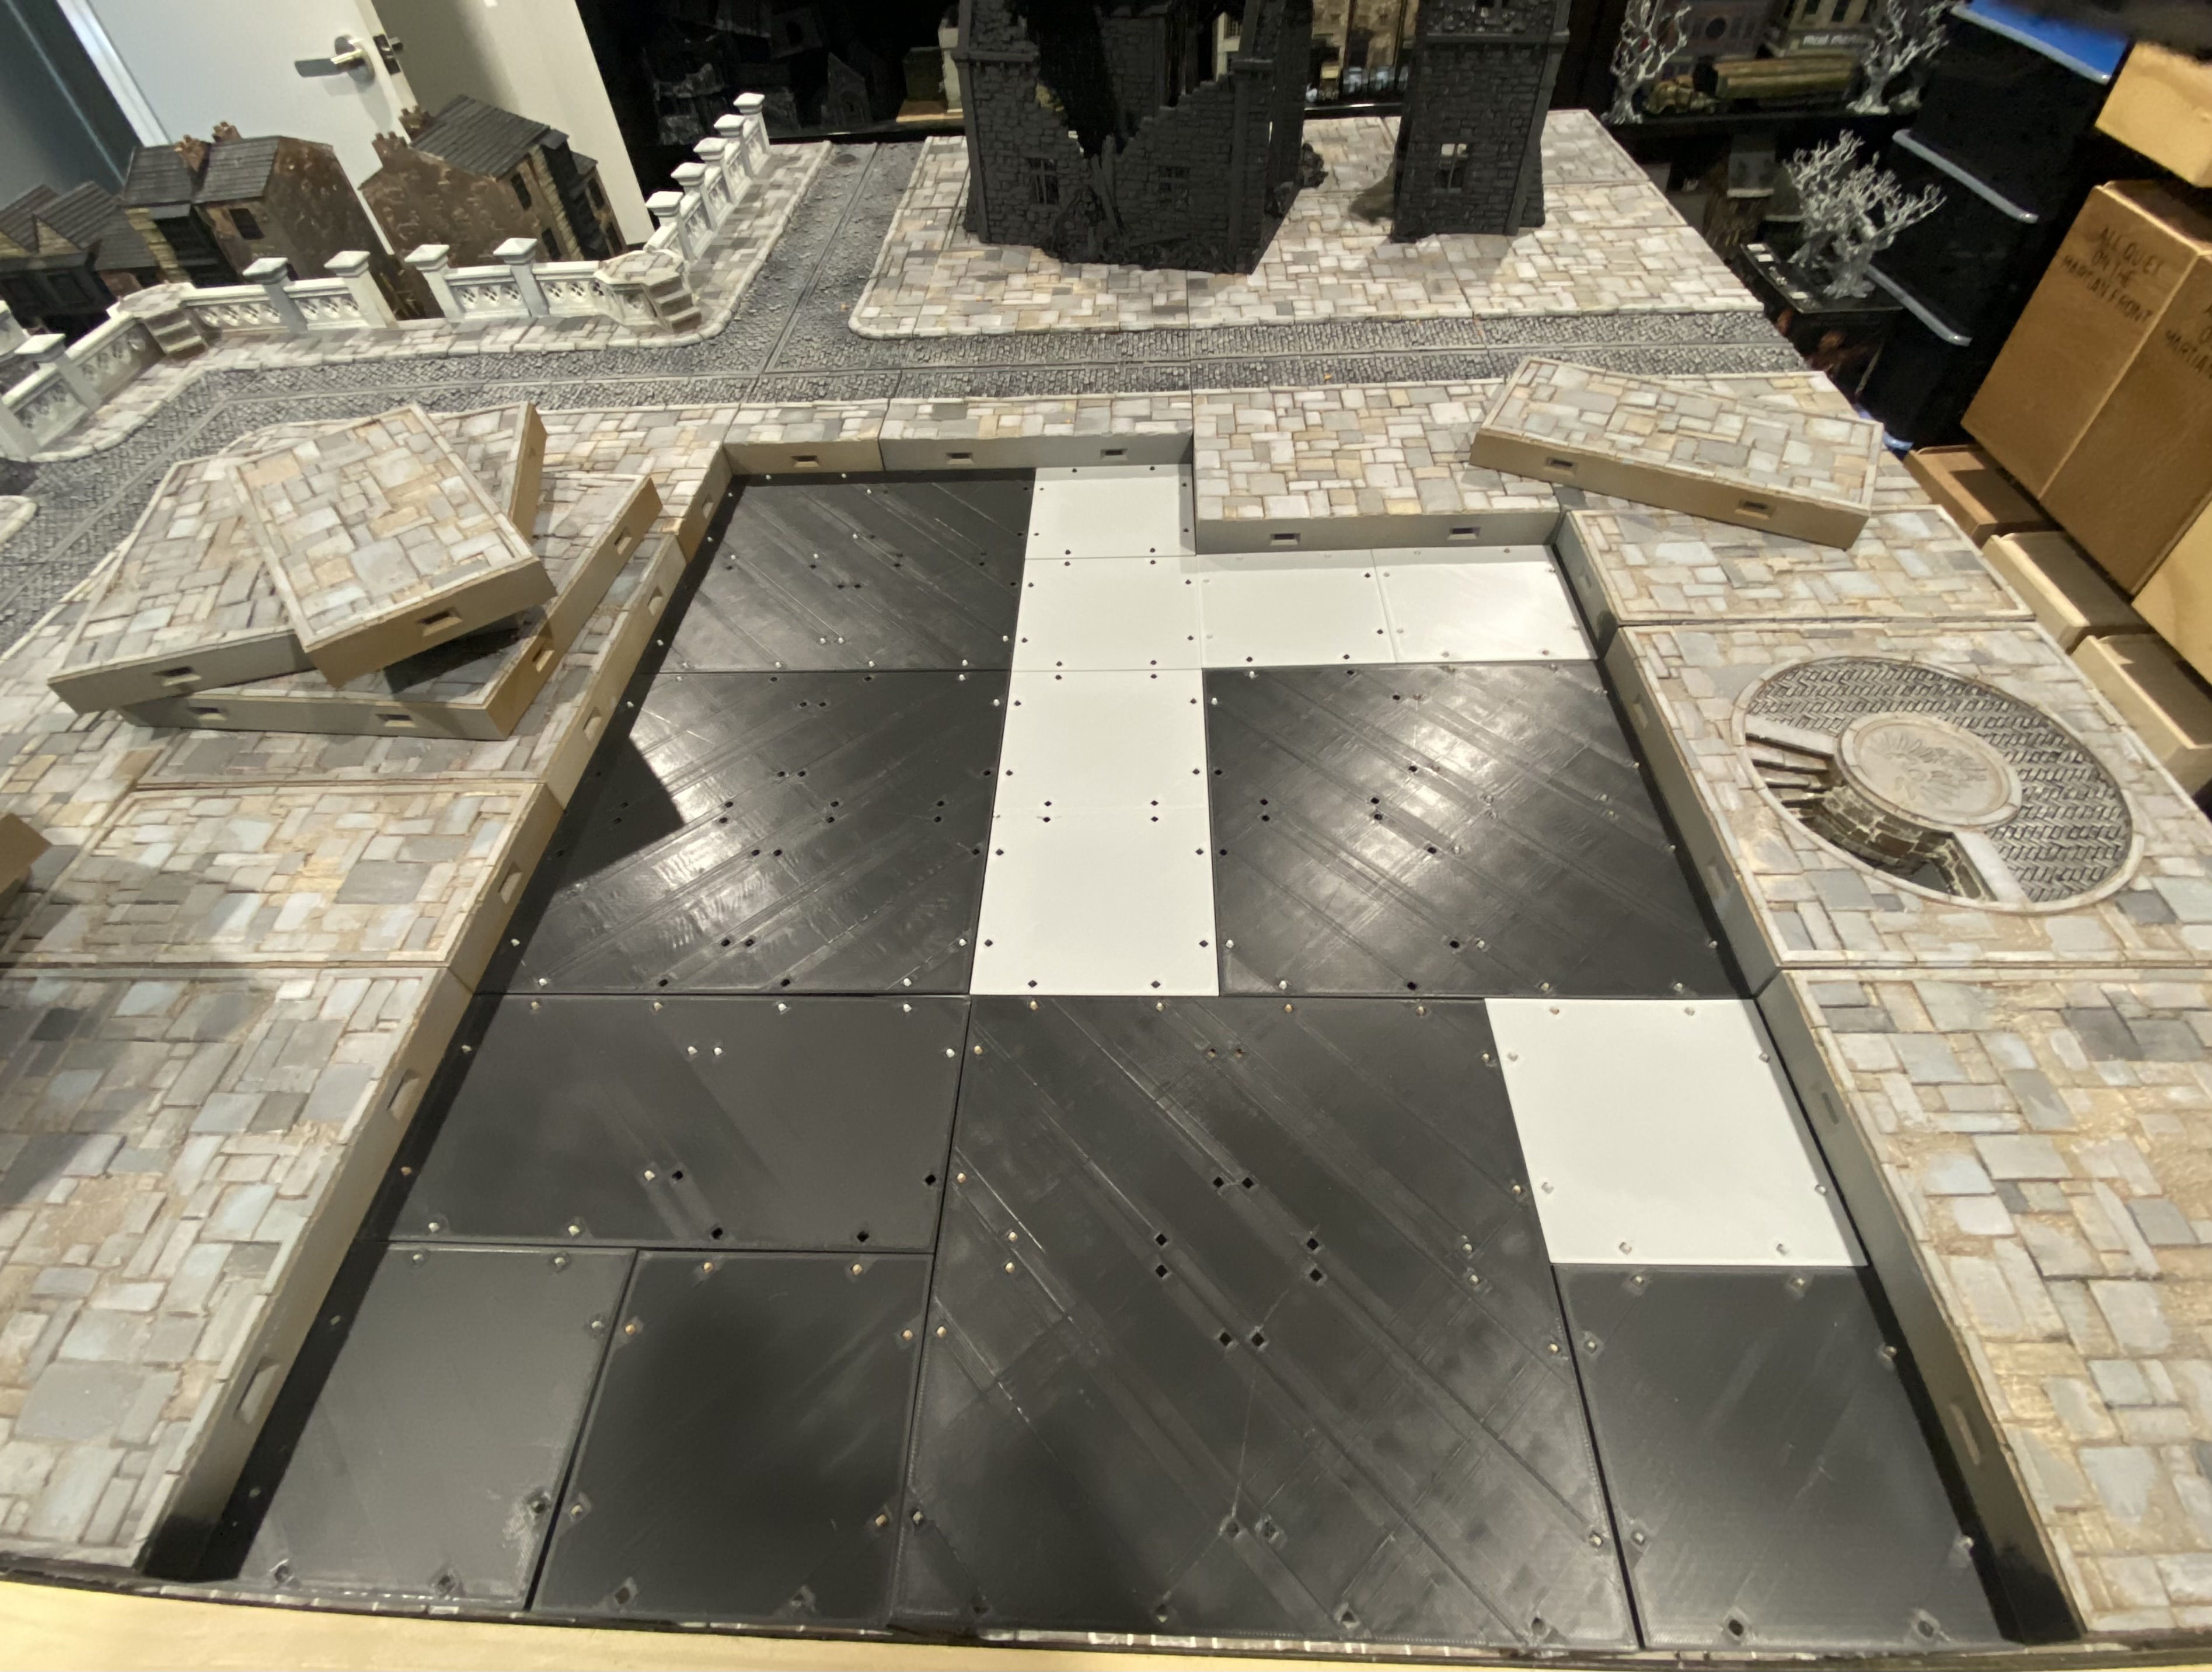
There are a few areas around the edges of the layout where the sewer tunnels expand into the middle of the layout and I didn’t want to let the opportunity to have sewer games pass me by.
I printed off a whole load of Straight sections, T-intersections, Crossroads and Bends. Some are smaller tunnels that will ultimately form a maze towards a larger central tunnel.
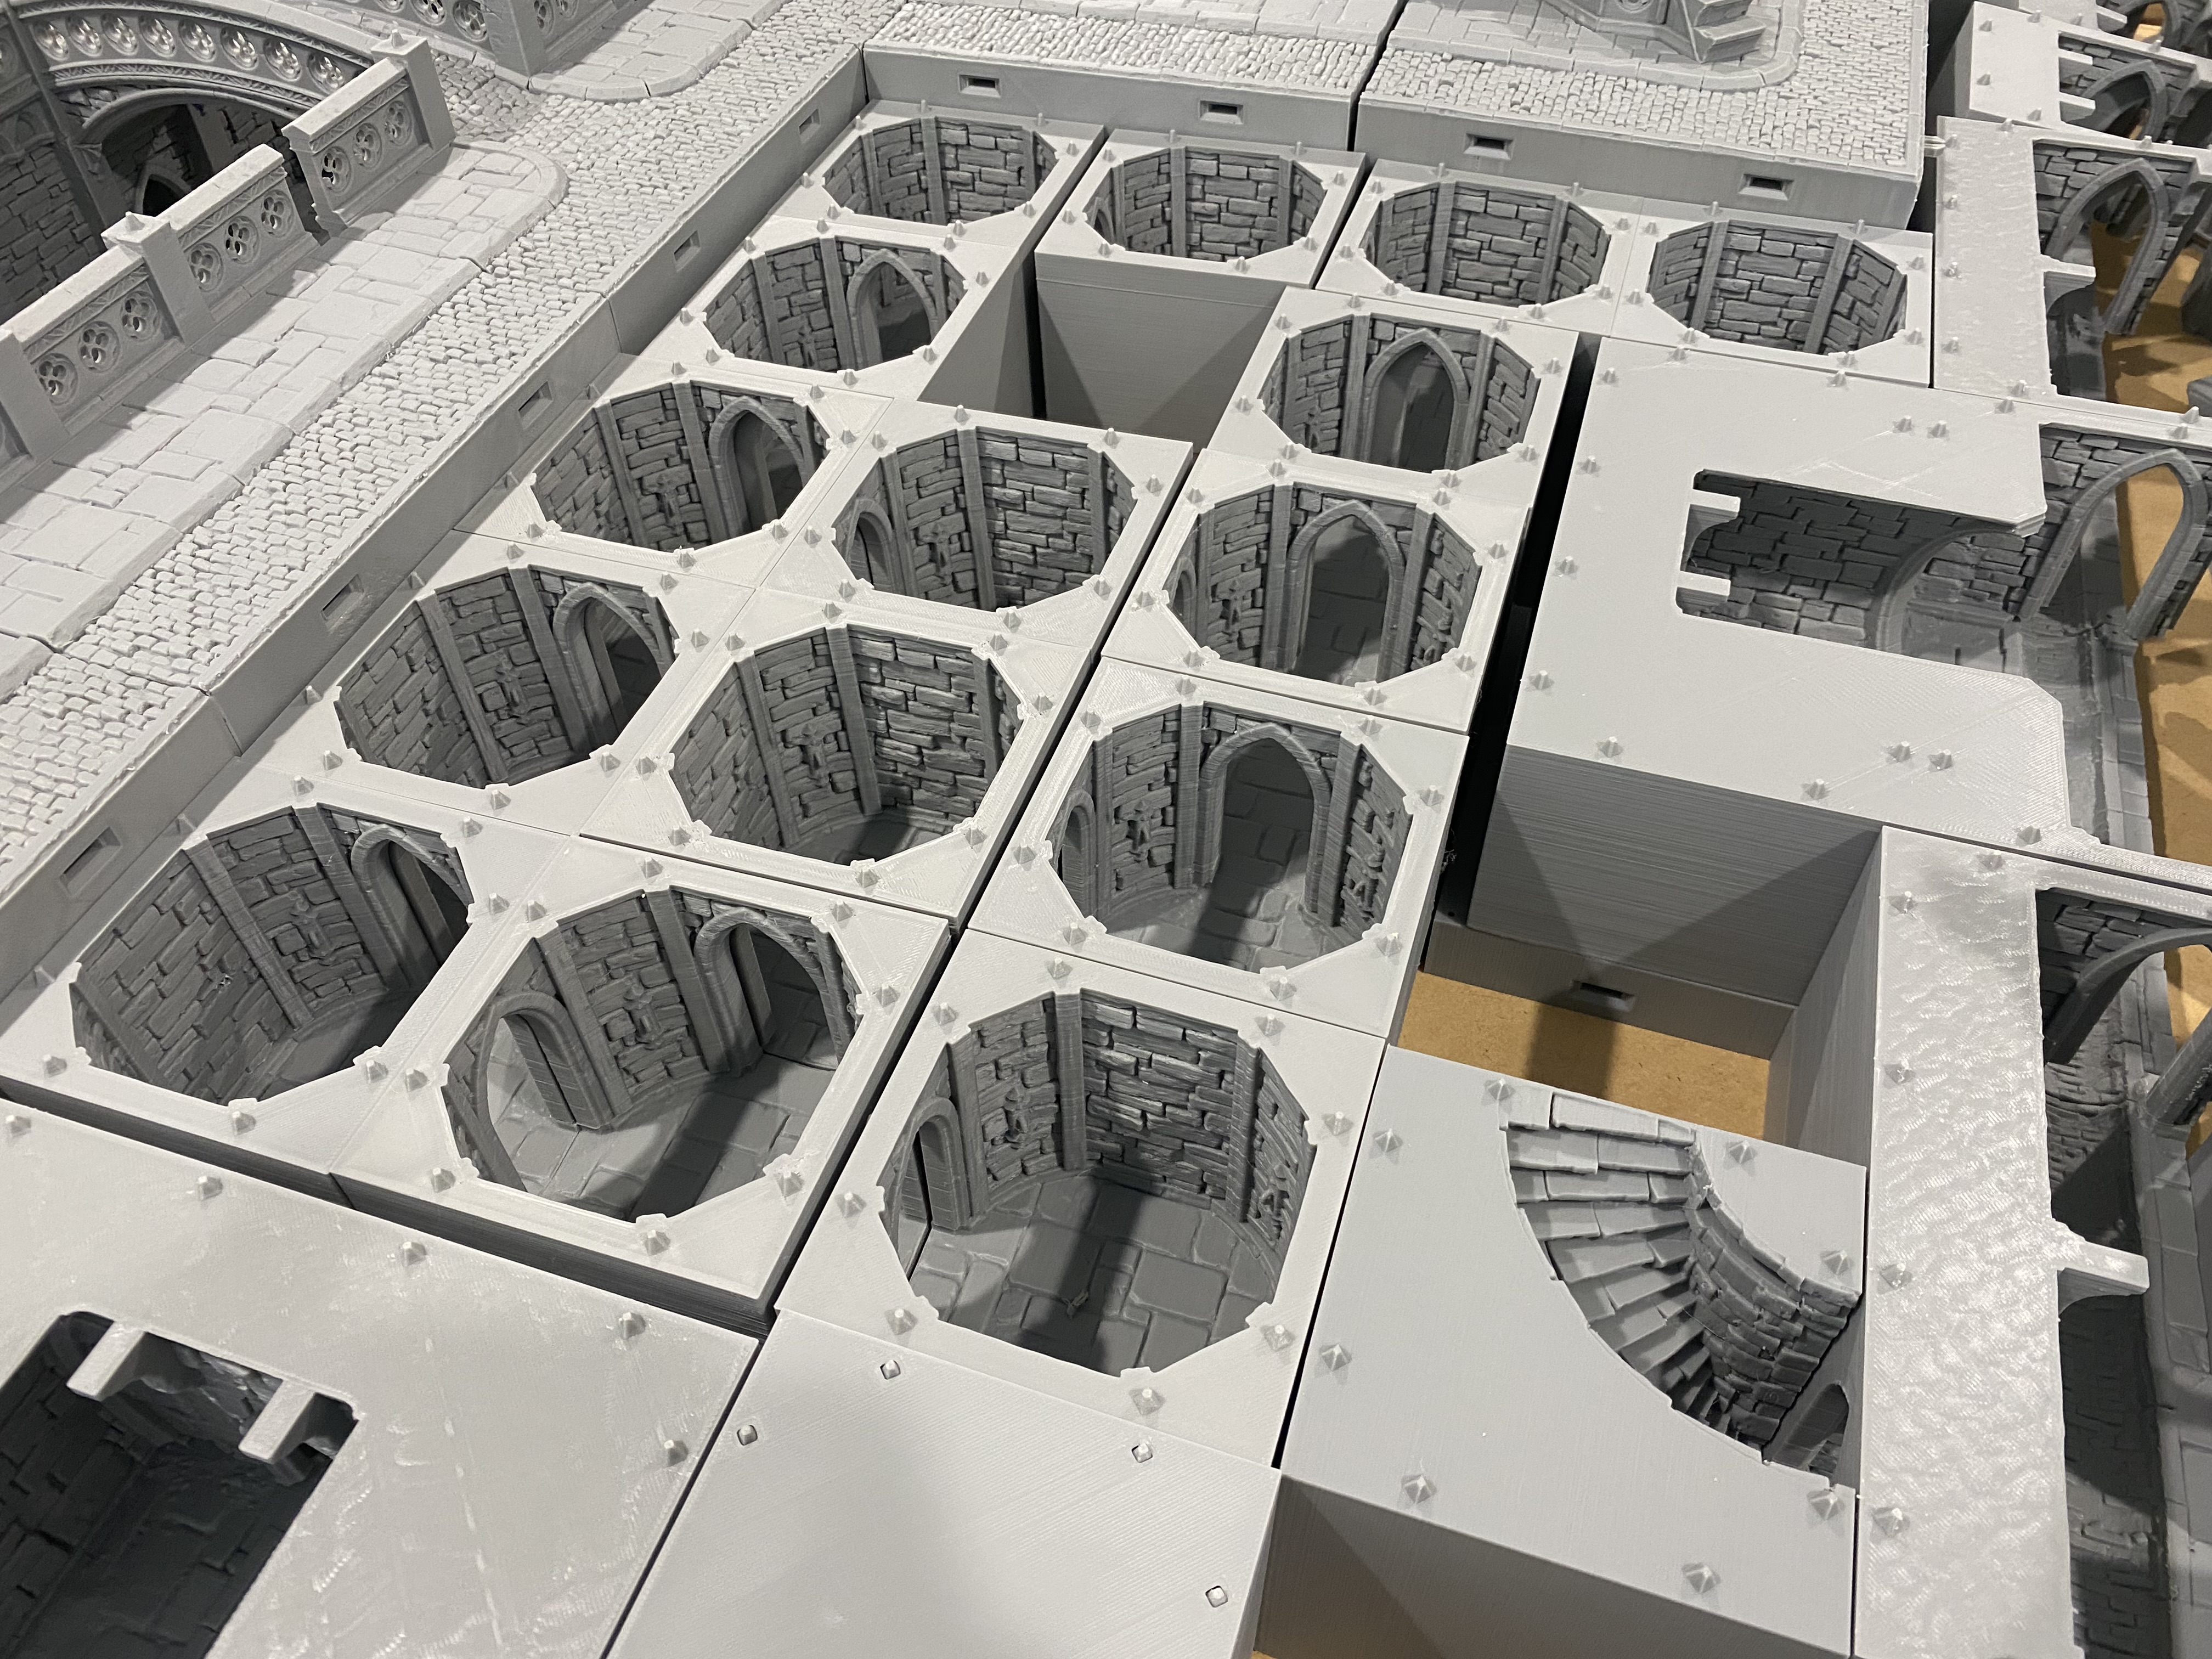
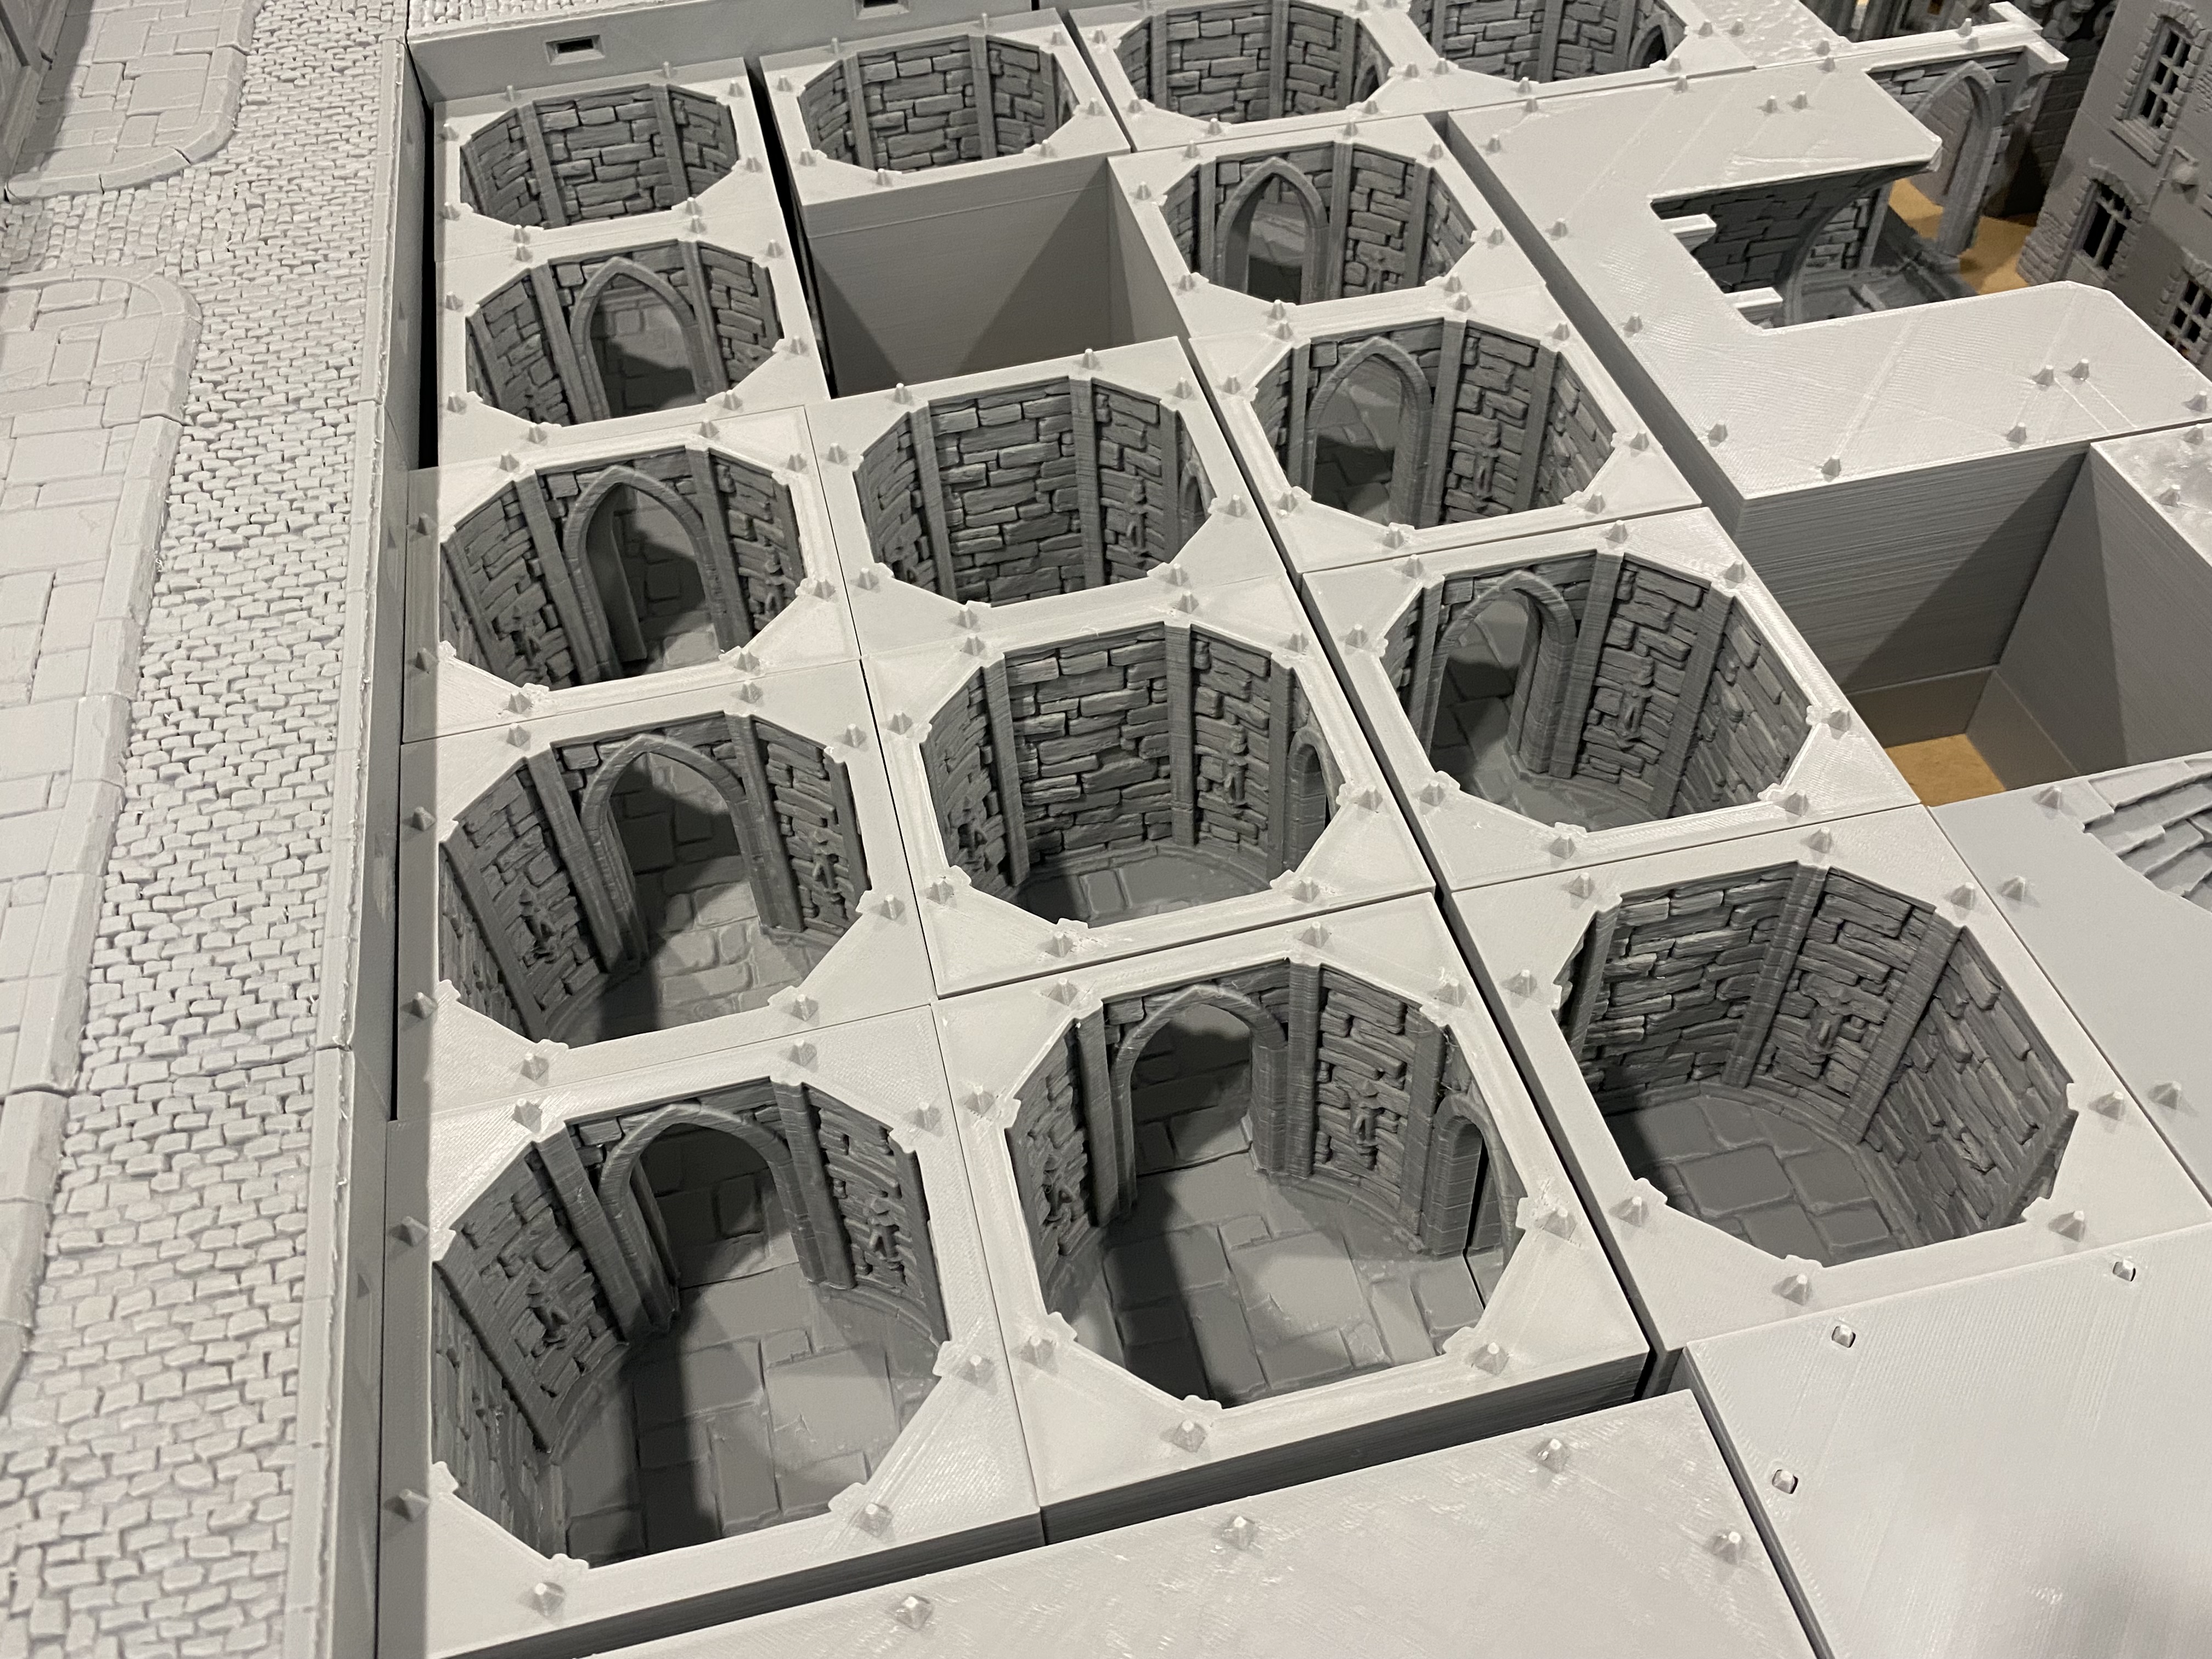
To create a fog of war feeling I printed off thin covers for the sewers. Initially Grey but then changed to black. I still have more to do to replace the remaining grey covers.
For these to fit correctly the tiles above them are slightly thinner than those without sewers beneath.
I also printed out some simple risers just to save some time and to support the upper level.
For the time being, I have just placed the sewers in any old order beneath the board to support the upper flagstone layer. When I return to this project in the future it will be to finish off and expand the sewer network.
For now, I’m happy with just having the sewers playable around the edges of the table down the line though, I have some ideas in mind but those will have to wait for now.
Nosferatu Carriage
What Gothic city layout would be complete without a creepy horse-drawn carriage travelling the cobbled roads at night? I had just the model in mind and printed it out with my resin printer. The original model was huge, so I rescaled it to fit in better with my other carriages.
I then used my FDM printer and knocked up a quick base to match the cobblestone roads. 3D printing is excellent for these kinds of things.
I was reasonably happy with the model, but it needed the lamps replaced with something else so that I could illuminate them.
 The basic printed rescaled model with a simple paint job.
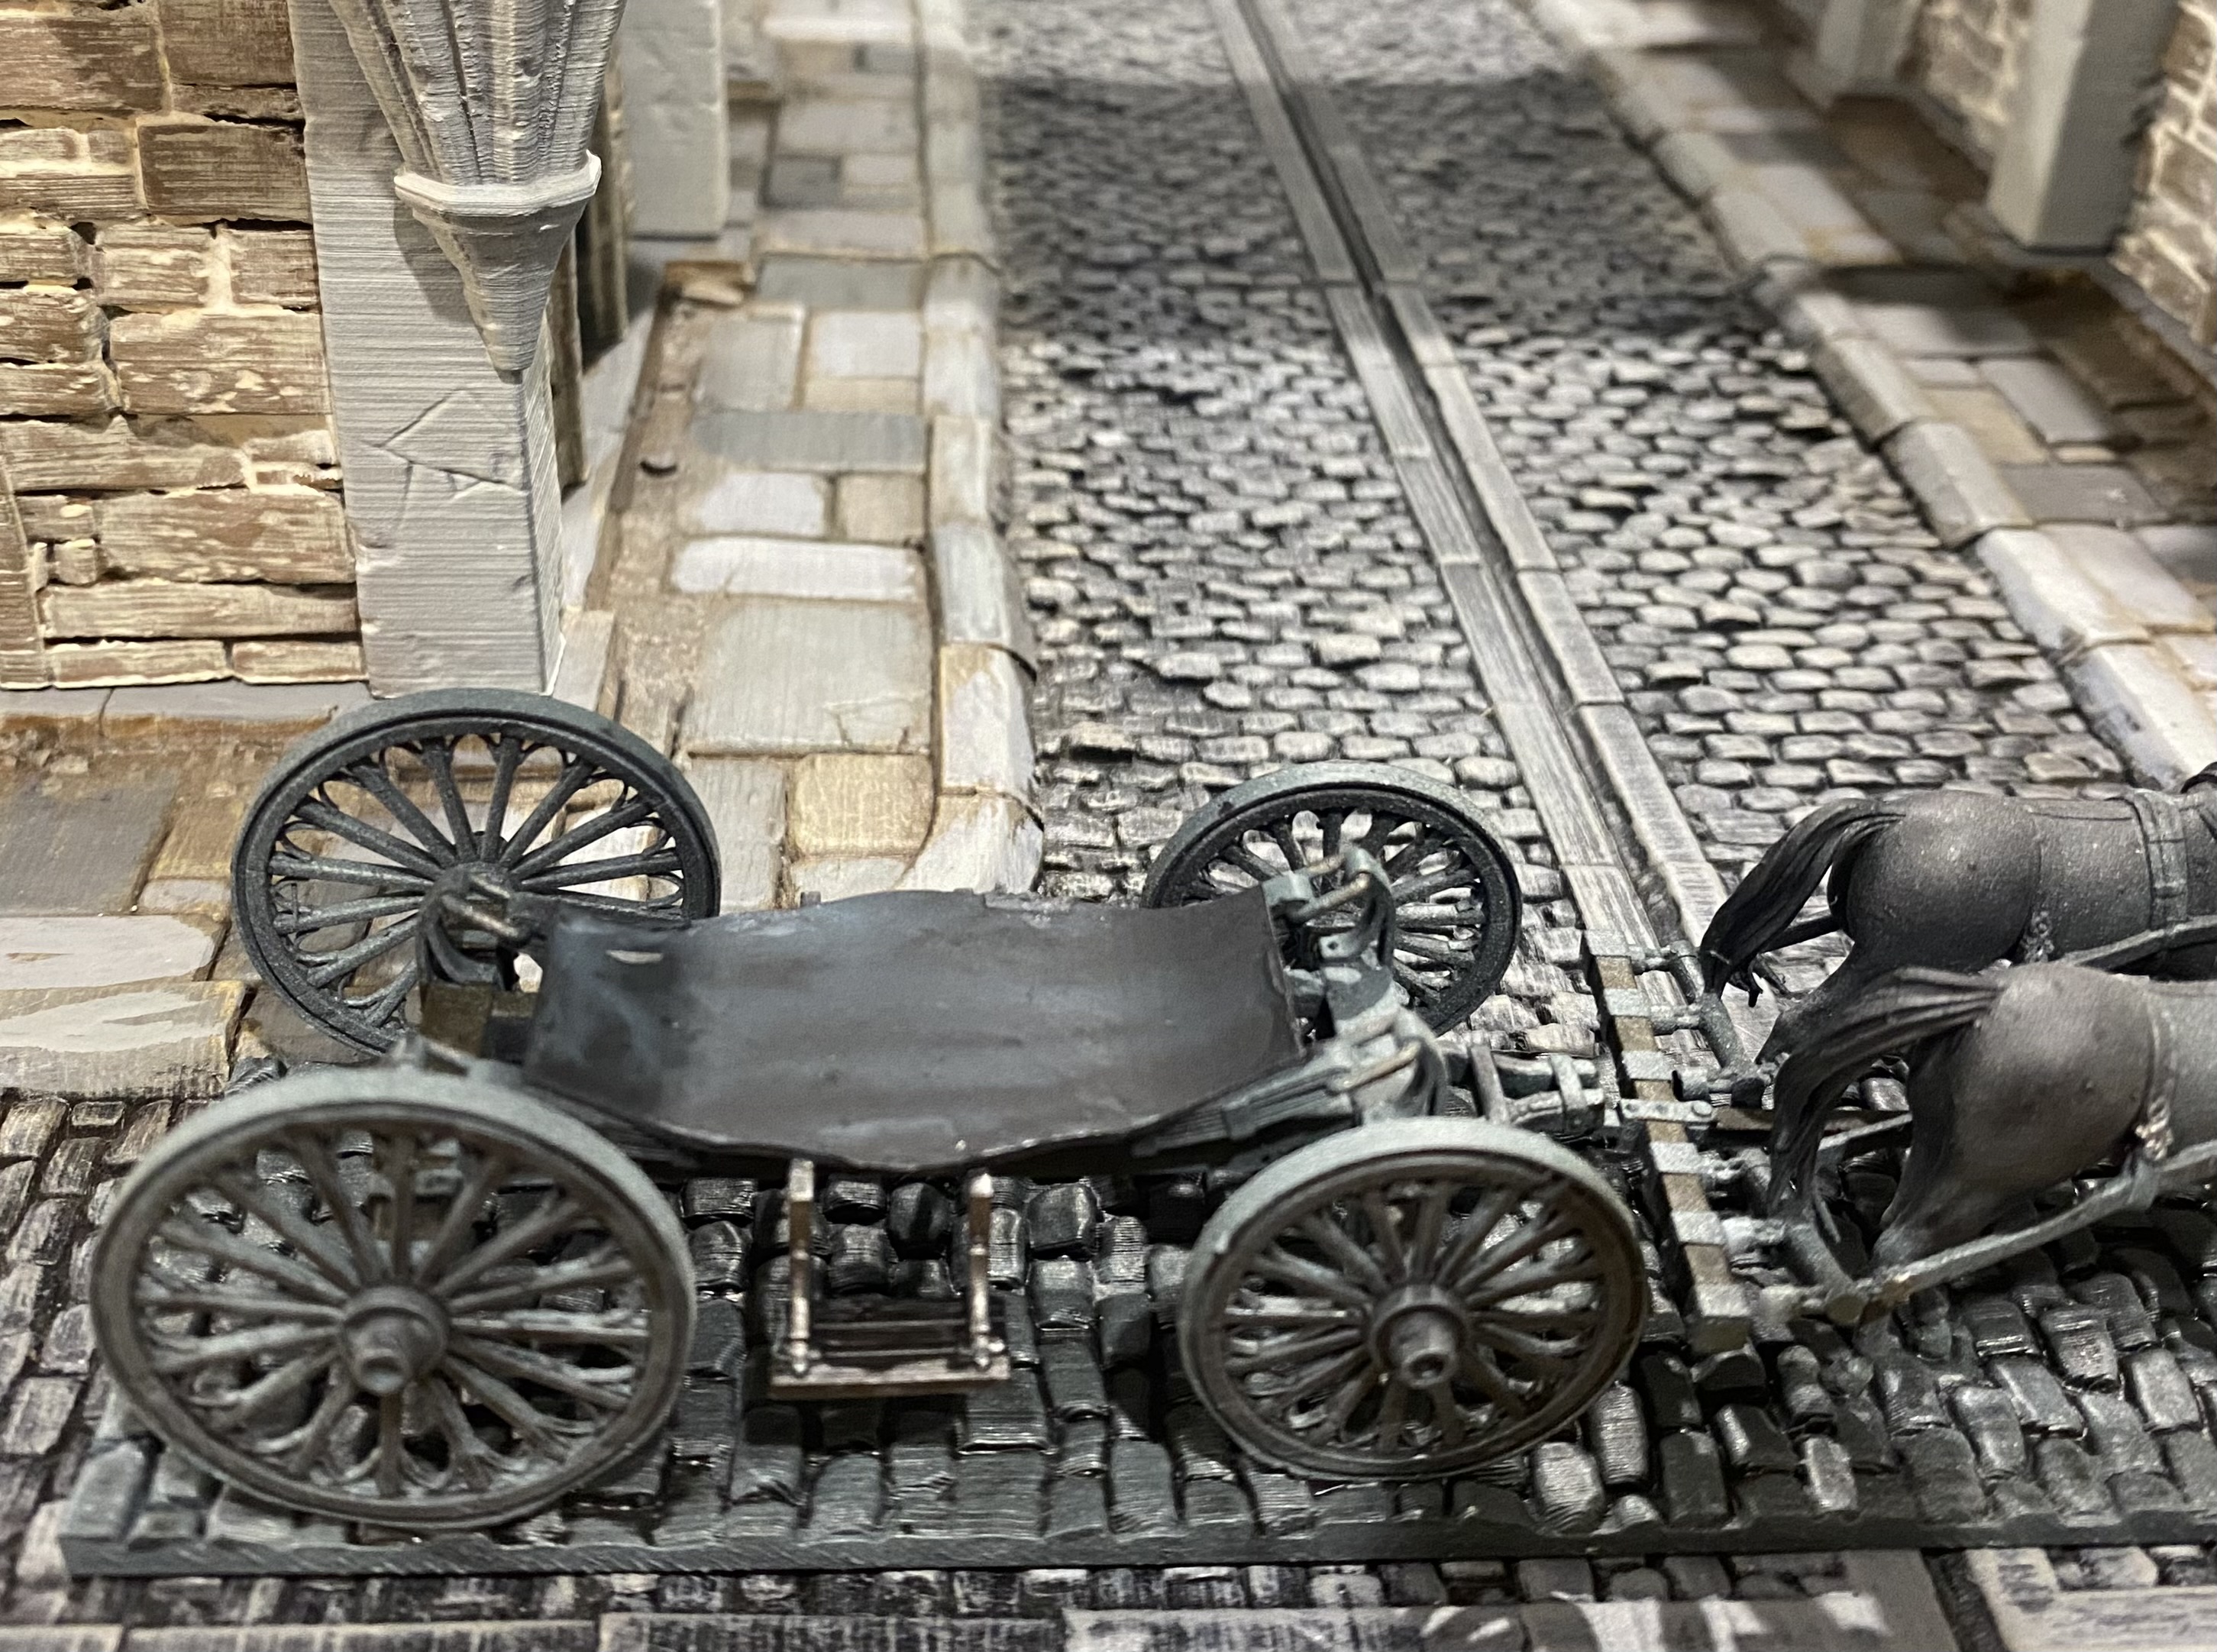 I removed the top part of the carriage so I could modify it to hold lights.
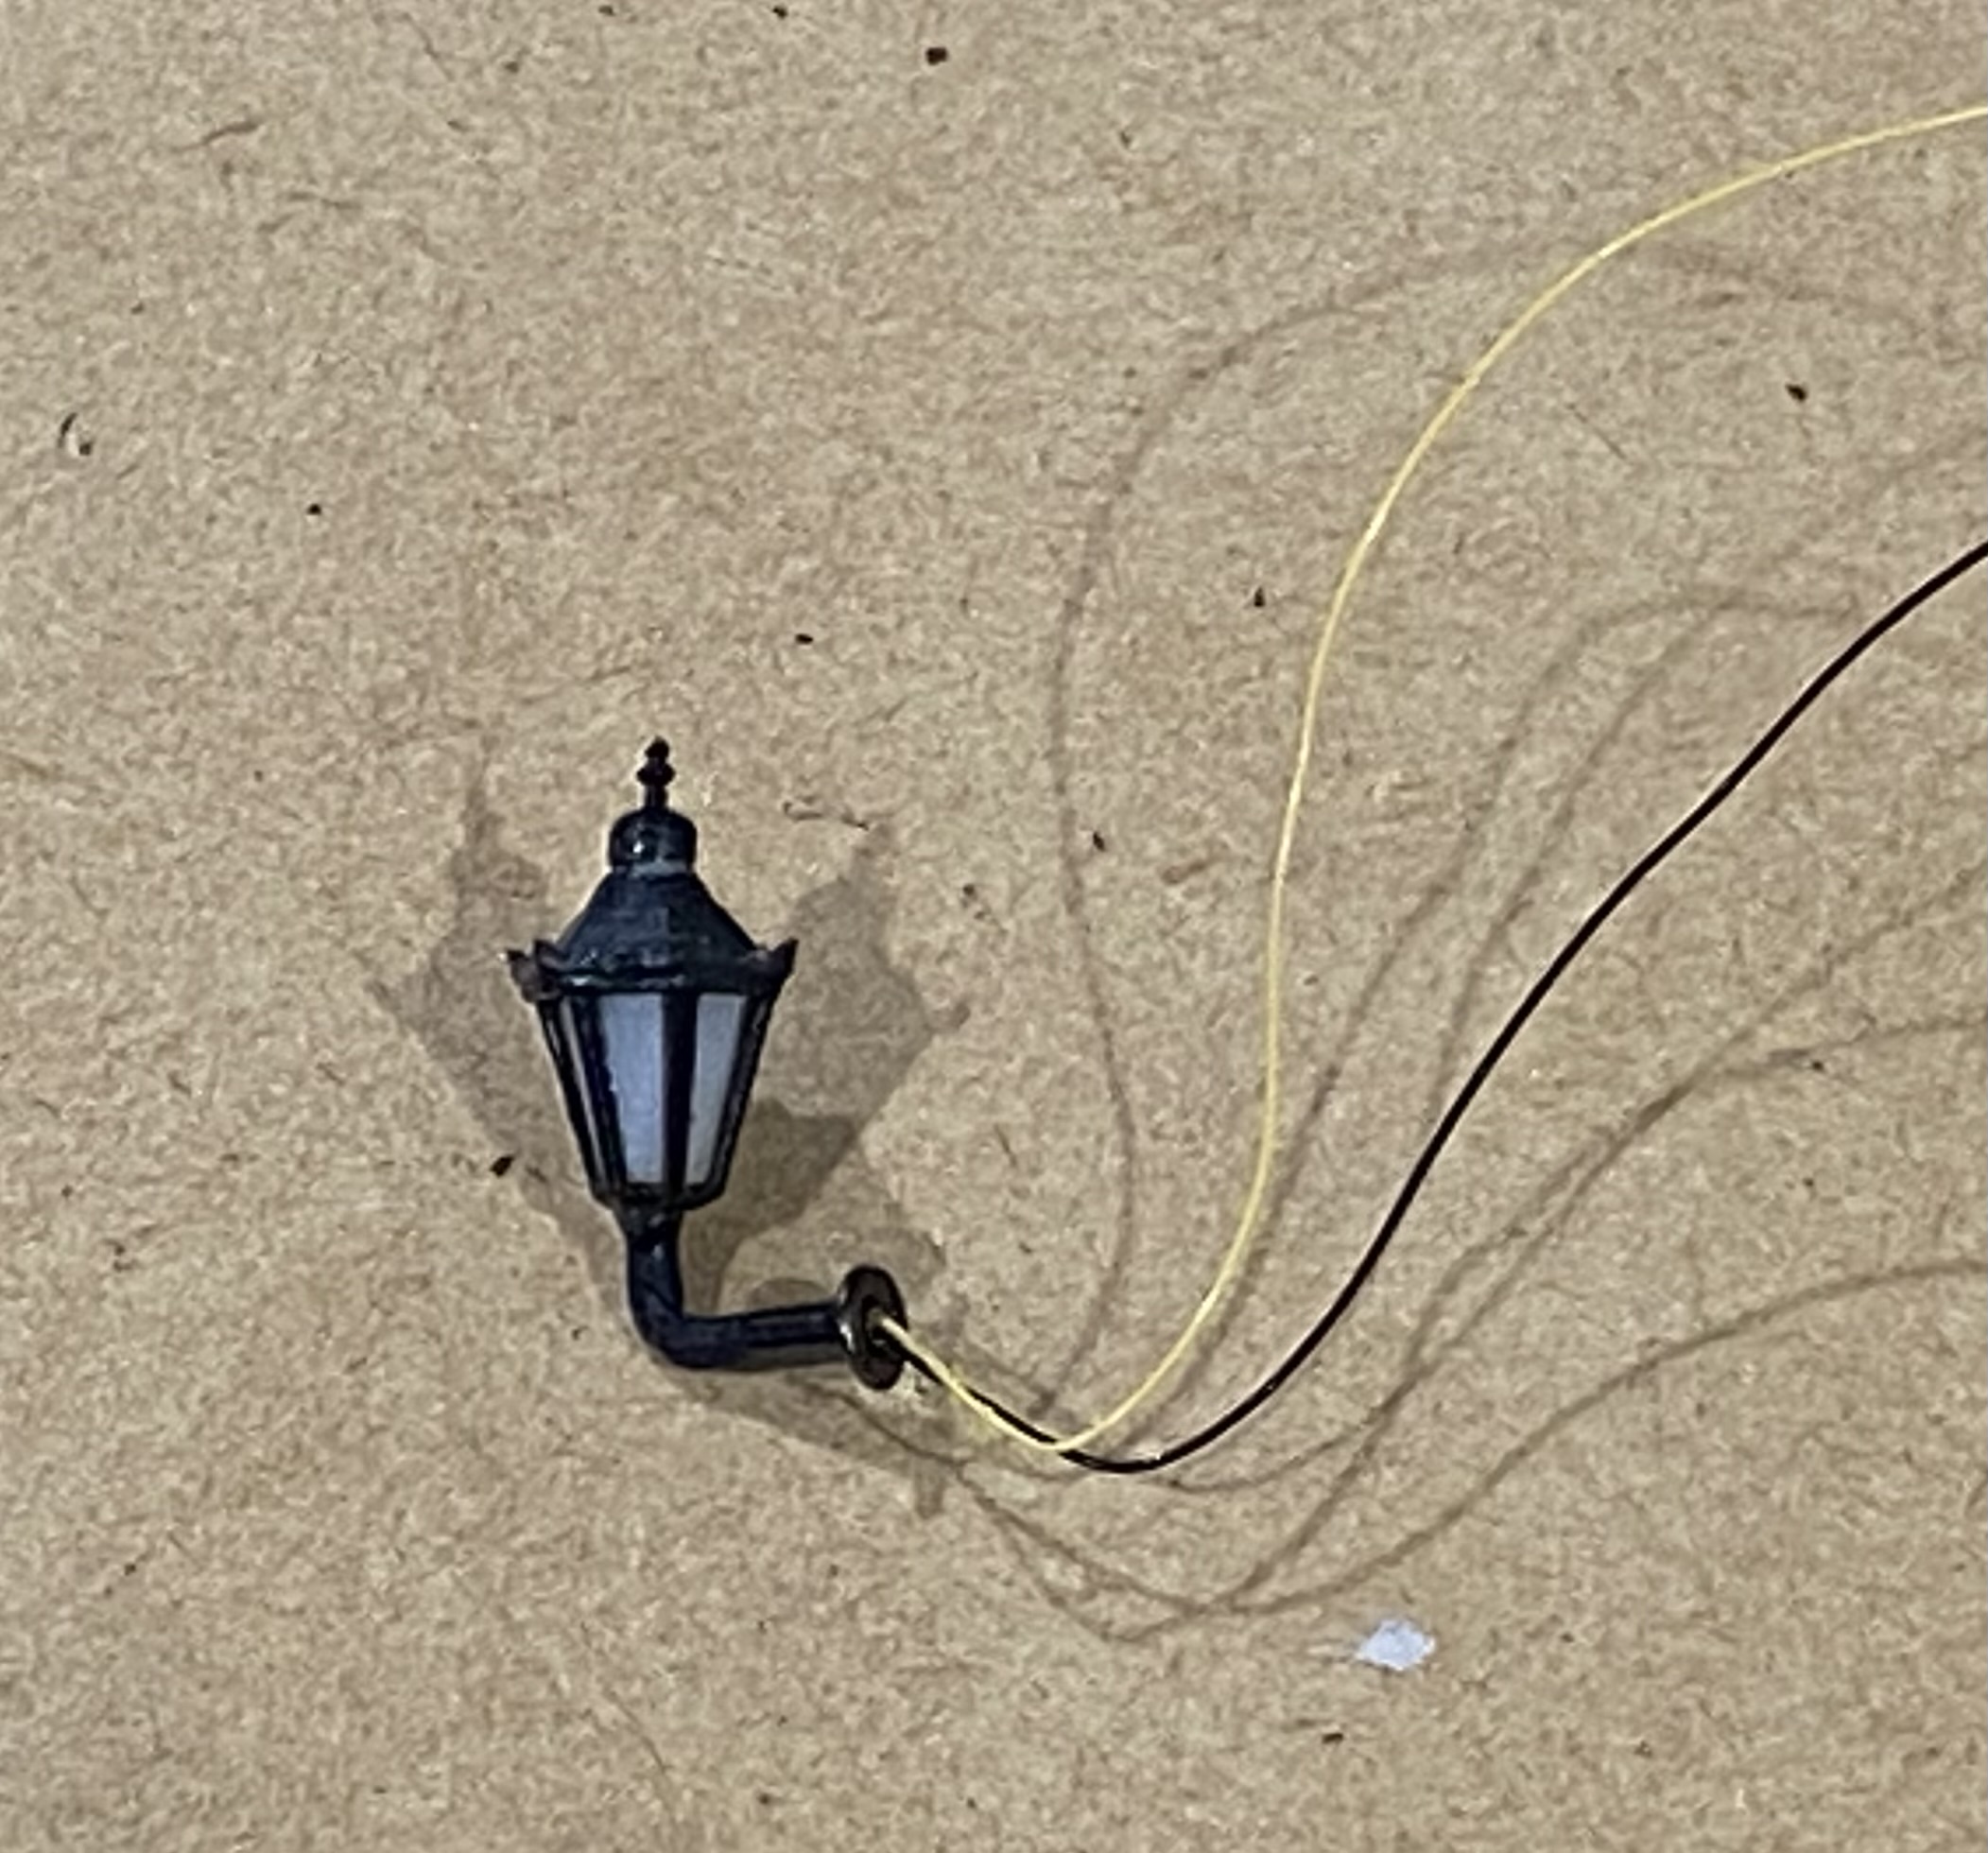 I had a few spare wall mounted flicker lights that were quite small and not to dissimilar to the lamps already on the printed model.
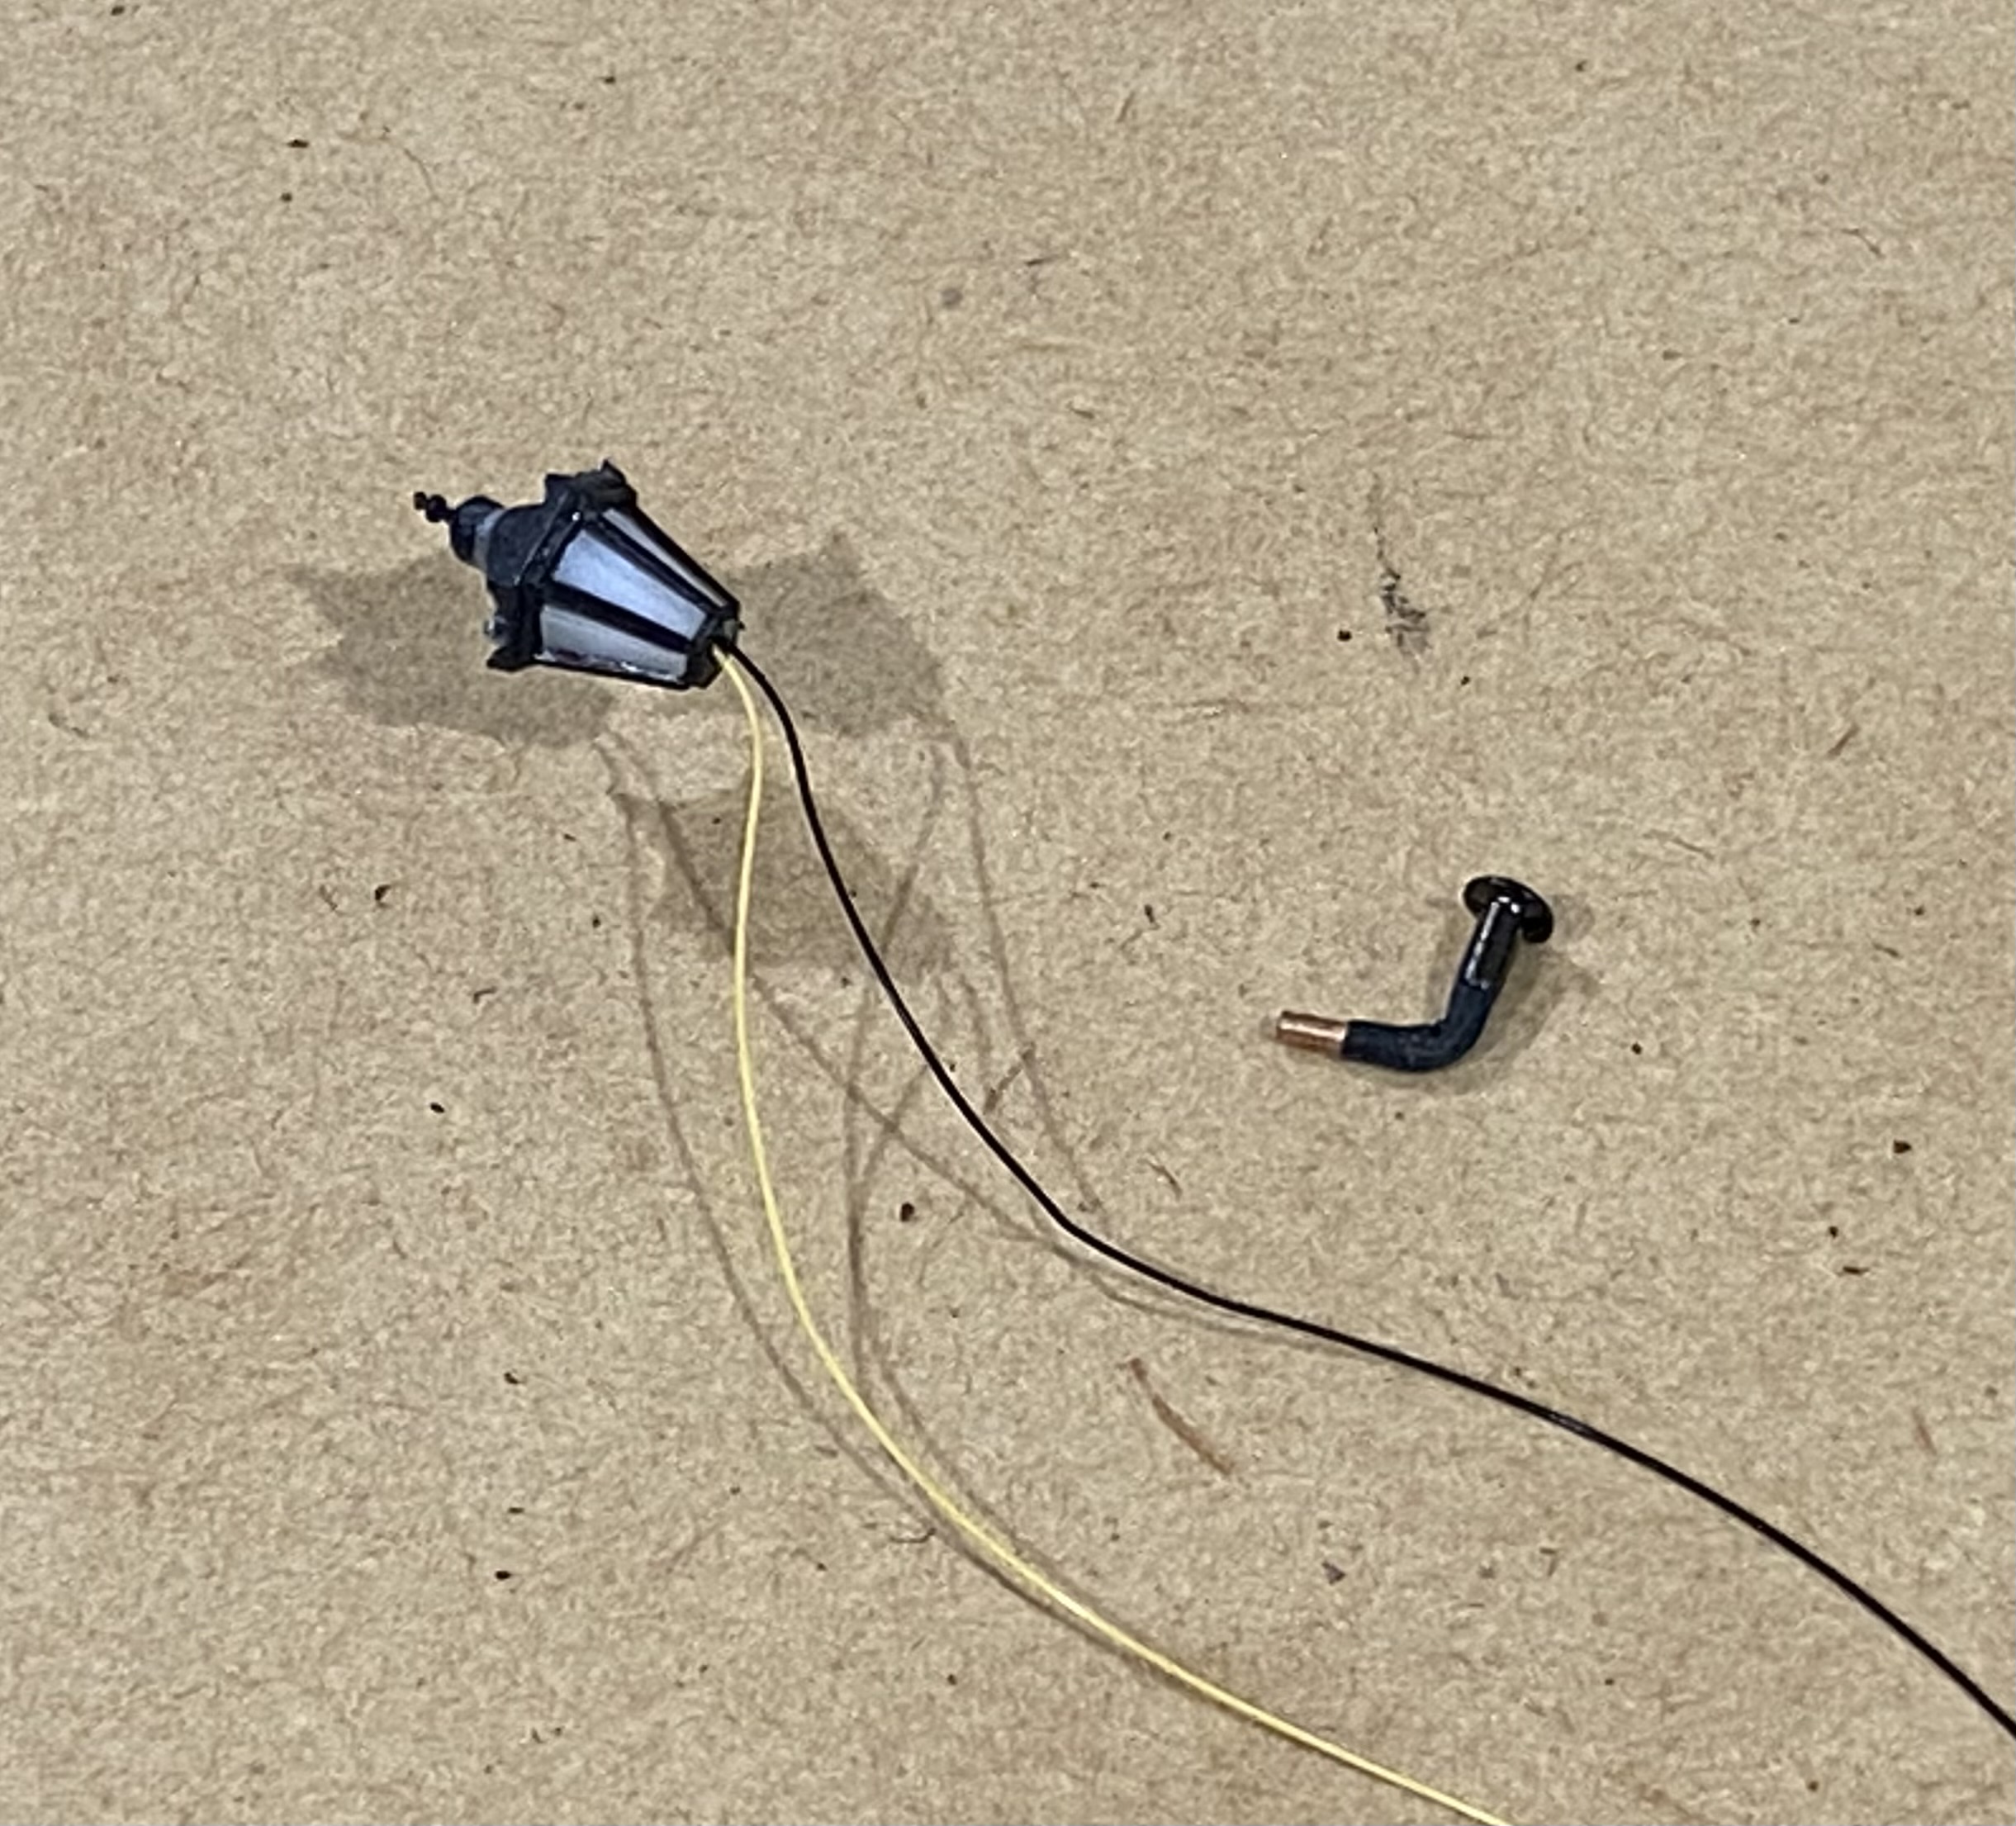 I removed the brass stem from the lights.
 I then broke off all the resin lights and drilled holes in the corners of the roof so that I could thread the wires through and into the body of the model.
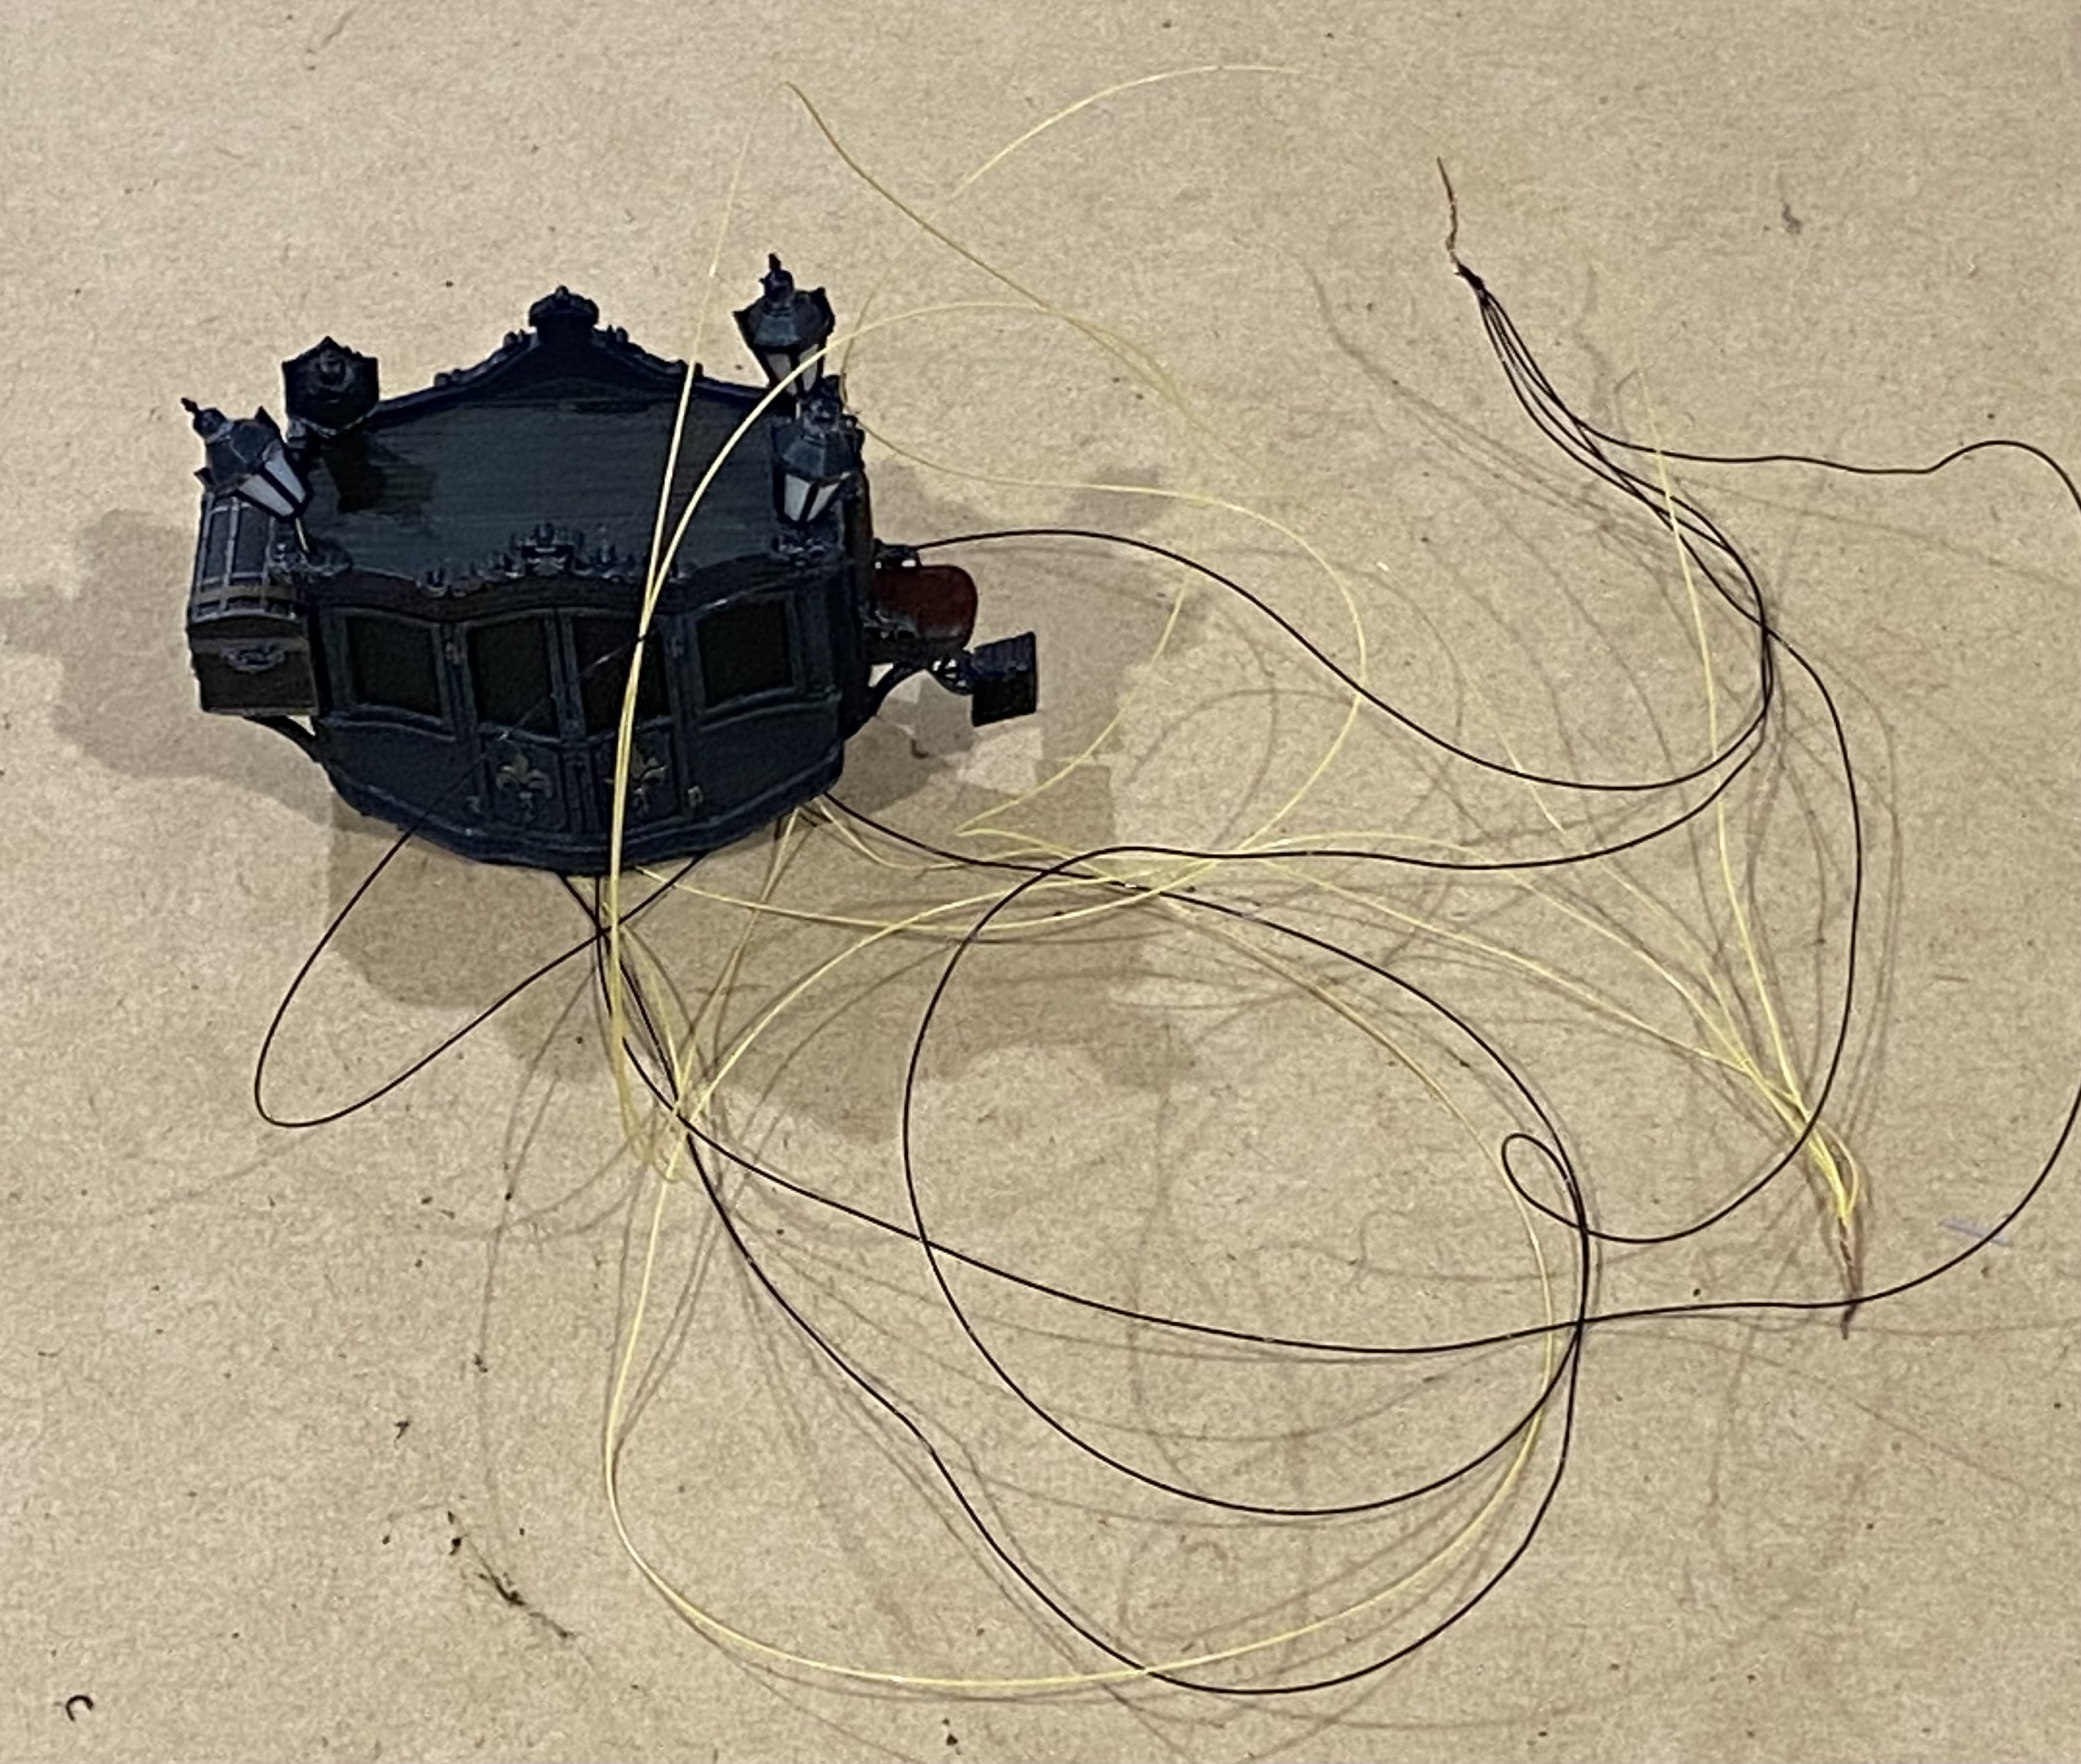 It ended up looking like this.
 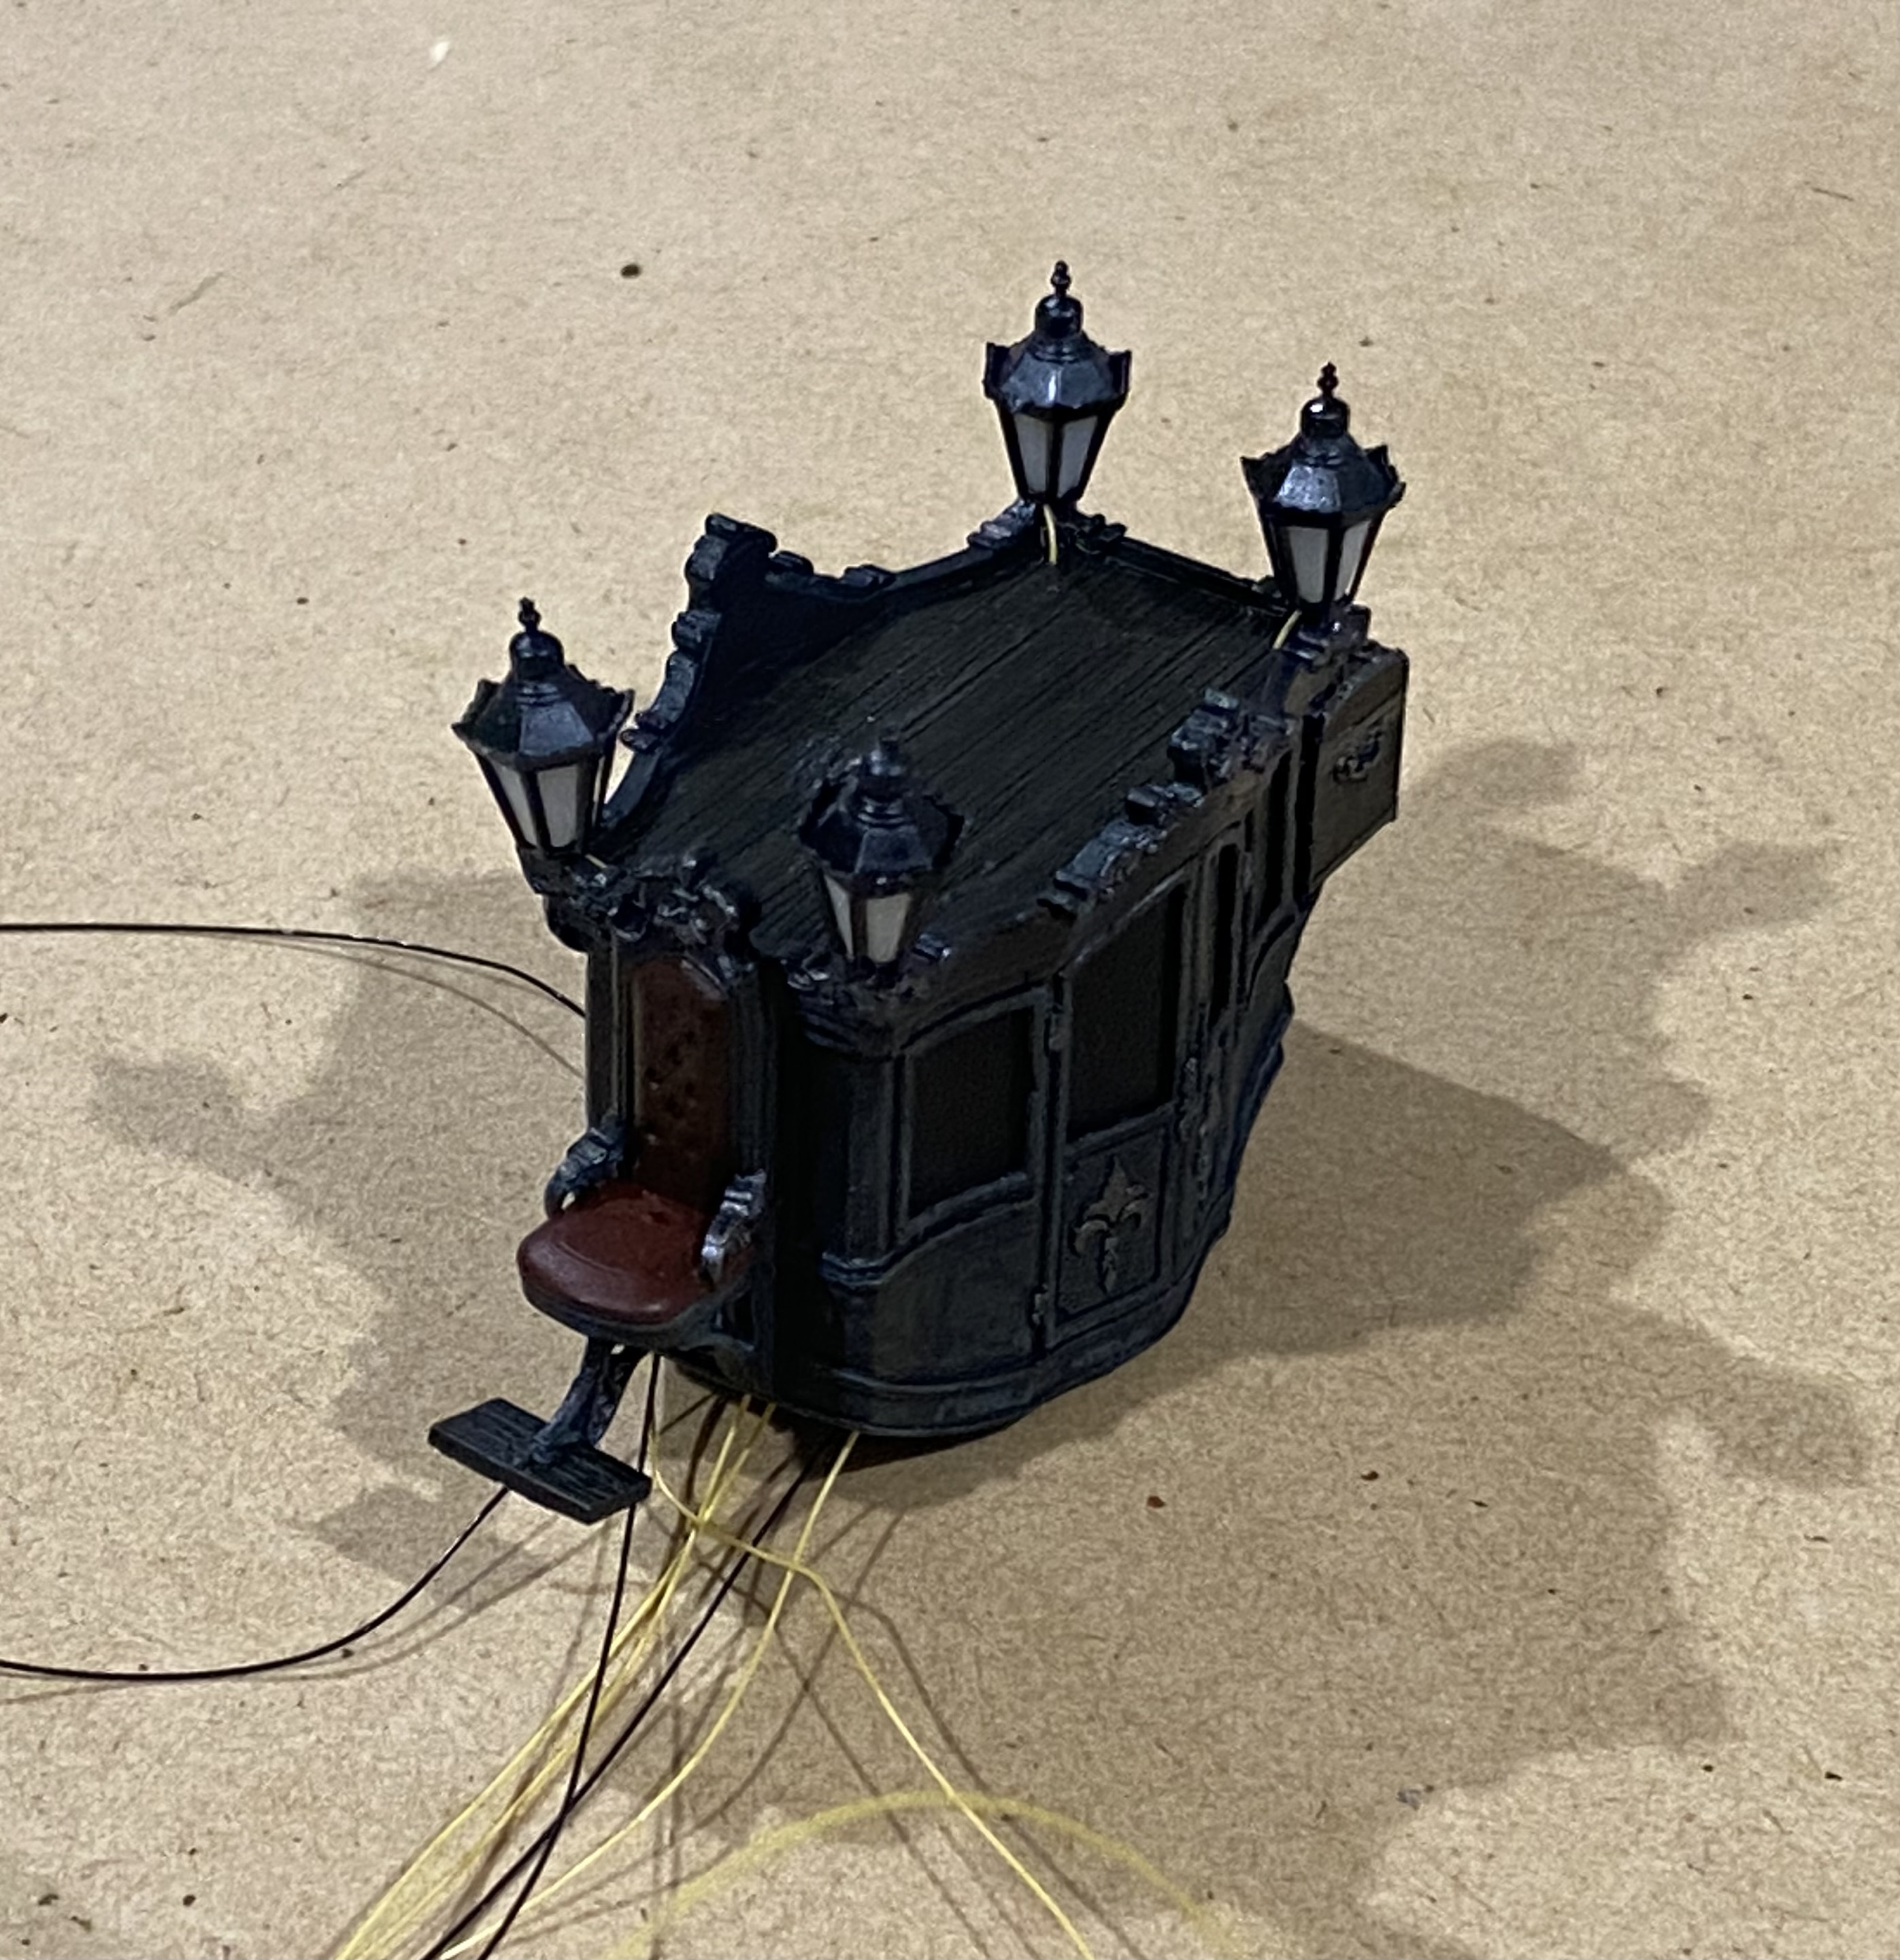 Next, I glued all the flicker lights into place, trying my best to make sure each was at the correct angle and orientation.
 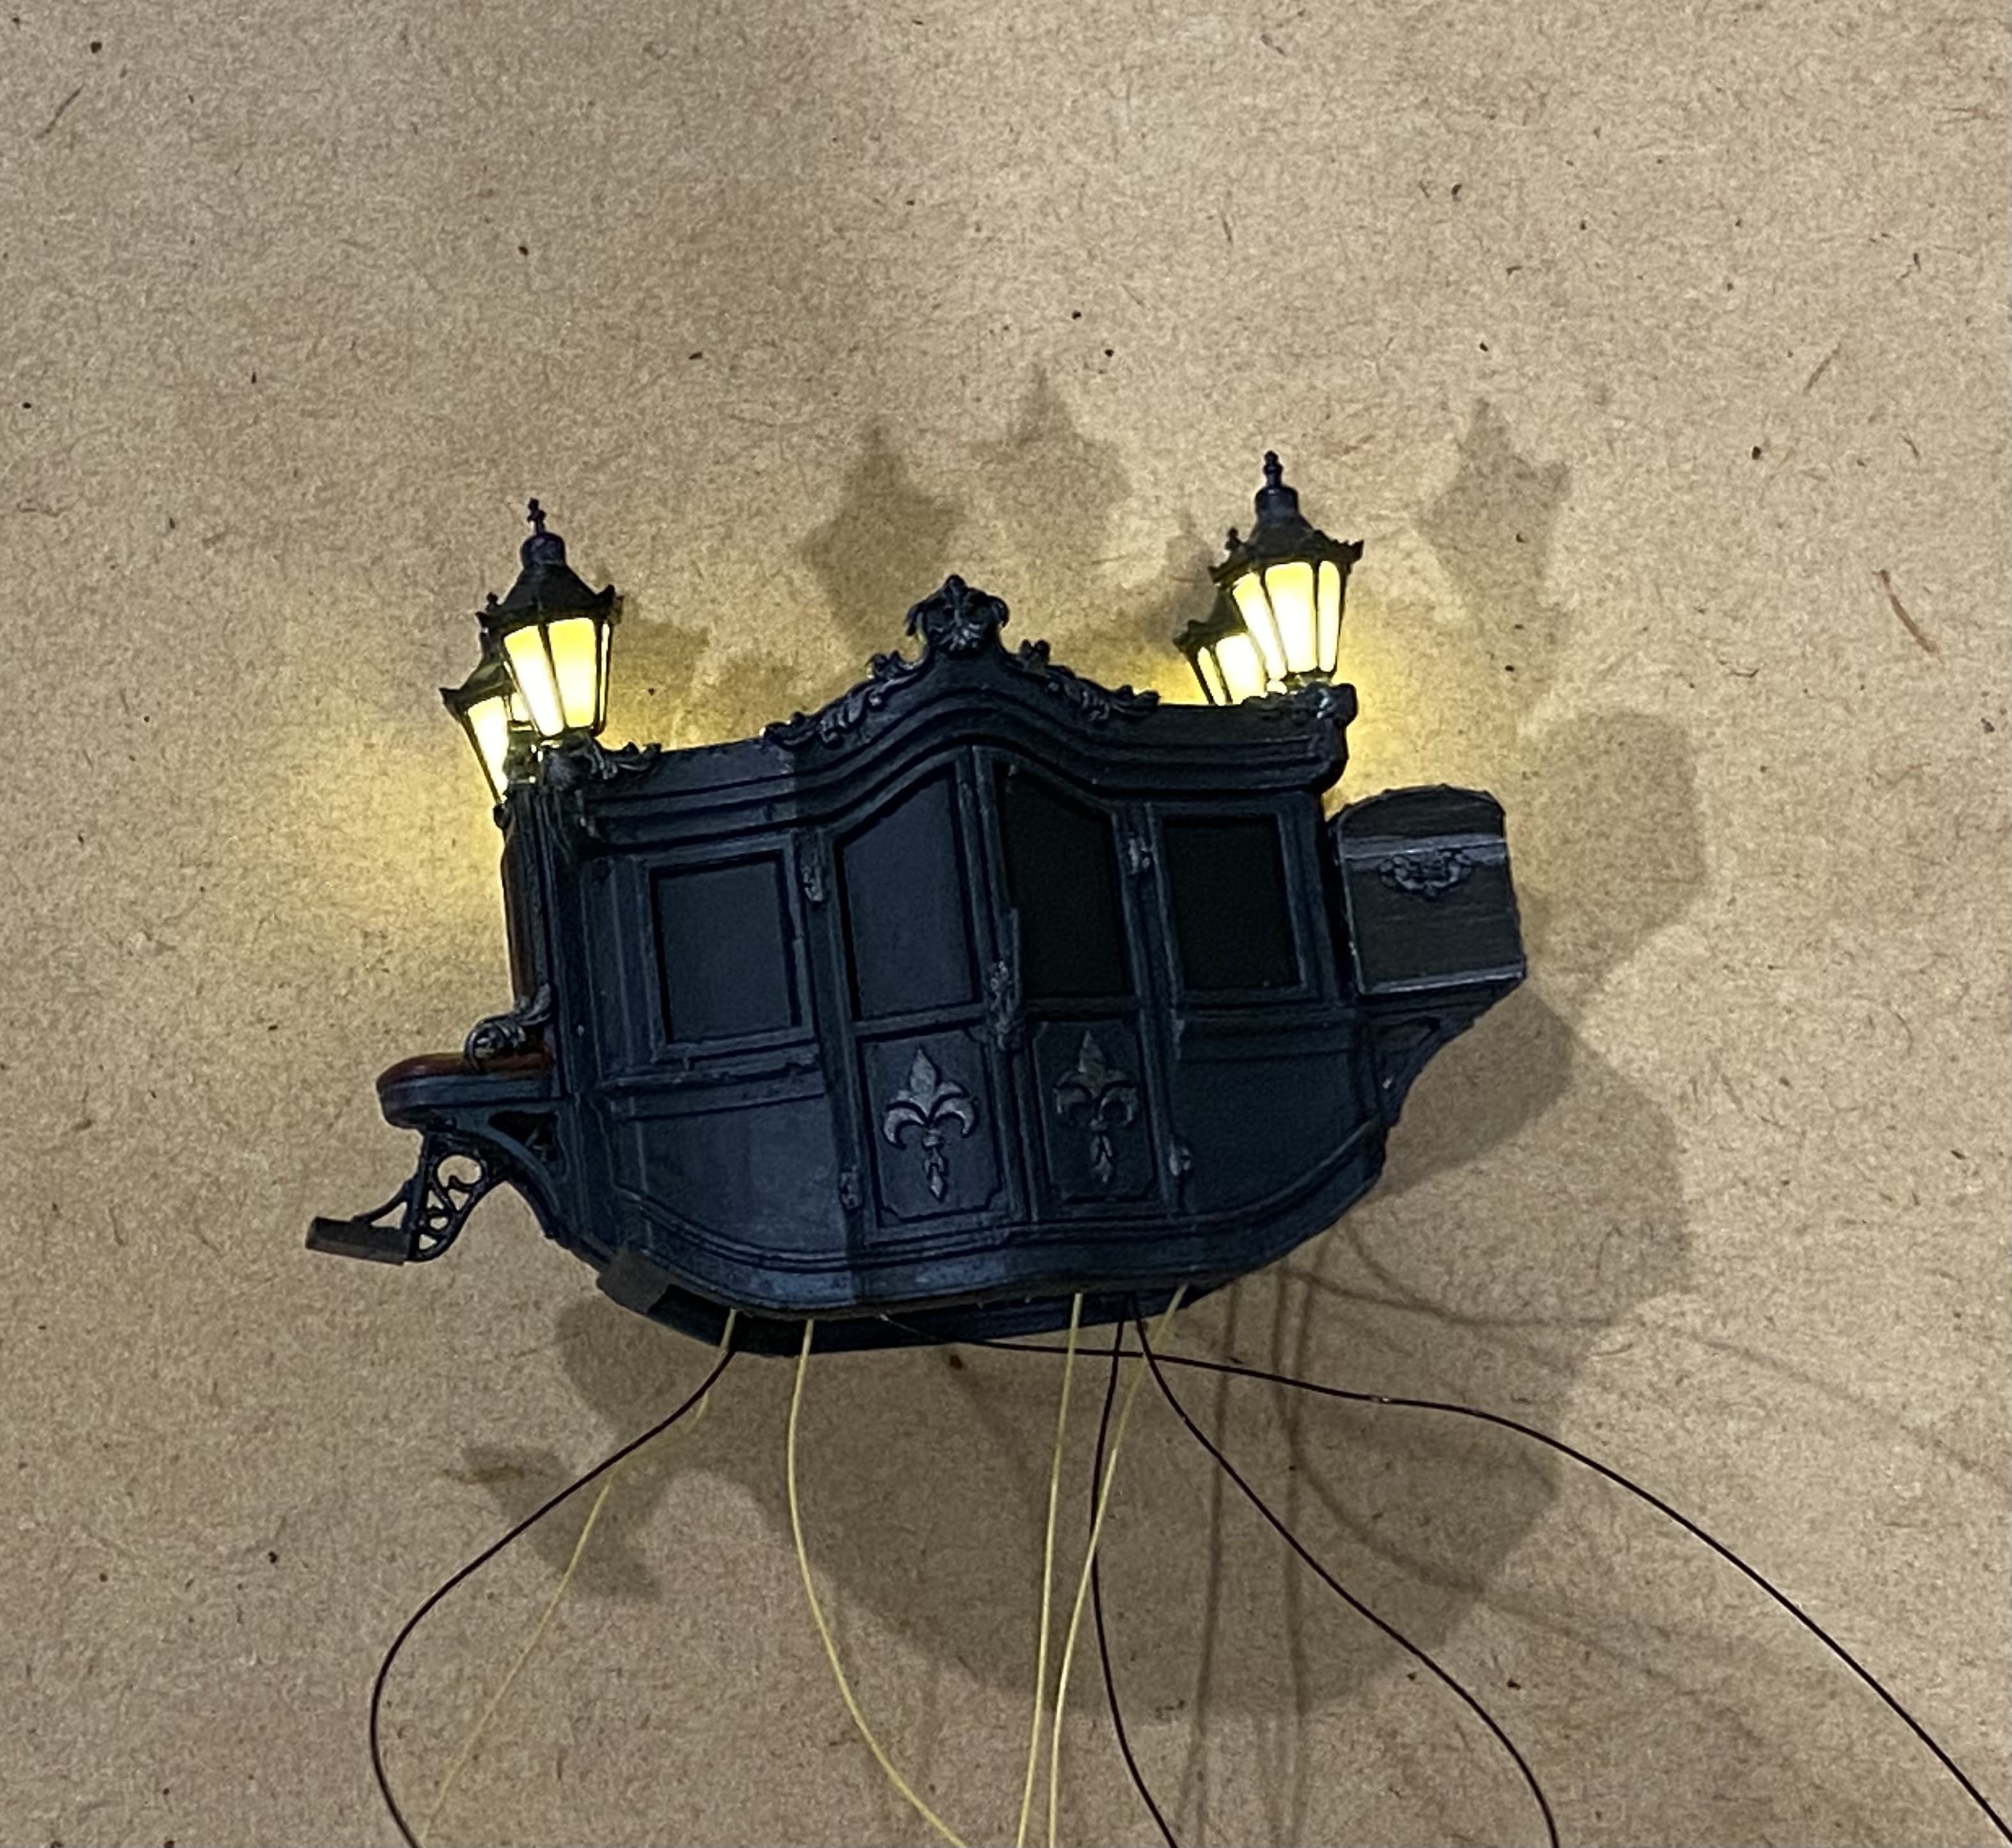 A quick test by toughing the wires to a battery.
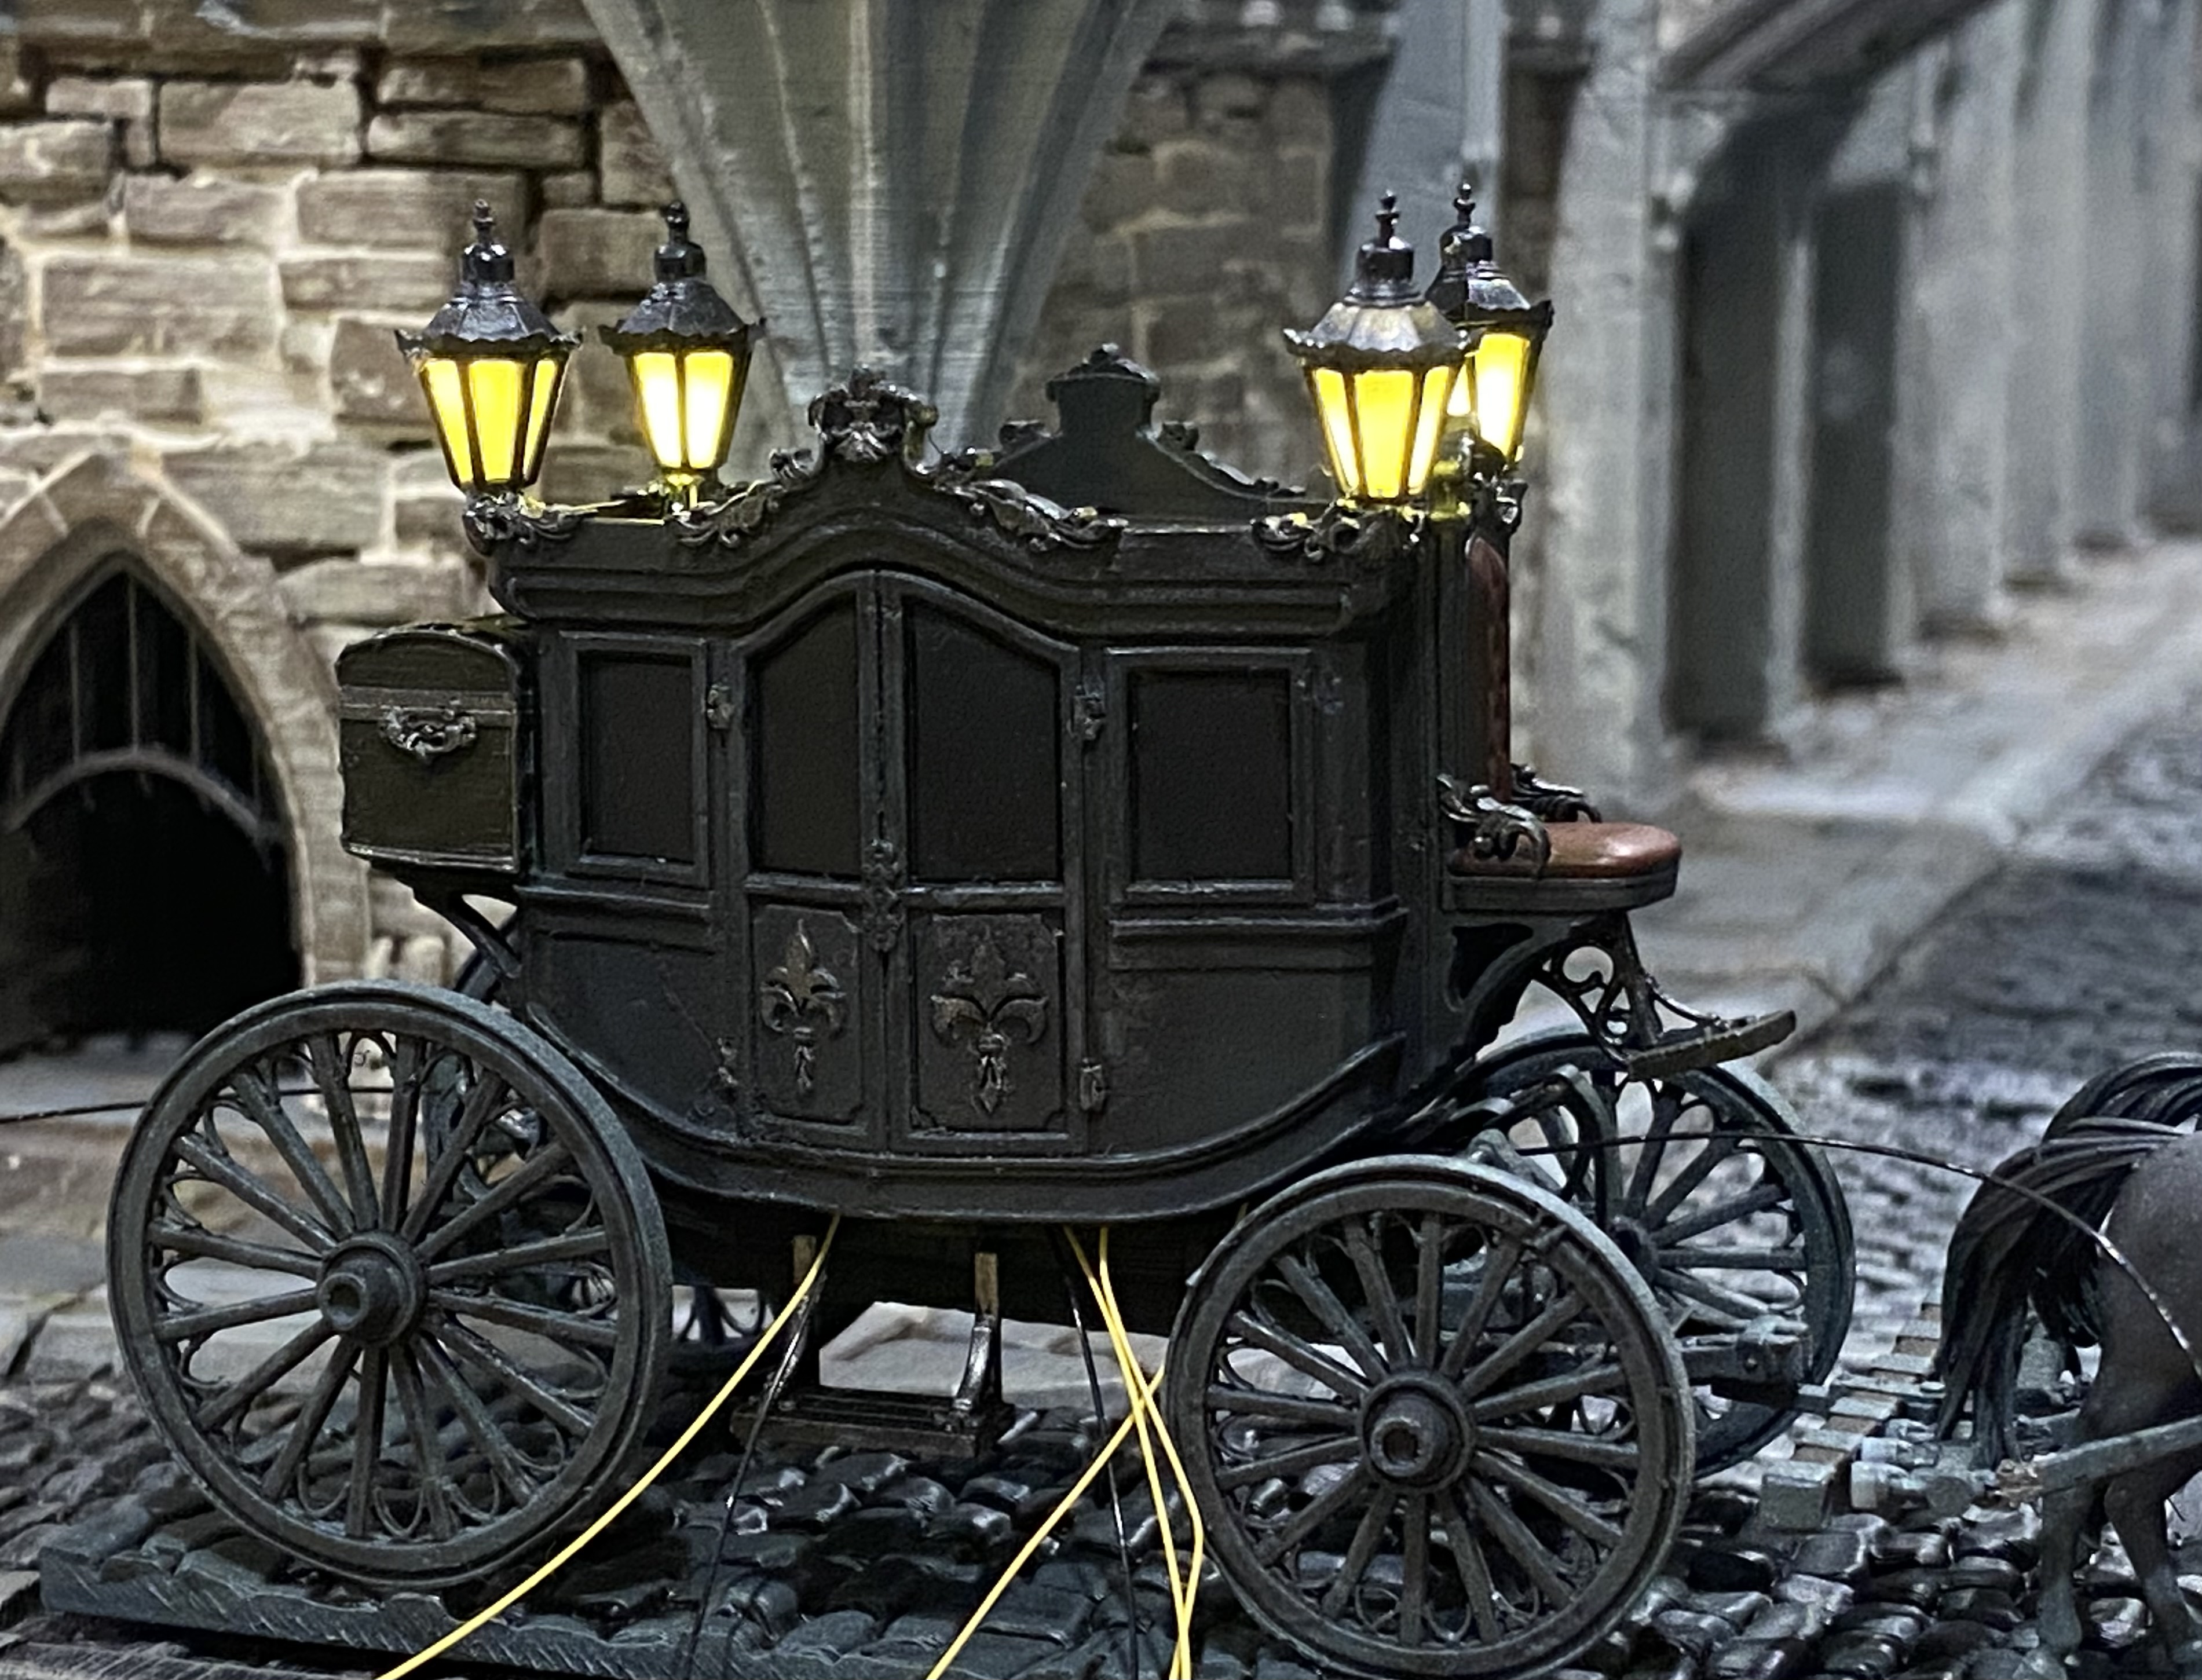 The top part of the carriage placed temporarily back in situ and a neaten up of the carriage paint job.
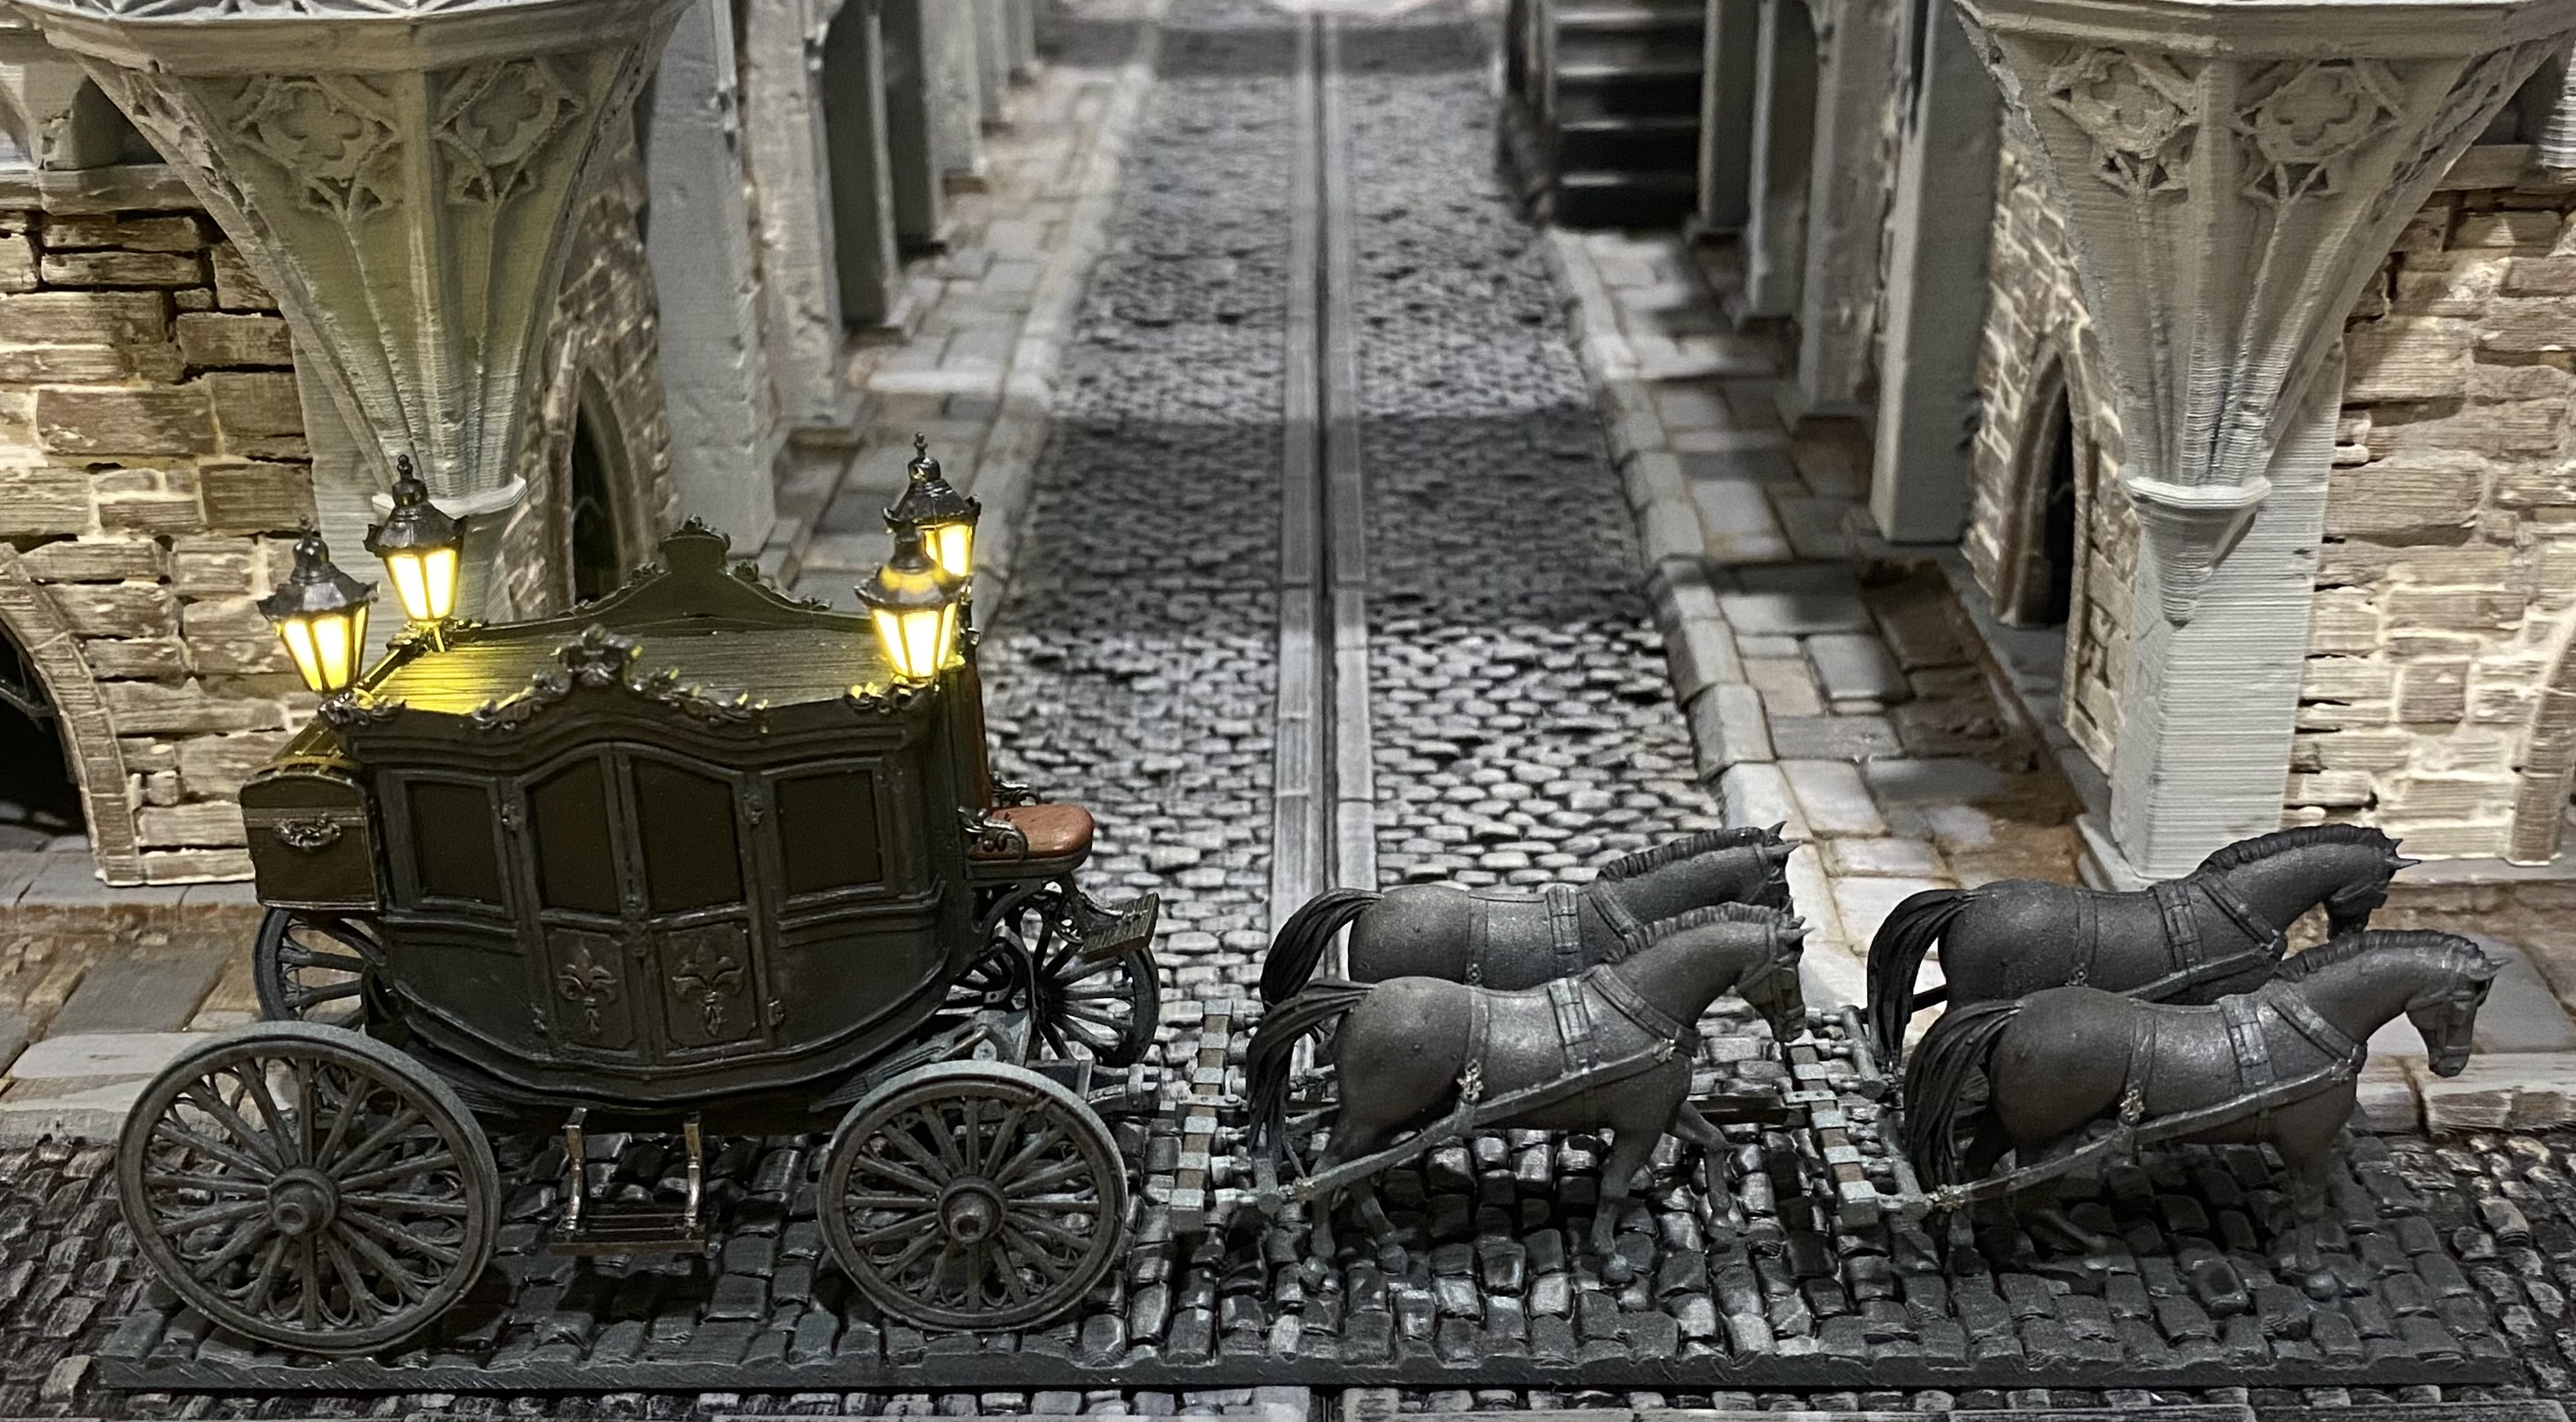 Once happy I trimmed the wires down to a more manageable length and installed a small battery into to body of the carriage.
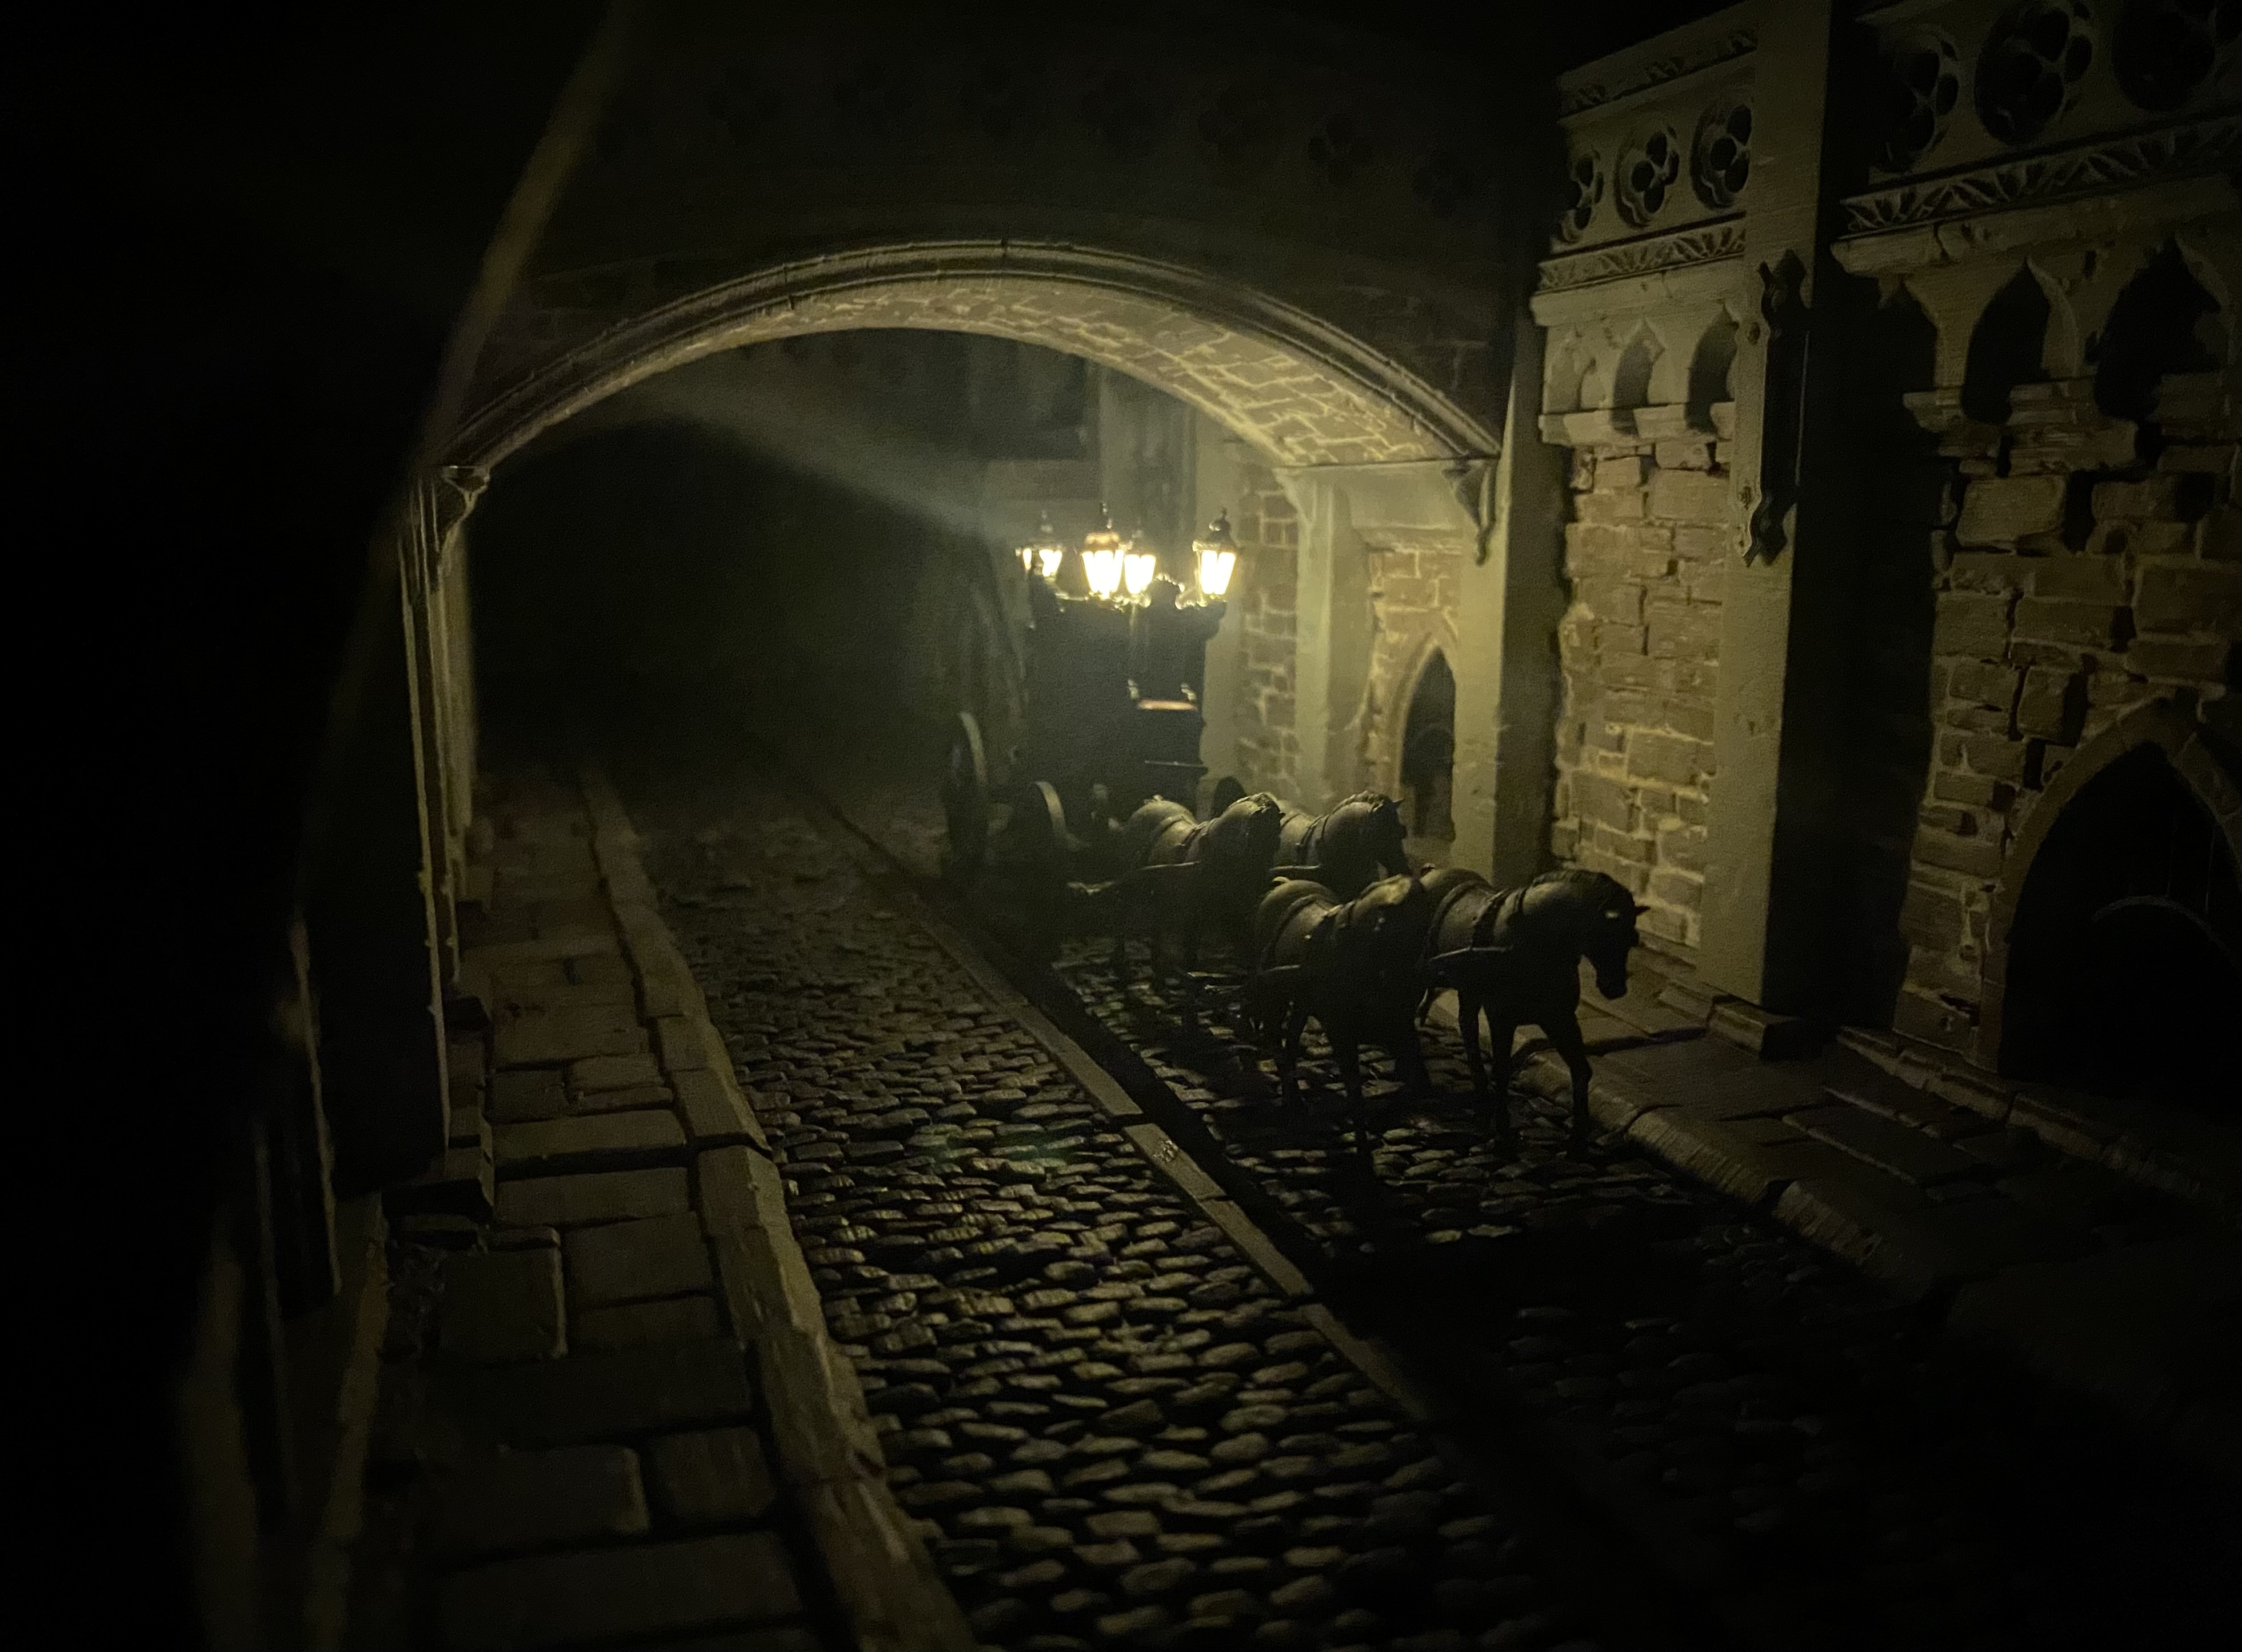 Now my carriage is ready to prowl the streets at night looking for the unwary who may find themselves outside alone.


