Something of a Maze


Recommendations: 467
About the Project
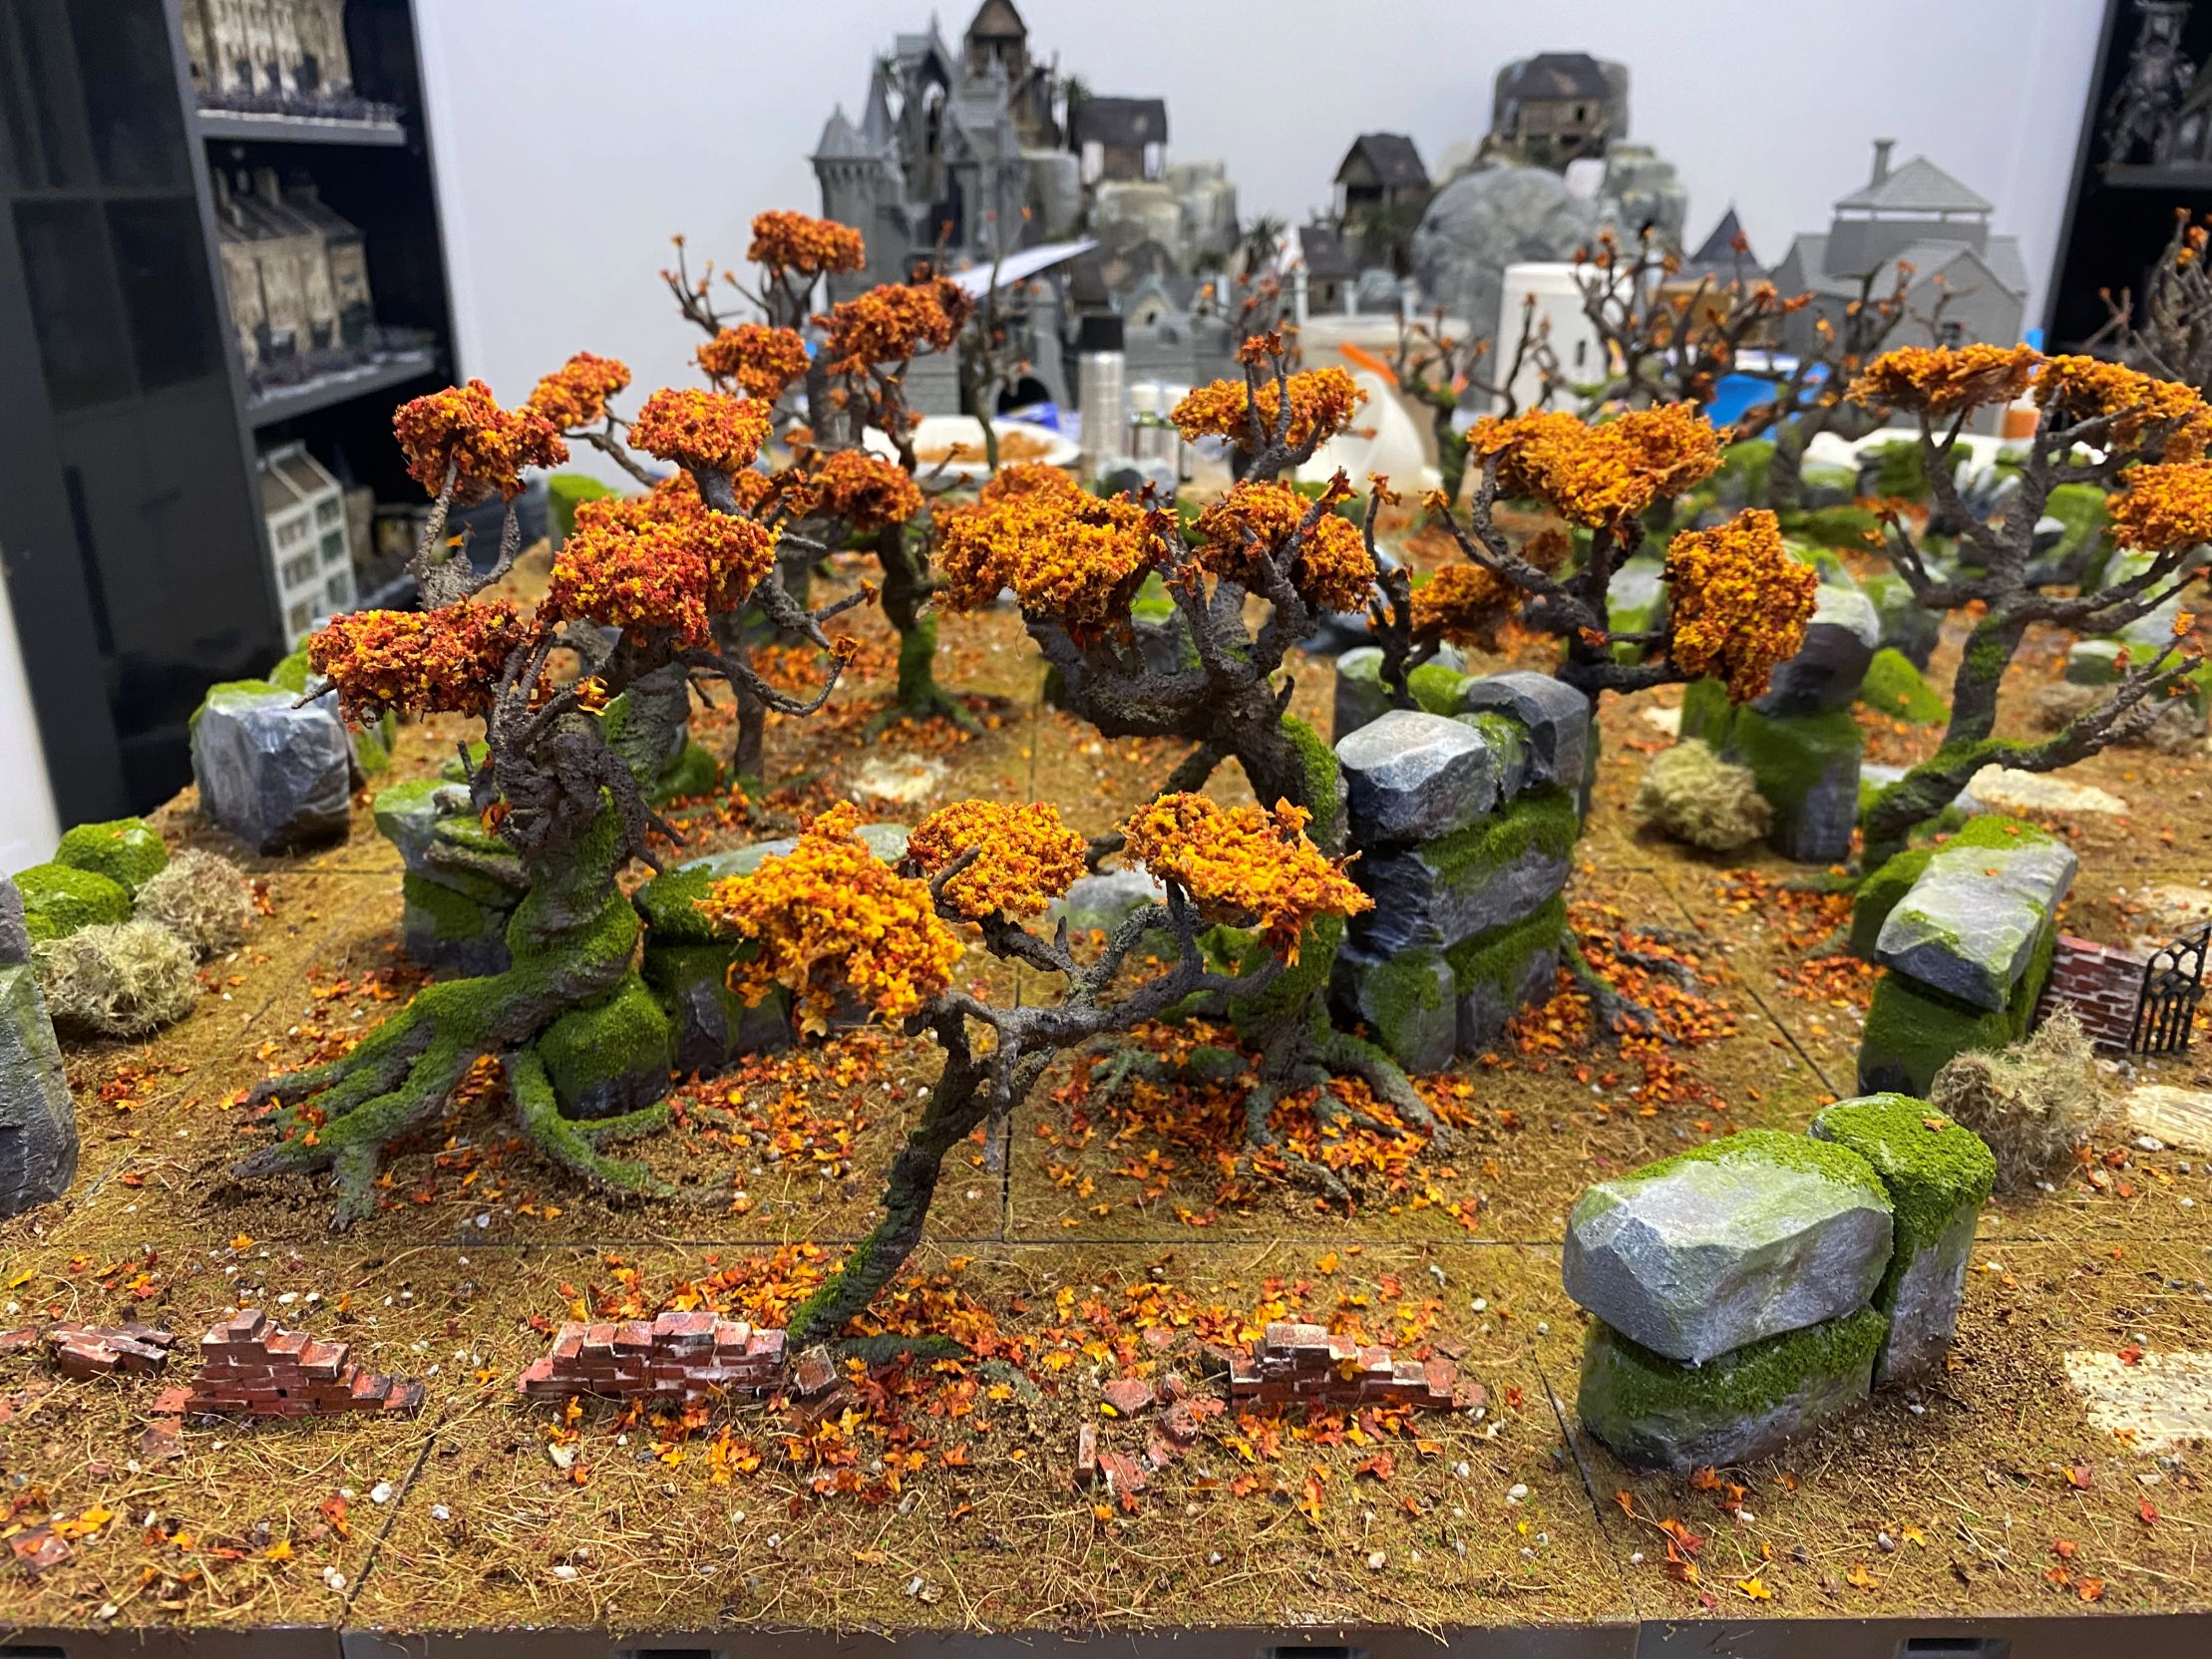
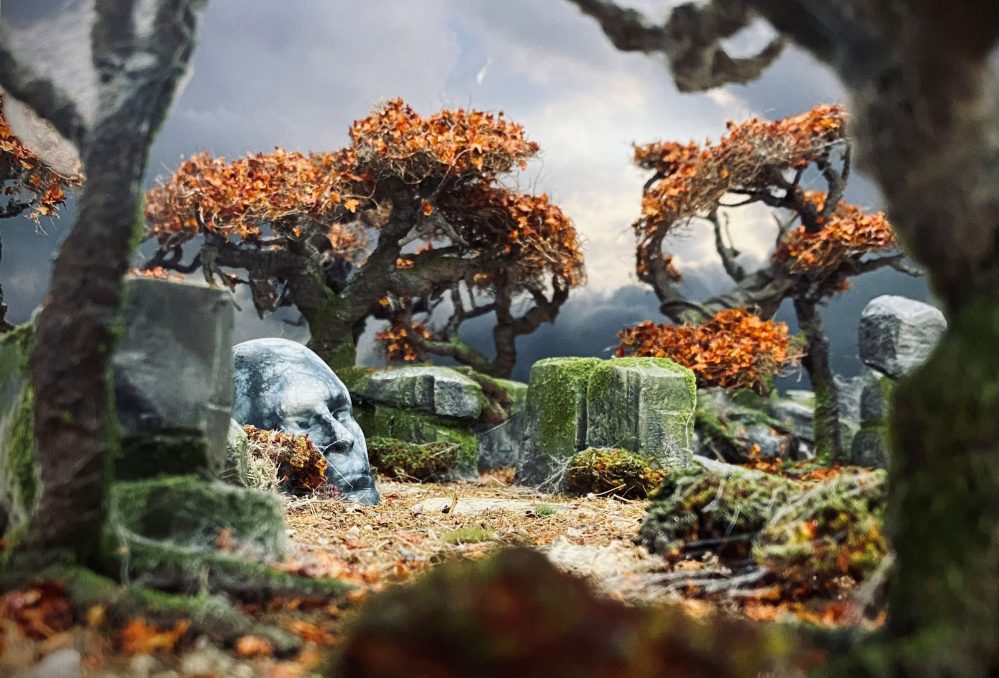
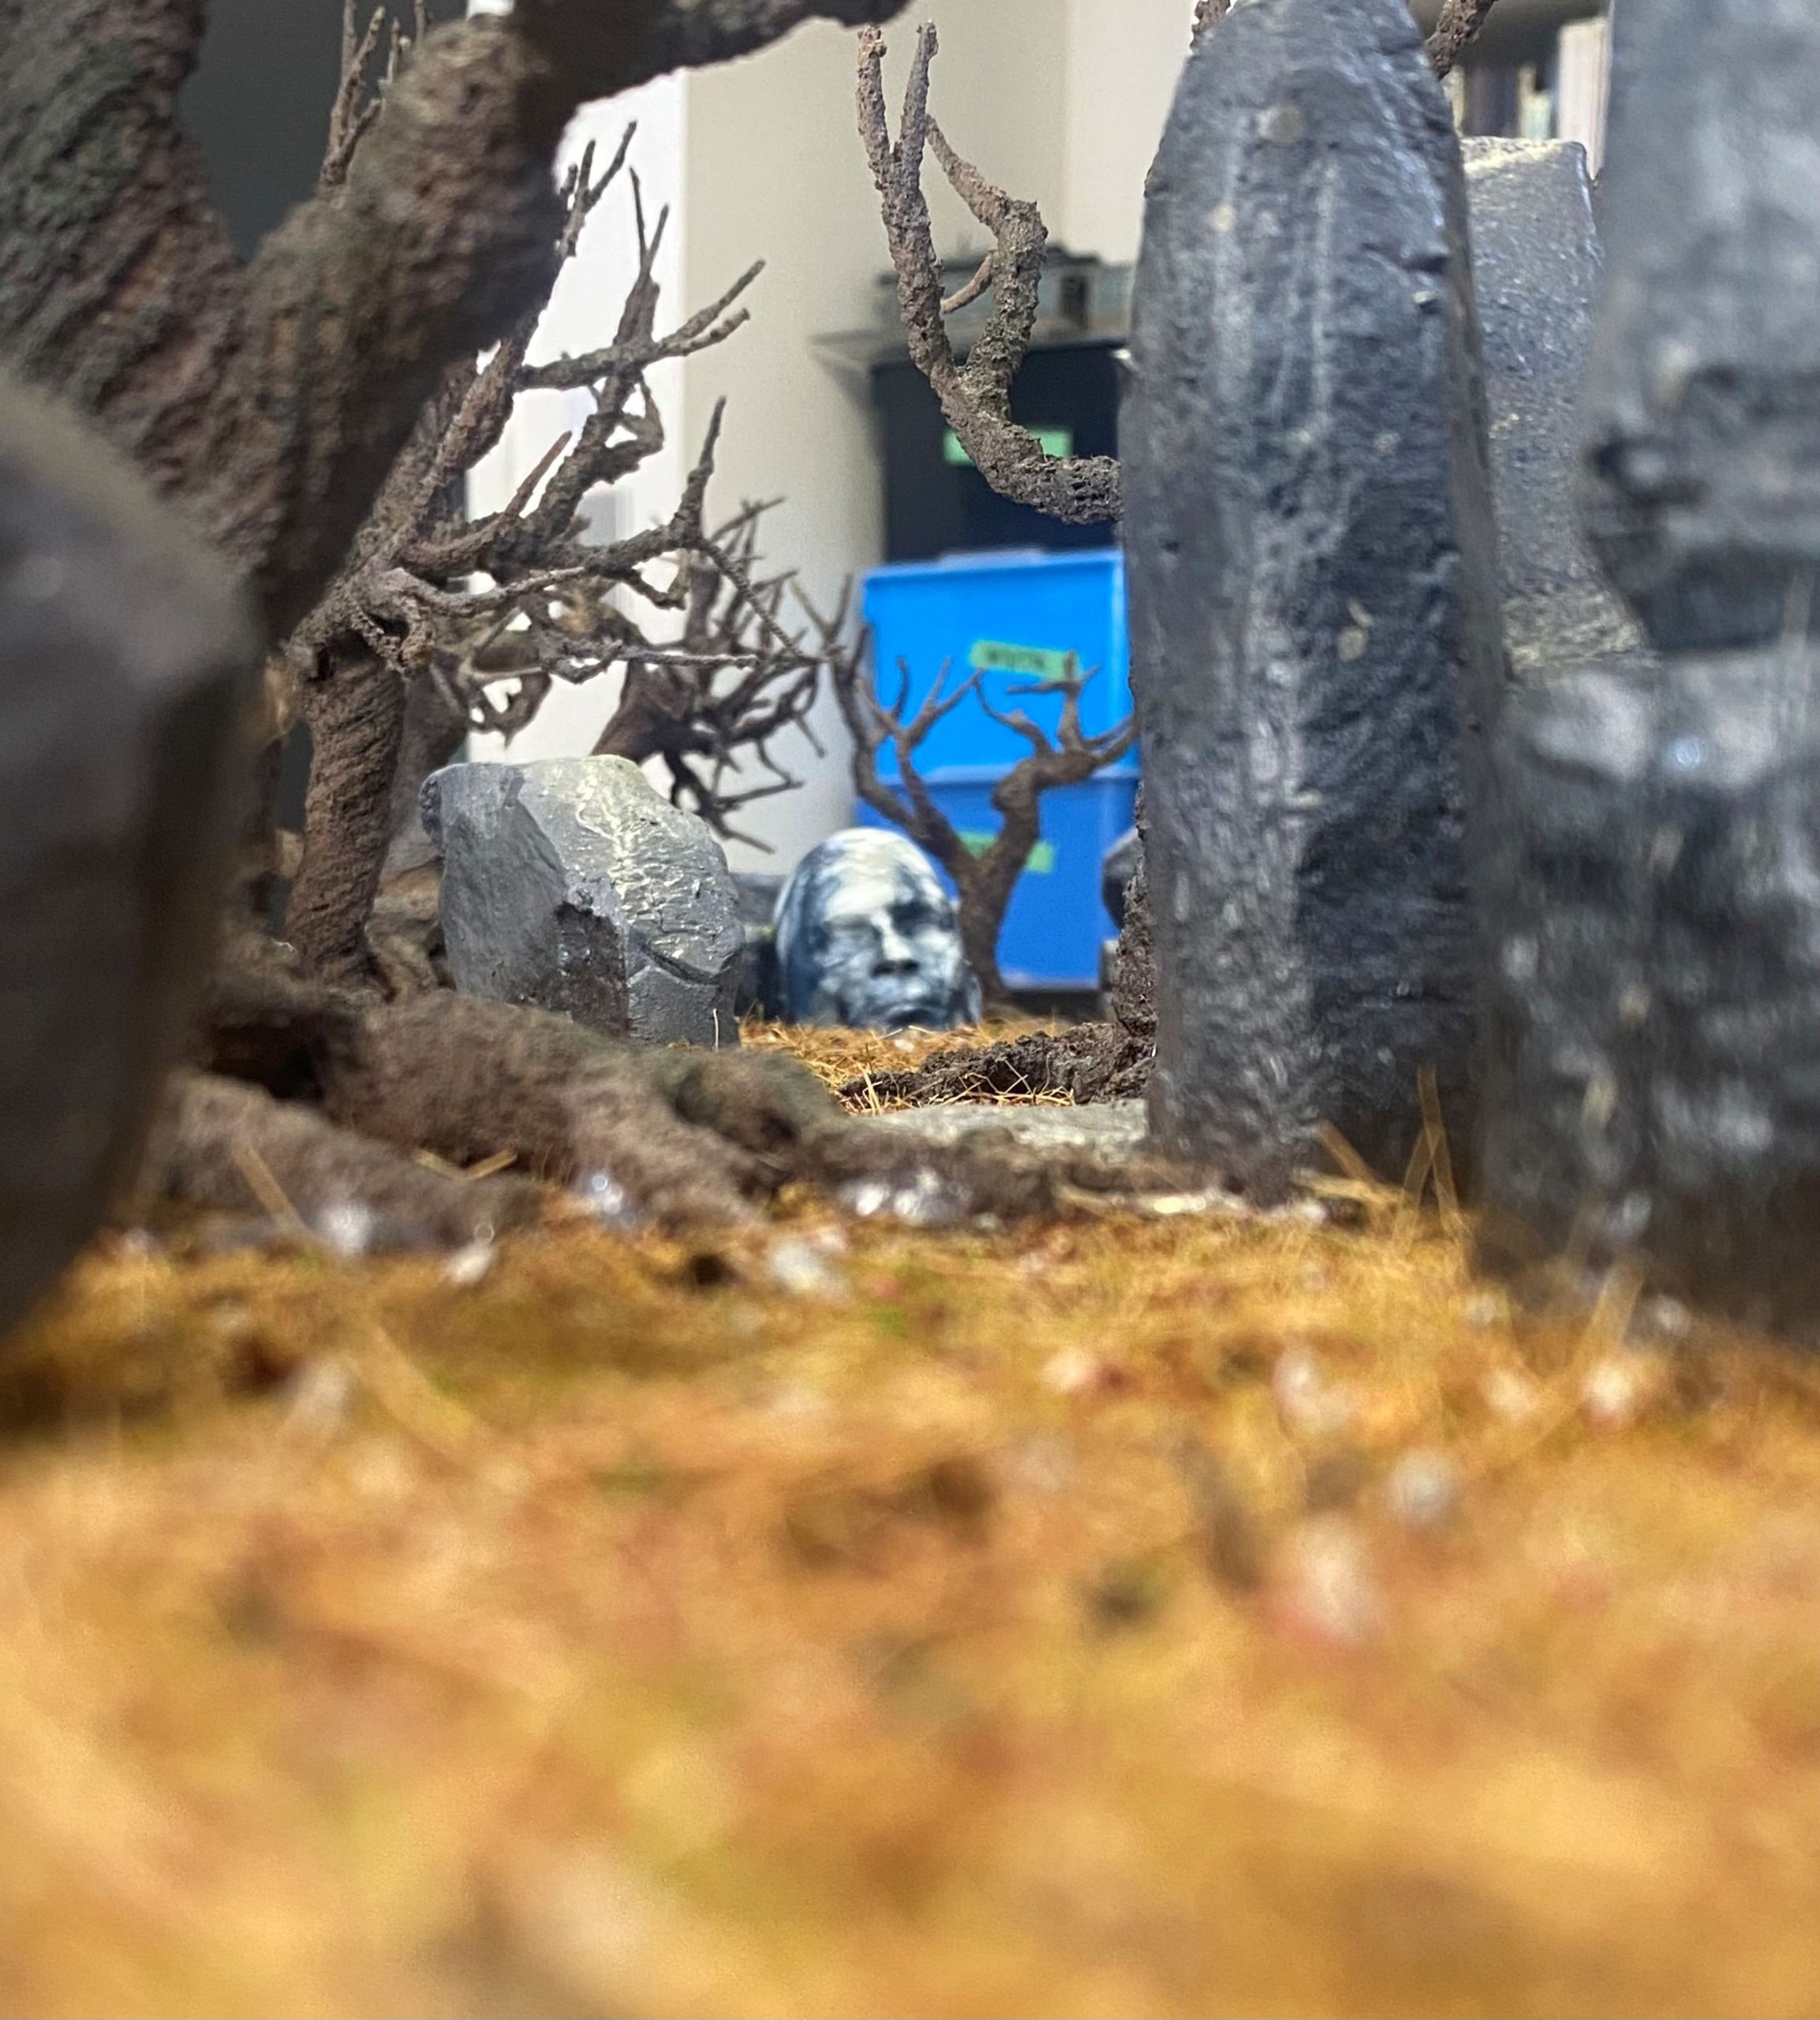
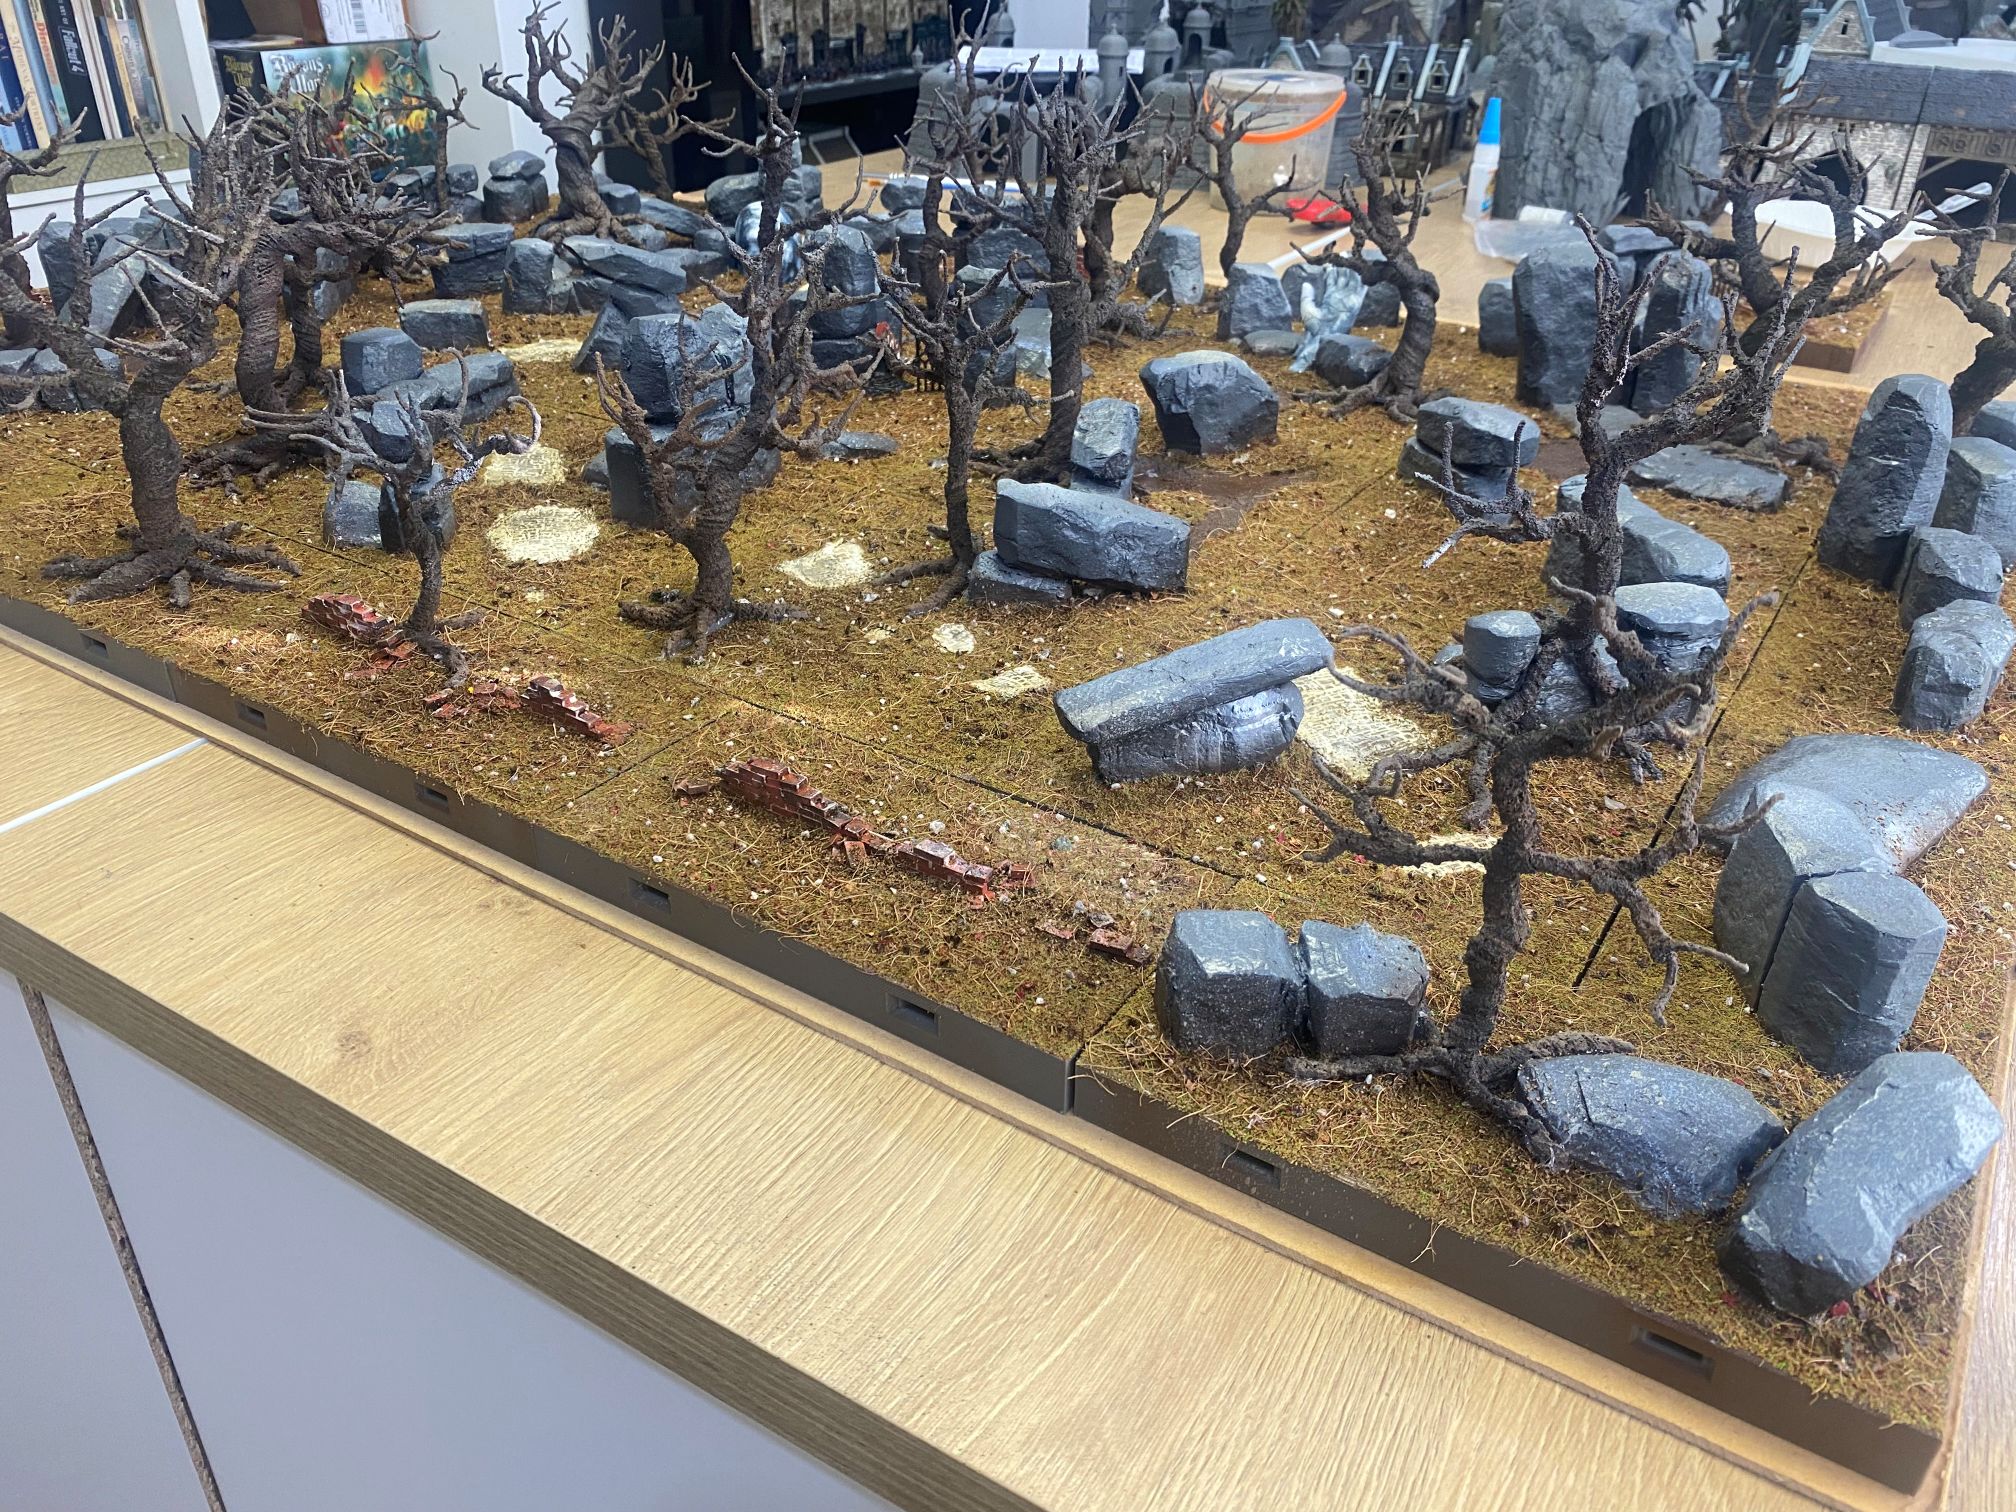
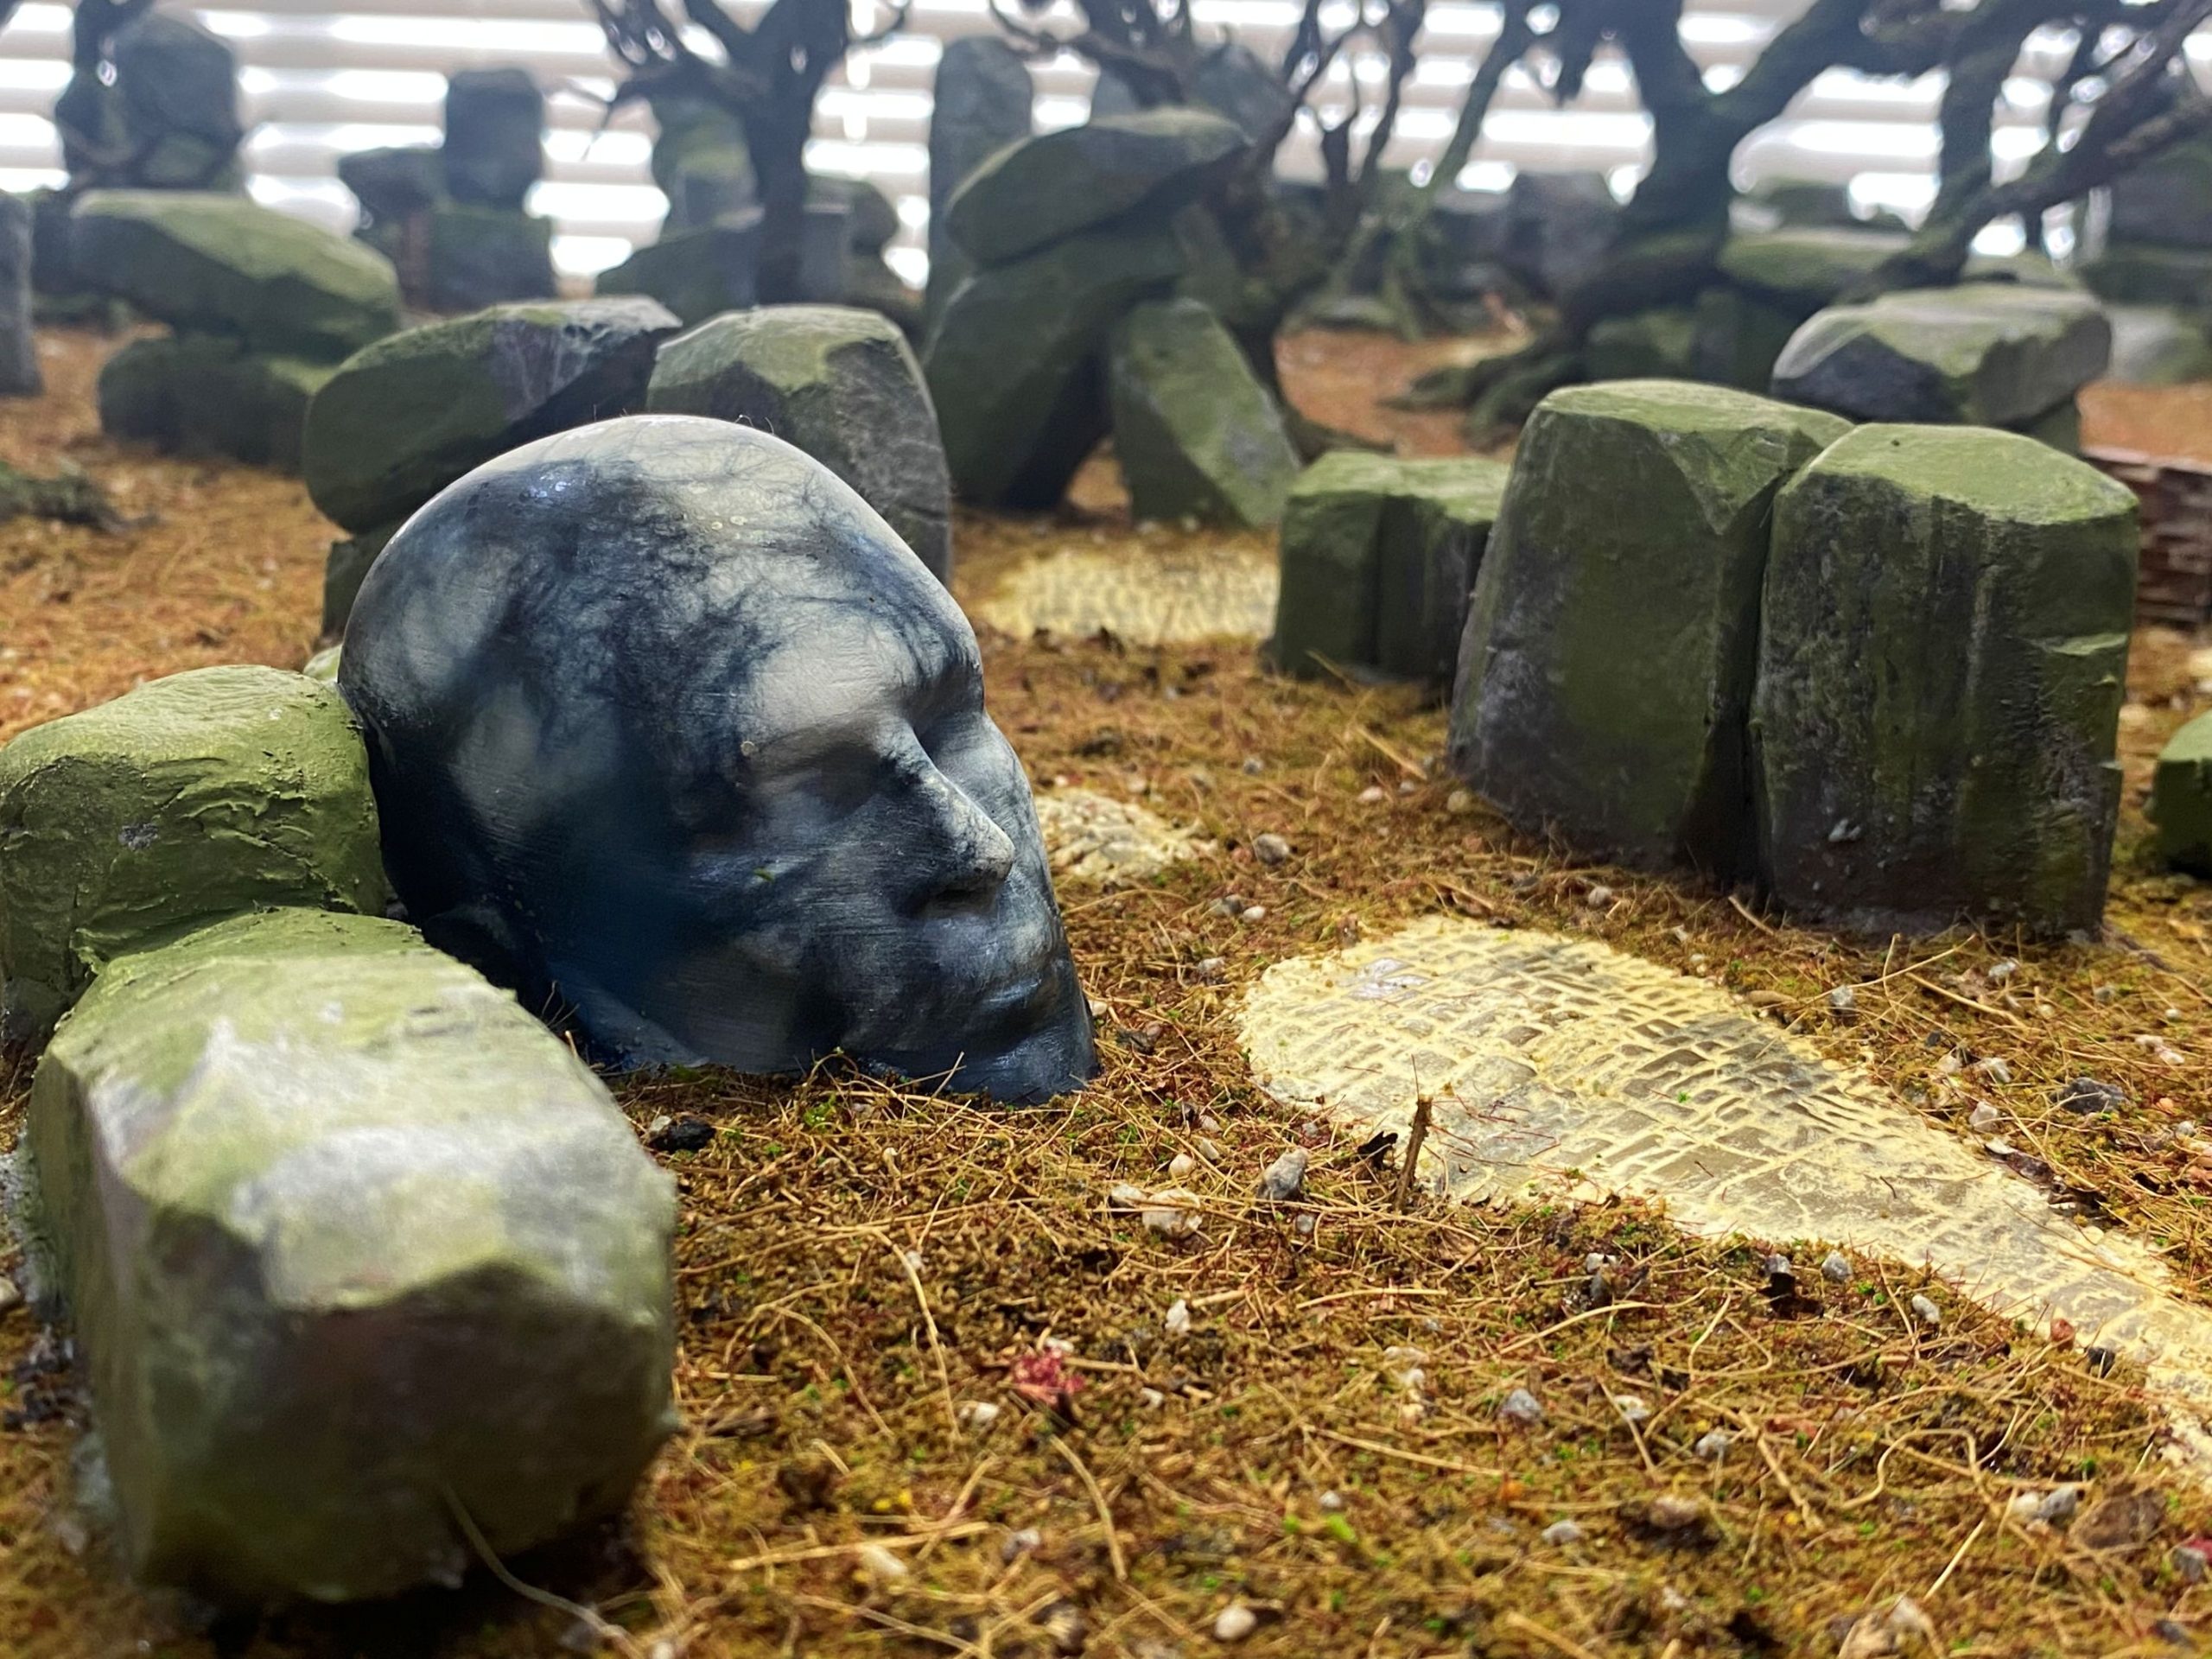
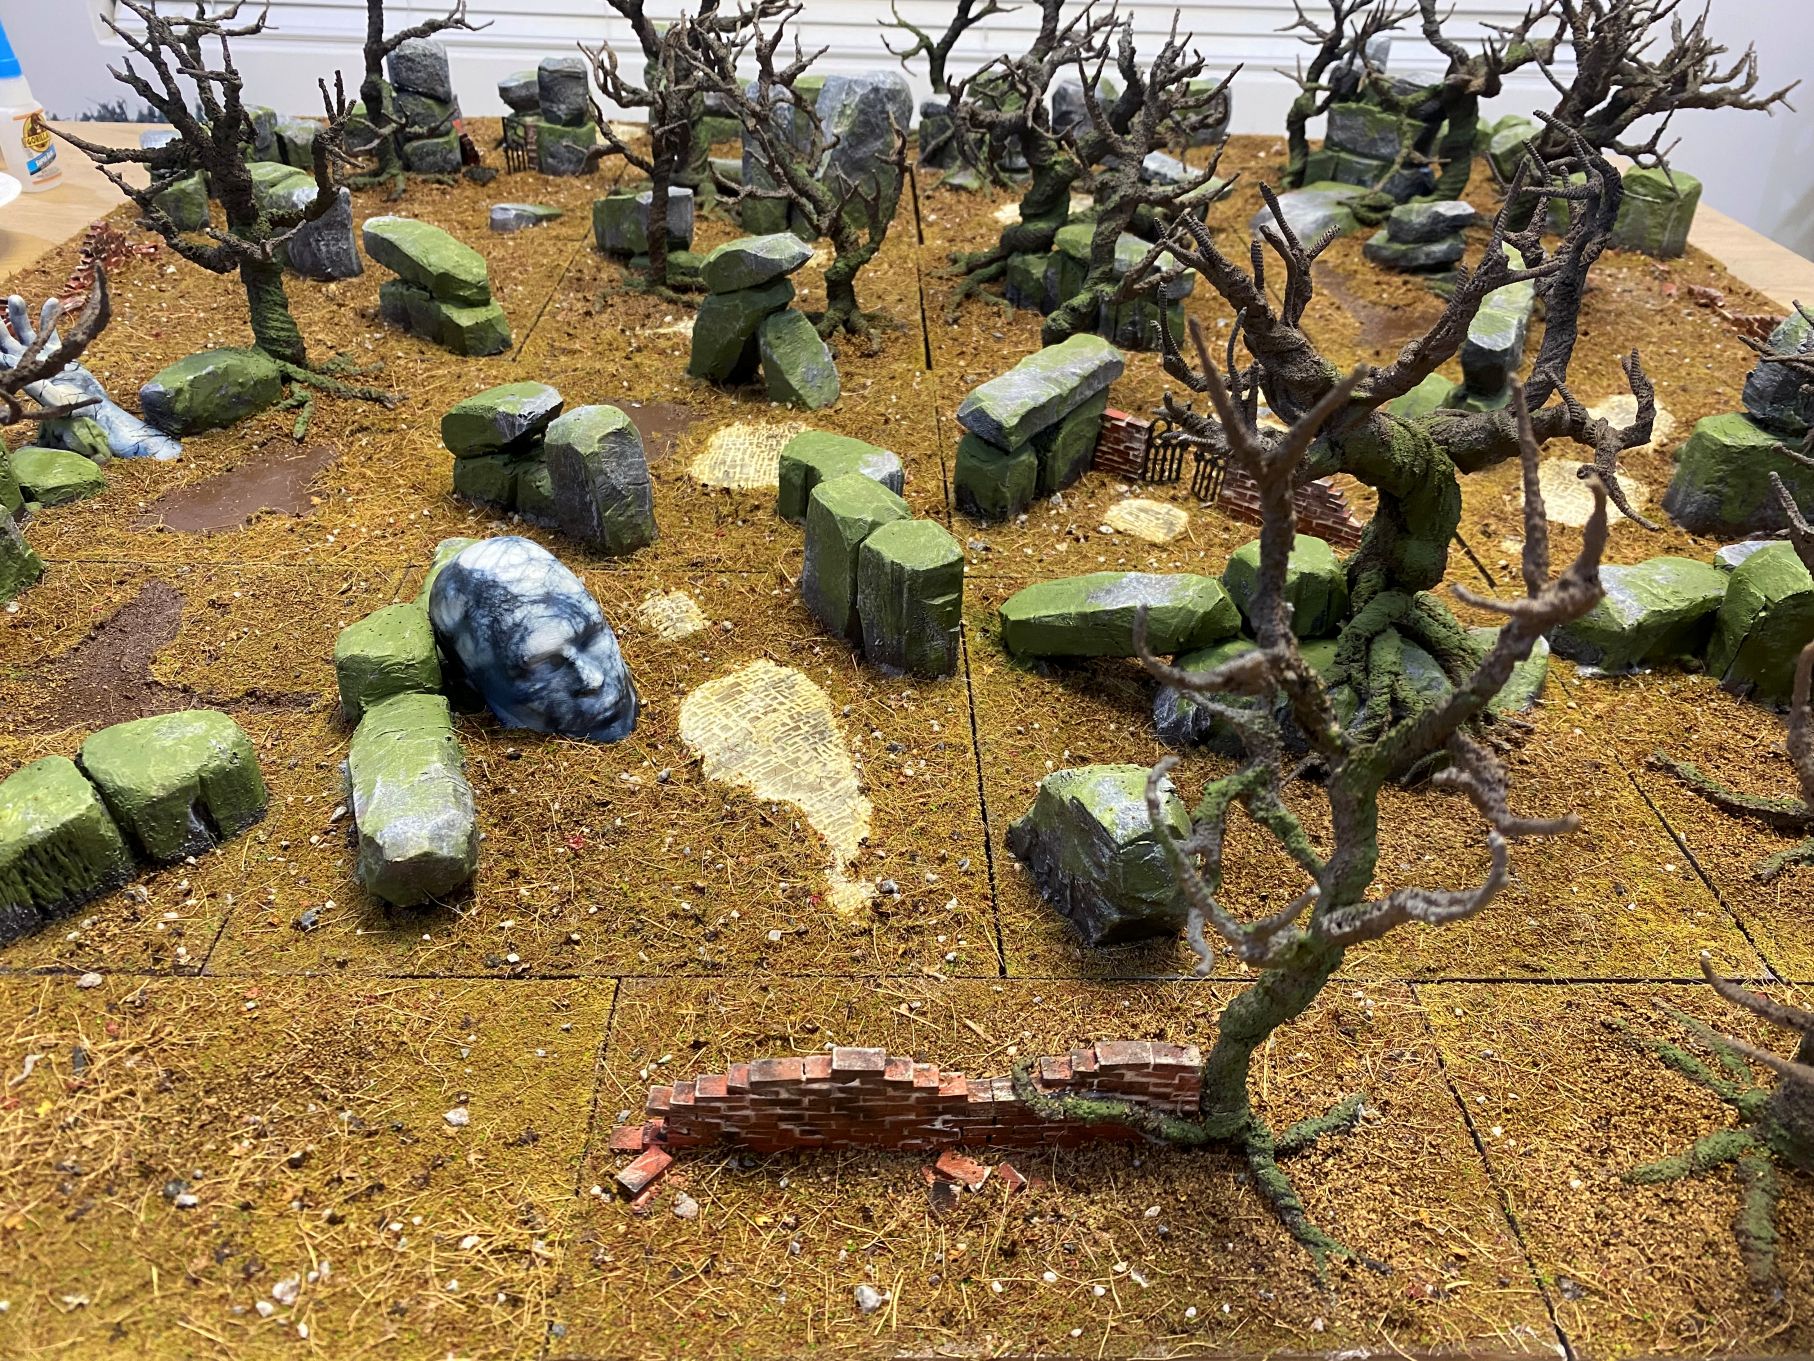
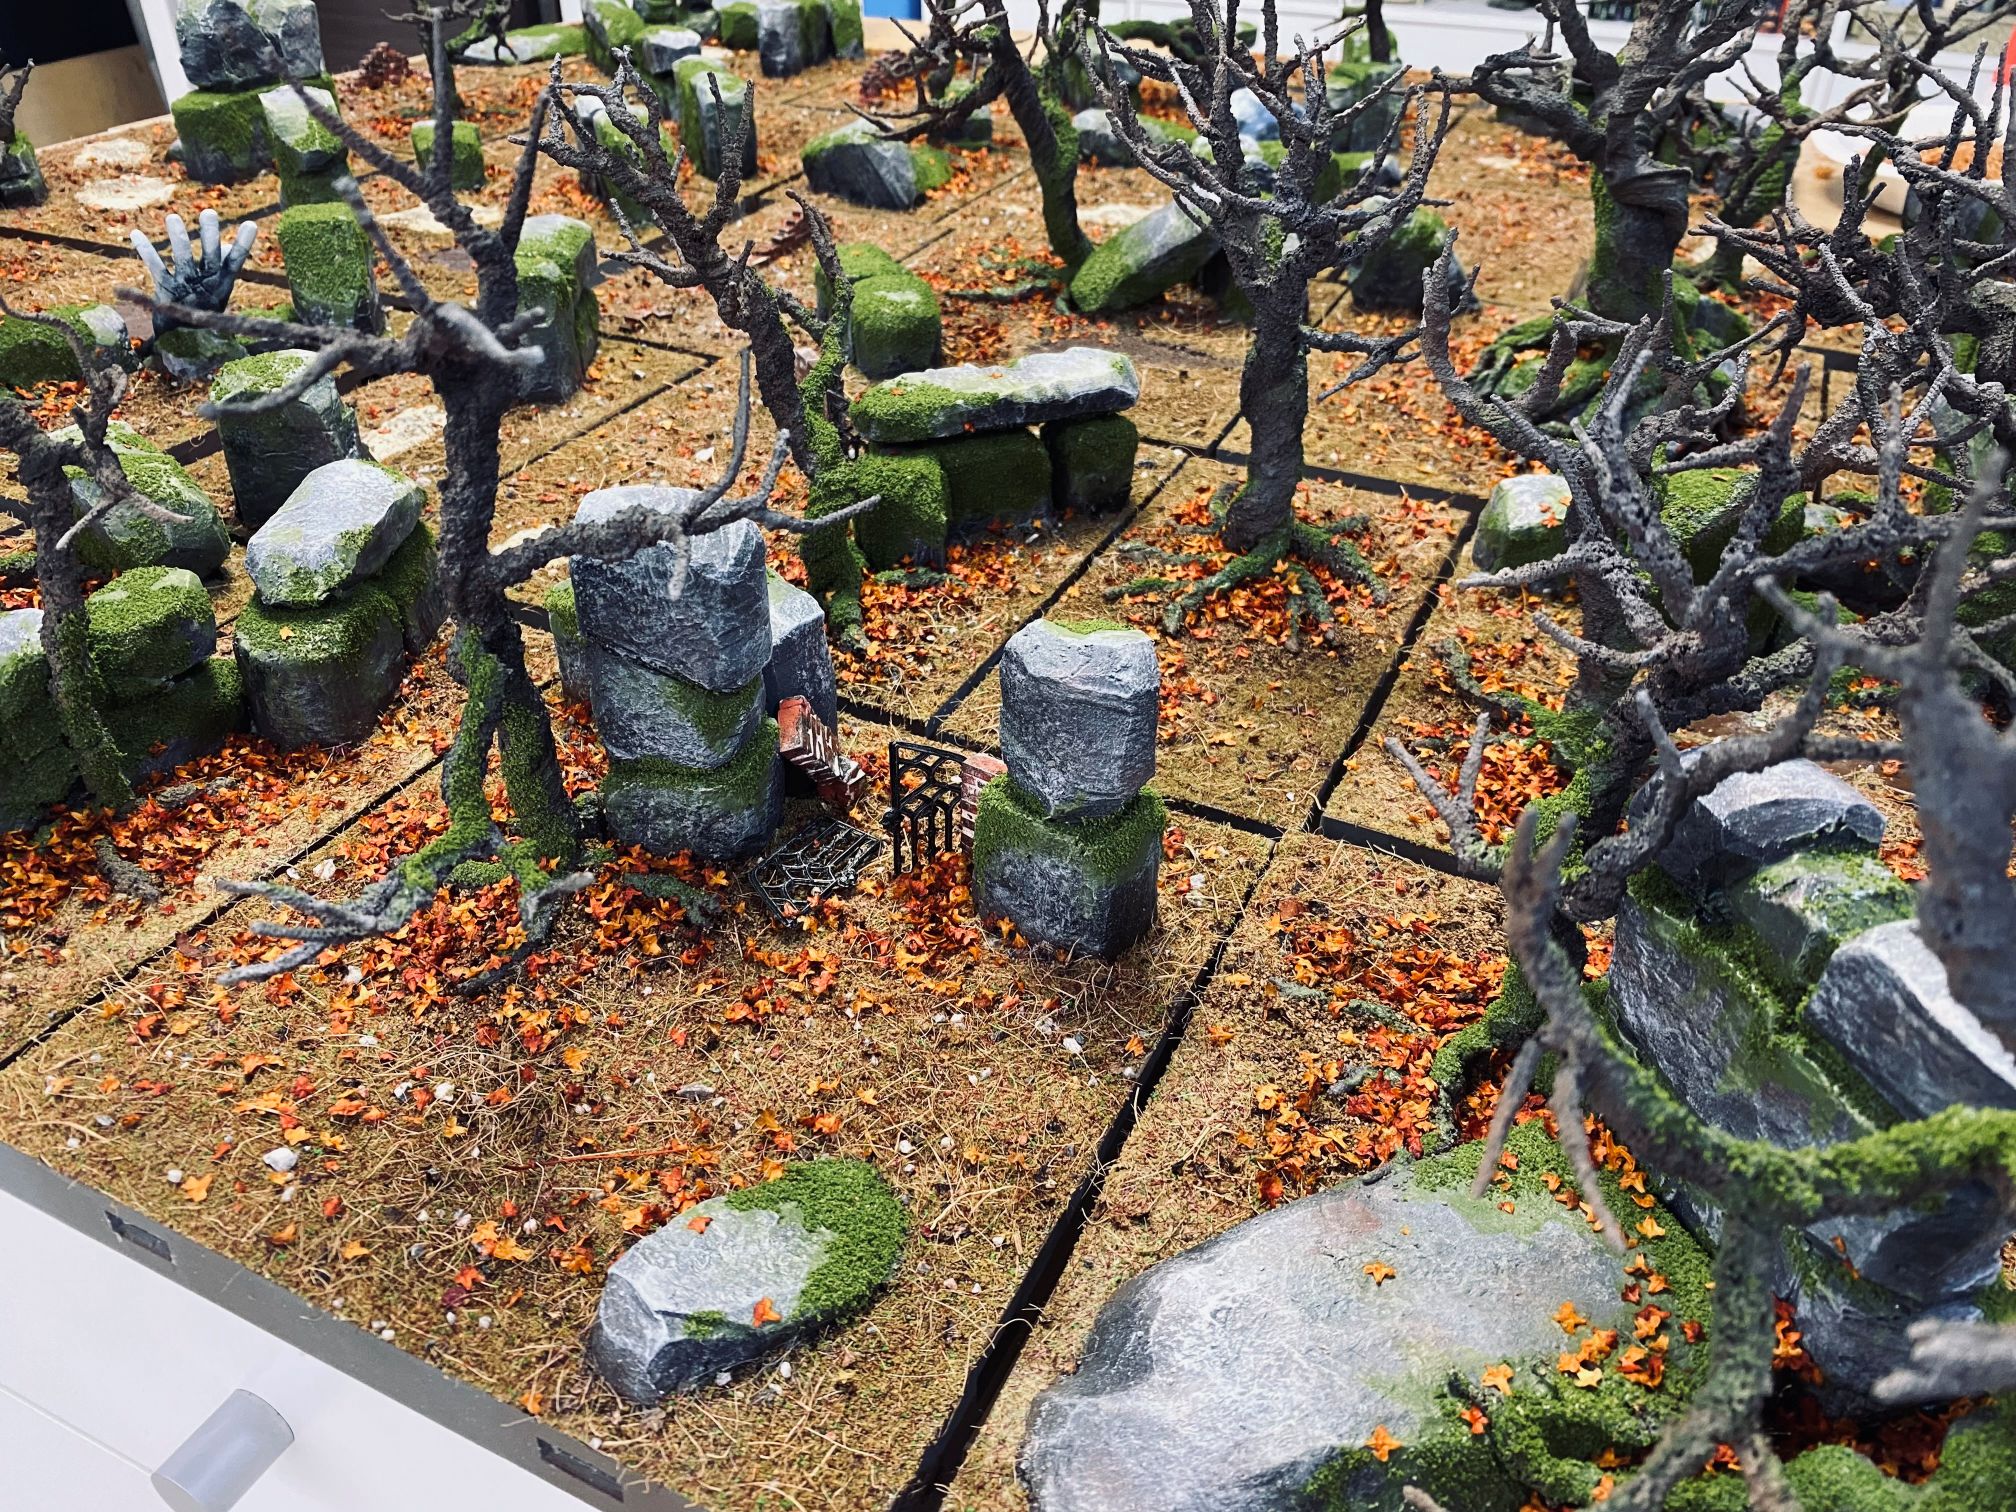
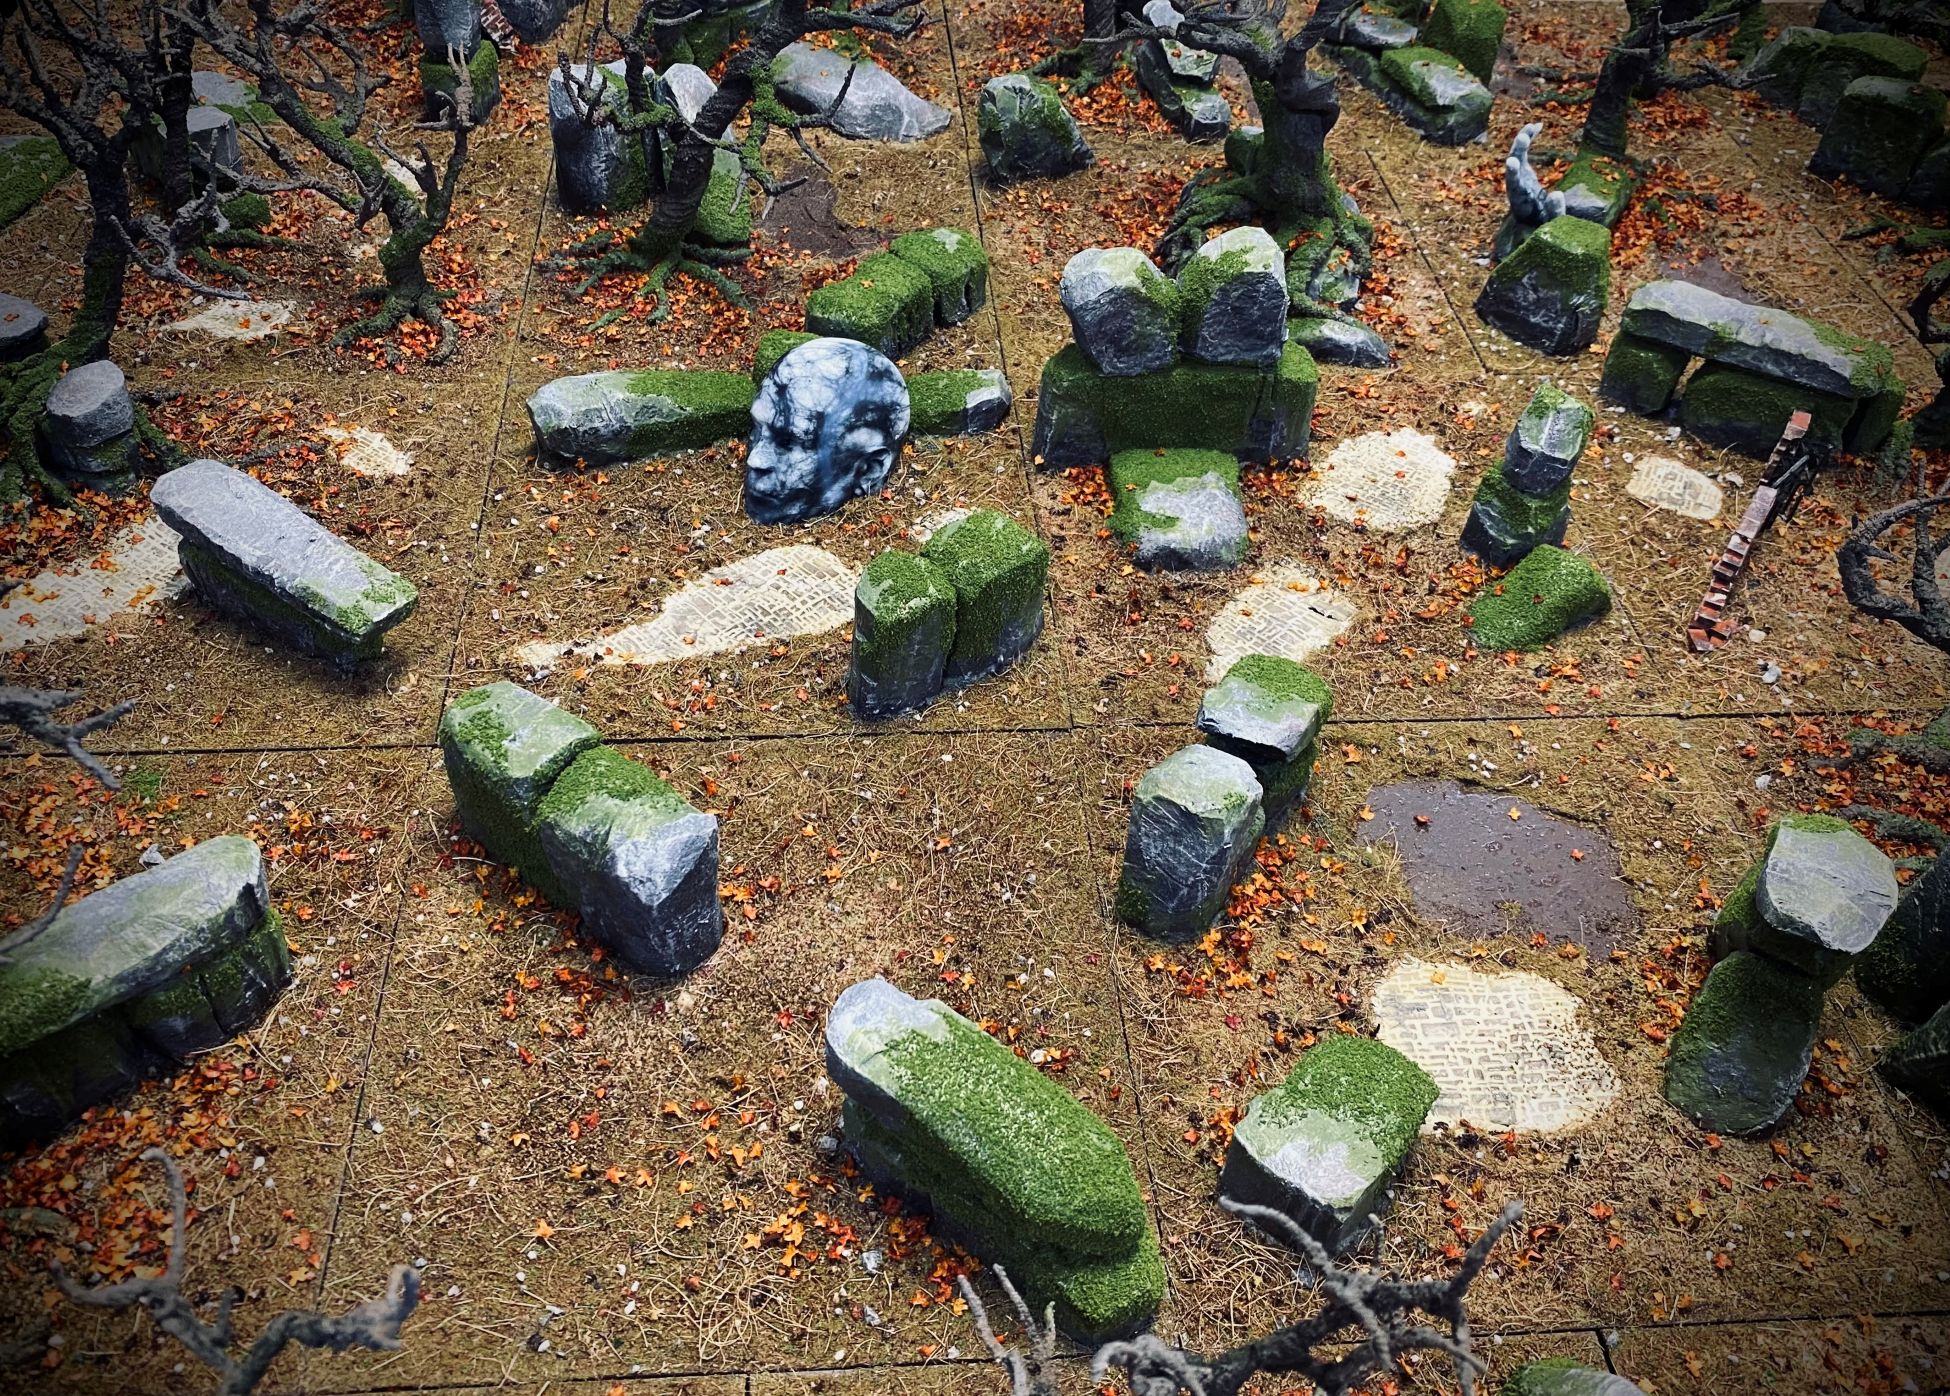
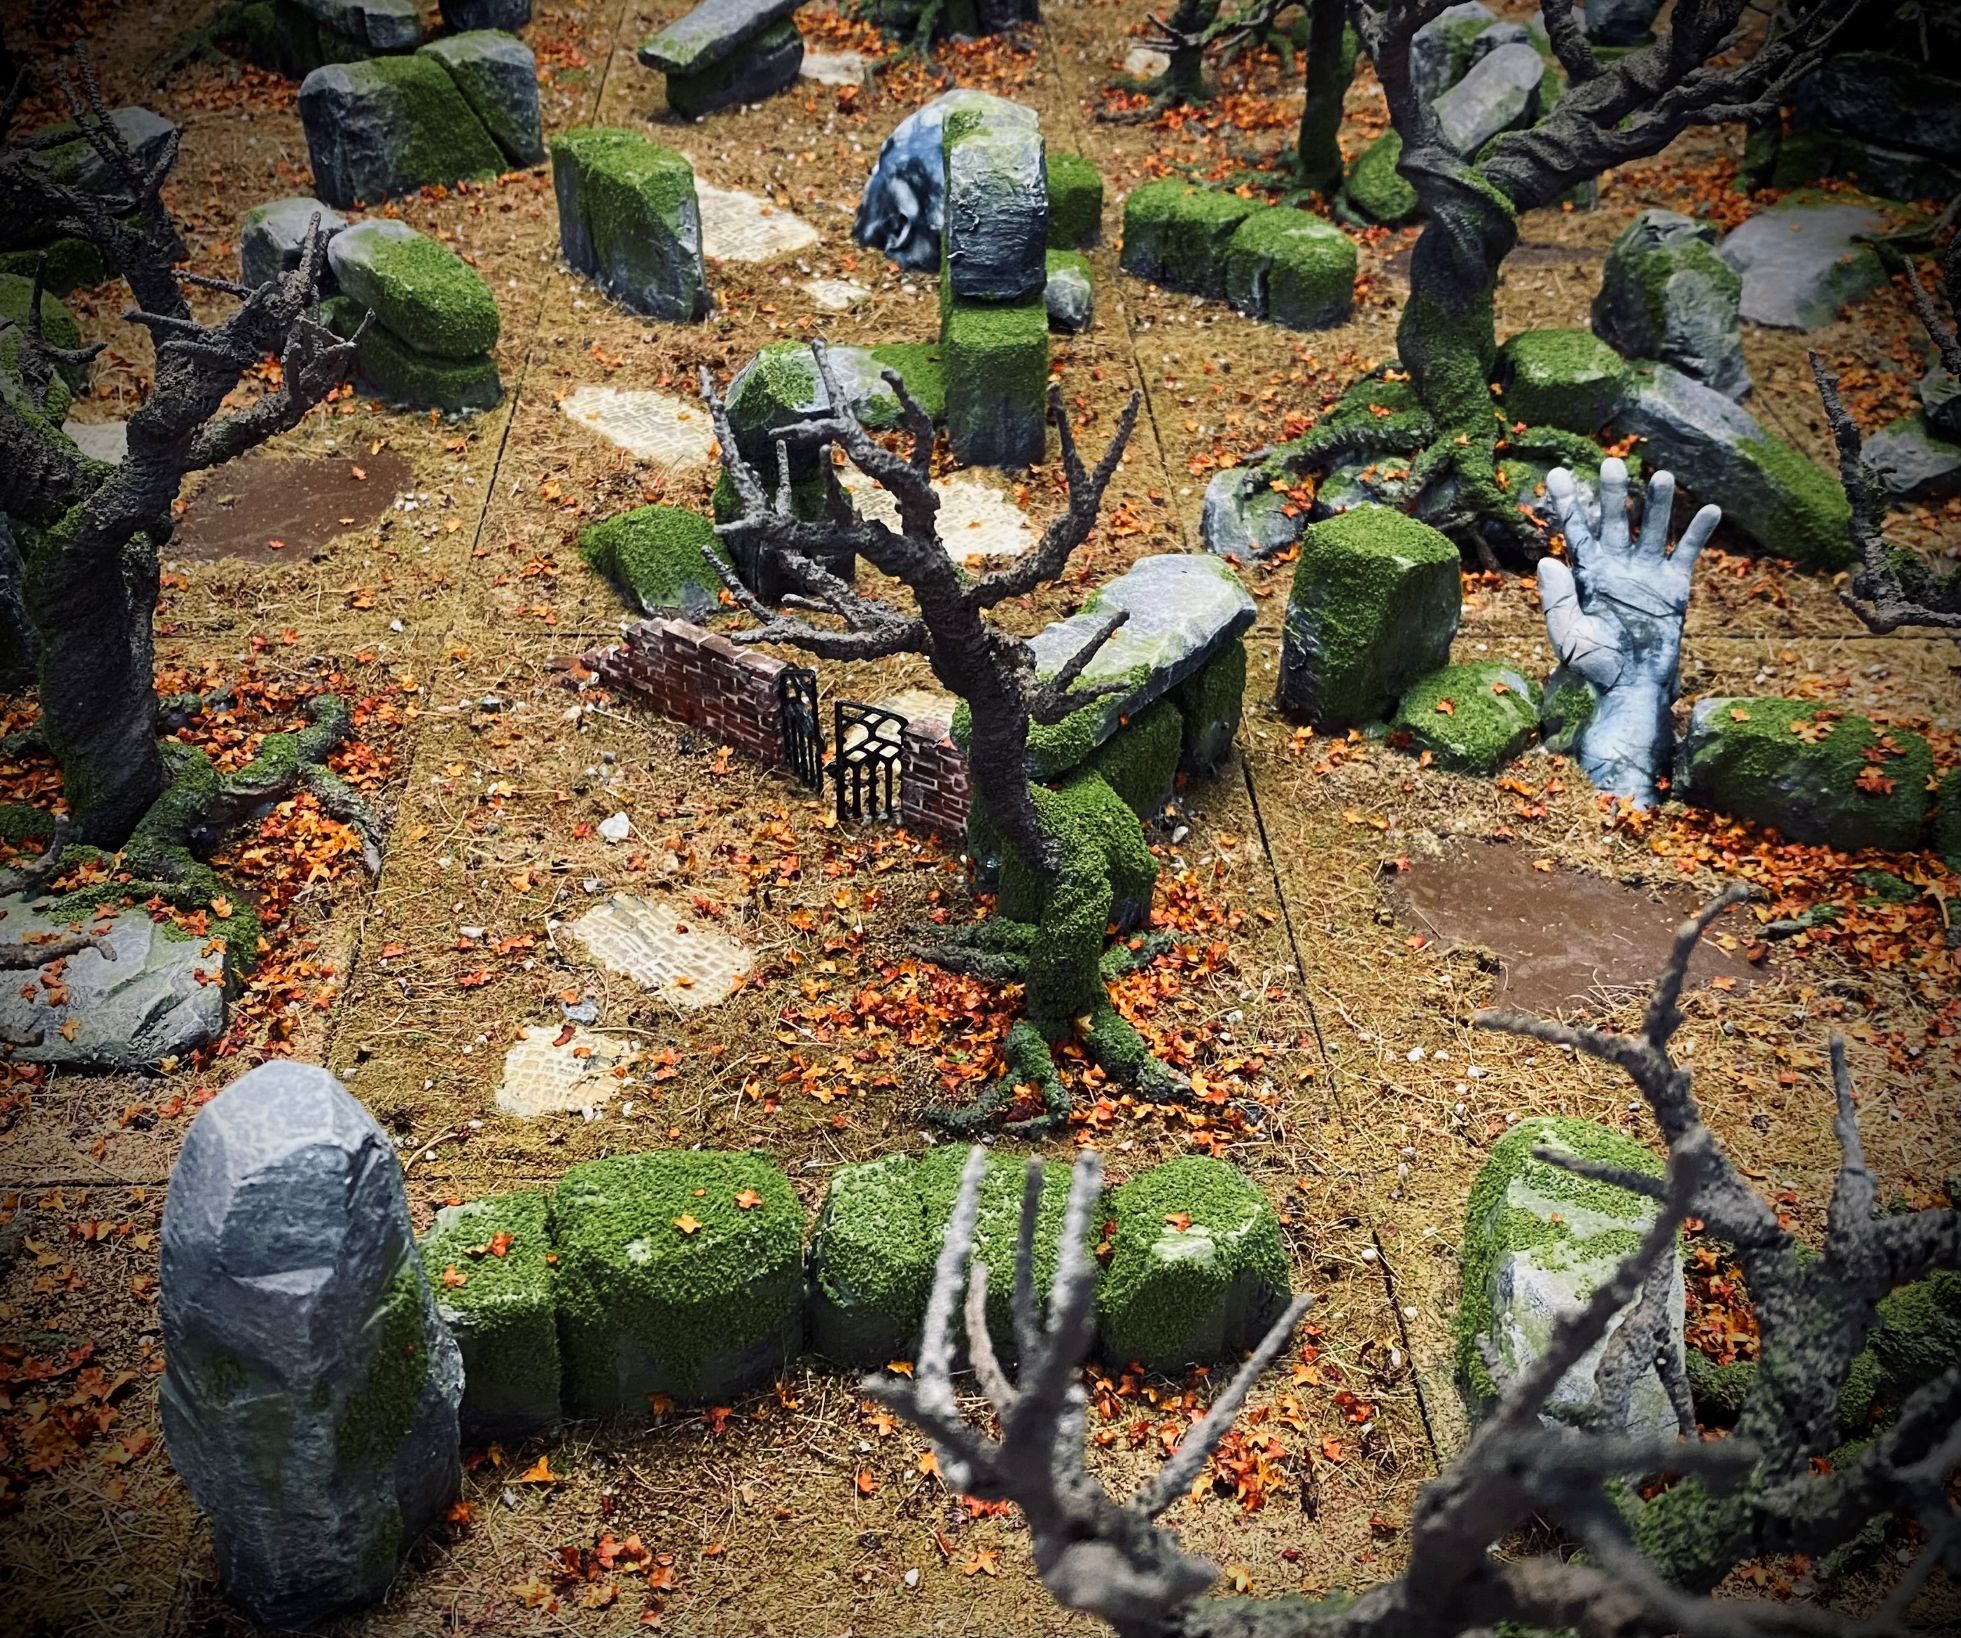
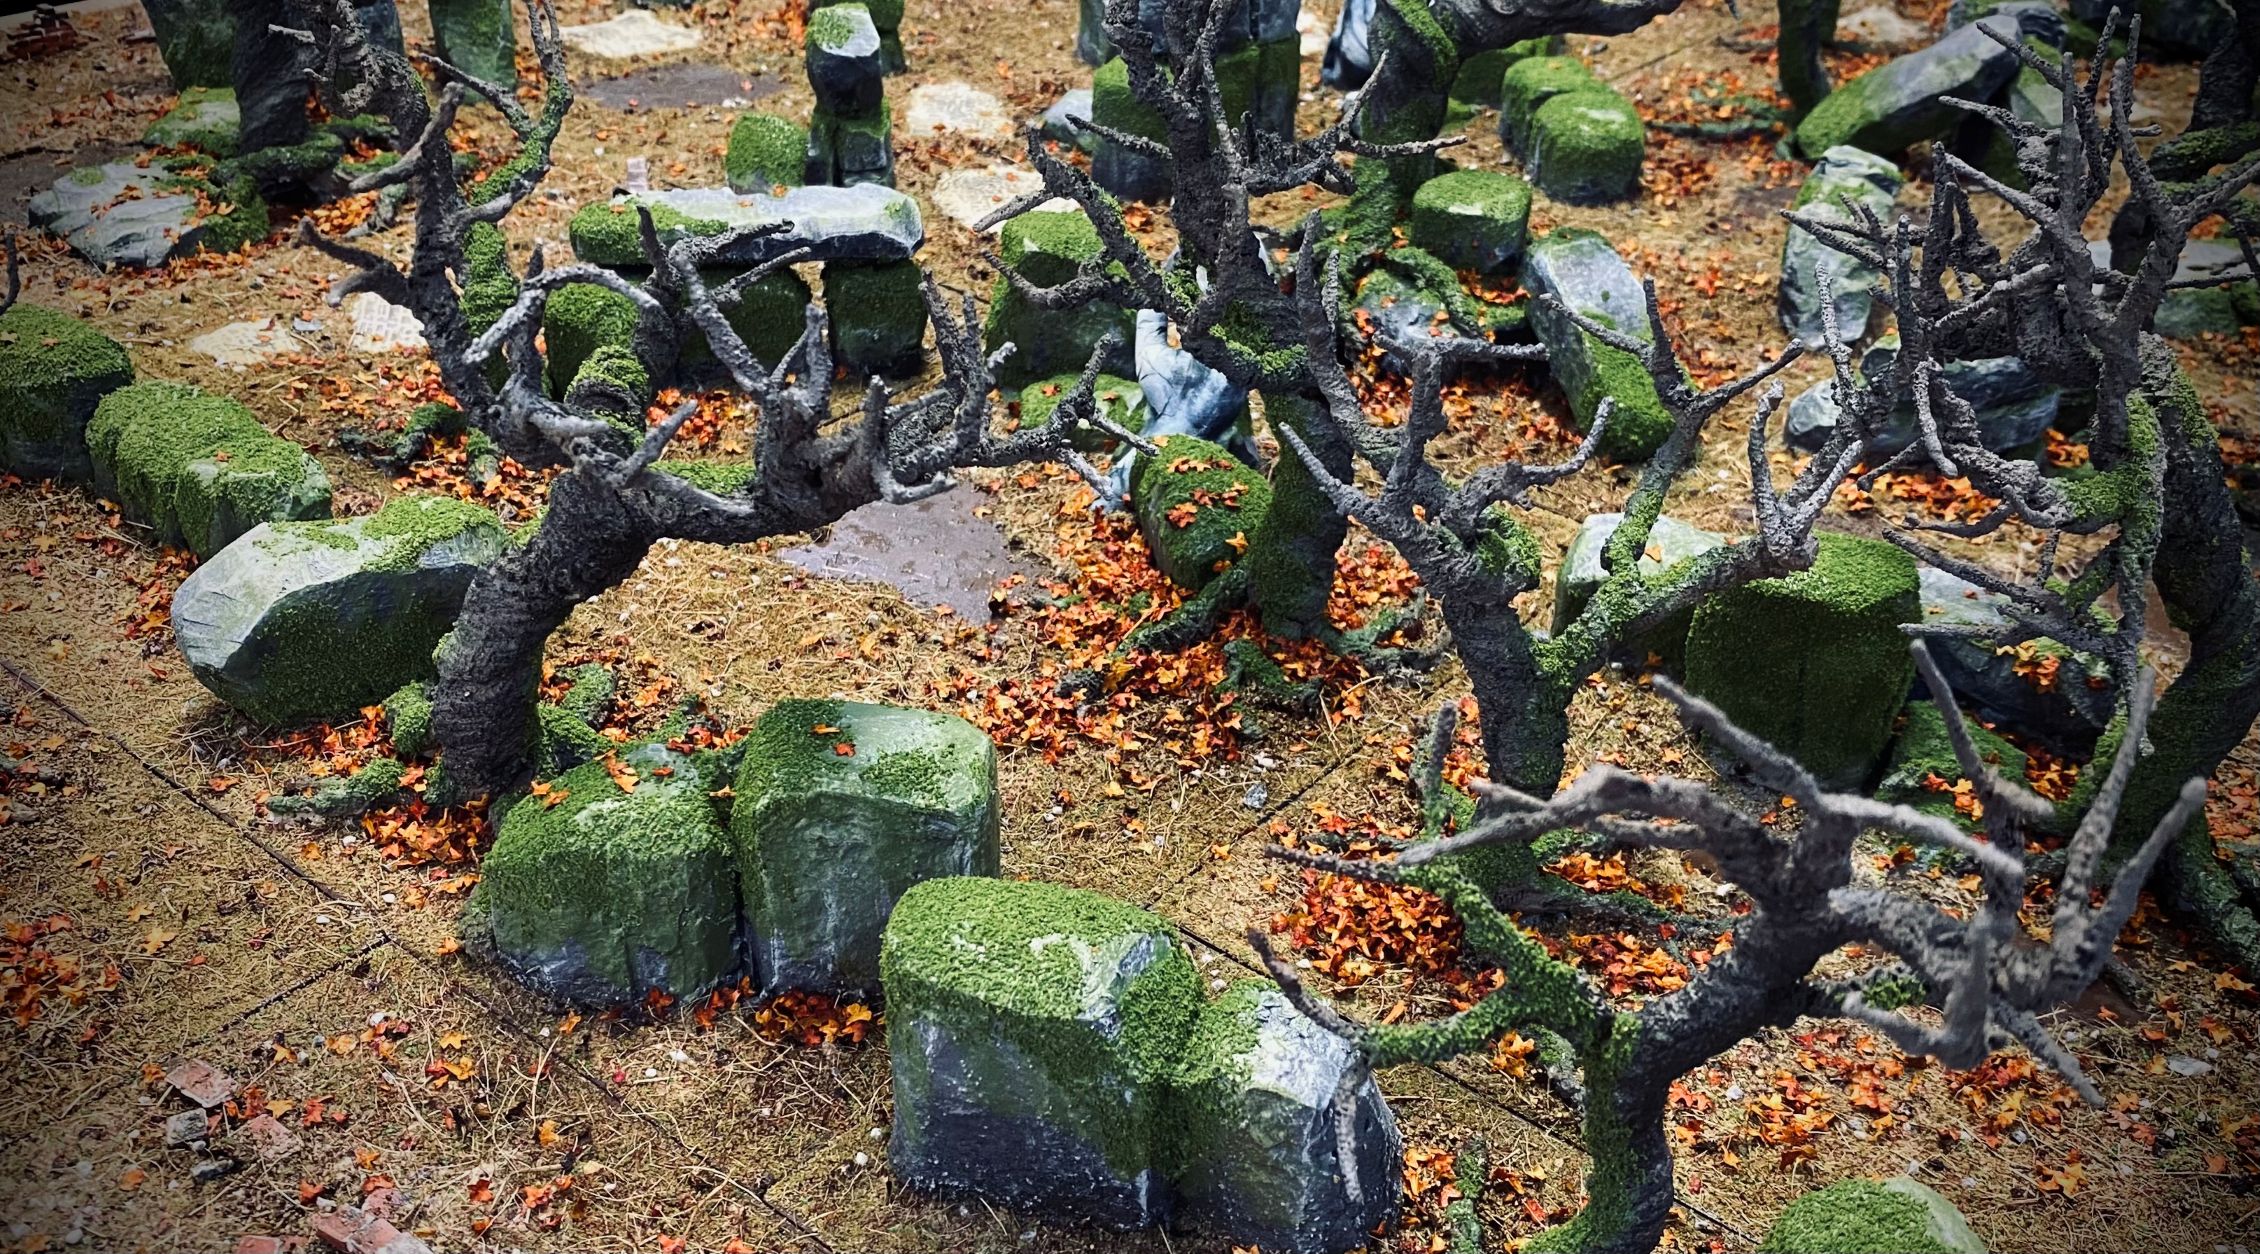
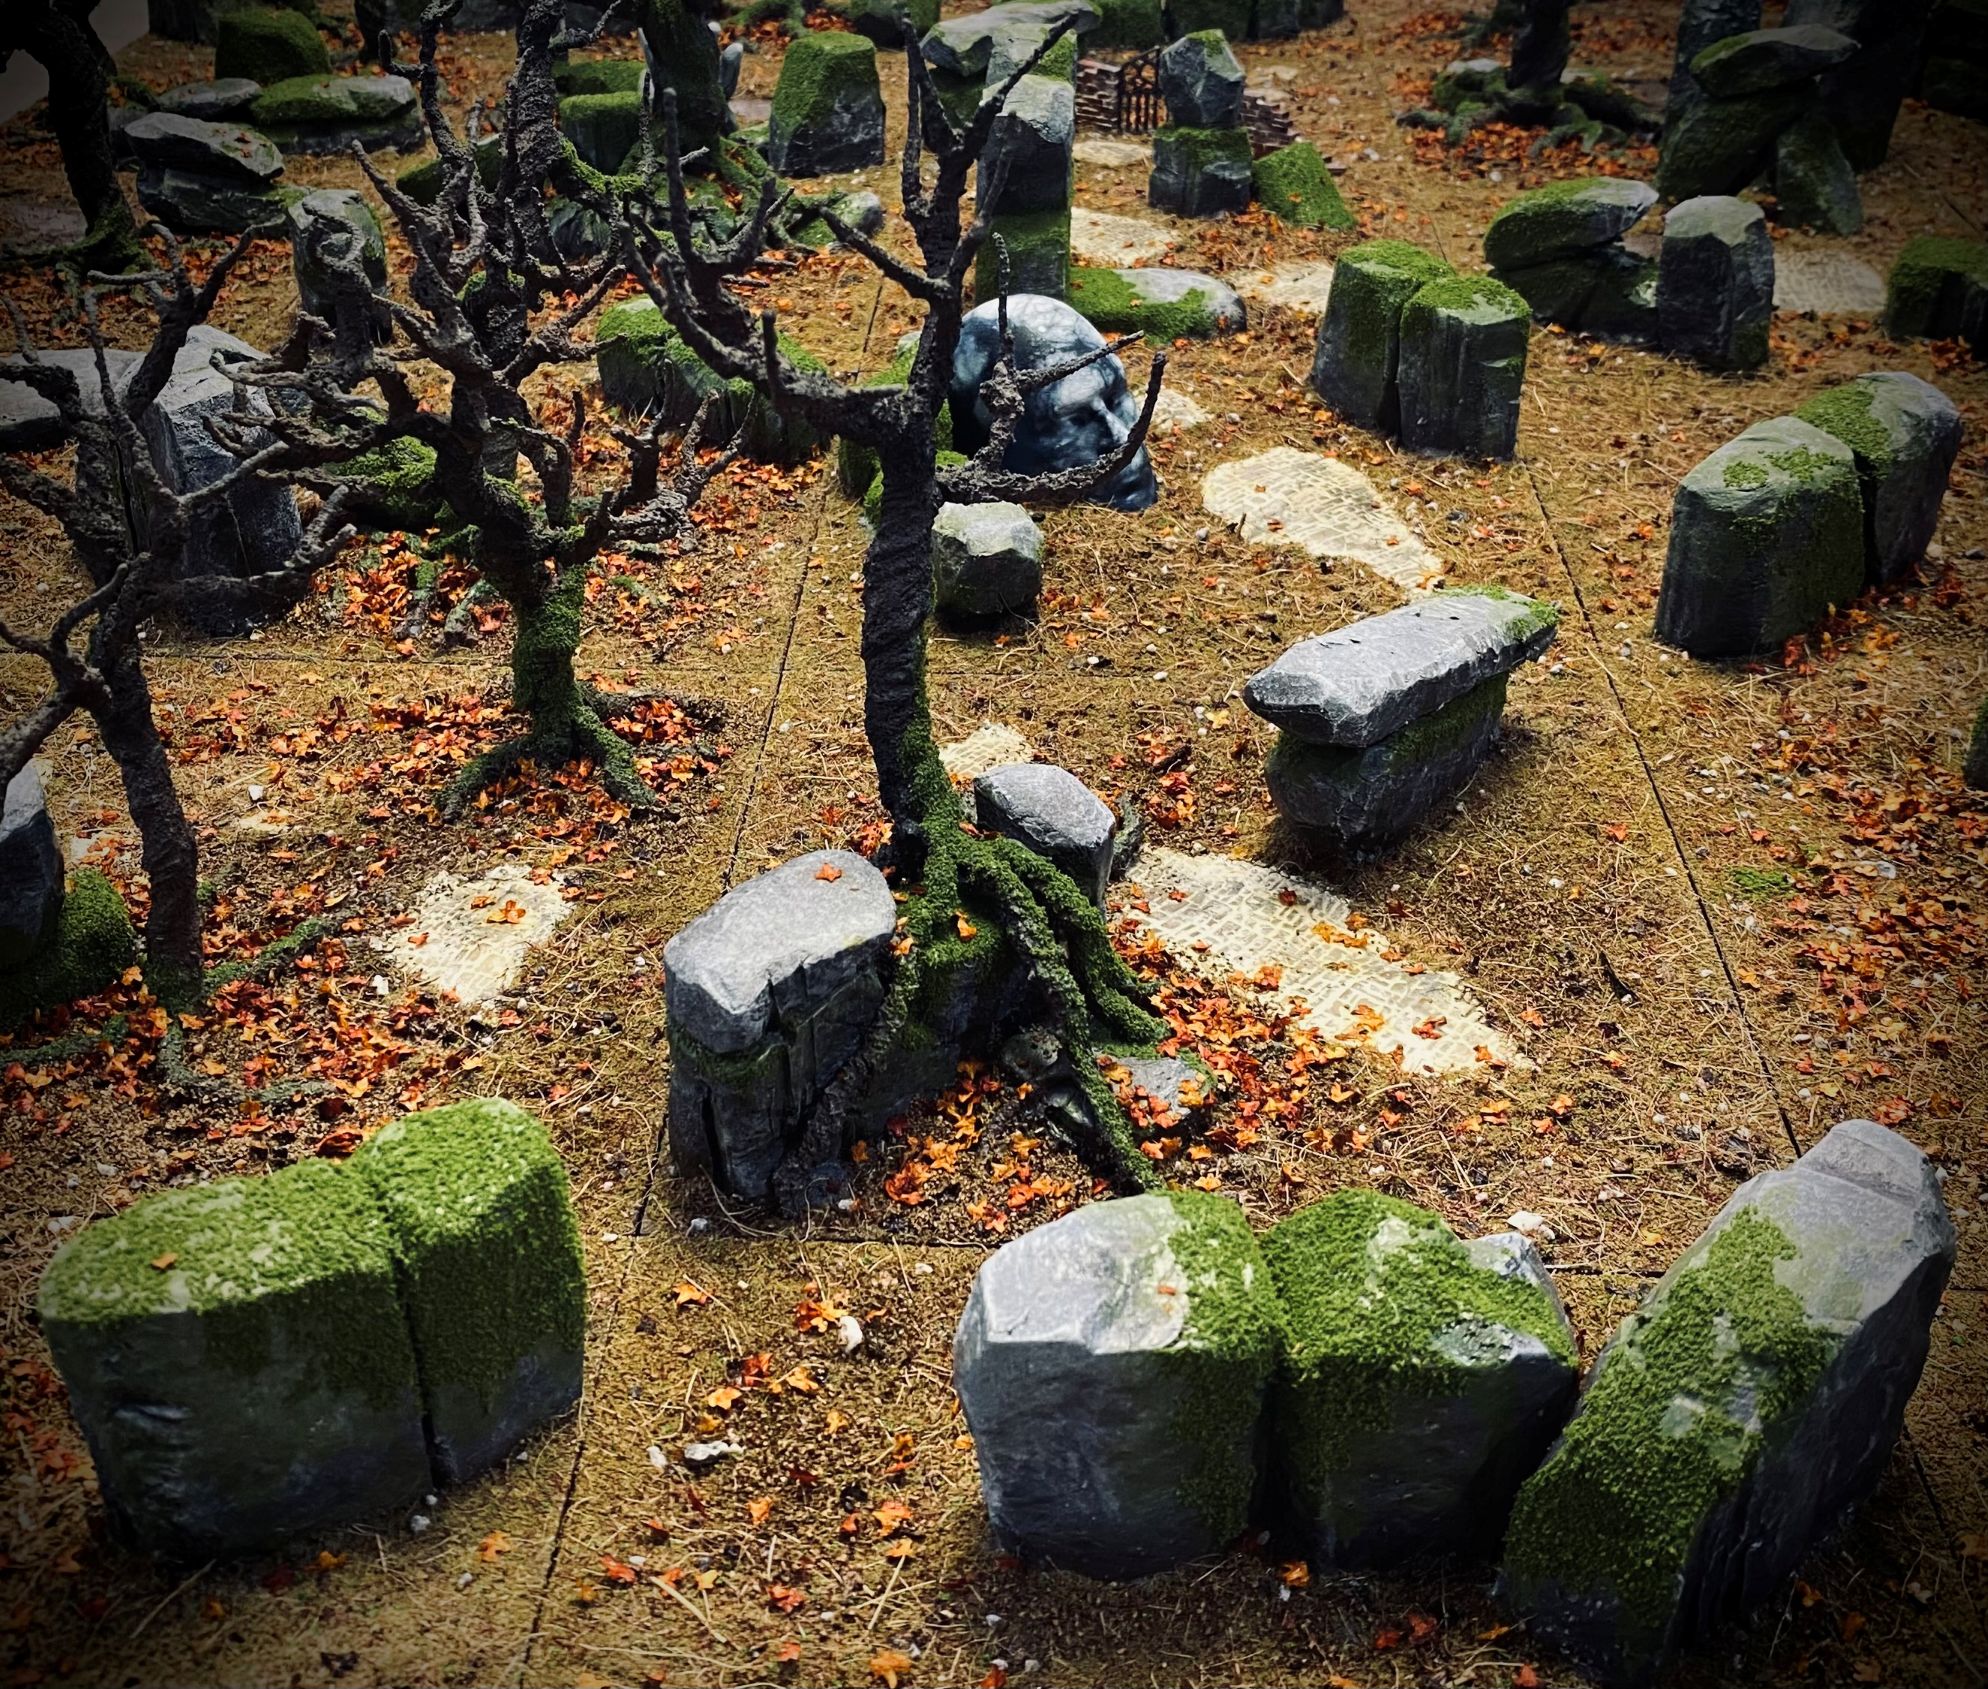
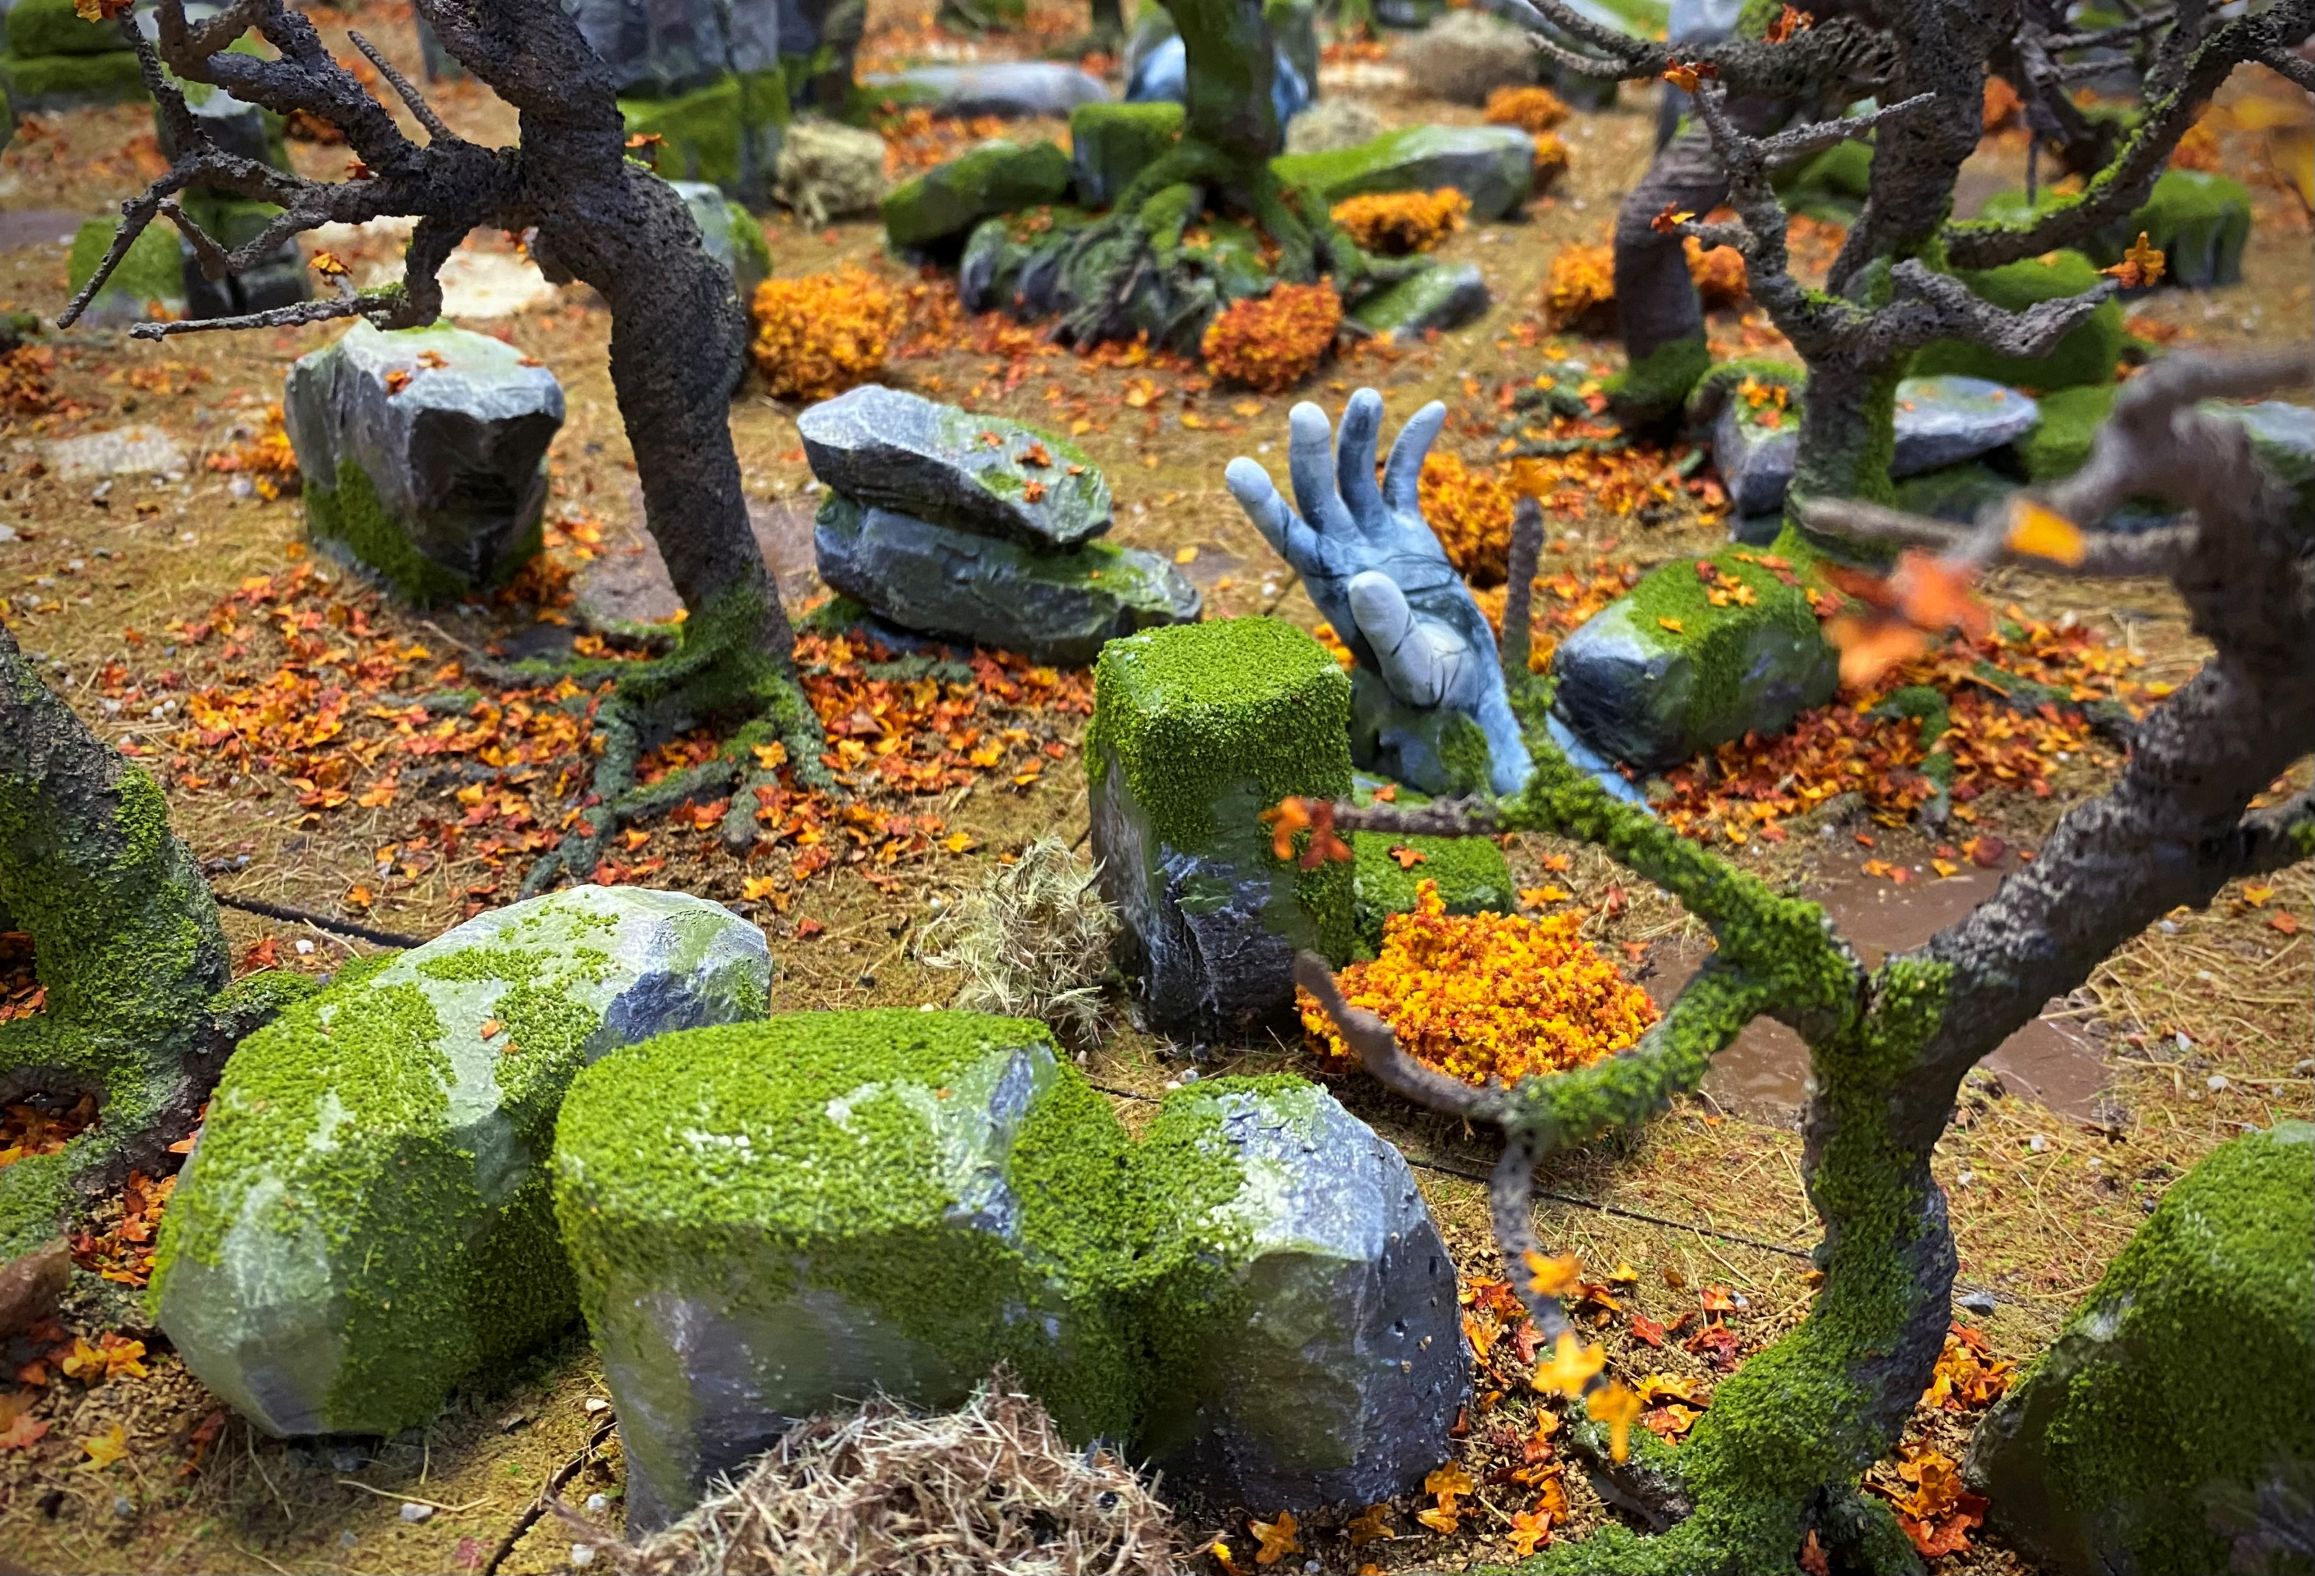
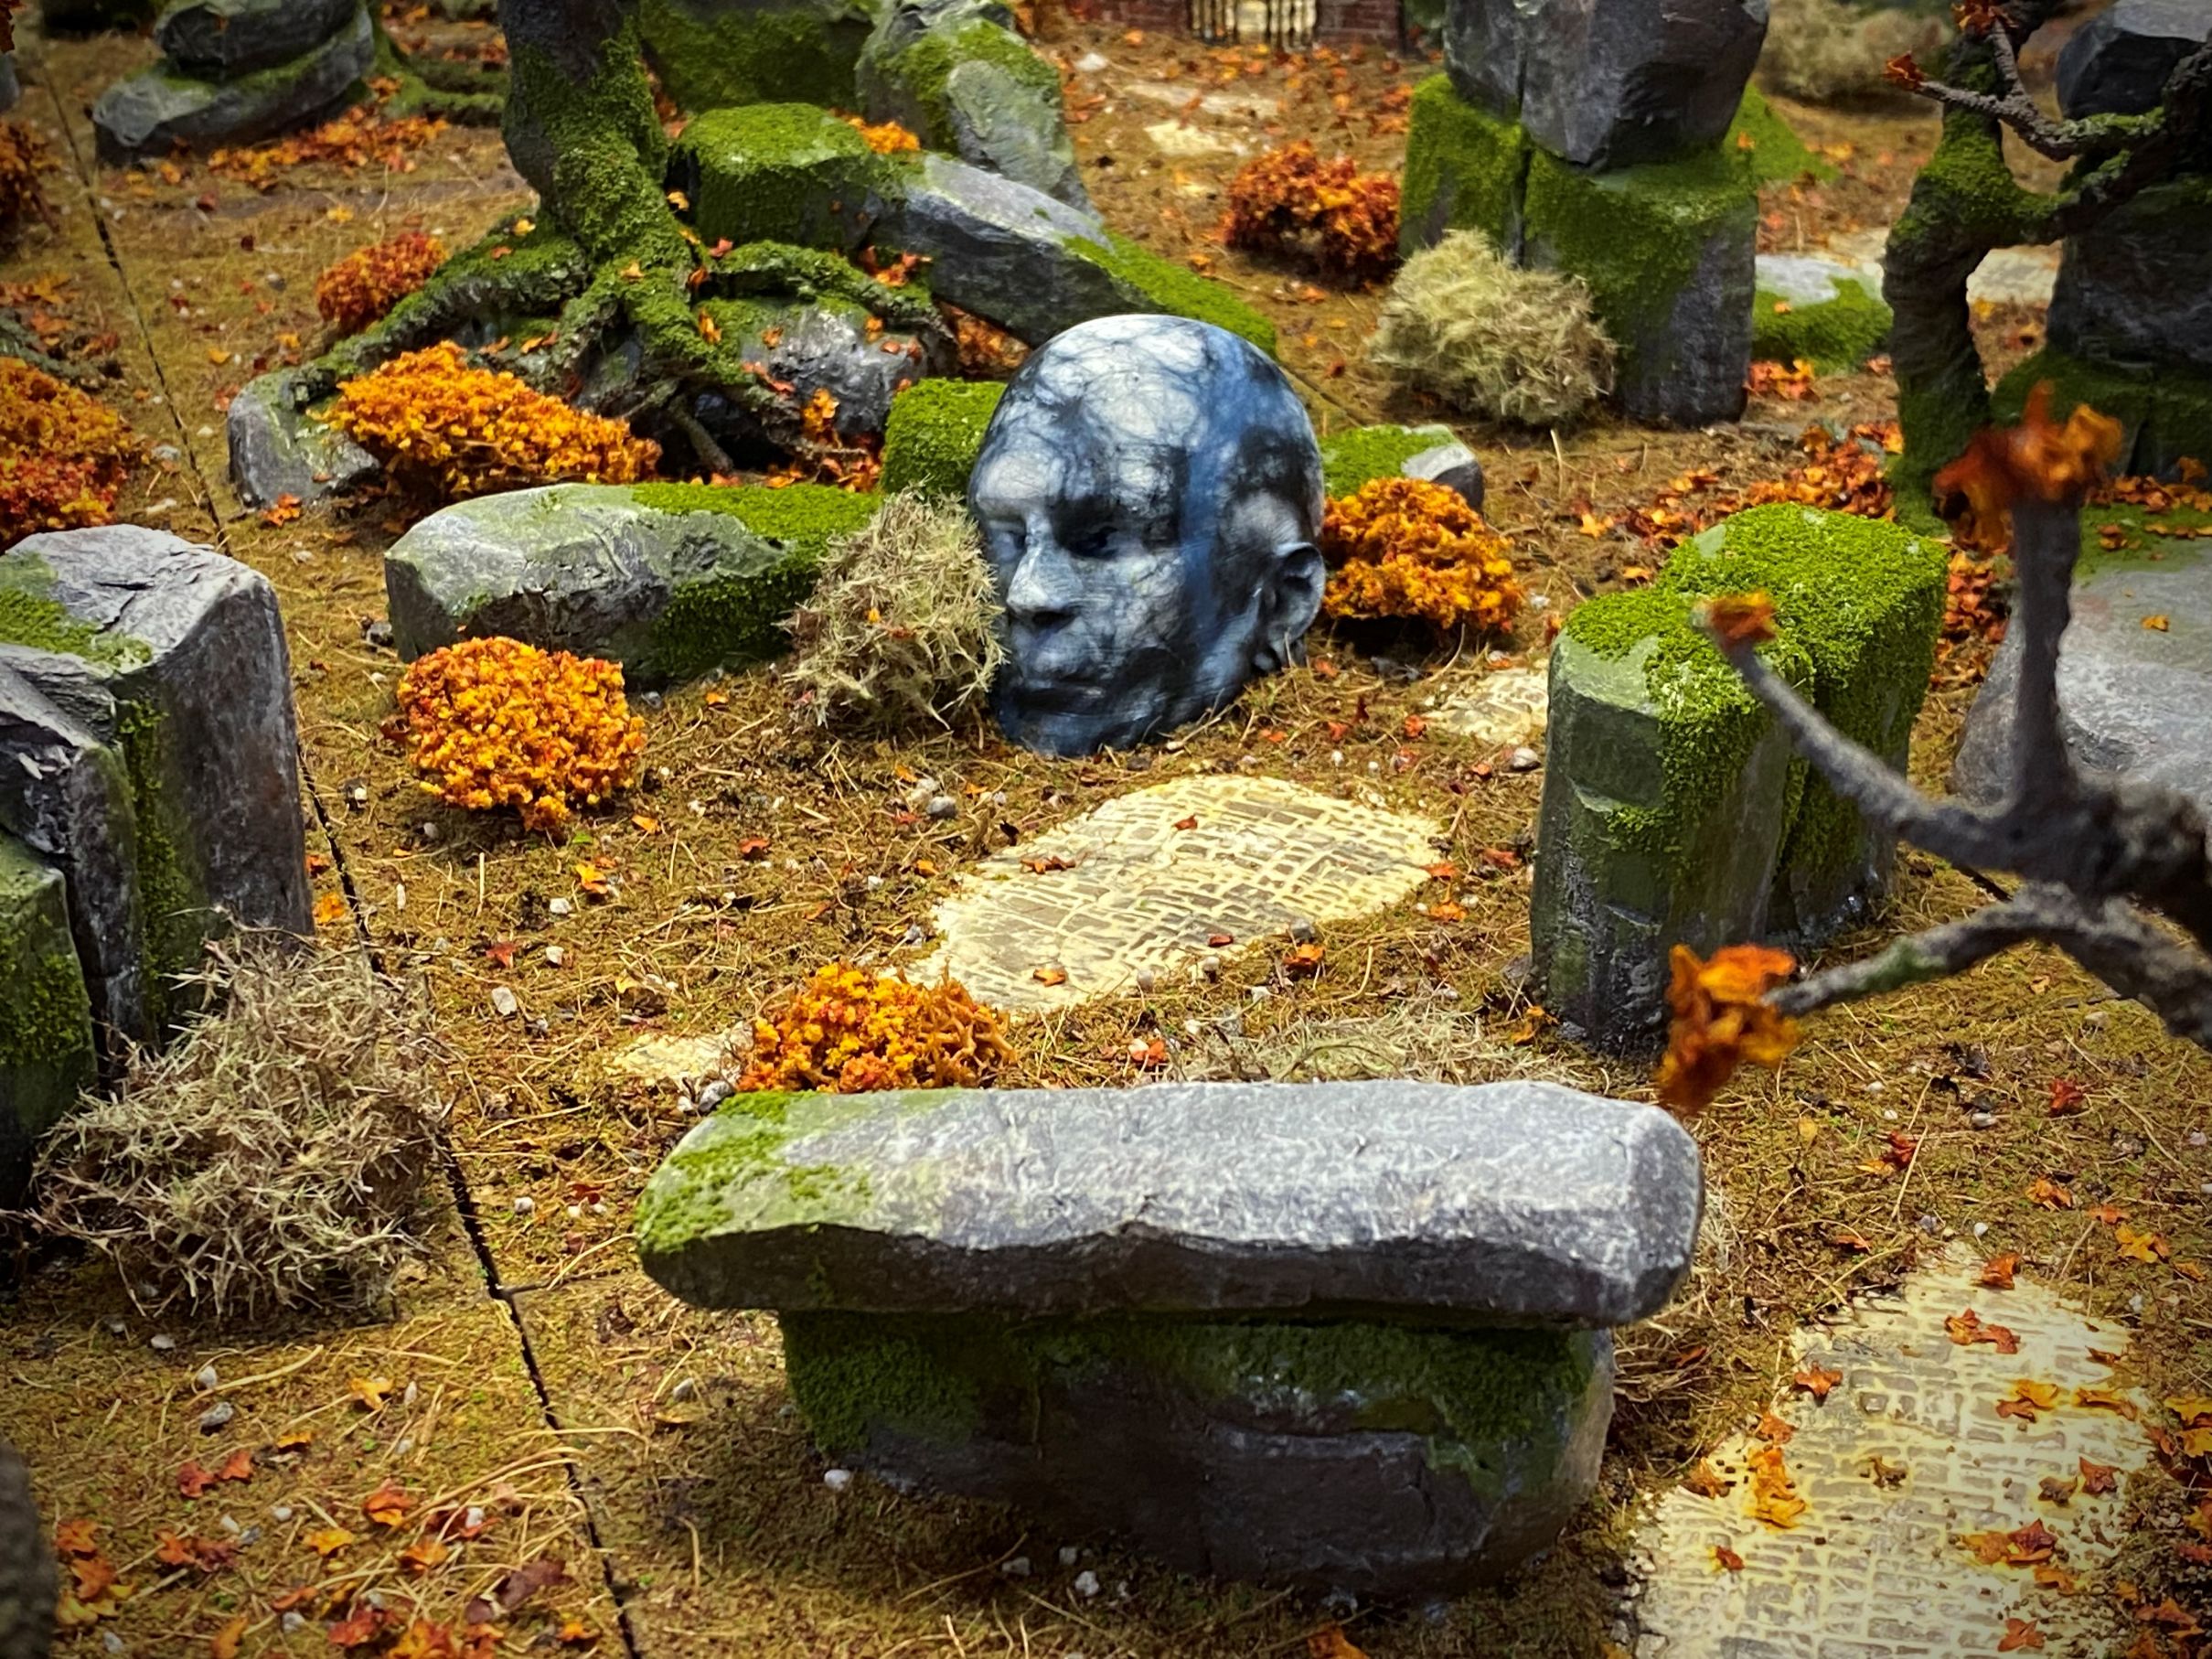
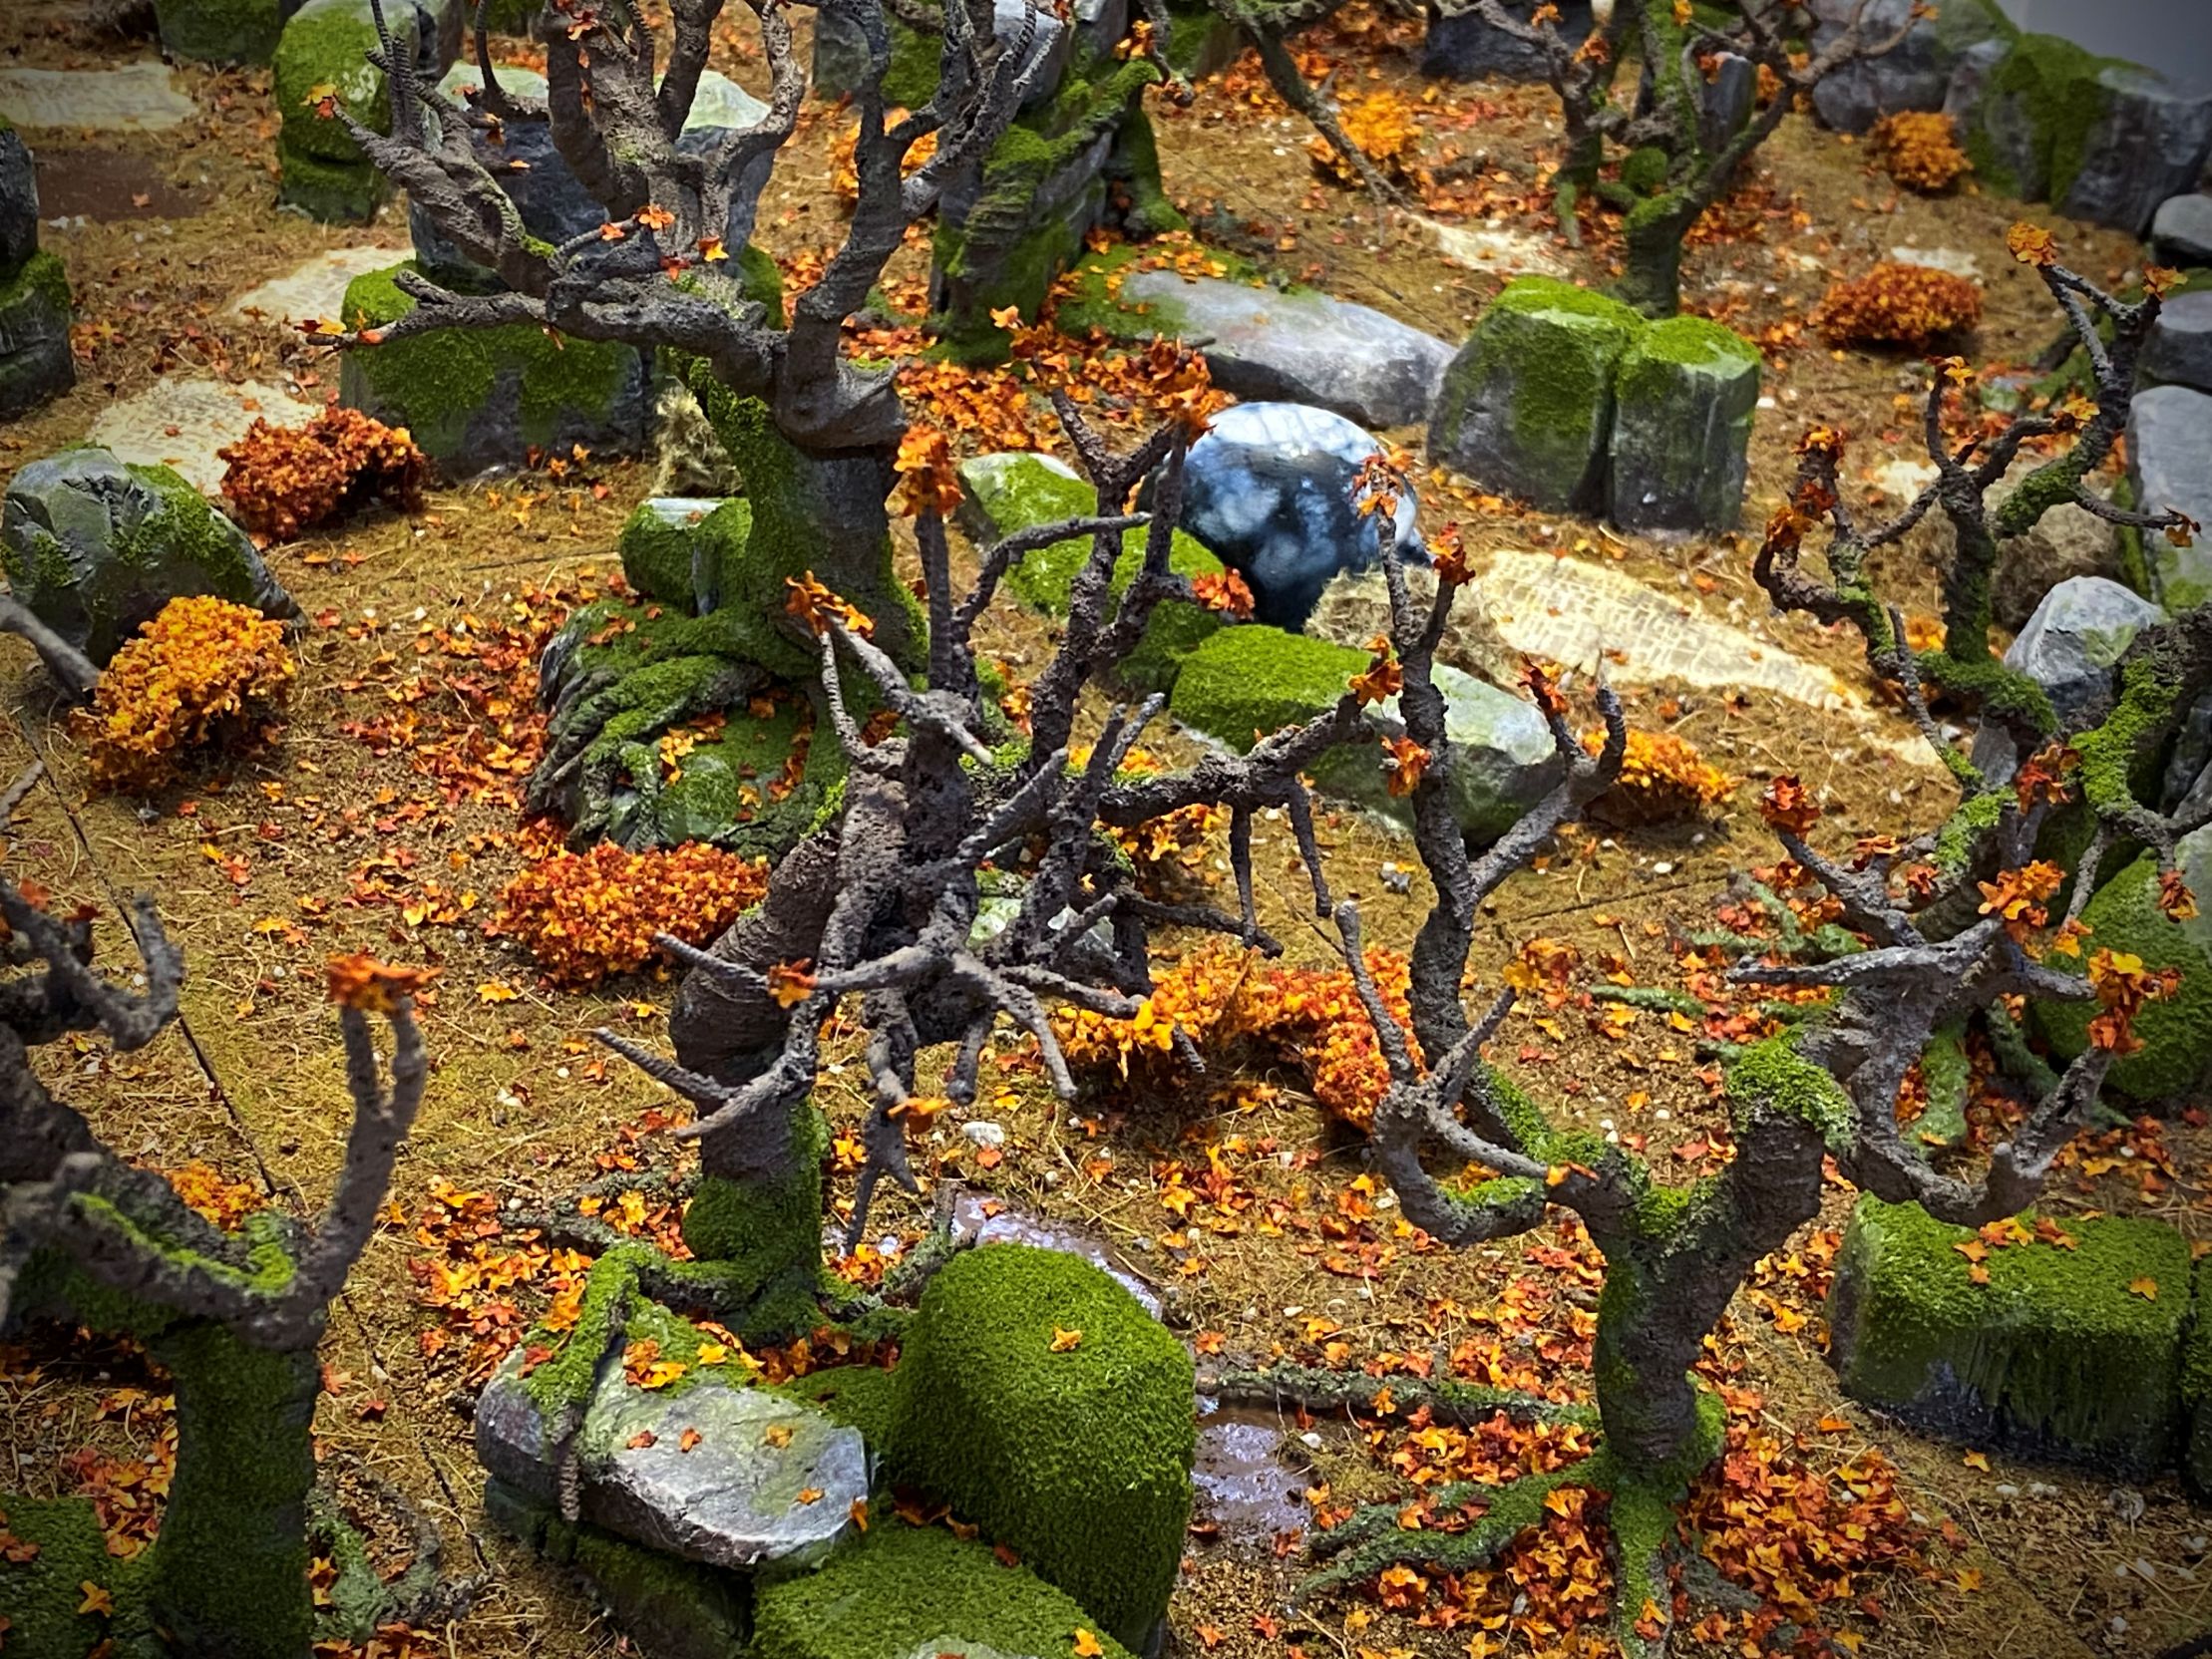
The forest looms before you, a twisted and foreboding realm where ancient trees writhe, their gnarled branches grasping for the sky. The air is heavy with the scent of damp earth and decay, and the silence is oppressive, punctuated only by the creaking of ancient limbs and the soft rustling of leaves. The trees seem to claw across the rocks, their roots like talons gripping the stone, as if trying to pull themselves free from the very earth itself. The bark is twisted and grotesque, like the skin of some ancient, leathery beast, and the branches are like arthritic fingers, reaching out to snatch at the unwary traveller. Dead trees stand like sentinels, their branches reaching towards the sky, as if in supplication or warning. Moss covers the rocks, a soft, emerald shroud that seems to muffle the sound of footsteps, making it impossible to shake the feeling that you are being watched. Old statues lie half-buried in the undergrowth, their features untouched by time or the elements. They seem to mark the graves of forgotten gods, or perhaps they are ancient guardians, tasked with watching over secrets that have long since been lost to the ages. The forest floor is a tangle of roots and rocks, with hidden dangers lurking in every shadow. The trees close in around you, their branches tangling overhead, casting deep, foreboding shadows that seem to move like living things. This is a forest of ancient, primal power, a place where the very woods seem to be alive, and where the laws of nature are twisted and distorted. It is a place that seems to draw you in, like a moth to a candle flame, promising secrets and power, but threatening only madness and despair. As you step into the forest, you feel a shiver run down your spine, a fear that is hard to shake. You know that you are not welcome here, that you are an intruder in a realm that is not your own. The forest seems to whisper secrets in your ear, tempting you to stay, to surrender to the darkness that lurks within.
Related Genre: Fantasy
Related Contest: TerrainFest 2025
This Project is Completed
More groundwork
I used a mixture of water and PVA in a spray bottle and drenched each terrain board to give some extra holding power to keep the first layer of flock in place.
Whilst it was wet I sprinkled some dark brown fine gravel over the pieces in an ad-hoc manner. I wanted to break up the uniformity a little and start to make the groundwork look a bit more damp.
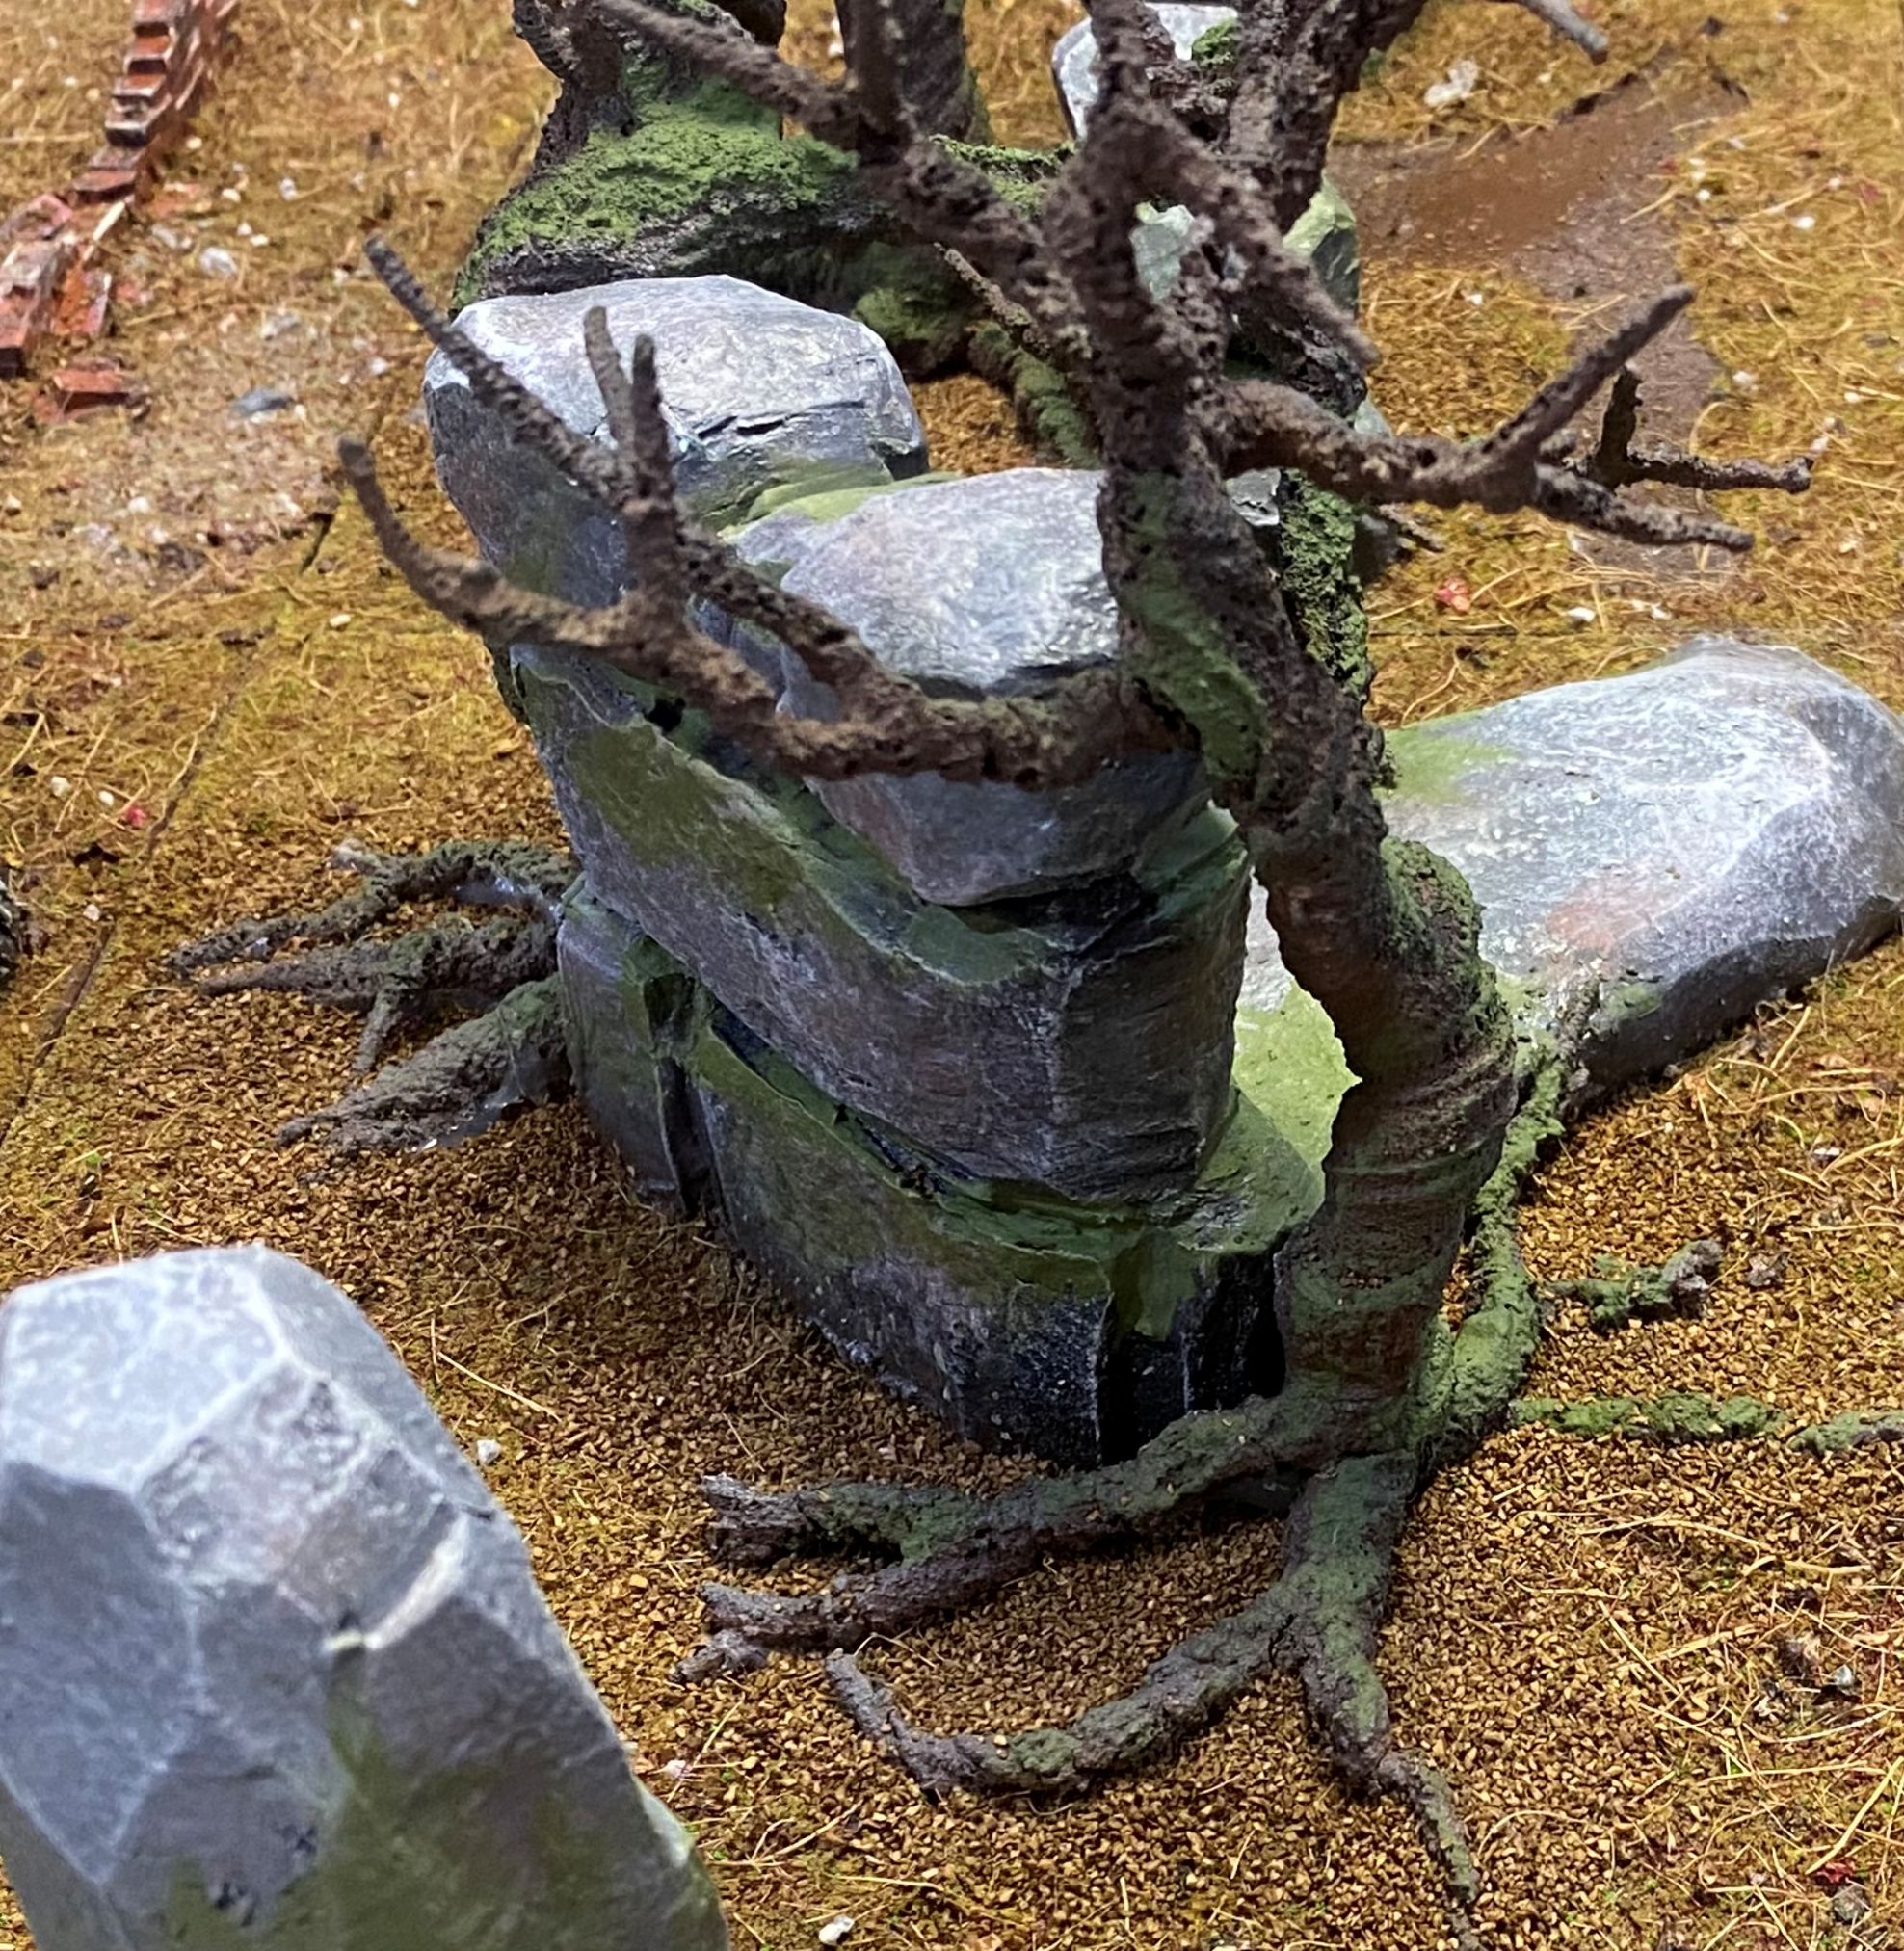
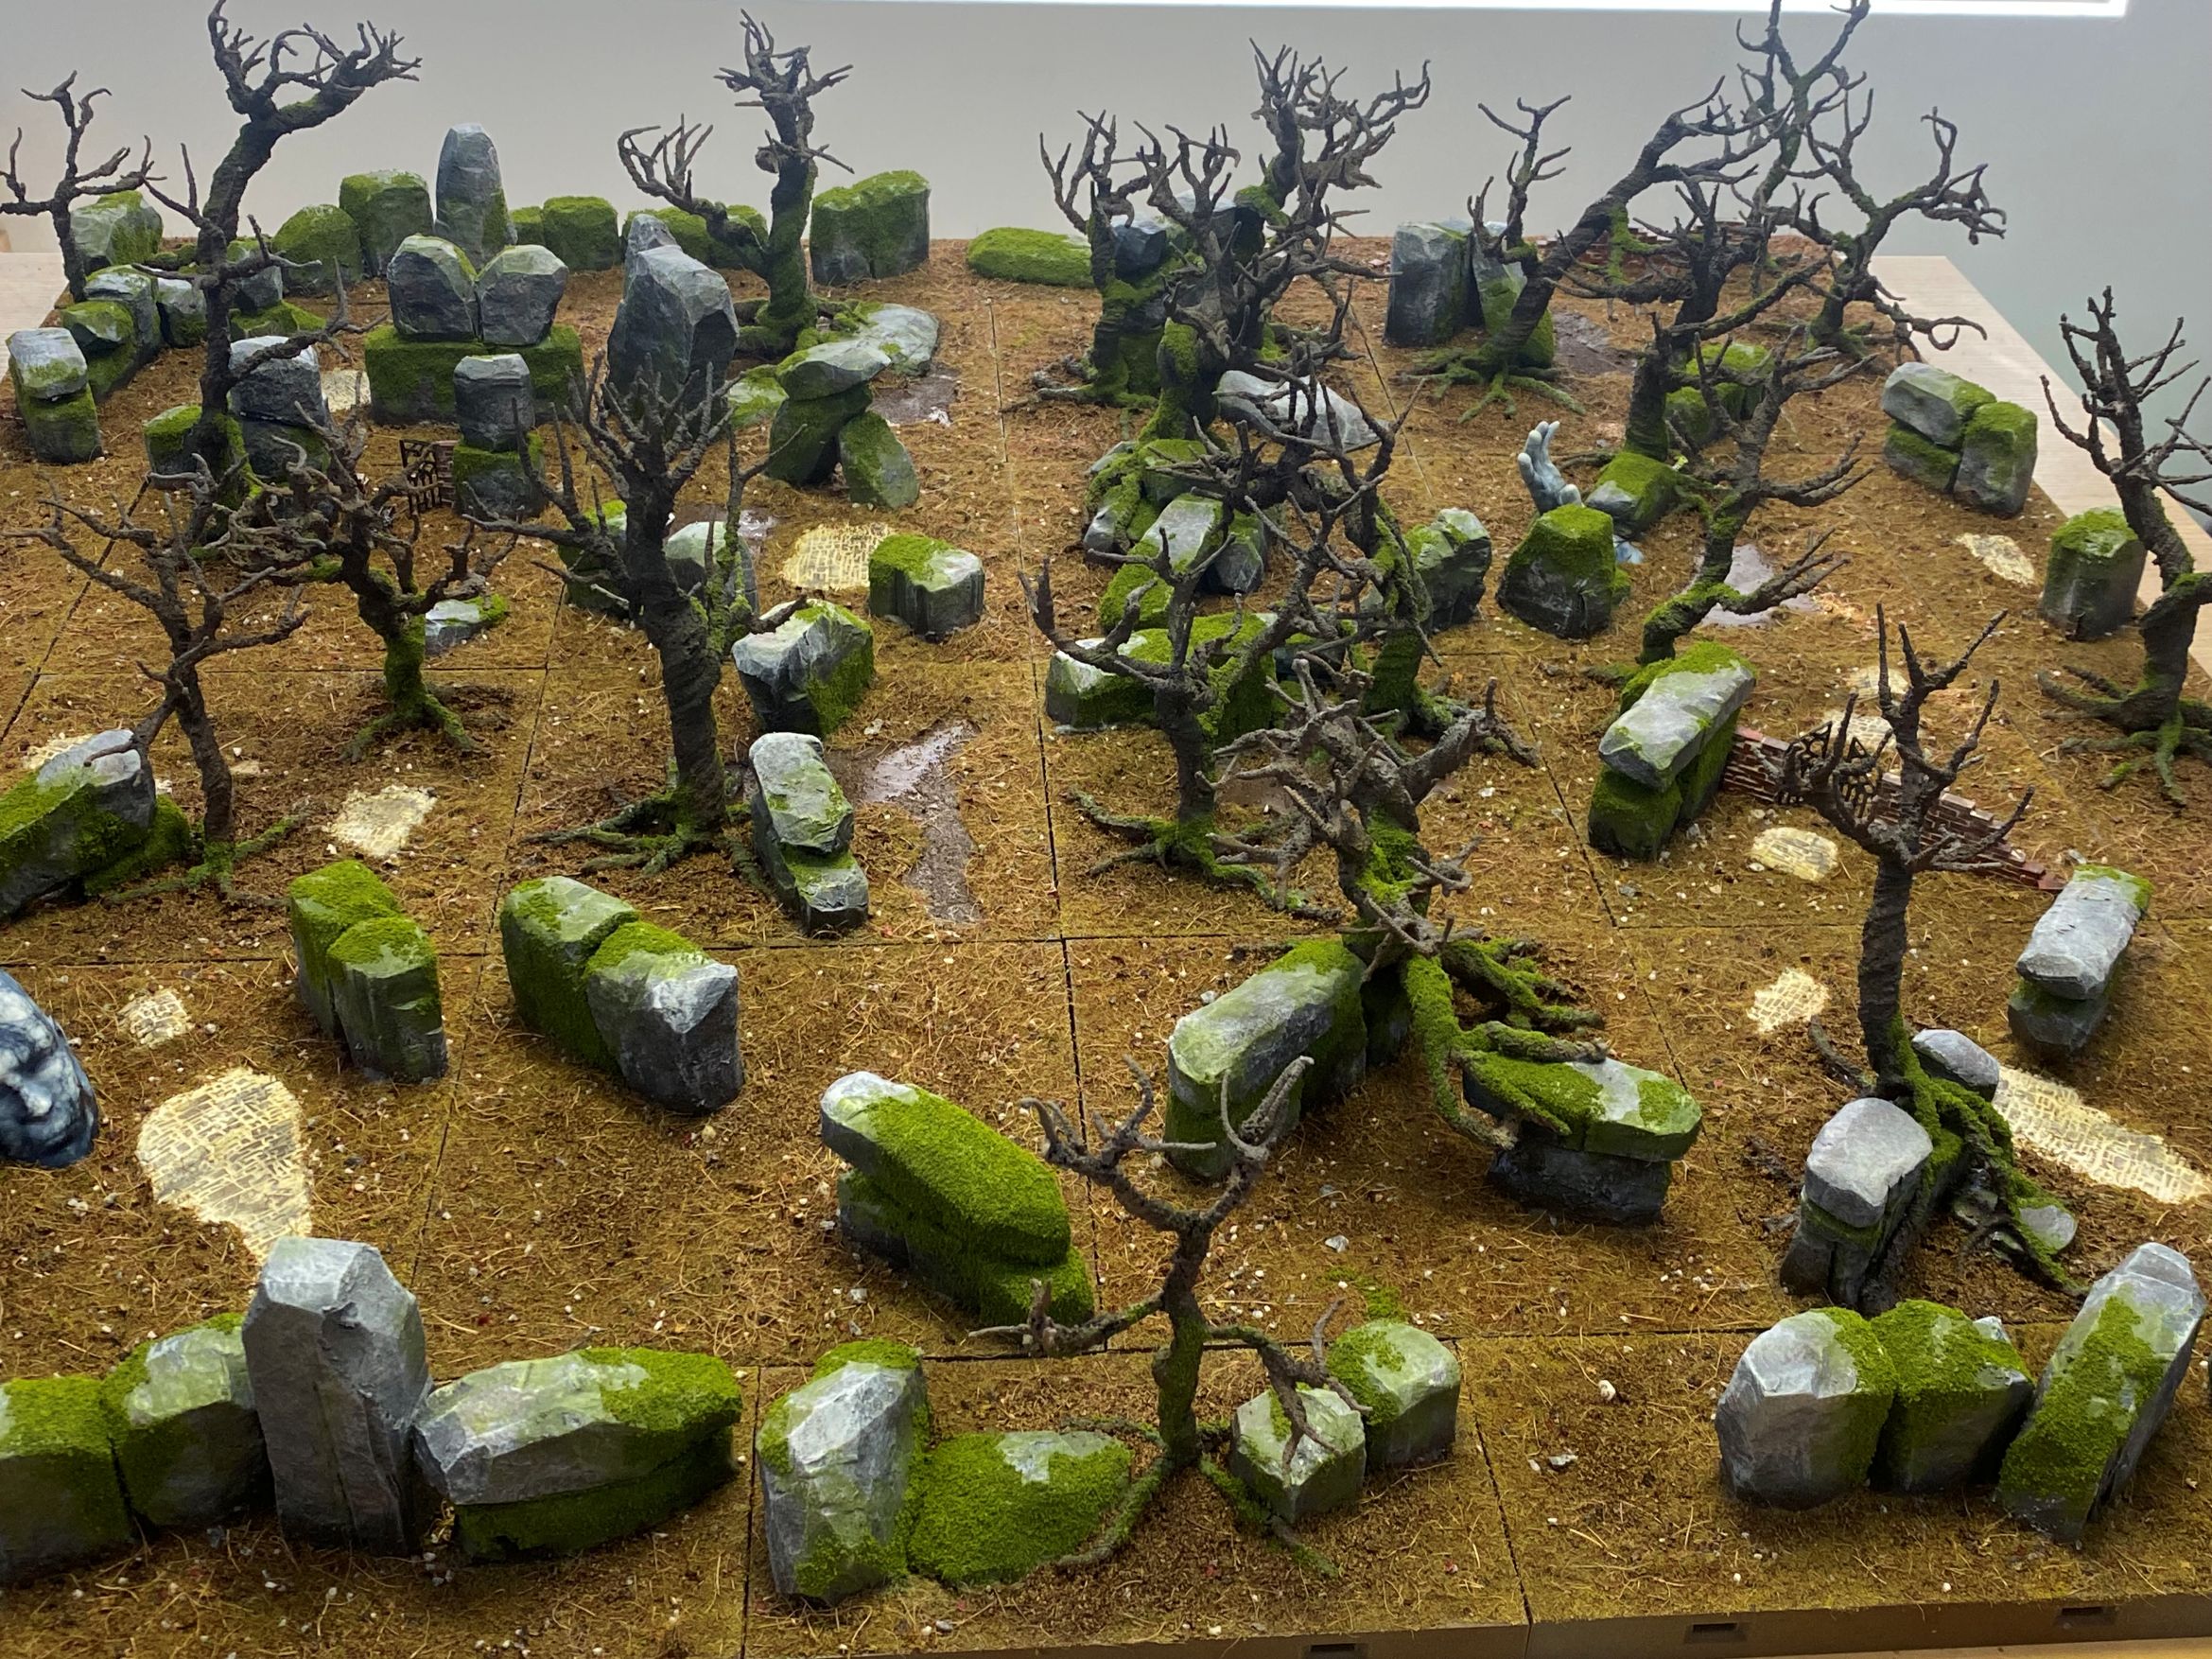
Once that was dry, I used a hot glue gun to attach the trees. I made sure that no tree extended past the boundaries of the tile it was placed on. I have purposely left several tiles without trees. This is so that I can crate clearings if I wish and also leave space should I wish to add a cabin of some sort at any point.
I am quite enjoying the modularity of the tiles at the moment, and don’t think I have managed to set them up the same twice so far, and I can make the board smaller for tighter games if I choose.
I think once more of the ground cover is done, they will start to blend in more and more with each other.
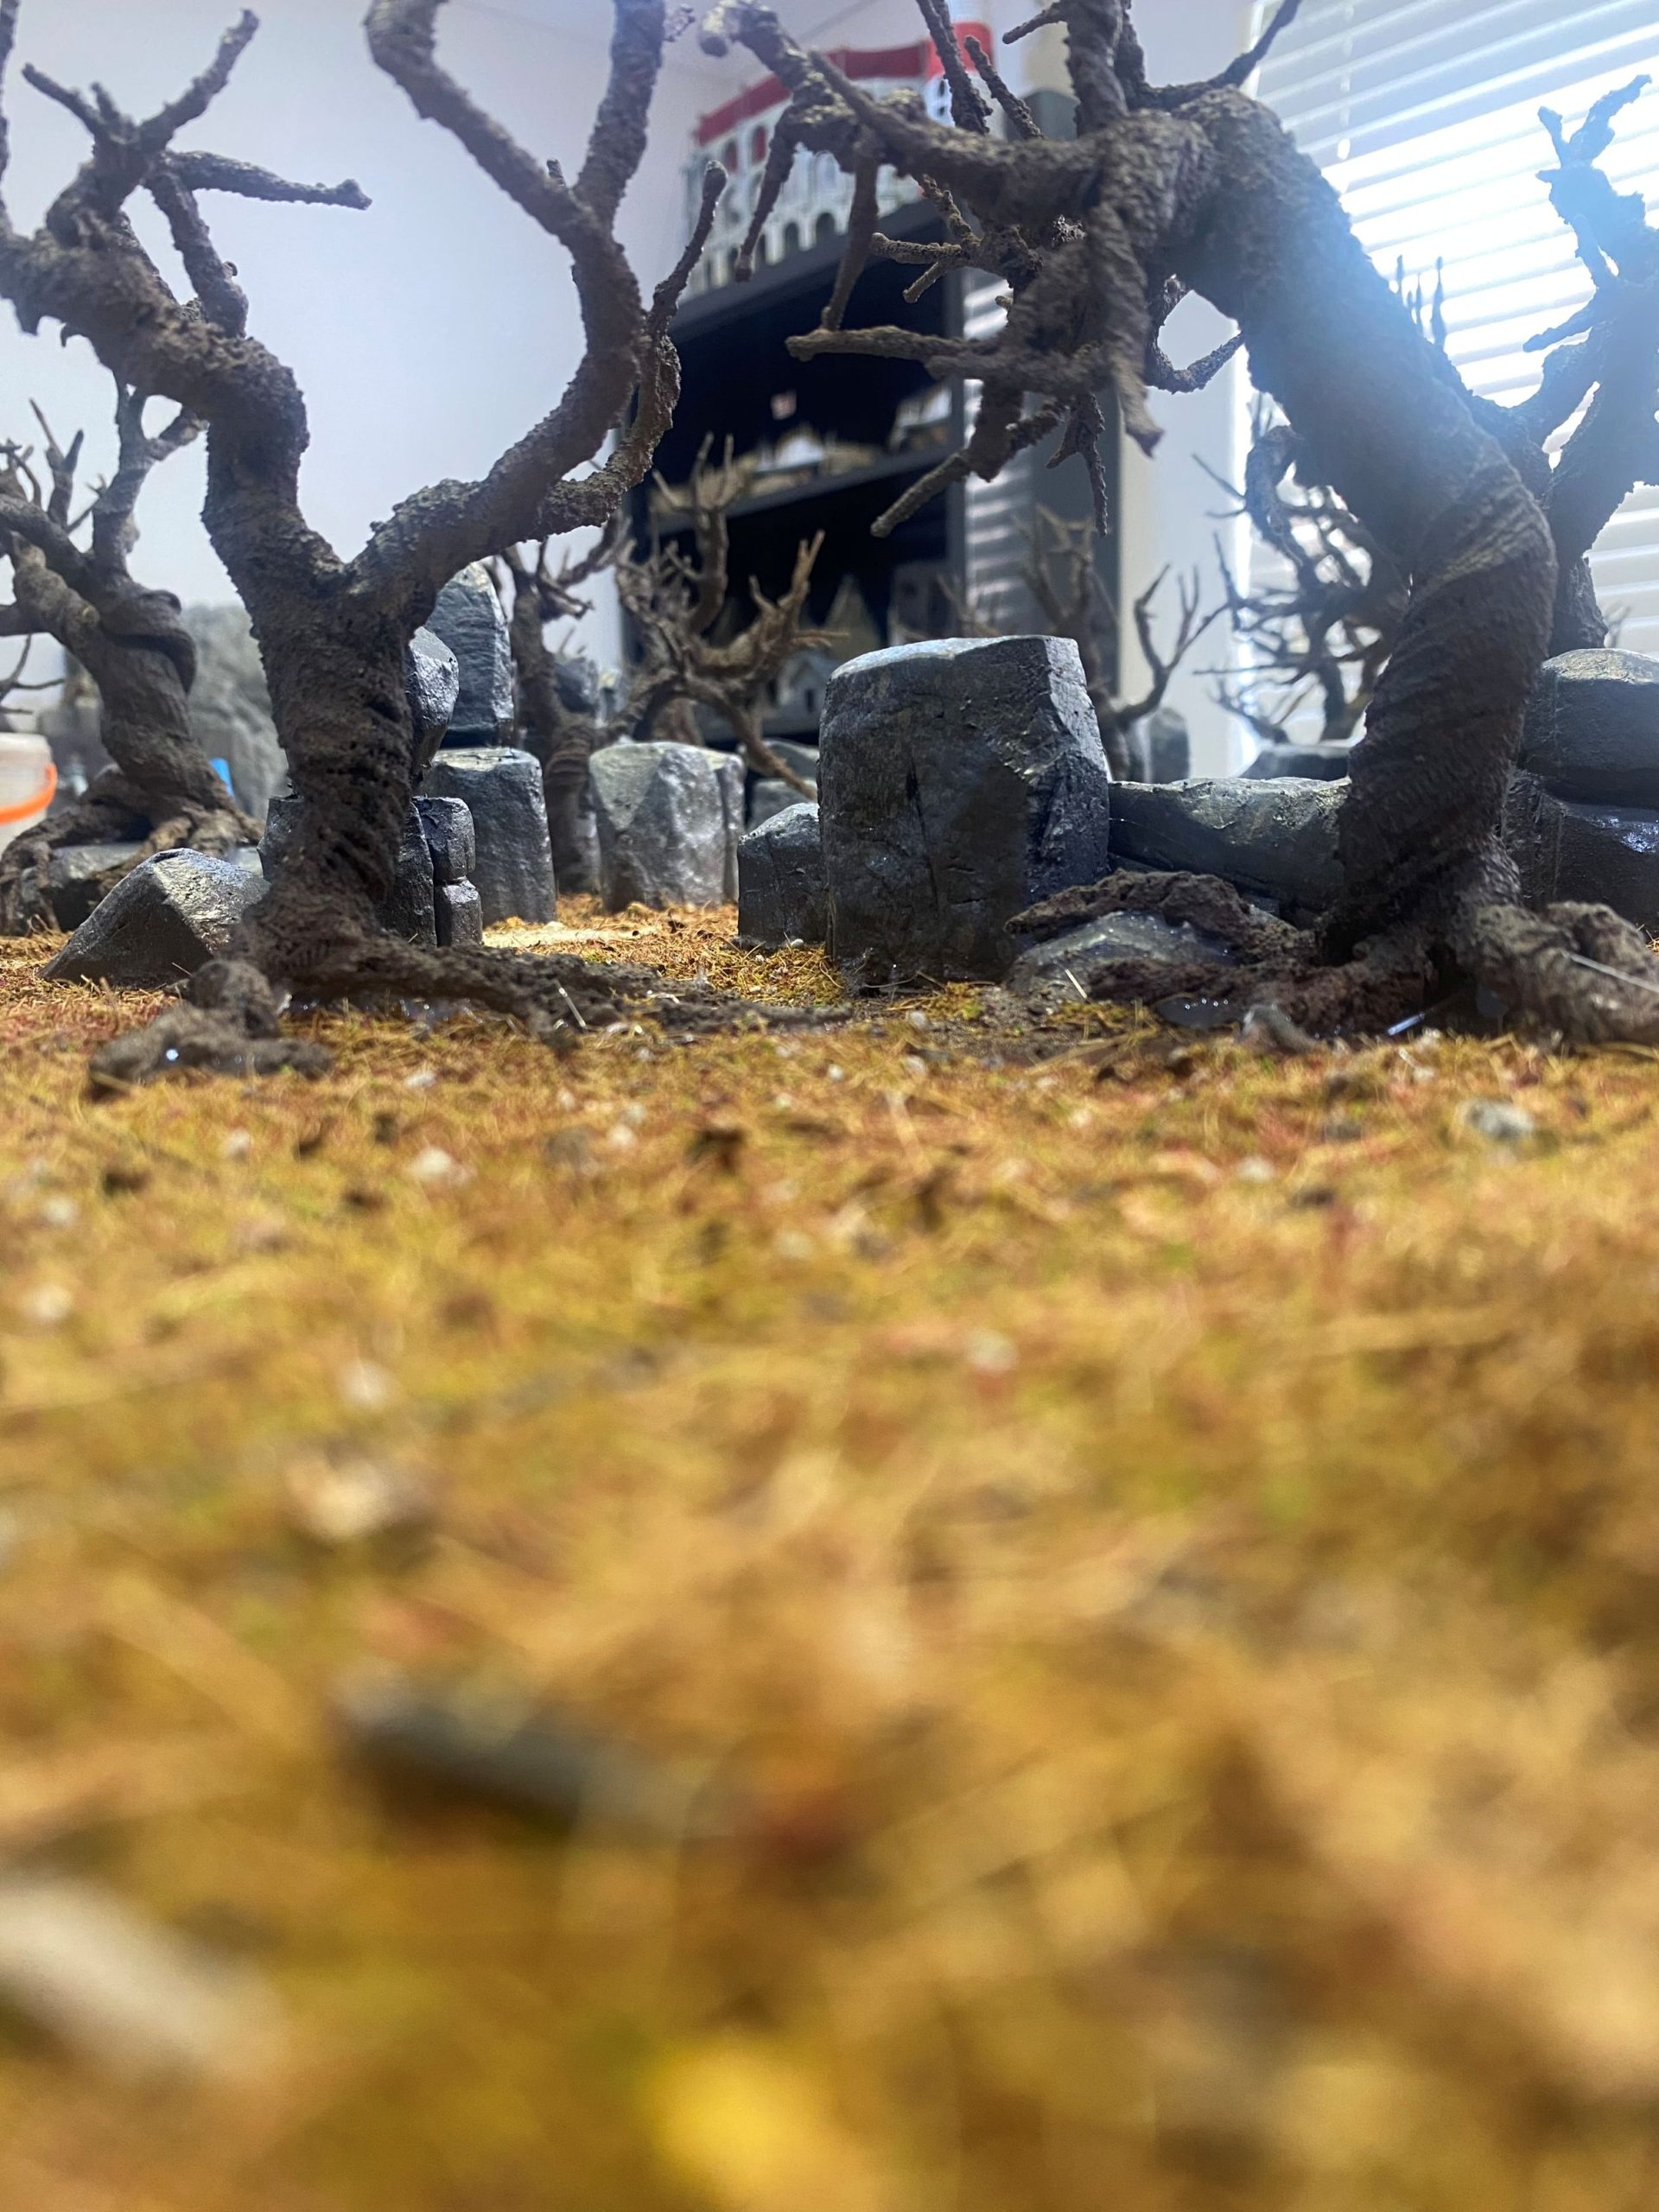
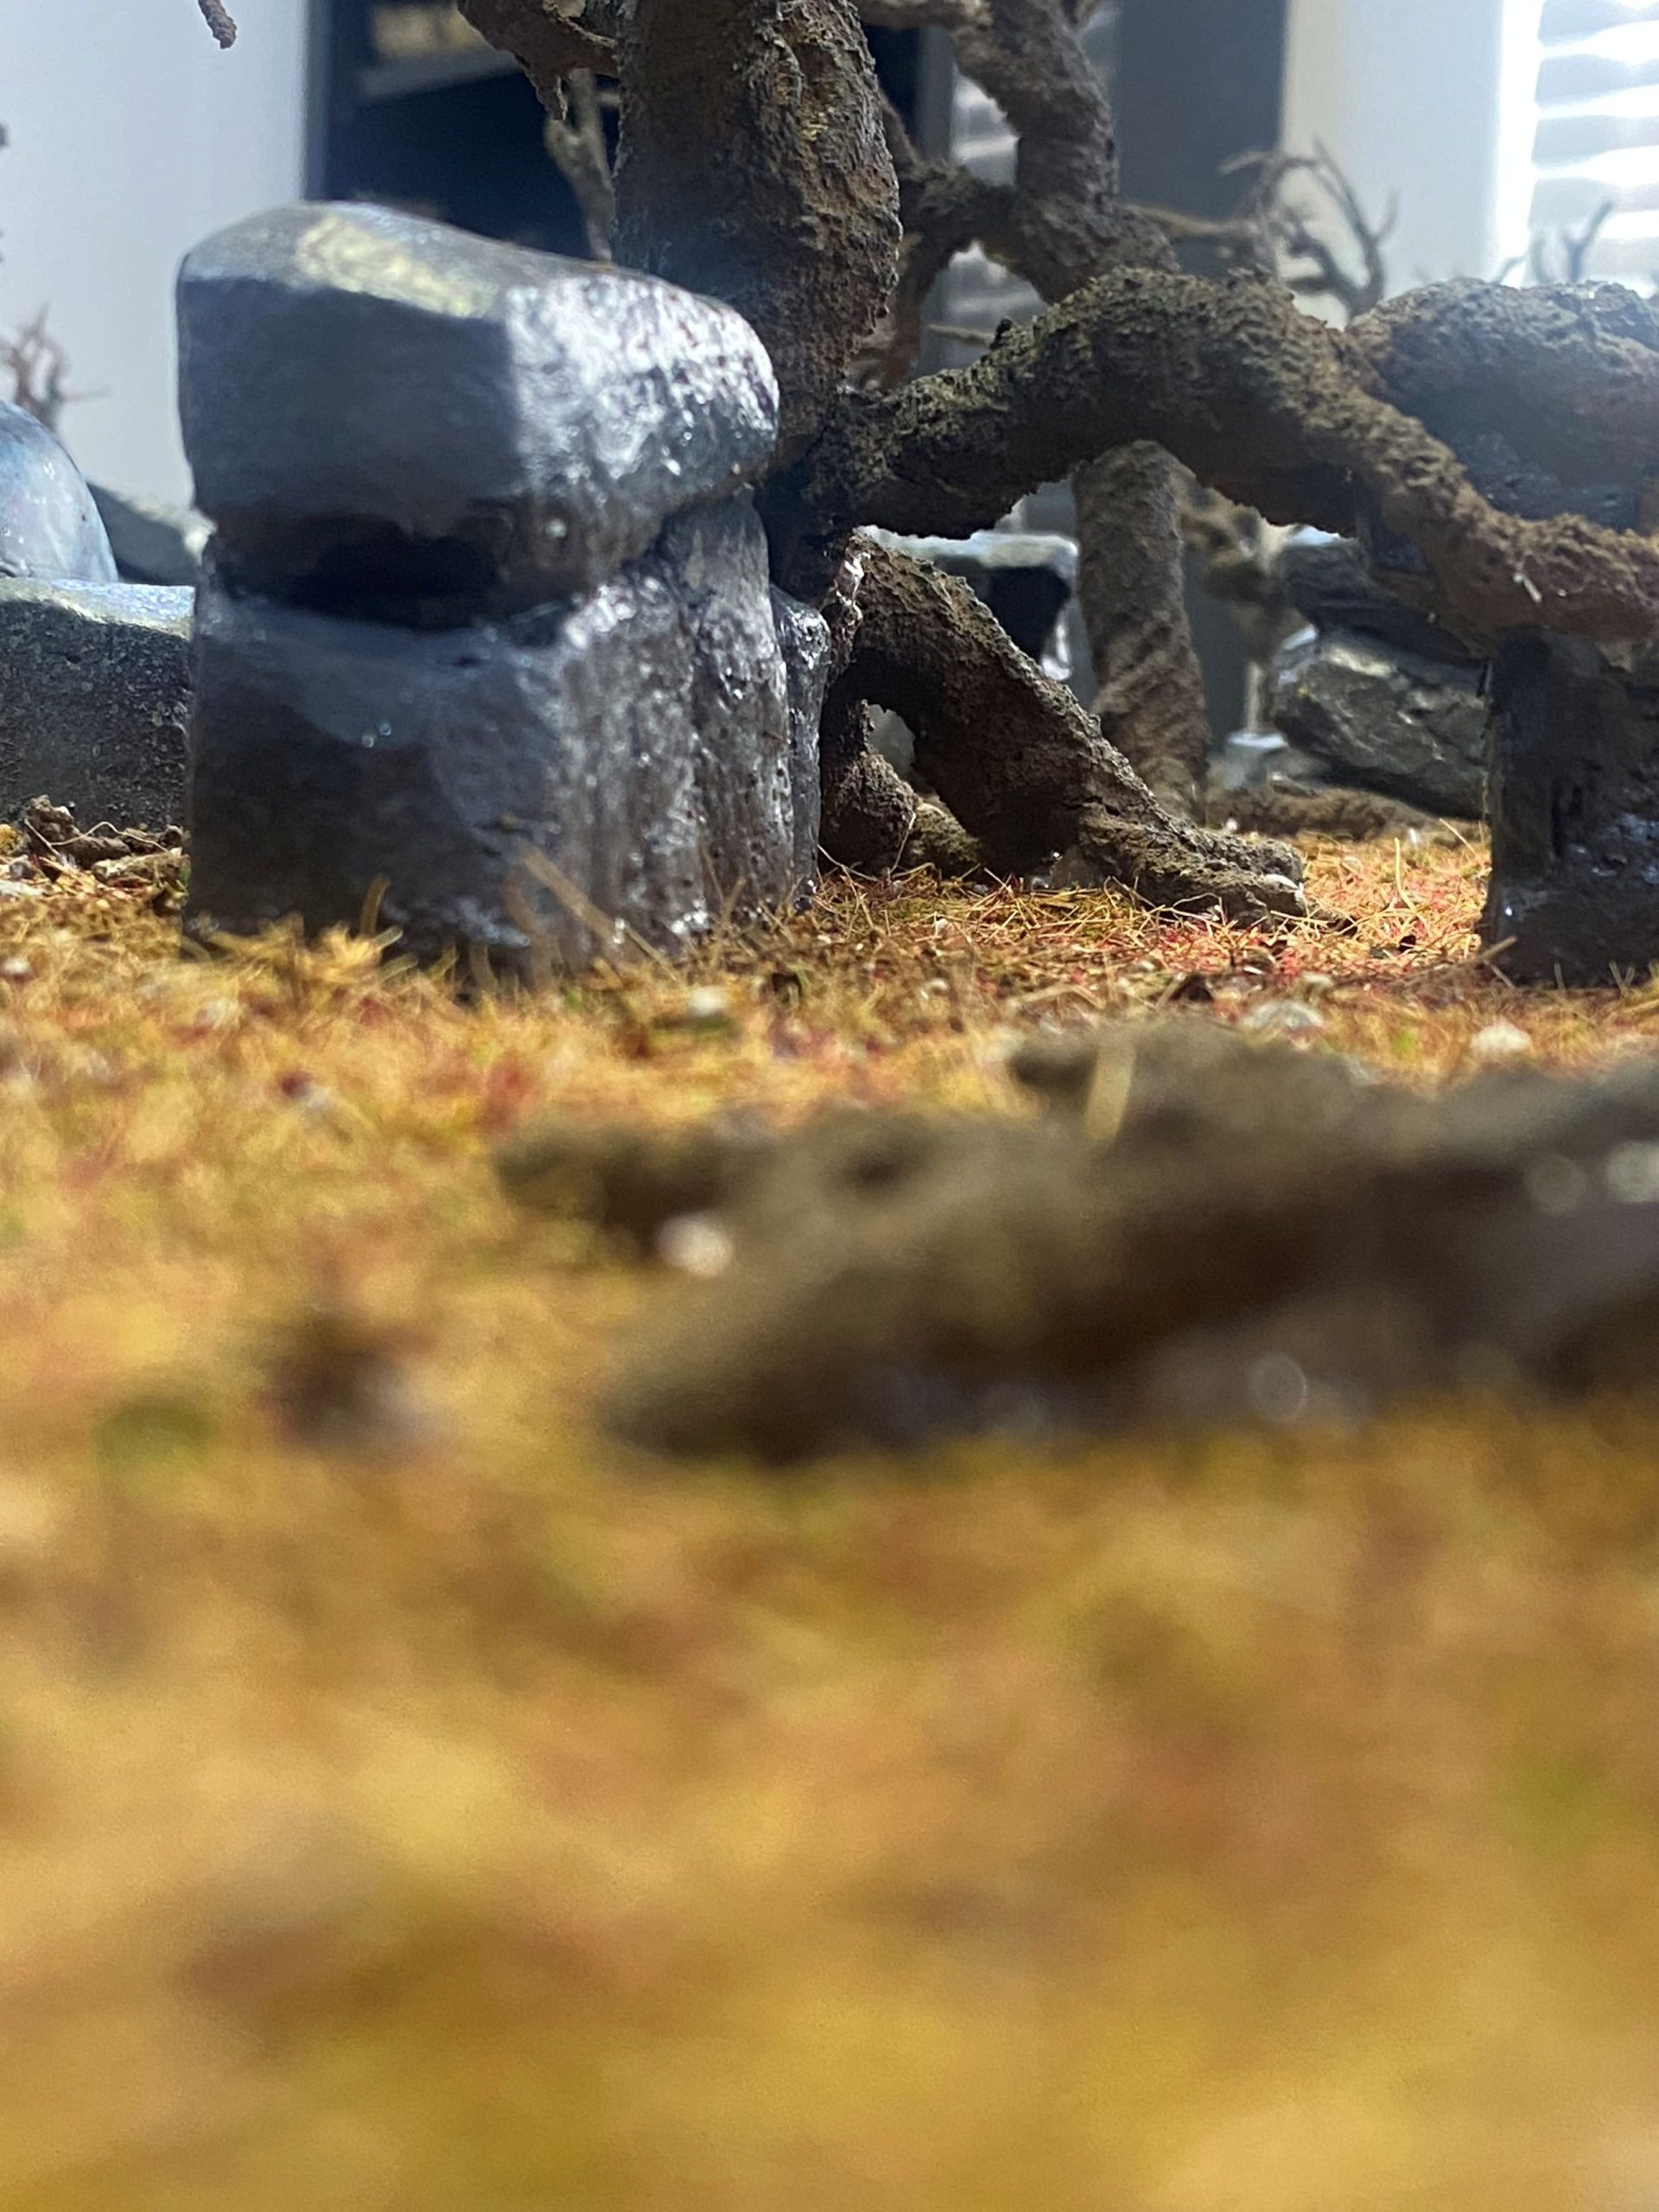
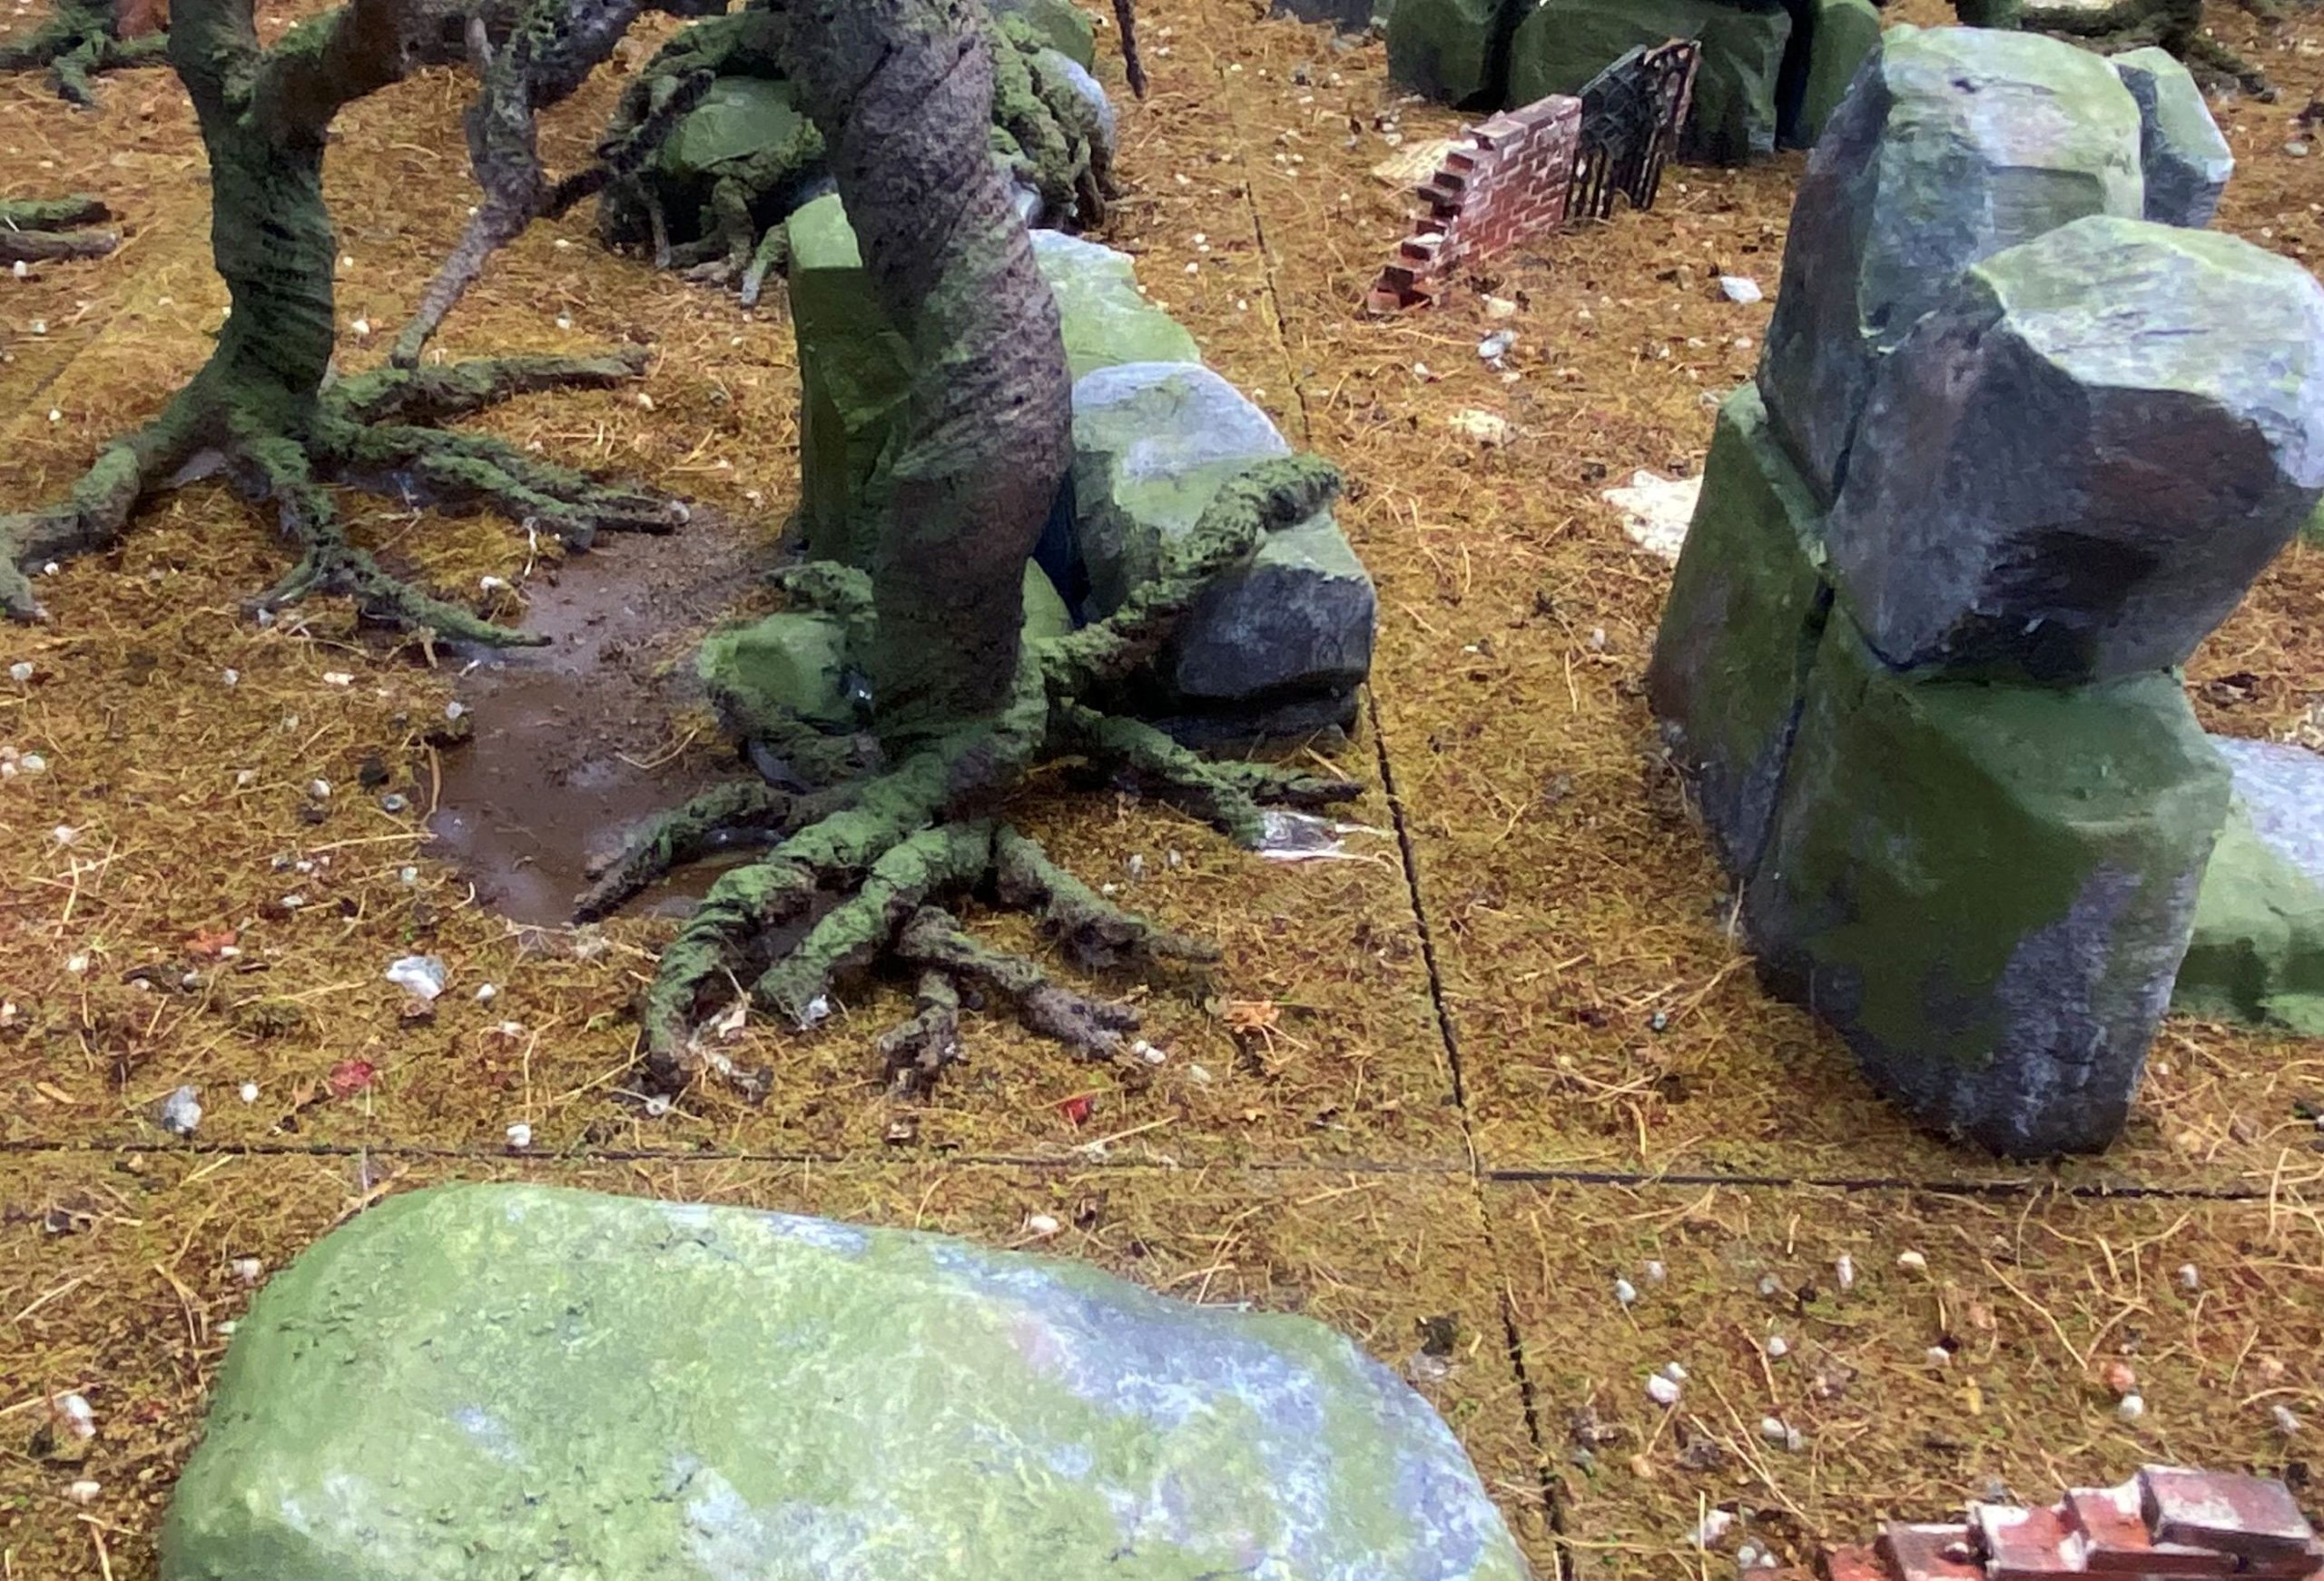
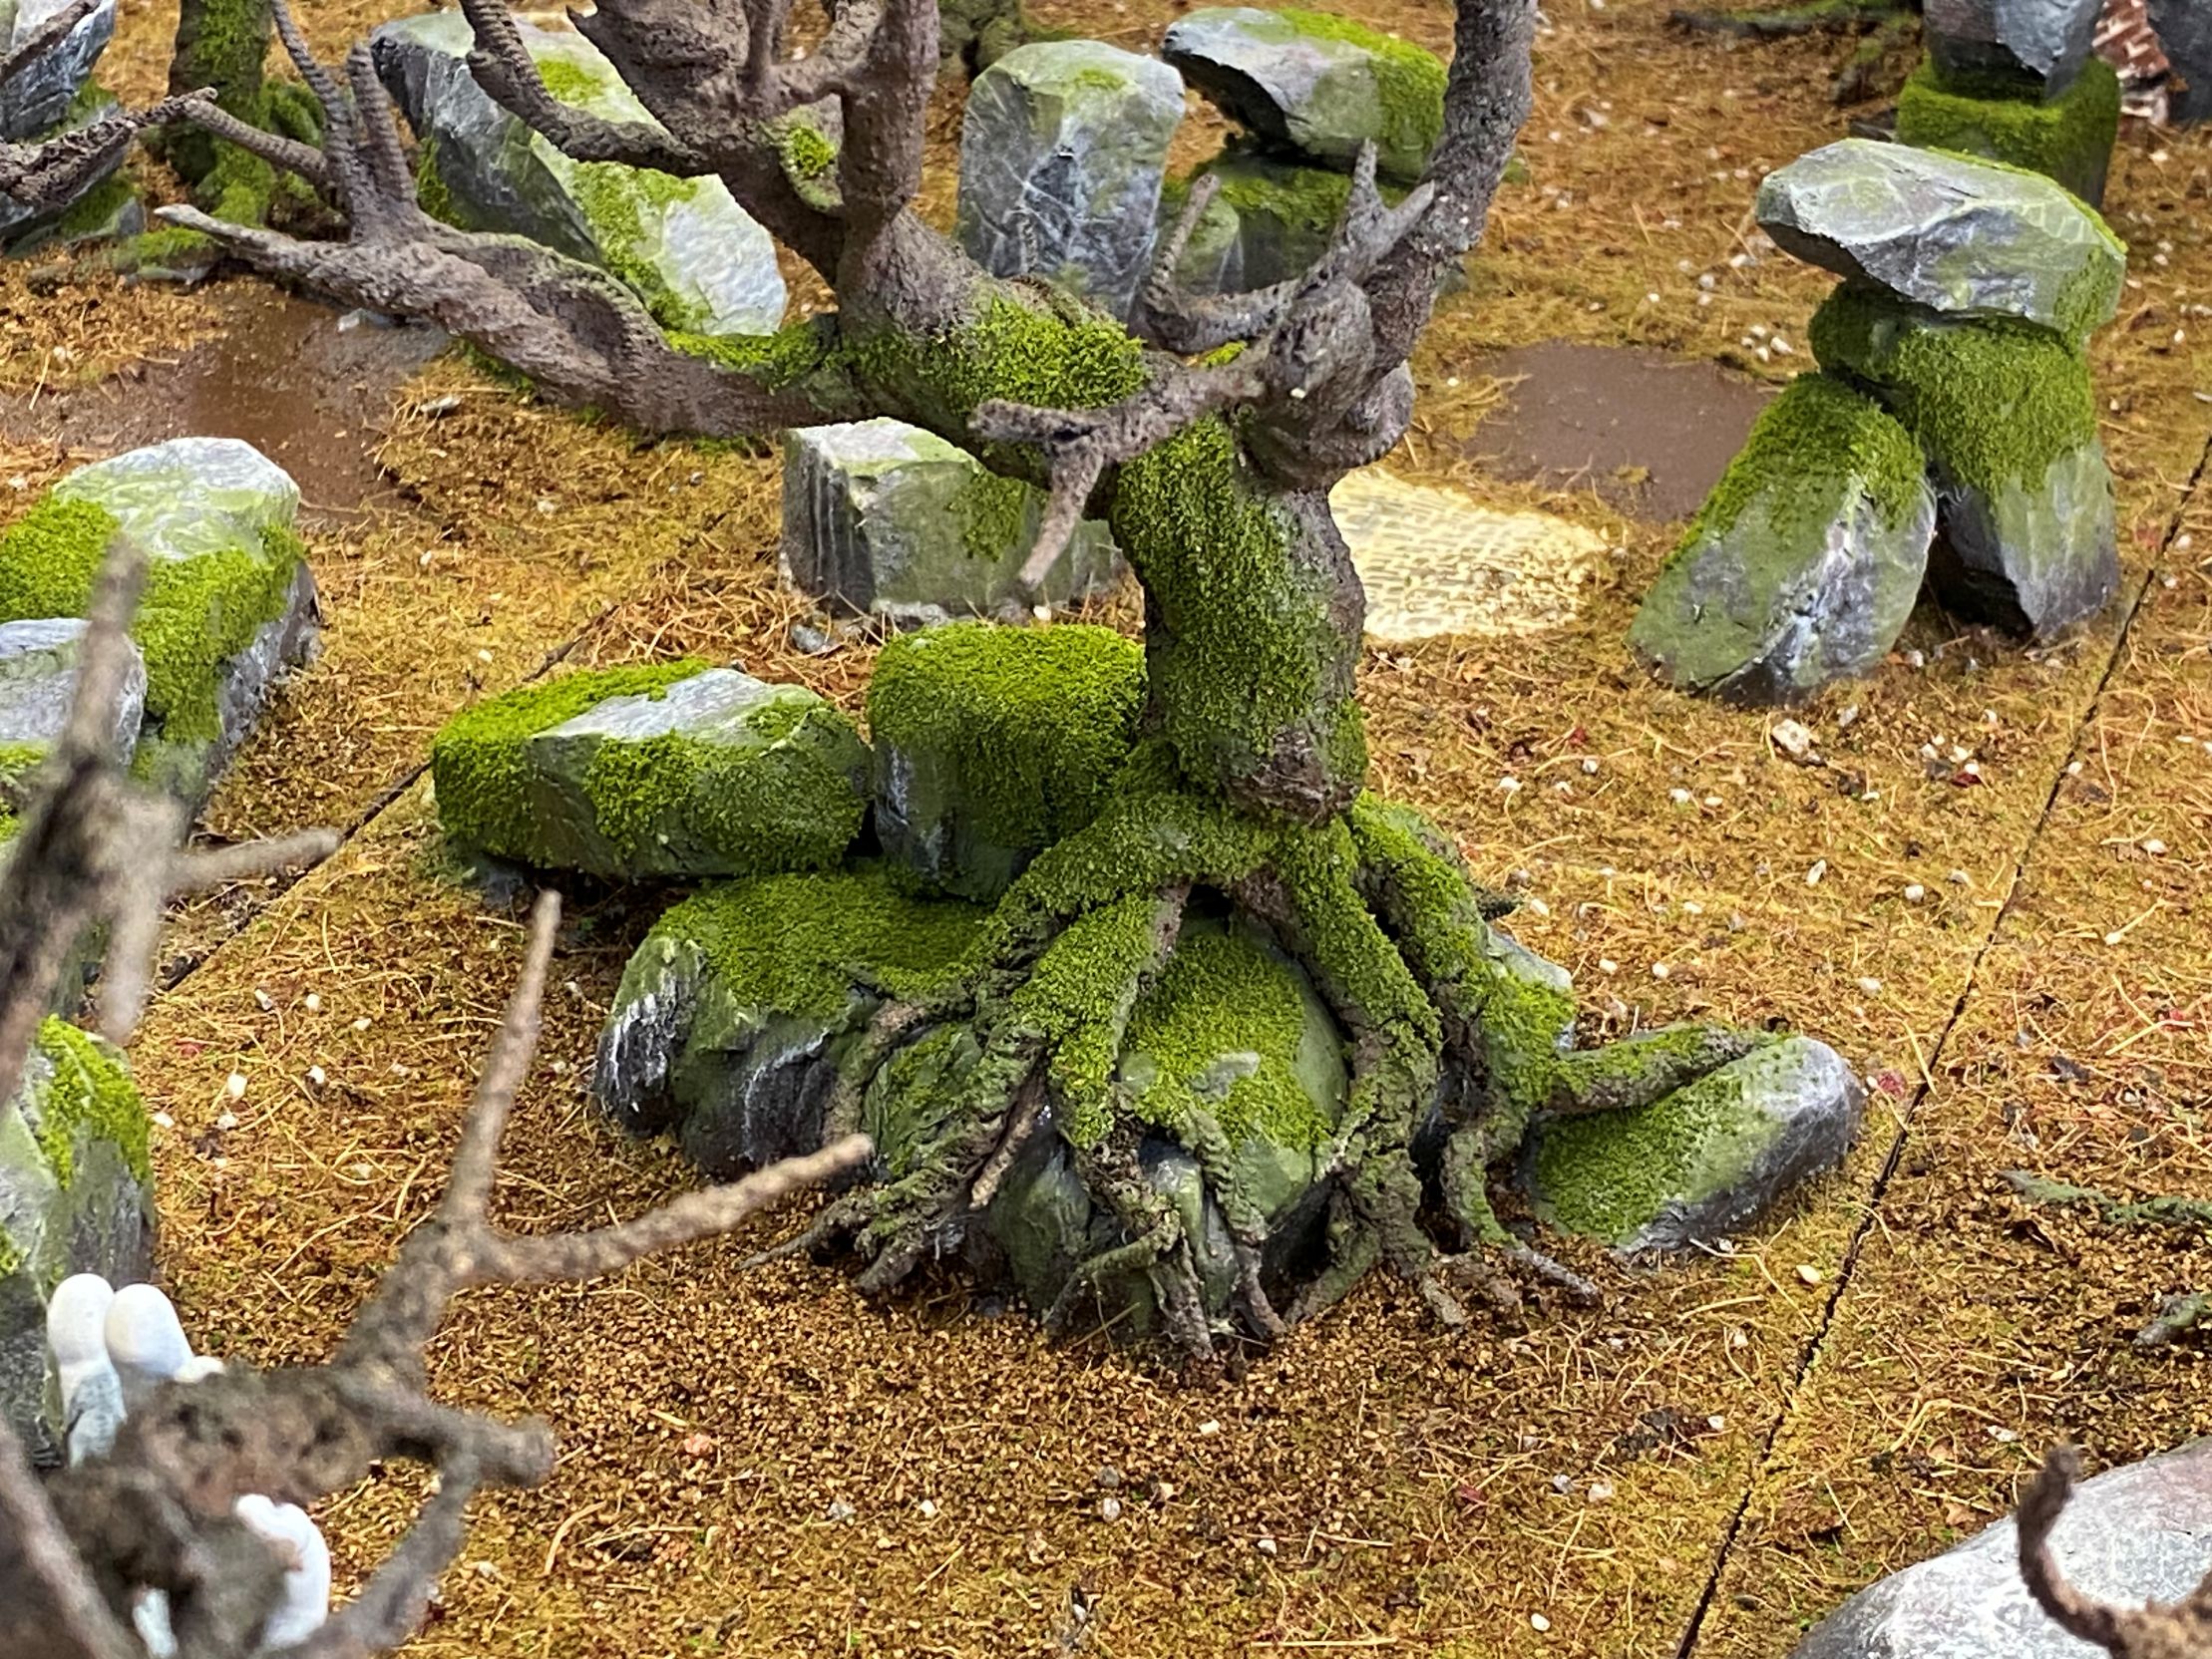
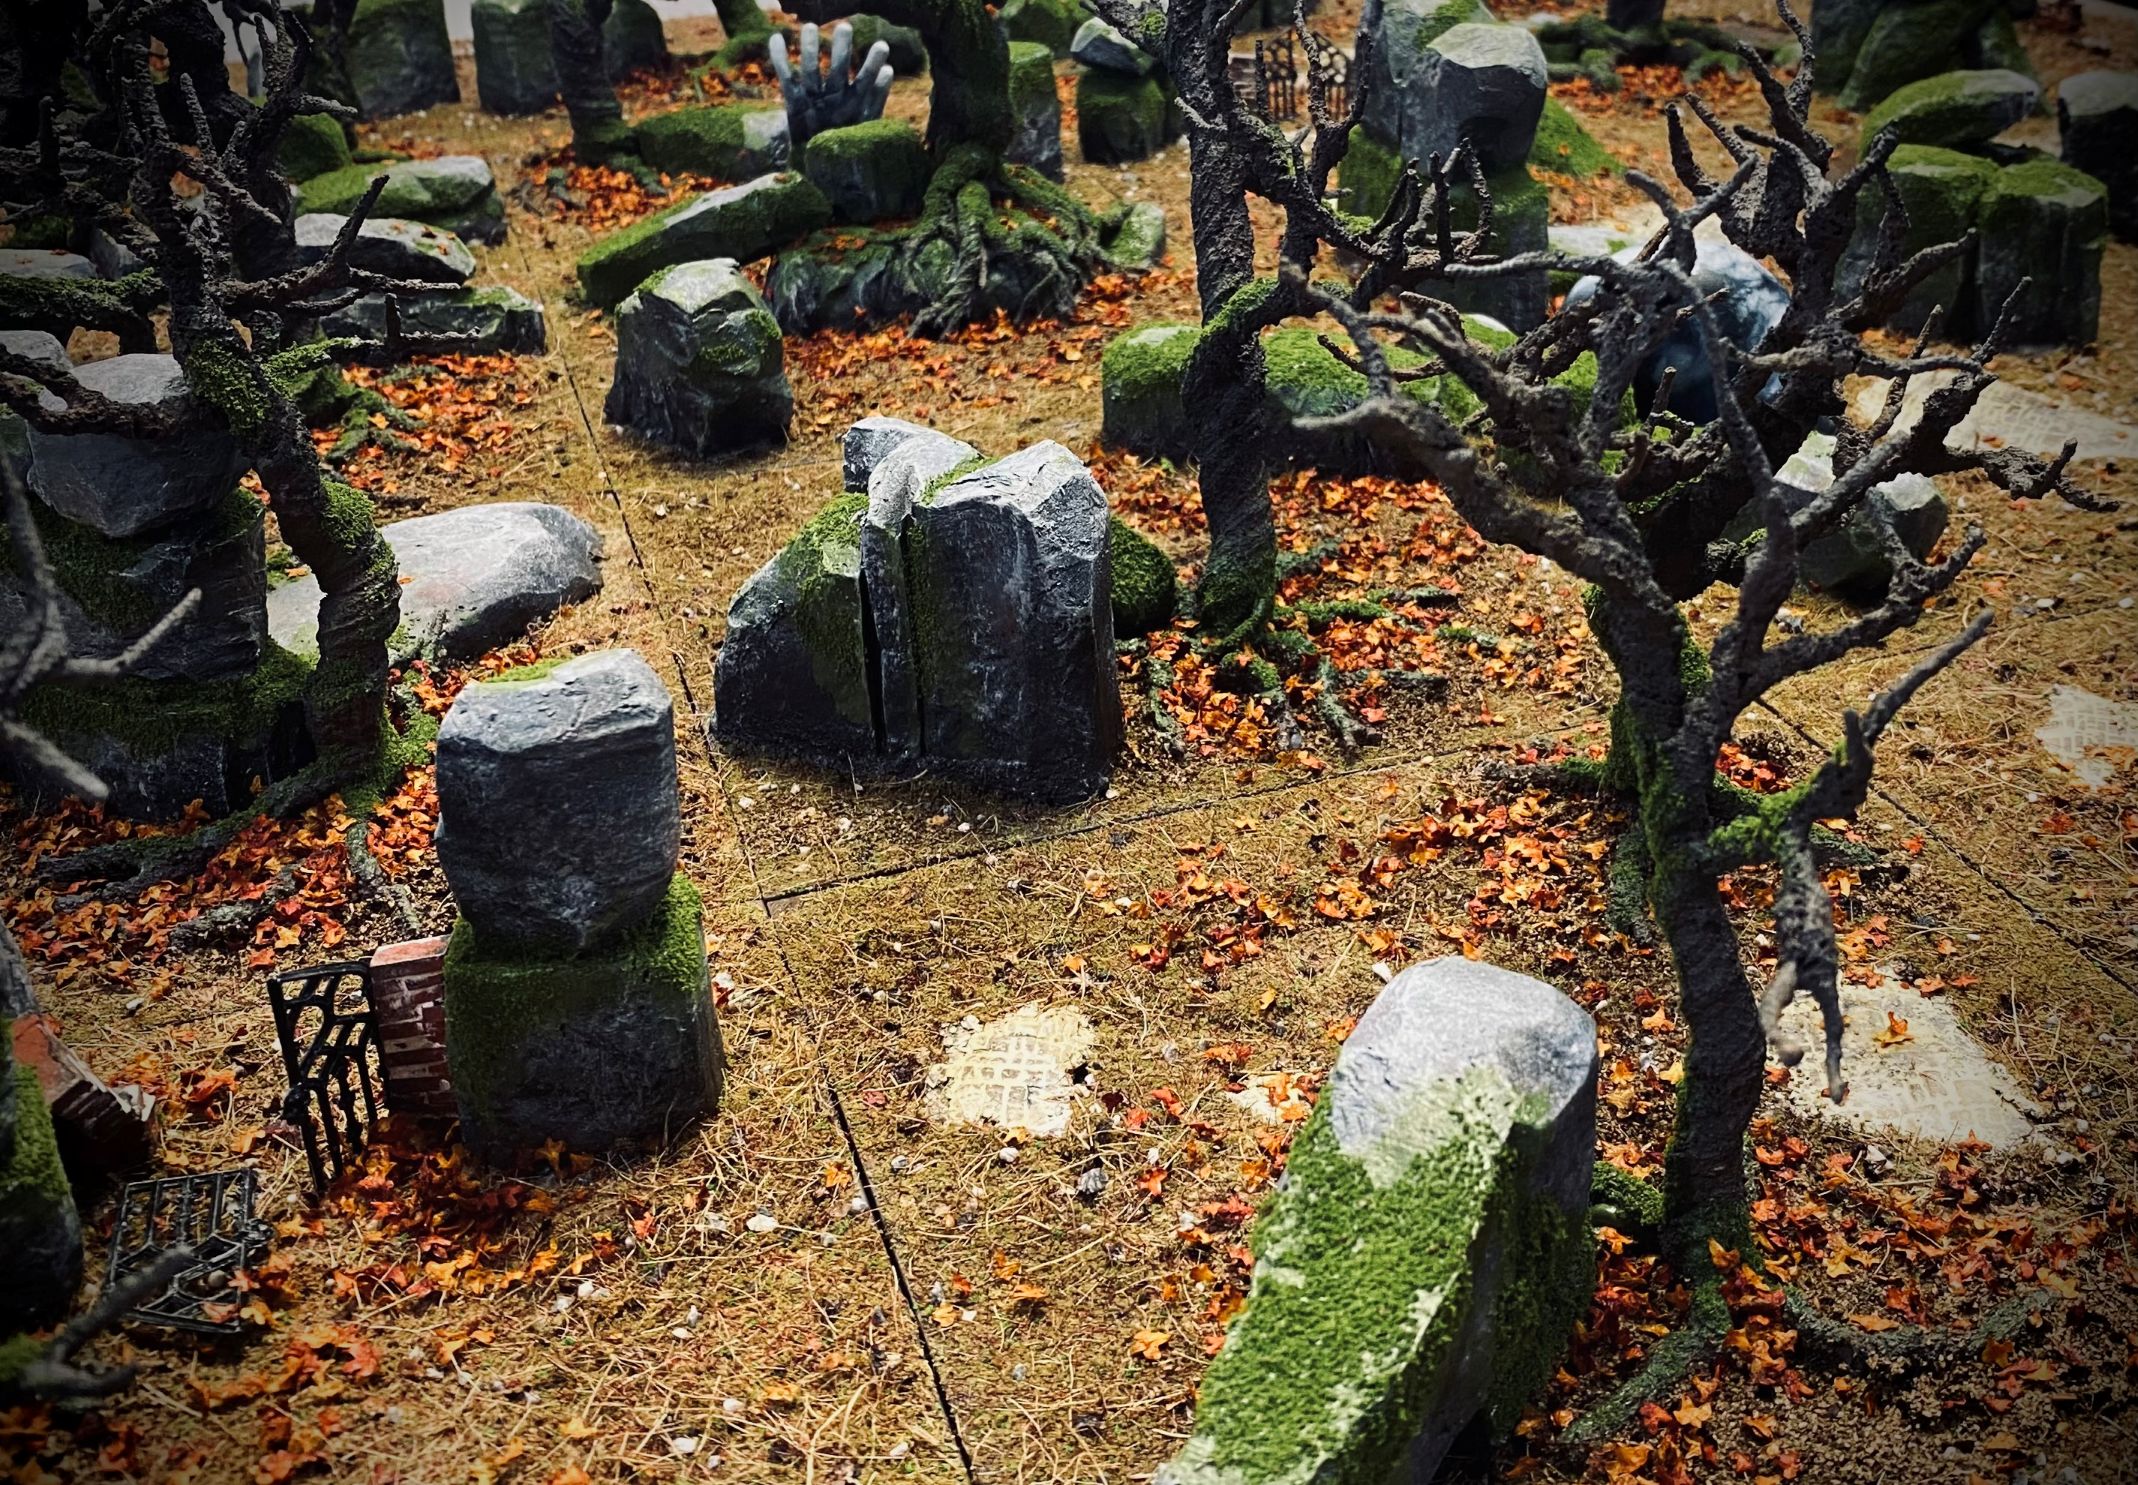
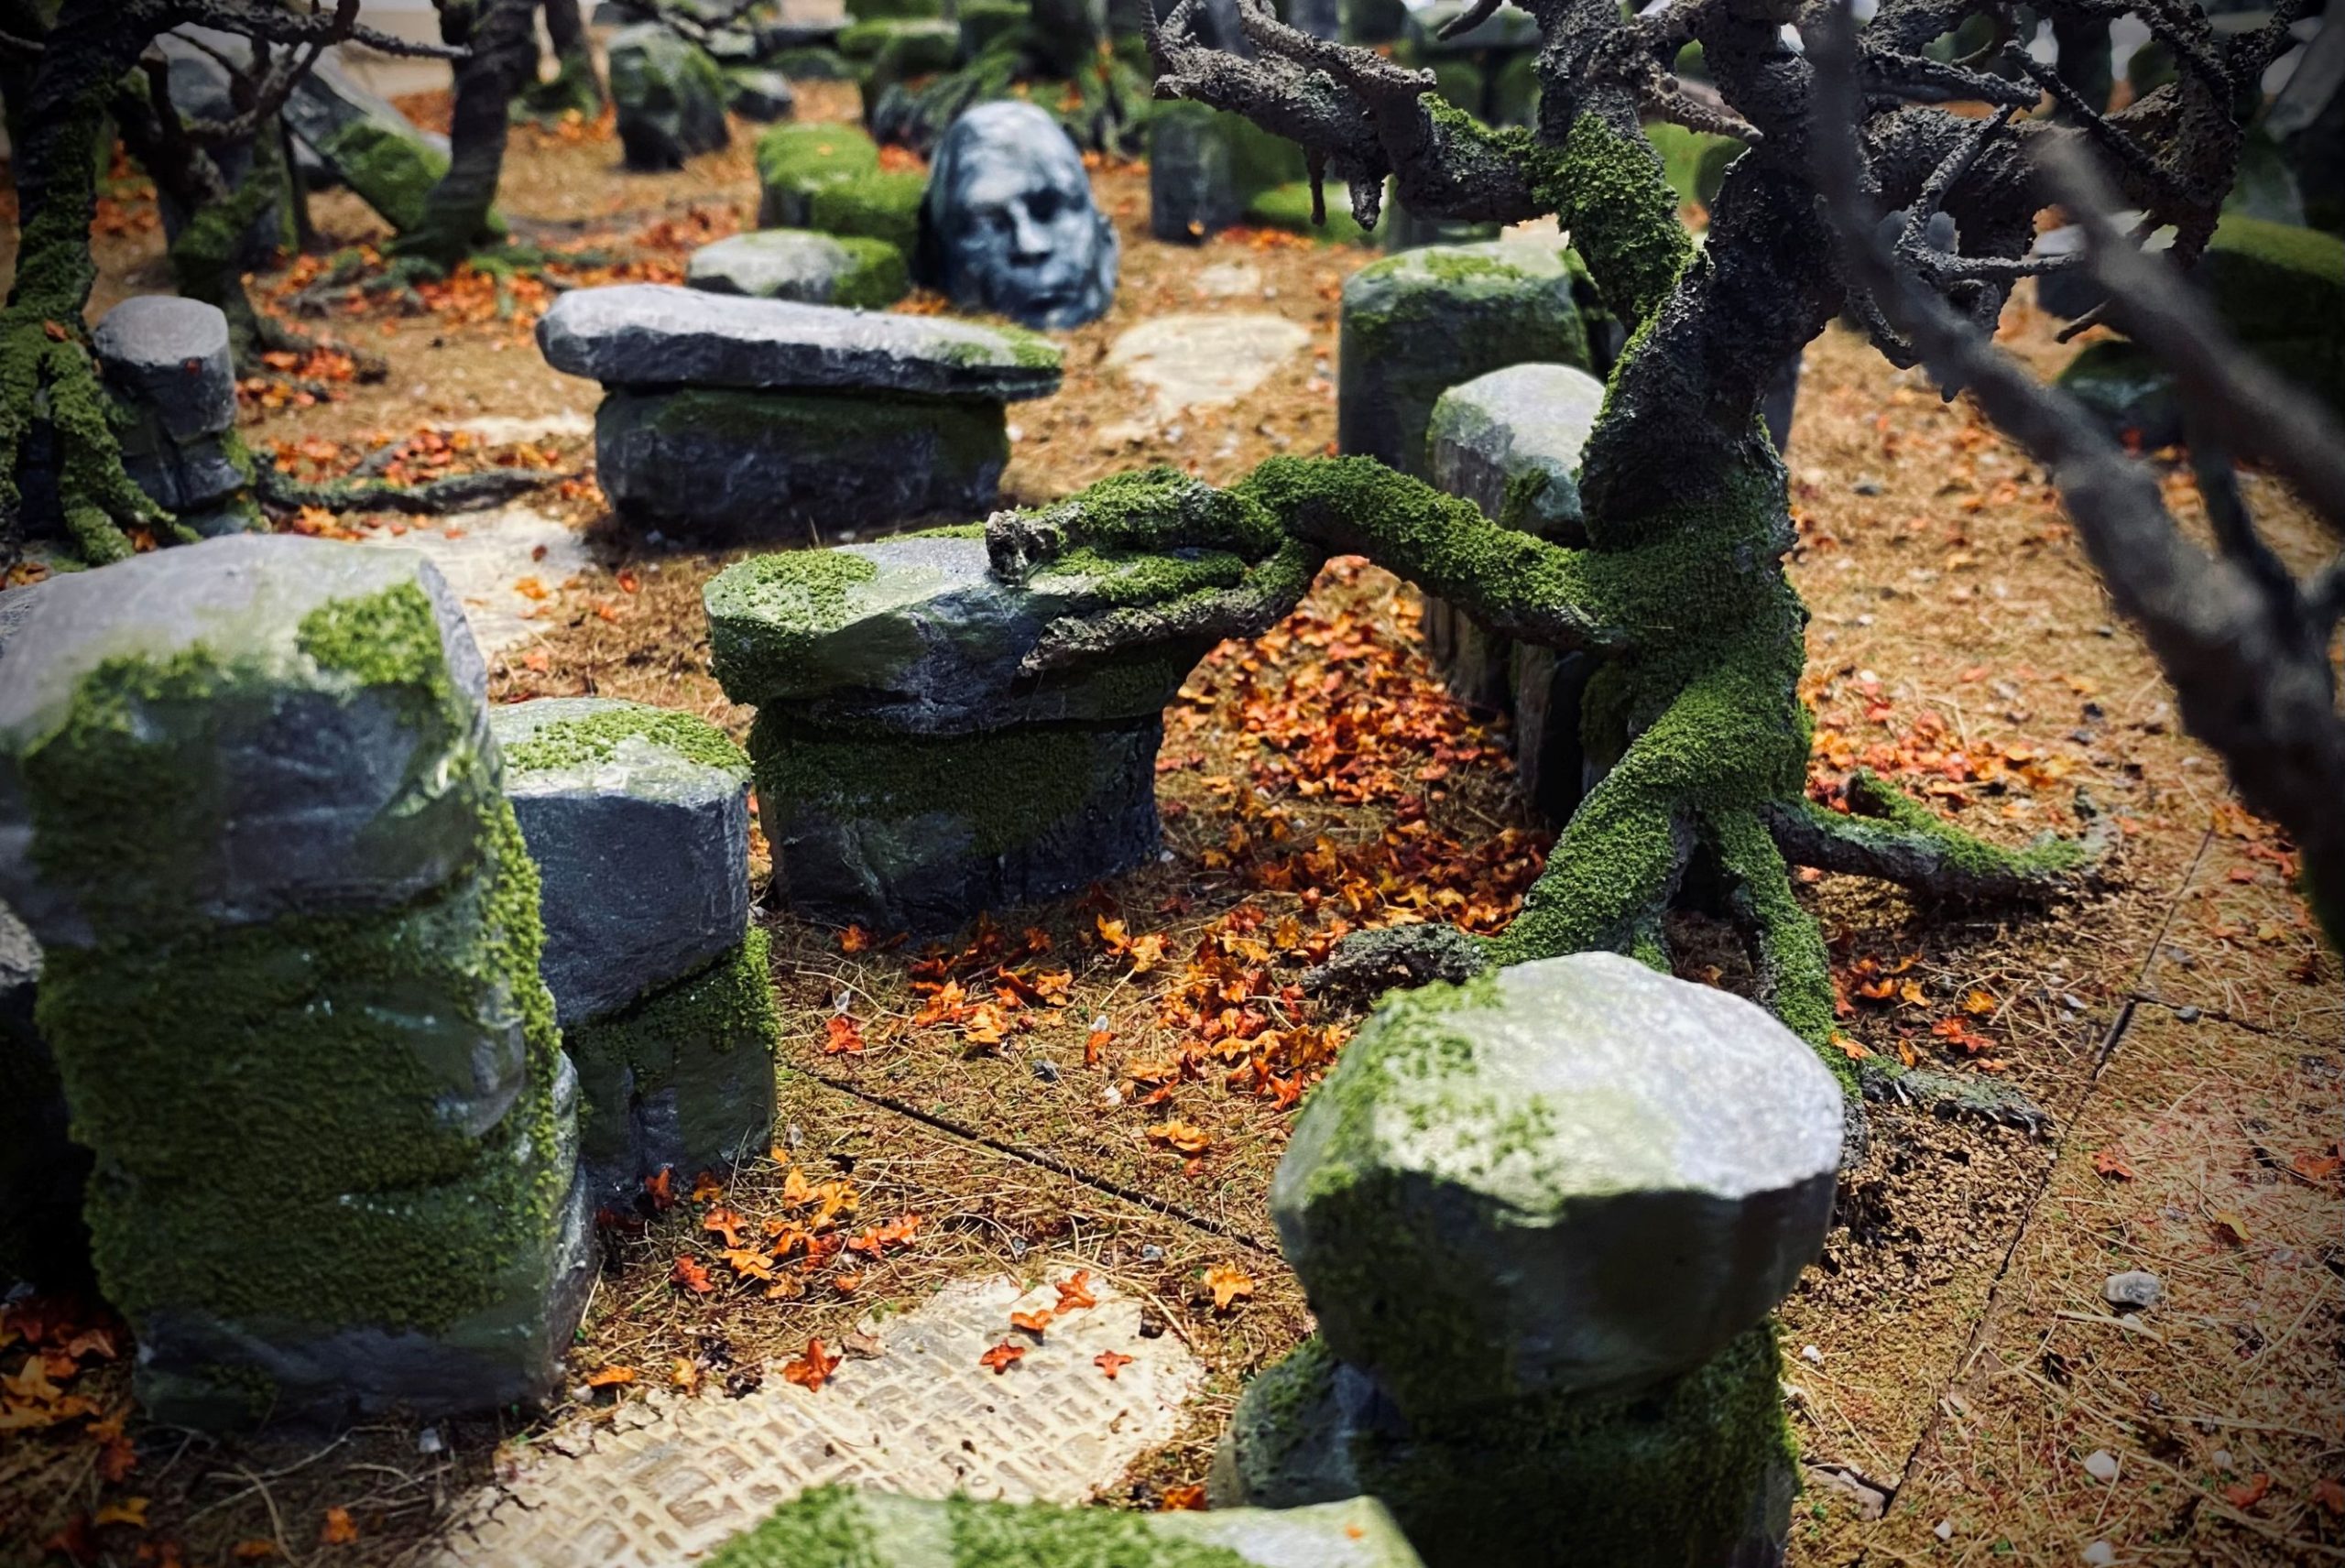
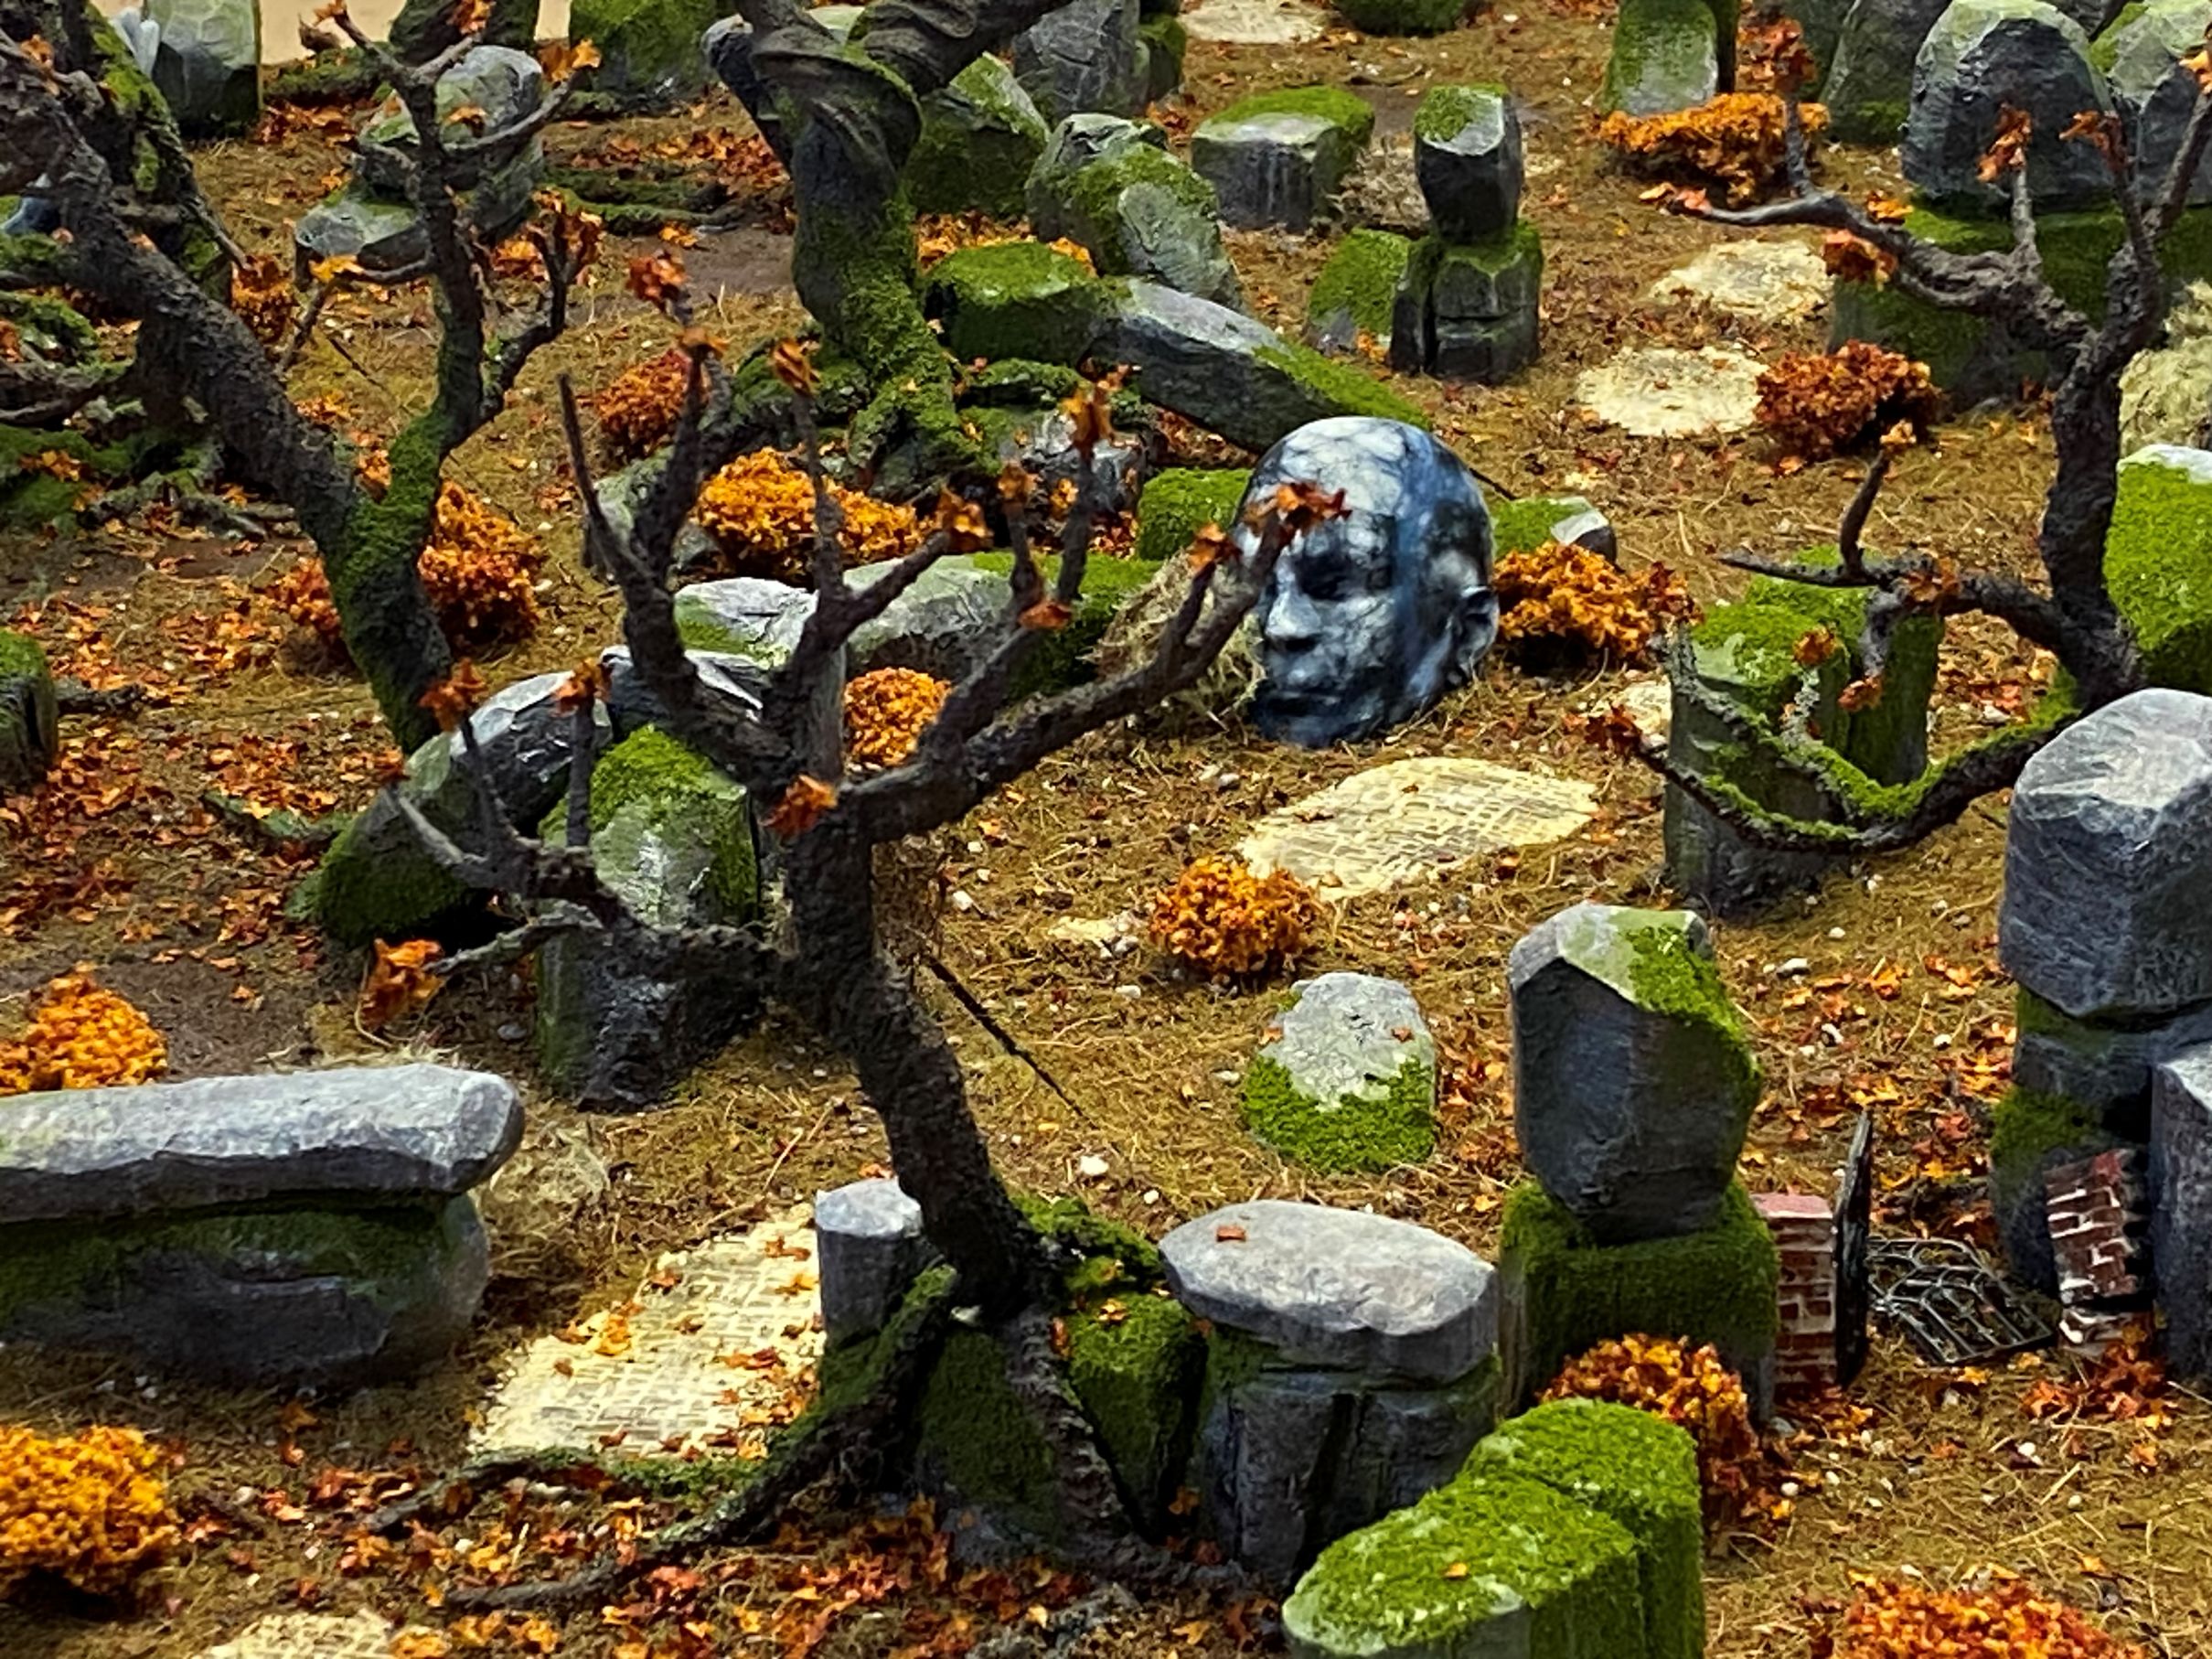
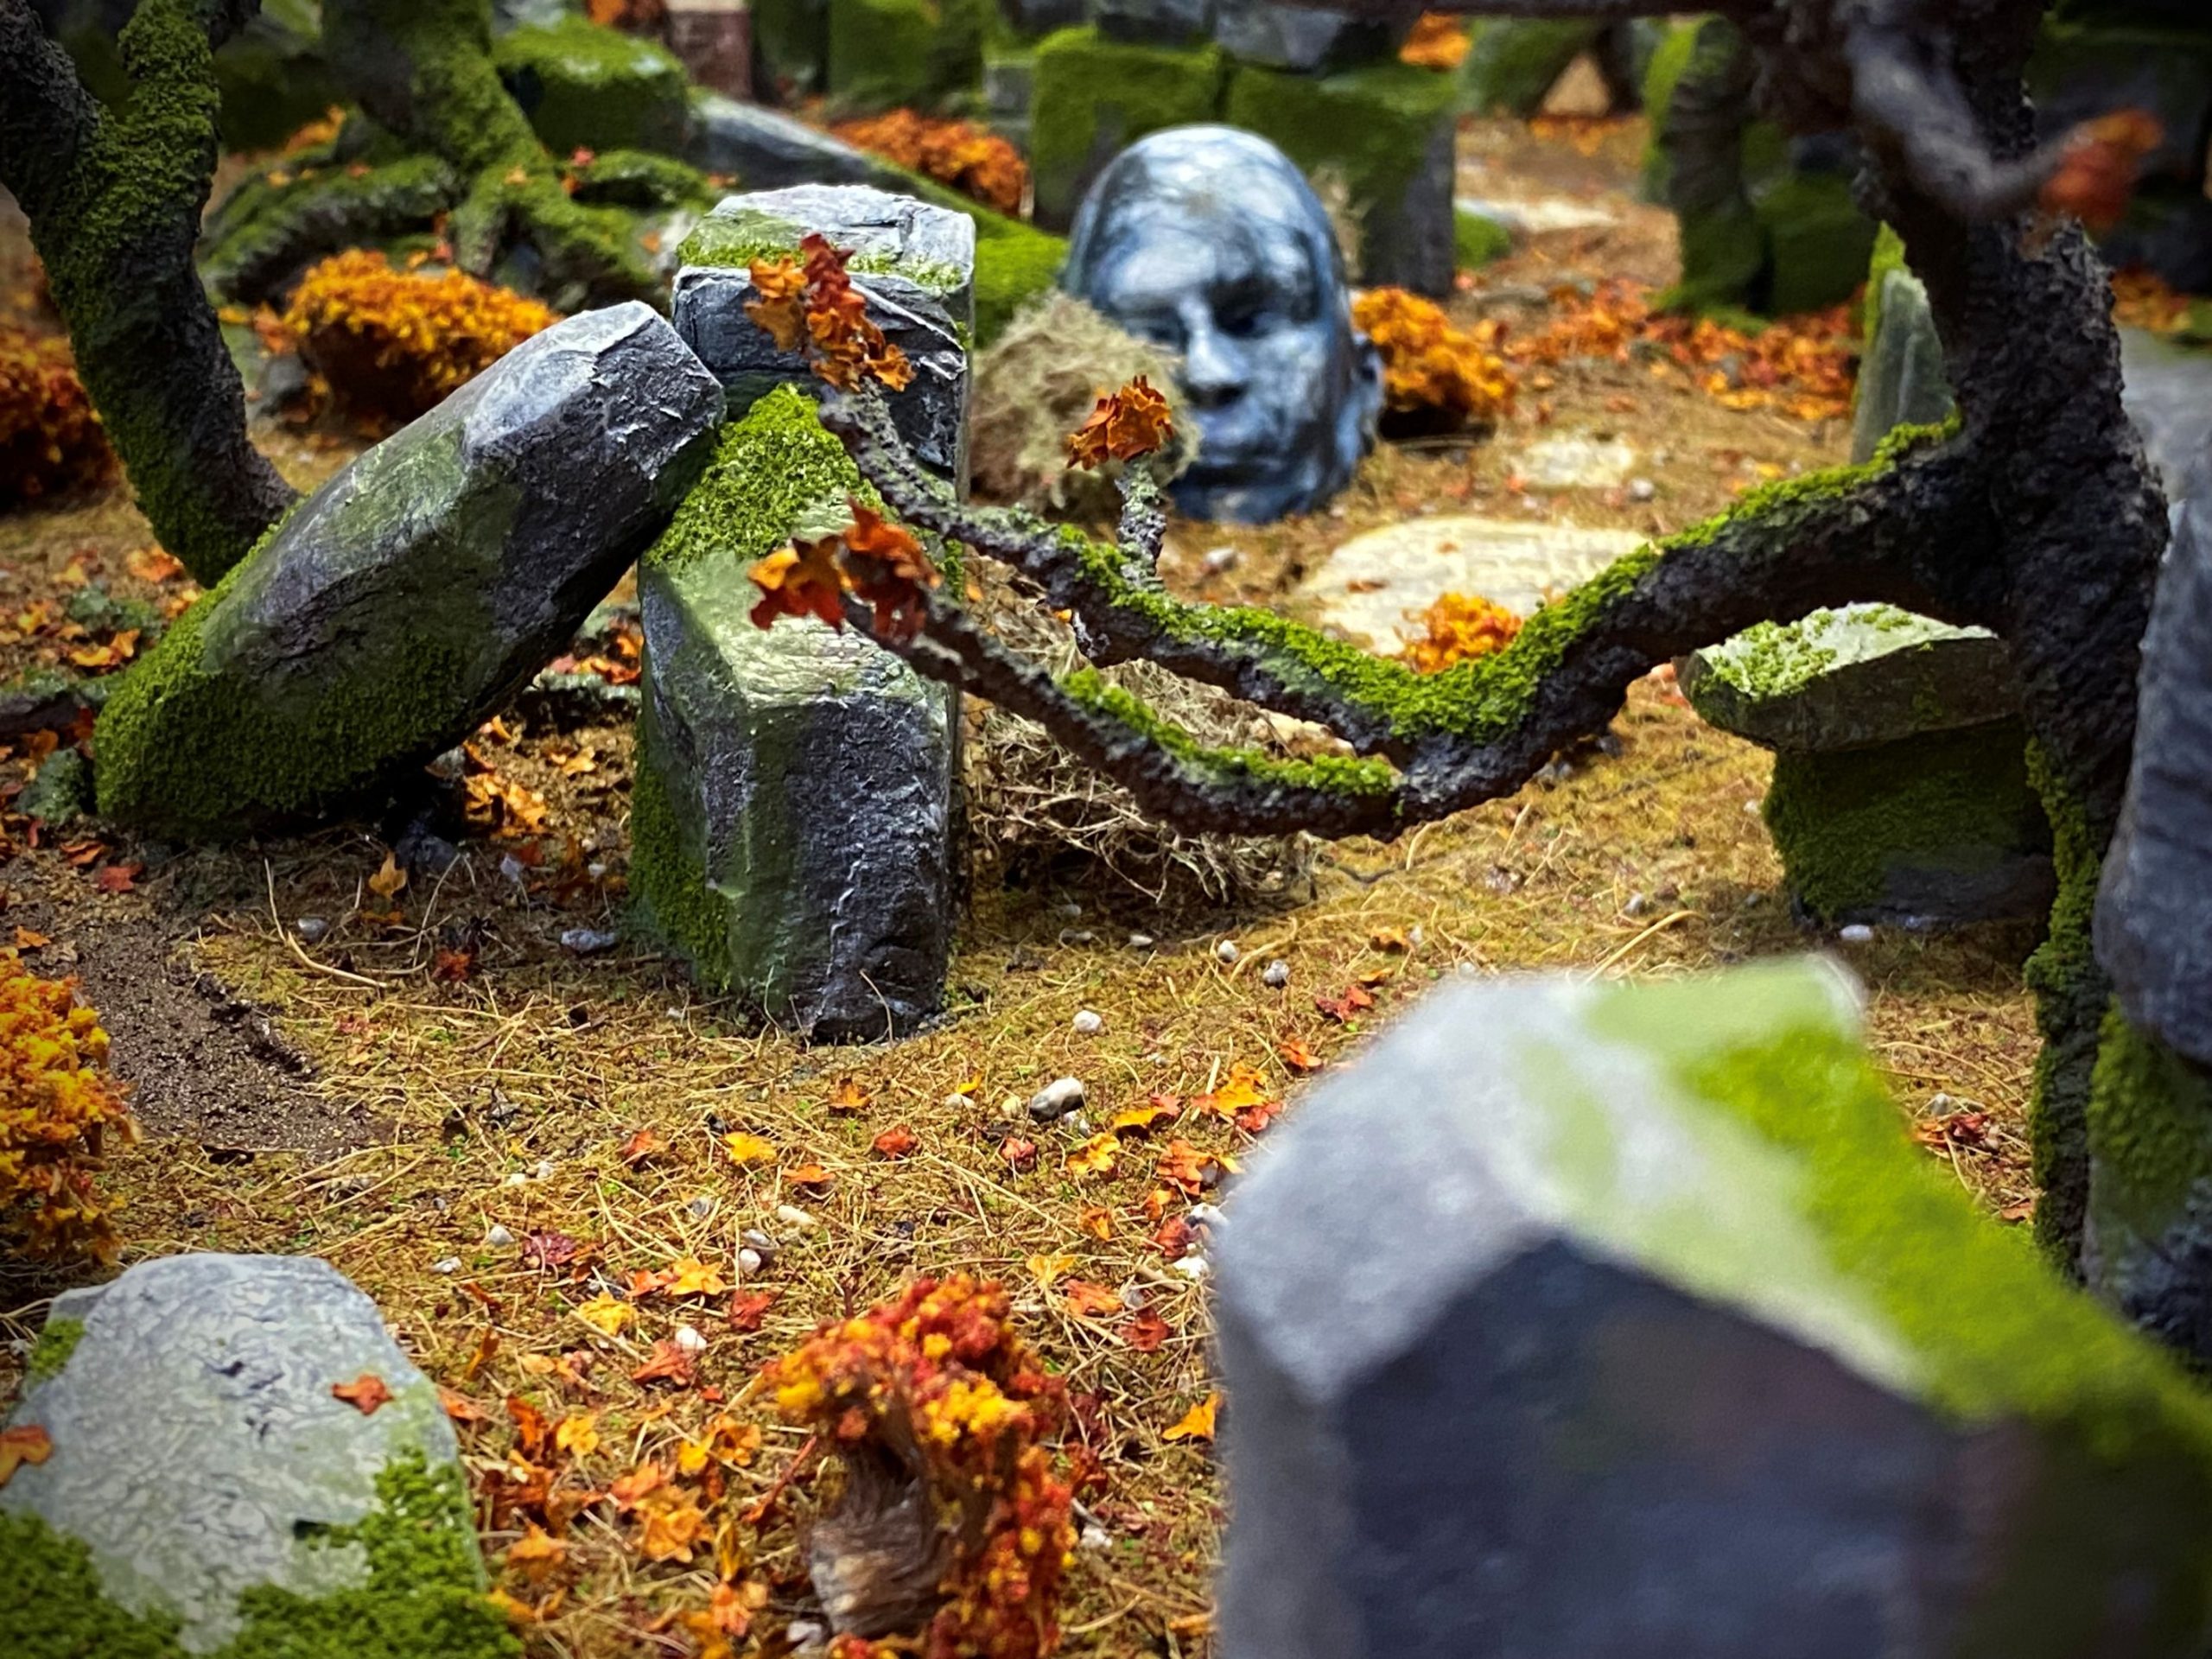
On the rocks.
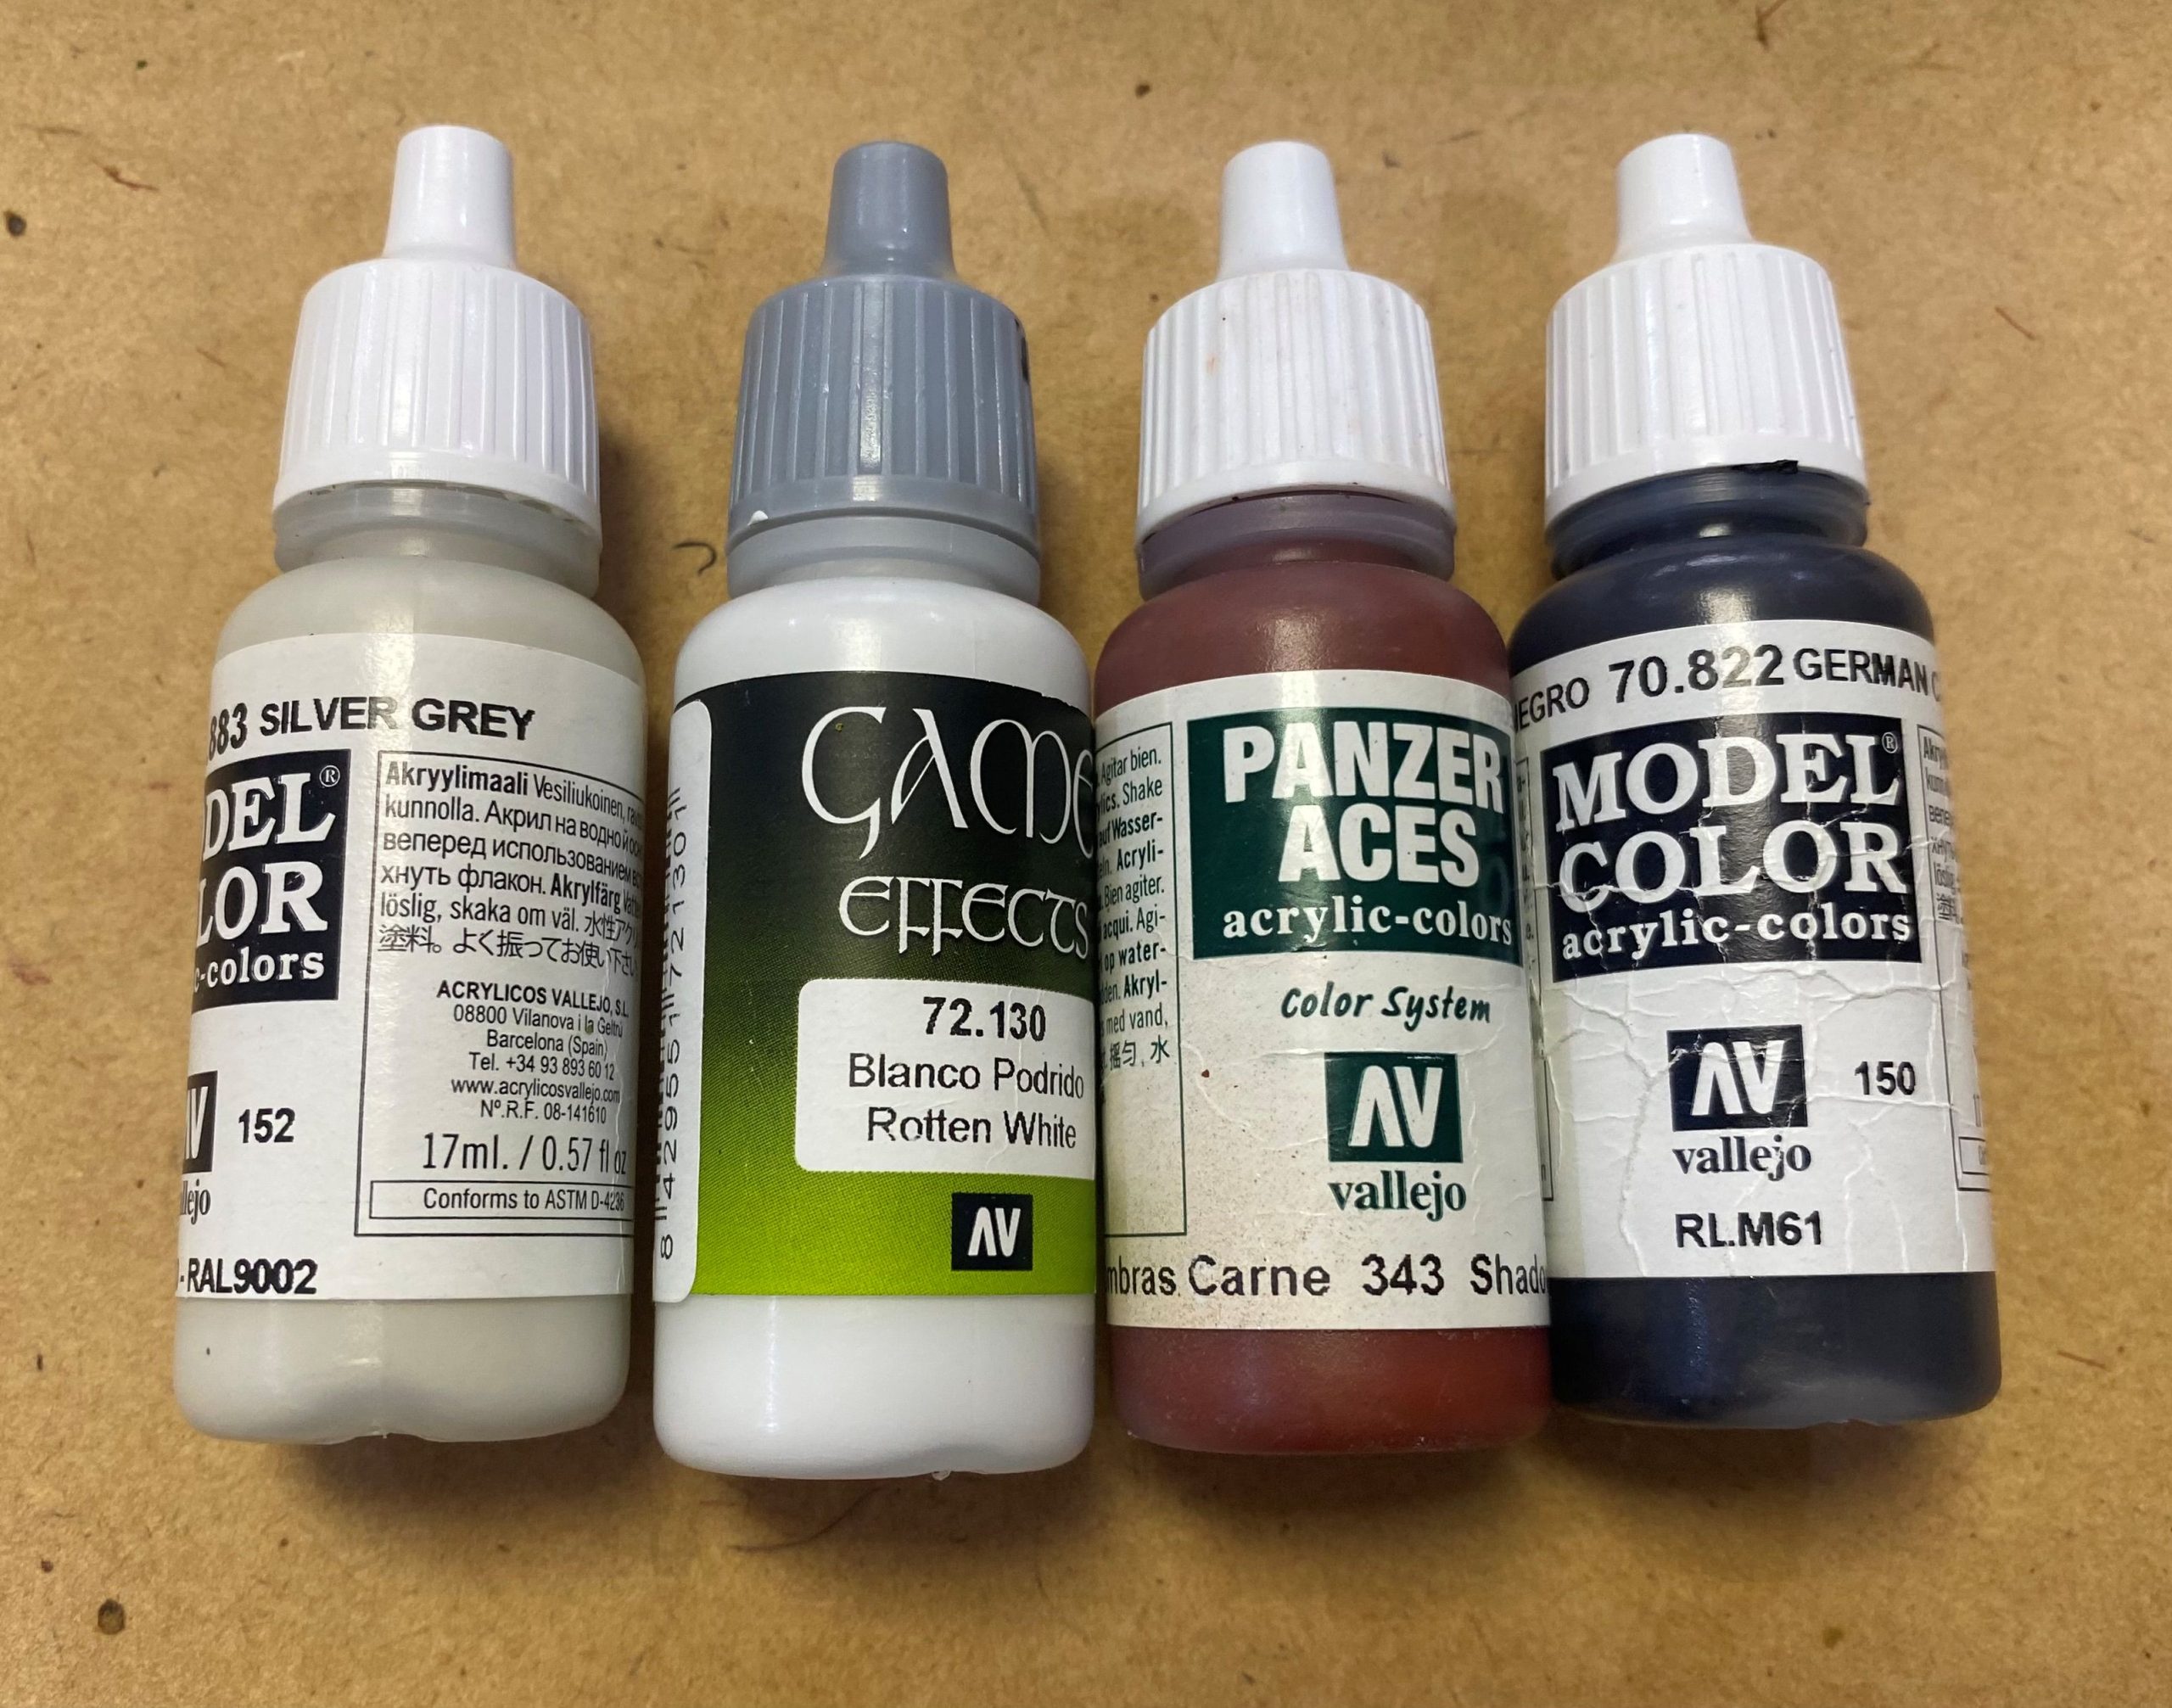
The next thing I had to address was the rocks. At the moment, they are just painted with rattle cans, which is okay for a starting point, but they need more definition, and the blue tinge toned down so that they fit in better with the loose rocks scattered around.
I grabbed a few colours to get rid of the blue.
First, mix a bit of dark, black-brown with some off-white, and randomly dry-brush bits before splodging on bits of a reddish-brown mixed with off-white.
After that, I splodged on a light stippling of reddish brown mixed with black brown, mostly in the bits that I wanted to be more shaded.
Finally, I gave the rocks two very quick dry brushes. First with off white and then with white.
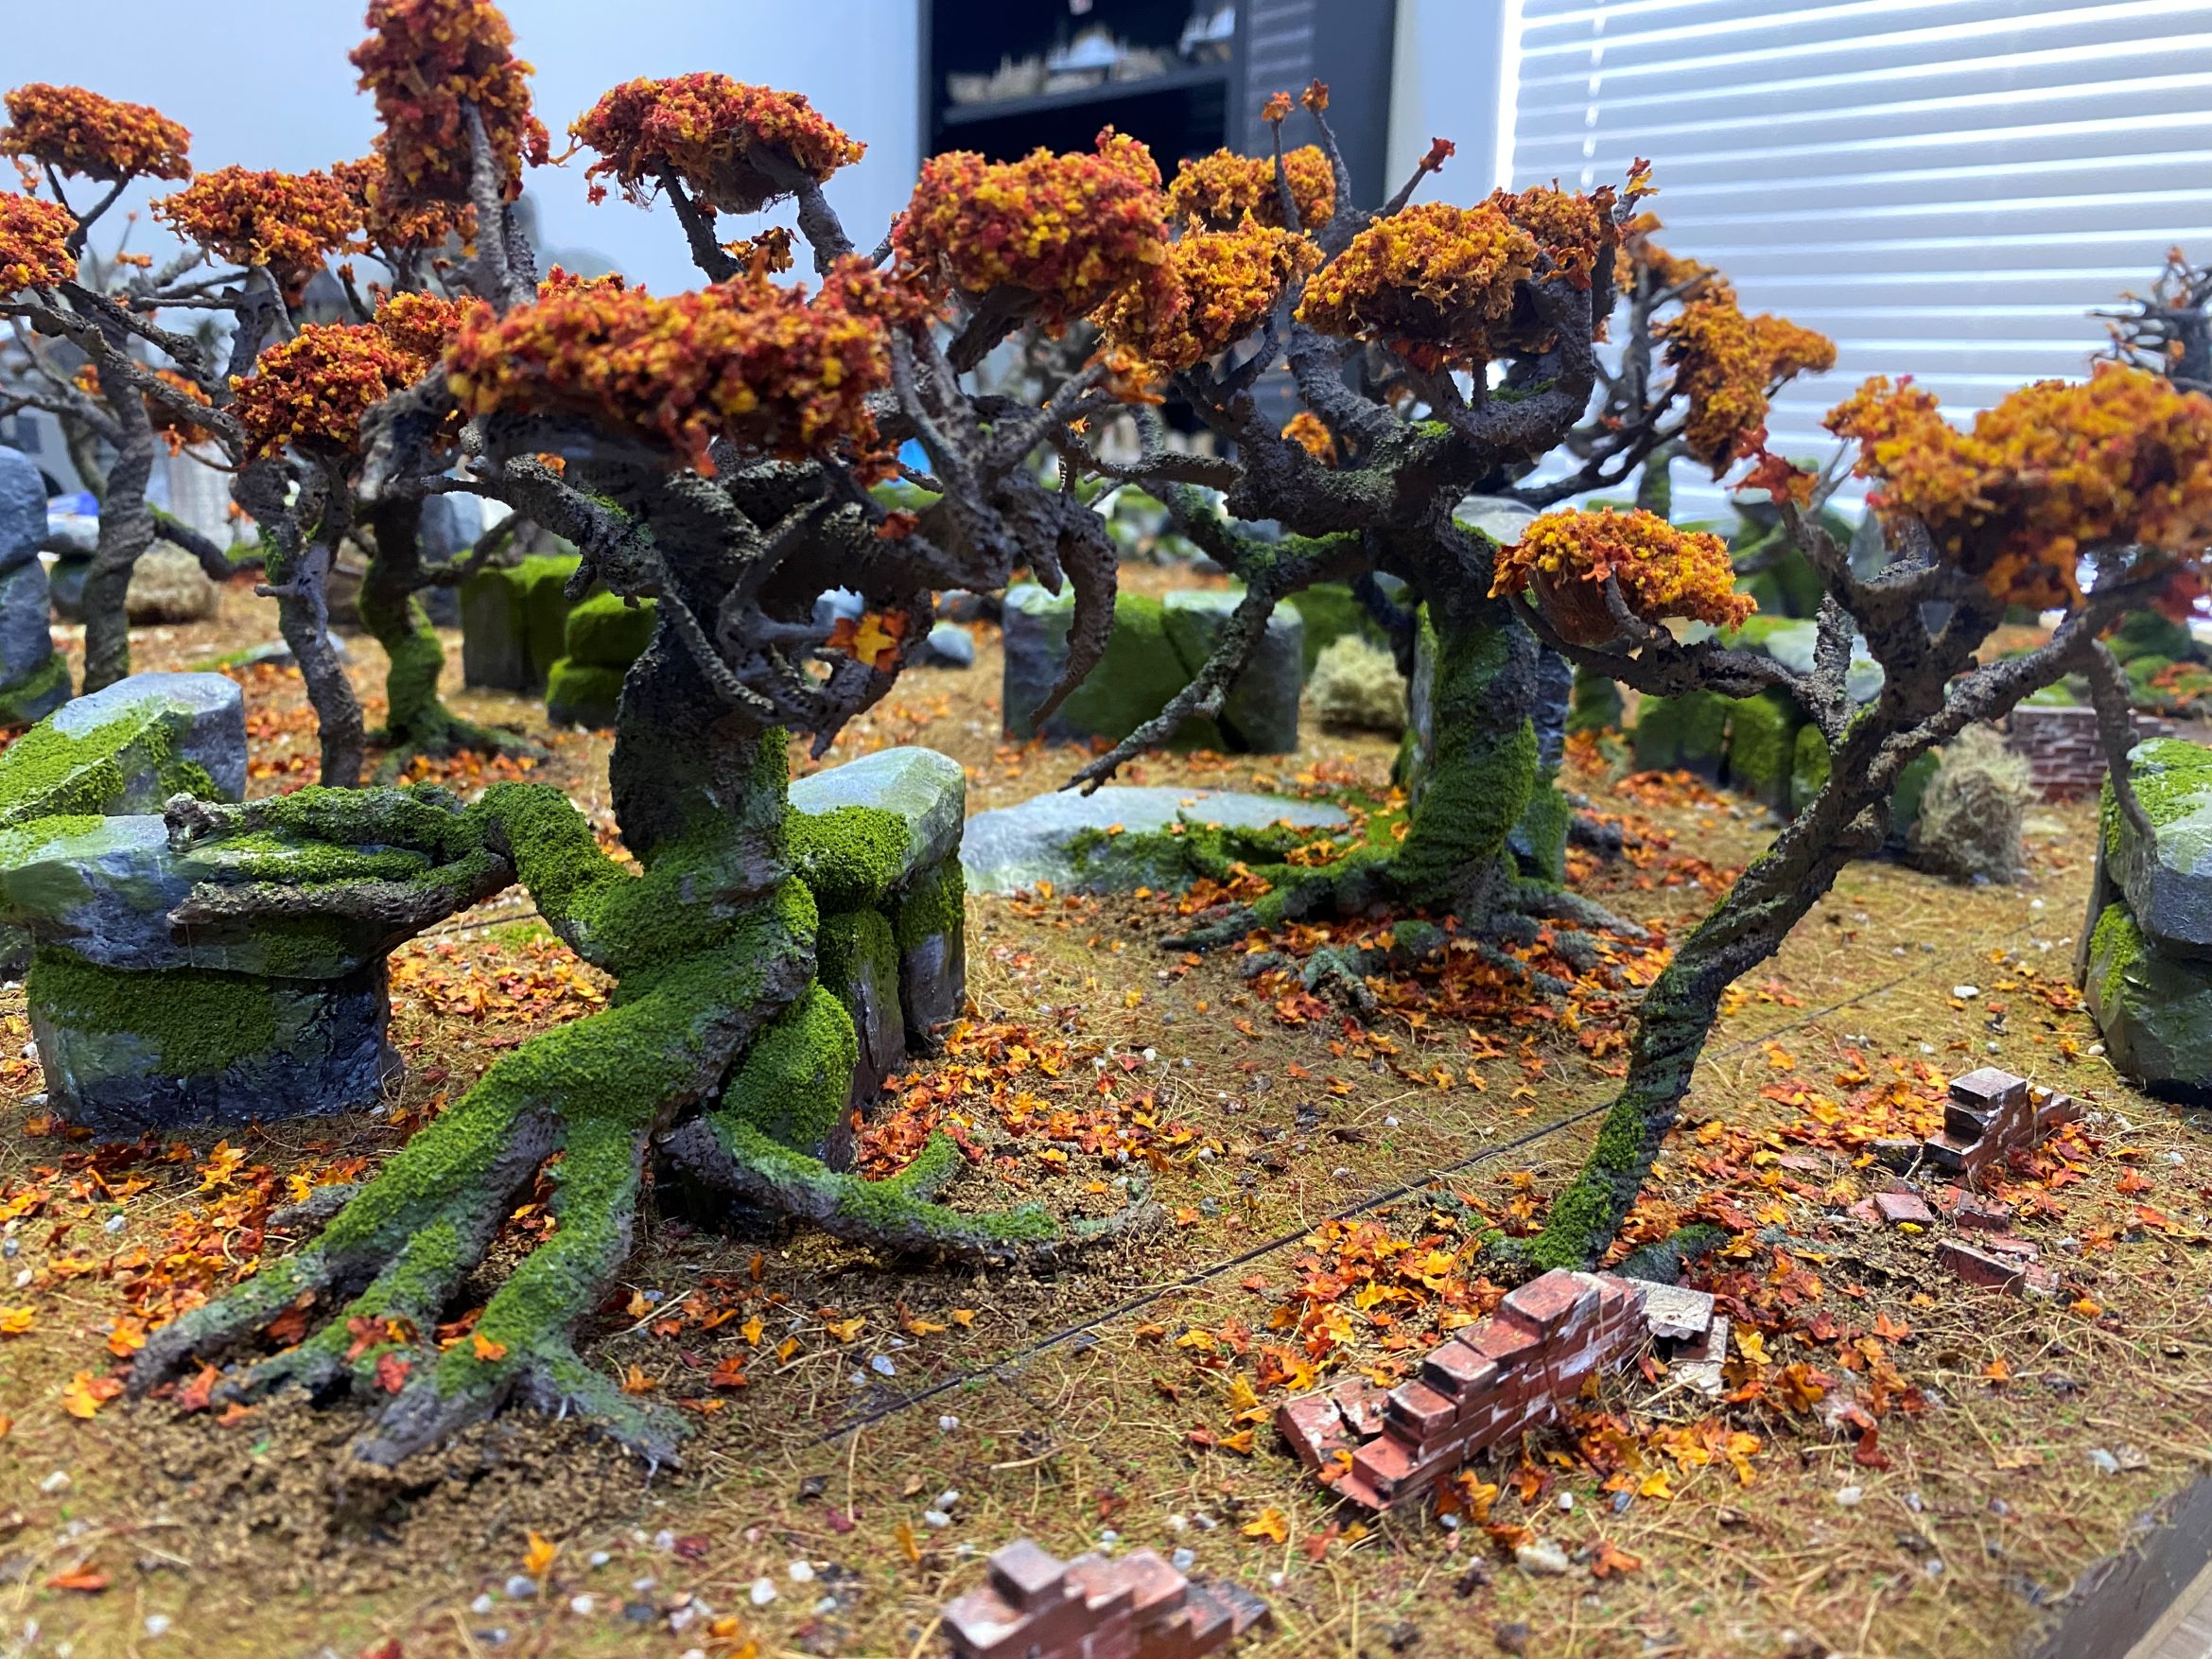
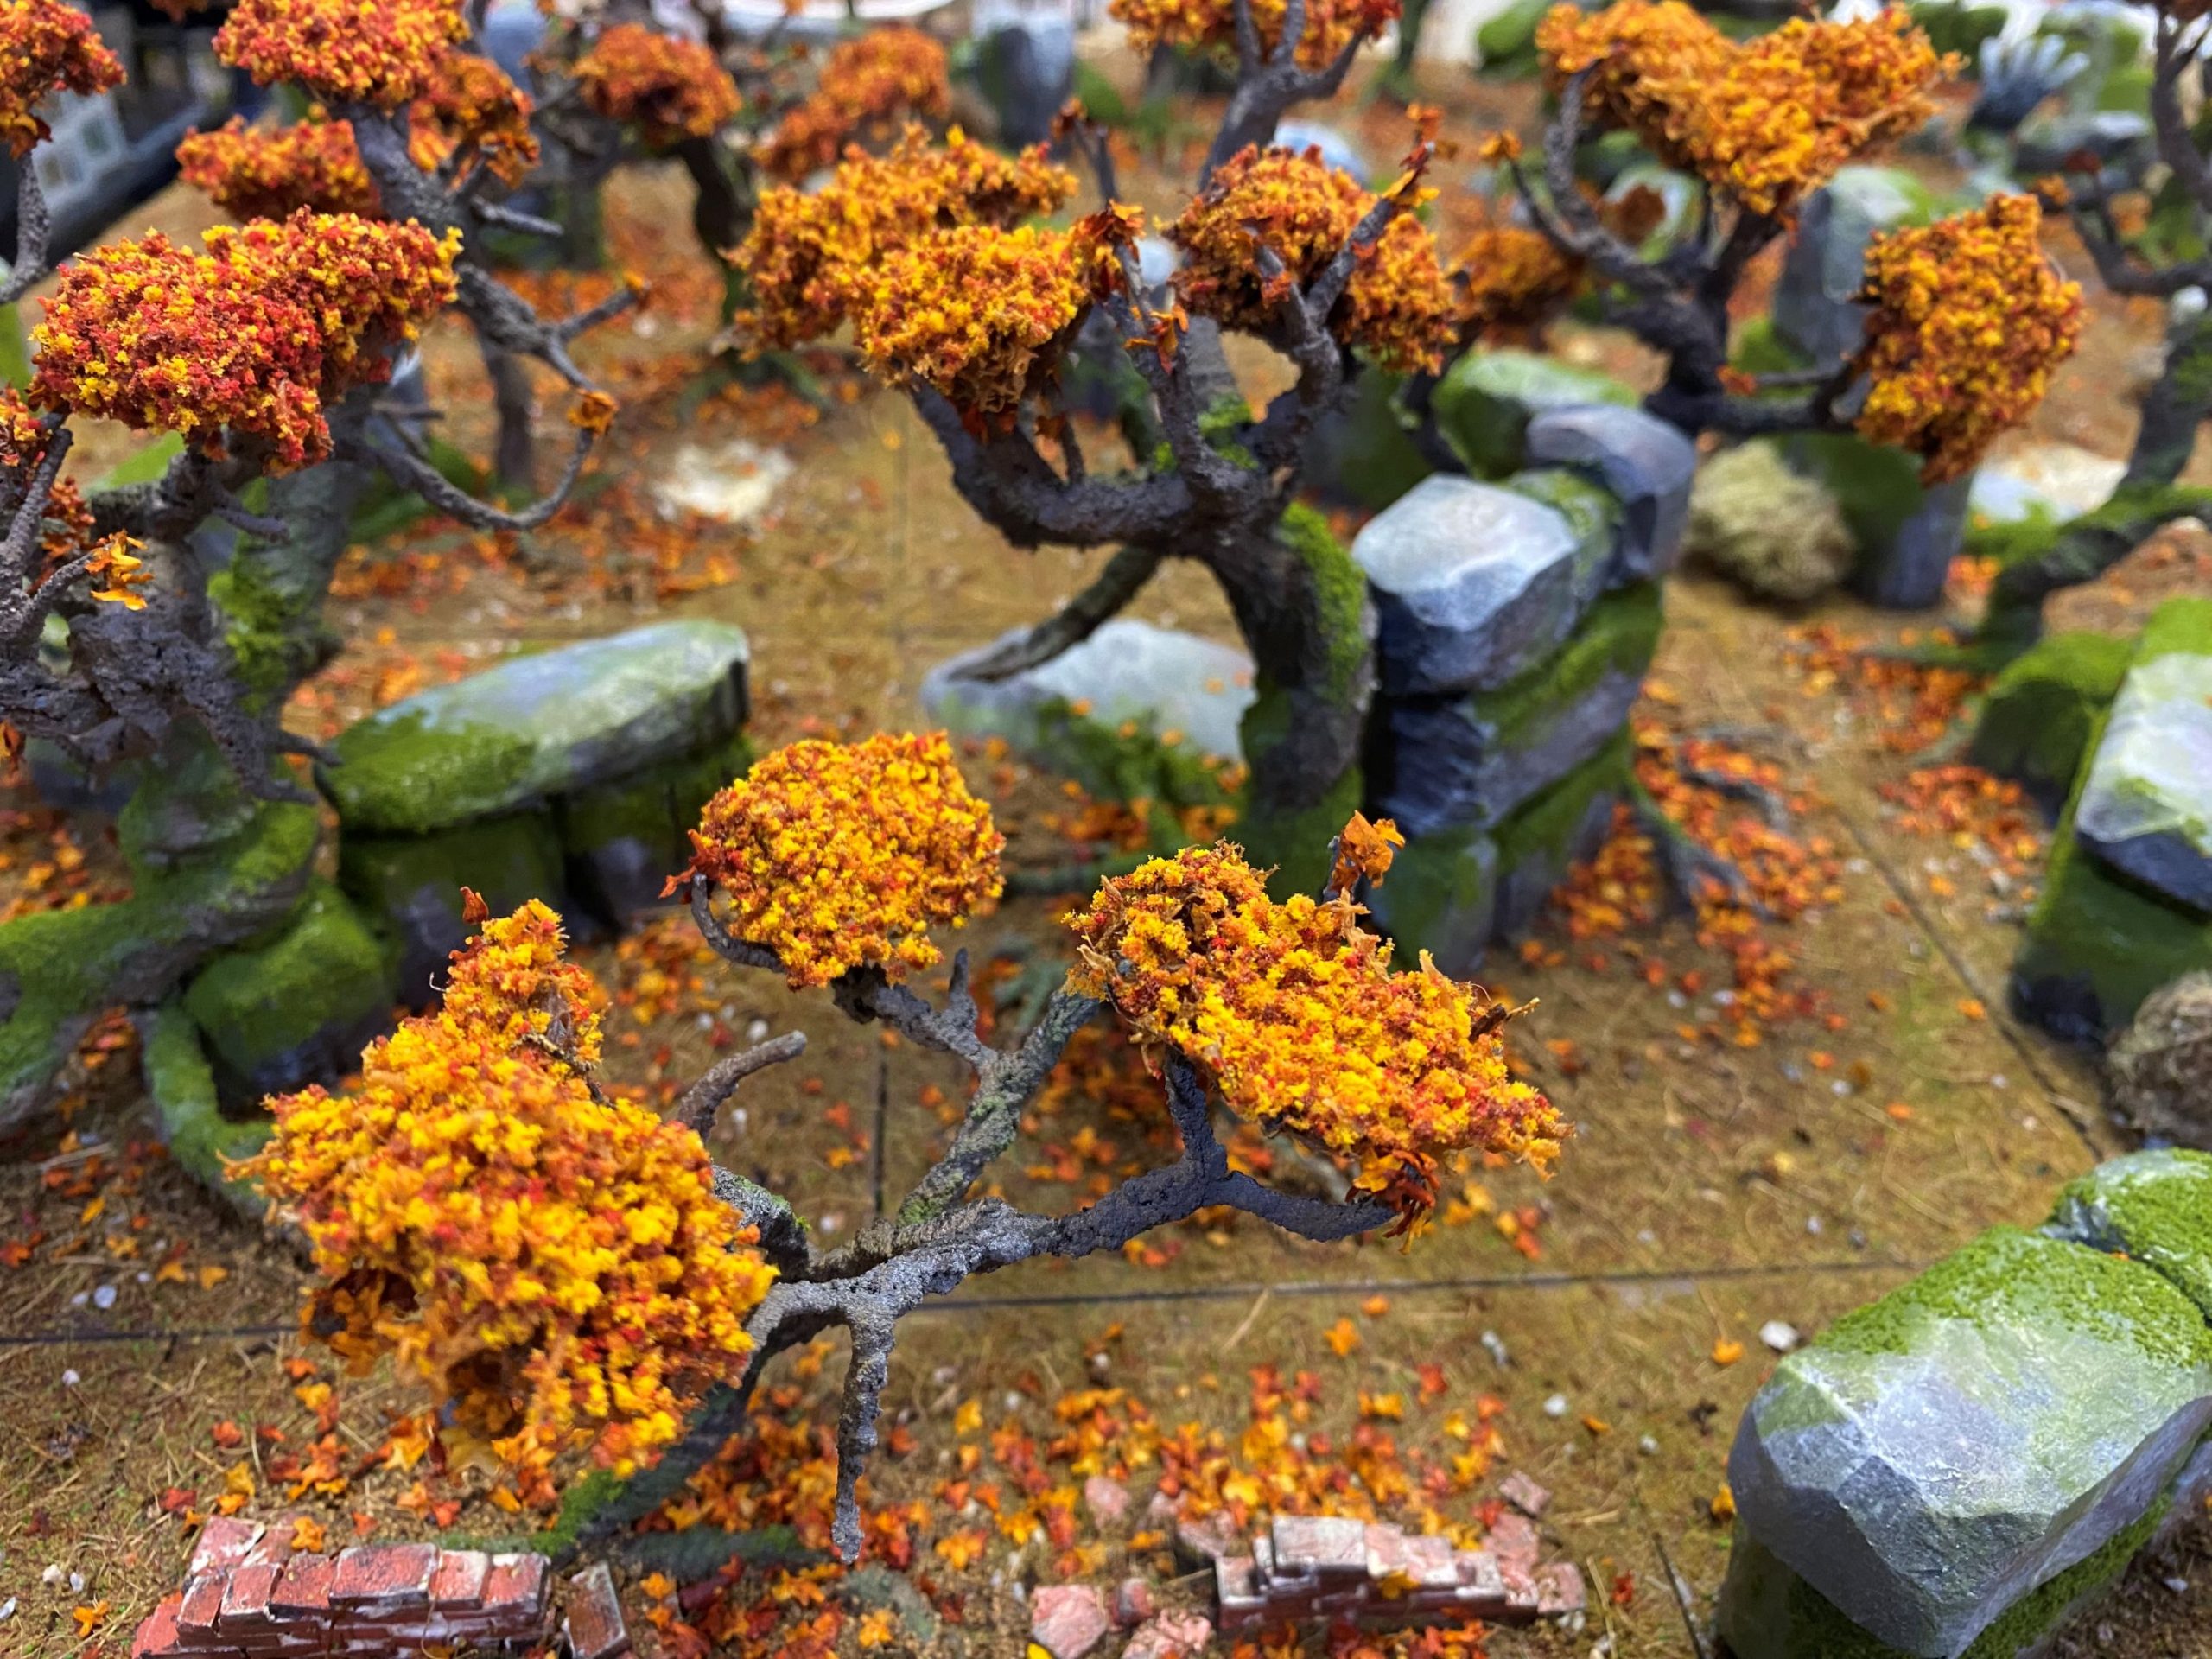
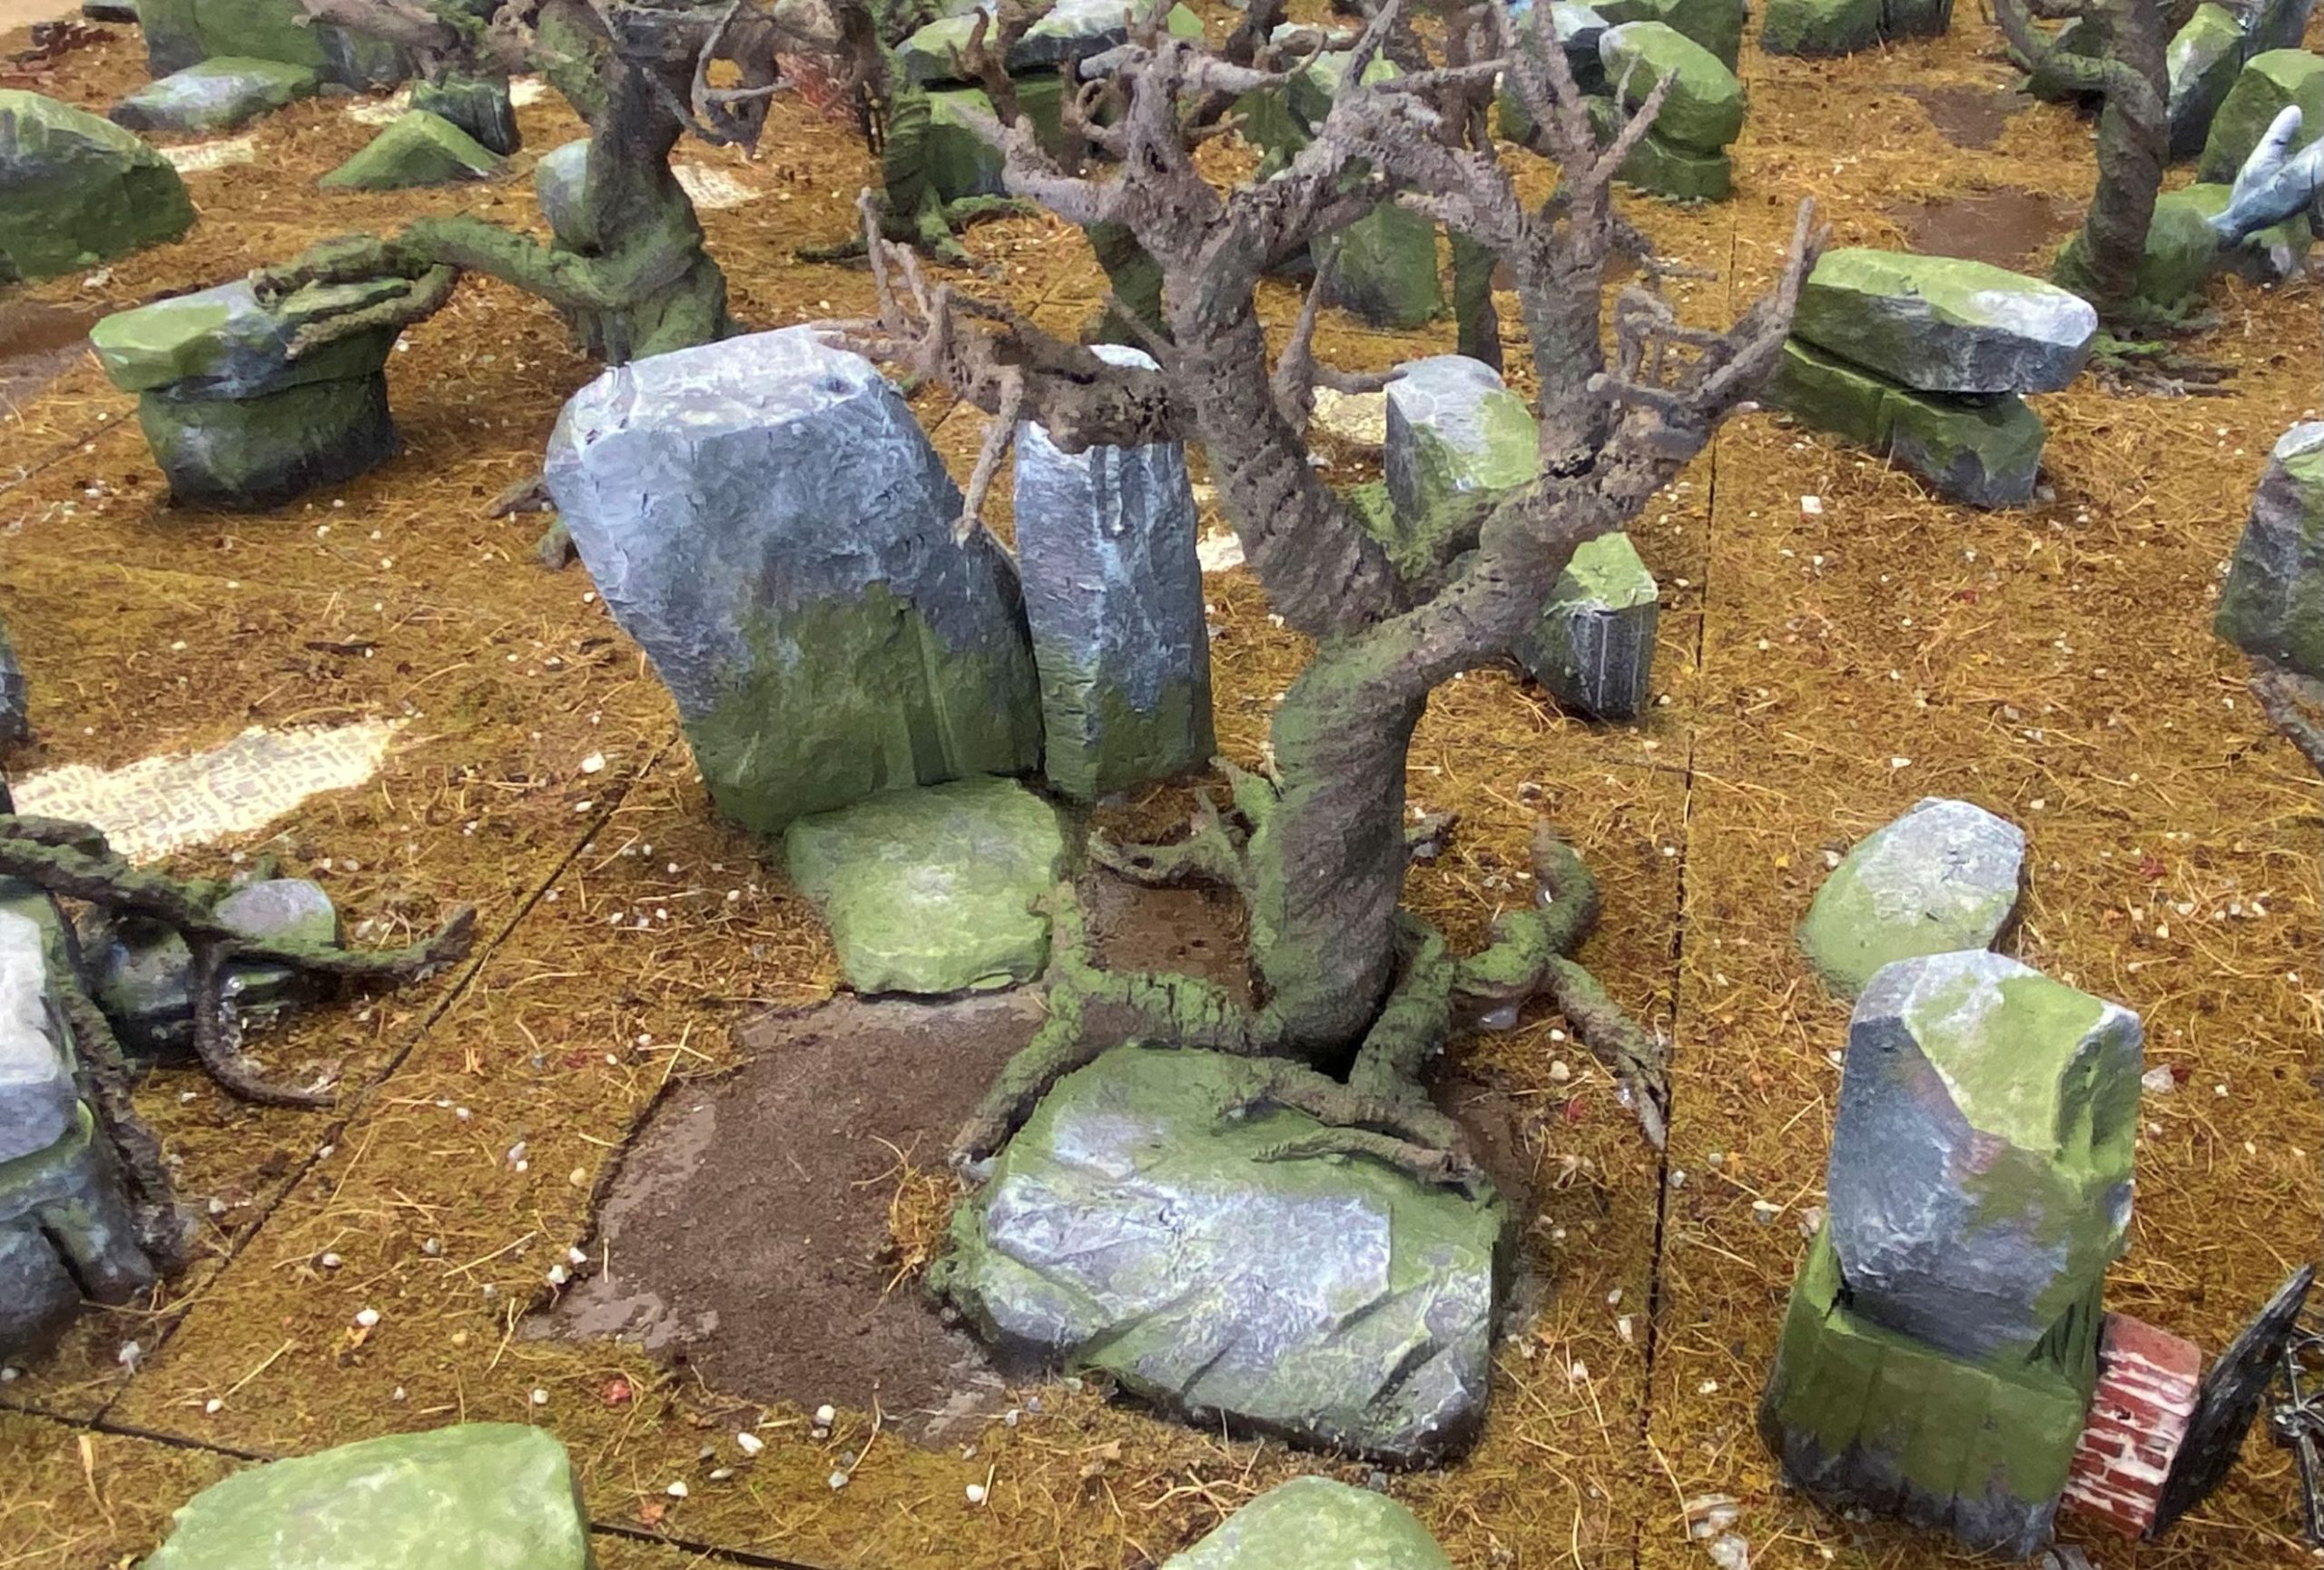
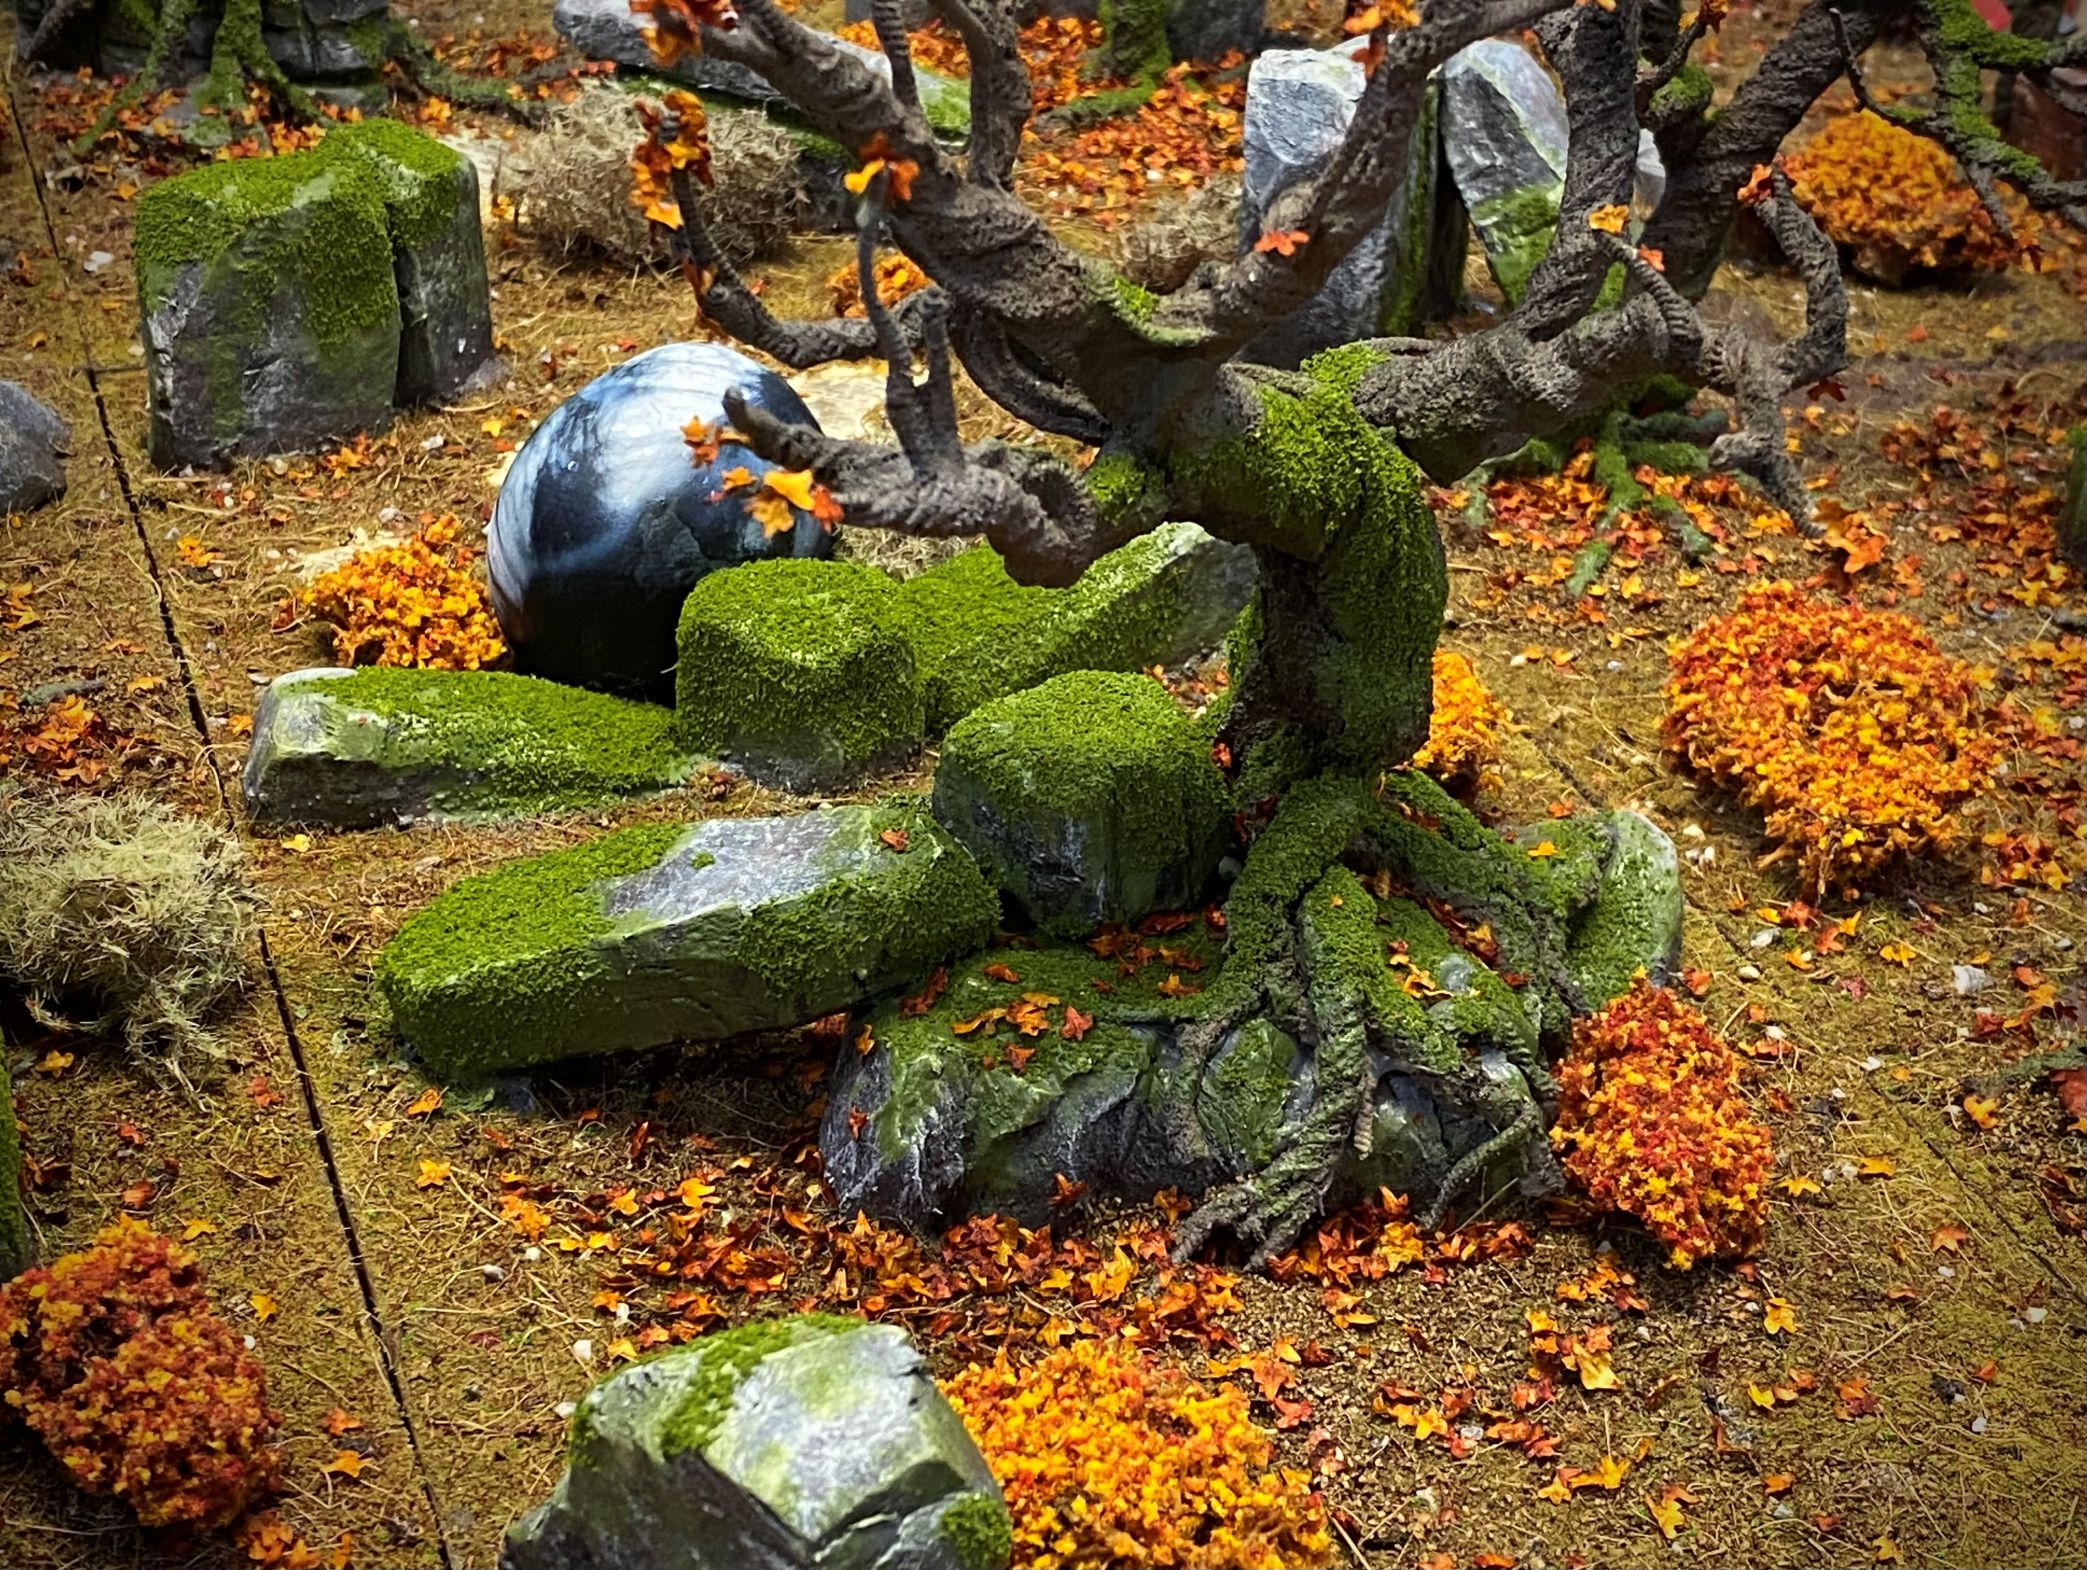
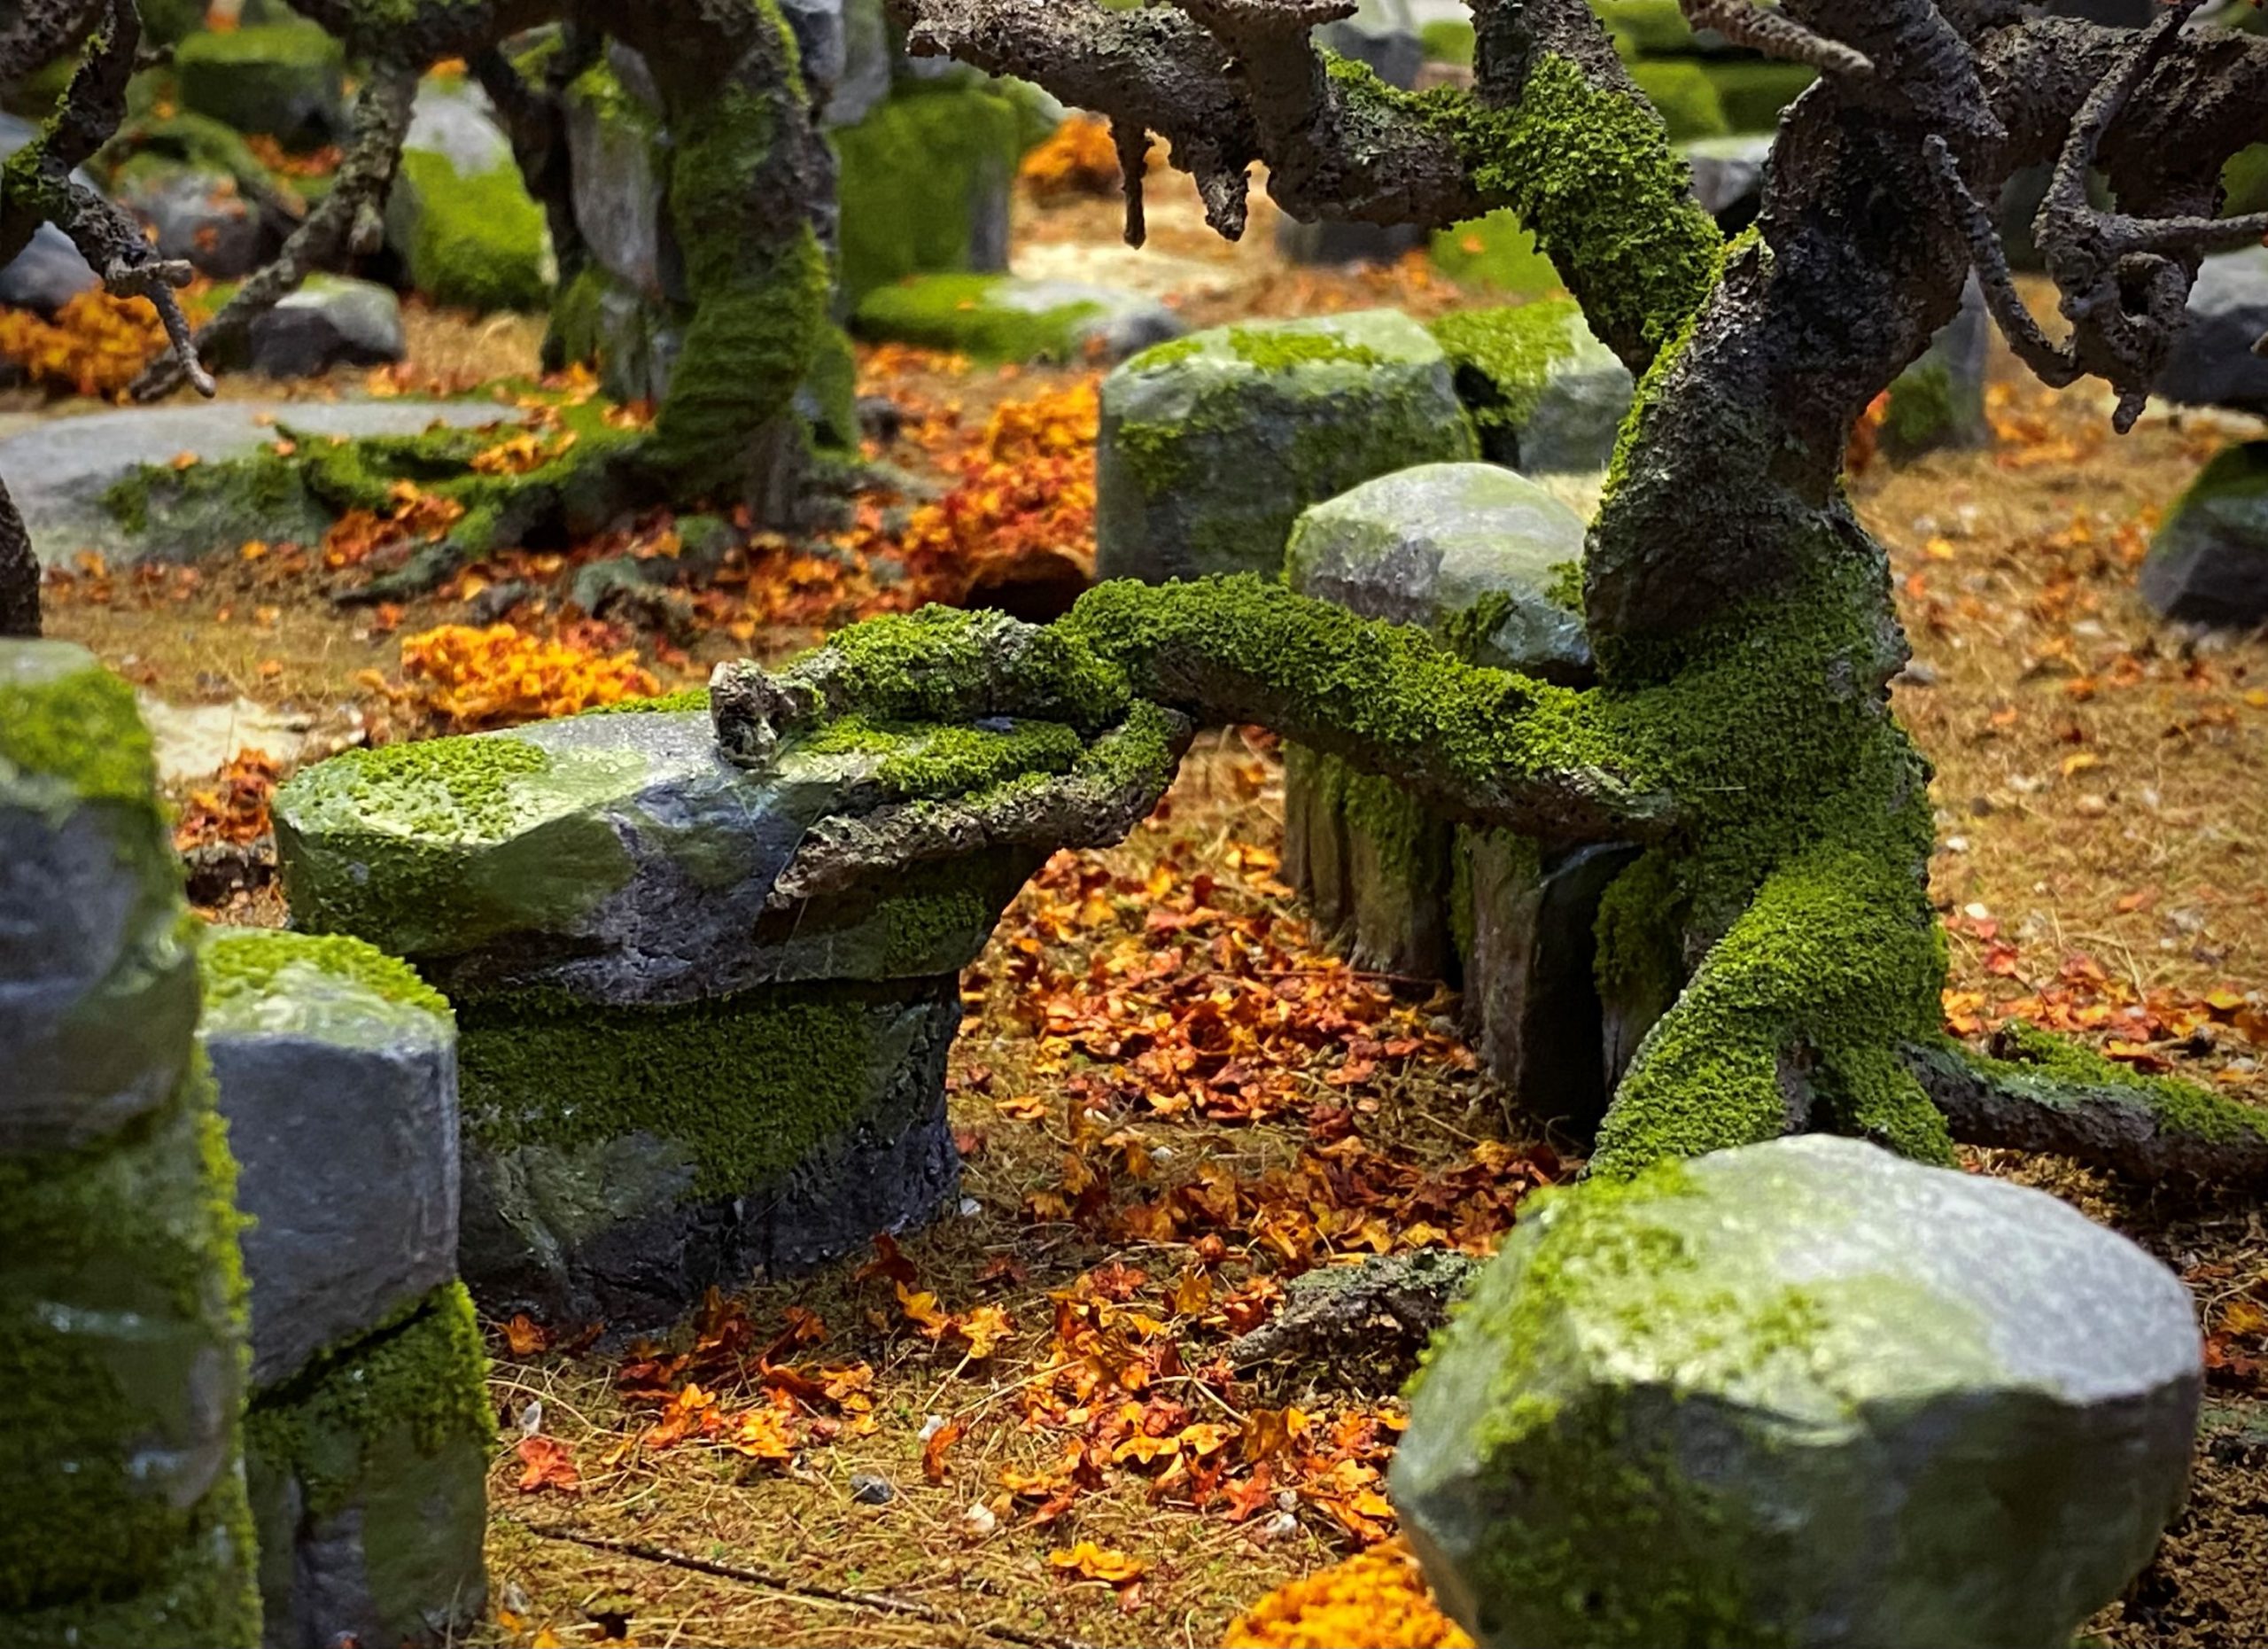
Next, I mixed up some green wash and applied it pretty liberally over the trees and rocks to simulate moss. I will come back and cover some of these areas with a fine green flock down the track, but for now, this is providing a nice basecoat for the areas that are mossy.
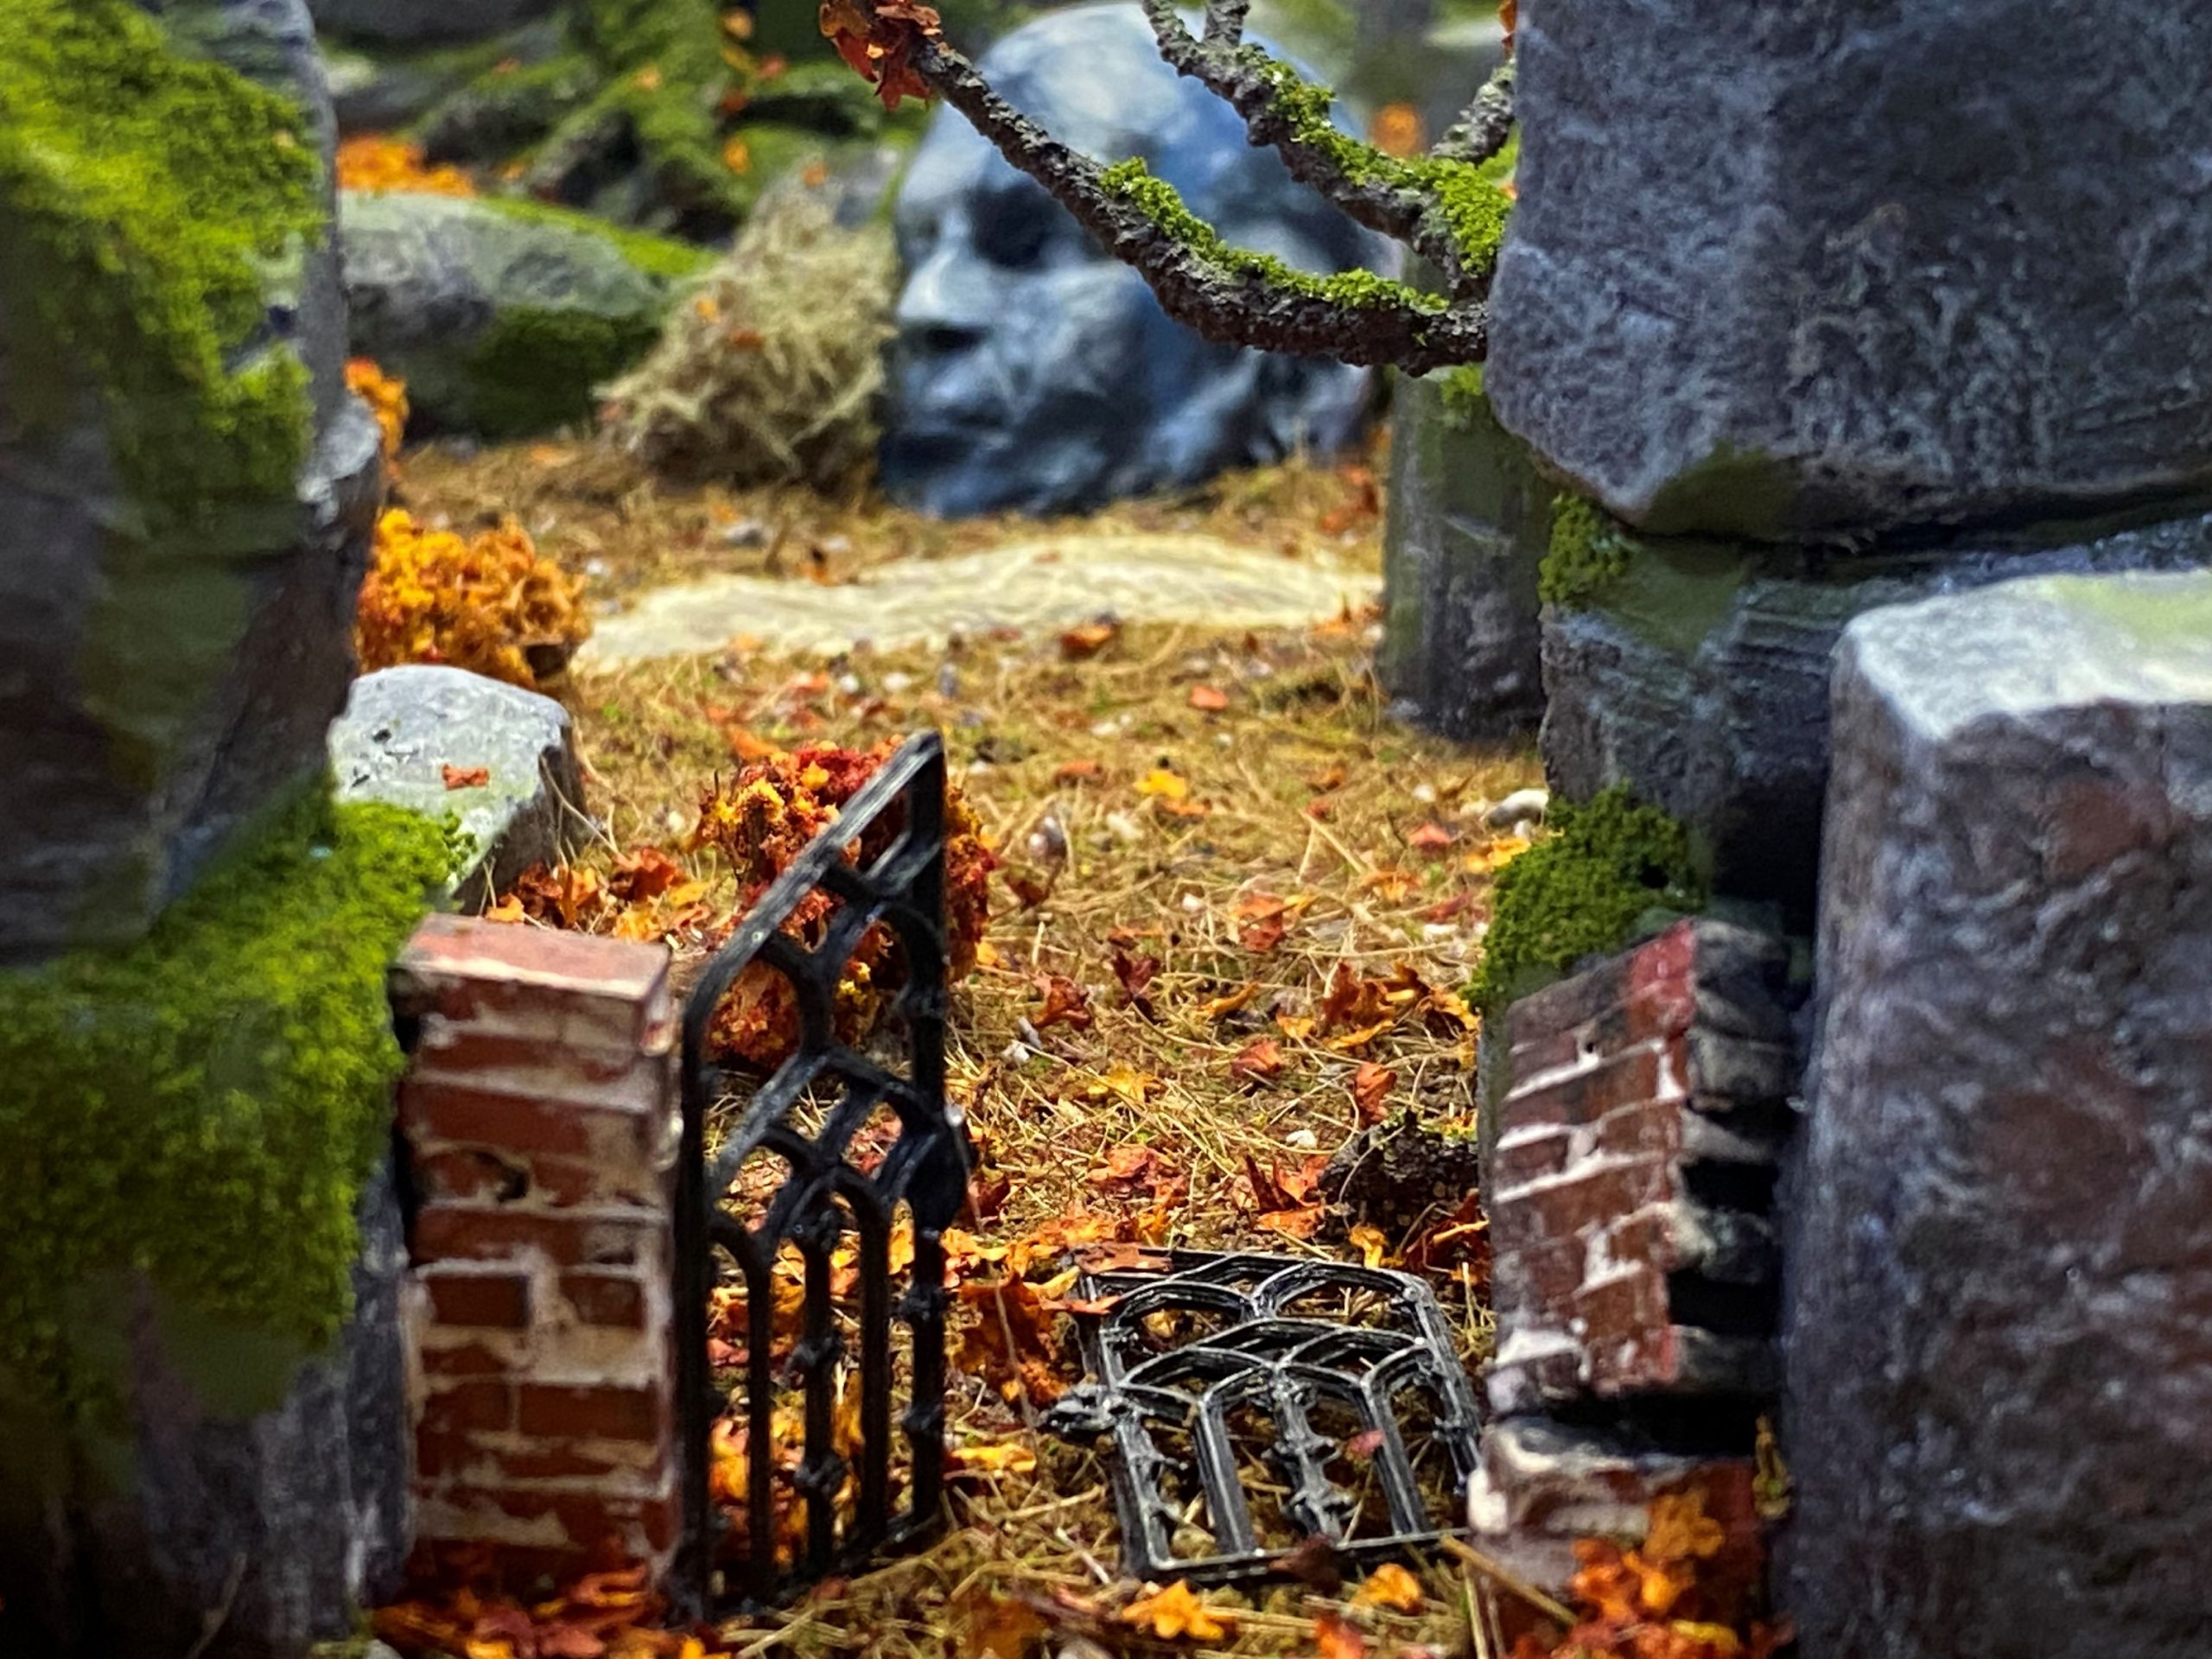
Moss is an evergreen plant, so it will add a nice contrast when set against the reddish autumn leaves. The green also helps the fallen statue pieces pop a bit more.
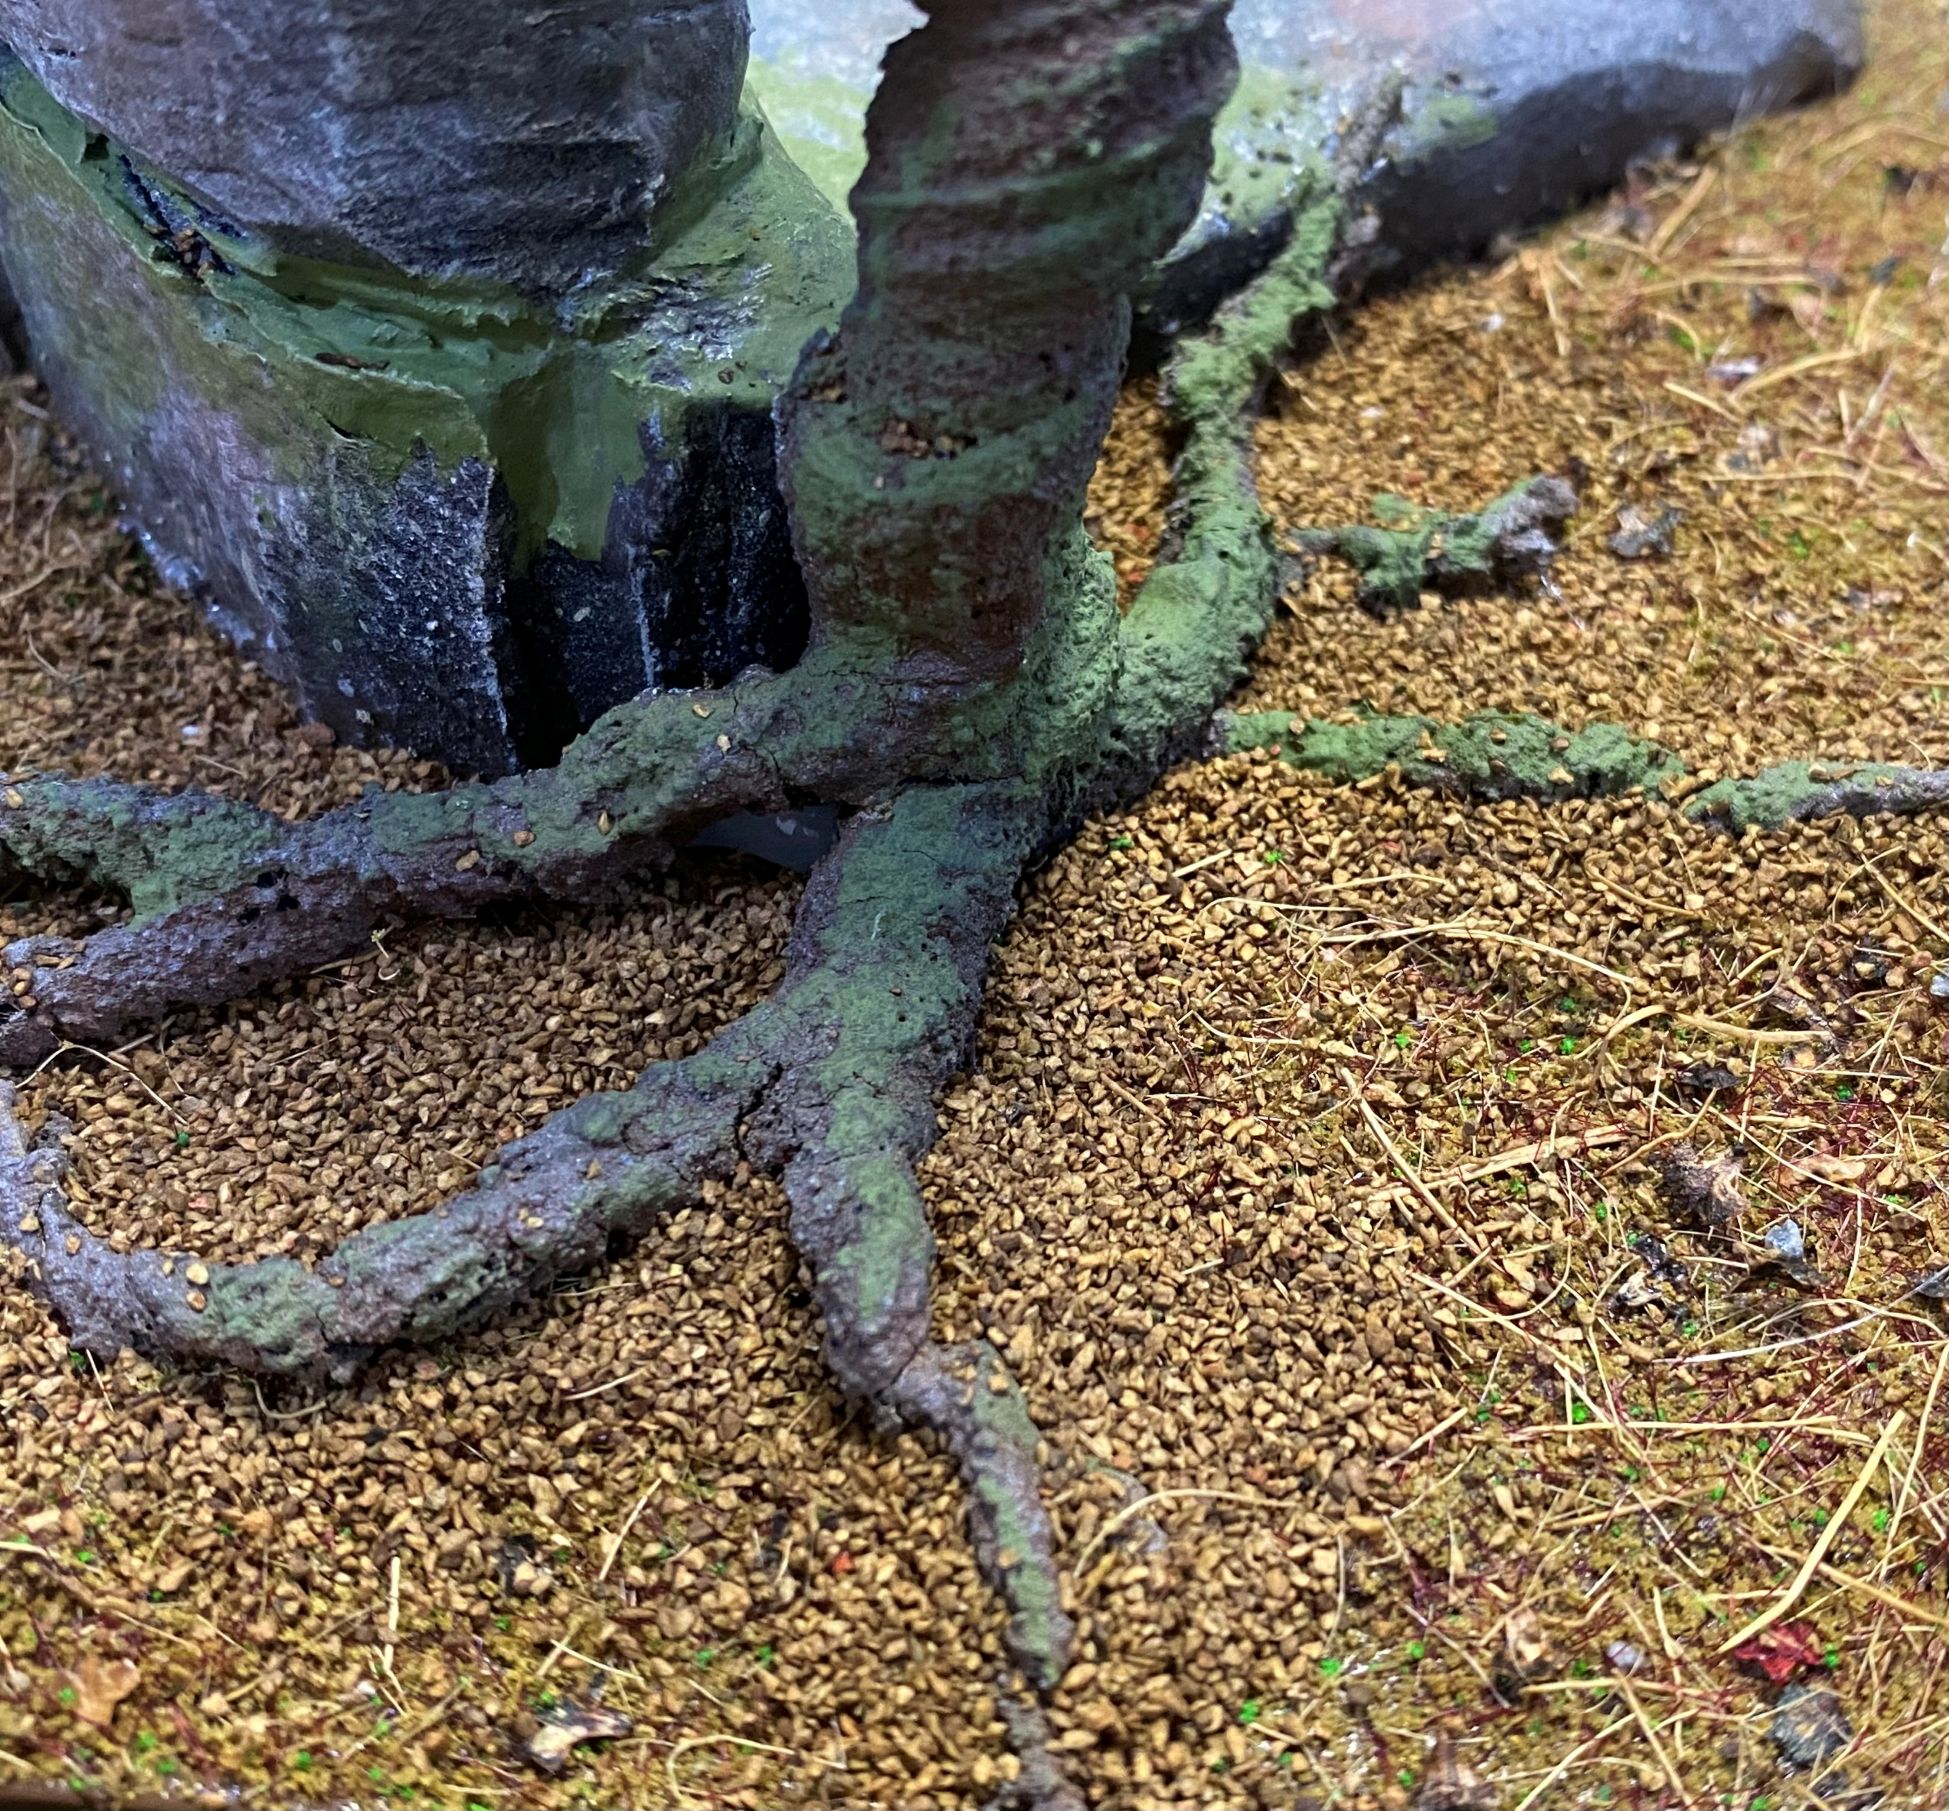
From here, I think my next stage will be to start blending the tree roots into the ground and cleaning up or hiding any exposed hot glue.
At the moment, it feels like the trees are sitting on top of the ground covering rather than being a part of it. I know that when I get to the final stage of ground cover, this will eliminate a lot of that, but I also don’t want to take the risk of any bits looking unfinished.
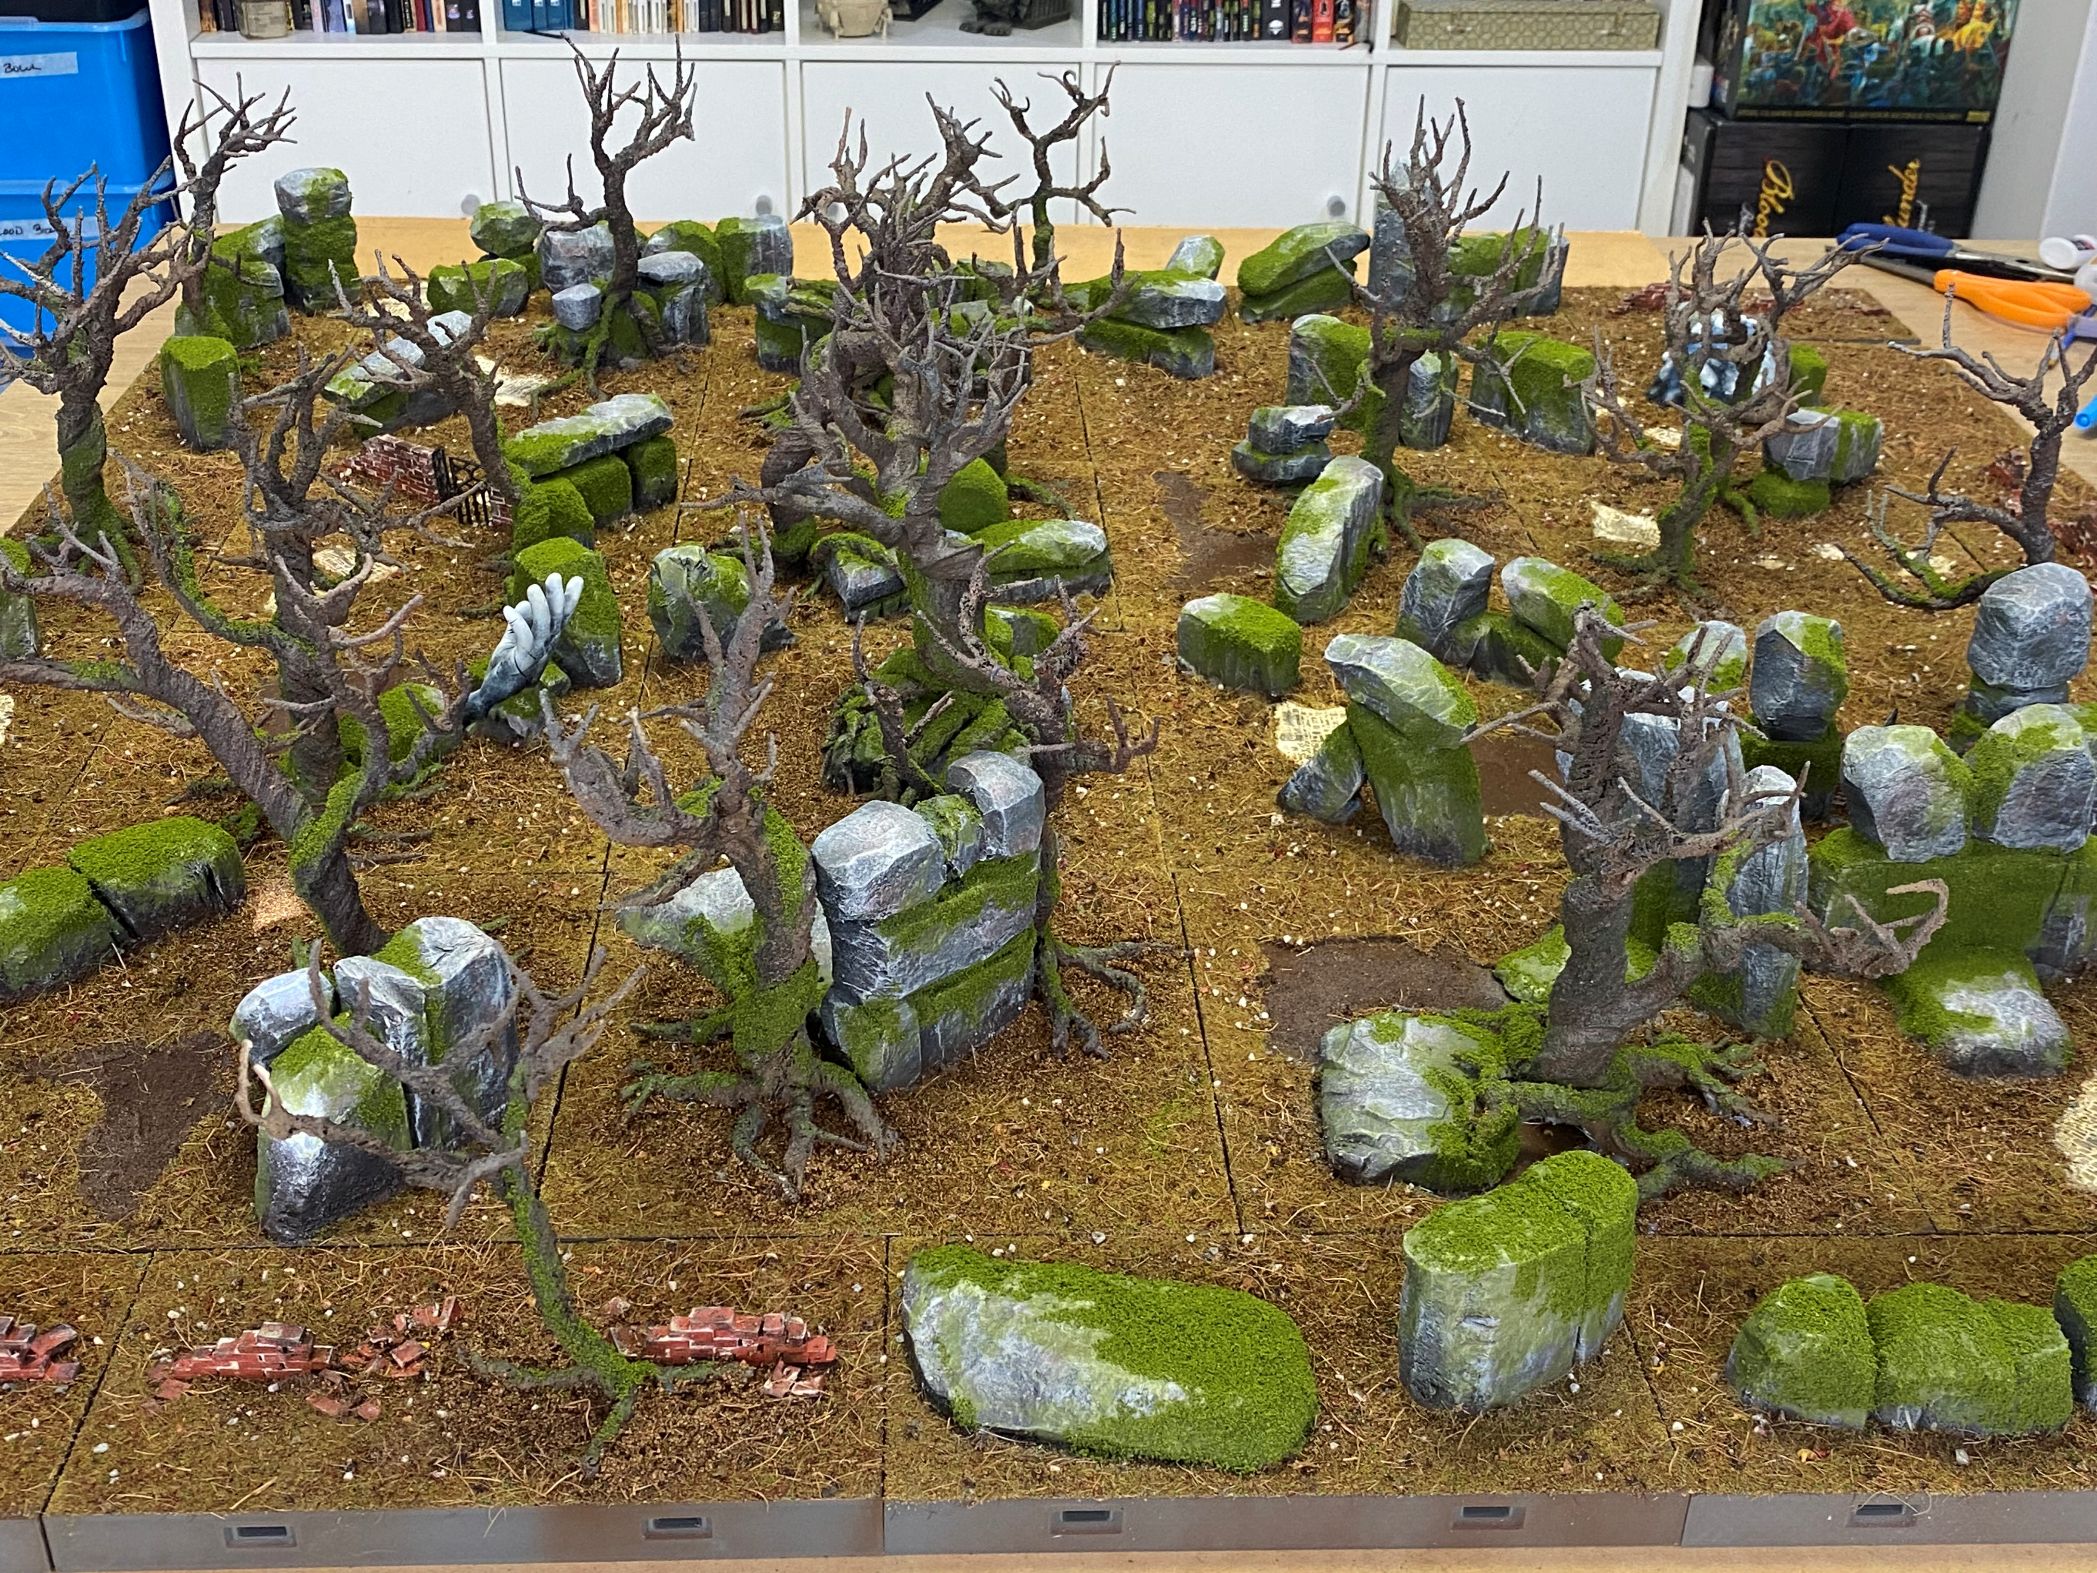
Mud mix
I sprinkled some brown ground covering around the bases of the trees to help hide where they have been glued down to the tiles.
Then I made a mix of Matte Mod Podge, Water and washing up liquid. Basically about 1 part Mod Podge to 4 Parts water with a few drops of washing up liquid to help break down the surface tension of the mixture.
I then applied the mix with a cheap pipette and allowed it to soak into the mixture before leaving it dry, which takes quite a long time.
Now I must admit this was not 100% successful.
I found that lots of the ground covering moved and was washed out of place as I applied the glue mixture. In hindsight, I would recommend gently spraying on a mist of isopropanol alcohol to keep everything in place whilst applying the glue and to also aid in further breaking down the surface tension.
I also found that some of the roots actually lifted and had to be glued back down.
It is not too much of an issue, as I have a lot of leaf litter to apply that will help cover any unsightly bits.
Shrubberies.
Whilst waiting for the mud to become 100% dry and hard, I set to the task of coming up with some shrubs and bushes.
My initial thought was that I would use rubberised horsehair as the base structure. I have used it before to make trees and hedges, and it seemed to work okay.
I started cutting out bits and realised that it was too uniform and didn’t quite capture the look I was going for.
I had some plumber’s hemp left over from when I made the trees for our little Fallout Campaign, and I figured I could use that to knock together some simple, inexpensive shrubs.
I would couple that with some leftover orangish lichen from when I pimped my Jungle Trees for a recent Congo game.
When I initially bought the Lichen I had envisaged using the orangey bits along with some of the redder clump foliages I have for my Mars setting in our Victorian Science Fiction games
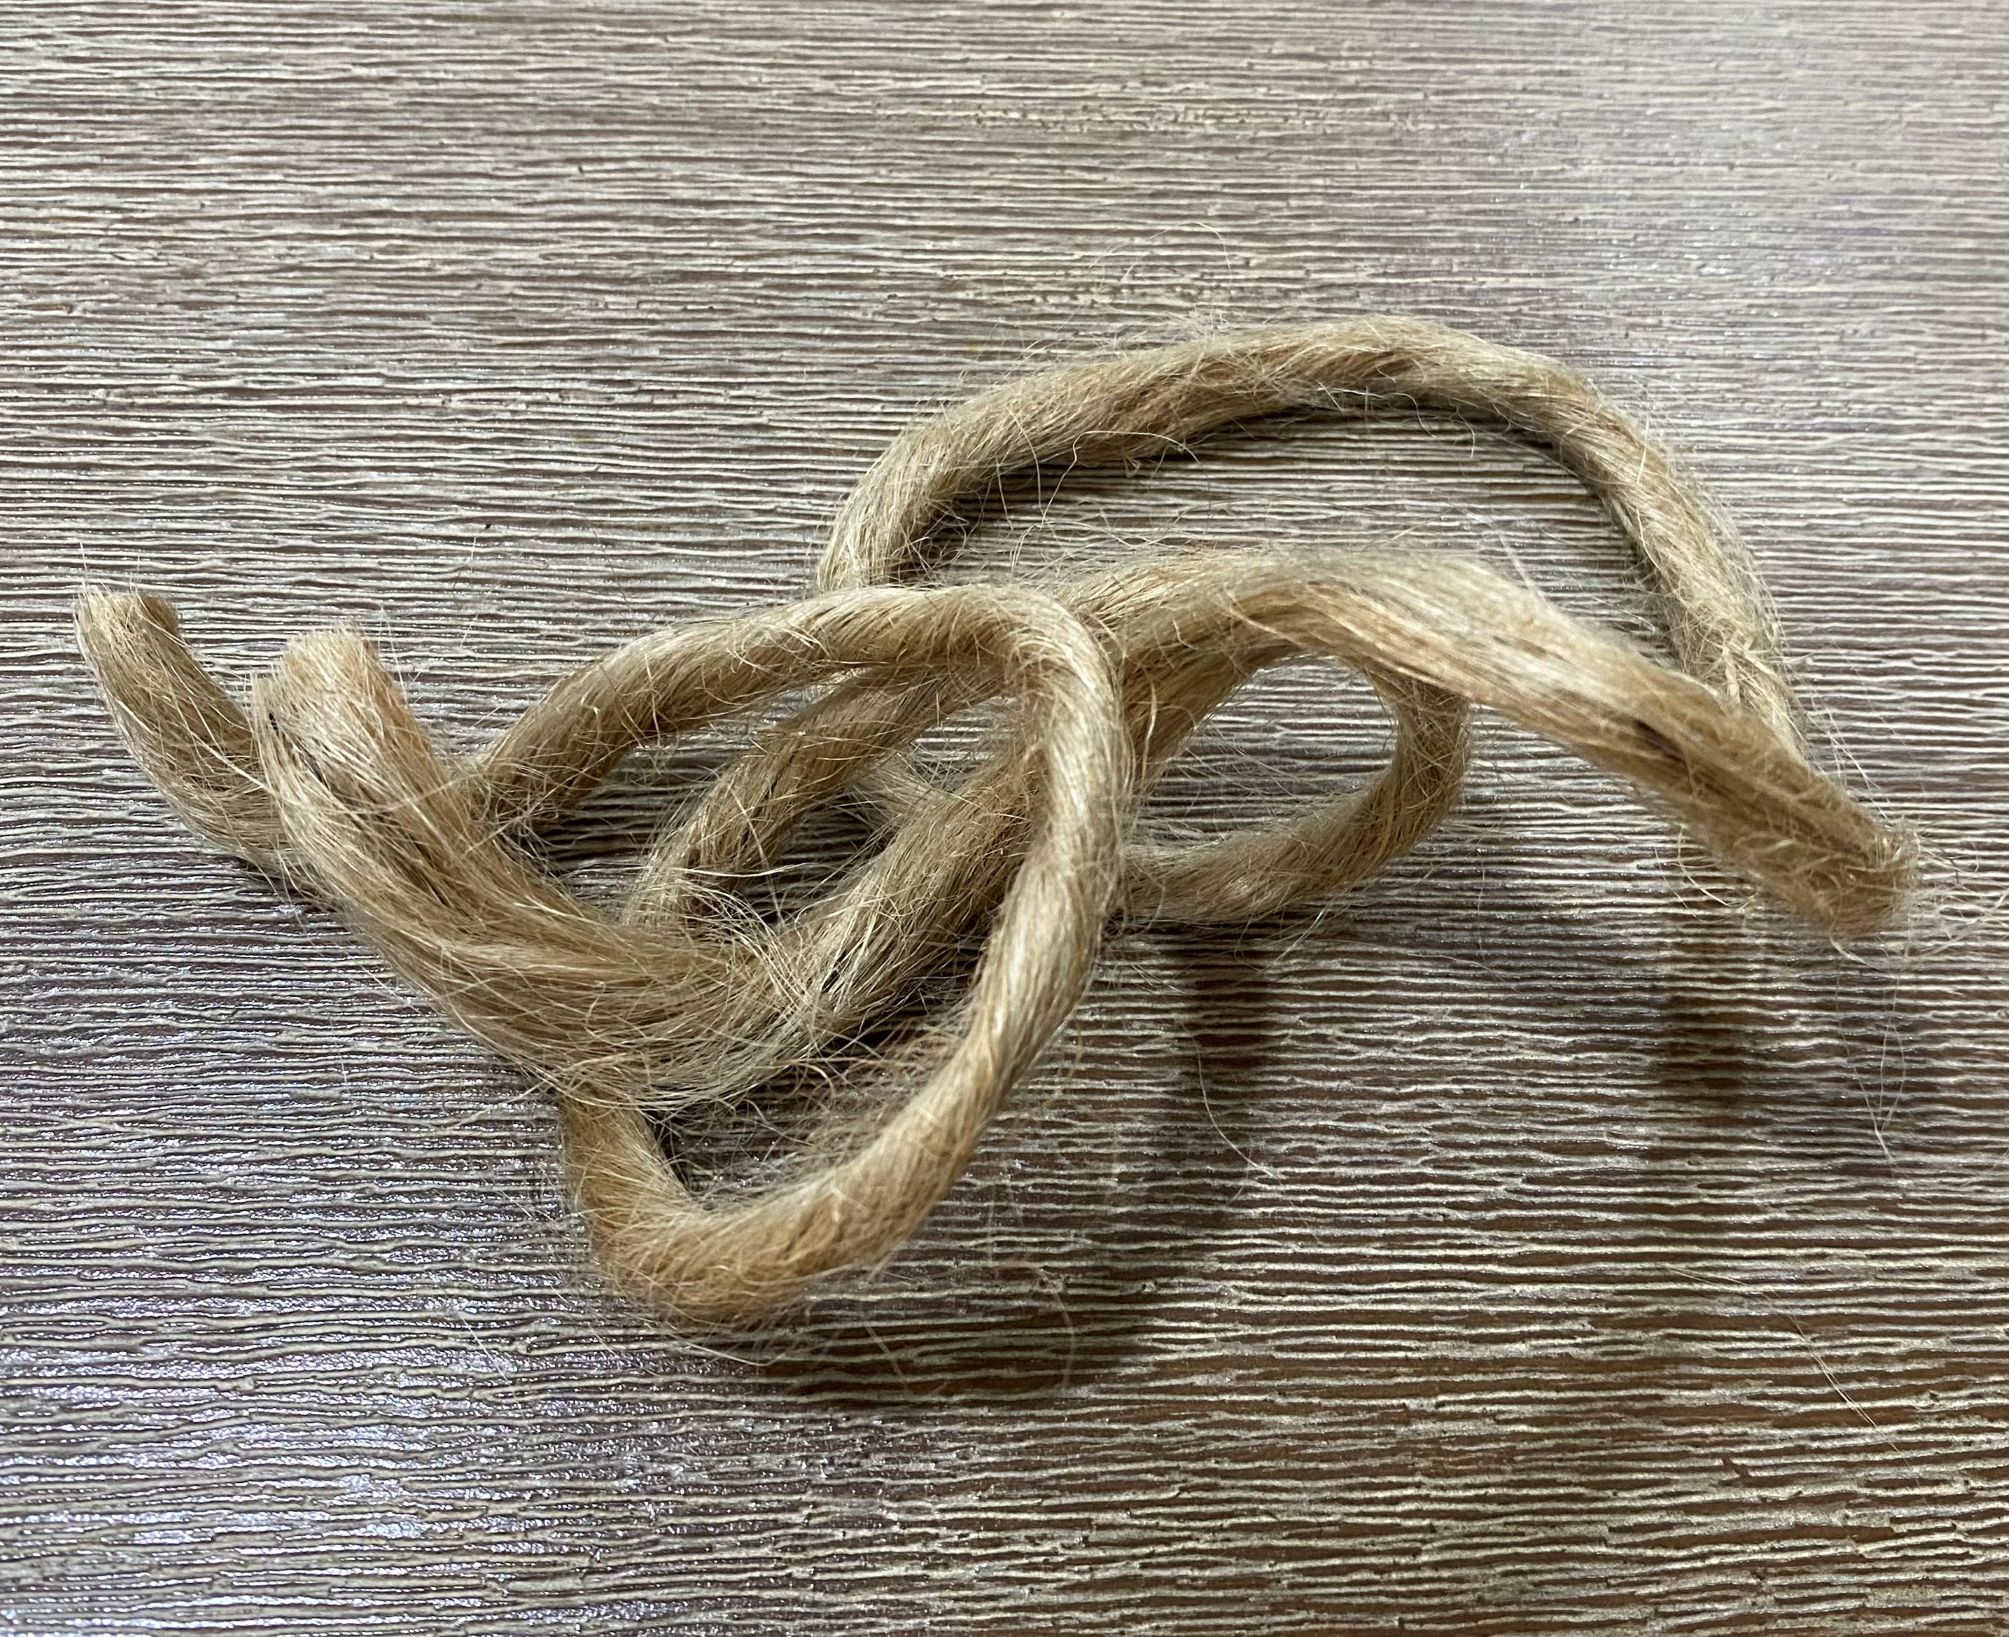
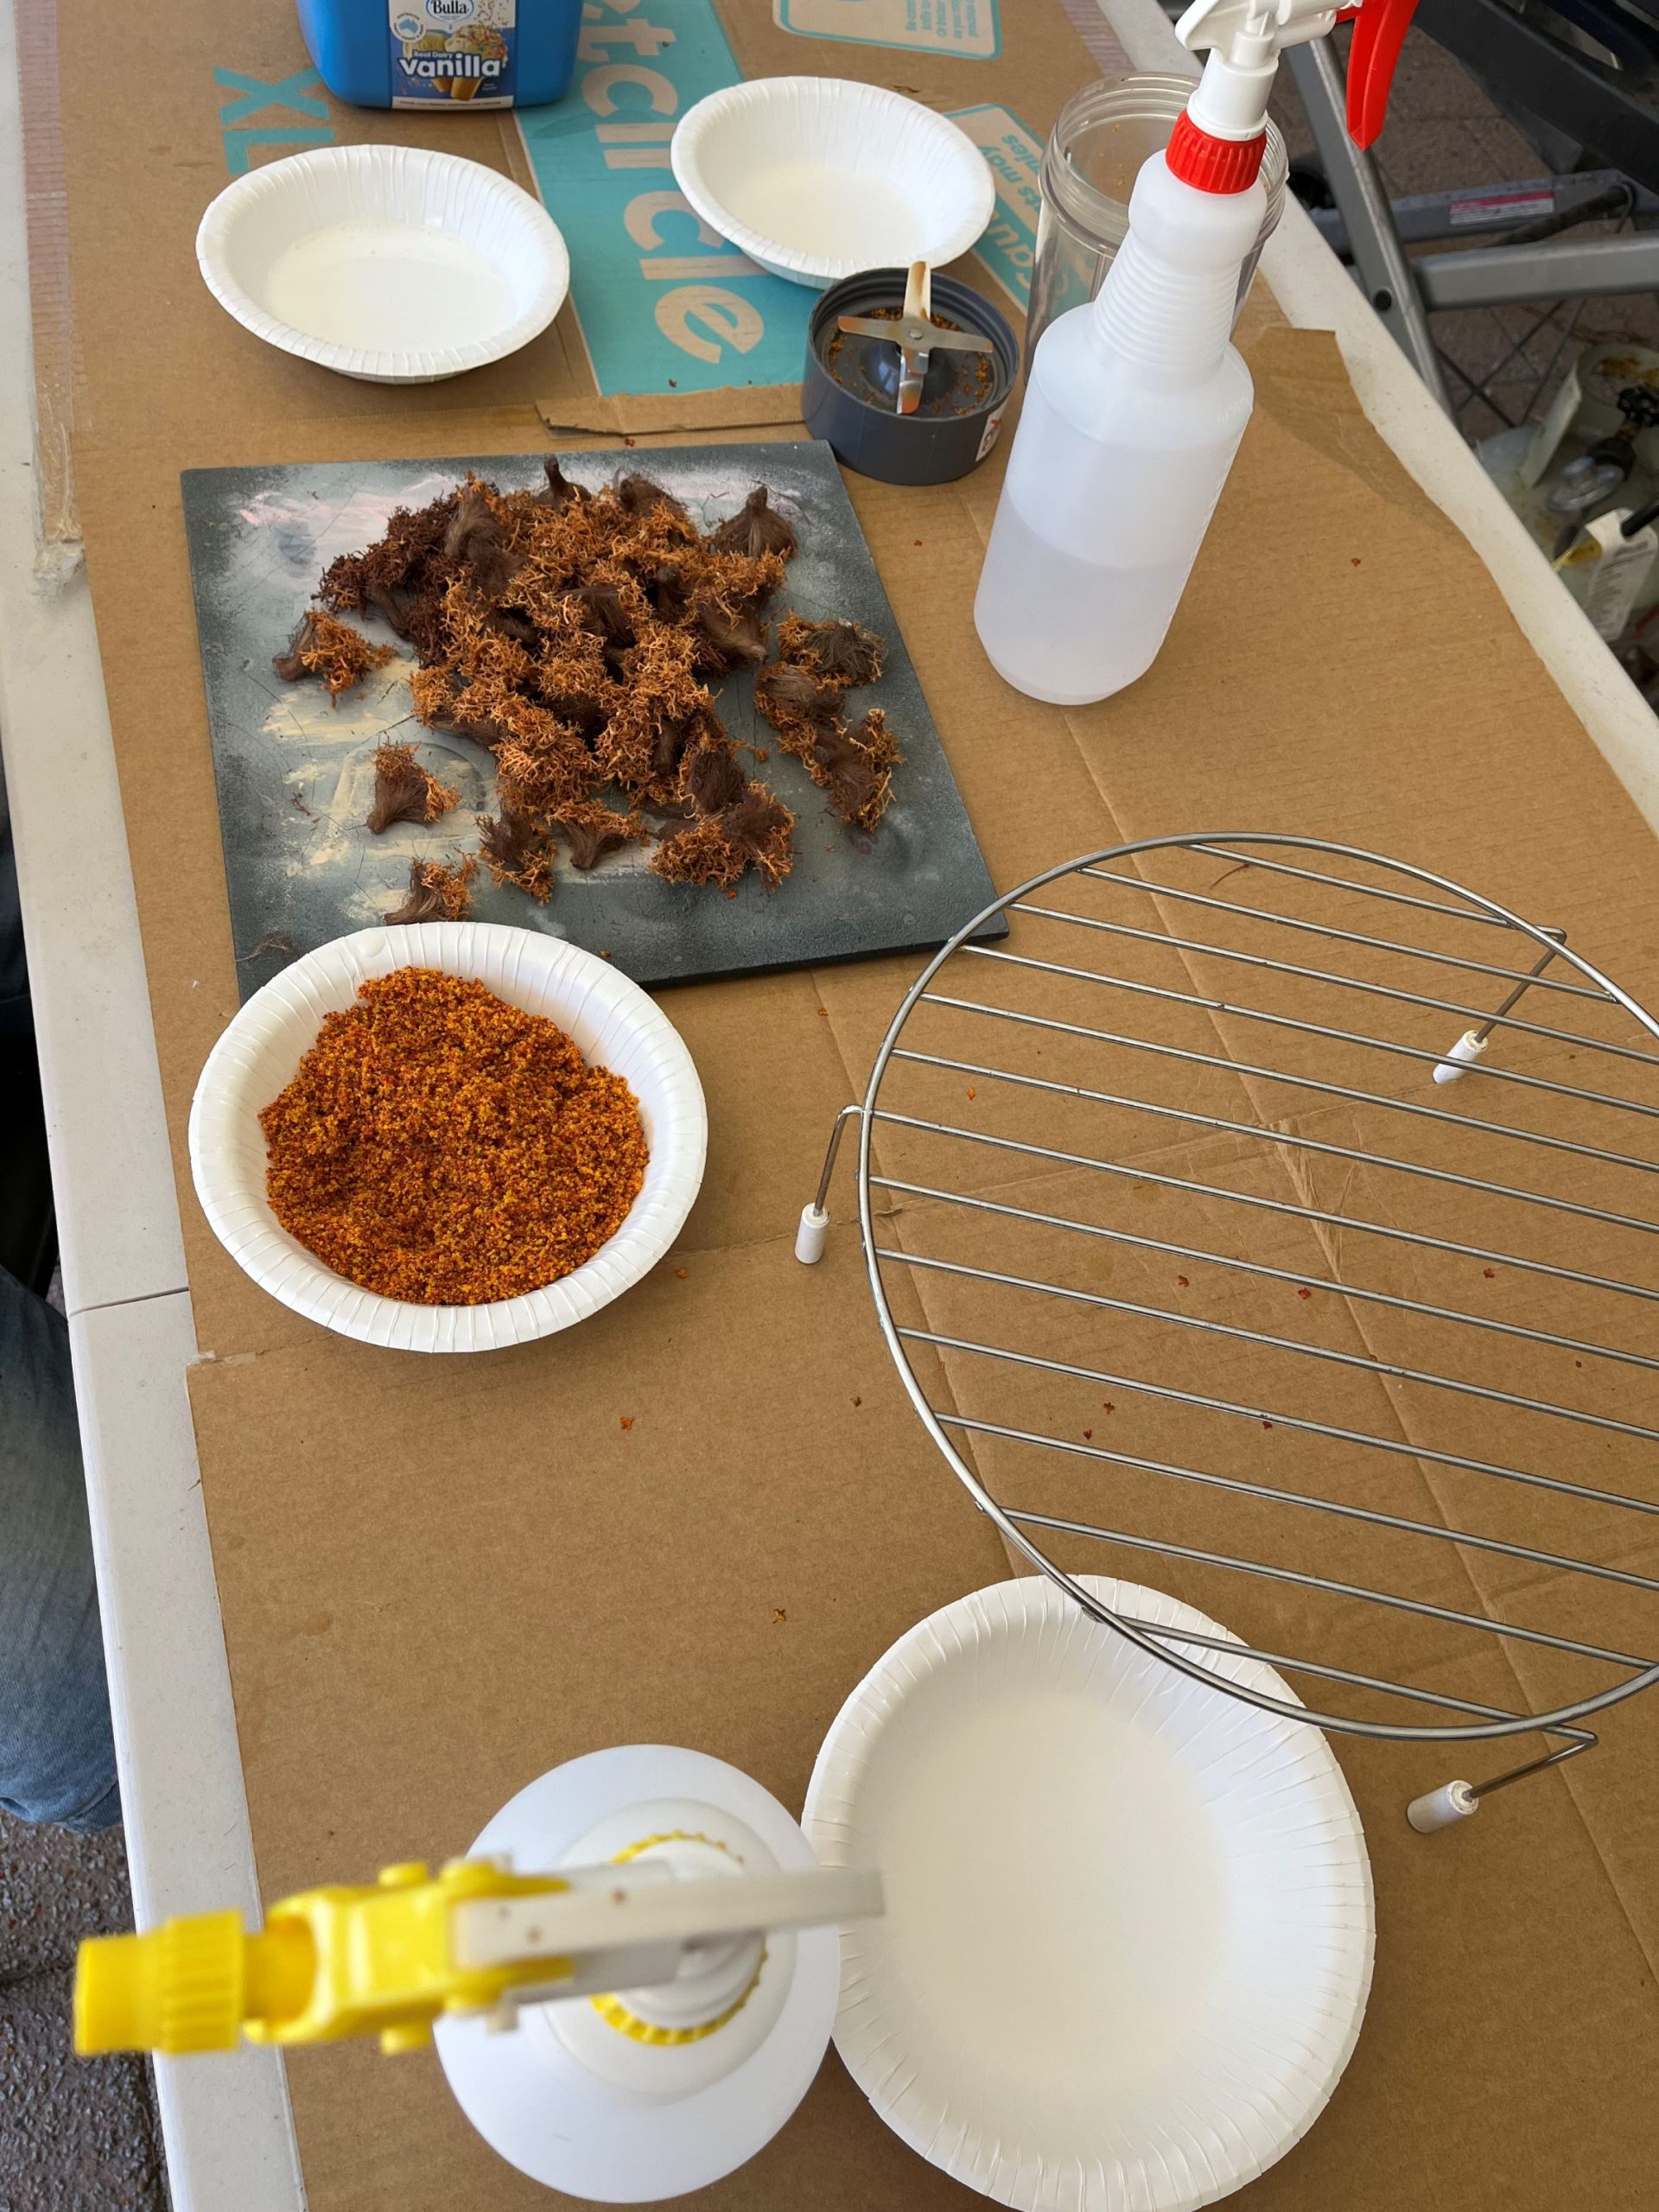
 I chopped the plumber's hemp up into small sections approximately one to one and a half inches in length. Pretty much any natural string would do for this.
 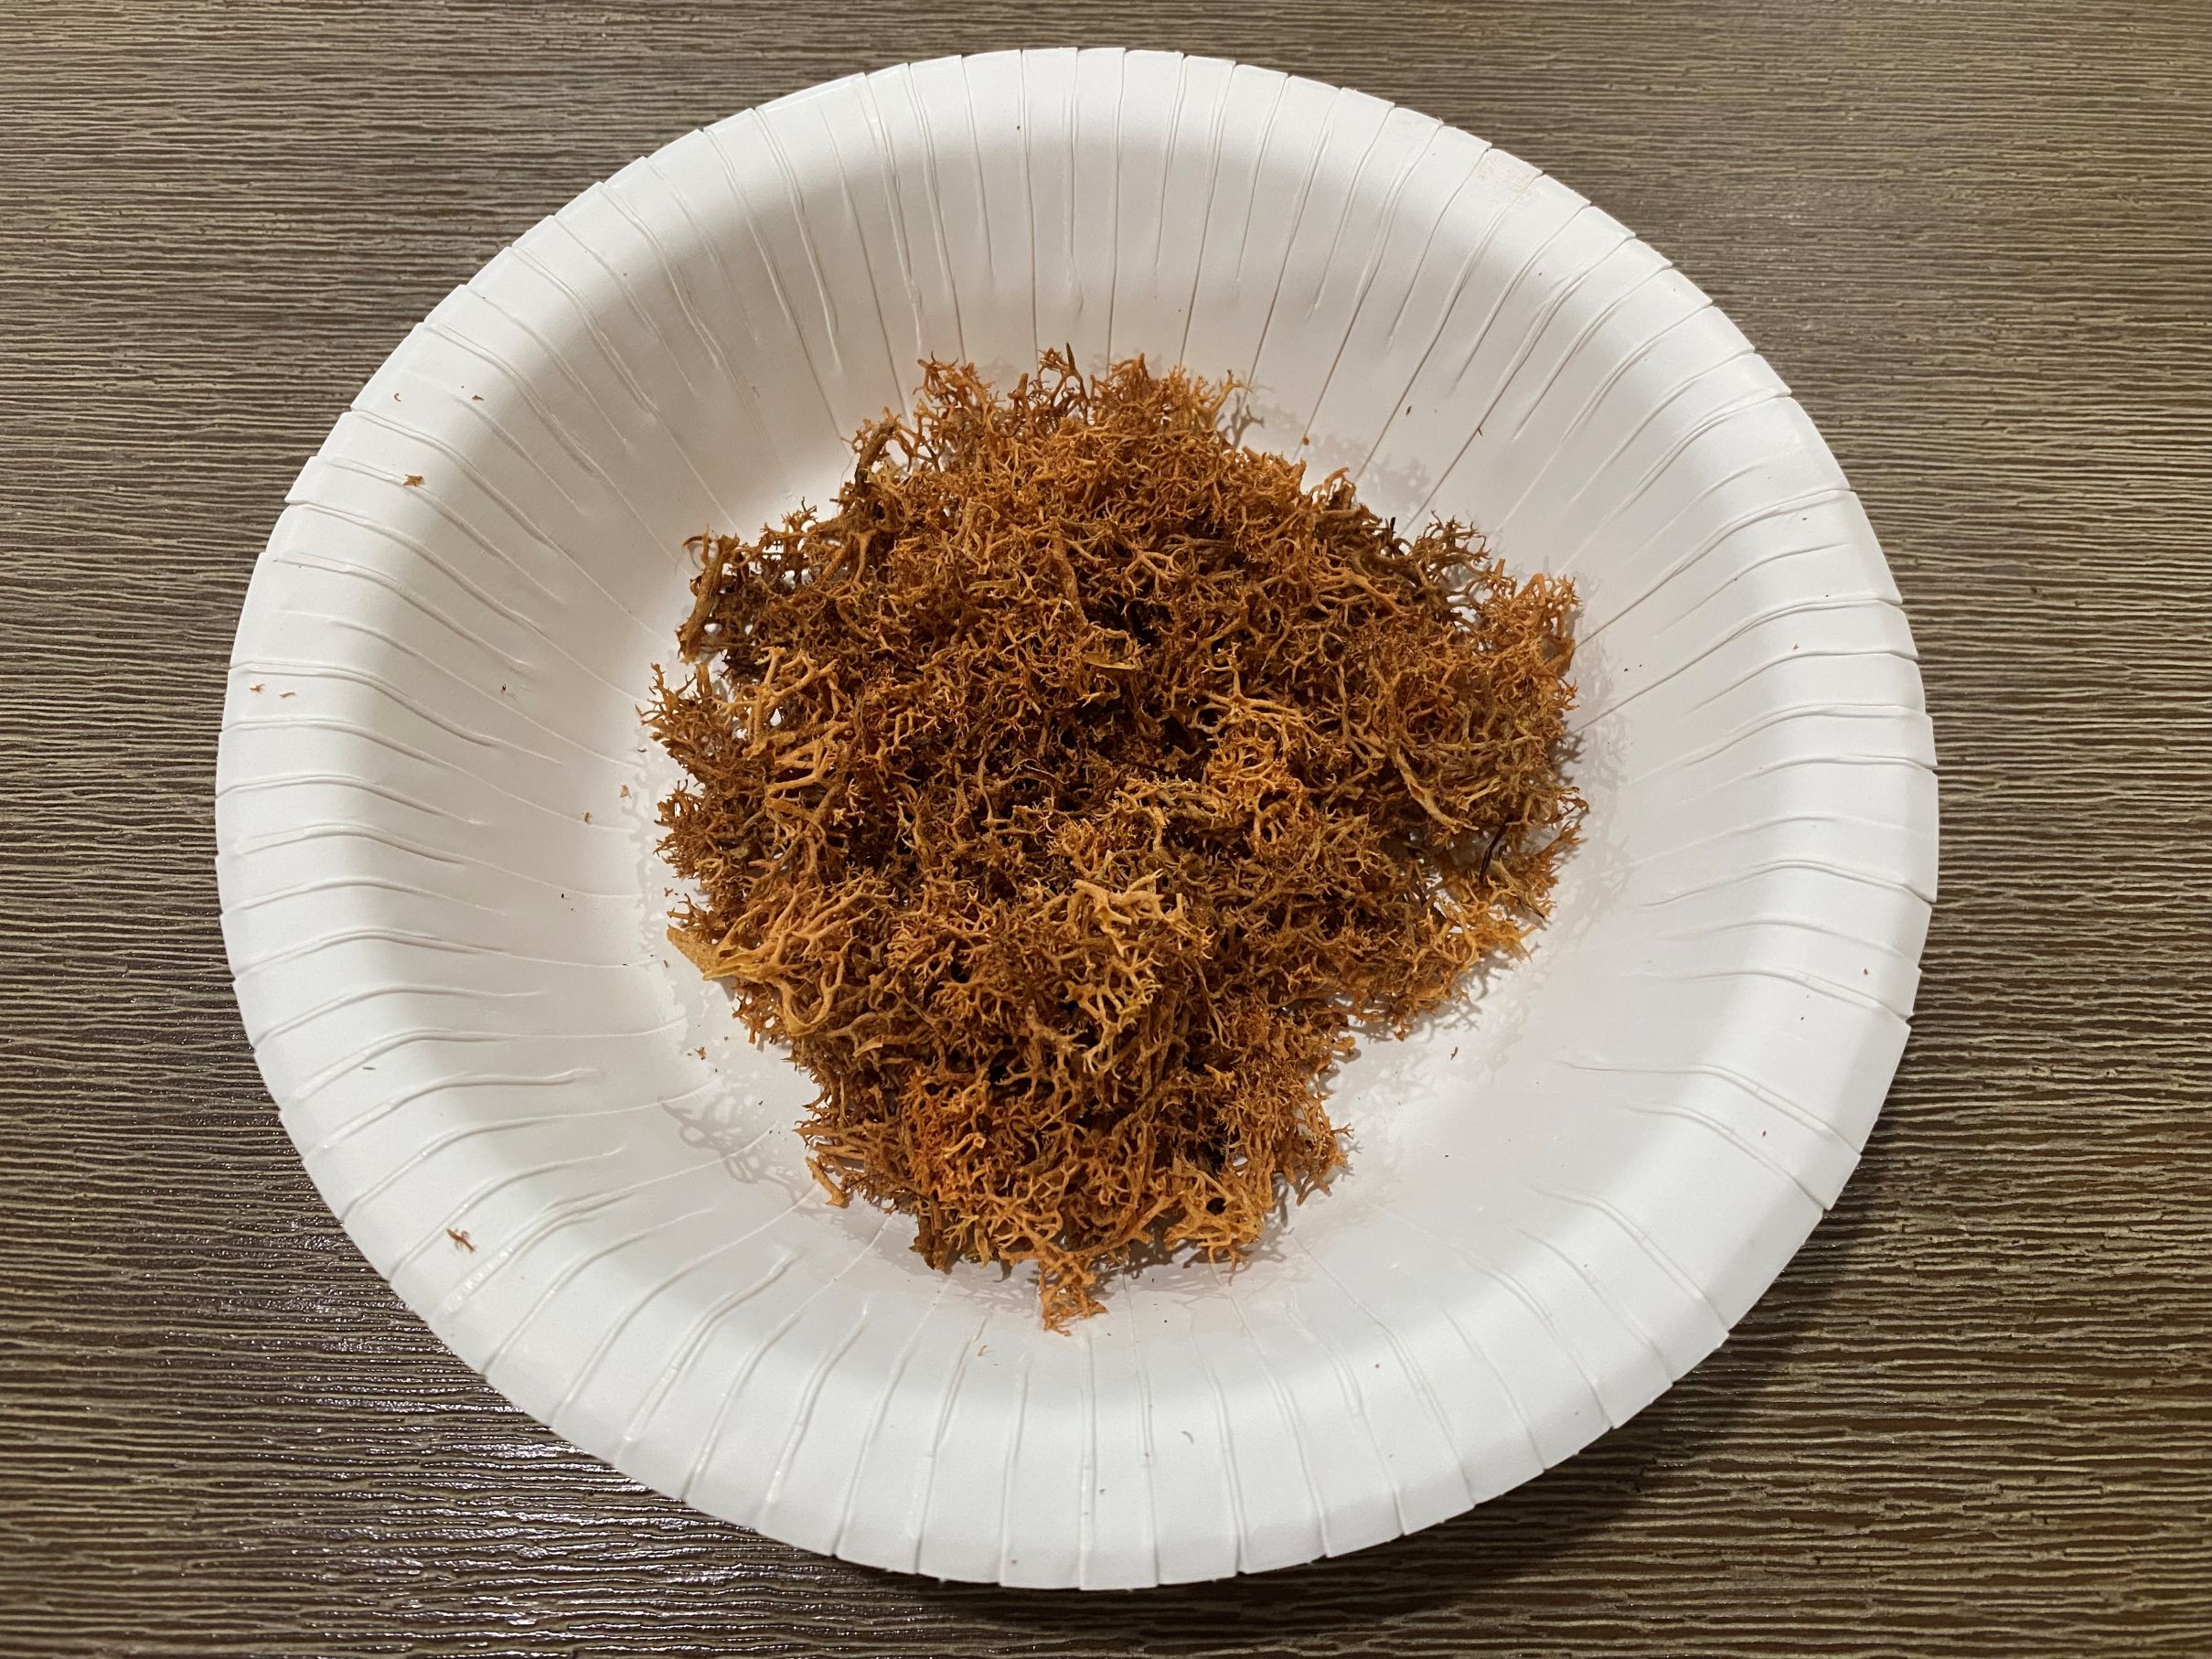 I pulled the lichen apart into small pieces and put it in a small bowl. I will do this a bit at a time so that I don't end up pulling too much of it into pieces in one go.
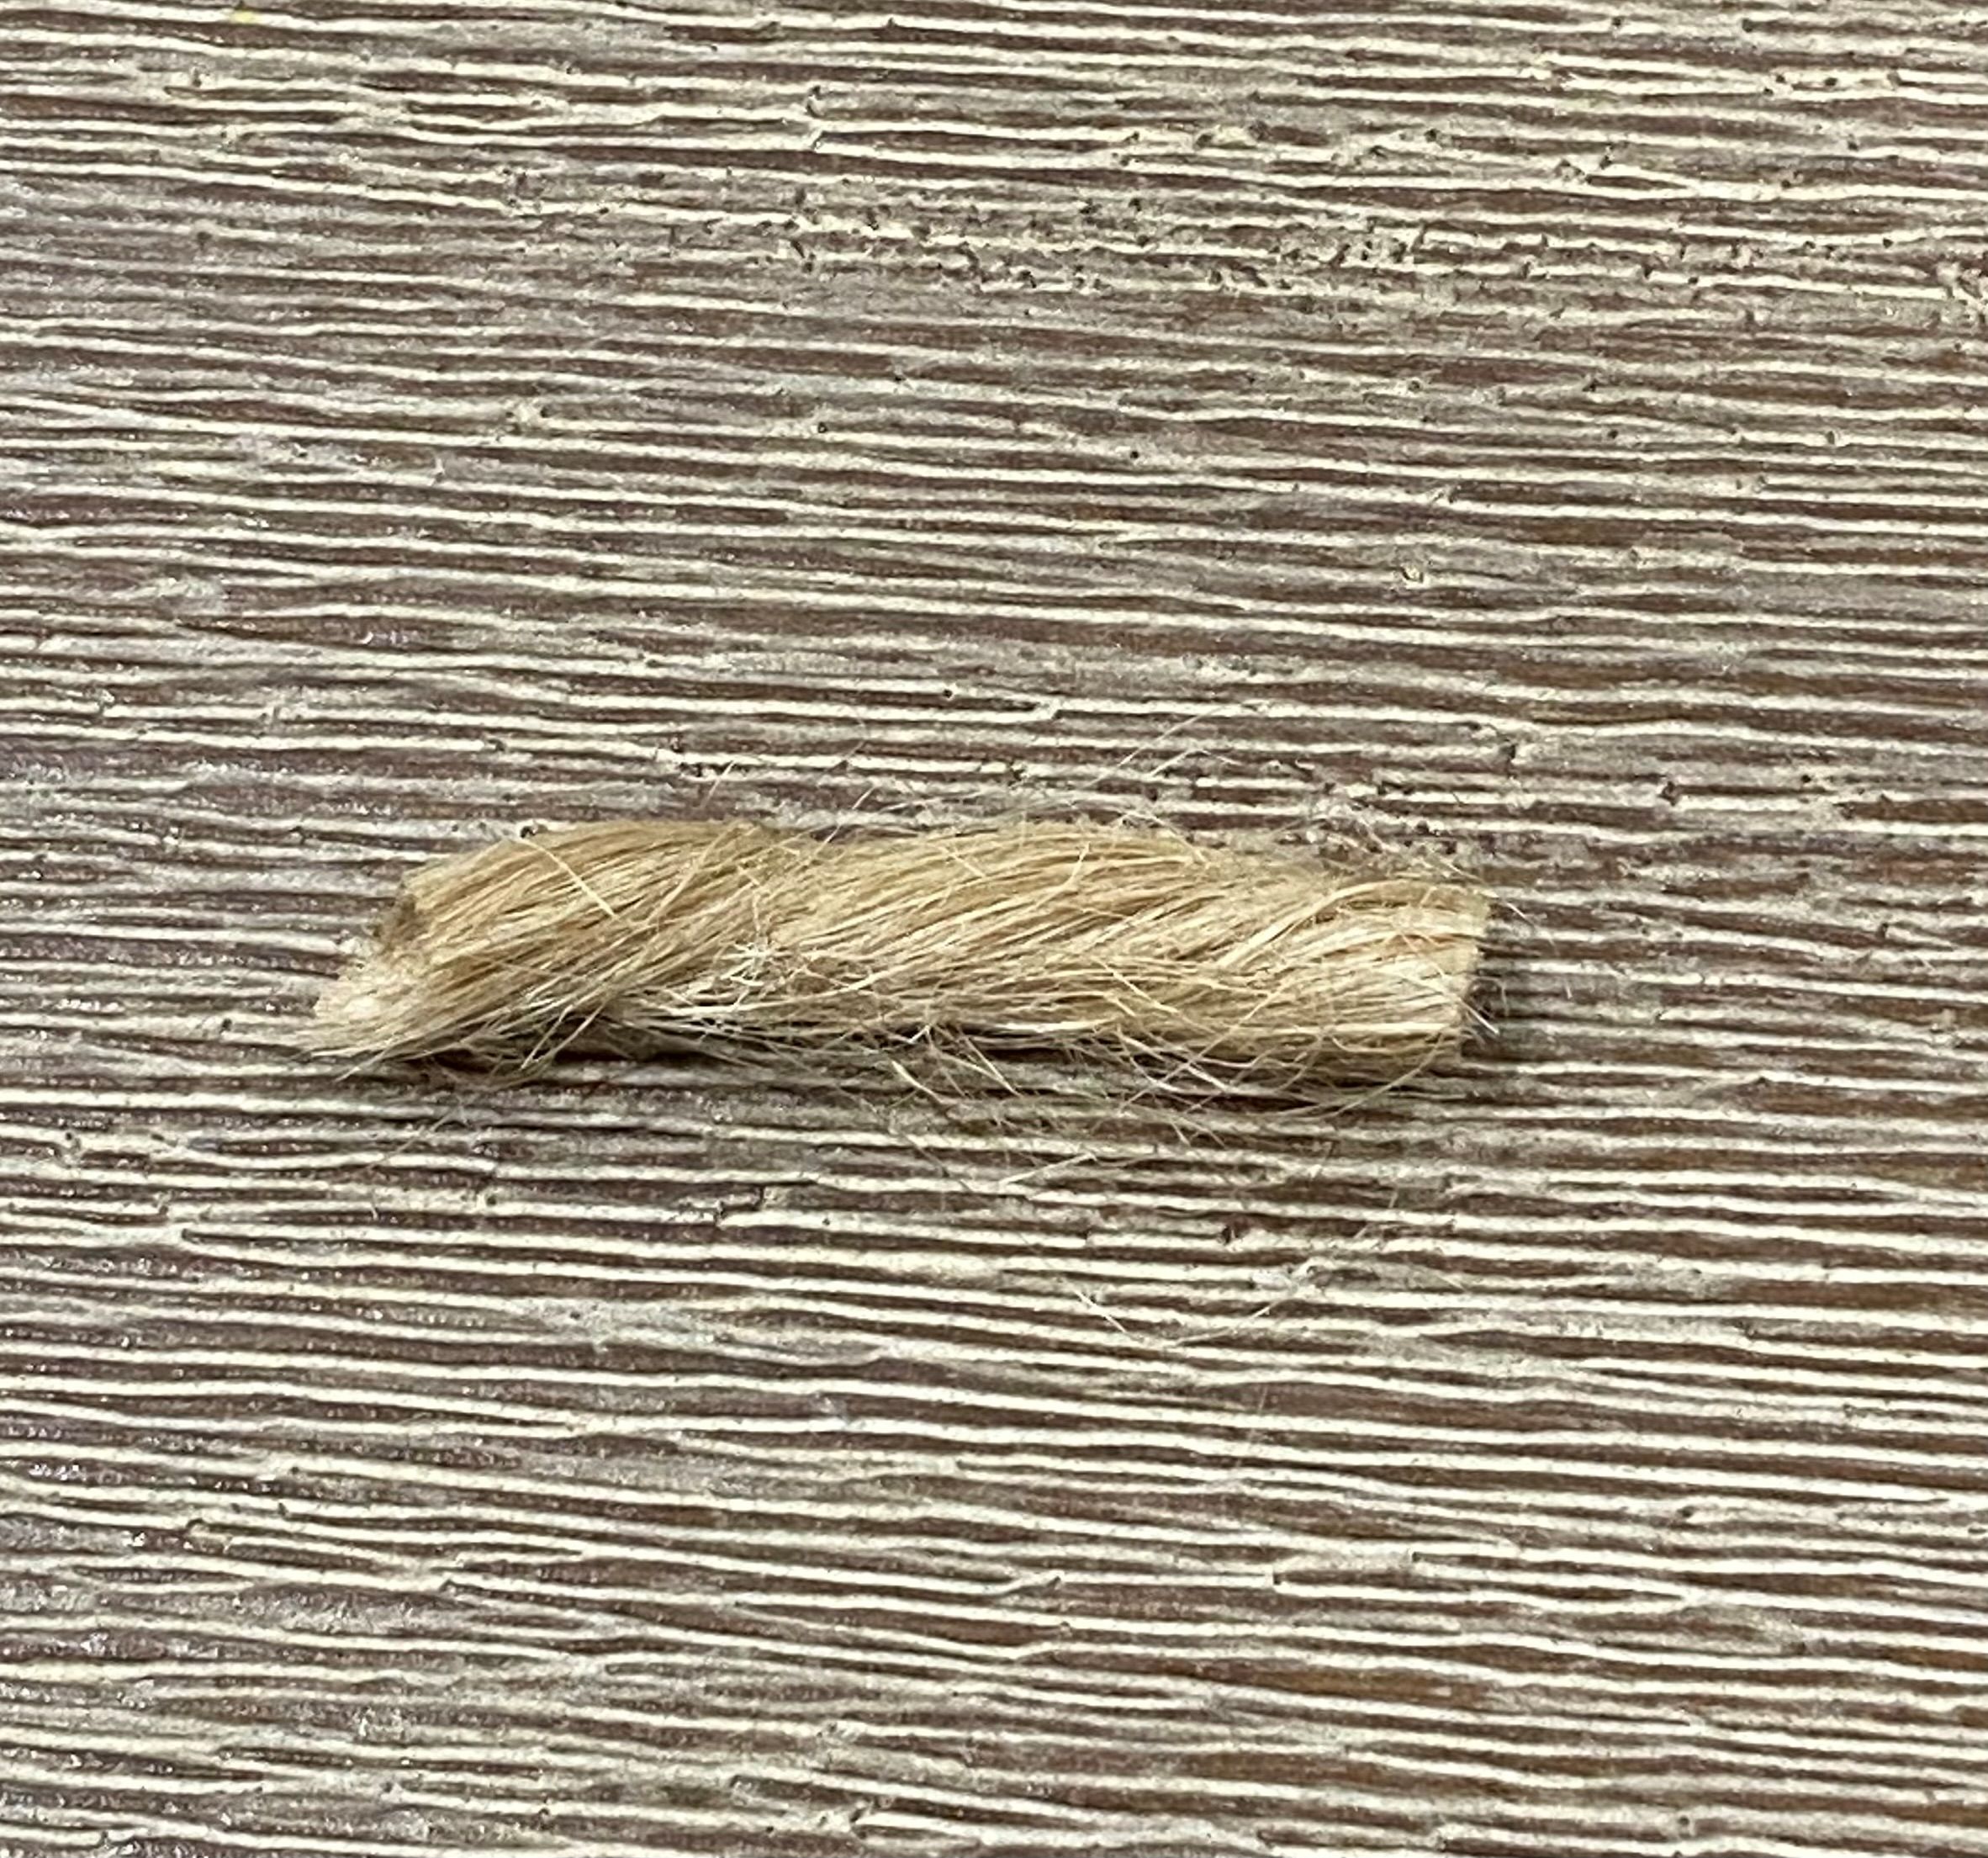
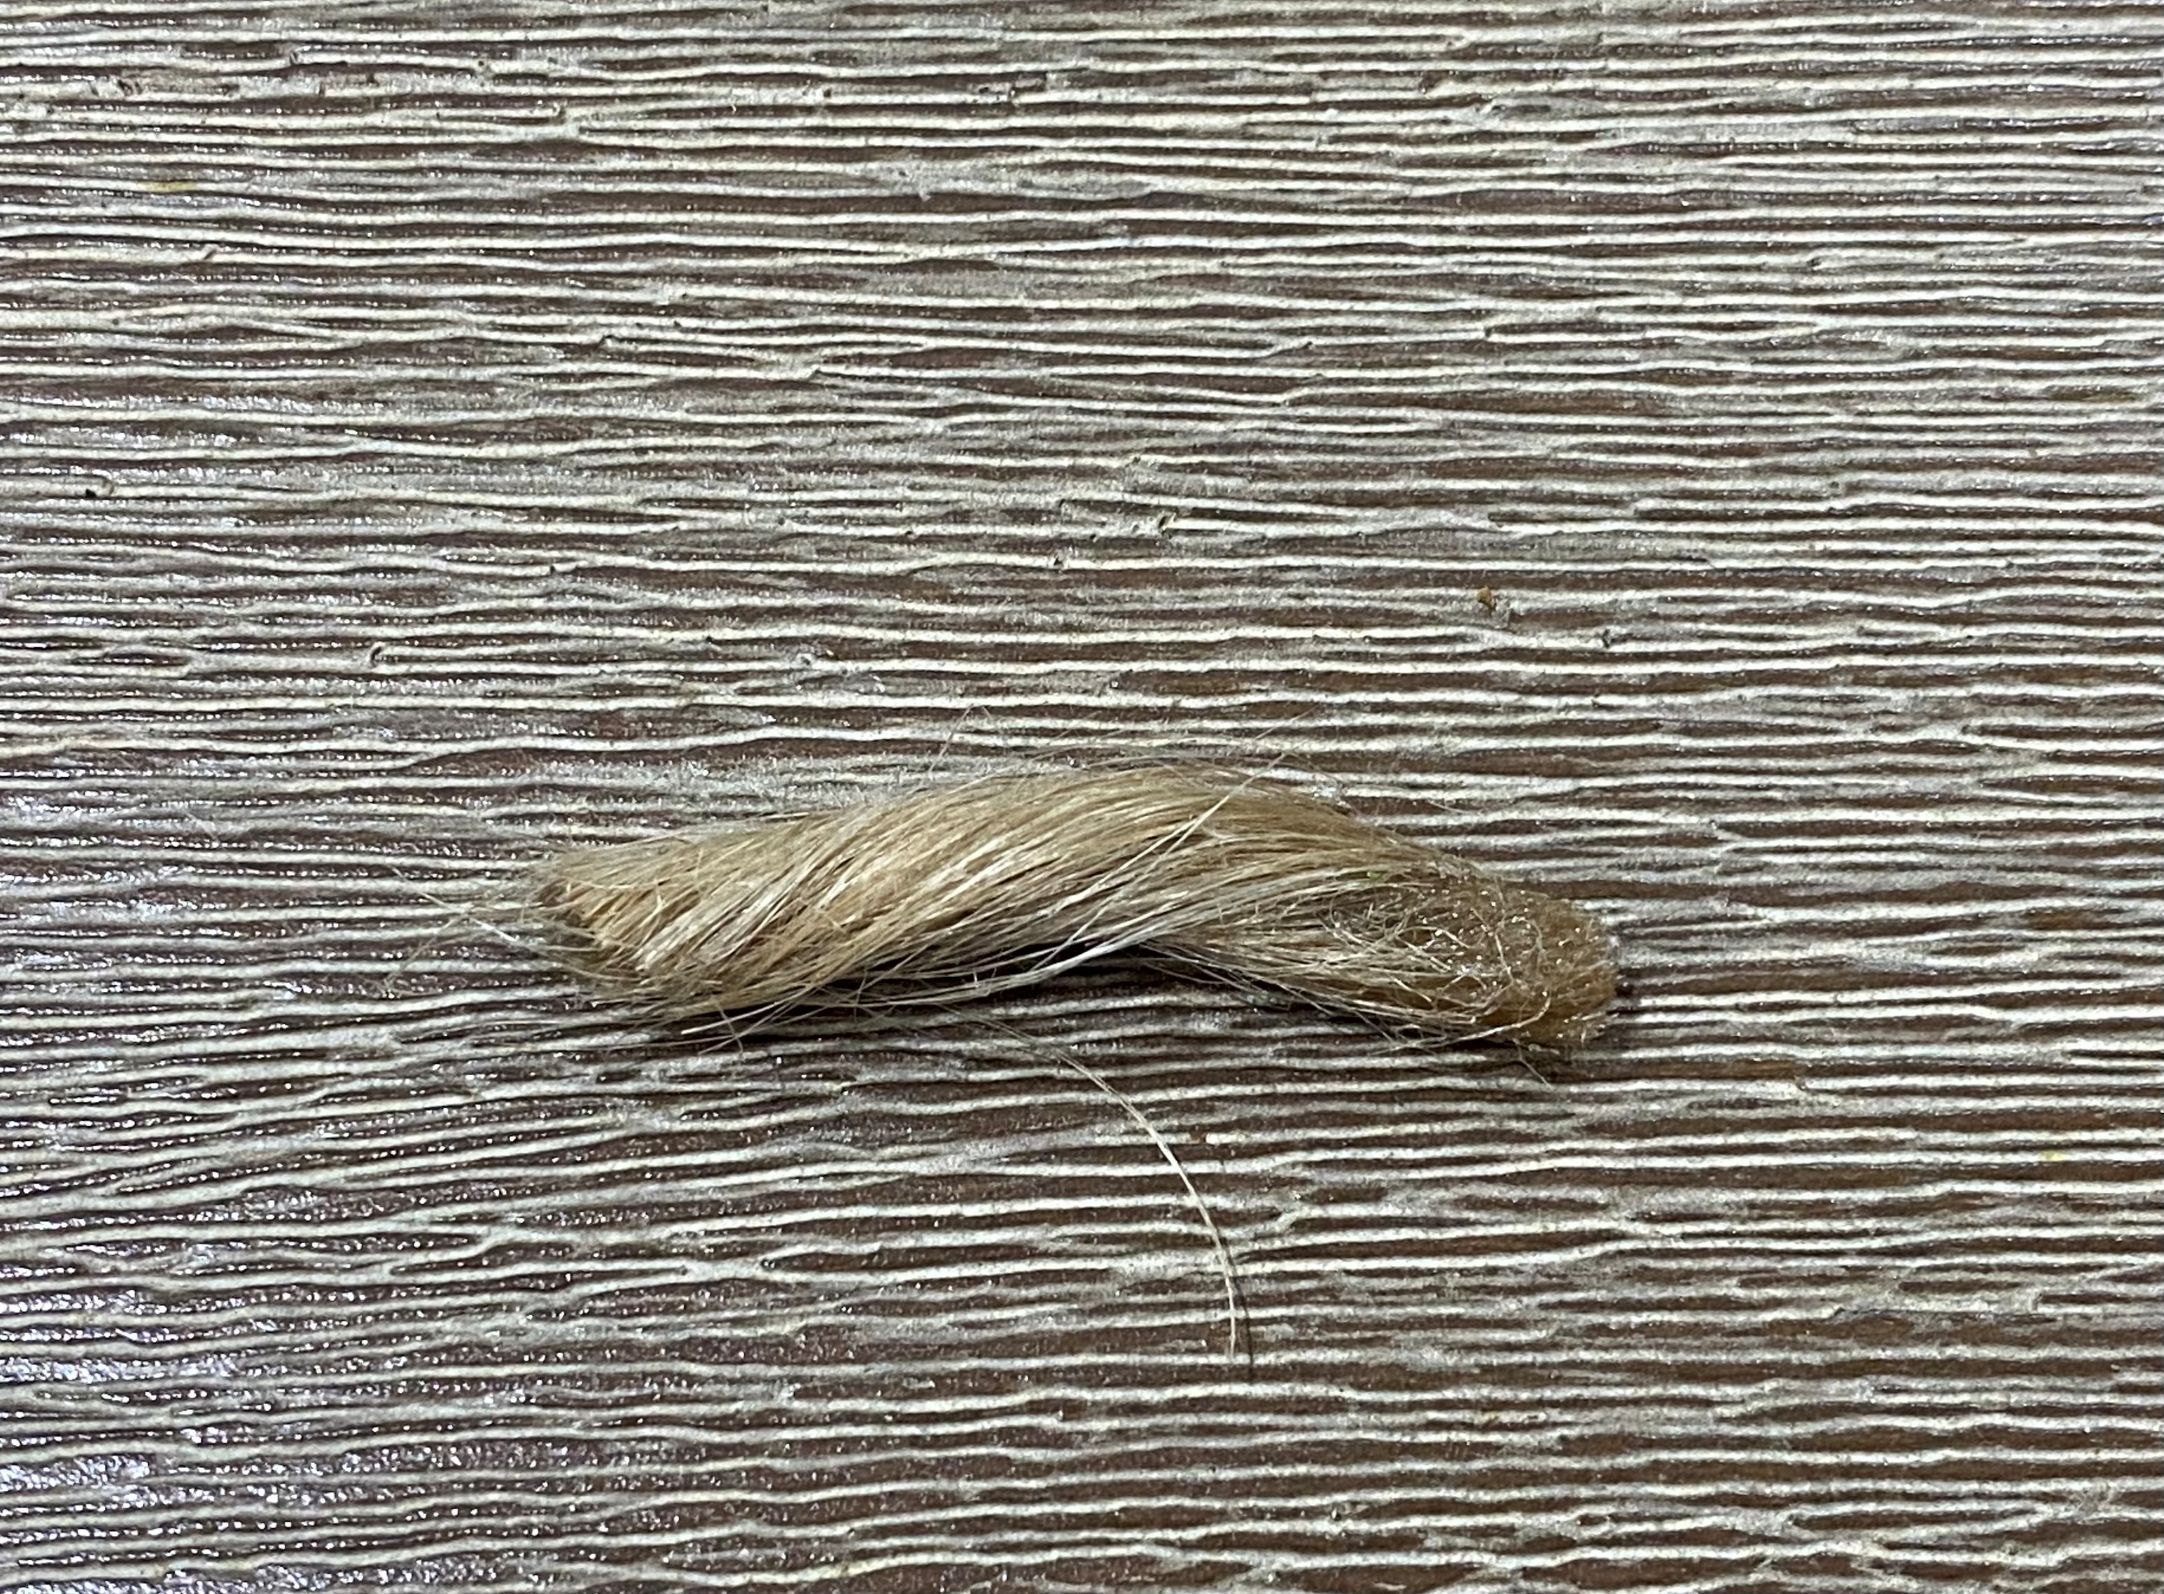 I then used a liquid superglue to glue one end of the string together. It needs to be the thin stuff, not the gel. I also used an activator to set the glue because I am impatient.
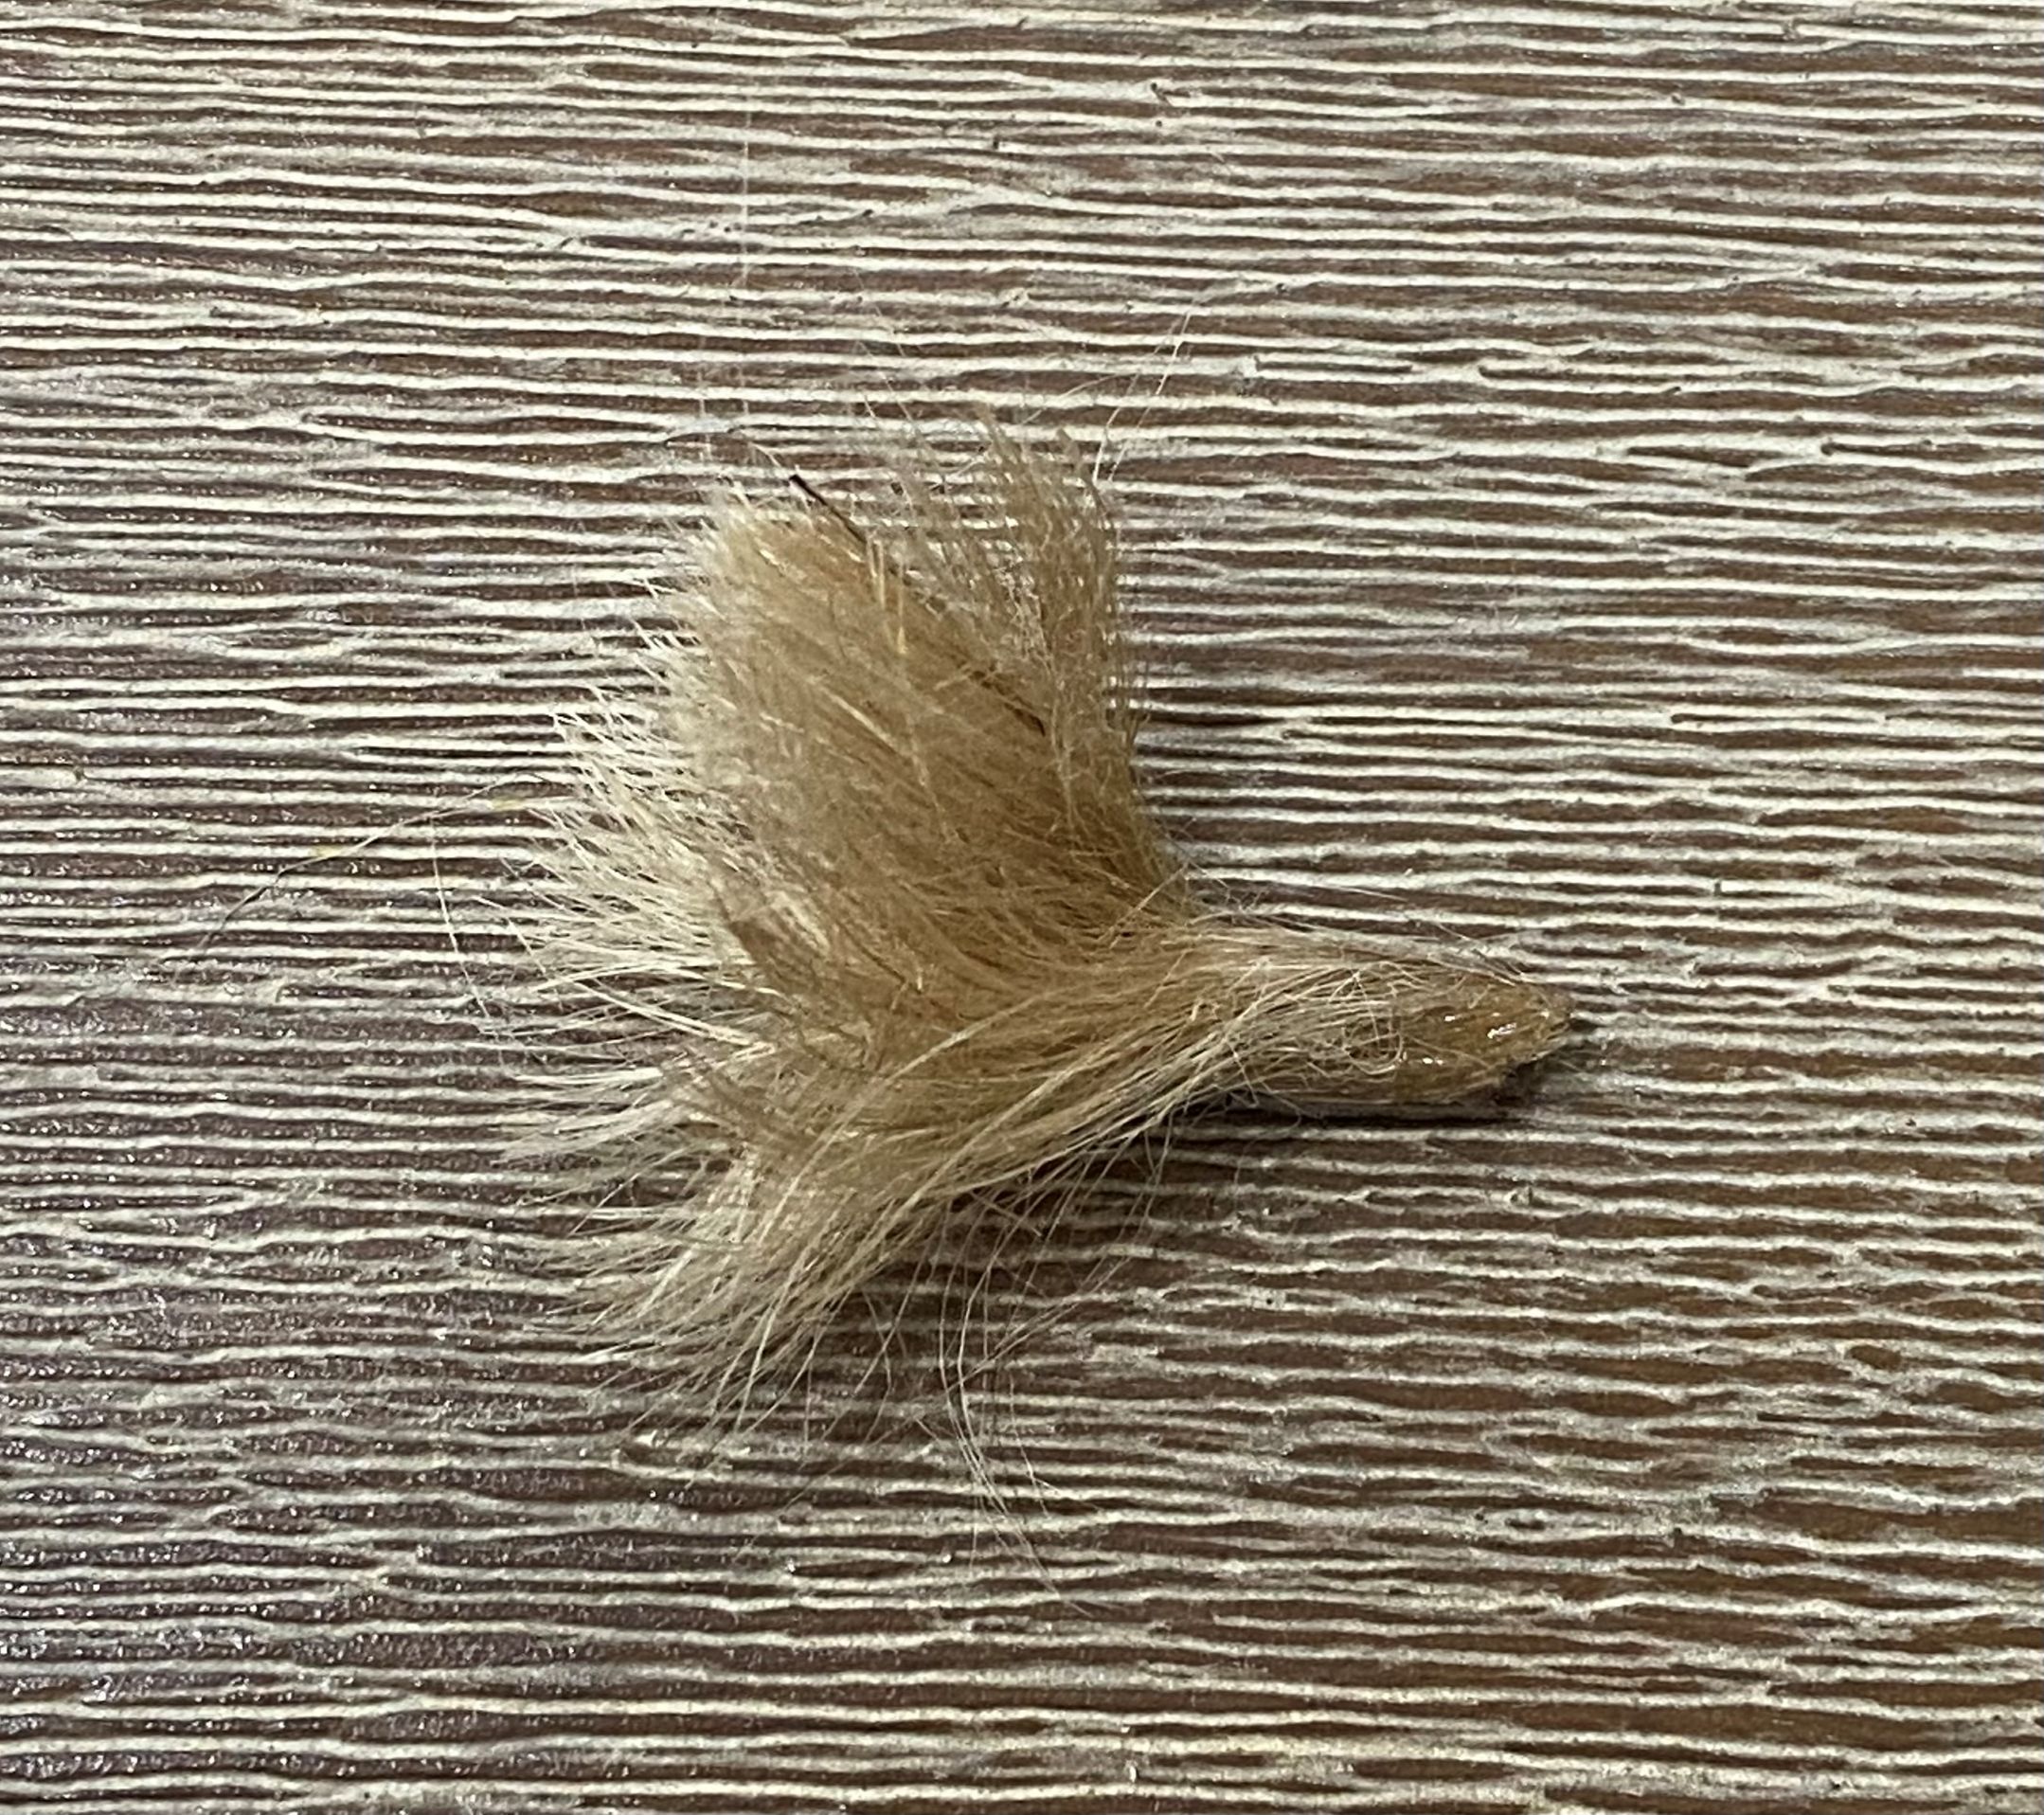 Once the glue was set, I splayed apart the other end of the small piece of string.
 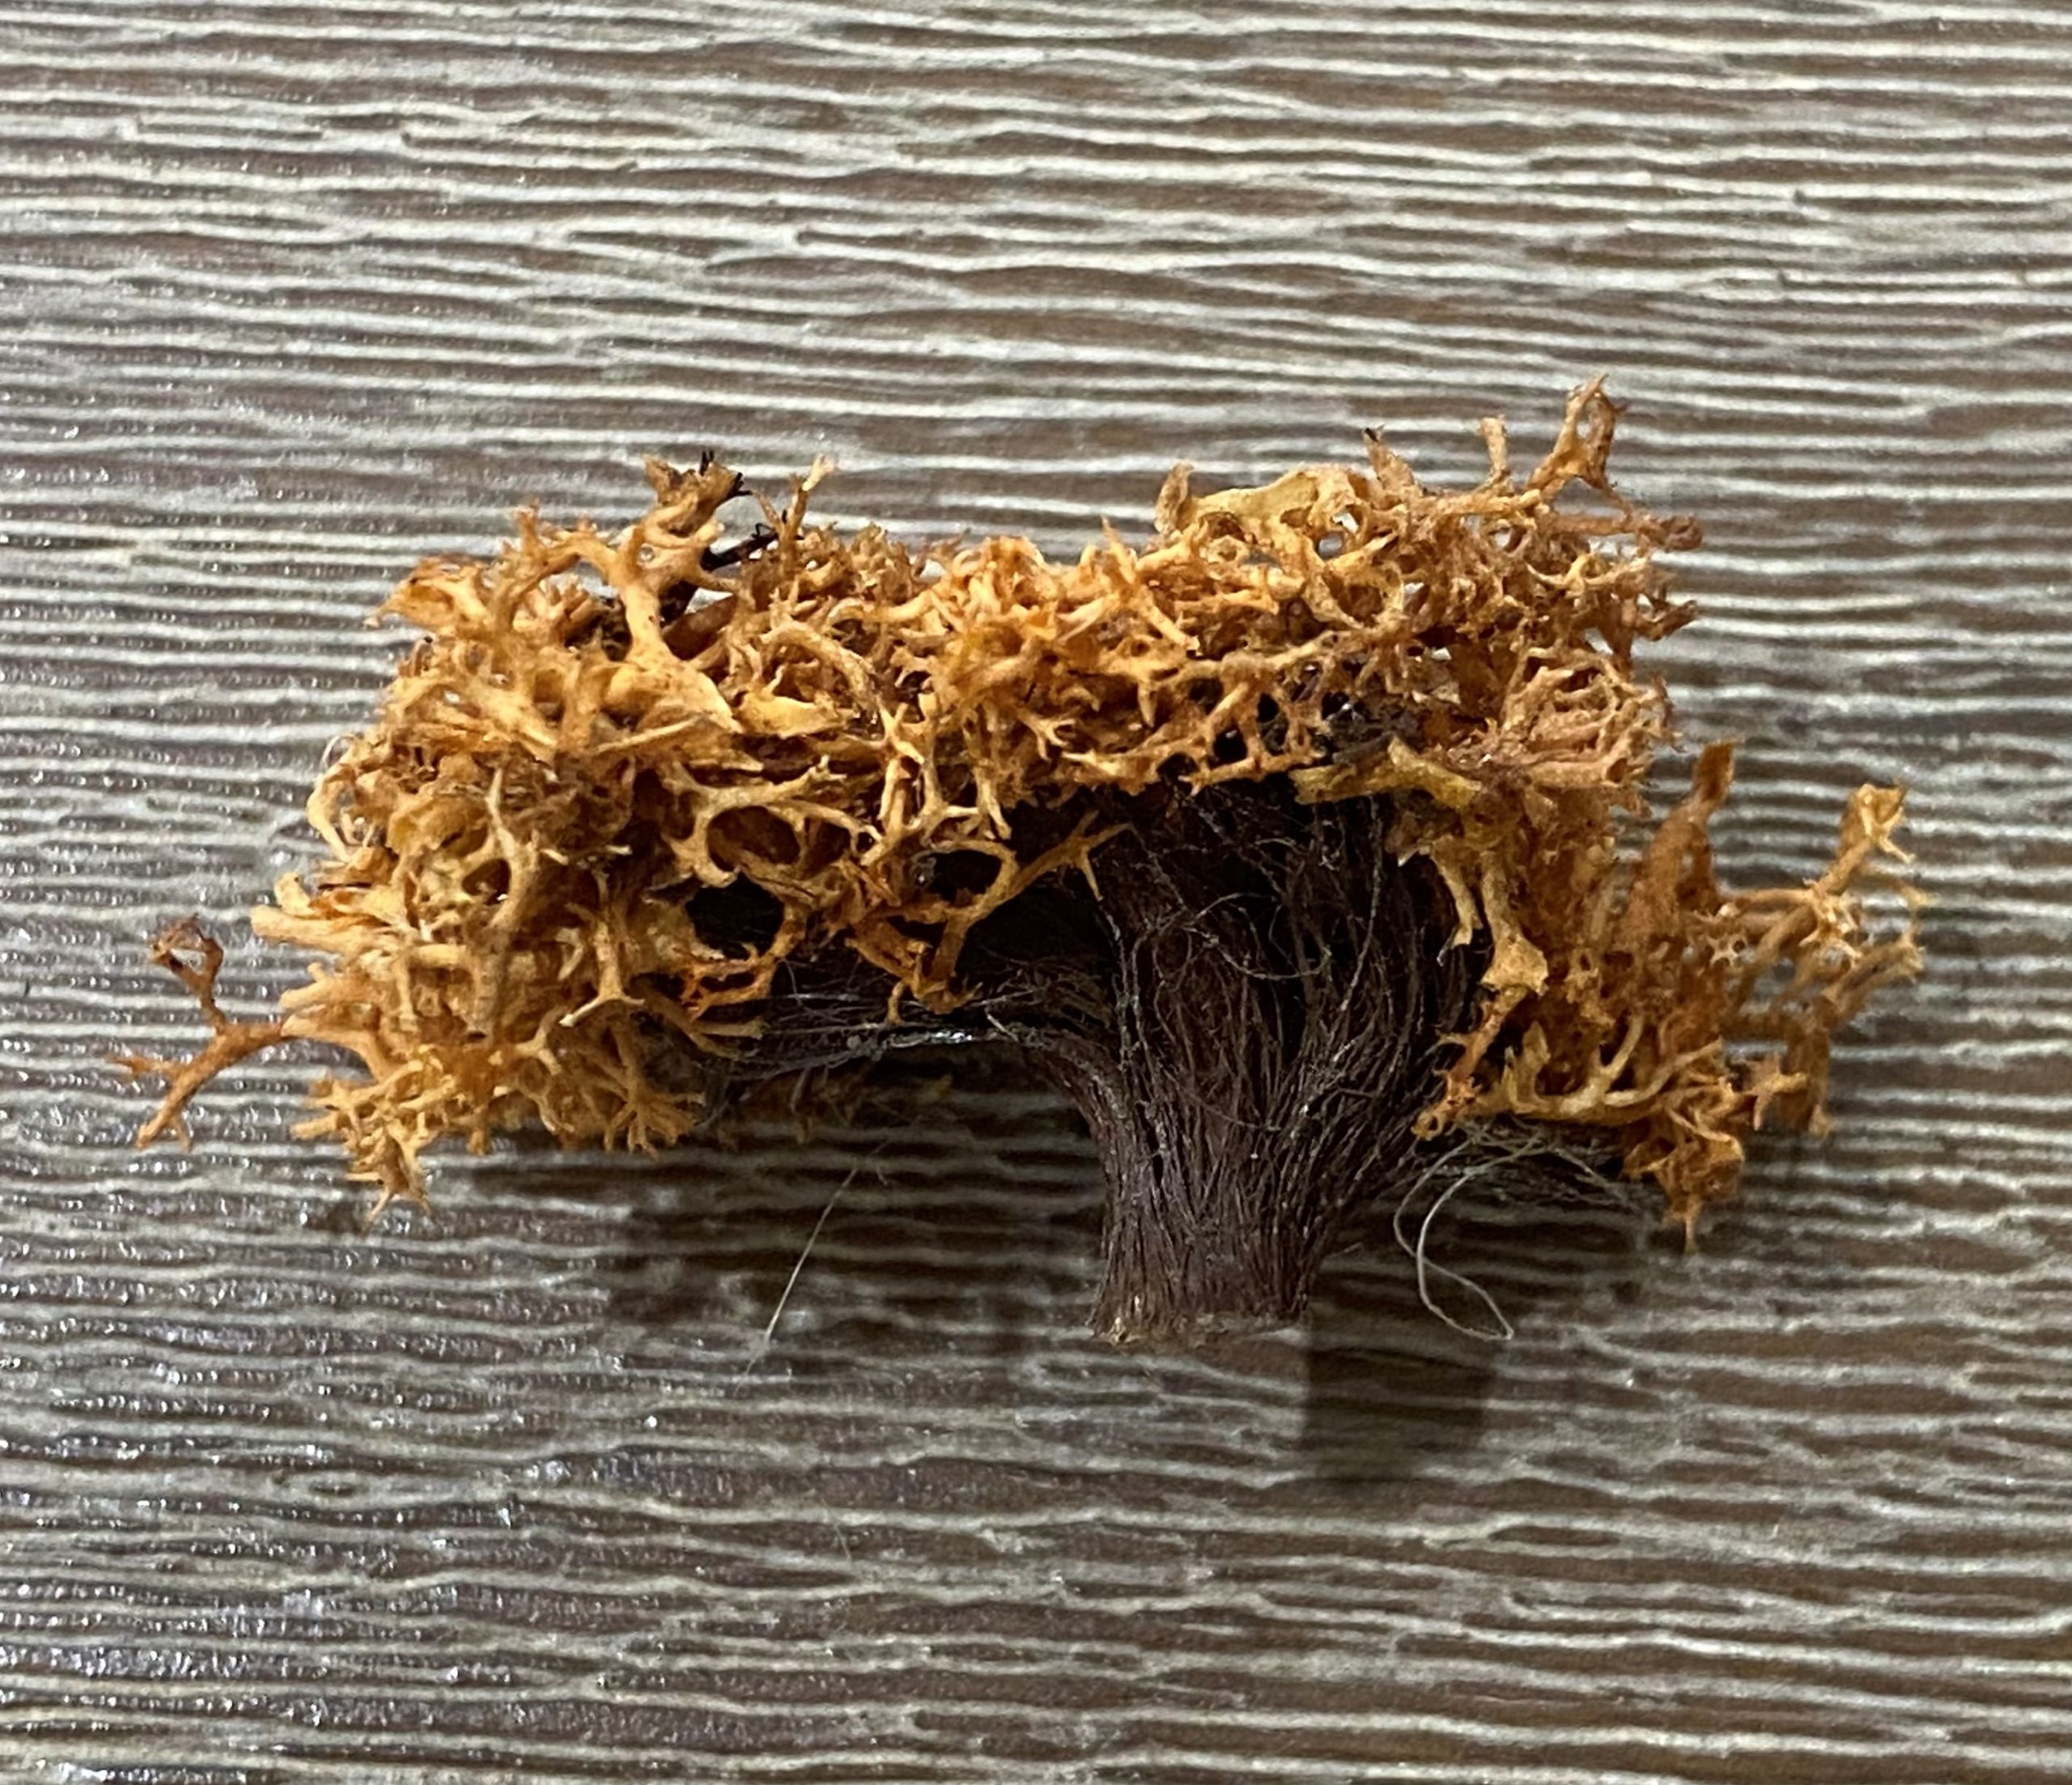 I then used brown spray paint to colour the string before dipping the frayed end into some Mod Podge and then into the small torn apart pieces of Lichen and then set it aside to dry. One dry I just used scissors to trim the glued and down a little. This creates a nice flat surface for gluing the shrub down. Alternatively, if mounting the shrub on foam terrain you could just make a hole in the terrain and push the base of the shrub into the hole.
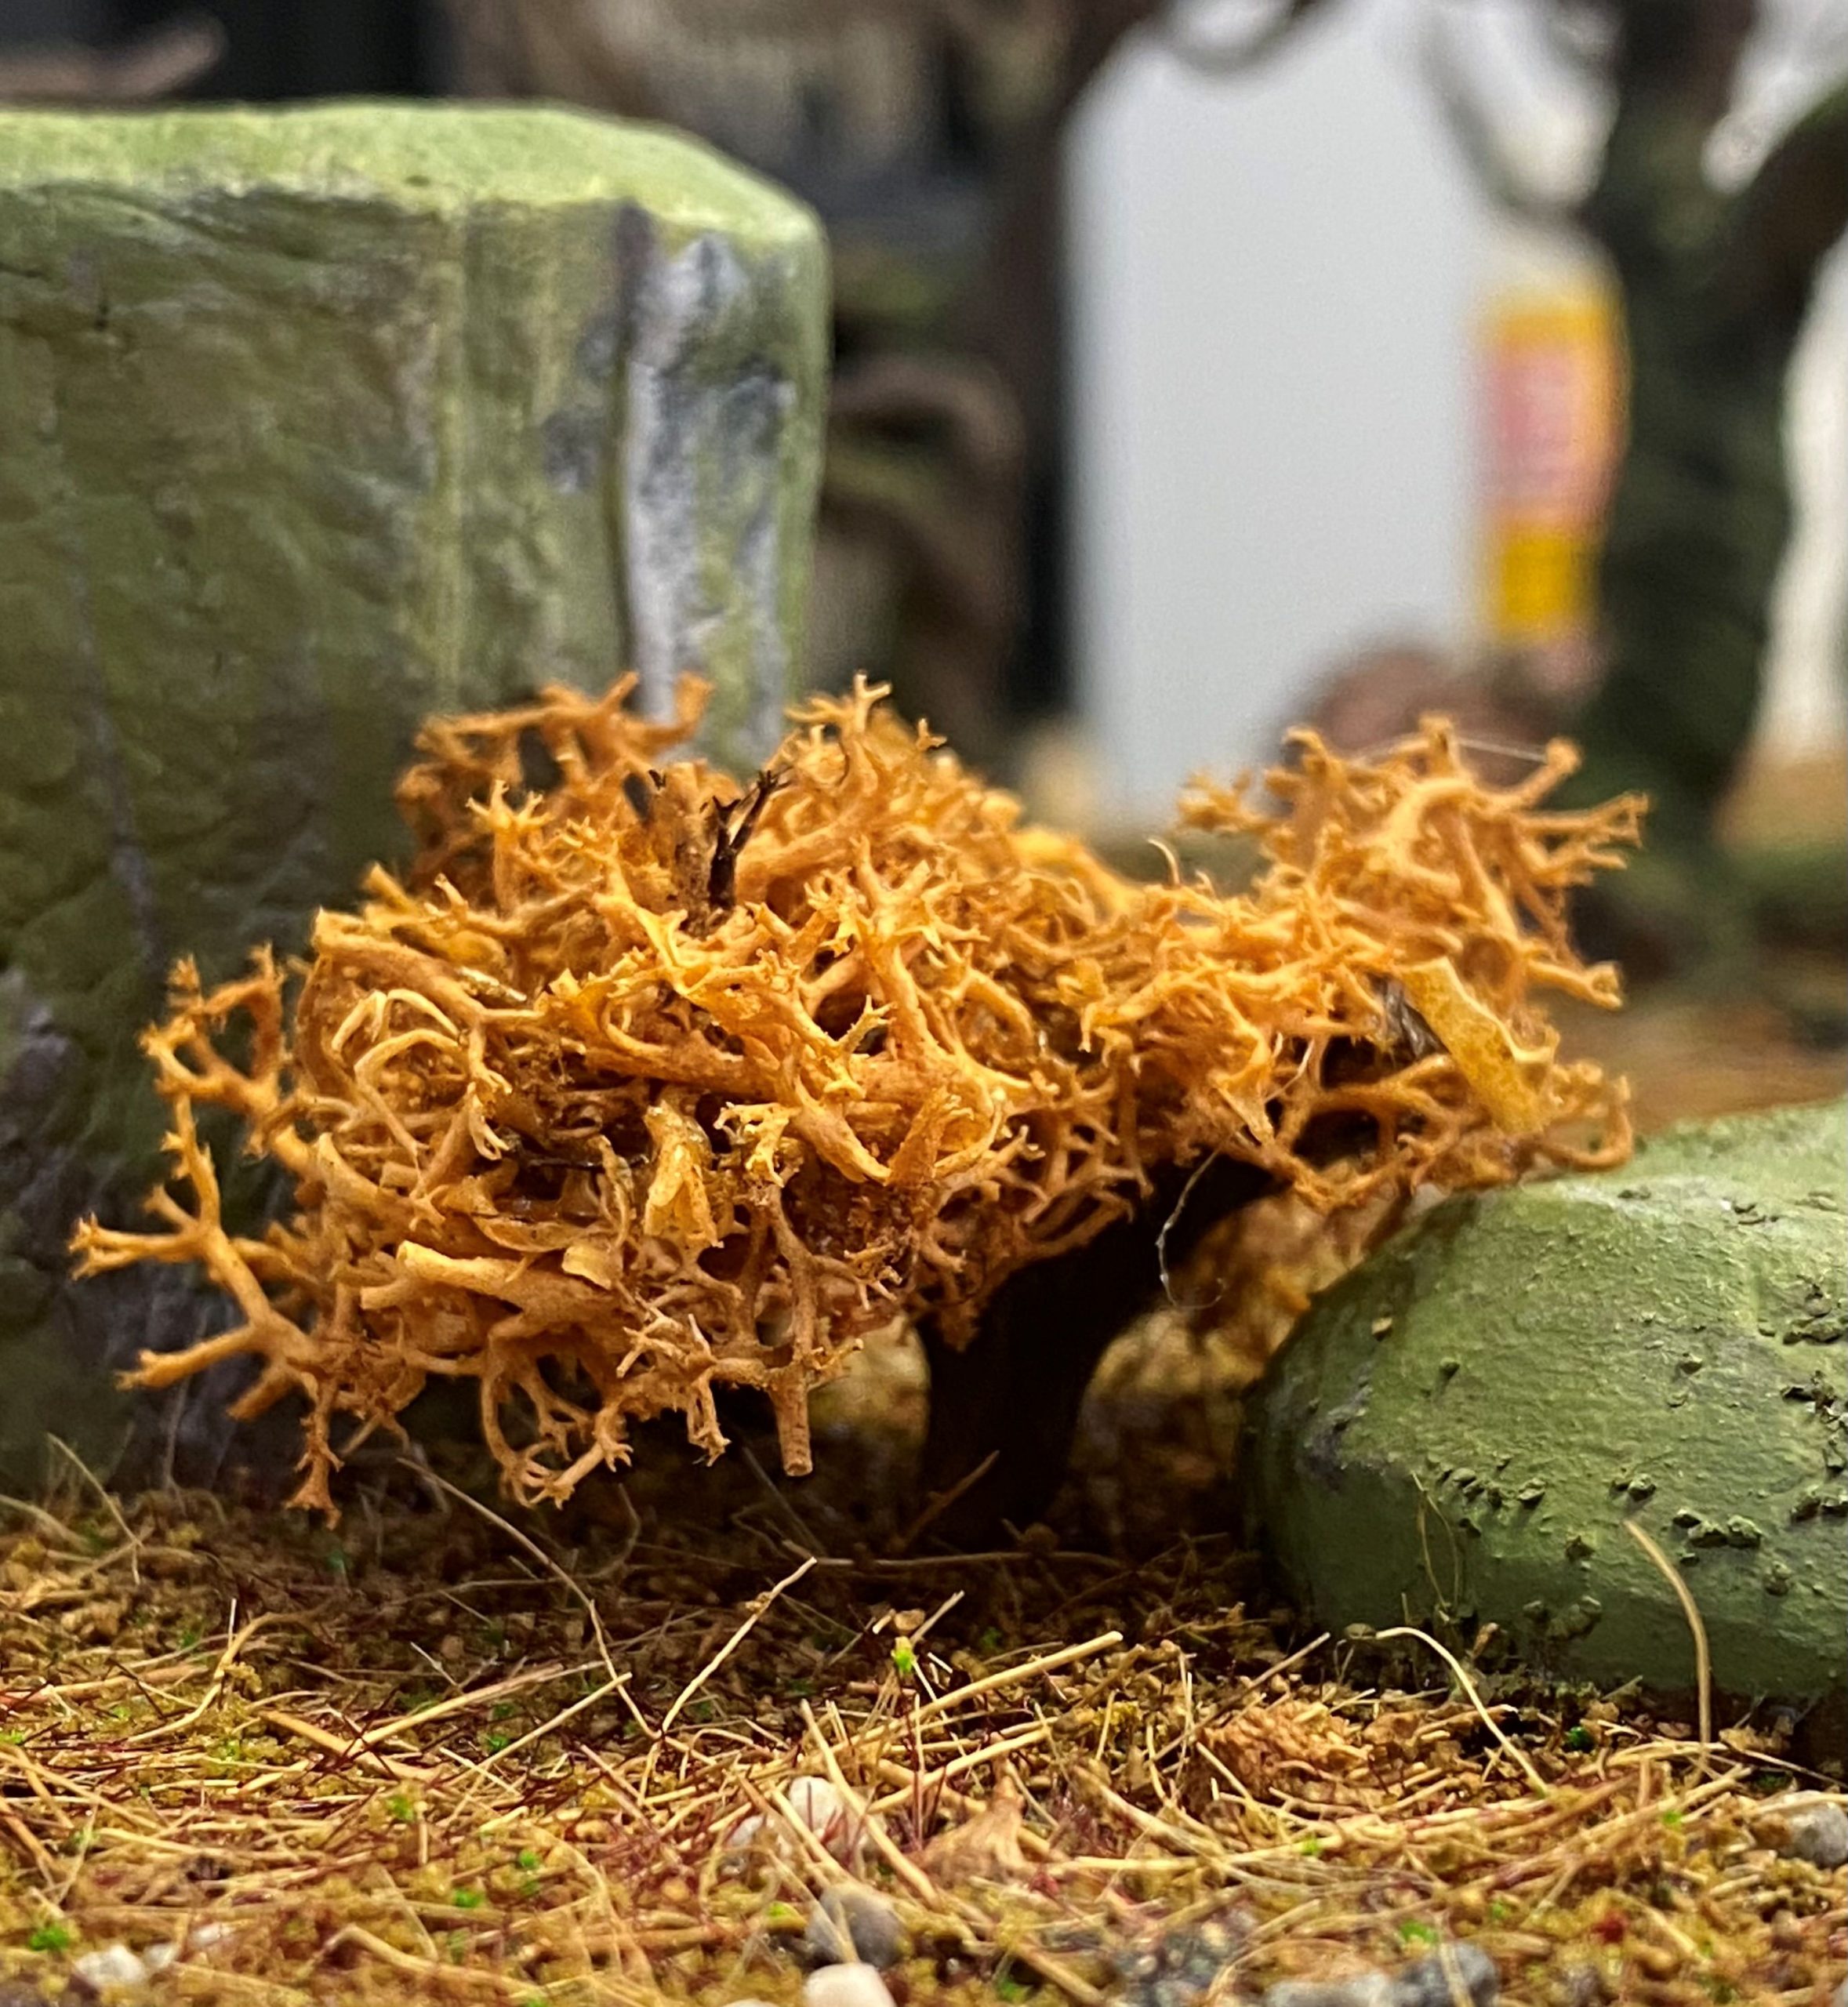
Before glueing all the shrubs into place, I may experiment with adding some flocks to them to add an extra layer of texture and colour and will most likely seal them with a fine spray of matt Mod Podge to give them a bit more rigidity and to make sure the bushy part is nice and secure, after all gamers are not the most gentle of beast out there and this has to survive contact with the enemy.
Moss
I’ve made some progress while I had some time to myself.
I used a fine green flock to add some texture and variation to the moss growth over the board. it was just a case of dabbing on bits of Mod Podge and sprinkling the flock on. It’s quite a vibrant green, but I really like it and feel it adds to the overall look.
Once it is dry, I will add some leaf scatter and then seal it all once again.
The rest of the ground covering is well and truly stuck in place, which is great, as the plan is to eliminate any shedding by the end of the build.

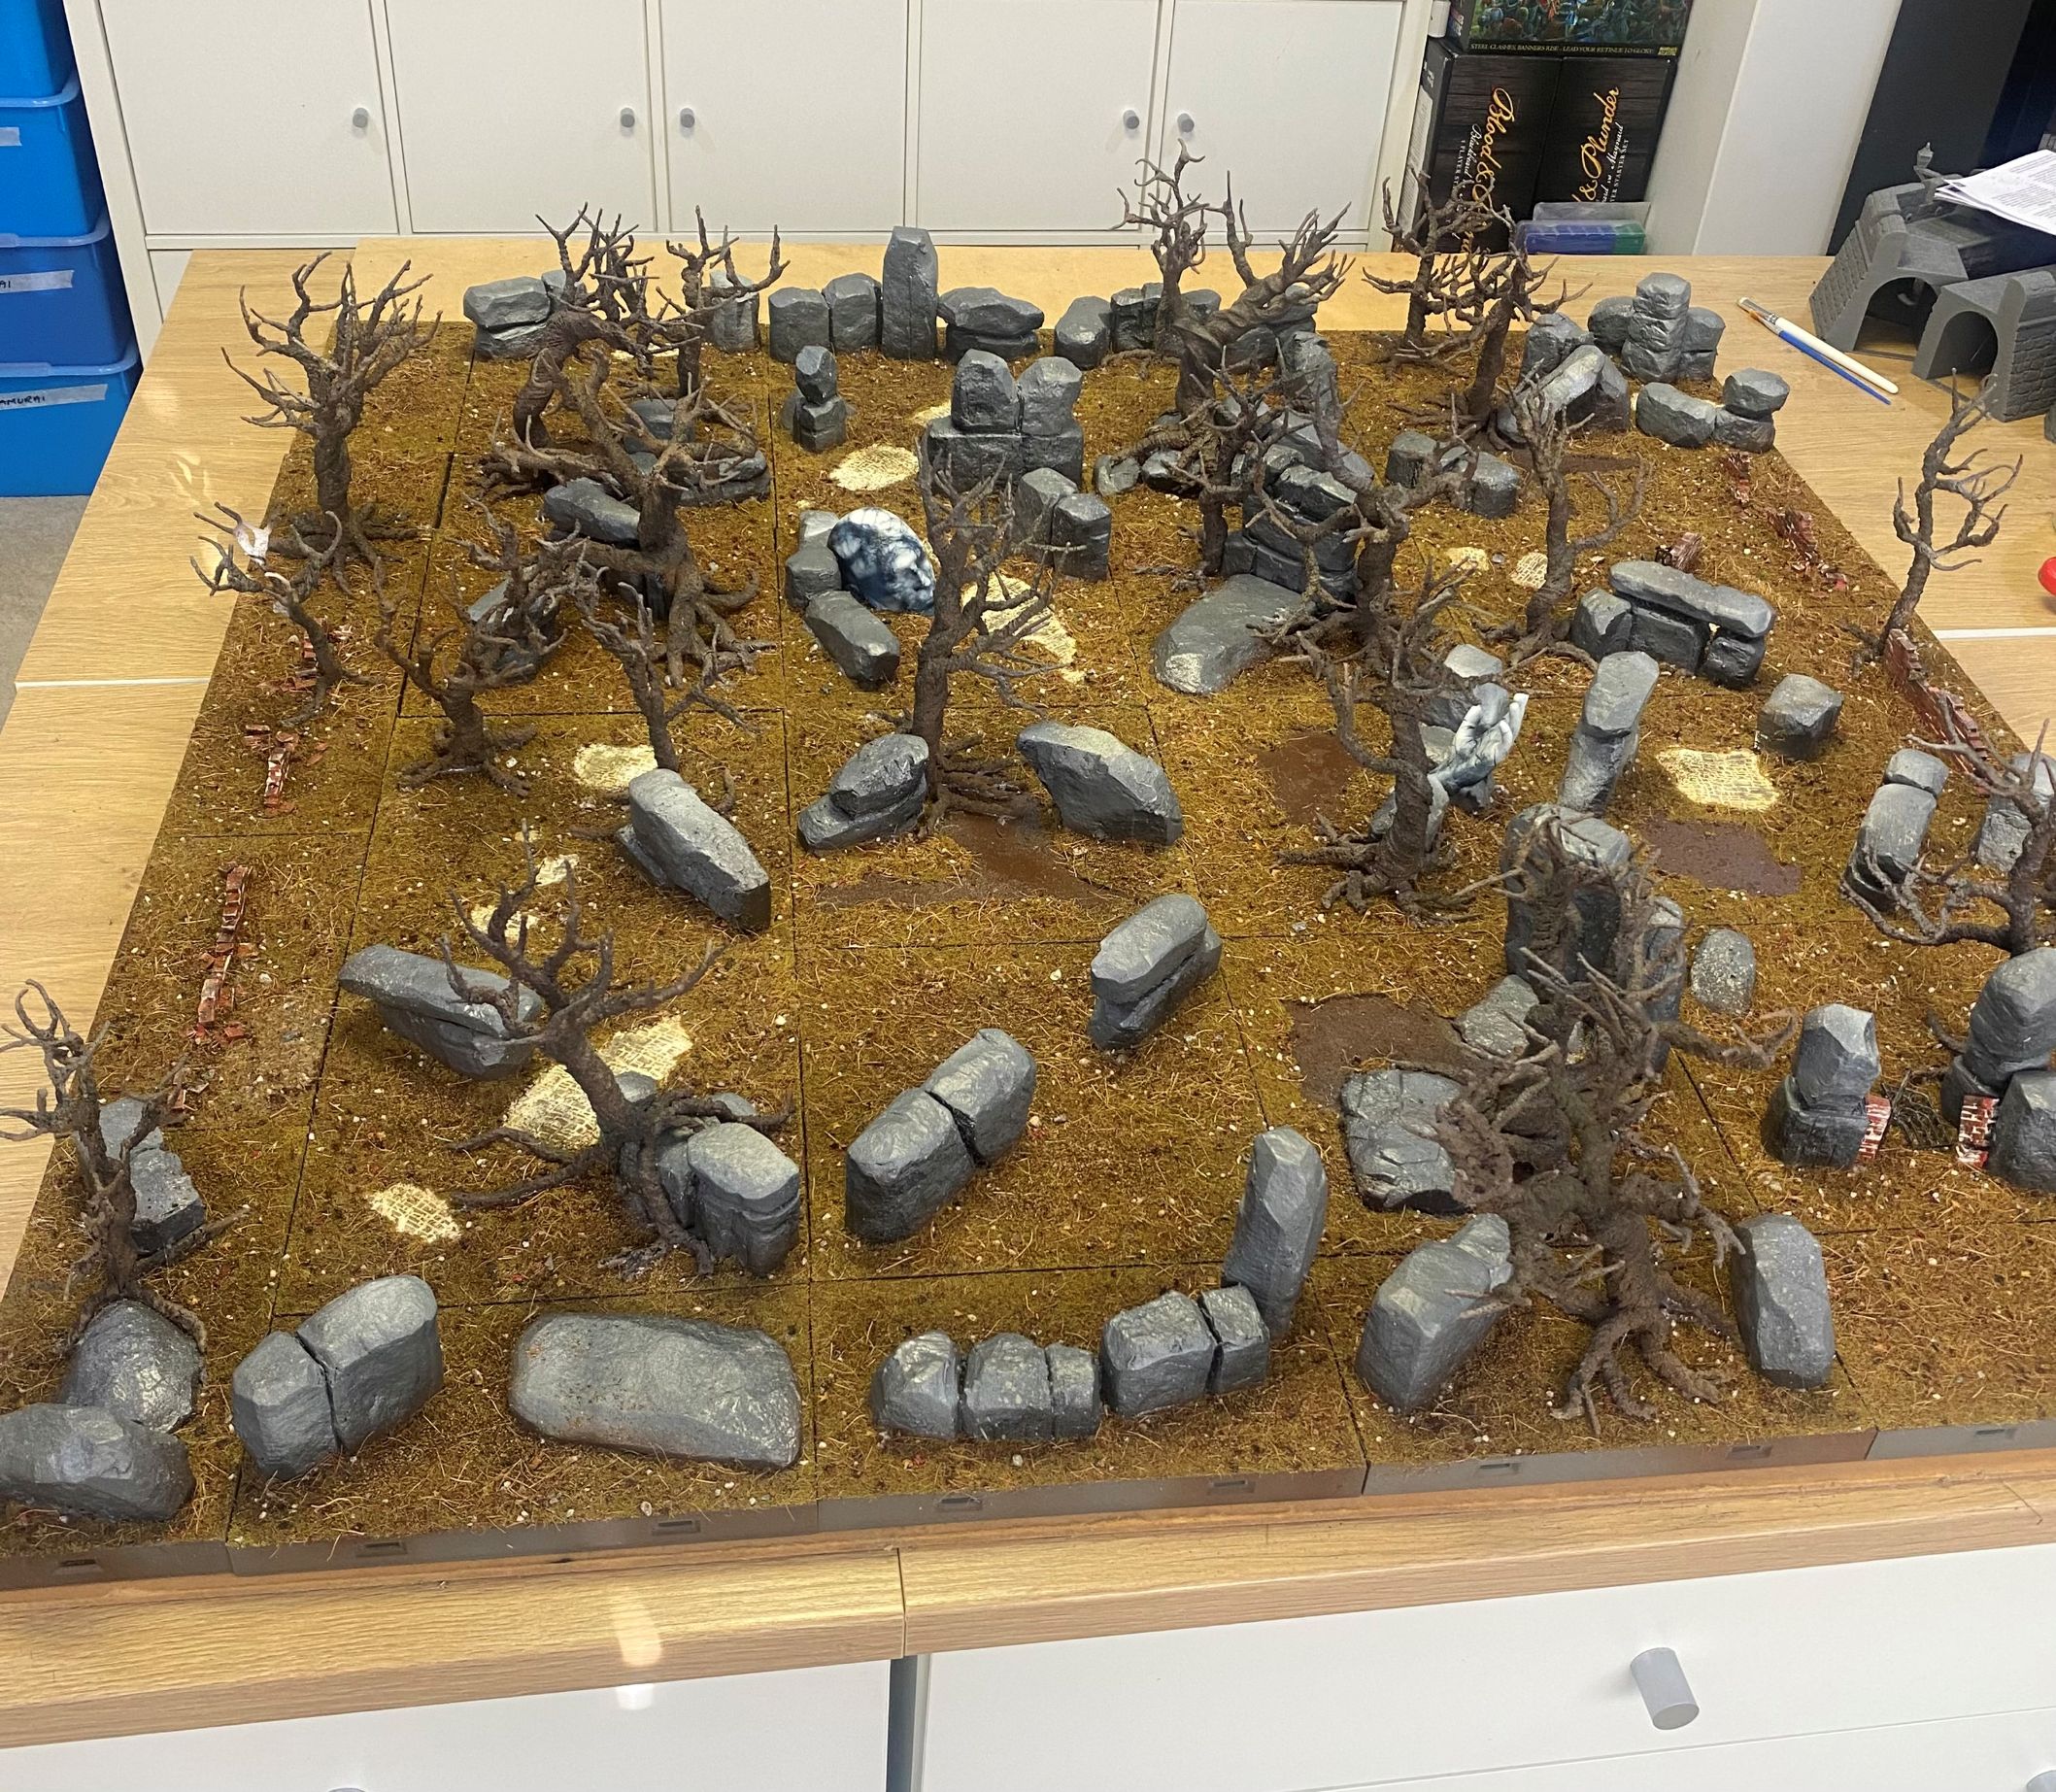
This is the current state of play.
I have a whole heap of bushes to add, but I can’t do that until all the groundwork is done, and I can also add some other bits and pieces I have in mind at the same time.
After that, I suppose I should take a closer look at each tile and see what I can add to them on an individual level.

Other than that, I just want to take the opportunity to wish you all an awesome festive period, however you choose to spend it. Stay safe and look out for each other.
Thanks to everyone who is working during the holidays, and special thanks to all those people who give up so much family time to keep us all safe, you are all very much appreciated.
Fallen Leaves
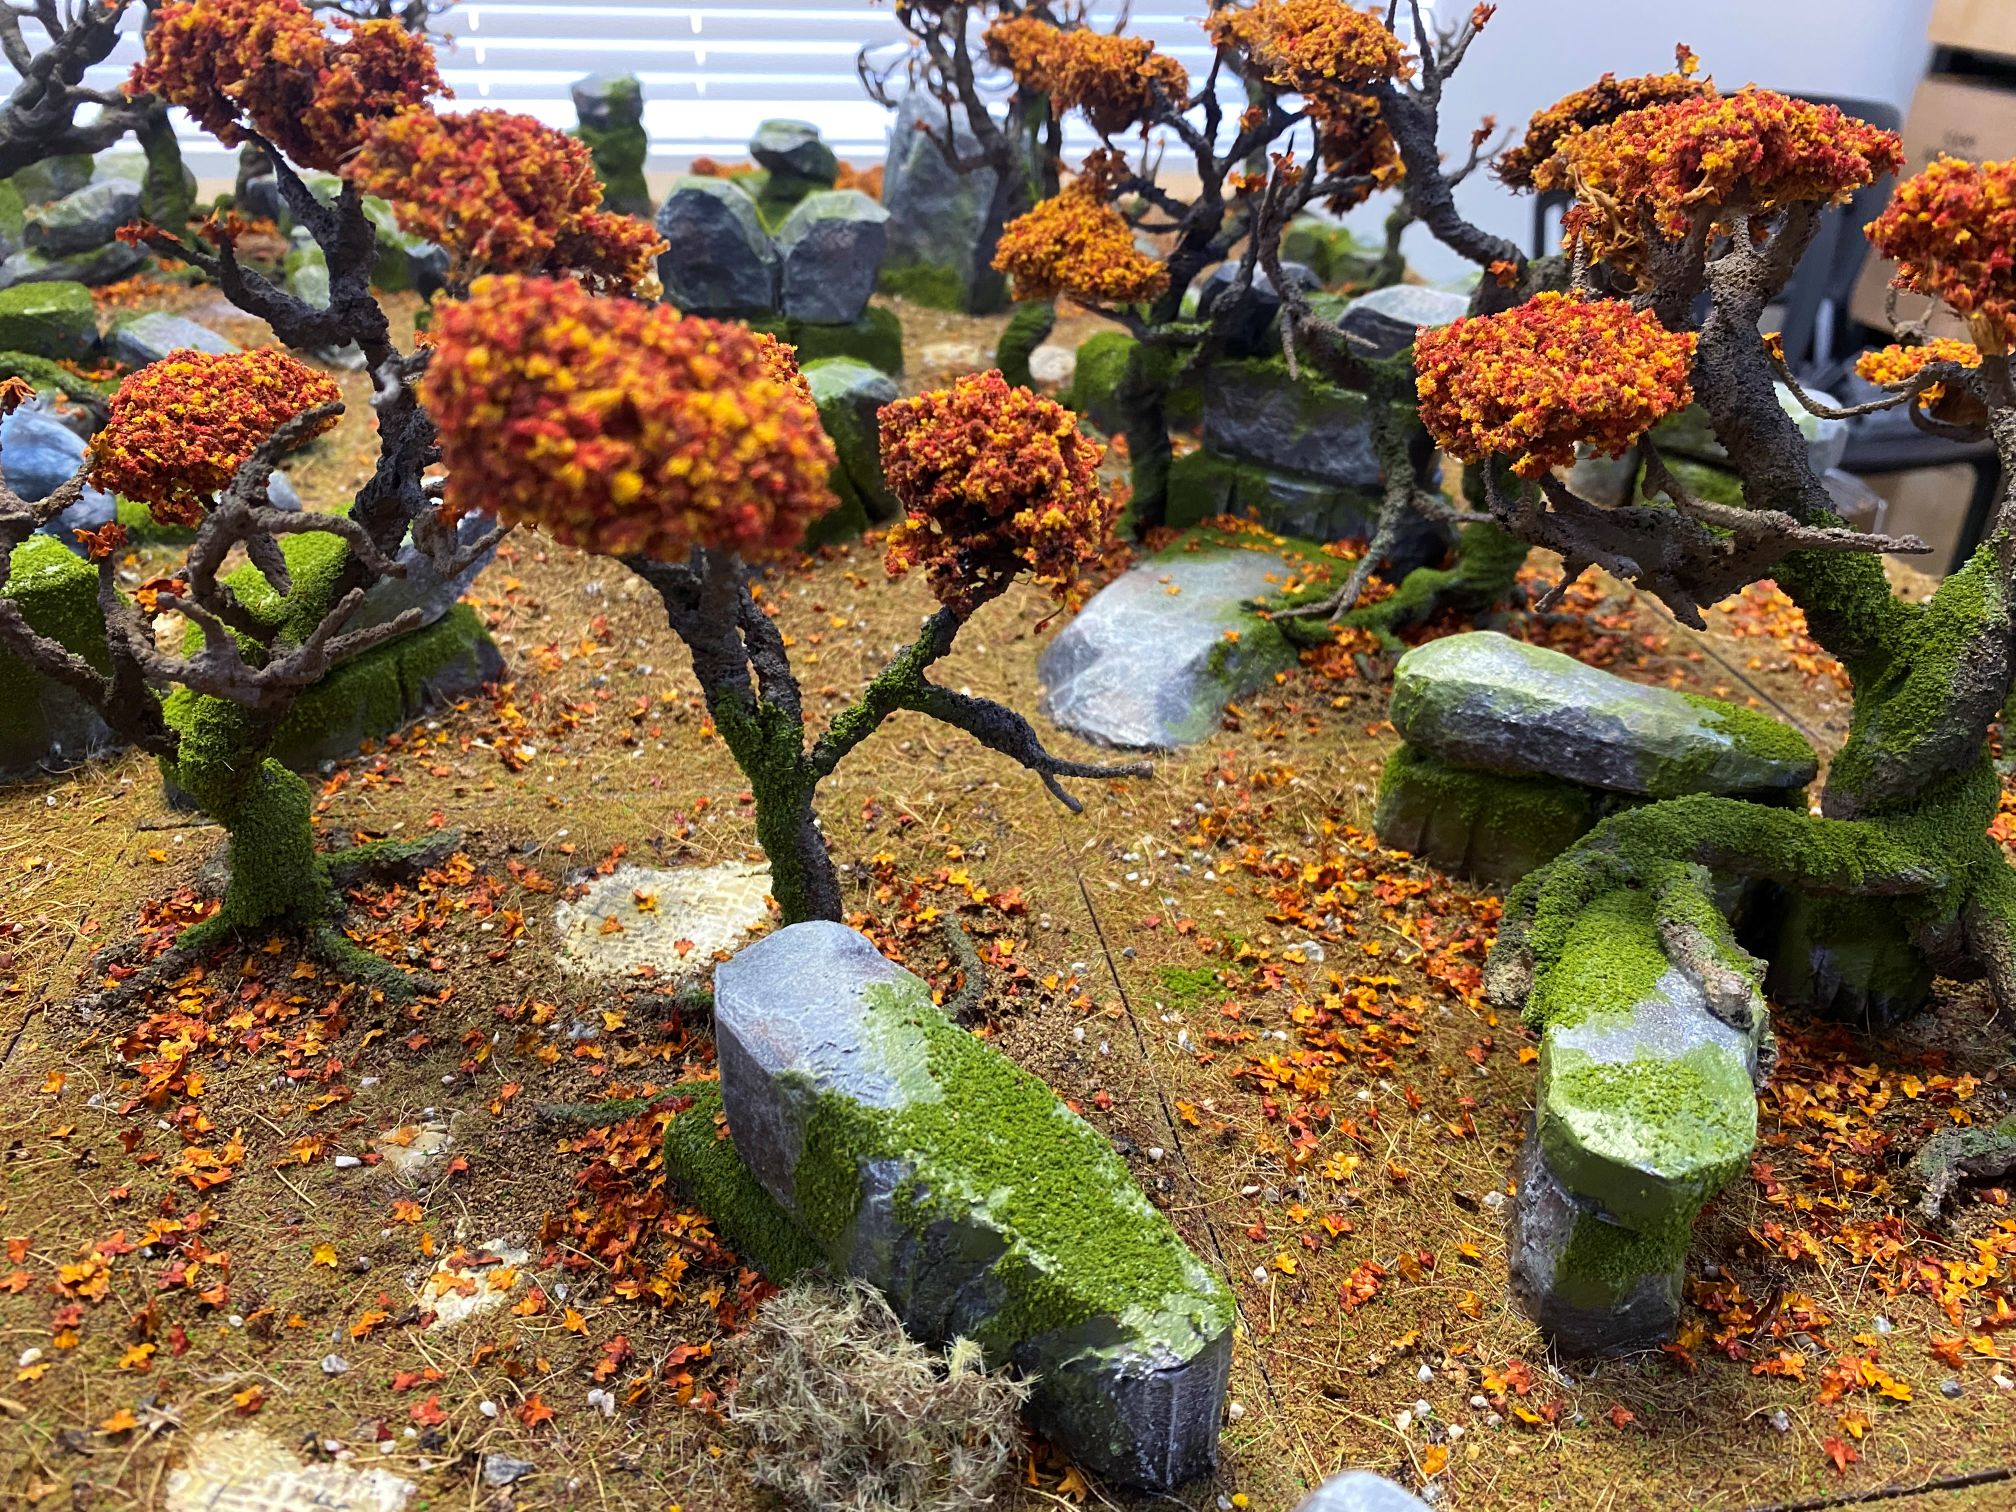
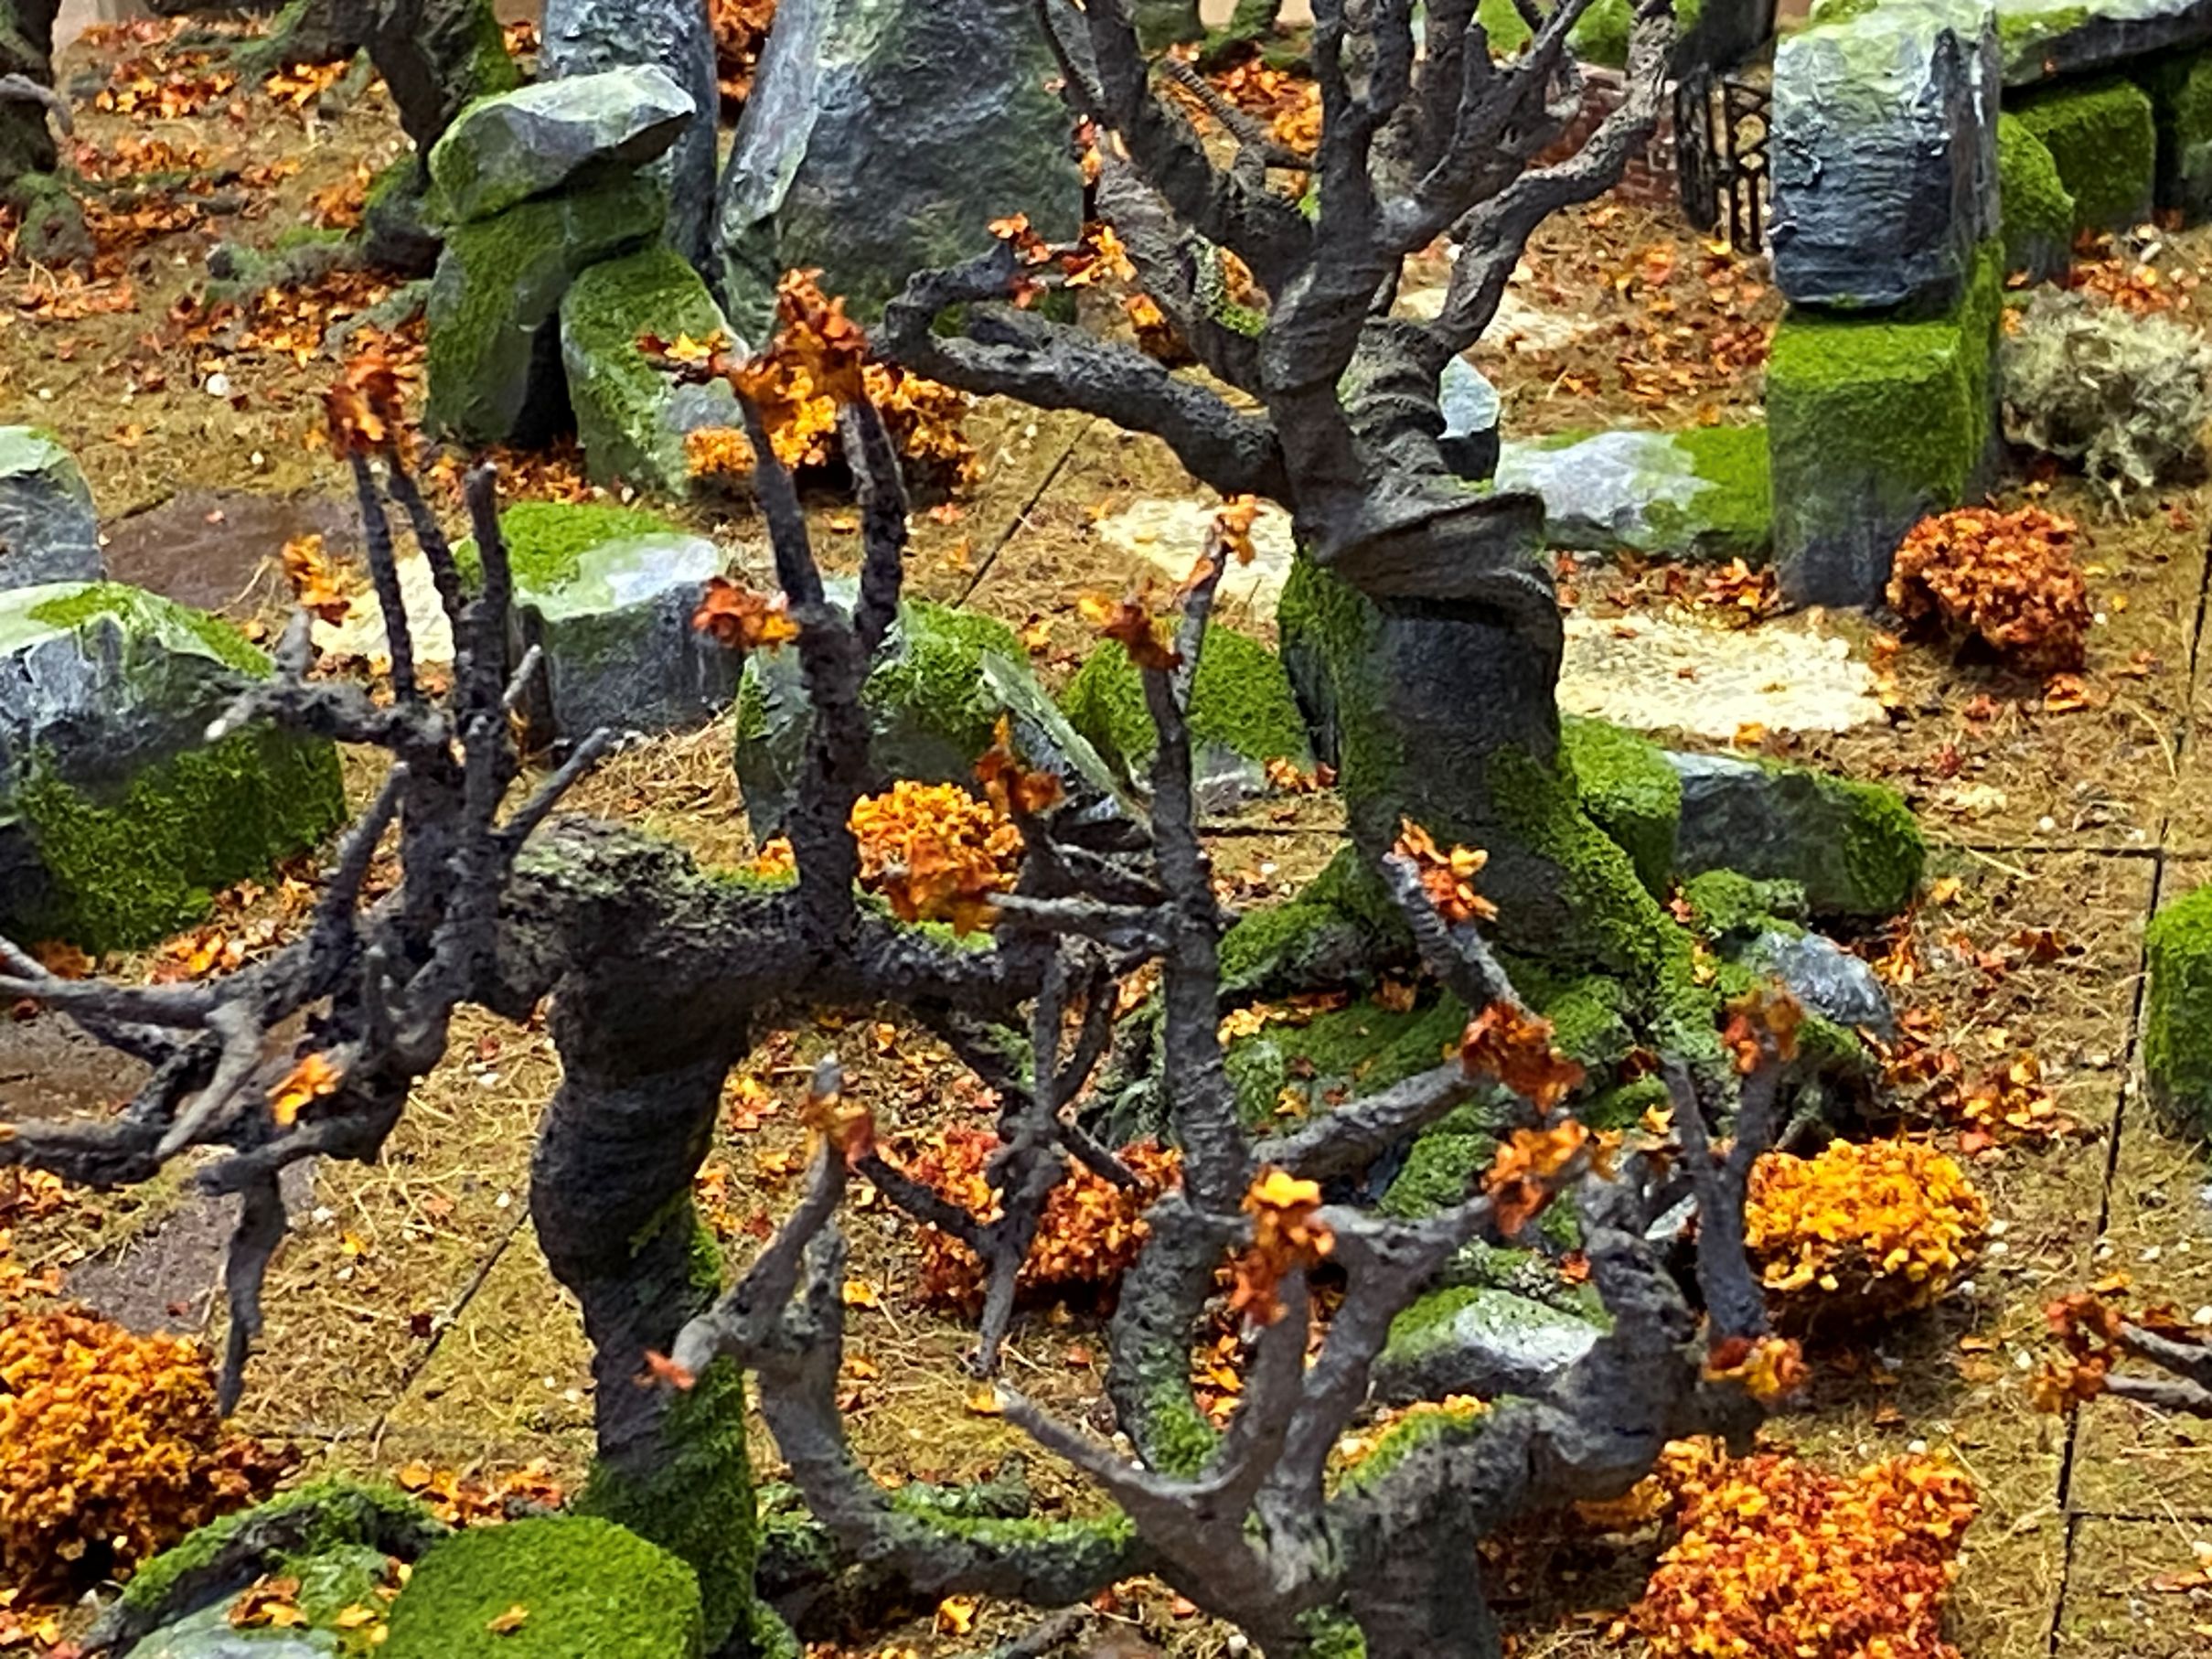
I am at the stage where I can start adding a first layer of fallen leaves to the tiles.
To do this, I first sprayed the tiles with some isopropanol alcohol before sprinkling some autumn-coloured silver beach seeds around. I then lightly sprayed over each tile again with the isopropanol before finishing with a spray of the water / Mod Podge mix.
The idea is that the alcohol will help break up surface tension and also keep the leaves in place whilst adding the glue.
I then took a quick look over each tile and, using a pair of tweezers, removed any leaves that were stuck in unusual places, like the sides of rocks.
Once each tile was done, I set them aside to dry.
Thankfully, living in Perth, this does not take very long at all.

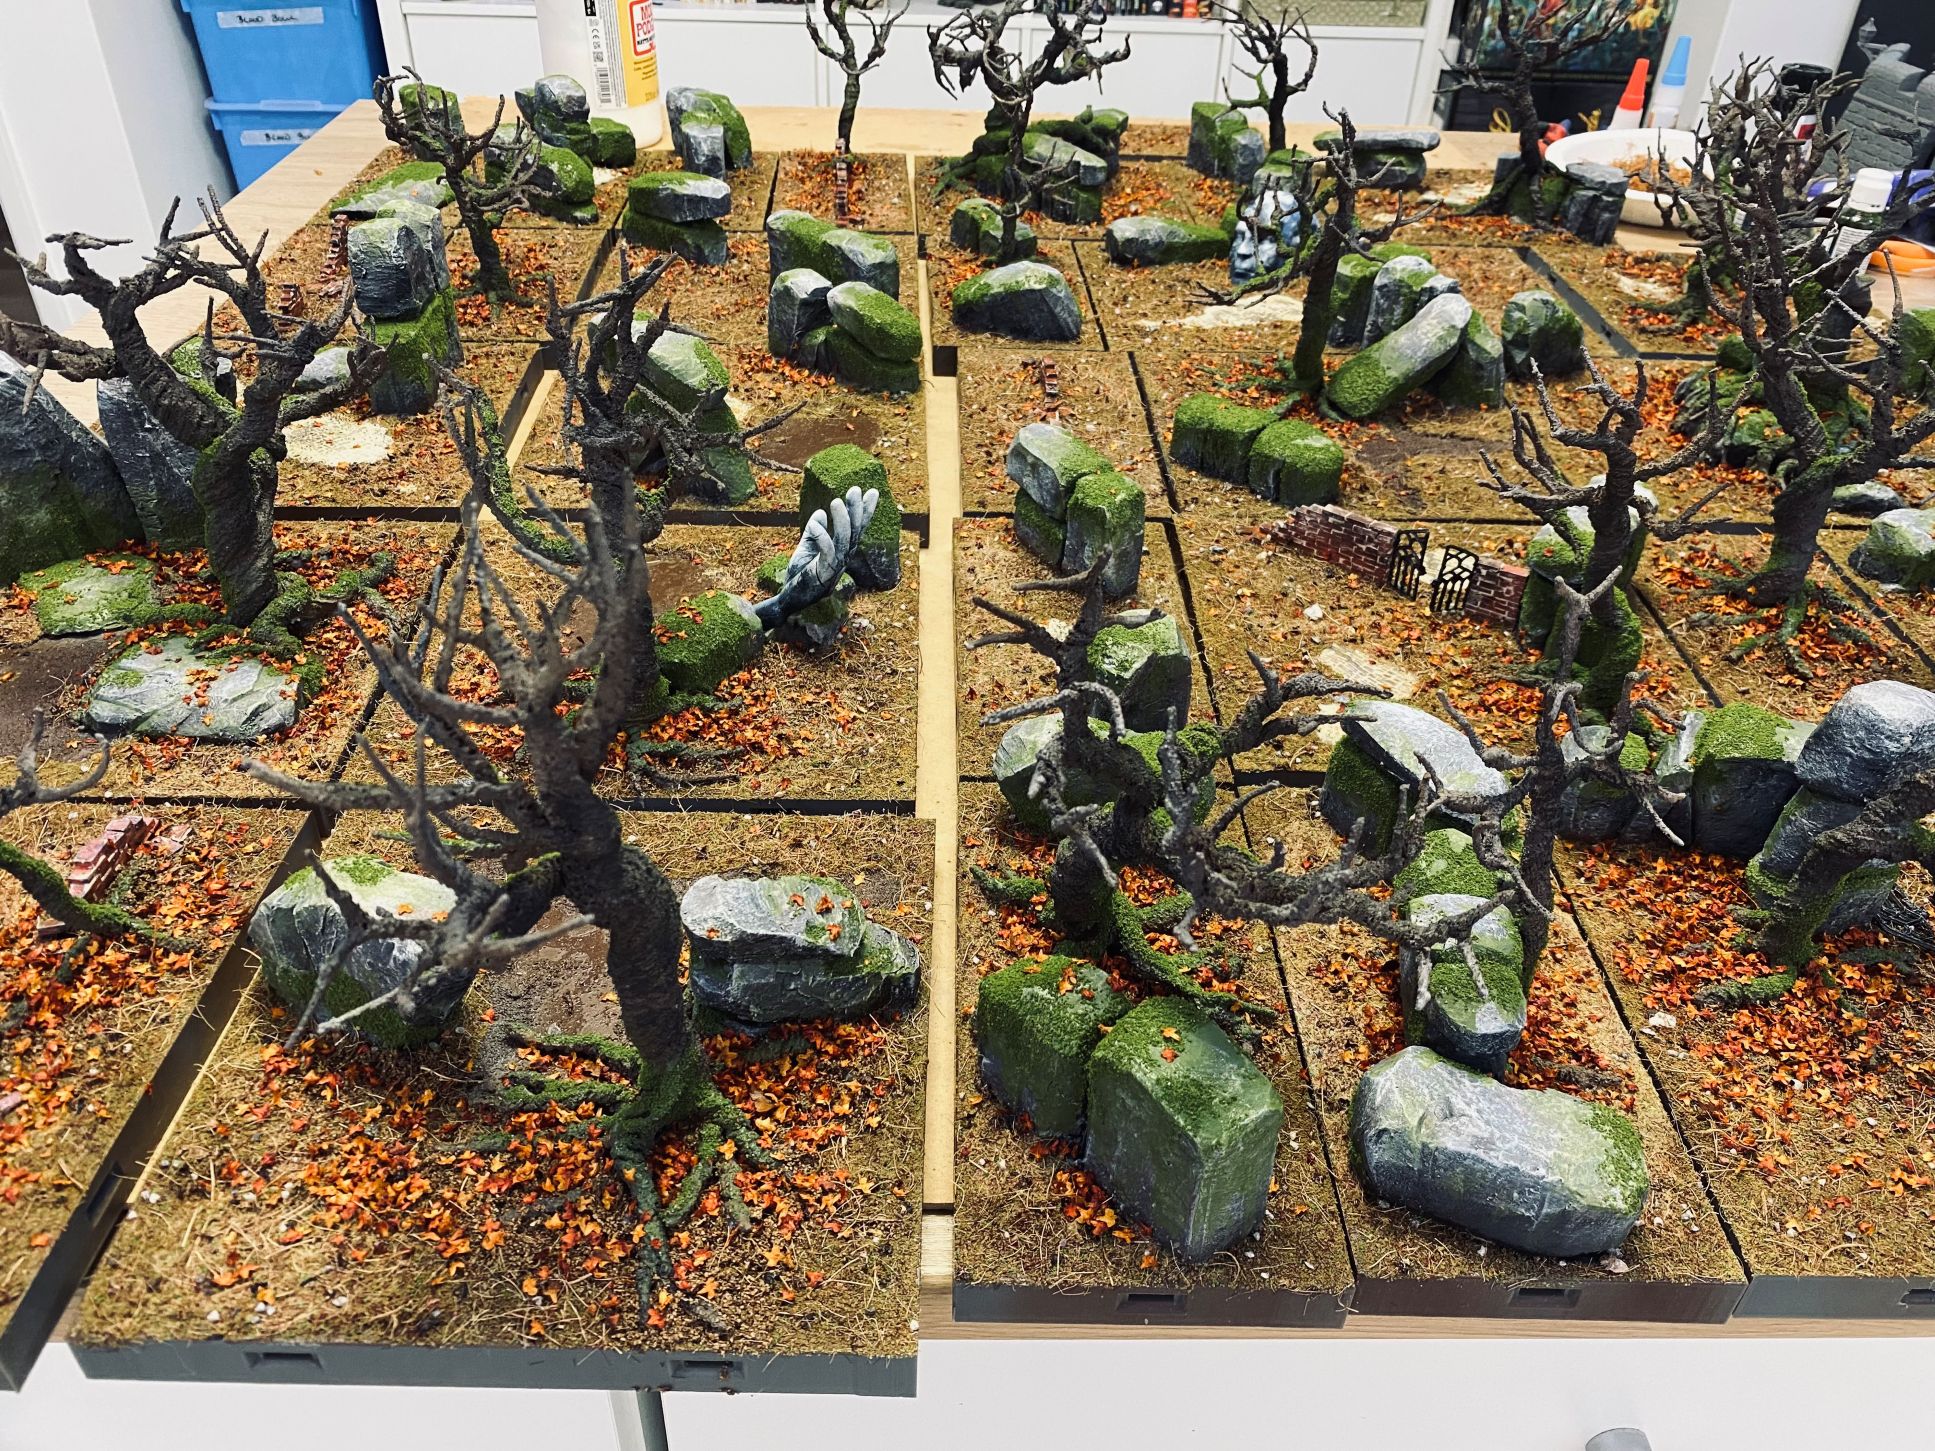
To help the colours of everything tie together, a very light sprinkling of fine brown ground covering helps the colours look more muted, and I think, personally, it fits in better with my existing terrain.
More hedgework
While I had the Isopropanol alcohol and Water / Mod Podge sprays out, I decided to crack on with some more work on some of the hedges.
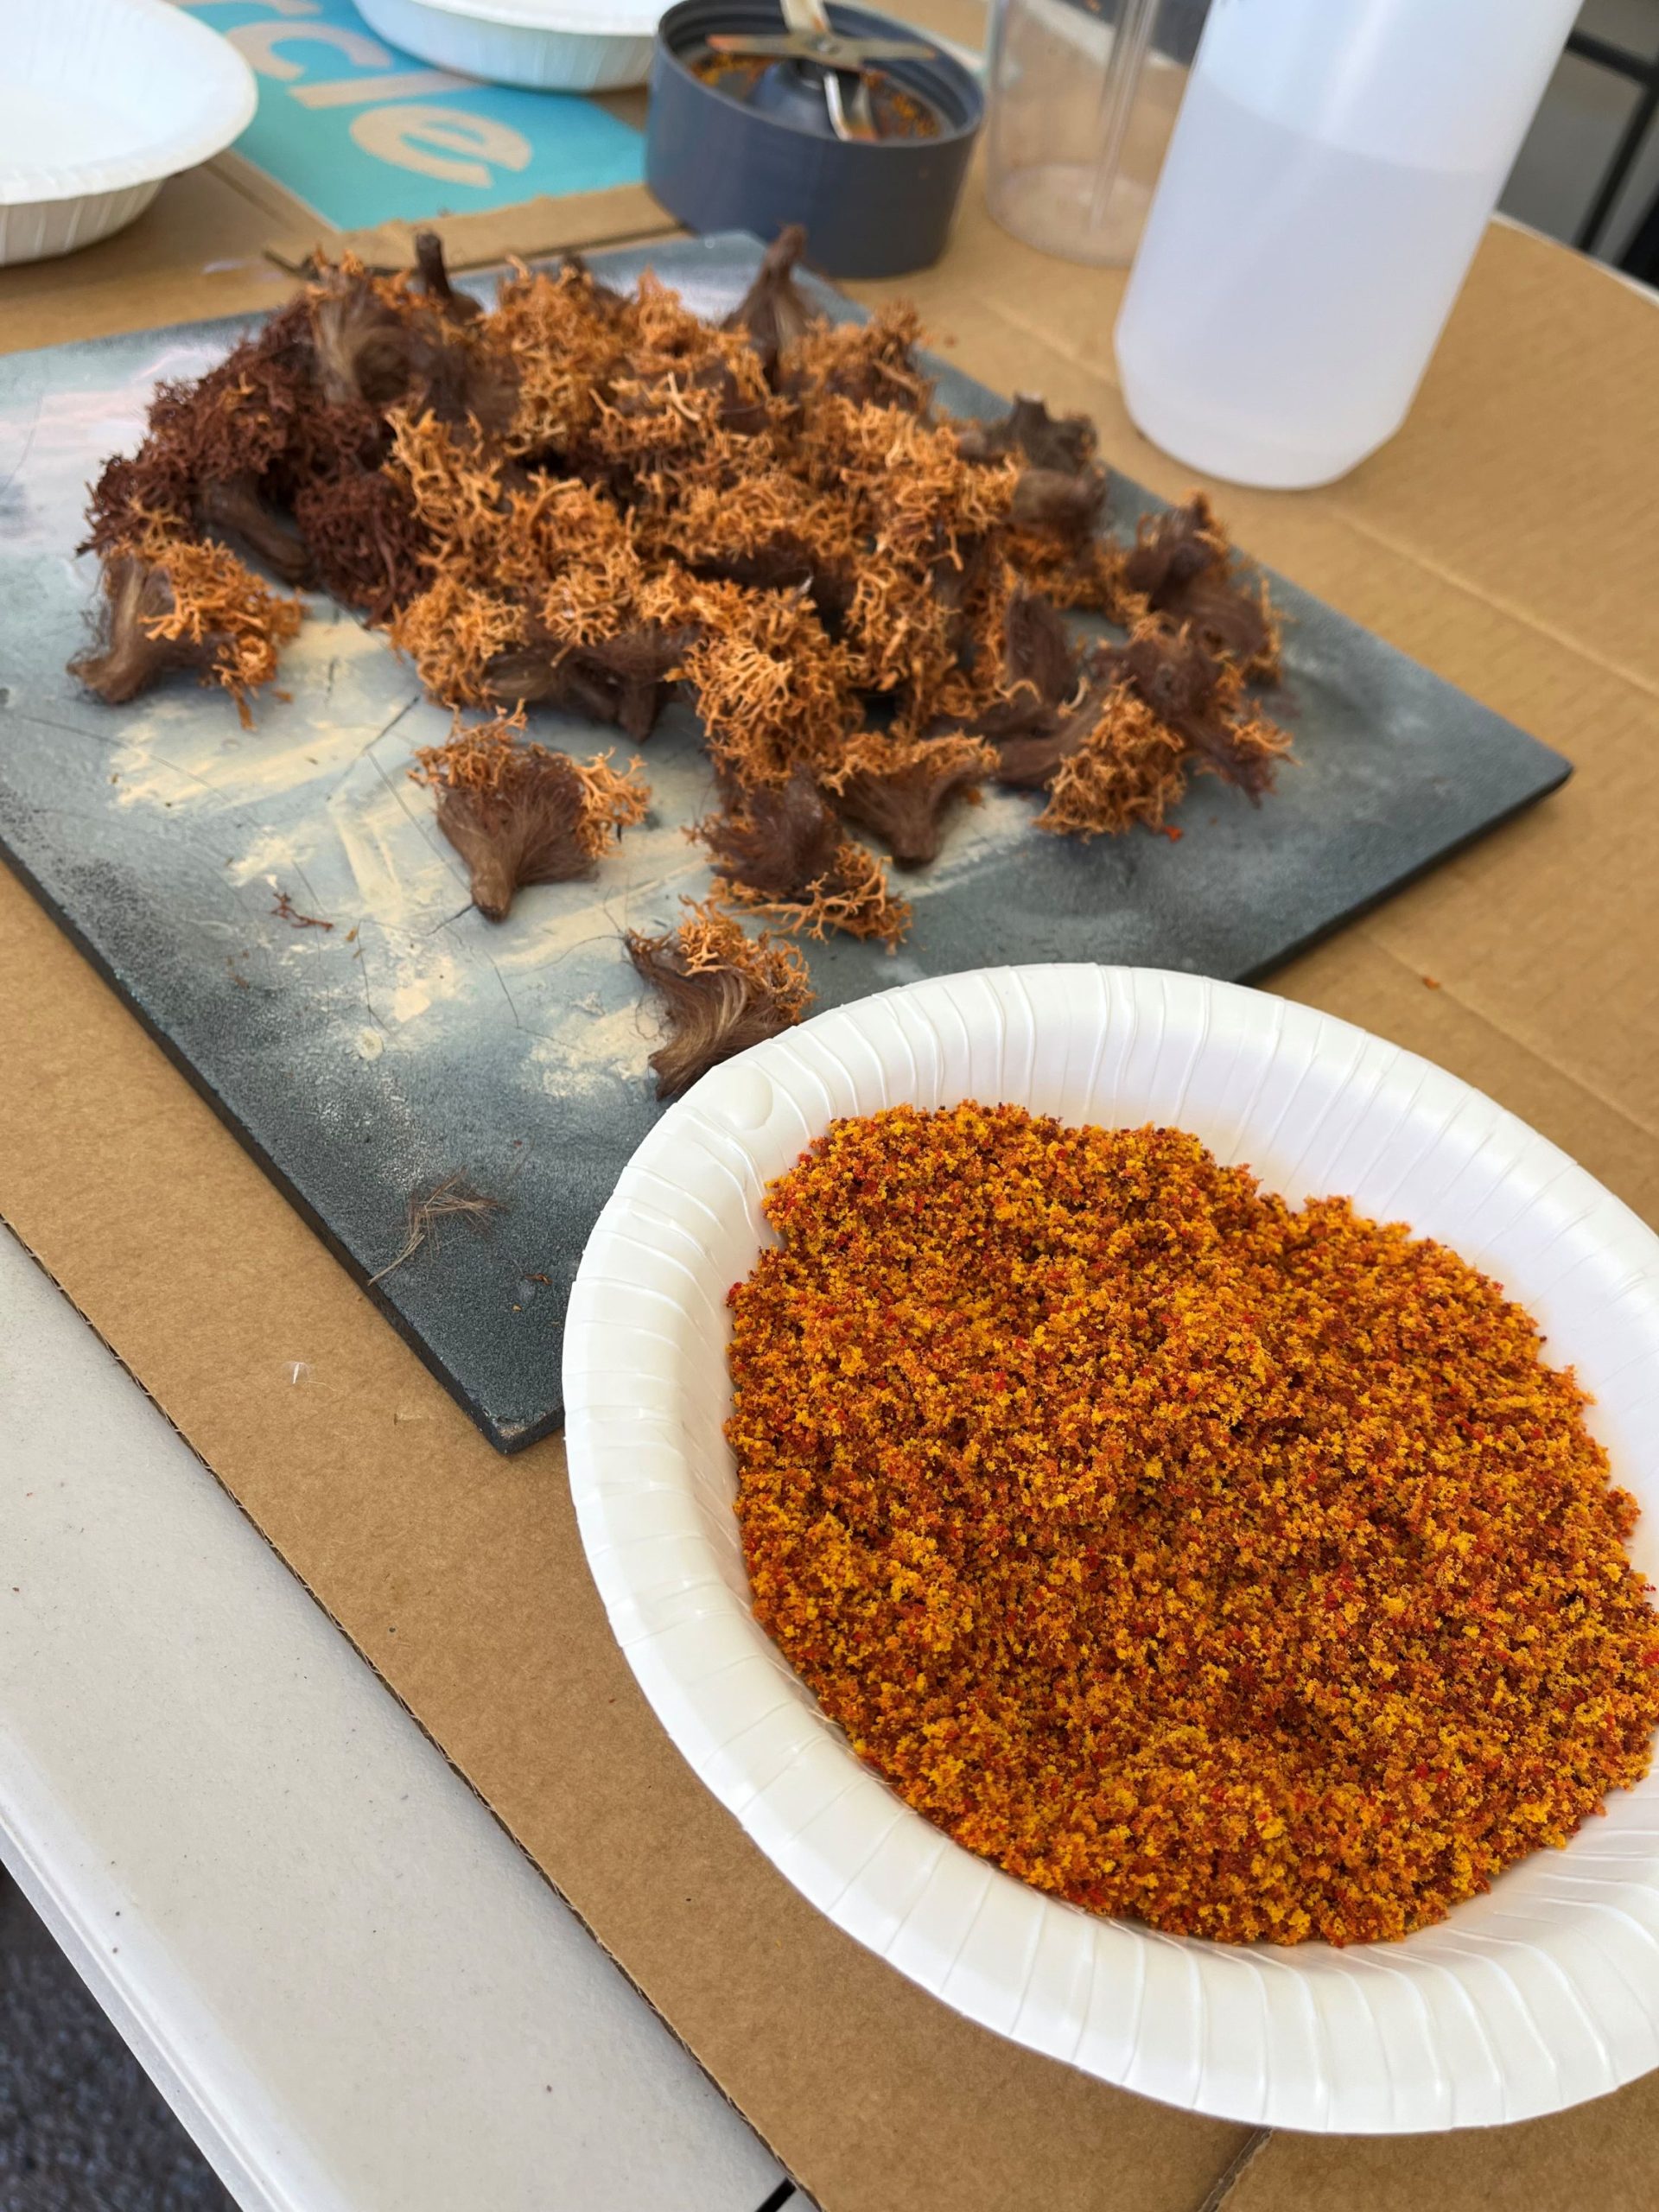
I used an old NutriBullet blender to chop up a load of clumped foliage that I had. I stuck to the autumn colours of reds, browns and yellows.
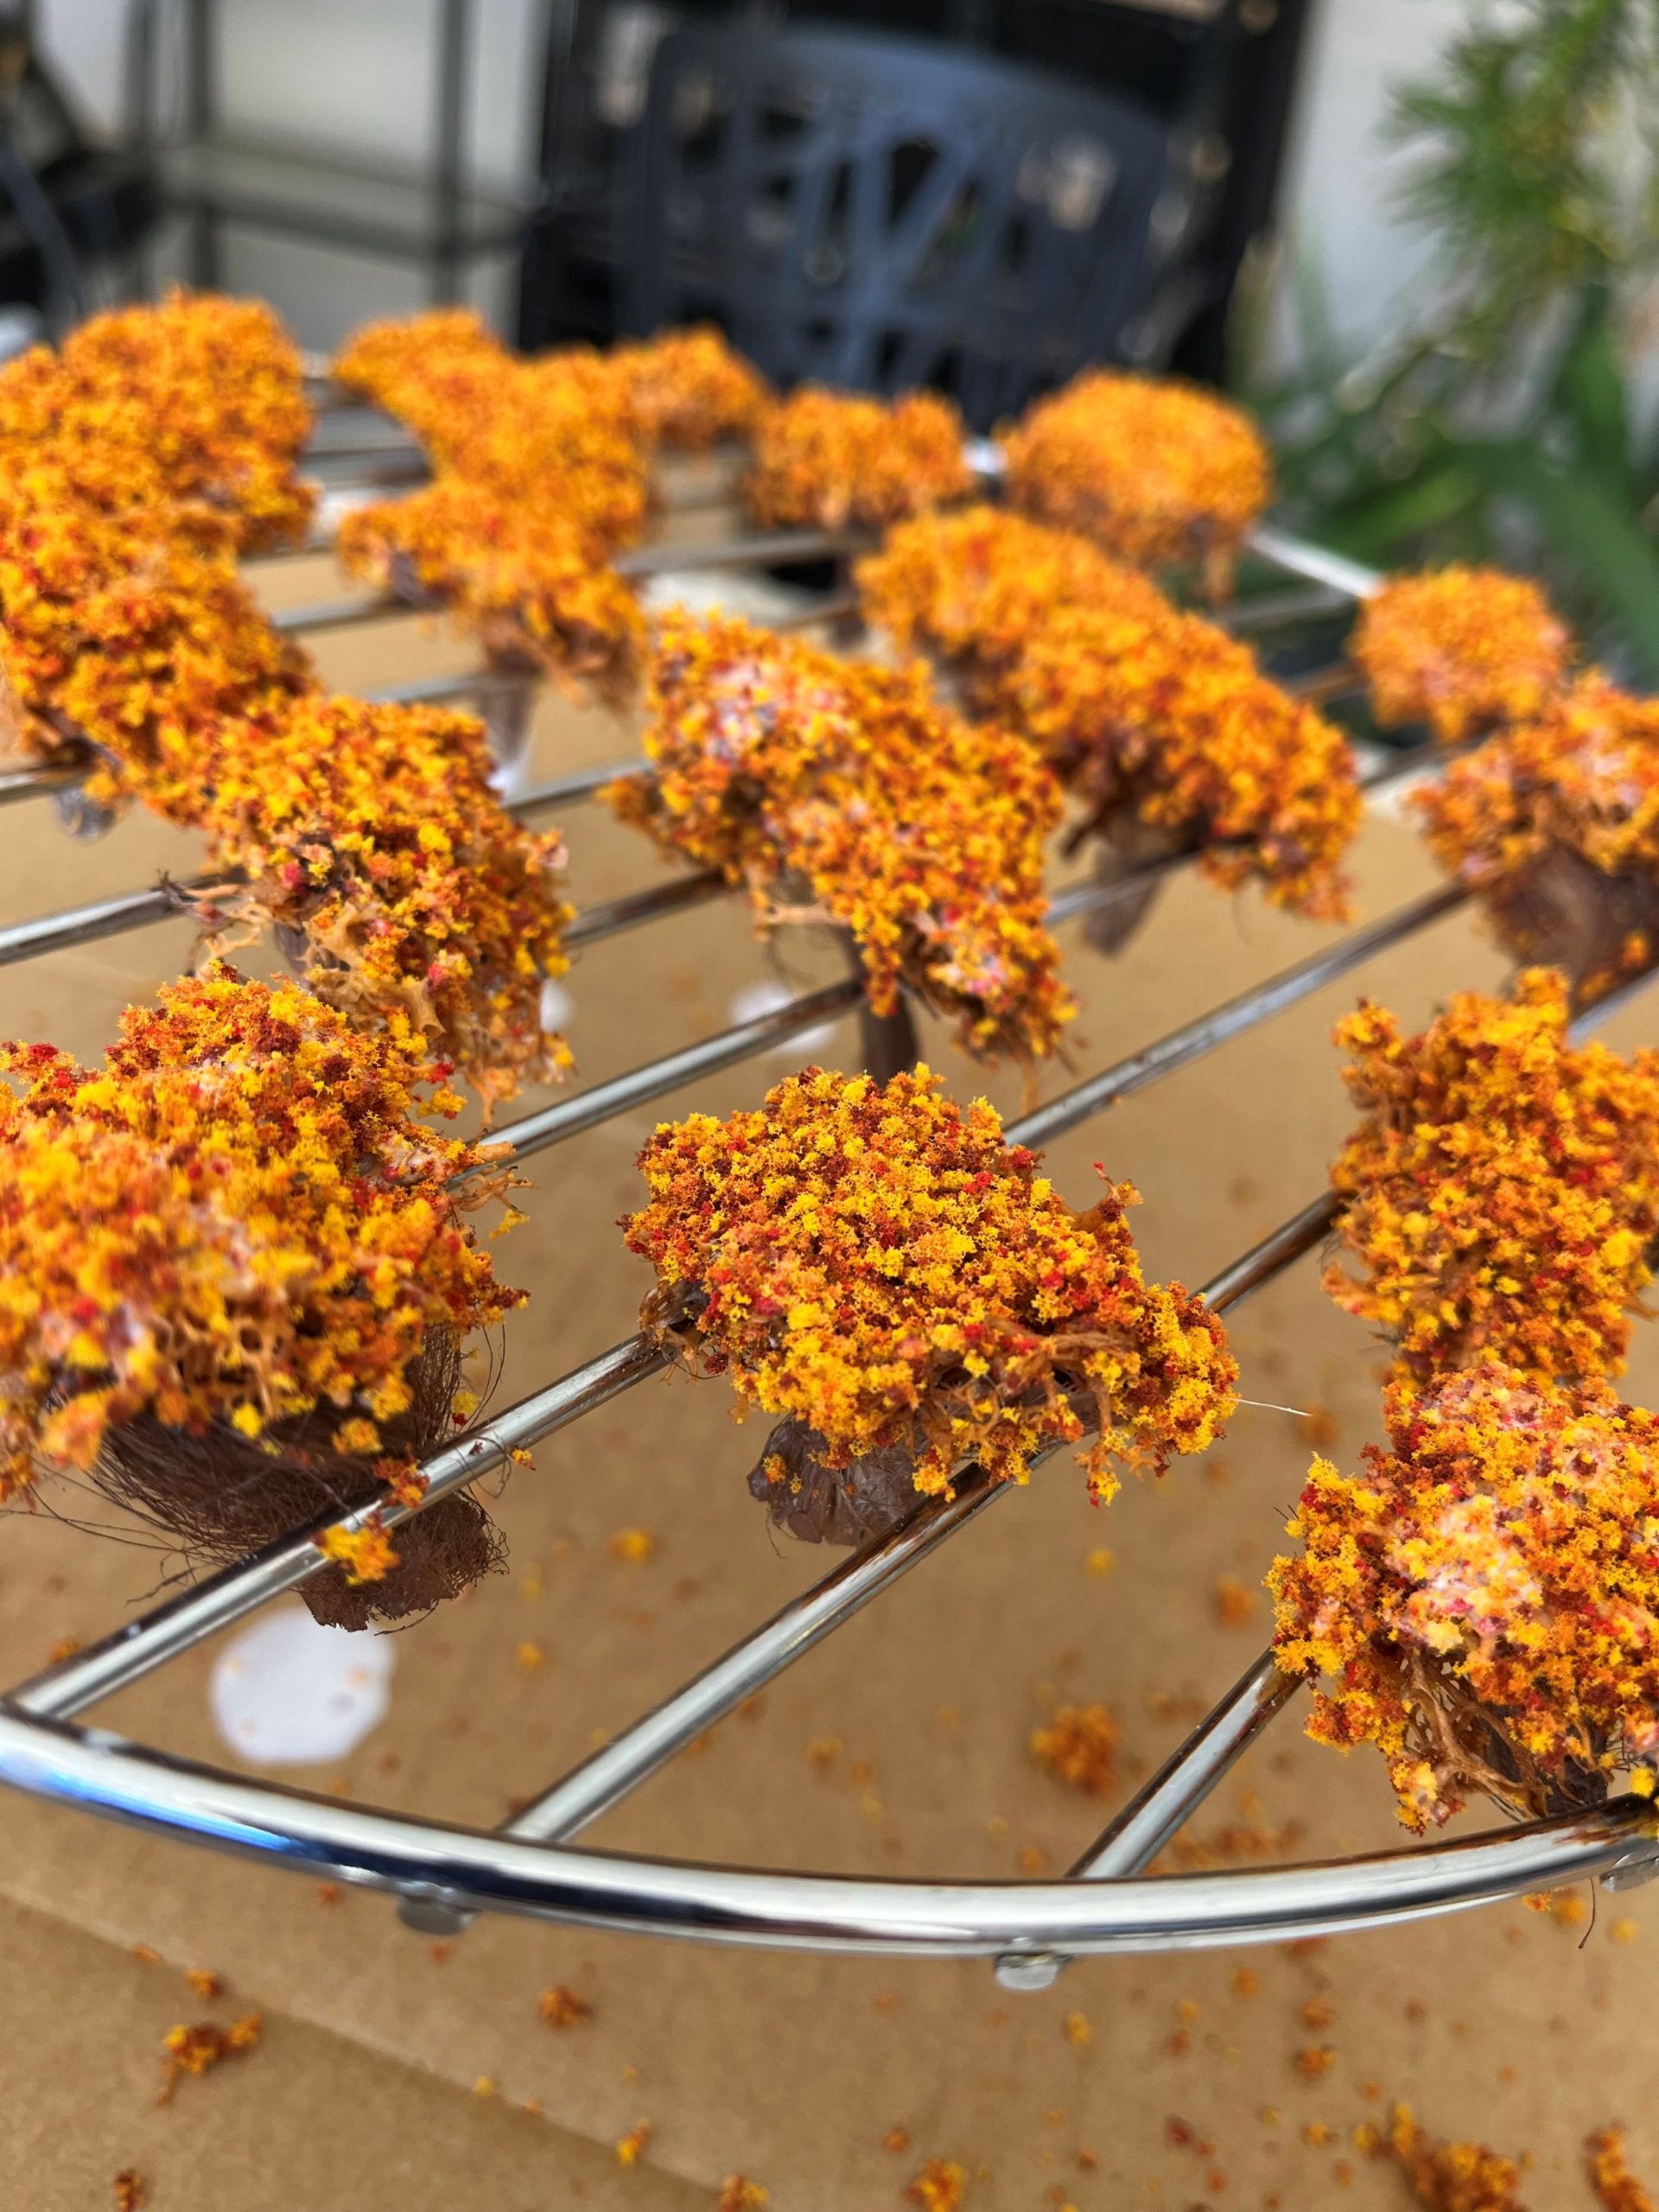
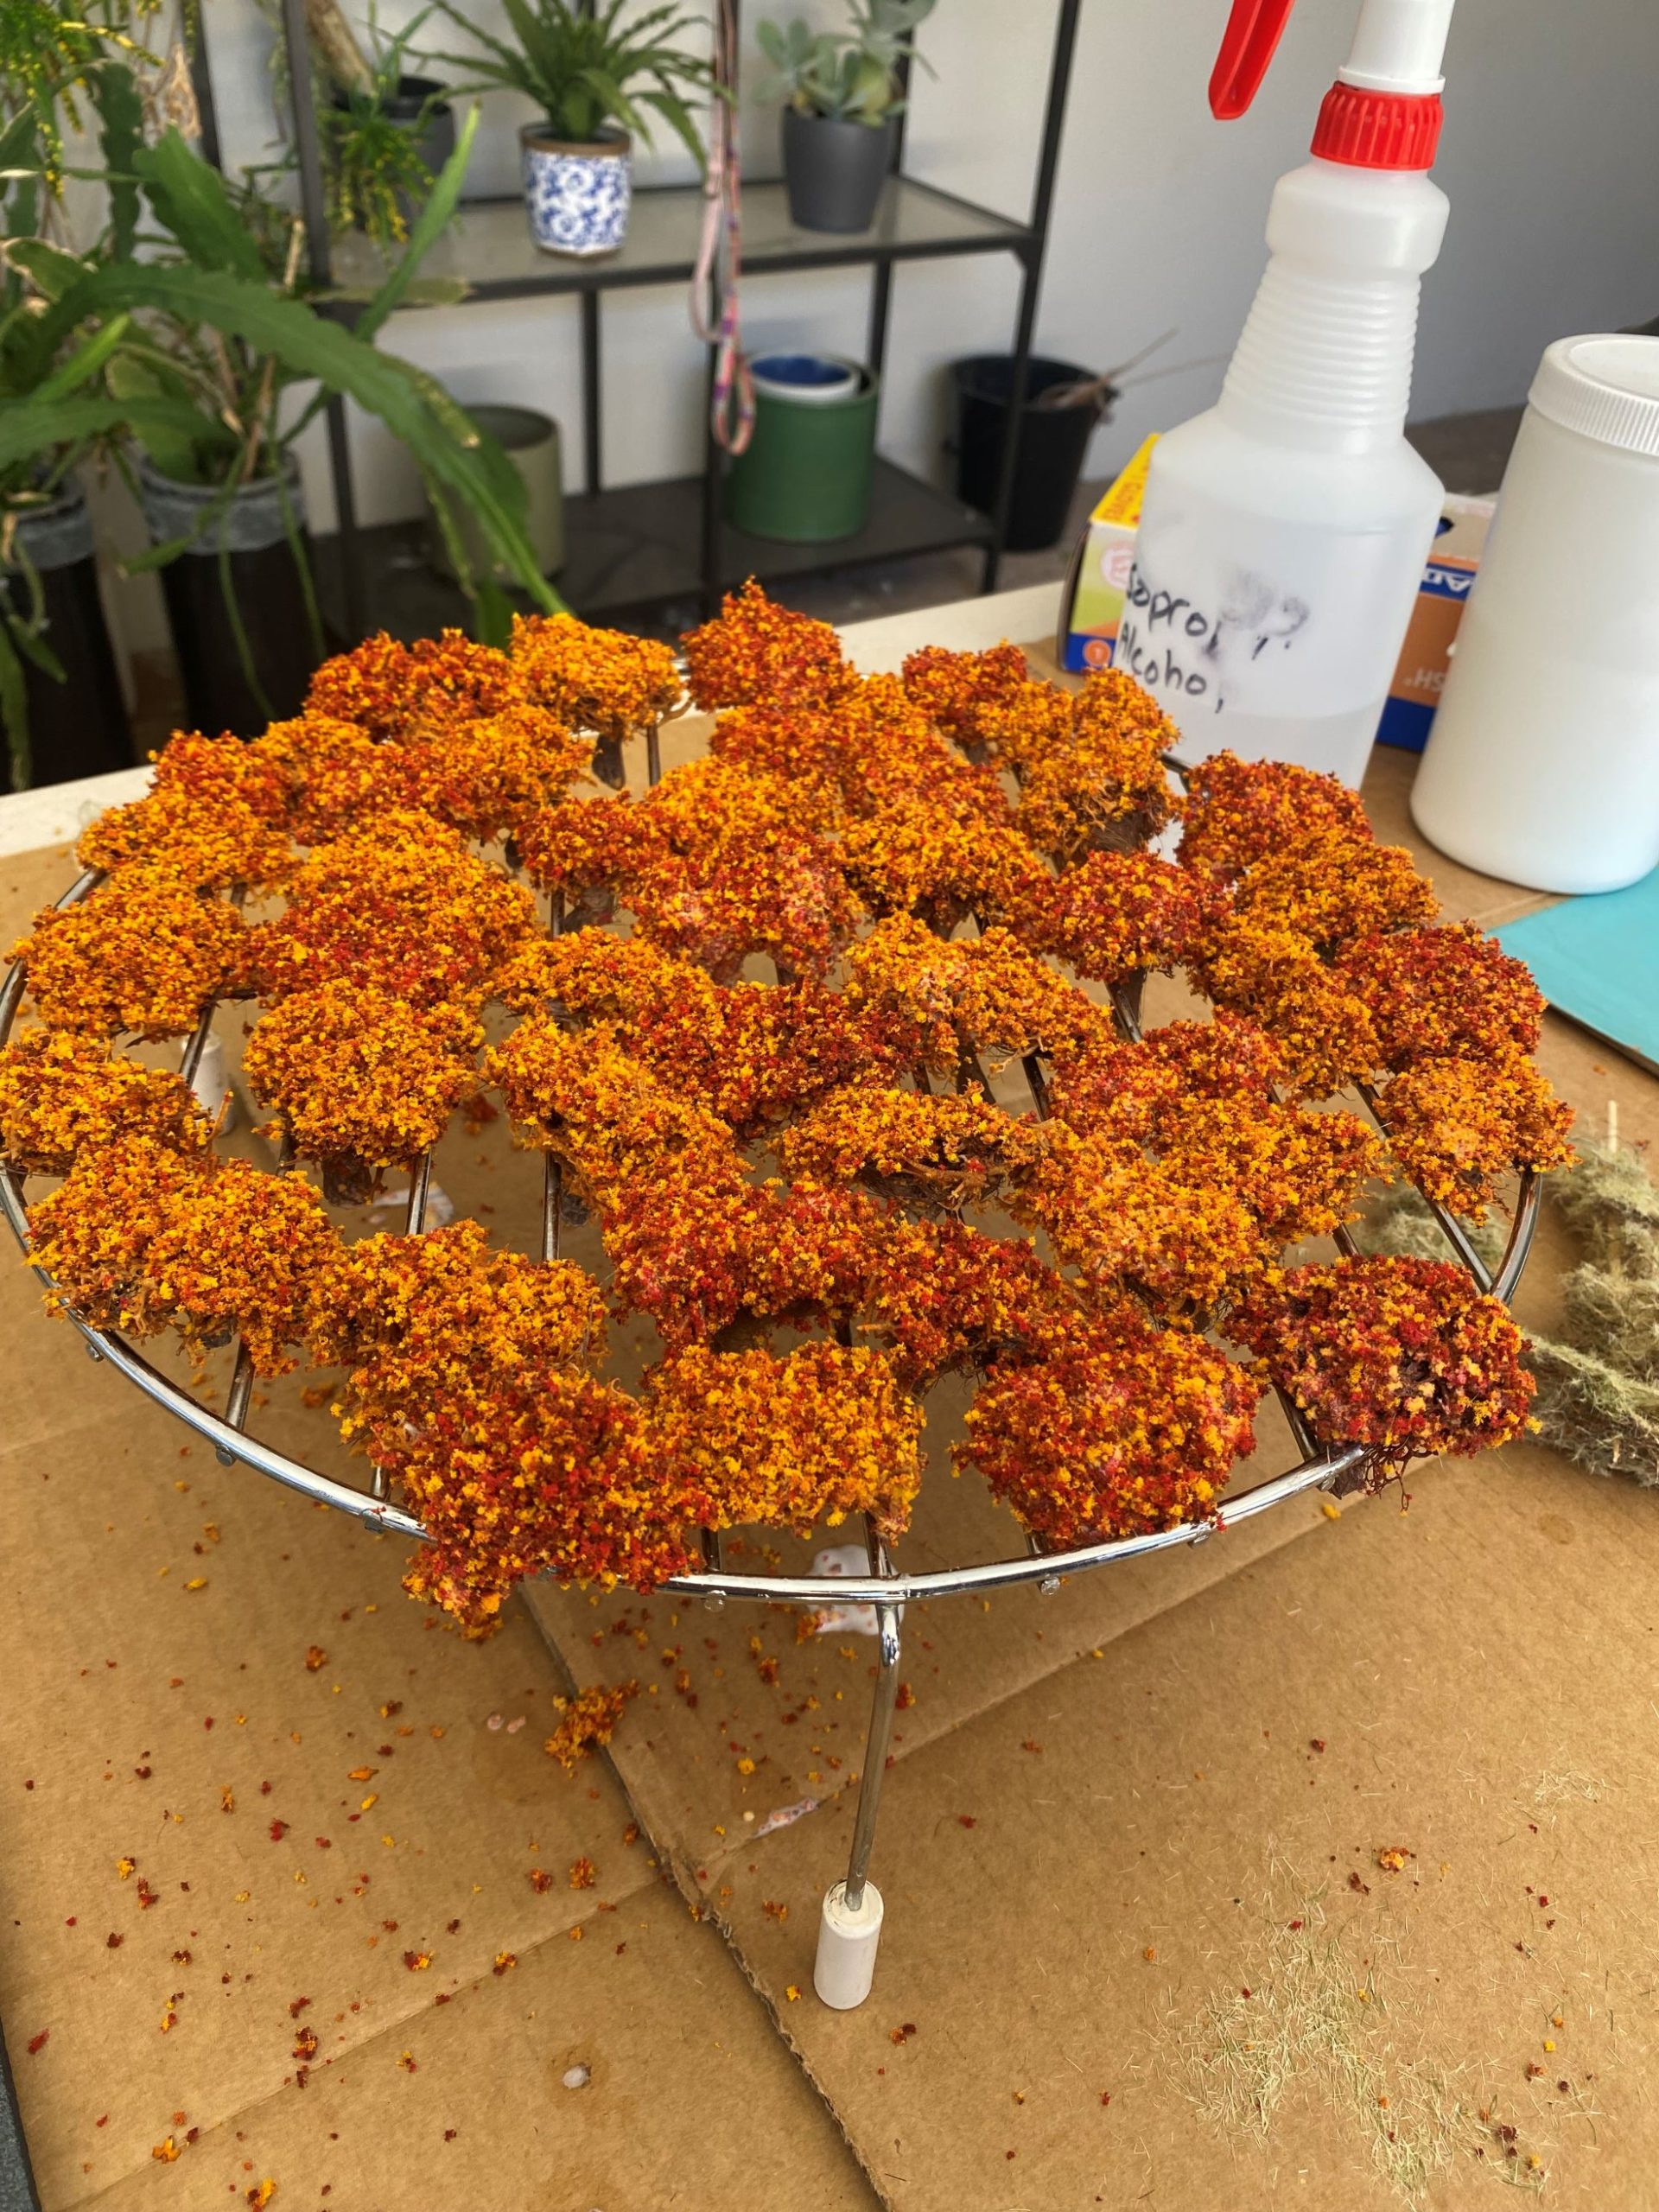
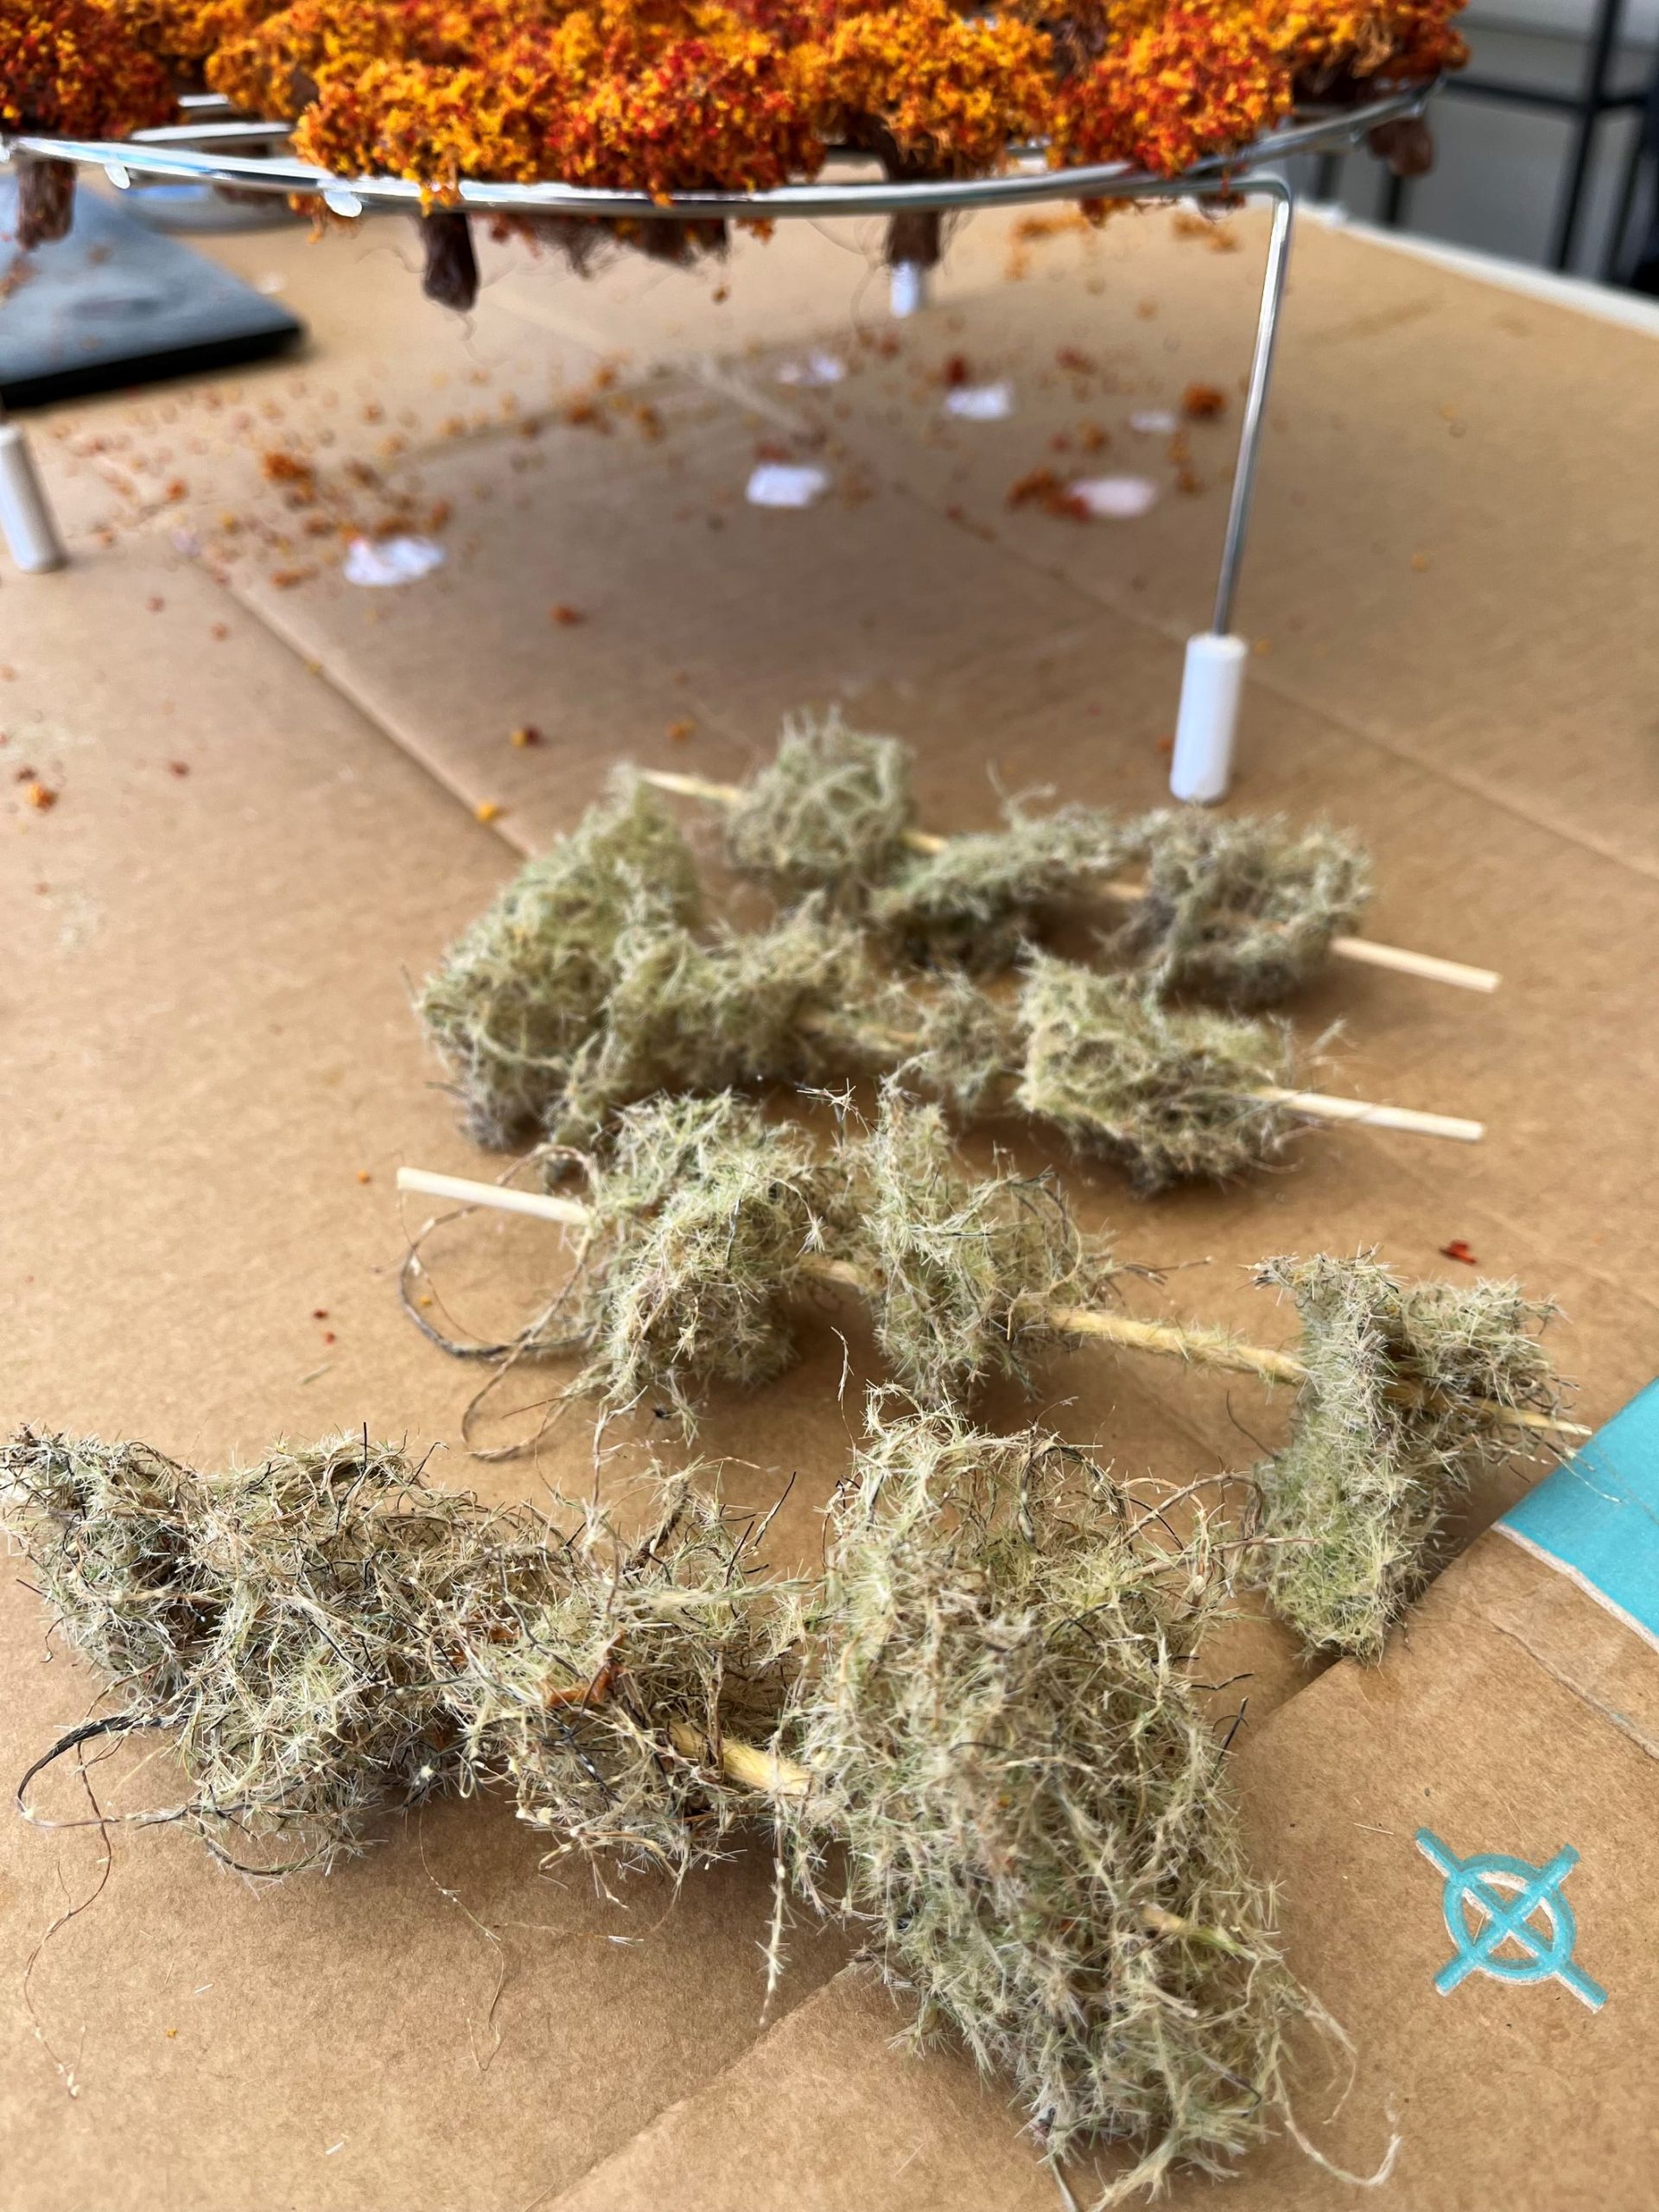
I took the rough hedge forms I had created from plumber’s hemp and lichen and gave them a good coating of watered-down Mod Podge. I then dunked them into a bowl of the chopped-up foliage before putting them into a cake rack to dry.
After that, I knocked out a few brambles using rubberised horsehair and static grass, following a similar process to the one I used for glueing the foliage on the bushes.
All the oranges
Using a pair of tweezers, I carefully applied individual leaves to select branches of the trees. I felt that this was a necessary step to tie the orange leaf litter to the actual trees.
After that, I positioned the bushes to see how everything looked.
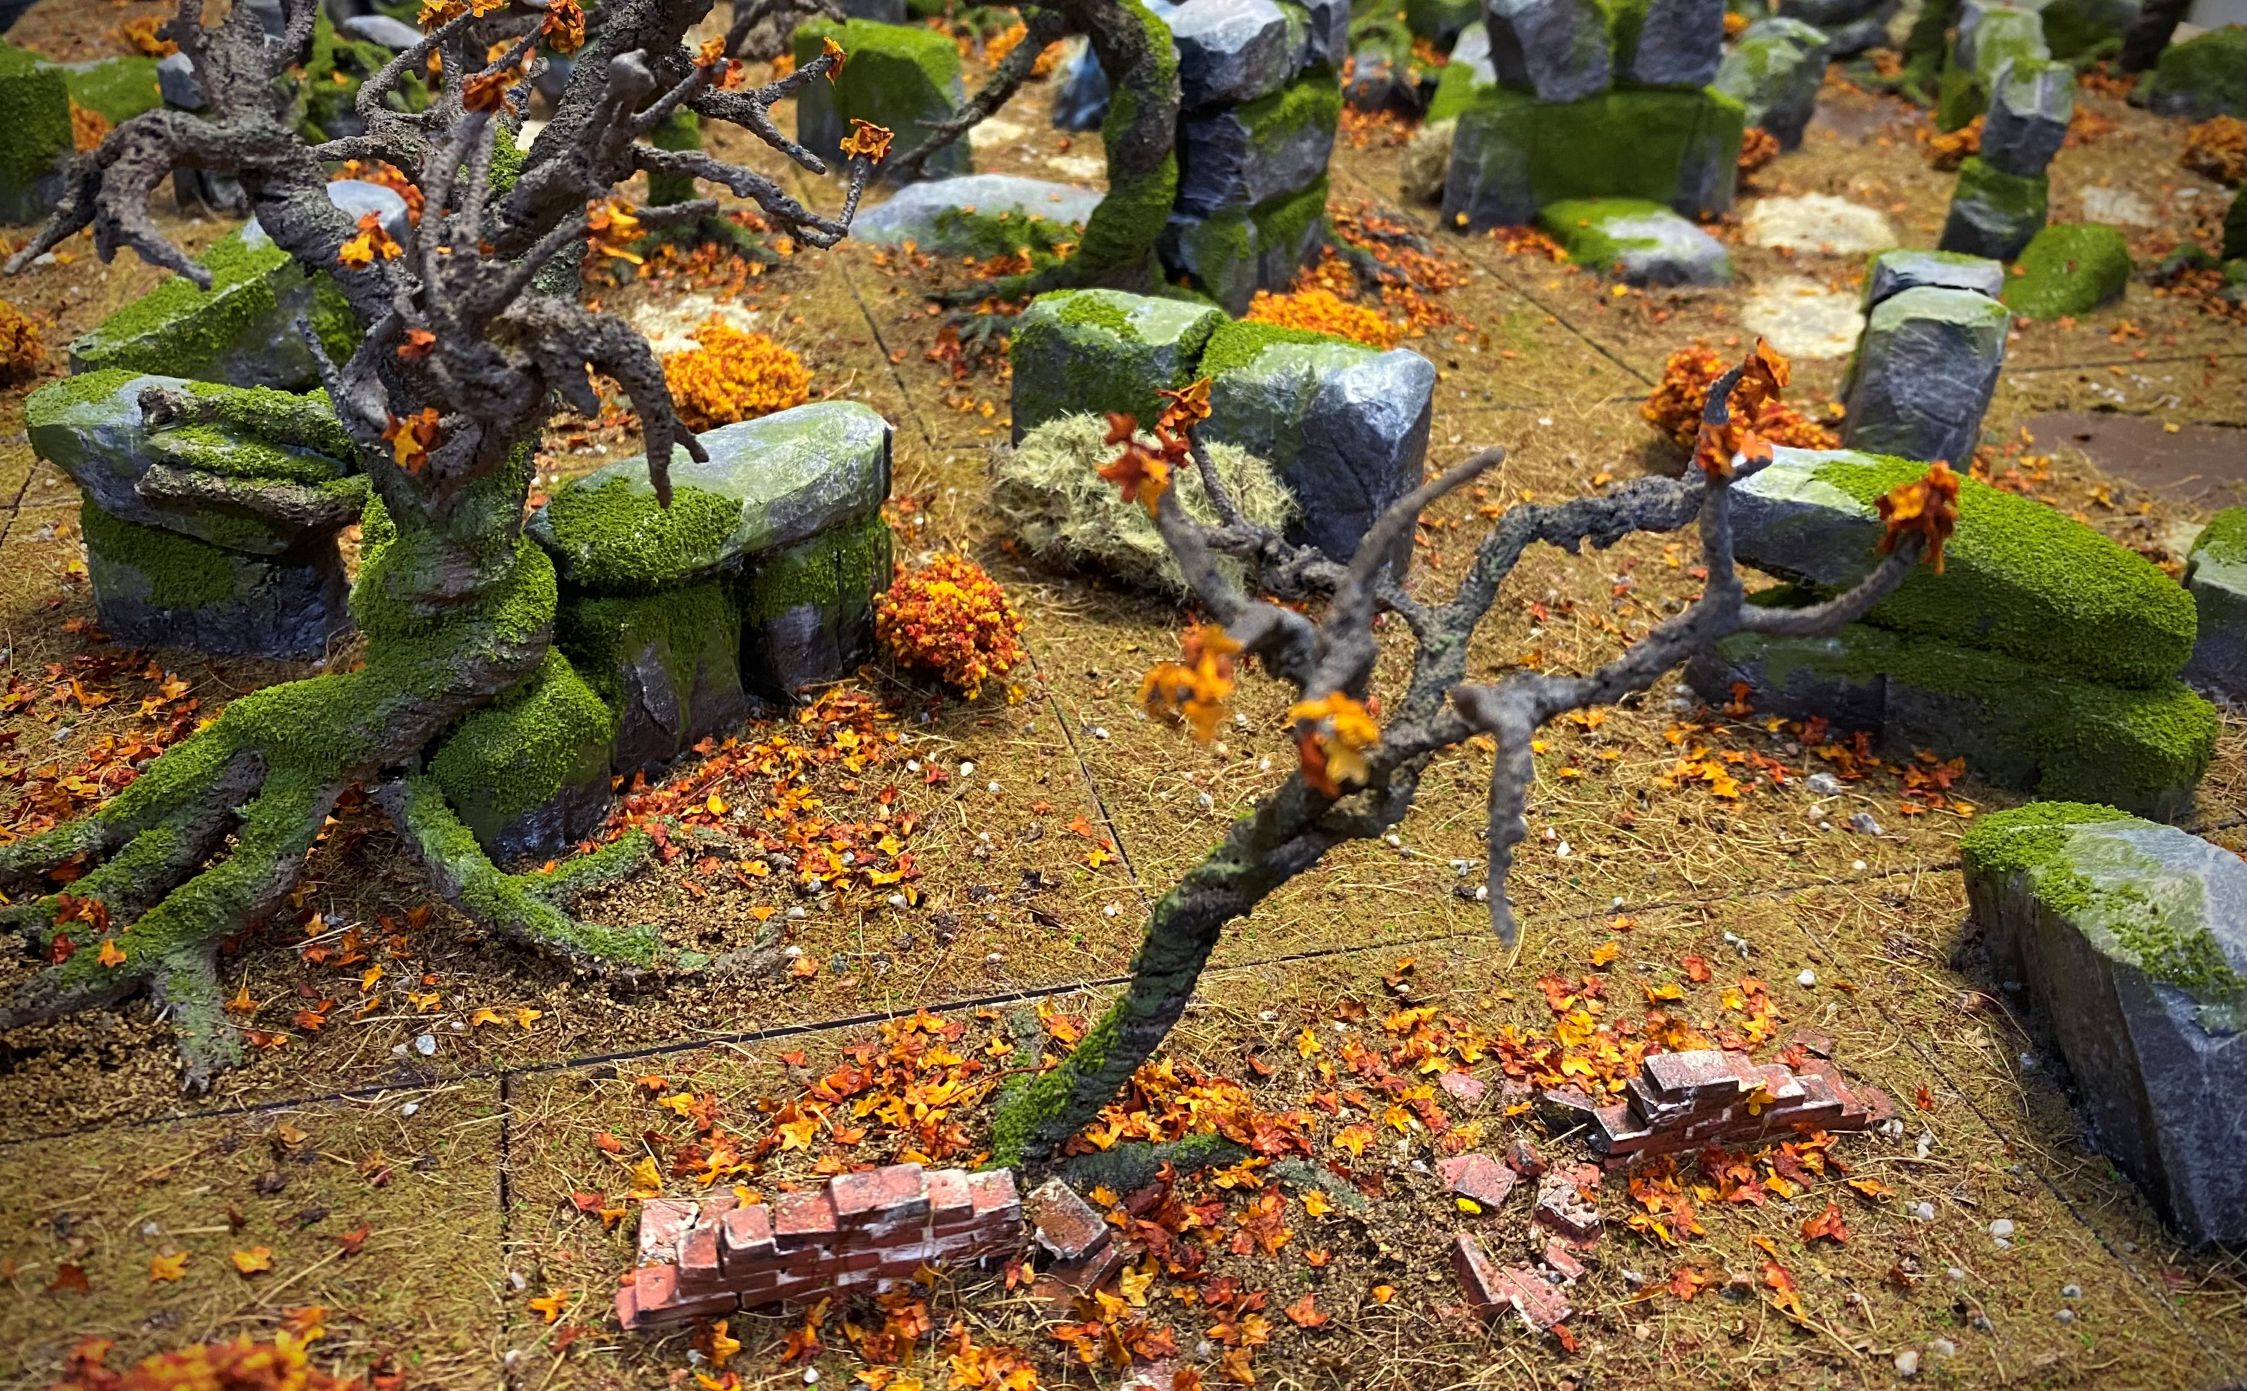
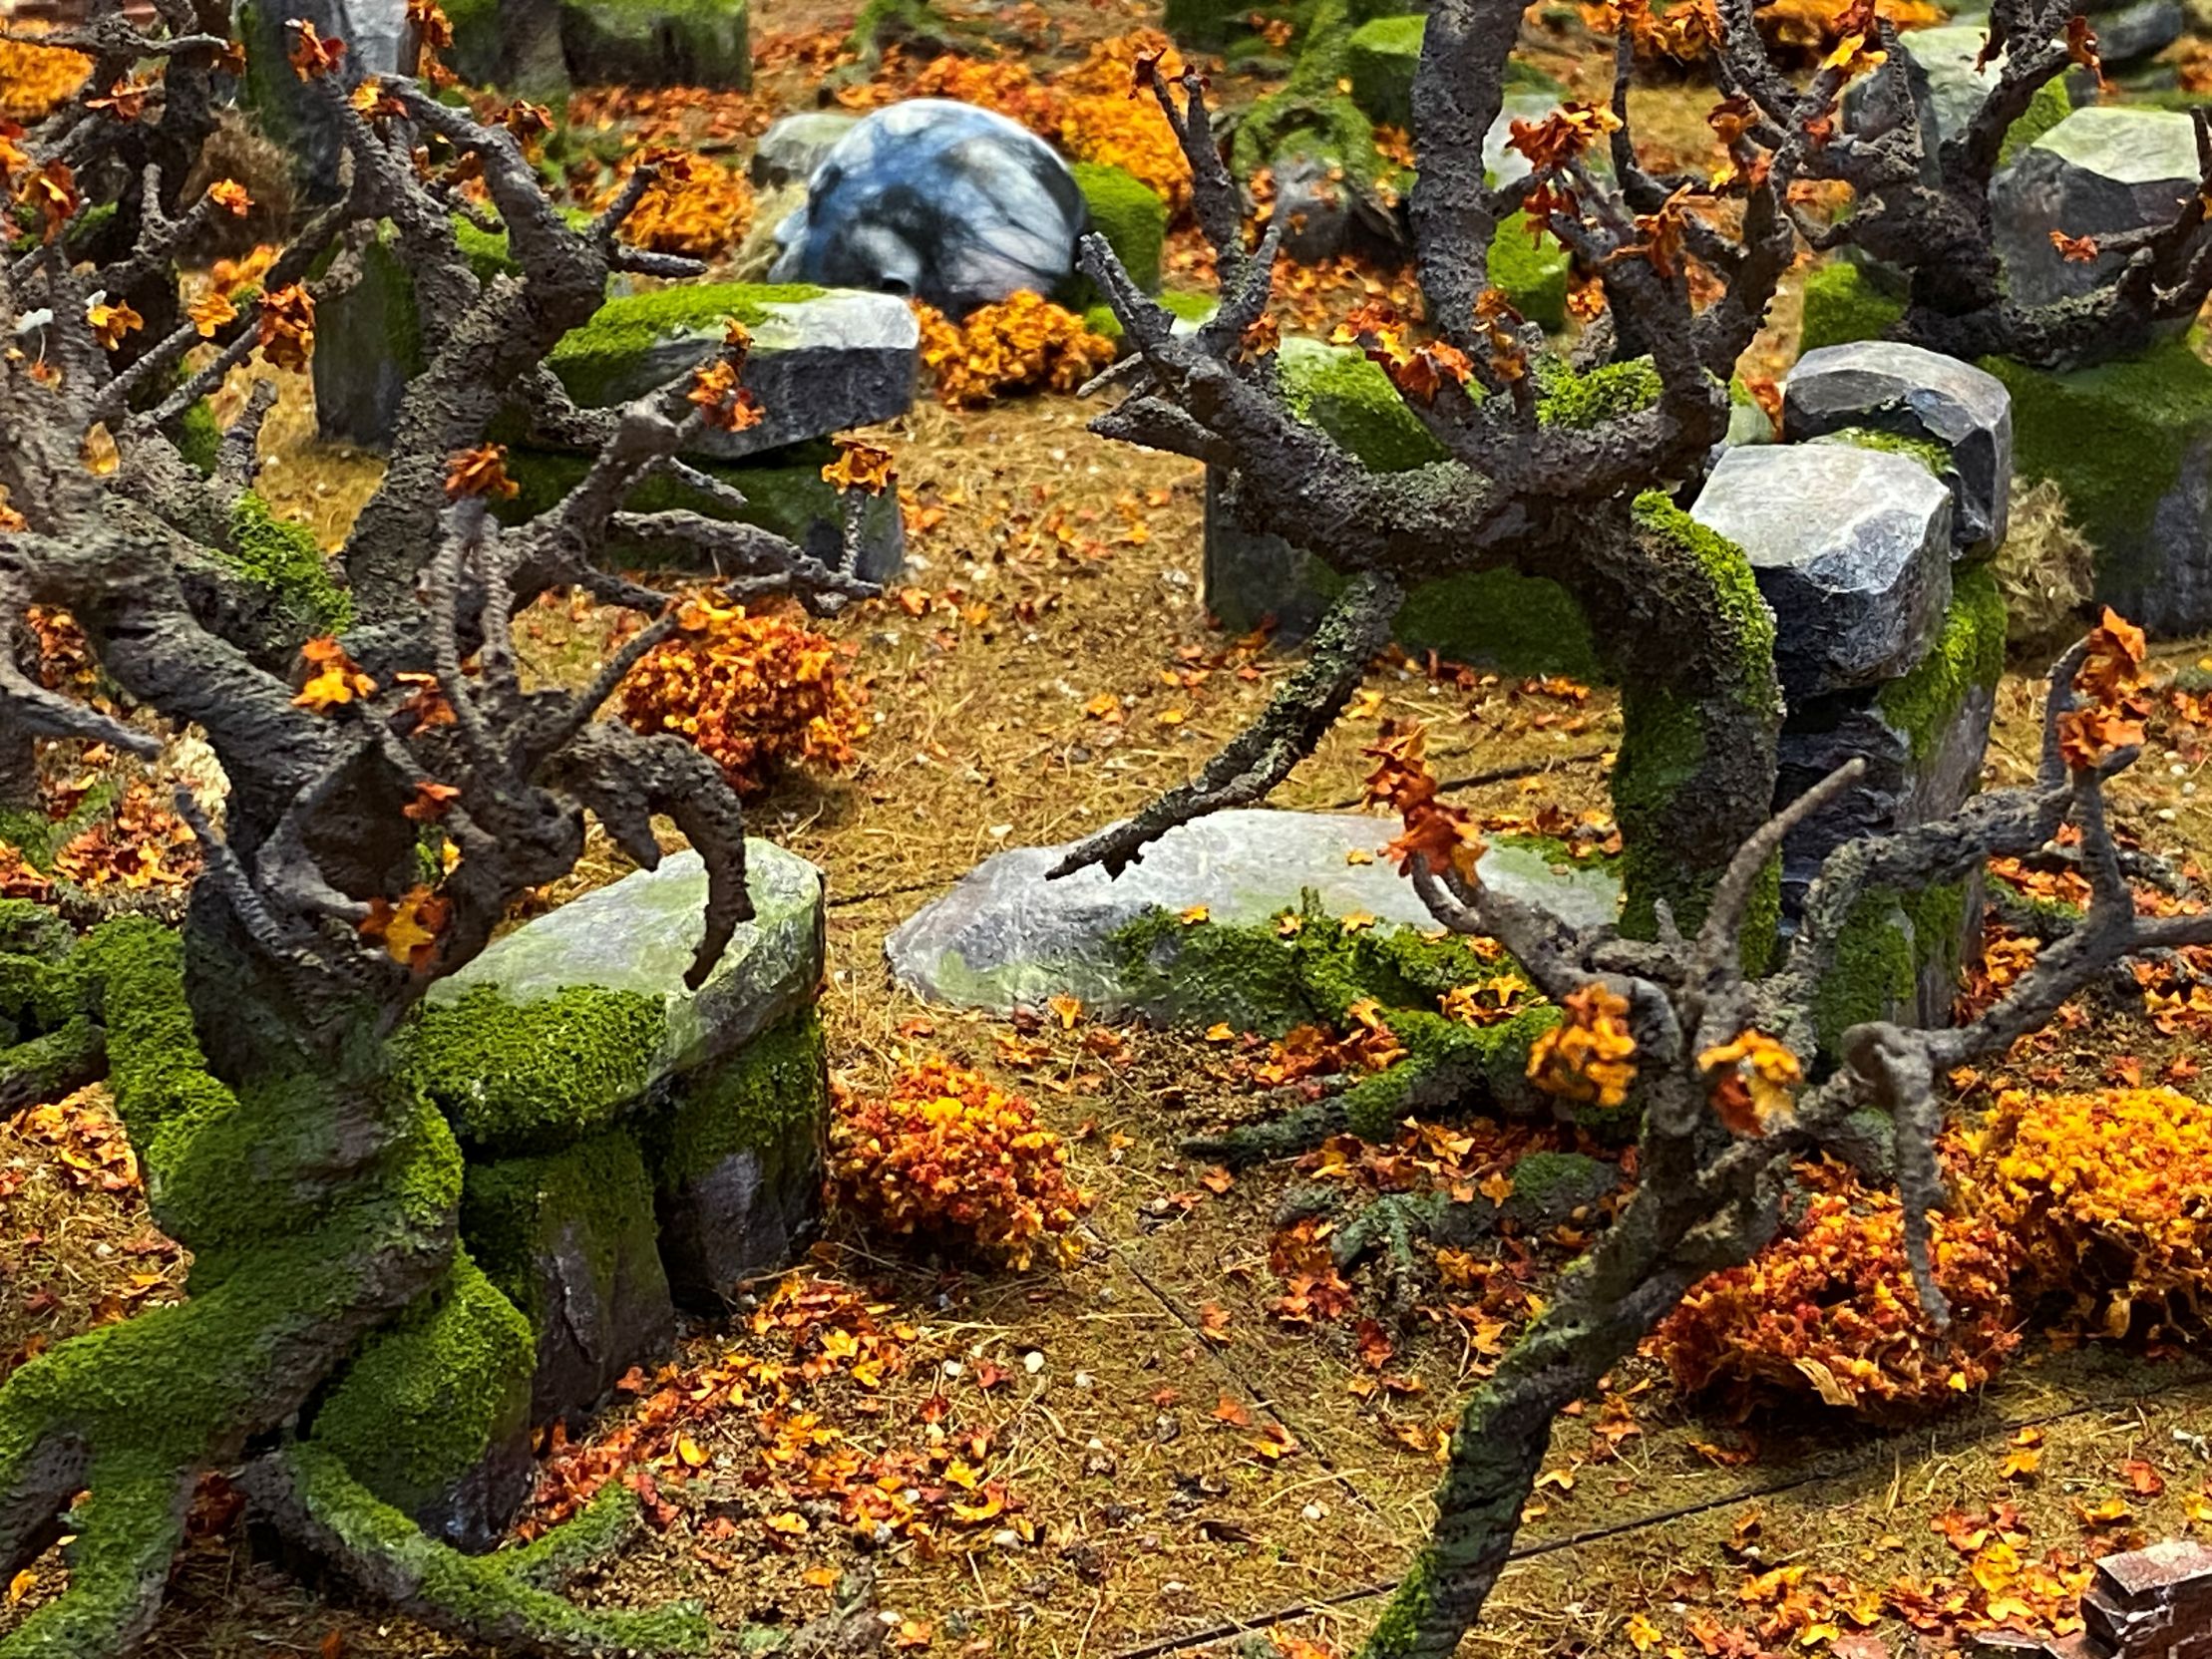
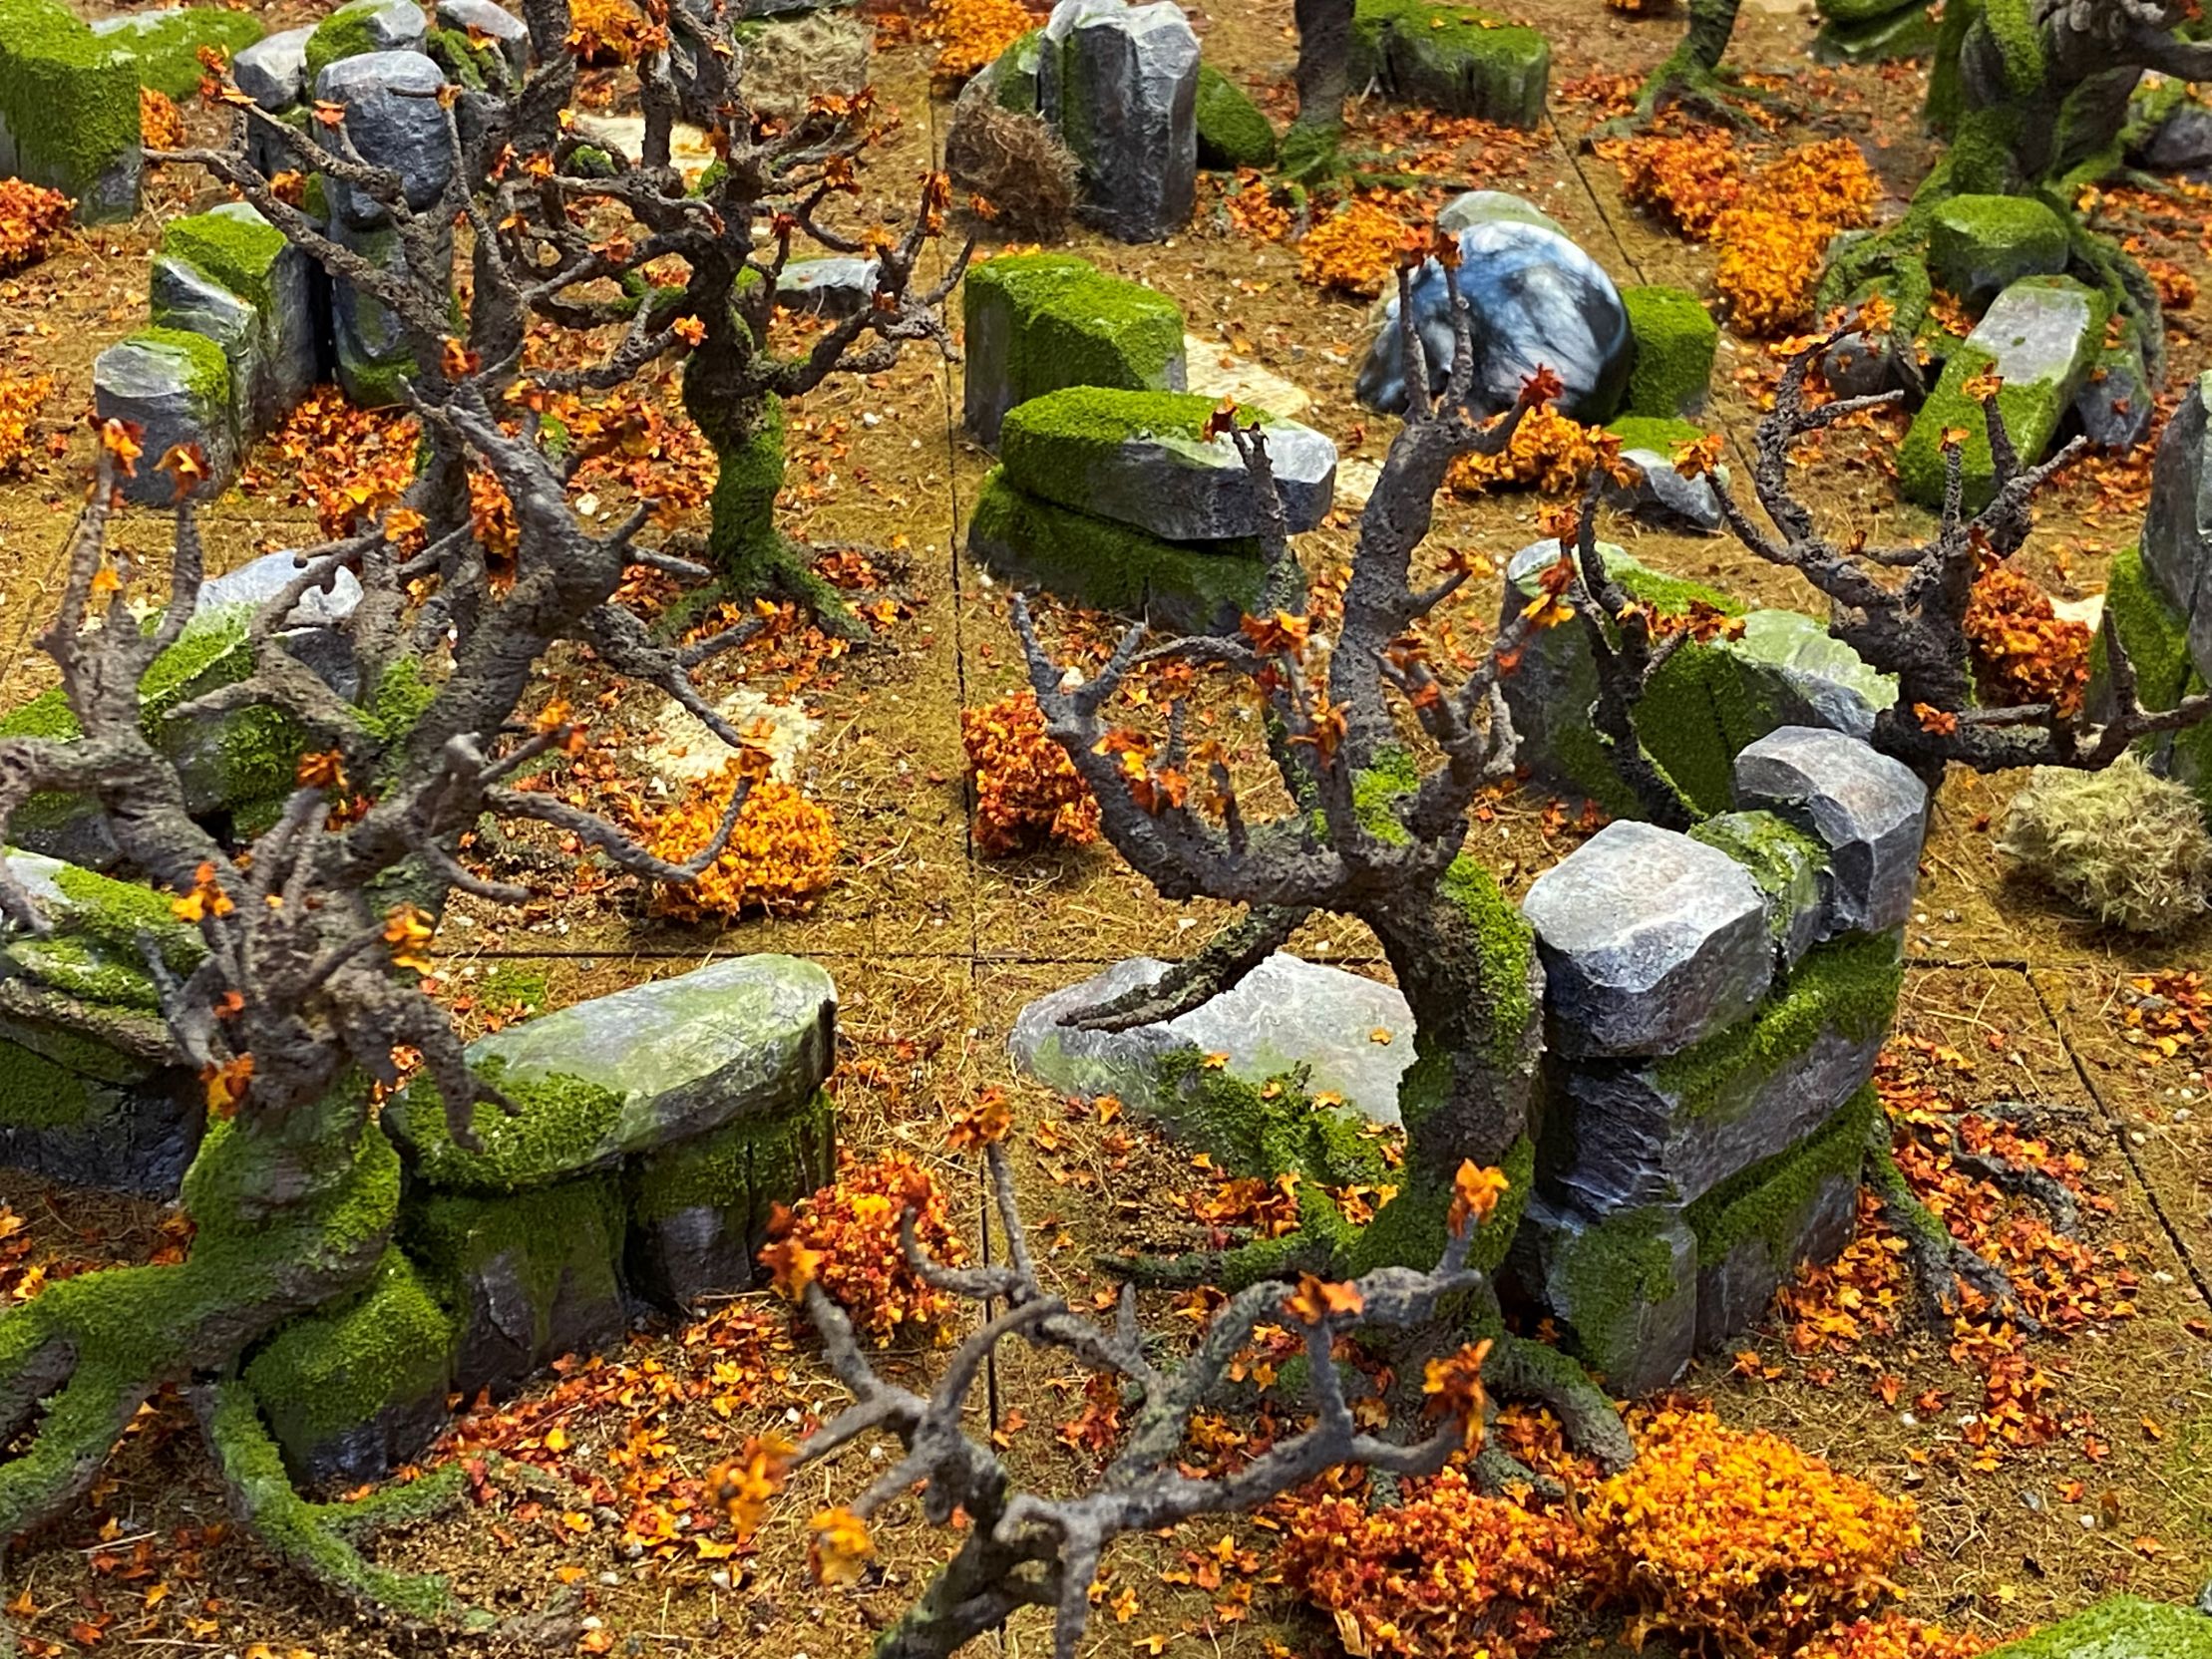
Now, I love the burnt orange look, which I feel makes a nice change to the more usual green trees; however, I am a little concerned that there is too much orange towards the bottom of the scene and that the top of the scene looks a little sparse.
So, I decided to move the bushes up to become a representation of a tree canopy, and I will do some more brown and green bushes to put down at the bottom to see how I feel about that.
I am always open to thoughts and suggestions, so any feedback on which way to go would be very much appreciated.
Anyway, here are some pictures with the bushes moved up into the trees.
What do you think?