
![Atomic Tank – The Robot Wars Review | Fast-Paced 10mm Sci-Fi Wargame [7 Days Early Access]](https://images.beastsofwar.com/2026/01/unboxing-hydra-miniatures-atomic-tank-the-robot-wars-coverimage-225-127.jpg)

![246 Dwarves in One Box?! | Wargames Atlantic Dwarven Host Unboxing & Review [7 Days Early Access]](https://images.beastsofwar.com/2026/01/unboxing-wargames-atlantic-epic-fantasy-battles-dwarven-host-coverimage-225-127.jpeg)


DRACONIS DOES….. TERRAINFEST 2025


Recommendations: 109
About the Project
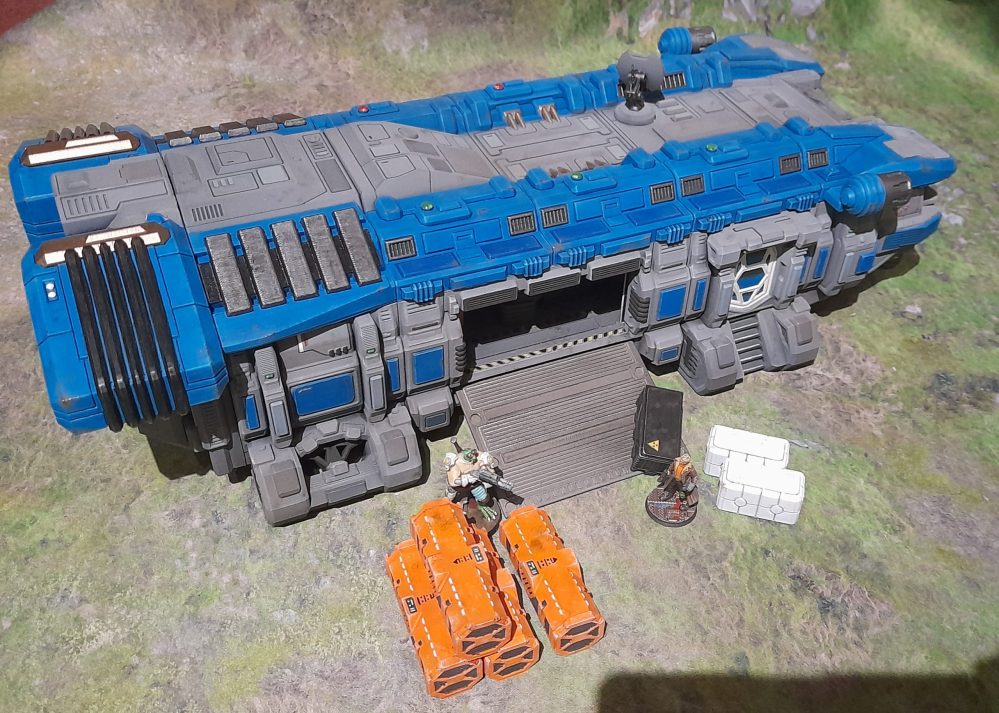
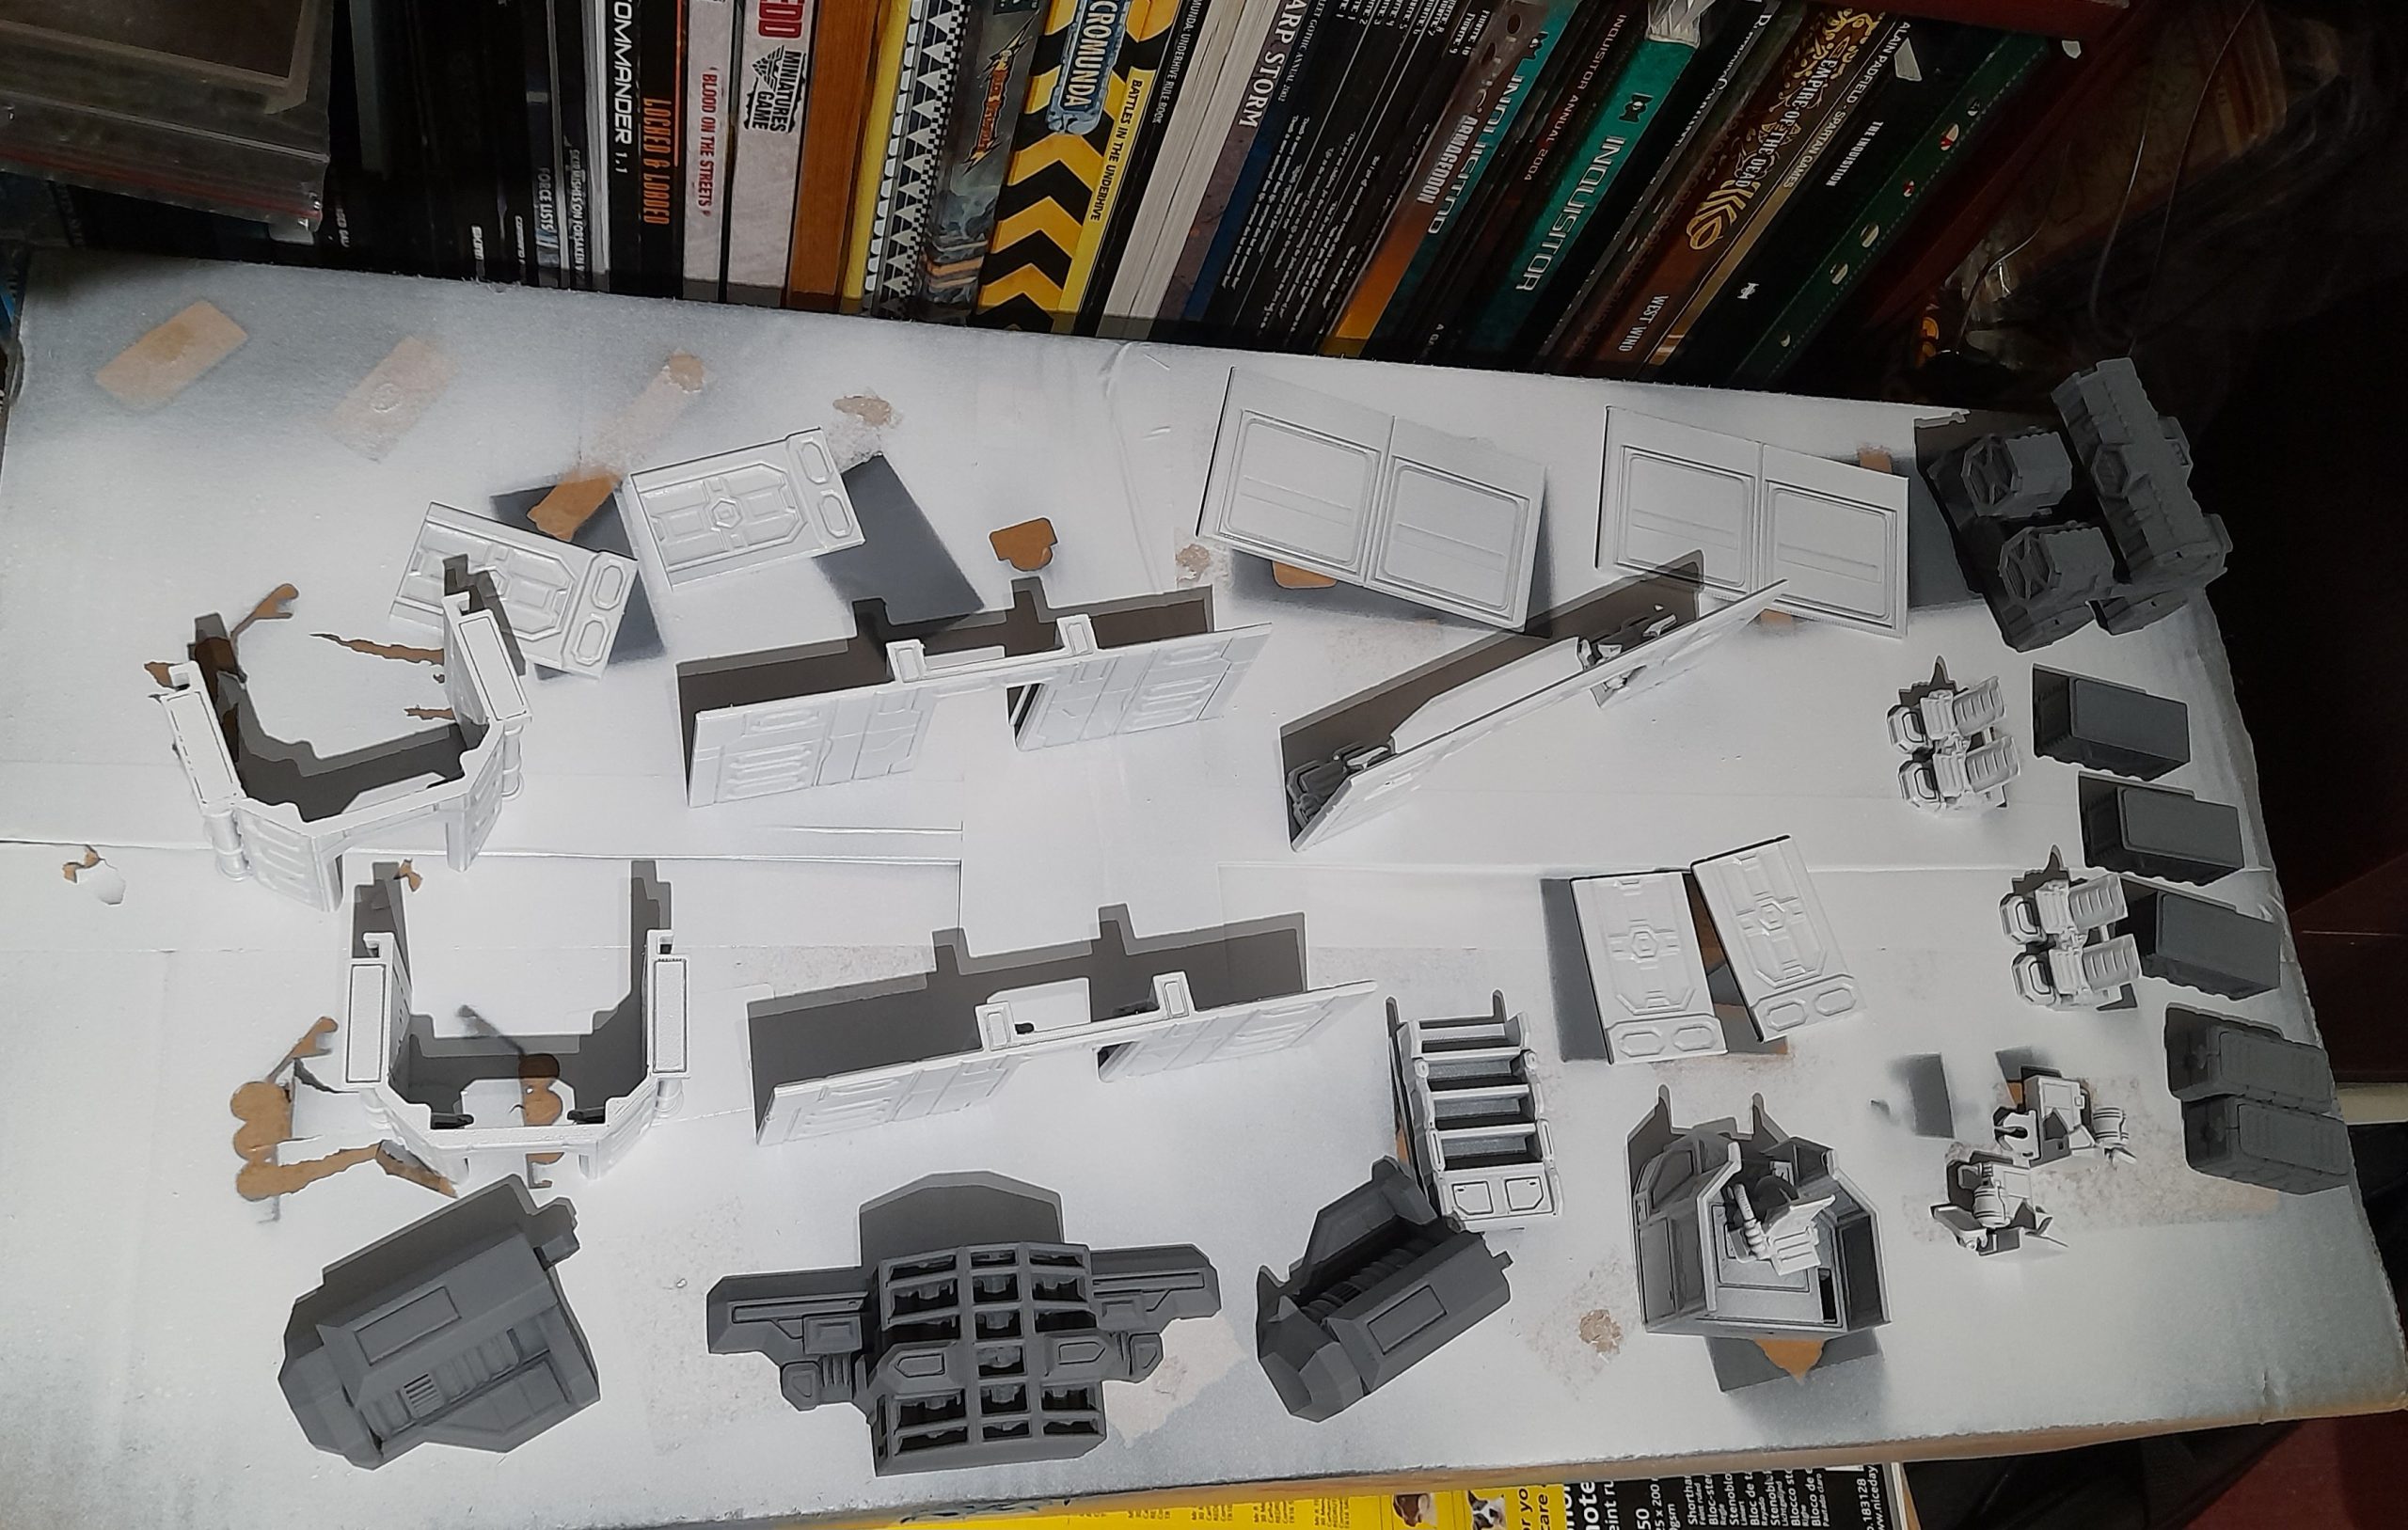
I have a few bits planned for this year’s terrainfest. The main thing is a 3D printed cargo ship that a friend gave me. It’s a hefty beast, and will be used as terrain for my future sci-fi skirmish project (not sure which rules I will use yet). If I finish that in good time then I have some sci-fi terrain from Shatterpoint that I picked up very cheap, and should also work for the same project. Additionally I have a small mausoleum to paint for The Silver Bayonet, and maybe some other buildings if time permits.
Related Genre: General
Related Contest: TerrainFest 2025
This Project is Active
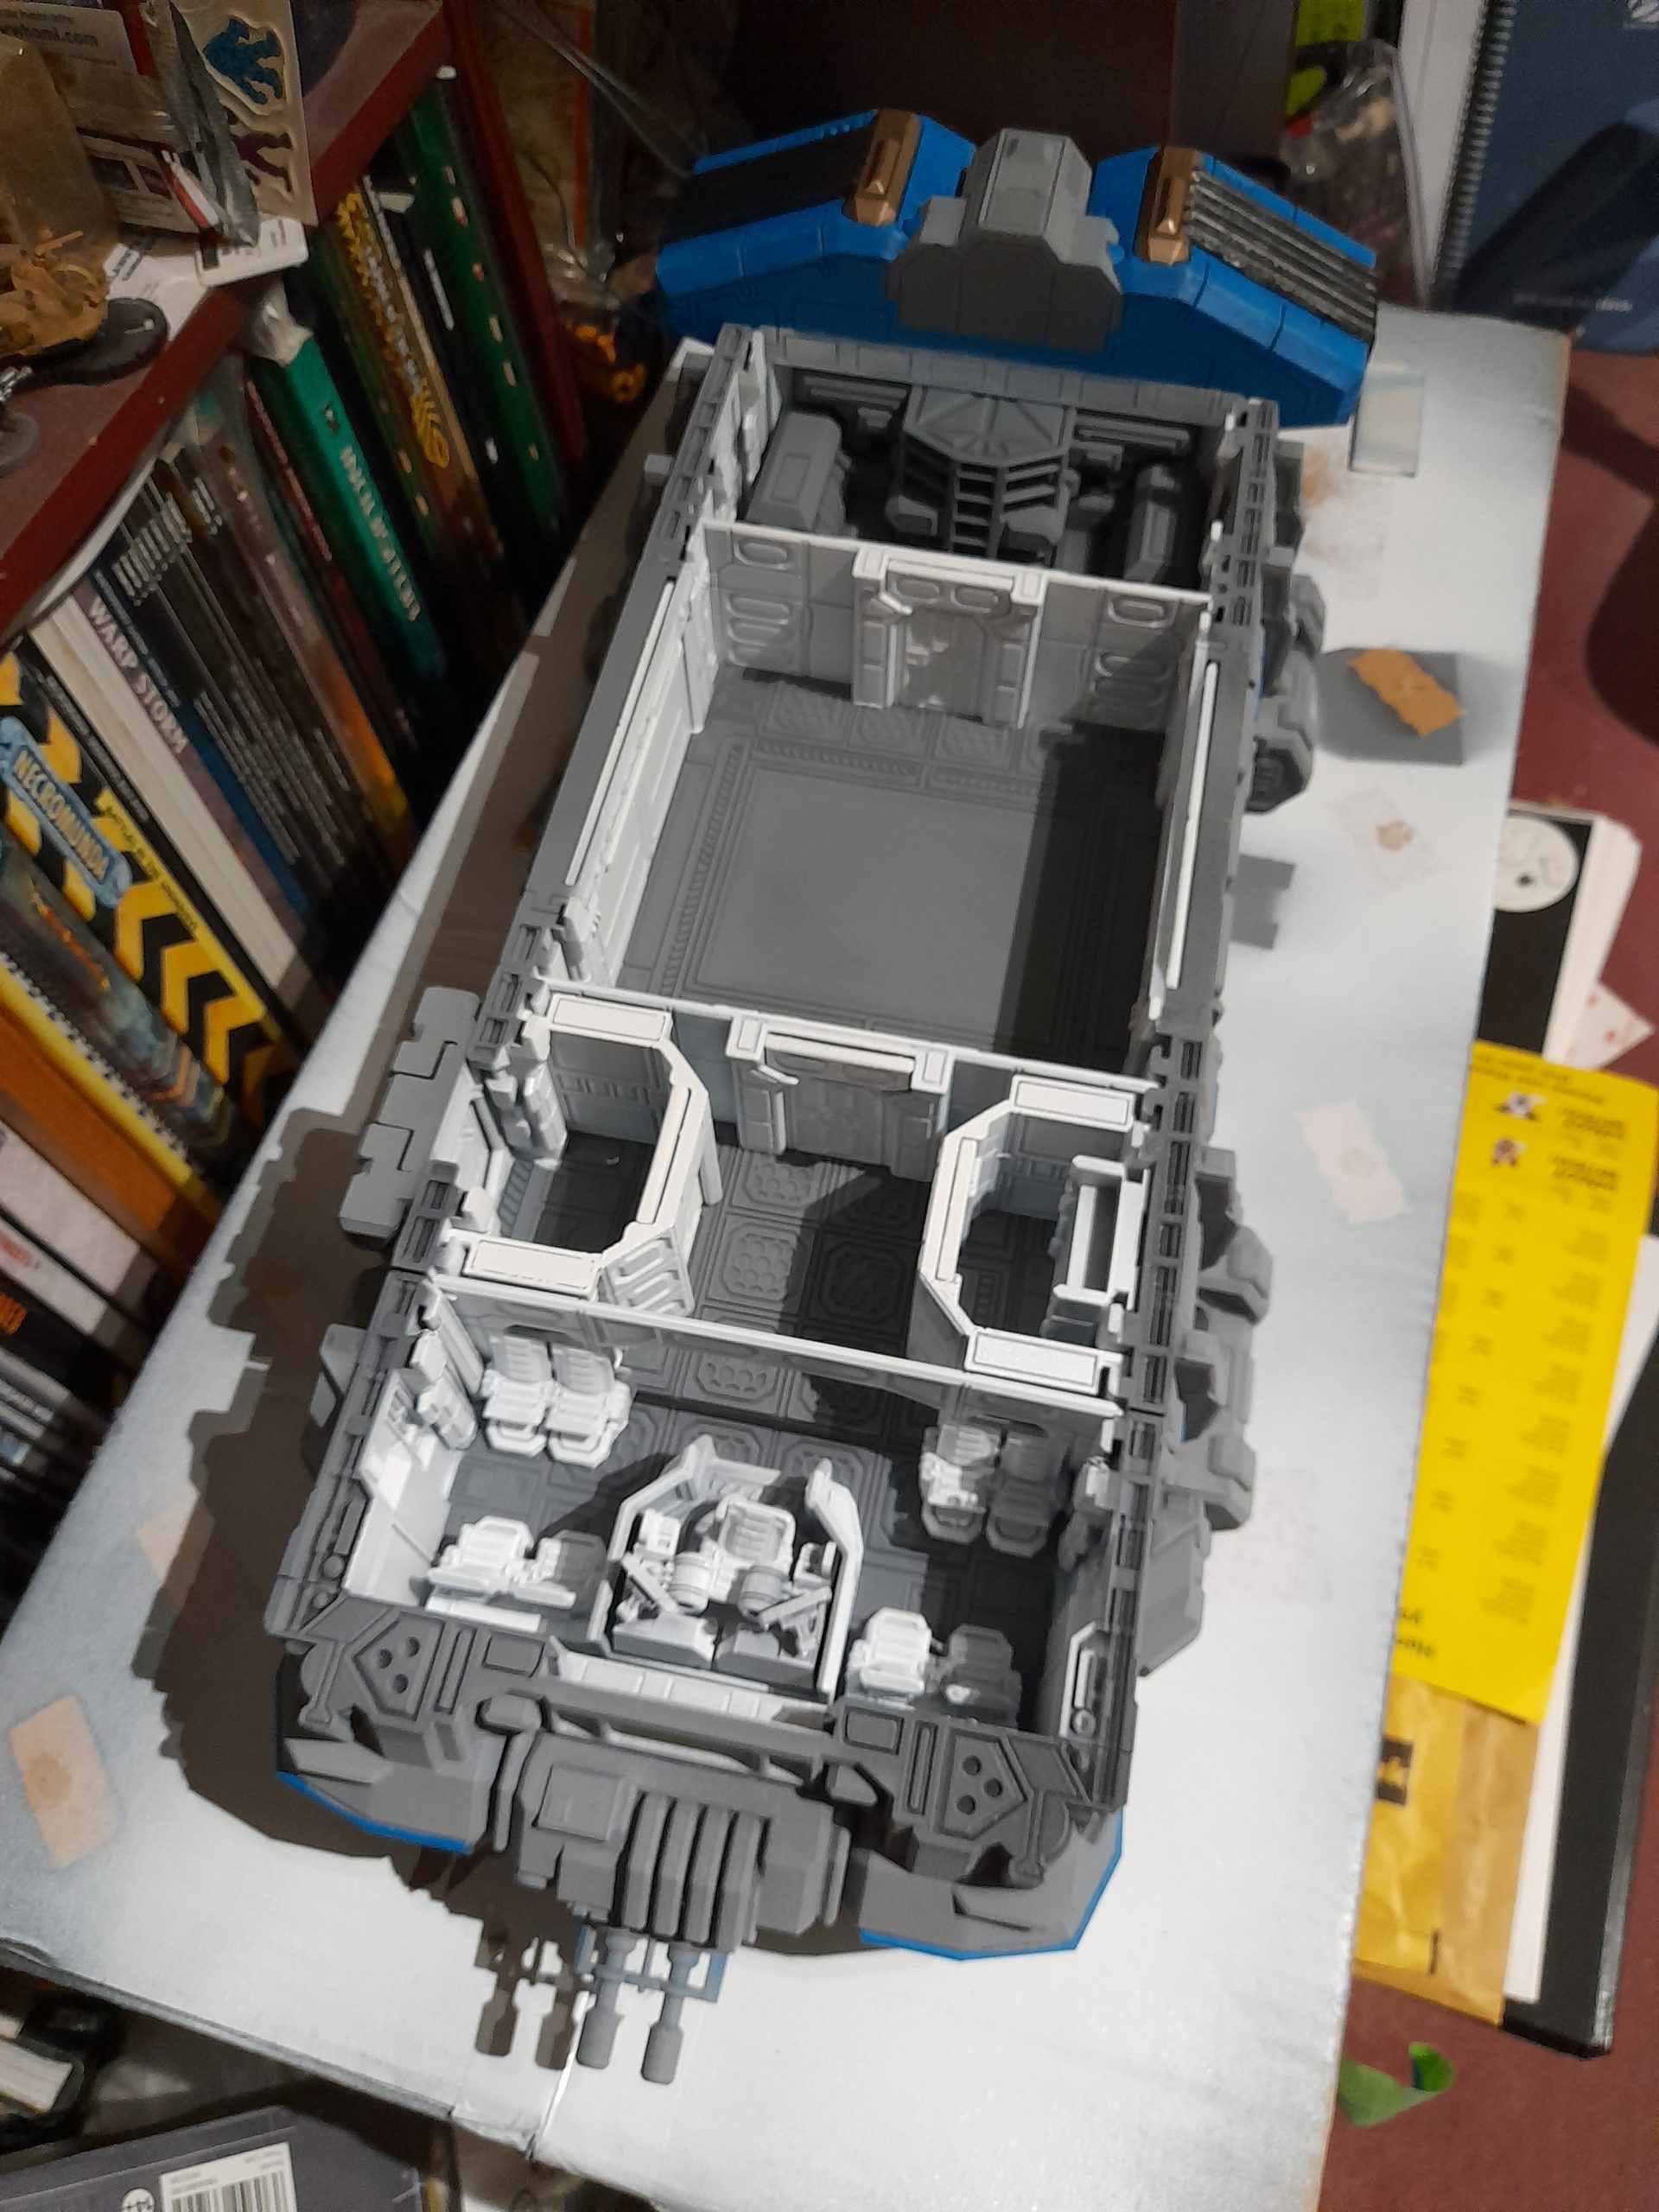
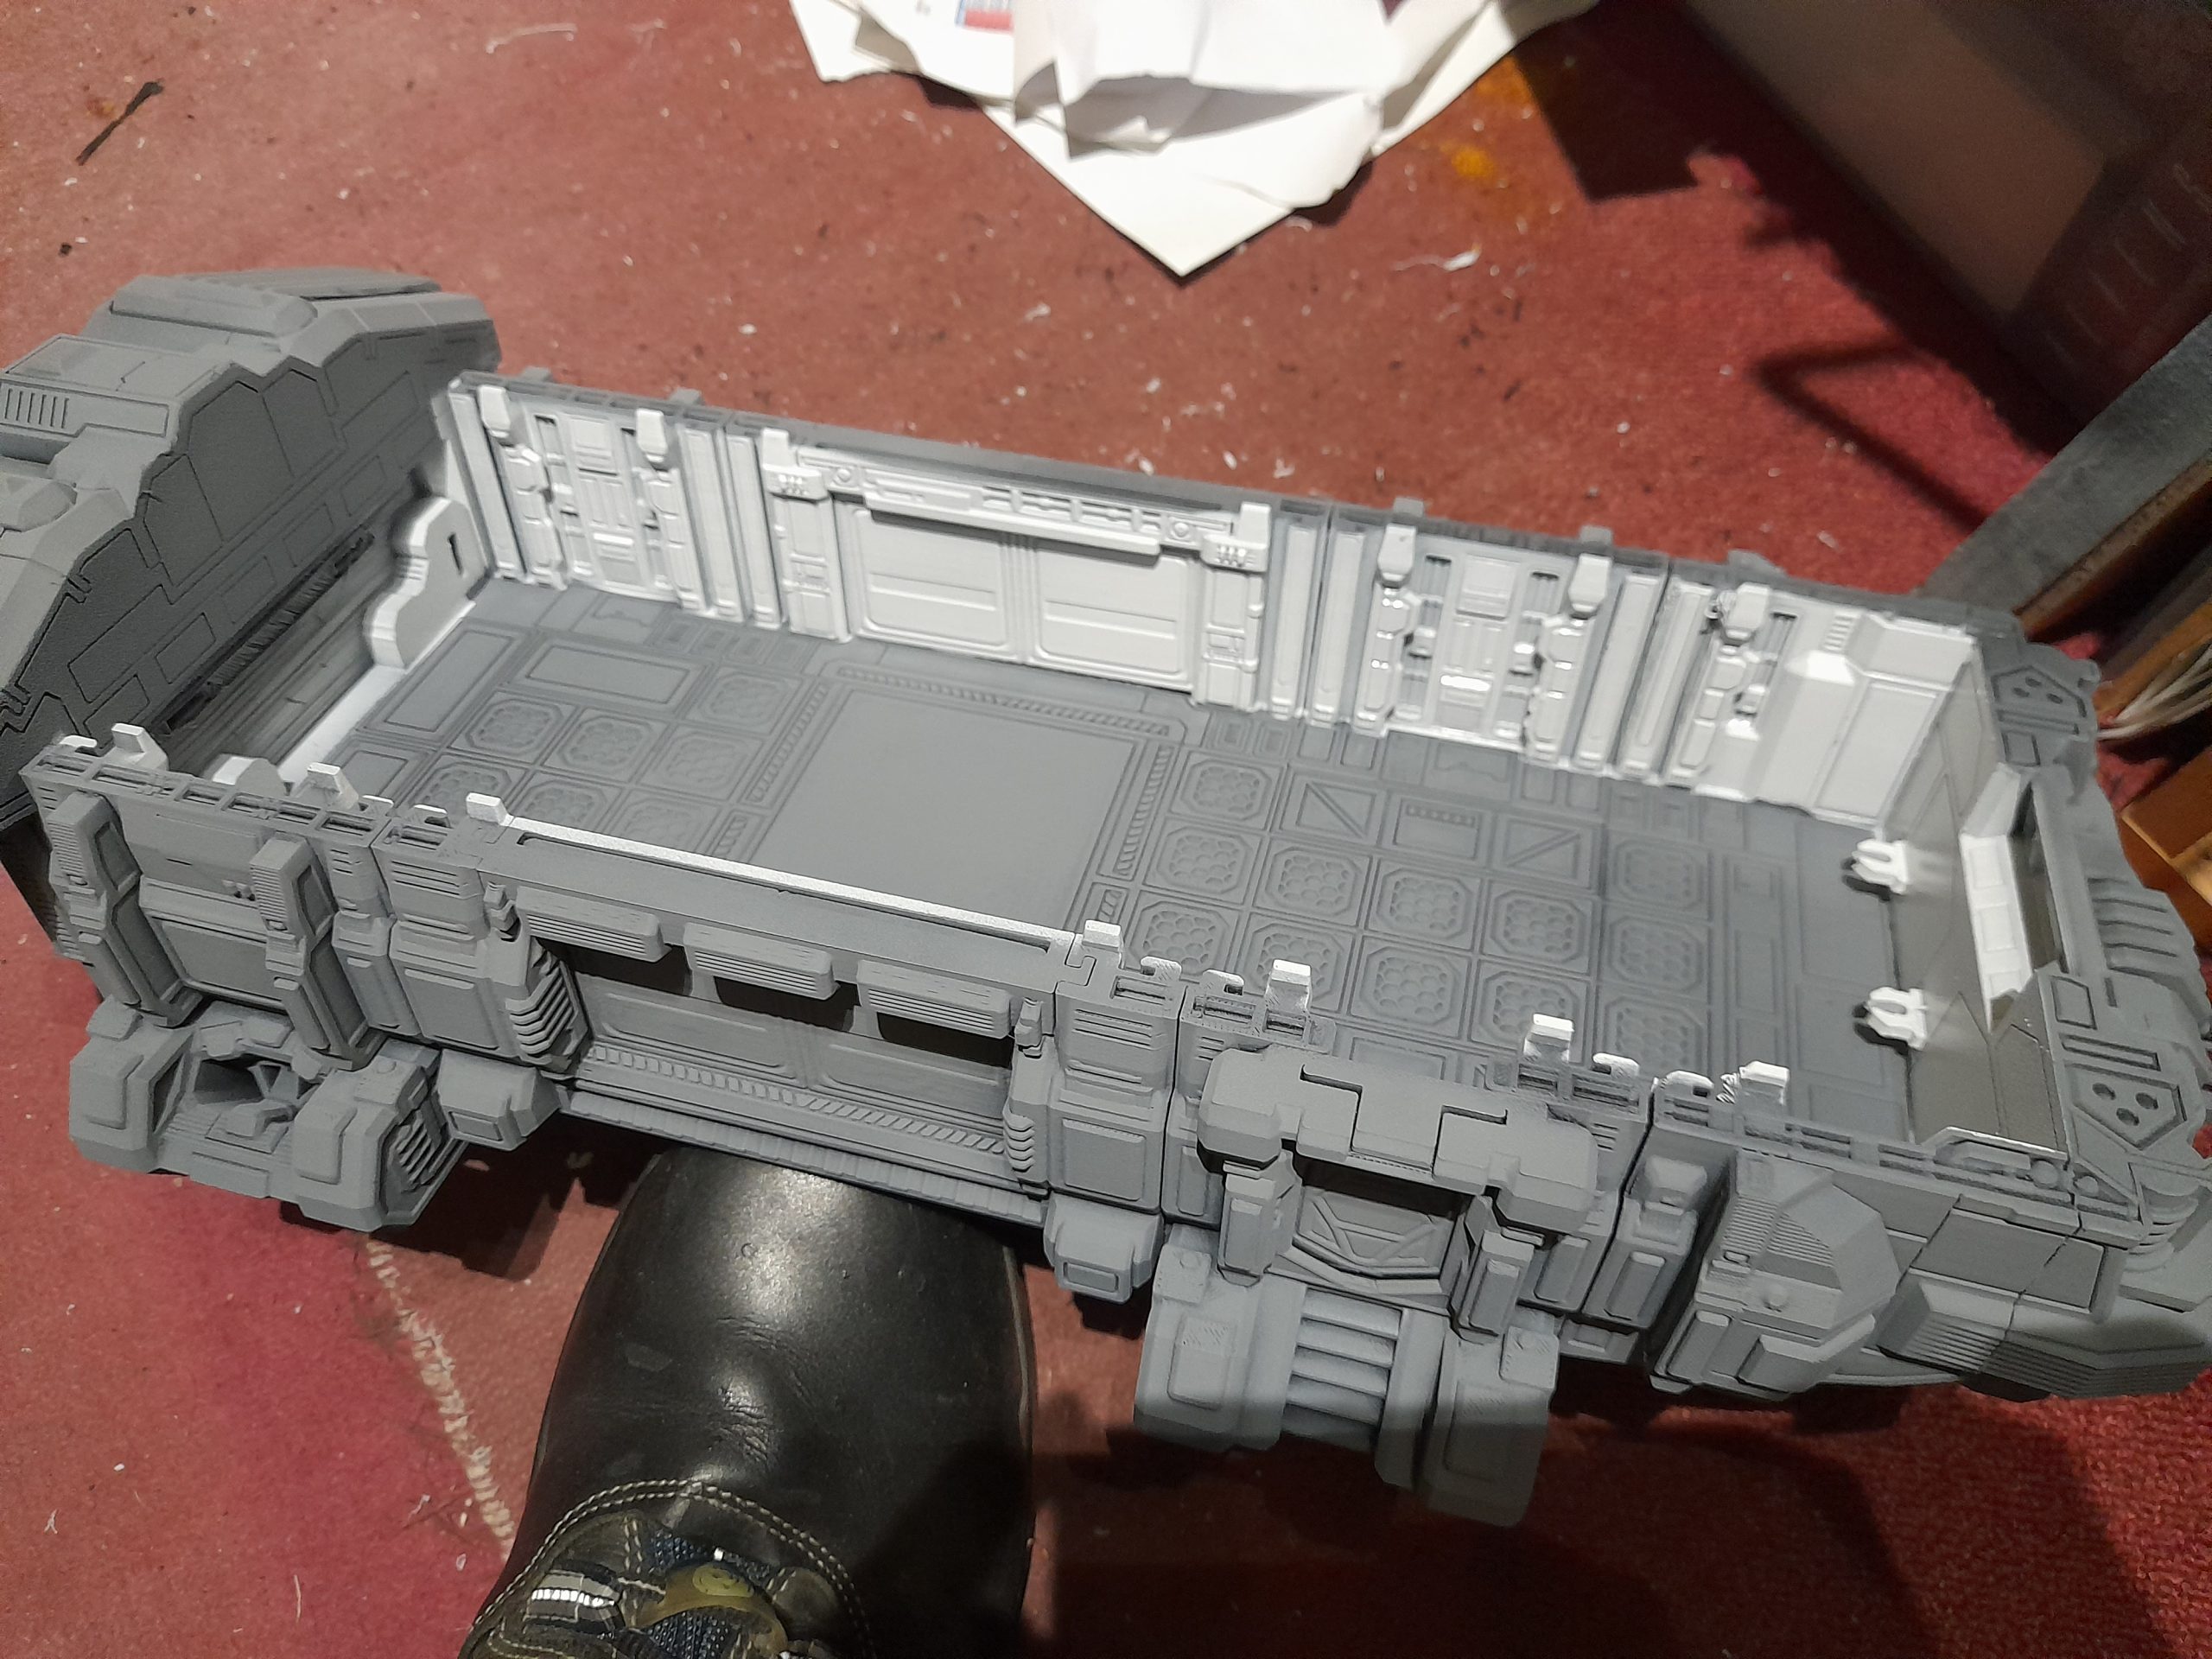
Small steps to progress… more on the interior
15th December 2025
Again I have not had very much time for hobby of late. I have however made some more headway, in small manageable chunks.
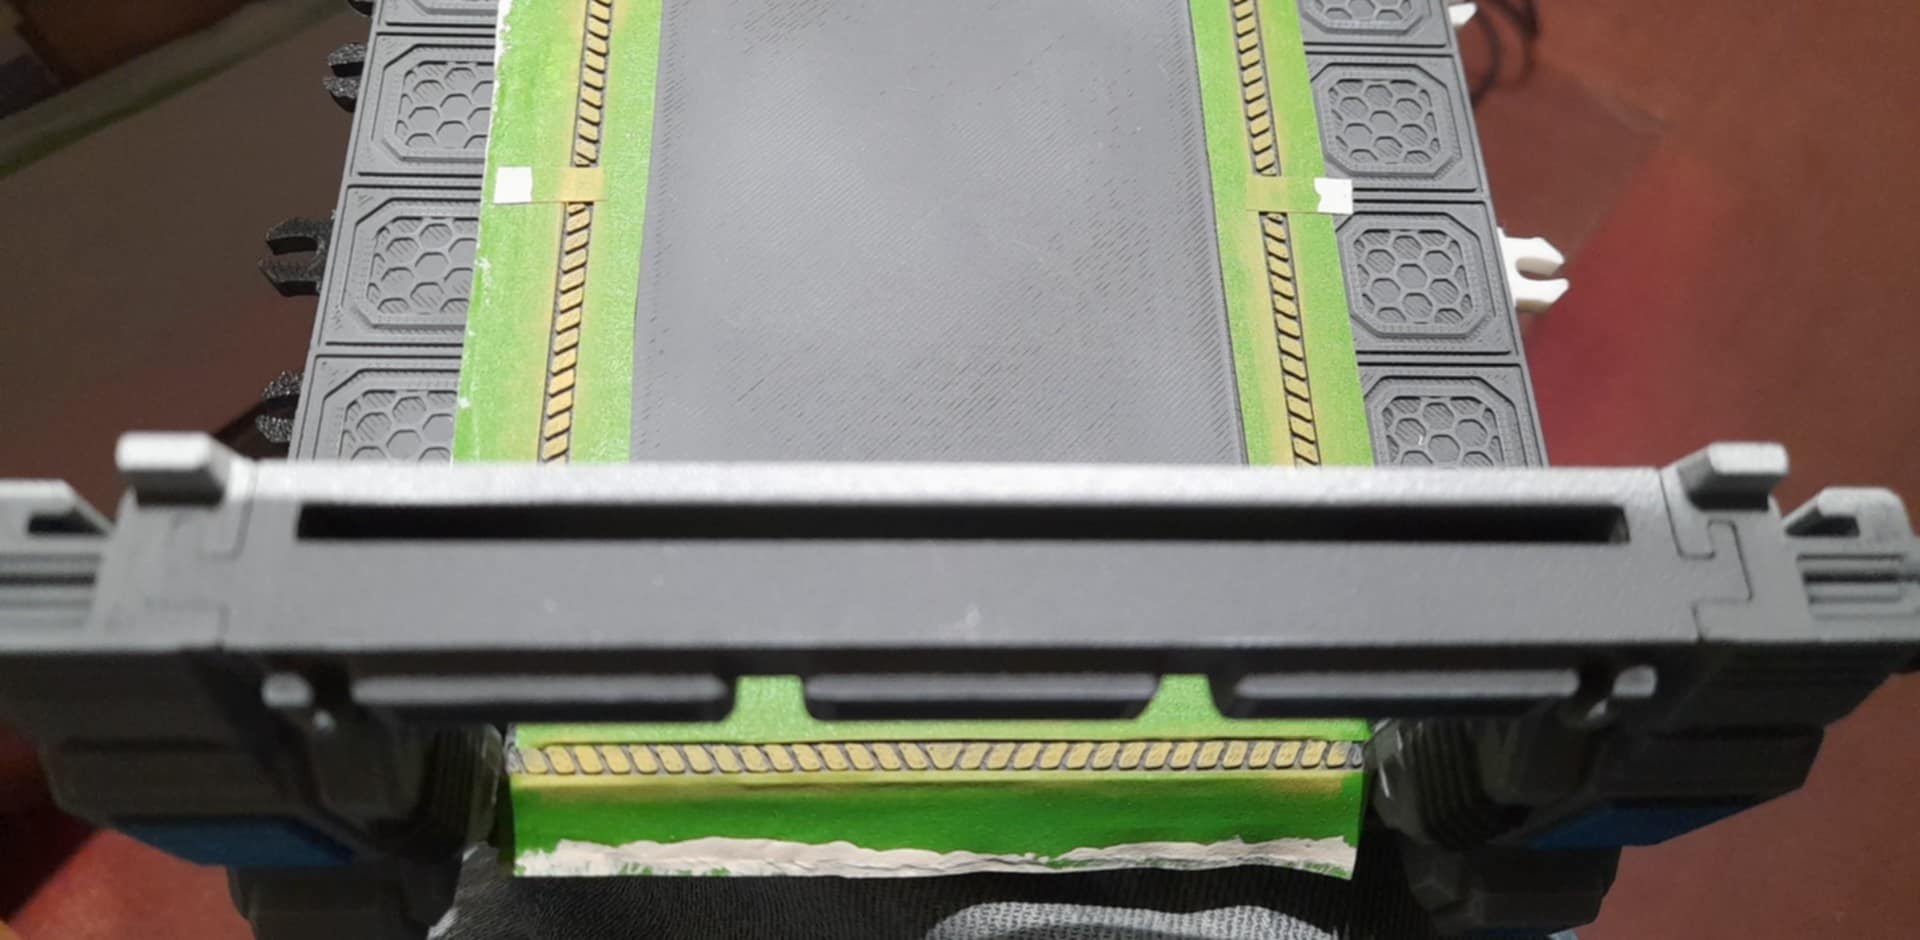
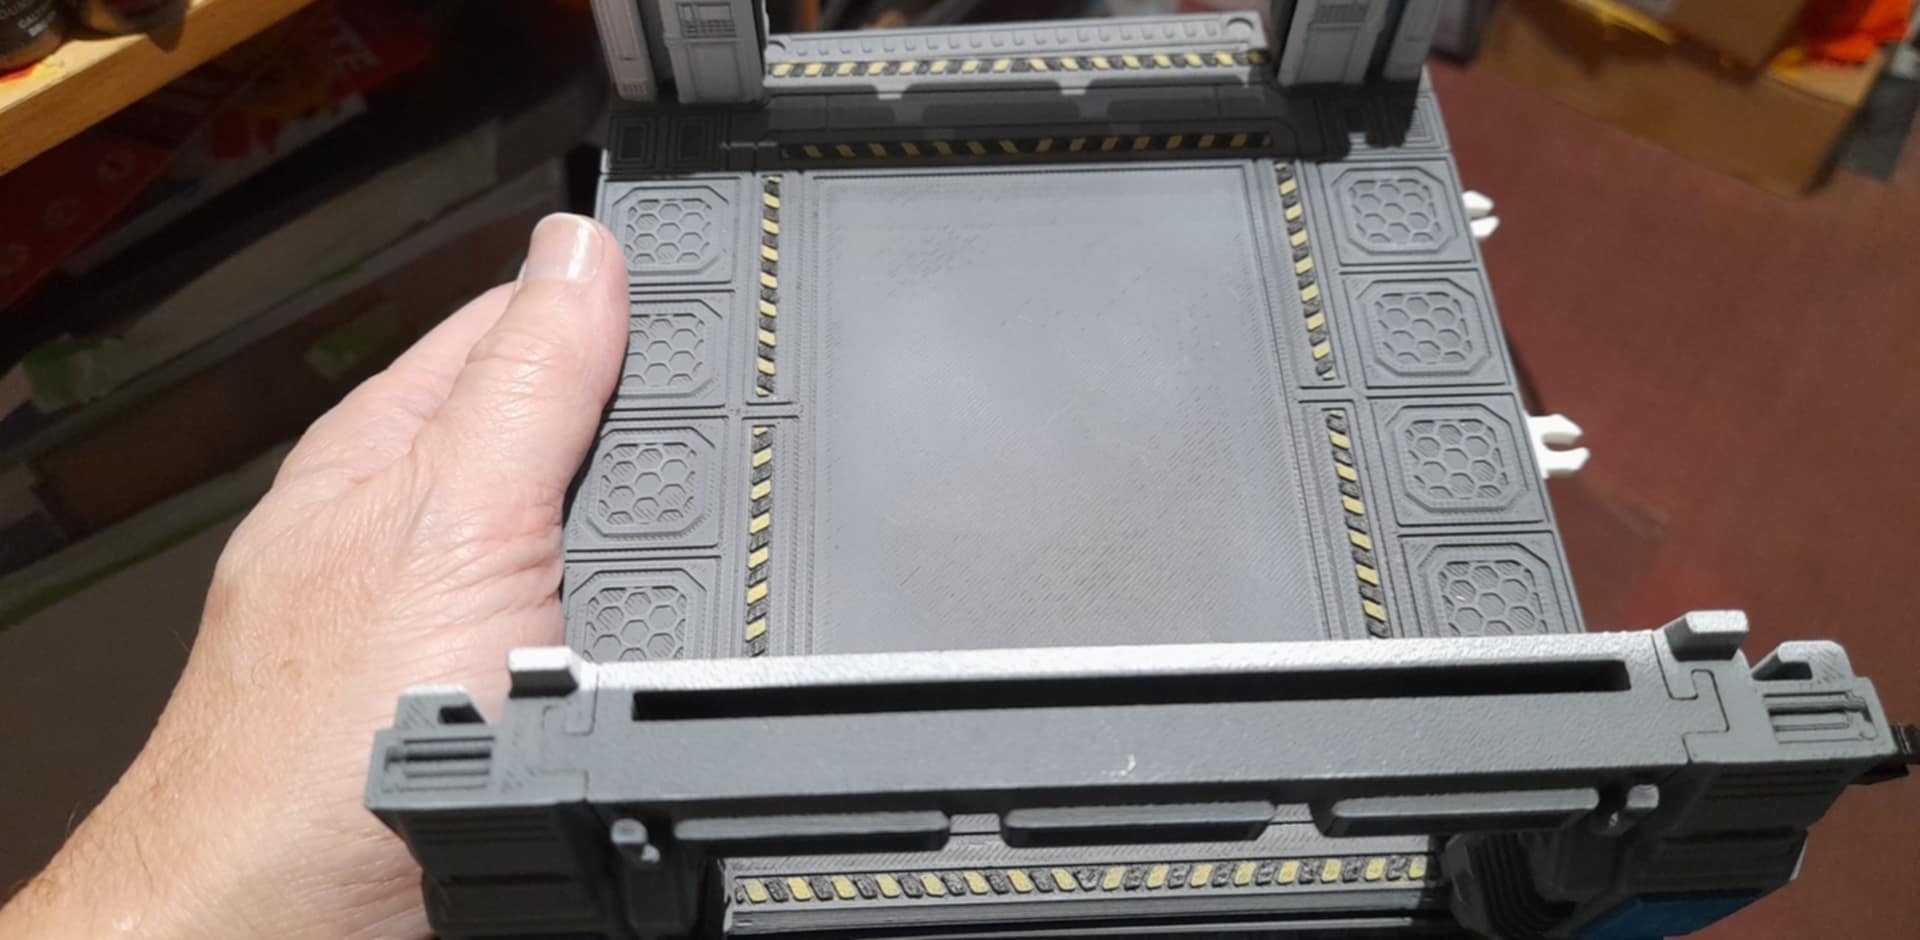
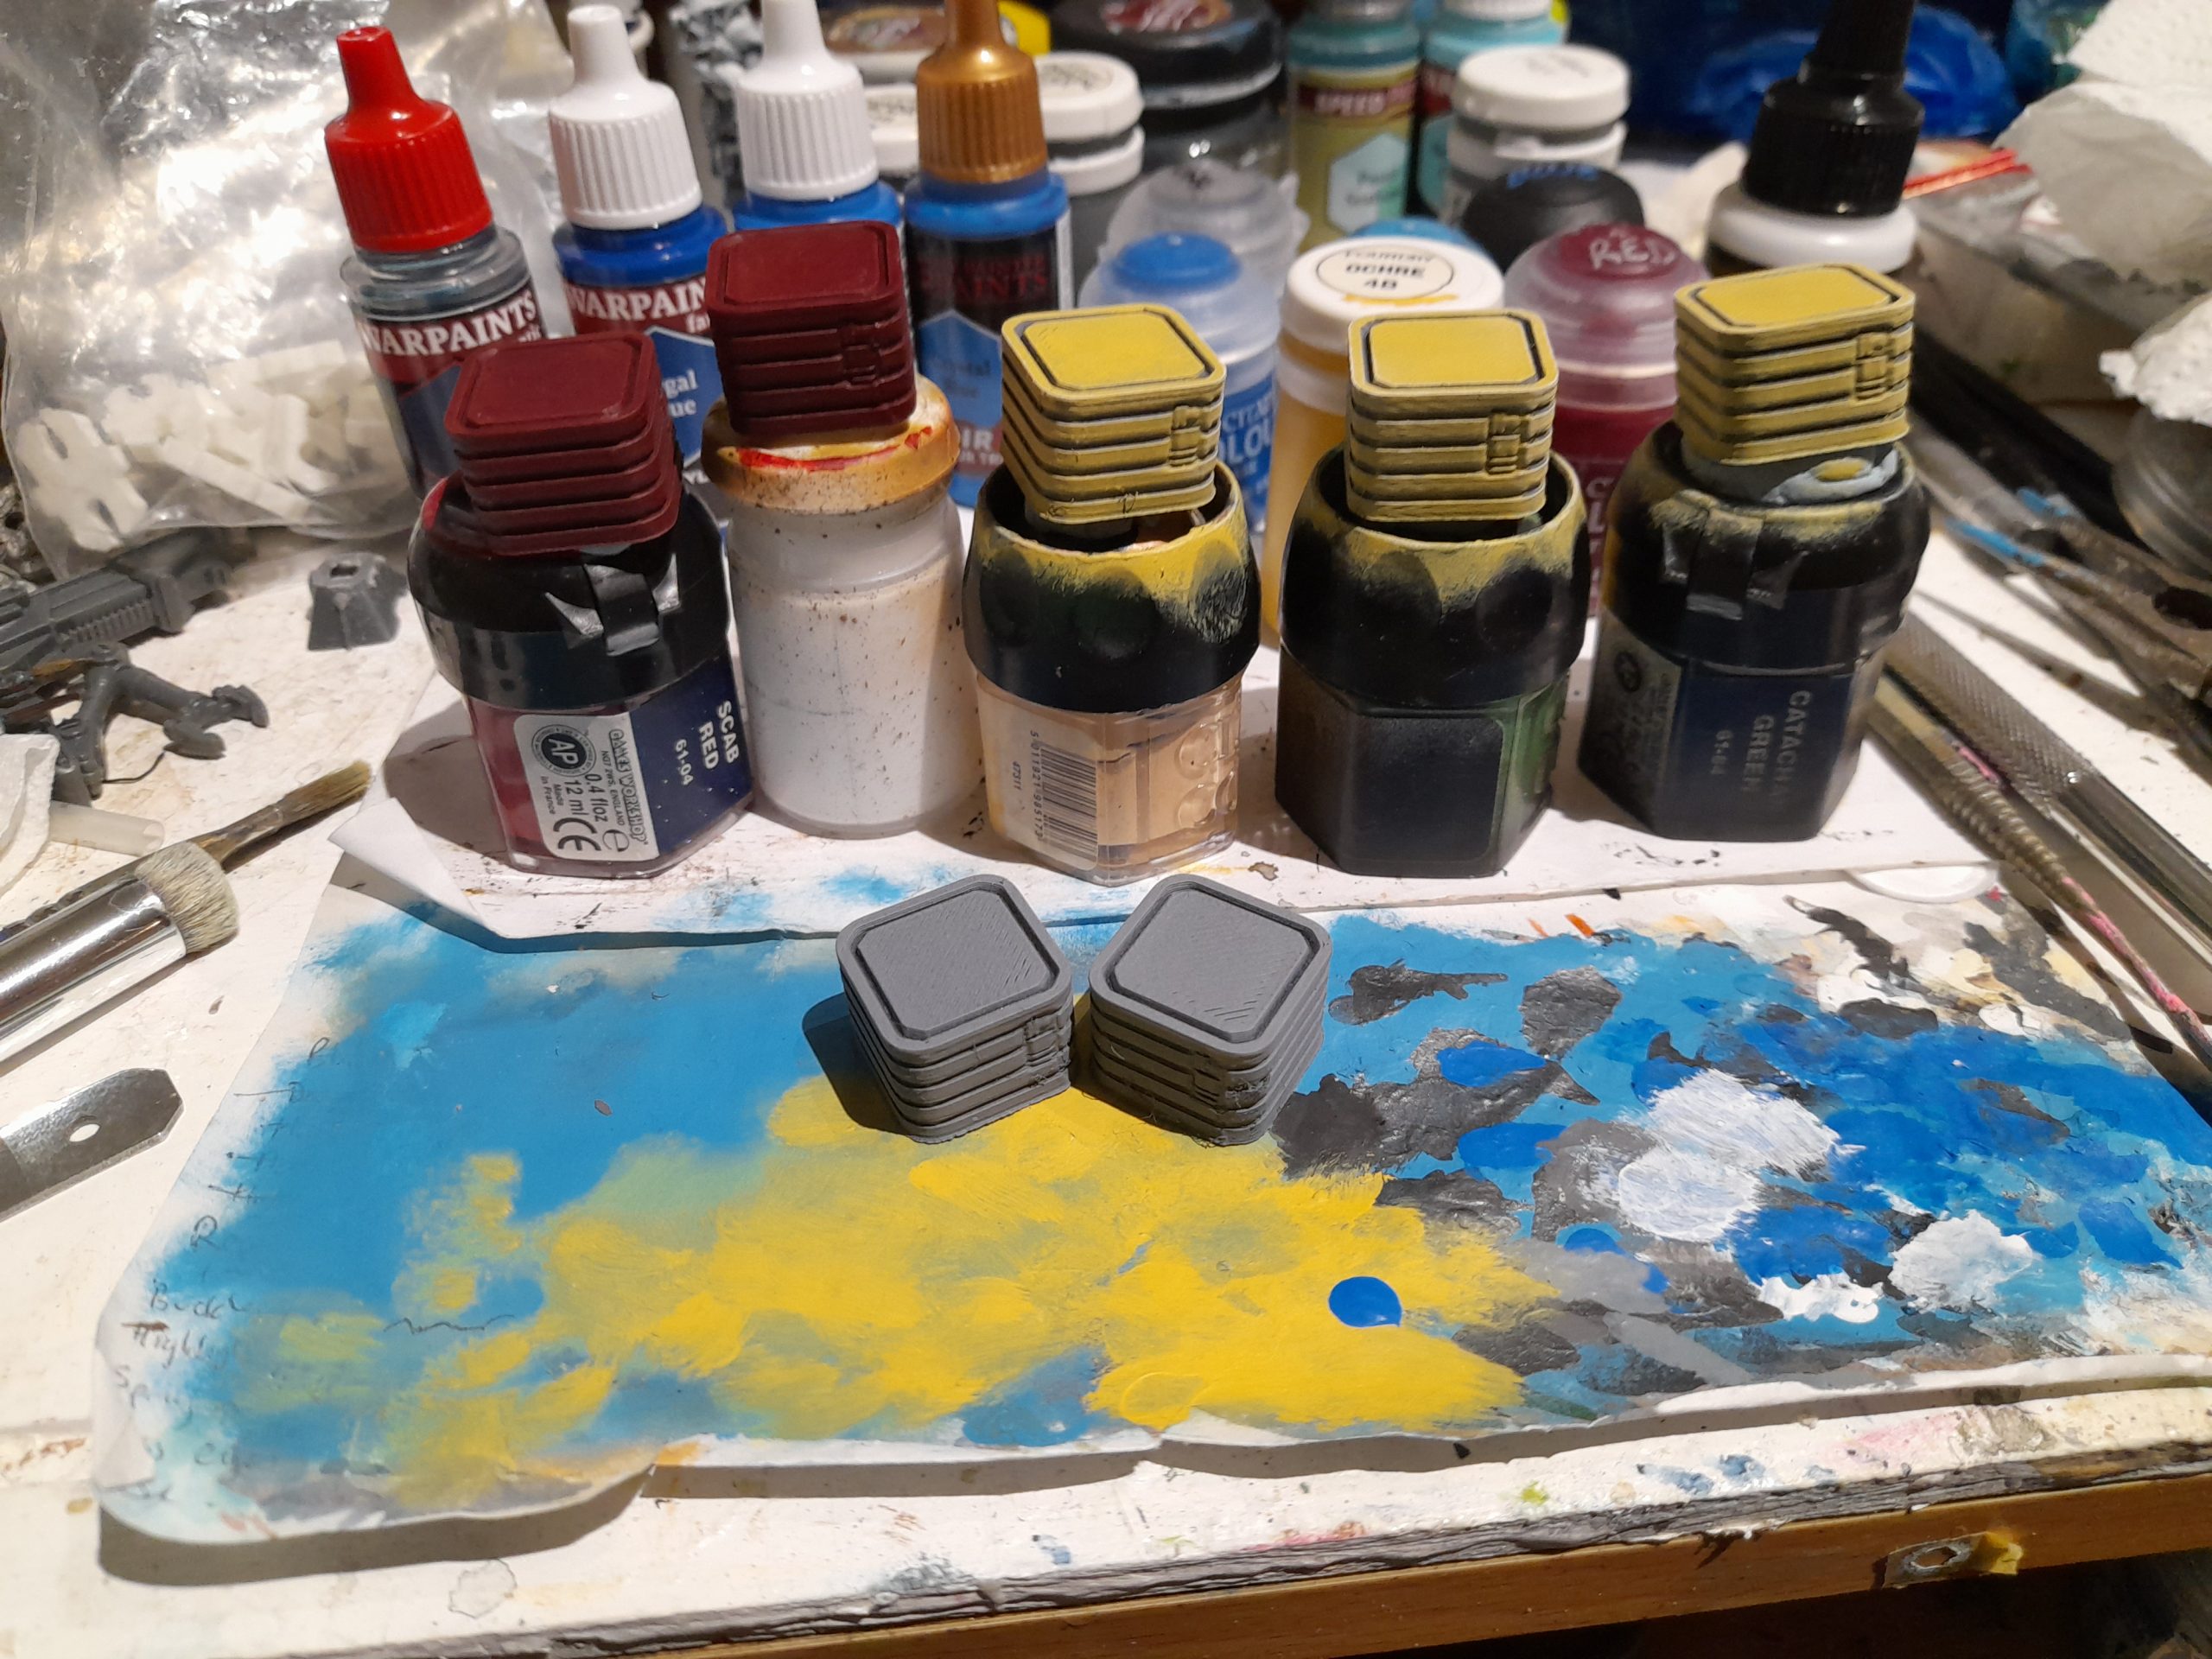
For the greyness of the power plant I decided to add some hazard stripes each side of what would be the central path (when the door is in place). I did these by masking off the rectangular area and then stippling on two shades of yellow ochre. I followed this by using further masking tape and using coffee stirrers to mark the width of the stripes. I then cut alternate sections out, masked over the yellow and stippled on the black. It works pretty well.
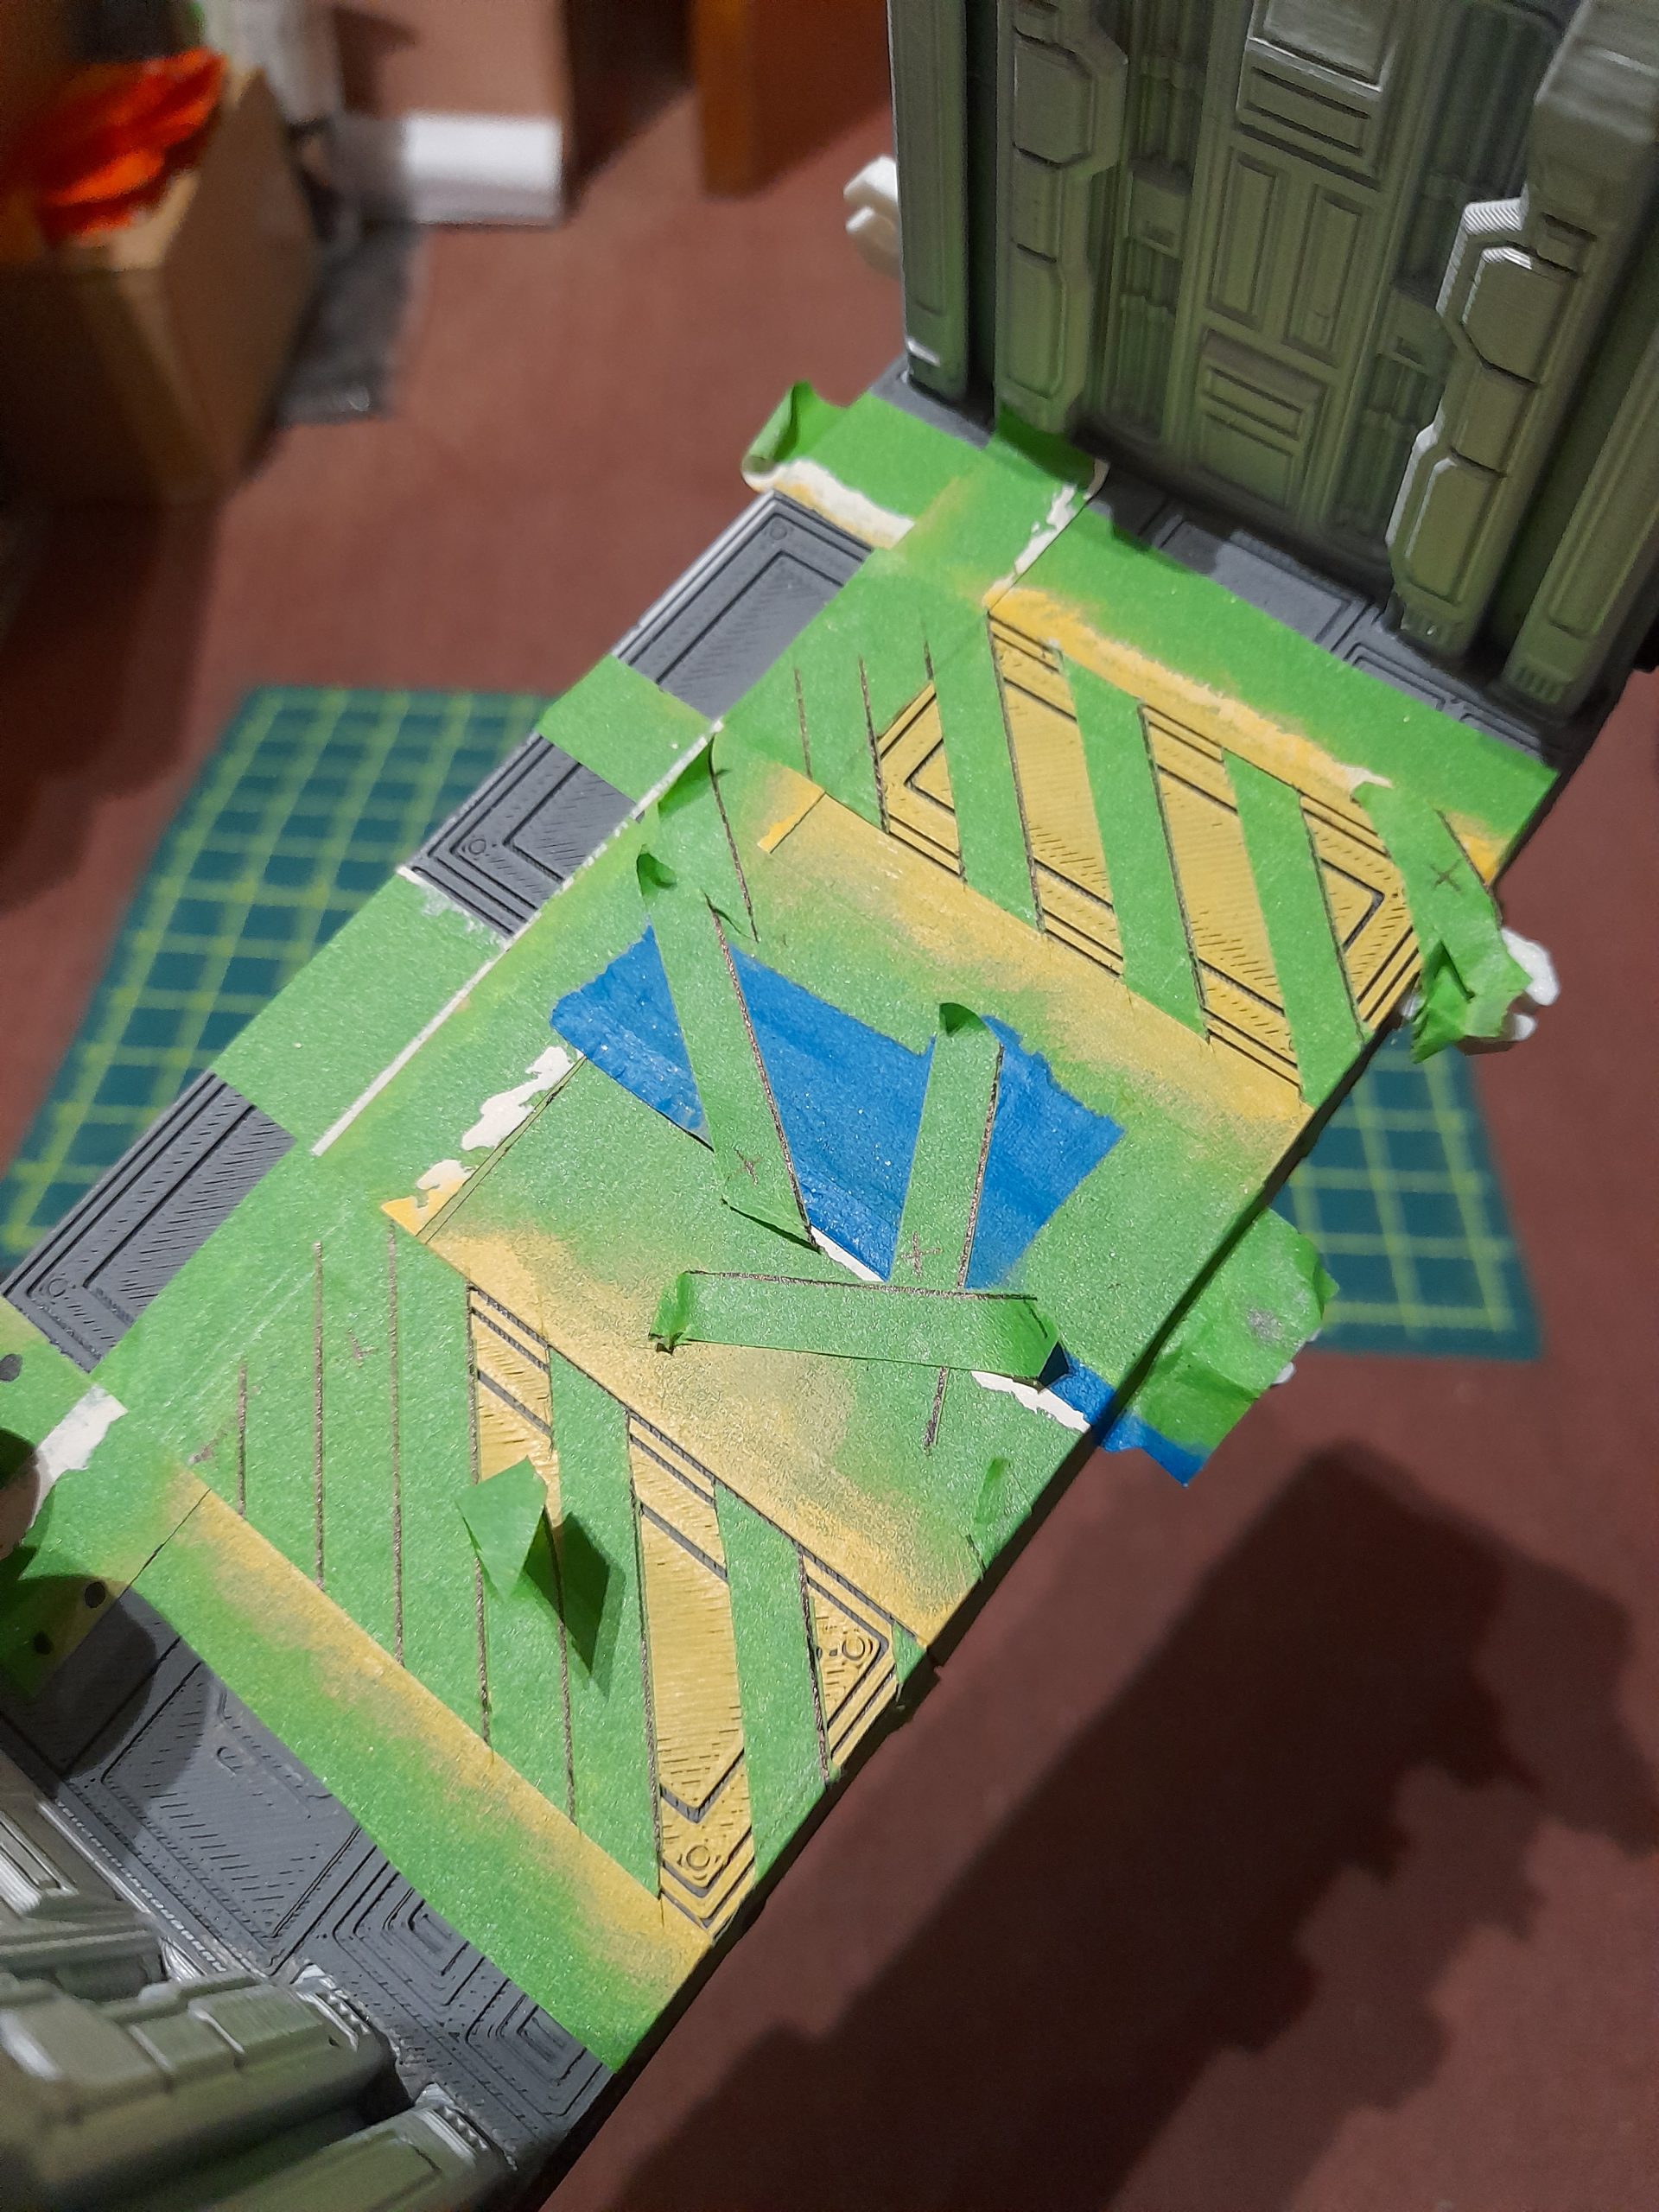

I then painted the floor sections between the walls and the hazard stripes in gun metal, washed with Nuln oil then drybrushed over with lead belcher.
On the walls I painted some of the recessed parts that could be power conduits (maybe?) with light blue contrast, to echo the engine glow I had already used. Finally I added some power warning transfers on the end of each side part.


Next up I used a gundam marker to panel line the more defined panel grooves on the partition wall sections. I also tried it on the door, but it didn’t work too well (not well enough defined edges) so I instead gave the doors a wash then re painted in the main sections.


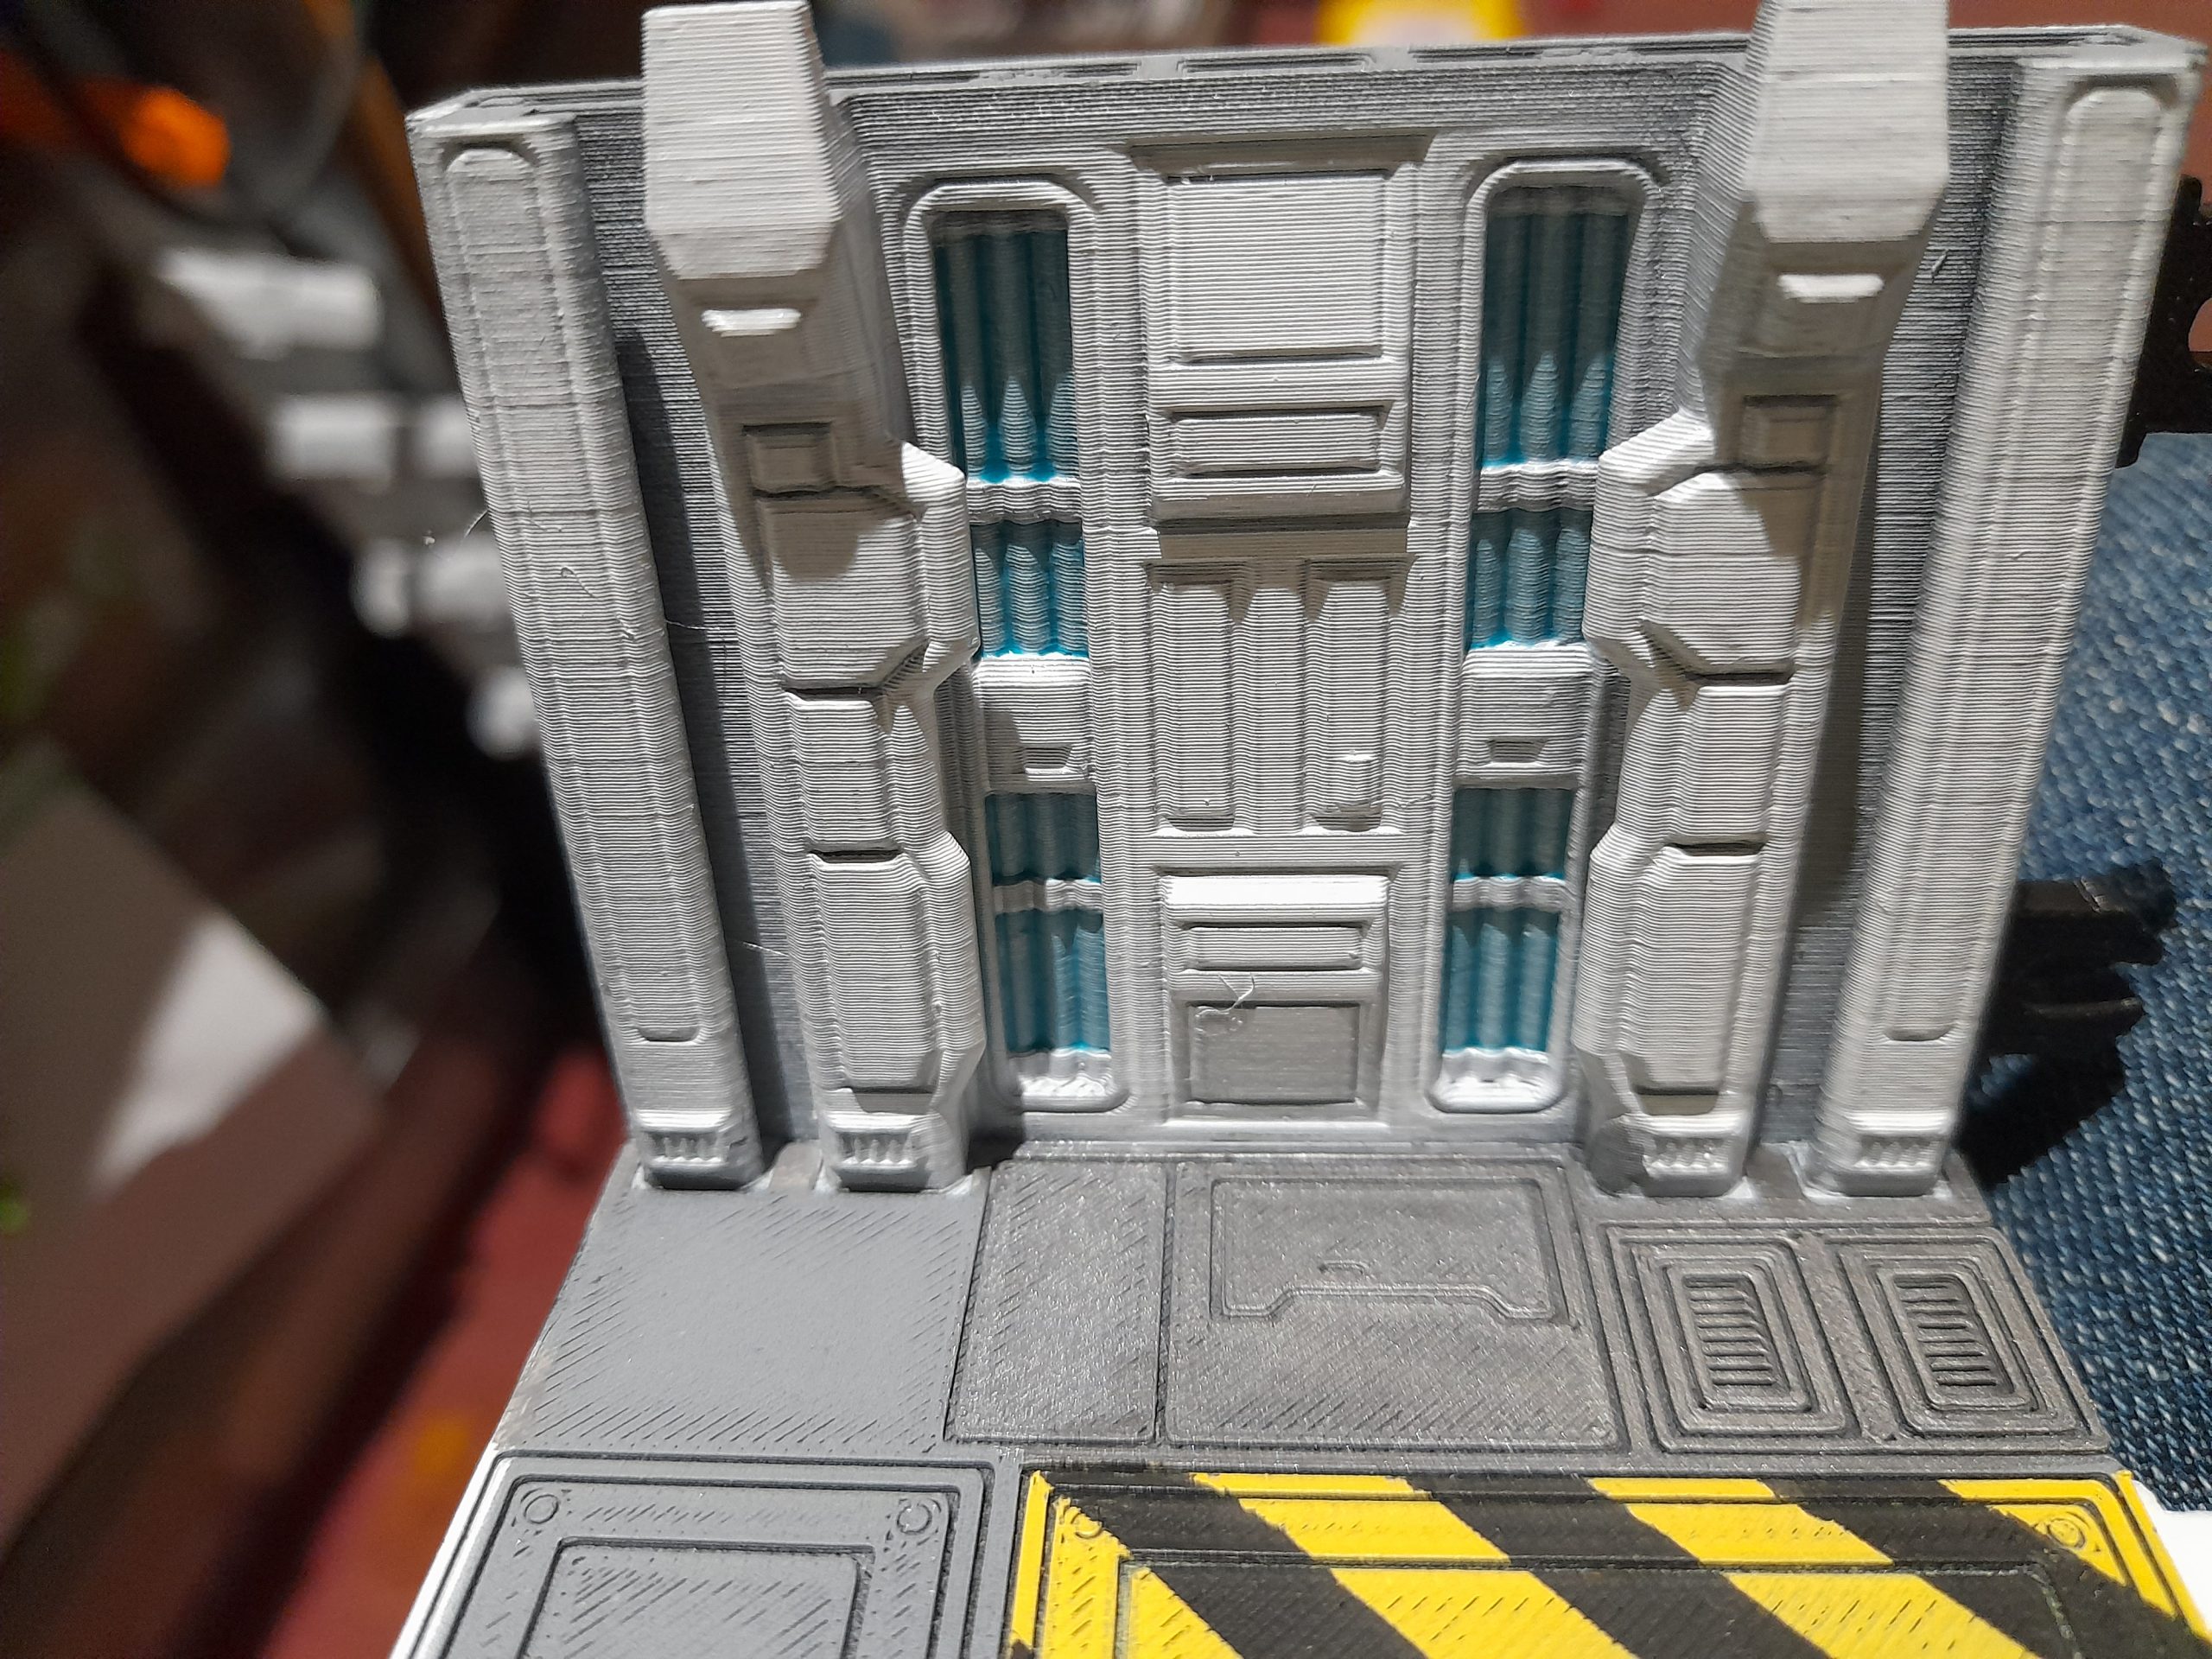
Then I did some work on the airlock and ‘storage’ room parts. I picked out the ‘pipes’ on the sides in a strong orange, then added white WW2 tank transfers onto the front pipes (since the others would not be seen once the walls were in place). I also picked out some panels inside the airlock in three different red shades, and added some dark grey panels to the lower section inside the storage room.

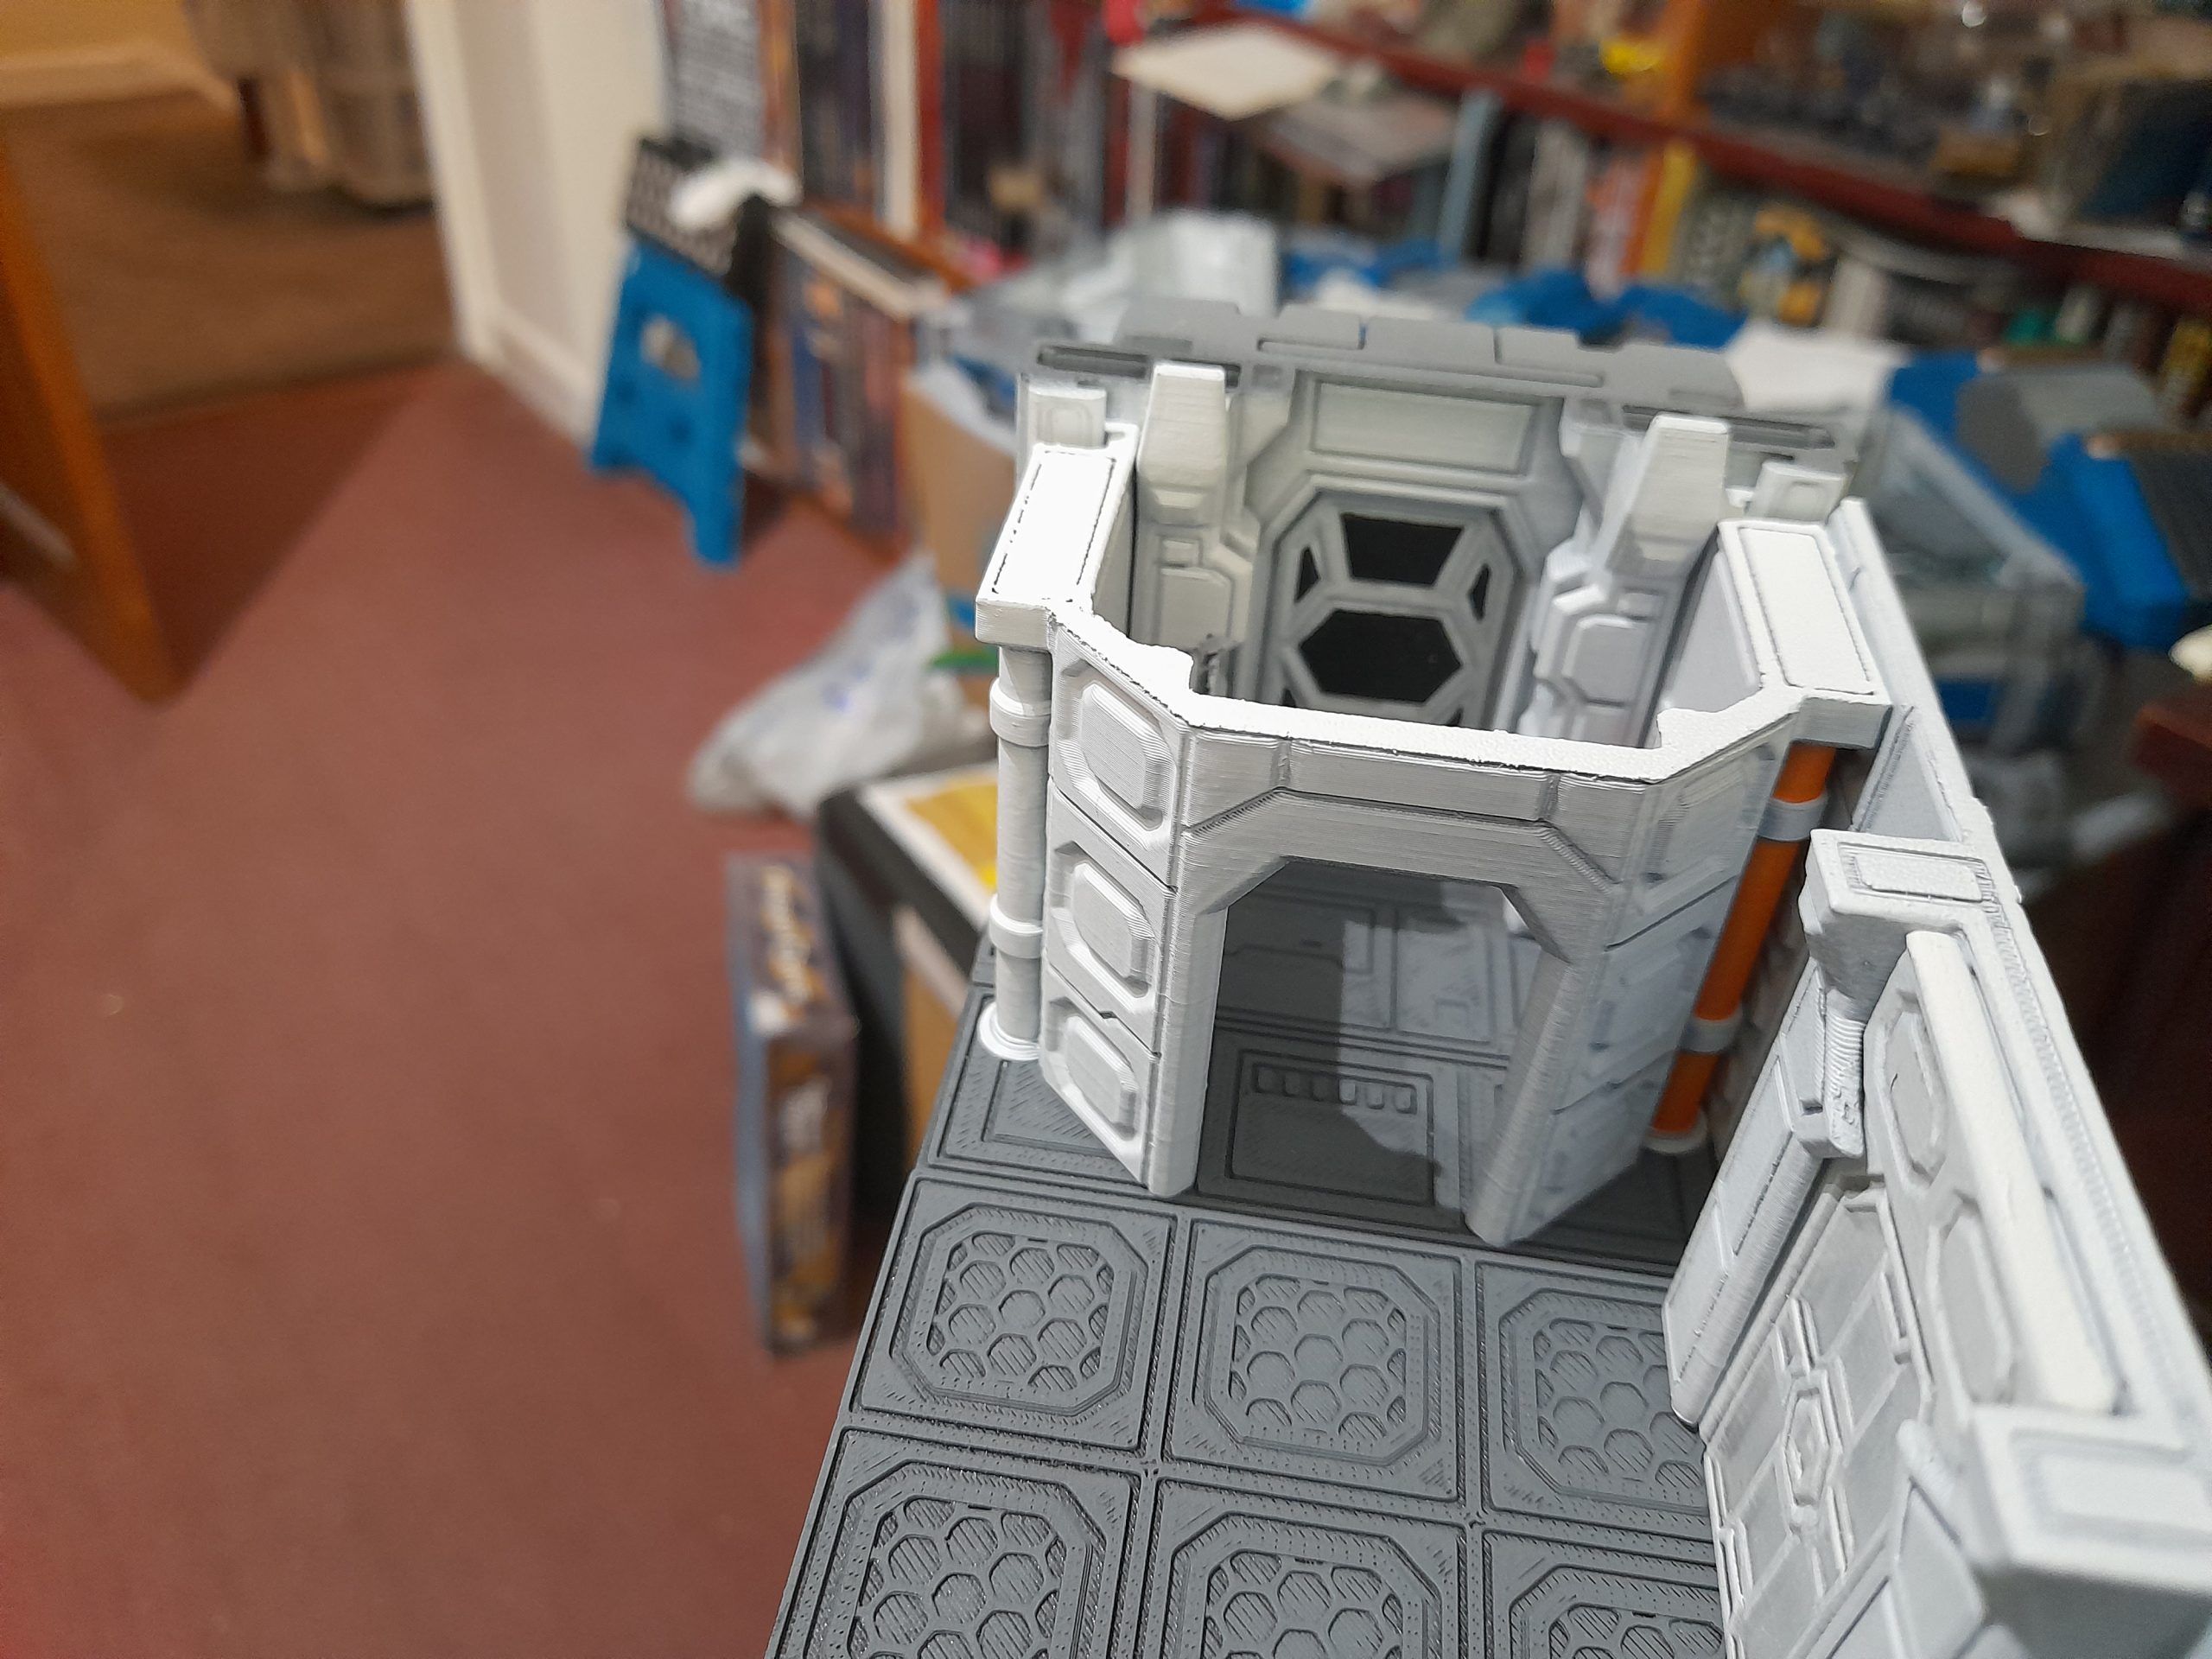

Finally I added some detail onto the cargo bay section. I painted up the computer consoles each side of each of the main doors, added some fluo yellow lights on the top of the door frame and picked out some piping in the orange that I used for the airlock wall pipes. I also added some scuff marks around the bottom of the door frames, and some scratches onto the door. But I will work more on the weathering once I finish the interior.

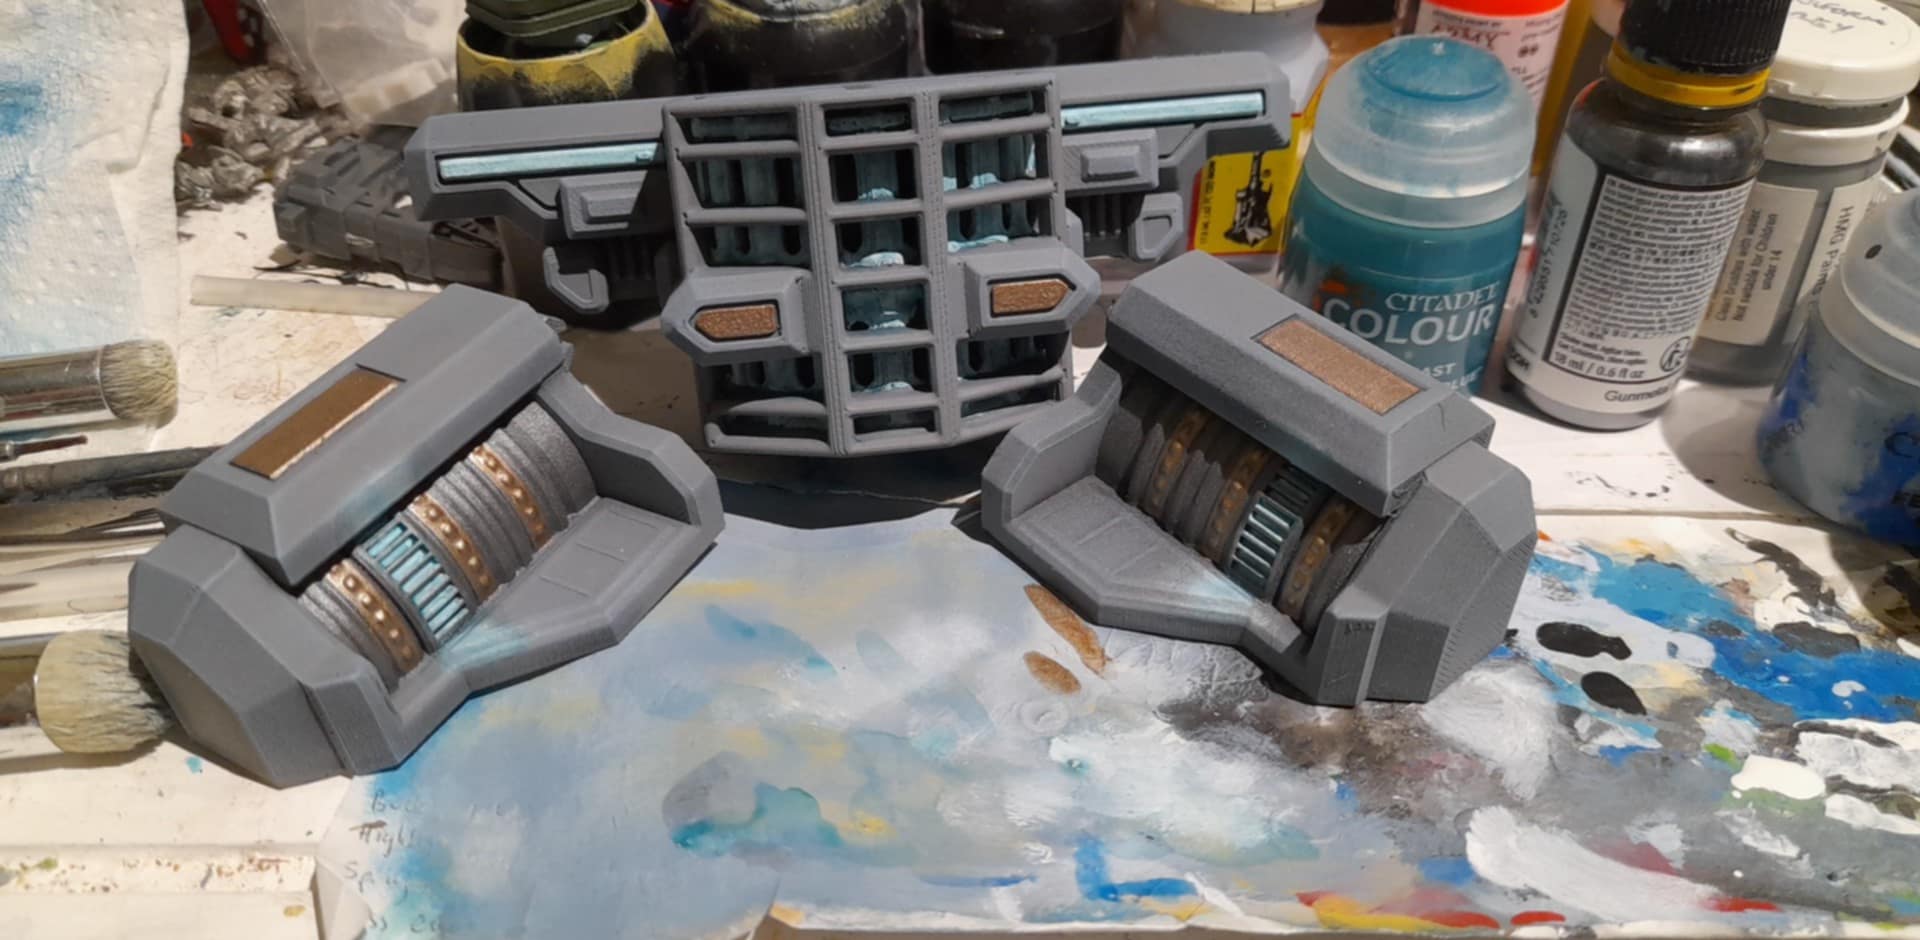
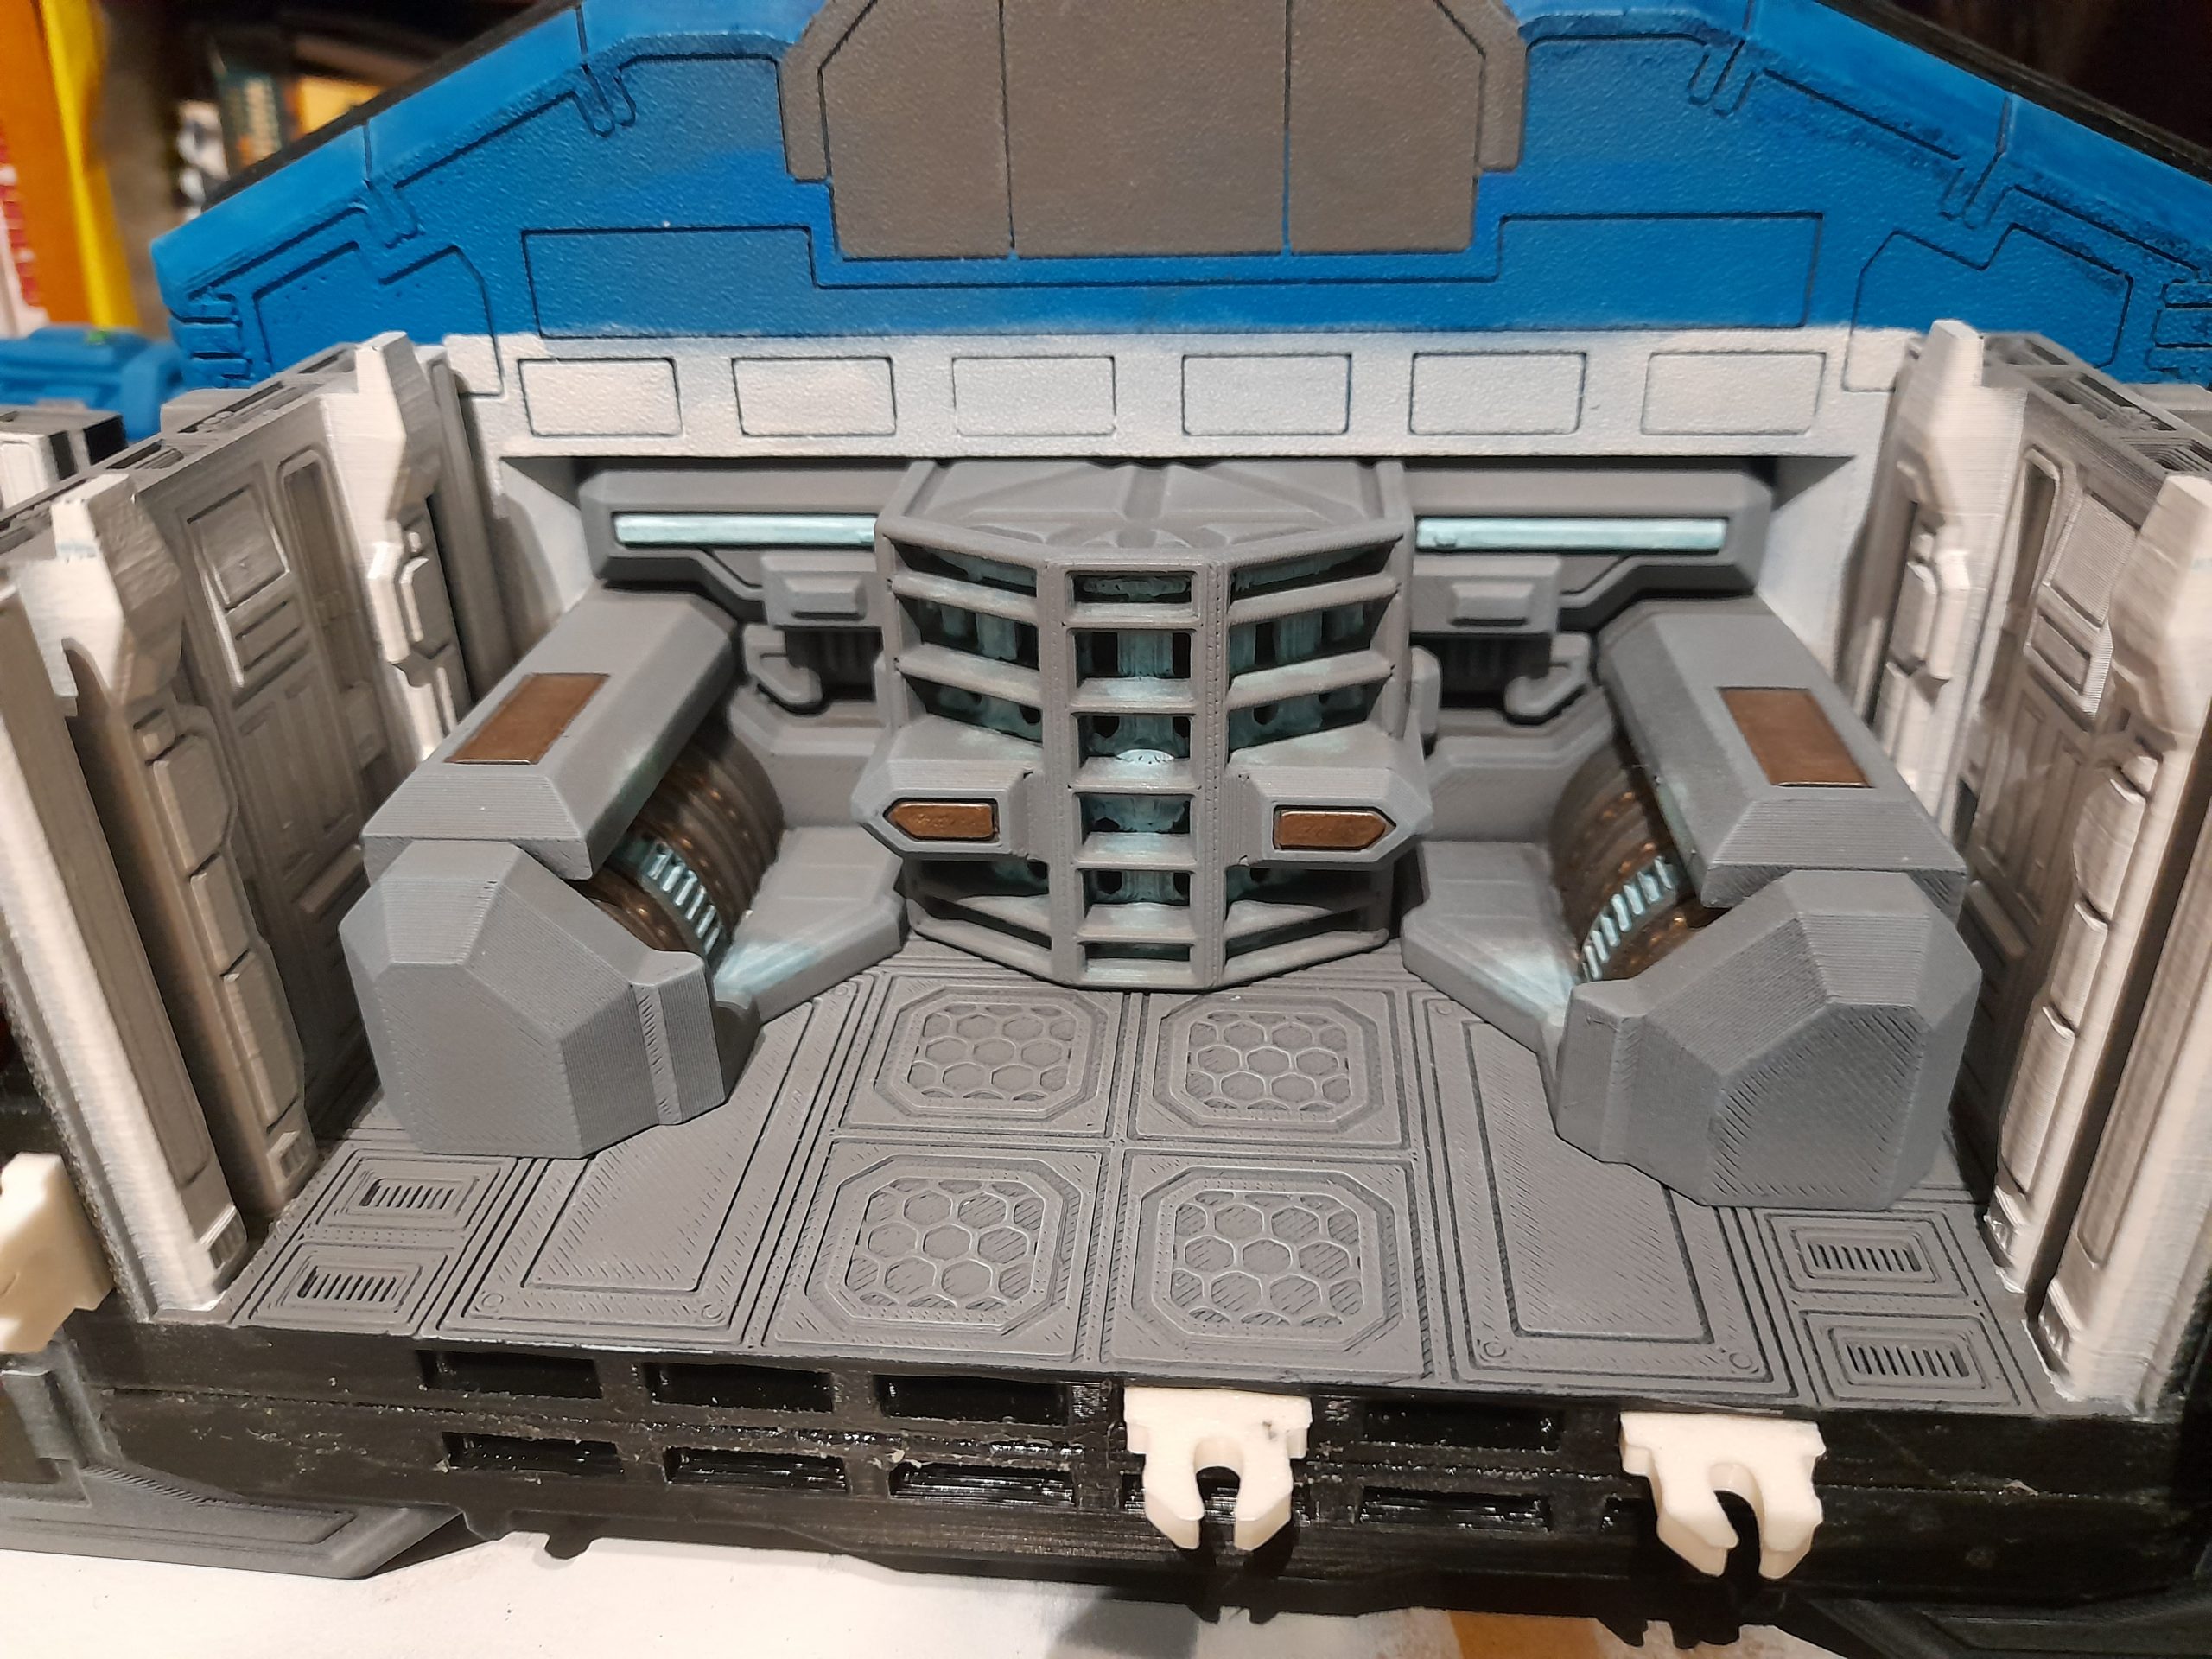
Power plant
3rd December 2025 continued.
Ran out of room on the last update.
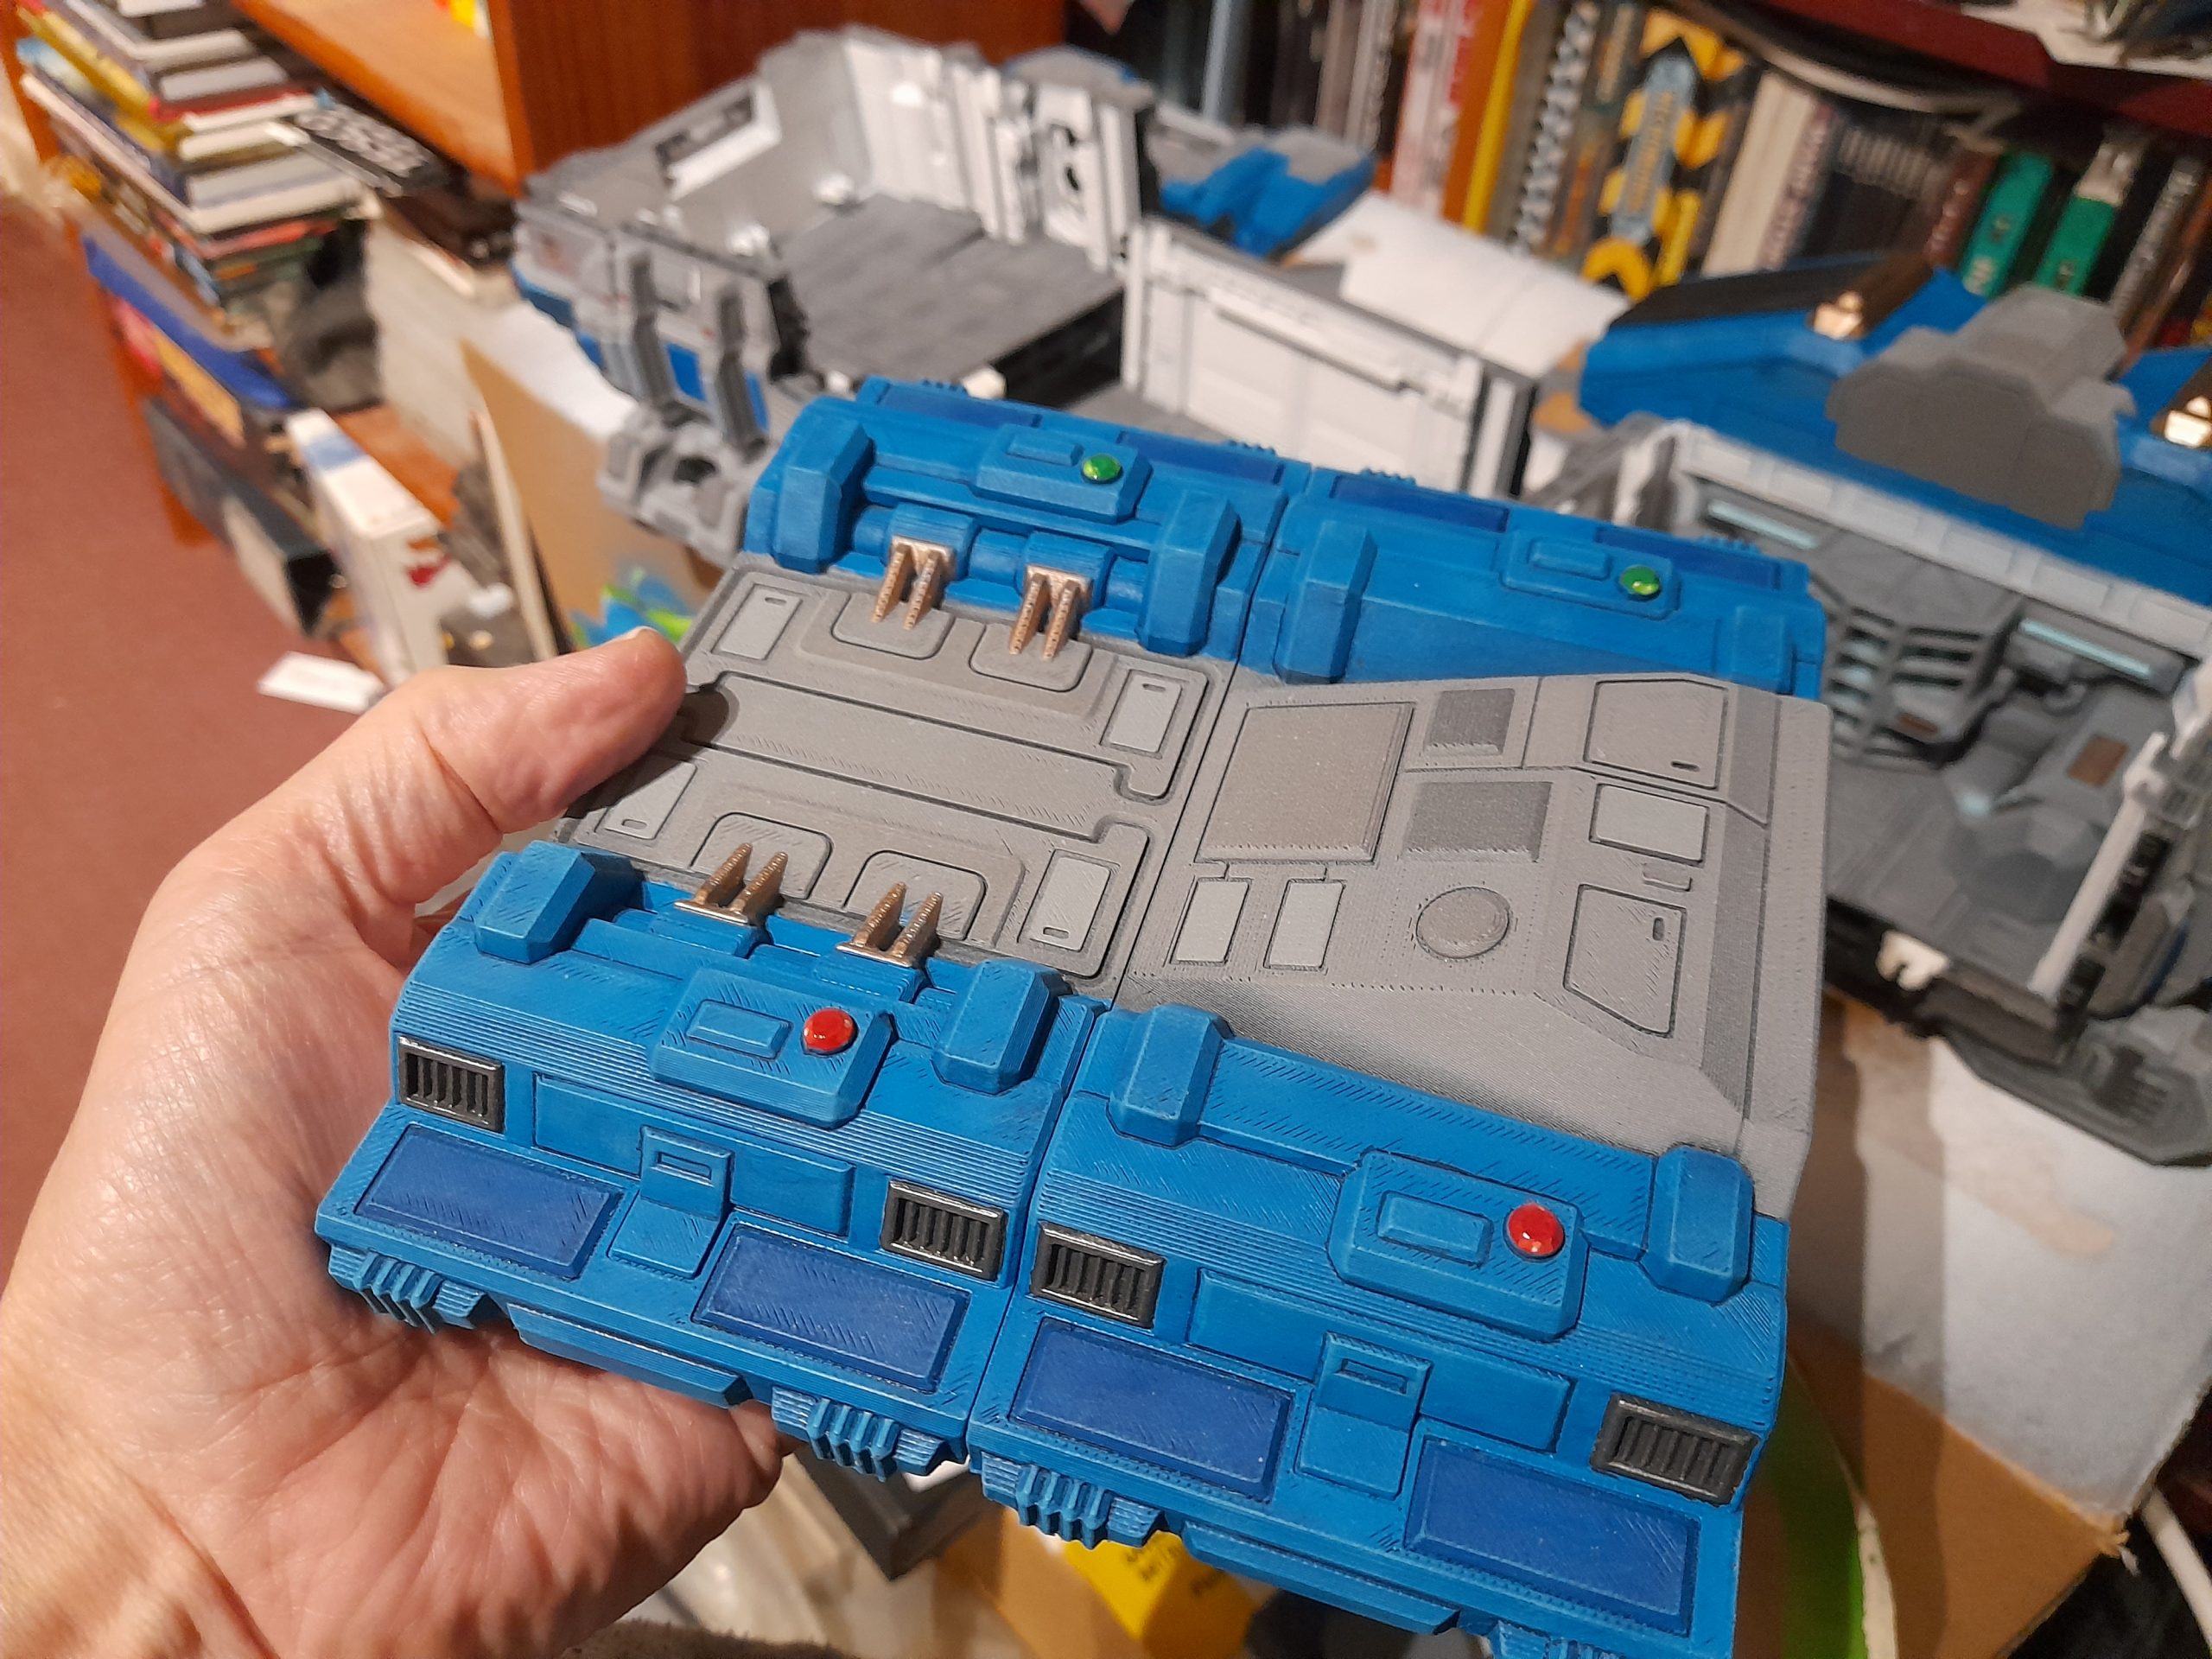
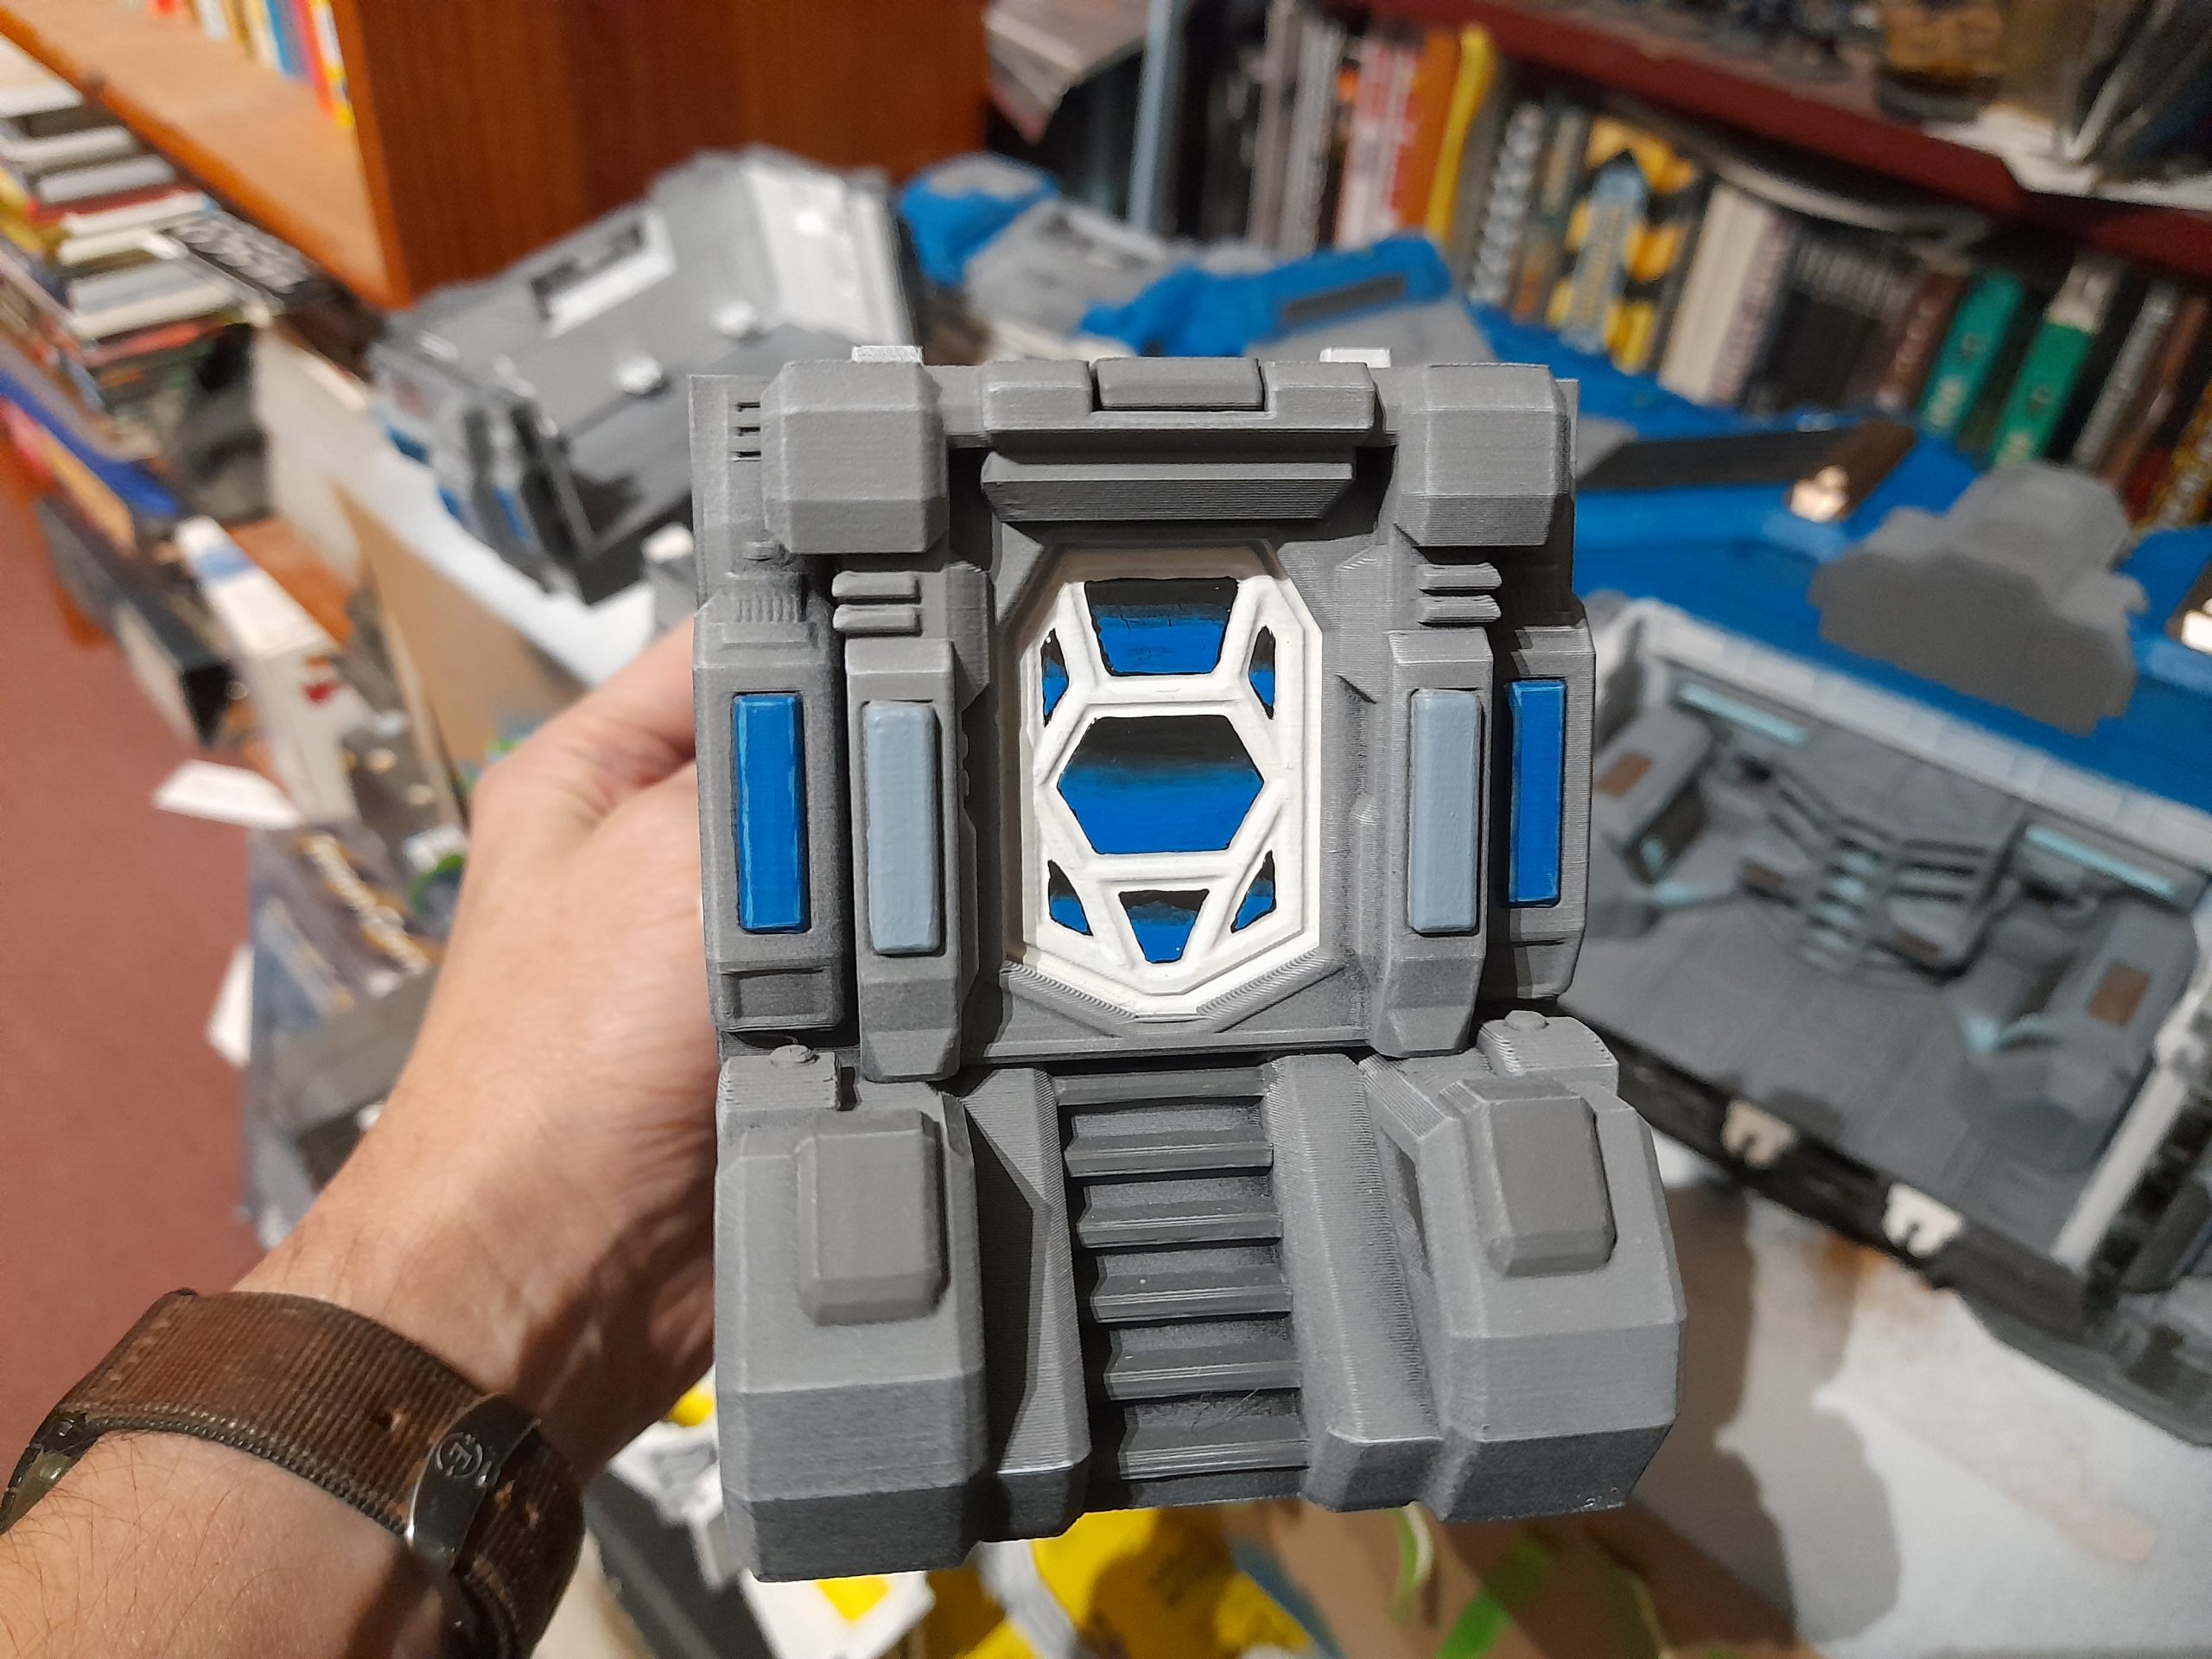
Finally I worked on the power plant pieces. For the side pieces I picked out the ‘turbine’ like section in gunmetal and brass, given a nuln wash. Then I added some engine glow by painting the vented section white followed by a light blue contrast. I also added some glow to the elements close to this.
The main power plant section also had some engine glow added in the same way. However, when I then mounted the parts into the hull it all looked a bit too grey…. I will need to come up with some options to get around this.
Bits, and indeed, bobs…..
3rd December 2025
Limited hobby time again due to work and decorating (not Christmas).
As such I added a variety of smaller elements where time would permit.
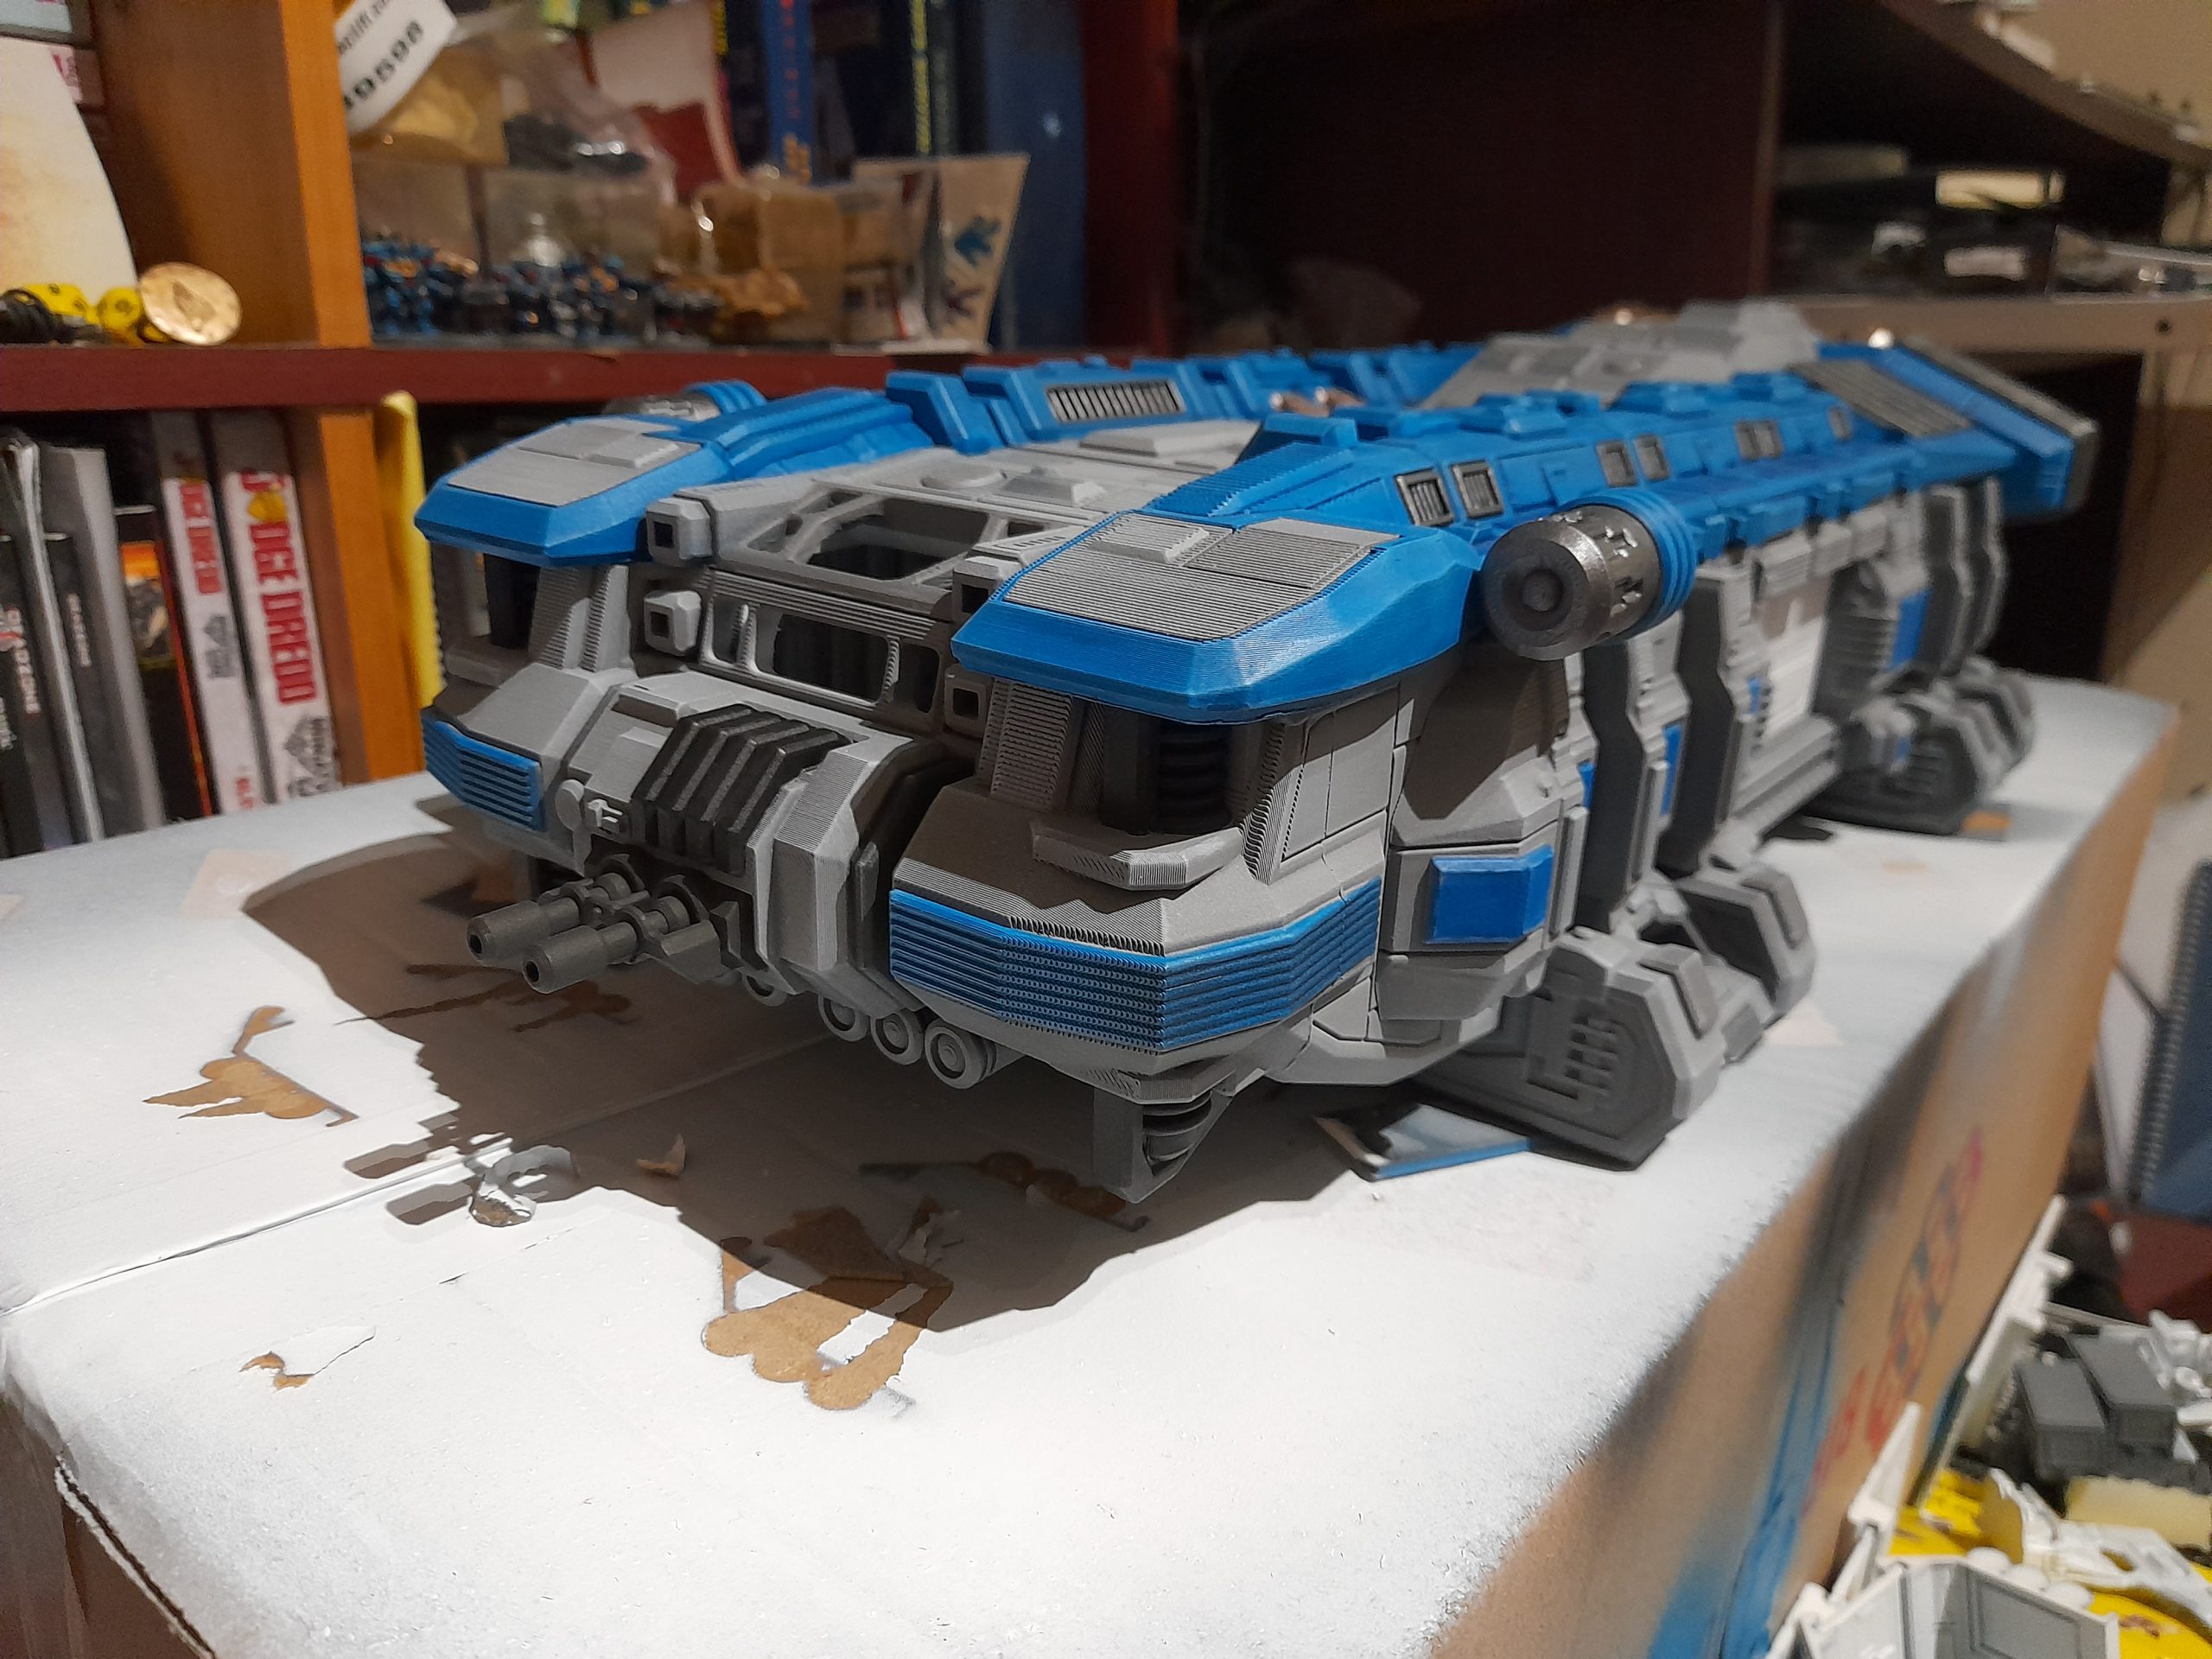
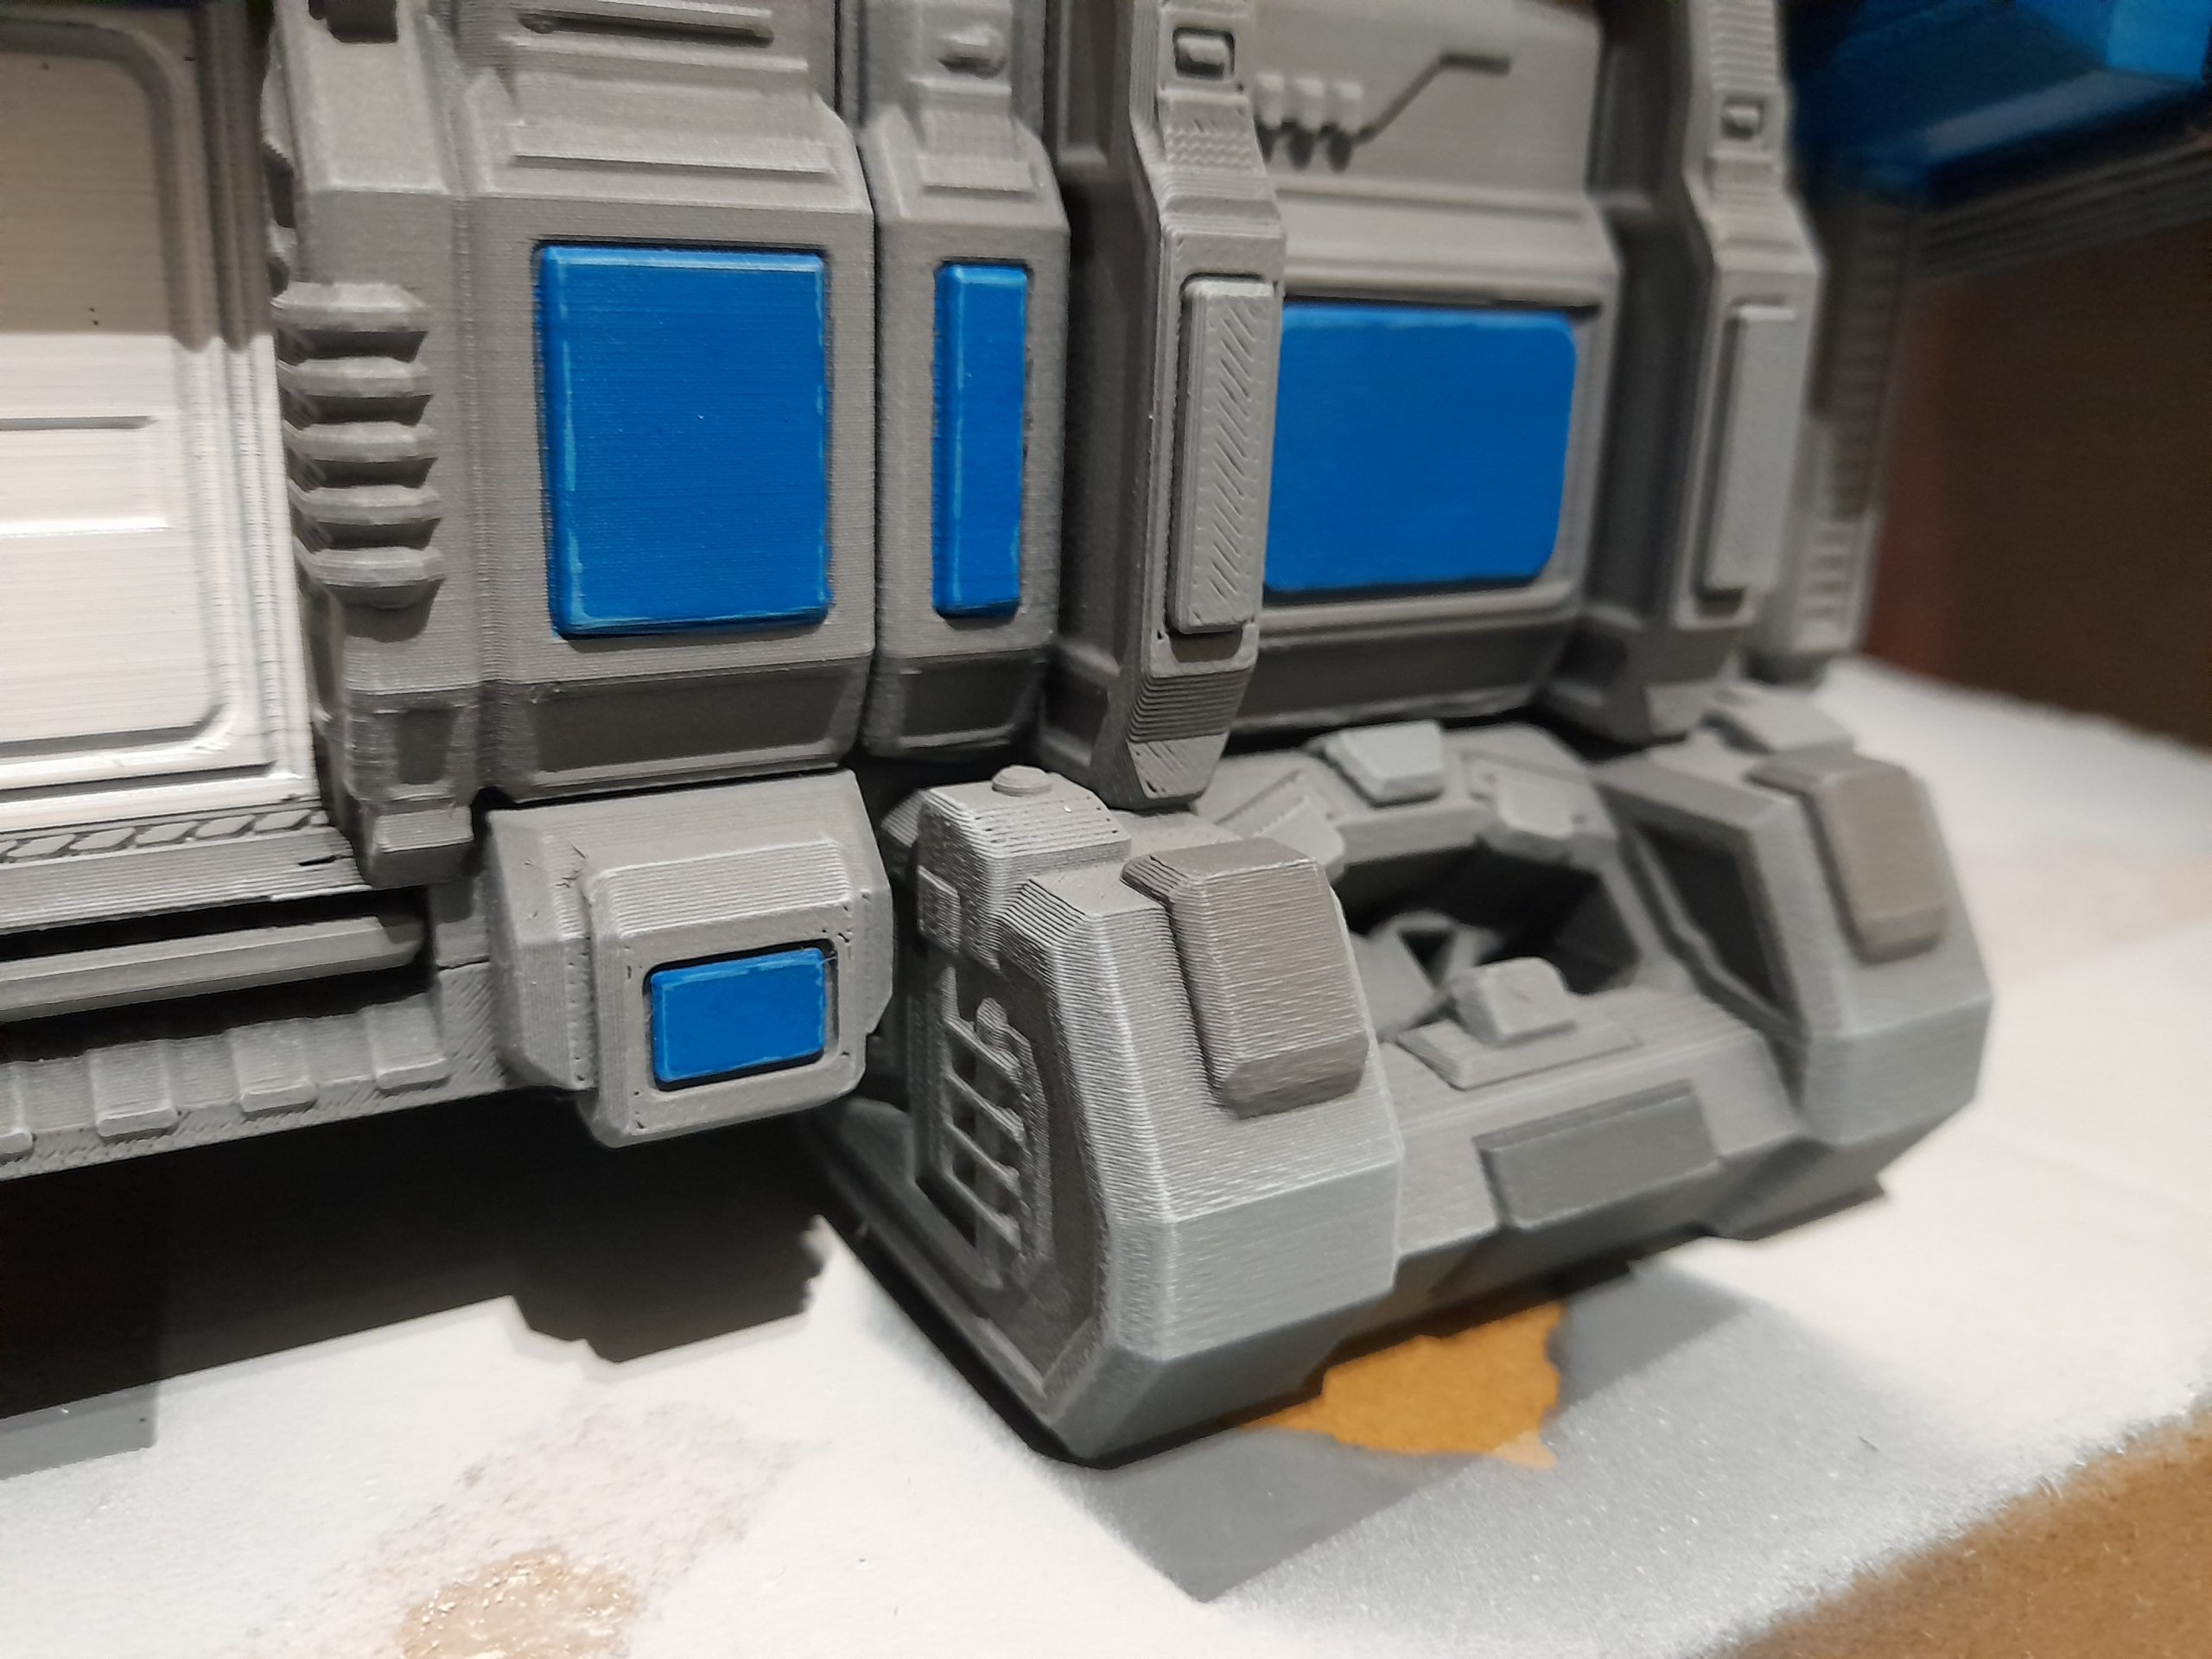
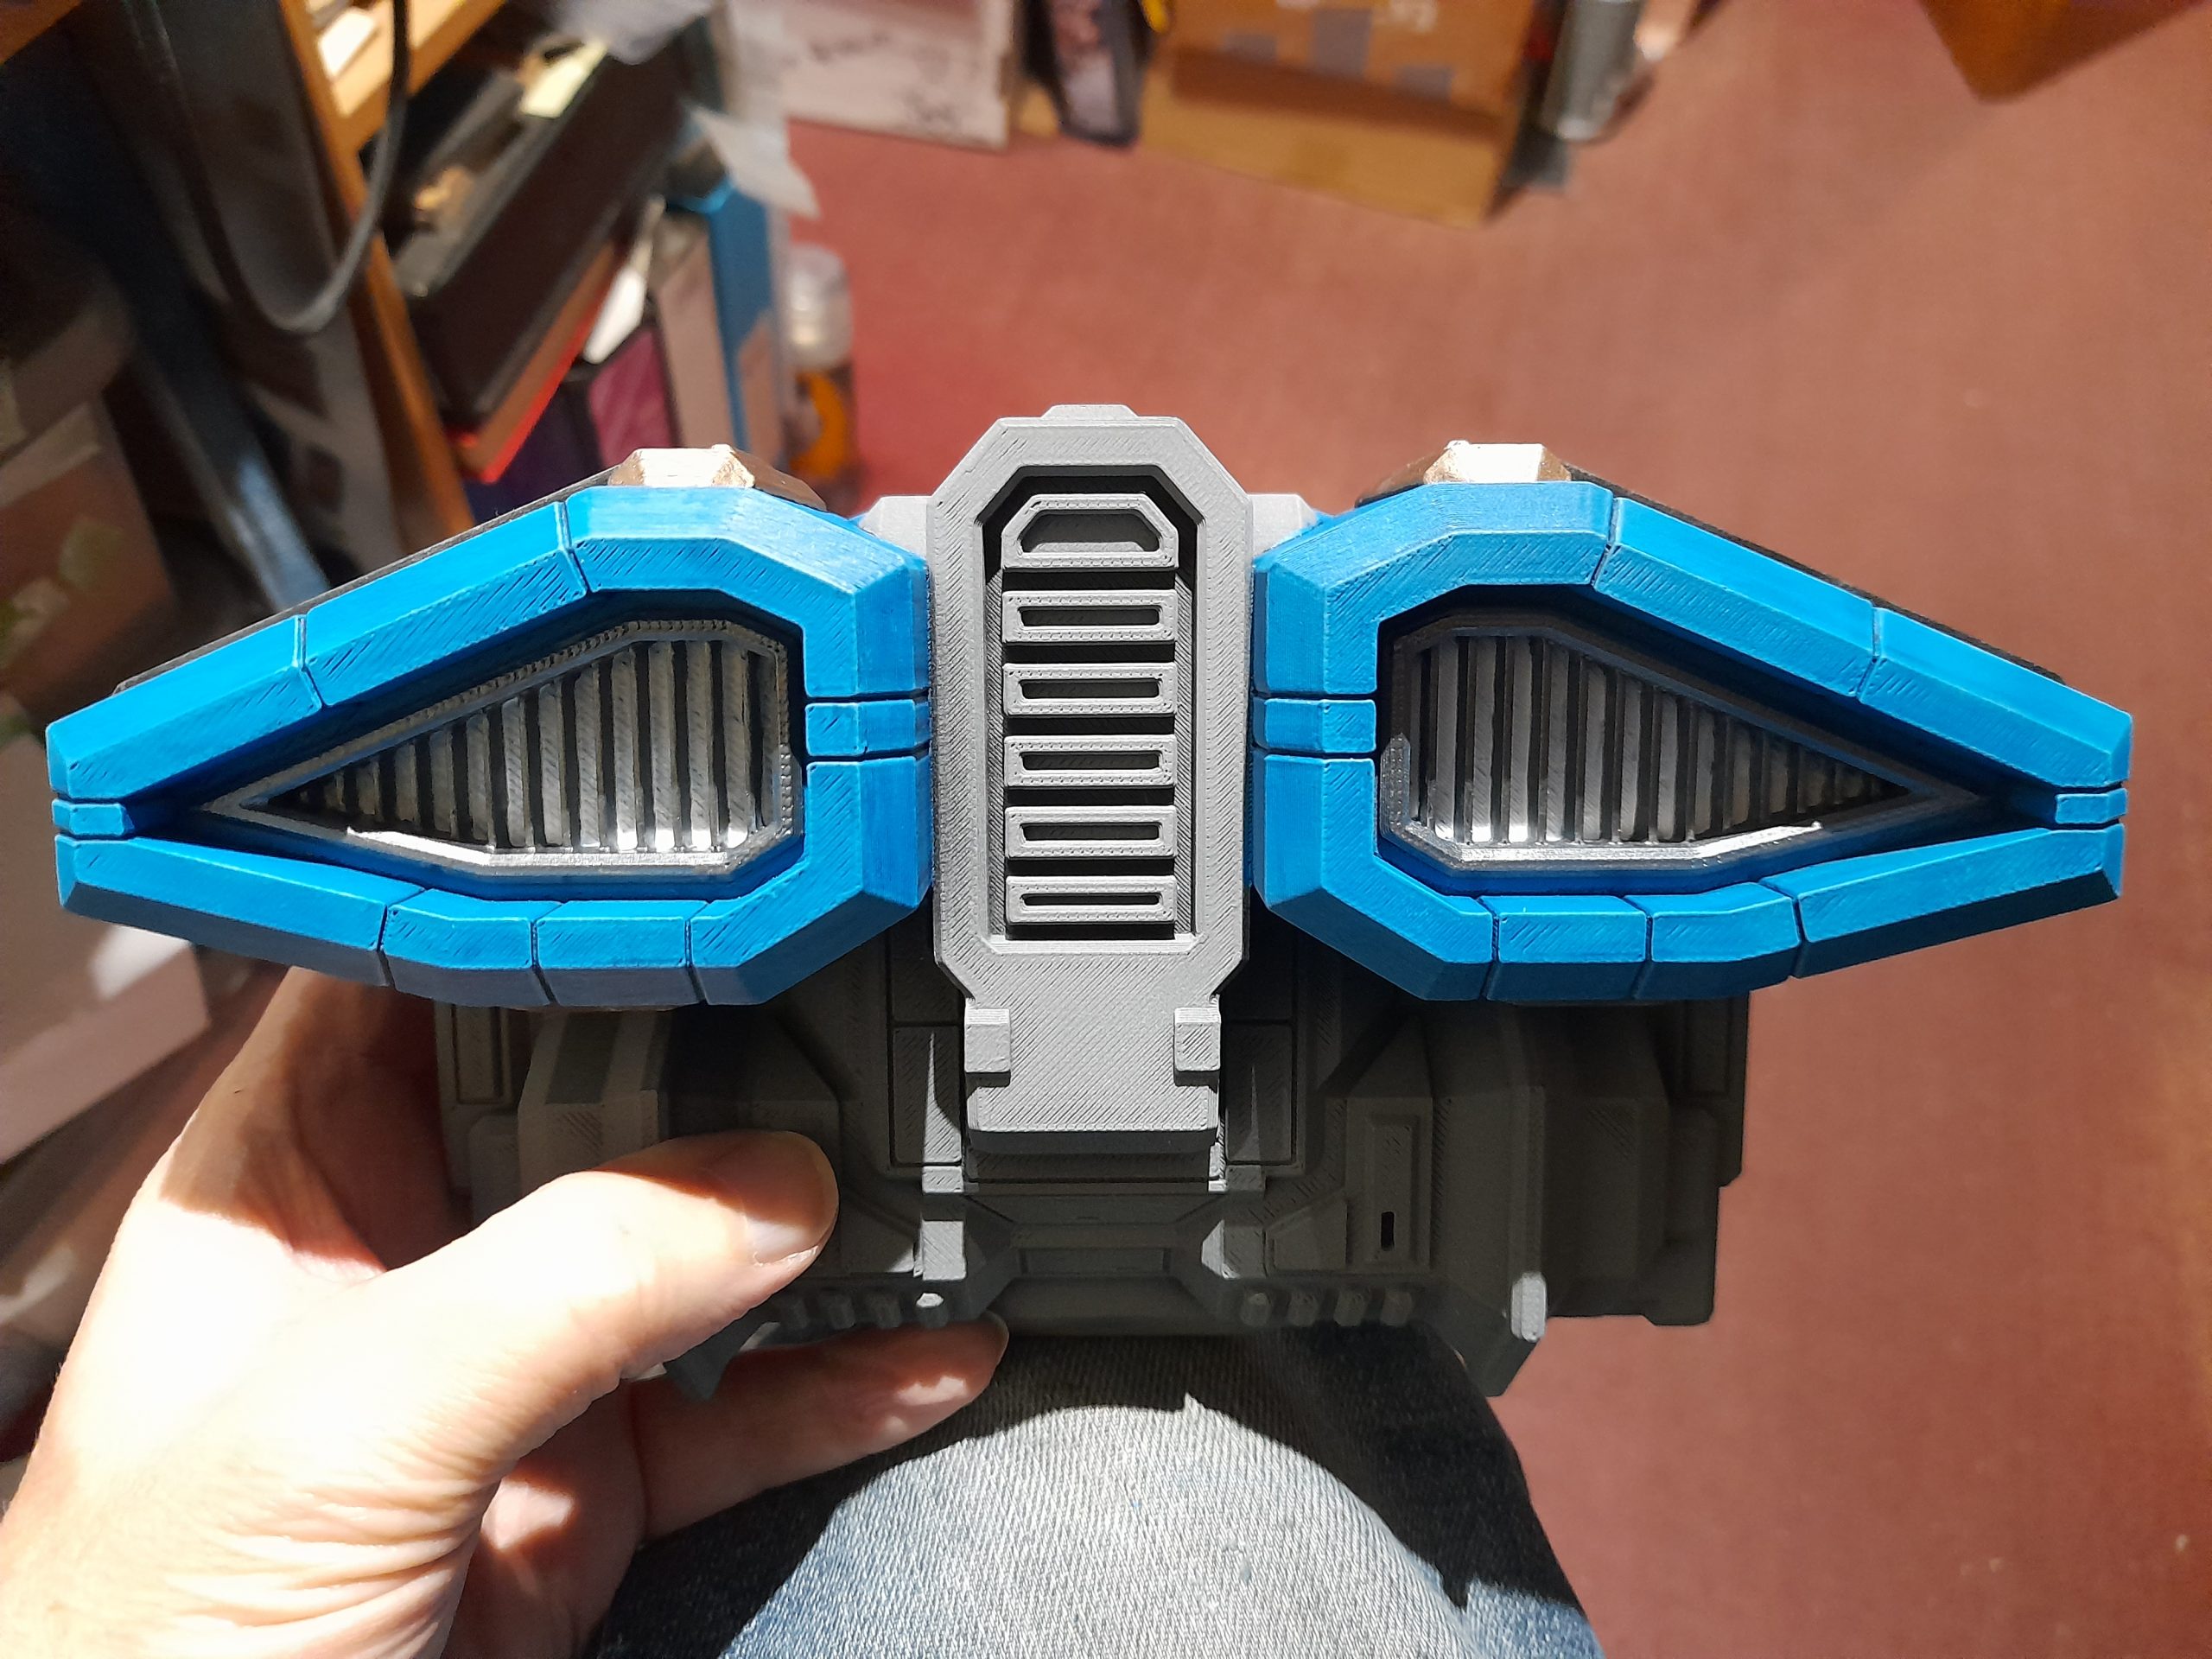
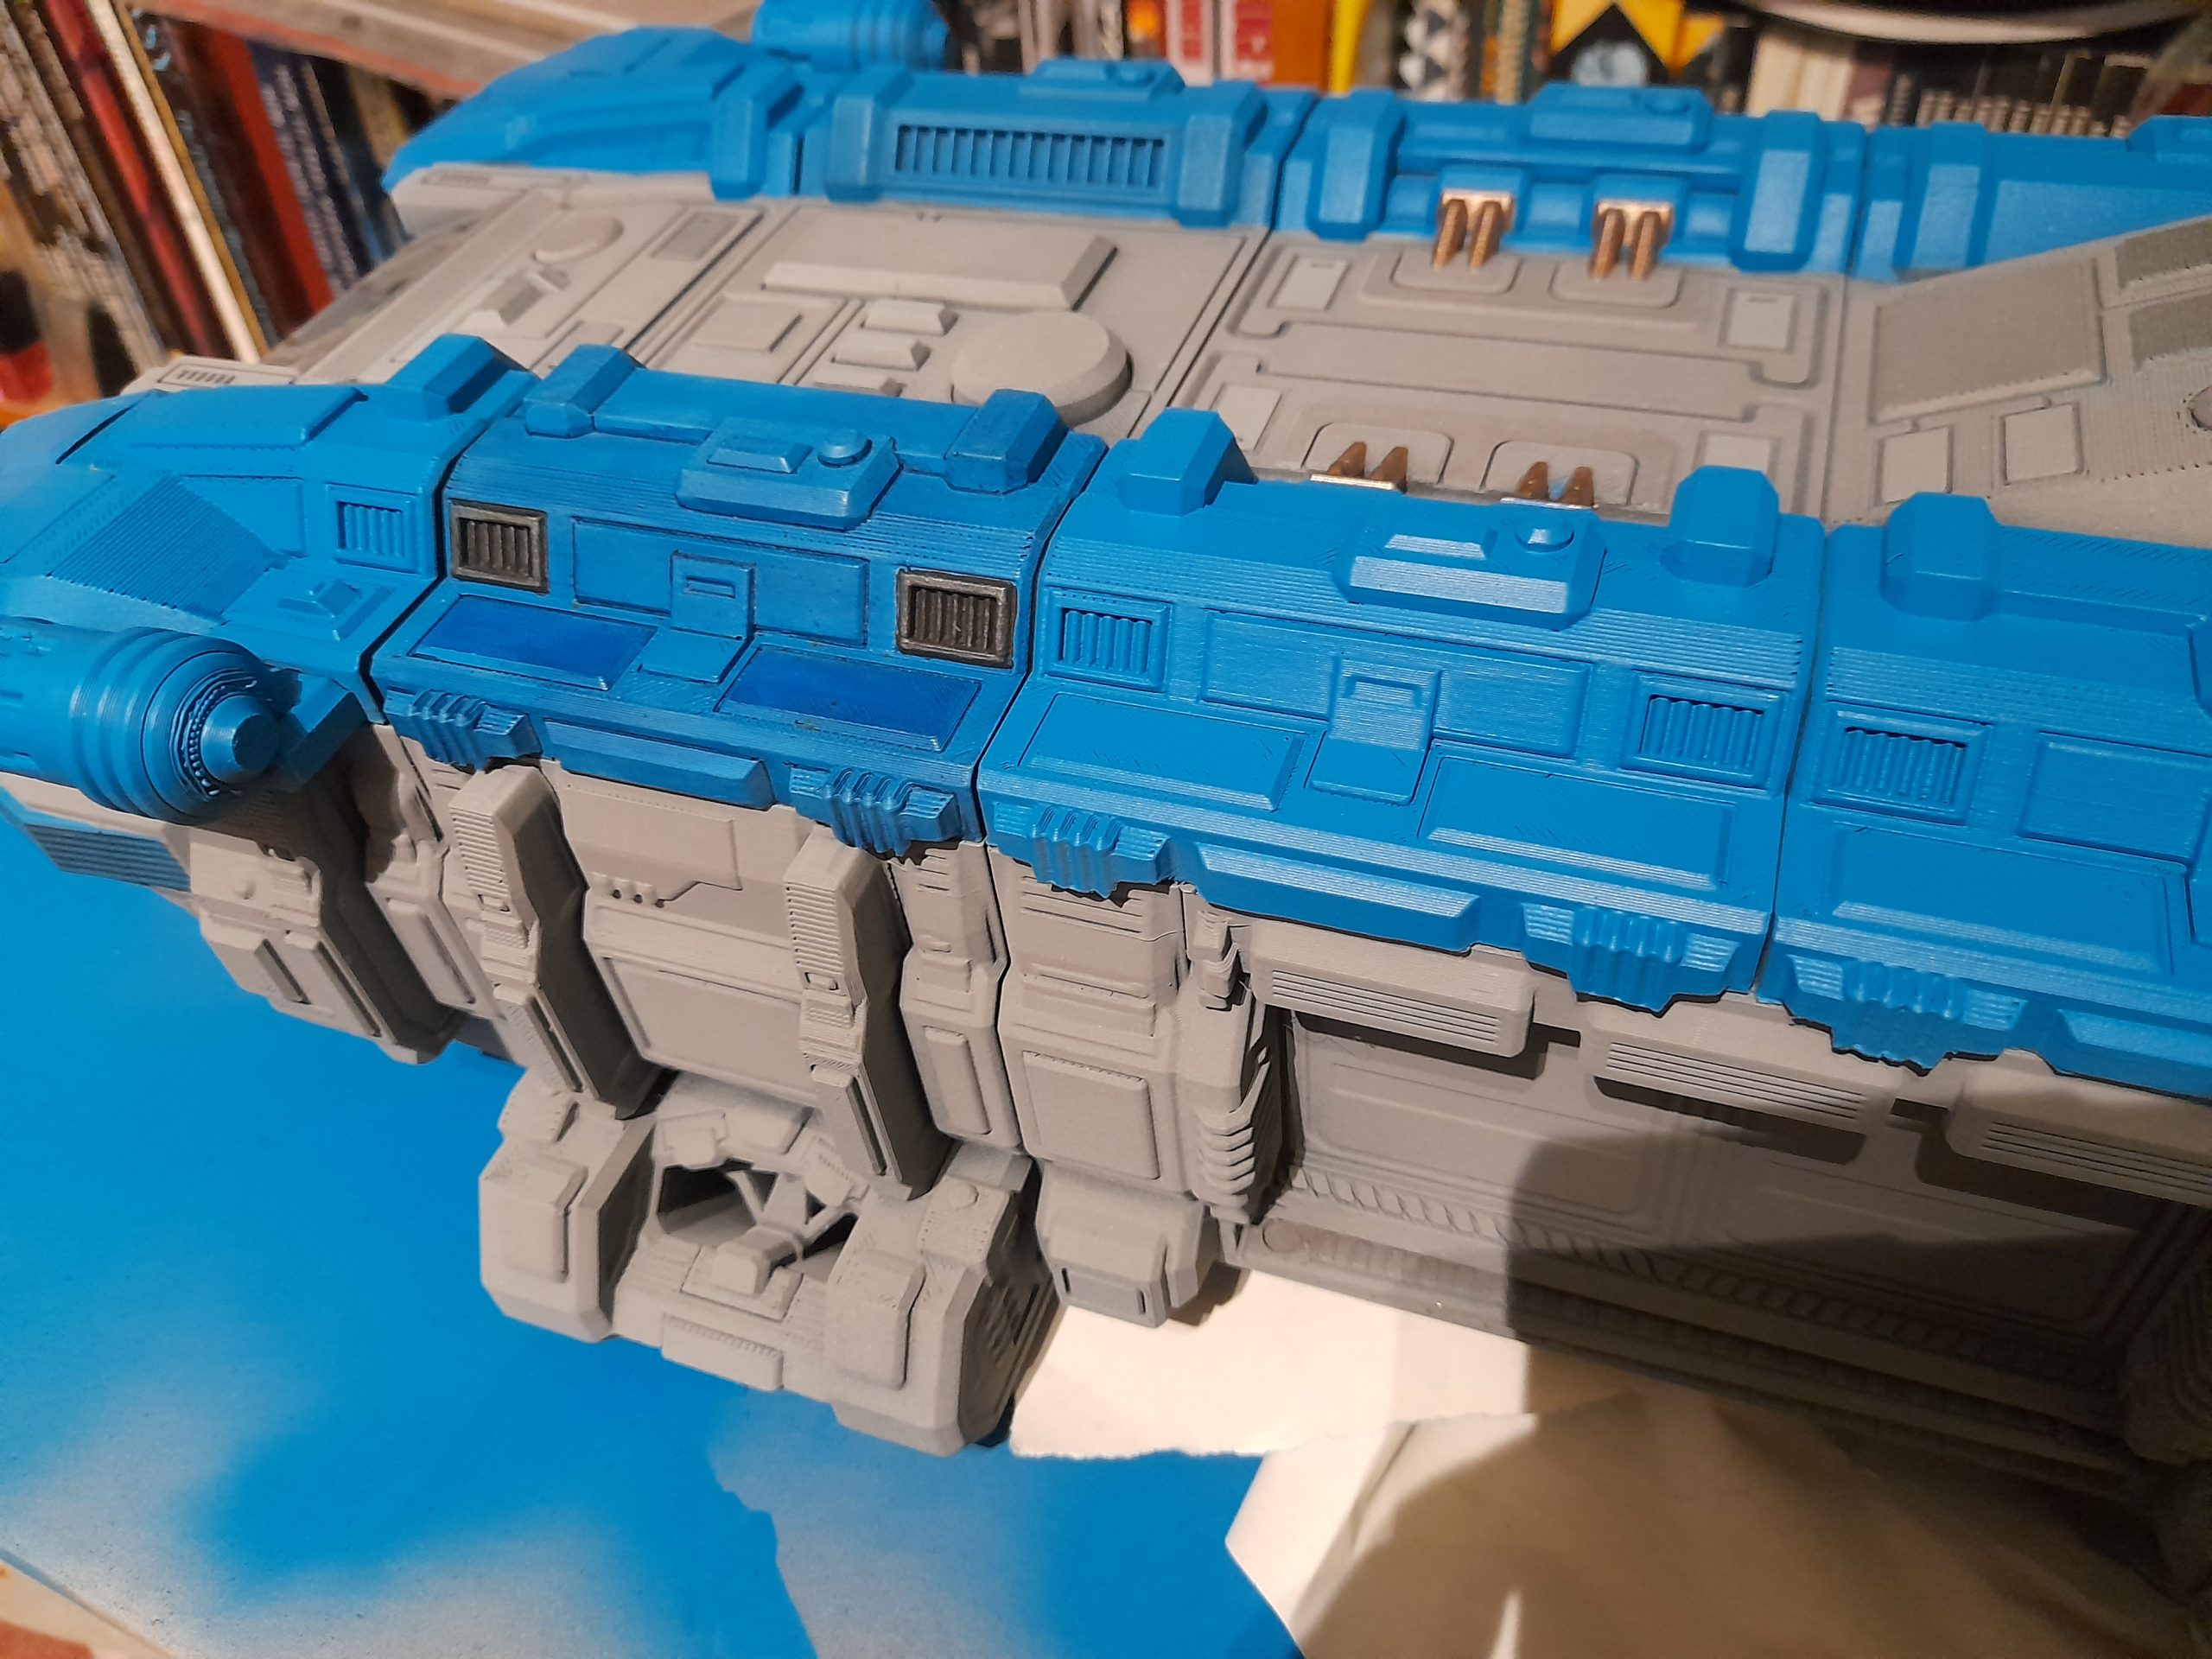
I painted lights on some of the side panels and on the roof. Red for port, green for starboard. For the roof lights I added lighter areas in two places on each light, then added a white dot in the middle of those, and gloss varnish. They don’t stand up to close scrutiny, but work well from play distance.
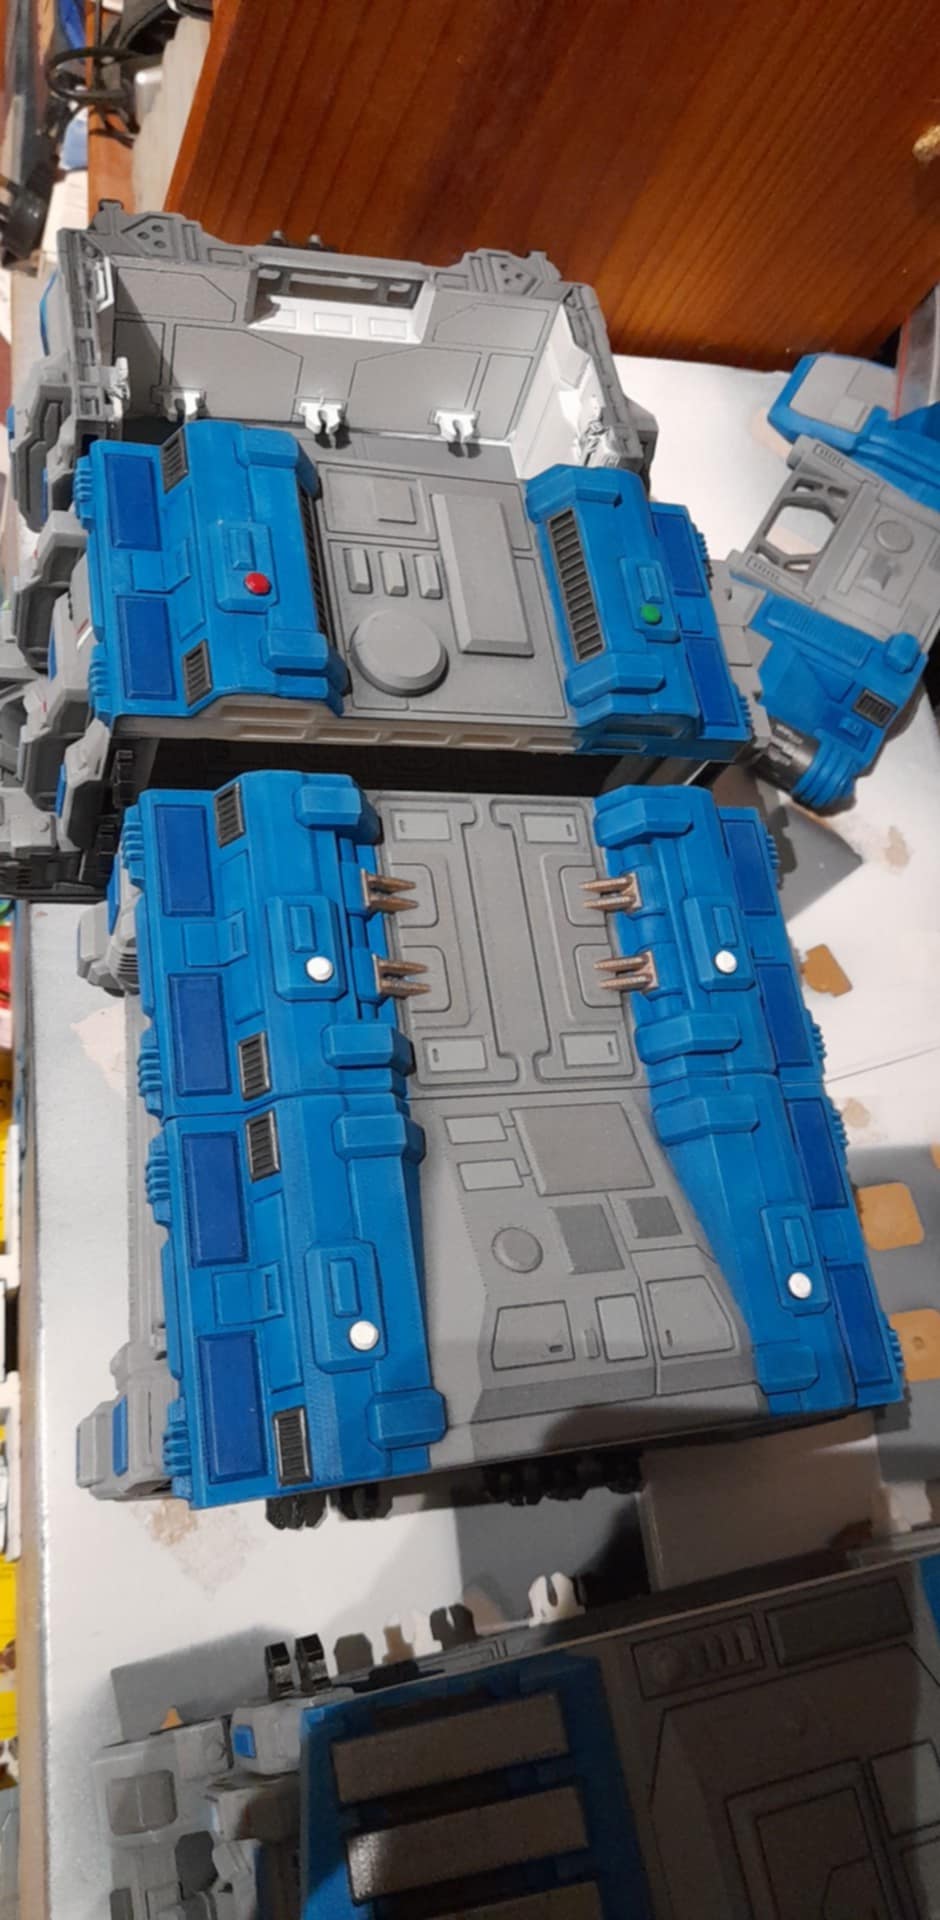
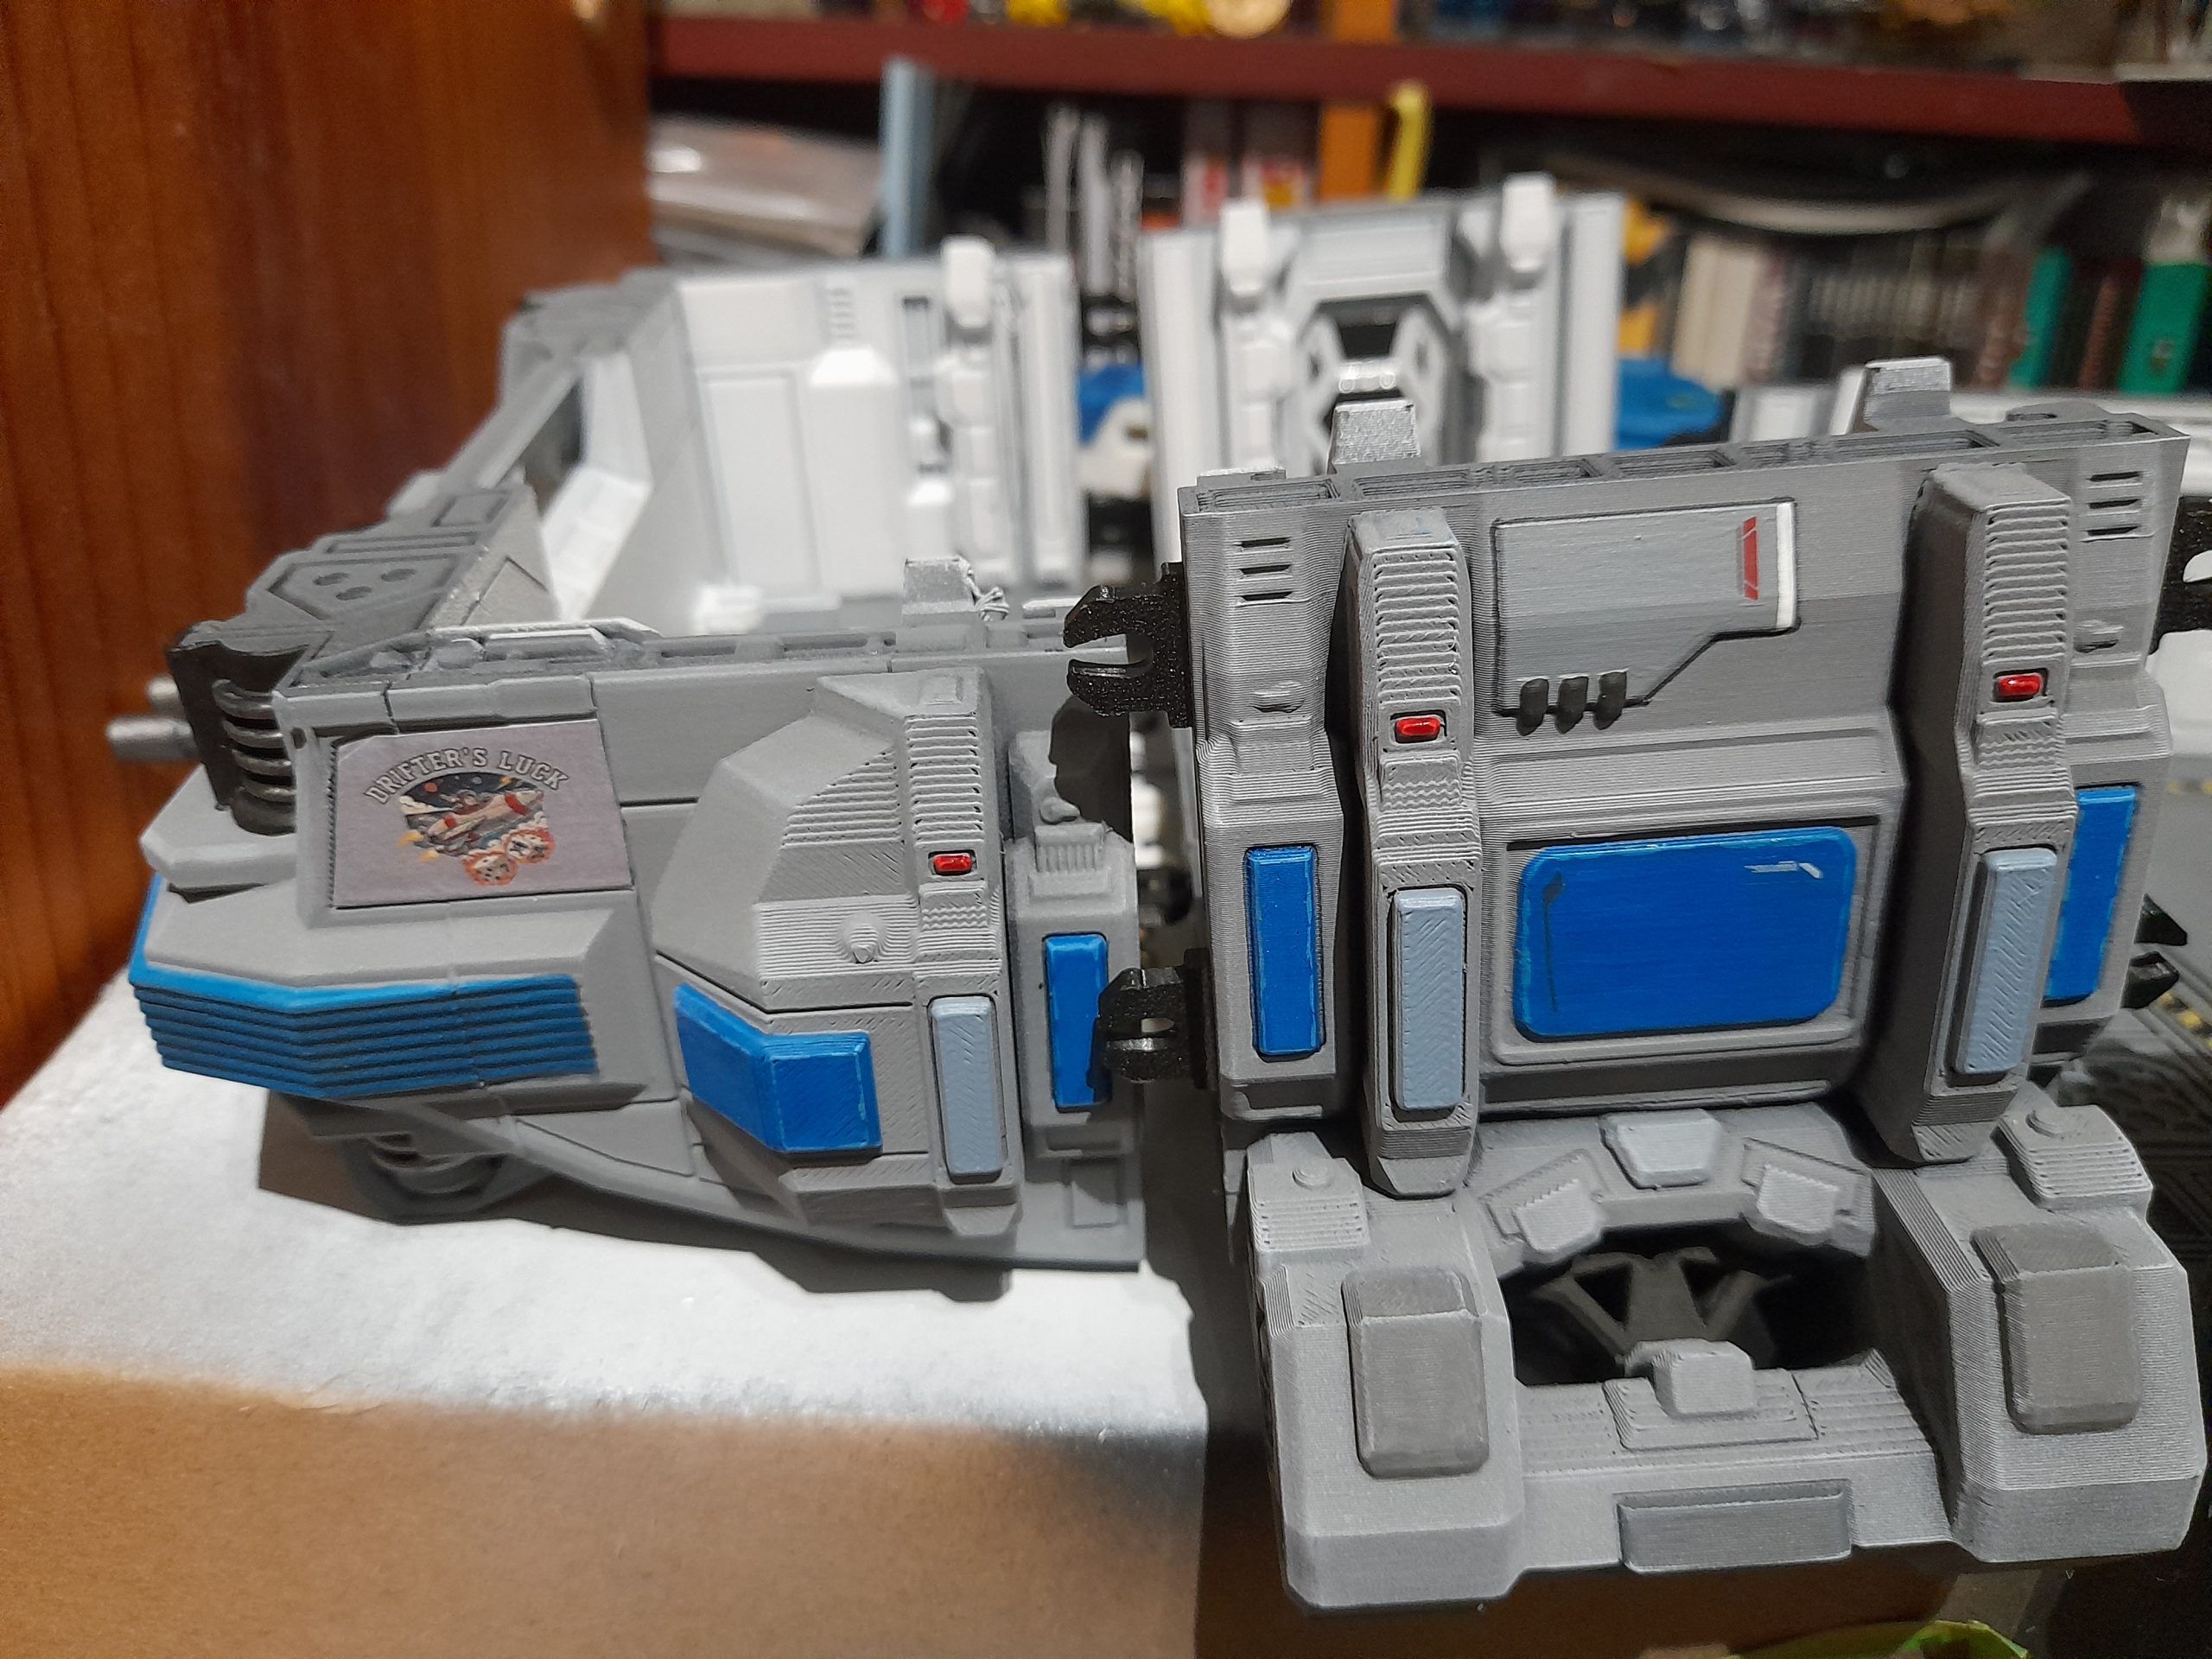
I also picked out some repeated larger side panels in a slightly lighter grey (perhaps too close to hull colour), added a white stripe at the far side, a red gundam sticker next to that, three black elements at the bottom, then panel lined them so they would stand out a bit. I also added a ship logo to each side of the cockpit. Printed out and glued on. The grey doesn’t quite match, so I will need to try to blend it in later, perhaps via the weathering stage.
While I had the gundam stickers out I also added several to the cargo bay doors, and a couple to each of the more square blue side panels.
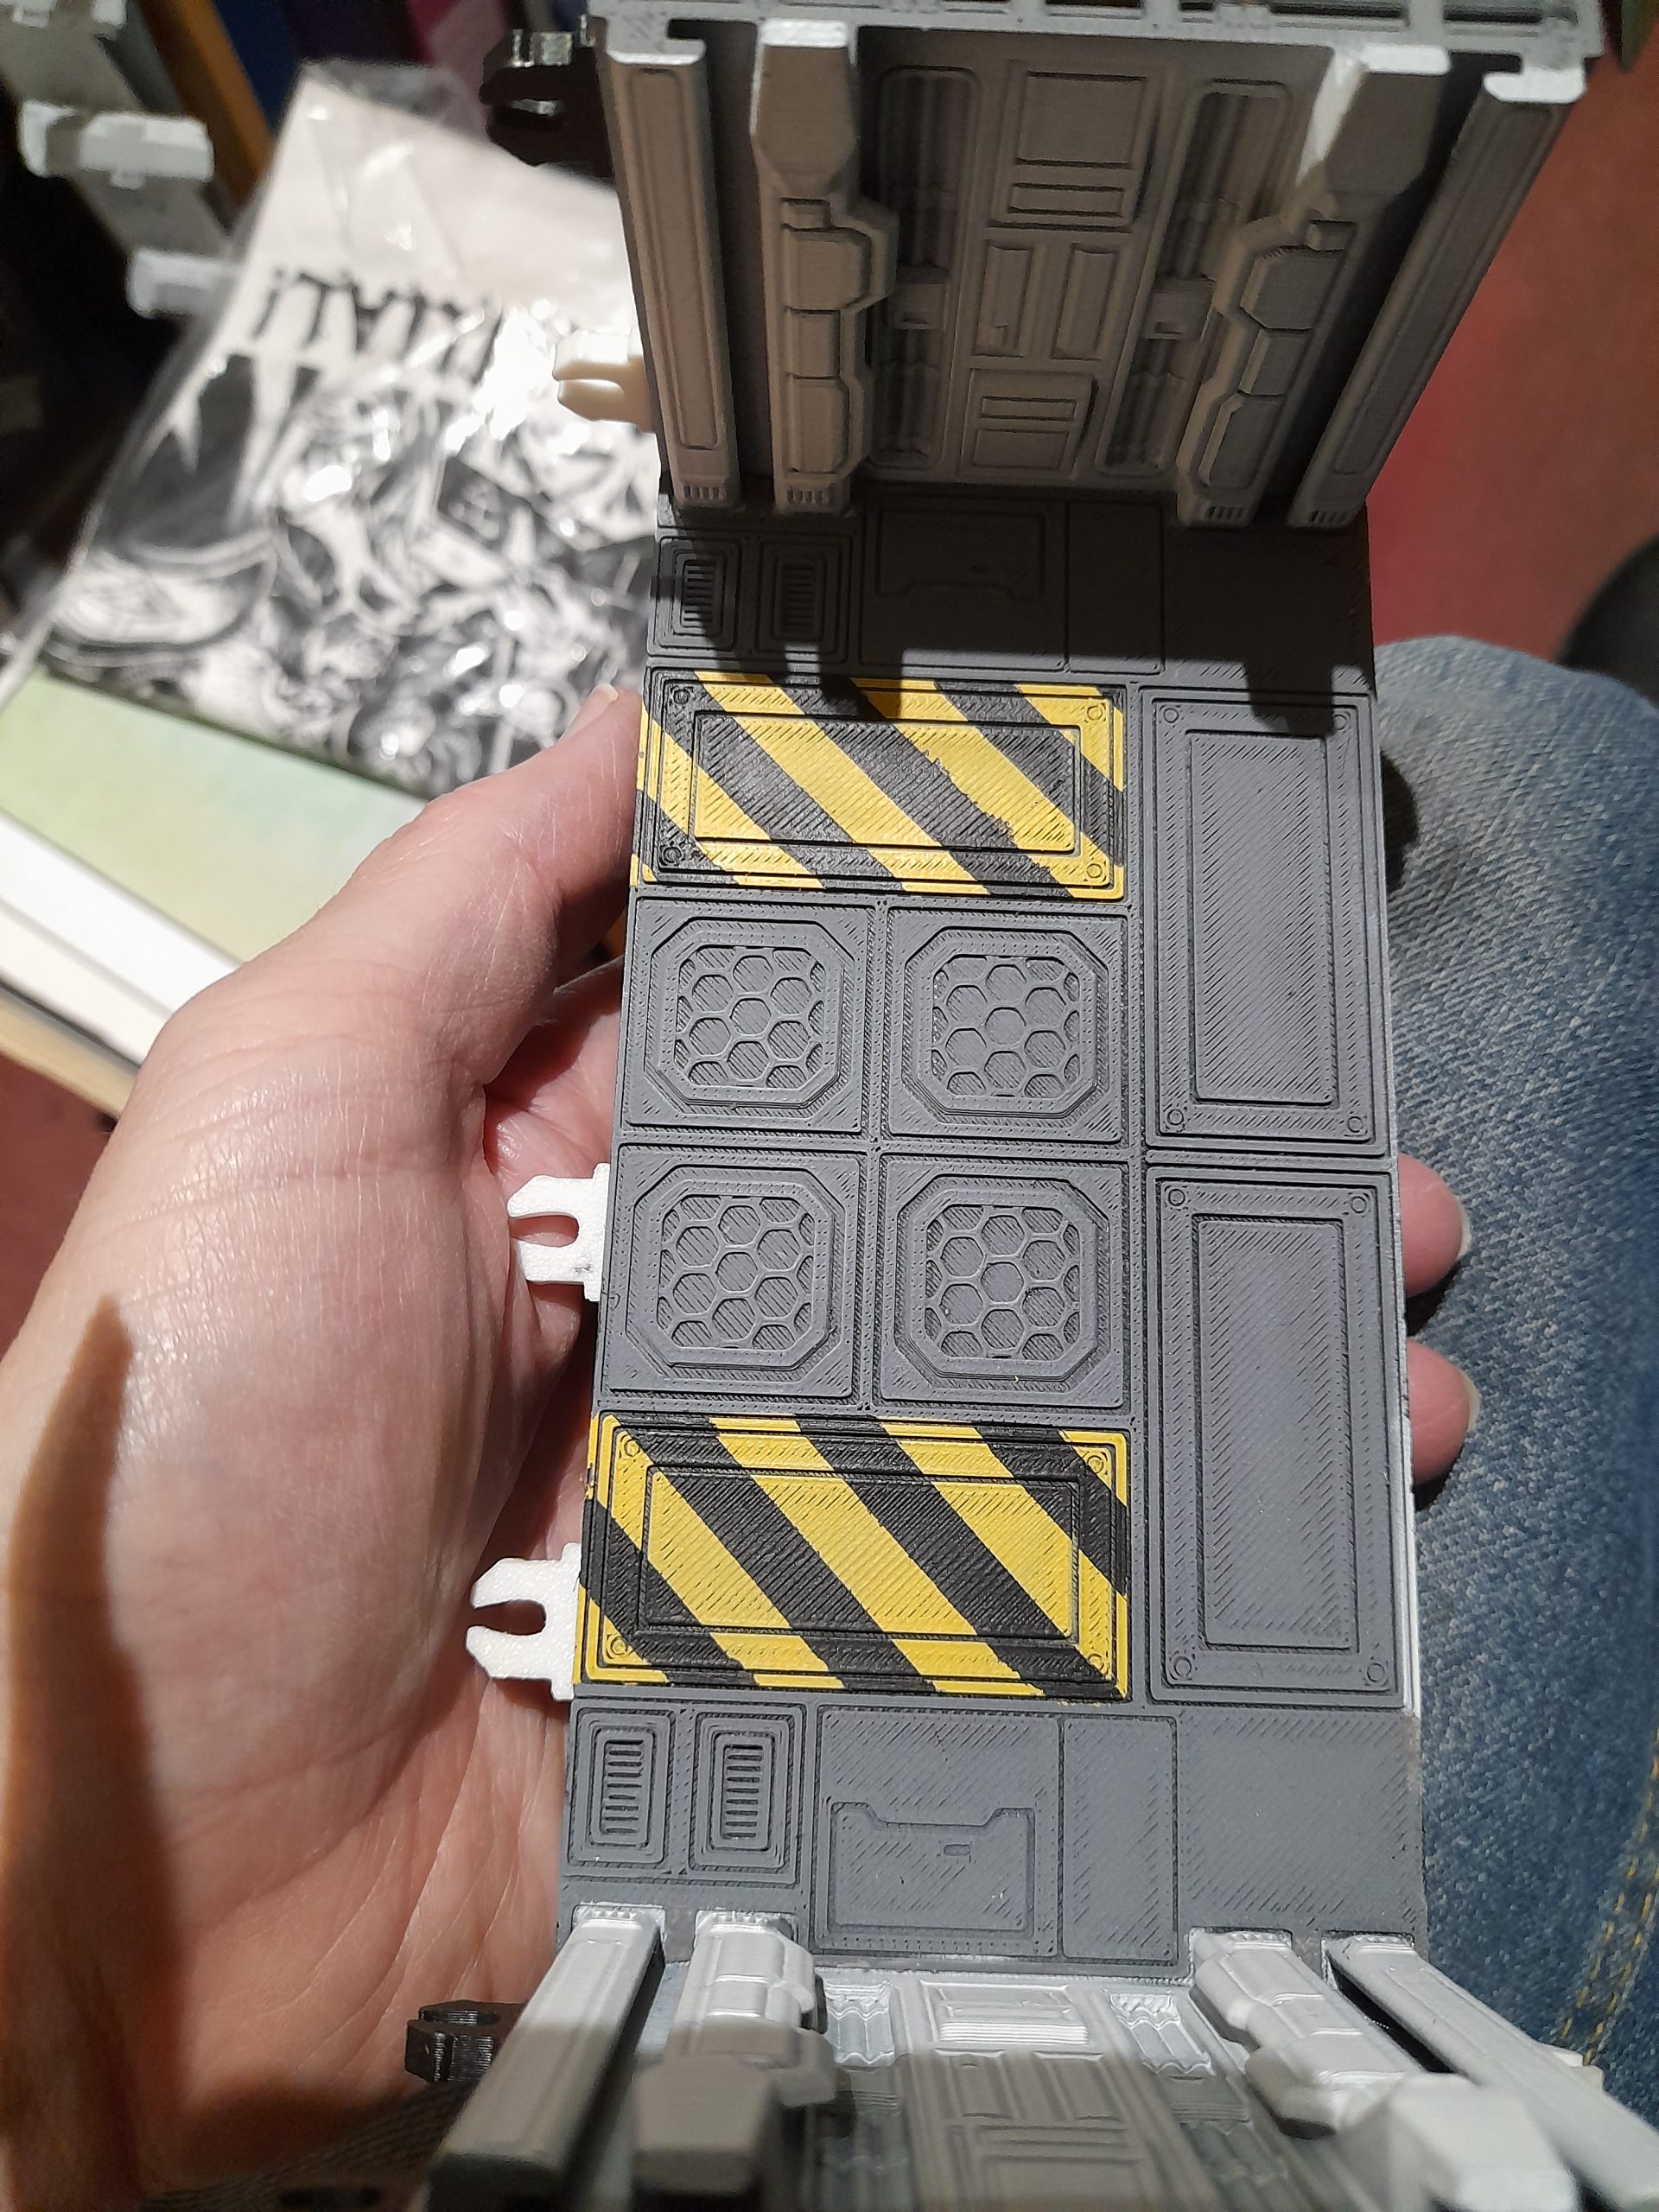
For the cargo bay there are hazard markers in the sculpt. So I masked these off, stippled on some yellow ochre, then picked out alternate segments in black. Works pretty well I feel.

For the airlock door, I initially had it in the grey, with a blue panel. But that was pretty dull. I repainted it white, and painted the panels in a blue to black graduation, to try to represent some sort of glass or Perspex material. The whole door then had a couple of coats of gloss varnish.

Slow progress
25th November 2025
Haven’t had much time to work on the ship this past week.
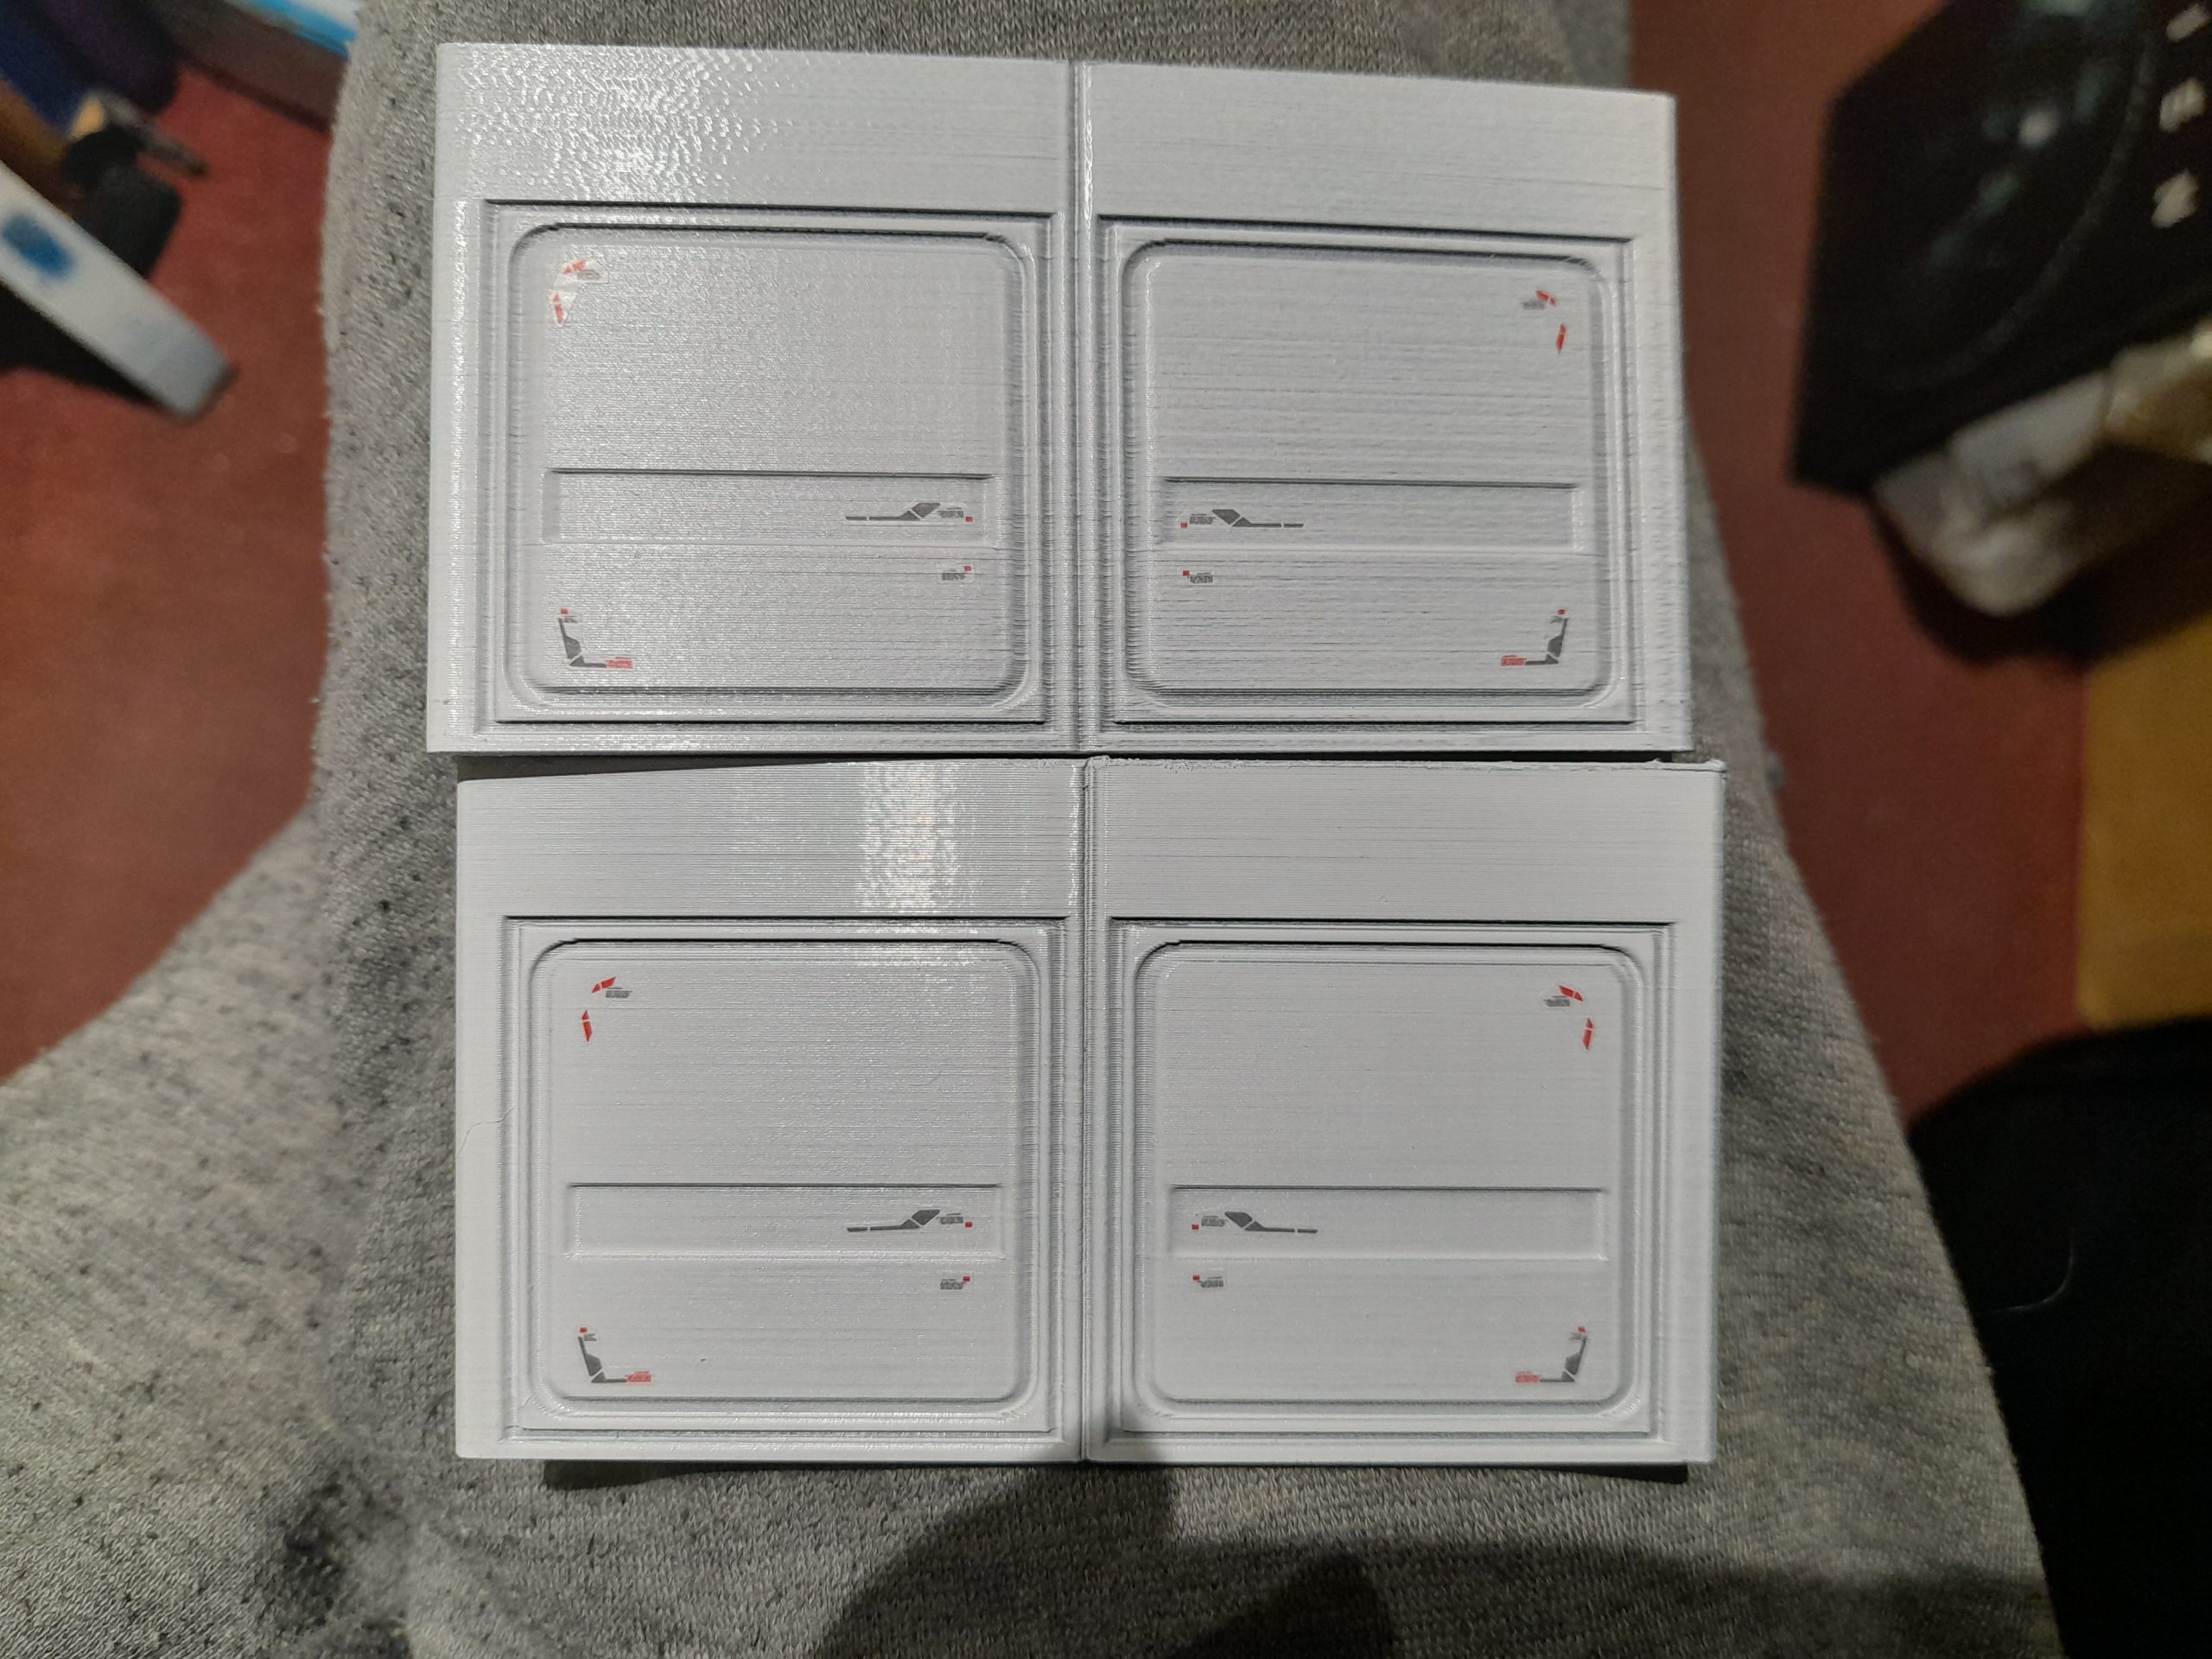
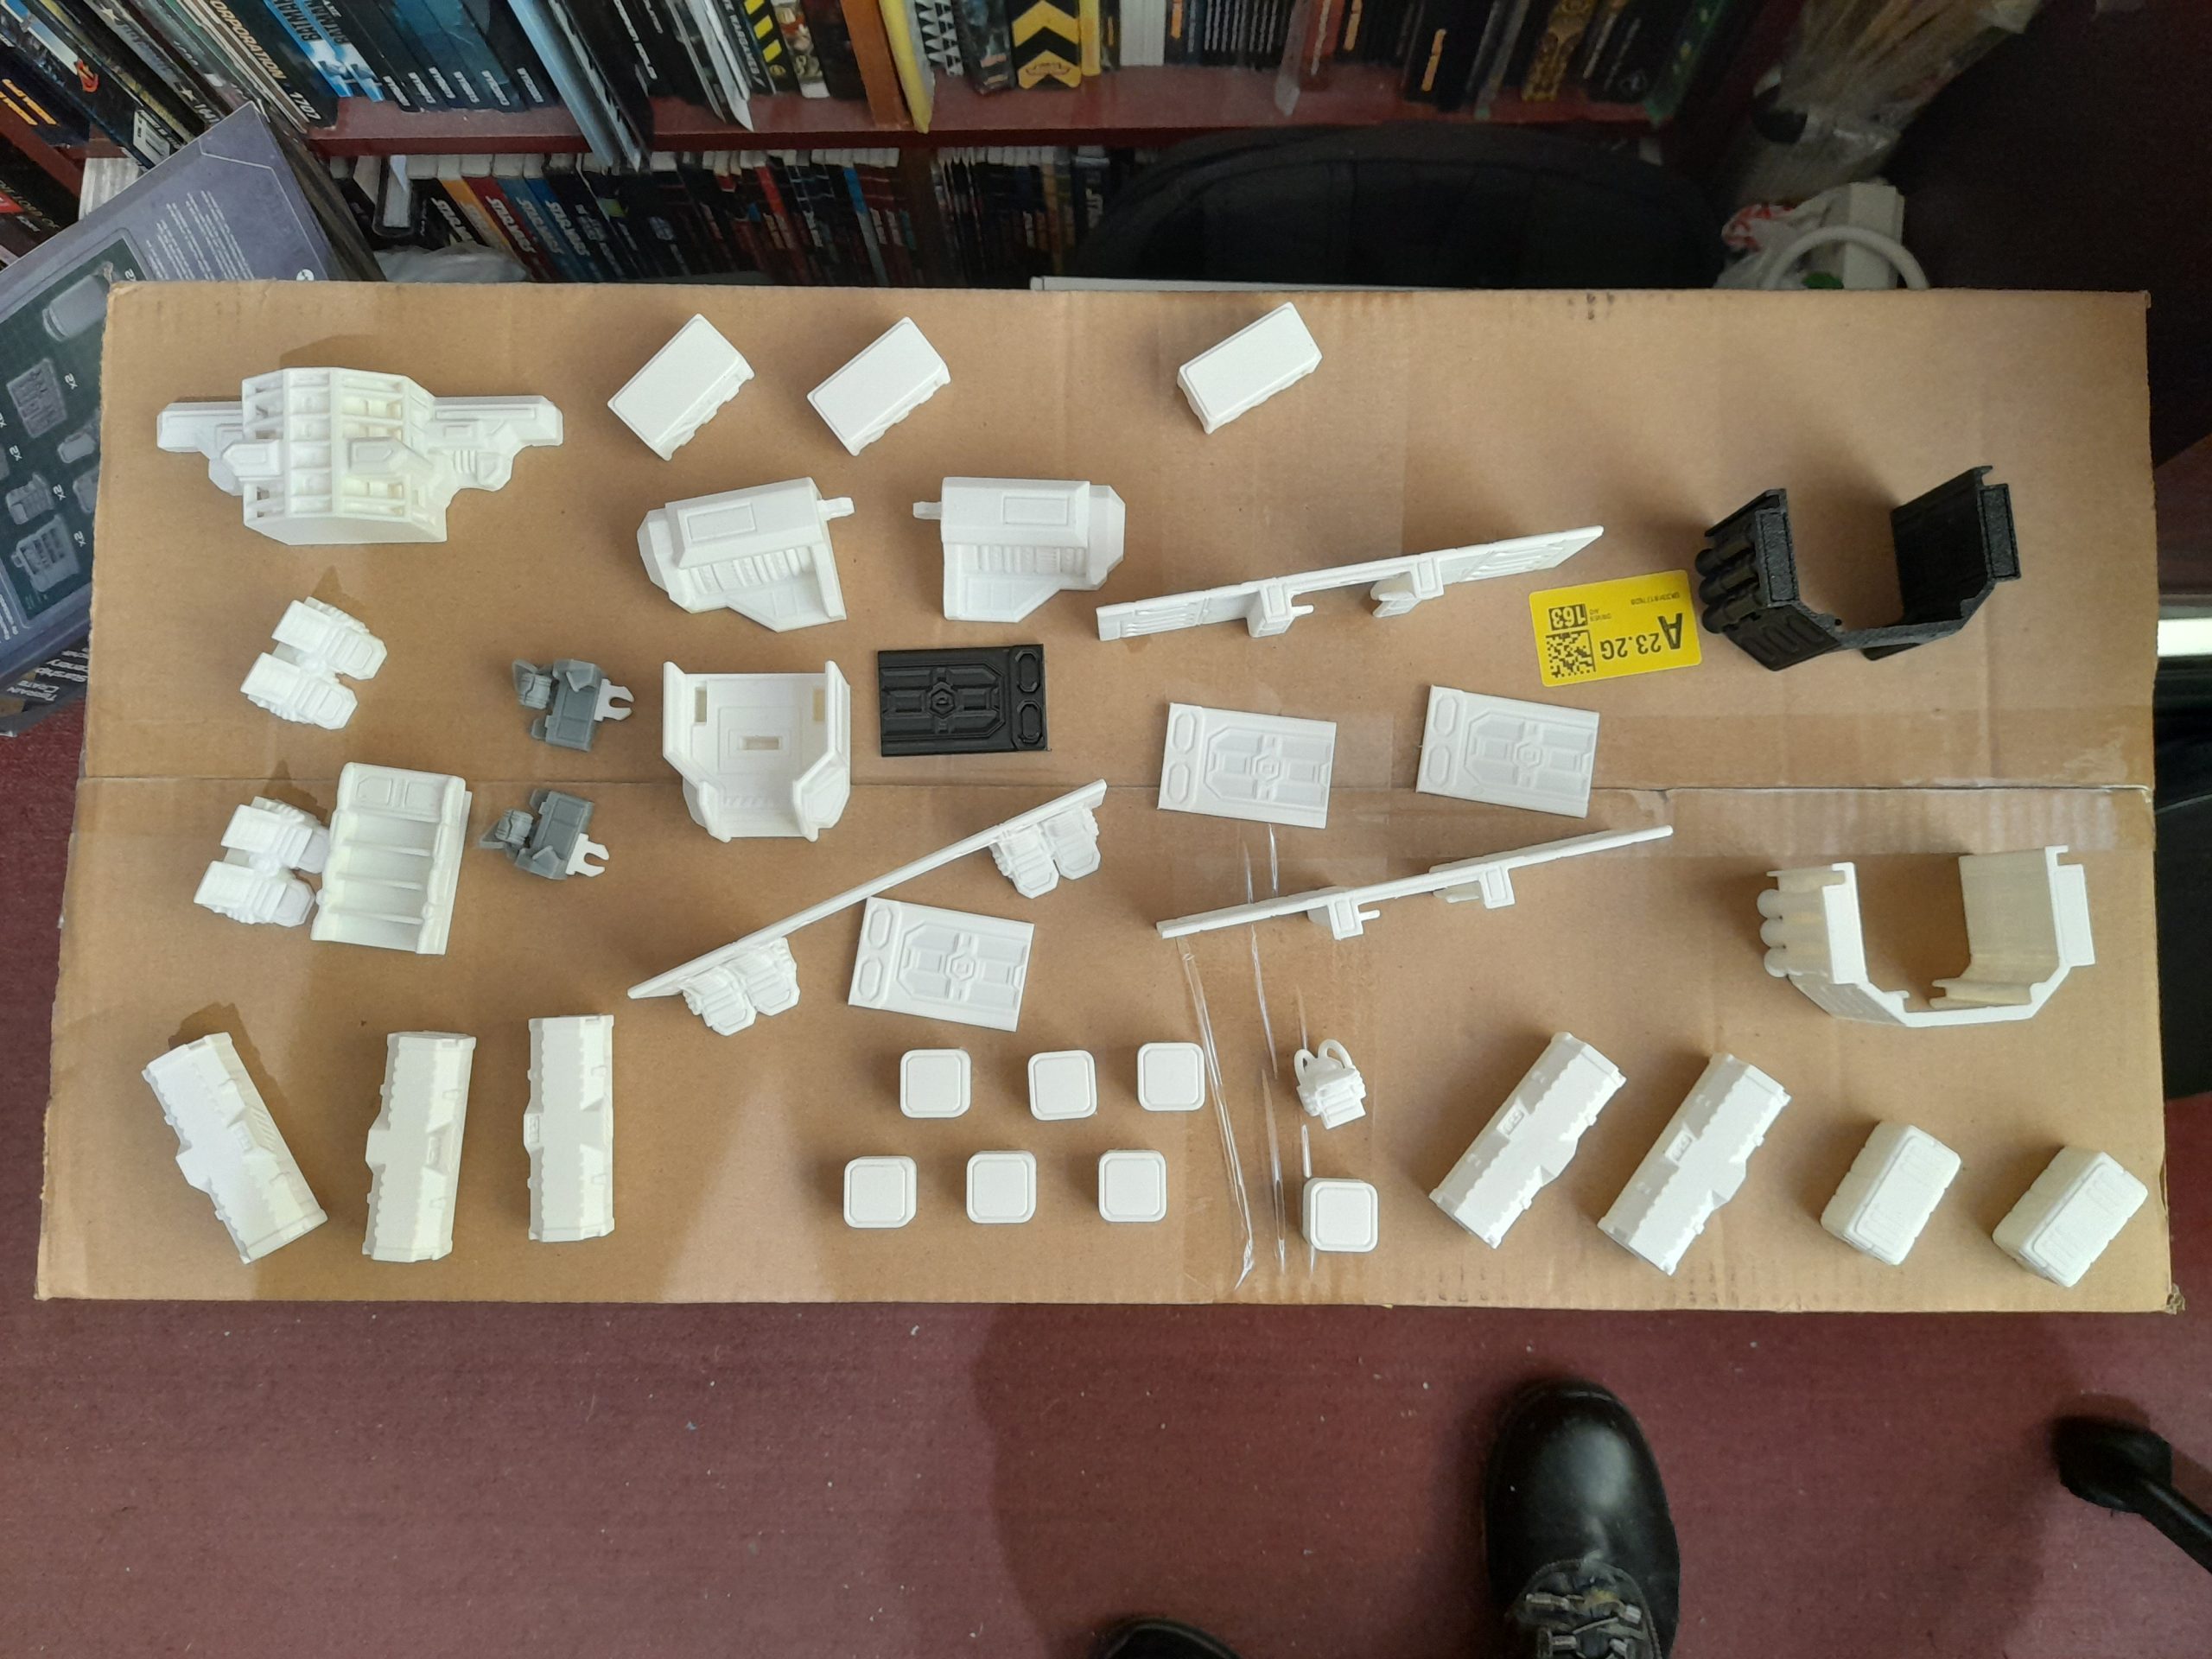
I have sprayed up the interior pieces in bright white, to match the aesthetic of Star Wars rebel alliance interiors, and primed the various crates.
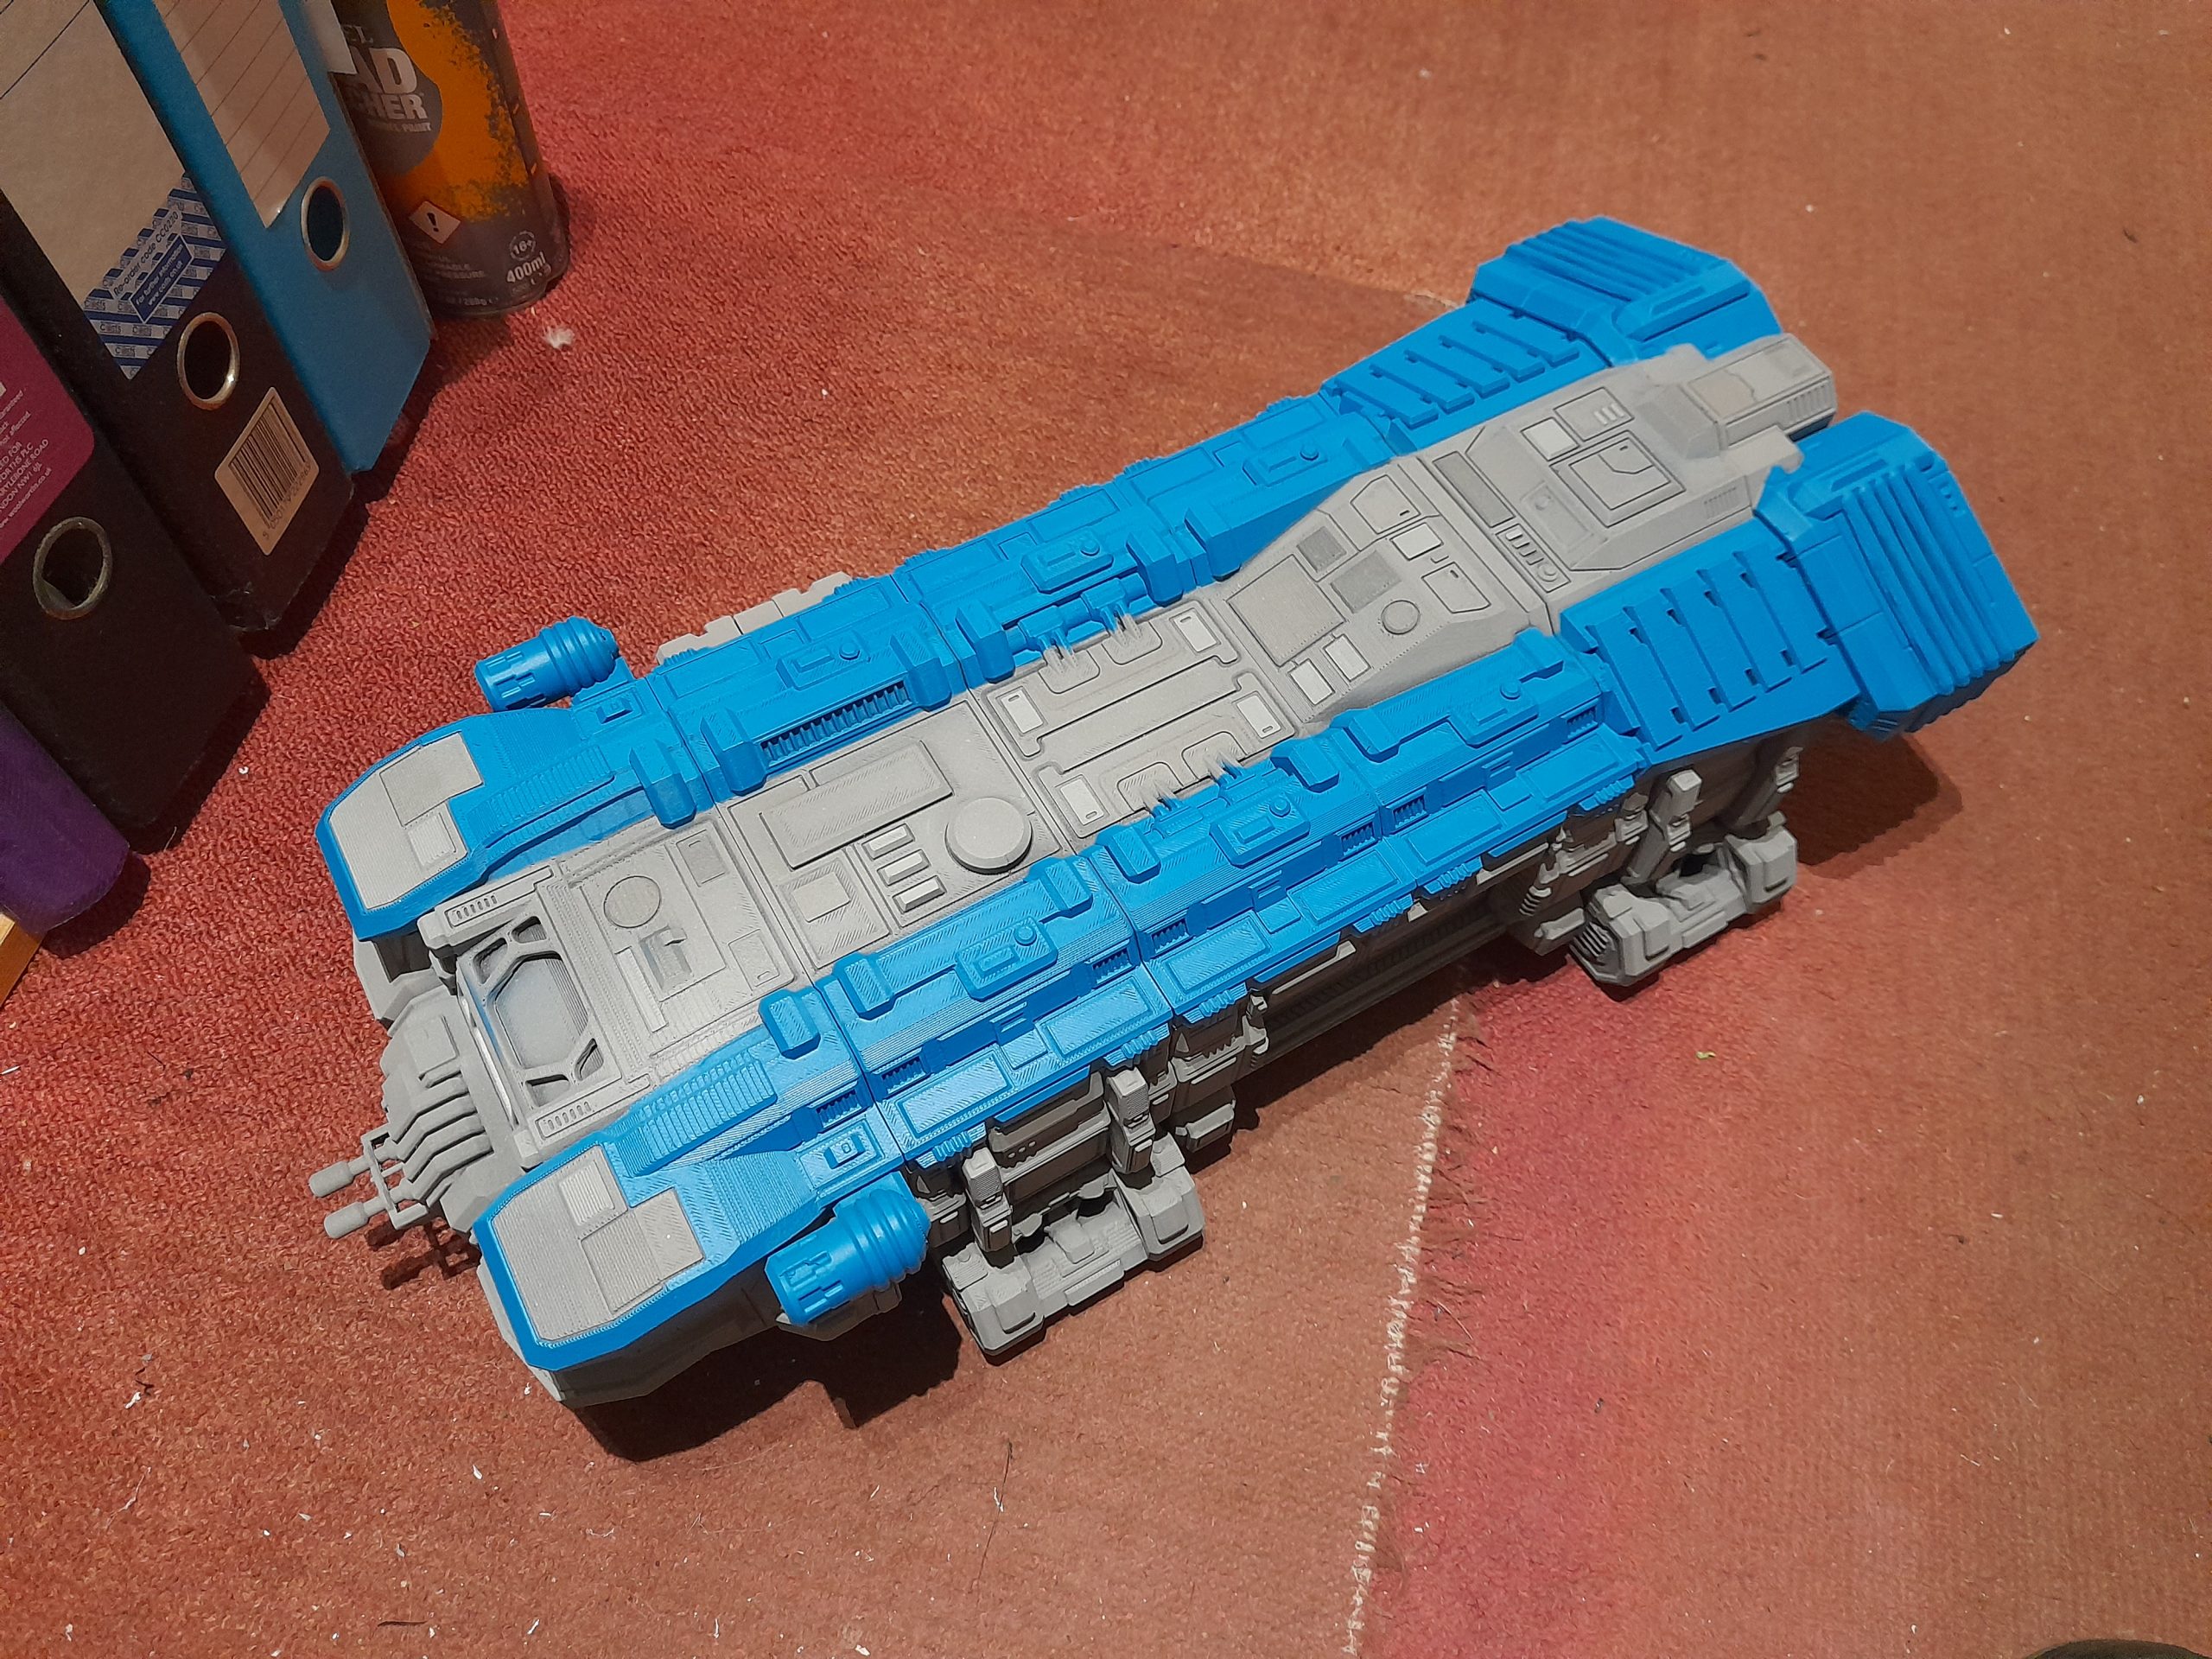
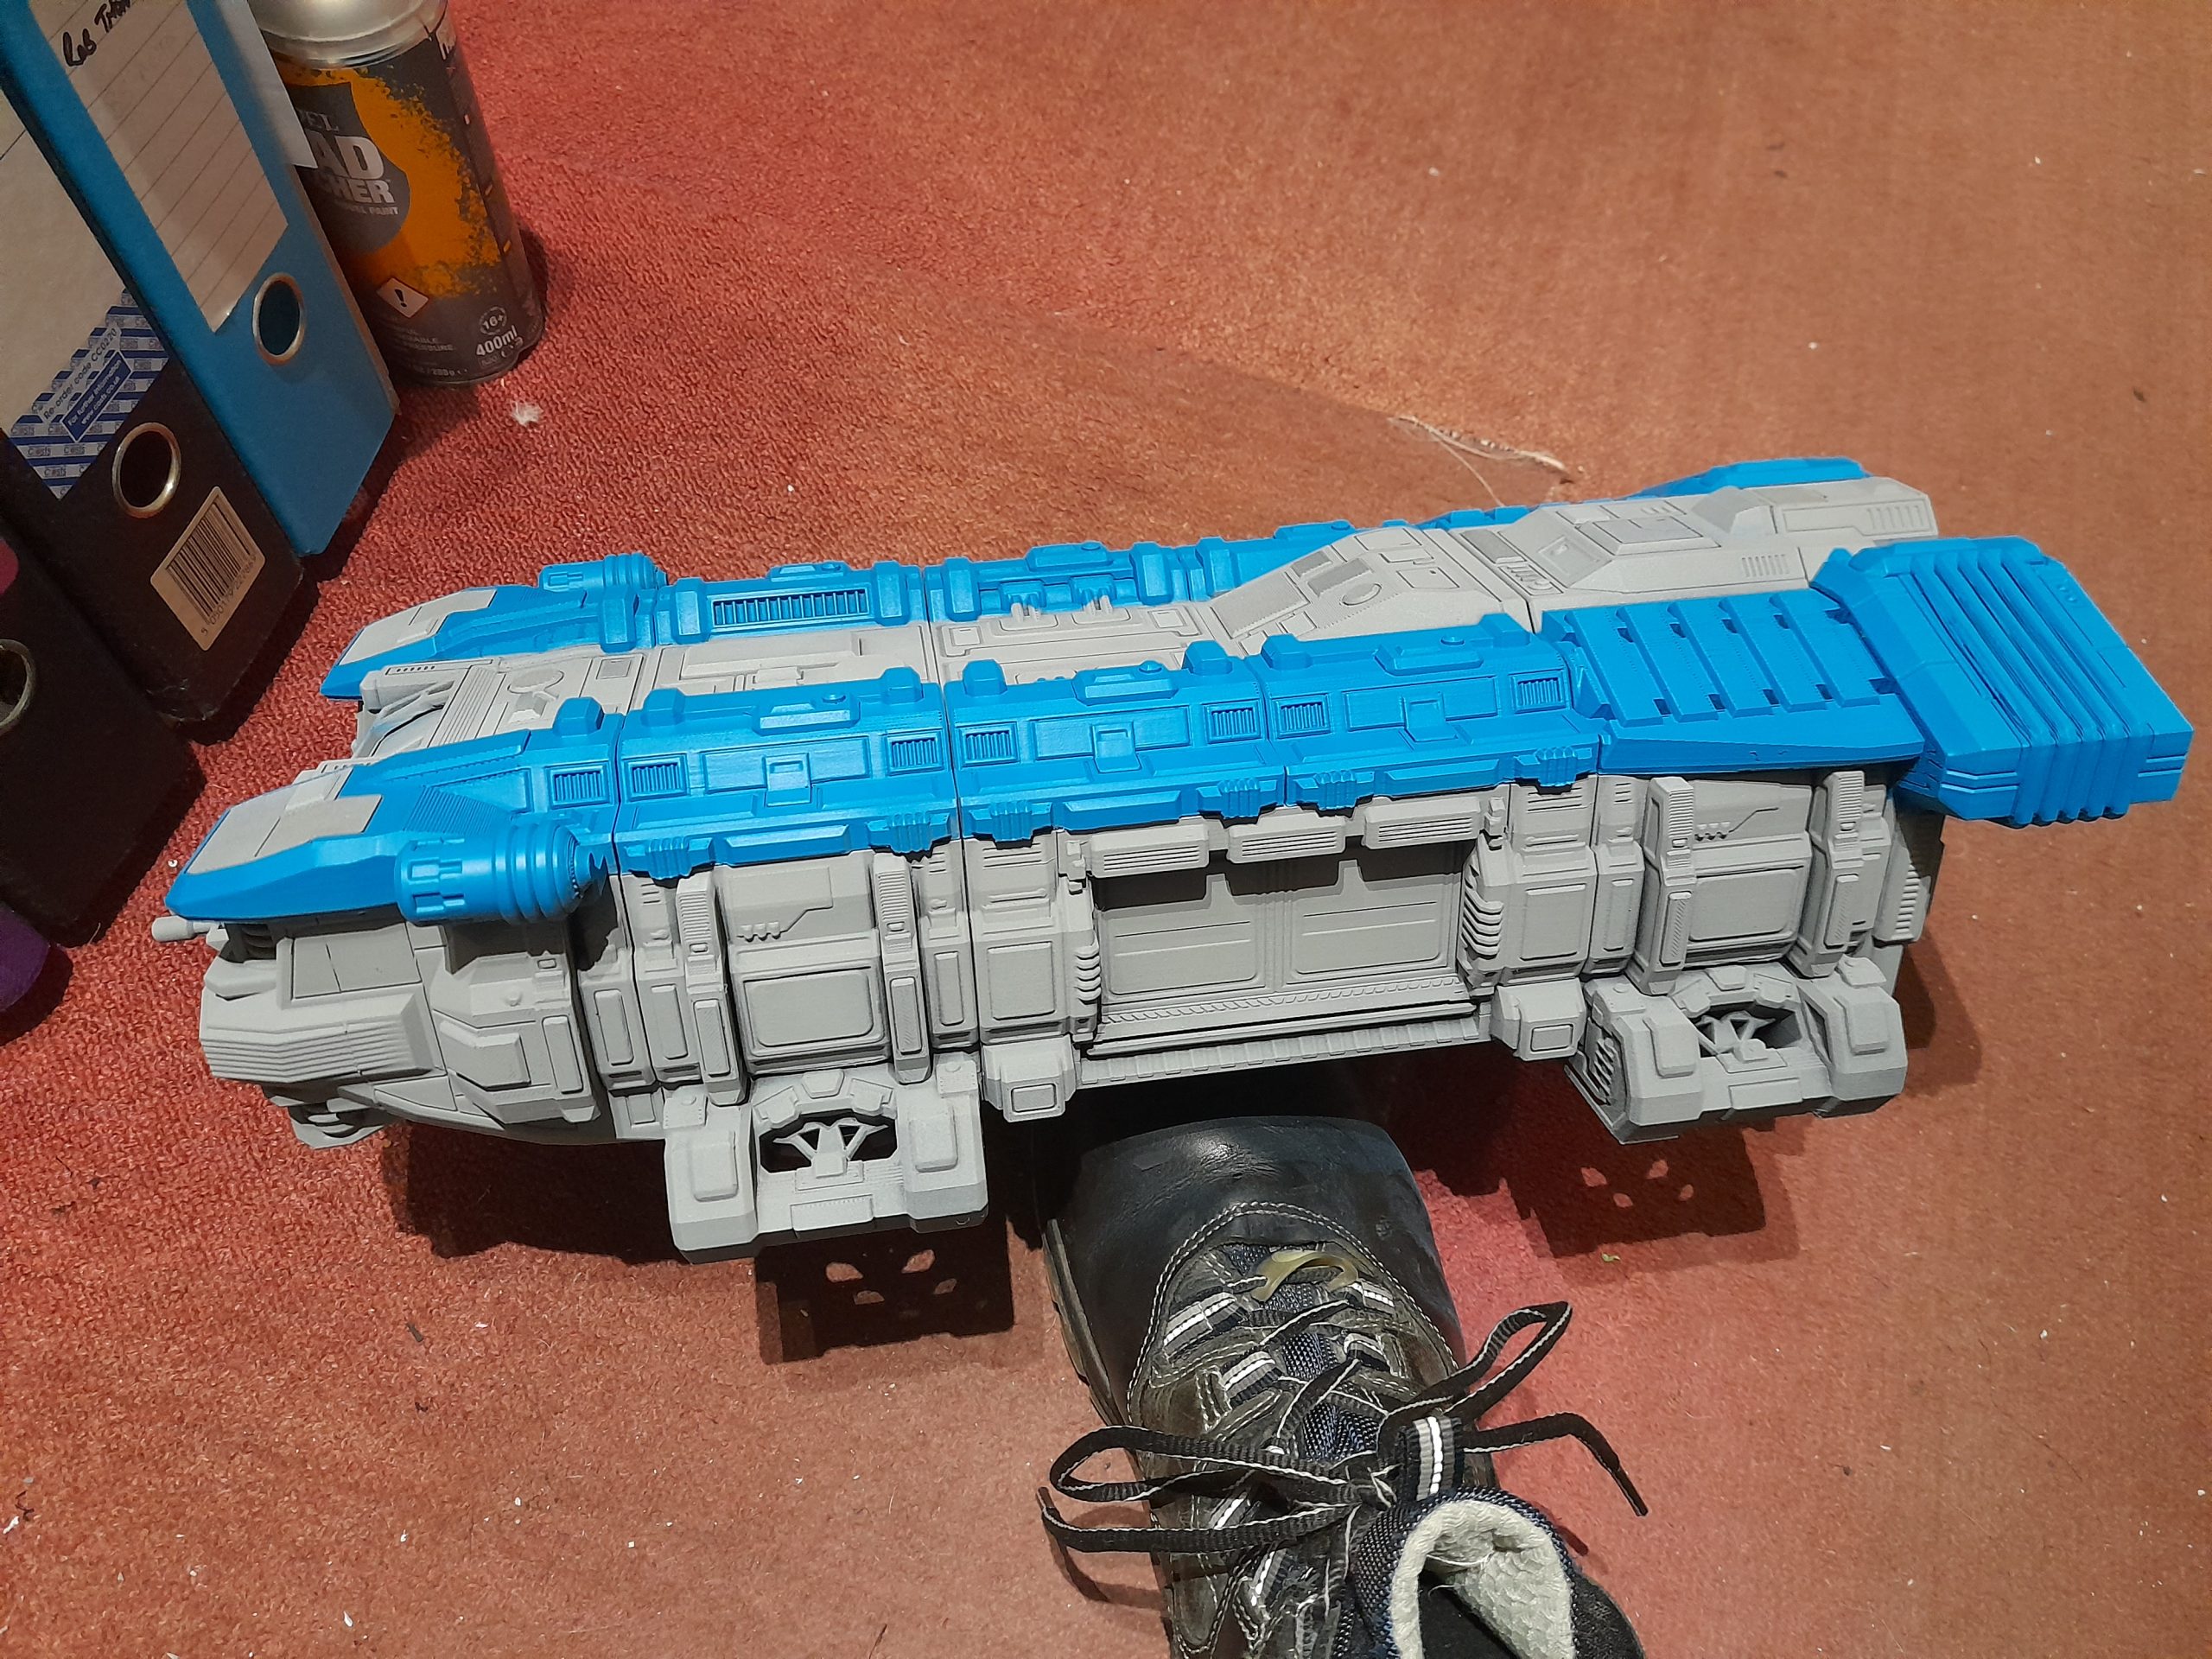
Additionally I added some more blue panels to the sides, picked out some other panels in different shades of grey, then drybrushed the greys and highlighted the blues. I also base coated the gun and the ‘suspension’ parts on the front.
Continuing the roof
17th November 2025
Rolling out the work of the test piece on to the rest of the roof I started out with the laborious process of panel lining with my Gundam marker.
Then it was onto drybrushing all of the blue with a pale blue. Followed this up with painting in the darker blue panels, then picking out the vents with rubber black.
This was all then washed with the slightly thinned Asurmen Blue wash (an old pot). Once dry I re applied a light drybrush and then hand highlighted some panel corners etc individually.
The vents were then tidied up with rubber black again, covering some areas where the blue drybrushing got on them. Finally the vent edges and bars were painted in gunmetal.
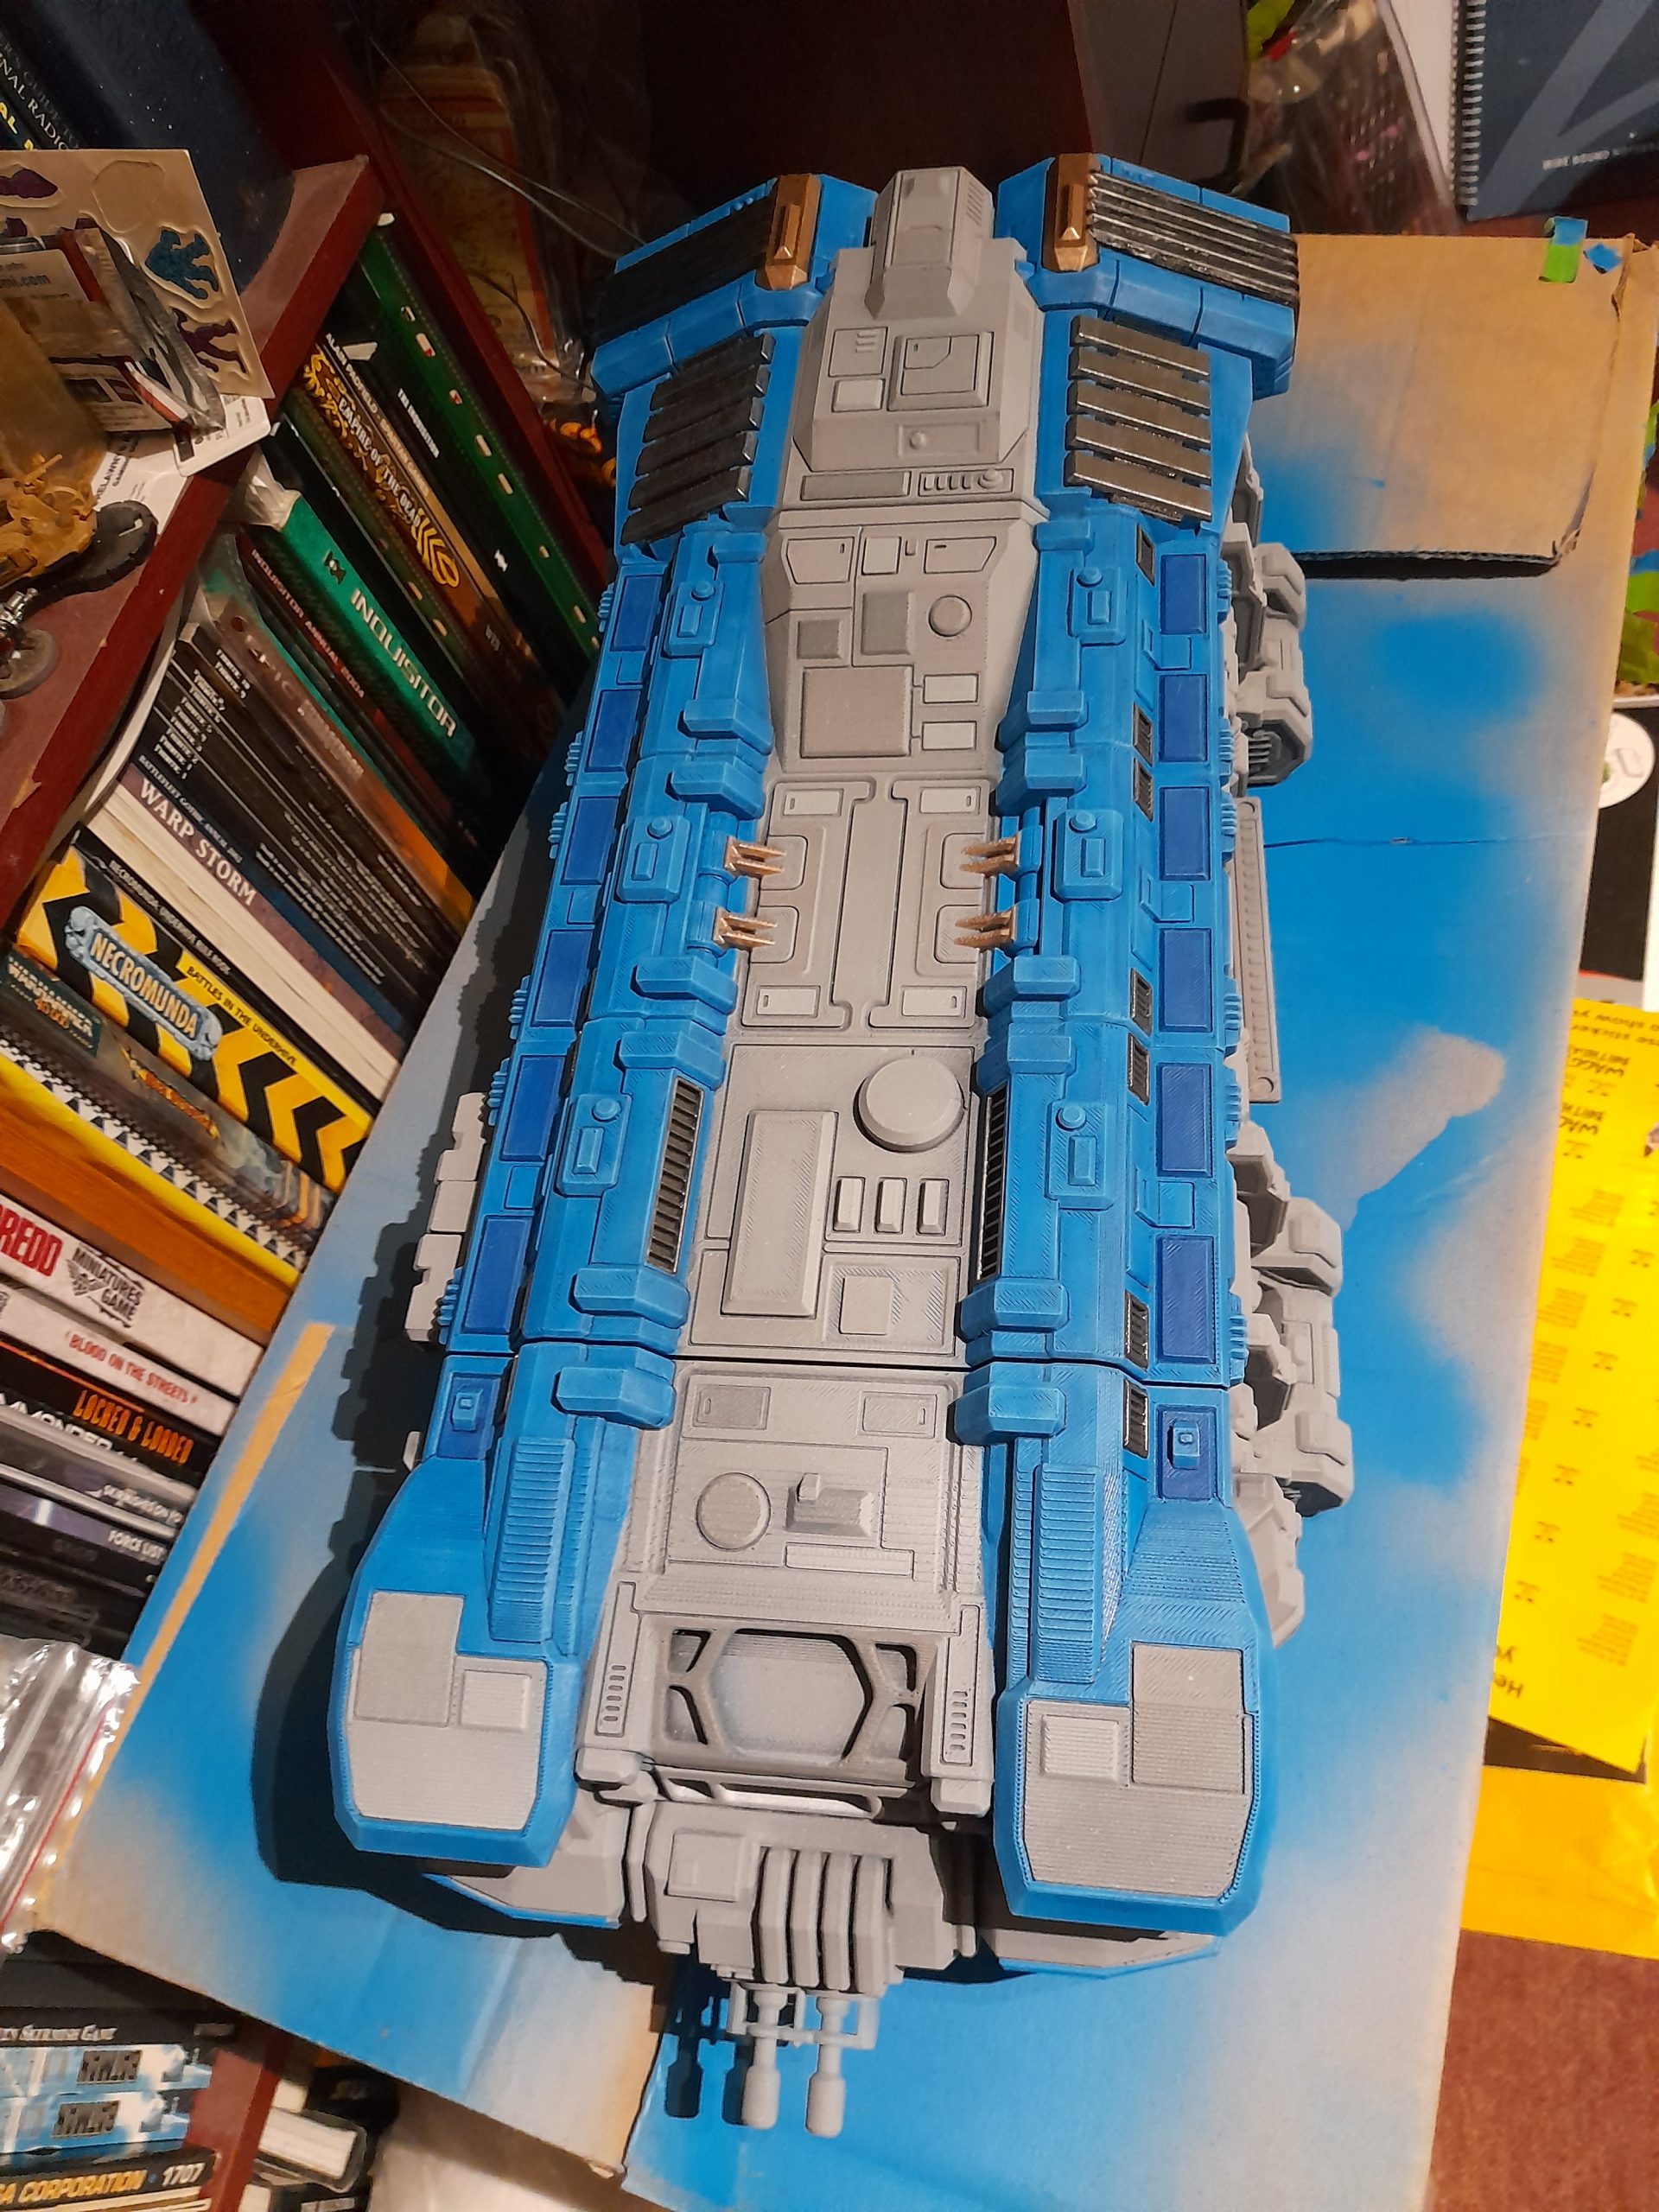
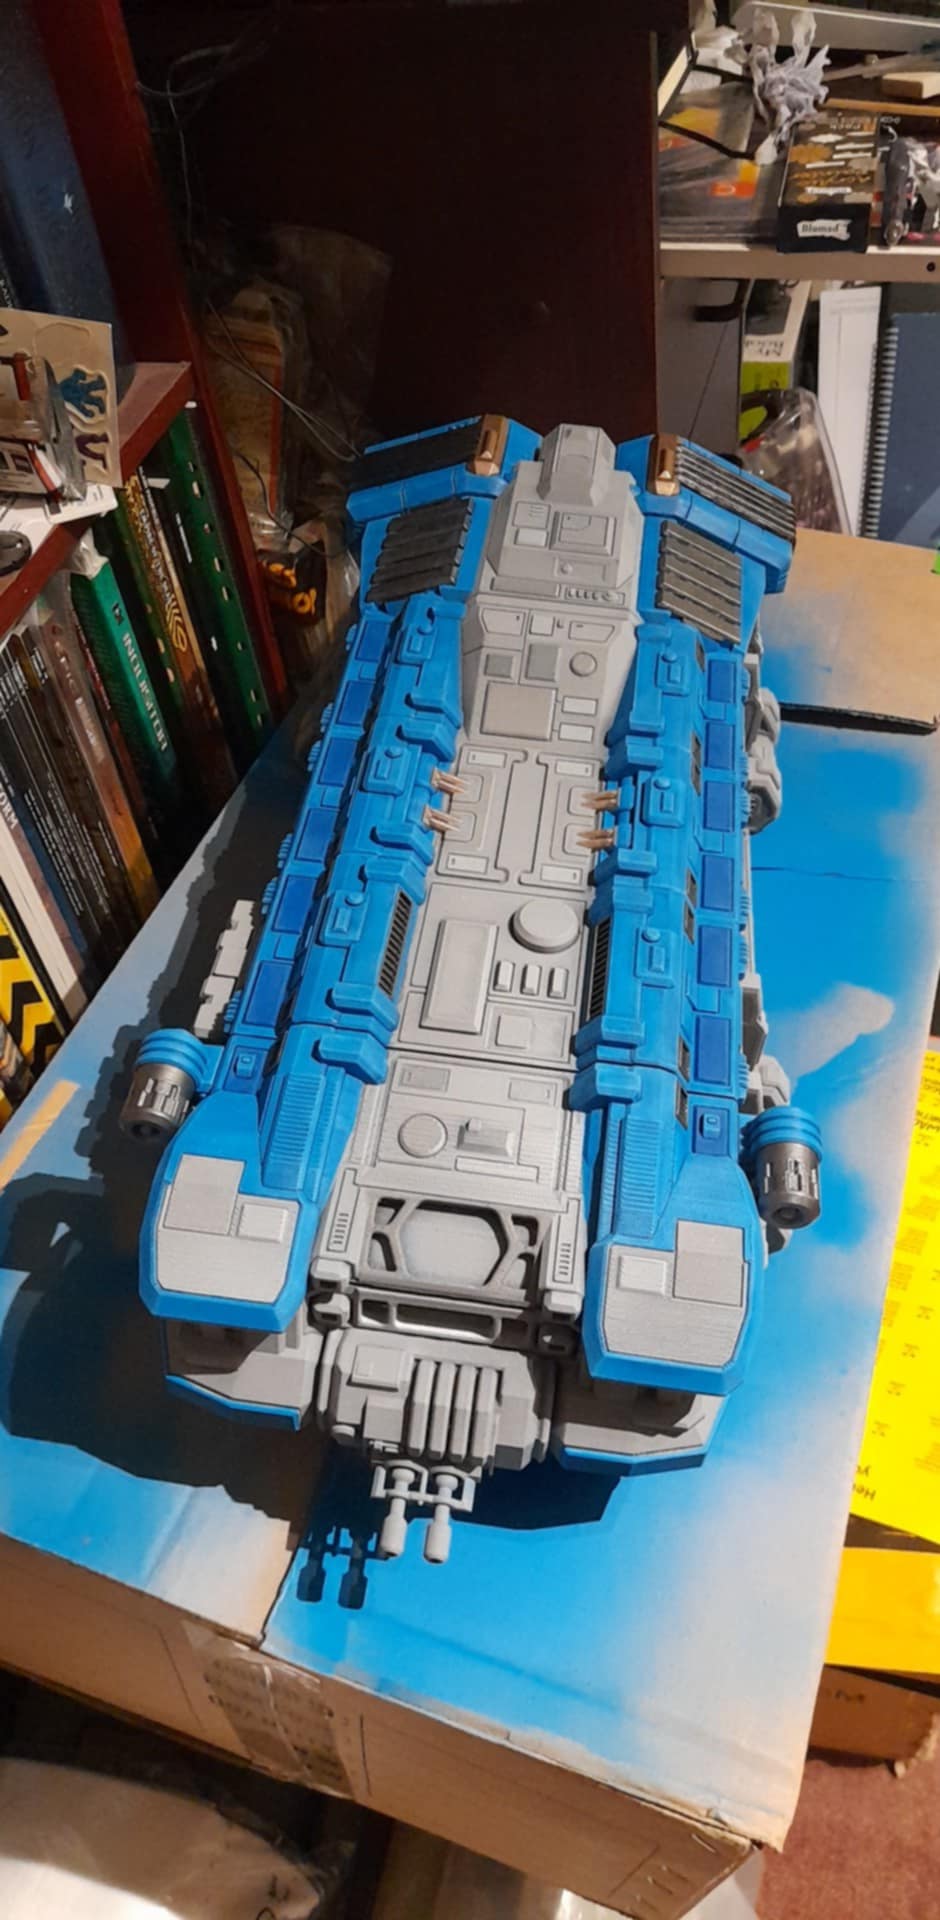
I also painted some of the rear segments / ‘pipes’ in black (not a fan of how Abaddon black goes on tbh) and picked out some elements in gunmetal and Runelord brass.
The engine interior was painted white and then the framework surrounding was painted in gunmetal. I may add a blue (or other colour) wash to the white of the engines later on, but not sure what to go for yet.
Next up I will roll out some colour to the sides.
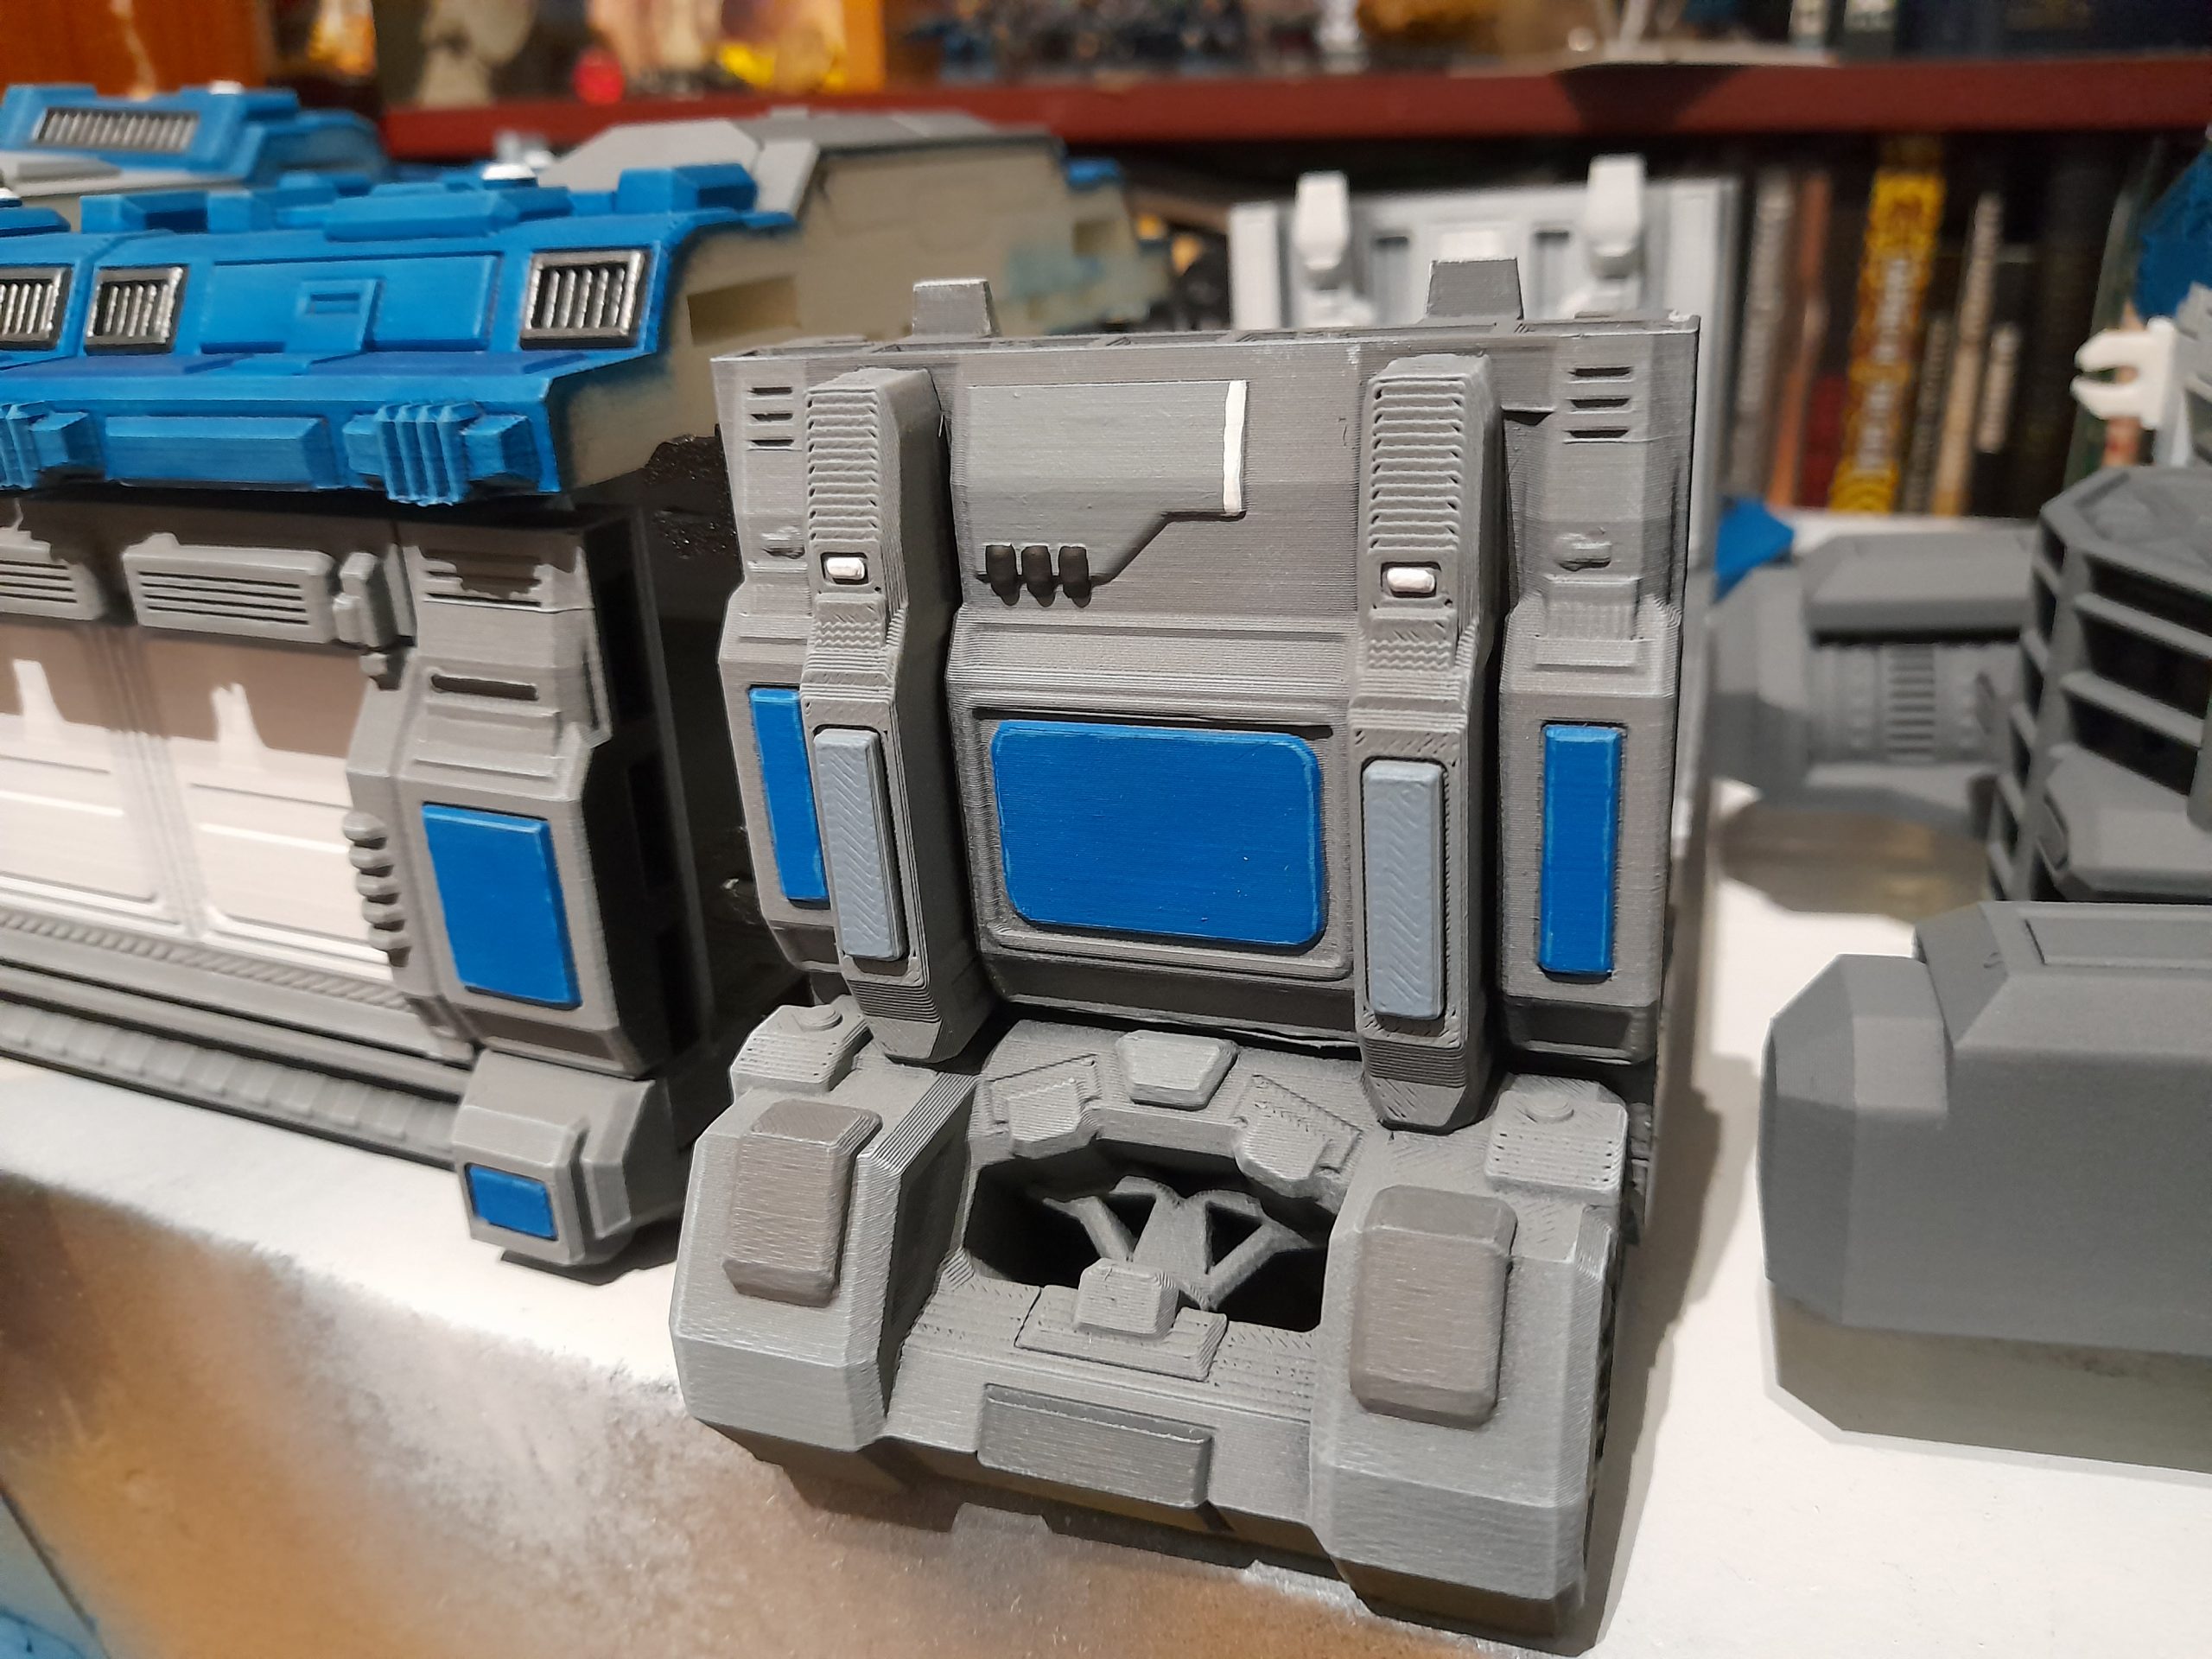
Adding colour
14th November 2025
With the basic grey of the hull down it was time to consider how to add colour. I took a picture of the ship and just used my phone to try out a few schemes. In the end I decided on using blue as the colour, and applying it to each side of the roof, and likely on some panels on the sides. So, I got the masking tape out again and masked up the roof and the rear section. Lots of fiddly bits to cut around, but I got pretty good towards the end of it.
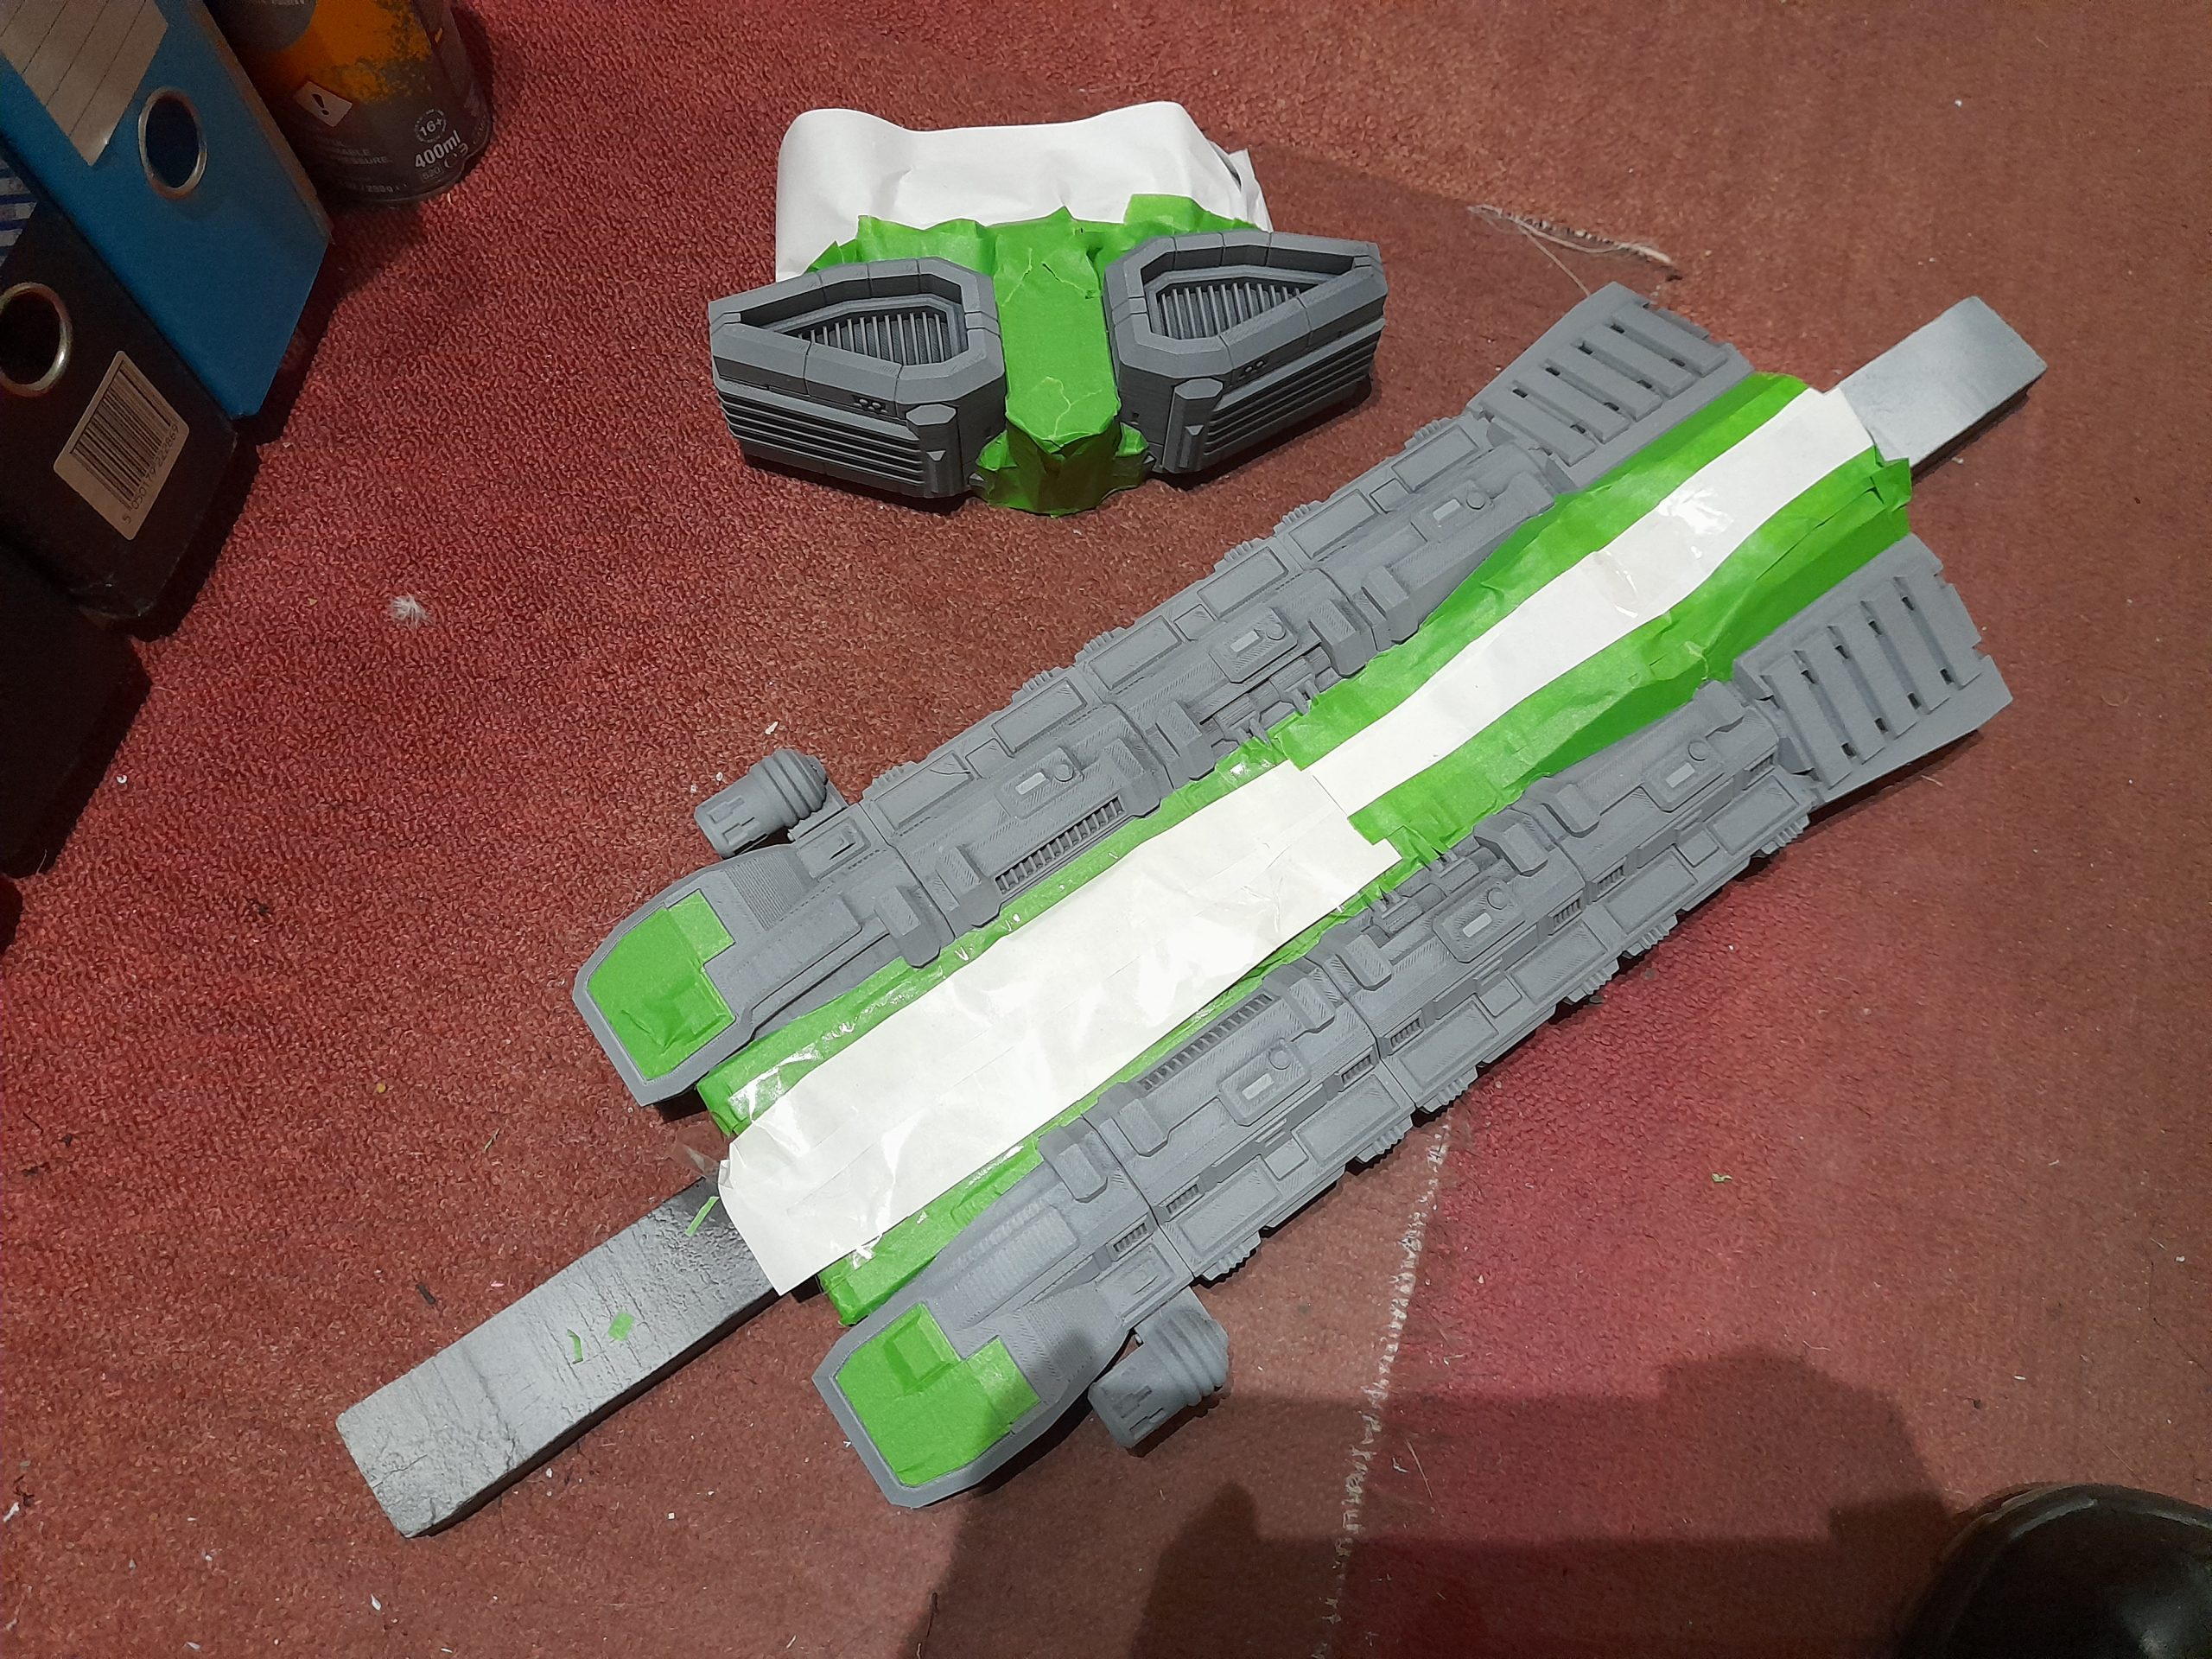
I had a can of Army Painter Crystal Blue, so used that 😊. It came out a little lighter than I had planned for, and also swamped the small amount of existing shading that the grey paintjob had provided.
I tried a few different techniques for adding more depth to the blue. In the end I found that using a Gundam marker to add panel lining, an overall light blue drybrush, painting some panels in a darker blue, painting the vents black, a wash of blue and a final light drybrush was the best result. The other panels that I tested on then had to be resprayed.
Next up I will roll this out to all the blue roof panels.
I have also ordered up some Crystal Blue to colour match to the spray can, so that I can hand paint the smaller panel pieces on the sides – it would be too much work to mask all those off!
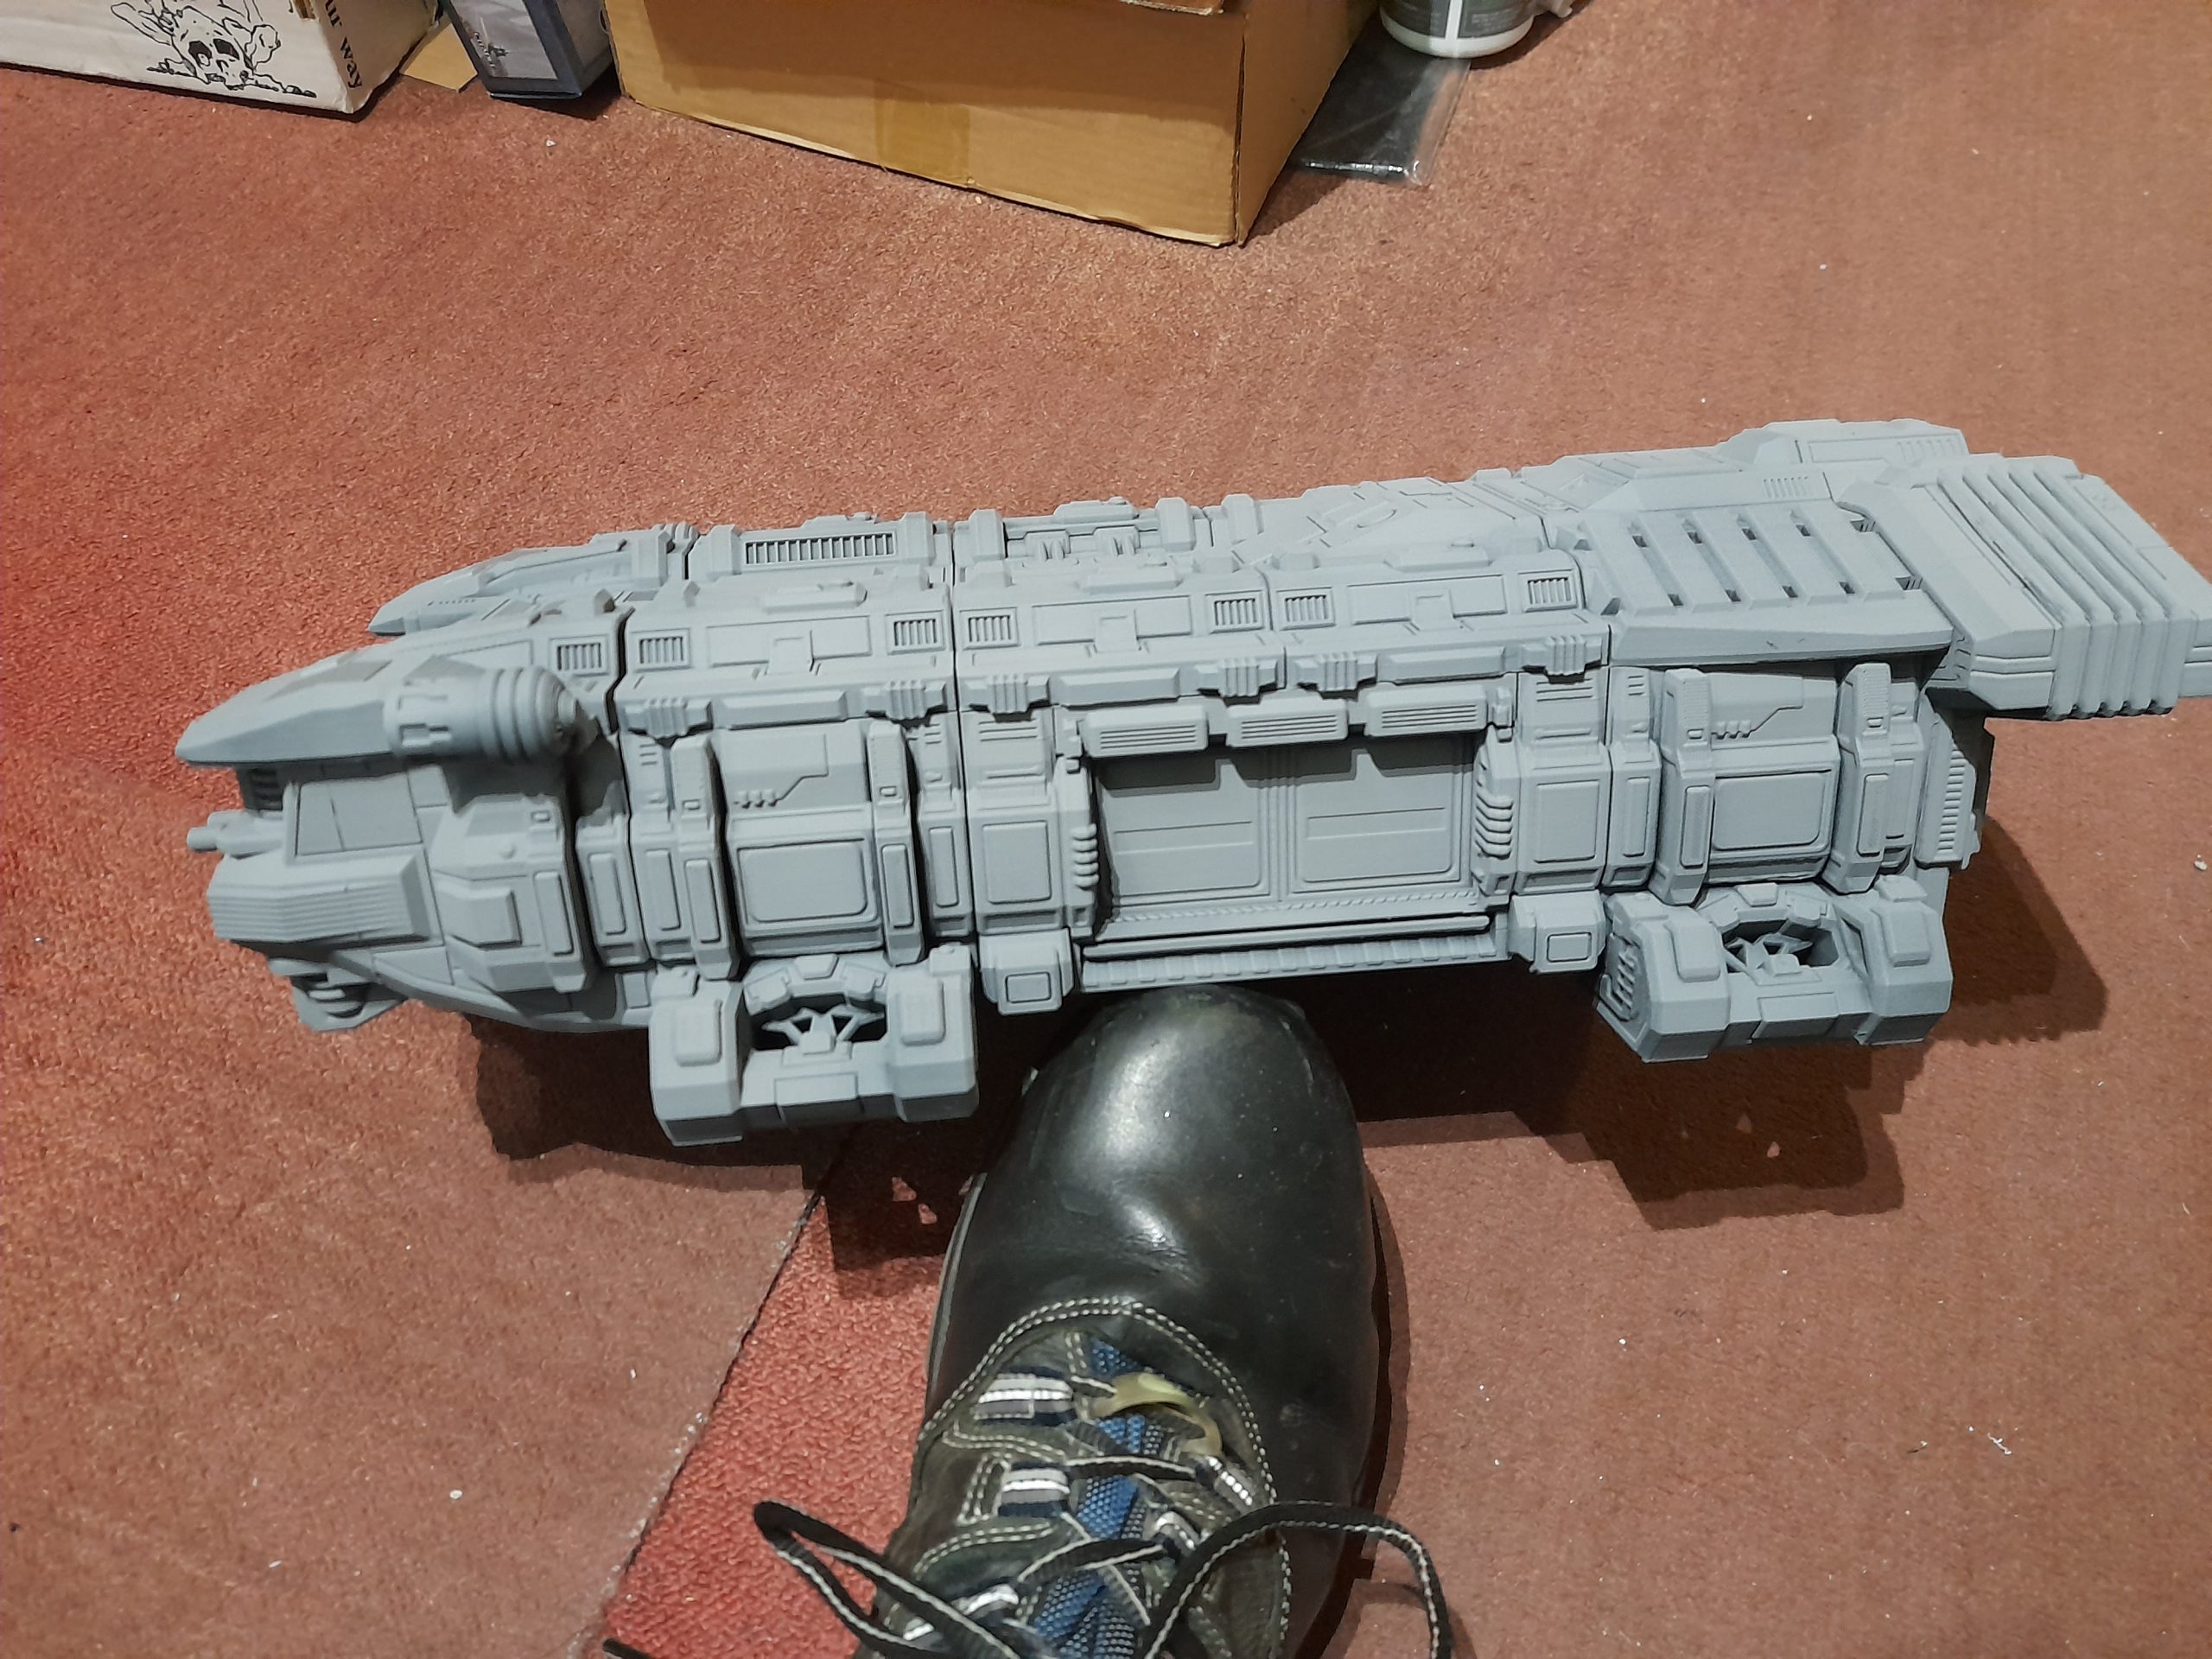
Starting the Spaceship
12th November 2025
A friend gifted me a 3D printed (FDM) spaceship…. A hefty beast that comes in a number of segments.
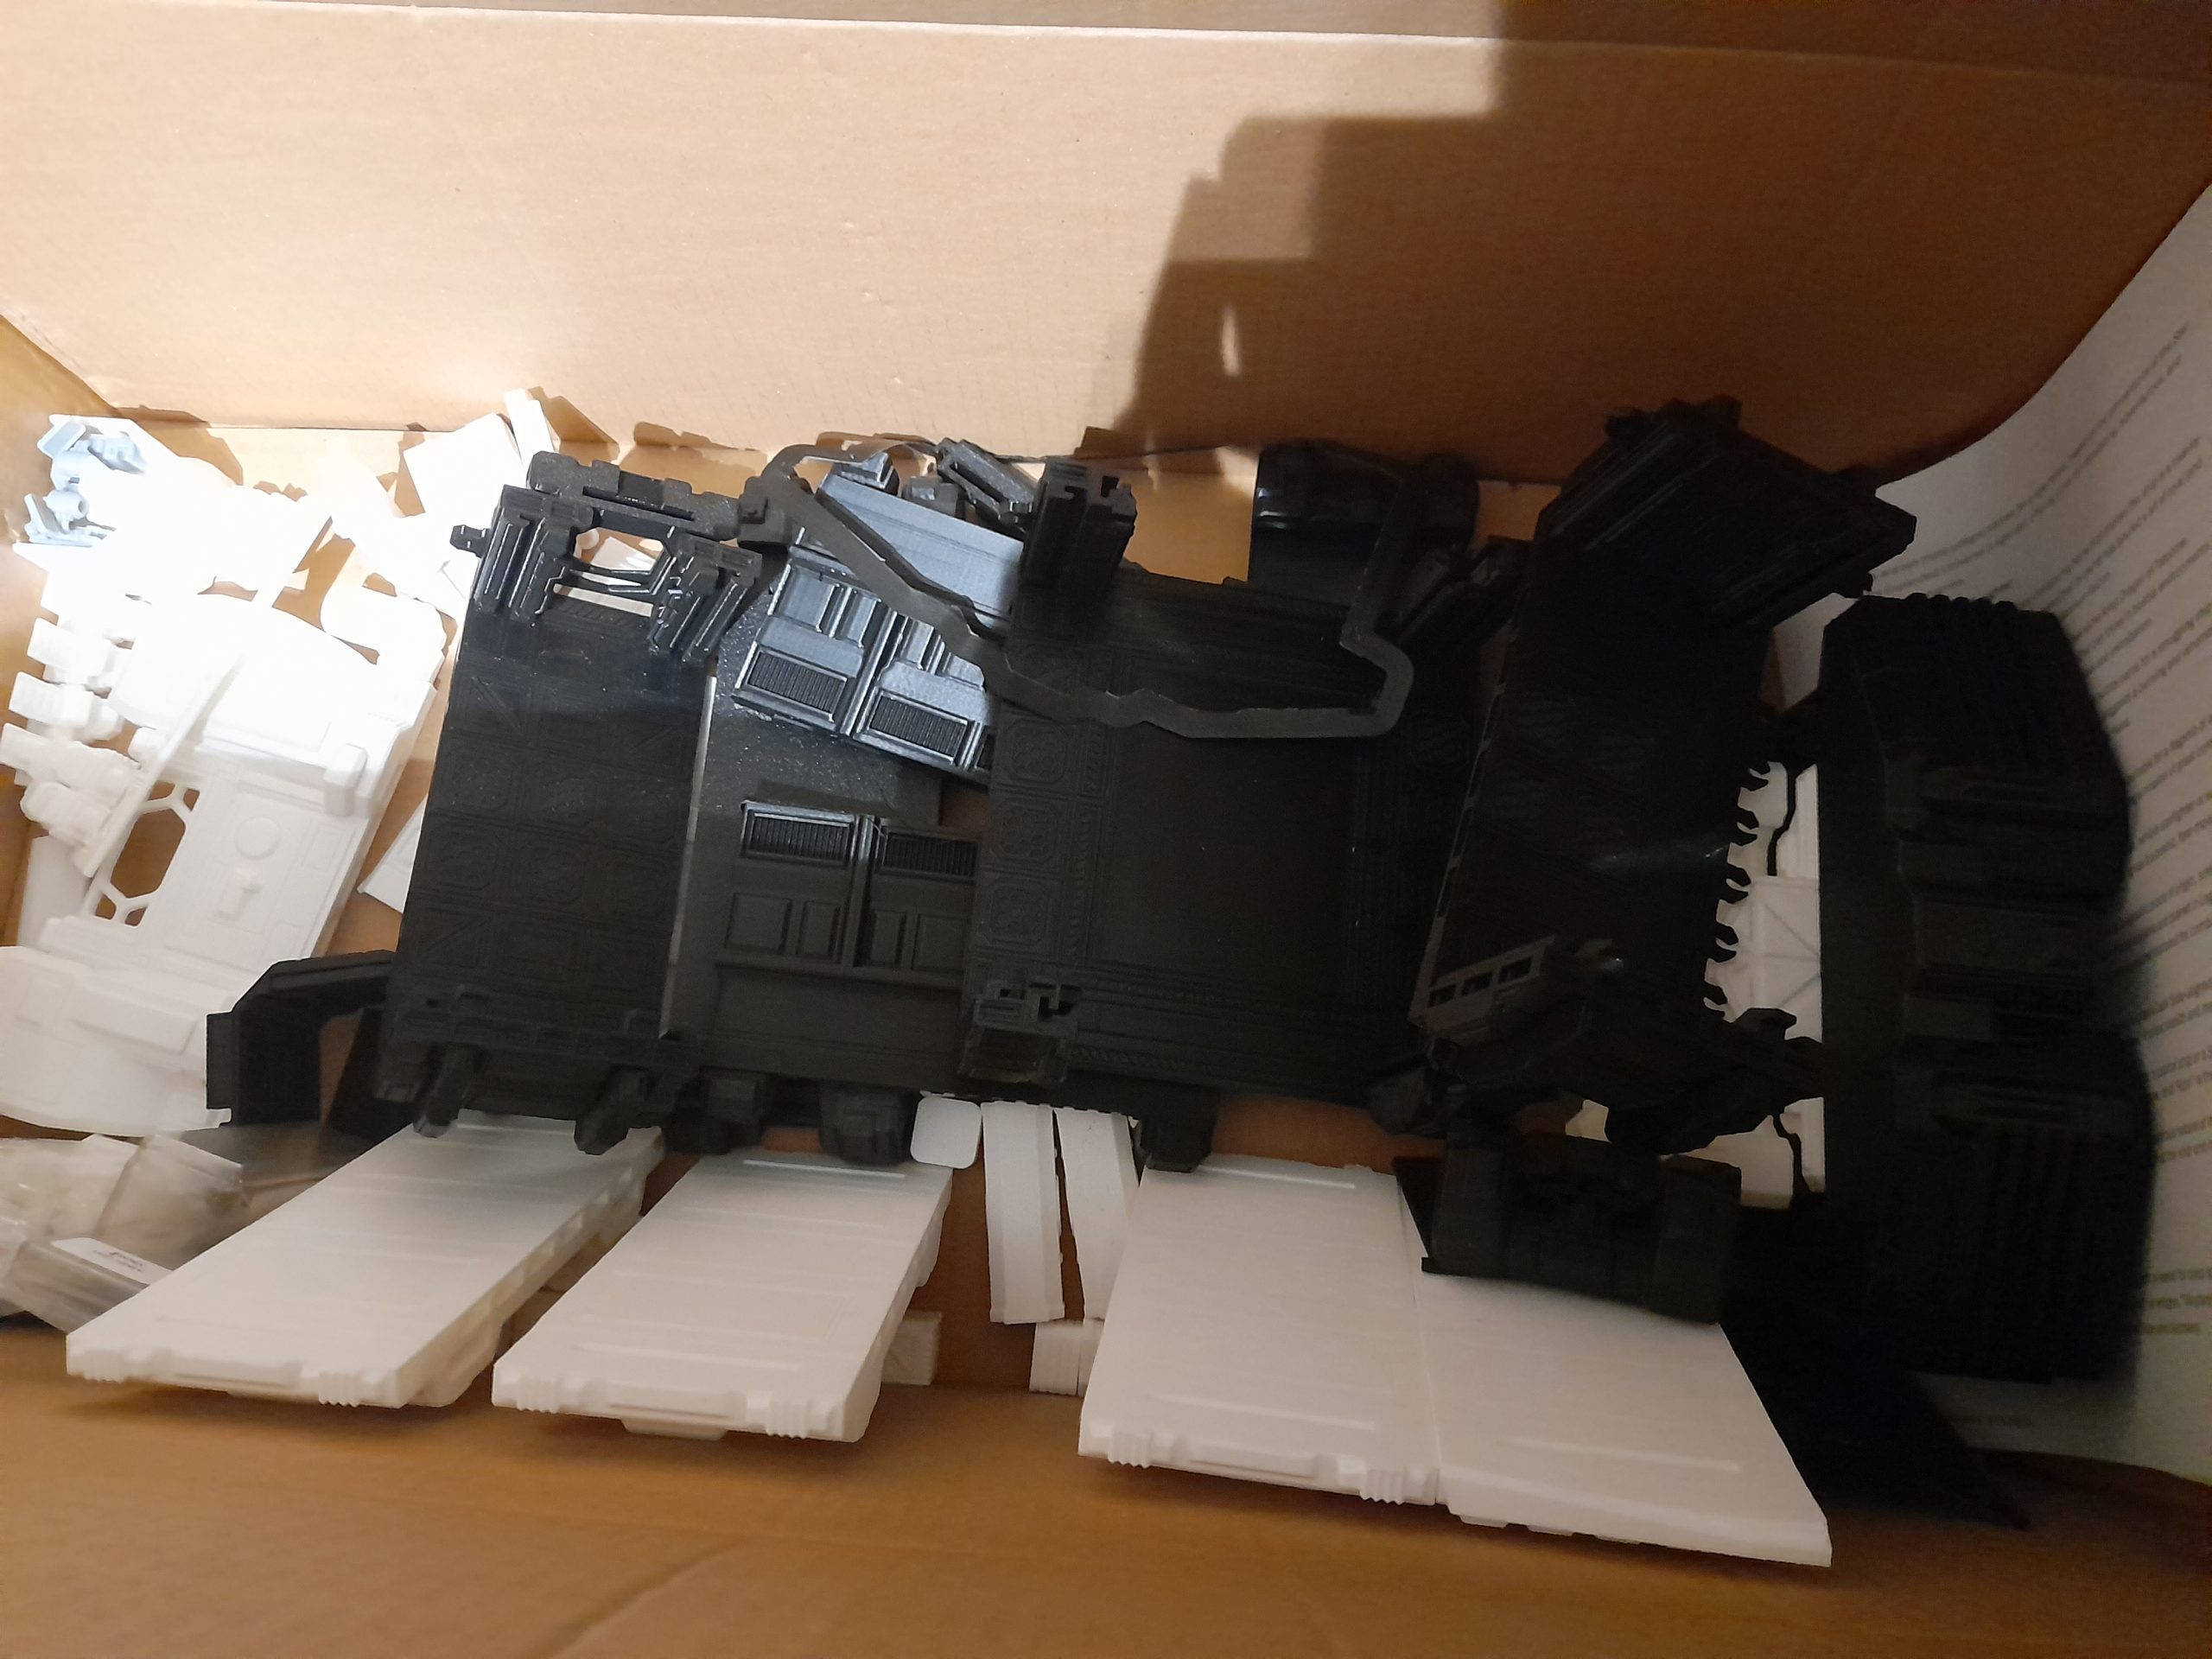
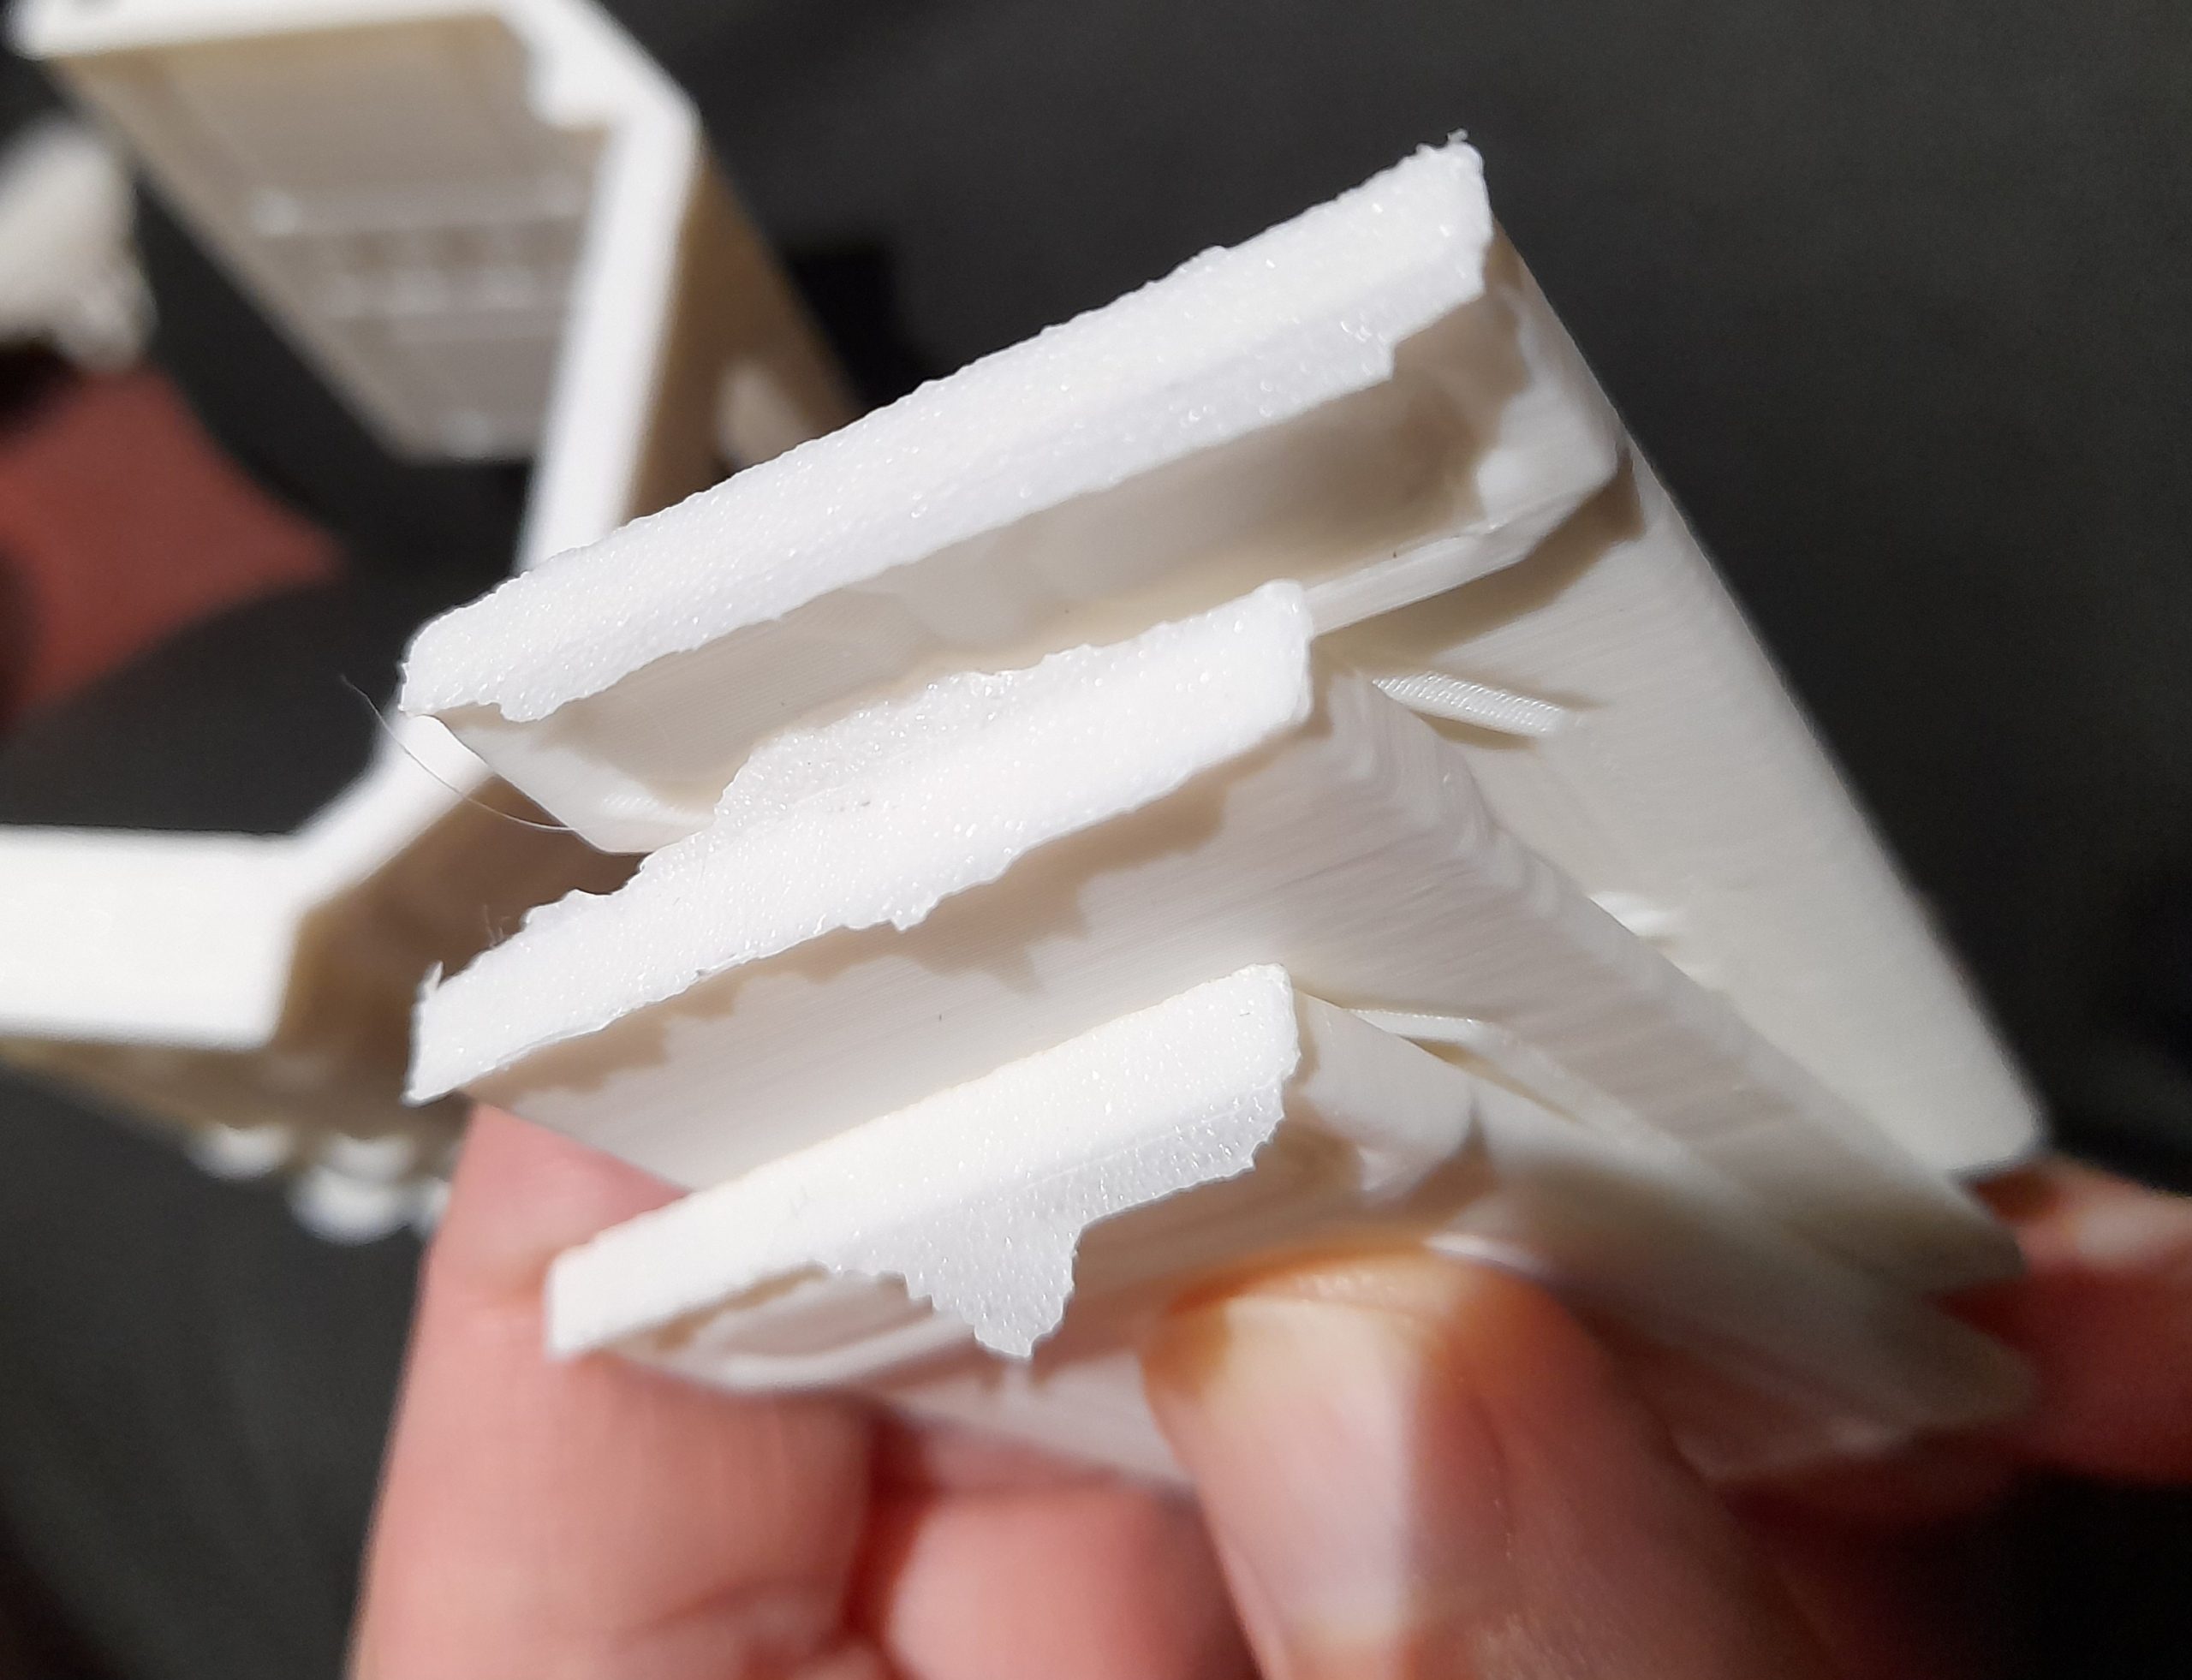
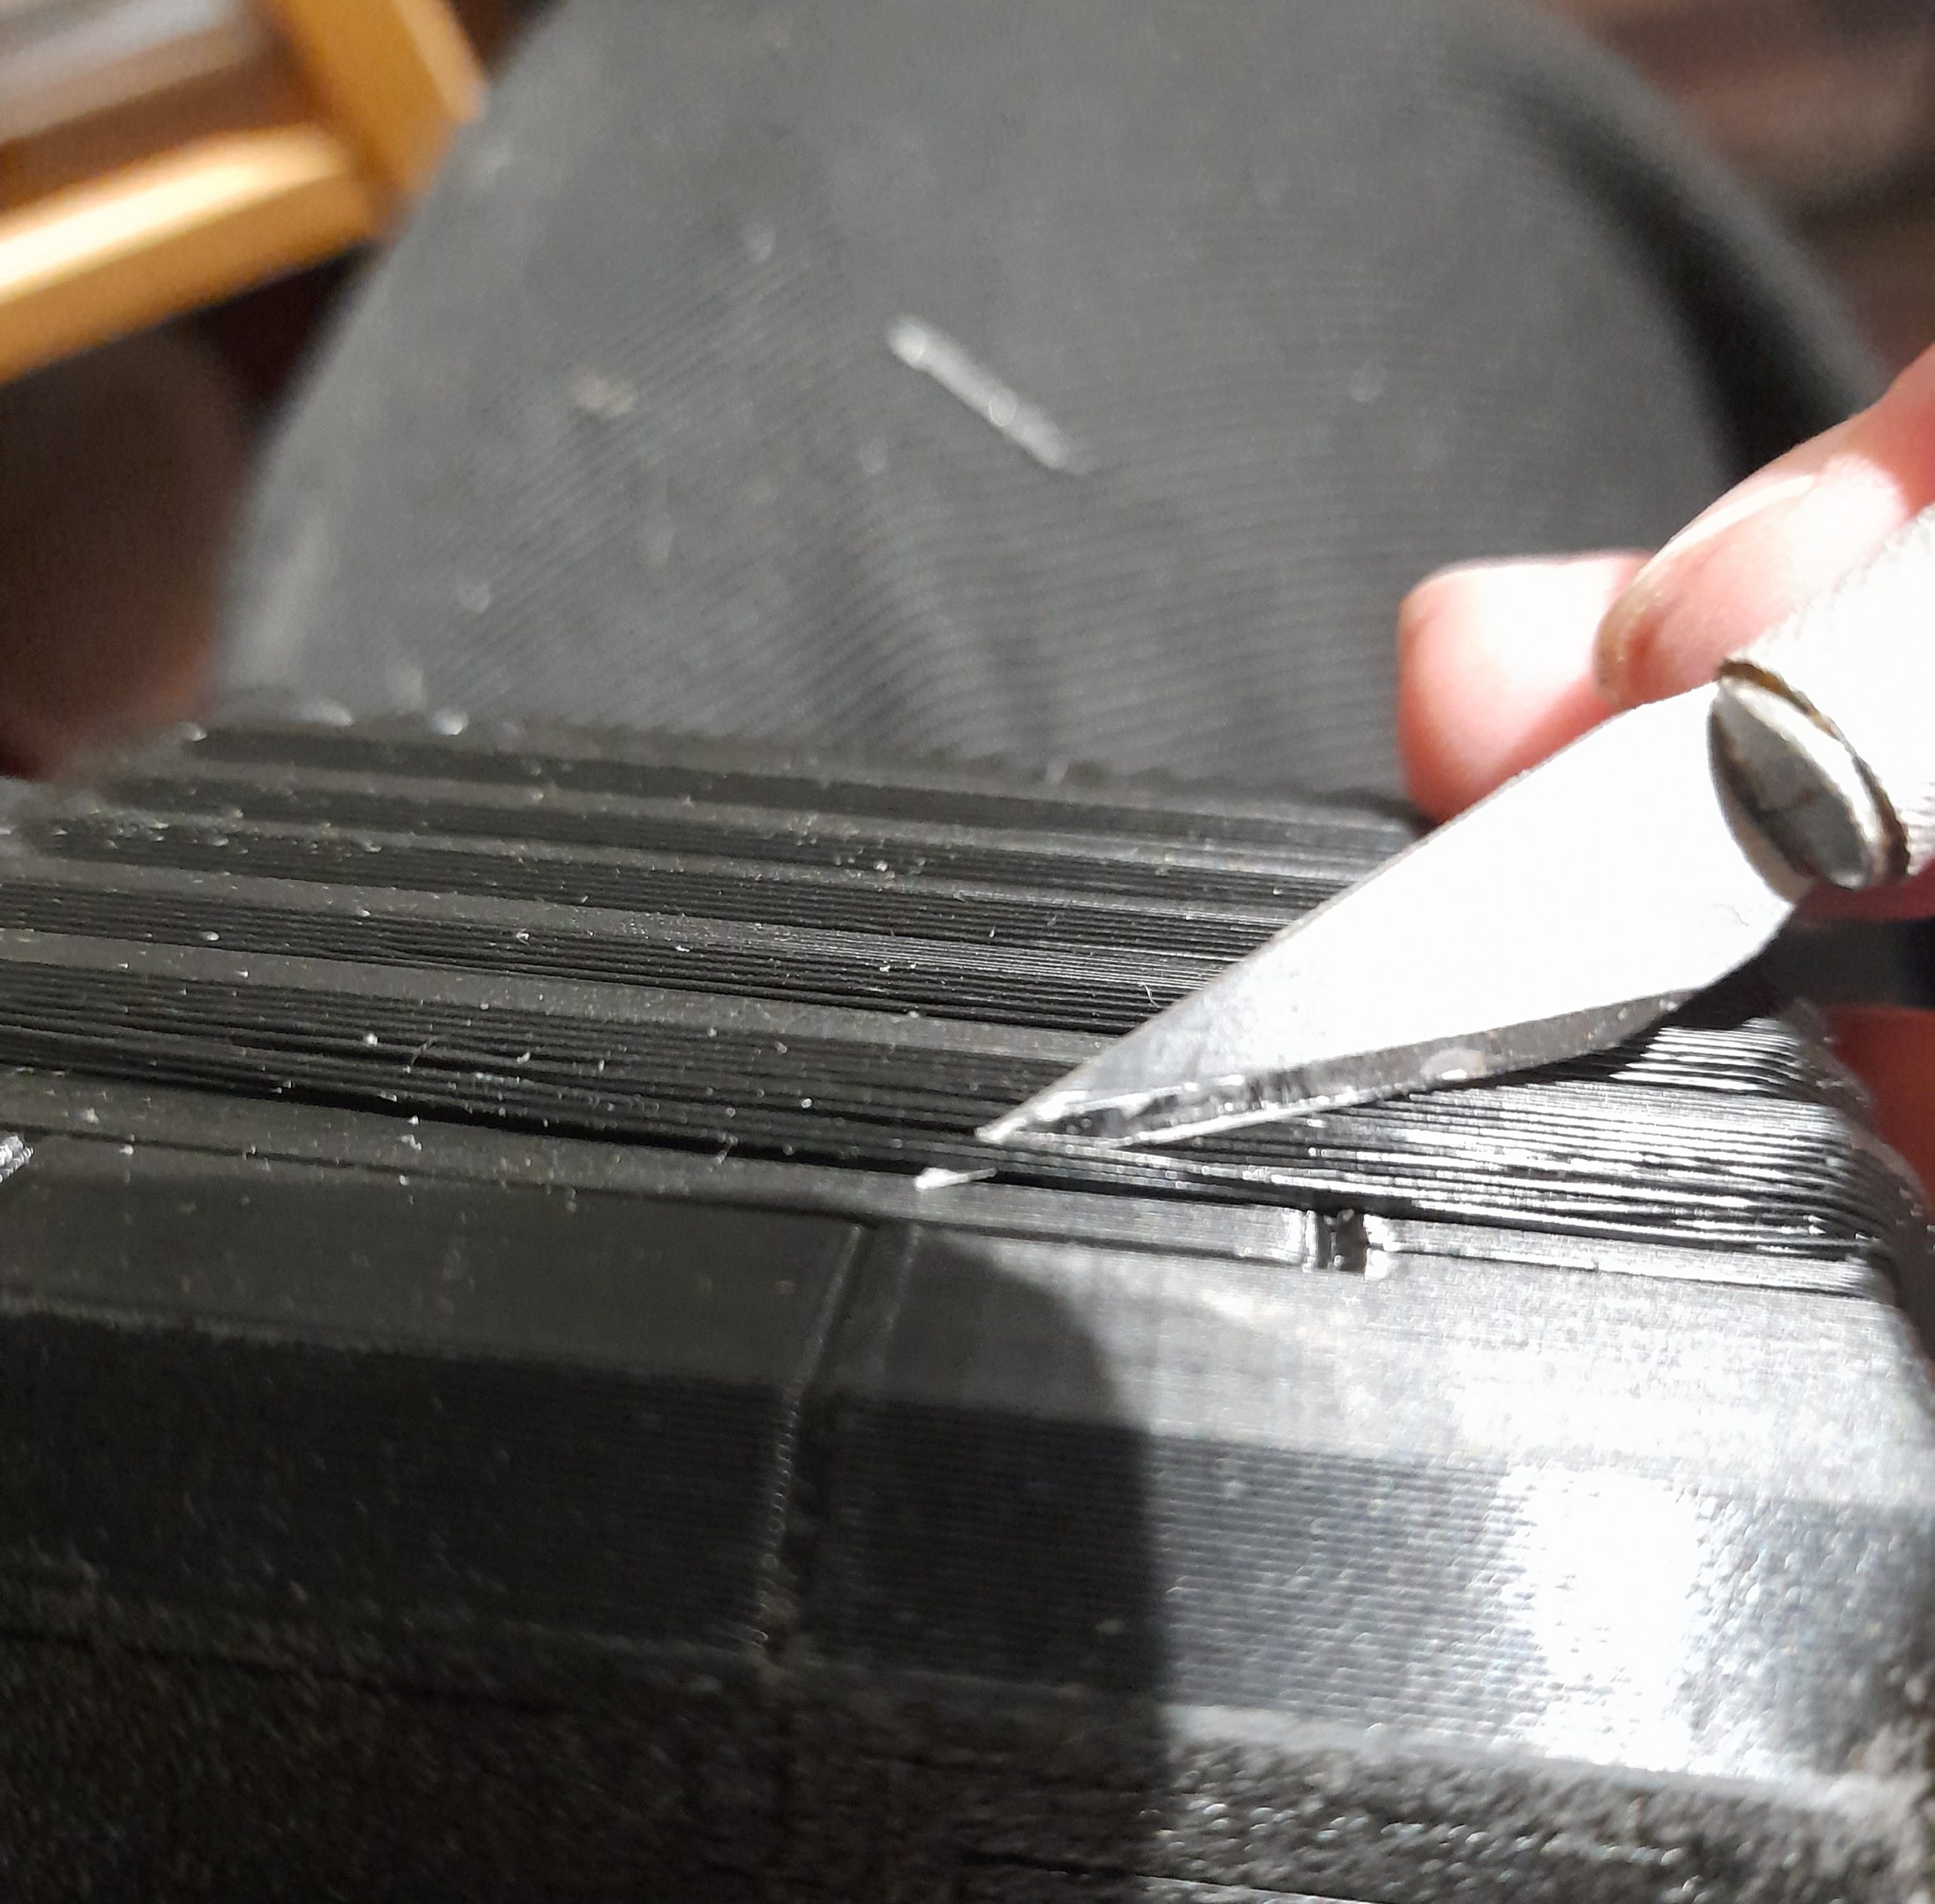
So, over the past week or so I poked and prodded at it – I started out by test fitting the ship, then took it apart and started to clean the parts up.
Even though it is an FDM print there are still areas of clean up required, and some areas of repair or consolidation where the filament hasn’t set or bonded properly.
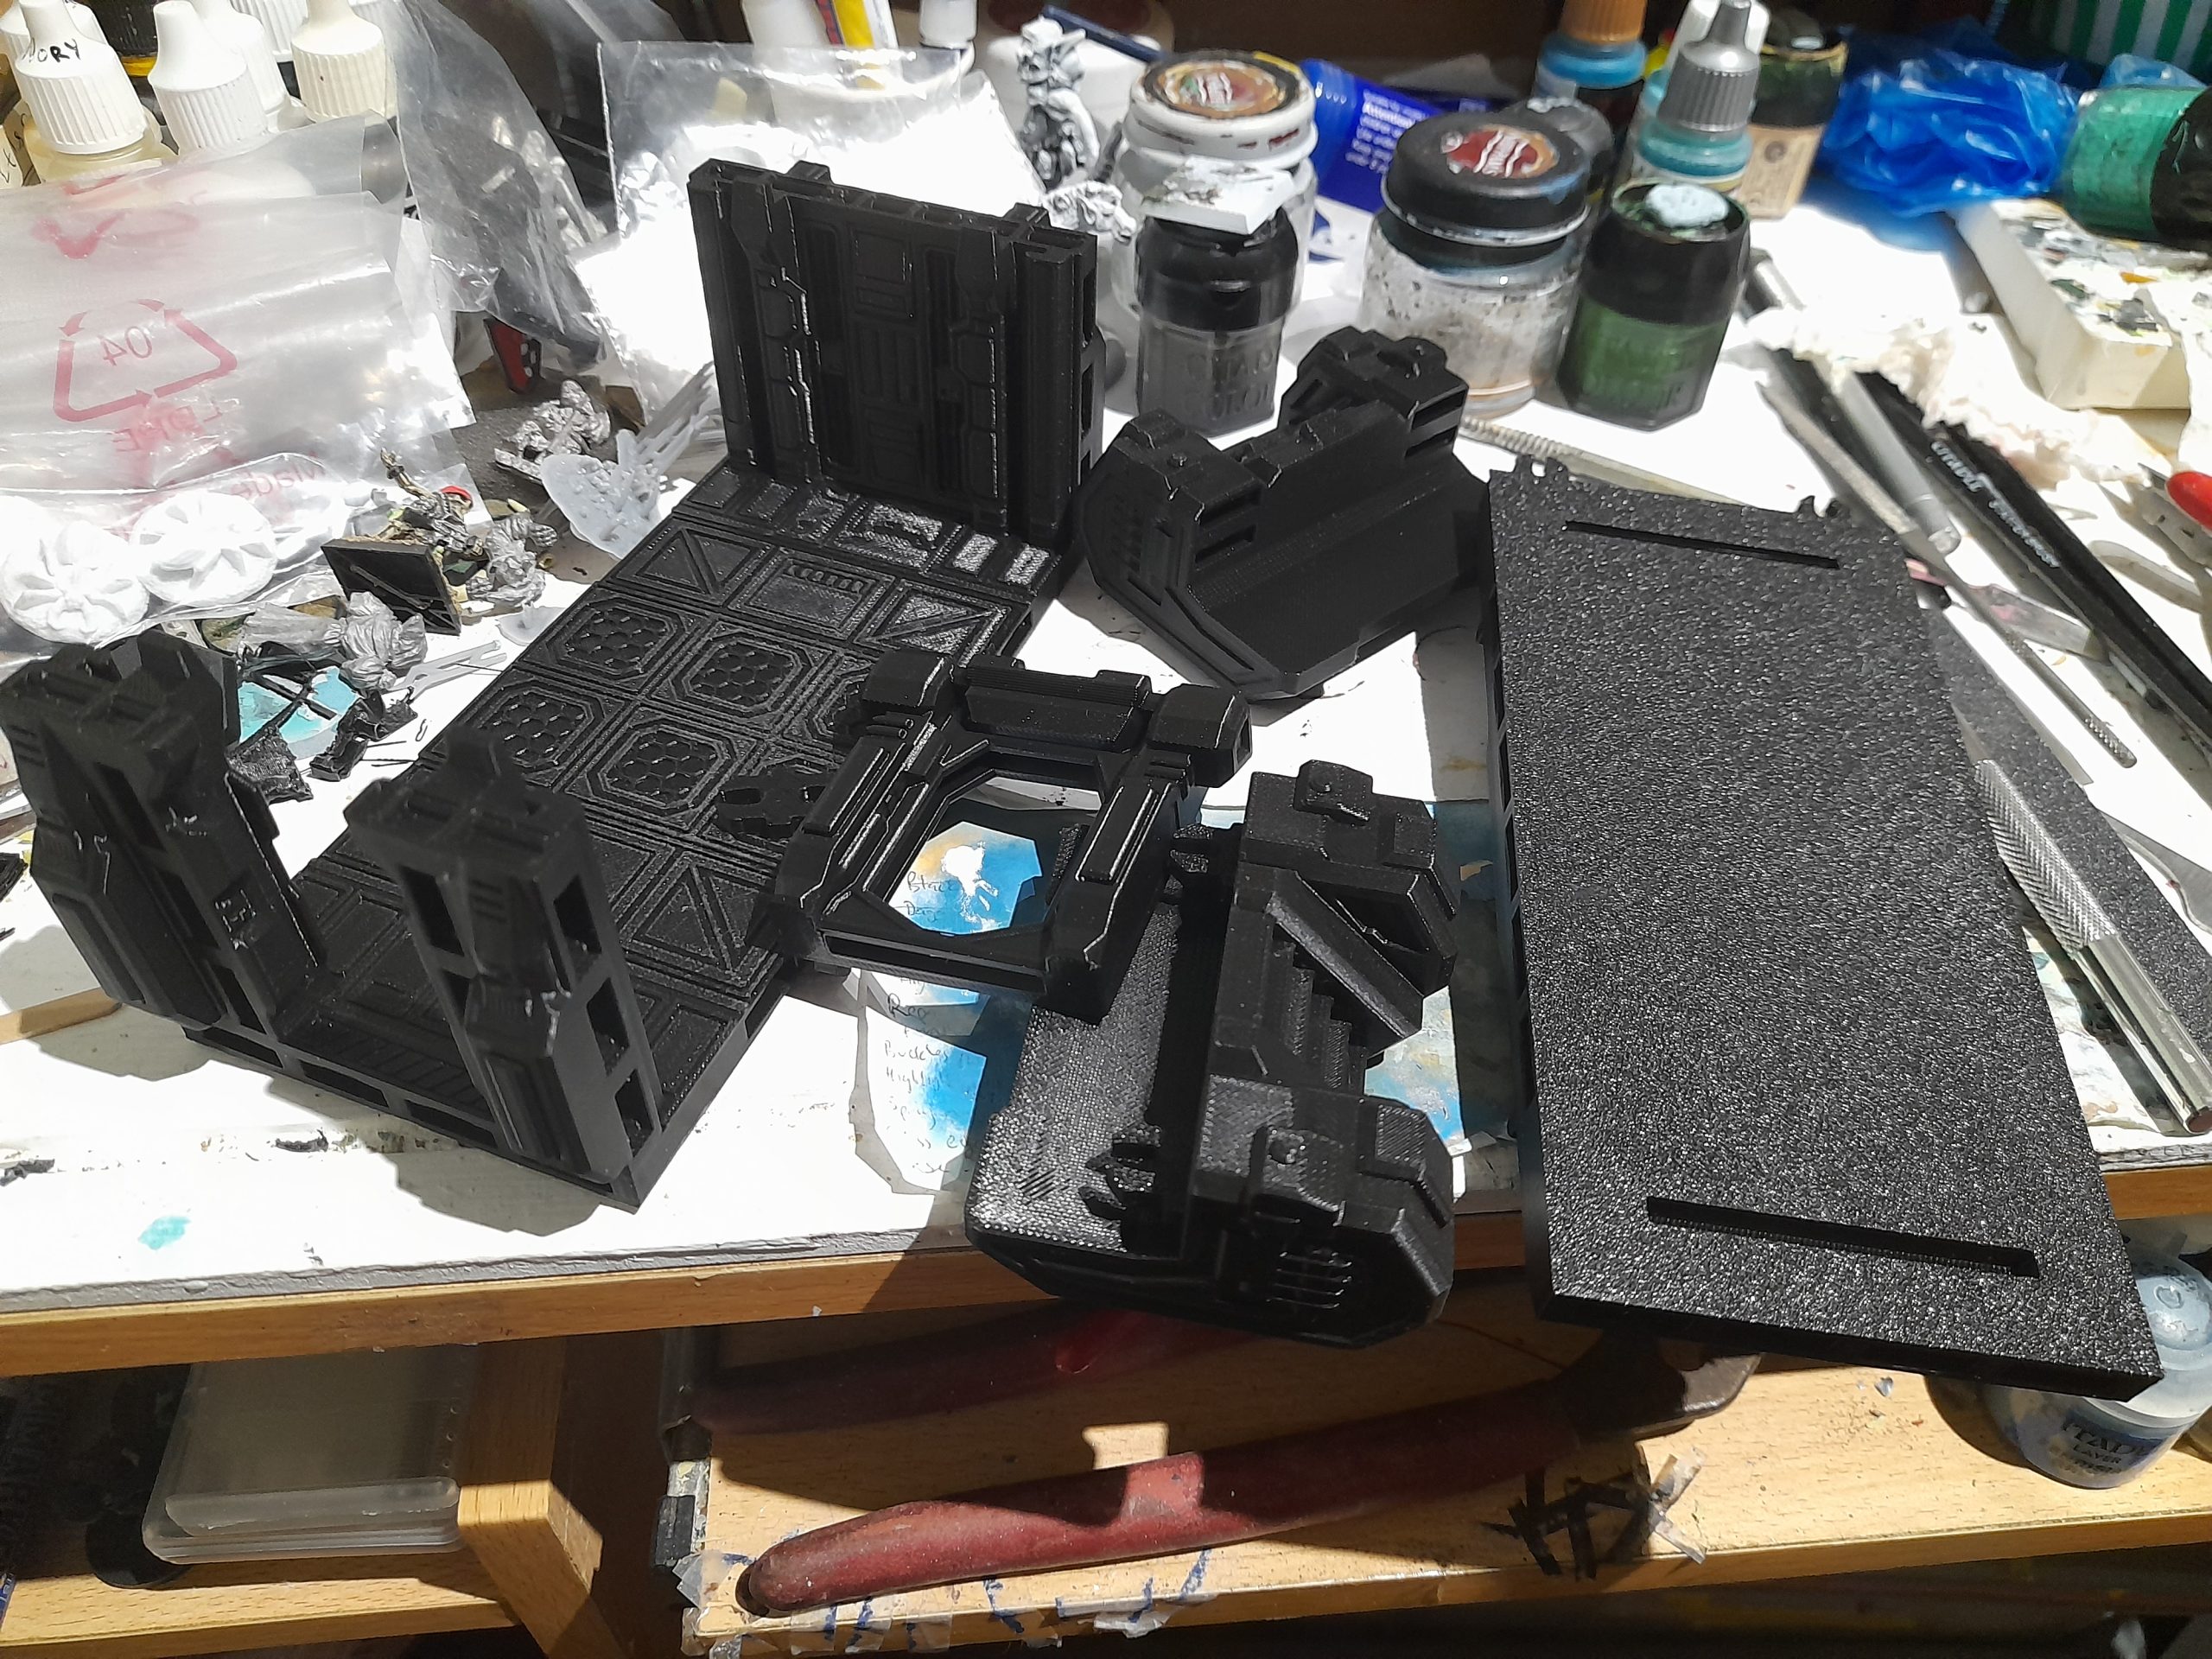
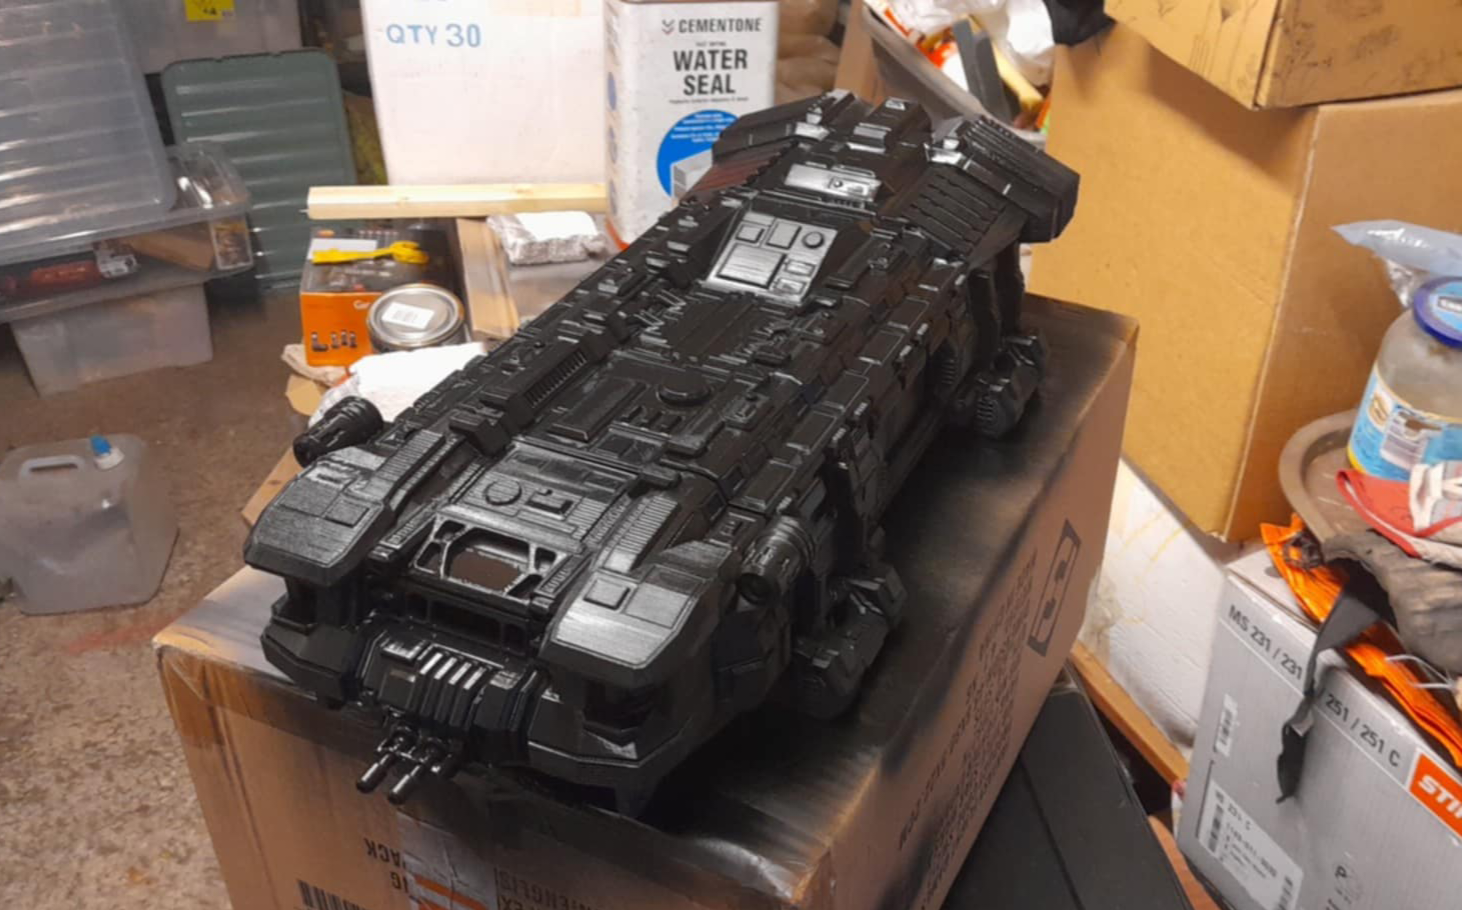
After clean up I glued the elements of each sub section, then pegged the ship together as a whole (not glued) to spray it black, followed by an overspray of grey. (On the cockpit section I did paint some panels in different shades of grey after, to test out some ideas).
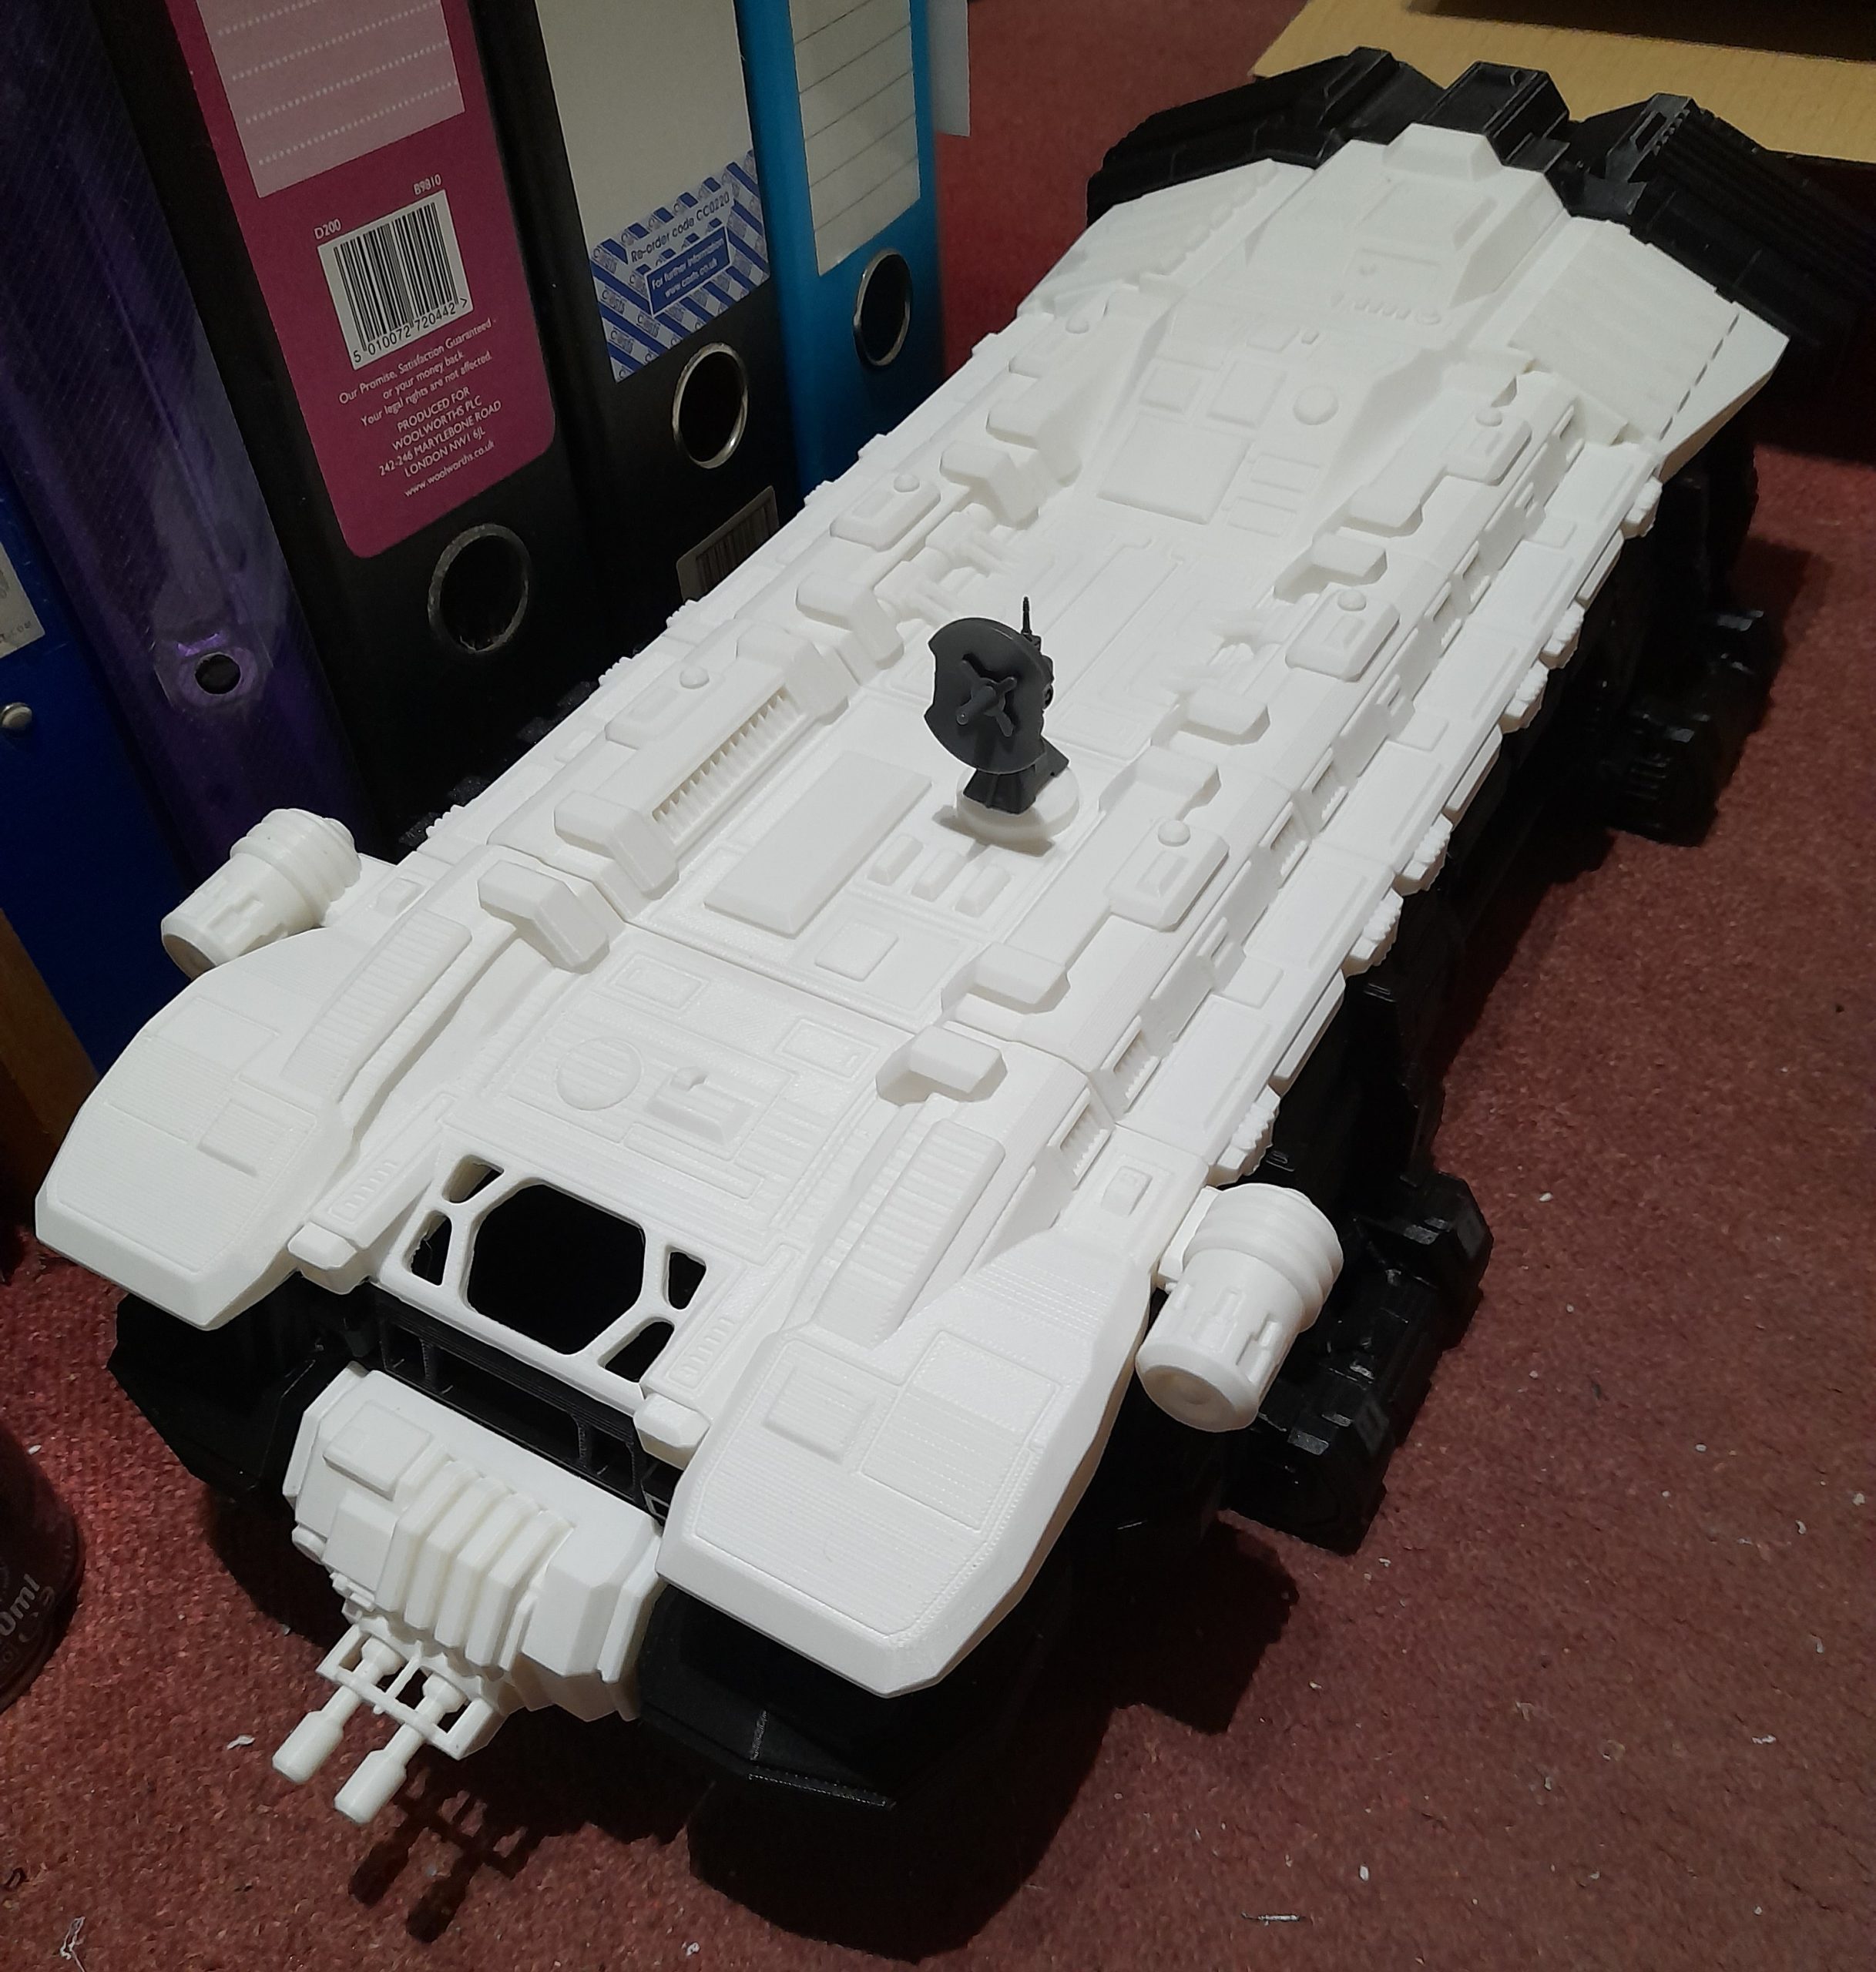

The interior had the same spray process. I then masked off the floor area and painted the walls with a bright white spray. The idea was to make it look like the interior of a rebel ship from Star Wars.
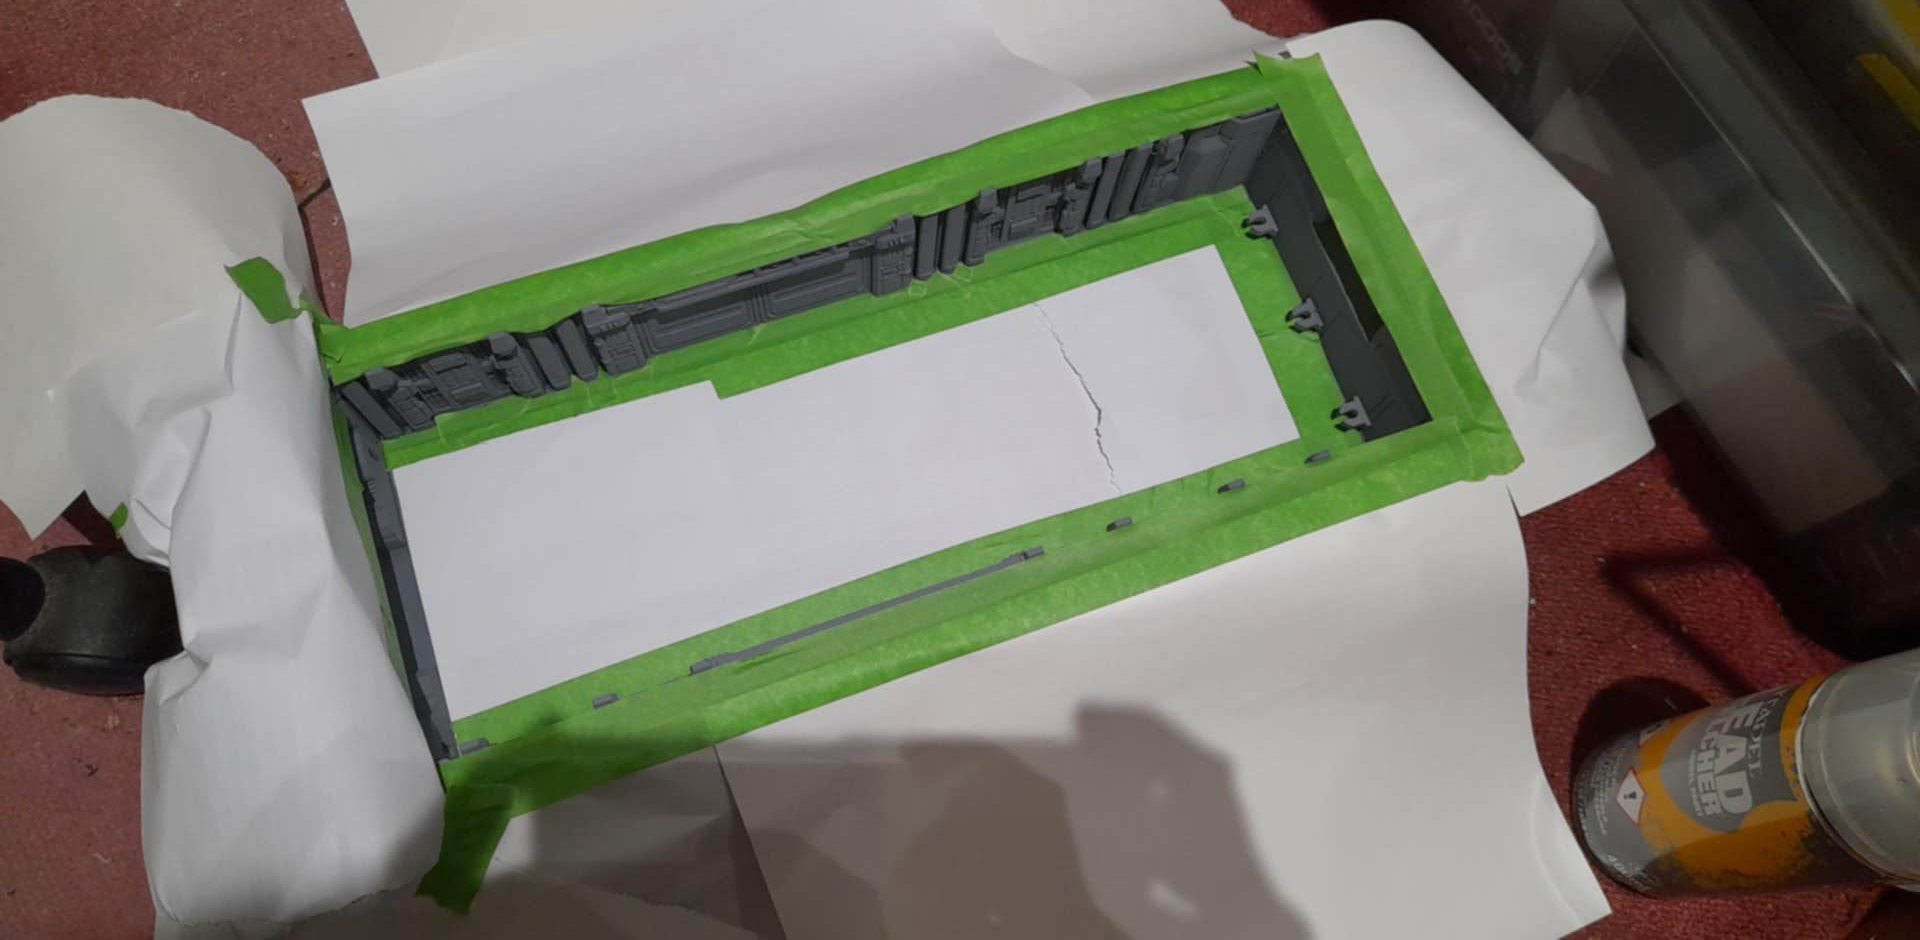
At this point I needed to decide on what colour elements to add and where….