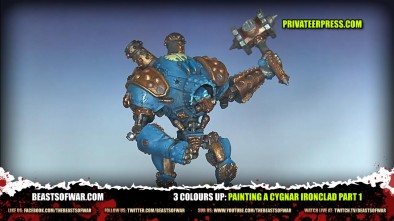
3 Colours Up: Painting a Cygnar Ironclad Warjack… Part 1
November 11, 2011 by elromanozo
Vider Sponsors: Infinity - Dark Age
Romain treats us to another series of 3 Colours Up painting videos, this time he's going to paint a Cyganr Ironclad from Warmachine.


![How To Paint Moonstone’s Nanny | Goblin King Games [7 Days Early Access]](https://images.beastsofwar.com/2024/12/3CU-Gobin-King-Games-Moonstone-Shades-Nanny-coverimage-225-127.jpg)


I haven’t watched any 3 Color Up videos before. Anyone care to explain in more detail Romain’s priming method?
we will have a video going out next week to explain it.
BoW Justin
@dignity I just saw that you guys just uploaded the priming video. Sadly it’s for Backstage members only. 🙁
@wargamerlester well it’s not all that expensive, and it helps your painting no end i’m working on this at the min: http://www.kabukimodels.com/index.php?go=produkt&id=30
and after using Romain’s undercoat style its turning out to be one of the best things I’ve ever painted.
BoW Justin
Aye that is true, and highly annoying. But this method has been used many times before. I use it myself. Though they do sort of differ between painter its all the same principle. Its a plain Black Primer is sprayed on first all over the model. Then secondly from the direction of the light you spray a Grey Primer on, not as heavily this time as you still need the Black in some areas, it shoudl be short sprays that covers most of the areas facing the direction of light. Also when i do this I move the can around… Read more »
I believe it is a spray on mat finish…
Be that as it may The paint work is fantastic as per usual. I would like to see Romain’s base work sometime especially on the steam punk stuff. I bet it would be pretty creative…
For the Ironclad and from watching the yellow/golden Dreadnaught before, excellent tutorials, but I must ask, how do you decide on which bits are painted in metallic and which are painted with regular paints.
When attempting metal clad beastie like this, I usually have a hard time planning what should be in metals, if all should be metal and that sort of thing. Any advise would be quite helpful. With my many thanks, Romain!
P.S. a Mary Poppins Warmachine crossover sounds great fun and would surely be legendary!
Thank you so much !
I’m afraid I cannot help you on this one, however… It is a matter of taste and balance between the colours you want on your mini… usually, machinery and pistons are unpainted, unlike some platings, but that’s it.
I will do a video on colour harmony that might help, albeit indirectly.
nice tutorial thanks again. are you going to purchase a set of the gw eavy metal brushes if so will you do a review of them ?
I already did a review on those, it is available to backstagers… clicking on the “3 colours up” button will get you there !
so, as im a noob about this matter, whats the point in priming a mini black, white, or black and then white or the oposite? and also, consider doing some verdegris, that would surelly look great.(just my personal point of view)
Priming white lets all the colours pop through much brighter, priming black accentuates the shadows, priming black+grey+white as I did makes all the details stand out and pre-shades the miniature, so your work is immensely facilitated… I explain it all in a future video. As for the verdigris, this necessarily comes in at a later time during the painting process, as this is just a basecoat with no shading… This tutorial has been filmed in its entirety, even though it is cut up in several parts for the purpose of web-publication, as with most of my tutorials, so I can… Read more »
oh ok. but if you paint several layers of paint, even differrent paint, whether you dont like the look, the primer ”abilities” still aplly? if so, i should get on buying me a grey and a white primerat once!
Unless you need heavy basecoating or change your mind more than once or twice about color, this probably won’t be an issue… You can always use the priming as a general guide. However, I would suggest you use thin, transparent layers of paint… If you haven’t determined the majority of your colour scheme before painting, I also suggest you think about it a little more ! These things are planned, somewhat. If you are displeased with your colour scheme and you’re well away in the painting process, you will want to strip the figure and start again from scratch instead… Read more »
thanks! im planning already , but i add some times too many layers. anyway ,thanks for your time replyiing !
Where’s the video?!
wow 9 years ago this was made, a great warjack.