


WW3:TY Soviets


Recommendations: 127
About the Project
As a longstanding FoW player I was eventually tempted while at club to give WW3: Team Yankee, the new edition, a go. After a quick survey of what nations others played I decided to dabble with Soviets. The project began when the Red Thunder book was the latest book, but has since been driven by the 2020 Soviet book (which incorporates everything Red Thunder). [RECOMMENDED: View Oldest first]
Related Game: Team Yankee
Related Company: Battlefront Miniatures
Related Genre: Historical
This Project is On Hold
ON HOLD
Although I had let this project slide during a general hobby lull, I felt that given the sight of many of these tanks and BMPs pouring into Ukraine that I wouldn’t enjoy continuing with this army for now… chack out my Mid-War Italians project!
2f: Support units
The Soviets have a wide array of support unit options for Recon, Artillery, Anti-aircraft/helicopter, Observation and antu-tank. I’m sure I’ll add to these over time (especially with some of the new units in the new Soviets book). But for now I have a modest selection to mop up some of those remaining points:
- 1x BMP-1 Observer
- BMP-2/3 Recon options; using teams not used in Motor Rifle Company Transport – build not included in this section
- 3x 2S1 (Carnation) SP Howitzer Artillery
- 2x SA-13 (Gopher) SAM Platoon
So after a quick build, including the first I’ve done with Battlefront Resin/Metal components I’ve got the following 6 models for this section…
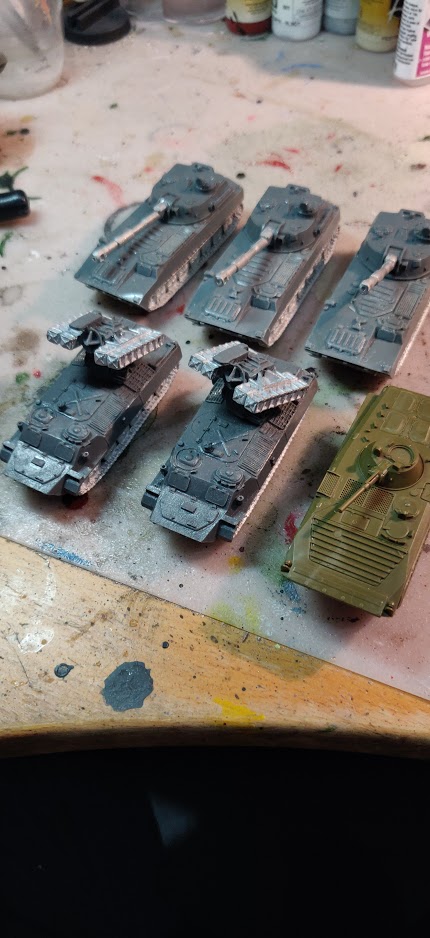 Carnations, Gophers and a Observation BMP-1
Some decisions to be made with the BMP-1.
- I’ll probably mount a binoculared bod stuck out of the top
- Considering whether to give it a unique (in my force) camo pattern for stealthy forward observation
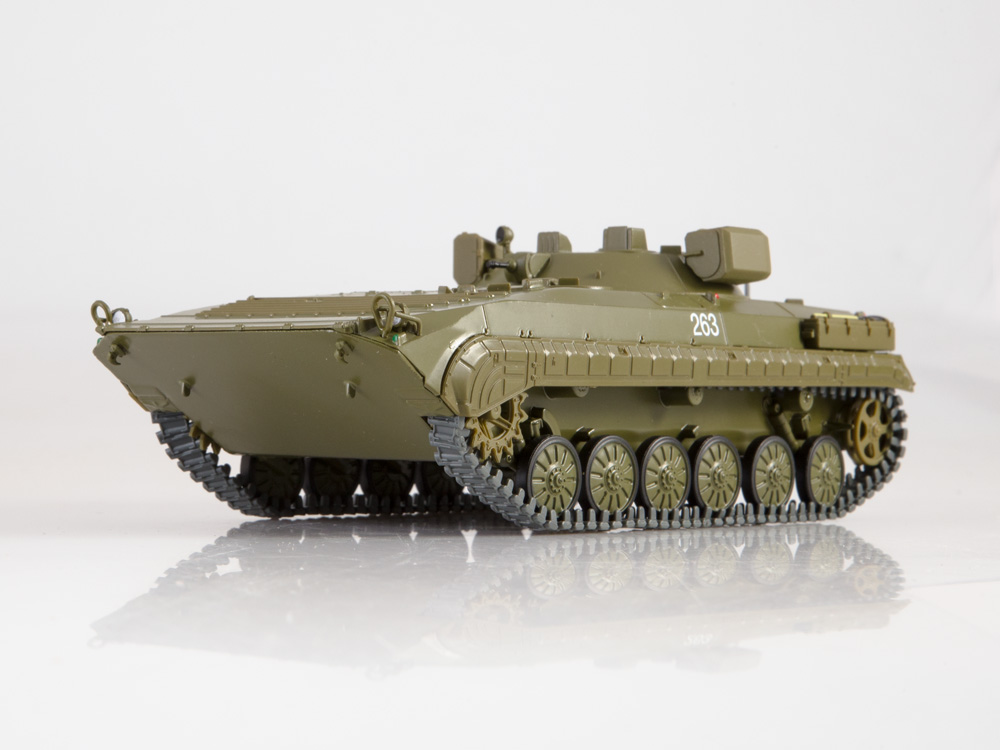
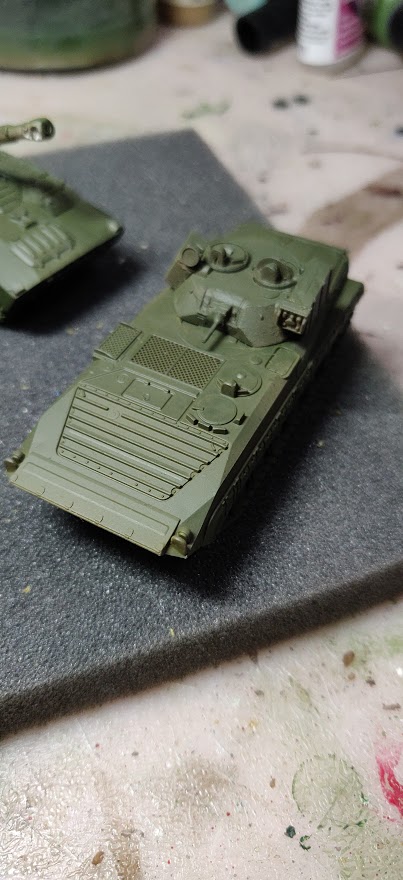
Decisions made: meet the PRP-4
BMP is the designation for Infantry Fighting Vehicles, but the Artillery observation vehicle isn’t therefore a BMP, it’s a PRP based upon the main body of a BMP-1:
PRP: Podvizhnoy Razvedyvatel’niy Punkt = Mobile Reconnaissance Post
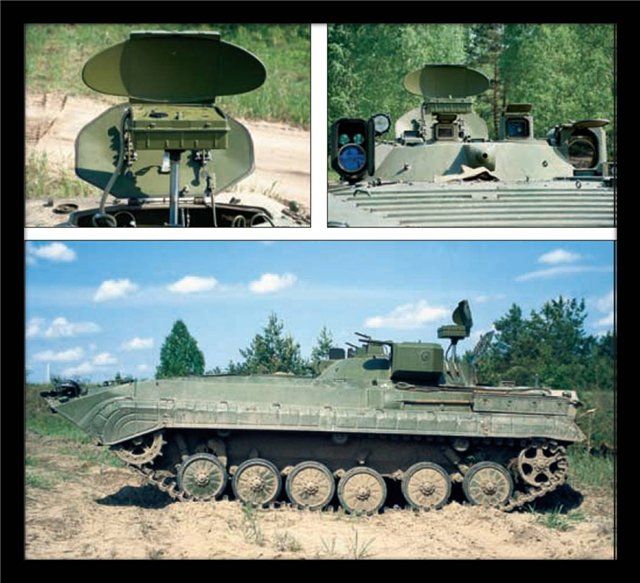
The USSR and subsequently the Russian Federation have evolved many versions over the years, but given I’m pitching my force in the early to mid 1980s I’m considering mine a PRP-4 “Nard” which lost the missile launchers of its predecessors. I’m not usually that obsessive about such things, but let’s find some reference images to work from:
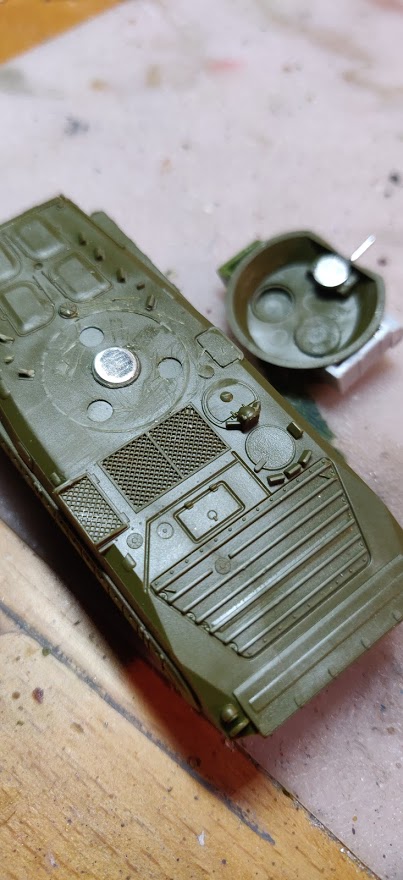
Time to sprue-hack something vaguely looking like it, rather than the BMP-1. That means losing the 73mm gun, the missile launcher and arming with only the 7.62mm MG.
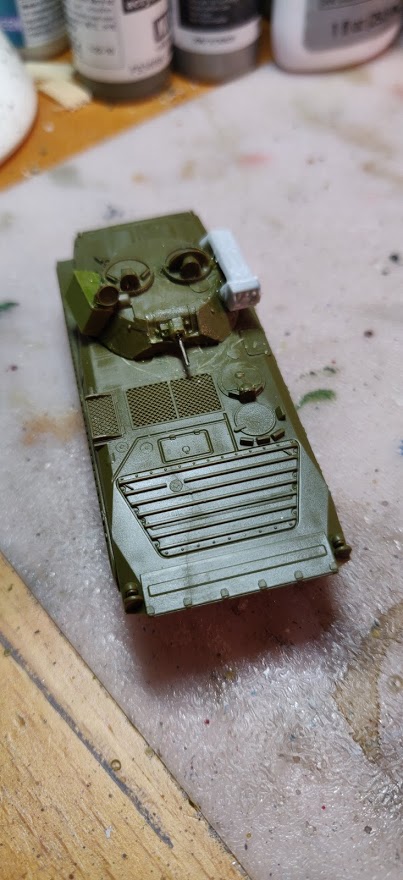
The turret was also larger to allow for two cupolas side by side and for the tech equipment to be mounted on it. so took a BMP-2 turret and adapted it, including drilling for a second hatch
This was fitted further back on the vehicle, so the circle on the hull had to be shaved down anda magnet fitted to the front of the new turret (hull magnet was already well stuck). Before priming it looked like this:
All support units primed:
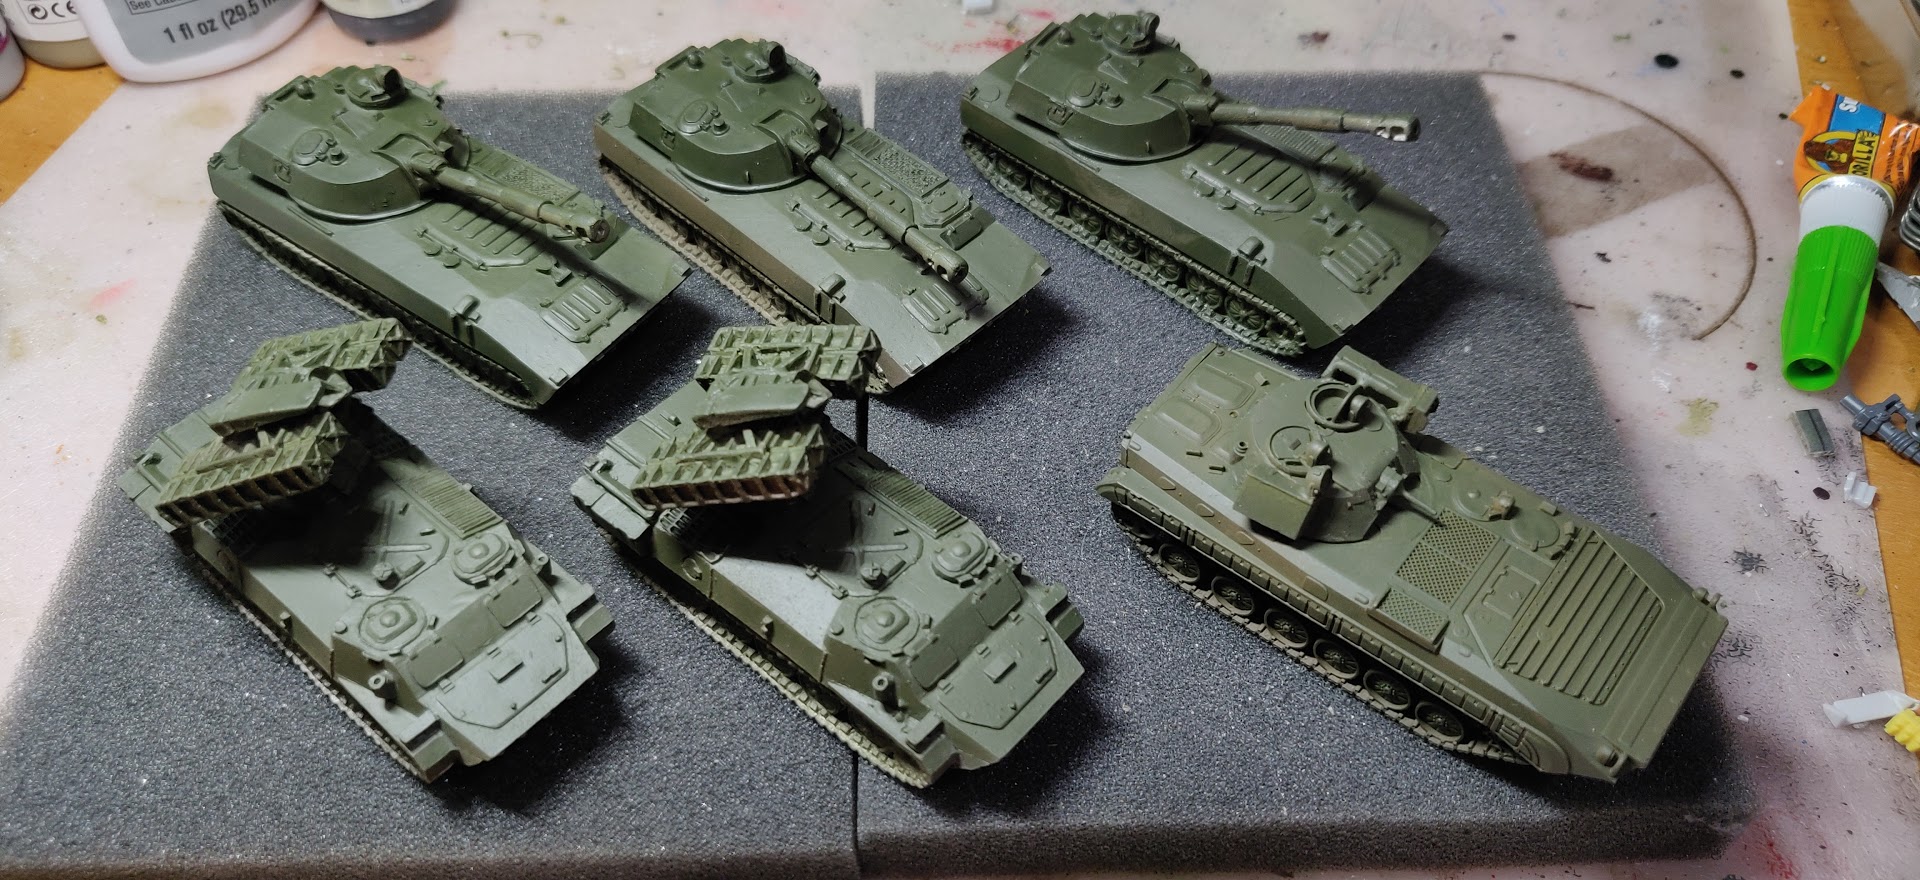 3x Carnations, 2x Gophers and a PRP-4
2e Troops: Motor Rifle Company with addit weapons and Hind Assault Co
Three boxes to make up a number of options:
- [TSBX18] Motor Rifle Company – makes up the following teams:
- 1x Command
- 10x AK74
- 9x RPG7
- 2x PKM LMG
- 1x SA14 Gremlin
- [TSU706] Motor Rifle Heavy Weapons – goves the following teams:
- 1x AGS-17 Launcher
- 2x AT-4 Spigot Missile **
- [TSU703] Motor Rifle Platoon – for use as Hind Assault Teams:
- 4x AK74
- 4x RPG7
** In hindsight this wasn’t a great buy as AT-4 Spigots can’t be used in BMP transported Teams or Hind Assault Teams, but looking at options…
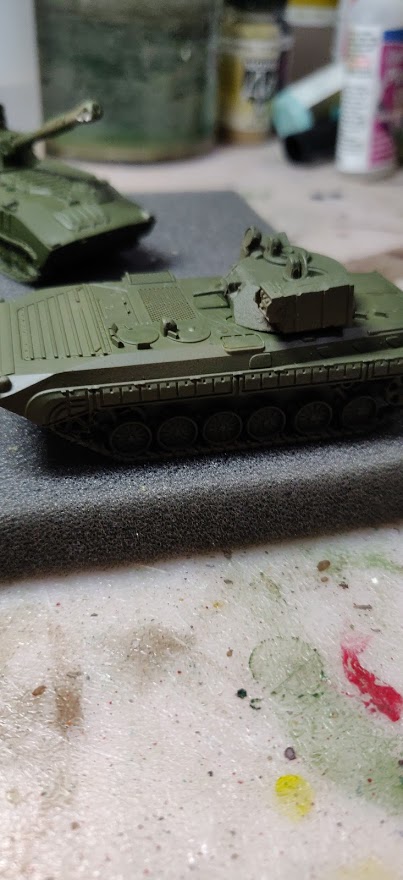
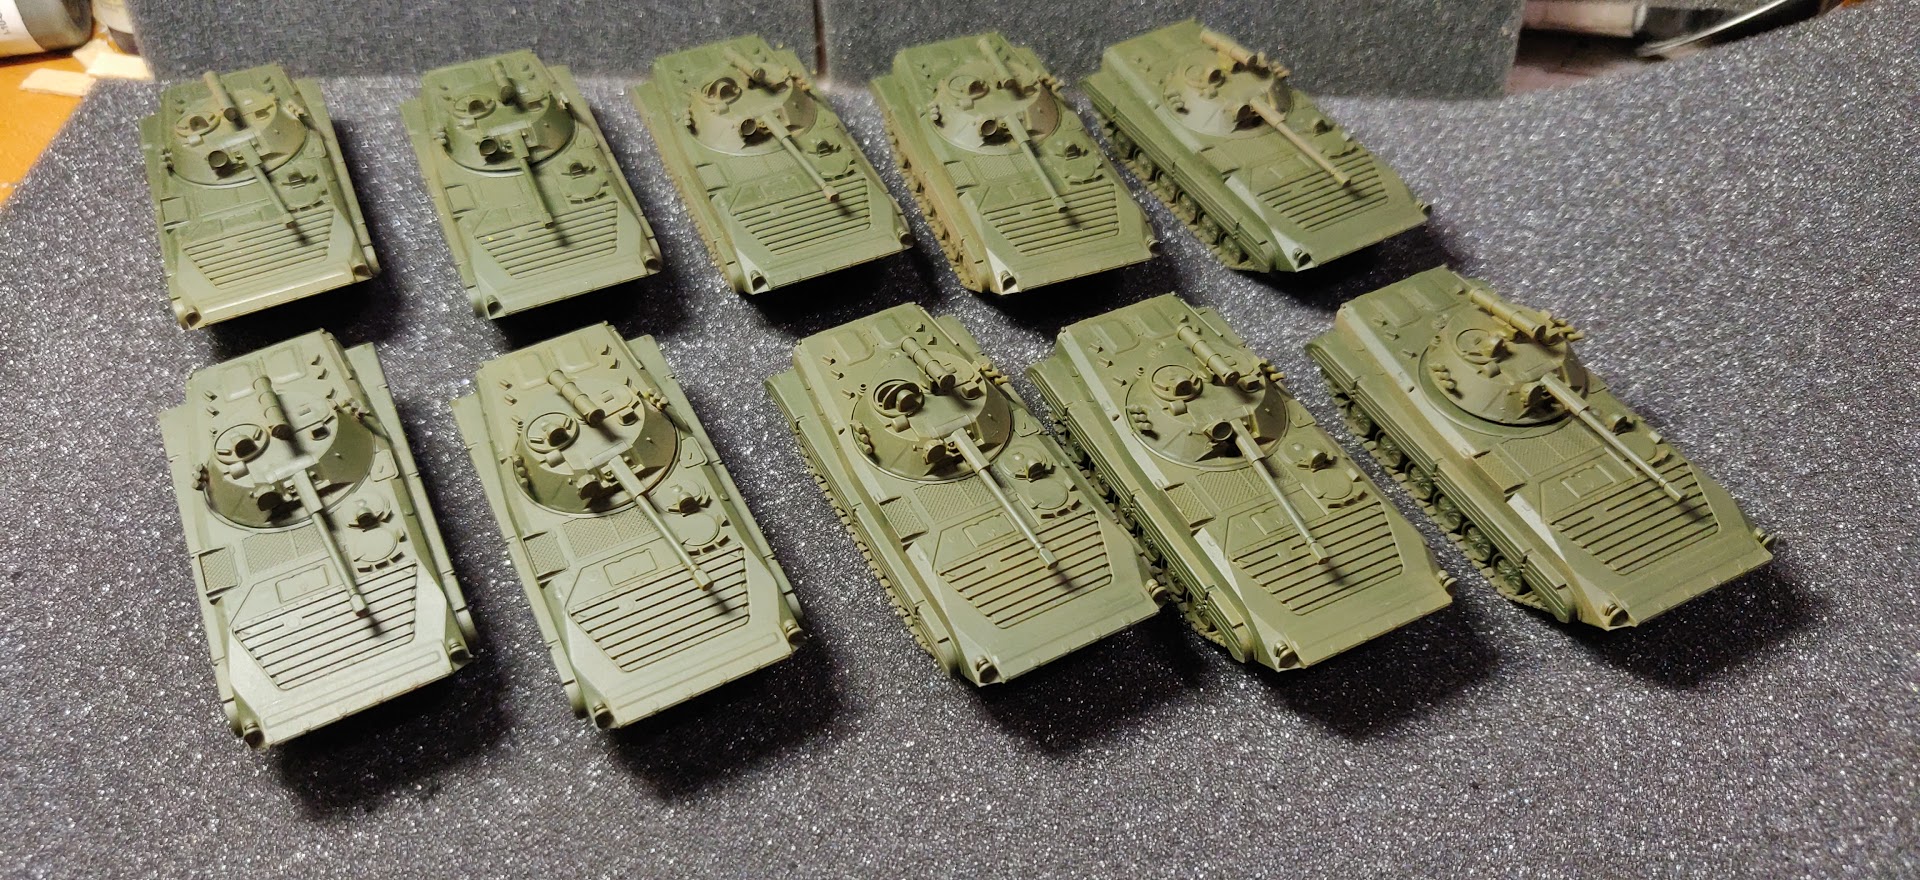
2d BMP-2 (x10): Transports for Motor Platoon and recon units
BMP: Boyevaya Mashina Pekhoty =Infantry Fighting Vehicle (IFV)
The 4 BMP-2 previously built and primed in phase 1 have now been brought up to numbers with the remaining 6, so now sitting with 10x BMP-2 with fully fitted turret mow including the front IR-light, smoke launchers and AT missile launcher.
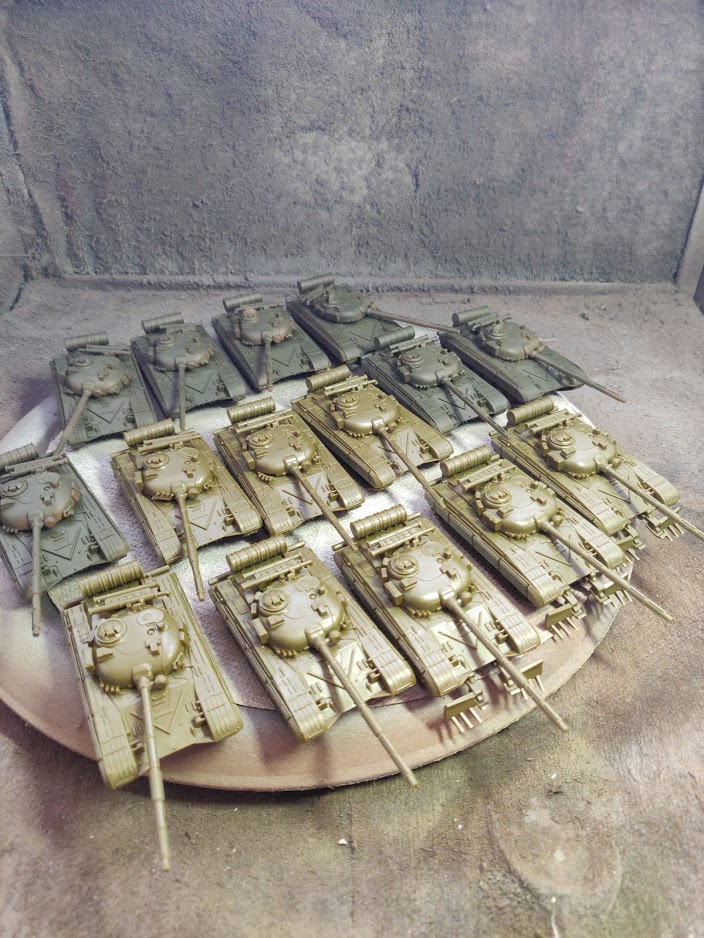
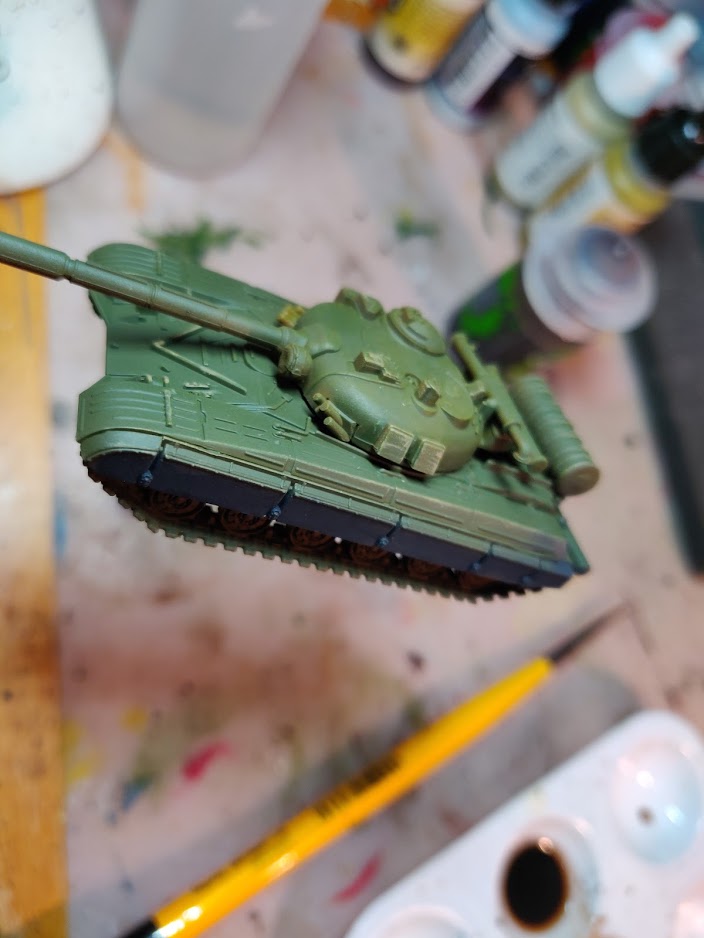
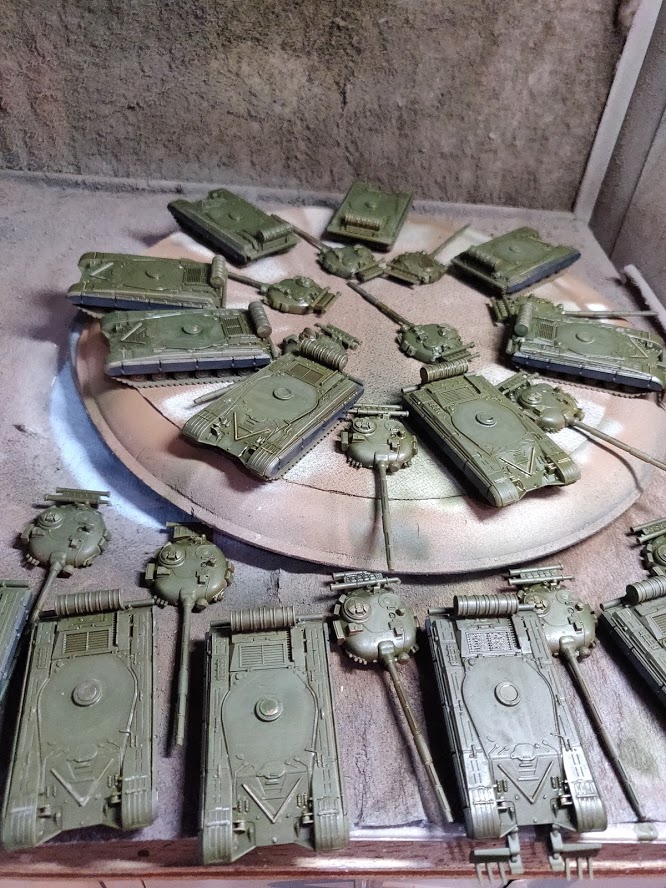
2c - T64 Main Battle Tanks (x15): Build, Prime & Paint
originally only built and primed 7 to quickly get them on the table. Juat done the other 8 over the last few days to bring to same stage.
First image below shows the 8 new builds next to the primed 7. Three at the front have mine clearing devices fitted for +1 per tank, up to three tanks per company. Given how important not getting bogged down is these felt essential and could be split across 2 companies if necessary.
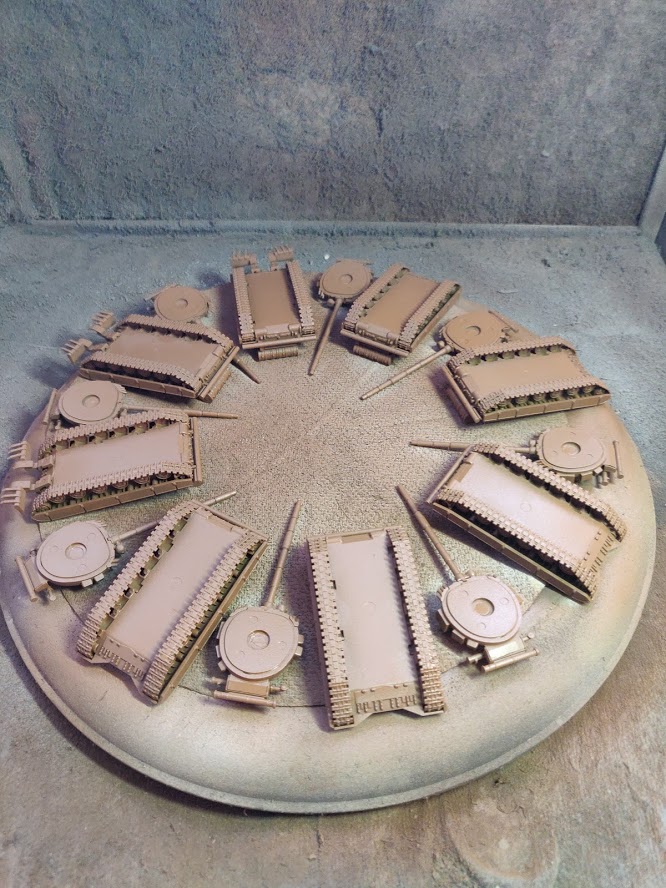
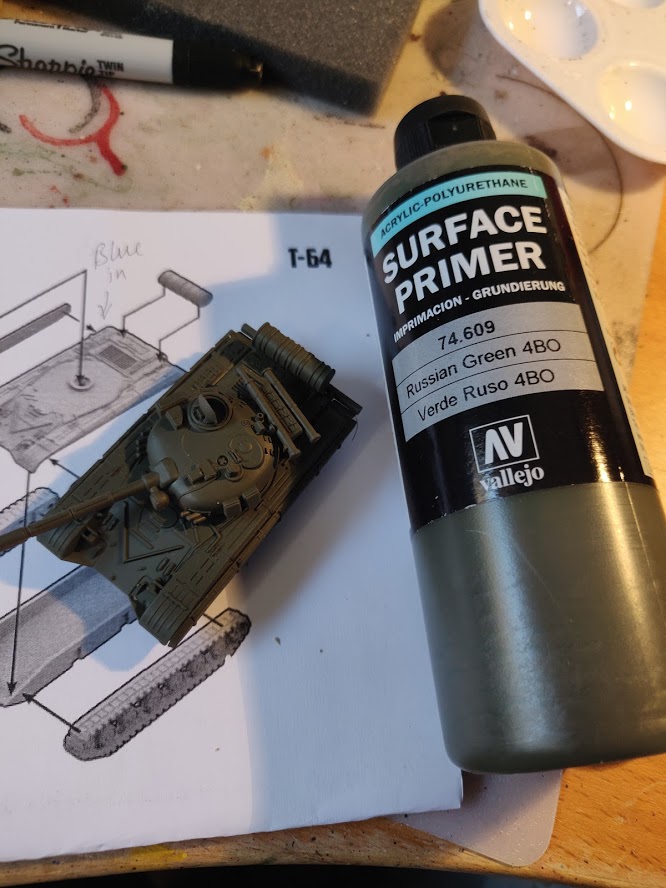
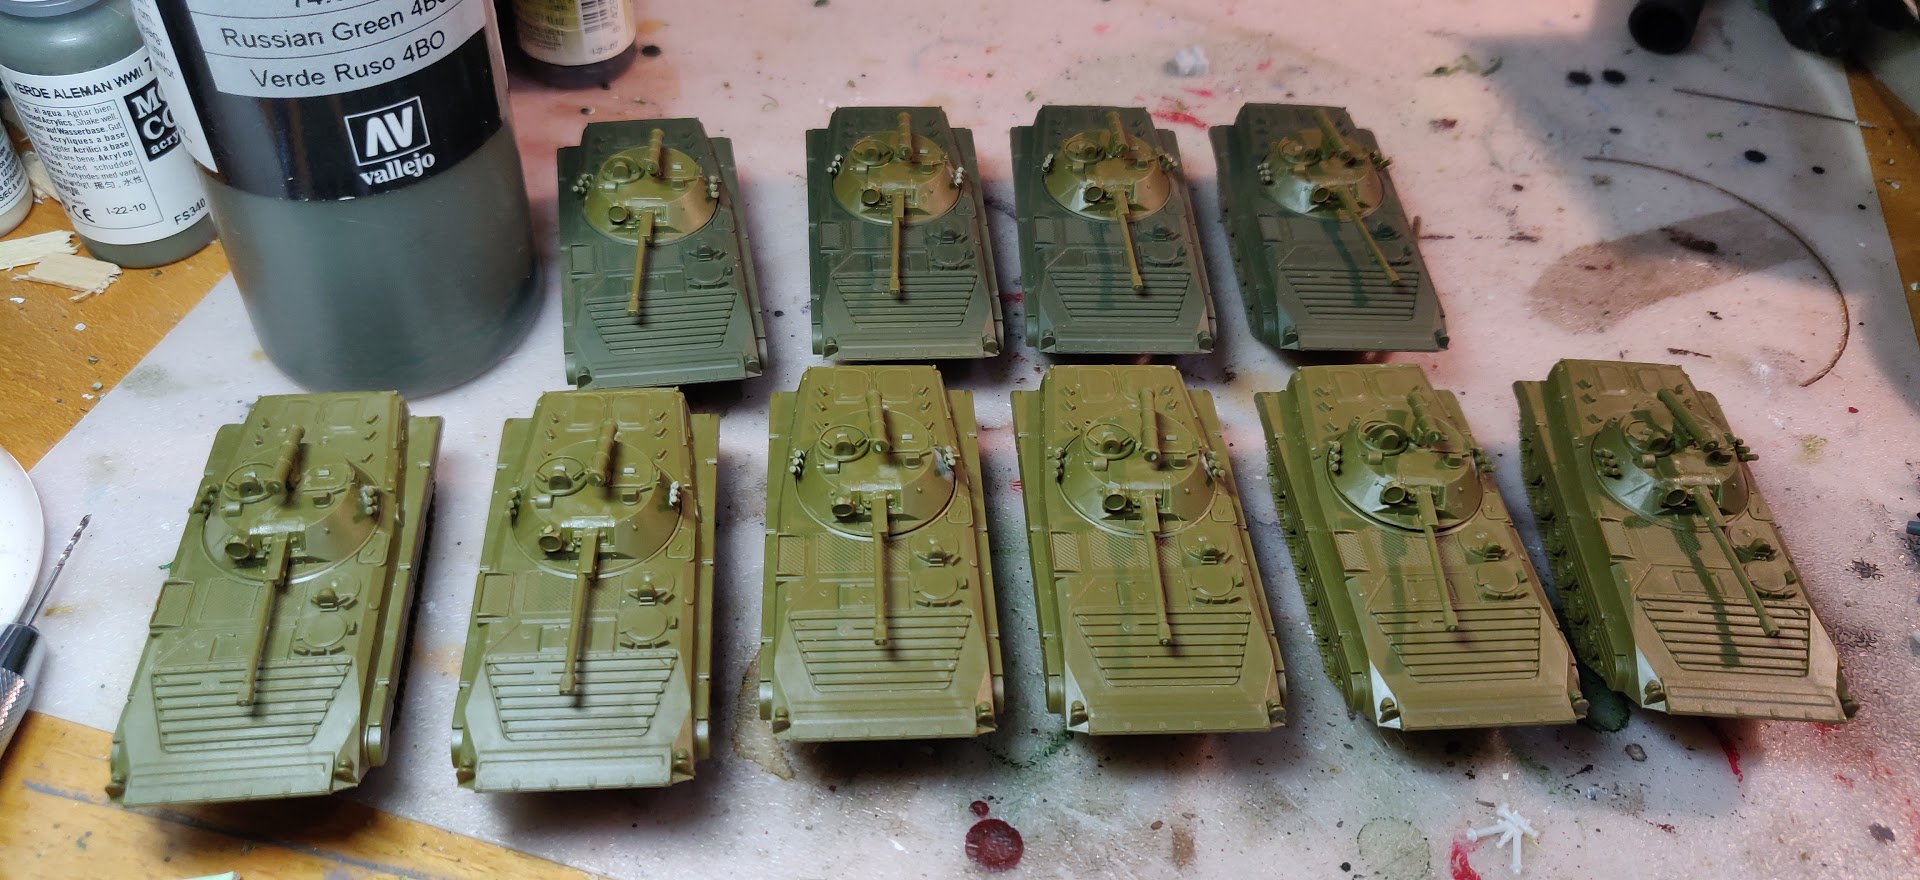
Followed the same steps to prime the new models as for the previous, what i call my ‘underweathered base’:
- Army Painter Leather Brown rattle can on the undersides of both the chassis and the turret.
- Vallejo Russian Green Primer [74.609] on the top surfaces.
Don’t want everything to look too neat and tidy. The bits of brown visible underneath give the impression of a tank that’s been through a few puddles and dust storms.
Paint Job
A quick highlight using a desert tan drybrushed and picking out some features, plus DunkelGrau/Dark Blue-Grey on the rubber skirts before a general wash over using a 50% dilution of Citadel Agrax Earthshade to act as a tone and darken some recesses ahead of a proper pin wash of elements like the vent panels etc later. The only areas with any significant pooling of shade will be under the turret.
Finishing
All that’s left to do are the decals etc. – watch this space
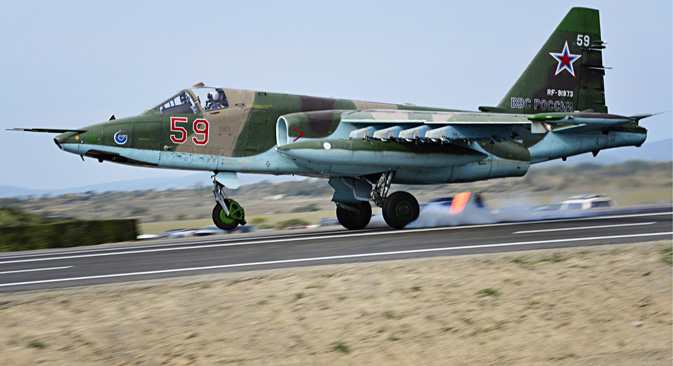
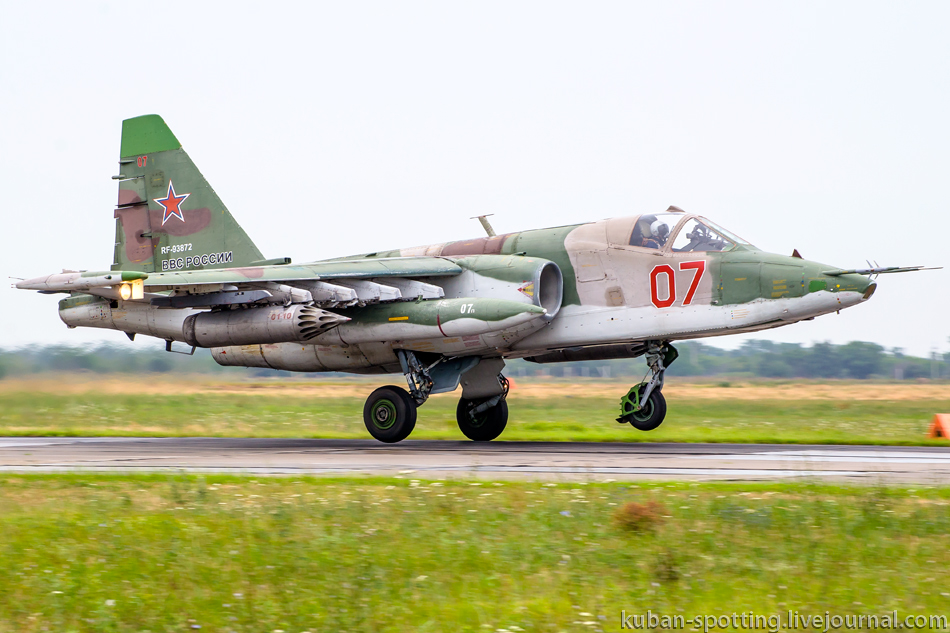
2b - Su-25 Frogfoot Aircraft (x4): detailing
So as with the Hinds I wanted to use the GSW Colorshift Storm Surge Green for the canopy, which wnet on the black a treat. It will be ‘softened’ by the final Matt varnish, but looking at reference pics I wanted to gice the canopy some framing so out with a Callejo Desert sand (in hindsight was the perfect color to have done the original camo) and painted on the frames.
Using a brush, even a fine one, witout any meaningful contours to work with left the lines a bit uneven, but I was going to do more anyway, so using a fine black marker pen (Sharpie) i went around the glass sections thinning the uneven lines and creating an almost 3d shading effect.
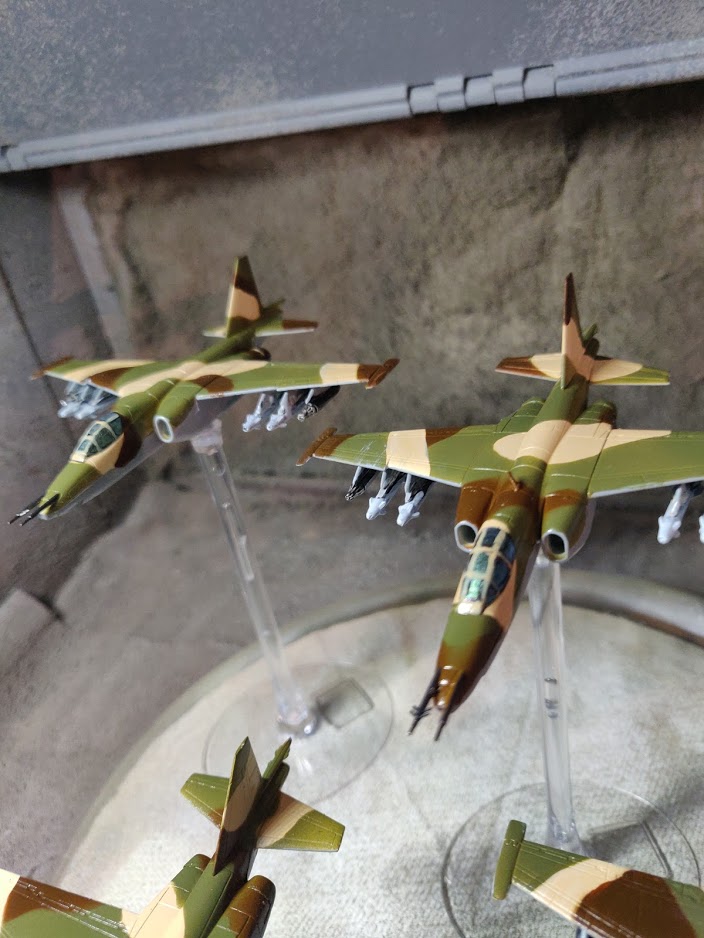 Canopy frames picked out
The planes were then ready for a light Vallejo Mecha Gloss varnish ready for pin-wash, decals and streaking.
Pin wash & streaking
I finally got my hands on some Humbrol enamel wash to work with, rather than my usual acrylic. Works differently and on top of the gloss varnish you have plenty of control and can tidy-up anything you don’t like with a bit of suitable thinner/solvent. I had white spirit to hand which I only needed to use sparingly as wasn’t sure if it might take the varnish with it if used too liberally.
Decals
Geting the hand of this now after my first try in decades on the Hinds. Micro Set and Sol really making it easier to blend them in, but what’s left should disappear under the final varnish layer.
Varnish
Vallejo Mecha Matt through the airbrush worked very smoothly; gee does it dry fast! Leaving it a full 24 hours to fully cure/dry but I’m very happy with the final results – will look great bearing down on those pesky M1-Abrahms on th tabletop…
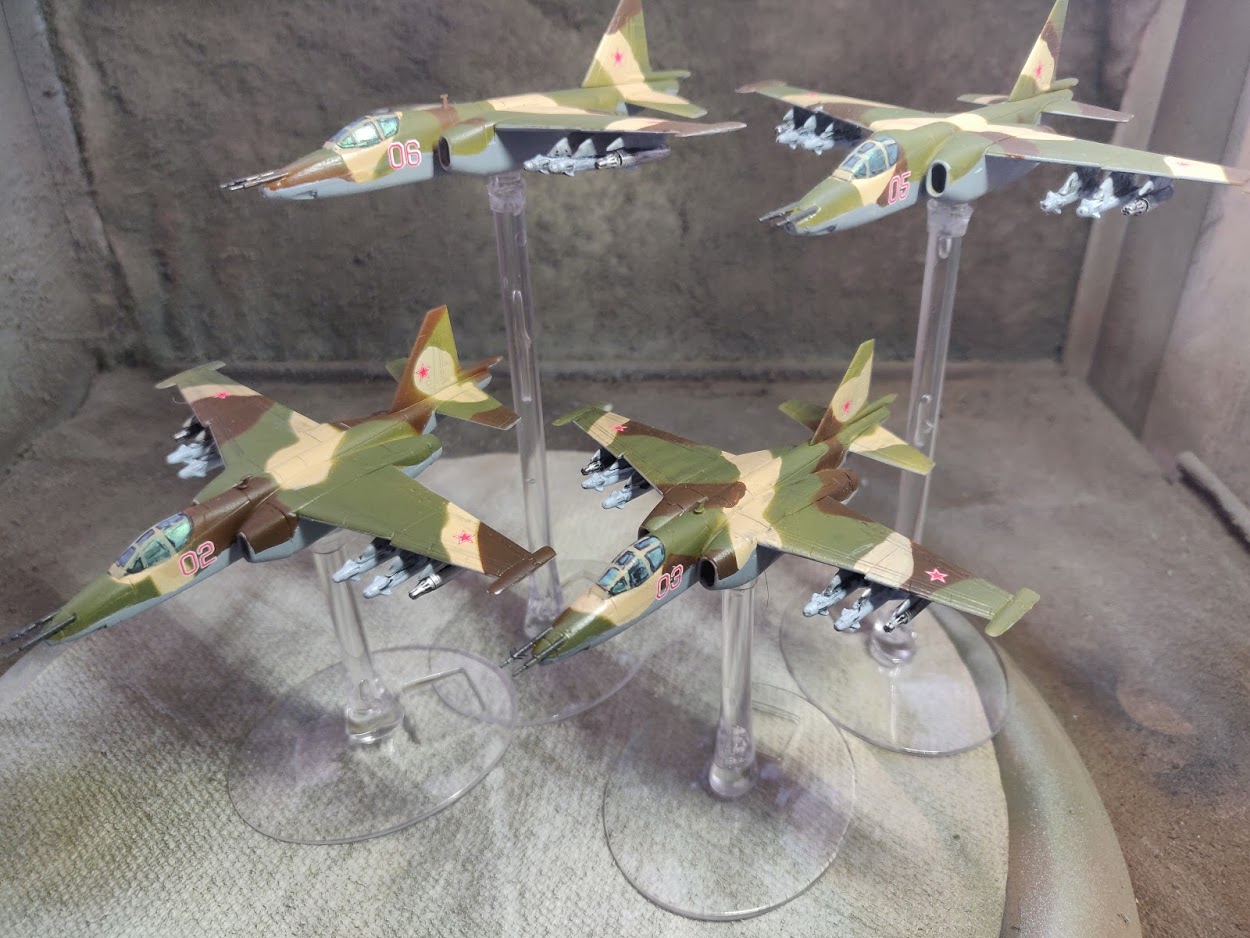 Frogfeet ready to make a splash on the tabletop!
2b - Su-25 Frogfoot Aircraft (x4): PAINT
Looking for reference colour schemes I tend to bypass model references and look for real-world examples. This plane was widely used across the Warsaw Pact, so made sure I found Russian references rather than Czech, Polish or Ukranian – all of which have slightly different schemes (but the giveaway is usually on the tail).
One thing I immediately spotted is that I’m not going to need such a steady hand painting the line between the underside and the top camo 😉
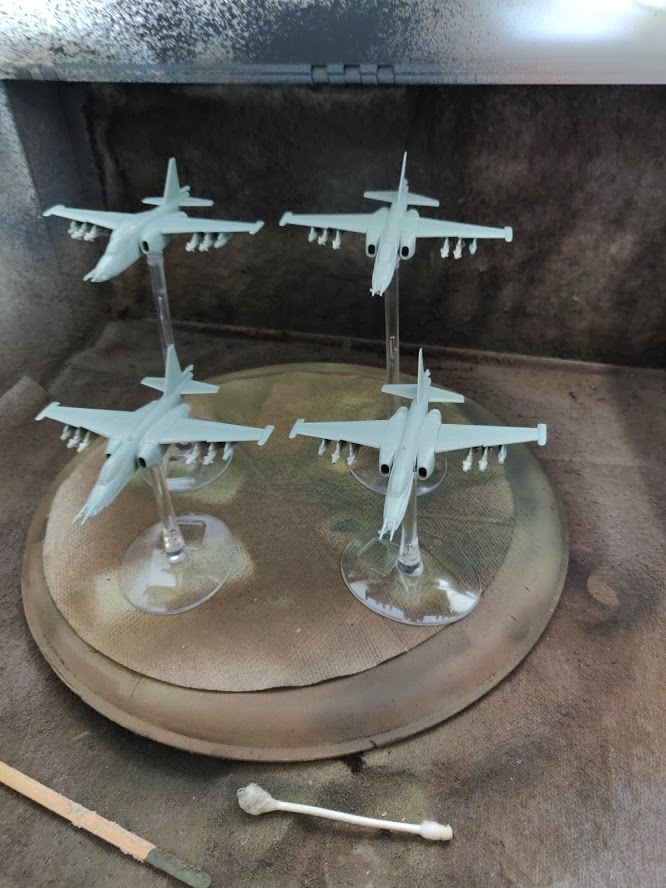
Priming
The Vallejo Mecha Ivory Primer is on. Trying this primer range for the first time as it’s designed for the airbrush and is reputed to give a tougher surface. Realised a bit late on the first model that I probably hadn’t mixed the bottle enough as very little pigment came out. Get the impression that the pigment in mecha is finer than other Vallejo primers and had probably setttled before reaching me. Worked a lot better once I’d properly mixed it.
Top Camo Colours
Sorted my three top camo colours as shown below with some test patches. The Ivory is not as dark as I’d anticipated, should probably have used the same Desert Tan as the Hinds, but going with:
- 50% Khaki Brown [71.024] / 50% Aged White [71.132]
- Russian Green [71.017]
- Burnt Umber [71.040]
Probably applied in that order using putty to mask. Again a first attempt using this technique. The under-colour will probably be the same as the Hinds and again I may try using the putty to mask off the camo line. I’ll also try to protect the canopy, although that would be based to black before the same effect paint used on the Hinds’ glass.
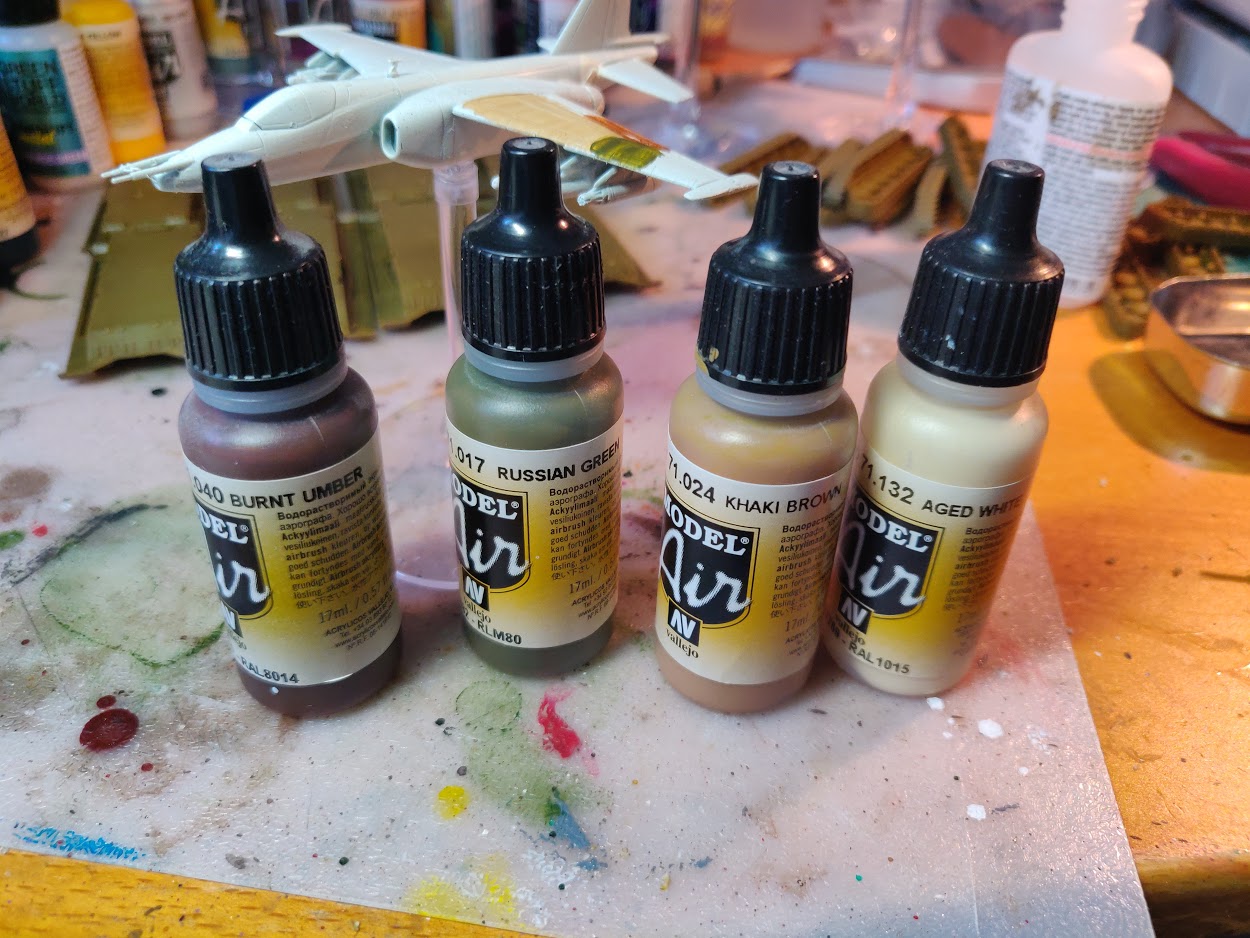 Top camo colours selected and tested
So here goes. First spray the light khaki mix all over the top surface and down the sides. Not being too precise as the colour underneath will come up and apply a nice line with the camo. Then on with the putty (retain light khaki) and on with the green. At this stage using this technique for the first time I have no idea how this will work out. I just know that I don’t want more than a third left light khaki…
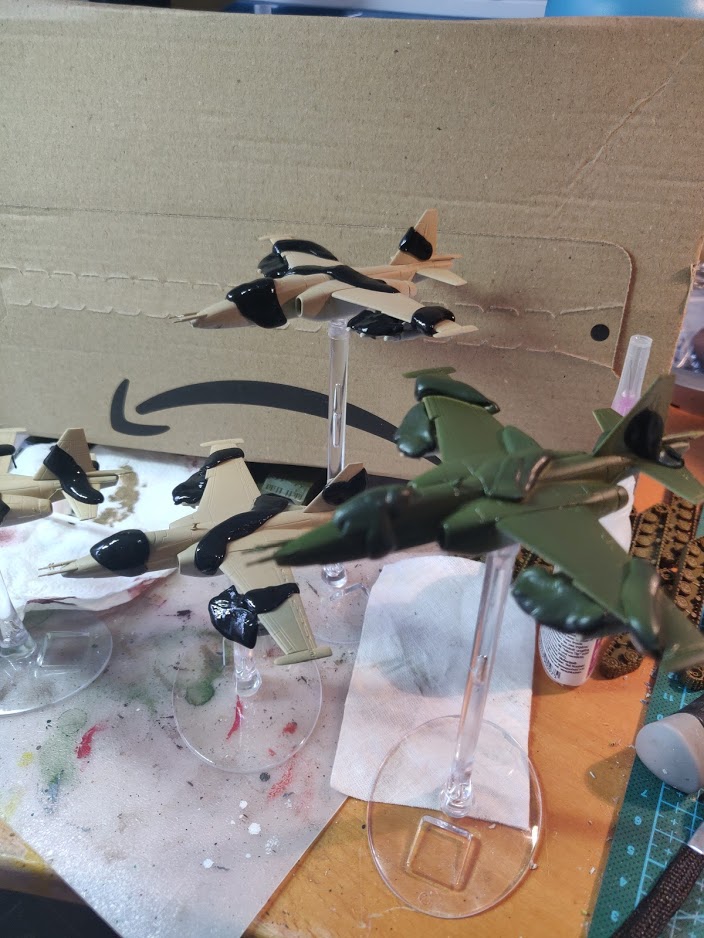 First plane gets it's Russian Green
Next colour is the Russian Green, making sure I don’t leave any fuzzy edges to the putty. Then more putty followed by the Burnt Umber. Time to leave it for a while before I mess with removing the putty. Schroedinger’s planes, at this point in time both potentially brilliant and potentially crap at the same time…
 All puttied up with three colours applied. Time for a cup of tea and cake before revealing...
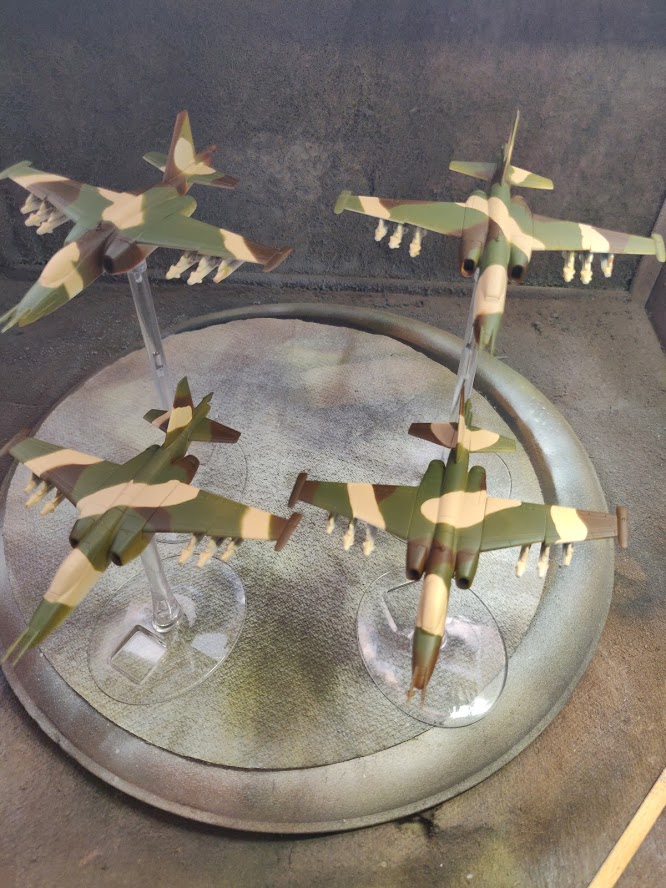 The putty's off!
I don’t mind admitting I’m rather chuffed! I’d planned to keep some bits consistent – the area around the cockpit and the area on the tail for the Russian Star left light Khaki. Apart from that enough variation overall for my liking. Some of the camo edges aren’t as twiddly as the box art, but I’ve not seen an real world reference photos that do that.
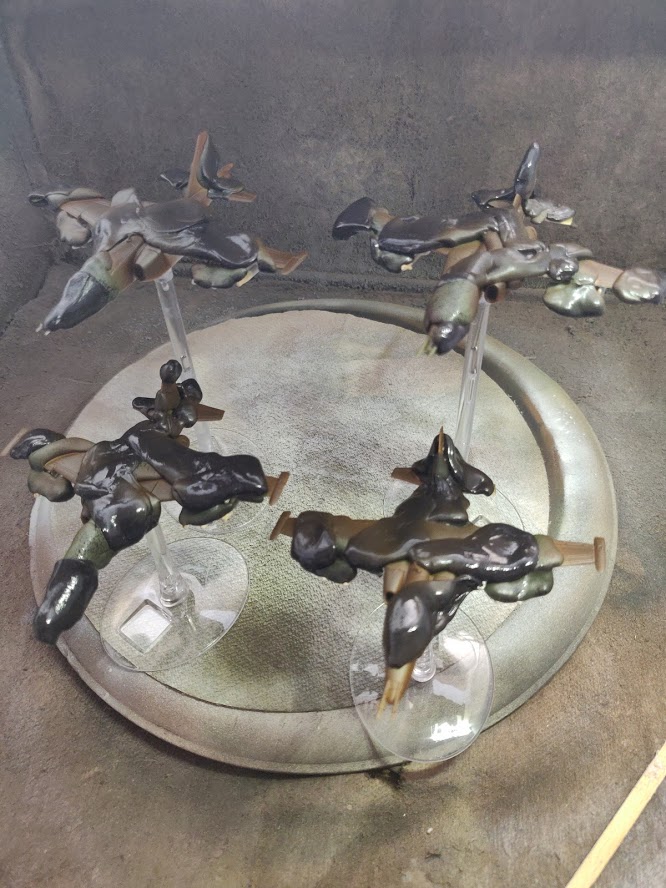
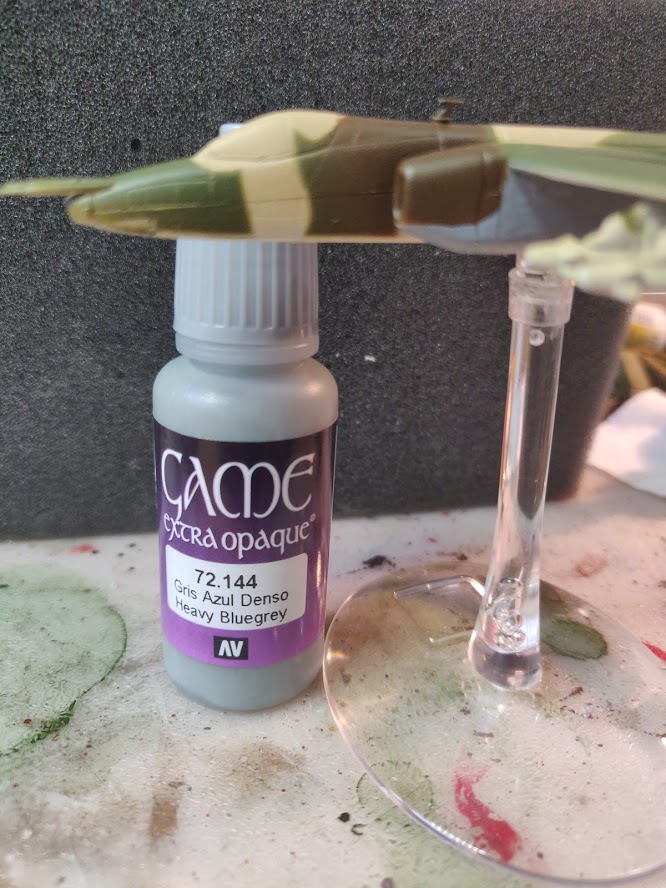
Under colour
There’s going to be quite a lot of the green and umber to cover up under the model so I checked my pack of Vallejo Game Extra Opaque paints (high pigment) and the Heavy Bluegrey looks a good match to me. A quick test under the wings of one of the models shows it covering anything else in one coat… ideal!
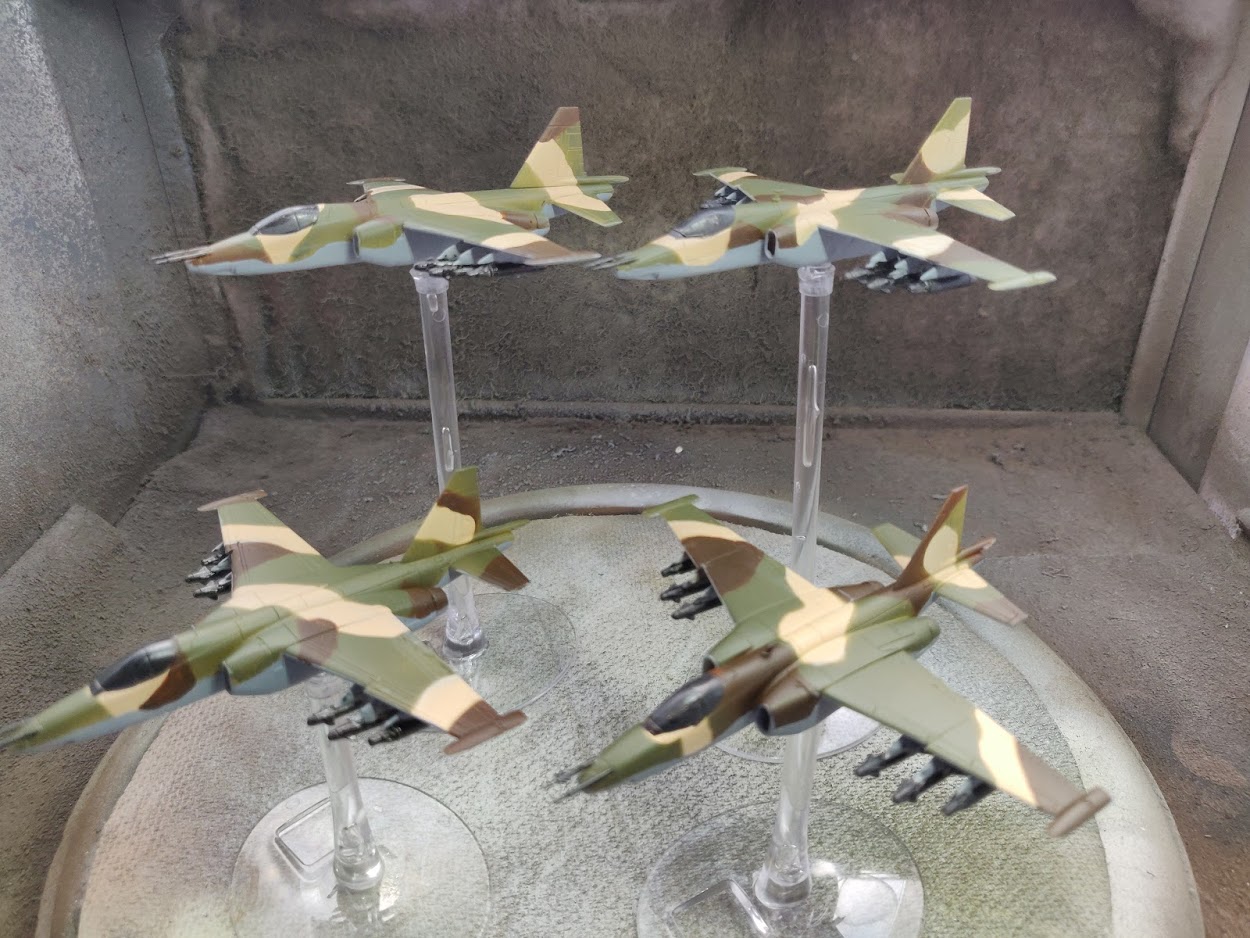
So the under colour was applied and the glass and front protruberances picked off using a Dark Grey extra opaque… time to do the detailing. Pin wash, oil streaks, glass effect and decals.
2b - Su-25 Frogfoot Aircraft (x4): BUILD
Again – do nothing by halves, two boxes of two it is giving me list flexibility. Having aircraft became a must for me after my first WW3:TY game when my opponents Tornadoes did most of the damage to my tanks on relatively few runs.
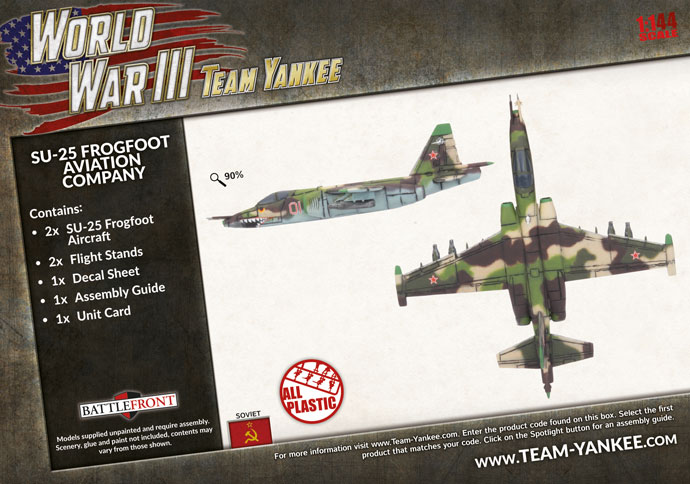
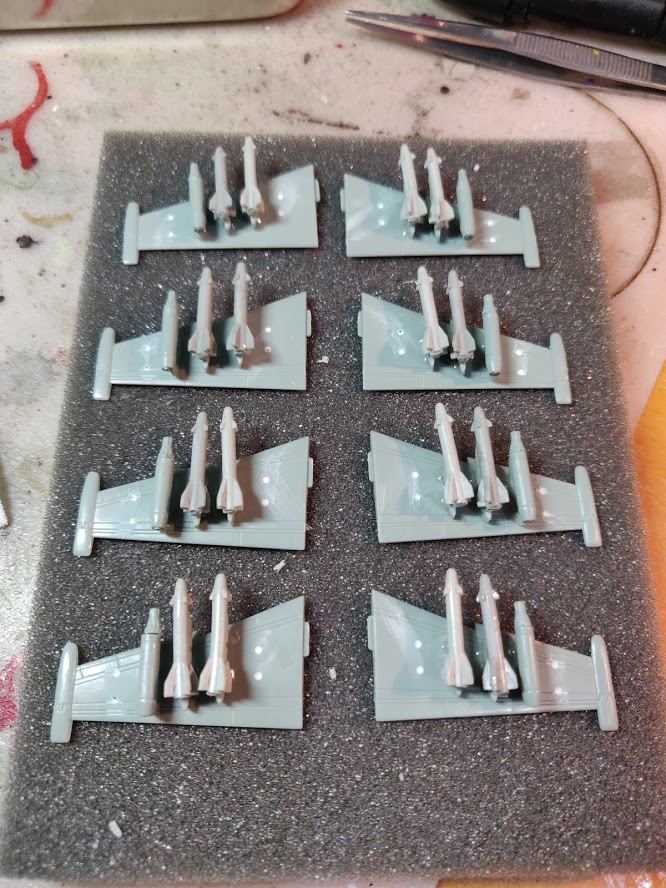
Building this model revealed what an interesting compromise Battlefront have made acquiring an existing scale model mold from someone and using it here. It has far more pieces than are necessary, plenty of parts (most undercarriage and armaments) left on the sprue. There were some quirks that I’ll detail later, but for now here are the four almost completed models. The canopy is an opaque plastic part, but I’m wondering whether to paint separately and add after:
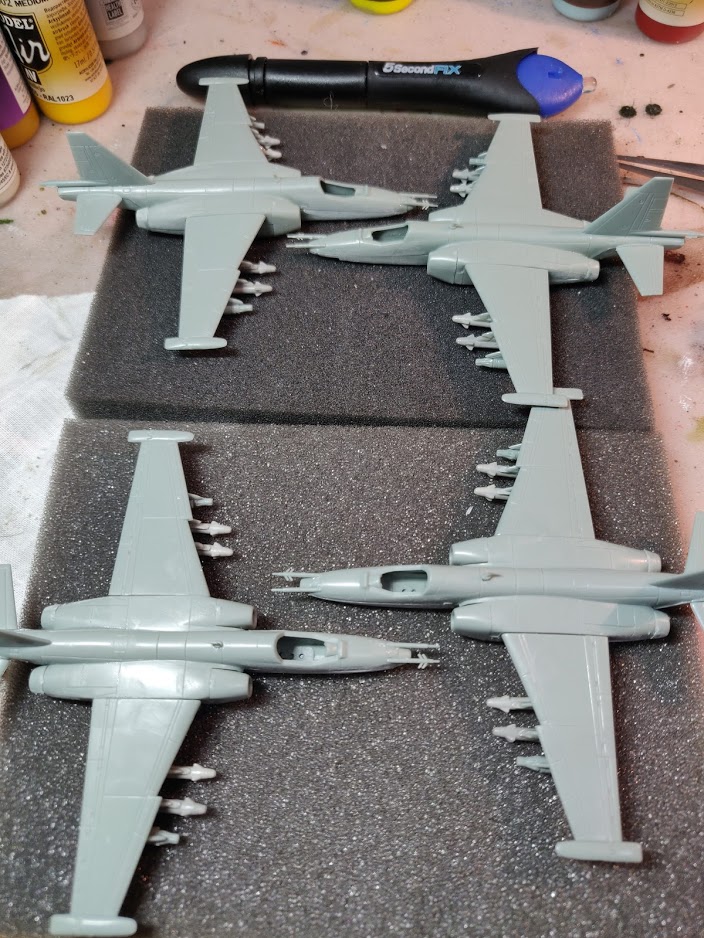 Four frogfeet minus canopy
The array of armaments on offer on the plastic sprue and the additional resin sprues was daunting, with 5 mounting points available and a selection of bombs, rocket pods, large drop pods and the resin A-G missiles.
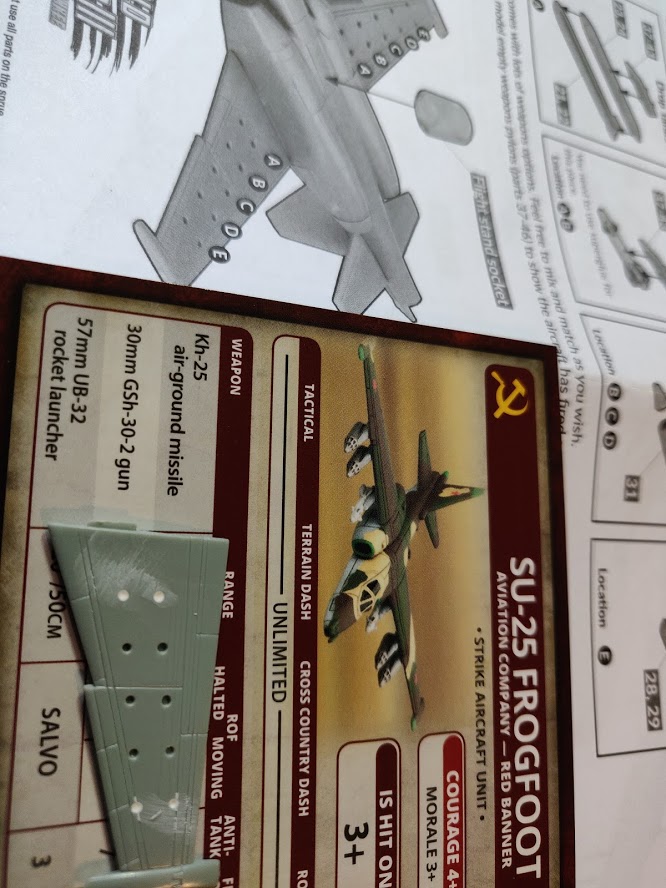
A quick reference to the card and book revealed that as far as WW3:TY was concerned the choice was simpler.
- single use UB-32 rocket pods
- multi-use KH-25 Air to ground missile
So blanked off (Vallejo plastic putty and a wet finger) two of the mounting points on each wing and loaded a single rocket pod and two KH-25s. Mounting on the wing before adding the wing to the fuselage made it a lot less fiddly.
You may notice a “5 second fix” pen in the image above. This is a cheap UV-resin device I got off the Internet (box of 5) that I’ve been using on this model and the Hinds to help with some issues. I use it to add strengthening ‘spot welds” where the glue itself isn’t likely to be resilient enough. Some of these I have been doing during assembly where they will be covered by paint but being out of general sight will be hidden. Others I add afterwards leaving the clear resin on view. For example I strengthened all my Hinds rear rotor mounts after the final varnish as they were weak points.
On these models as well as glueing I ‘UV spot welded’ each of the missile supports under the wing and will strengthen under the front and rear wings where they fit to the fuselage.
I was actually laughing at the two probes sticking out of the noses as I glued them thinking that they won’t last long in the foam/ on the table. I may well add some UV resin to support them, or to be honest I may as well just clip them short now!
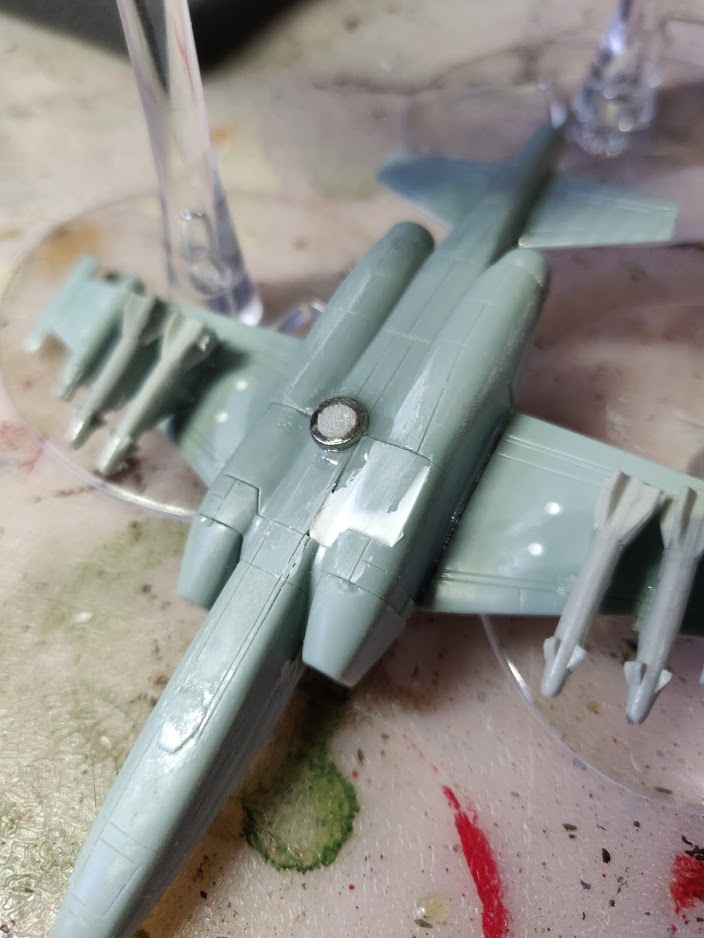
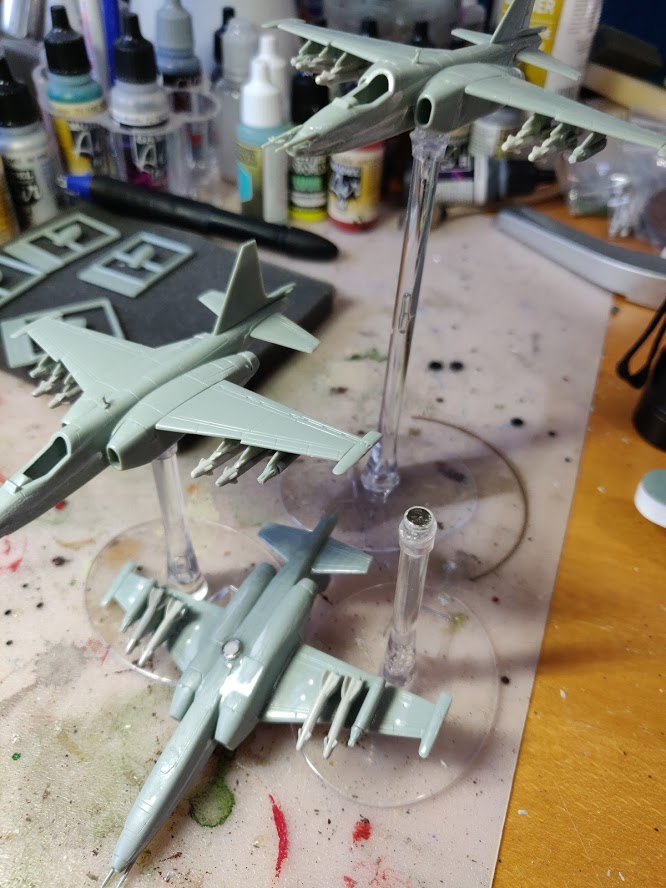
Magnetised for flight-stand
A last minute decision has been to add magnets (the ones I couldn’t fit into the Hinds) to the flight stands and to simply glue straight onto the fuselage underneath. Looks about as elegant as the suggested mount, and may actually look better once the primer etc. has been applied. Superglue was the main adhesive here, but again I’ve used the UV Resin to fill aroud the sides of the magnet giving a smooth shape that will both strengthen the bond but also make it more attractive (it’s underneath so no big issue).
After the resin had been in a window getting natural UV to fully cure I tried them on the flight stands and they were a bit wobbly, the resin had clearly formed a slight mound on the surface of the magnet. No worries, a quick sand down and they were stable and ready to go… well one final decision before priming, stick the canopy on and do it in one.
One final note on this. I’ve been using very fine grit sandpaper for a while. It’s not cheap! One thing I struggled with is when you need a flat surface, such as removing the resin bump above. Had a brainwave a couple of days ago sanding some of the filled joins…
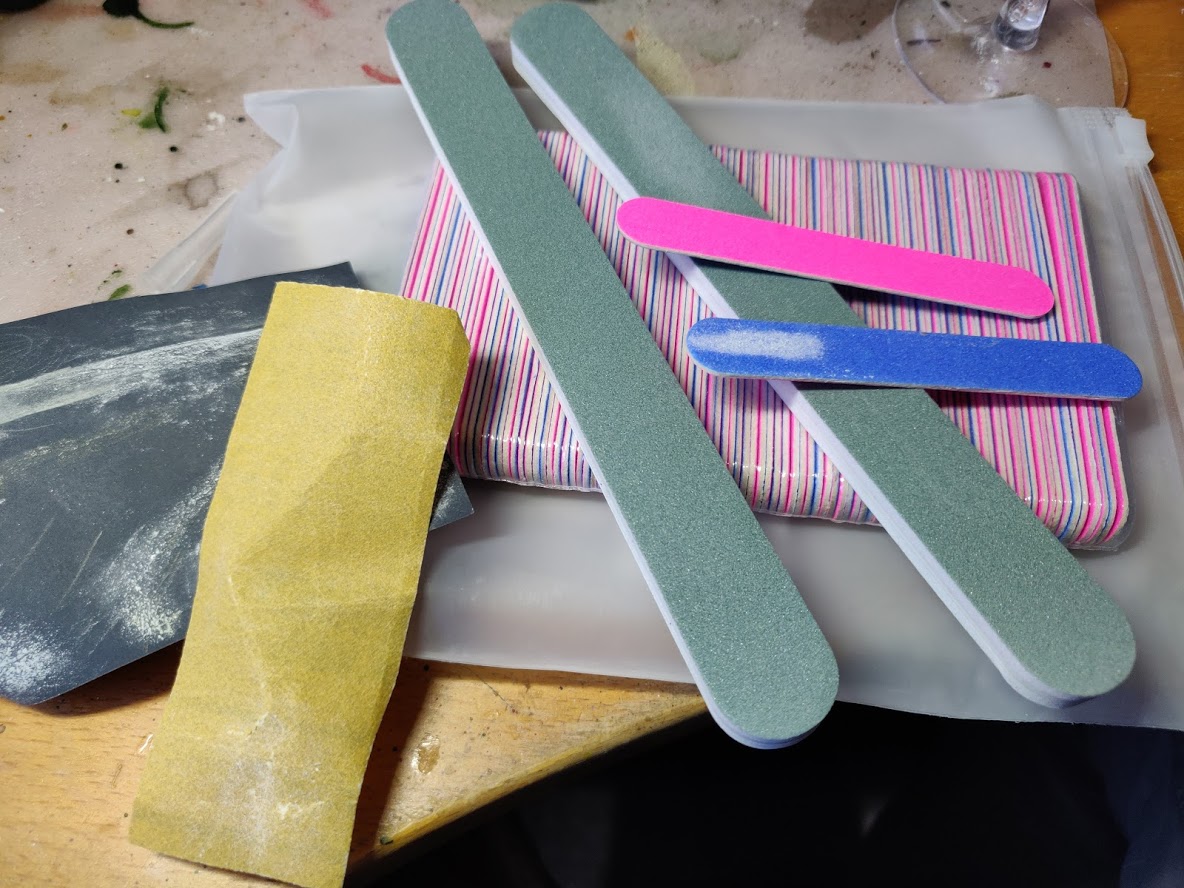 New and old sanding tools.
Cheap nail files, 100 of them. Grit on each side are 180 and 240. Pack came with buffing strips which are effectively 400 & 4000 grit – useful when you need a smoooooth finish!
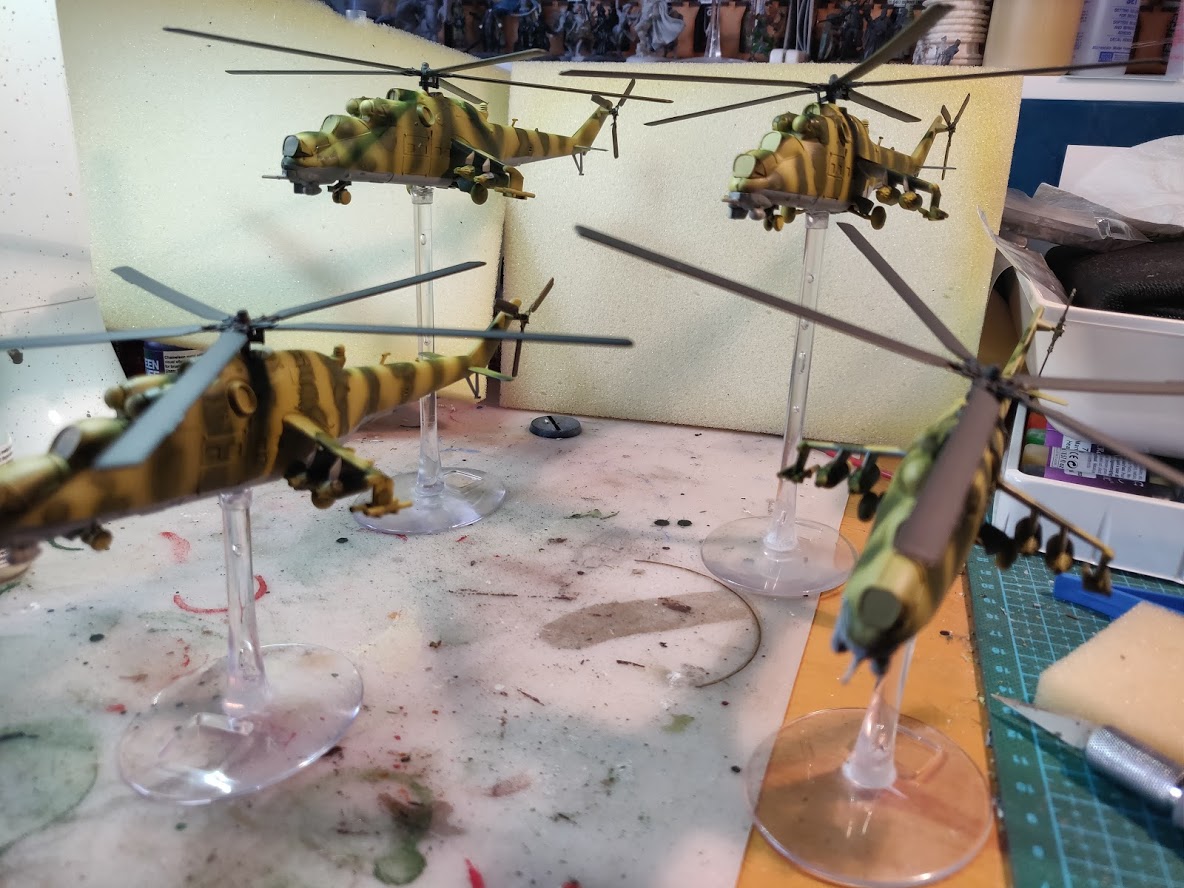
2a - Mi-24 Hinds (x4)
Time for something completely different for me. I’ve been throwing together kits for gaming for years, but I need to go back several decades since I carefully built some scale models, and that’s what these feel like you’re building. So, starting with two boxes with two in each box [TSBX04]
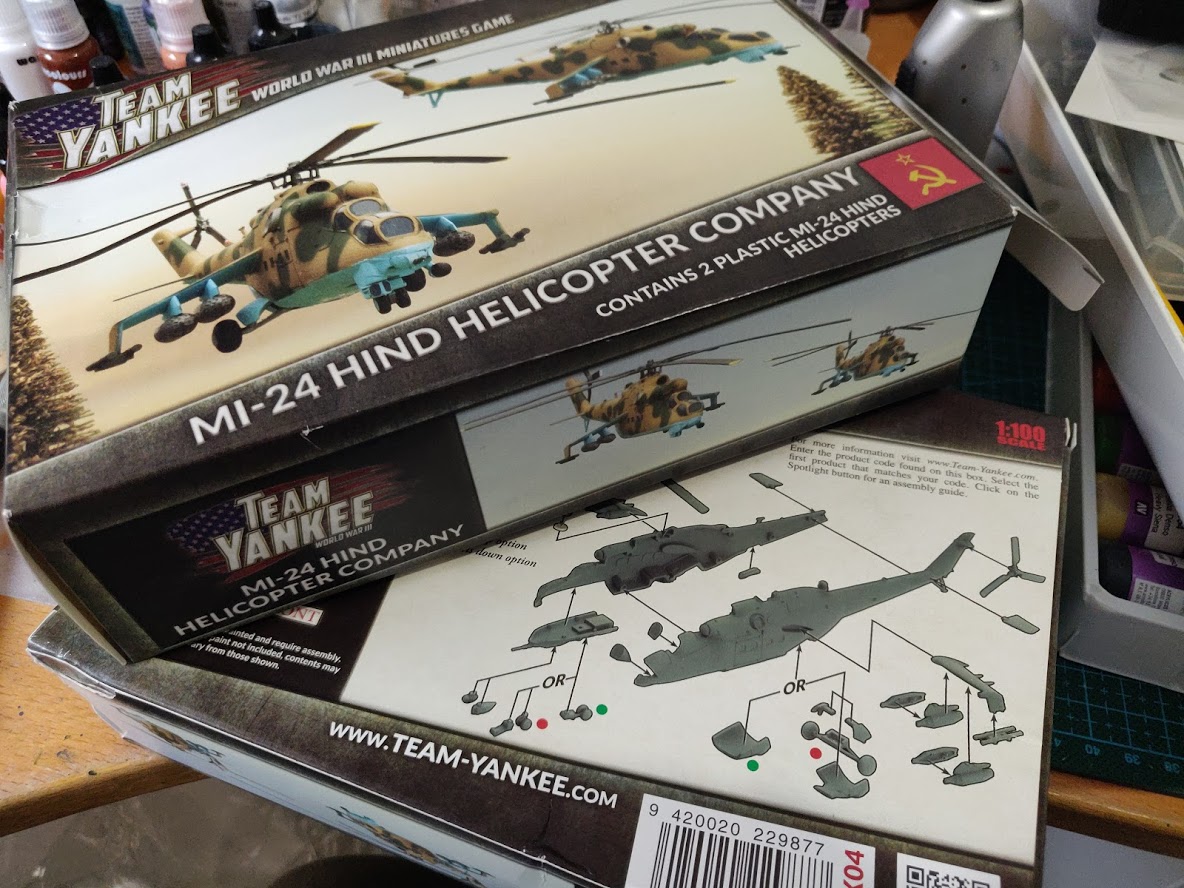 Two boxes of Mi-24 Hind Helicopters
Assembly was mostly smooth, a couple of pointers for anyone trying this at home:
- That first meld of the two halves of the main fuselage. Have some means of keeping them together after glueing. They’re inevitably slightly warped and it’s hard not to have gaps open up.
- The missile launch pod supports are a complete ****. The mounting under the wing requires 4 pieces on the sprue each with a unique combination of mount angle (left or right wing) and the gap between the nubs on the surface (small and big). Having struggled with my first model I had a very close look. From what I can see you get two left and two right, and two small gap and two large gap. However you have two identical pairs rather than 4 unique mount. Answer? Trim off the nubs that are wrong. Also do these out of order, mount them on the small wings before you glue the wings to the main fuselage.
- The supplied magnets fit well in he top of the fuselage to take the rotor assembly, but the hole at the bottom to take a magnetised flight stand is too small to take the magnets even before priming (always magnetise before priming!)
 assembled models
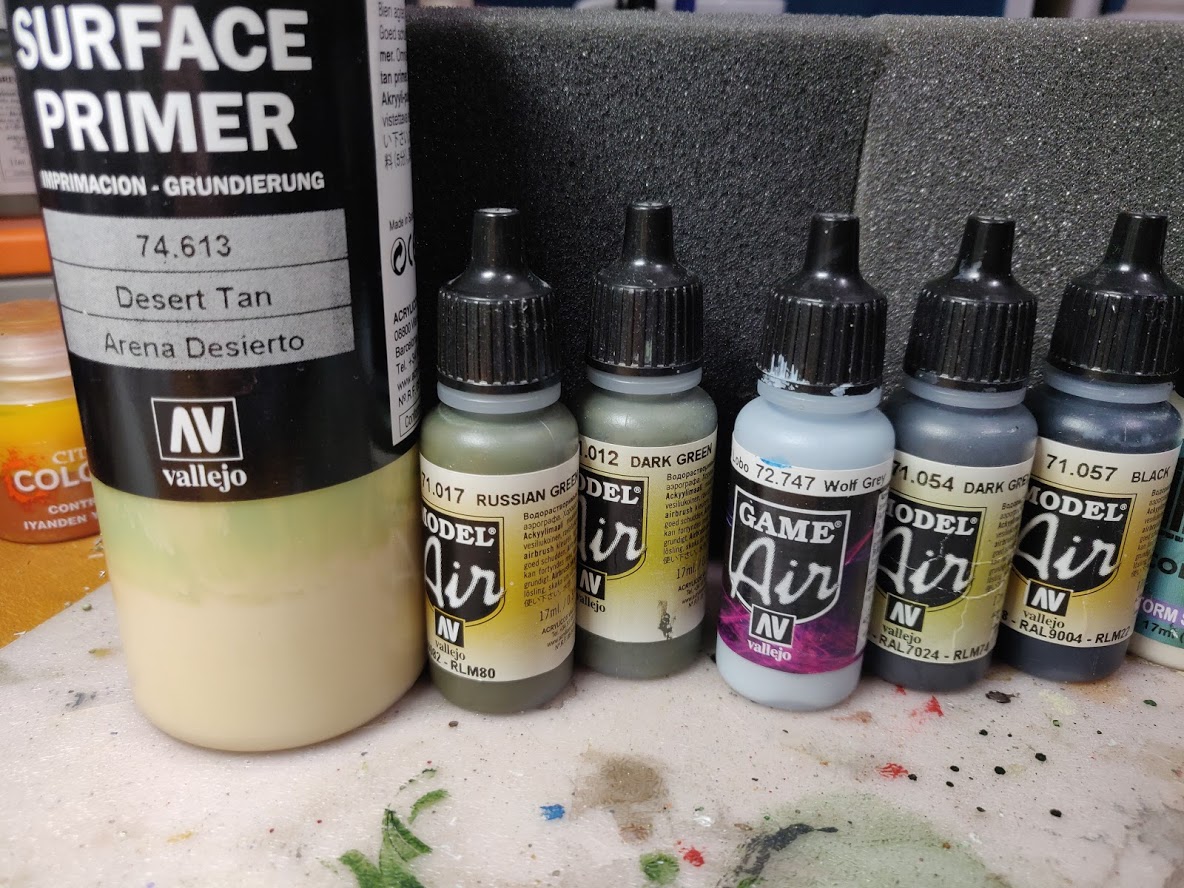
Fuselage primed with Vallejo Desert Tan Surface Primer [74.613] through an airbrush. Rotors primed standard black (See separate panel for pic of all paints used).
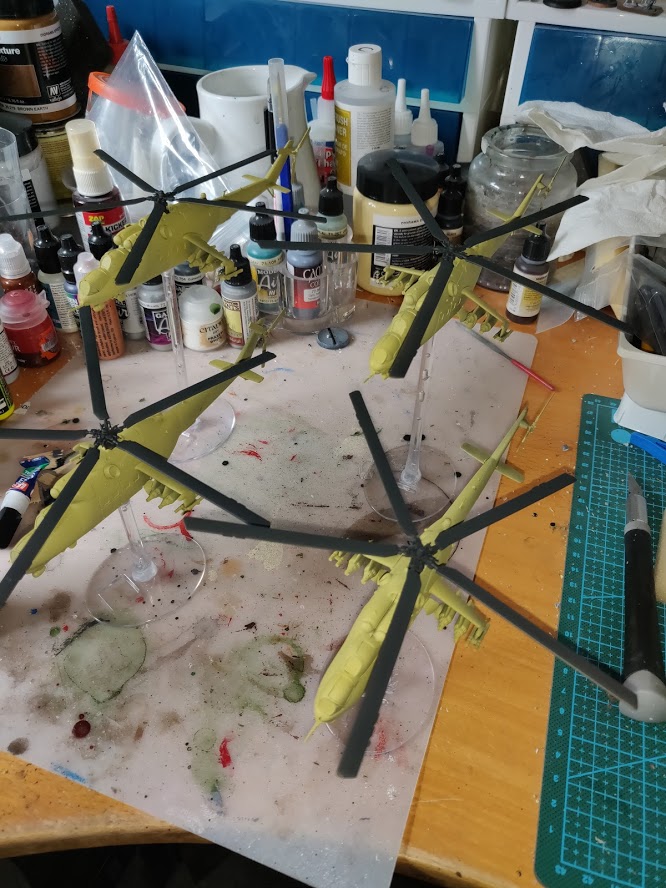 Primed models
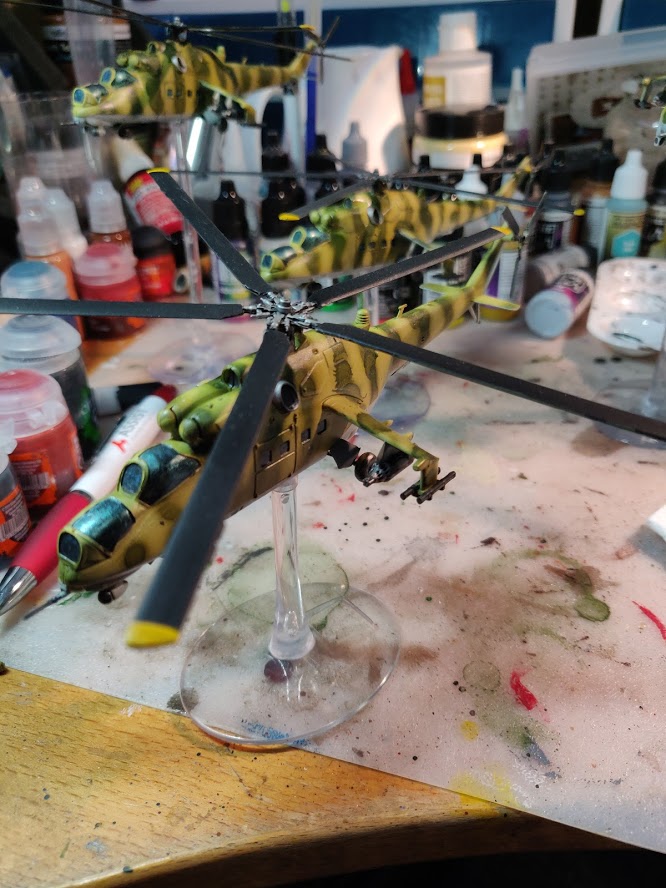
Main paint job
Firstly, the green camo was a mix of Vallejo Model Air Russian Green and Dark Green [71.017 & 71.012] that I air-brushed straight onto the primed model, leaving the desert tan primer as the contrast. In hindsight I had the pressure too high as got some unwante effects.
Underside was Game Air Wolf Grey [72.747] I could have masked and airbrushed. but used a steady hand and a brush instead.
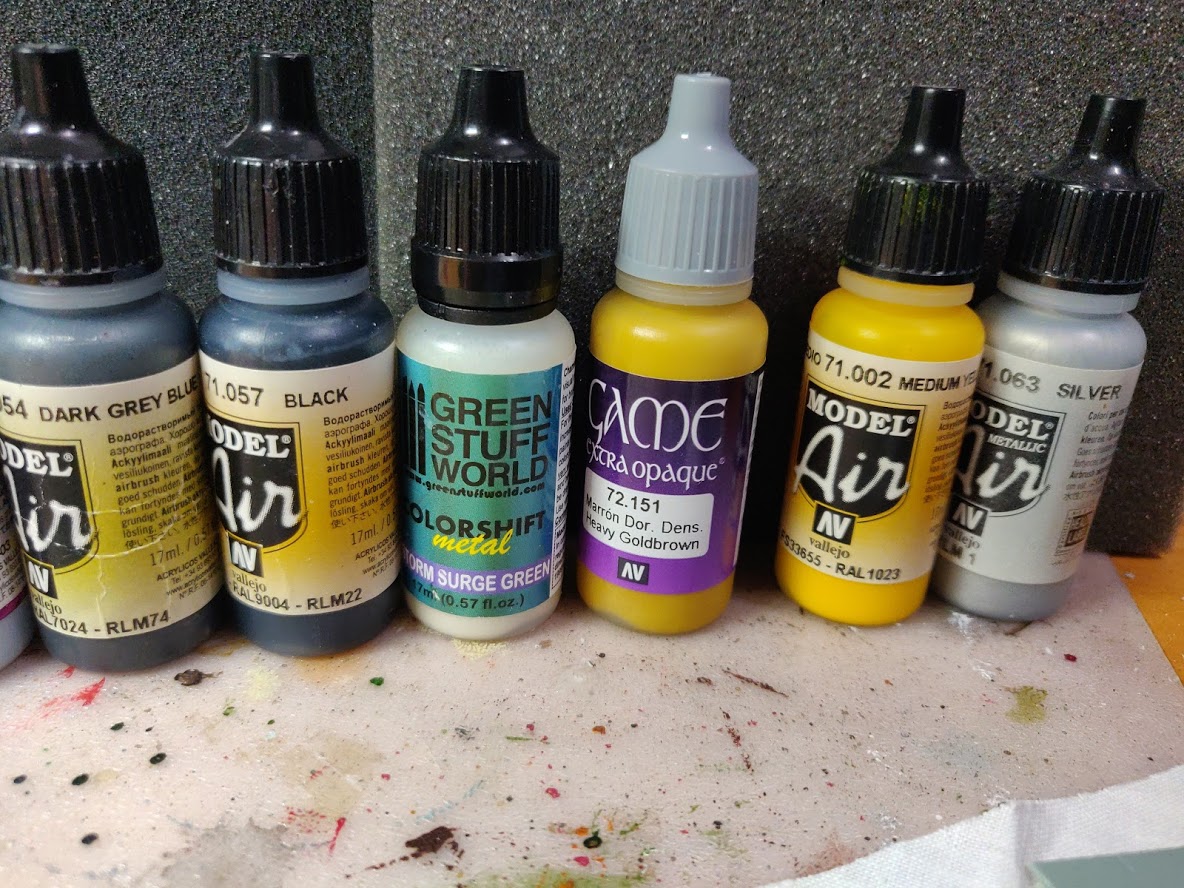
Rotors and wheels base painted with Dark Grey Blue [71.054], probably my most overused colour across all models that need black with shading. The glass picked out and taken back to black, as were a few items under the wings.
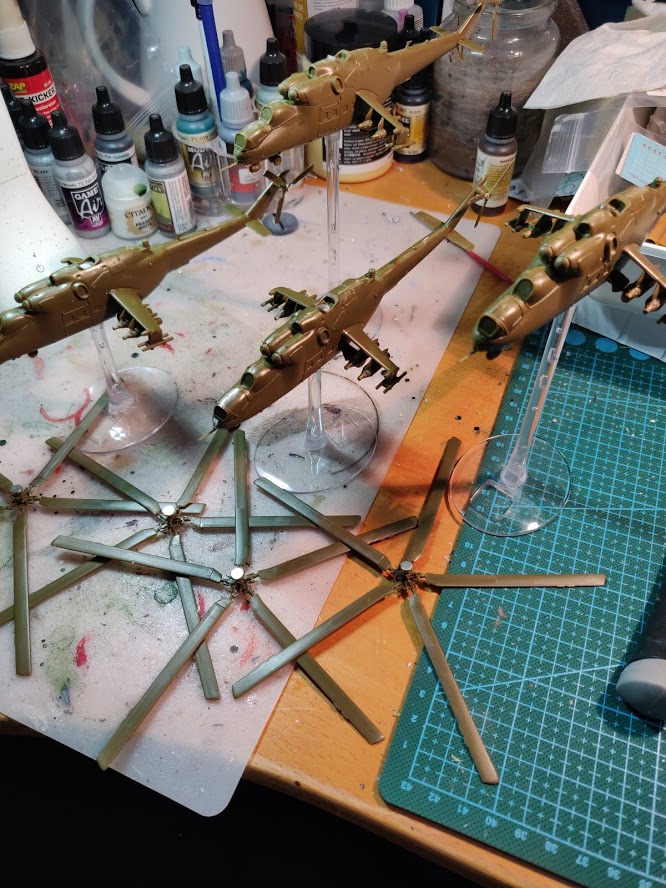
 Base colours applied
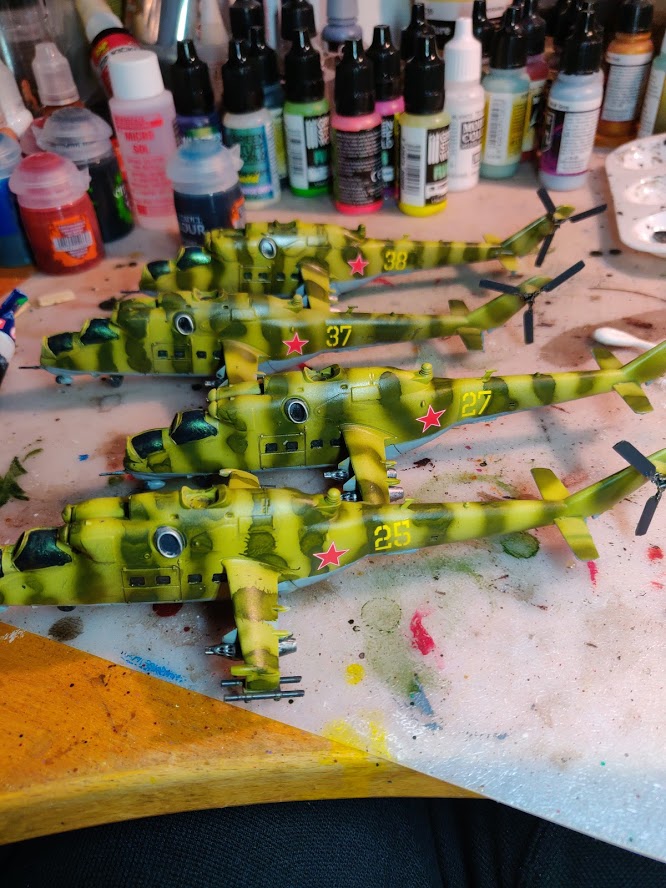
Detailing
Several steps to detailing.
- Model Air silver [71.063] applied to missile pods, engine vents and main/rear motor works before nuln oil wash.
- Ends of main rotor blades first based with Vallejo’s Game extra opaque Heavy Goldbrown before brightening with Model air Medium Yellow [71.002]. Using the extra opaque saved a lot of time doing yellow on black!
- Coated the windows with GSW’s Colorshift Storm Surge Green onto the black base. Looked a bit lary at first, but after some wash and matt varnish that settlesd down.
- Decals applied using Microset and Microsol. First go at decals for decades, I was nervous at first but it went OK. Was suprised a couple of times how quickly the decal took and couldn’t be slid dead straight – but I think I got away with it!
- Pin washed various parts, applied selective washes on rotor parts etc and the windows.
- Vallejo Mecha Matt Varnish through airbrush finished the job off.
Phase 2: Time to do a proper job
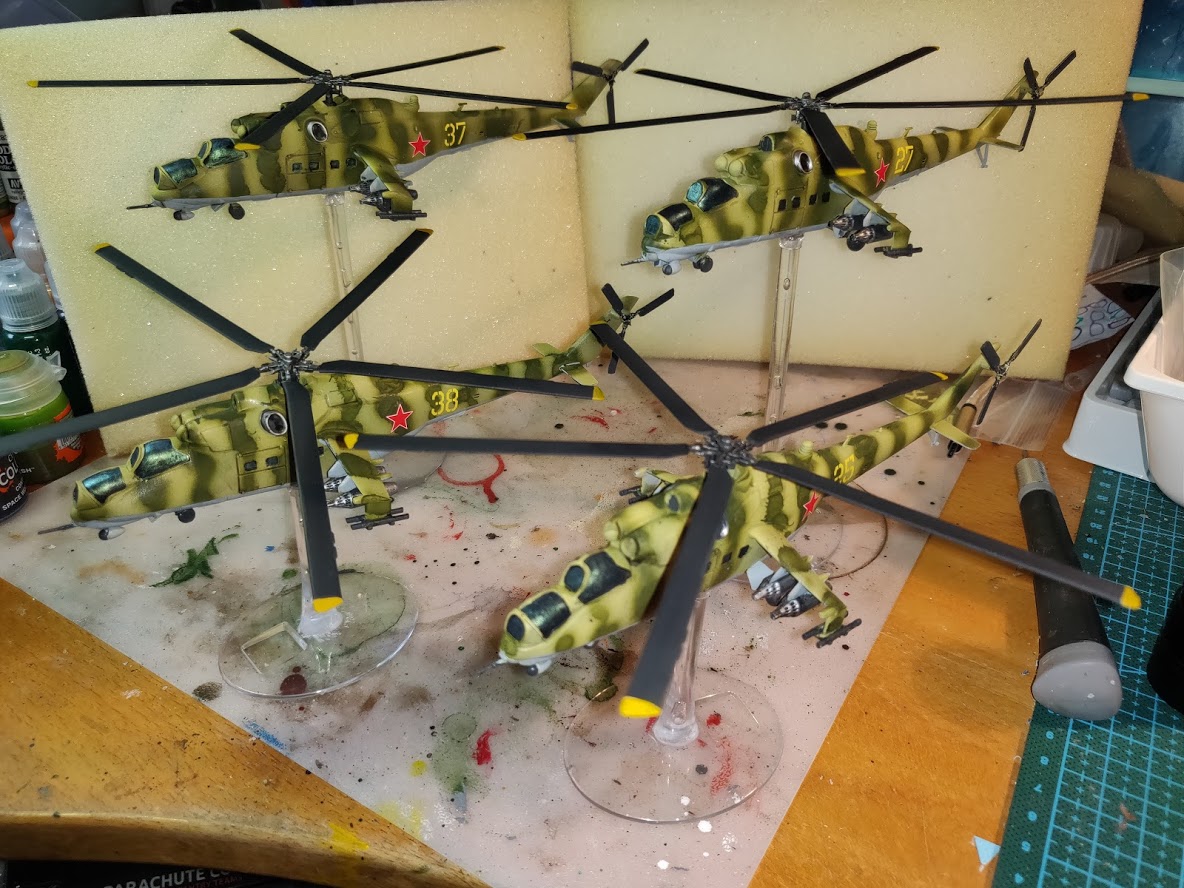
2a) Hinds [completed]
Just finished the Hinds as I open this project, but I’ll retrospectively go through that process with a few pointers for these tricky models.
2b) Frogfoots [completed]
All 4 Frogfeet ready for battle.
2c) T64s [started]
The core armoured vehicles in the collection. Collected through three Yuri’s Wolves boxes (TSUAB3) giving me 15x T64s. Originally built and primed 7 for first game, but all 15 now in sync
2d) BMPs [started]
To the 6 BMPs from the Yuri boxes I added a box of 5x BMPs, 10 of which will be BMP2s to have a decent size Motor Rifle platoon and one will be a BMP1 to be an observation vehicle (see 2e). originally did 4 gor first outing, but now all 10 up to same level.
2e) Artillery & AA Support units [started]
3x Carnations, 2x Gophers SAM and 1x BMP-1 Observer, now referred to as a PRP-4 (which is what it would be).
Tempted to add more options, but going to at least finish the Phase 2 before I’m tempted,
2f) Infantry
1x Motor Rifle Company box (for use with BMP-2s)
1x Motor Rifle Platoon blister (For Hind Assault Company)
1x Motot Rifle Heavy Weapons… not very useful for this build!
Anyone getting the impression I’m leaving these to last?
Phase 1: The army takes shape
So once I got hold of my Red Thunder book it was time to start to plot my force. My initial focus is on a tank platoon, but eventually want the flexibility to run a BMP Motor Rifle Platoon as an option, both with common supporting planes, AA, artillery etc.
Was persuaded that T64s are a better option than T72s so that’s the initial core. <<update Dec 2020>> Added T80s and BMP-3s to the list as ordered to be able to table a Shock force from the new Soviet book. May augment with additional support options later.
Below is a table of all the models and progress so far which I’ll update as I go.
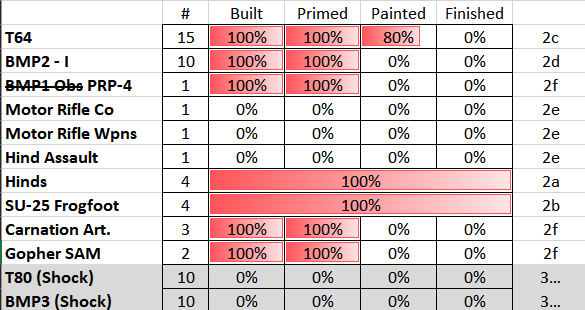 Progress bars for each sub-project
The project begins with a retrospective
As a longstanding FoW player I was eventually tempted give WW3:Team Yankee, the new edition, a go. After a quick survey of what nations others at club played I decided to dabble with Soviets.
The project is initiated
Well I say dabble.., I don’t think I’m genetically able to dabble.
As described in detail in Phase 1 section below, I’m aiming for a good mixed forces collections based around a T64 tank division with support as my main list, but with options to do a Motor Rifle division with tank support.
PLAN
Phase 1: Stuff done before I started this project page. Quickly threw 50 points of T64s and BMP2s on the table to try the game out. Basic Russian Green prime of half those models in my backlog for now, will pick up with these models and show them when I get around to the rest.
Phase 2: work through the backlog (see separate panel) starting with something different… 4x Hind helicopters!
<<UPDATE DEC 2020>>
Phase 2.1: The production backlog has just got a bit longer. With the release of the new Soviets book I decided that my main battle force would still be shedloads of T64s, but an option should be to take a Shock company of T80 tanks supported by BMP-3 s. 1ox each on their way. They will use a different, camoflague scheme compared to the standard tanks, which should be fun.