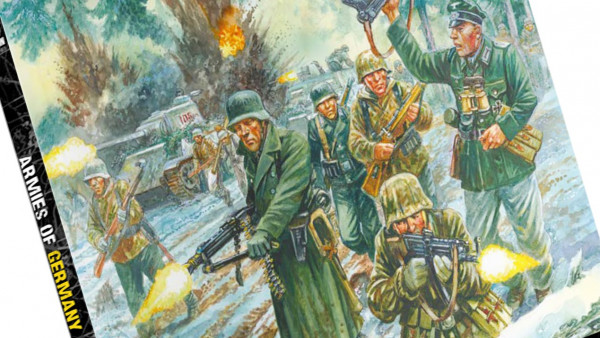


How to be an Armoured Farmer, building Hobart’s Funnies in Glorious 15mm (and maybe 28mm if they arrive in time!)


Recommendations: 2233
About the Project
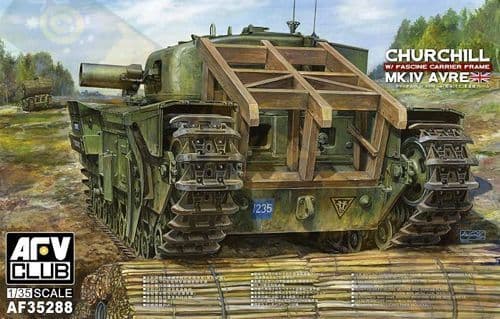
Right then, having avoided any sort of Spring cleaning challenge in the past, I have decided to use this year's one to get something done that I have been gathering bits for over the past few years and finally finish and assemble all of my Hobart's Funnies. To get technical these are Armoured Vehicle Royal Engineers (AVRE) tanks, using the Churchill chassis as a base. I will also throw in some Sherman Crabs (Flail tanks). I have gathered a few books for reference so that I can paint and mark them up for one of the Armoured Assault Squadrons Royal Engineer (either 77, or 79) that landed ashore at Sword Beach and were the very first to see action on that beach; Plus the Sherman Crabs of A Squadron 22nd Dragoons. Whilst I want to be able to use the finished tanks in games depicting the D Day Landings (in Flames of War and Chain of Command at 15mm) I also want then to be versatile enough to be able to be used in later engagements that the 79th Armoured Division took part in (which is pretty much everything!). I hope you will find this of interest if you ever want to branch out into what the modern day Royal Engineers affectionately call being an armoured farmer.
Related Game: Flames of War: The World War II Miniatures Game
Related Company: Battlefront Miniatures
Related Genre: Historical
Related Contest: Spring Clean Hobby Challenge (Old)
This Project is Active
Please hold, we are connecting you shortly……..?
Hi all, well I have been patiently waiting for my decal order to be processed but it looks like I’ll be a wizened old man before they arrive, so I thought I’d have a play with something different.
I thought I’d try and make my own.
and I’ll most likely bugger it up so there will be much trial and error before I show you the Blue Peter “here’s one I made earlier!” Final show and tell.
I’ve been trawling the internet for suitable images, mainly as I’m lazy and shit with IT but can just about find my way around MS Paint ???? and I found some decal paper to print them on (along with some Matt varnish for sealing them in).
So that’s this weekend’s challenge and I’ll let you know how I get on.
 White and clear decal paper from Mr Decal Paper (the clue’s in the name! ?)
Scuppered!
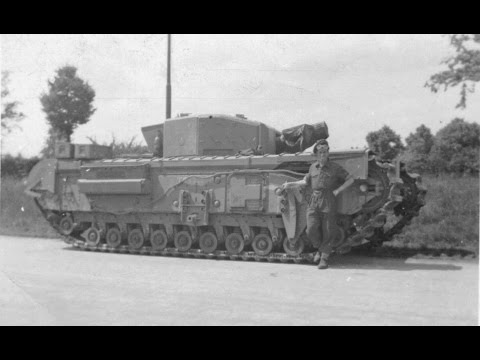
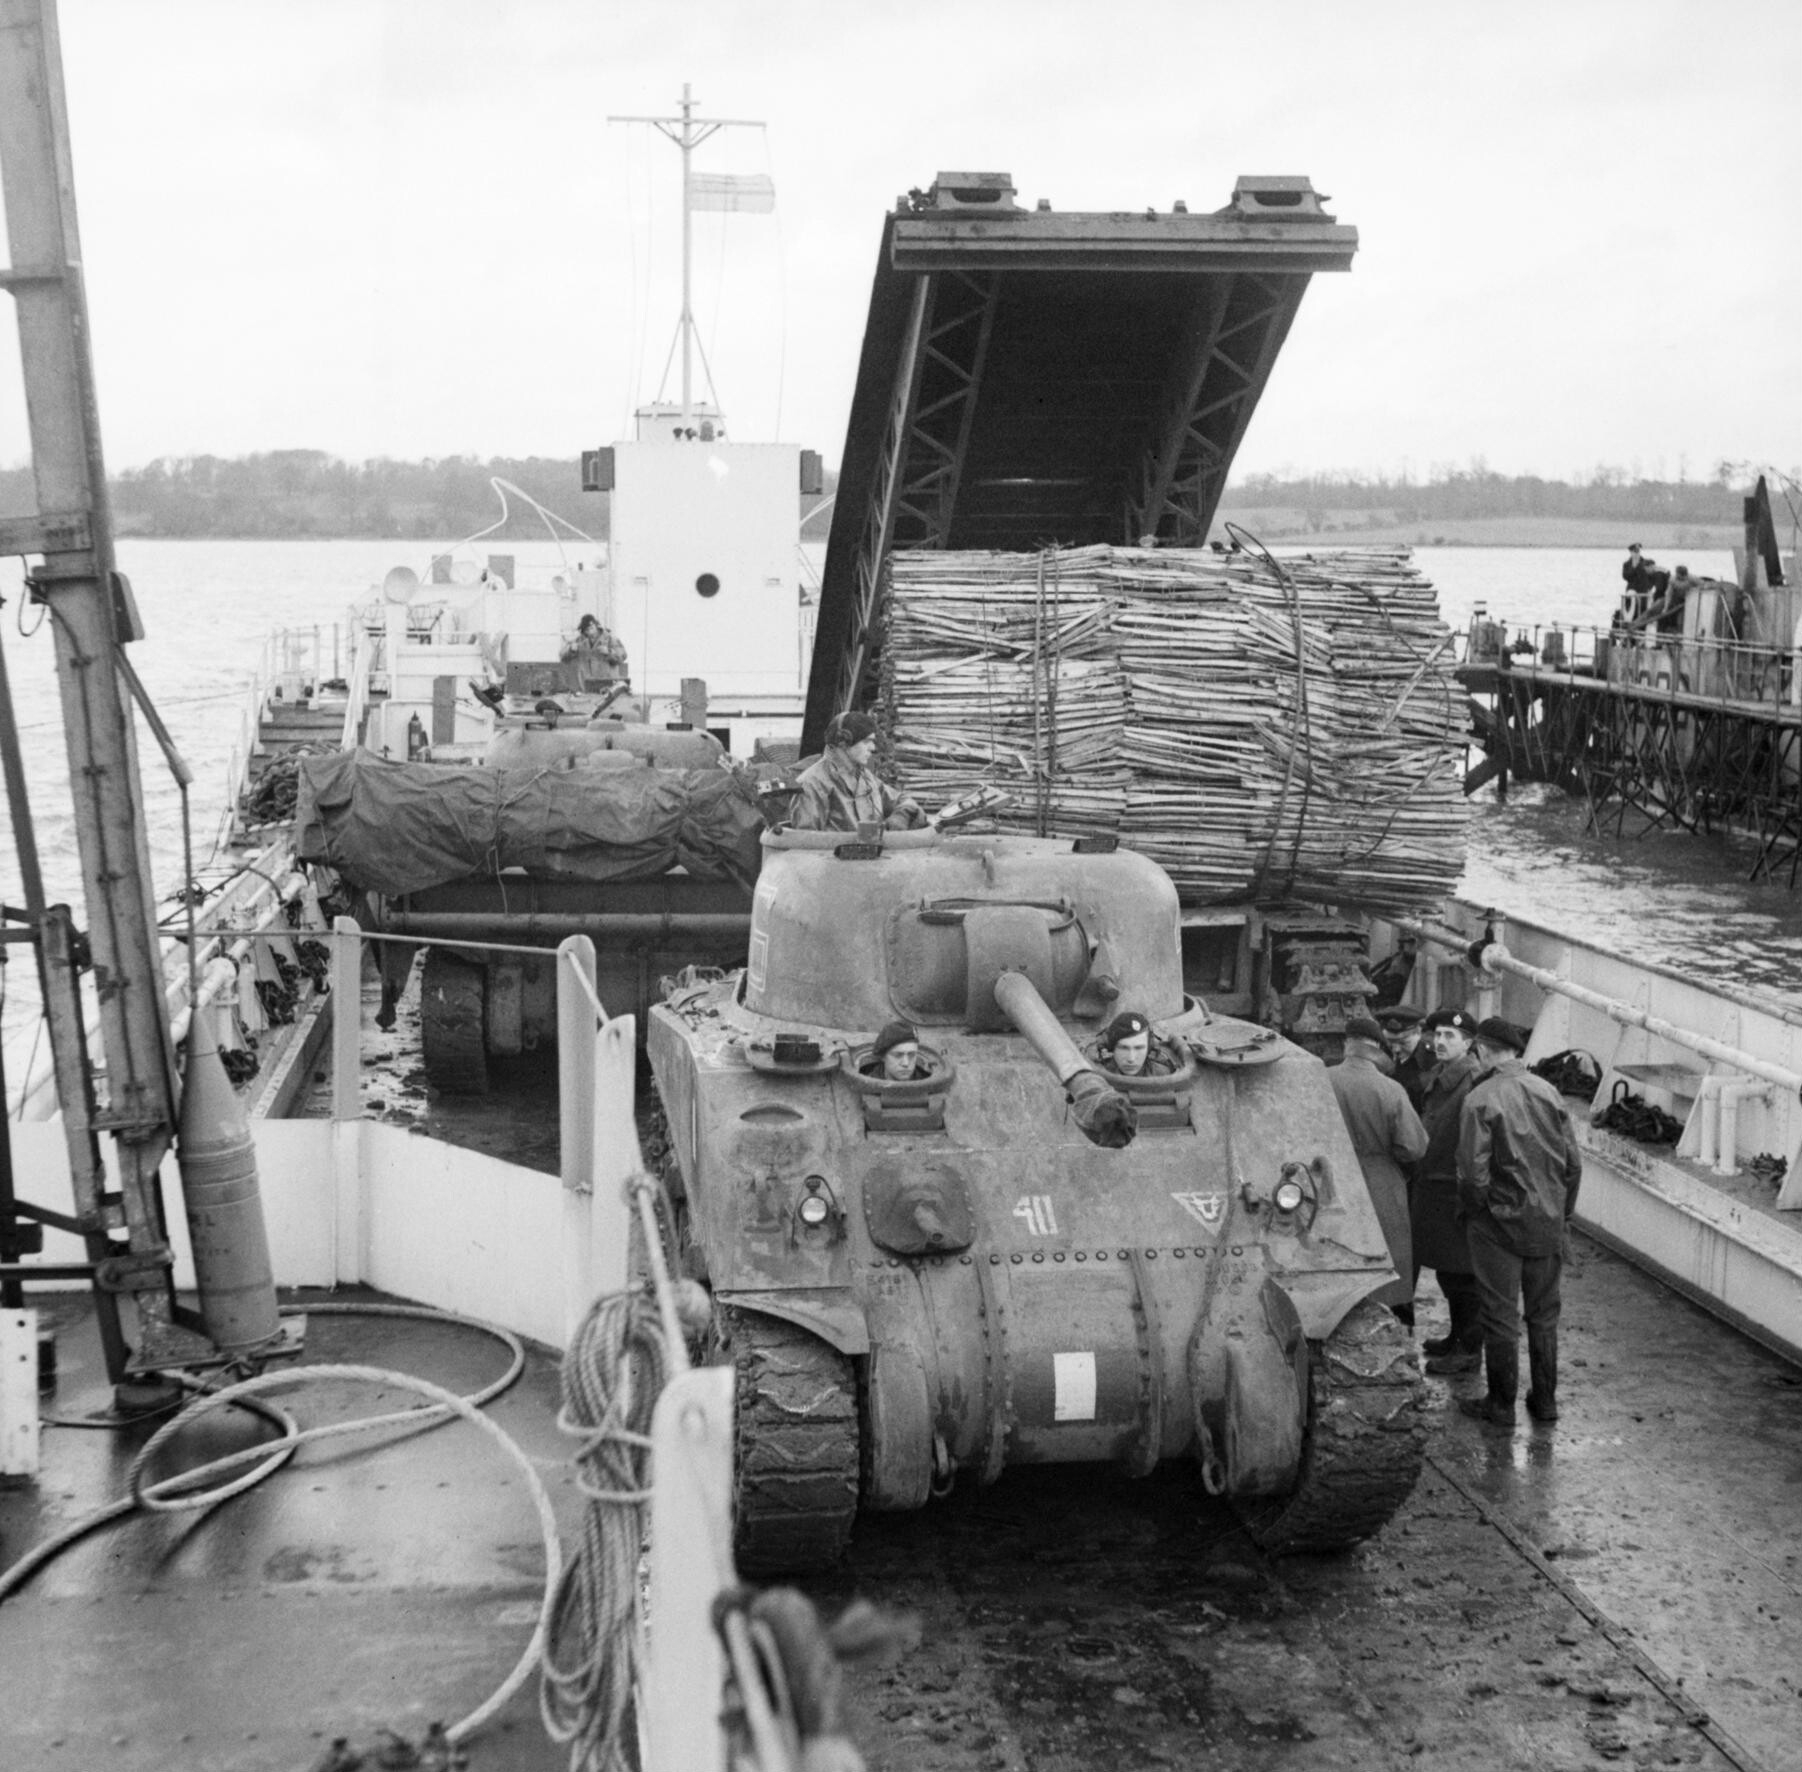
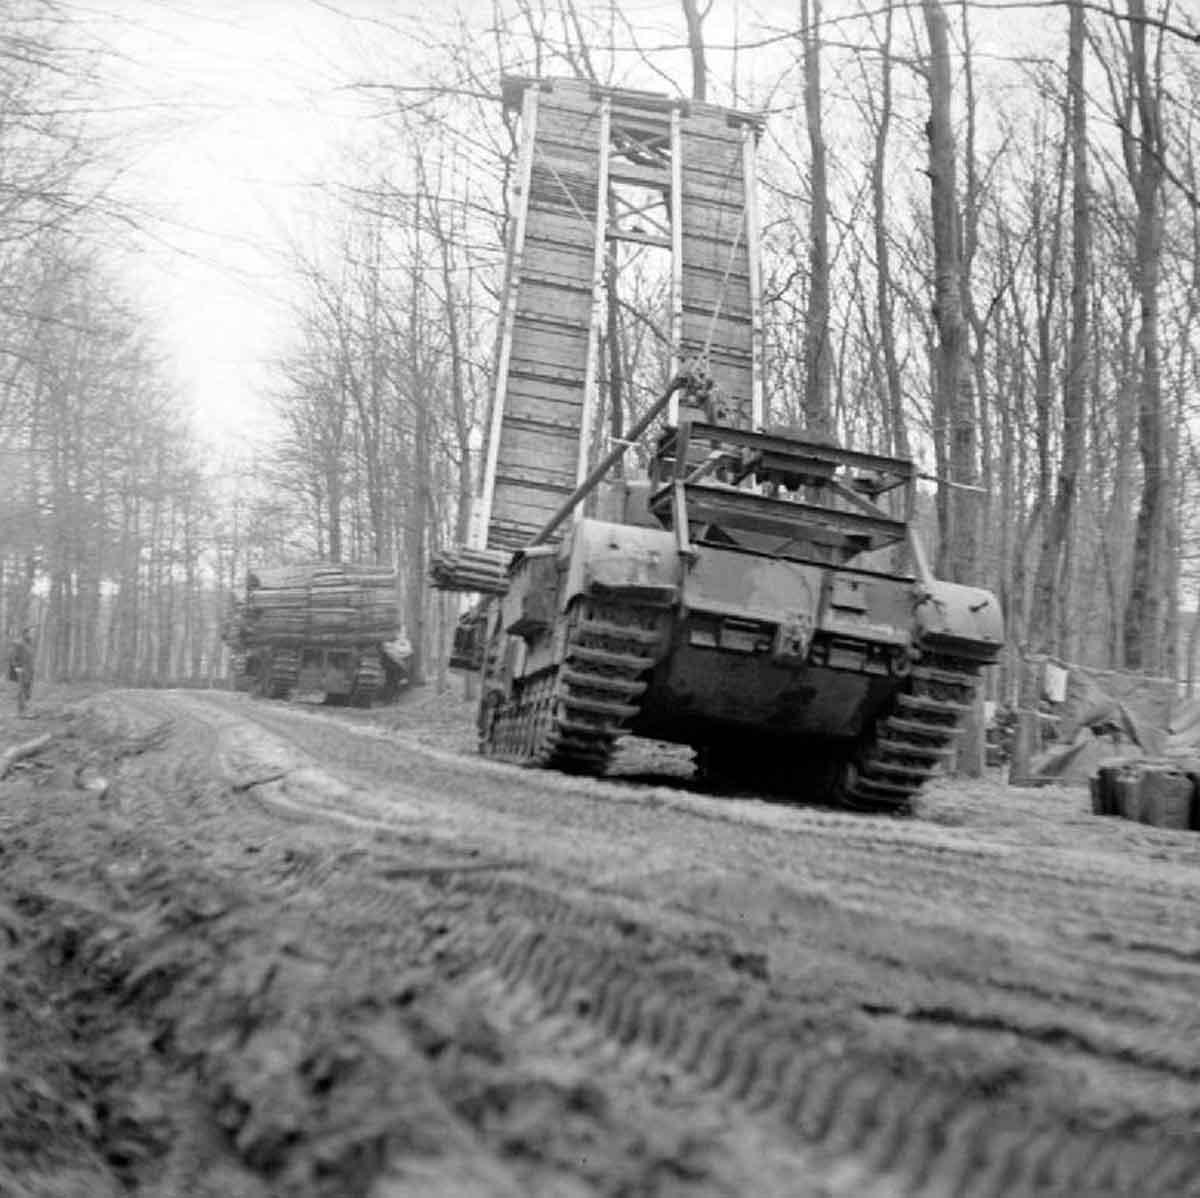
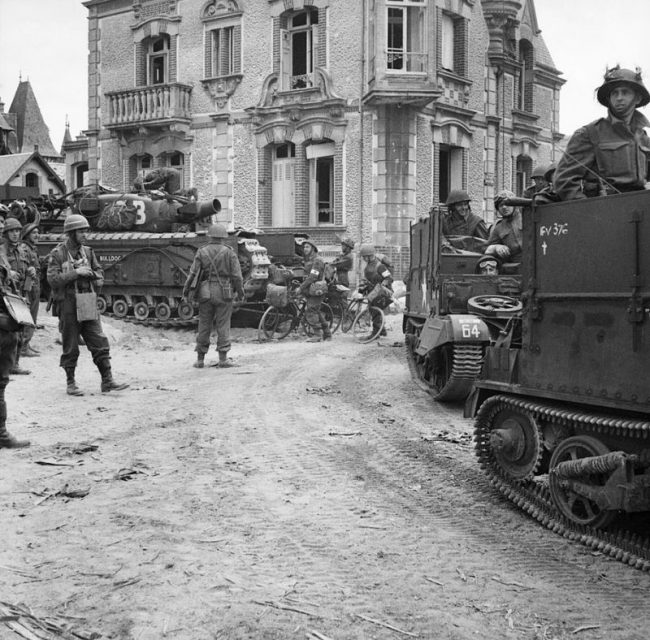
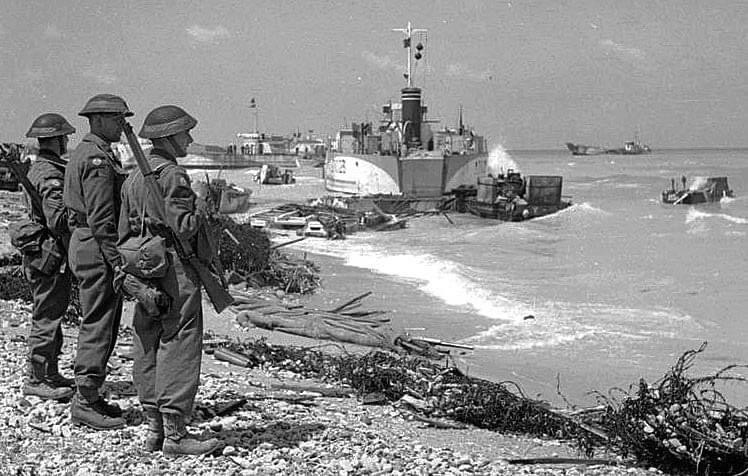 So I had ordered some very specific decals for these vehicles as i wanted them to represent specific units. I had placed and order with a guy who regularly does this sort of thing but he is extremely busy and has told me that i could be waiting at least 3 months for my order to even be processed. Therefore it is with slight annoyance that i am going to have to park this project for a while and then come back to it when i either receive my order, or learn how to do my own ones. Any tips anyone??? I shall therefore leave you with a poignant photo of some Royal Engineers on Sword Beach looking at the aftermath of the battle and most likely thinking SHIT! we're going to have to clear this lot up! For the rivet counters, i know they are sappers as all D Day assault unit sappers had a white band painted around their helmets (Not much of a target for Jerry then eh!?)
Also, for the spotters, there is an SBG and AVRE in front of the LCT, and what appears to be an armoured bulldozer in the far right of the photo.
Applying Decals
The act of applying decals is something i have been doing for over 40 years. Having started off by chucking them in a side plate of water, waiting for them to float off and then apply them with the end of my finger, hoping that i didn’t fold them over, or rip them, i think i have moved on somewhat!?
Nowadays i still use a side plate, i do my research to make sure that i have the right decal and correct location for it. Then carefully cut it out to leave the least carrier film possible and place it in water to soak the back paper and move it to the edge of the plate for a couple of minutes until it frees up. Meanwhile the location for the decal has been covered in an acrylic gloss varnish (Vallejo, or good old ‘Ardcoat from GW) and then i apply some MicroSol liquid to the spot the decal will sit. then using either a scalpel or tweezers, i pick up the decal and gently slide it off the backing paper with a moist brush (usually of a suitable size for the size of decal). The micro sol on the model allows me to adjust its position easily until i am happy. Then depending on whether the decal is on a flat, or rough surface i will either: If it if flat gently wick away the MicroSol with kitchen towel and press the decal in place, then add a bit of MicroSet to just cover the decal and fix it in place. If the surface is rough i leave the micro set to do its stuff and literally melt the decal in place, watching and adding a tiny bit more as necessary to get the decal to contour to the surface. Please Note, NEVER try and move a decal after applying MicroSol has been on it for more than a couple of minutes, it will disintegrate on you! Once dry i will then apply another varnish, matt if i am not going to weather the vehicle, and gloss if further weathering is to happen.
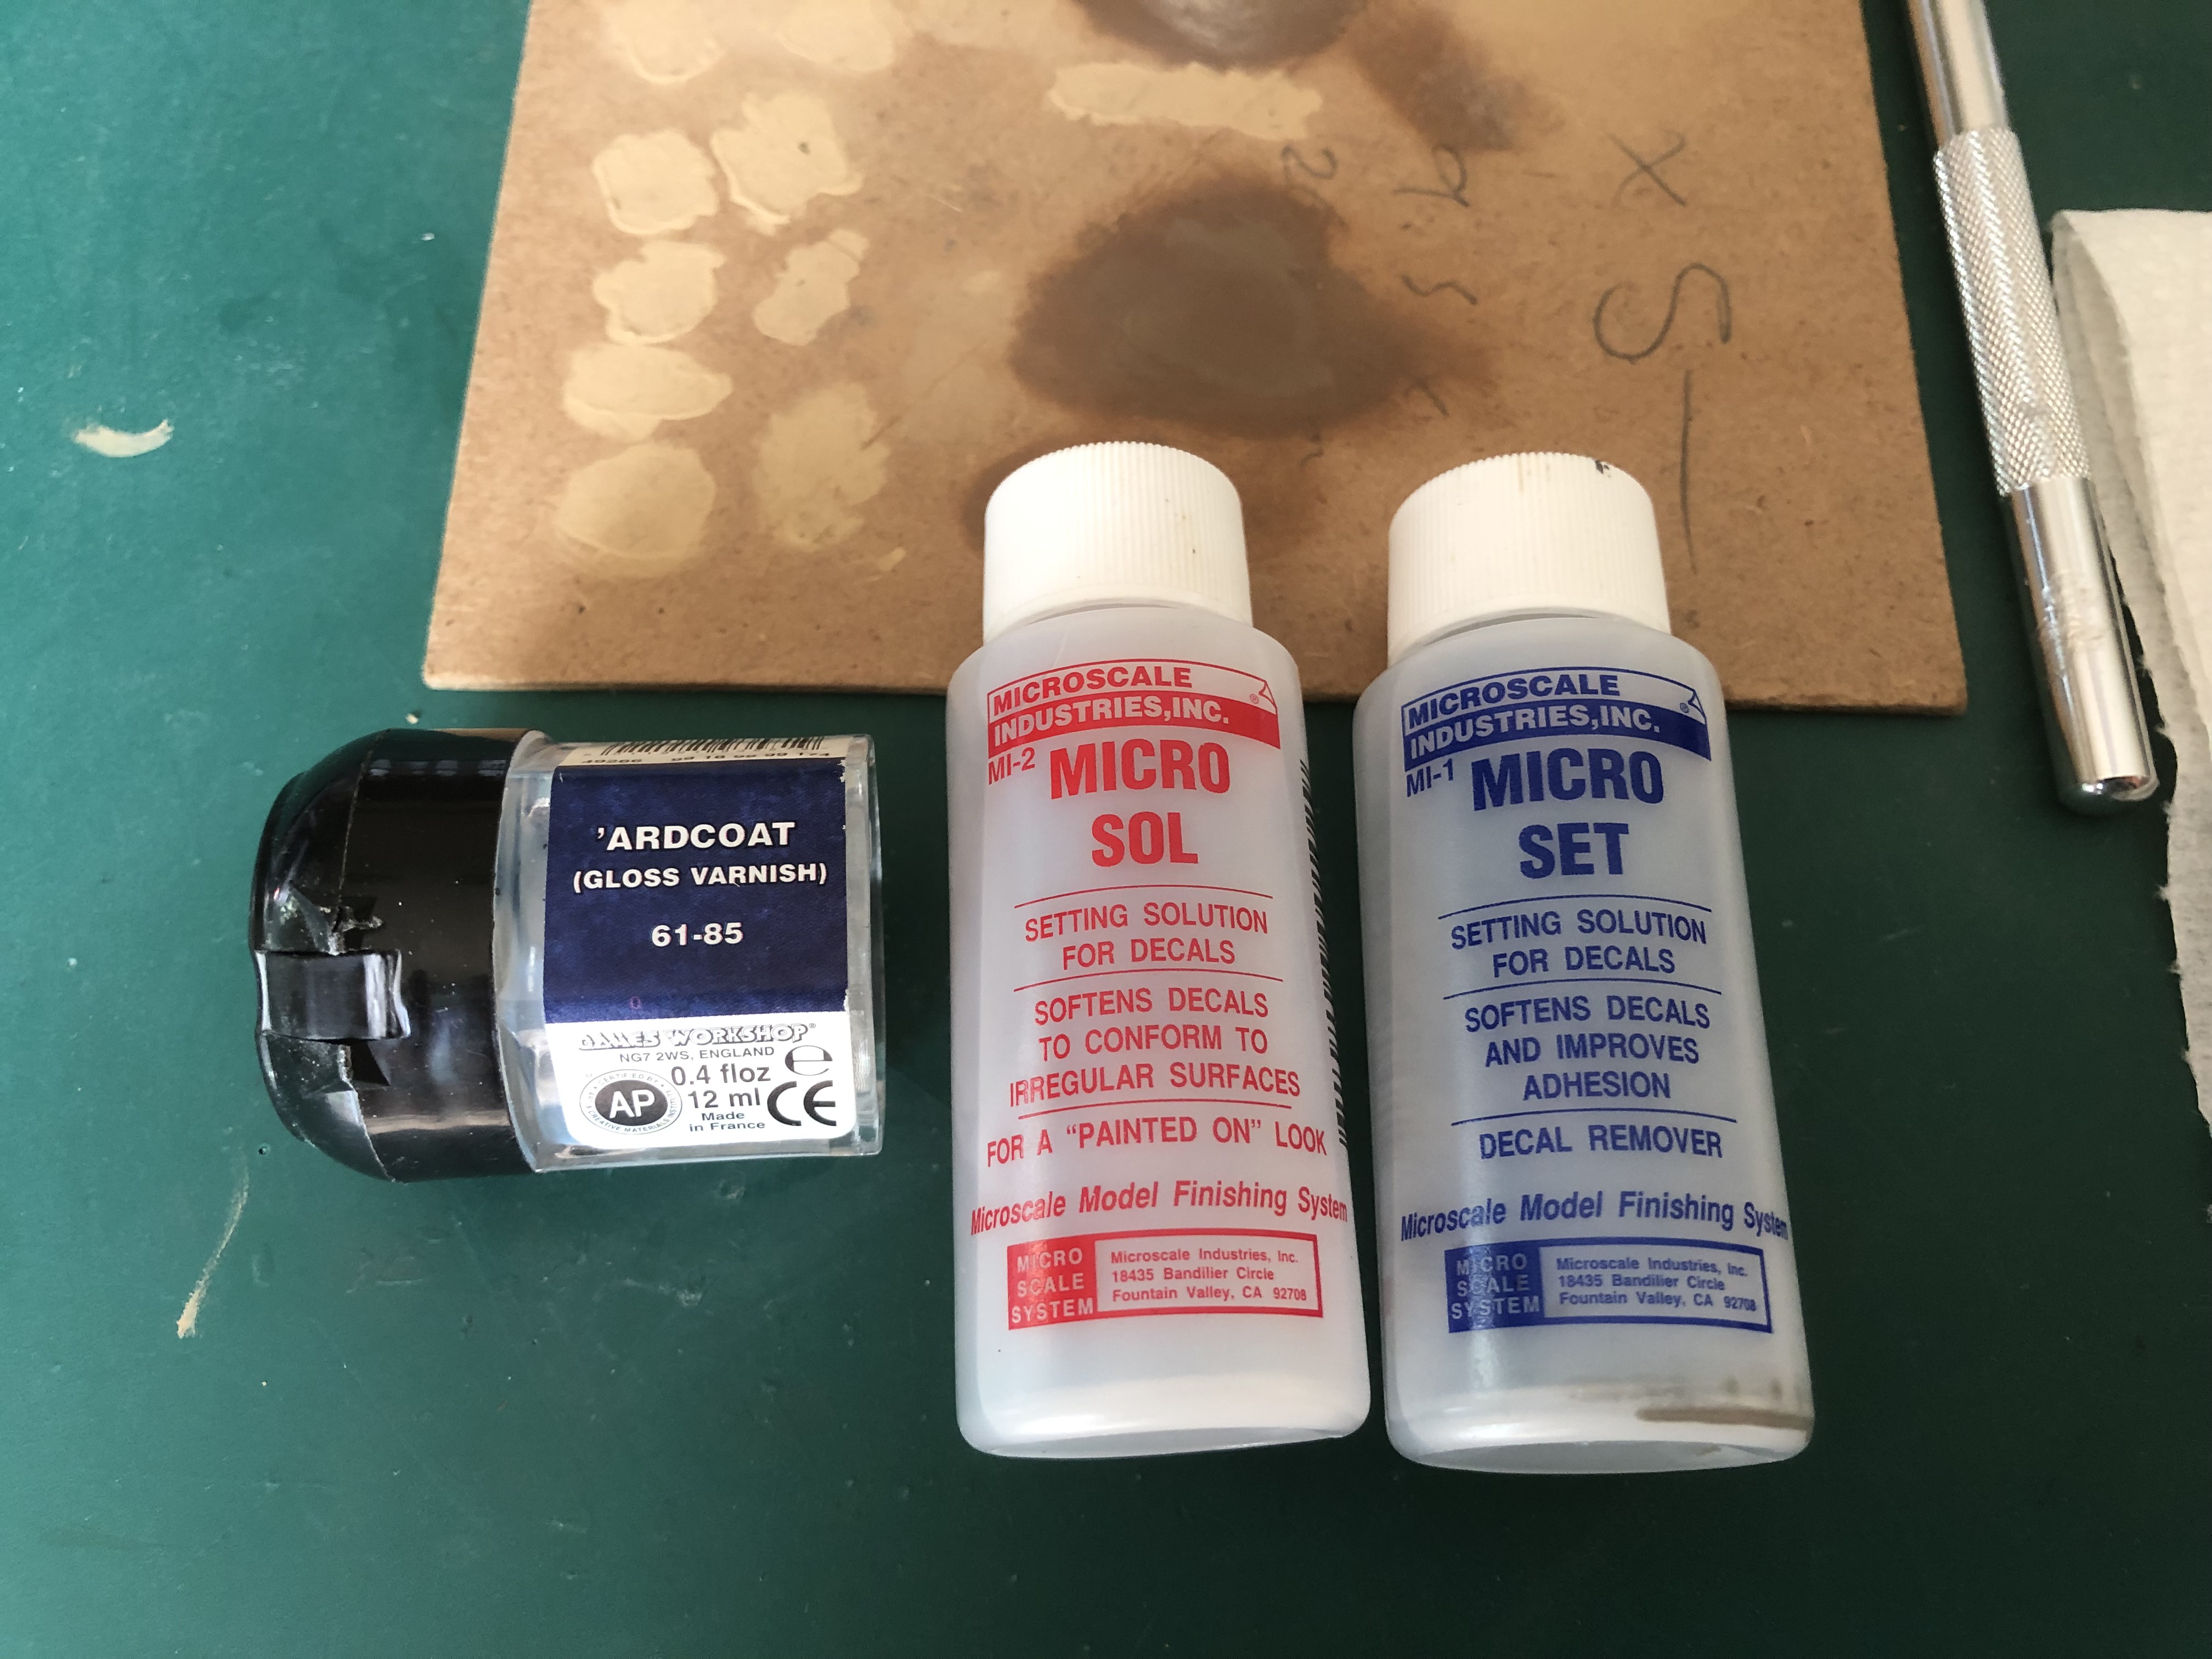 My weapons of choice for applying decals, used correctly it looks like you painted them on.
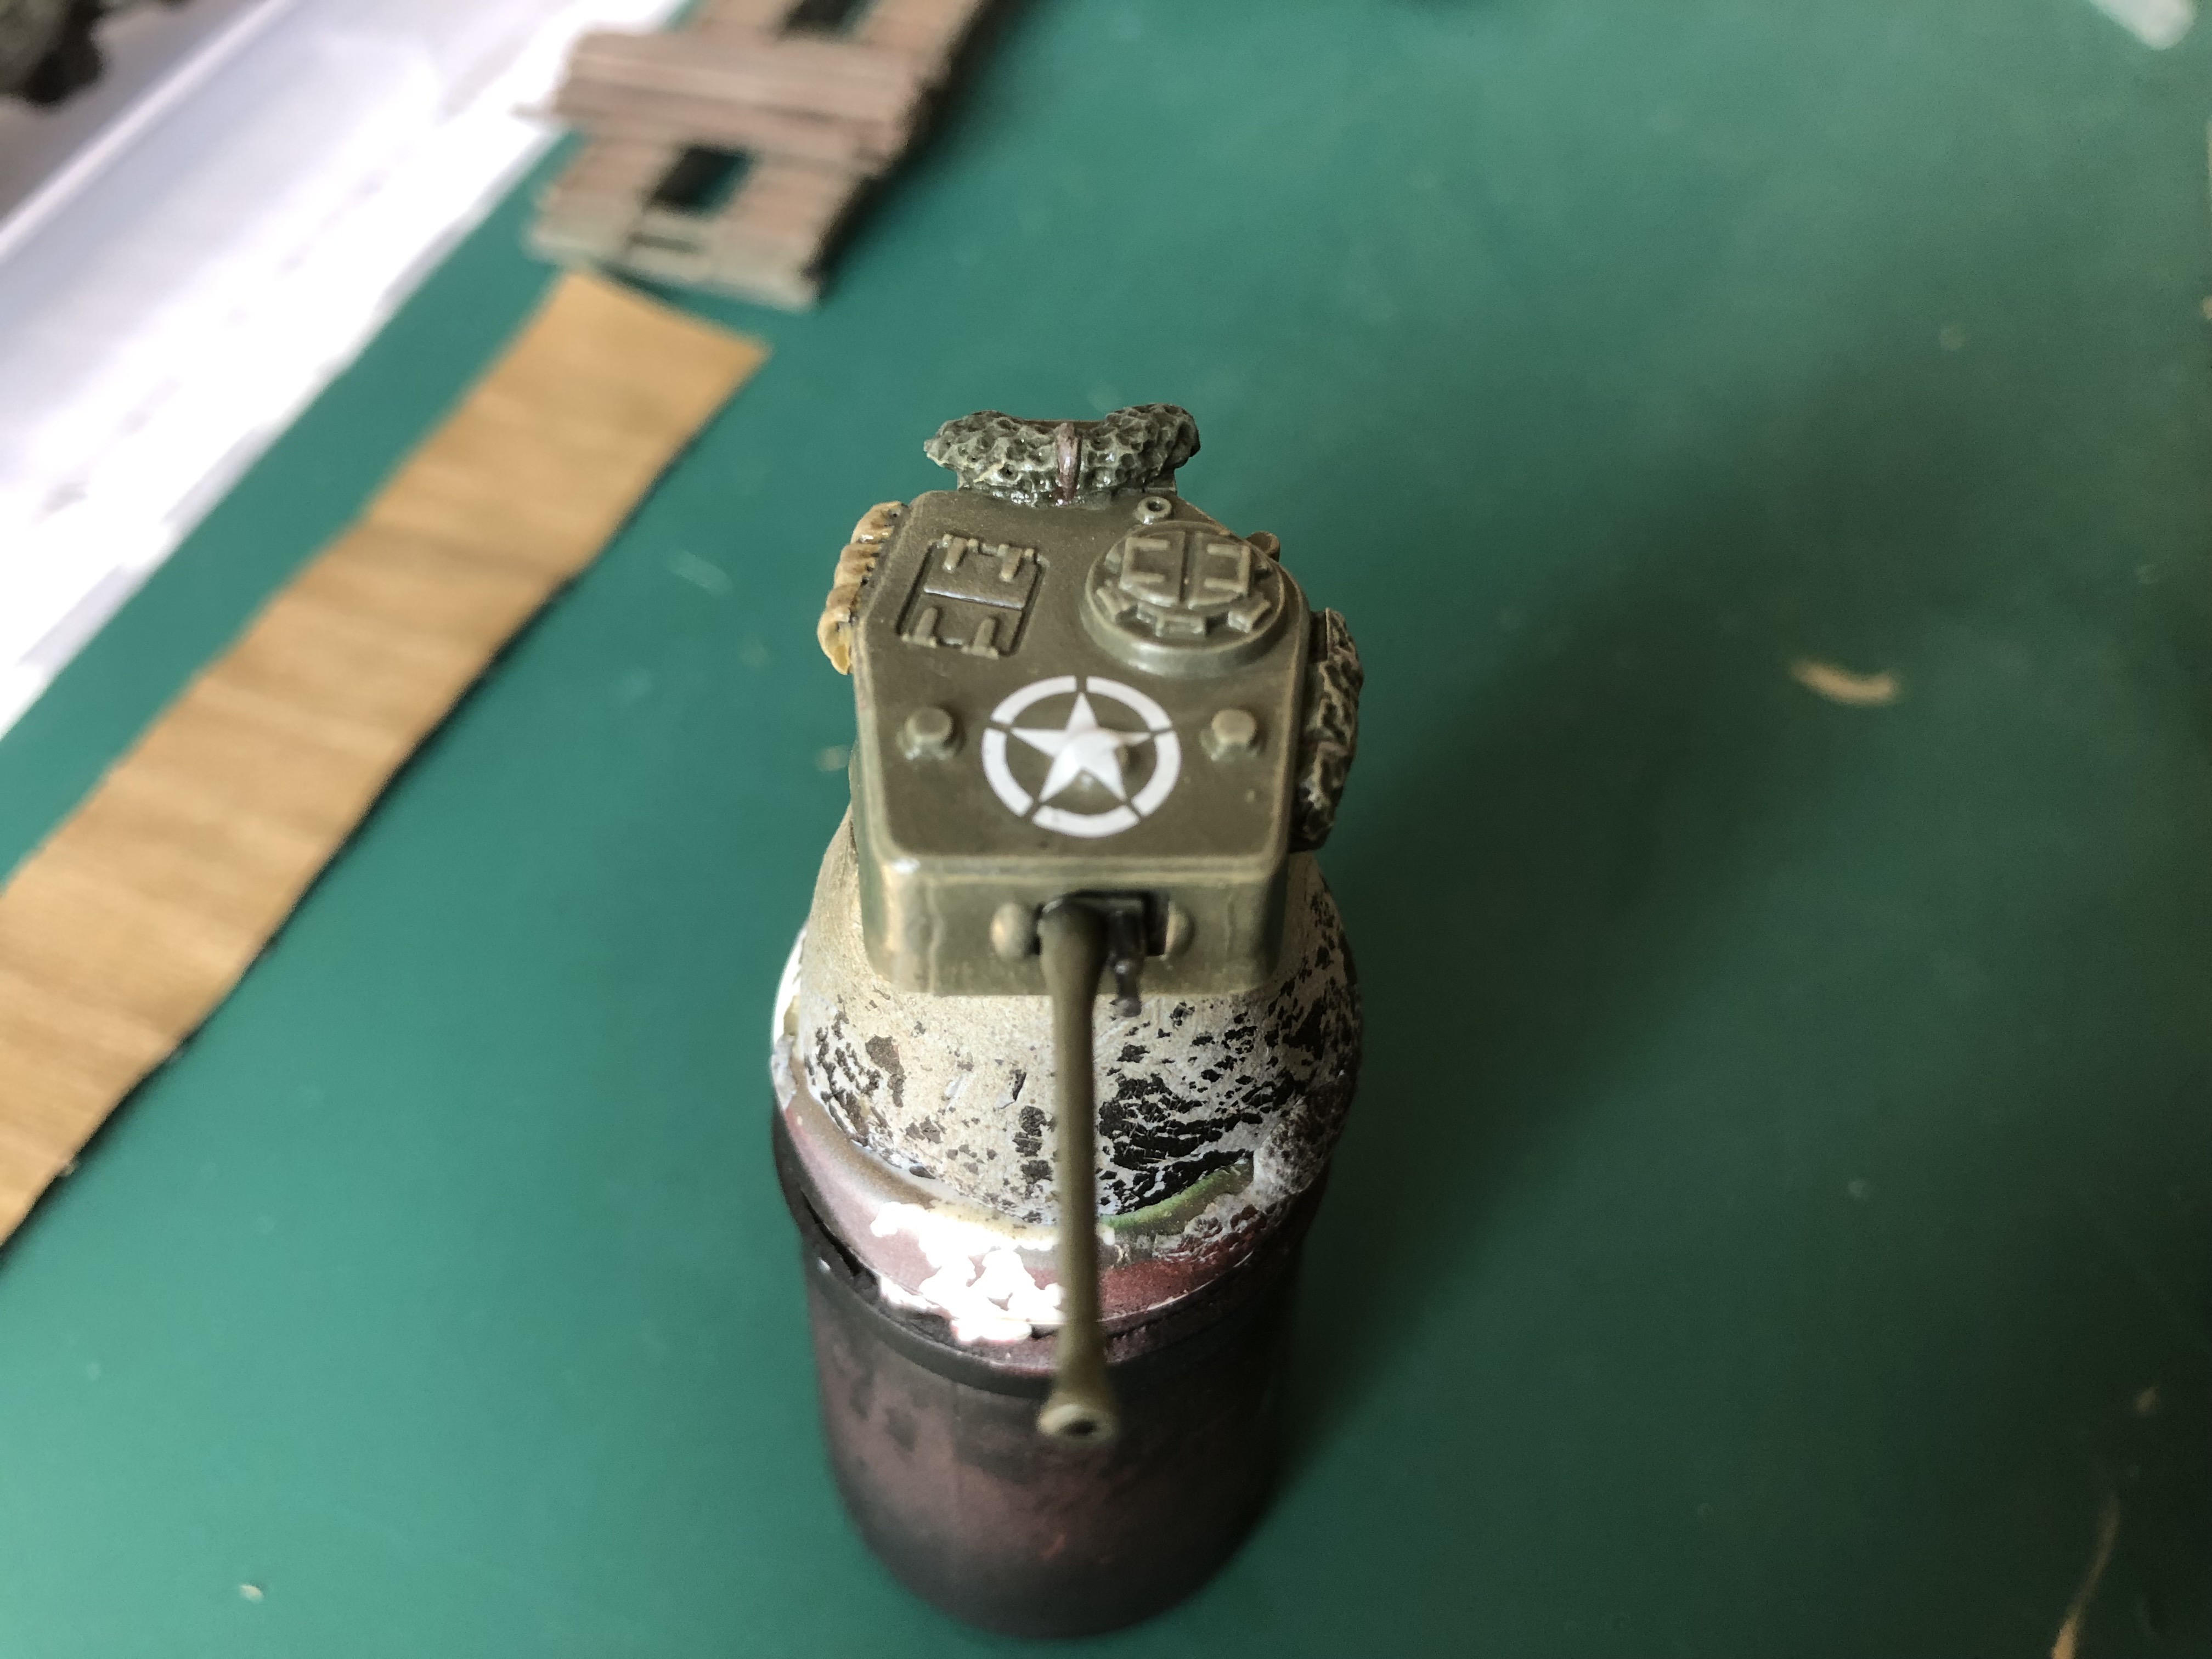 As a test i have applied an allied air recognition star to this turret. it was placed over what i think is and air vent cowl so the star needs to conform to this shape. if you zoom in you will see that it pretty much has without any creases. Although you will see a tiny rip in the outer circle that was caused by me ignoring my don't move it after 2 mins rule! not too worried about this as i will be painting the outer circle as a solid line, so can touch this up at the same time.
highlighting Cont'd
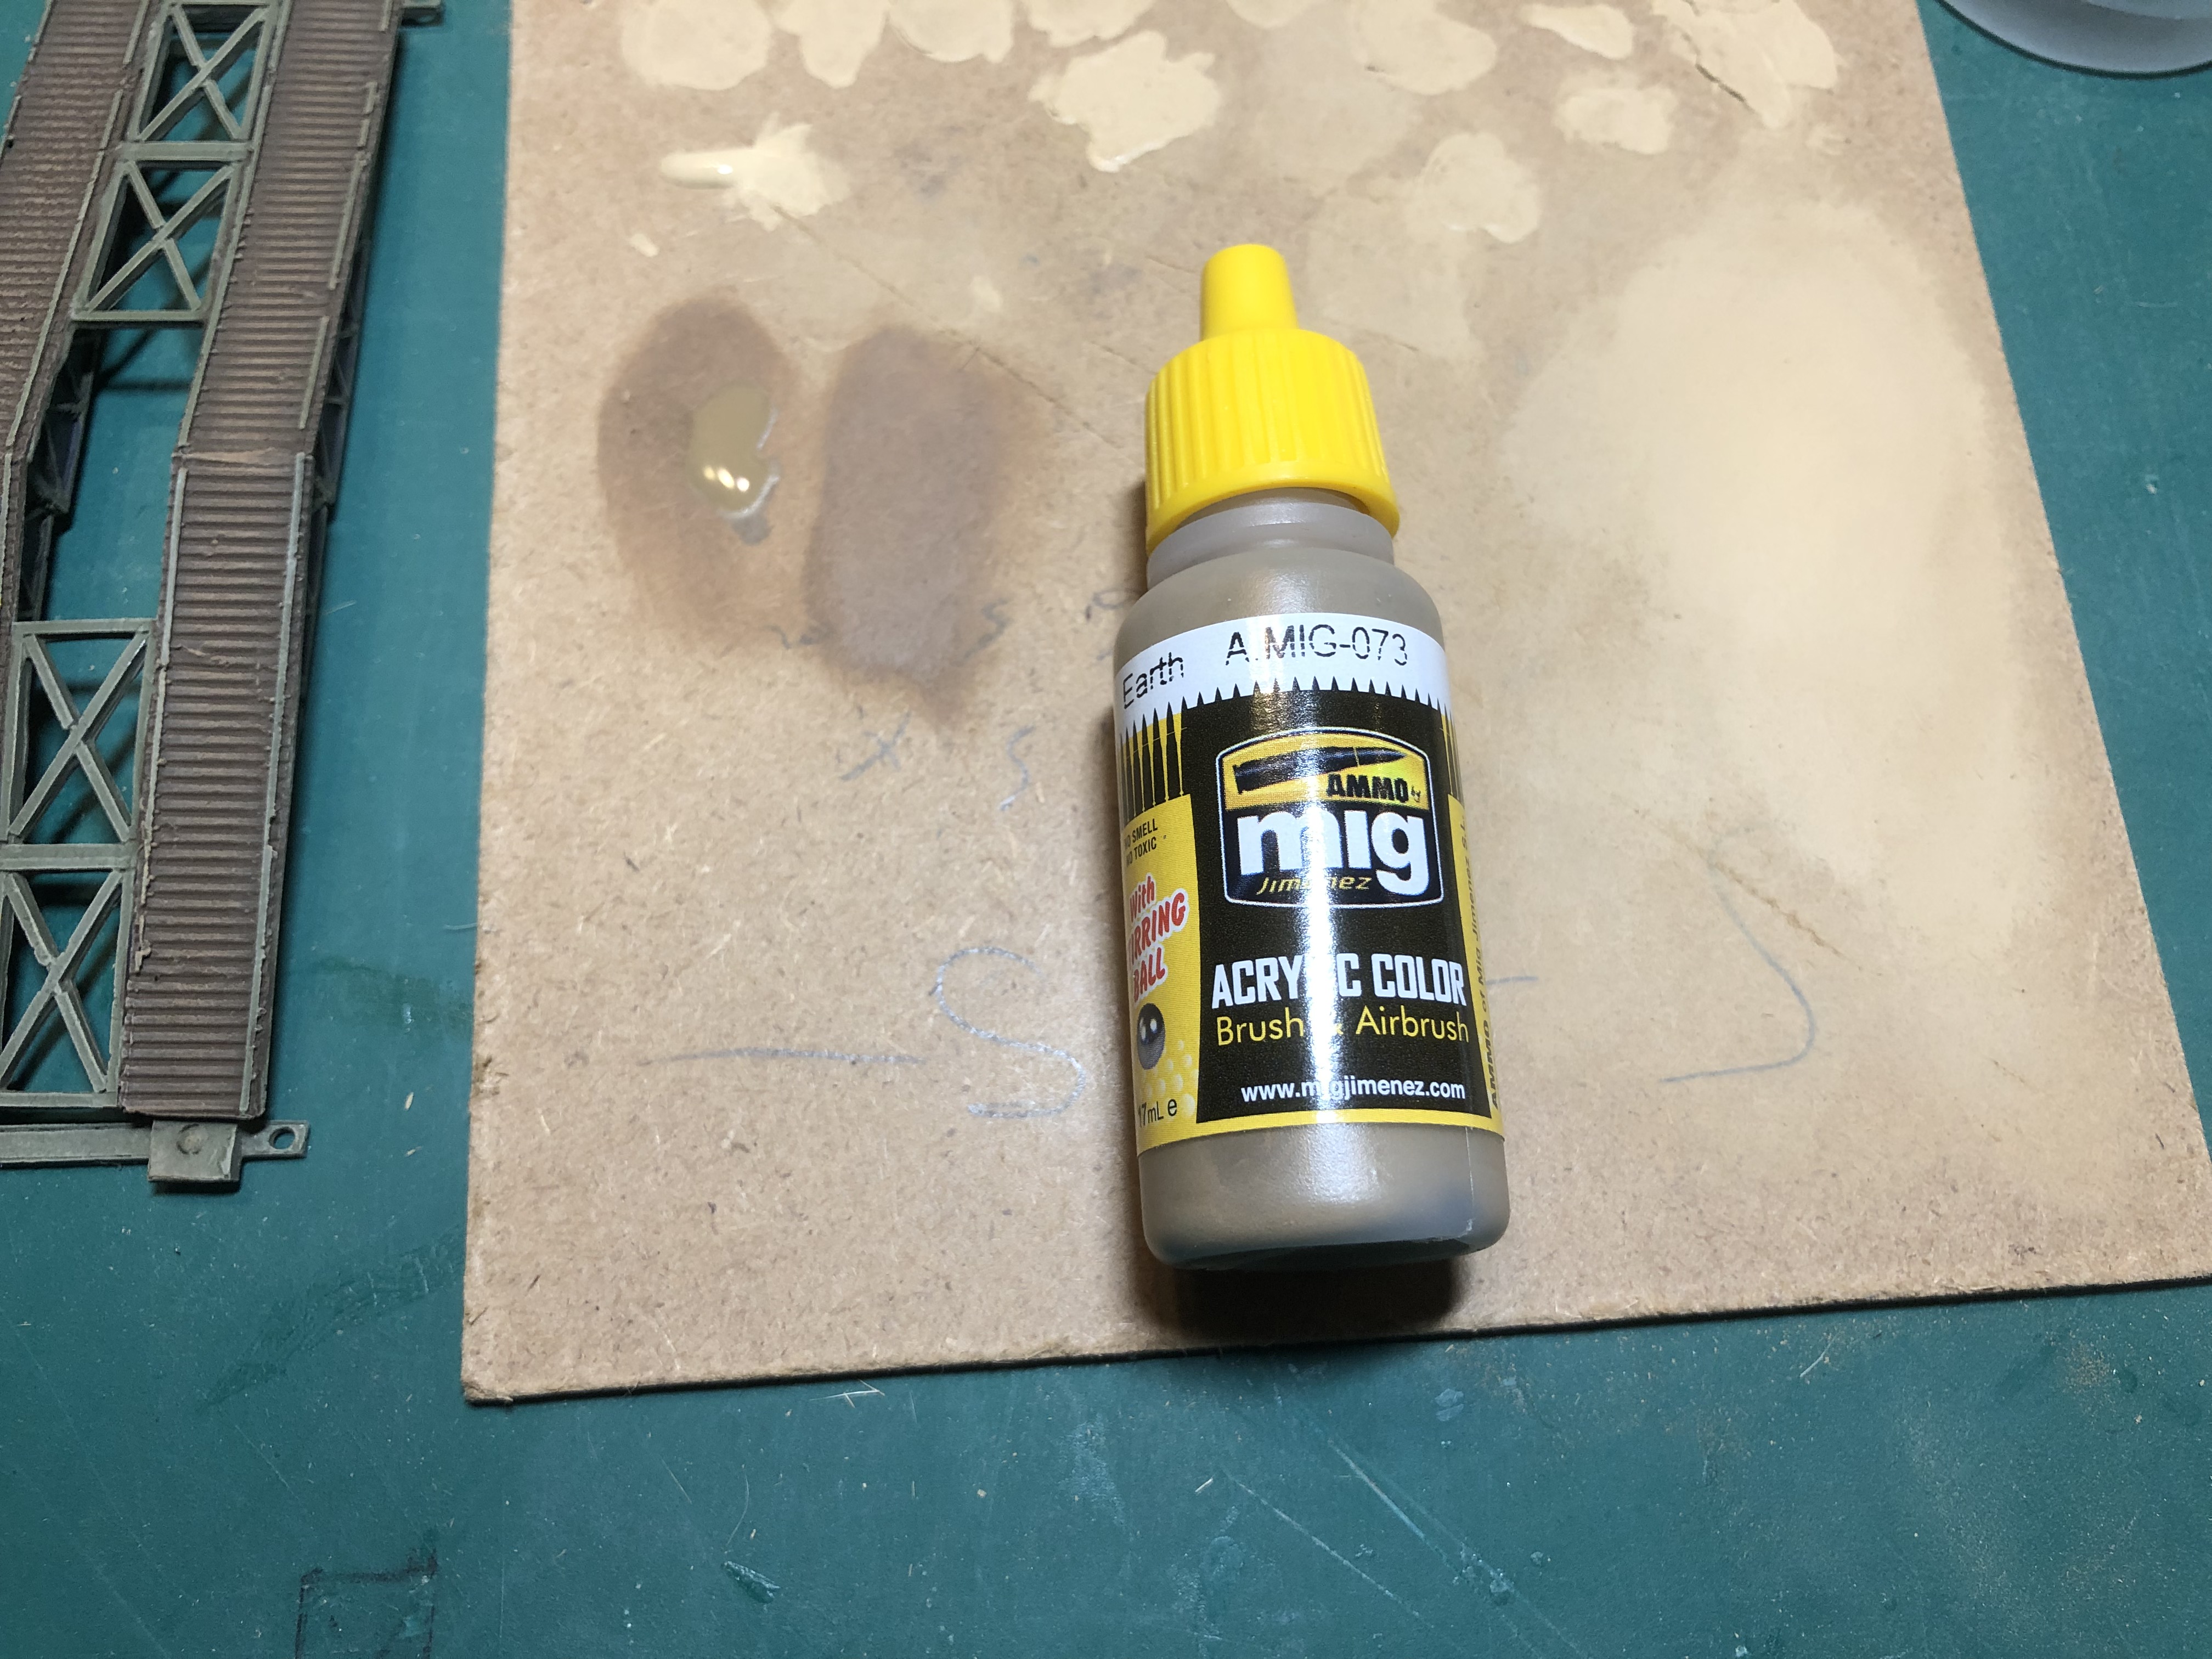 I chose Mig Earth to highlight all of the wood on the bridges, log carpet and fascines, once done i followed it up with a lighter pass with iraqi sand
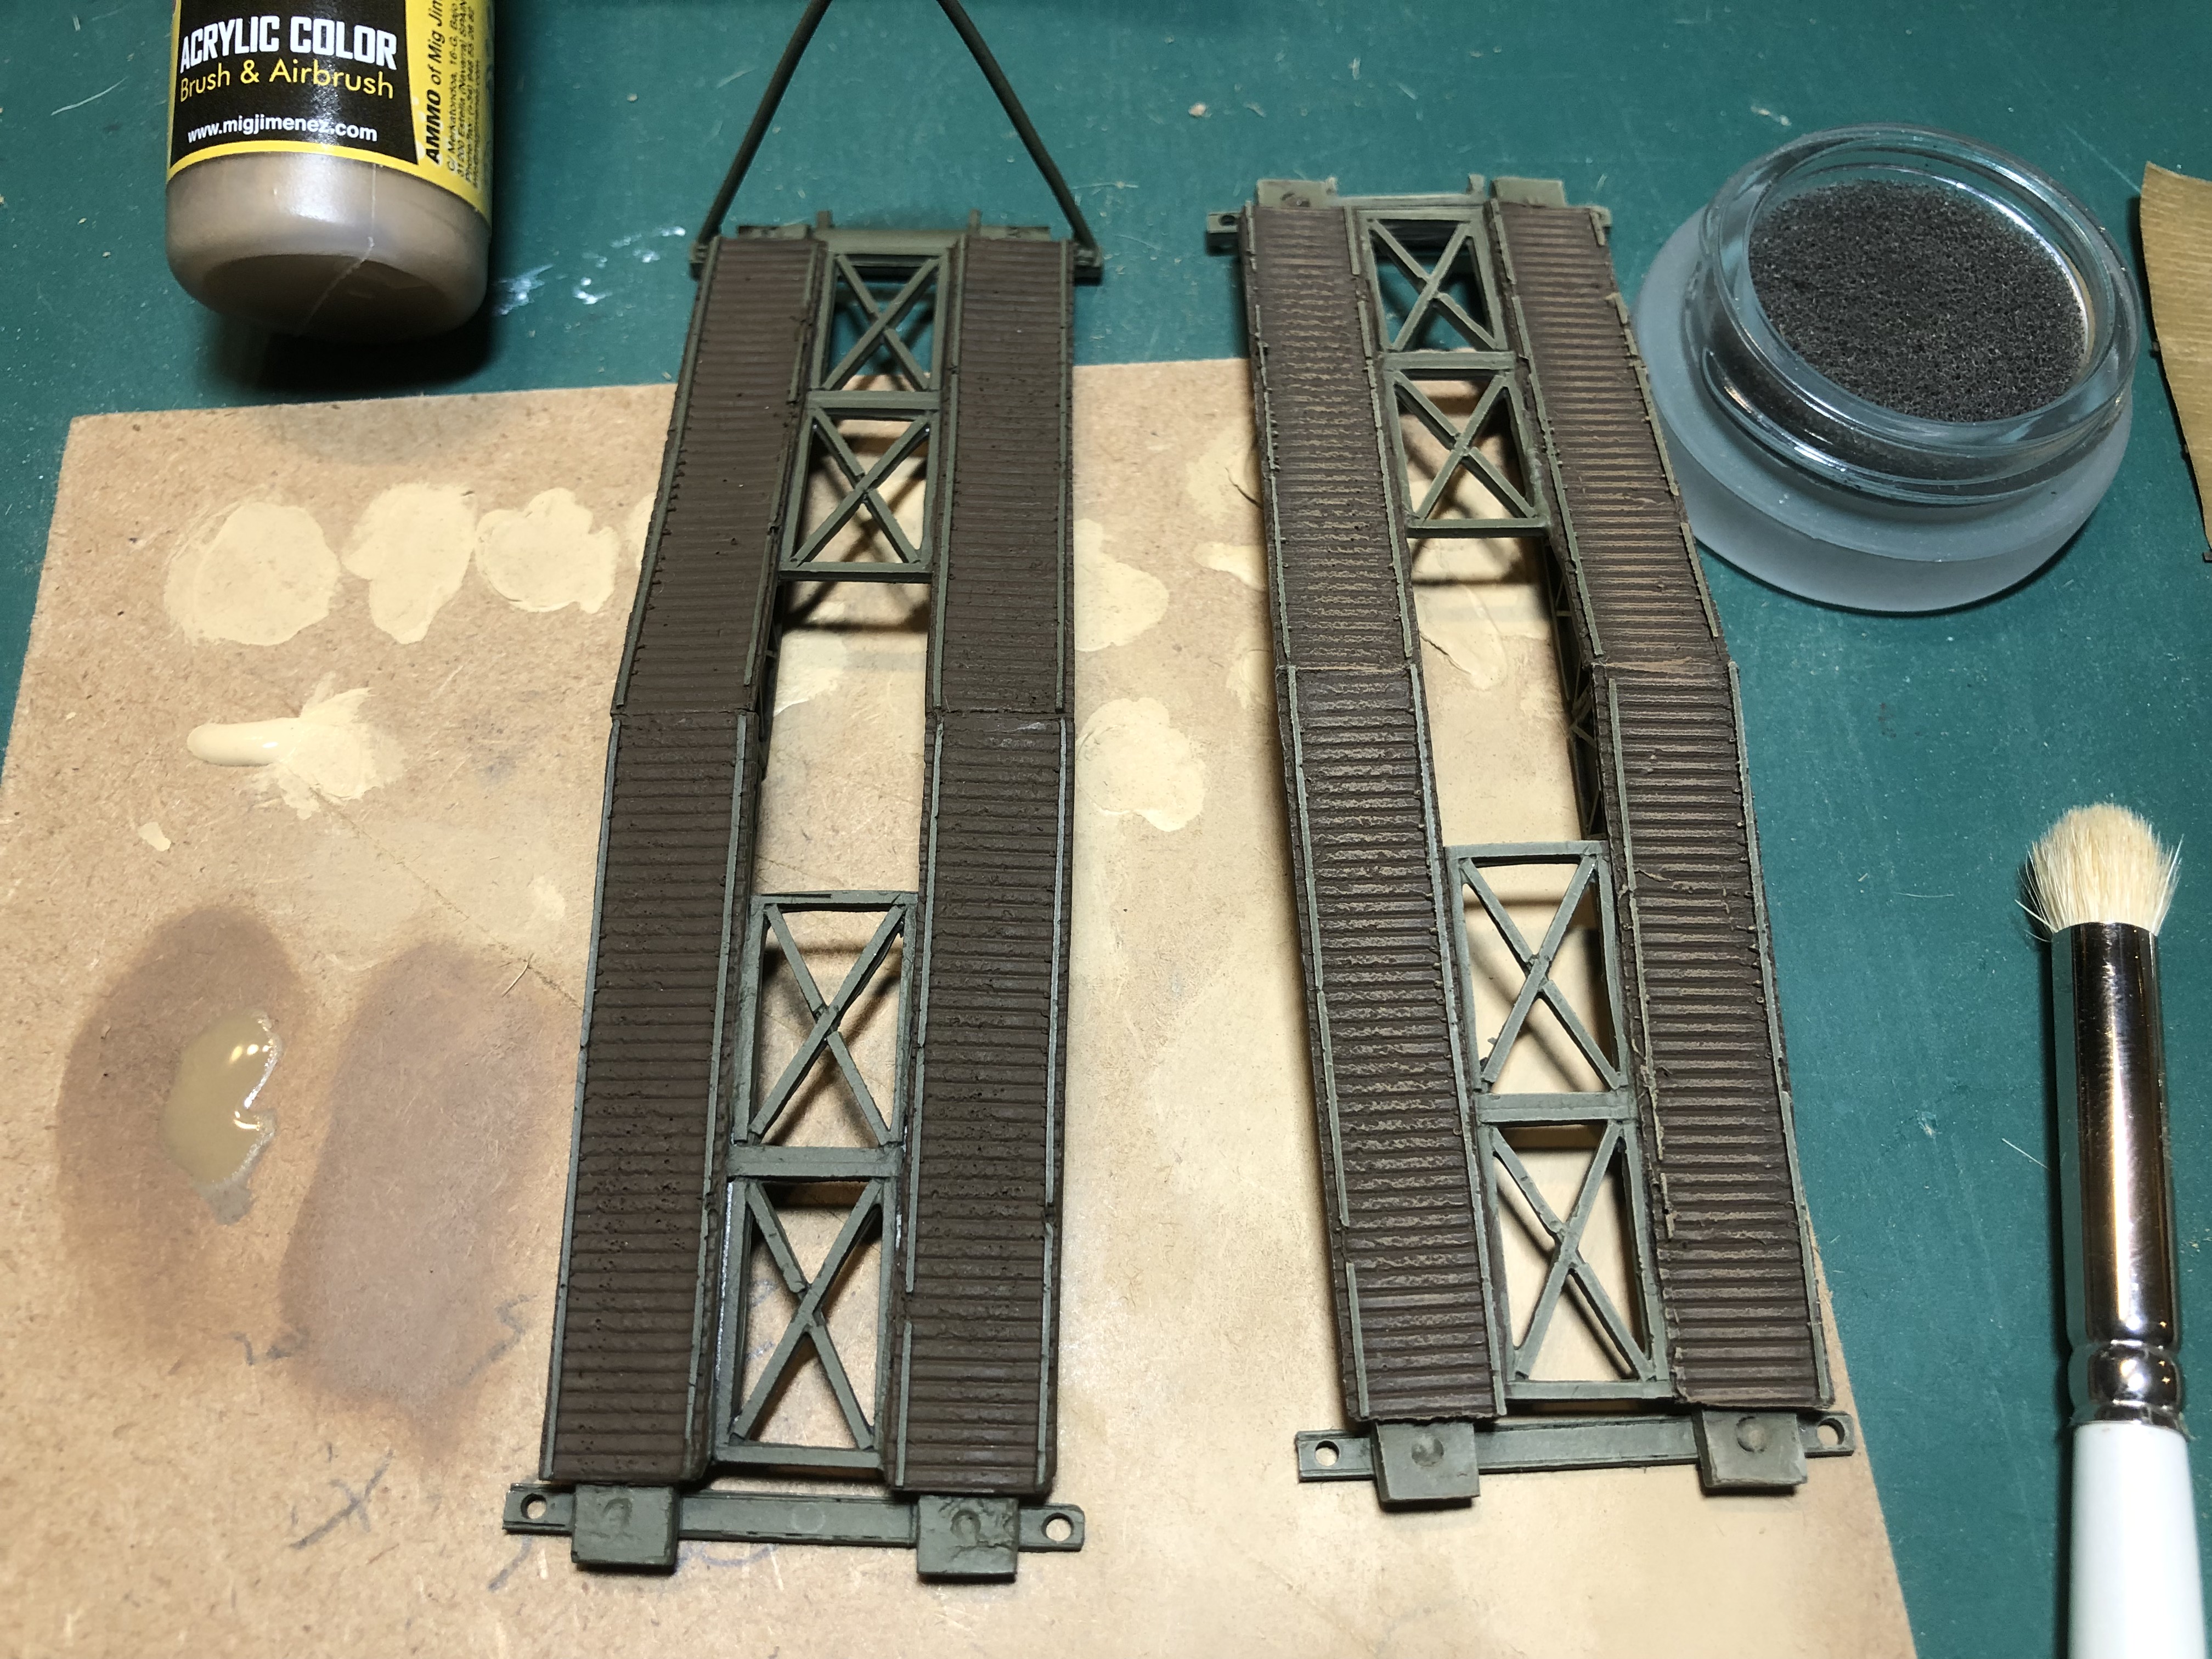 I concentrated the drybrush highlights to the centre of the bridge decking where it would receive the greatest wear.
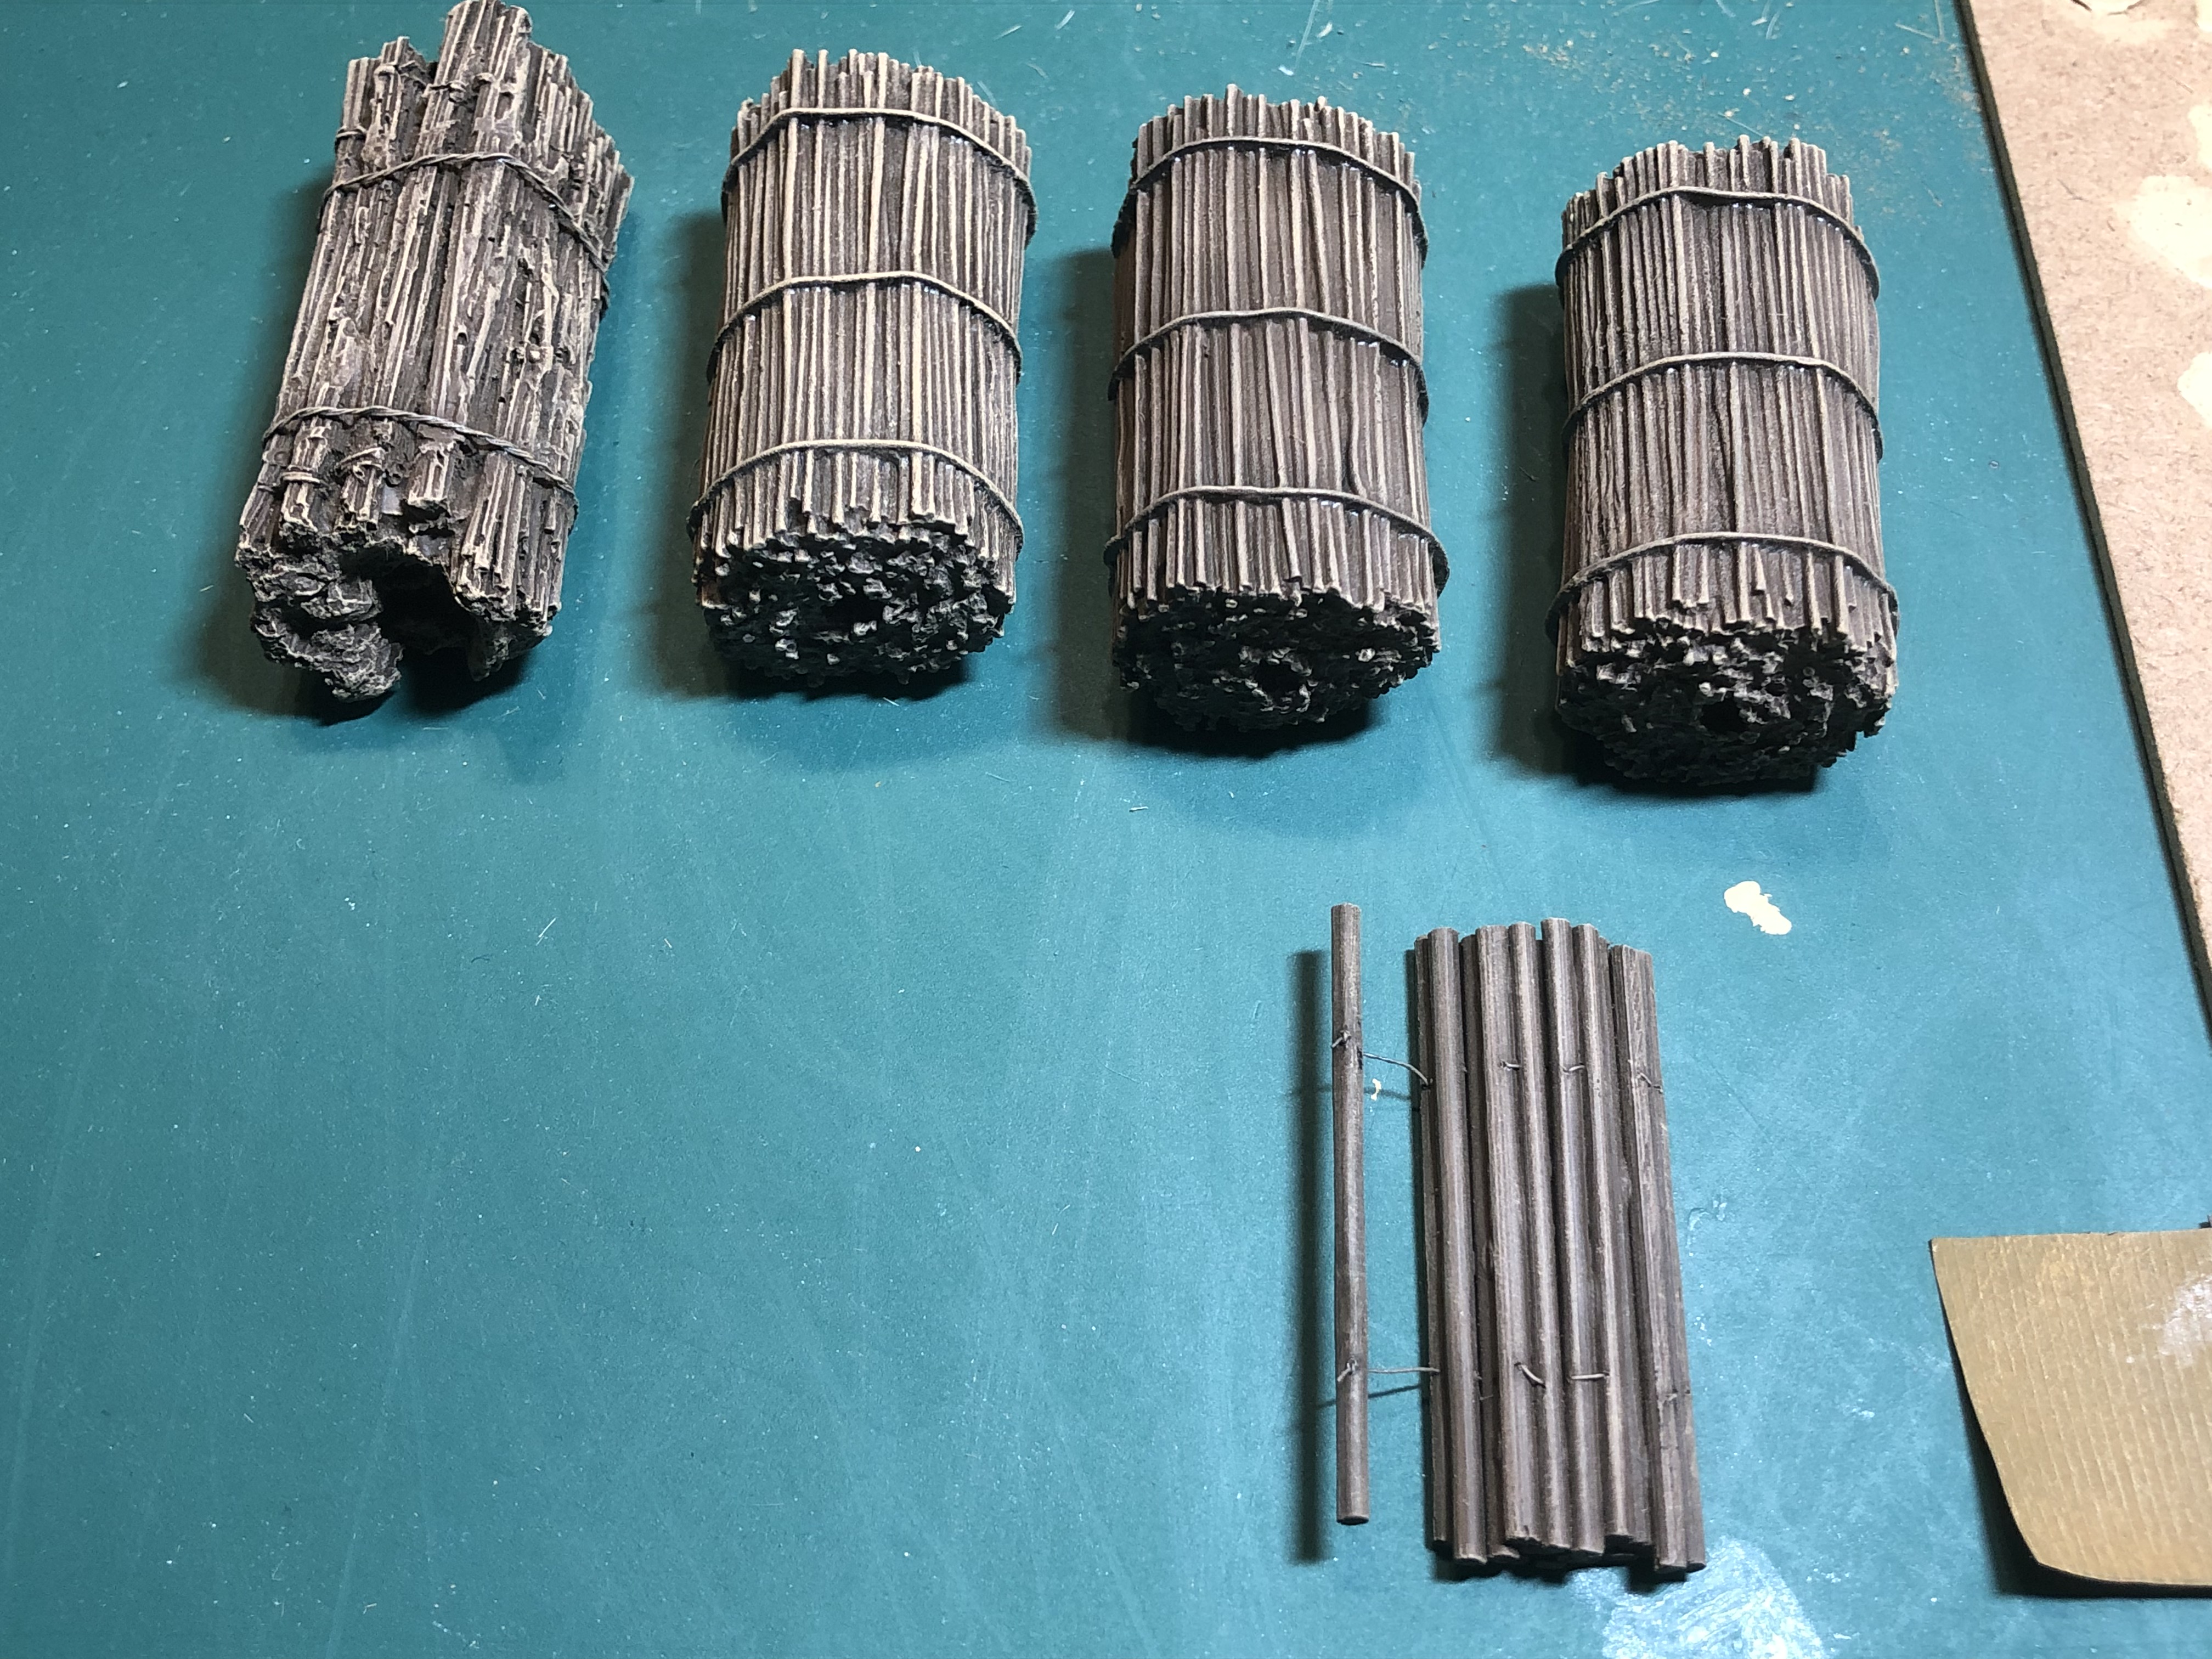 The fascines and log carpet got a heavier drybrush as i wanted to get a good colour variation and add to it's feel. Looks like i'll have to go back over all the retaining wires!
 Here are all the vehicles and ancillaries completed after this phase. Next up is applying the decals.
highlighting
 I chose to highlight in Iraqi sand, you can see two of the new dry brushes and the bamboo lidded pot holds the sponge i mentioned for reactivating any paint left on your brush.
 The hull in the forefront has been highlighted, I really like the subtle effect you get from this technique.
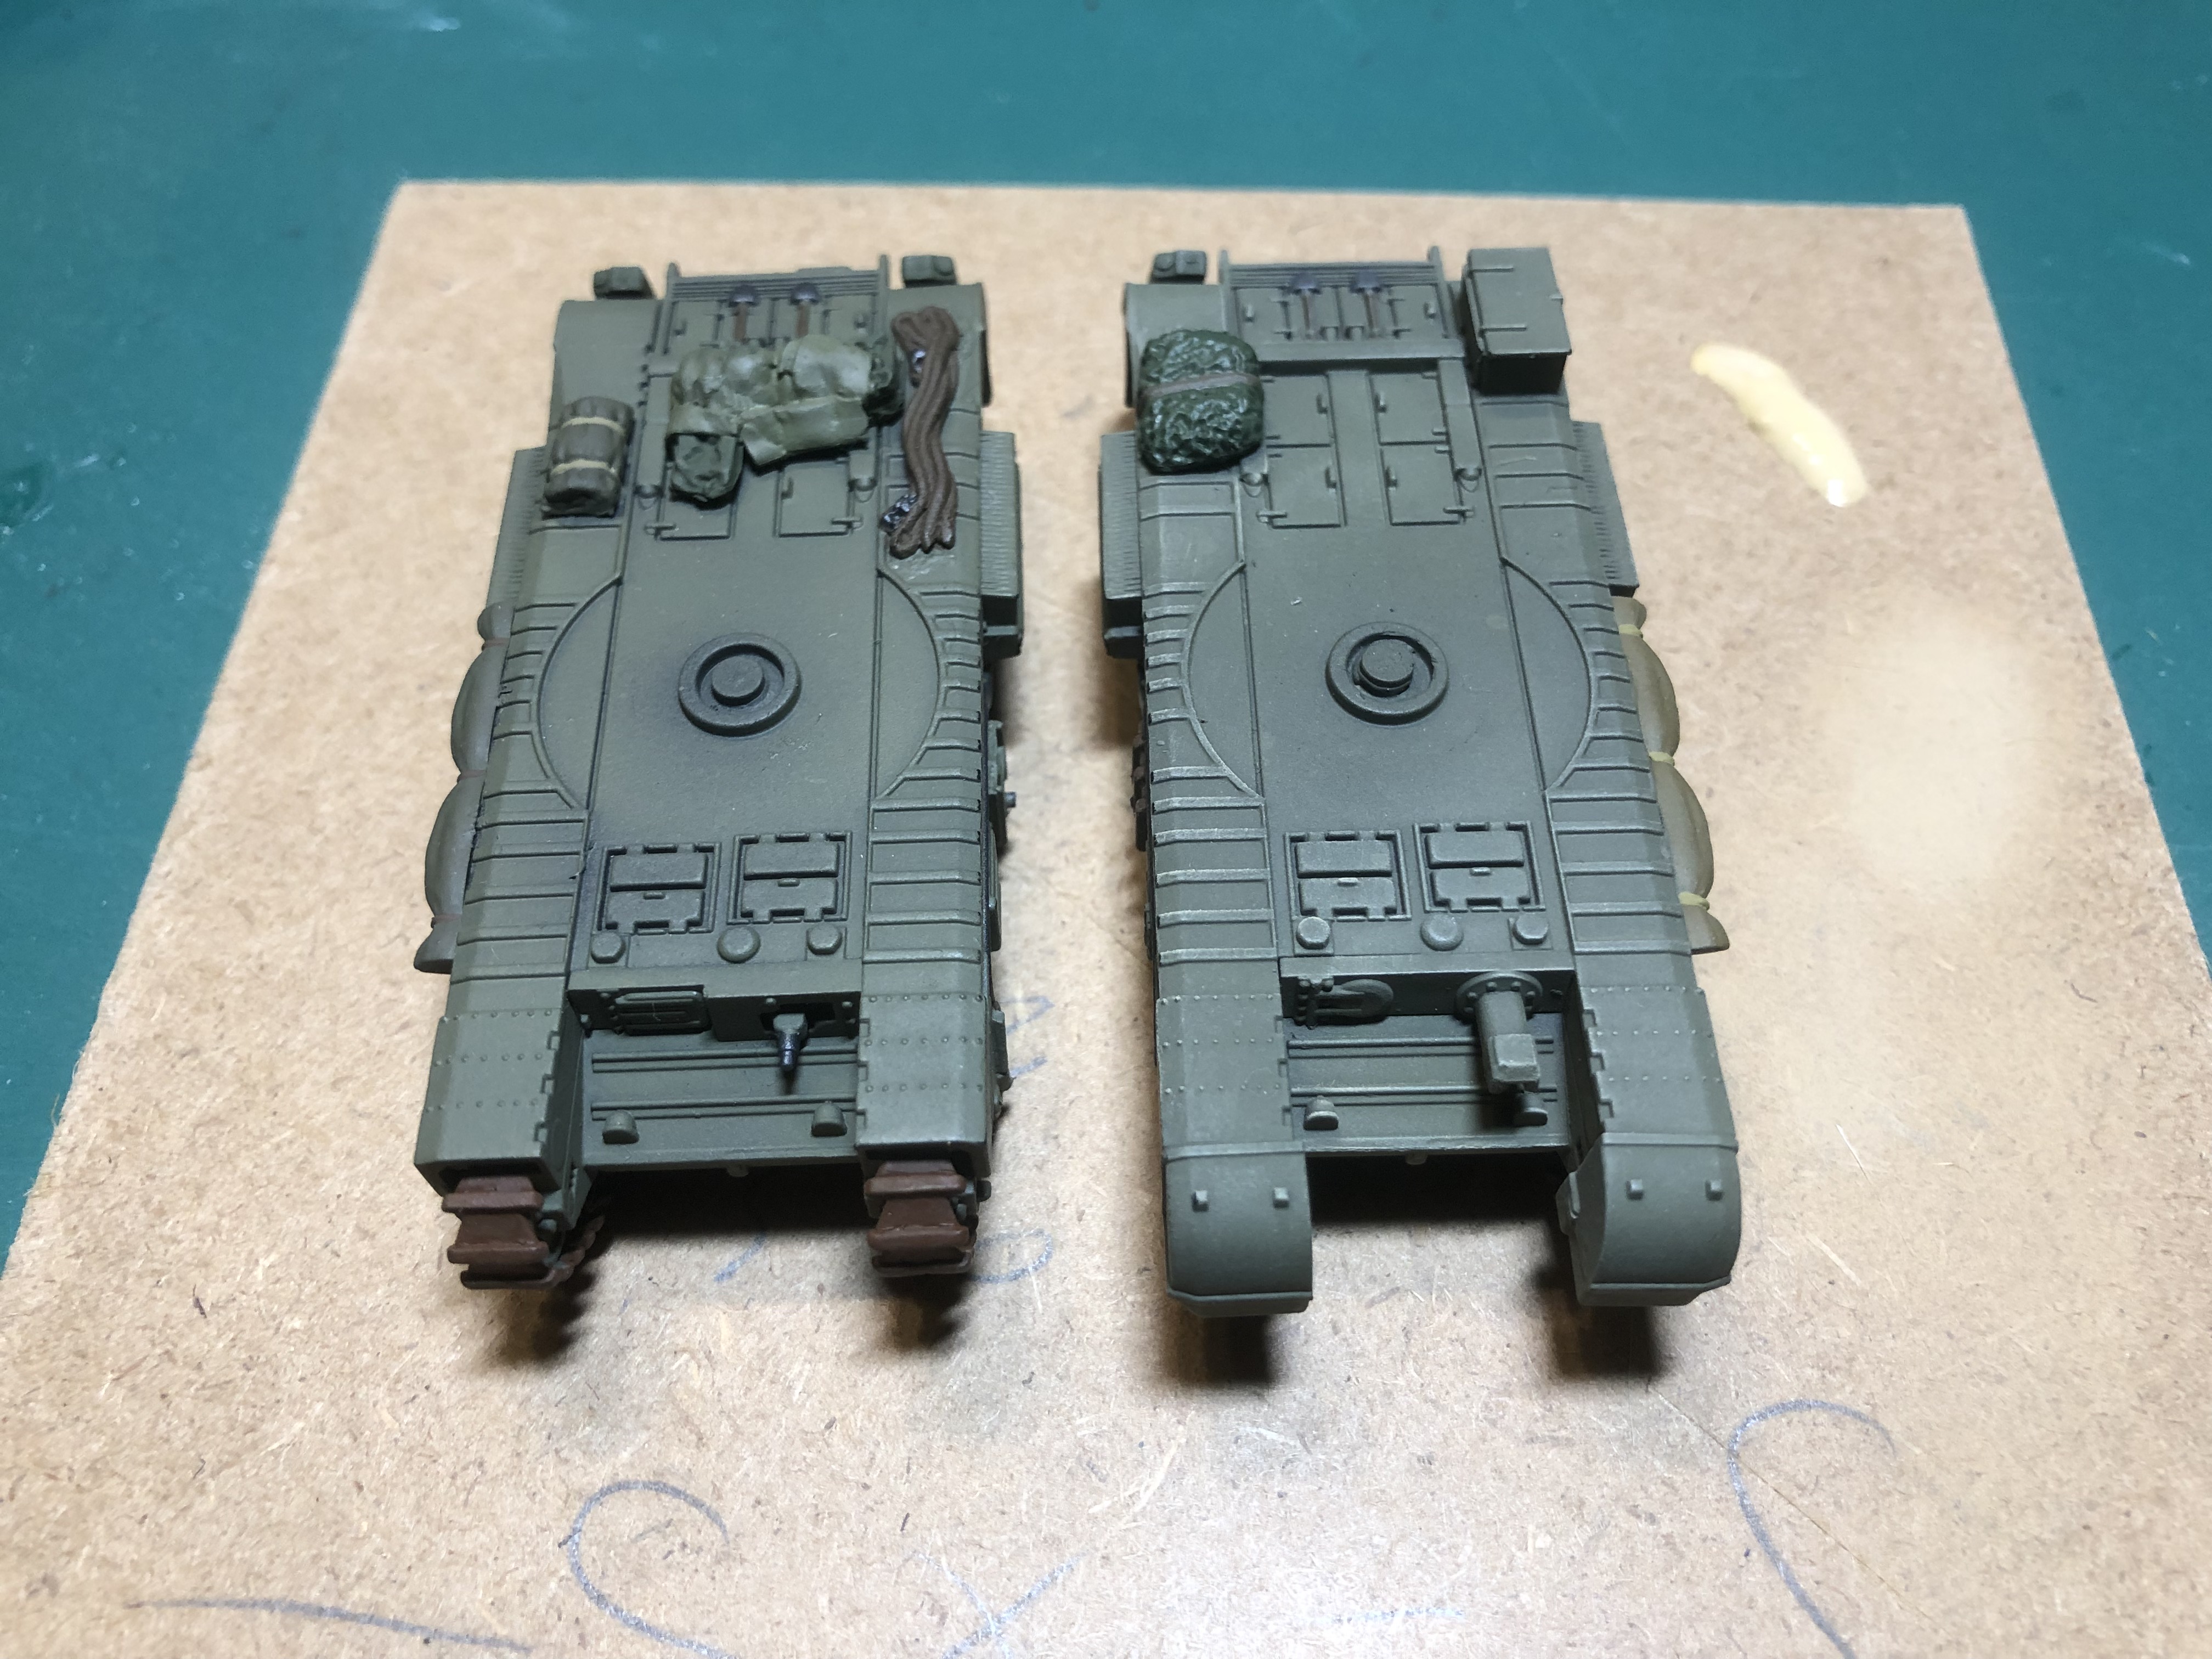 Another view head on.
 Whilst i had the Iraqi sand out, i also used it to drybrush the bobbin matting. this really brought out the texture of the parcel paper i used.
Time for some highlighting
There are two schools of thought with vehicles, option one is to add a wash and then highlight, which is pretty much what all miniature painters will do because they want their paint job to pop (as is the parlance). The other option is to highlight first and then wash so that the effect is more muted and gritty. It is this second option I will follow, as I will be further weathering the vehicles down and this gives me a head start.
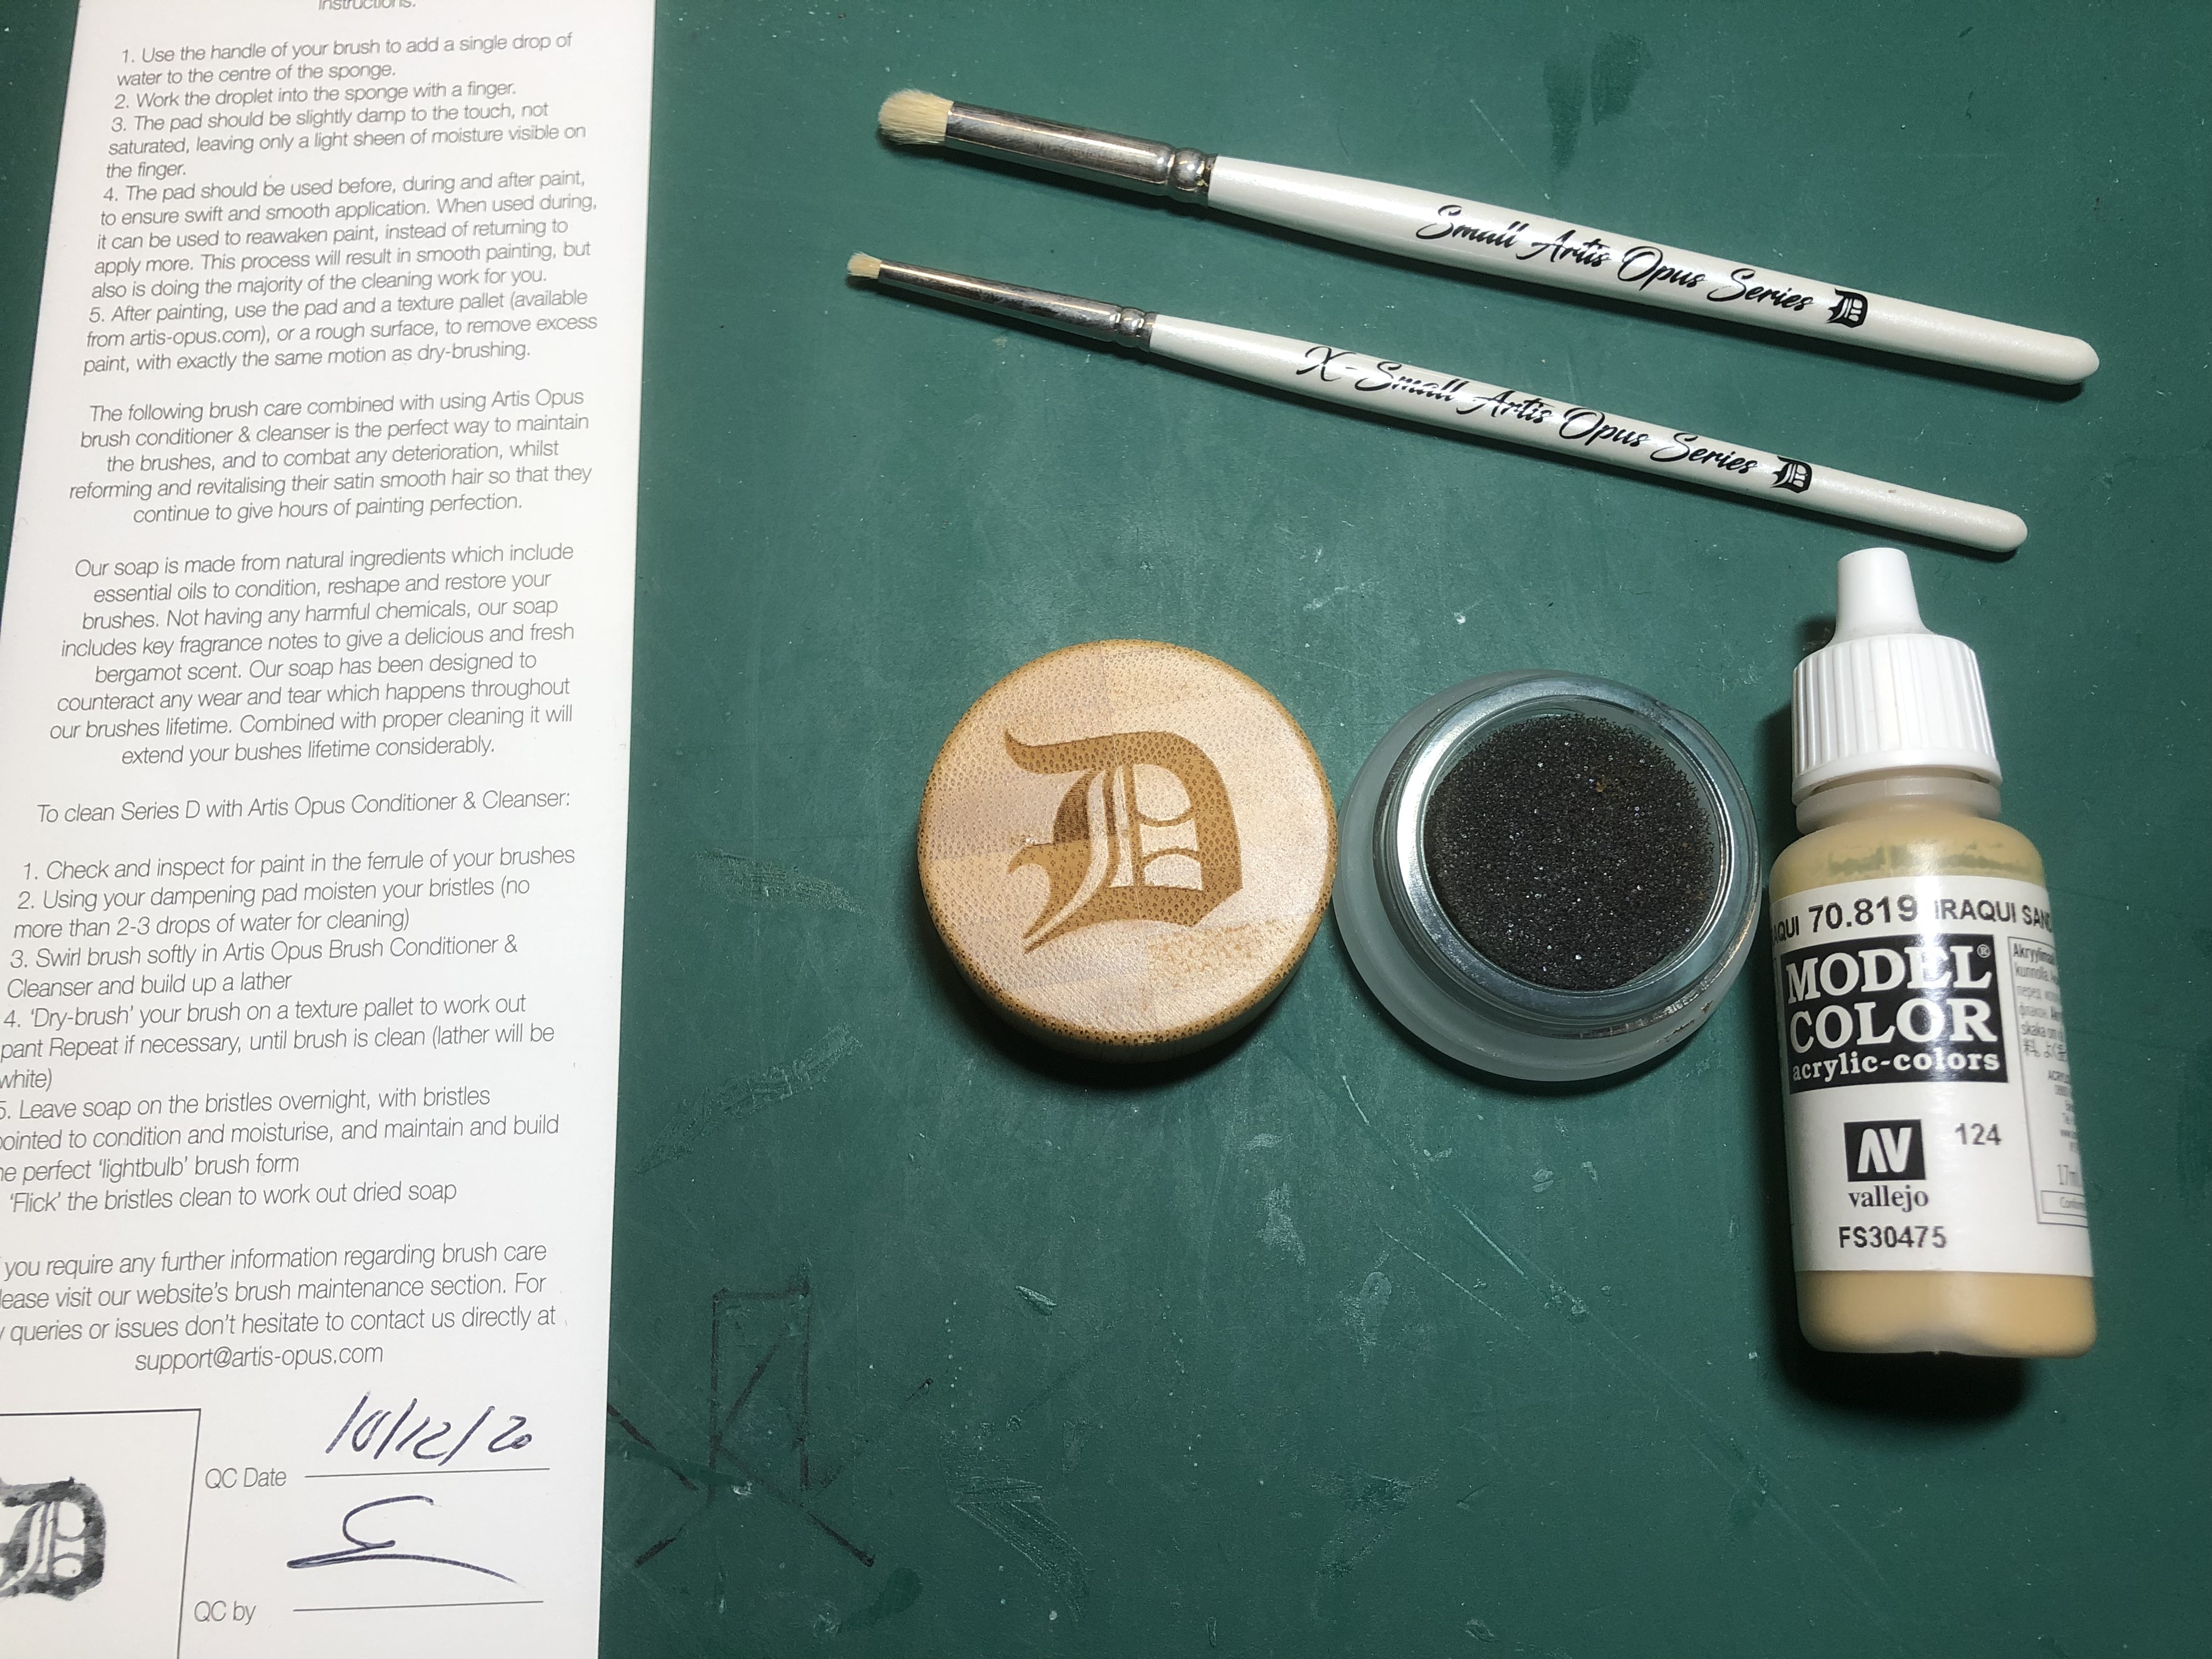
Now for this stage I borrowed my eldest lad’s set of Artis Opus dry brushes, mainly so I could try them out to see if wanted to buy a pair (who am I kidding, they’re a shiny new gimmick, of course I want them!!). I have noticed that they give a more subtle effect overall but still with good edge highlights.
As these are going to be weathered I am not so worried about going too far with the highlights. The brushes themselves come in a wide variety of sizes and i bounced through them all to get into all the areas i wanted to address. They are very soft and with a rounded finish and whilst they produced a really nice effect I did notice a lot of initial bristle loss (but maybe i was still doing it too hard).
The process is the same as for normal dry brushing but they also provide a small pad that you very slightly moisten and when your brush runs out, instead of loading it again, you go to the pad and reactivate the remaining paint on the brush to use again. This has the effect of stopping your brush clogging up but also gives a really subtle transition when used to blend in the dry brushed areas. The kit also comes with its own MDF board to dry the brush on before use, but as this was not my set i used an offcut of hardboard instead.
Up Next...
Next up will be the highlights and I will be trying out some new dry brushes from Artis Opus. After that I would normally be adding decals but we’ll have to see how far I get with that as my order with Doms Decals looks like it will take significantly longer to deliver than I first thought (like in @3 months time!!!).
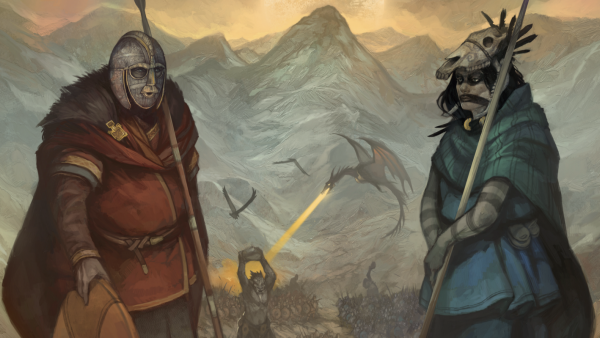
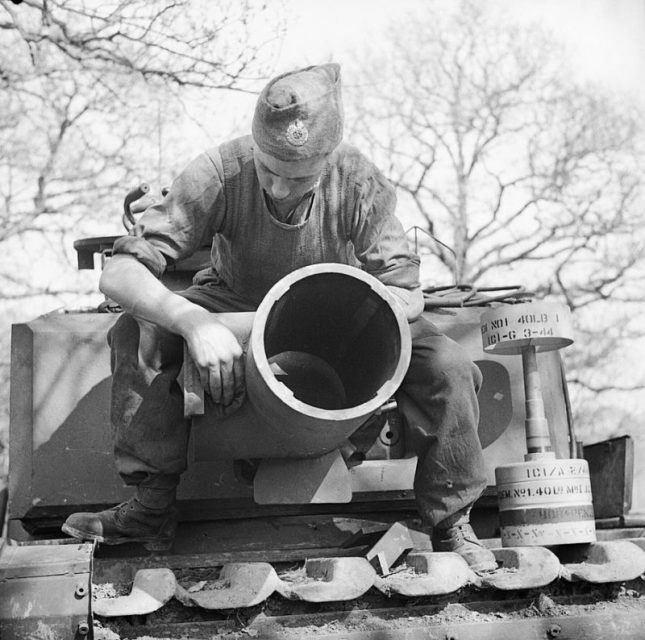
And my favourite reference photo of all
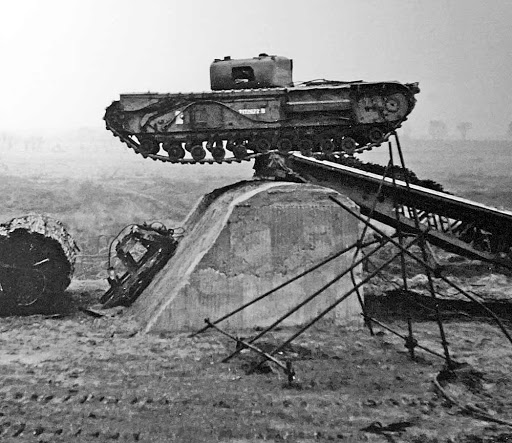 Now that takes Balls!


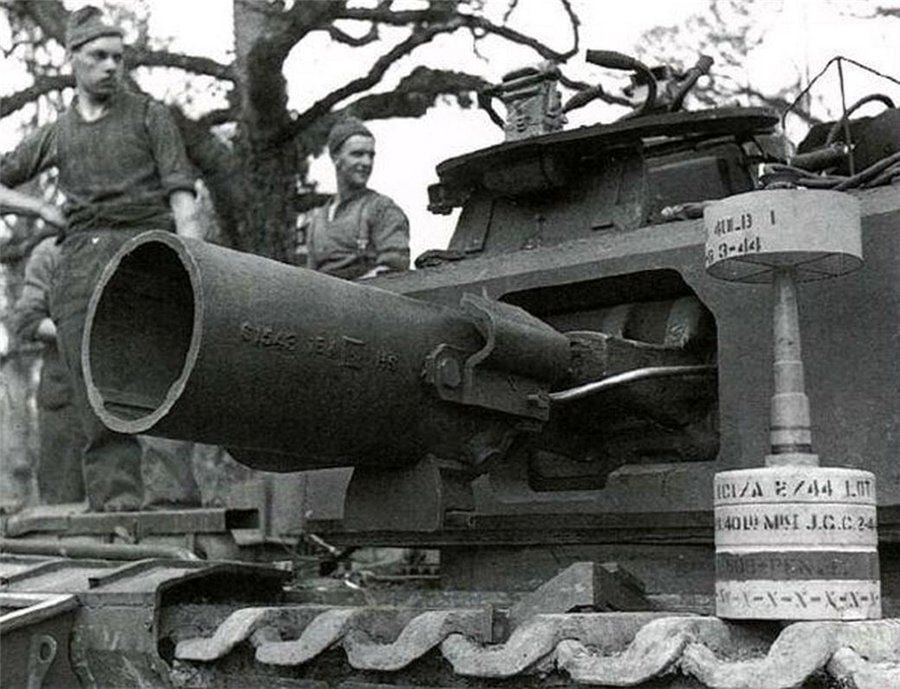

Reference Photos
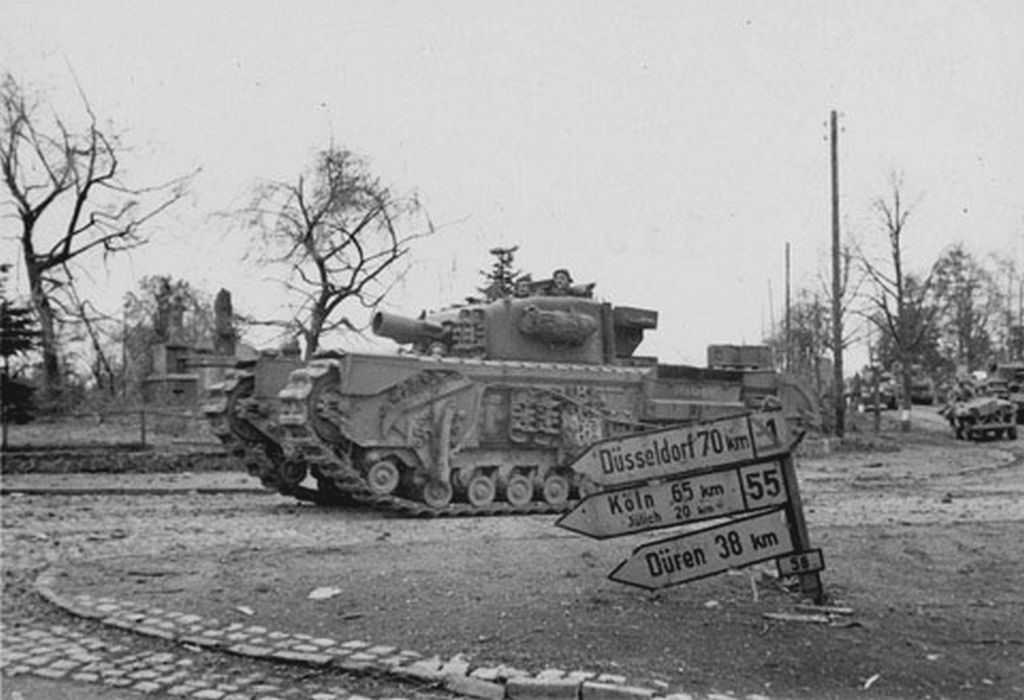
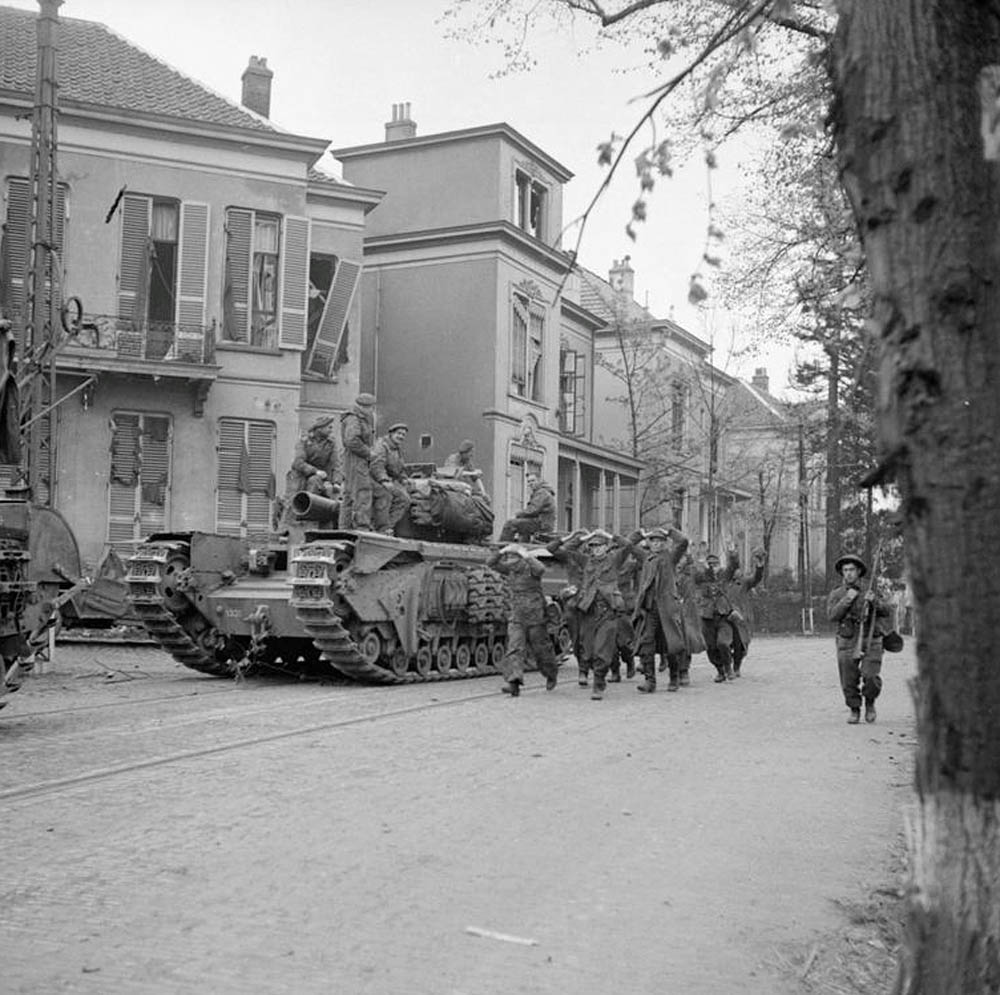
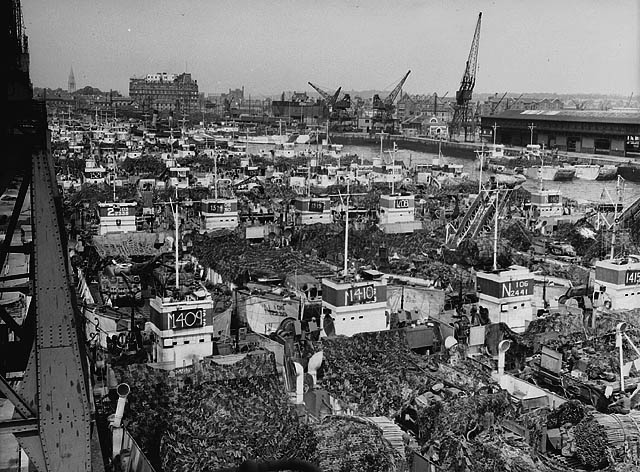
And finally for our history segment, some more reference photos of AVREs and also vehicles loaded on to LCTs in preparation for D Day.


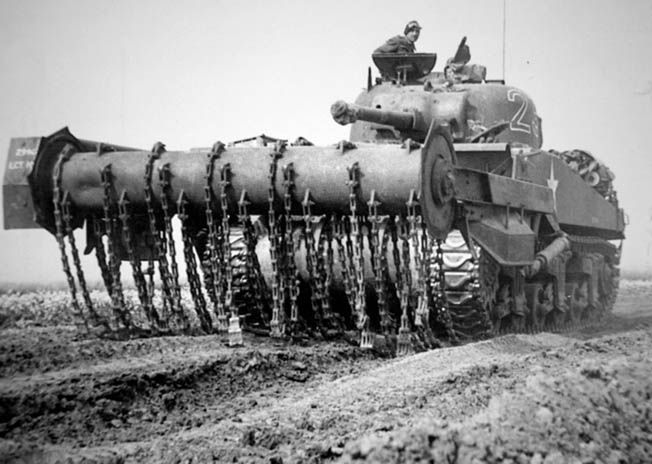
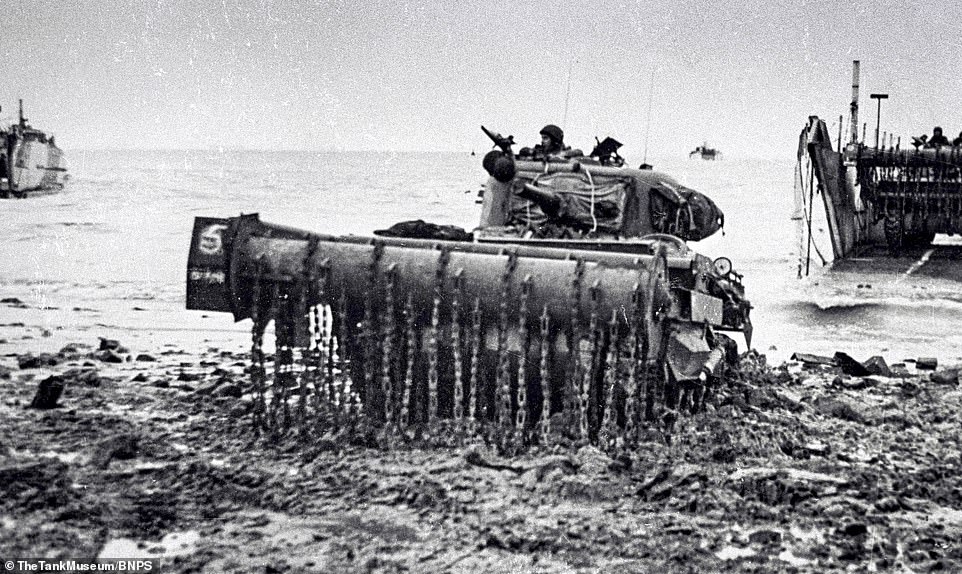
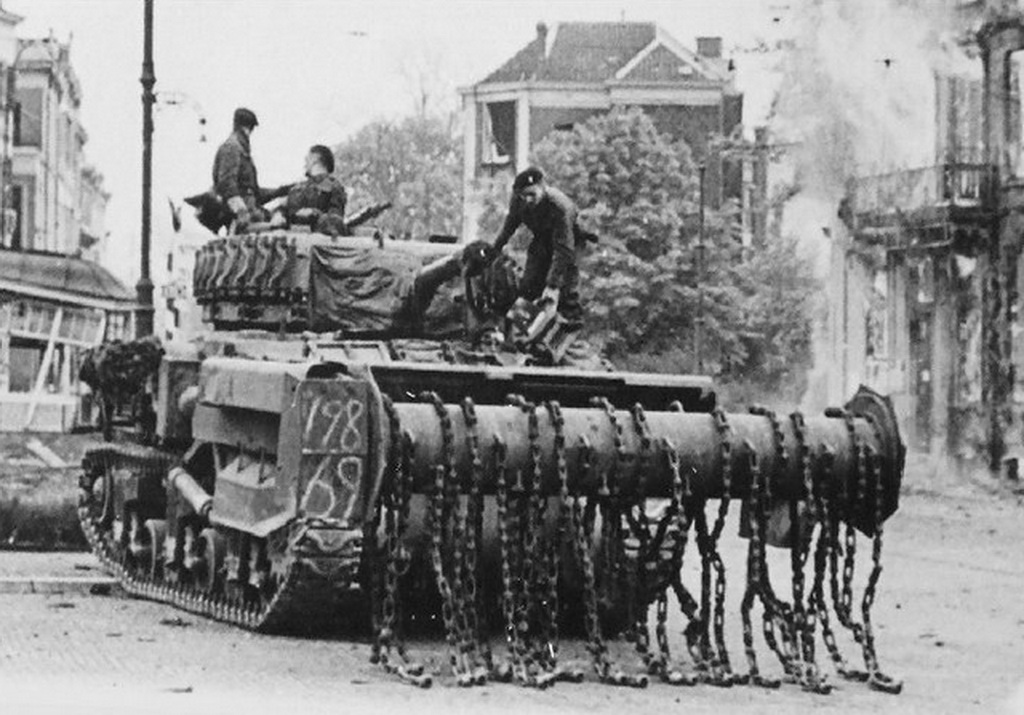
Sherman Crab Flail Tanks
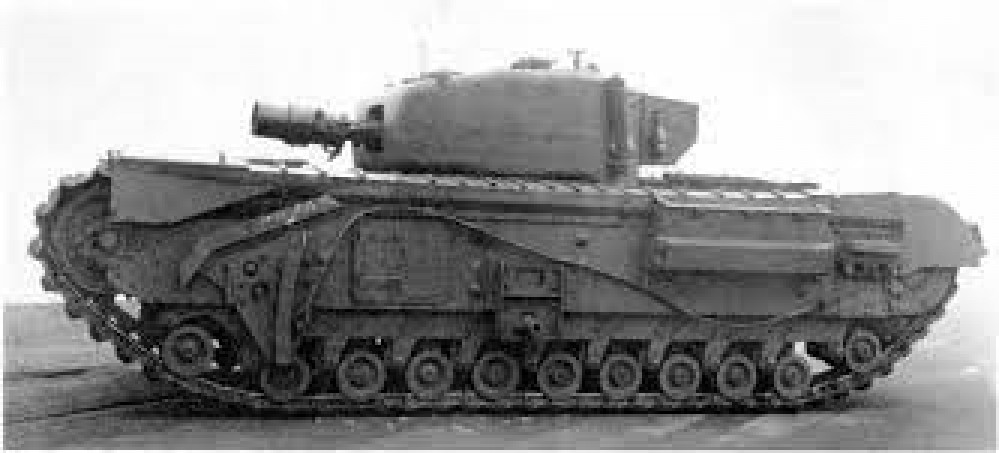
As I mentioned before the Sherman Crabs I will field will be from the 22nd Dragoons but as for the crocodiles, the crabs were split into 3 independent regiments, that again would be split up as required to support the operations of other units. The 3 regiments themselves formed part of 30th Armd Bde. One other thing to note is that the tanks normally reversed their turrets when flailing to prevent damage to the main armament.
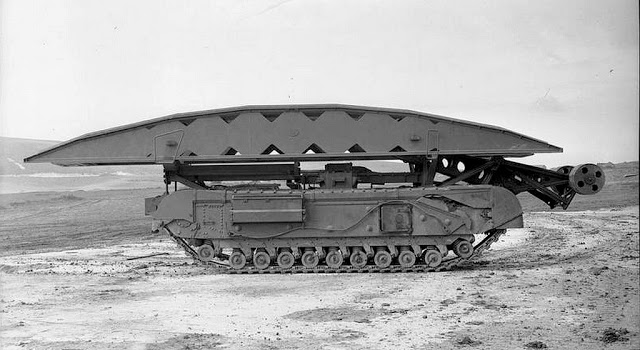
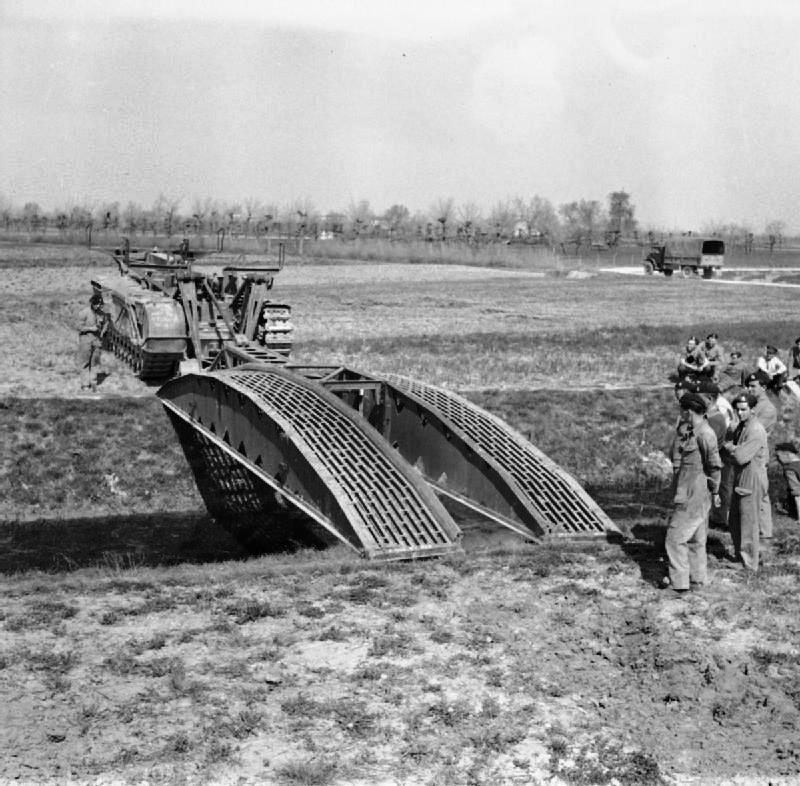
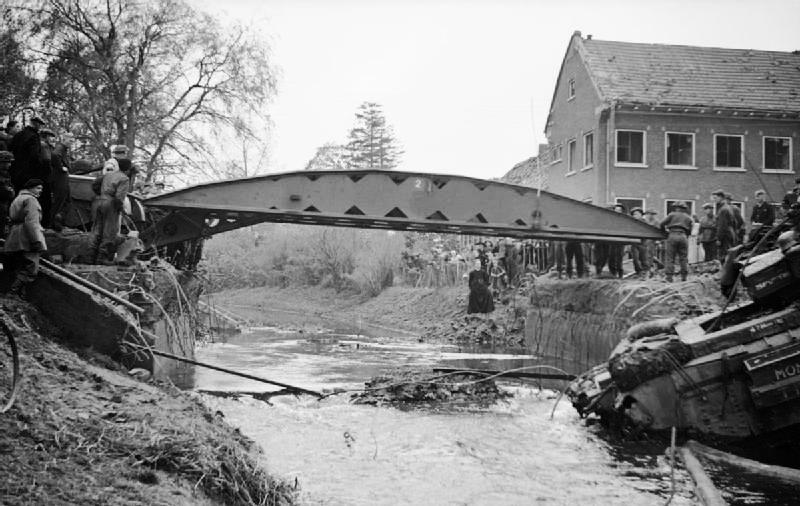
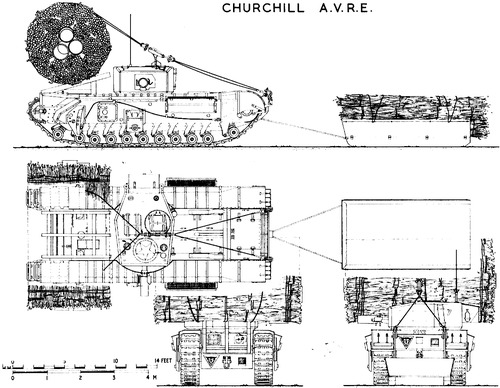
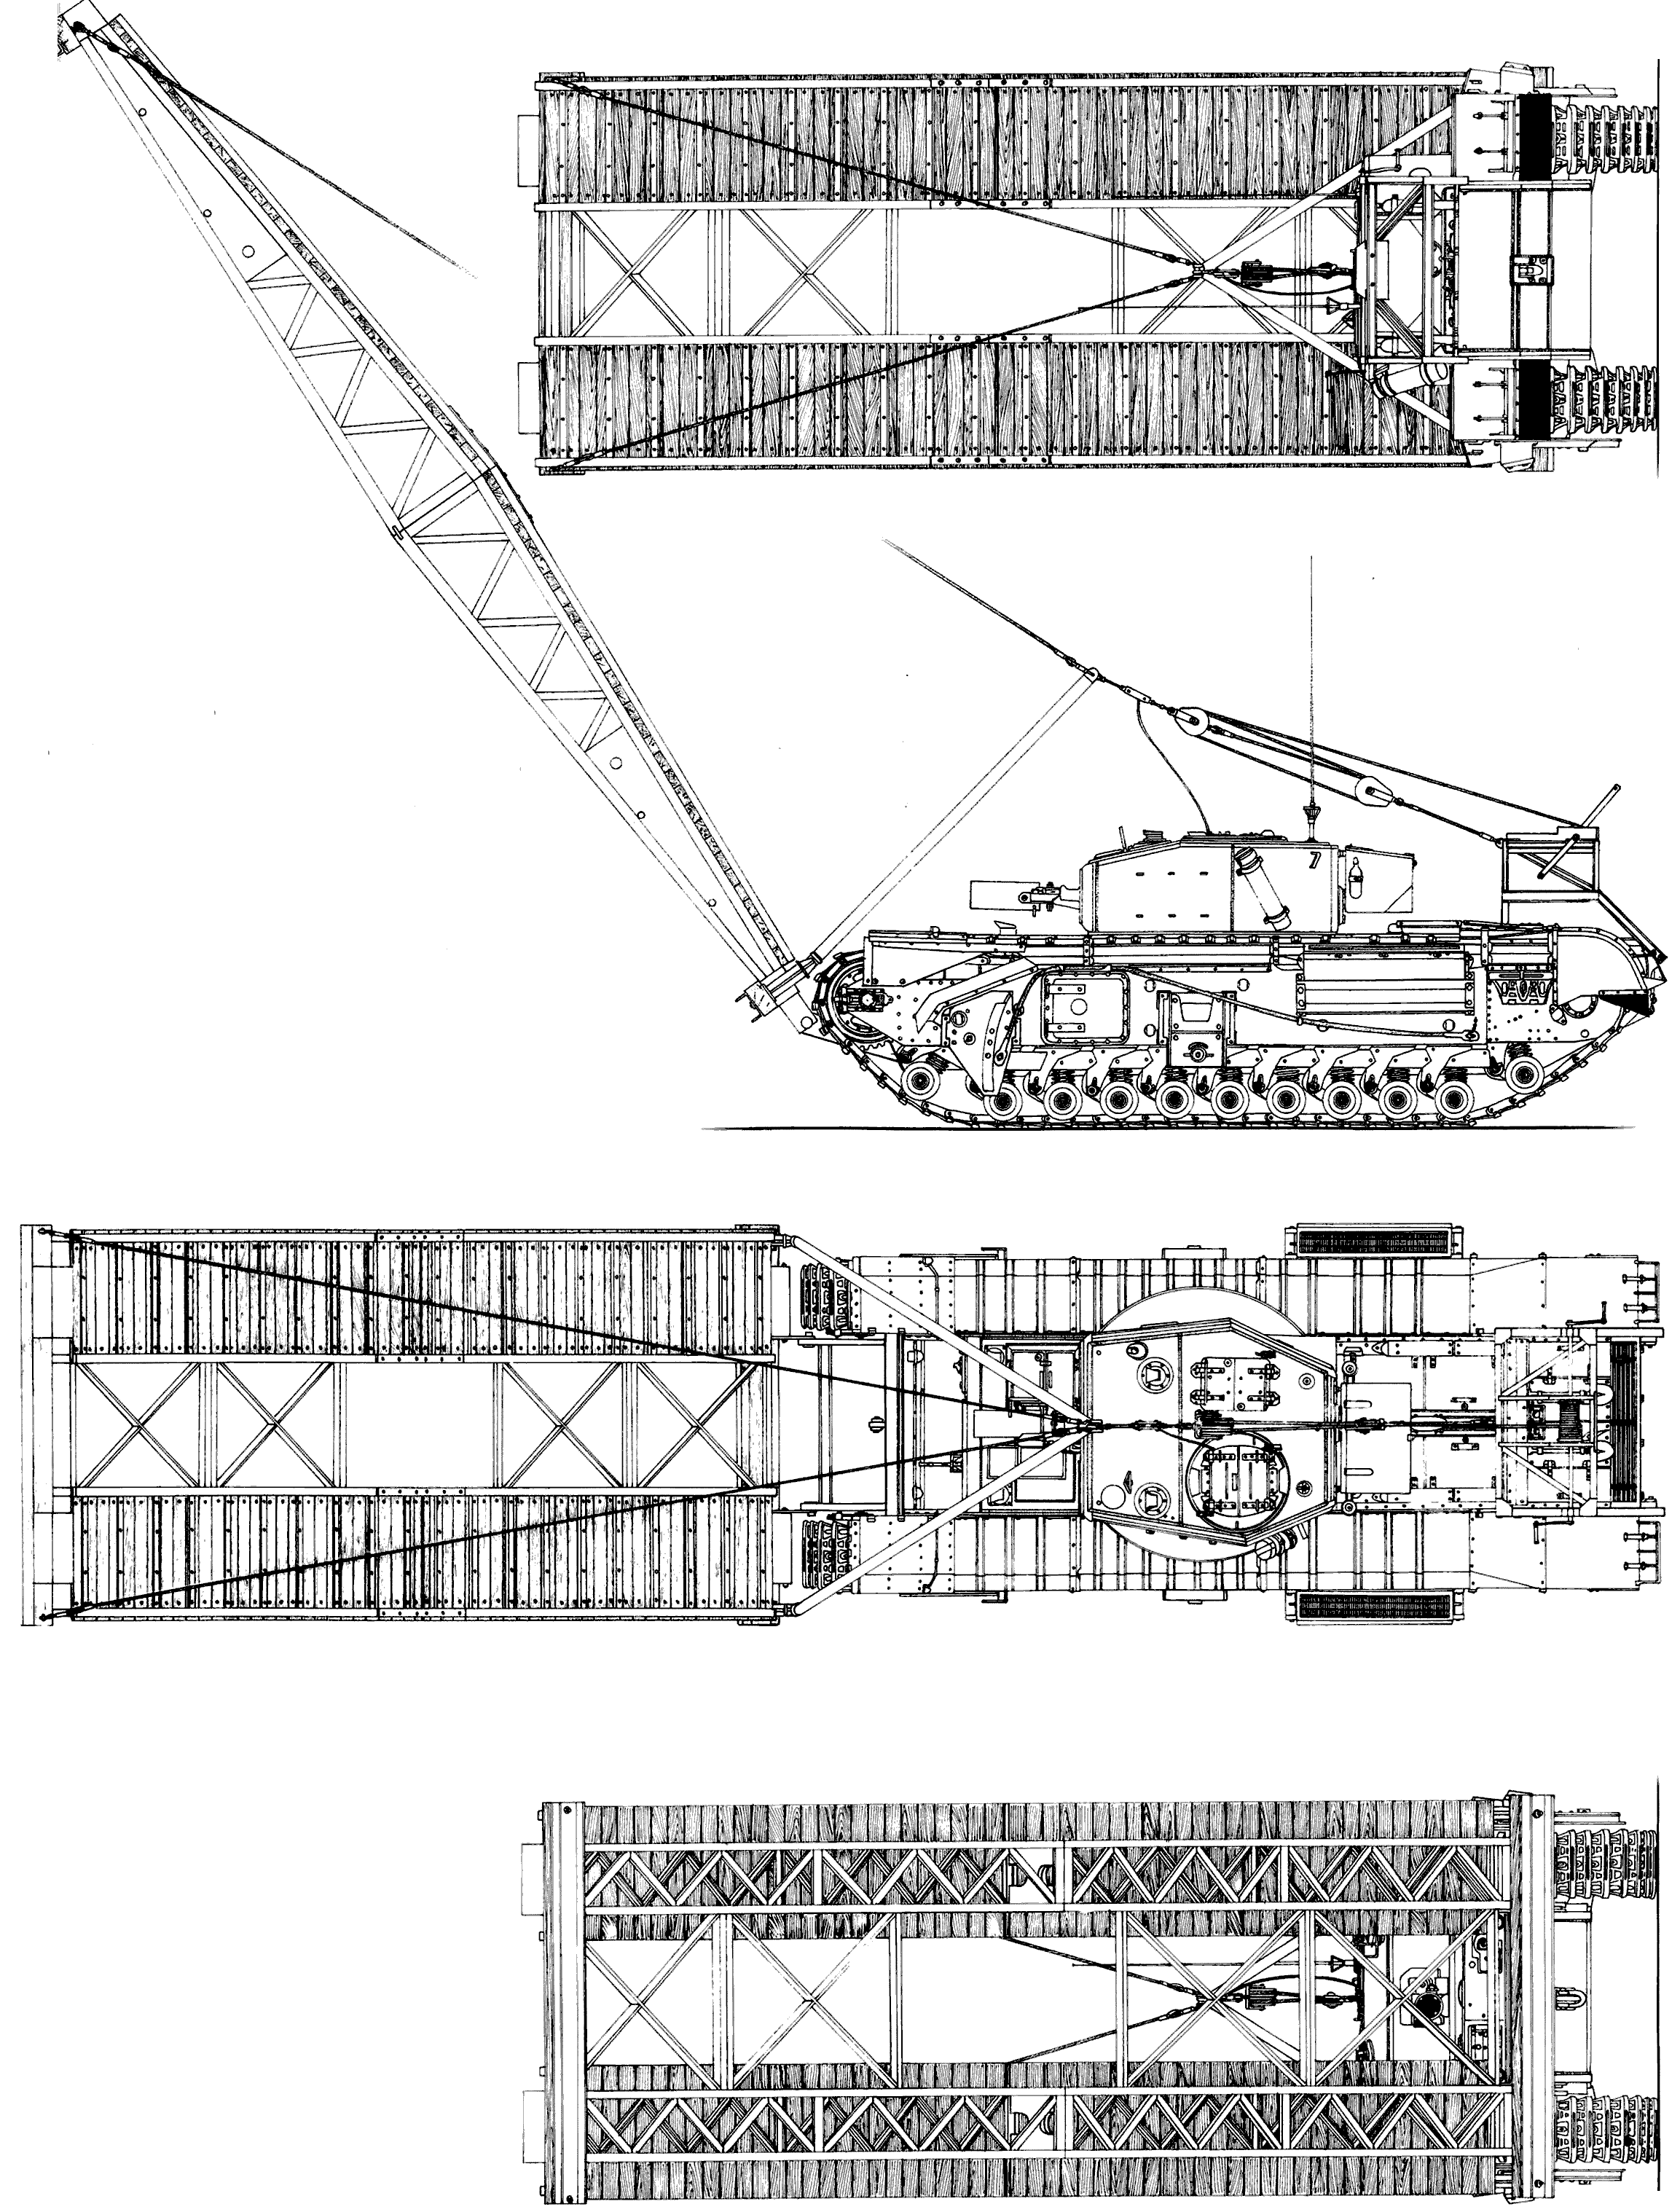
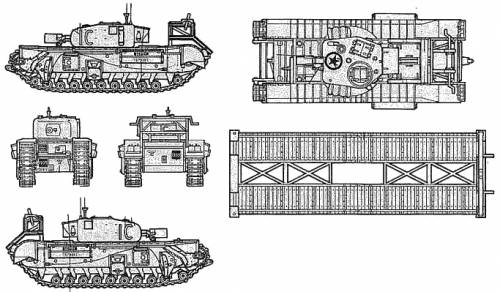
AVRE Small Boxed Girder Bridge
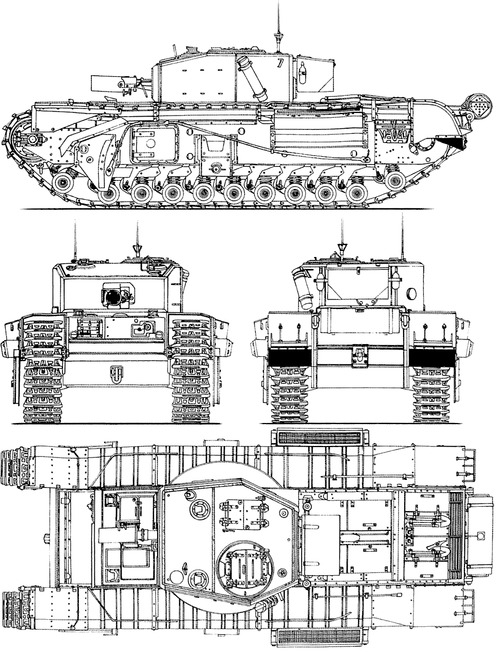
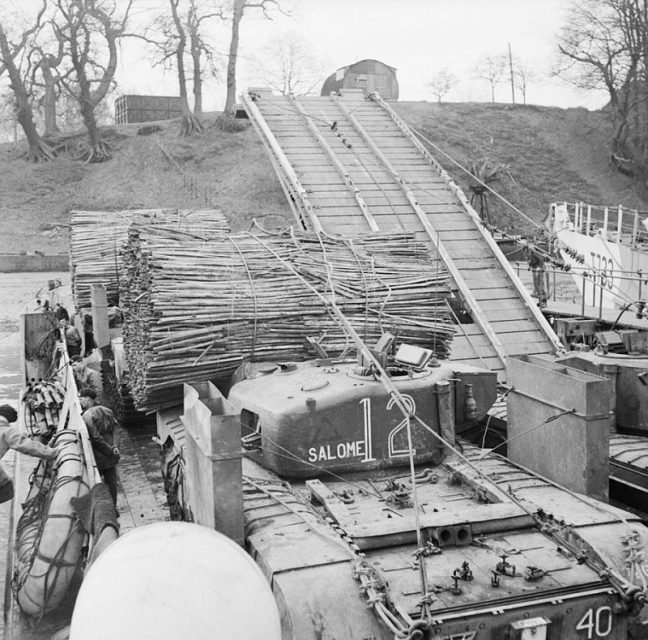
The Small Box Girder Bridge SBG, was one of a number of bridge laying vehicles available to the Army. The earliest version was based on a Valentine tank, and there were to variants of the Churchill bridge layer, The SBG and the Jumbo (based on the No. 2 tank bridge). All of the bridges had a 30ft gap crossing capability and could take up to class 40. Unlike the other two, which carried the bridge on top of the vehicle, the SBG held its bridge in front of it on a series of cables and could be raised and lowered using a winch fixed over the rear engine decks. The bridge was capable of bridging gaps with up to a 60 degree difference in angle/height, which as well as being remarkable, it also made it ideal for D Day and crossing the man made obstacles and natural barriers of the Normandy beaches.

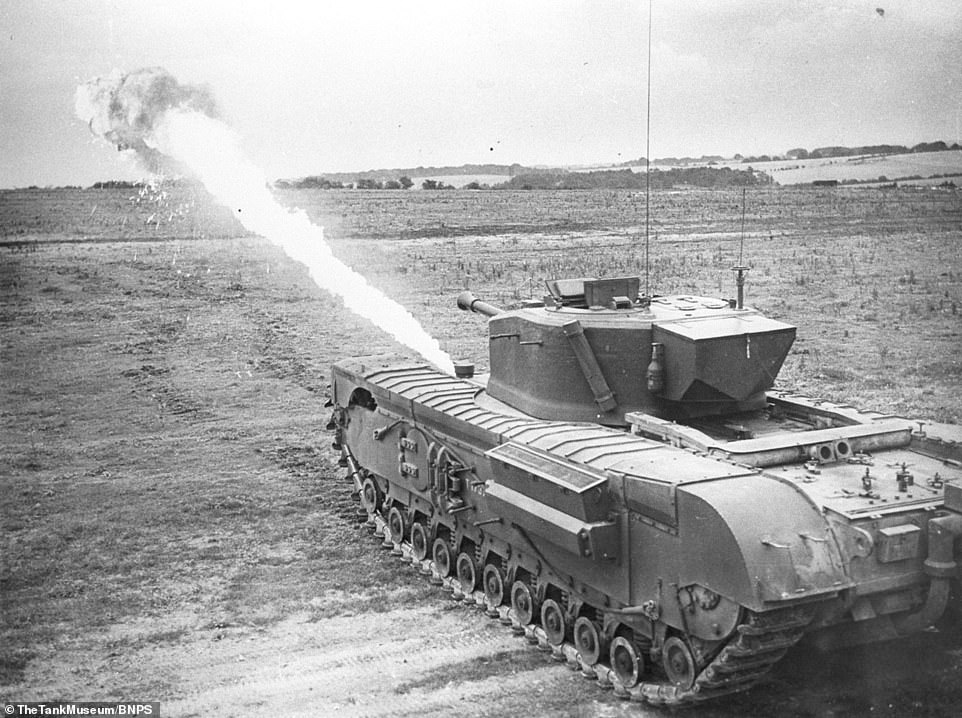
Churchill Crocodile
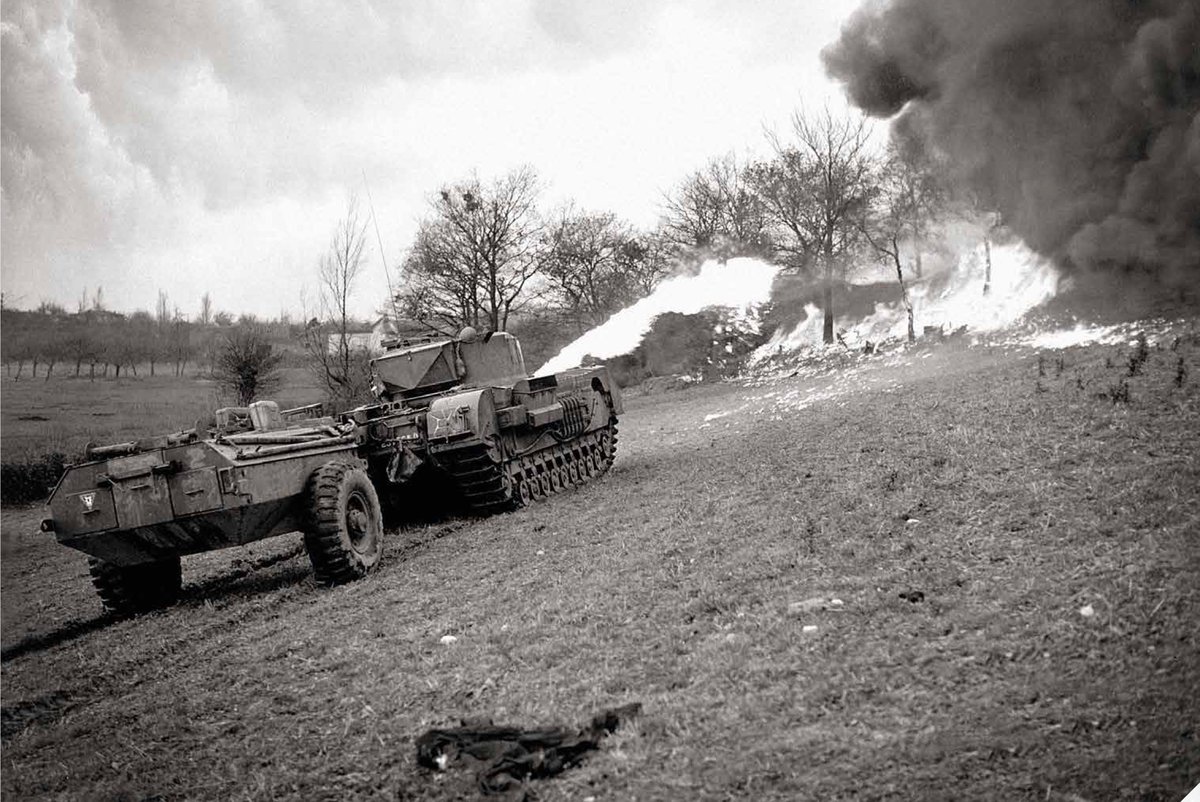
The Churchill Crocodile was perhaps the most feared vehicle the British had. It is rumoured that German soldiers would surrender as soon as a crocodile appeared on the scene. The system on the crocodile was based on the WASP the flame throwing device fitted to the universal carrier. So important were these vehicles that 79th Armd Div formed 3 Regiments of them and they would be detached as sub units with liaison officers as required to support a specific action. The liaison officer would then pull them out and back to 79th Armd as soon as that task was complete. The crocodile regiments were from reorganised armoured units, namely 141 RAC (The Buffs) who deployed on D Day; 1st Fife & Forfar Yeomanry; & 7th Royal Tank Regiment.
Each Crocodile would carry 400 Gallons of flame fuel and it could be fired in 1/2 second bursts and would normally last for between 12-15 bursts. The flame fuel was projected up to 100yds by pressurised Nitrogen cylinders inside the trailer. The system was also only good for @30mins before the Nitrogen pressure dropped to the point where it would not project the flame sufficiently.

AVRE Bobbin
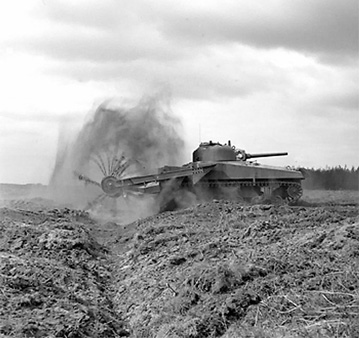
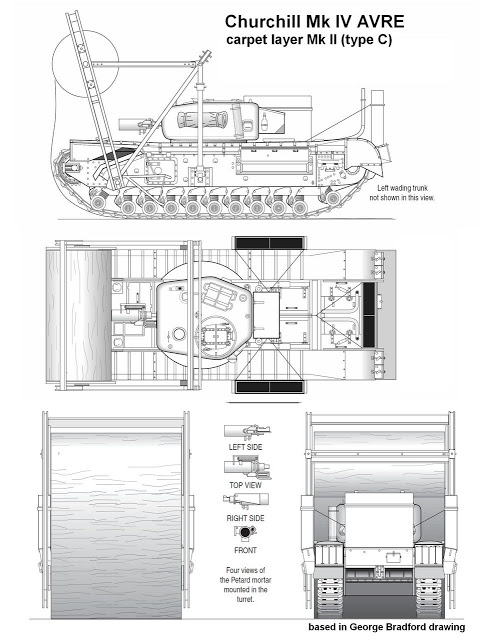
The bobbin AVRE was predominately for D Day only and came out of the lessons learnt during the ill-fated Dieppe raid. Tanks struggled on loose, or soft ground, so they came up with a way to lay a carpet that would span the soft ground and allow the vehicles exiting the beach a safe route. There were many different varieties of layer trialled and the full width version was selected. There were two types of this layer, the type C and type D. Both of these variants were used on D Day.
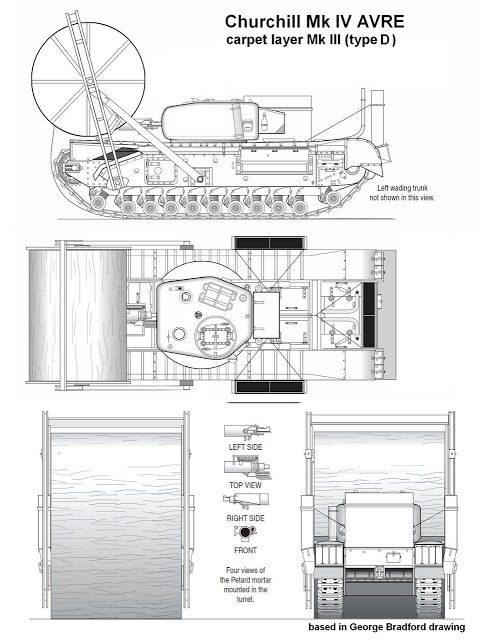
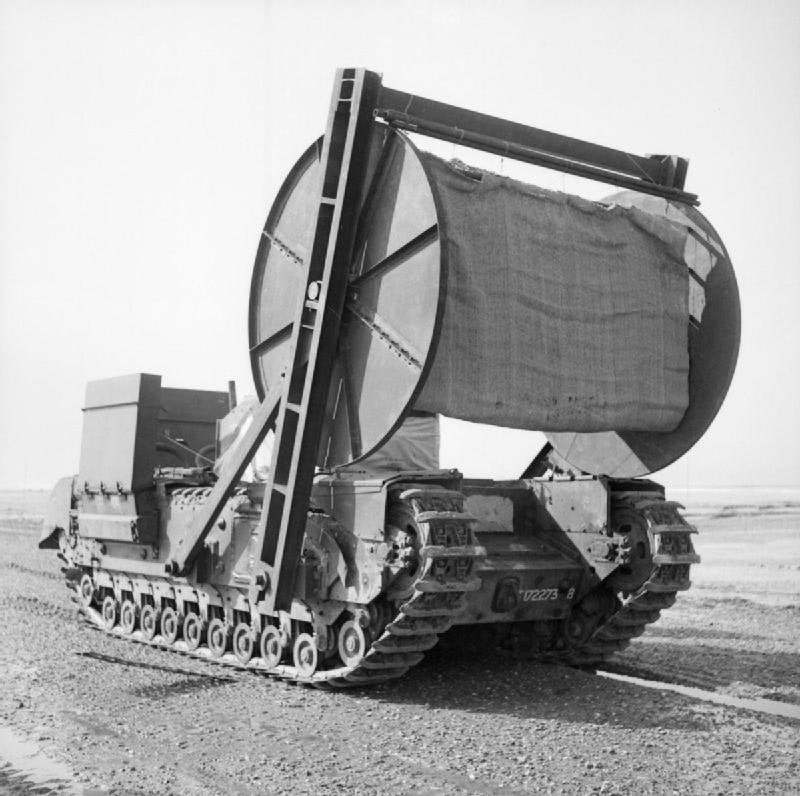
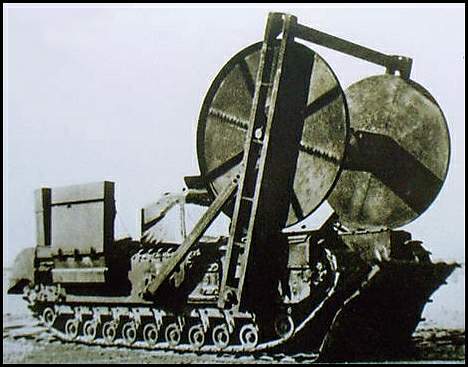
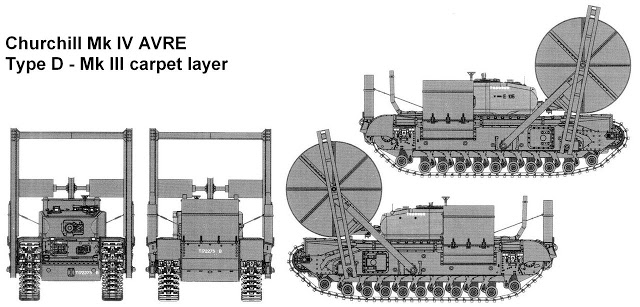
Type D variant.