


Hunting in the Darkness – KD:M


Recommendations: 578
About the Project
An attempt to get the core of my Kingdom Death collection painted. Survivors, Monsters and maybe some extras.
Related Game: Kingdom Death: Monster
Related Company: Kingdom Death
Related Genre: Horror
This Project is Active
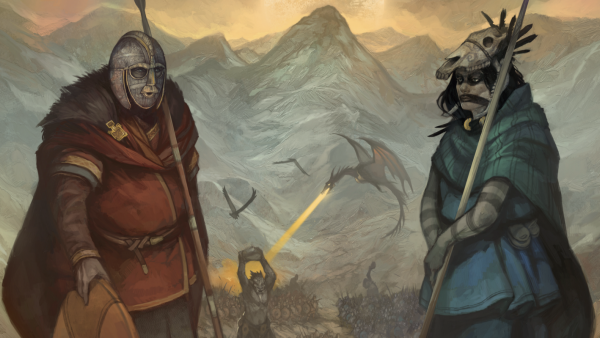
26 Nov 23: Two Entities on the table.
 Left: Atnas, Right: The King
Just recently, Kingdom Death announced the next competition they will be running, based around the Gambler’s Chest expansion.
I’ve two ideas in mind:
- Atnas, the anti-Santa in a KD Christmas themed display
- The King in a parade of his soldiers.
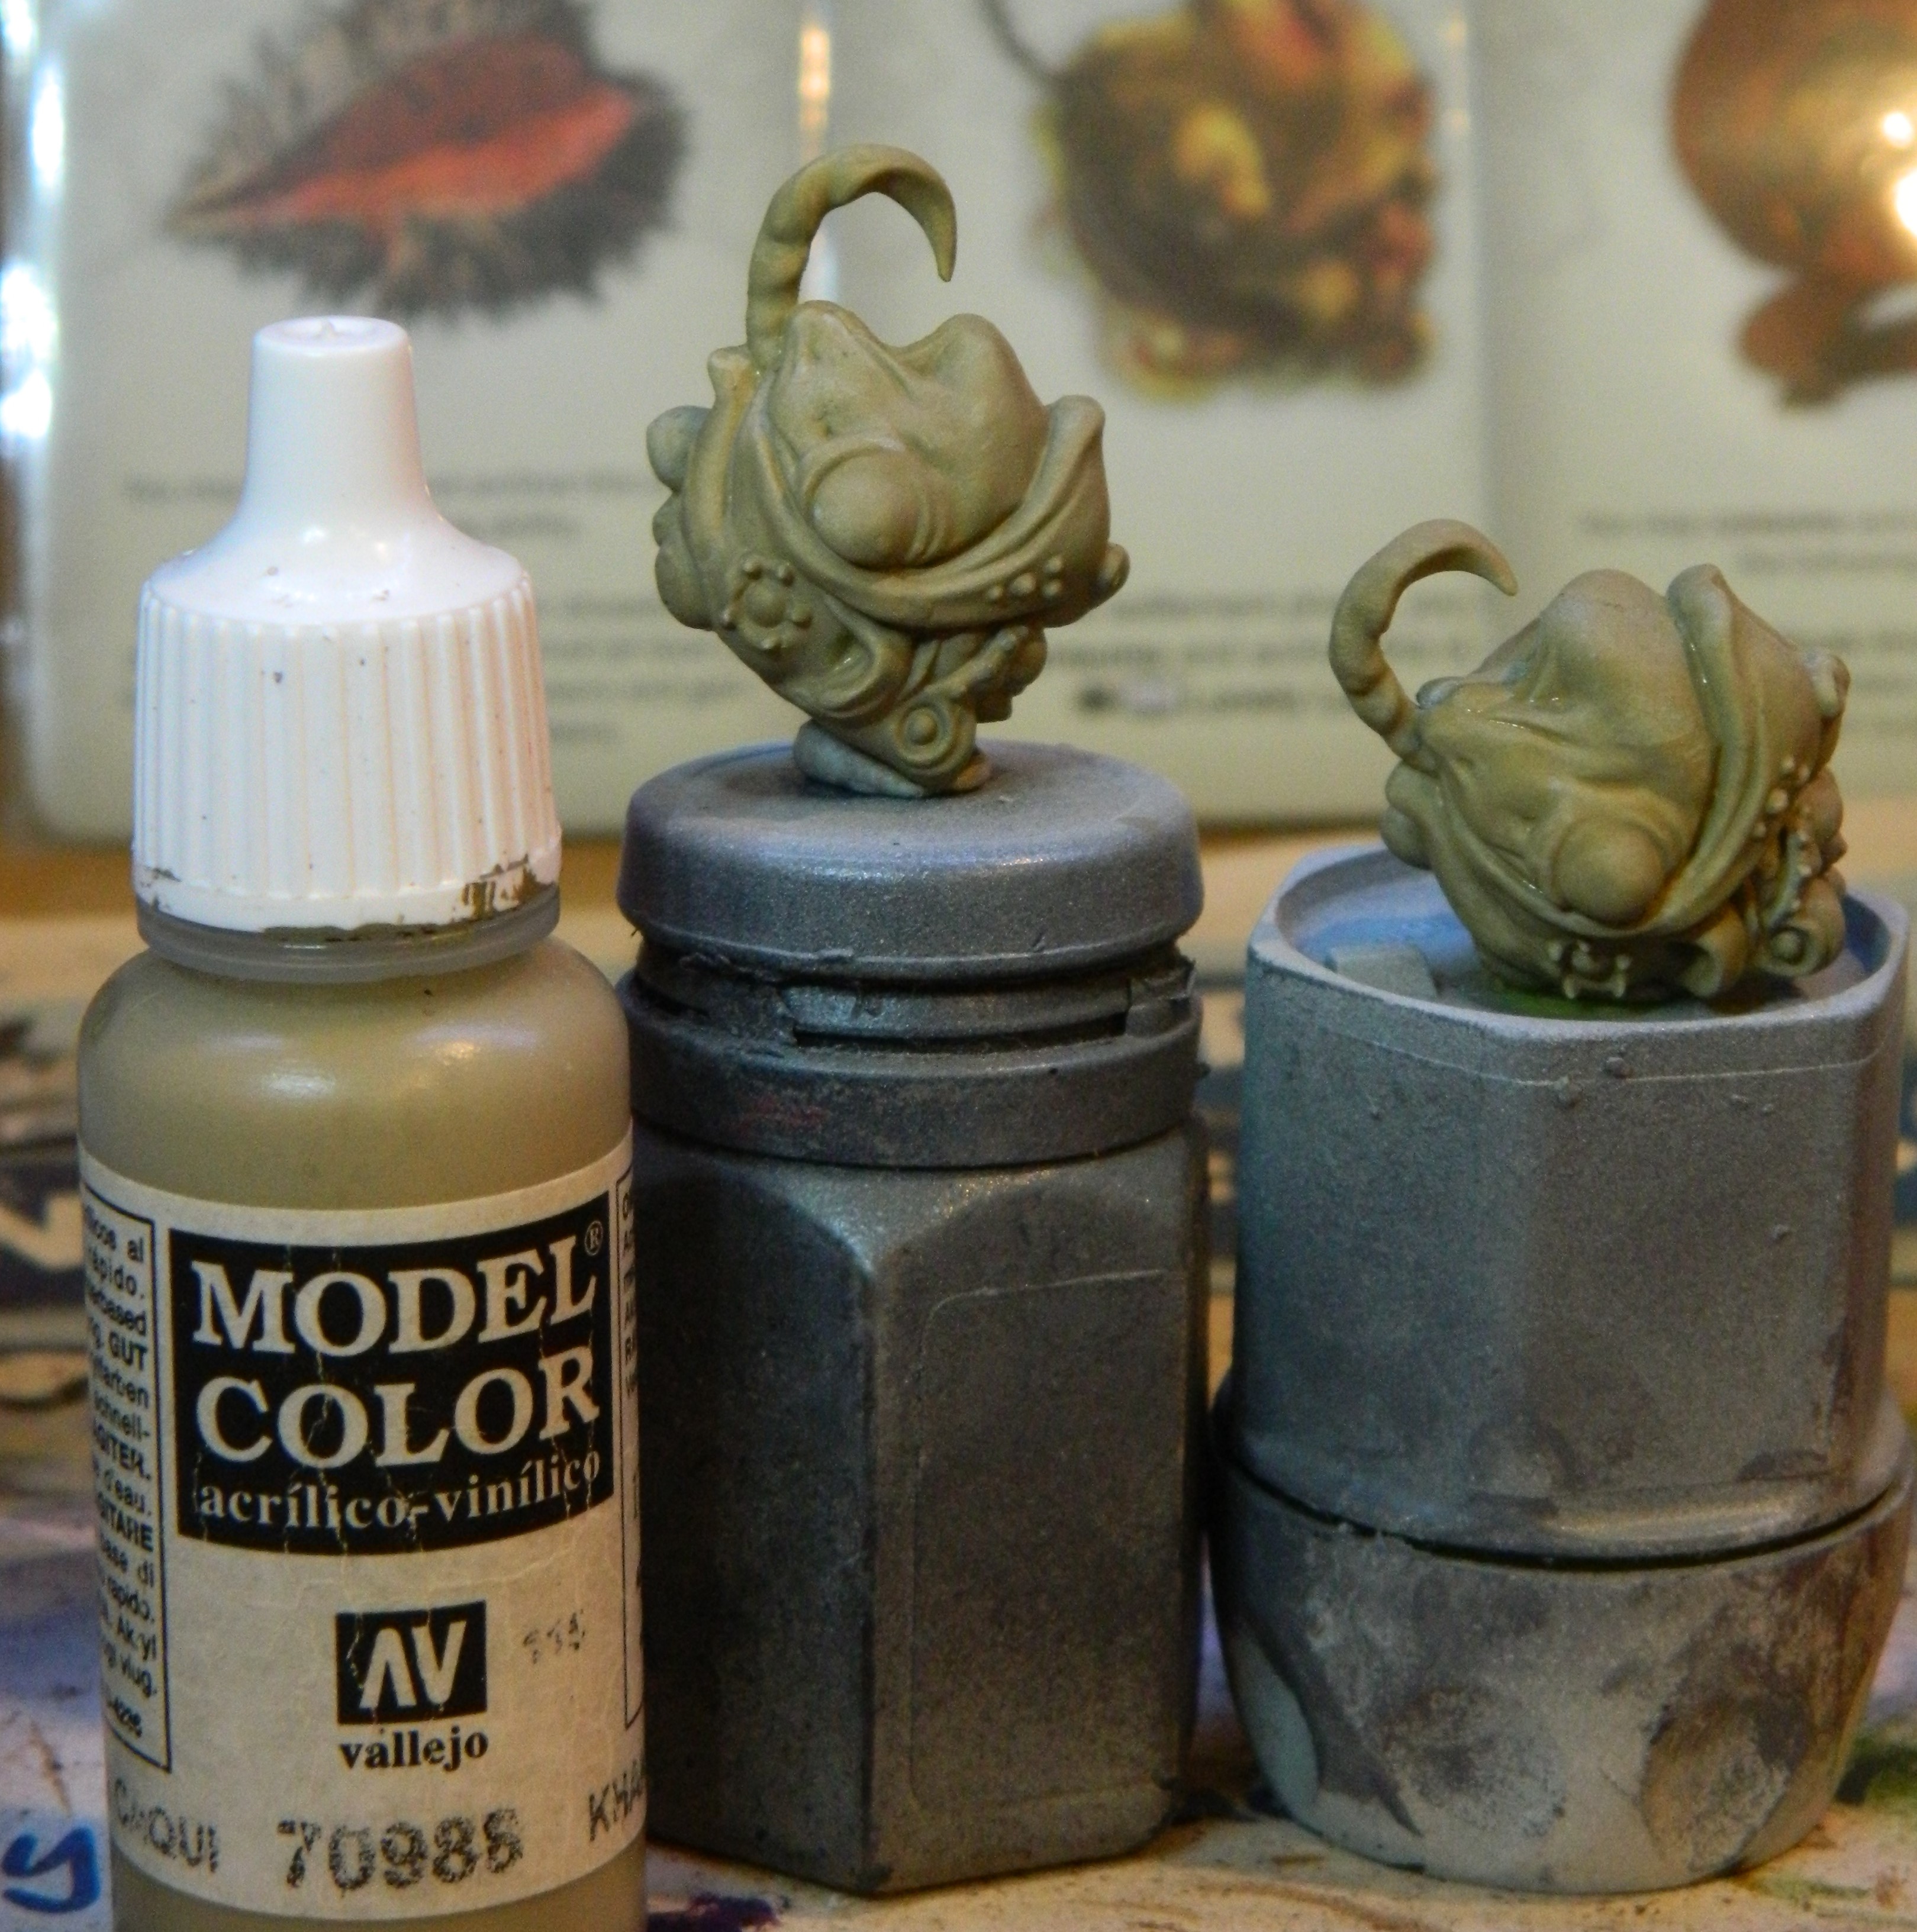
I’ve built and primed both. Atnas in Vallejo Fantasy Spray Ultramarine Blue and The King in Vallejo Fantasy Spray Gory Red.
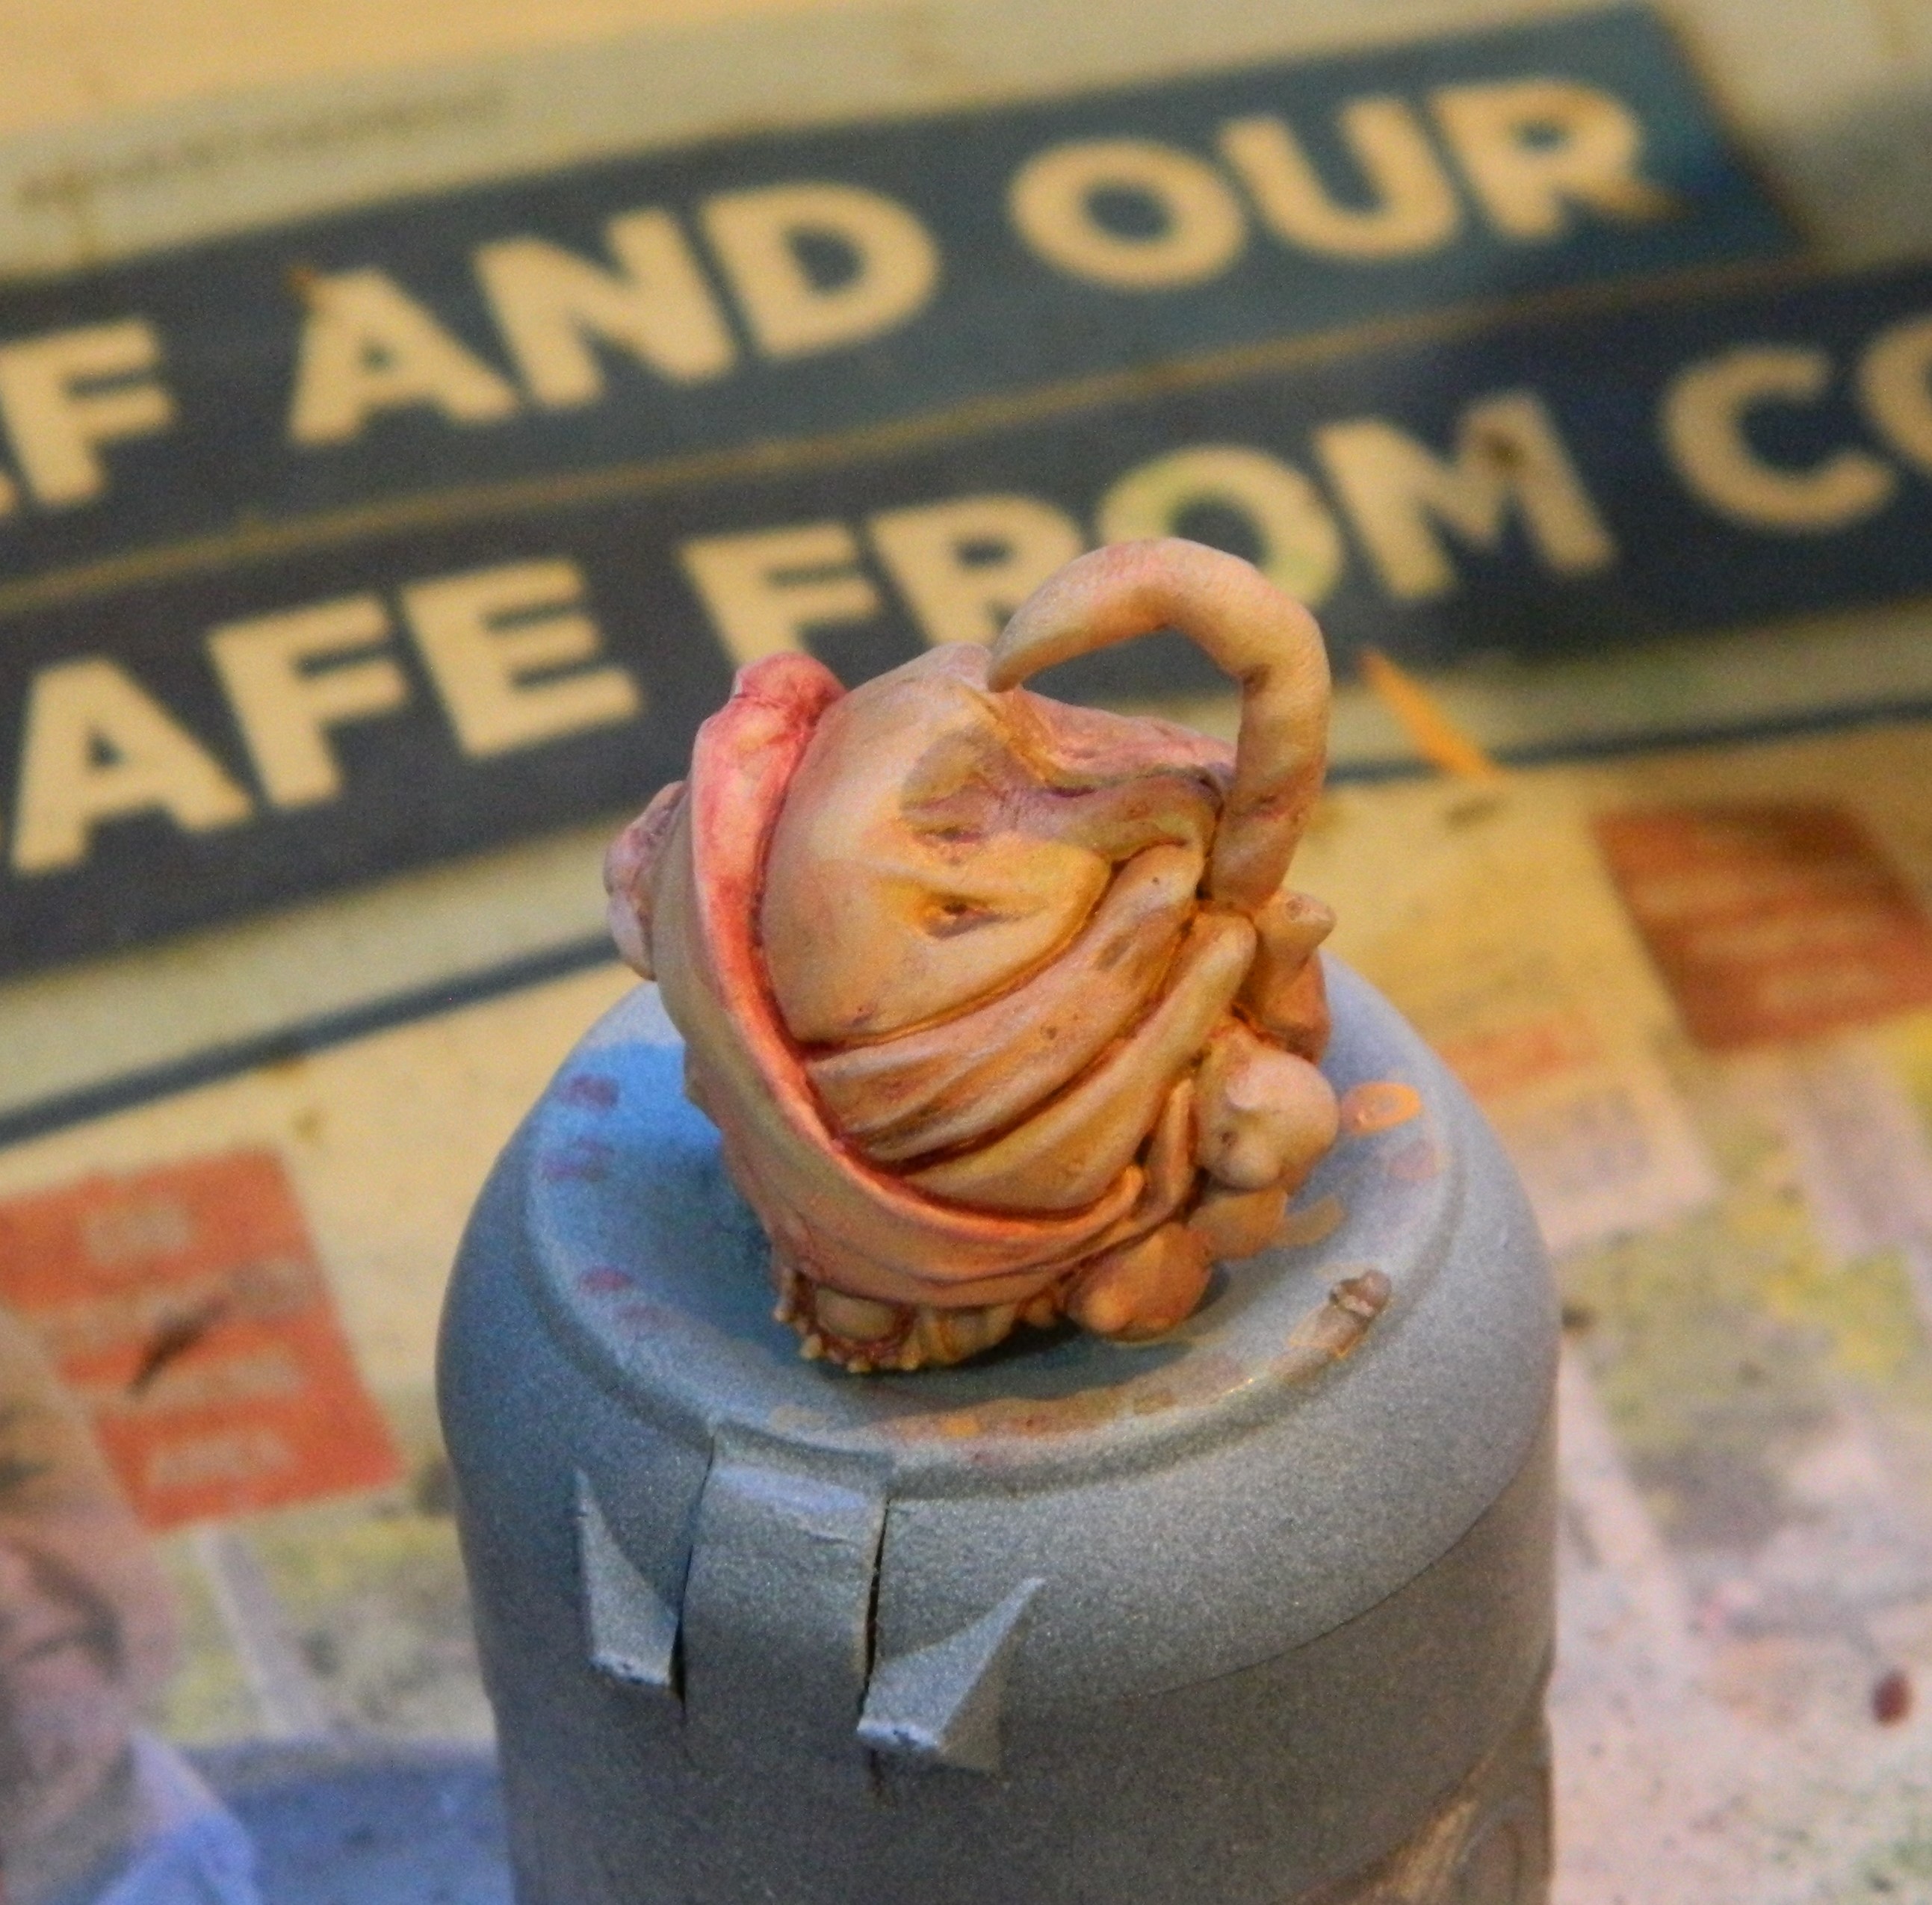
 30 Nov 23: Temporarily assembled
  Zenithal highlight
Atnas is temporarily assembled using small amounts of super glue. Given the intricacies of the sculpt and what I want to try, it seemed best to assembled, apply a zenith highlight and then disassemble.
The zenith is Citadel Contrast Spray Bleached Bone.
The next day or so, I put Atnas into the freezer to weaken the superglue, and pulled it apart again.


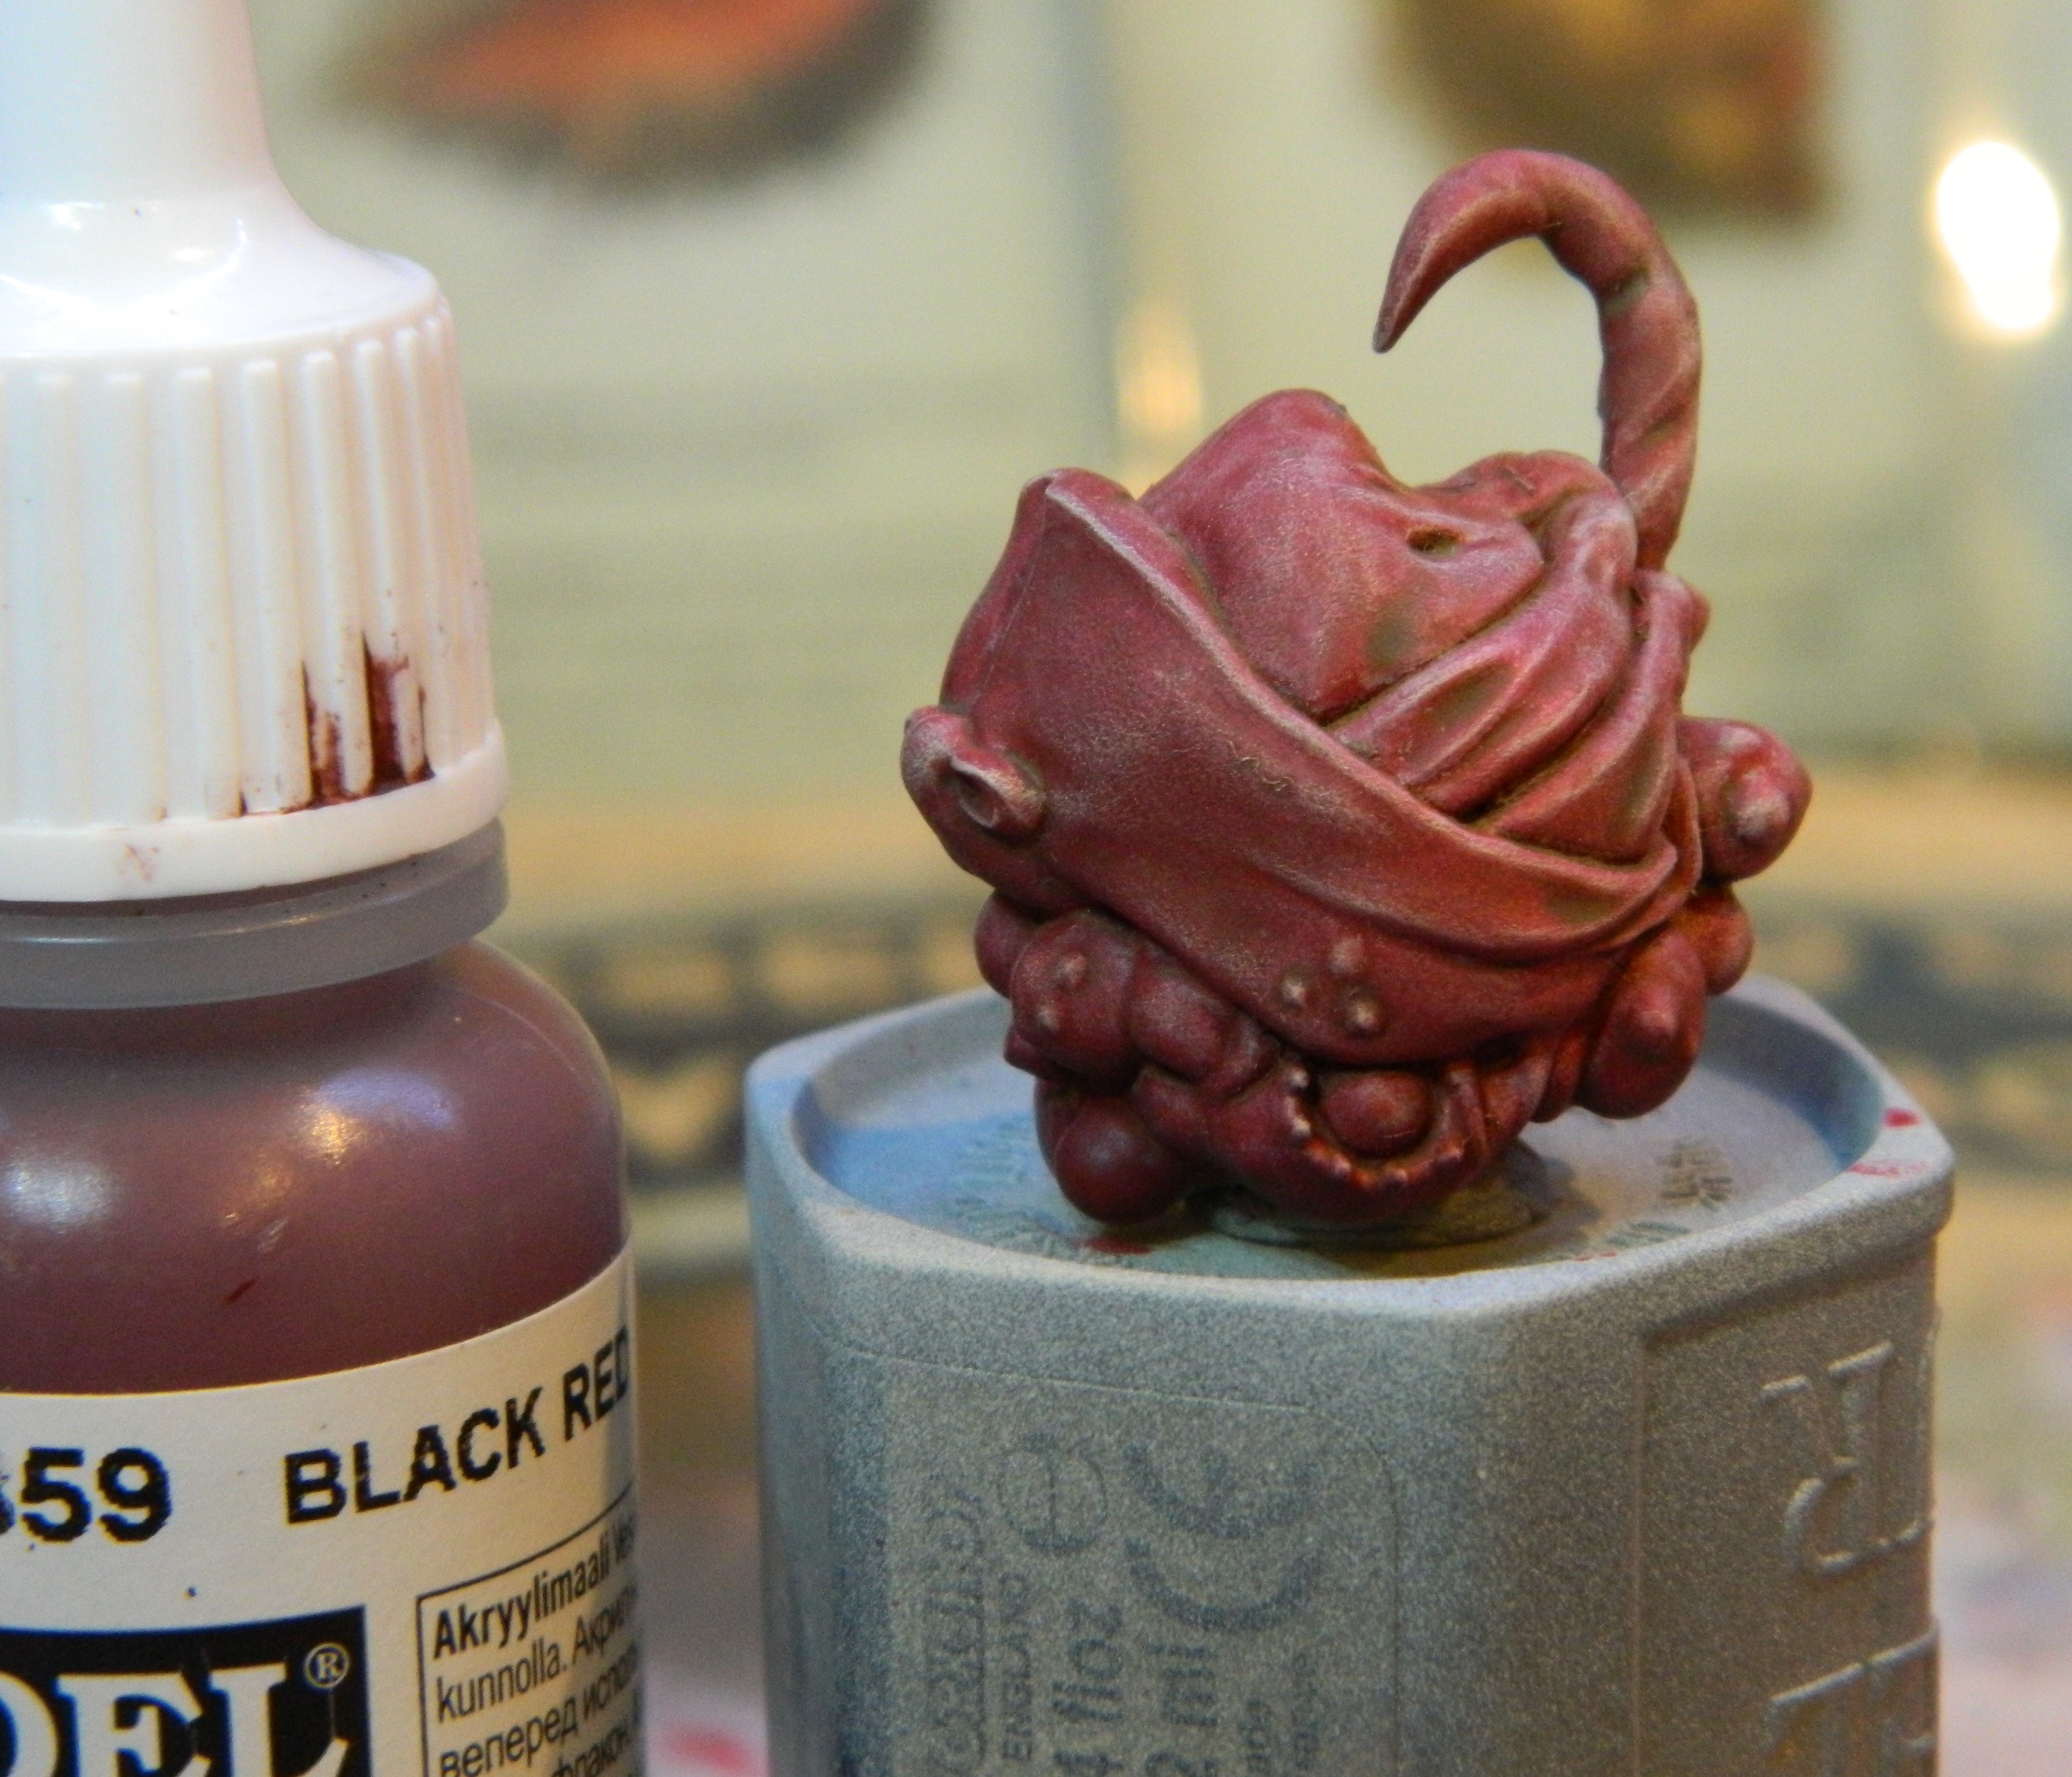
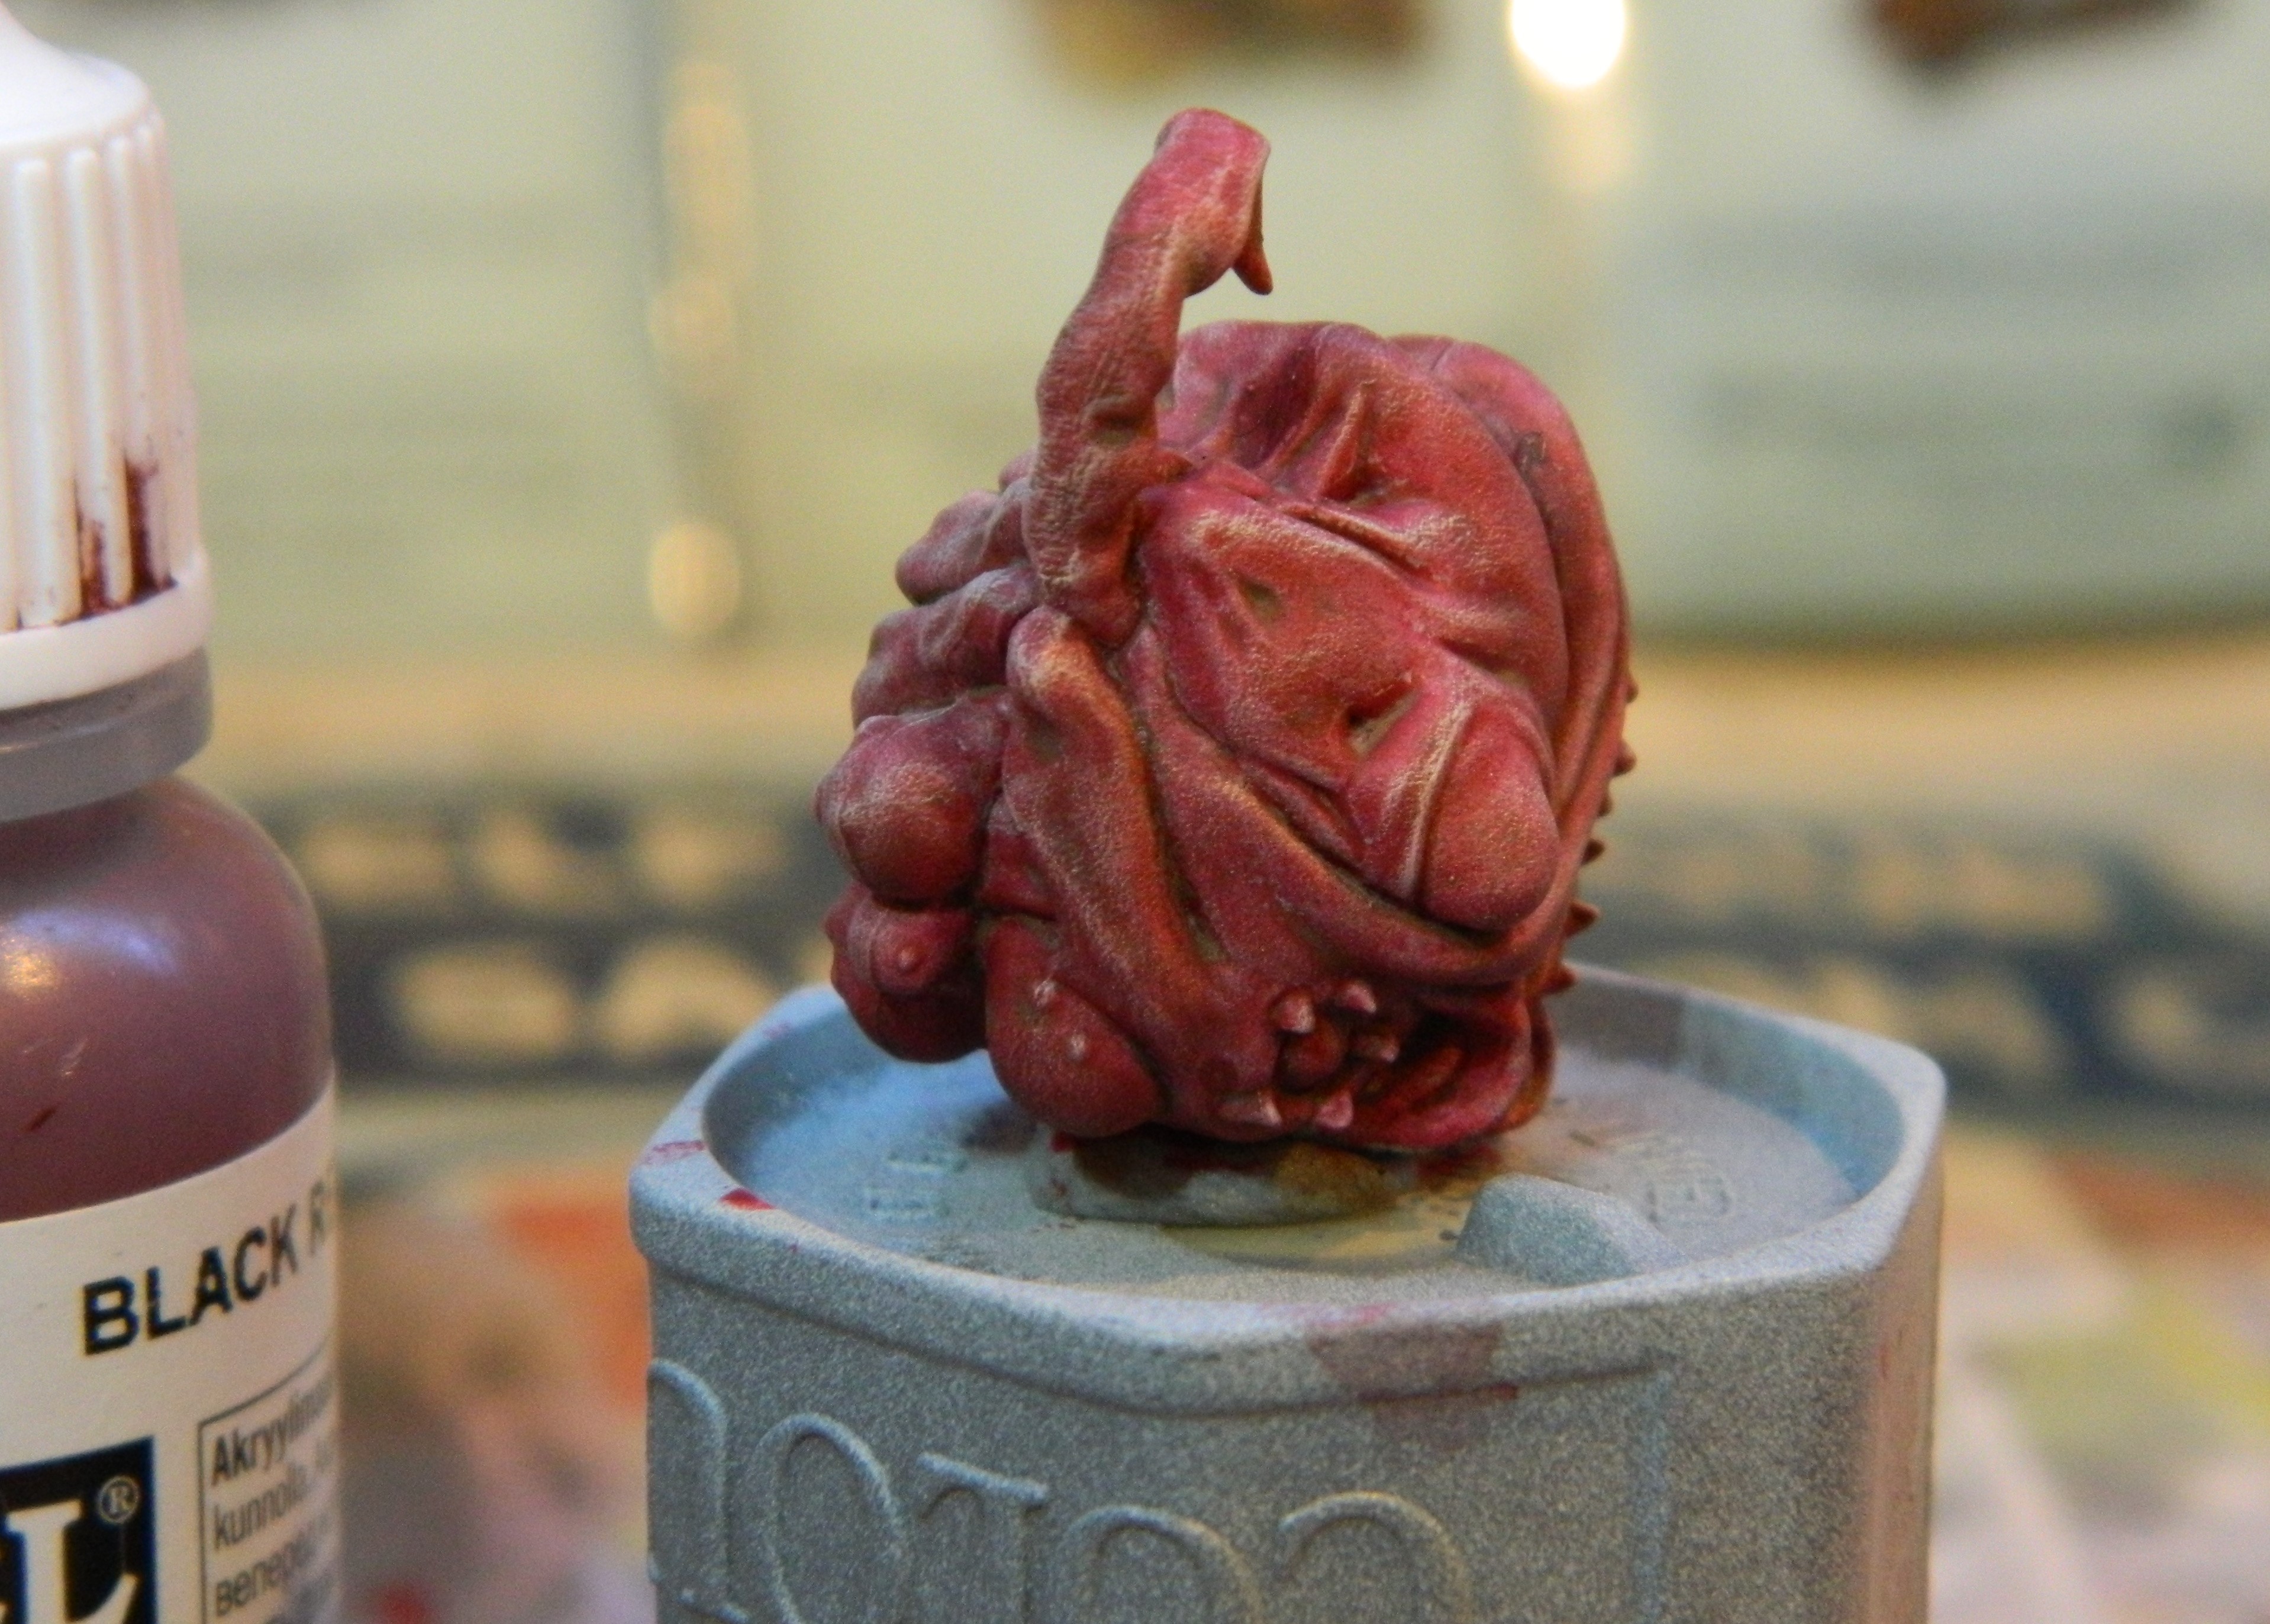
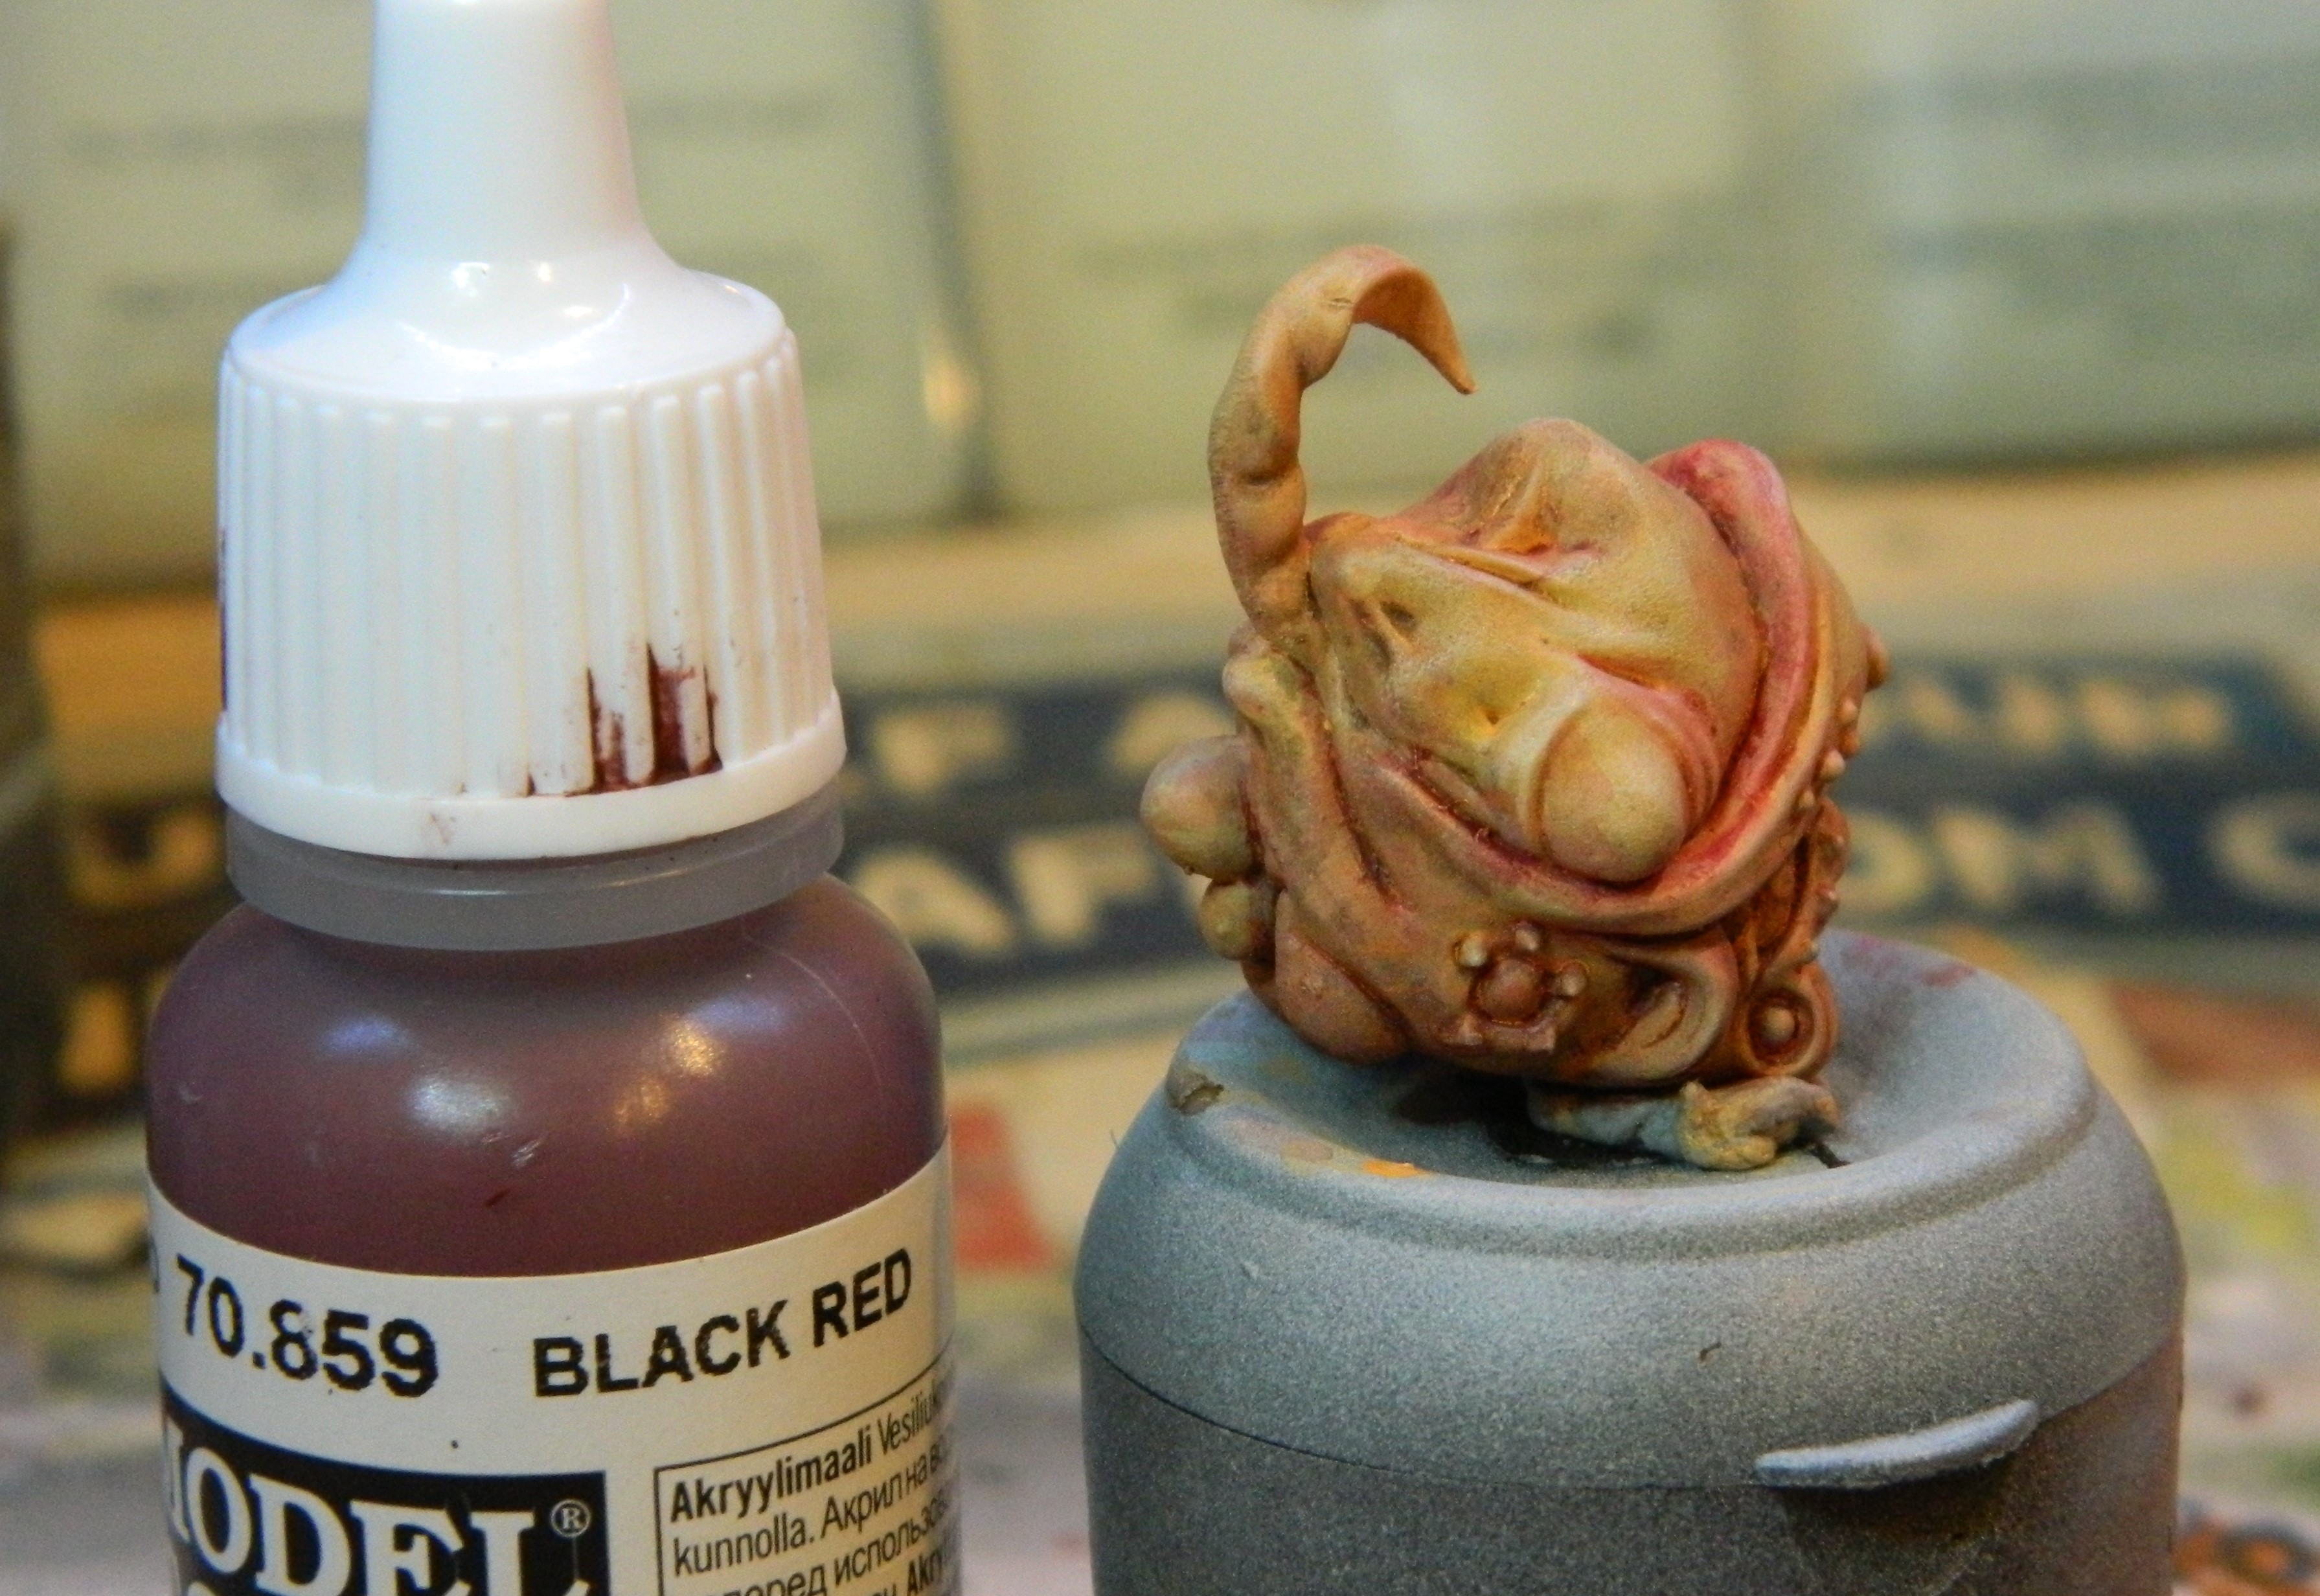
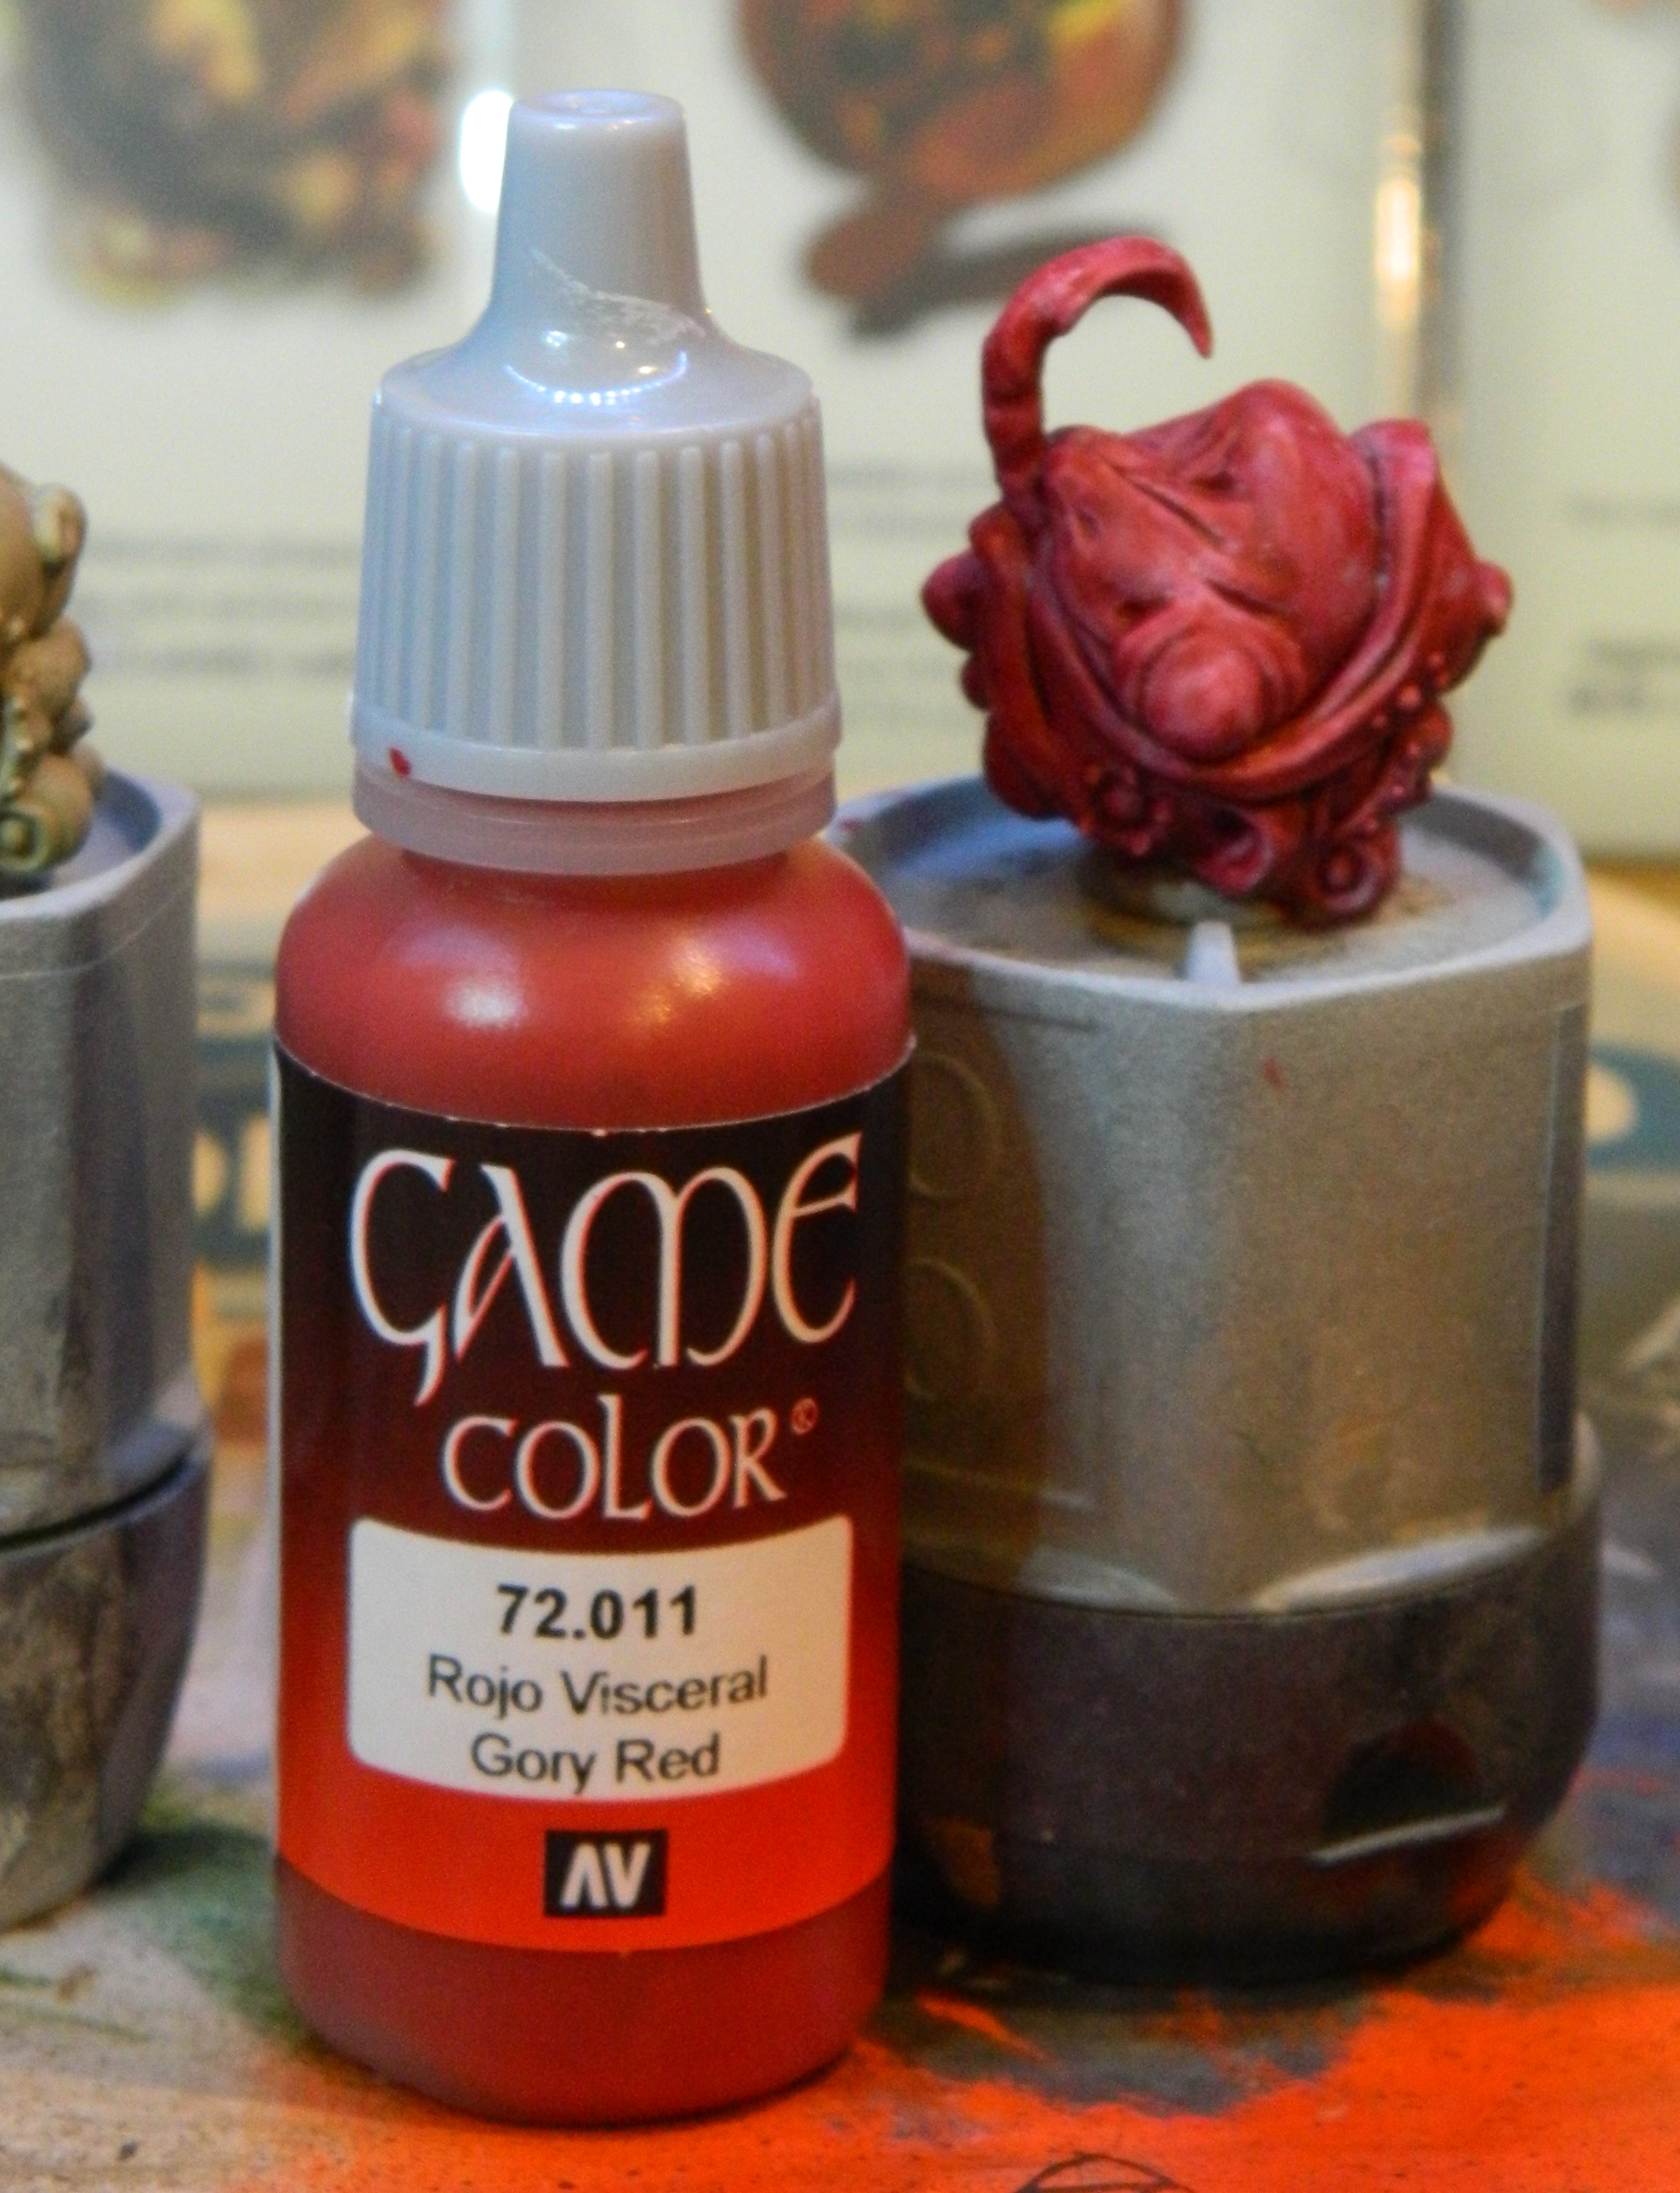
I started with Vallejo Game Colour Gory Red. Seems appropriate.
I’ve applied it all over in thin glaze layers, at least 3 or 4 layers letting each dry. In this weather and with such thin layers that doesn’t take very long.
I then used Vallejo Black Red for the folds and shadows. Again, glazing, multiple layers. I’m not sure that it’s terribly noticeable? I may add more to it.
Finally I employed Citadel Mephiston Red to start the highlights on the top of the folds and upper parts of the garment.


Please feel free to leave comments or tips, thoughts on the Red so far!


11 Nov 23: Halloween is over...
 ...but I'm still working on this


A few other details:
The lantern hanging from the sword was glazes of Citadel Kantor Blue blended with Vallejo Buff for the lighter parts and pure Buff for the edges.
The sword is my rough effort at NMM using the Vallejo Black, Vallejo Buff and Vallejo Ivory. This was also used on the few pieces of metal (Pauldrons, elbows, the skulls on the belt, the body of the lantern.)
I also used these colours for her shoes but did more mixing of the paints and tried to keep the highlights low-key.
The Pumpkin-Ghost base is the same orange recipe as the cloak.
12 Nov 23: Halloween Pinup Twilight Knight


 "Trick or treat!"

30 Oct 23: Halloween Treats
Another batch minis getting started, and KD being who they are, there’s Halloween special minis.
The Halloween Pinup Twilight Knight has been in my collection for some time. So being that it was Halloween, I thought I’d get this one started finally and gey some of the other Suvivors done.
 Halloween Twilight Knight and two survivors in Rawhide gear.

Skin done in glazes, 3 – 4 layers each time. Started with the mid tone, then applied shadows.
Base was approx equal mix Citadel Cadian Fleshtone, Vallejo Basic Skintone, Warpaints Flesh.
Shade: Citadel Cadian Fleshtone, Vallejo Basic Skintone and Citadel Bugman’s Glow.
First Highlight: Vallejo Basic Skintone, Warpaints Flesh
Second Highlight: Vallejo Basic Skintone, Warpaints Flesh, Vallejo Buff
 6 Nov 23: Seasonal Orange


I wanted the orange to be fairly bright and vibrant to contrast against the black of the clothes and the pale skin.
The base is Citadel Wild Rider Red which I thought would come out too fluro, but it was the only orange I had on hand. After it dried though, I was quite happy.
The shade was a mix of Citadel Wild Rider Red with a little Vallejo German Camo Medium Brown.
Highlight: Citadel Wild Rider Red with Citadel Golden Yellow
 Blue-black for the other clothing.


The remaining clothing was done with Vallejo Black
To create the highlights I added approx equal Citadel Kantor Blue and Vallejo Buff bringing the black up to a blue-ish black.
I then added more of the blue and black for the next level highlights.


Oh yes, and these guys got some Vallejo German Camo Brown.
The left and centre have had two coats at this point. I had extra on the pallet and didn’t want to waste it, so added a 3rd survivor in Lion Gear who got 1 glaze coat.


27 Aug 23: Further work on Phoenix Feathers
On to highlighting this monster.
The small feathers along the leading edge of the wing got a dry-brush of Citadel Kabalite Green.
The longer mid-wing feathers with Citadel Kantor Blue, blending/ crossing onto the previously blended section.
The large feathers of the wing and tail were drybrushed with Citadel Rhinox Hide. Over the Vallejo Buff, this made the colour a lighter purple/lavender.
 Wing-ding


Around the body are pustules of various size, especially at the joint of the wing and body.
I addressed these with a 50-50ish mix of Citadel Bugman’s Glow and Vallejo Dead Flesh.
The Dead Flesh on its own was too bright.
The fingers on the tiny hands had been hit by the previous drybrush of Vallejo Buff, but I felt they needed more.
I tried Vallejo Sunny Skin on its own, but it was too bright as well. I mixed in some Bugmans Glow with that too. It looked better.


5 Sep 23: Other weird little details
At some point I’d done the inner face. It was started with Citadel Rhinox Hide as well.
It got a Citadel Agrax Earthshade wash.
I wanted the skin to look a little different to the skin of the body, so it was highlighted with lighter mixes of Citadel Bugmans Glow and a Citadel grey… though I forgot to note which one…
The beak and claws were highlighted with lightening stages of Vallejo Black mixed with Vallejo Buff.
Afterwards they got a glaze of thinned Army Painter Dark Tone just to bring some depth back in.
The big ol’mustache was based with Citadel Kabalite Green. Later it was carefully drybrushed with that Citadel grey that I forgot. It wasn’t quite strong enough, so I went back with a very careful overbrush.
It was highlighted with a lighter Citedel grey.
The outer eyes, all four, were based in with Vallejo Ivory. The yellow is Citadel Sunburst Yellow. Later a Vallejo Ivory pupil was added.
The eyes of the inner face were glazed with Citadel Kantor Blue. They also had Vallejo Ivory popped into the centres.
 Who's a pretty bird?
The tongue was done using similar colours, Vallejo Gory Red, Buff mixed in for highlights.
The flesh in the mouth Citadel Bugman’s Glow with a glaze of Vallejo Black Red.
 Where's a pretty bird?


The base was filled in with Milliput, after marking out the location of the log the Phoenix sits on.
The log was pinned and glued to the base. Since the Phoenix messes with time, I was inspired to try and paint the log as petrified wood. After looking at some pictures I decided on browns, reds and creams. The rest of the base was done in greys and as my other KD bases have been.
24 Aug 23: Time to return to the Time-twisting bird
Well, it has been a minute since I worked on this mini. It has been sat on the shelf of the painting desk since May 2021! I dusted it off with a brush, got stuck back in.
 Skin areas base coated with Citad Rhinox Hide


 25 Aug 23: Birdy details
The comb on its back and the legs were coloured with Vallejo Black Red to distinguish them.
It was done as an over-brush, just to catch the detail, but leave the Rhinox Hide showing through.
The tiny hands around the model were based with Citadel Bugman’s Glow they were also given a wash with Citadel Agrax Earthshade to pick out the detail.
The beak and all the claws were picked out with Vallejo Black.
The flesh of body, arms, head and wing fingers got a dry-brush with… I forgot.
It was either Vallejo Sunny Skin on its own, or mixed with some Citadel Rhinox Hide.
 So many little hands. It's the most helpful bird ever.

 Differently lit bird
26 Aug 23: Highlights on a Phoenix
The whole model got a light drybrush of Vallejo Buff.
The comb and legs were then carefully drybrushed with Vallejo Game Colour Gory Red.


05 May 21: the Phoenix
 Prepped mini, a few of the gaps required filling


The Phoenix is a rather large bird. I assembled the miniature and had some gaps to fill with greenstuff.
I then primed the mini, getting to mess with an airbrush of a friend.
Starting with Citadel Kantor Blue and Citadel Rhinox Hide, on the feathers of the wings and body. These colours were blended while still wet for the transition across the depth of the wing.
 Feathers and wings


08 May 21: More fun with feathers


27 Dec 22: A little KD Christmas
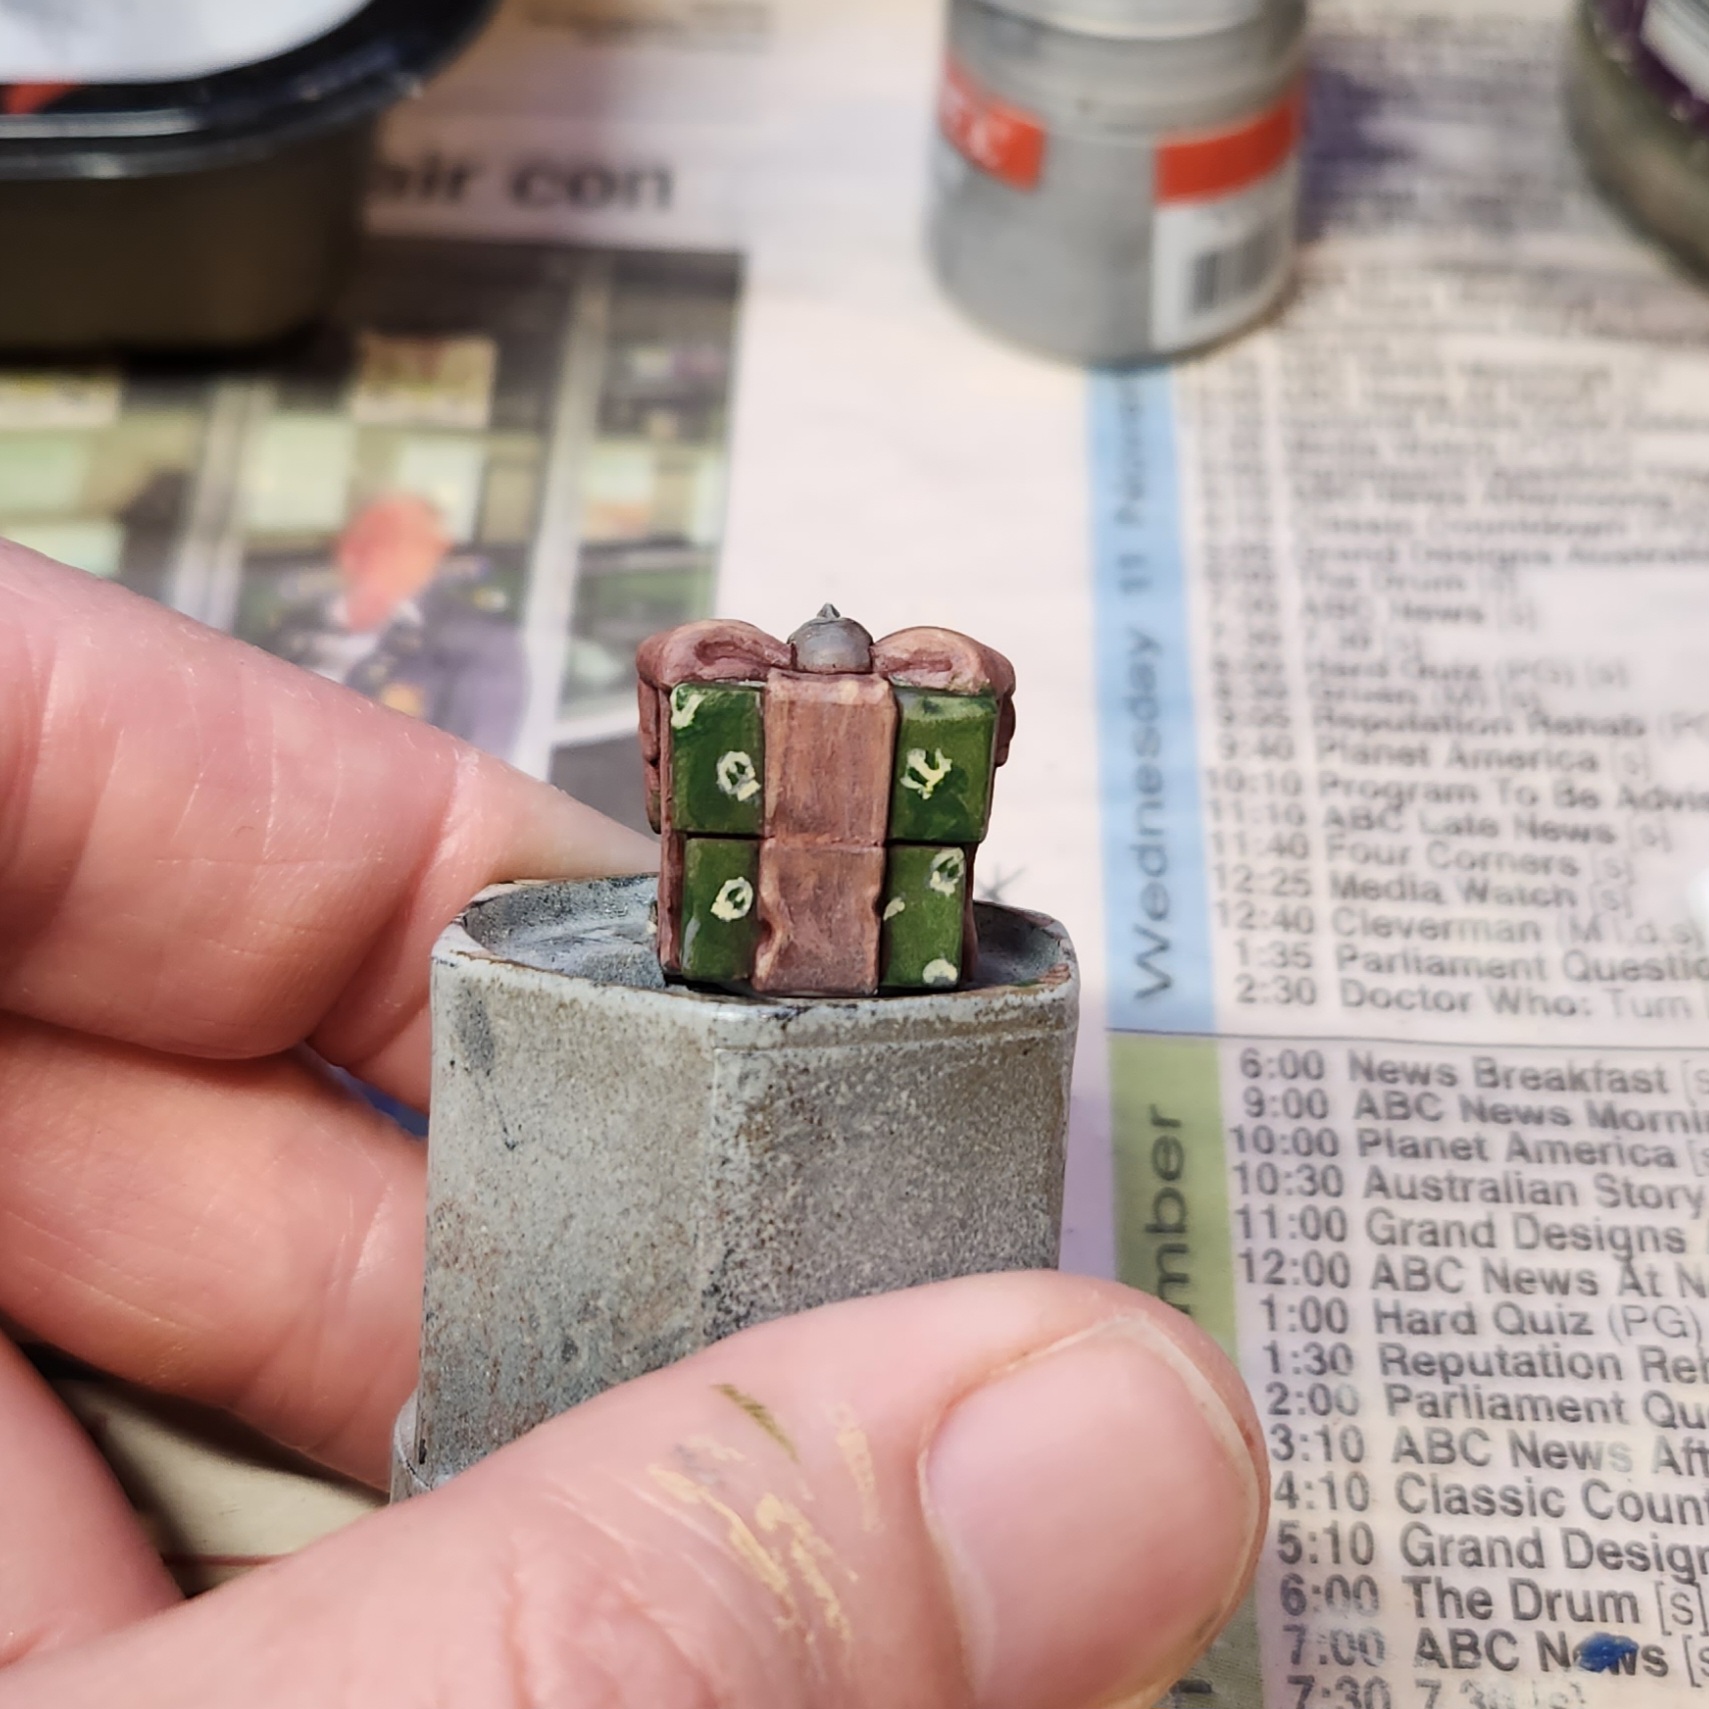
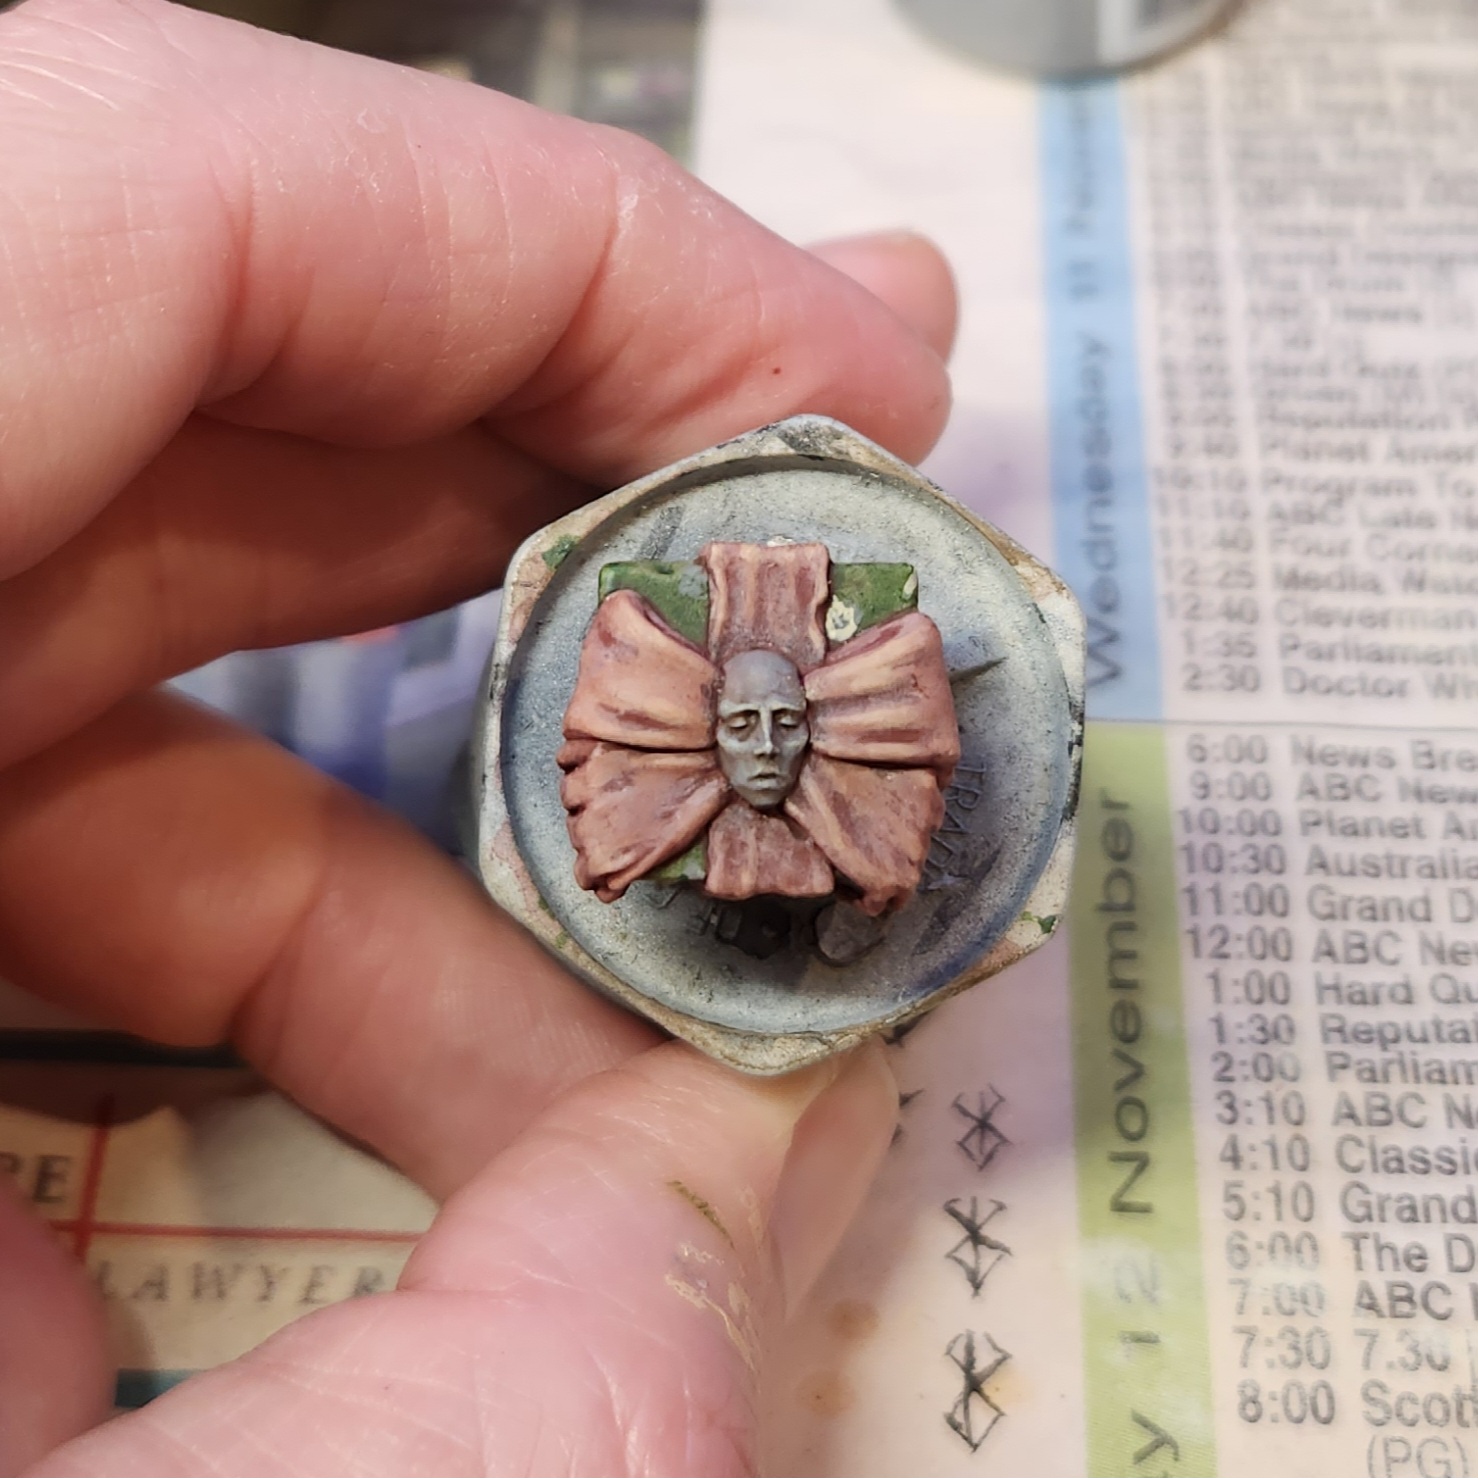
A little KD Christmas present. It comes as part of one of their seasonal releases.
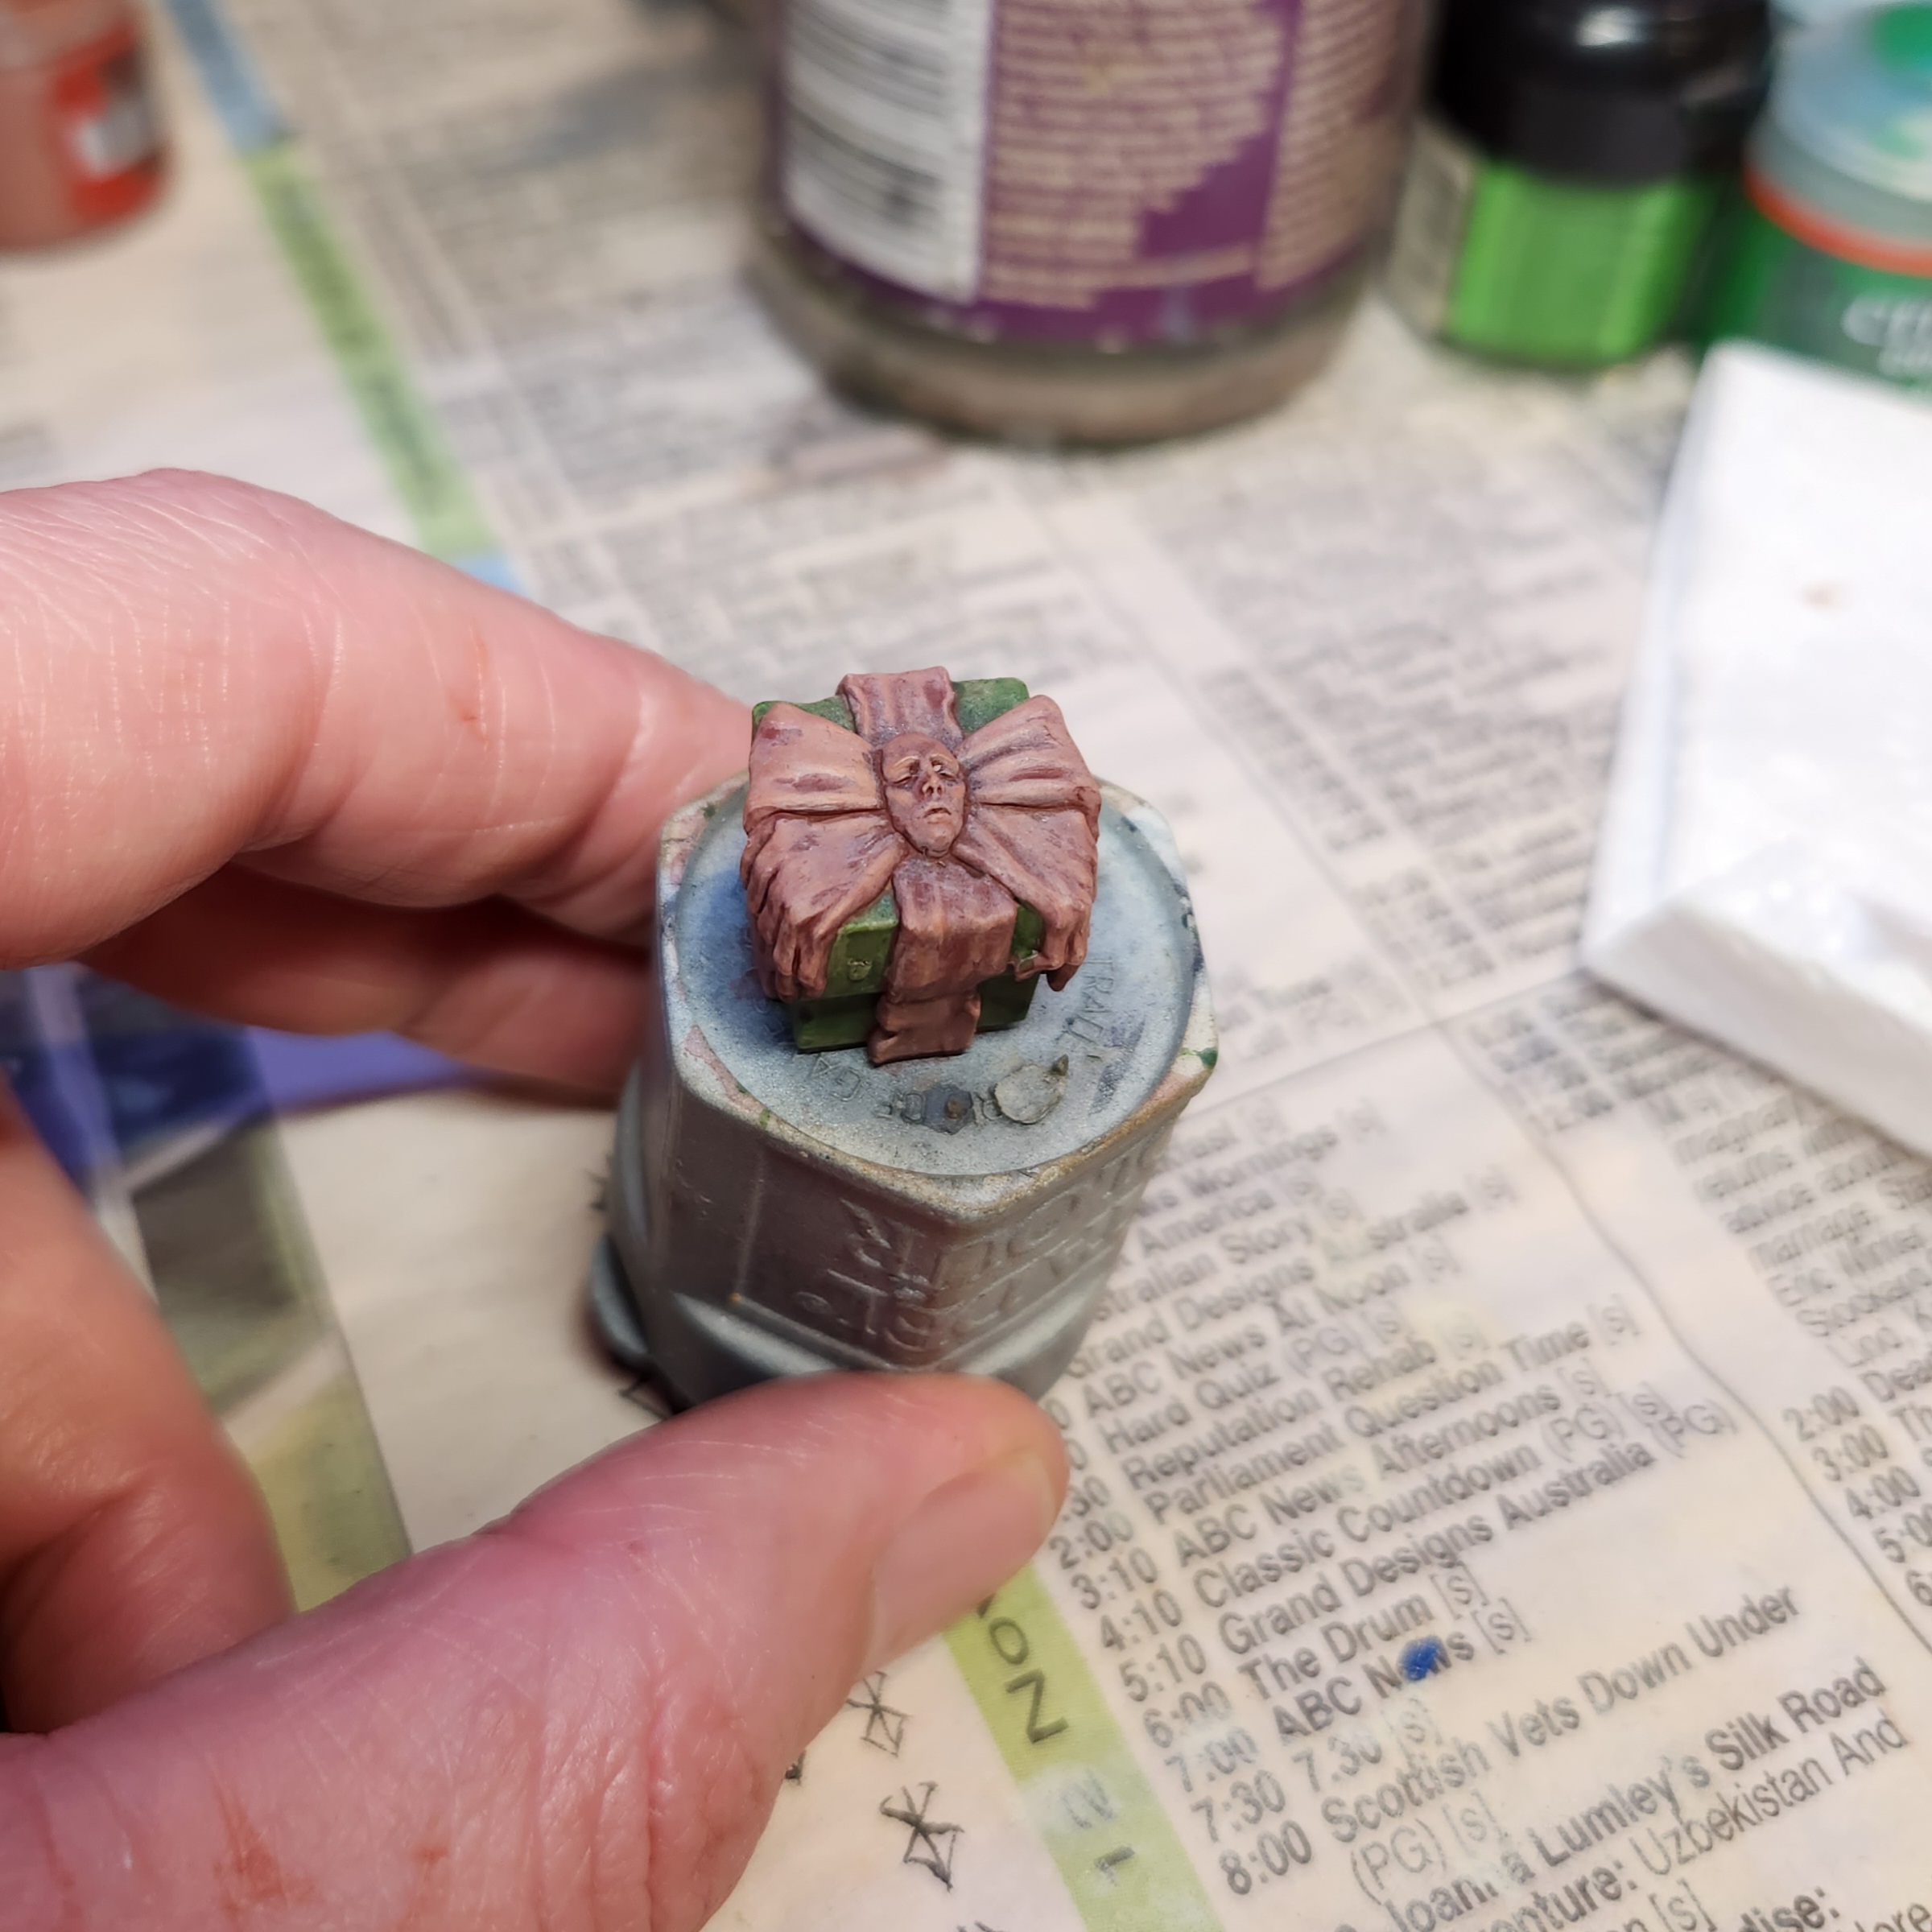
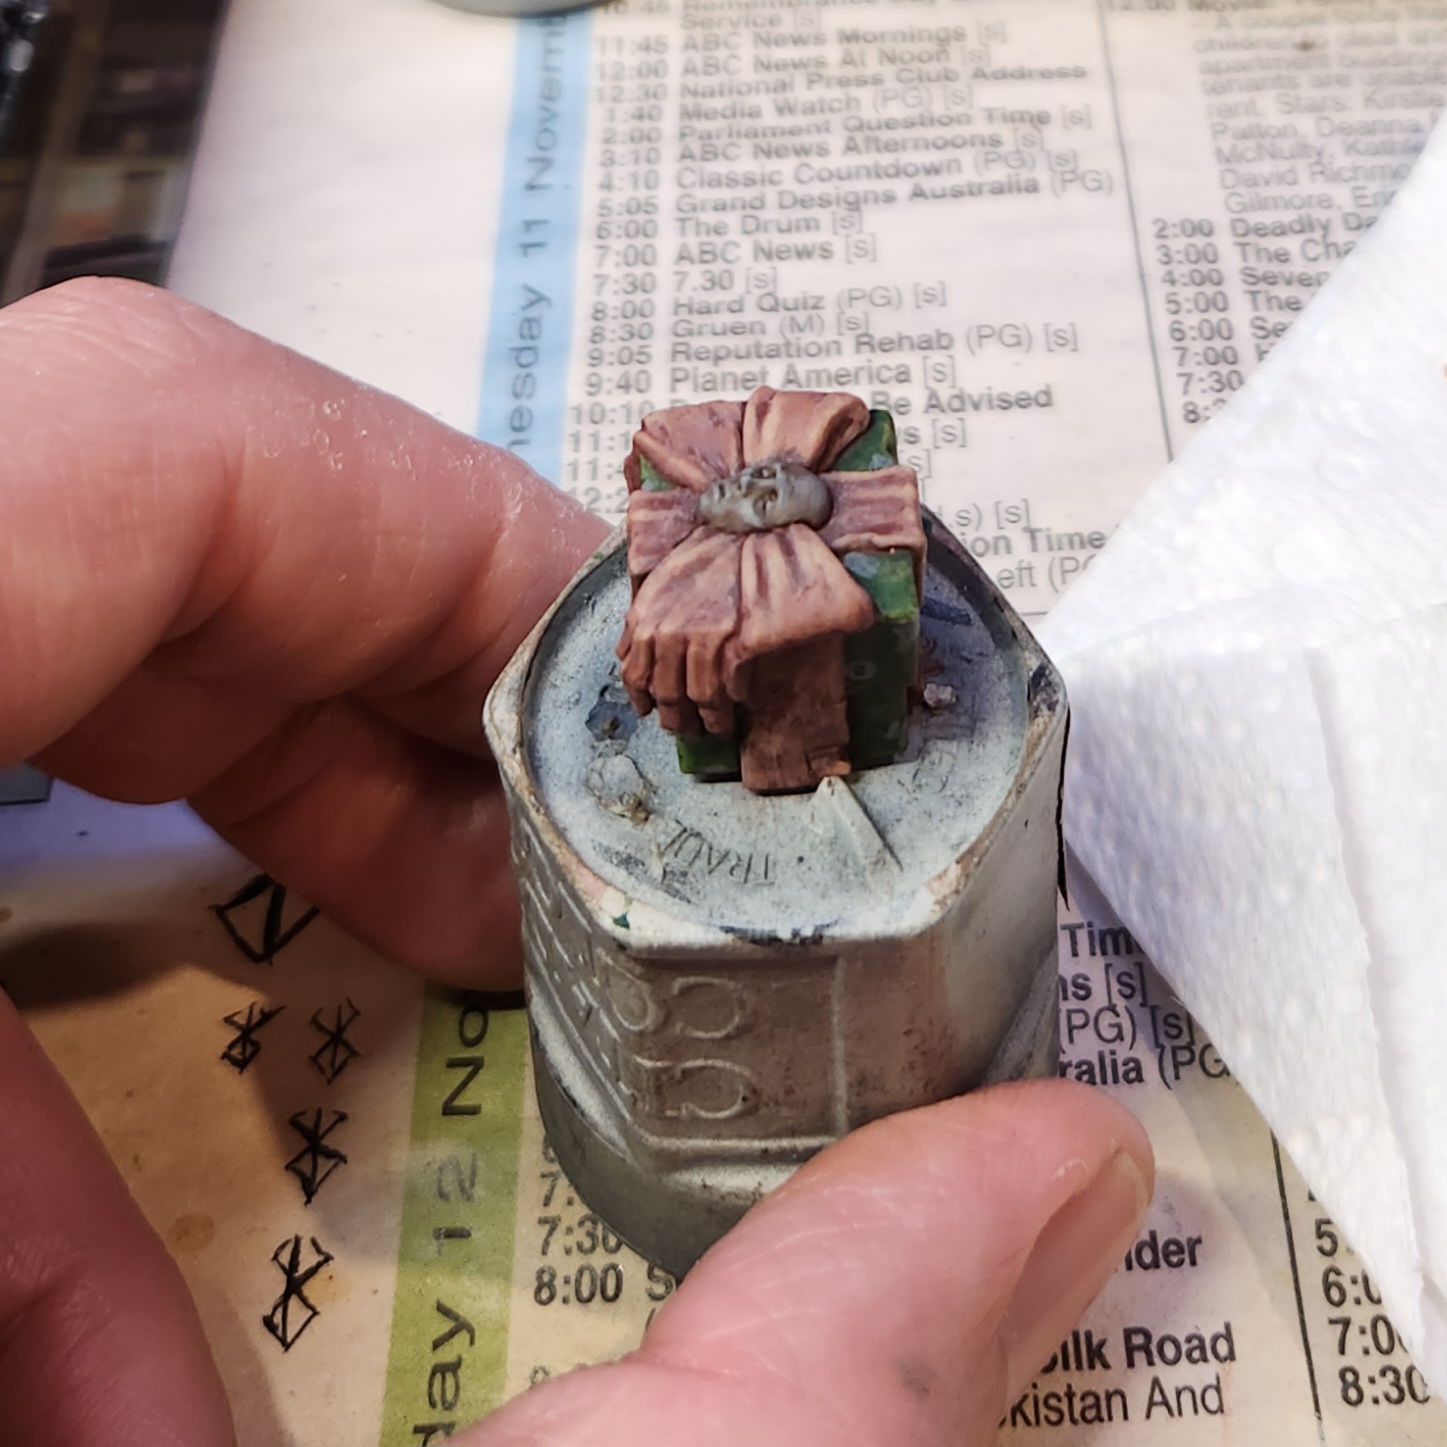
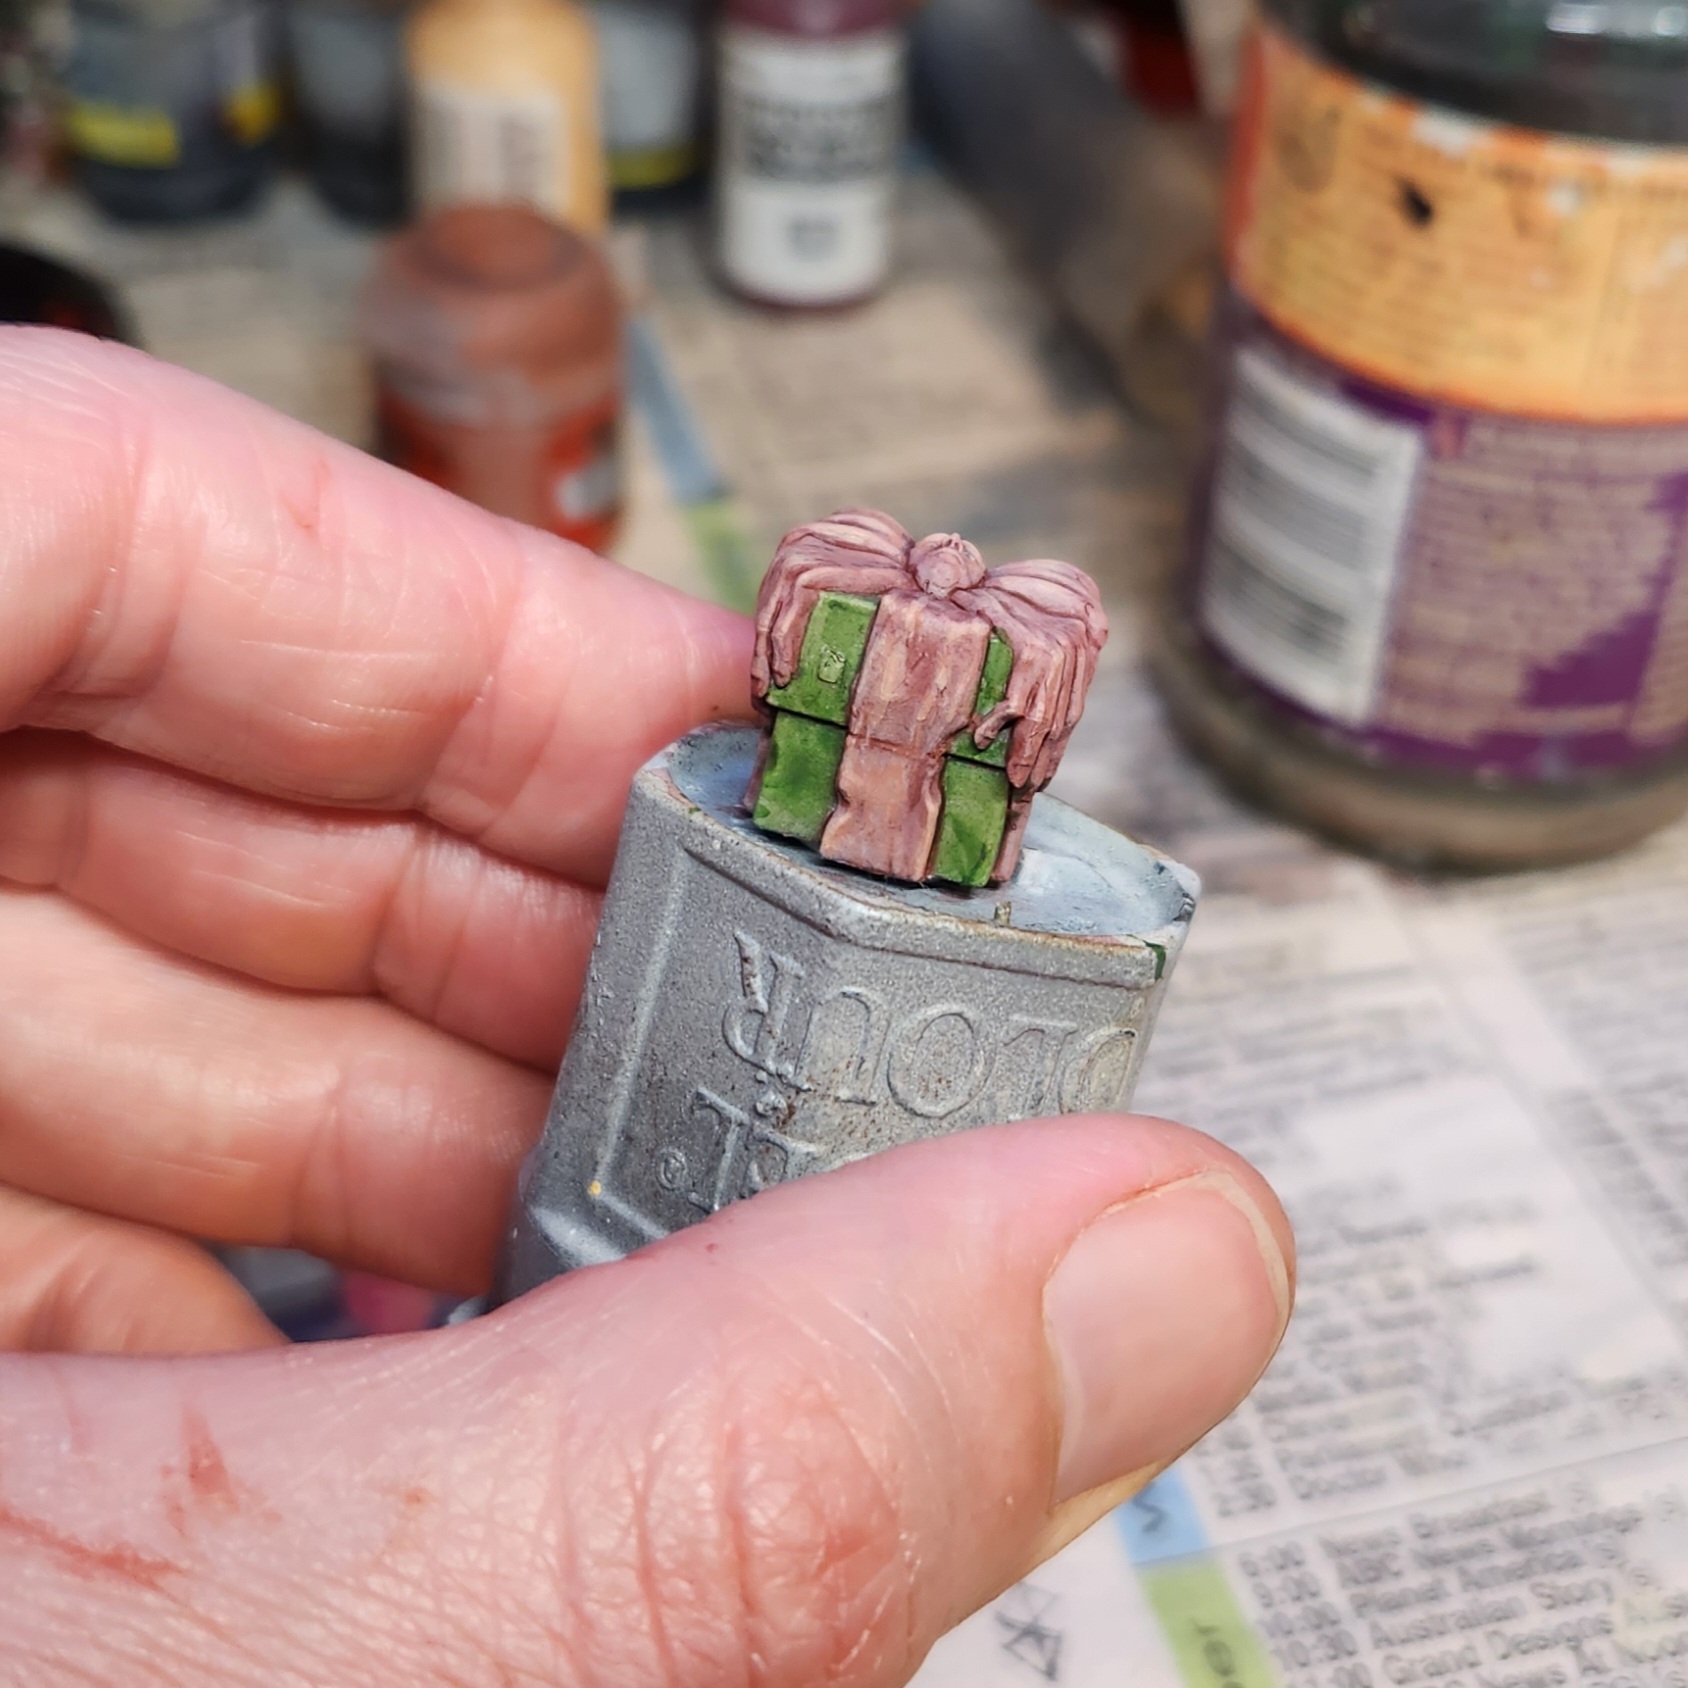
28 Dec 22: Little details
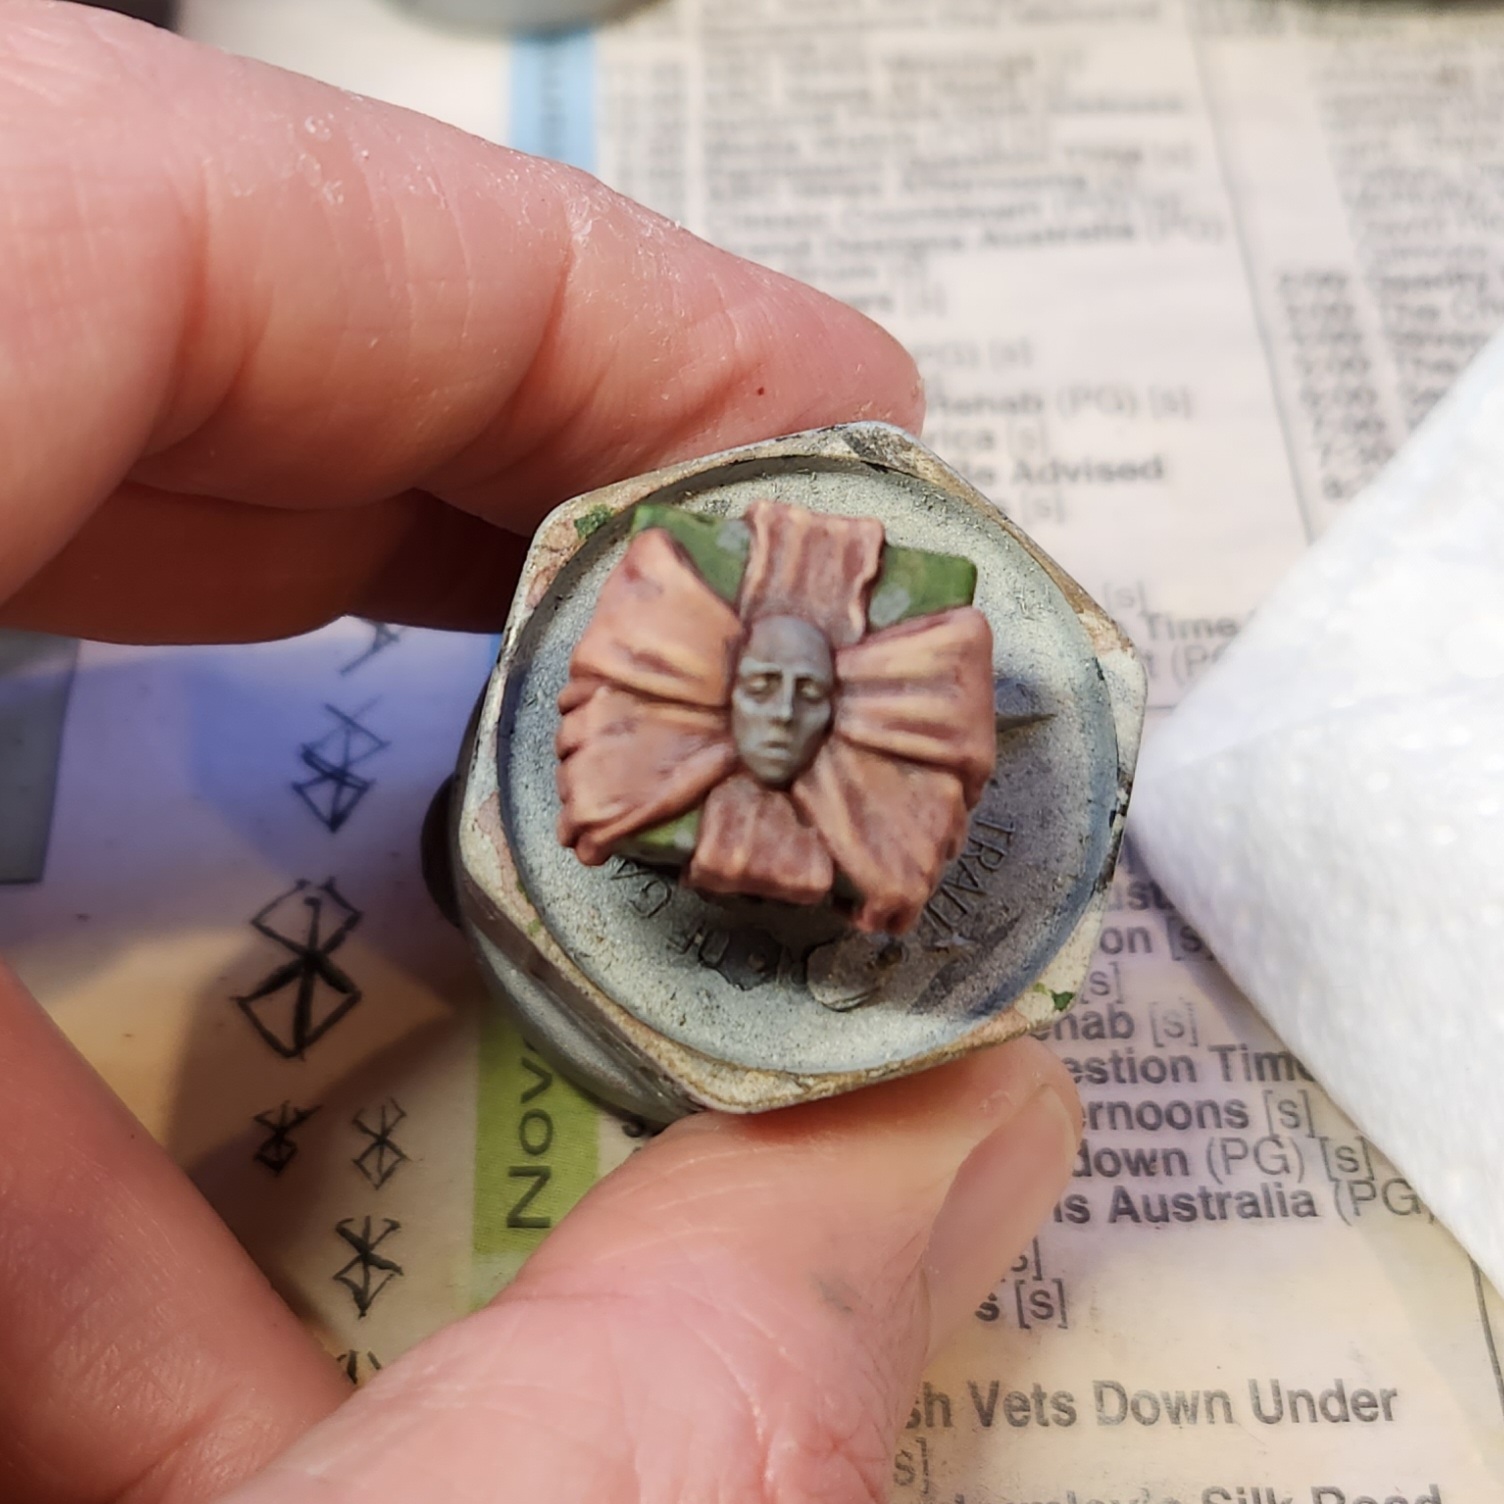 It needed a little more detail
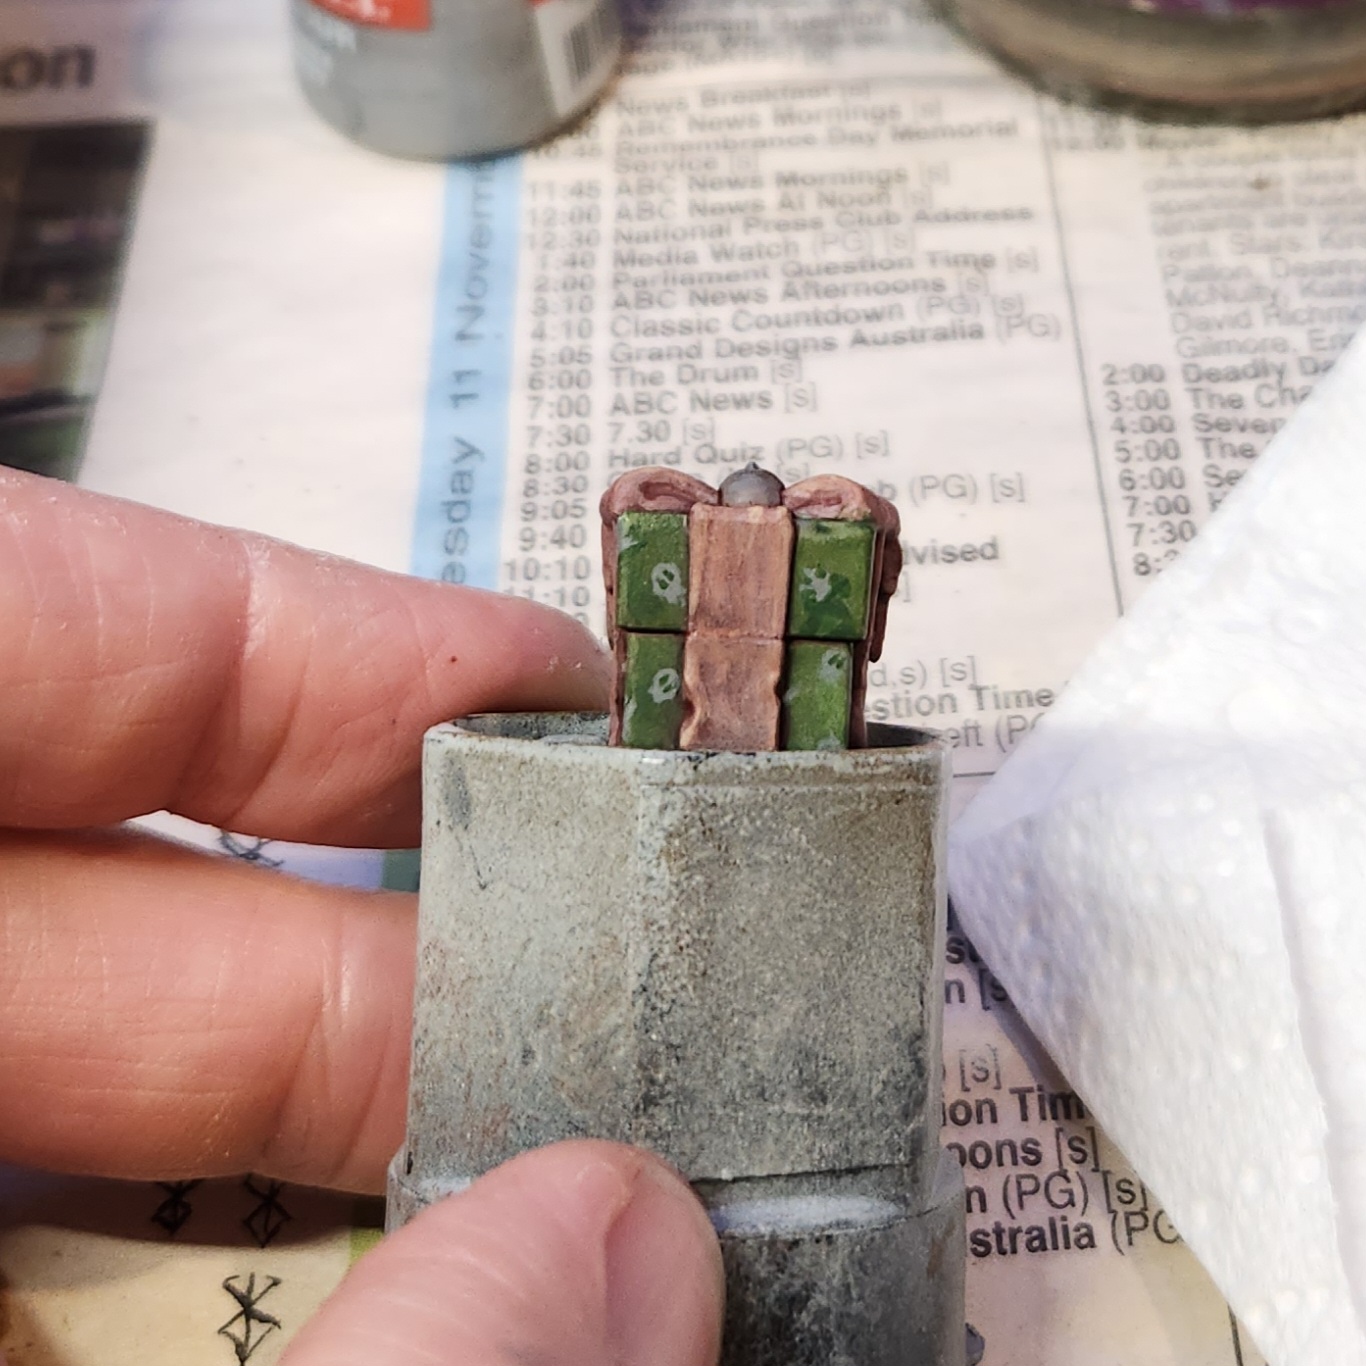
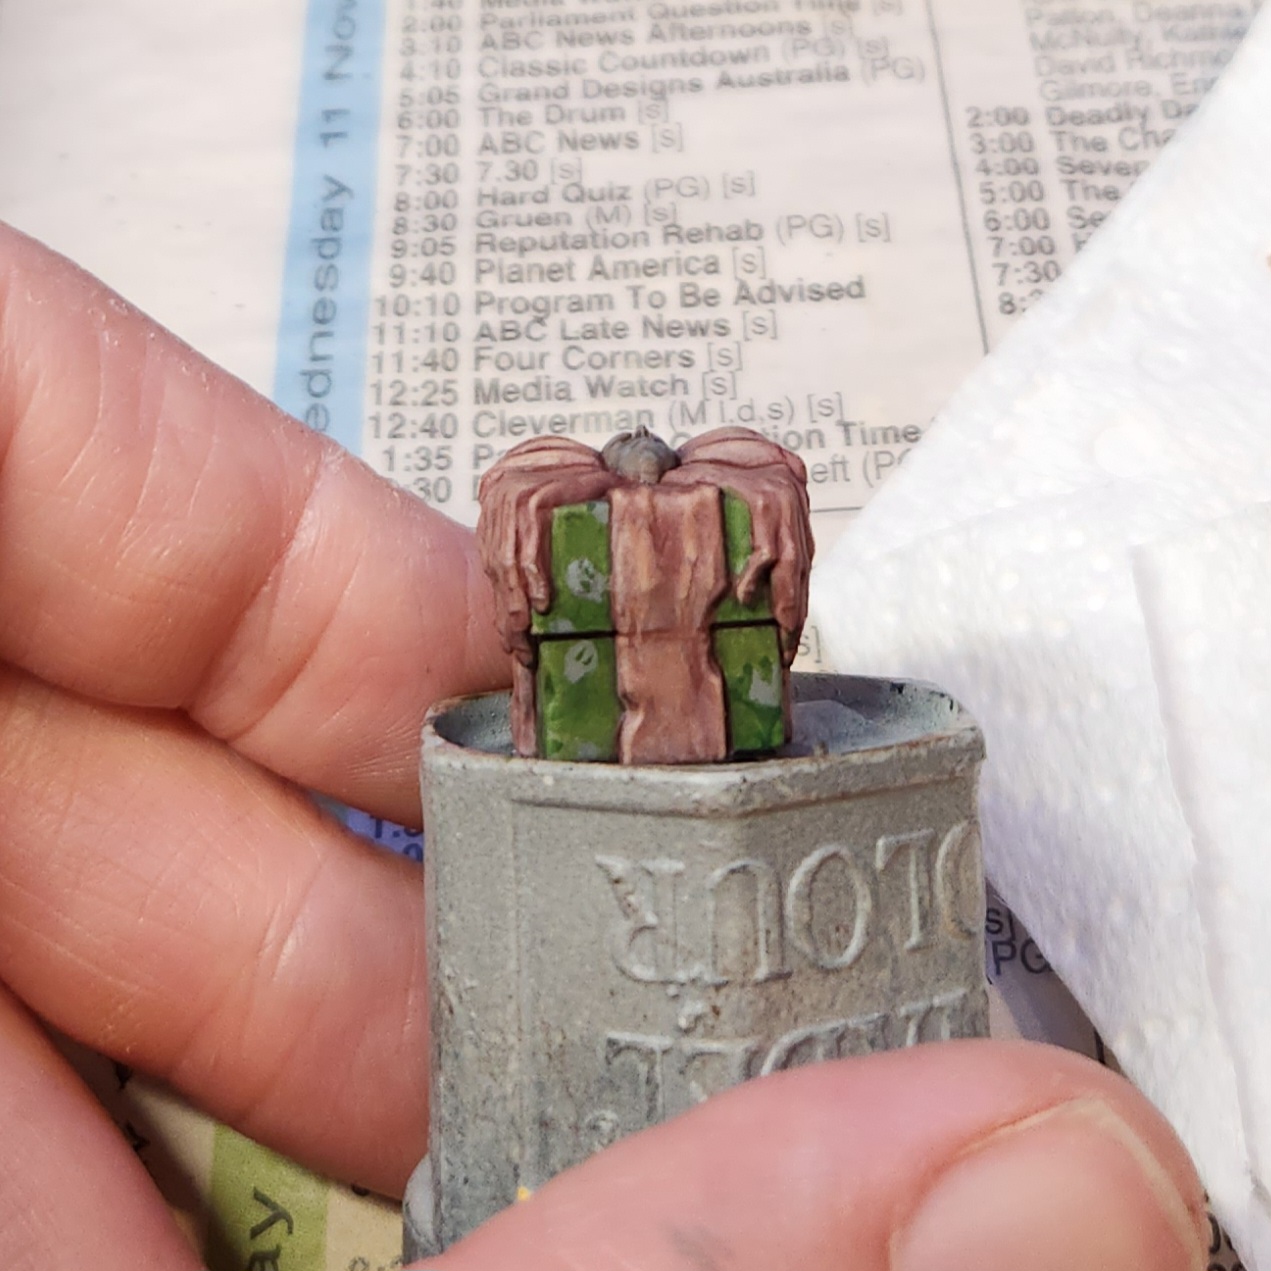
I painted the face on top to match one of the ubiquitous KD stone faces.
The wrap of the present is inspired by the KD tissue paper that they use to pack their minis in for shipping.

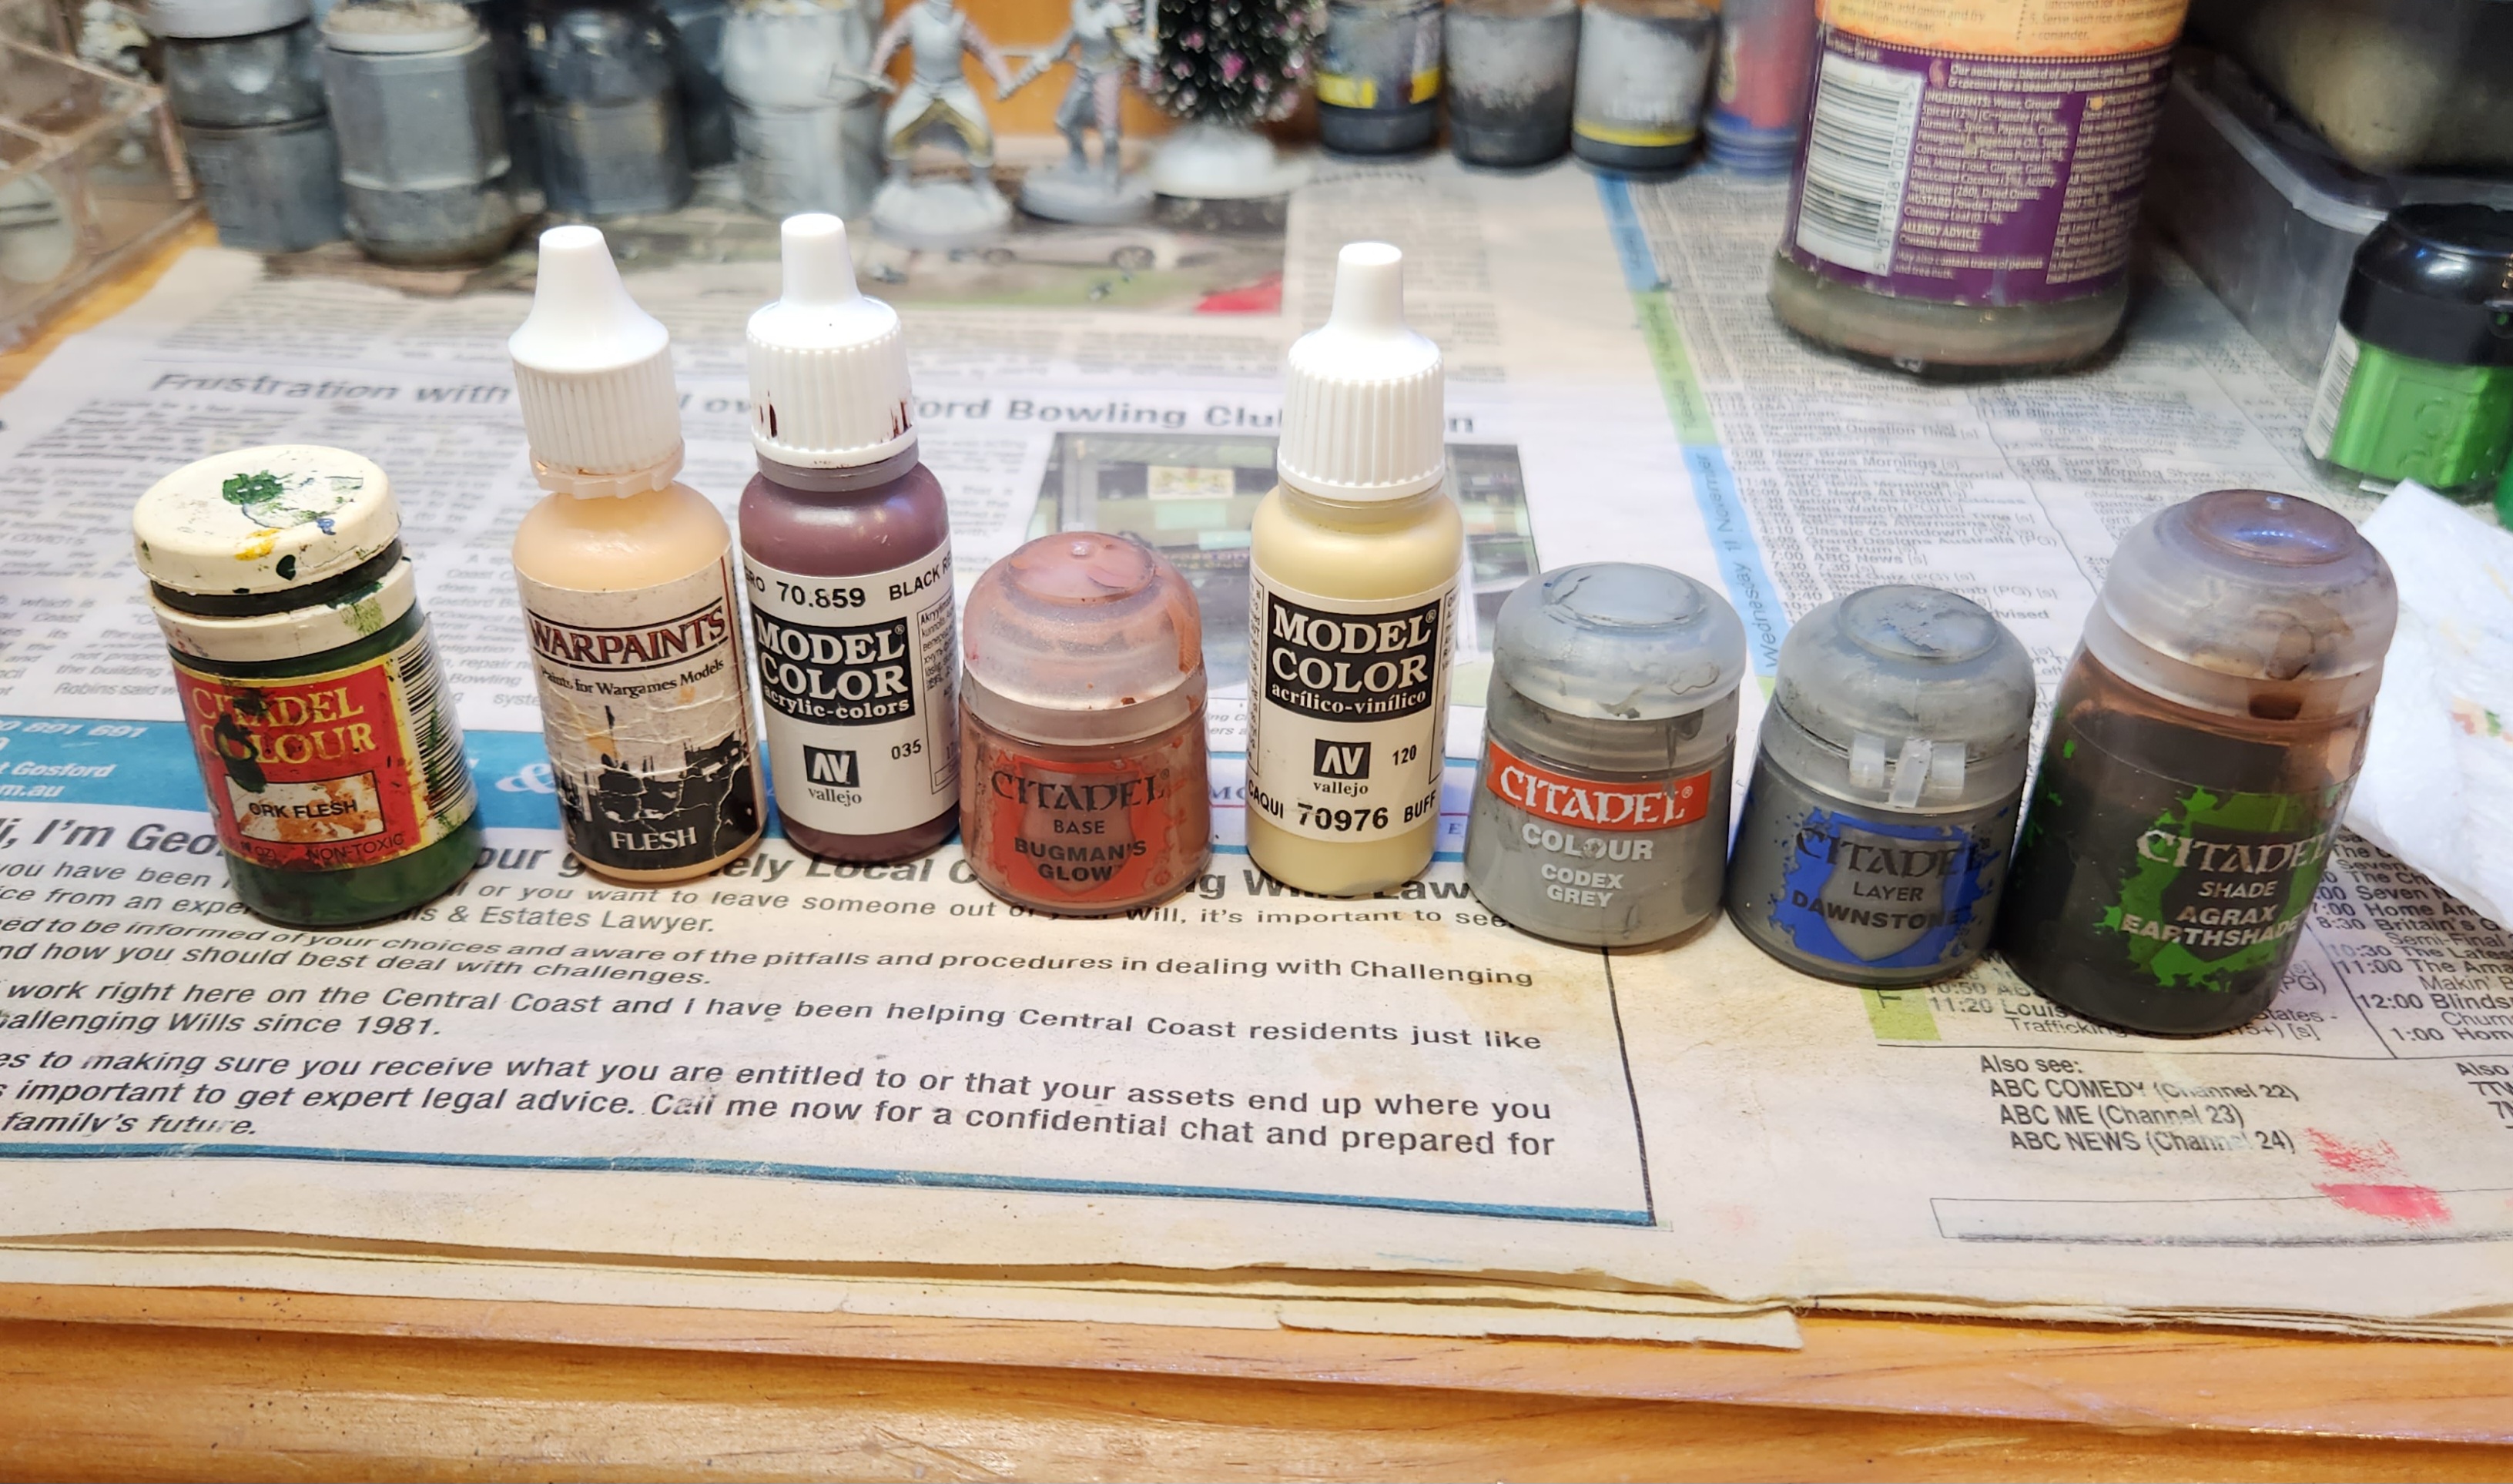 Colours used
 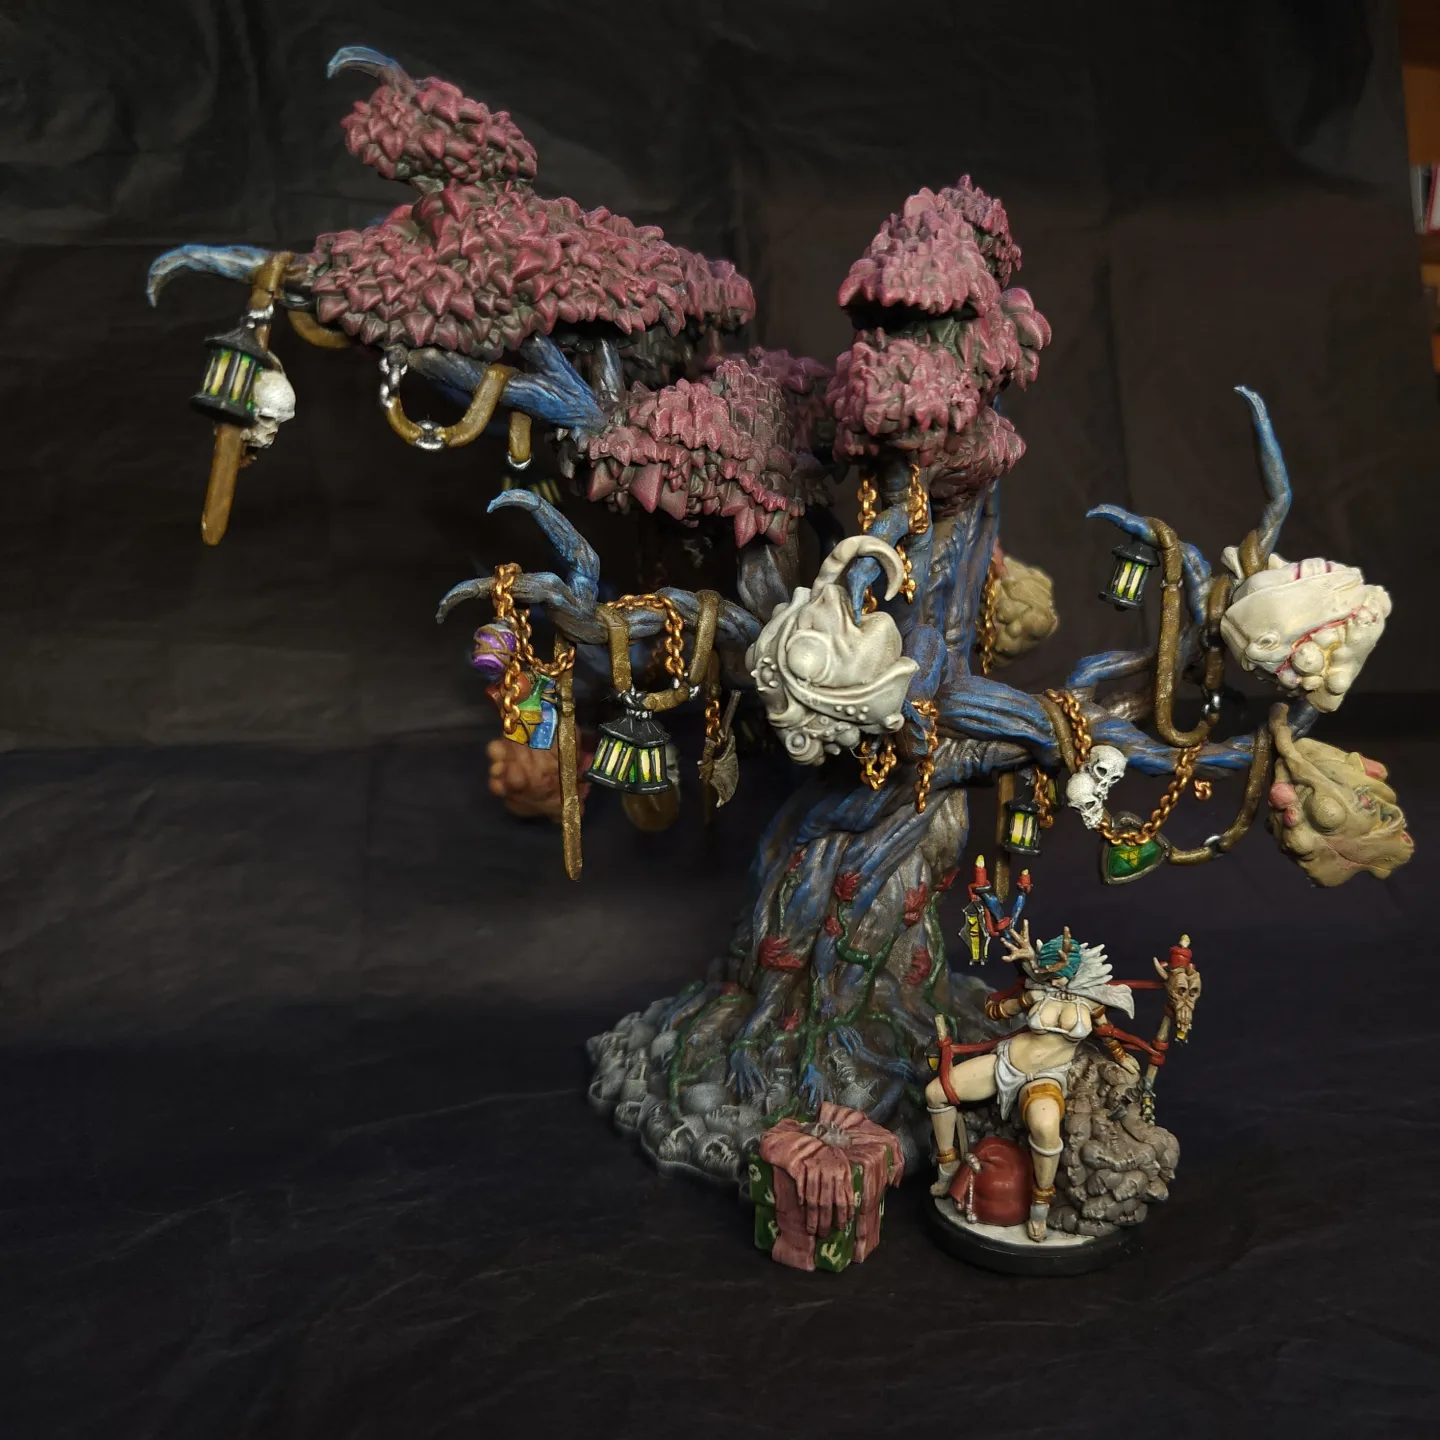 A little KD Christmas.
 11 Oct 22: argh, quick... do something!
Second-guessing myself and thinking maybe the submission wouldn’t qualify I decided to quickly put another, smaller diorama piece together.
I used the same materials: cork, foam board, and KD miniatures.
 The new base ready to go.
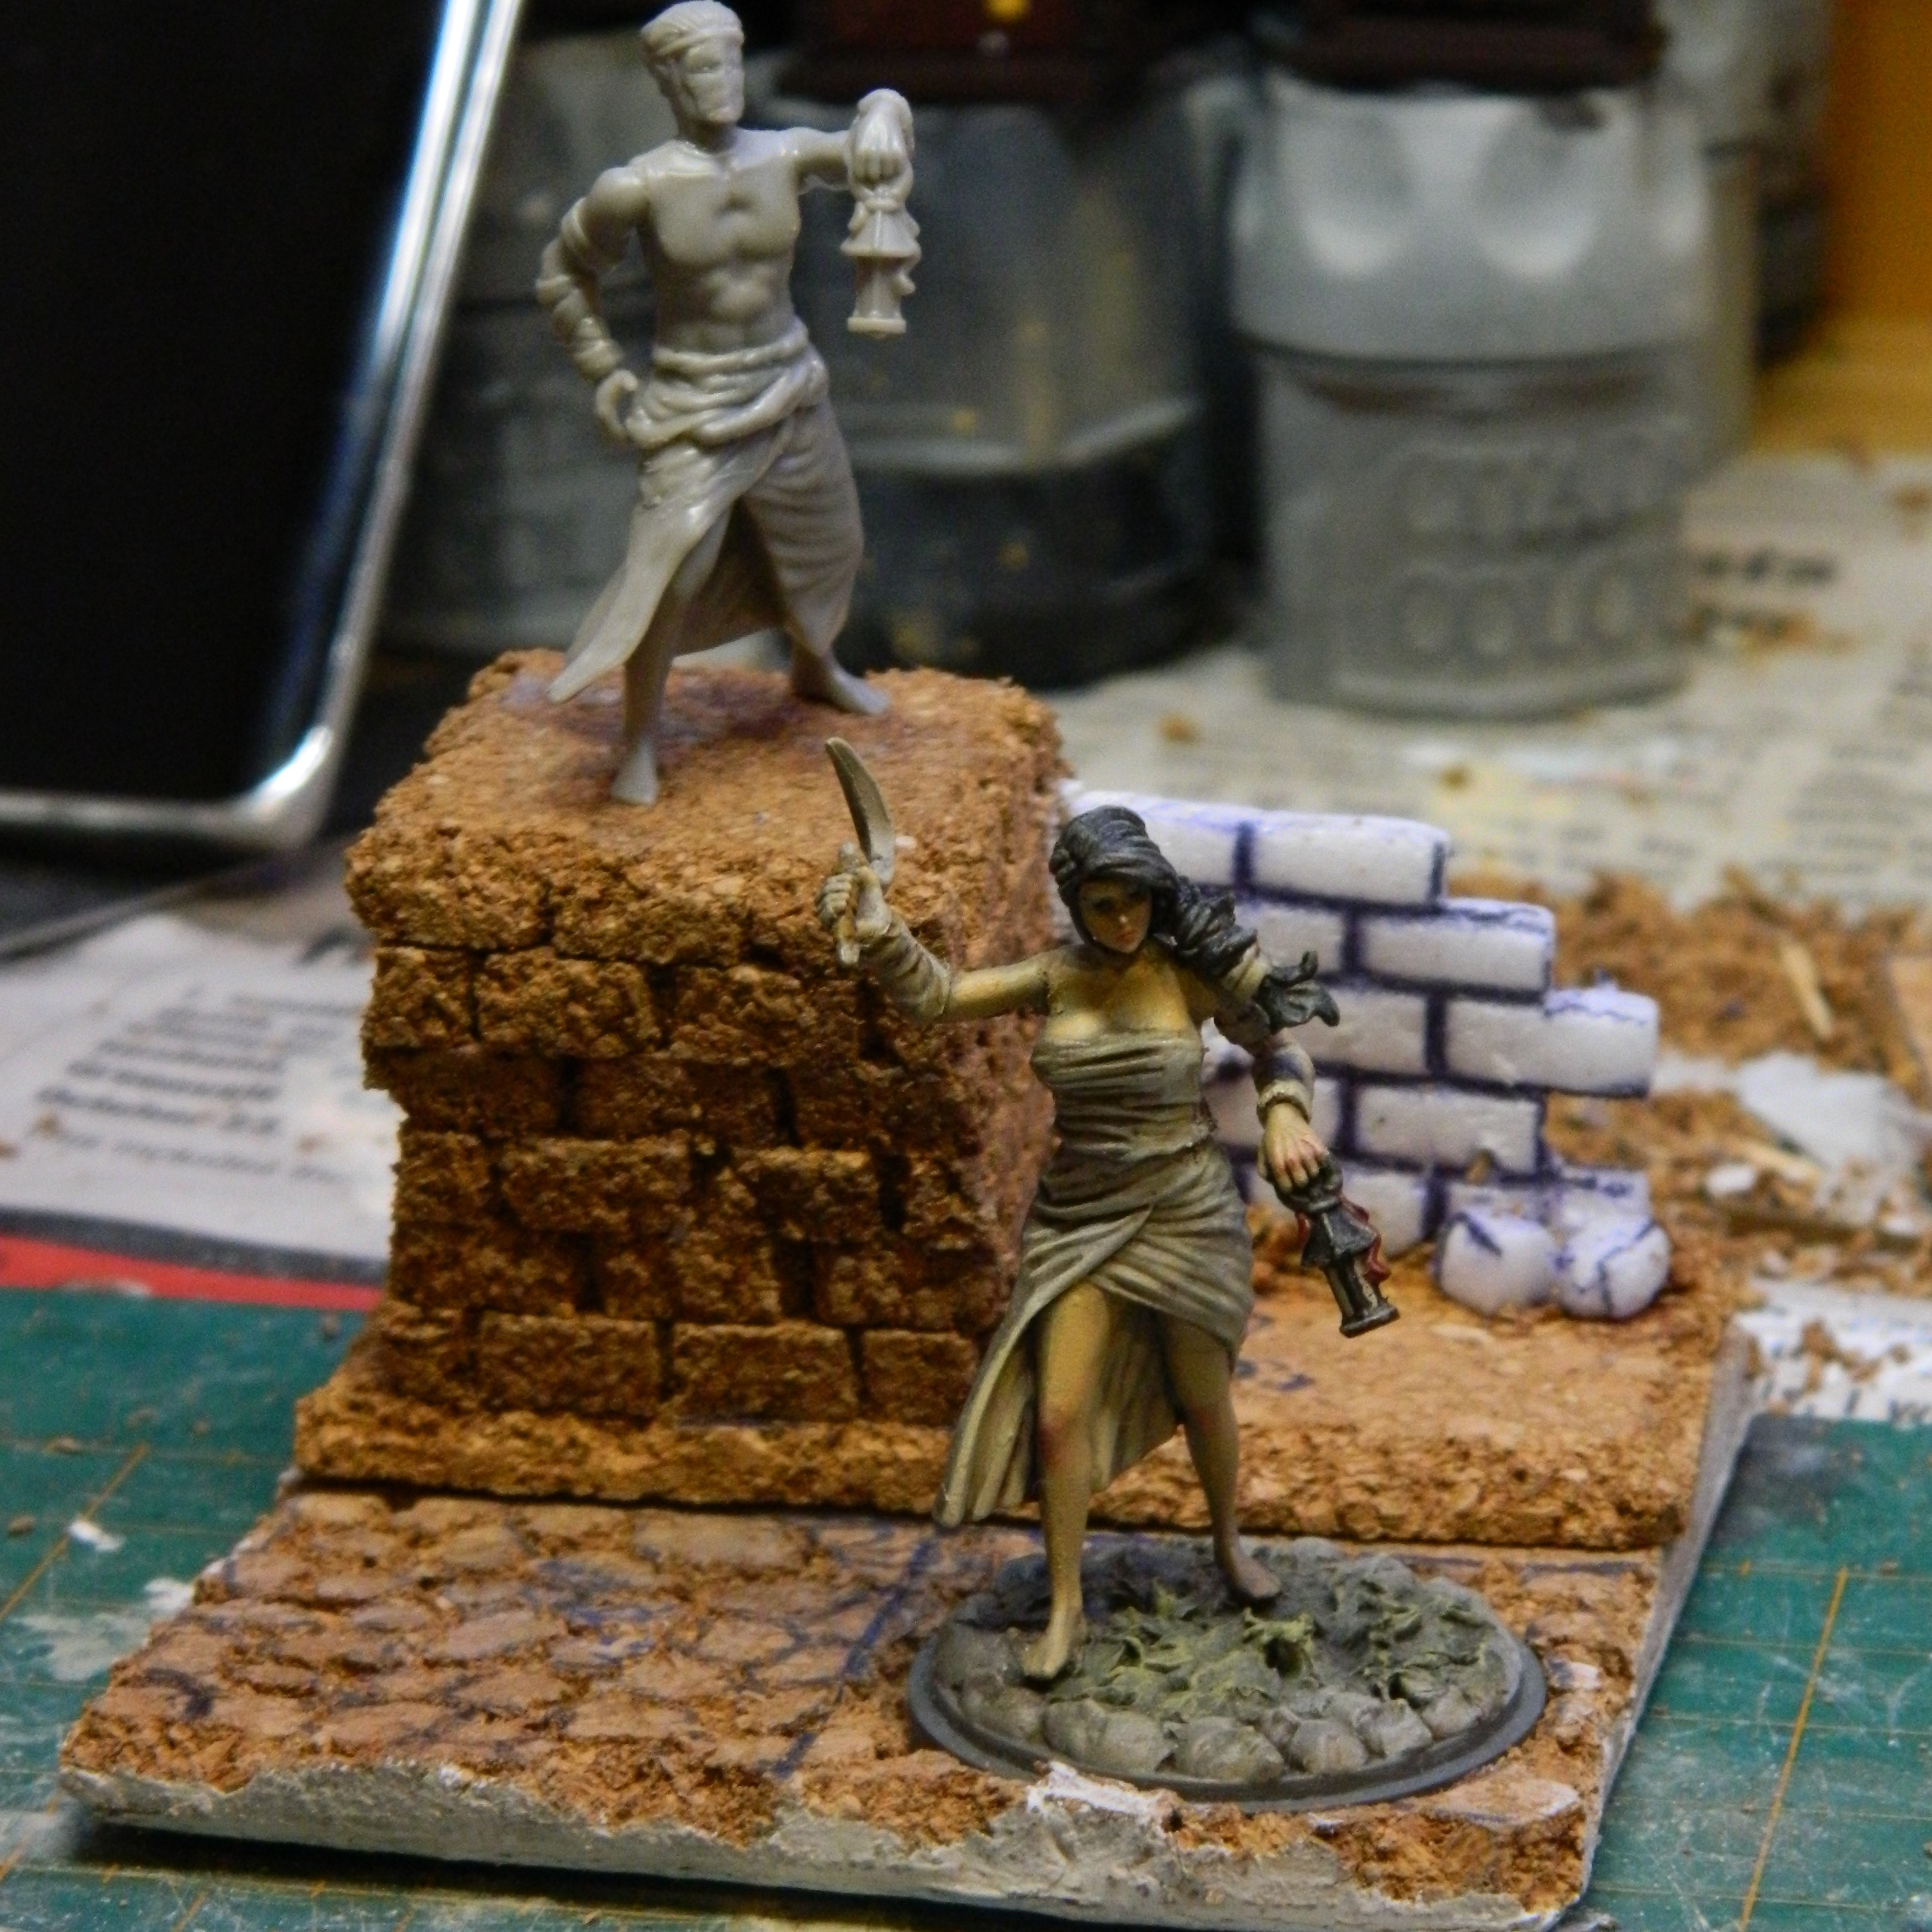
 13 Oct 22: the actual submission...
 "Respite Below the Faceless Statue"
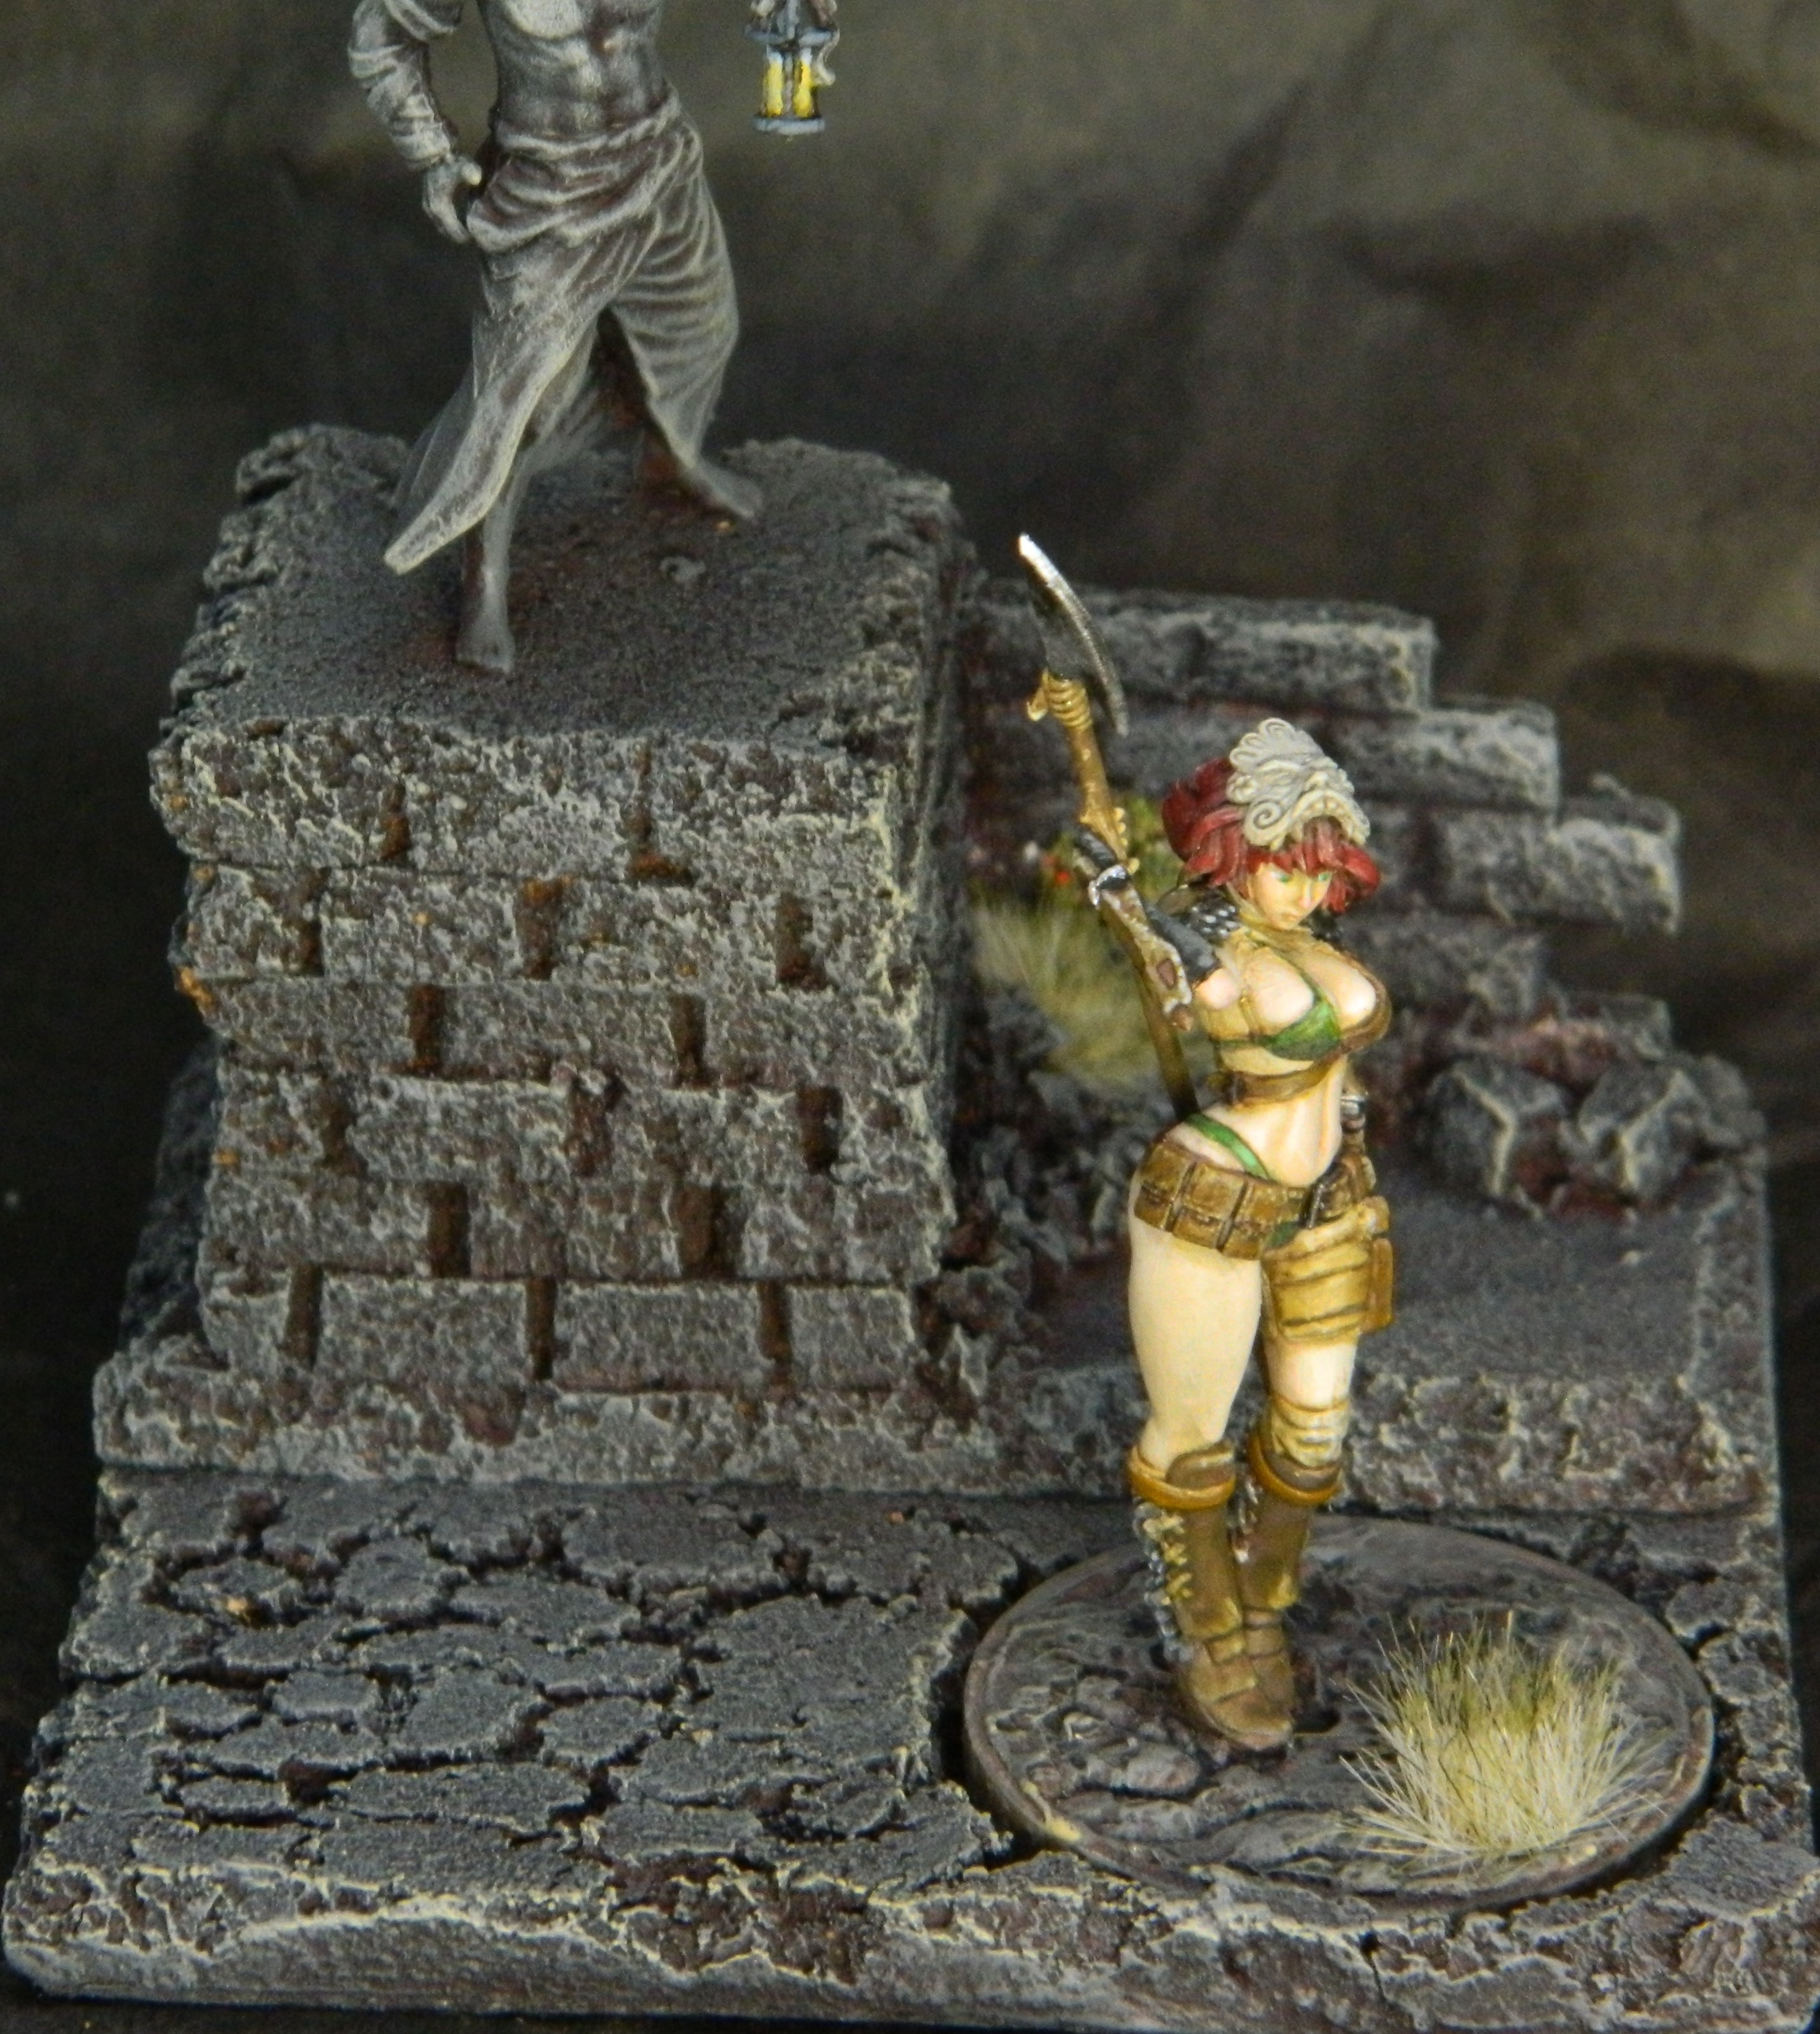
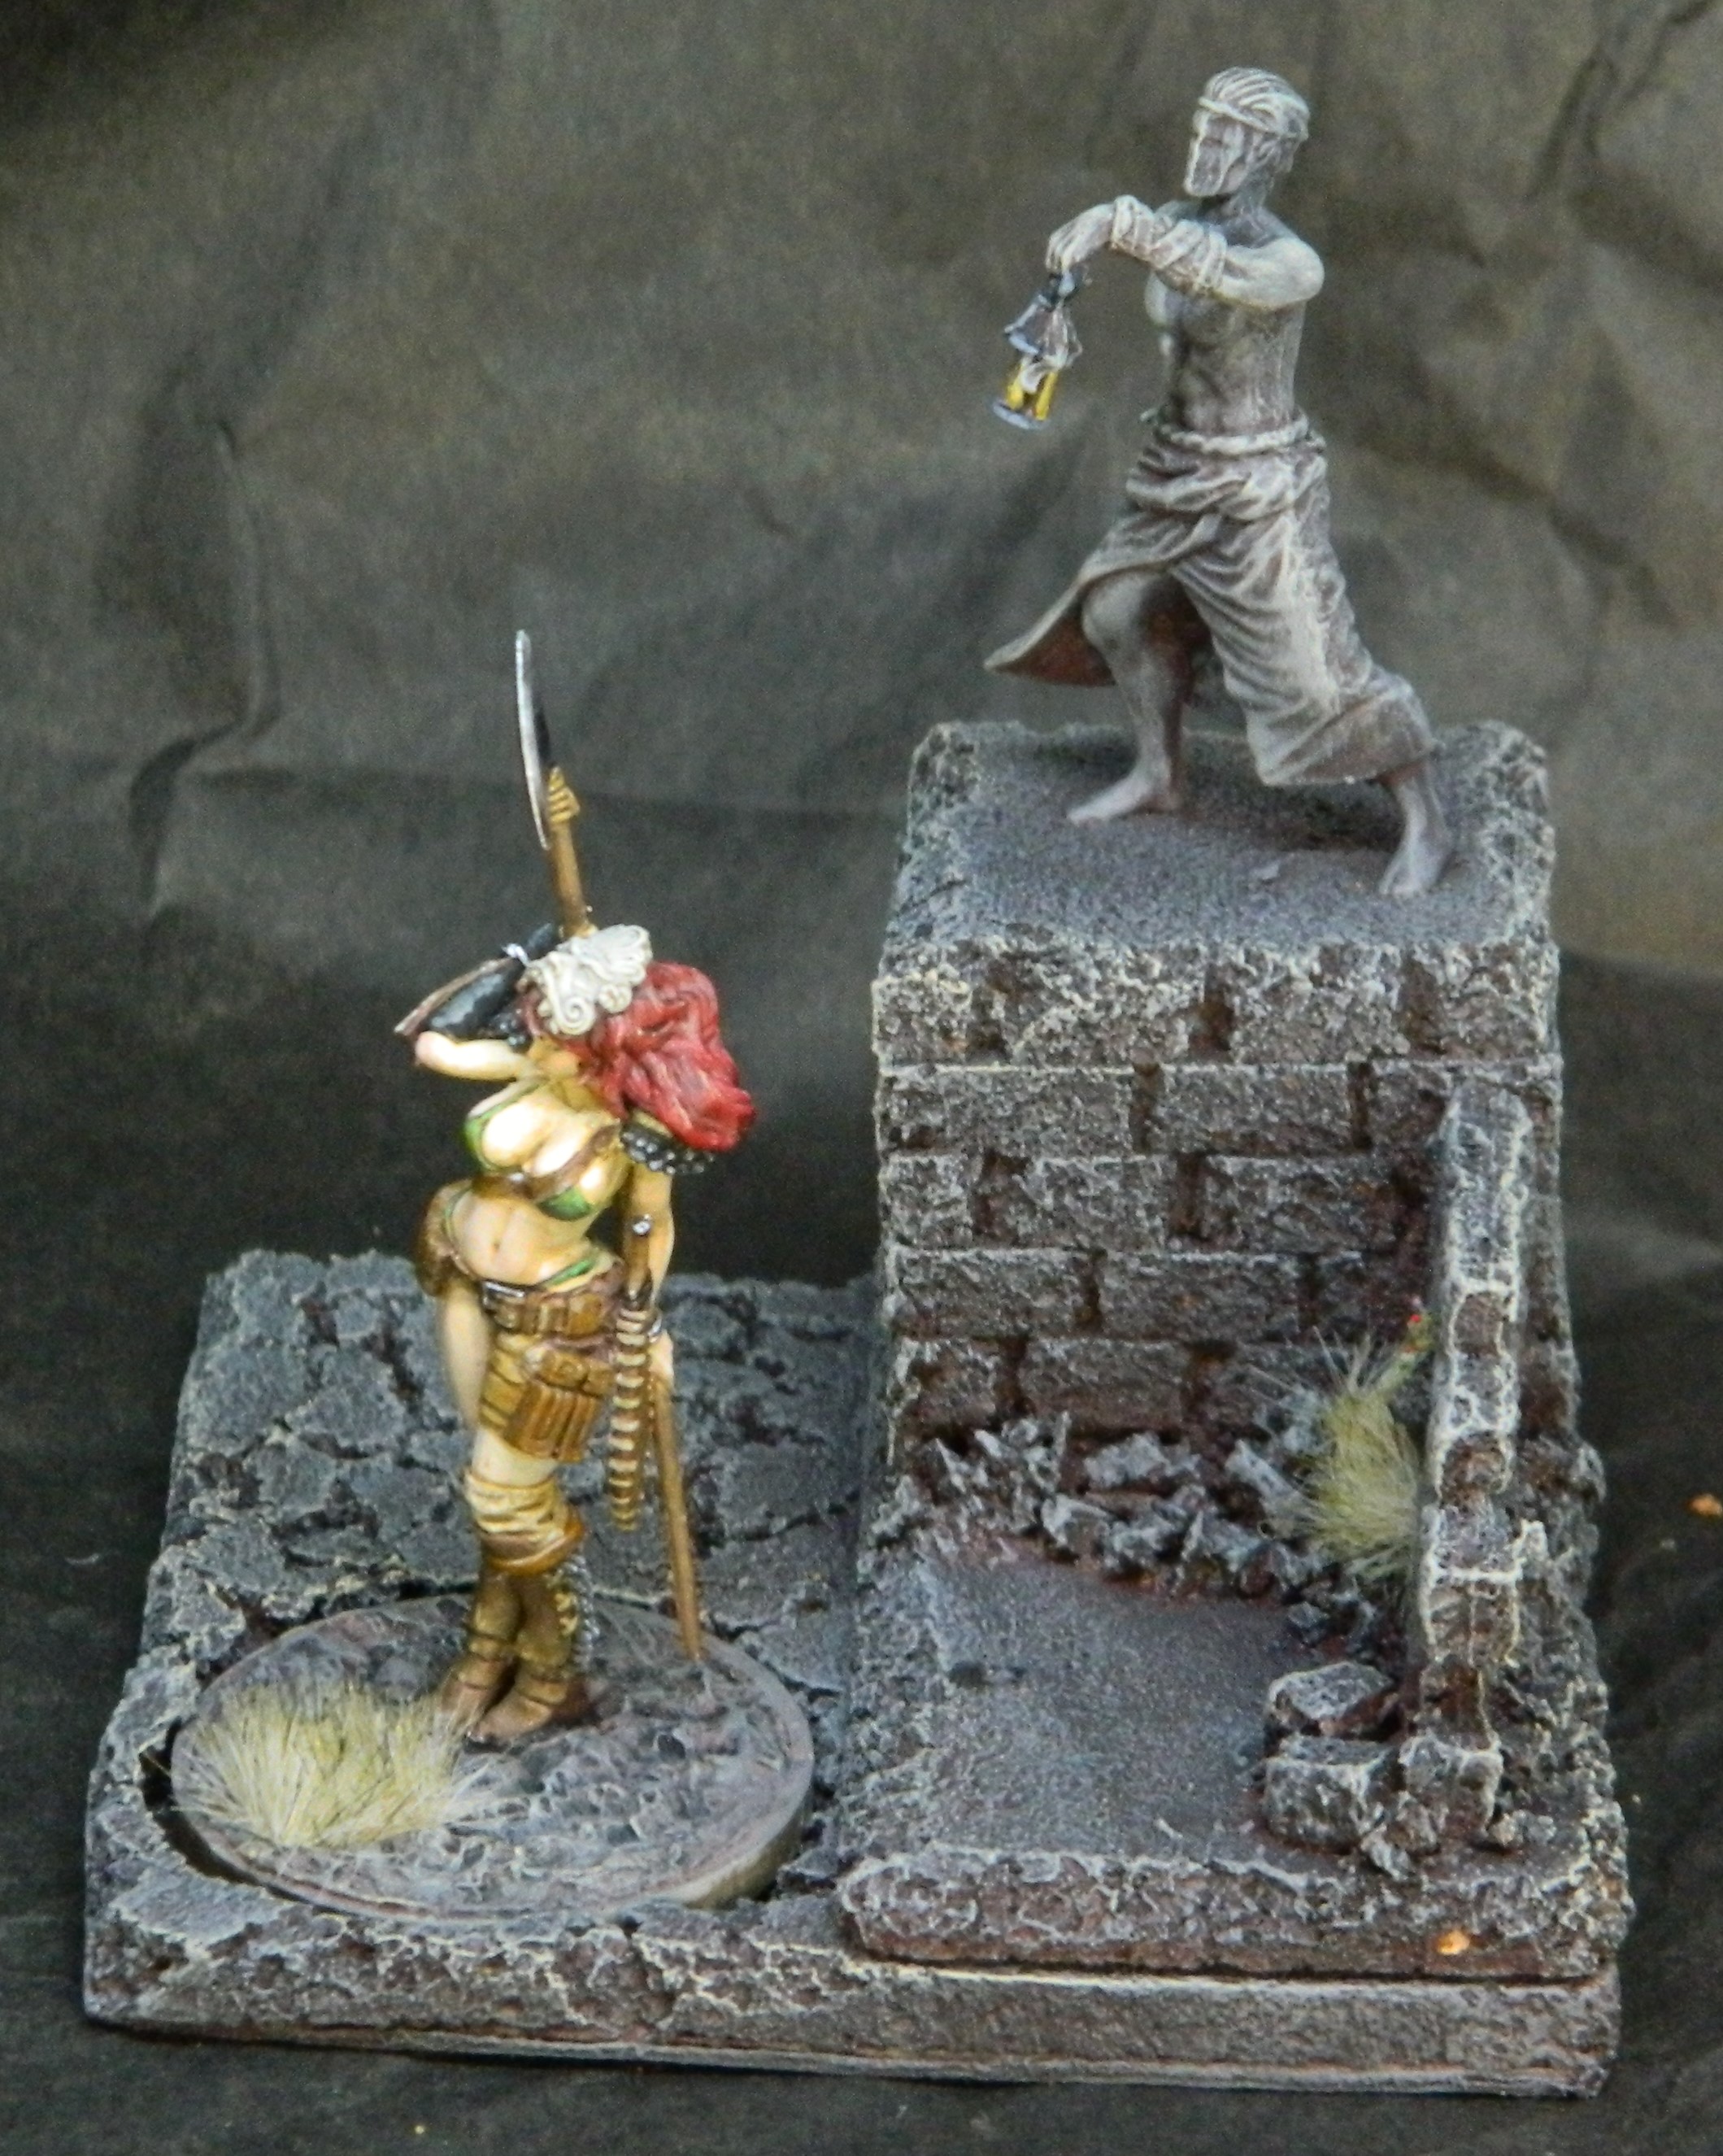
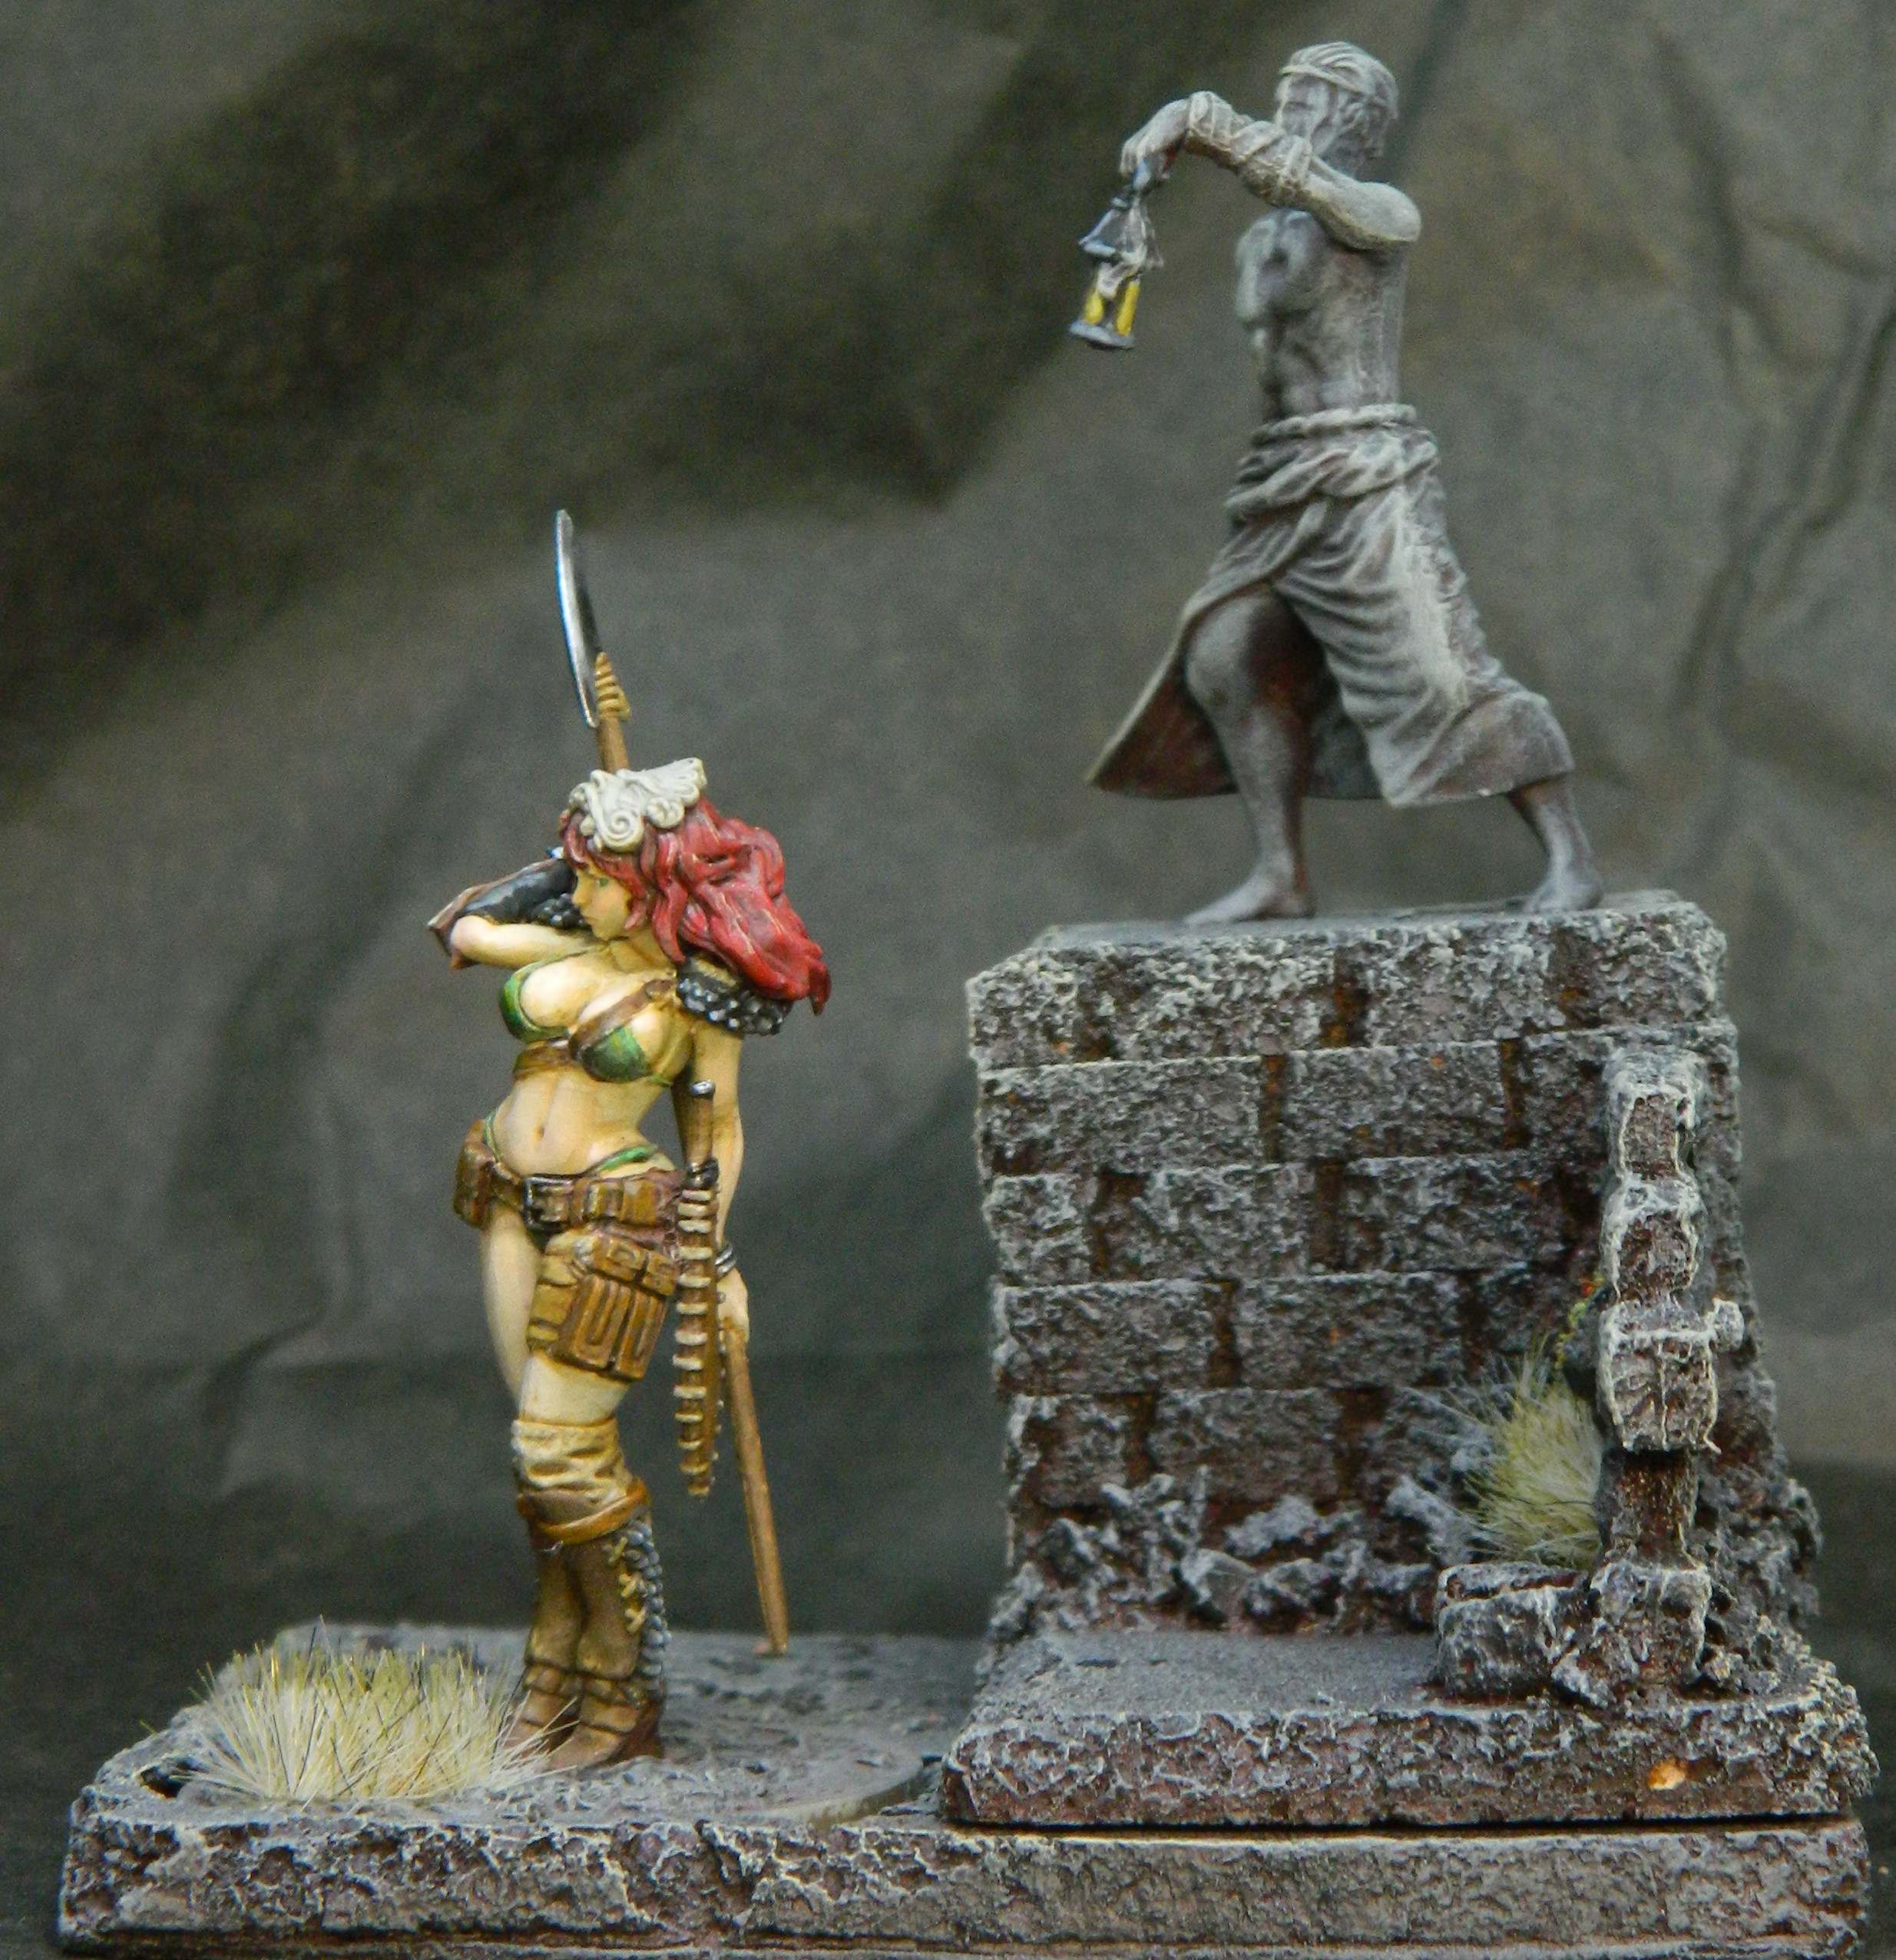
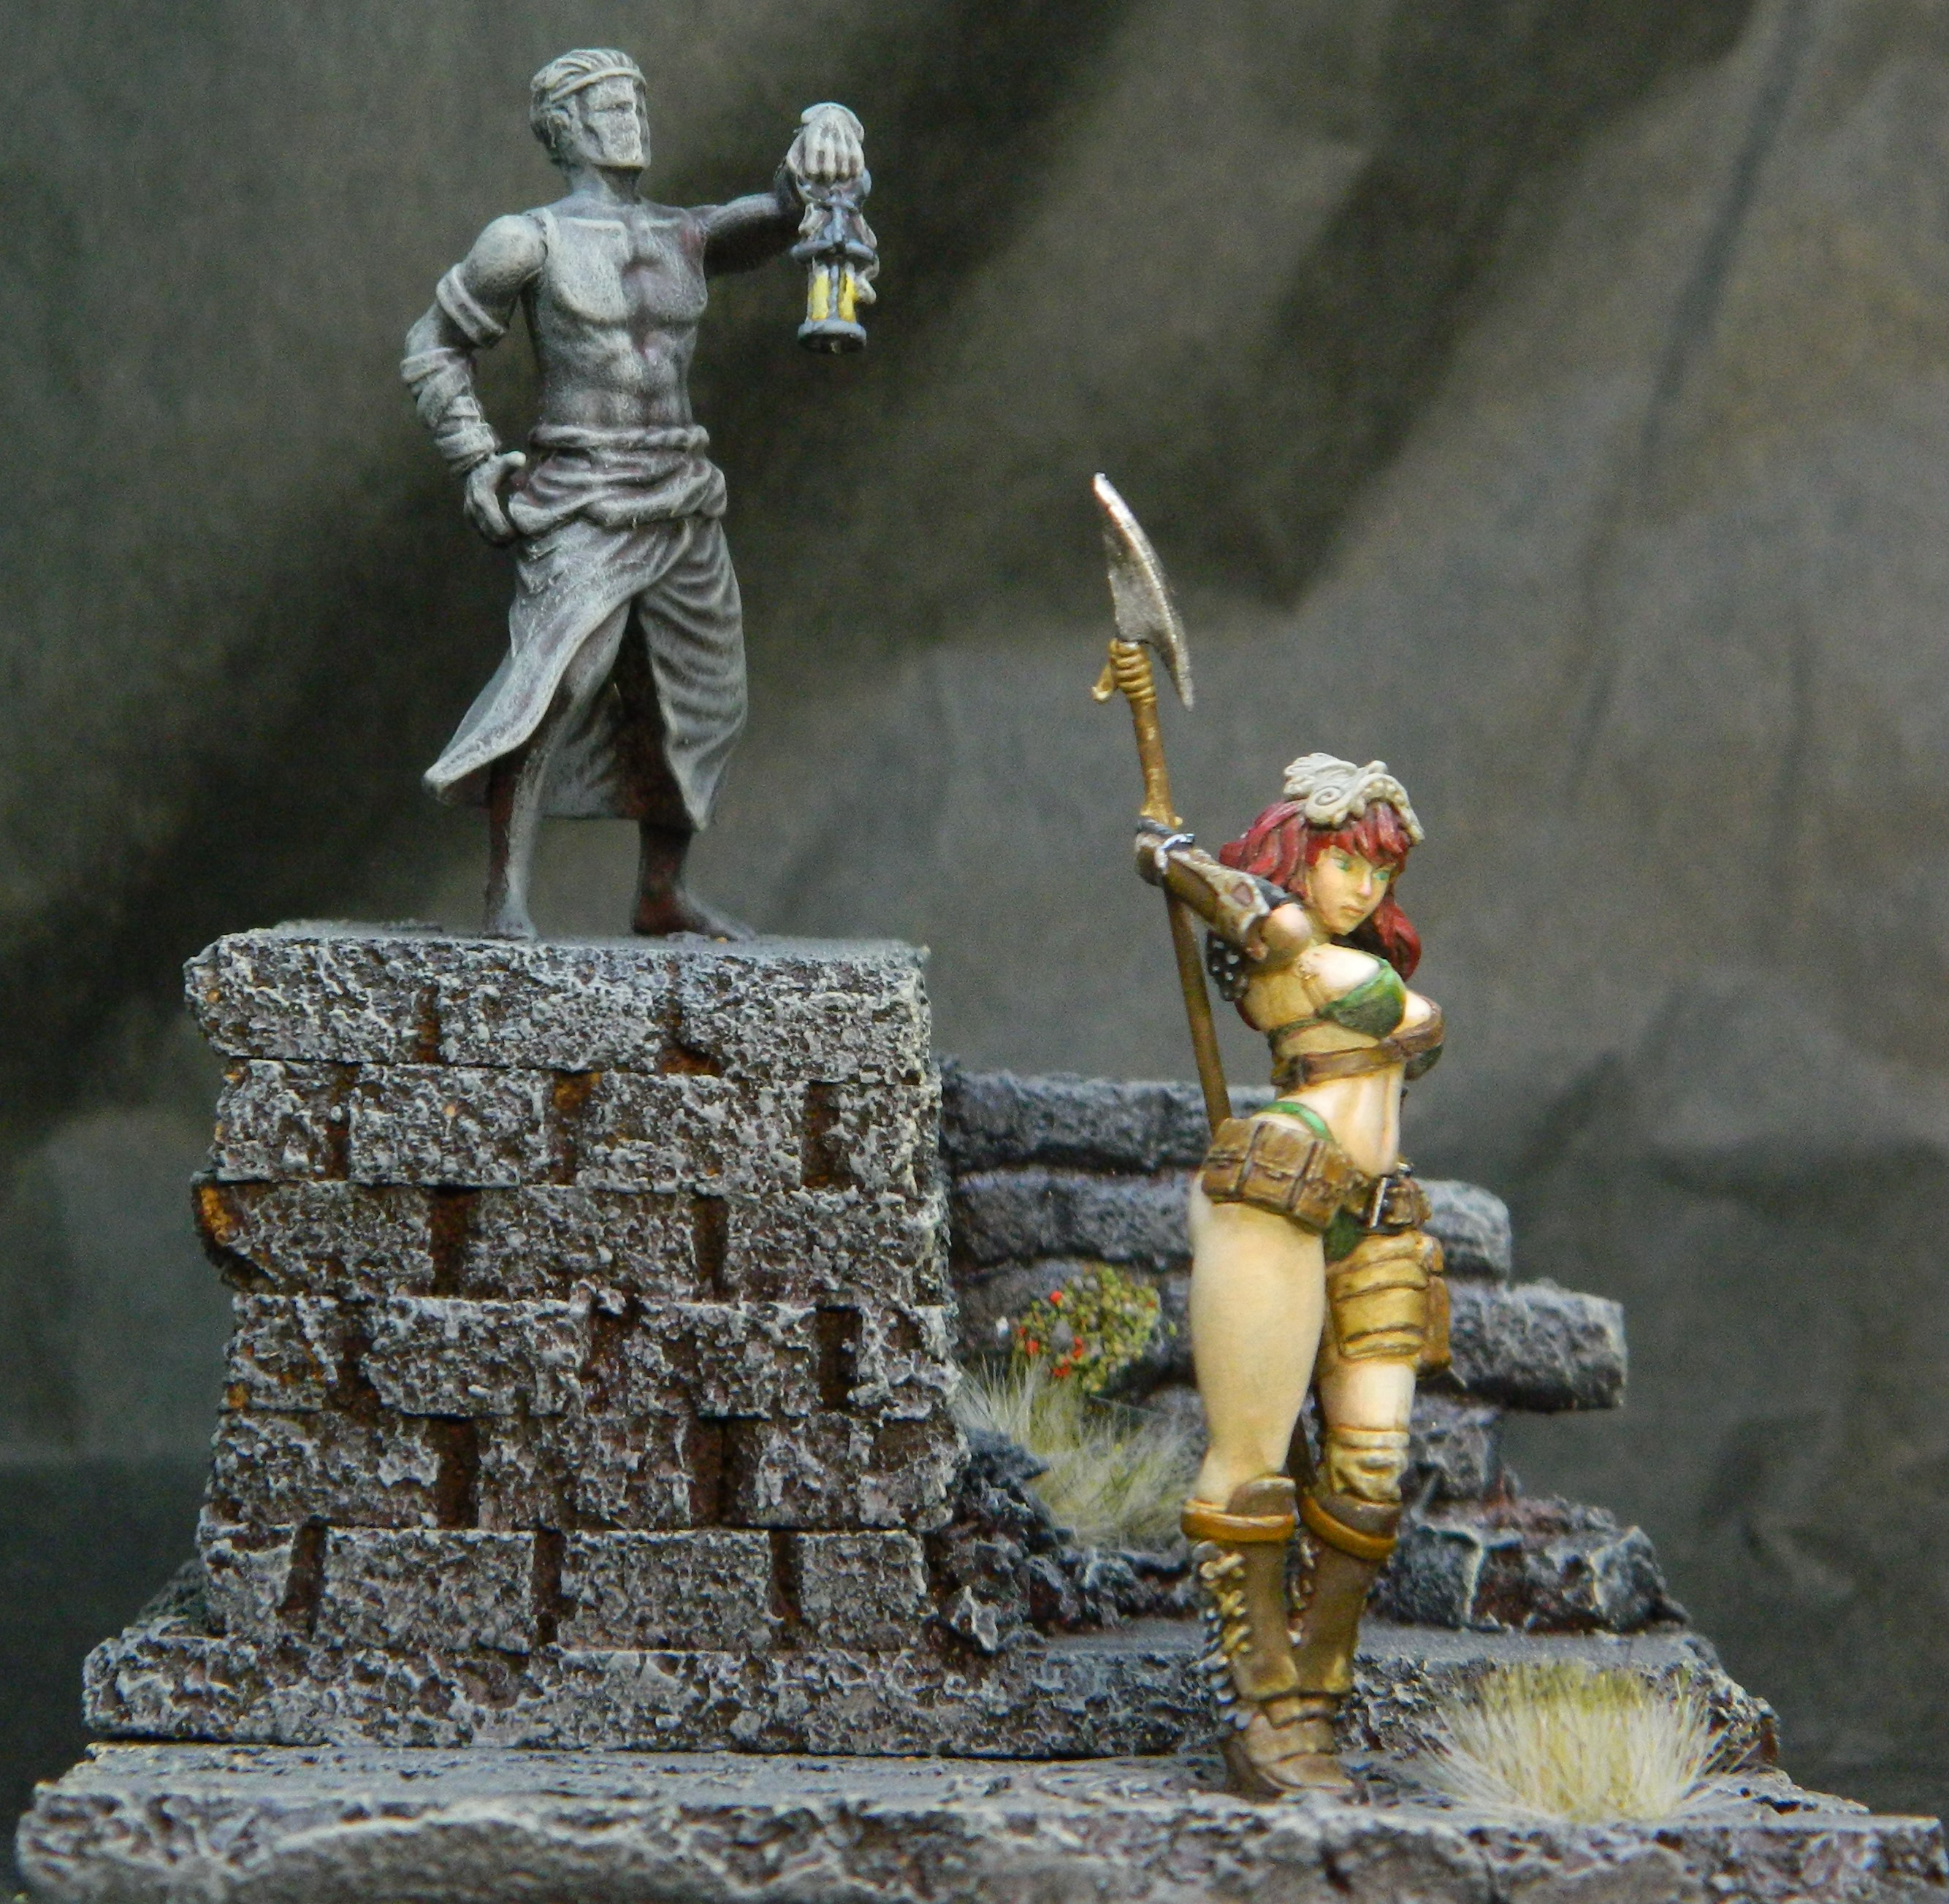
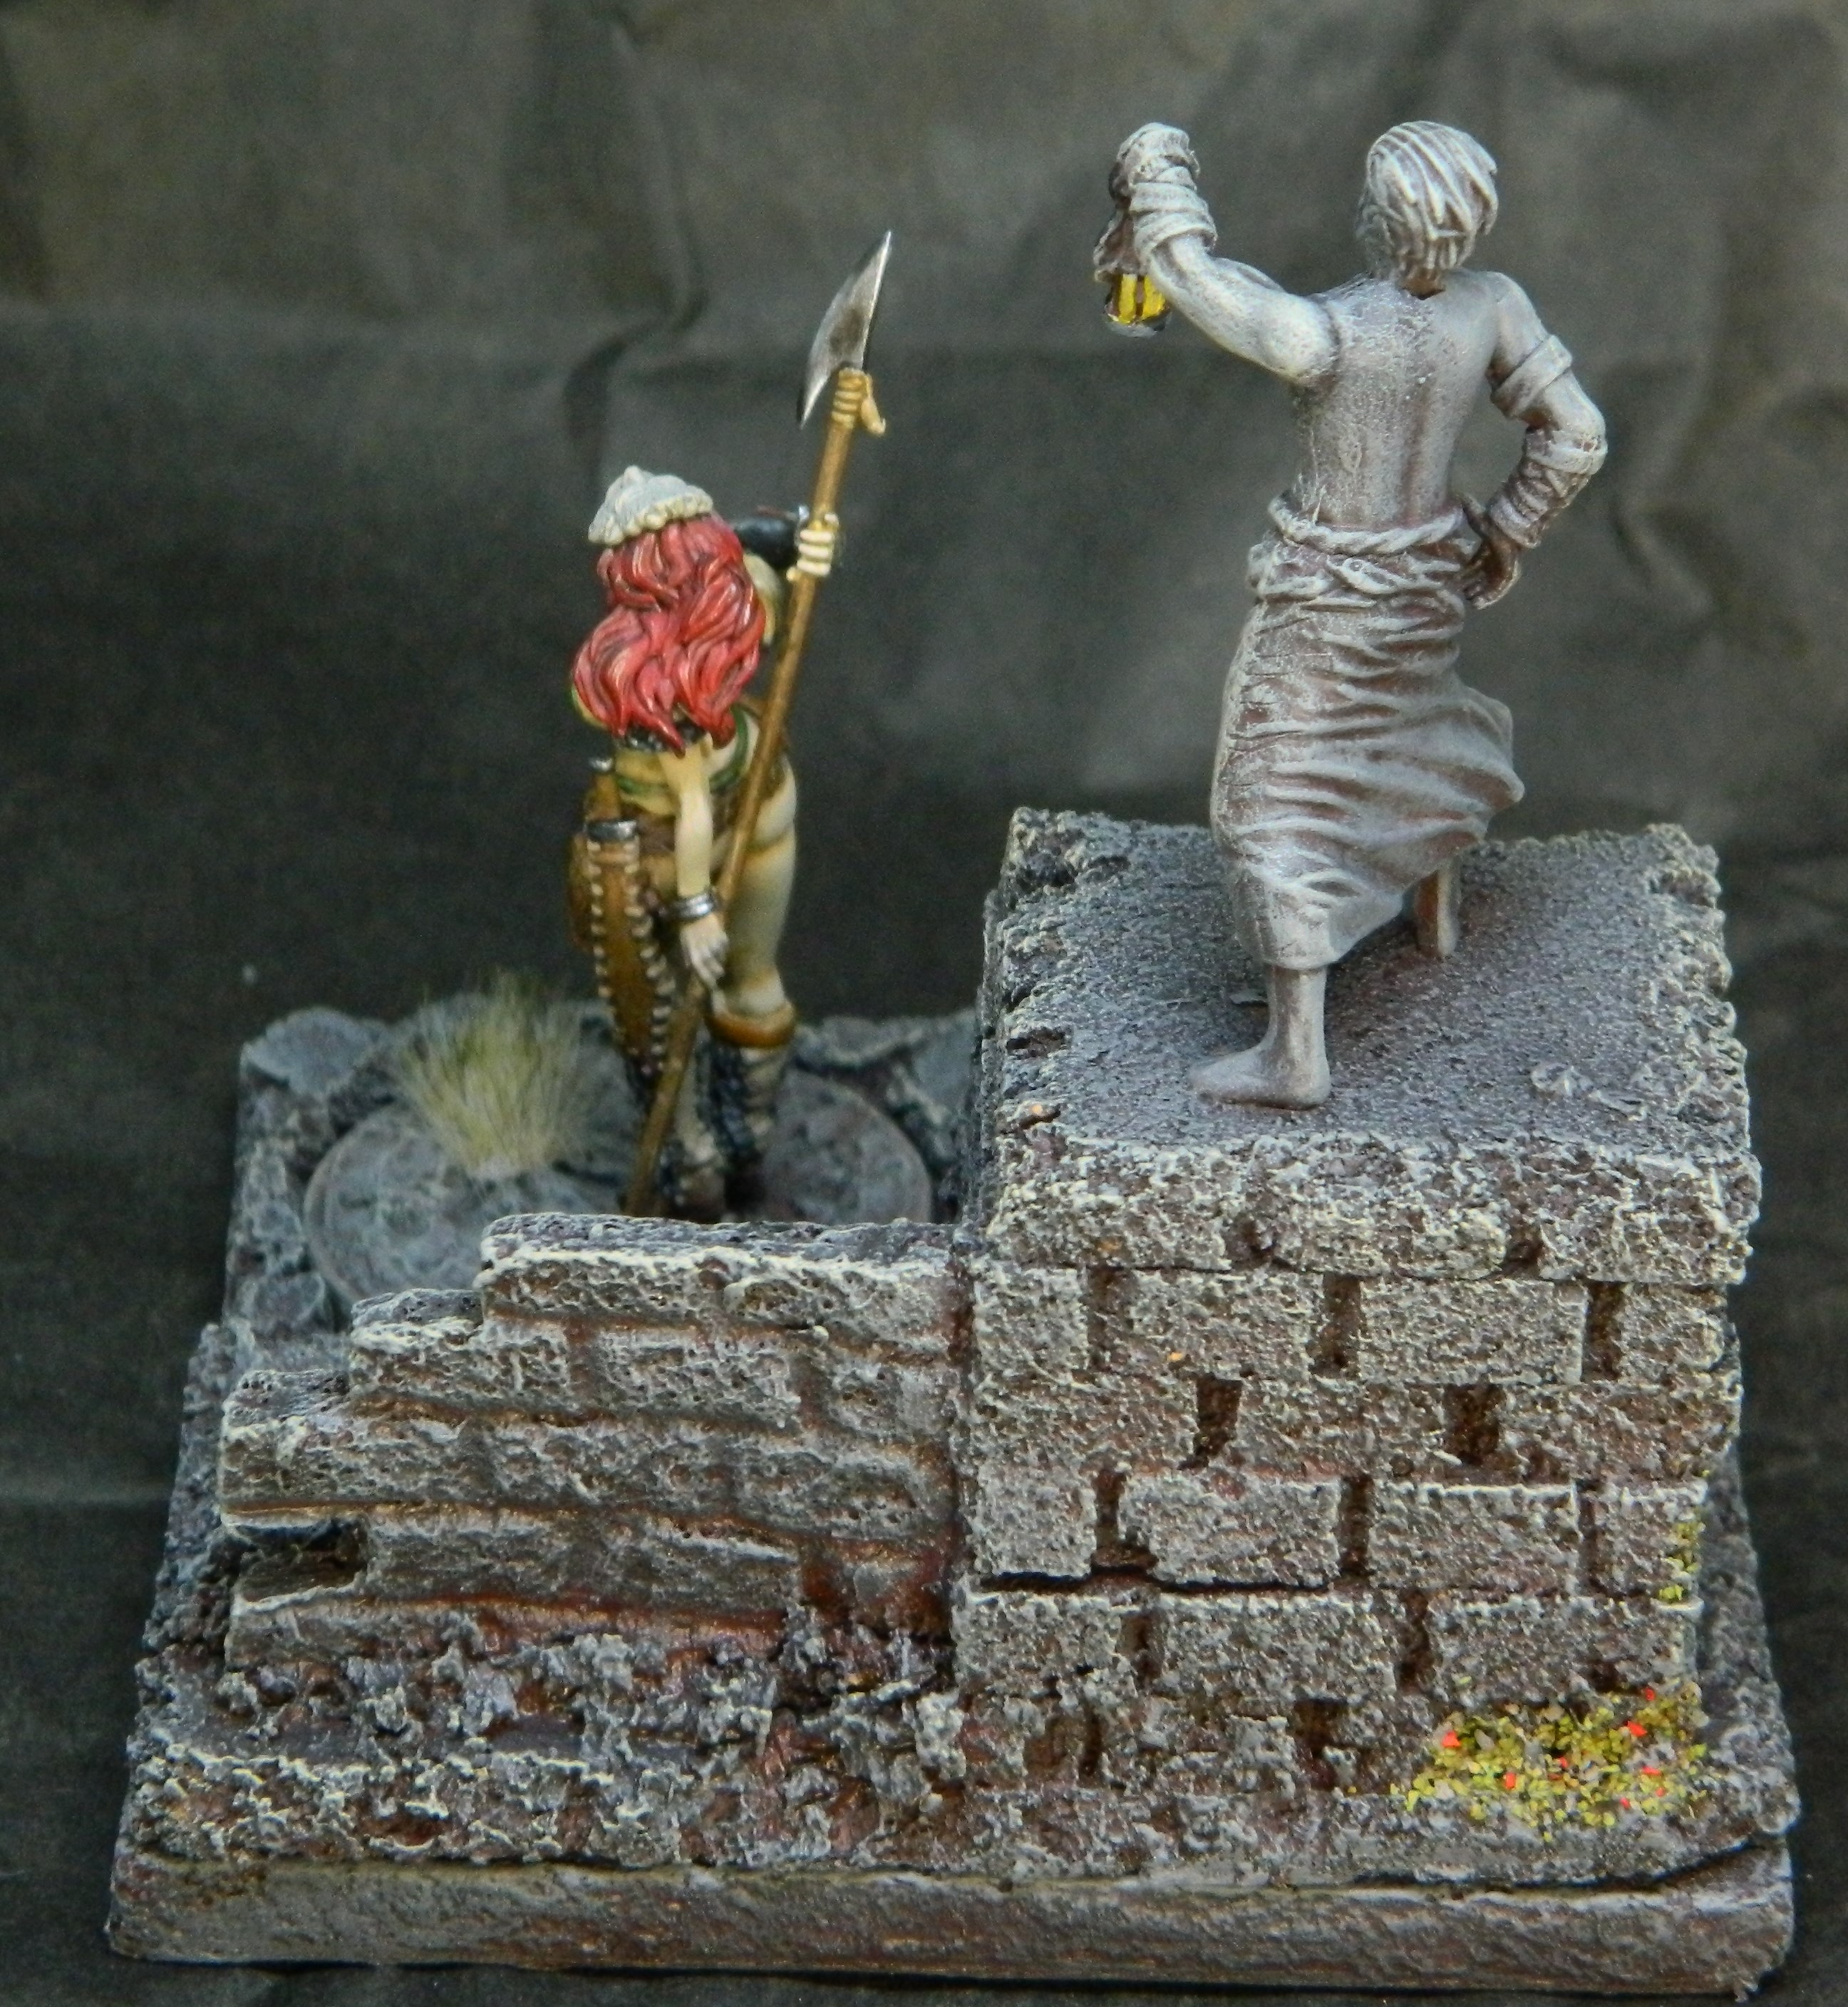
So that’s it! My entry to the Kingdom Death Pin-up Painting competition.
It didn’t win a prize, but the quality of some of the other entries was amazing! Do check it out!
6 Oct 22: I thought I was done...
Now that the competition winners have been announced, I can show off what I had intended and what I finally submitted.
As said previously, the original close date was 1 Oct 22, but this was extended on the last day to the 22nd. (It was extended again later ?)
But on 6 Oct, I was ready to submit this:
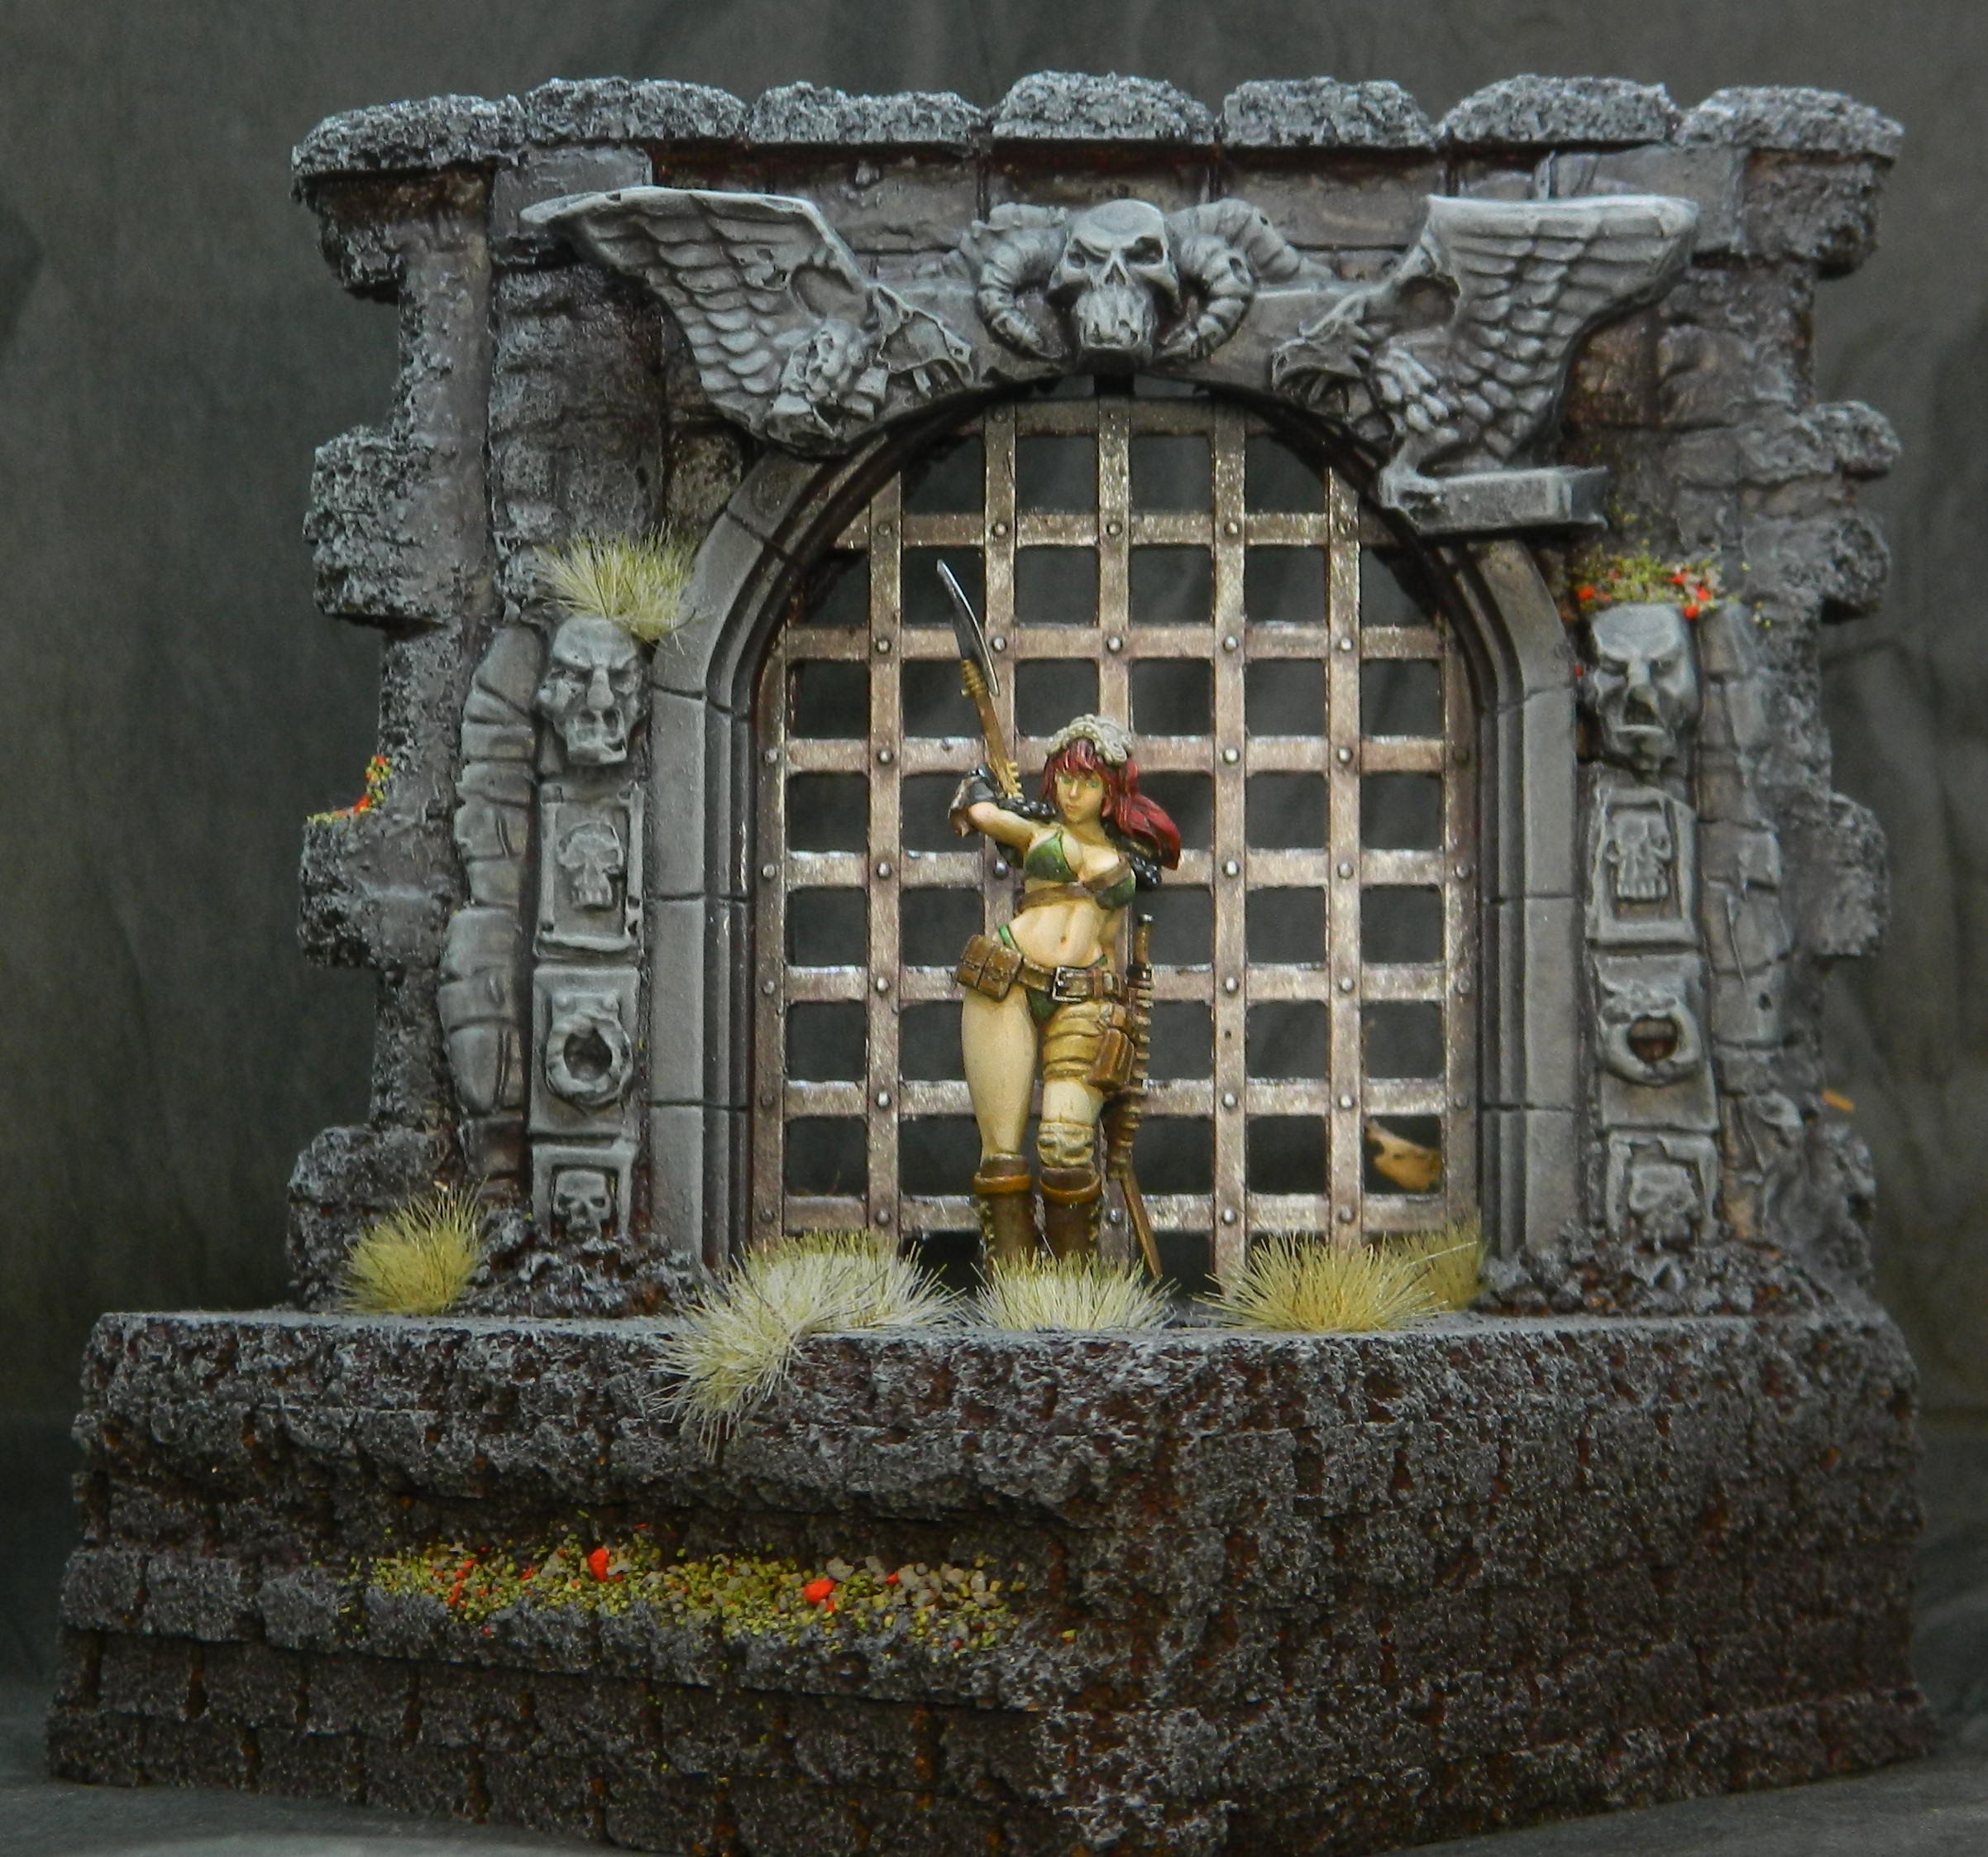
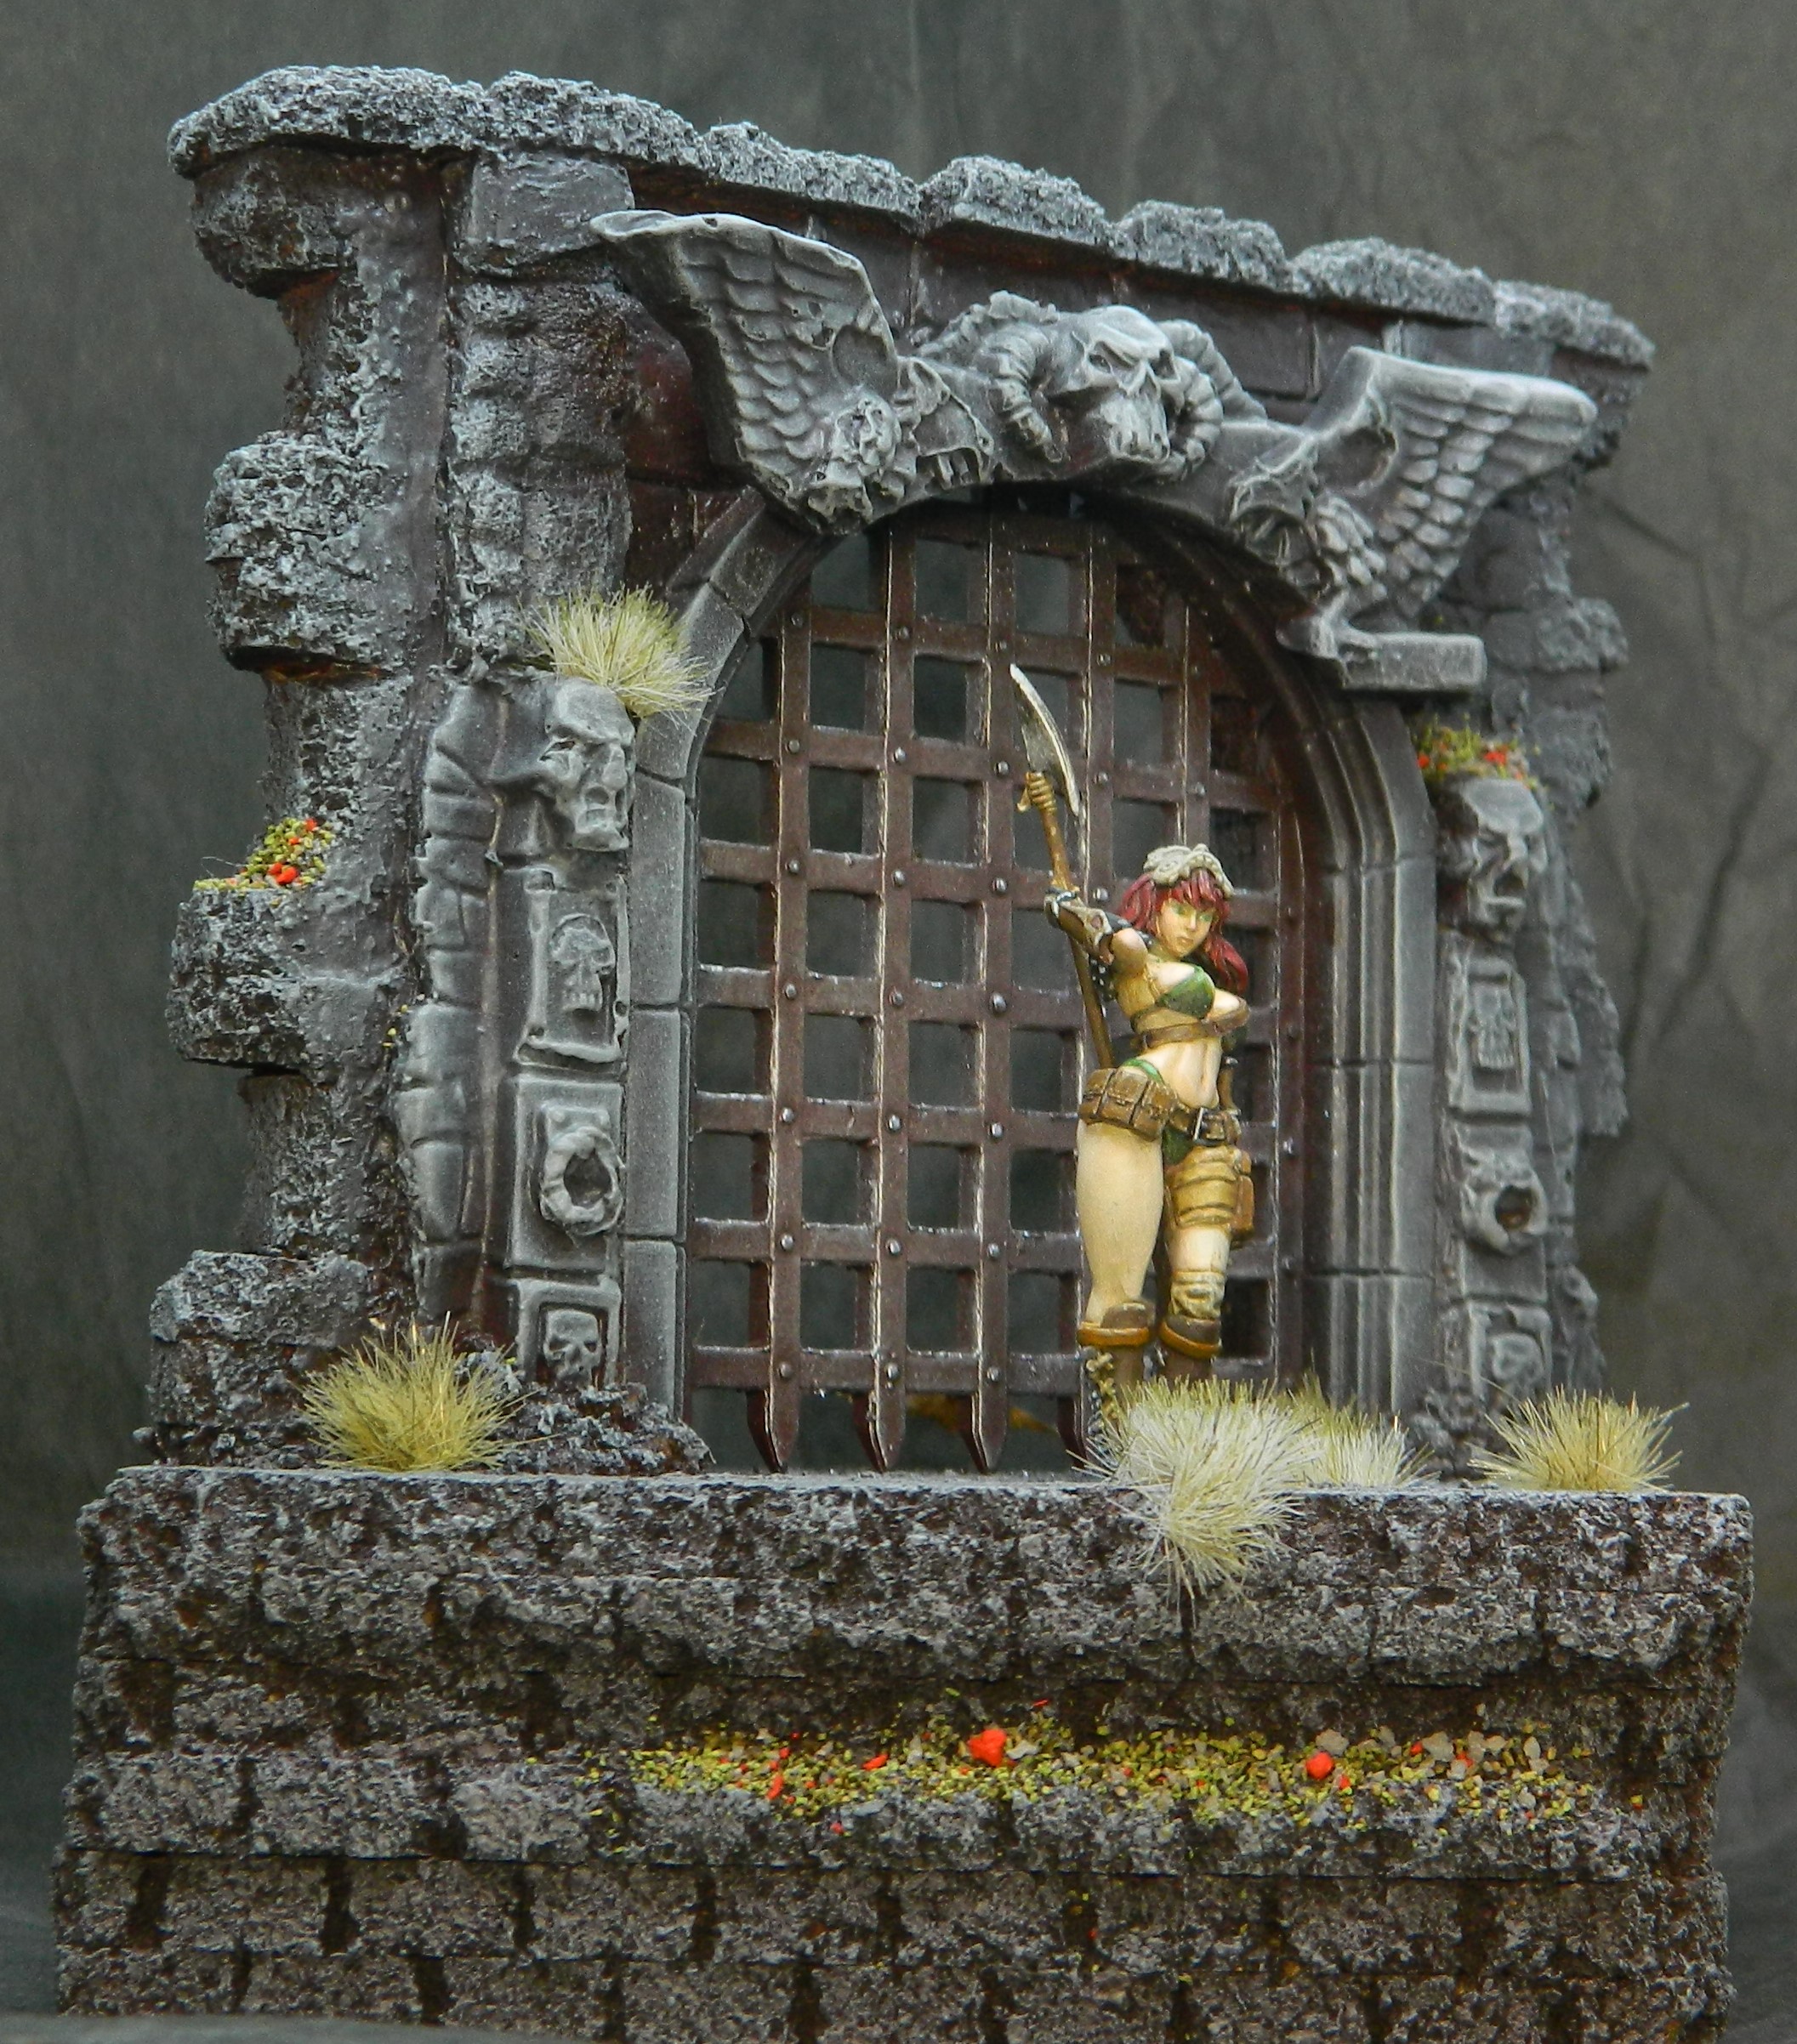
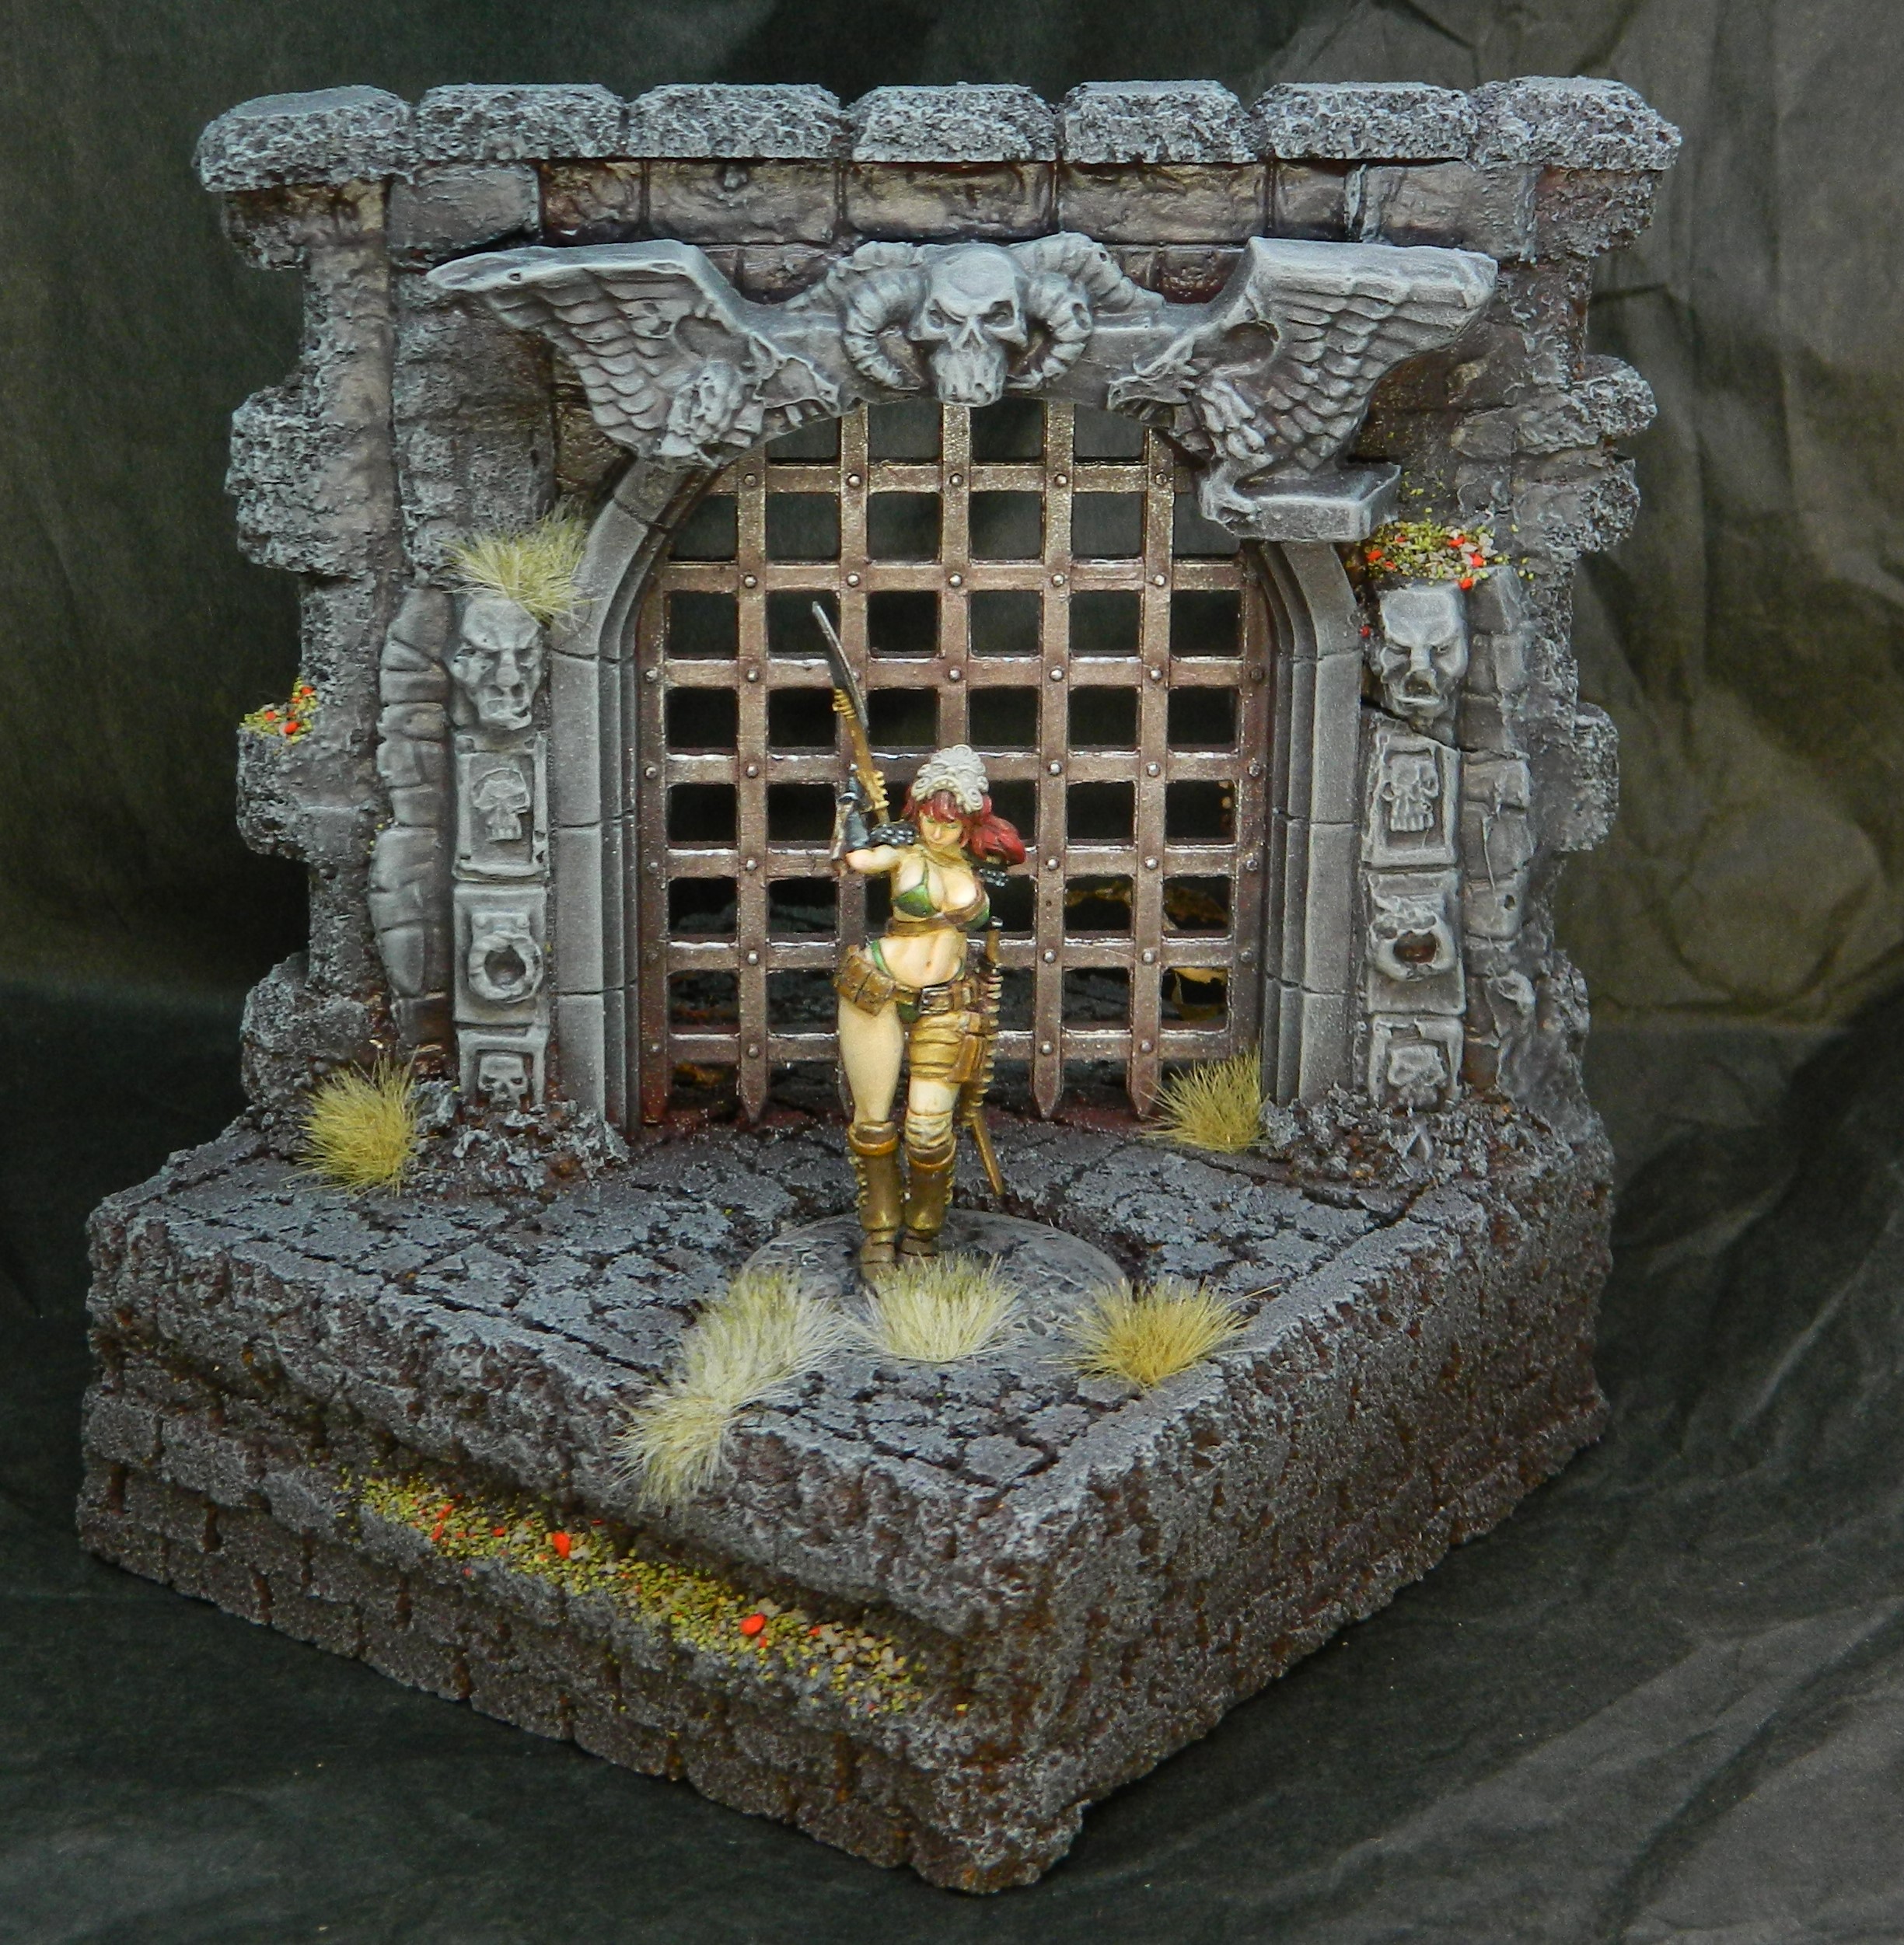
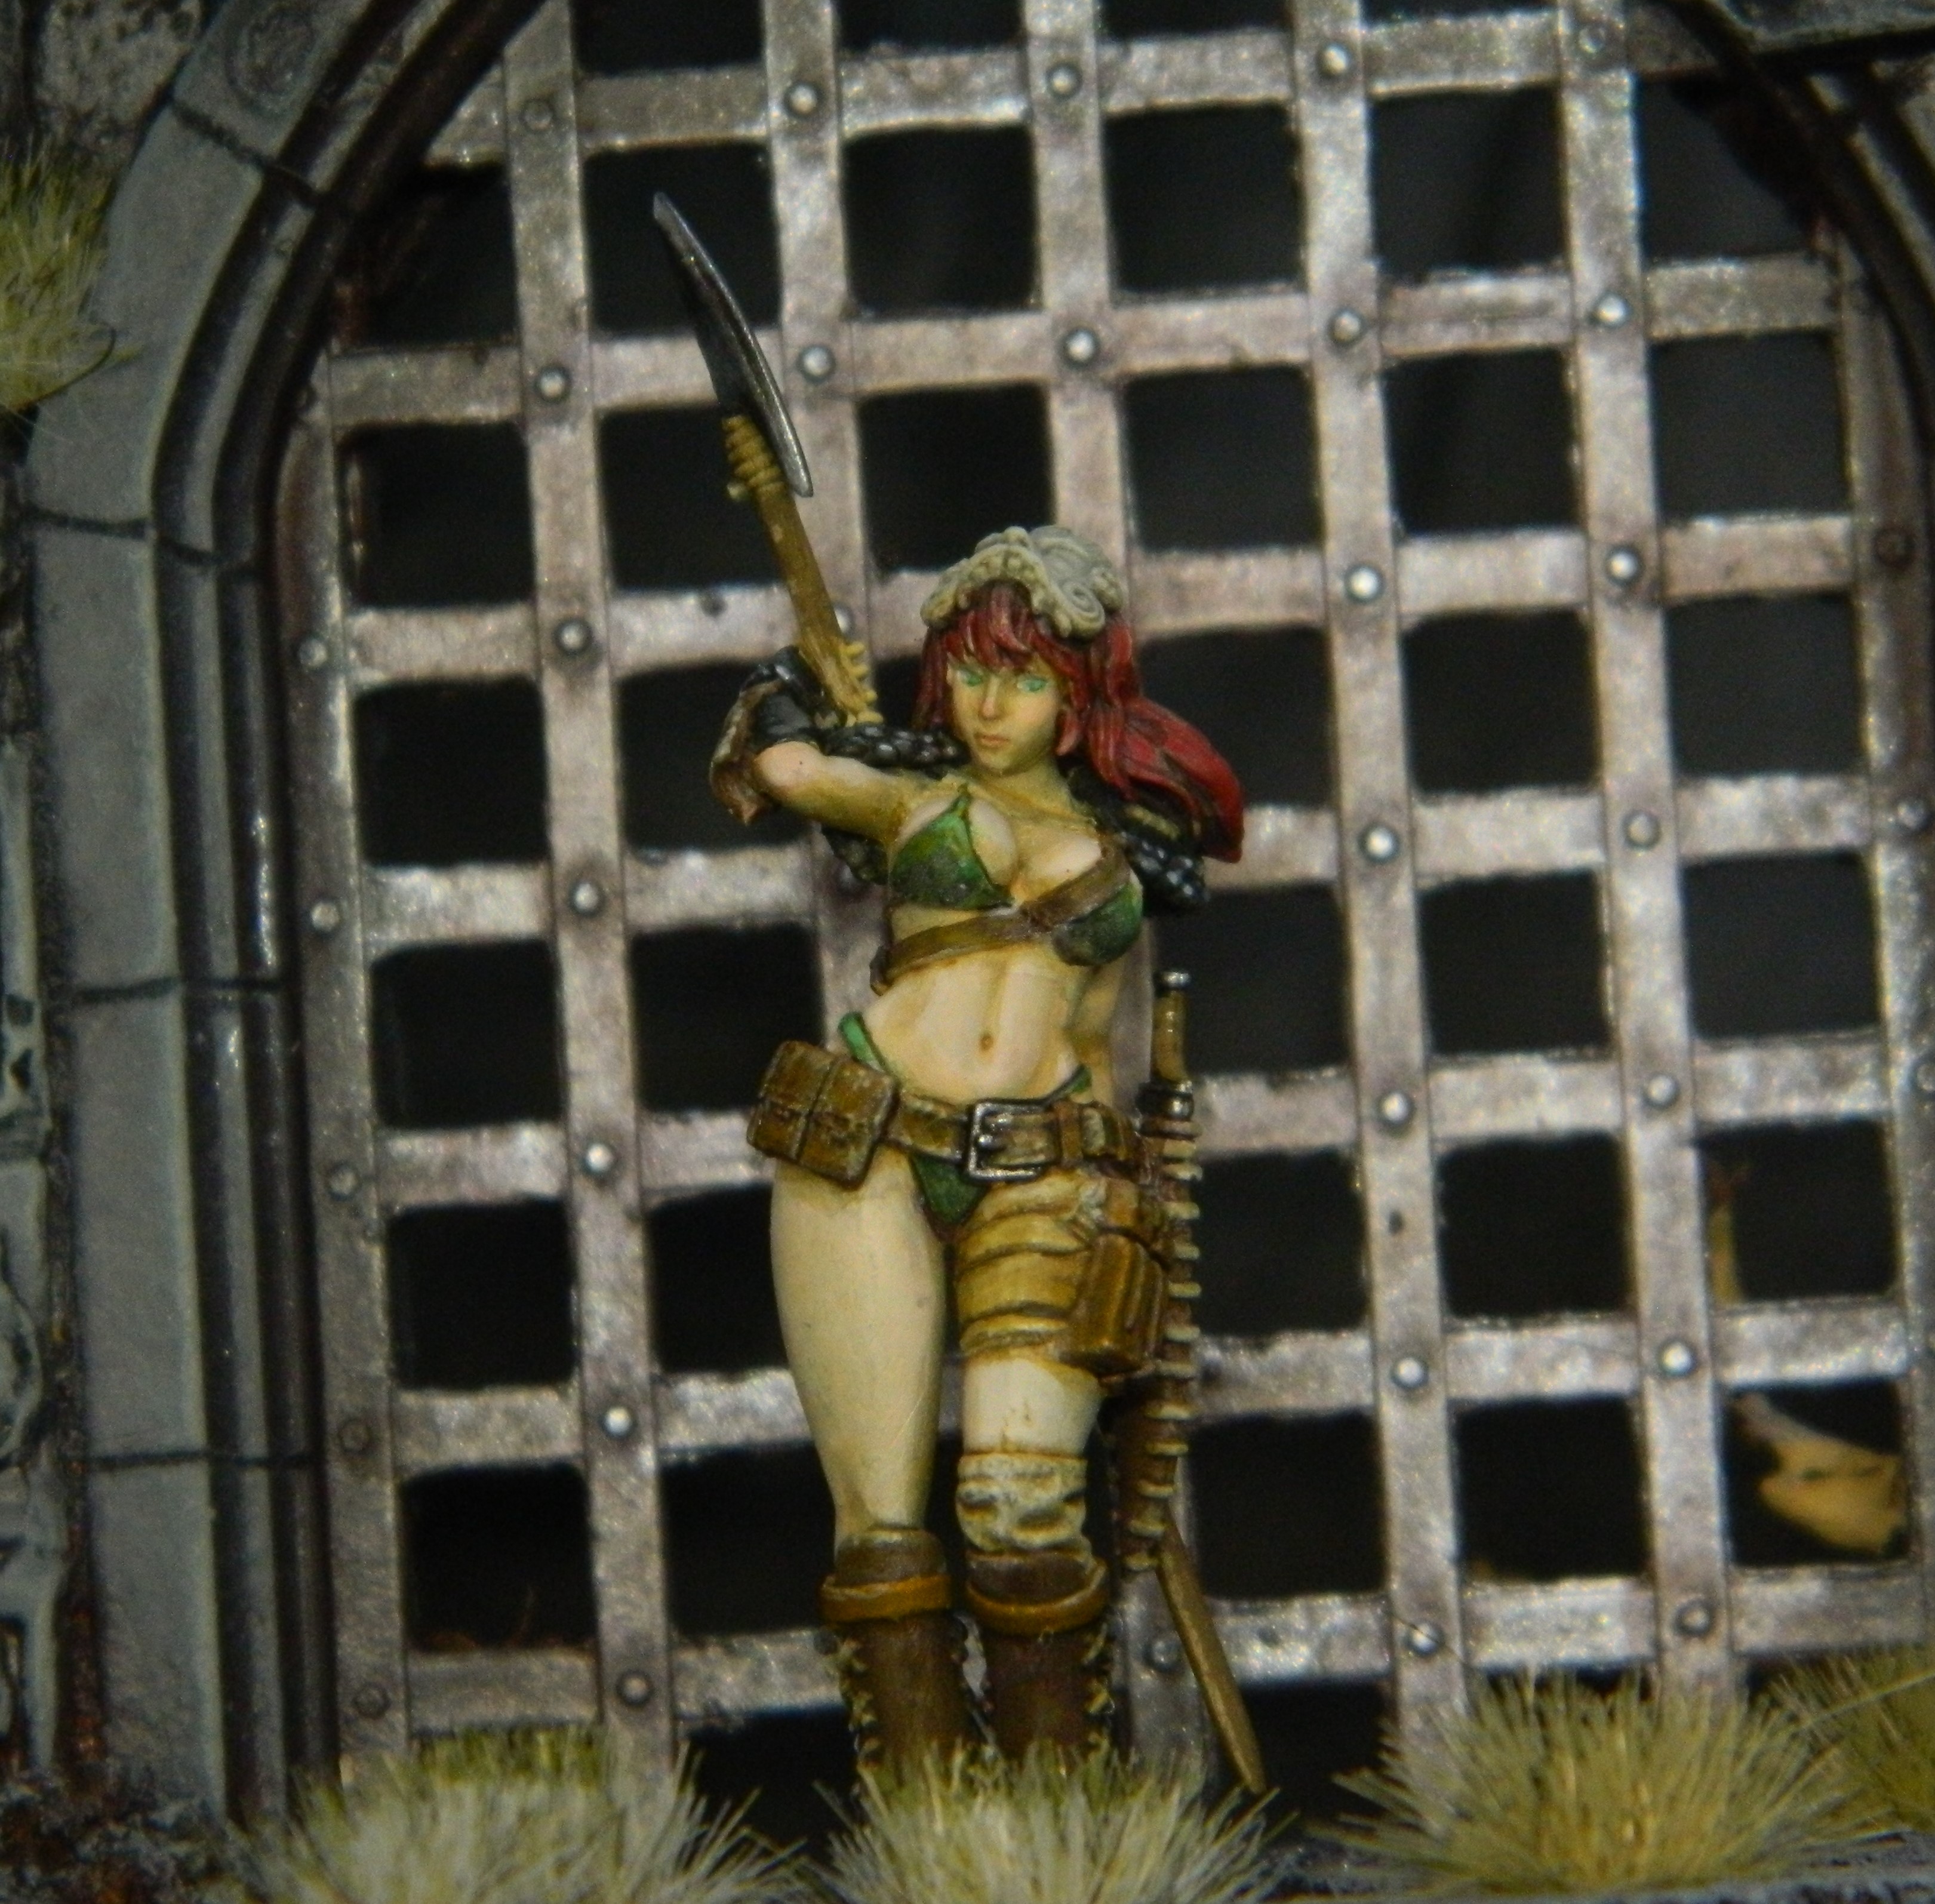 "At the Portcullis"
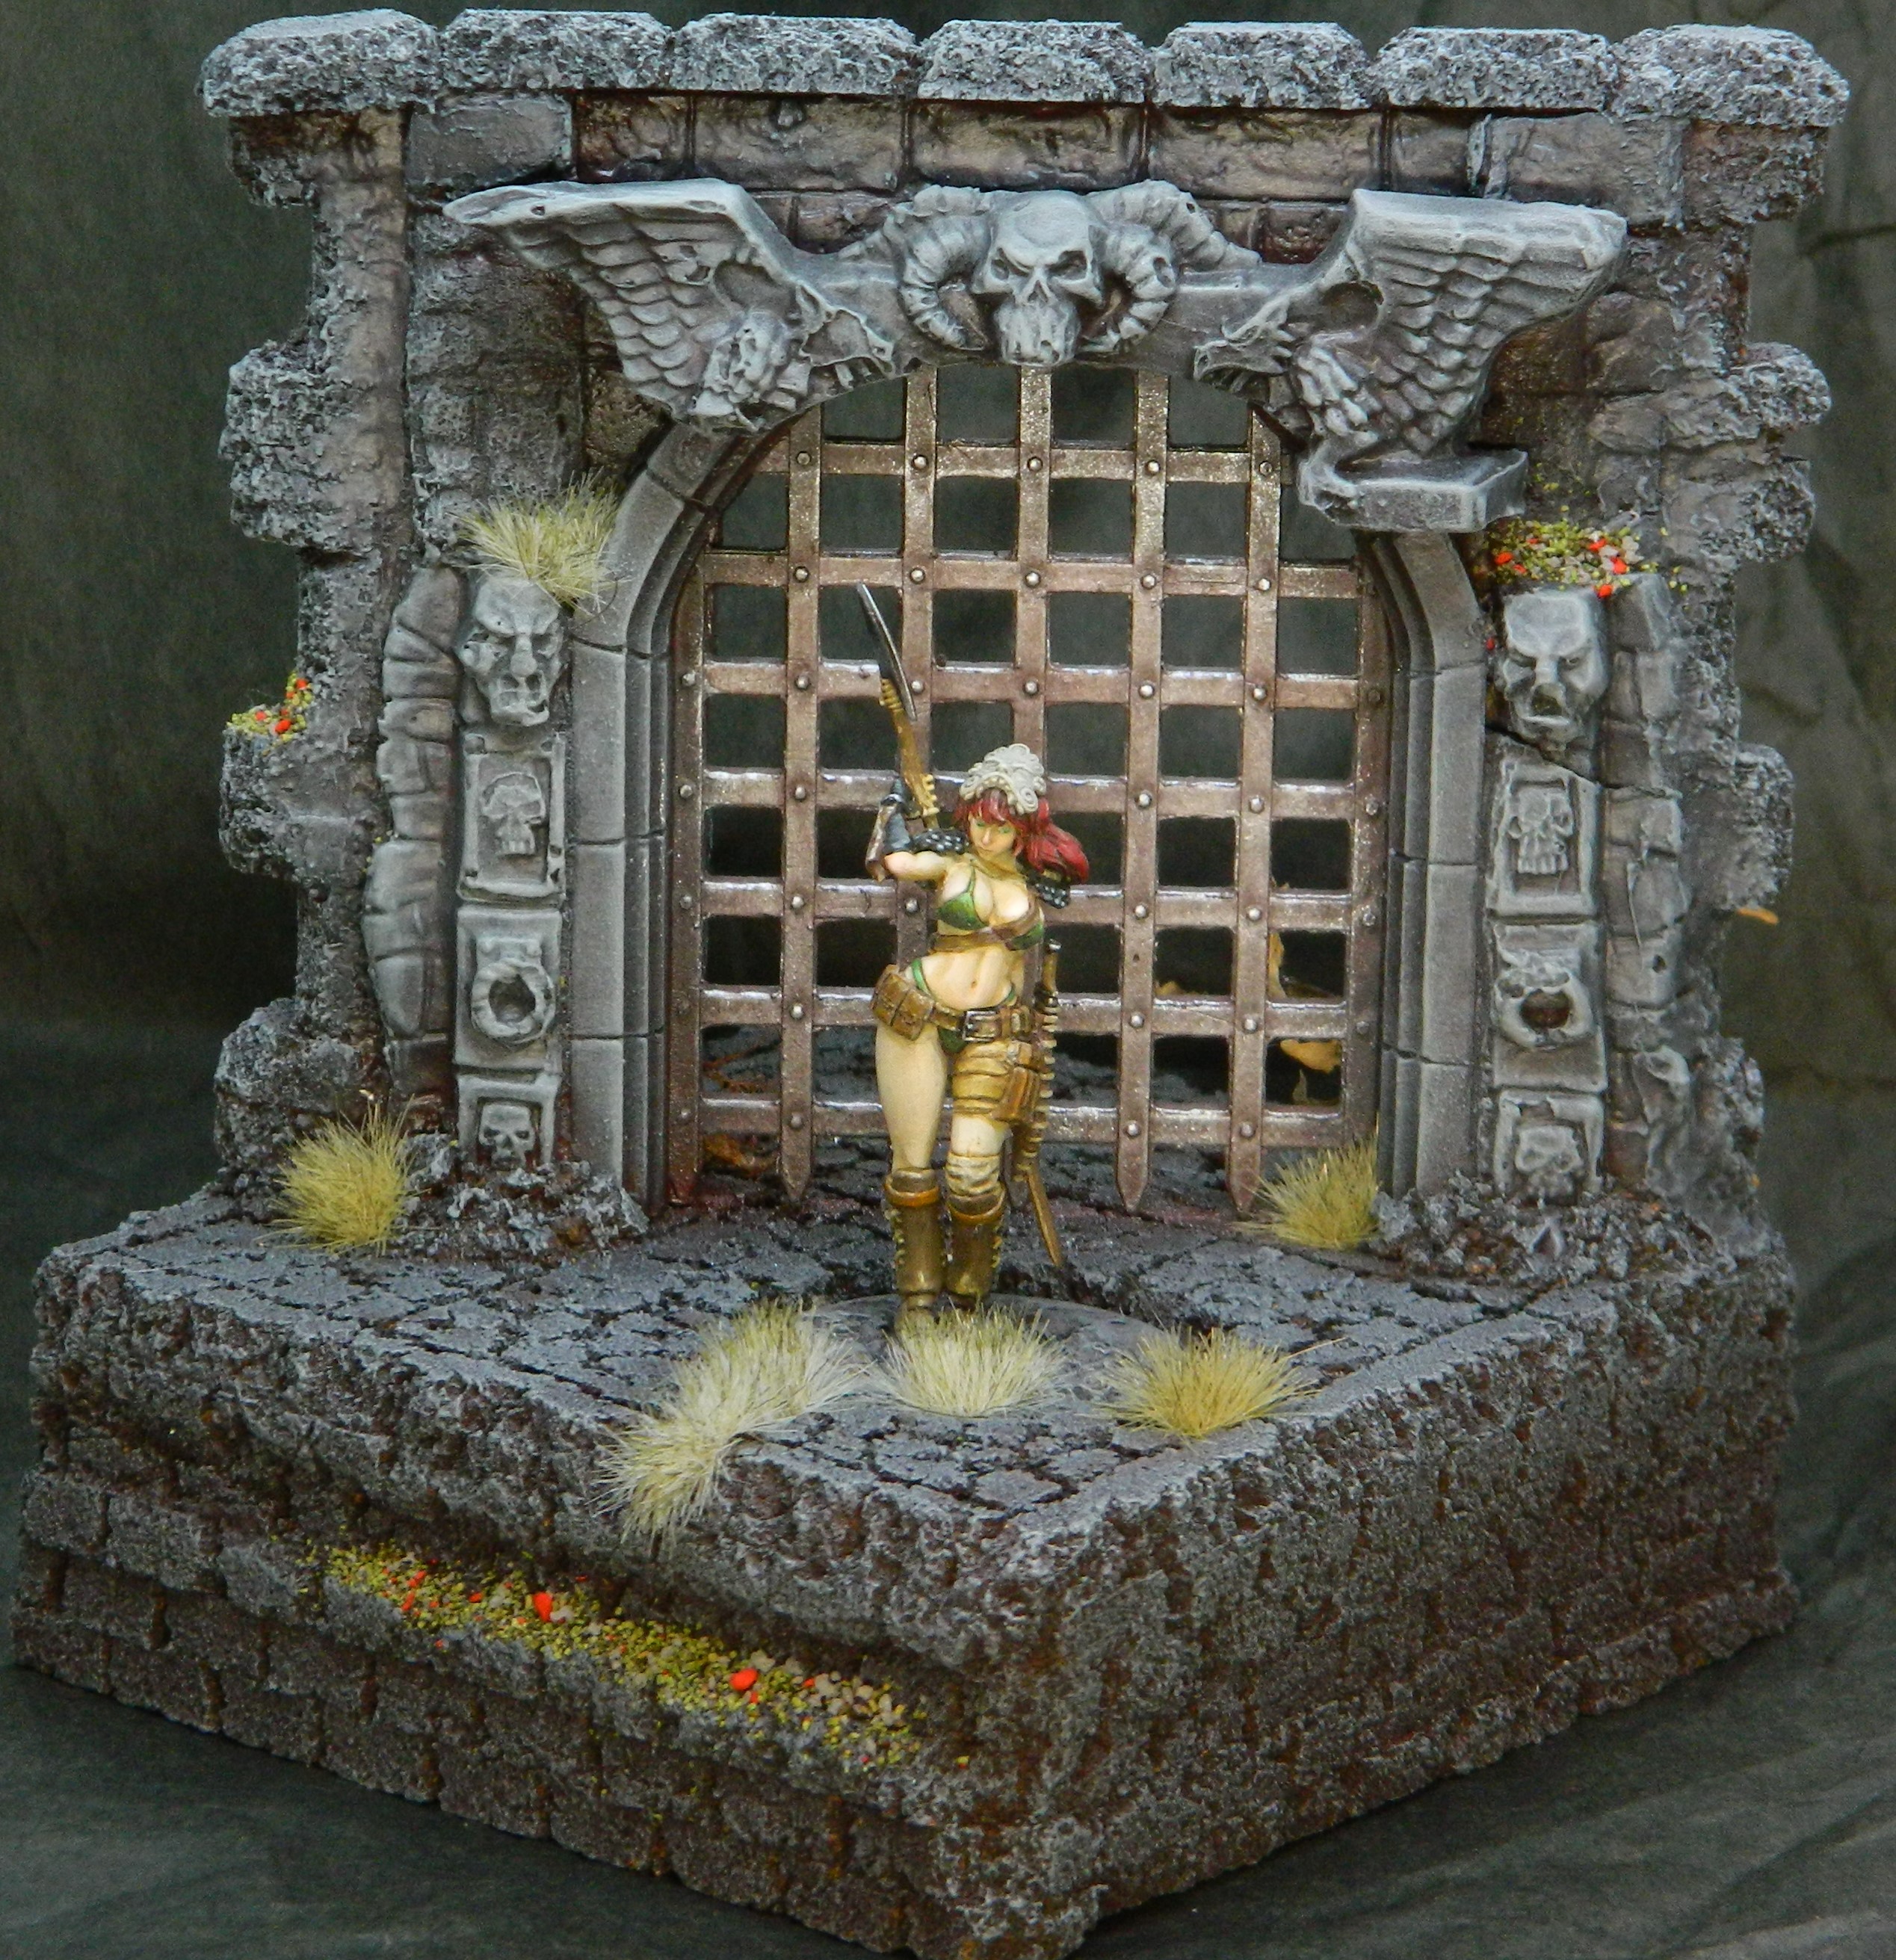
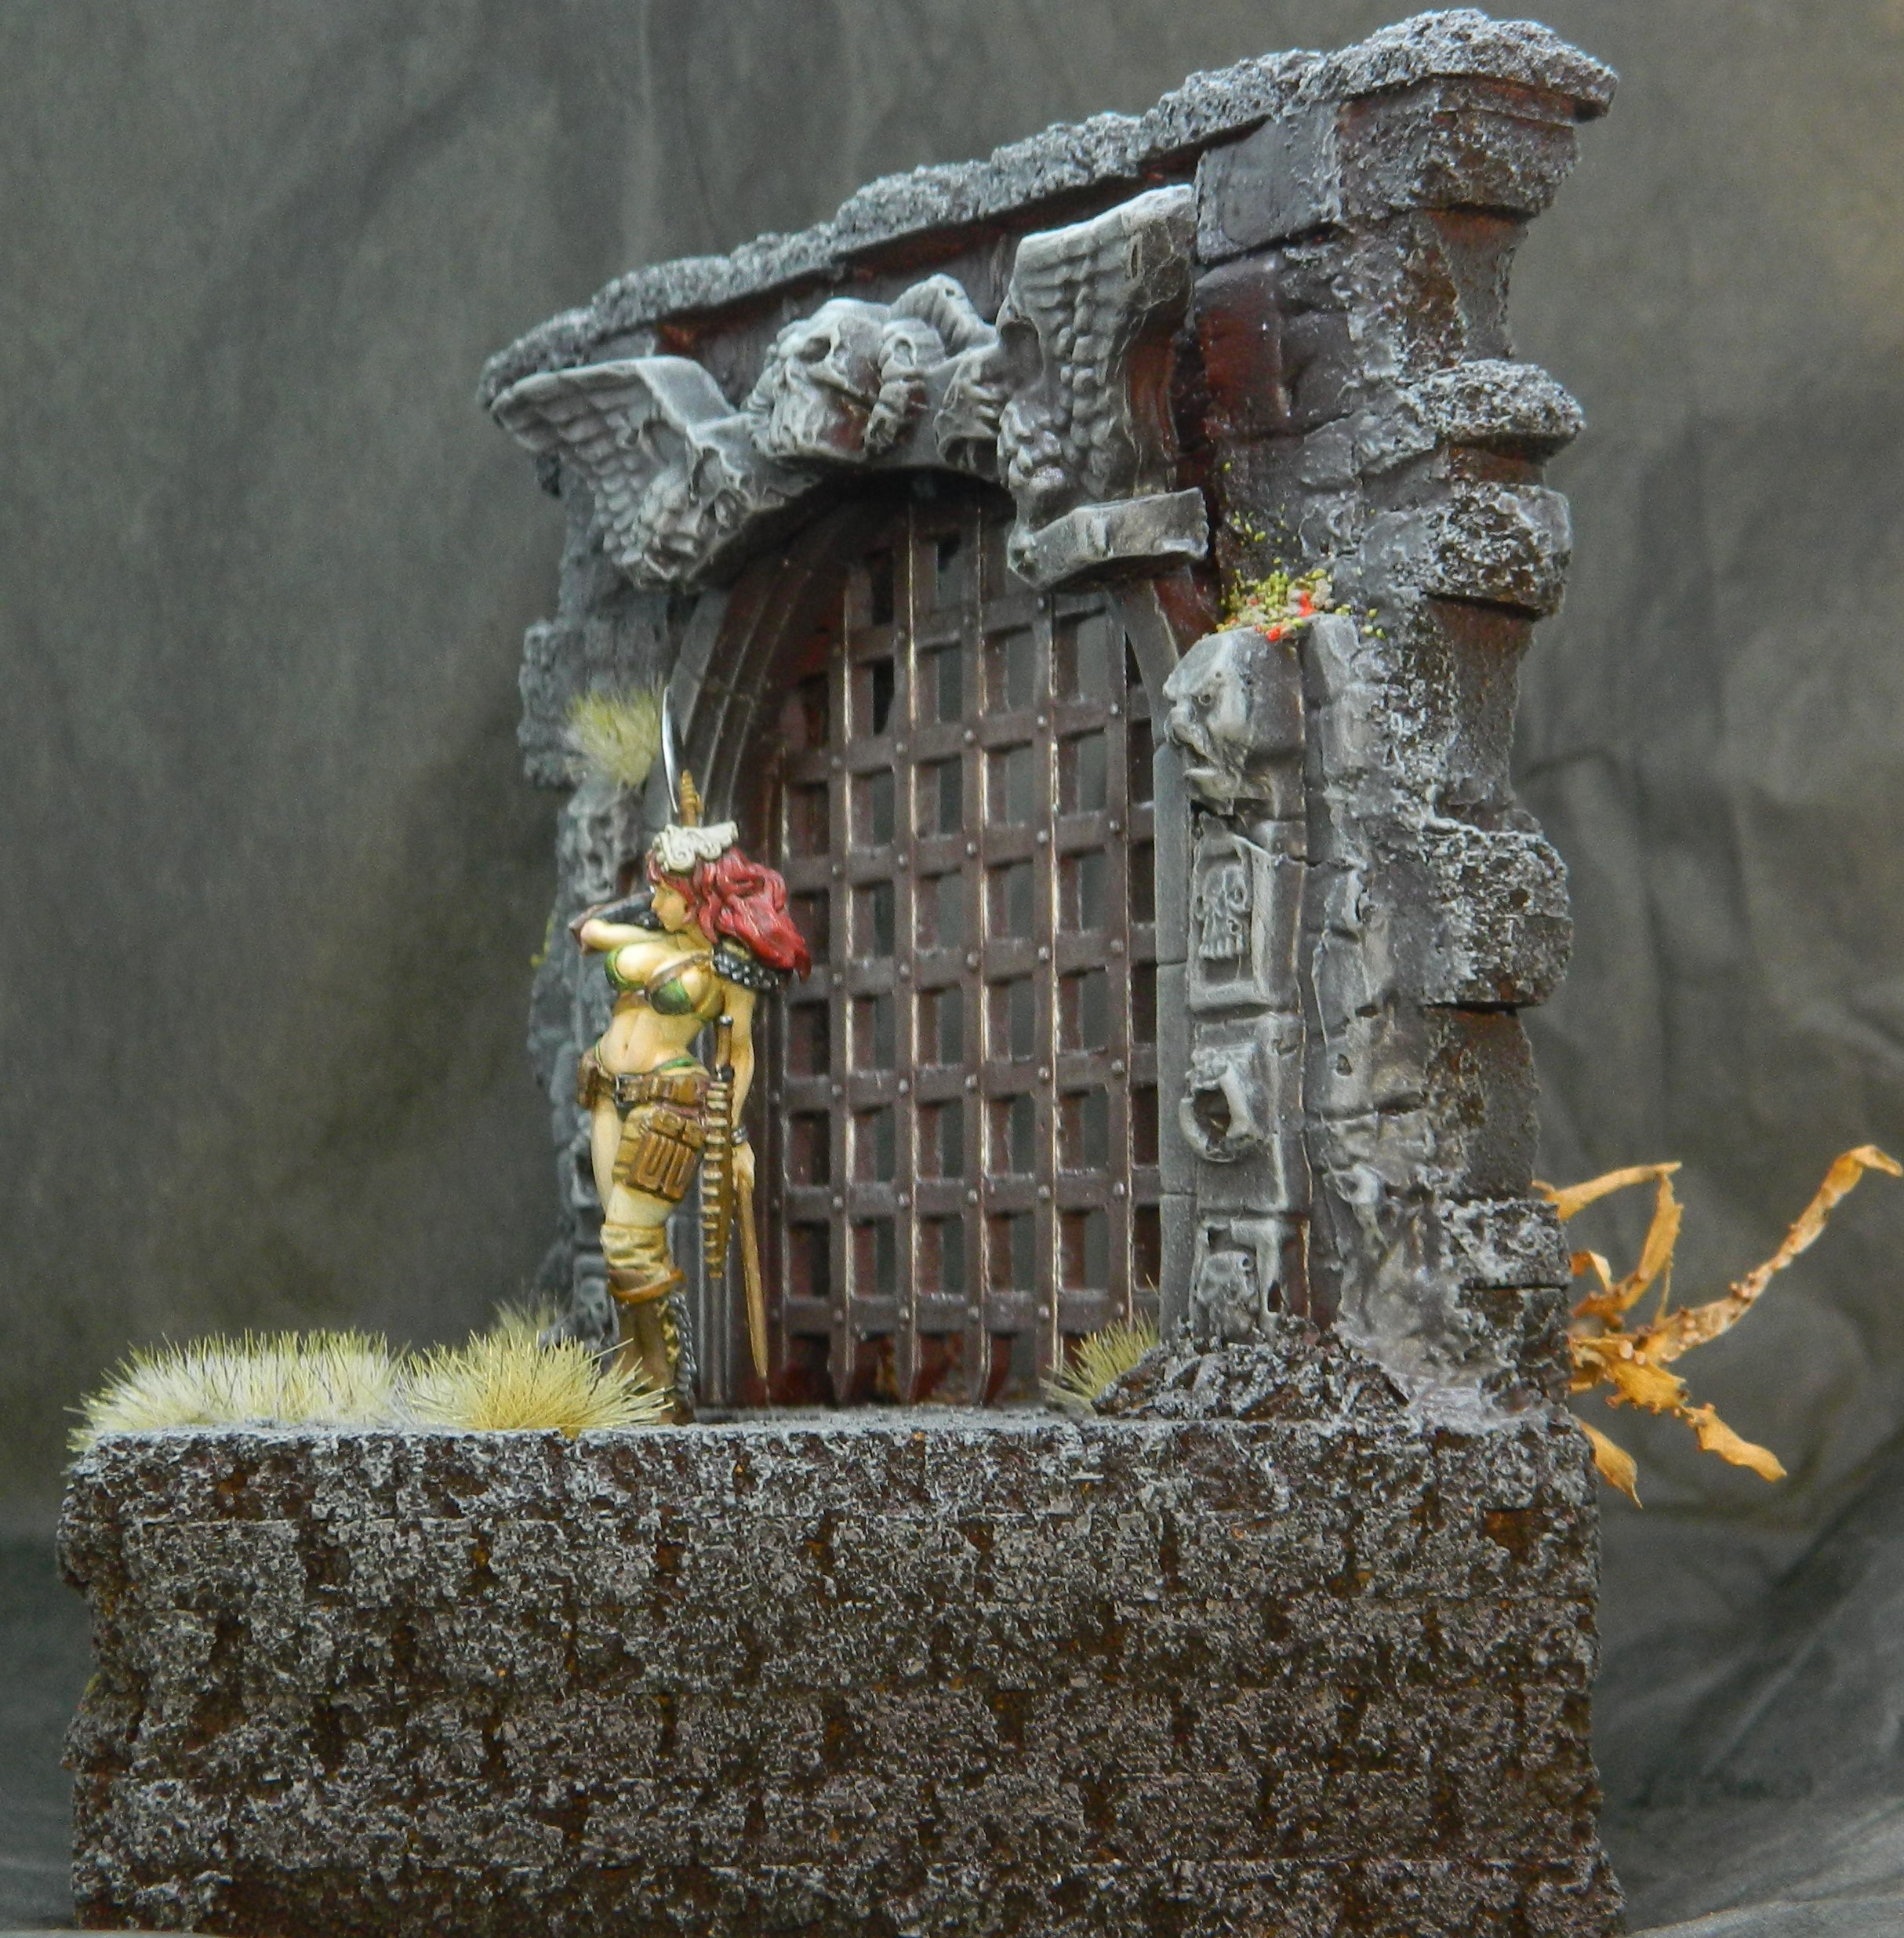


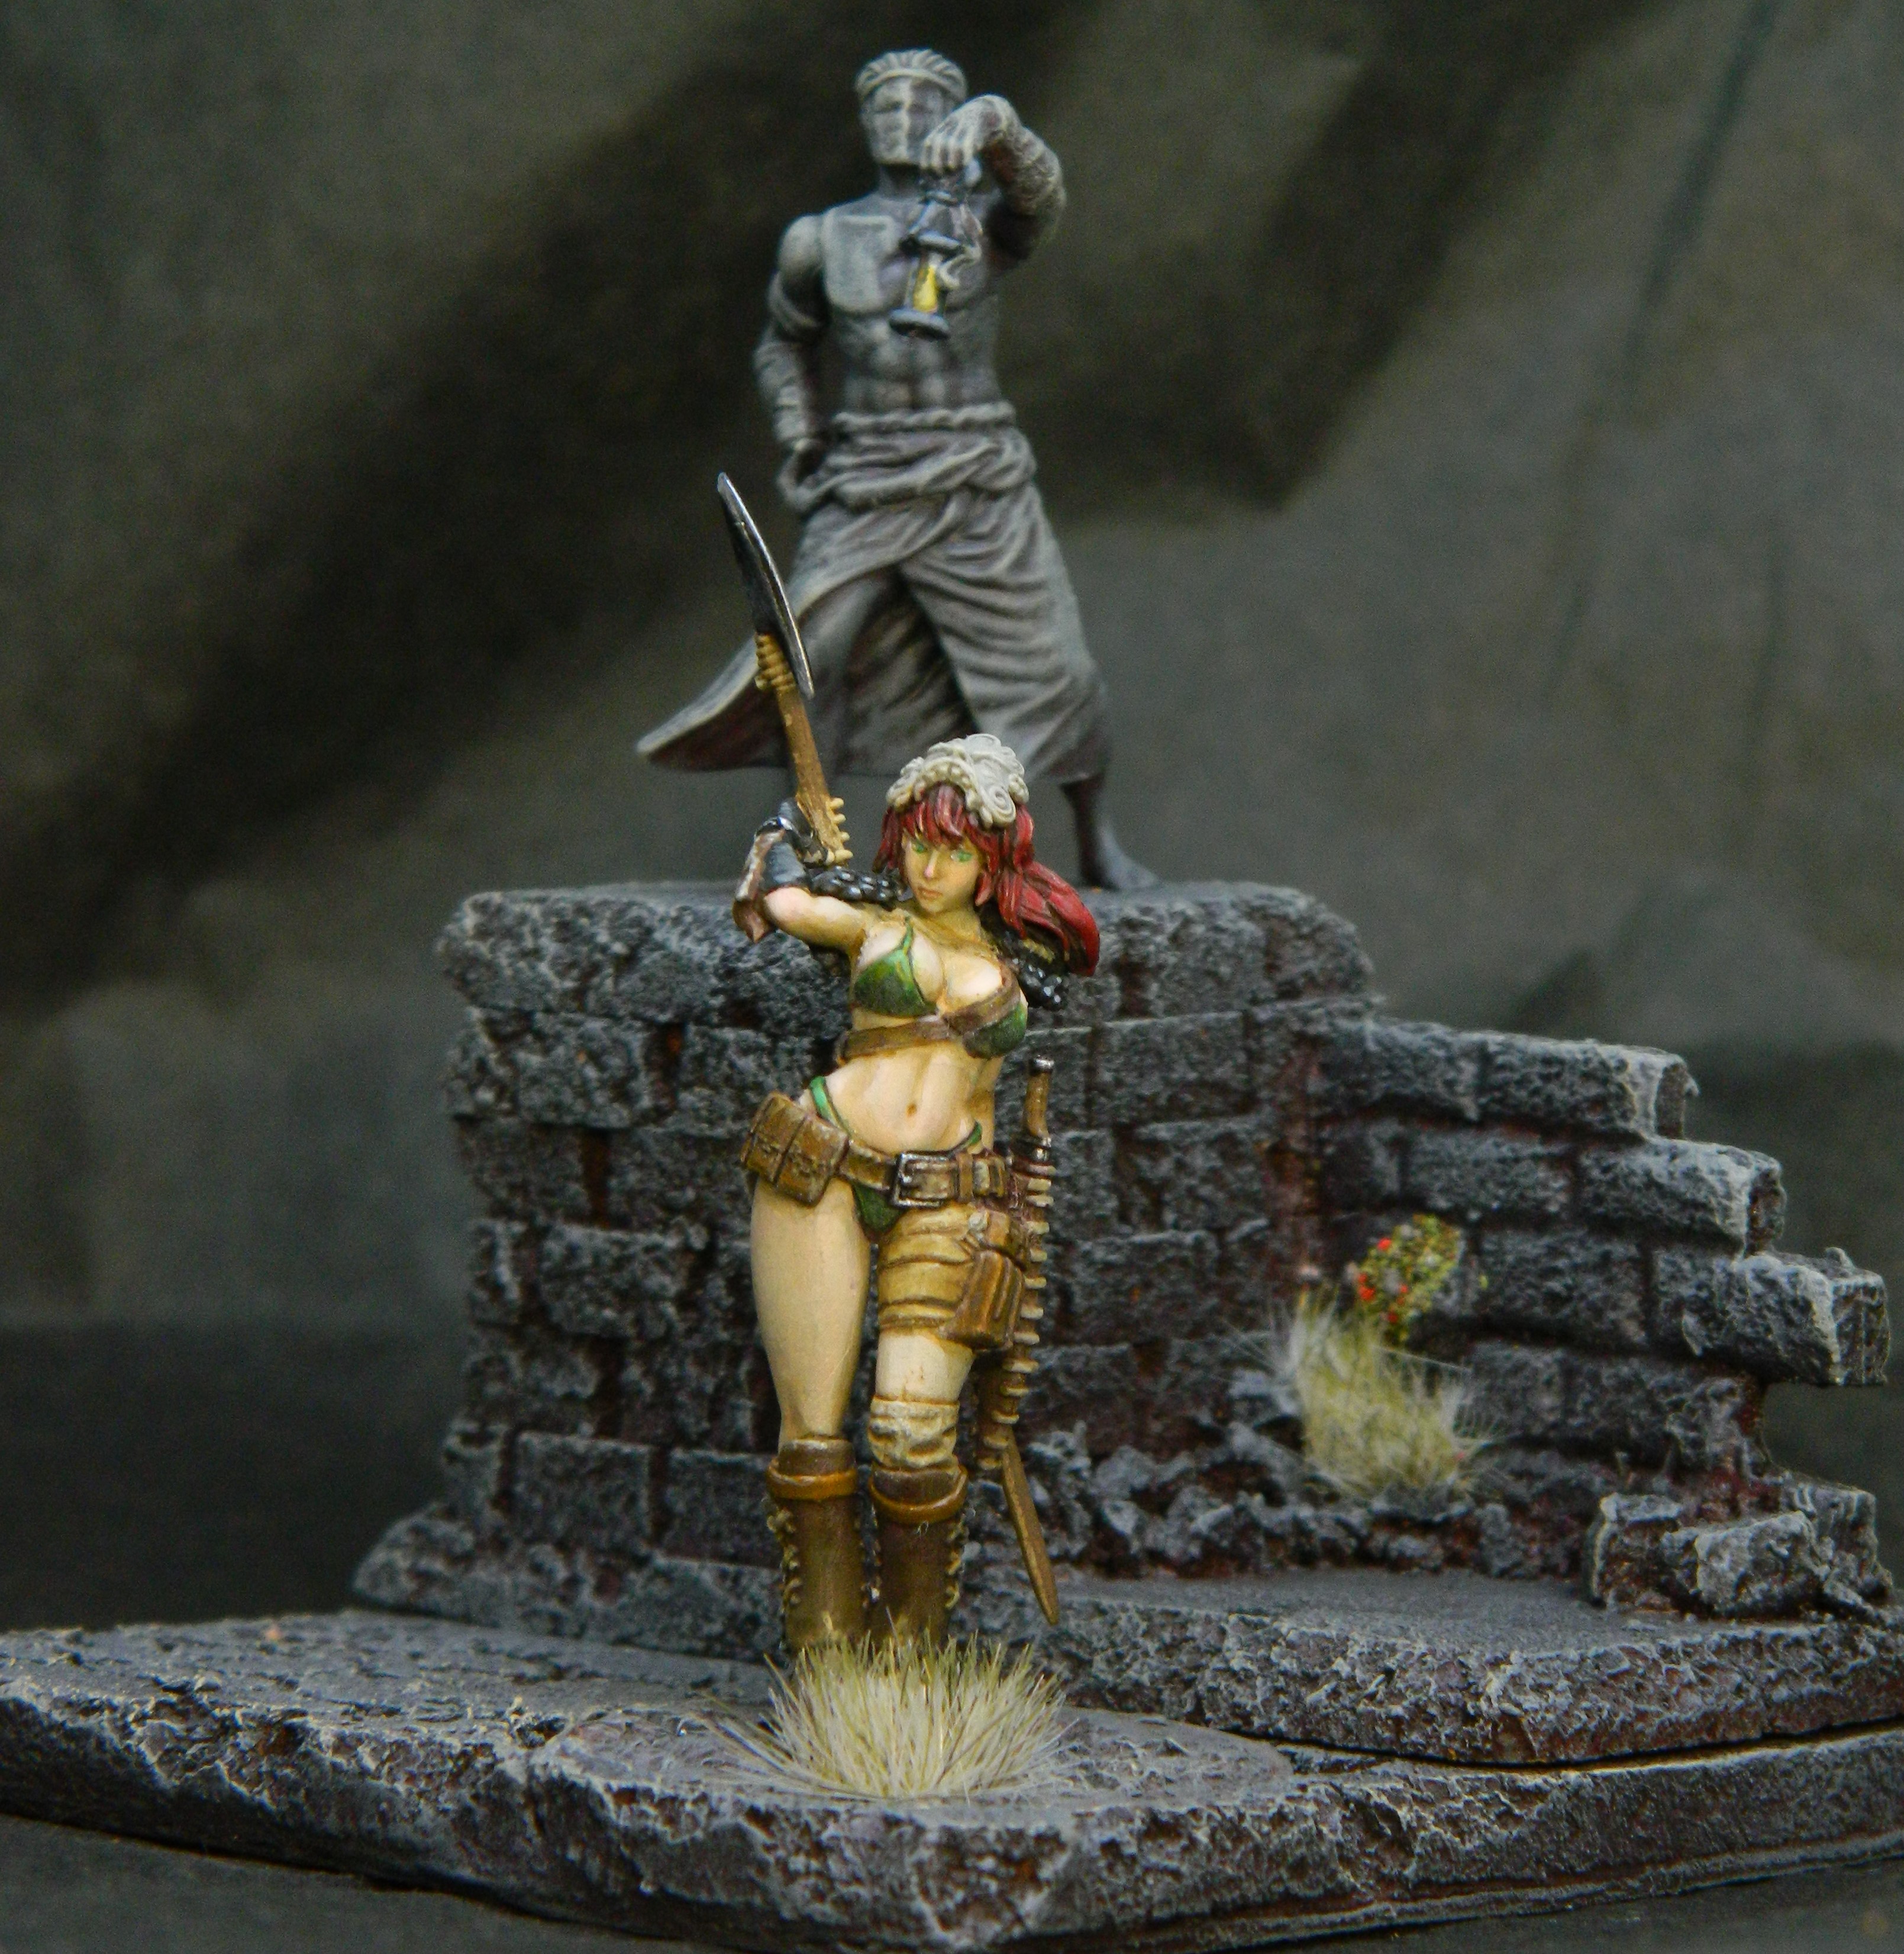
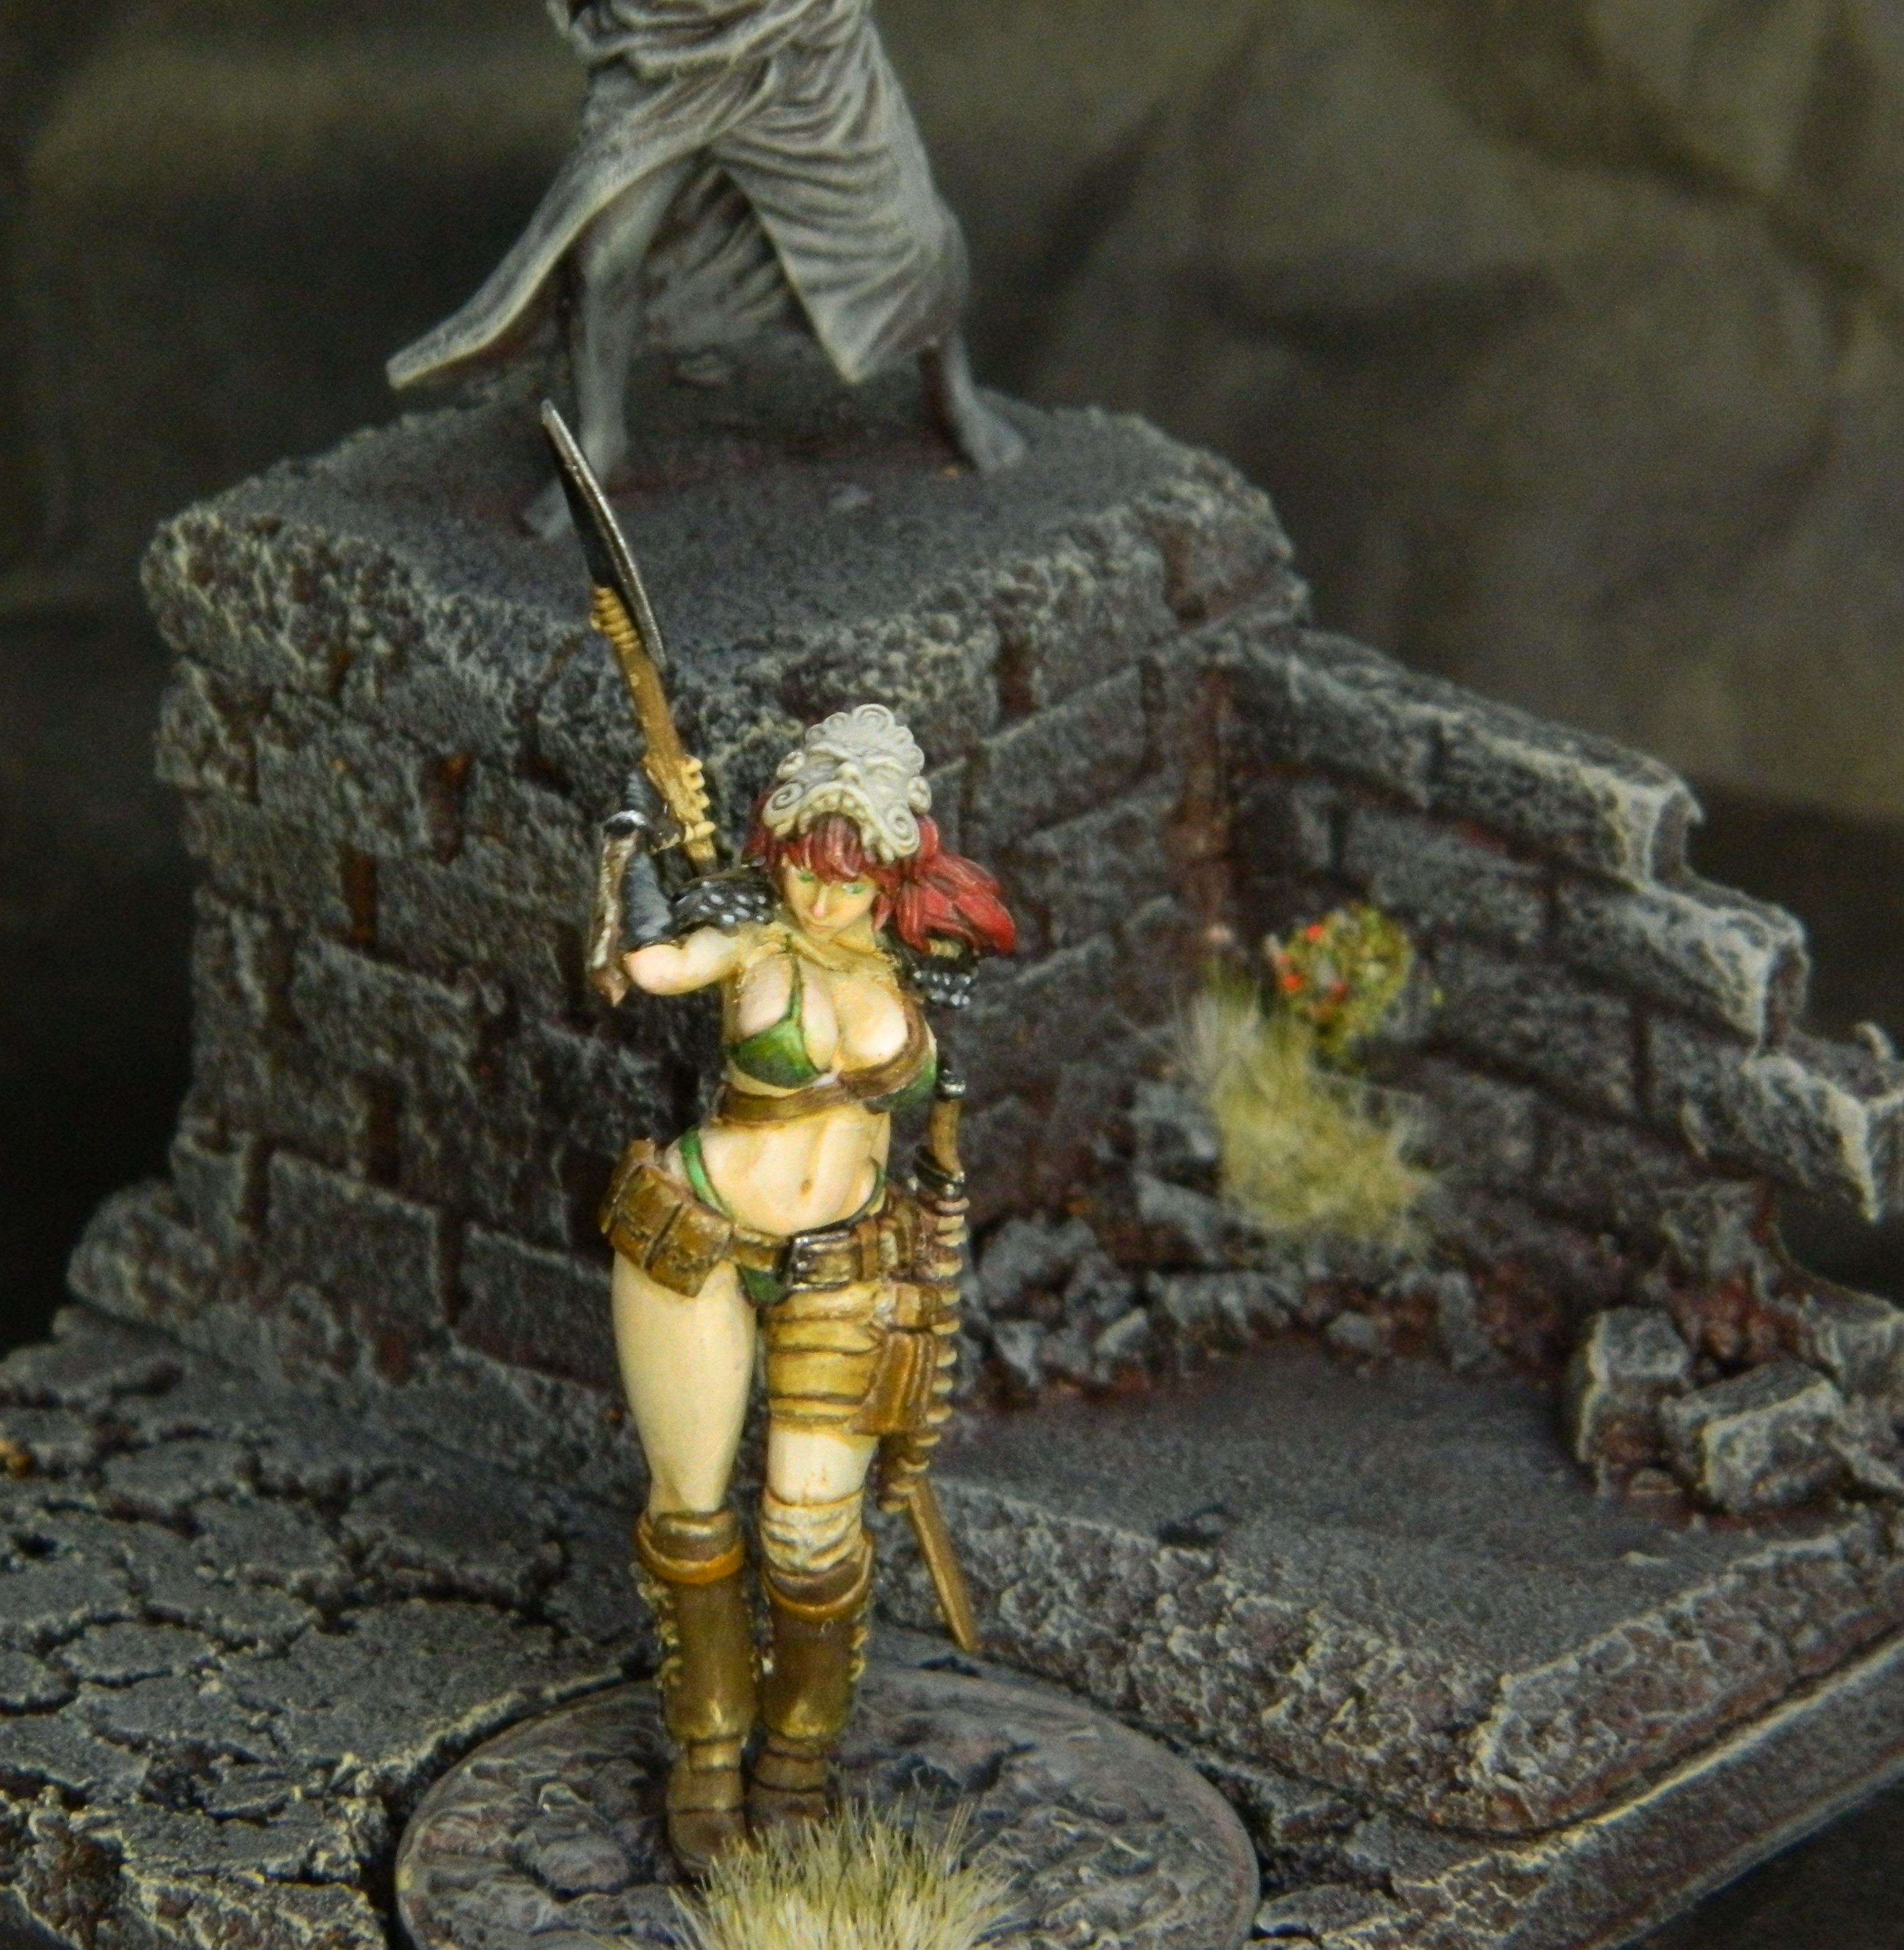
28 Sep 22: the Pinup Competition Survivor
While building the diorama, I also set about painting a mini to stand at the front of it!
While this was an entry to a competition, it was also an exercise in painting skin.
 The Pin-up Survivor for the Pin-up Competition


 30 Sep 22: progressing on to the gear


 1 Oct 22: Getting close to done...


28 Sep 22: Assembly complete
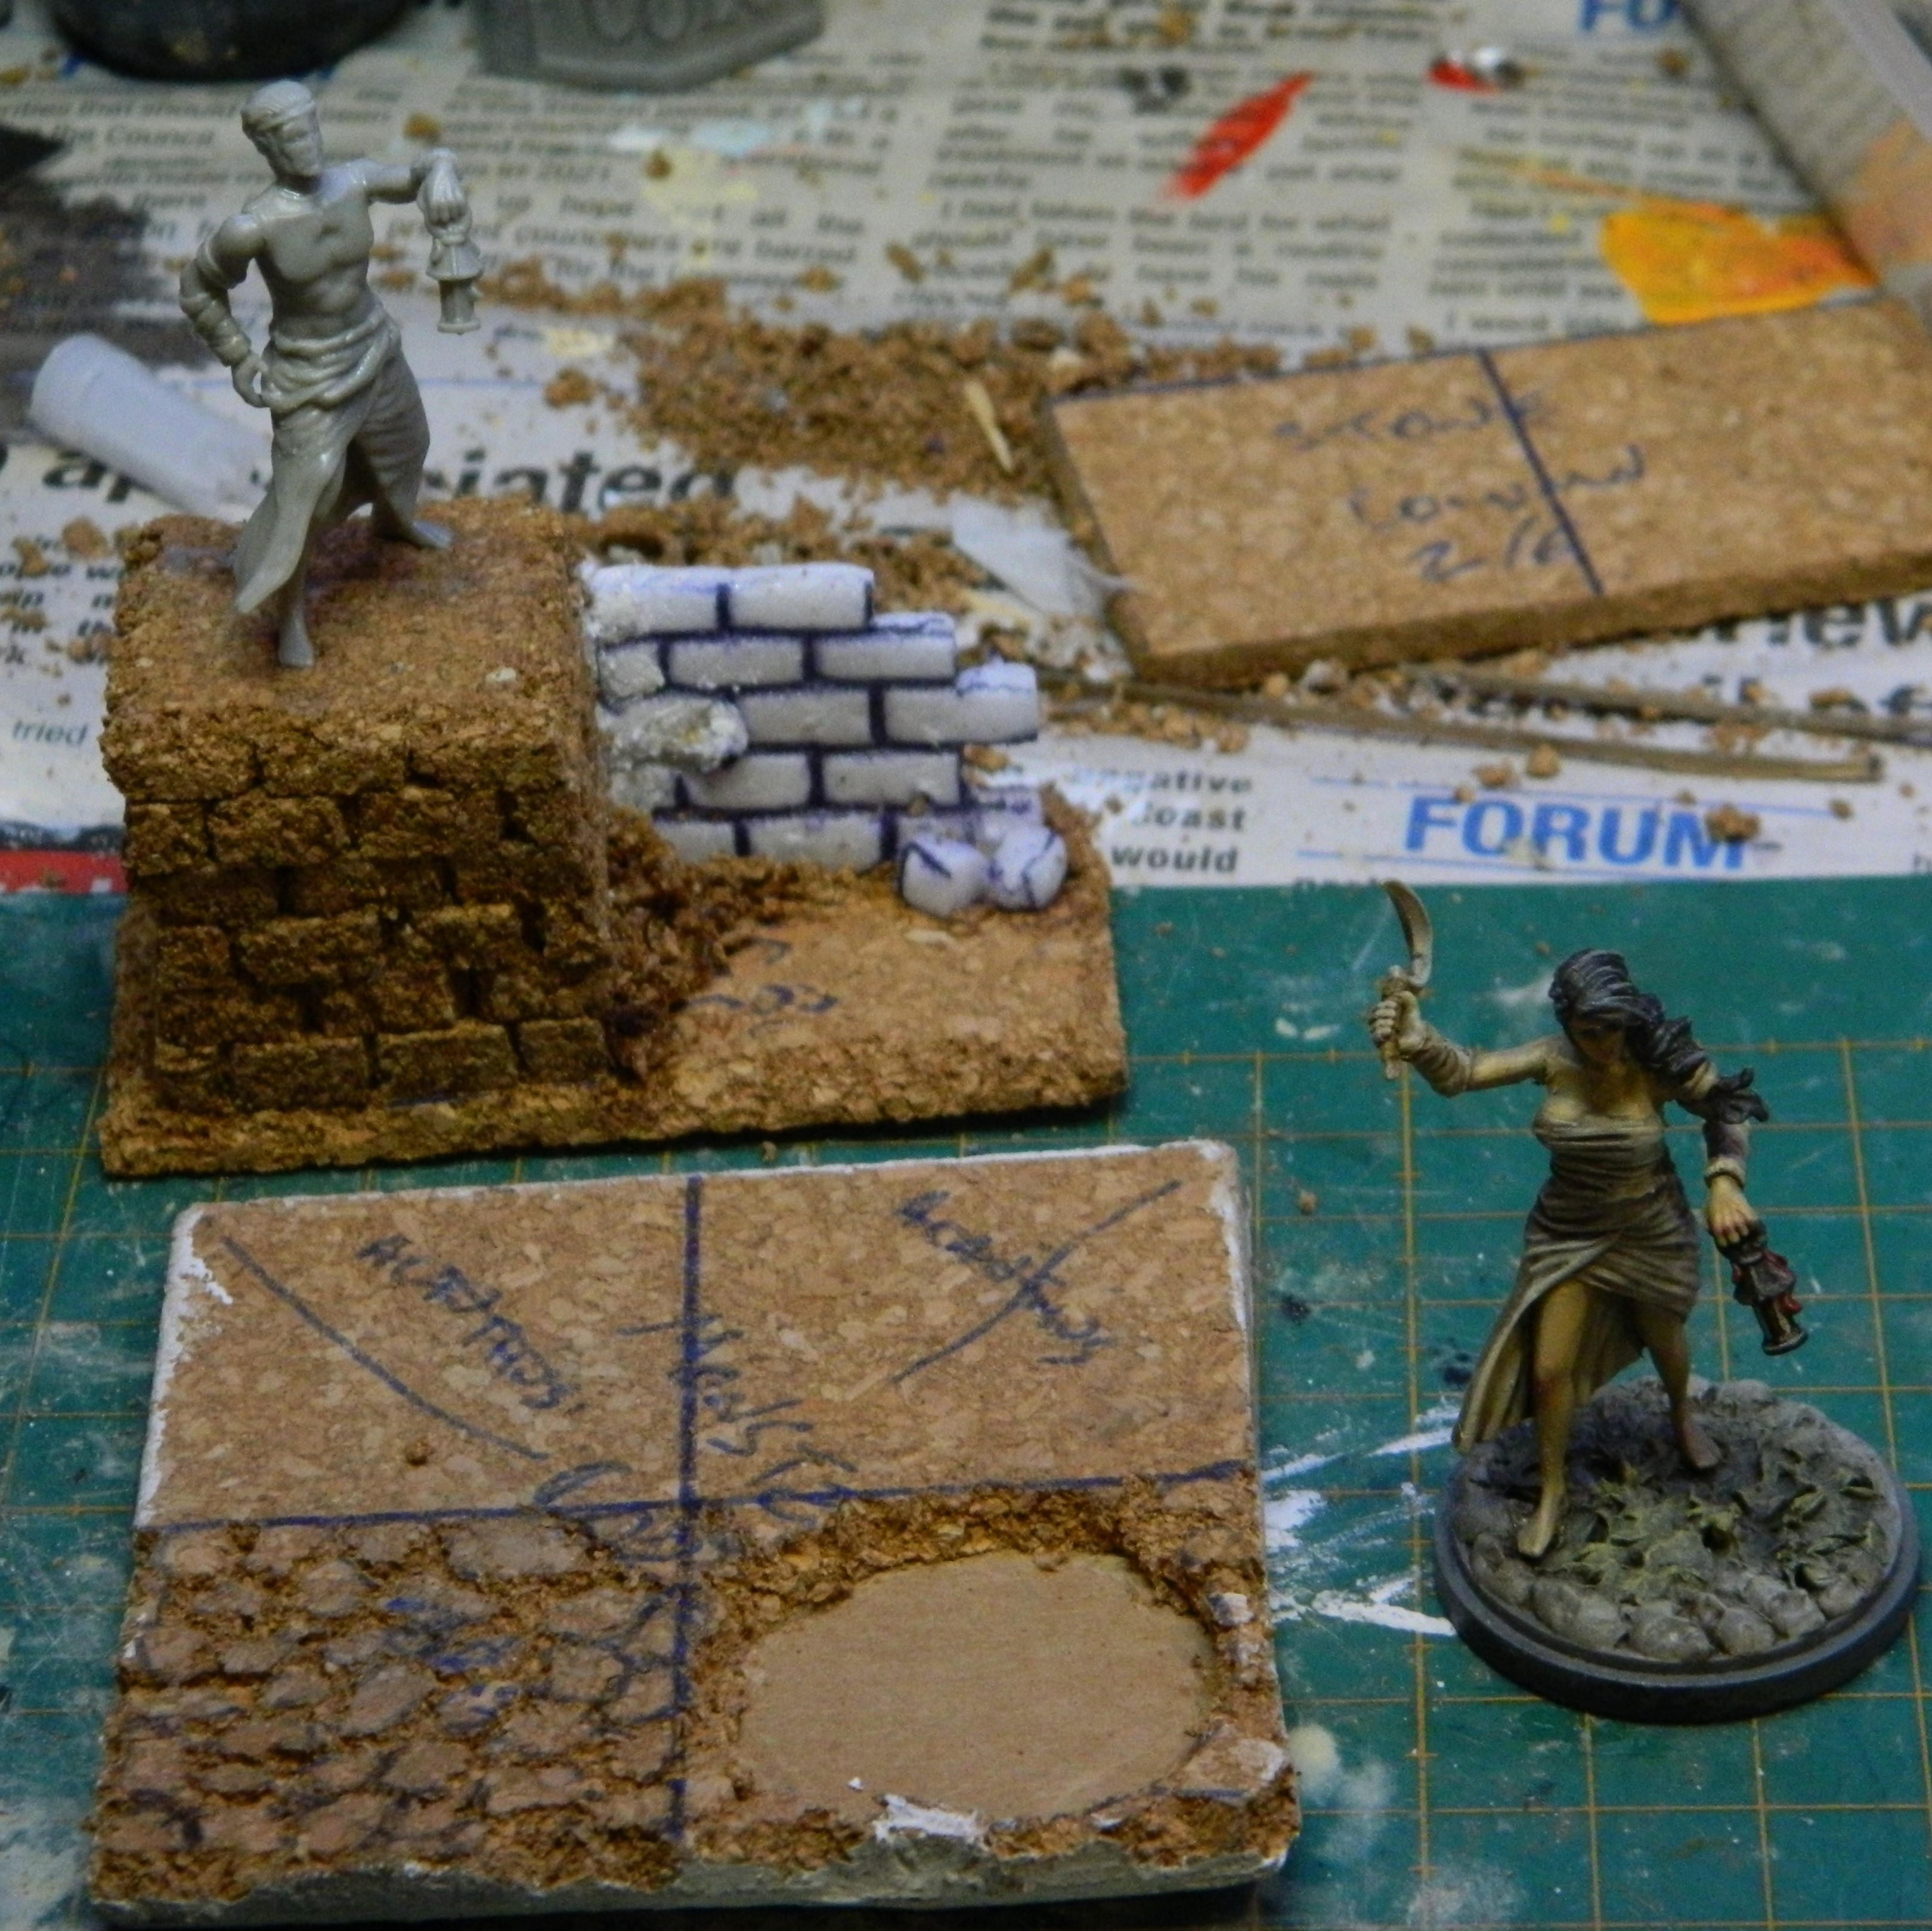
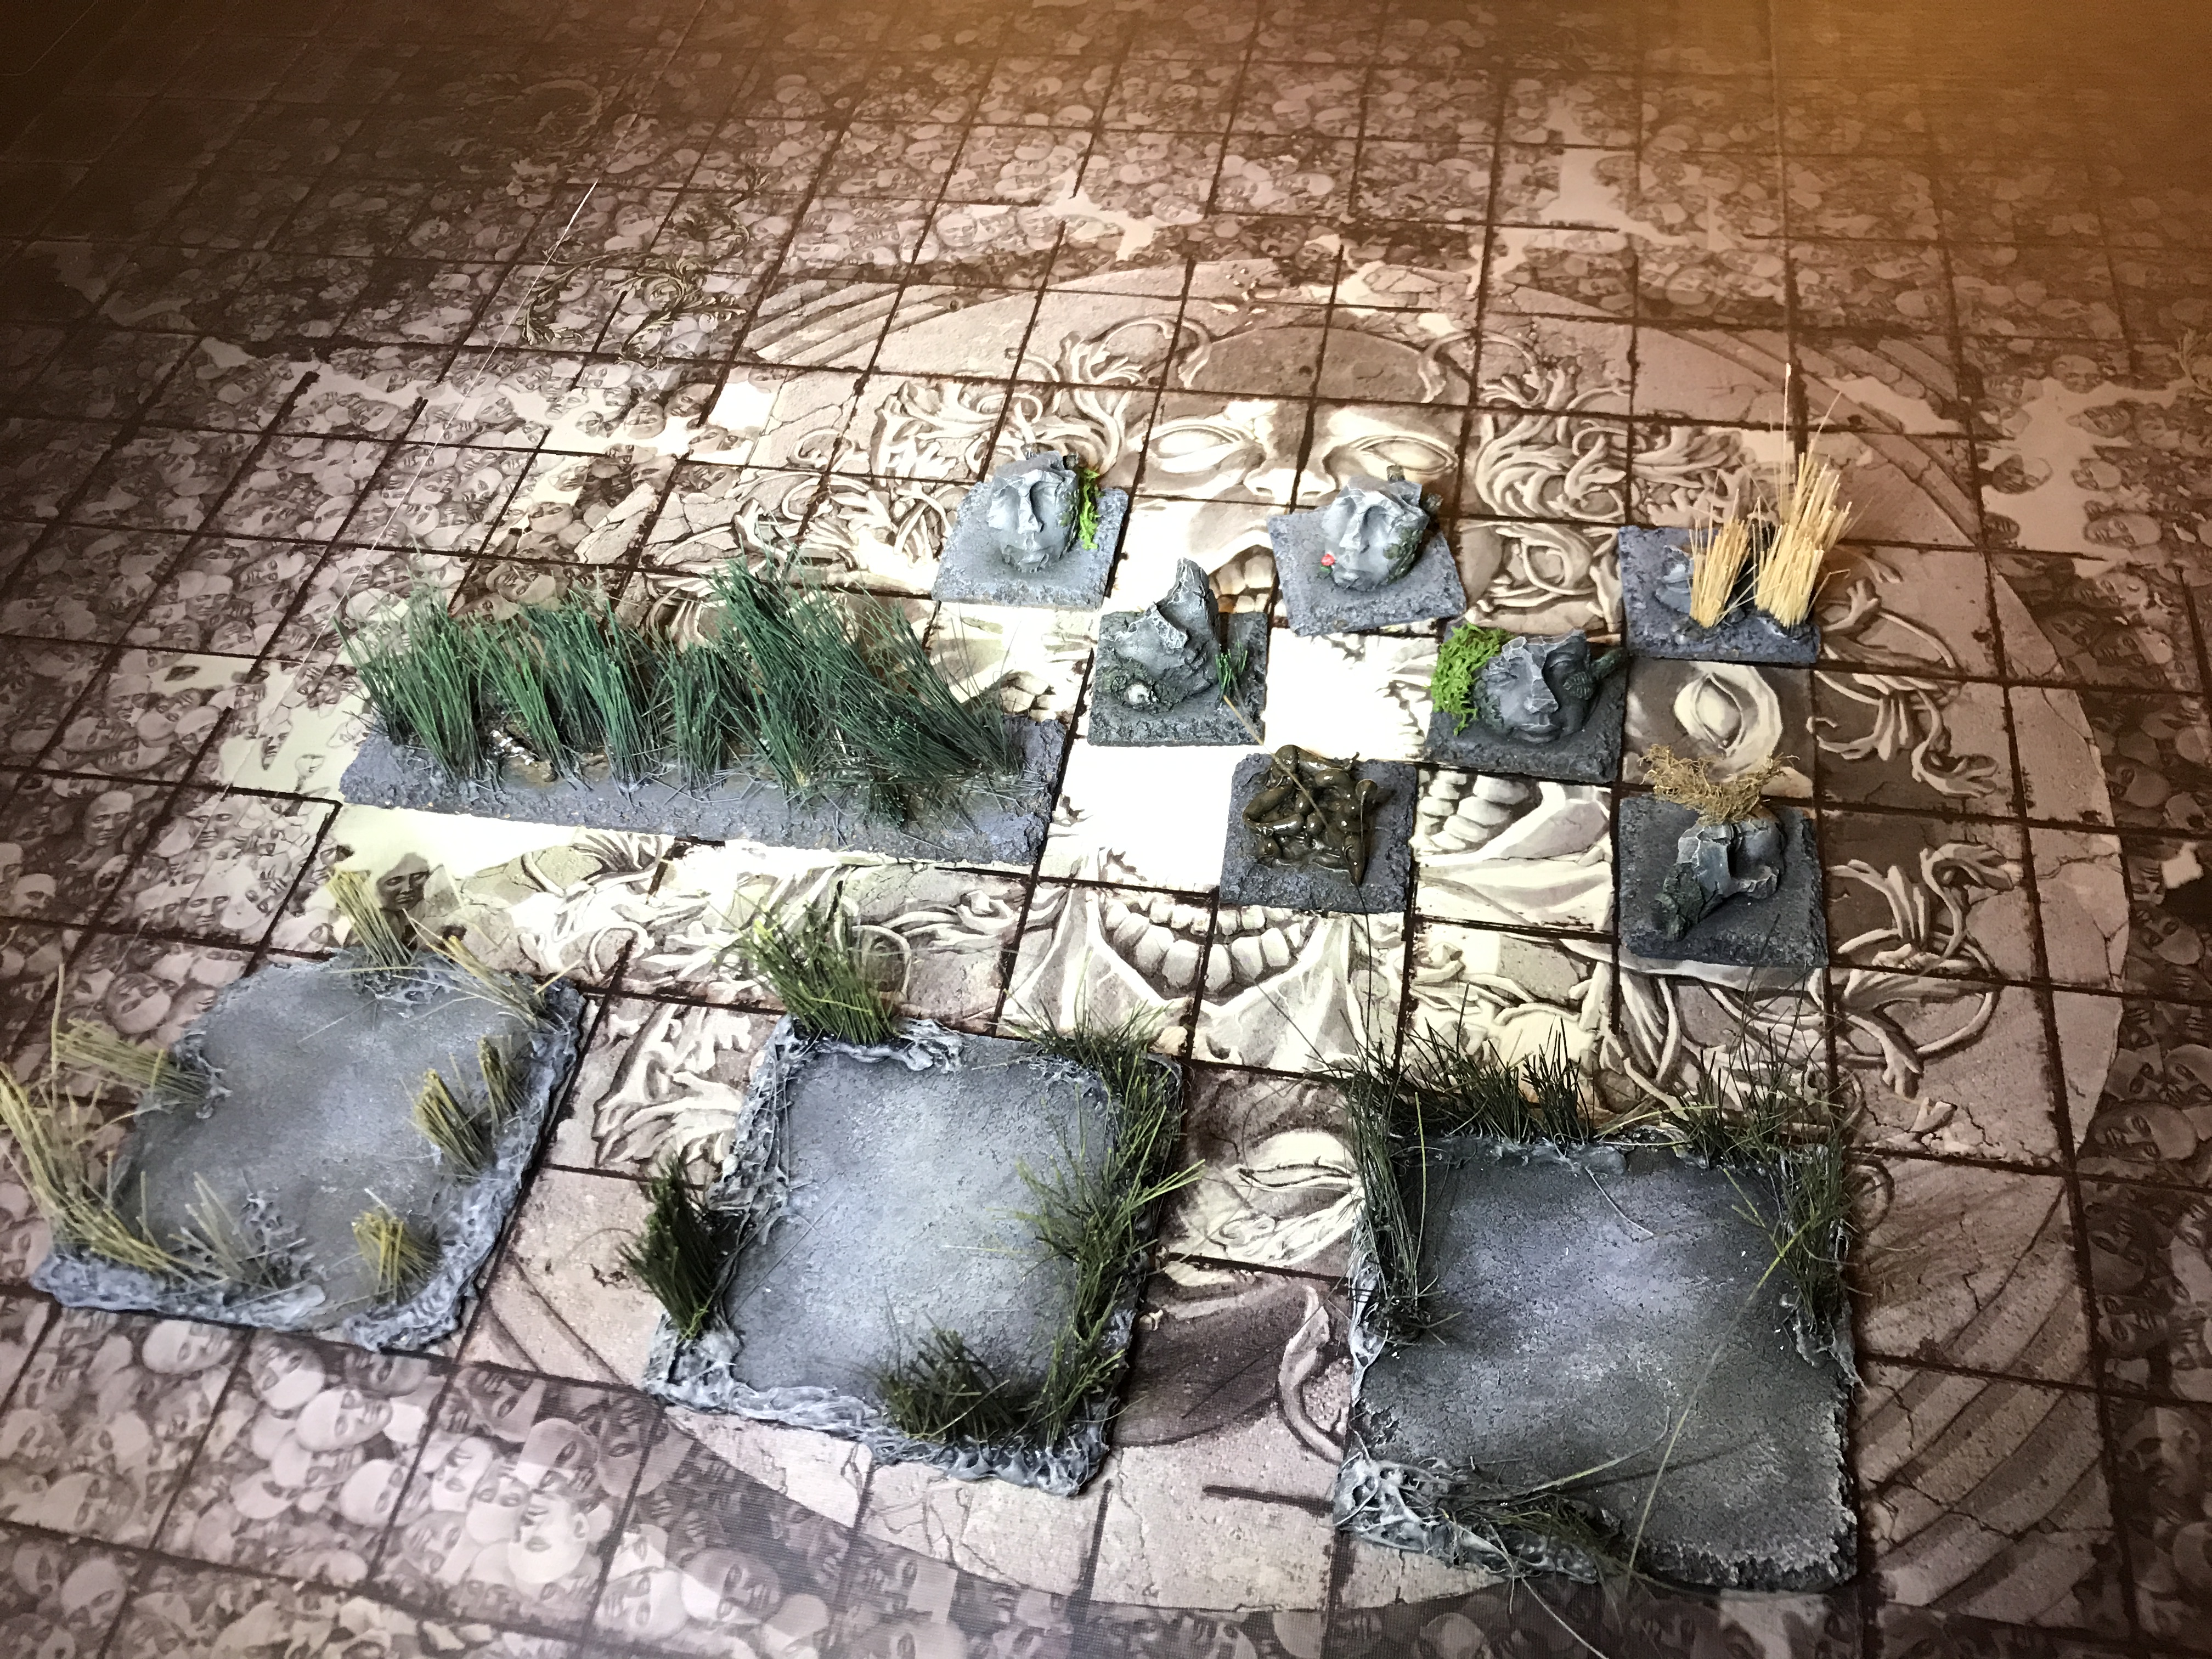
 Cork bricks on top and up the sides to indicate that this was once part of another structure. Cork crumbs have been glued around the base to blend it in.
 The rear of the wall, not much to see back here... Lloyd shot of a diorama?
 The Miner standing in here just to double check composition.
 29 Sep 22: The paints happen
 A black prime, a grey zenith, then a coat of Army Painter Chaotic Red. Then overbrush with Dulux Klavier emulsion paint.

After putting down the black/white/red spray and the Klavier grey, I drybrushed on Citadel Dawnstone and Codex Grey.
I may have done a lighter colour after that… but I forgot to note if I did. :-/
30 Sep 22: Metals and Organics
I hit the portcullis itself with a couple of metallics via drybrush.
This time around I used Citadel Leadbelcher, Chainmail, the aim being to leave some of the red showing through. I used a dilute Army Painter Strong Tone to dull the shininess a little, but then followed that with Vallejo Model Colour Silver for the final highlights.
To add some extra colour and life to the scene, I used a couple of different colour grass tufts spotted around. I also used a mix of green/grey/red flock to represent some strange moss.
 Nearly done... realisation of mistake yet to hit.

The back of the wall is looking ok, needs just a little bit more. But the deadline is looming.
This was to be the diorama base for the Kingdom Death Pinup painting competition. Entries were due by 1 October 22. I intended to finish a couple of last details, take the photos and submit within the last few hours. As it happened, on the 1st, team KD extended the submission date until Halloween. But this brought another item painfully to my attention.
The rules. I hadn't read the rules properly!
Point 10 in the rules:
- Bases and scenes can be simple or elaborate, provided they do not contain miniatures or terrain from non-Kingdom Death properties. Scratch-built terrain and crafts supplies are allowed.
Ah. $#!*. Right.
I debated submitting anyway. The frame was a cast, the plastic portcullis… who would know where that came from?
In the end, I didn’t want to risk my submission being rejected. The old WHQ door frame is easily recognisable as non-KD, even if it was a cast piece. The plastic Renedra portcullis is Renedra. Not Kingdom Death.
While disappointing, it was good experience. Given I had more time to prepare something, I began to cast around for other ideas for my entry.
This piece I will use to show off my other KD stuff.
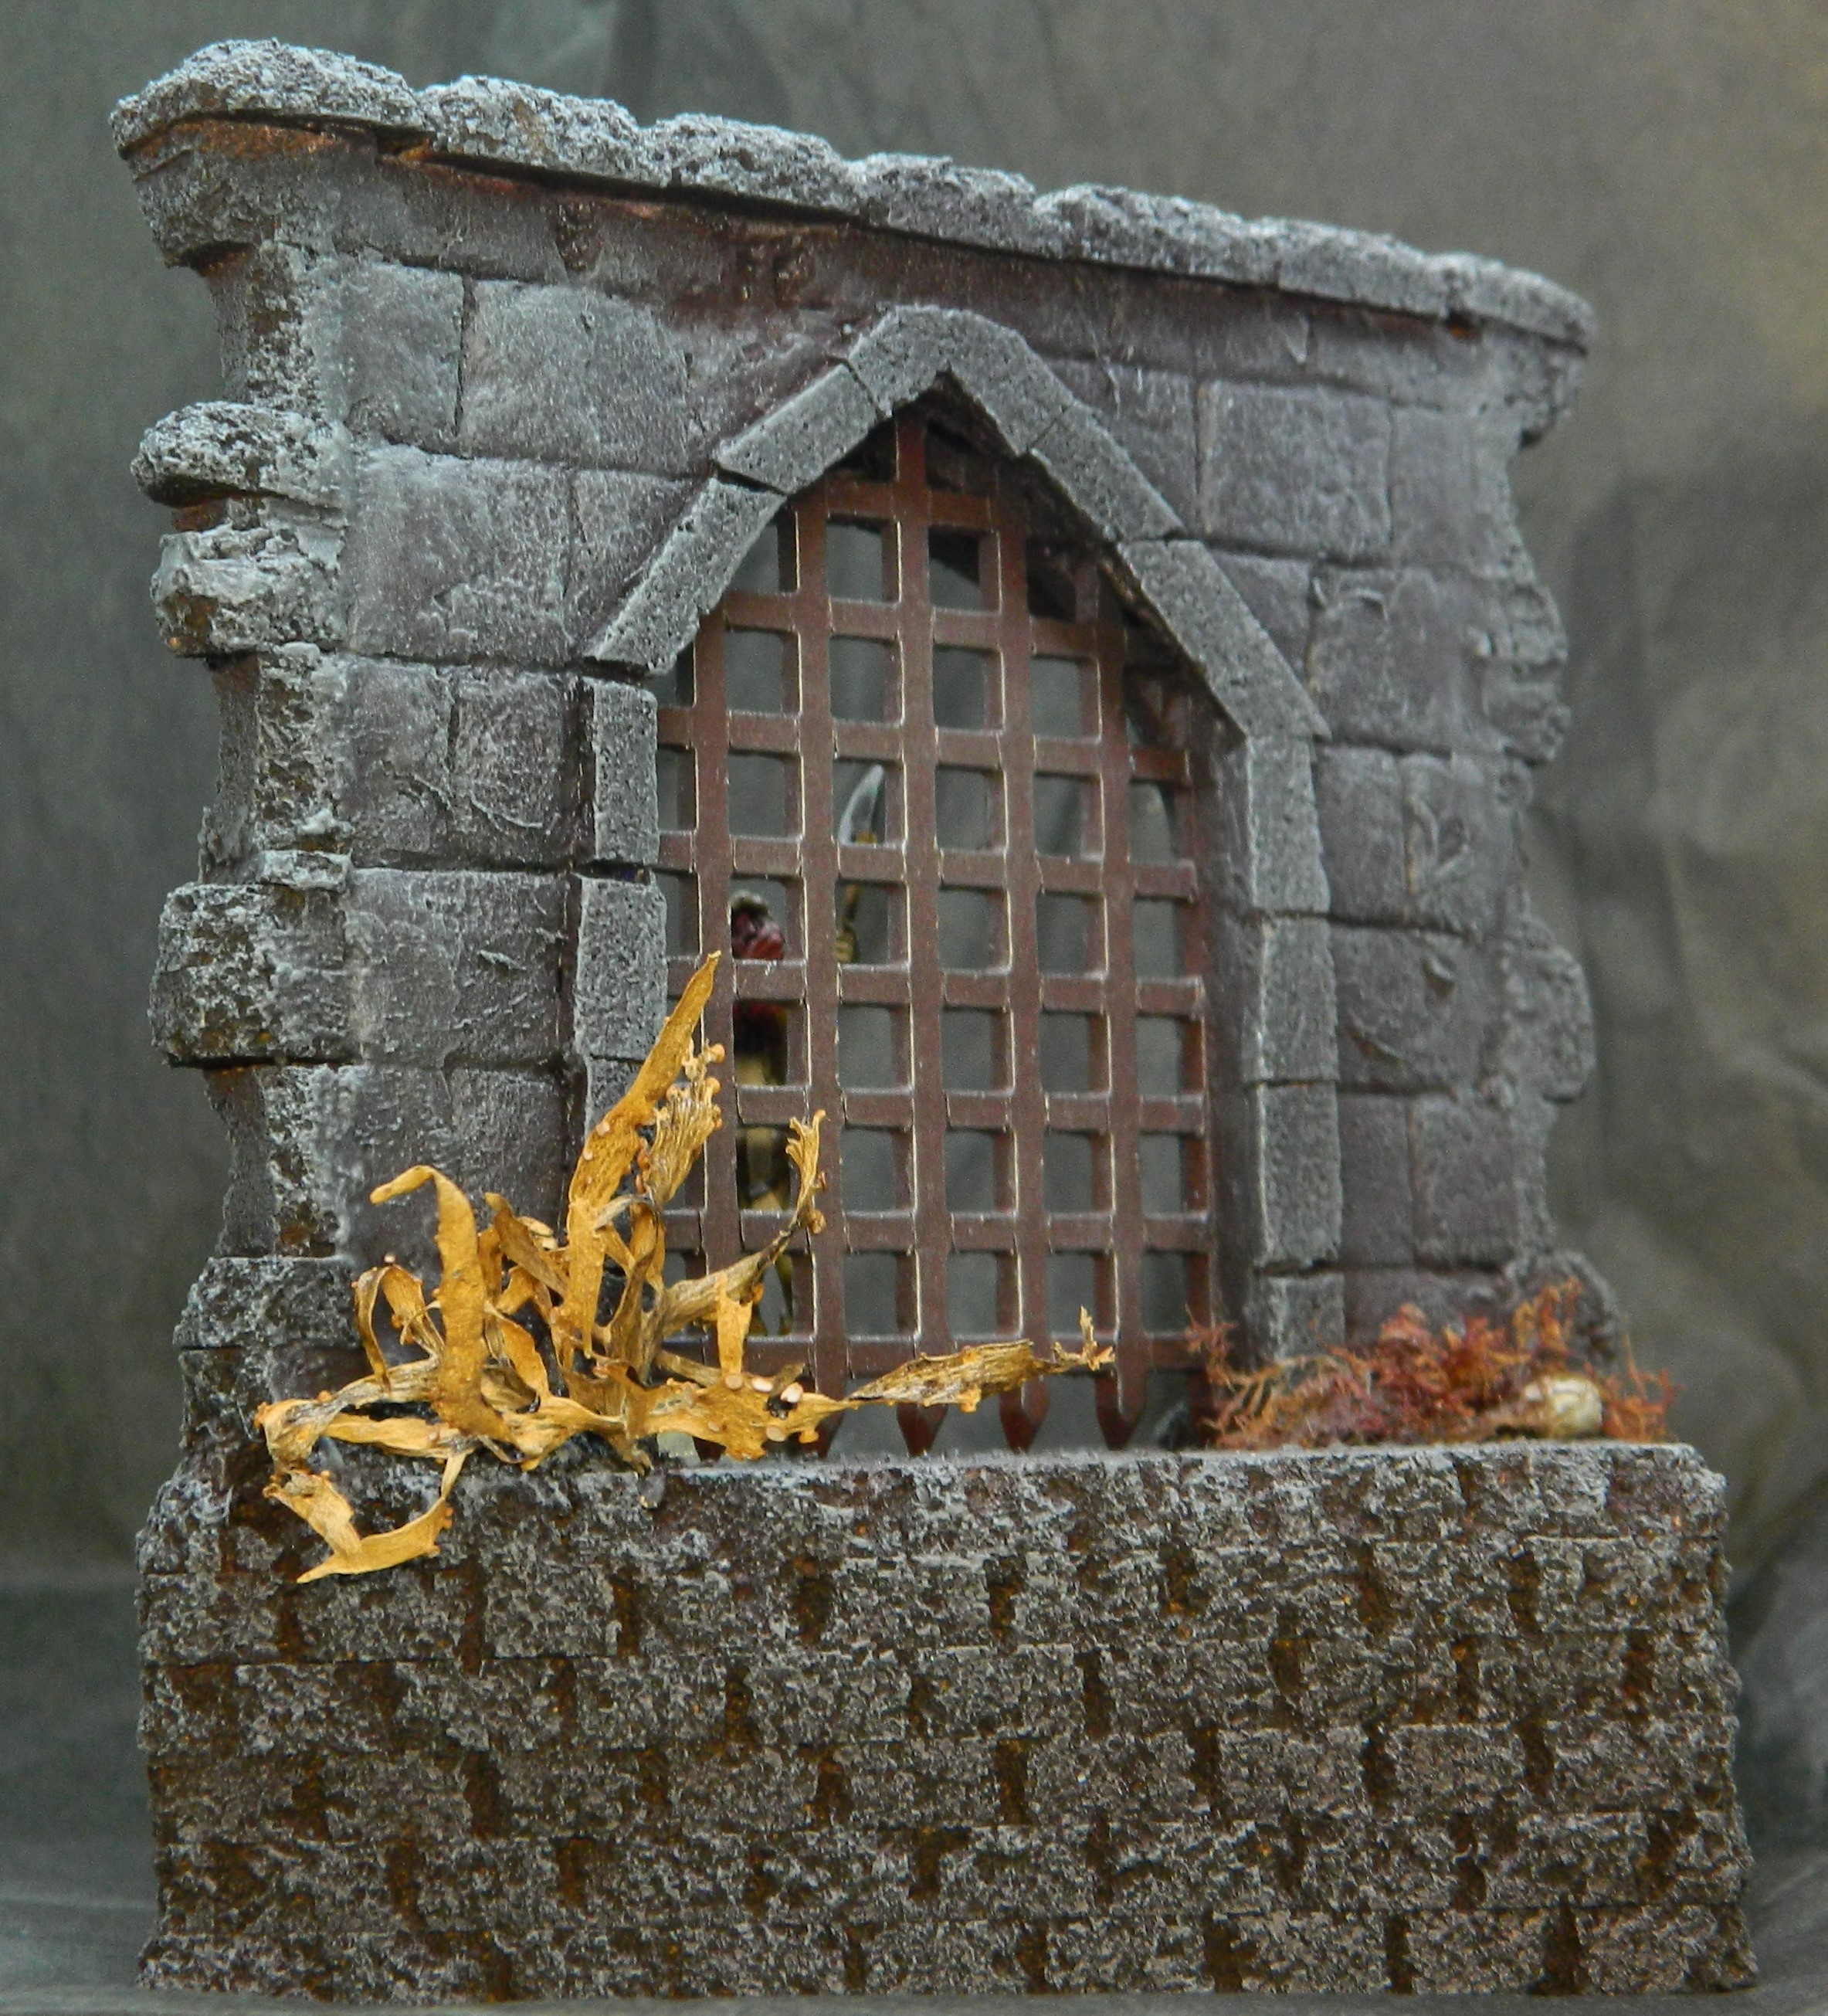
19 Sep 22: Another portcullis... a carefully crafted mistake!
Using the previous pieces as practice, I began to build another item.
Cork tile, a left-over plastic portcullis and a few other bits and pieces went into the making.


I cut a single 5mm thick cork tile into 90mm x 90mm squares. Stacking them up gave me a 30mm high plinth. I used the previously constructed portcullis to check the spacing.
In order to make a KD mini look like it is “in” the scene, I cut a hole in the top-most layer to fit the standard 30mm base. That way it can be hidden in the base, rather than having the mini stand “on” the scene.
I glued the layers together with PVA and skewered a couple of cocktail sticks through to bind each layer together. I left it dry overnight. Then the carving began…
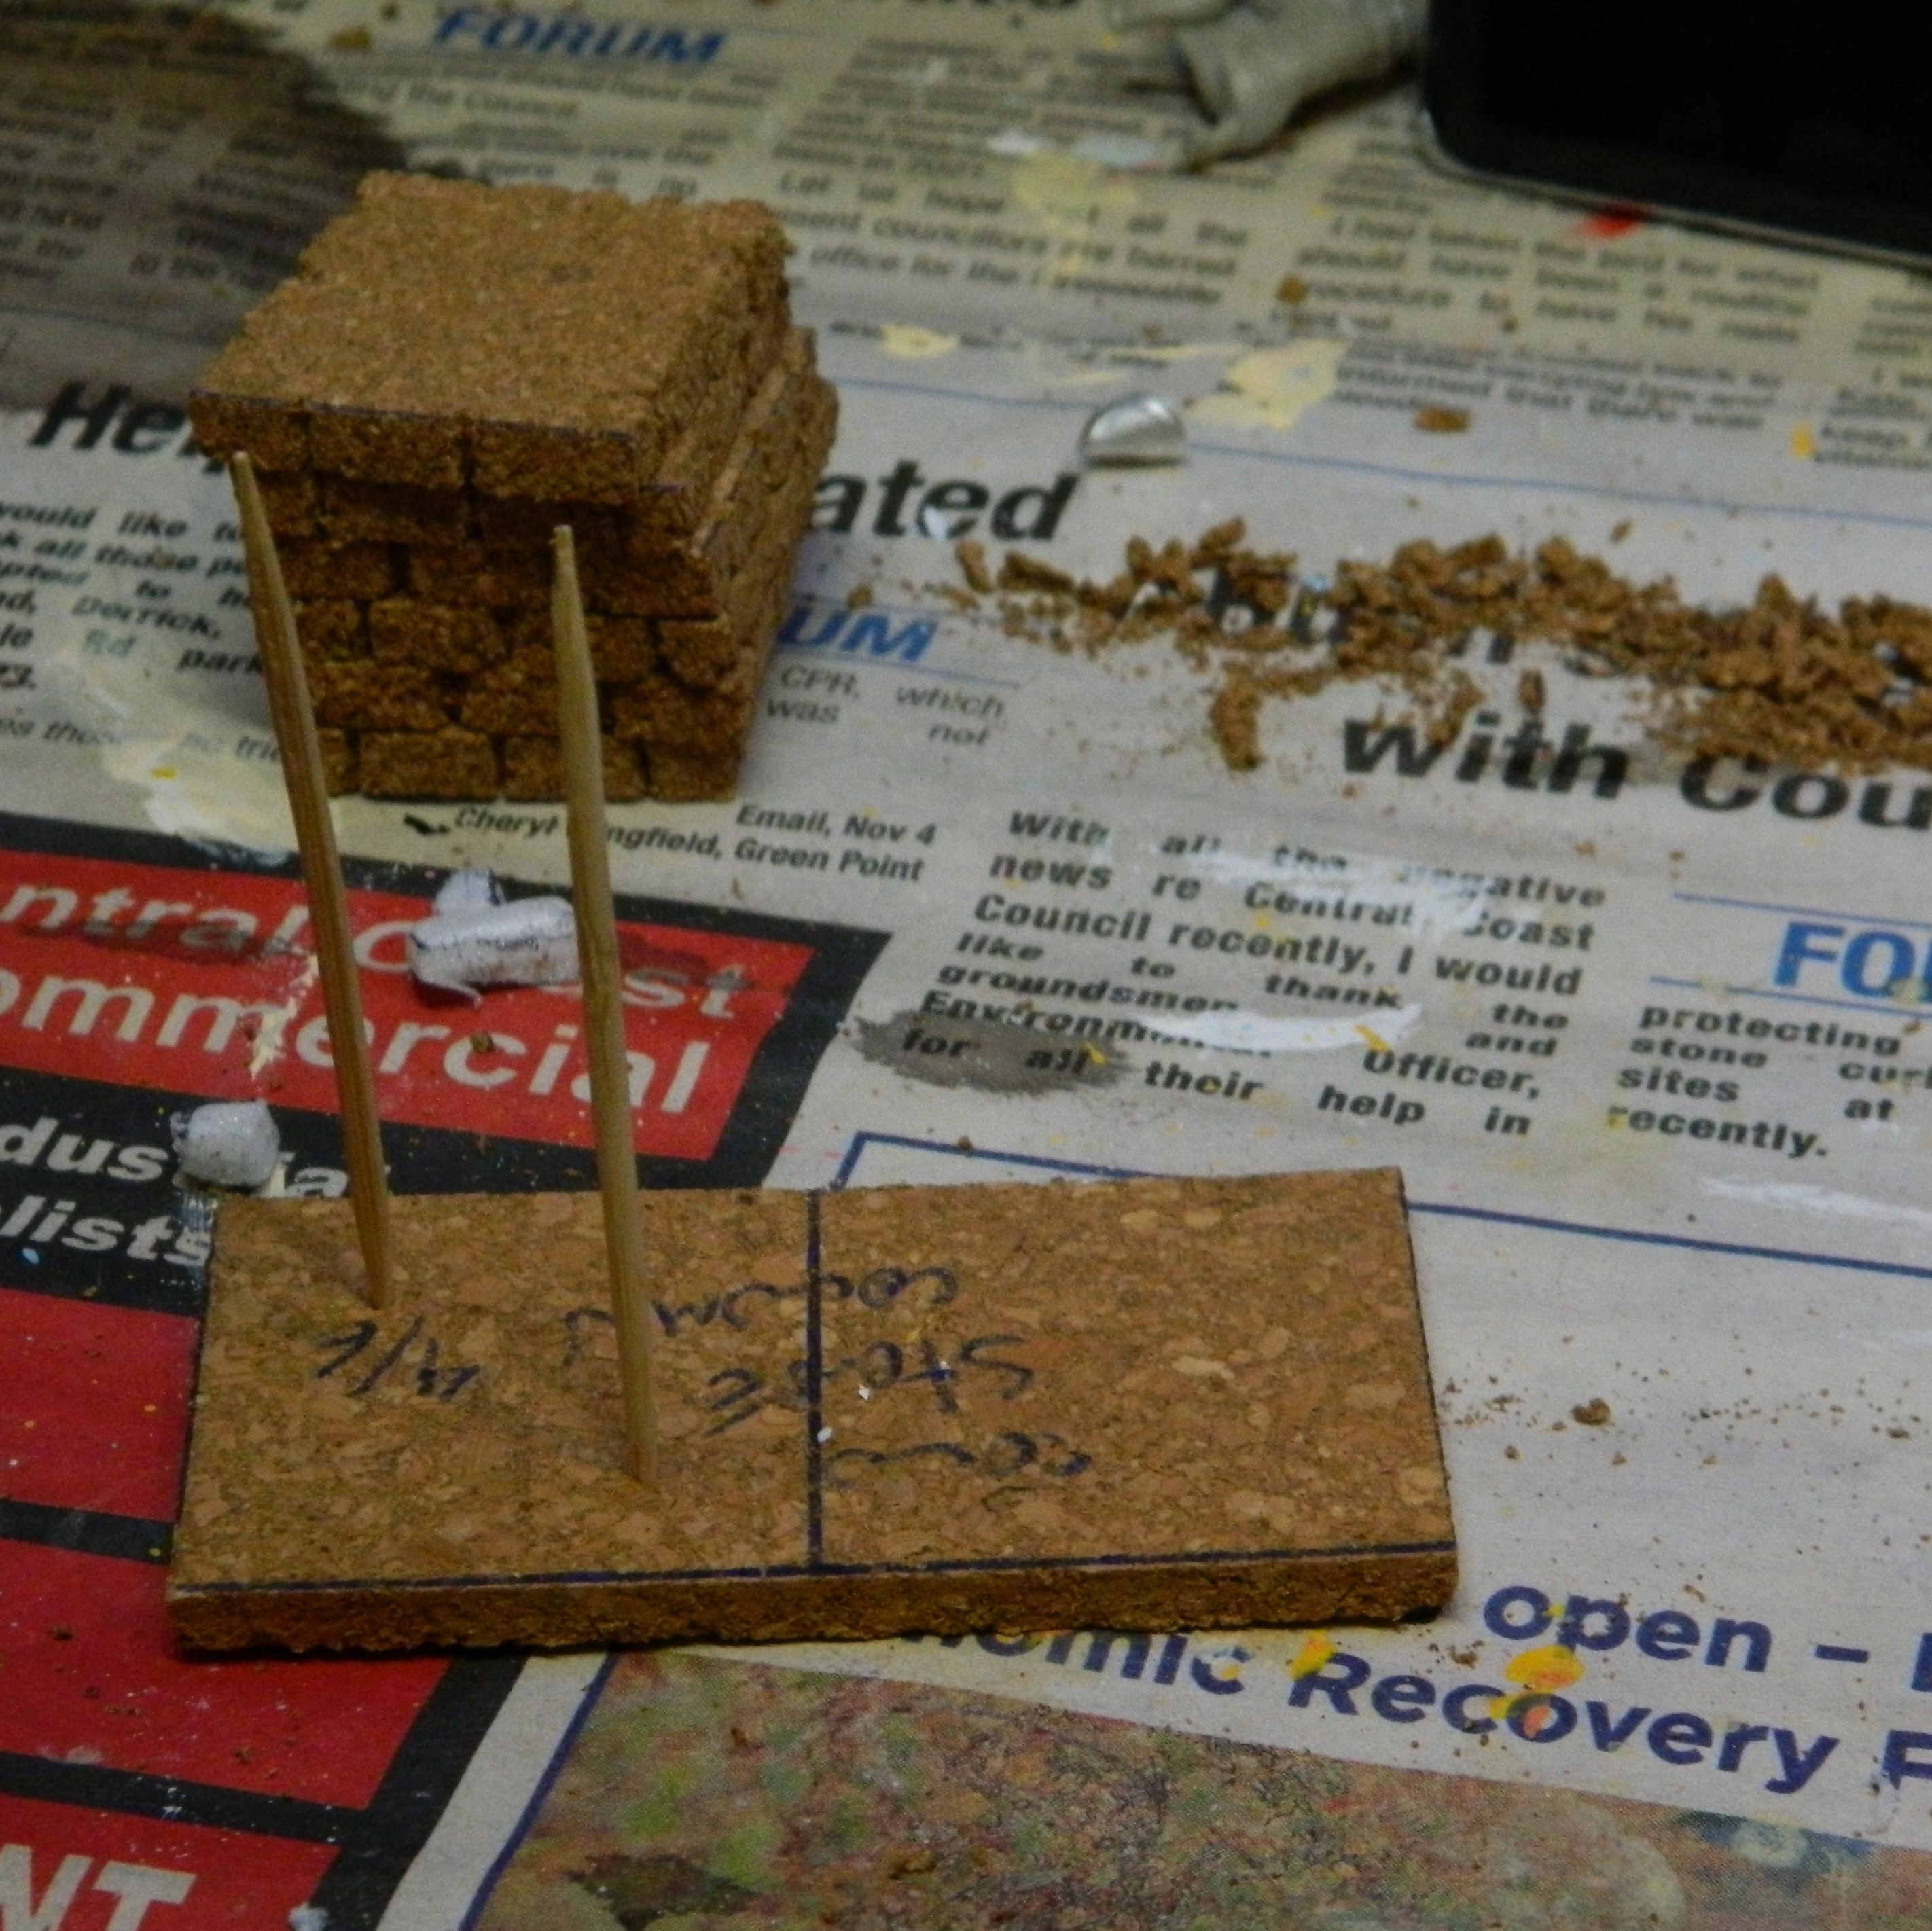
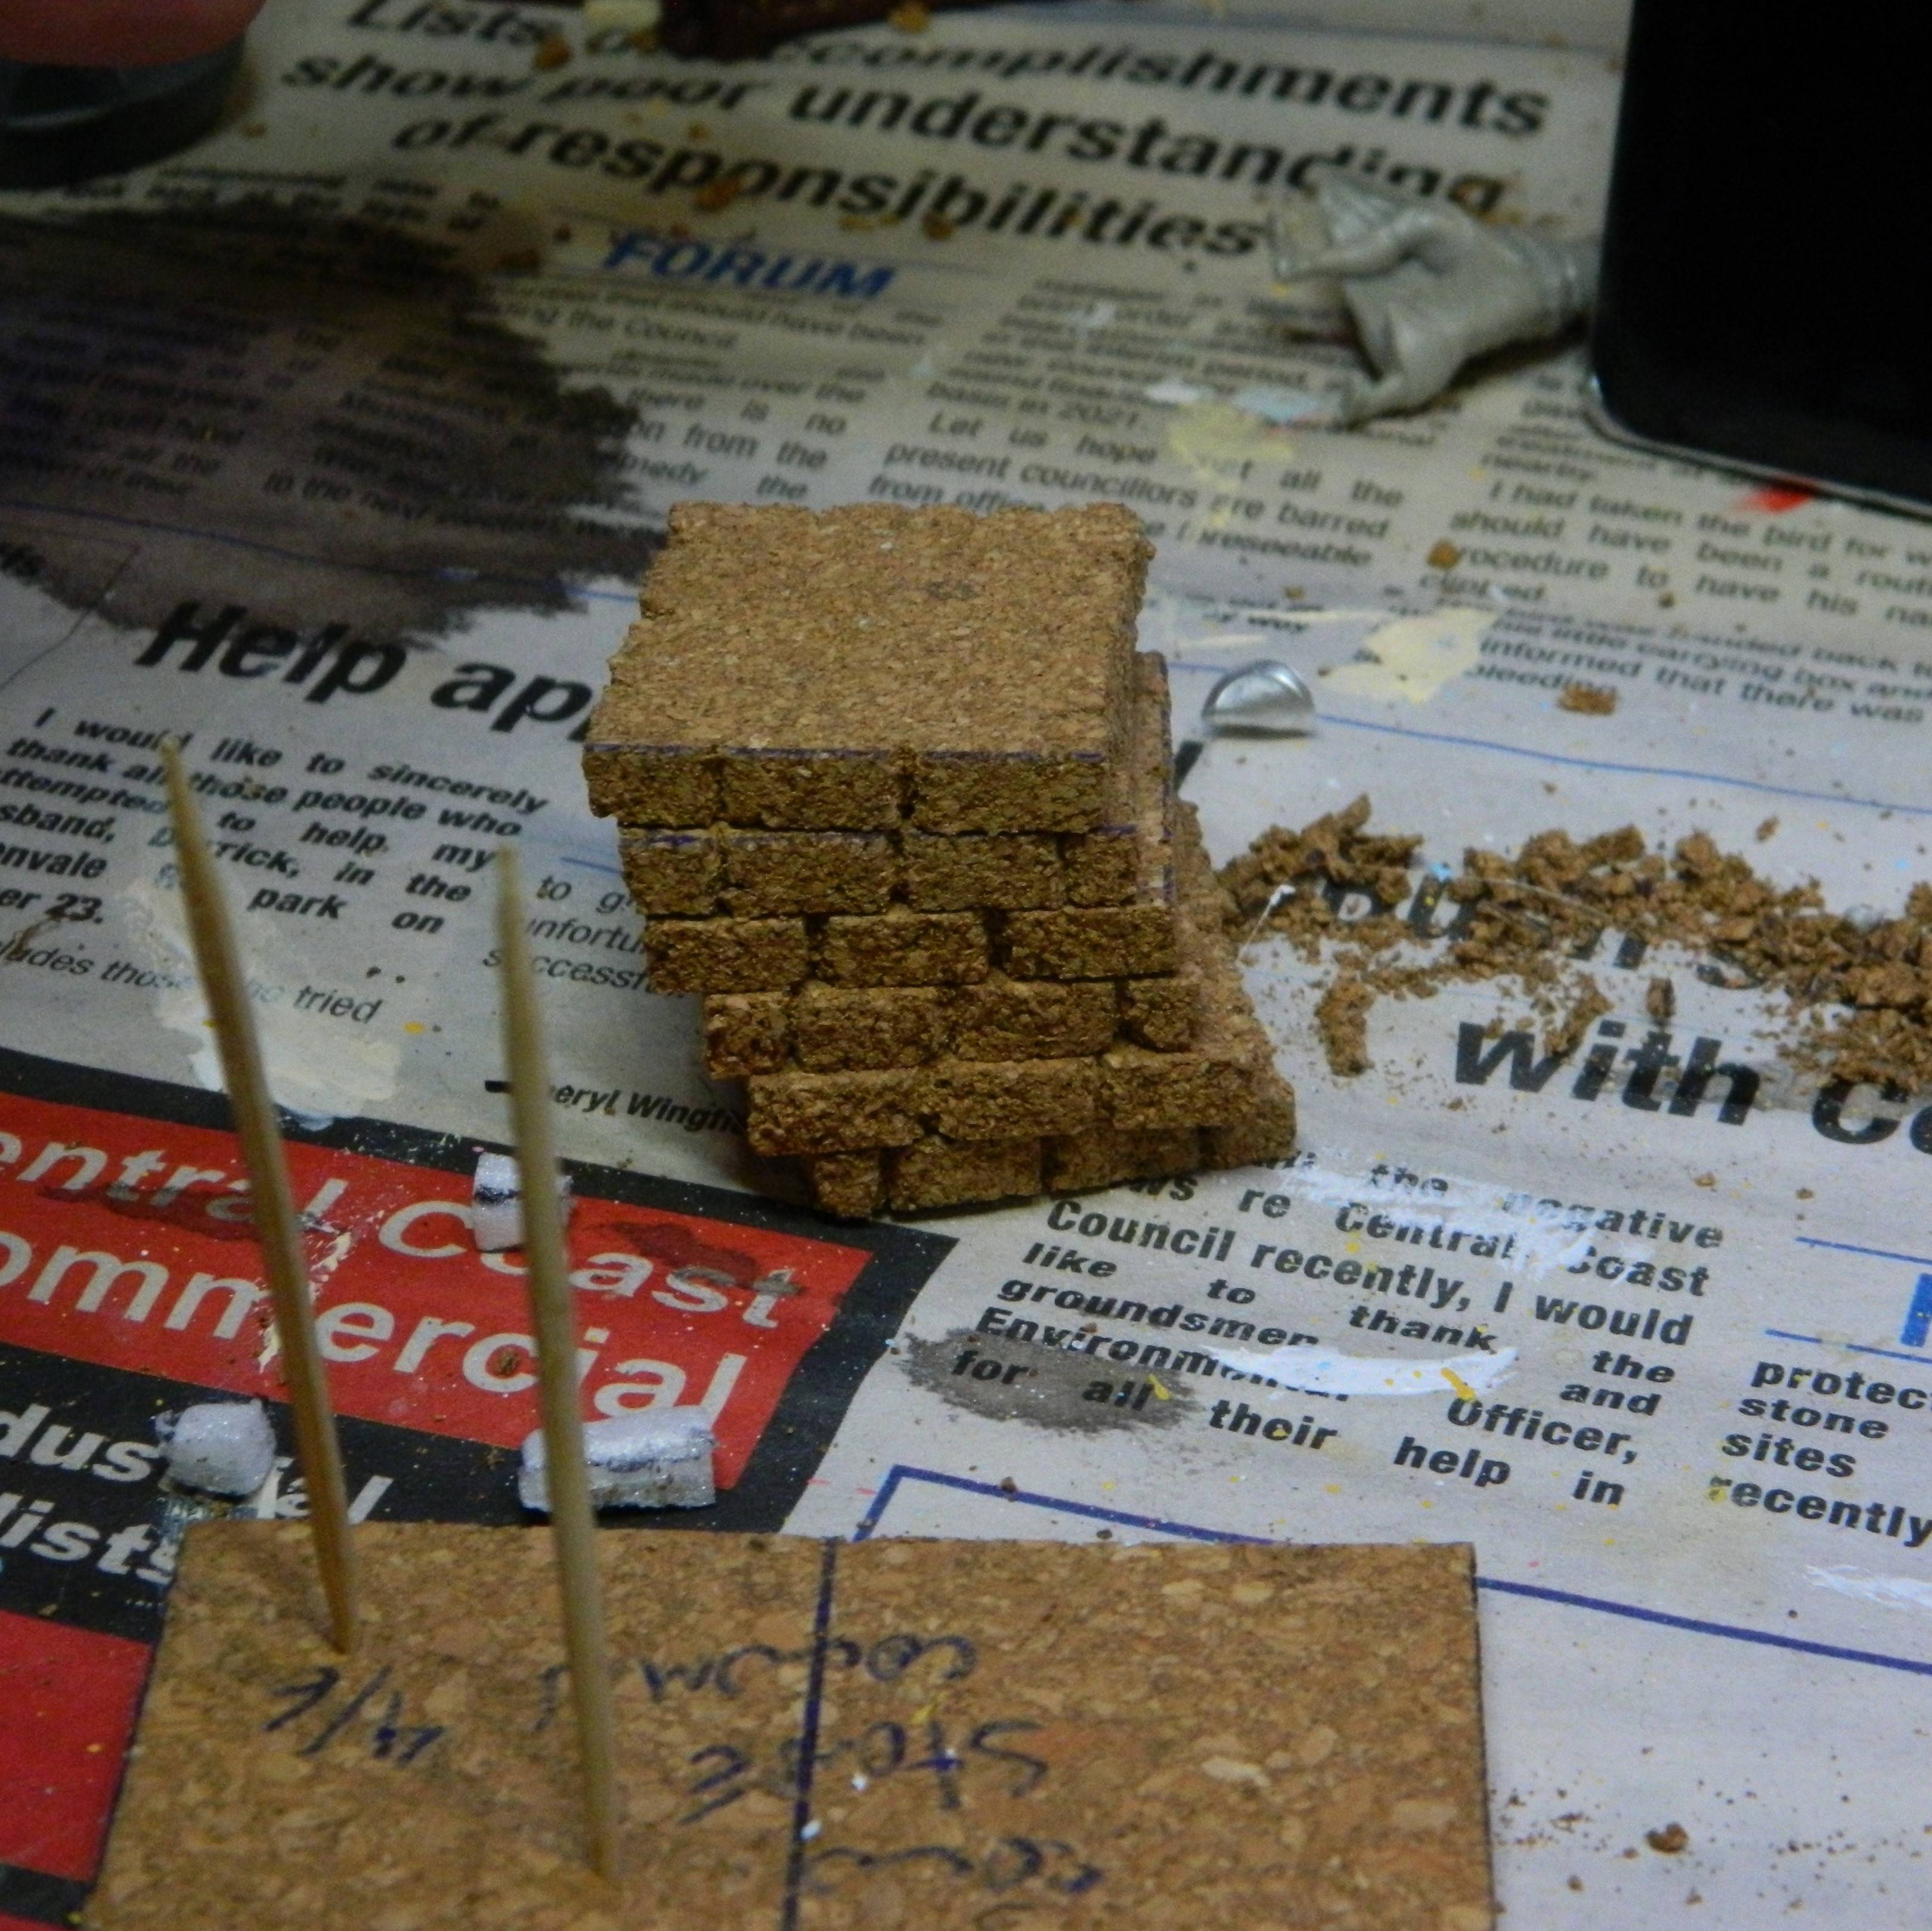
20 Sep 22: Hand-carving bricks and stones... ugh.
In retrospect, it would have been easier to carve the bricks in the sides of the cork before assembling the layers. Oh well.
The bricks are 10mm, offset on every other level of course. The top is divided into 30mm squares and then carved into a cobblestone type texture.


 After the evening's carving. All four sides and the top done. Also, some weathering to the corners. More to come.
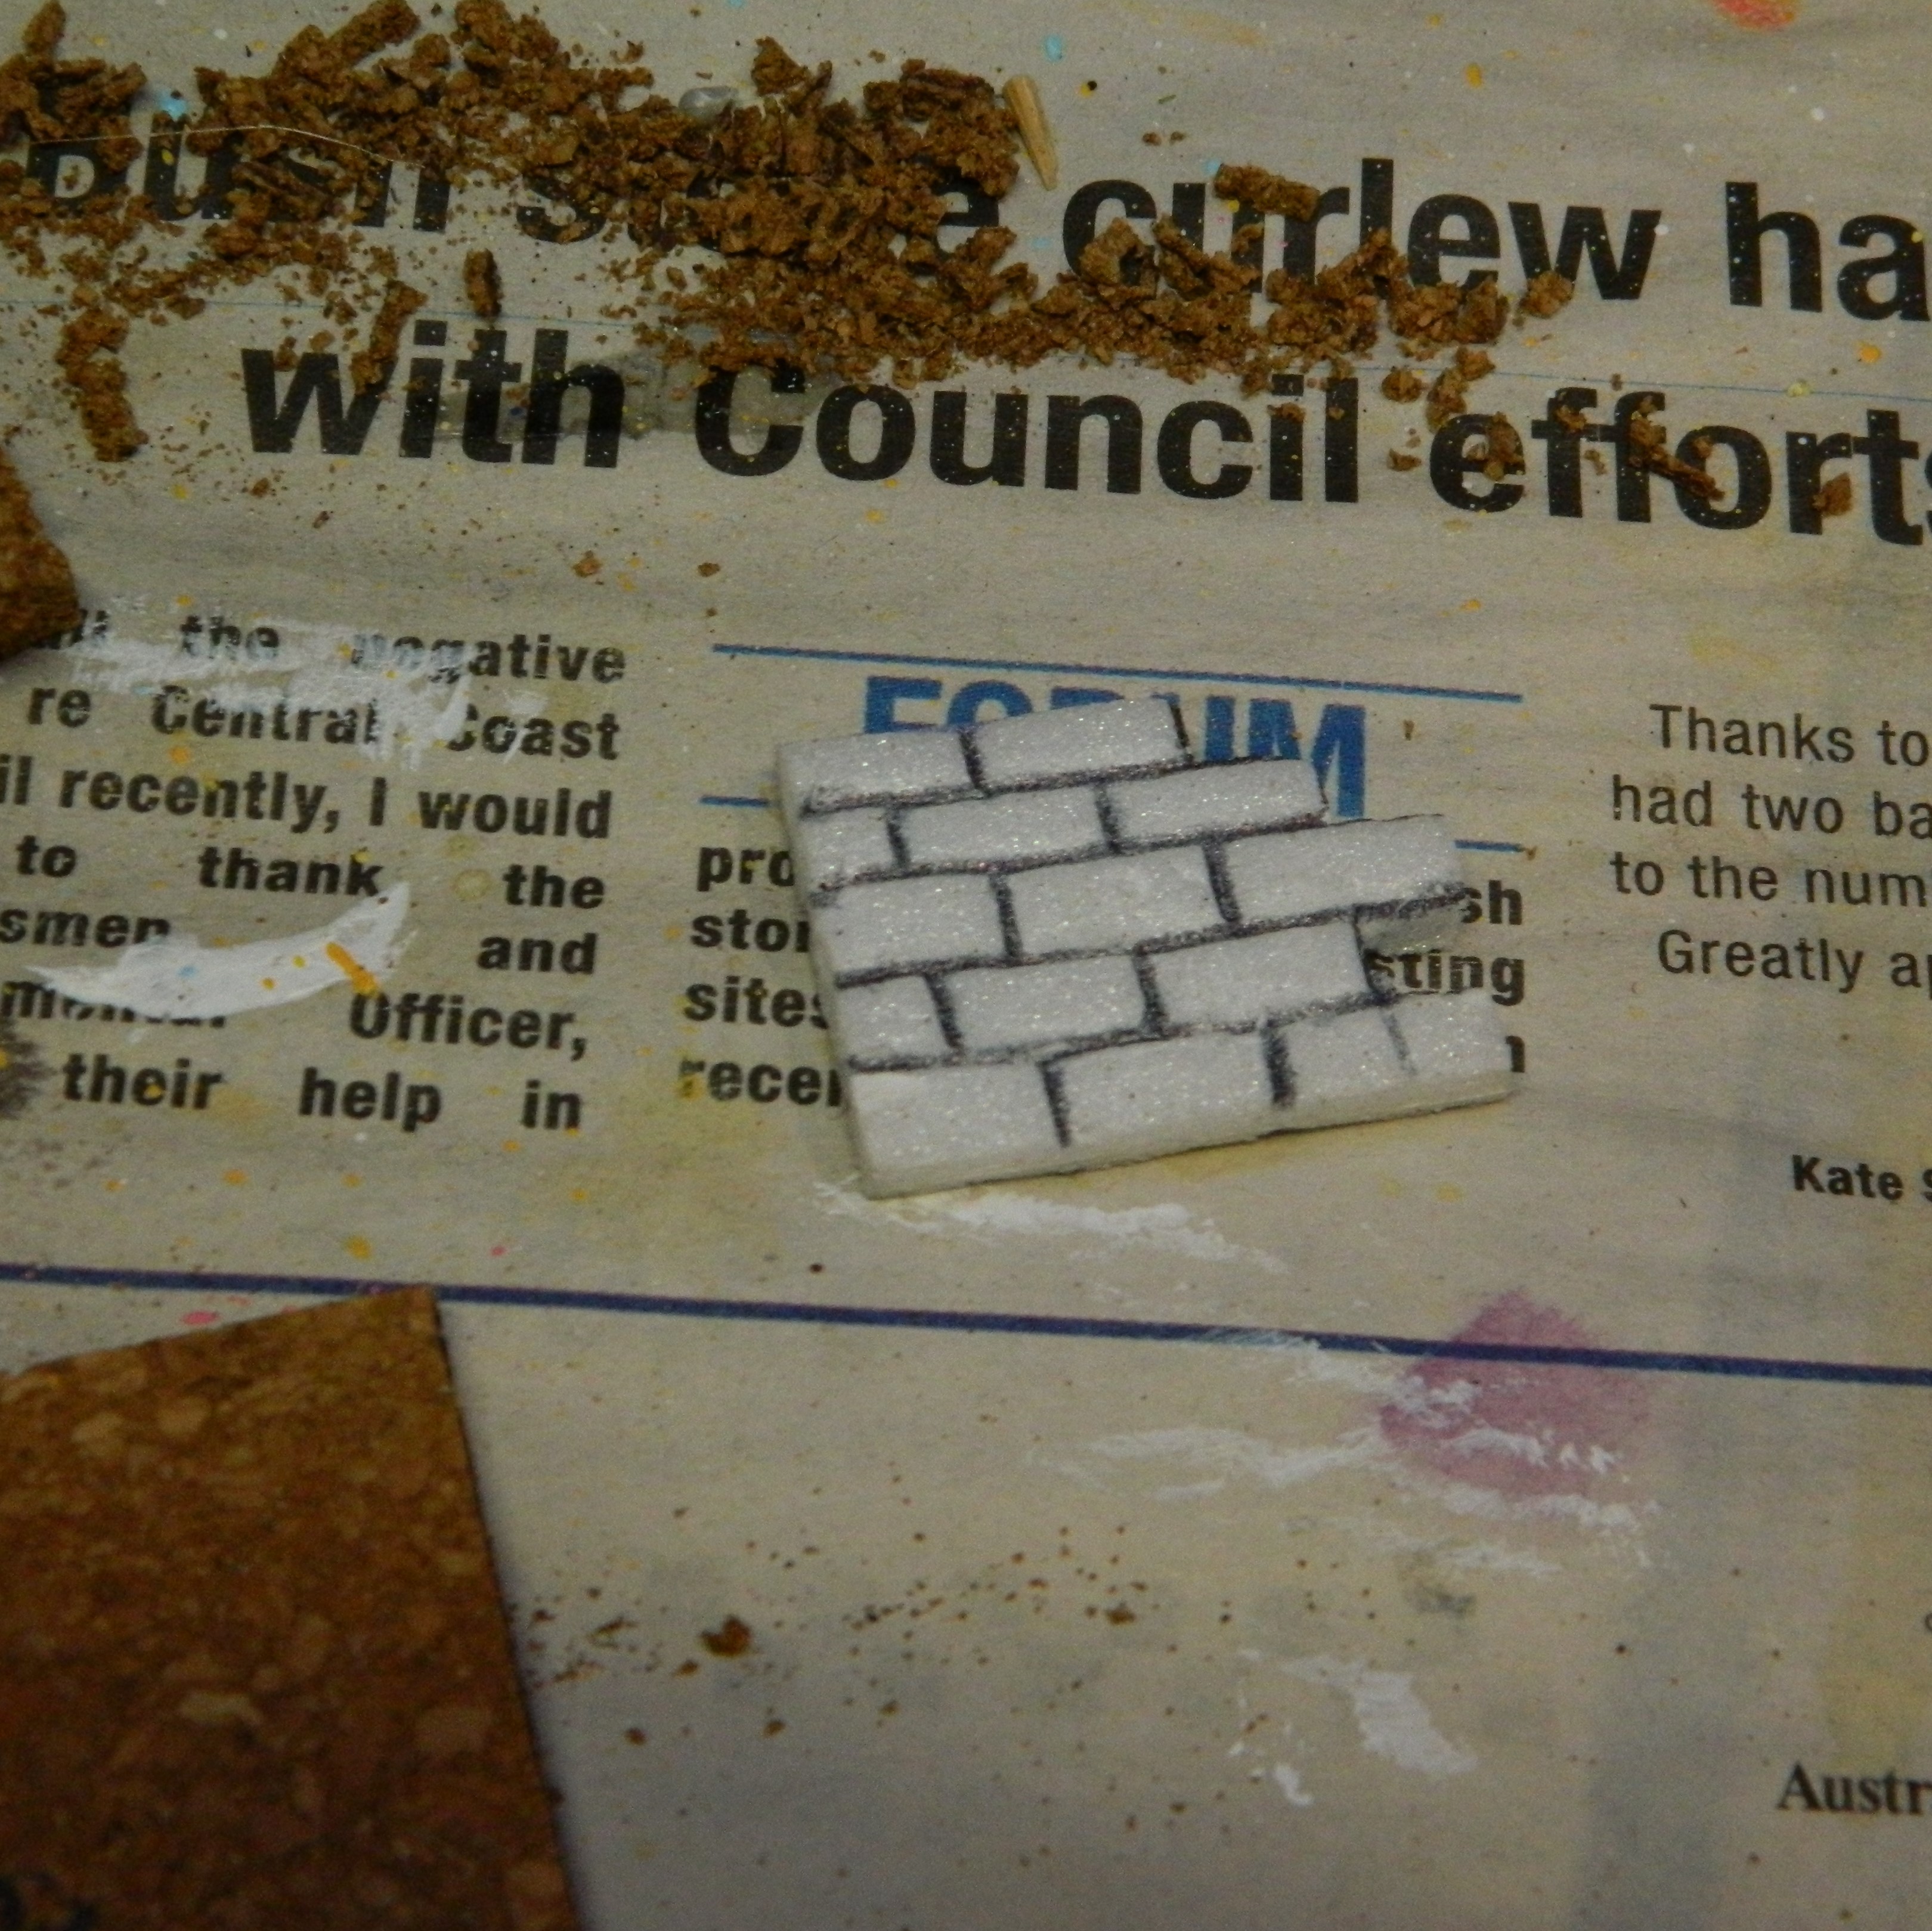
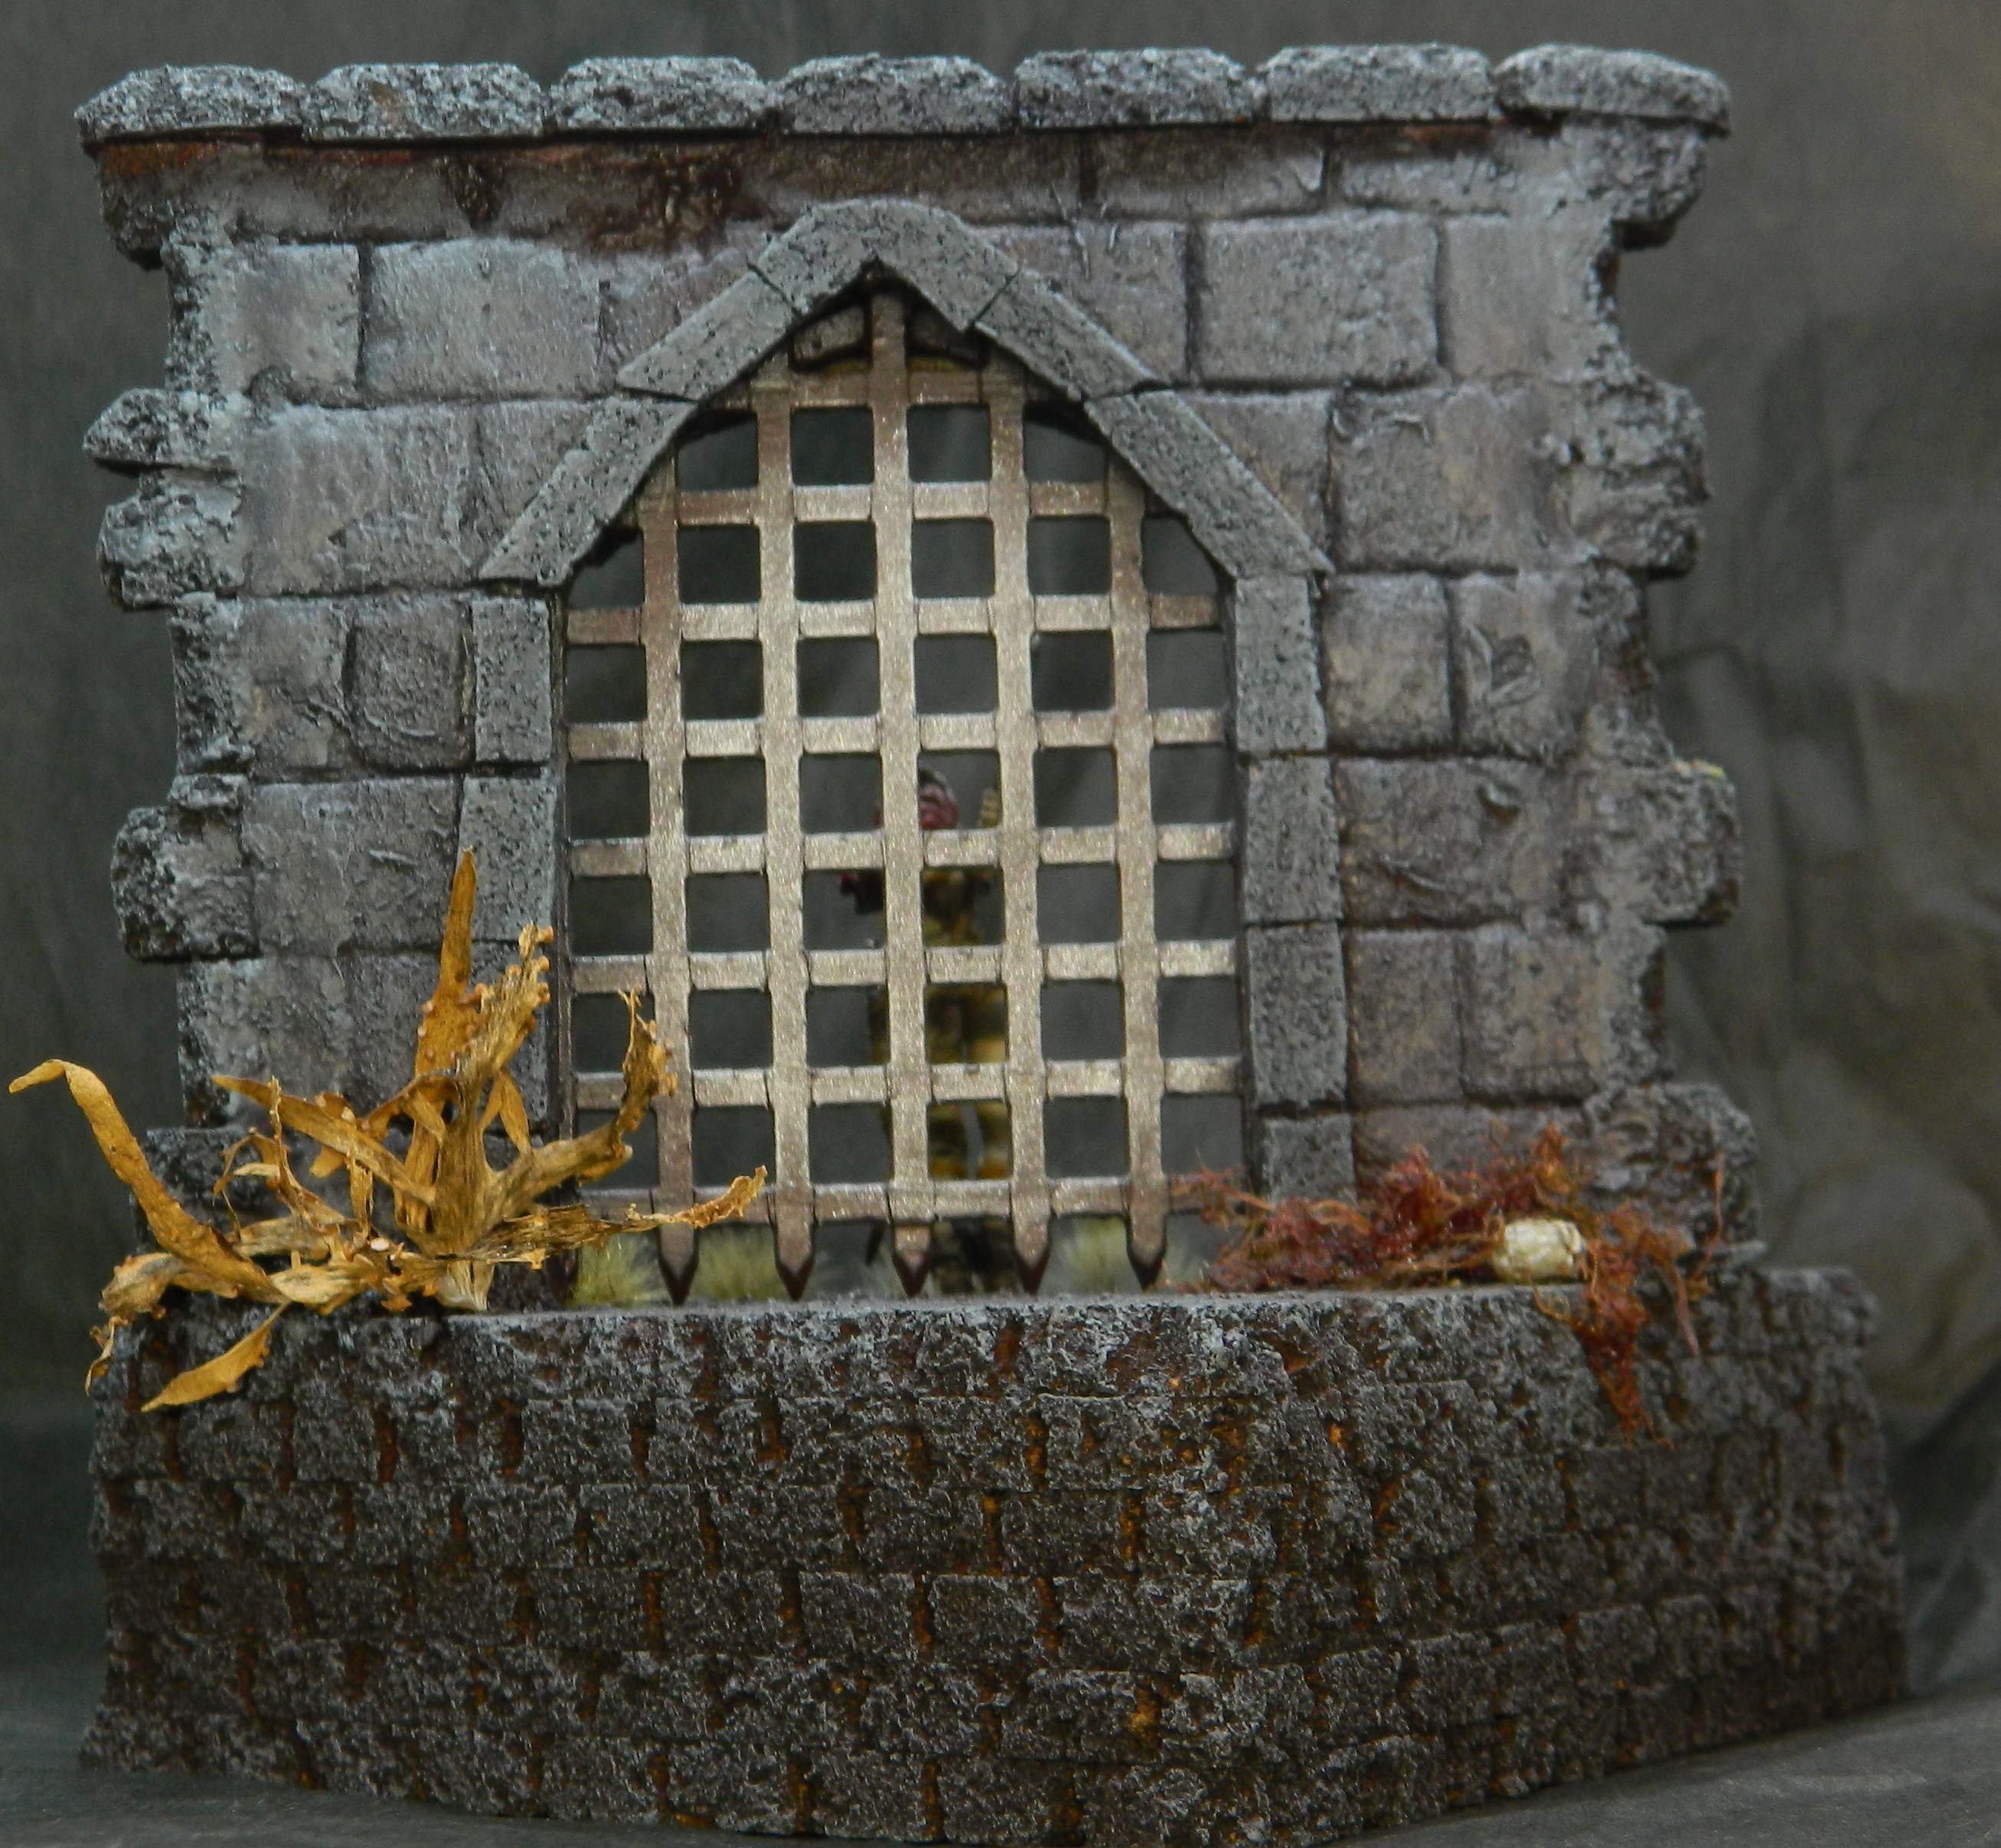
  22 Sep 22: Putting the pieces together. A plastic portcullis from the Renedra Tower set, WHQ door mold using Milliput this time and foamboard to finish it off front and back.
23 Sep 22: Building, checking, tweaking


The wall continues to fill out. Quite literally, I suppose, as I am using a tube of wall filler to cover the gaps along the edges and in between the various components of the wall. There’s a gap along the top that needs covering, which will have cork tile bricks over it. Given that the piece will be intended to be viewed from all sides, I also went and cut in the rear side of the portcullis bars. They were otherwise flat with no detail as this side isn’t meant to be seen in the original model.
The wall is now wider than originally anticipated though and has to go on an angle to fit properly. But now the edges look unfinished, so I want to cover them with something… which will make the wall wider again.
22 Jun 17: Do You Remember the Colours of Spring?
 The Colours of Spring in the Lantern-lit dark...
 Before the Spring Clean Challenge was the Colours of Spring.
My entry then was inspired by the Nightmare Tree. 3D terrain for a game that doesn’t really need it. Scatter terrain that would work in Kingdom Death, but also in other games.
Some of the ideas for these pieces were drawn from the tokens included in the game. But the wonderful Hunt table gave me so much more inspiration.
Feeling in a terrain build mood, and prepping for another challenge, I put together some more pieces.
In the image above the inspiration and what they count as:
- event 18: Dead Weed – Acanthus plant 1×1
- event 82: Consuming Grass – Acanthus 1×1, Toppled Pillar 4×1 and Long Grass 2×2
- event 87: Weeping Faces – Acanthus 1×1
- event 24: food from the Mouths of Others – Acanthus 1×1
- White Lion Hunt deck: Sea of Golden Grass – Acanthus 1×1 and Long Grass 2×2
- Event 11: Monster Droppings – Ore 1×1 or Debris 1×1 (yep, poo)
13 Sep 22: Thank-you, Past Me!
 At some point in the past, I had a copy of original Warhammer Quest.
 In my foolishness, I sold it to obtain other gaming goods. A sad story for another day. Before I sold it though, I made a very rough mold of the door piece. I’ve had that mold sitting in with other gaming supplies for a long time. Now was the time to use it.
I cast using Green Stuff. Not sure if this was the best material, but I had it to hand.
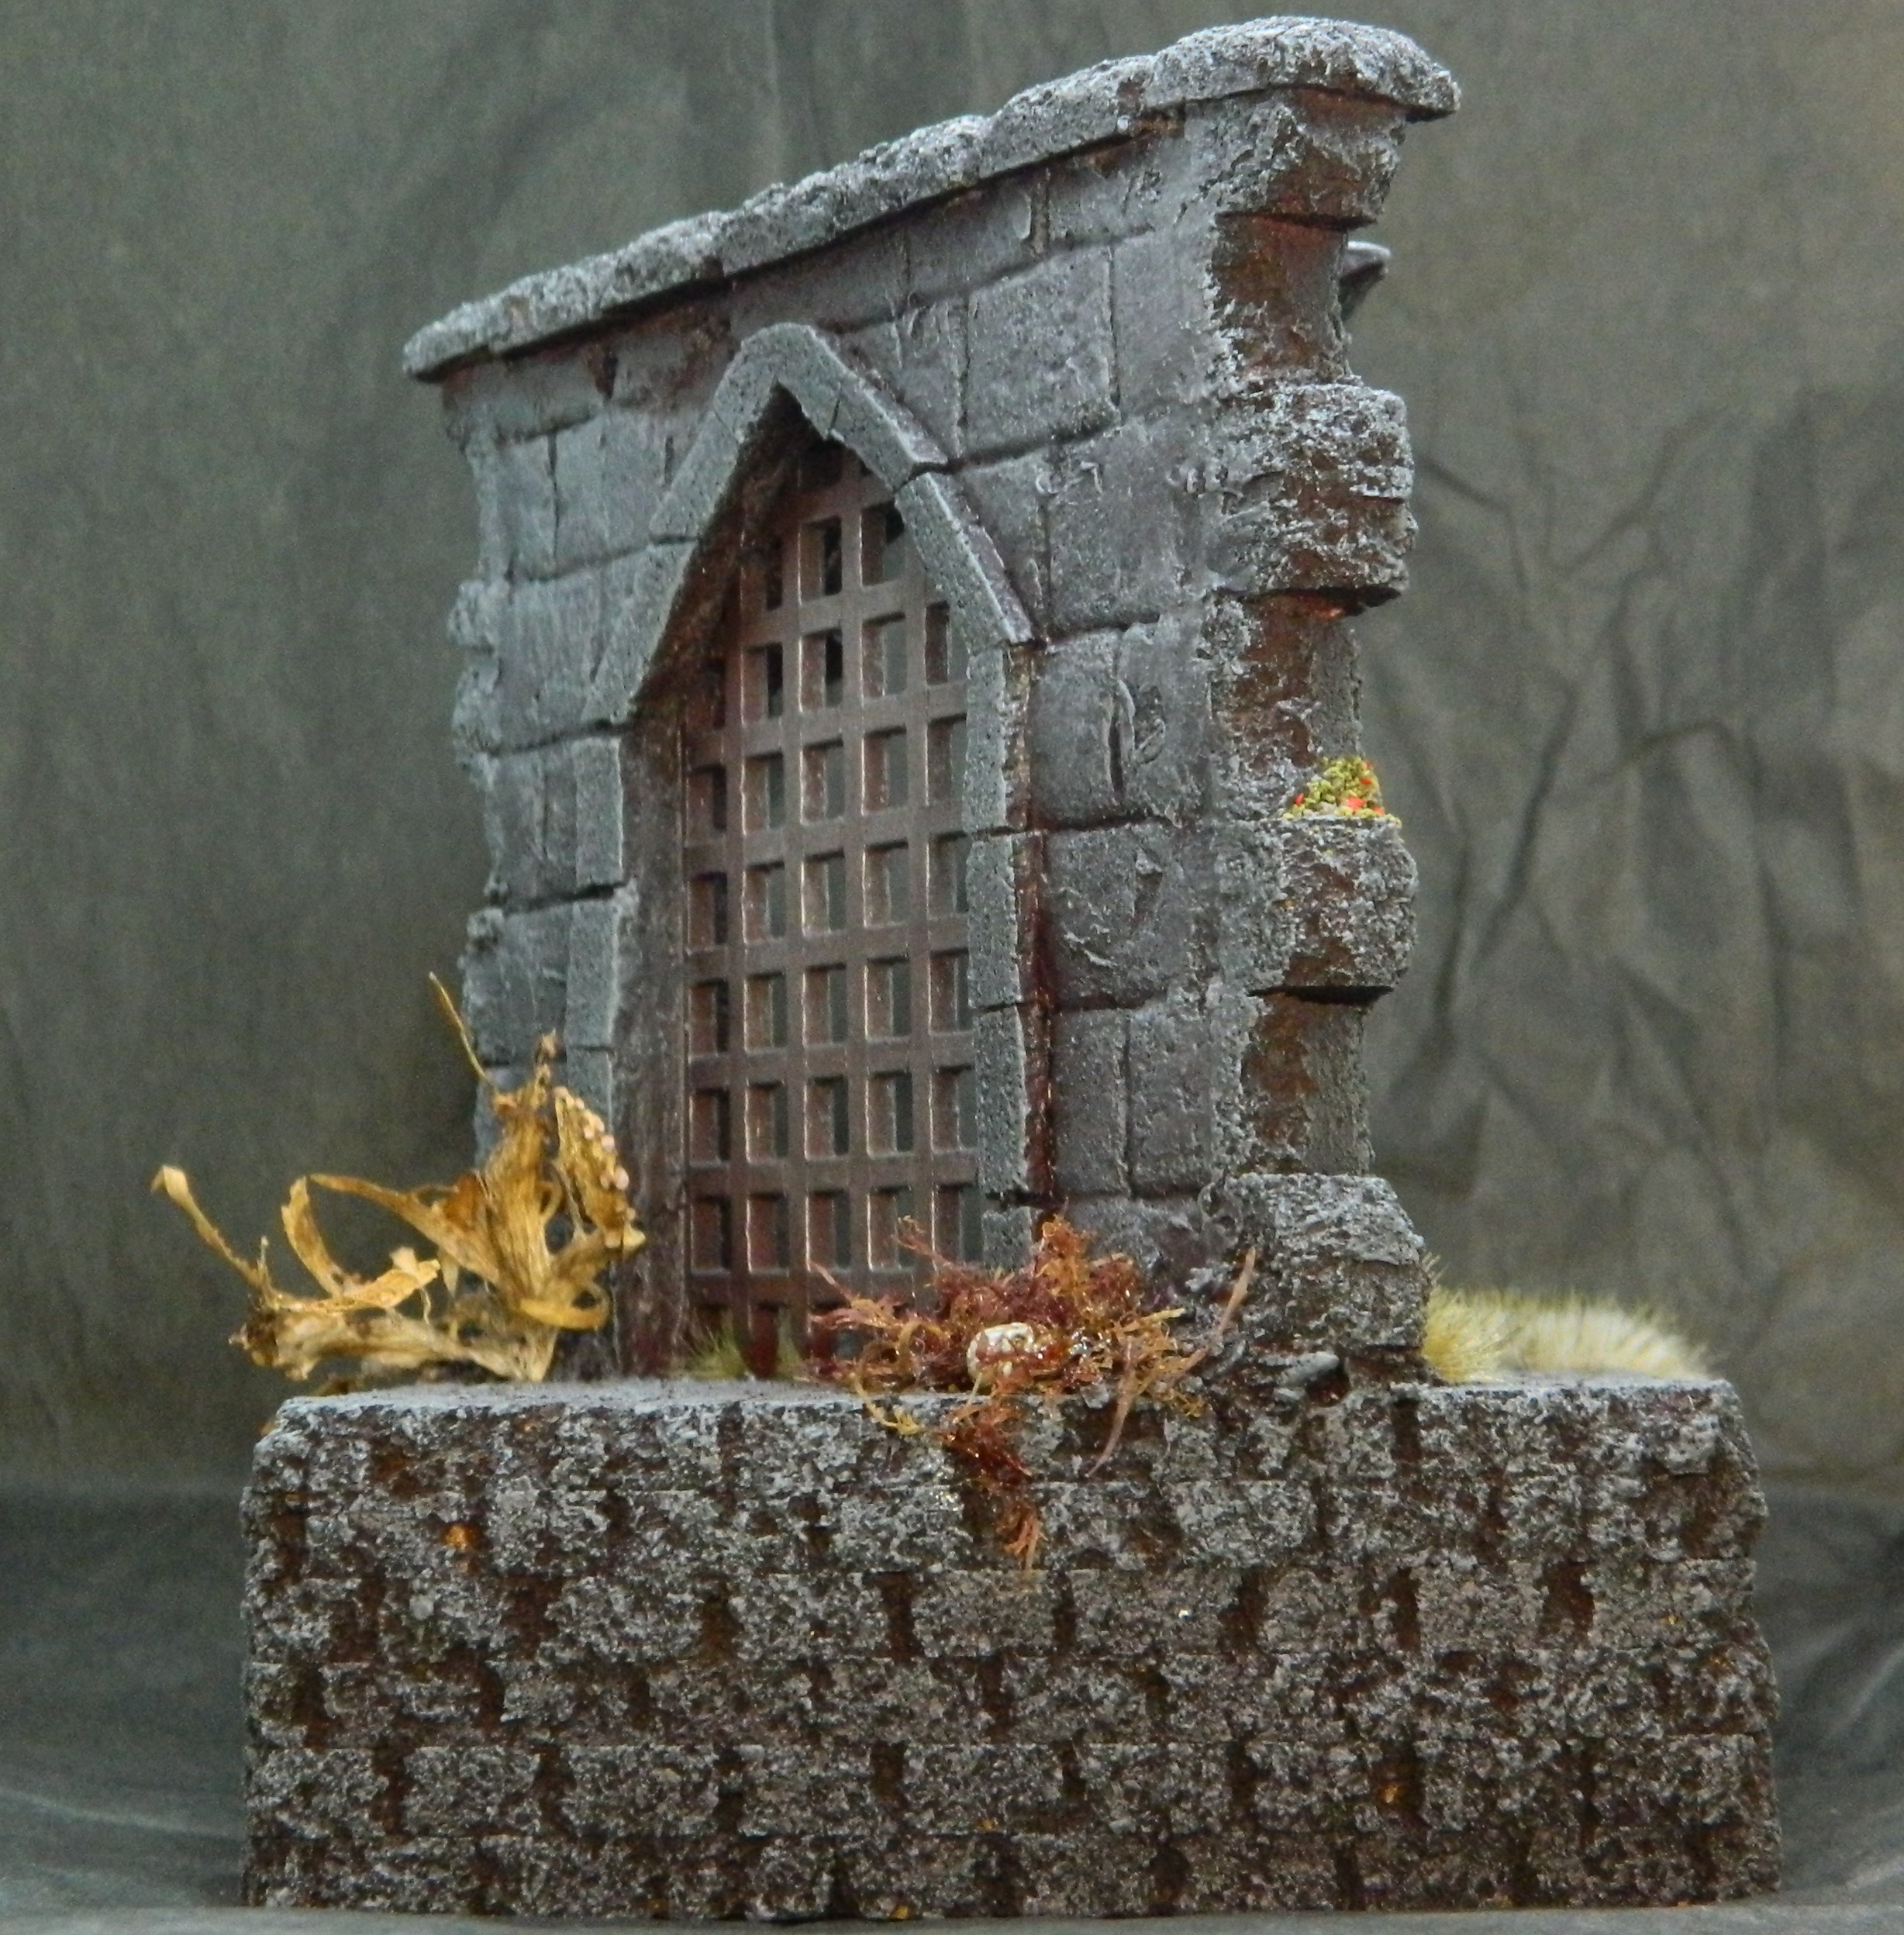
Event 99: The Portcullis
Counts as a Stone Colum 2×1
A portcullis, standing alone. It doesn’t bar the way and the survivors can walk all the way around it. There is a lock… if only they had a key…
I have a stack of bases ready made from when I started this idea. I aligned one half on a 2×1 base and pushed a couple of cocktail sticks through to provide support through the uprights of the arch.
 Build a door frame.
 14 Sep 22: Bars
 Cocktail sticks pushed through the cork and trimmed to make the bars. A matchstick to top them.
 19 Sep 22: Detailing the Portcullis, also Ore tokens
 I added a piece of card on each side at the top to fill in the gap there, roughed up the edges of the tile to blend into the table better and used the resultant cork rubble to blend the archway into the base.

 The Ore tokens use Secret Weapon crystals added to the usual Scibor resin faces
1 Mar 22: White Speaker Nico Christmas edition
Yeah… March is a bit after Christmas. But I was painting the Intimacy Survivors and planning on doing the Lonely Tree. This mini was sitting there… waiting.
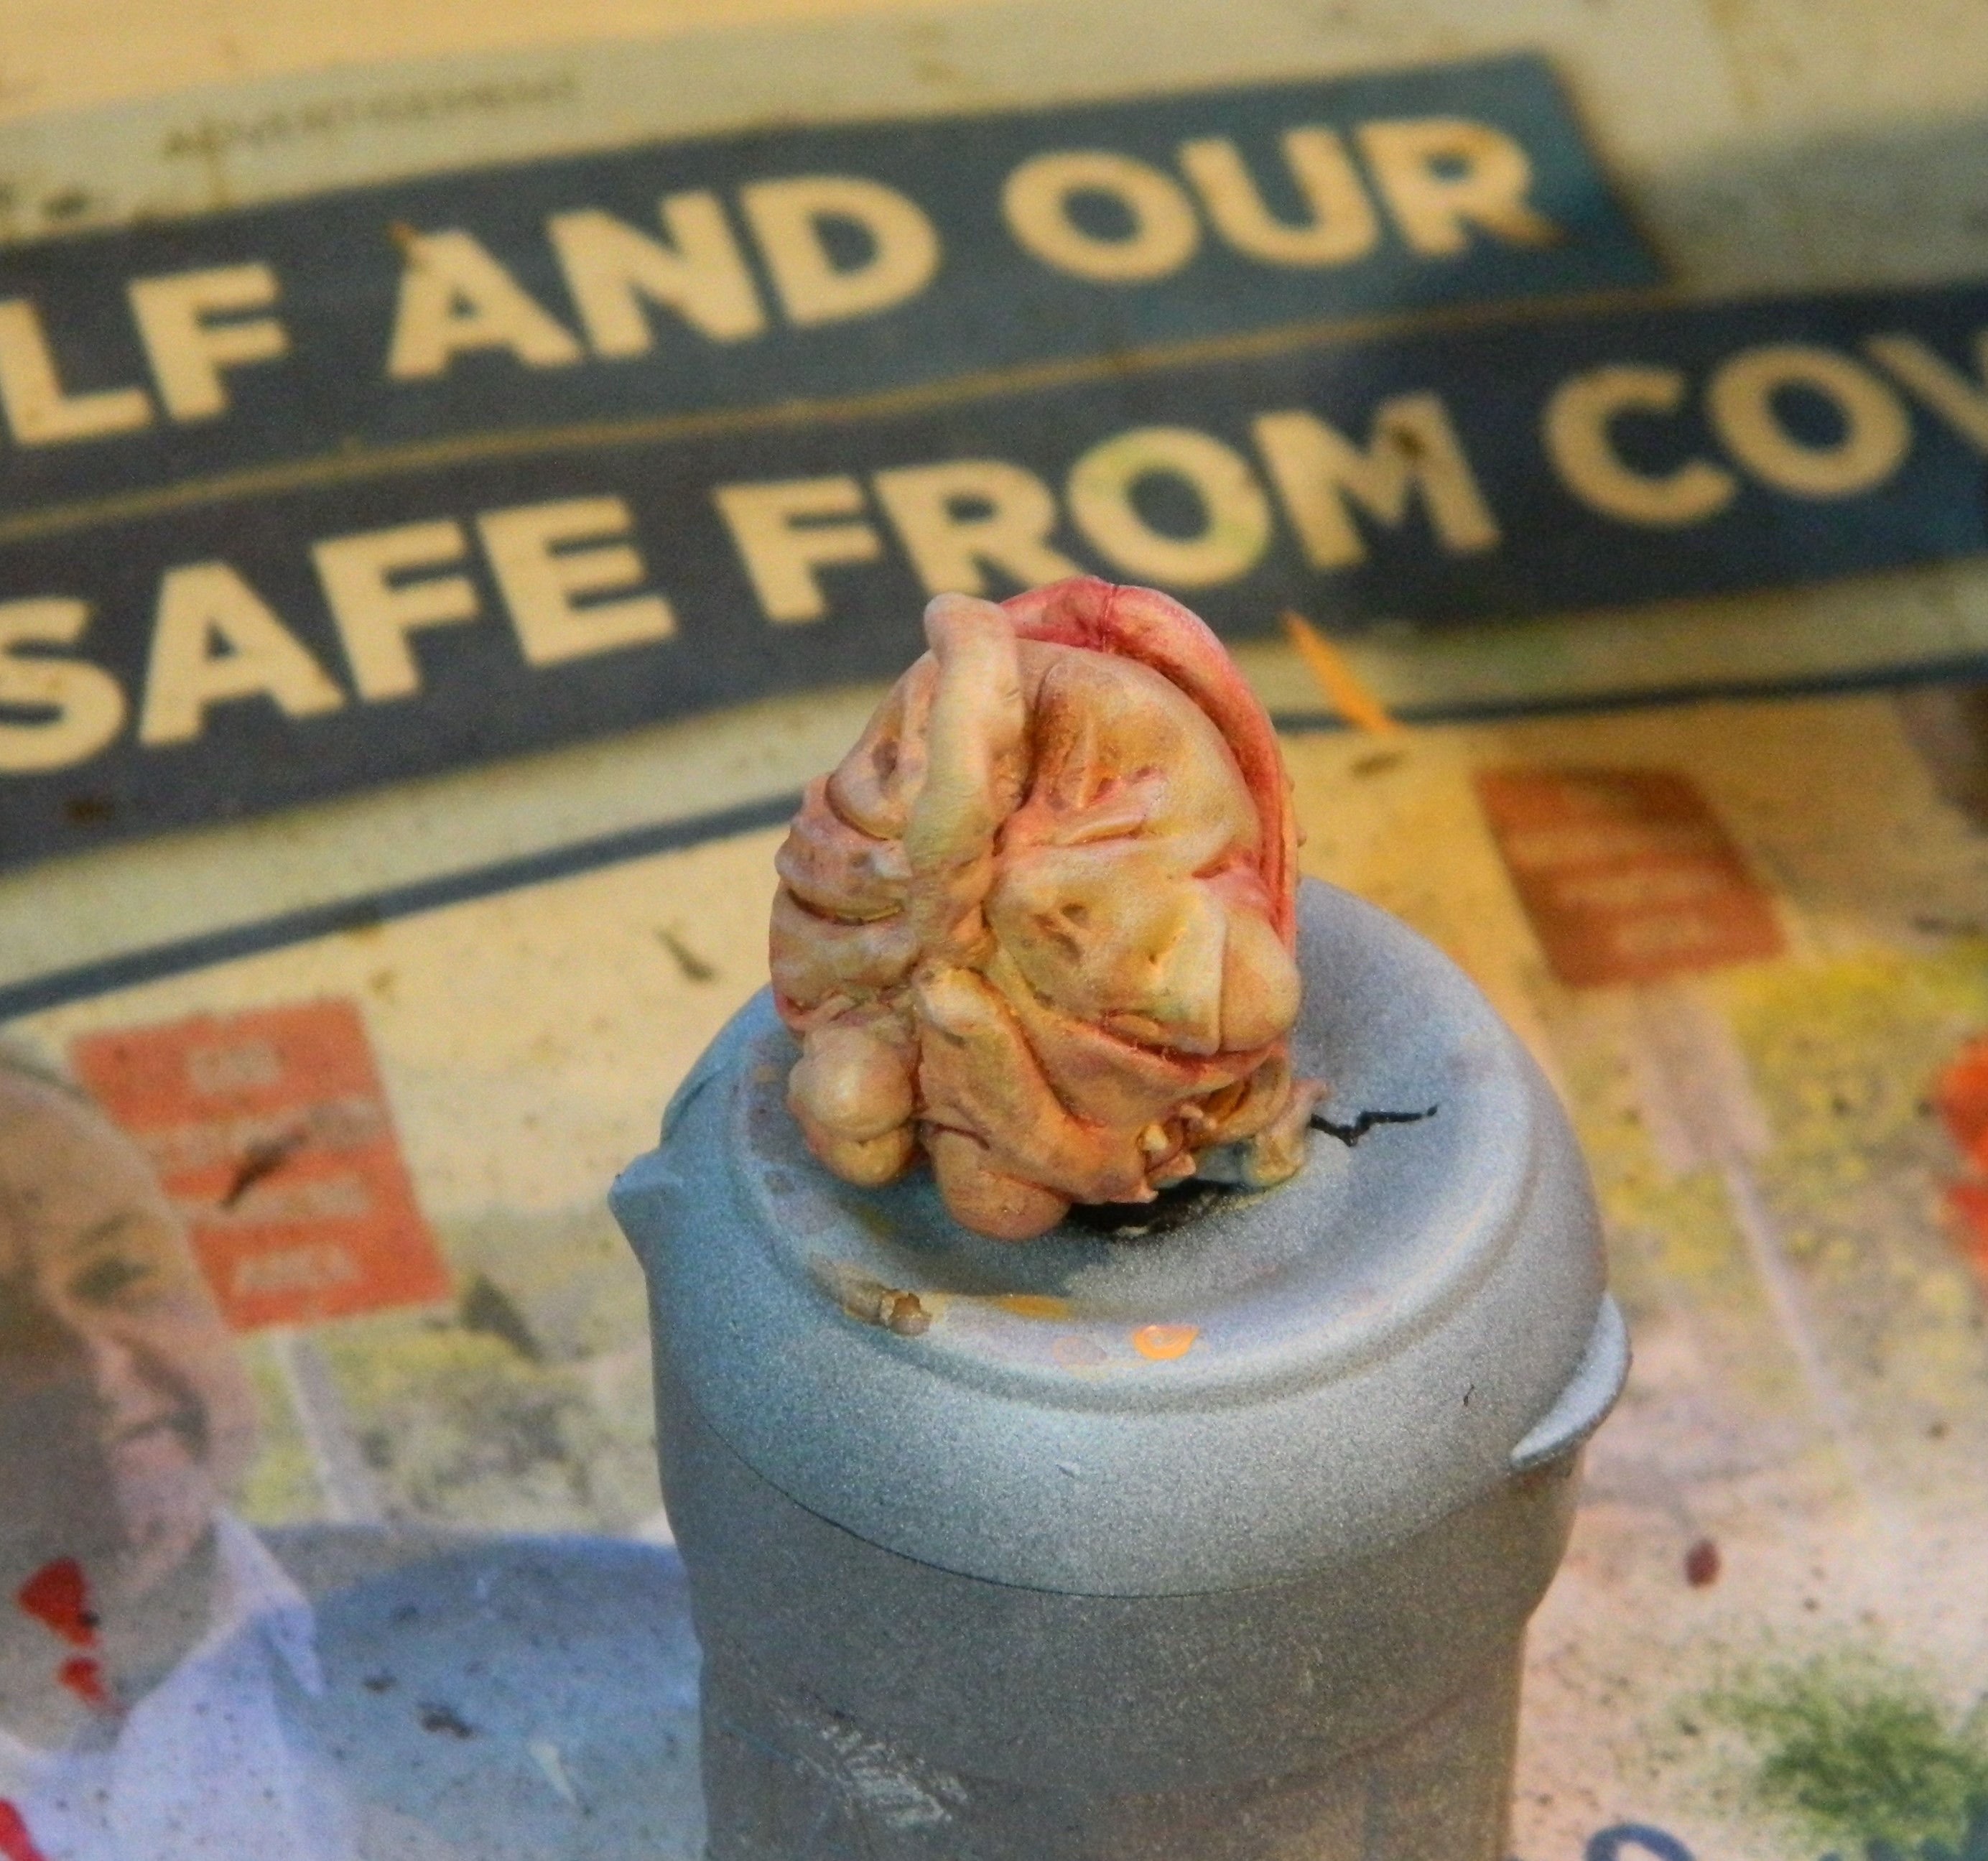
The mini represents a reoccurring character in KD. A member of the White Speaker cult named Nico. Presented here with a bag of gifts for the Survivors.
I used the same colours that I was using on the Intimacy couple at the time, as I had them on the palette.


14 July 22: Christmas in July
 Ready to hand out presents for all the insane girls and boys.
The colour selection was mainly drawn from the art. The only thing I changed is the component that looks like a branch, which has three candles on it. I did it in blue to suggest that maybe it was taken from a particular tree…


 FACE!
FACE! She has an axe in that bag and her knife stuck in the stone face by her left hand... just sayin'
17 Apr 22: The Lonely Muse....
The final component of the Lonely Tree set is the Lonely Muse. Although it looks like a survivor, it is as much a part of the tree as the trunk.
Fair warning: some nudity ahead, but this is Kingdom Death, so it was going to happen eventually.
My plan was to use the colour to link it back to the tree. I used the same colours for the blues and reds as I did with the tree. I painted the lantern in the same manner.


Yikes… Looks rough…
My first attempt I wasn’t happy with. There was a particle of something that I hadn’t noticed when I’d primed. It’s right on the mouth. The skin has some elements I’m happy with, but overall, I wasn’t satisfied. Also, it looks like she had a bad night…
I decided to dip it in Dettol and start again.
25 Jul 22: Have you seen the ghost of the Tree?
I’ve worked on this and another KD mini over the last month between other minis. I feel that there is still progress to be made on my skills of painting skin. But this one is better than it was, and I’m happy to move on.
The colours used were:
- Vallejo Basic Skin tone
- Vallejo German Camo Medium Brown
- Vallejo Ivory
- Citadel Bugmans Glow
There was no particular recipe used. Just thinned glazes, the German Camo Brown and the Ivory were mixed in in small amounts to the Basic skin to create the shade and highlight respectively.
A small amount of the Bugmans Glow was mixed in to the Basic Skin with some Ivory for the redder skin areas.


 Face
Face The Lonely Tree set
 Take no gifts from under this tree...
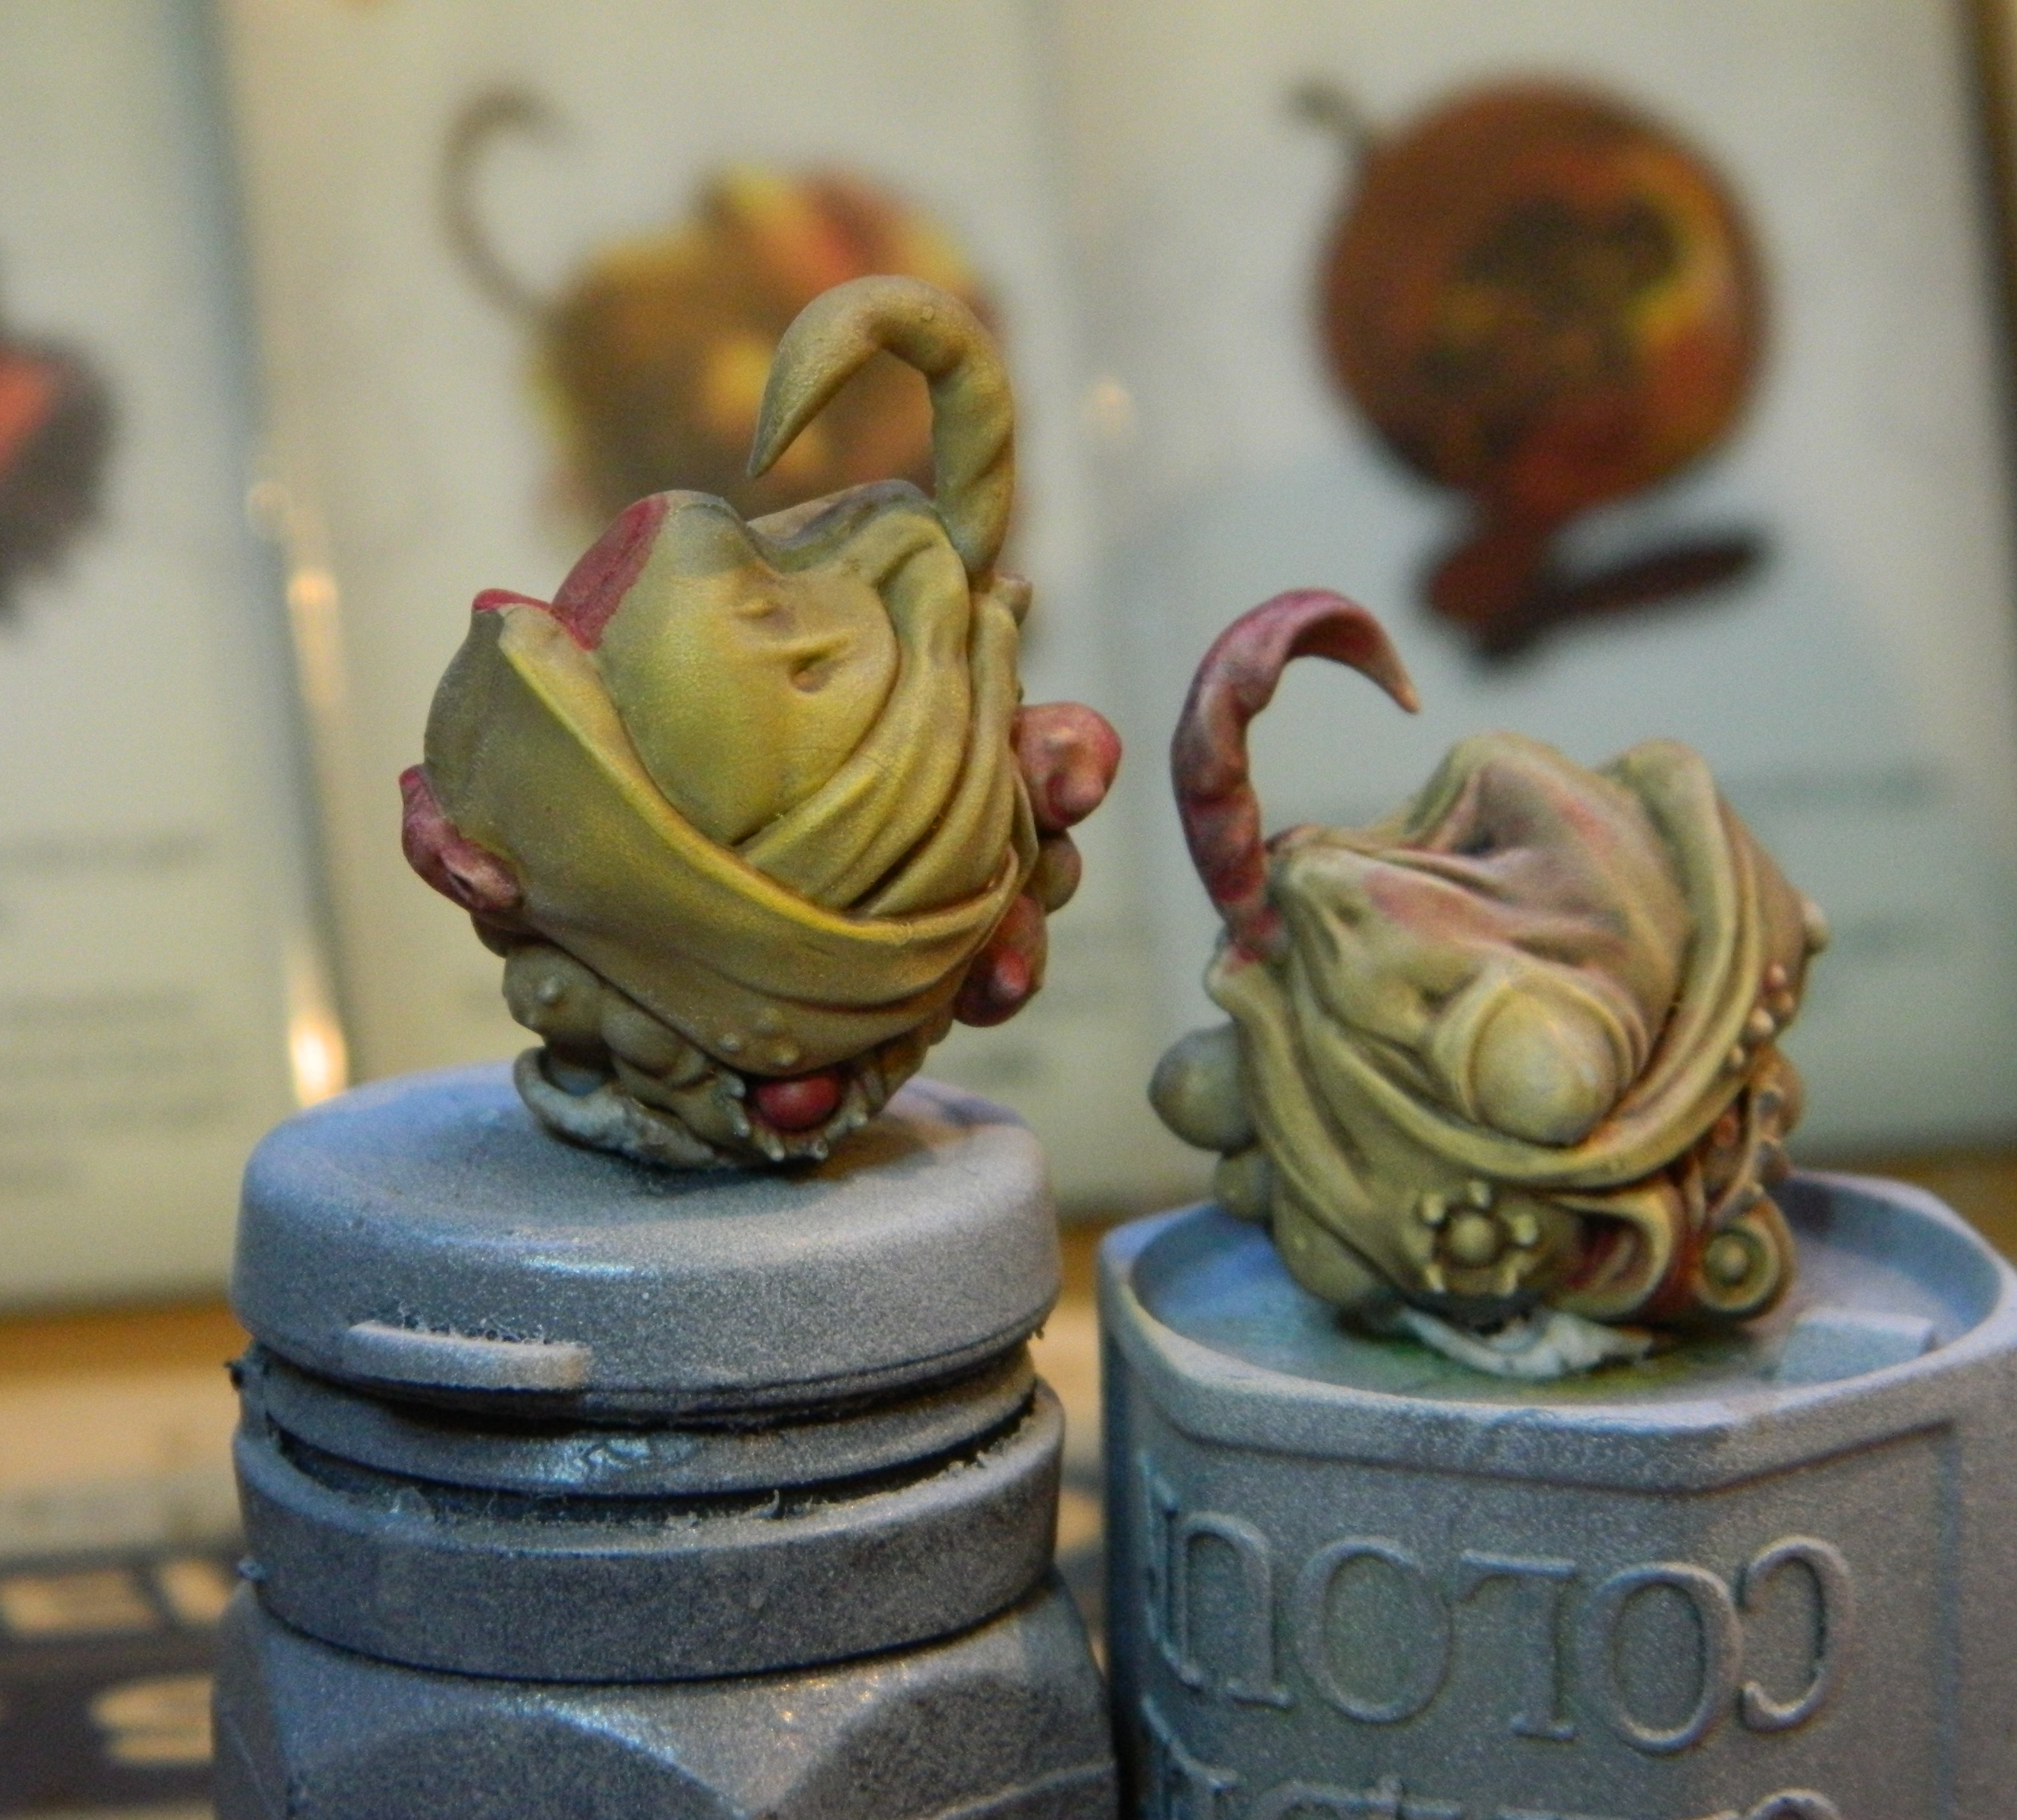
21 Mar 22: Fruitful efforts continued
The fourth fruit flavour is the Porous Flesh fruit. Mmm, just makes you want to sink your teeth in, doesn’t it?
- Glazes randomly of Gory Red
- Glazes Black Red, to deepen the shadows of the Gory Red
I could have maybe added some of the blue, but I was guided by the art. What I should have added were little, thin strokes of a black, to indicate the hair. But I didn’t.


Finally in this orchard of horror, the Drifting Dream fruit.
- Glaze Deadly Nightshade for shadow
- Glaze the Warpaints Flesh Colour in higher locations
- Random glazes of Ivory
A dark grey/ black fruit in the art. Though it has flesh and ivory through it as well.
Compare the pears
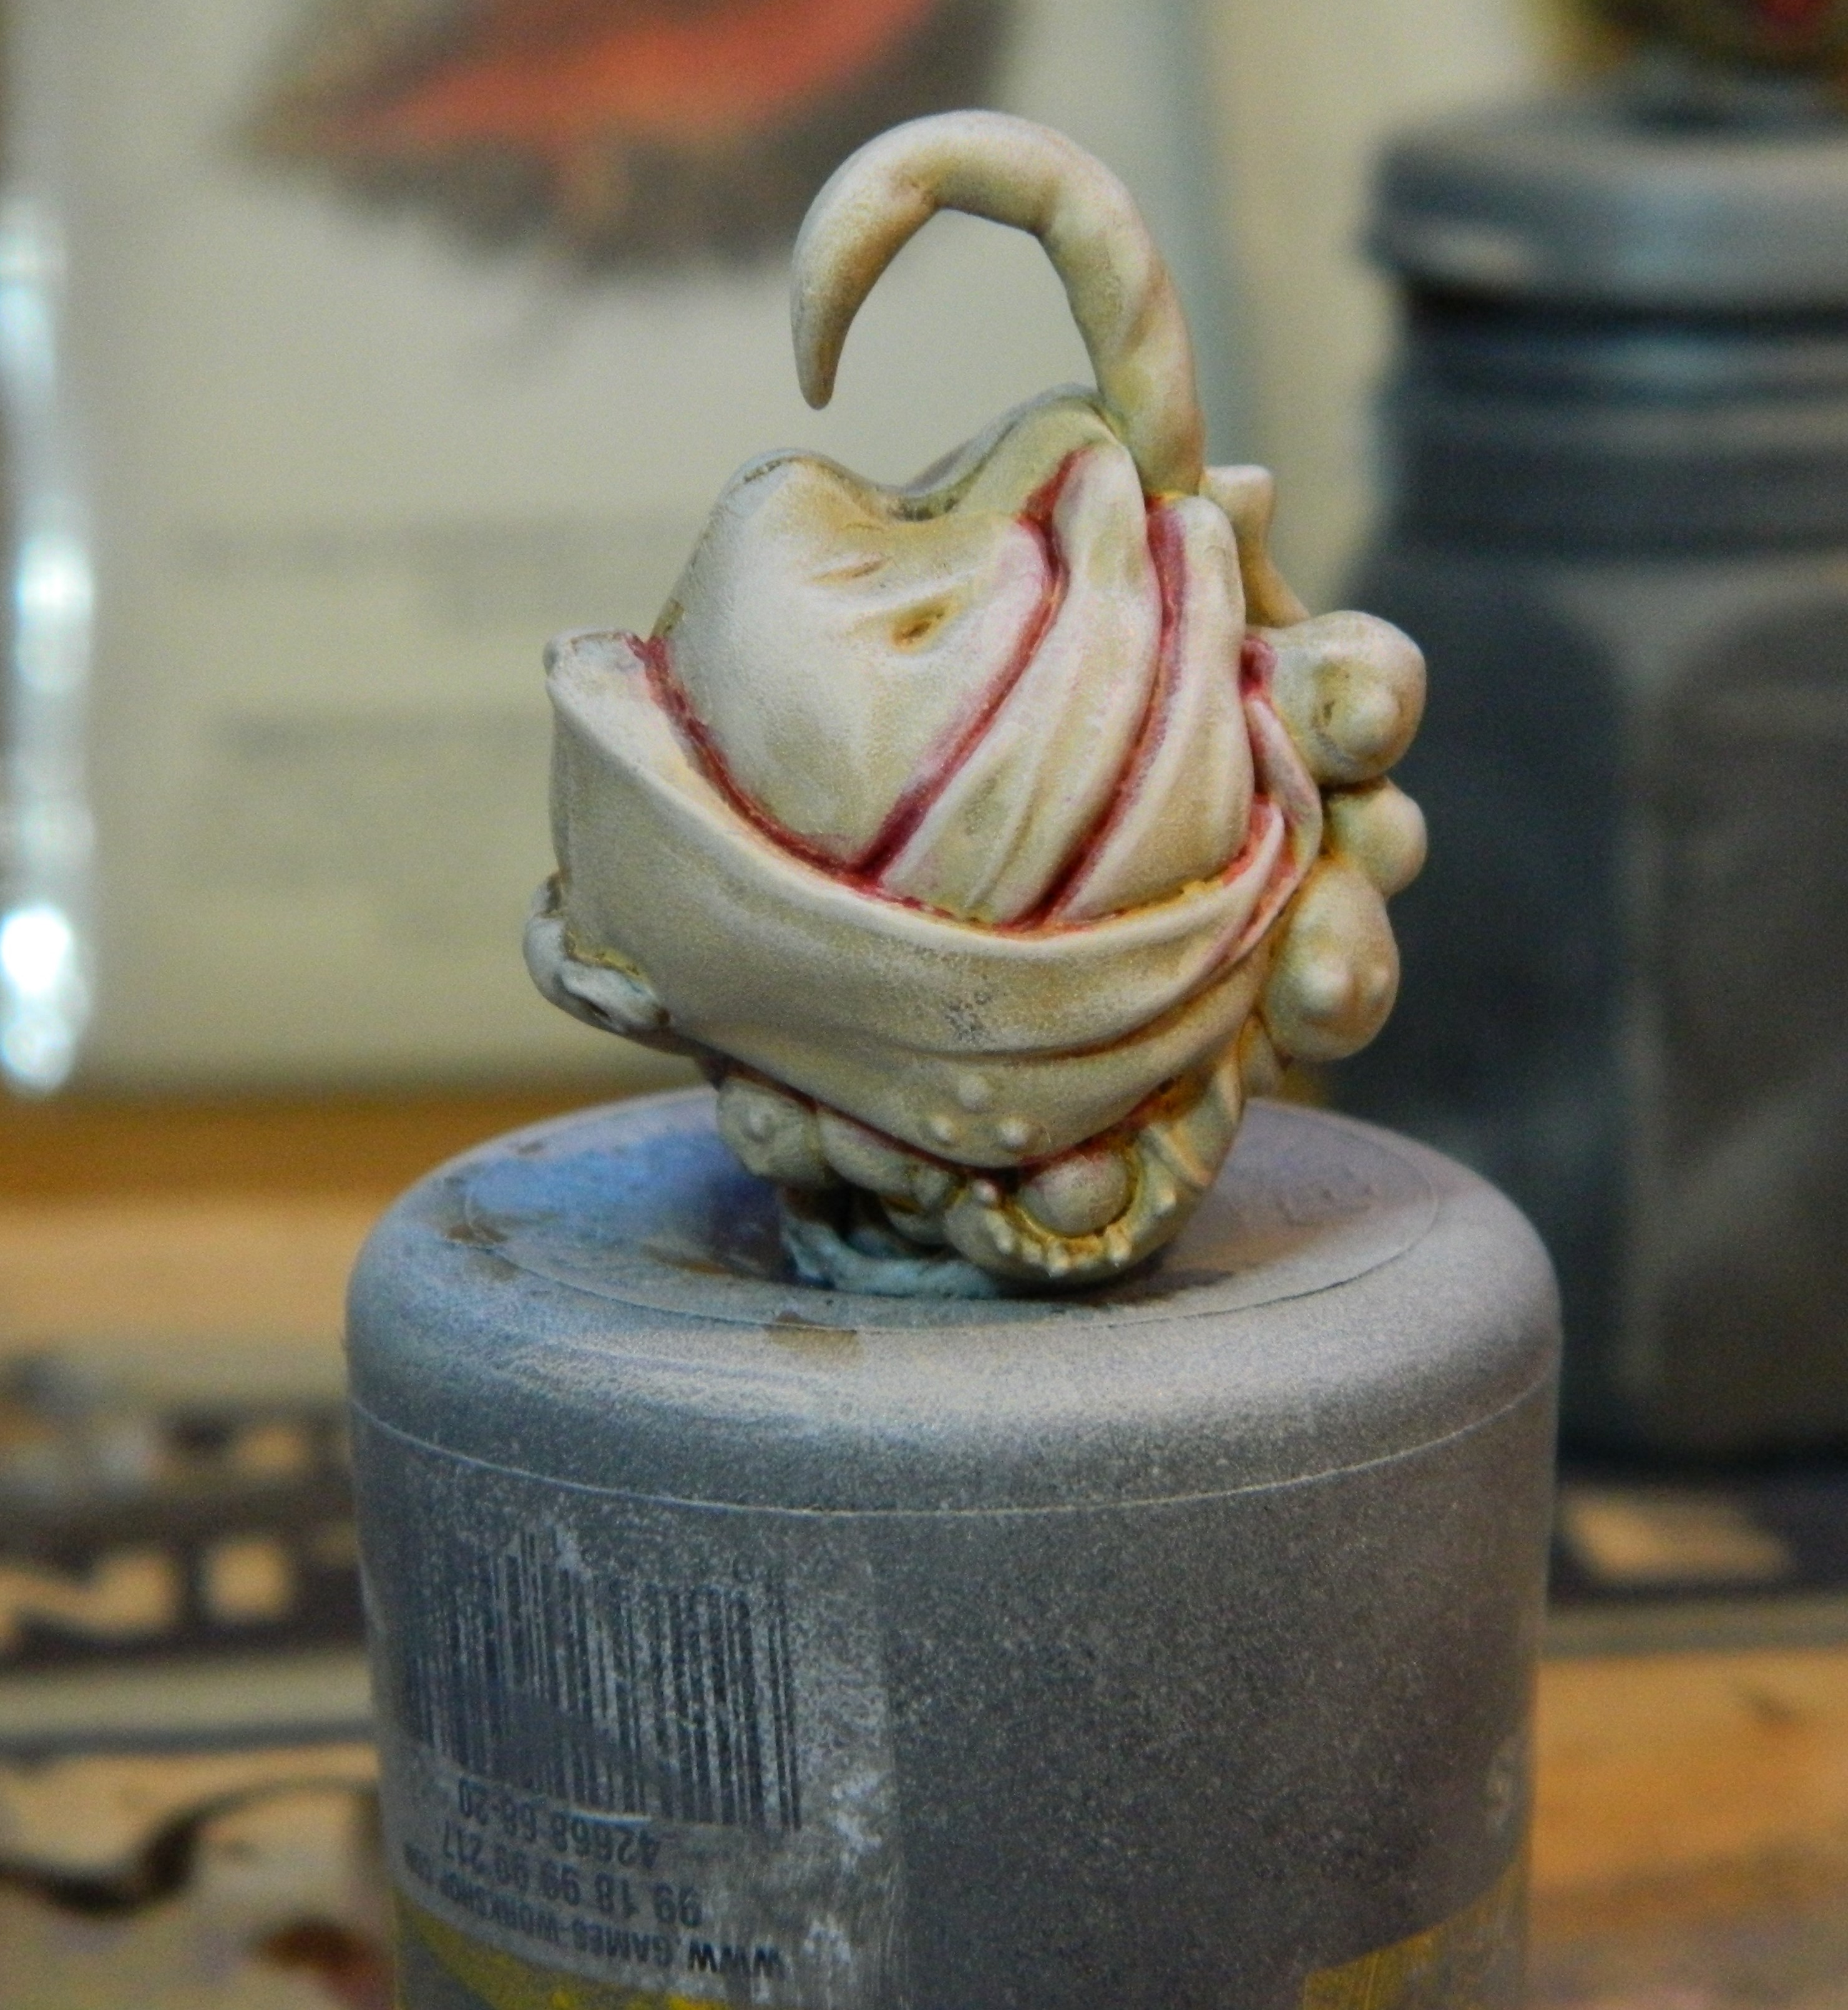
 Jagged Marrow Fruit
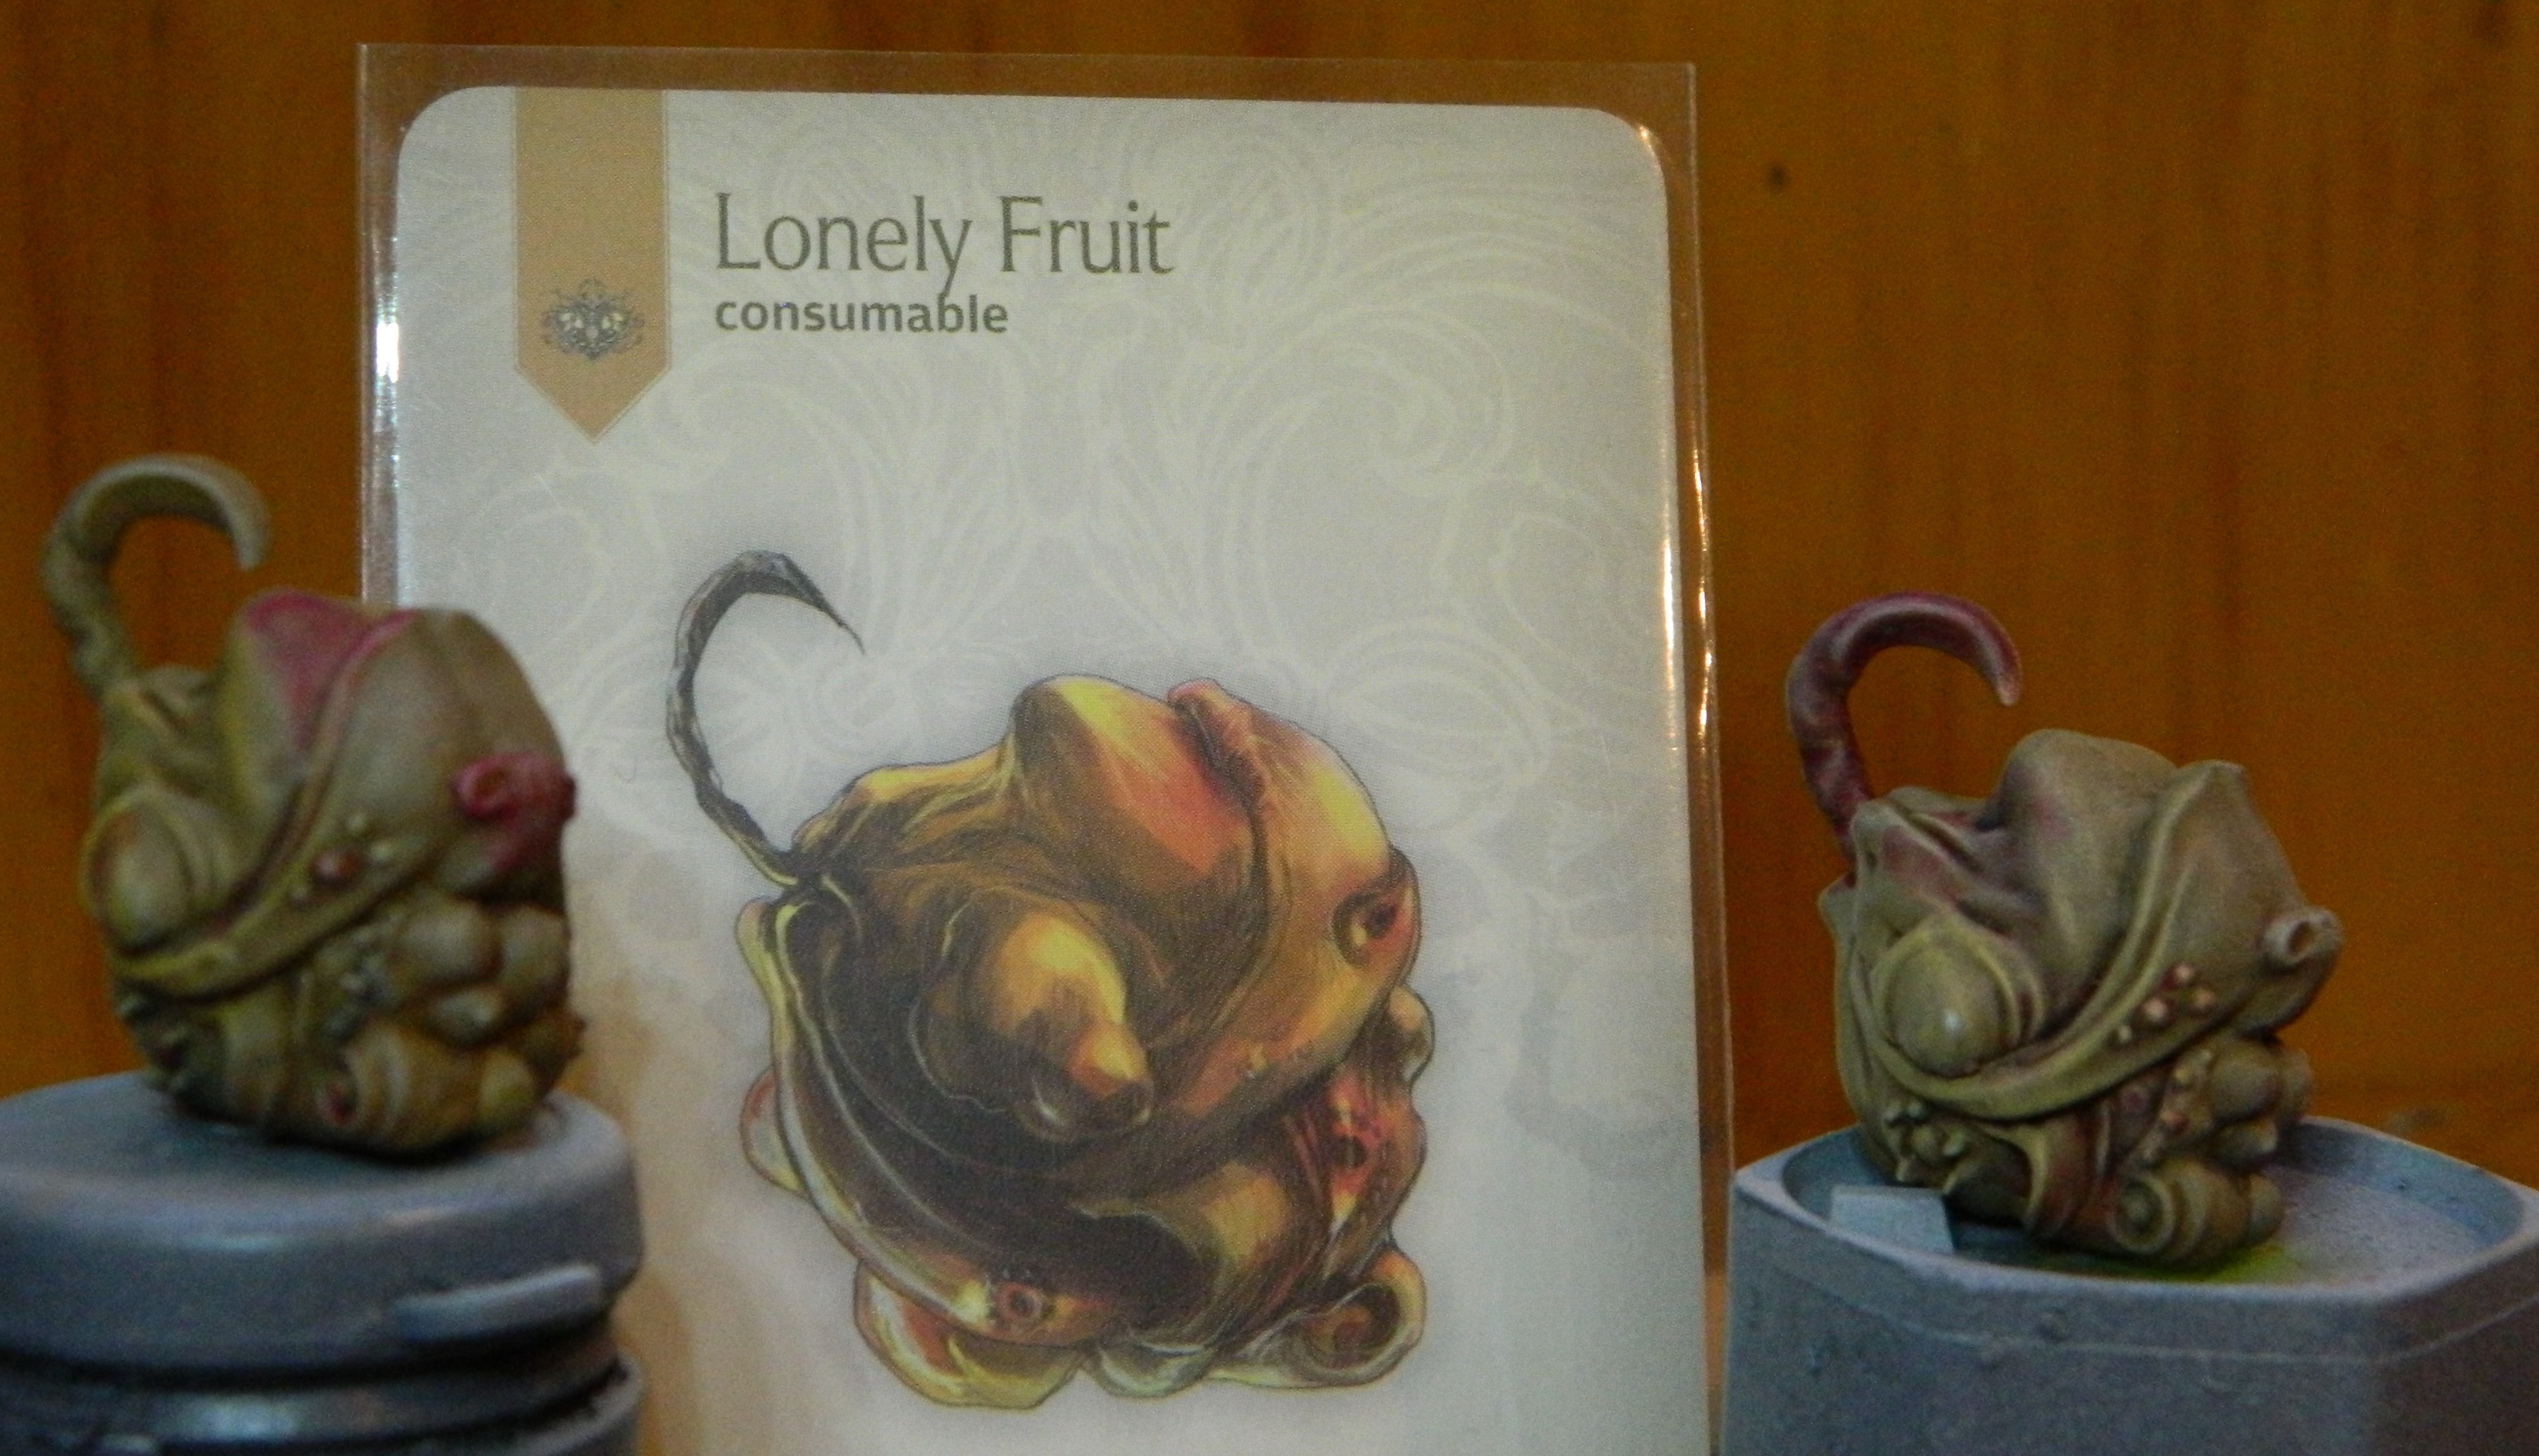 A pair of Lonely fruit
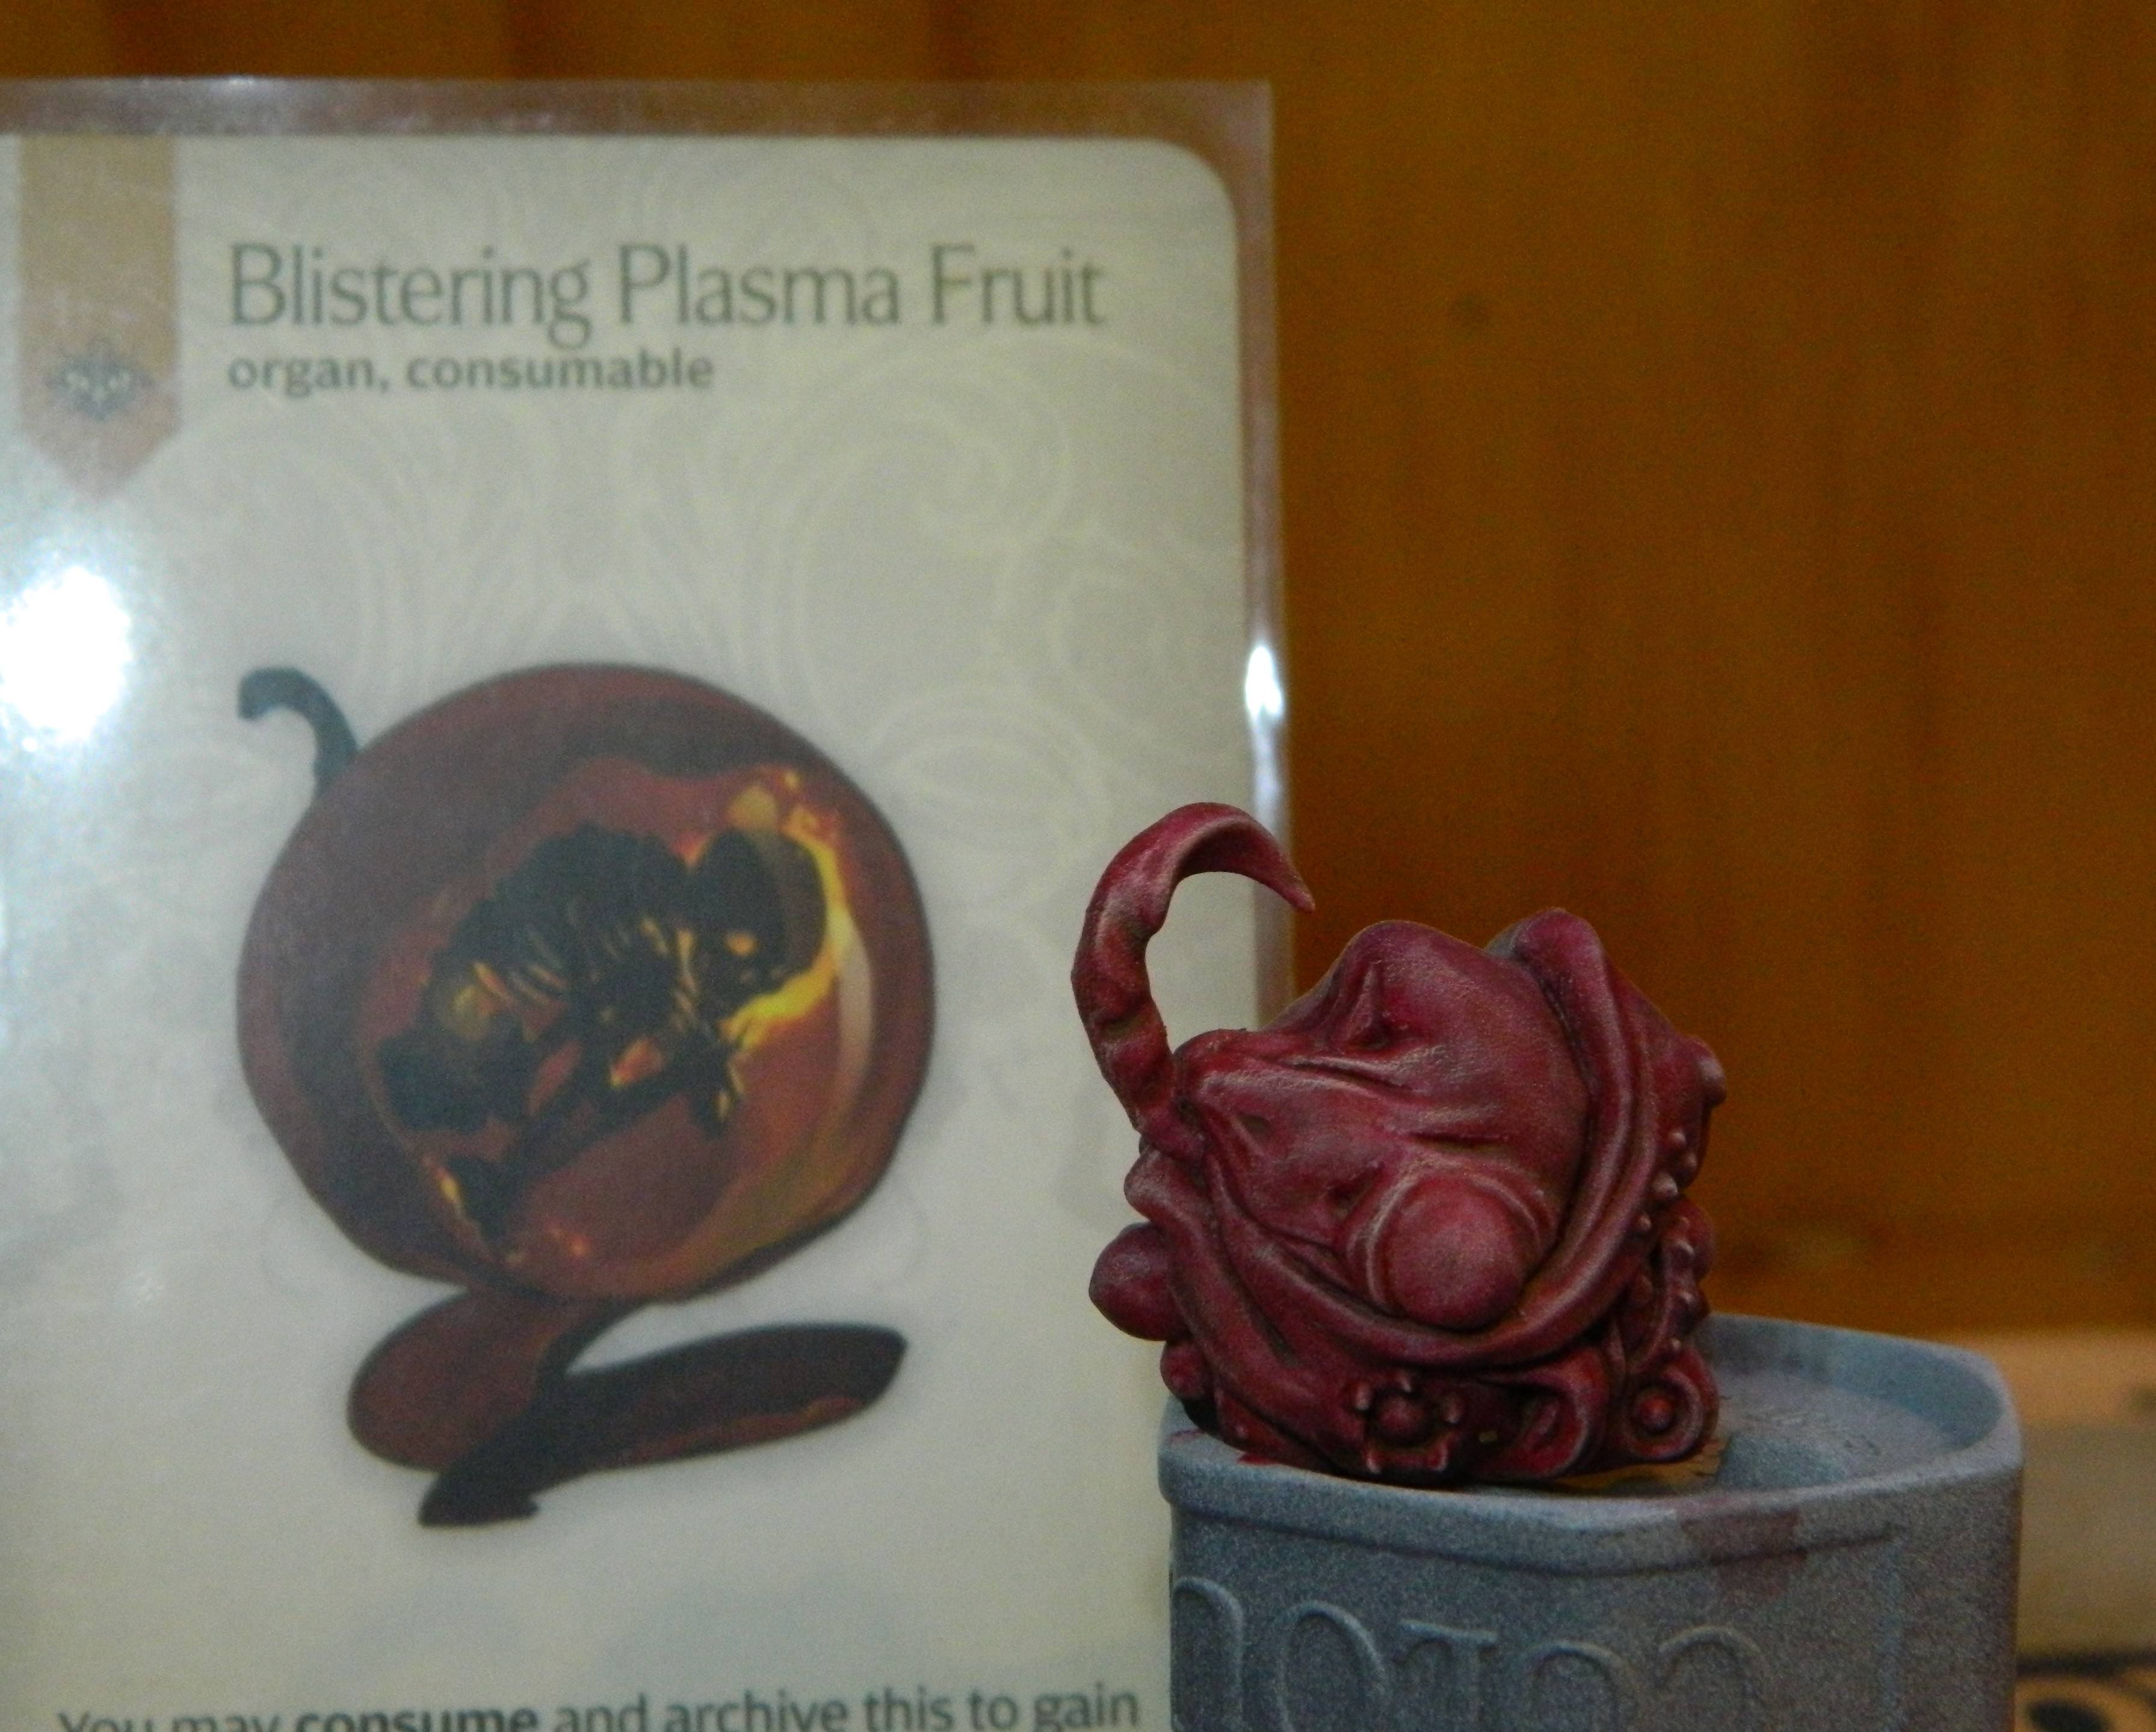 Blistering Plasma fruit
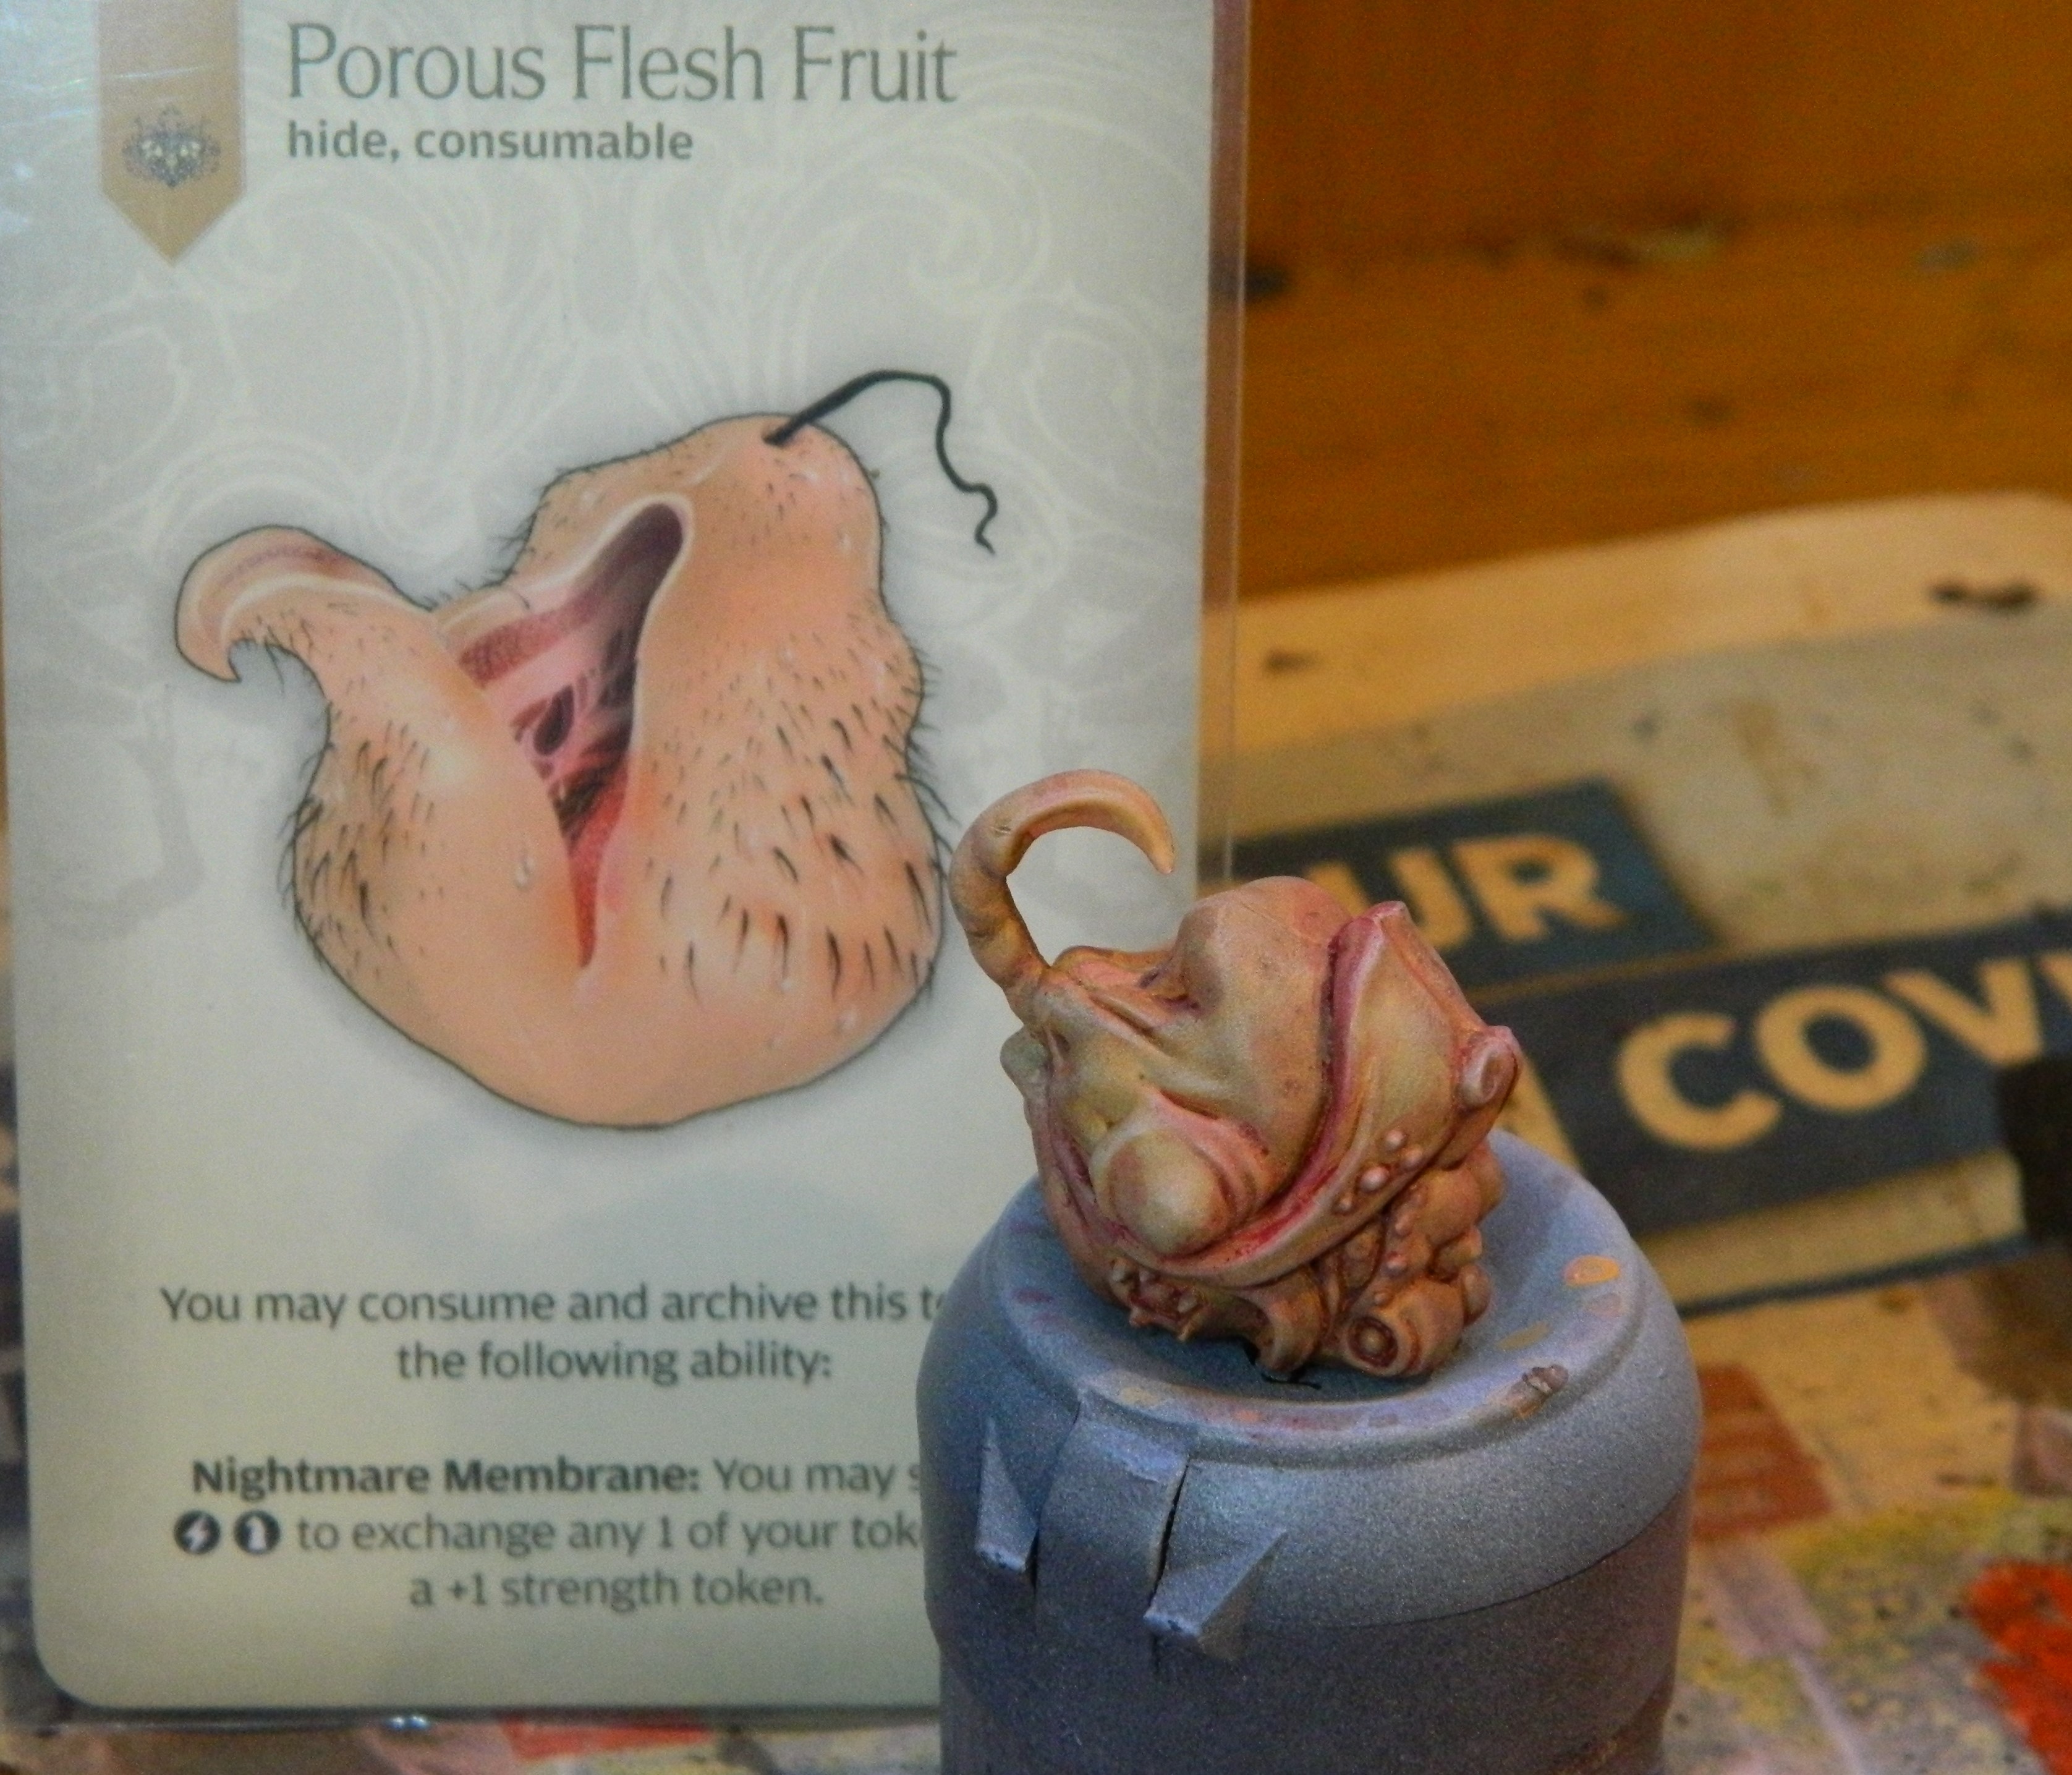 Porous Flesh fruit
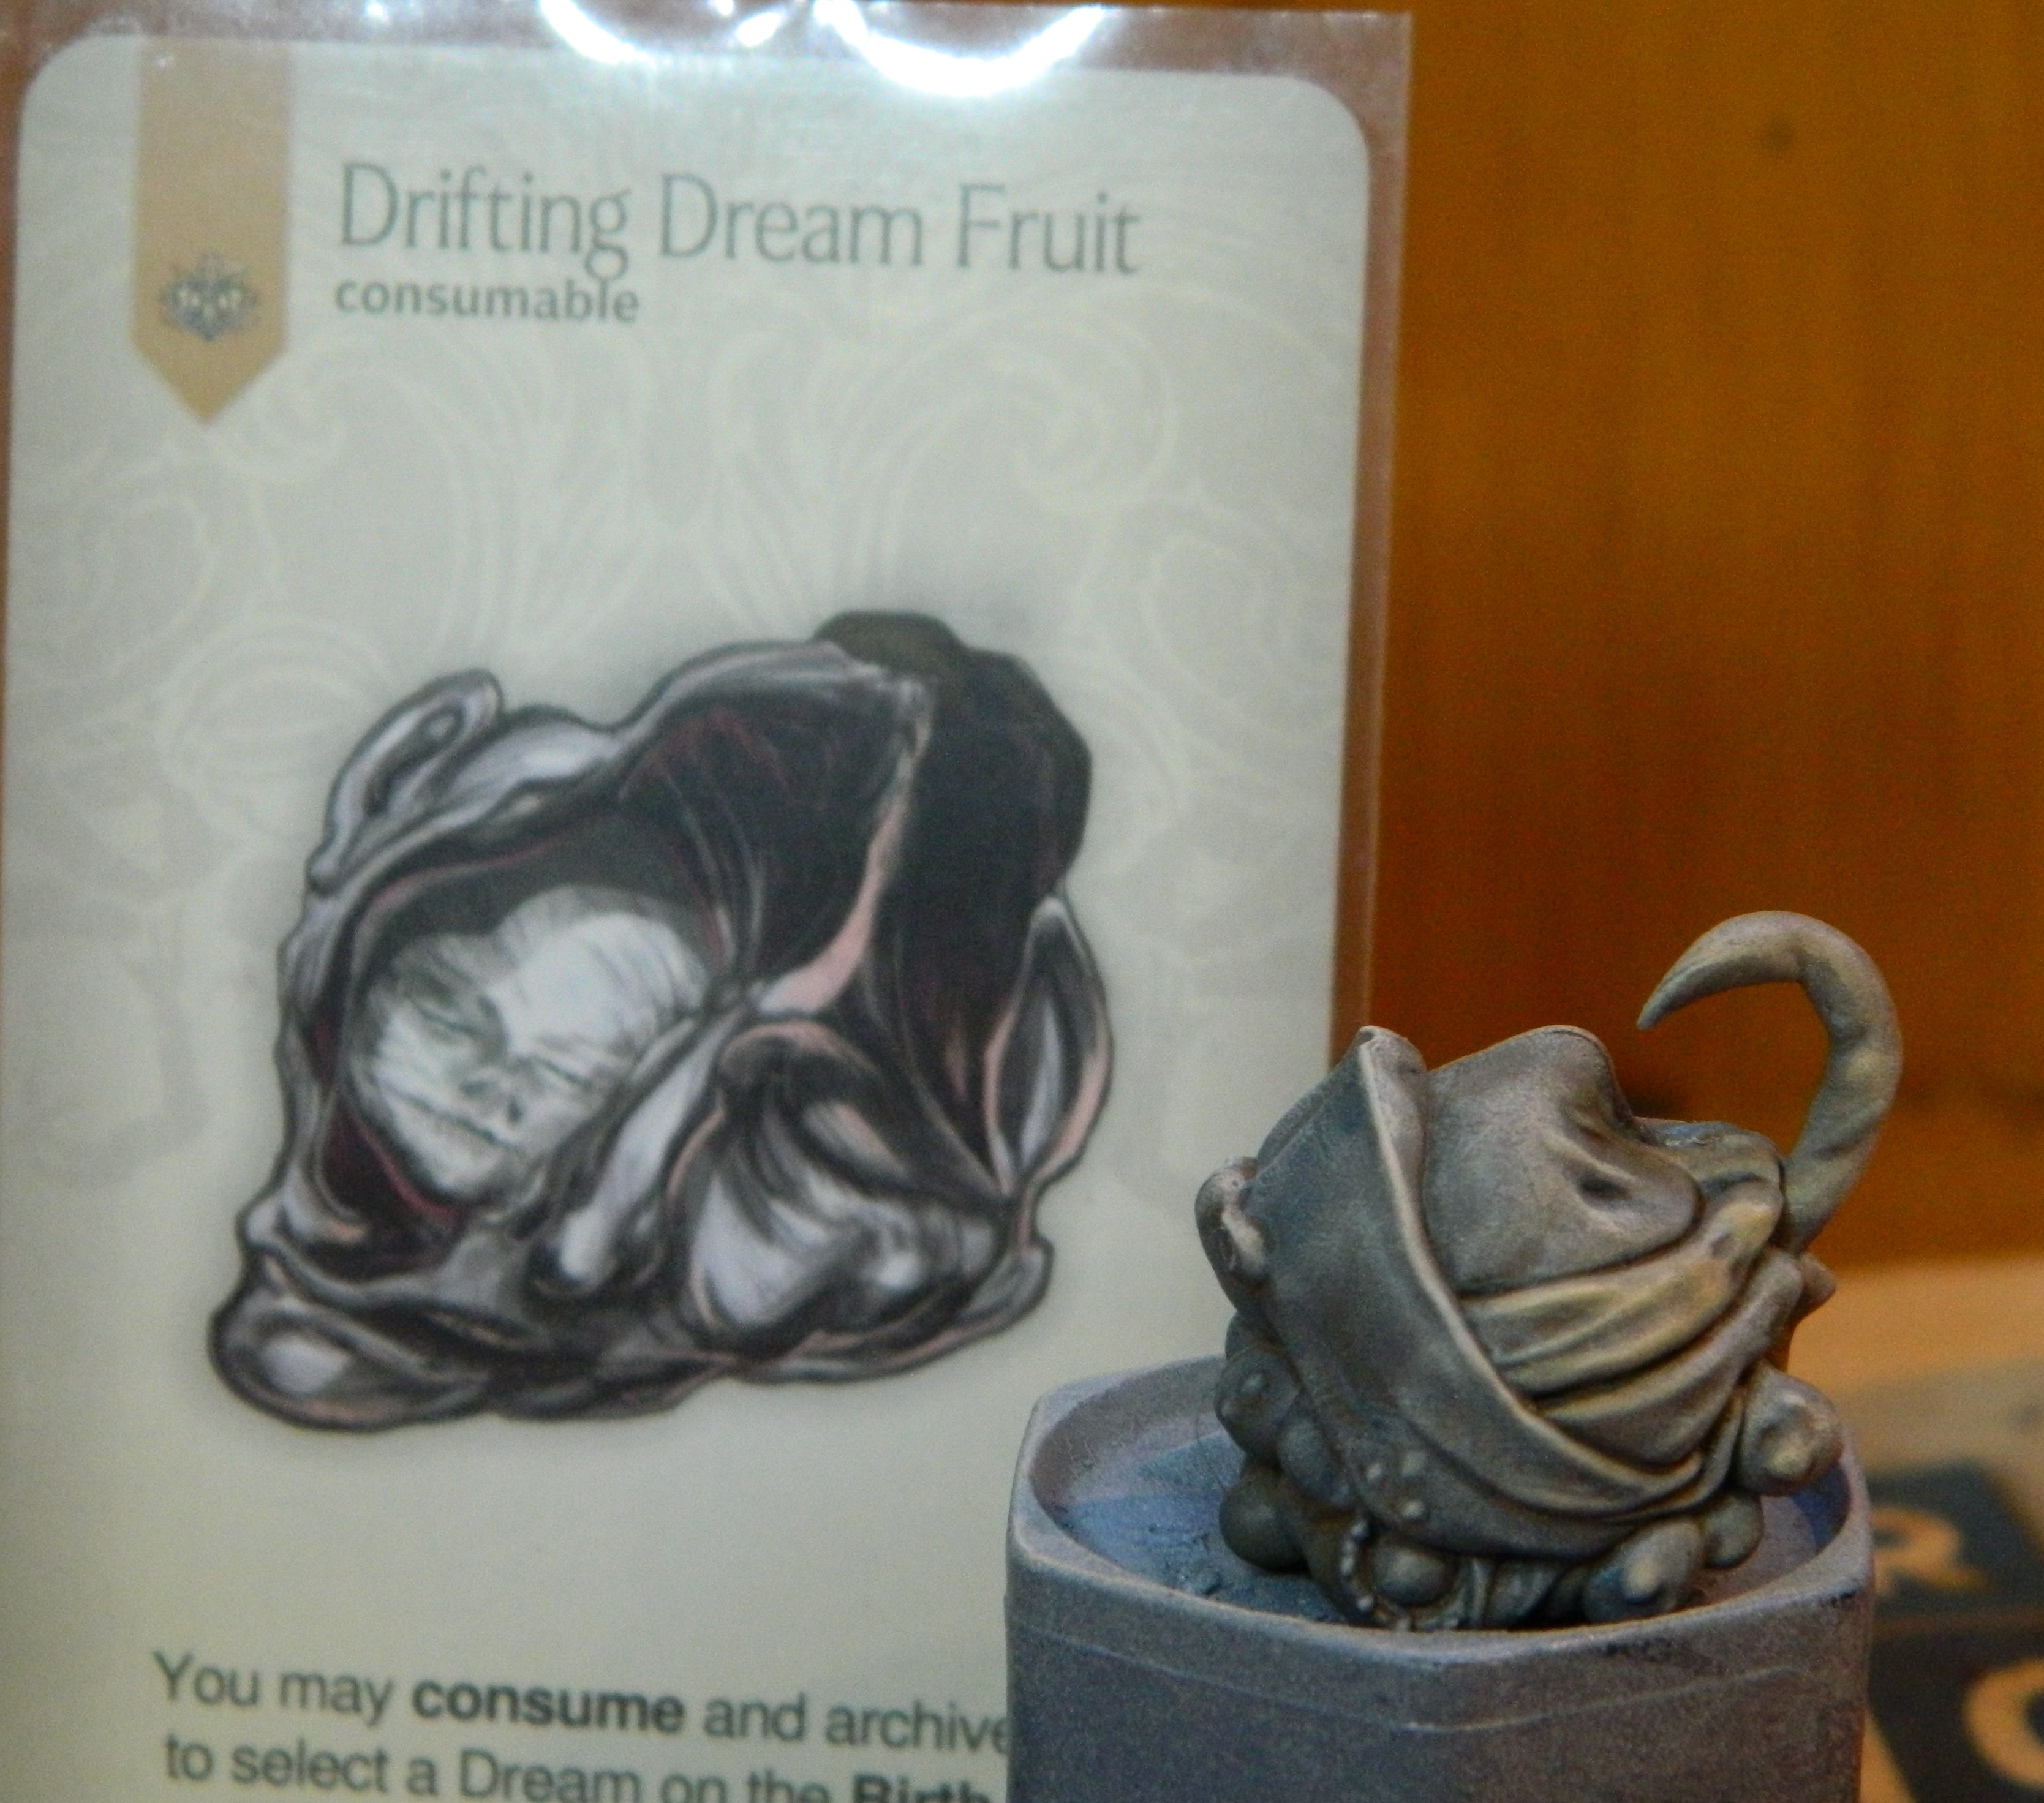 Drifting Dream fruit
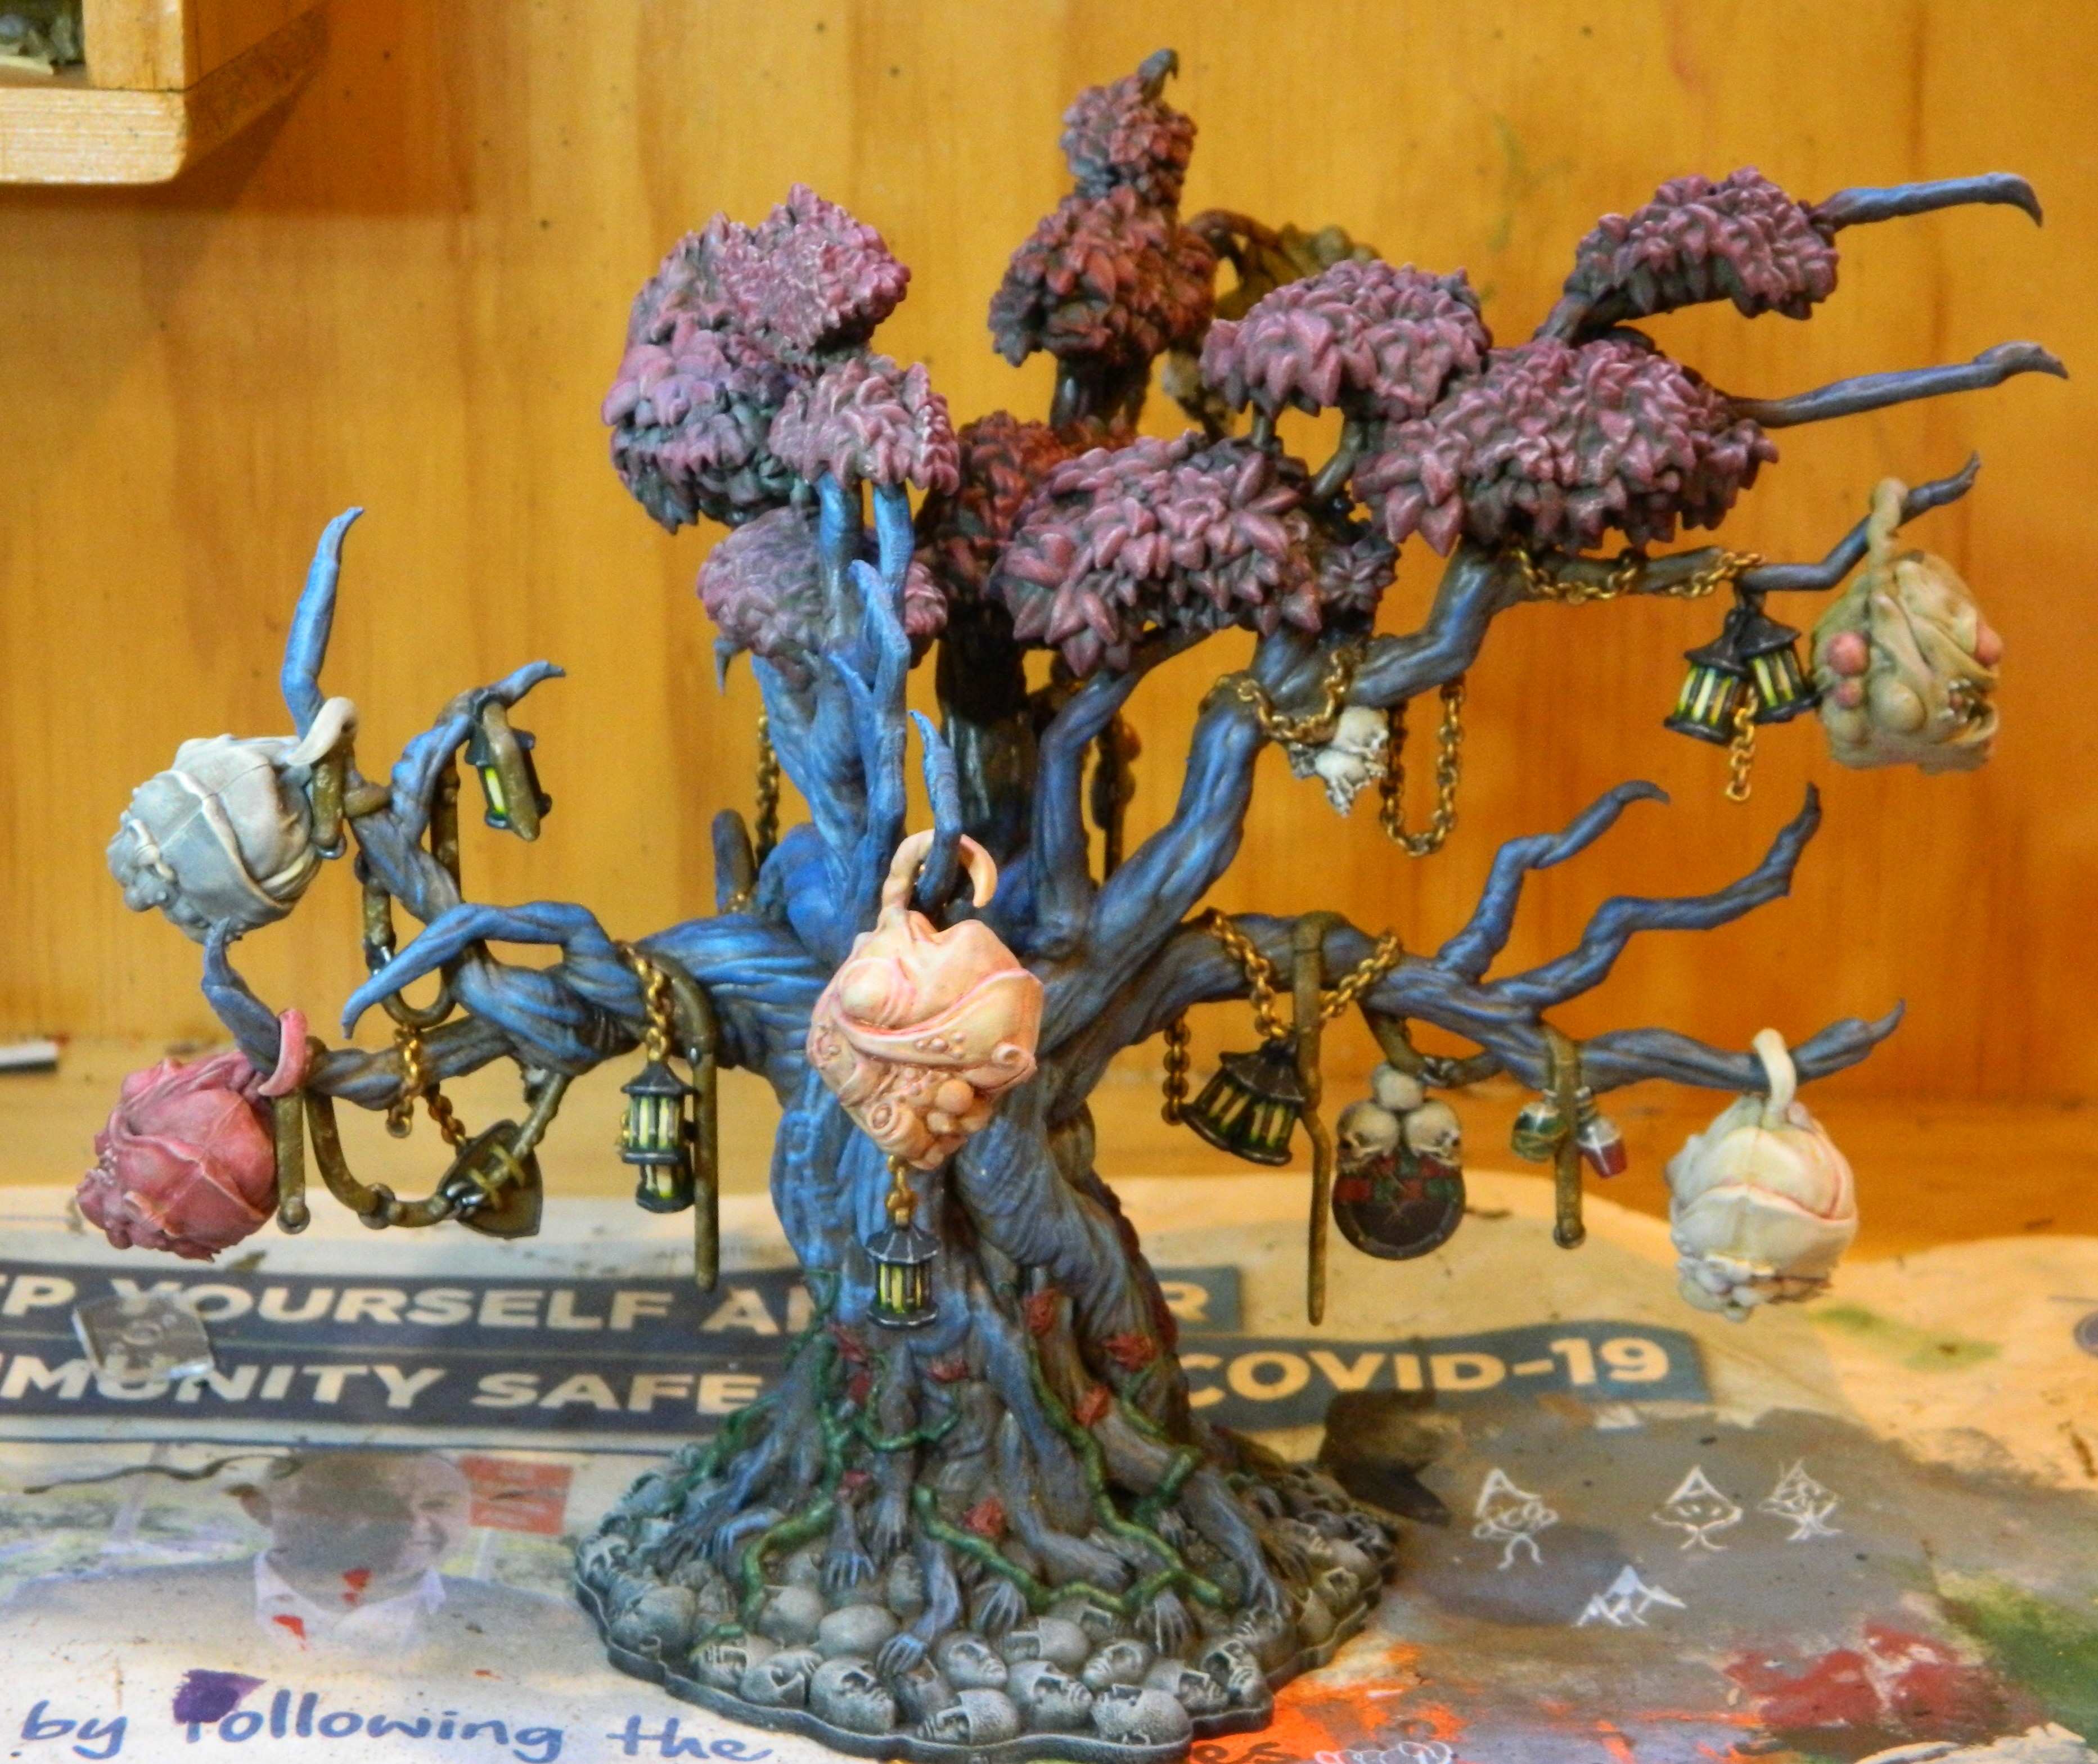 Pics of the Bunch
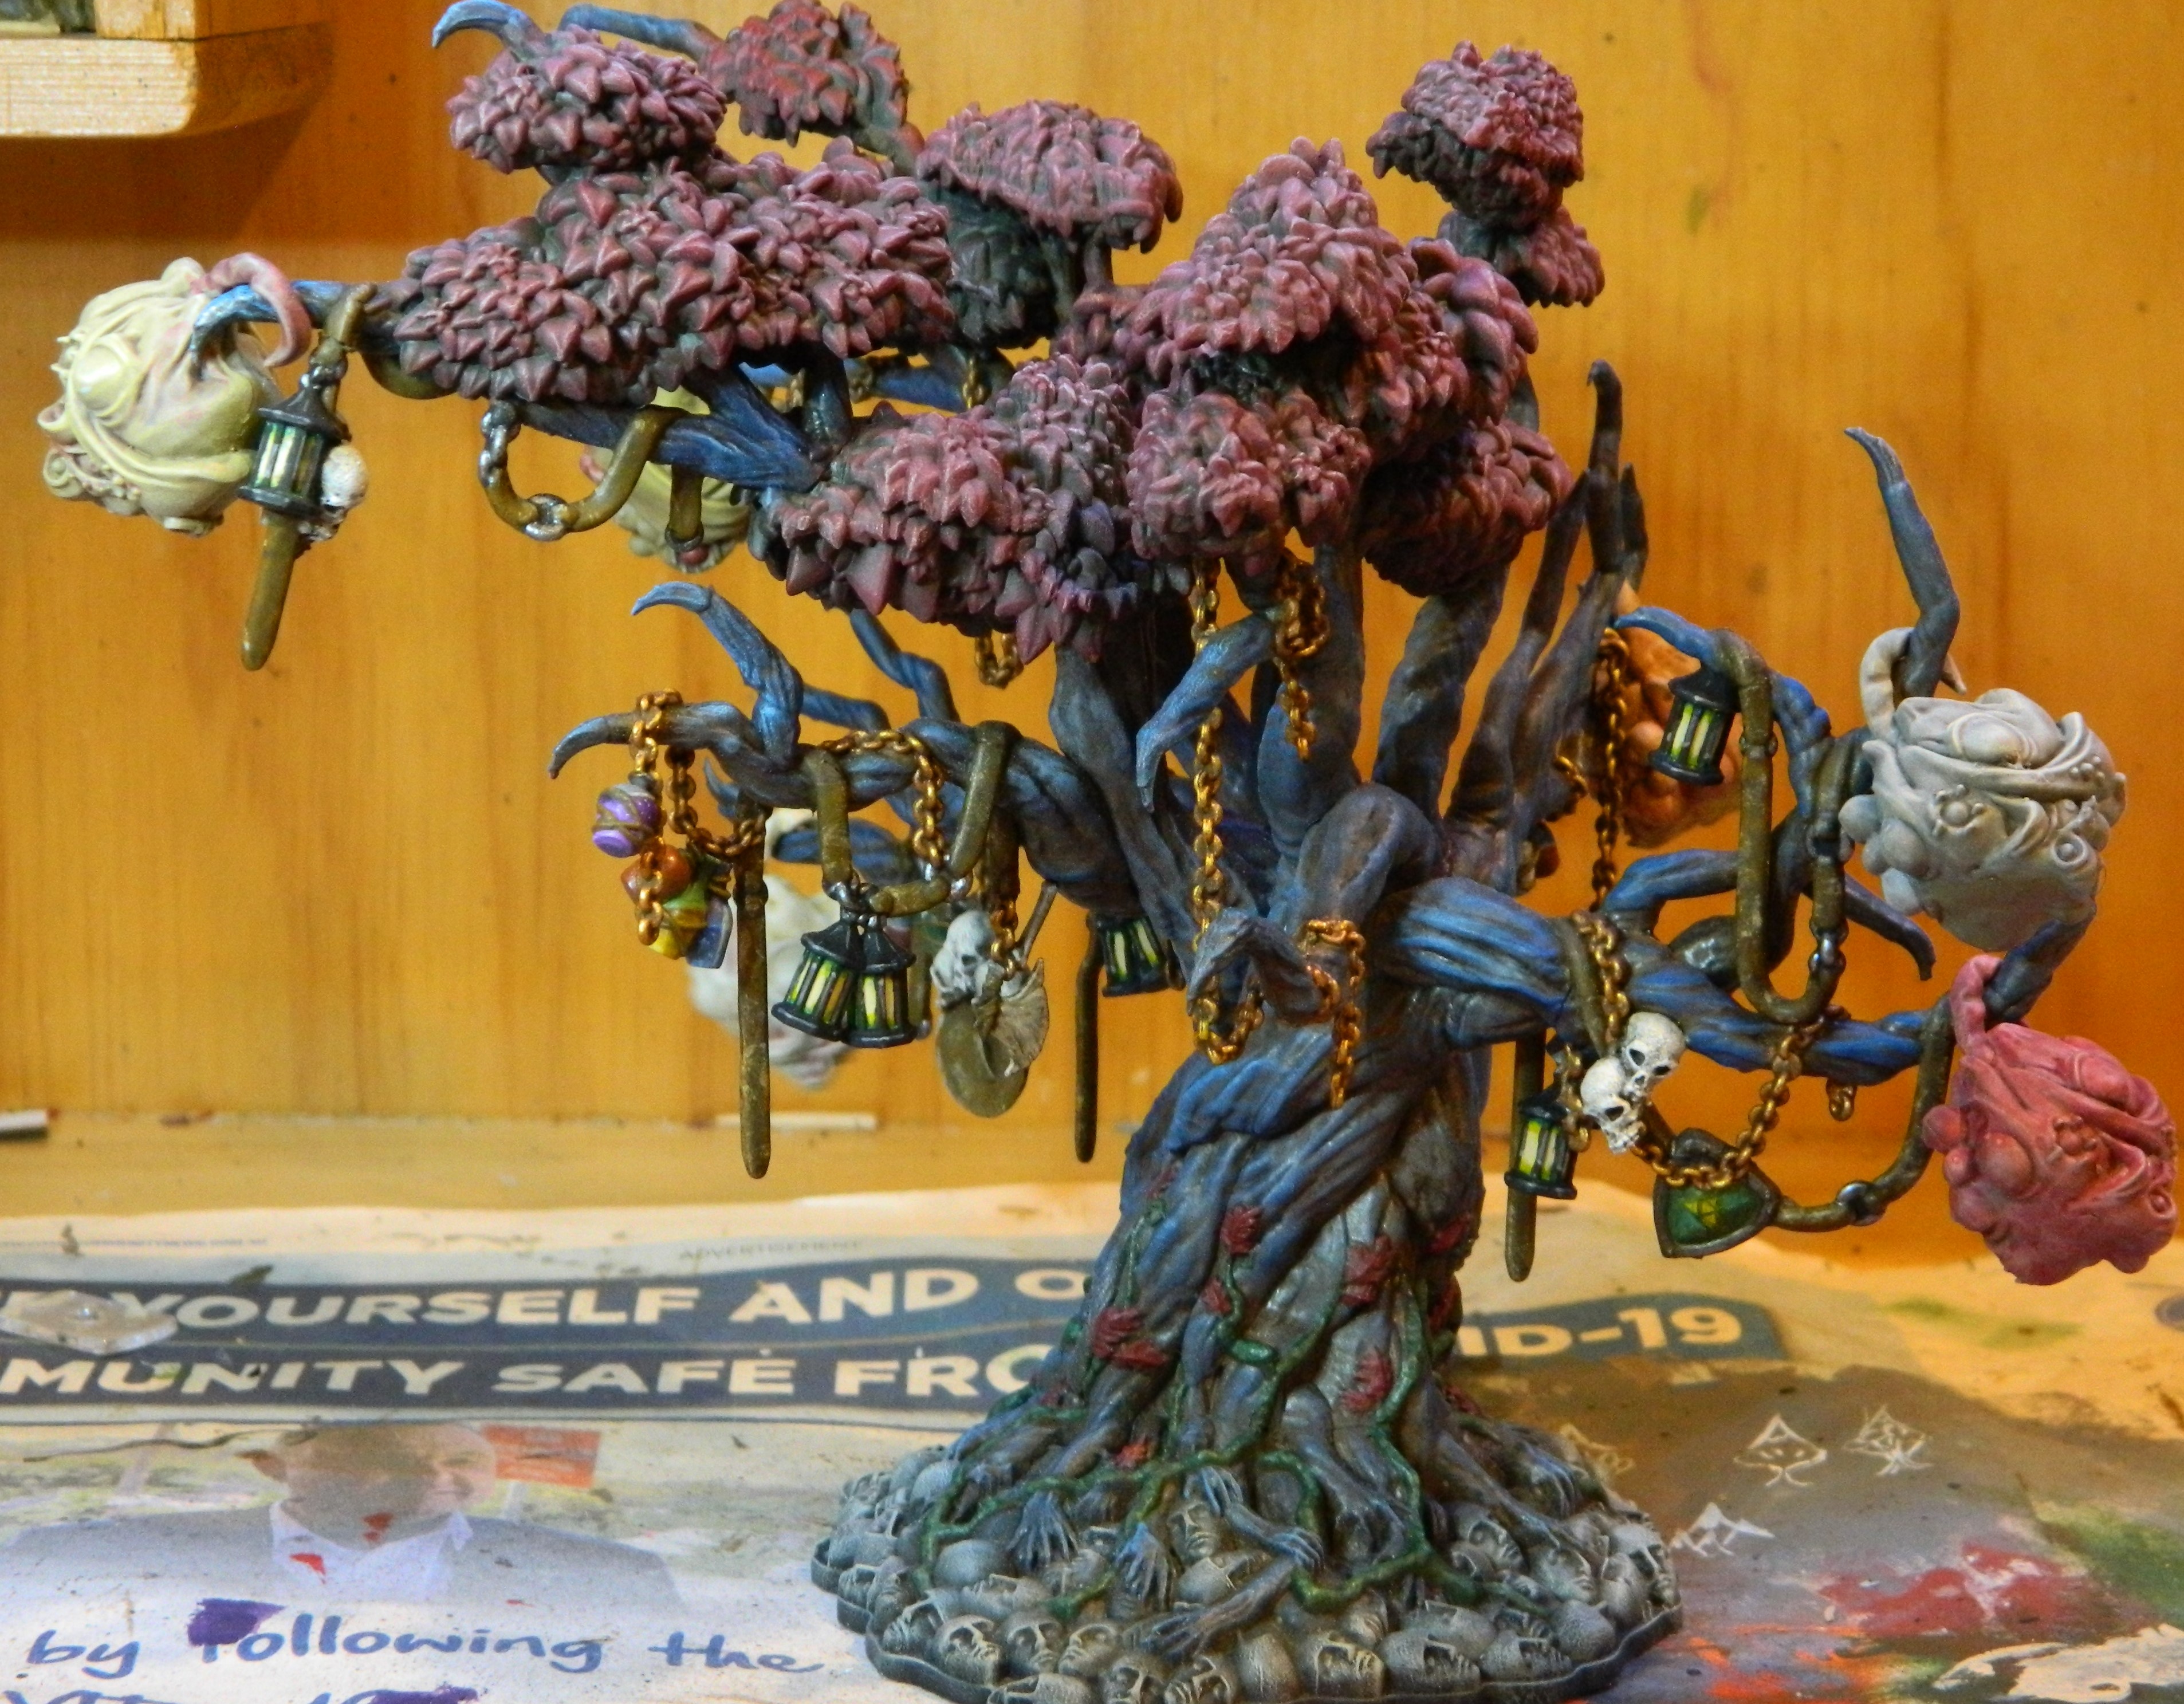 There's just *one more* piece that completes the Lonely Tree set. Just got to get it primed.
 21 Mar 22: Fruitful efforts continued
The fourth fruit flavour is the Porous Flesh fruit. Mmm, just makes you want to sink your teeth in, doesn’t it?
- Glazes randomly of Gory Red
- Glazes randomly of Black Red
I could have maybe added some of the blue, but I was guided by the art. What I should have added were little, thin strokes of a black, to indicate the hair. But I didn’t.

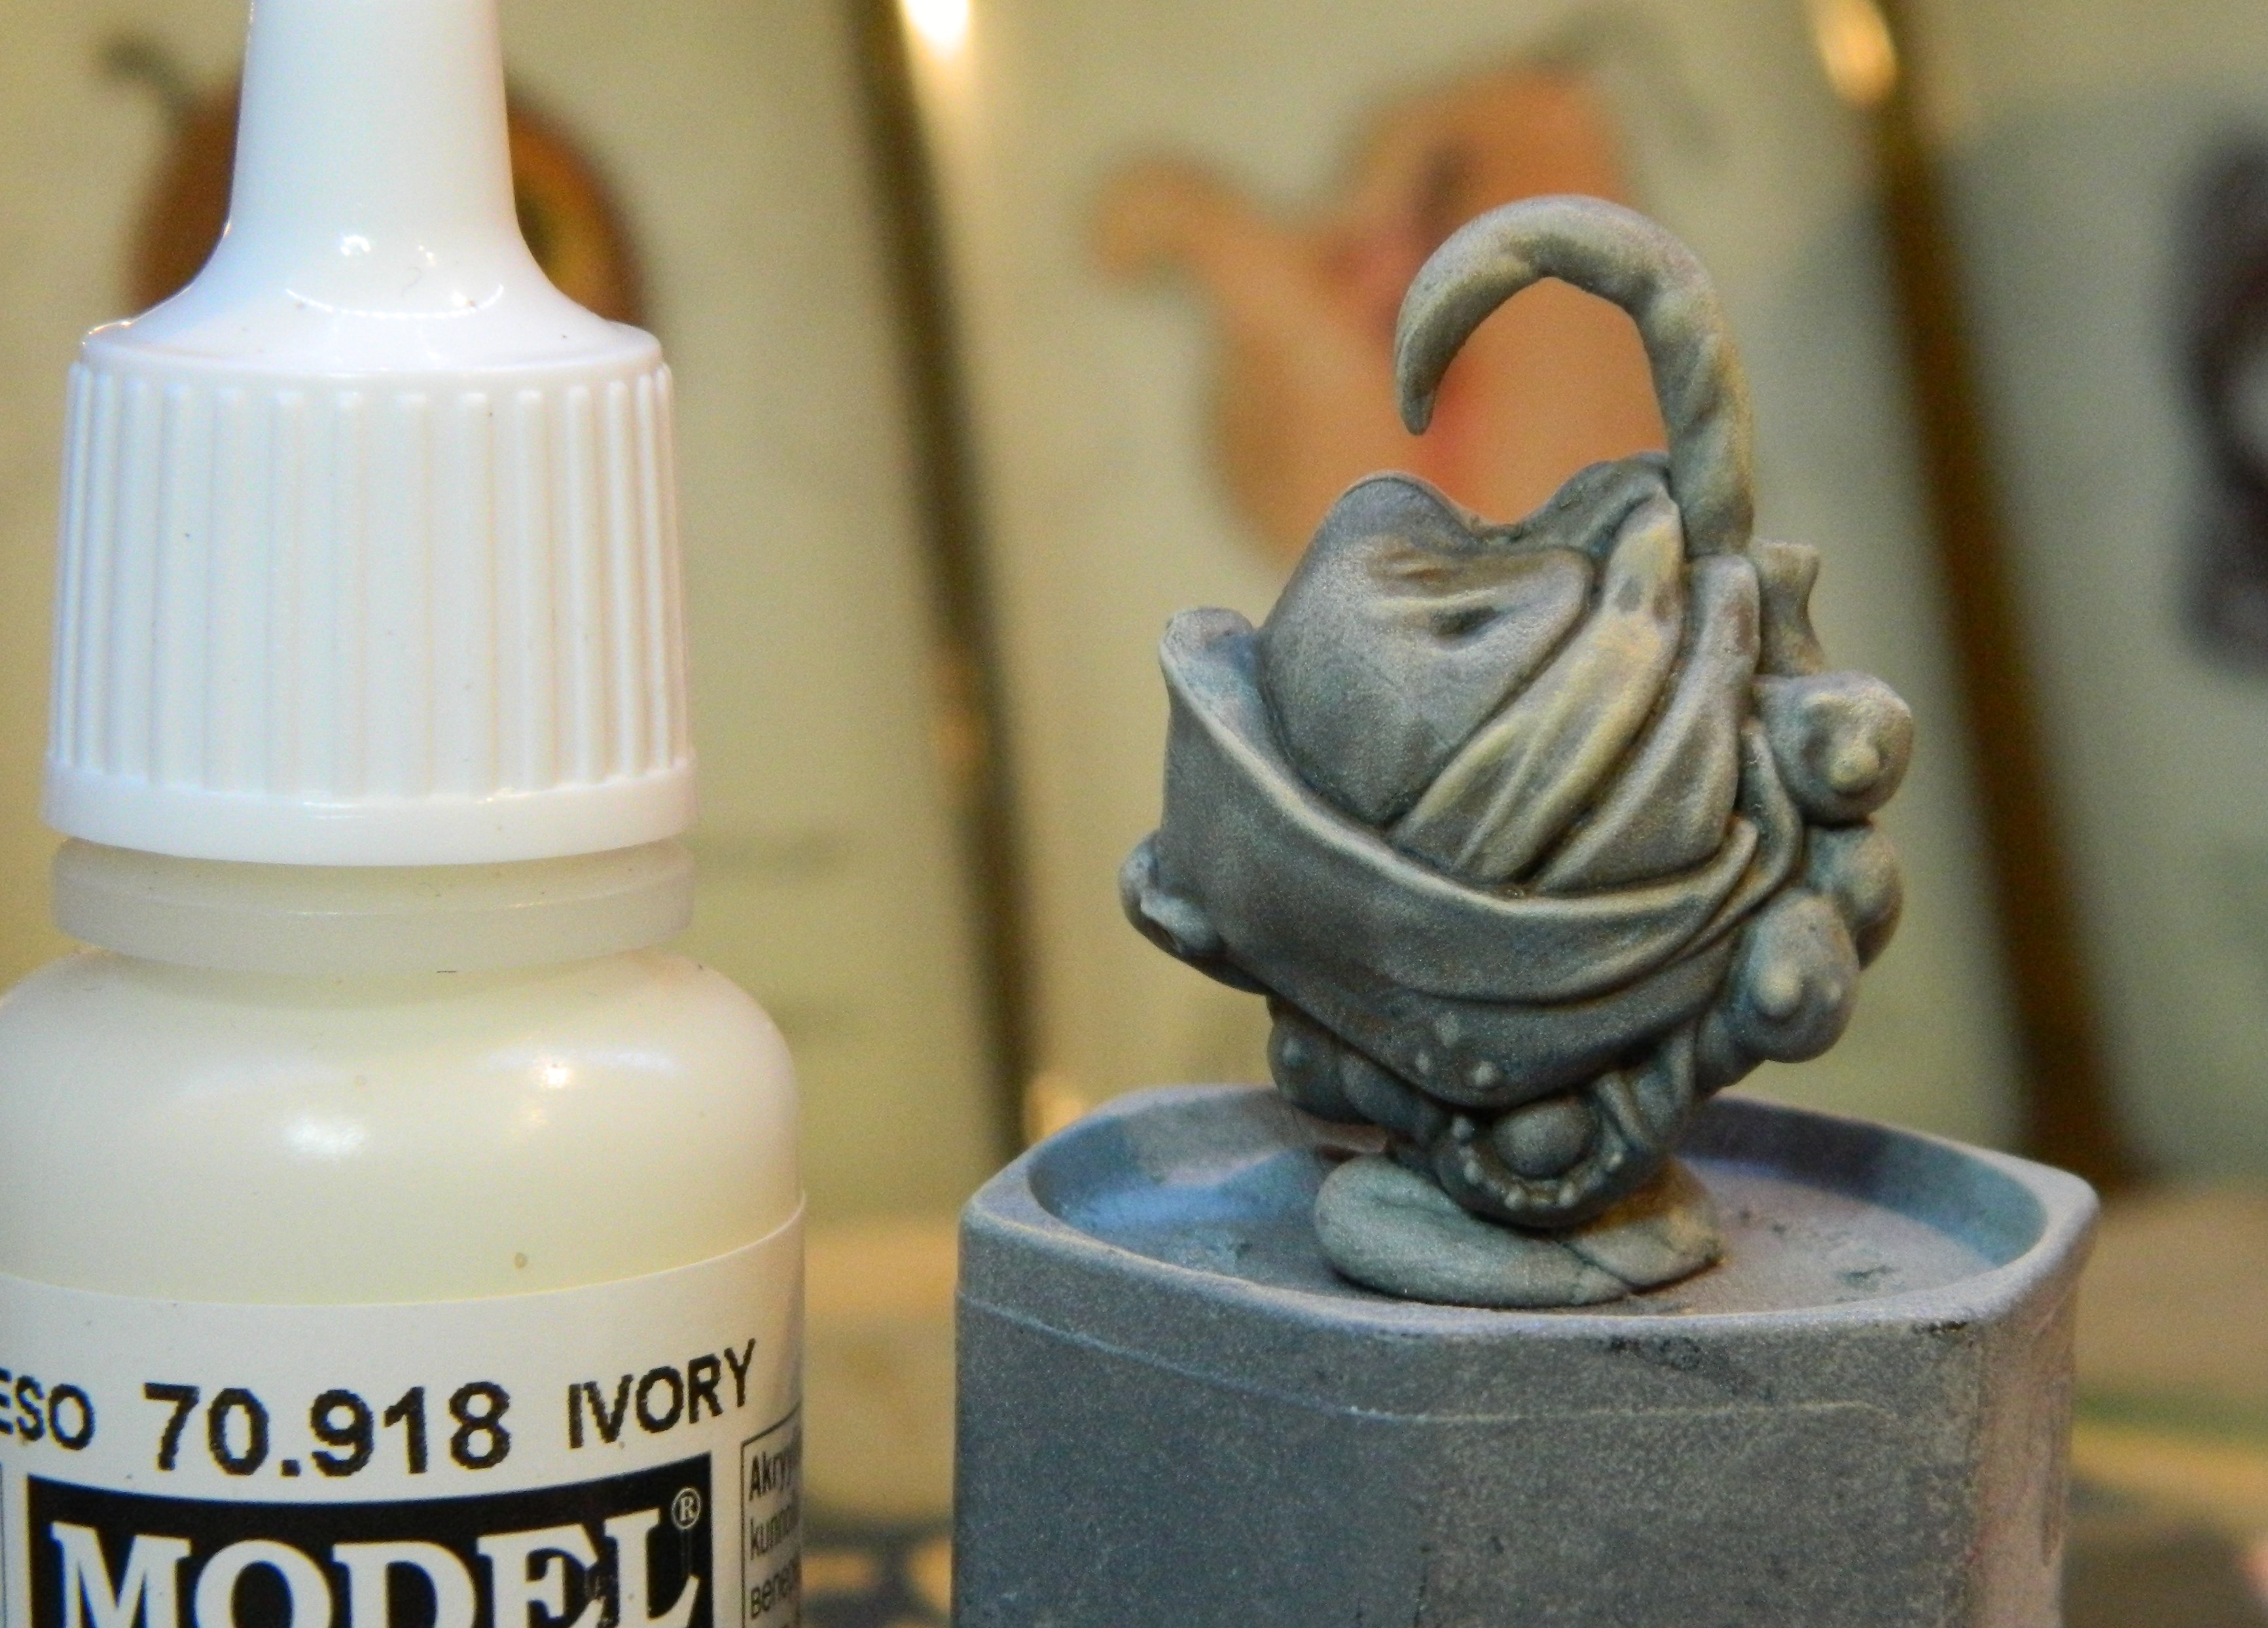
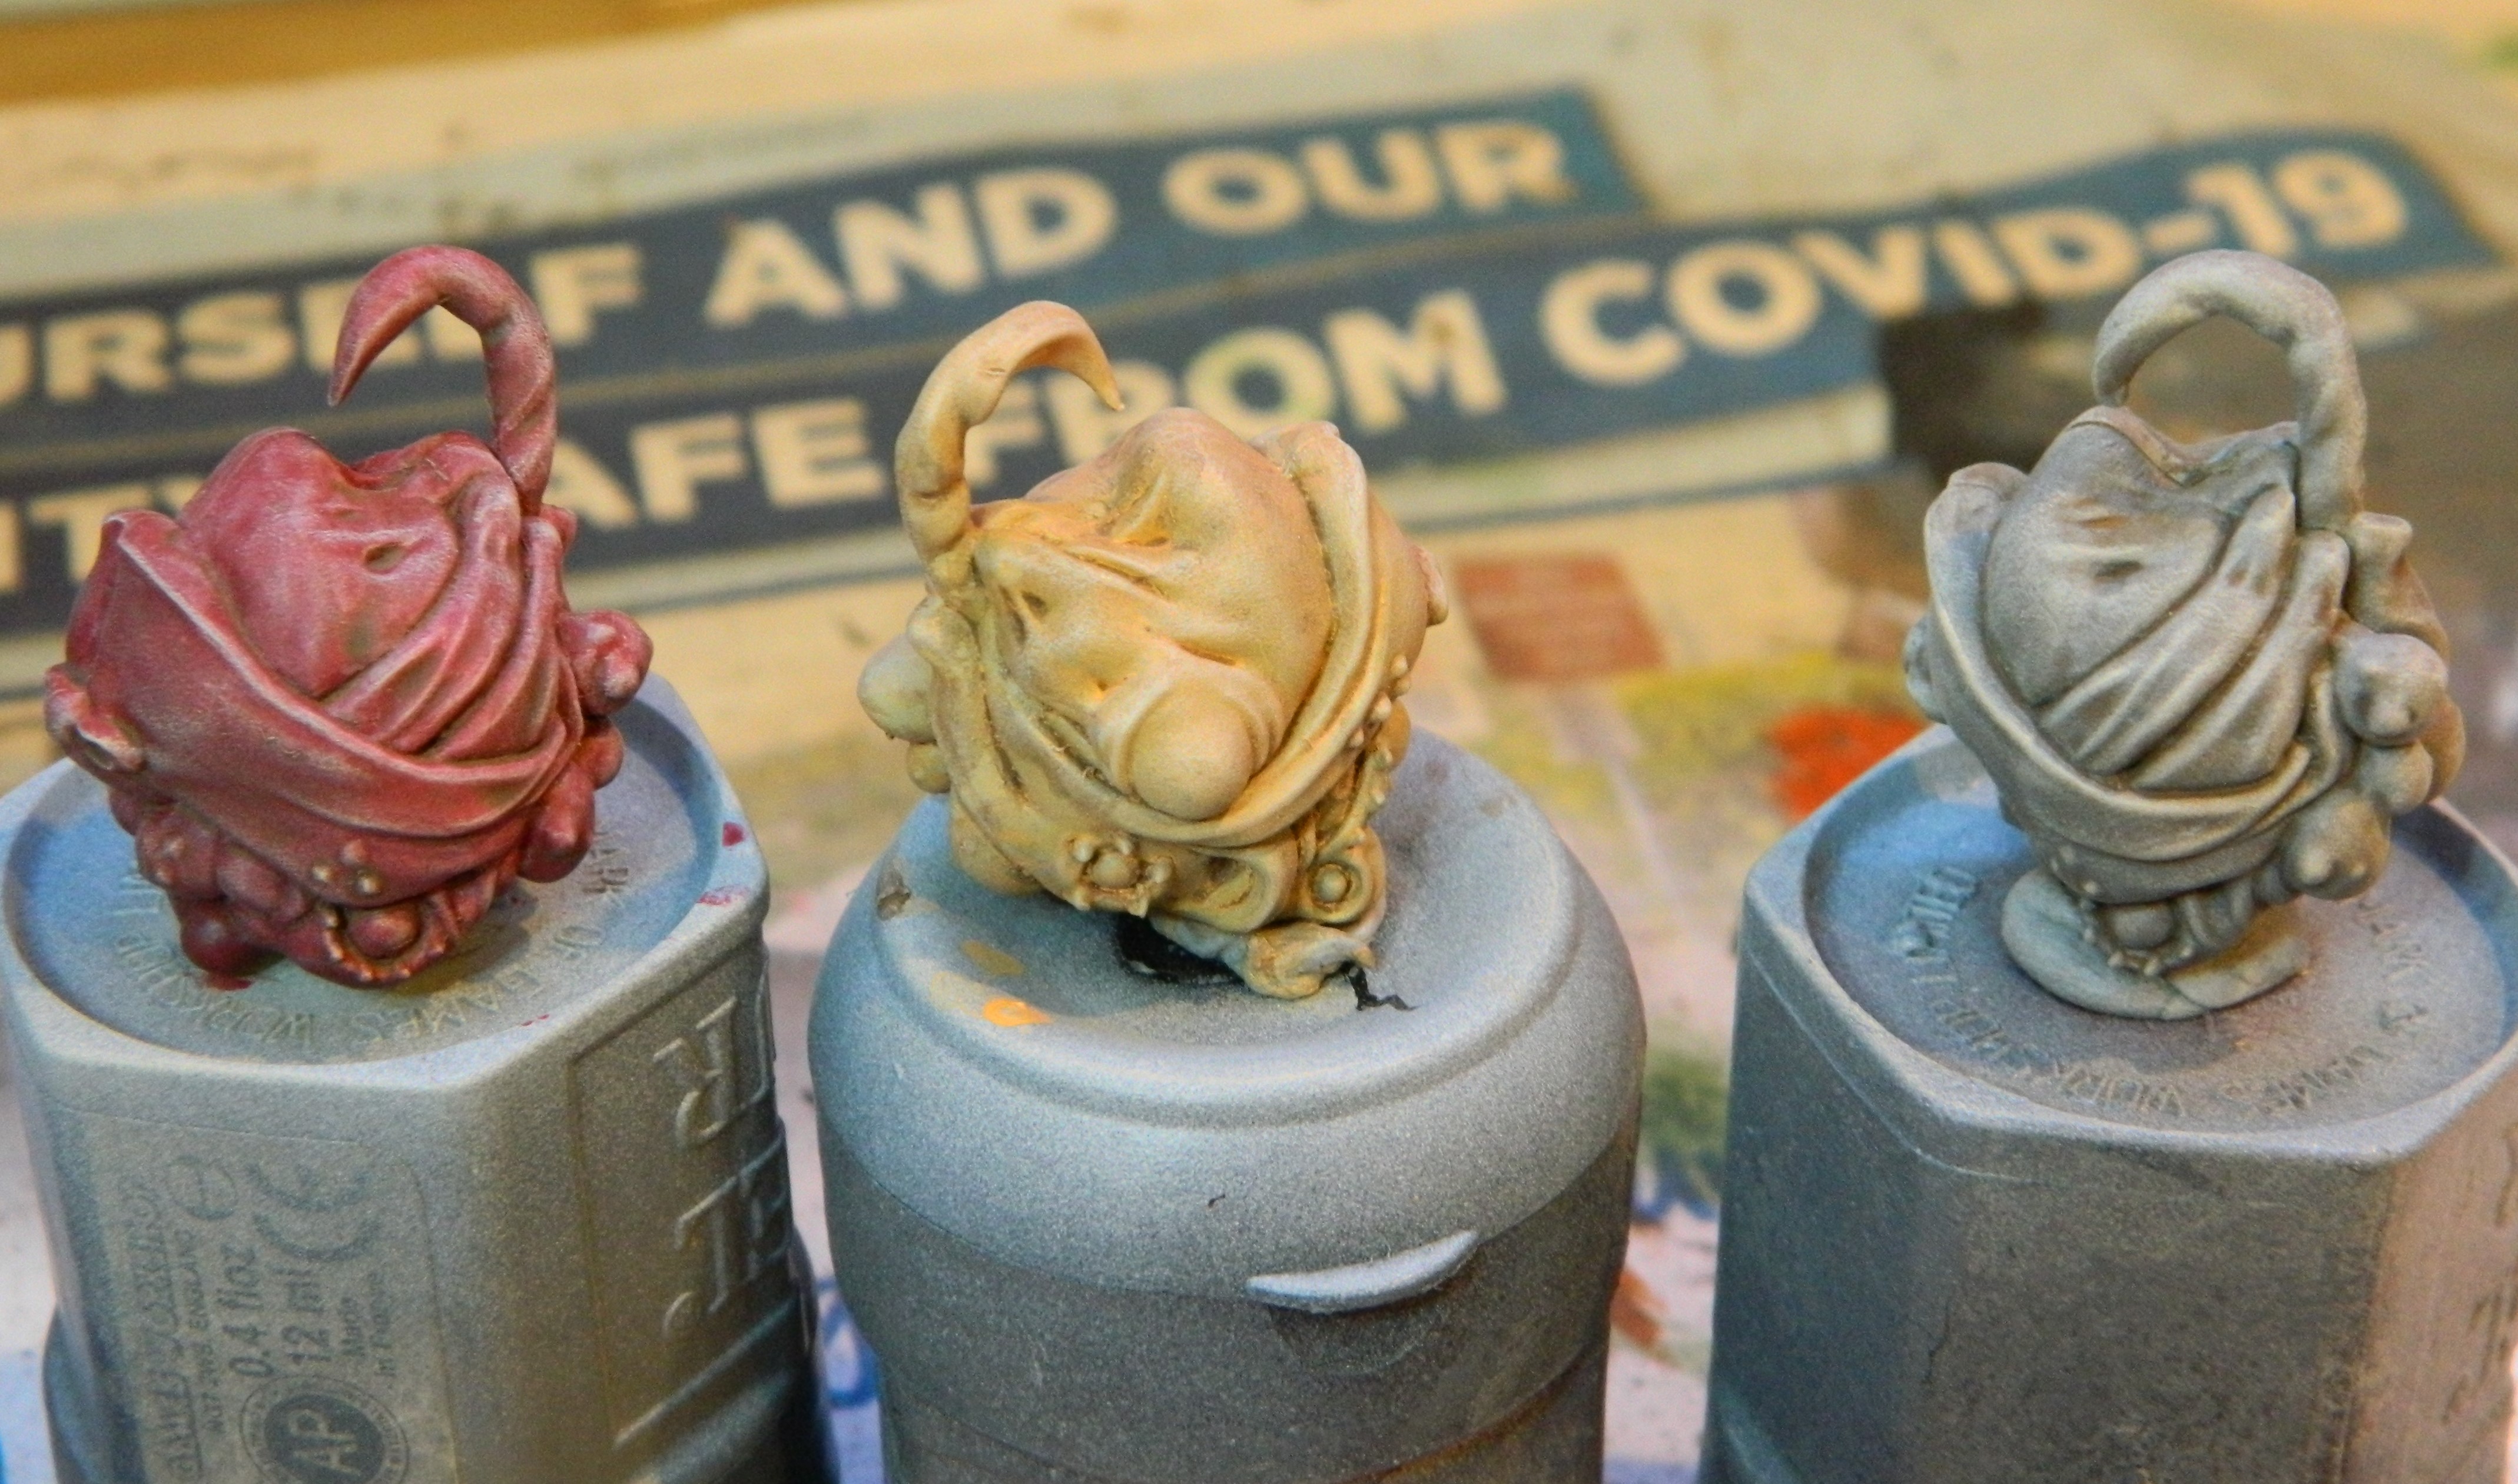
20 Mar 22: Frightful Fruit
The Lonely Tree set isn’t yet complete…
With the tree come six fruit. Six, horrible fruit. In game, they hang from the tree until they fall. Then they can be pushed around the board, impeding movement and potentially exploding… because of course they can explode.
They can also be collected as a resource by the Survivors, but the effects can vary depending on which variety is collected. There’s 5 varieties to find. Five varieties… six fruit supplied.
The fruit are primed grey with a white zenith prime. They each then got a couple of thin coats of a base colour to correspond to the fruit variety they’re inspired by.
I should say that I remembered watching these 3-colours up videos when they were new, and I dug back through and found them. They came in mighty handy! Thanks to @elromanozo
The videos: Part 2 and Part 3
If any of the OTT team see this… it would be good if you could find part 1 in the archive, I had to guess my way to the beginning of part 2 X-D

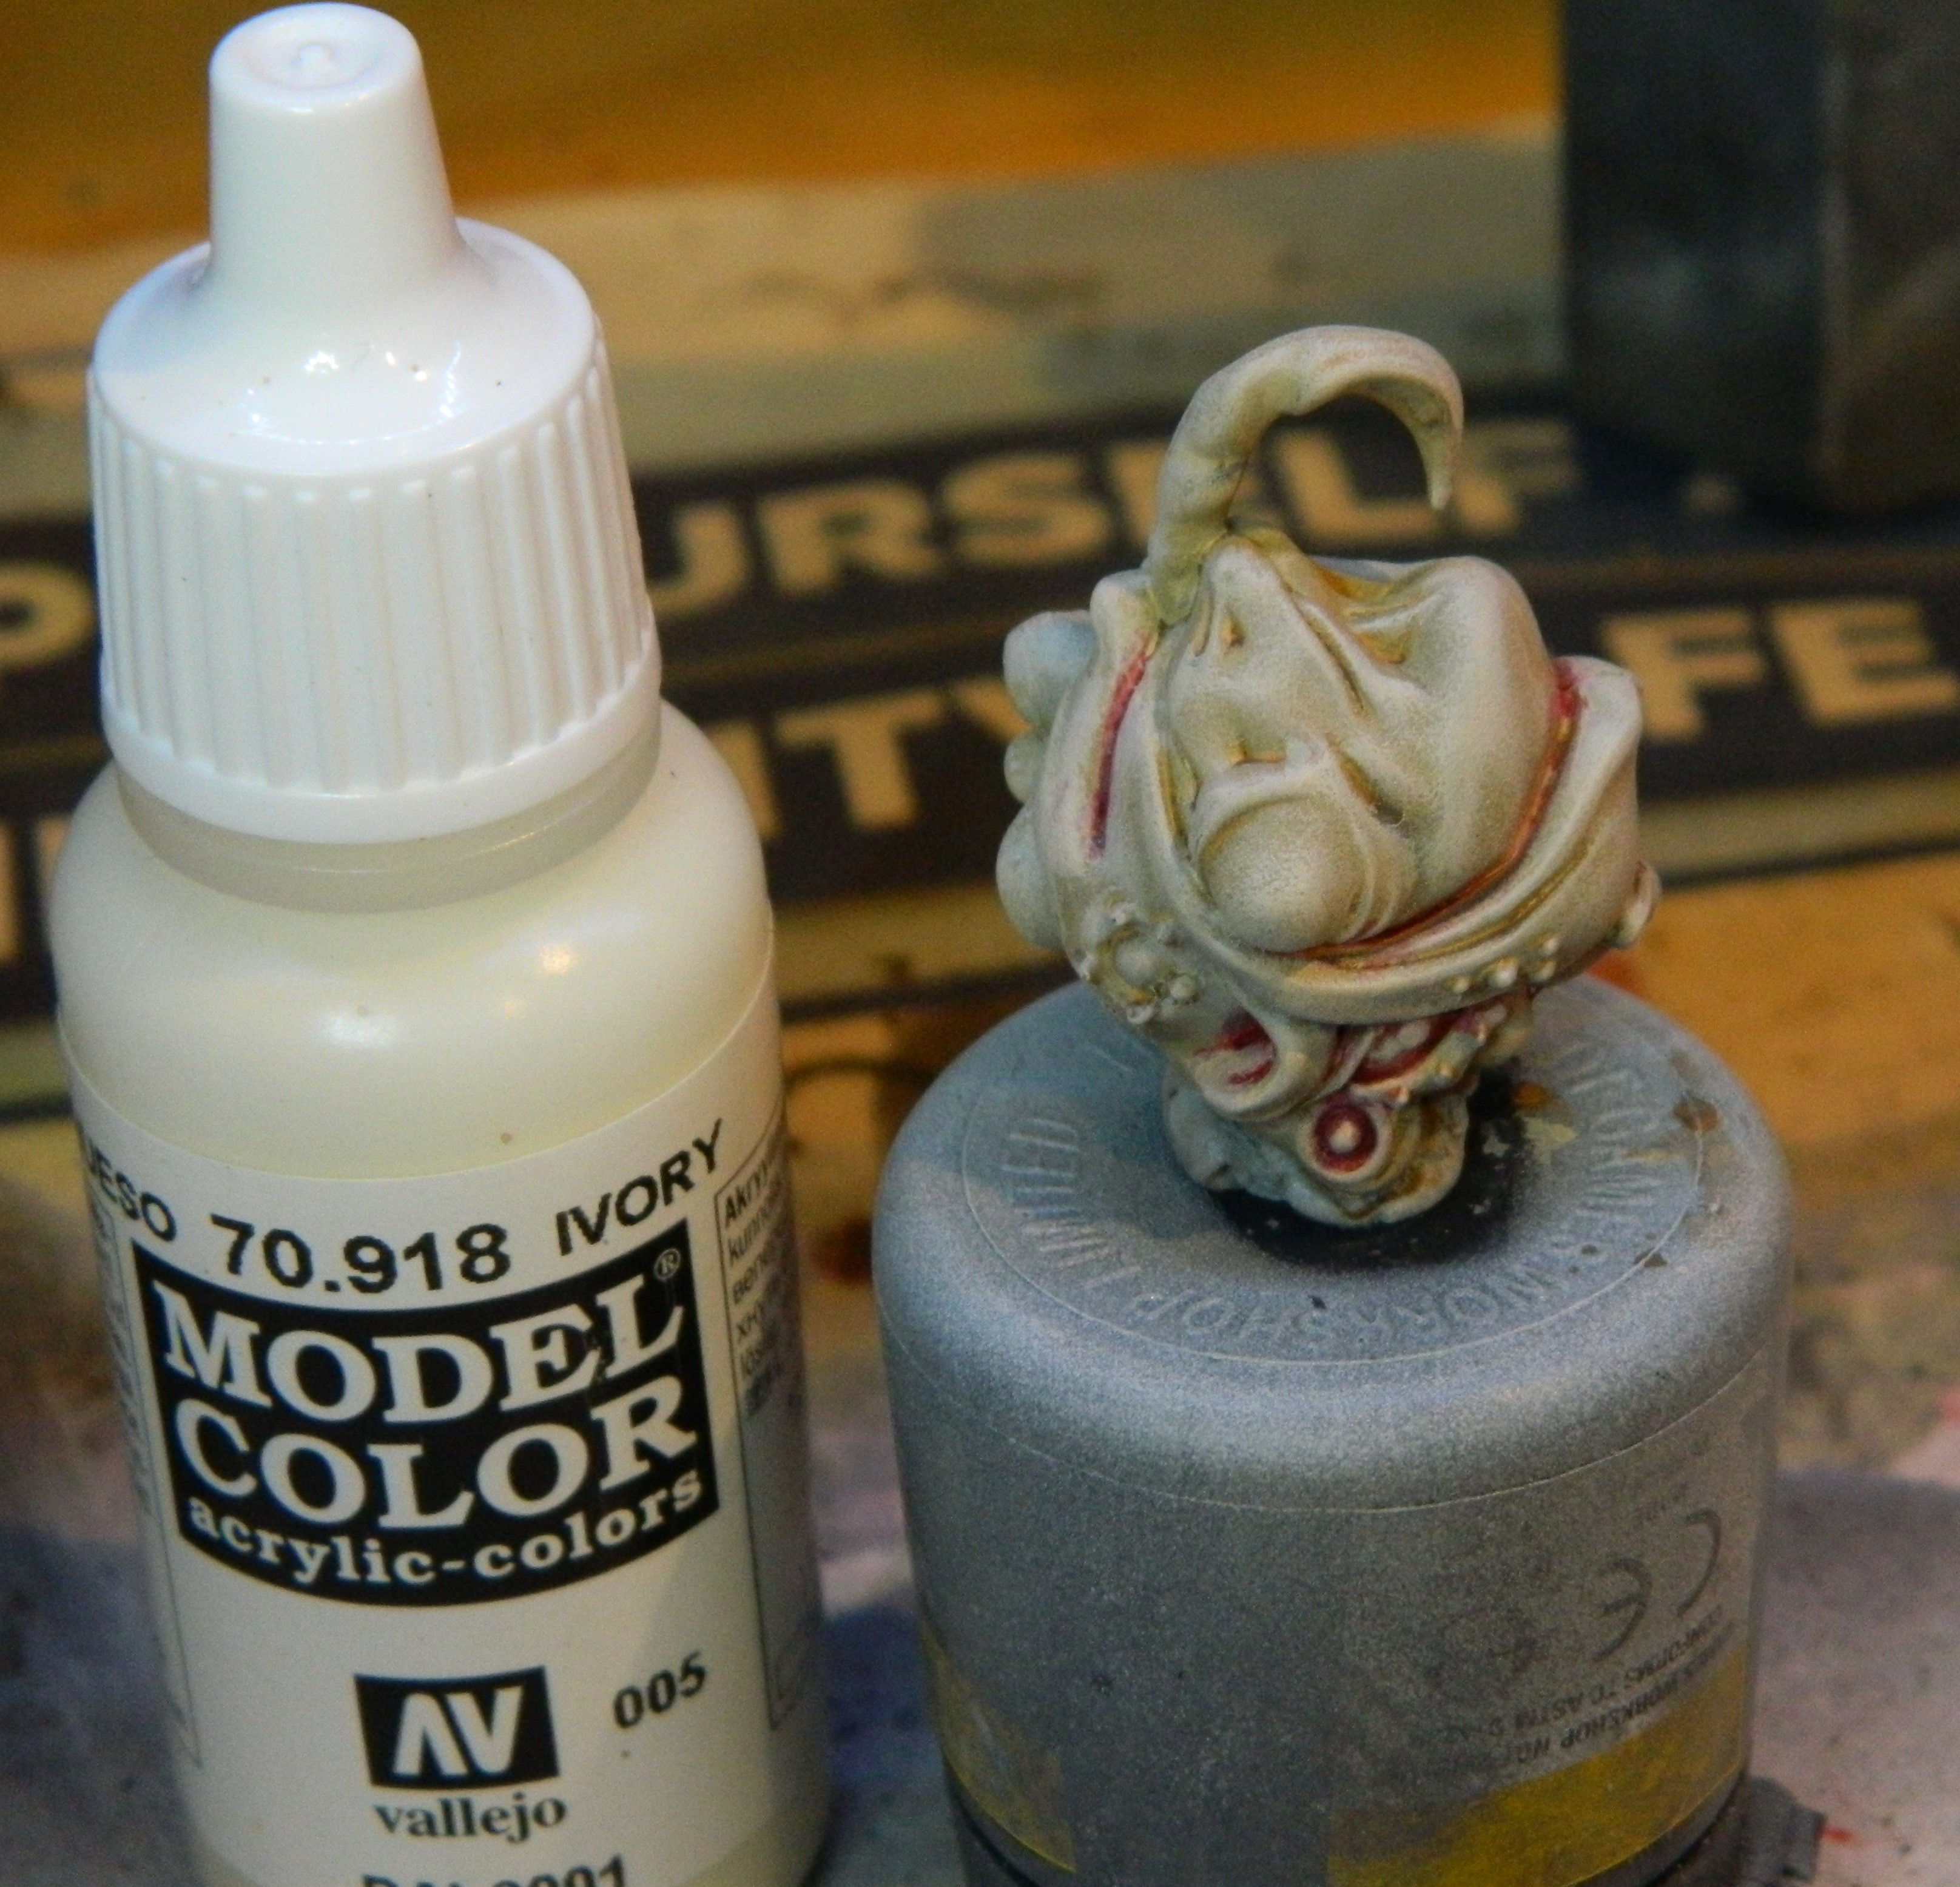
21 Mar 22: Fruitful efforts

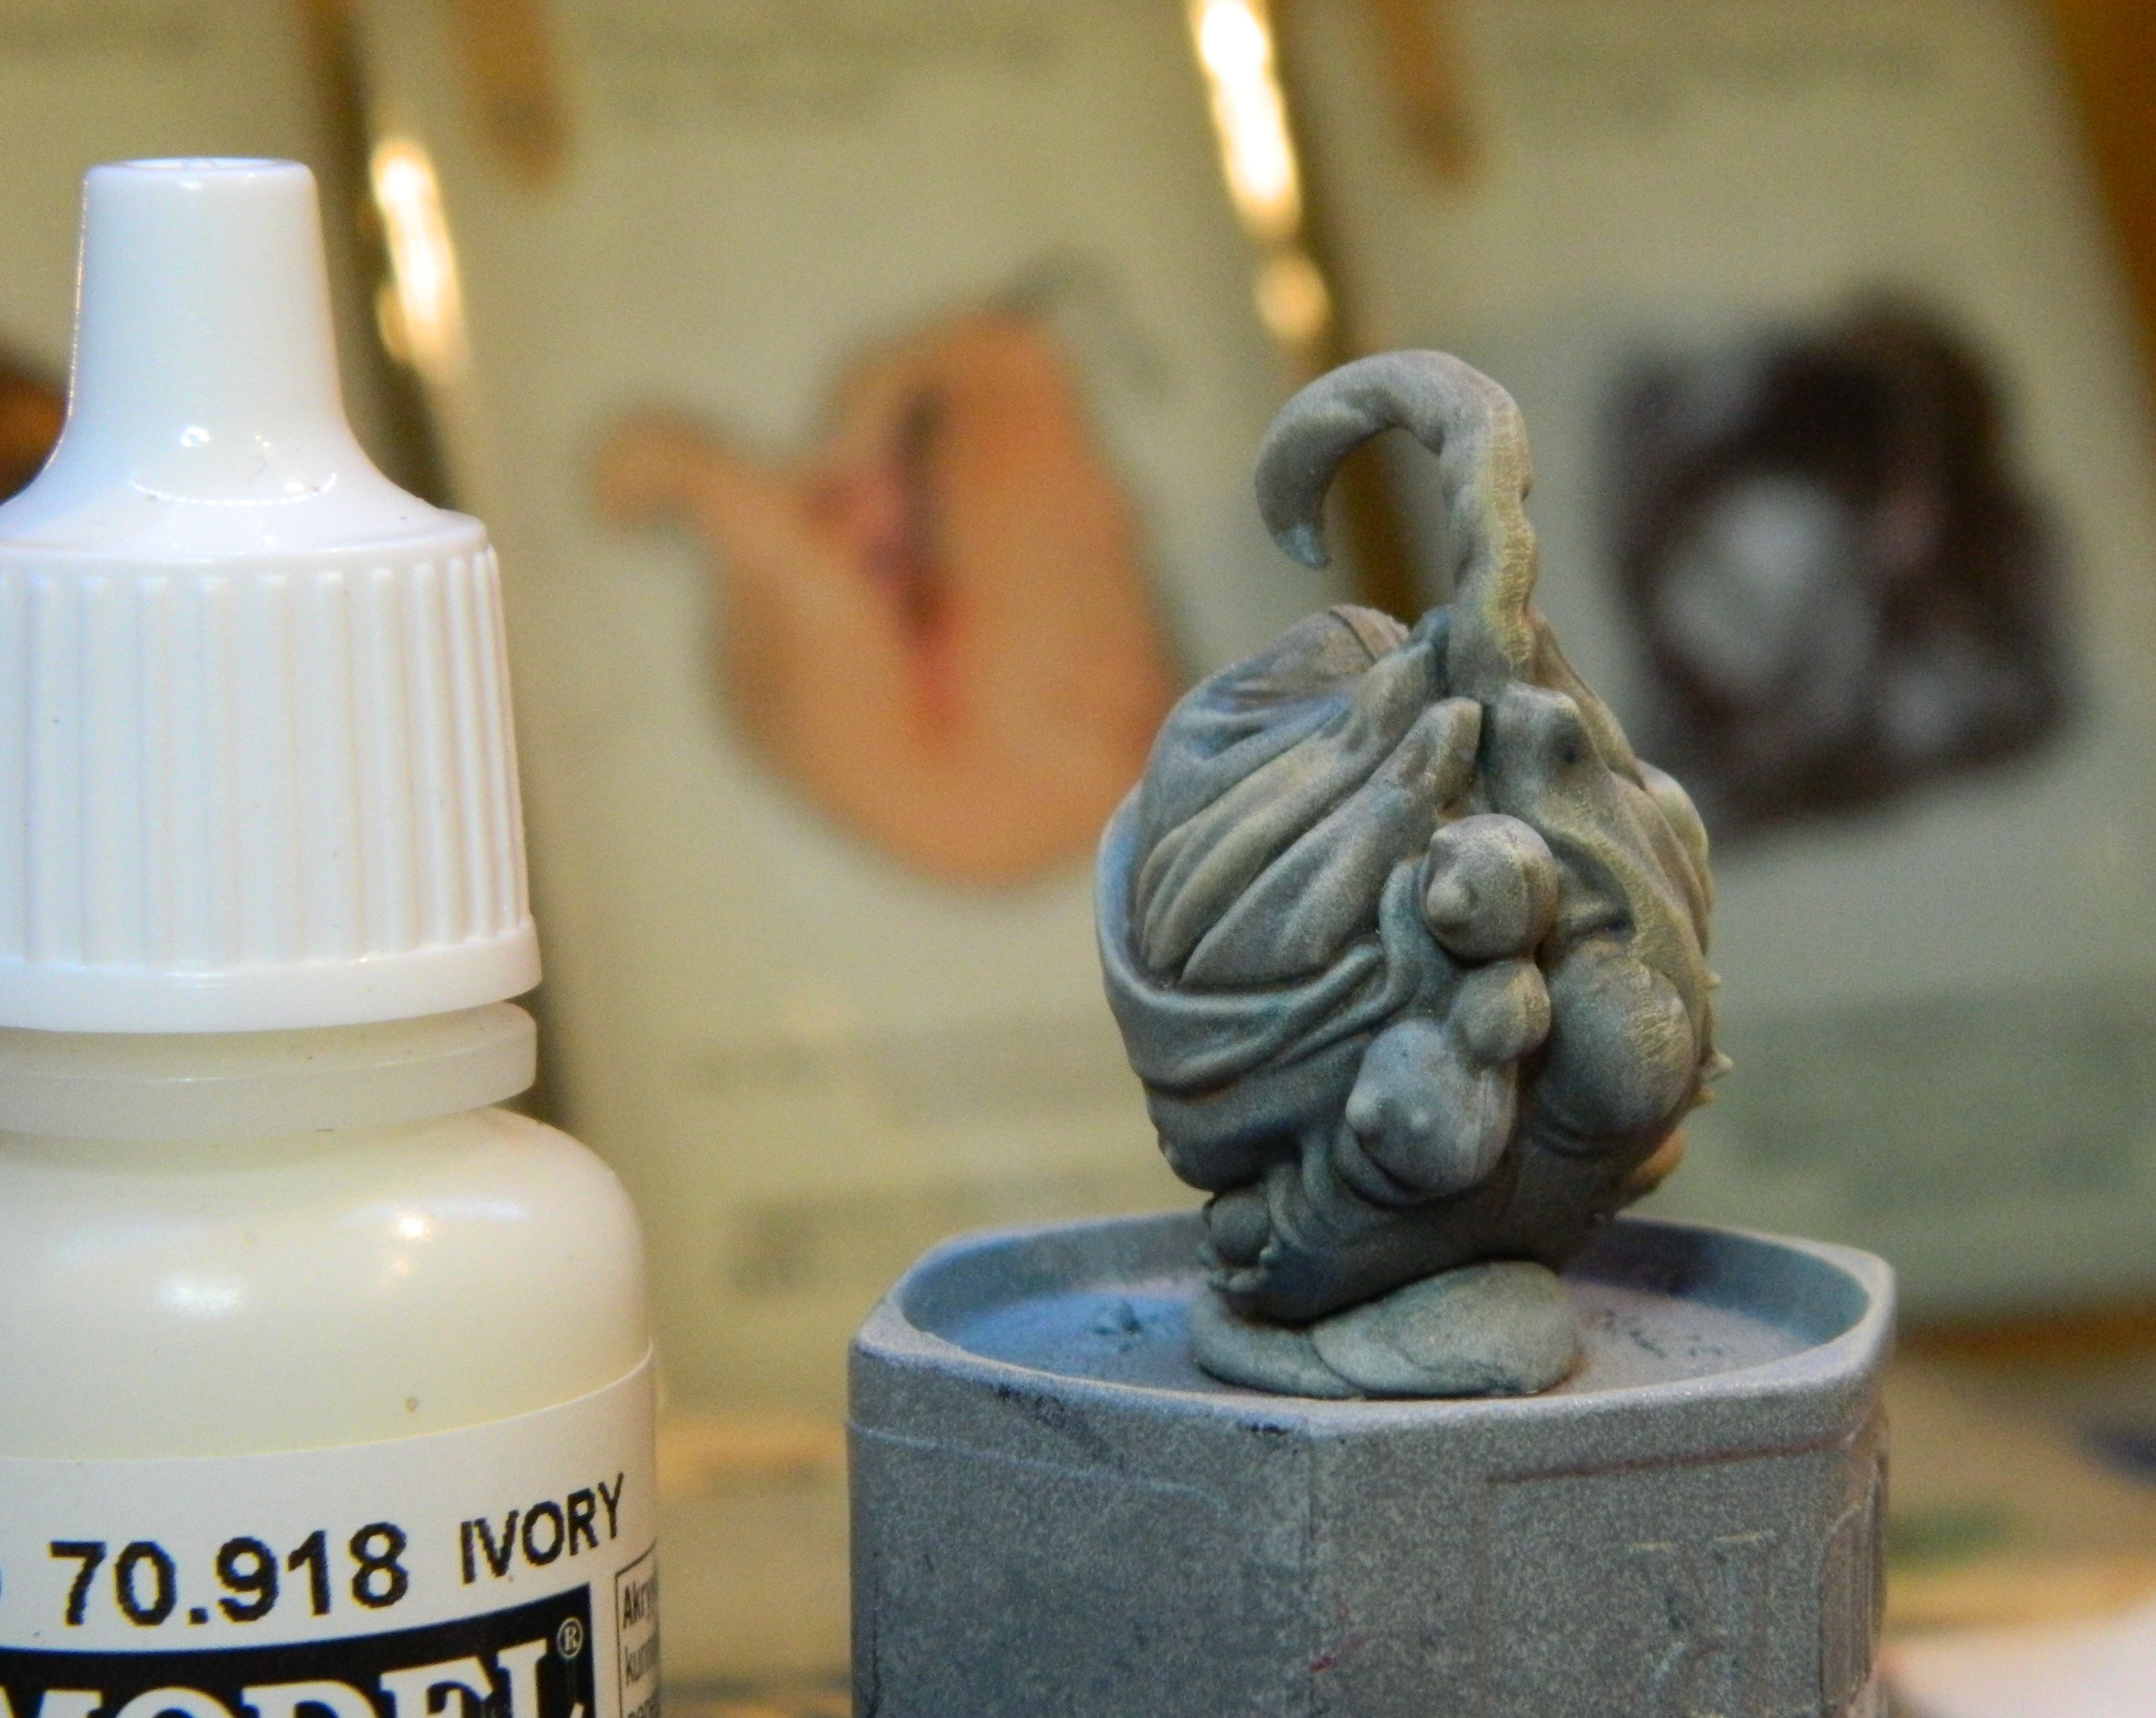
The next step was to apply a wash of Vallejo German Camo Mid Brown all over.
When this was dry I gave all of the fruit a drybrush of the Skeleton Bone seen above… kinda didn’t make a difference to the bone coloured fruit for some reason…
This is where things start to get a little more interesting. Now I start to diversify the fruit and make them more like their inspiration.
The bone coloured fruit is to represent Jagged Marrow fruit.
I added some extra glazes of the Vallejo Gory red into the crevices randomly, to give a hint of the juicy goodness within. It also got a follow-up dry brush of Vallejo Ivory to really hit that bone-look highlight.
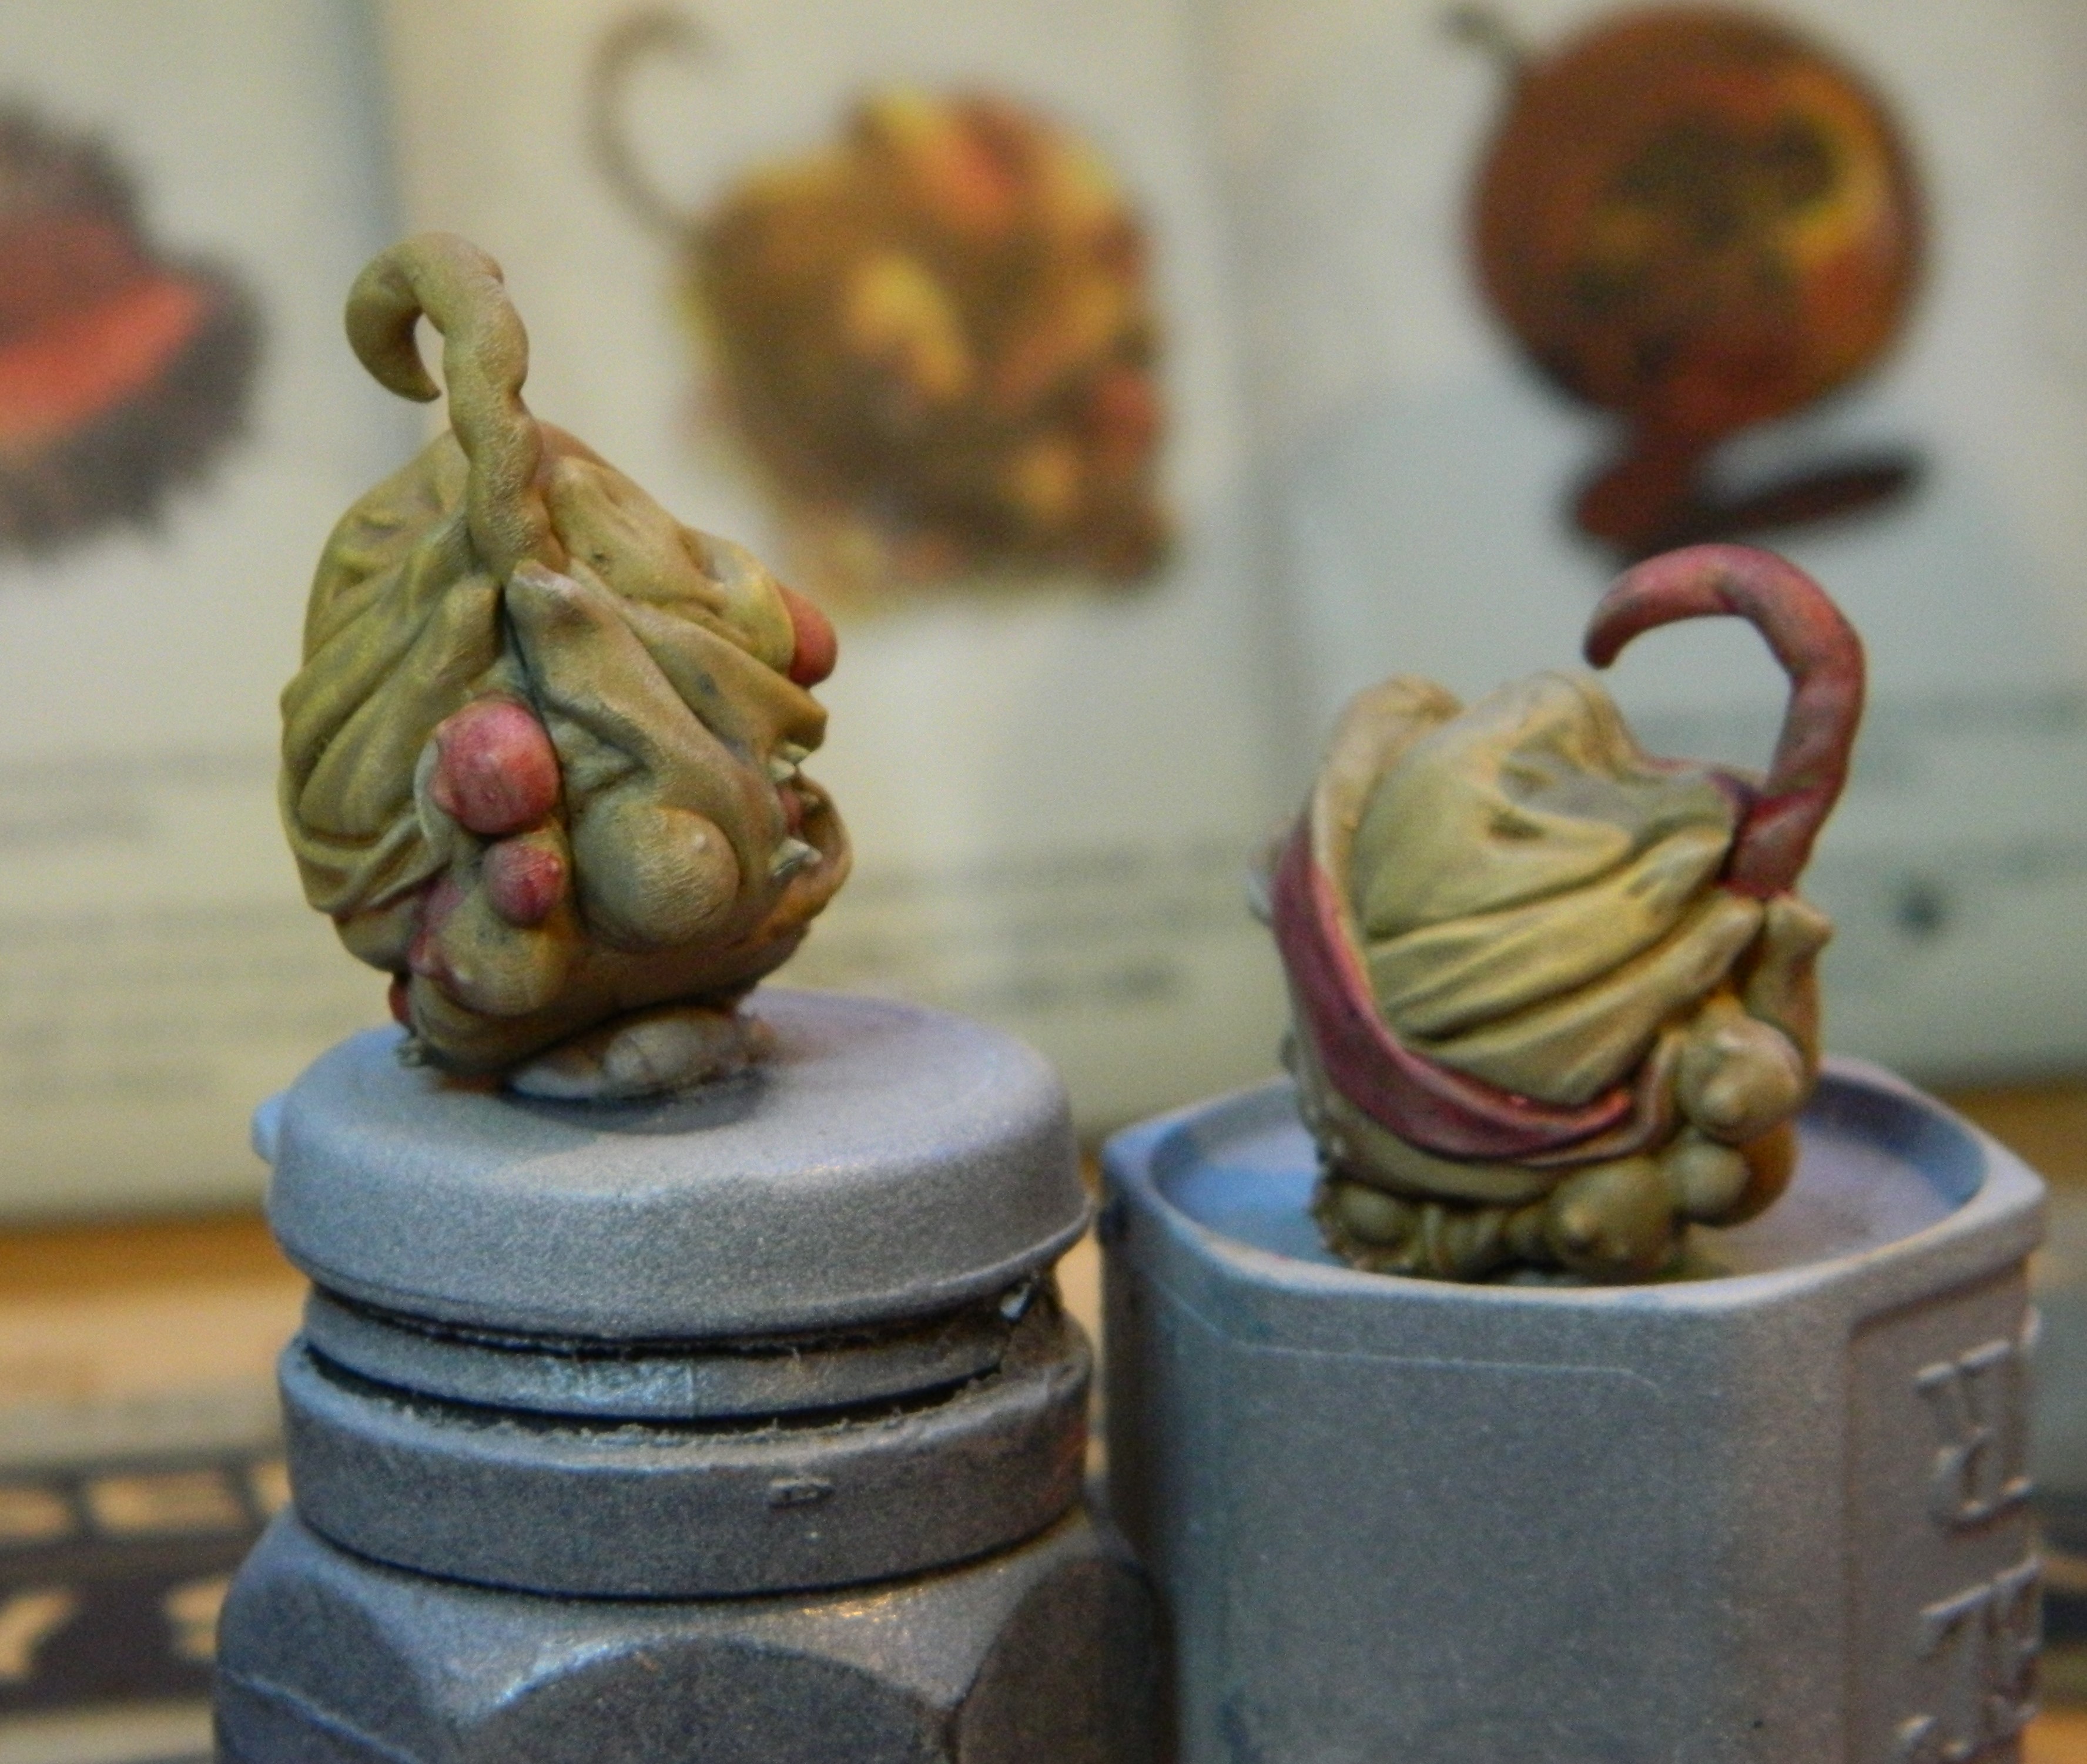
The Khaki coloured fruit represents the Lonely Fruit. Since the art is the match of the miniature, I did two in this scheme.
The quick version:
- Glaze random patches with Vallejo Gory Red
- Glaze with old Citadel Deadly Nightshade
- Drybrush with Citadel Golden Yellow
The random patches of the Gory Red looked ok, but needed a little more. I brought in the Deadly Nightshade to add some depth, and give some other areas a bit of a bruised look. The original art also had some yellow looking highlights so I added the drybrush of the yellow at the end.


The next fruit on the list is the Blistering Plasma fruit. I kept this one simple, on adding an extra glaze in random spot of Vallejo Black Red to darken some areas.