


Last Days of the Horus Heresy


Recommendations: 43
About the Project
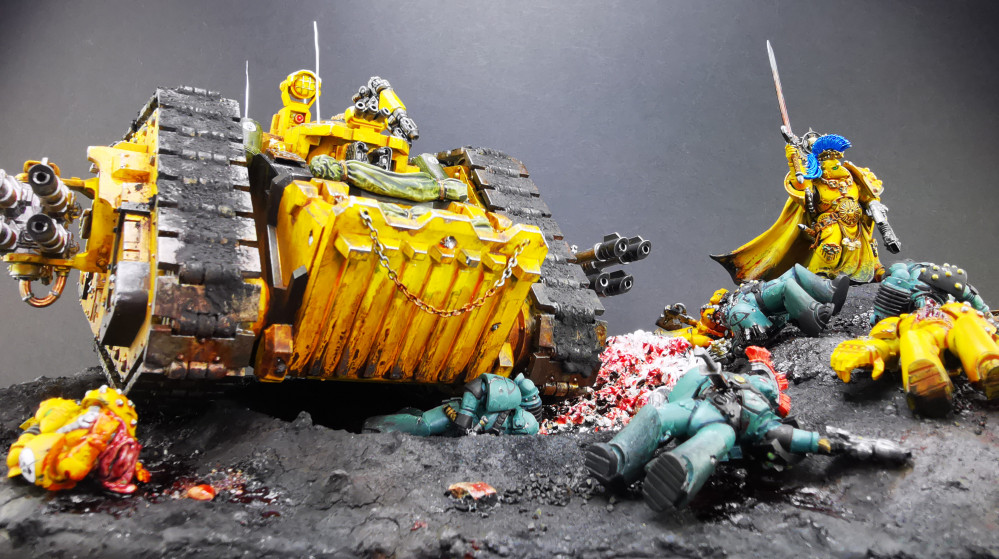
Last Days of the Horus Heresy Diorama. For this Warhammer Horus Heresy diorama, I wanted to show the cost of this sprawling, Galactic civil war at the ground level. Space Marines fight to the death in the blackened earth of scorched Terra, leaving mounds of mutilated casualties and a river of blood. *** With the relentless pace of the Siege of Terra, there is no opportunity to mourn the dead. Imperial Fists still in the fight race through the blood and bodies, towards their next objective or opponent. *** I’m using the Space Marines and Spartan Land Raider from the Horus Heresy Age of Darkness starter set.
Related Game: The Horus Heresy
Related Company: Games Workshop
Related Genre: Science Fiction
This Project is Completed
Completing the diorama

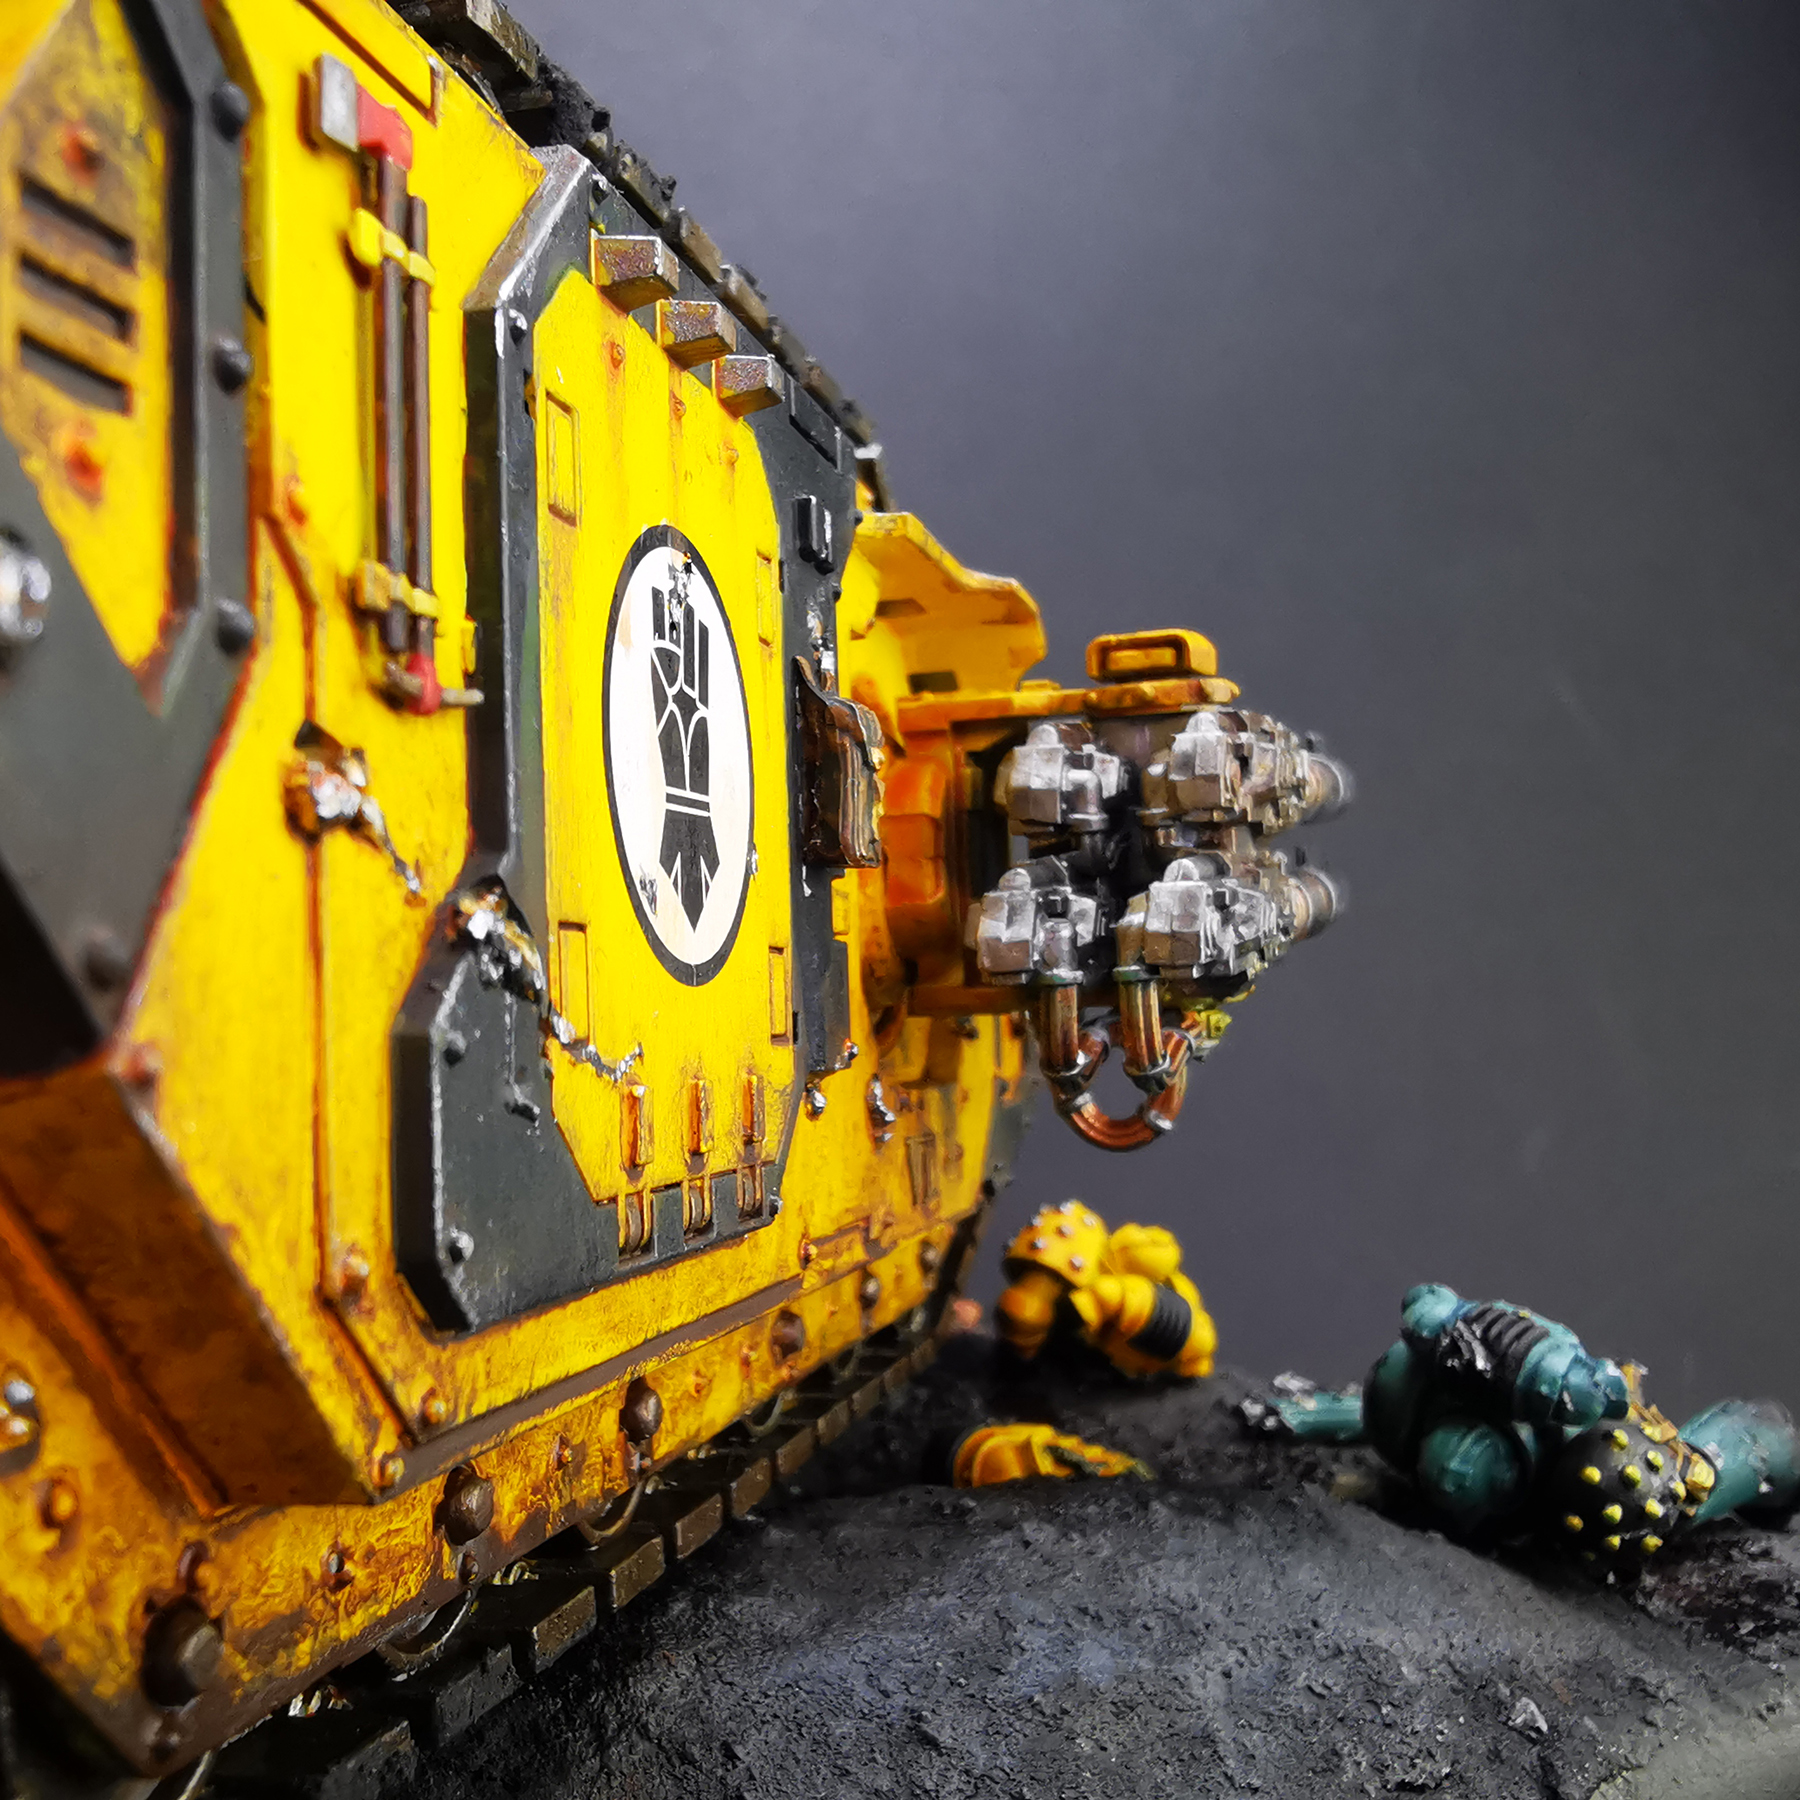
Land Raider
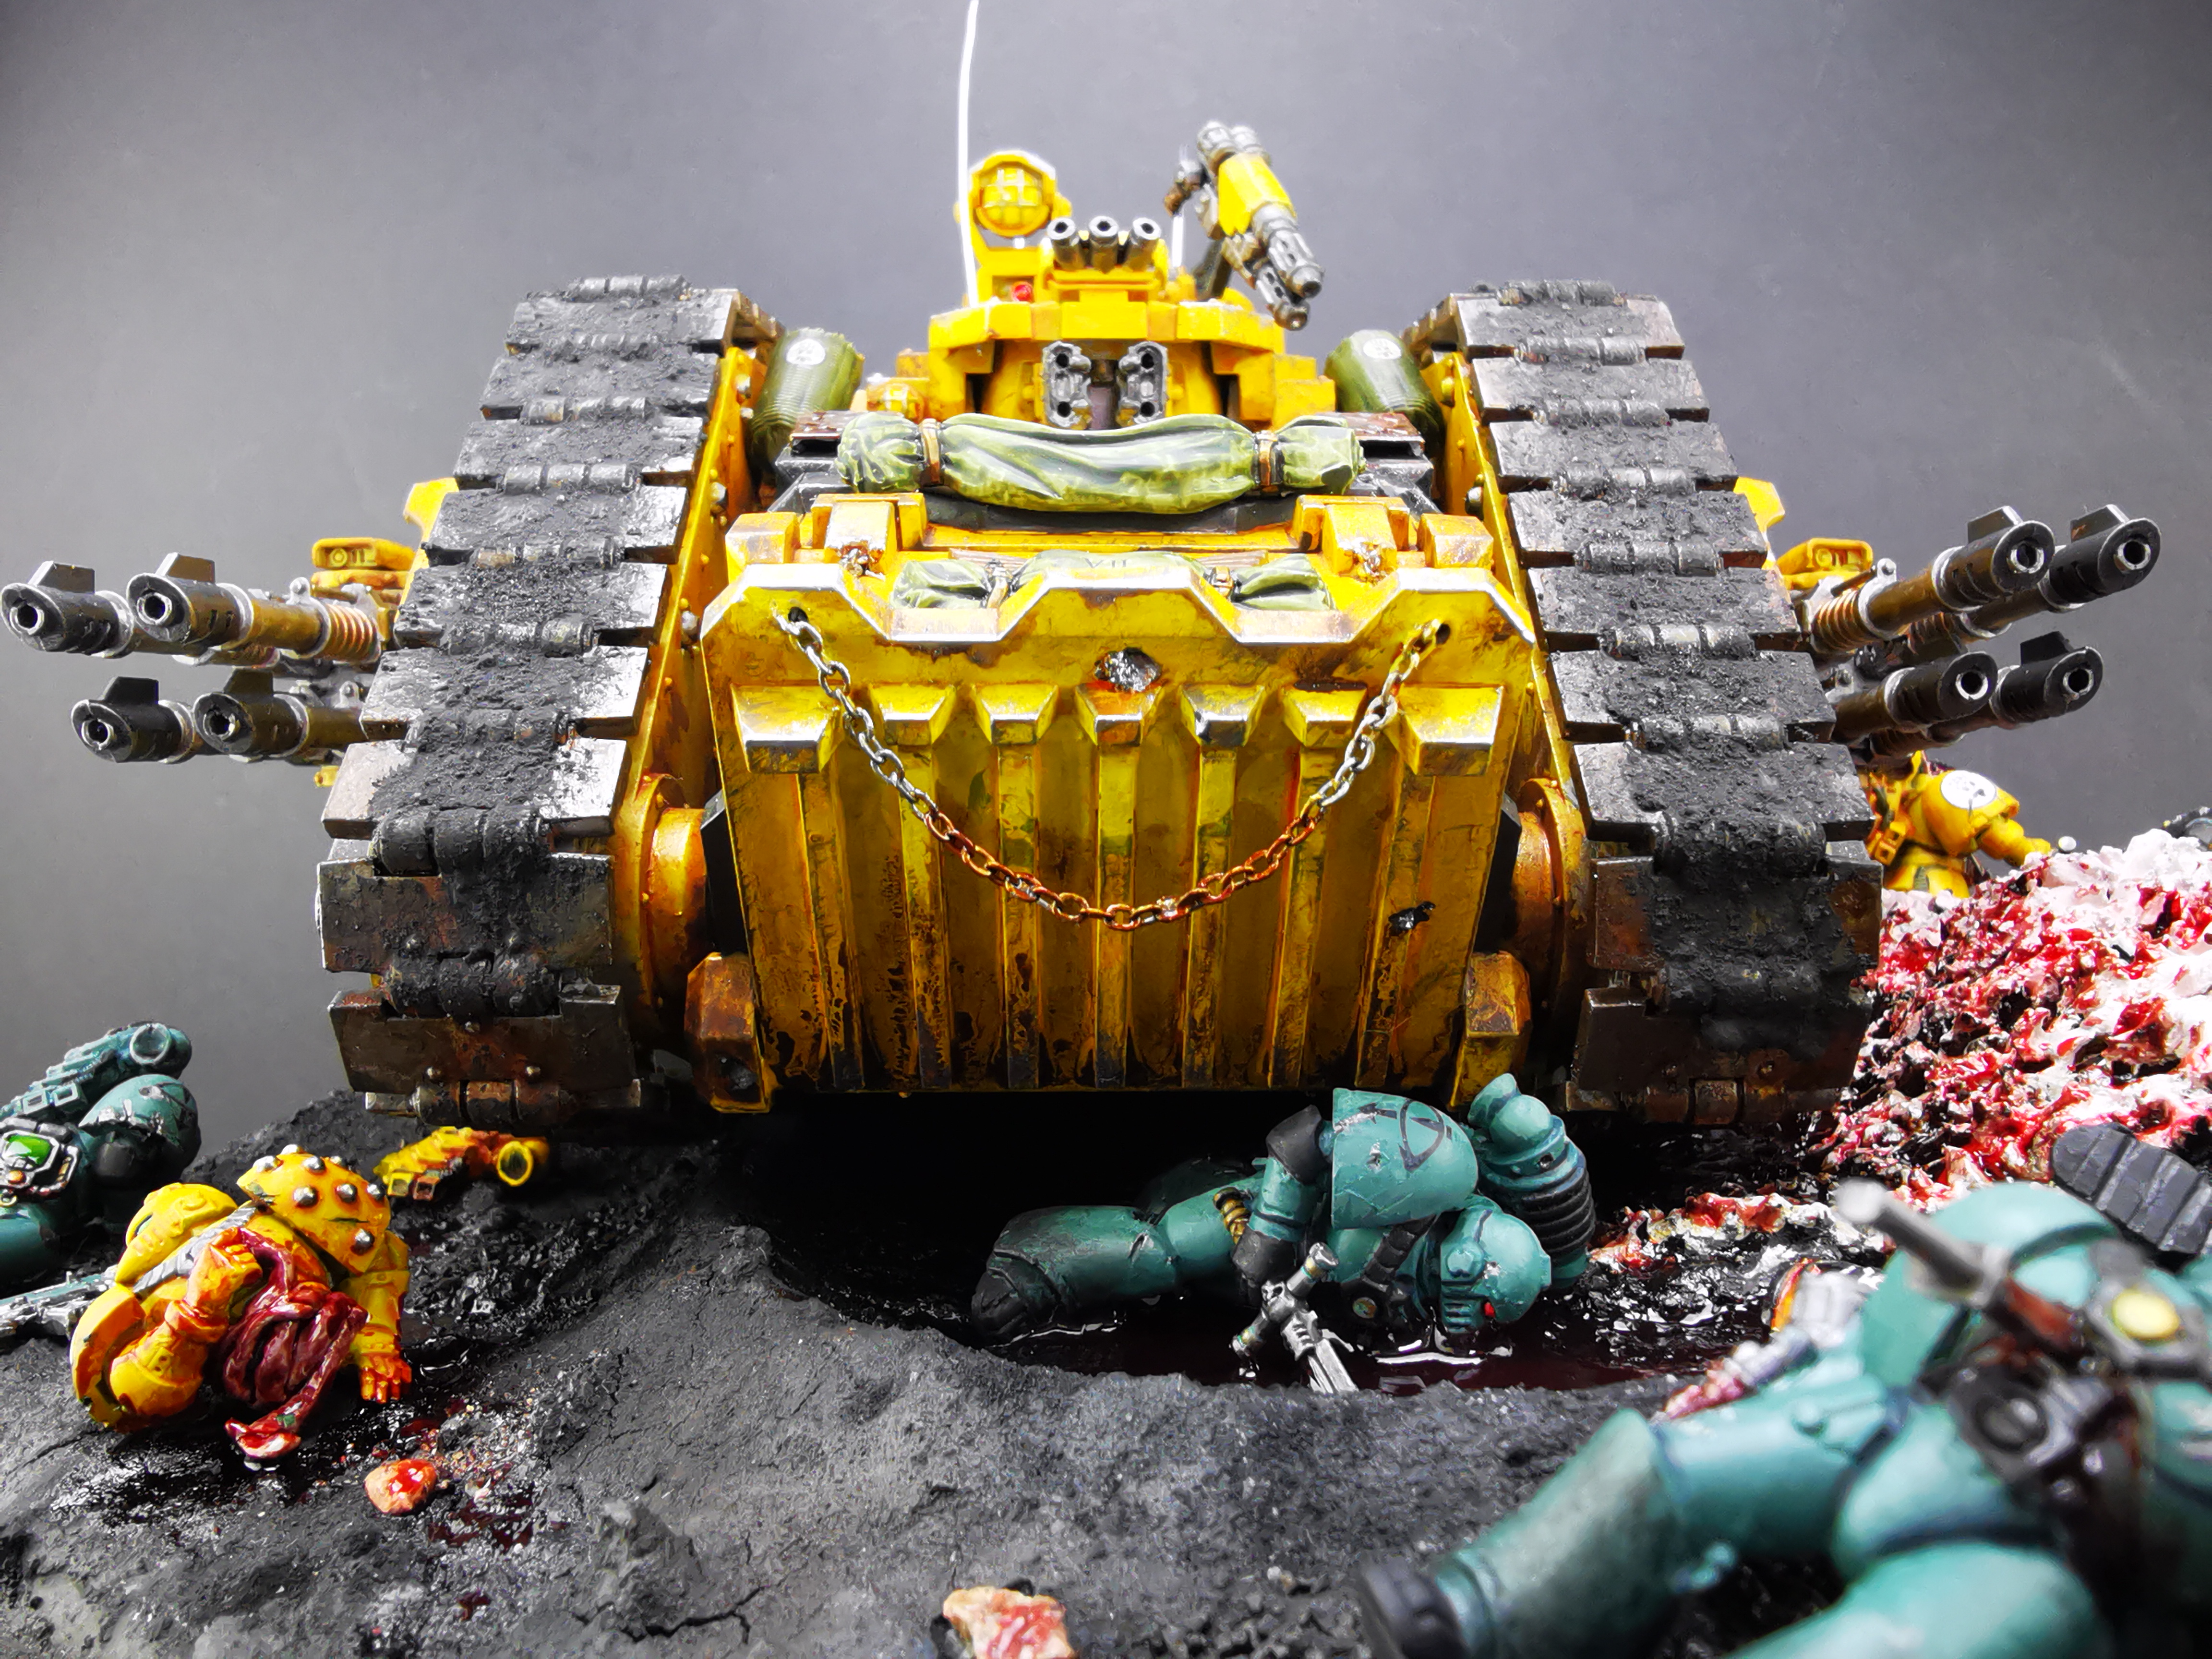
I painted the Land Raider the same way I did the other Imperial Fists but did a lot more weathering on the armour! I’m a big fan of enamels and I’ll dip in and out of several different pots when I’m distressing armour. It’s less of a defined process and more of a tweaking-as-I-go approach, determined by what looks good at the time.
The beauty of enamels is that you can blend, reduce or remove with enamel thinner/white spirits/mineral spirits long after you’ve applied the paint, so there’s no such thing as a permanent mistake! (Unless you spill some on the dining room table…)
My favourites to dip in and out of are:
- Streaking Grime (Mig)
- Engine Grime (AK)
- Streaking Rust Effects (Mig)
- Track Wash (AK)
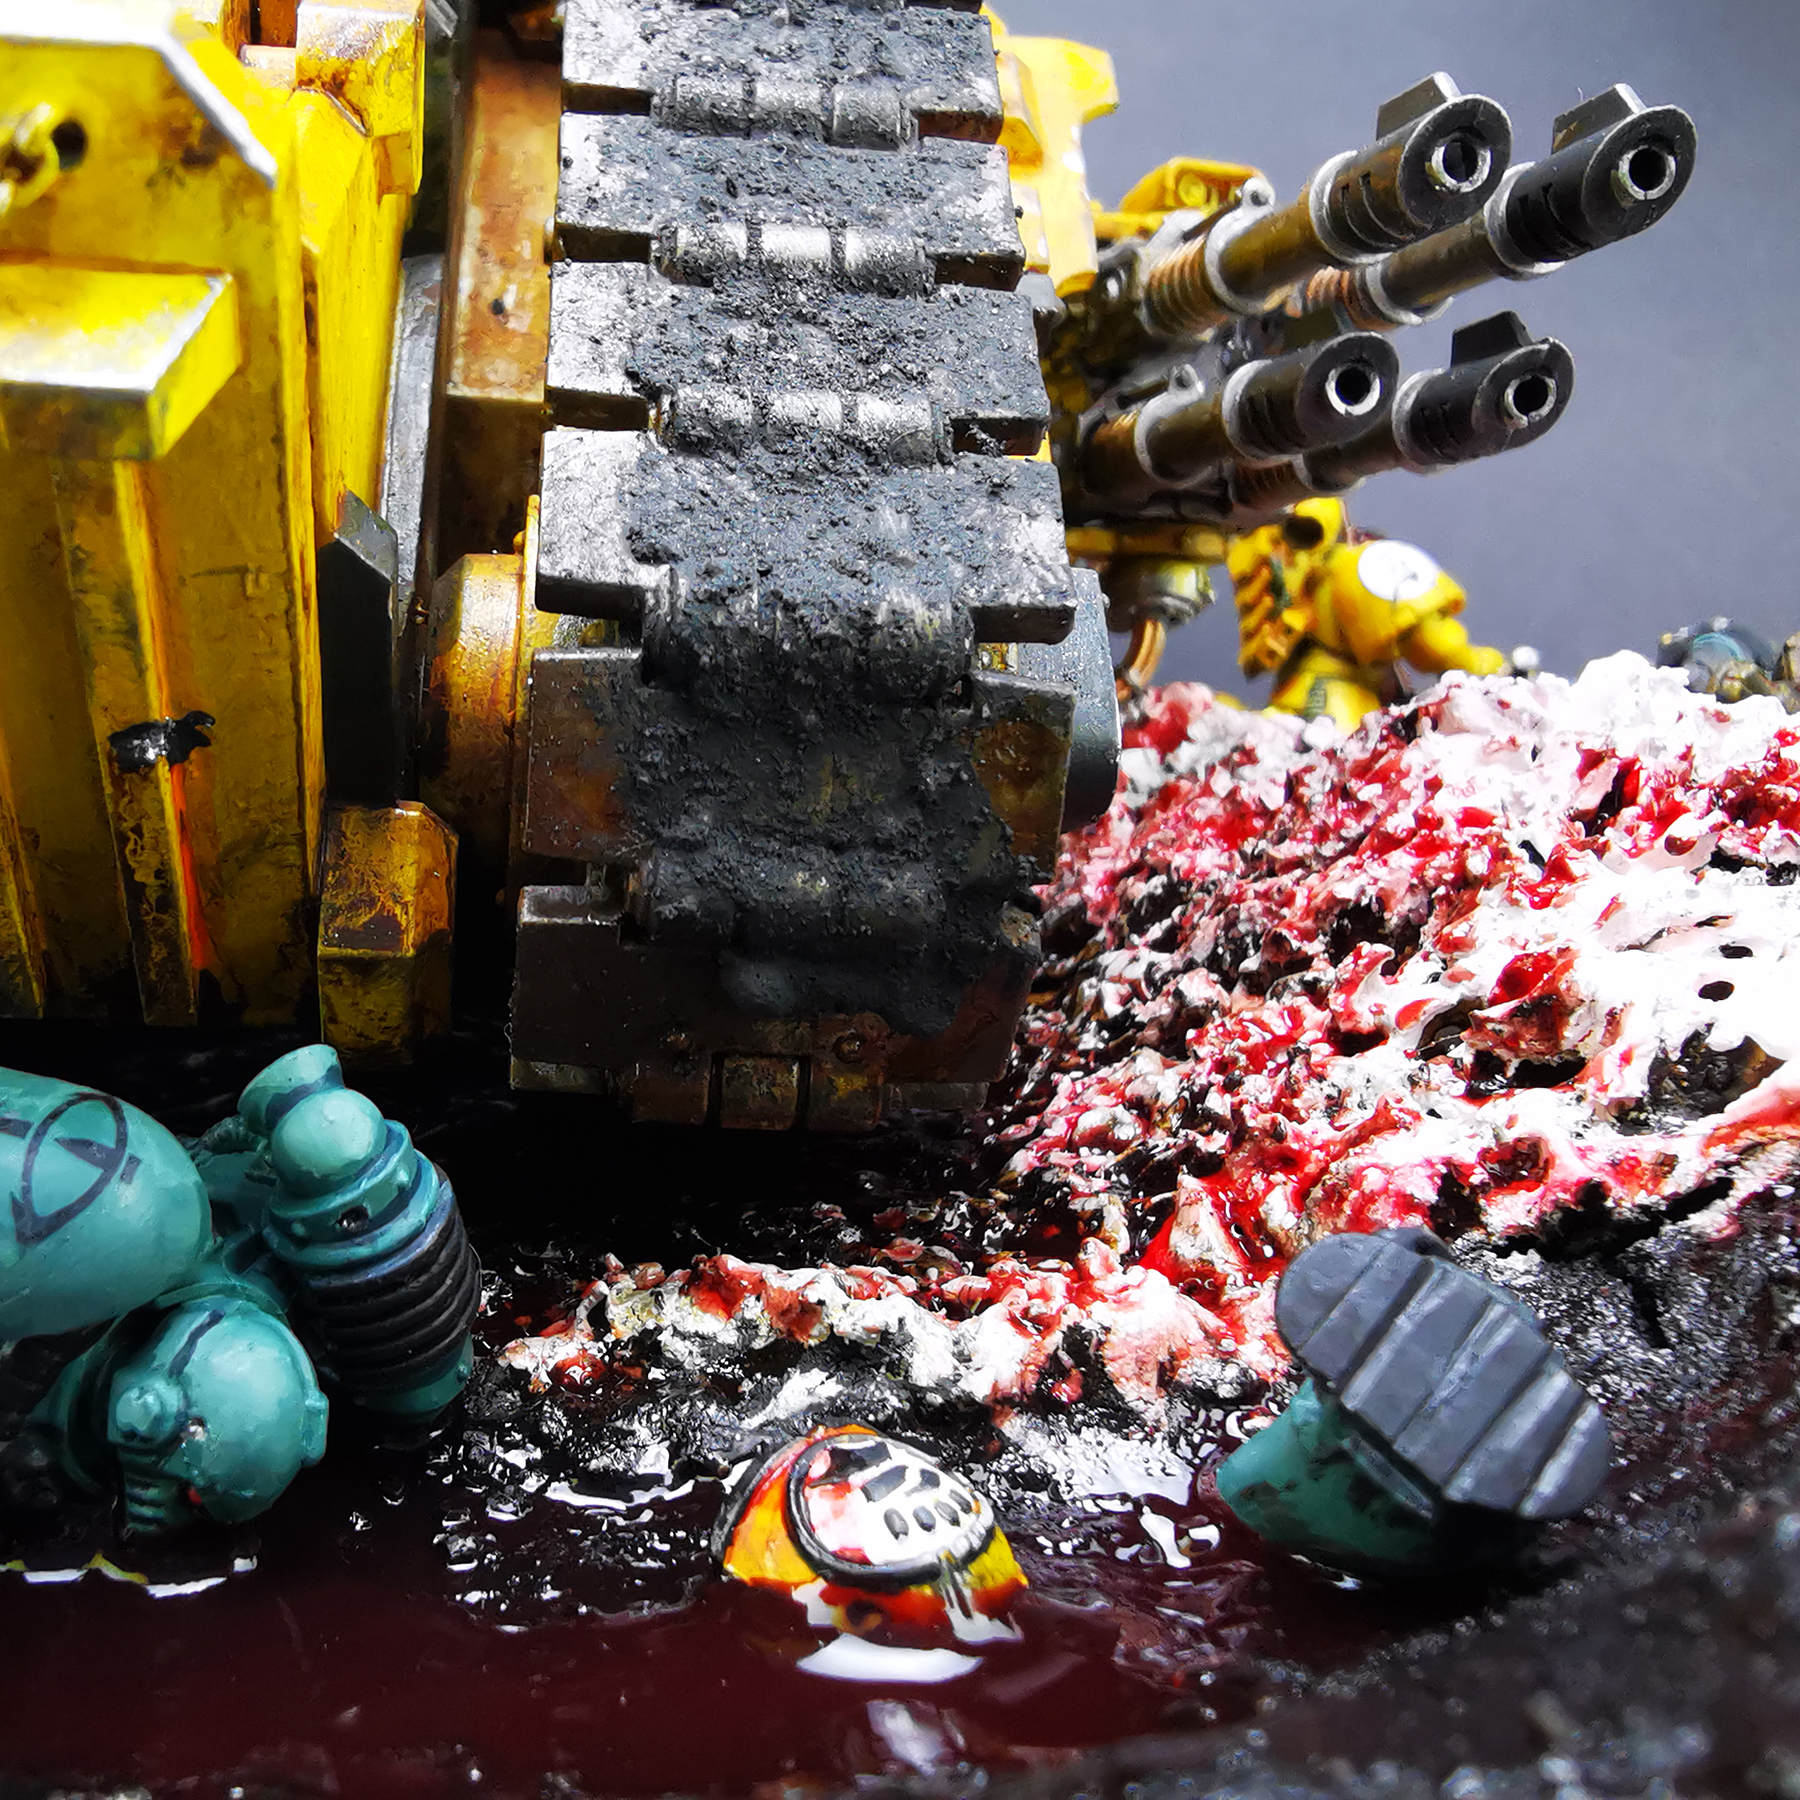
I also use Rubble (Ammo) and Smoke (AK) Pigments that I fix with Vallejo Pigment Binder to give me gritty finishes on the tank tracks and around the exhausts.
Gore
Again, more of a scrappy approach than a process, but I used a lot of these:
- Blood for the Blood God (Citadel)
- True Blood (Green Stuff World)
- Coagulated Blood (Green Stuff World)
Diorama base
Lots of messing around here to get this painted, and almost impossible to list everything that I used. The painful part was waiting for it to dry after each coat to see what the final effect would look like.
Vallejo Asphalt texture paint for terrain is my go-to for scorched battlefields, and I also dry-brushed various grey and brown tones to add some tonal variation. This is a nuclear-scorched hellscape, so there’s no green. I had to rely on the teal Sons of Horus and the sunny yellows of the Imperial Fists to not have this look monochrome!
Finishing Up
Everything was superglued or PVA-glued in place, and I added a little more gore to the diorama to match the injuries sustained by the Space Marines.
Making the diorama base
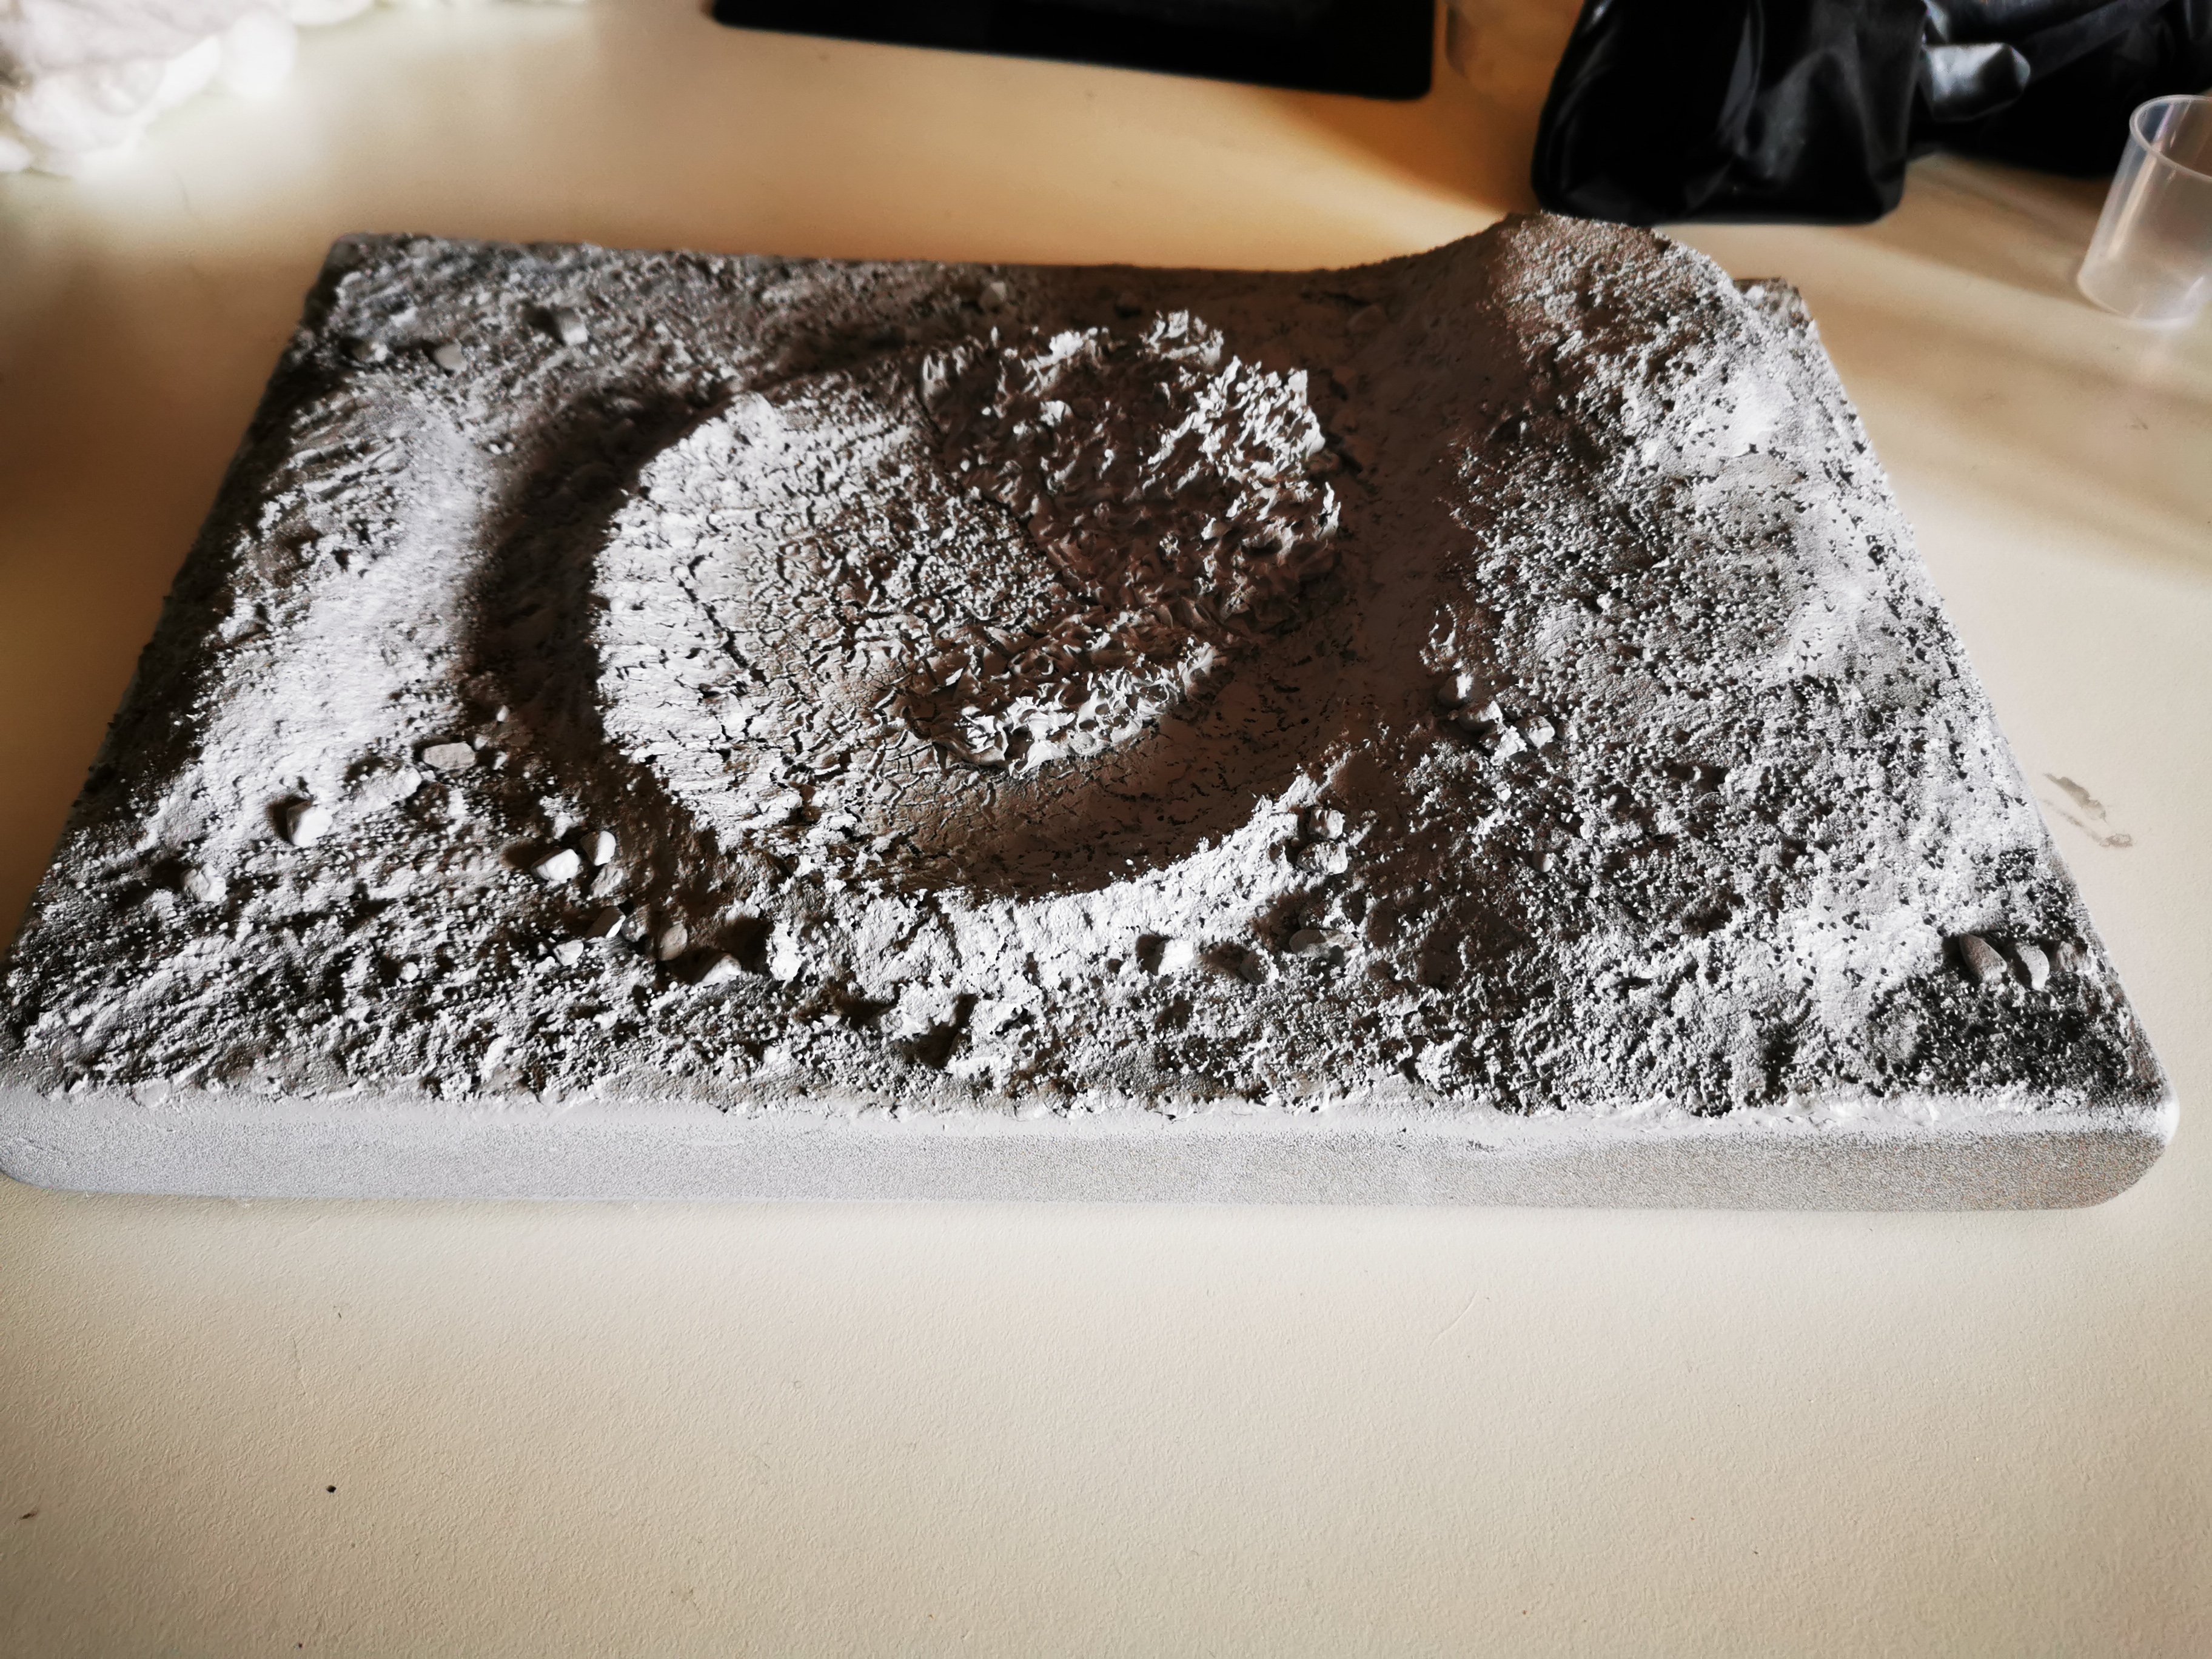
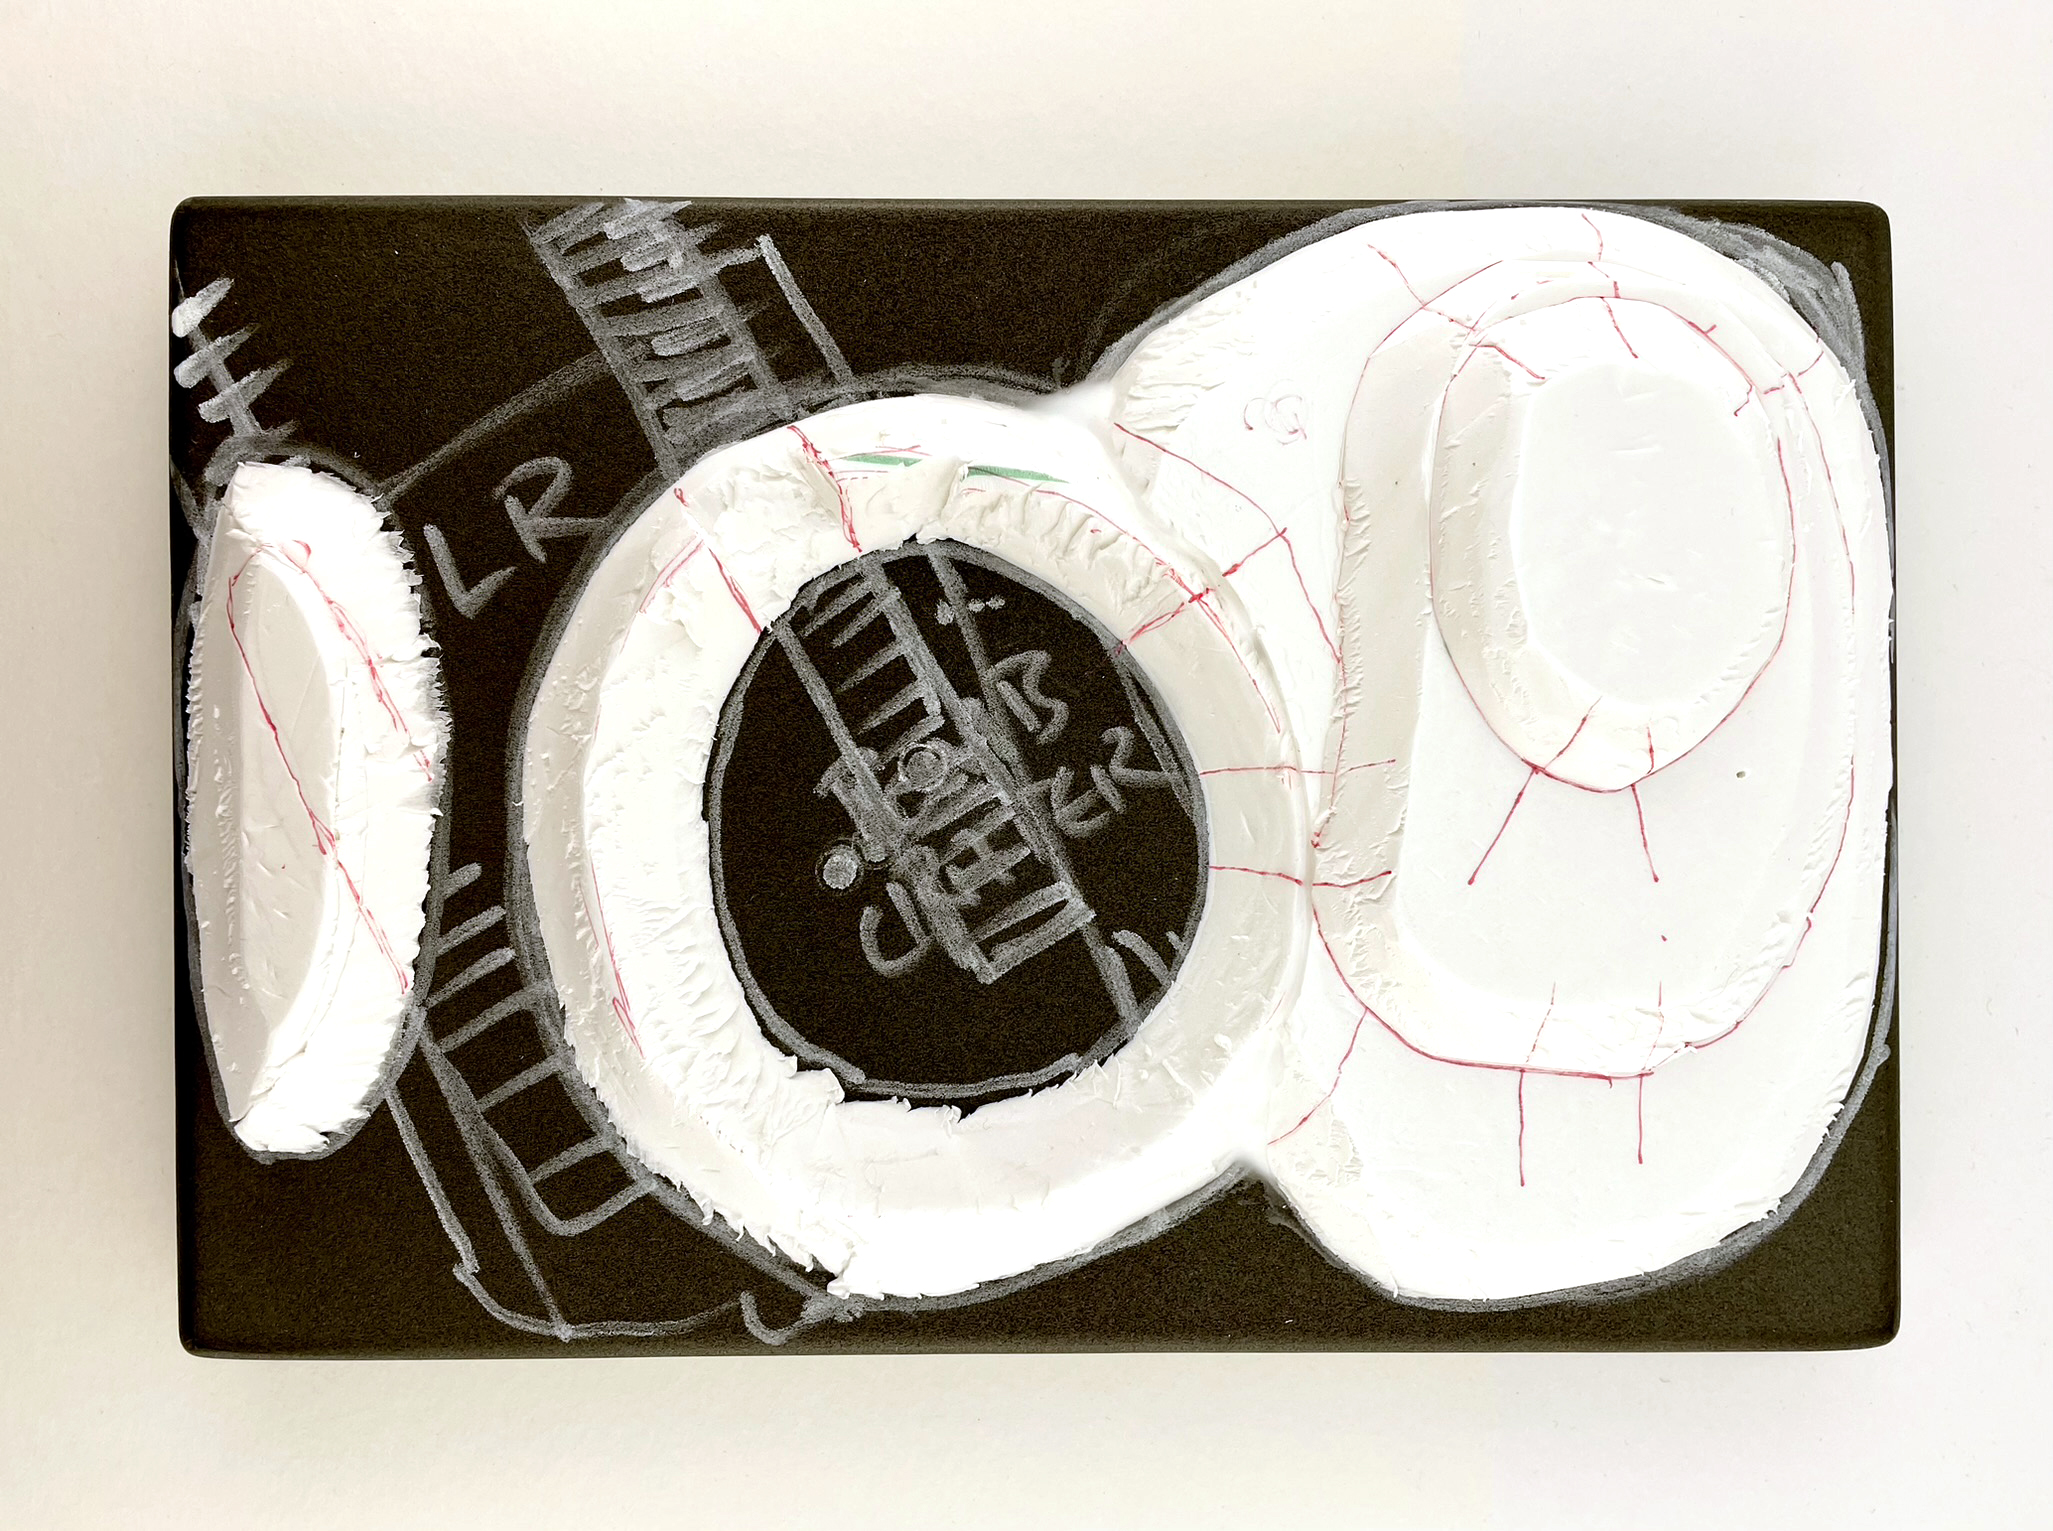
Base material
I used an EVA yoga block measuring 305mm x 205mm x 25mm, which I bought from Amazon. Yoga blocks have bevelled edges which give them a clean finish around the edges. The high-density foam cuts smoothly doesn’t deform with aerosol spray or superglue, and has become my go-to for medium-sized dioramas like this one.
Contours
I marked the base with a chalk pen and then added XPS layers to give the feeling of a contoured hillock. I also used XPS to create an artillery shell crater which has a groove cut into one side to allow the tank track to nestle into it.
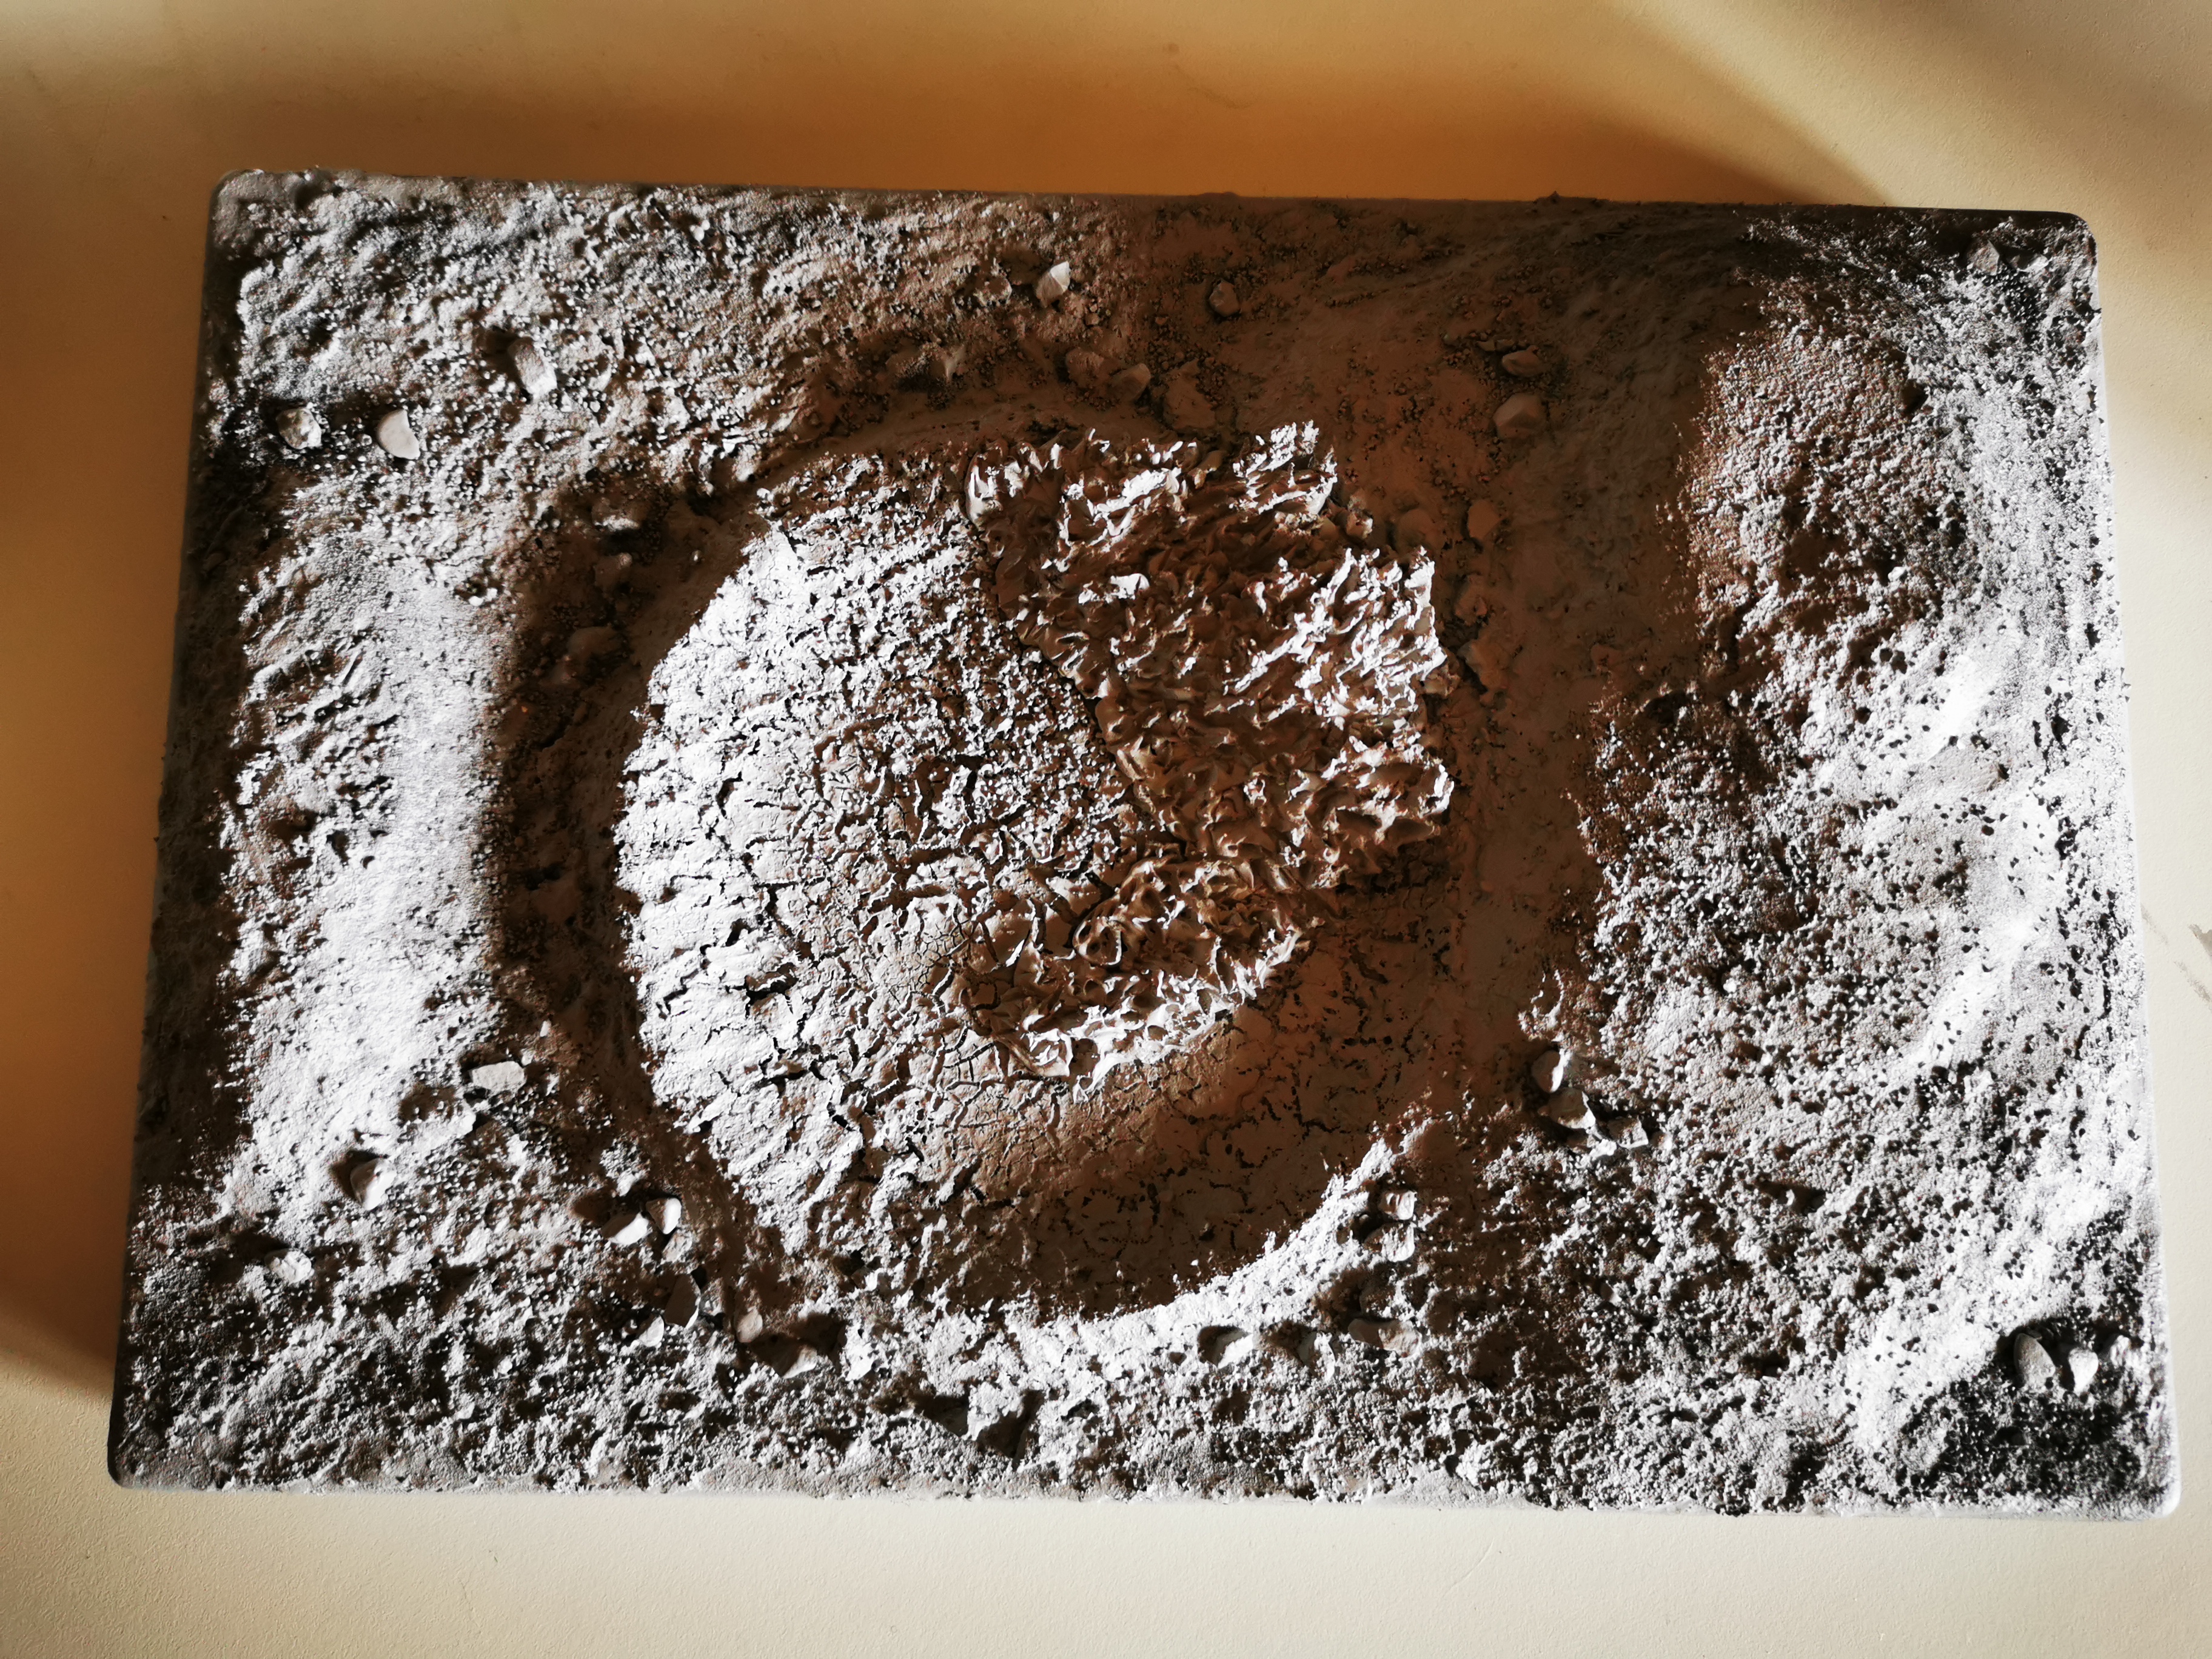
Texture
I used DAS clay over the entire surface of the base to create smooth transitions between the various contours. This clay takes a while to dry, which is a pain when you’re in a ‘creative flow’, but is the best around for jobs like this.
A coating of texture paste mixed with some crackle paint gave this whole thing a lovely granular and cracked finish.
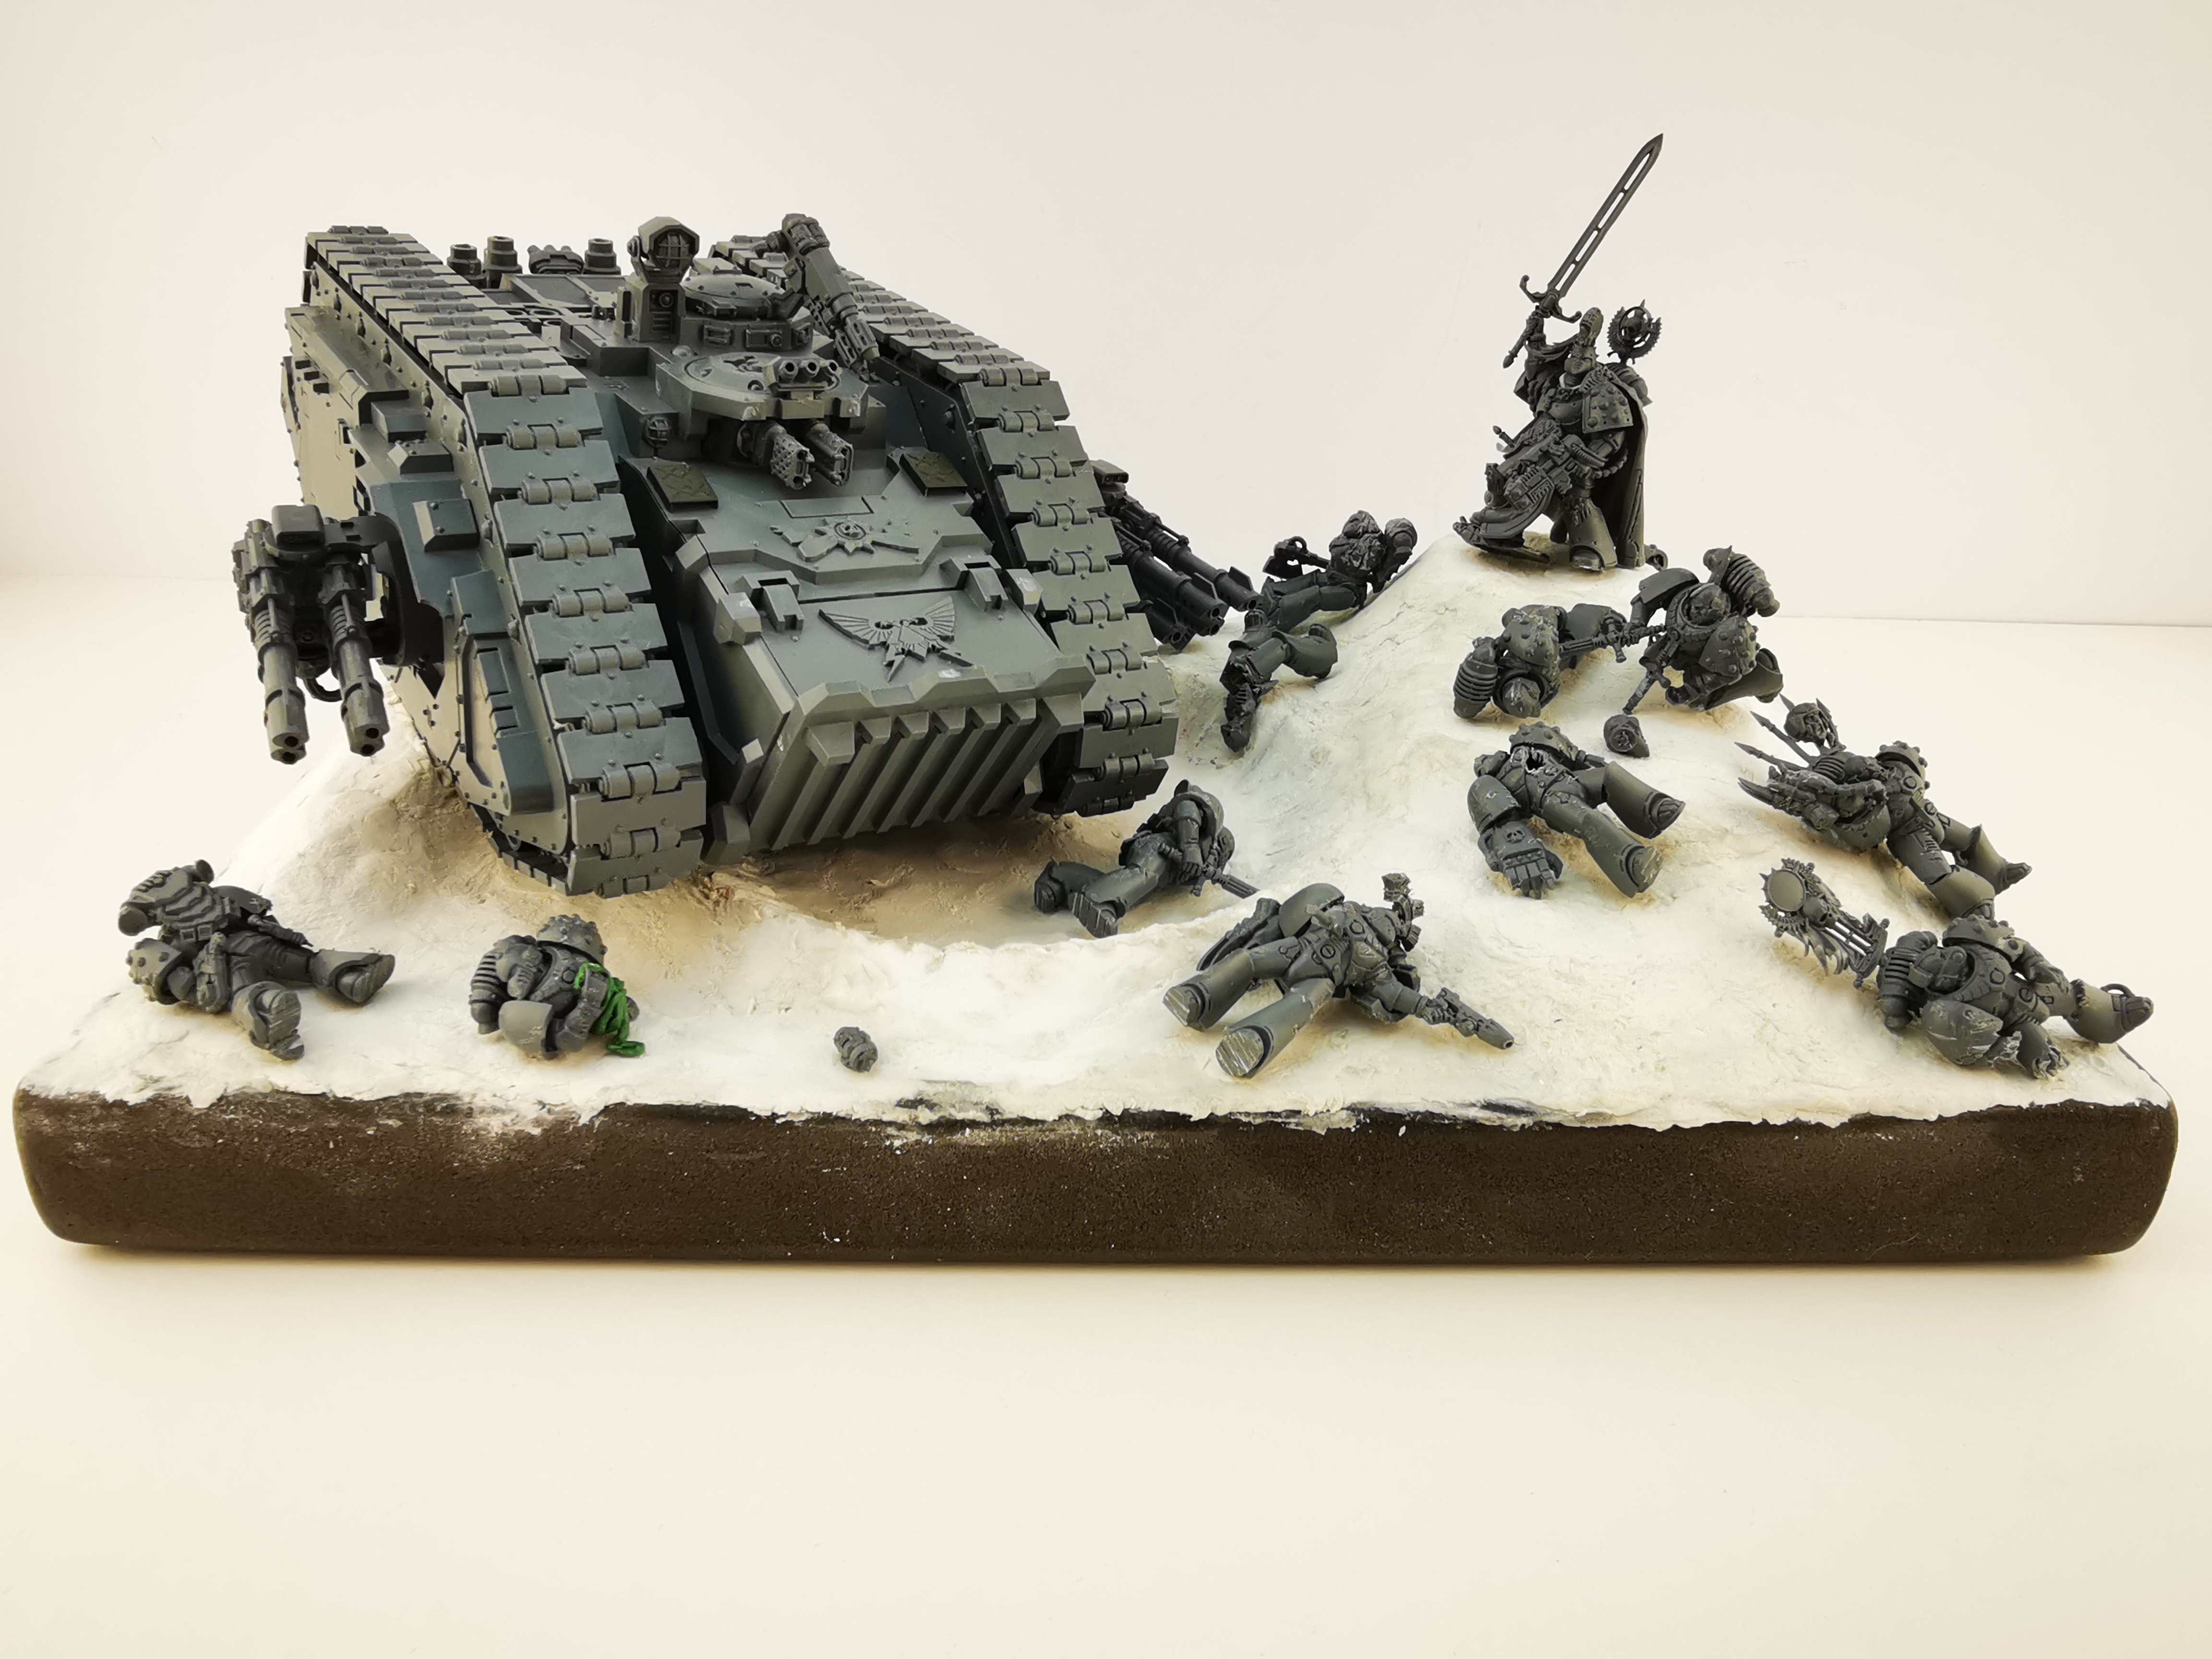
I sprayed the lot with Tamiya Fine Gray Primer and test-fitted the miniatures.
Detailing the Land Raider Spartan
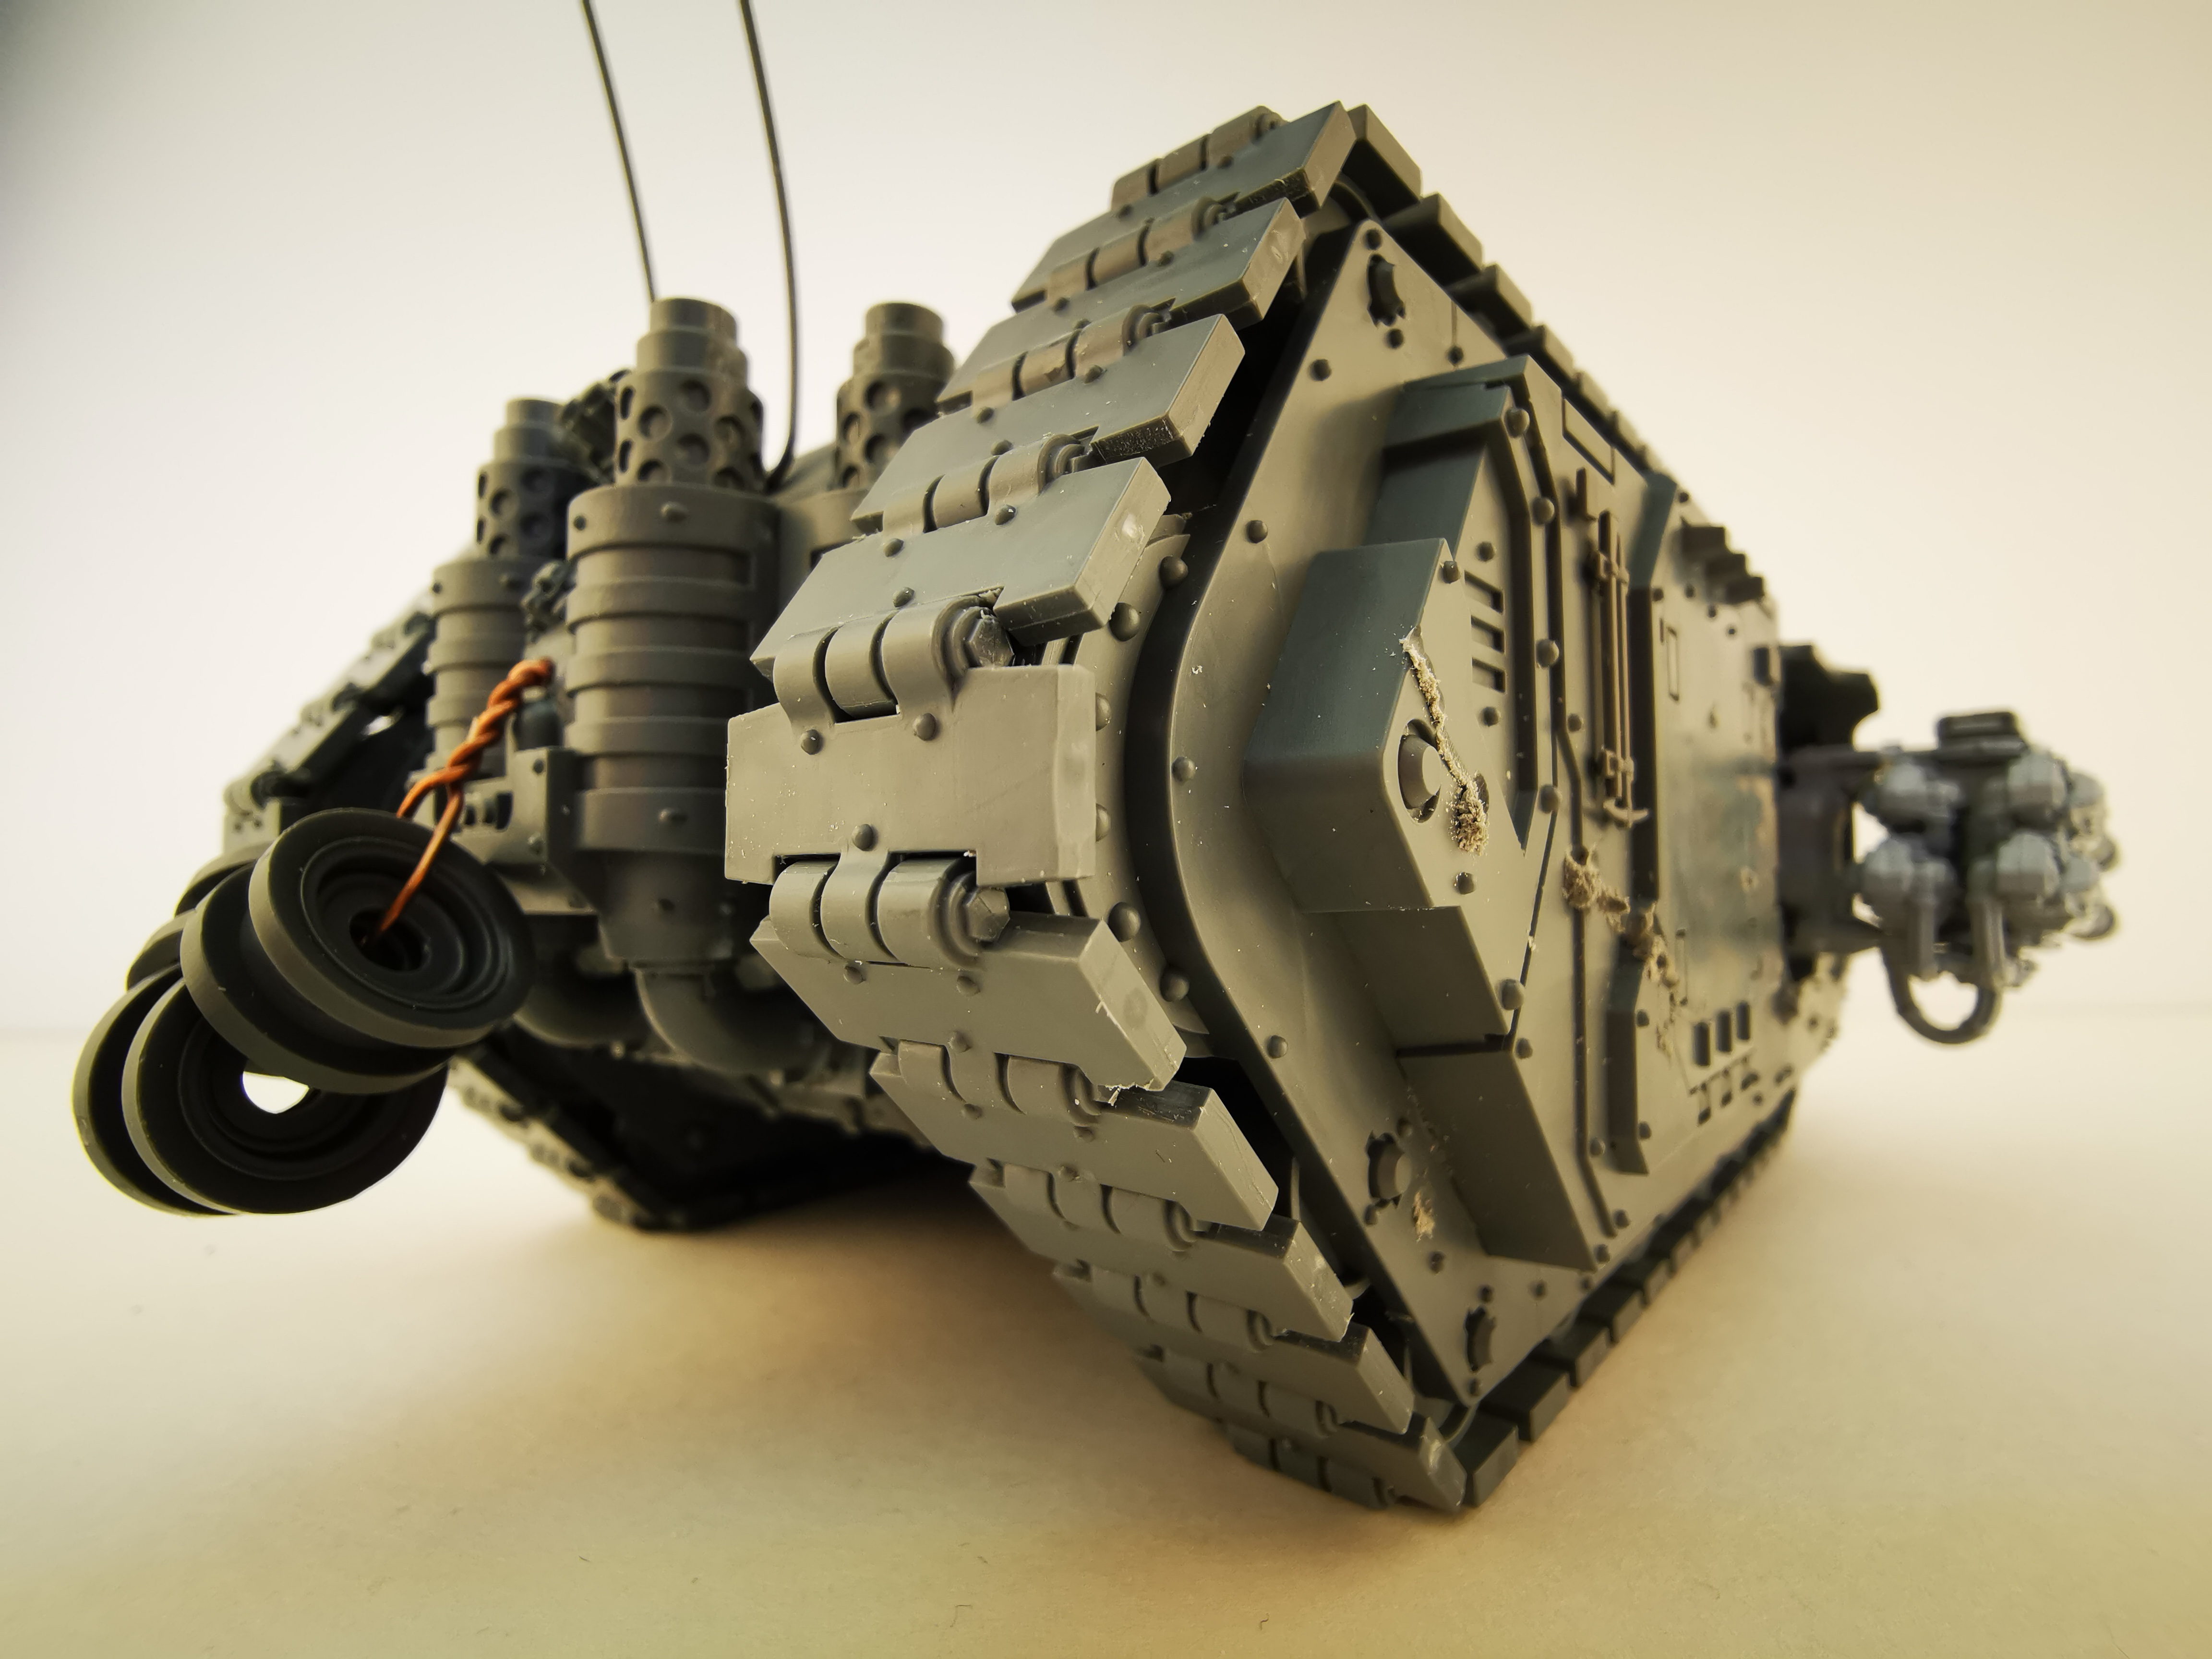
Damage
I gouged this up with a rotary tool, using various bits. I try to match the calibre of the rounds that I imagine are being used to the diameter of the drill bit I’m doing the damage with. This way, even if the drill accidentally skips across the model, the damage will still feel authentic. Shells like to skim across armour plates, after all!
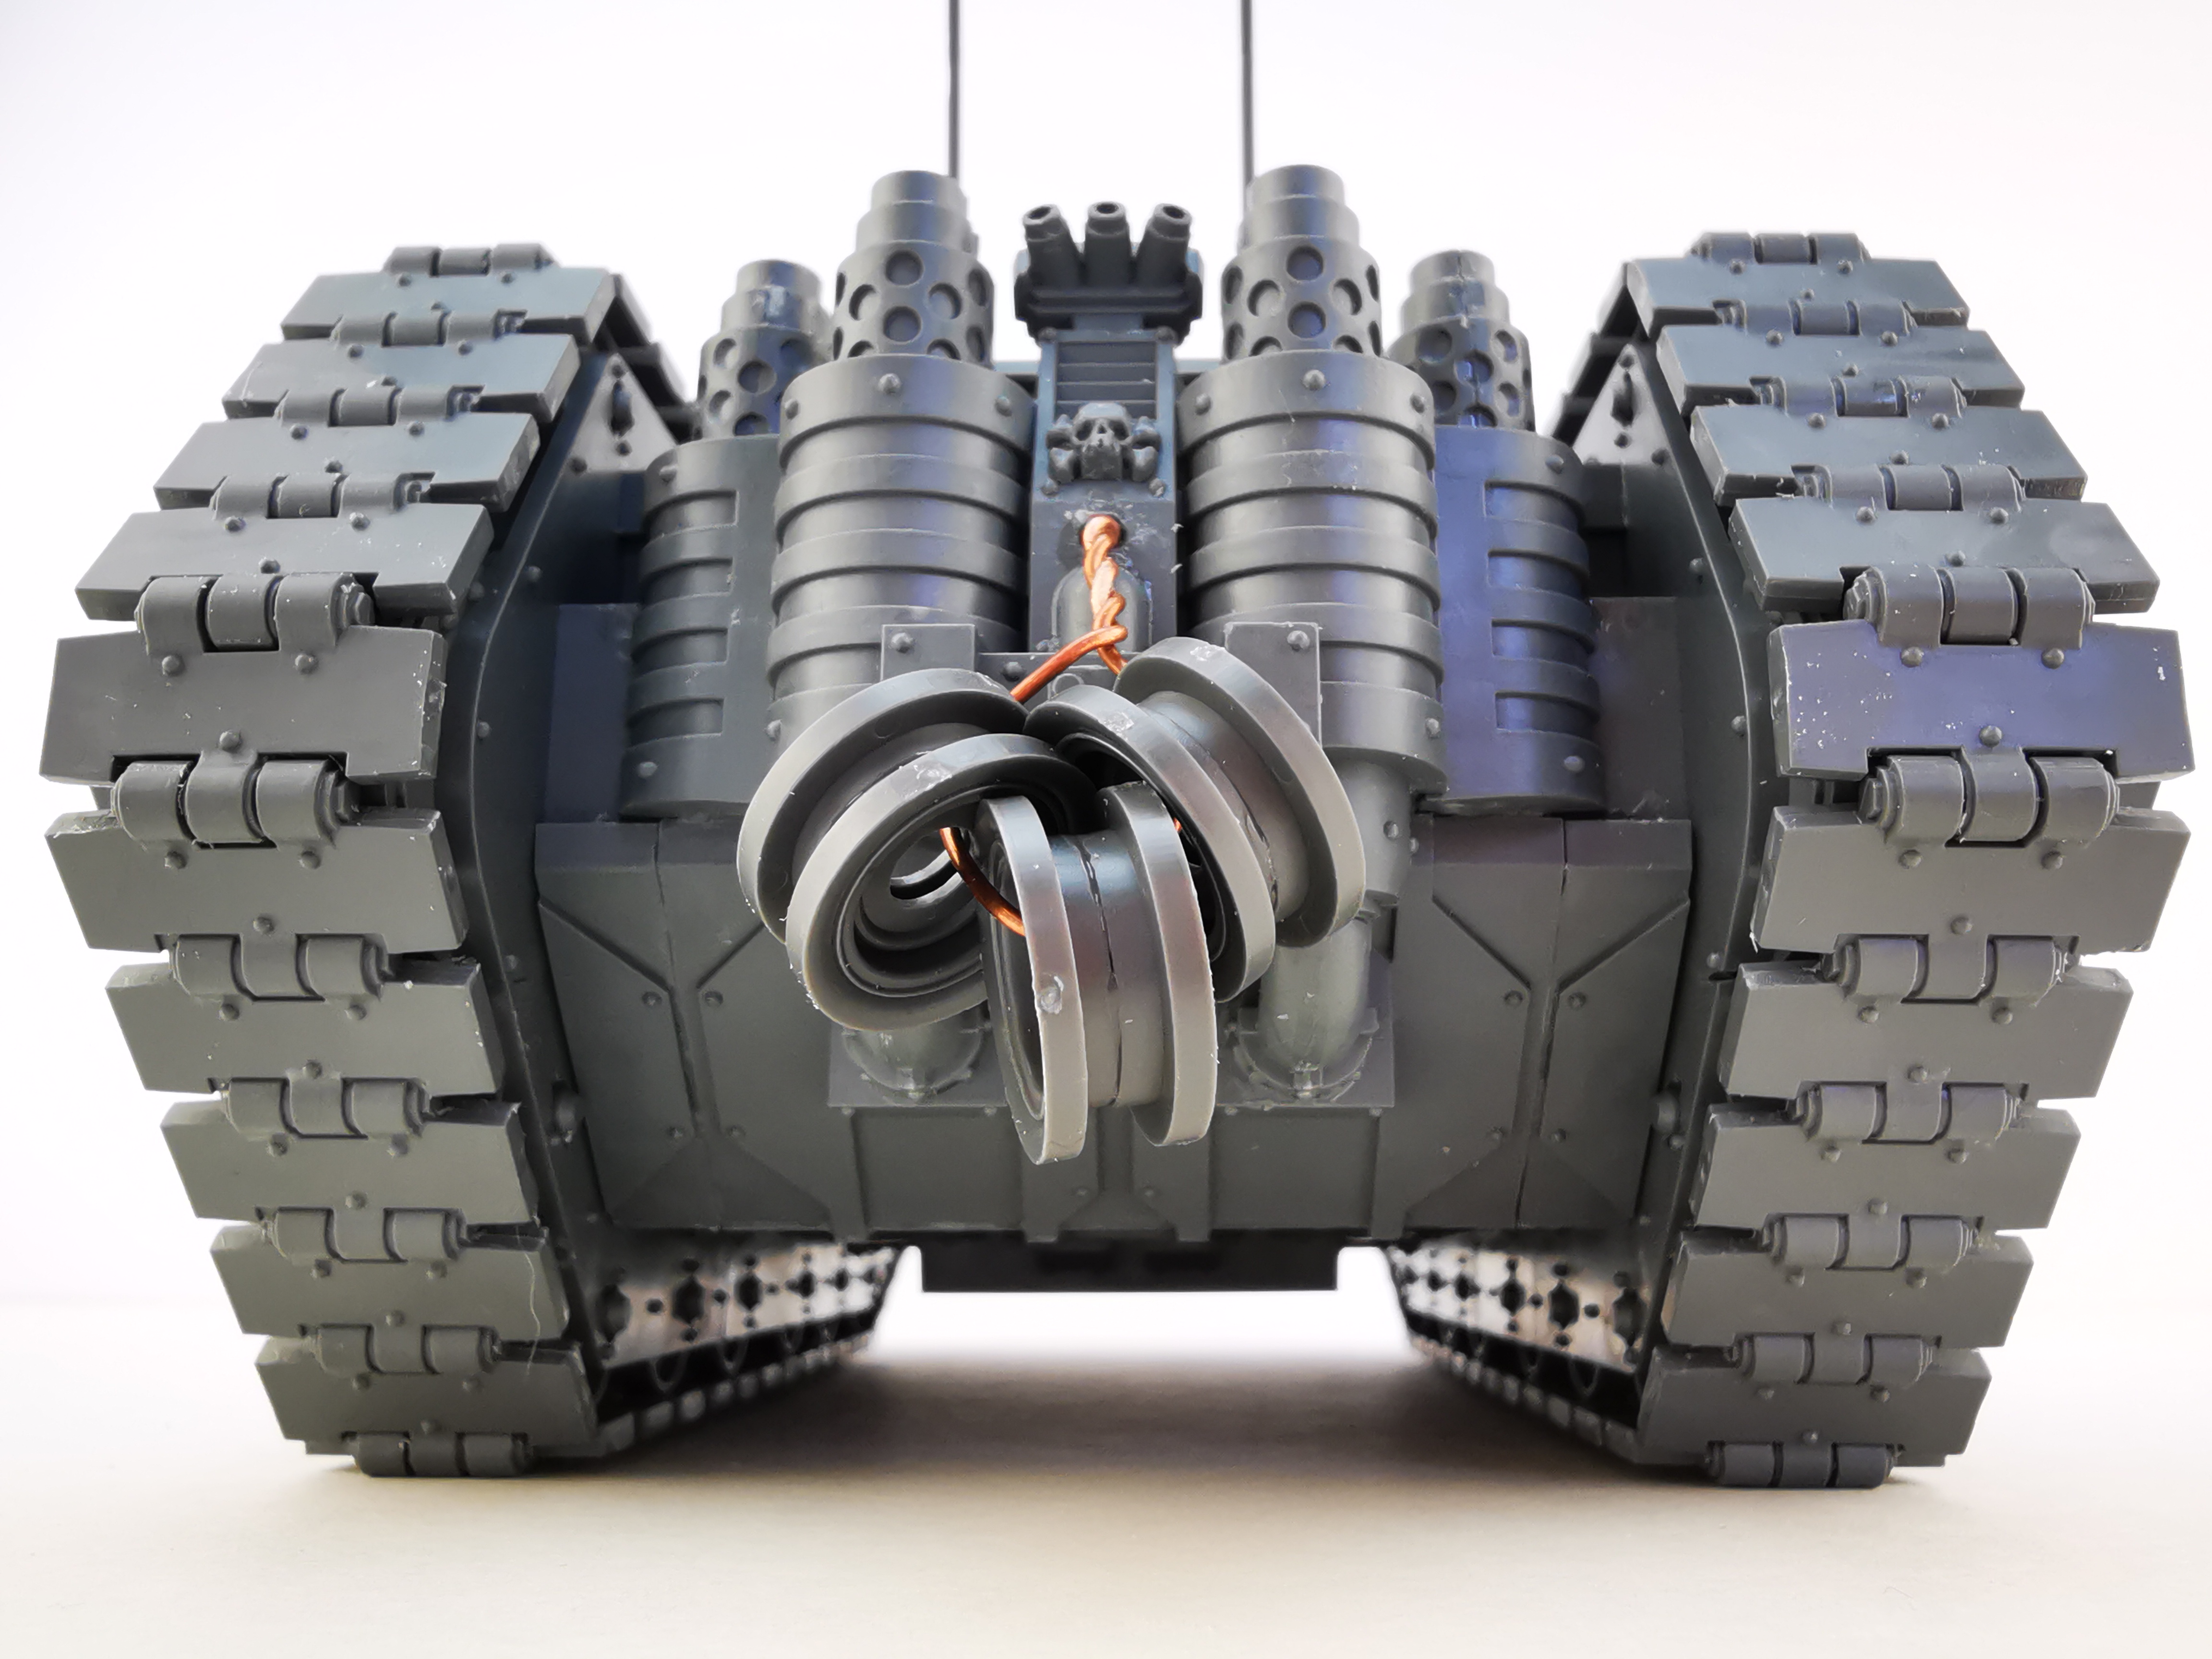
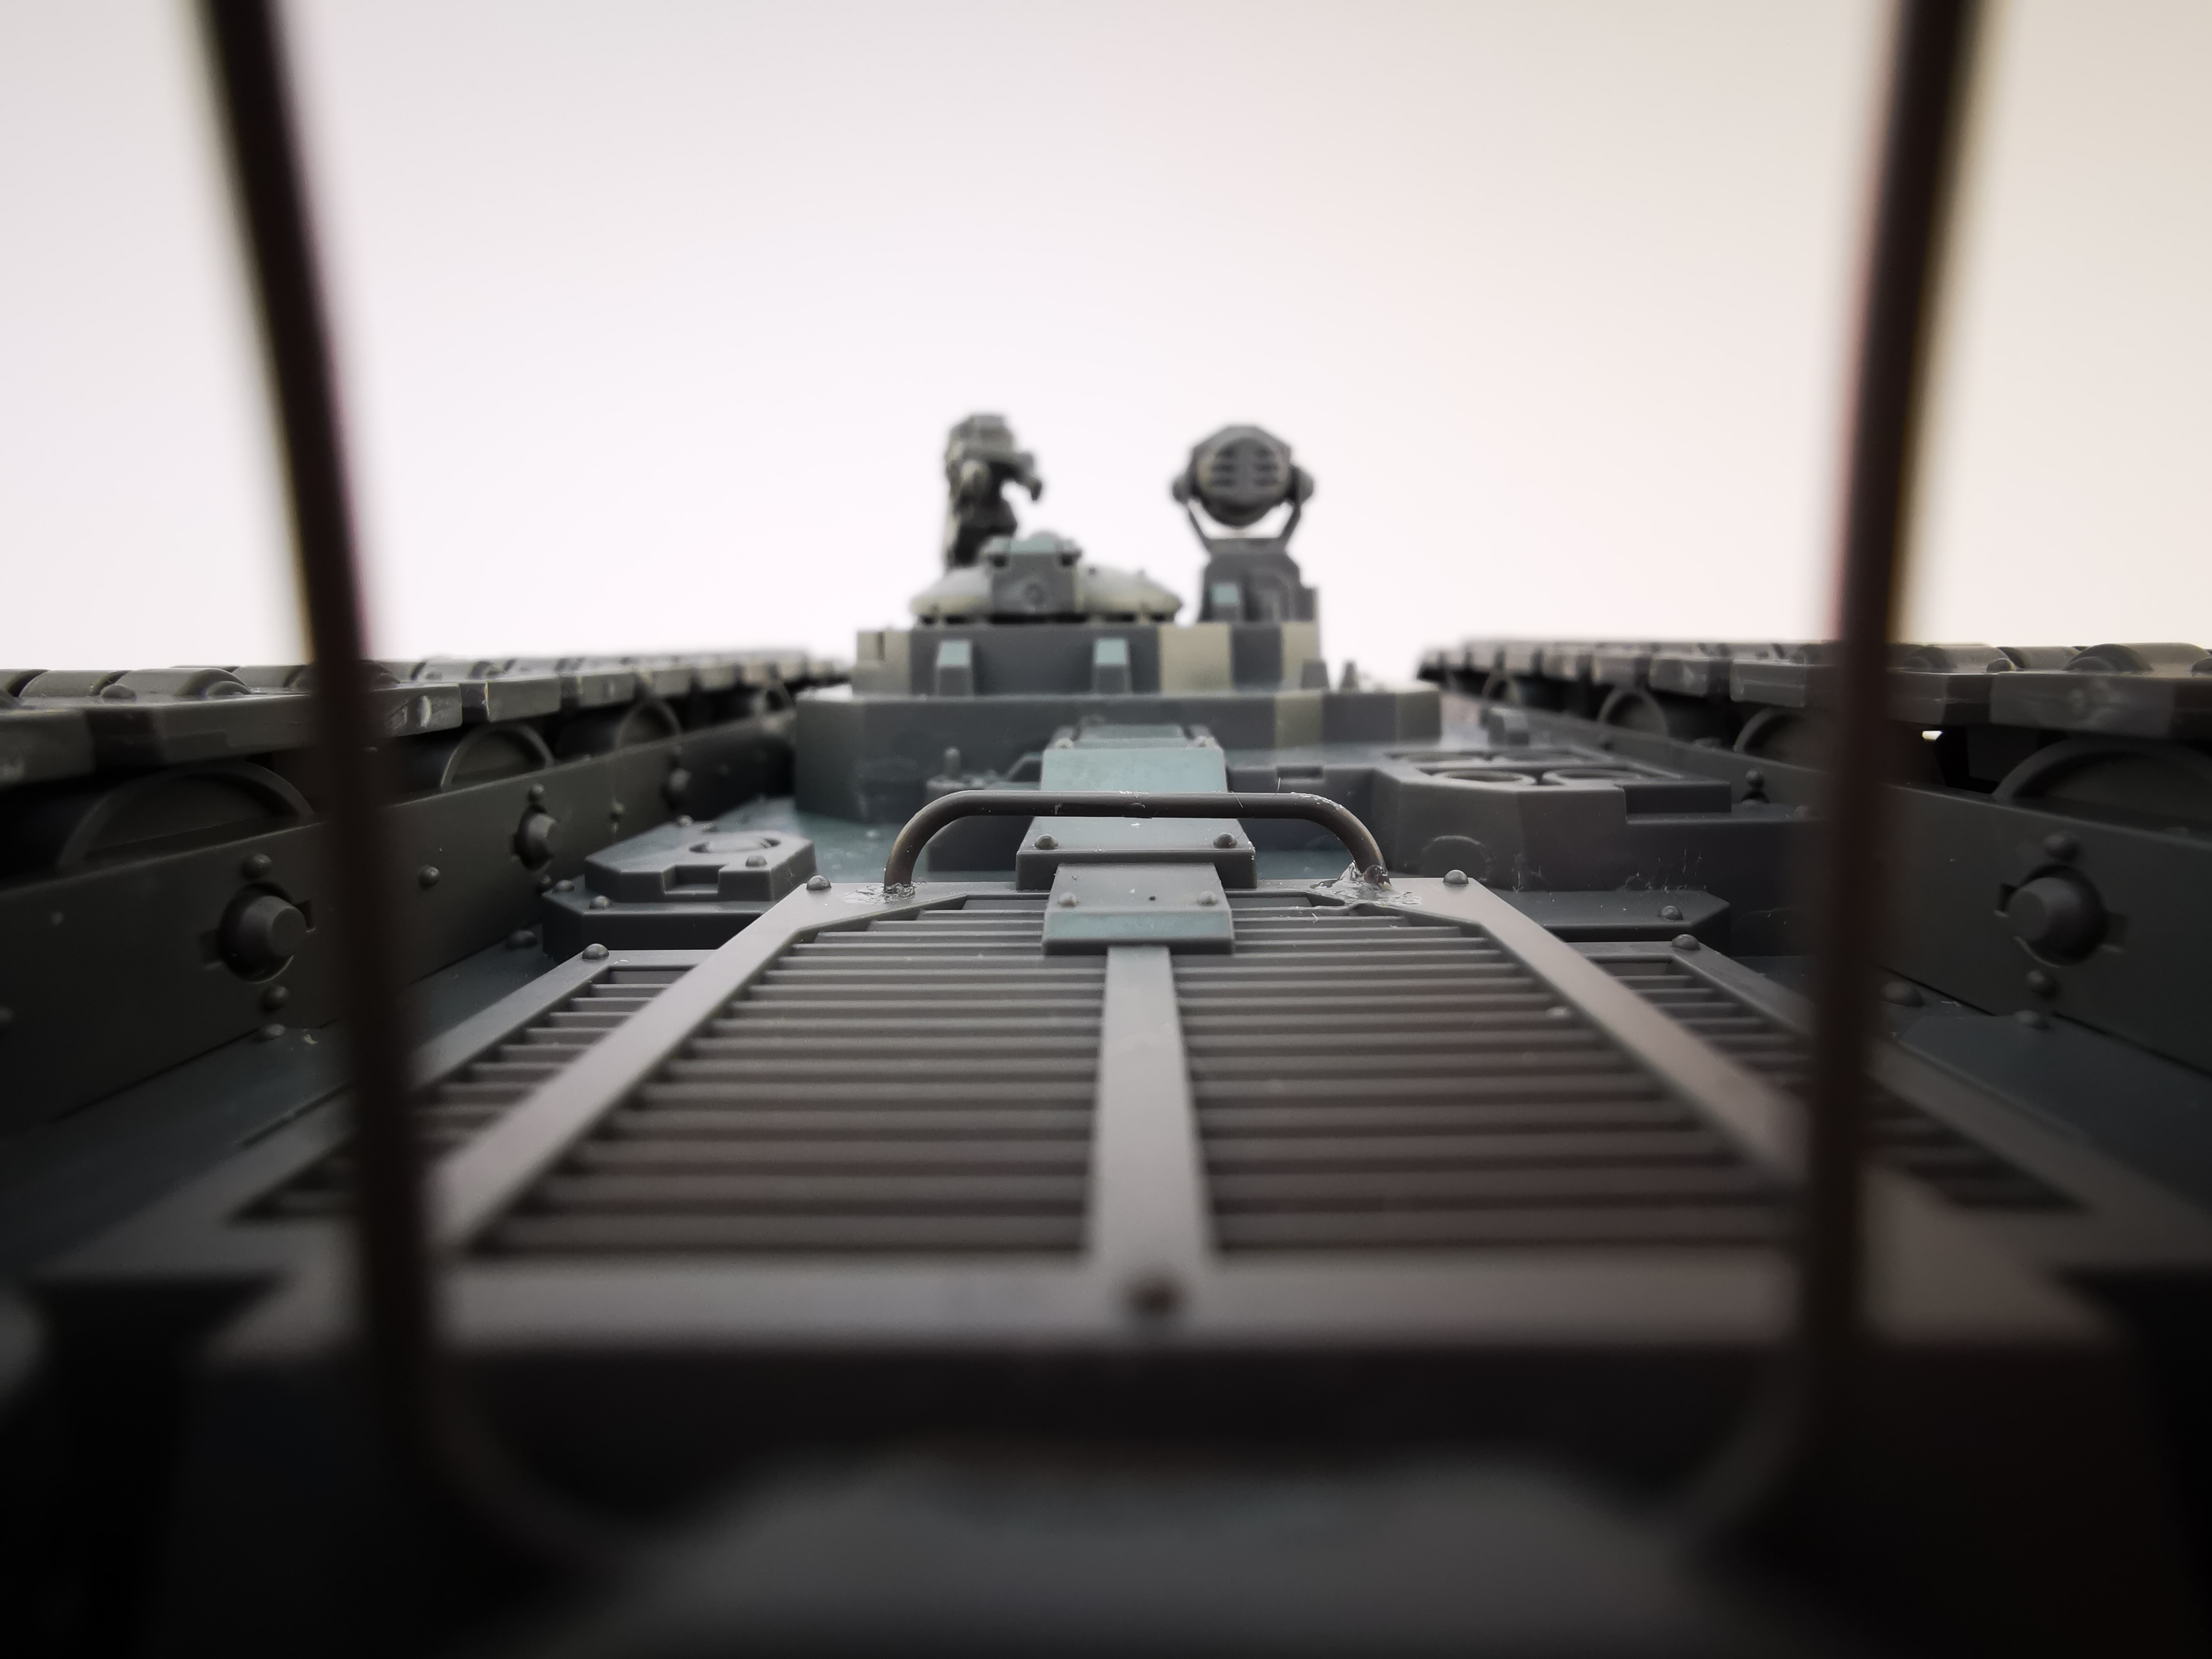
Radio antennae
Lightly curved copper wire, superglued into small holes drilled with a pin vice matched to the wire’s diameter. I usually replace the supplied antennae with most tank kits, as they’re often too thick and rigid.
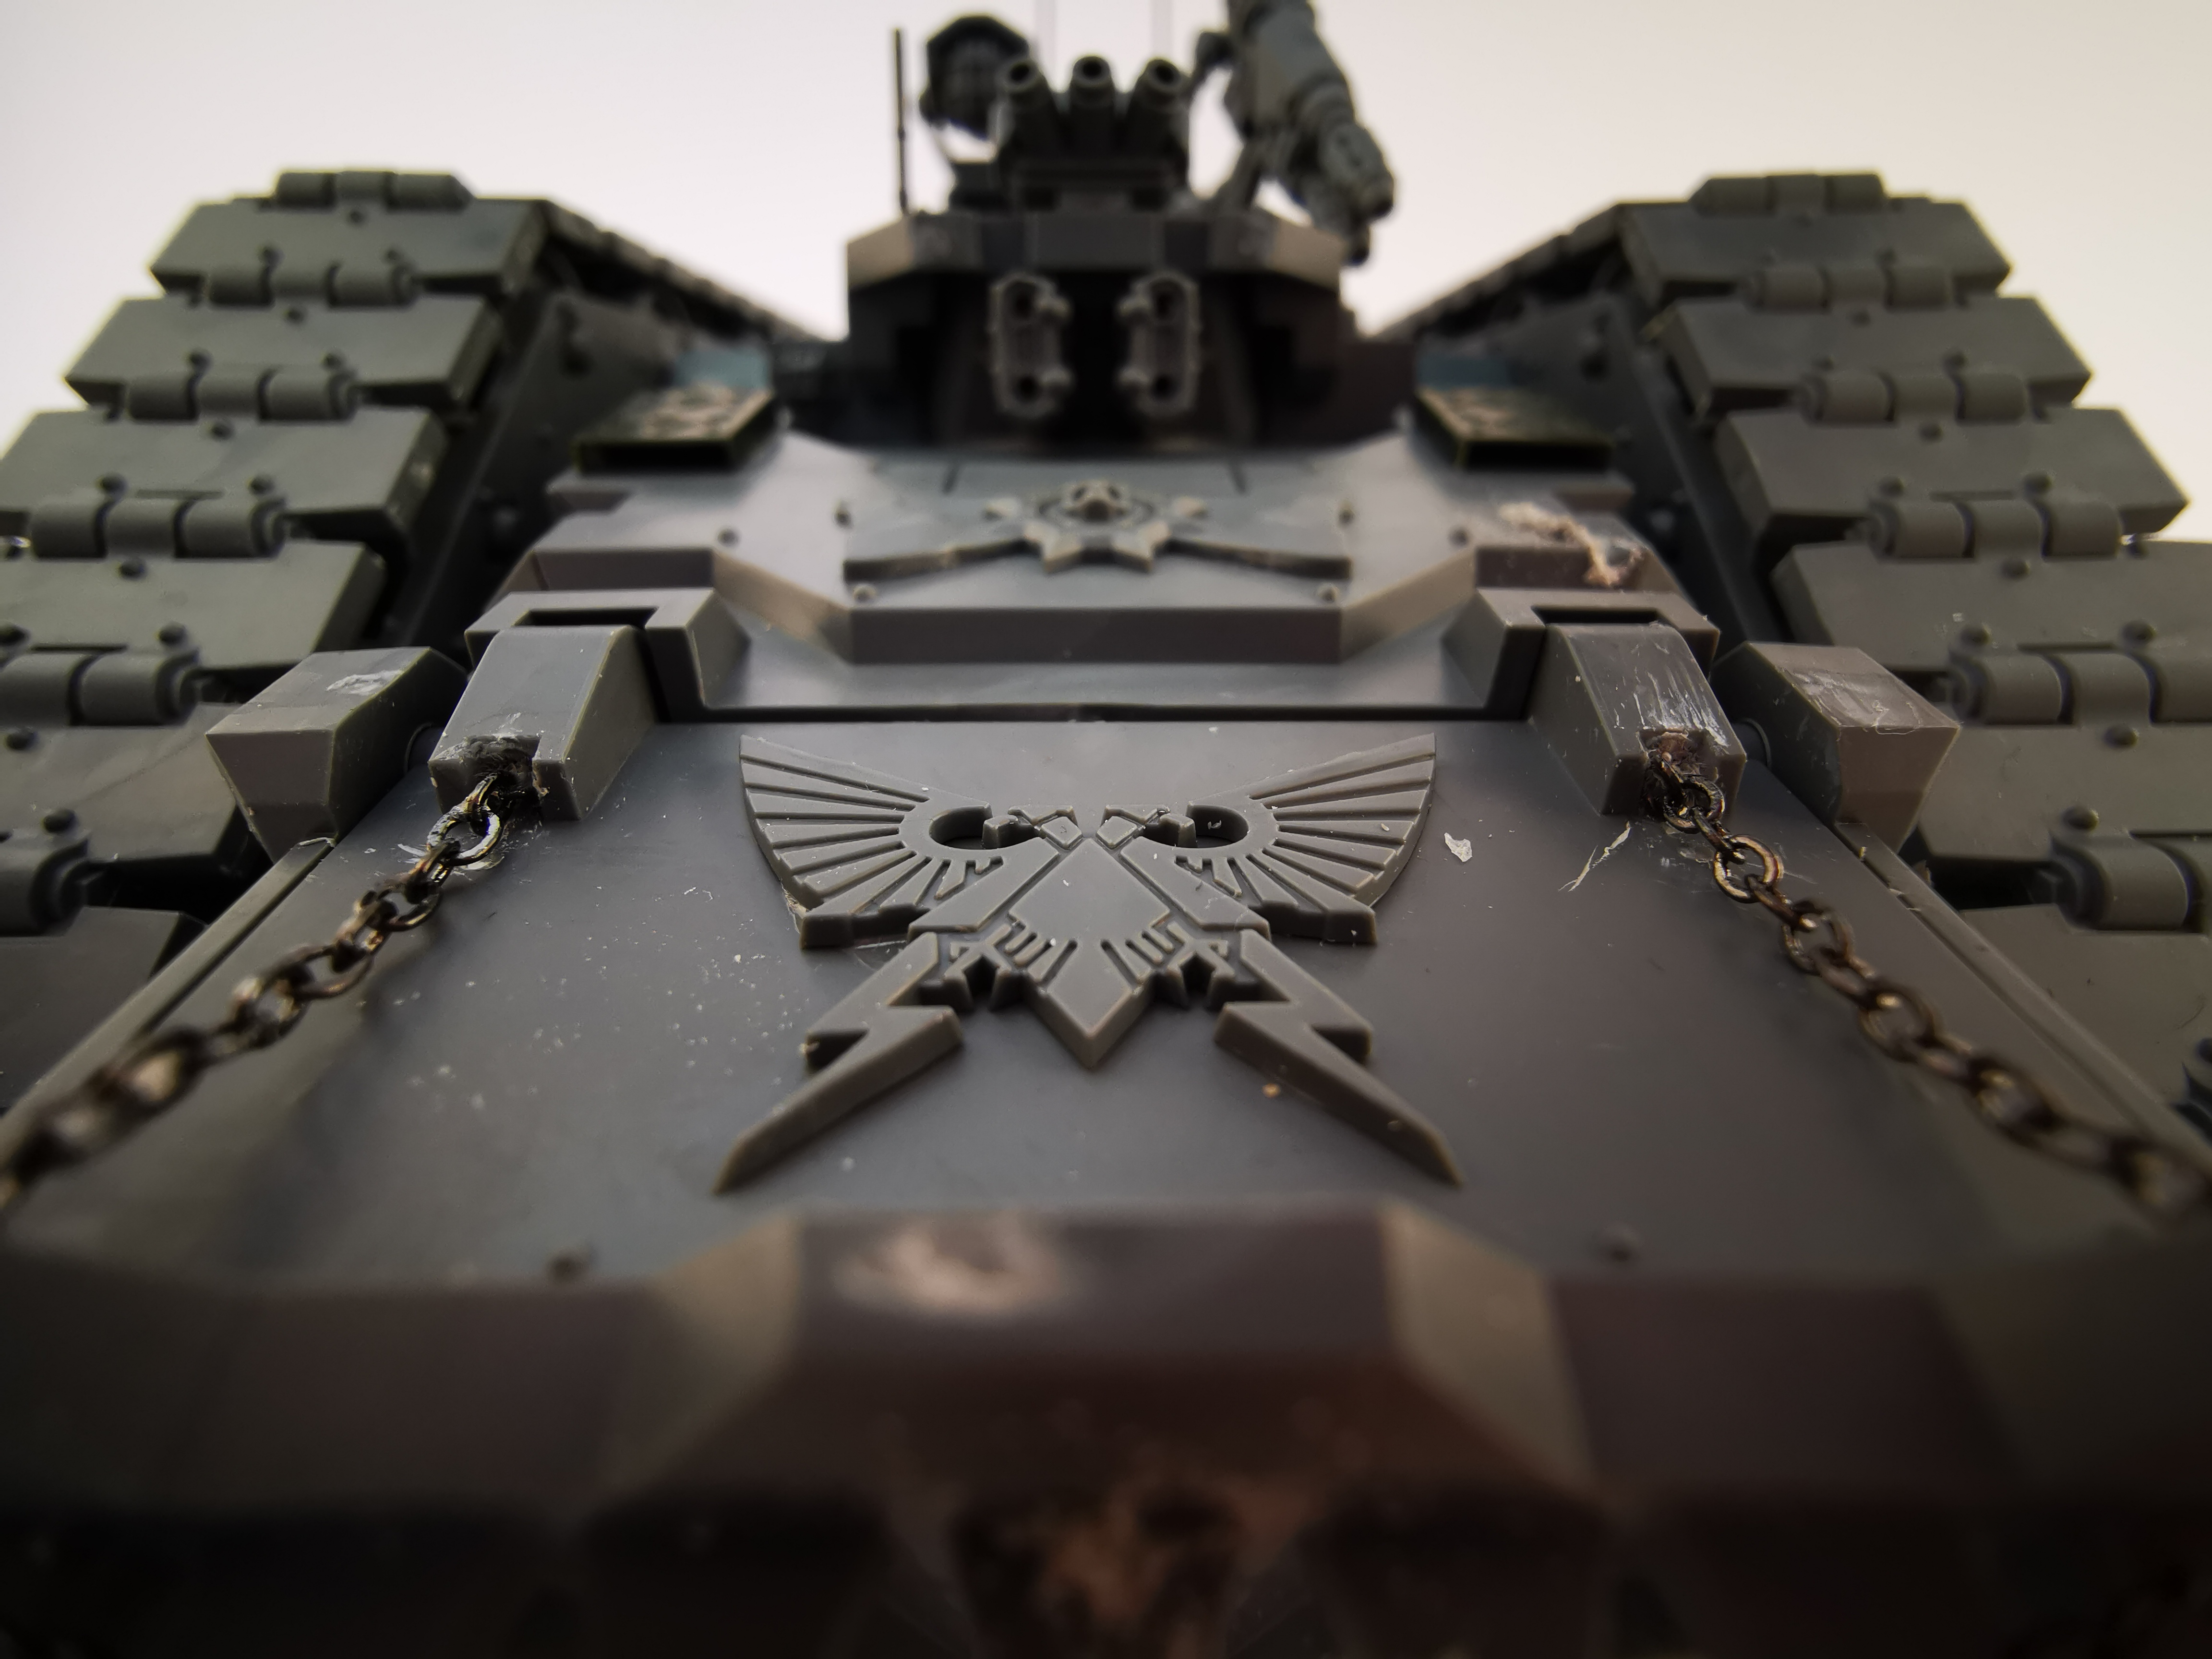
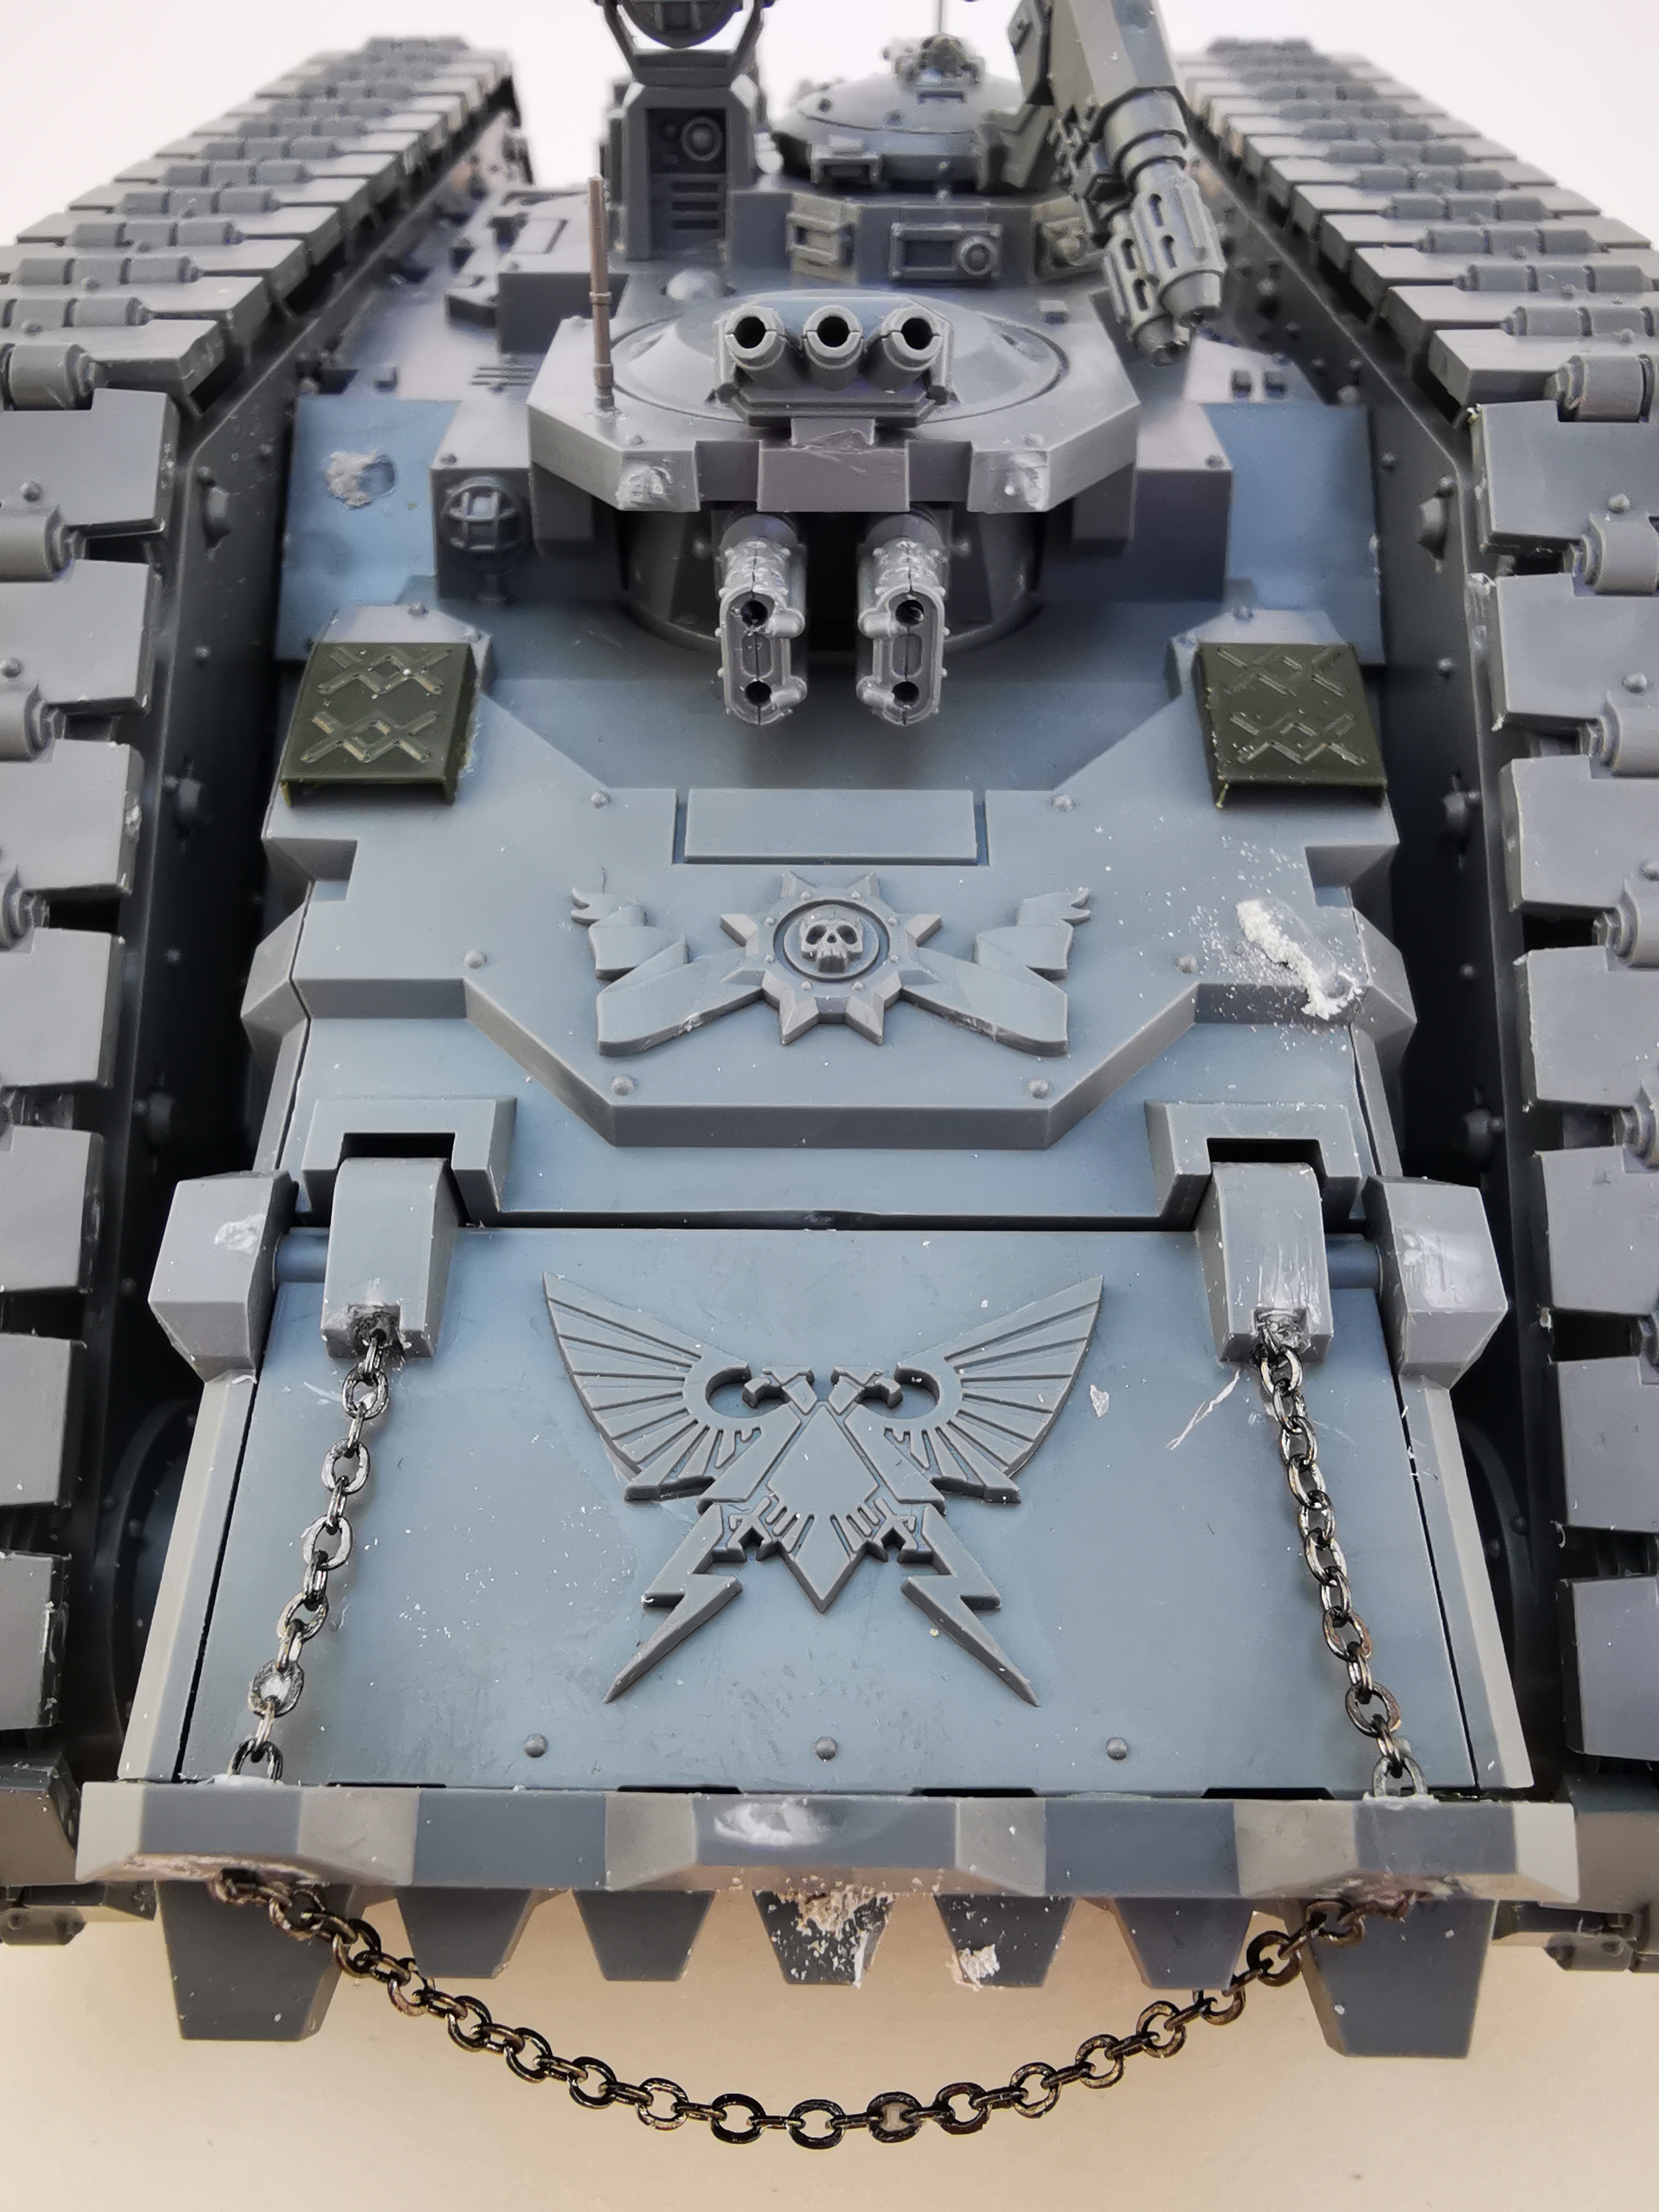
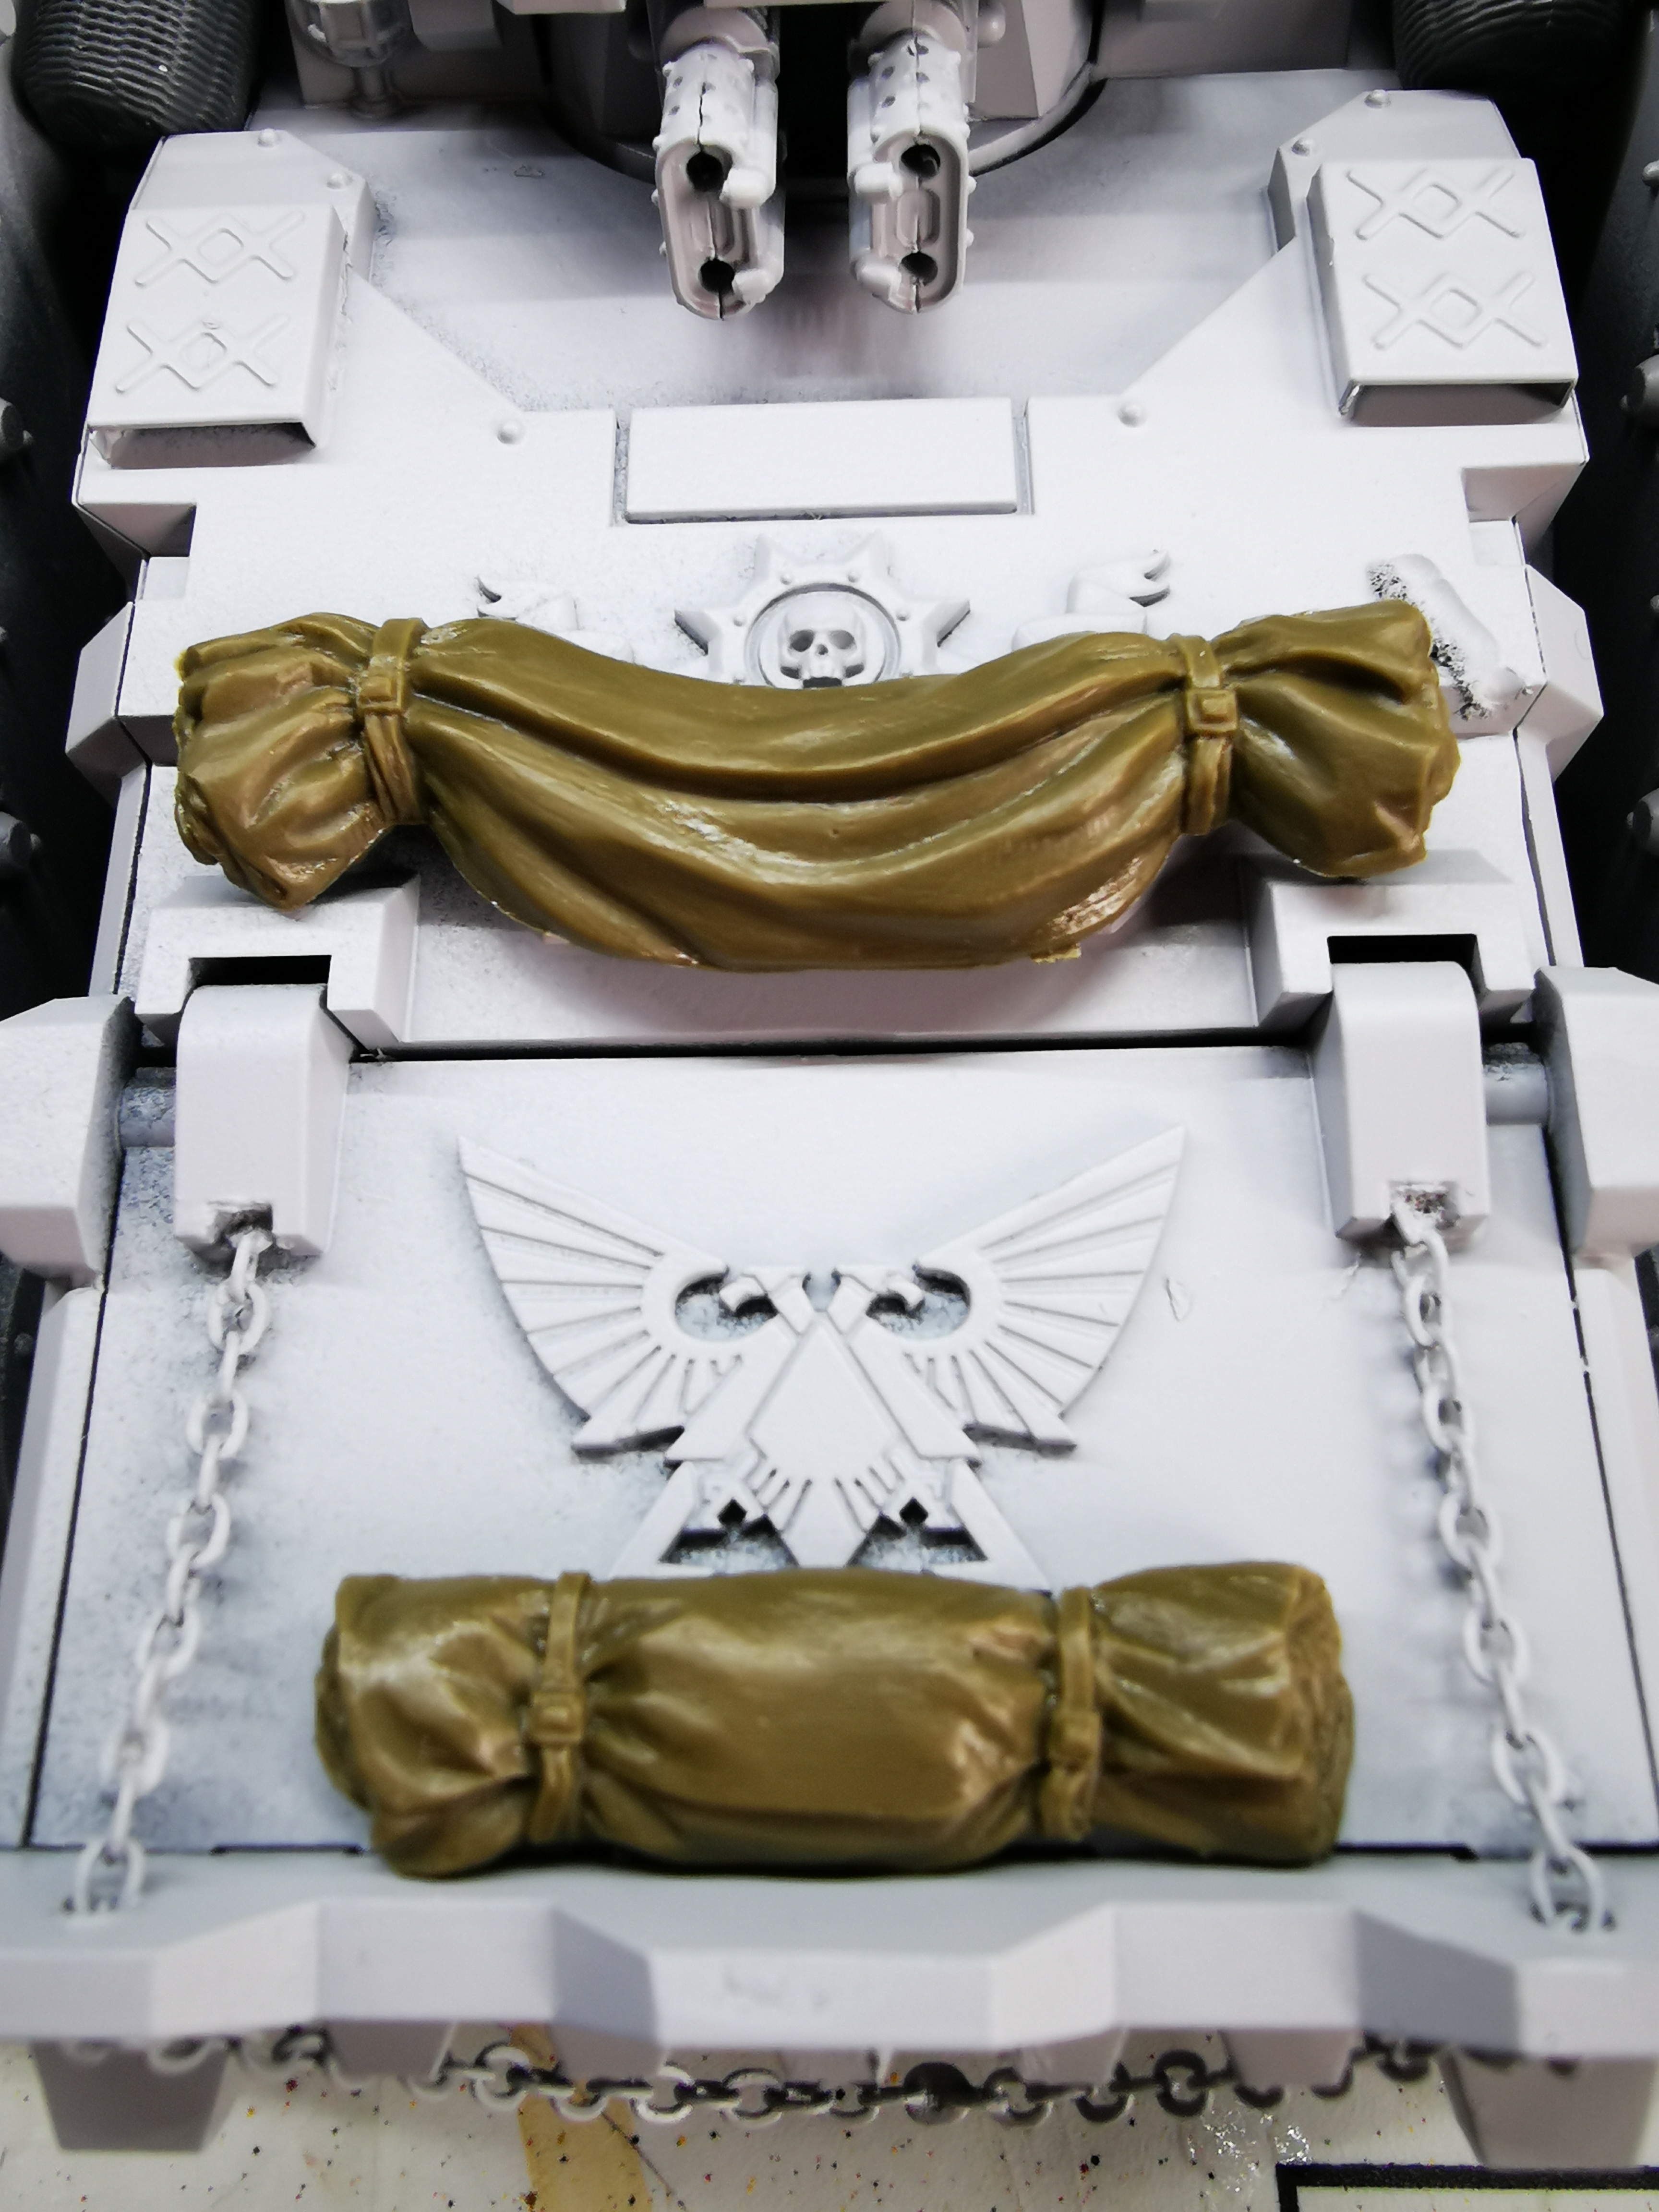
Chains, stowage, and accessories
I added some jewellery chains to the front hatch to add visual interest. Before I glued it all in place, this was actually a working system, and there was a satisfying noise of the chain moving when you opened or closed the hatch.
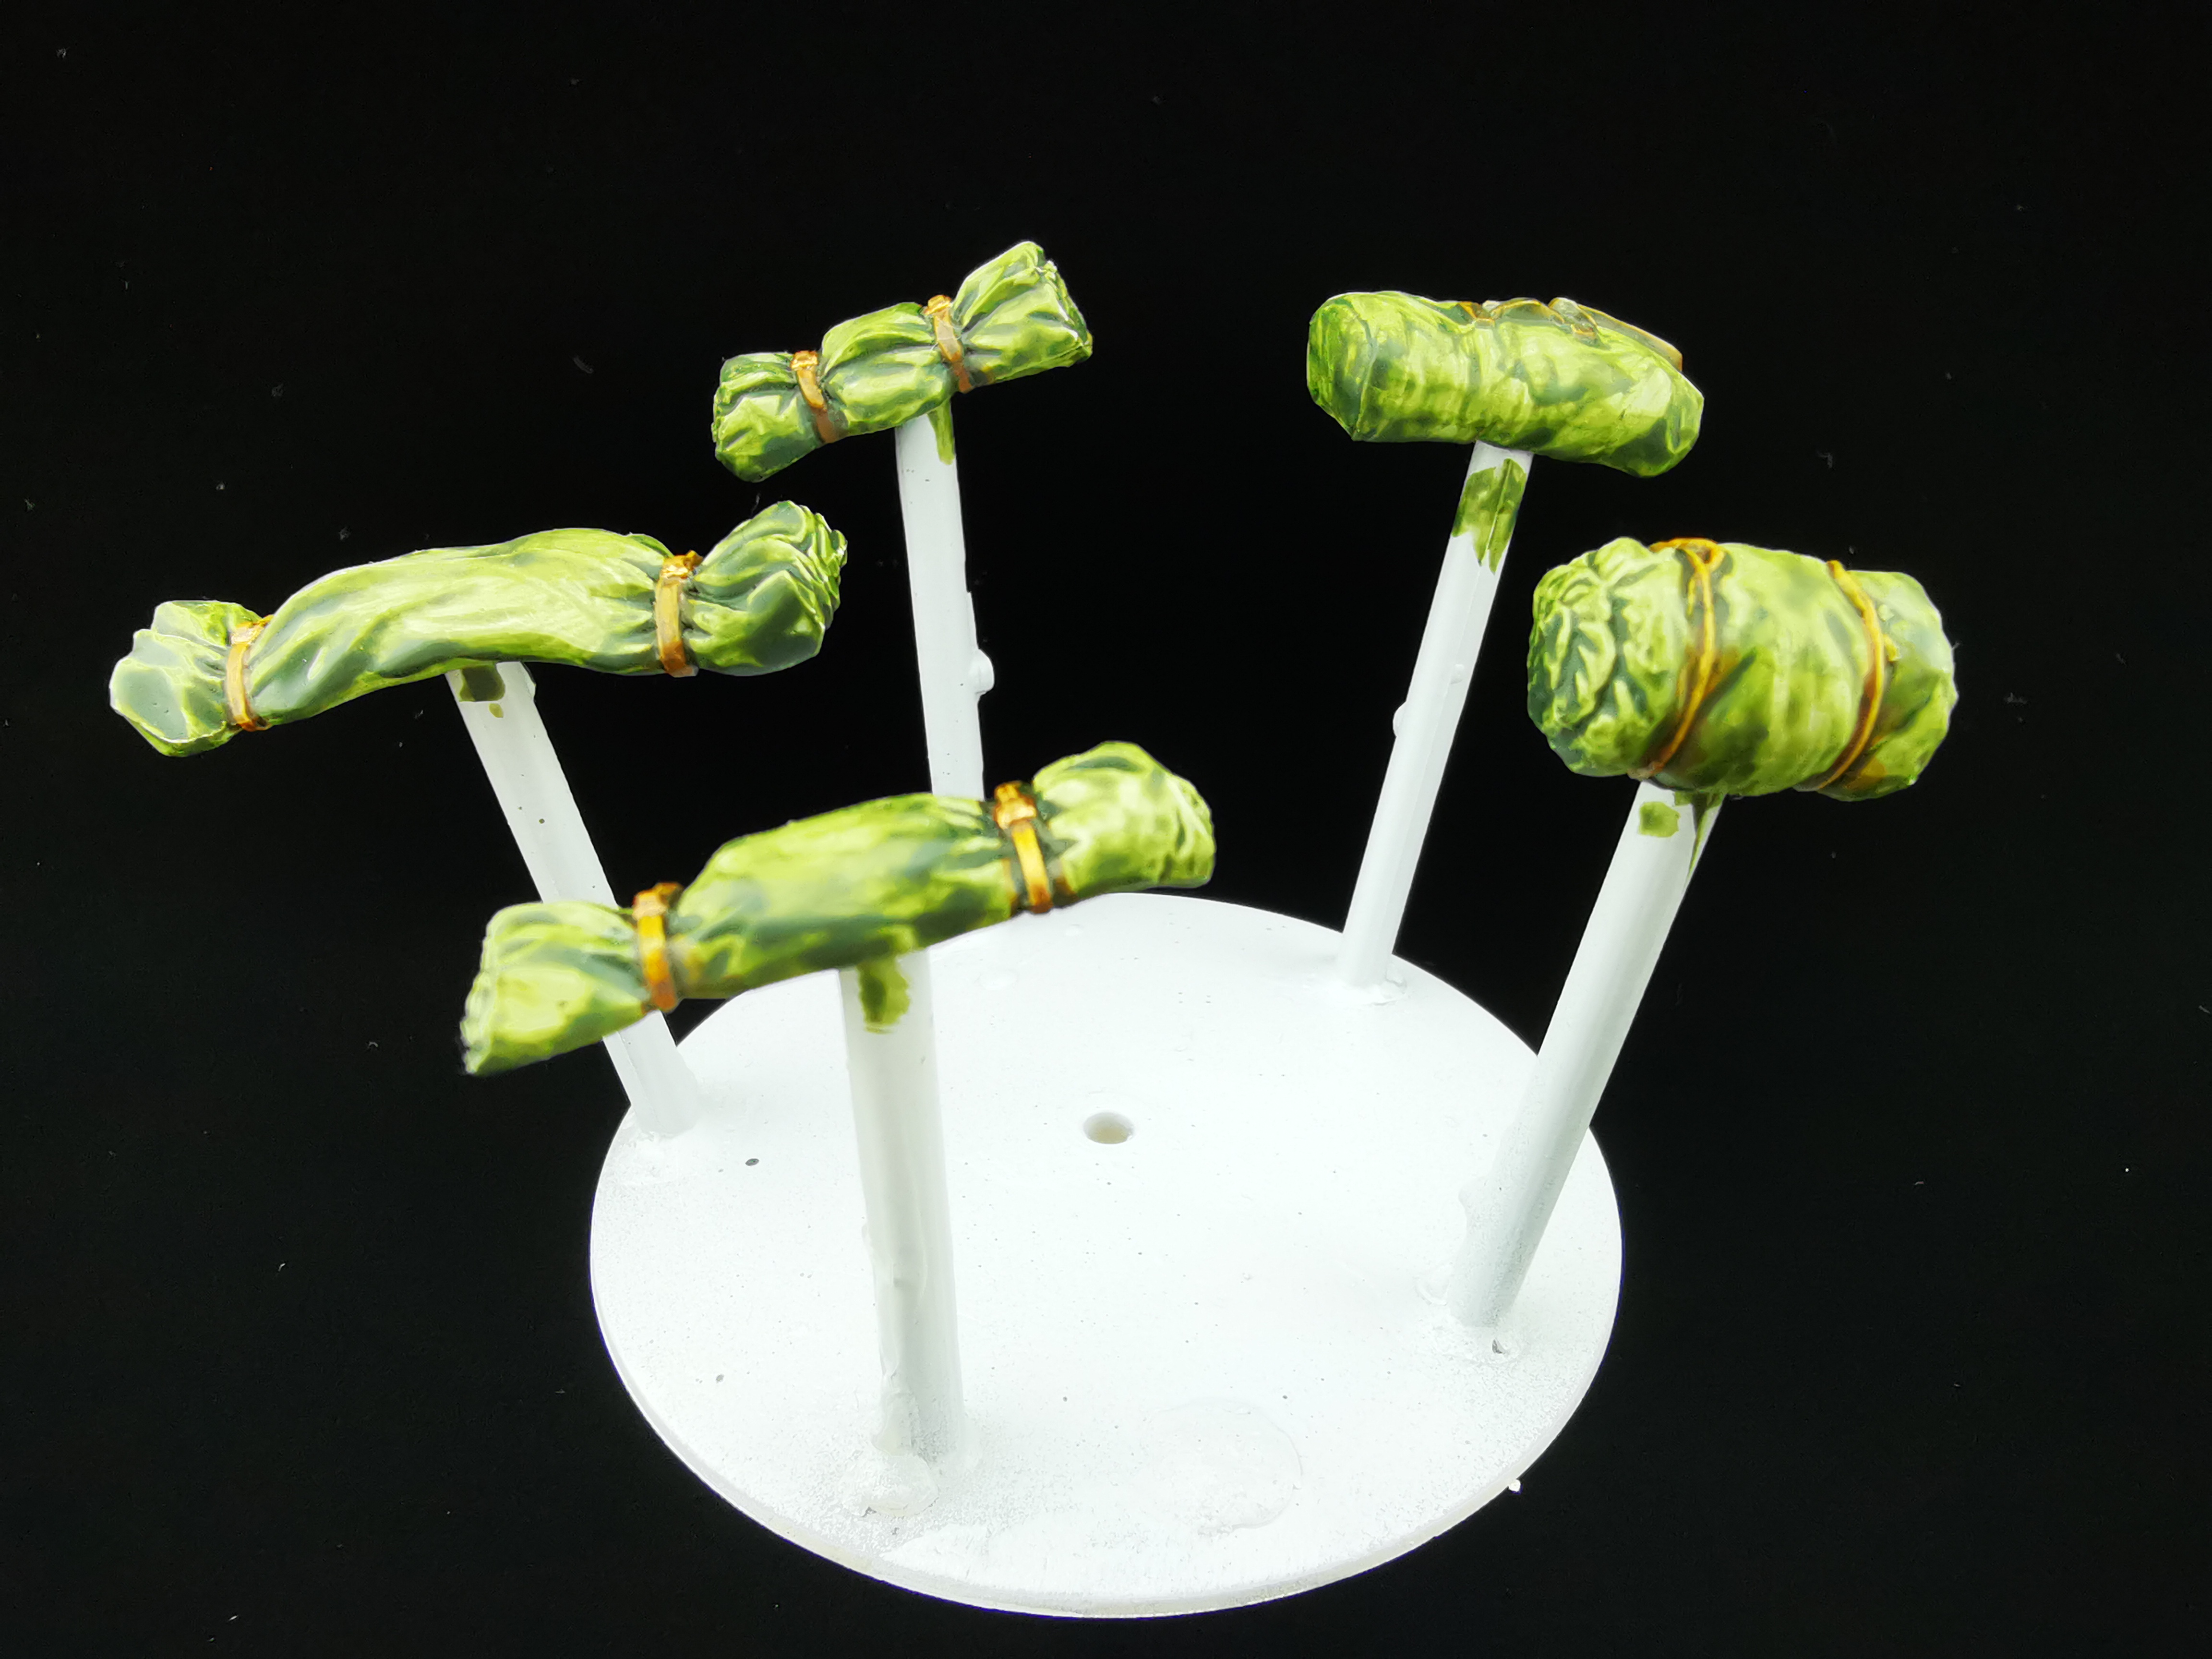
The stowage is from Tamiya’s 1:35 Allied Vehicles Accessory Set and works well, scale-wise.
The other small accessories, such as shovels and spare road wheels are from the 1:35 scale section of my bits box. While 1:46 better suits the Imperial Guard and other 28mm kits, I find that 1:35 works well with chunky Space Marines (and Orks).
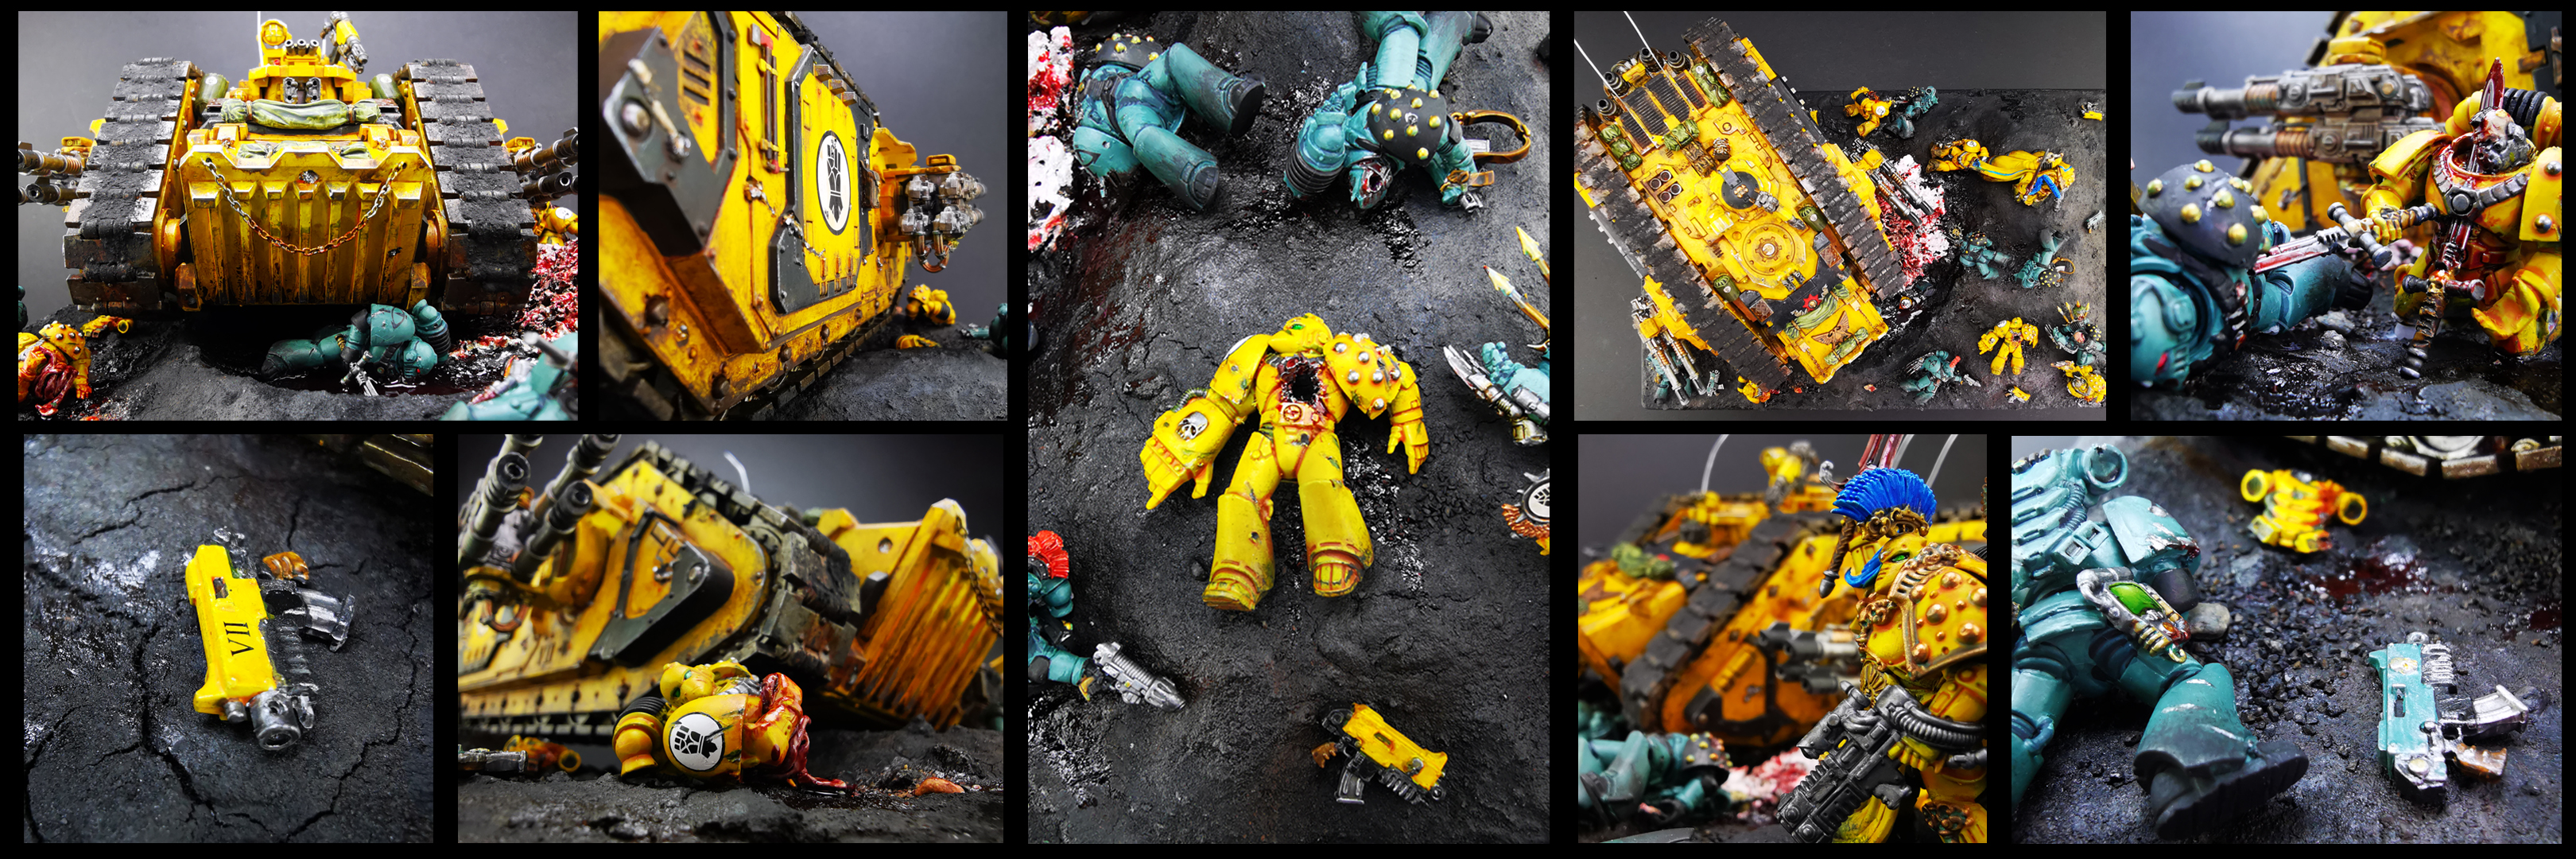
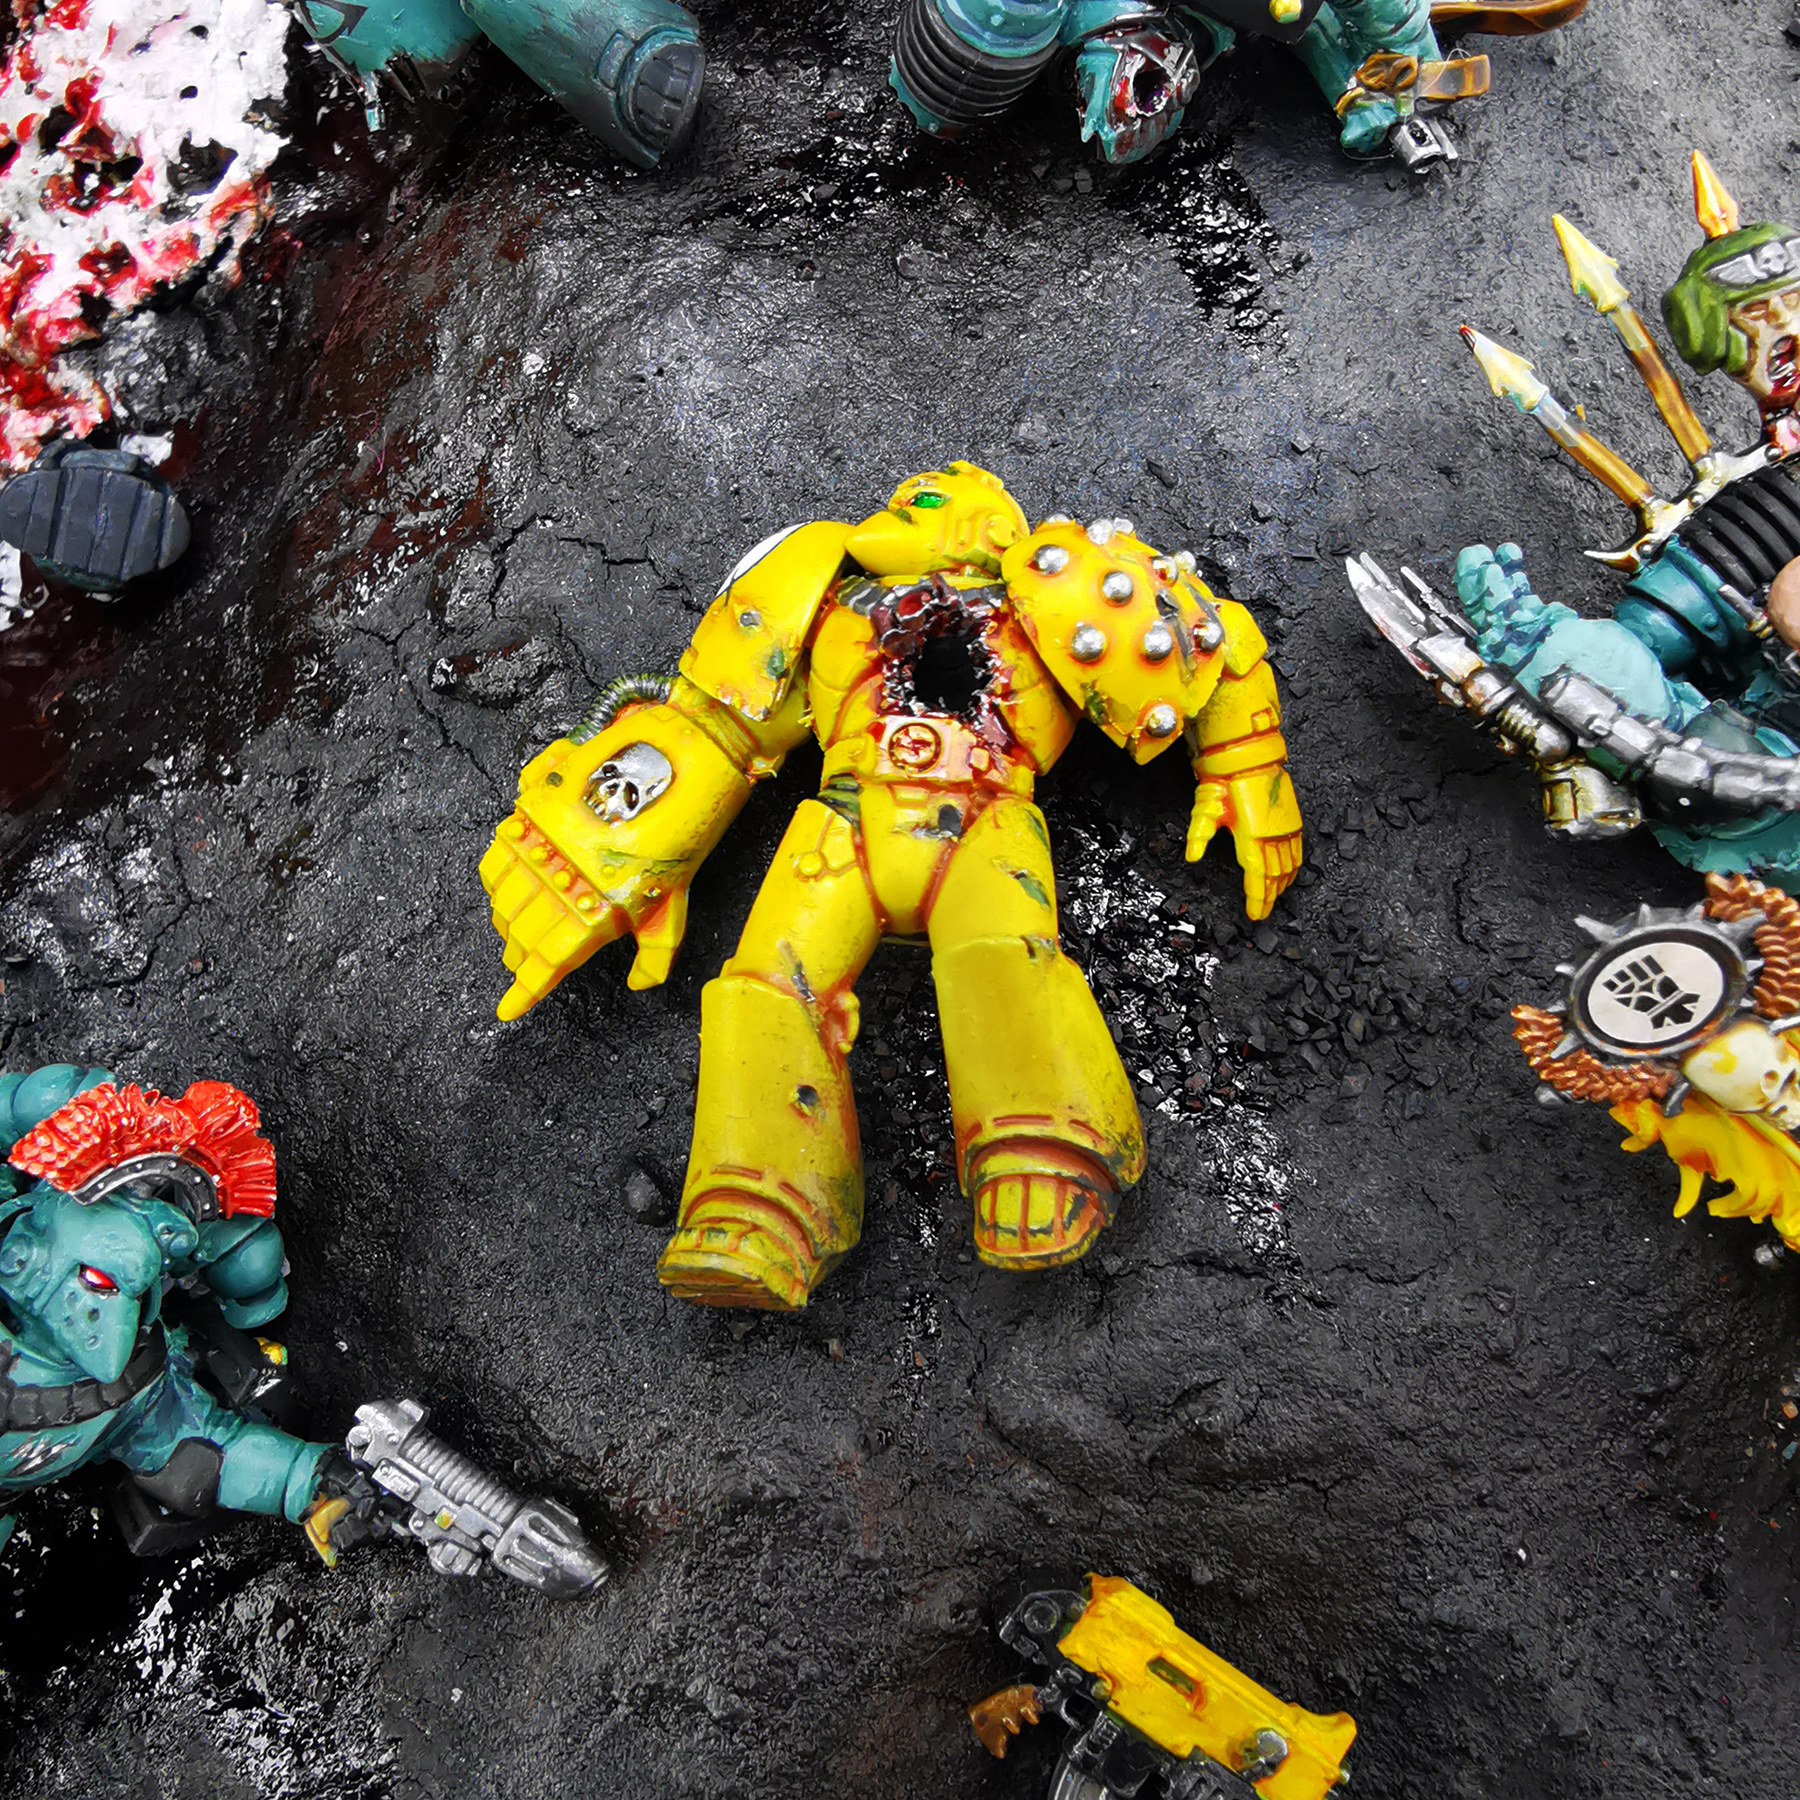
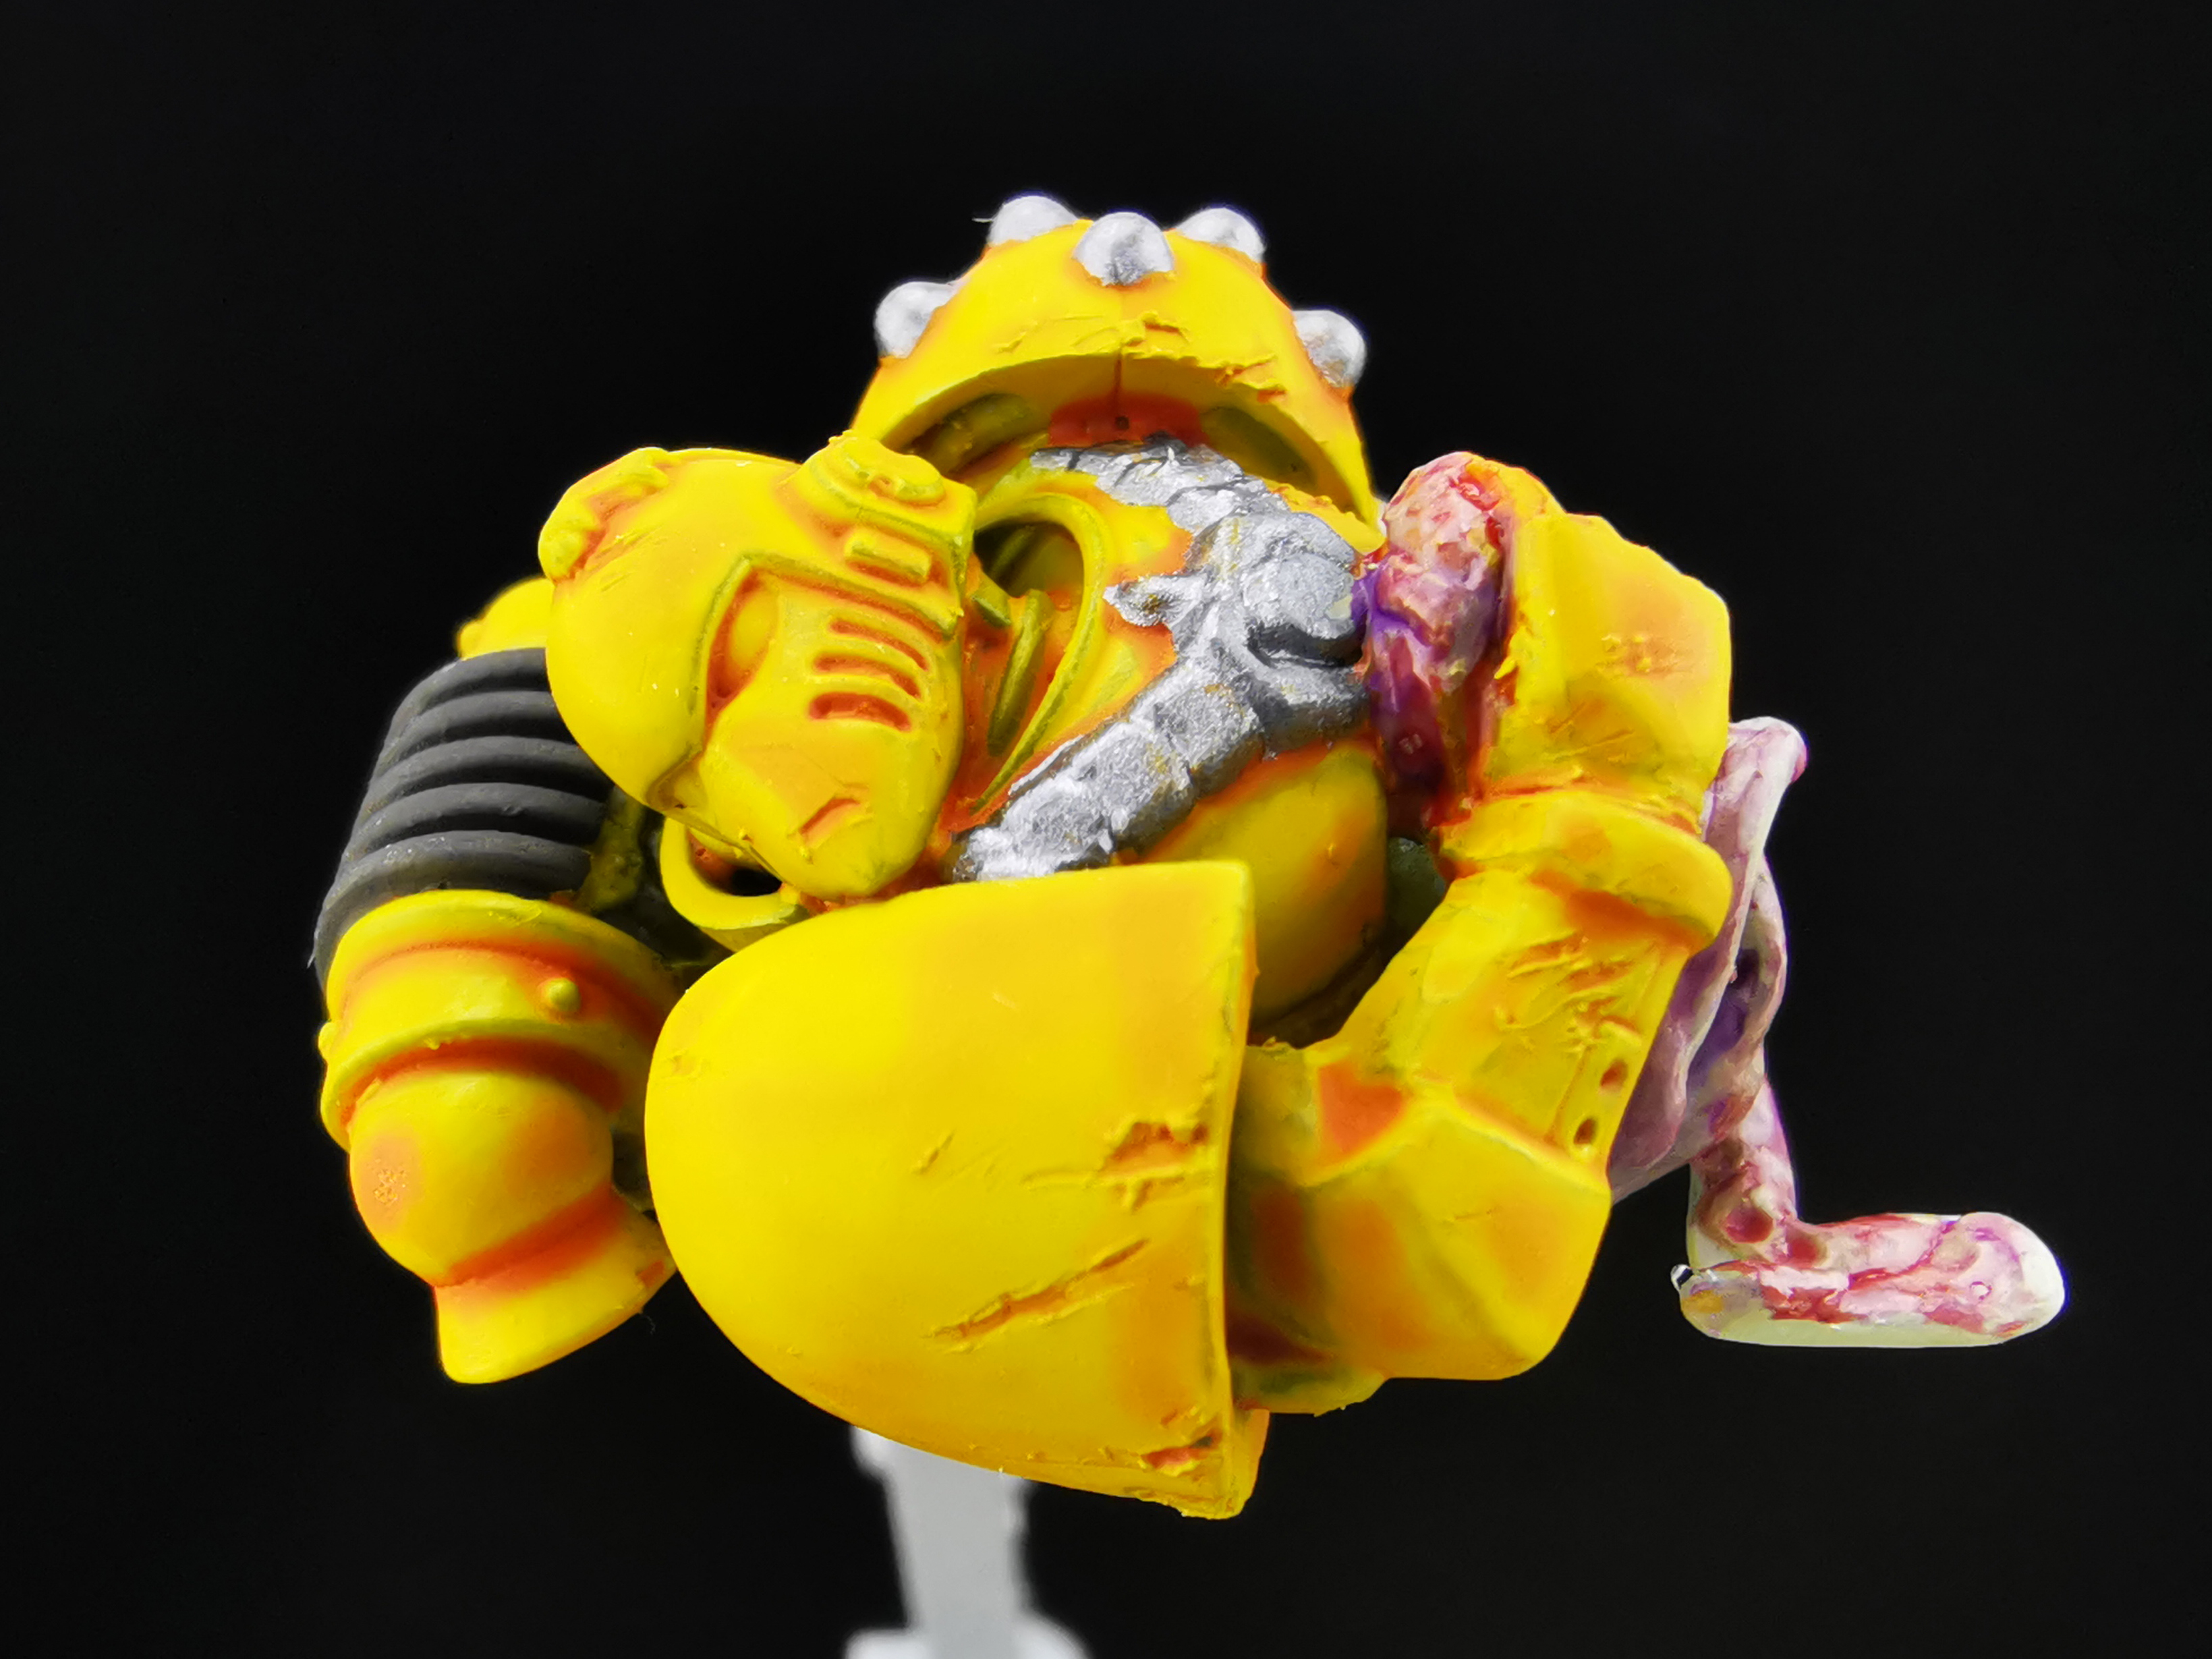
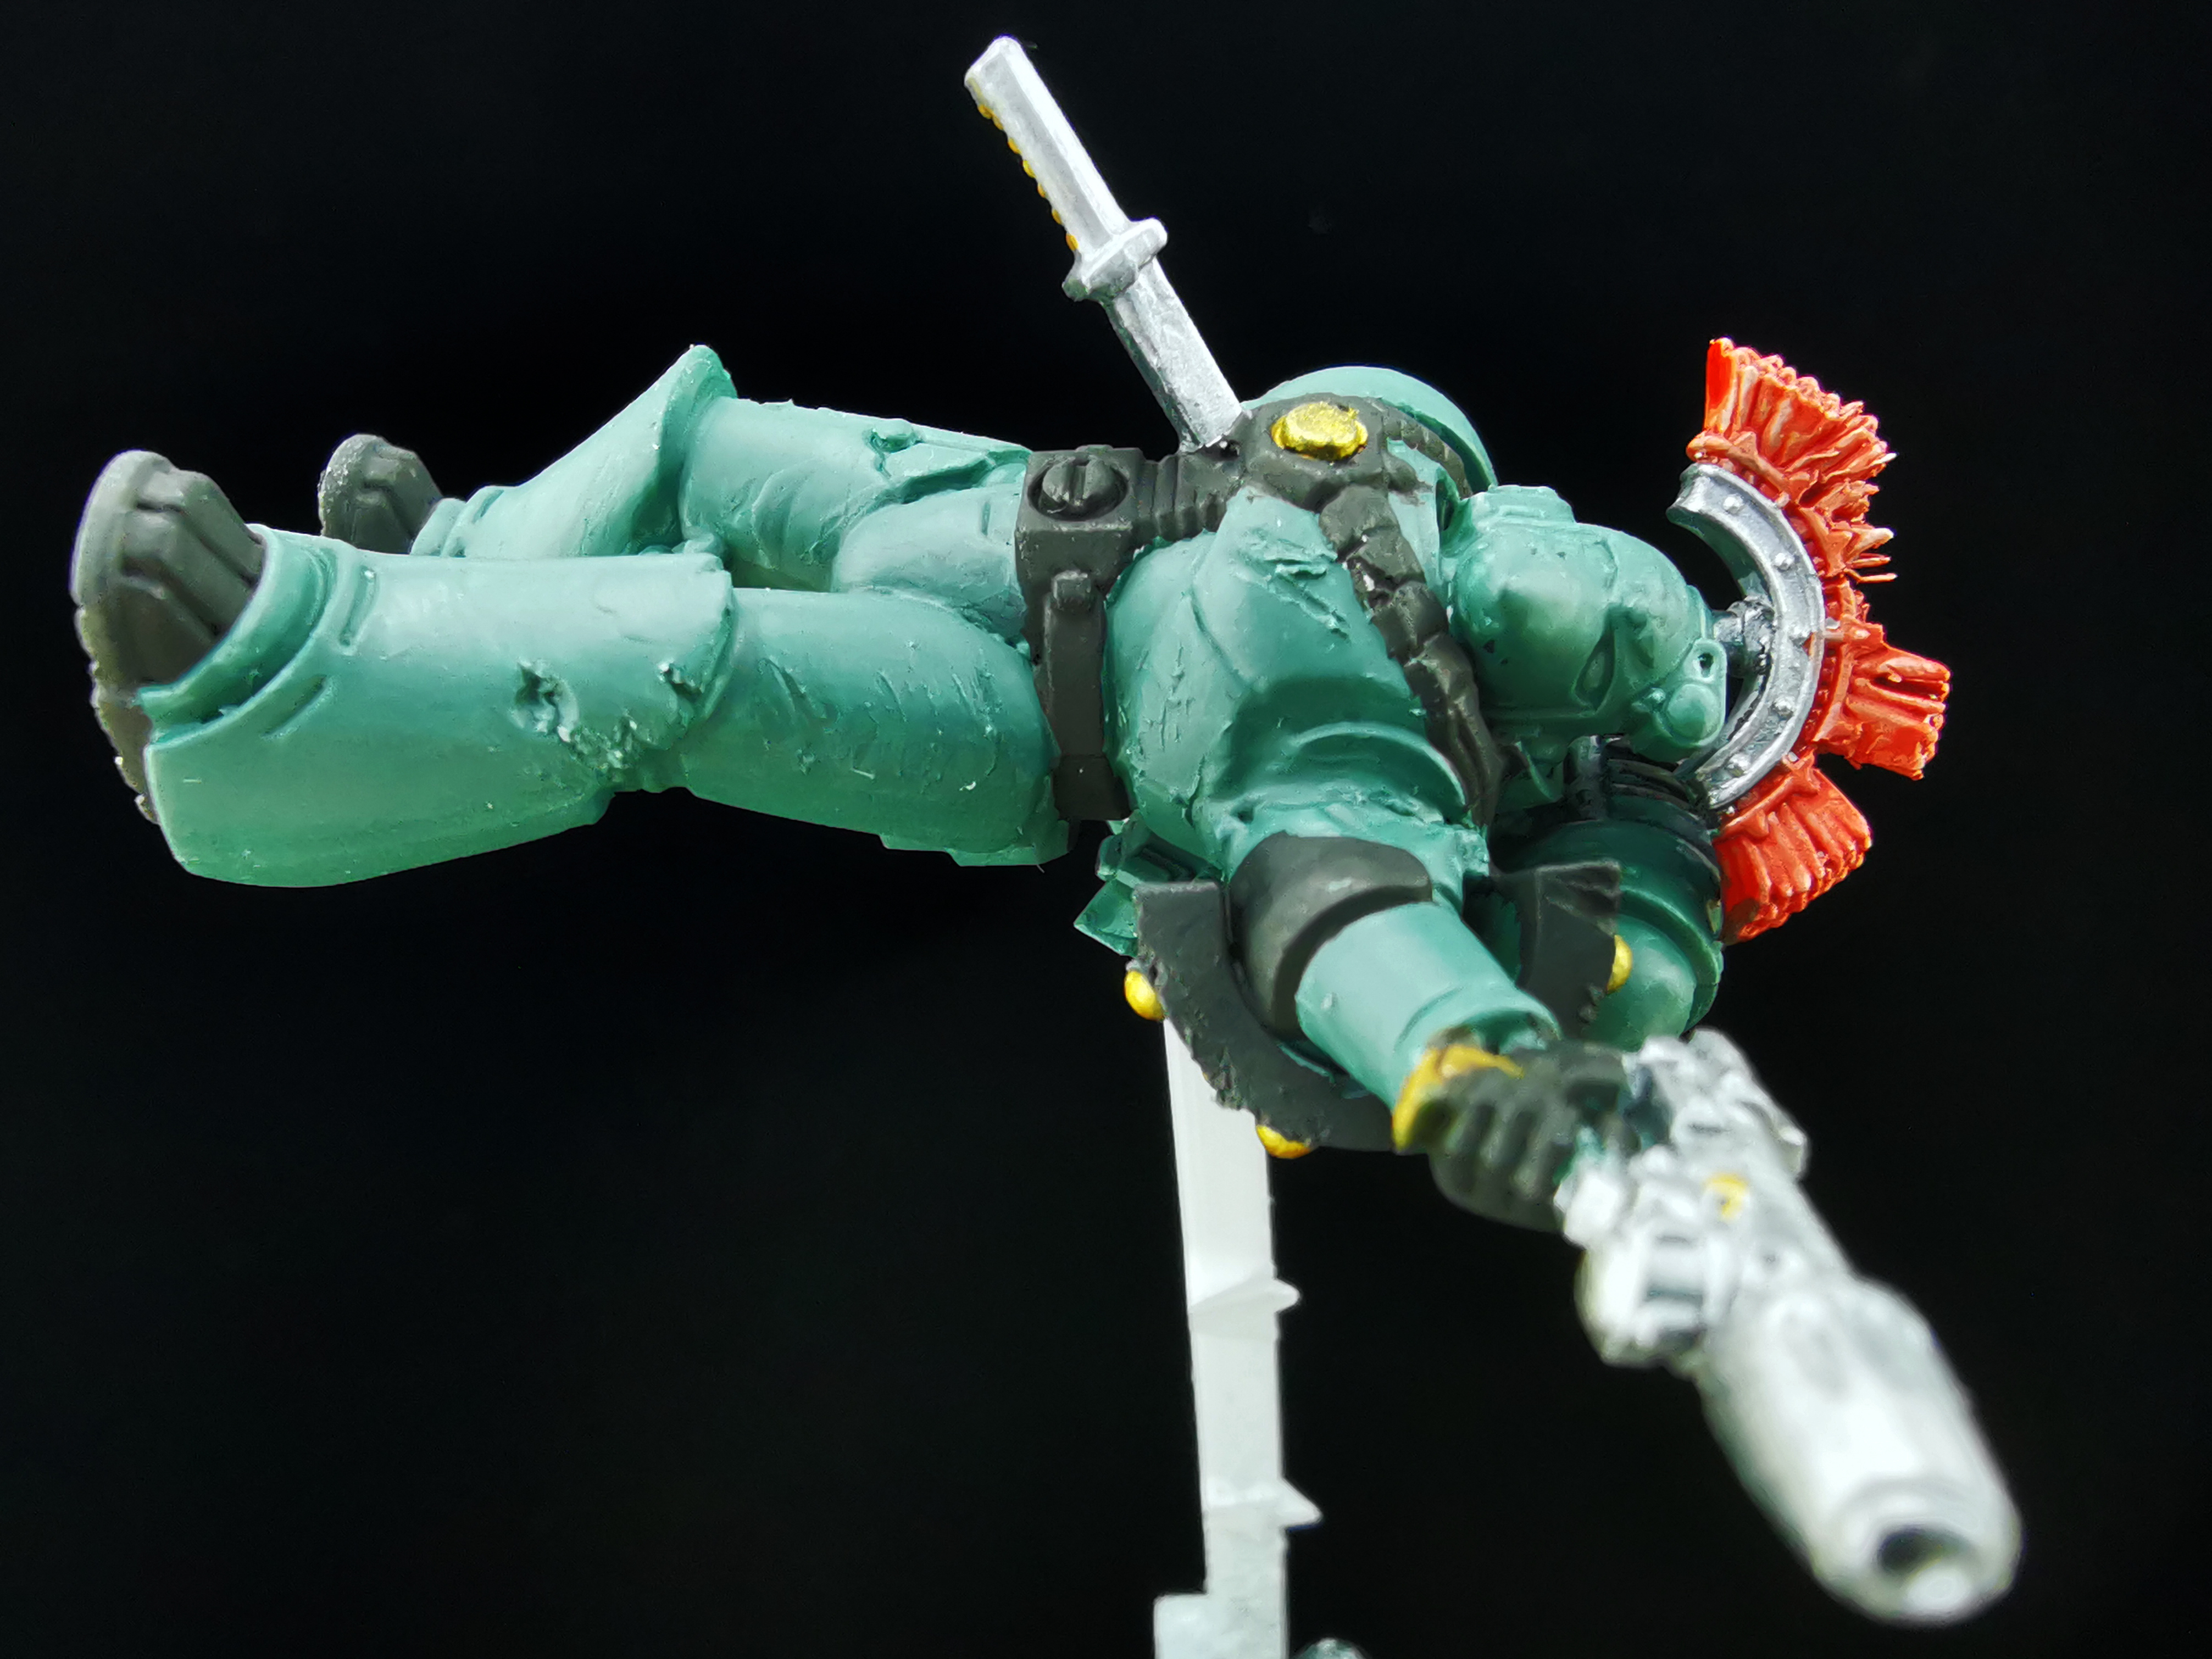
Weathering and gore added to the Space Marines!
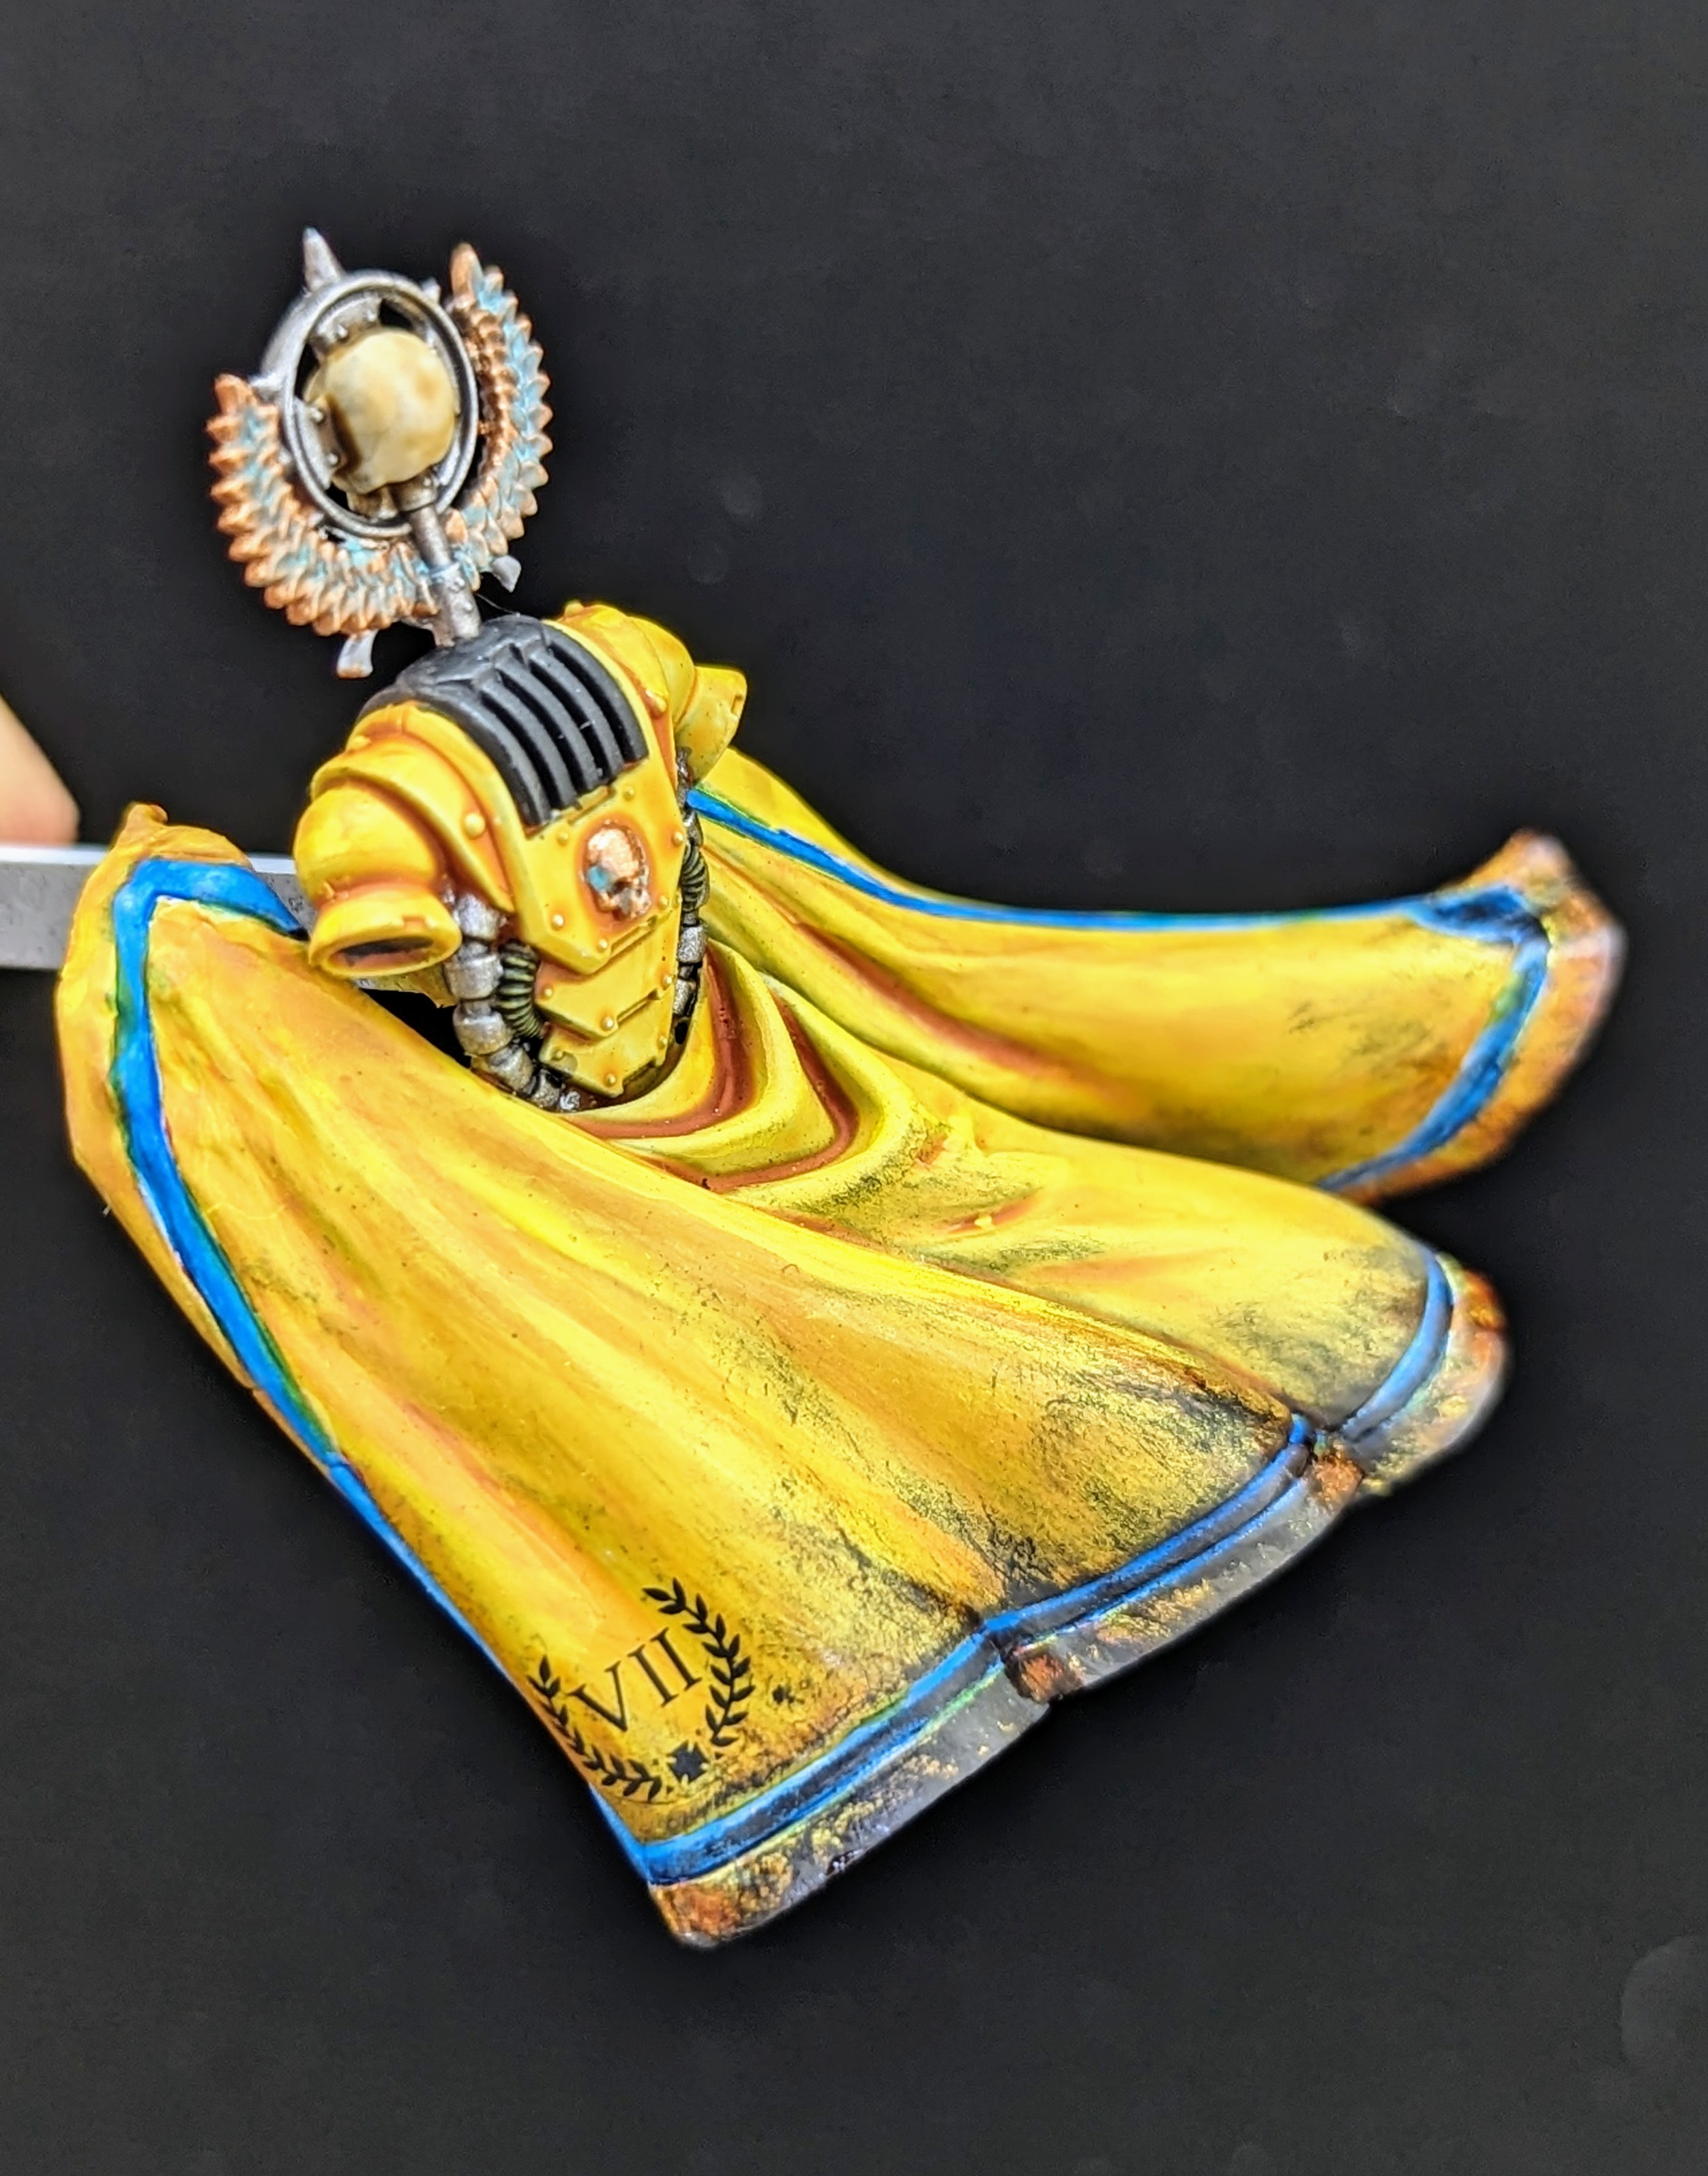
The Imperial Fists and Sons of Horus are fully painted, including weathering, battle damage and GORE!
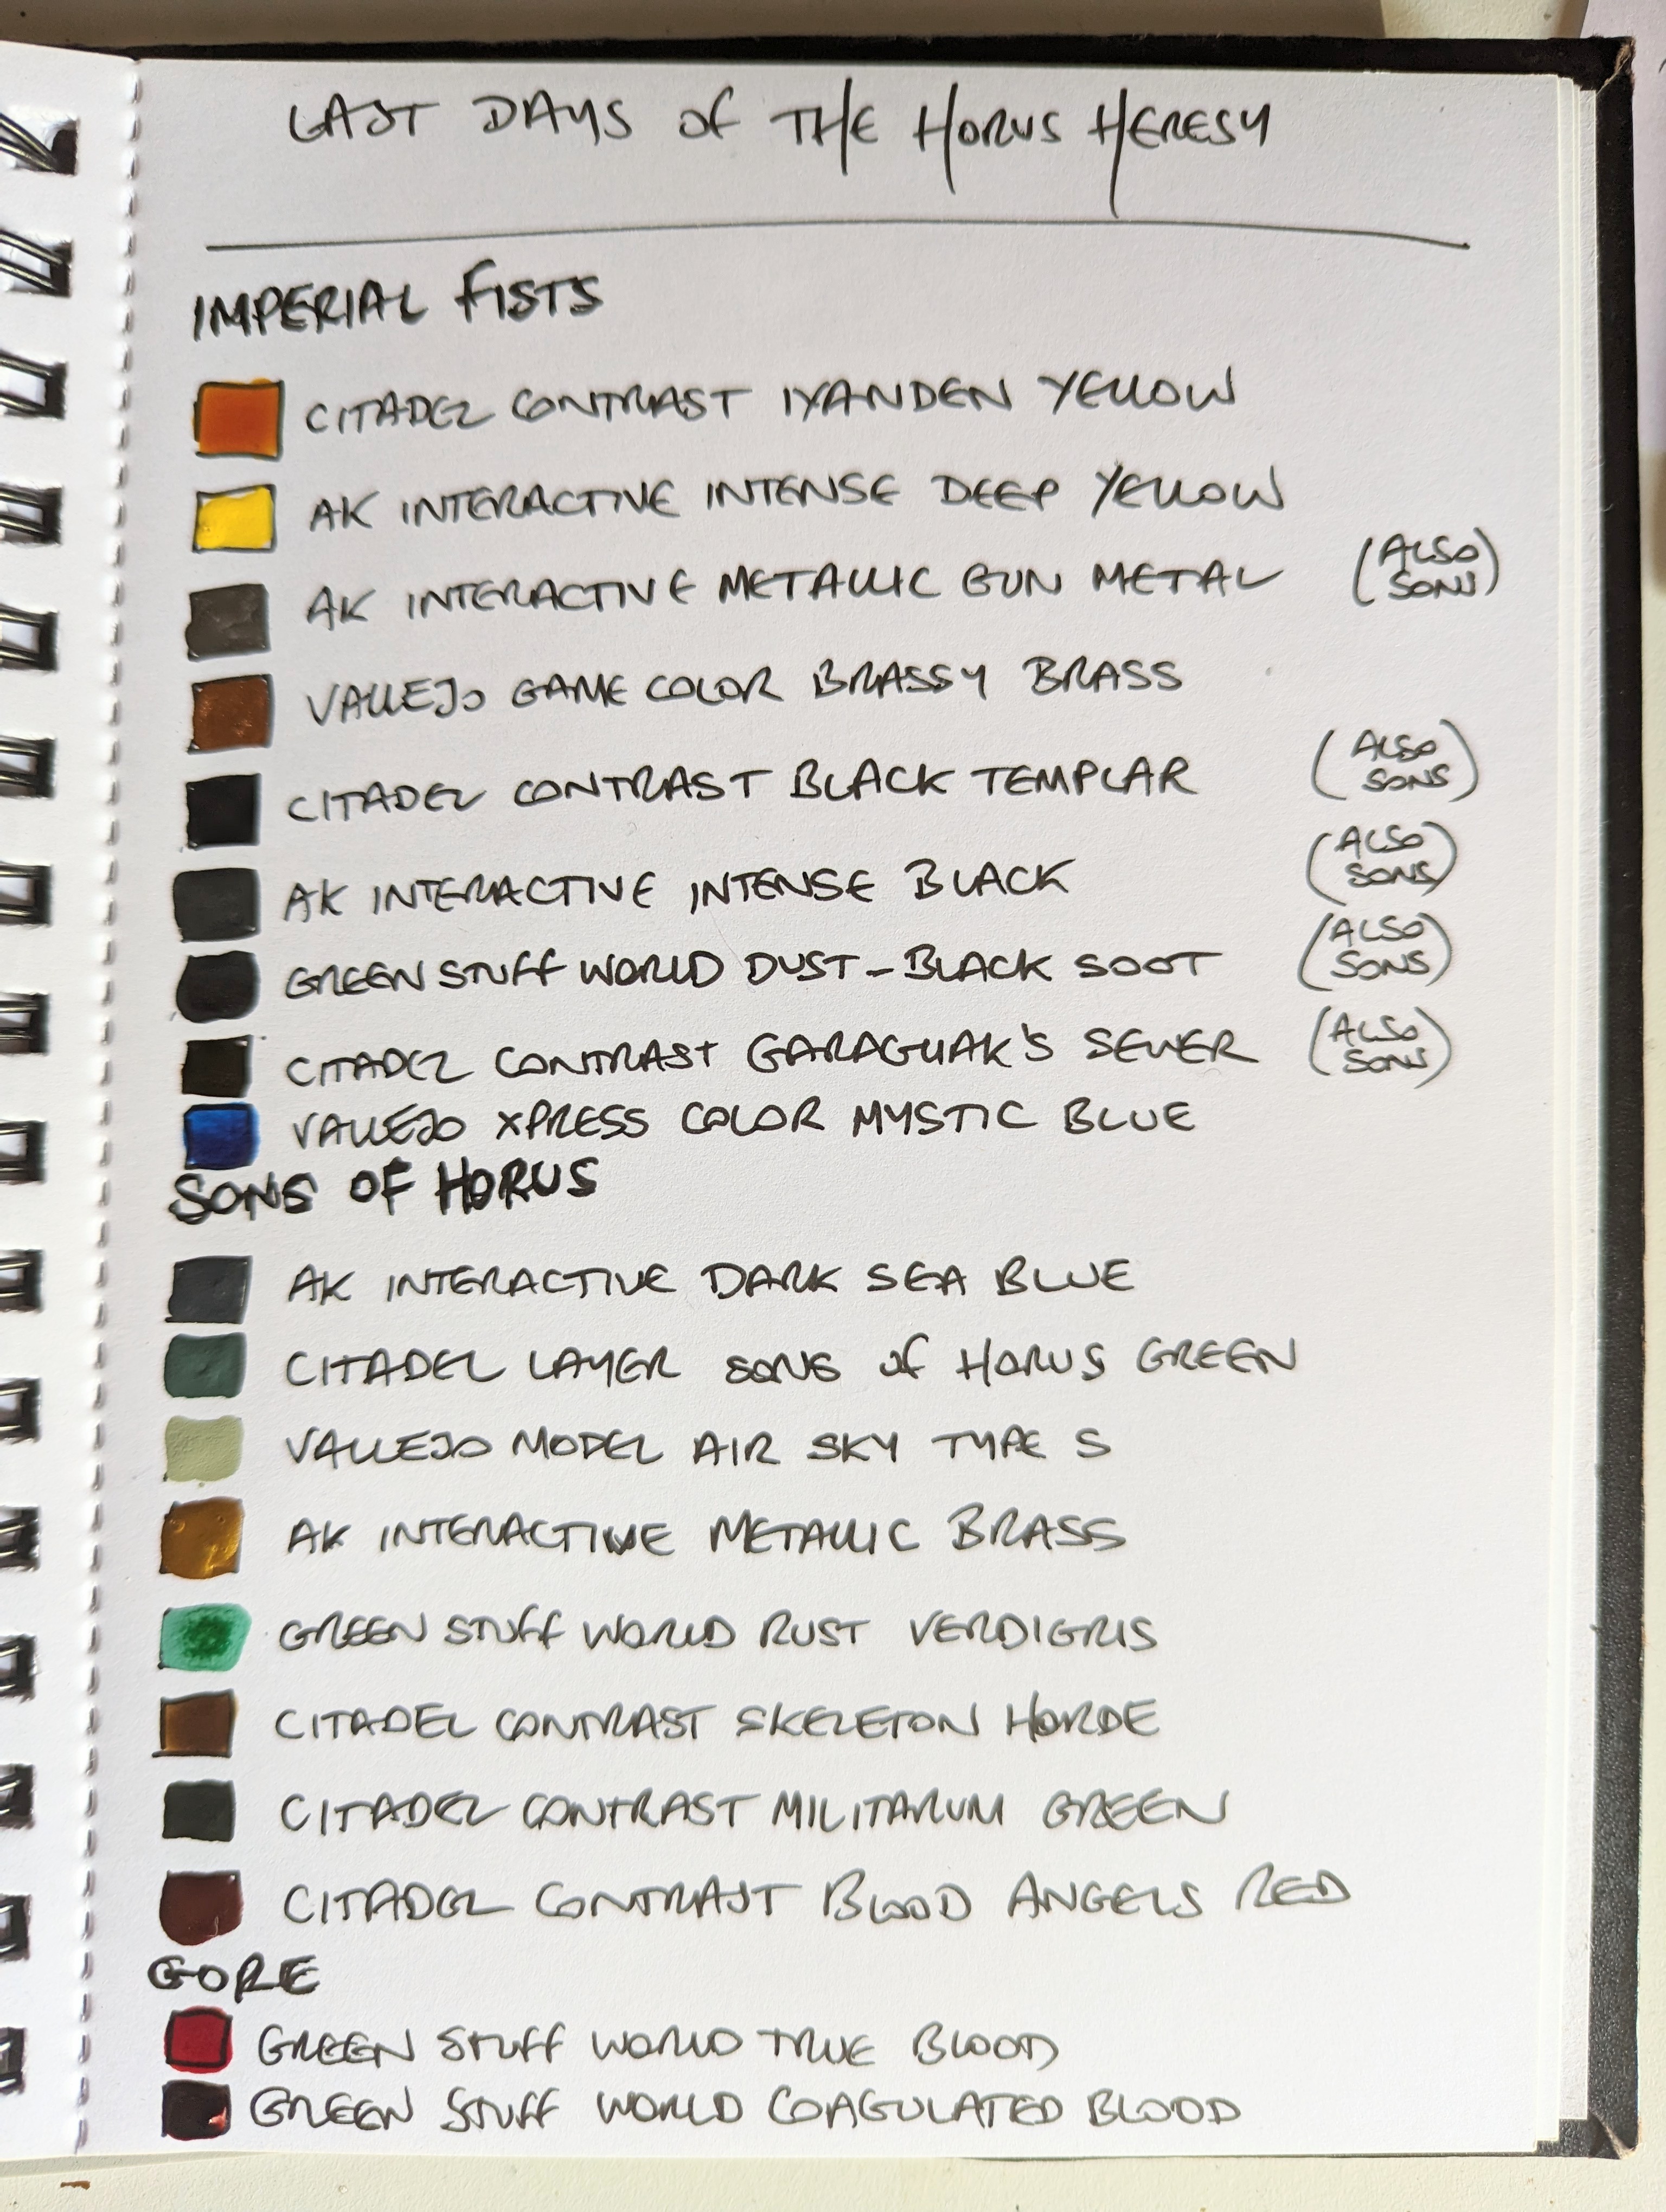
I’ve included the colour palette below to show the recipes for each of the factions.
You’ll see some crossovers, especially when it comes to the weapon detailing and weathering pigments.
For the decals, I used the sheet that came with the Age of Darkness box.
While this paint scheme is a big departure from the normal, clean paint jobs you normally see on Marines, I hope I was able to convey the dirtiness of the scorched battlefield.
Next up is the Imperial Fists tank!
Painting progress update for the Imperial Fists and Sons of Horus

I’m (very) slowly working through my Space Marine casualties and getting them painted for either the Sons of Horus or the Imperial Fists. I’ve been trying to keep the paint schemes simple to achieve, as I don’t want to still be doing this diorama when it’s the 2024 Spring Challenge!
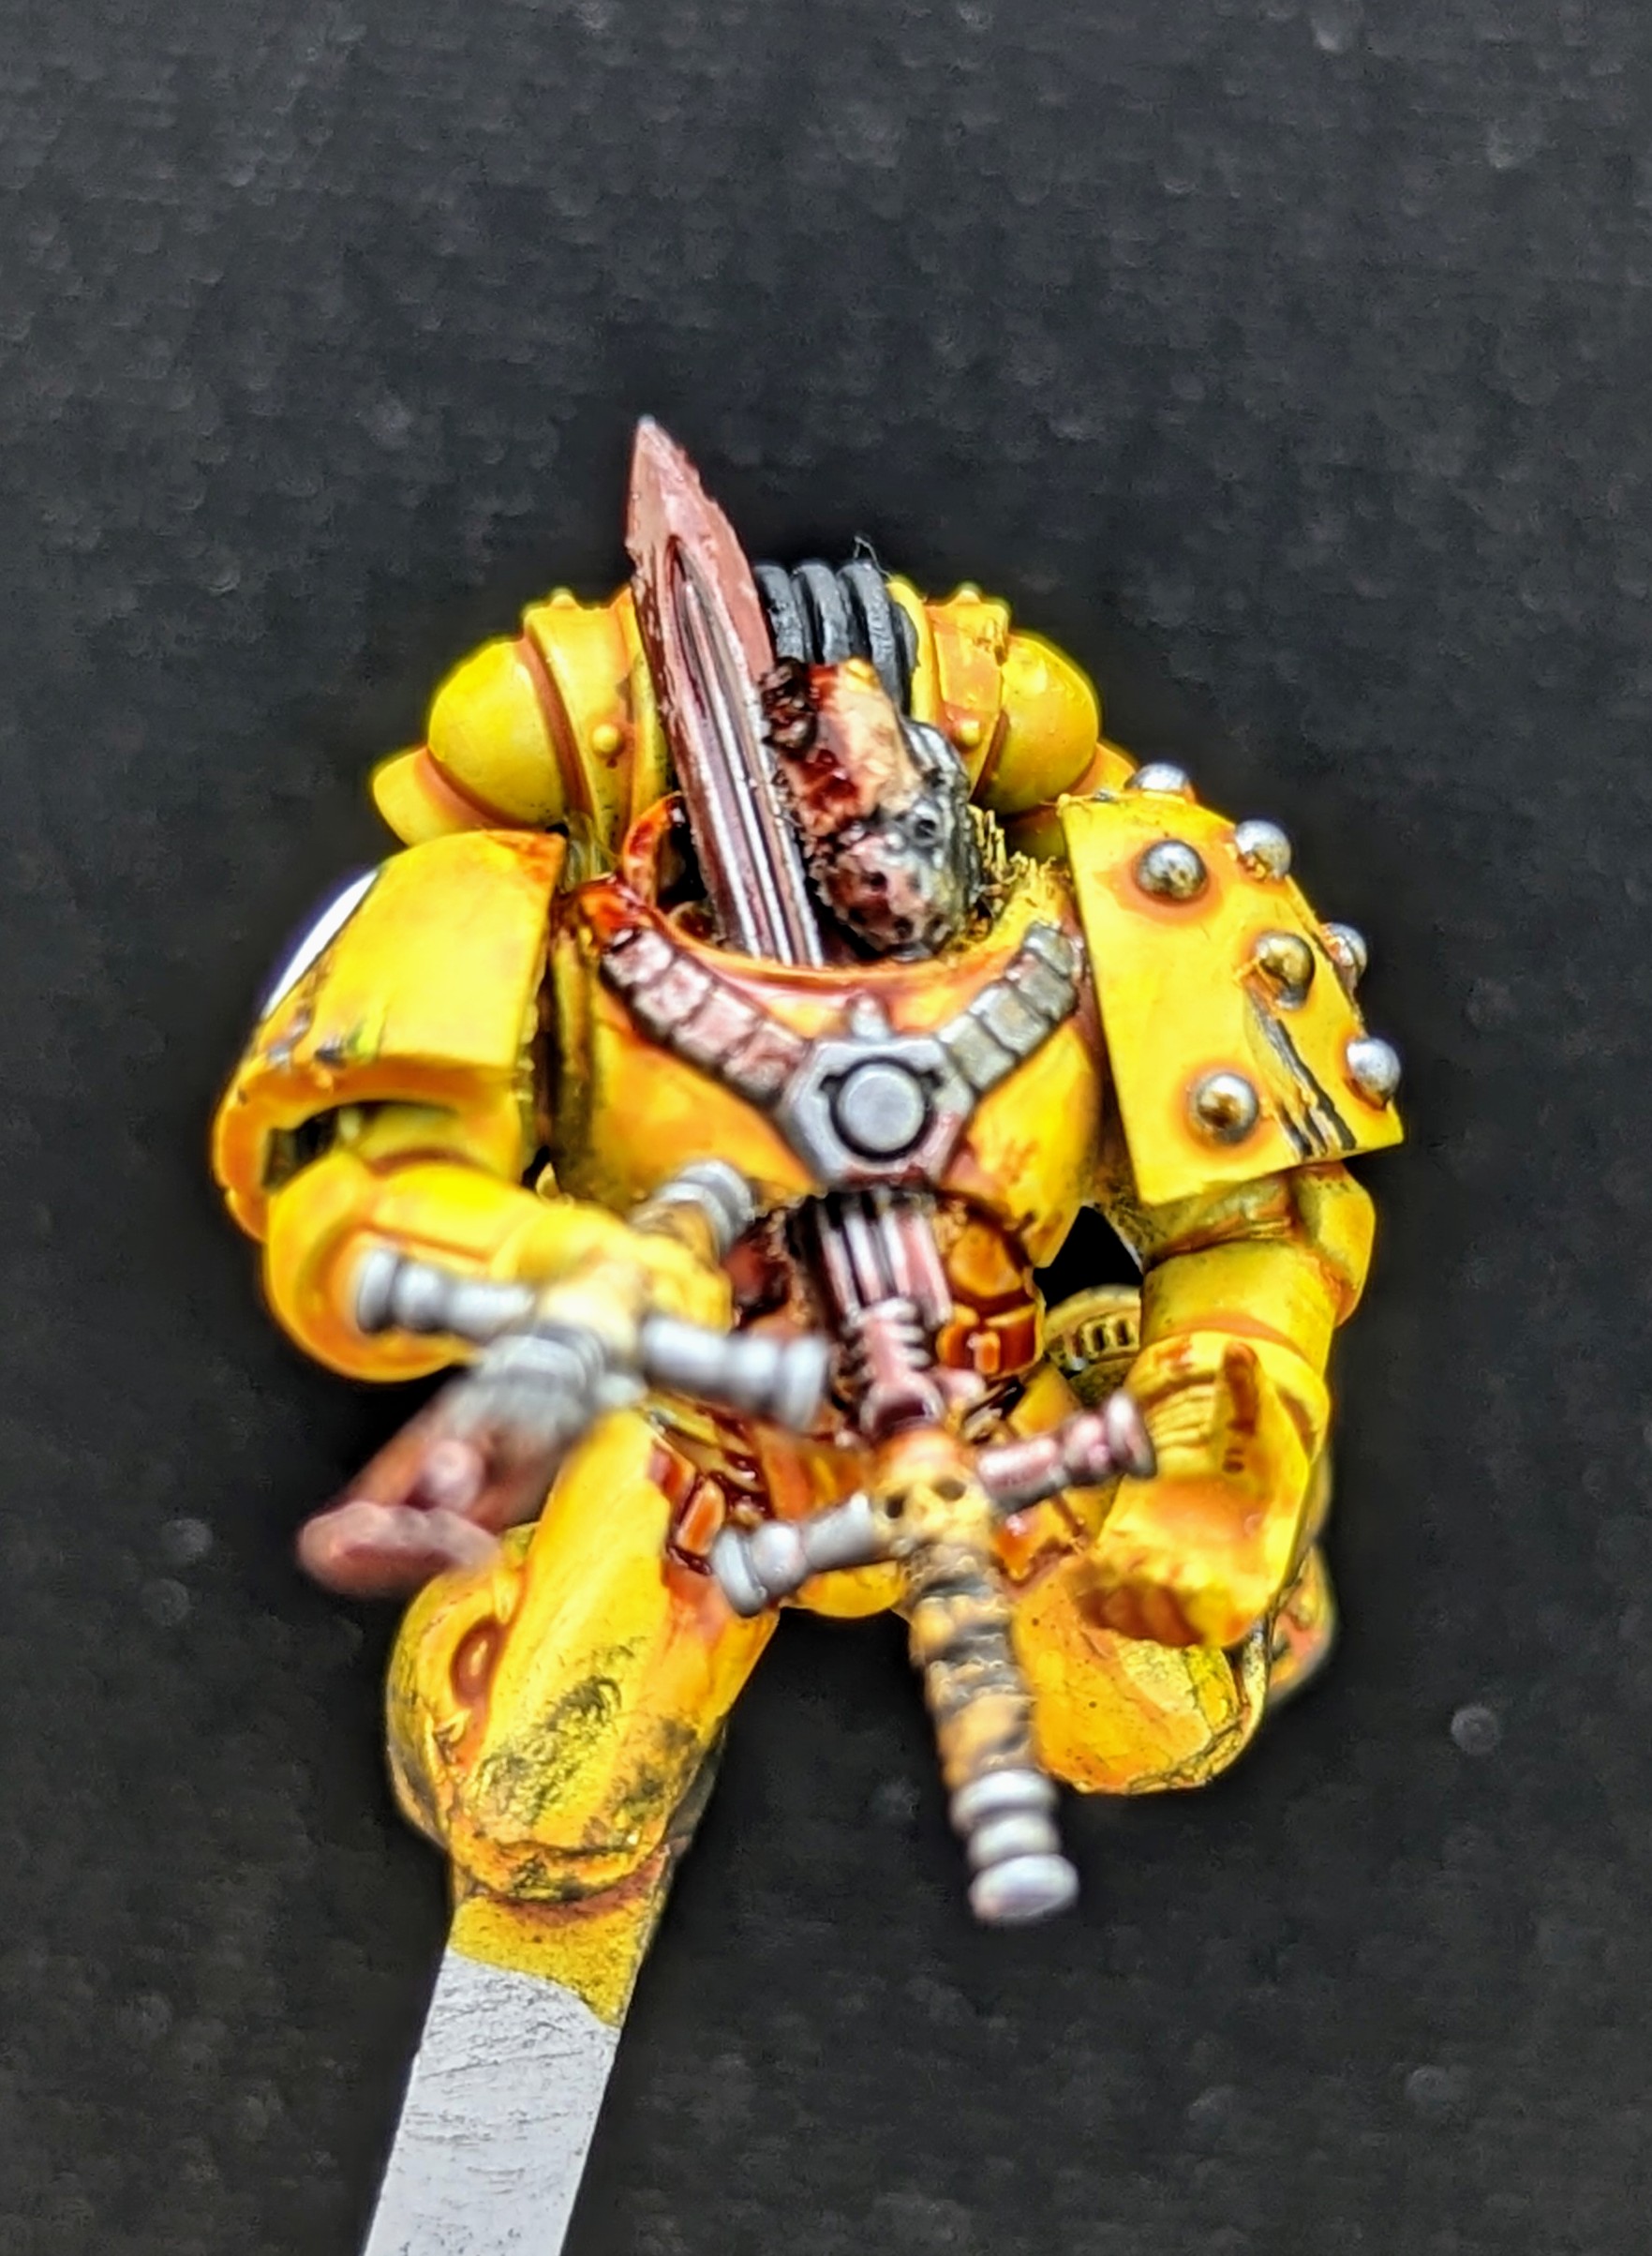
Imperial Fists colours:
- Citadel Contrast Iyanden Yellow – Armour
- Vallejo Game Color Brassy Brass – Pauldron studs
- AK Interactive Intense Black – Weapons, Backpack vents
- AK Interactive Metallic Gun Metal – Weapons, armour damage
- Citadel Shade Nuln Oil – Weapons wash
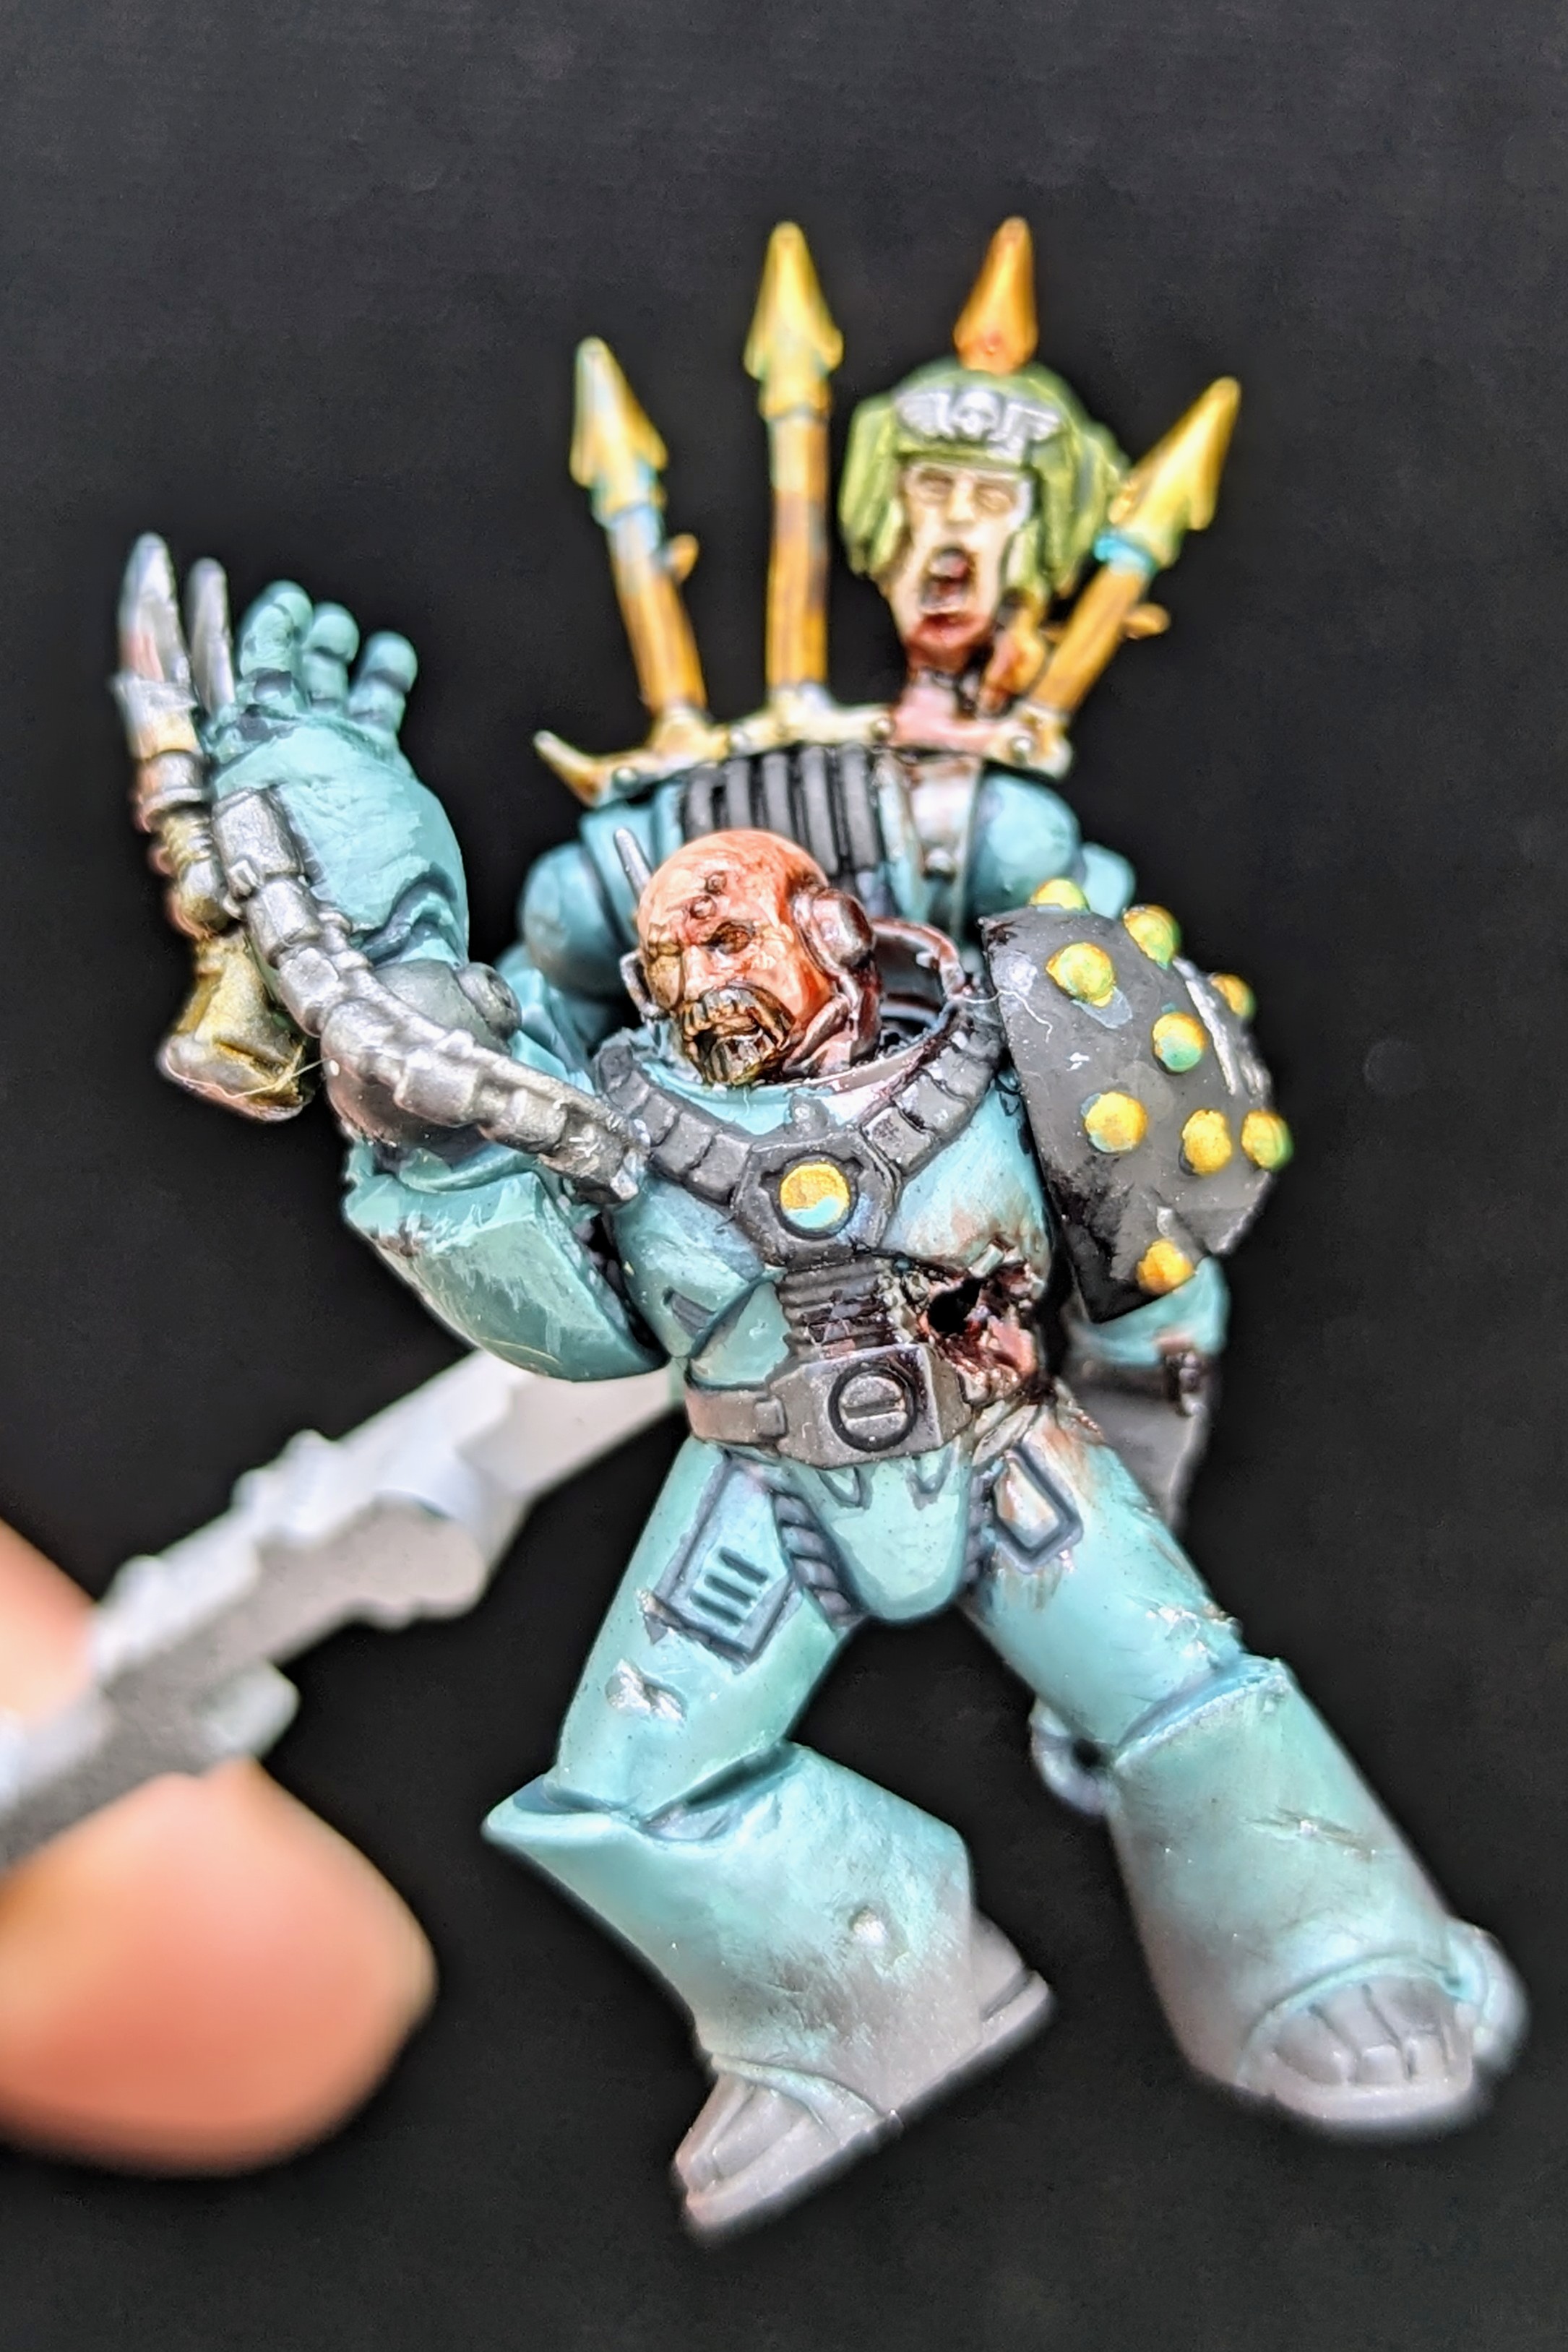
Sons of Horus colours:
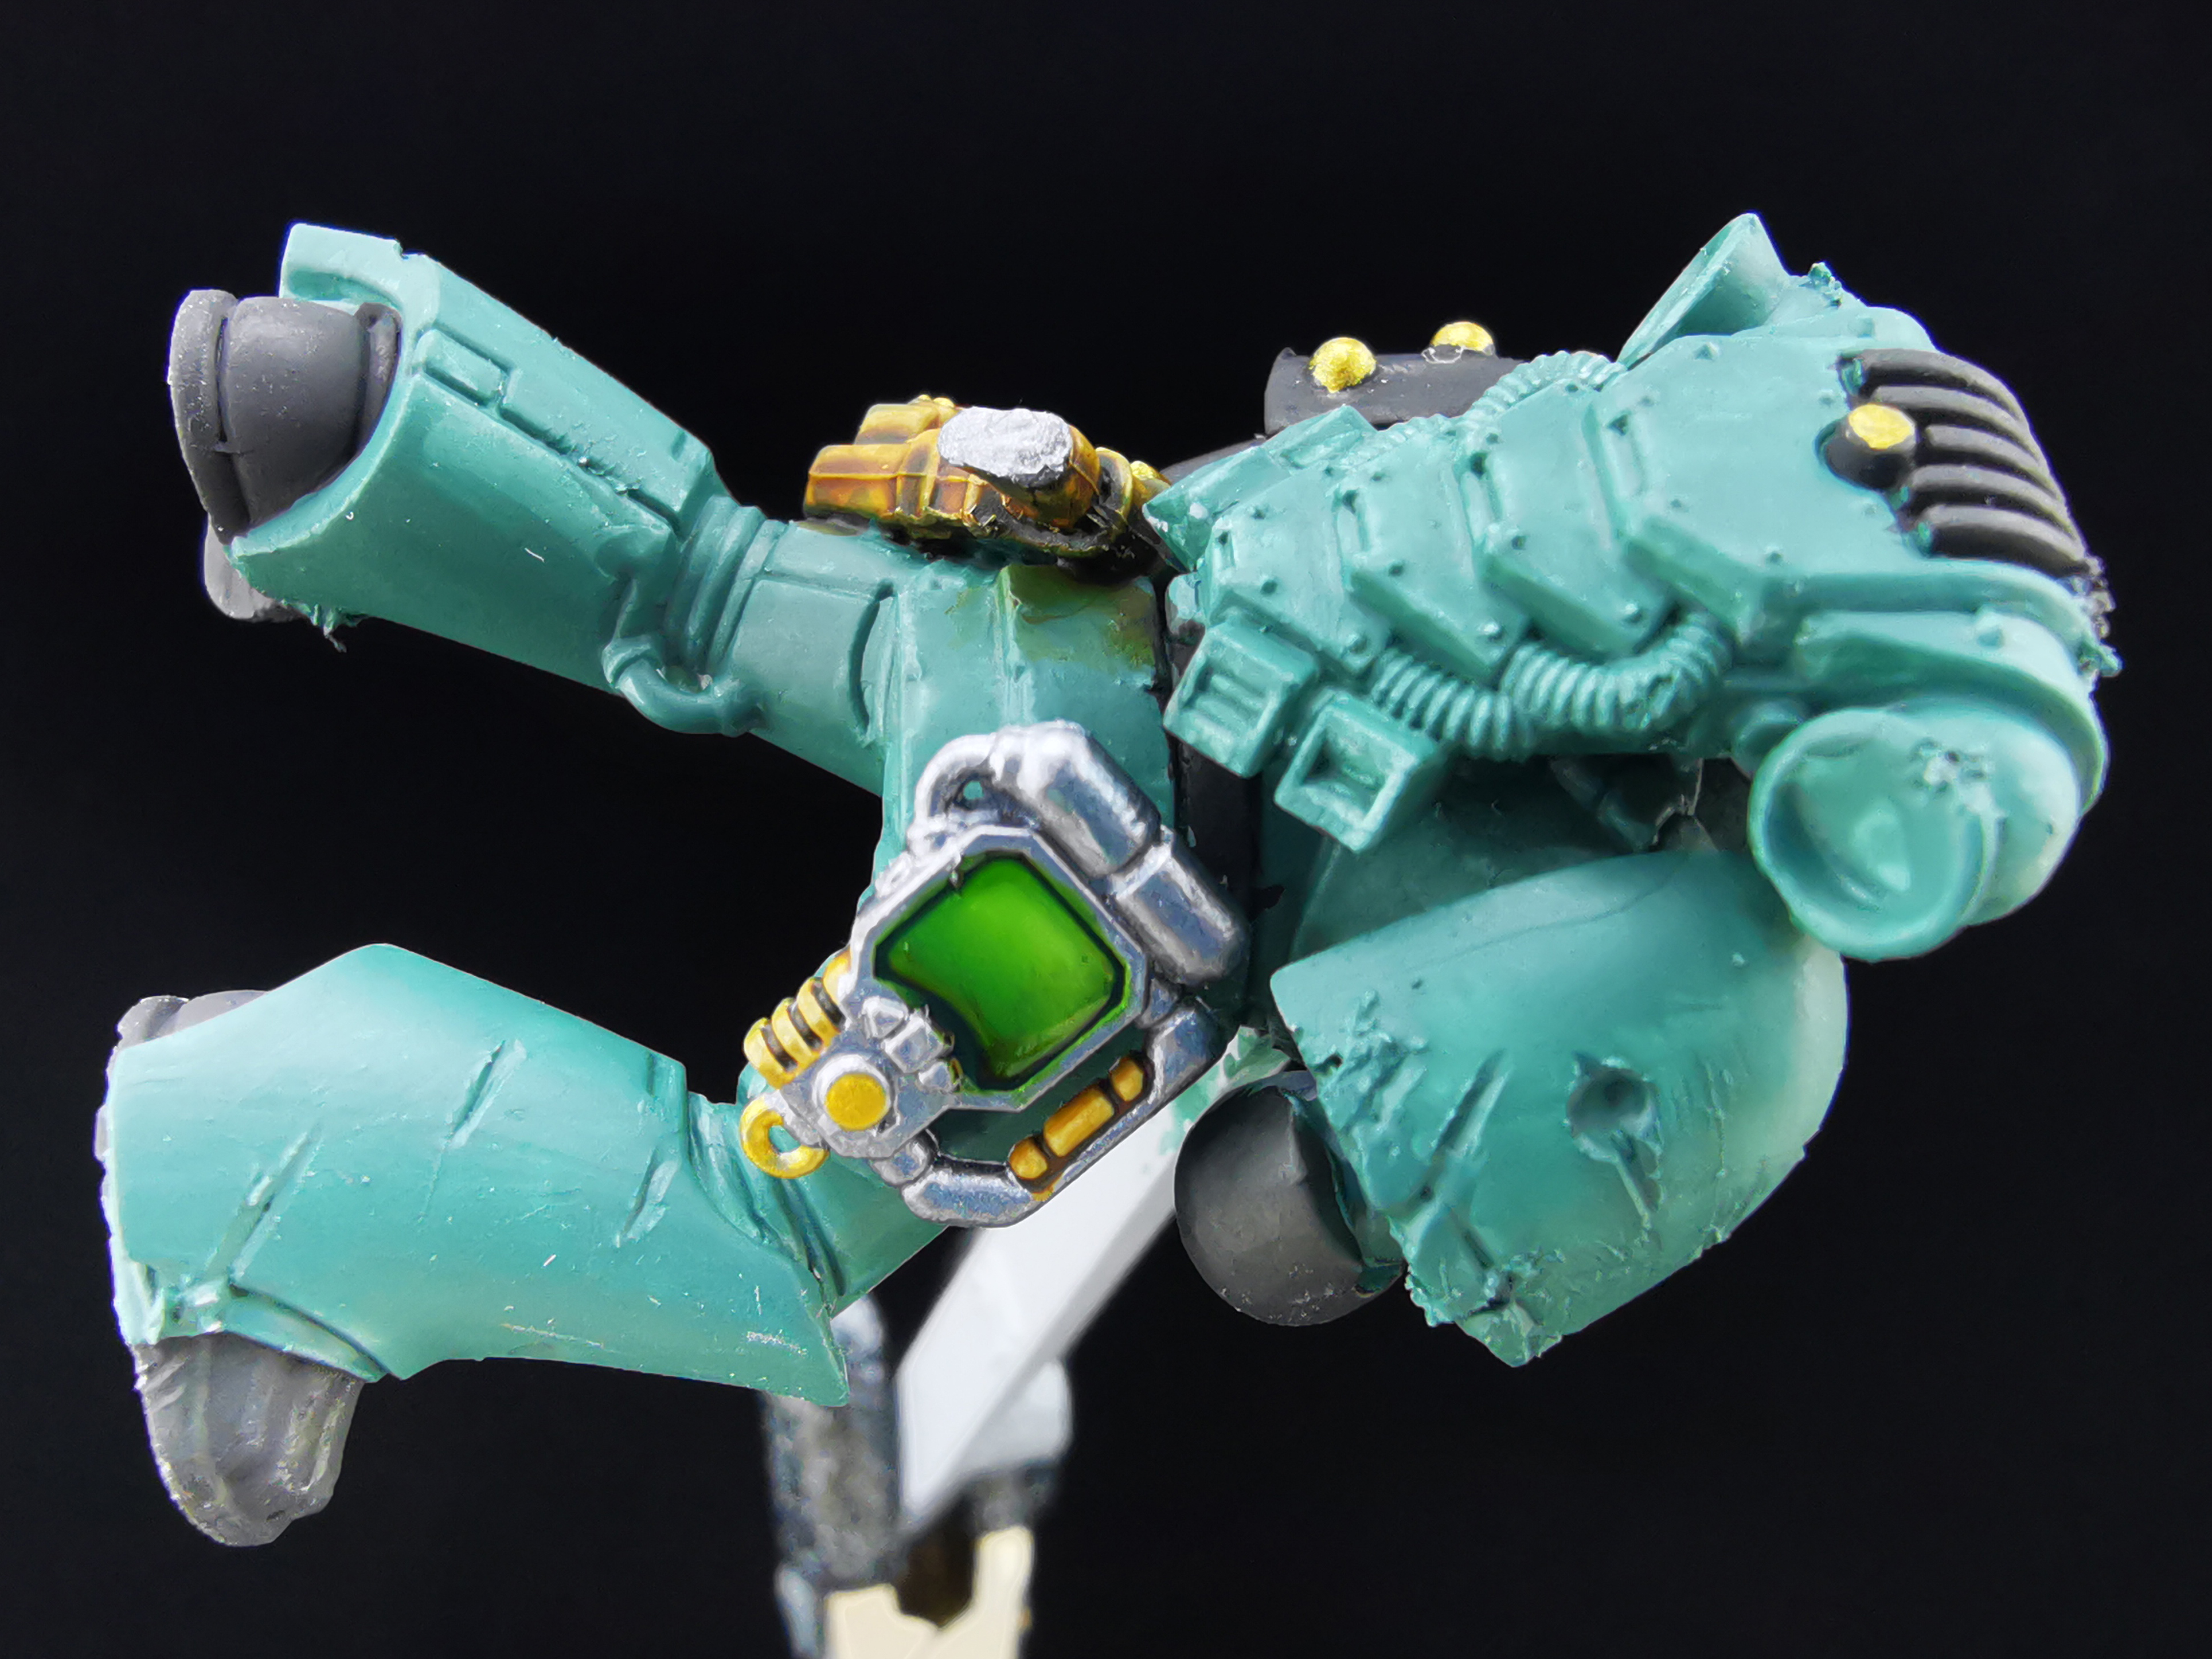
- Citadel Layer Sons of Horus Green – Armour
- AK Interactive Metallic Brass – Pauldron studs
- AK Interactive Intense Black – Weapons, Backpack vents
- AK Interactive Metallic Gun Metal – Weapons, armour damage
- Citadel Shade Nuln Oil – Weapons wash
I’ll get onto gore and weathering next, and then I’ll be able to start painting up my Spartan tank!
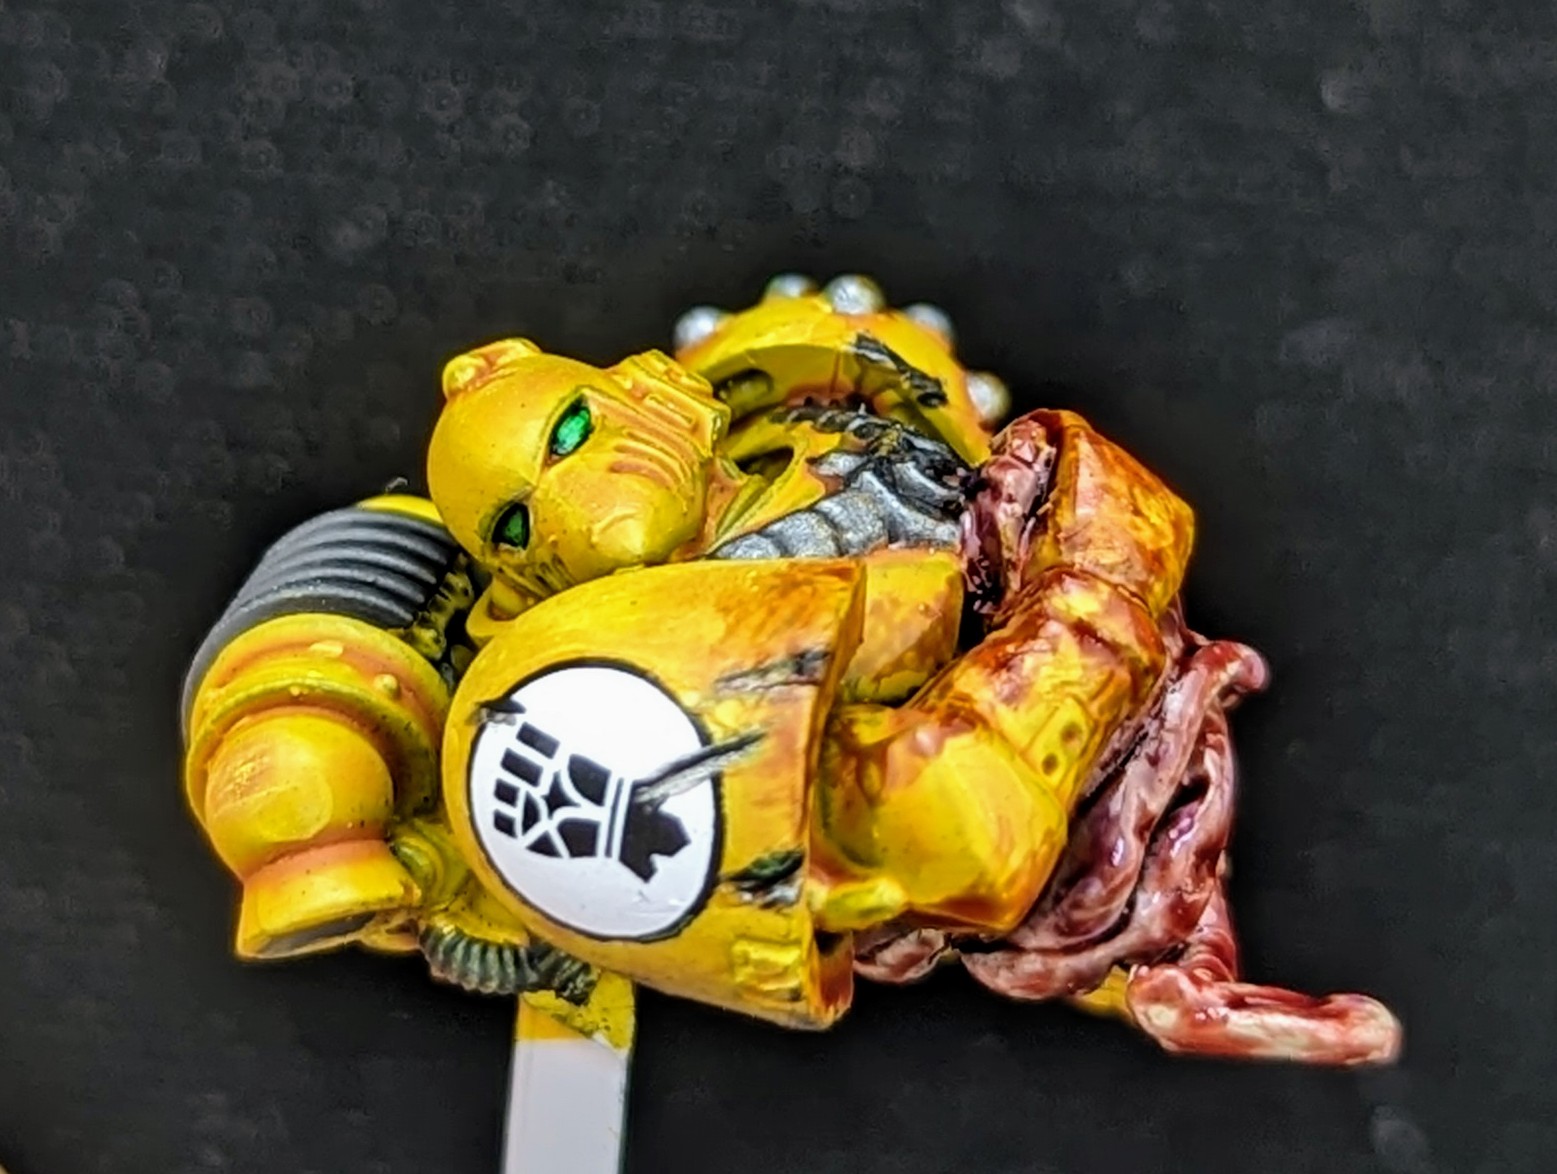
Vignette of reference images, and a look at my Space Marine fatalities
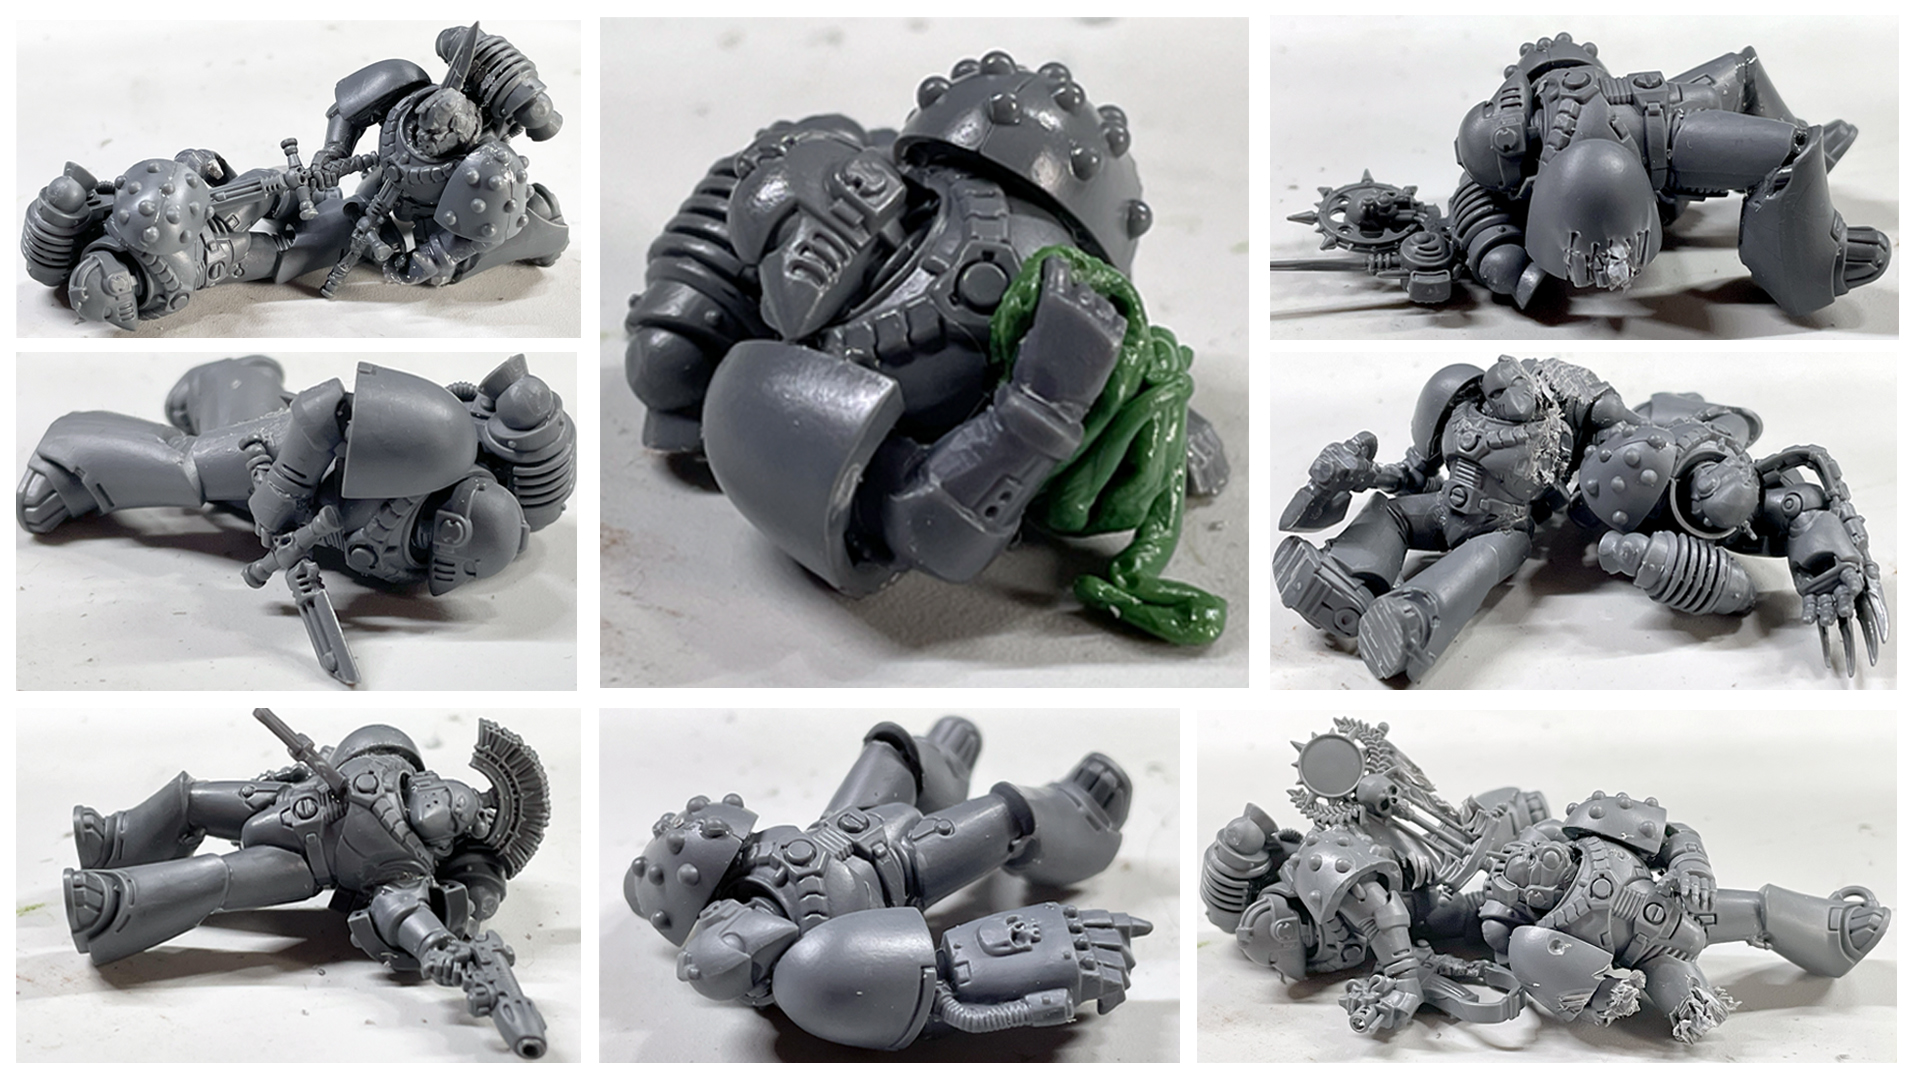
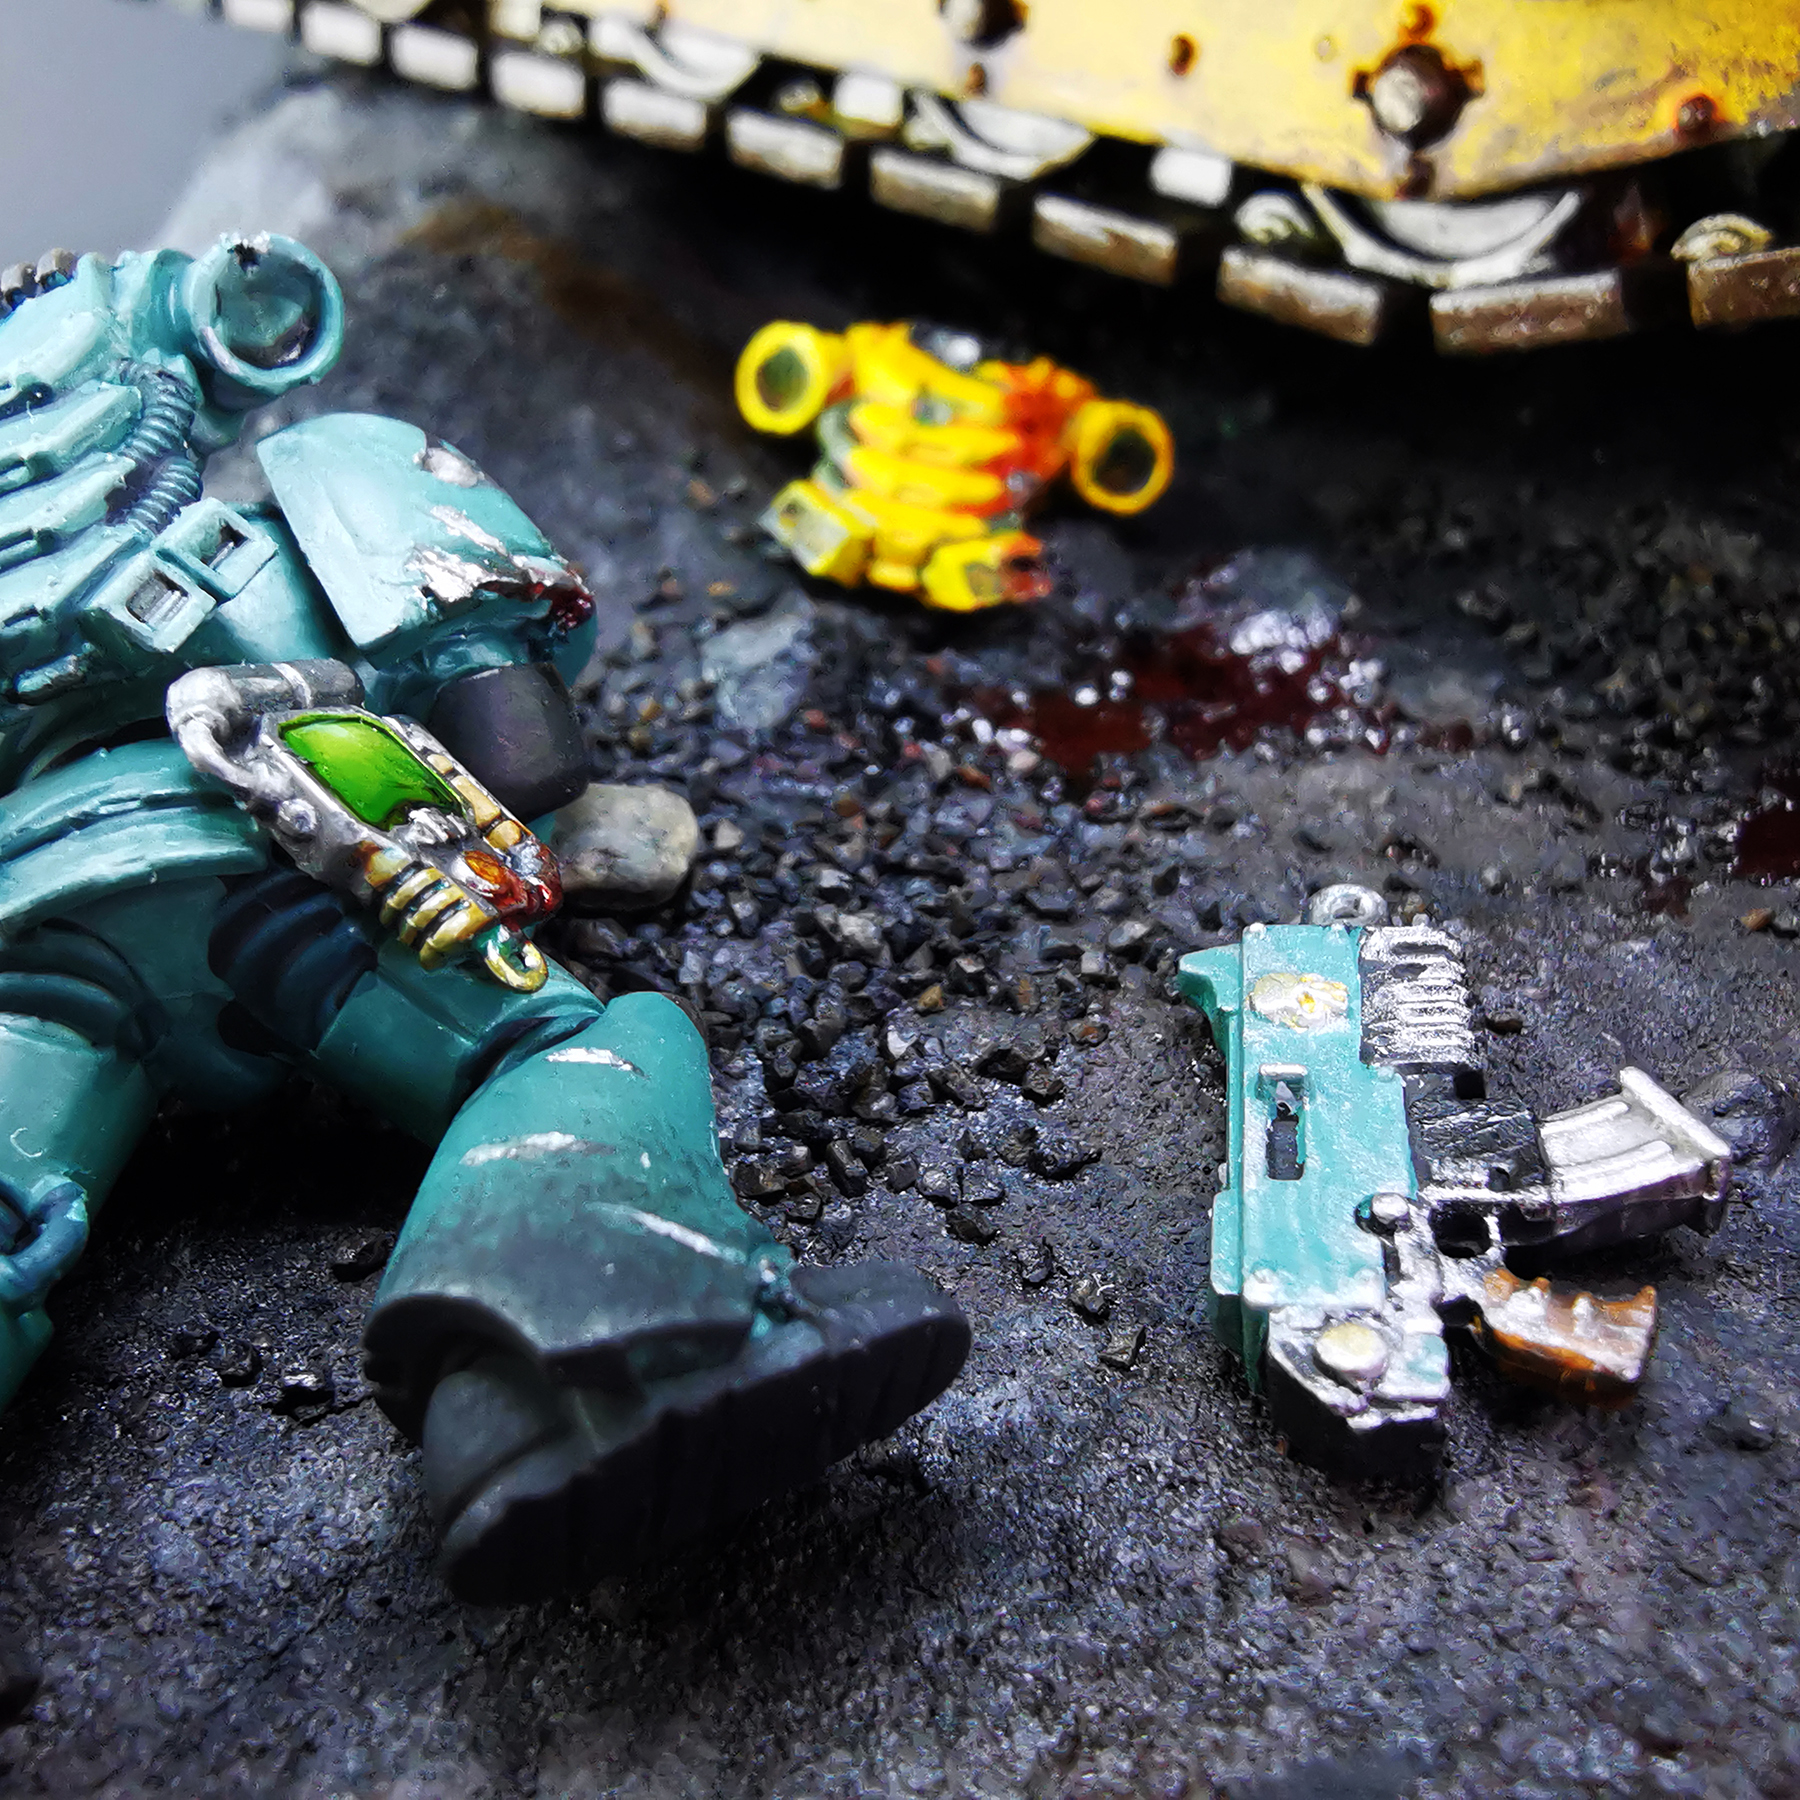
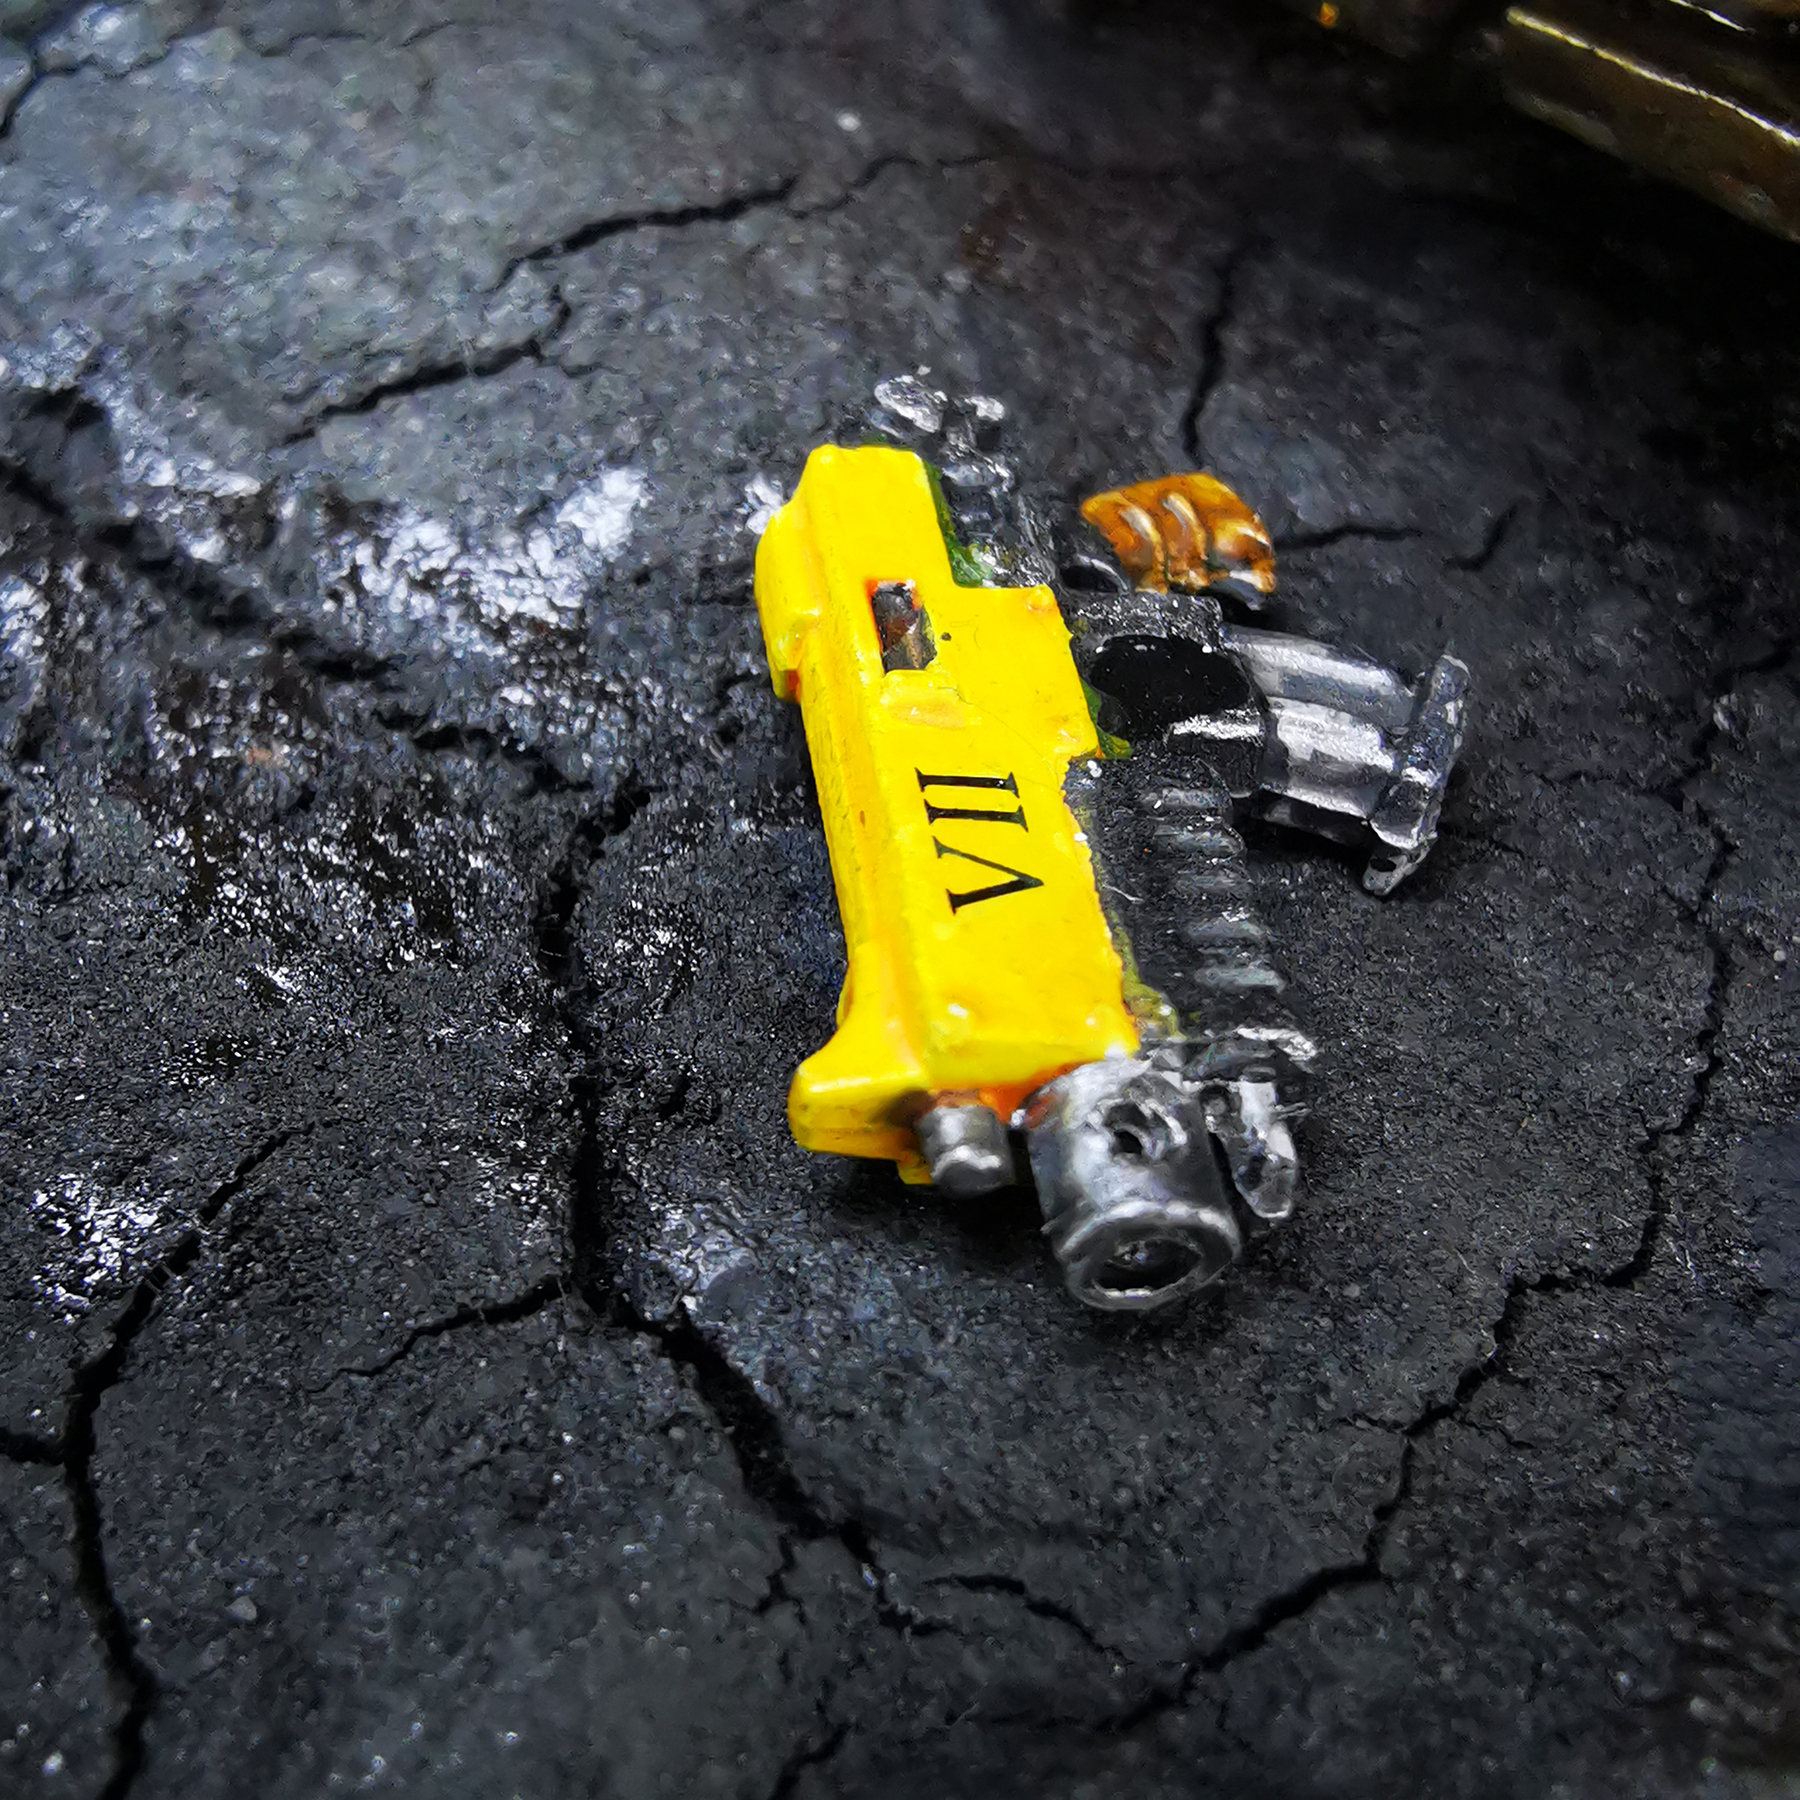
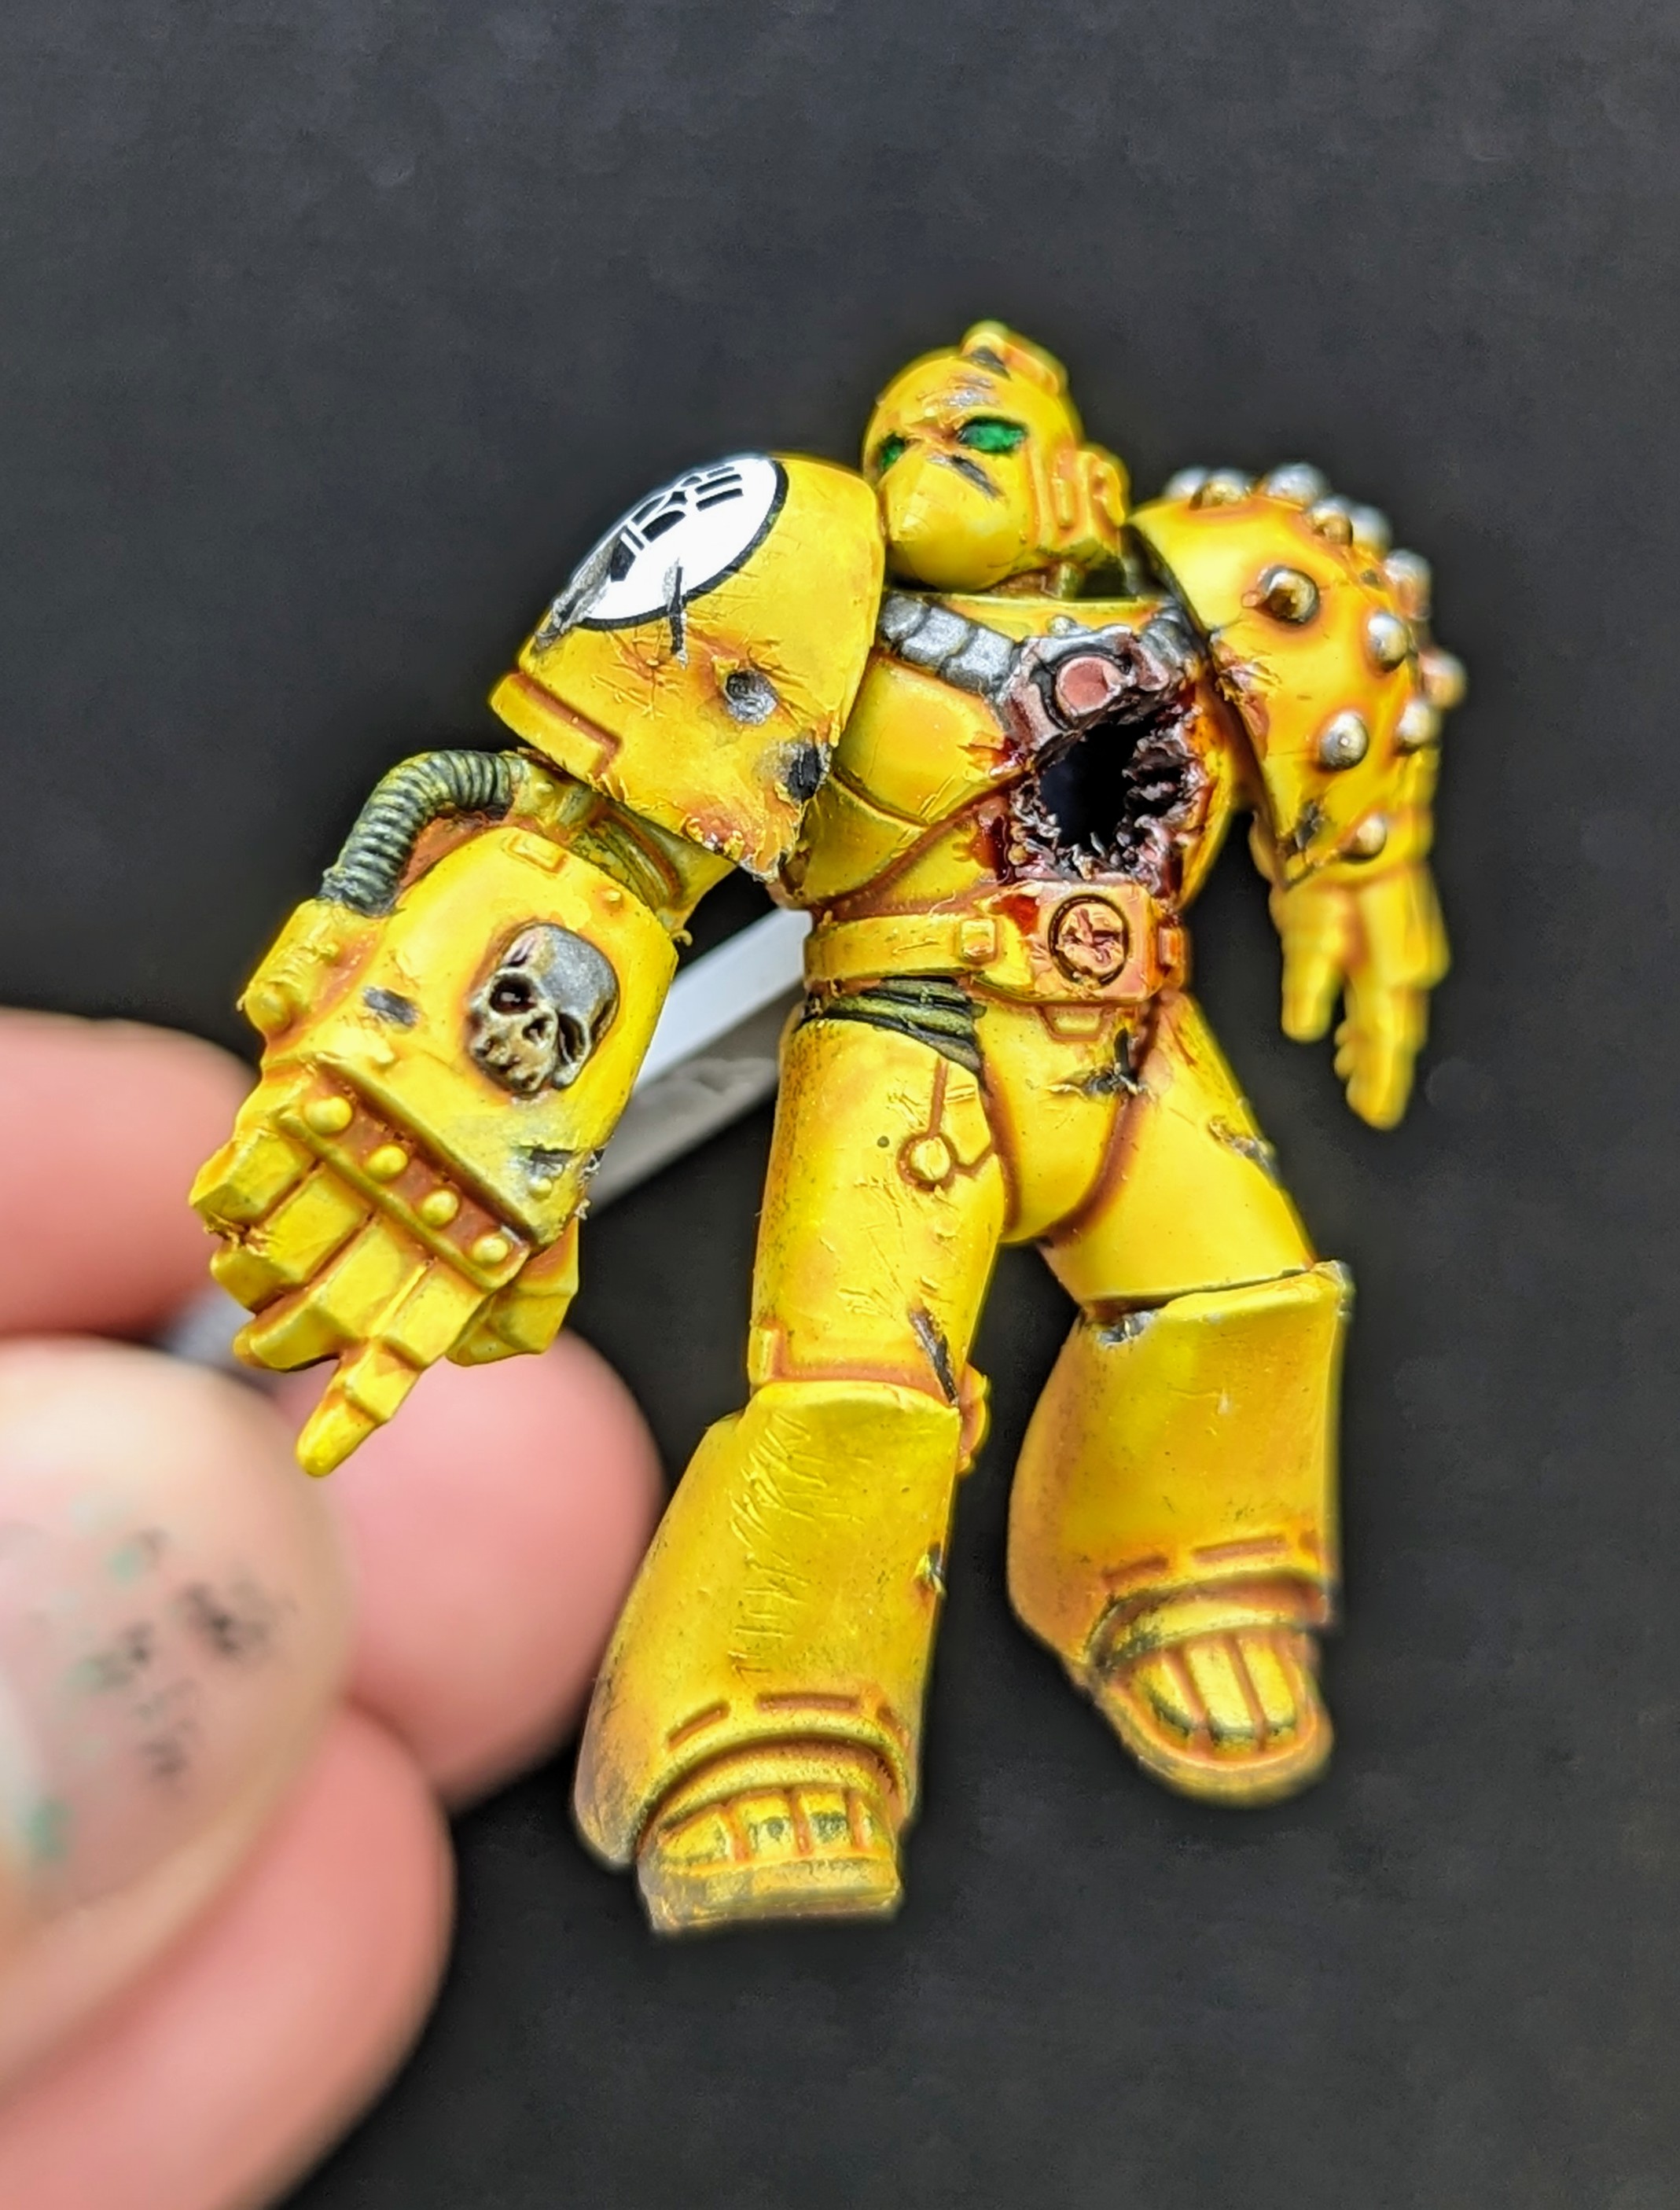
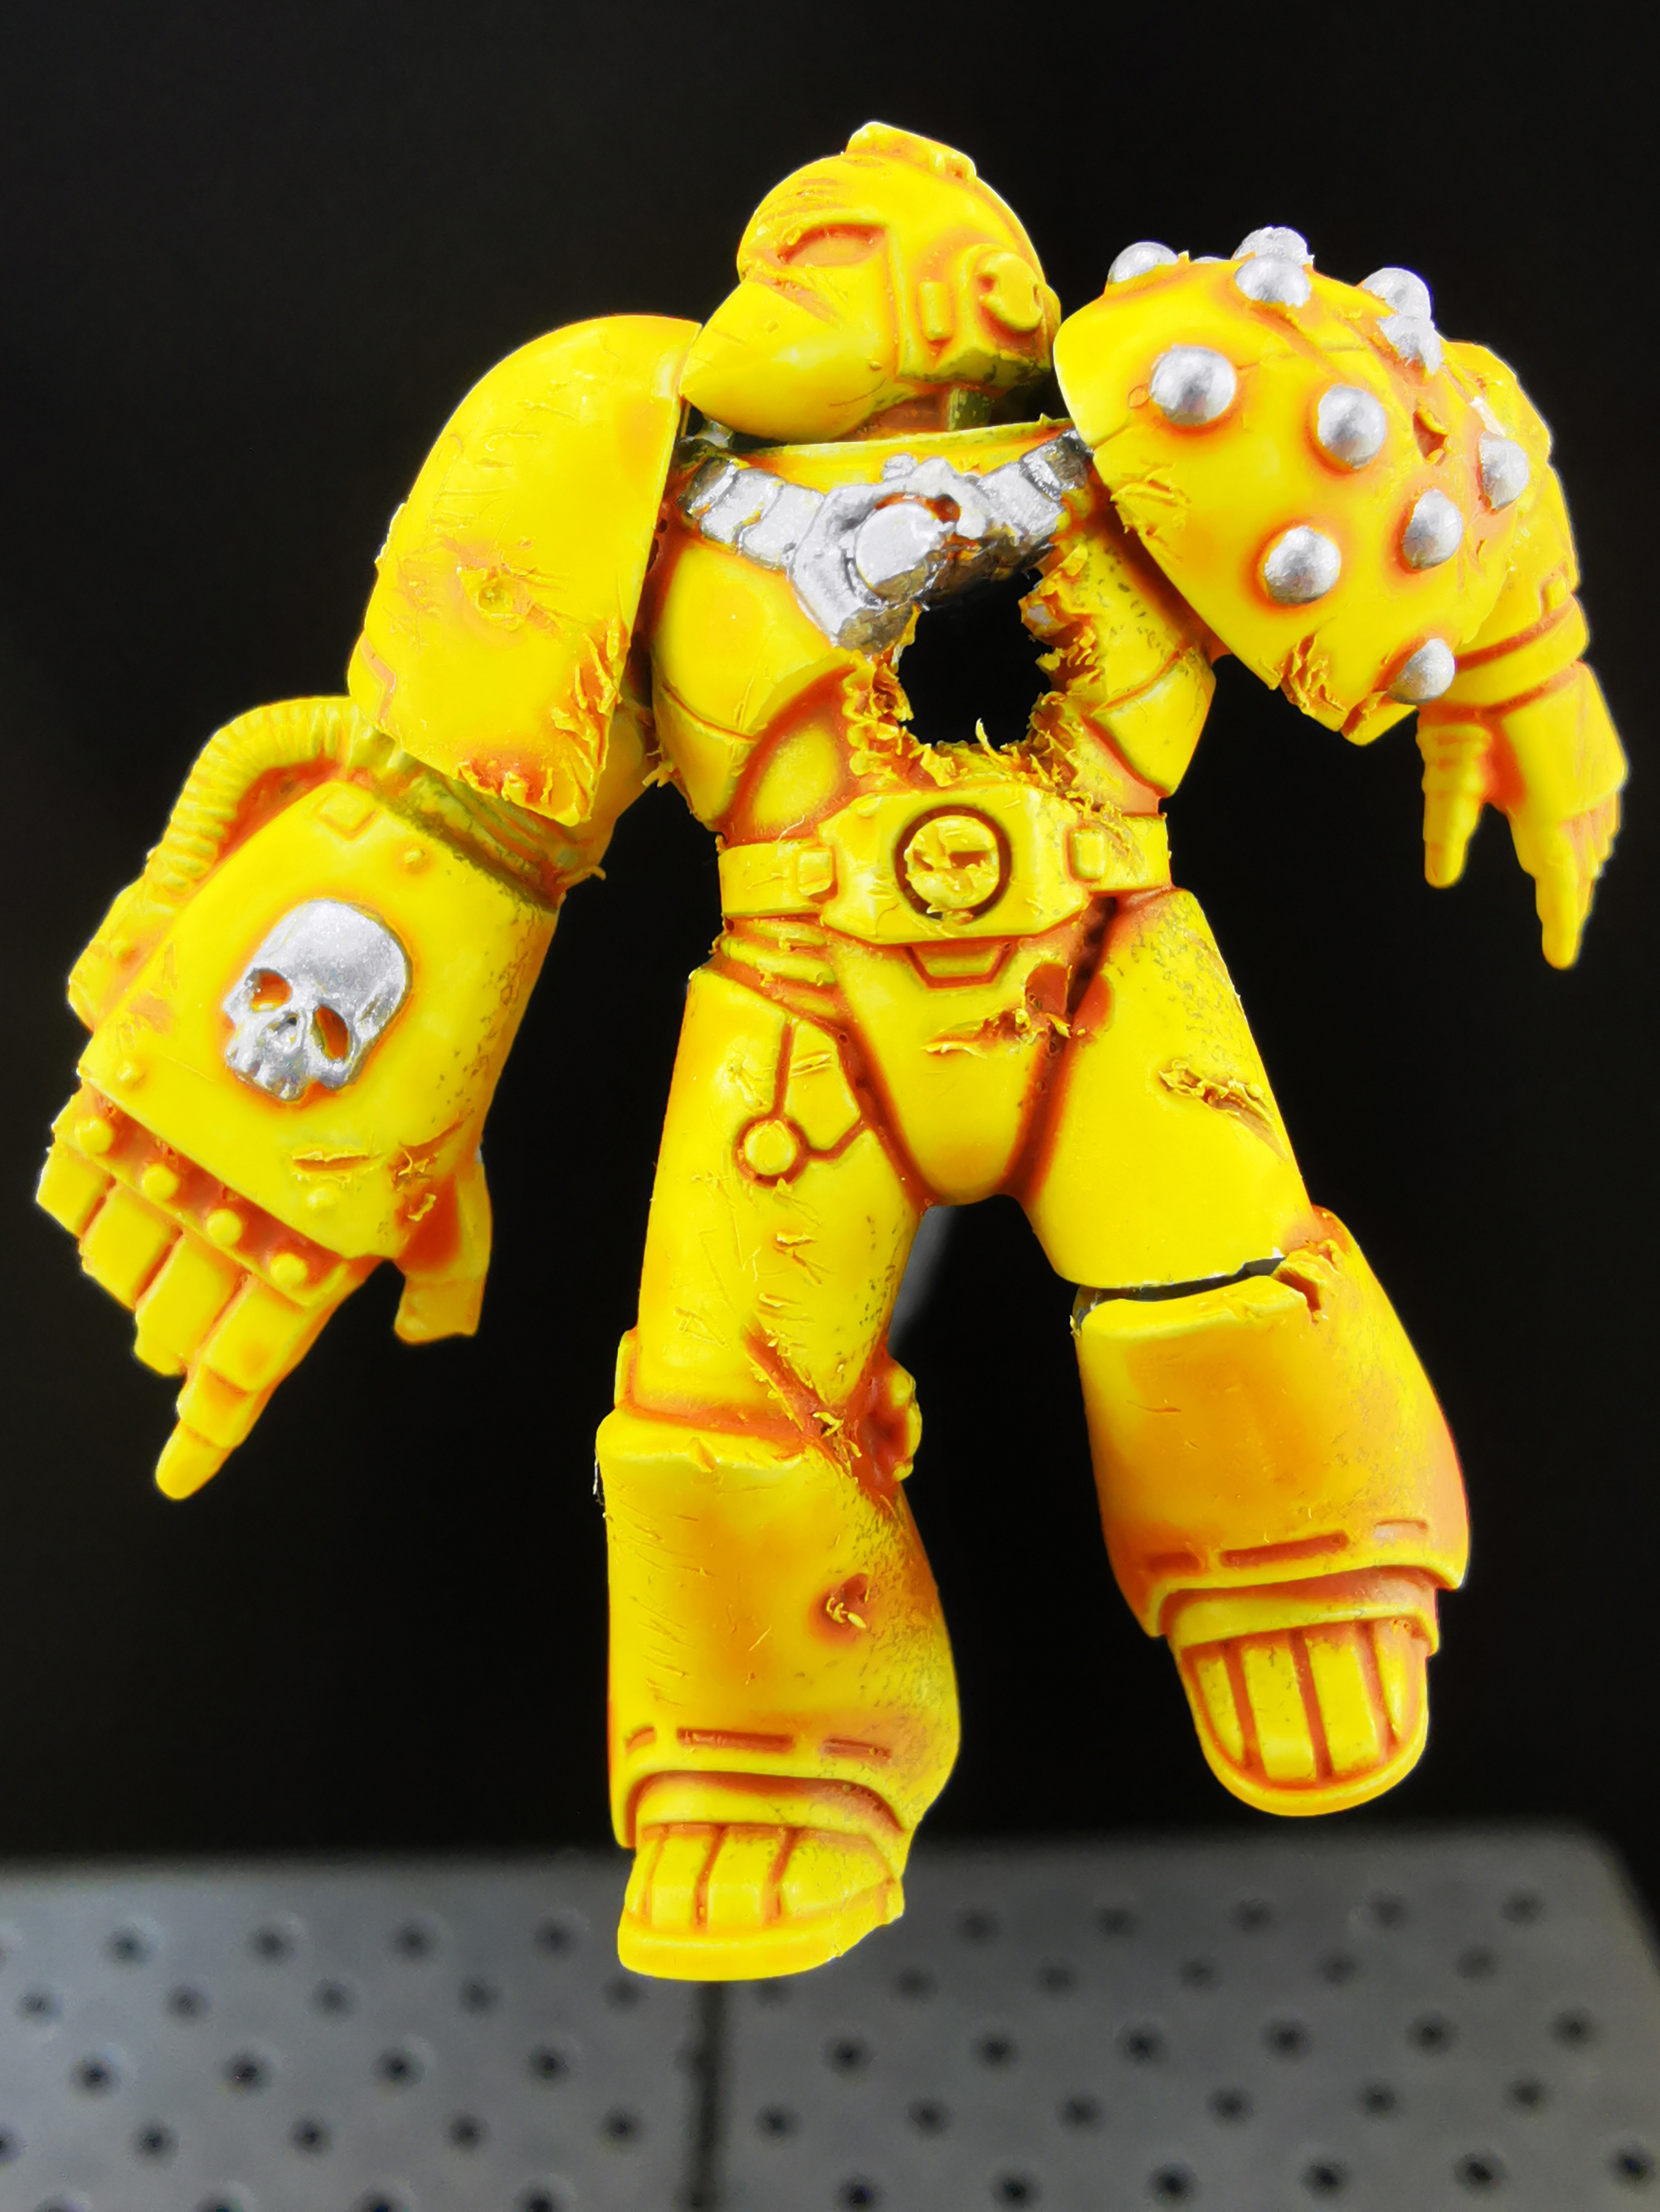
I used my imagination for deciding how to damage the Space Marines. These are the standard Mk 6 armoured marines from the Age of Darkness starter box for The Horus Heresy game by Warhammer.
I used various widths of bits in my pin vice to make bullet holes, my clippers to remove arms and legs, and the rotary tool to get really nasty. I also used my knife to apply scratches and wound feathering.
For sword damage, I cut part of the sword away to give the impression it’s buried in a body or in the ground. The one exception is found in the pair of marines who have run each other through. The sword goes all the way through one of the marines and emerges by (actually through) his head. Ugh.
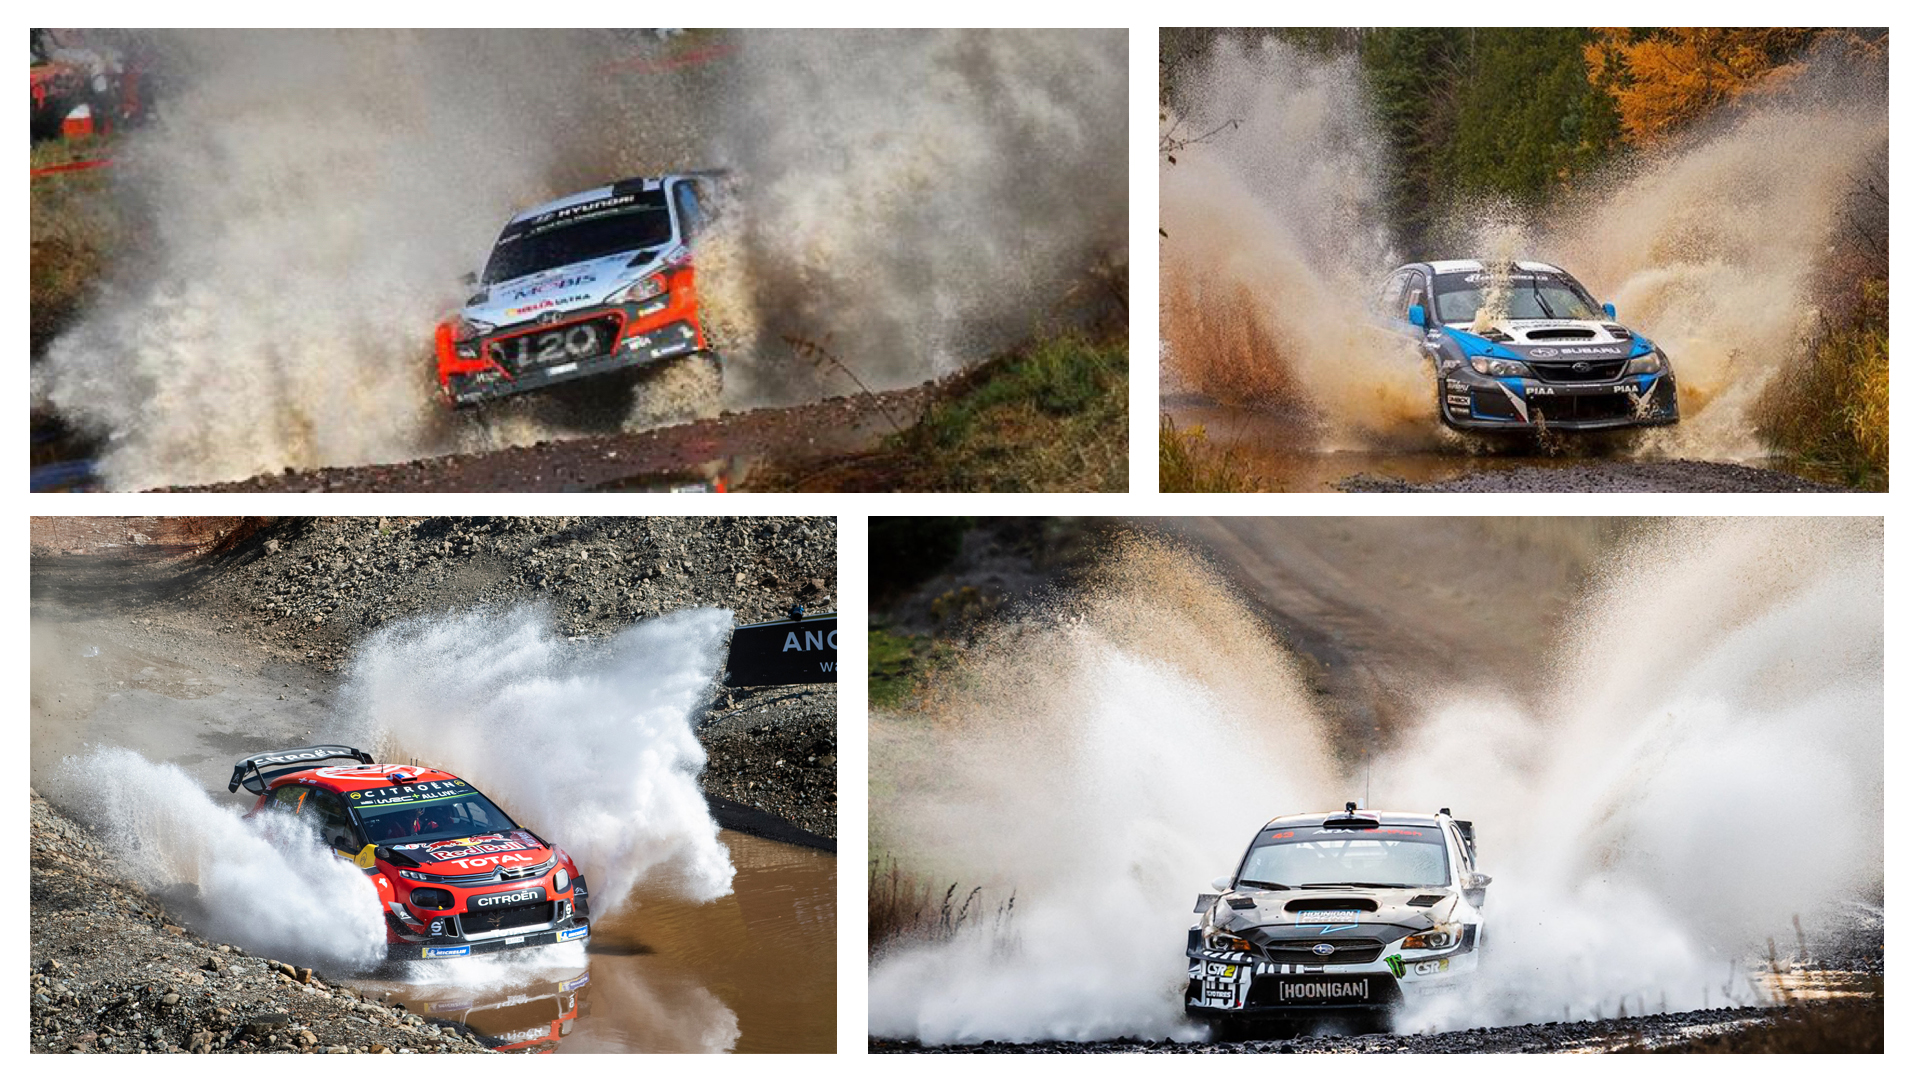
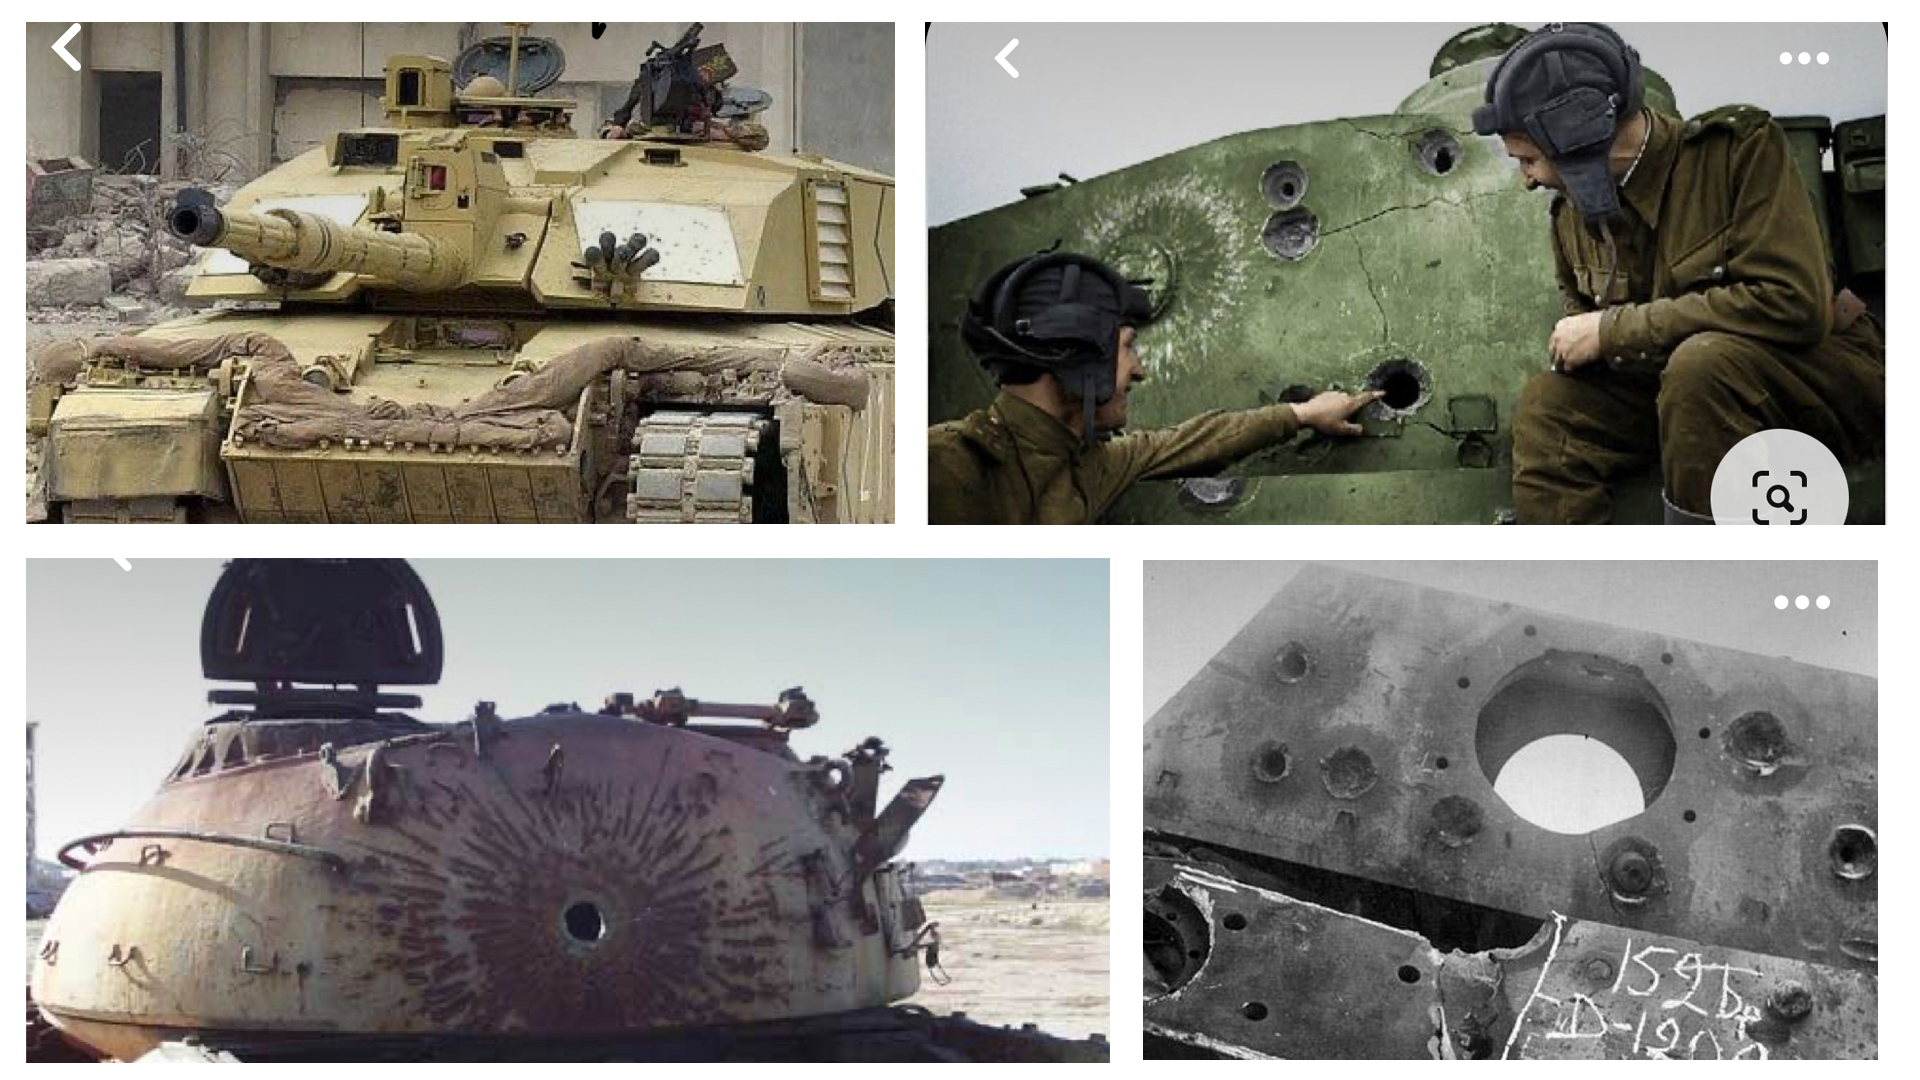
In this diorama, the tank is going to be battered and bruised, and splashing through a bomb crater filled with blood.
I researched images of tanks with armour damage, and also rally cars splashing through puddles.
These will be invaluable when I’m sculpting the splash effect, and also unleashing the rotary tool on my poor, unsuspecting tank!