


Manda (Amachan) goes to the Eastern Front


Recommendations: 330
About the Project
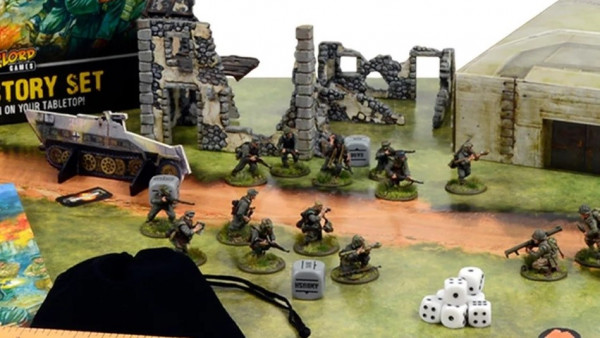
This project will follow my progress into 15mm Eastern Front wargaming. I will be building at least 2 armies, a Soviet and a German one and all the terrain I need to play. I am focussing on the latter half of 1942 so around the battle of Stalingrad, but not on Stalingrad itself.
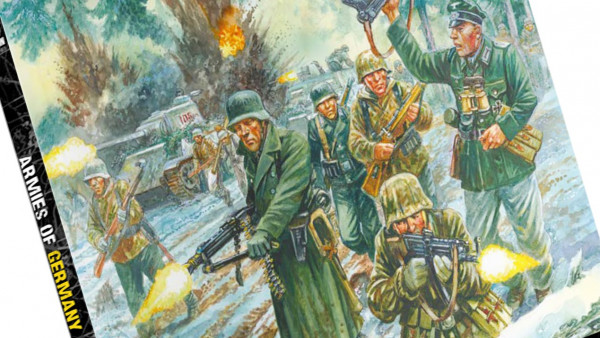
Related Game: Battlegroup
Related Company: Battlefront Miniatures
Related Genre: Historical
This Project is On Hold
Project On Hold.
I have been struggling with massive disabilities causing me to not be able to paint or build miniatures. The major disabilities limiting my hobby are tremors in my right hand making it very unstable and lots of pain in my left which I was learning to paint with. I am getting physiotherapy to try and help me cope with the disabilities, but I am not sure it is going to solve anything. I do not know if I will be able to return to miniature painting and such and for now I am starting a new project involving LEGO, something I can do with my disabilities.
PANZER!!!
A couple of updates.
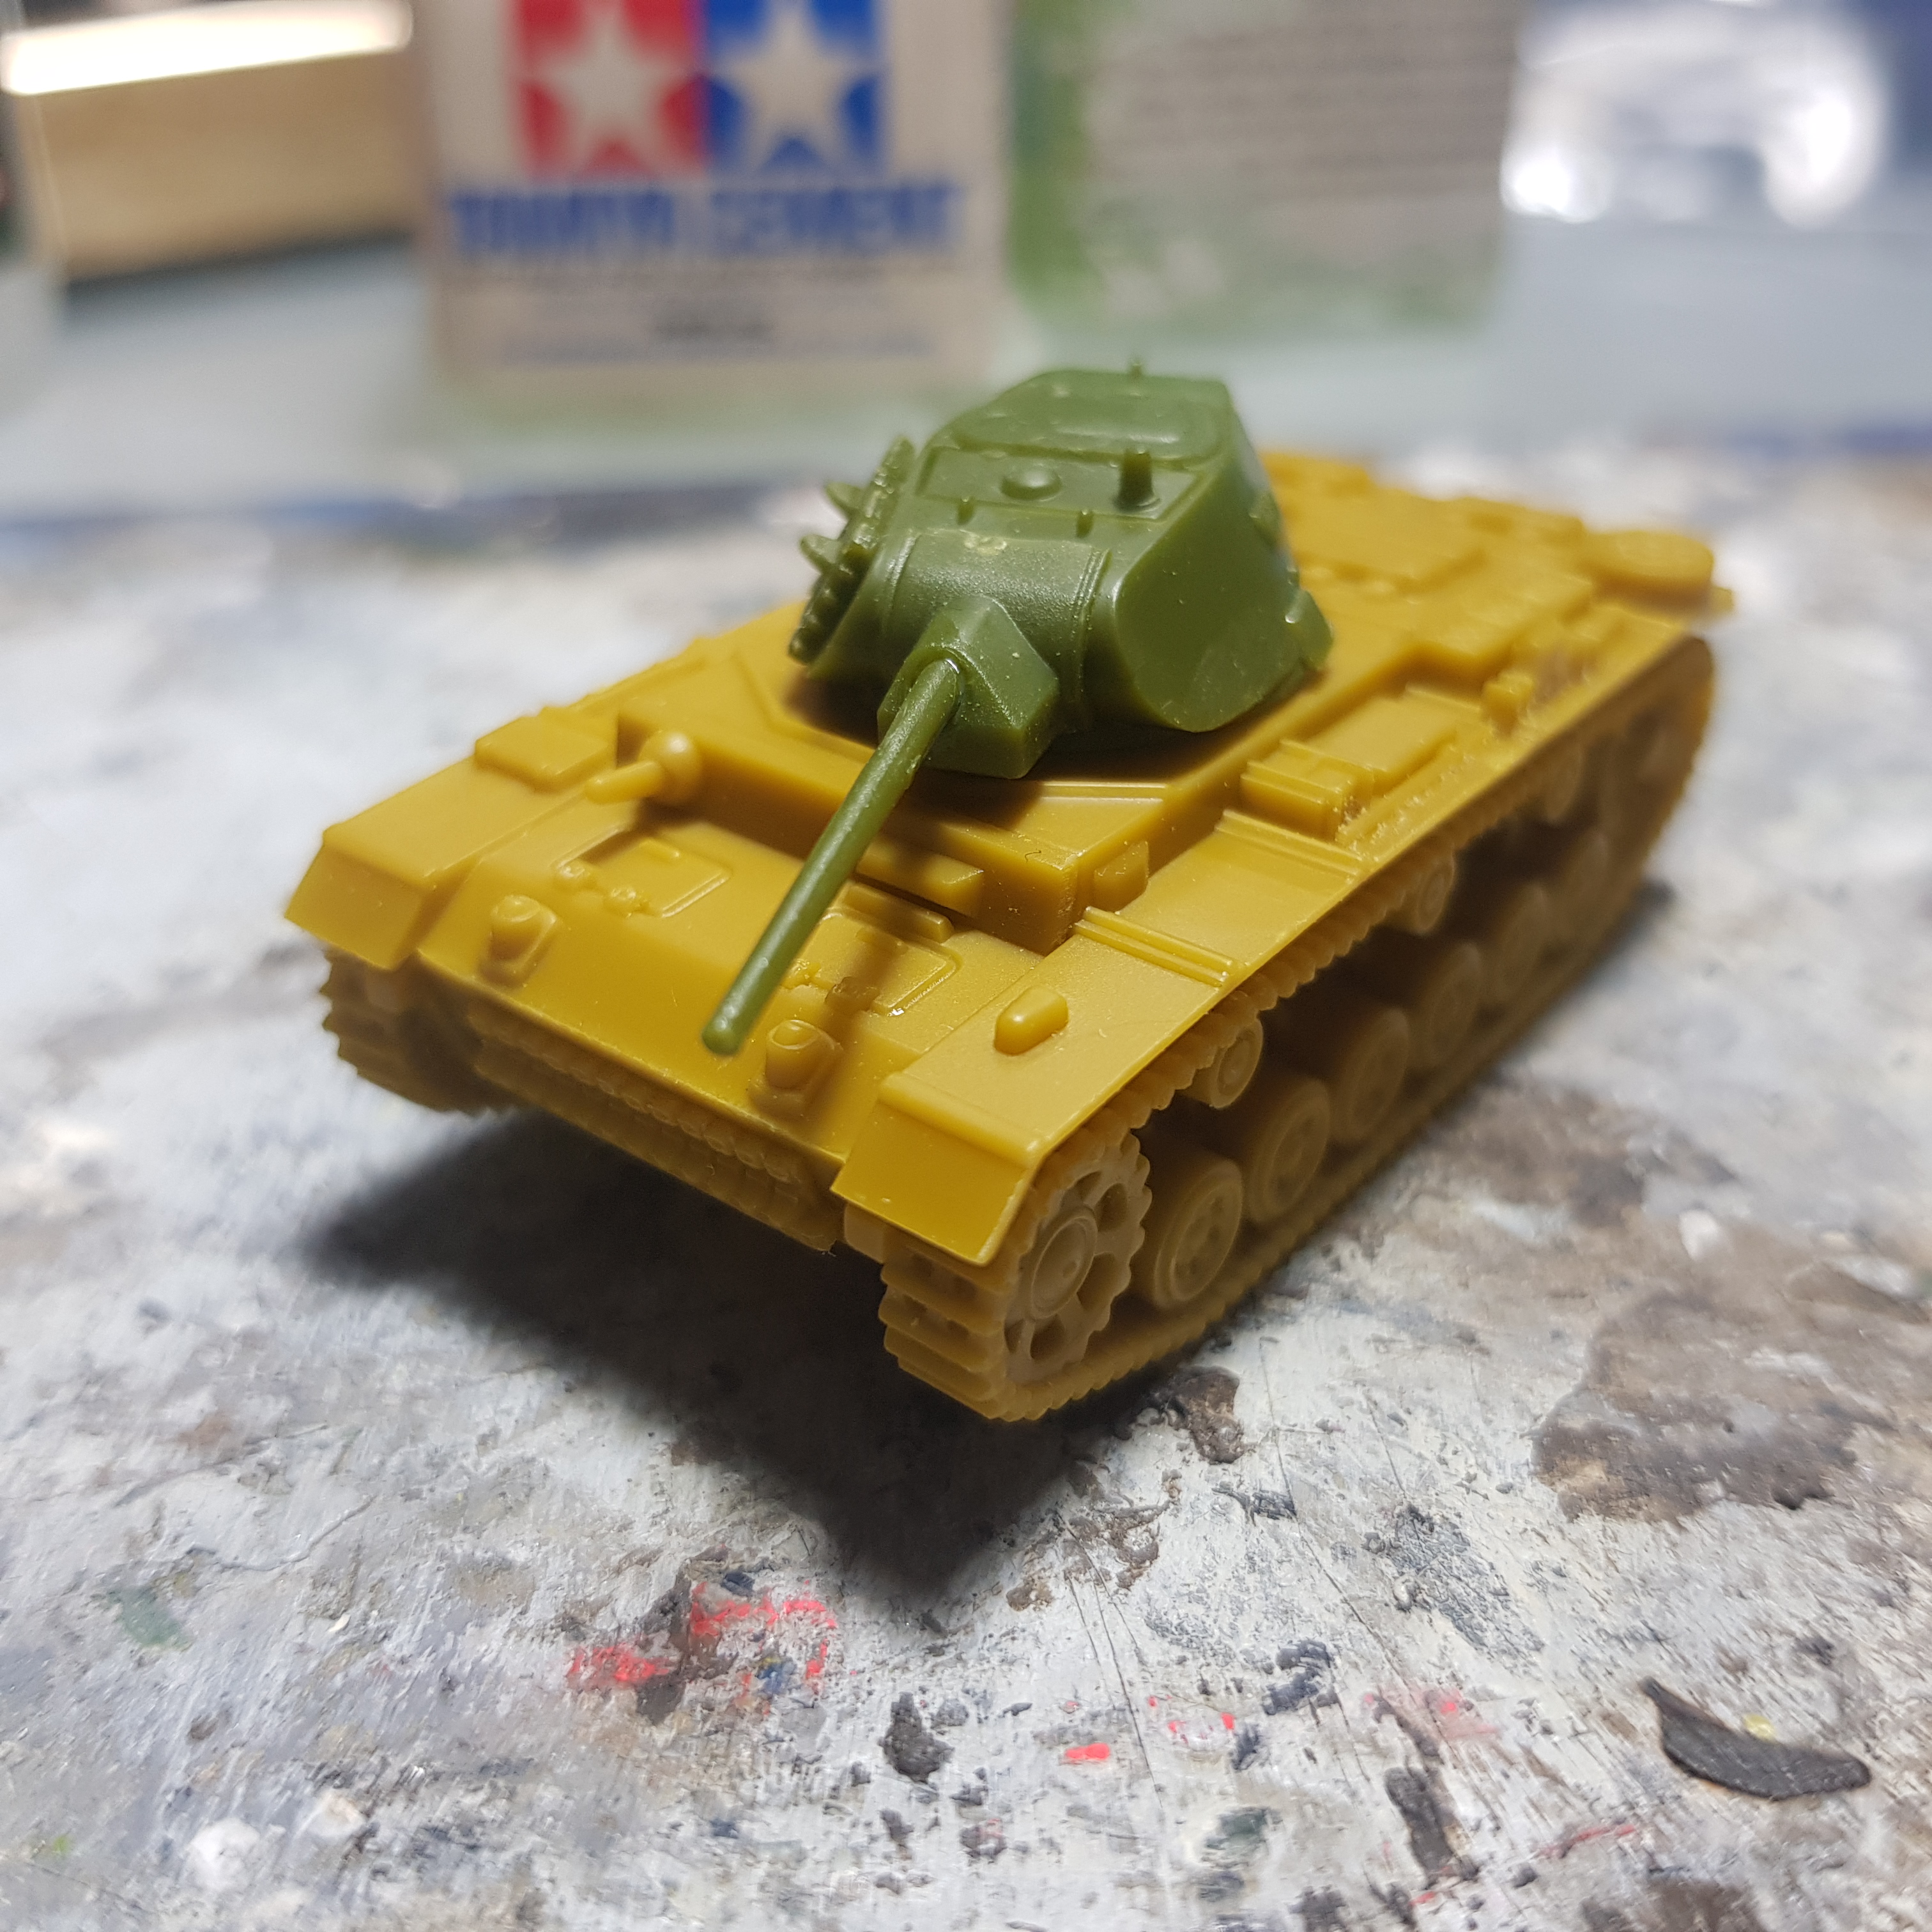
A small correction from earlier on in the project. I said I was making 3 Panzer III Ausf. J and 1 Ausf. L, I got it wrong they are all Panzer III Ausf. L, the command one is just the uparmoured variant. The Panzer Ausf. J actually has a shorter gun and all of these were planned to be with the longer 5cm gun.
For the change to Battlegroup, until I actually have the rules and can make new army lists, I am still going to roughly follow my Flames of War armylists that I made before.
On to building some tanks.
I wanted to go over the way I apply the magnets to magnetize the turrets onto the tanks. A couple of steps I do just make it a lot easier for me.
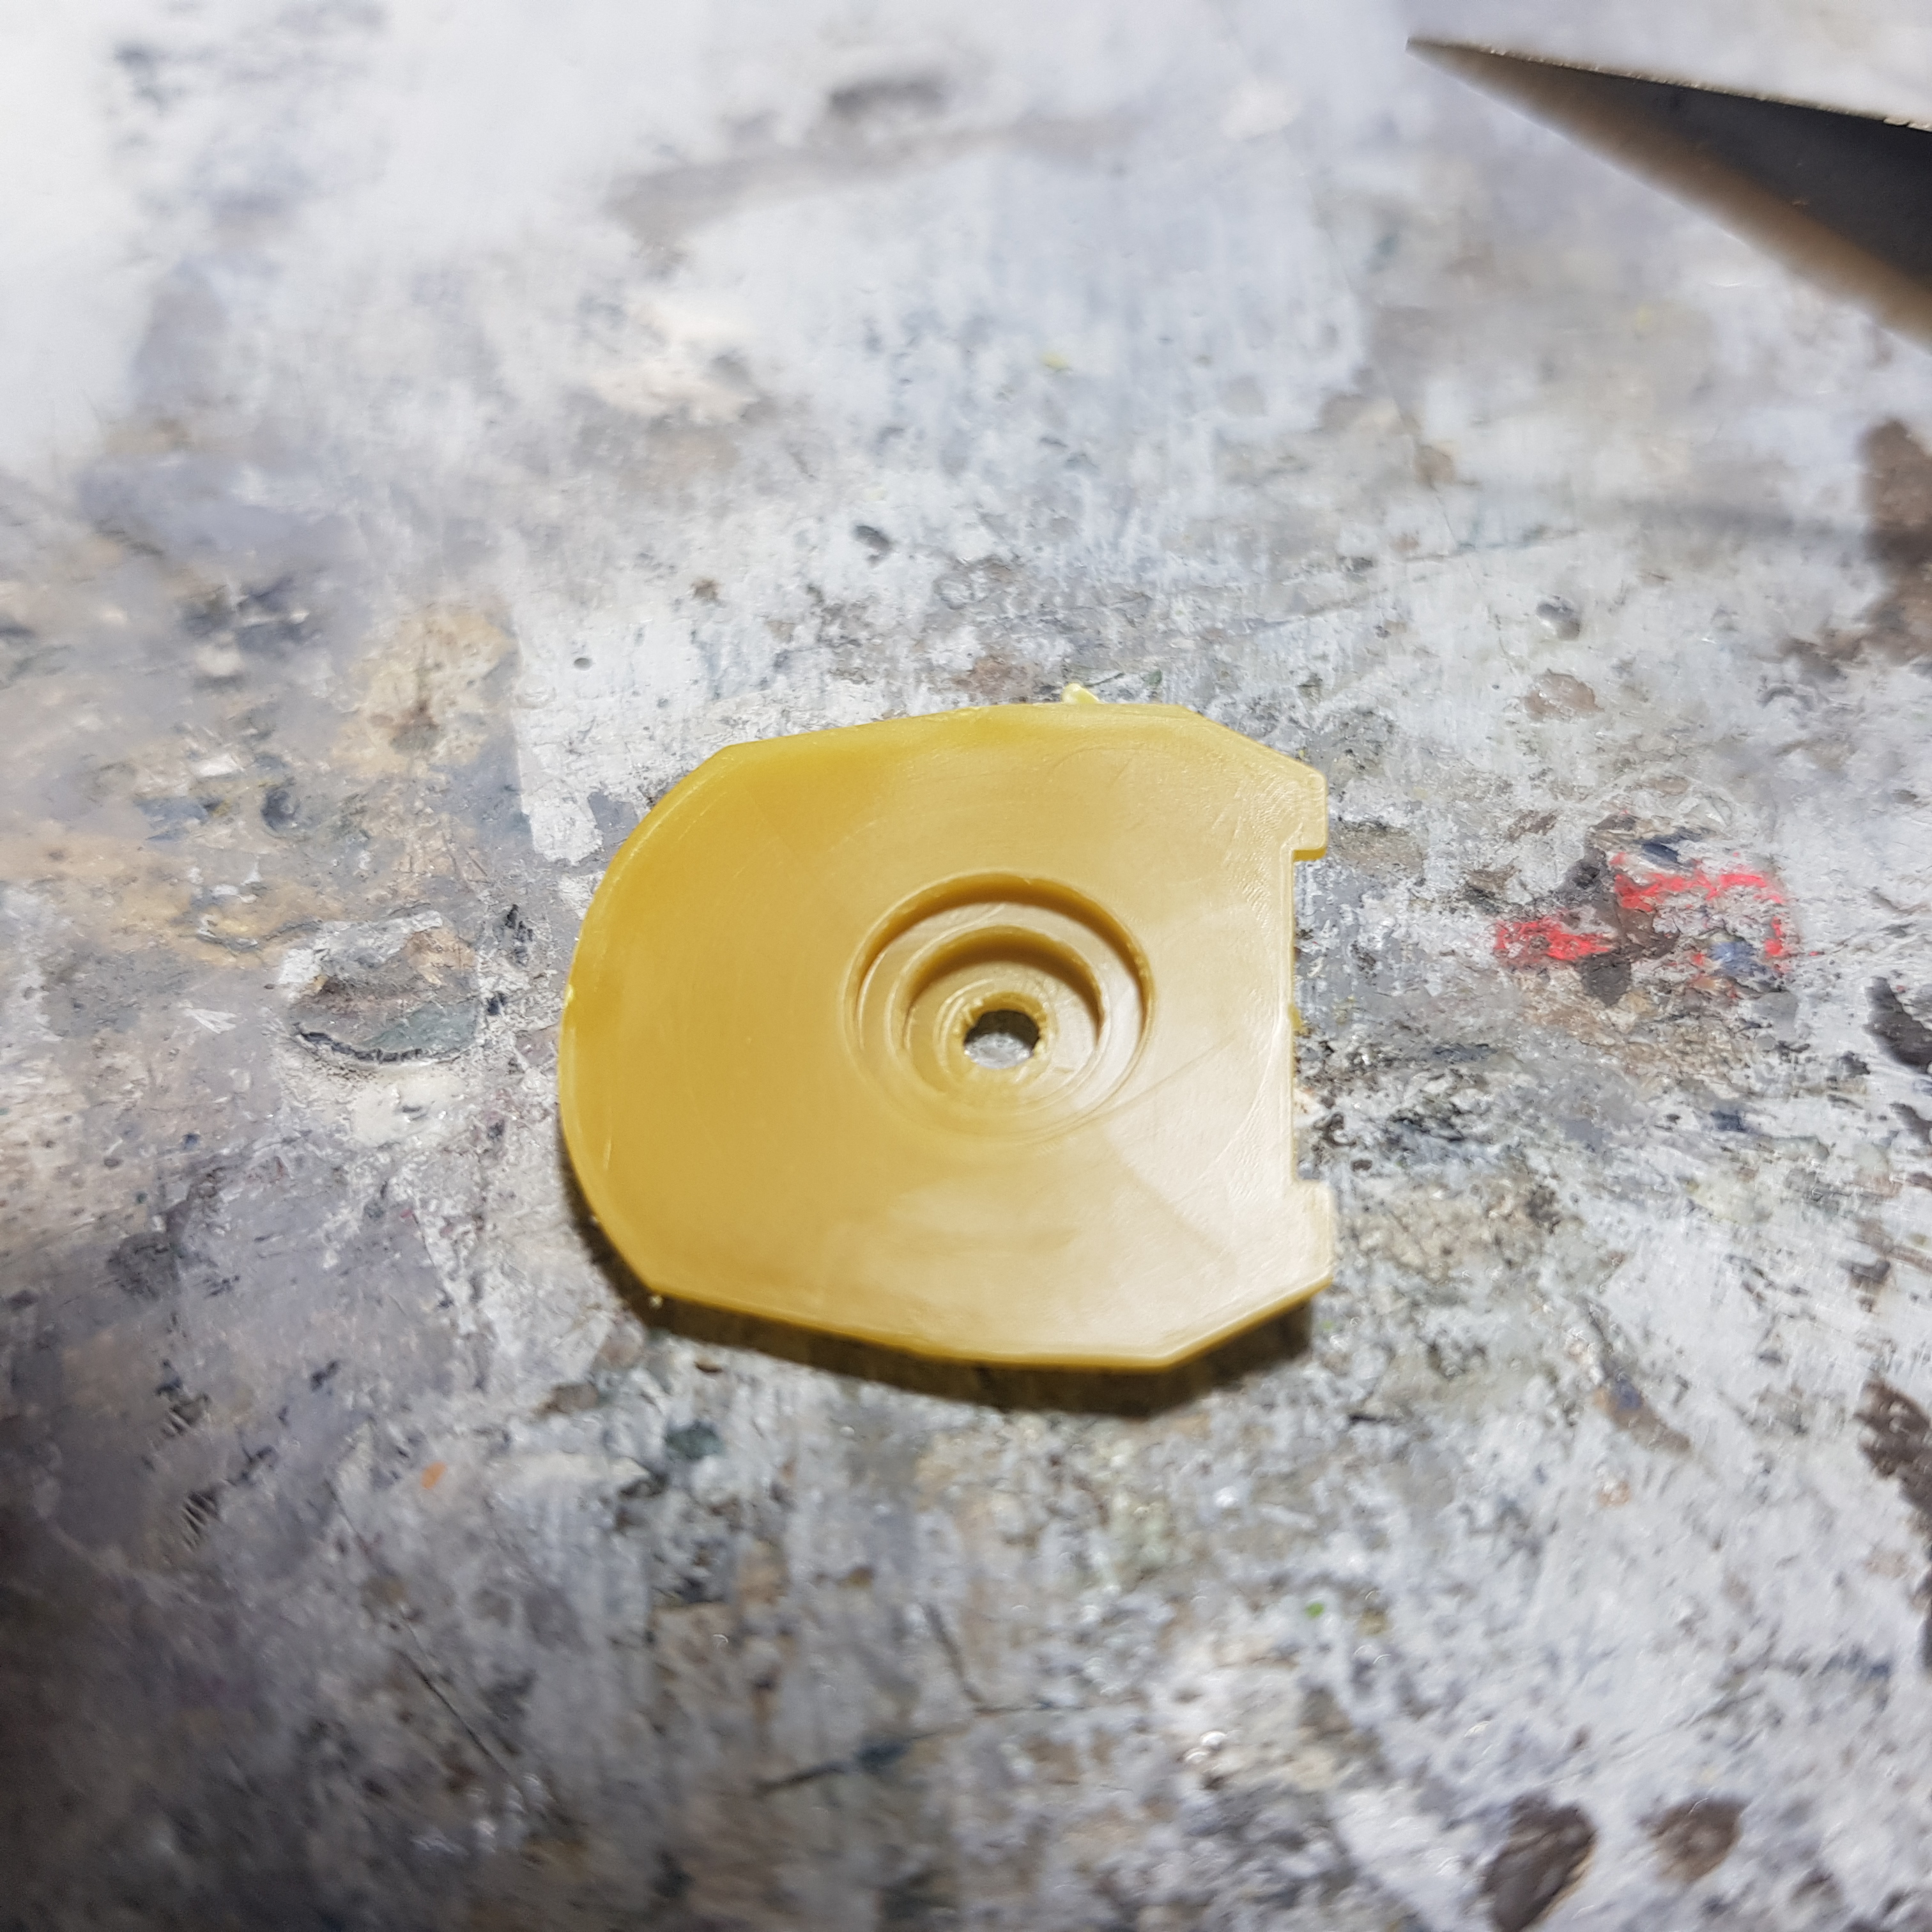
In these Panzer III kits the top of the hull does have a hole where you mount the magnet, but the turret bottom does not. By adding a hole to it it makes it easier for air and excess glue to get out so you’re not pushing against that too.
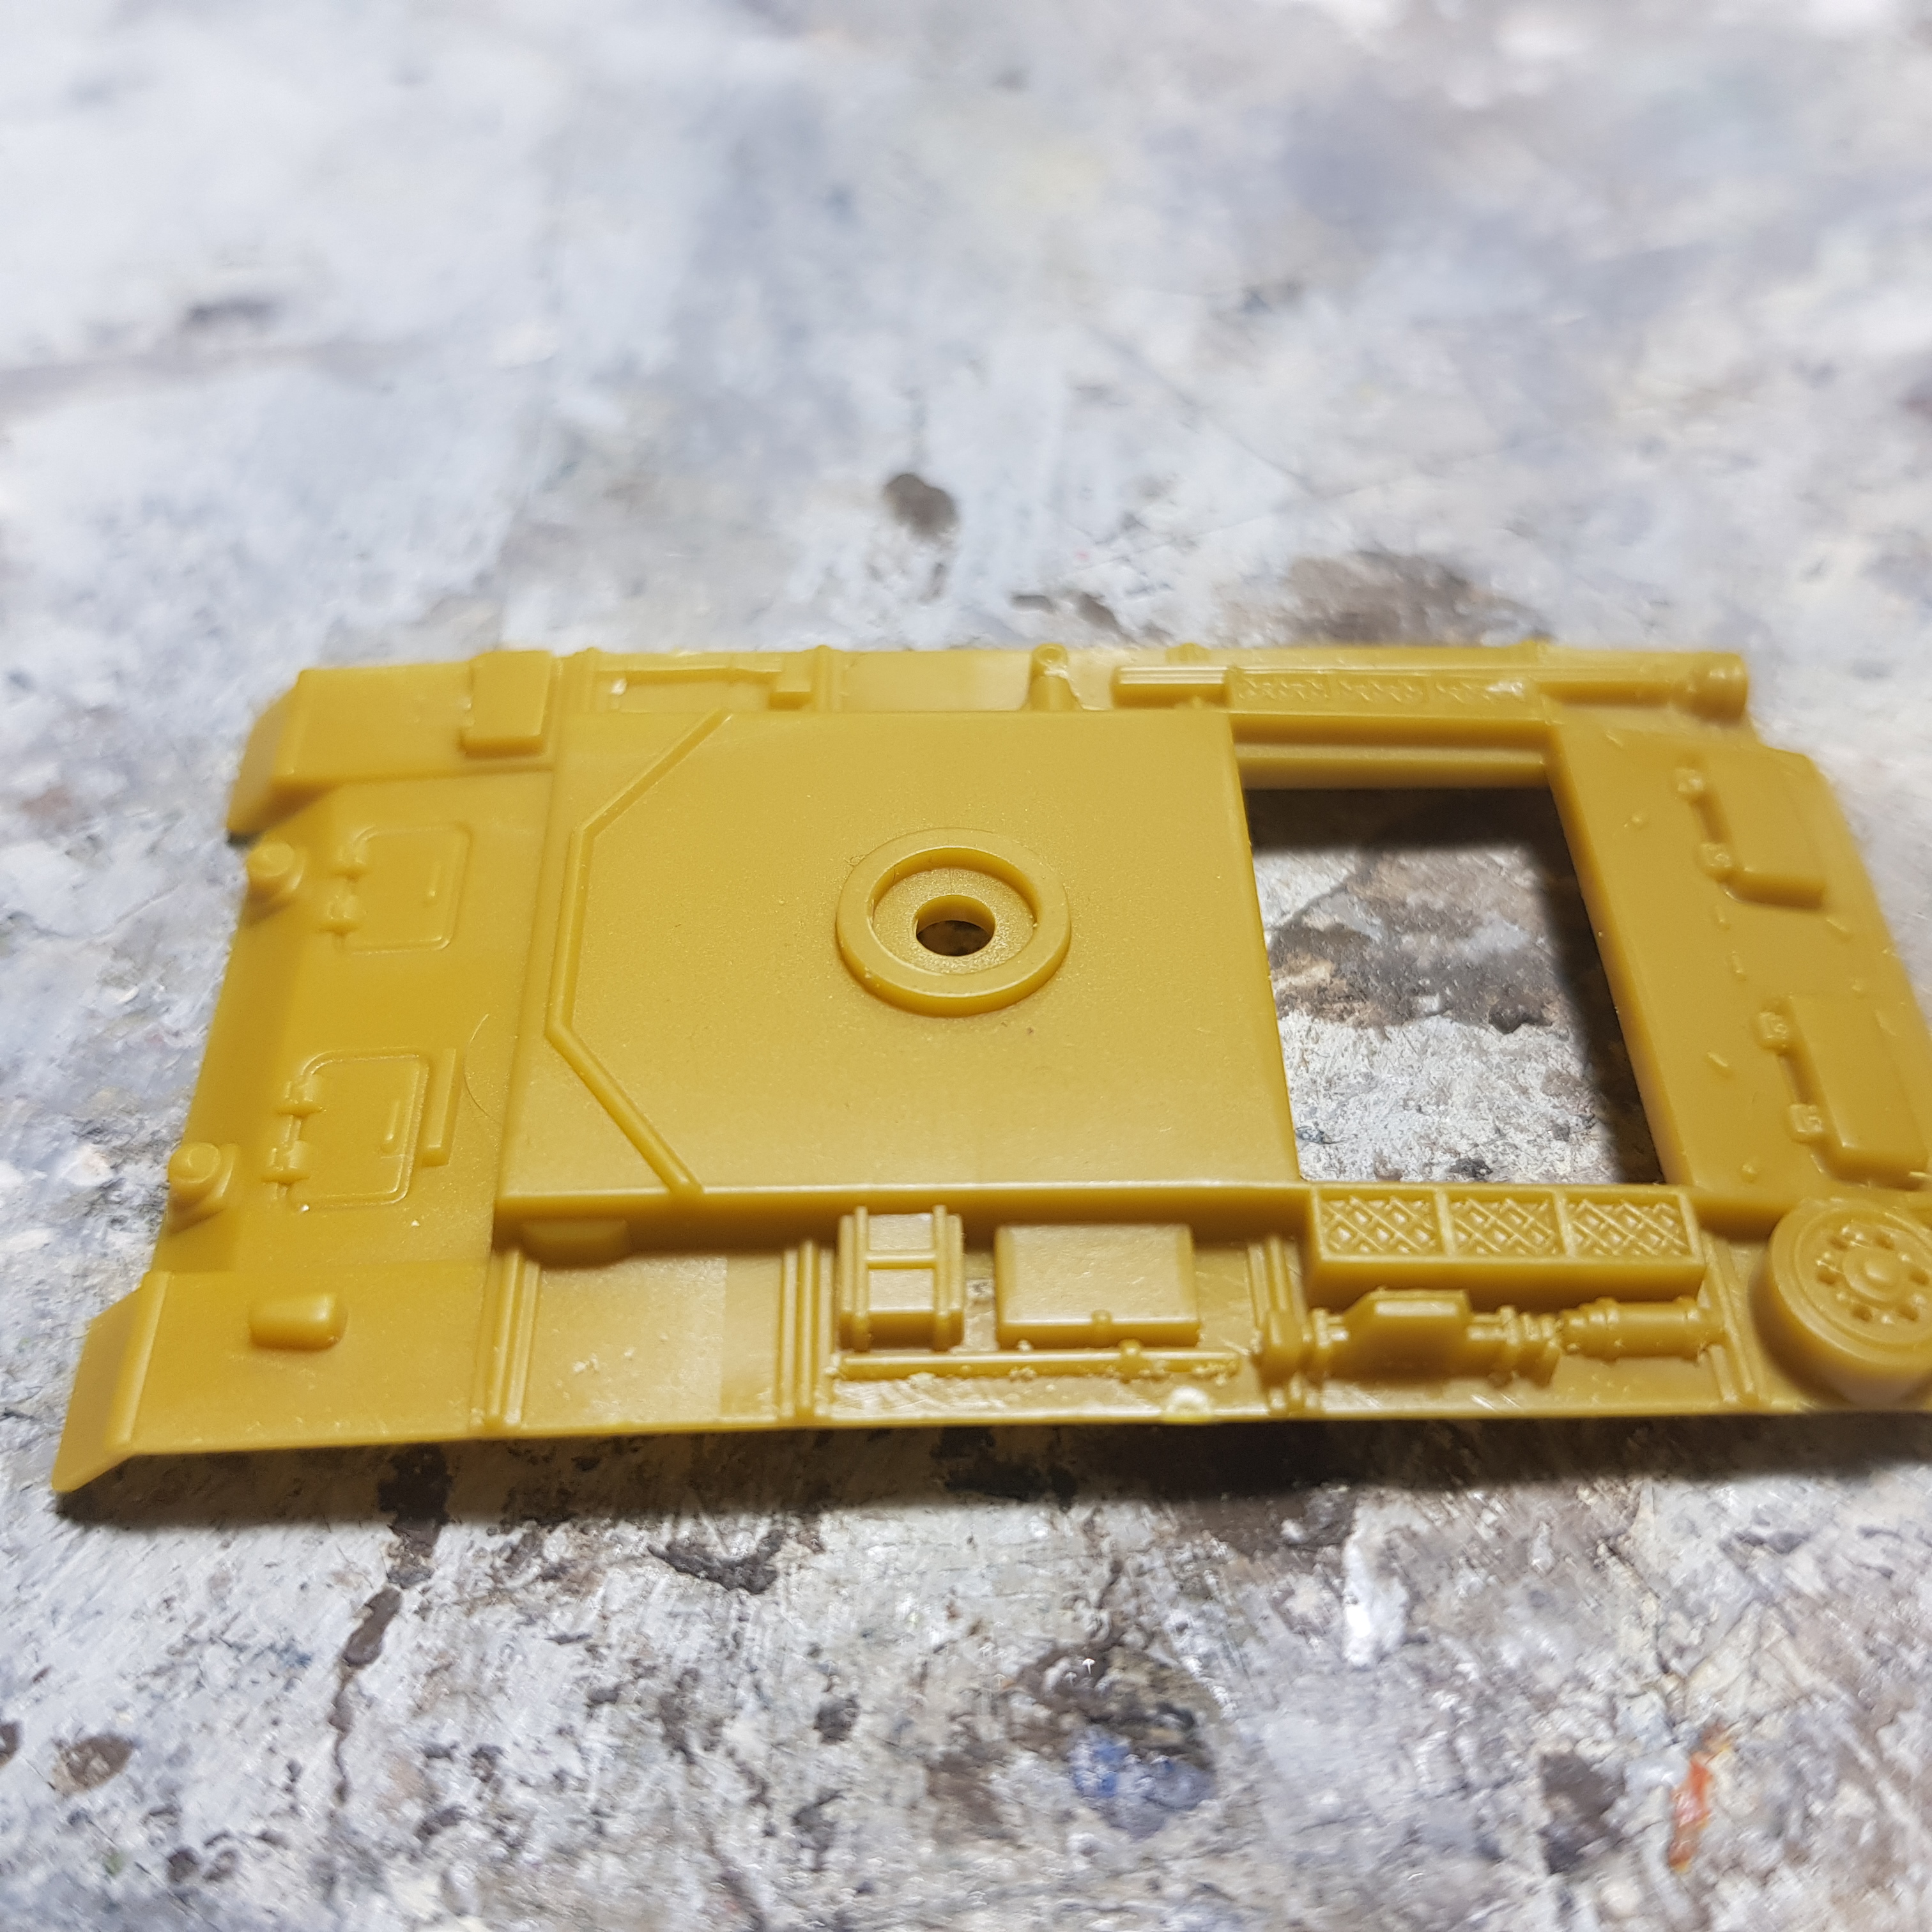
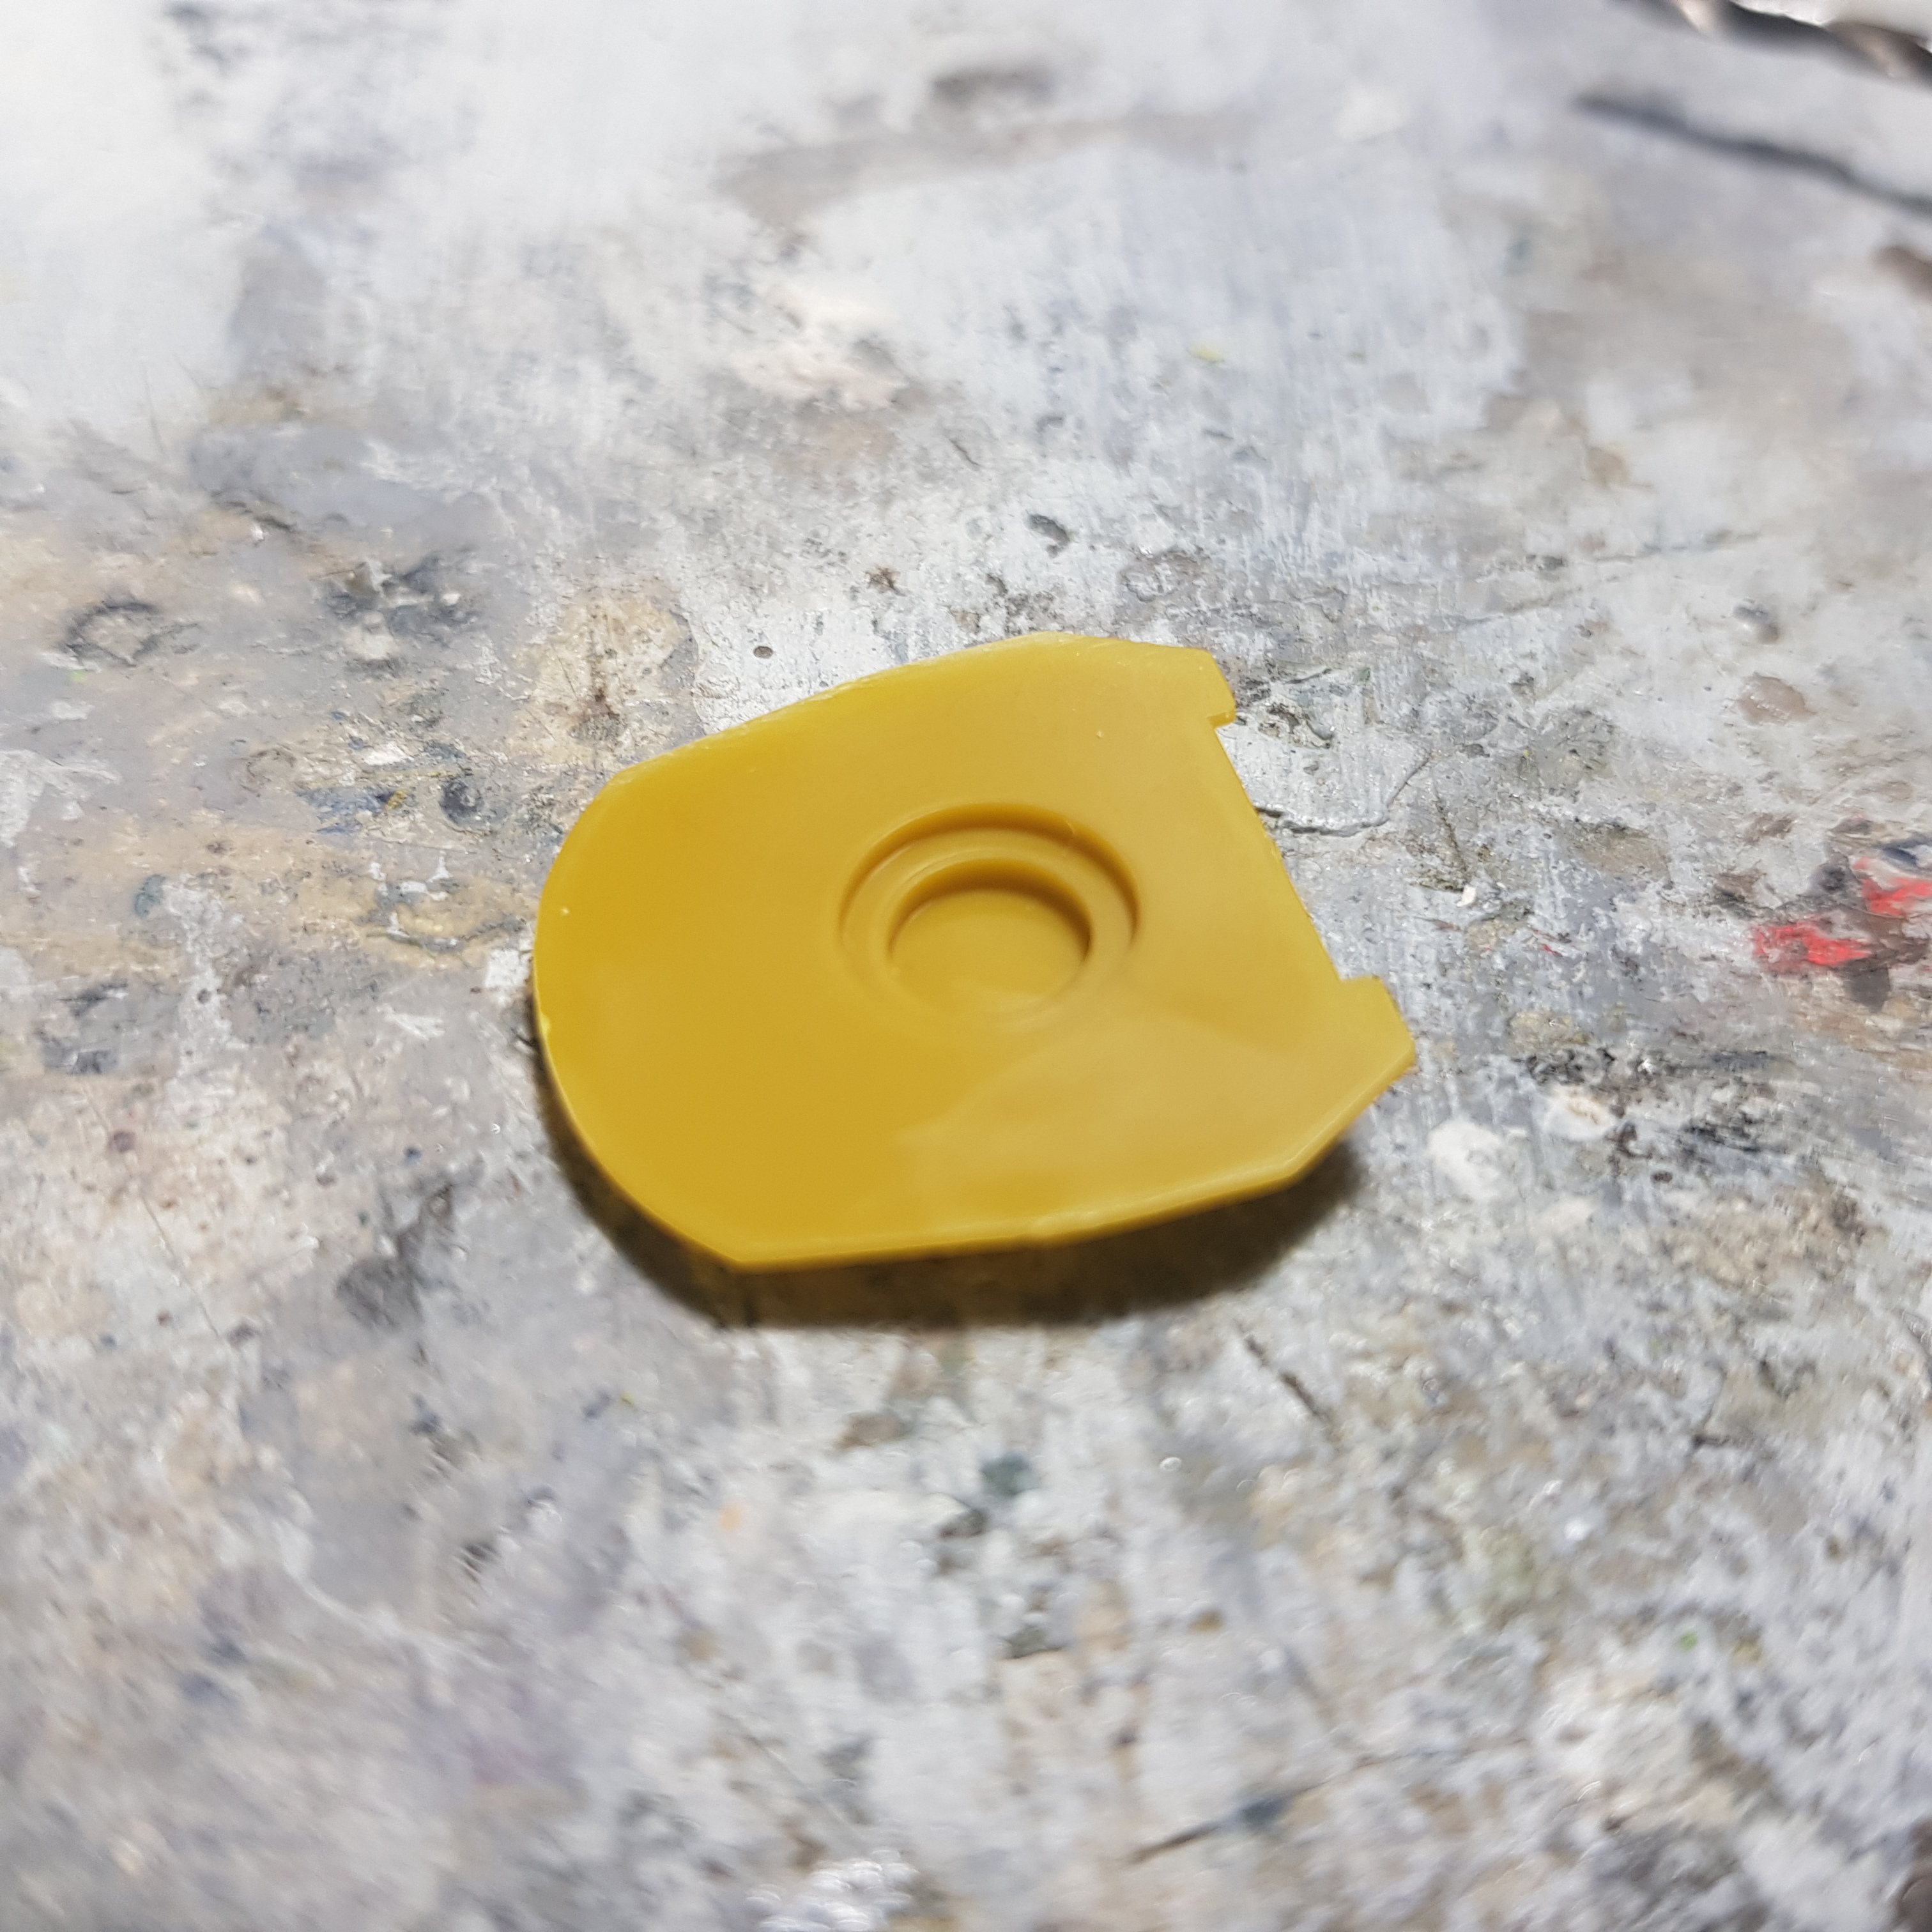
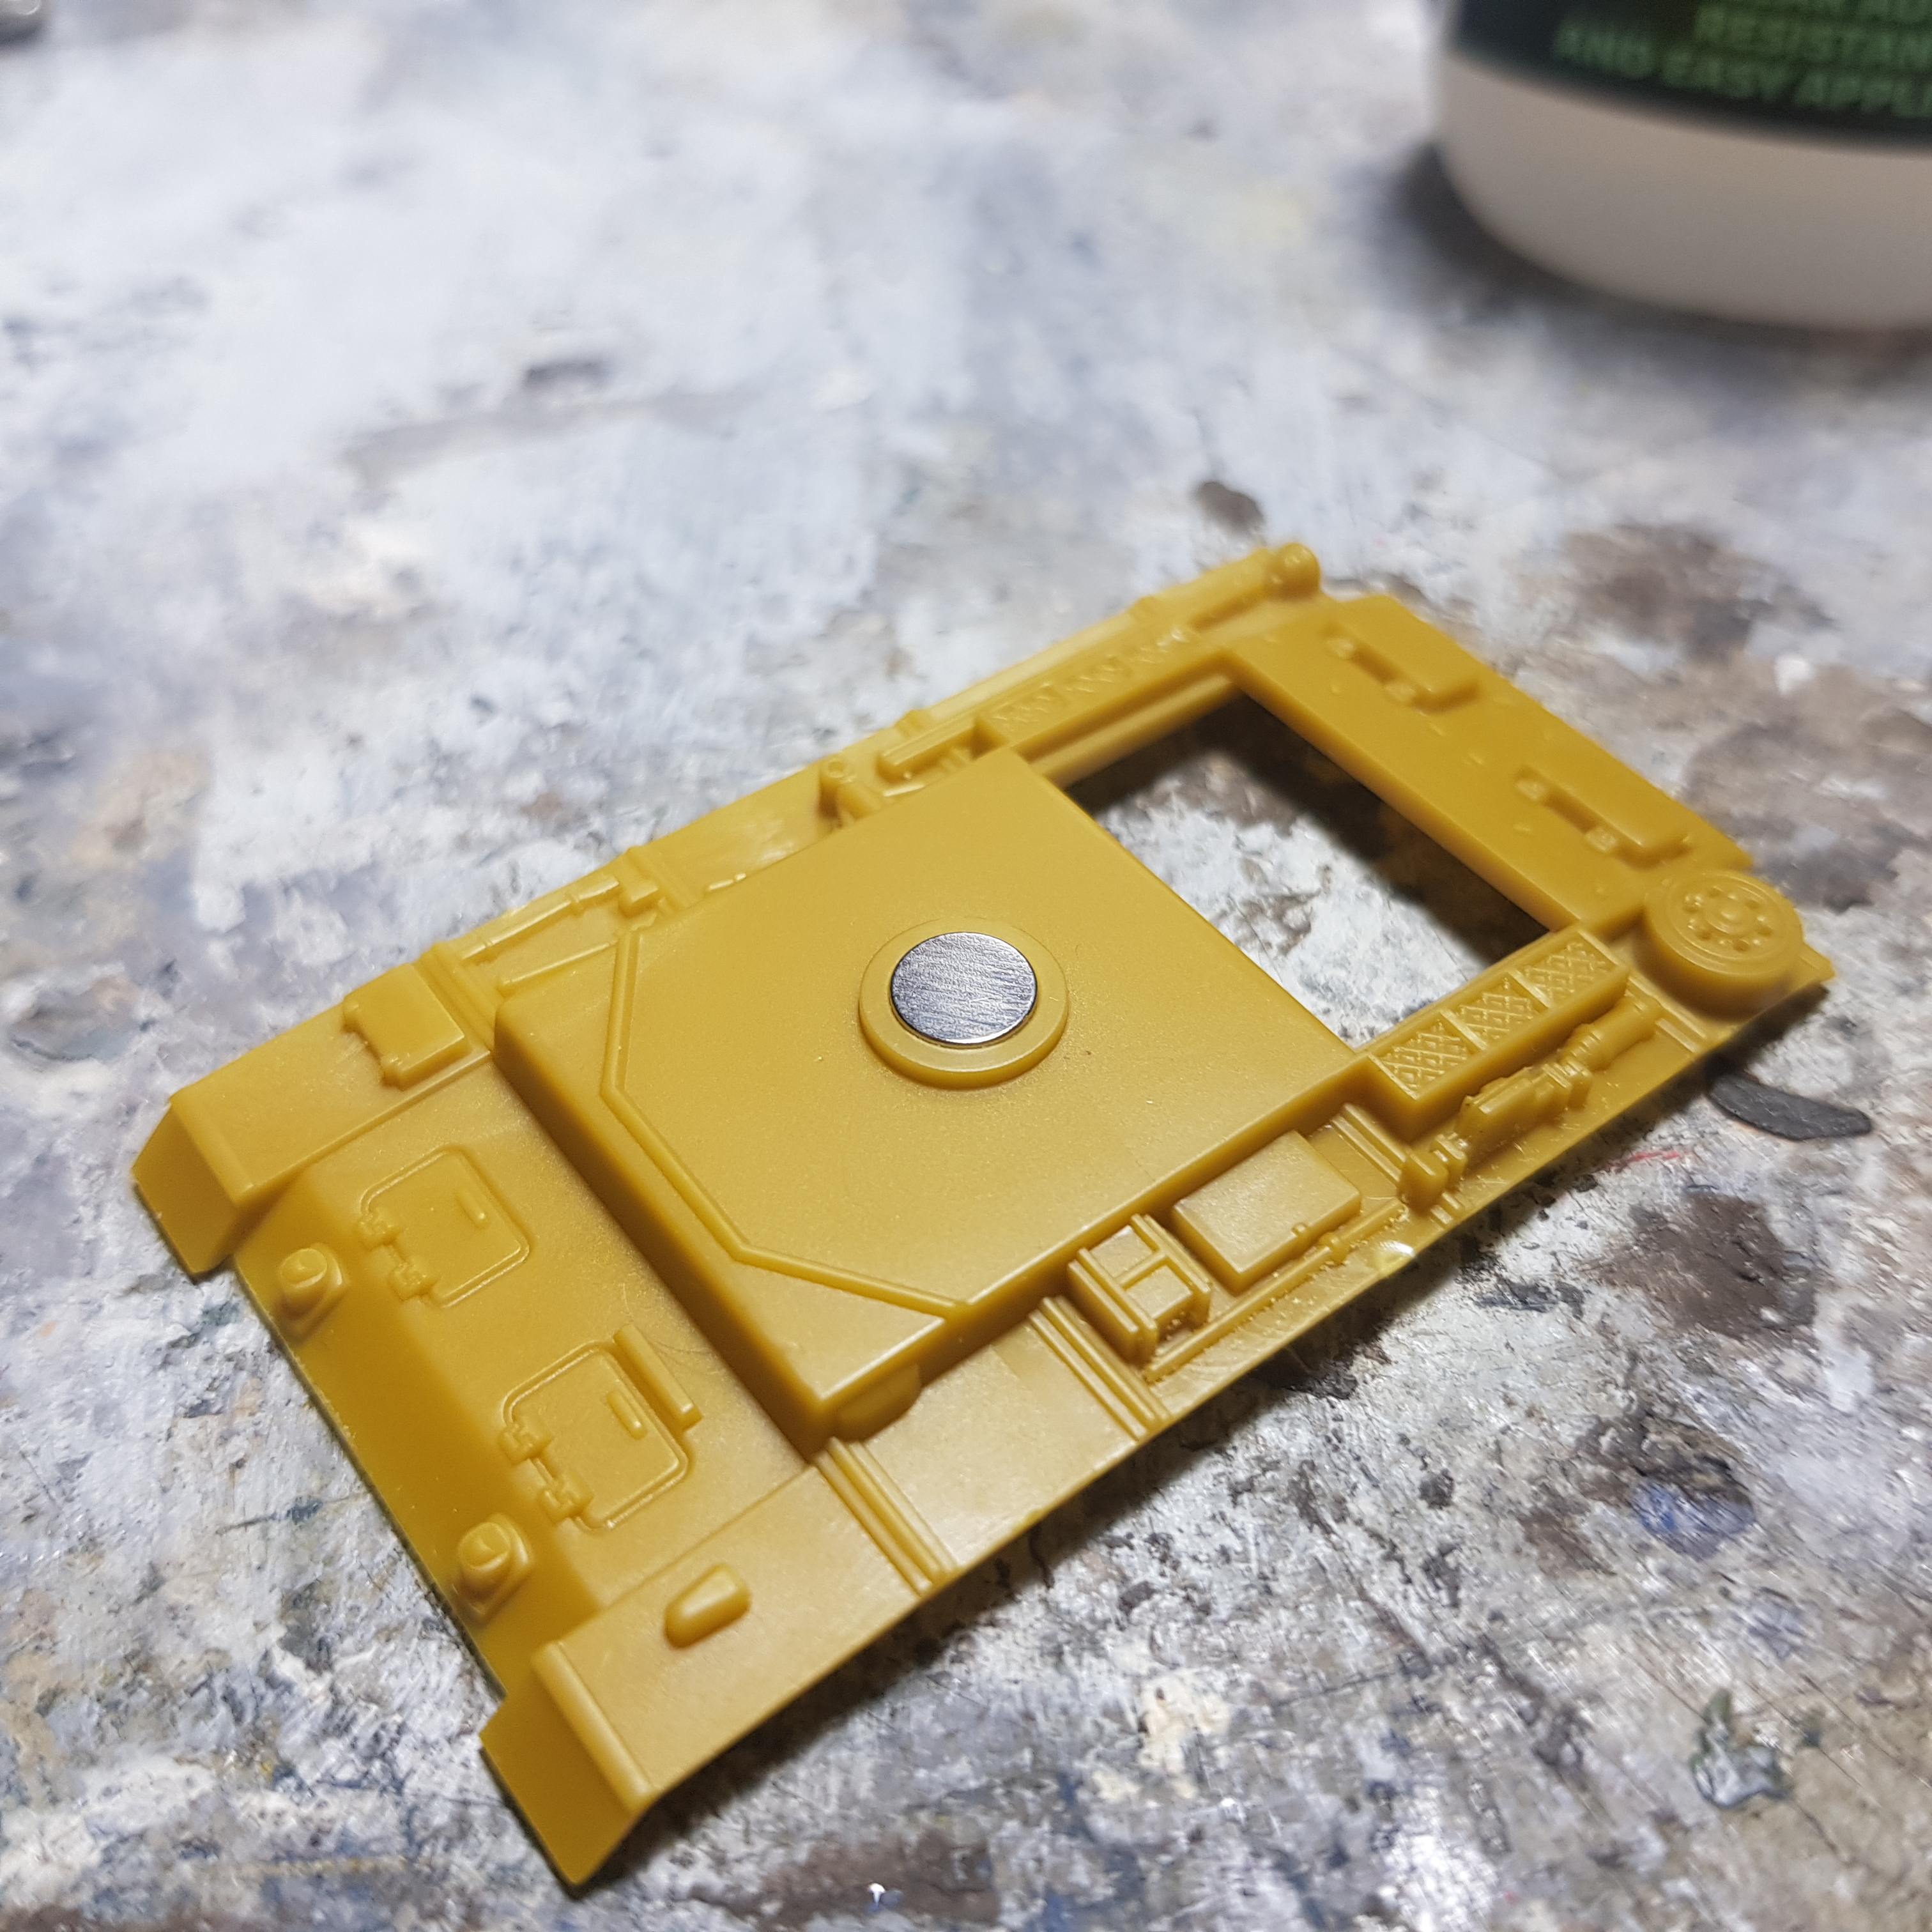
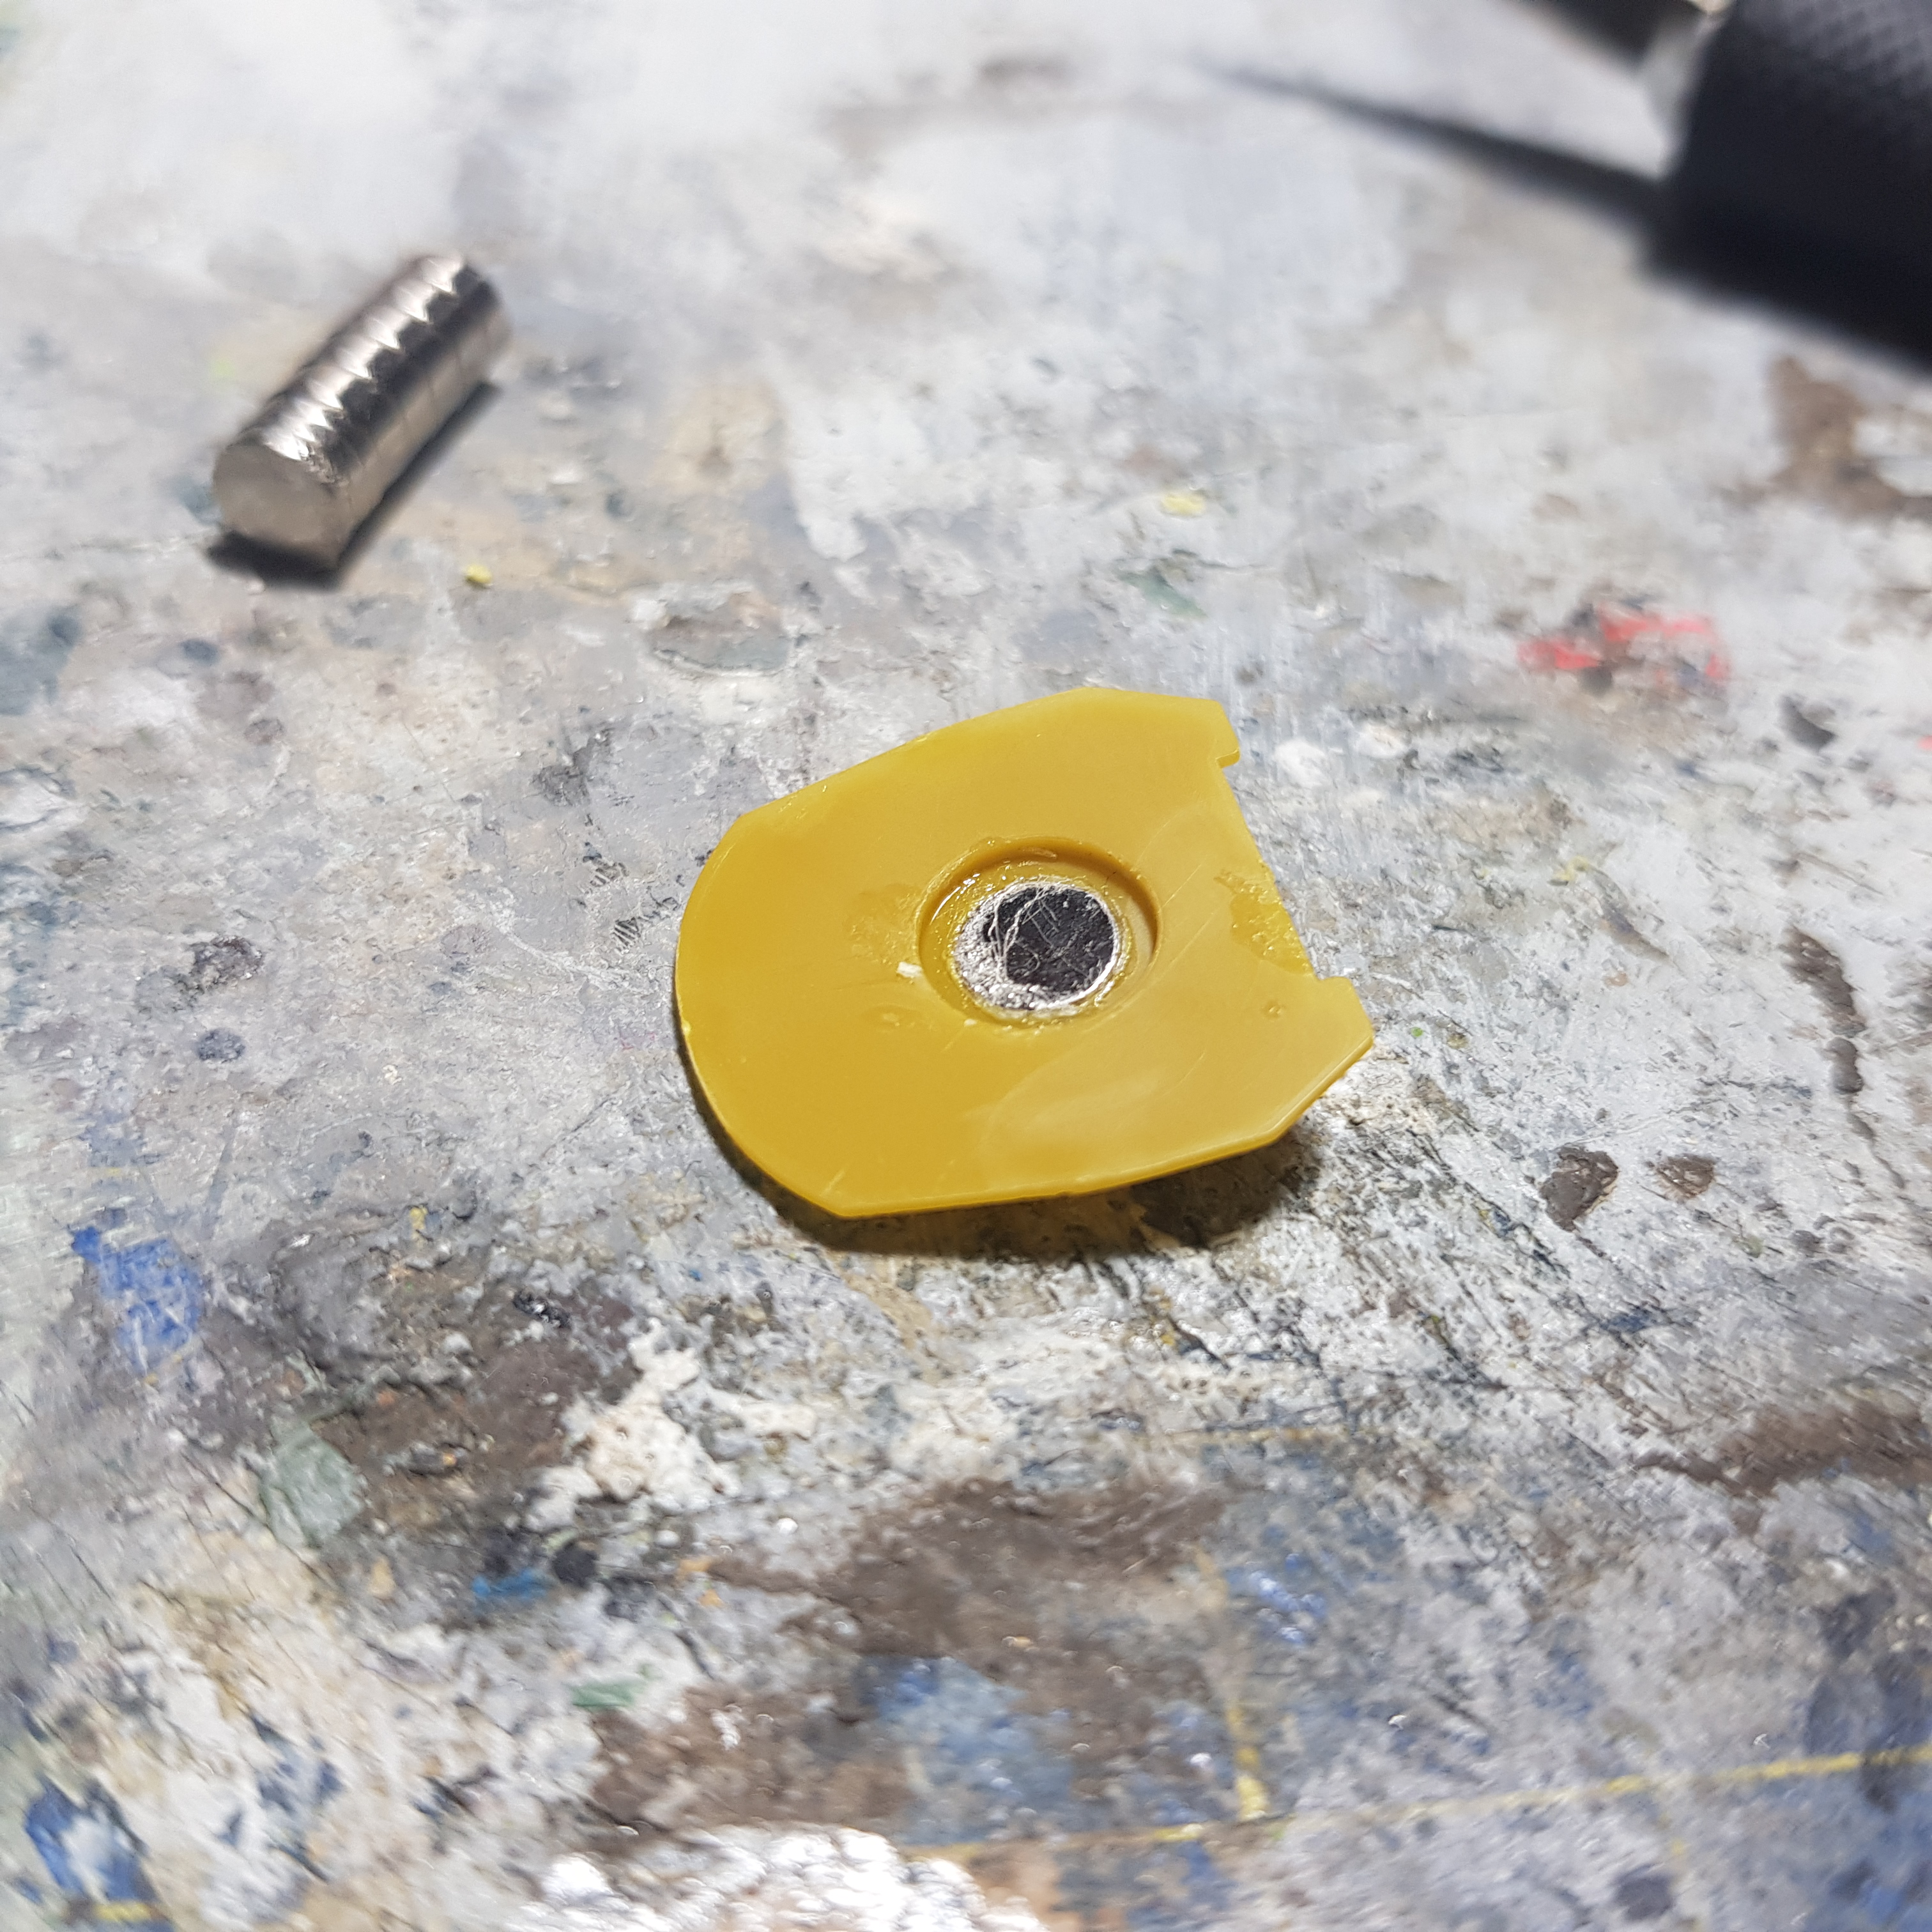
I then put a bit of thin superglue on top of the magnet and force it in it’s hole and the magnets sit completely flush in the hole they are supposed to be in. For the top I can easily just press the top and the magnet on my desk, but the turret on is a bit more recessed. So I used a couple more magnets to push it in.
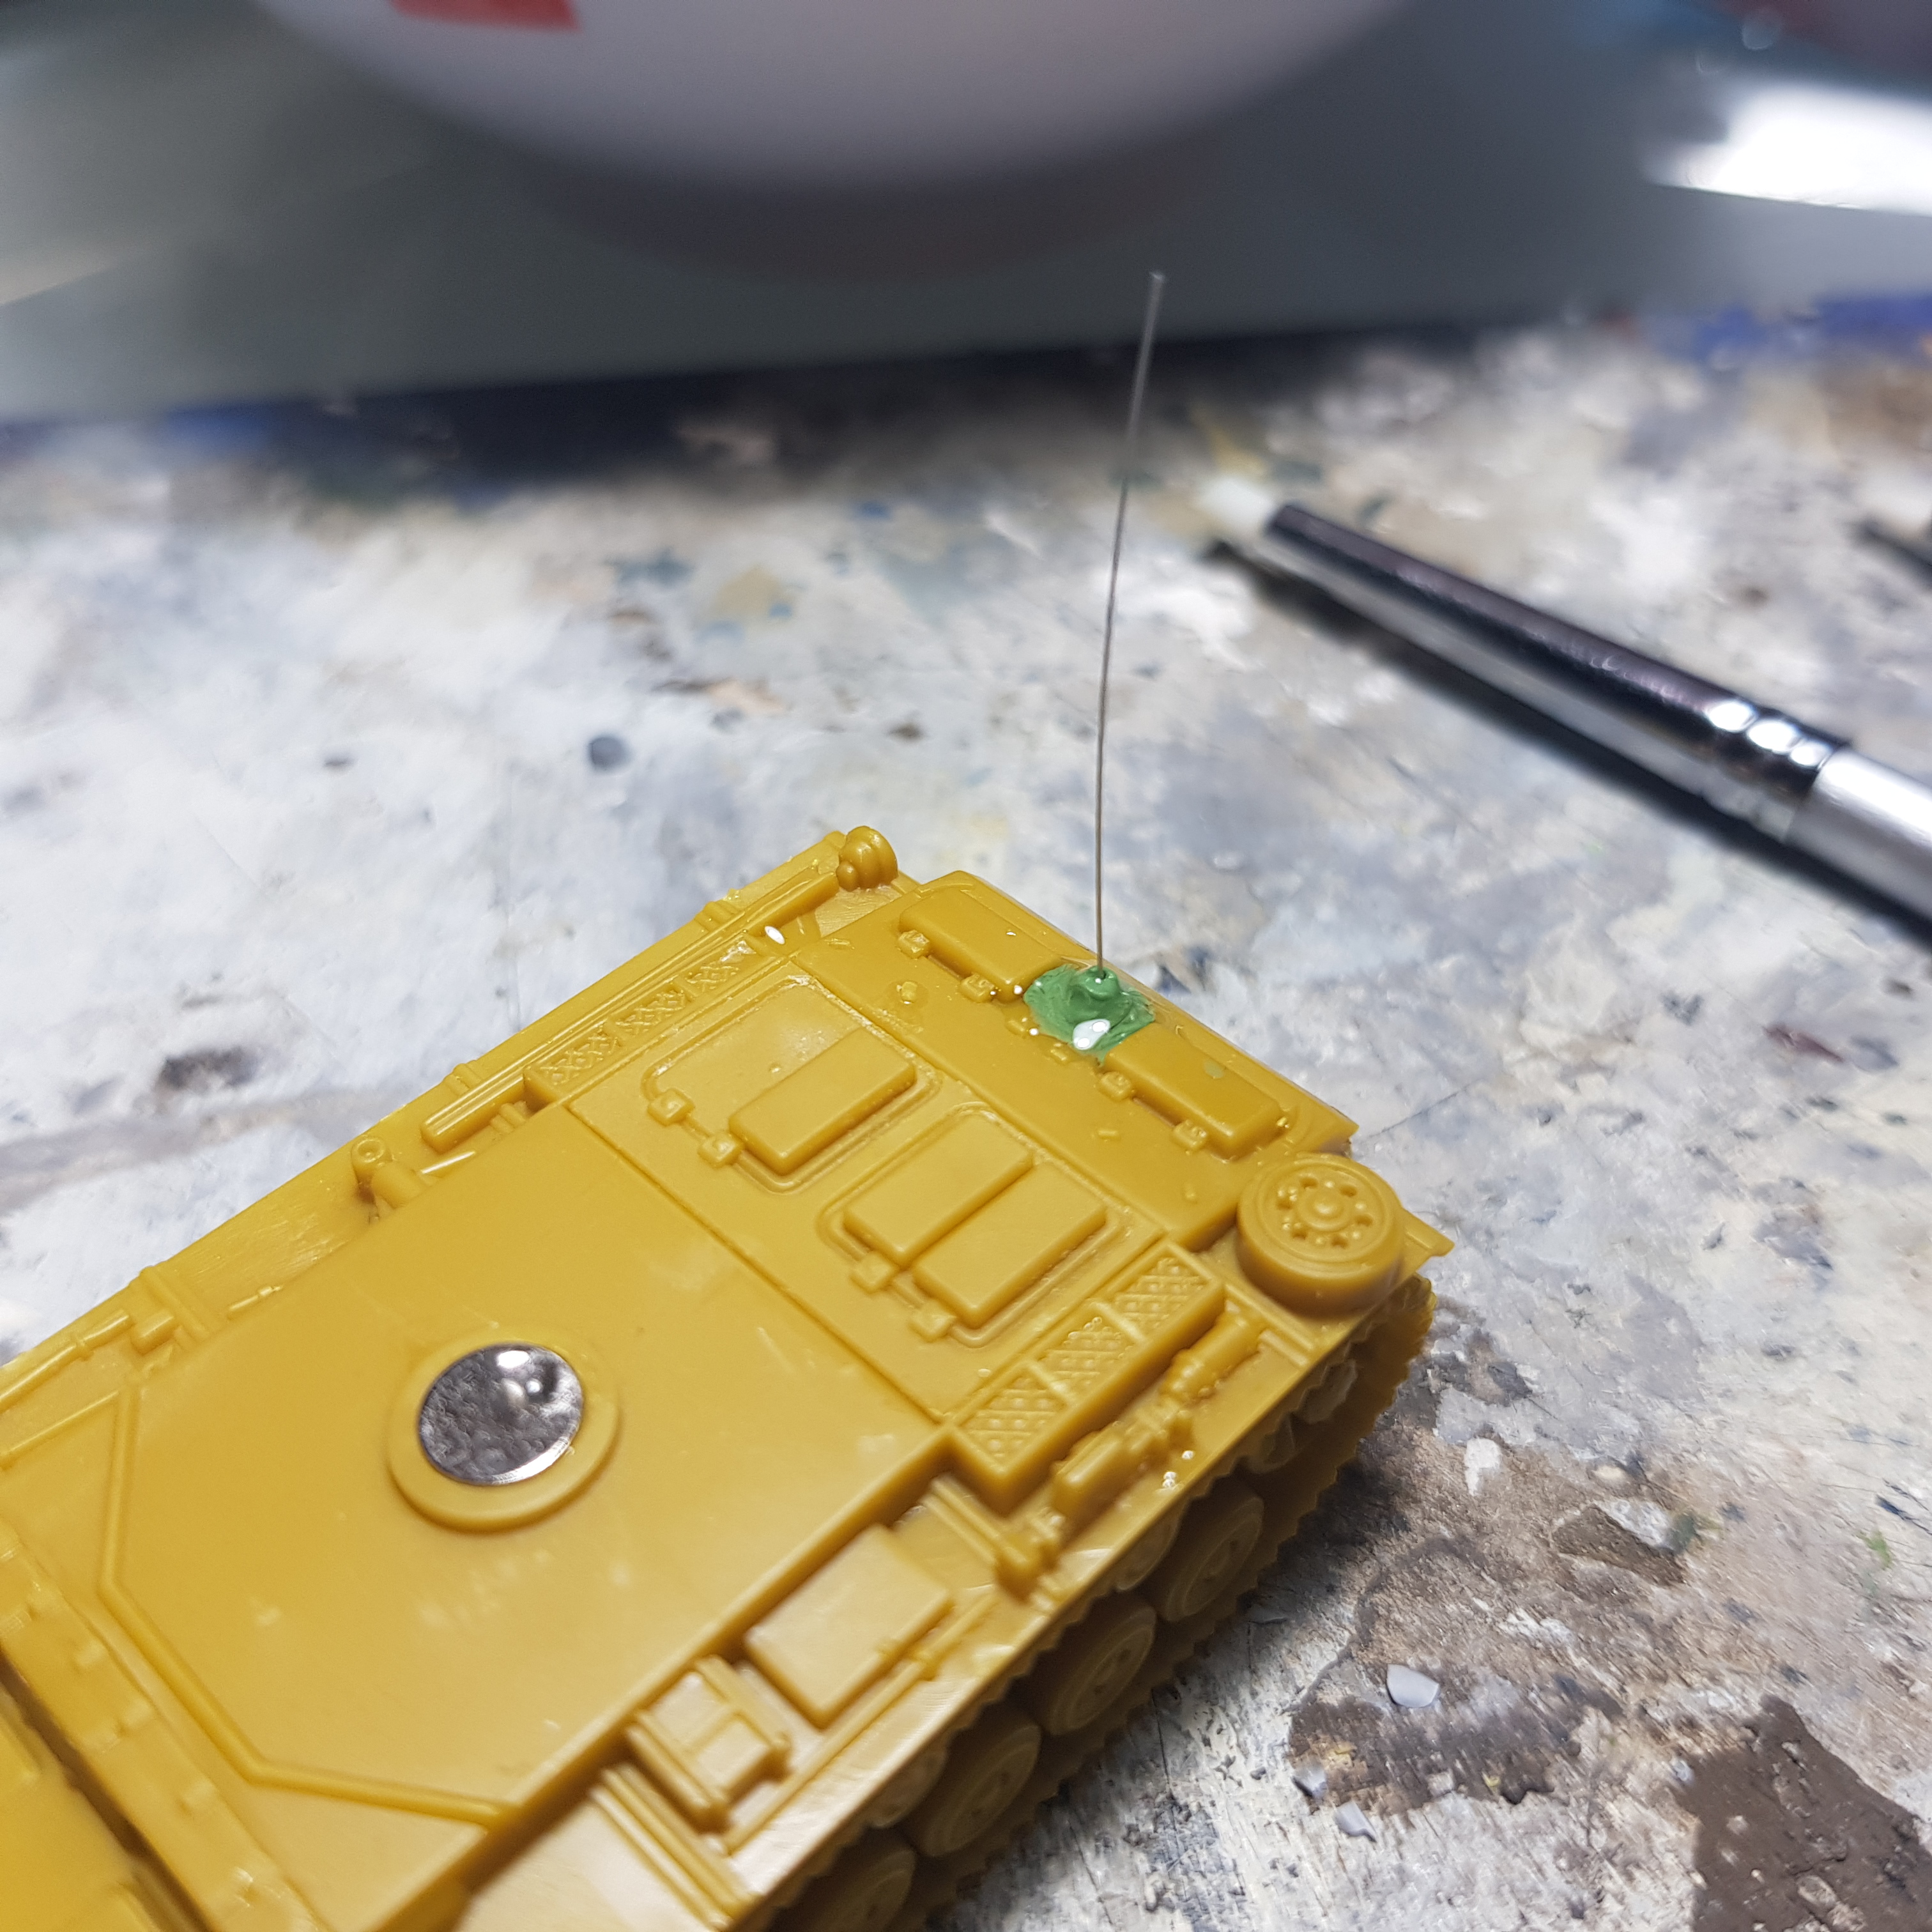
Now for the Befehlspanzer III, this is an uparmoured variant of the Ausfahrung L. I did not want to make one with the laundry rack on the back, so I went looking for command versions of the Panzer III.
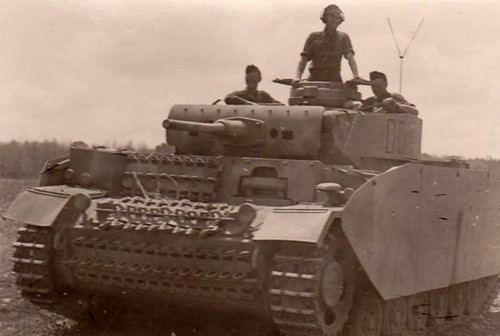
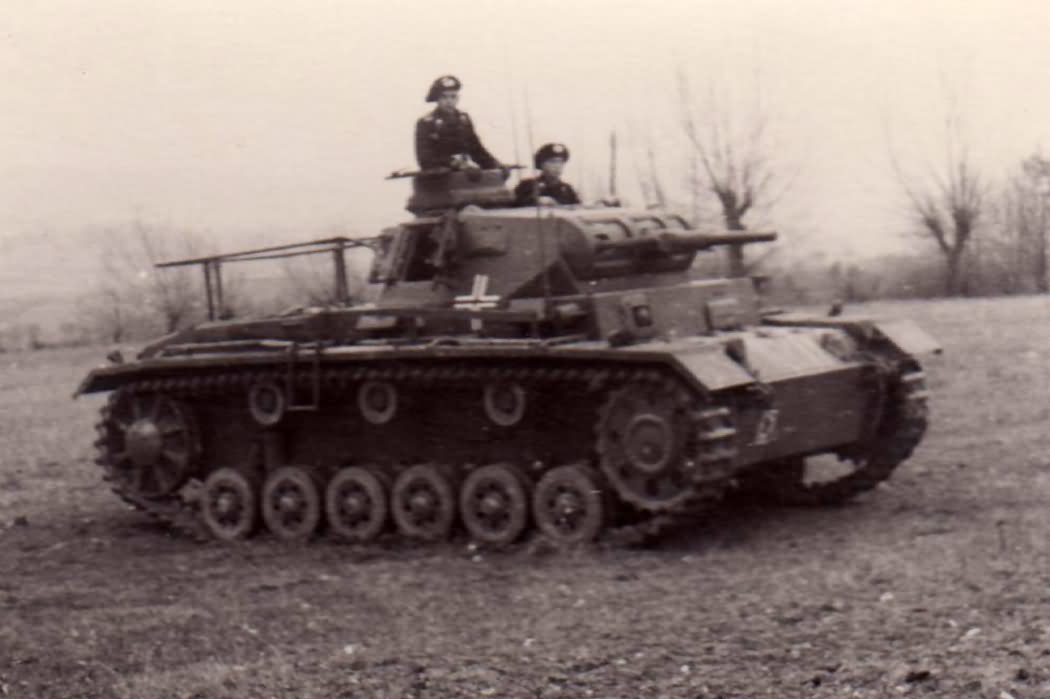 Befehlspanzer III Ausf. H.
I came across this one, which is obviously later than the one I am doing, but I decided to make something similar to this. The first picture itself is not very clear and that’s why I looked at other models doing a similar idea.
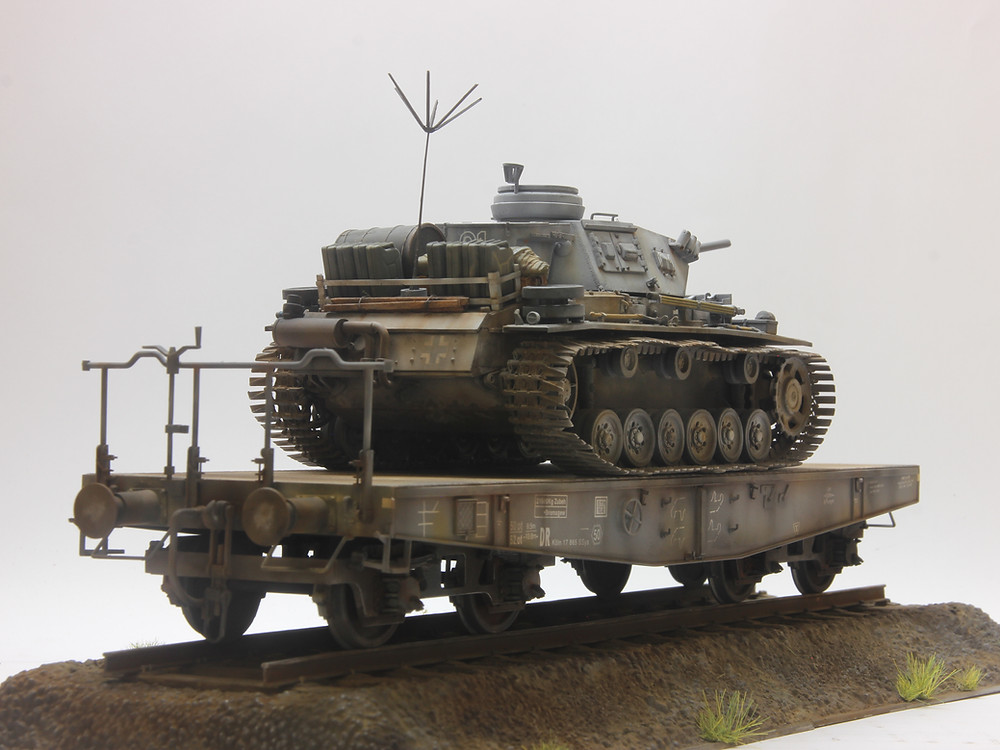

I used a bit of greenstuff to make the mount for the antenna on the rear and used the already existing mount on the side to mount one as well. I used some soft broom bristles as the antennas as I think this would be flexible enough for wargaming as well. I did not want to go for the forked antenna as I don’t want to make that at 1:100 scale and don’t think it would be strong enough for wargaming anyway. So these 2 antennas will do. With some of the excess greenstuff I prepared I did a couple more Kuban Cossack hats for the ZiS-3 gun crew on the Soviet side.
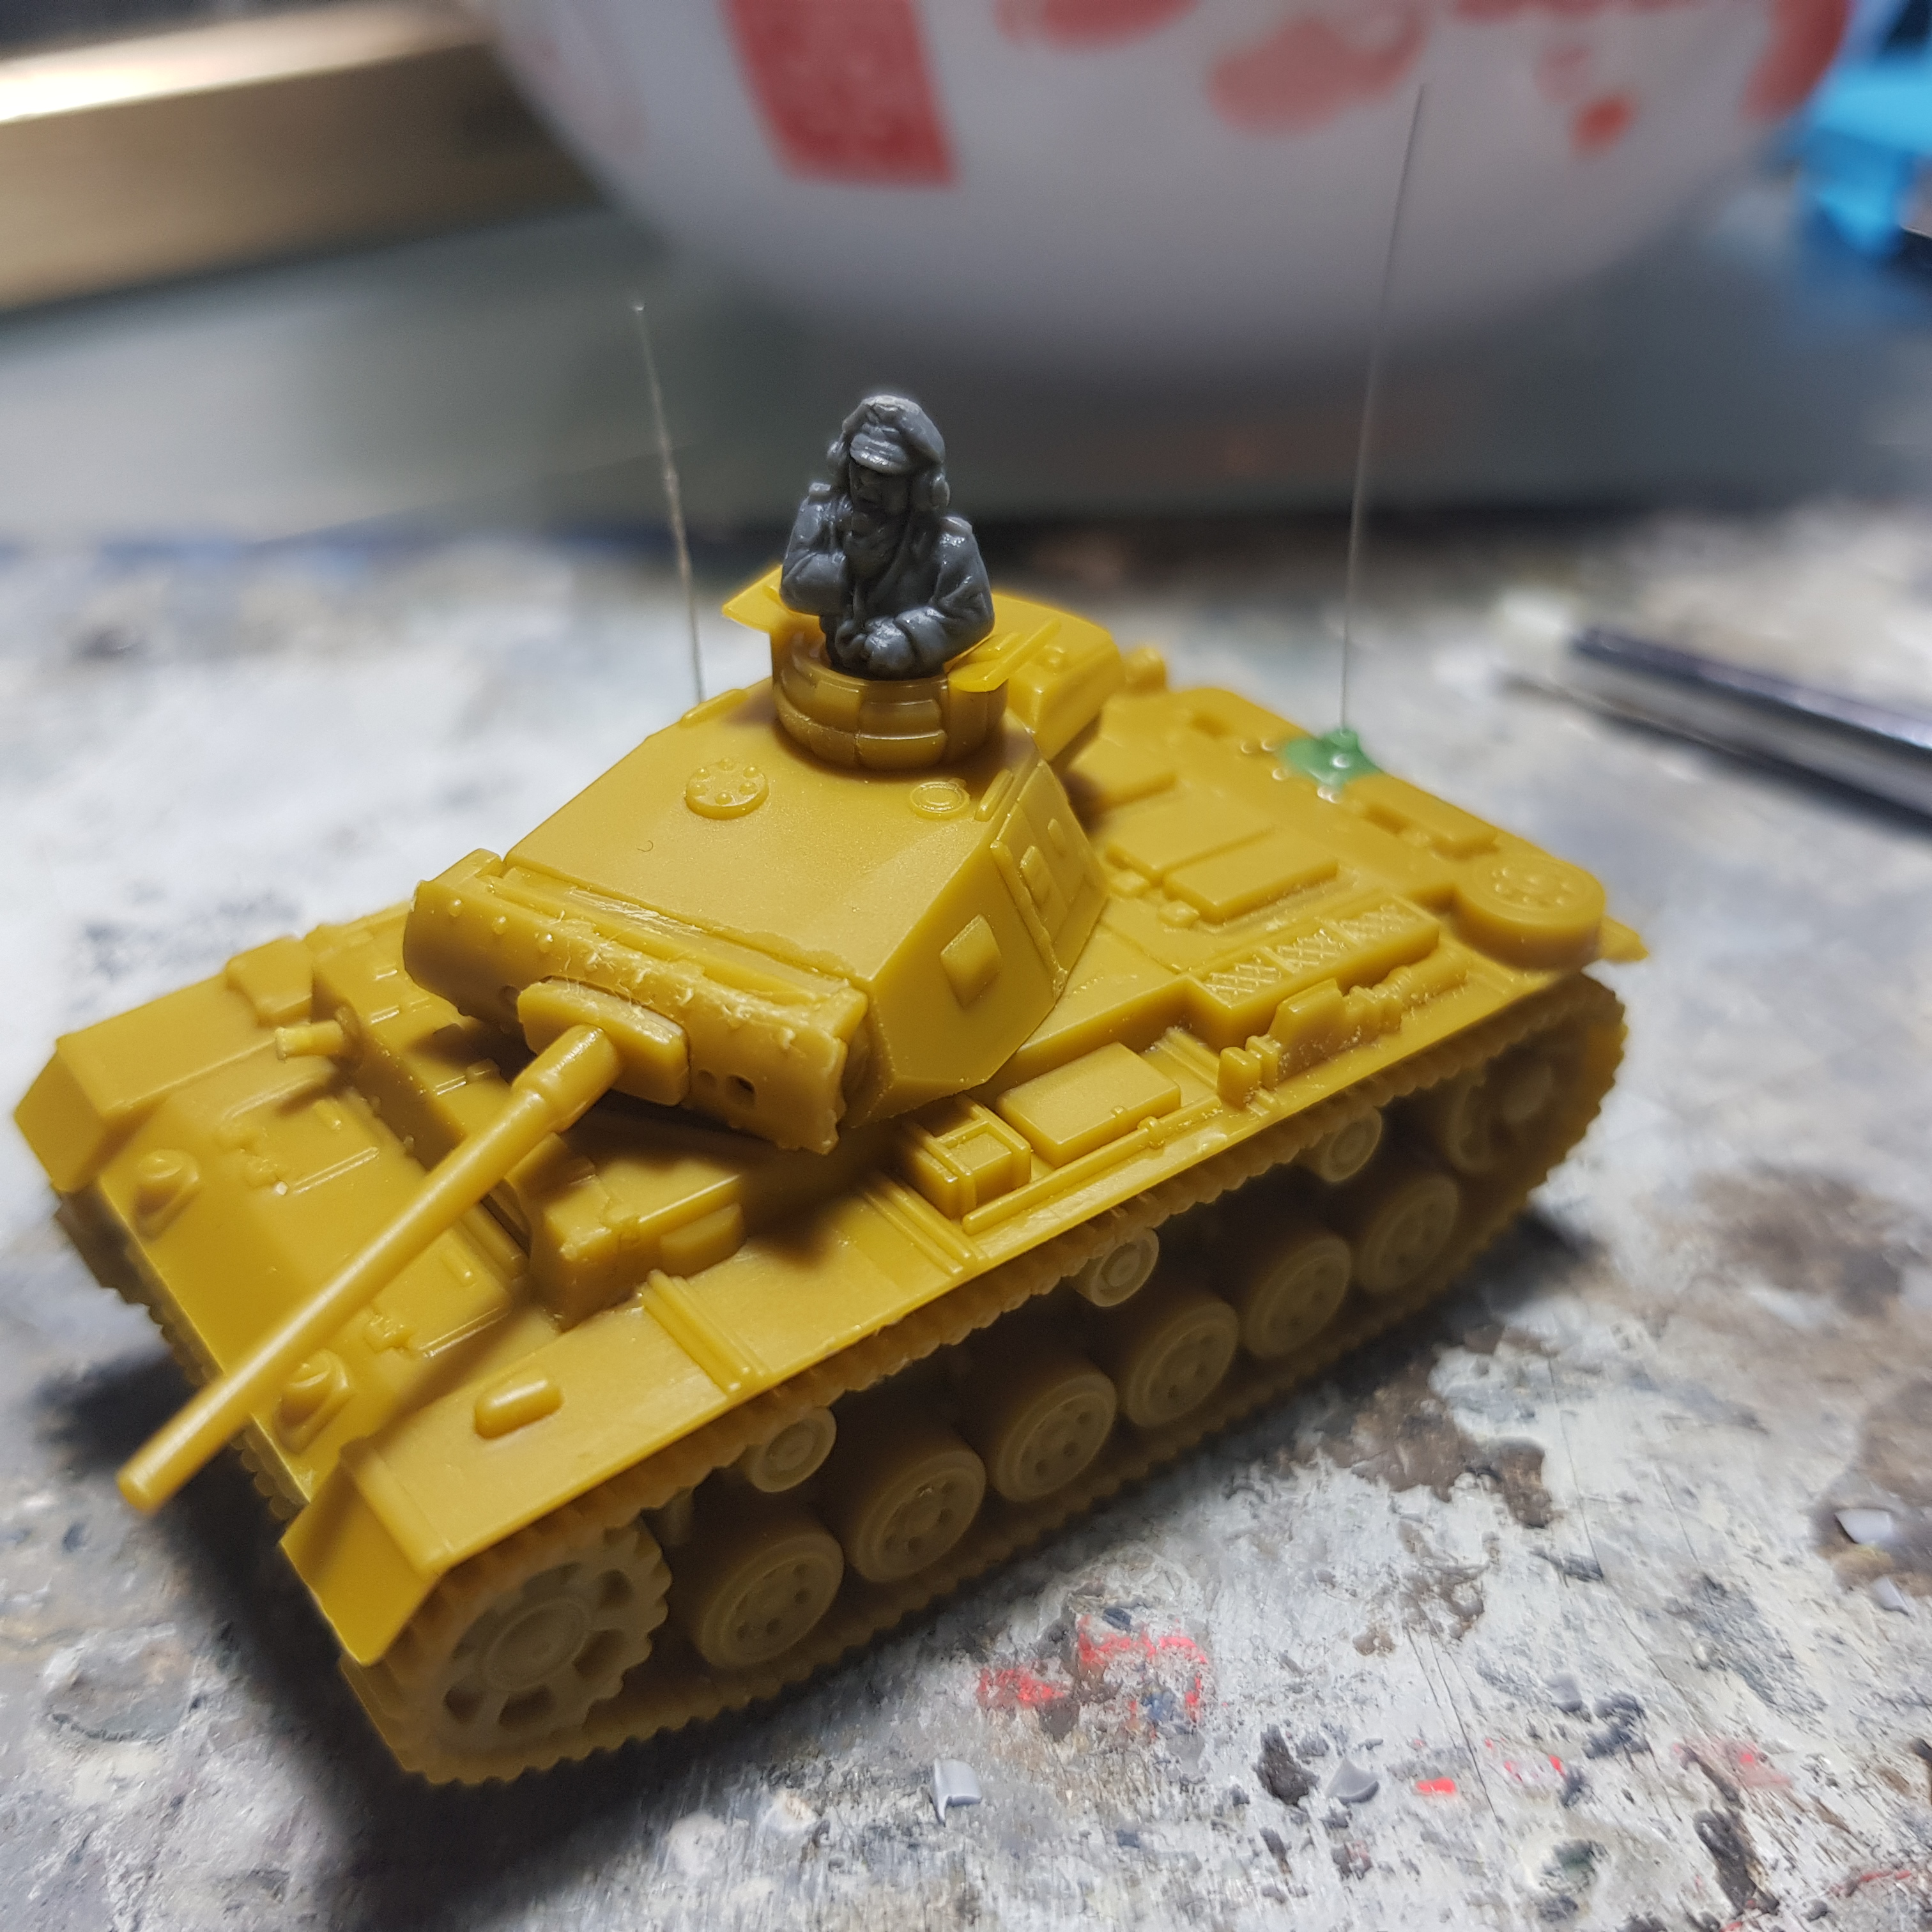
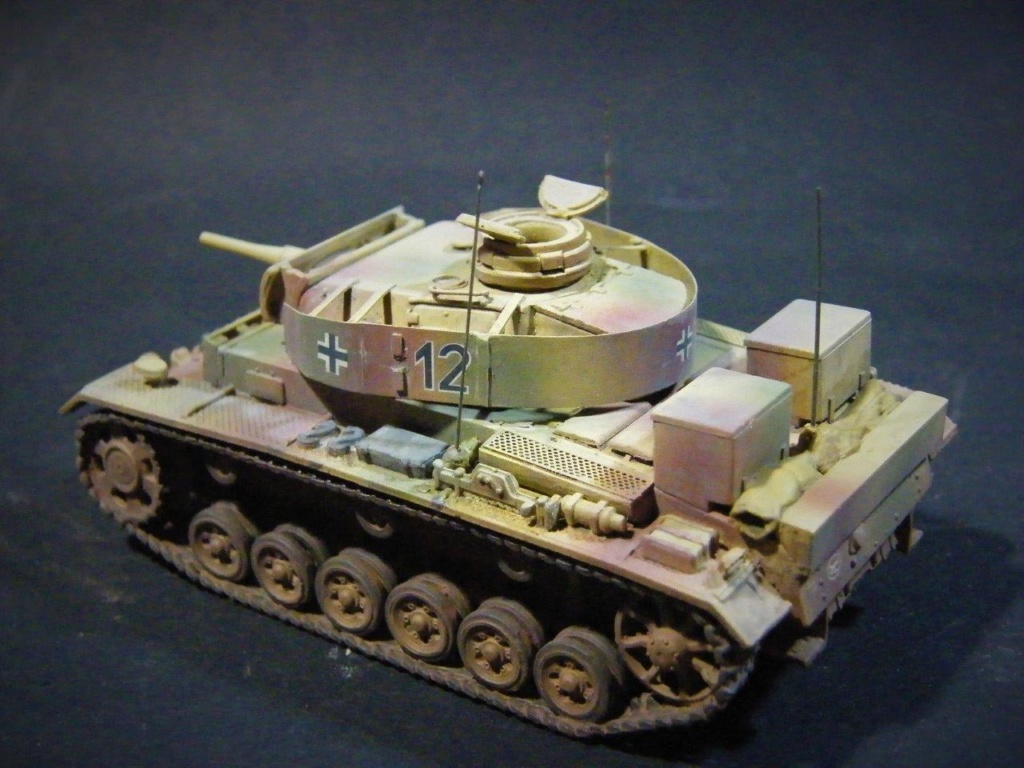
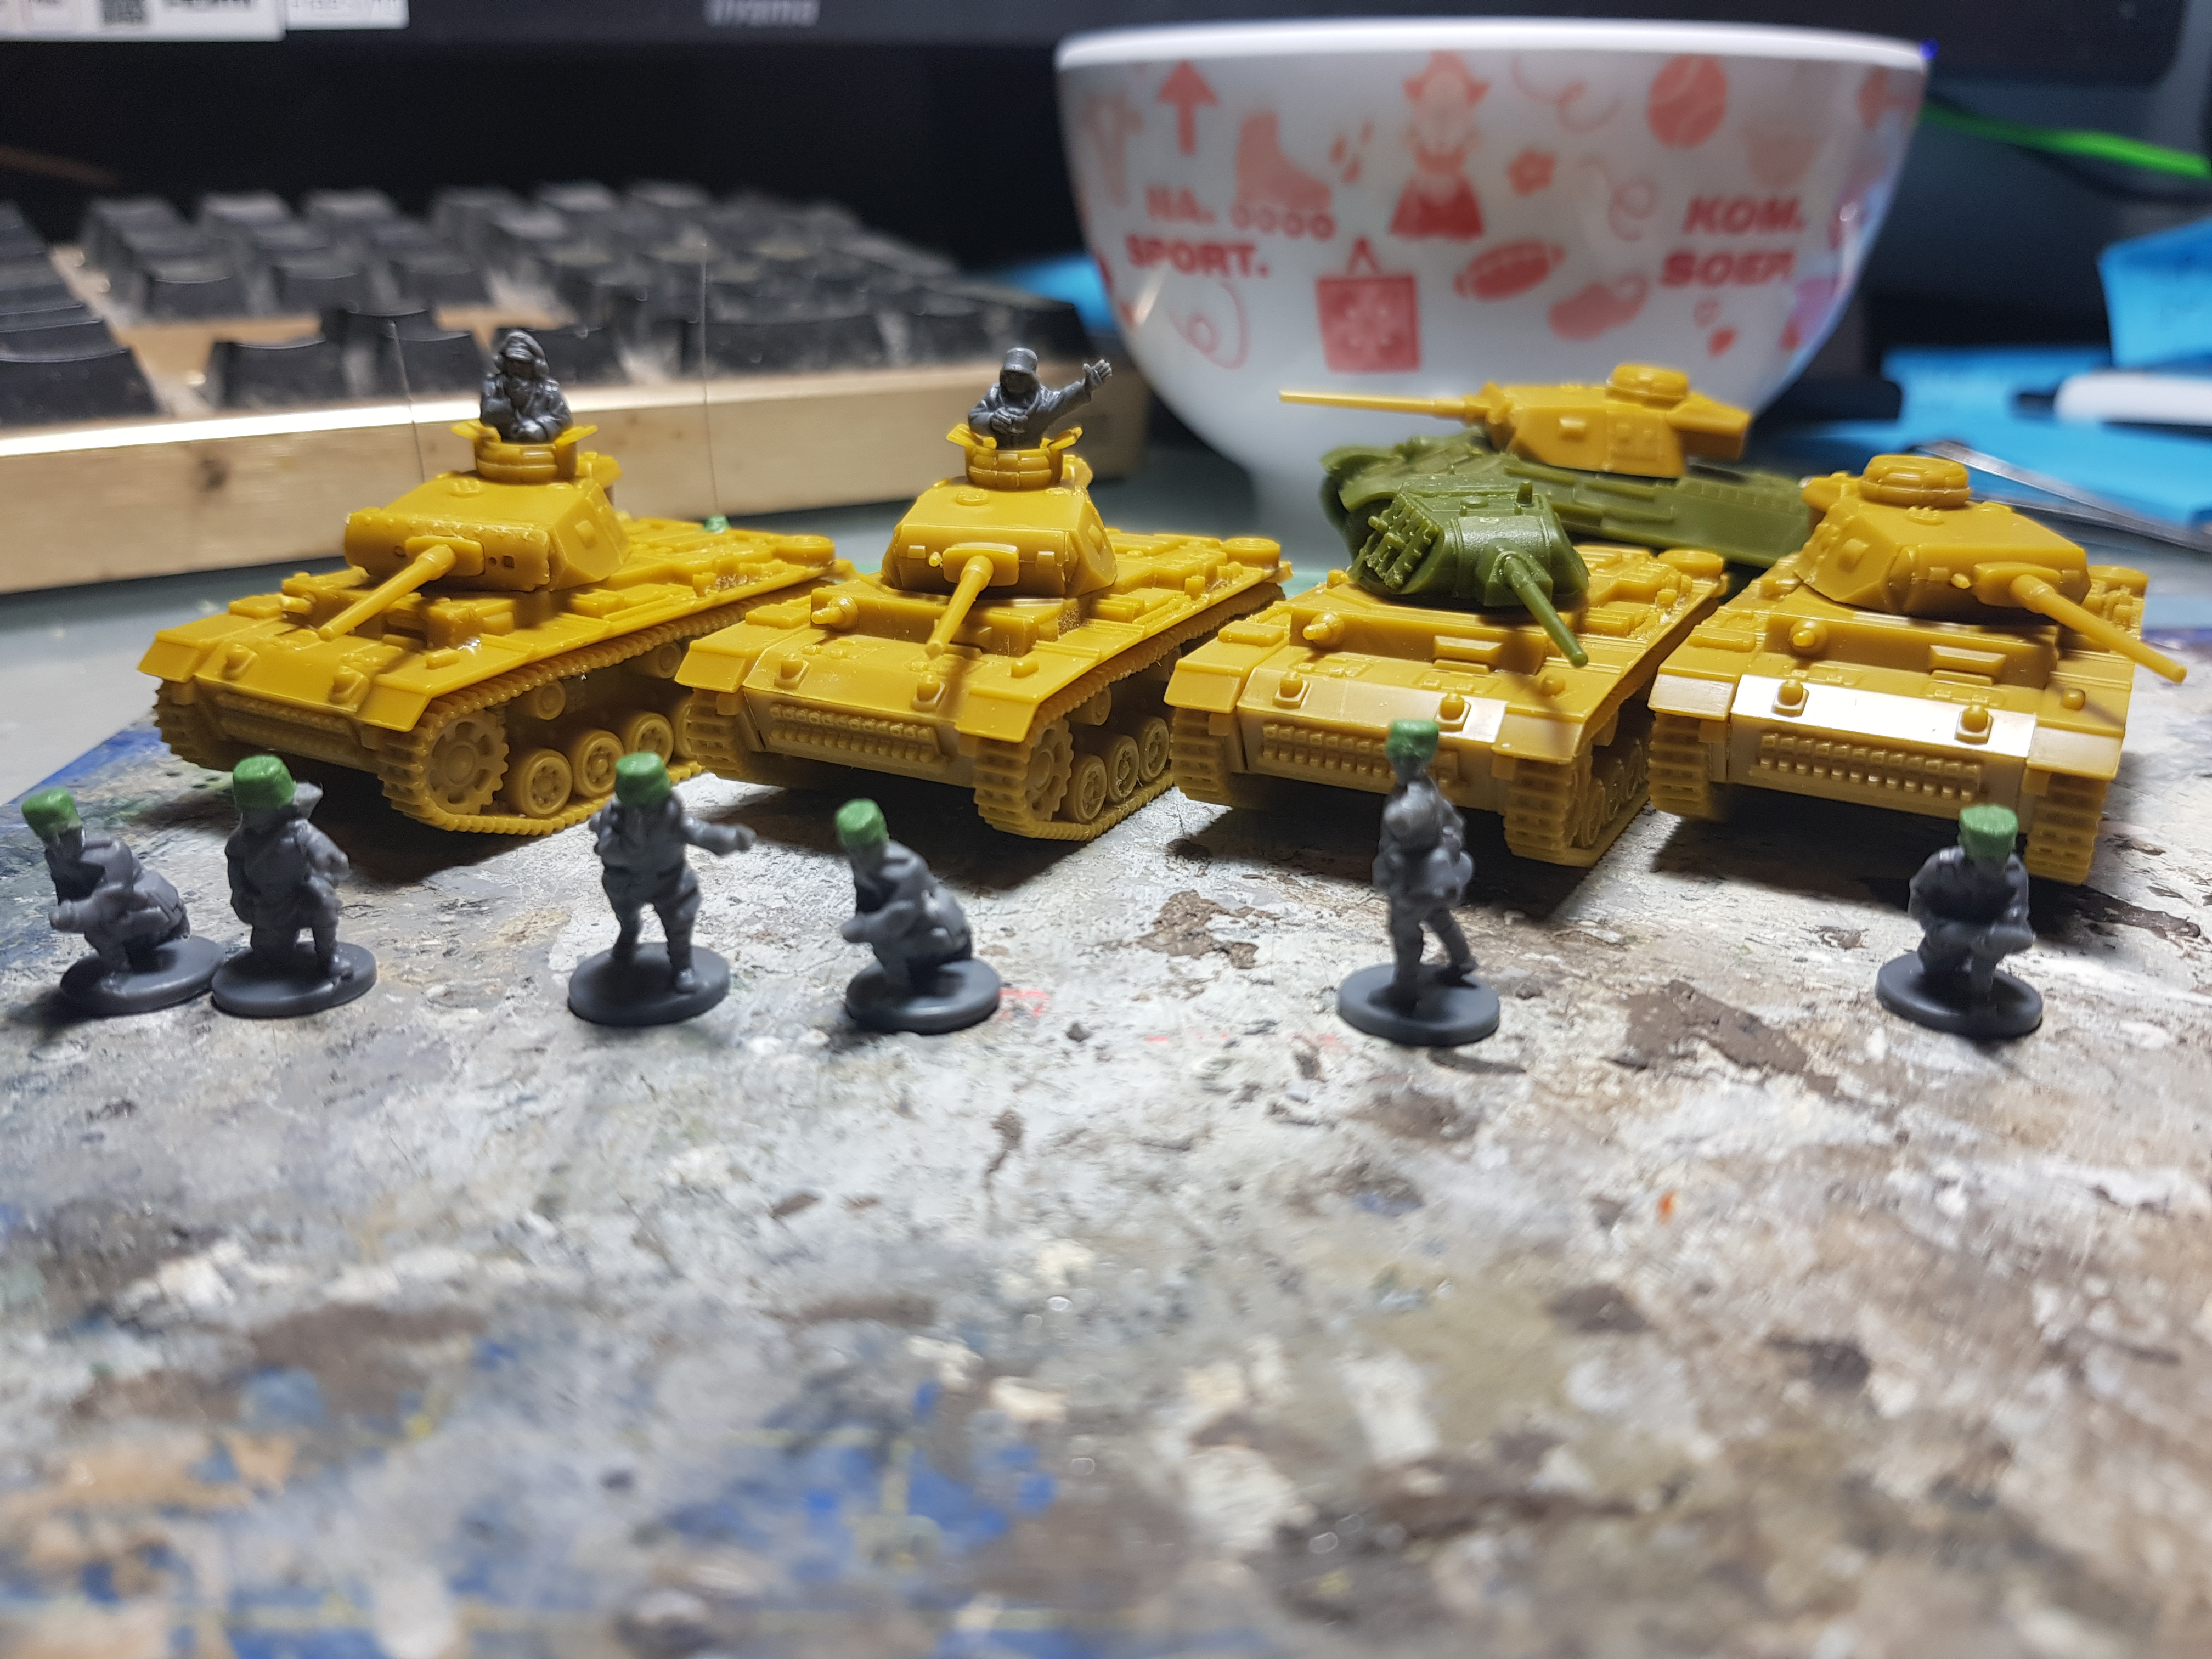 The results of the last couple of days work.
Getting back to the Eastern Front.
A couple of changes to this project. I am first of all not going to try to post everyday, like I did before. It is just not going to work with my health to do something everyday and there is a limit to how many WWII memes I can post. Secondly I am changing the game I am focussing on to Battlegroup. From what I have seen this is a better game than Flames of War. These armies will still be viable for Flames of War and I am still going to get the stuff to play Flames of War, but it is not my main focus. That means that until I get the rulebooks I am not entirely sure what I am doing with my armylists. That does not mean I can’t do anything, I can still get a lot build and painted following historical references I have and there is the pink panther as well. A new paint recipe for both armies will follow once I have that figured out. And then it is the basing. Battlegroup does work with individual miniatures so what I am going to do is turn the Flames of War bases into movement trays. Still valid for Flames of War, but also good for Battlegroup and maybe even 15mm Bolt Action which I have heard is also good.
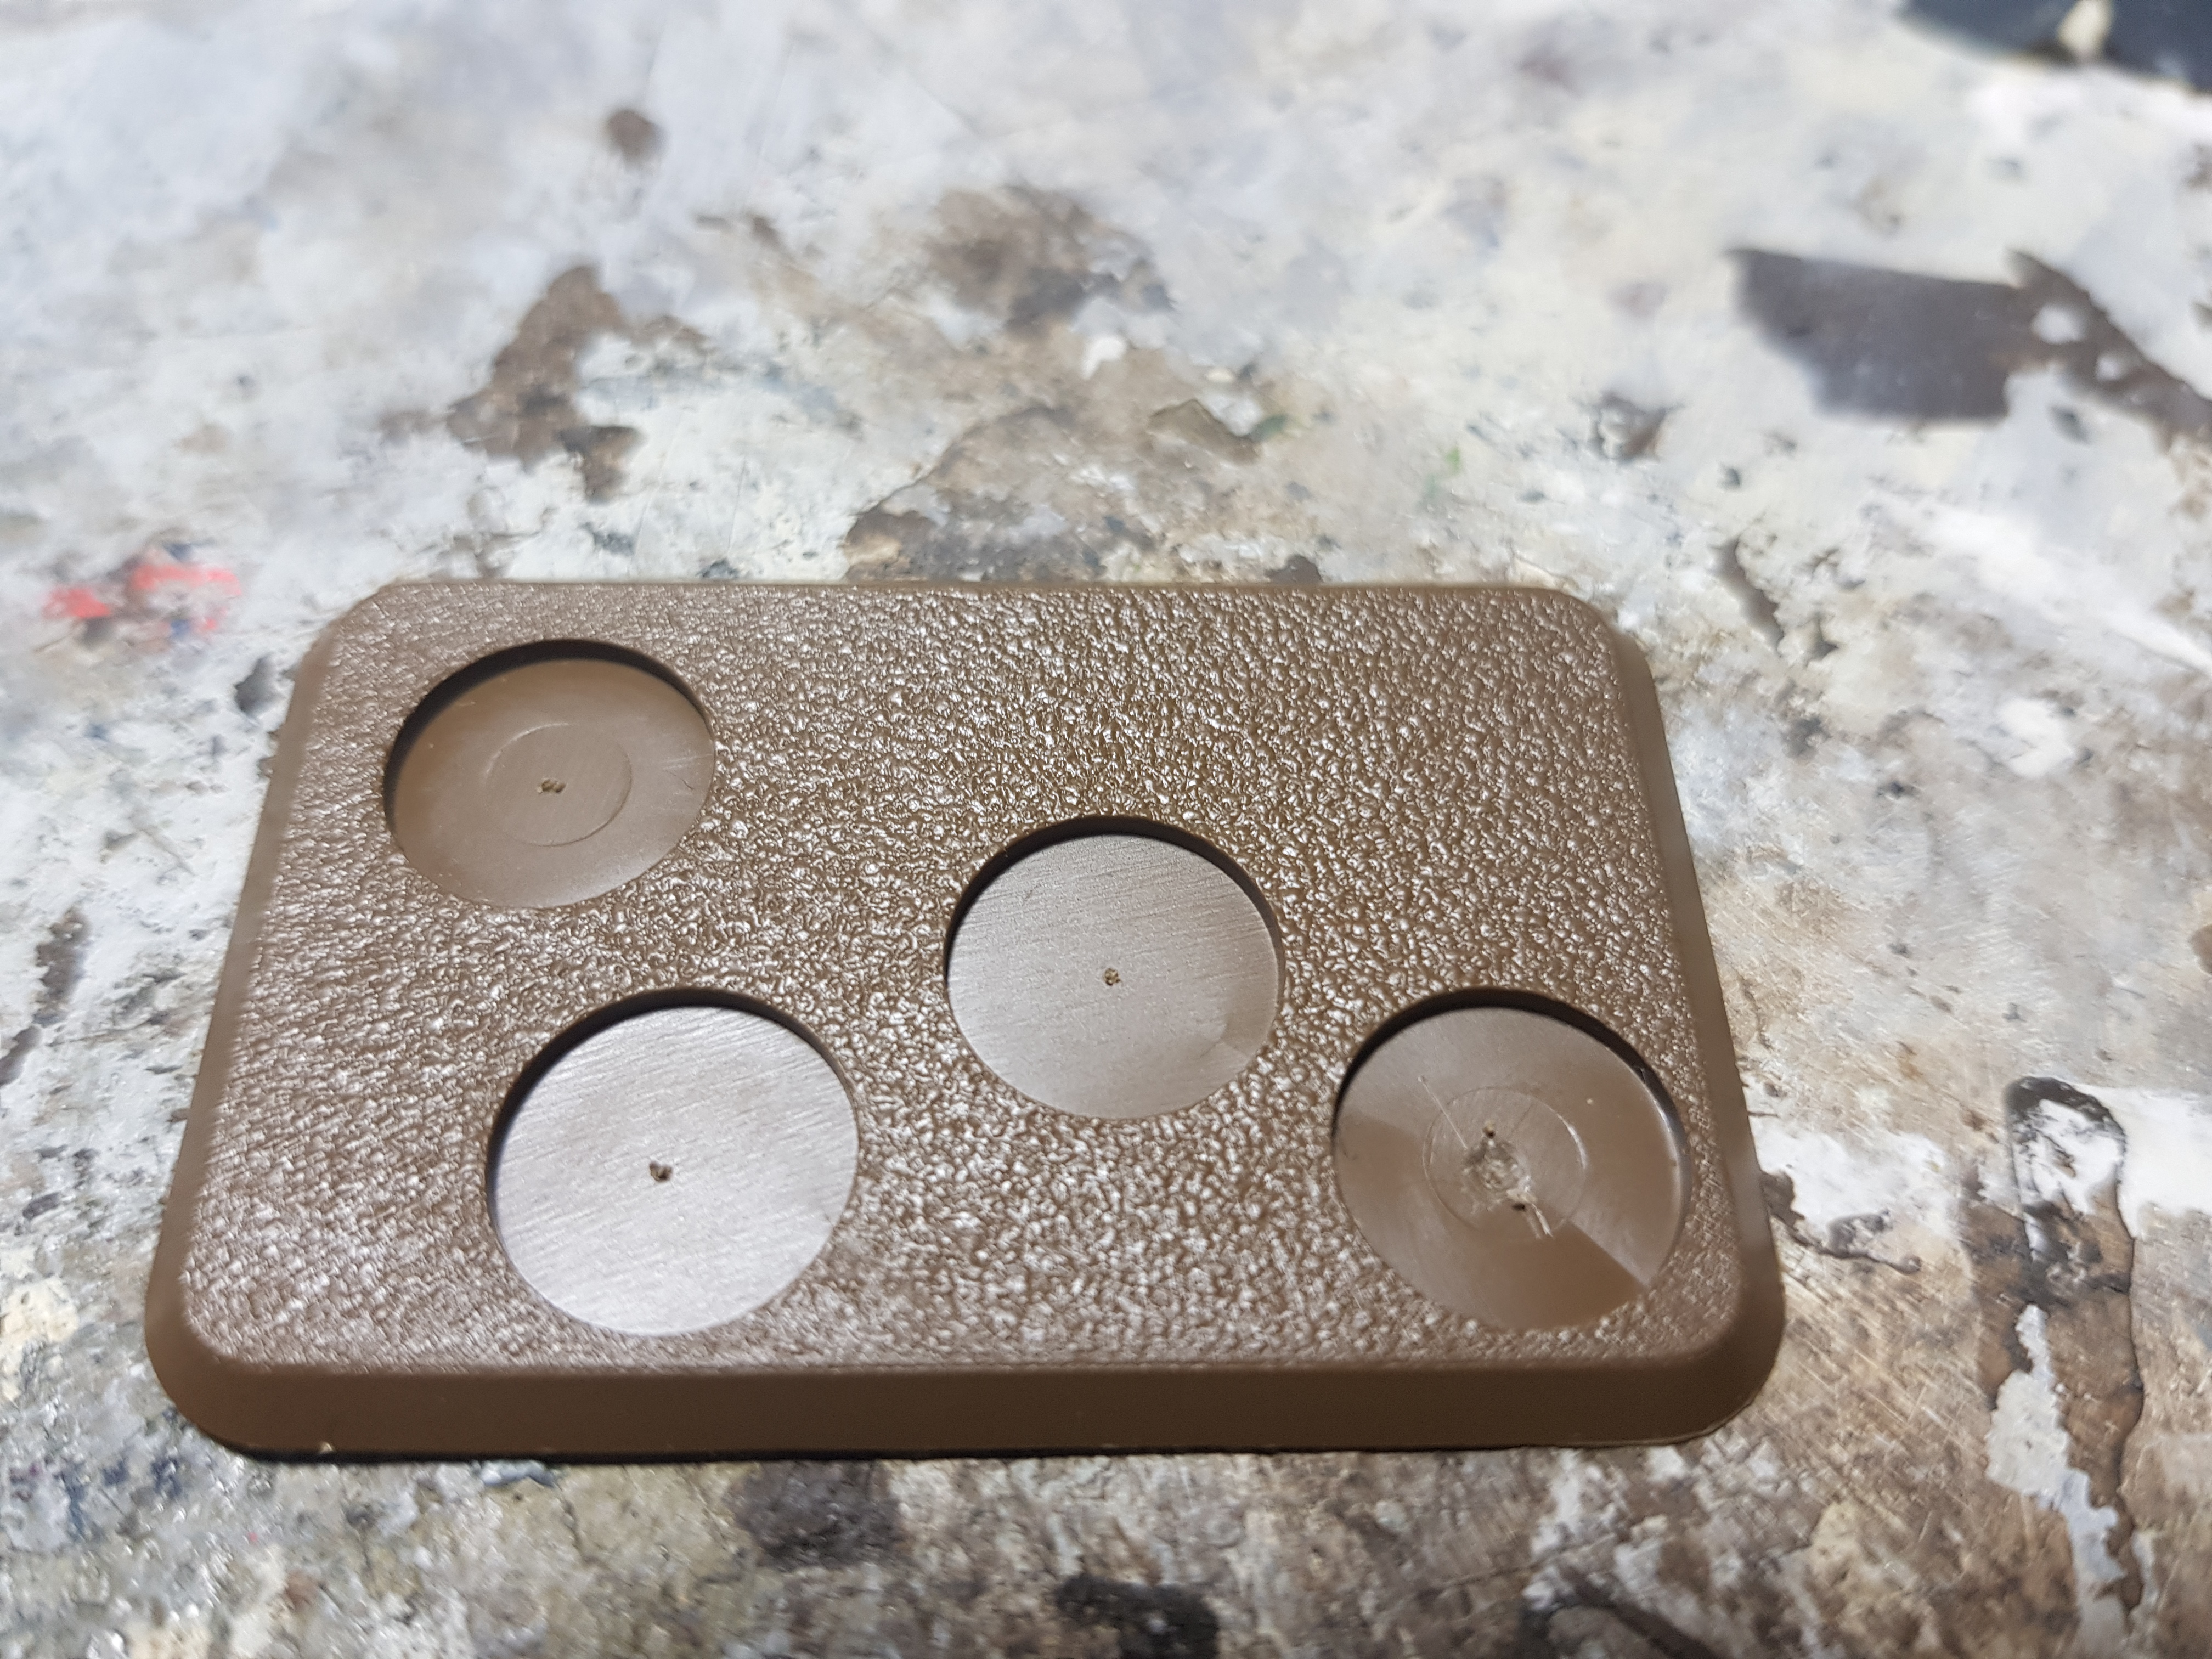
To start off I have not very precisely marked the centre of each base slot for drilling.
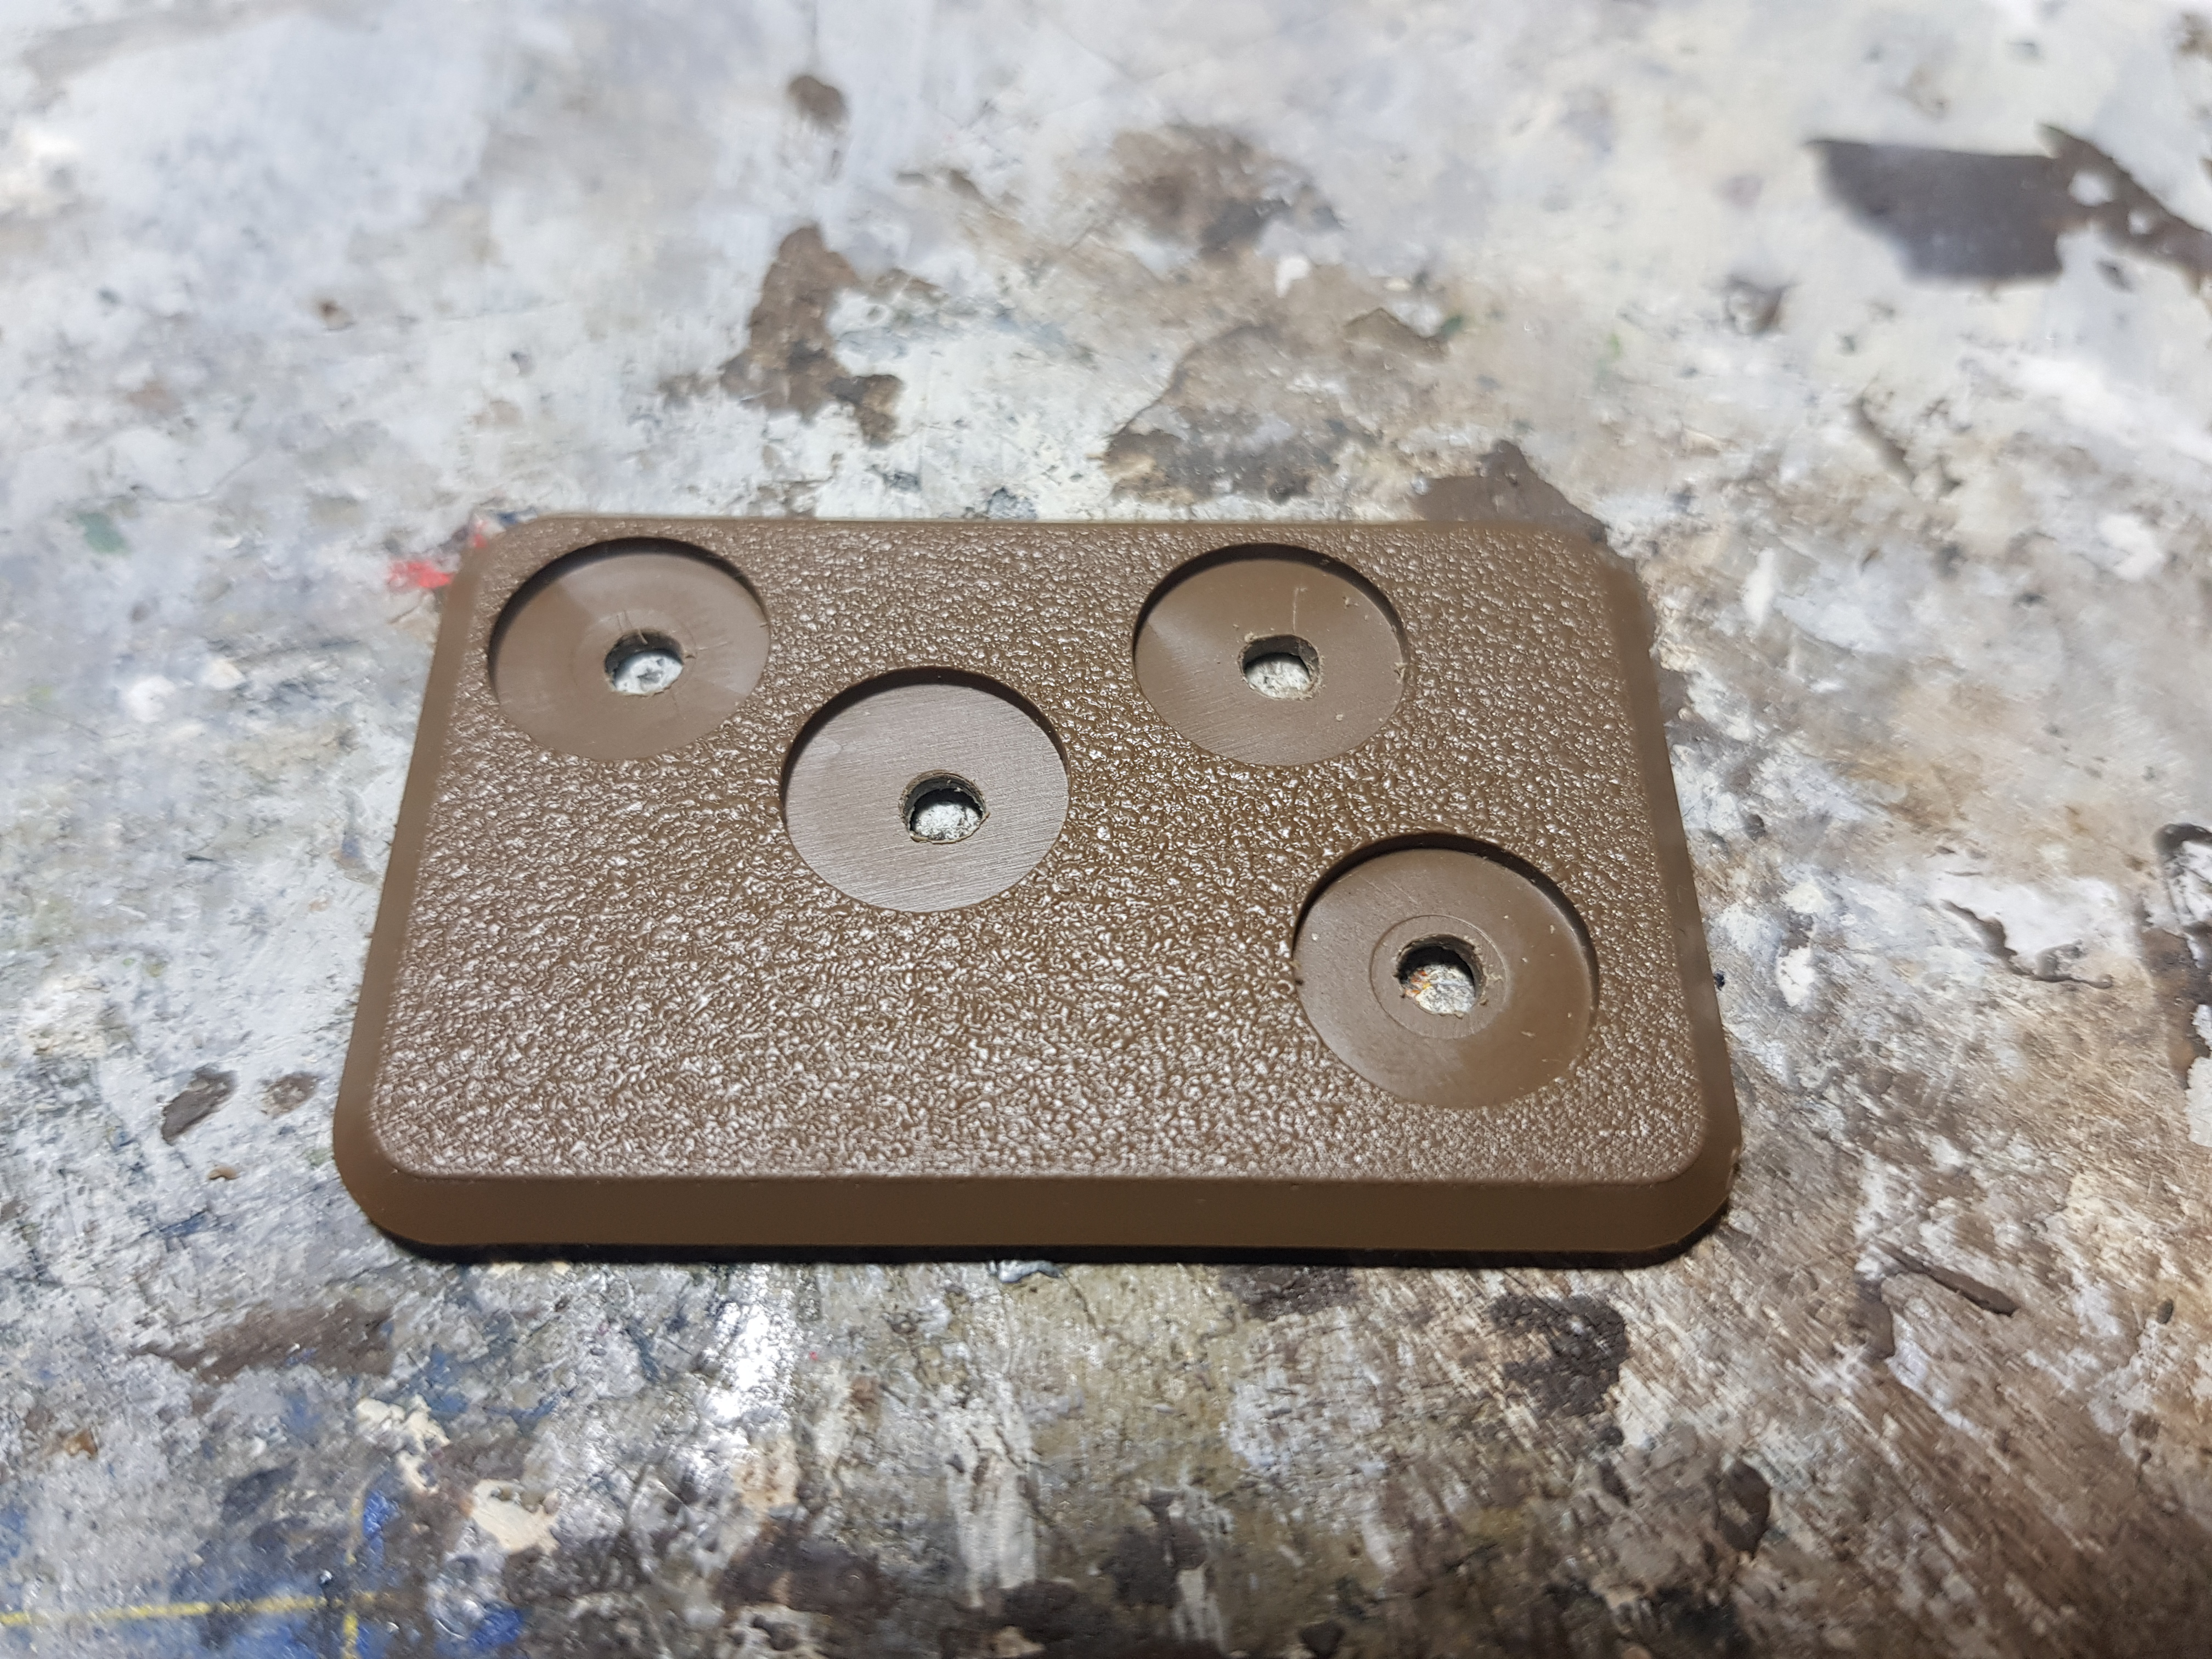
I then drilled a 3mm hole in them.
Put 3x1mm magnets inside.
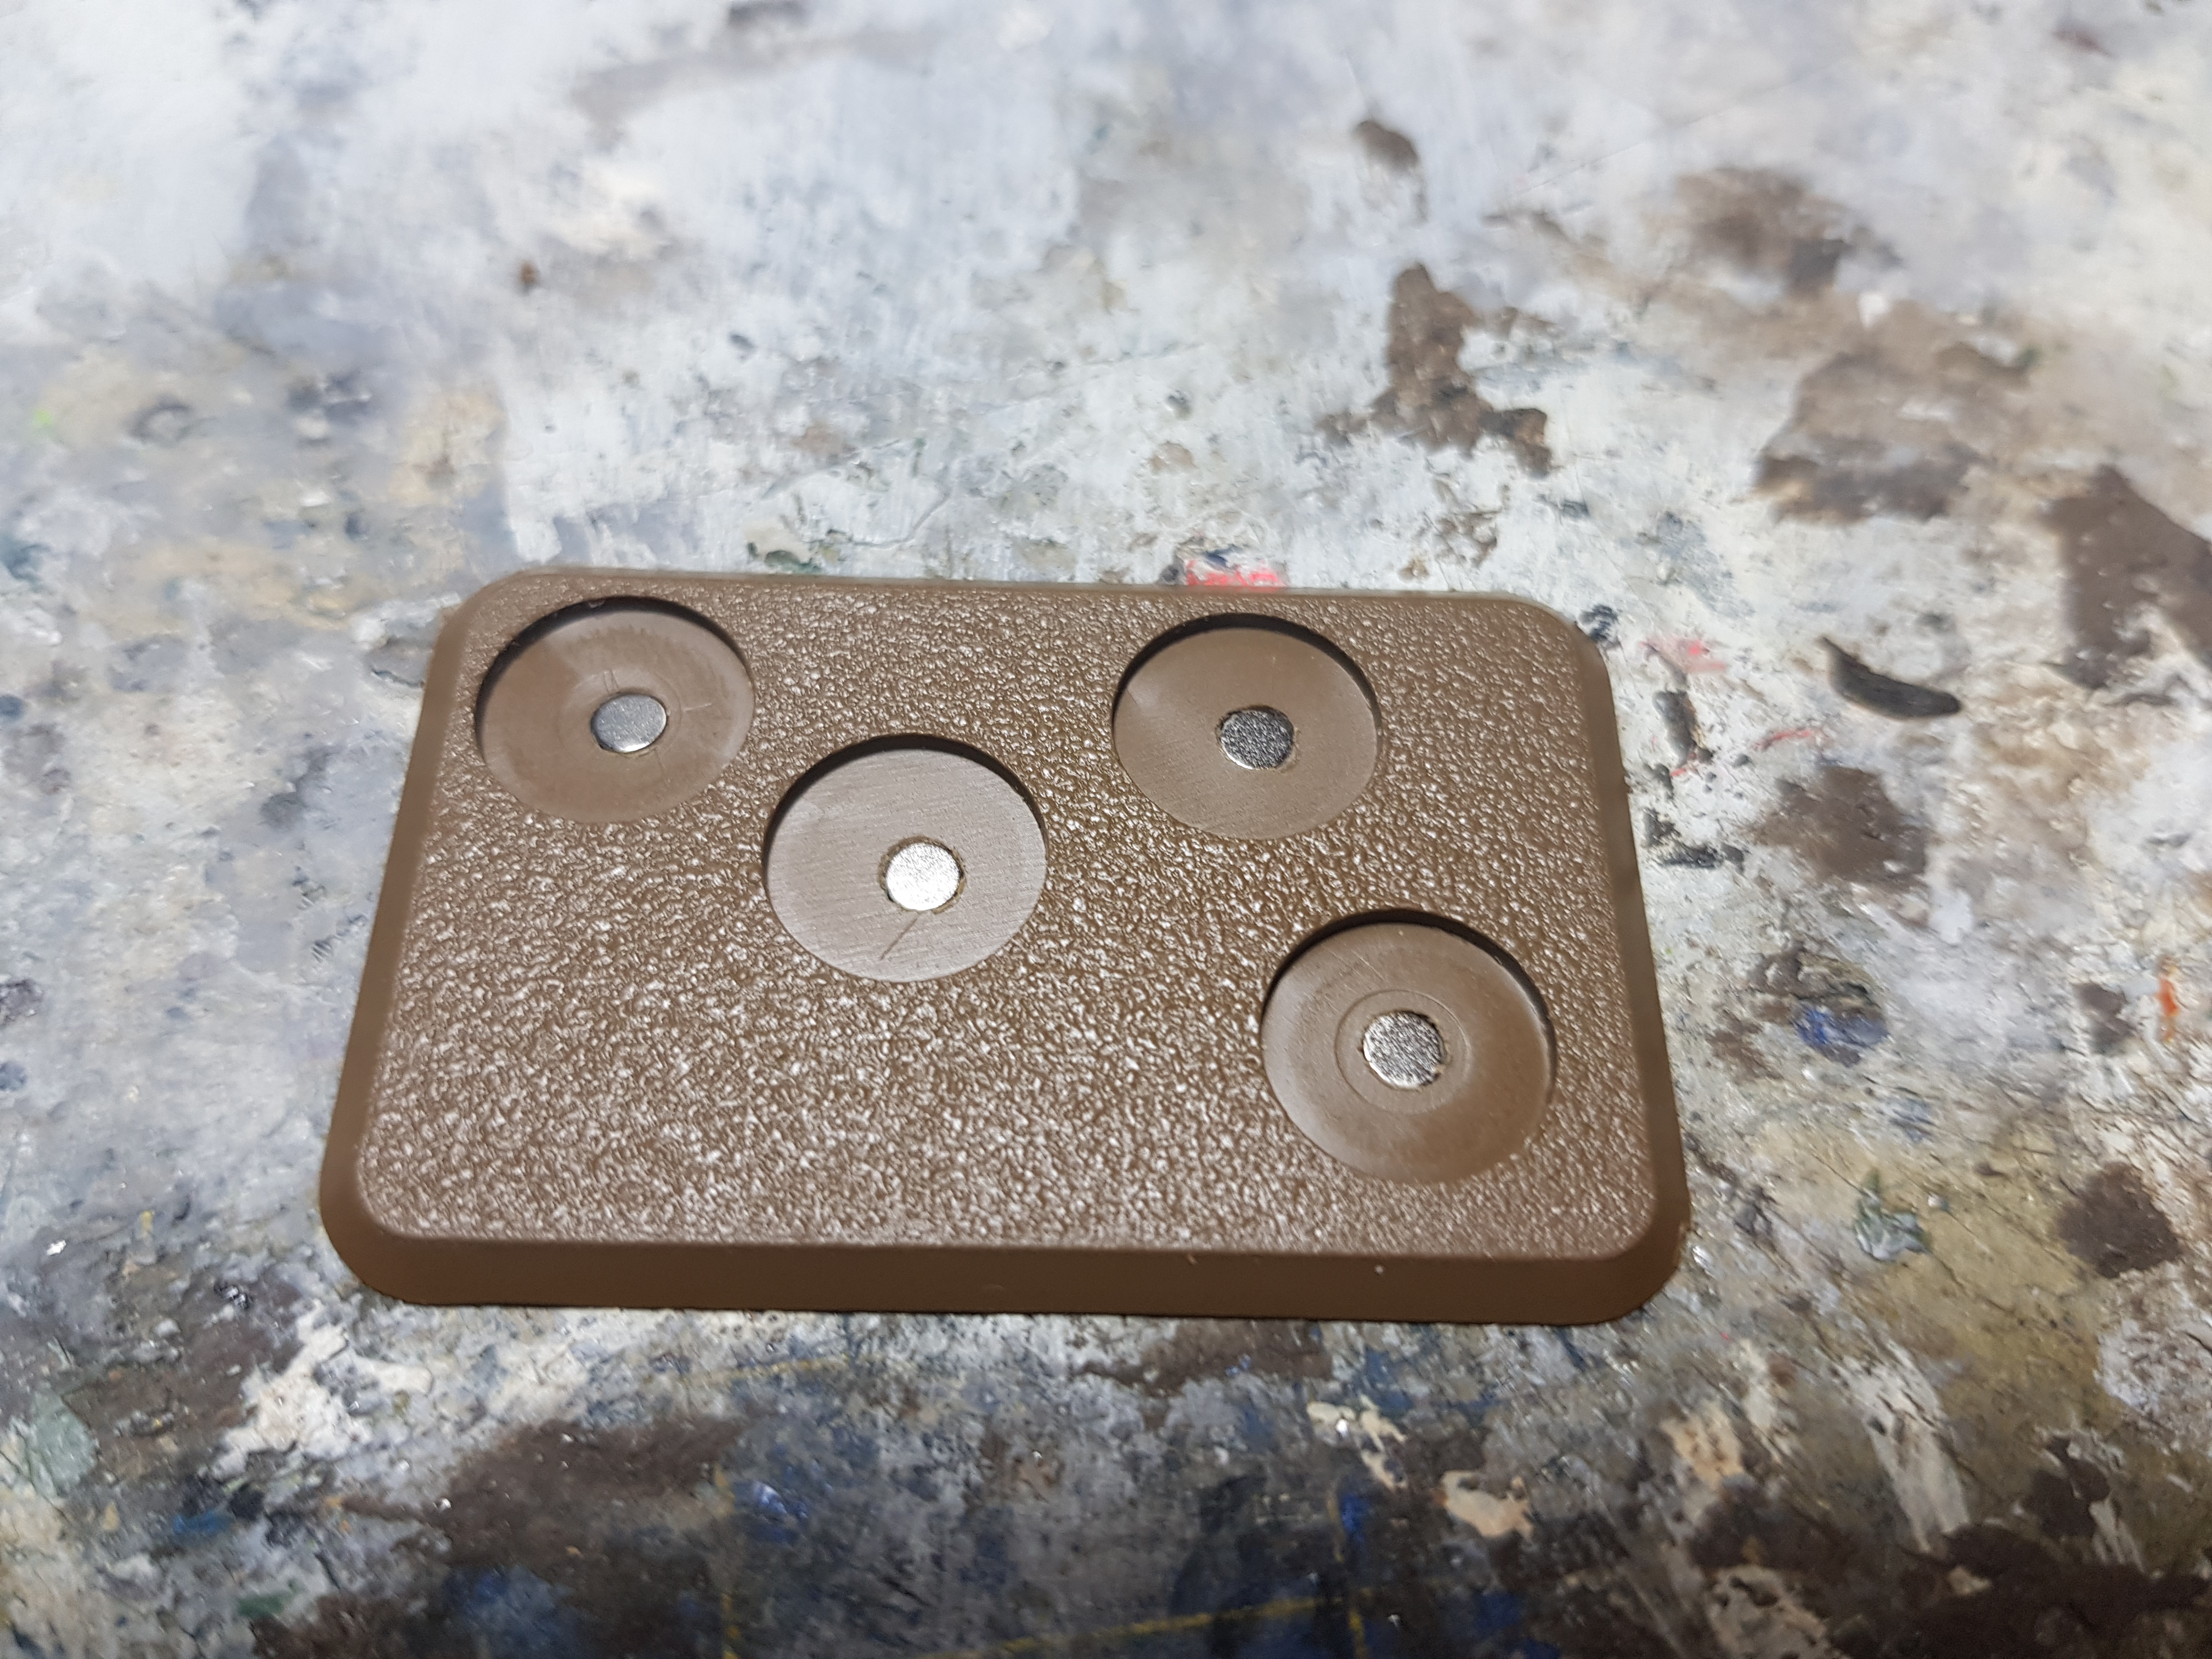
And put a bit of thin superglue at the bottom to help hold the magnets in place.
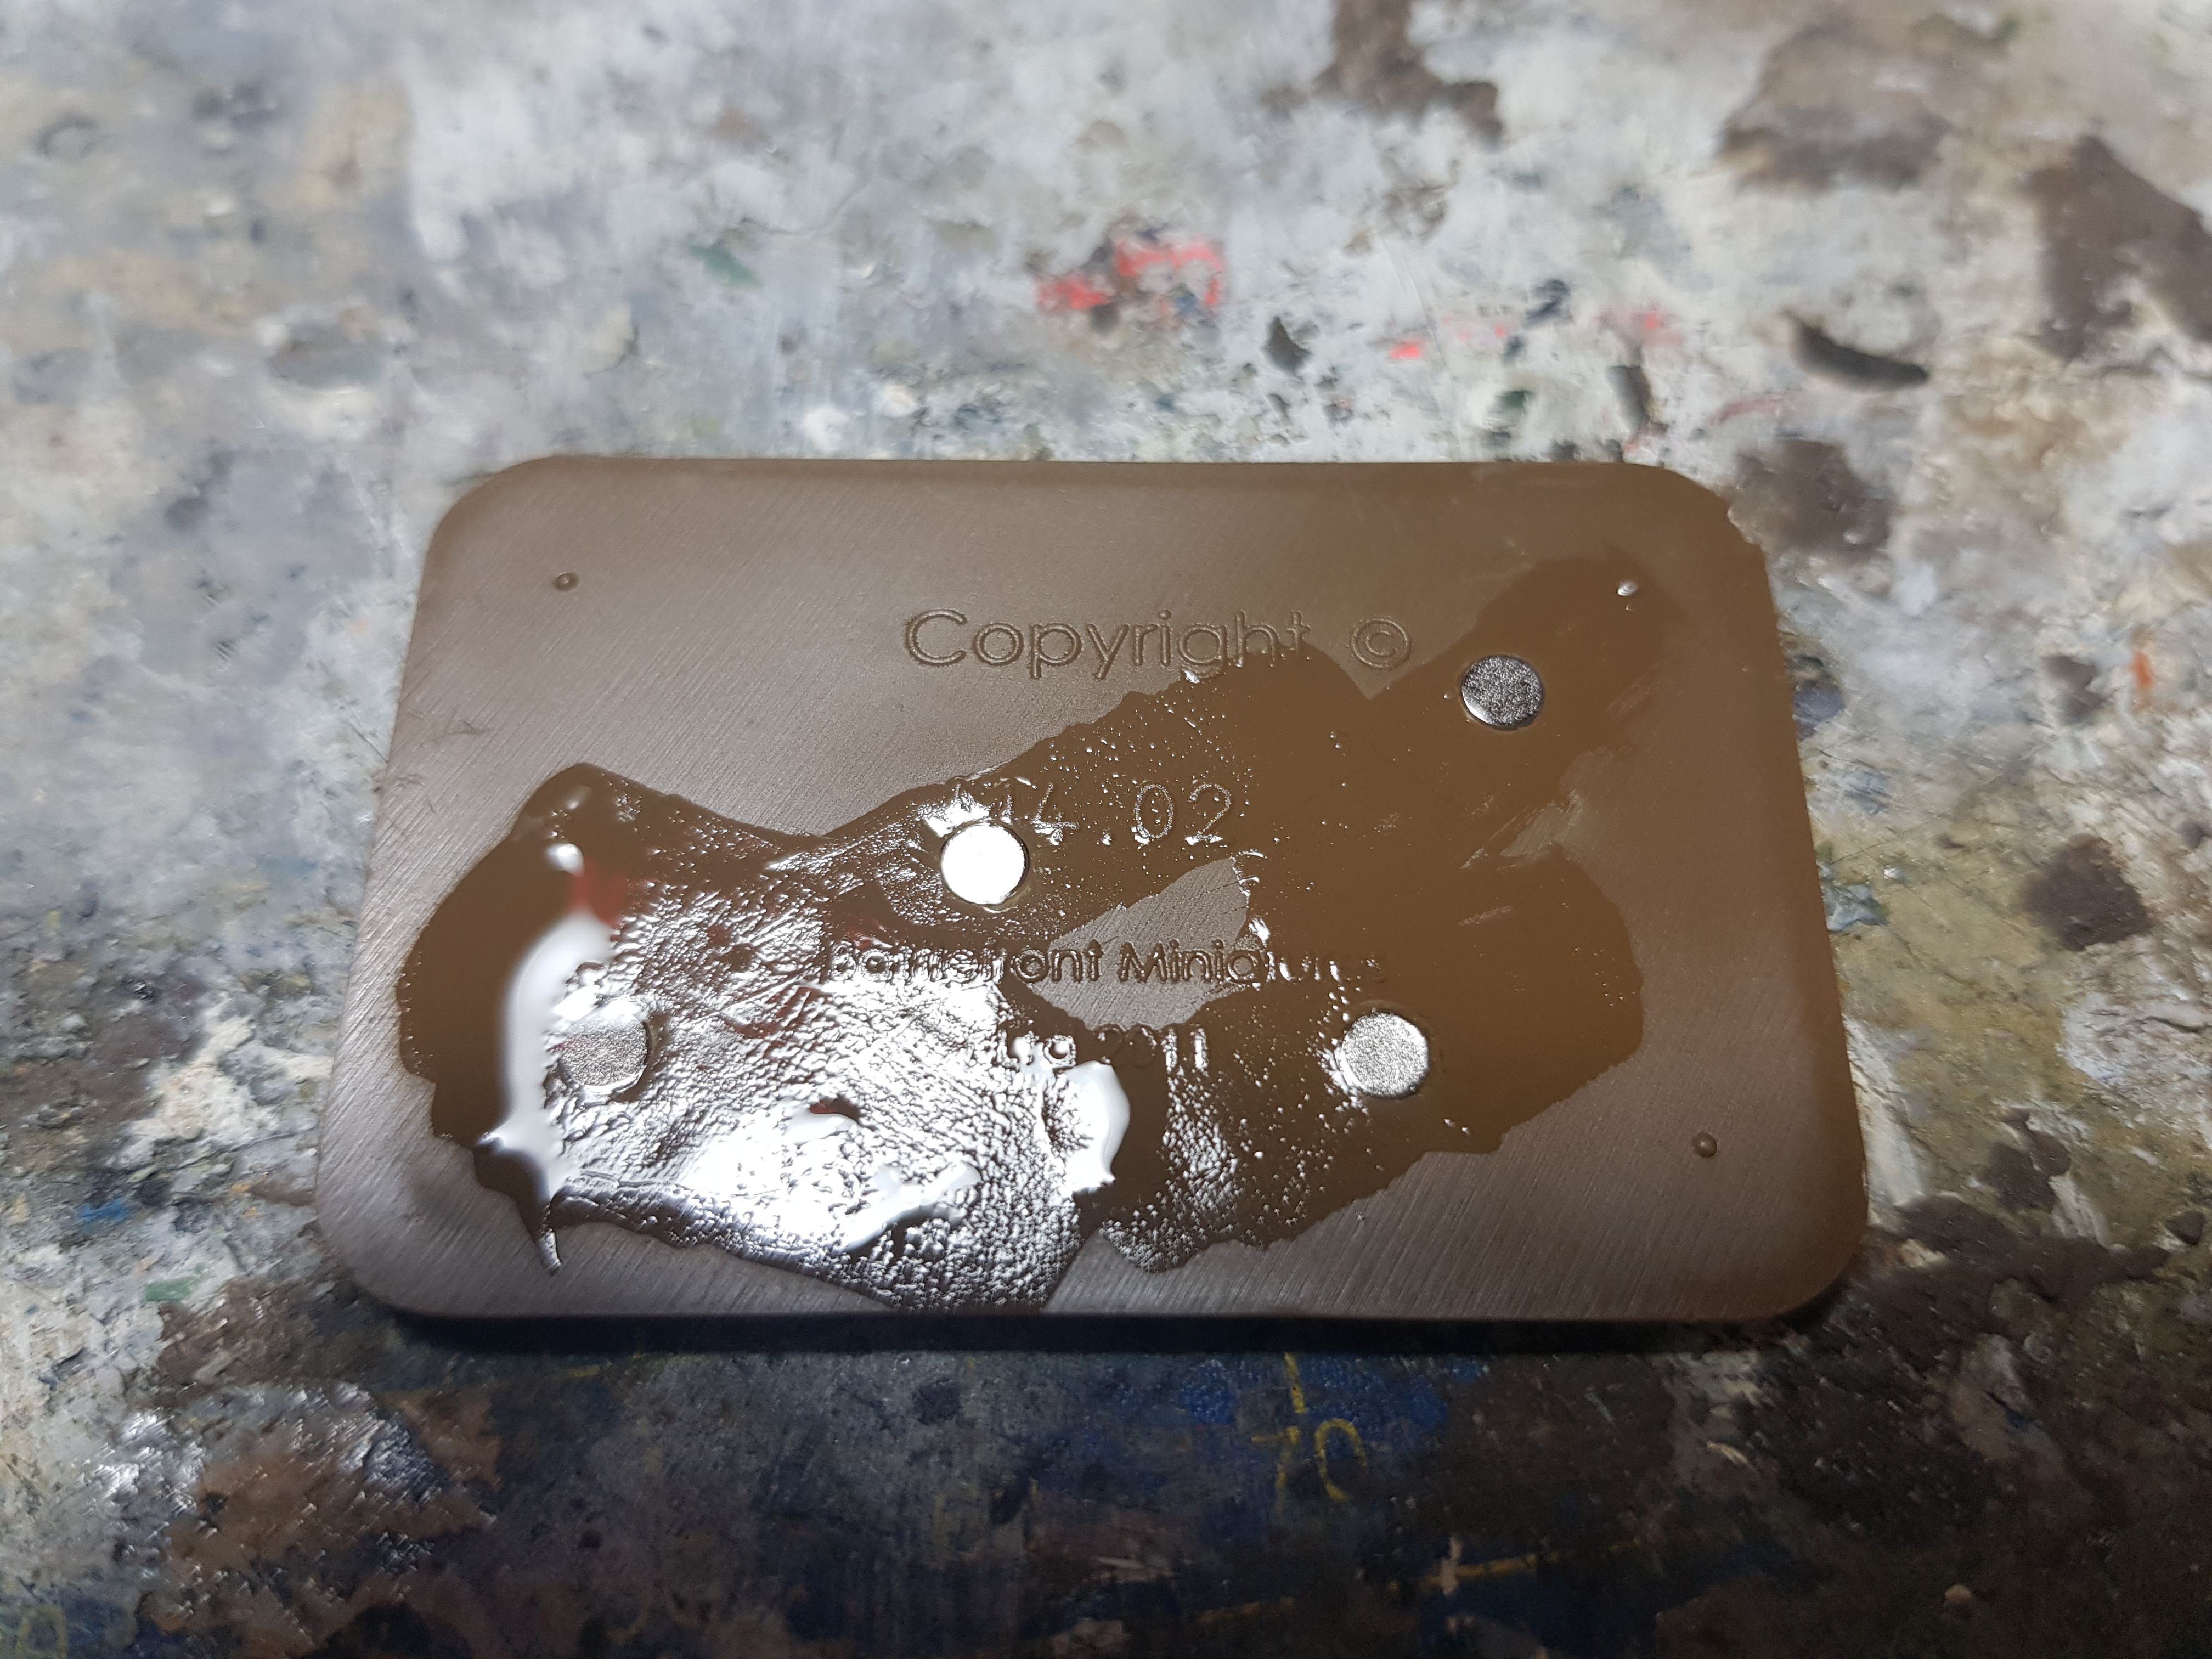
I then drilled a 2mm hole in the bottom of a handfull of models and just waiting until I can get some 2x1mm magnets to fit into them.

This will obviously work for my plans of magnetic carrying solutions for miniatures, I am just not sure yet how I am going to do that with vehicles. I am thinking of not basing the vehicles so I need to think of a solution. If you know one, let me know.
And that is how my Eastern Front project is going to develop from now on.
Taking a Break
 Hans, can I haz a light?
With my health getting worse and no idea if this or when this gets better, I have decided to take a break from doing any hobby for a while. While it boosts my mental health being able to do something every day, it is really detrimental to it when I try to do it and it is just getting more and more difficult to do any if I can do any at all. With everything currently going on with my health, I am not just struggling with my hobby, I struggle doing some of the basic things I need to do everyday. I am still awaiting the blood test results from my doctor which are taking longer as the sample had to be send to a different laboratory that could do the testing and even then that can only specify one thing that we hope is the issue, otherwise it’s on to a specialist to figure it out.
So when this gets better, or when I have good days, I might be able to do something and post something, but don’t expect regular updates for a while.
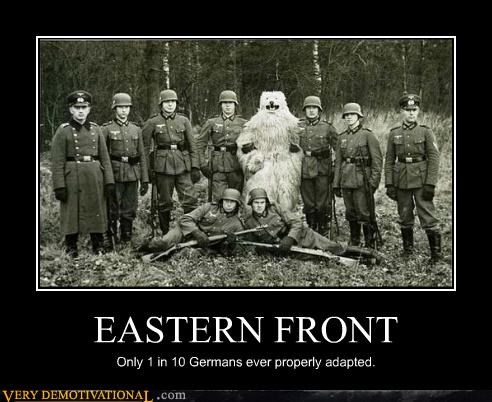
Alternatively, I could just post World War 2 related memes everyday…..
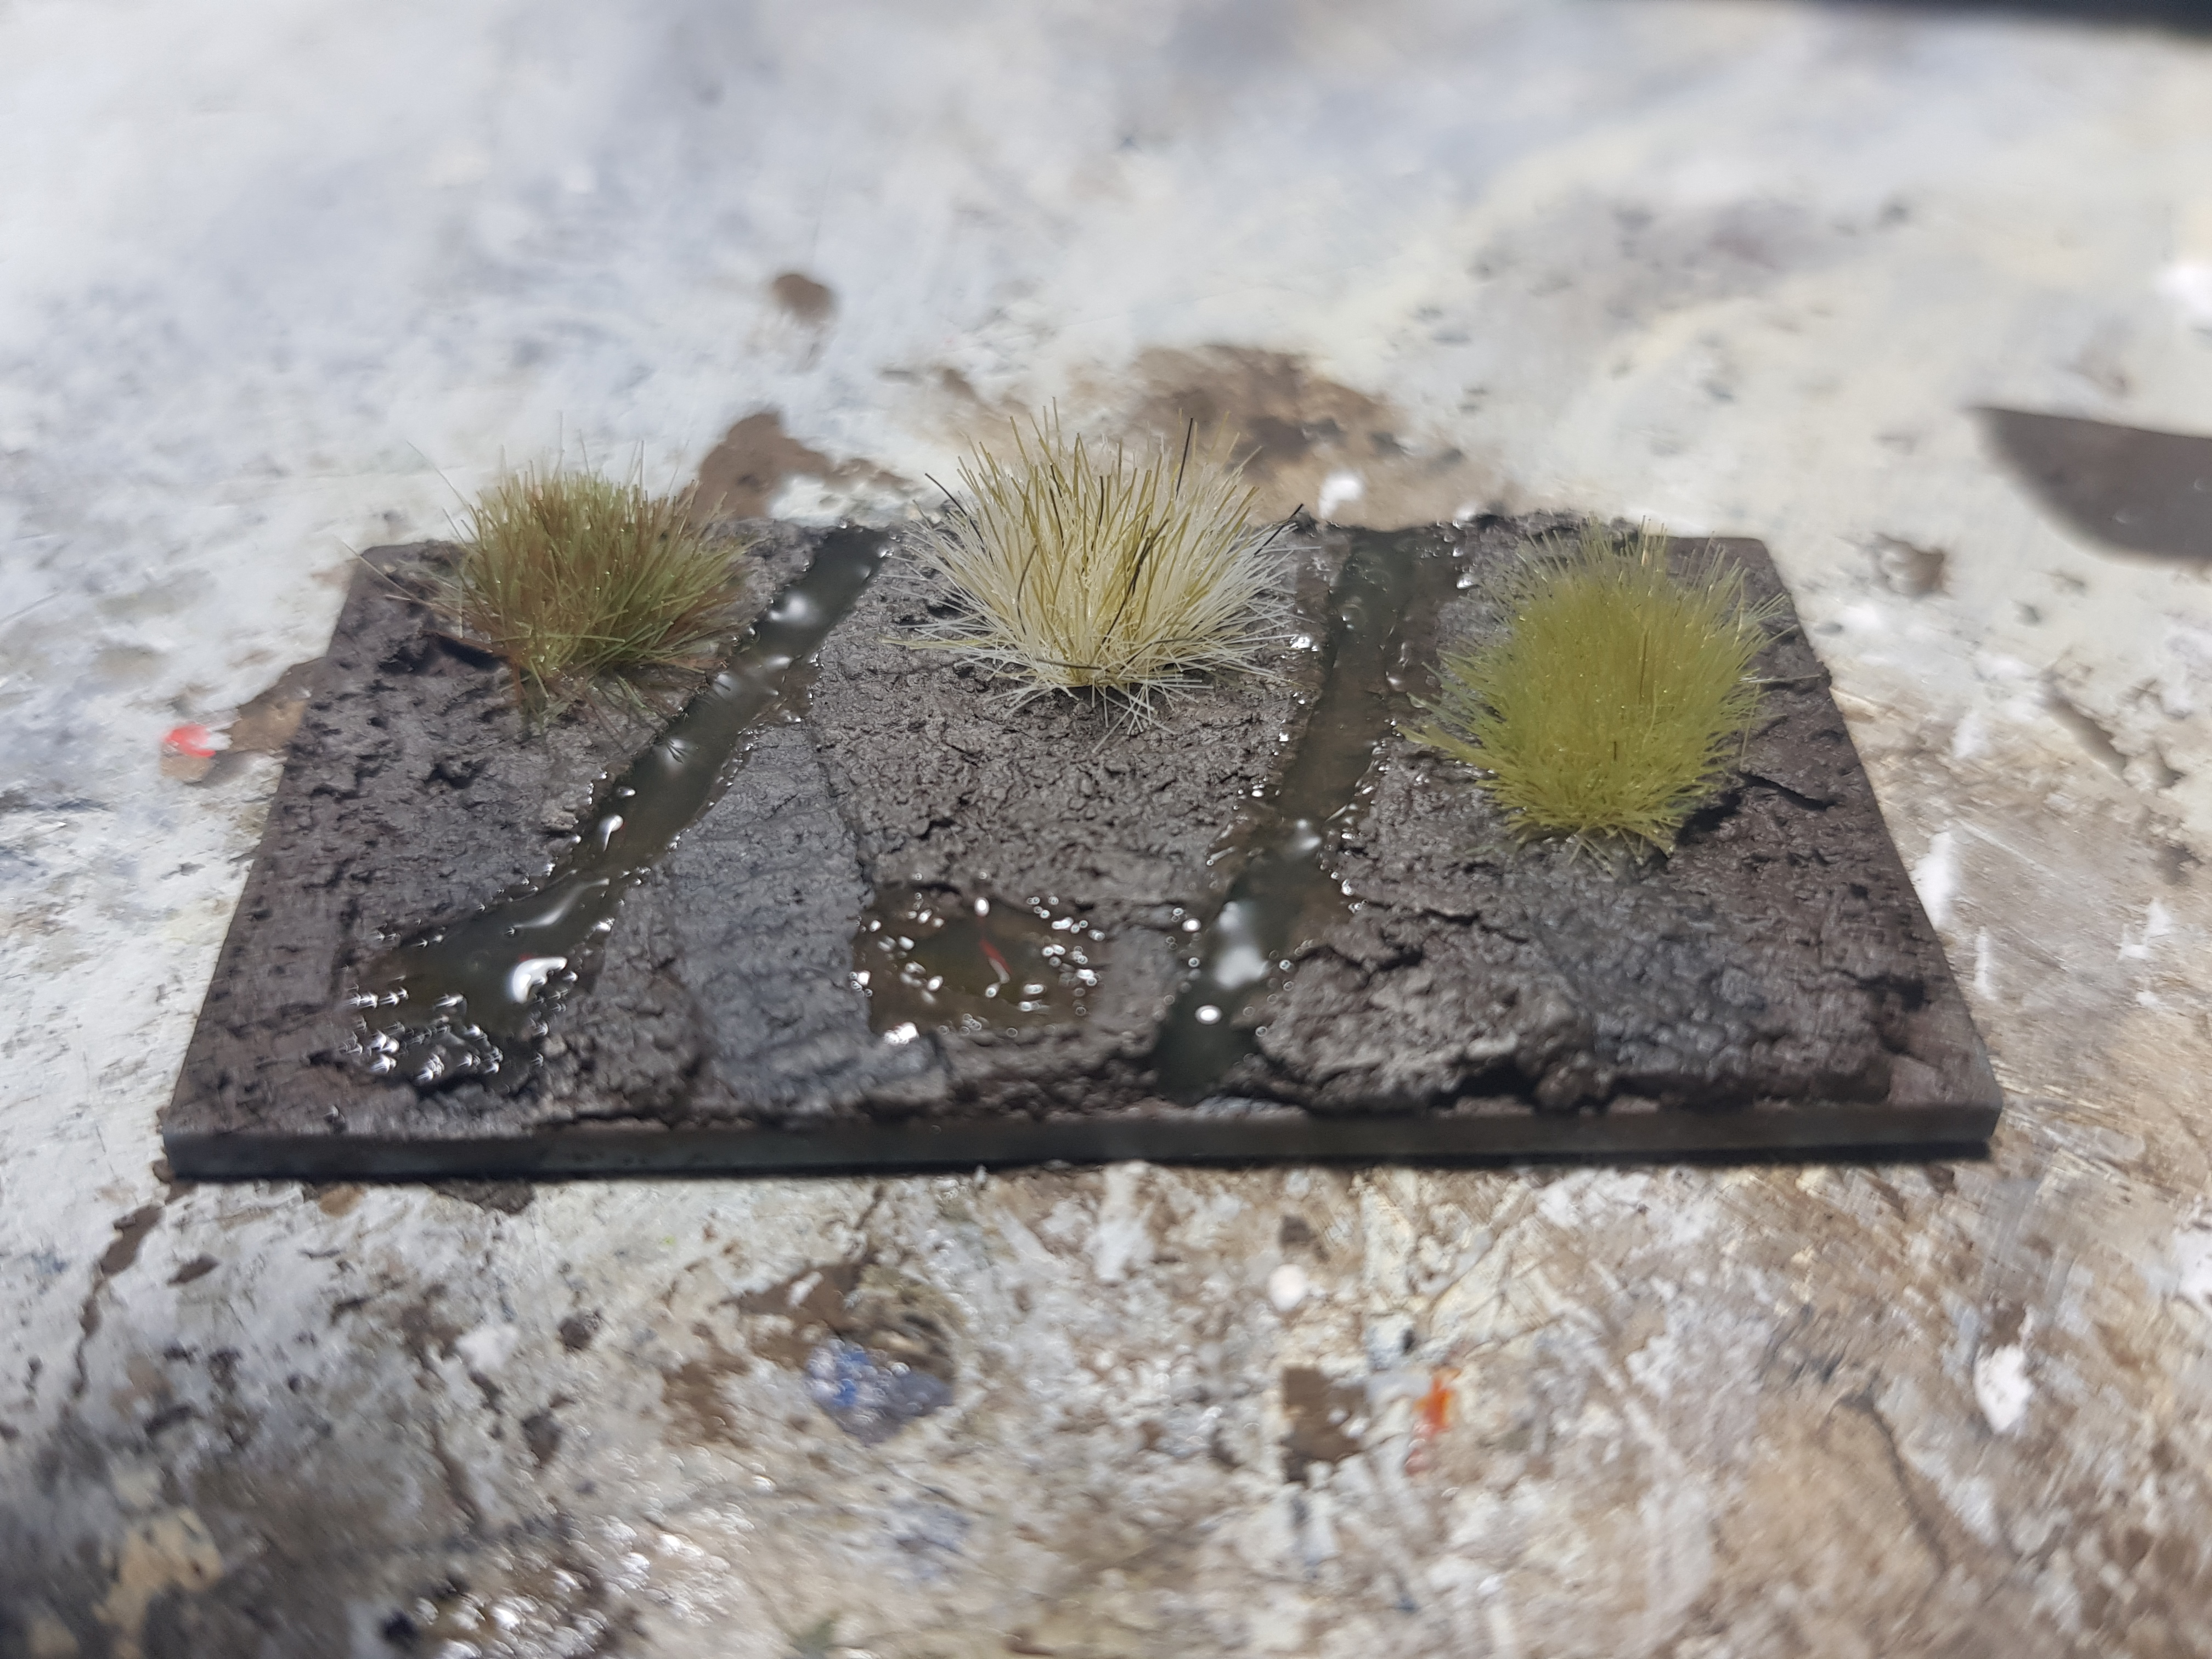
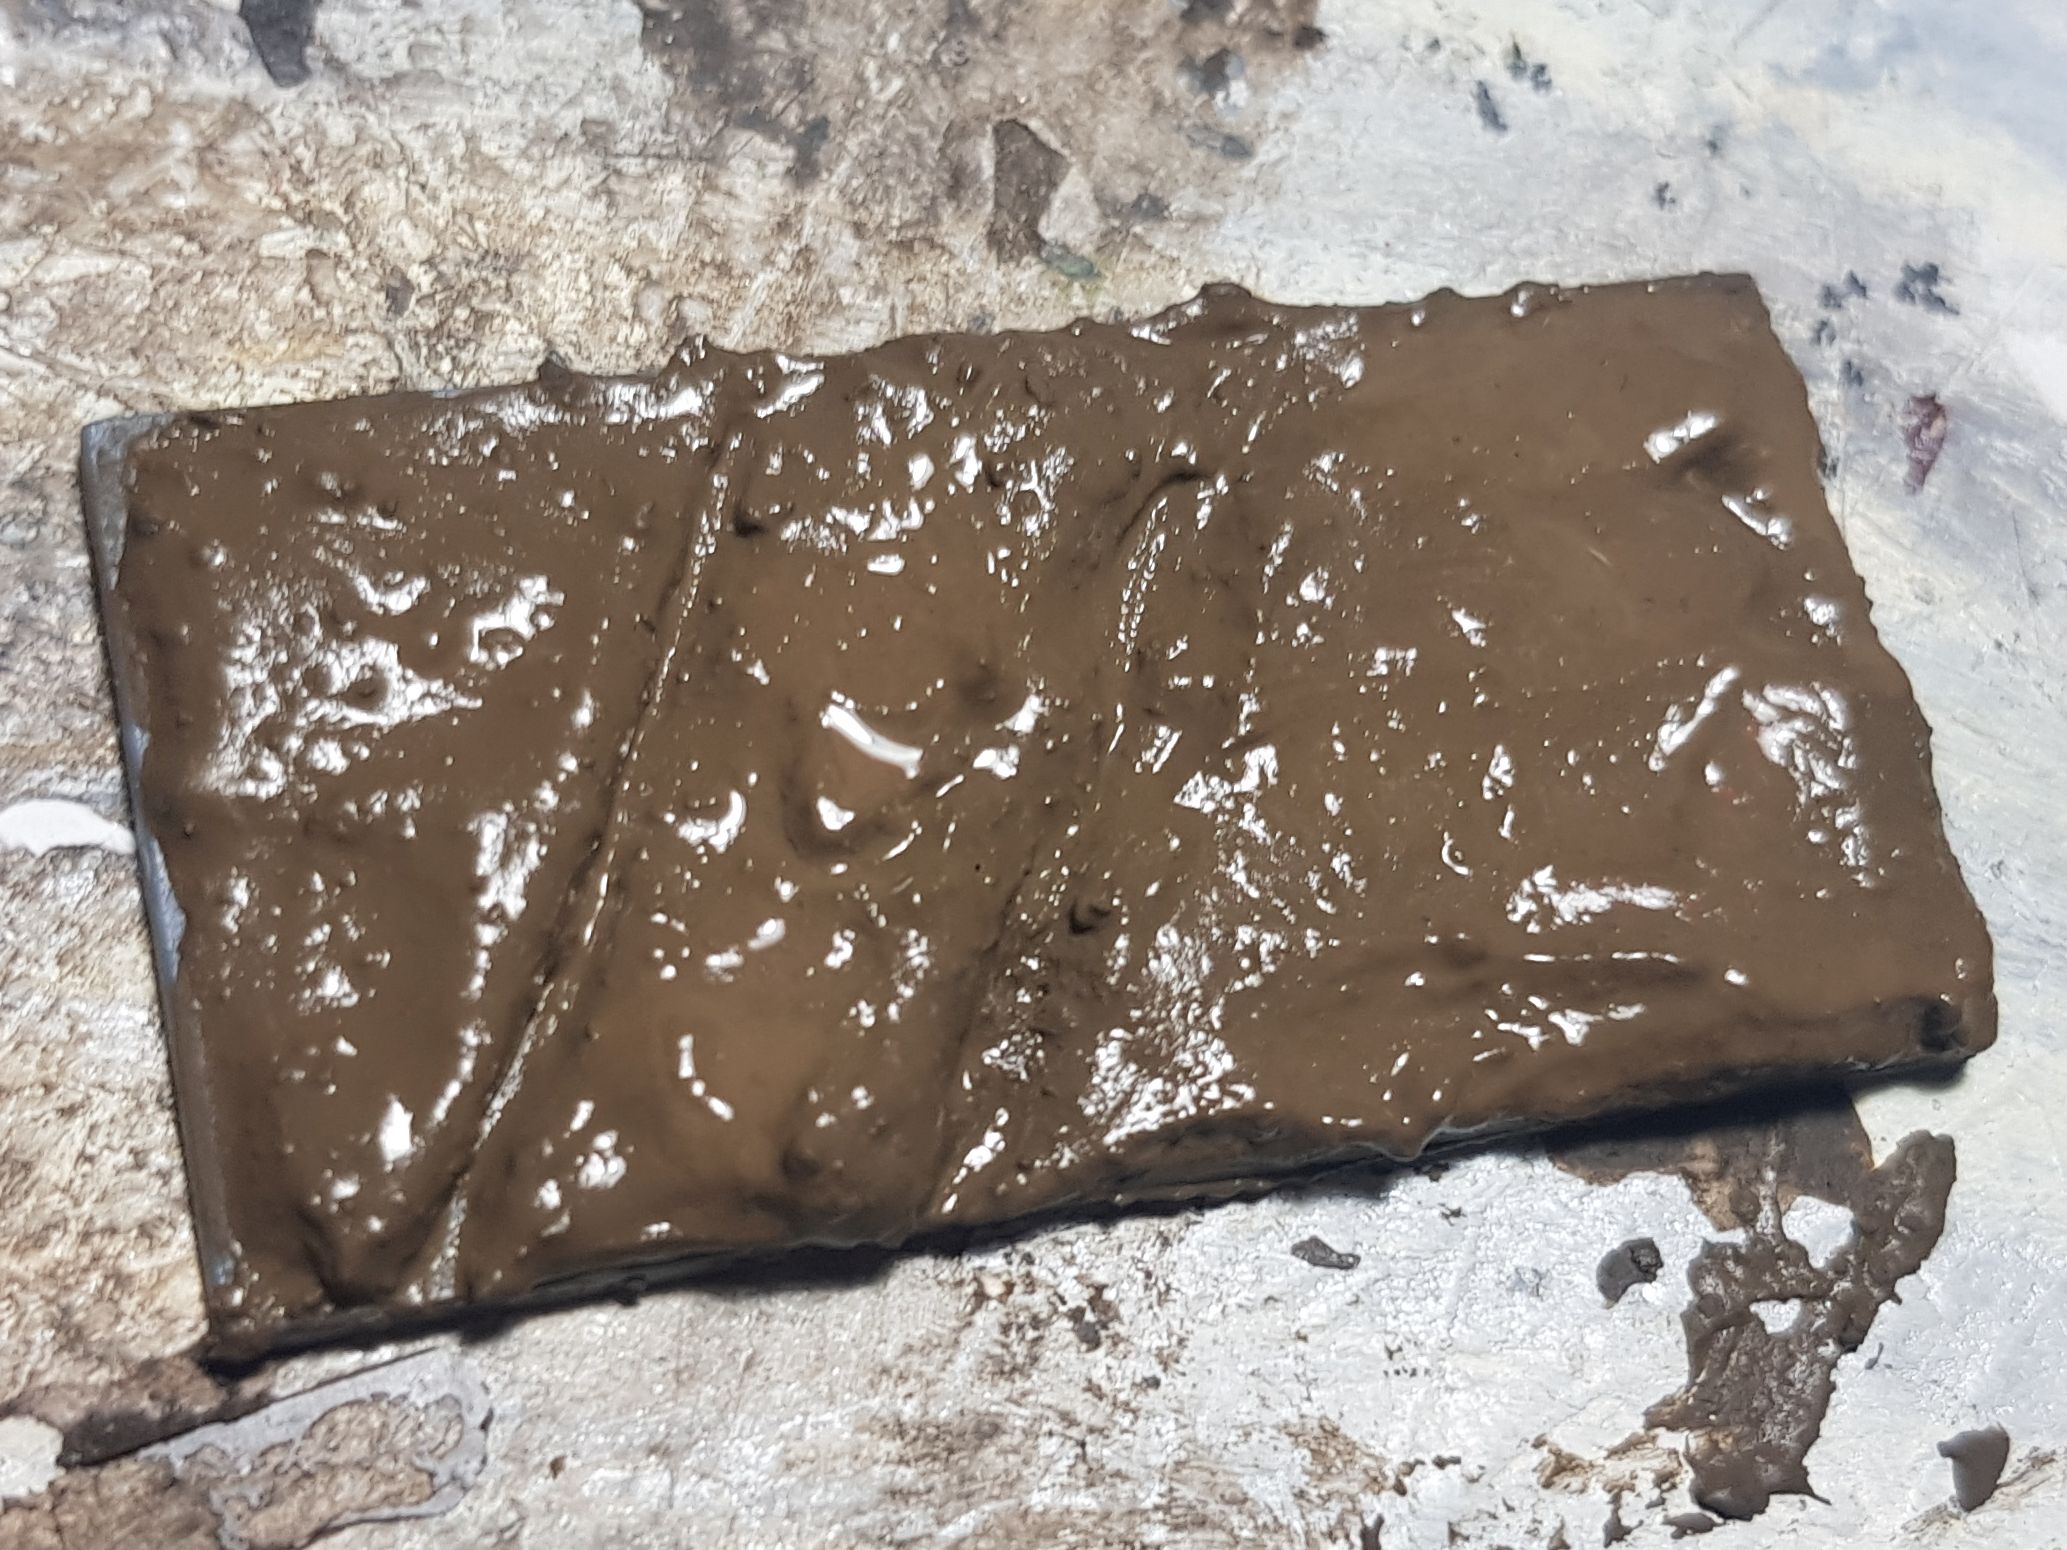
Milking the Puddles....

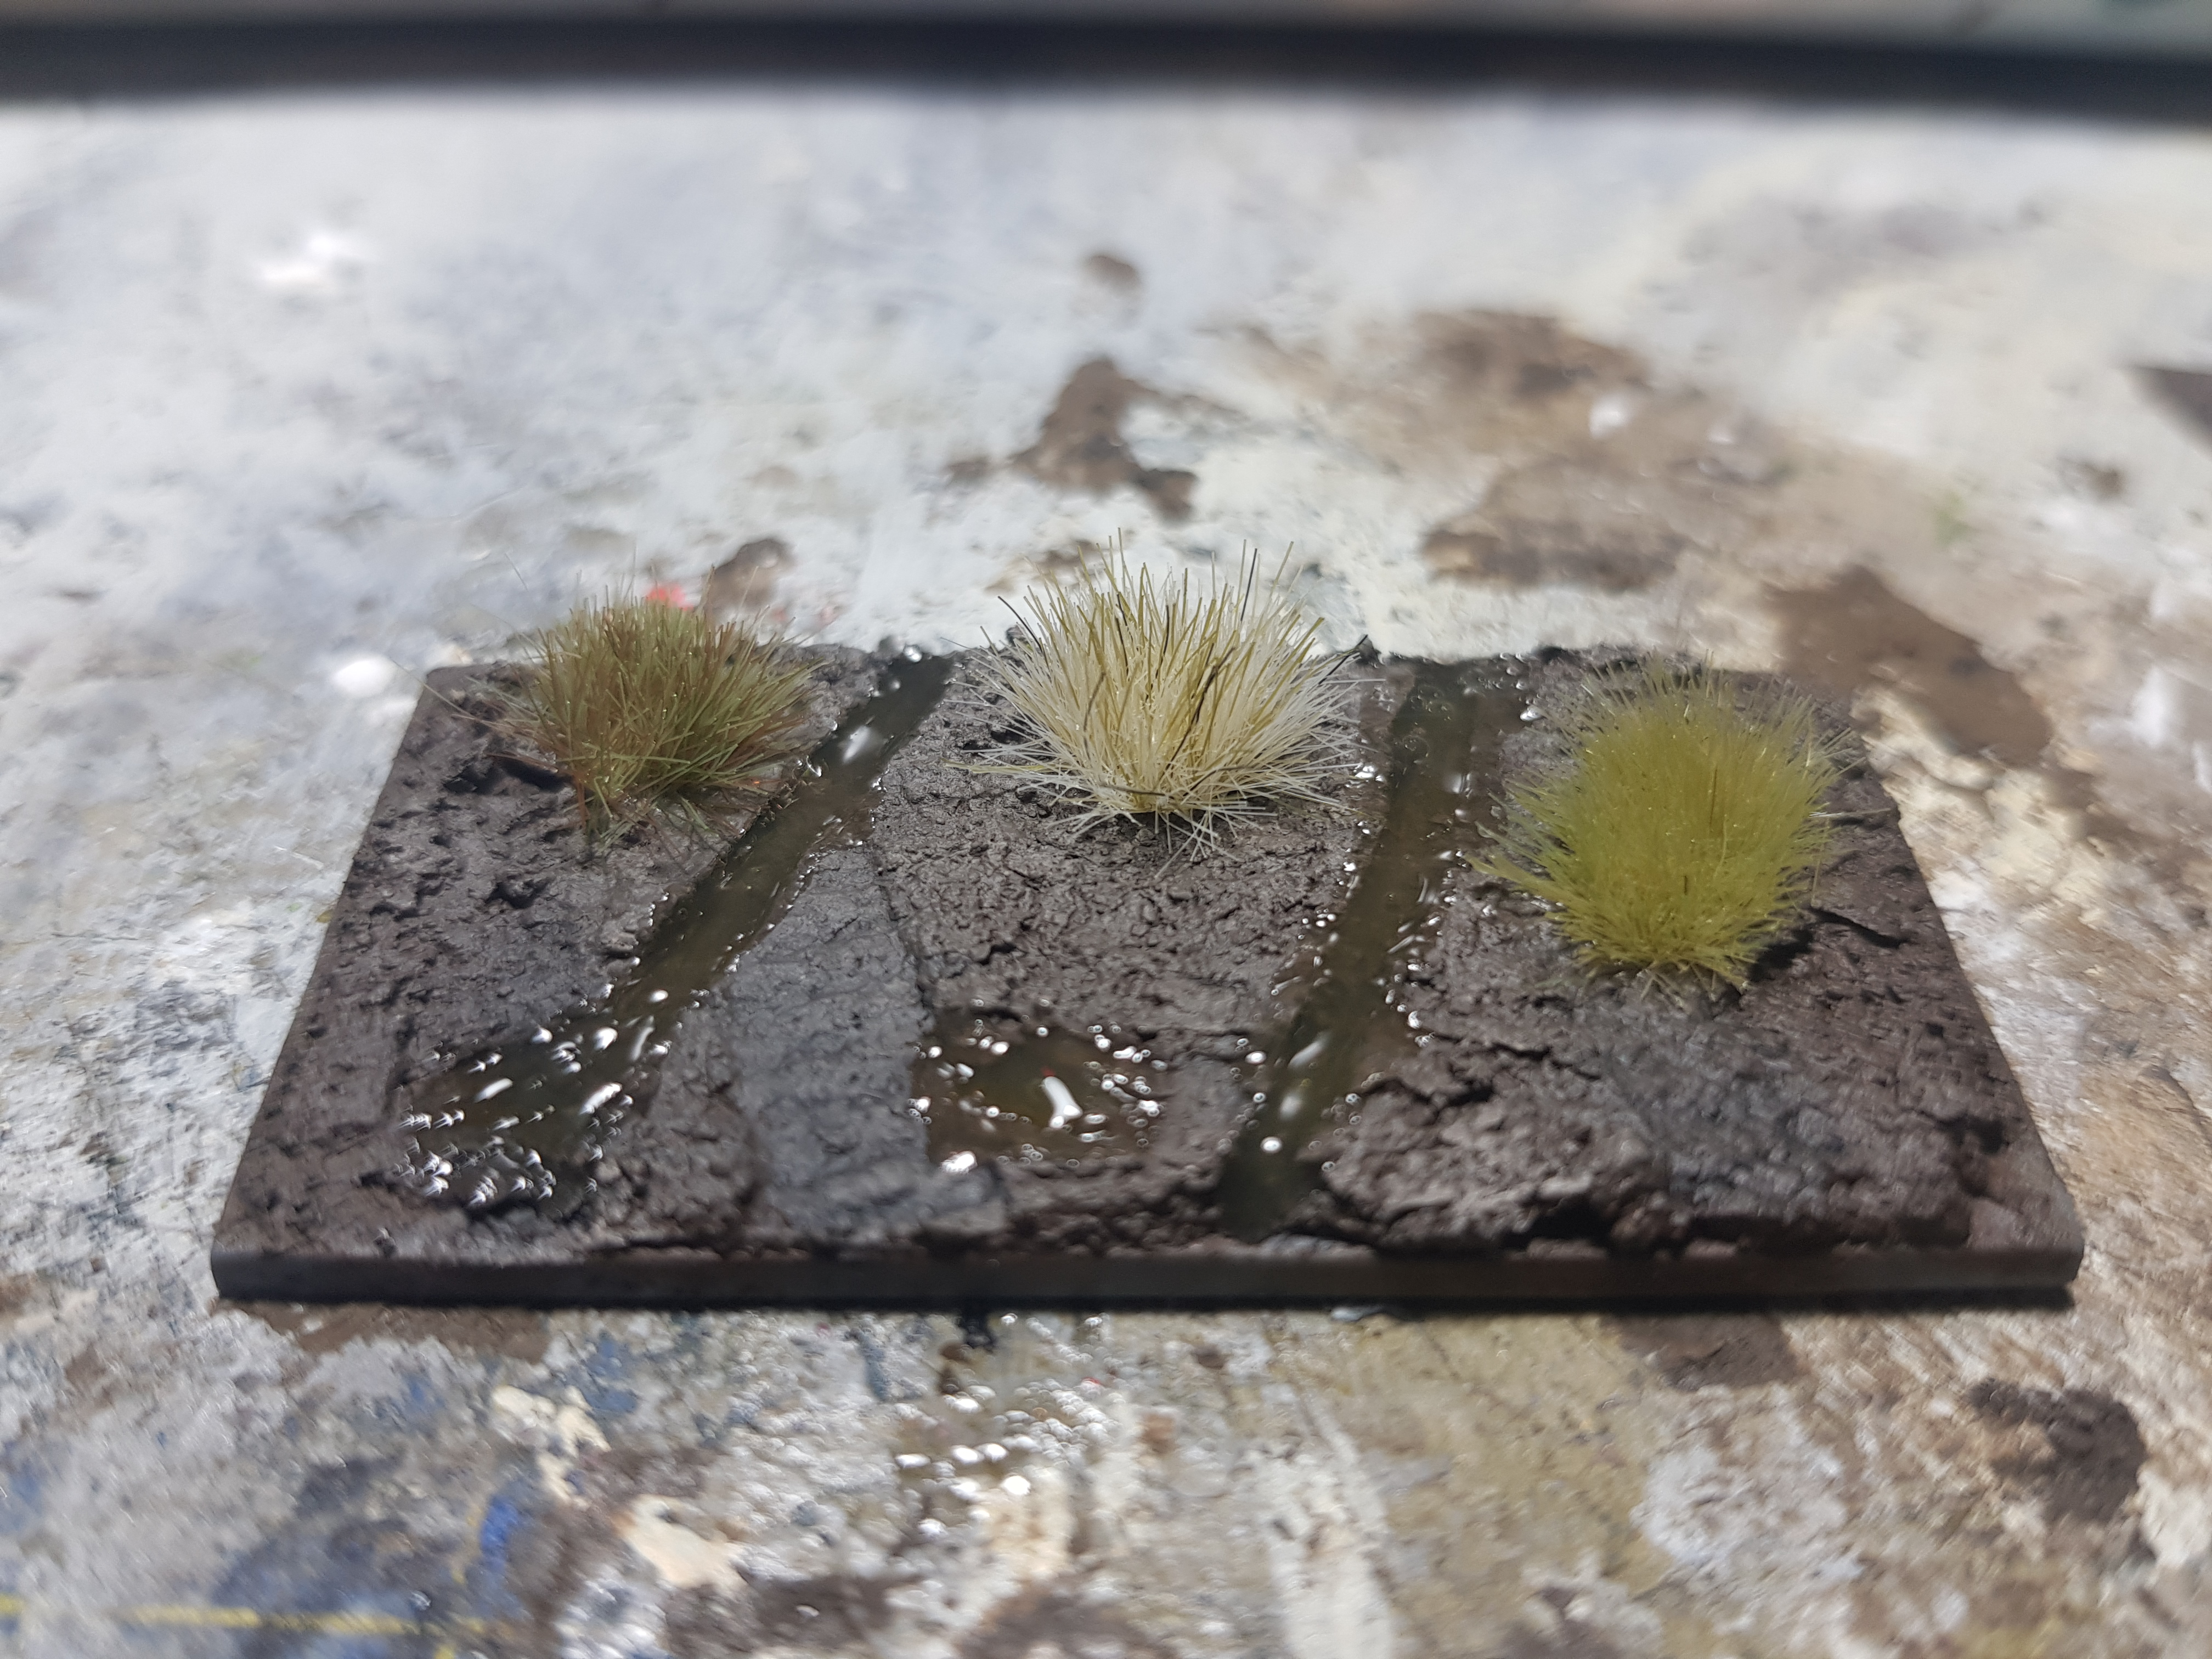
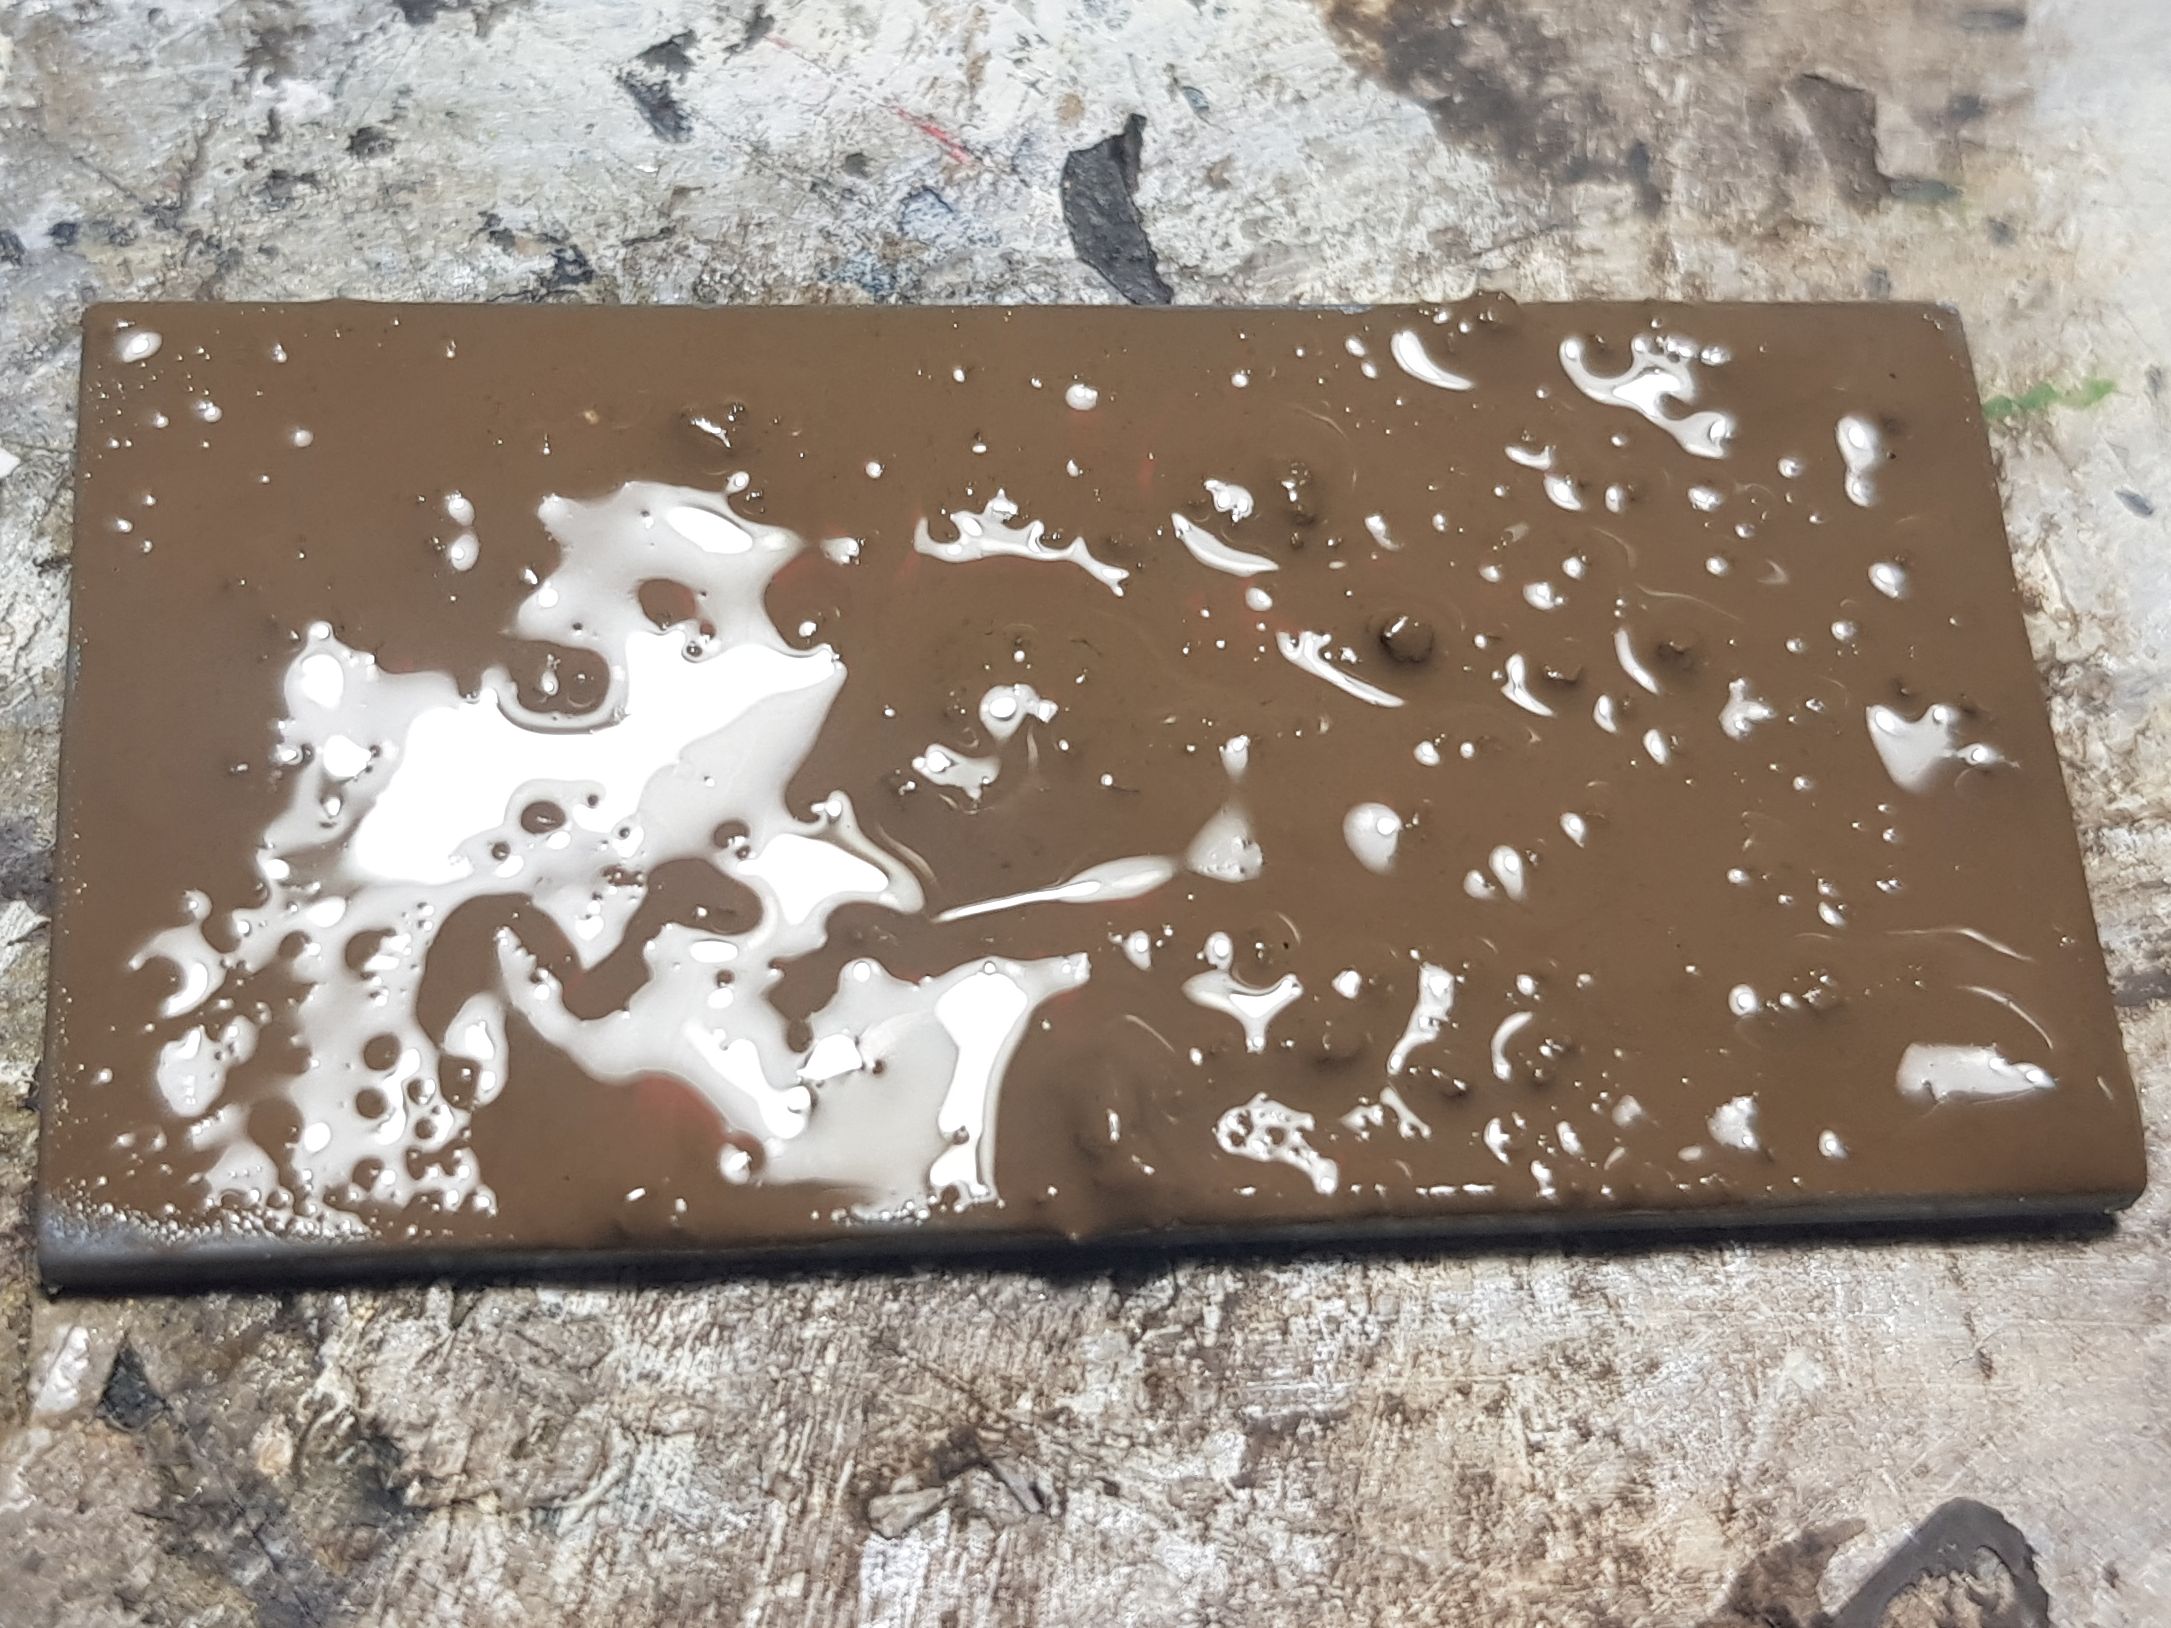
Dried result up top and then I added a bit more AK Interactive Diorama Puddles (AK8028) in as you can see in the bottom. It was surprisingly difficult to just do this today, I am really struggling with my motor skills toady.

Muddlin' Puddlin' Some More
So, the AK Interactive Diorama Puddles (AK8028) dried and shrunk again, I filled it in a bit more. But I definitely feel that adding the puddles with a wooden toothpick is the way to go forward from the start.
I know I am just milking the puddles when my health is like this….
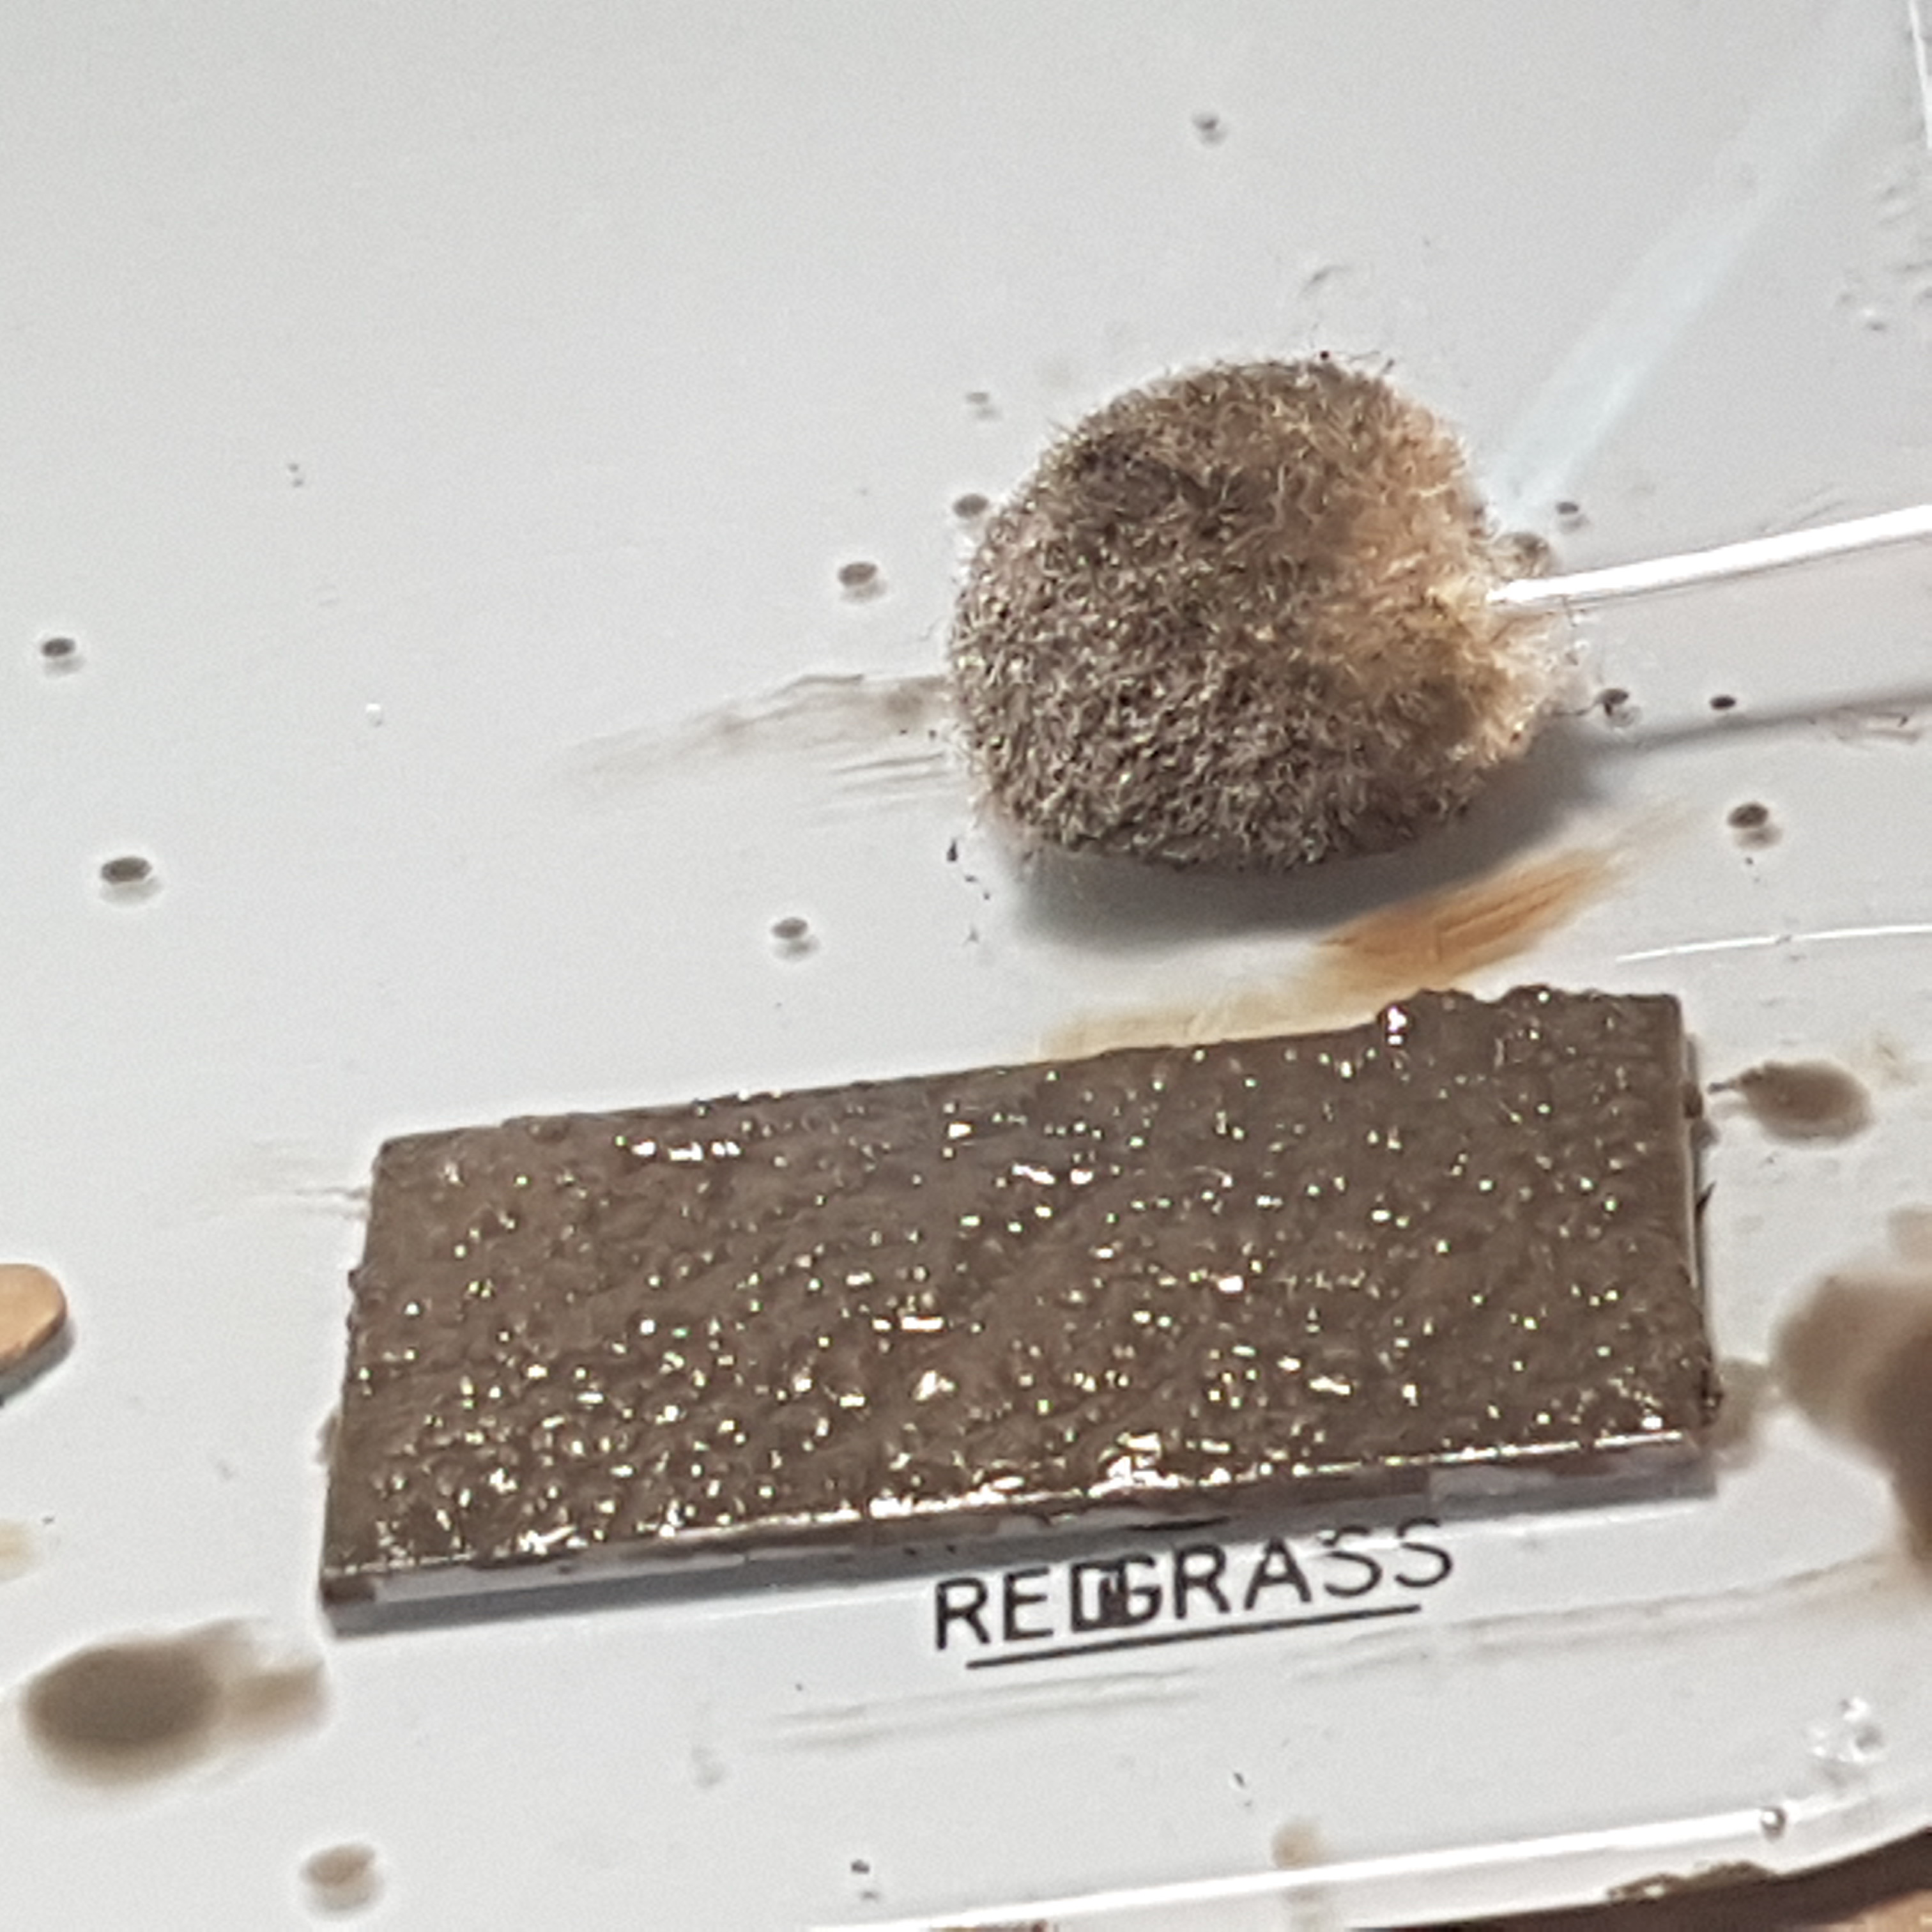
Muddlin' Puddlin'
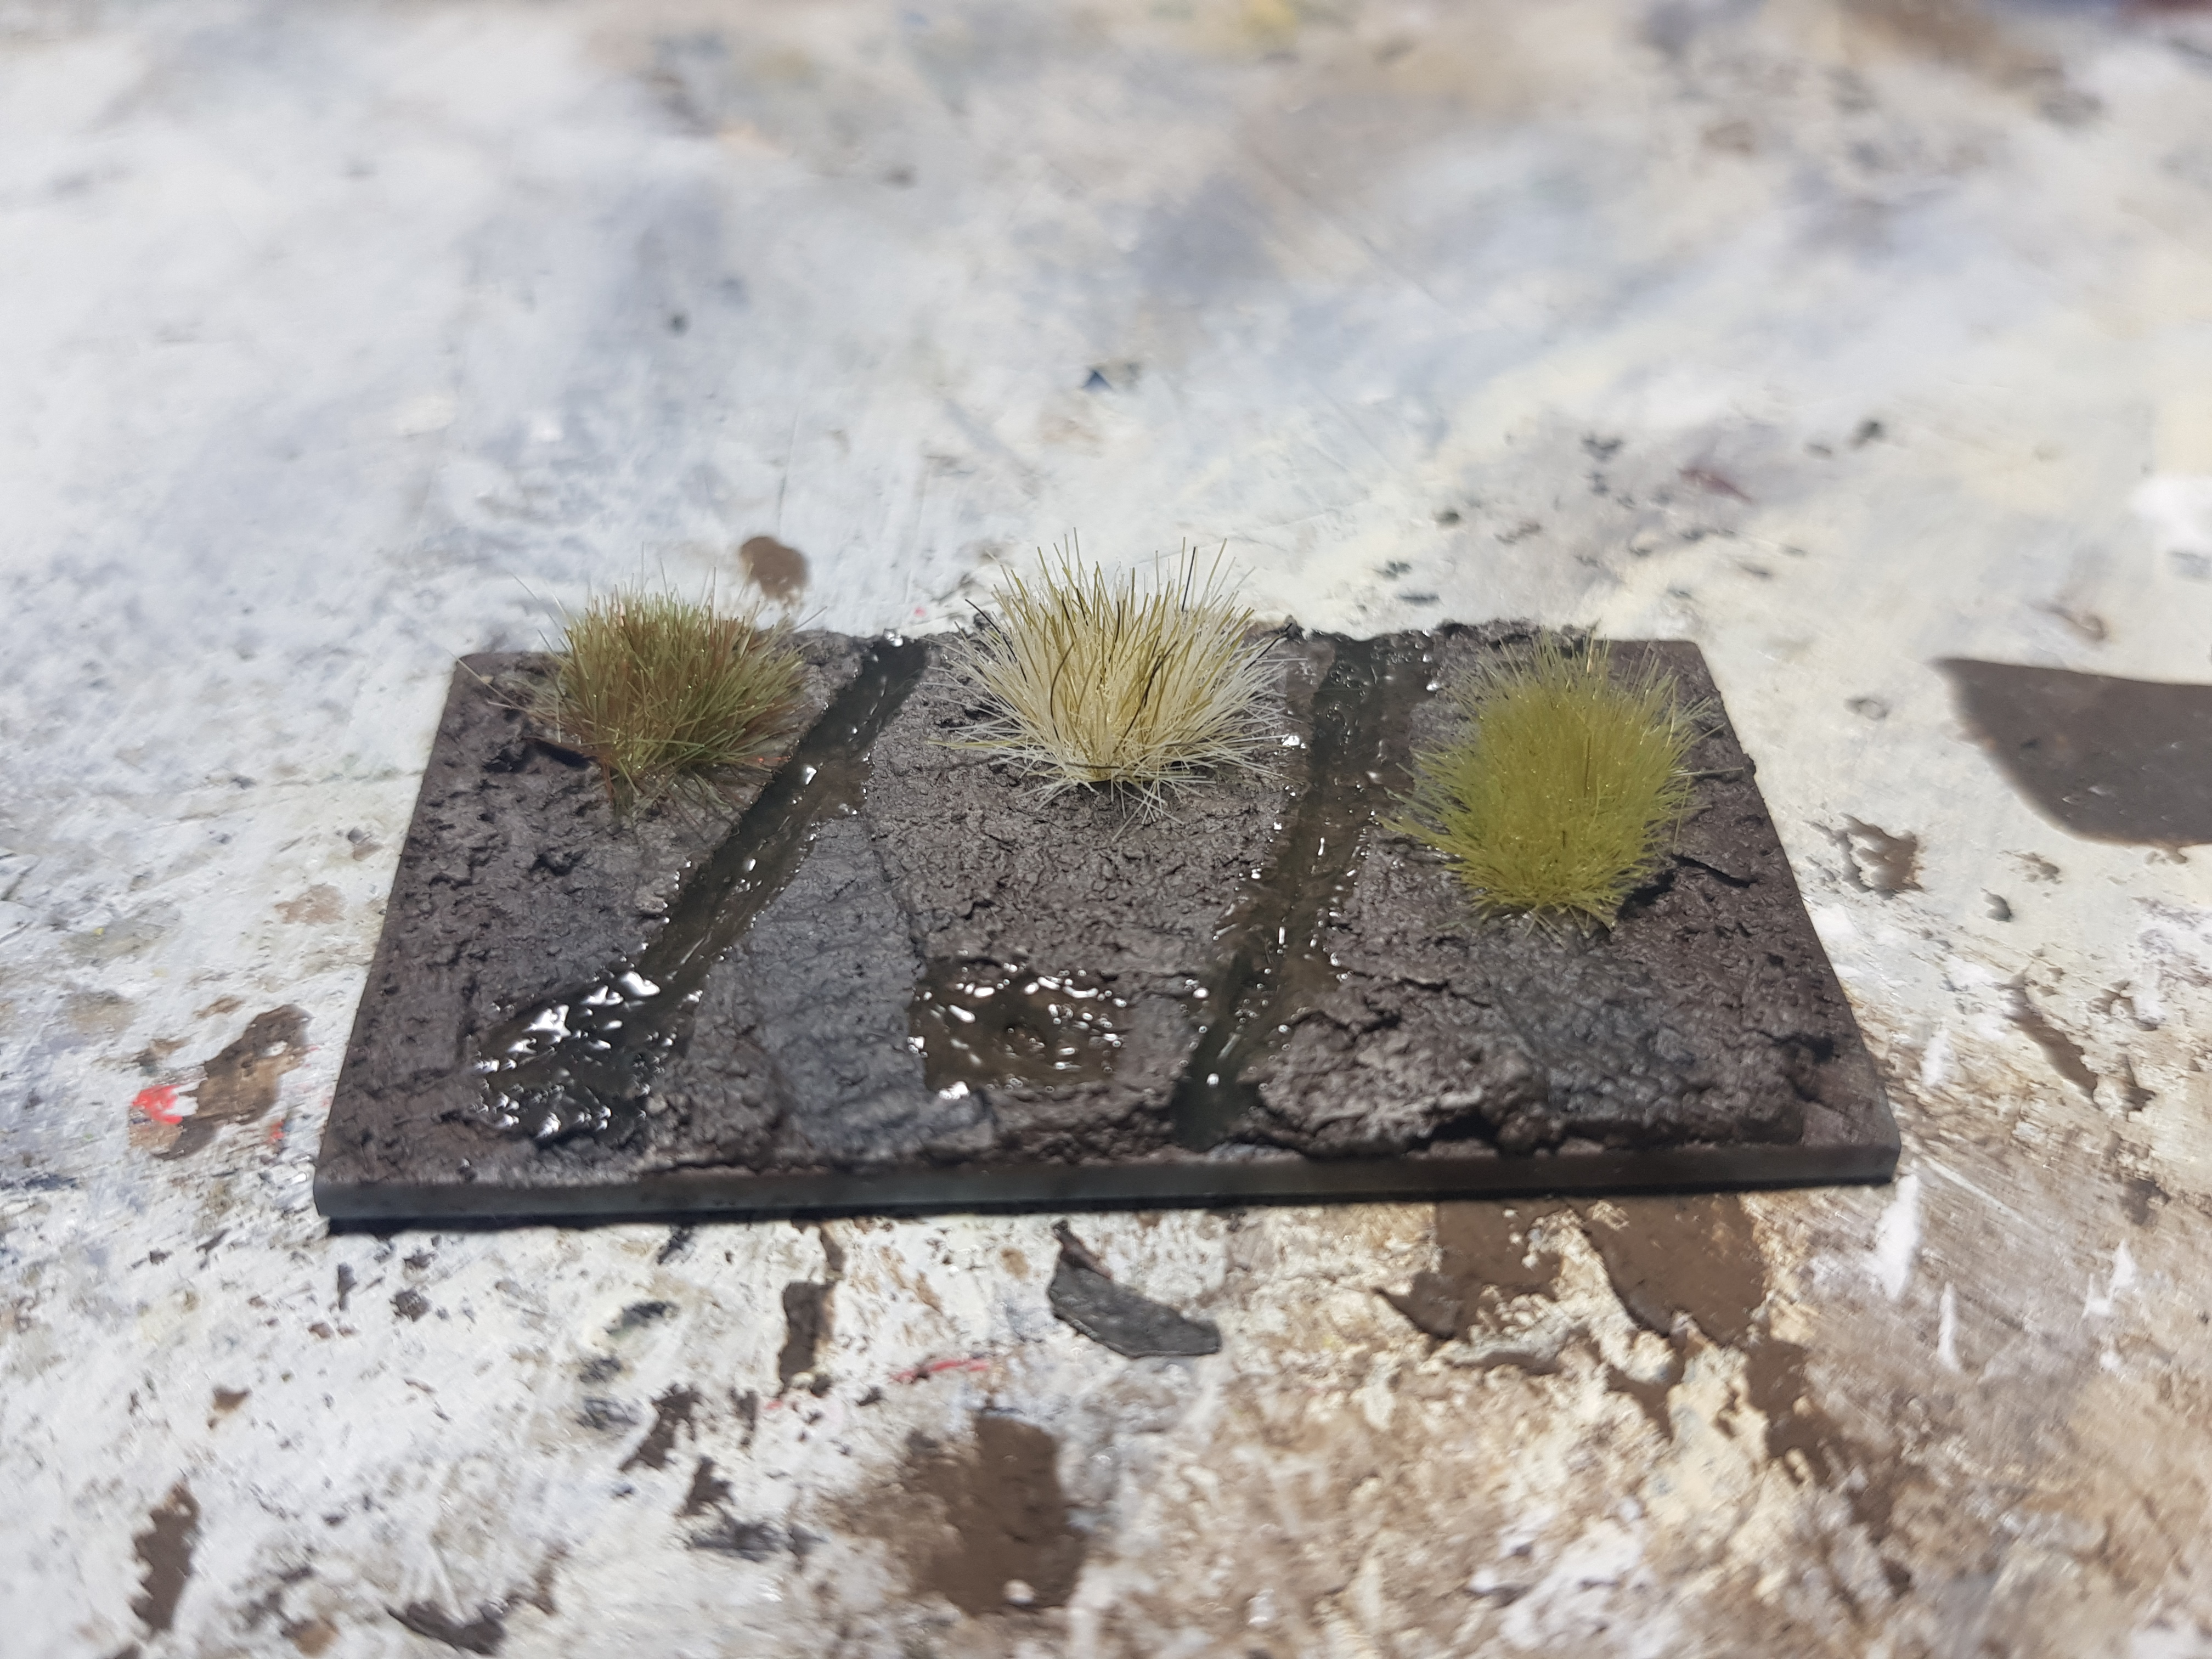
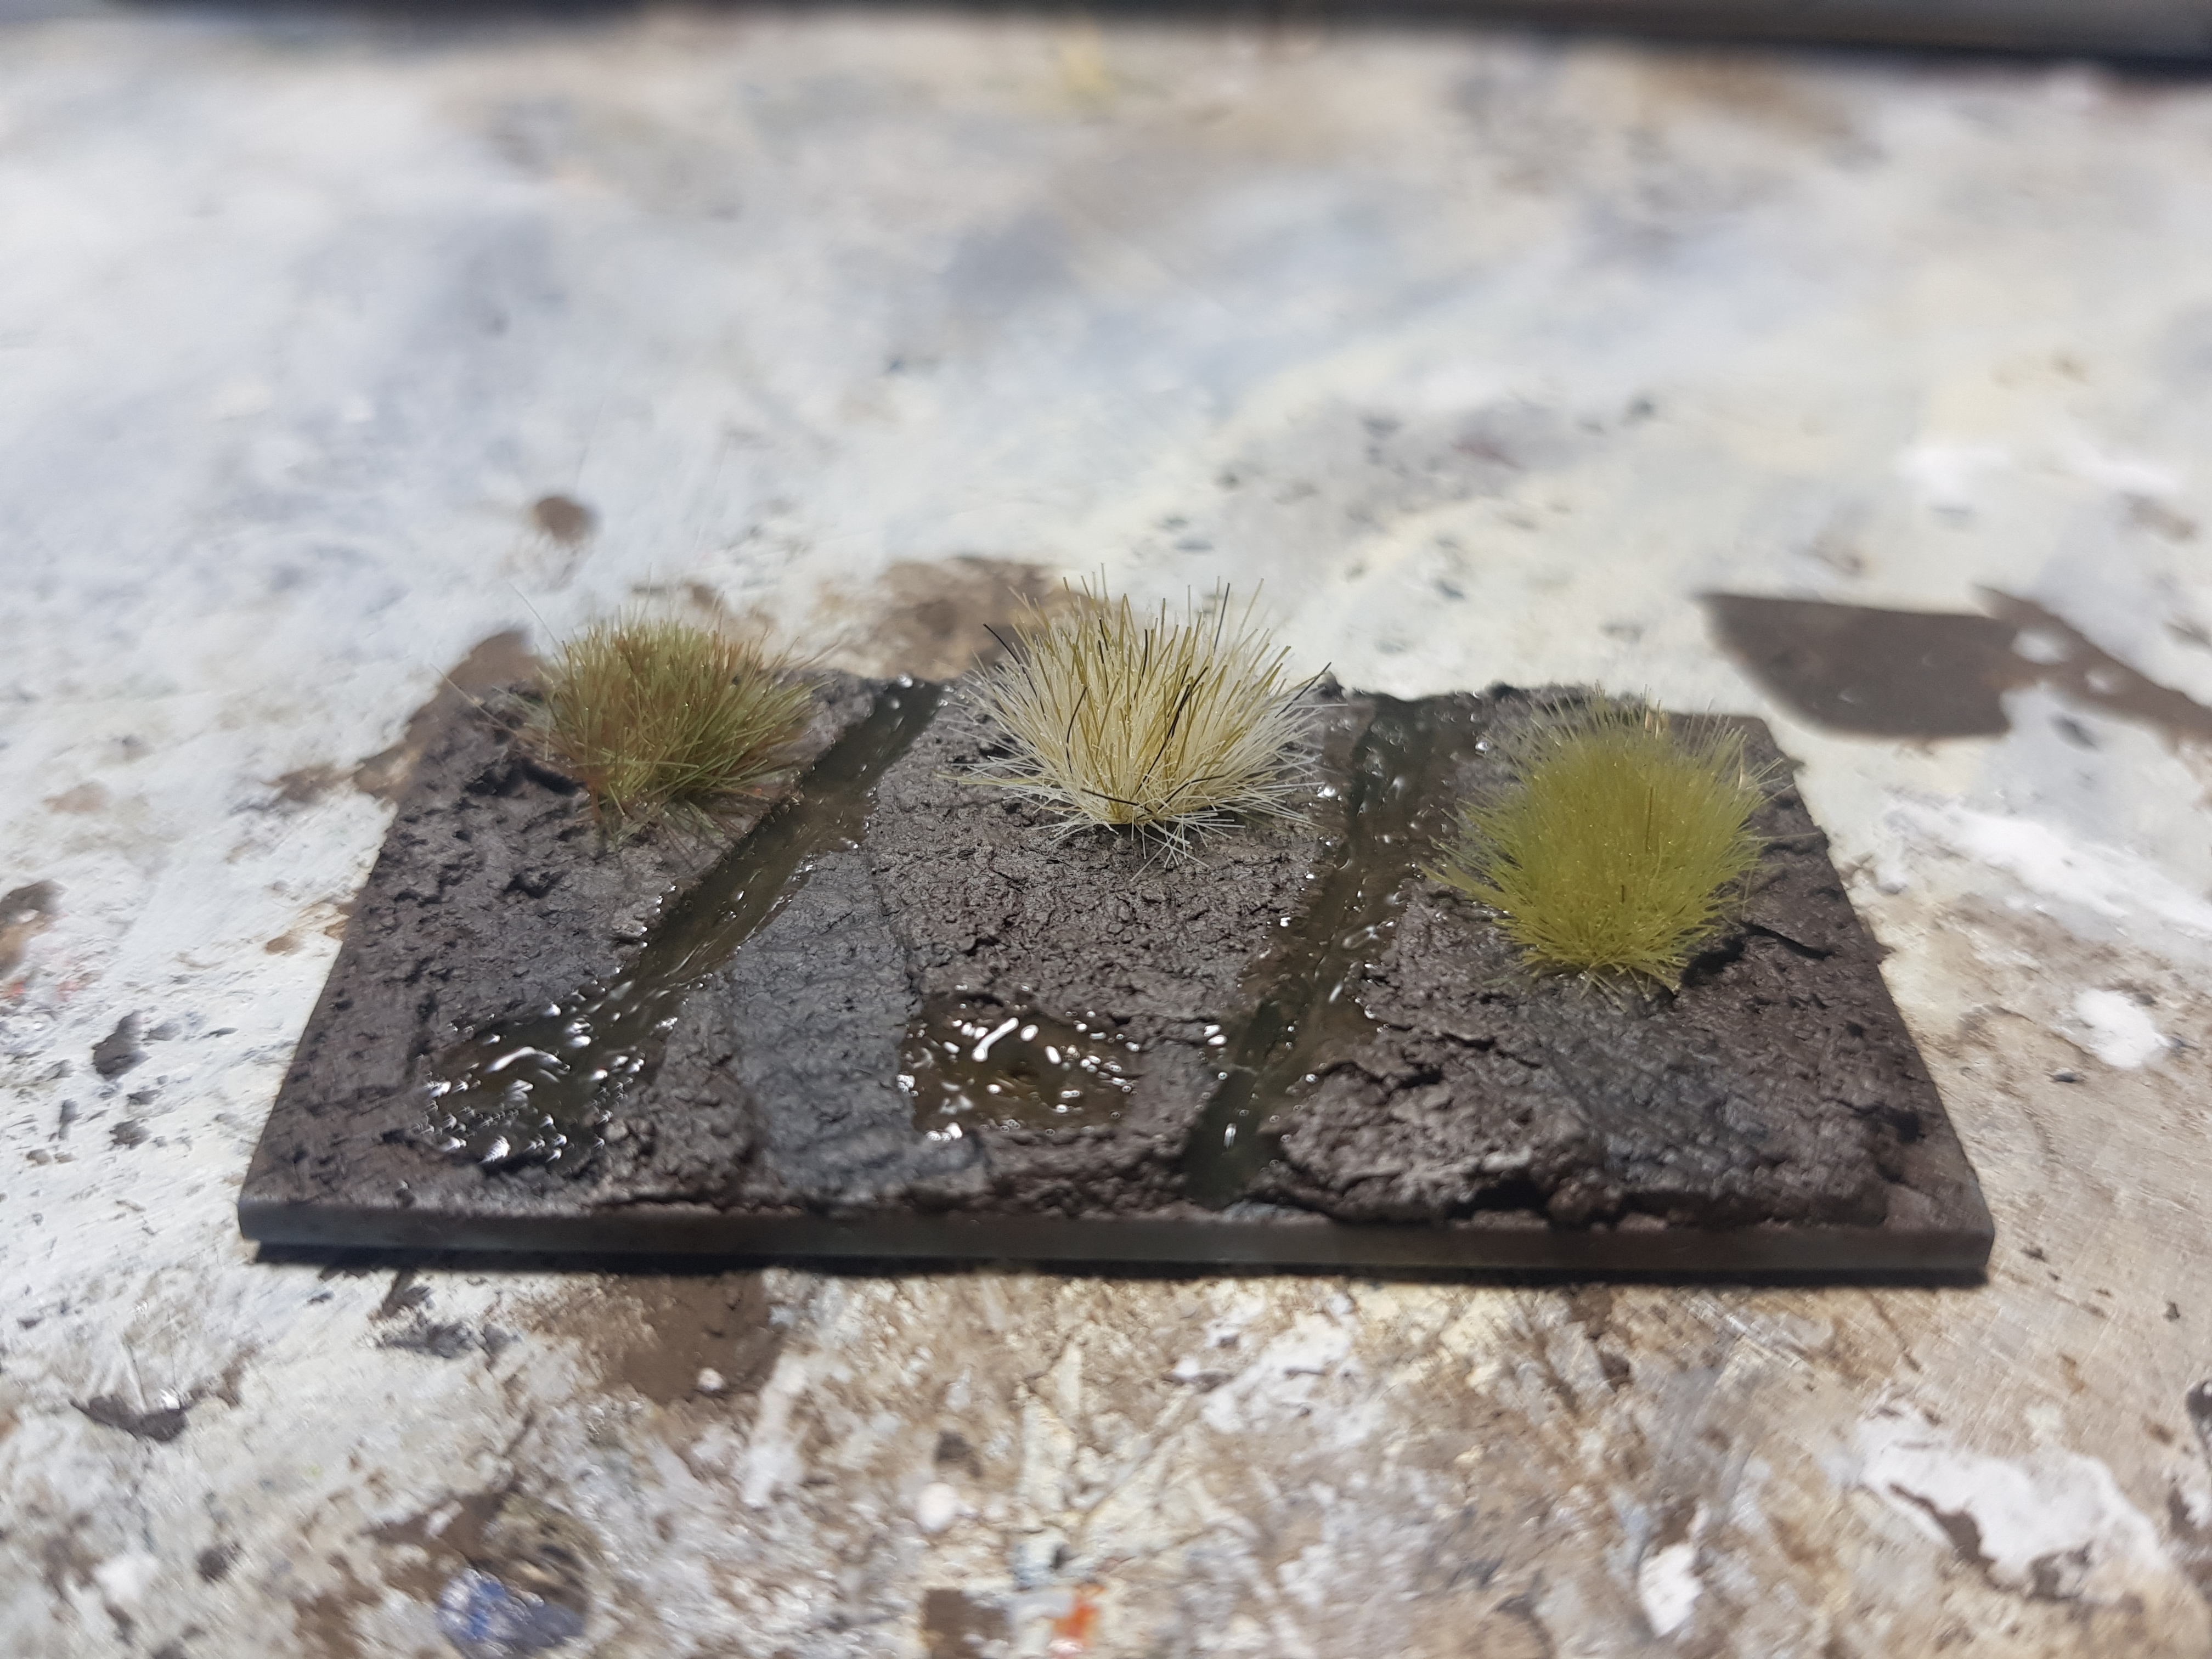
So, here are the results of the last test. I was expecting the AK Interactive Diorama Puddles (AK8028) to shrink and it did a bit more than I was expecting, but that is fine. On the side of the tufts, I like the tuft on the left the most on this base, but when you look at my sources the grass should be a bit more dry. The summer in 1942 was really hot and dry causing issues to both forces.

I grabbed a bit more AK Interactive Diorama Puddles (AK8028) and put it in the the sunken areas to fill it back up. I may have to do this several times.
On a side note, at the moment I really don’t trust myself with any fine detail work, especially not when it includes sharp objects like a hobby knife.
A little bit more basing.
Today was another challenging day, but I managed to get something done in the end…. So I grabbed base 12 as base 12 is best base.
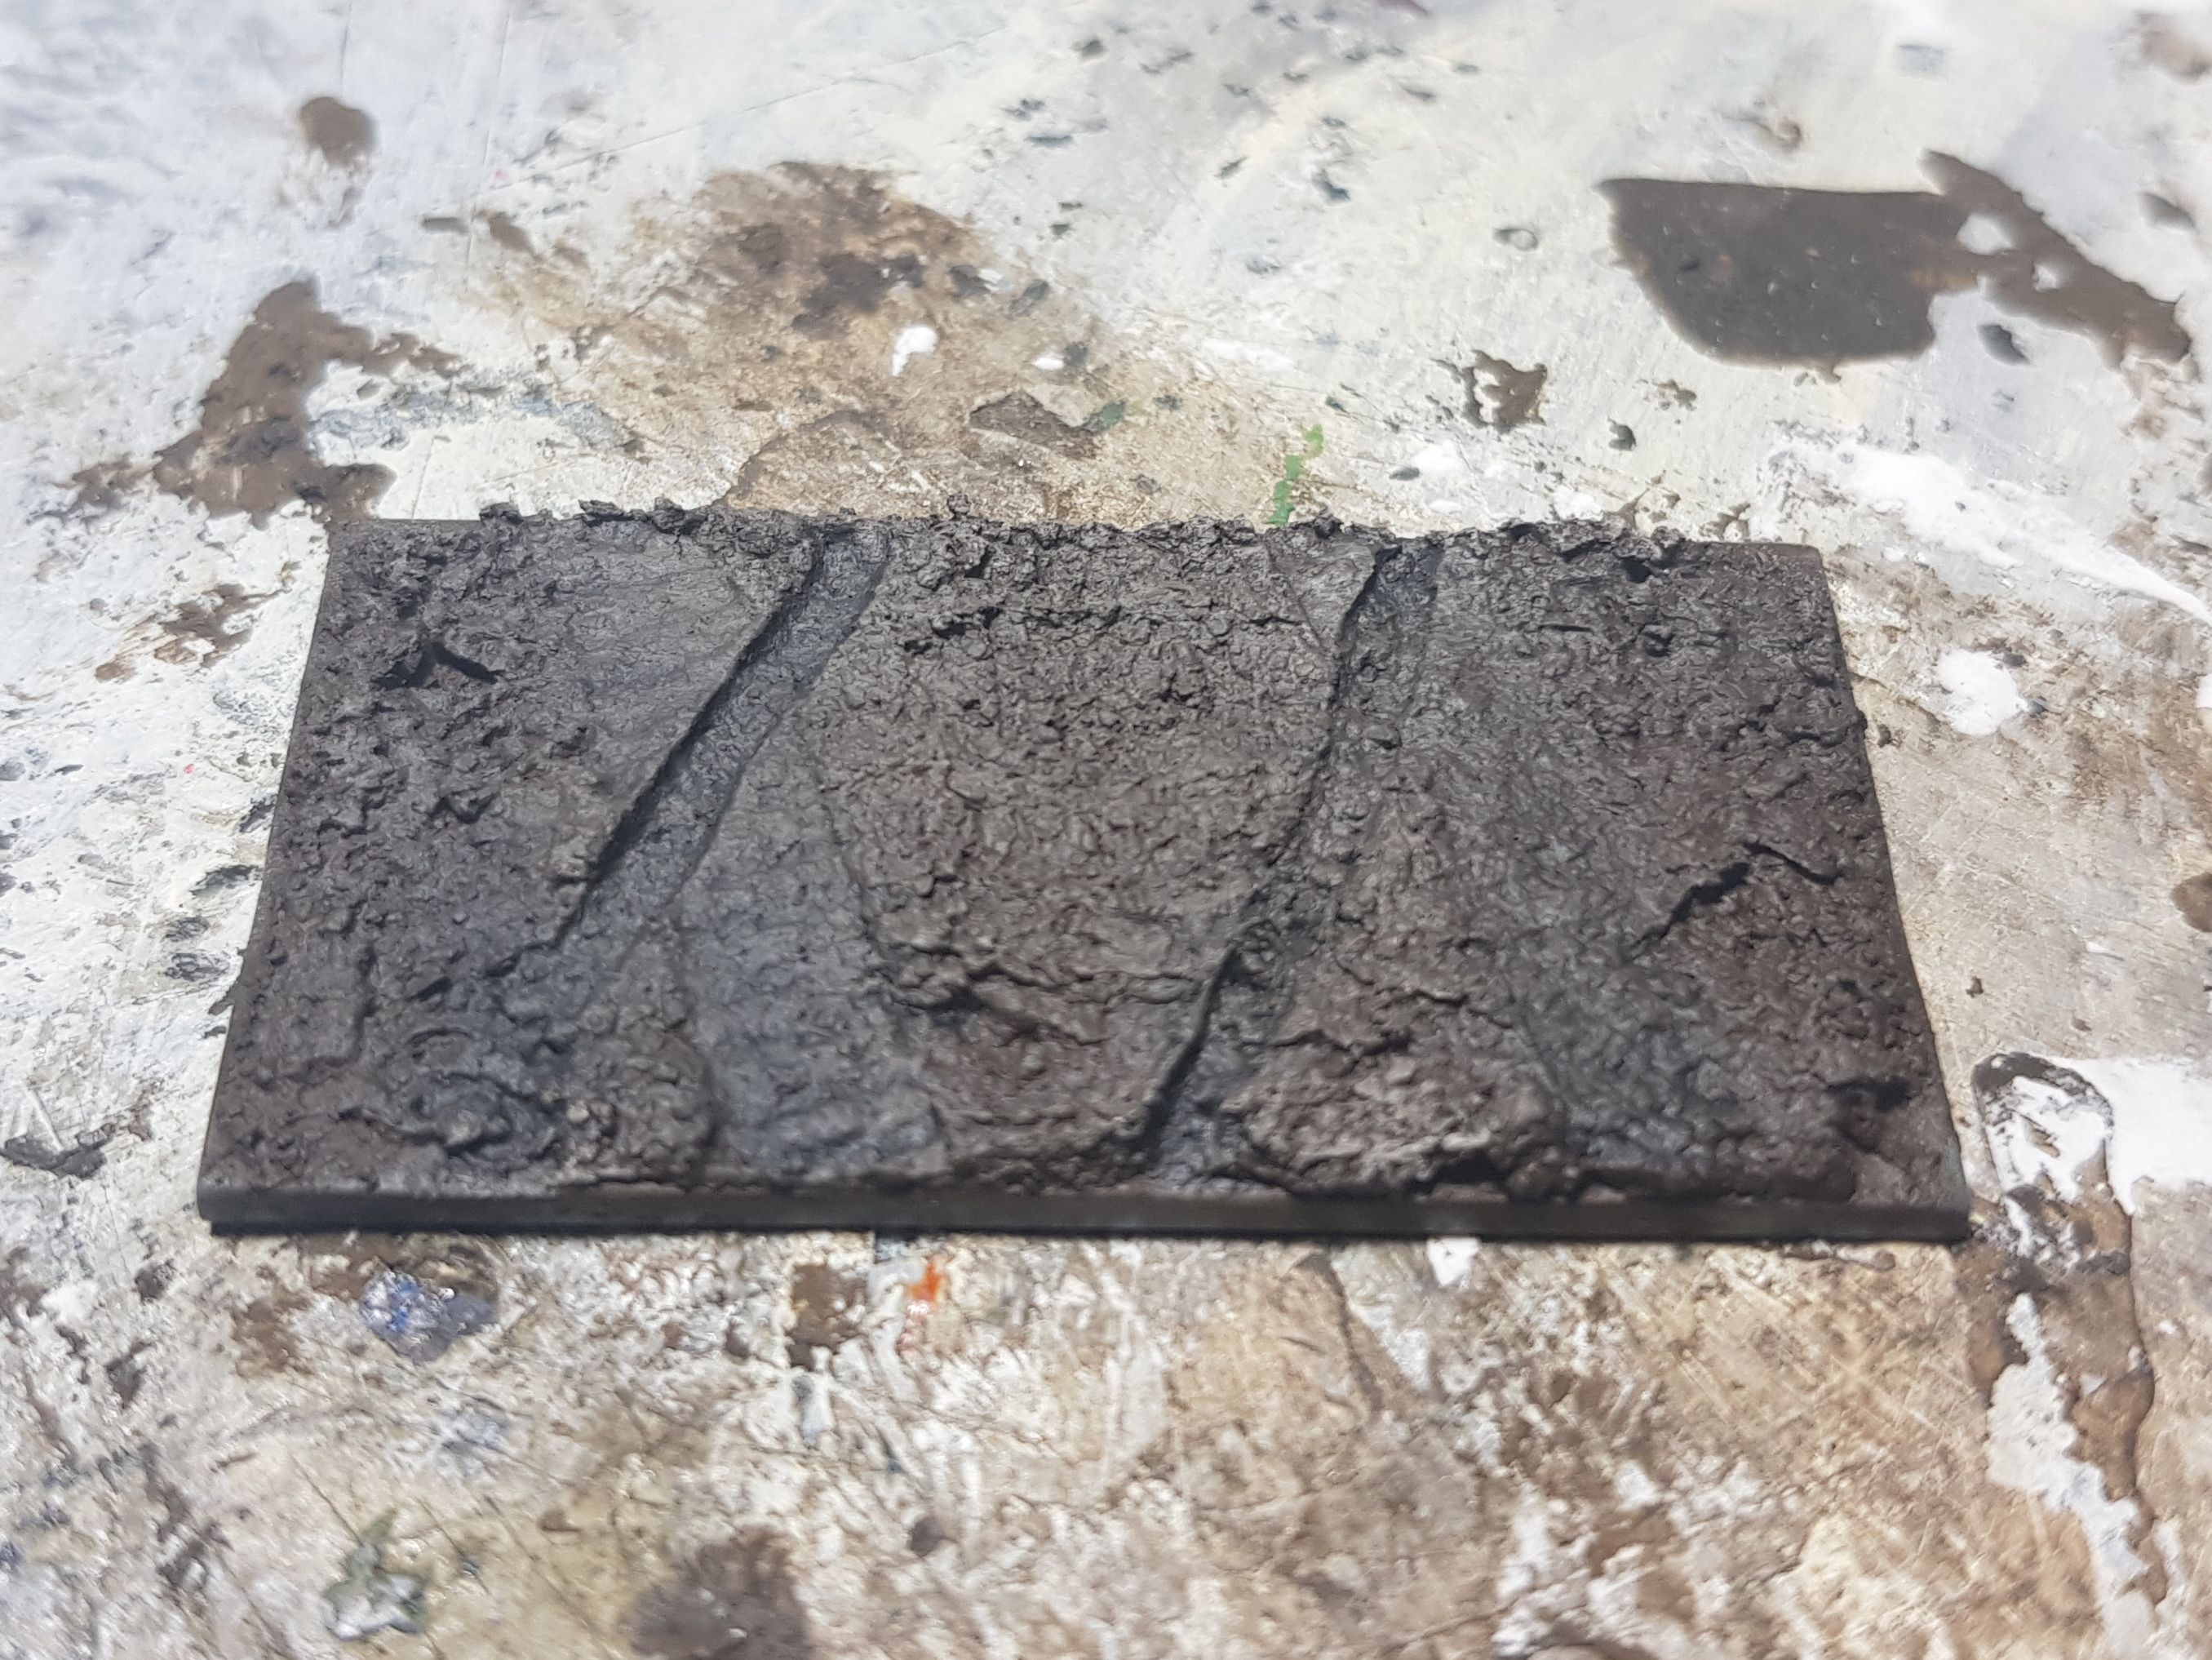
I added a couple of drops of AK Interactive Diorama Puddles (AK8028) and spread them out using some little wooden pokey sticks, I can’t think of what they’re called. I know this will shrink a little so it doesn’t matter that they are a bit over the edges.

Then I grabbed a couple of different tufts, just to see what kind of colours work. I stuck those on using a bit of PVA as I usually do even though they are self-adhesive. We’ll see what I think when it has all dried.
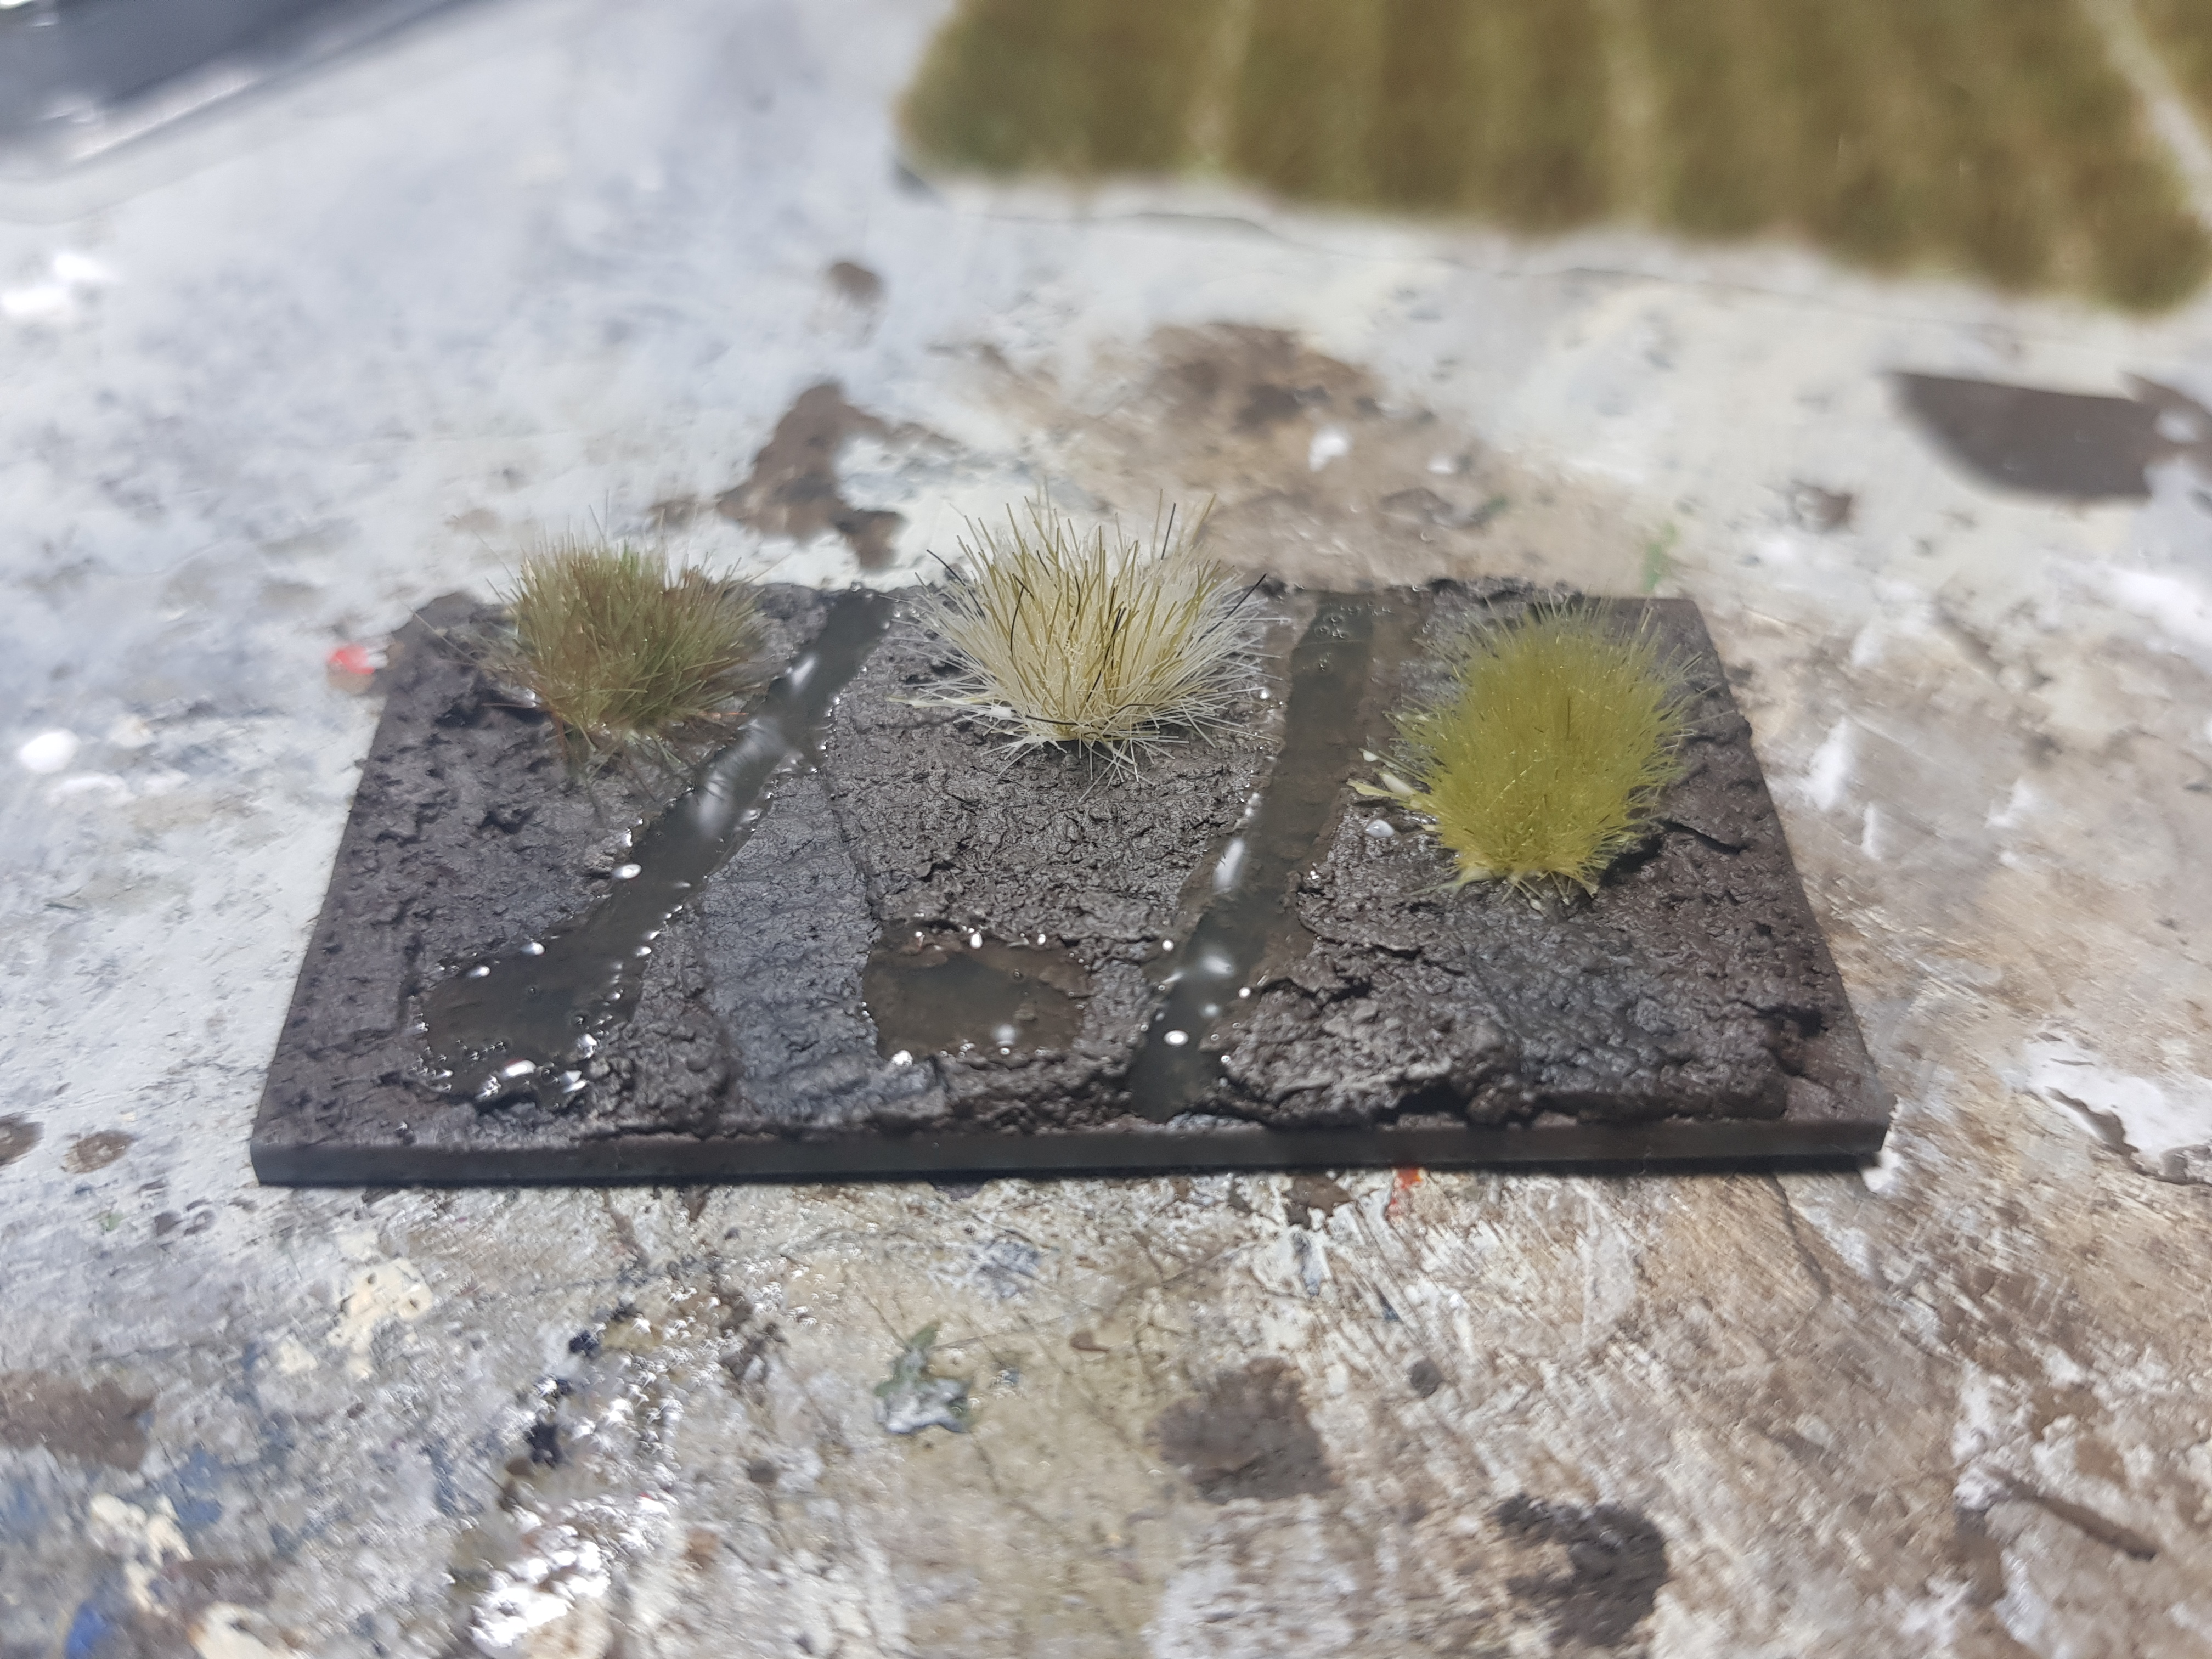
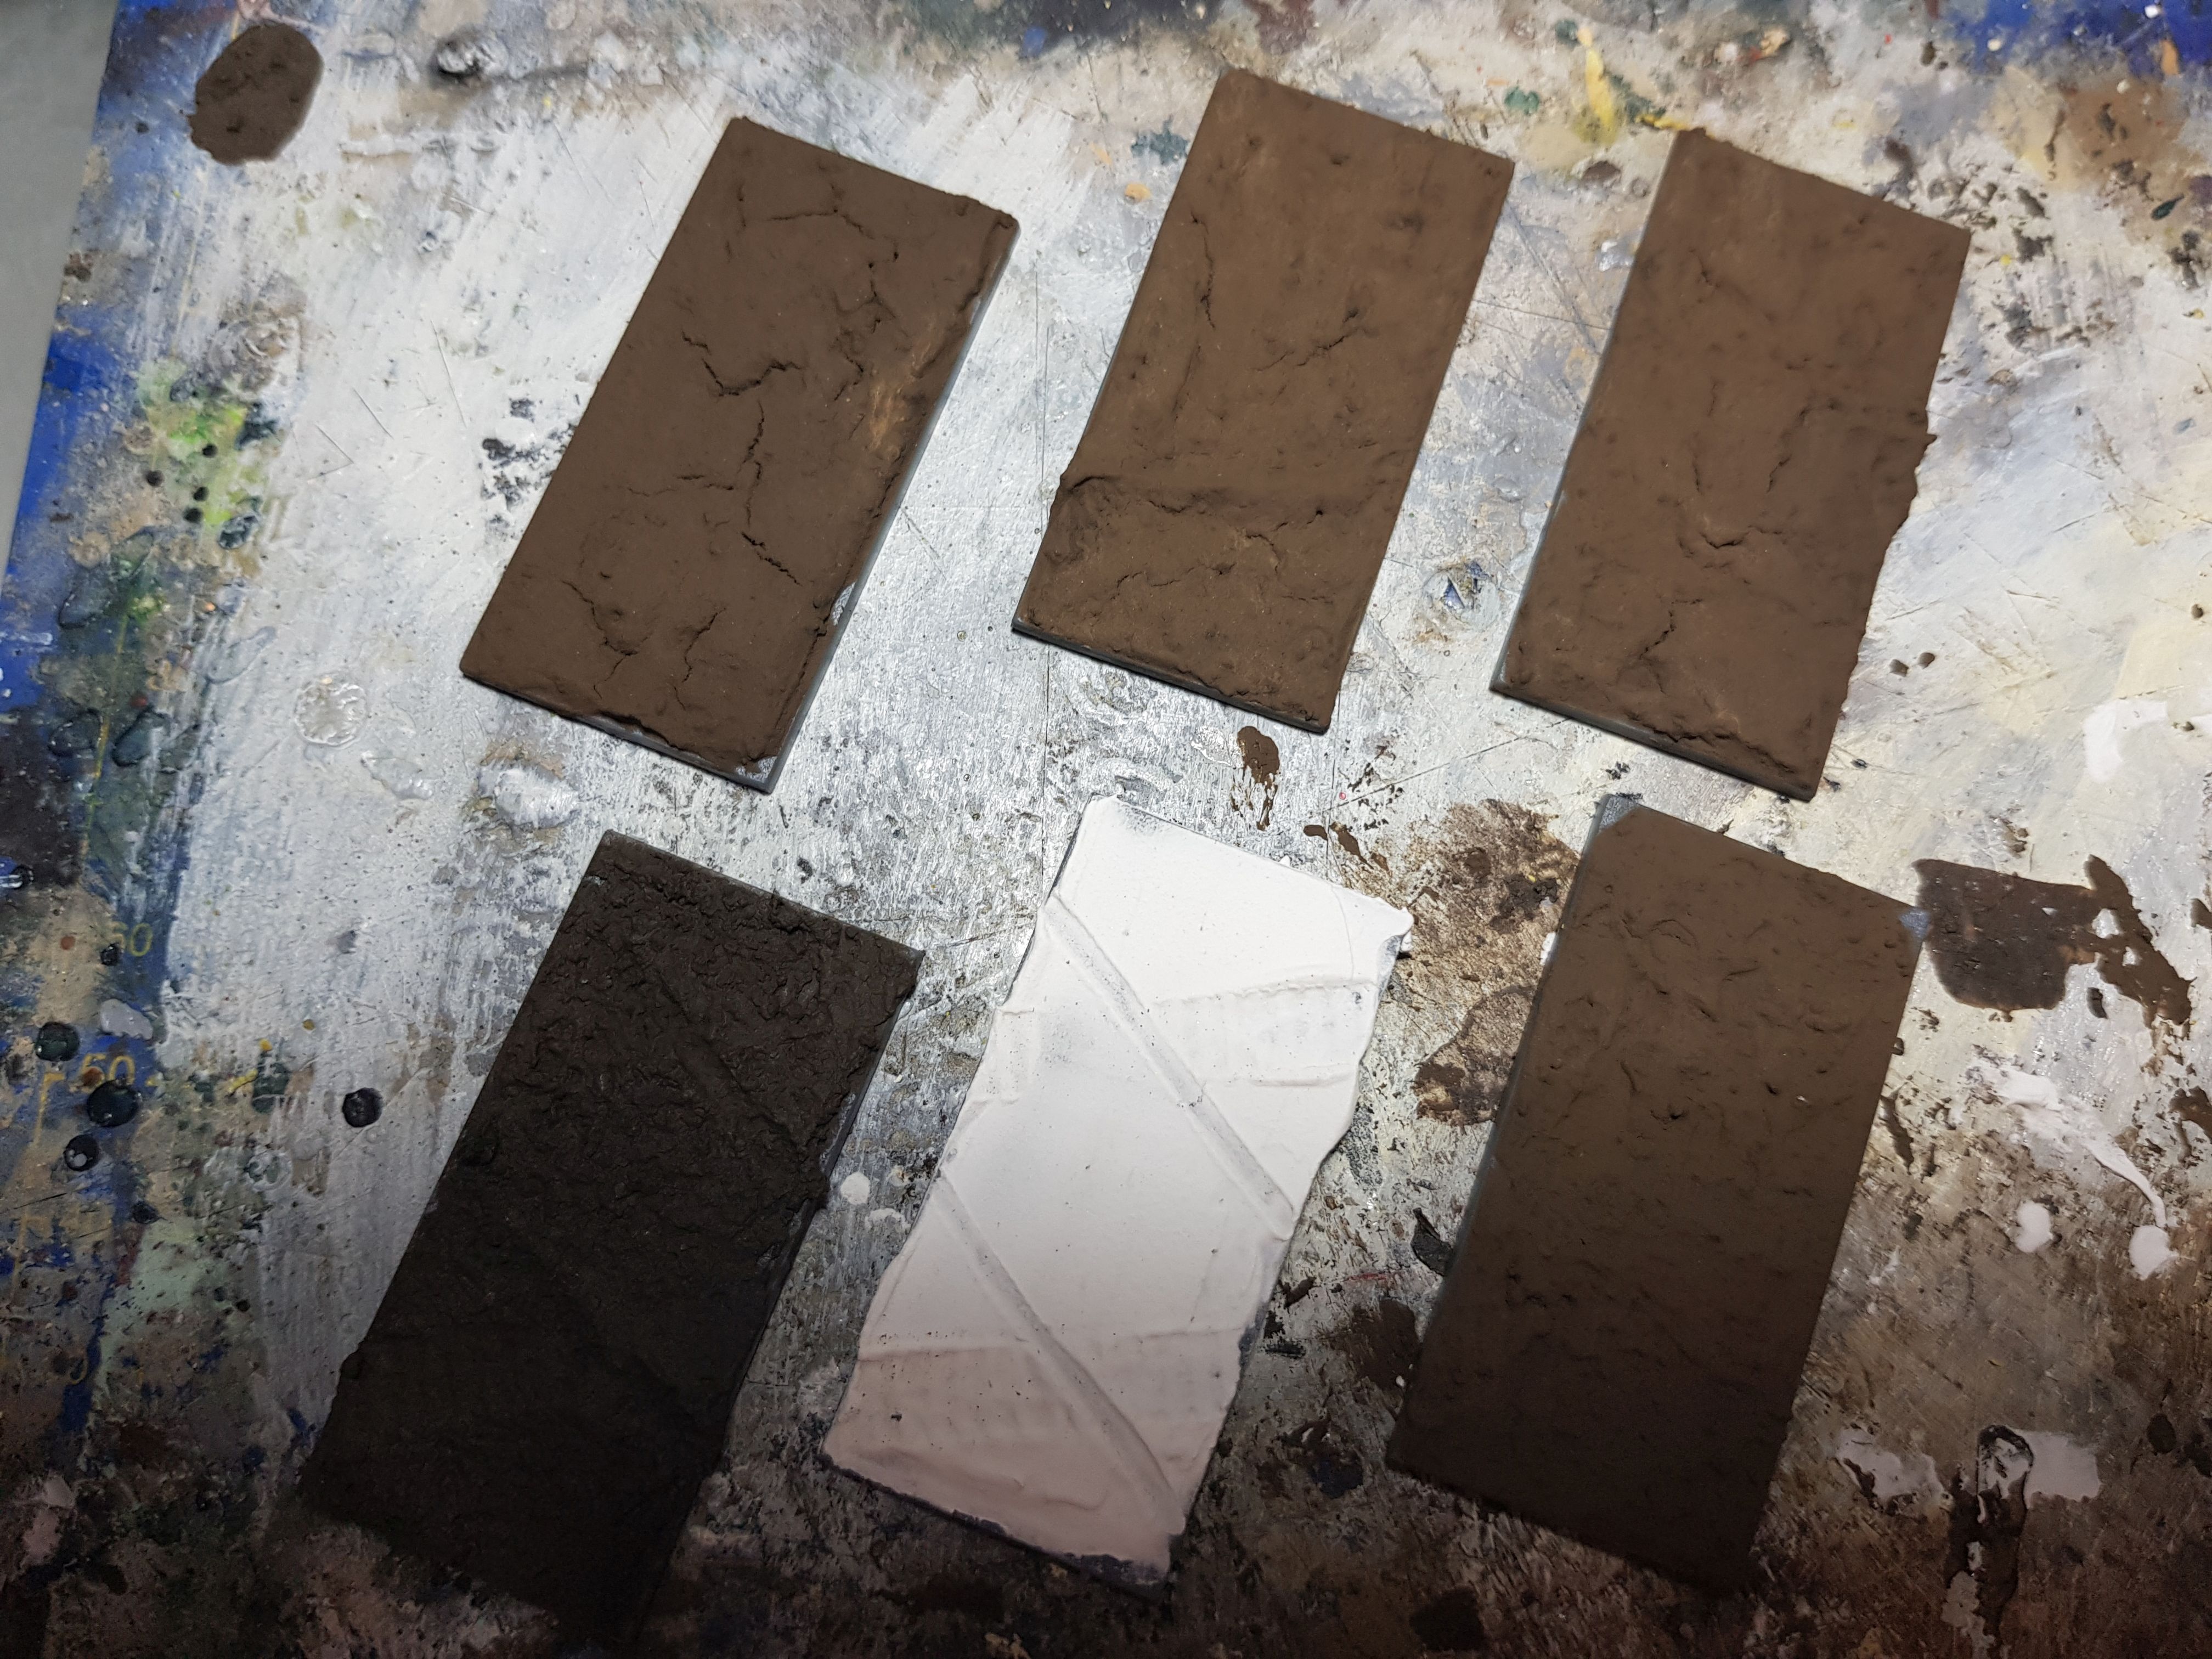
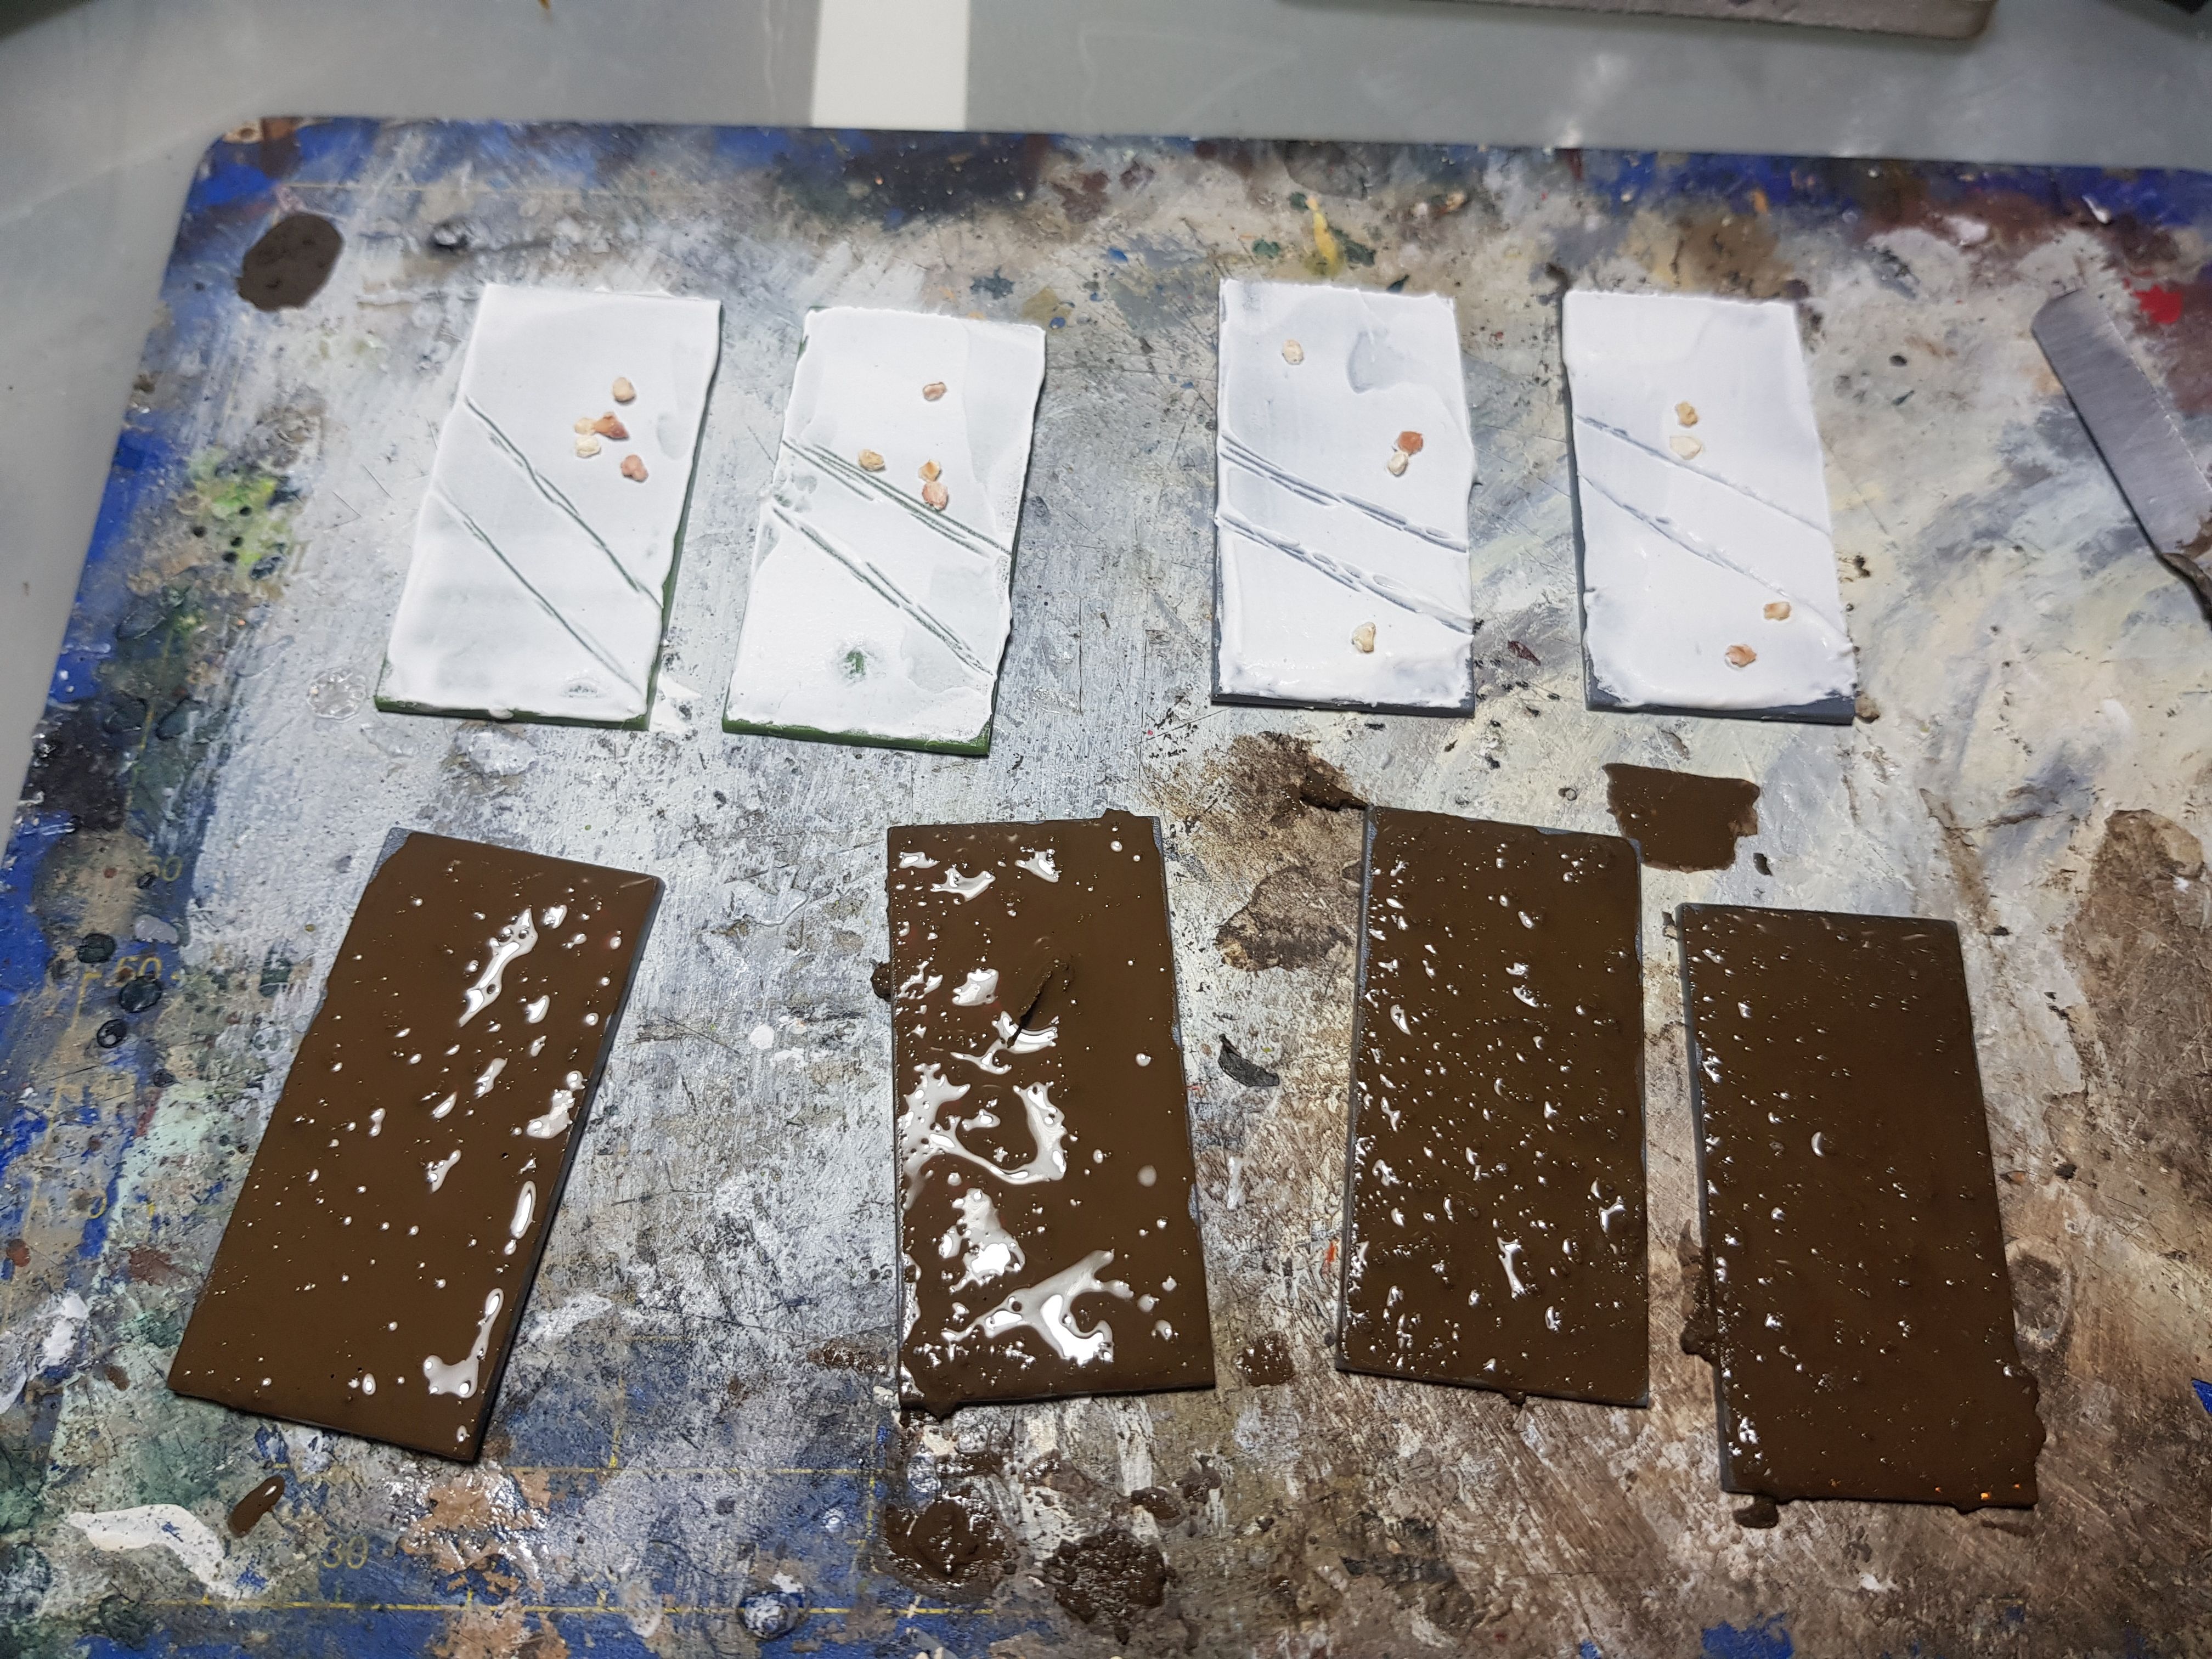
Basing Results.
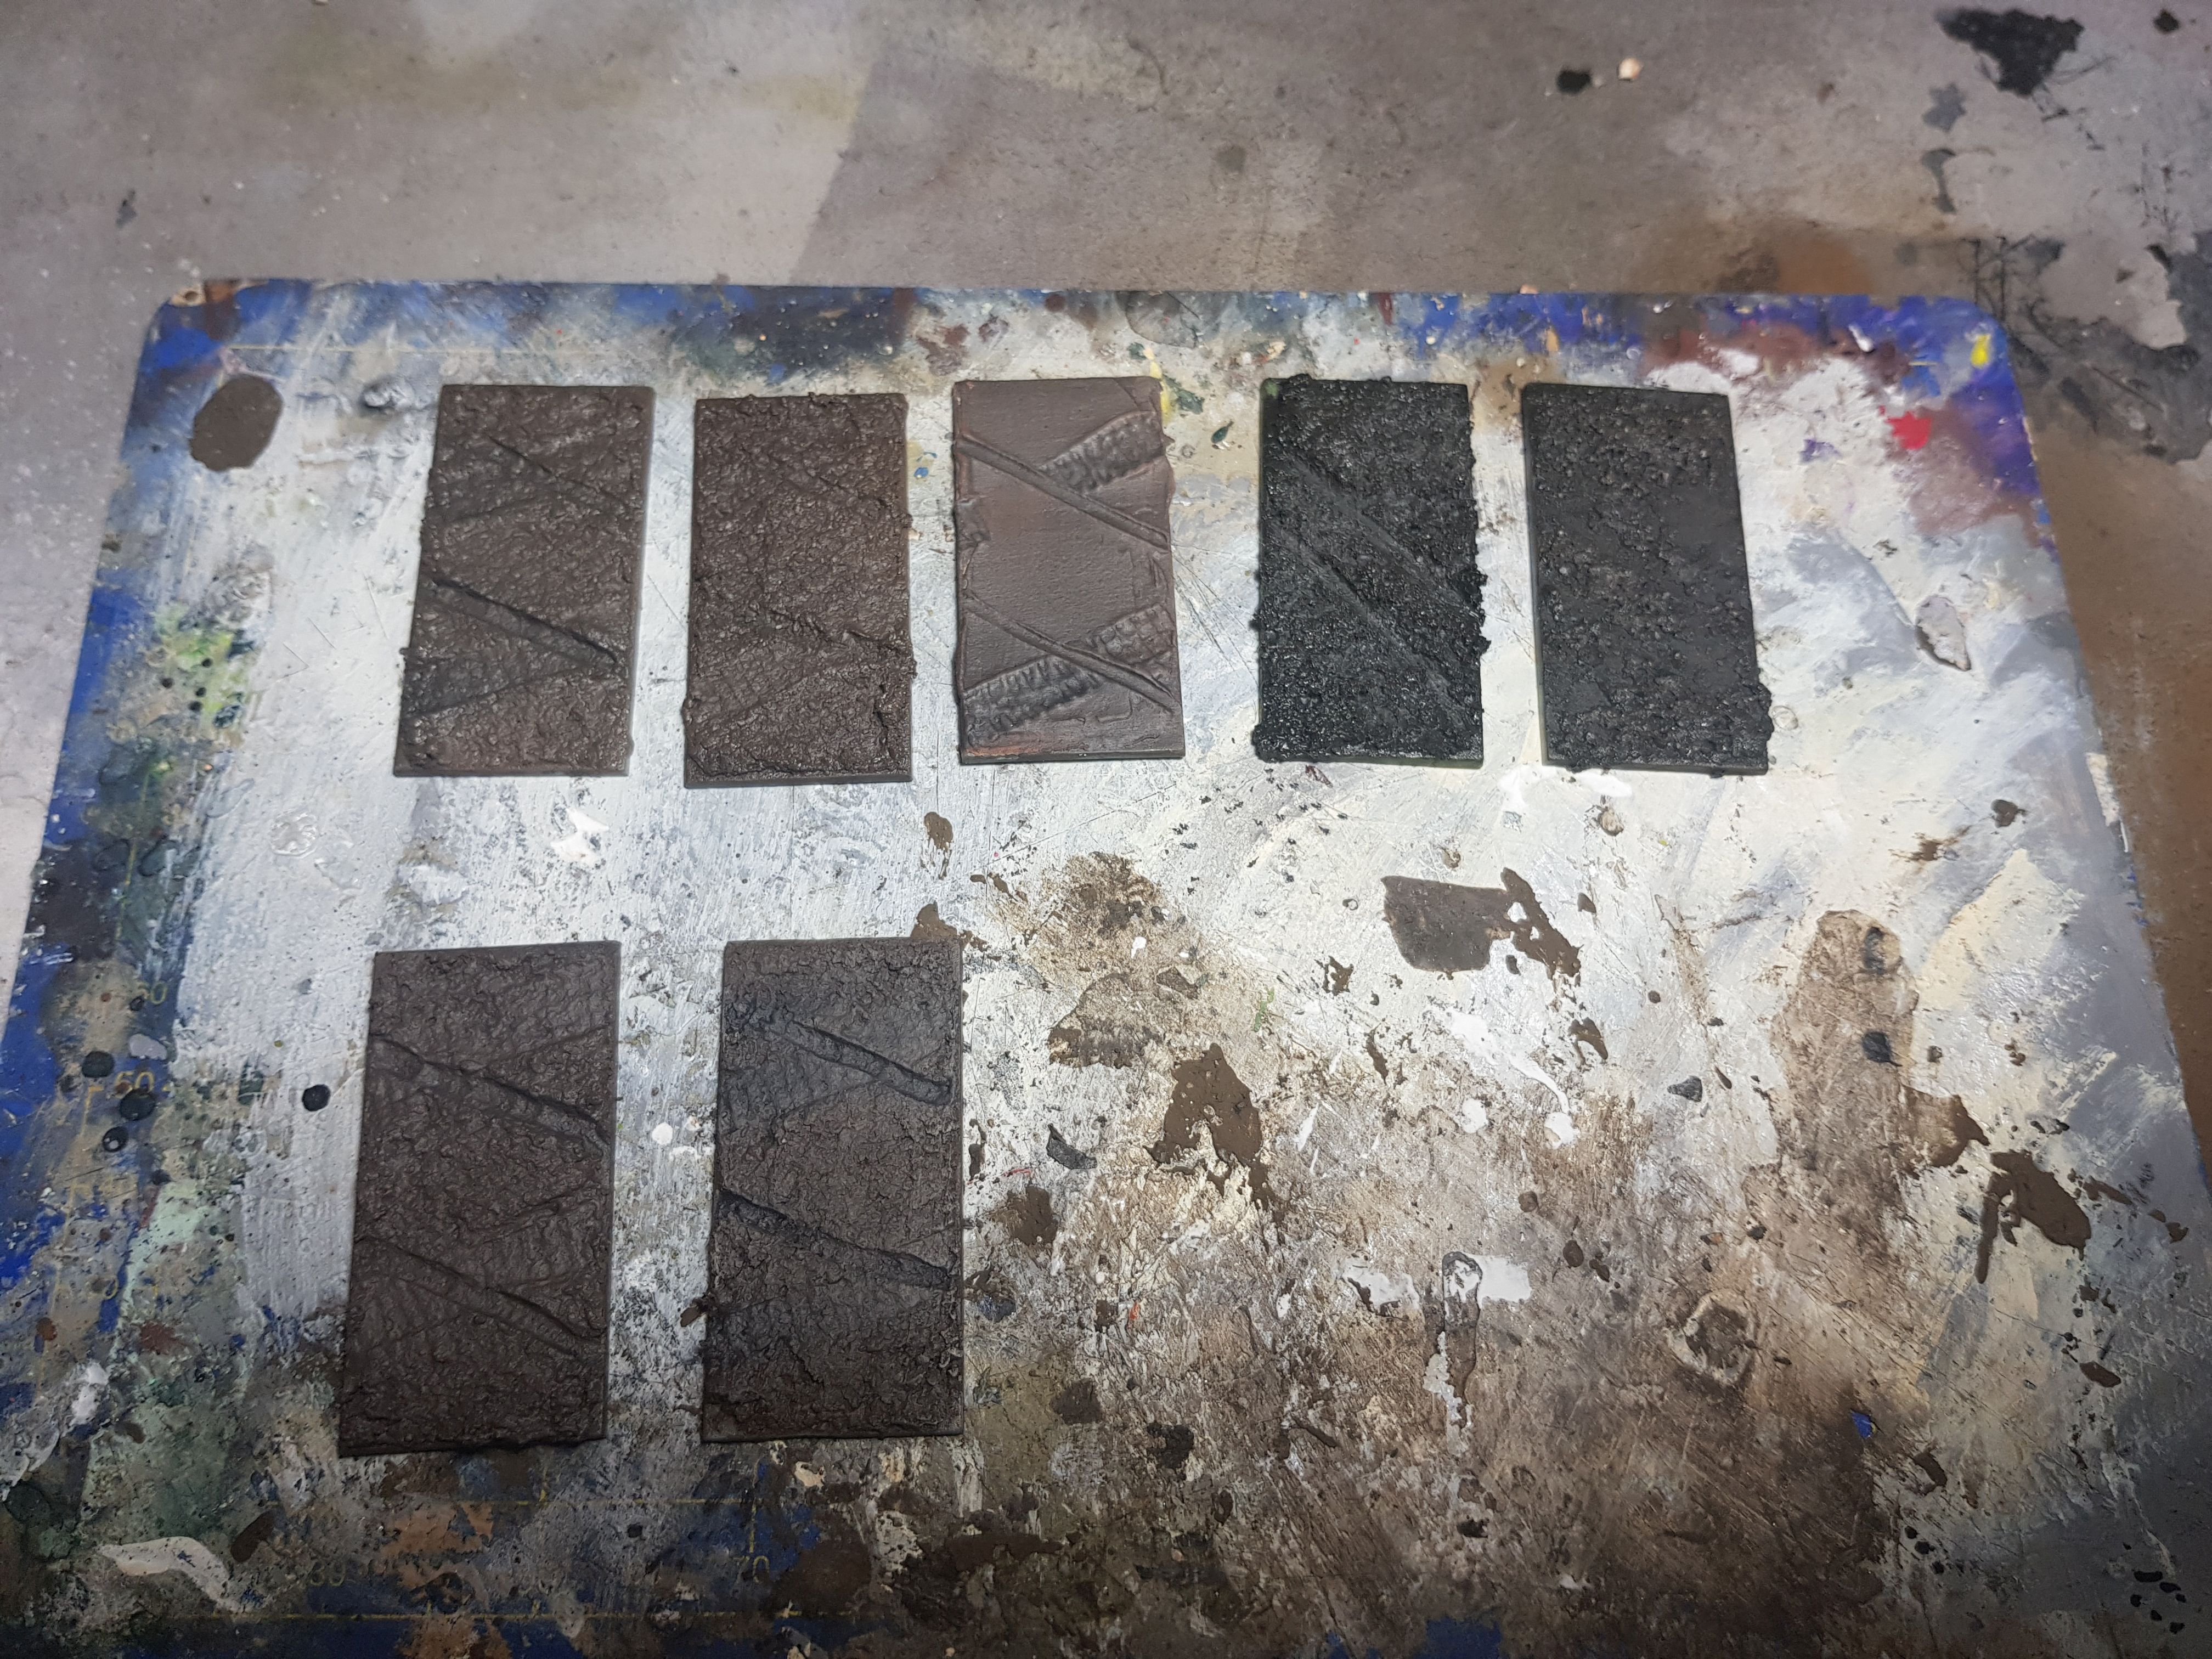
So, here are the basing results form the last tests. The top row is 6-10, left-right and bottom is 11-12 left-right. I had already mentioned that 12 is the way I want to go forward.
Now for some sad news, I am not going to be able to keep up my challenge of trying to post something everyday. While it is great for my mental health, over the last couple of weeks my physical health has been getting worse. This is not related to trying to hobby everyday as I have been able to do that before, it is an illness potentially caused by my anti-depressants or if not could be far worse. I am still awaiting blood test results for that. While I will still try to do something and post something everyday, it is getting really really difficult.
Stripping Miniatures
 Not that kind of stripping....
WARNING! Do not use this method of stripping miniatures with cast resin figures, it will ruin them.
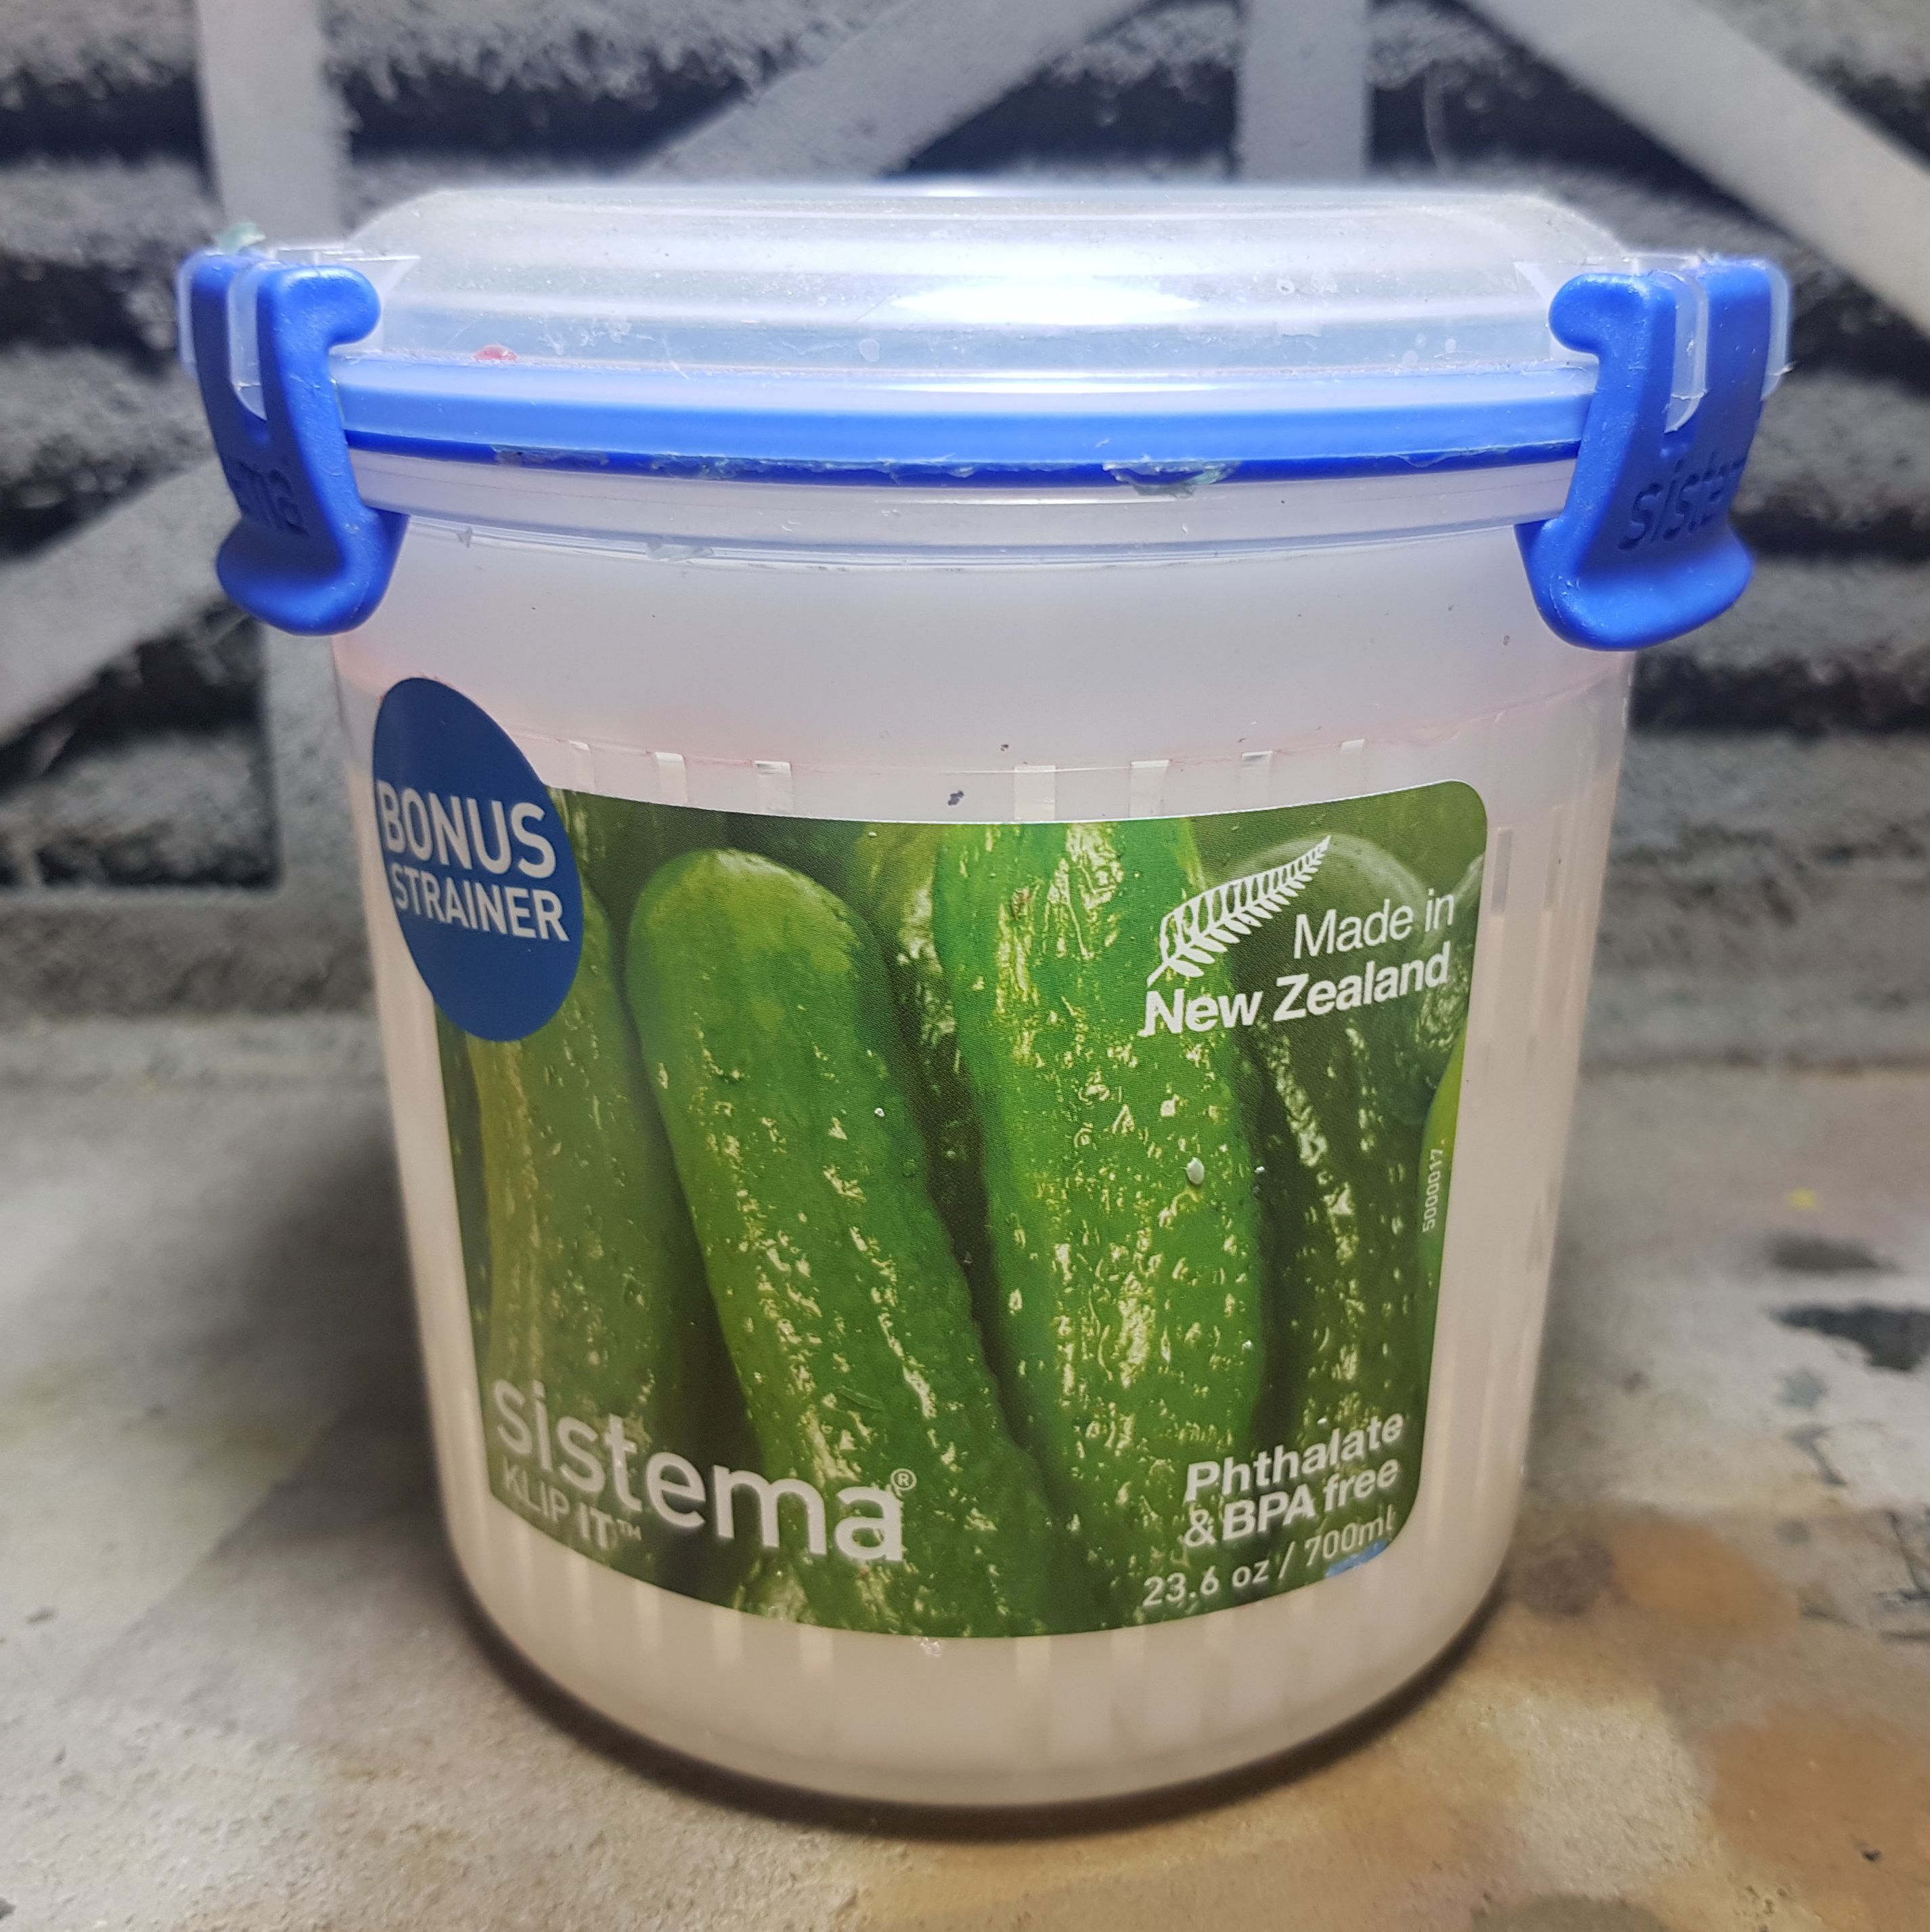
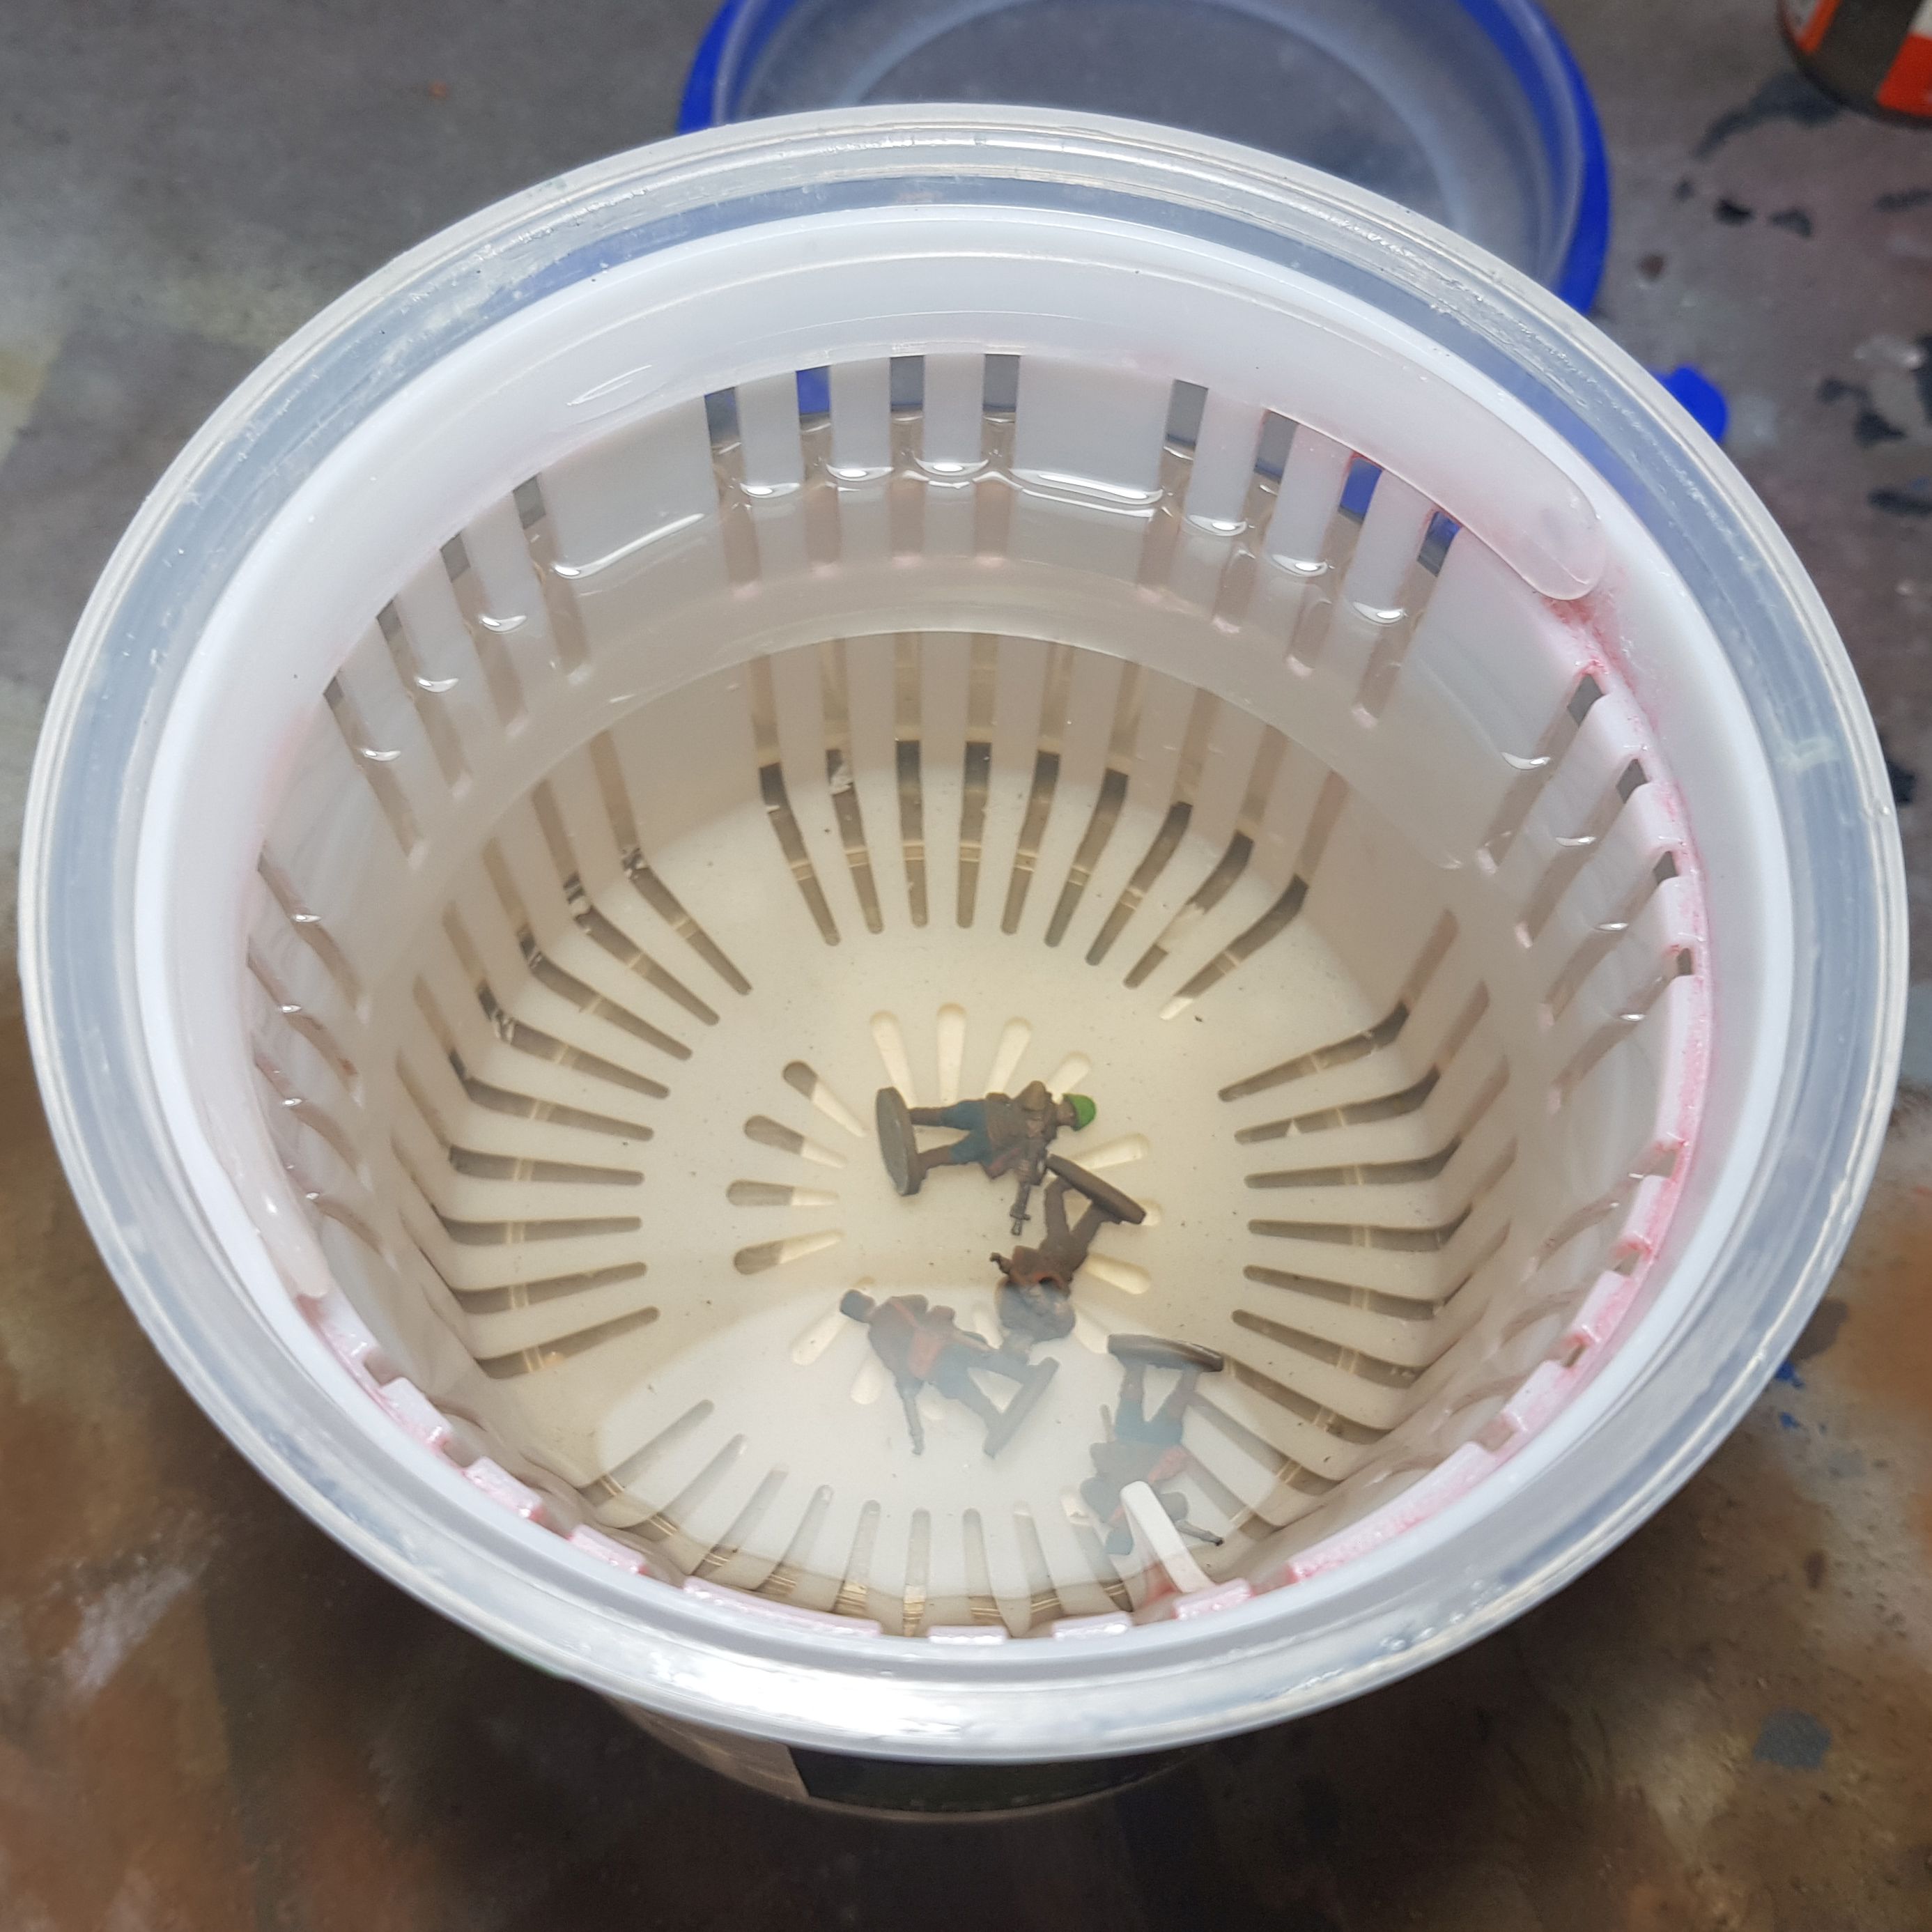
For this I am using 99.9% isopropyl alcohol, this also really softens cast resin figures making them impossible to strip or use, but it will solve all paints. Then I am using a pickle jar with a strainer, the same I actually use to clean my resin 3D prints, but since my printer is basically dead I can use it for this instead. I filled it with the alcohol, the alcohol is a little bit discoloured as I used this same bath to strip some miniatures before, but it is fine to reuse it many times over. Then I of course grab my figures and toss them in the pickle jar and let them soak in there for about an hour. The strainer really helps getting them out and this jar has rubber seals around the lid so harmful vapours won’t get out while it is shut.

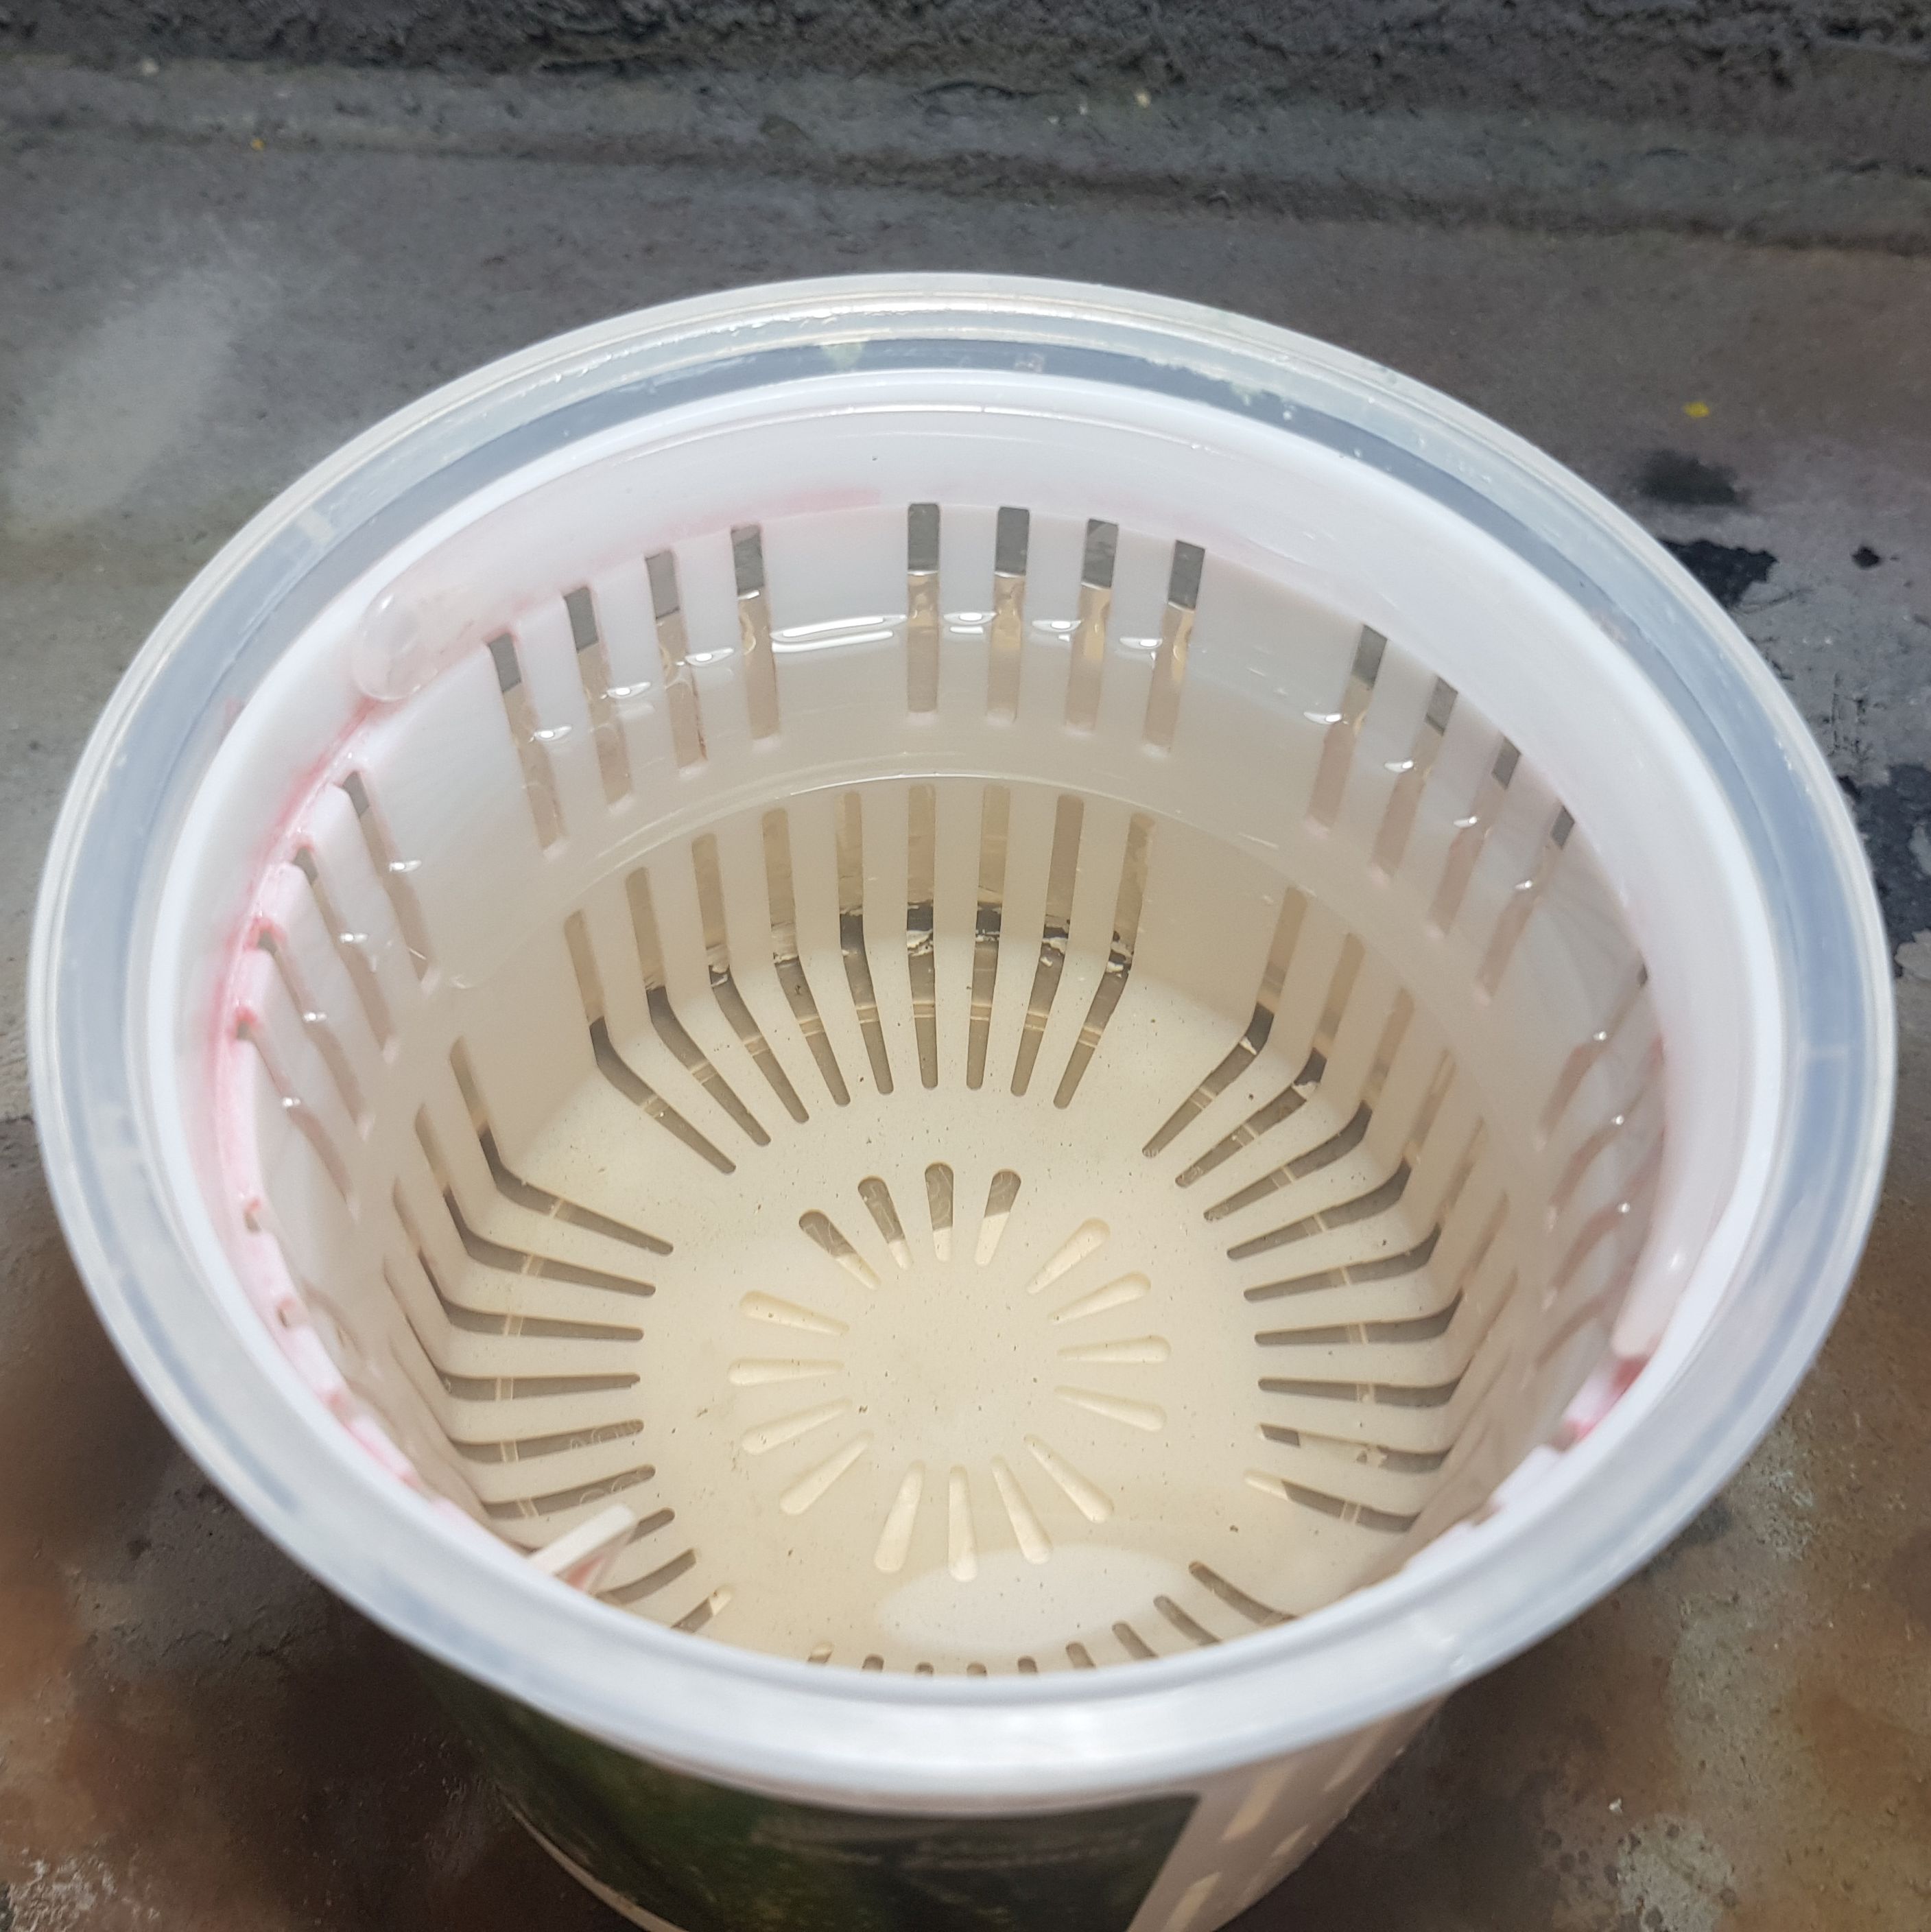
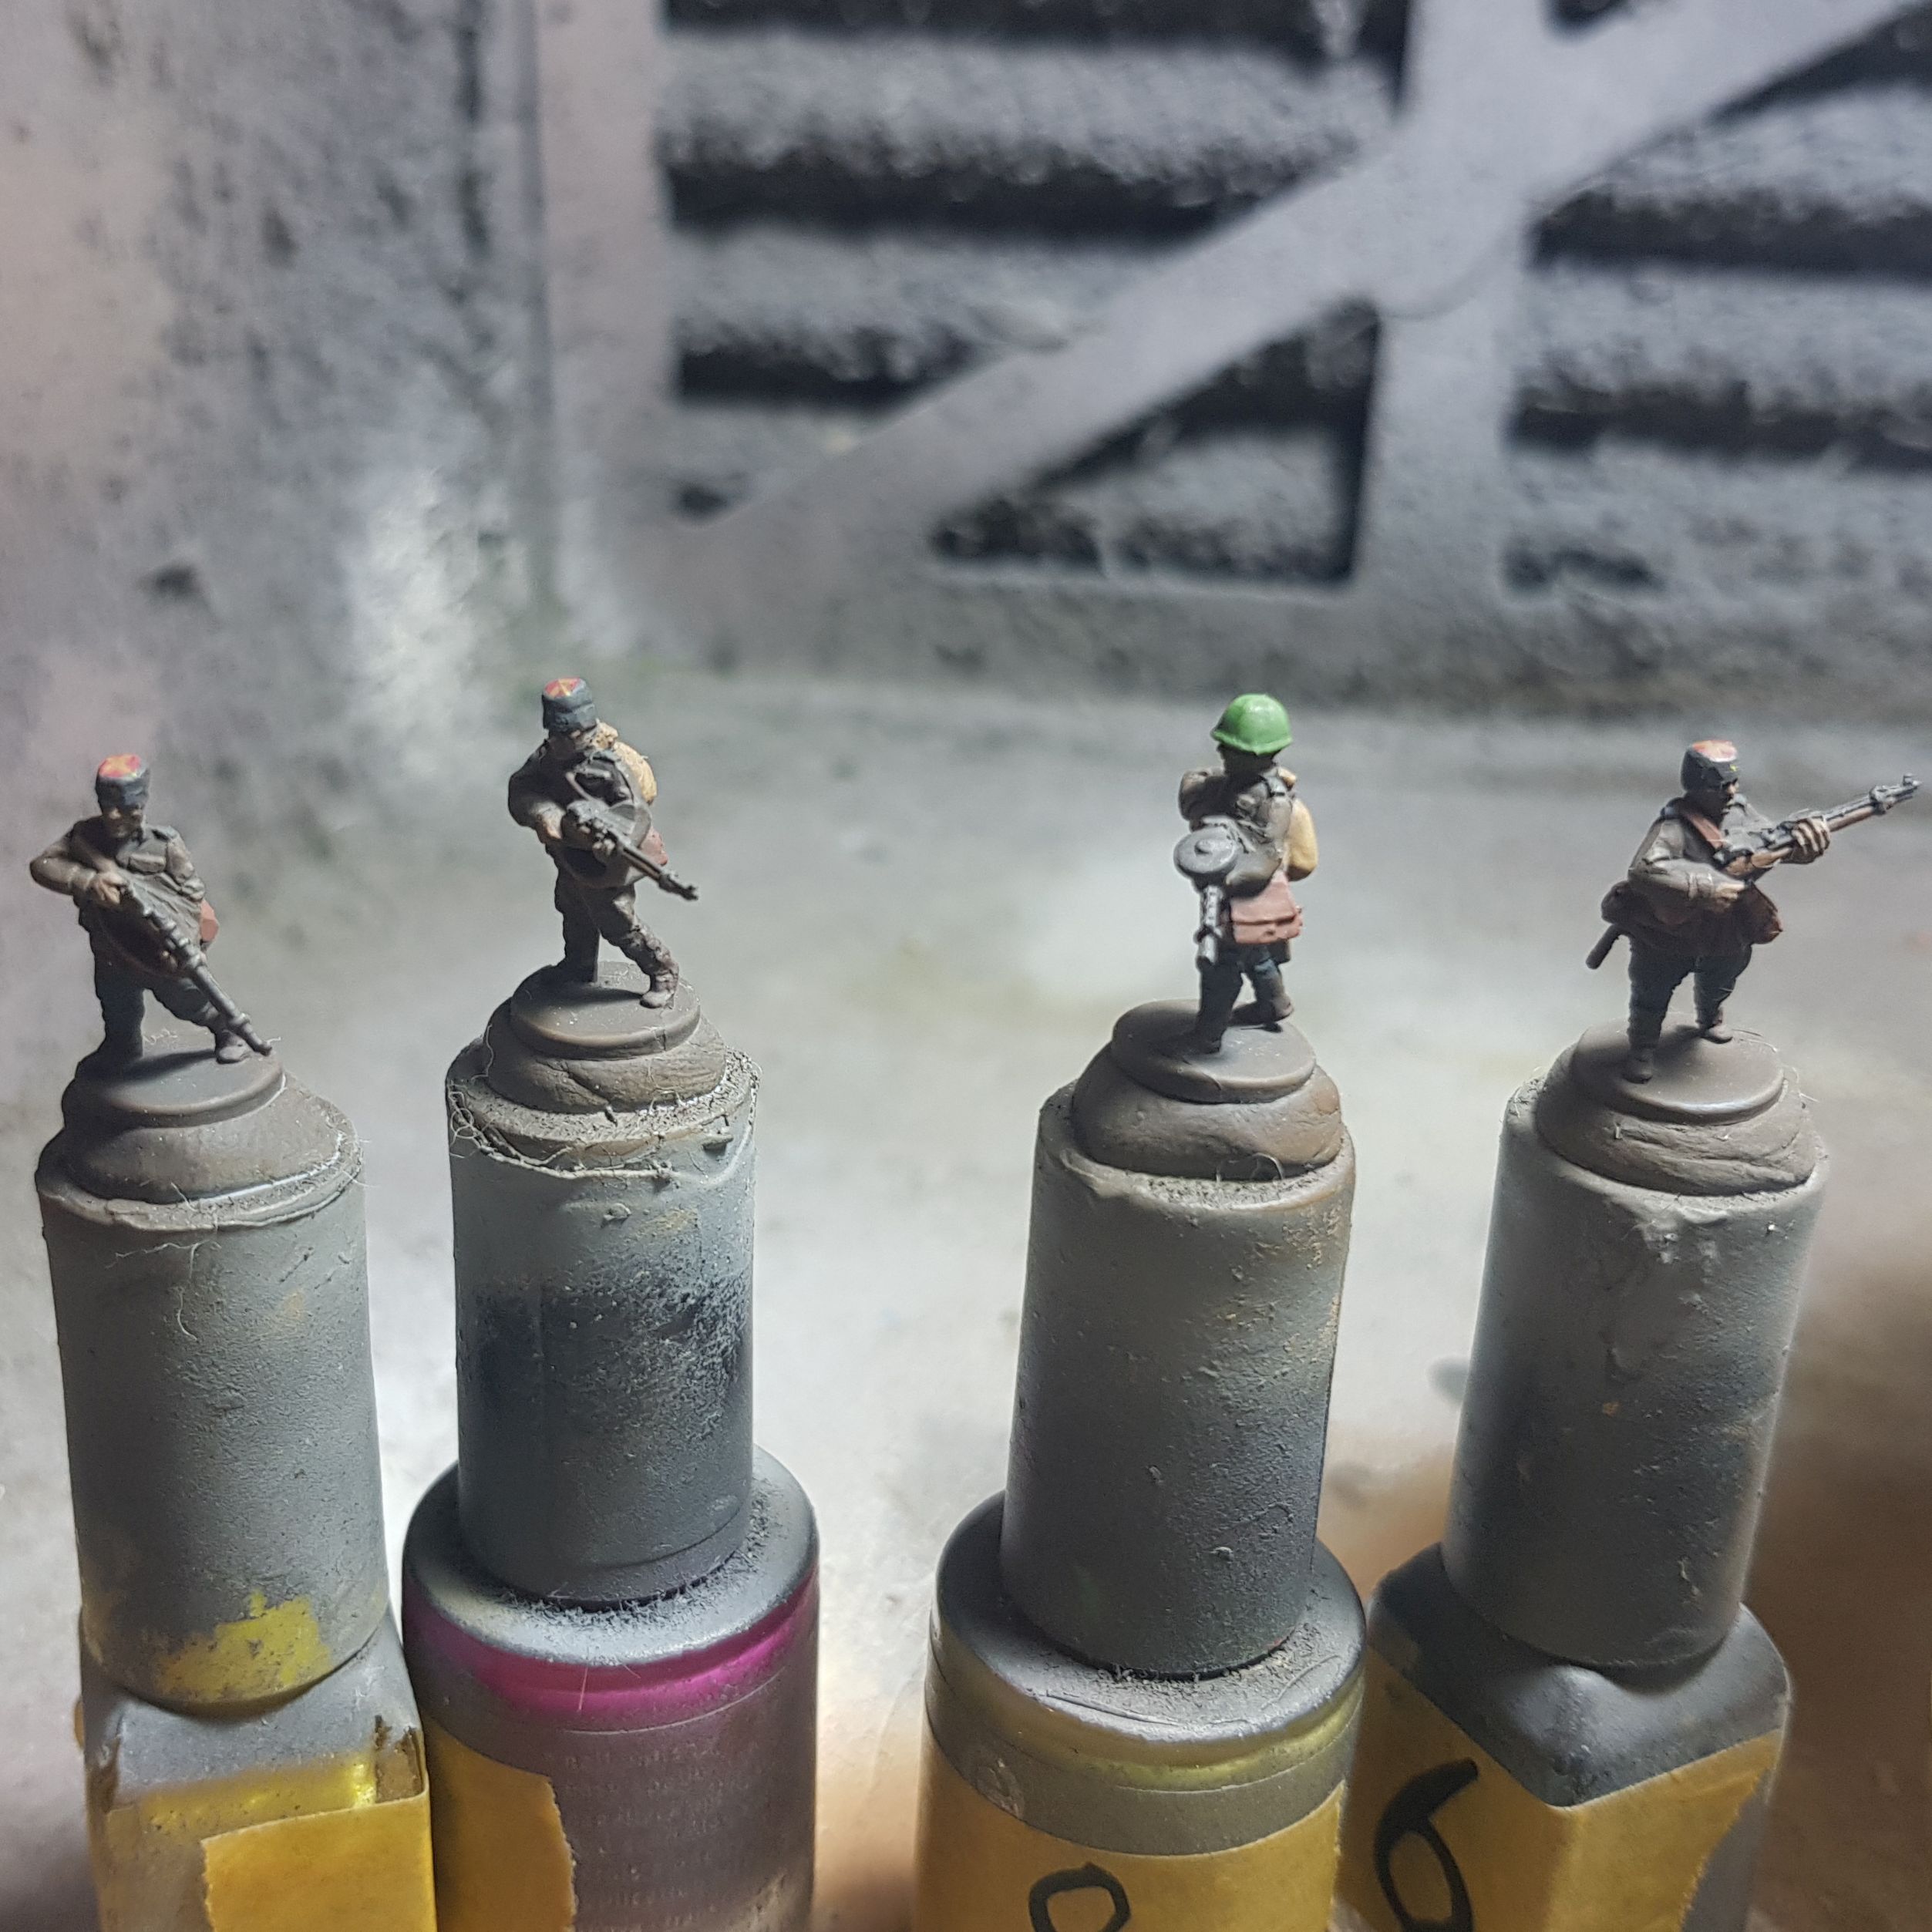

So an hour and a half later, I lost track of time…. It happens….. I opened the pickle jar and this is what I find. So grab one of the miniatures out of the jar and you can see that the paint is already letting go. I then grab an old toothbrush, I just bought some cheap ones just for this kind of work as I found that more hygienic, just rub the miniature with the toothbrush for a minute and you’ll end up with a clean miniature. Now you can go through this process again in order to get an even cleaner miniature, but this will do for most cases.

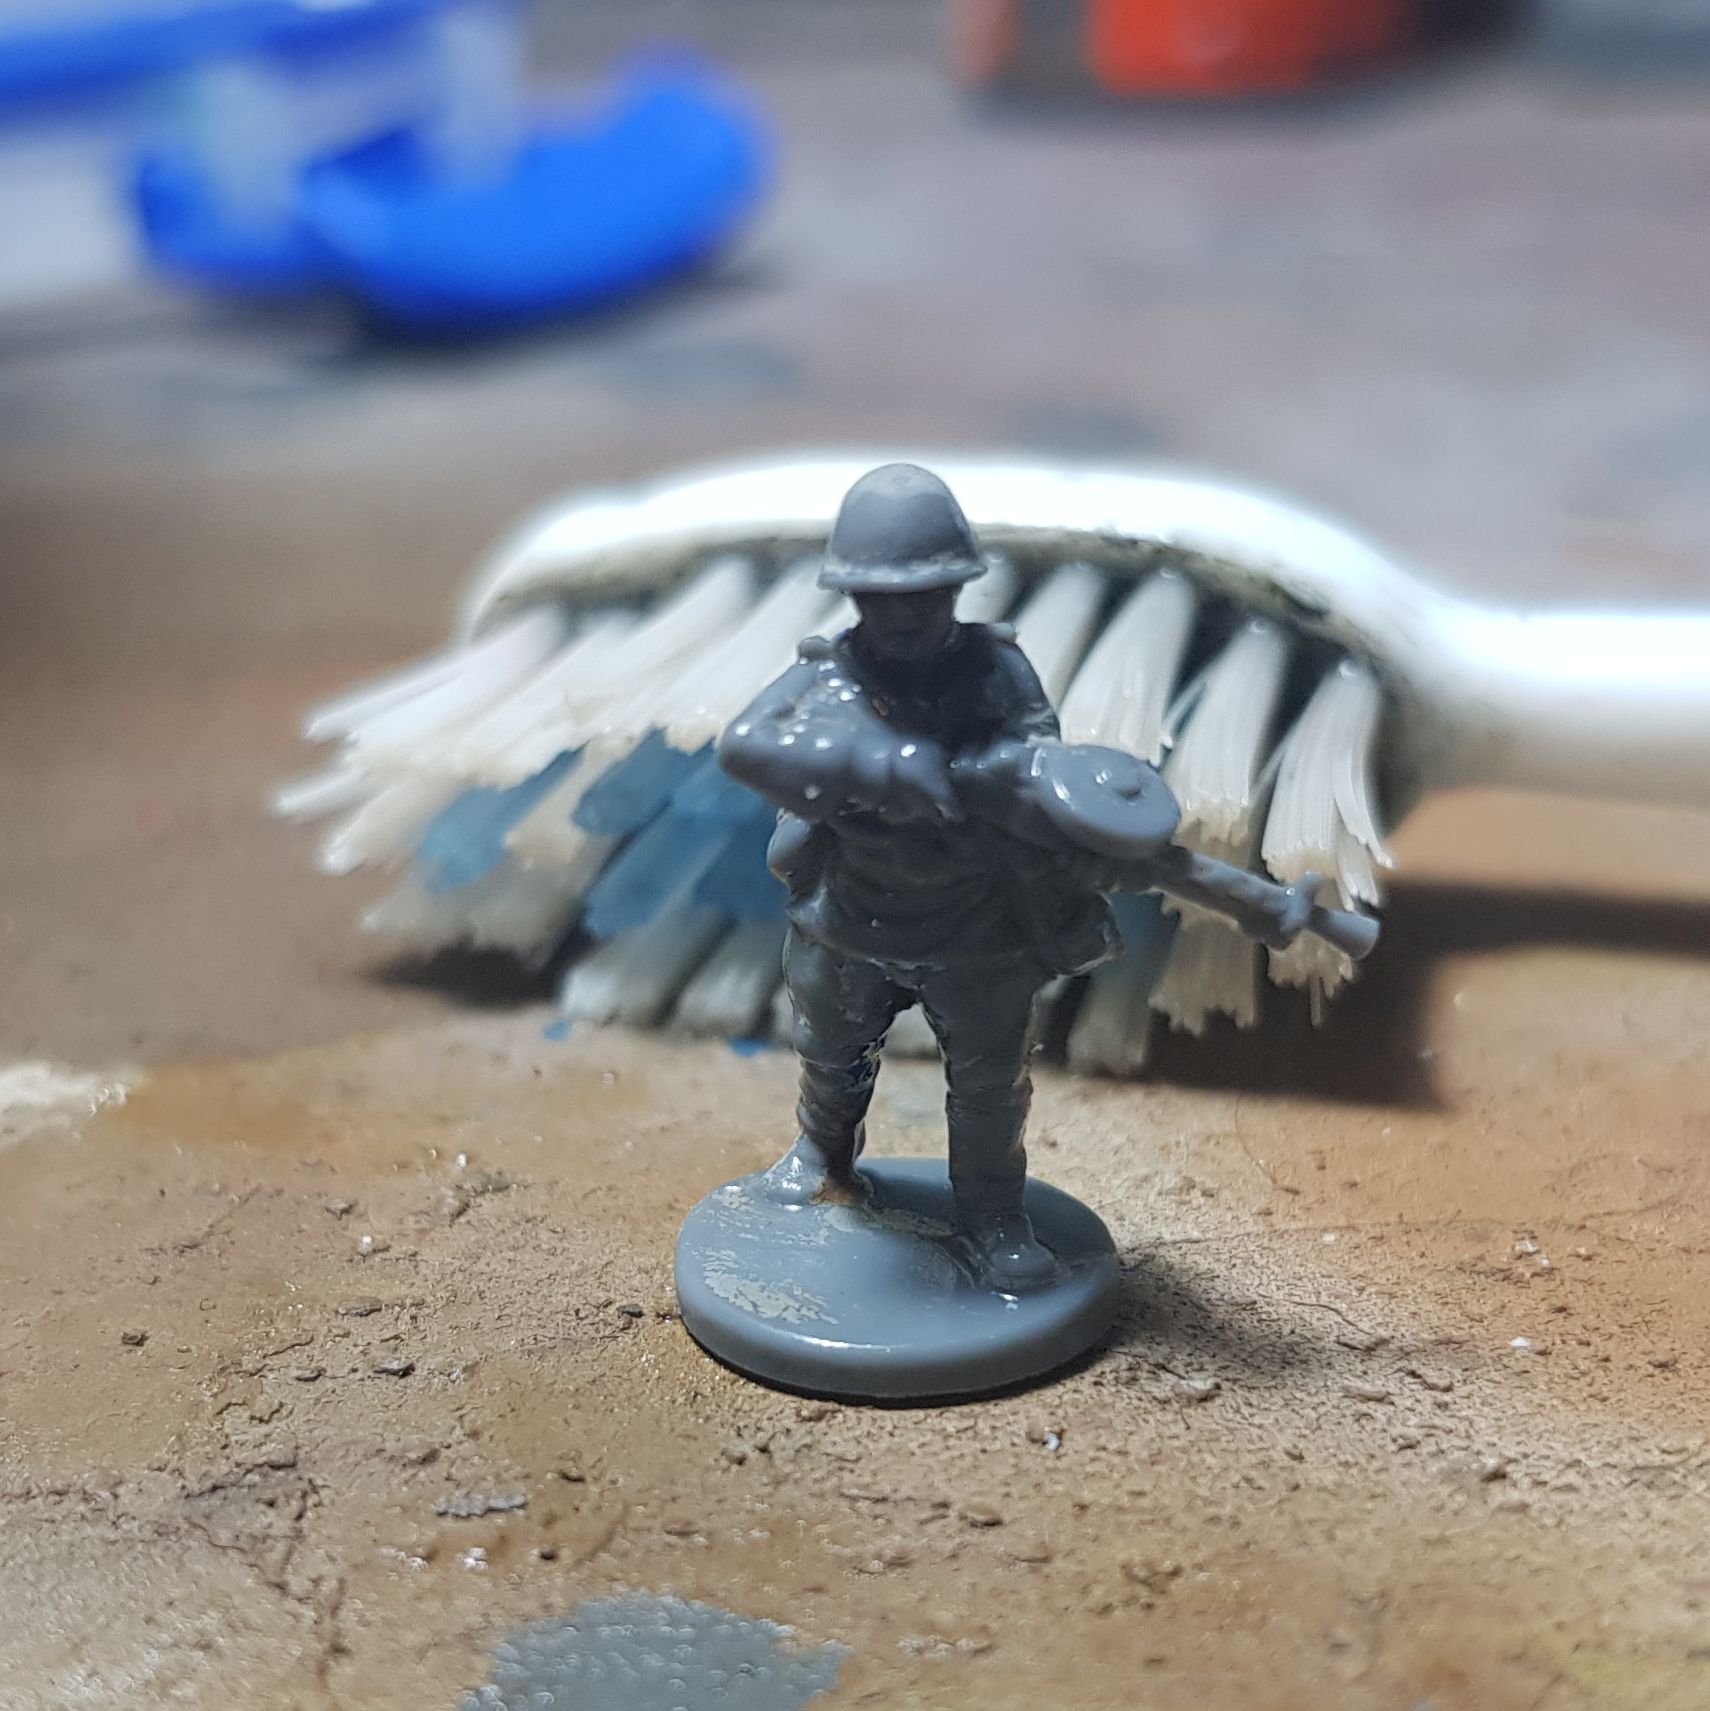
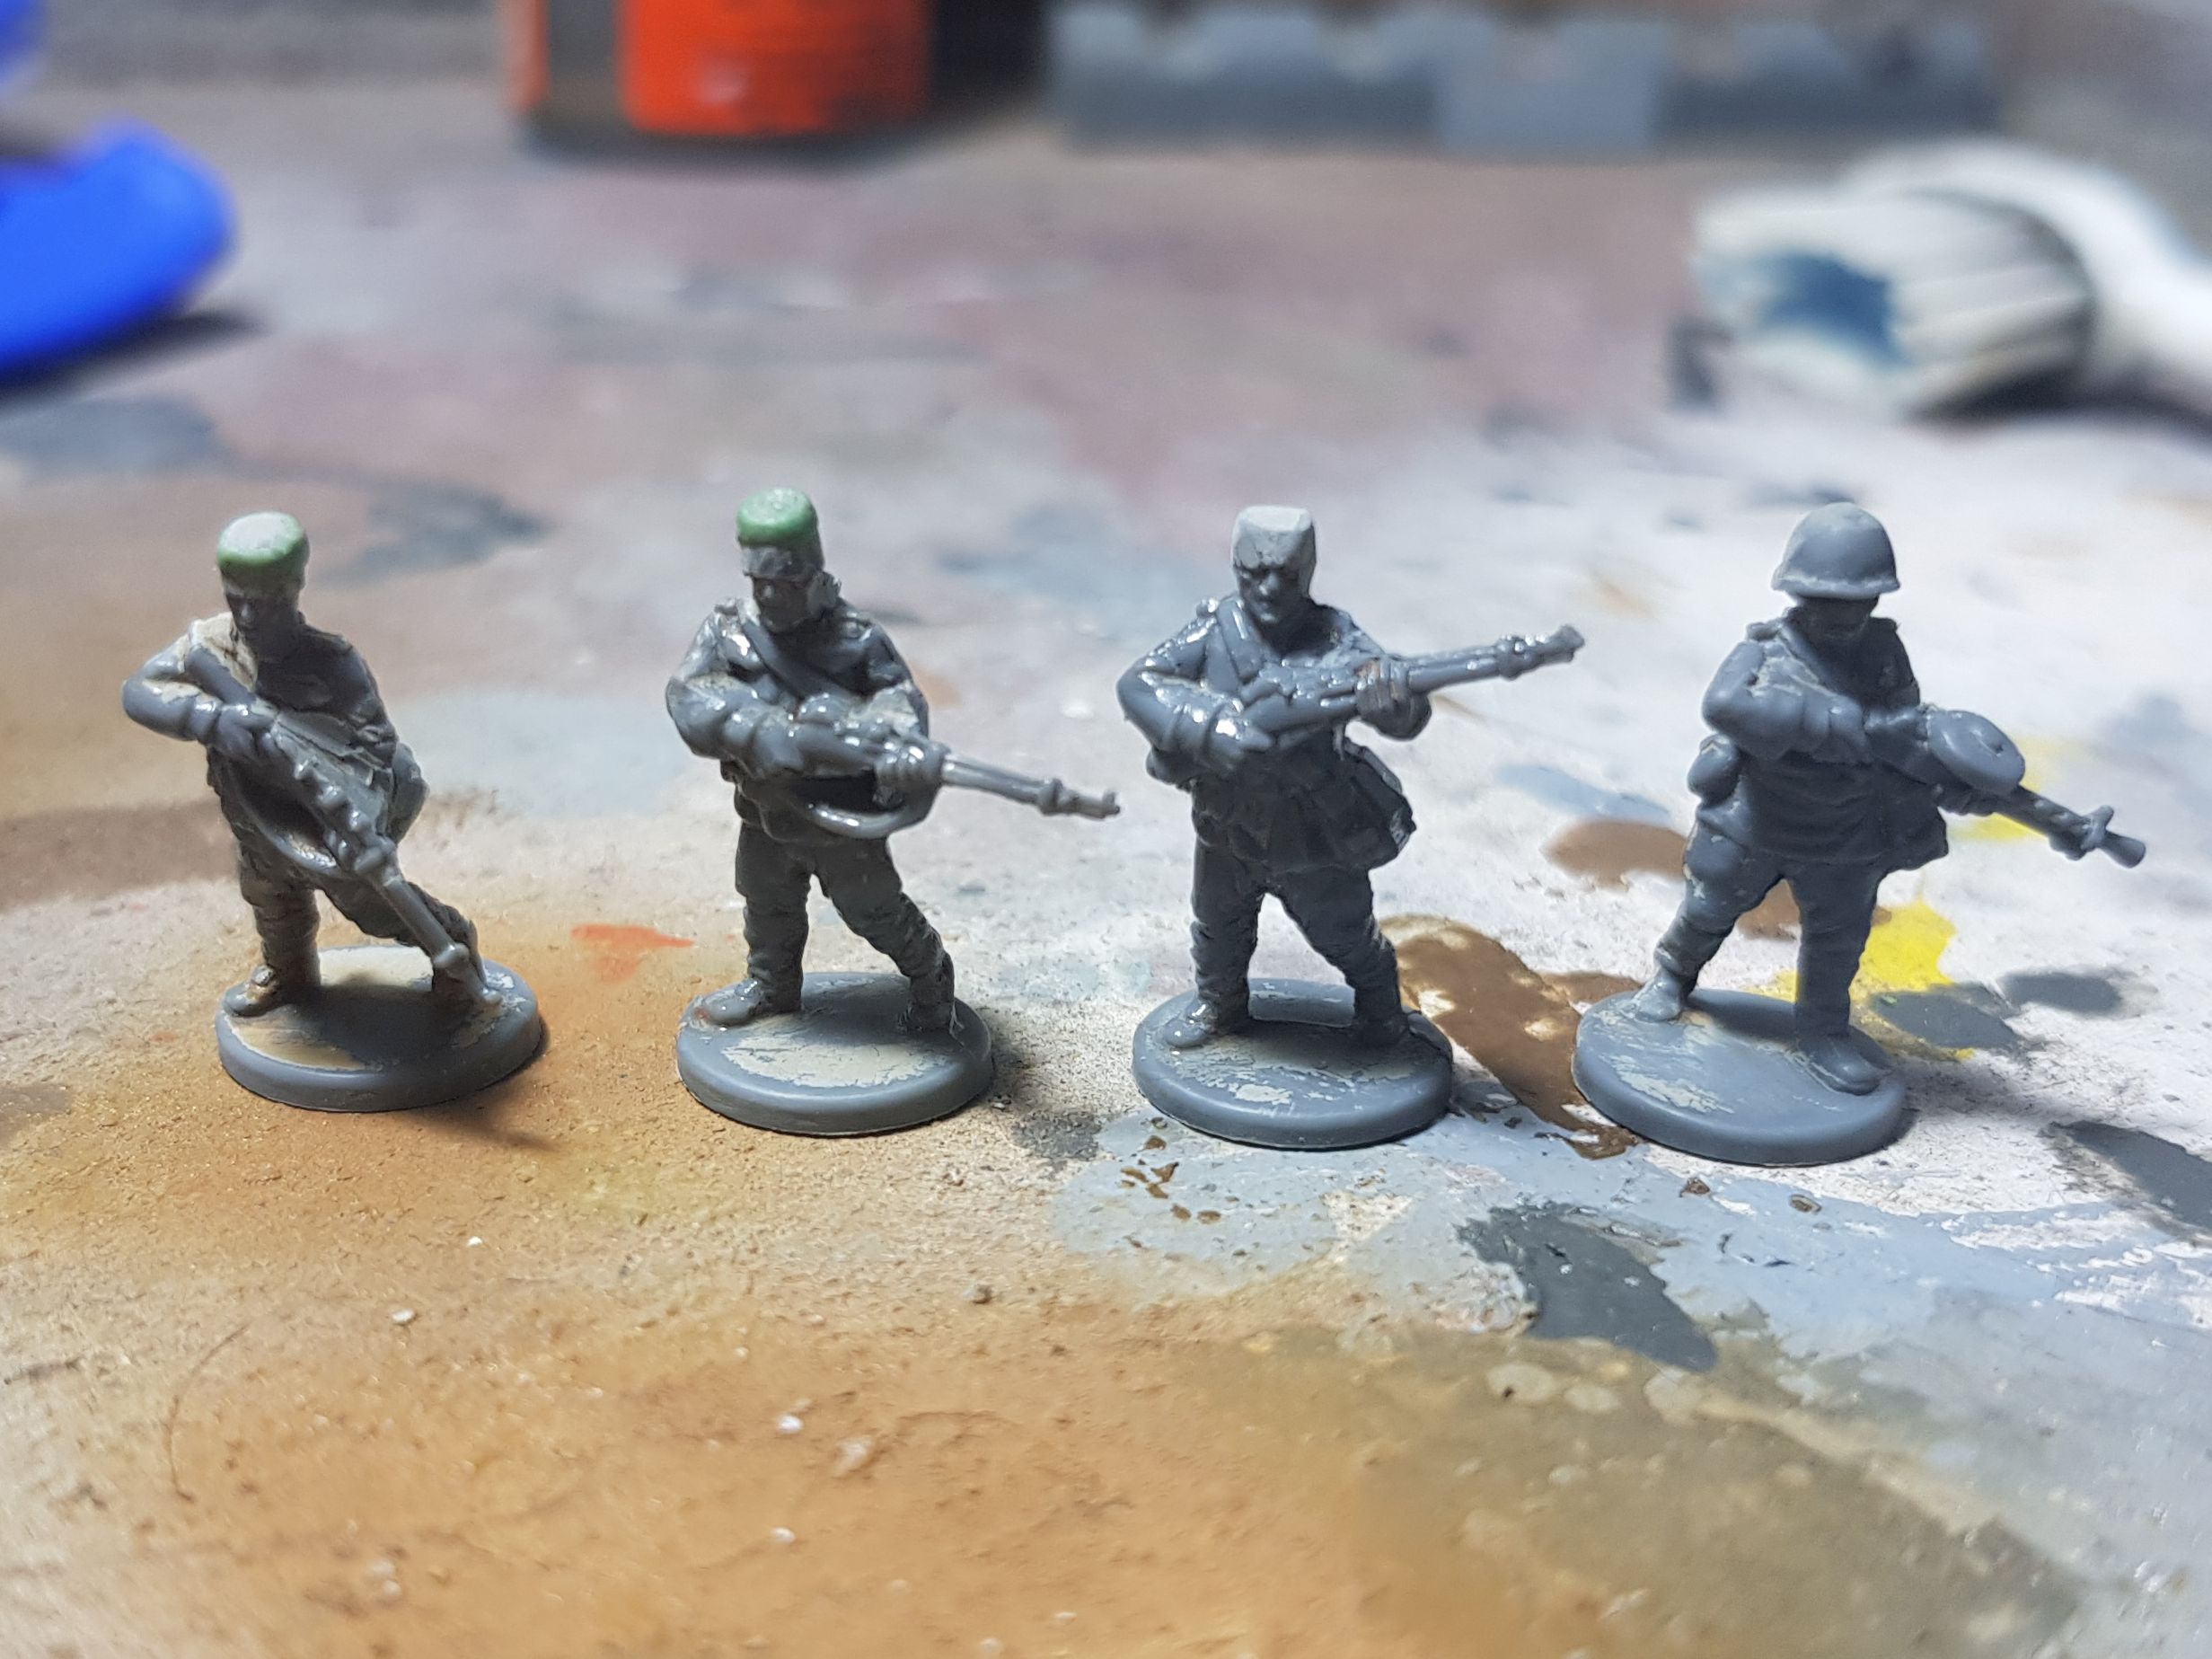
And after that I ended up with some non painted figures, even the greenstuff hats survived the process.
We all know that working with chemicals has its hazards, when doing this you should wear gloves and do it in a well ventilated area. When working with stuff like this I usually do it in my airbrush booth as it is set-up to filter the air that it sucks in before it goes back out. My airbrush booth is also set-up next to a window which I have open when working with stuff like this and I also have a fan blowing air towards the window.
Squad Size, Battlefront vs. History
Today I am going to have a look at squad sizes and if I can make them more realistic on tabletop. Technically it is the base size that matters in Flames of War not the amount of models on it, so I feel like I can do it if I have enough models. So let’s do some basic maths.
Germans
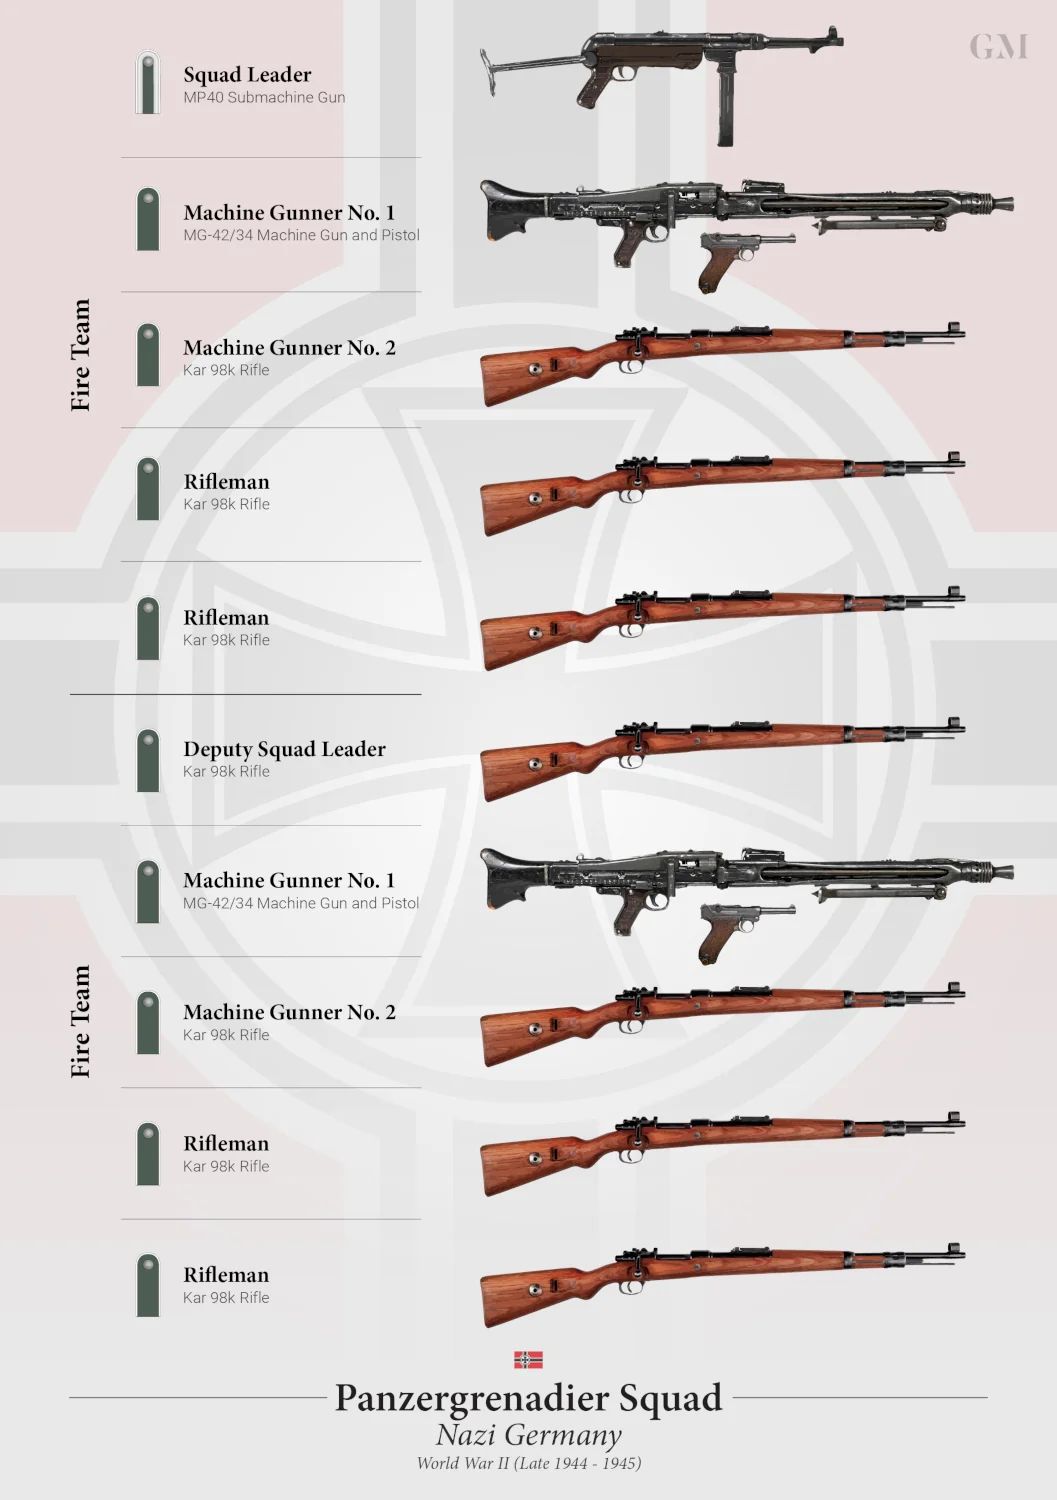
The infographic above shows the panzergrenadier squad layout for late war, but it was very similar if not almost identical in 1942. The included MG34 assembly instruction says: “MG34 teams combine a machine-gunner with either two riflemen and an NCO, or three riflemen, on a medium base.” This doesn’t say that one of those riflemen it wants you to add is a machine-gun loader which is kind of odd. The info on the Flames of War website is a ton better, although this lists the same team as an MG42 team but with an far better idea of what each model is and what how they should be based. Now here is a minor rant, why are the models I got to make an MG34 team modelled with MG42s? A minor thing I now, both weapons served the same battlefield role and in the grand scale of things it really isn’t going to matter. So let’s get down to how many models I got.
1 PzGren sprue contains:
- 11 K98 Riflemen
- 2 NCOs
- 3 MG42 Machine-Gunners
- 3 MG42 Machine-Gun Loaders
- 1 Officer
- 4 Panzerfausts
I have a total of 4 of them.
1 German Grenadier HQ sprue contains:
- 1 Radioman
- 1 NCO
- 1 Panzerschreck Gunners
- 1 Panzerschreck Loaders
- 2 Officers
And I have 1 of those. So leaving out the panzerfausts and panzerschrecks as they are too late for the period I am building things for, I have:
- 44 K98 Riflemen
- 9 NCOs
- 12 MG42 Machine-Gunners
- 12 MG42 Machine-Gun Loaders
- 6 Officers
- 1 Radioman
From this I am building 2 platoons of 7 MG34 teams each. In each platoon 1 of those teams is the platoon command, so in total I need to make 12 MG34 teams. The infographic above shows the squad perfectly divided in 2 fire teams, so that is what I want to go for for each team. So for the 12 MG34 teams or 6 full squads I am going to need:
- 42 K98 Riflemen
- 6 NCOs
- 12 MG42 Machine-Gunners
- 12 MG42 Machine-Gun Loaders
For the commanders and unit leaders the Flames of War building instruction that were included tell me: “Base Formation and Unit Leaders on a small base with an Officer, NCO and a rifleman.” I am inclined to agree with that for the platoon leaders, but not for the company HQ. So for the 2 platoon leaders I am going to need:
- 2 Officers
- 2 NCOs
- 2 K98 Riflemen
Since I can’t find a good source of what the company HQ would look like, I am going with a slight twist to the Battlefront approach. 2 small bases with each 1 officer, 1 NCO and on 1 base a rifleman and on the other the radioman. Since in game they are listed as a MP40 SMG team if I have a spare or can get a model with an MP40 I will replace the K98 riflemen with one of them. So in total for the company HQ I am going to need:
- 2 Officers
- 2 NCOs
- 1 K98 Rifleman or model with MP40
- 1 Radioman
So in total I am going to need:
- 45 K98 Riflemen
- 10 NCOs
- 12 MG42 Machine-Gunners
- 12 MG42 Machine-Gun Loaders
- 4 Officers
- 1 Radioman
So in all I am short 1 rifleman and 1 NCO, I most likely can use an officer as an NCO model and I am pretty sure I can find some 15mm models to buy somewhere on the interwebs. Since it such a small shortcoming this is what I am going for with the Germans.
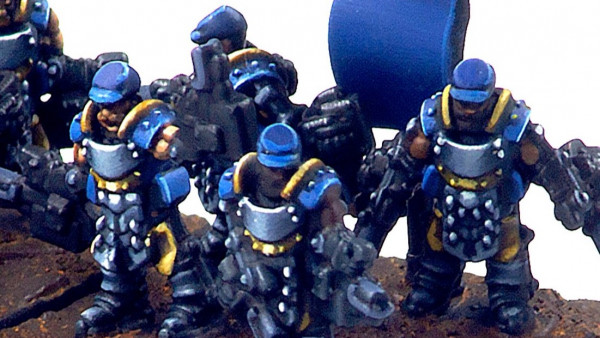
Soviets
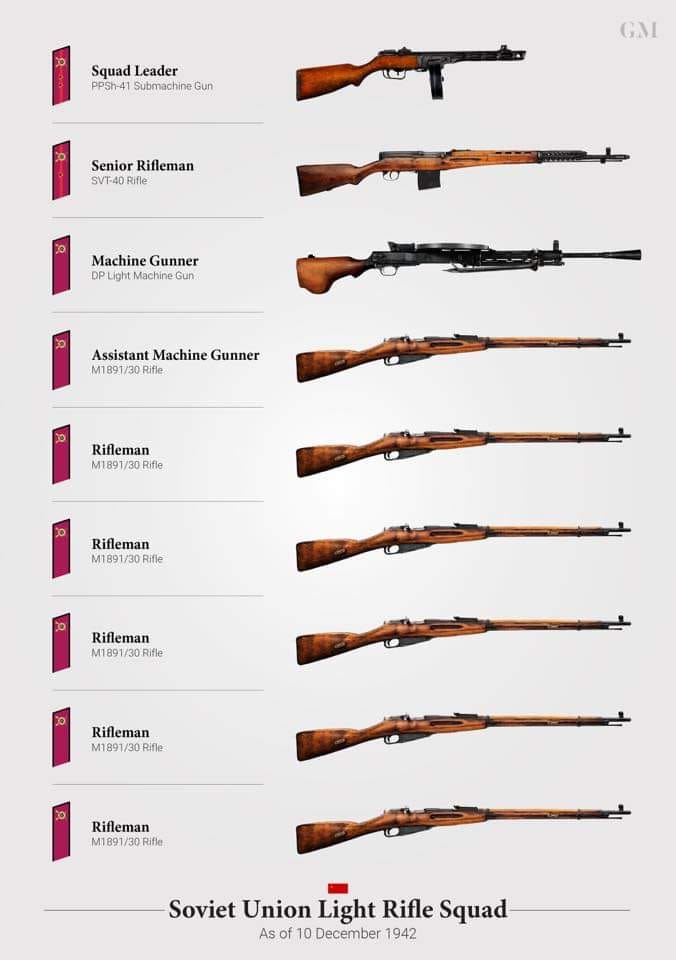
As manpower was becoming a problem for the Soviet Union in the latter half of 1942 the basic rifle squad was reduced in size from an 11 man squad to a 9 squad team. I want to represent the 9 man squads on the tabletop. Let’s get the elephant in the room out first, there are no SVT-40 riflemen on the sprues from Battlefront. Why not? I don’t know. I also can’t seem to find any out there either. Anyway let’s move on not try to get distracted by SVT rifles….. The DP MG and M1891 rifle teams, which I am now just going to call rifle teams because there aren’t any other rifle teams in the Easter Front Mid-War book, according to Battlefronts included instruction are build like this: “DP MG and M1891 rifle teams combine an NCO or DP machine-gunner with three riflemen on a medium base.” So that is 4 man a team and thus 8 a squad. Why is the SVT rifleman being left out? They also don’t have an assistant machine-gunner model, but I can kind of excuse that one as he wouldn’t really have much different equipment apart from maybe carrying a spare magazine or 2. So I want to add the SVT rifleman to the base of the NCO to make 2 team s 1 full squad. So let’s get over the models that I got:
So 1 LW Strelkovy sprue (That is what is written on the sprue) contains:
- 14 M1891 Riflemen
- 3 NCOs
- 2 DP MG Machine-Gunners
- 2 Officers
- 1 Komissar
- 1 Maksim HMG team
I have a total of 5 of these sprues so that gives me a total of:
- 70 M1891 Riflemen
- 15 NCOs
- 10 DP MG Machine-Gunners
- 10 Officers
- 5 Komissars
- 5 Maksim HMG Teams
So I want to make 2 hero rifle companies which in total contains 18 rifle teams split in 2 different fire teams, so 9 each. Team 1 contains the NCO, the senior riflemen with the SVT-40 and 3 other riflemen. Team 2 consists of the DP MG machine-gunner and 3 riflemen of which one will be counted as the assistant machine-gunner. So in total I am going to need:
- 54 M1891 Riflemen
- 9 SVT Riflemen
- 9 NCOs
- 9 DP MG Machine-Gunners
Each rifle company includes a komissar team as well and Battlefronts included instructions tell me: “Base the Komissar team on a small base with a Komissar and a rifleman or NCO.” To me having the komissar together with an NCO makes more sense so that is what I am going with. I need to make a total 2 komissar teams so for them I will need:
- 2 NCOs
- 2 Komissars
For the commanders and unit leaders Battlefronts included instructions tell me this: “Base Formation and Unit Leaders on a small base with an Officer, NCO and a rifleman.” Since the company leader does count as a DP MG and M1891 rifle team in game, I prefer an higher rate of fire rifle for the riflemen. So I will replace the normal riflemen with a senior riflemen with an SVT-40. I have 2 companies so I am going to need 2 teams and for that I need:
- 2 SVT Riflemen
- 2 NCOs
- 2 Officers
And then the teams for the battalion HQ count as just an M1891 rifle team and thus I will have normal M1891 riflemen, but otherwise the same as above. The battalion HQ consists of 2 teams and for those 2 I am going to need:
- 2 M1891 Riflemen
- 2 NCOs
- 2 Officers
And at last the Maxim HMG team. I plan to make 4 teams and the included Battlefront instructions tell me: “Base the Maxim HMG gunner and his weapon along with the loader and a riflemen on a medium base.” So to make 4 teams I am going to need:
- 4 M1891 Riflemen
- 4 Maxim HMG Teams
So in total I am going to need:
- 60 M1891 Riflemen
- 11 SVT Riflemen
- 15 NCOs
- 9 DP MG Machine-Gunners
- 2 Komissars
- 4 Officers
- 4 Maxim HMG Teams
So if I want to make them like this I am short 11 SVT riflemen and If I were to replace the SVT riflemen with the M1891 riflemen if can’t find any I would be short only 1 M1891 riflemen. So I am going to look for and explore my options for SVT-40 rifles, but may have to go with M1891 rifles sadly.
Can I get some respect for the SVT riflemen who seem to be sadly lacking in 15mm….. Honestly, why can’t I find any? Am I just expecting too much from 15mm?
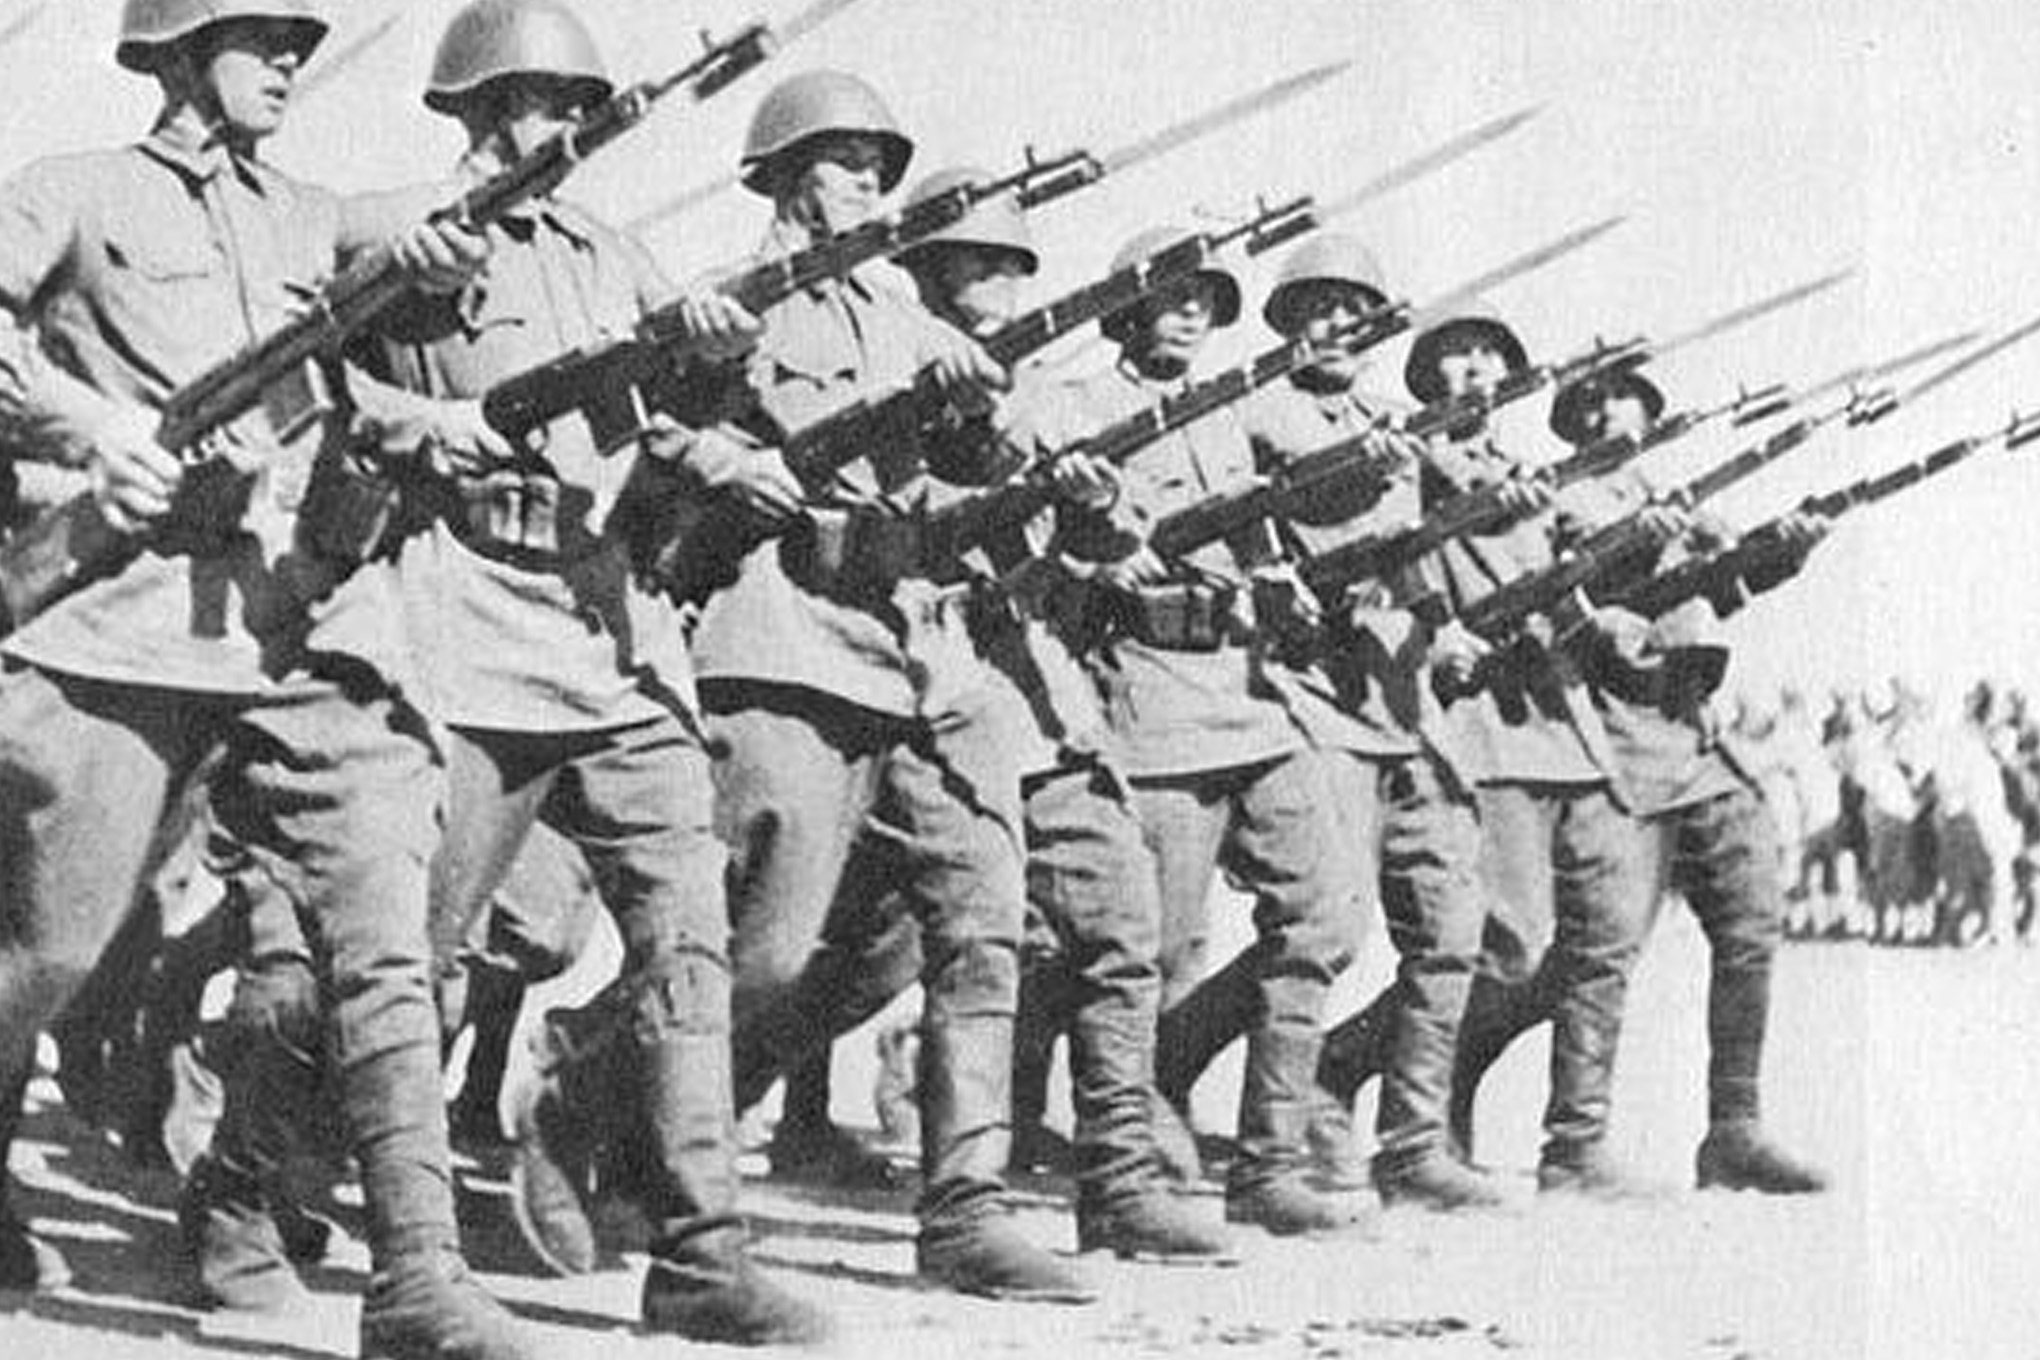
I am going to do my best to make my squads as realistic as possible.
I have throughout the project been careful with listing my sources, but for these I really can’t seem to find where these images come from. I found most of them just randomly on the internet.
Flinging Around more Paint.
So, guess what, the last test still hasn’t dried….. Well that’s oil paints for ya when you don’t use anything to speed up the drying process, my mistake.
Base 11
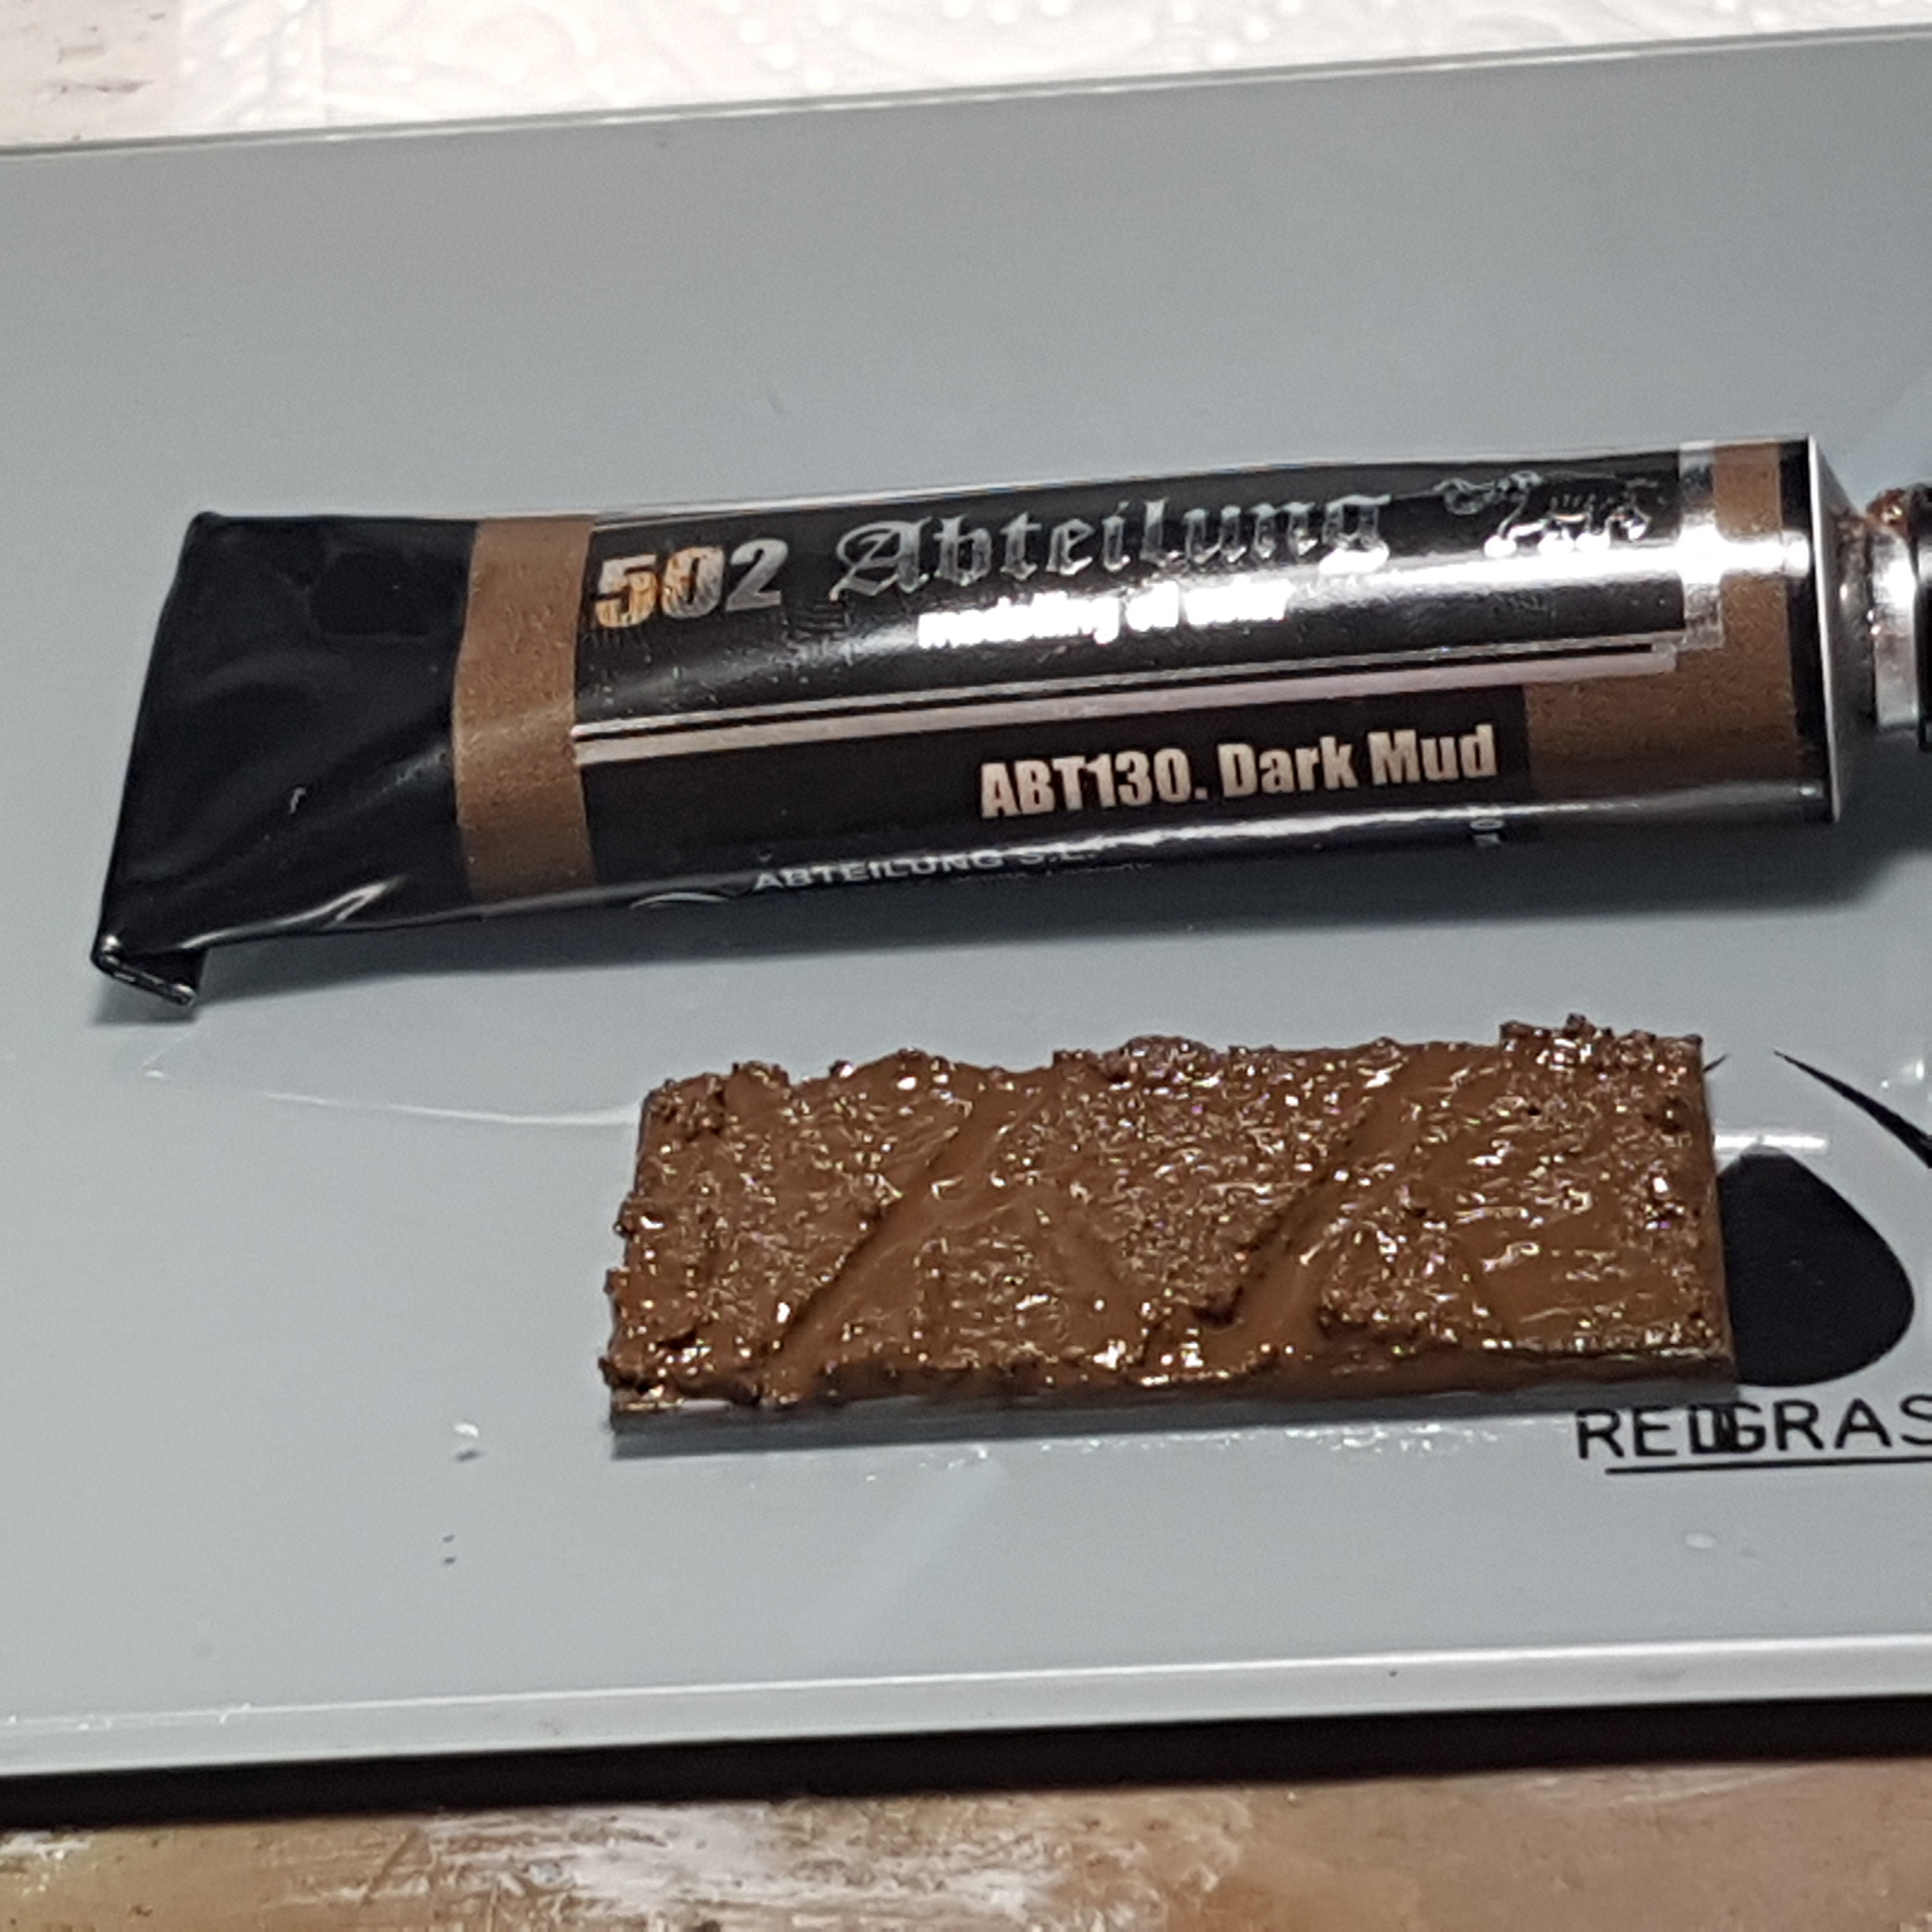
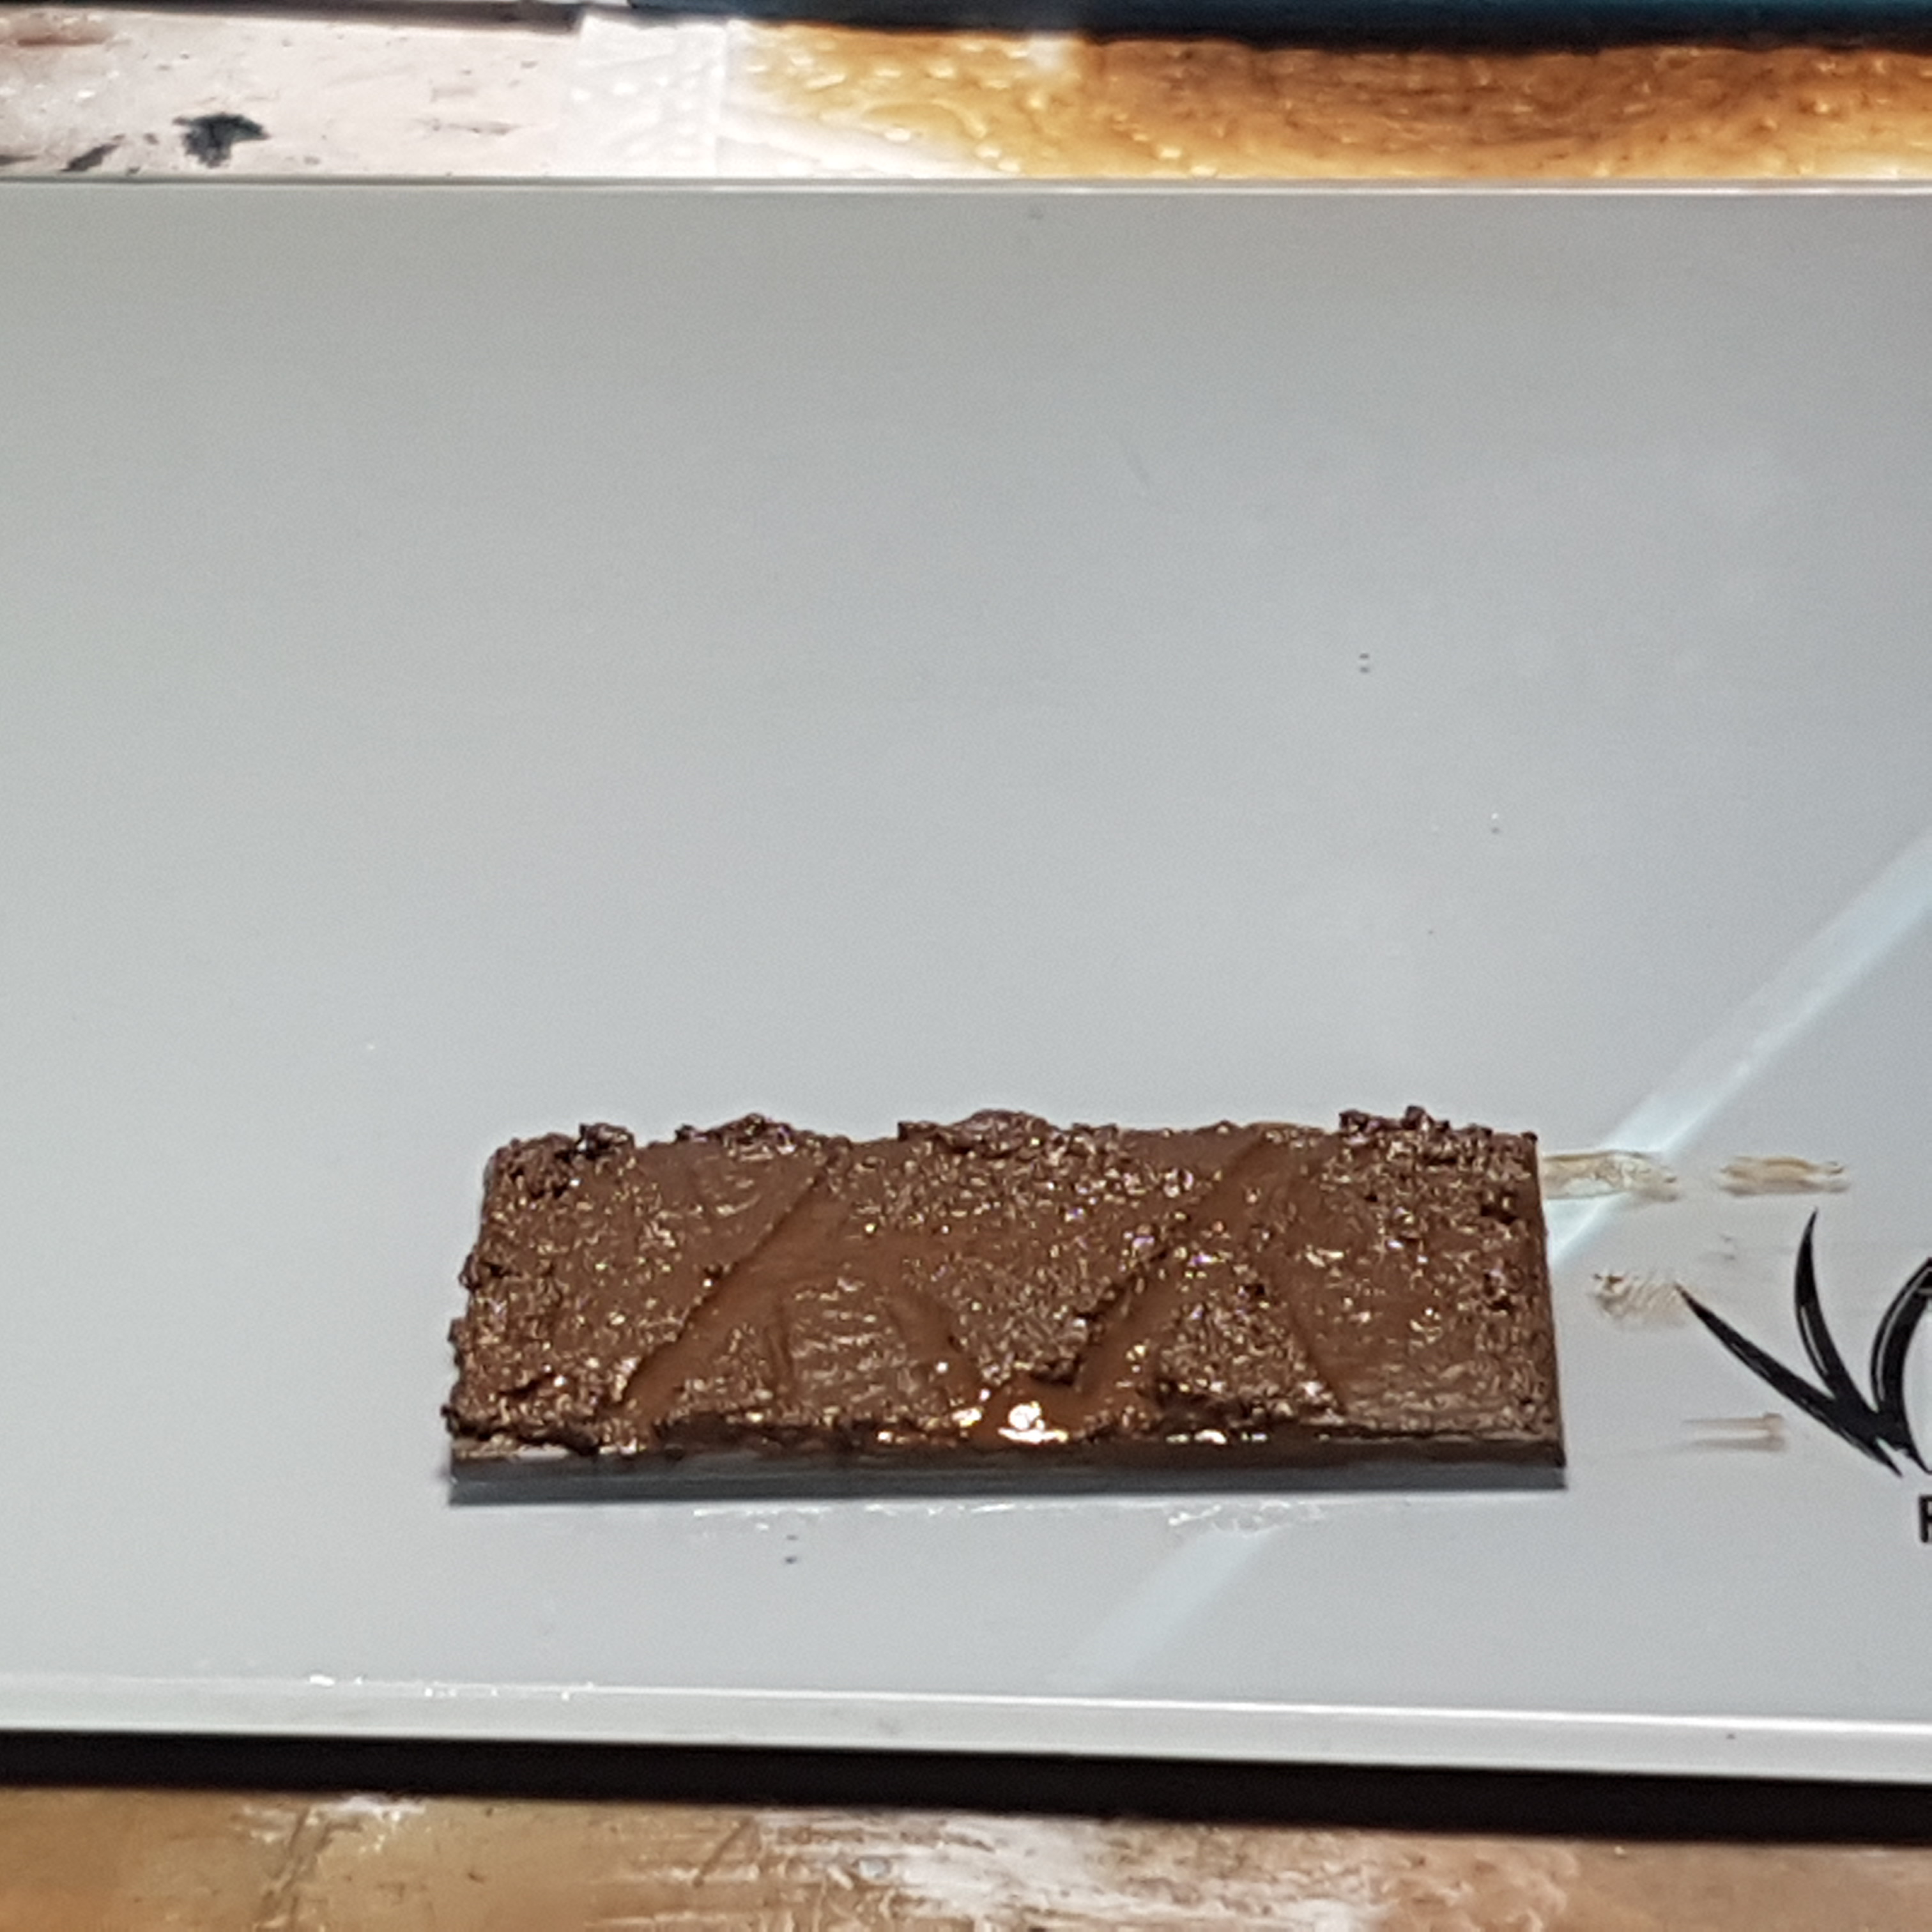
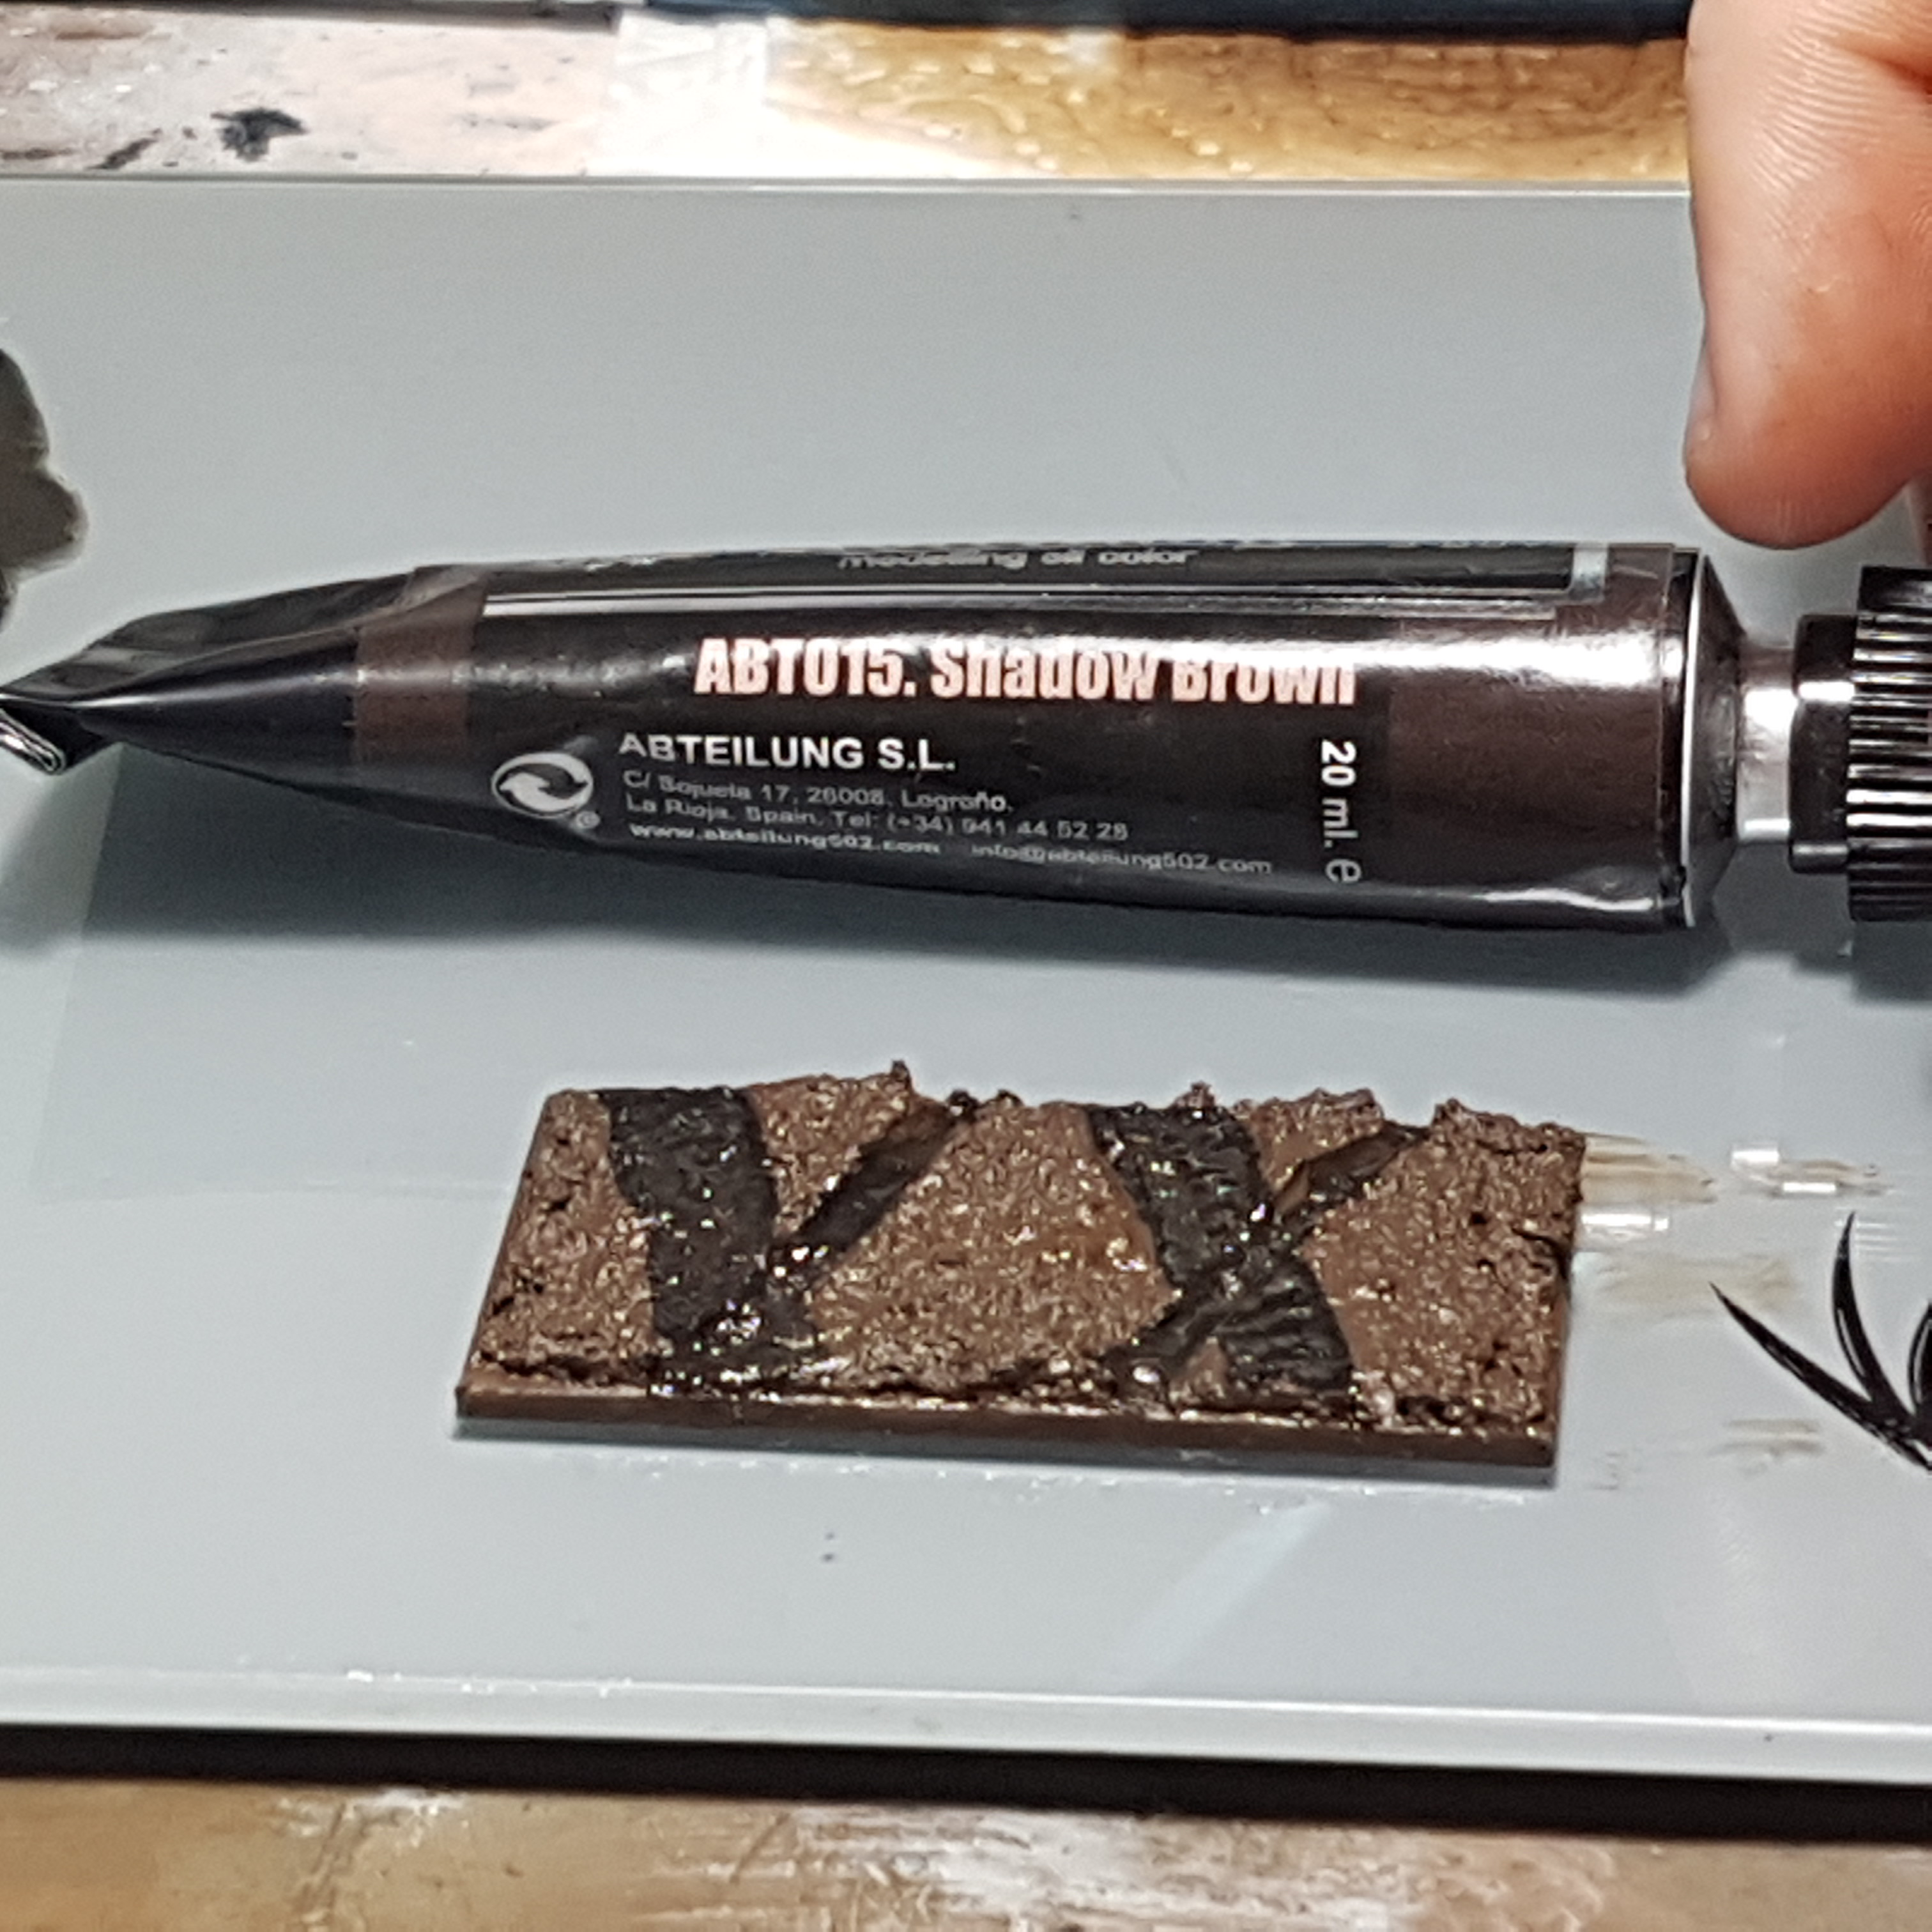
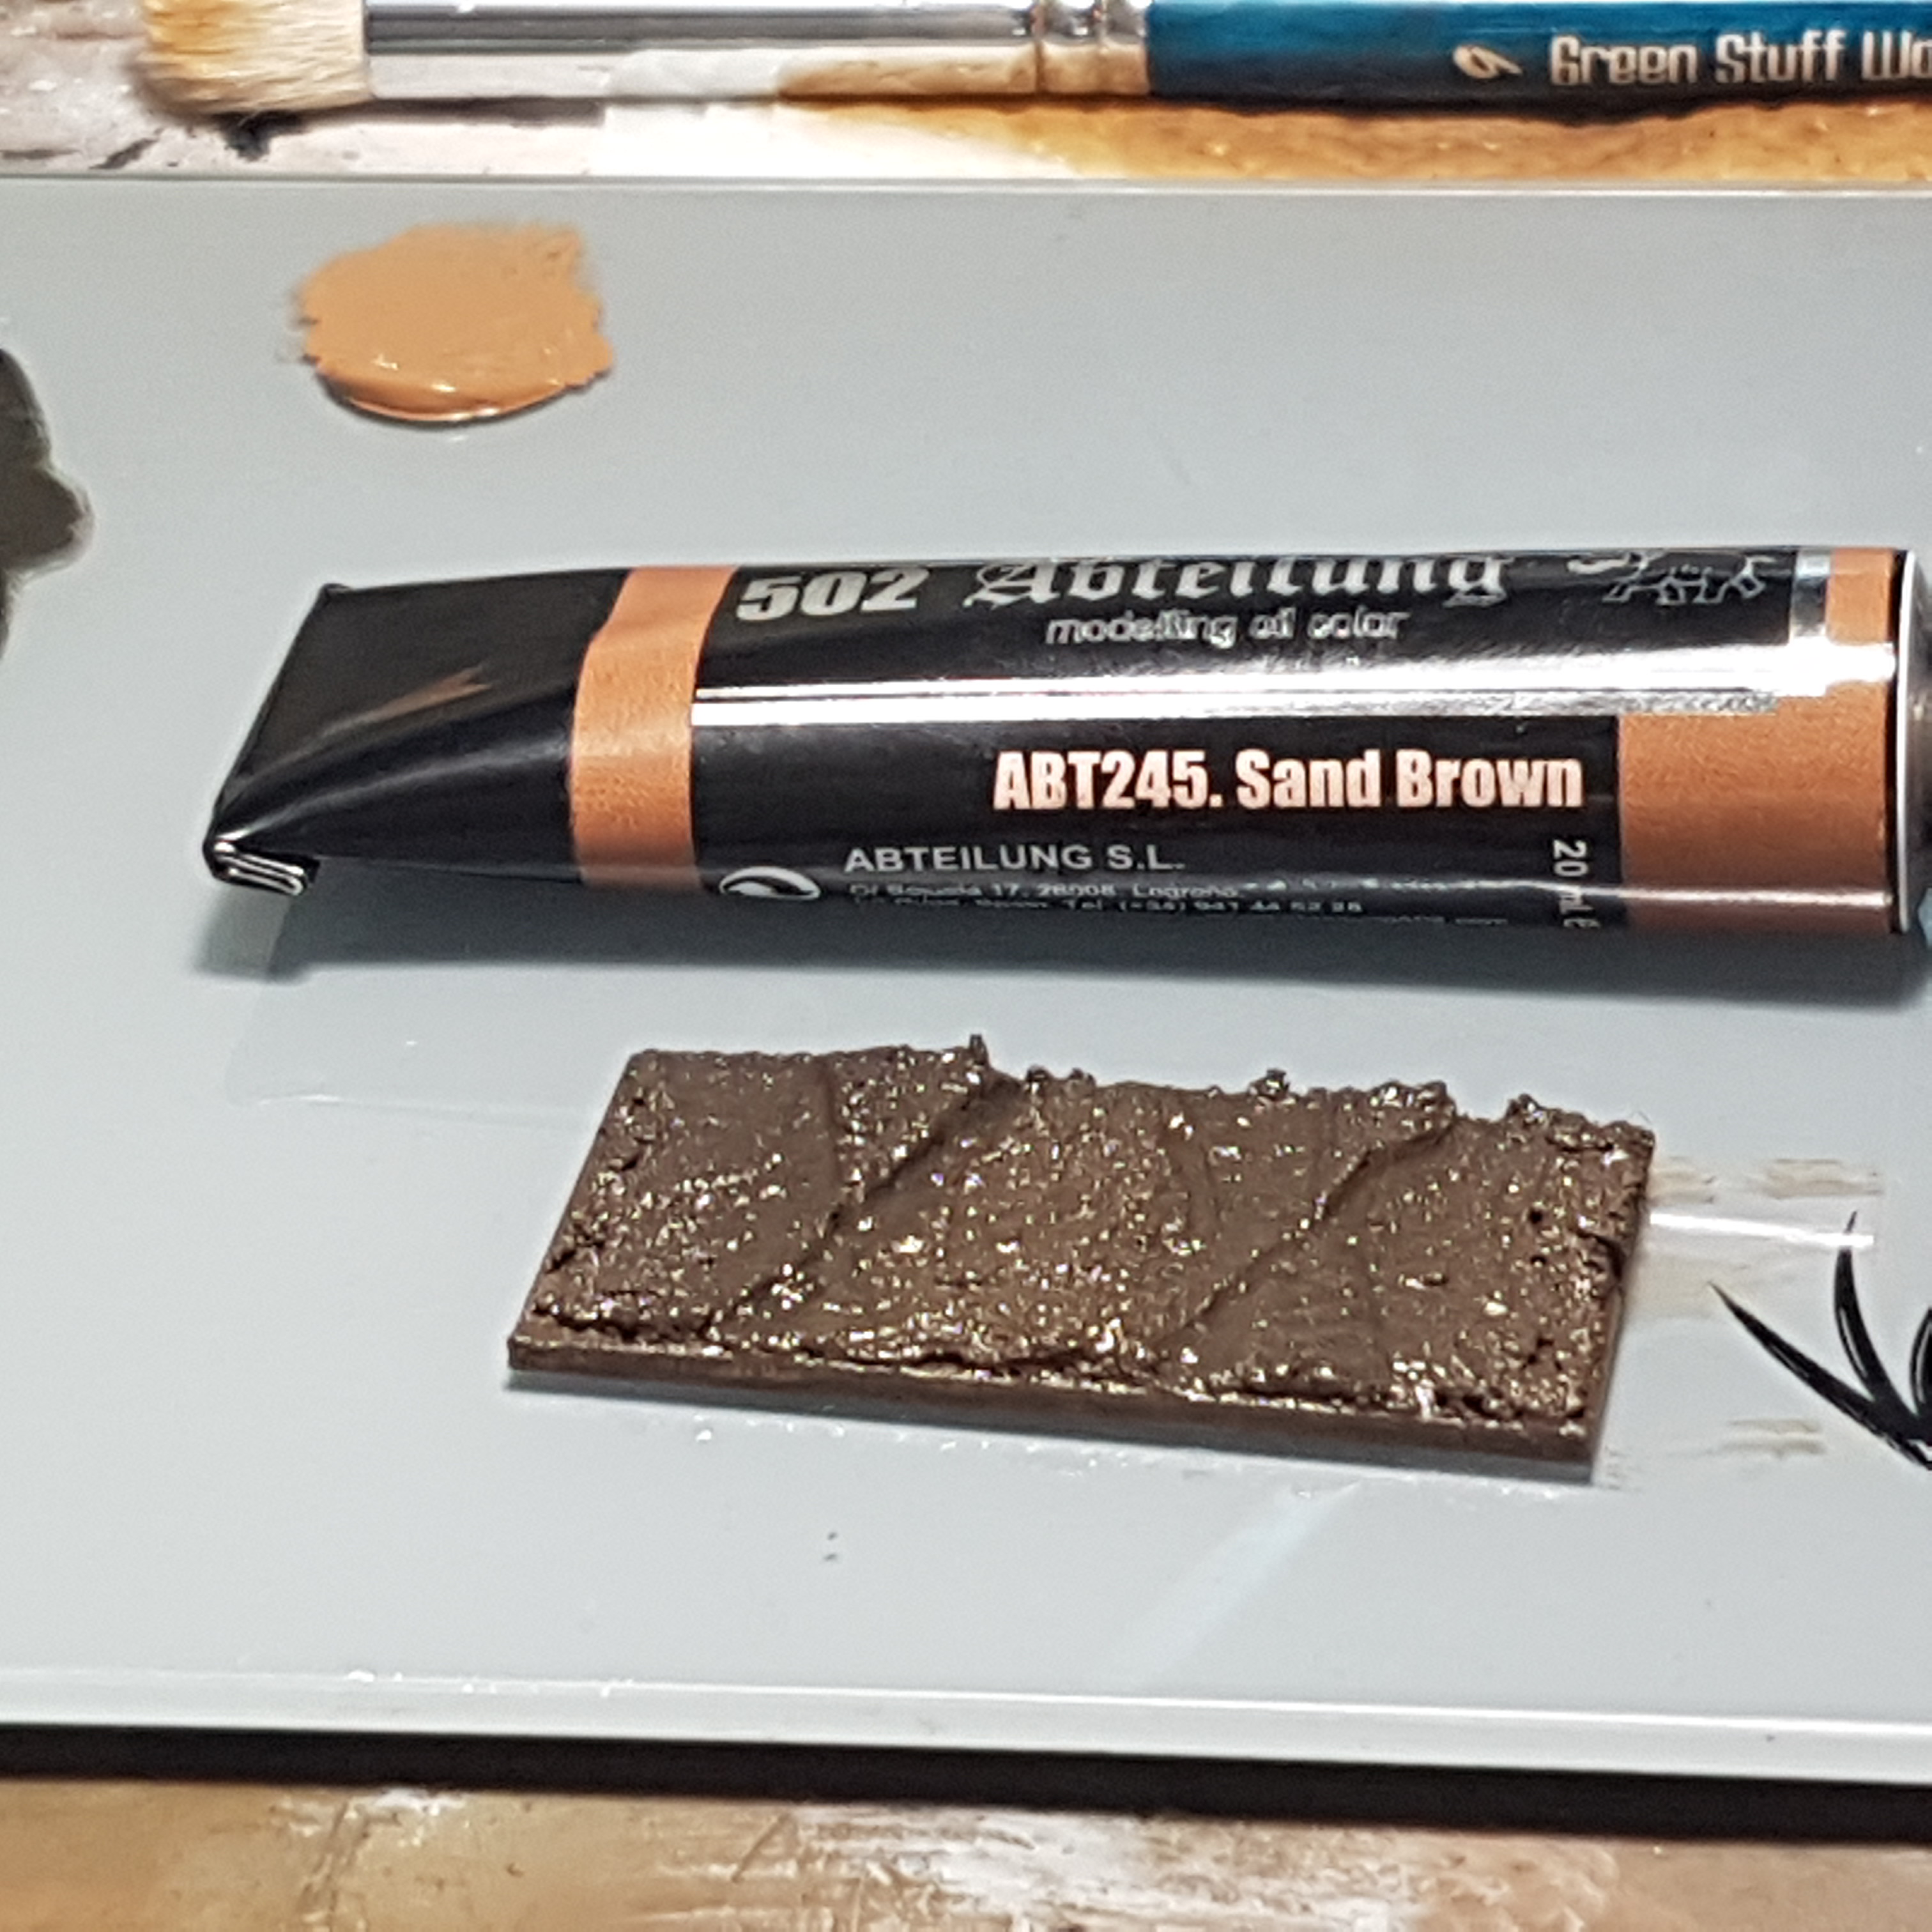
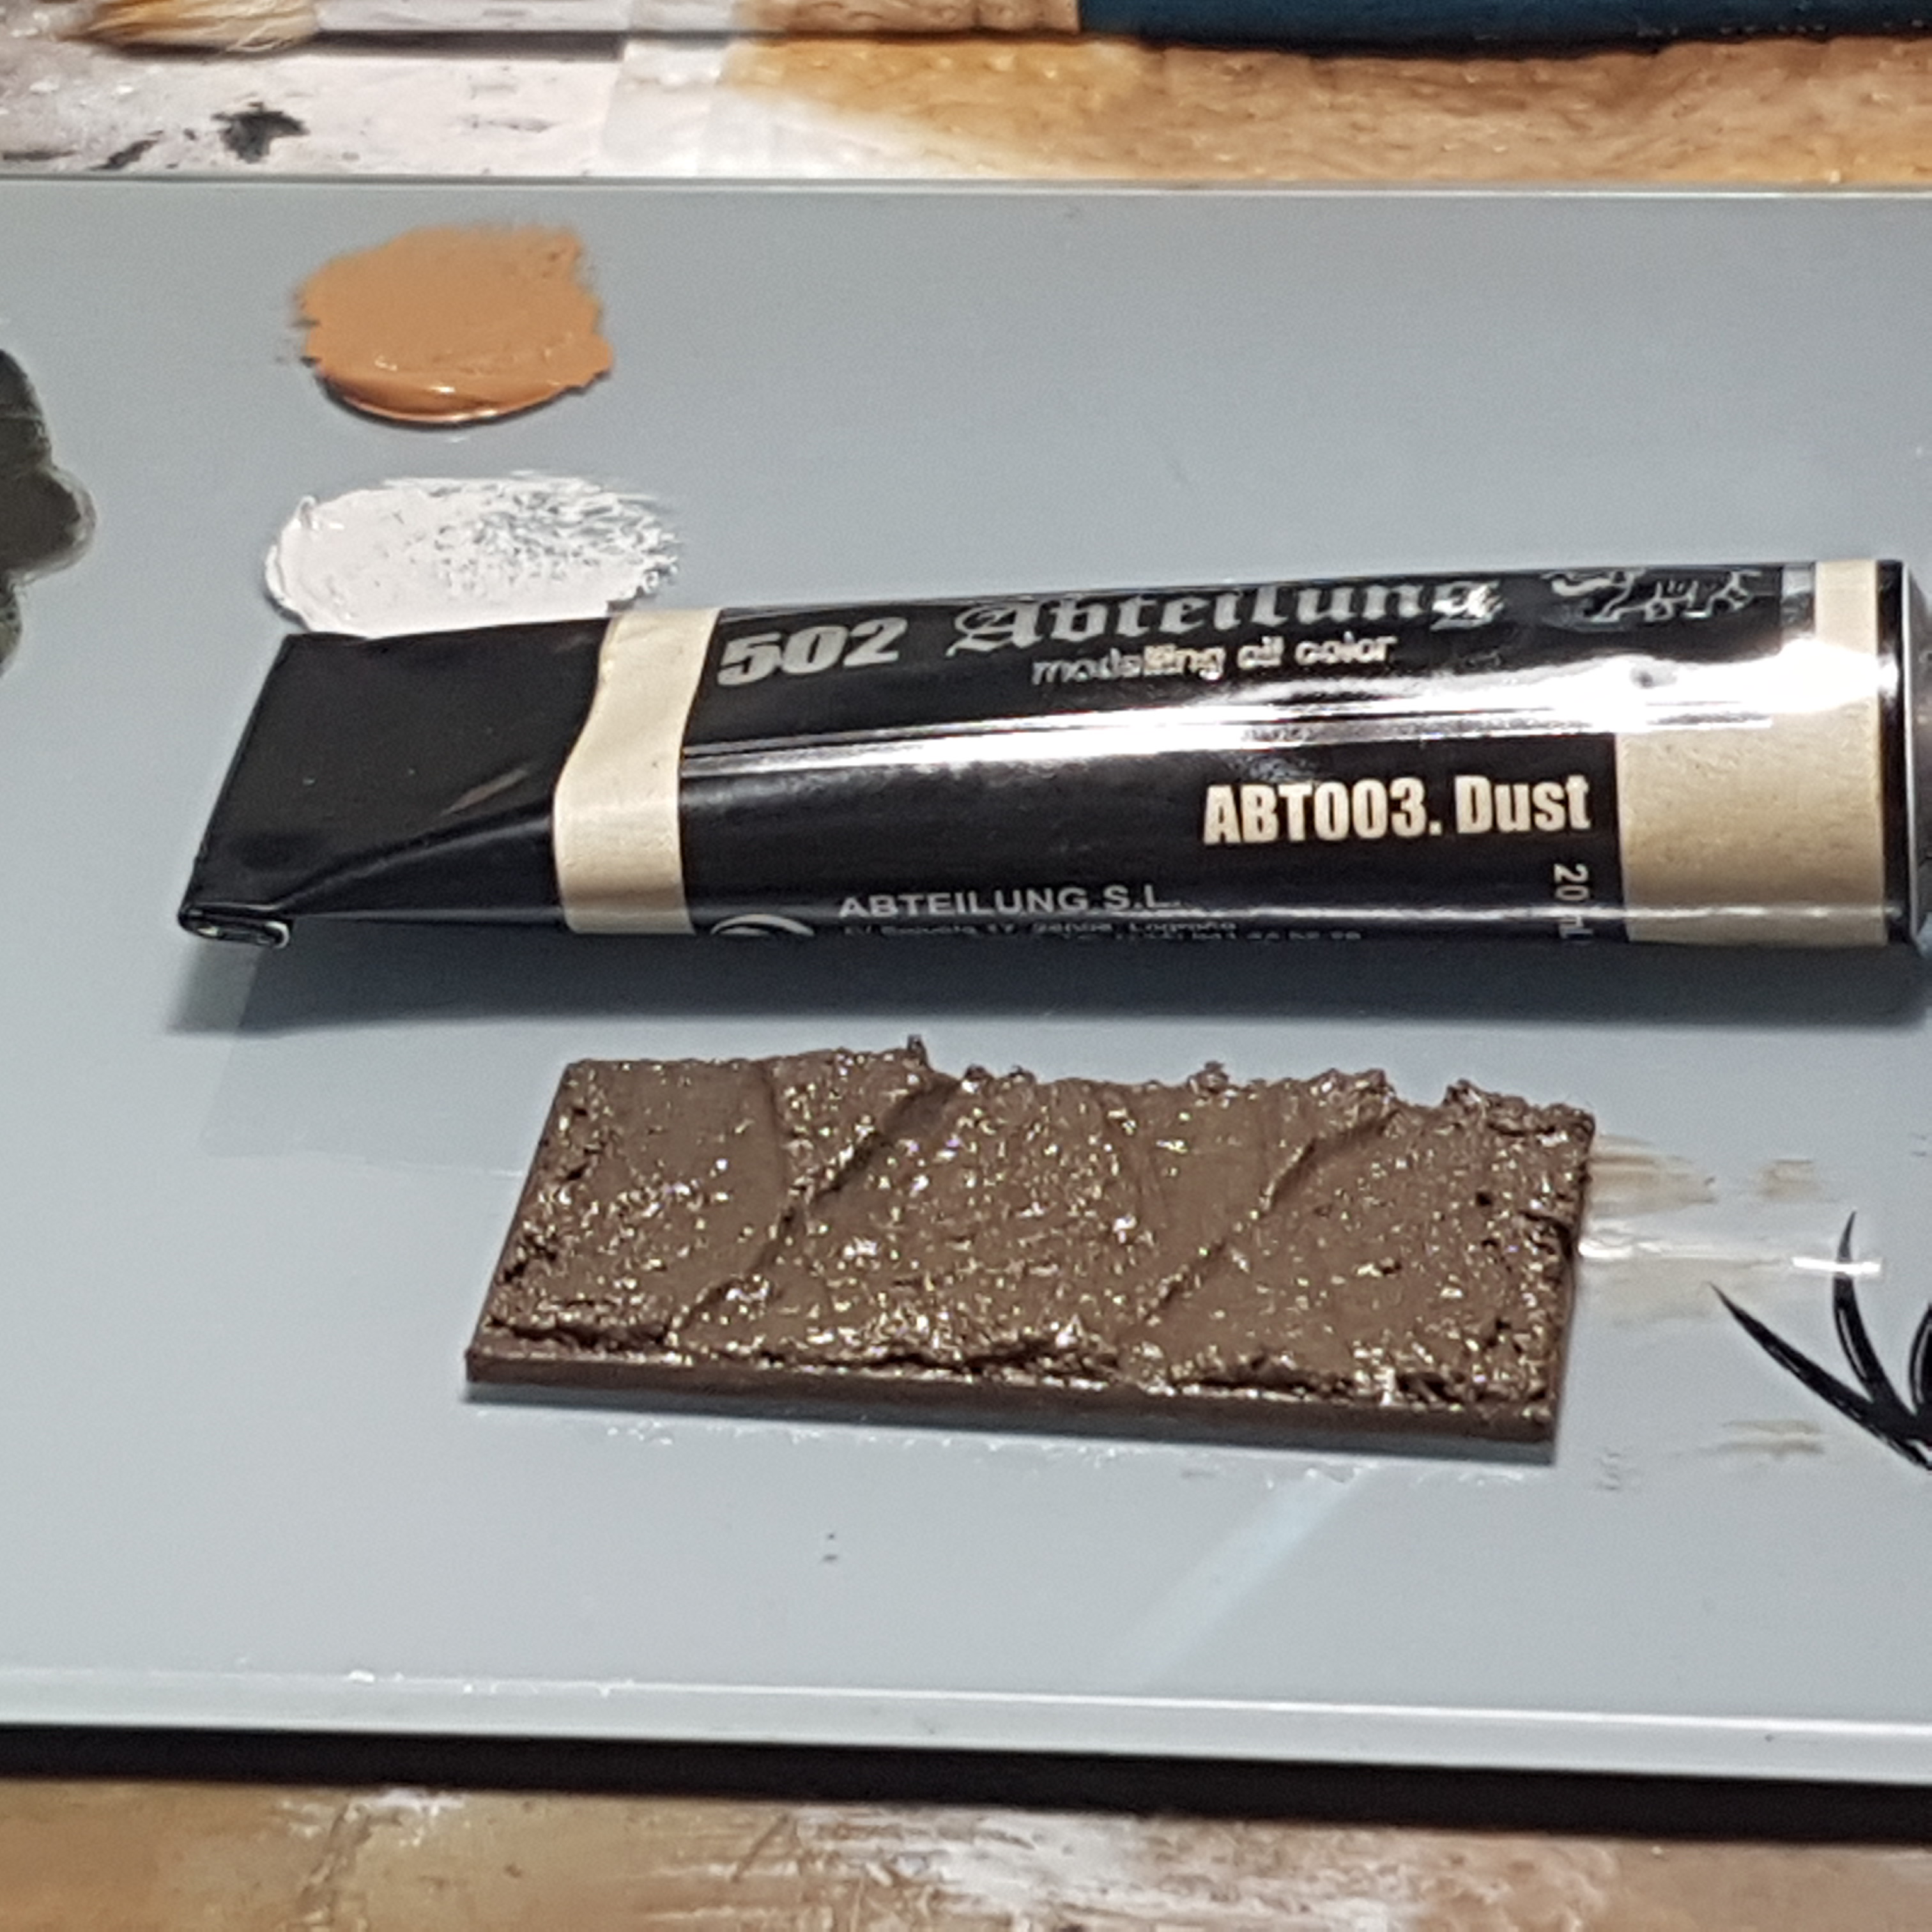
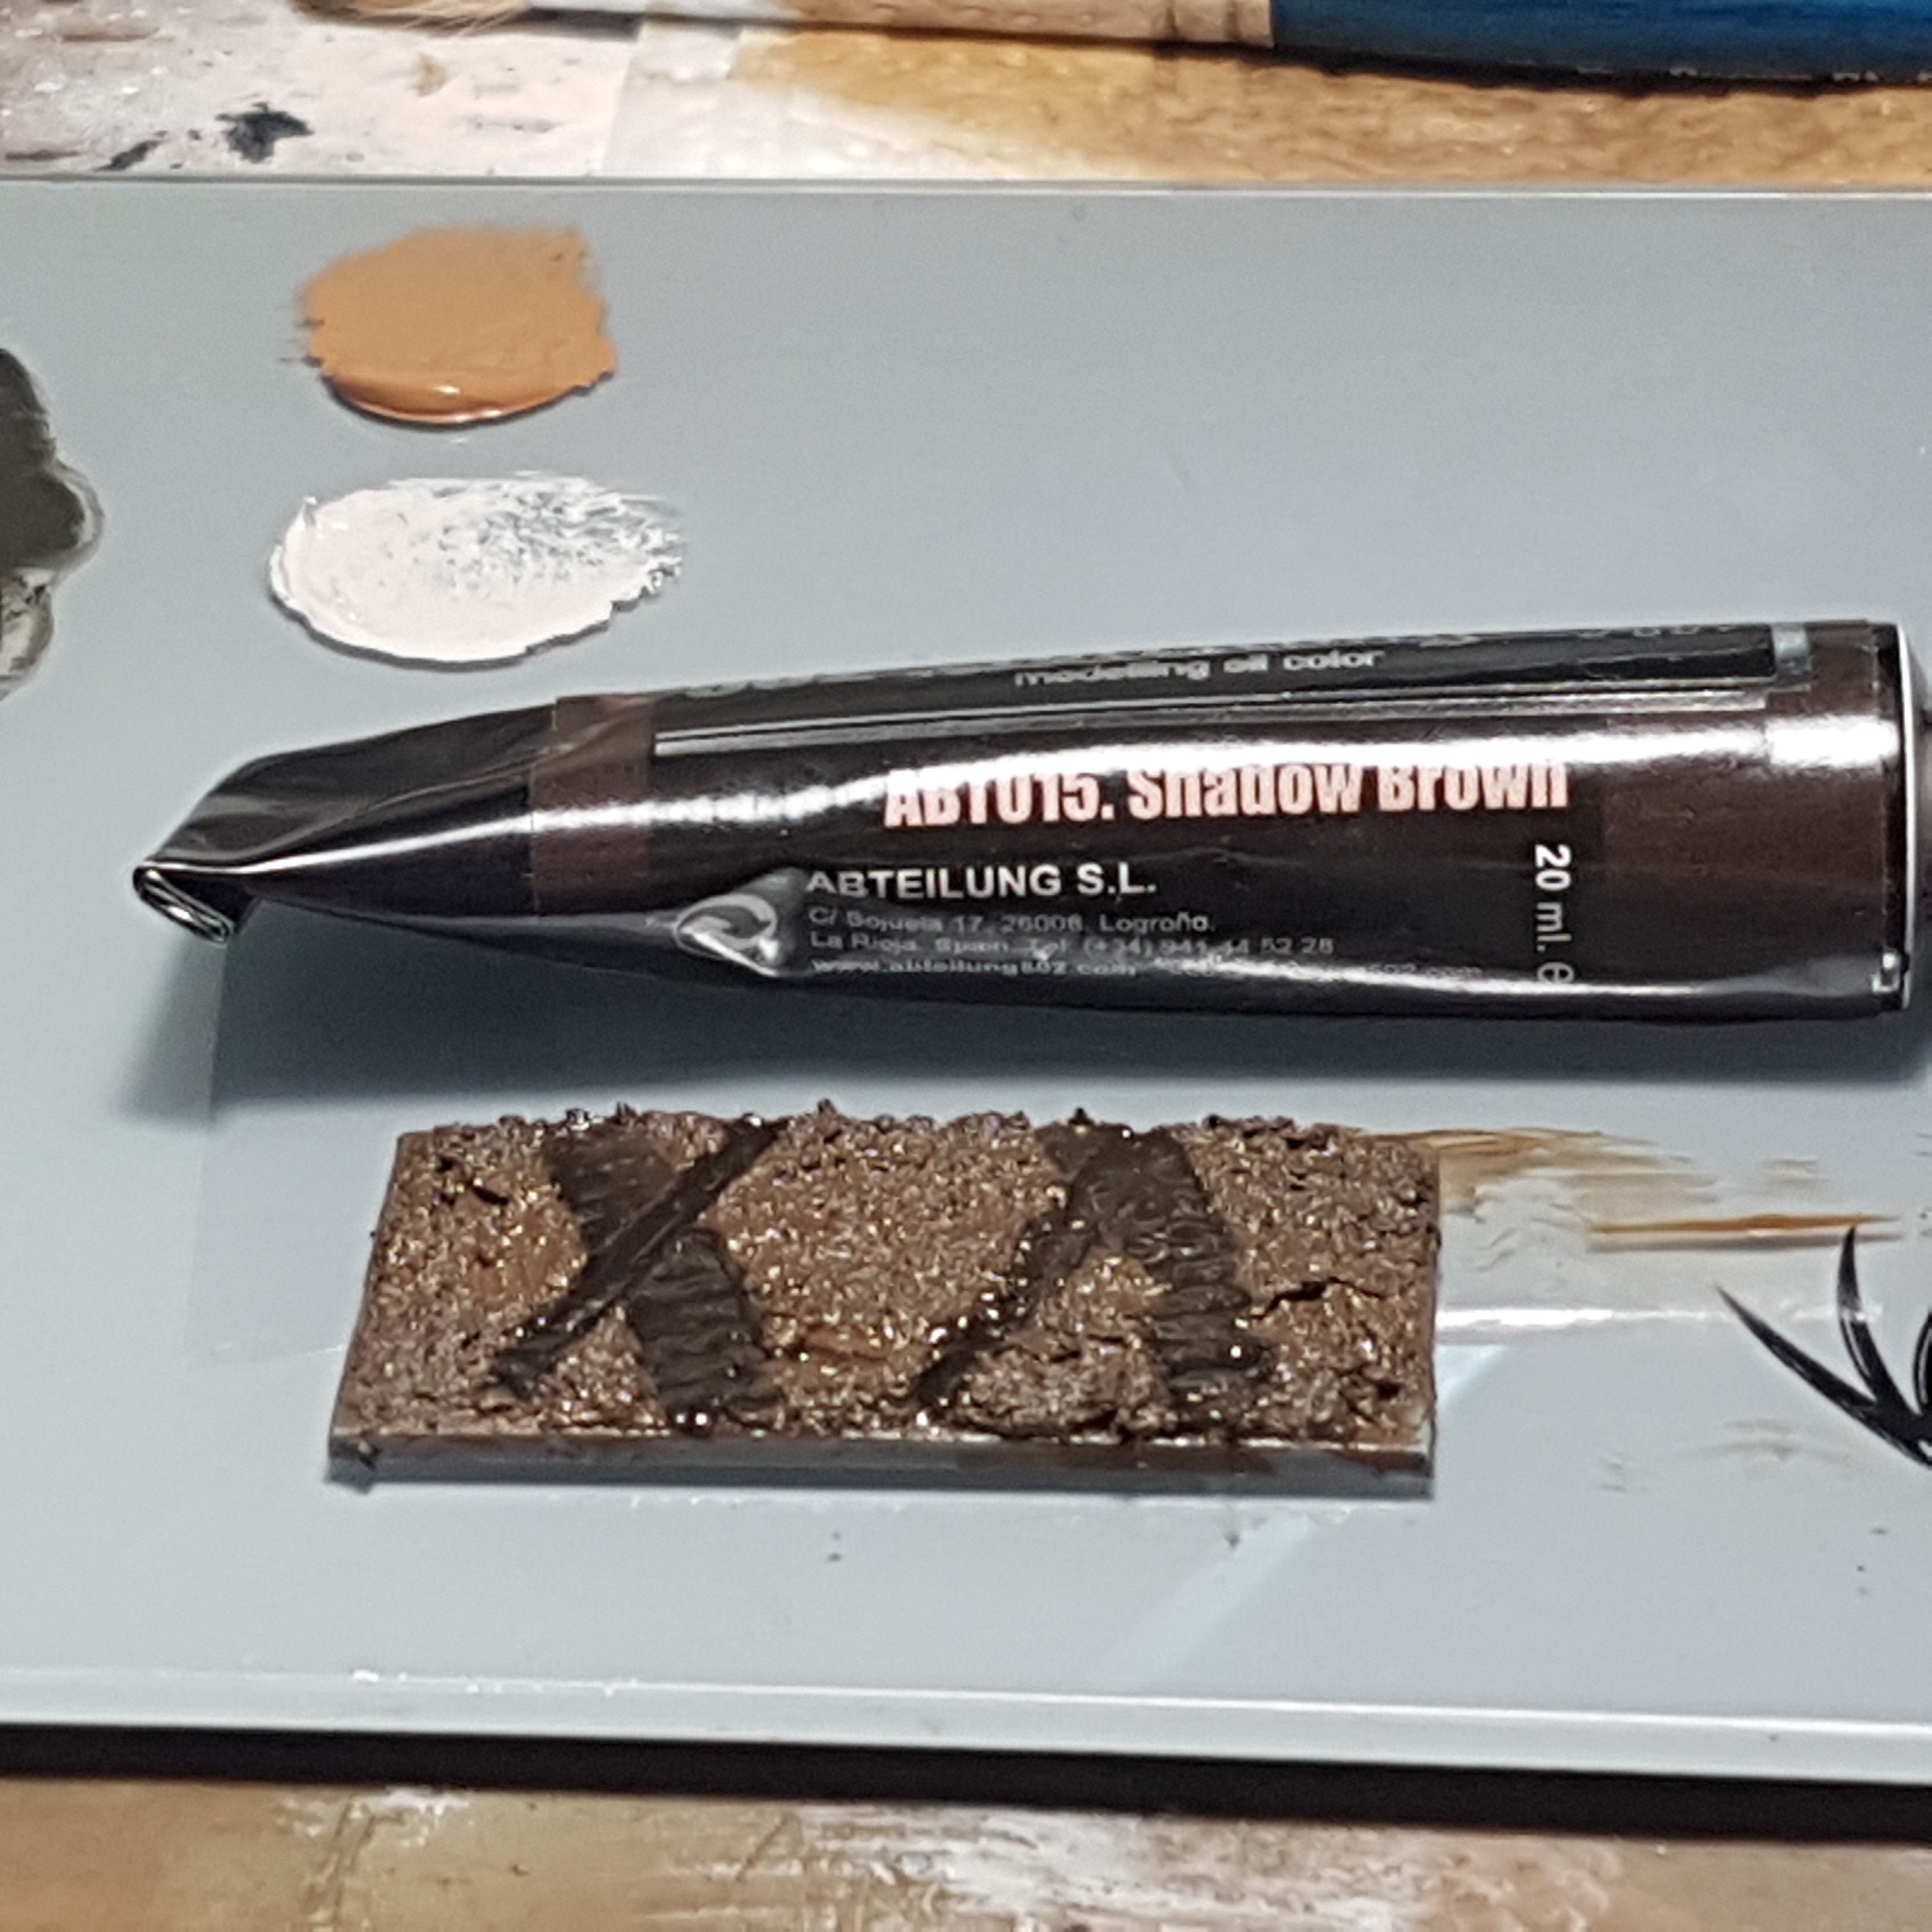
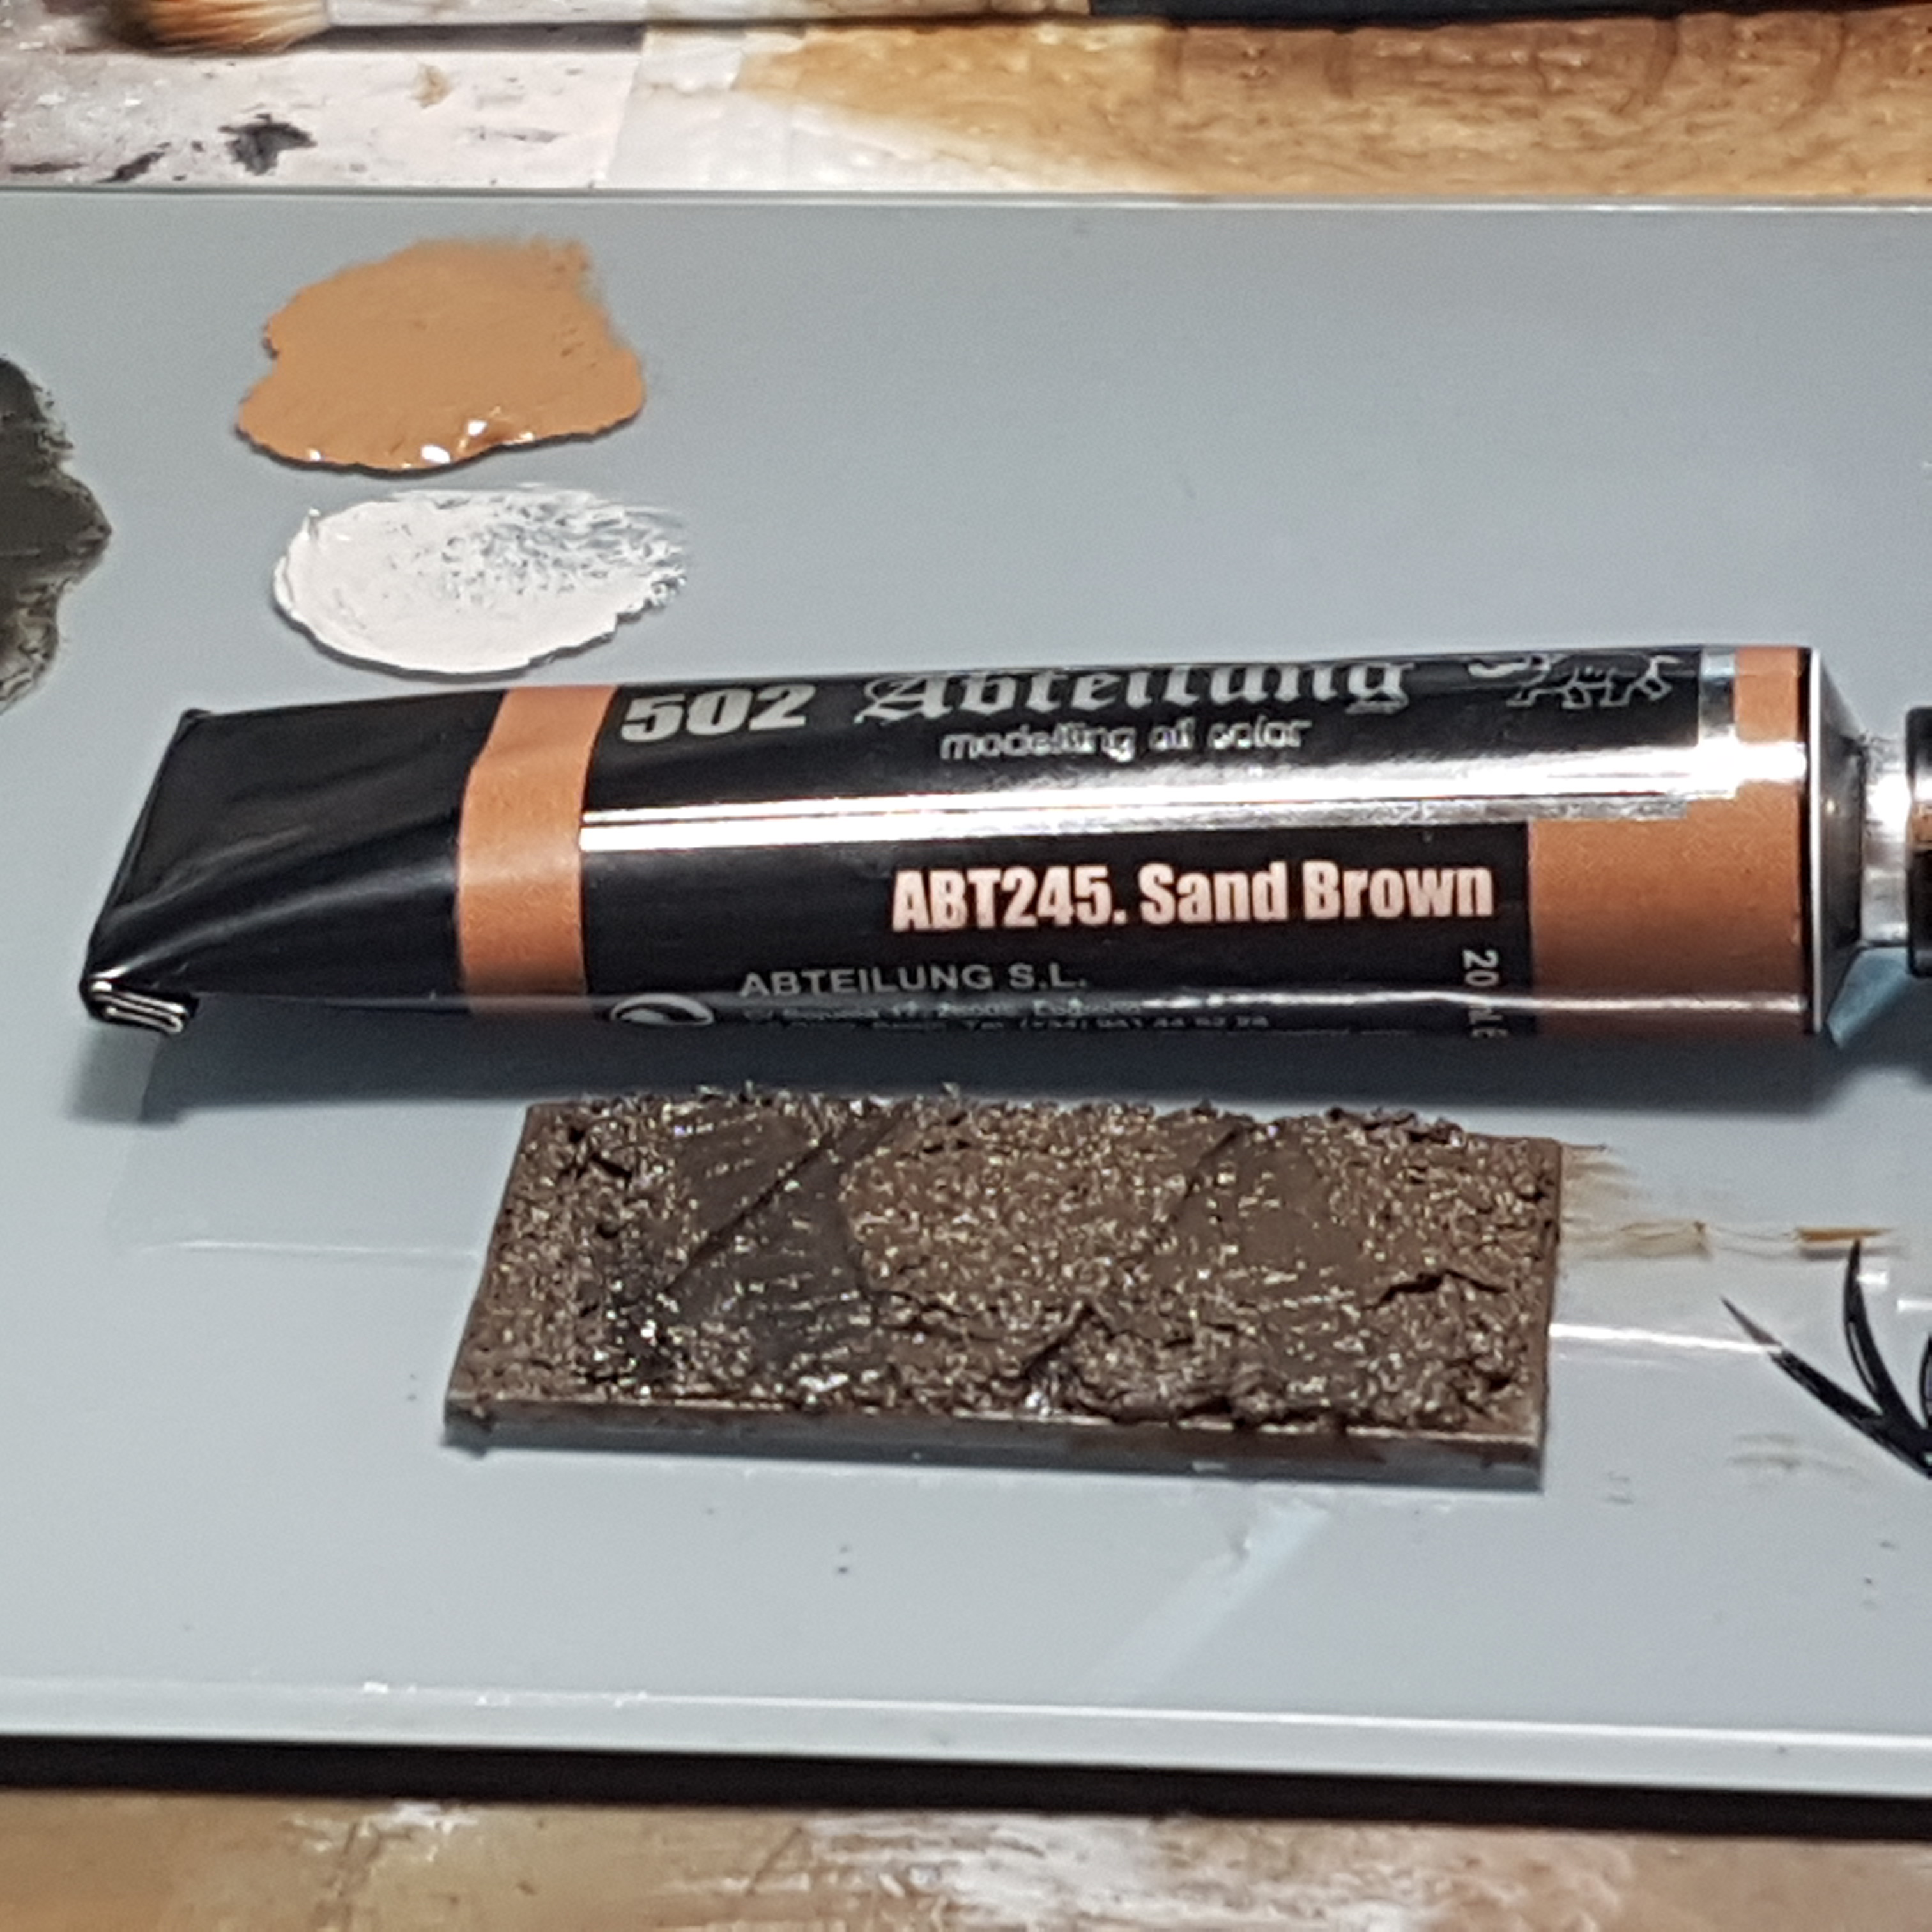
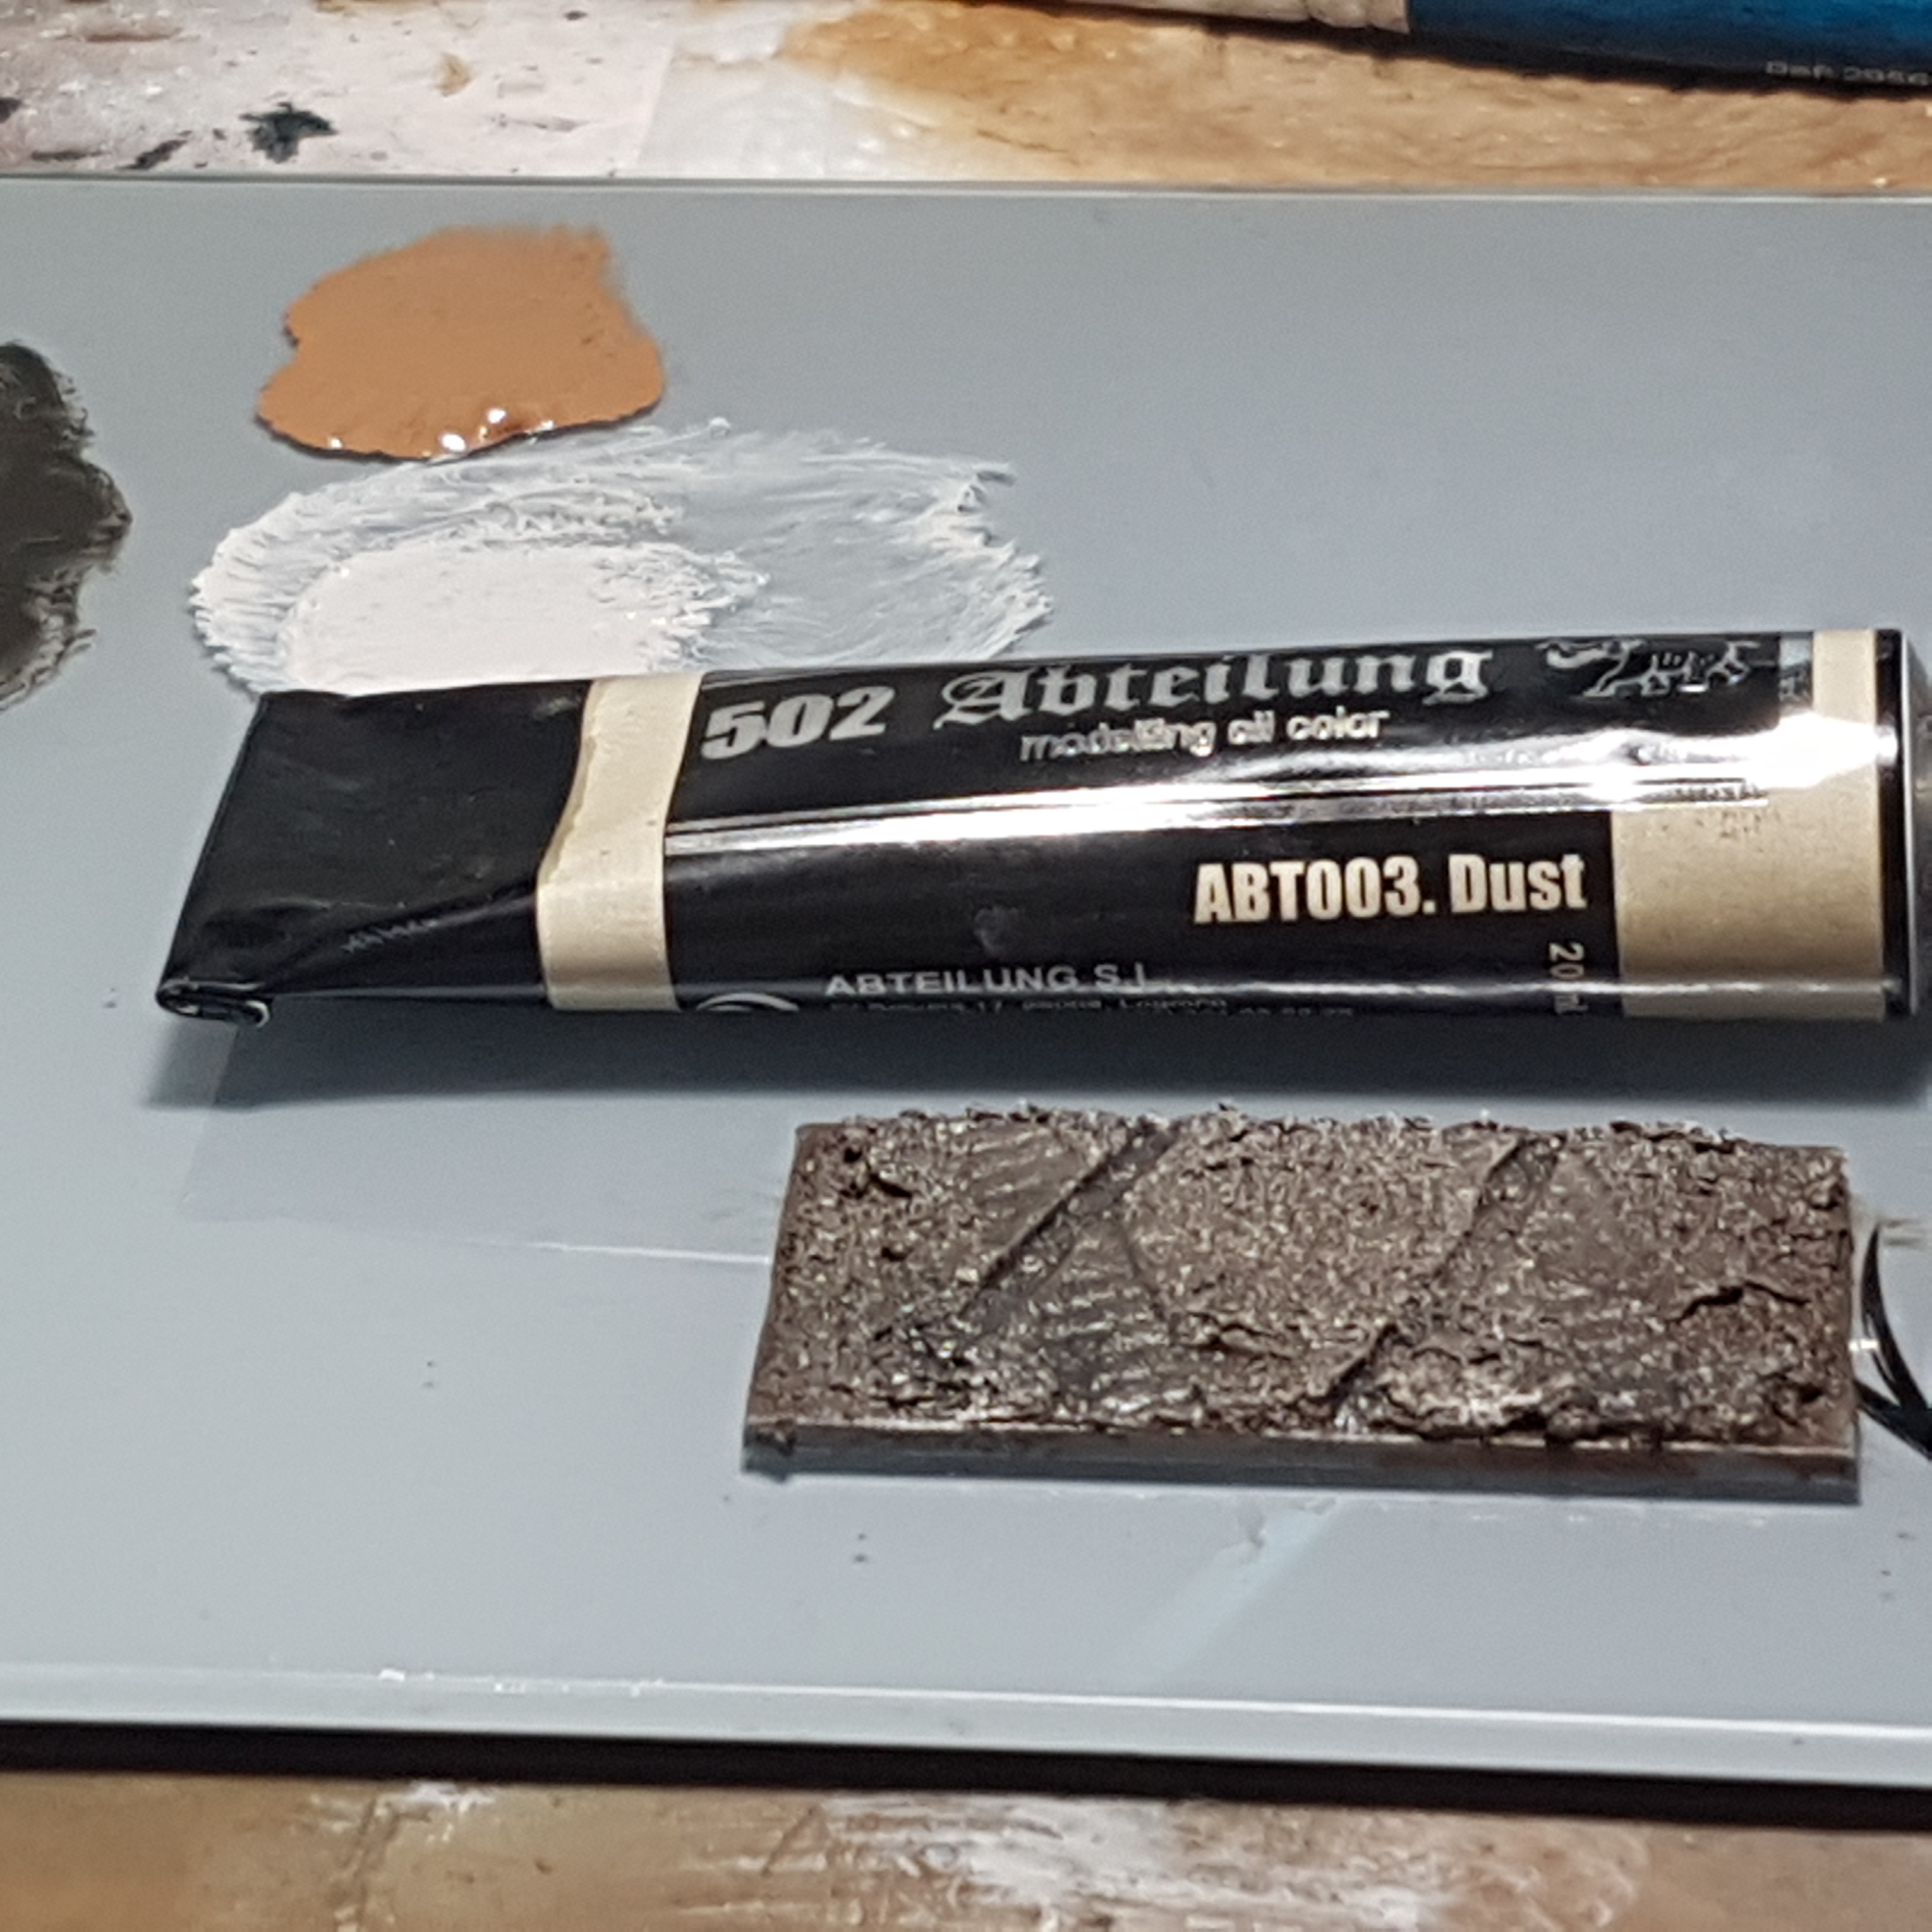
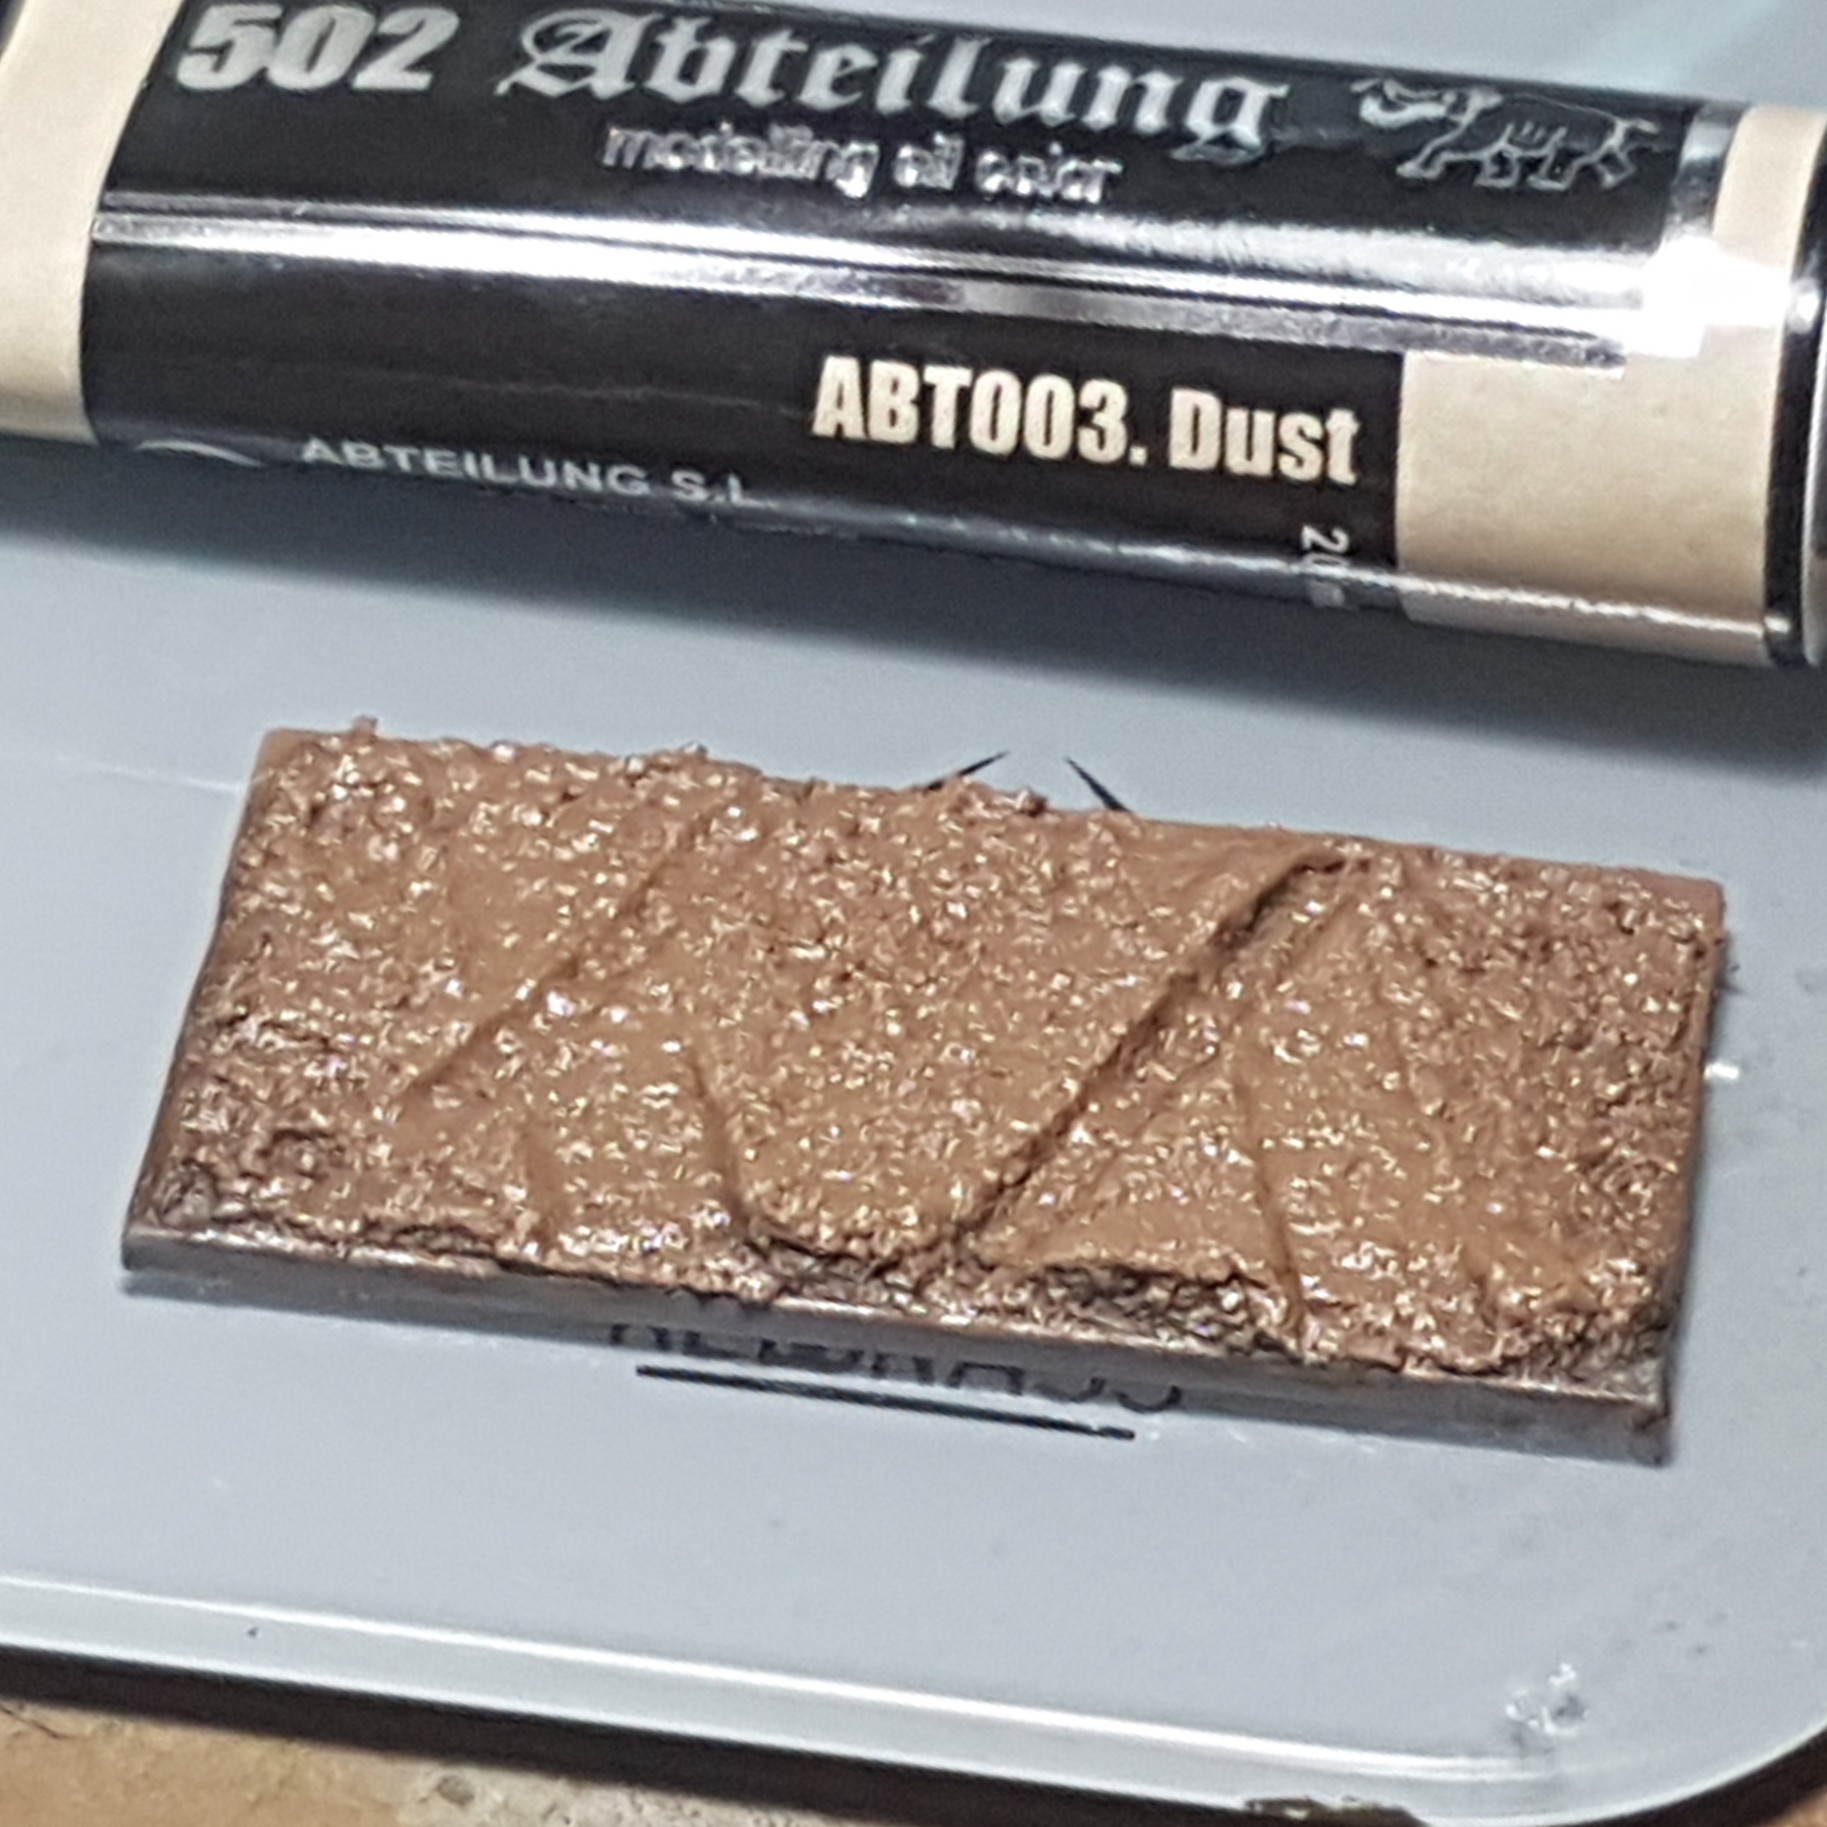
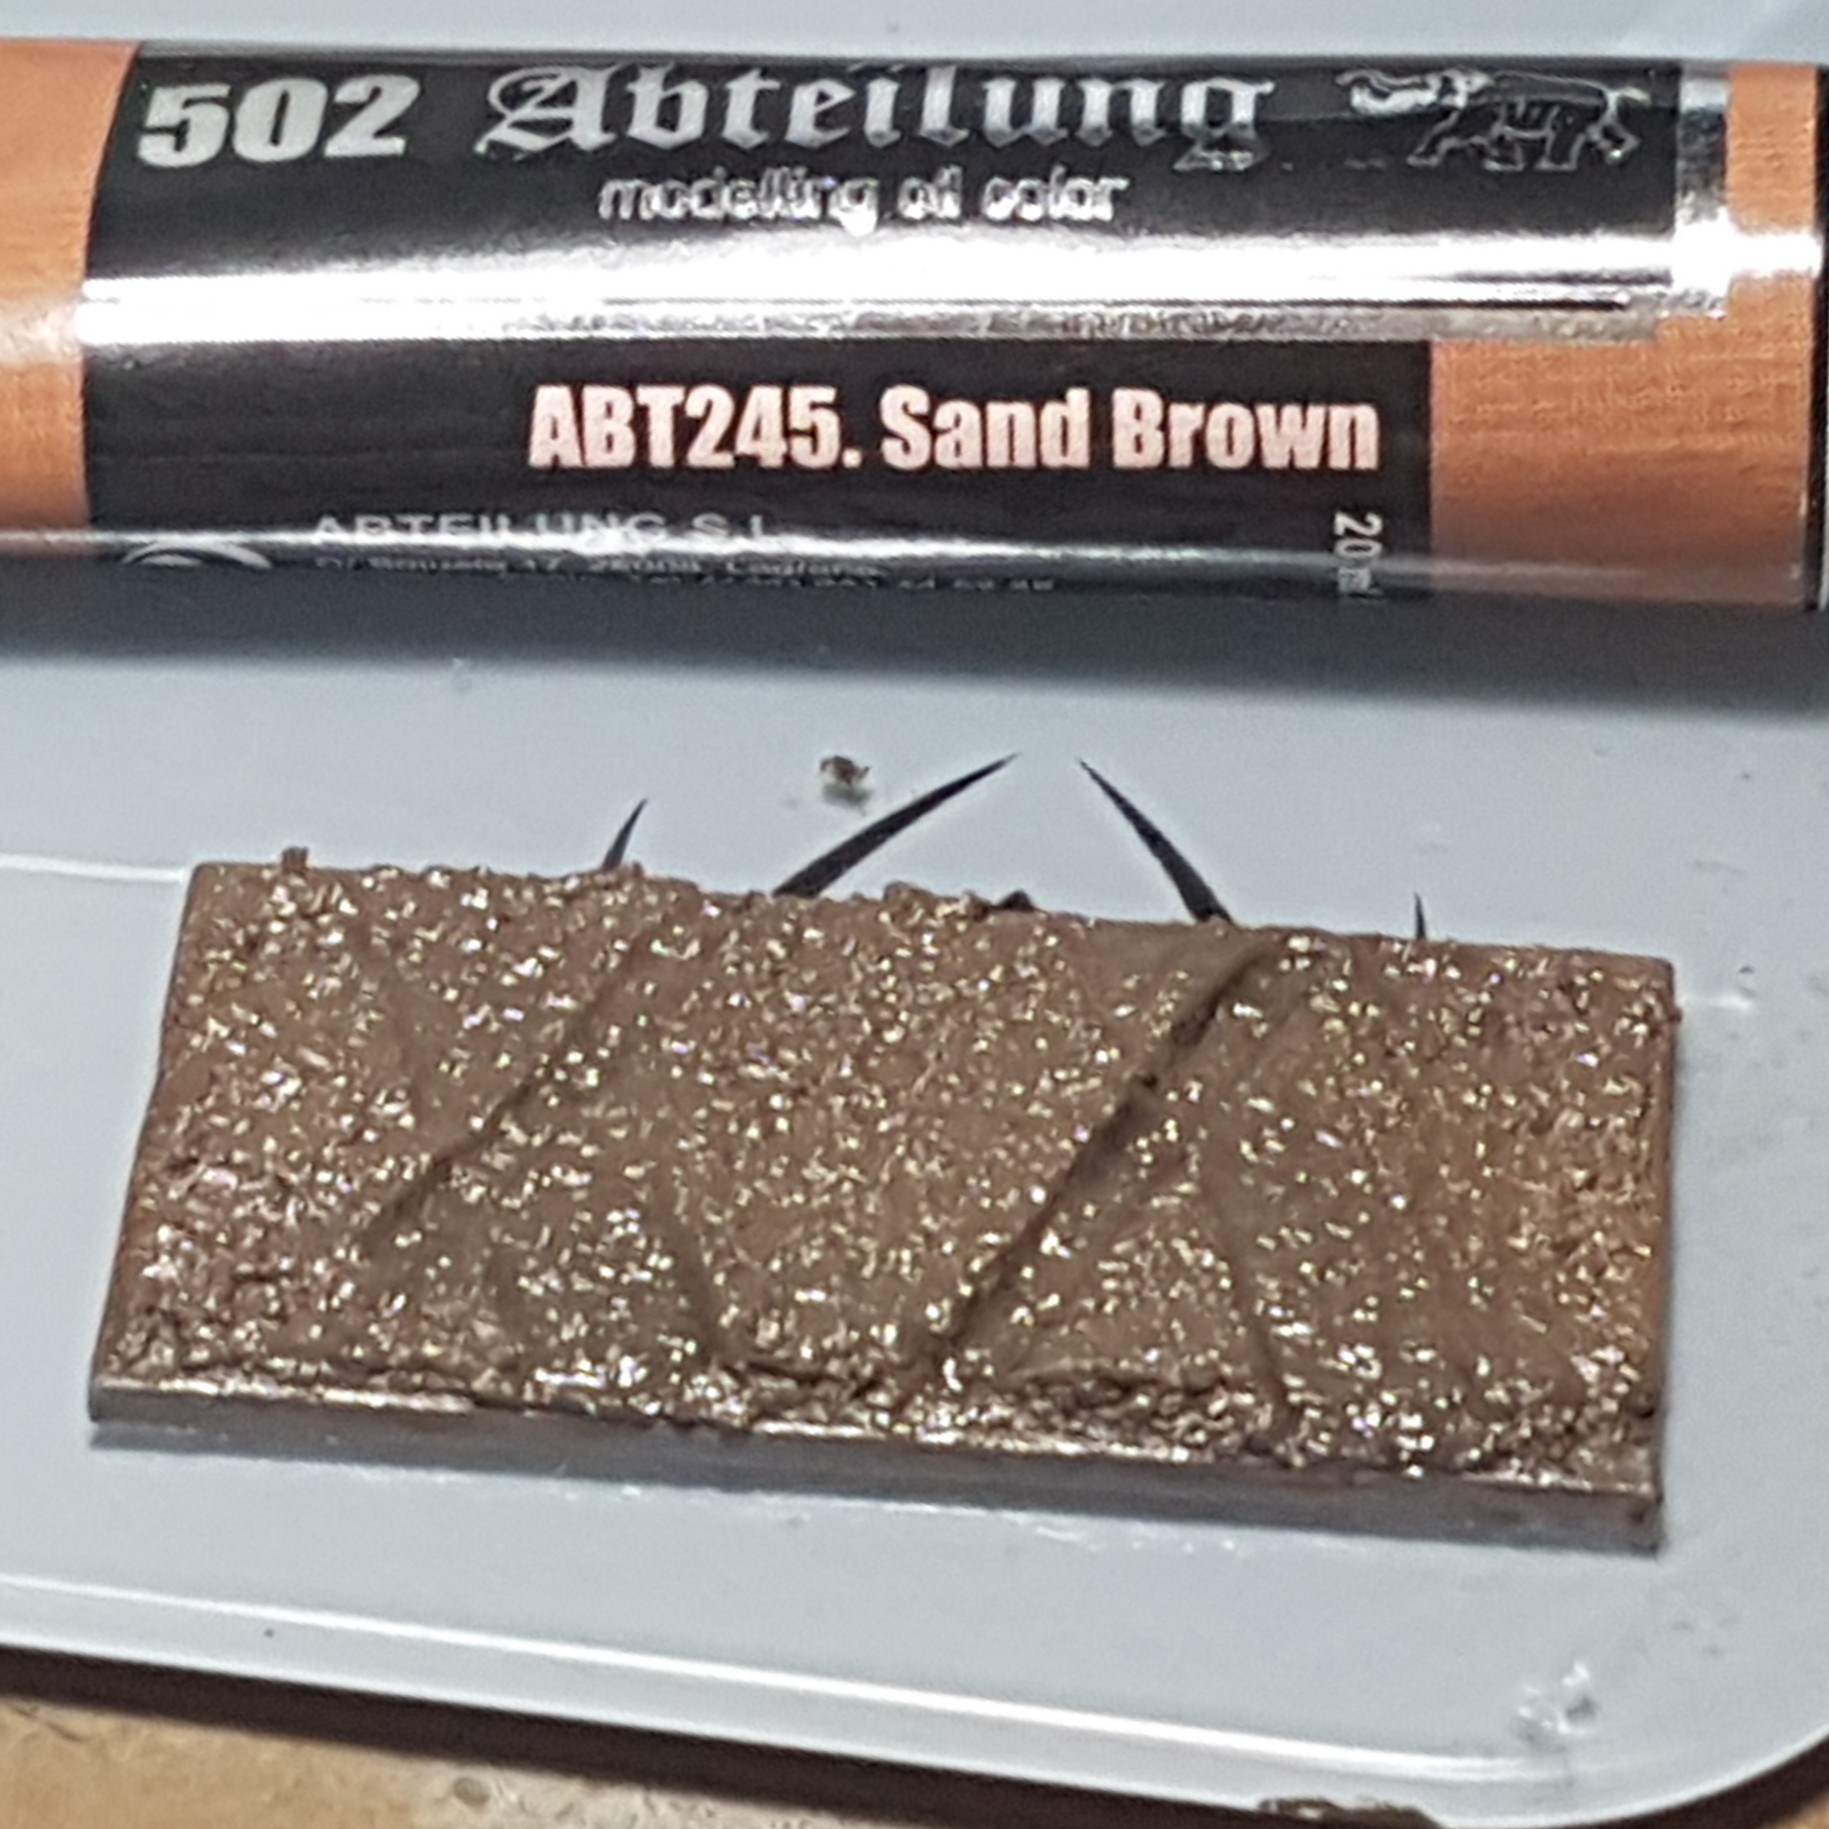
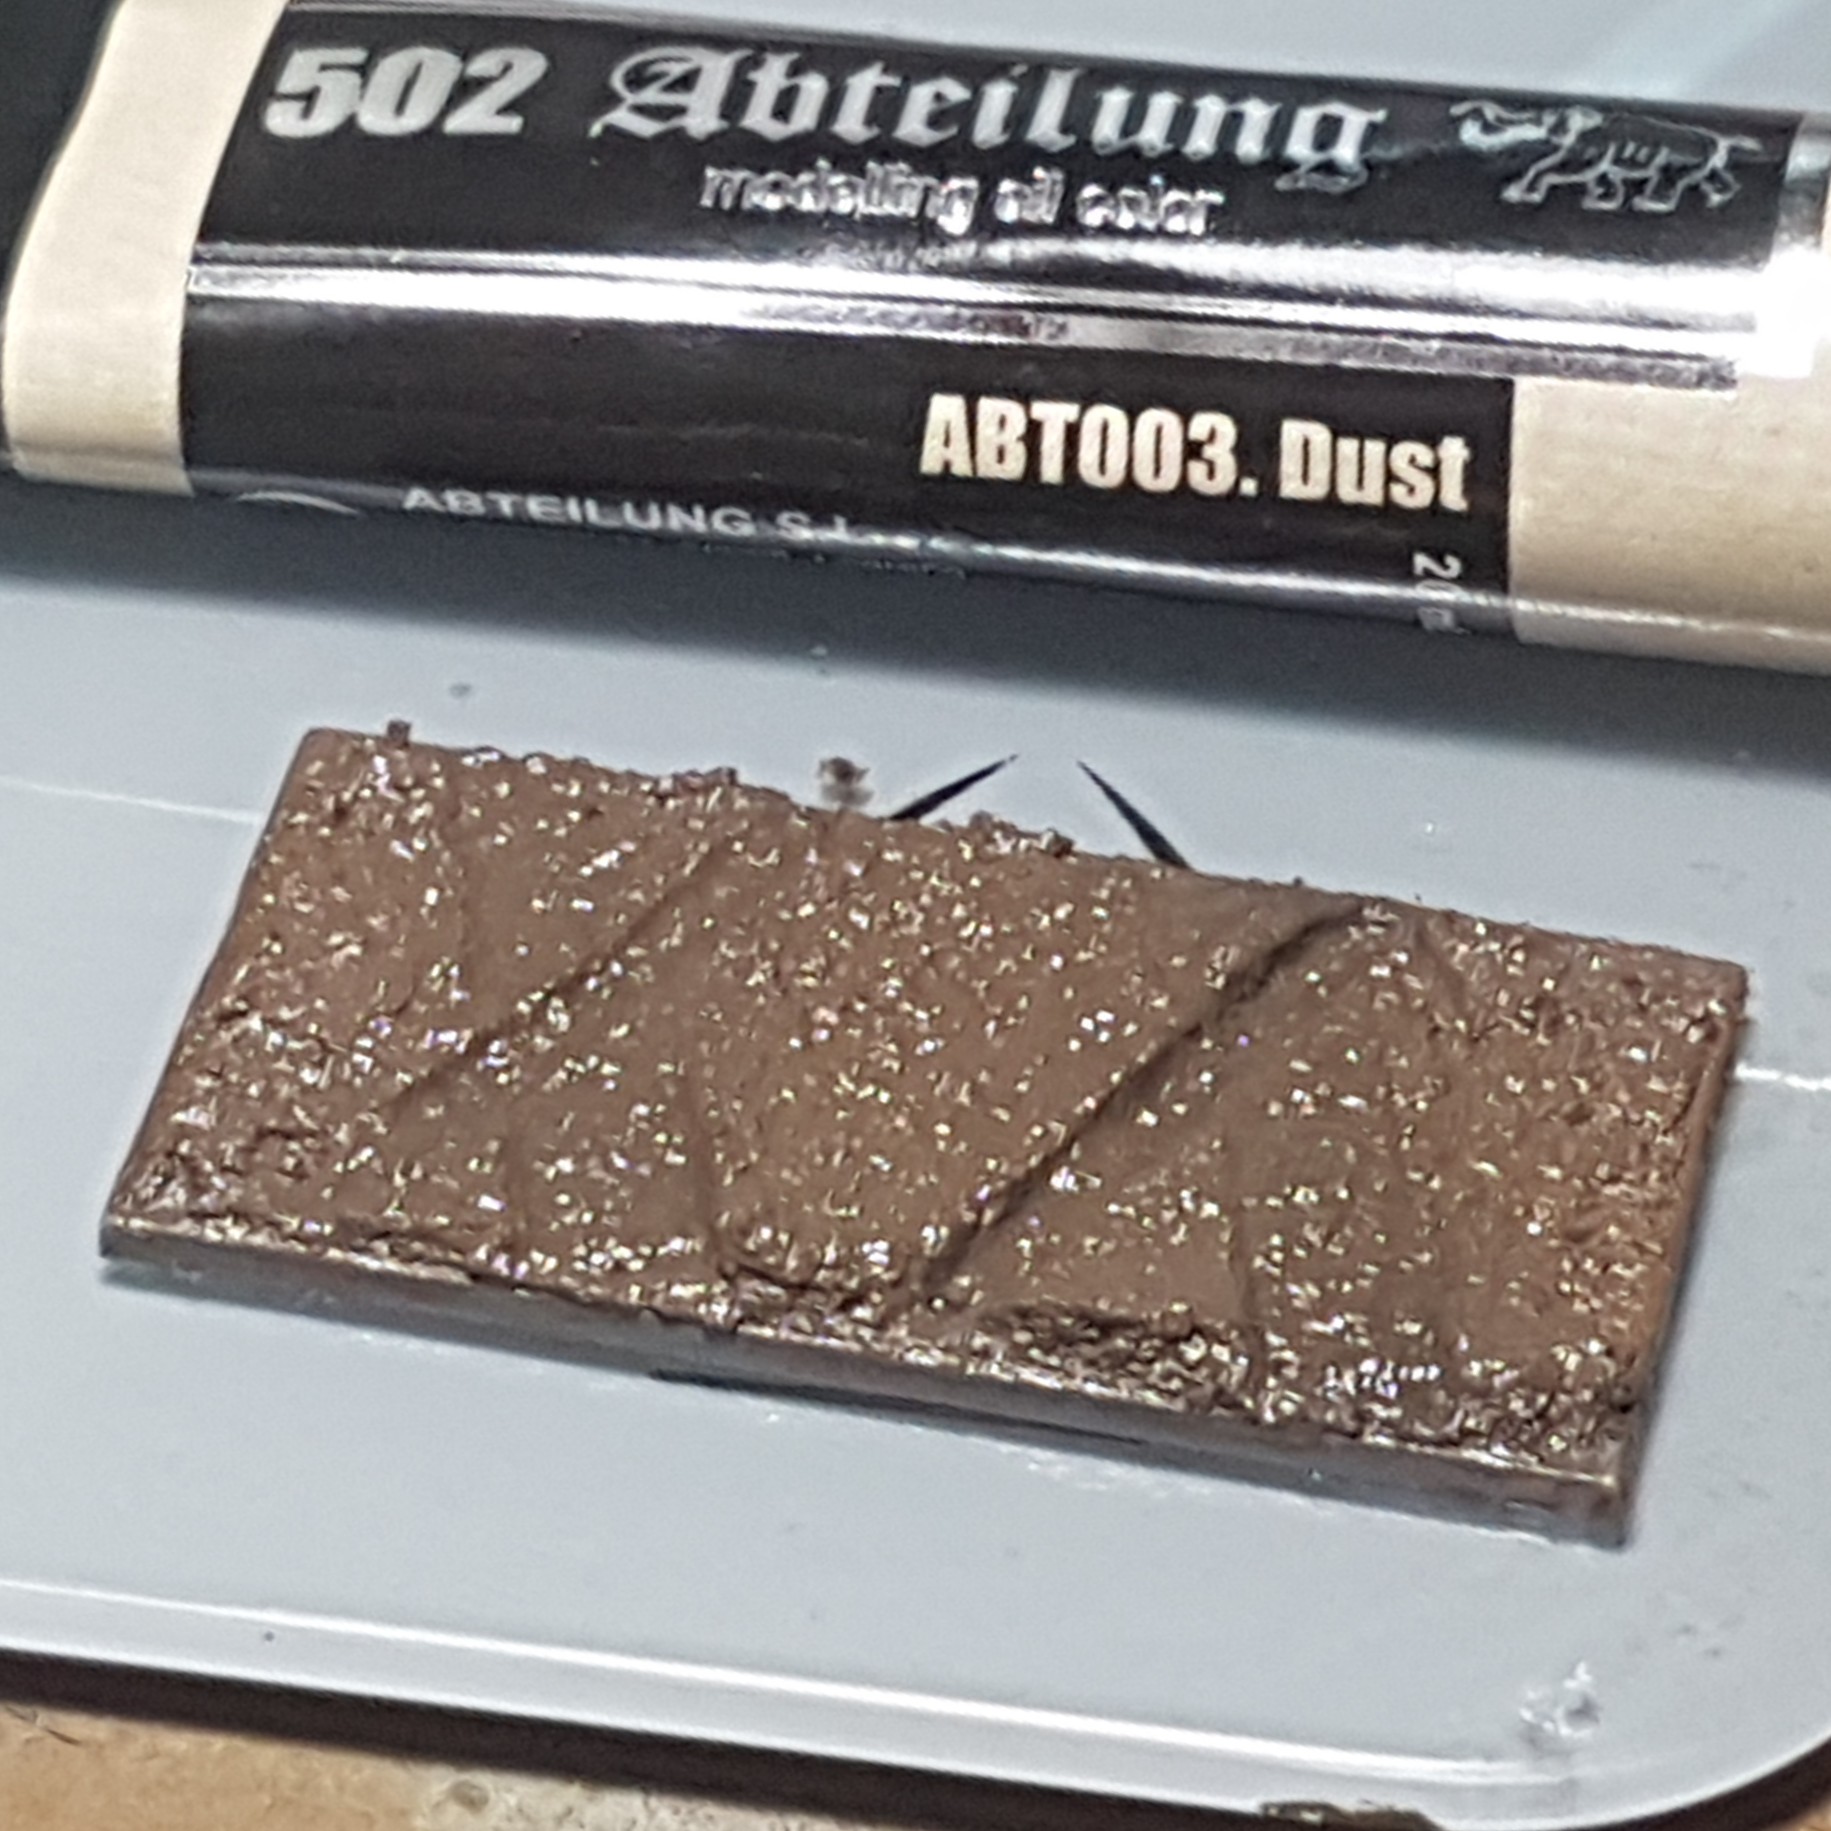
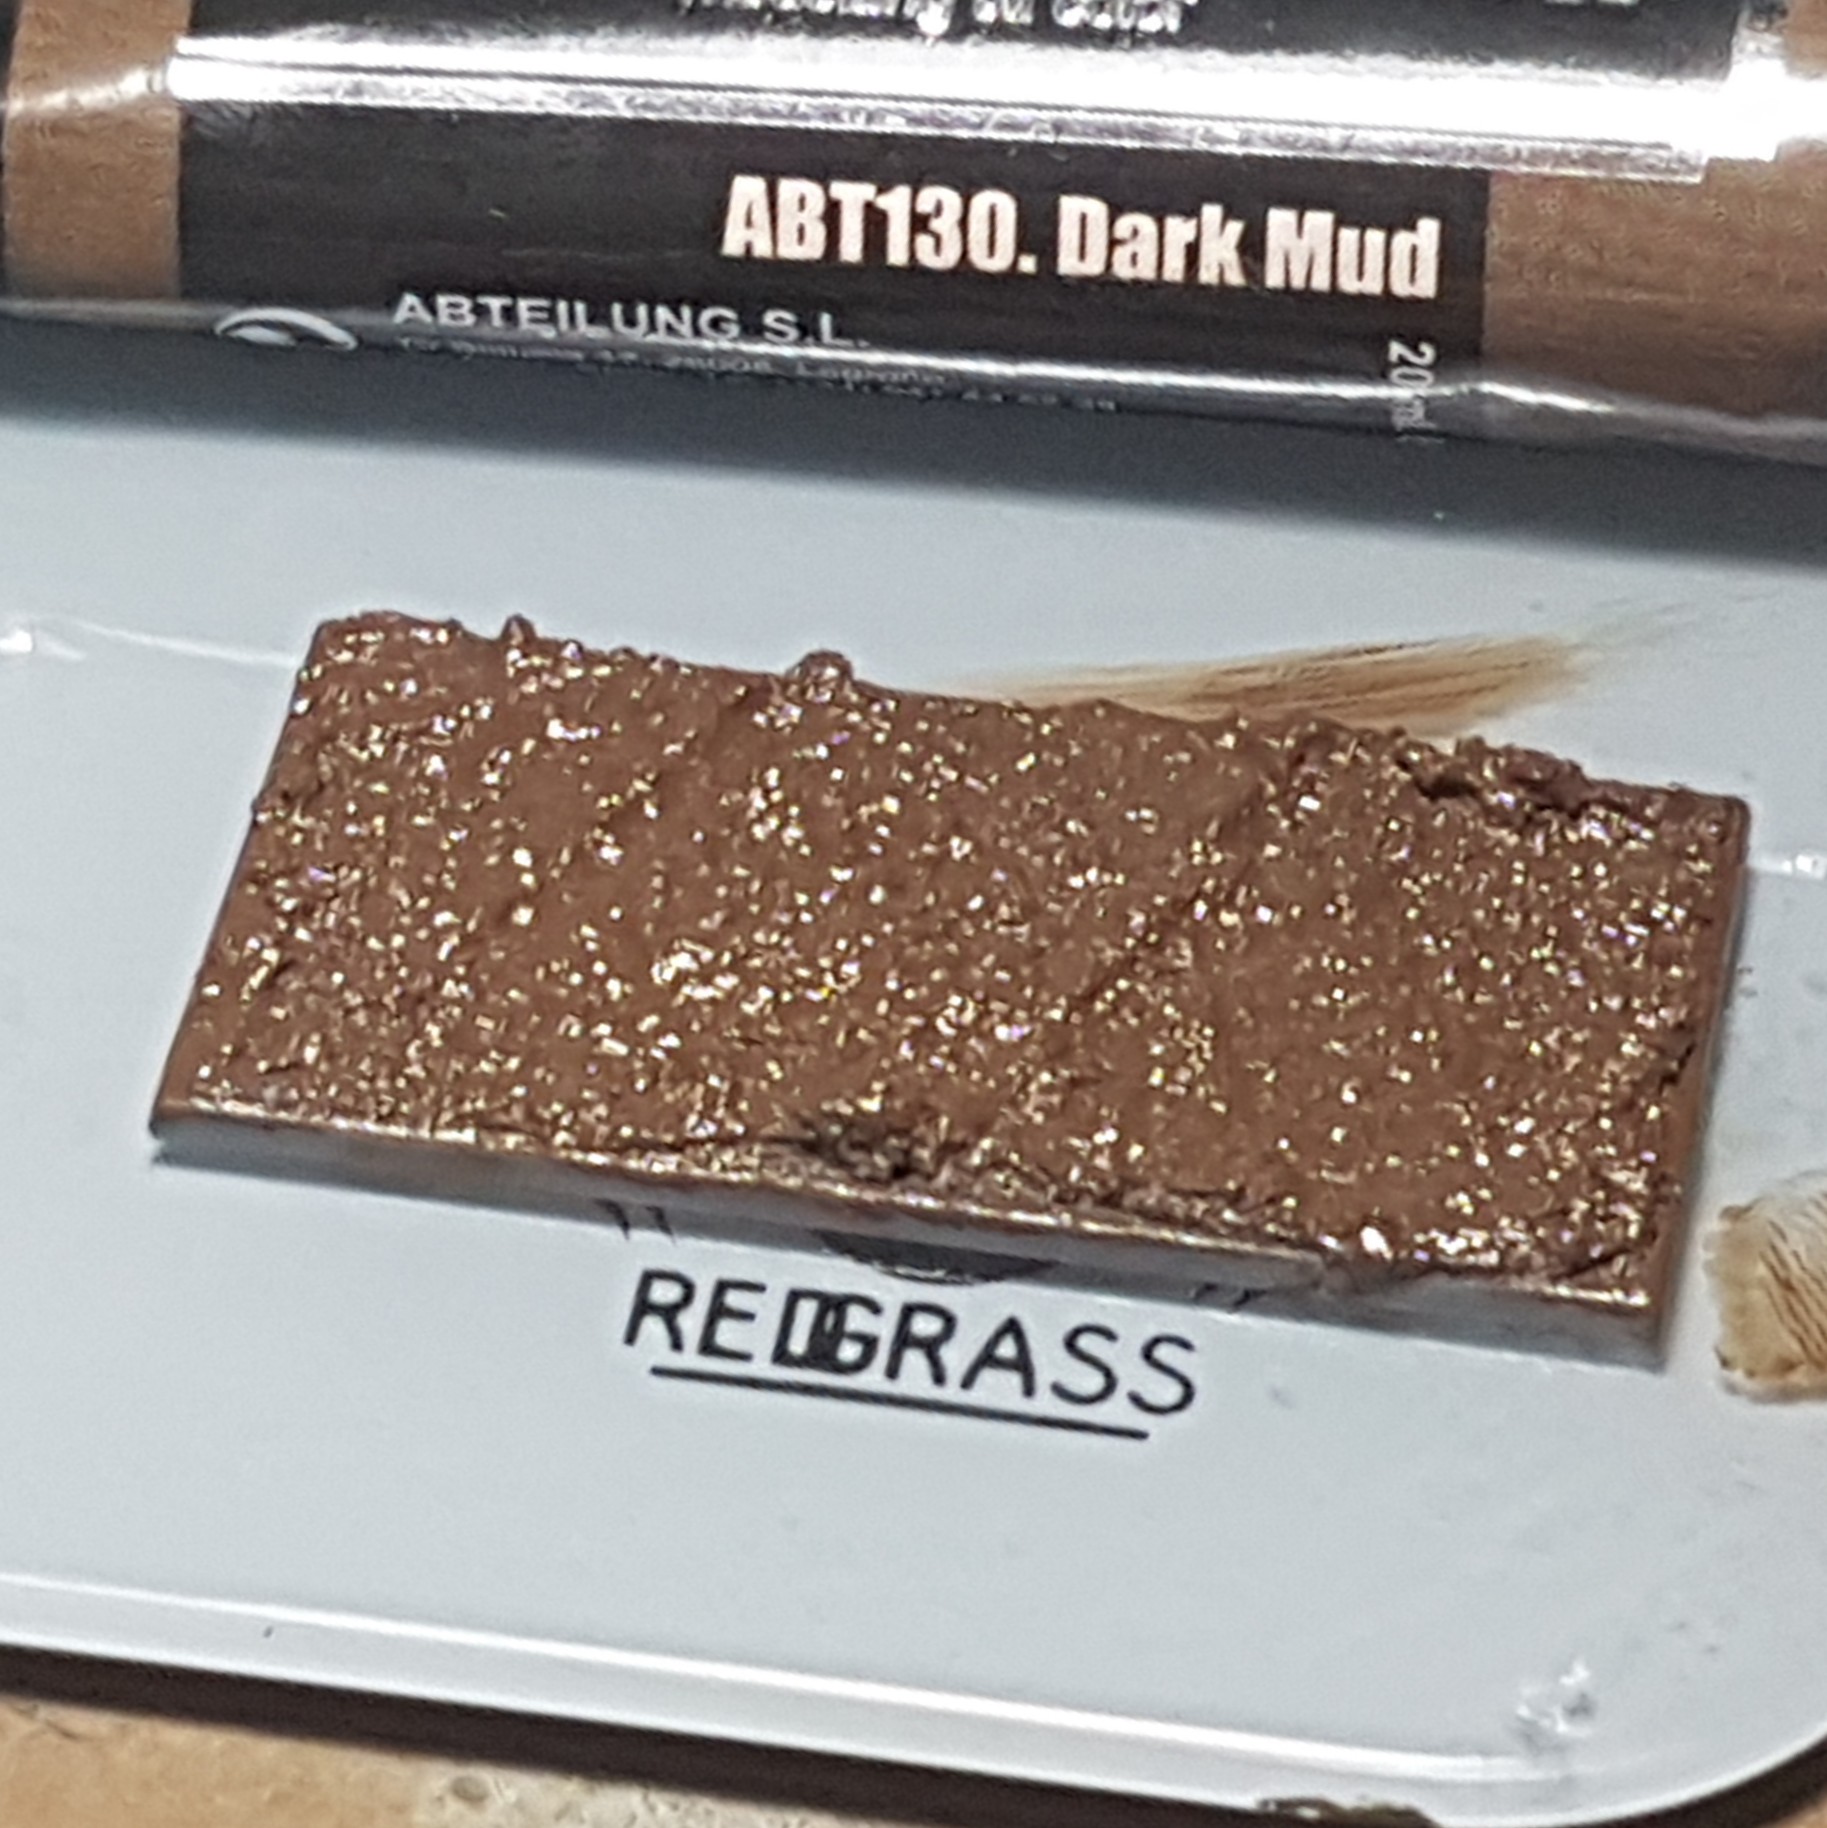
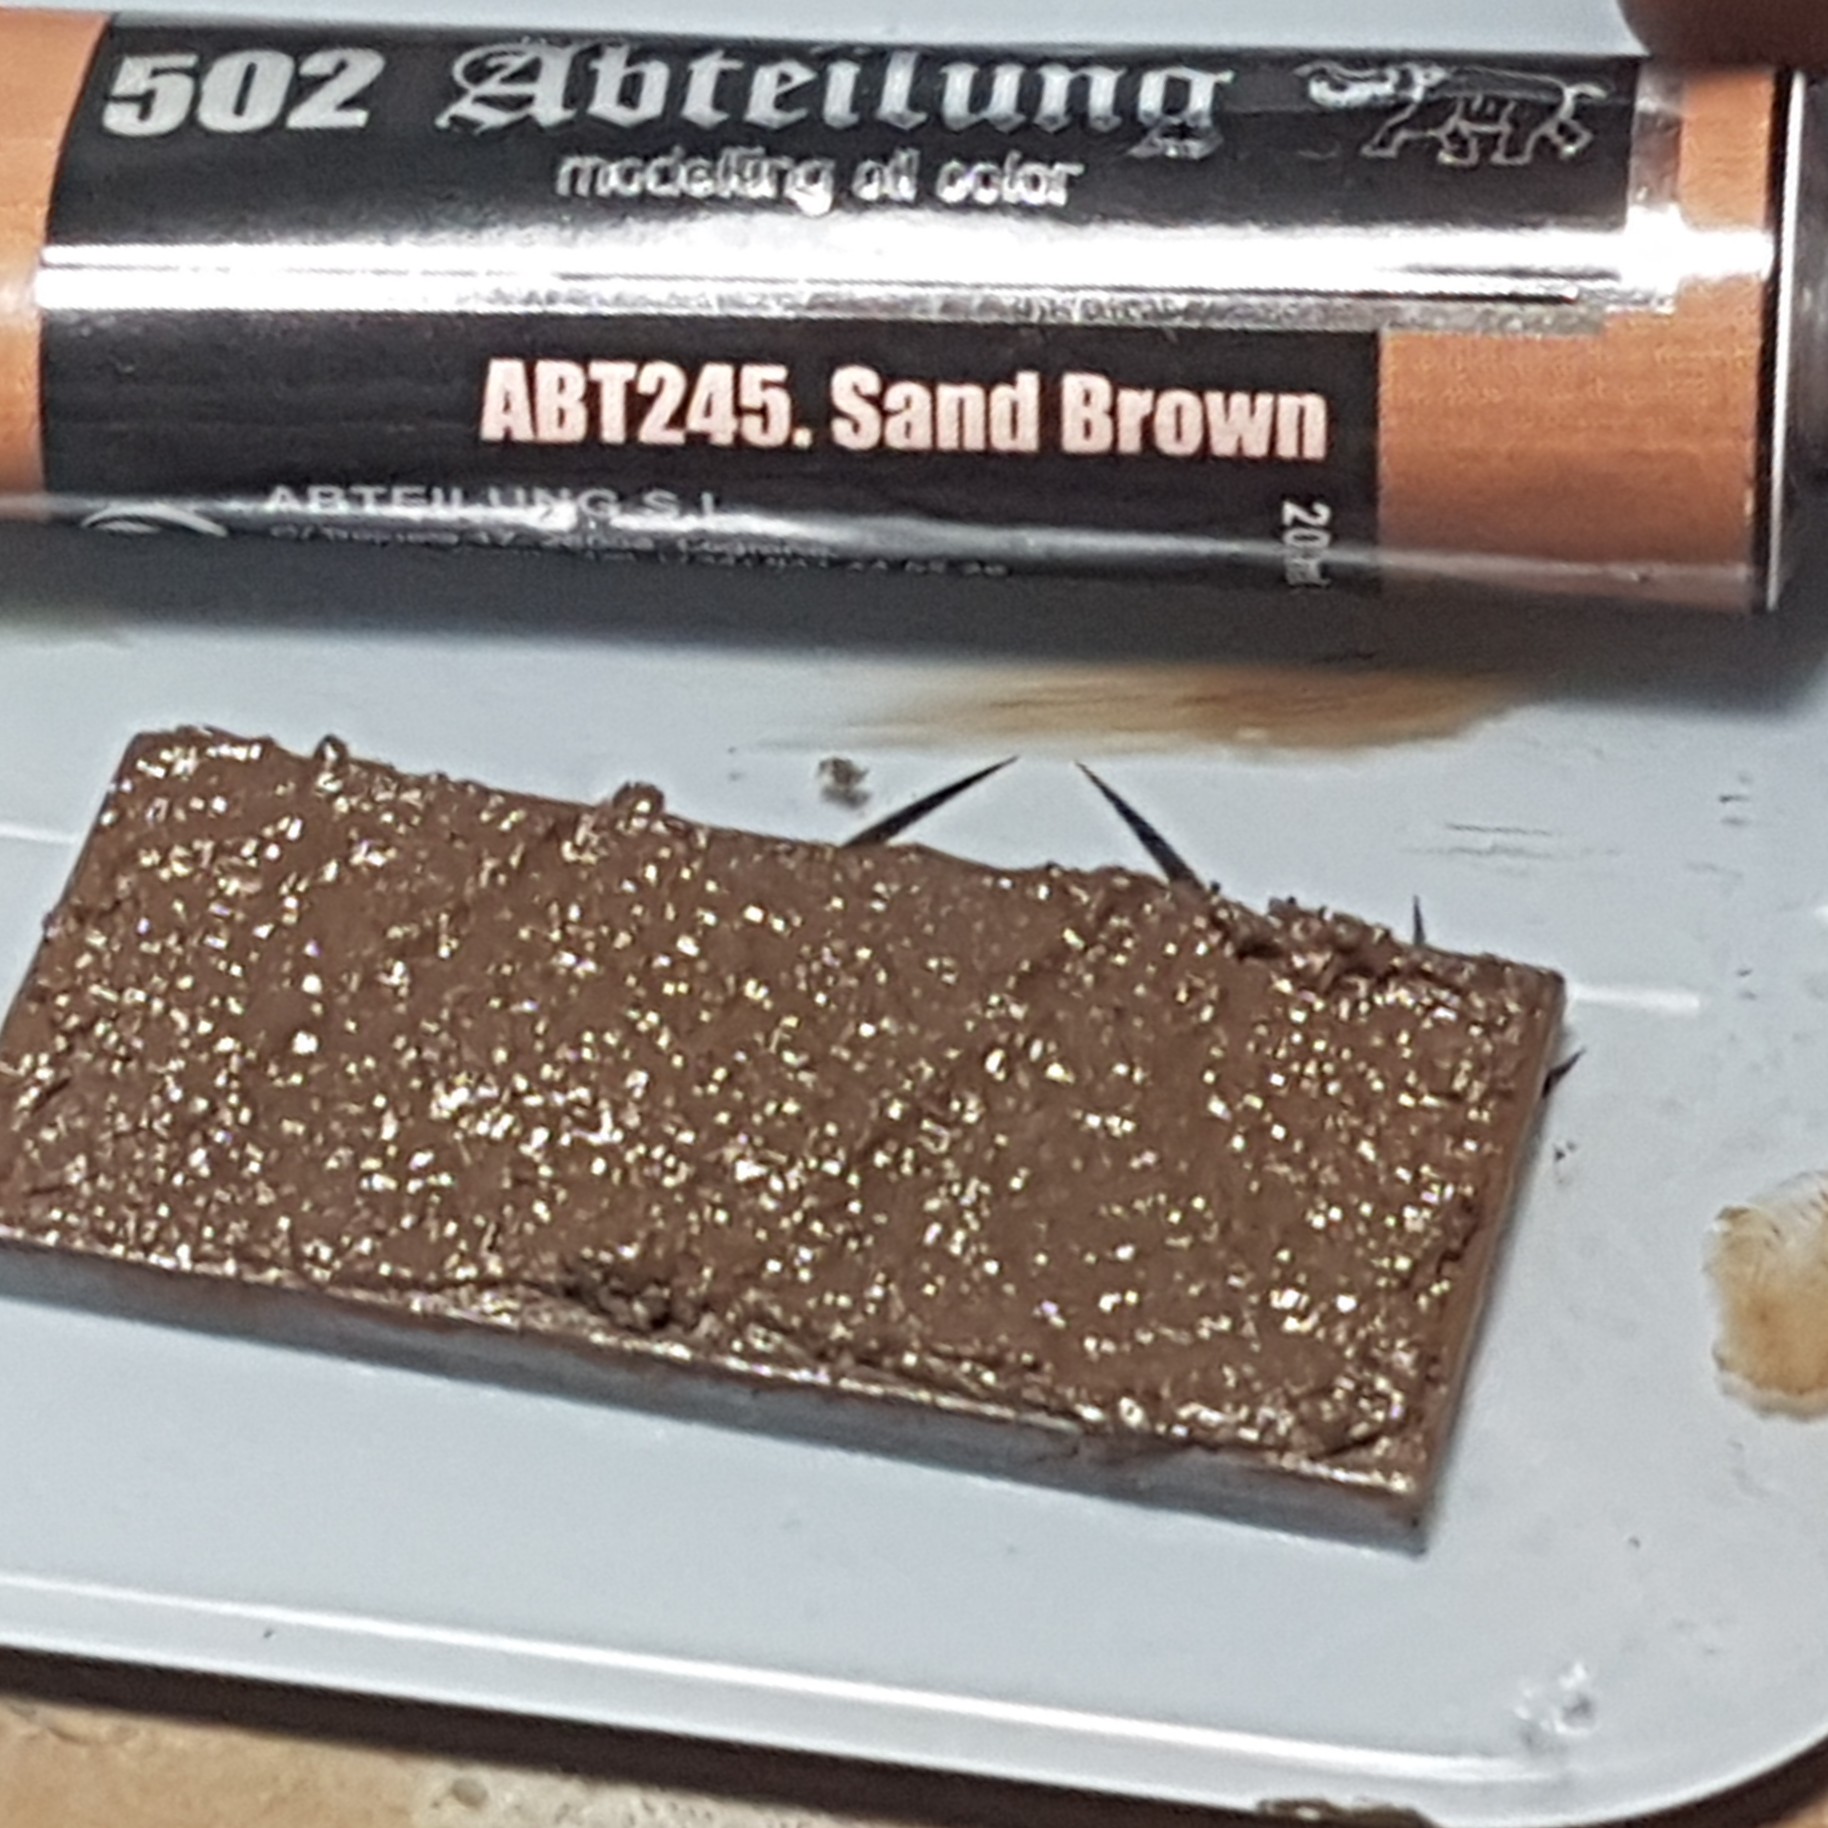
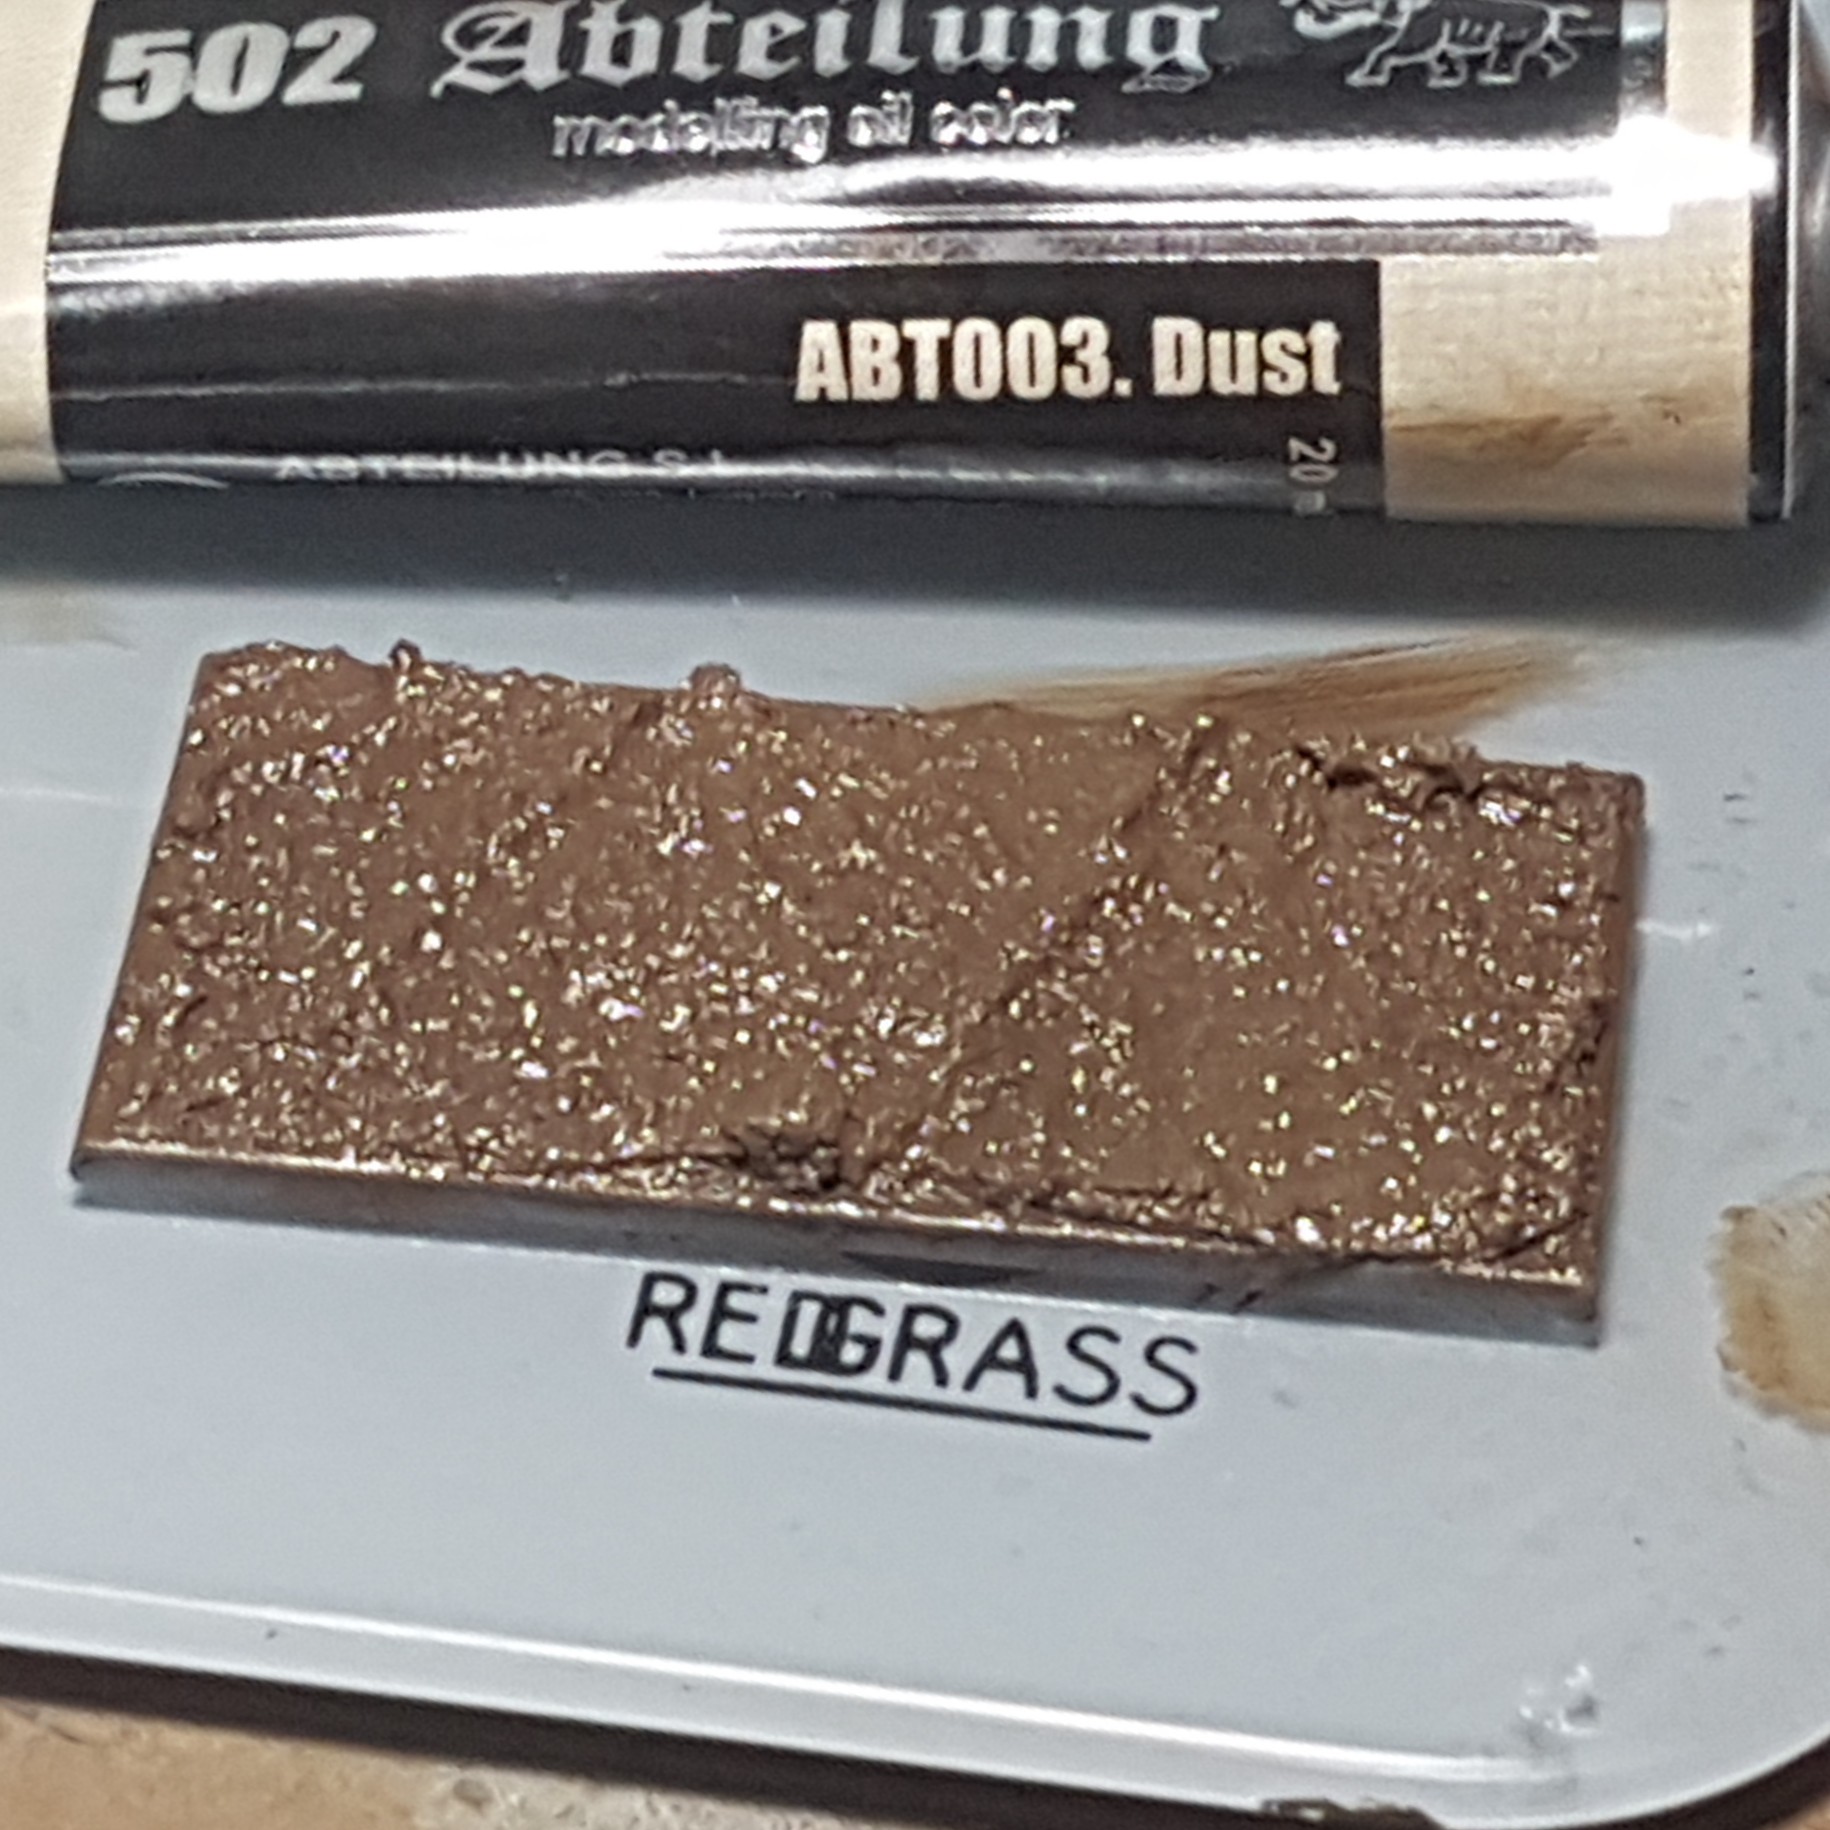
So we start off with a base with AK Interactive Diorama Terrains Muddy Ground (AK8017) over it and tracks marked into them. I then thinned a bit of Abteilung 502 Modelling Oil Color Dark Mud (ABT130) with some white spirit to help it dry quicker. I accidentally thinned it a bit too much which will be a blessing in disguise I will come to with base 12. So I grabbed my hairdryer and dried it out a bit. Then I thinned some Abteilung 502 Modelling Oil Color Shadow Brown (ABT015) to a wash consistency with some white spirit and put that in the tracks. I then put over a drybrush of Abteilung 502 Modelling Oil Color Sand Brown (ABT245) followed by a lighter drybrush of Abteilung 502 Modelling Oil Color Dust (ABT003).

Base 12
So a similar base as before to start with, but this time I thinned some Abteilung 502 Modelling Oil Color Dark Mud (ABT130) to a wash consistency and applied that to the base. I then dried off the white spirit with my hairdryer. Then I went in with the wash of Abteilung 502 Modelling Oil Color Shadow Brown (ABT015) in the tracks and dried that off with my hairdryer as well. I then followed that up with the drybrush of Abteilung 502 Modelling Oil Color Sand Brown (ABT245) followed by a lighter drybrush of Abteilung 502 Modelling Oil Color Dust (ABT003) to get this result.
Some pictures of this process are sadly missing as I may have forgotten to take them….

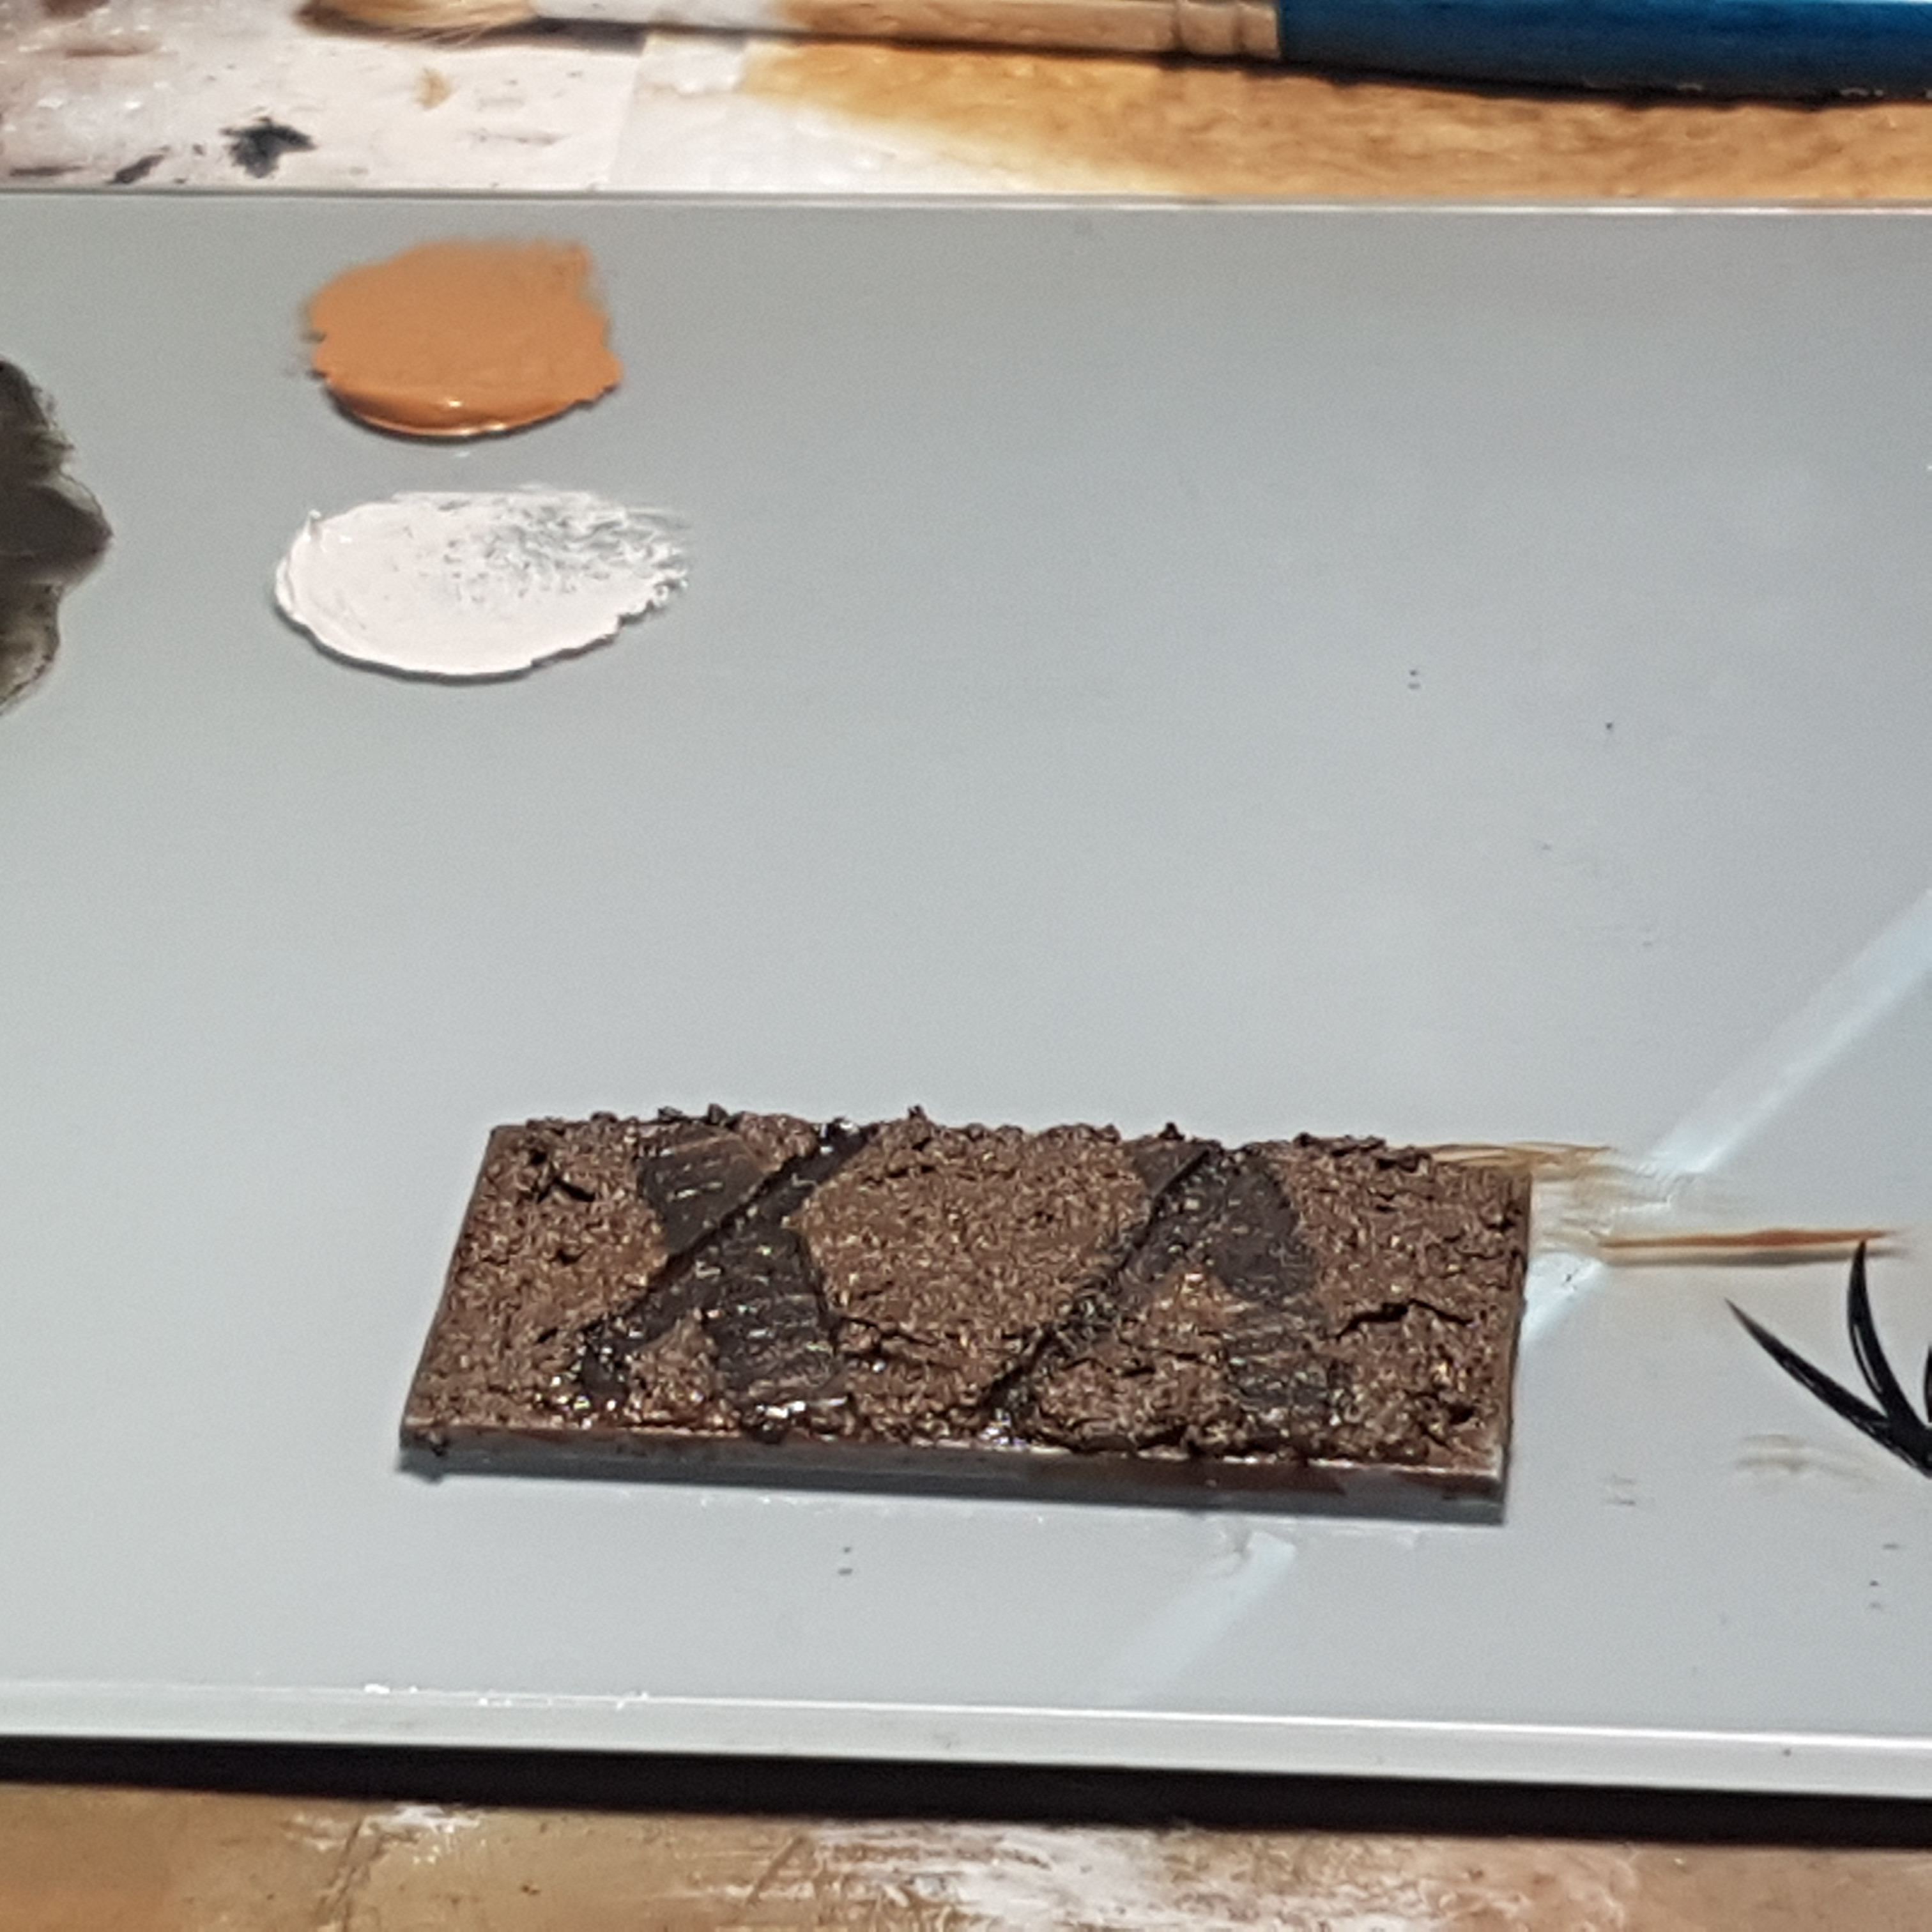
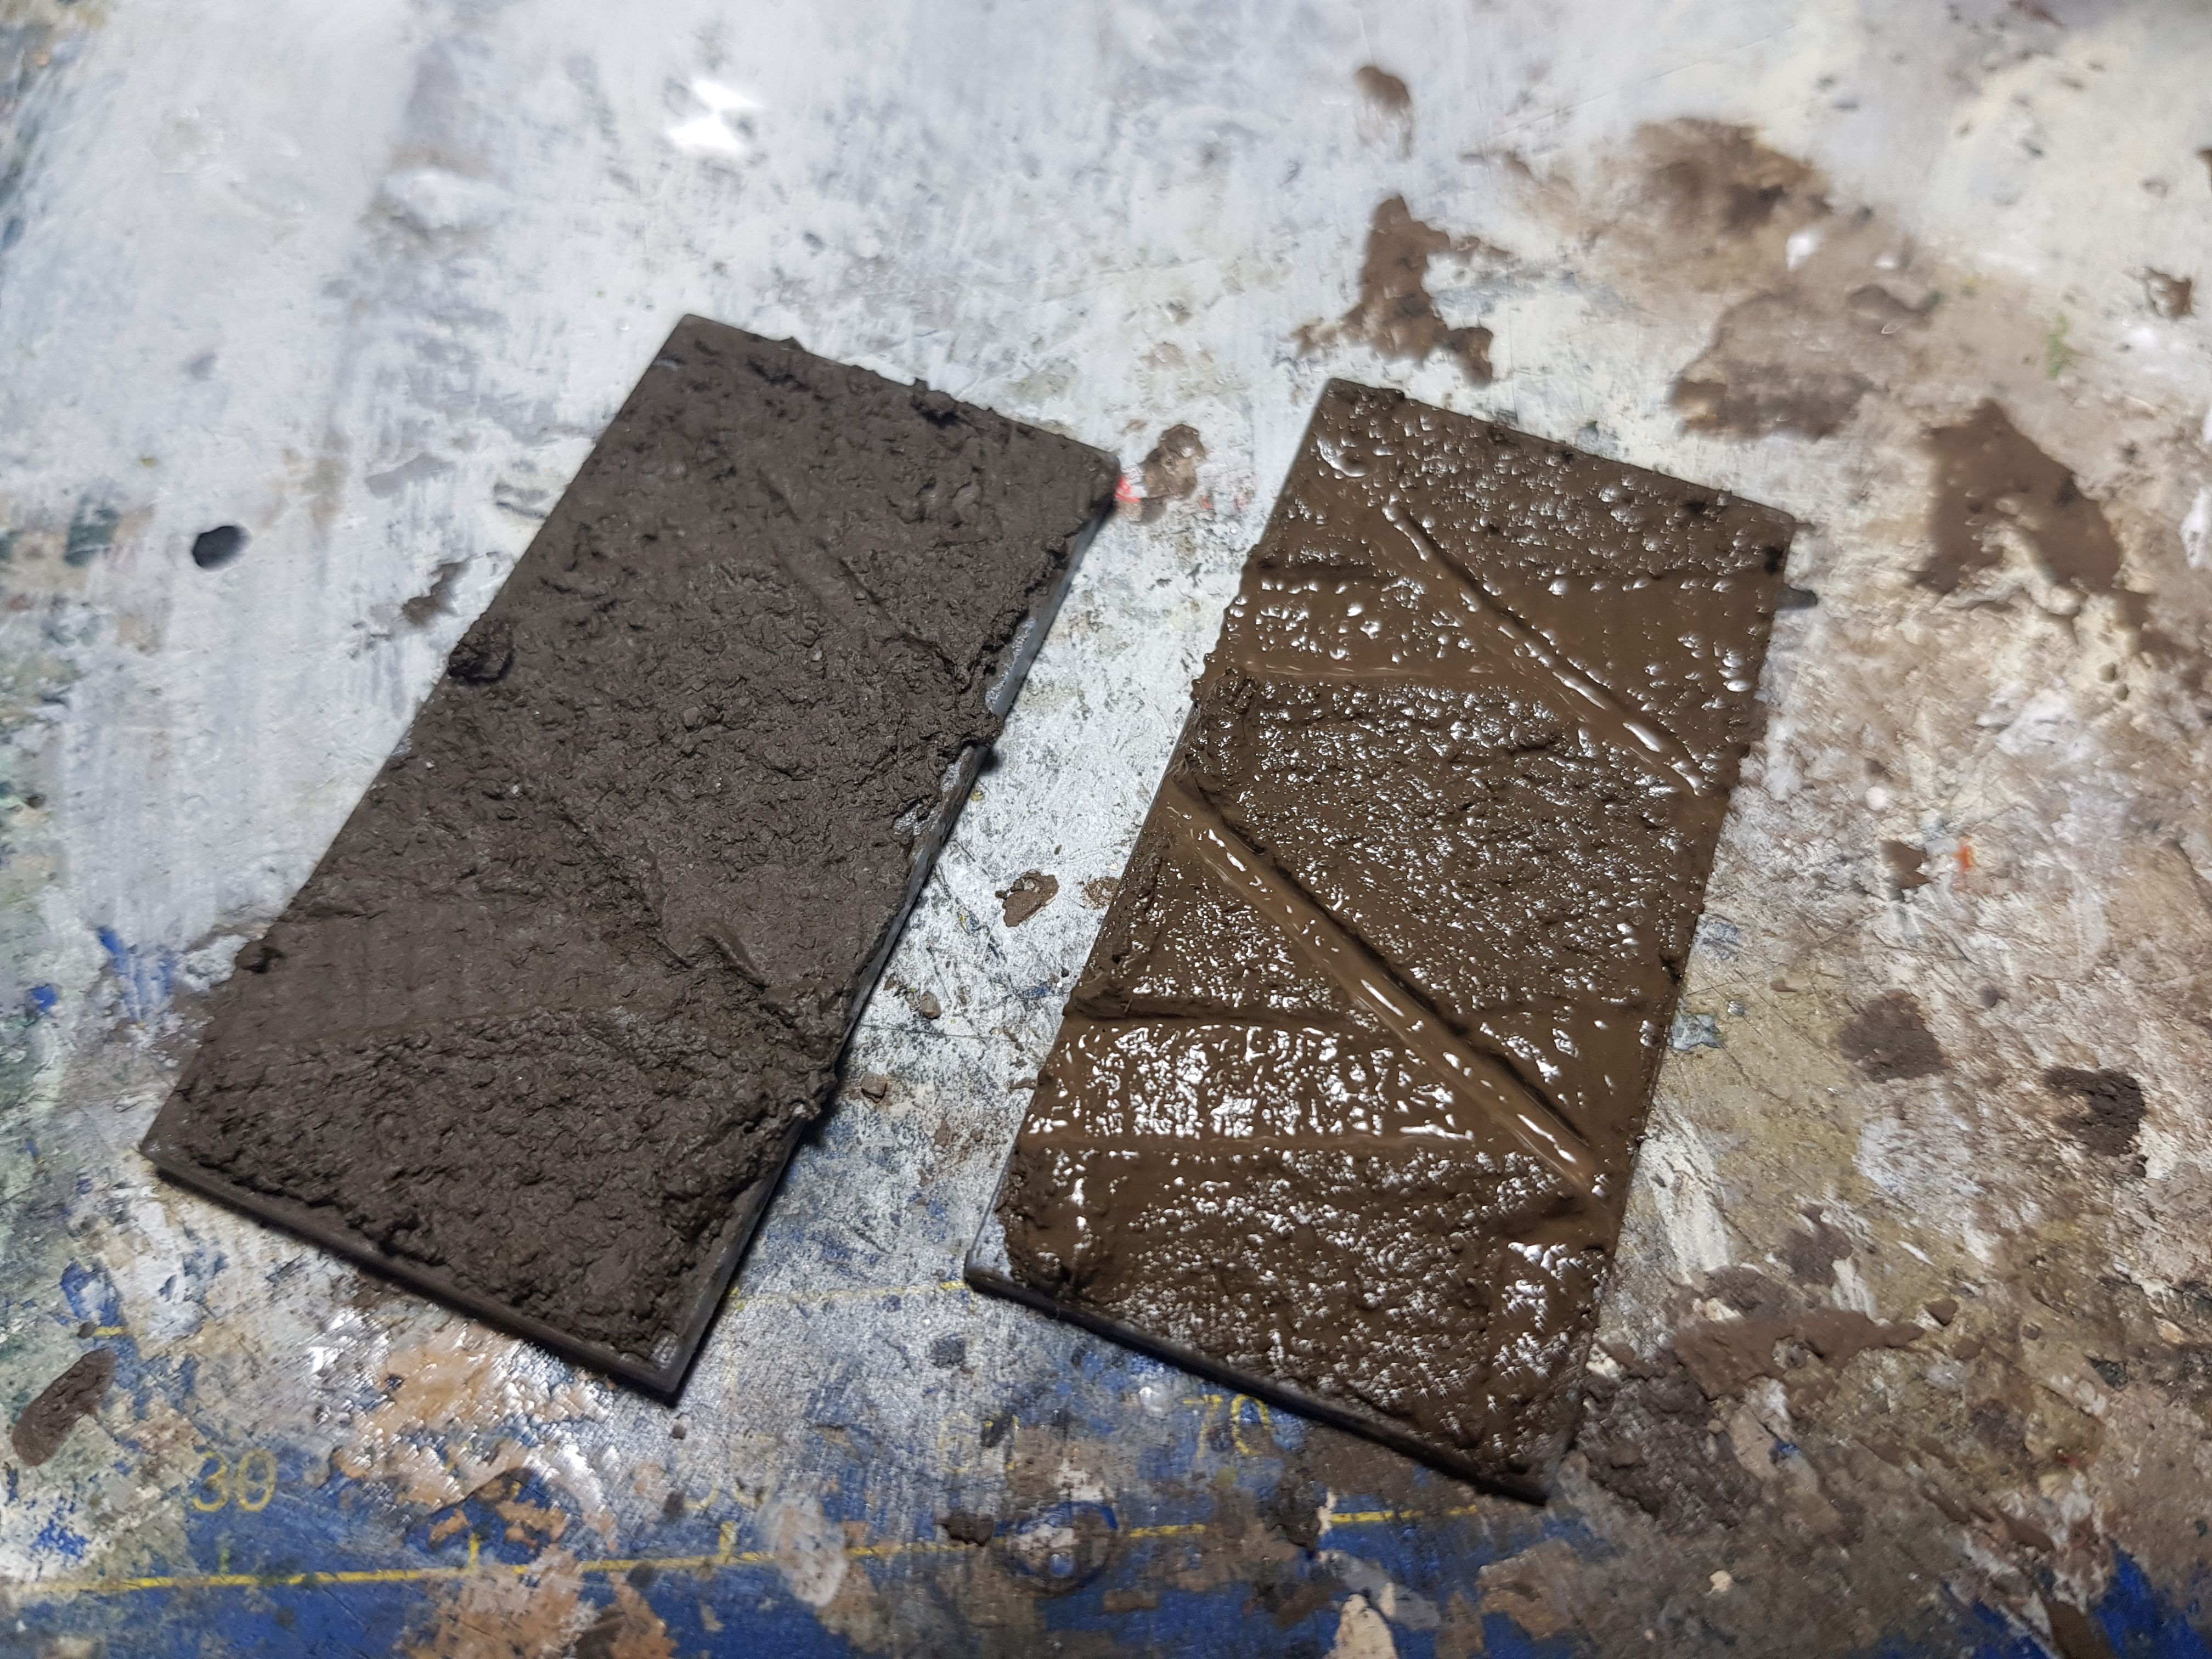
And thus base 12 (right) is finally the result I was looking for all this time, quite happy I finally found it. Now I am going to let this dry and see what else I am going to add to the base as a final process.
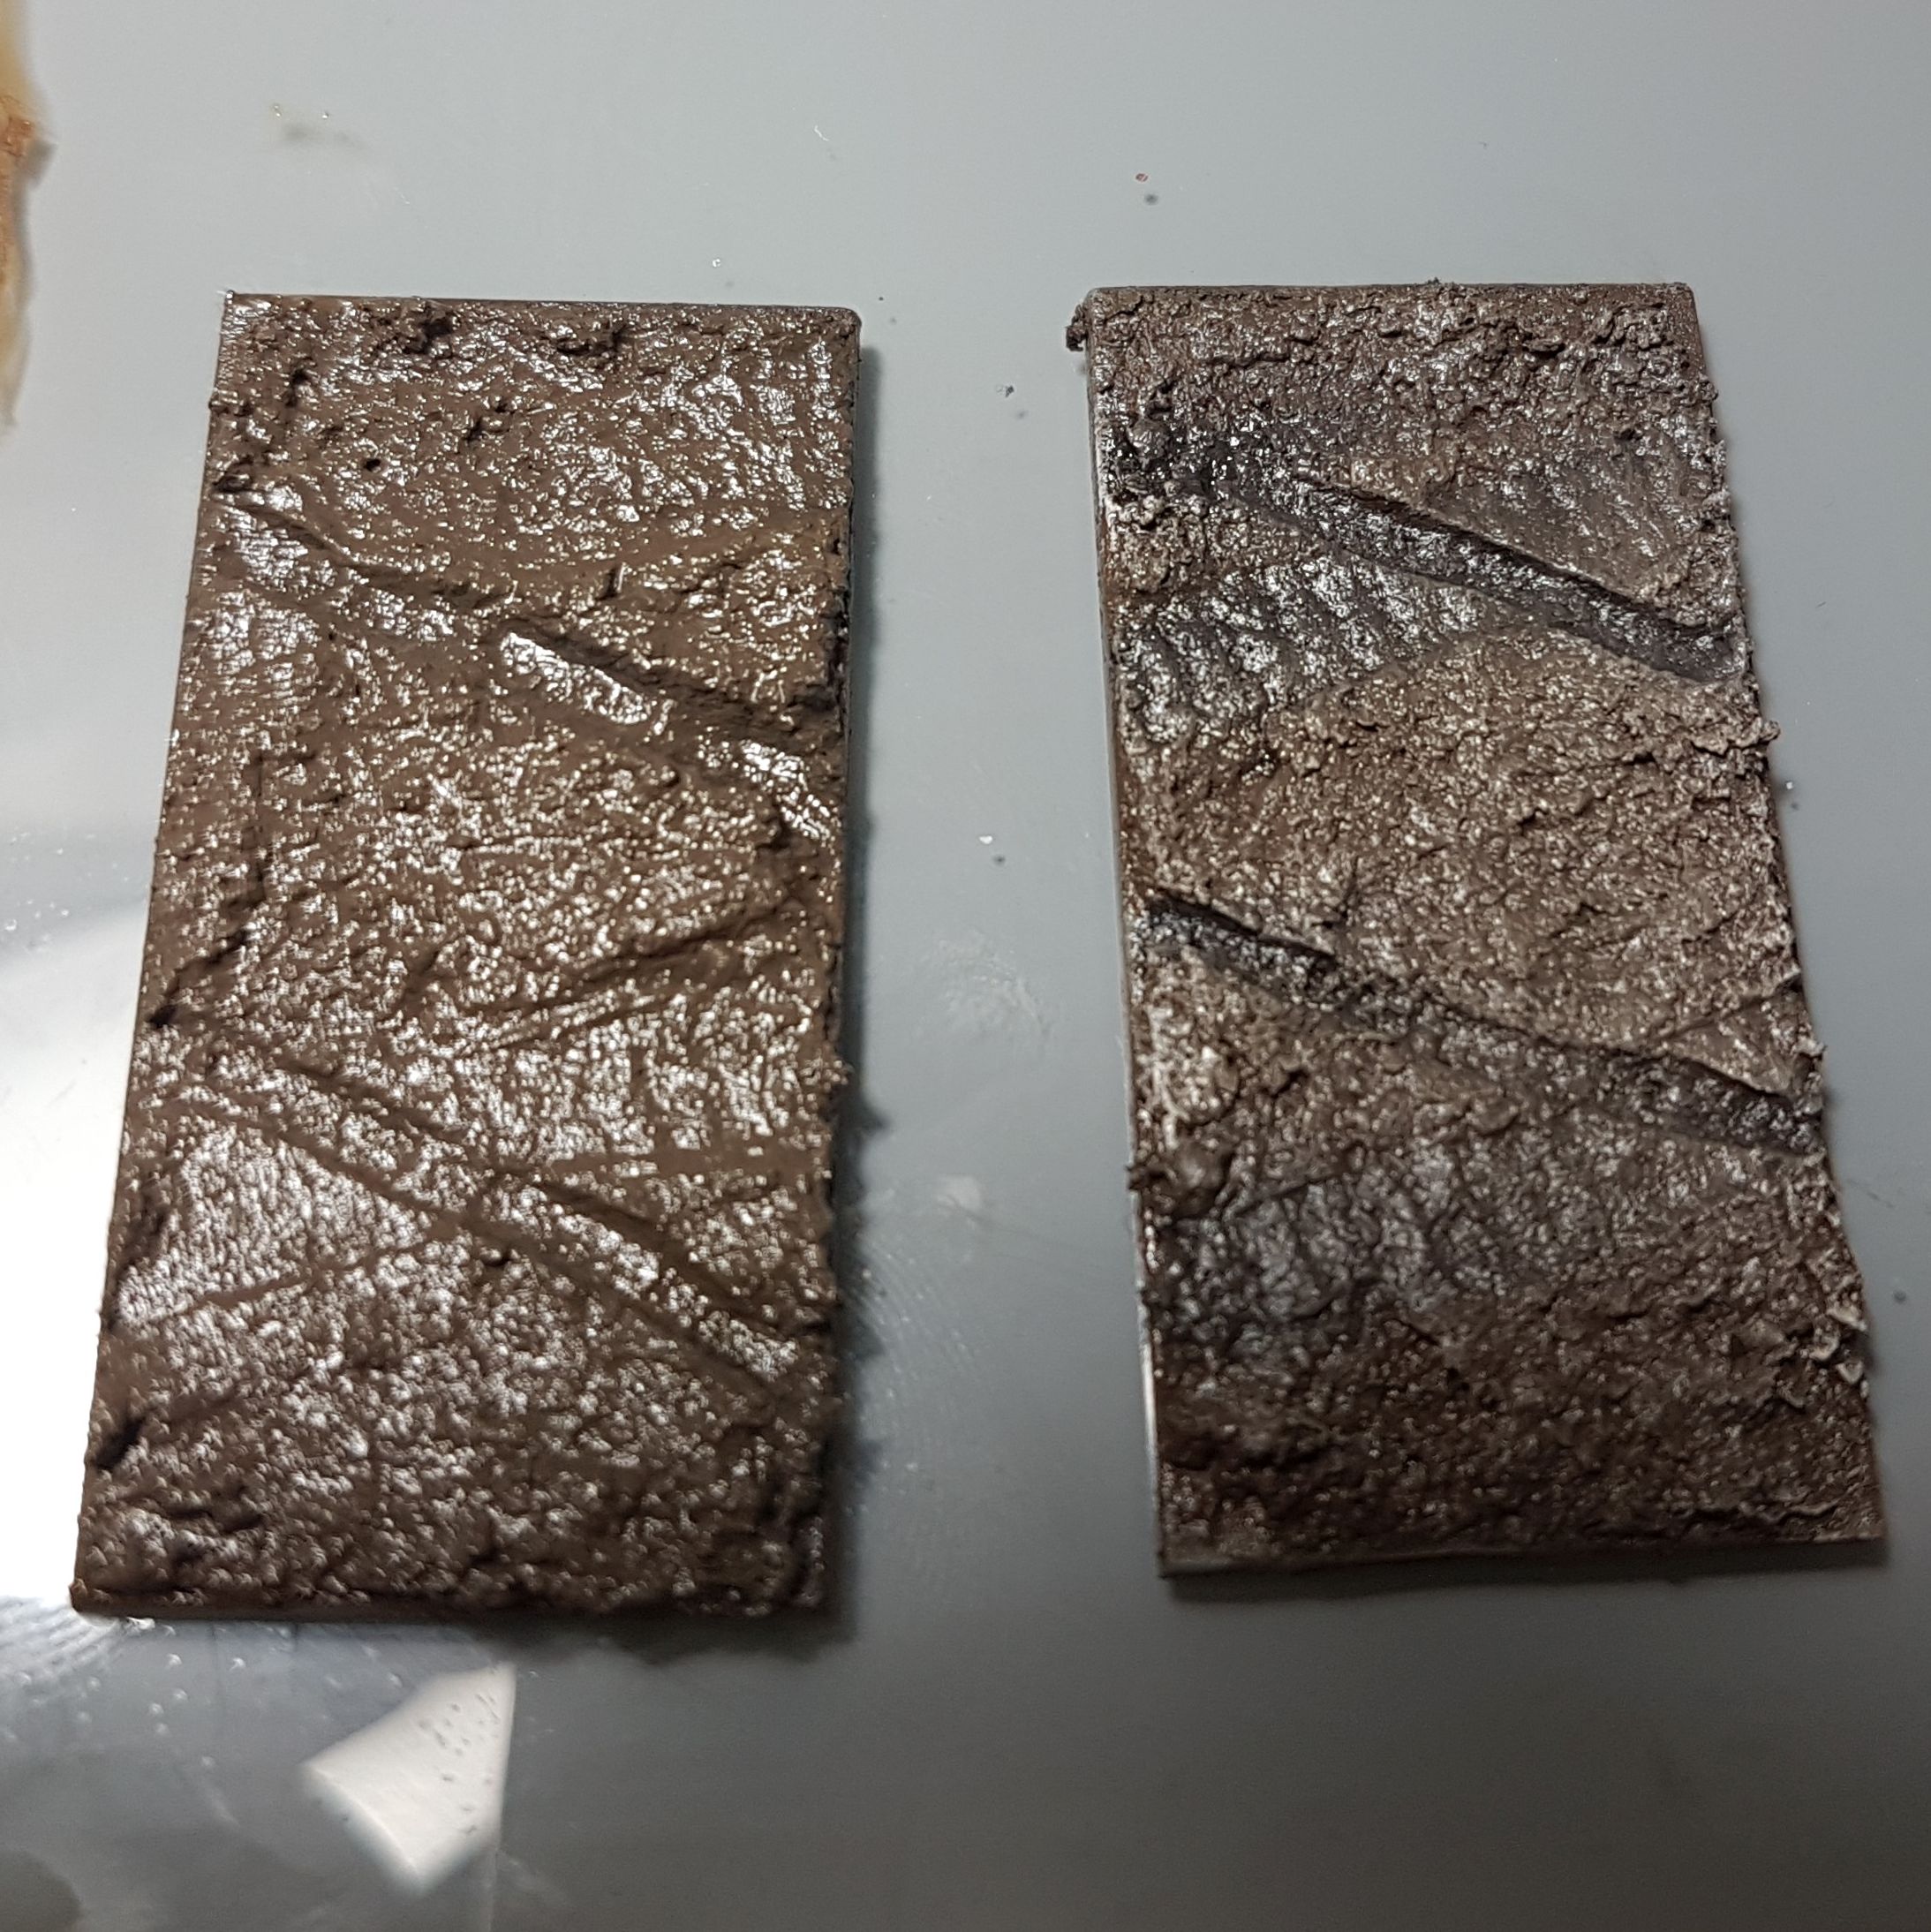 Base 11 (Left), Base 12 (Right)
I was almost thinking of subtitling this project as the search for mud….
More Mud
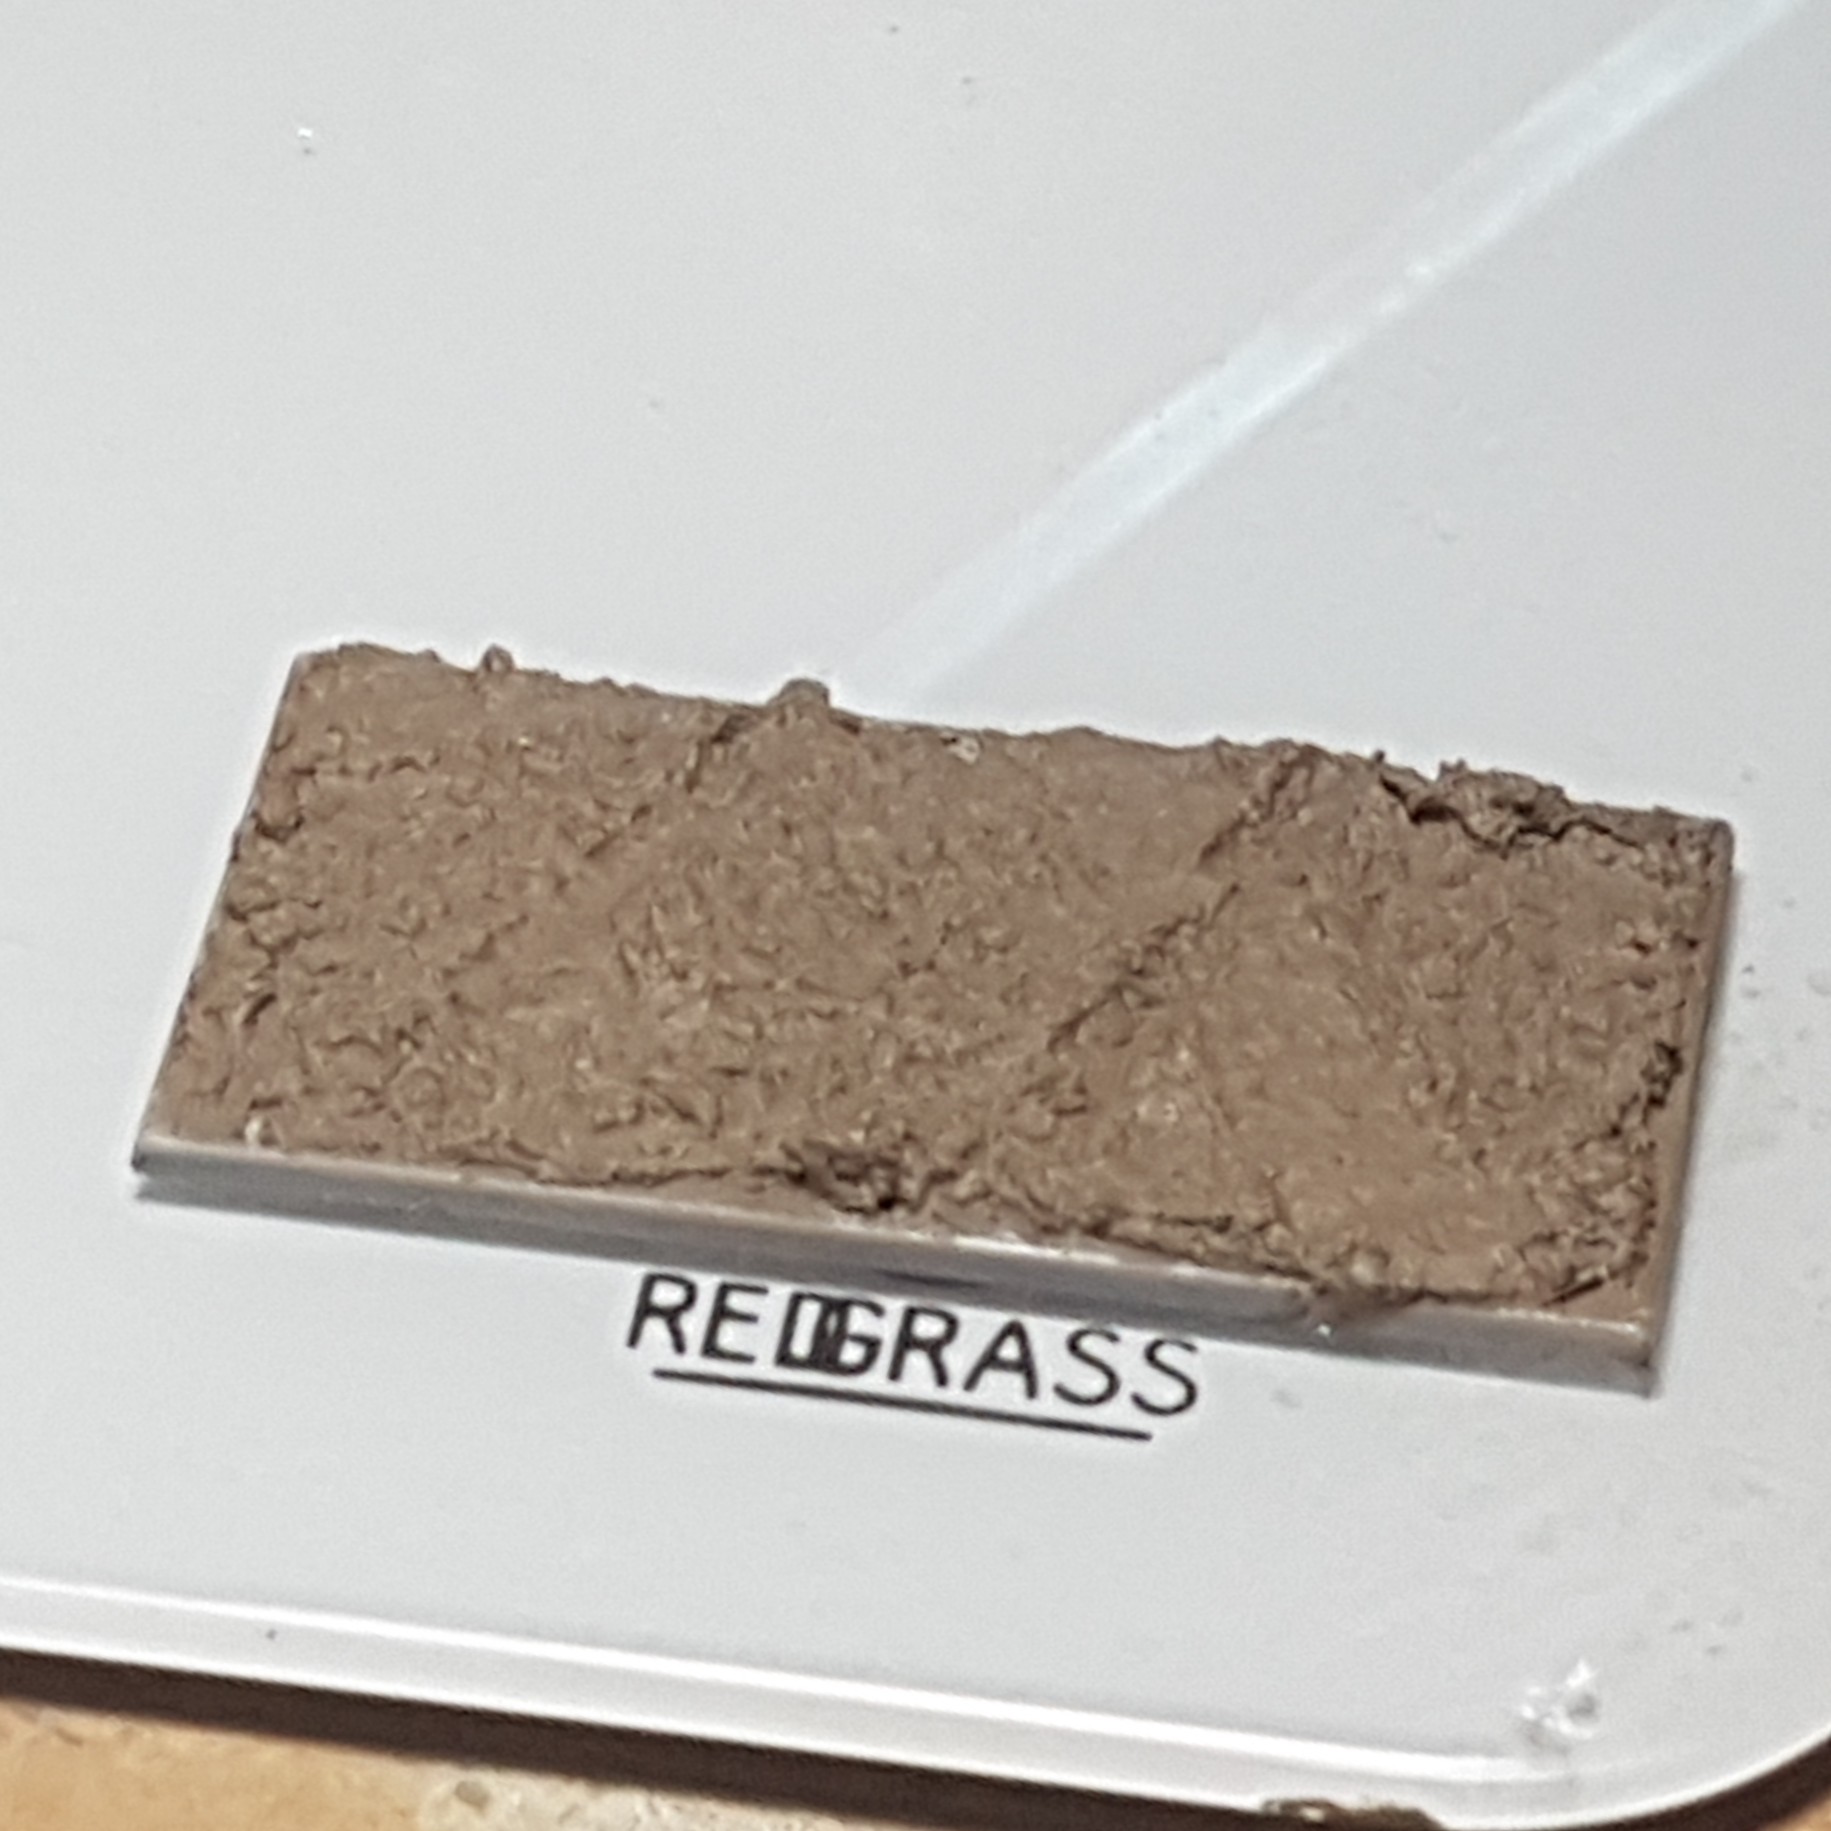
I prepped 2 more bases to be painted. The results from the last paint test isn’t dry yet or it has dried a bit glossy, I’ll have a closer look tomorrow. But I am thinking that I want to use the painting technique of base 8 on the texture of base 6 from the previous test and that will give me the result that I want. I’ve prepped 2 so I have a second base to try something else if it doesn’t work and also because those are the last of my rectangular bases that are not planned to be used for anything. So these bases just got a layer of AK Interactive Diorama Terrains Muddy Ground (AK8017) with tank with wet tracks pushed in and my wheel tool, wet as well, rolled through.

Throwing Paint Around and Seeing What Sticks.
Here we go again…. I keep counting up the bases numbers from what I was doing before. I had some camera issues which I tried to resolve, but generally not happy with the quality all the photos.
Base 6
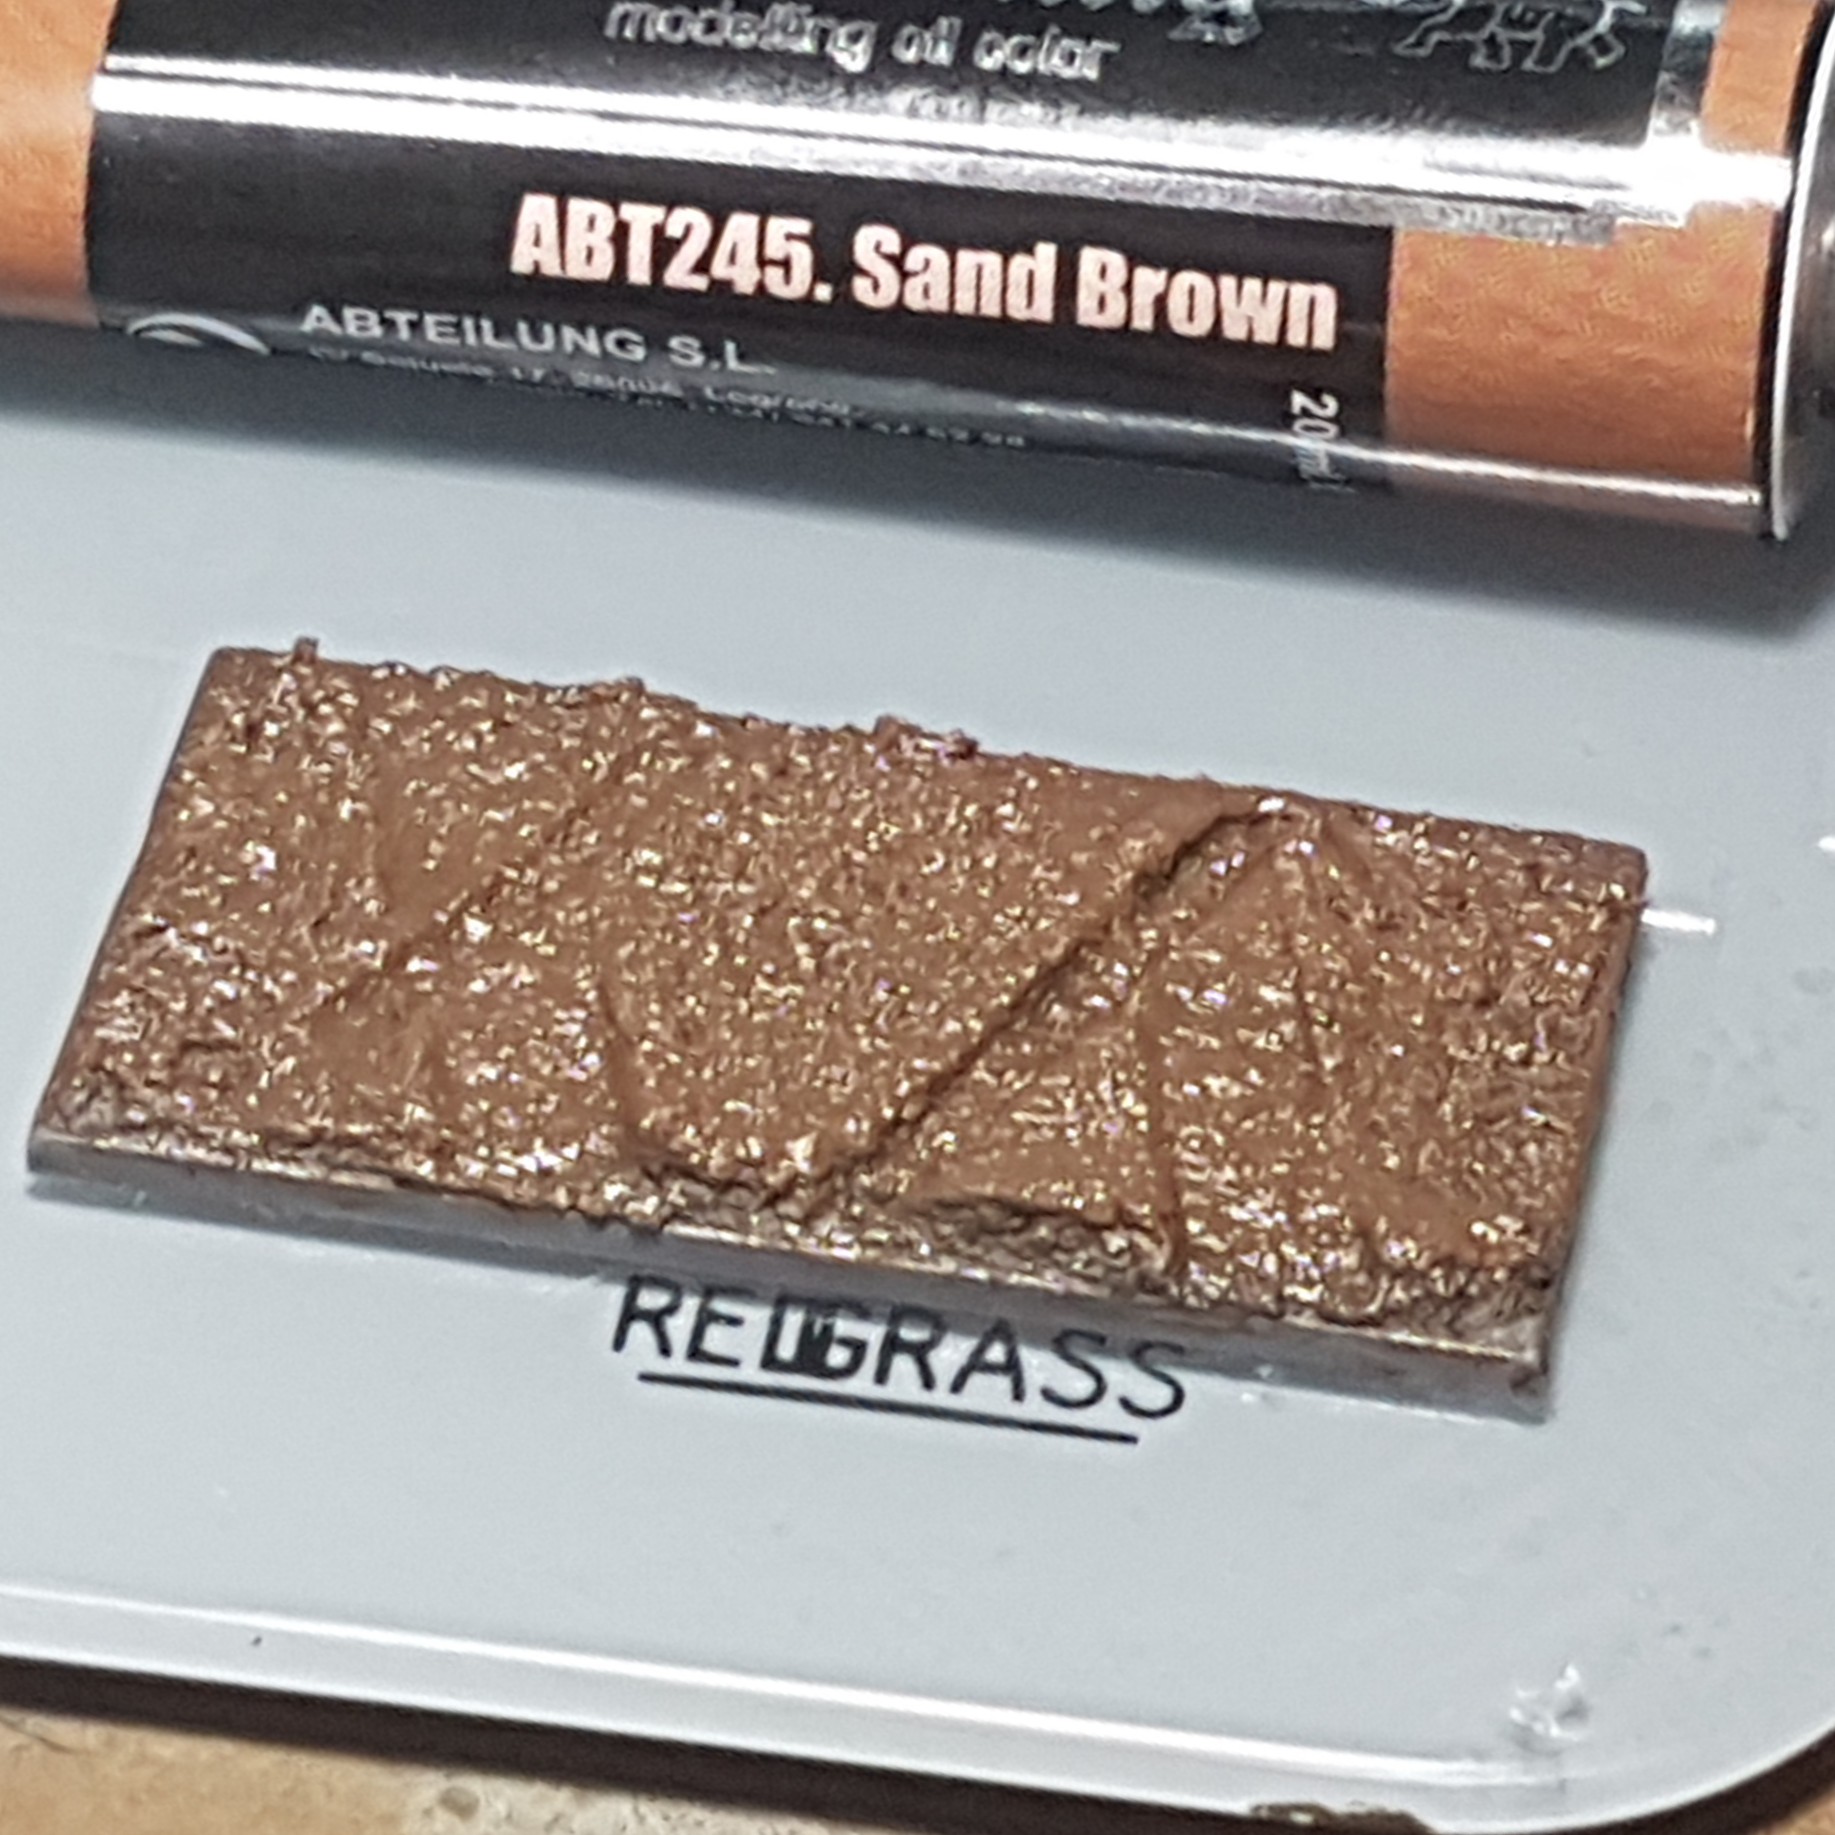
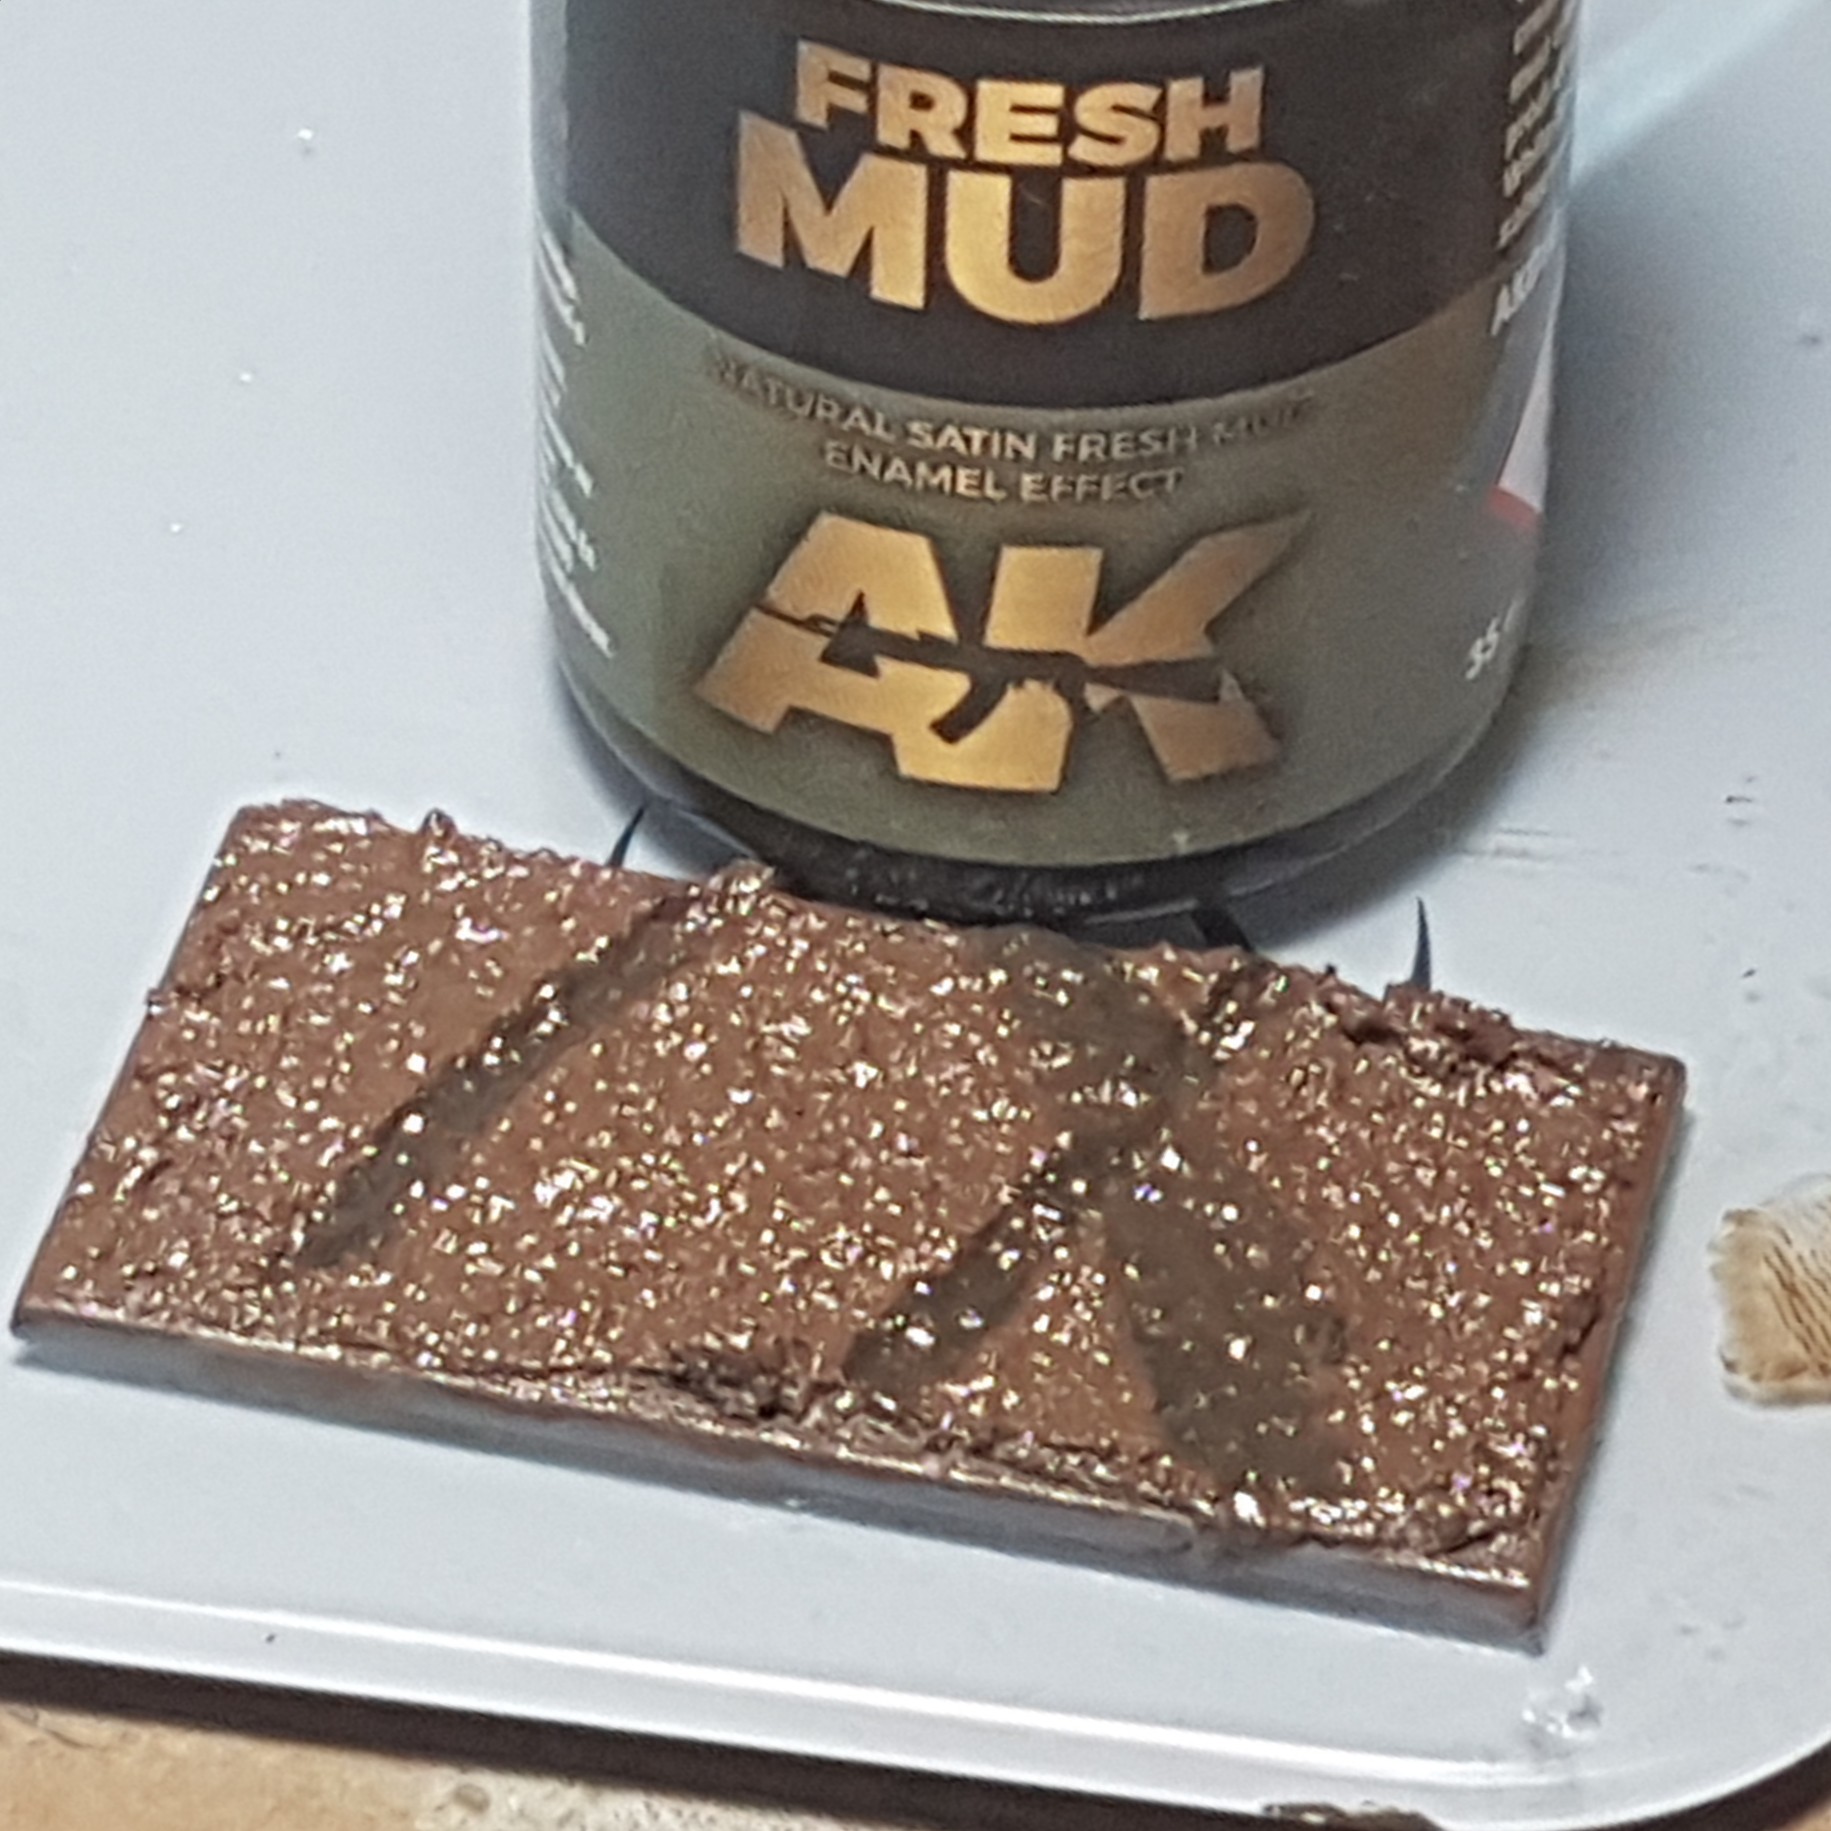
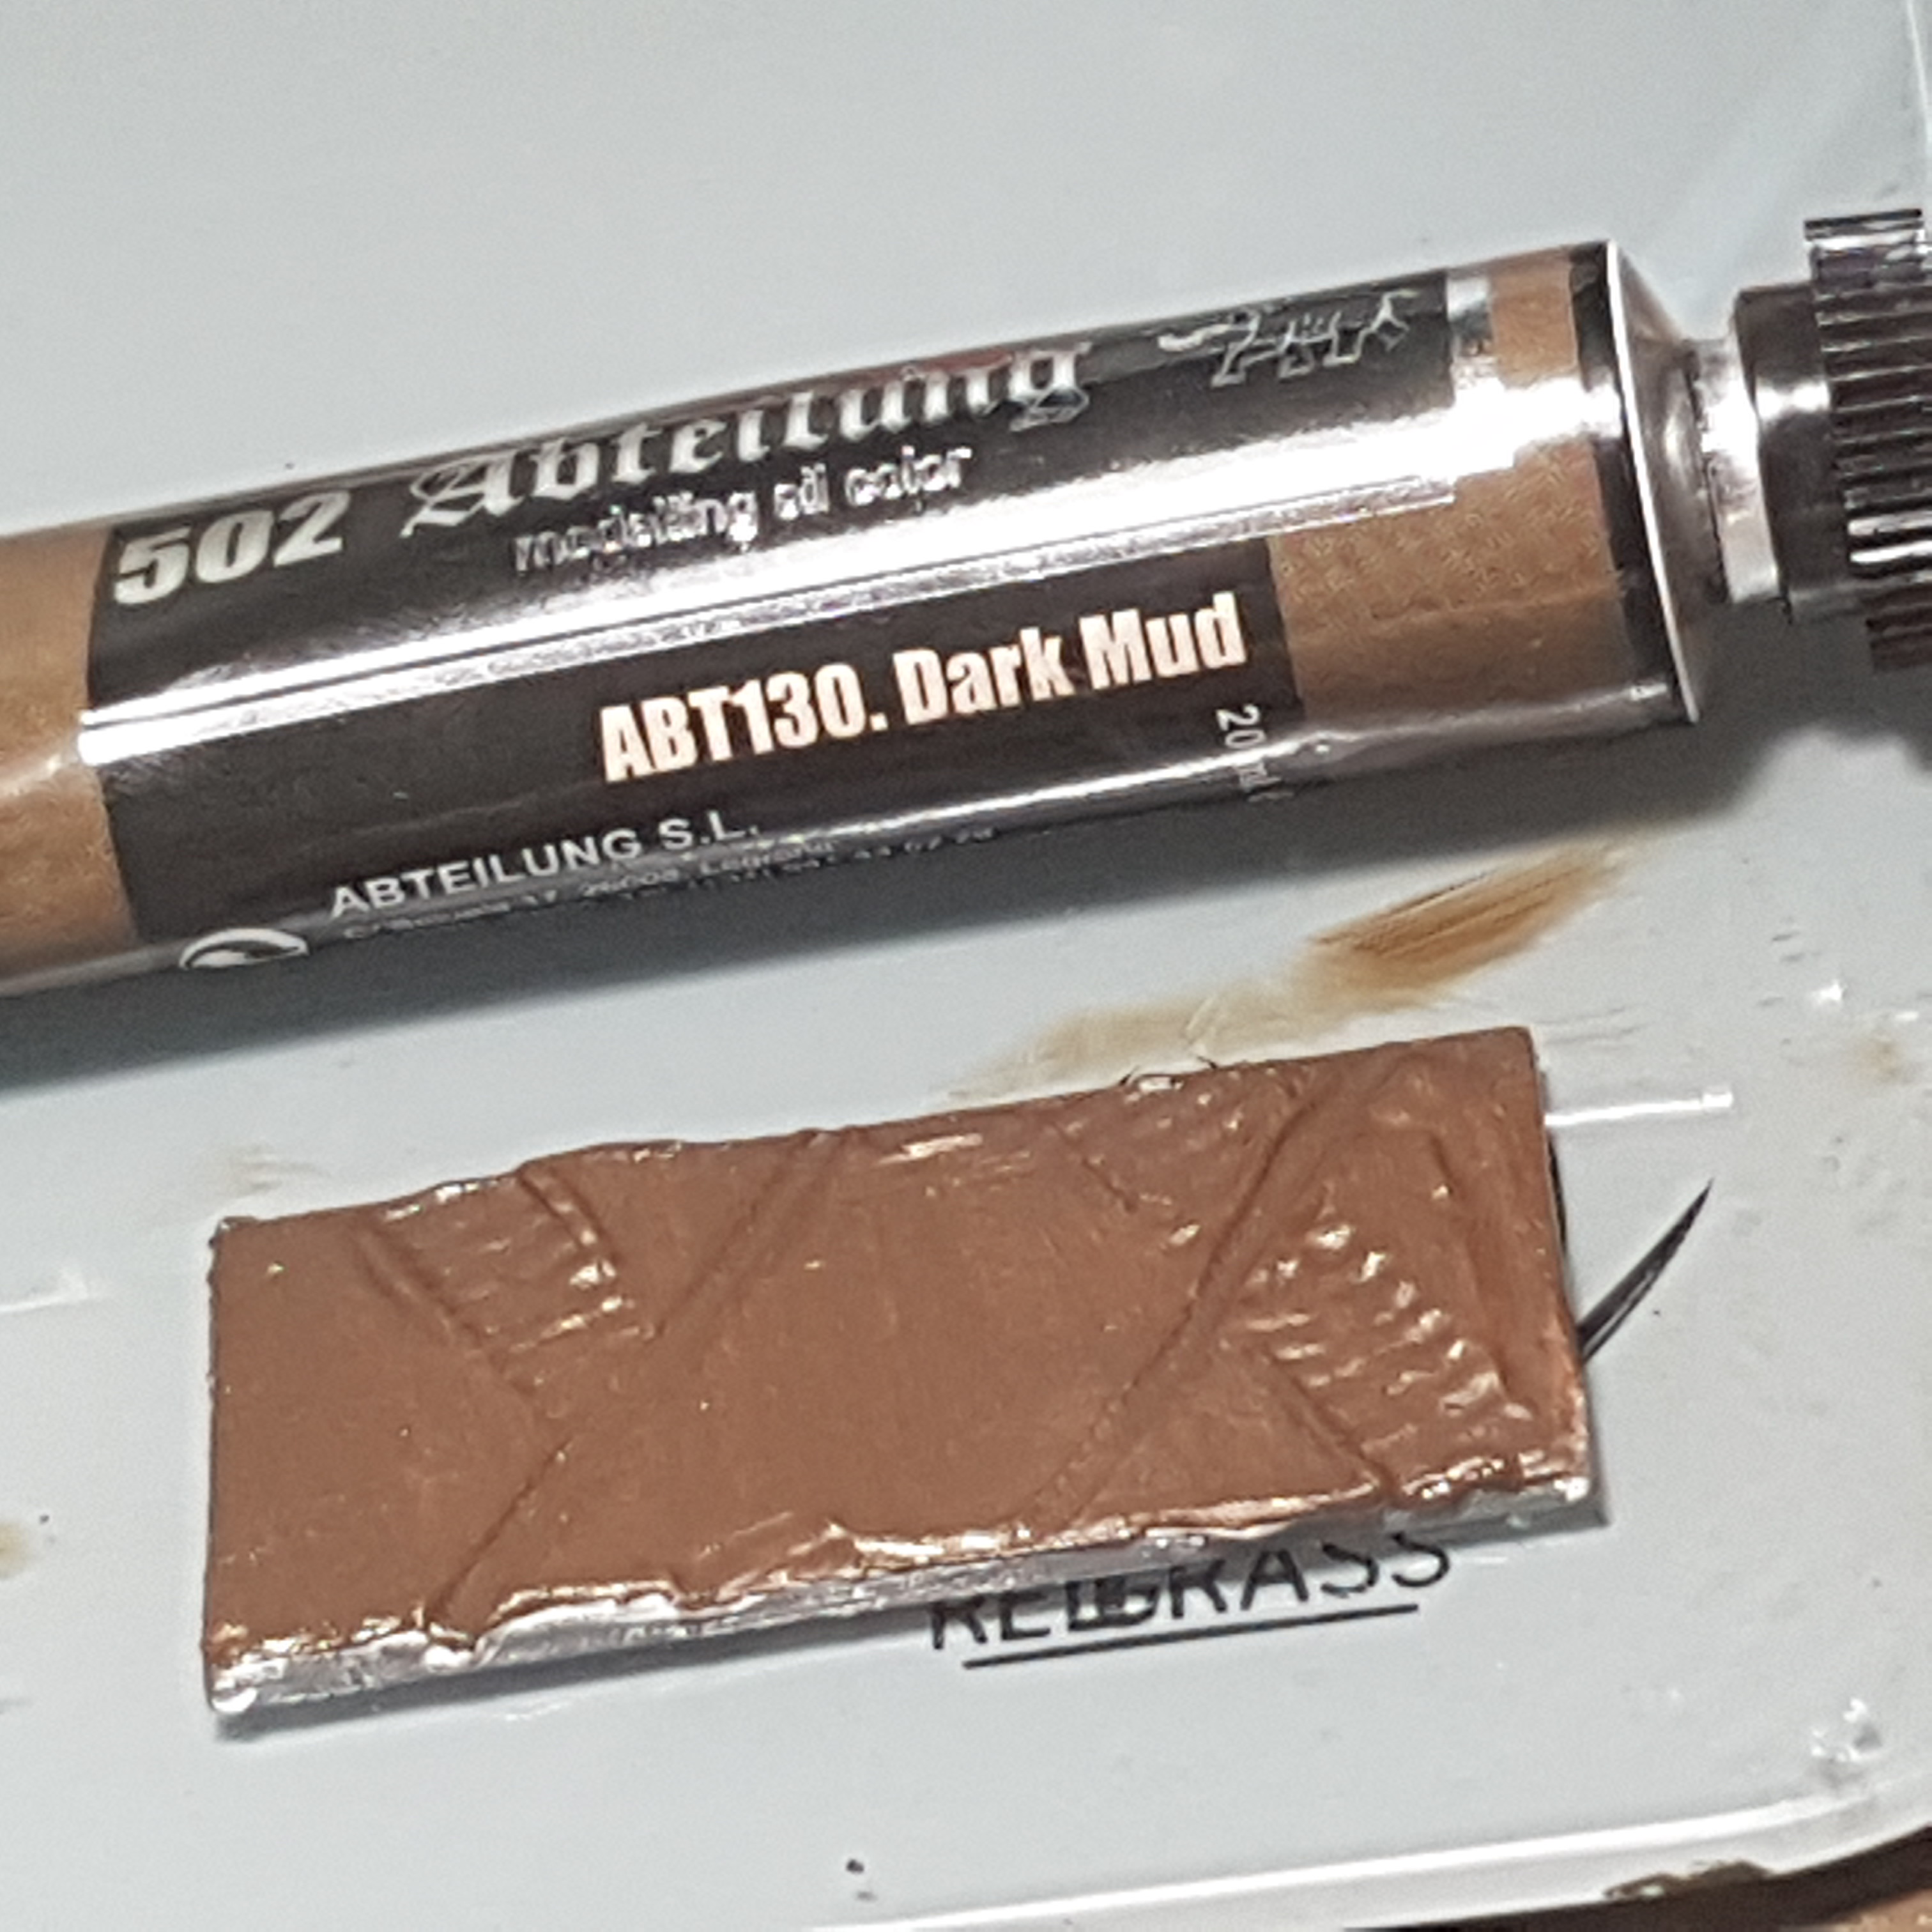
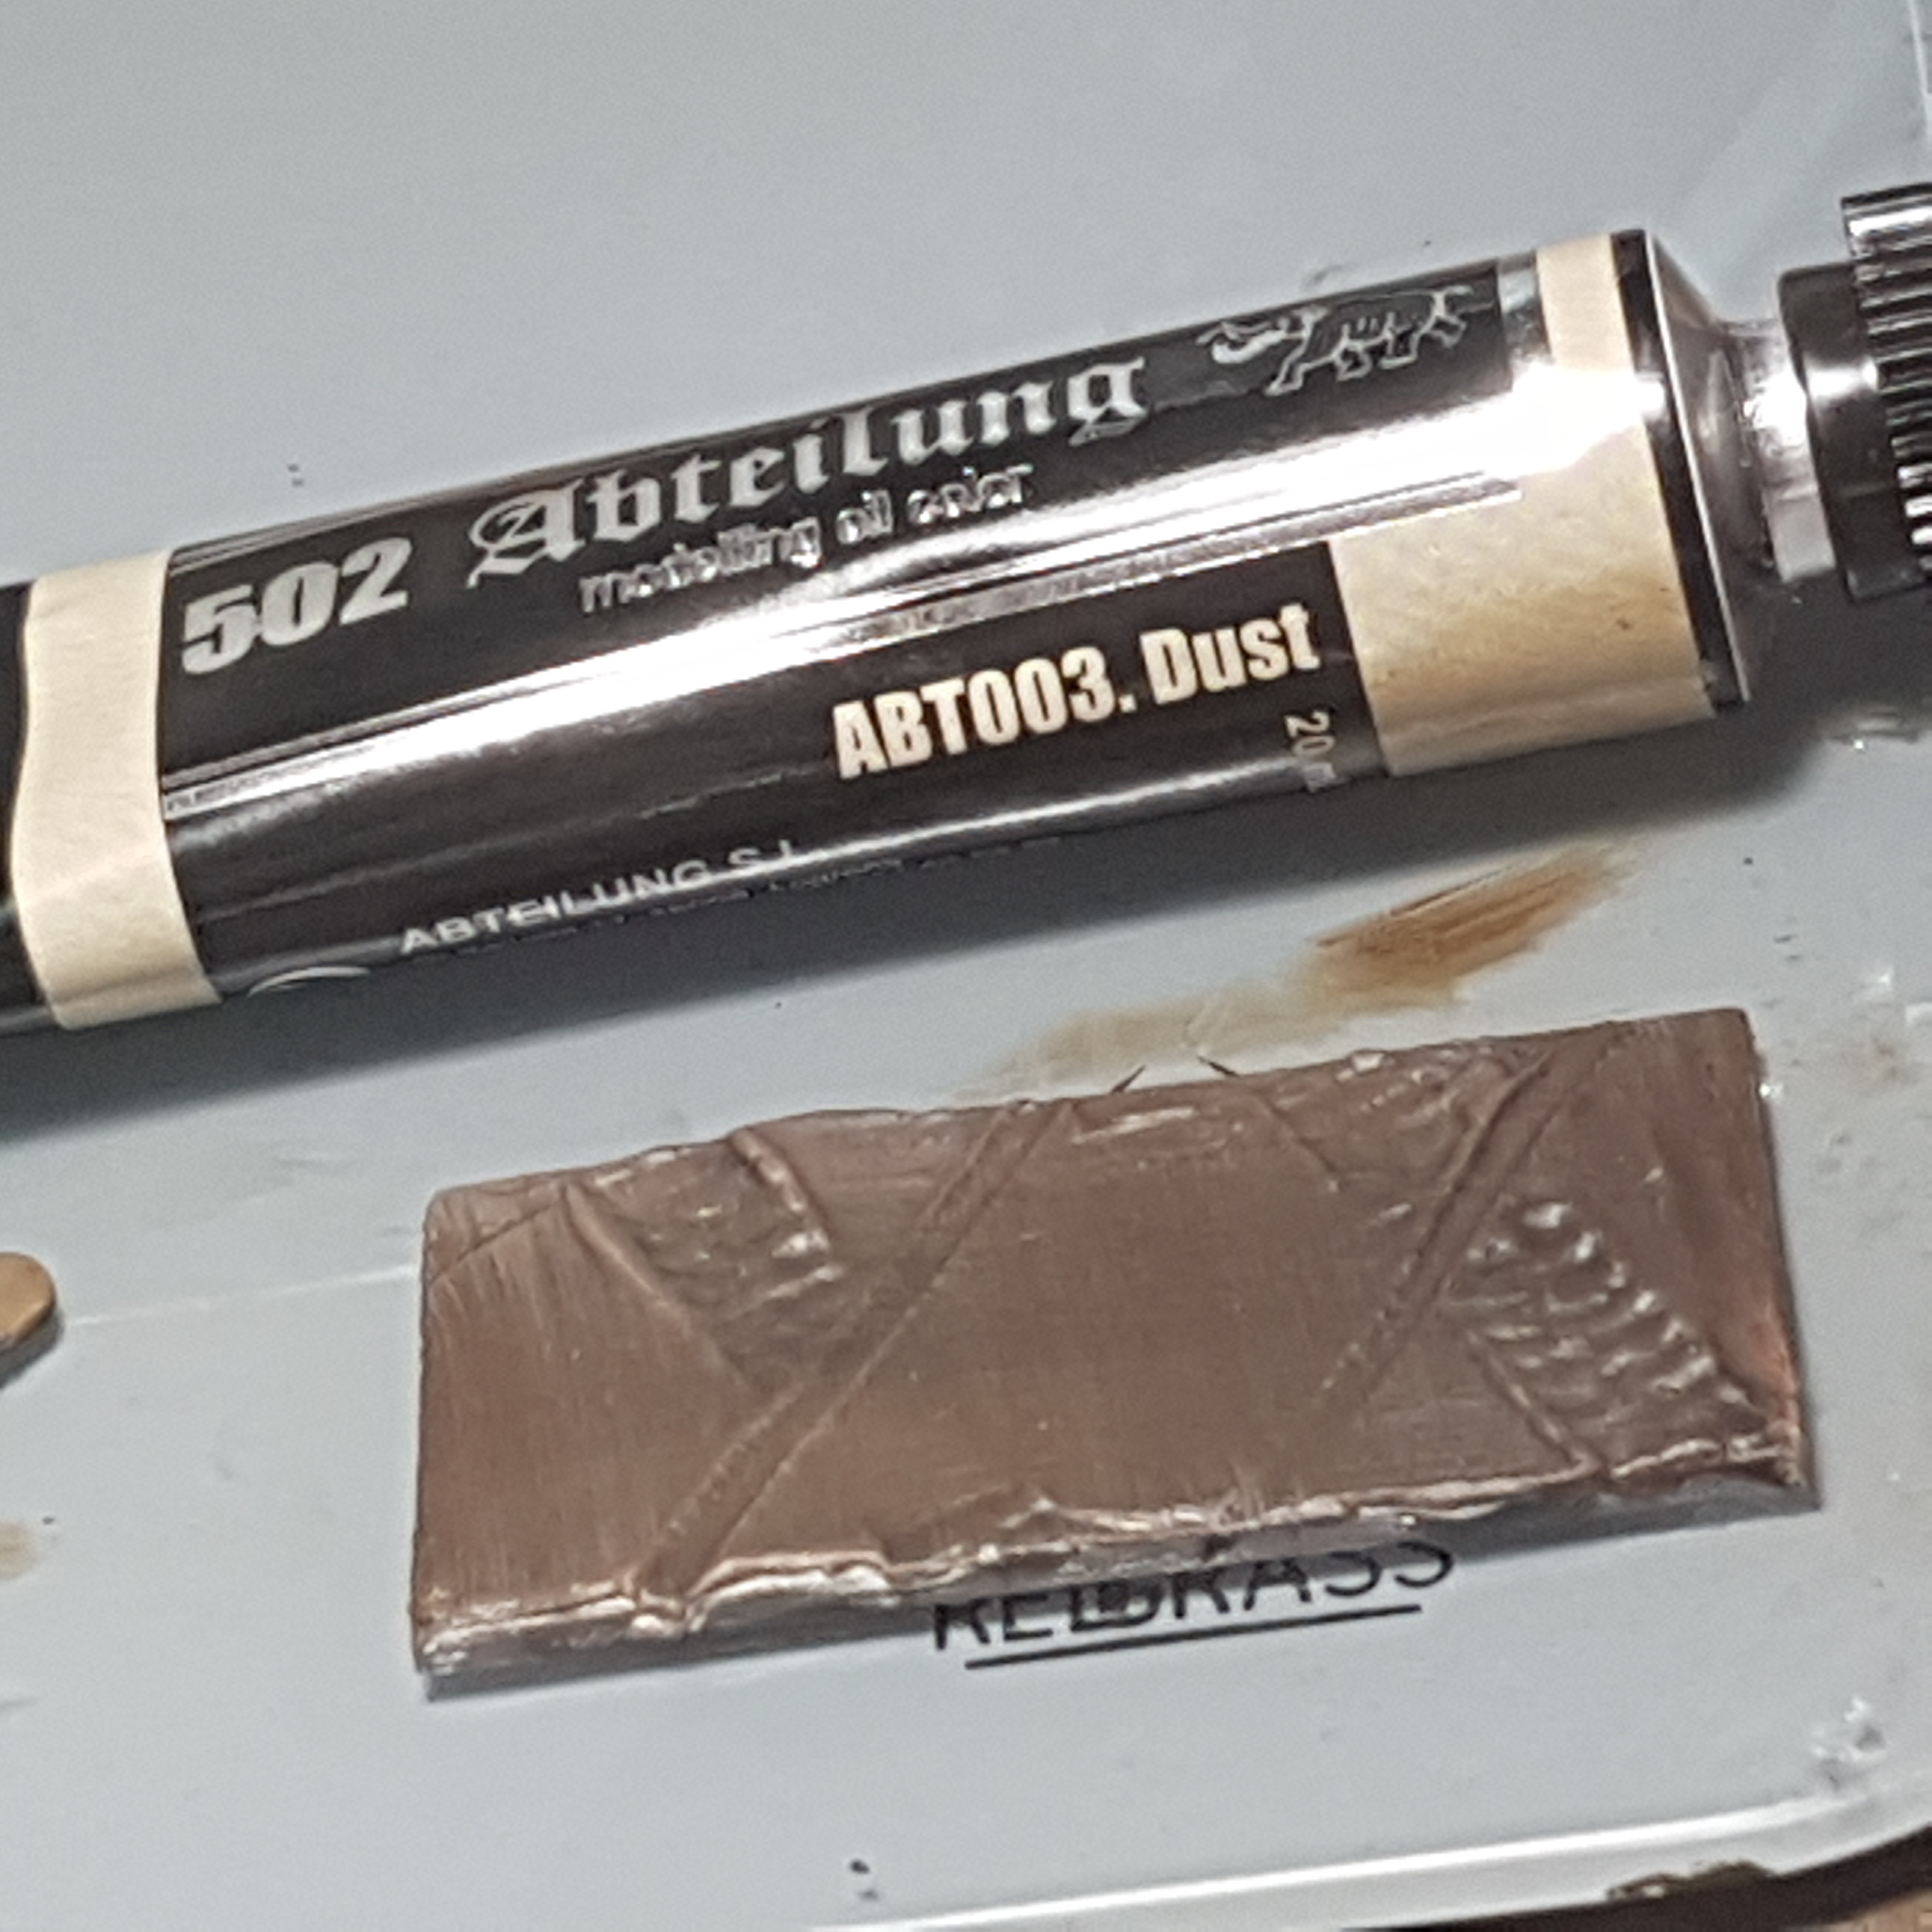
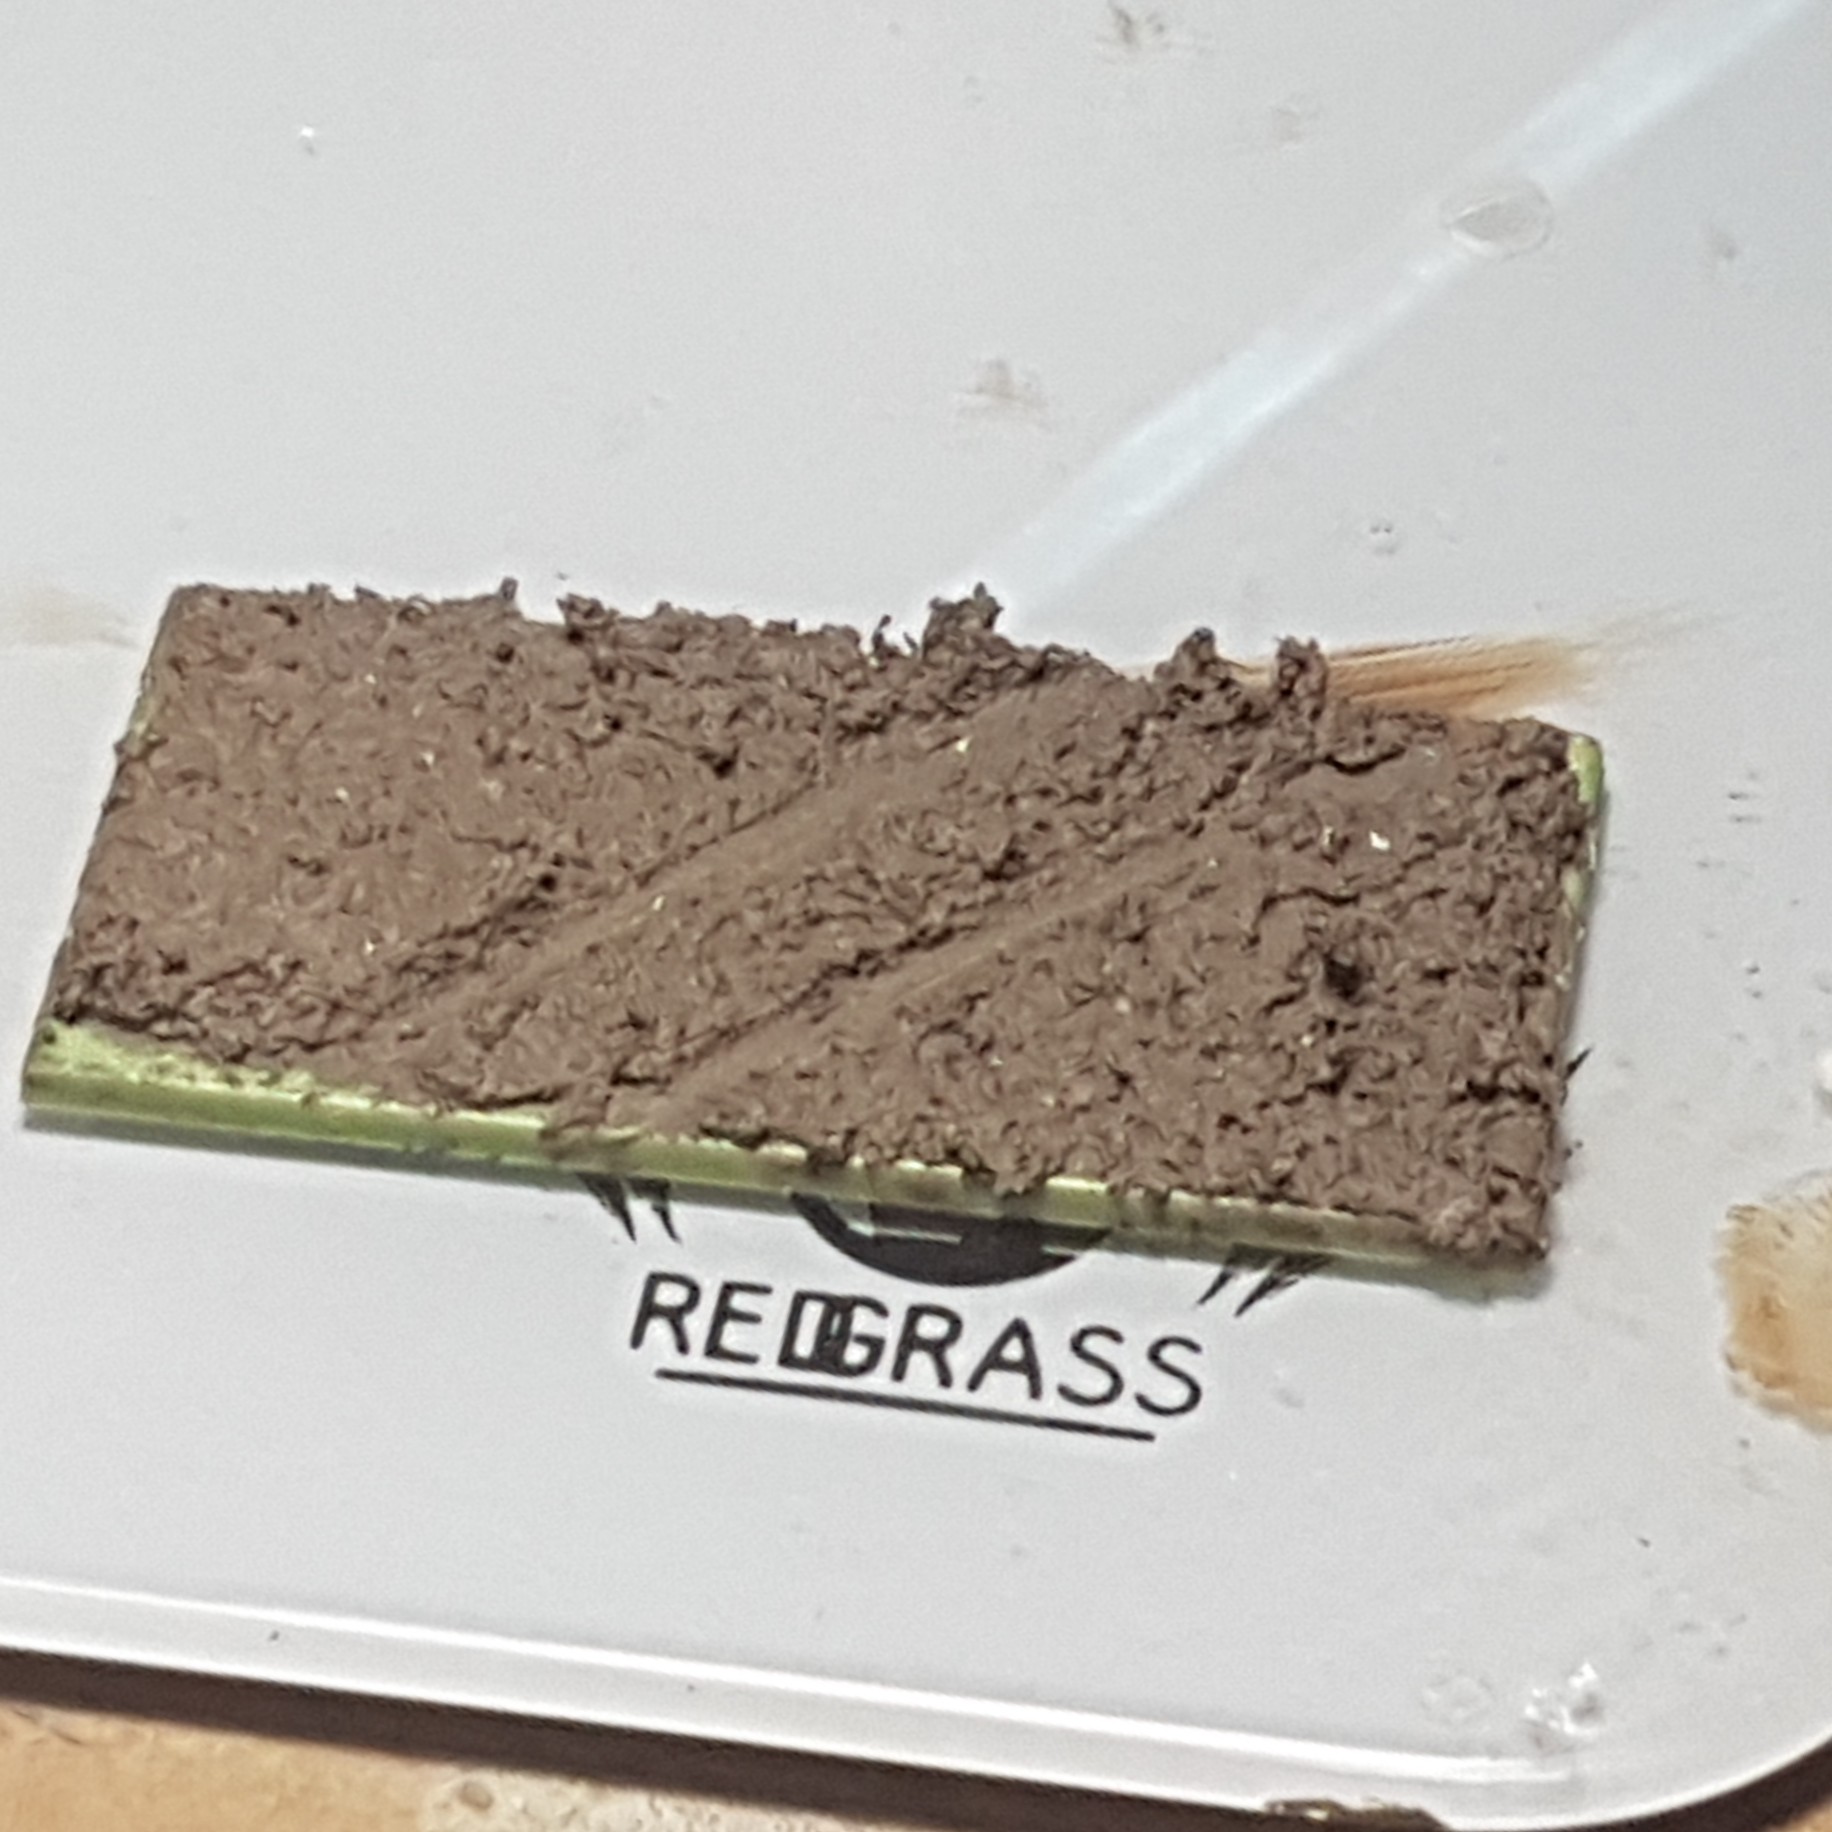
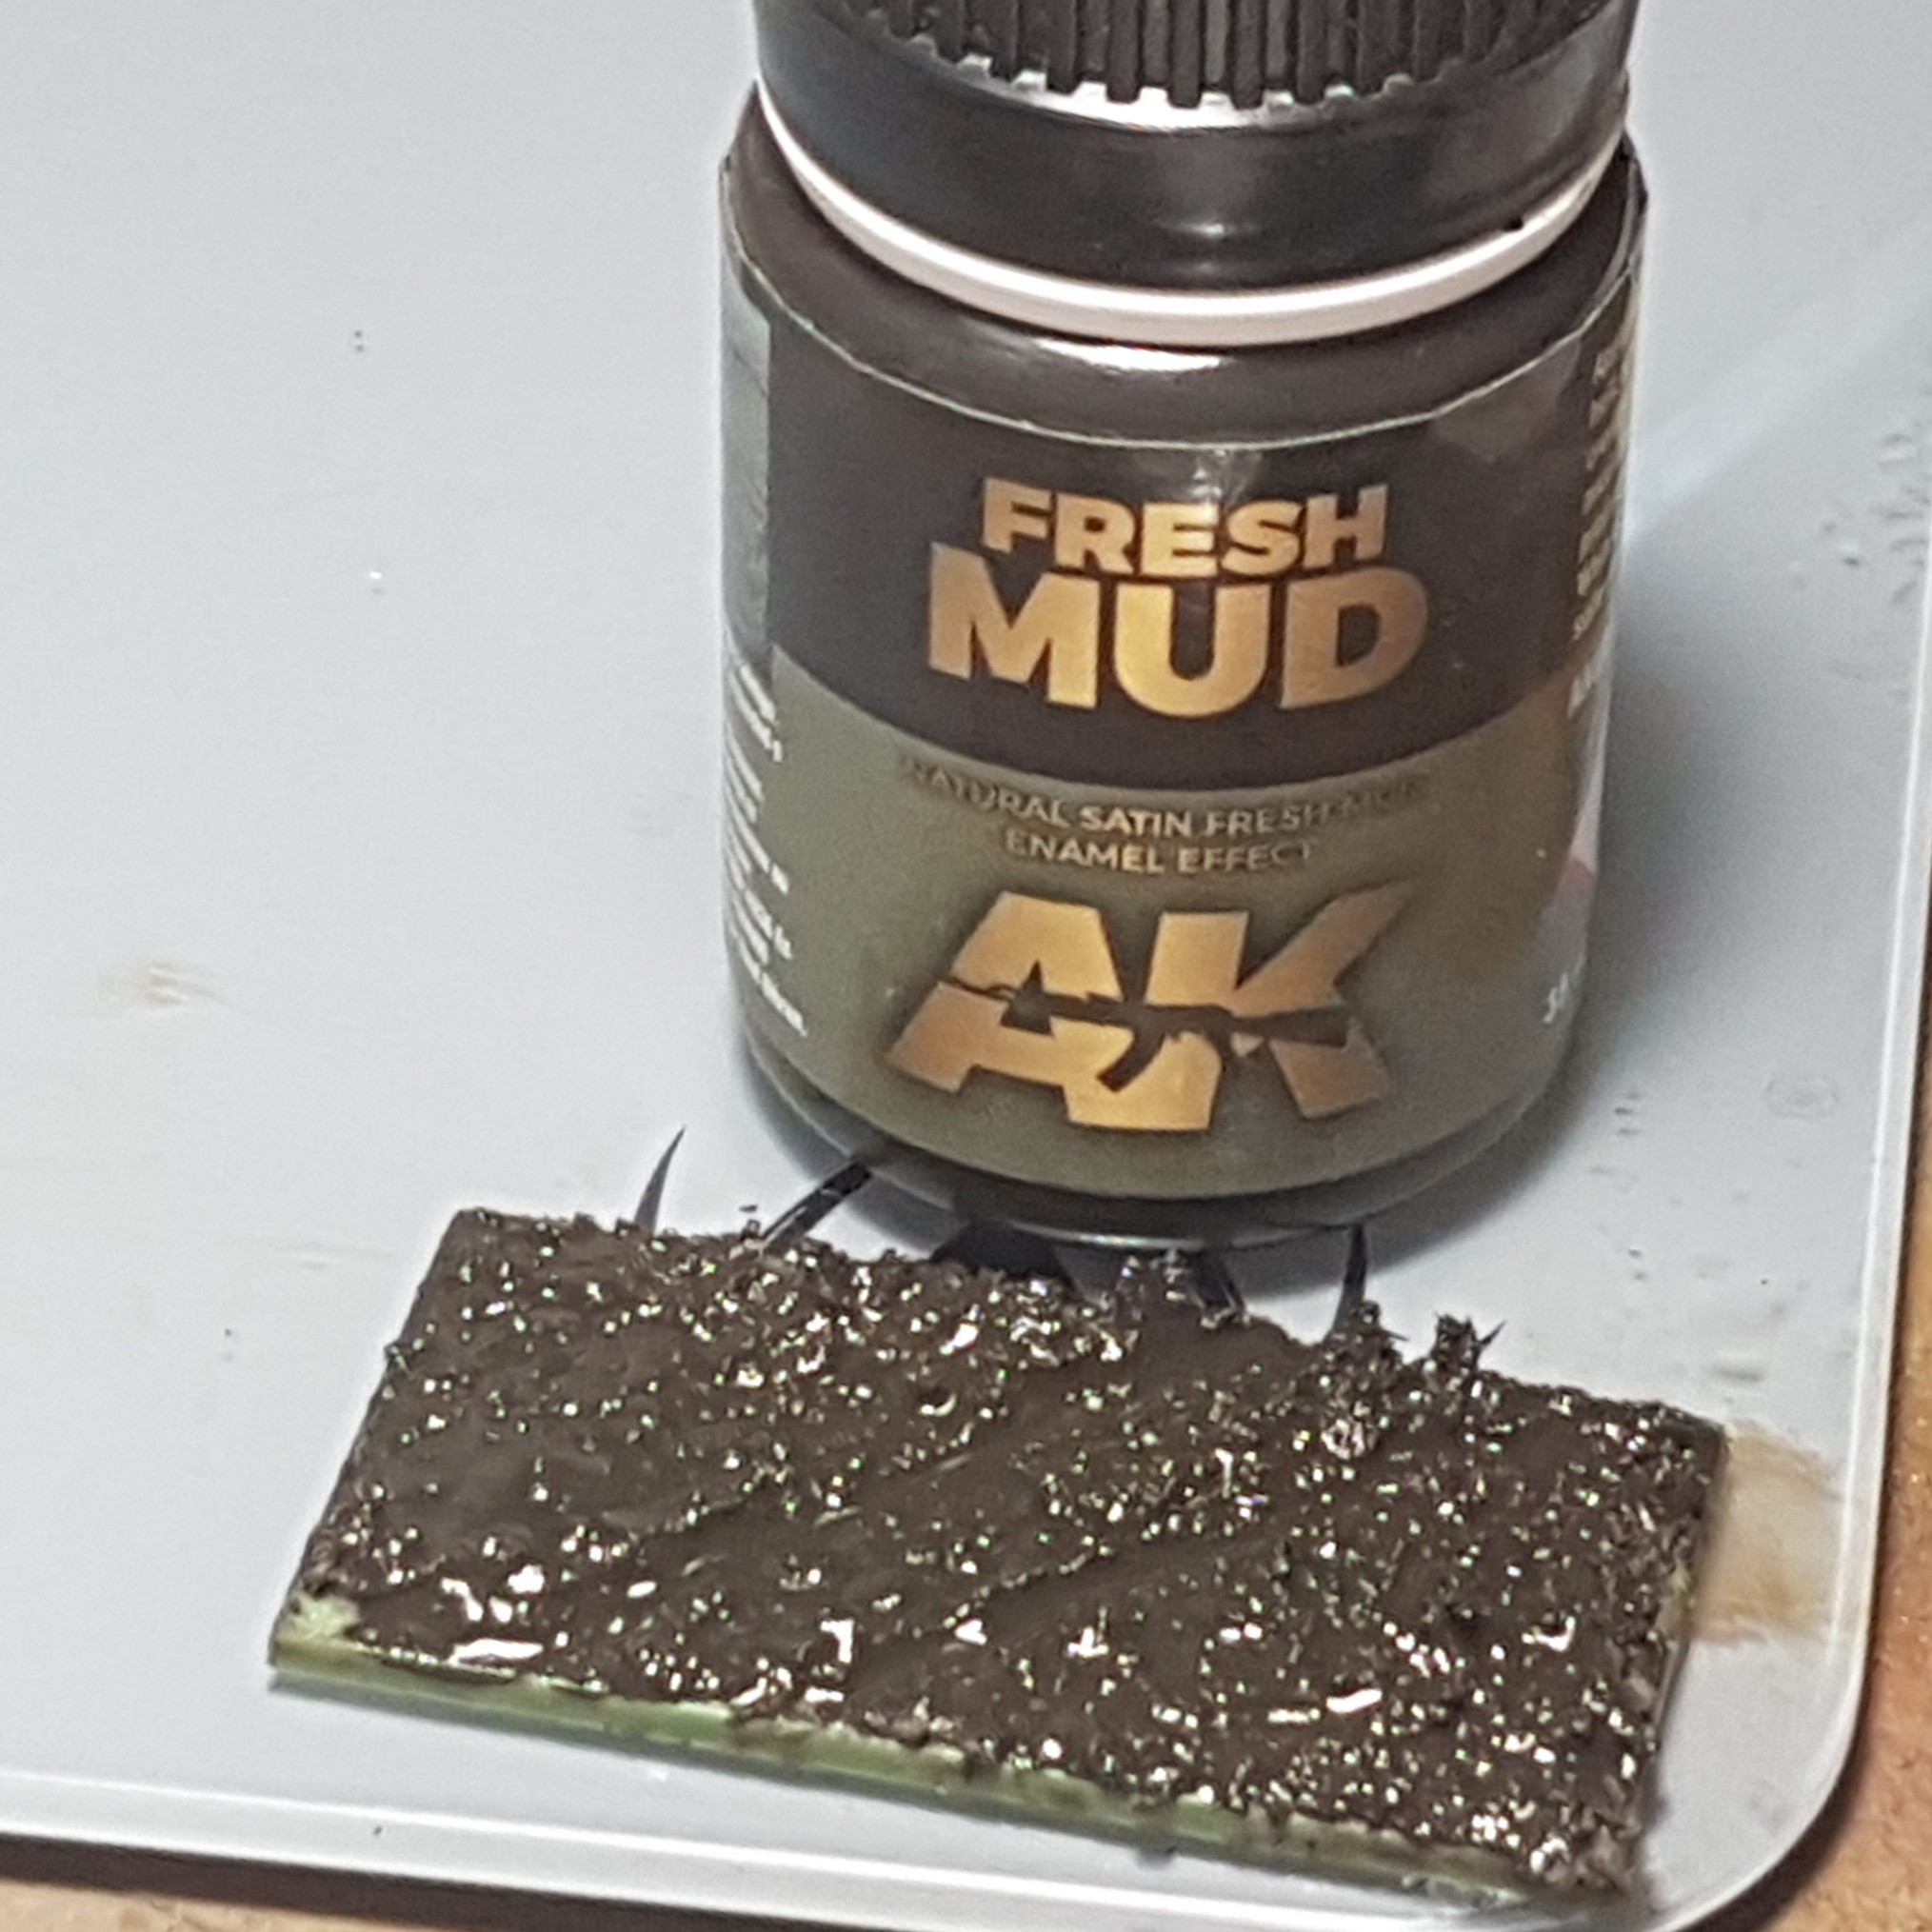
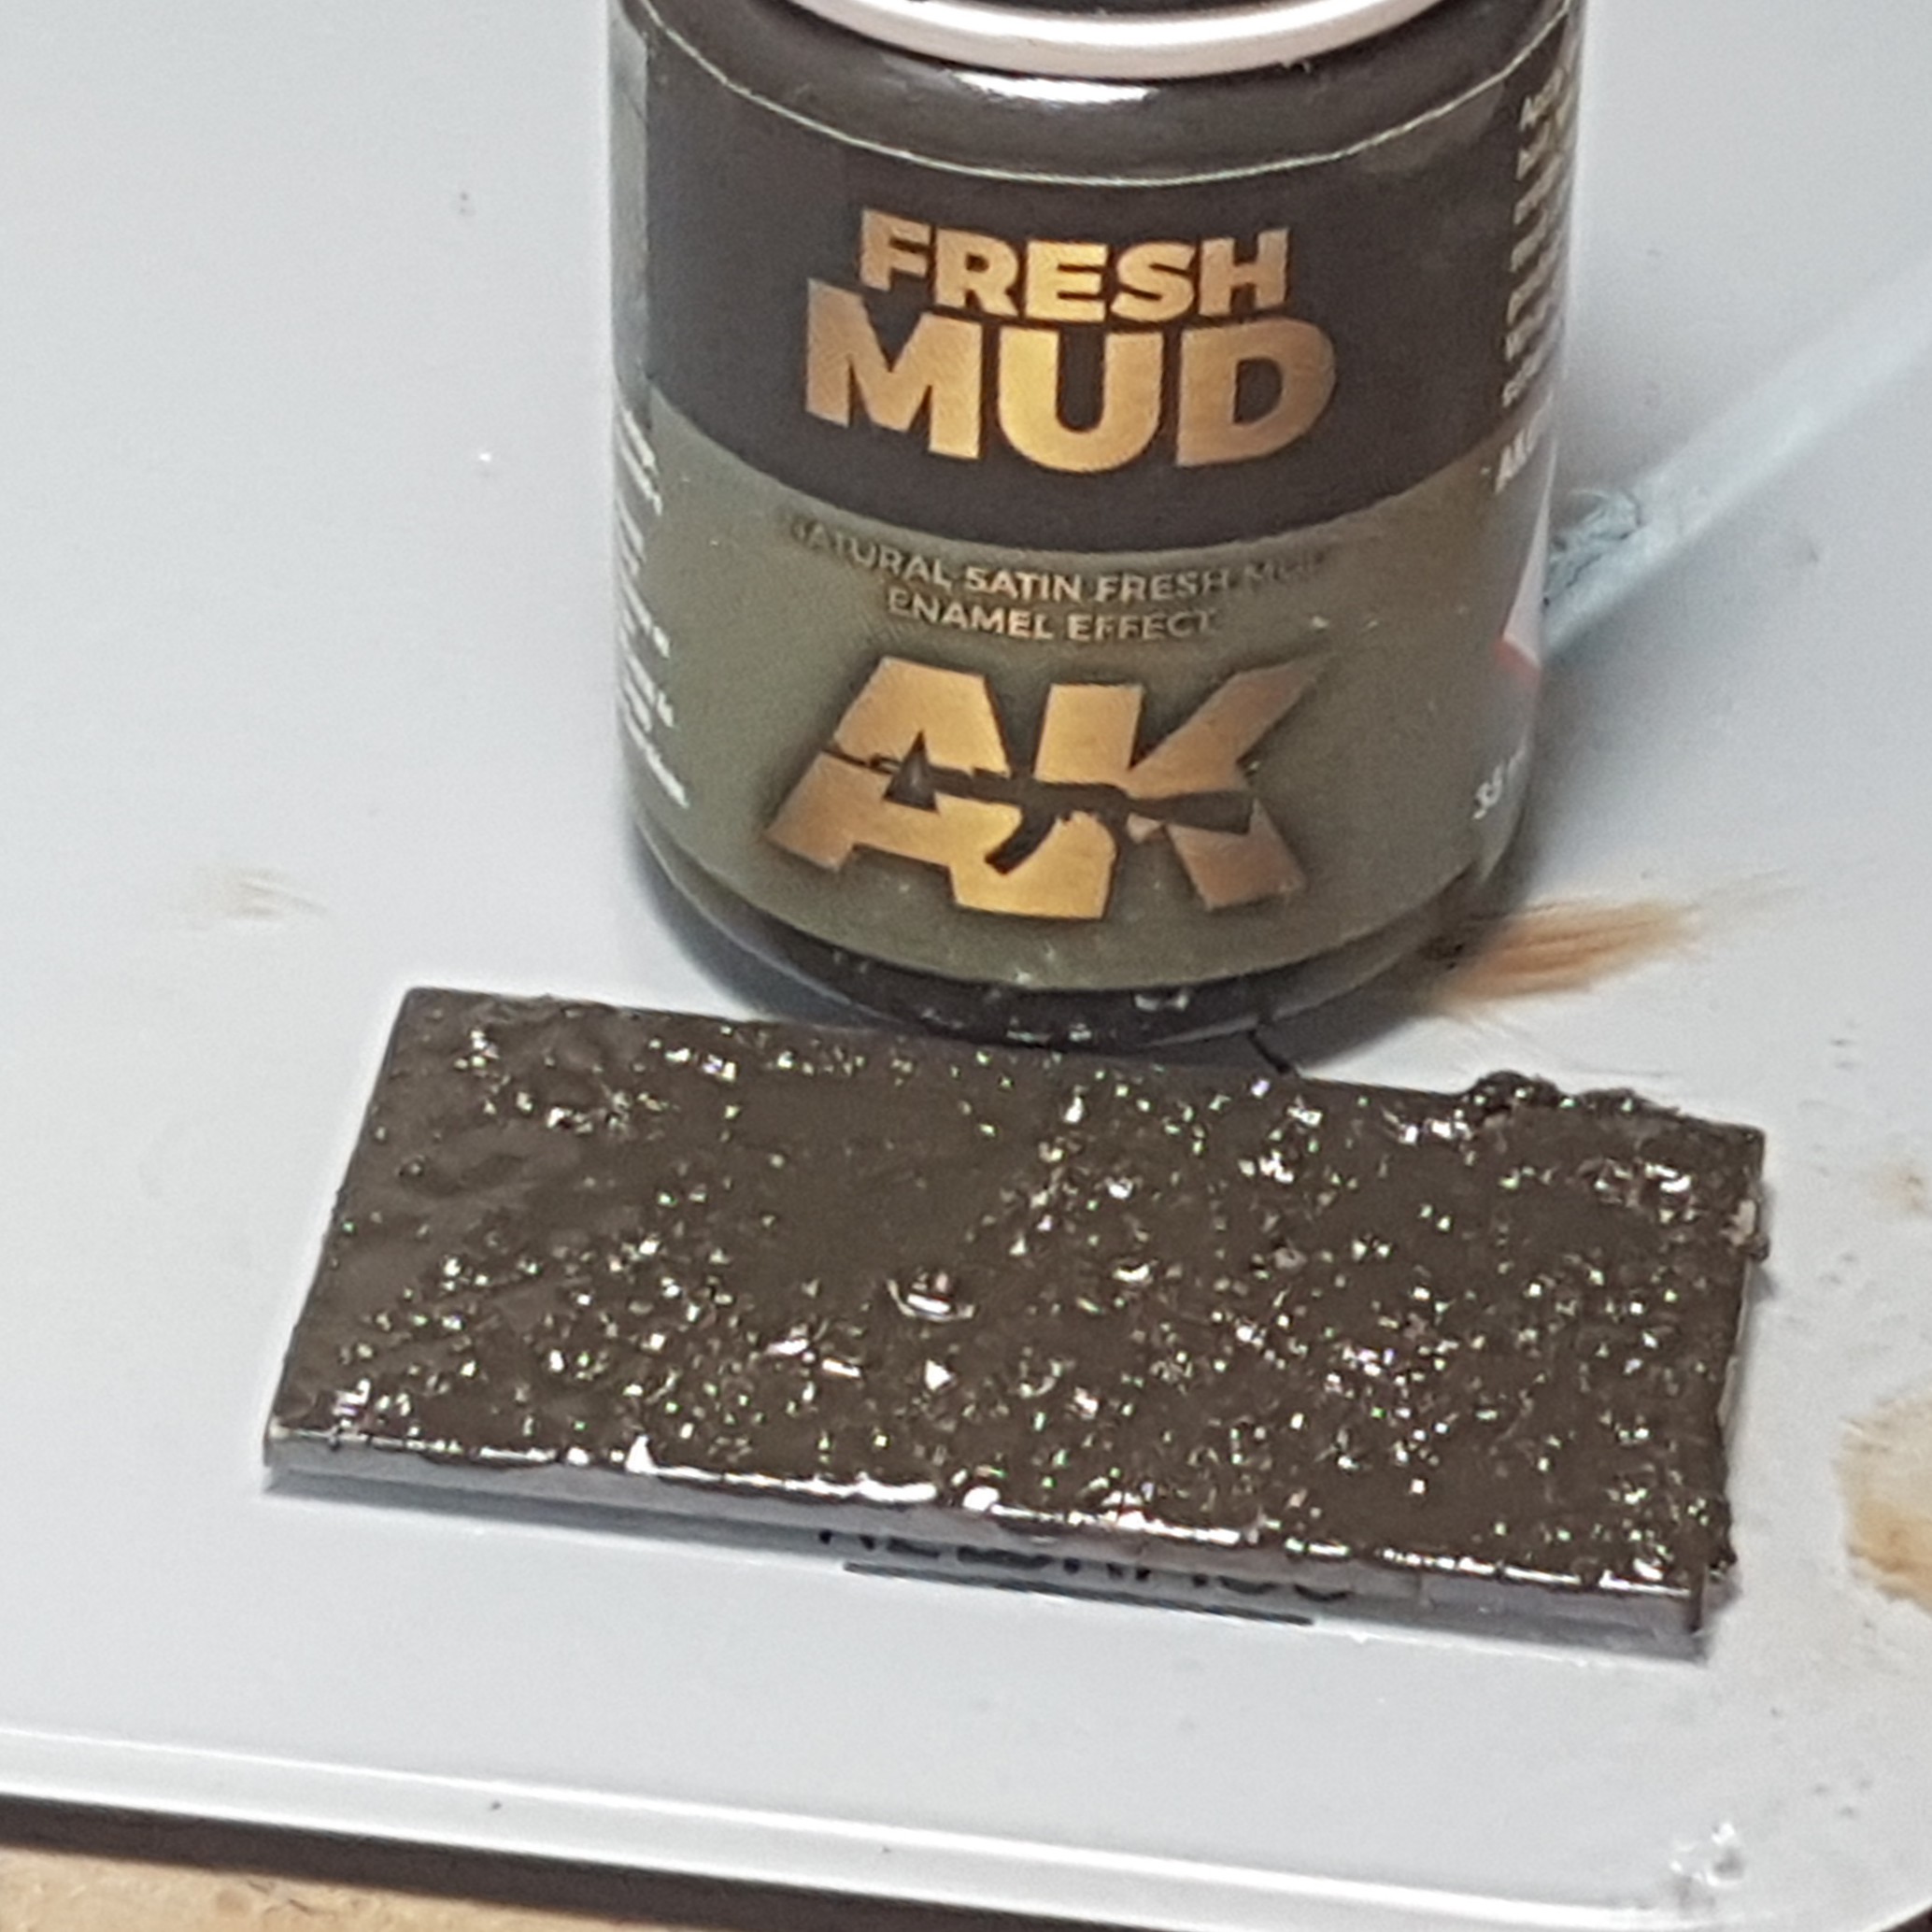
I am starting off with the base that I did last made with AK Interactive Diorama Terrains Muddy Ground (AK8017) because I obviously thought I was going to nail this first time around (sarcasm). I started with a good coat of Abteilung 502 Modelling Oil Color Dark Mud (ABT130), followed by a drybrush of Abteilung 502 Modelling Oil Color Sand Brown (ABT245) and then a lighter drybrush of Abteilung 502 Modelling Oil Color Dust (ABT003). I then put some AK Interactive Fresh Mud (AK016) into the grooves and felt like this was too stark of a contrast. So I went in with another drybrush of Abteilung 502 Modelling Oil Color Sand Brown (ABT245) and then a lighter drybrush of Abteilung 502 Modelling Oil Color Dust (ABT003). I am liking this result.


Base 7
So the second base with AK Interactive Diorama Terrains Muddy Ground (AK8017) that I did earlier, but because the coat of the muddy ground was less thick, it had less detailed impressions. Let’s see if I can do this without the 2 drybrush steps in the middle. So started with a coat of Abteilung 502 Modelling Oil Color Dark Mud (ABT130) and then did the impressions with AK Interactive Fresh Mud (AK016). Then I did the drybrush of Abteilung 502 Modelling Oil Color Sand Brown (ABT245) followed by a lighter drybrush of Abteilung 502 Modelling Oil Color Dust (ABT003). Not that happy with this result.
Base 8
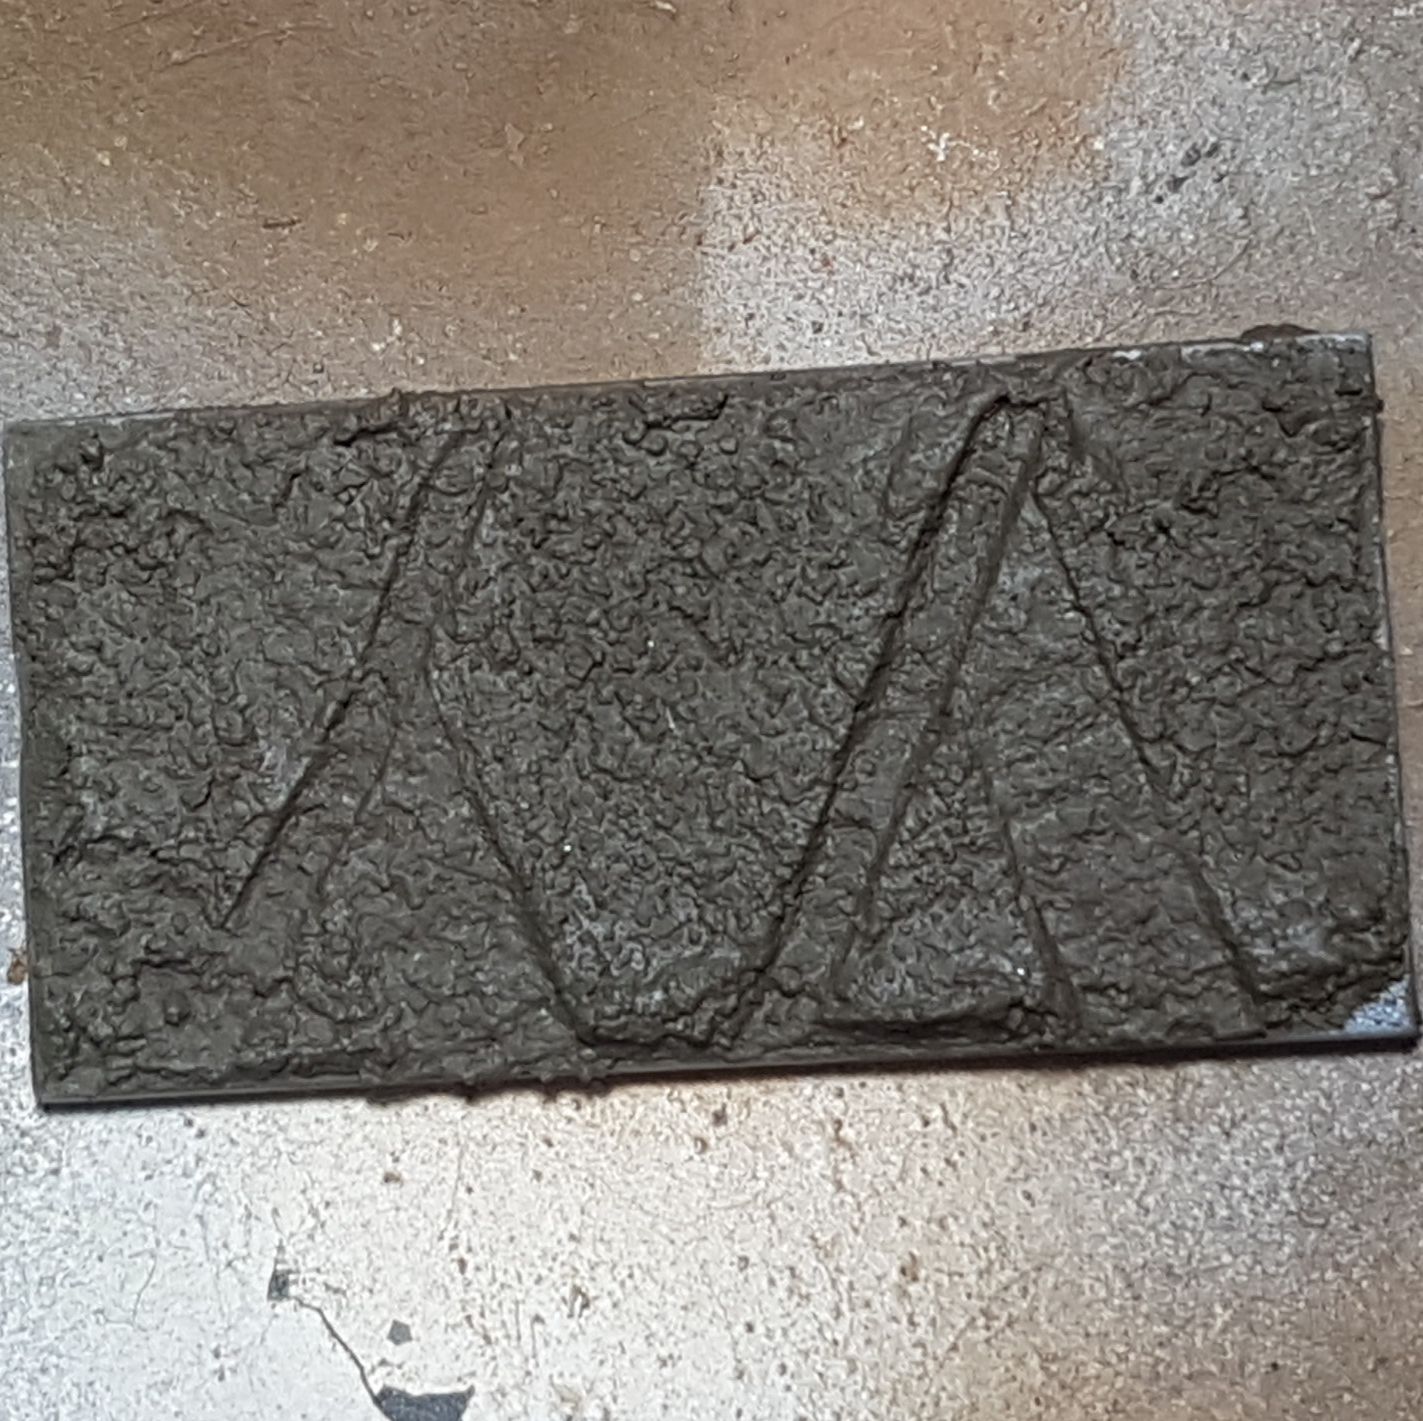
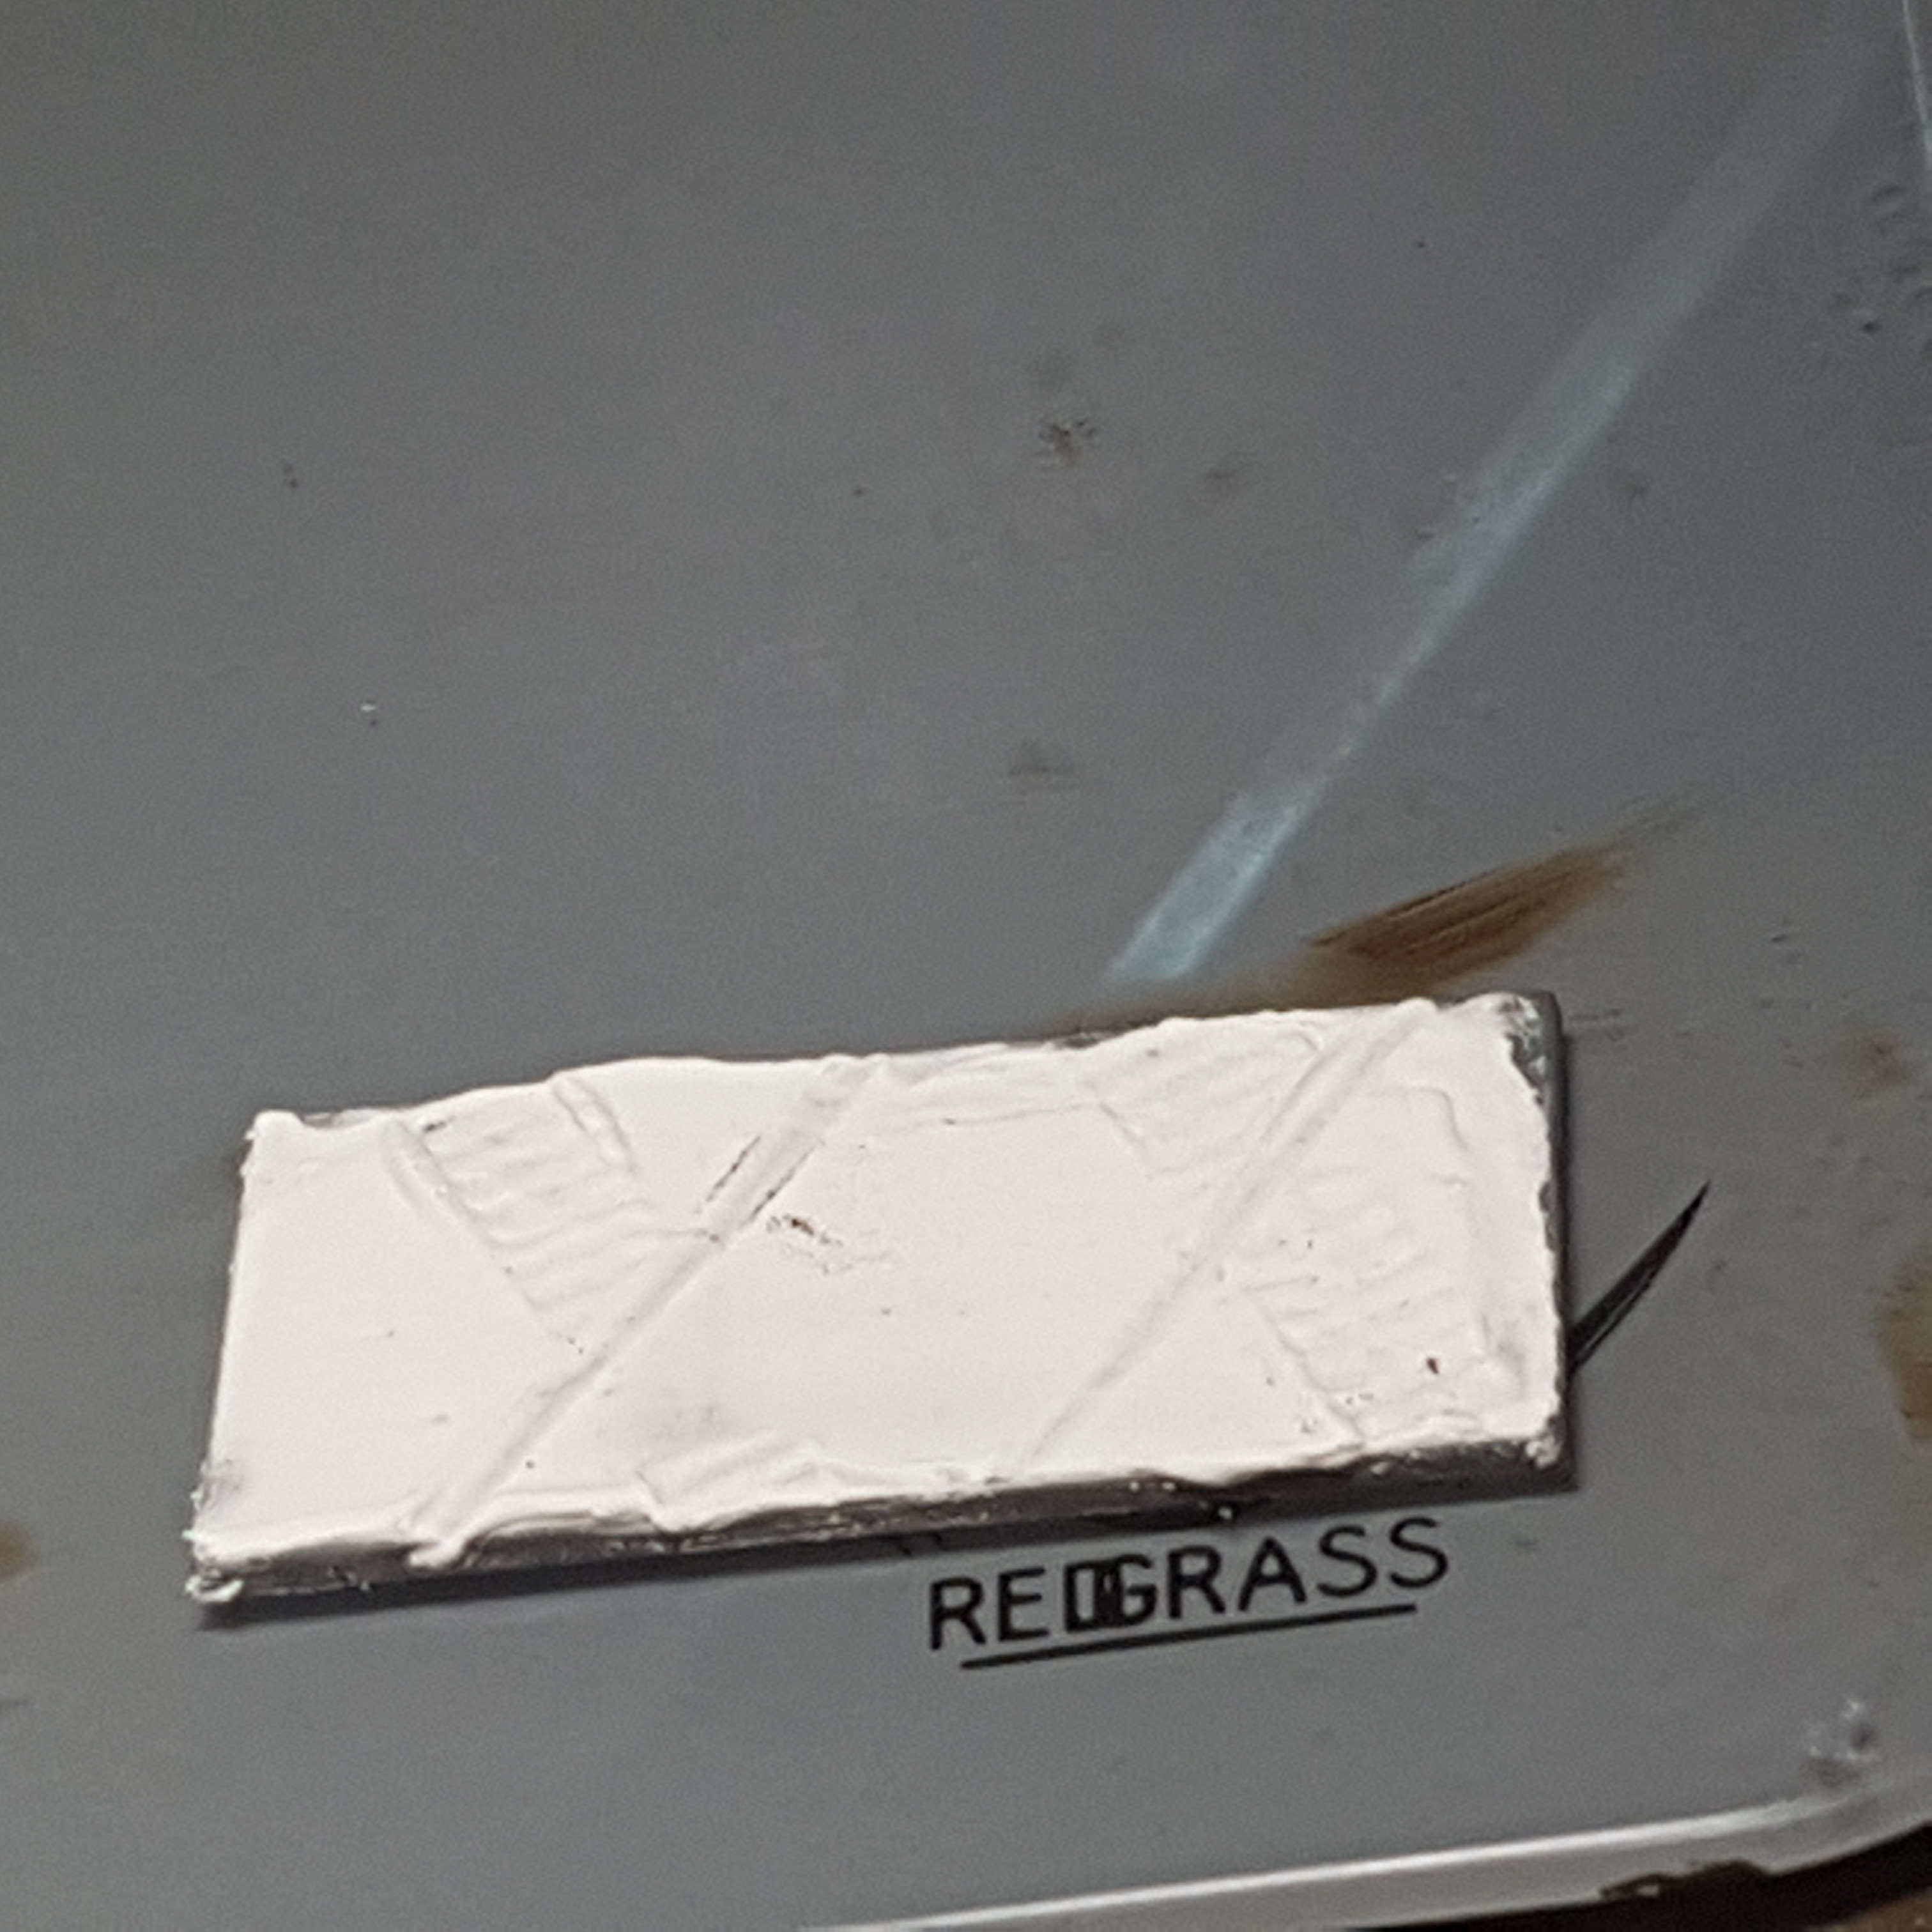
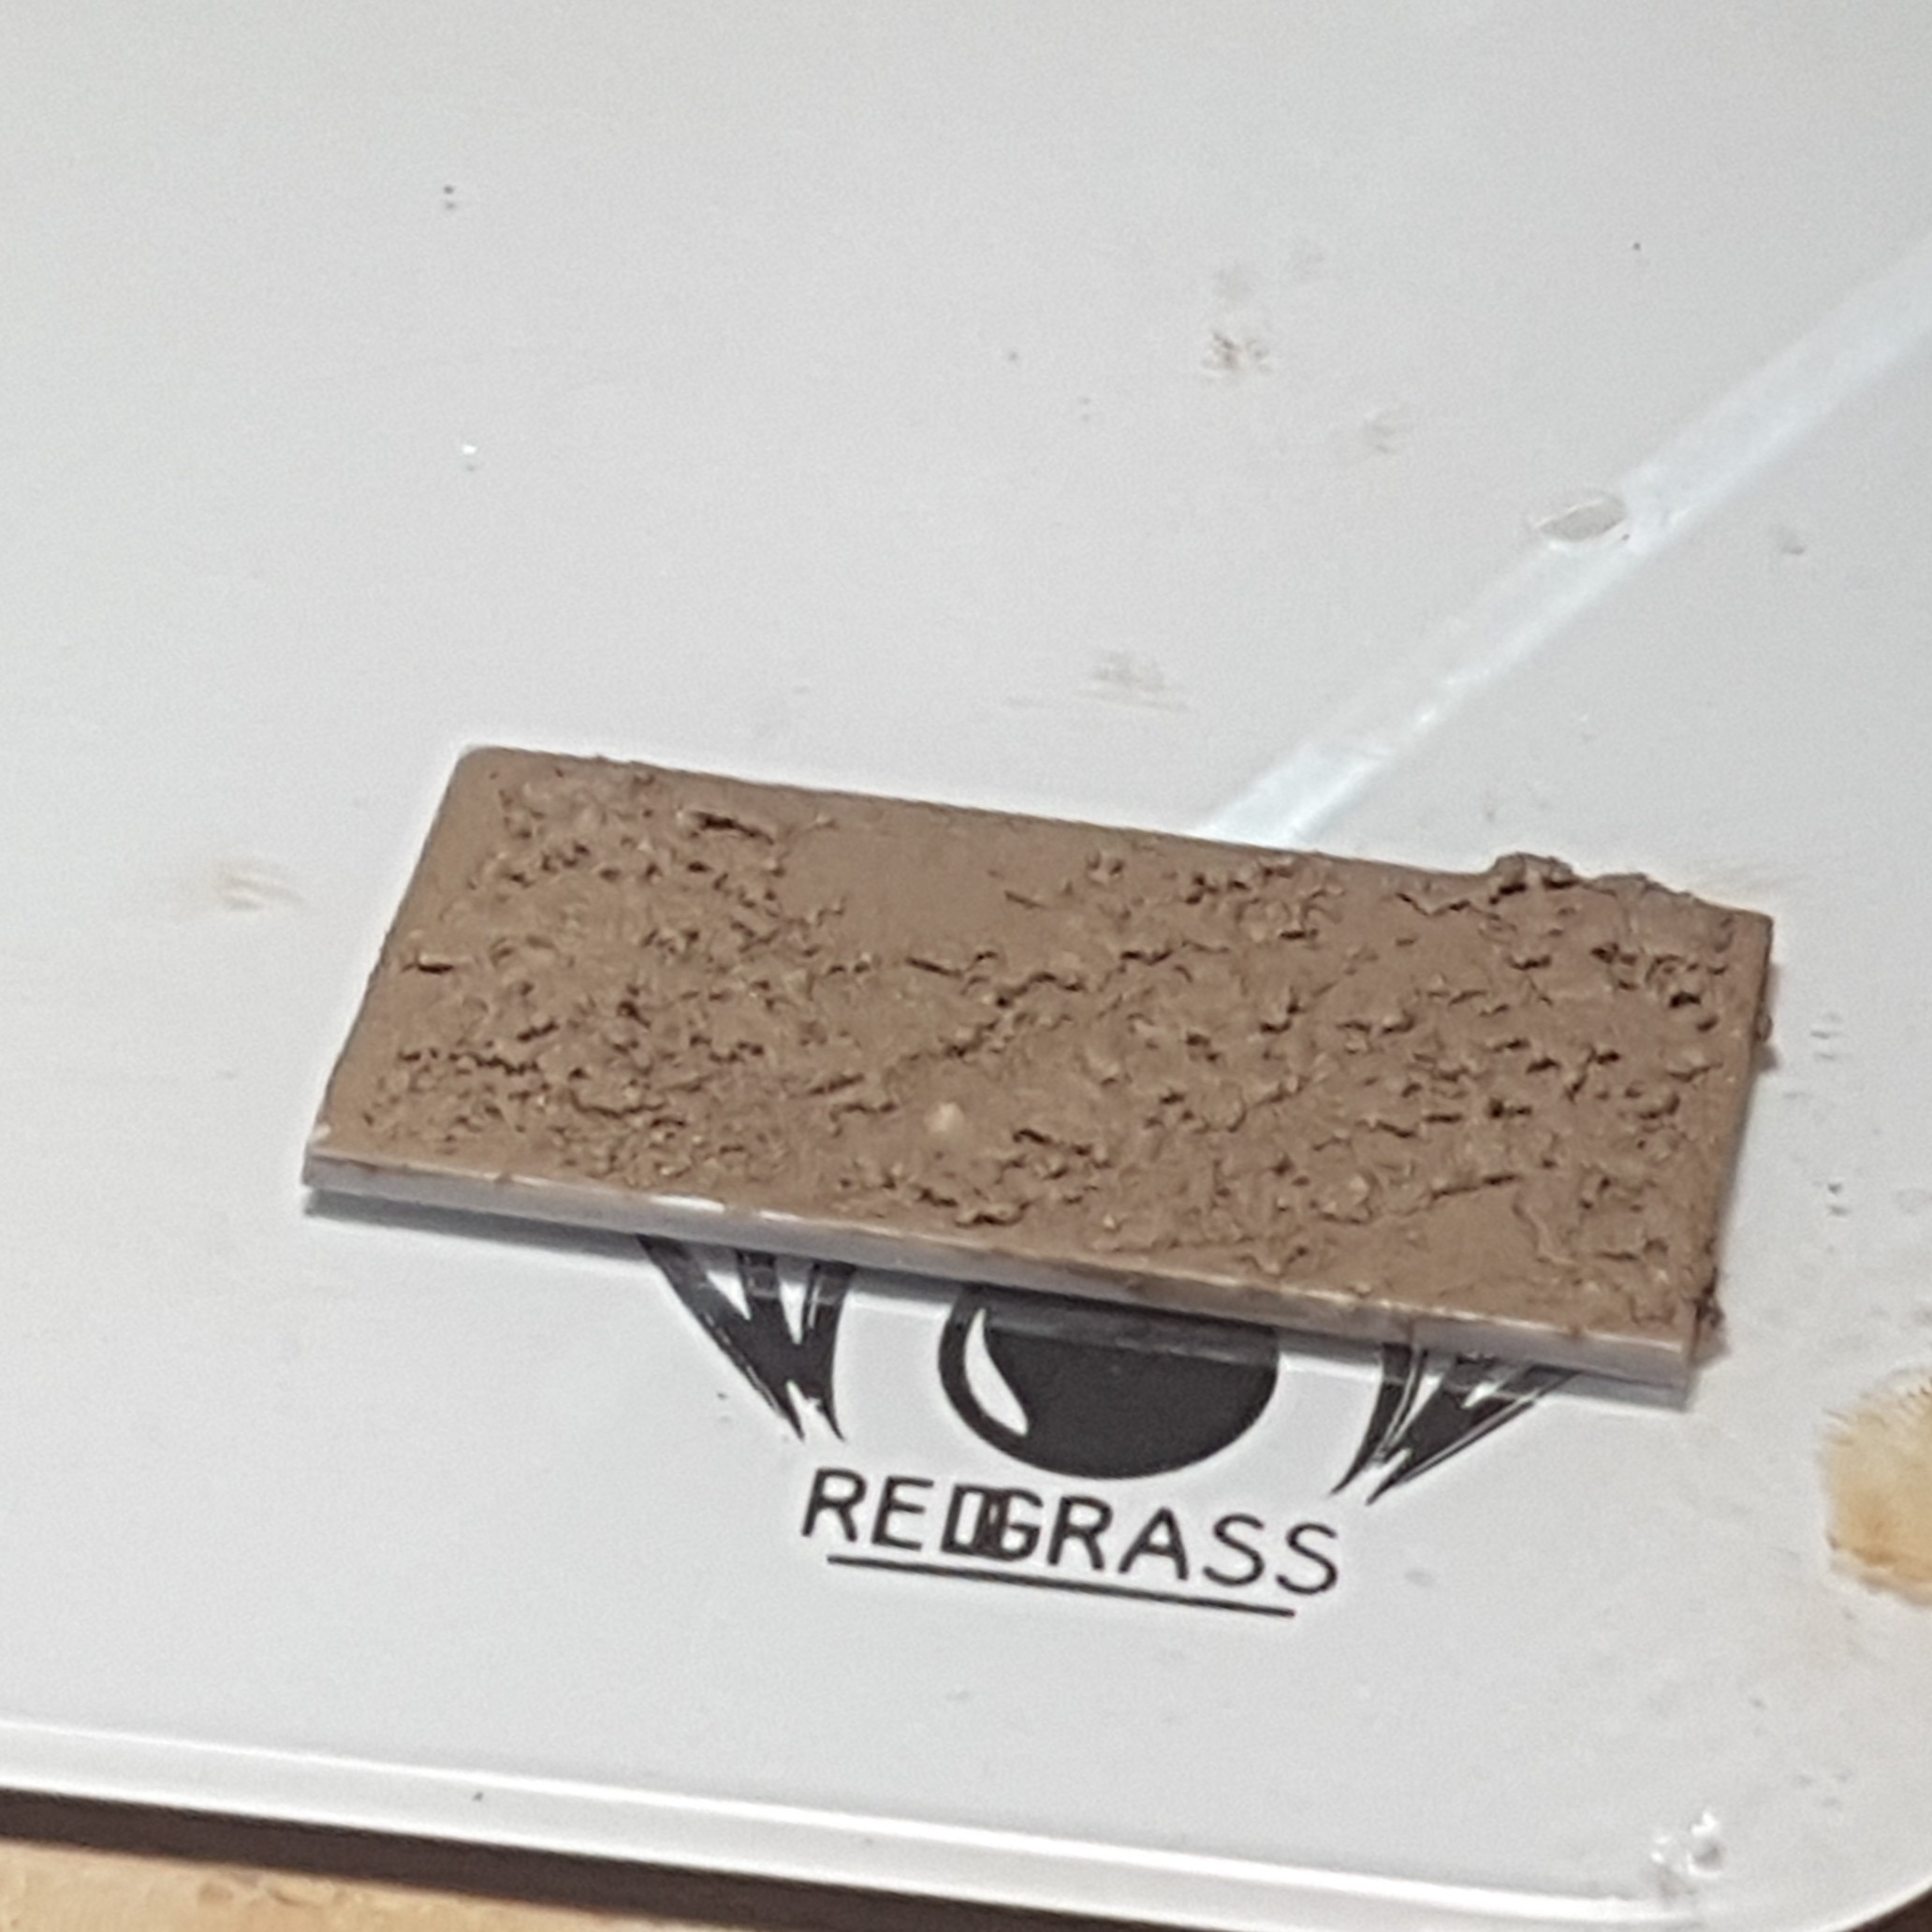
So I looked at Base 1 that I did earlier and wanted to try the impressions with an oil rather than an enamel and see if that makes a difference. So I grabbed a base made with structure paste and impressions in it. I started with a coat of Abteilung 502 Modelling Oil Color Dark Mud (ABT130) and then did the impressions with a bit of slightly thinned Abteilung 502 Modelling Oil Color Shadow Brown (ABT015). Then I did the drybrush with Abteilung 502 Modelling Oil Color Sand Brown (ABT245) and the lighter drybrush with Abteilung 502 Modelling Oil Color Dust (ABT003). I am liking this result as well.


Base 9
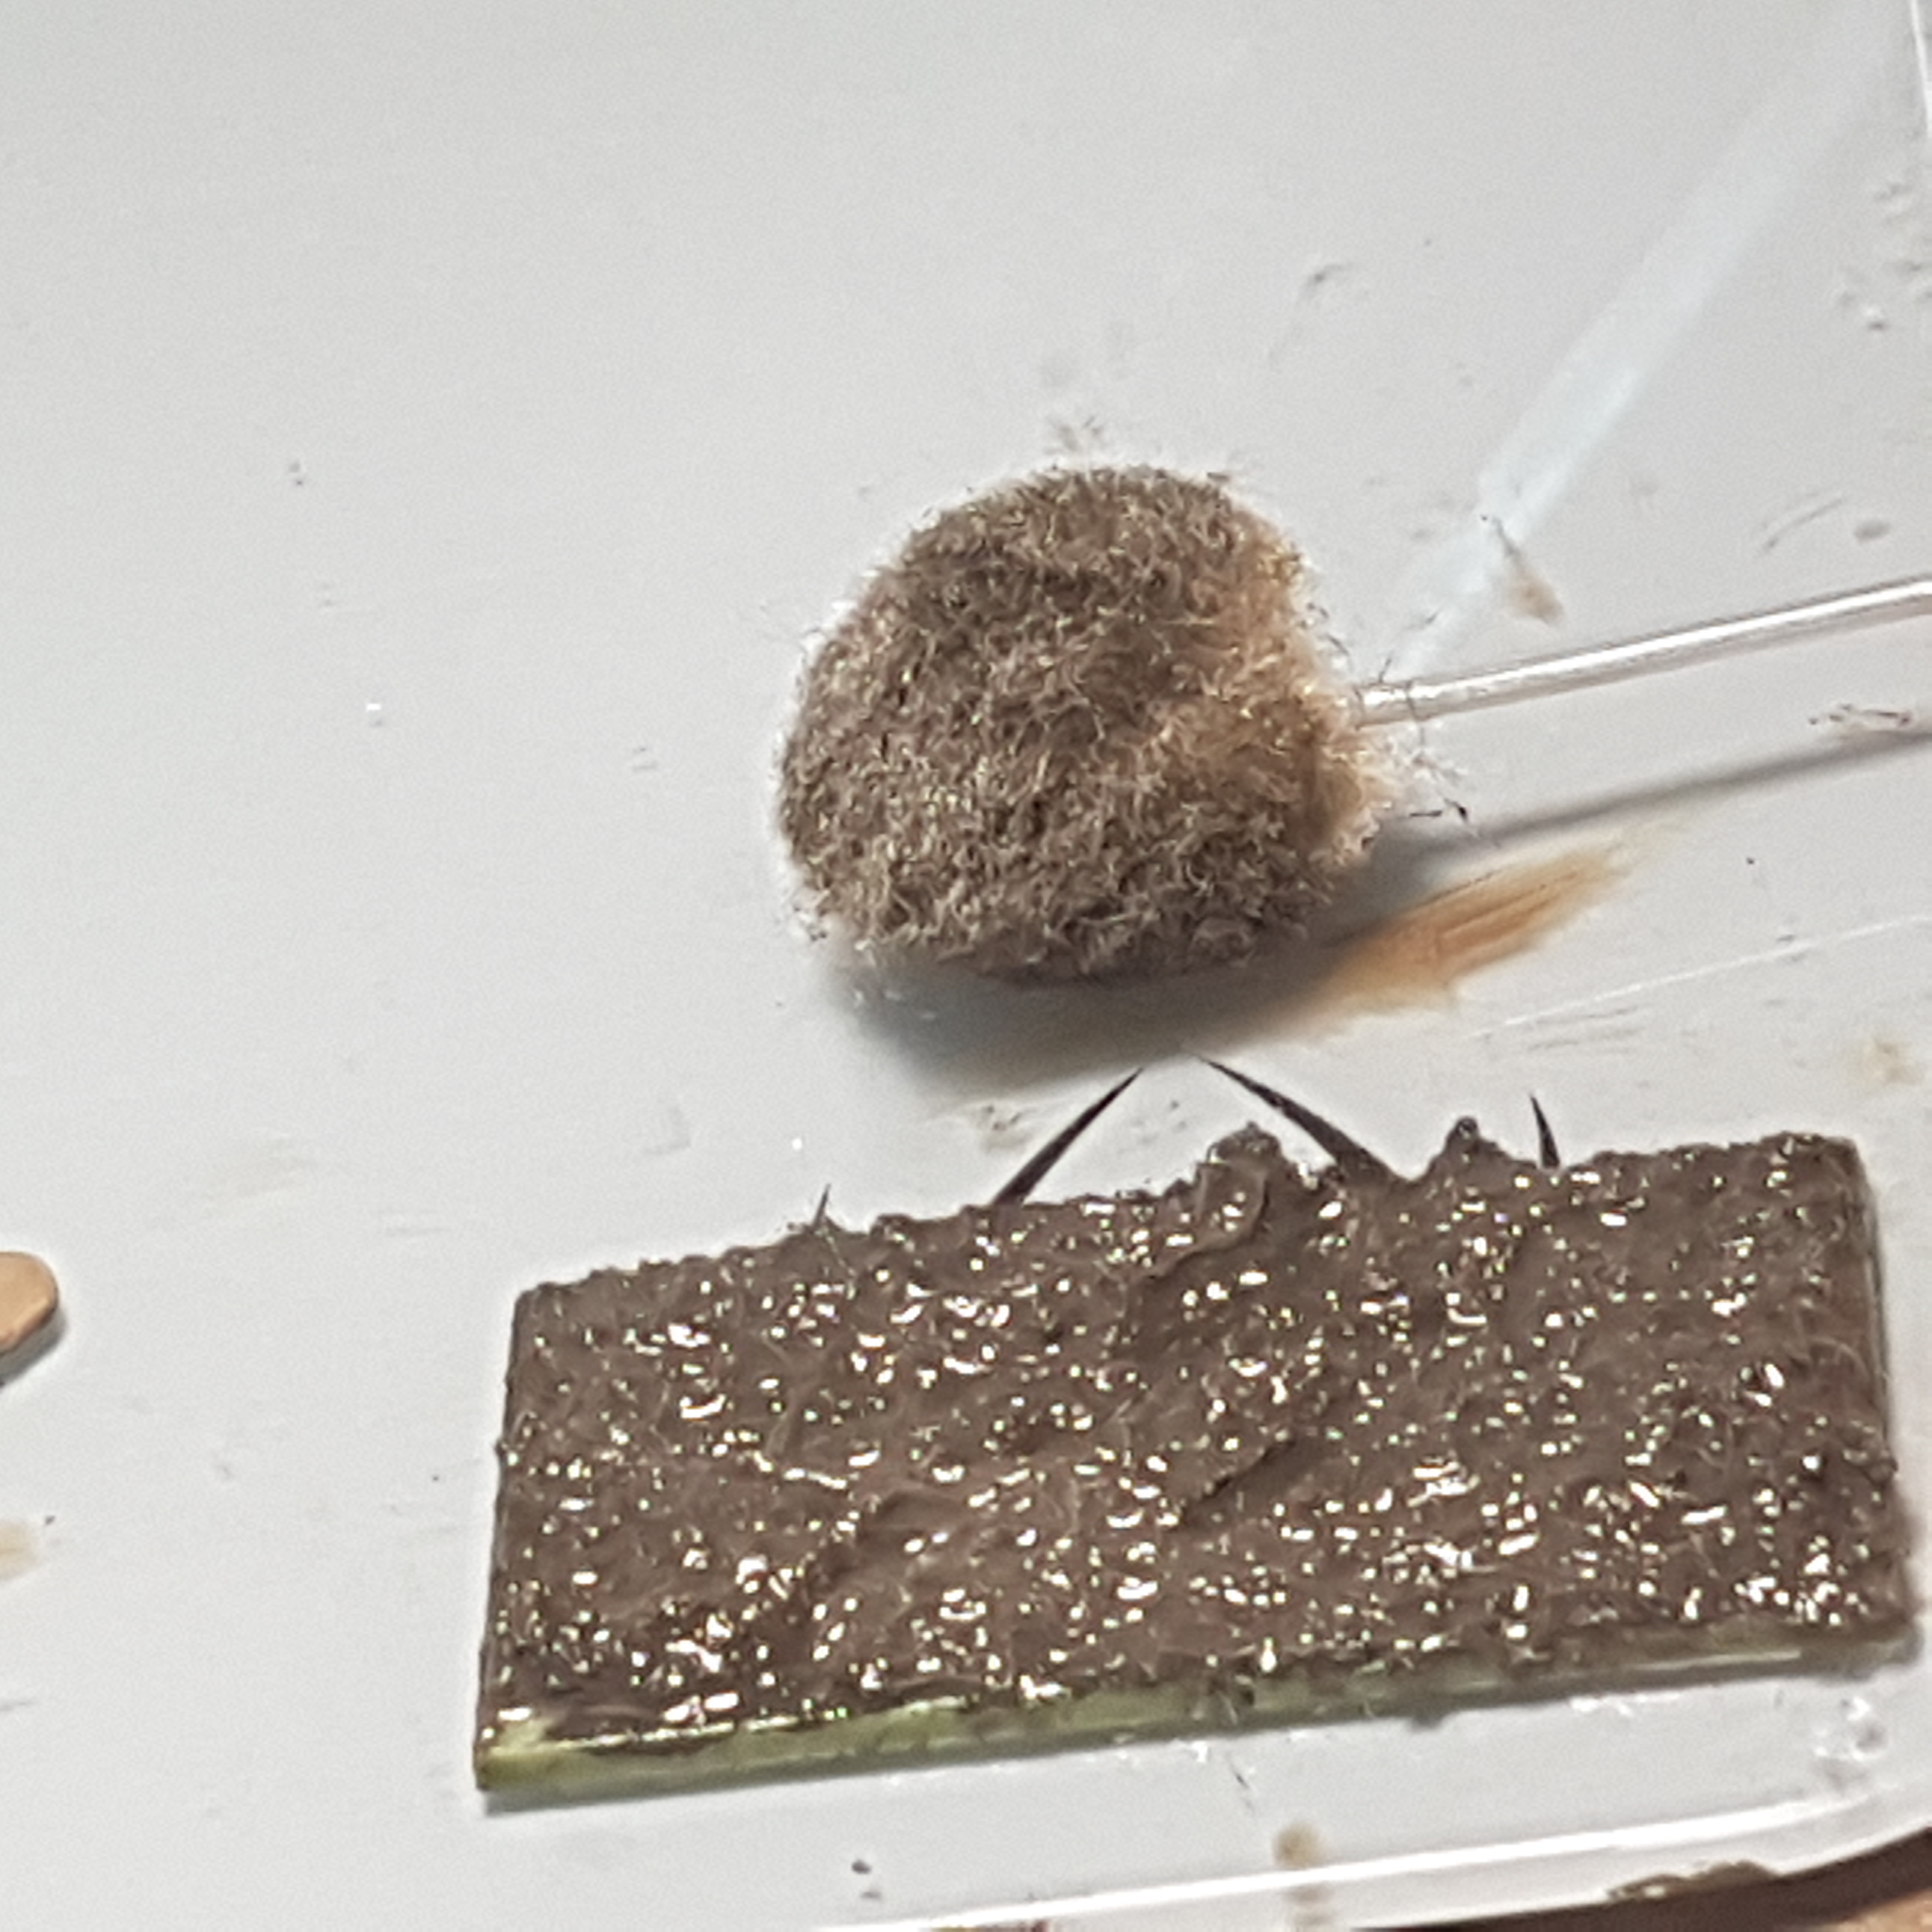
Why so complex? So I grabbed one of the bases with AK Interactive Diorama Terrains Muddy Ground (AK8017) coated it with AK Interactive Fresh Mud (AK016) let it dry for a bit and then went over it with a wool dauber dampened with a little bit of white spirit. I can only really see how this will look when this is dry.
Base 10
An alteration of base 9. This base has some thinned AK Interactive Diorama Terrains Muddy Ground (AK8017) on it, but that doesn’t matter. This time I started with a drybrush of Vallejo Panzer Aces Light Mud (70.315) and then did the coat with AK Interactive Fresh Mud (AK016). I let that sit for a bit as well and then went over it with the wool dauber dampened with white spirit.

 Left-Right Base 6-10
This obviously didn’t lead to an obvious way to go forward yet, but I feel like I made progress finding the way. I need to prep more bases with the good impressions.
Why Oil Paints?
People have mentioned that using oil paints is an interesting choice and there are 2 main reasons as to why.
- Oil paints blend easily with each other leading to far more natural blends than acrylics can. Mostly because acrylics dry way quicker and are thinner to begin with.
- Oil paints have a long working time and since I am doing the basing after the models have been attached to the base, oils are easy to remove from the the models using a bit of white spirit. I just need to make sure that I use an acrylic varnish on the models before I attach them to the base.
In hindsight, most of the pictures actually look quite good on the project page, just as long as you don’t look at them at full size.
All of the Mud.
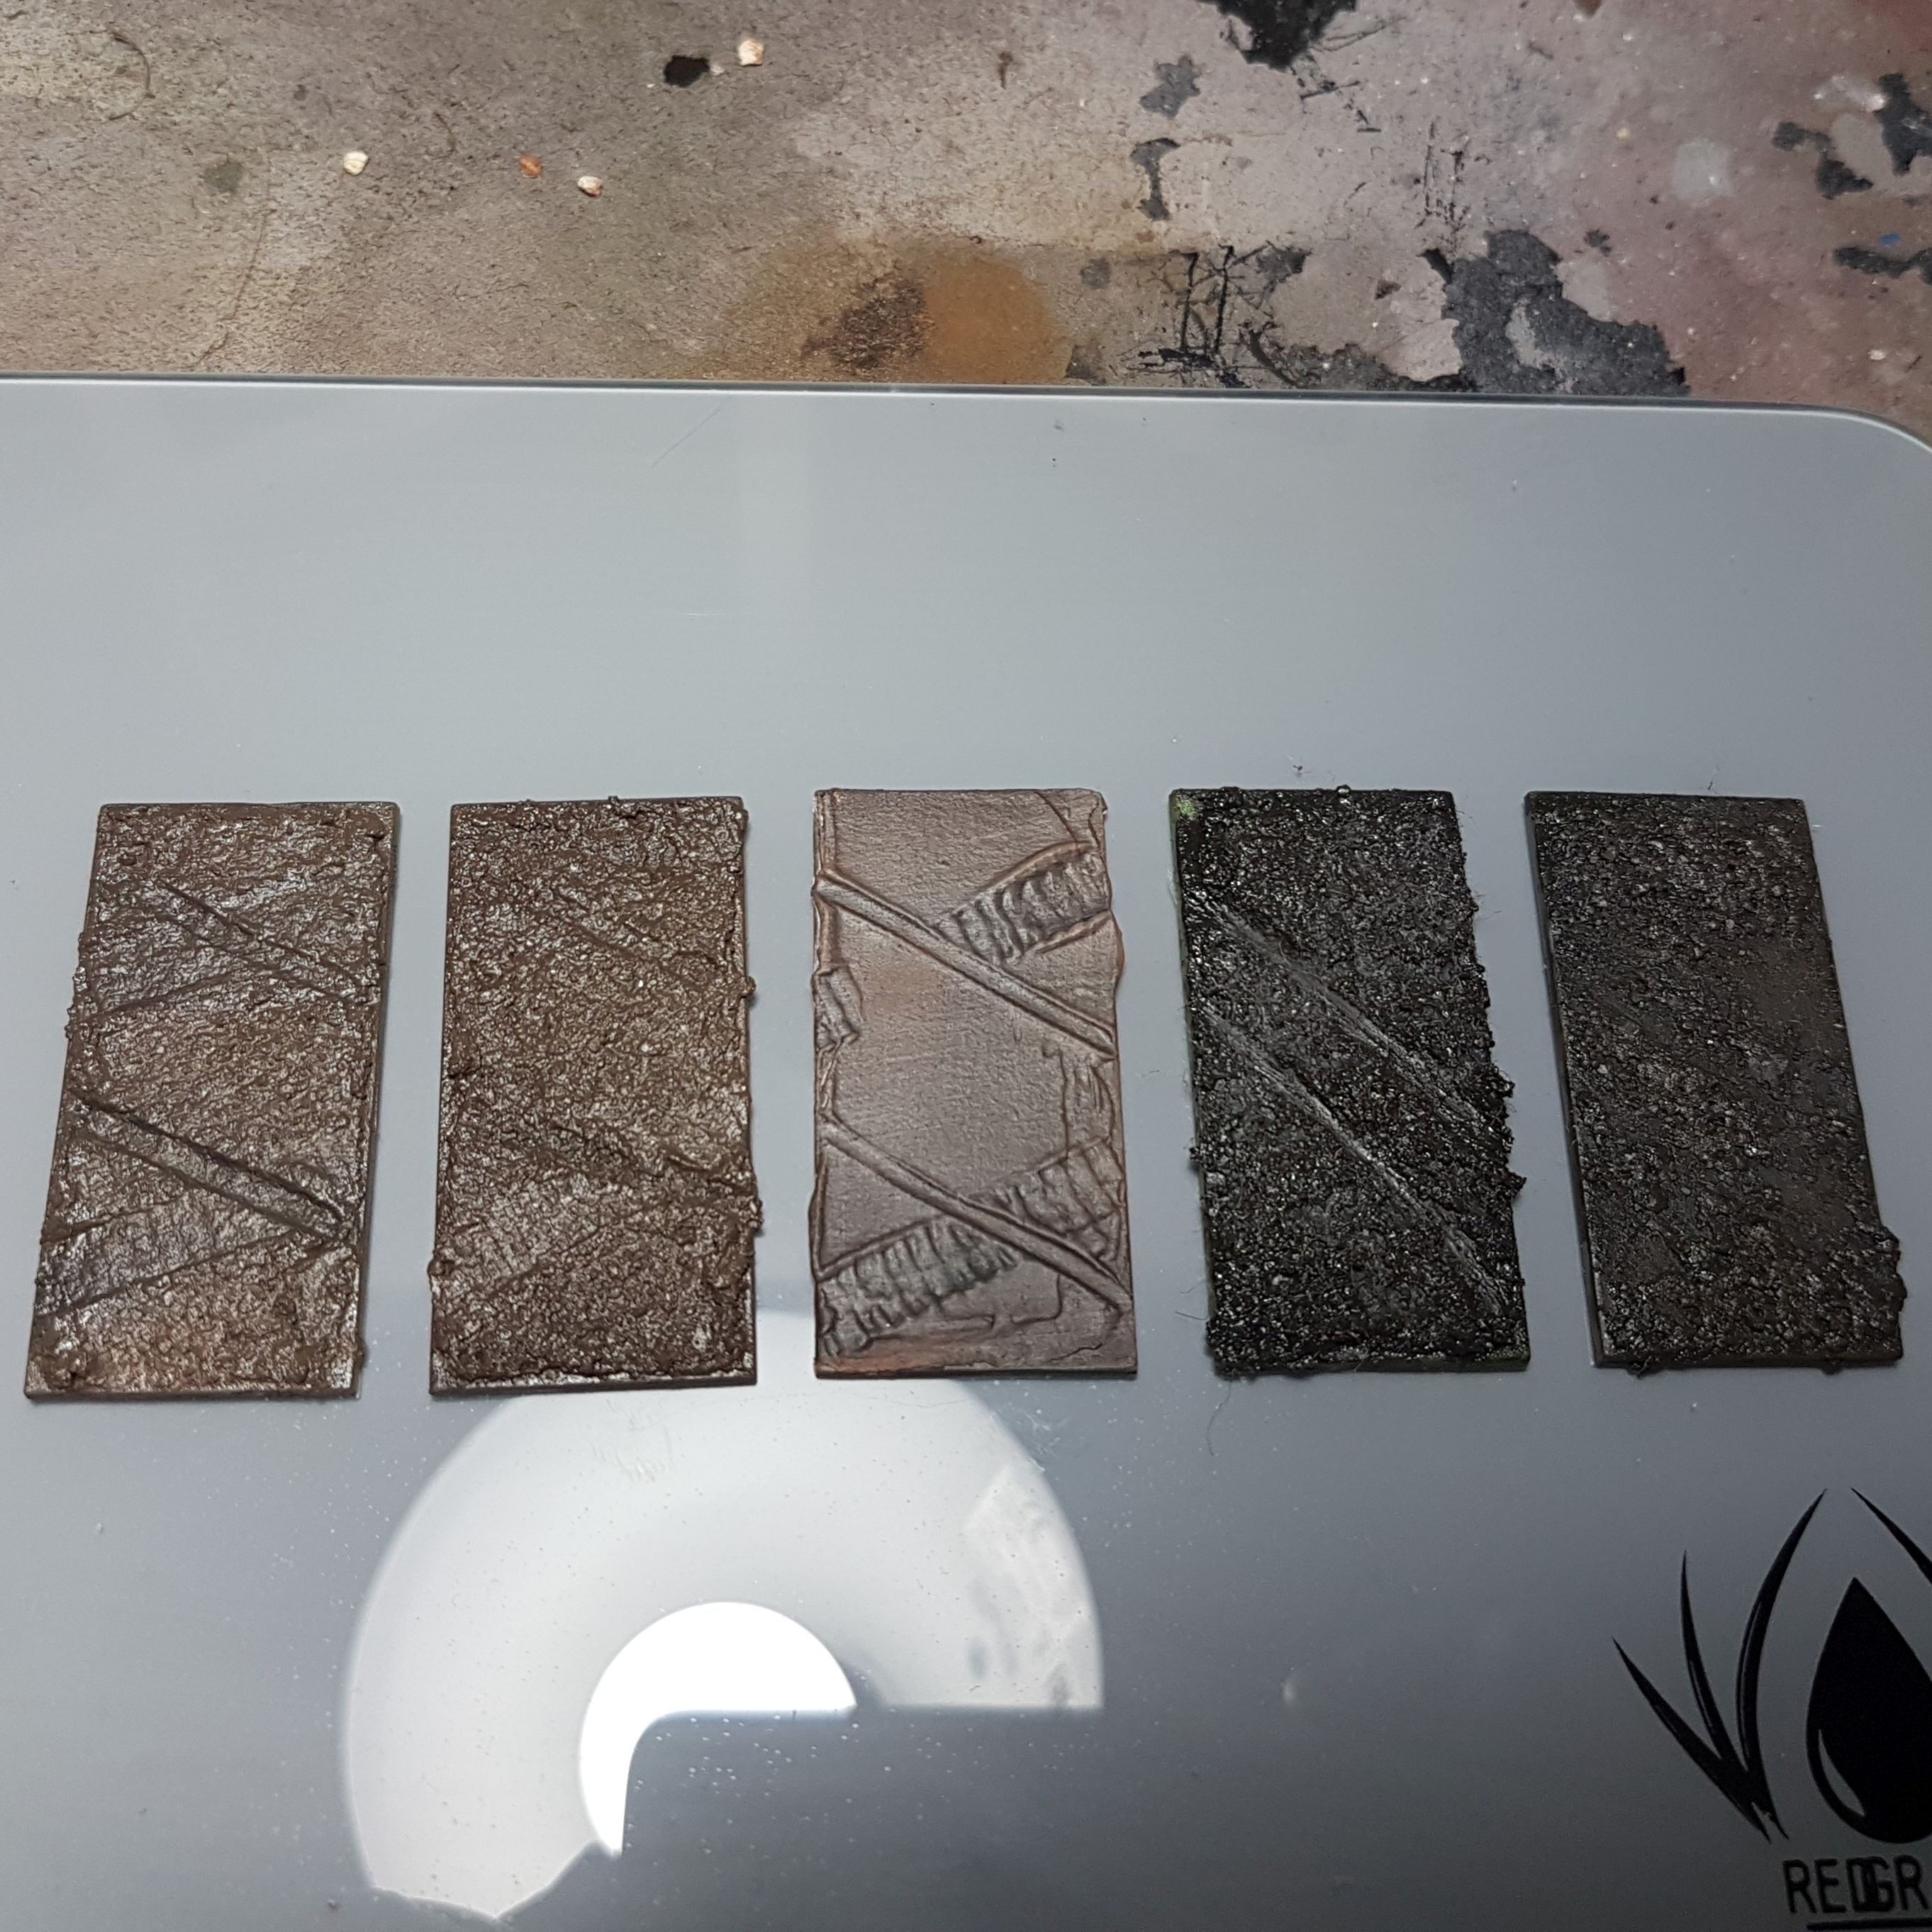
So here are the results from the last test.
The basing paste mix seems to crack if it is applied too thick, so that’s another nail in its coffin. That means it is either the structure paste or the AK Interactive Diorama Terrains Muddy Ground (AK8017). My preference goes out to the AK Interactive Diorama Terrains Muddy Ground (AK8017) especially since it gives a nice texture when just flattened out completely and then with the tracks of the tank wet and pressed in and the wheels wet and rolled through, I am getting a good appearance as long as I don’t use the paste too thin. And thus this is the winner.
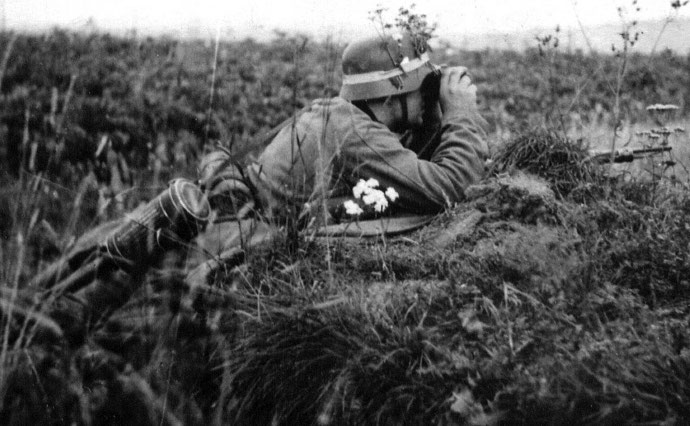
Now that I have the texture sorted out, next is the colours. Since most of the WWII pictures I have are in black & white this didn’t help me much with the colour apart from the fact that the dirt looks pretty dark off road.
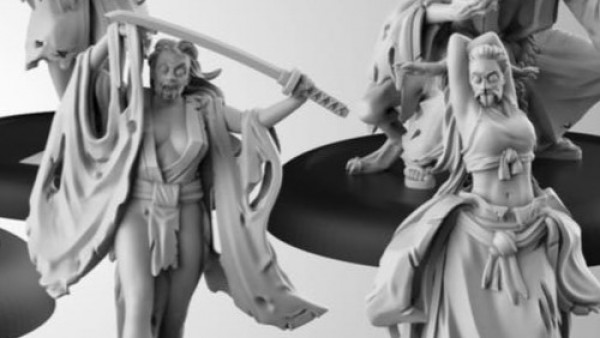
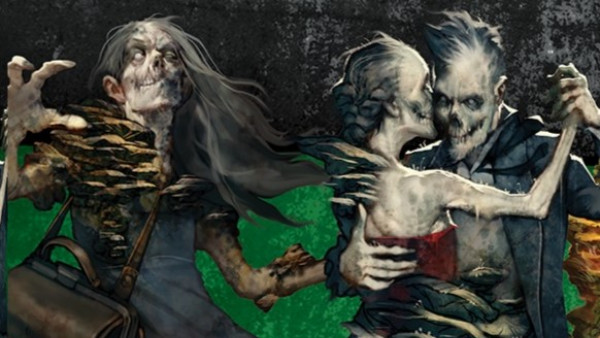
Source: ‘Images of War The Battle for the Caucasus 1942-1943’ by Anthony Tucker-Jones
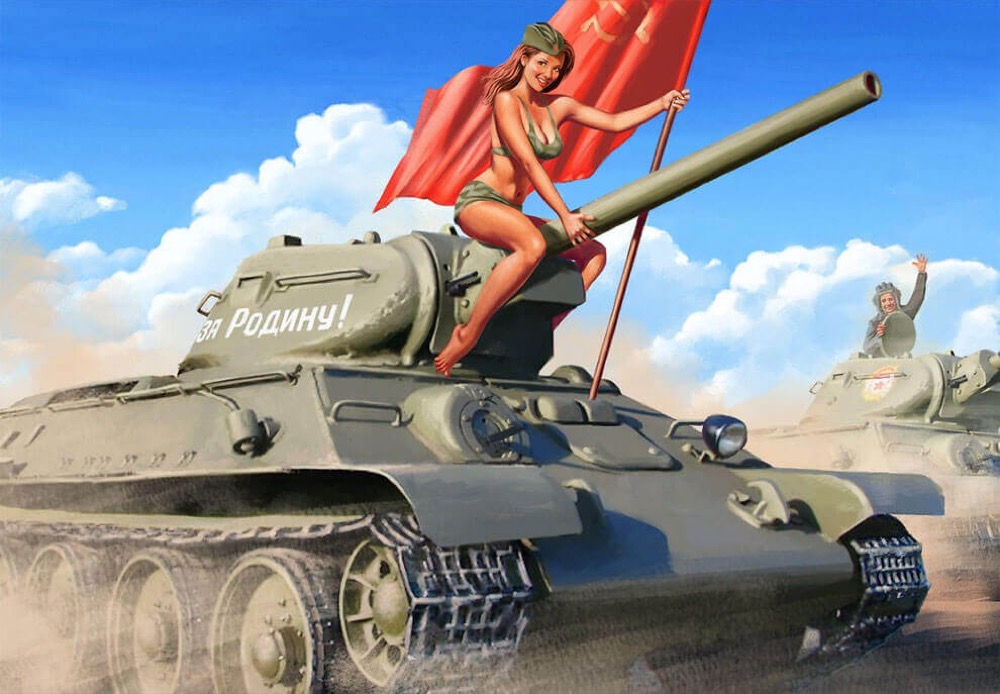
So finding pictures about mud in the Caucasus for some reason led to a lot of pictures of Caucasian women in mud….. ?
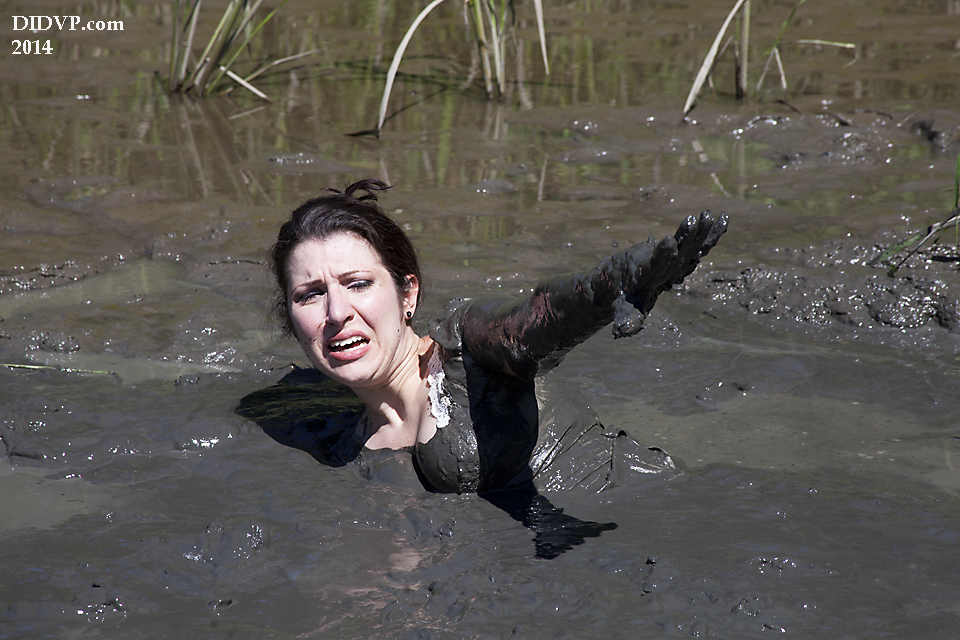 Whatever floats your boat I guess...
But I did find 2 good ones that can help me get a good idea of the colour, so next up is more playing around with paints.
Not a Blanket Burrito Day.
But a very busy one…. Anyway, more basing tests today. Here are the results with the basing paste mix from last post. I am really liking the result.

I am thinking about buying new MDF bases for everything so that I can also base my vehicle and not have the vehicle bases look different. So for that it would be great if I can just hide the bases moulded on the models in the texture of the basing, that would be great. So I glued 2 of the filler caps for the Battlefront bases on one of my test bases to see how this is going to turn out. I don’t want to see a rim of the bases through my basing.

A New Tool.
In order to make tire tracks more consistently I made a little tool. I used 2 spare road wheel I had from the PaK36/Nebelwerfer kit, drilled some holes into them and glued them to a bit of a brass rod in order to make a tire track tool. I don’t have any spare tracks to do the same for tanks, but they differ per tank anyway, so I’ll just press the tank in.


Back to Basing.
Top Left: This is the basing paste mix over the 2 filler caps.
Top Middle: The basing paste mix where I pressed a tank in, but it just kept sticking to the tank and couldn’t get a good impression.
Top Right: More of the basing paste mix but I tried to roll the tires through it, you can barely see a thing.
Bottom Left: Just pure AK Interactive Diorama Terrains Muddy Ground (AK8017) I pressed the tank in after wetting the tracks a bit and then rolled the wheels through it.
Bottom Middle: The same process but that with just the structure paste.
Bottom Right: Again the same process but with the basing paste mix.

So from this I am concluding that putting the the texture in the the muddy ground or in the structure paste is fine, but once you mix them together is goes wrong and can’t hold the structure. I’ll have see after it has all dried, but this is going to require more testing.
Blanket Burrito Day 2.
The bad news that got me completely down in the gutter yesterday has been resolved today luckily, but I was still very tired from a very bad night so I spend another day as a blanket burrito.
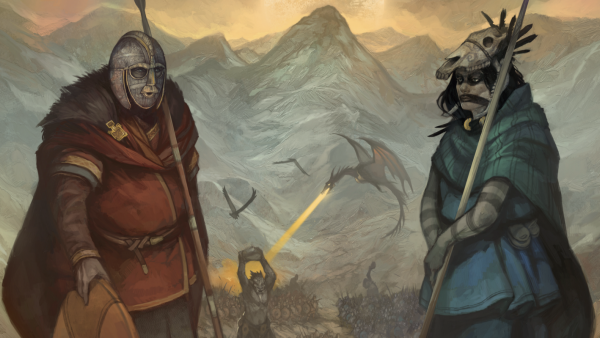
Today I am going to take a bit more of a dive into the battle for the Caucasus in order to help me set the scene for my bases and eventually terrain. I managed to get my hands on a digital copy of ‘Images of War The Battle for the Caucasus 1942-1943’ by Anthony Tucker-Jones and will be using that as my source a lot in this post.

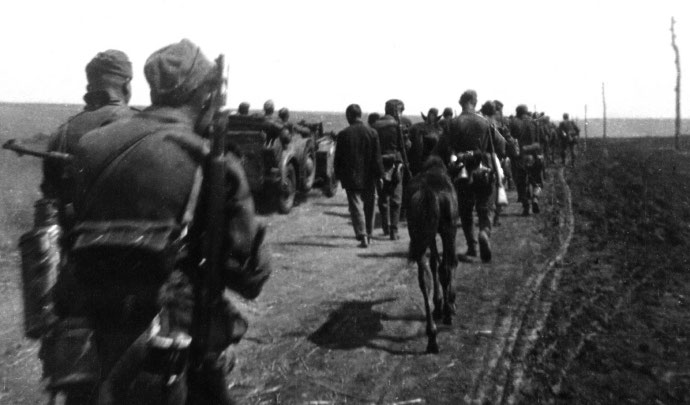
So, the first picture is going to cause the first problem. These are Soviet prisoners at the end of October 1942 and the Soviet models I have are not wearing winter uniforms like these guys do.
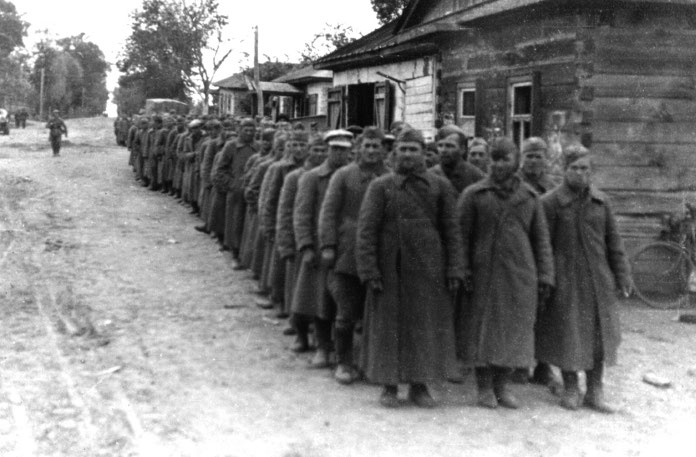 Source: 'Images of War The Battle for the Caucasus 1942-1943' by Anthony Tucker-Jones
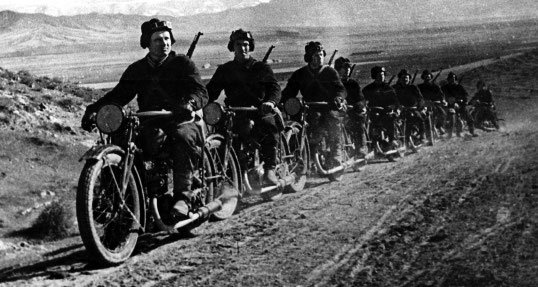
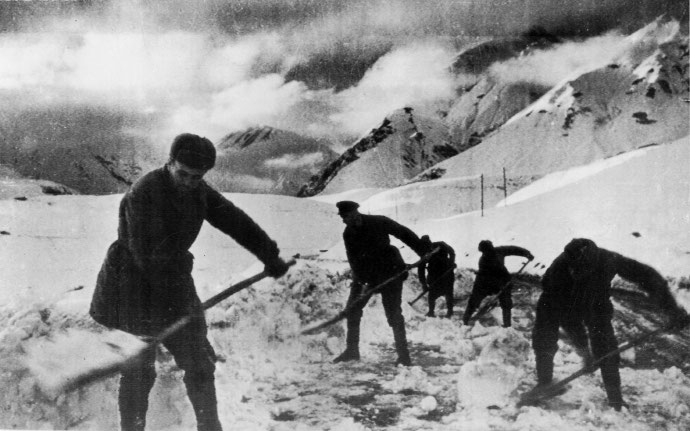
And then there is this image of Soviet troops clearing a mountain road in the Northern Caucasus. They wear a different winter uniform closer to the summer uniform the models I have wear, but still not the same.
 Source: 'Images of War The Battle for the Caucasus 1942-1943' by Anthony Tucker-Jones
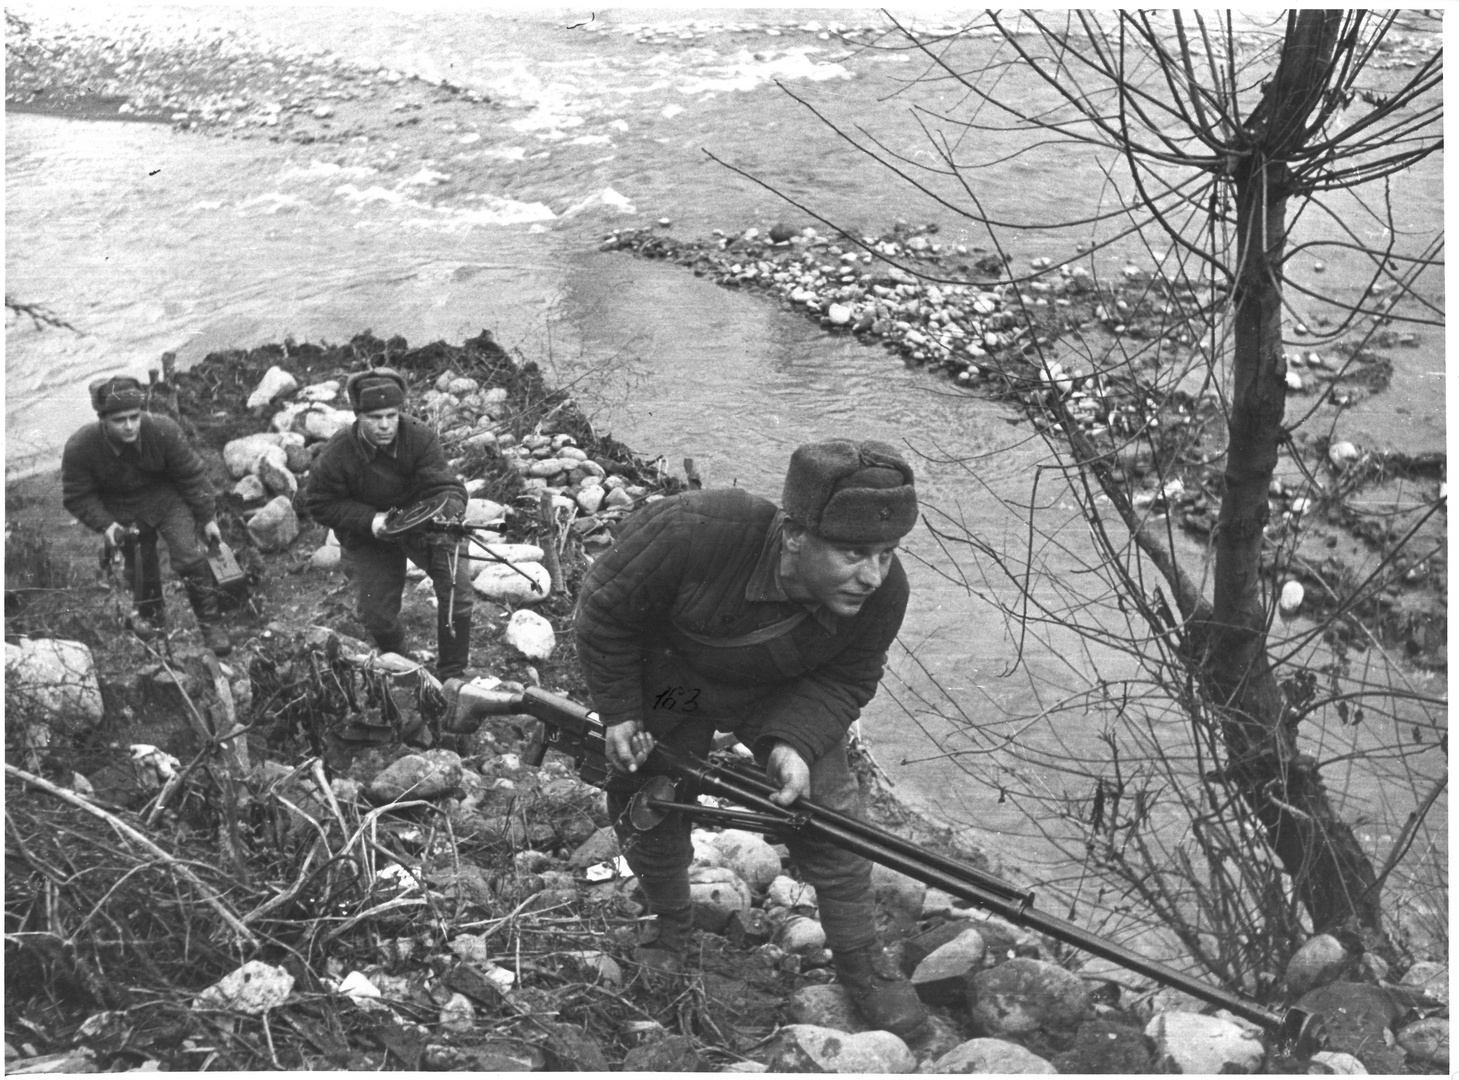 Another image from the internet showing the winter uniform better.
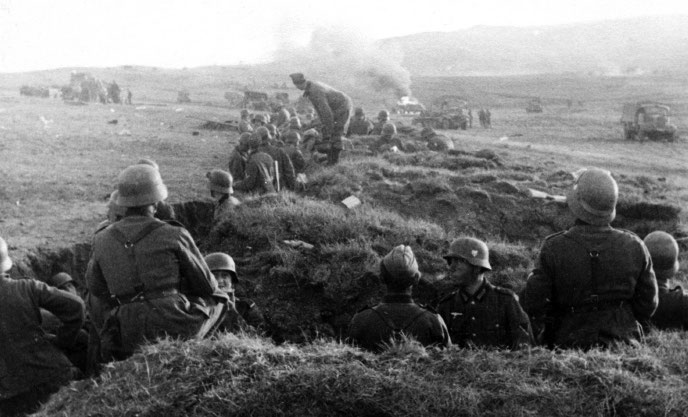
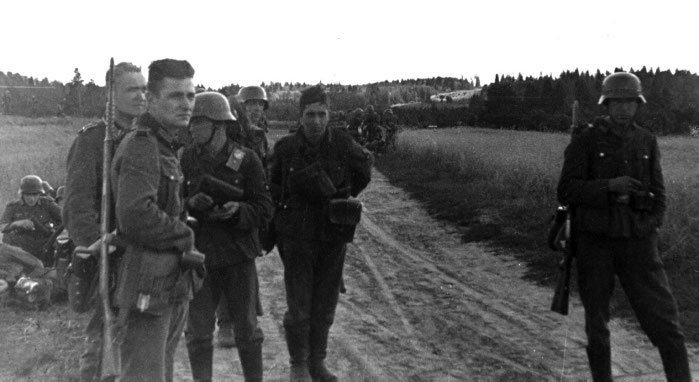
And then I have not even gotten into the German uniforms…. So that means I won’t be doing winter 1942. Luckily the raids done by the 9th Guards Cavalry against the 1st panzer army started in September, so that will be my focus. The following photos will give a good idea of what the terrain looked like and what I am going to do with my bases.
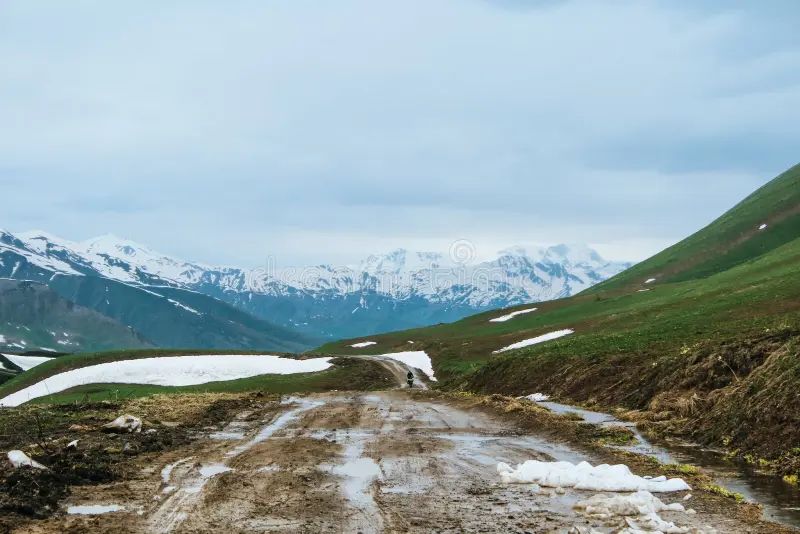
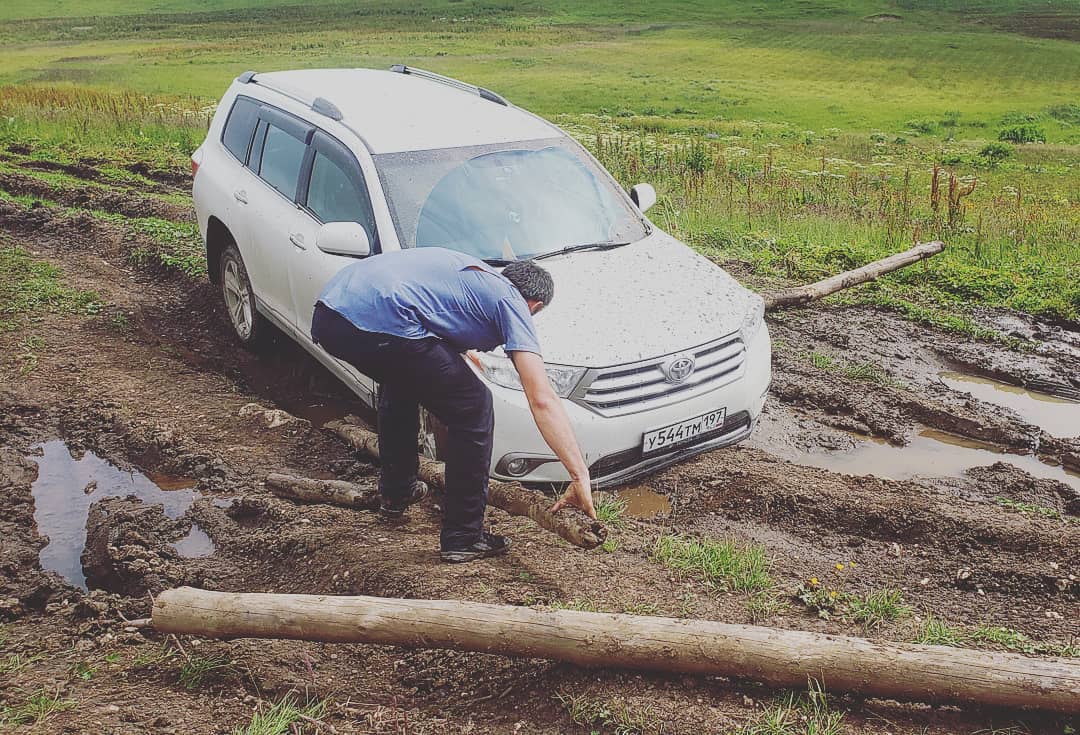
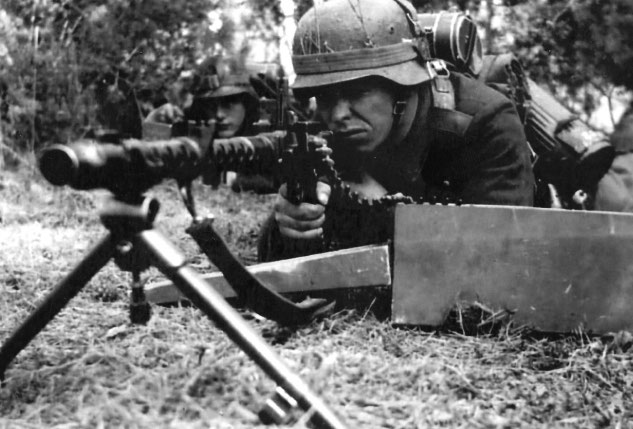
Here are some more pictures from ‘Images of War The Battle for the Caucasus 1942-1943’ by Anthony Tucker-Jones during the summer and autumn of the battle of the Caucasus.


And here are some colour photos I found on the interwebs from the same battle, these gives me a great idea of what colours I need to look at.
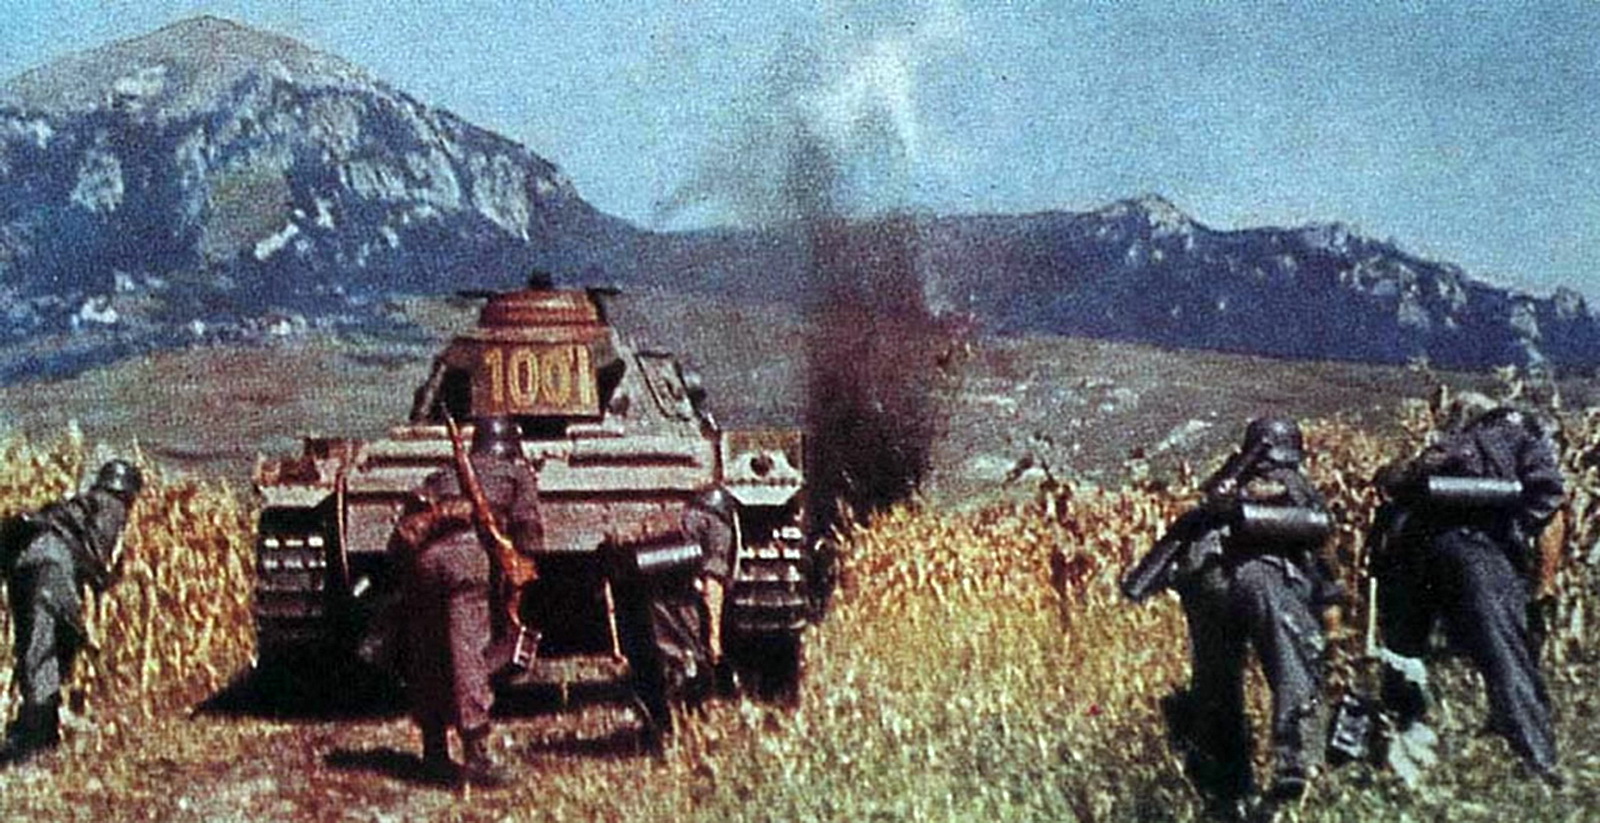
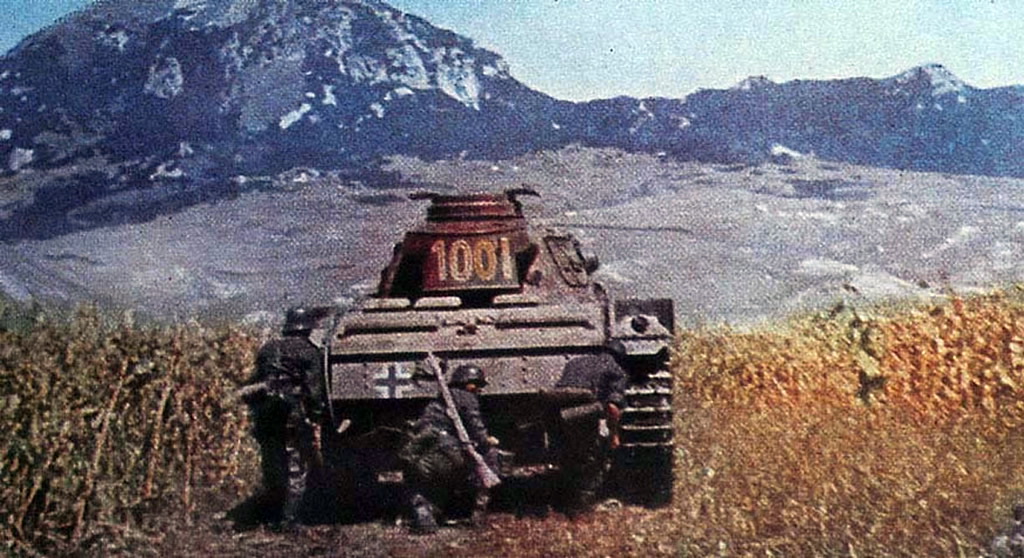
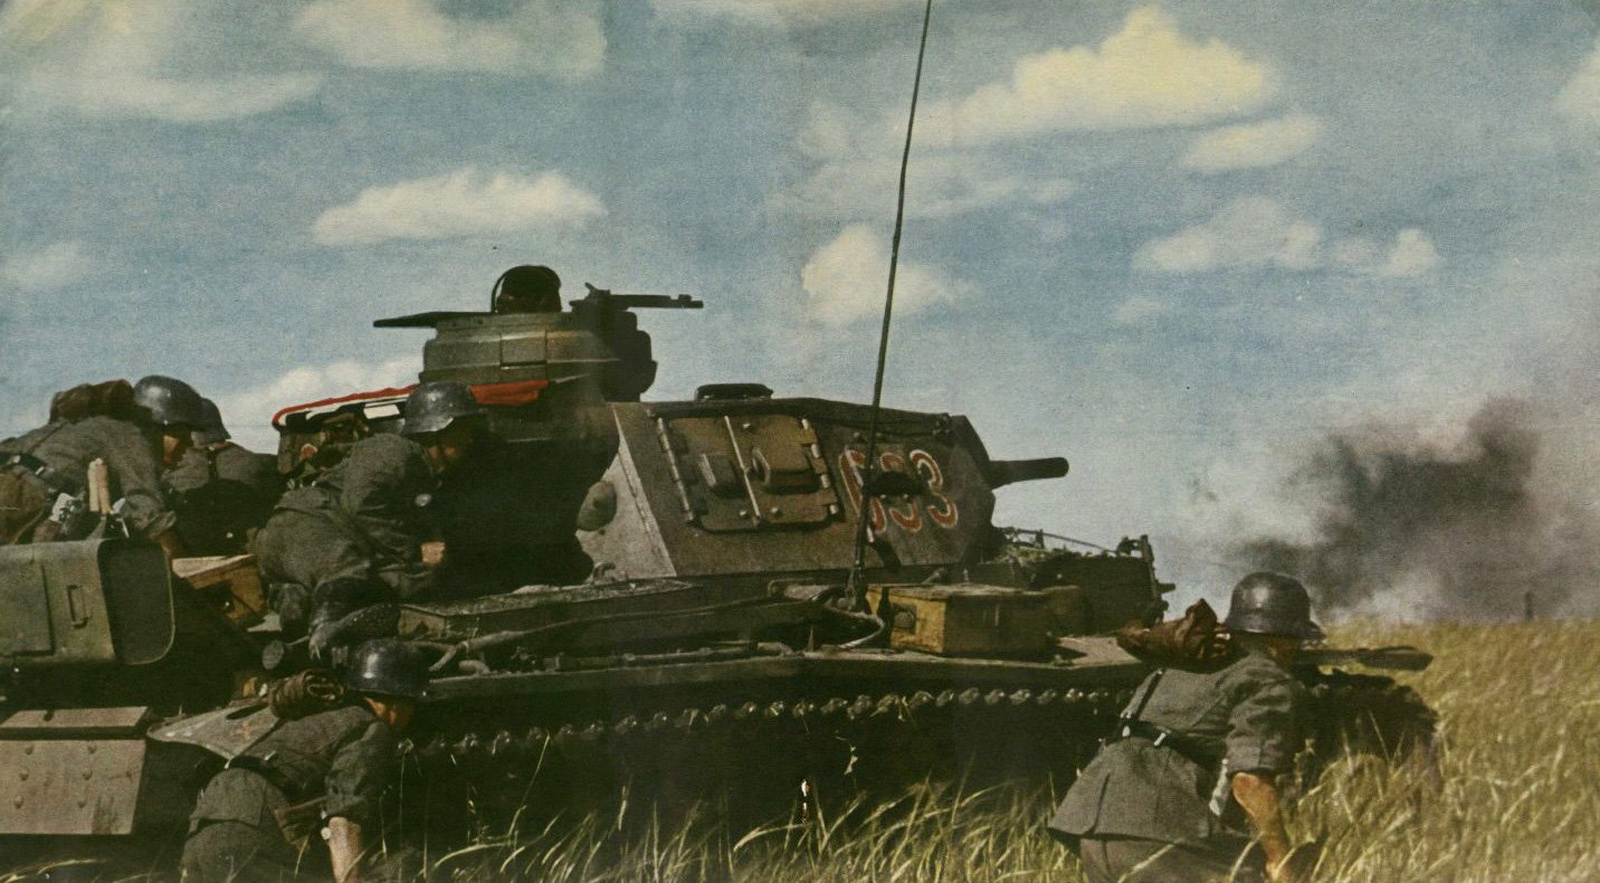
So that all gives me a great amount of detail to work with for now and I’ll be sure to follow up on this with my basing tests.
Mental Health.....
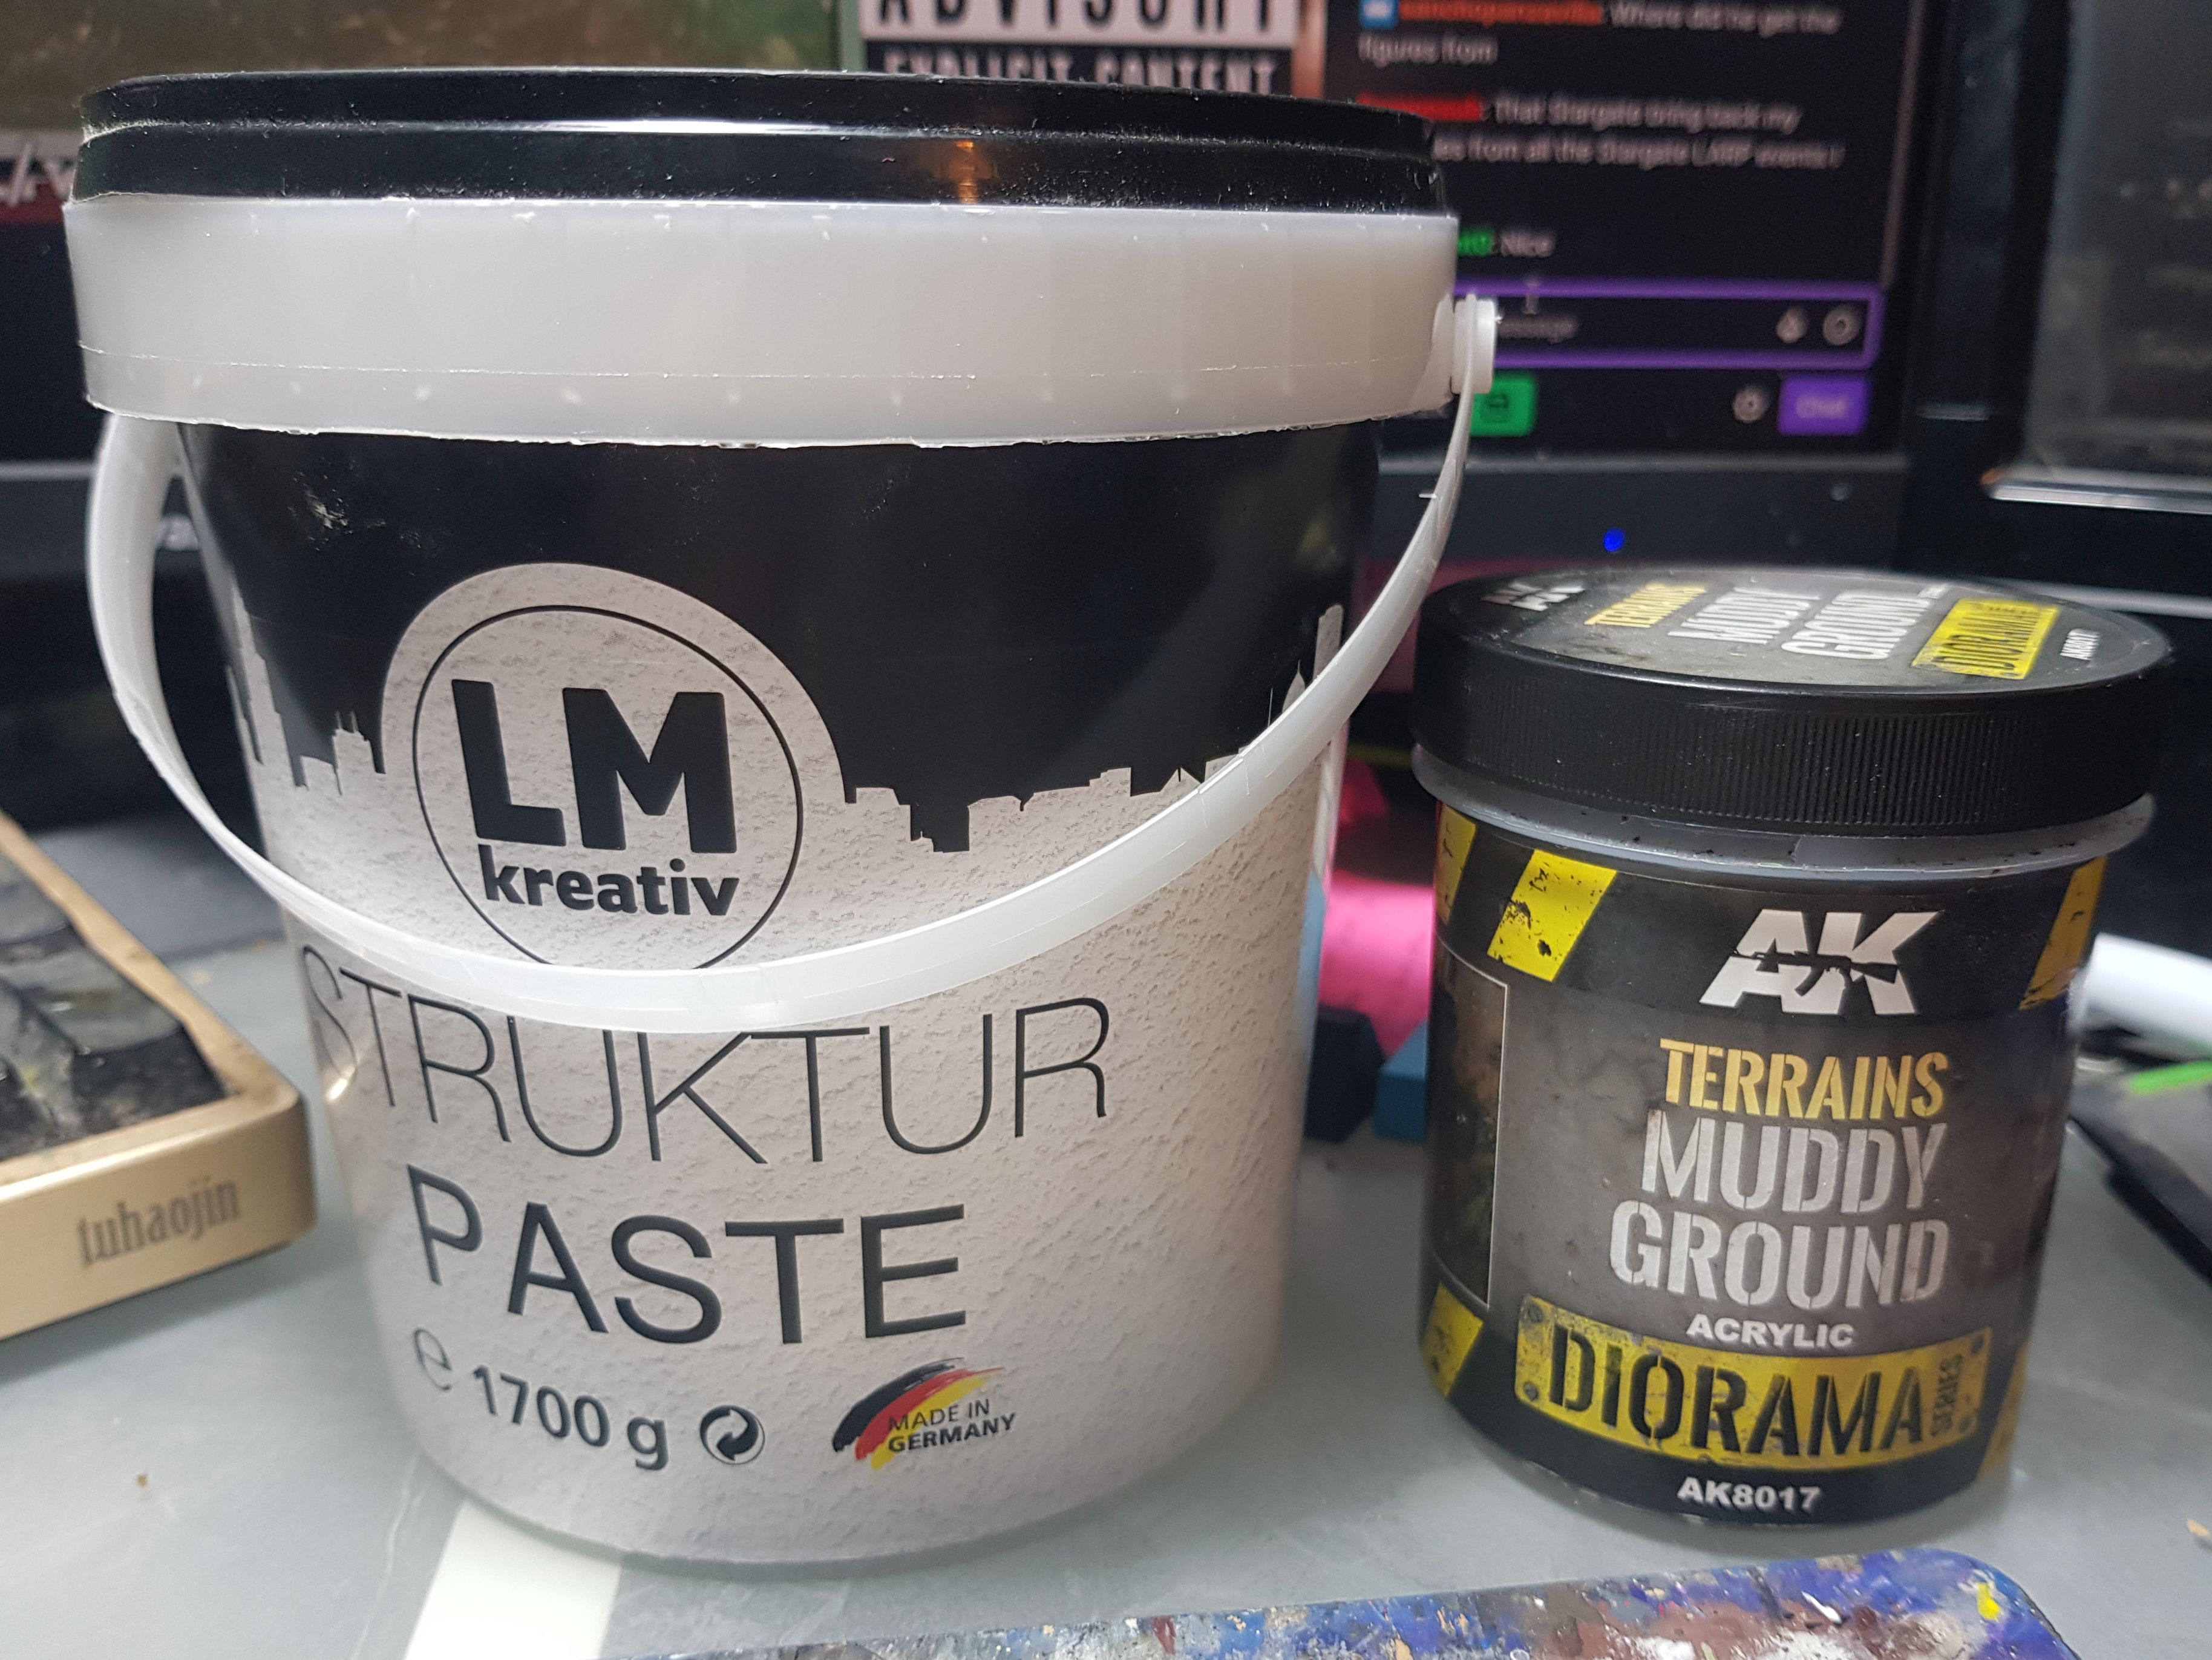
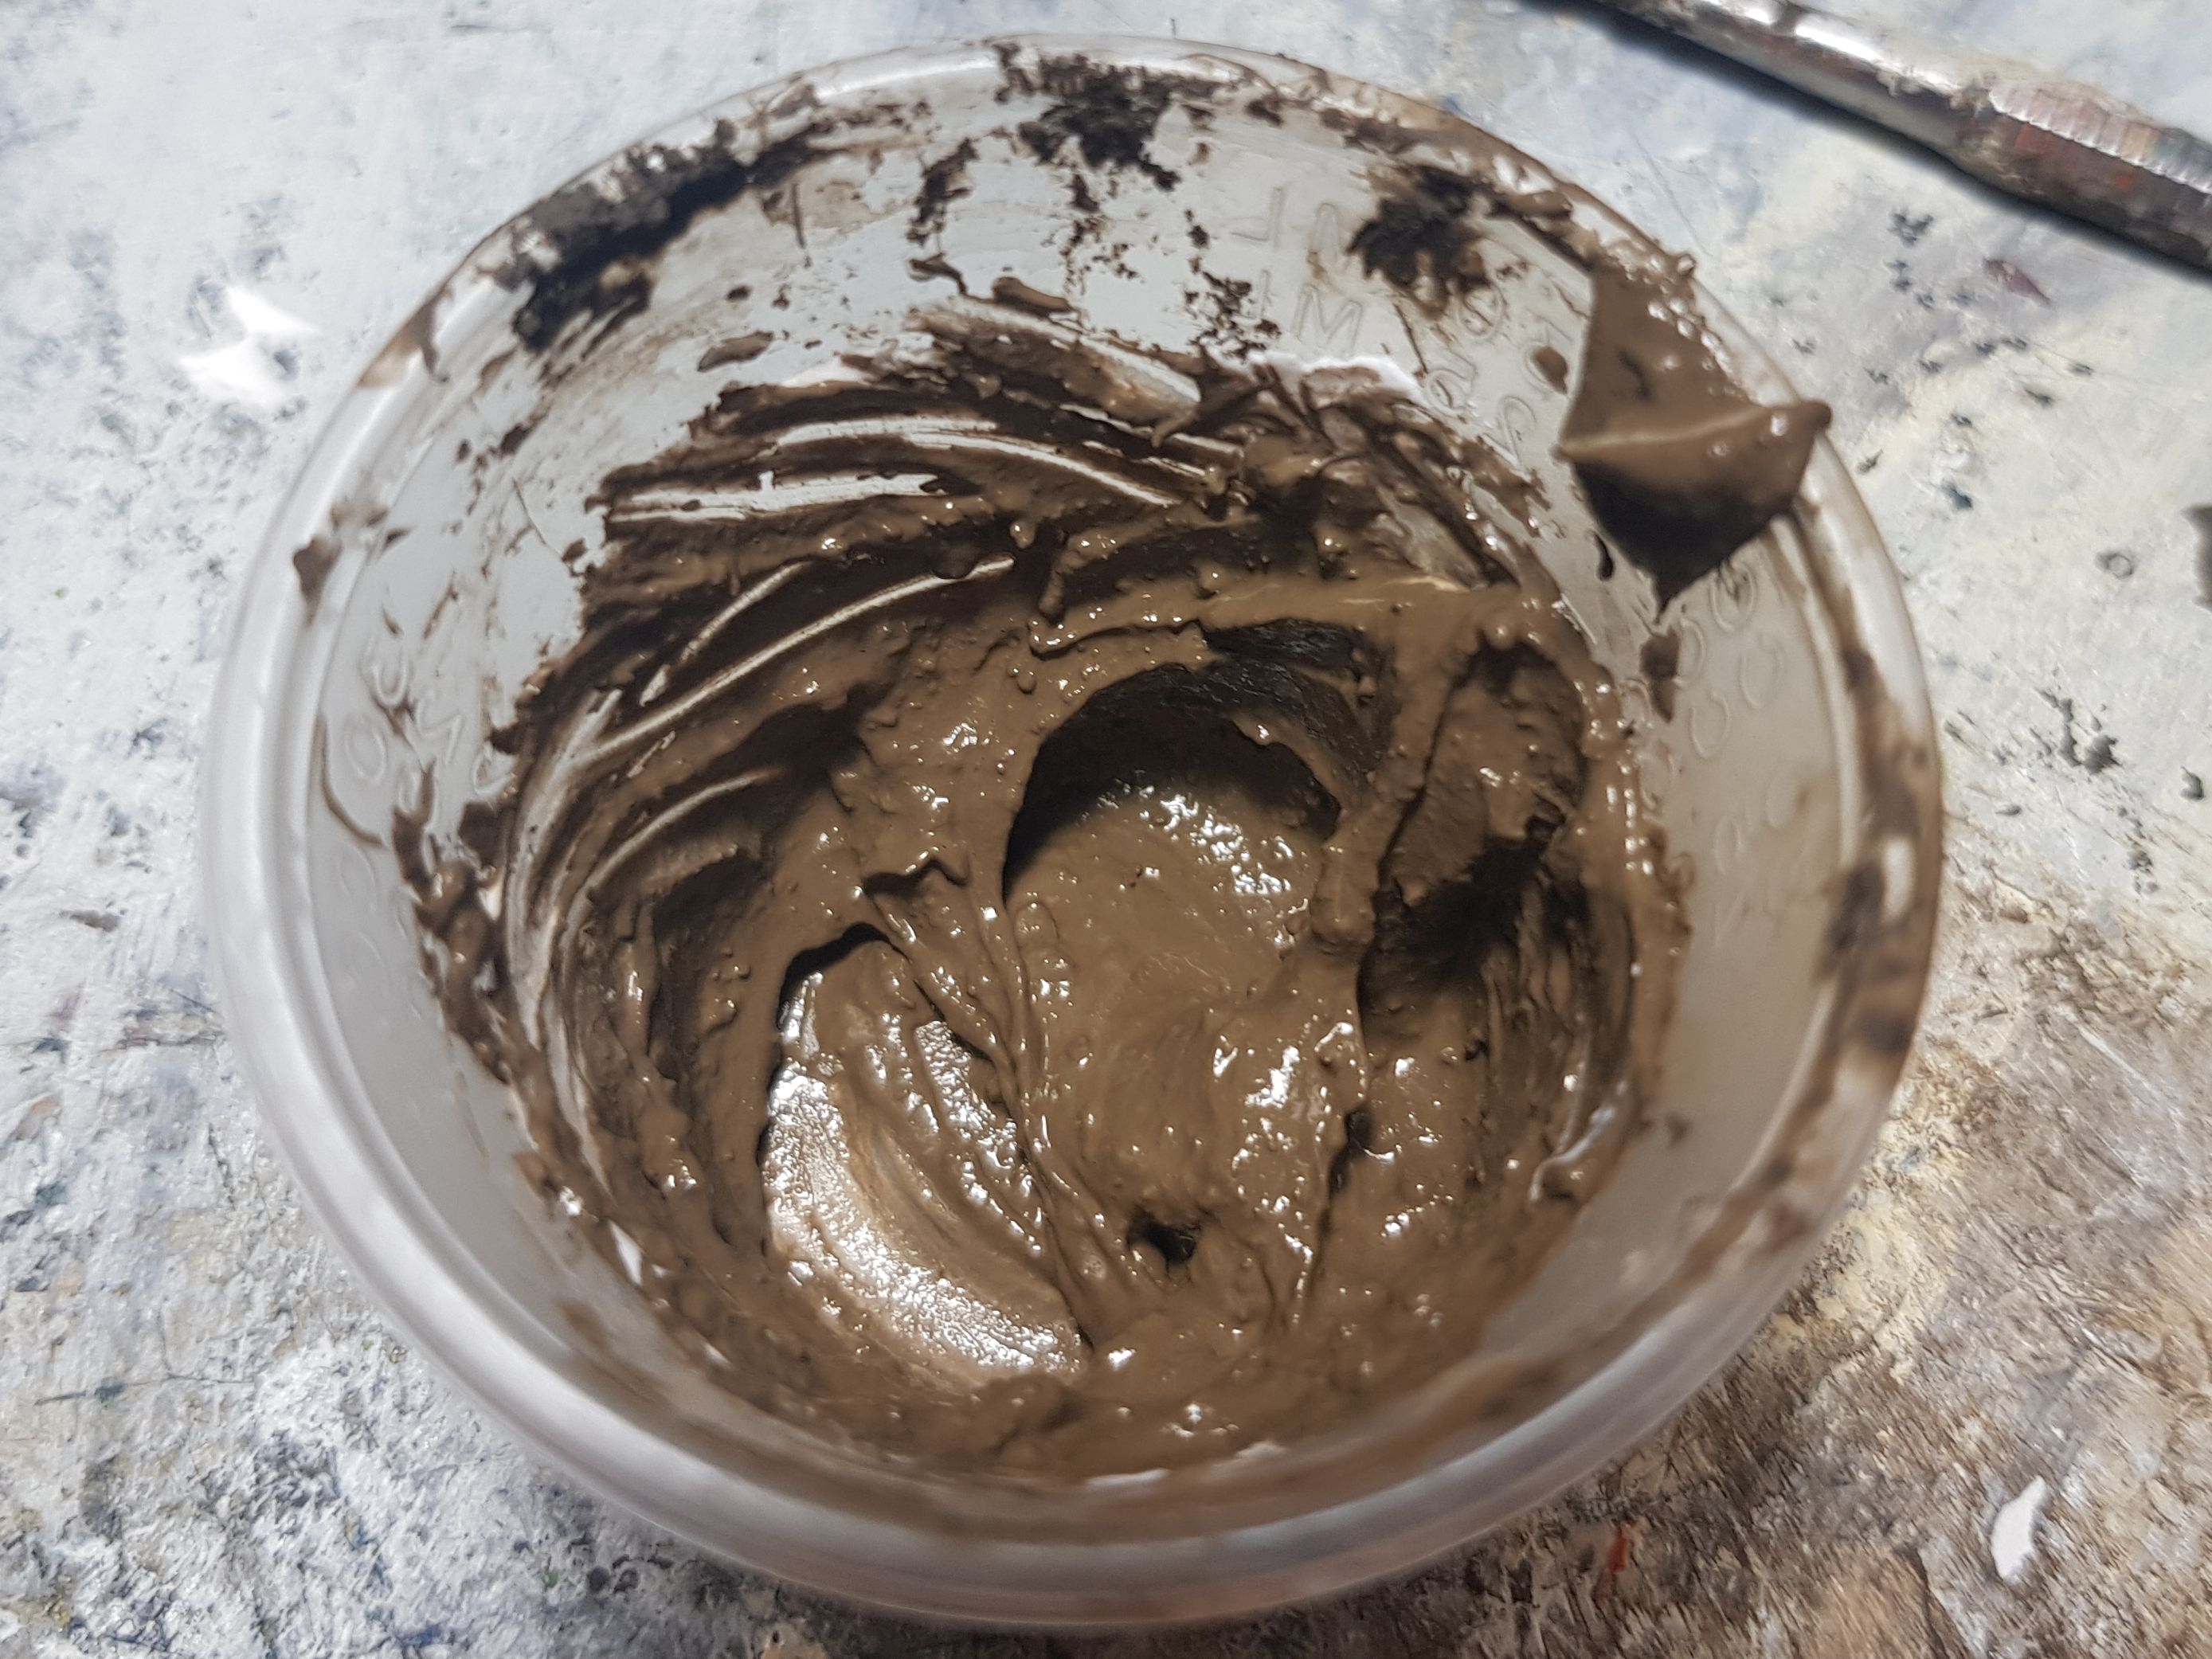
Today I got another blow to my already unstable mental health and spent most of the day as a blanket burrito not wanting to do anything….. But I was thinking, what if I mix the structure paste with the AK Interactive Diorama Terrains Muddy Ground (AK8017)? I like the thinner coats as they are a bit softer in detail, but I can’t really add any structure to it. So I thought of mixing
It works!
So here is a base done with it.
And here is what happened if I add water to the mix, it s basically a similar effect as before, just a bit lighter in colour, so that won’t be an option for me.
Basing Results.
So here are the basing results from the Sundays test.

I am personally quite happy with some of them and have learned a ton from trying different things. I am going to have another round of basing tests for which I prepped more bases and going to see if I can find something I really like the look of. I did prep a couple more bases with the texture paste as I did like some of the results and did add rocks to them again, even though they don’t stick, they did make interesting textures on the base. And then I prepped a couple with thinned AK Interactive Diorama Terrains Muddy Ground (AK8017). The thinner coats looked better to me, so these are quite thin.
The Post Something Everyday Challenge.
I kind of issued myself the challenge of posting something a day as a mental health exercise. By doing this I have a reason to do something for my hobby everyday and show something off. It helps me dealing with my depression and feelings of emptiness and not just sit in the gutter. So that is the reason why I am trying to do this.
Pink Panther.
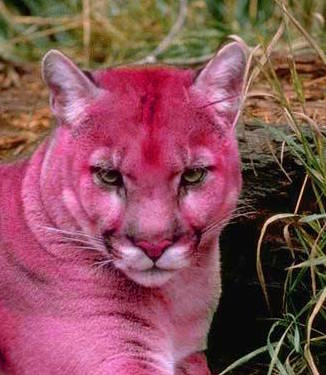
I couldn’t sleep so I ended up thinking, bad combo, I know, but when I am waiting on paints and I run out of stuff to post, what will I do? As many know, I always tell people to paint tanks pink and yet, I have only done one and now I am doing a World War 2 project.
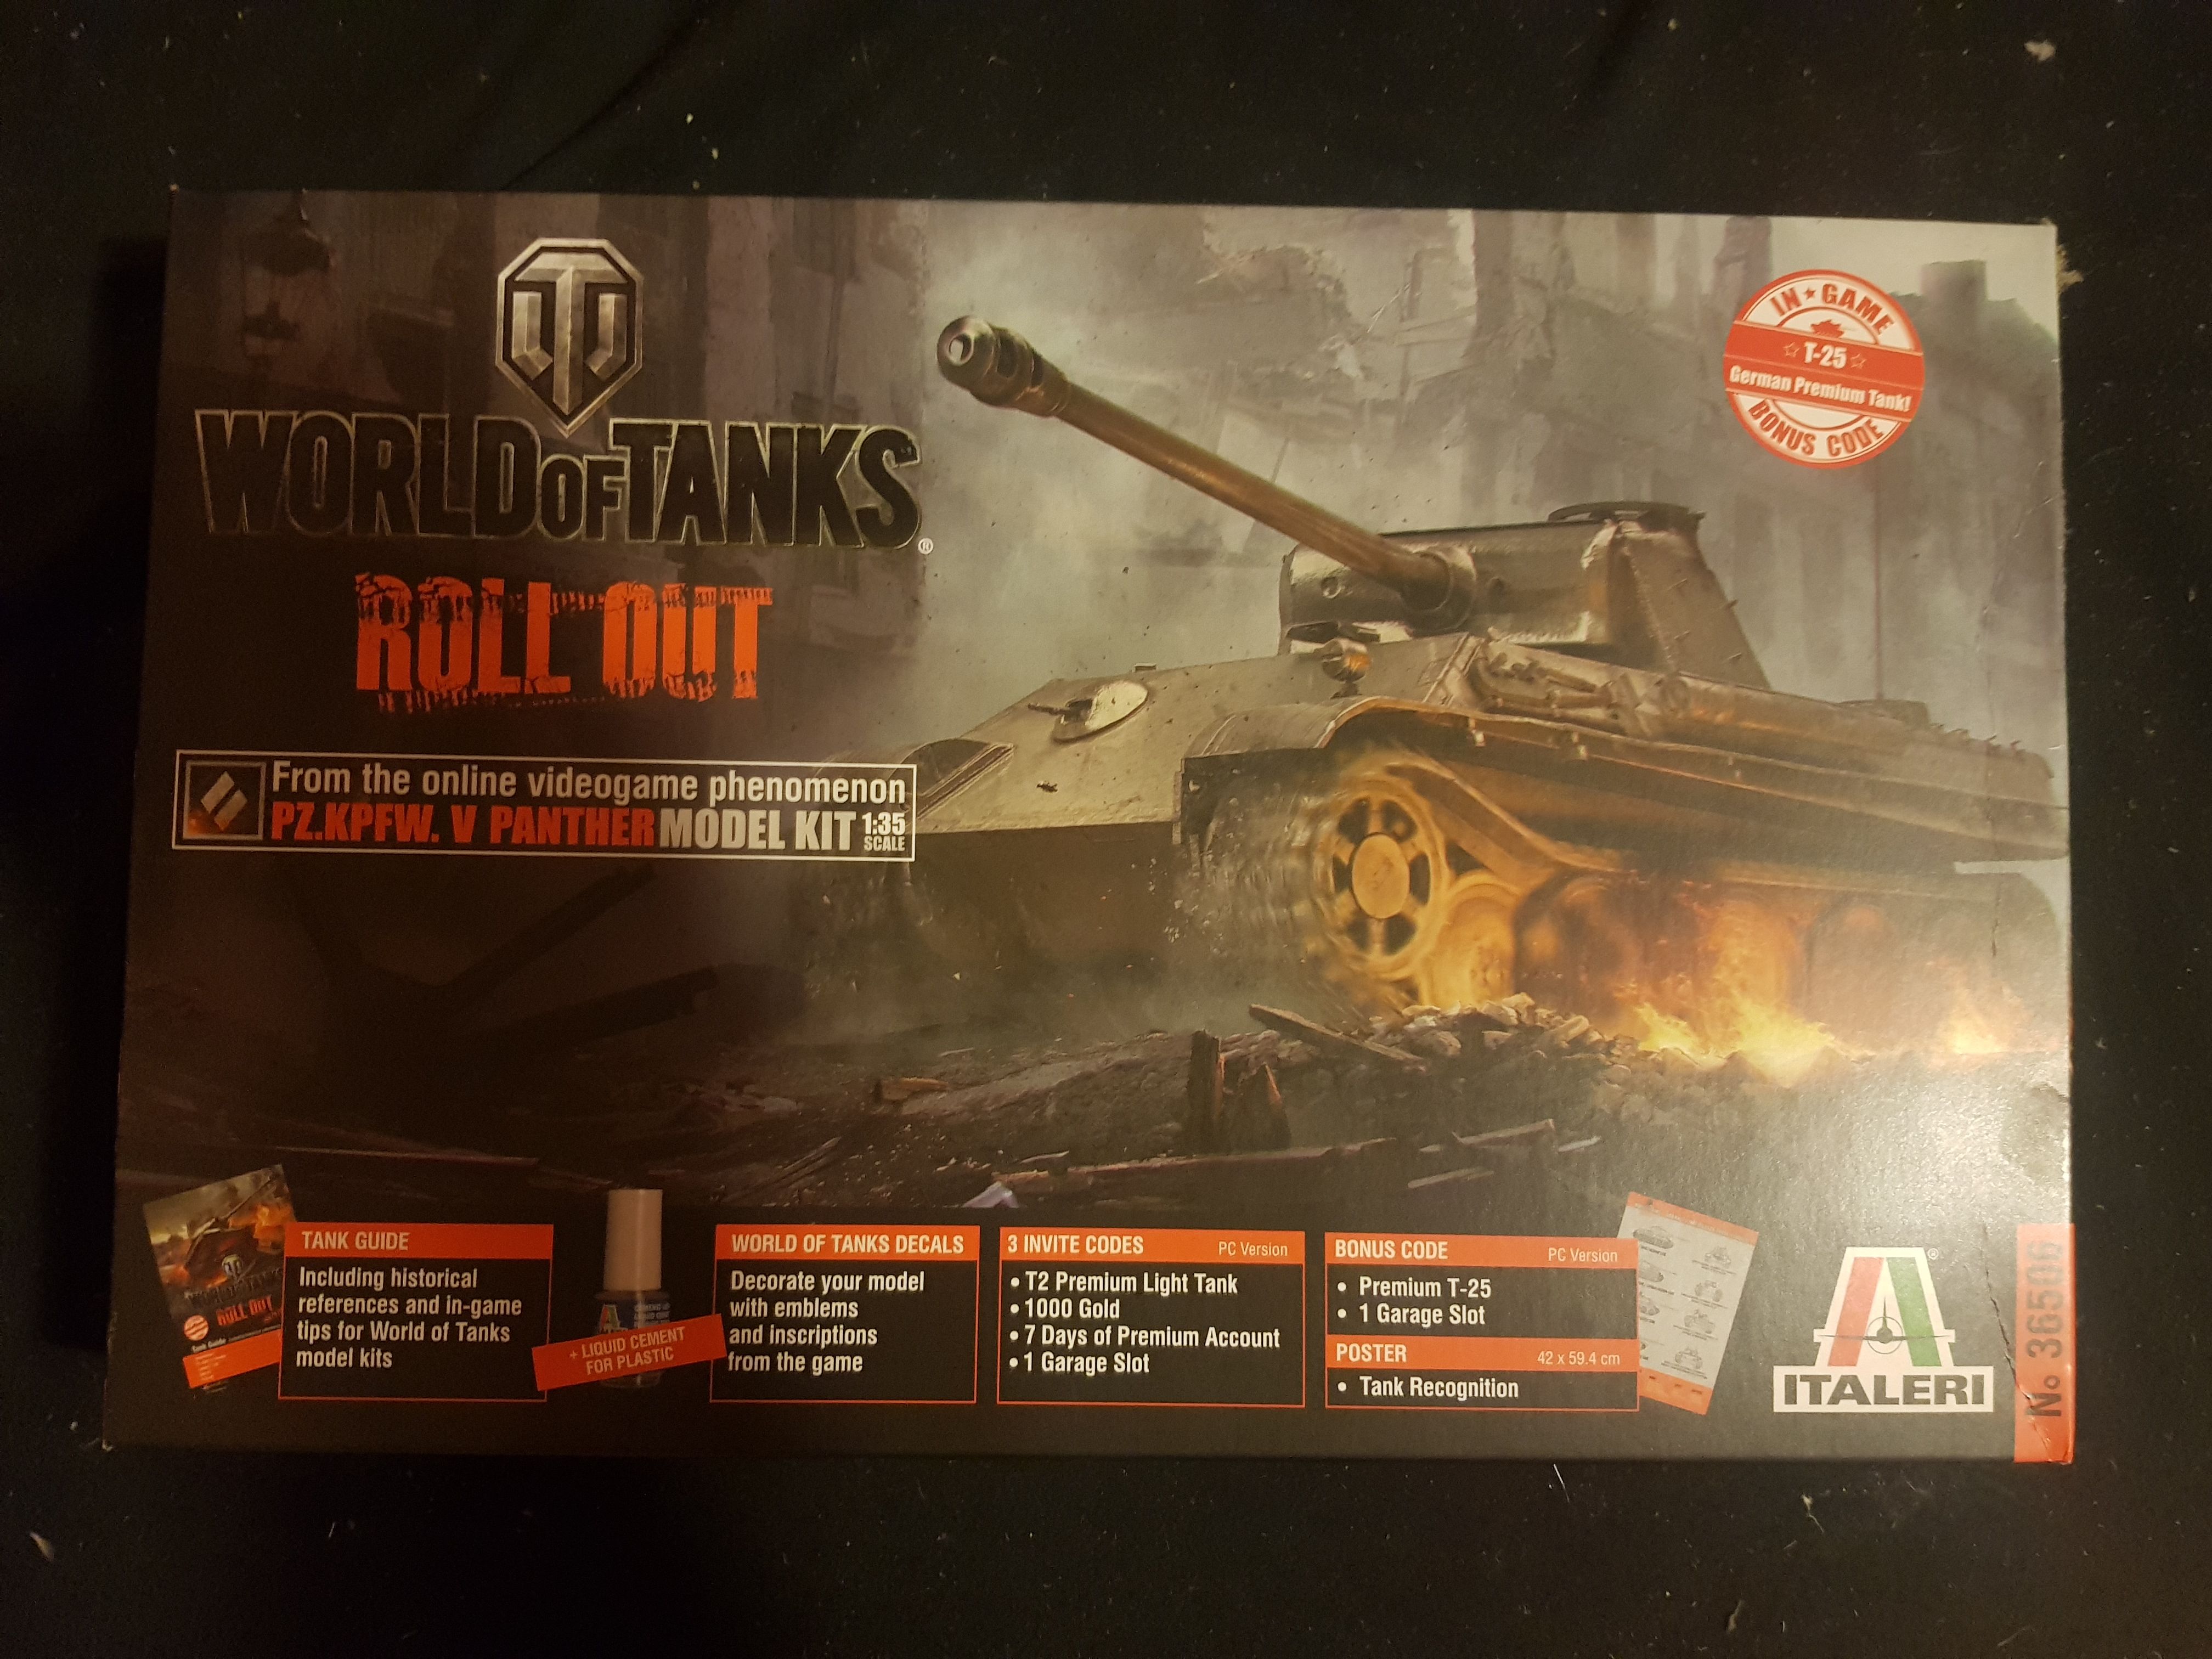
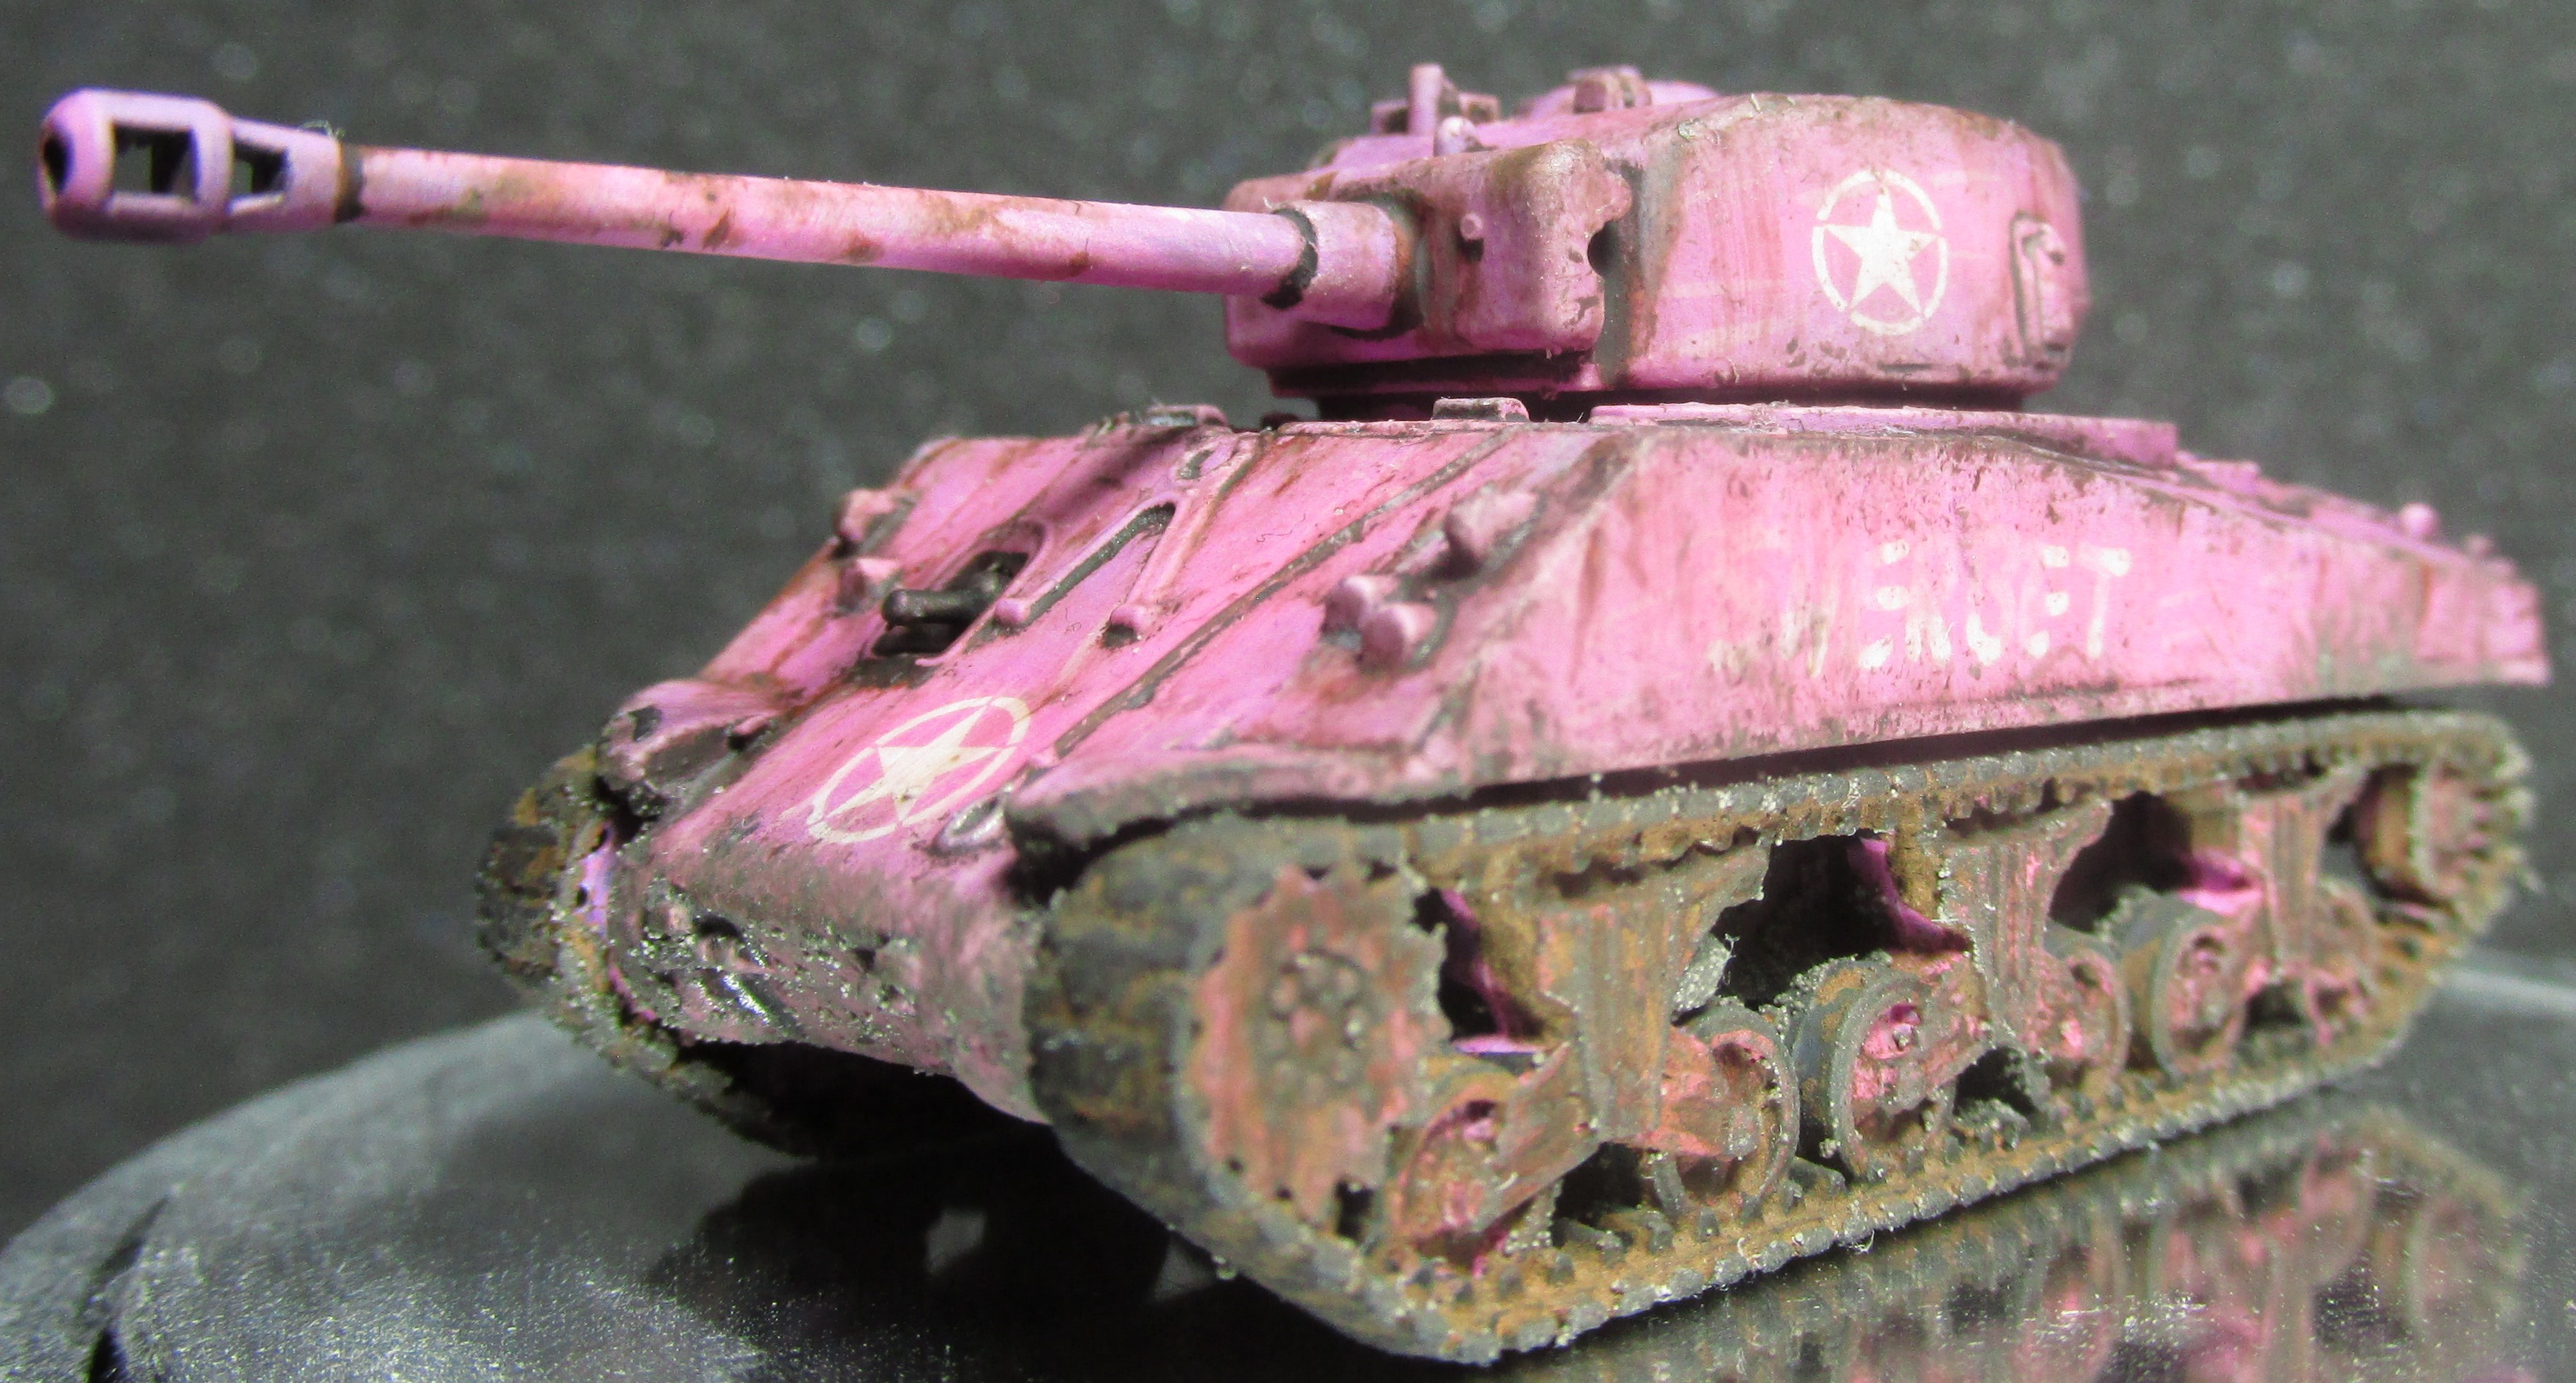 "Sherbet" the Sherman
And thus it only seems fitting I paint another pink tank. I so happen to have bought this kit at some point in my life.
So I thought, this would be a wonderful opportunity to keep working on this project and include a pink tank. This will be my pink panther as a bit of a bonus in this project. It is just going to be a display piece and won’t add anything to Flames of War, but I think it’ll be fun. My priority still lies on Flames of War, this is just something I am doing on the side to keep posting something every day.