


Bot War Painting Challenge 2020


Recommendations: 666
About the Project
Bot War Painting Challenge 2020..... Paint for 31 minutes for 31 days. Complete a minimum of 7 figures from the Bot War game by Traders Galaxy
Related Game: Bot War
Related Company: Traders Galaxy
Related Genre: Science Fiction
This Project is Completed
Background
For those that don’t know Bot War is an 8mm miniatures war game set in an alternative 1985 where there has been a global war and a subsequent invasion of bots from outer space…. If you’re a fan of 1980s Saturday morning cartoons then this game has all the tropes you love….. For me it’s giant robots that look like they may transform.
Anyway, there’s plenty of info on the Traders Galaxy website where this game can be found. It’s run by a single guy in Australia who does all of the metal casting himself. He is venturing into resin casting and will be using crowd-funding to release the 3rd edition of the Bot War game with resin miniatures.
This project is to chronical my participation in the Bot War Facebook groups 2020 painting challenge which involves painting for 31 minutes a day for 31 days with at least 7 models being finished (painted and fully based) by the end.
(I wanted to start this on day 0 but totally forgot, this is day 10 so have a few photos to add to catch up)
Day 0...
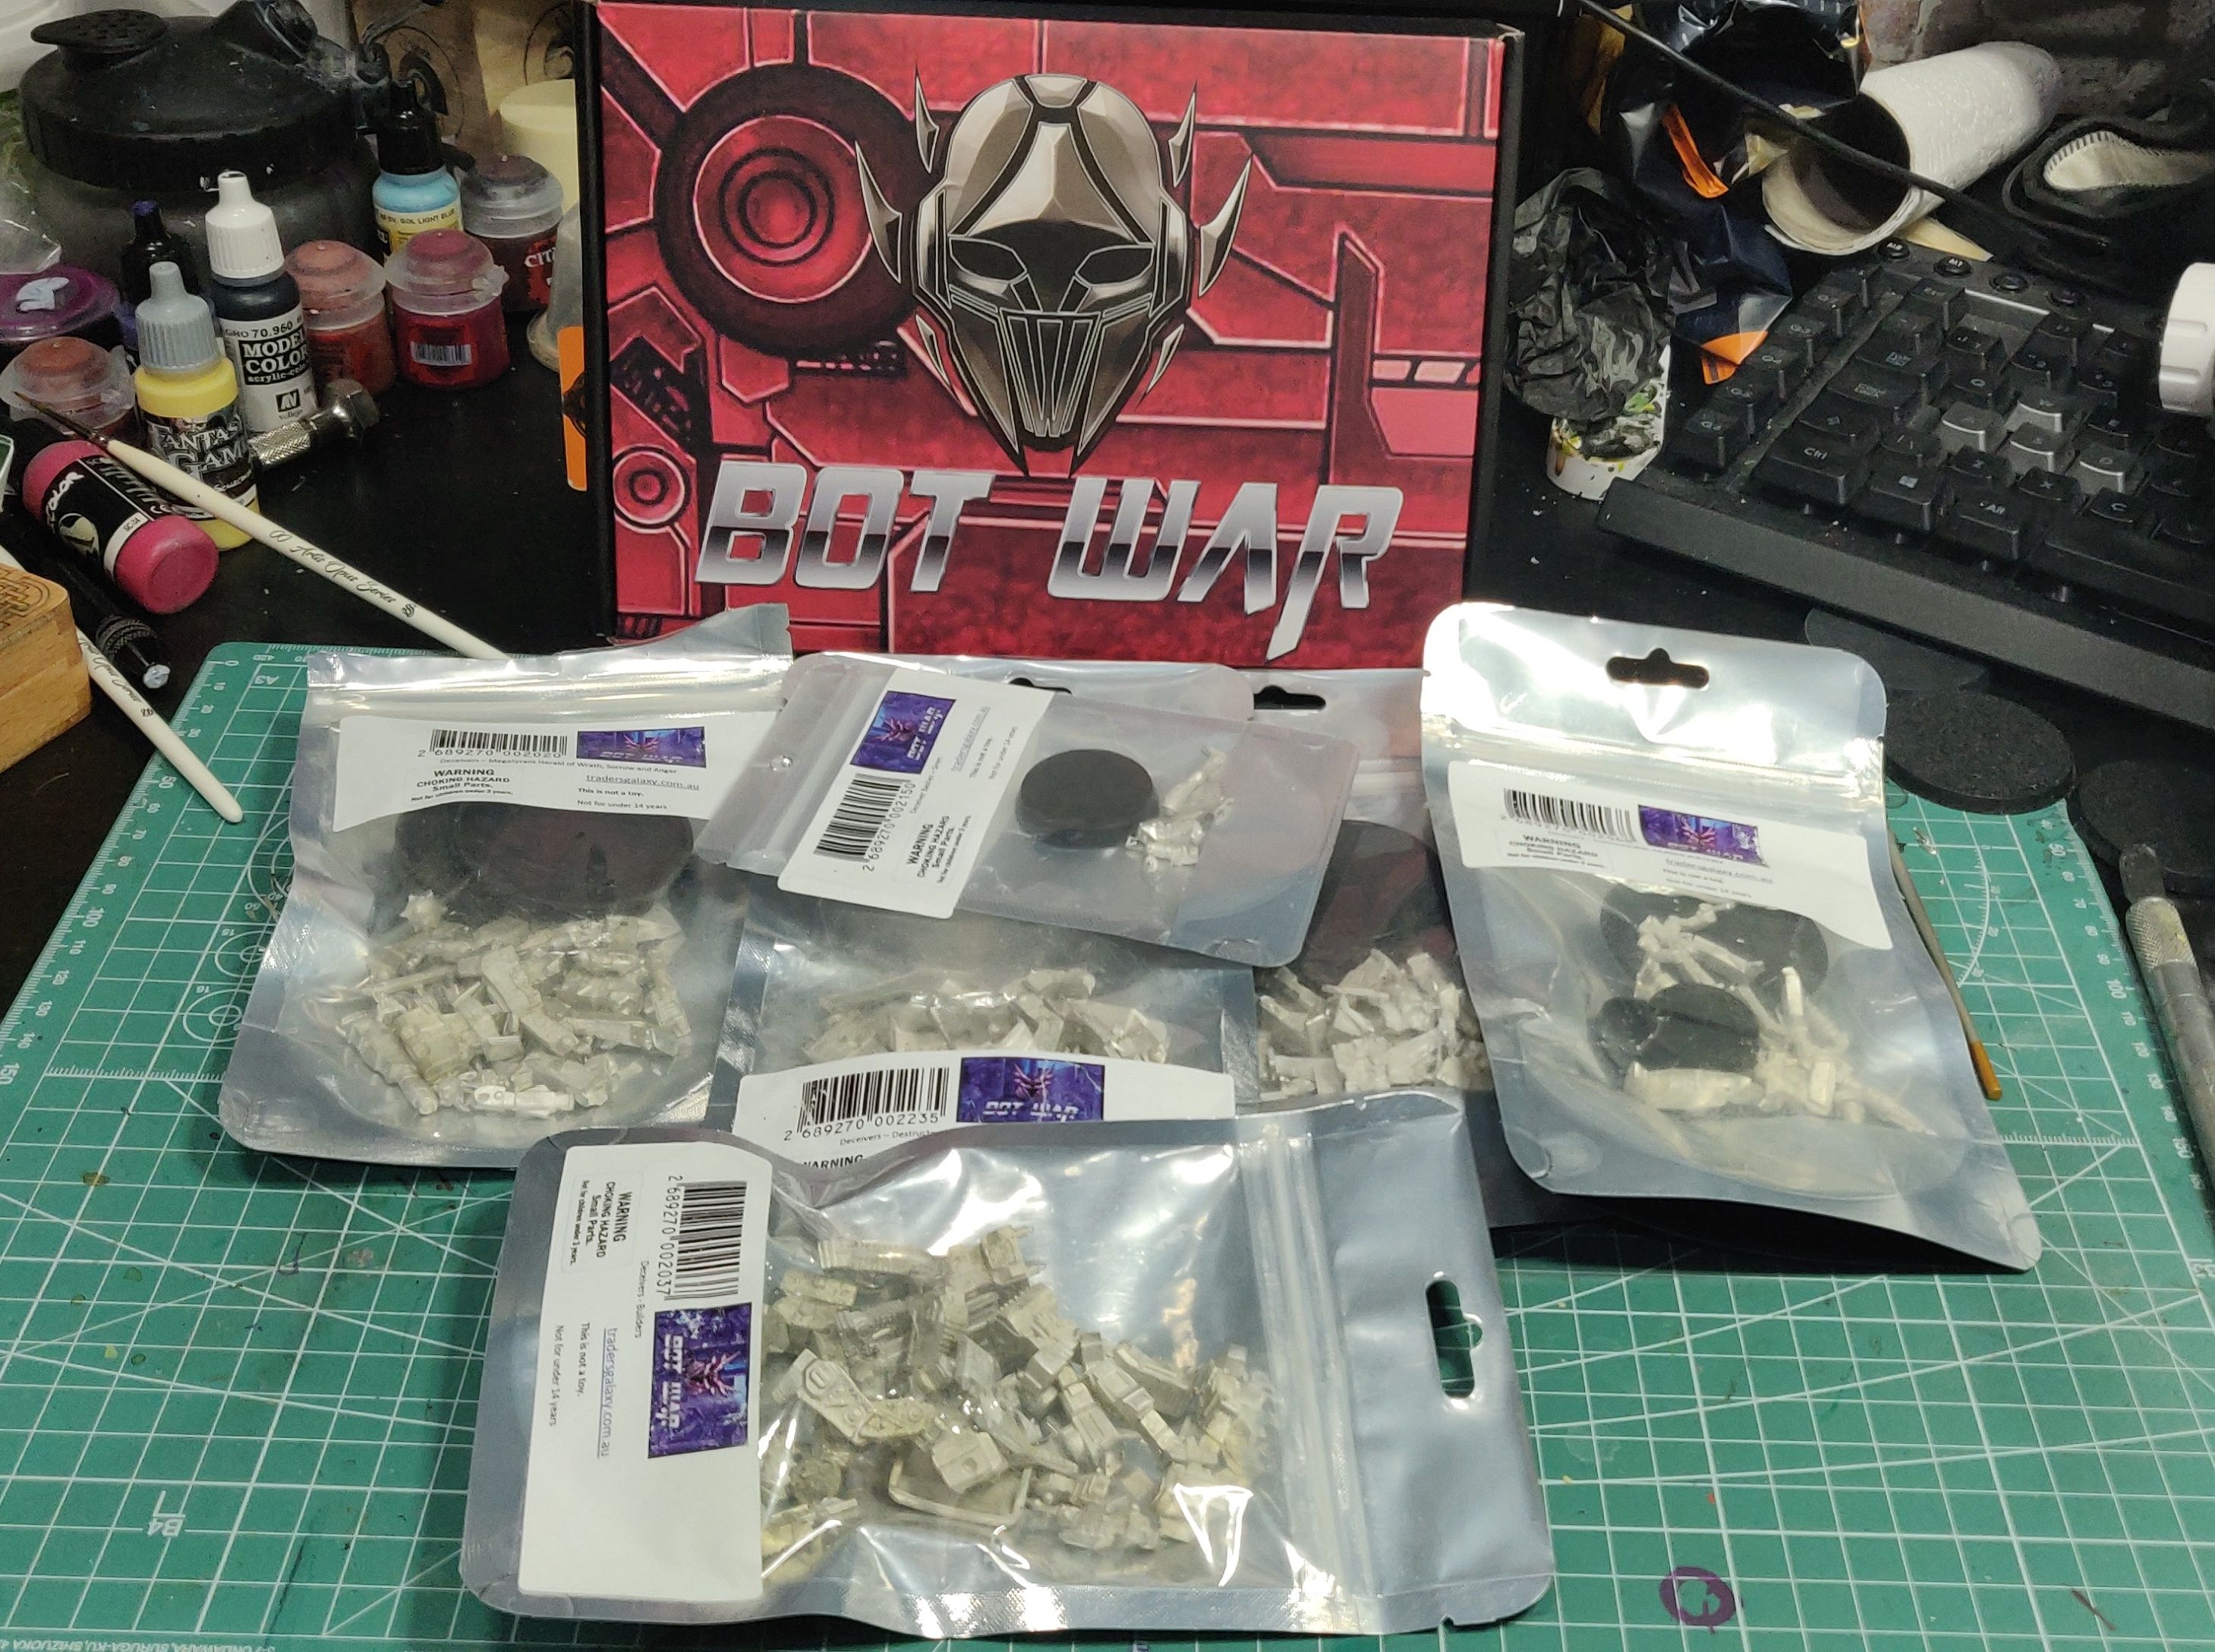
To prepare for the challenge I first needed to have models to paint. Having already acquired a decent backlog of models I knew I had a squad of 5 and a combined form big bot that I wanted to get painted. I just had to clean, prep, and build them ready for the first day of painting. I would like to have done a project on prepping metal models but that would have to be another day.
Anyway, the challenge is to paint 7 models, so although the combiner is technically the 5 smaller bots in one, it still only counts as one, so I have a few extra bots in the WIP pile ready to make up numbers.
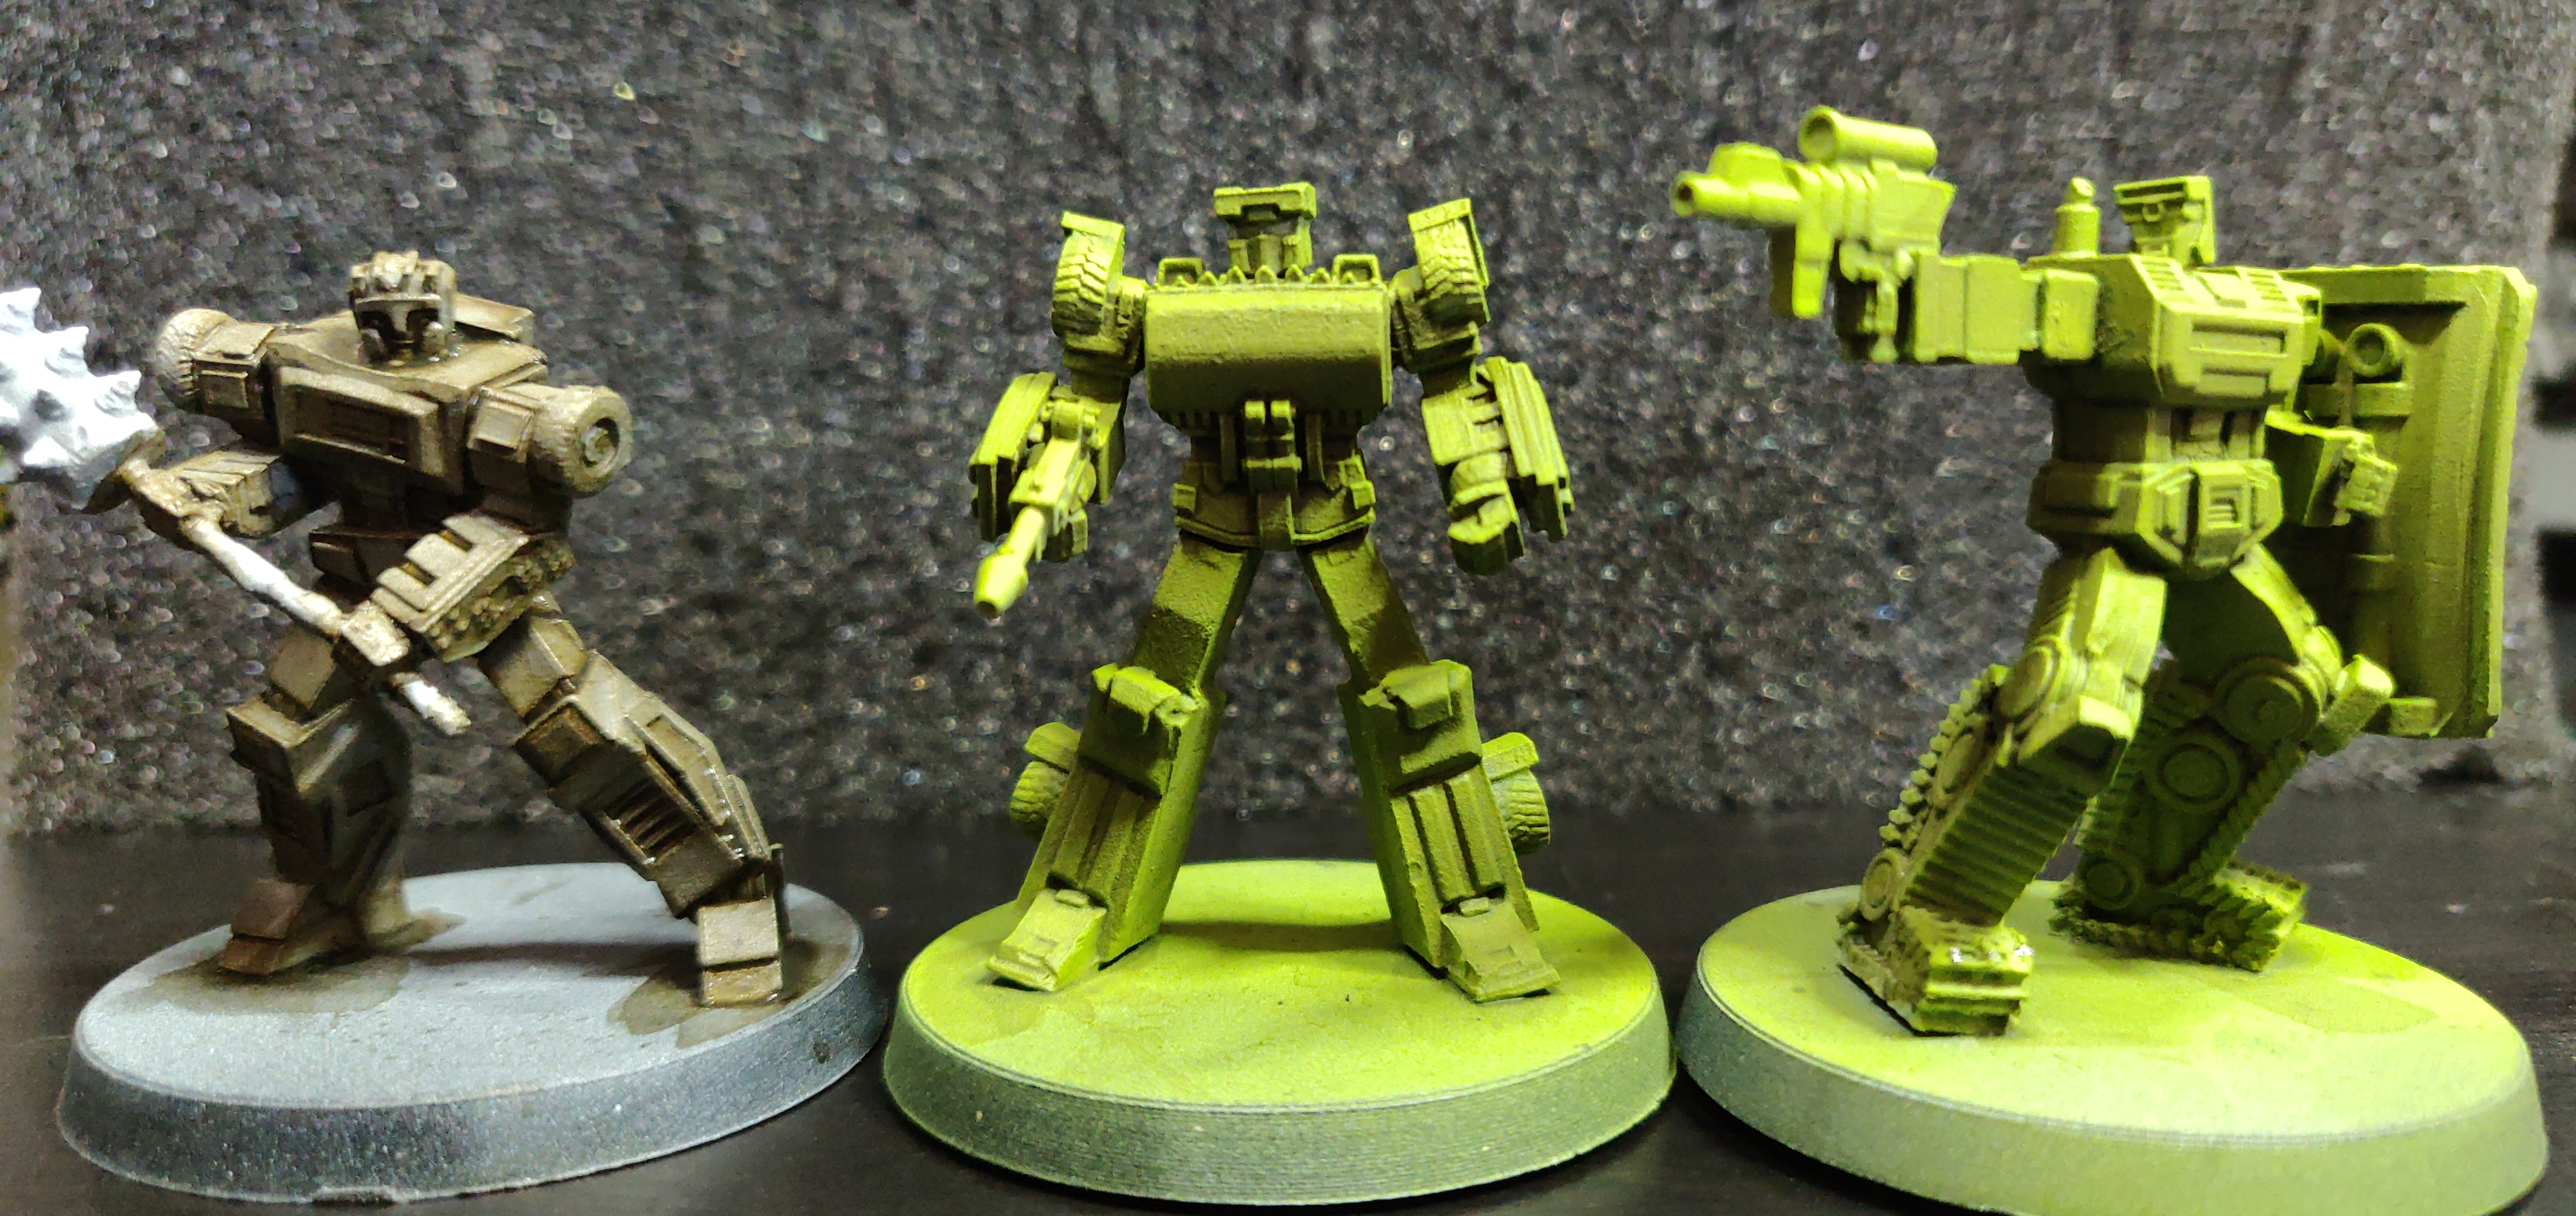
 Behold, day 0, the Builder unit and Destroyer from the Deceivers faction (and a few friends)
 Day 1....
Day 1, where to start. Oh yeah, the same as every other model painting project, research!
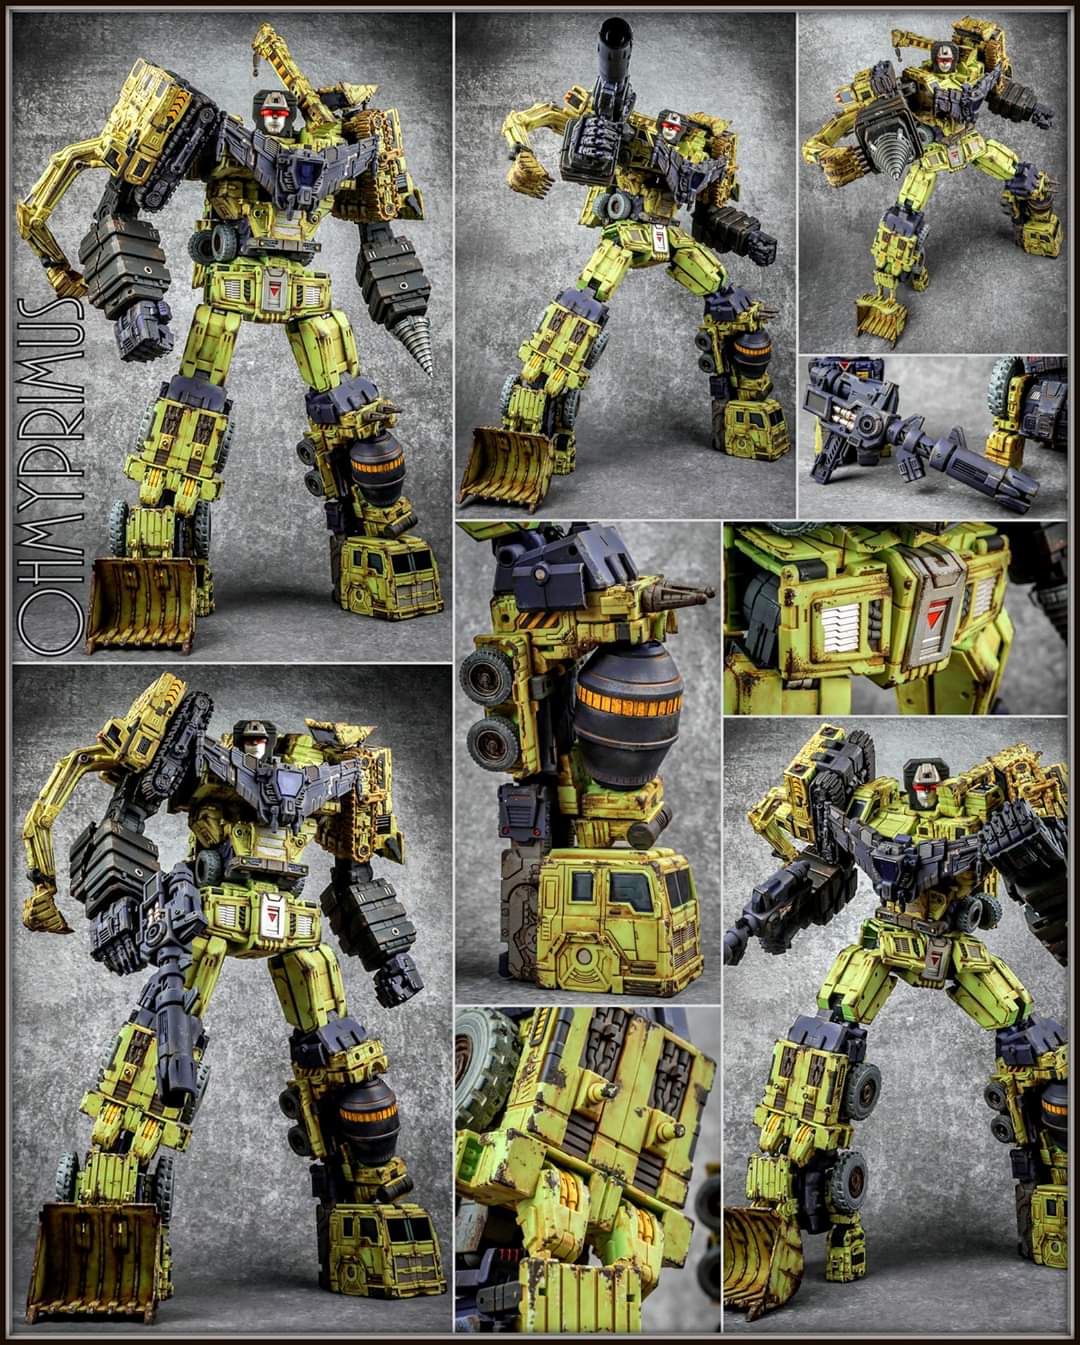
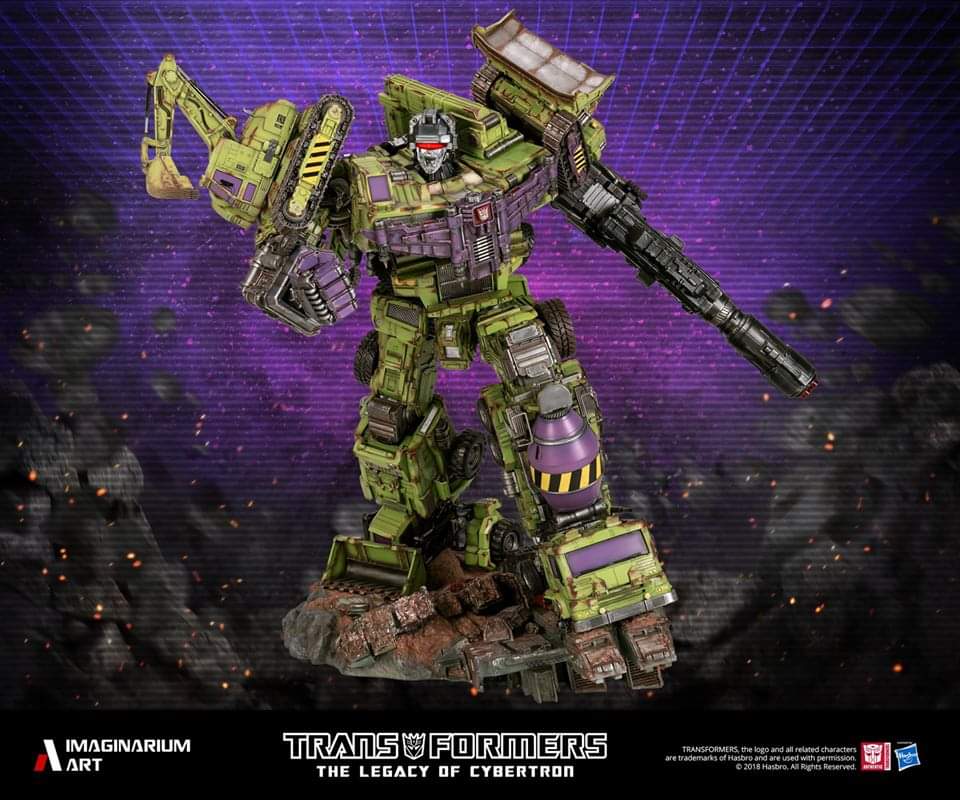
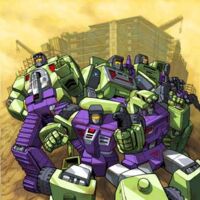
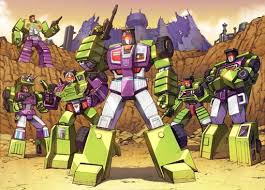
I knew I wanted these bots to pay homage to the construction robots from the 1980s series of Hasbro’s Transformers cartoon, the bright green Decepticon Constructicons and their combined form Devastator!
I found a couple of photos of Devastator in toy form (not the original, these are the super detailed, mega-expensive 3rd party versions) and the bots themselves from the IDW comicbook.
So continuing my research I knew that to achieve the bright green I need I would need a white primer, I usually do a zenith prime from black with a white directional, but for this project I went with grey and white so I’d didnt have to worry too much about dealing with such a dark starting point.
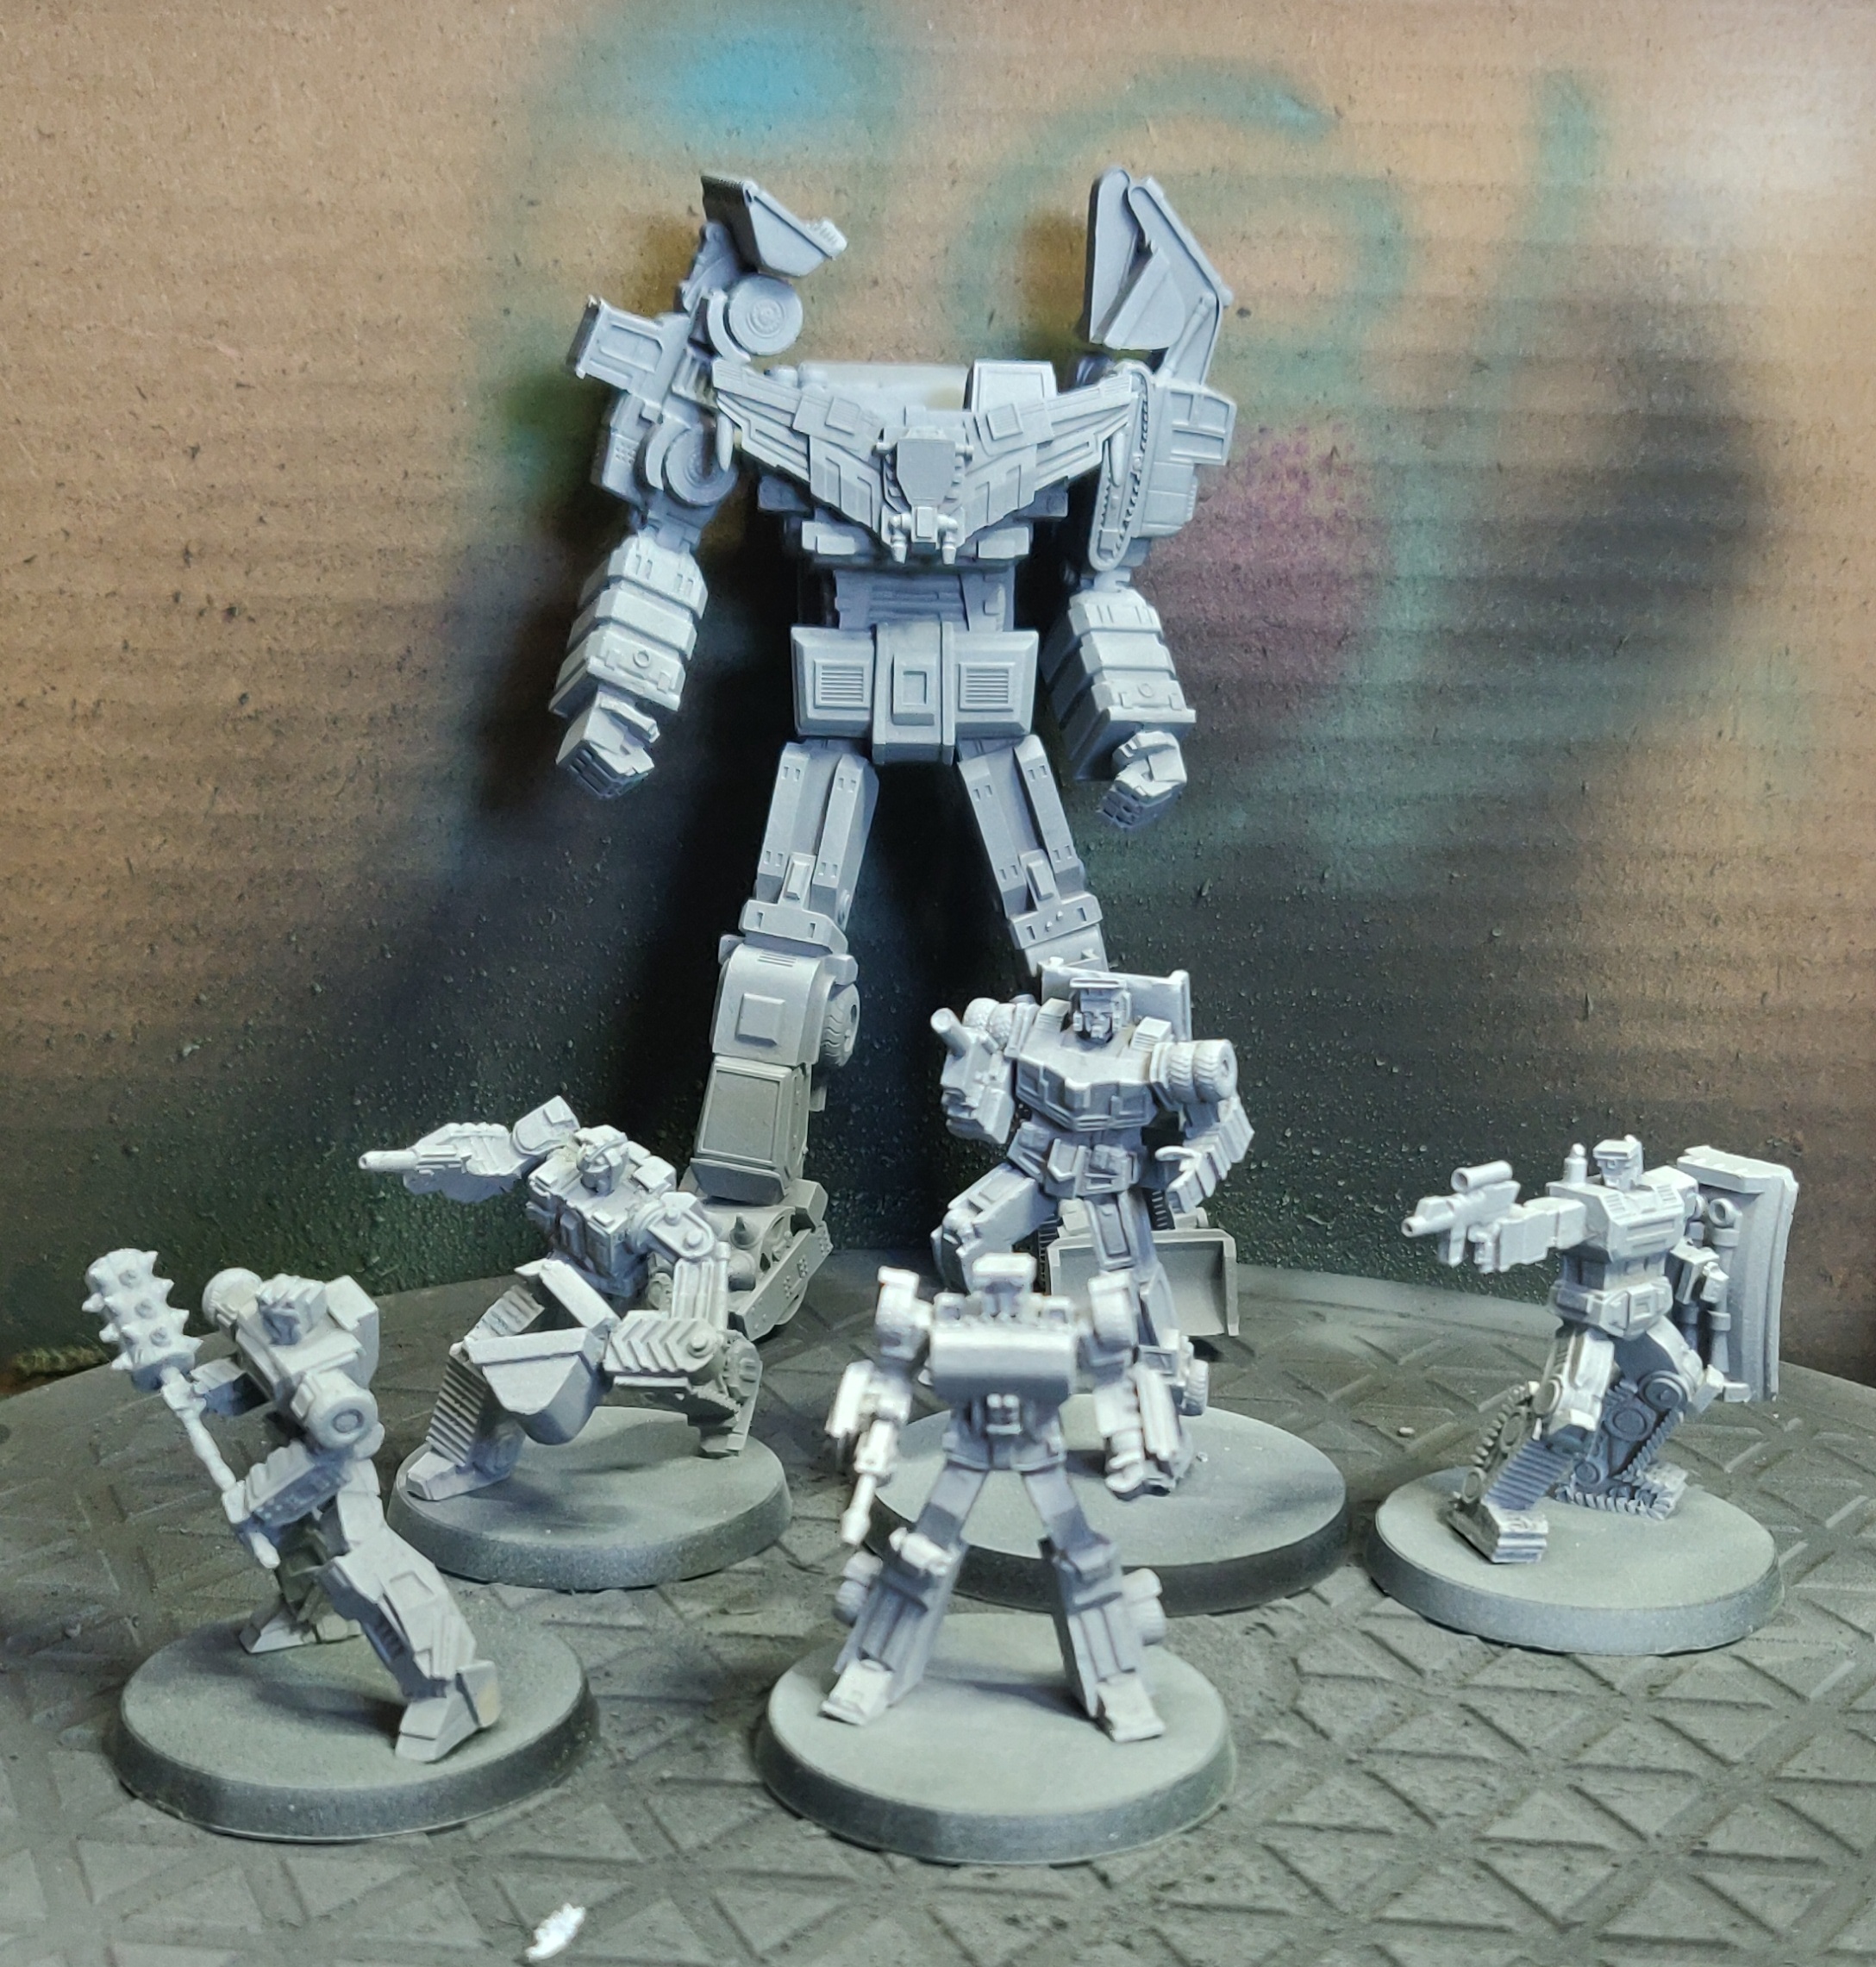 All bots primed, big bot is just tacked together as I will be painting him in sub assemblies
 Day 2...
I didn’t want to stare at the primed models for too long, so gave the first 2 a couple of washes of Secret Weapon Sewer Water.
This is a great acrylic “gunk” wash which went really nicely over the primer and settled well in the recesses. This was going to give me a quick pre-shade for when I go over with the airbrush

Day 3...
Day 3’s goal was to get the rest of the bots pre-shaded, I had to drag this out into 2 days as I was waiting on a paint delivery for the greens I planned on using for the main colours.
Again this was just a Secret Weapon Sewer Water wash over the grey/white primer
Day 4...
Big day today, this was the day I actually started applying proper colour to my bots.
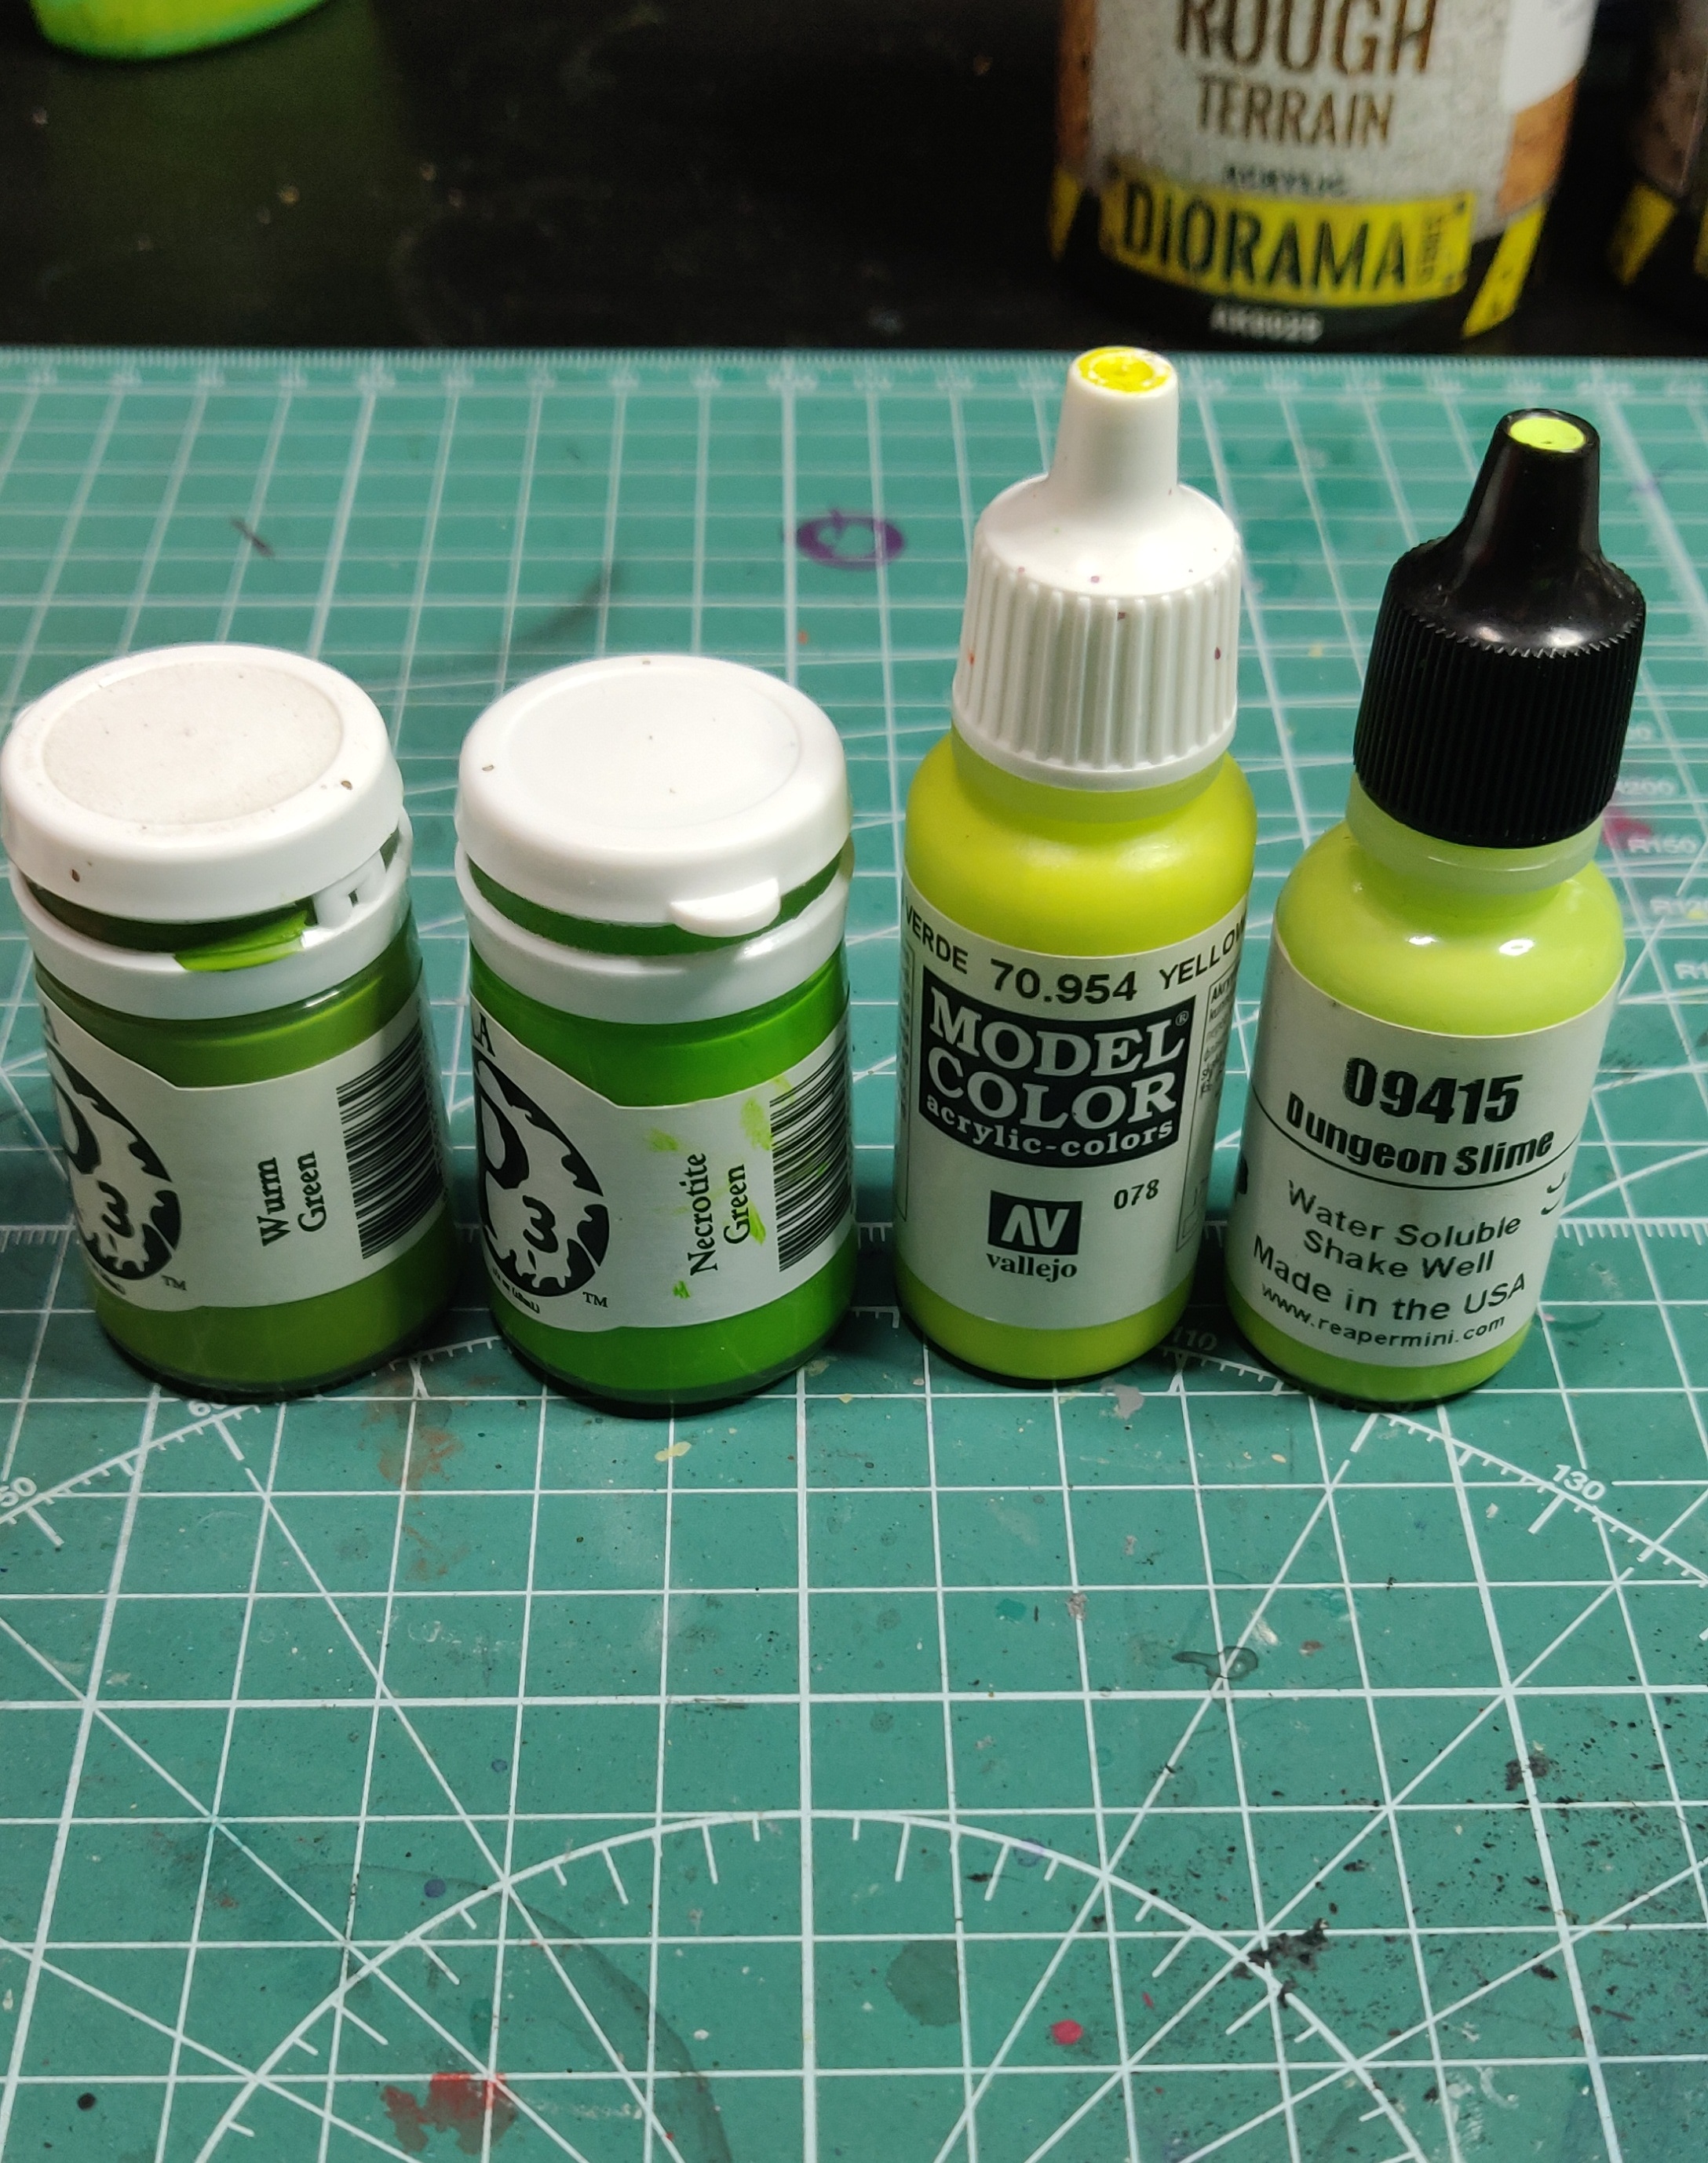
I wanted bright green, so having used the Paint Rack for Android app (highly recommended!) I used the colour picker tool on my research images to identify 2 greens I could use, these were Wurm Green & Noctite Green from P3 (typically i had to order these as I didn’t have any thing suitable besides having over 600 paints across multiple brands)
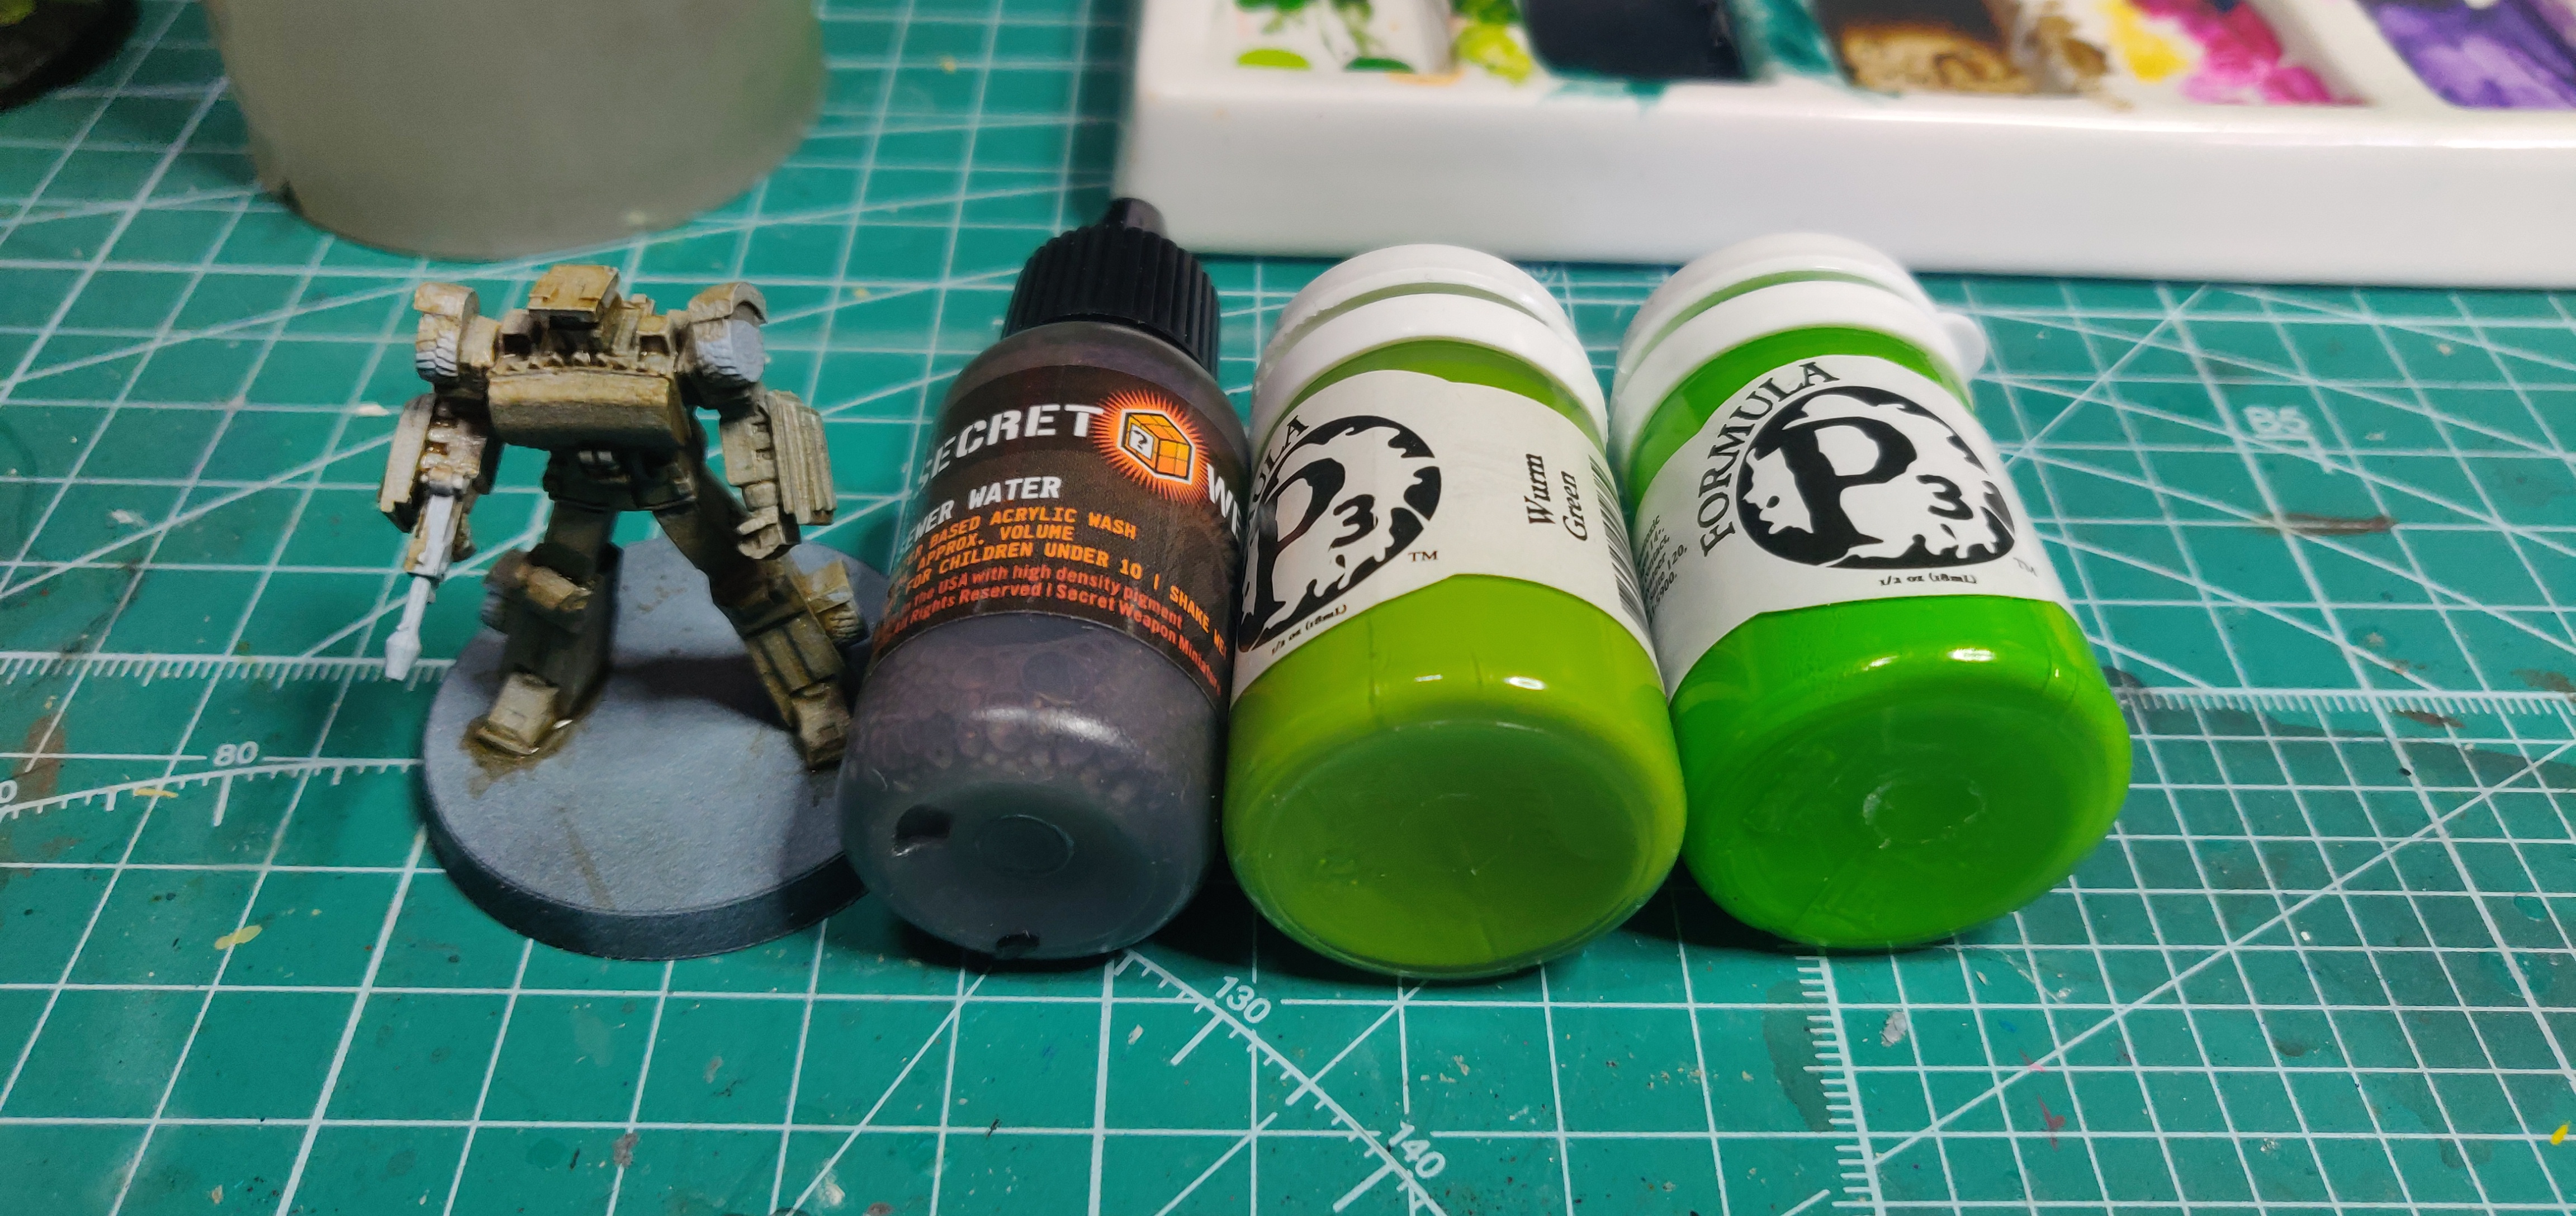 So I started off with a couple of light layers of Wurm Green over the sewered base, then applied a directional highlight with Noctite Green to really make the model pop
Once I knew this was working how I wanted it to, and as I had the airbrush out, I got the remaining bots greened-up. Whilst I knew this was taking me longer than 31 minutes (which is only a minimum) I wanted to give myself a good starting point to work from on the individual bots.

Day 5...
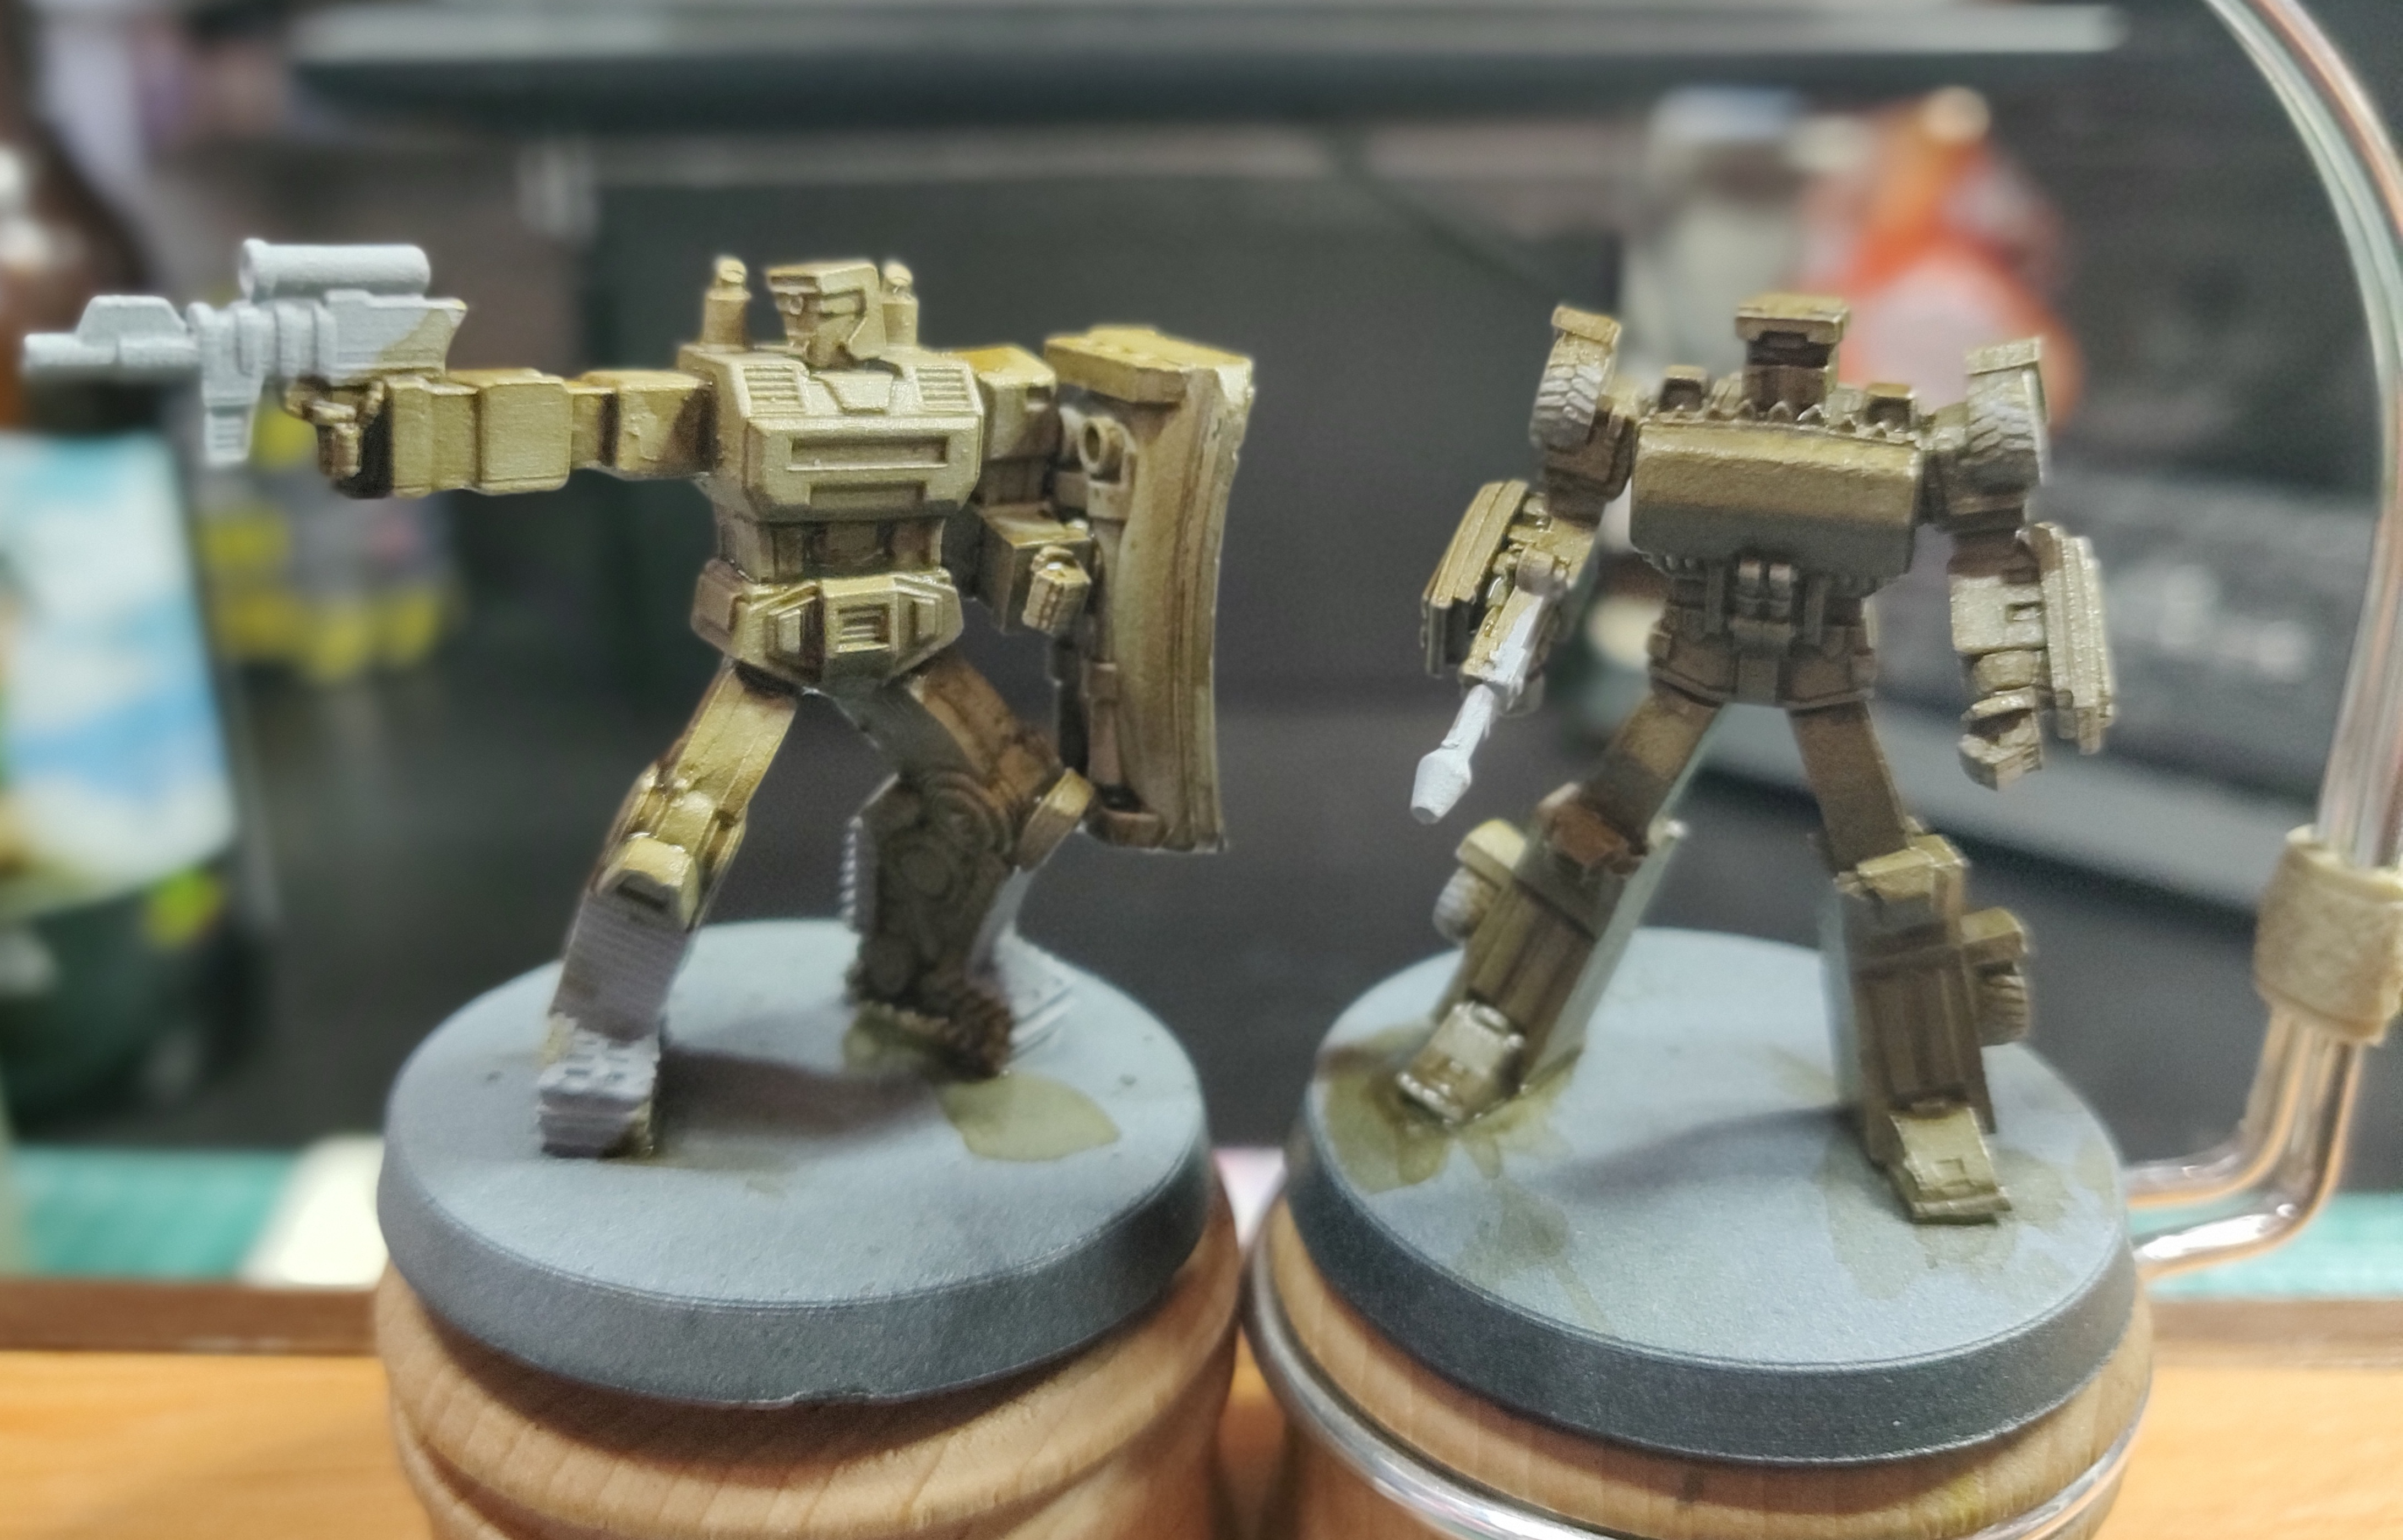
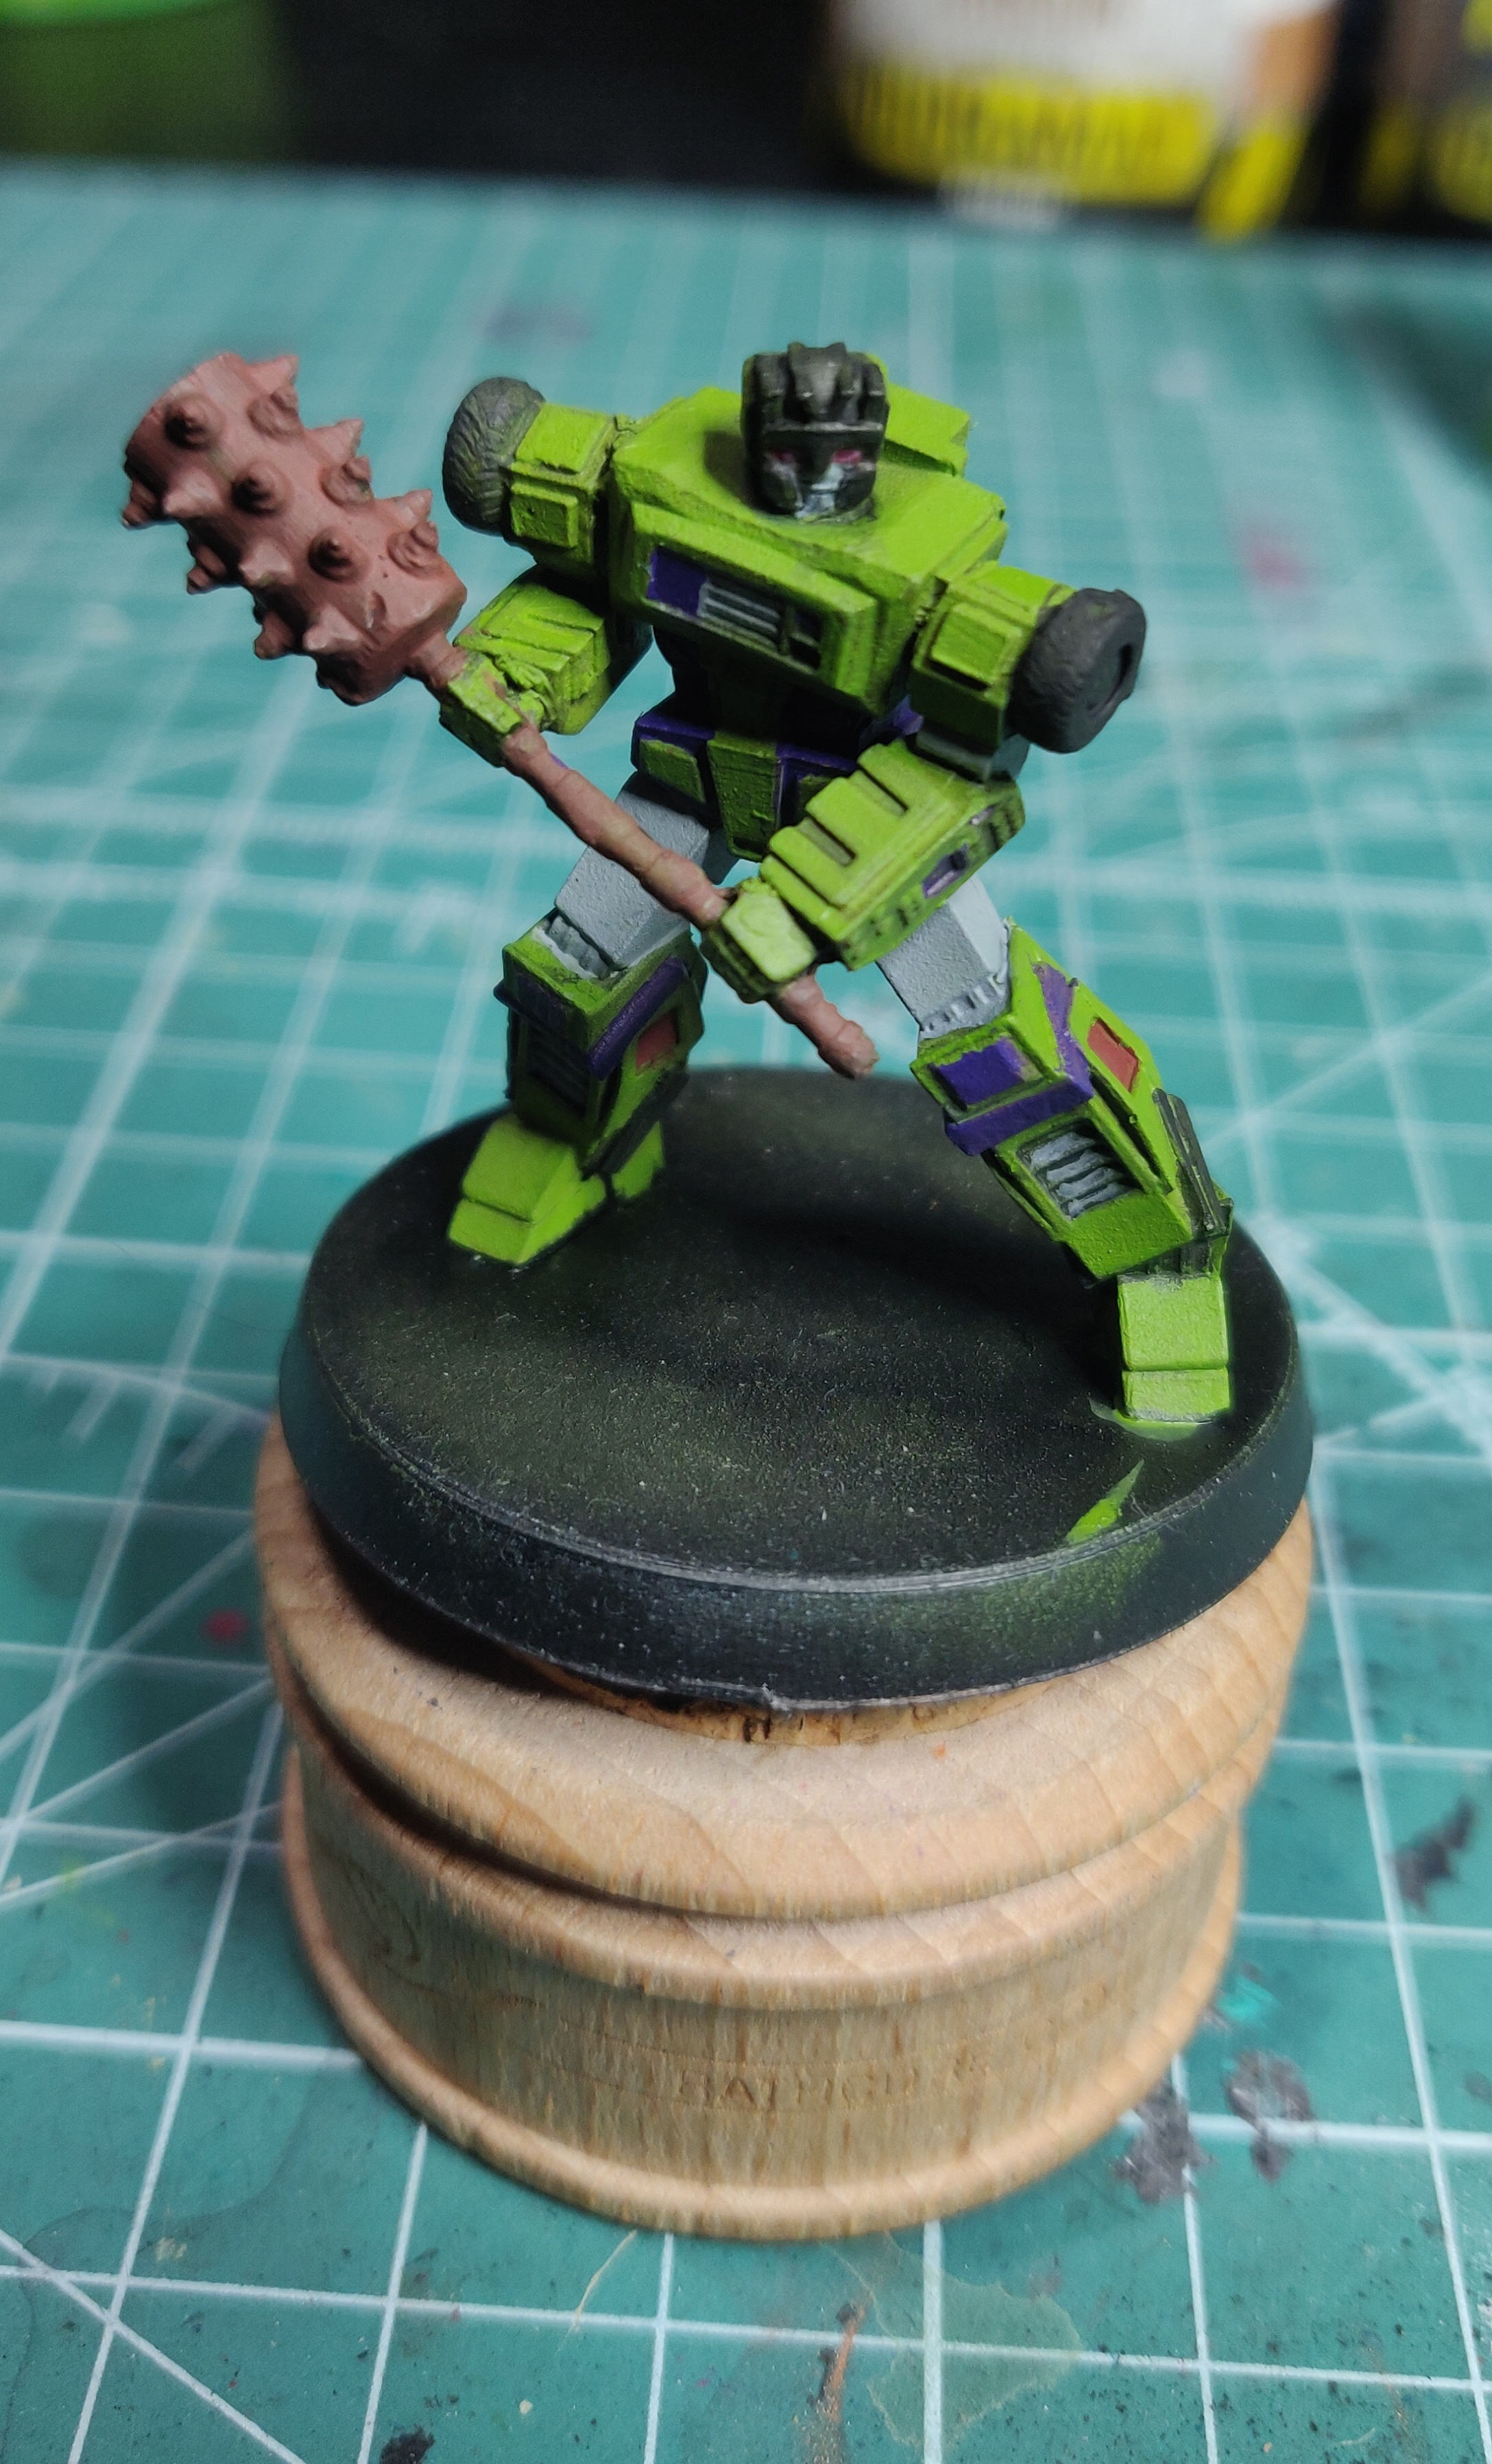
Starting on the individual bots now, 1st up is Loader
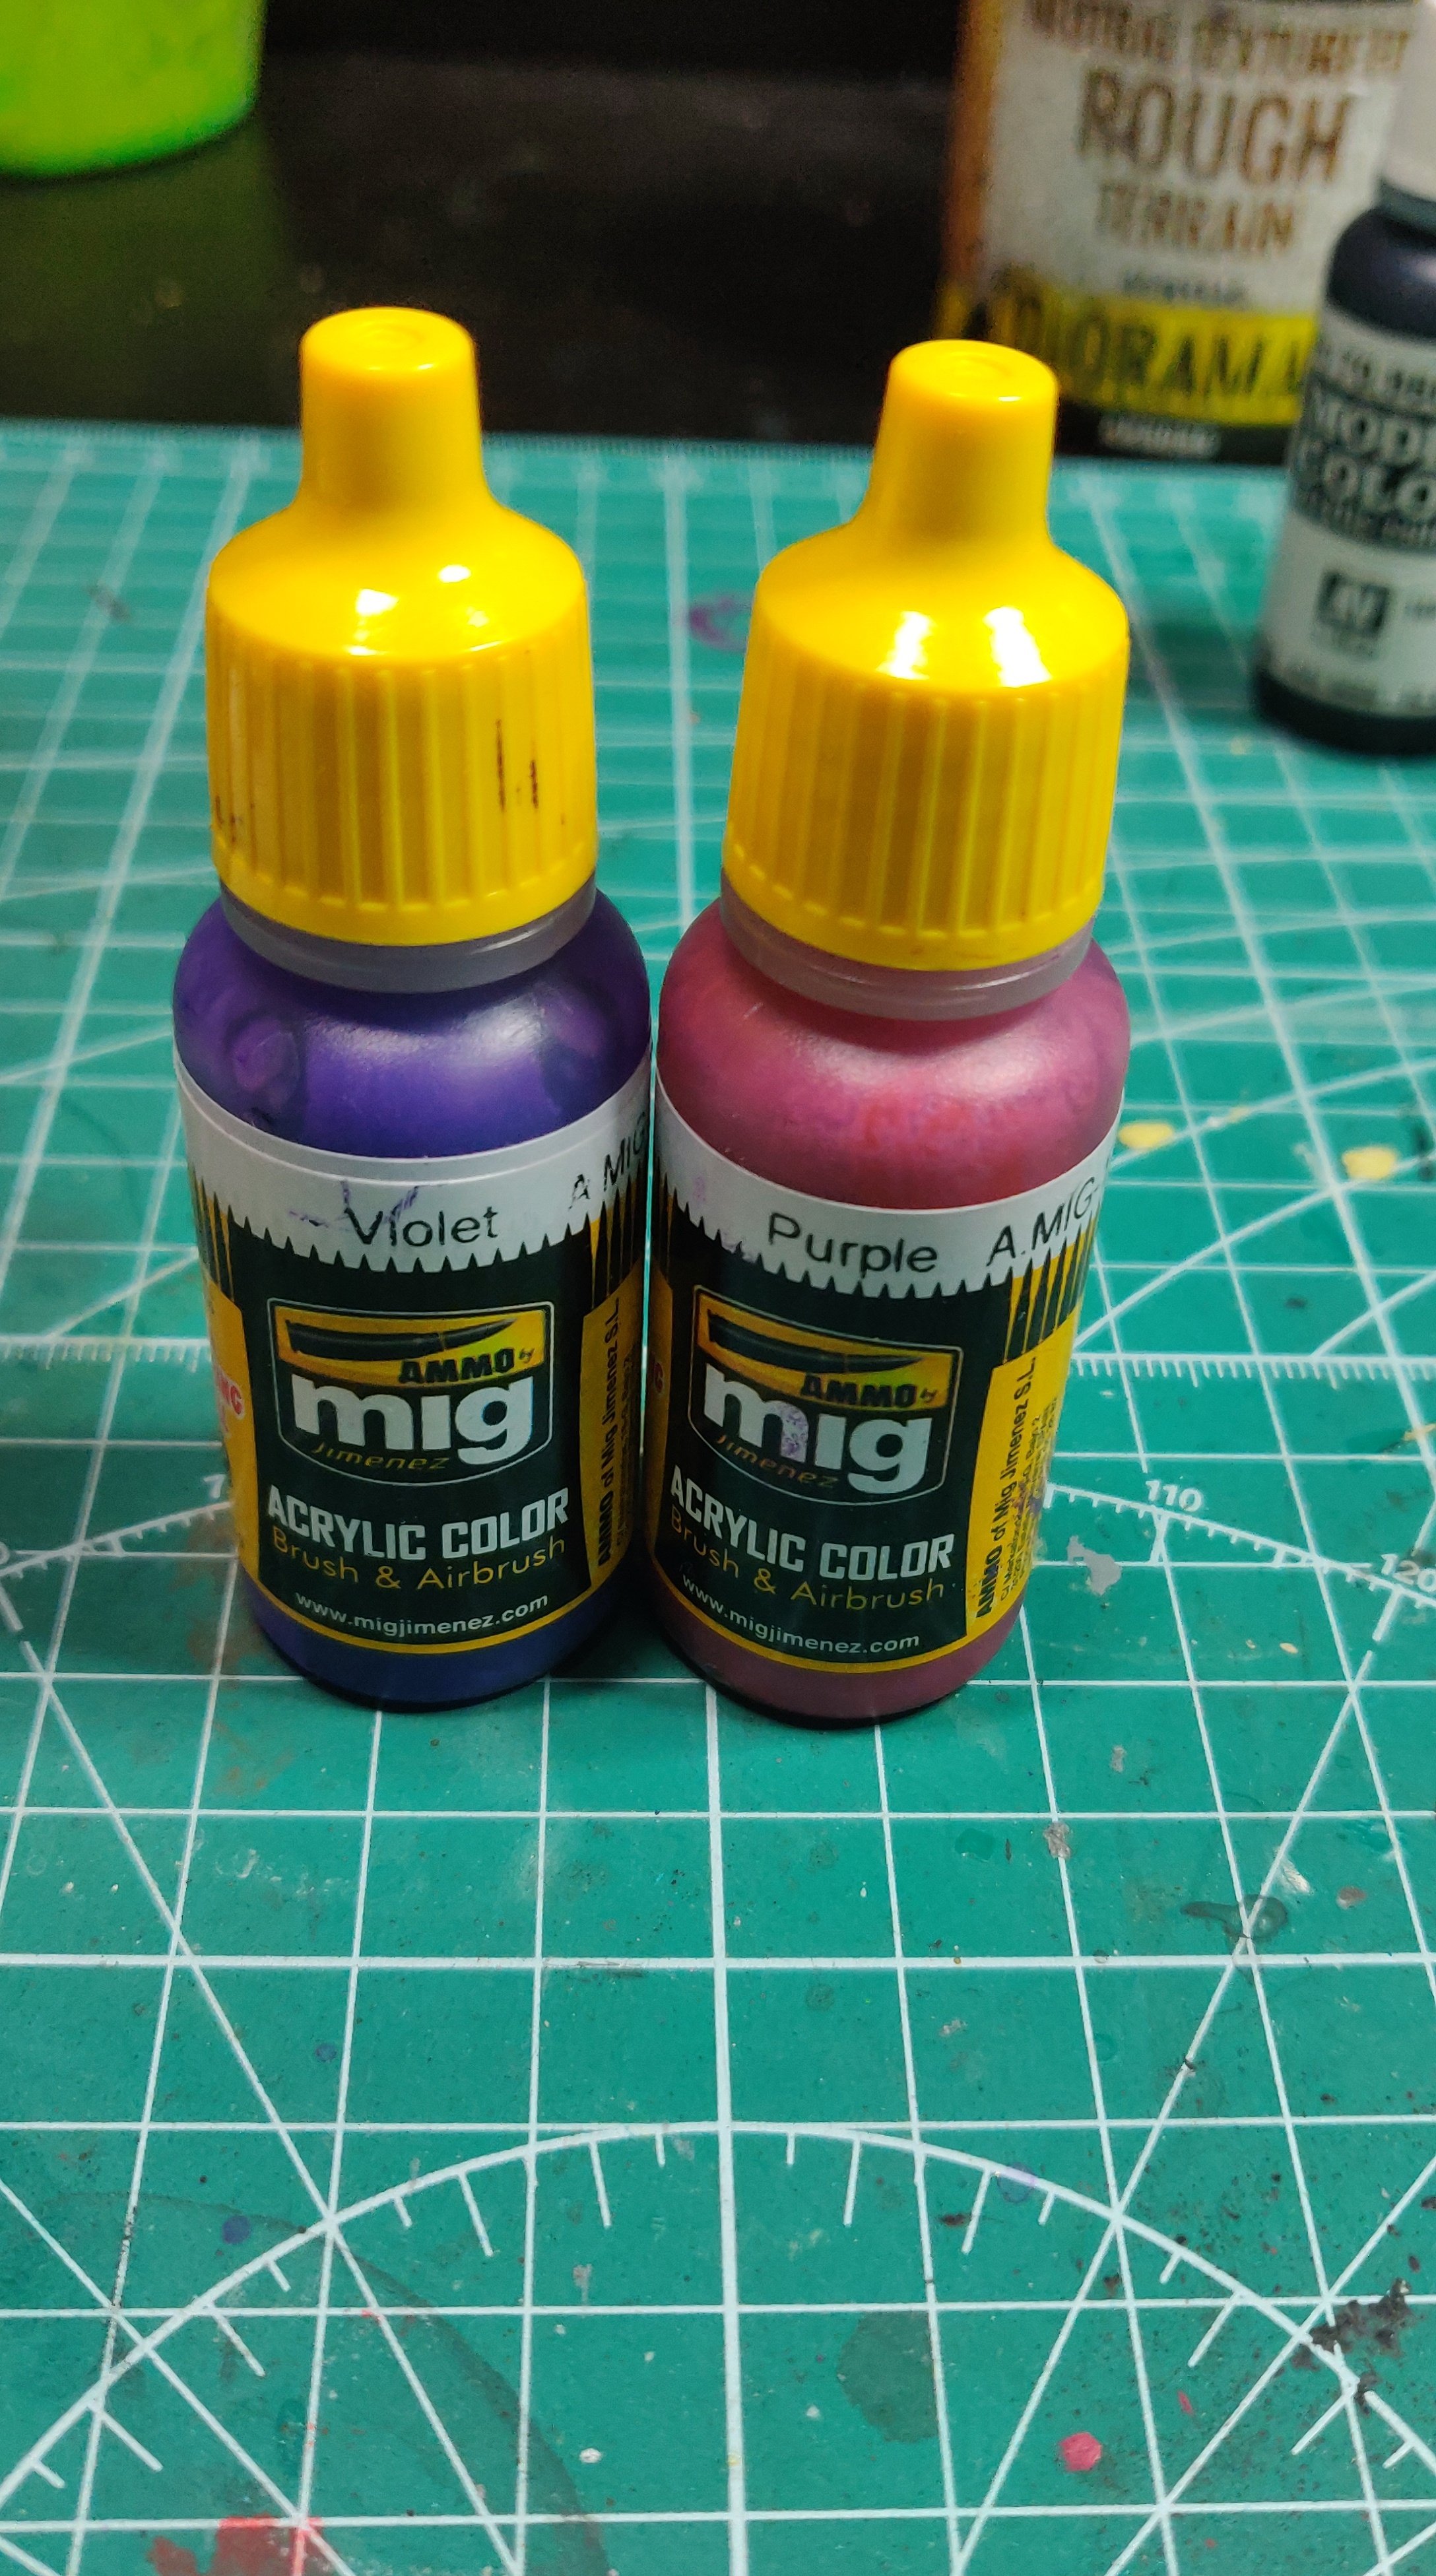
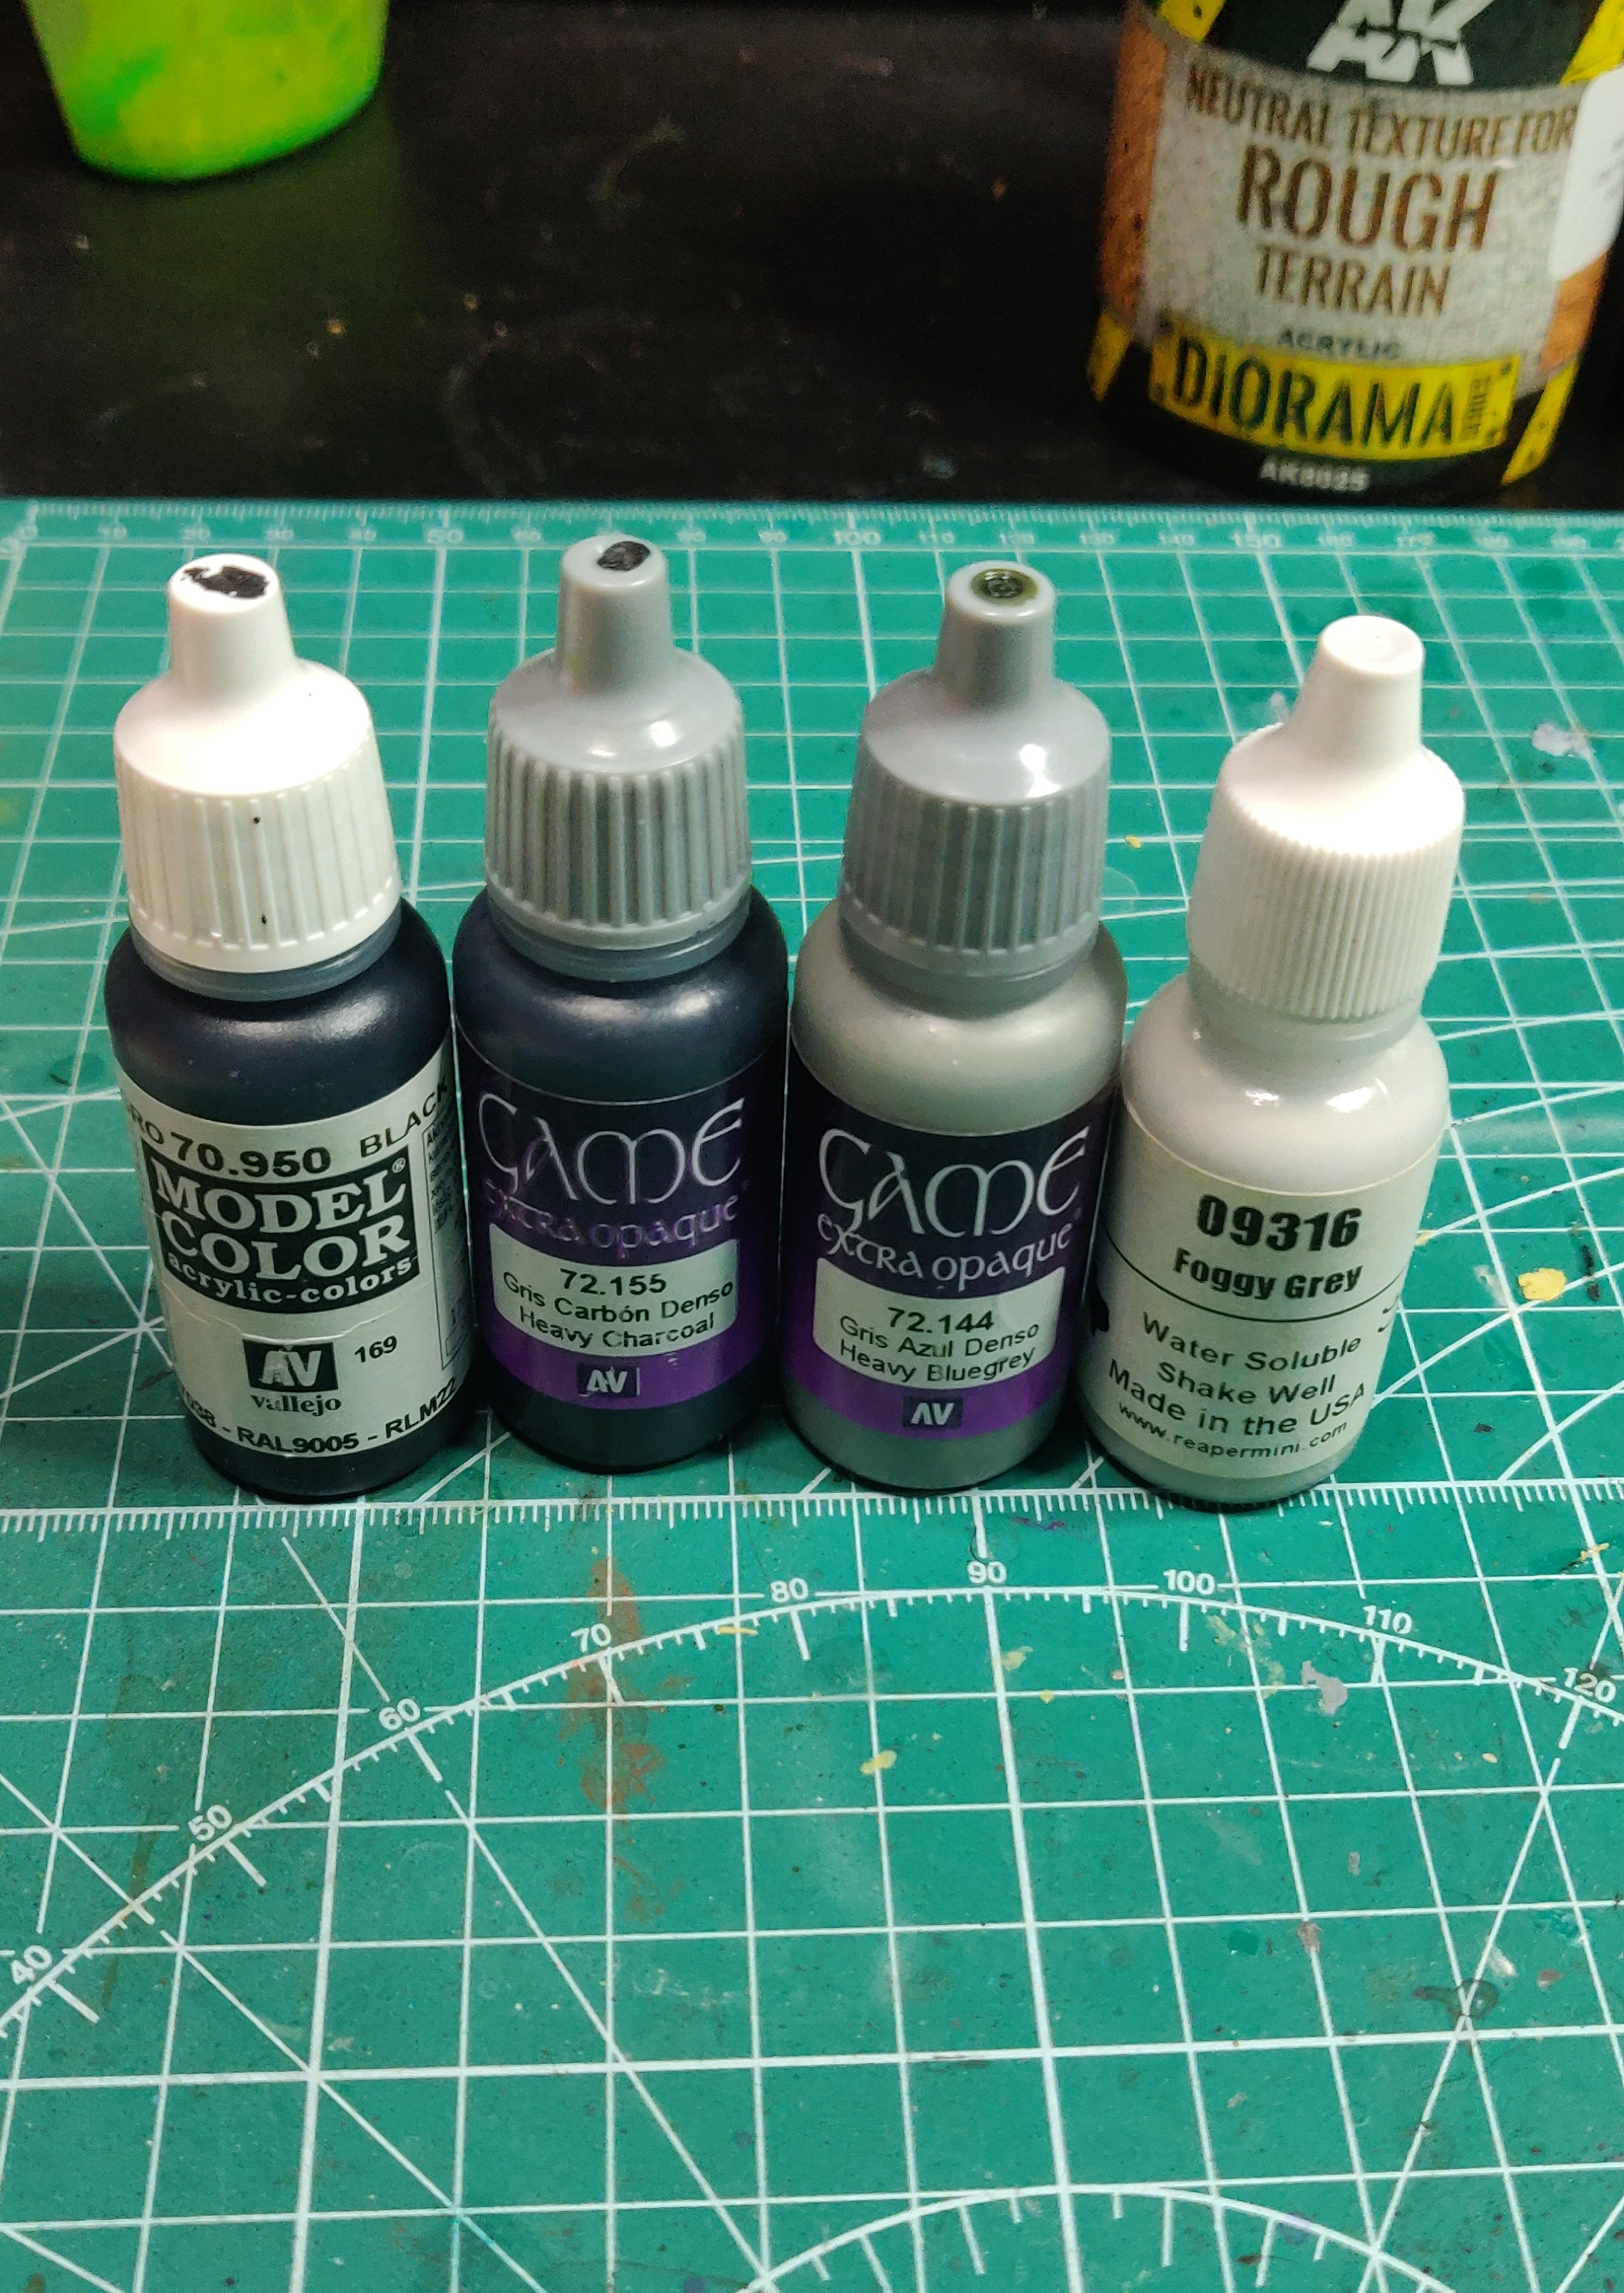
I refined up the green base and layer coats, blocked in my purples with MIG Ammo Violet, and the grey joint sections with vallejo Game colour extra opaque bluegrey.
The gun was also given a light coat of vallejo model colour black just to stop the eye from being drawn to a green gun.
Day 6...
Day 2 of focusing on Loader – details
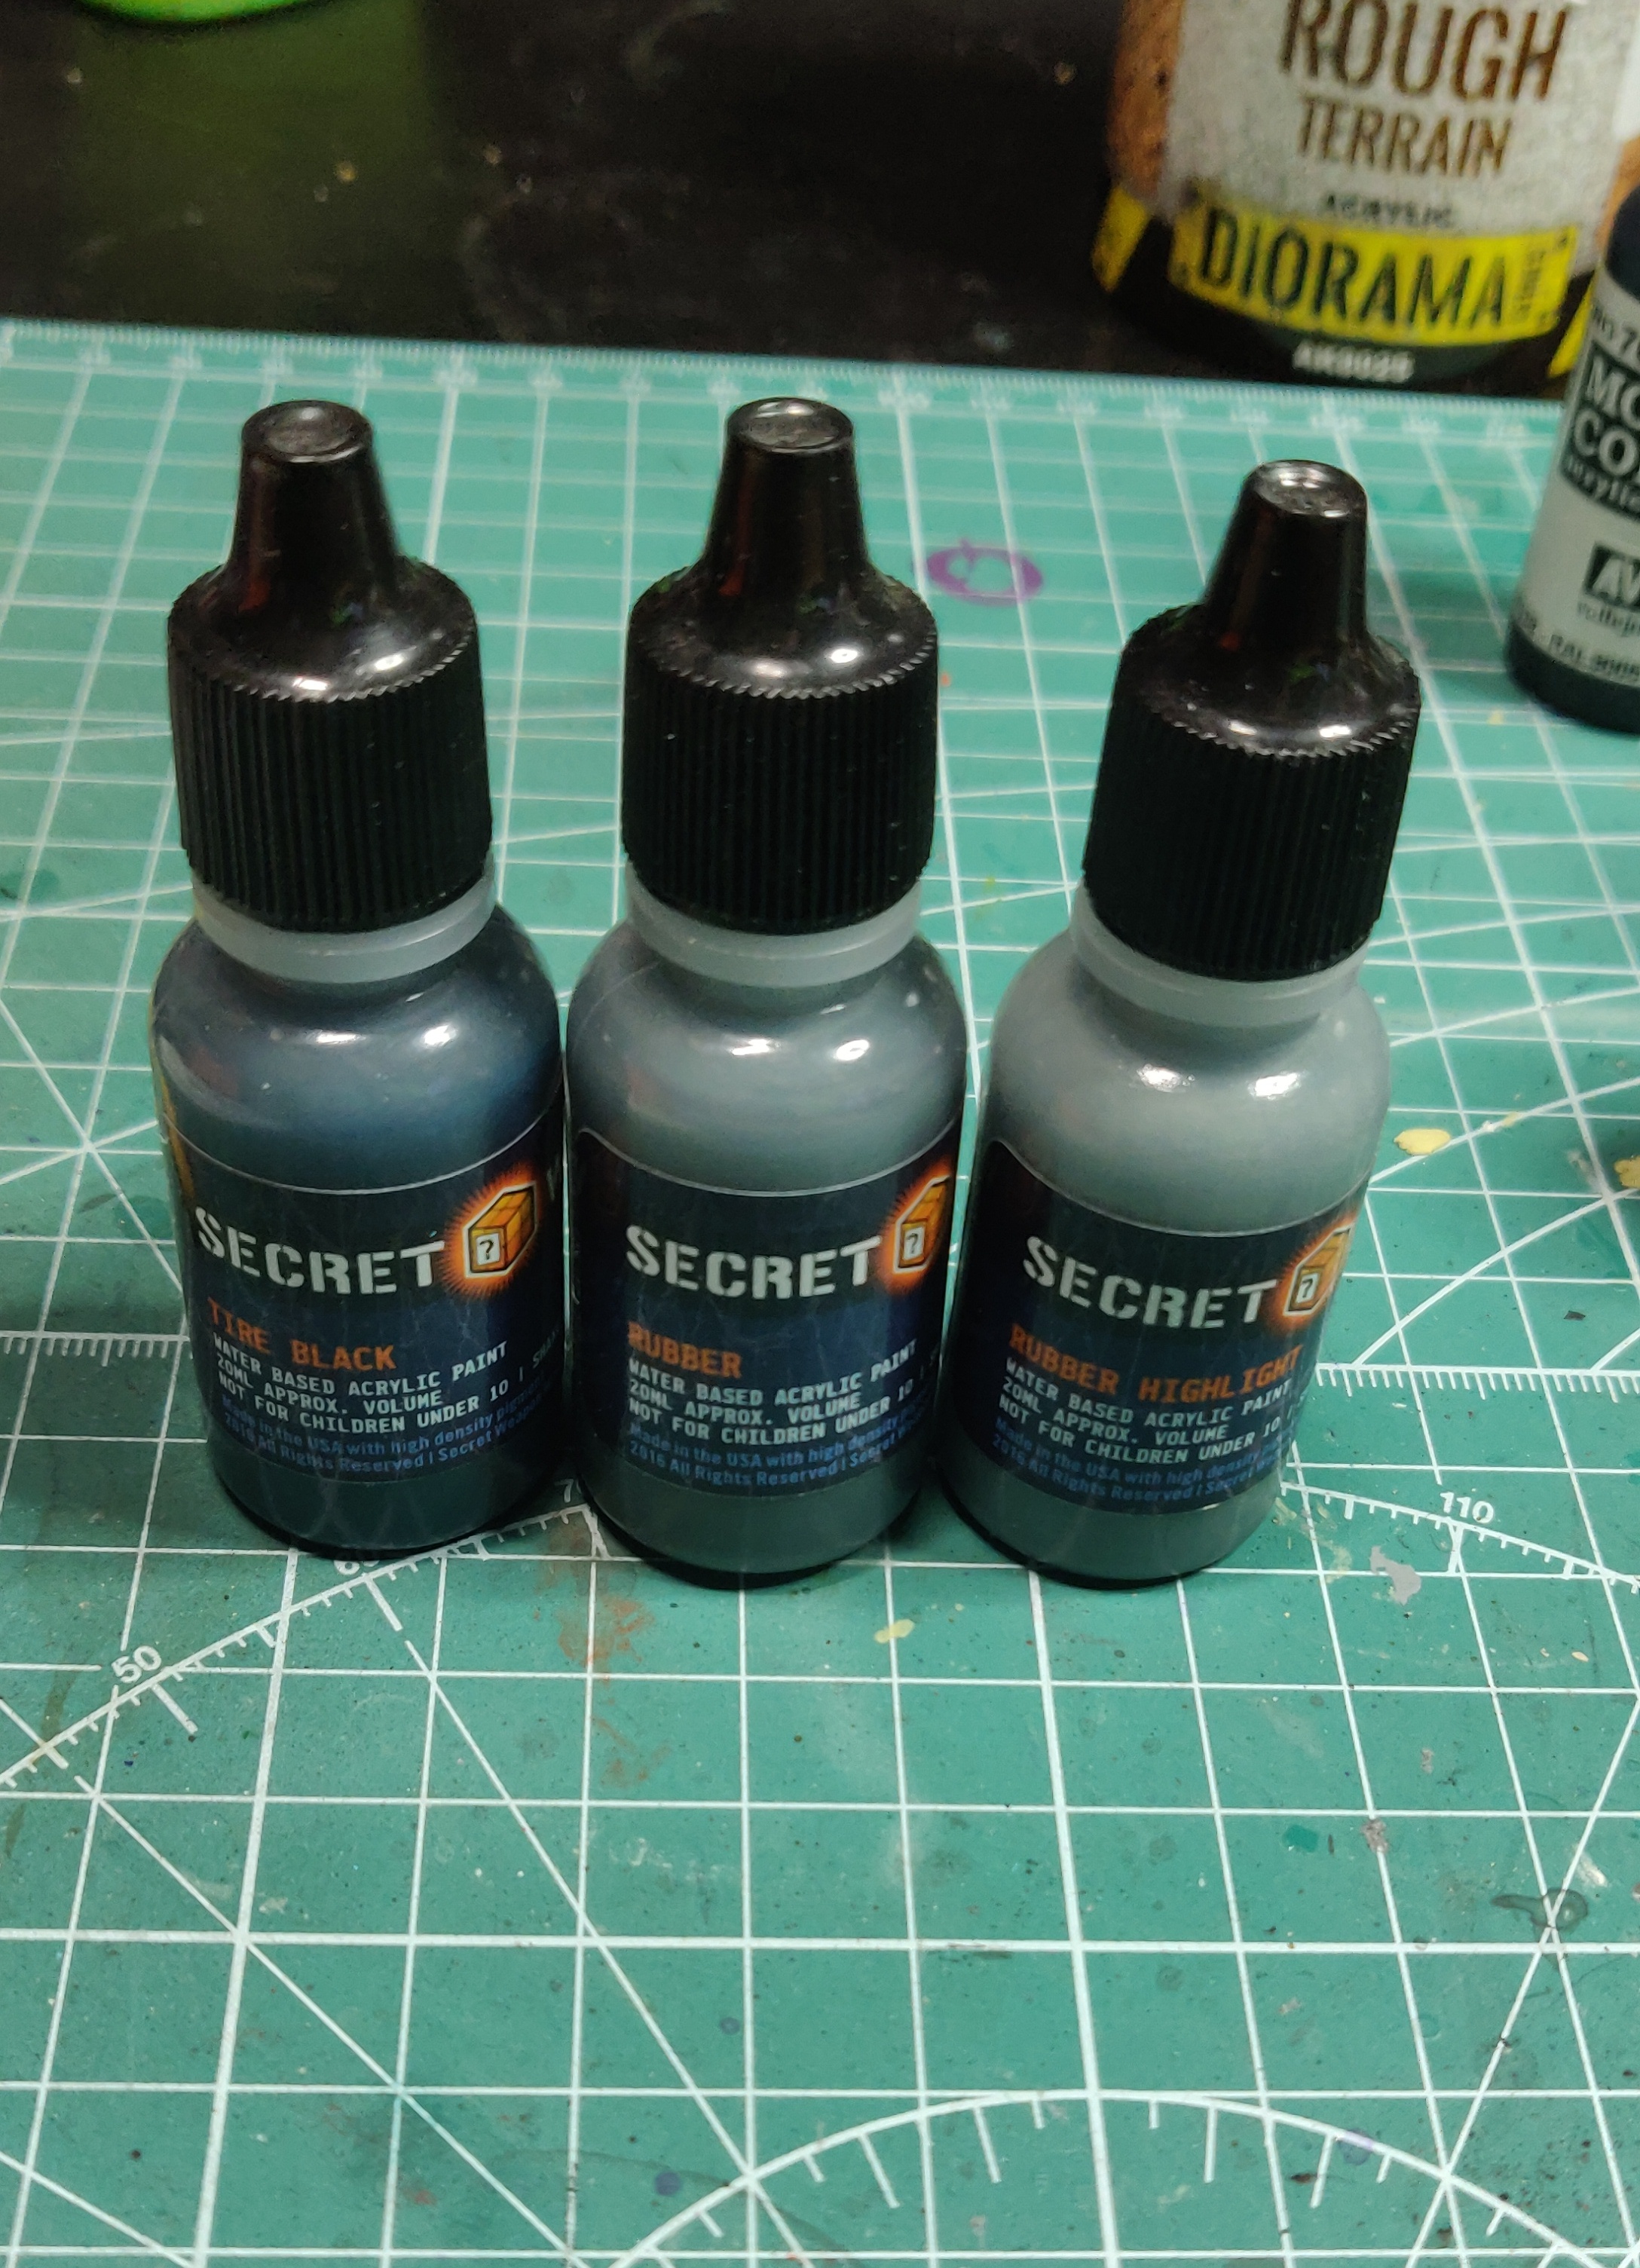
Added a layer of Secret Weapon Tyre Black to the tyres, this is a great blue-black which as its name suggests is great for tyres.
I also used thinned down vallejo model colour black to start blackining panels and adding in extra grey details with the vallejo extra opaque bluegrey
 He's come quite some way after only an hour (2-sessions) painting
Day 7...
Day 3 of painting Loader – Finishing touches

Time to wrap this bot up (for now anyway)
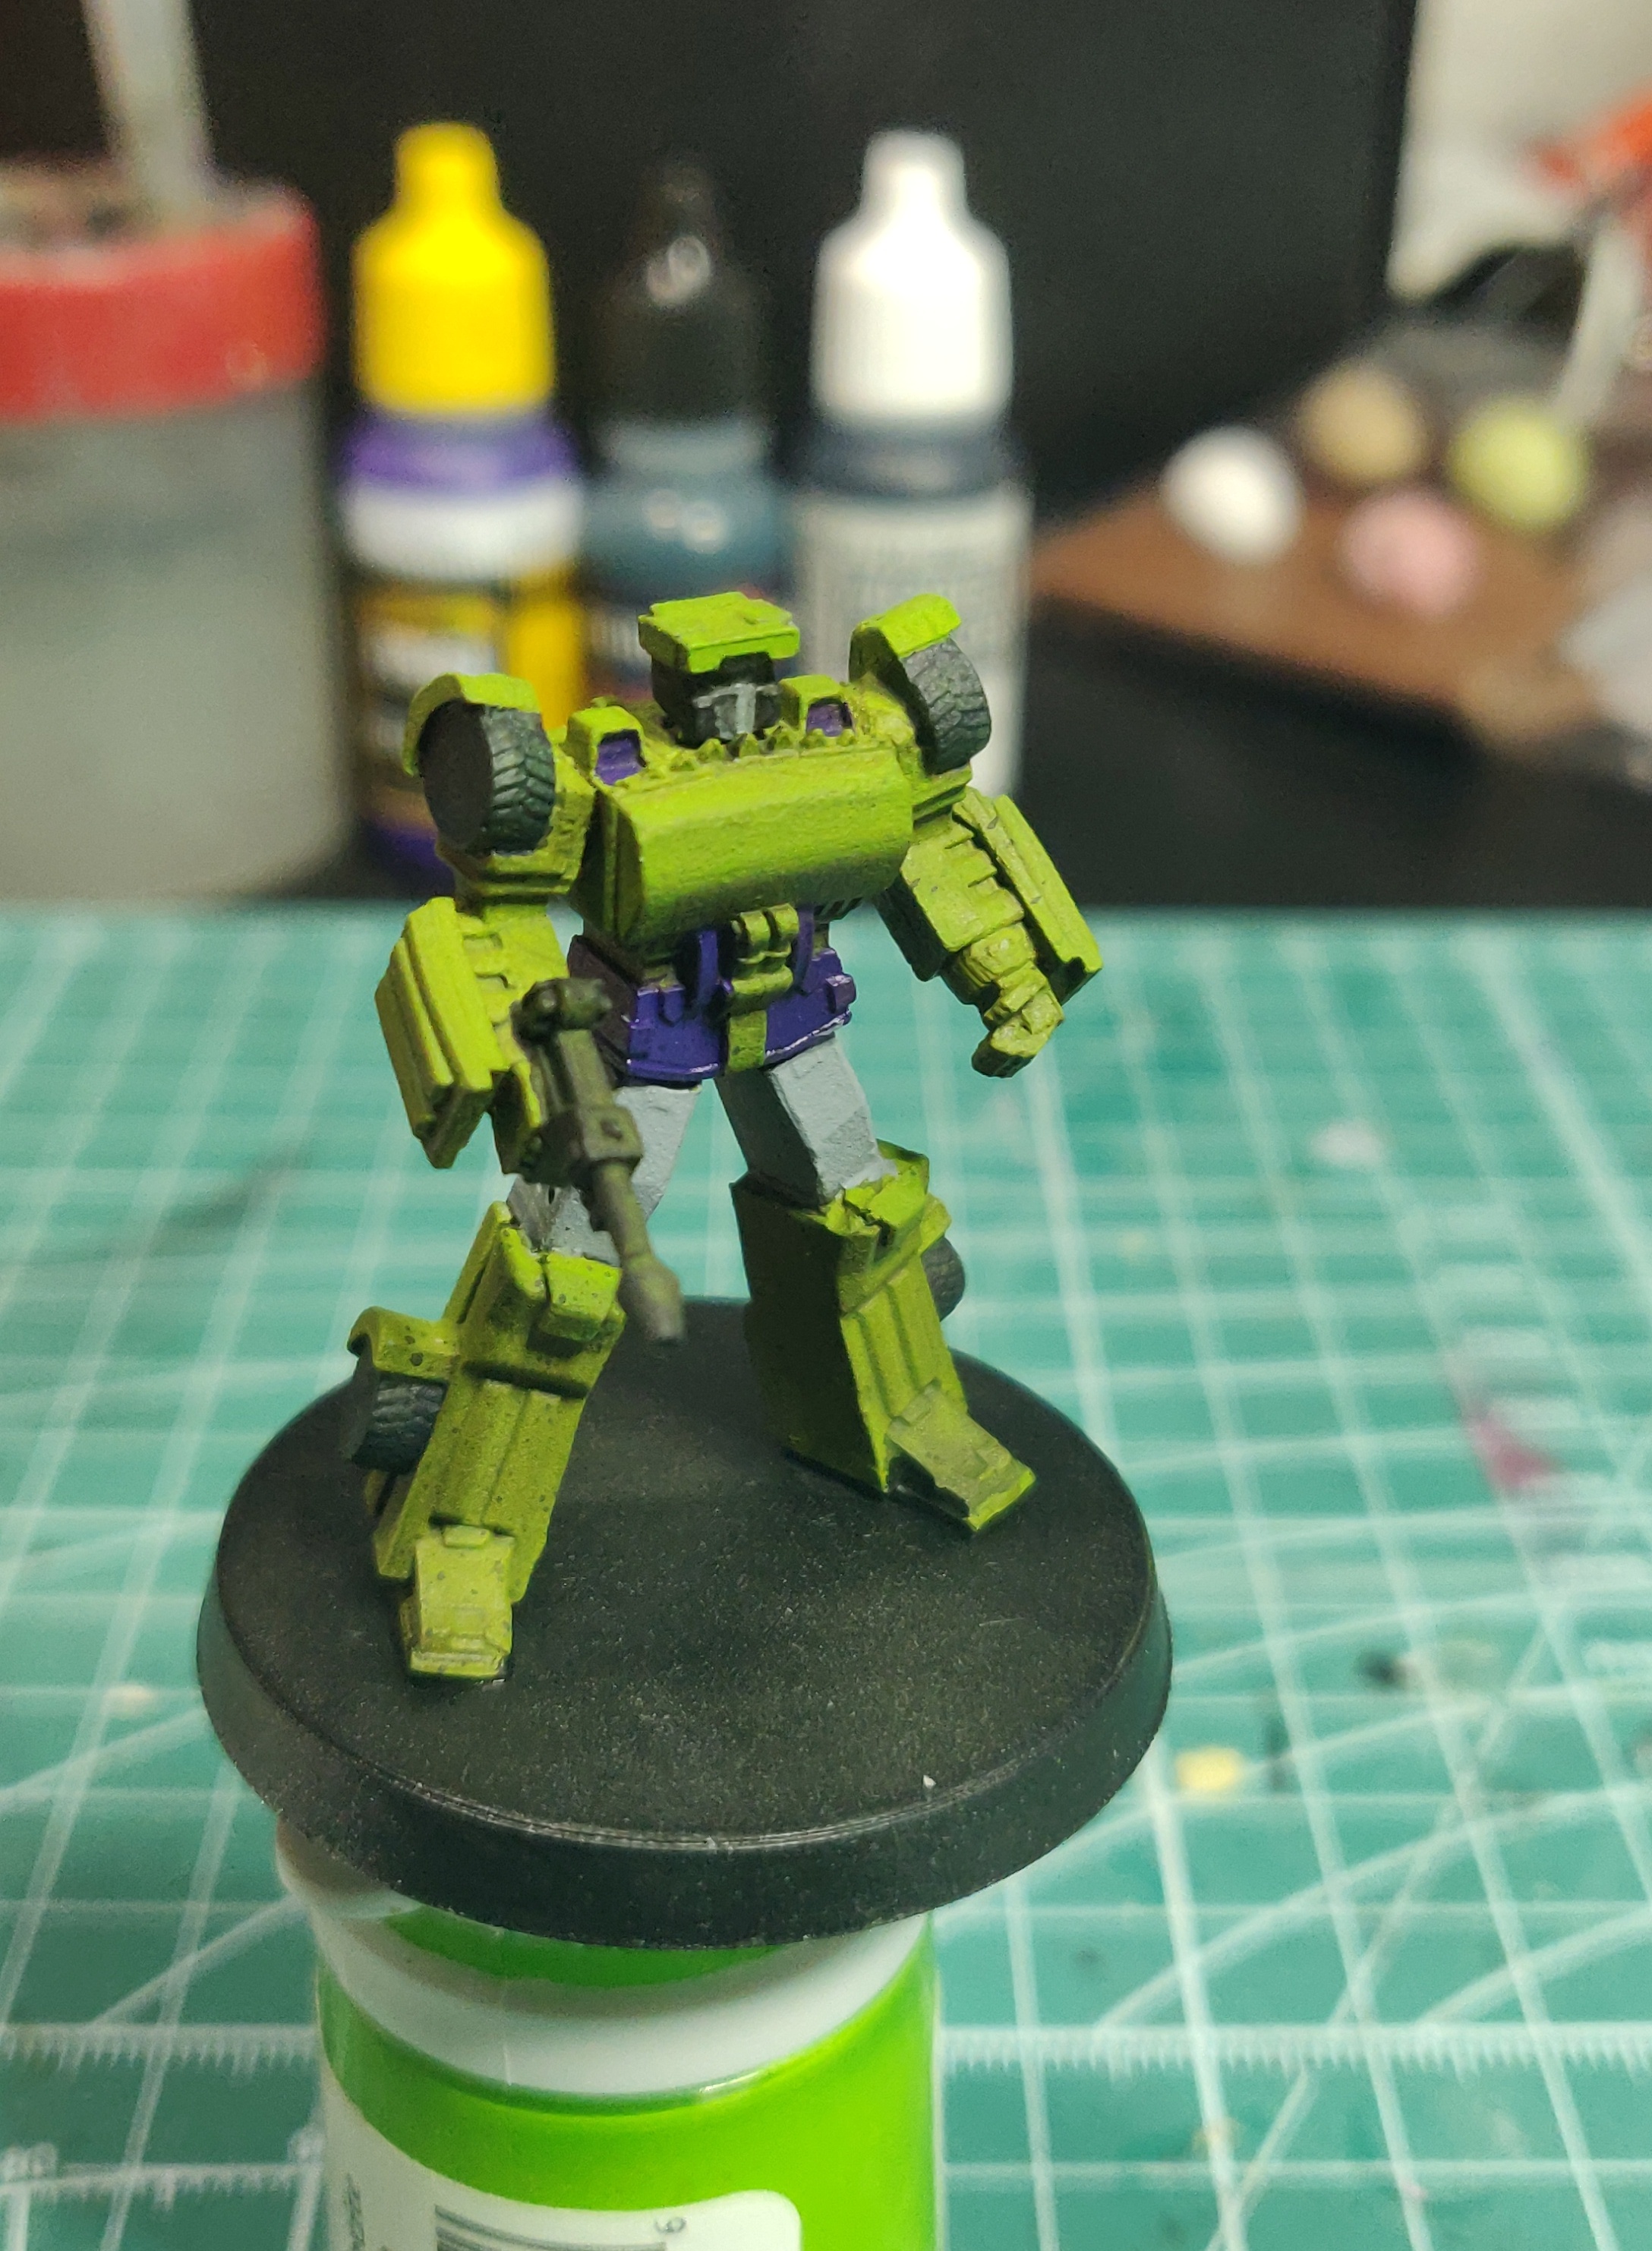
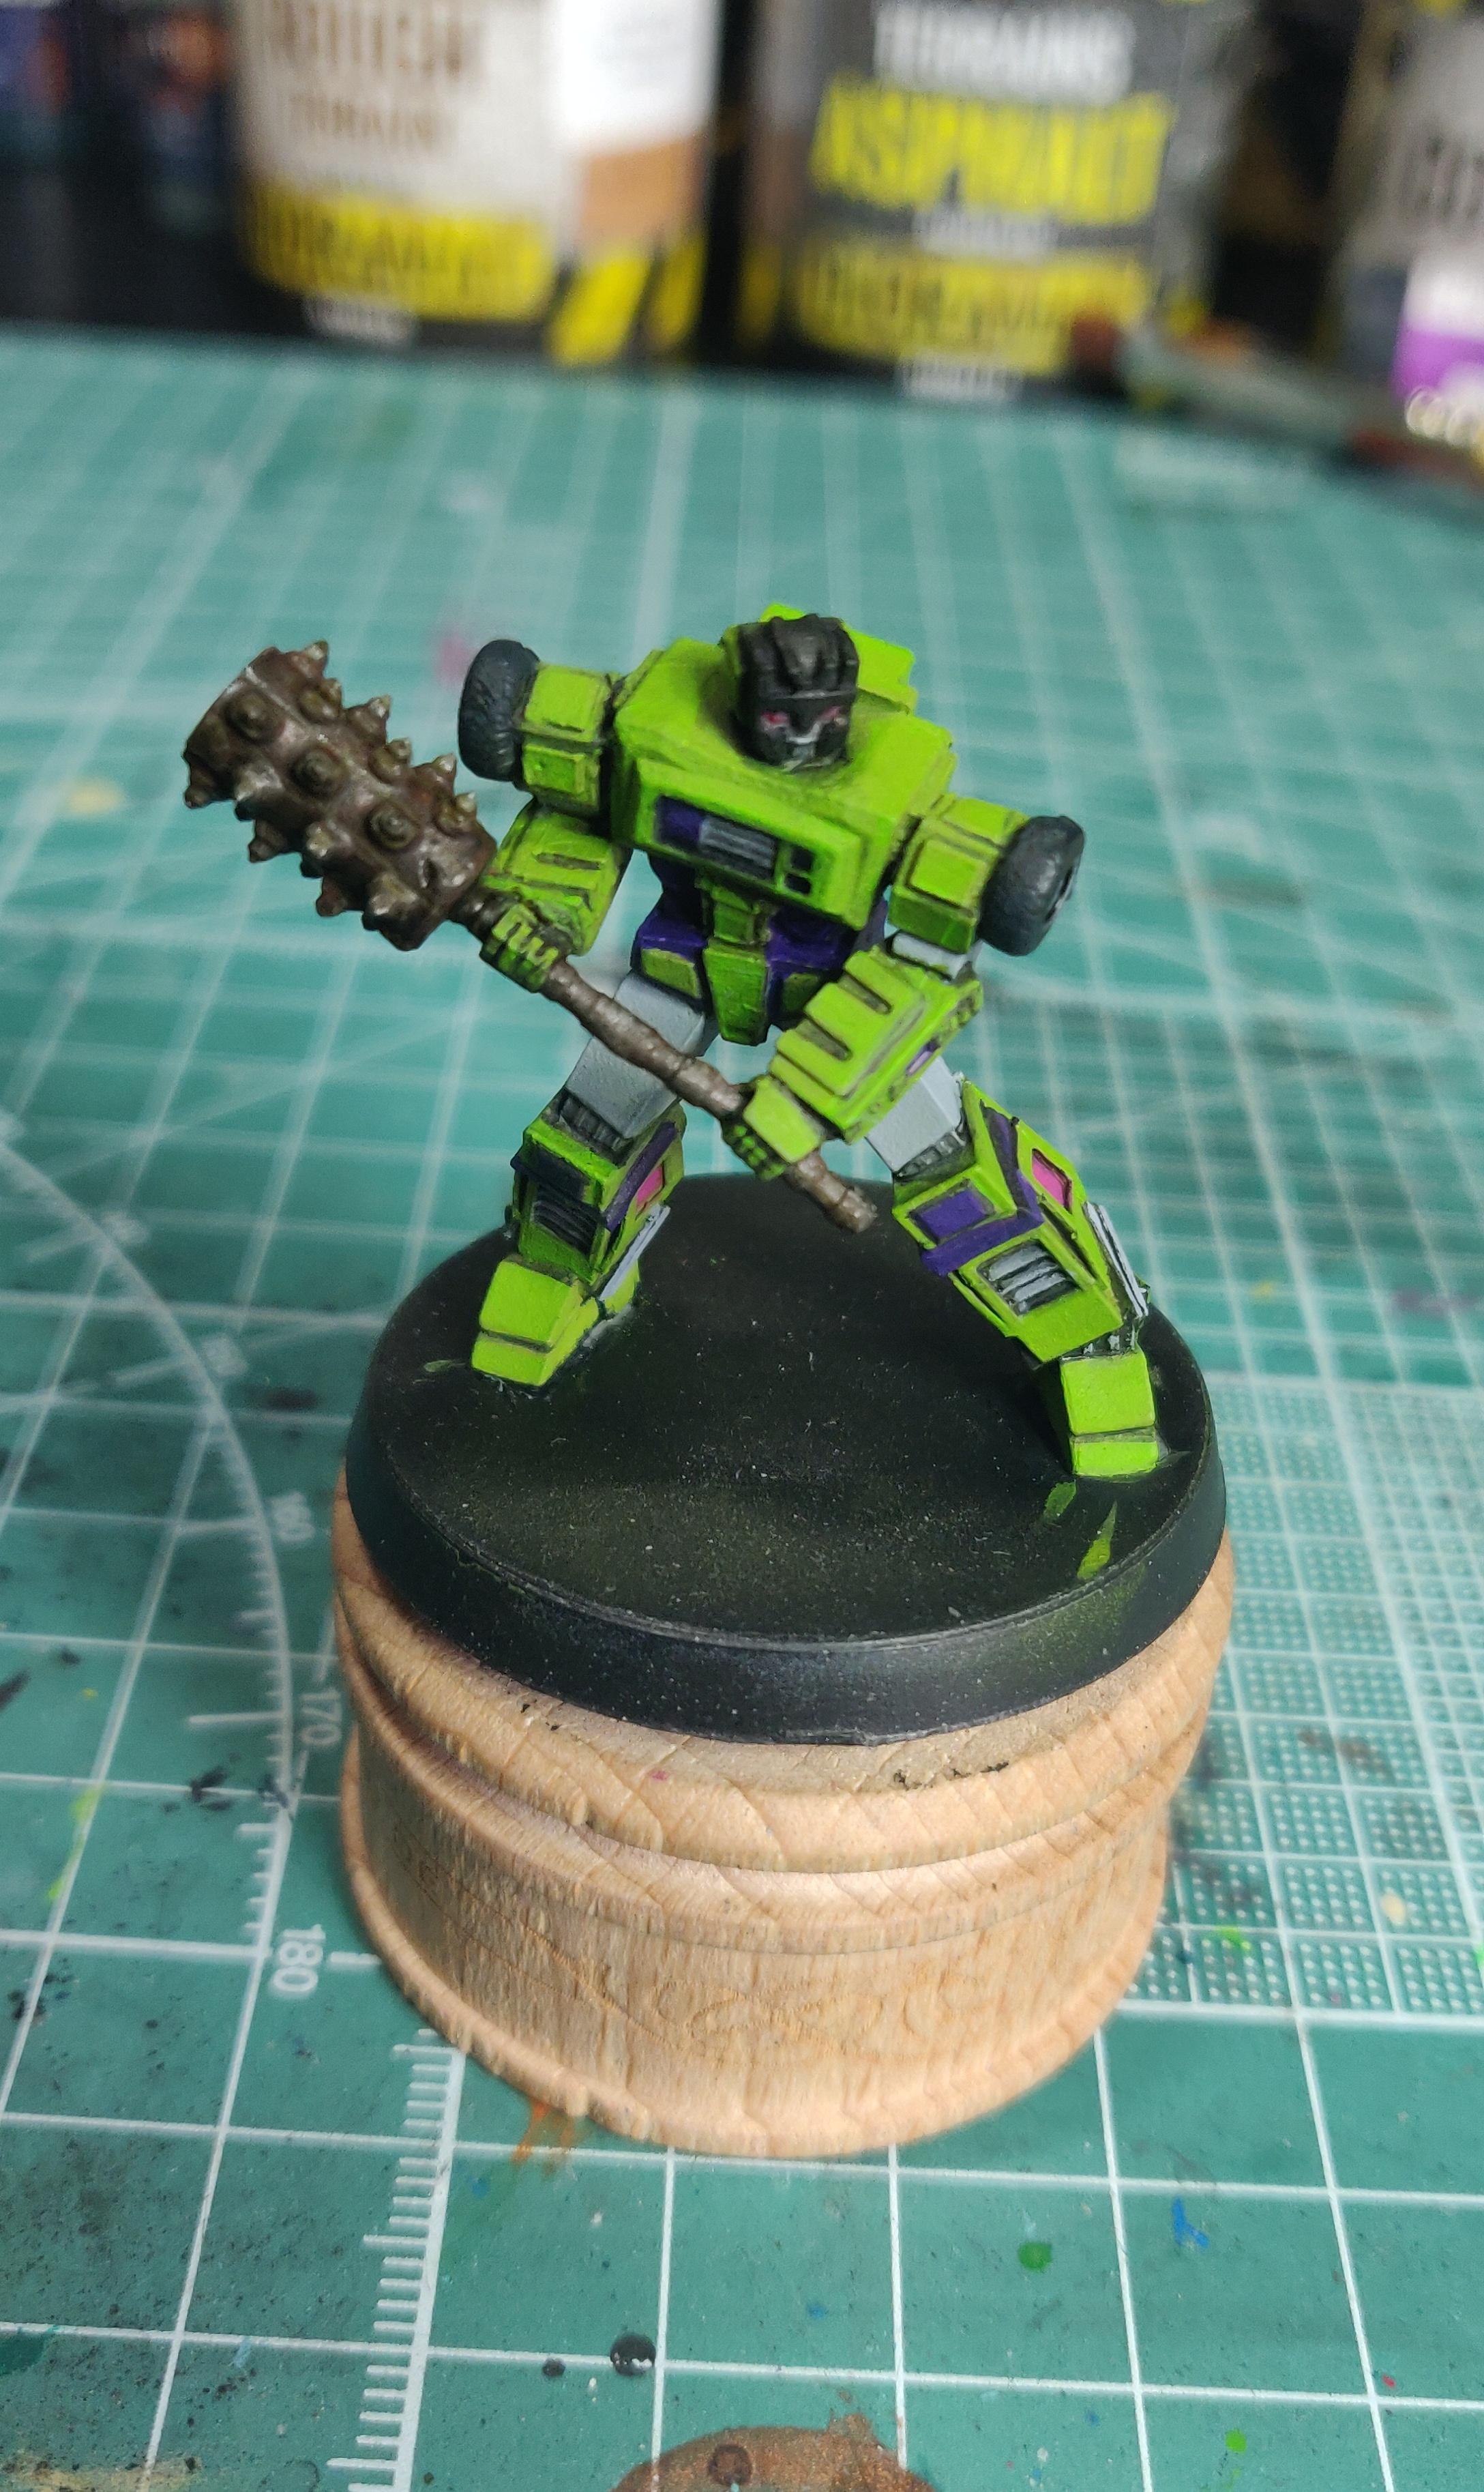
Edge highlights were added to the green using a mix of Reaper MSP Dungeon Slime and Vallejo Model Color yellow green
Purple edges were finished with MIG Ammo Purple
Grey edges finished up with Reaper MSP Foggy Grey
Tires and gun were finished with Secret Weapon Rubber and rubber highlight
Visor was first based in vallejo extra opaque heavy red, then highlighted with model colour magenta, and a small amount of Arctic Mist blended in for a bright point.
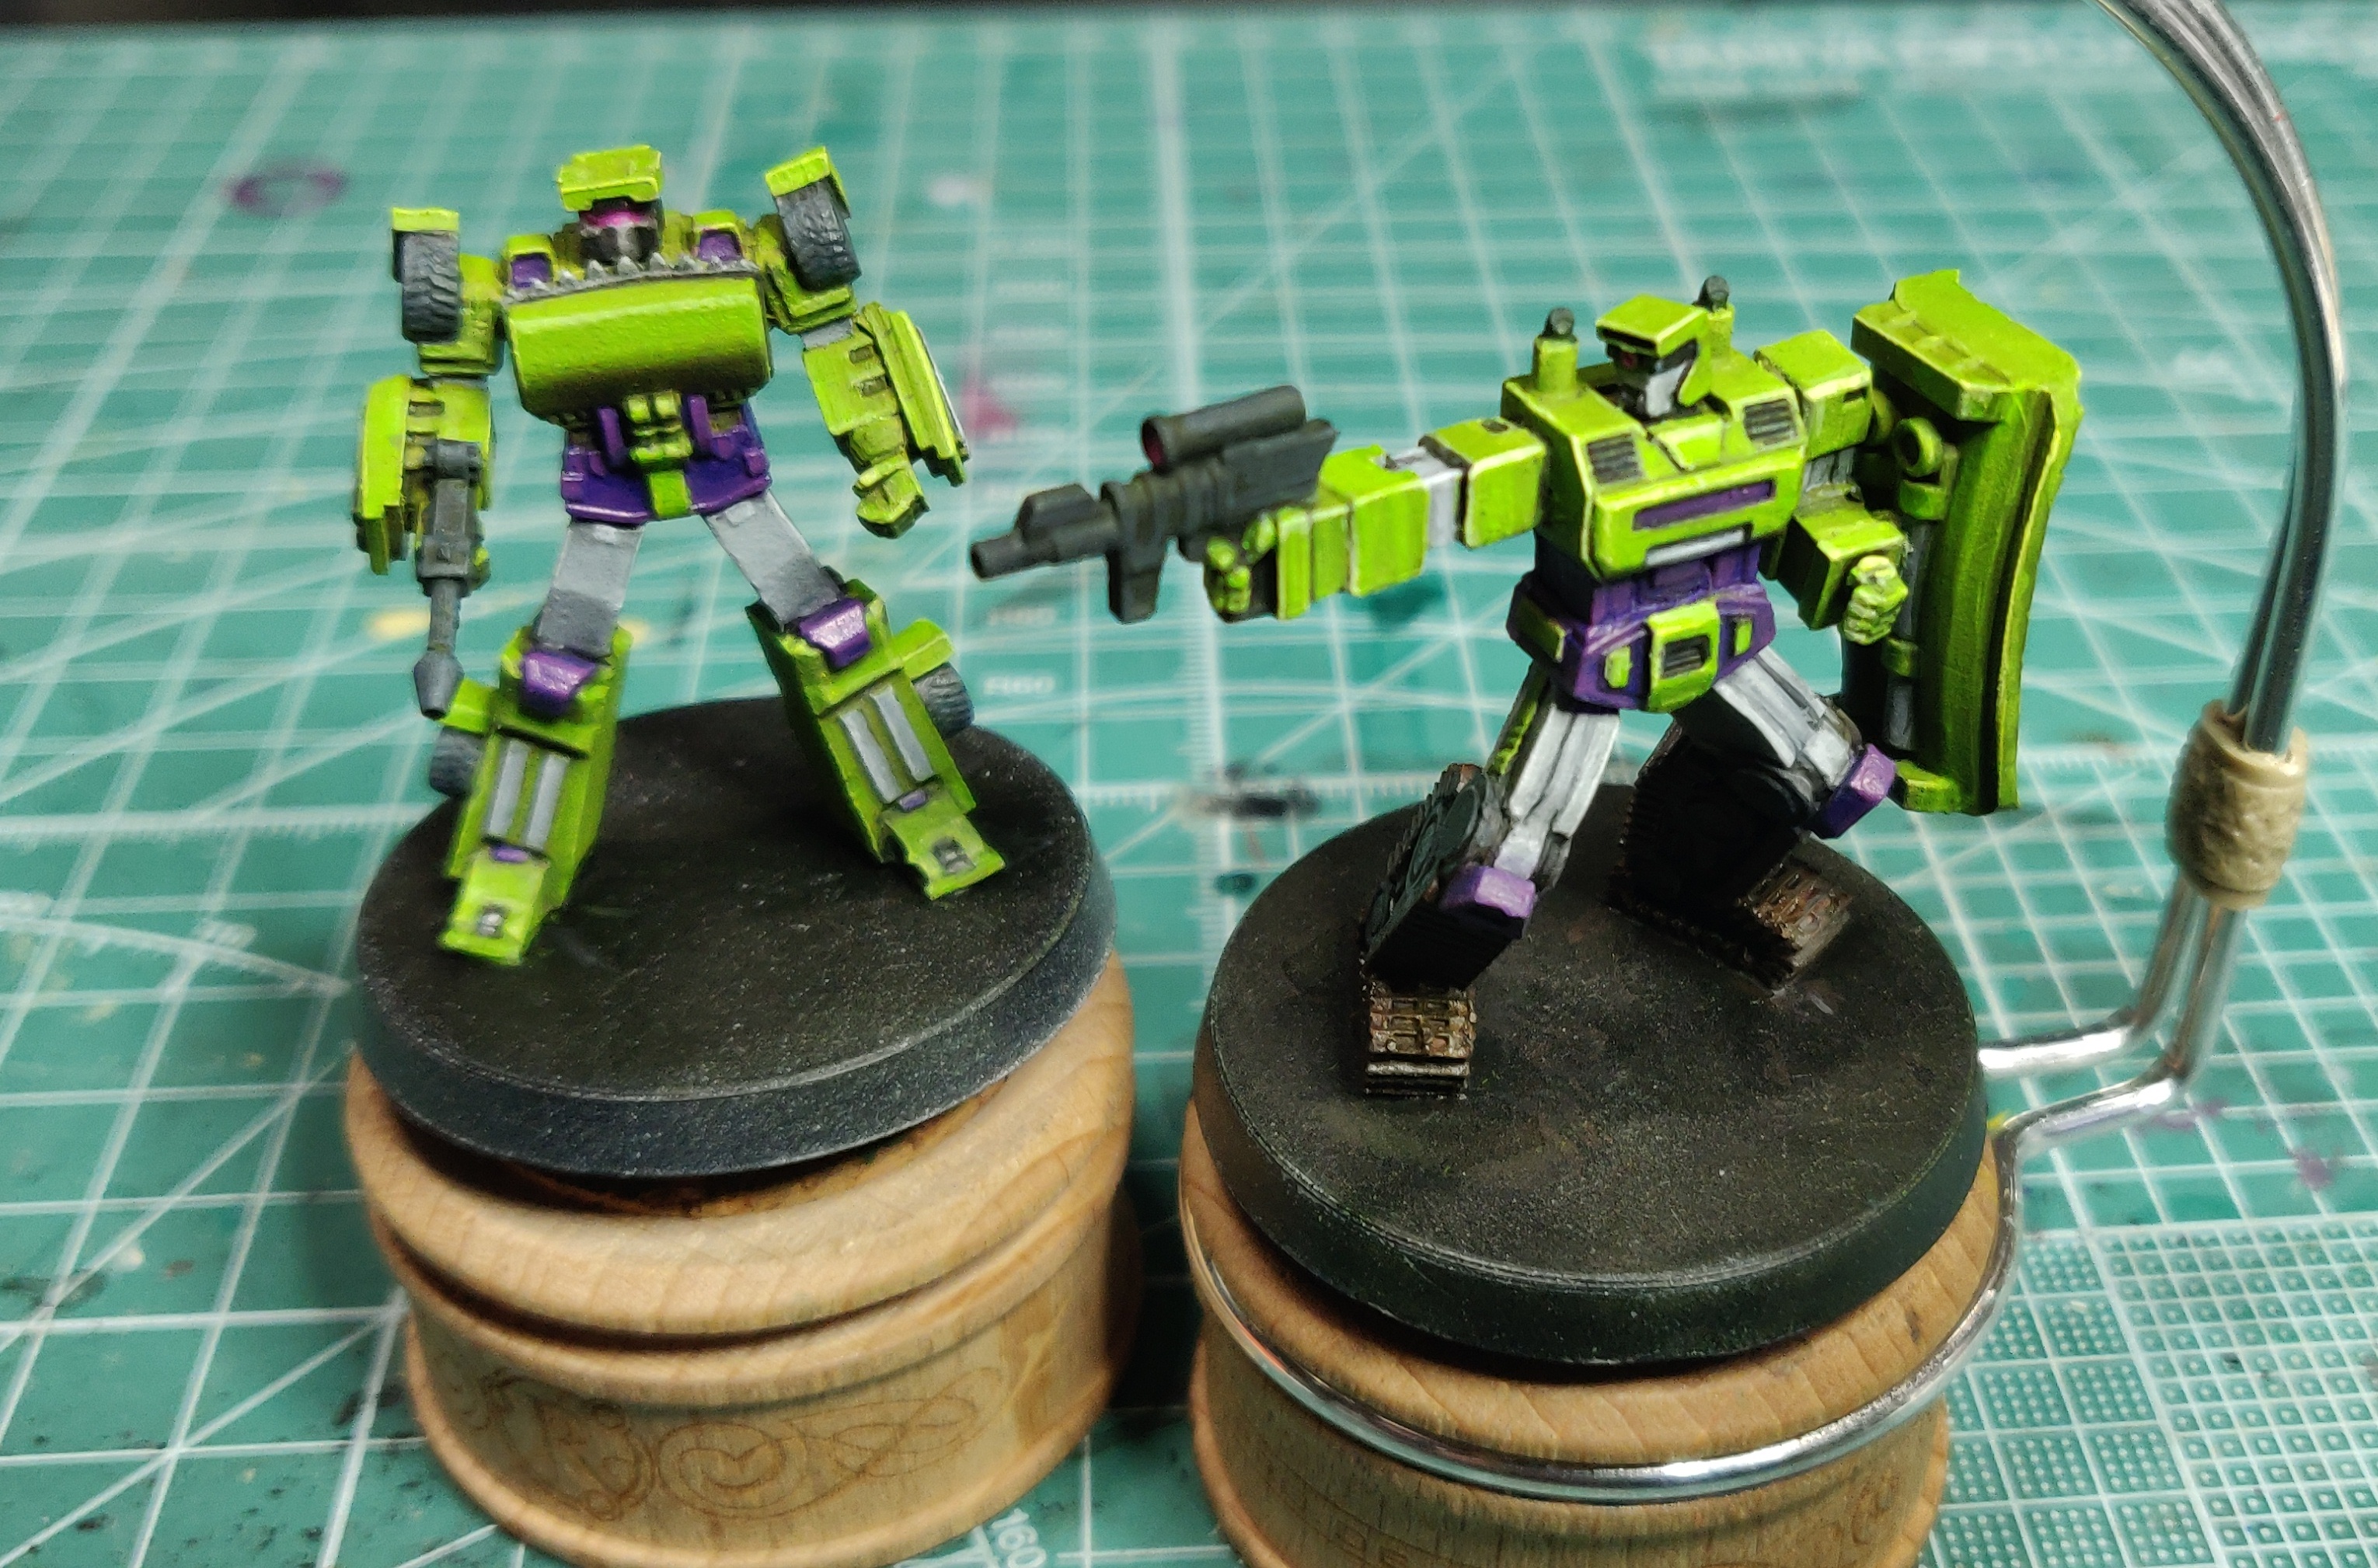
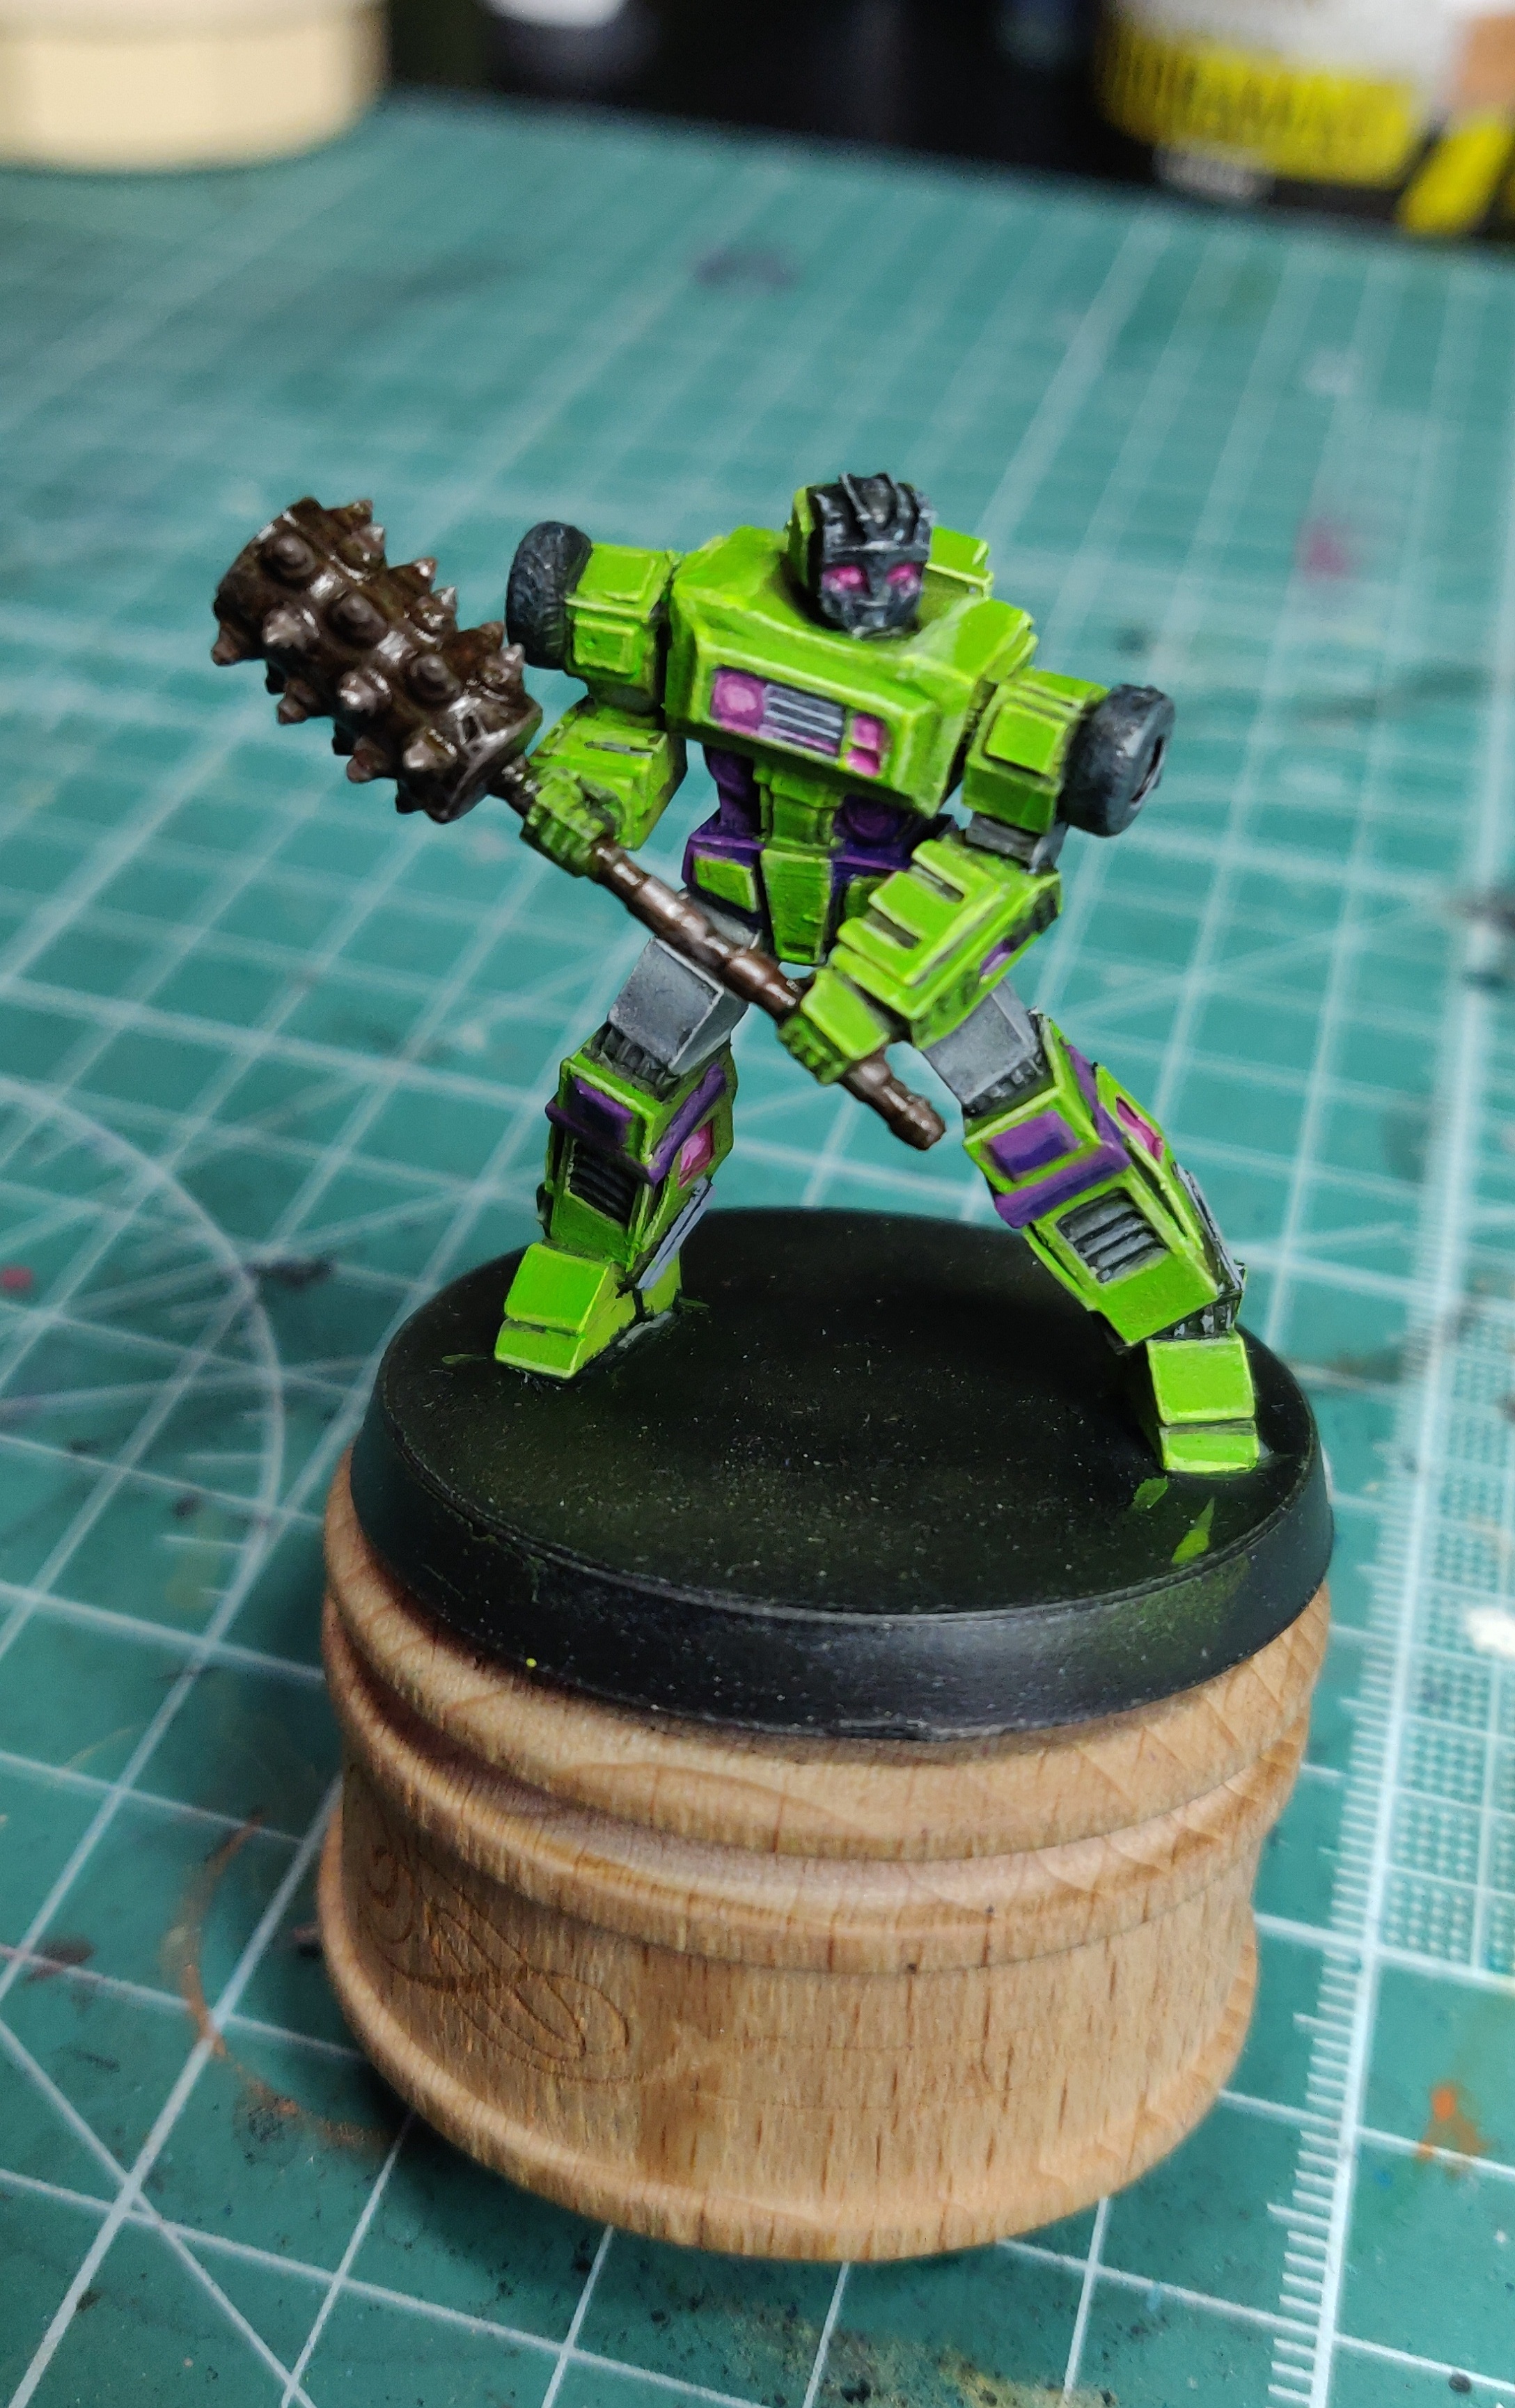
 Basecoat, Highlight, Edge highlights
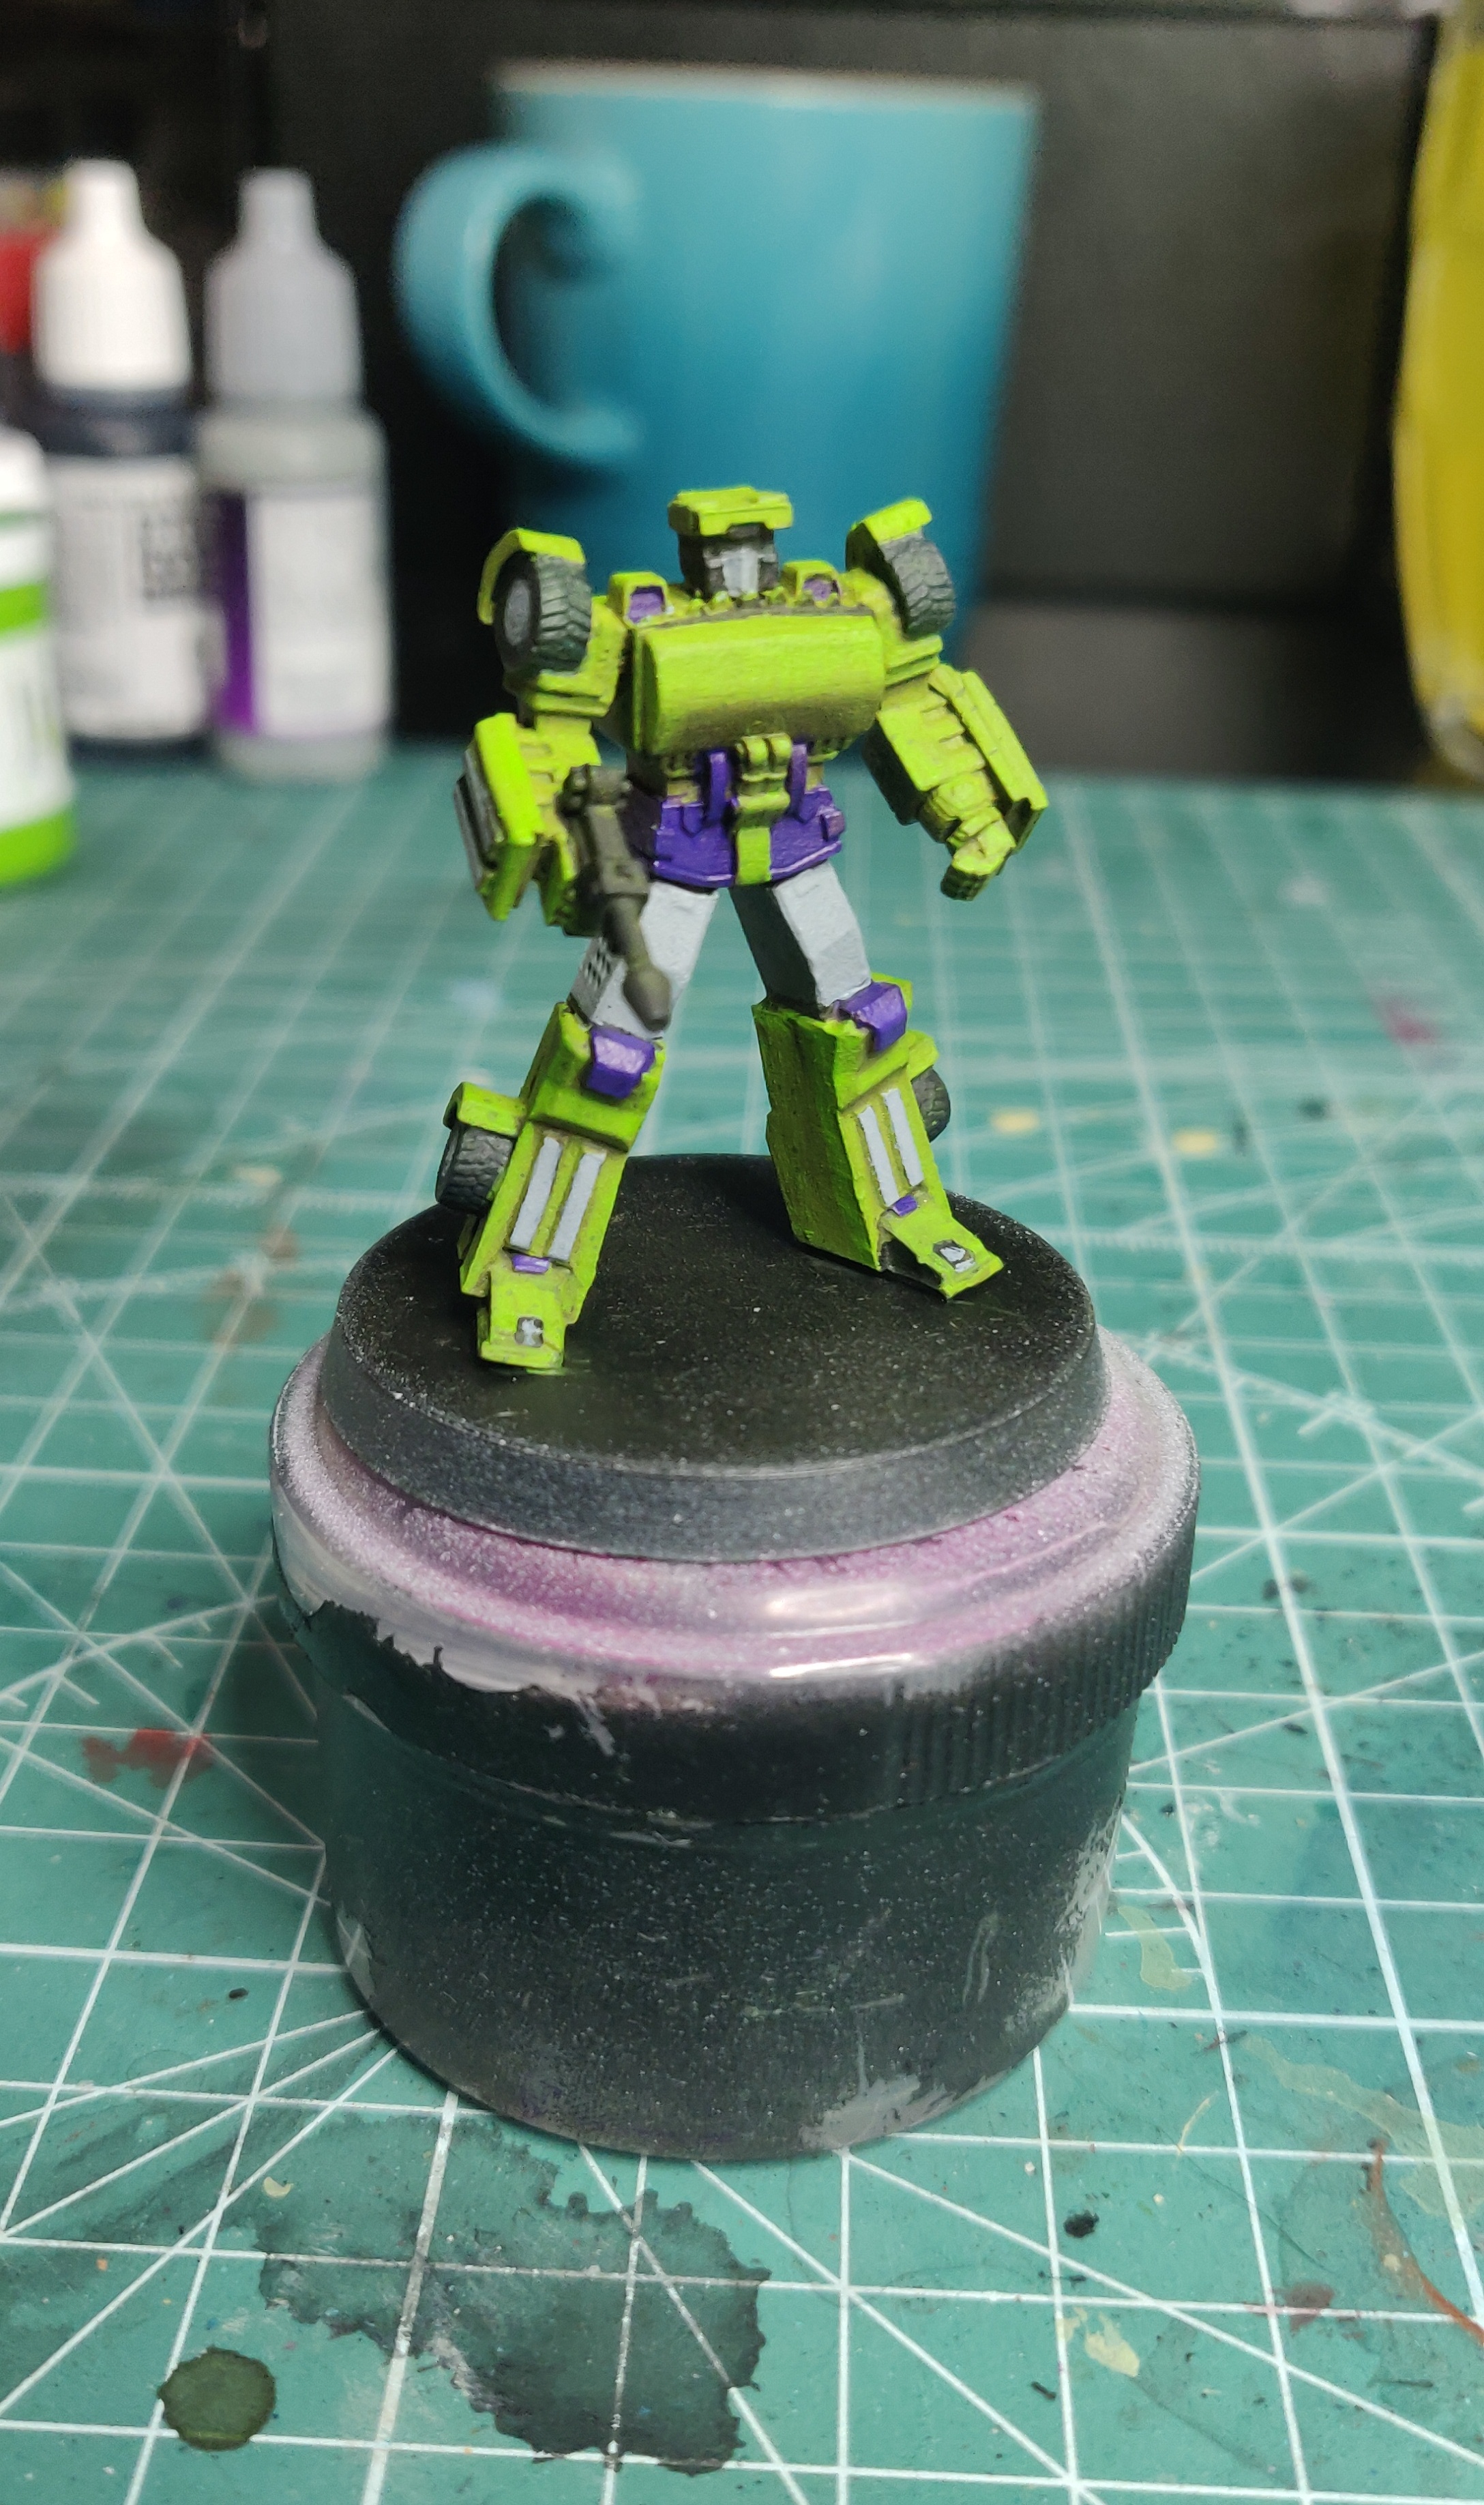
Considering the time spent on him, I’m really proud of what I have accomplished. I still have the base to texture, and also weathering/rust to be added, but this guy rocks IMO
…. 1 down, 4 to go, then the big bot

Day 10...
Bot #2 day 3 – Dozer
Today I wrap up the 2nd of the Builders by applying edge highlights to make everything pop and refining the black lining.
For the green edges I used a mix of Reaper MSP Dungeon Slime and Vallejo Model Color yellow green. This gives a vibrant highlight that works well with the P3 Noctite green without going to fluorescent or yellow.
The purple (well violet) was edged with MIG Ammo Purple, these work well together as they’re from the same set, and the redness in the purple doesn’t get too lost in the darkness of the Violet.
The grey is edged with Reaper MSP foggy grey, this is a nice off-white which works well with the vallejo bluegrey as it has a very faint blue tint to it
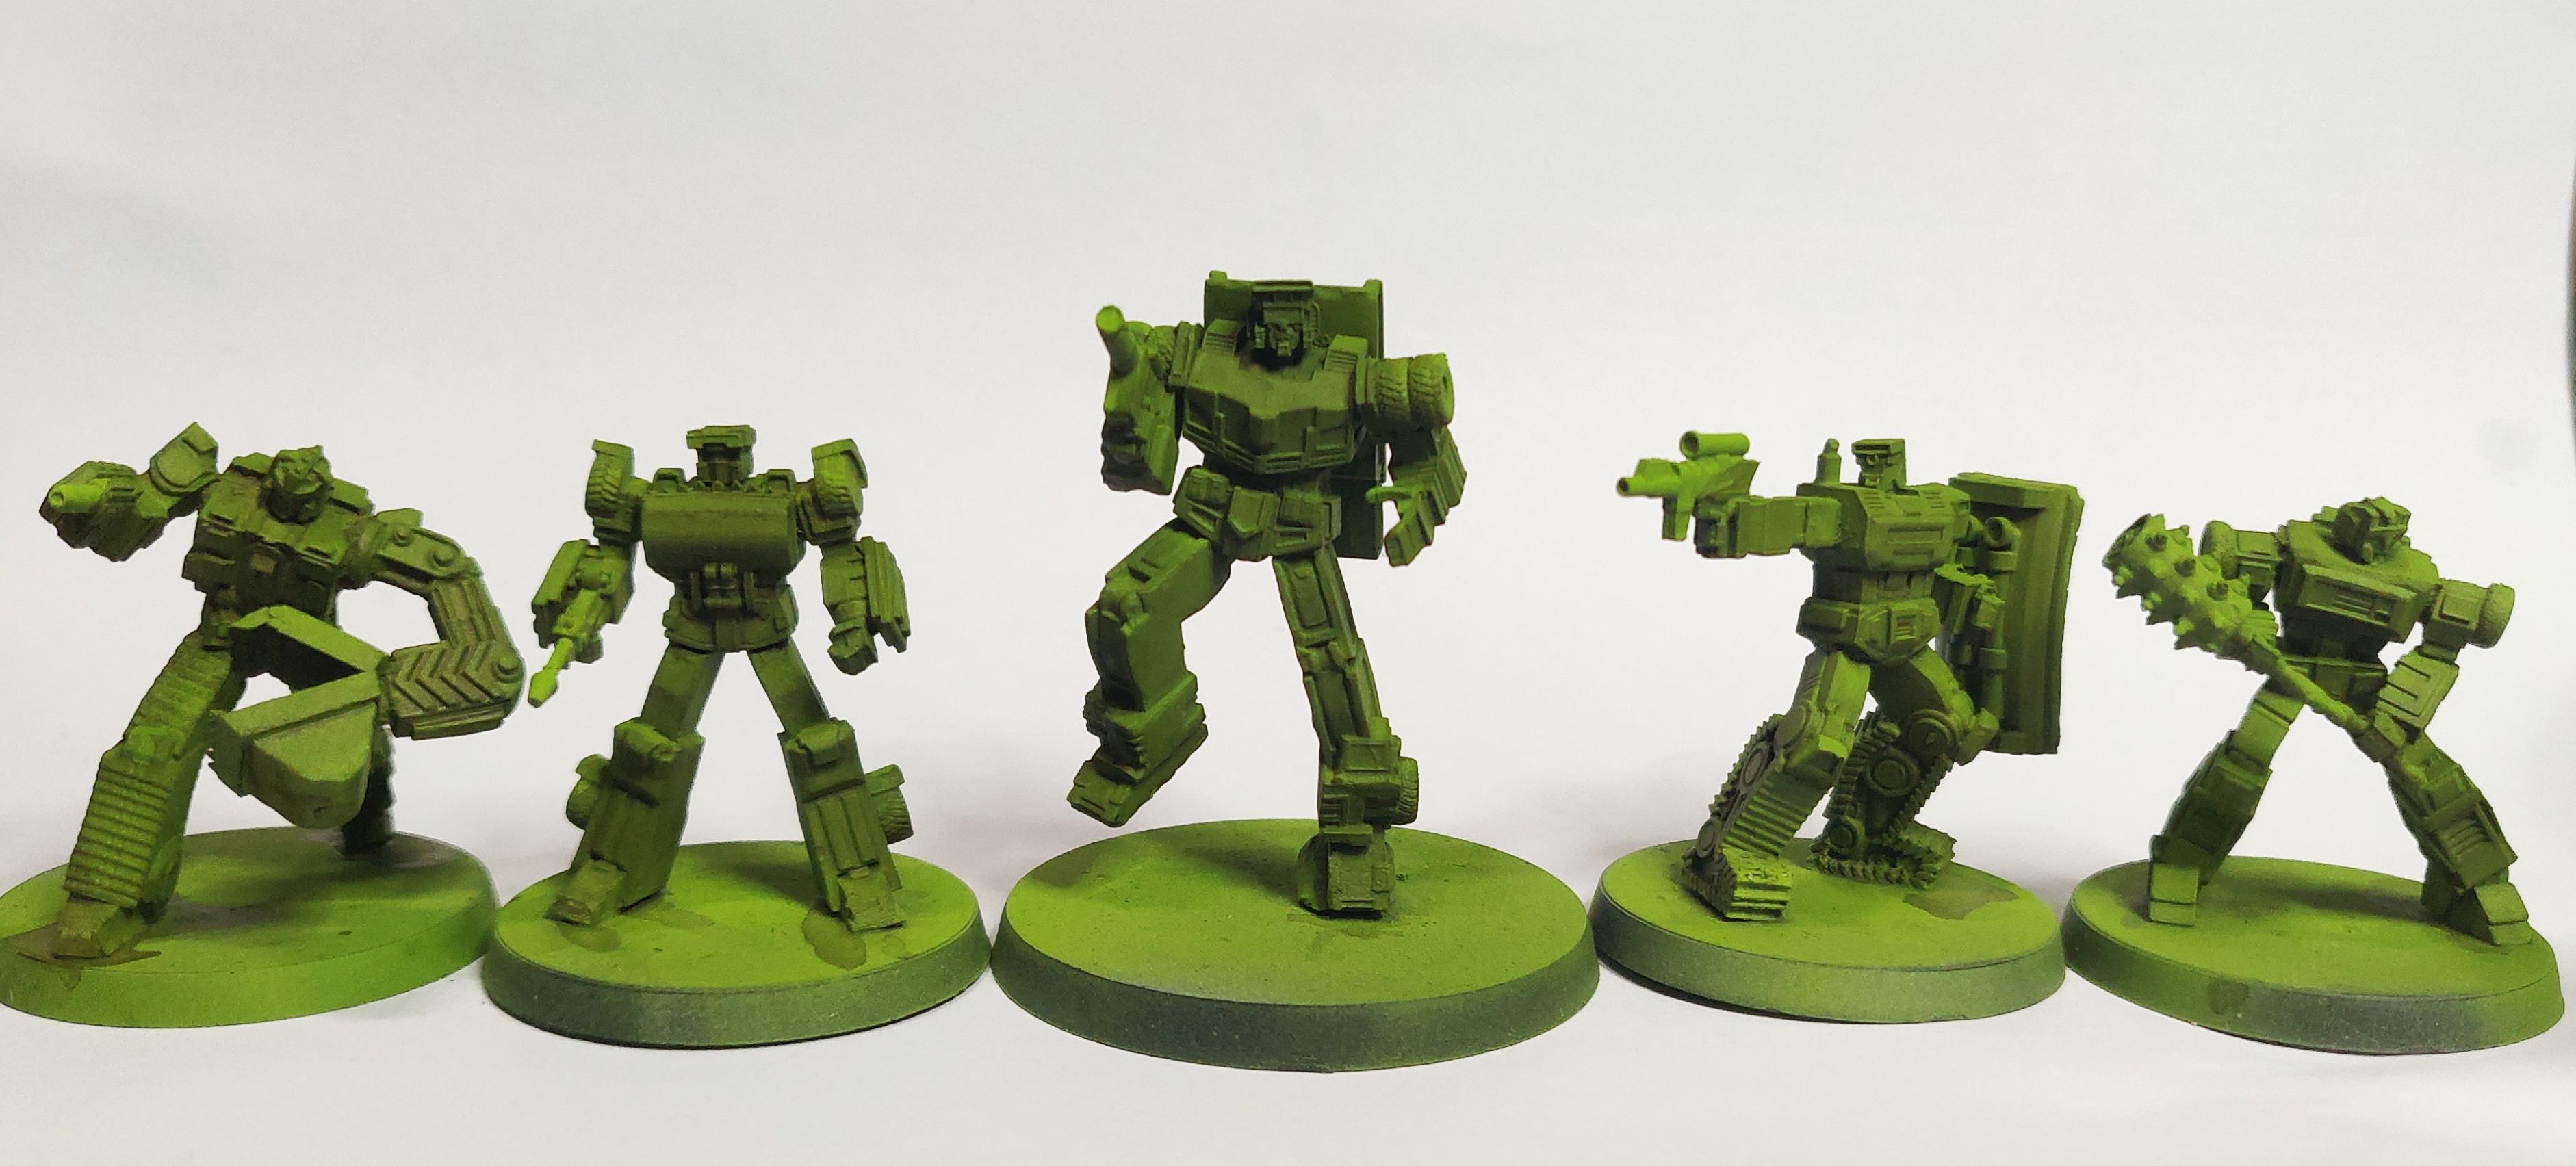
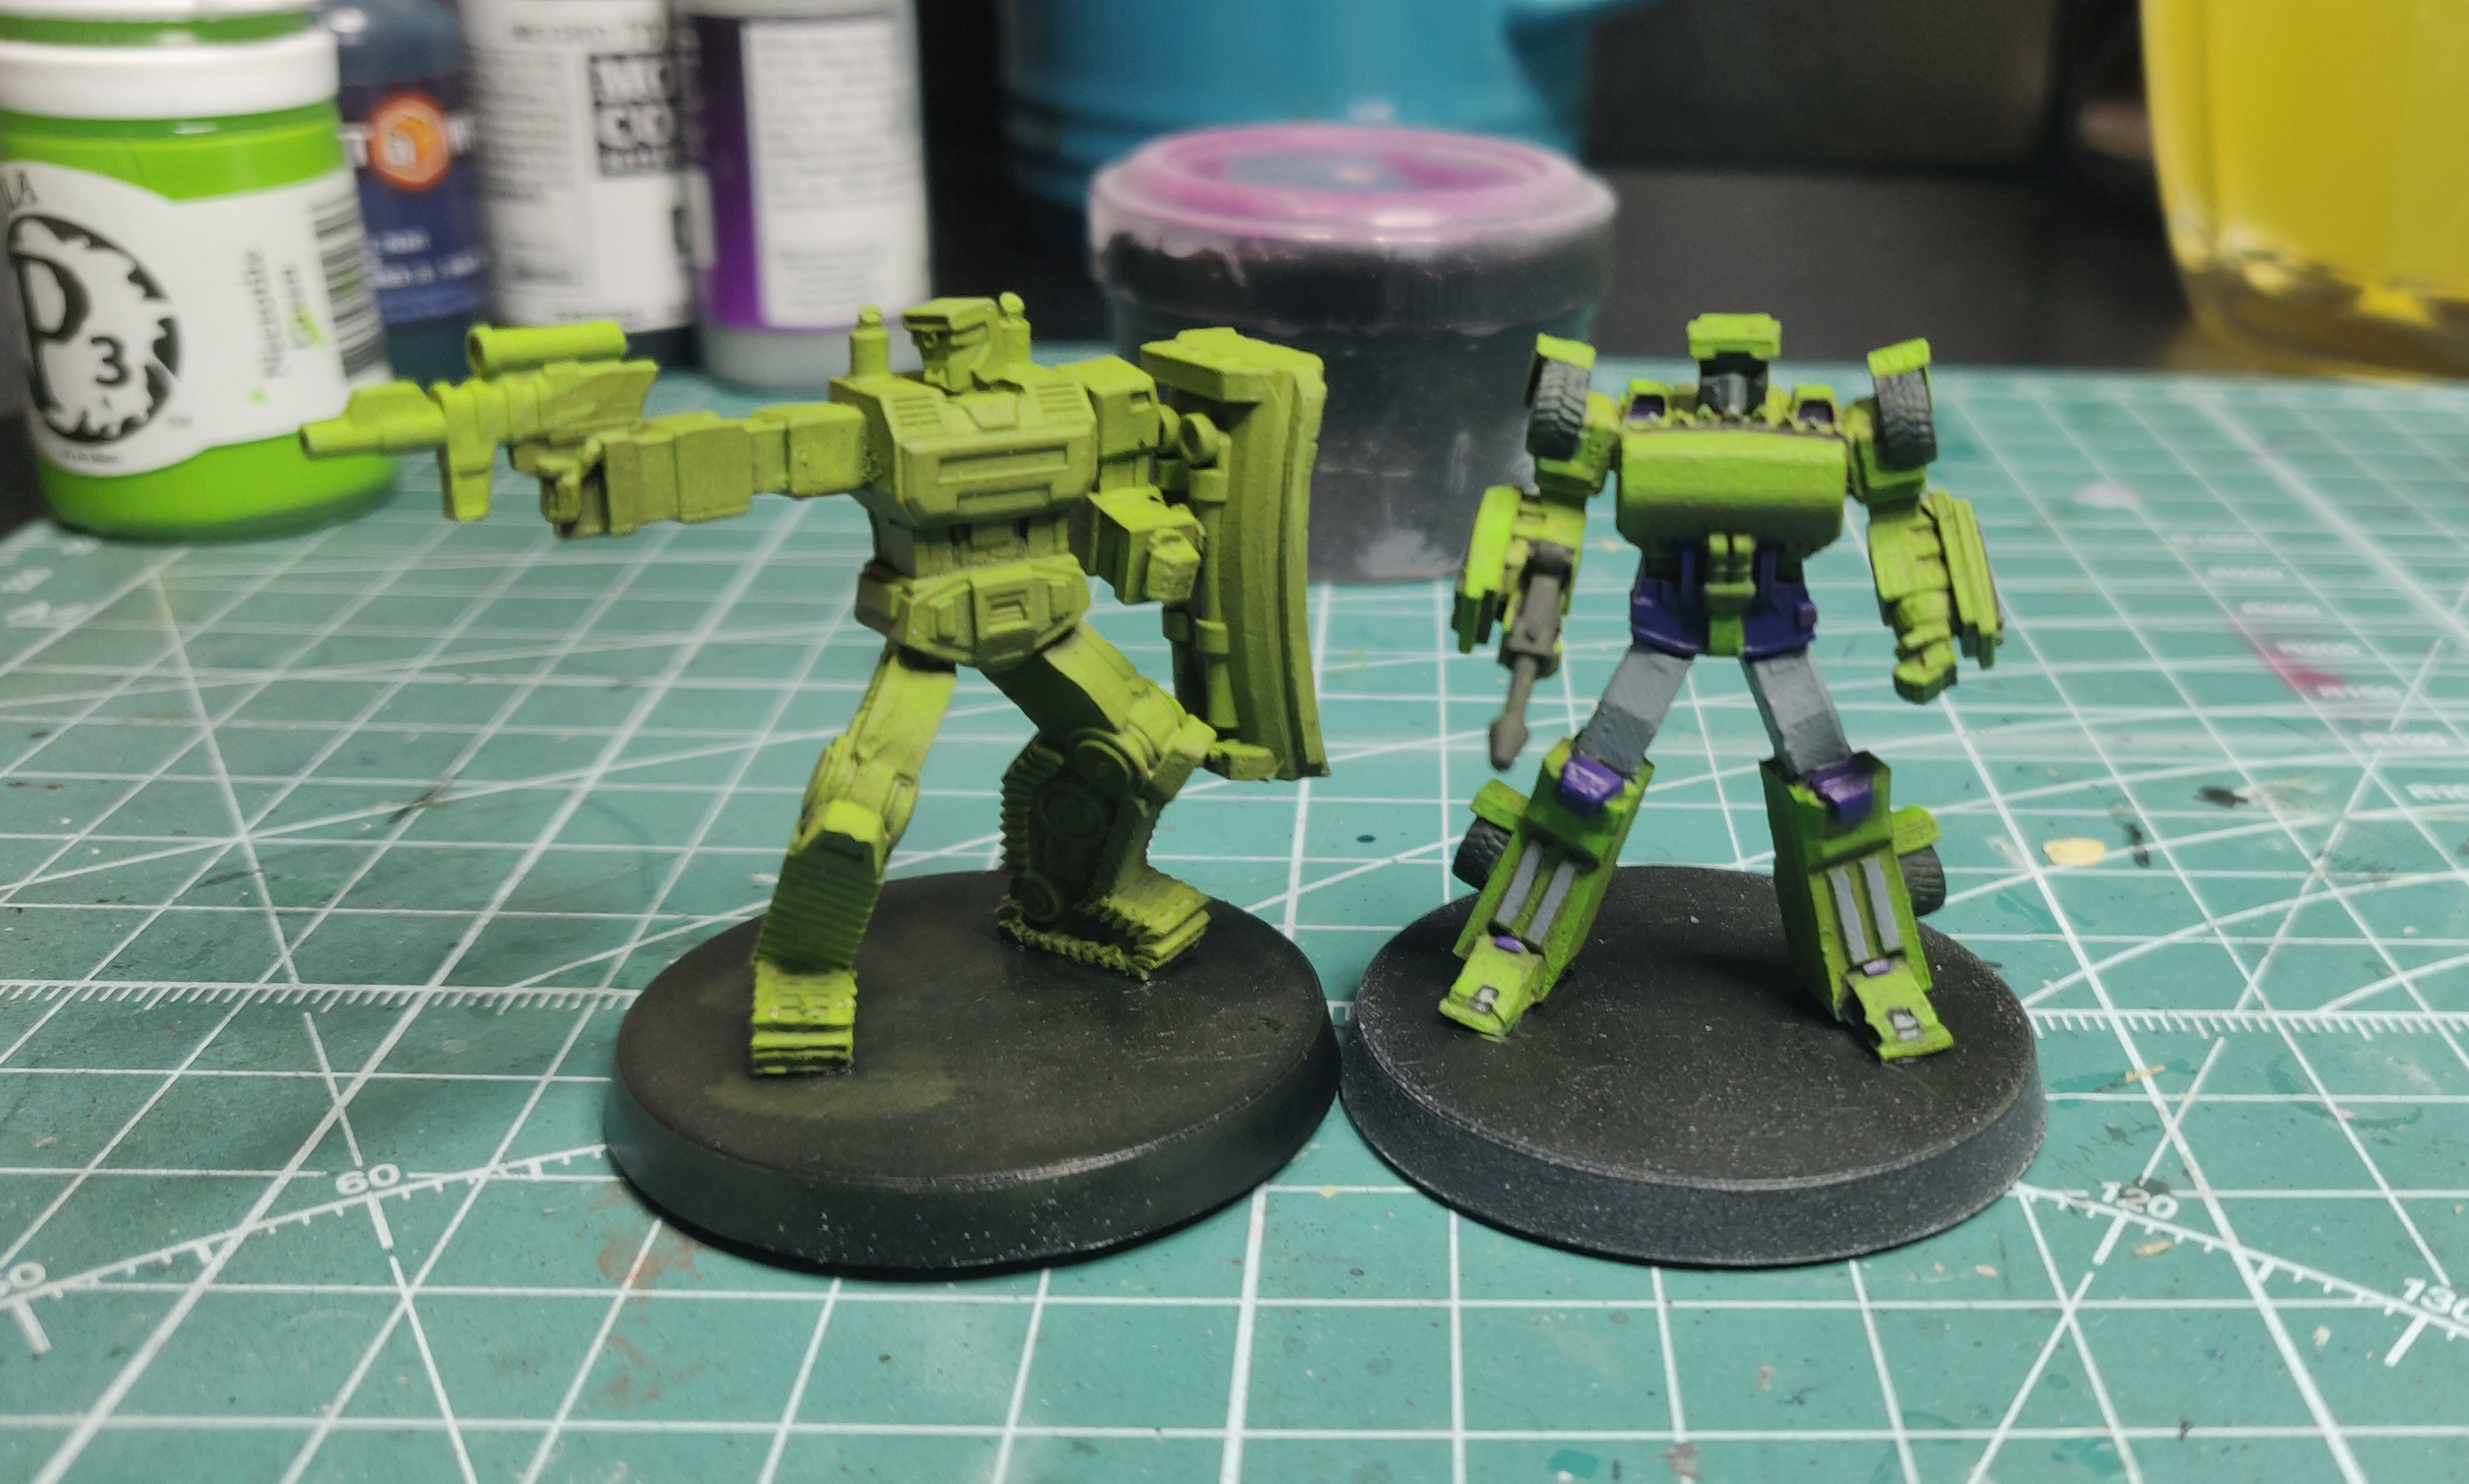
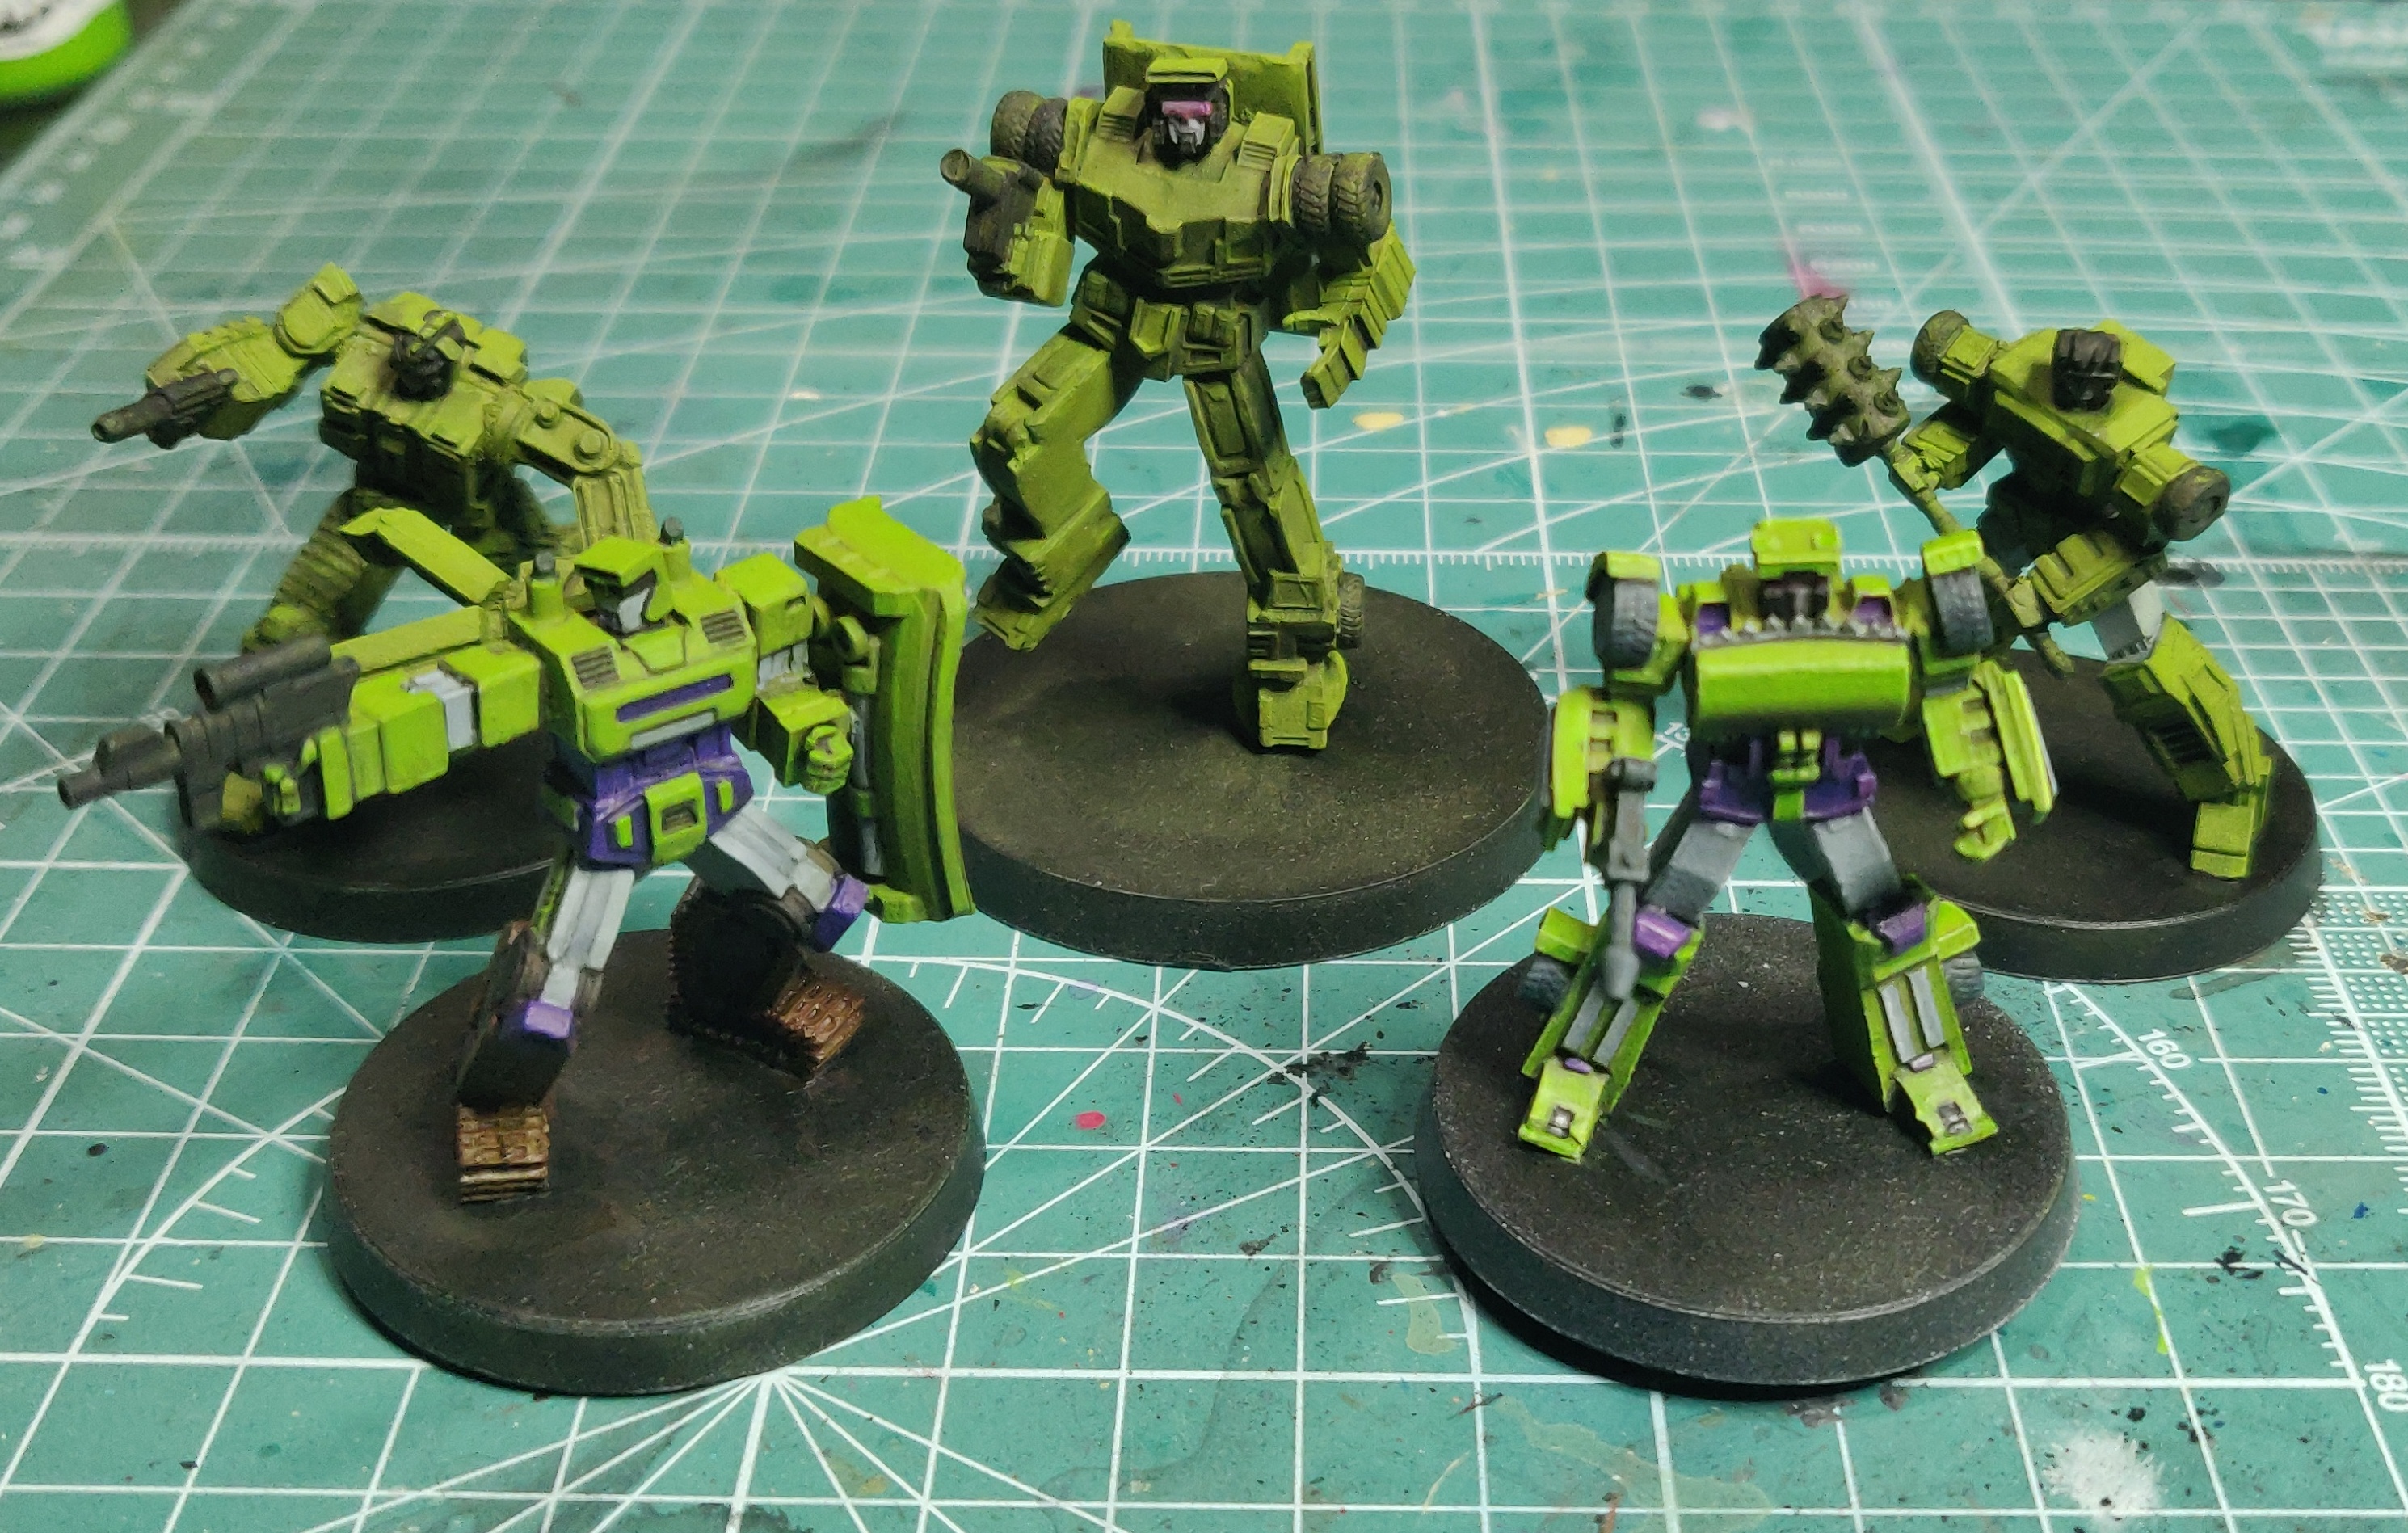
 Loader & Dozer, 2 of the 5 now done
 Intermission..... Project Paints
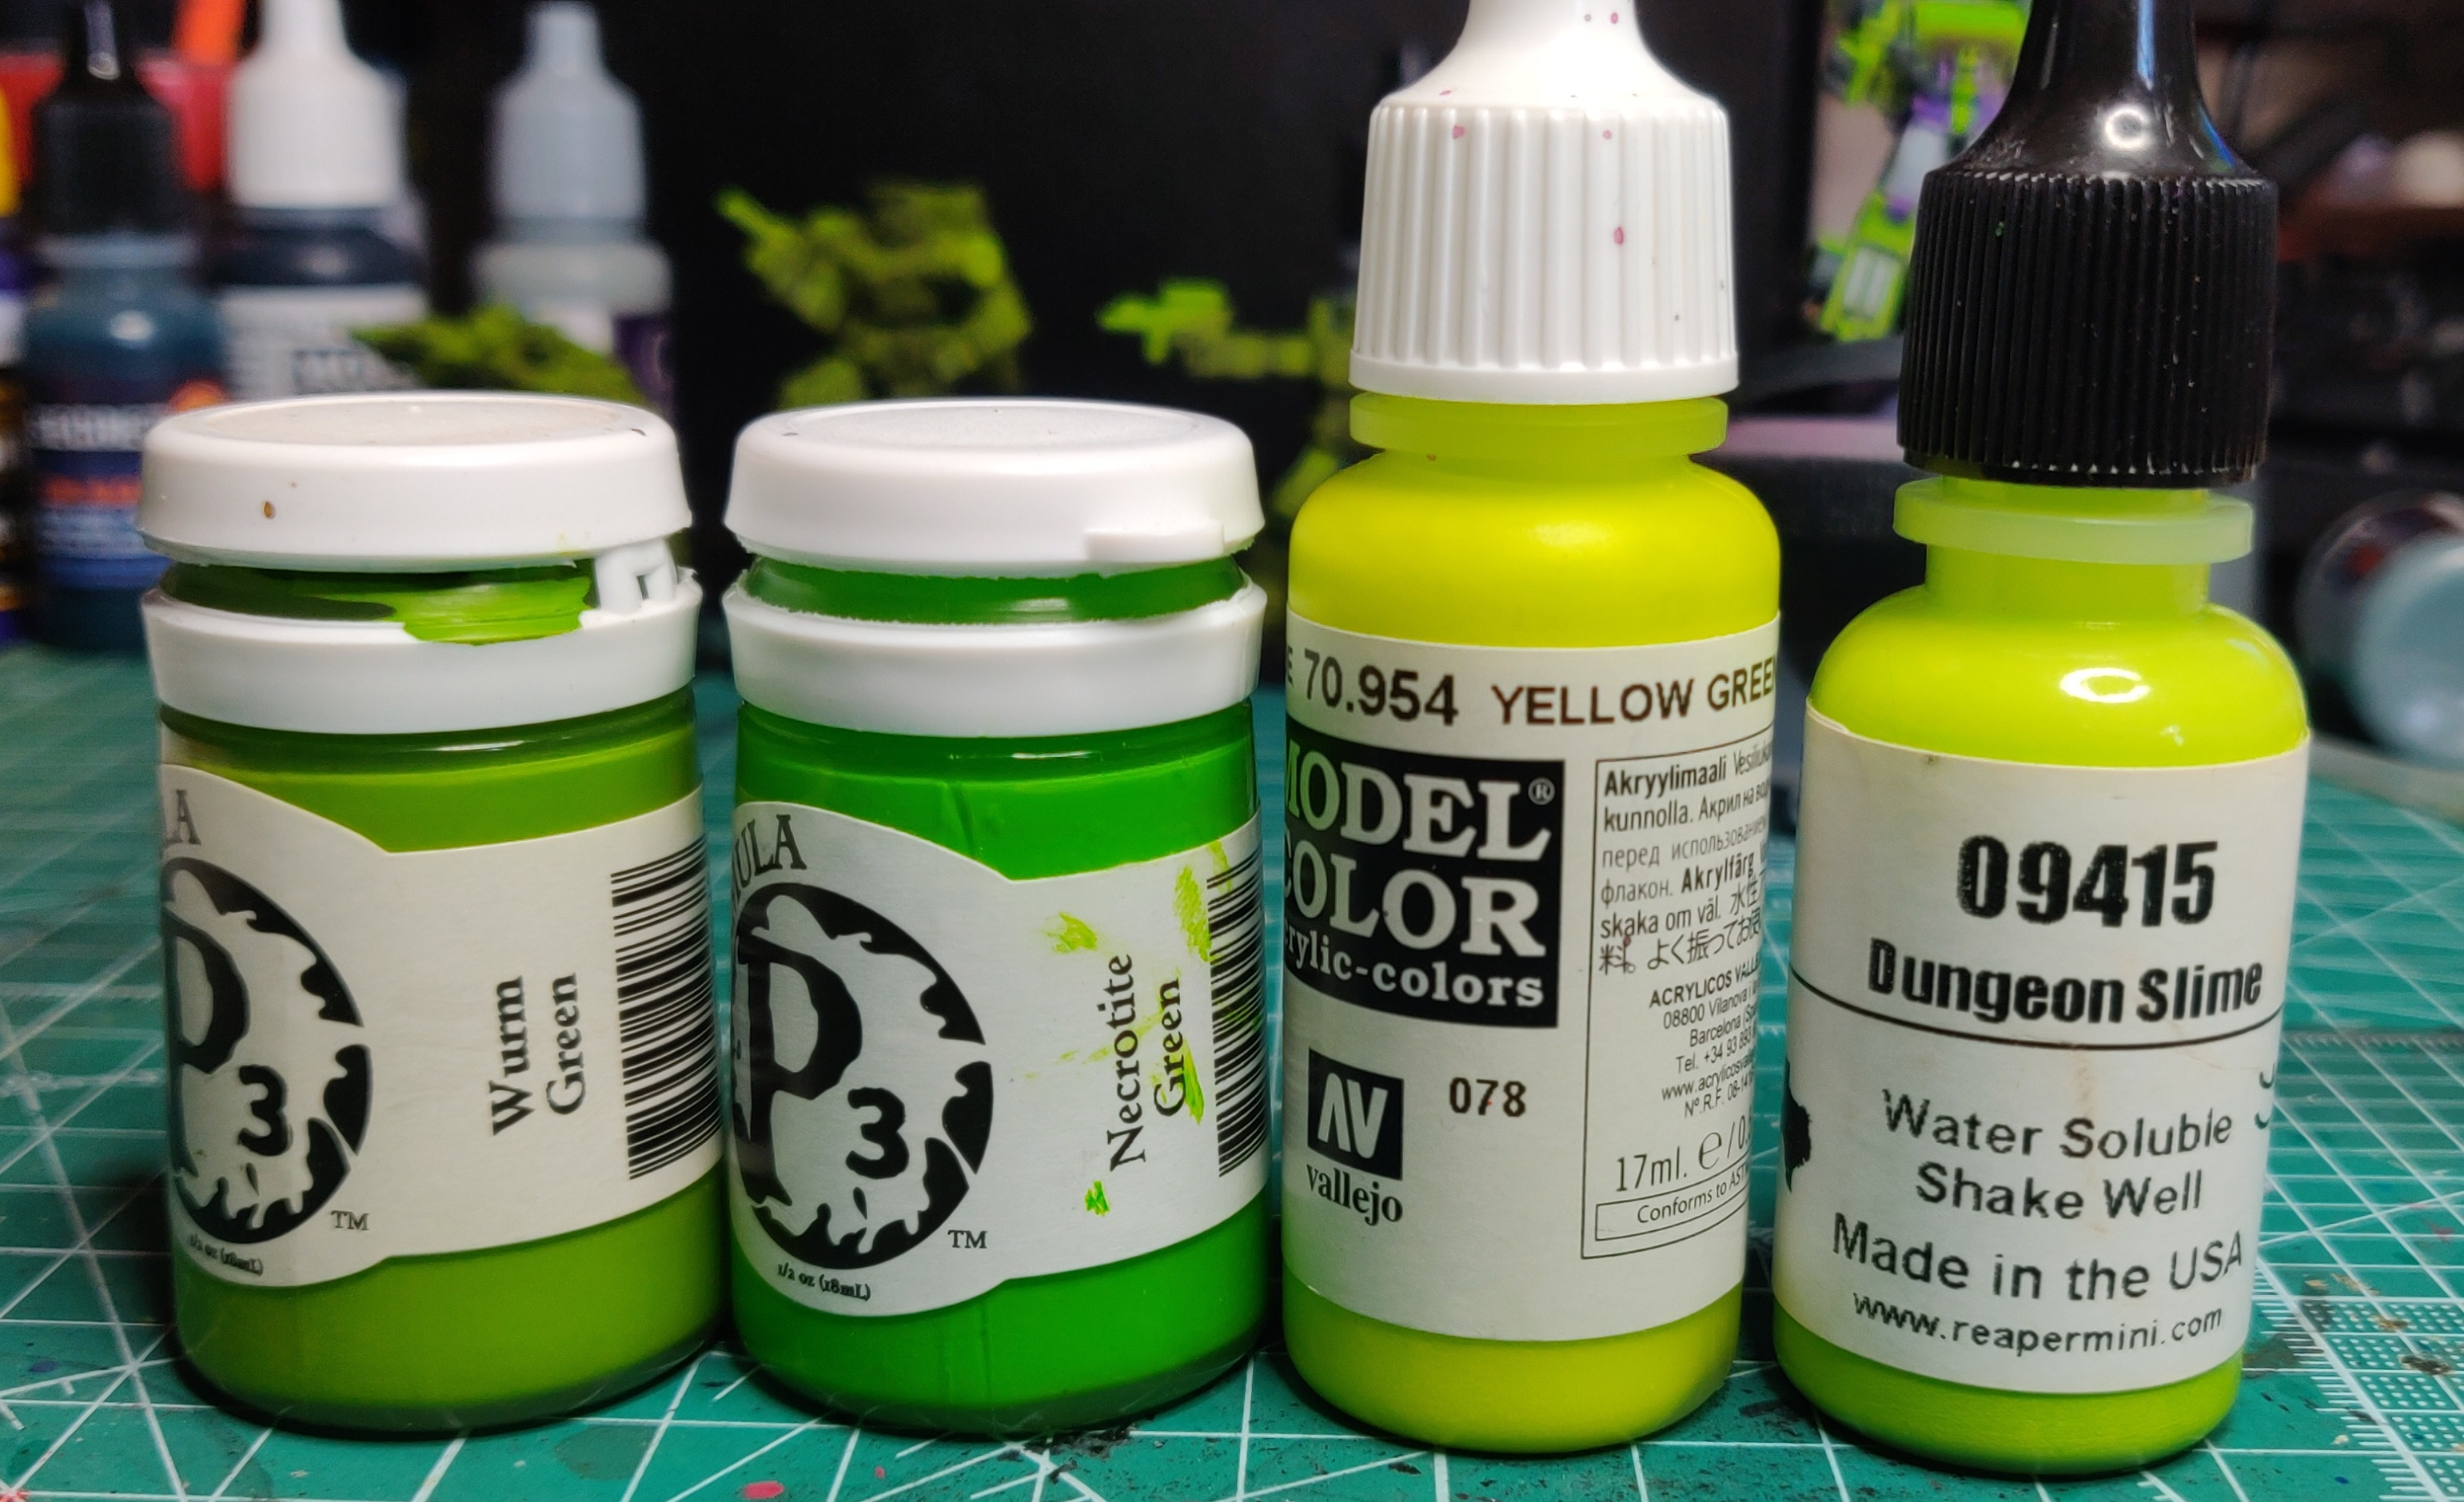
So at this point in the Project I have pretty much finalised my paint scheme and have all of my paints identified, so thought it would be a good time to show these off in case anyone wanted to replicate it, or should I want to look back at that time I went crazy Green instead of my usual desaturated schemes.
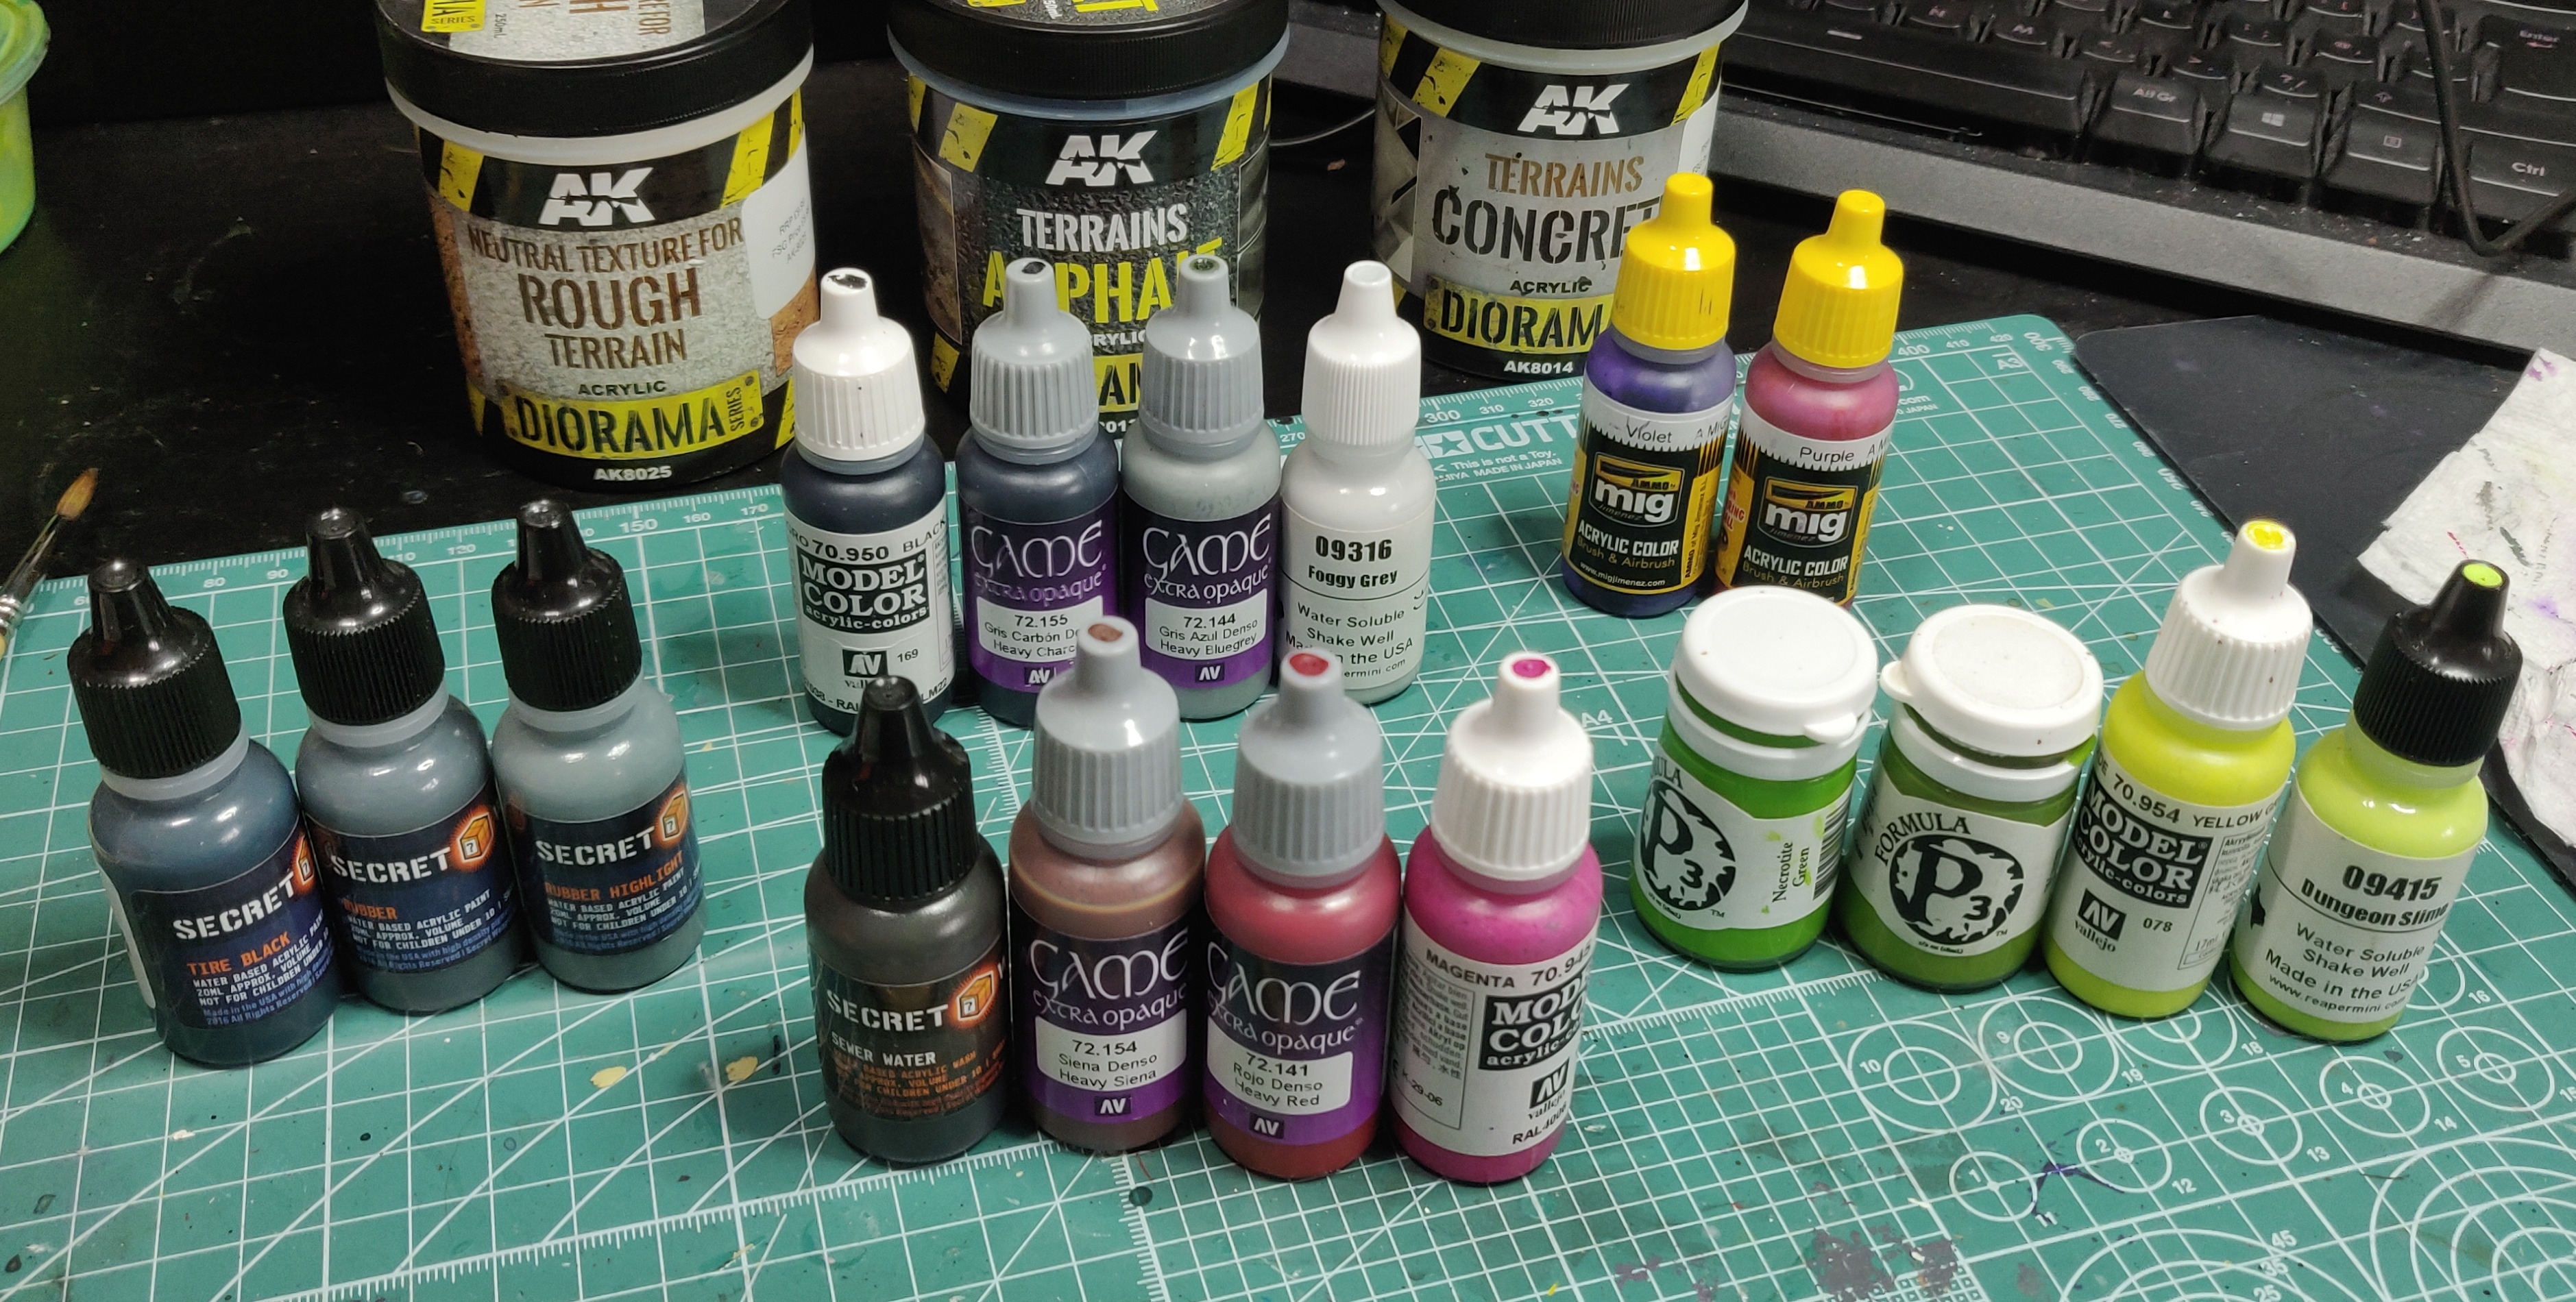 All paints used so far (except for primers) (also ignore the AK textures, I haven't worked out my basing yet)
 Those Greens
 Basecoat, layer, edge highlighting
Evil Bot Purples
 Basecoat and Edge highlights
Tyres and Weapons
 Basecoat, layer, edge highlights
Blacks & Greys
 Black lining, basecoat, layer, edge highlights
Browns & Reds
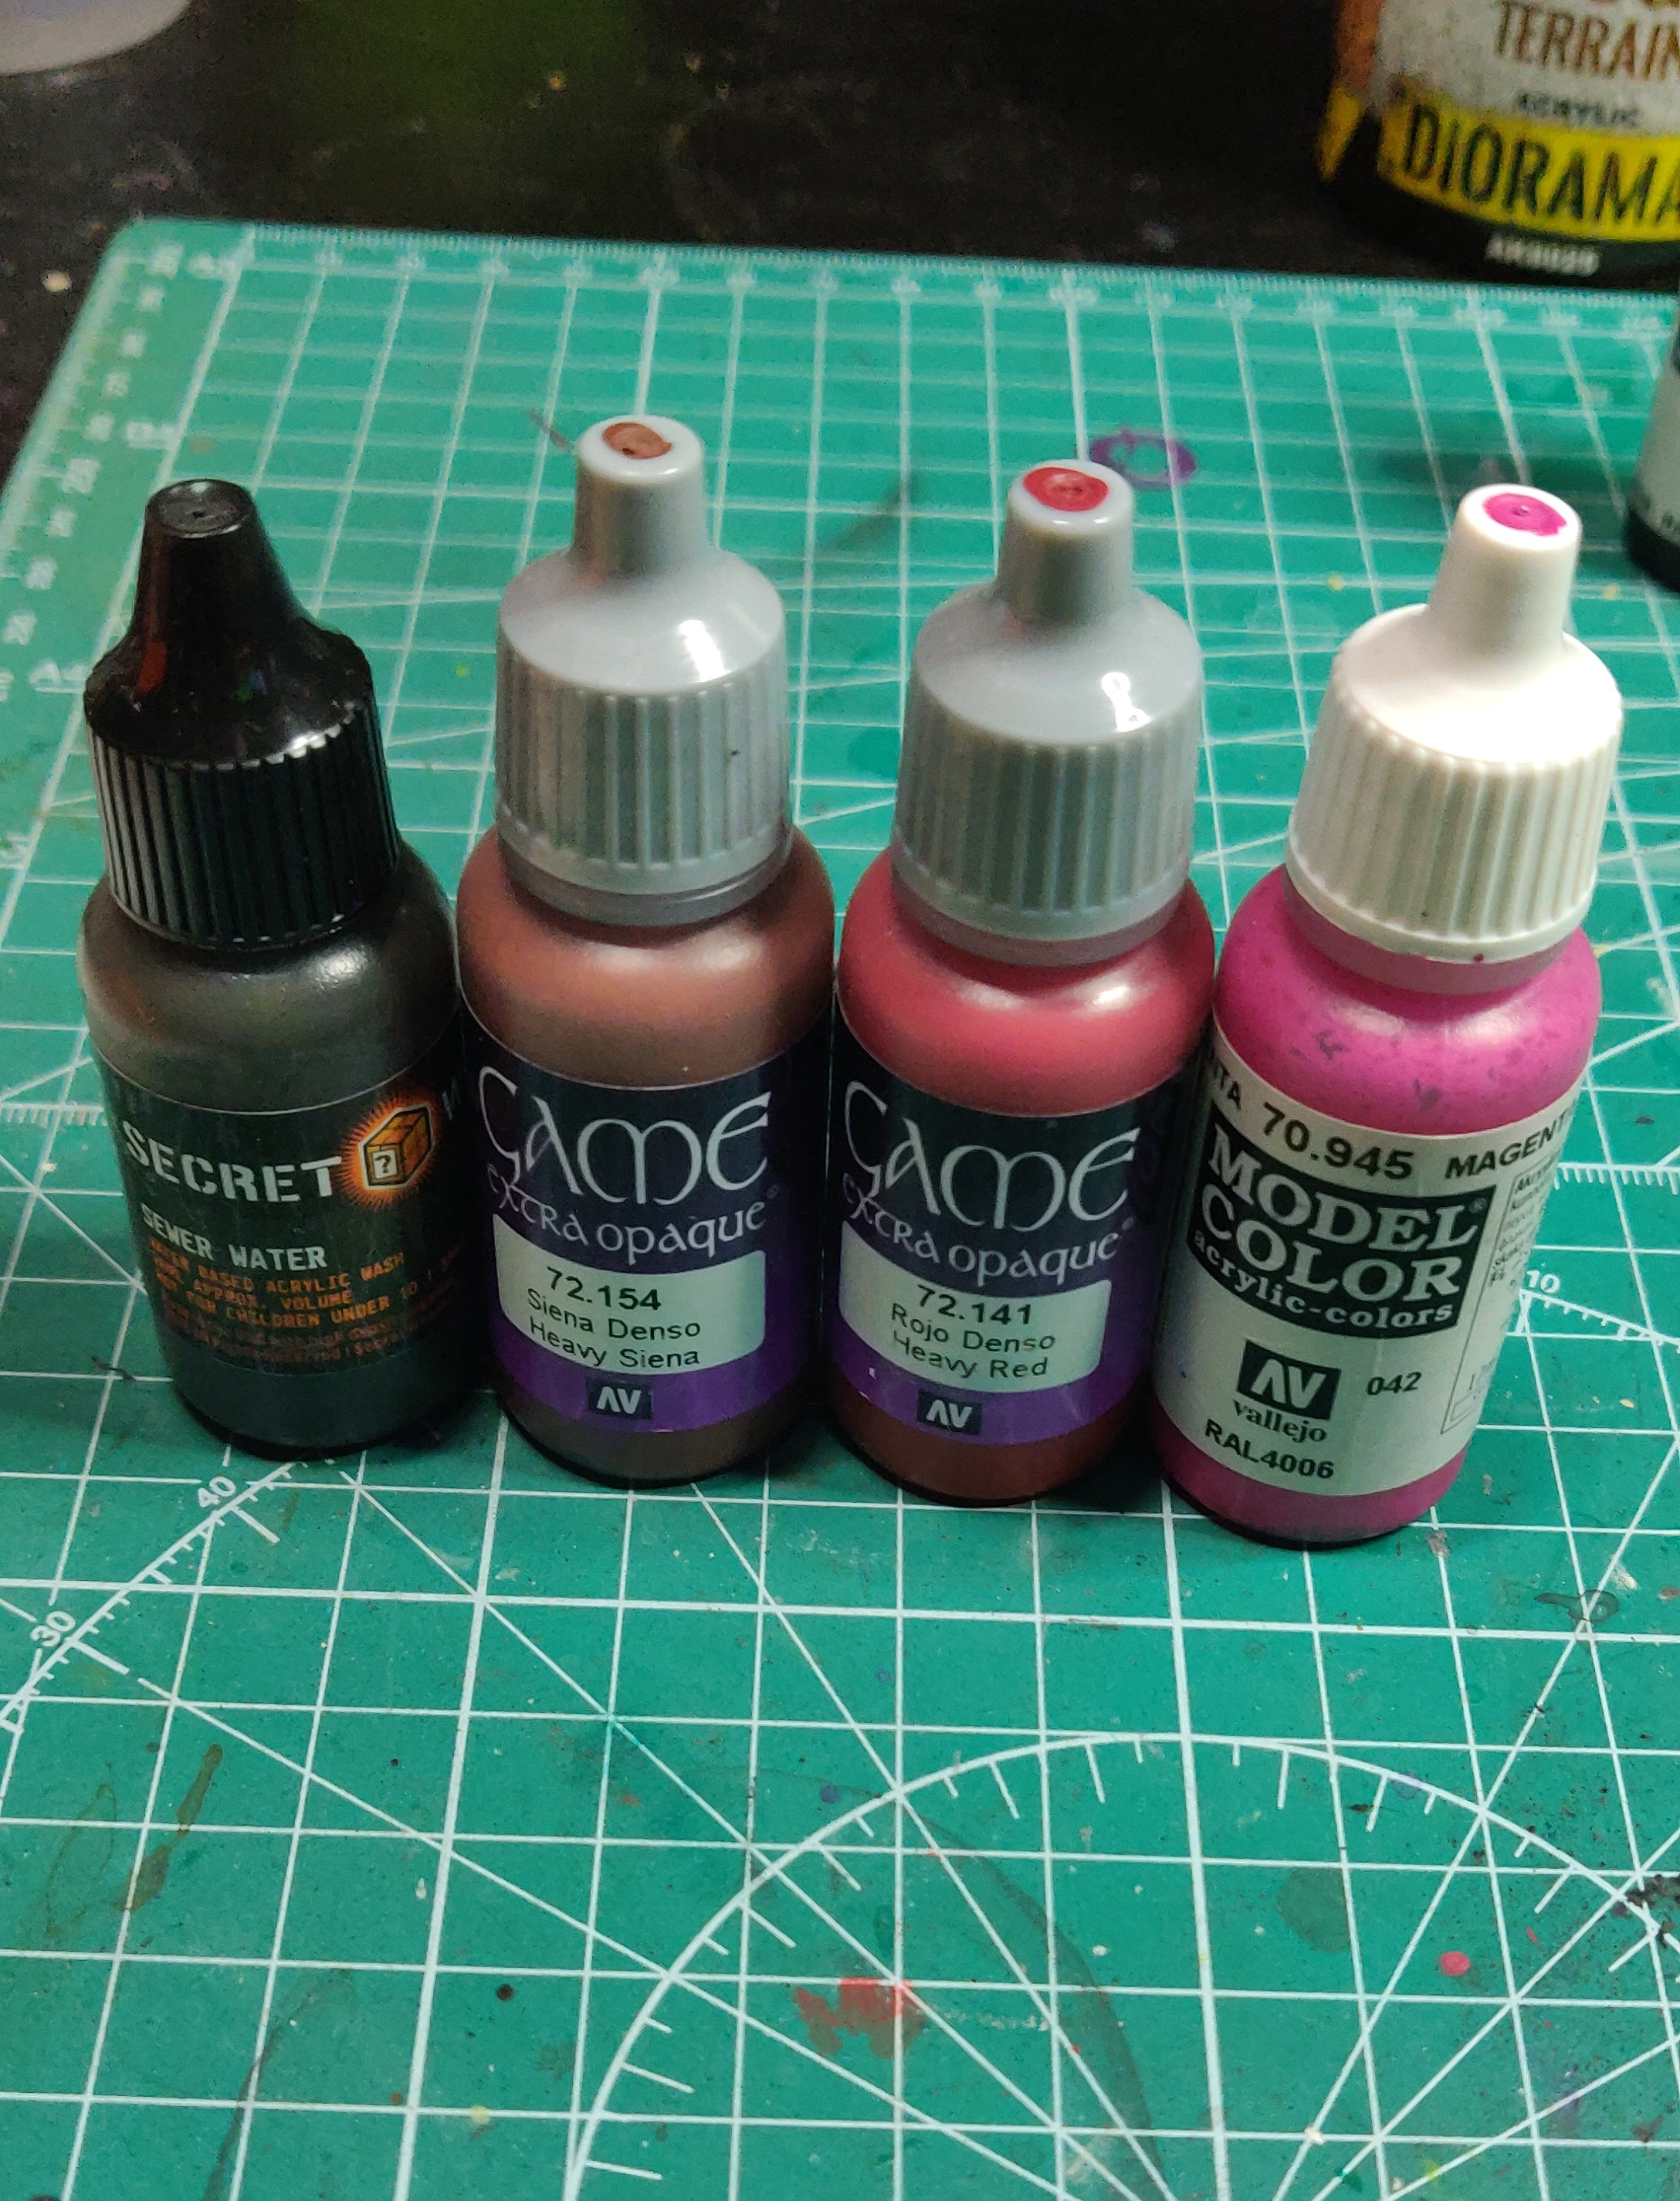 "gunky wash", weathered metal basecoat, glass basecoat, glass highlight
Day 11...
Day 1 of Bot #3 – Roller
So today is basecoat day. I began by touching up the airbrushed green basecoat with P3 Wurm Green, there’s also a few spots where the models pose or limbs meant the airbrush couldn’t quite reach so going back in with a hairy brush is almost always a necessity.
Next up, it’s blocking in the grey. I really do like the Vallejo Game Colour Extra Opaque range for applying a totally different colour over the original basecoat, the coverage is great, it’s smooth to apply, and the slightly satin finish is fine for me to work up from.
These bots need a good contrasting colour to the green and in 80s in your face fashion this is delivered via MIG Ammo Indigo. I came across both this and the highlight Purple when I was doing a custom paint job on a gunpla kit for a Twitch competition. This range of range is perfect for airbrushing, but applies great with a traditional brush as well. Like the Vallejo Game Colour Extra Opaque these apply very easily and very smooth.
Tyres and some of the other details have been blackened with vallejo model colour black before getting a basecoat of Secret Weapon Tyre Black. This has a slight blue tint which works so well for building up black details.
This bot had some small glass. Details on its feet (these would be door windows in its vehicular form) so they along with the eyes were given a basecoat of Vallejo GC extra opaque heavy red as this gives a nice base to work up into magenta layer on.
These bots haven’t had any metallic paints used, and I haven’t been interested in doing NMM (remember only 31 minutes a day) and wanted to explore working straight into heavily weathered looking metal details. As with the tracks on the previous bit this started off my taking it back to black, then giving it a coat of vallejo extra opaque heavy sienna, a great rusty basecoat to work up from.
And that’s it. Times up for day 11.
Day 12...
Some more refinement on Roller’s main colours through glazing on layers , black lined some of the details, and added some more depth to the mace with secret Weapon Sewer Water washed vallejo extra opaque blue grey highlights.
Will spend one more 31 minute session on this bot tomorrow to add the edge highlights and final shadows then he will go into the done pile.
Day 13...
3 down, 2 to go....... then 2 more
Roller is finished.
Today was (probably) the last day working on this bot. I still have the base to do but I’ll be removing the Bot from the base to do that as I near the end of the project. I do want to go back and work on each bot to add on some weathering and refine other details should I have time, at the moment they’re all sitting at 90% which I am fine with, but I’d like to do some weathering effects on each bot after I have based them should I have time left.
For now, though this bot will join Dozer & Loader in the done pile. 3 of the Builders are now “done”, 2 left to go, then the big bot, and as that’ll technically only be 6 I will break out another to make it 7…. But that’s still 18 days away
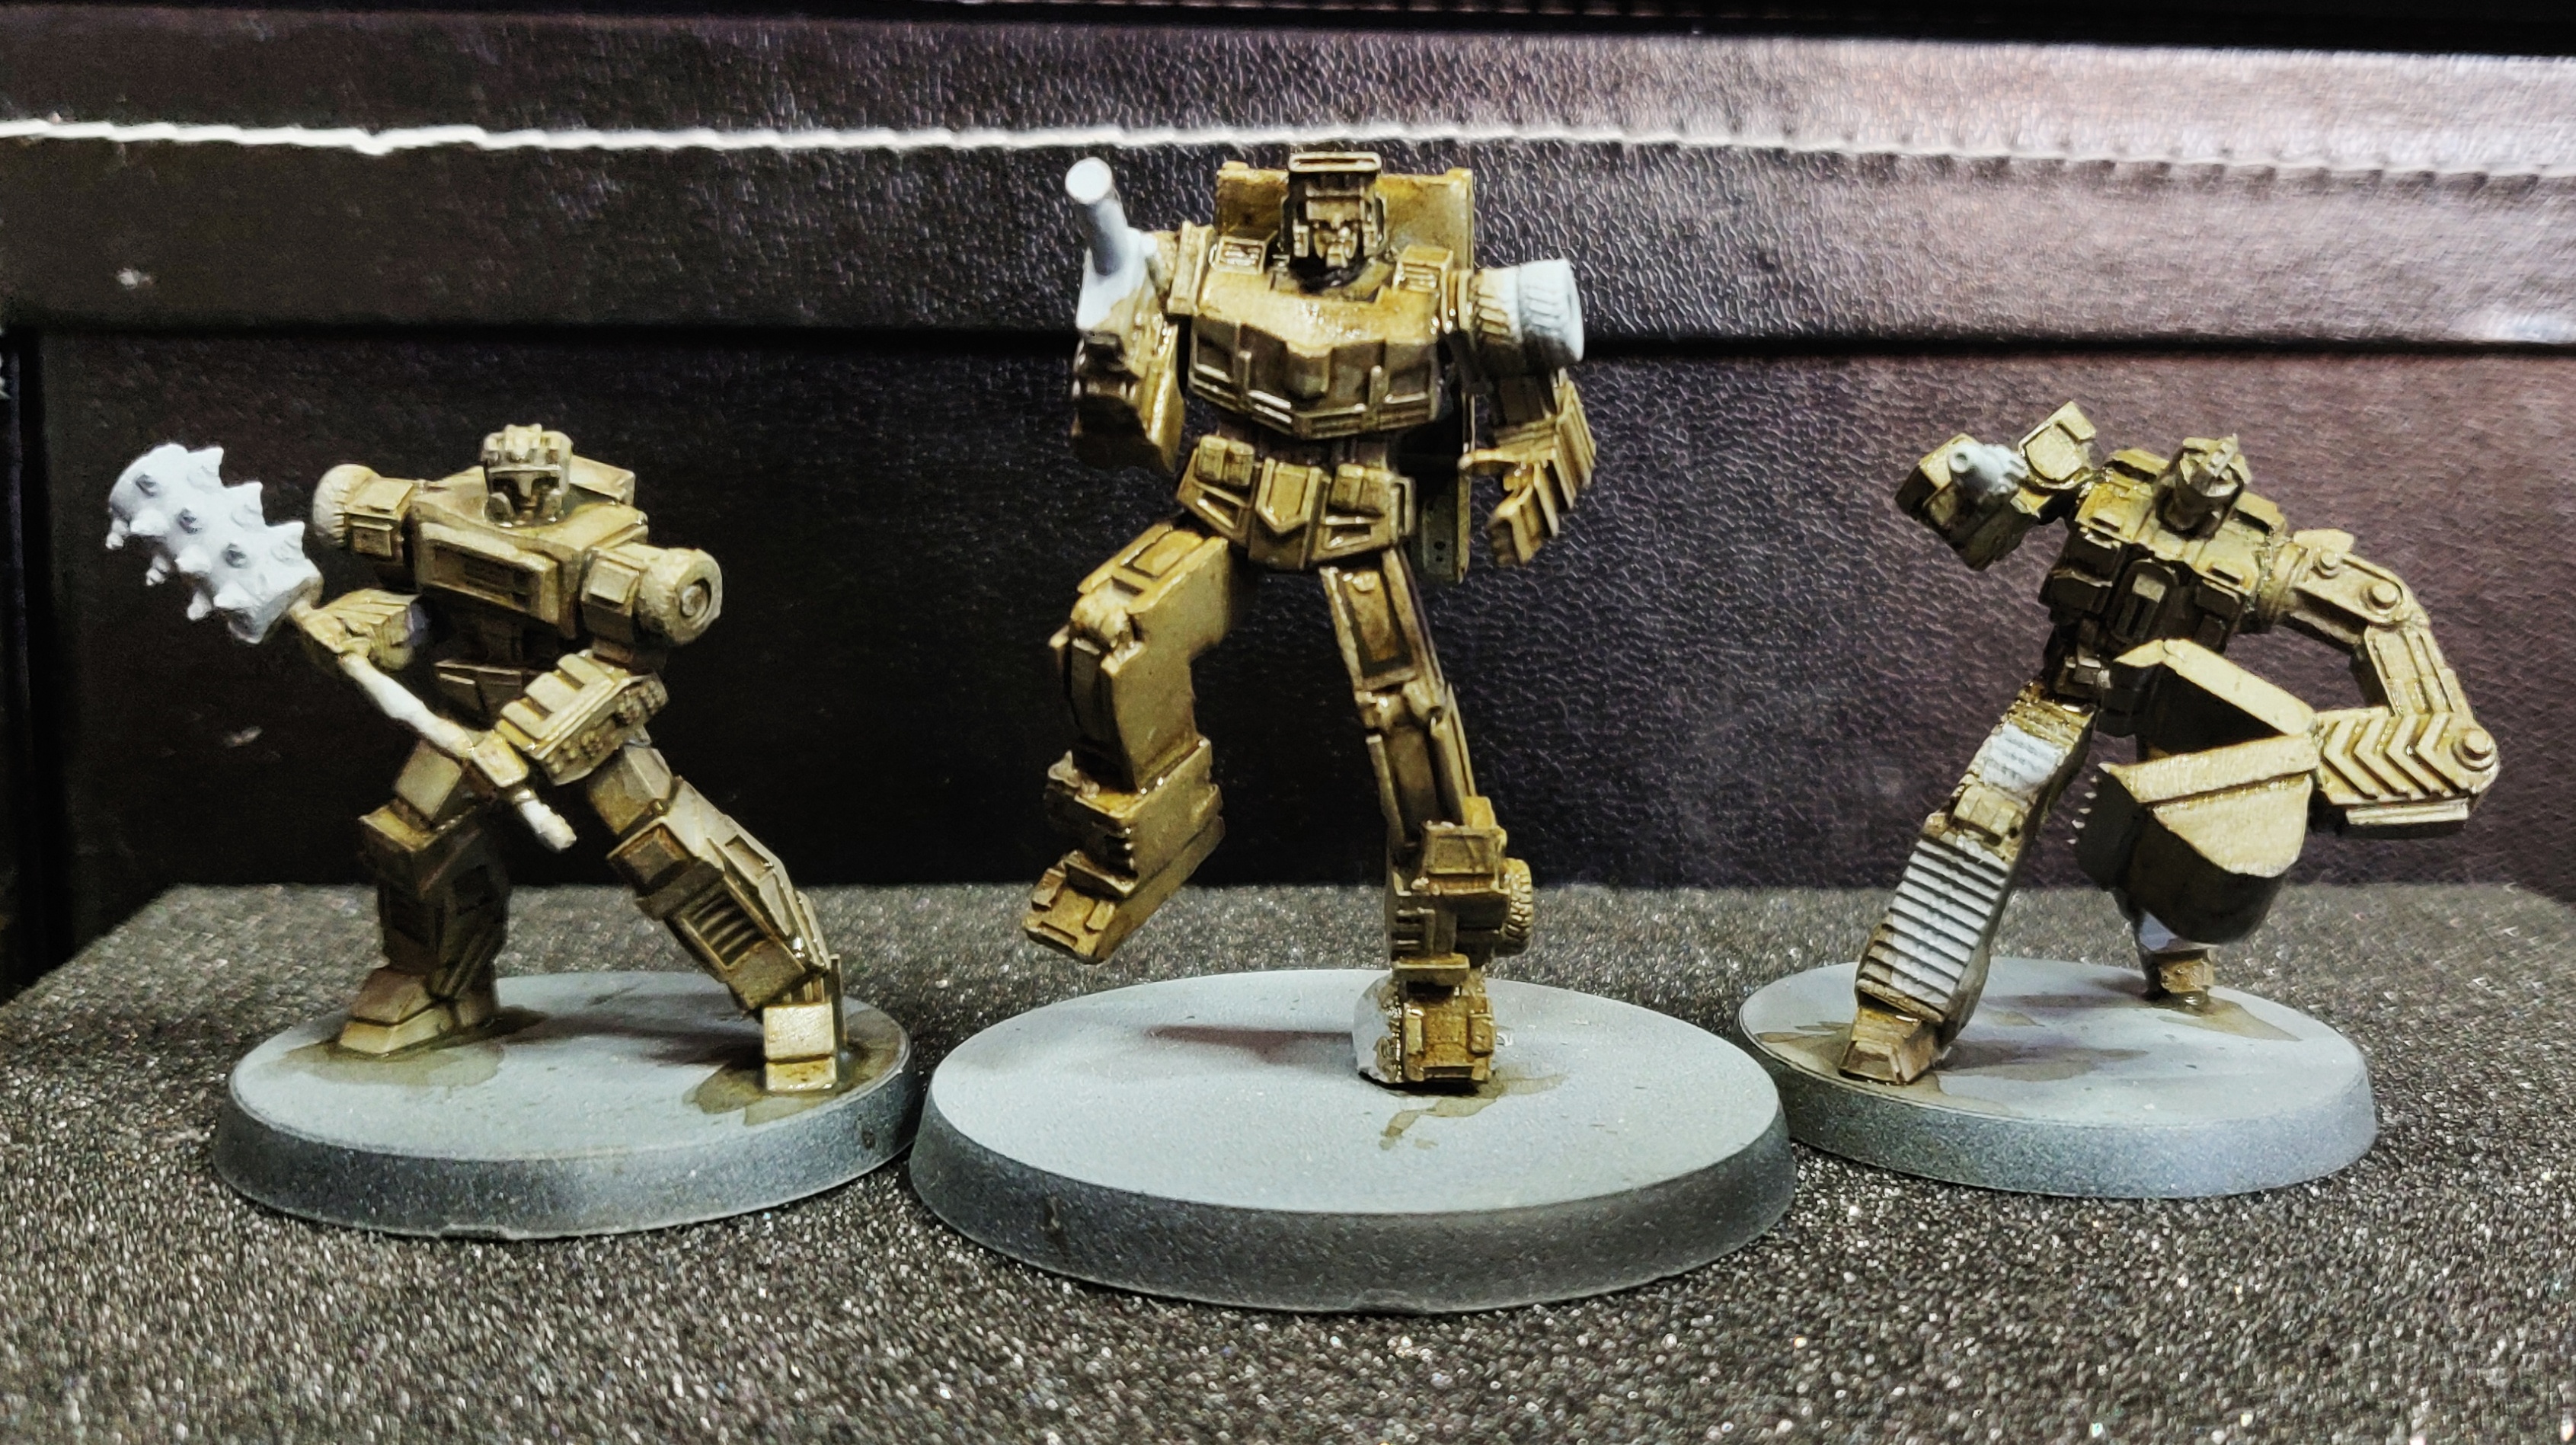
 Dozer, Loader, Roller
 The remaining builder ready for some attention
Day 14...
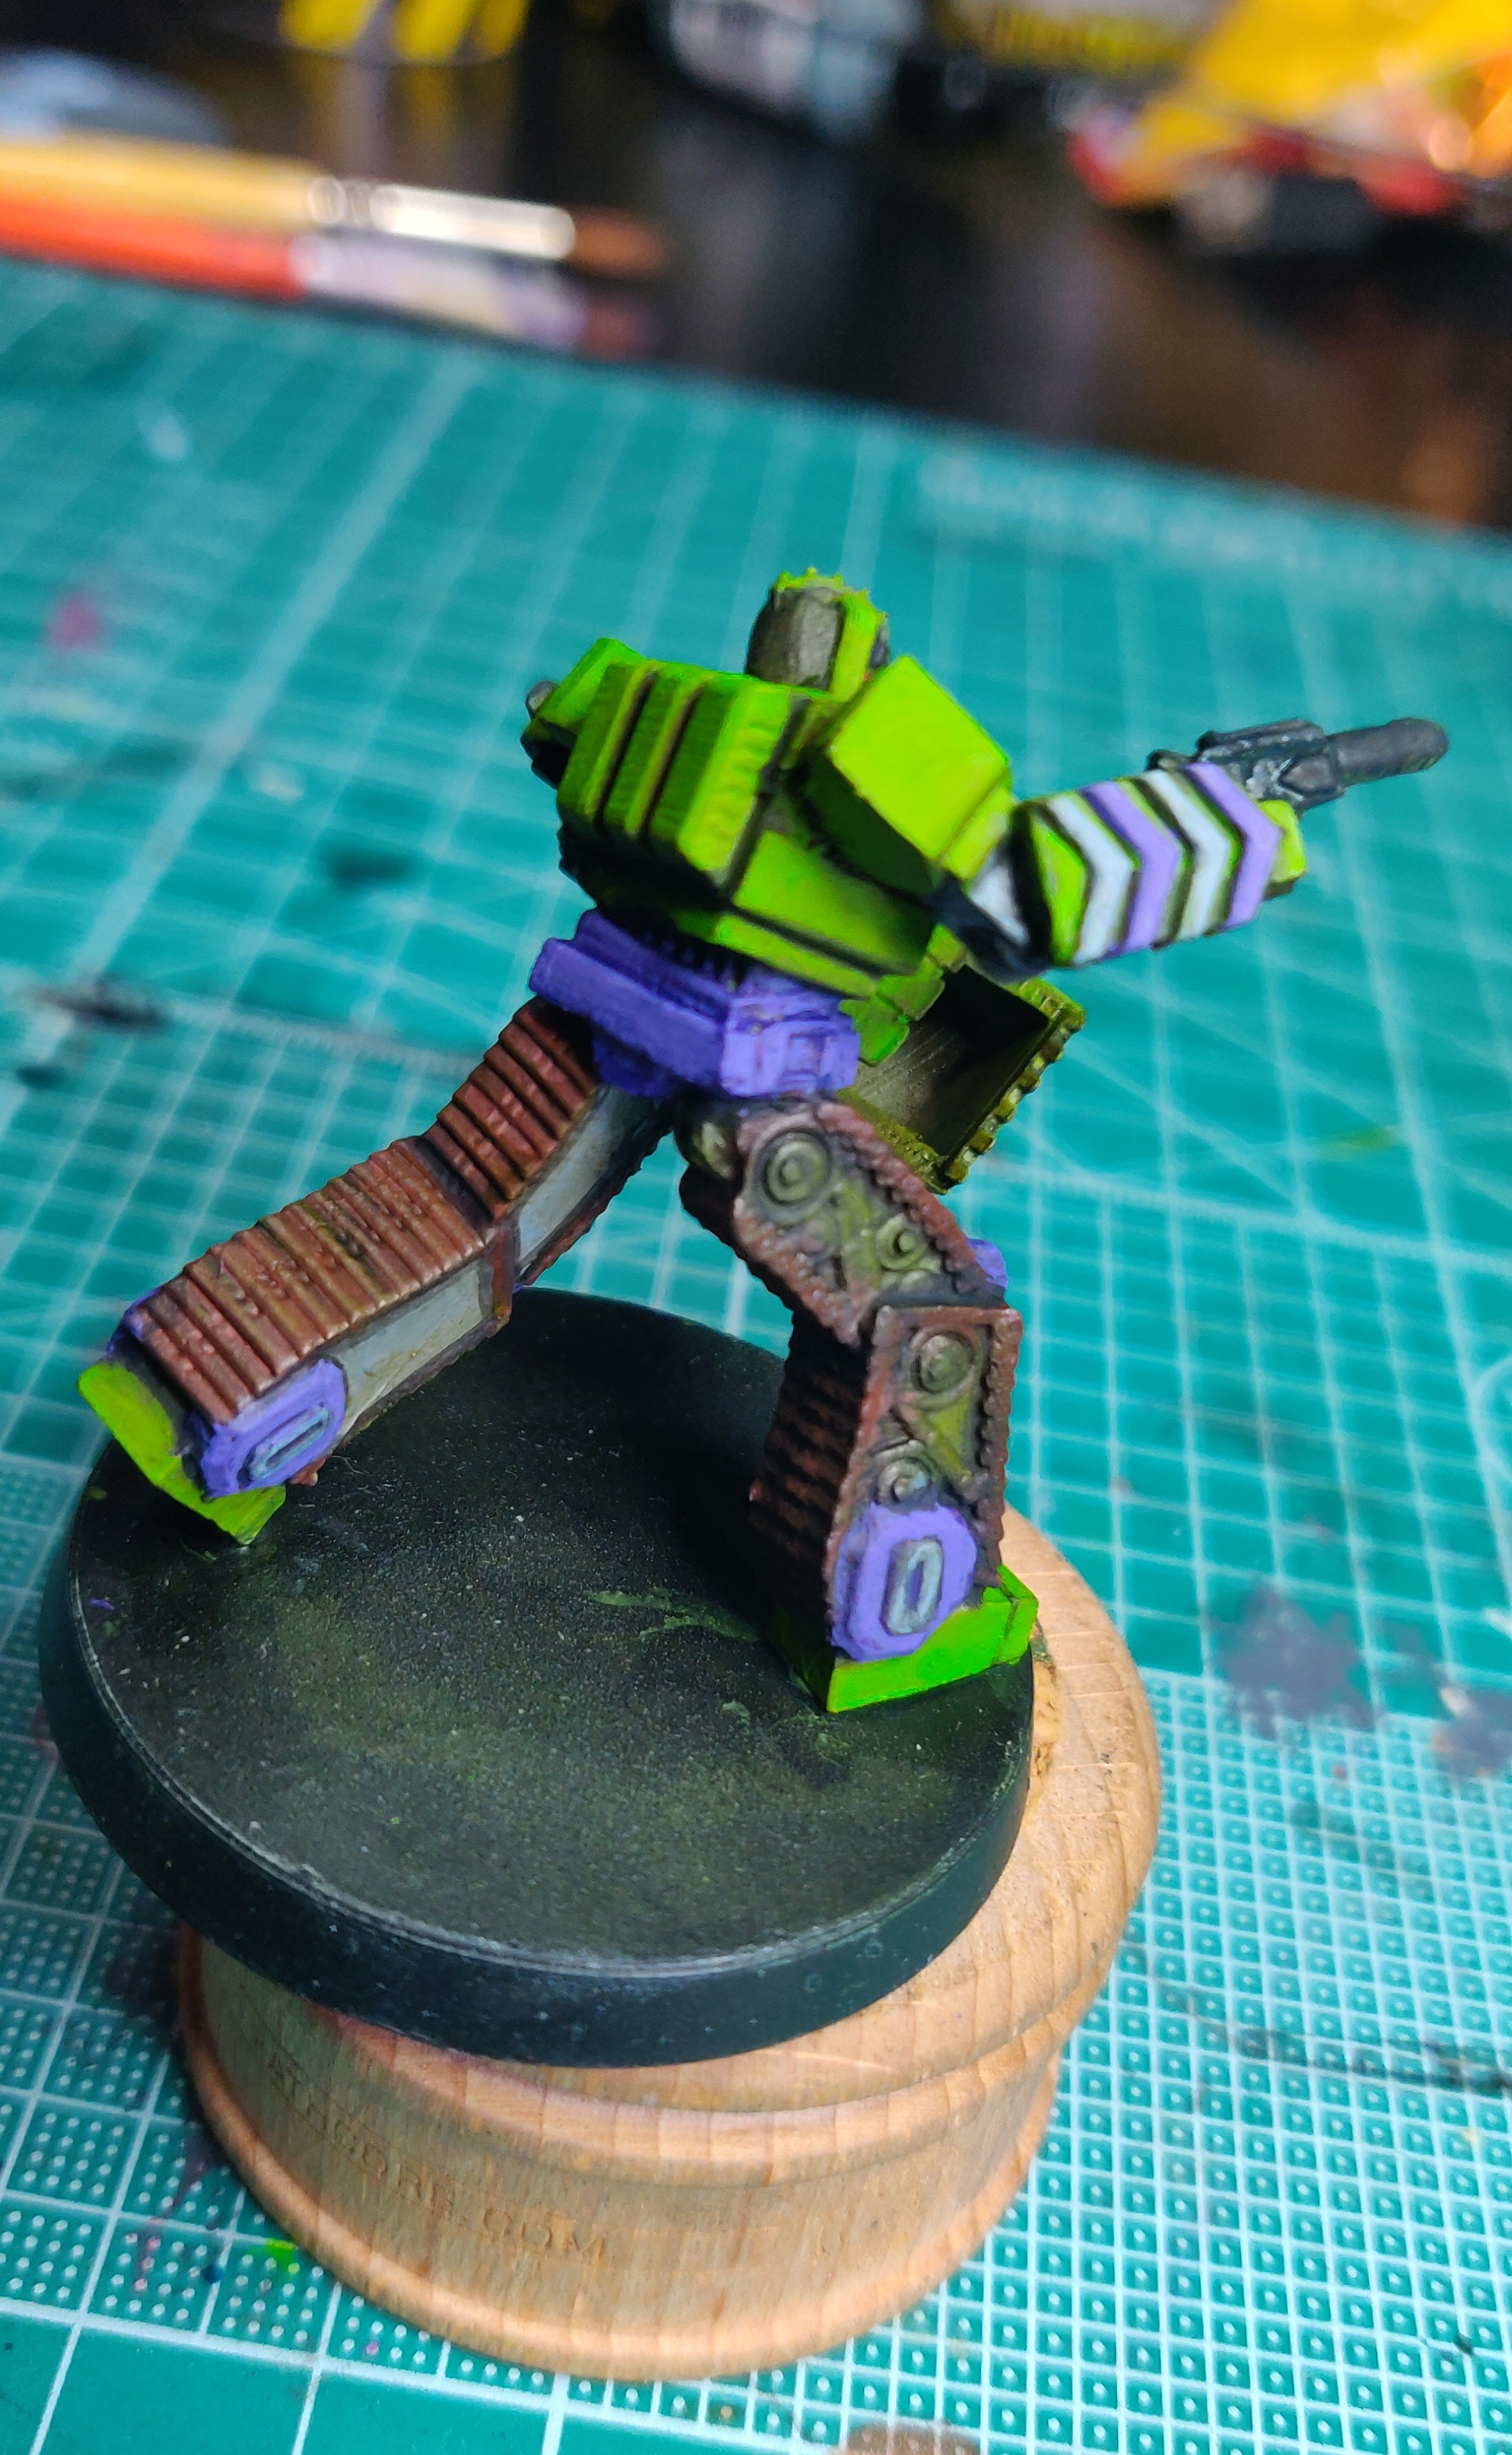
Digger

Today saw the start of my 4th bot – Digger – one I had been putting off to last as he has a large amount of “metals” and is asymmetric. I really wanted to make sure I had nailed my paint schema and method before I made a start on it hence leaving him to number 4 out of the 5 bots in the Builder squad (the leader will be number)
I have refrained from using metallic paints on these bots, instead I have tried to create worn and weathered looking points of interest using standard acrylics, texture through drybrushing, filters and recess shading from washes.
Tomorrow I will post a write up specifically on this as this bot has a lot of tracks and details that I can take photos of.
Today though, I have just blocked in the main colours. As mentioned above this bot is asymmetric so I wanted to make sure the primary green colour would still dominate and not become unbalanced against the large tracks. Also the pose of the model hides a lot of the body details so I needed to make sure that there was sufficient grey and purple detailing.
My original source of inspiration had the tracks coloured purple, which I didn’t want to use as I didn’t think it looked “real” (ignoring the fact that these are bright green robots). So I went with my metal colour for the tracks and tried to include purple into the waist and ankles. The inside legs were plain surfaces so in keeping with the other bits I have gone for grey to show for “under armour” joints. This will need to be refined with highlights and black lining to really sell it, and if this unbalance the amount of grey on the model I have the chevrons on the arms I could add some more purple to if its needed (perhaps alternating purple & grey)
 Check out those purple trousers!
 My original source of inspiration had the tracks coloured purple, which I didn’t want to use as I didn’t think it looked “real” (ignoring the fact that these are bright green robots). So I went with my metal colour for the tracks and tried to include purple into the waist and ankles. The inside legs were plain surfaces so in keeping with the other bits I have gone for grey to show for “under armour” joints. This will need to be refined with highlights and black lining to really sell it, and if this unbalance the amount of grey on the model I have the chevrons on the arms I could add some more purple to if its needed (perhaps alternating purple & grey)
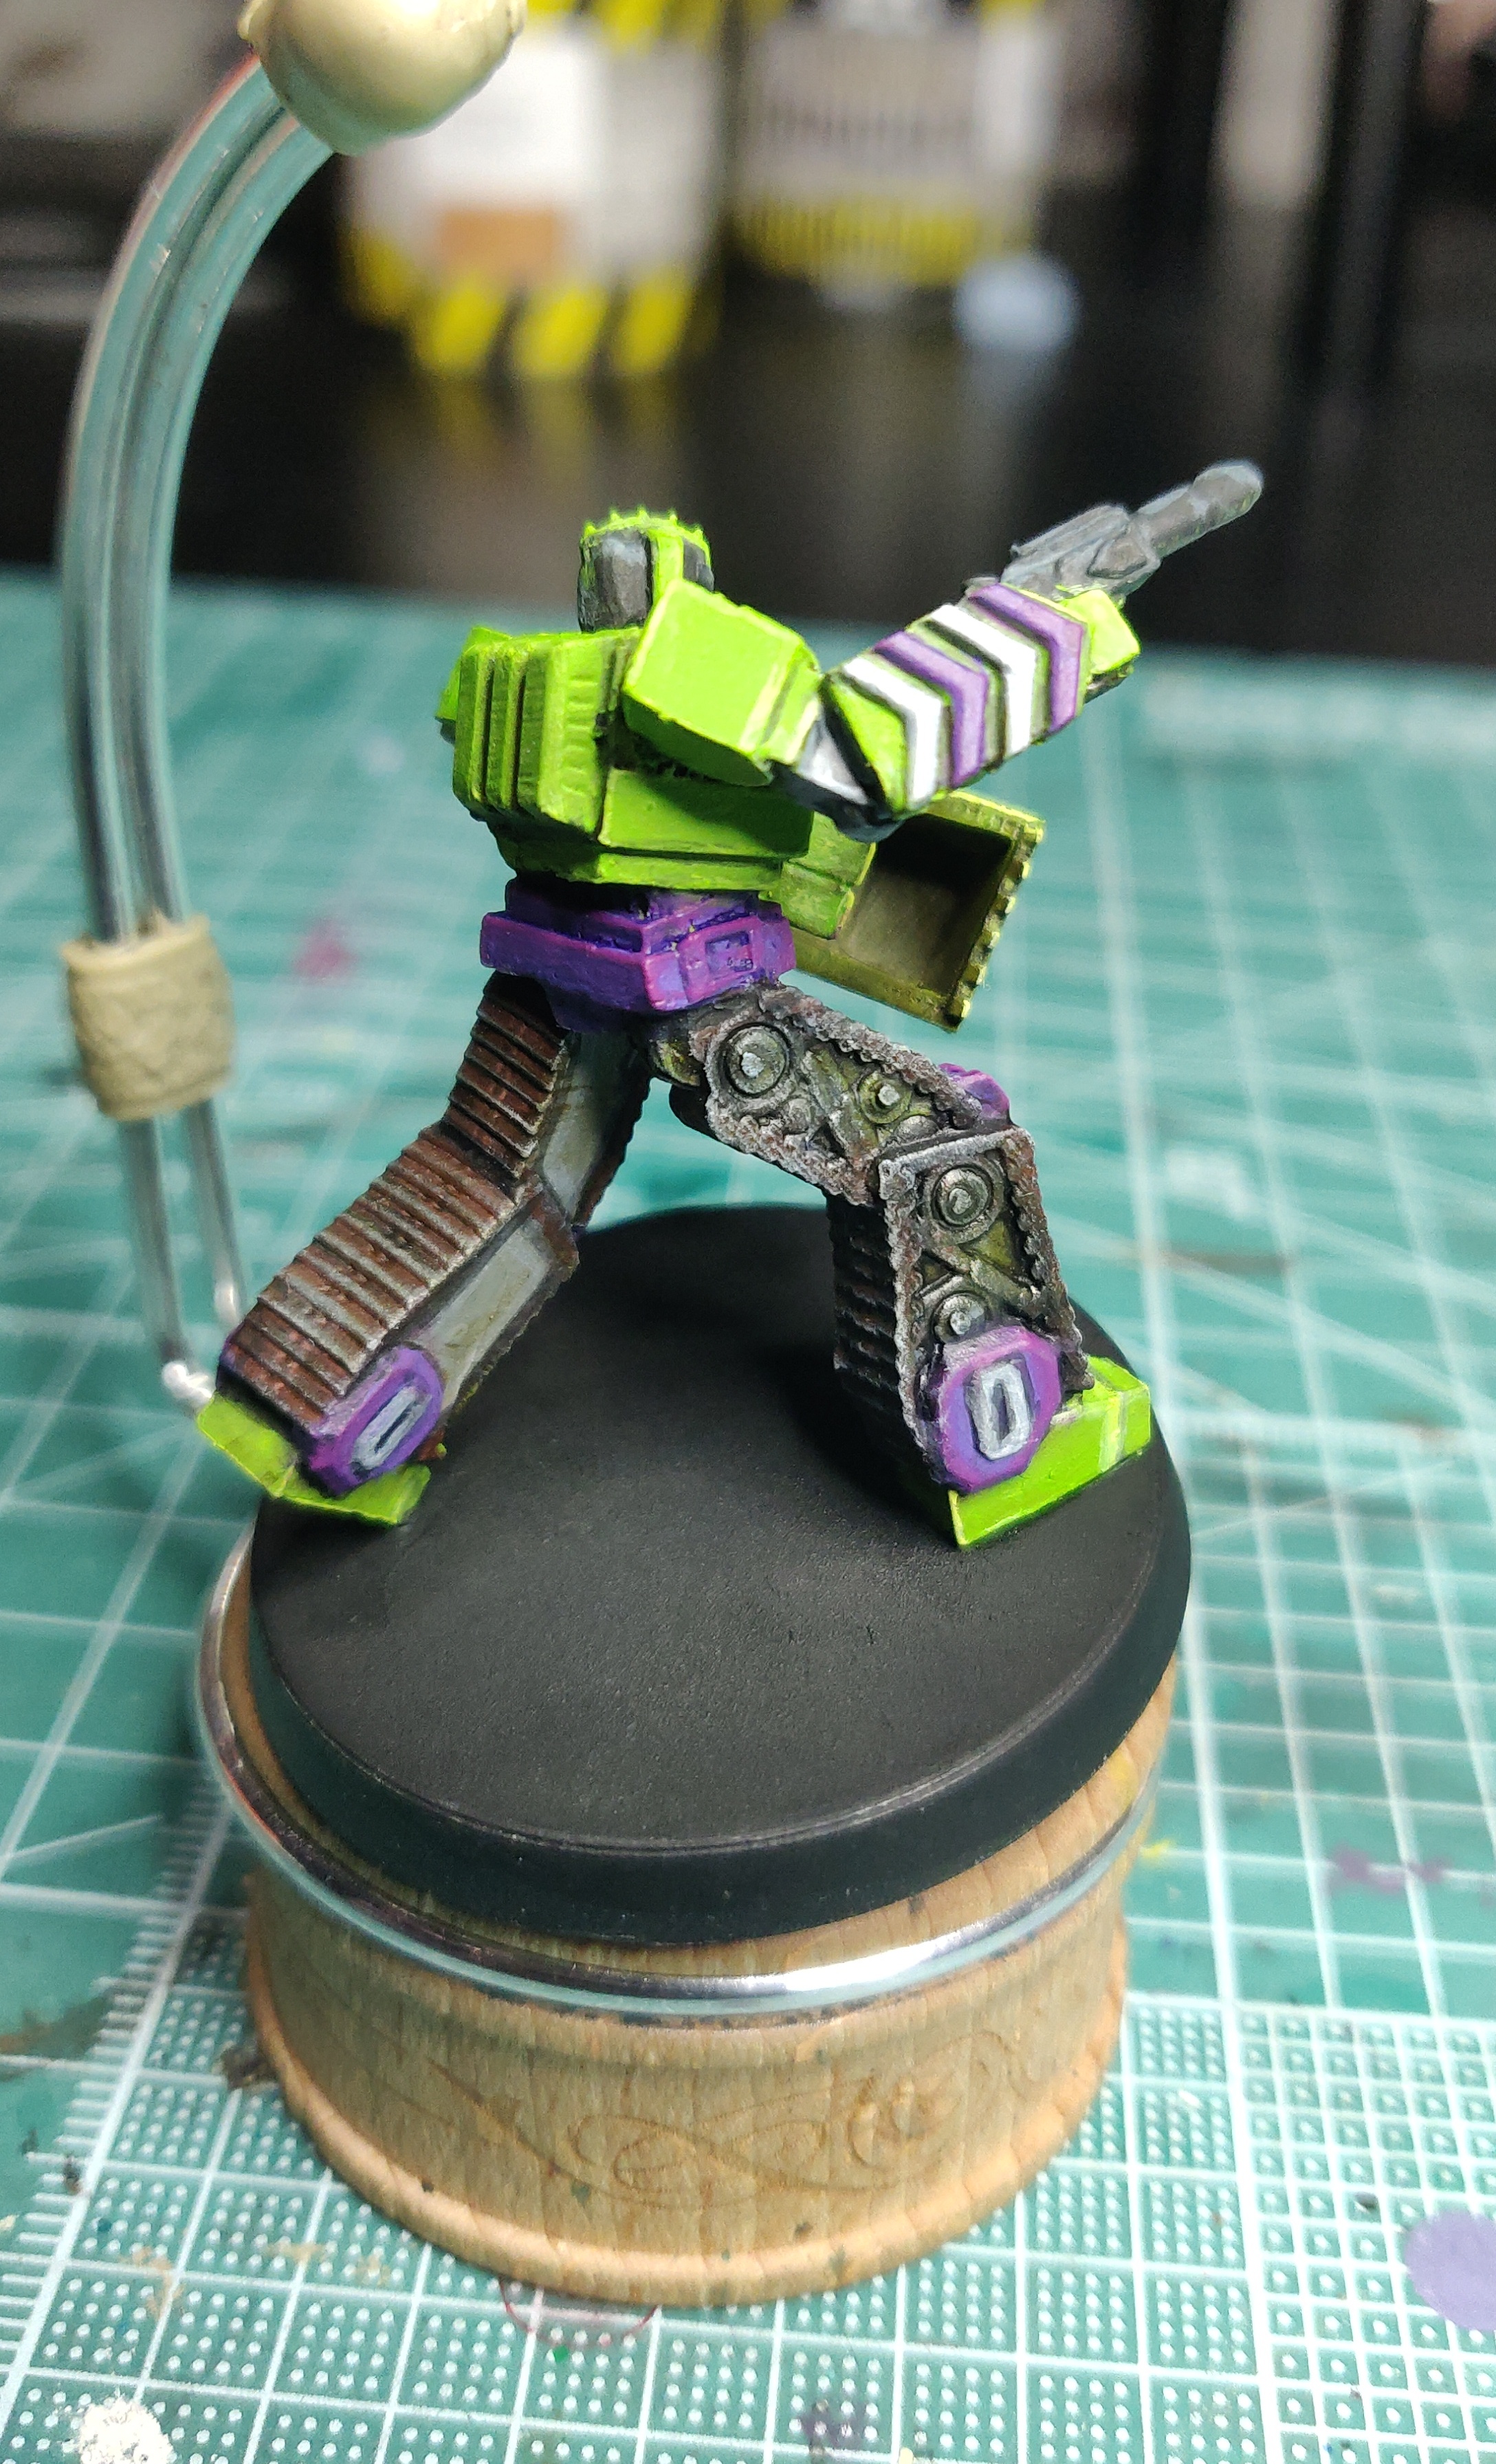
Day 15....

So day 2 of Digger is done. Managed to pick out most of the details but went a bit heavy handed with the highlight and black lining. Worked on the tracks with some more colour and good ol Sewer Water from secret weapon.
Really struggling with this bots pose, the head is looking down too much so when I come to base them I may operate on him, make him look up a bit.
Approaching the half way point now.
Day 16....
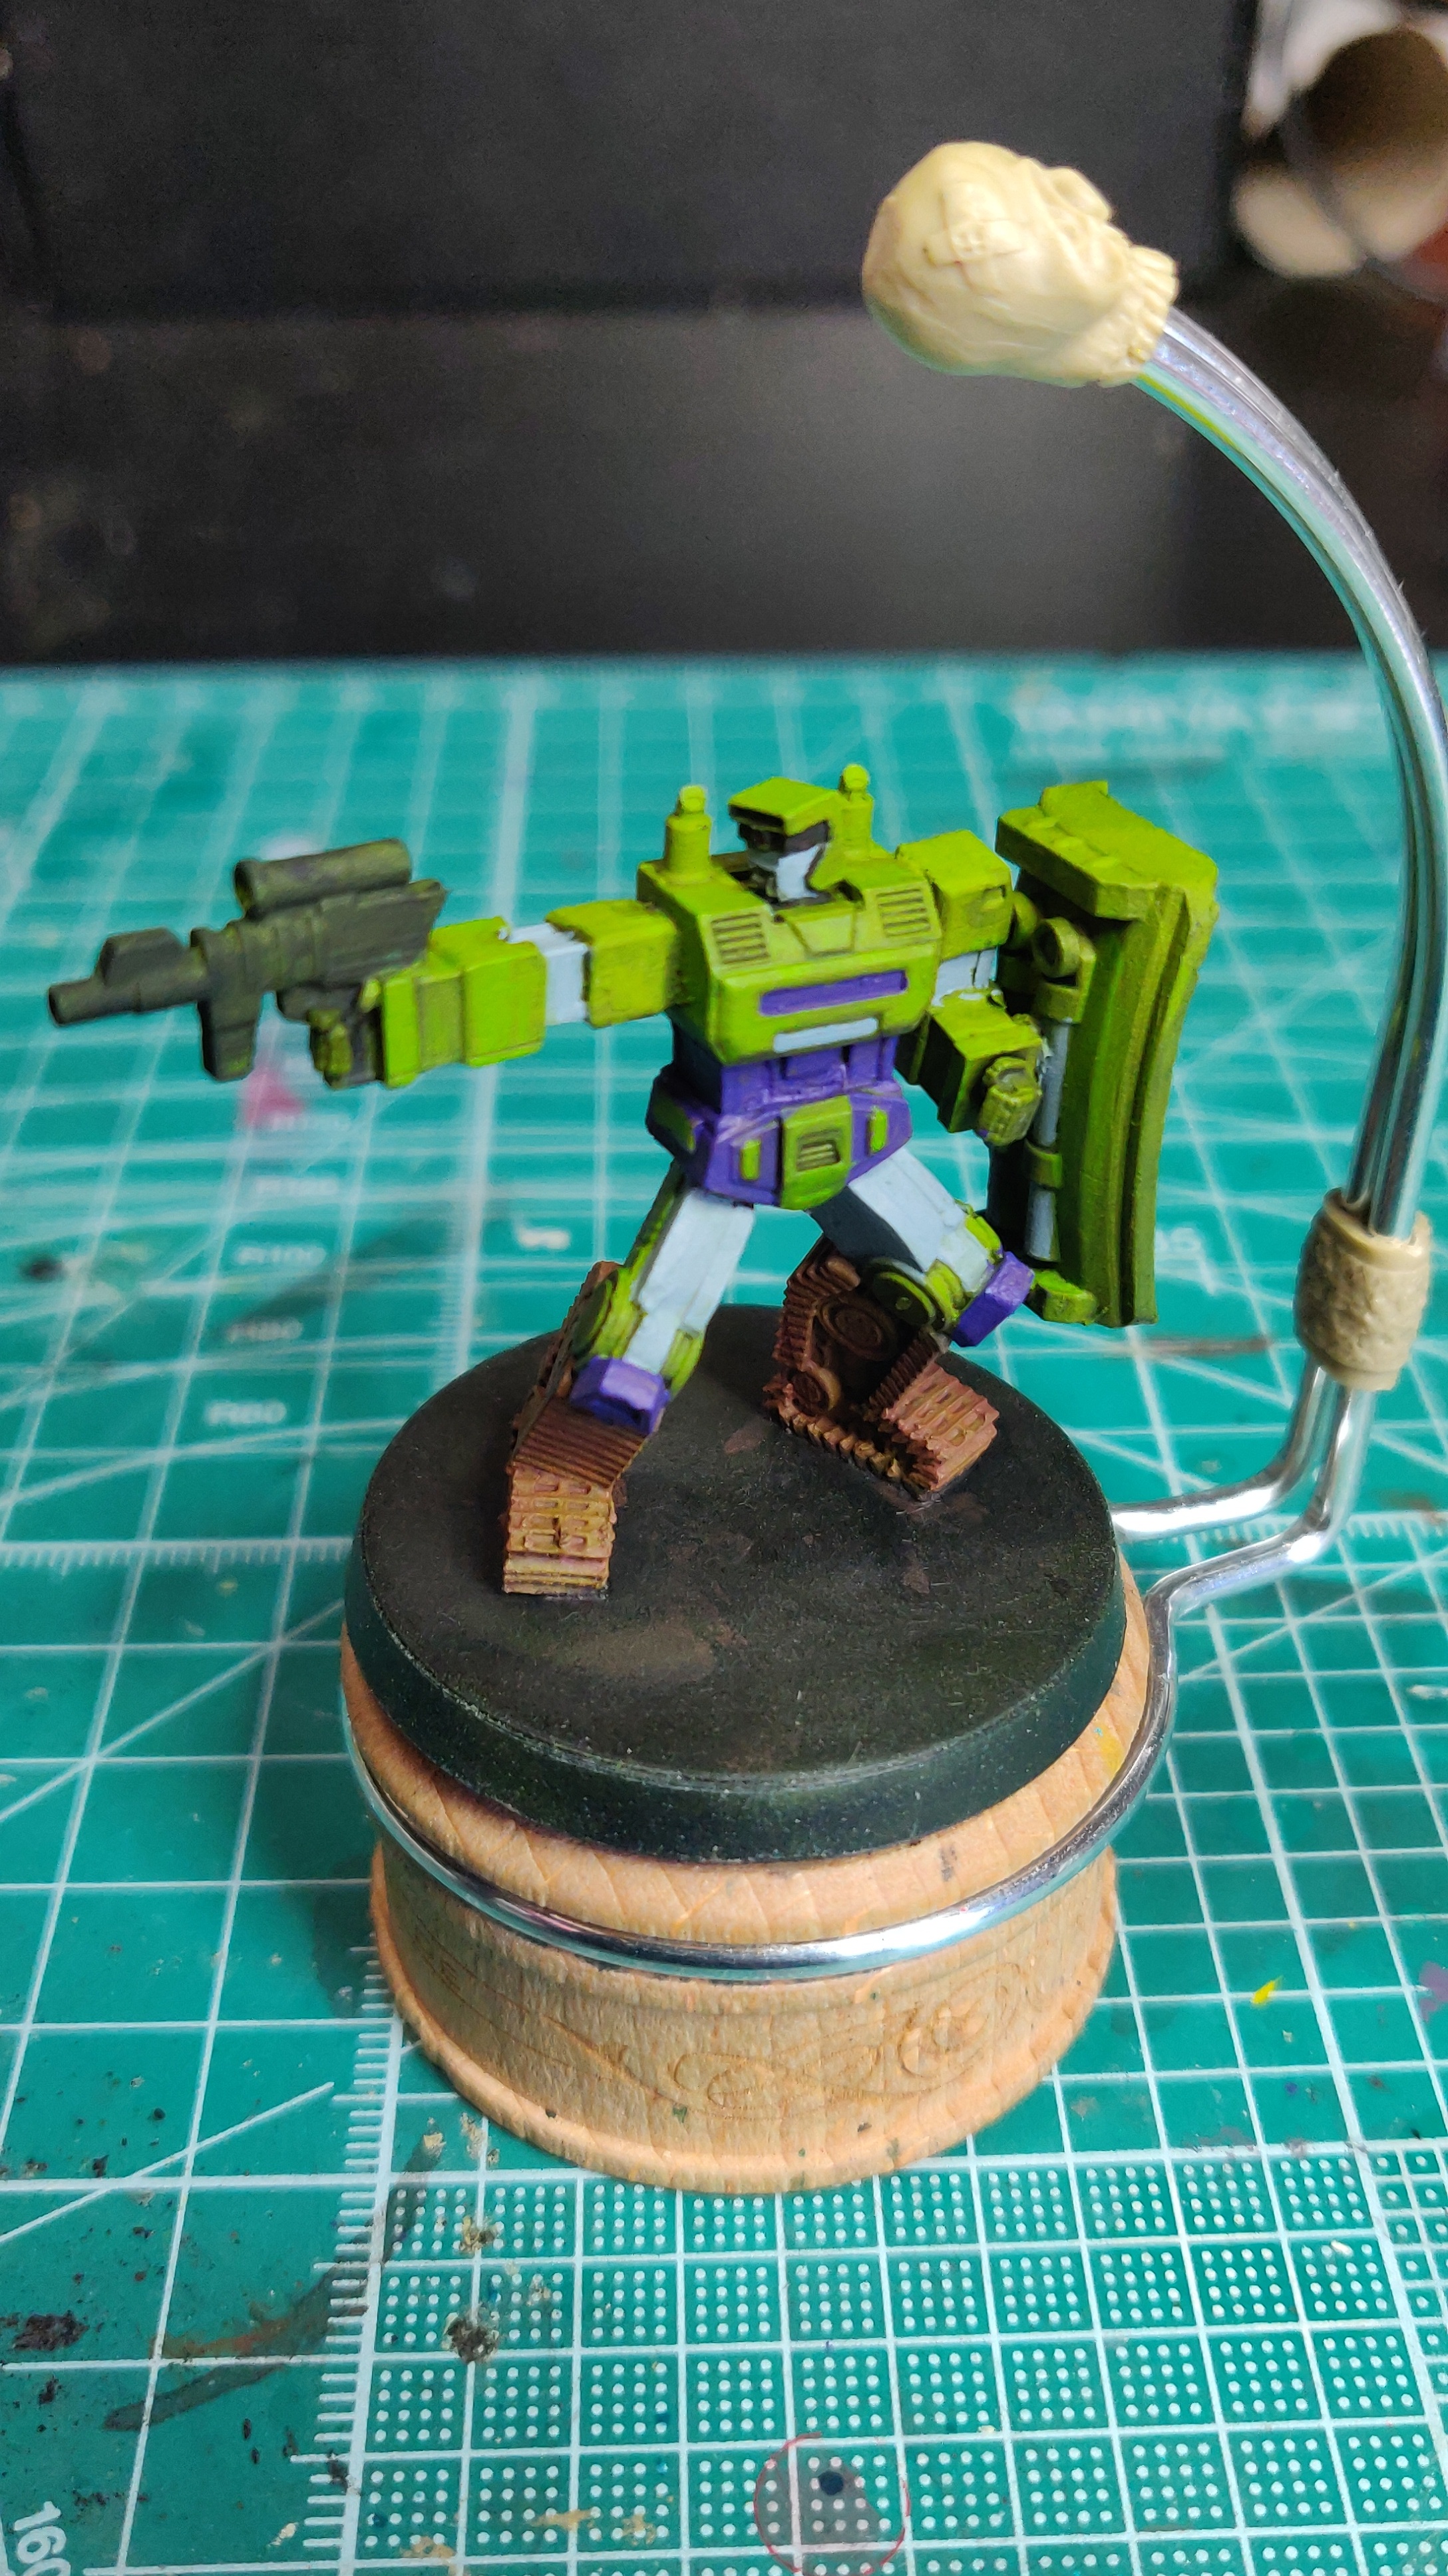
Digger Done!

Over the halfway hump, and 4th Bot is done. Tried to bring on more glazed shading on the bucket to mimic the chest on Loader (1st bot).
Still struggled to get a good shot of this bot, will do a proper photo shoot at the end as a green bot on a green background wasn’t the best.
Tomorrow I will start the 5yh and final Builder, who is slightly larger and has pretty crisp details, may stretch him out over 4 days to make the most of it.
 Track details
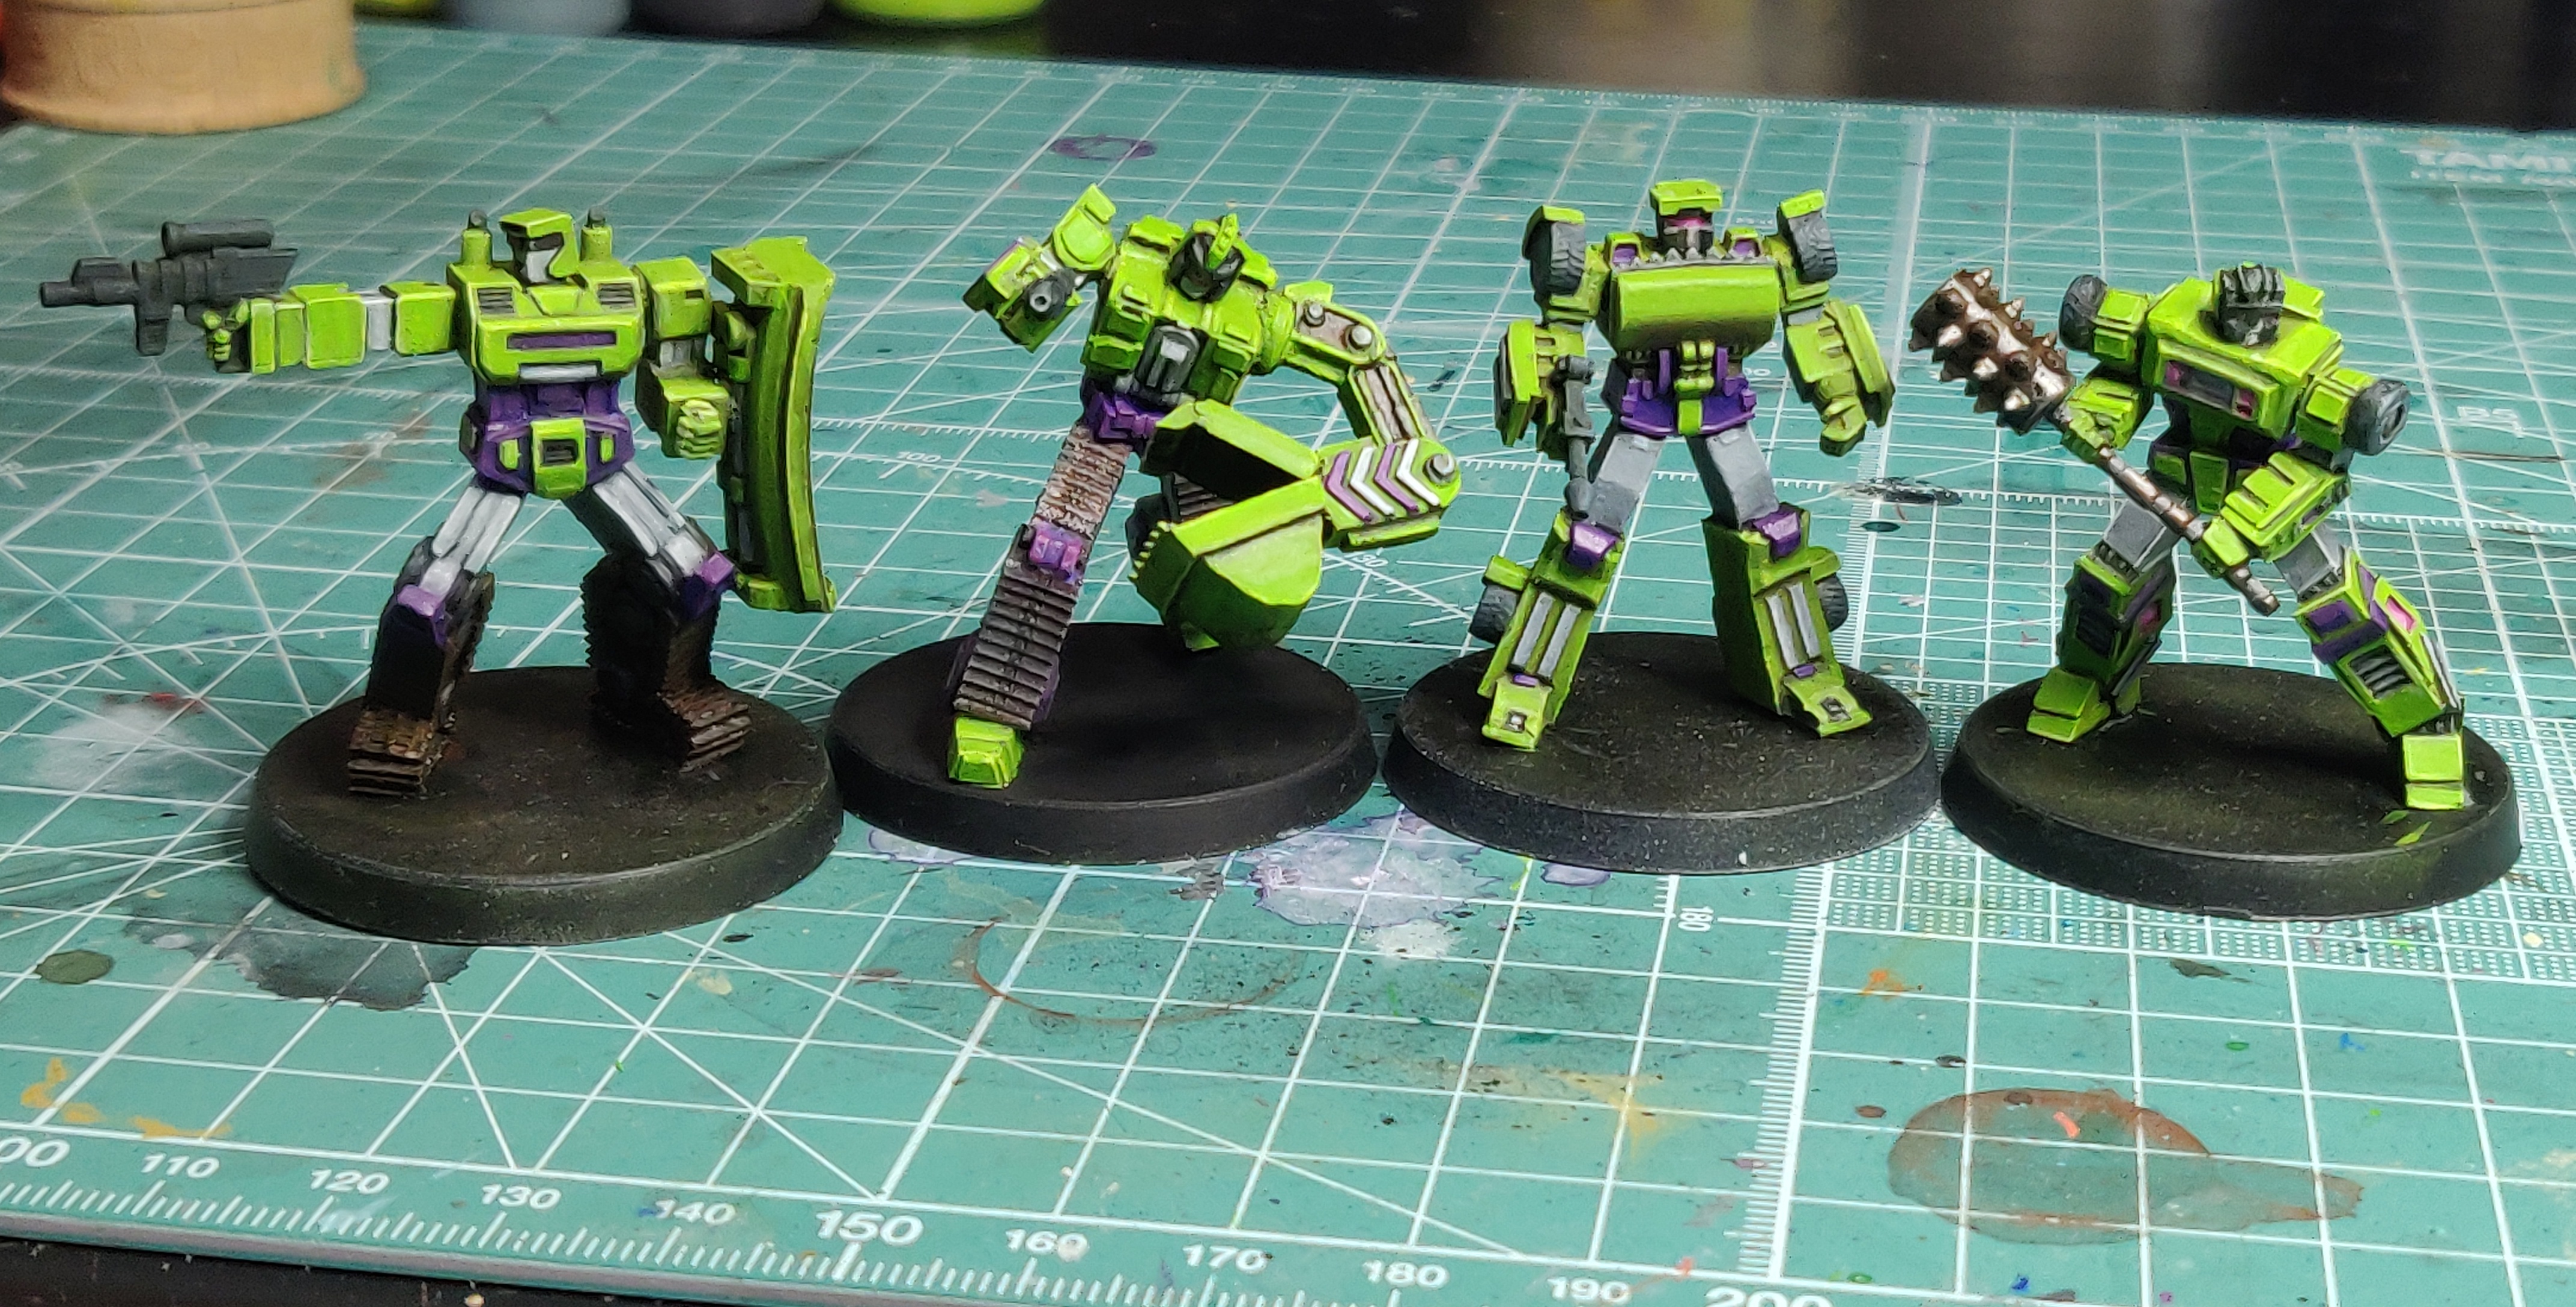 4 bots down
Day 17....
Dumptruck day 1!
 Start of the session to the end
This is it, the final bot of the 5 Builders, and the unit leader (note foot on rock).
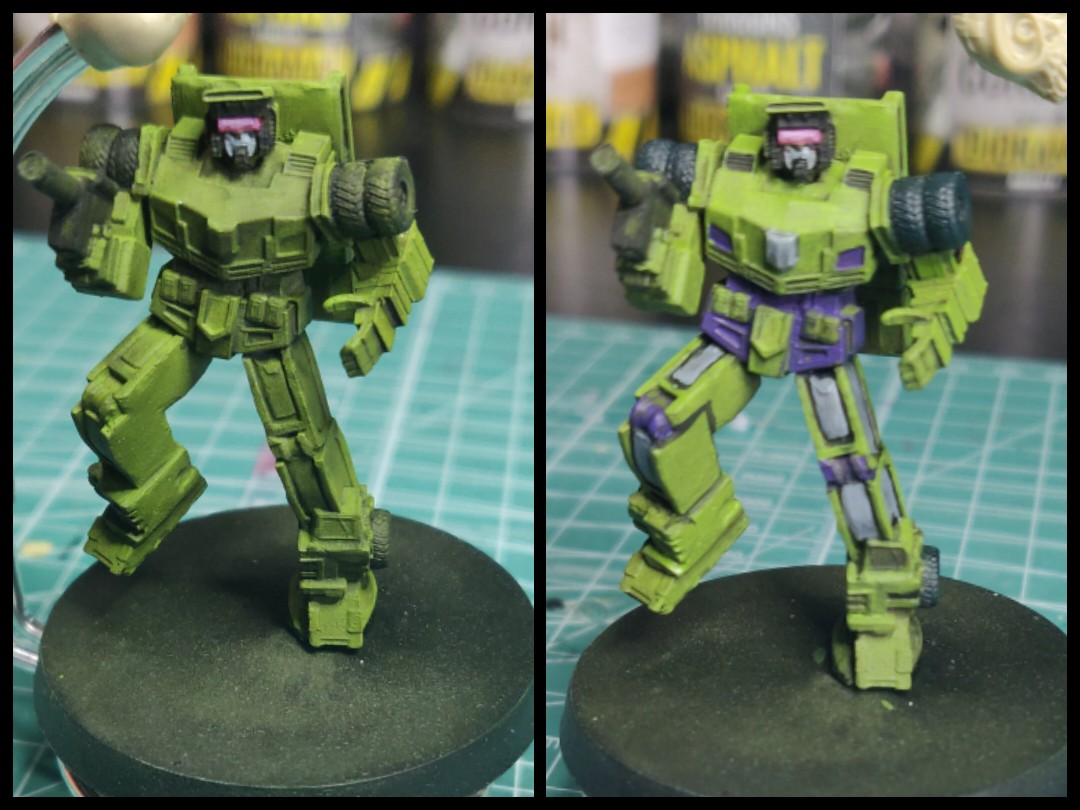
I thought I’d do something different to day and show the starting point for this bot as it’s not exactly starting from nothing.
Back on day 1 I zenithal primed all of the figures I was going to paint for this challenge, and on day 3 I gave them a secret weapon Sewer Water wash over that prime to gunk them up. Day 4 was the P3 Wurm then Noctite Green airbrush session. Day 9 I then secret weapon washed the green again to add some shade (which I actually regret doing, you can see a difference between the first 2 models and the latter ones). It was also whilst painting the lens of Dozer on day 9 that I also painted the lens/visors of the other bots. So yeah, it’s not starting from scratch on this bot but an even starting point that the previous 2 have been started from.
I wasn’t really feeling it today, 17 days on the trot painting after work may have something to do with it, but i was really happy to at least get my base coats down and have all of the main colours plotted out. This bot is slightly larger than the other 4 and his details are nice and crisp so I should hopefully get some nice edge highlights in a few days time. On his back is also the big bucket so the Sewer Water wash has already made a nice weathered/worn effect which I will photograph tomorrow as I work up from it.
- That’s it for now, hope you’re enjoying the project, 14 more days to go!


