


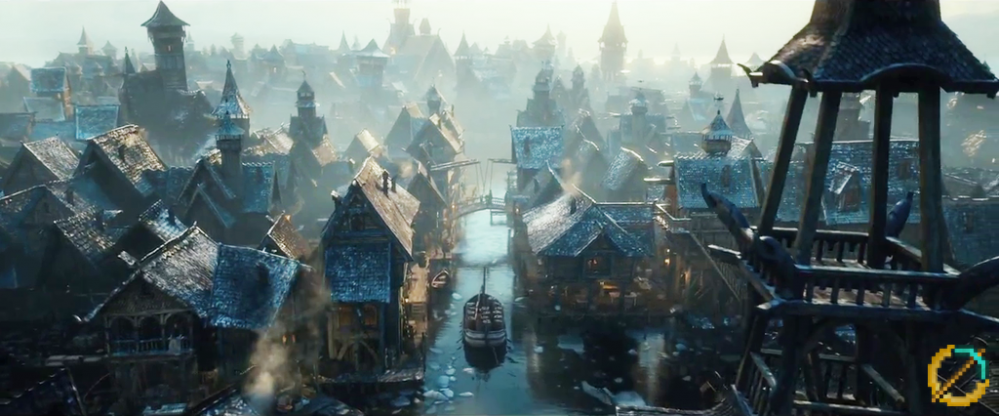
Lake Town in need of Spring Cleaning!


Recommendations: 826
About the Project
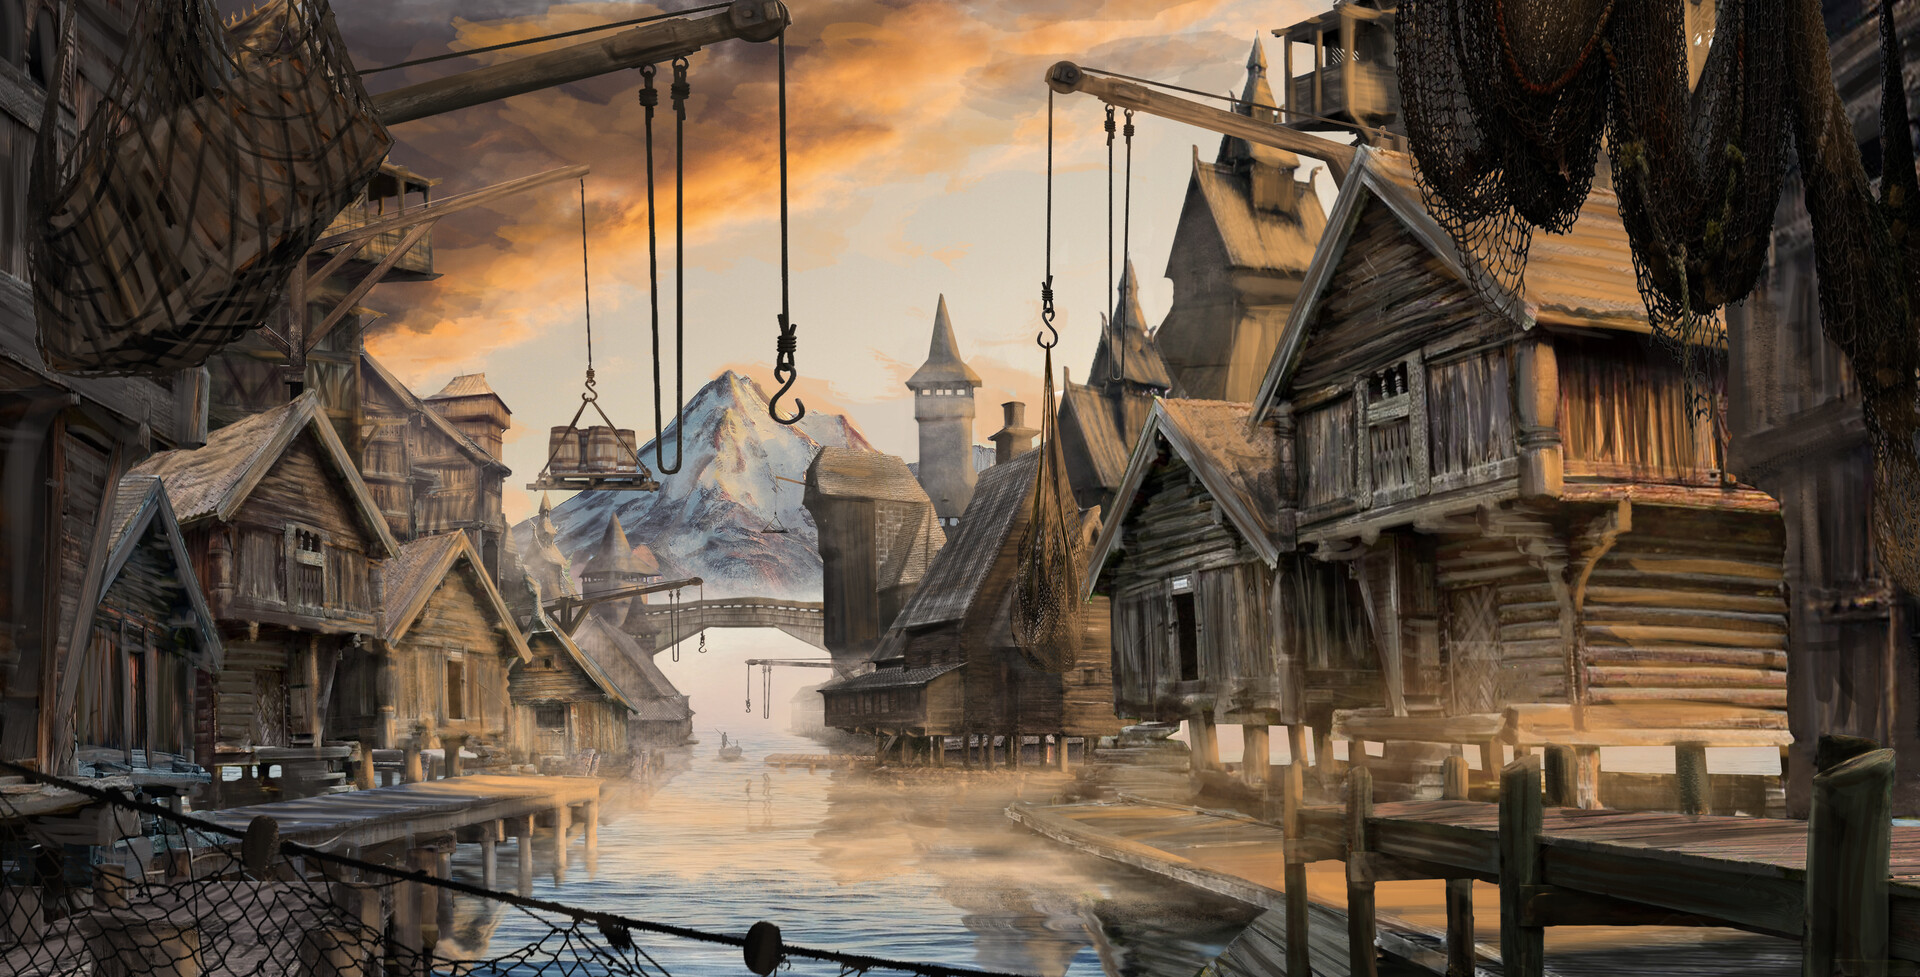
Resurrecting an old project in which I started building a full tables-worth of Lake Town for Middle-Earth Strategy Battle Game. This project will make use of official GW kits, MDF kits and complete scratch-builds to bring Lake Town to life. Along the way, I hope to share some good Tutorials of how to make these pieces, and my Skills in painting.
Related Game: Middle-Earth Strategy Battle Game
Related Company: Games Workshop
Related Genre: Fantasy
Related Contest: Spring Clean Hobby Challenge 2023
This Project is Active
Where it’s at
I don’t have two turntables or a microphone, sadly.
With the end of the Spring Clean Challenge now in sight, what I’ve done so far is where I’ve got to. It’s not as much as I hoped to get done. But, given I took a detour to do a whole WarCry terrain project, and have been struggling with mental health and work pressures – I think I can say with full confidence that I’ve really dug into this sizeable project, and have certainly started spring cleaning and reducing the pile of potential – turning it into a small pile of hobby goodness.
This project doesn’t end, and I will keep going with it, so hopefully you’ll follow along as I continue to build out LakeTown.
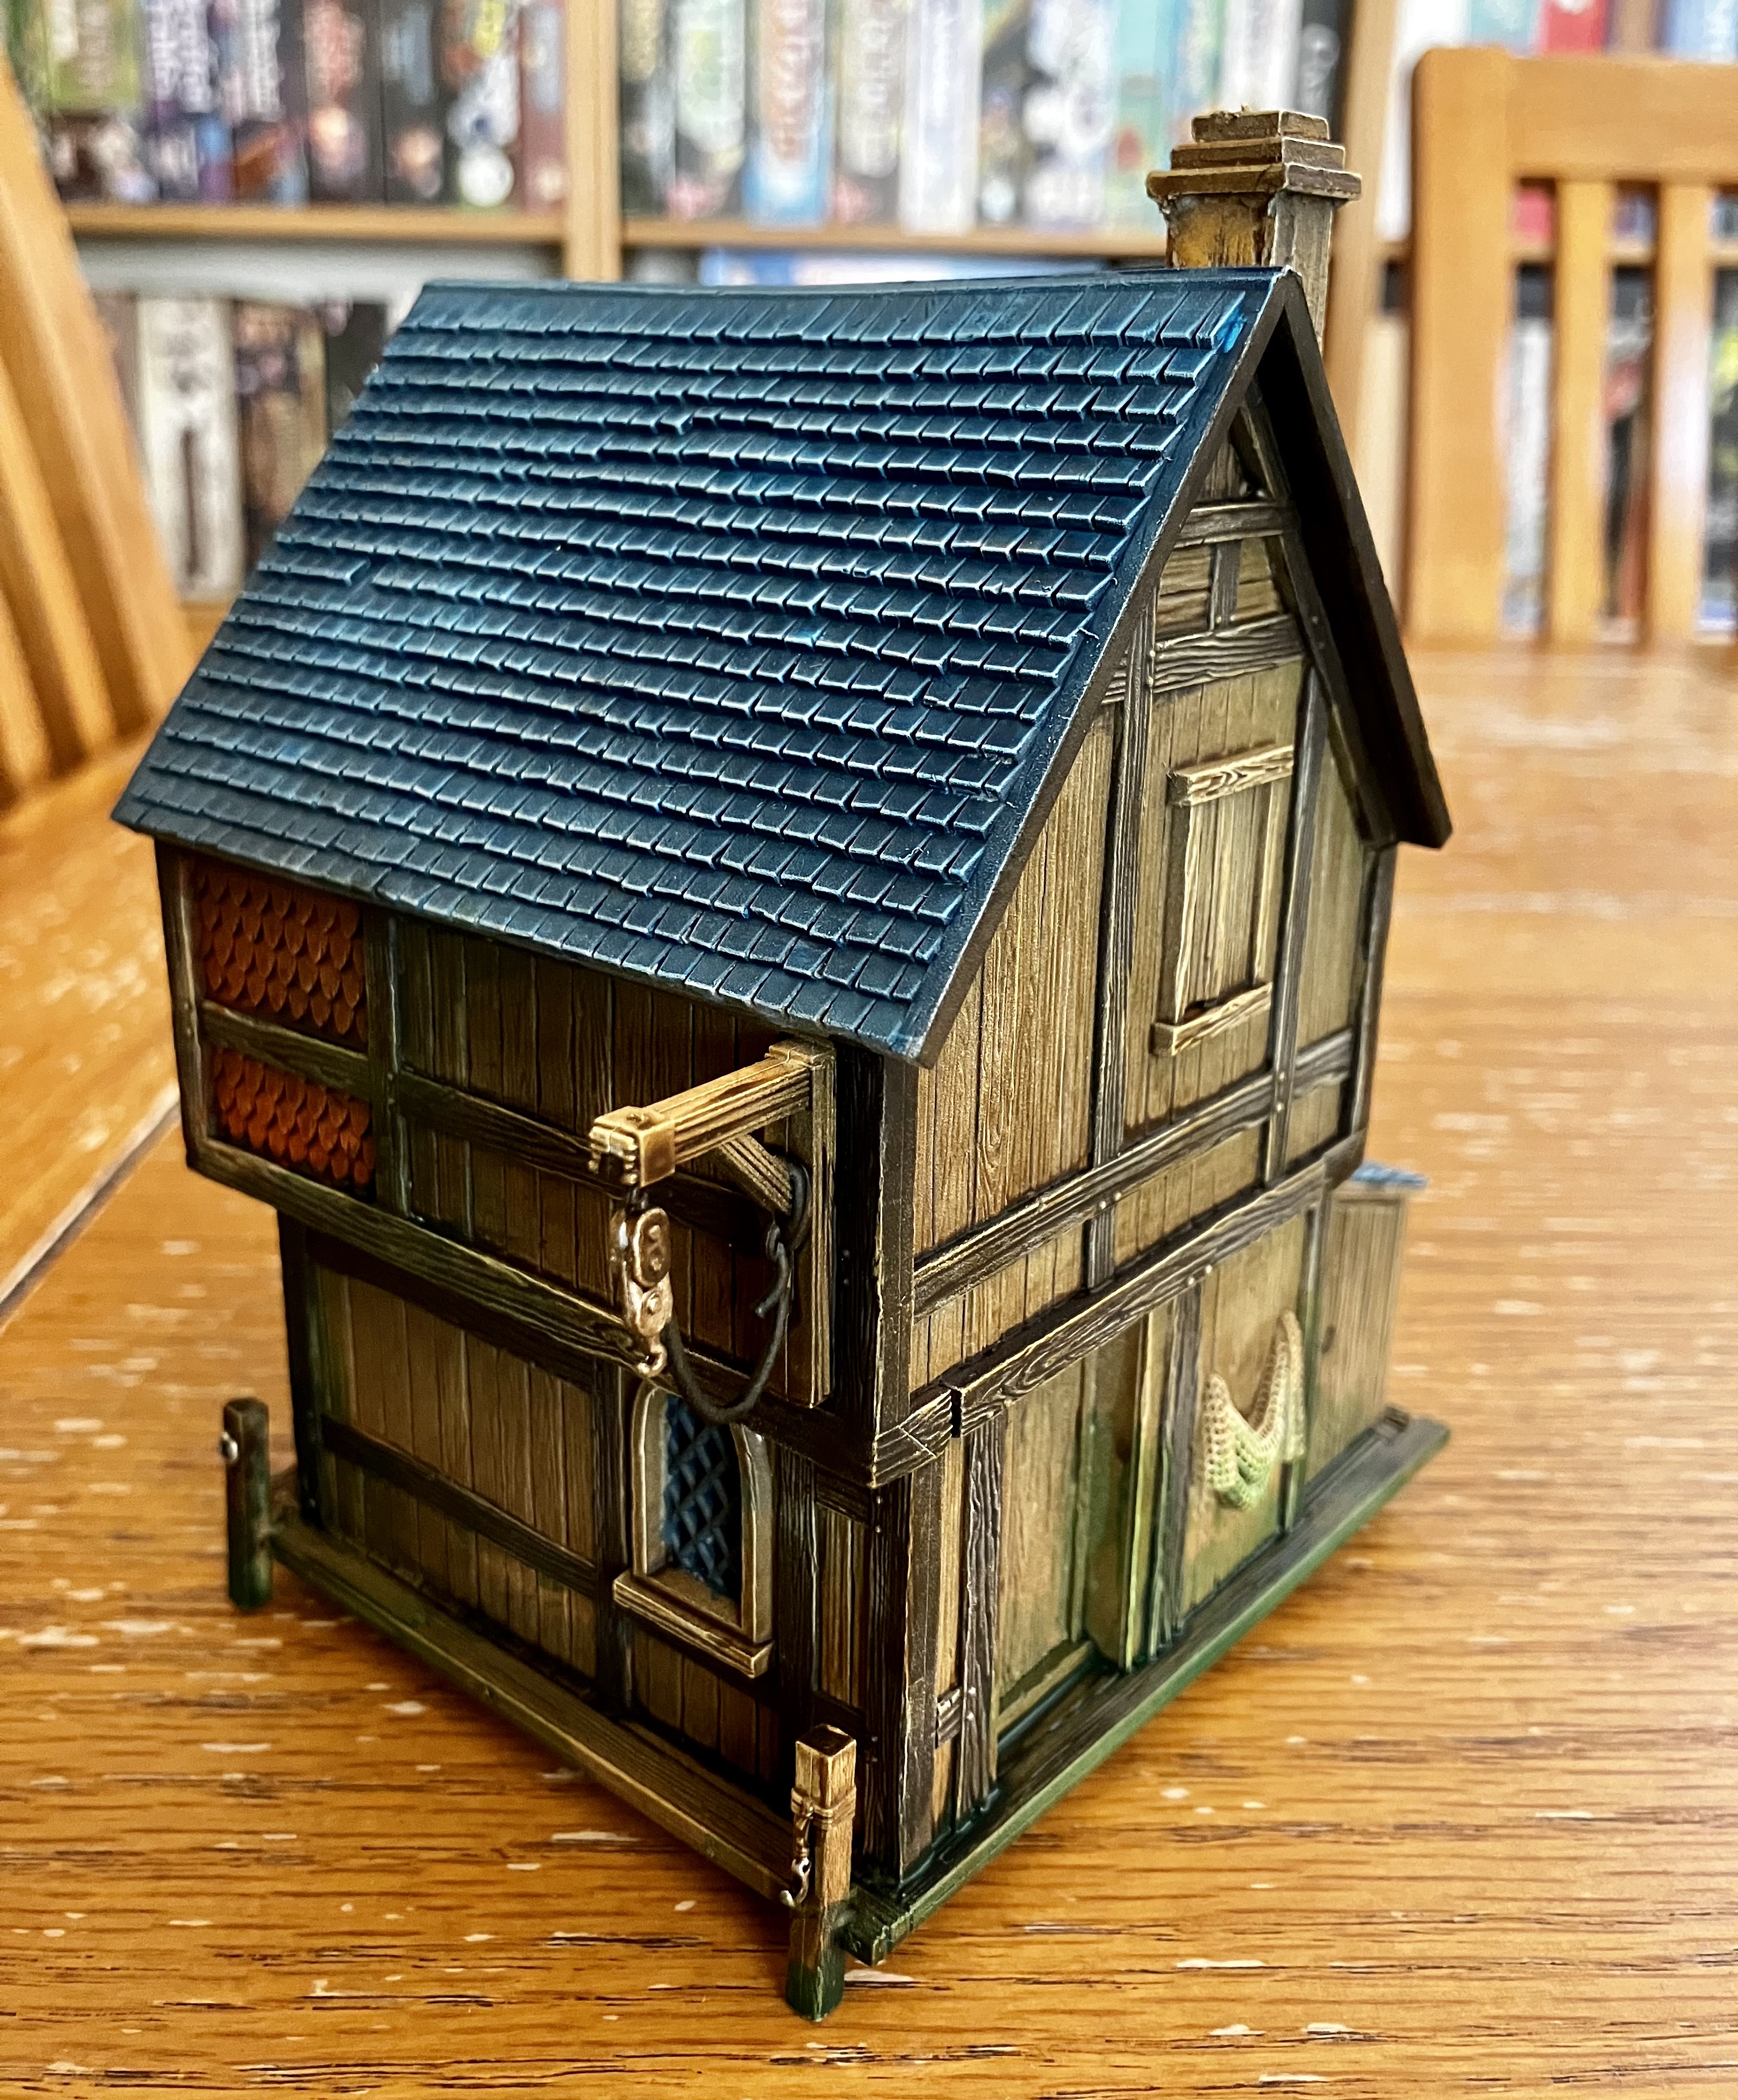
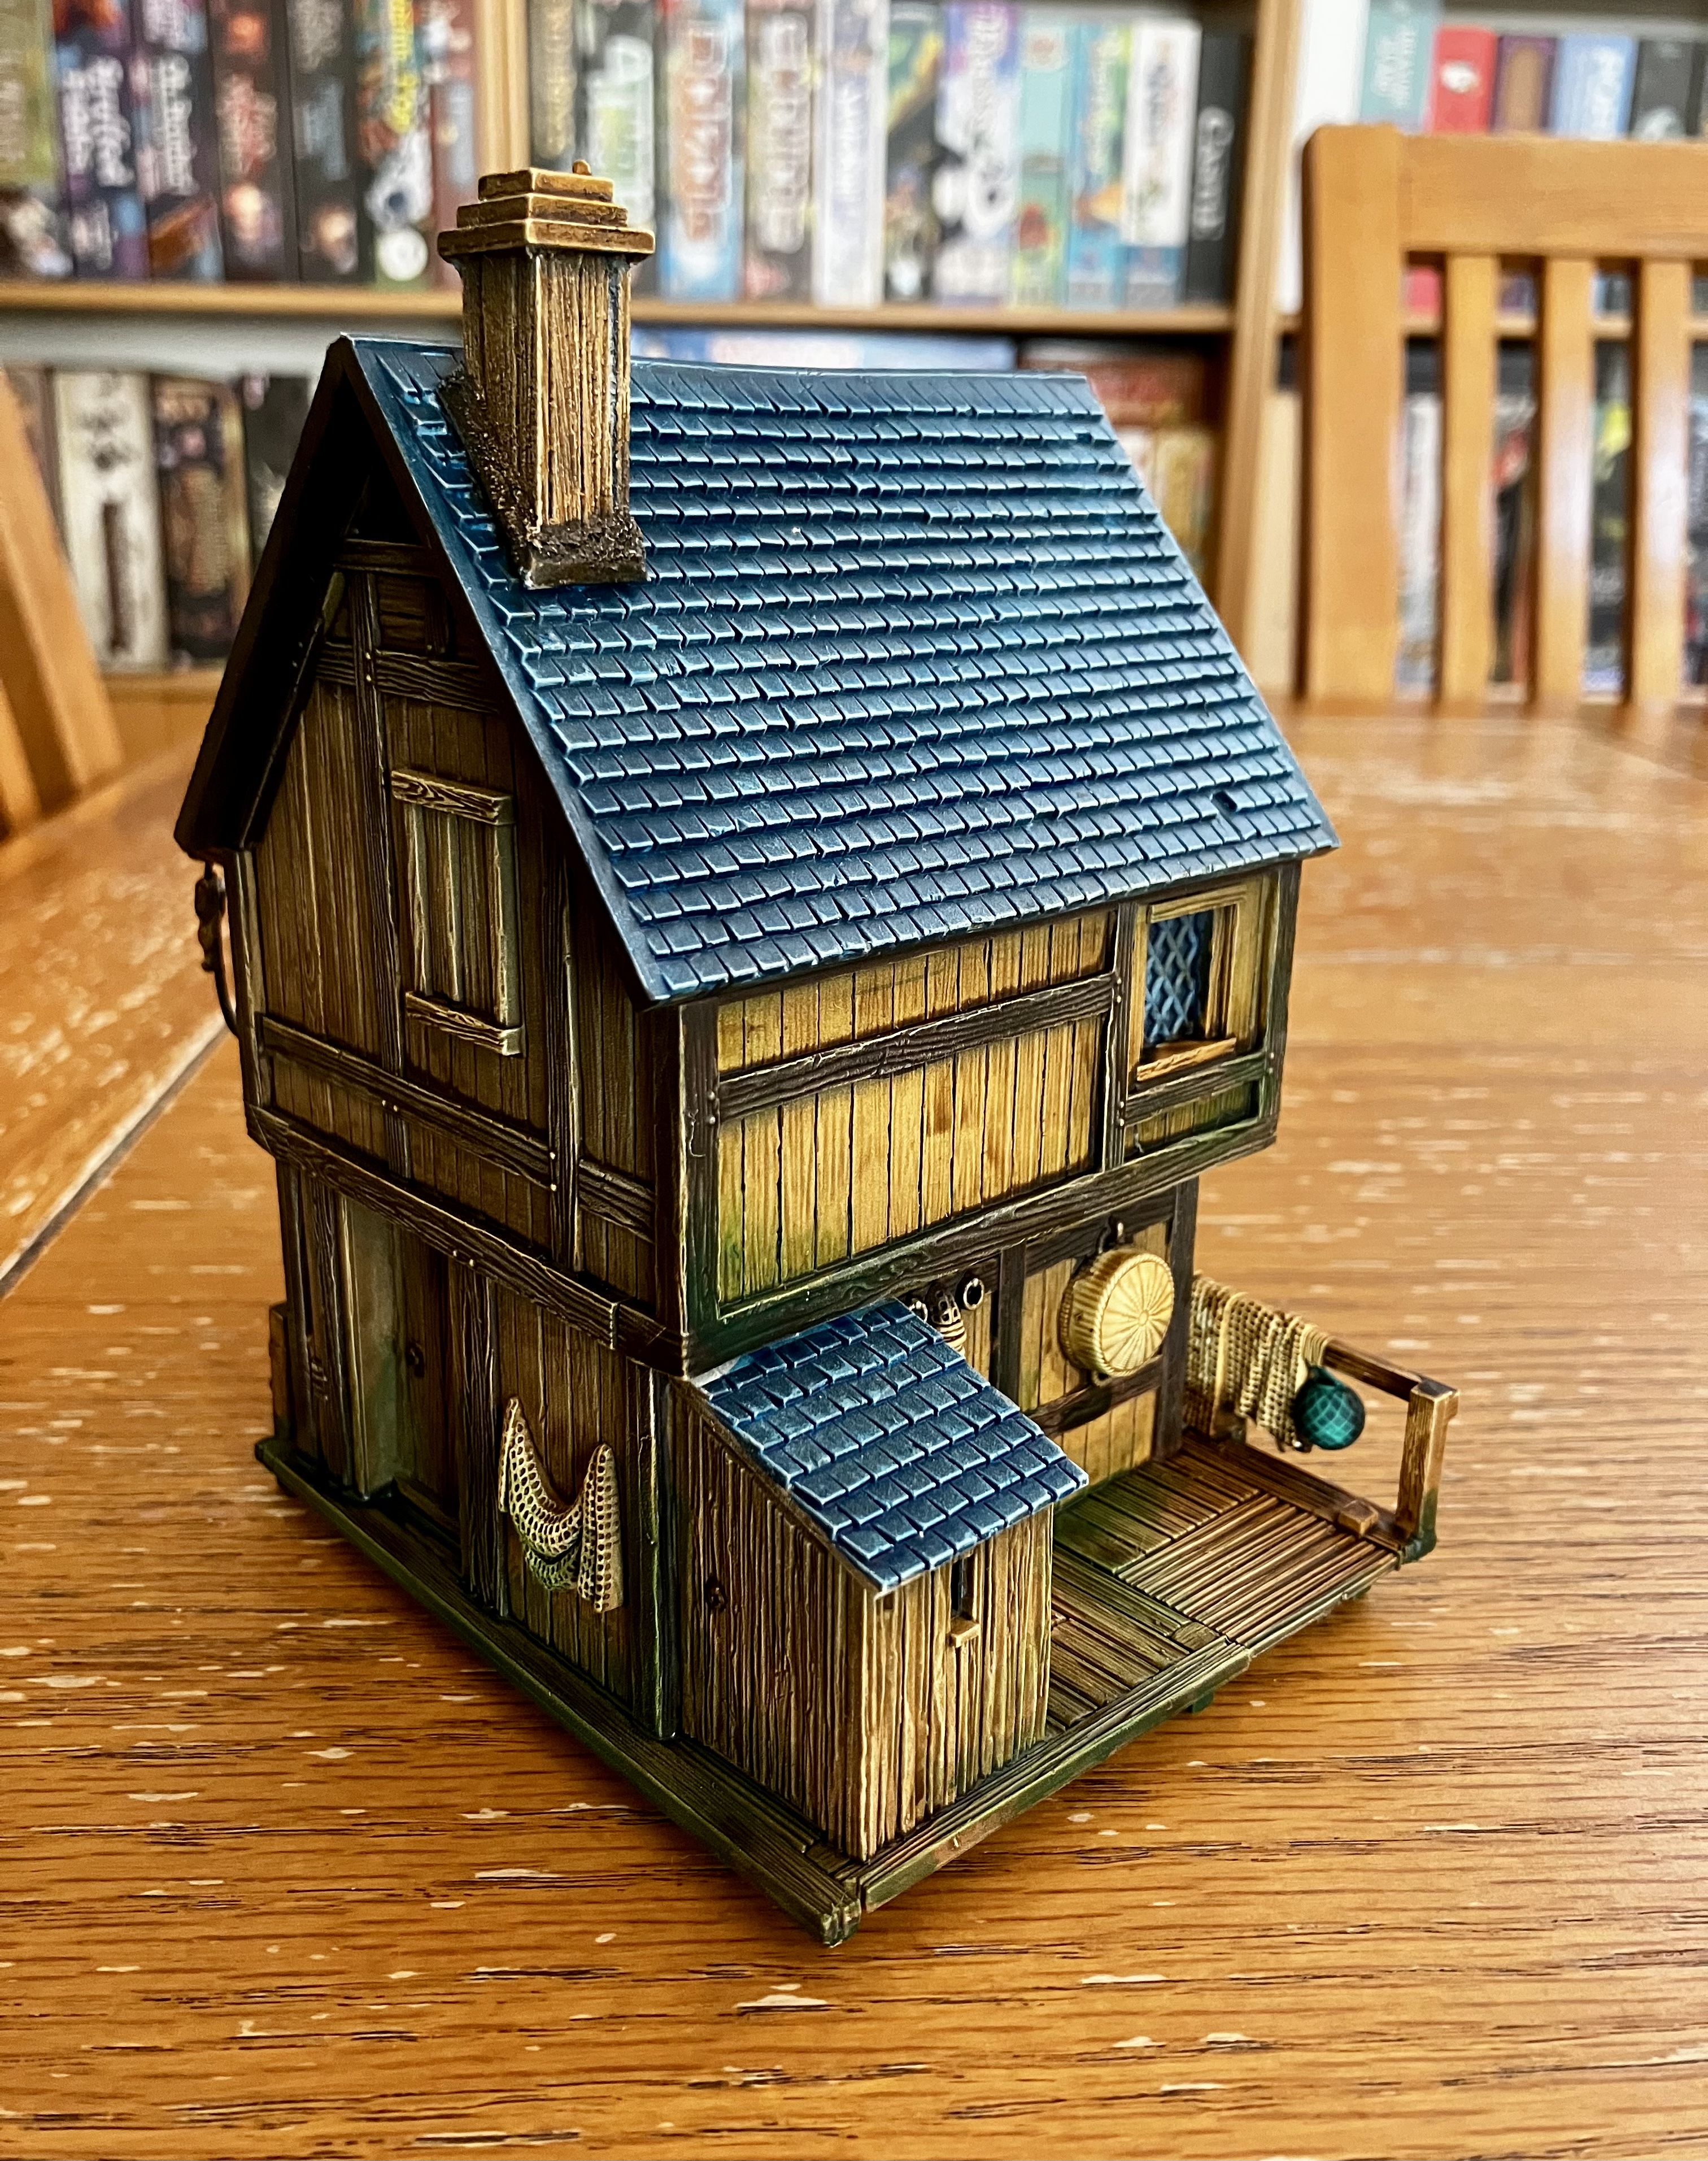
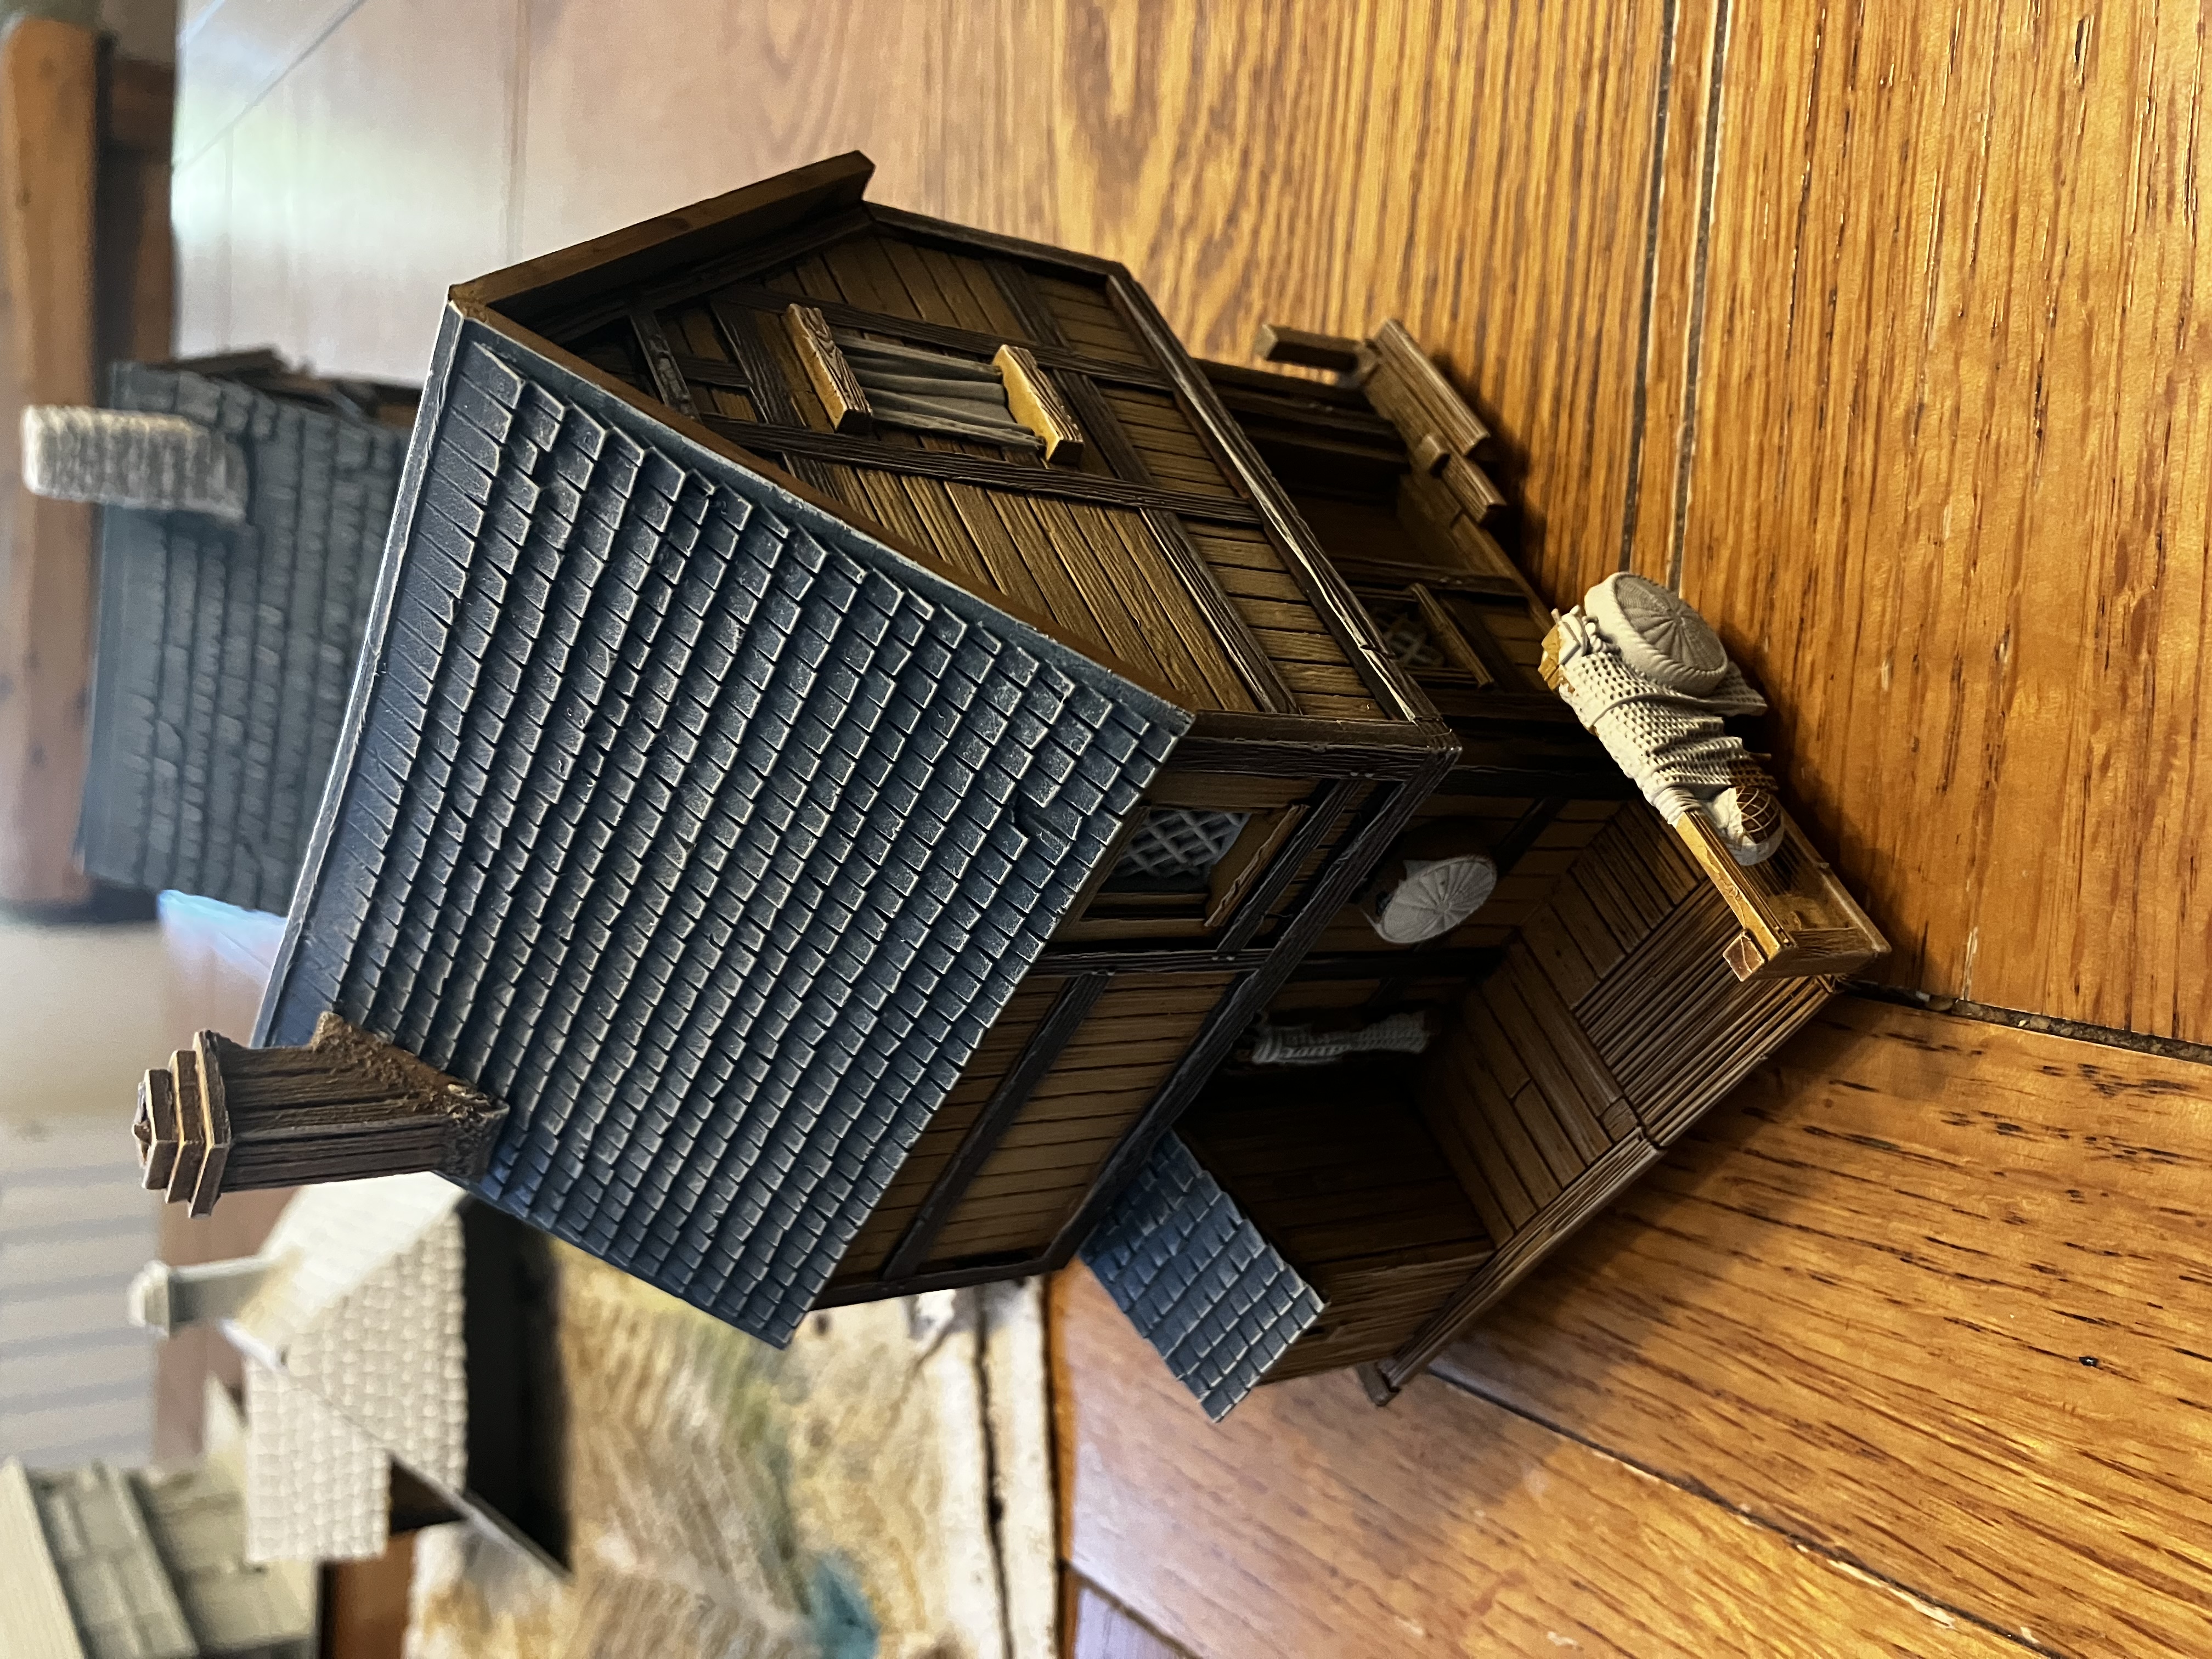
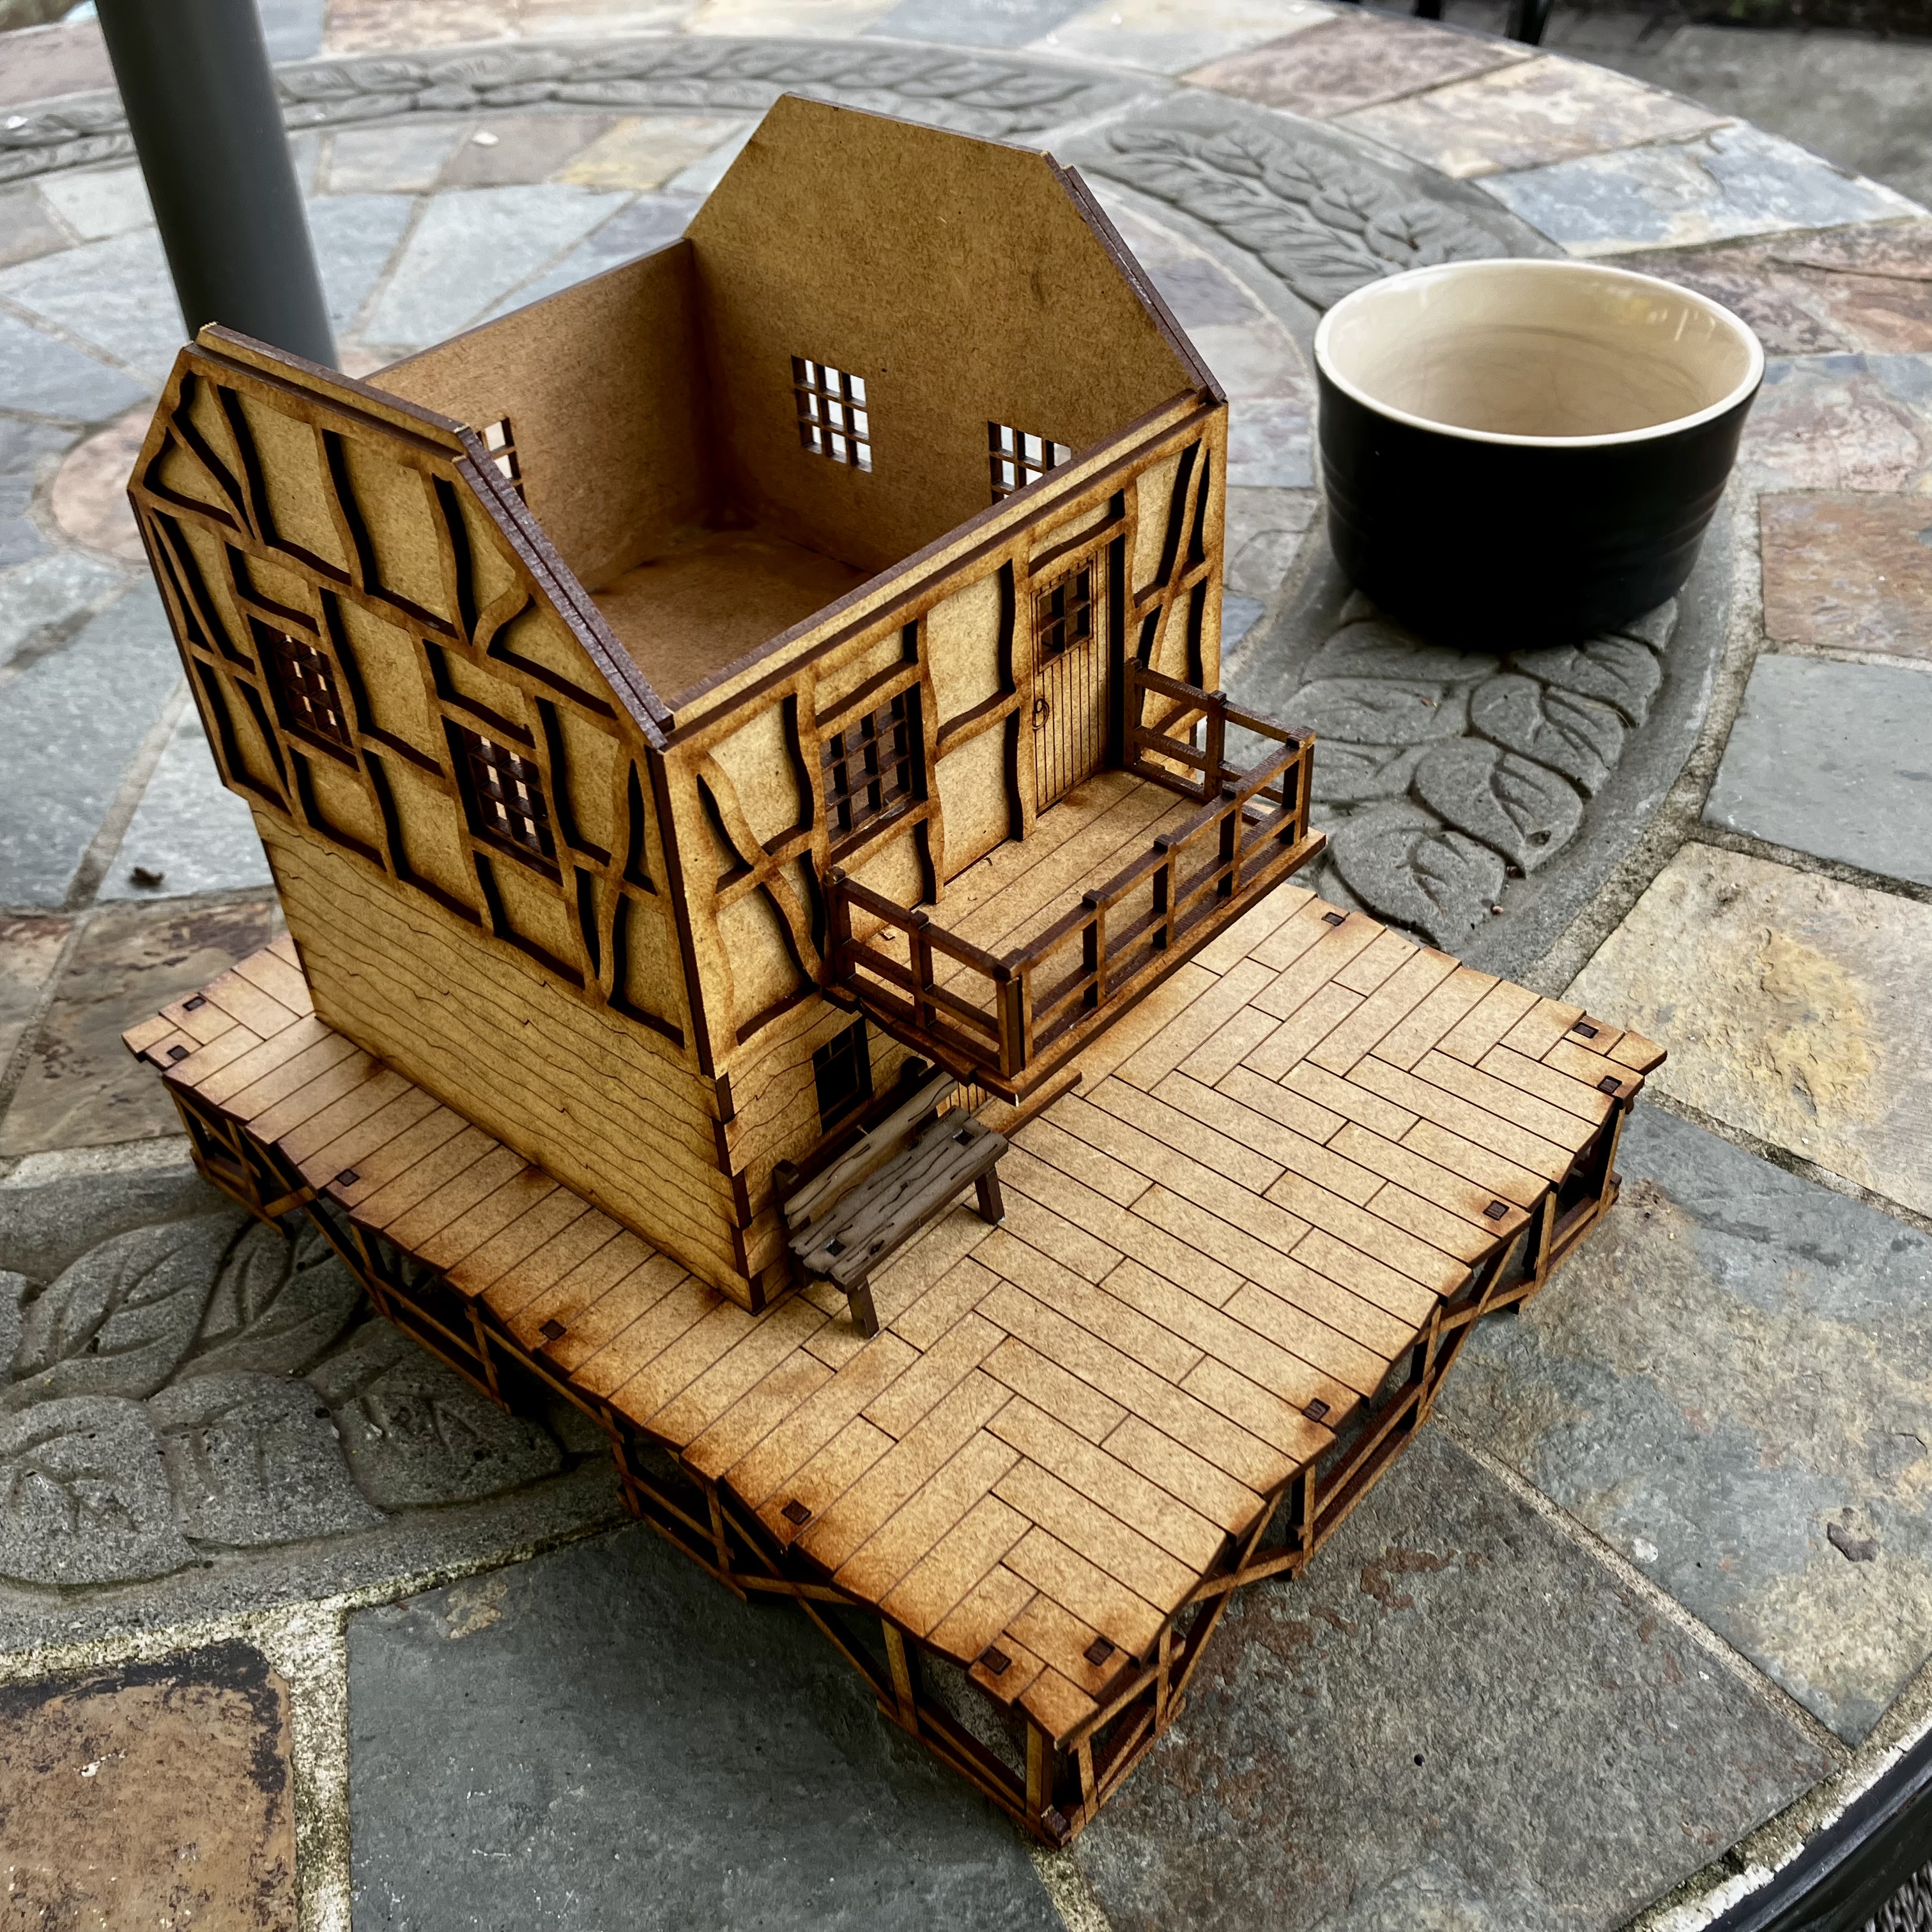
The combined house
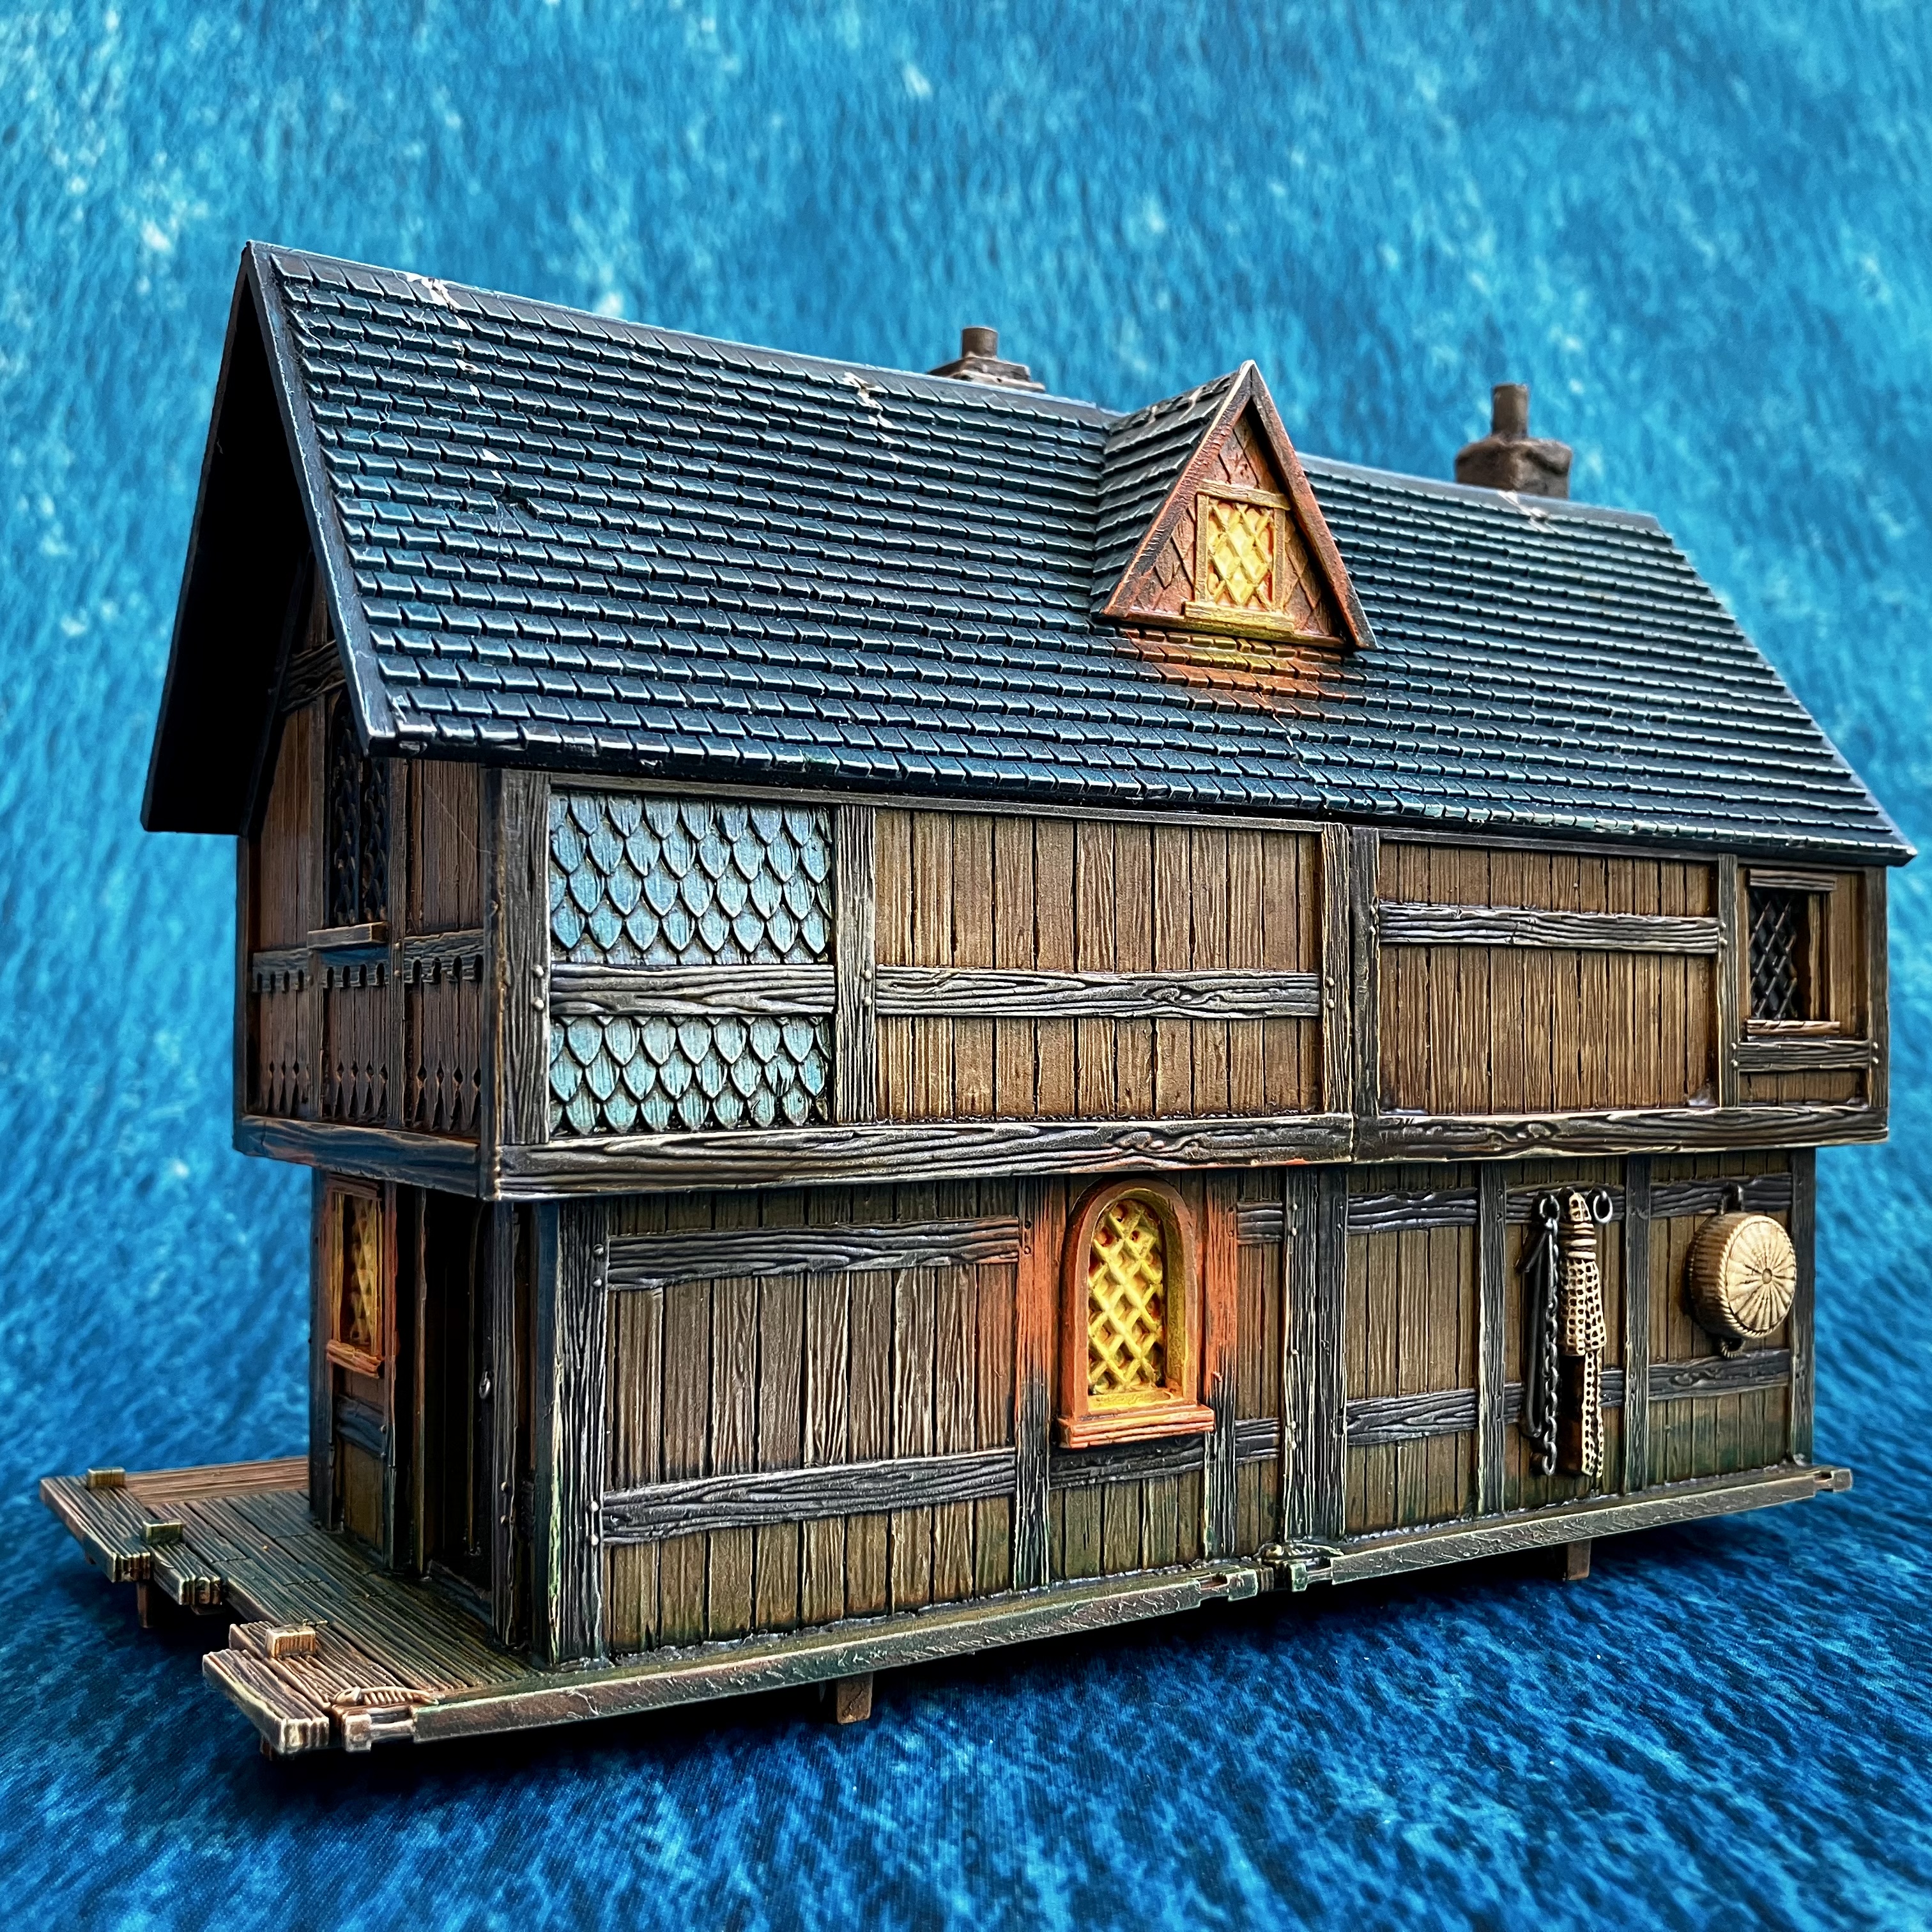
Really pleased with how this came together. It’s not as complex as some examples I’ve seen online, but really does add extra variety.
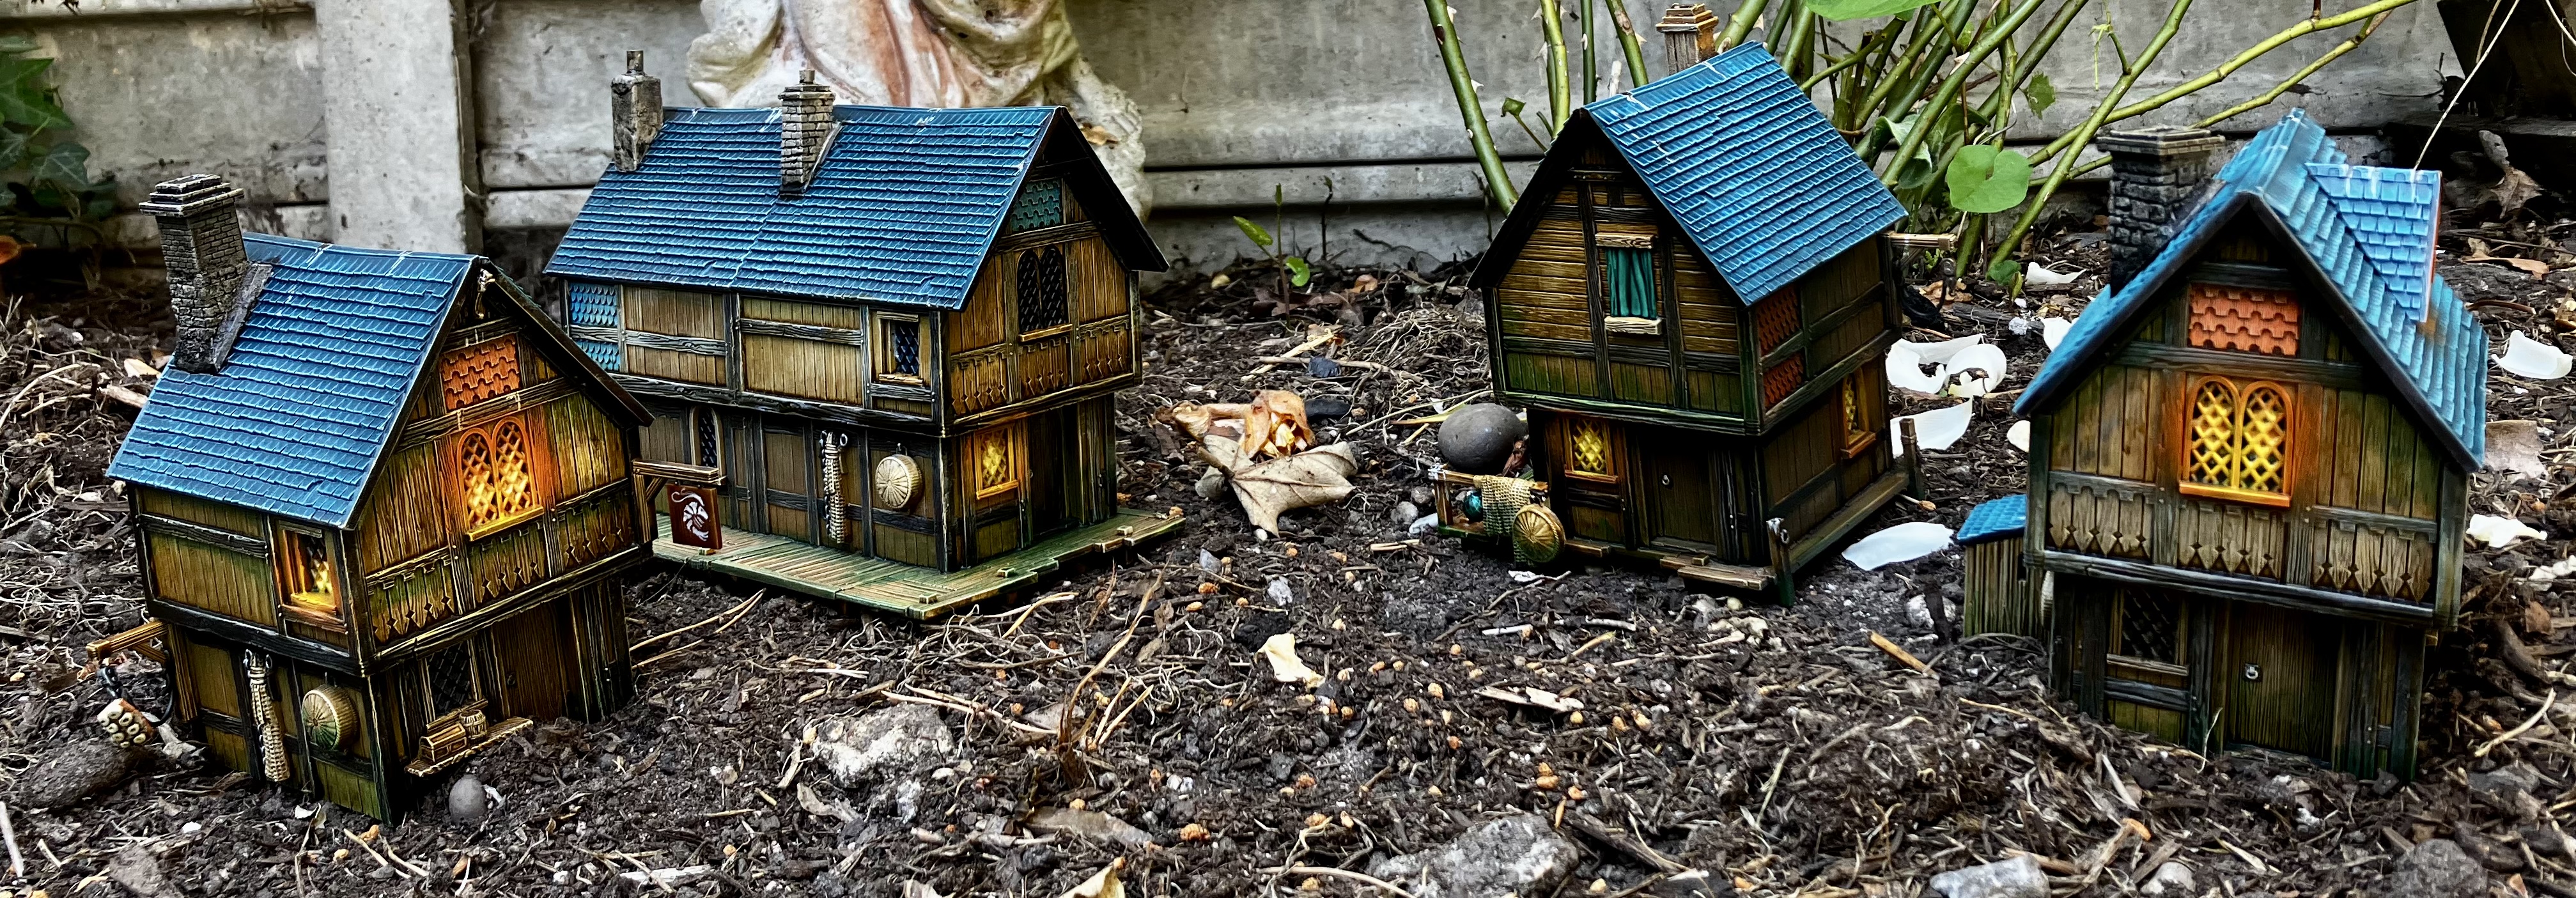
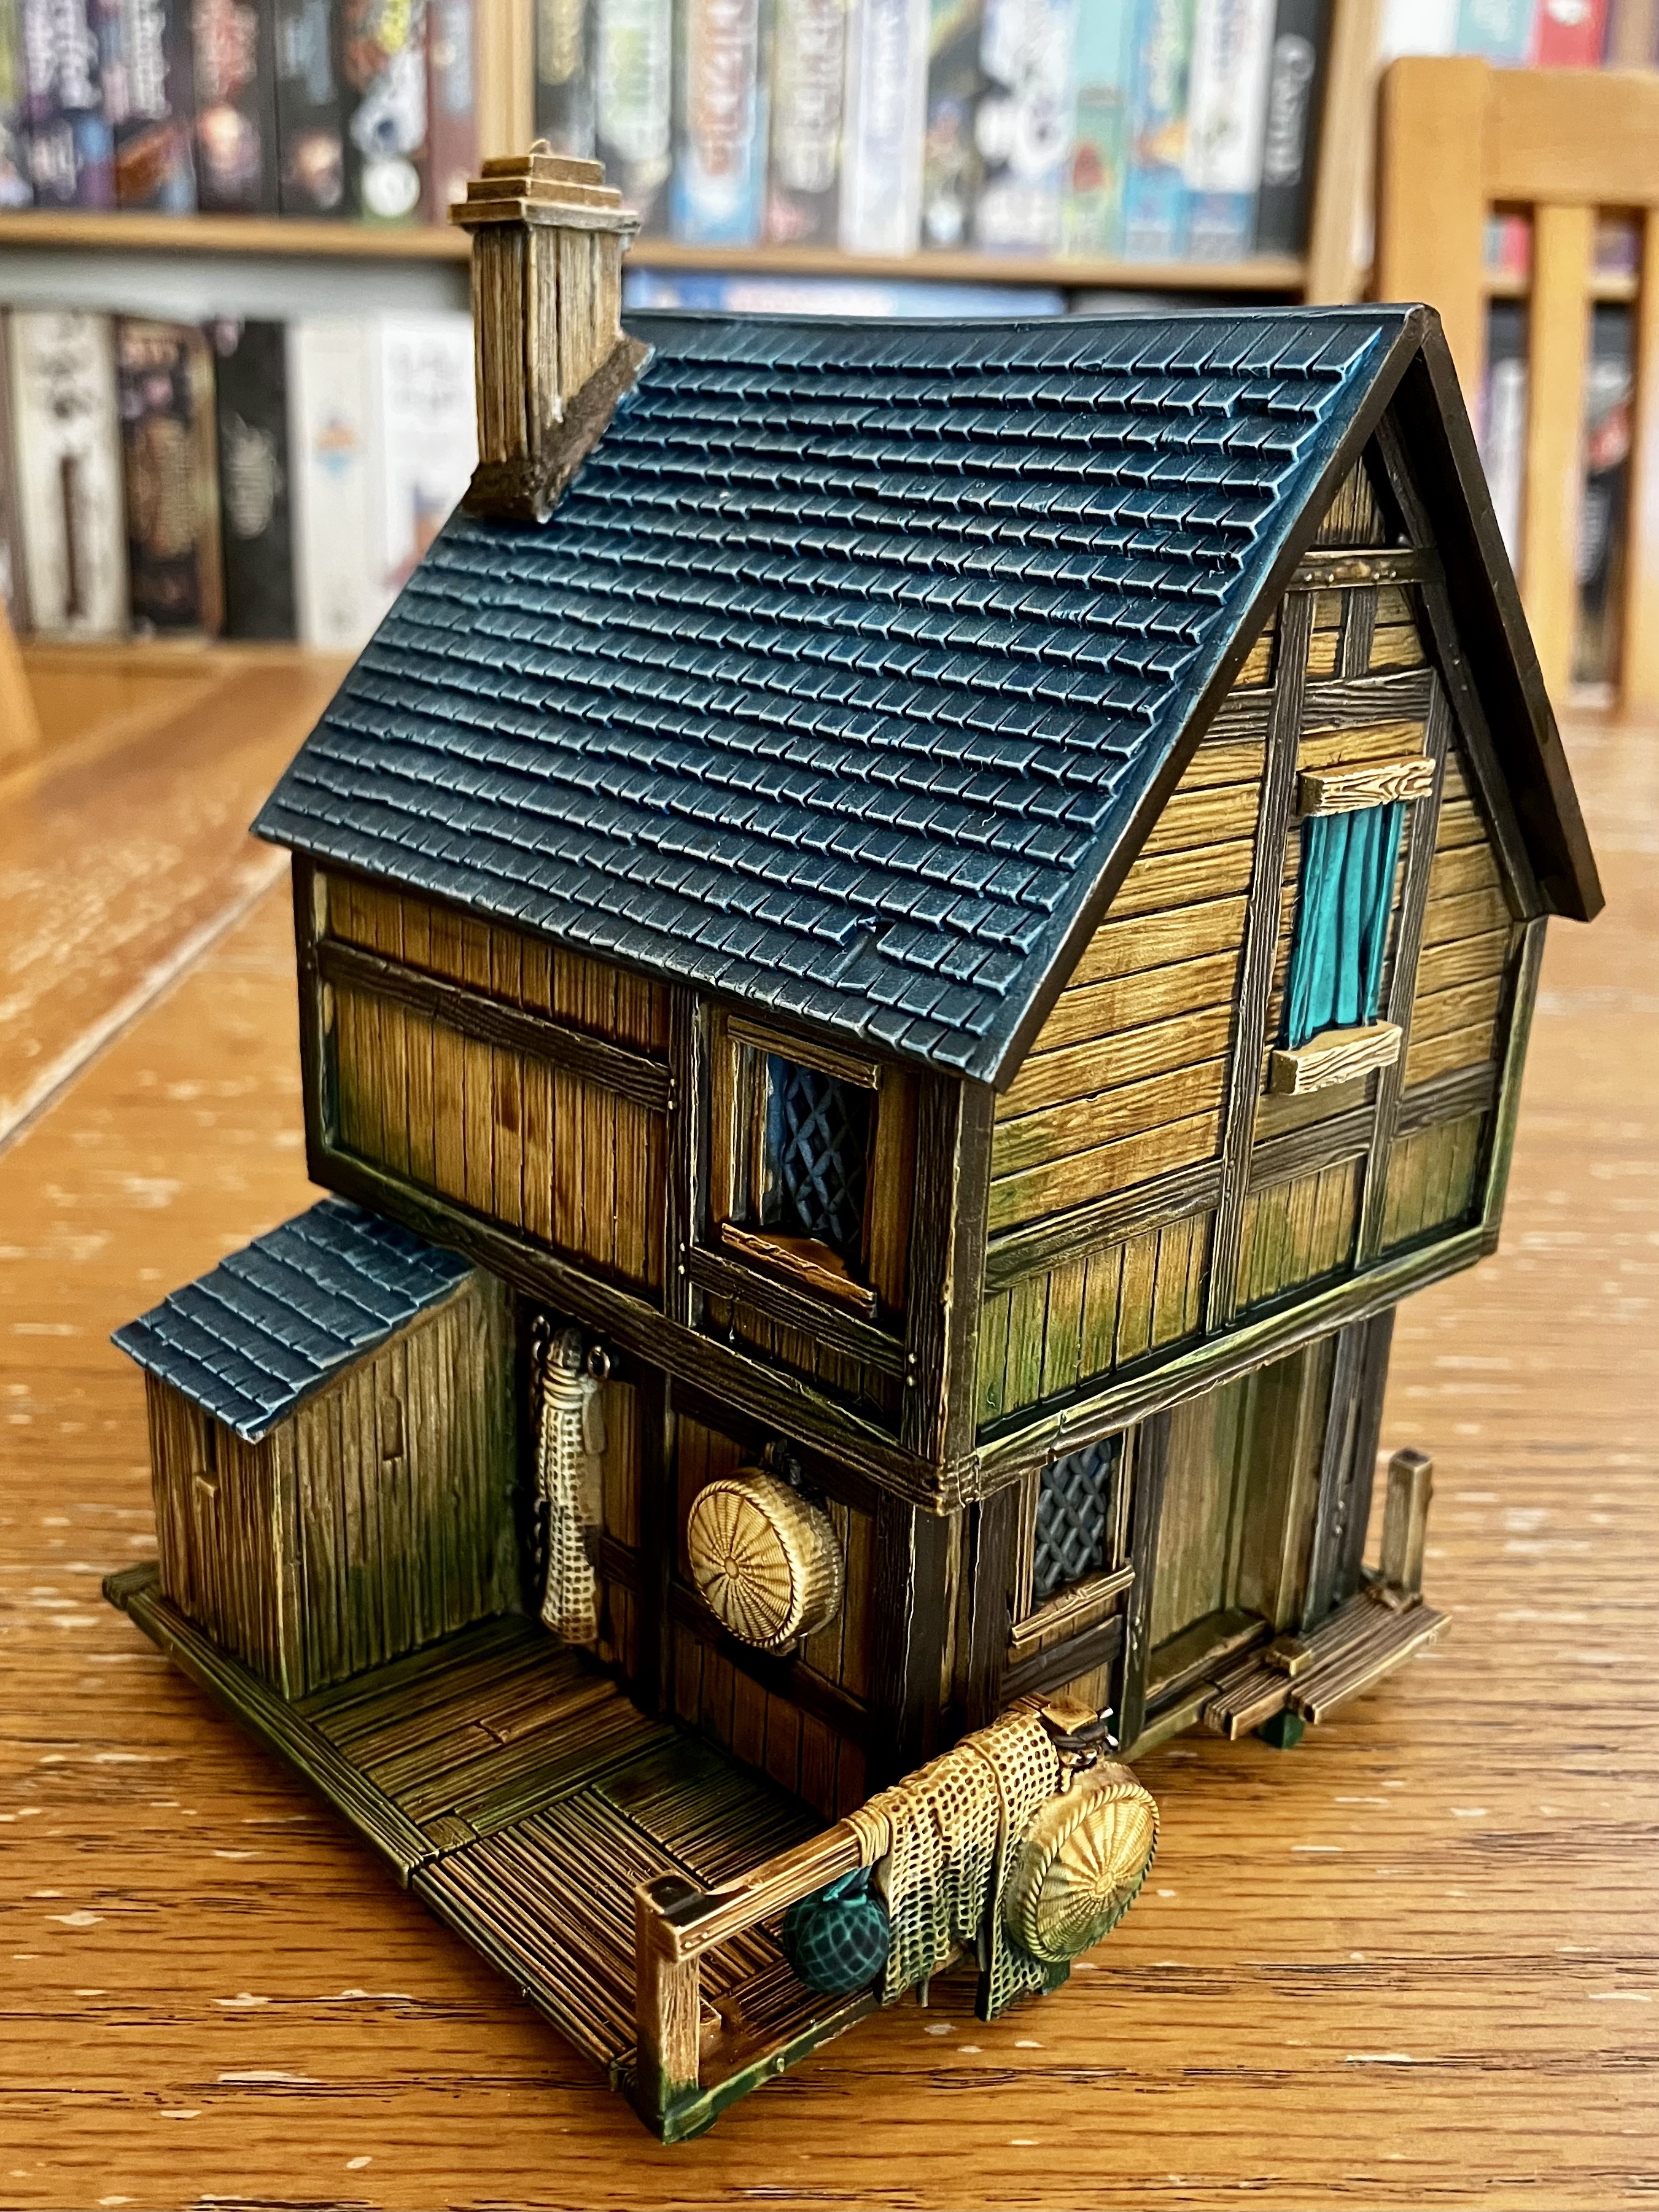
Four LakeTown houses finished!
Really pleased to have got to this stage. It’s given me a real boost and shows me that the work I’ve put in will pay off over a larger table. Admittedly, these are all the very textured plastic GW kits – but I know the weathering, details and little pops of lighting will tie all the other buildings together.
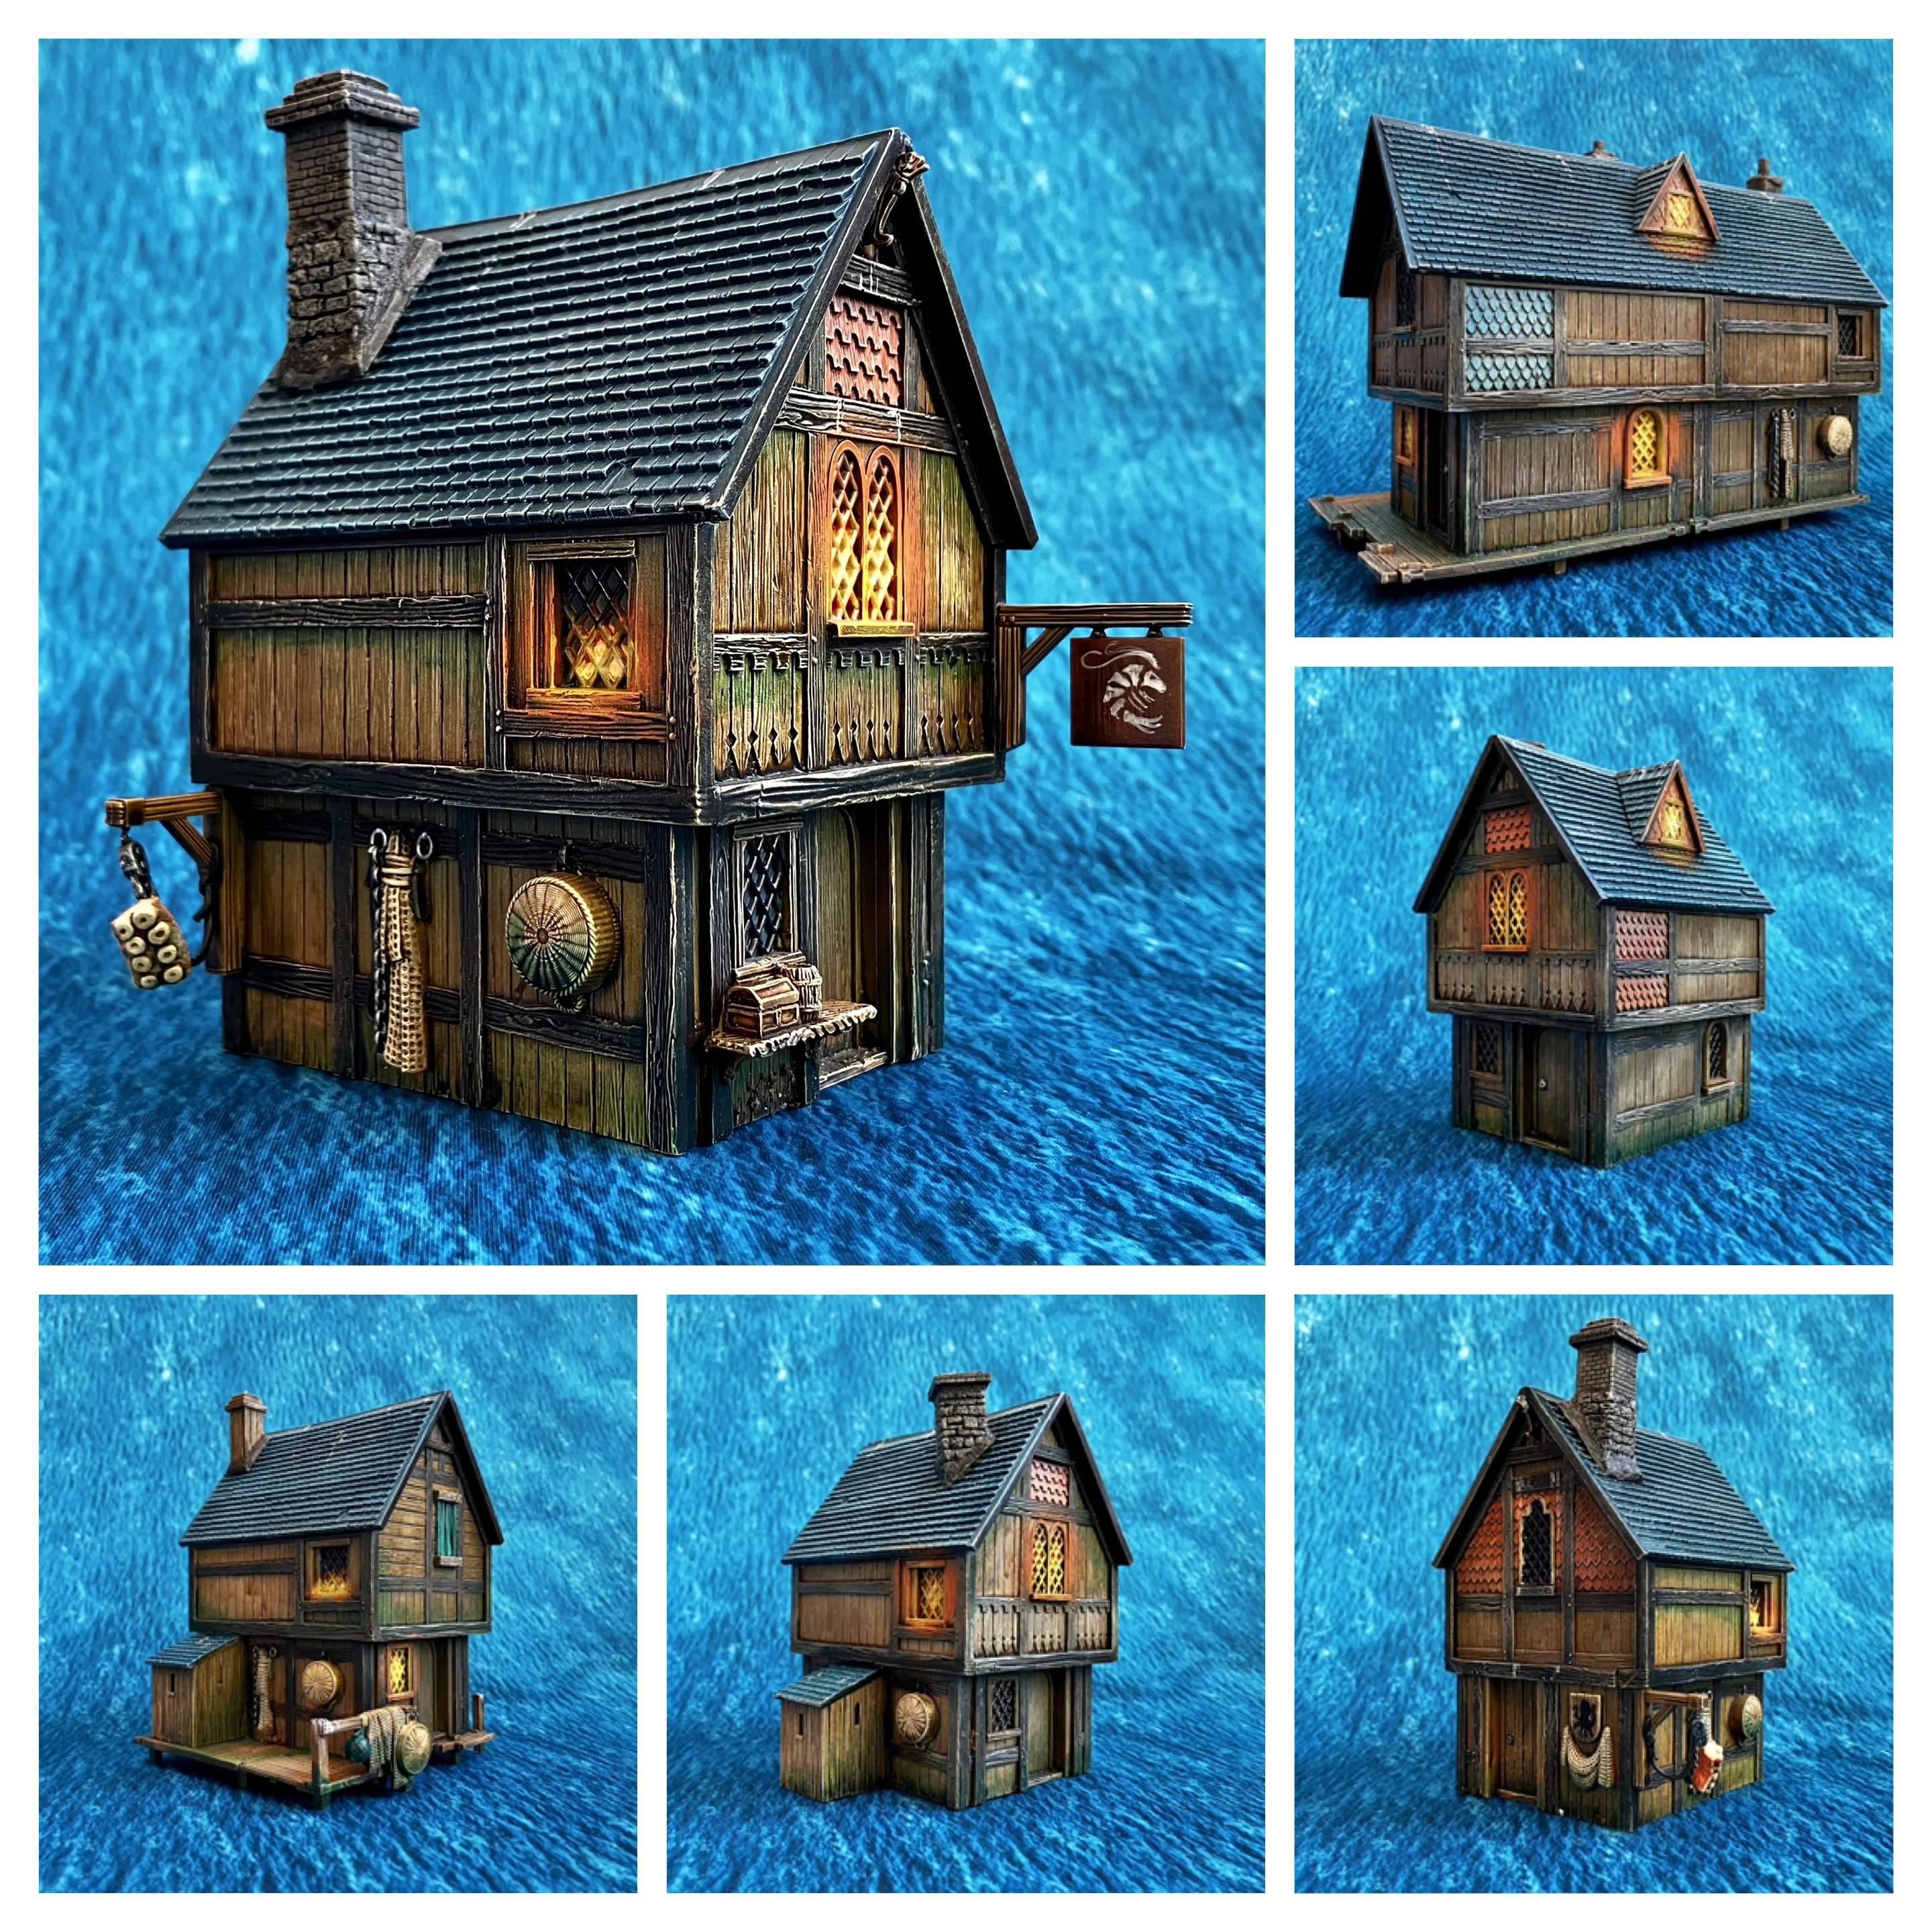 Collage
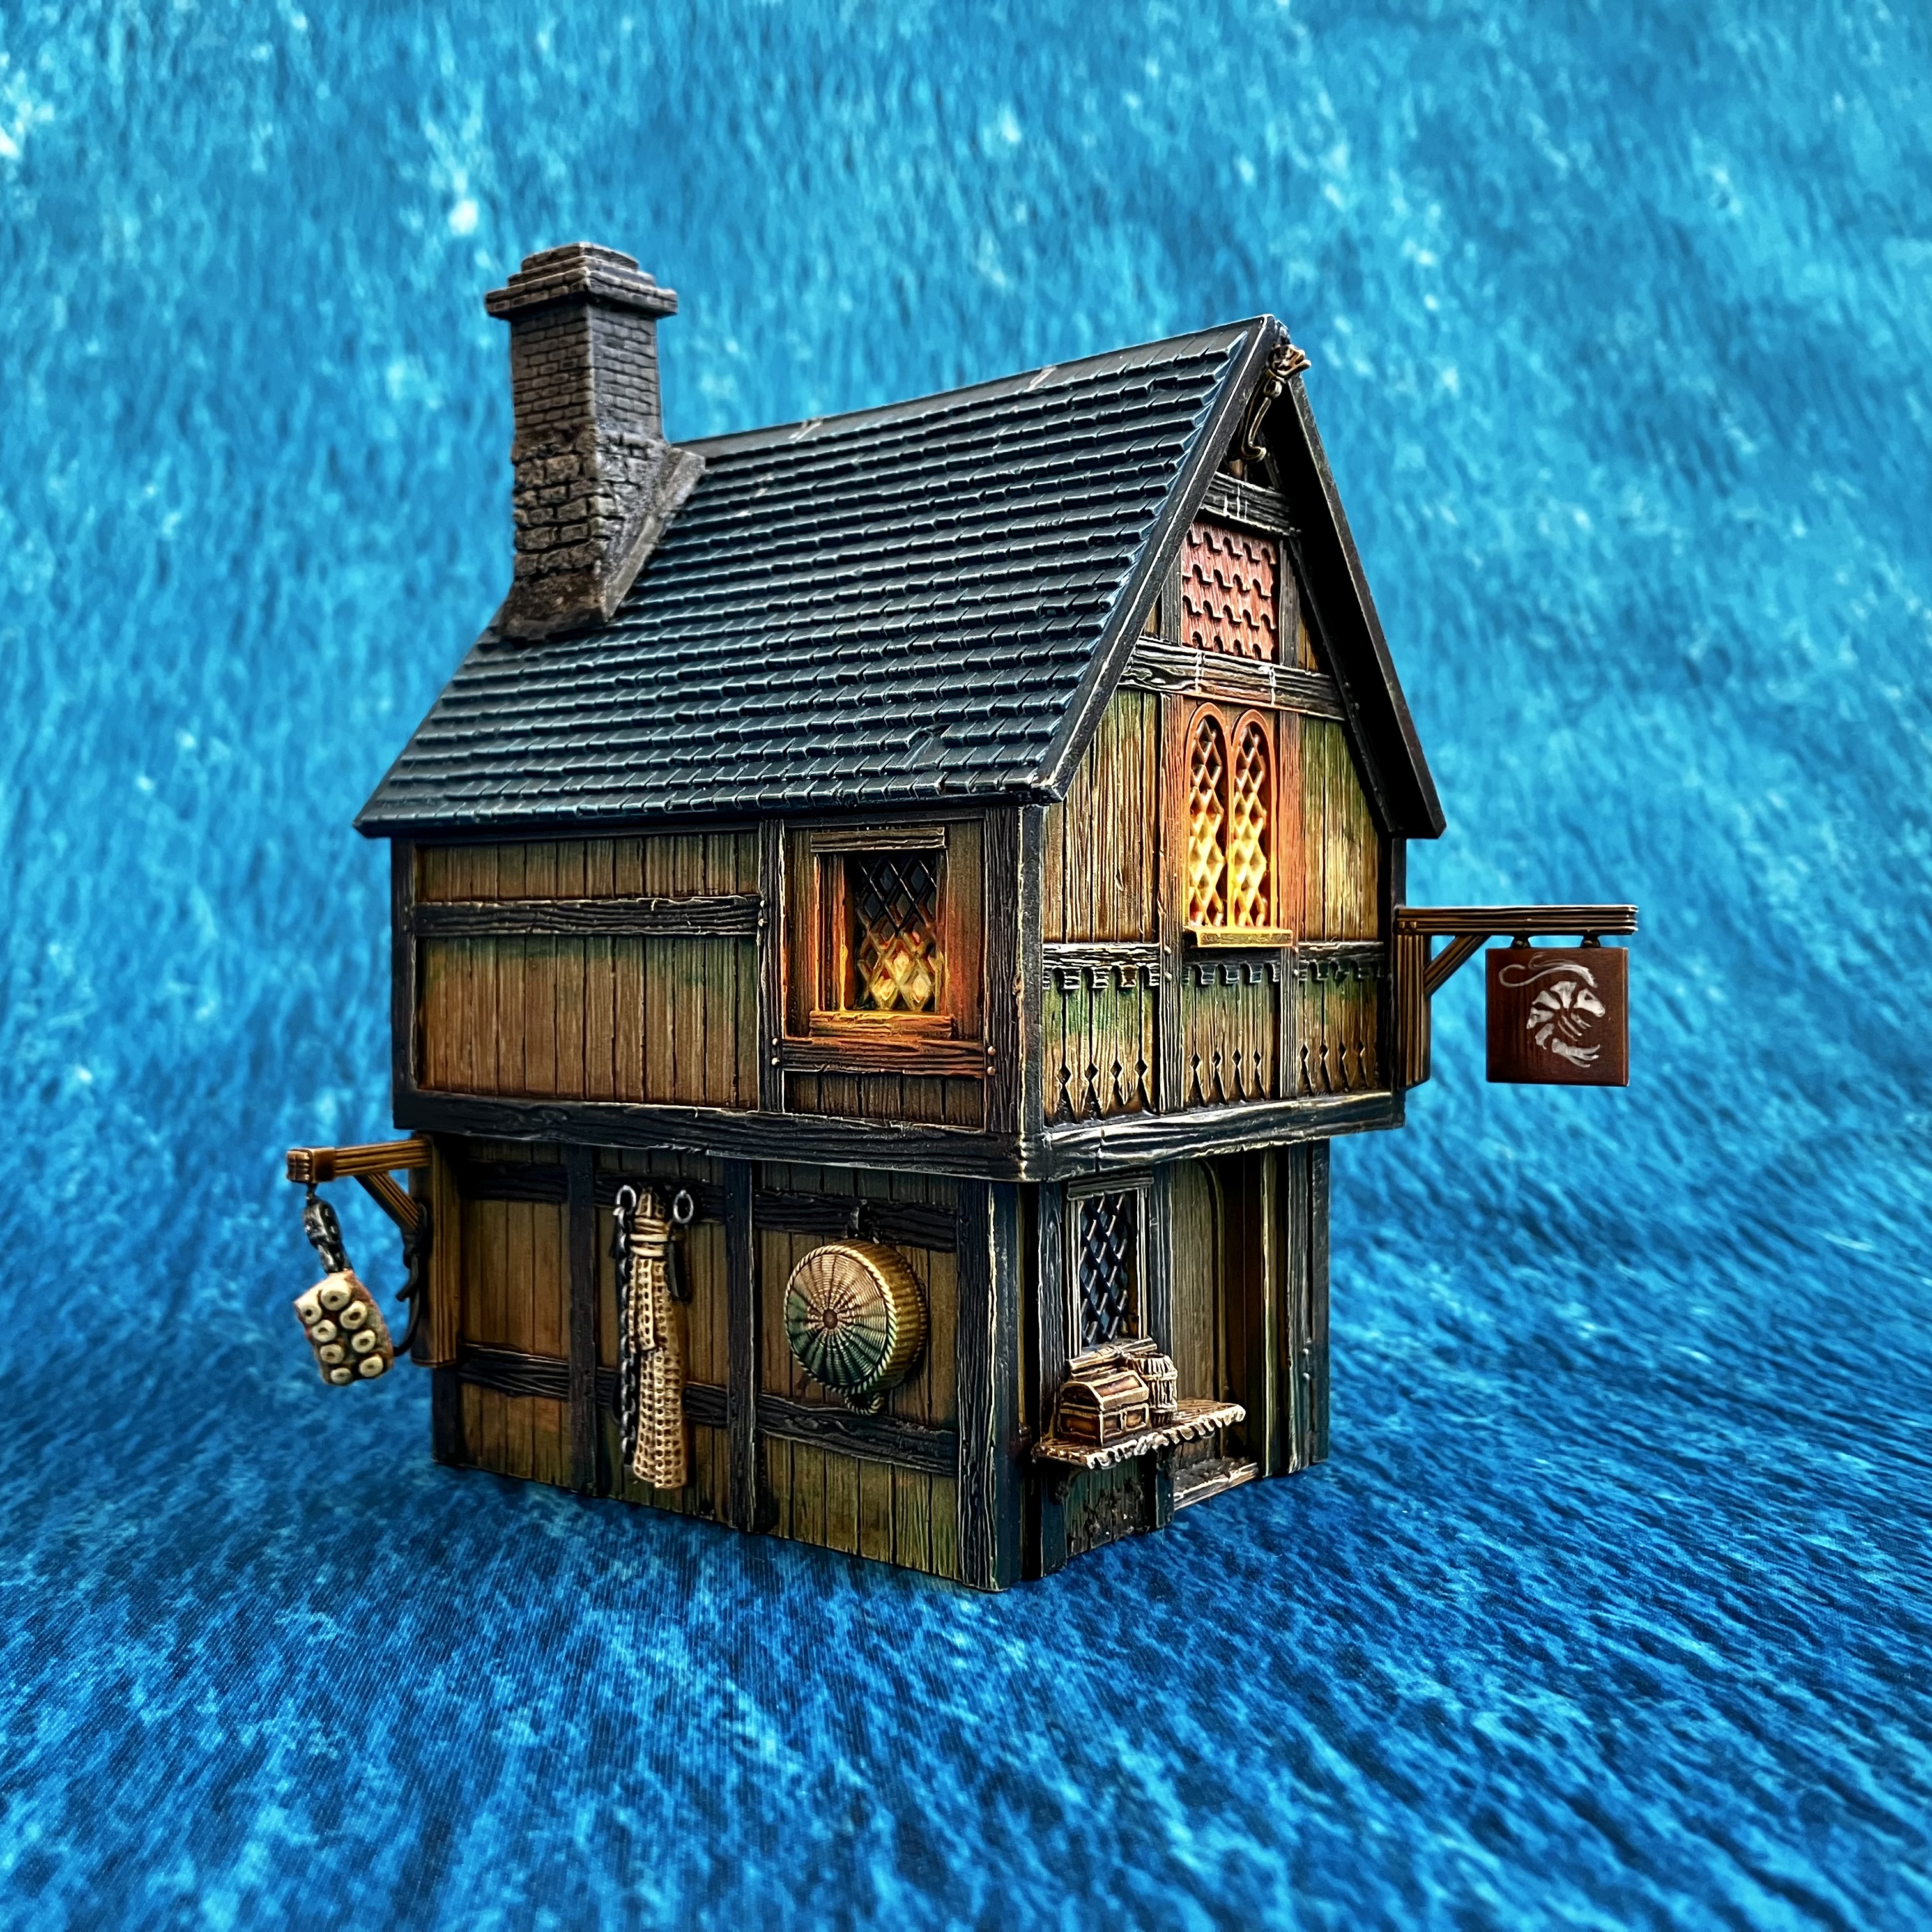 The Prawncing Pony ?
Method was the same as listed previously, only here you can see some extra details:
- Bird poo. Thinned Wraithbone, with a centre of Ratling Grime
- Lighting glow. Light drybrush of Trollslayer orange. Light drybrush of Averland Sunset. Light drybrush of Wraithbone. Glaze with Iyanden Yellow.
- Leaded windows. Black sharpie over the leading.
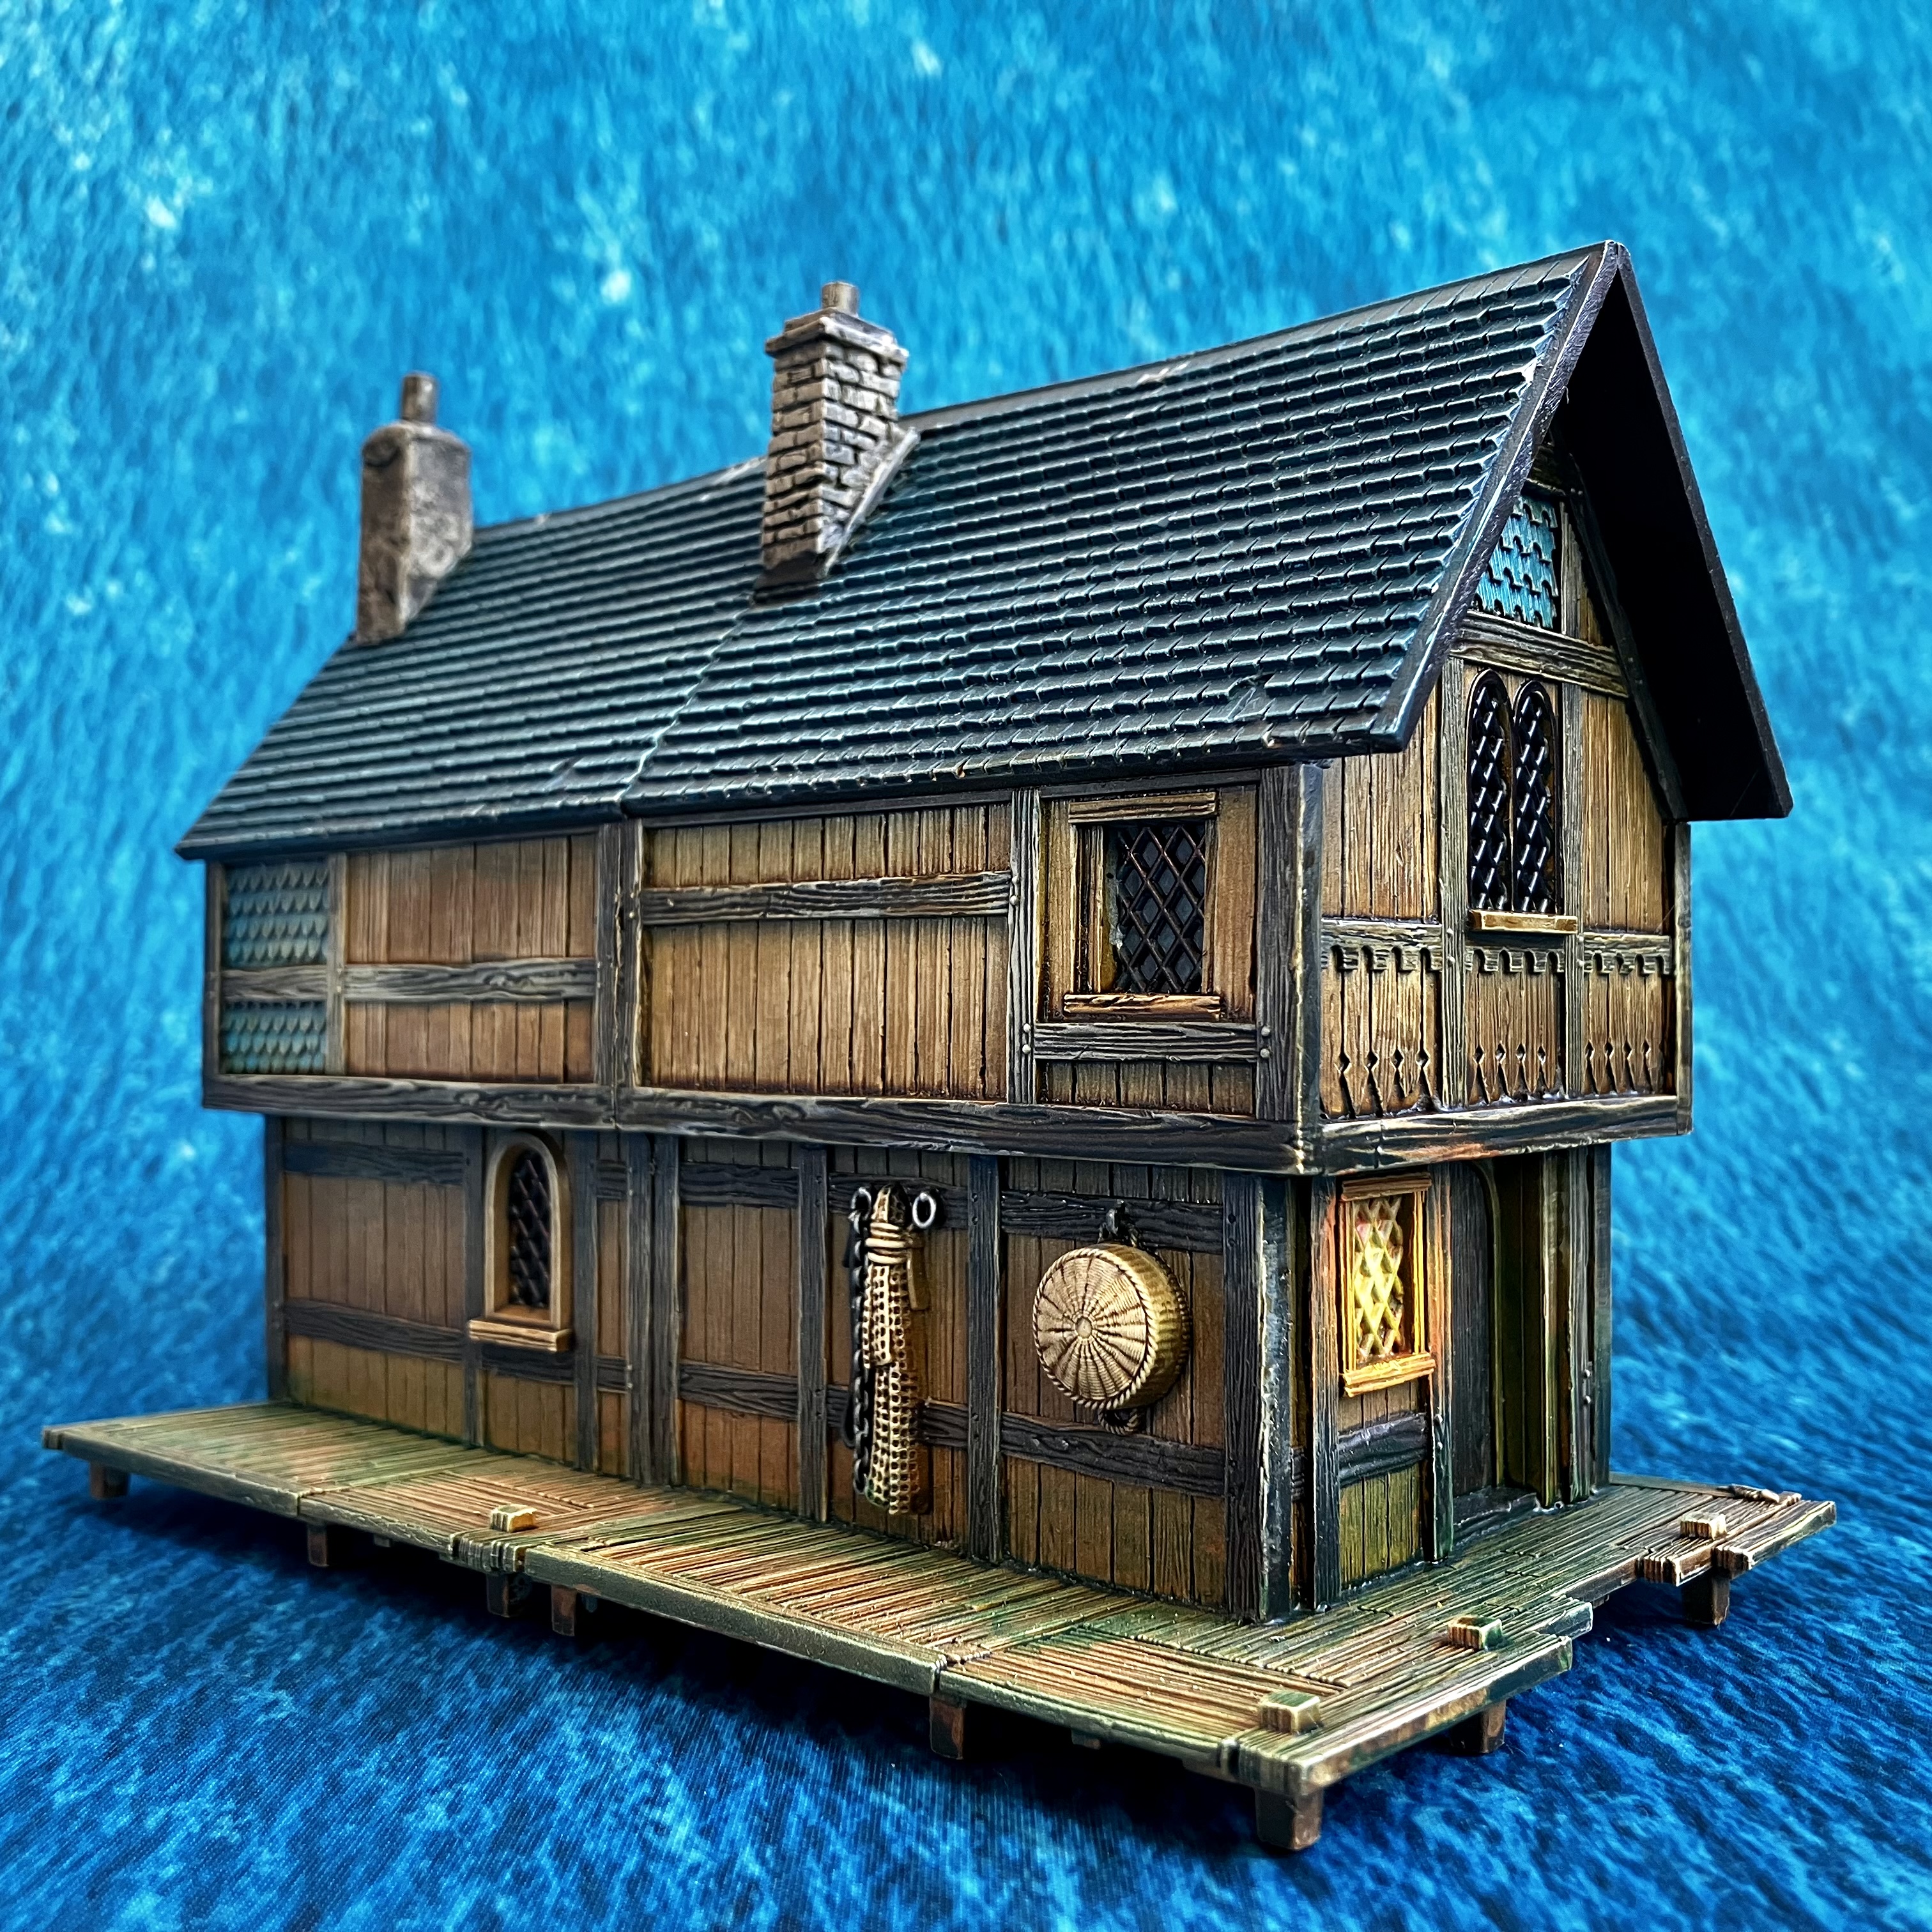
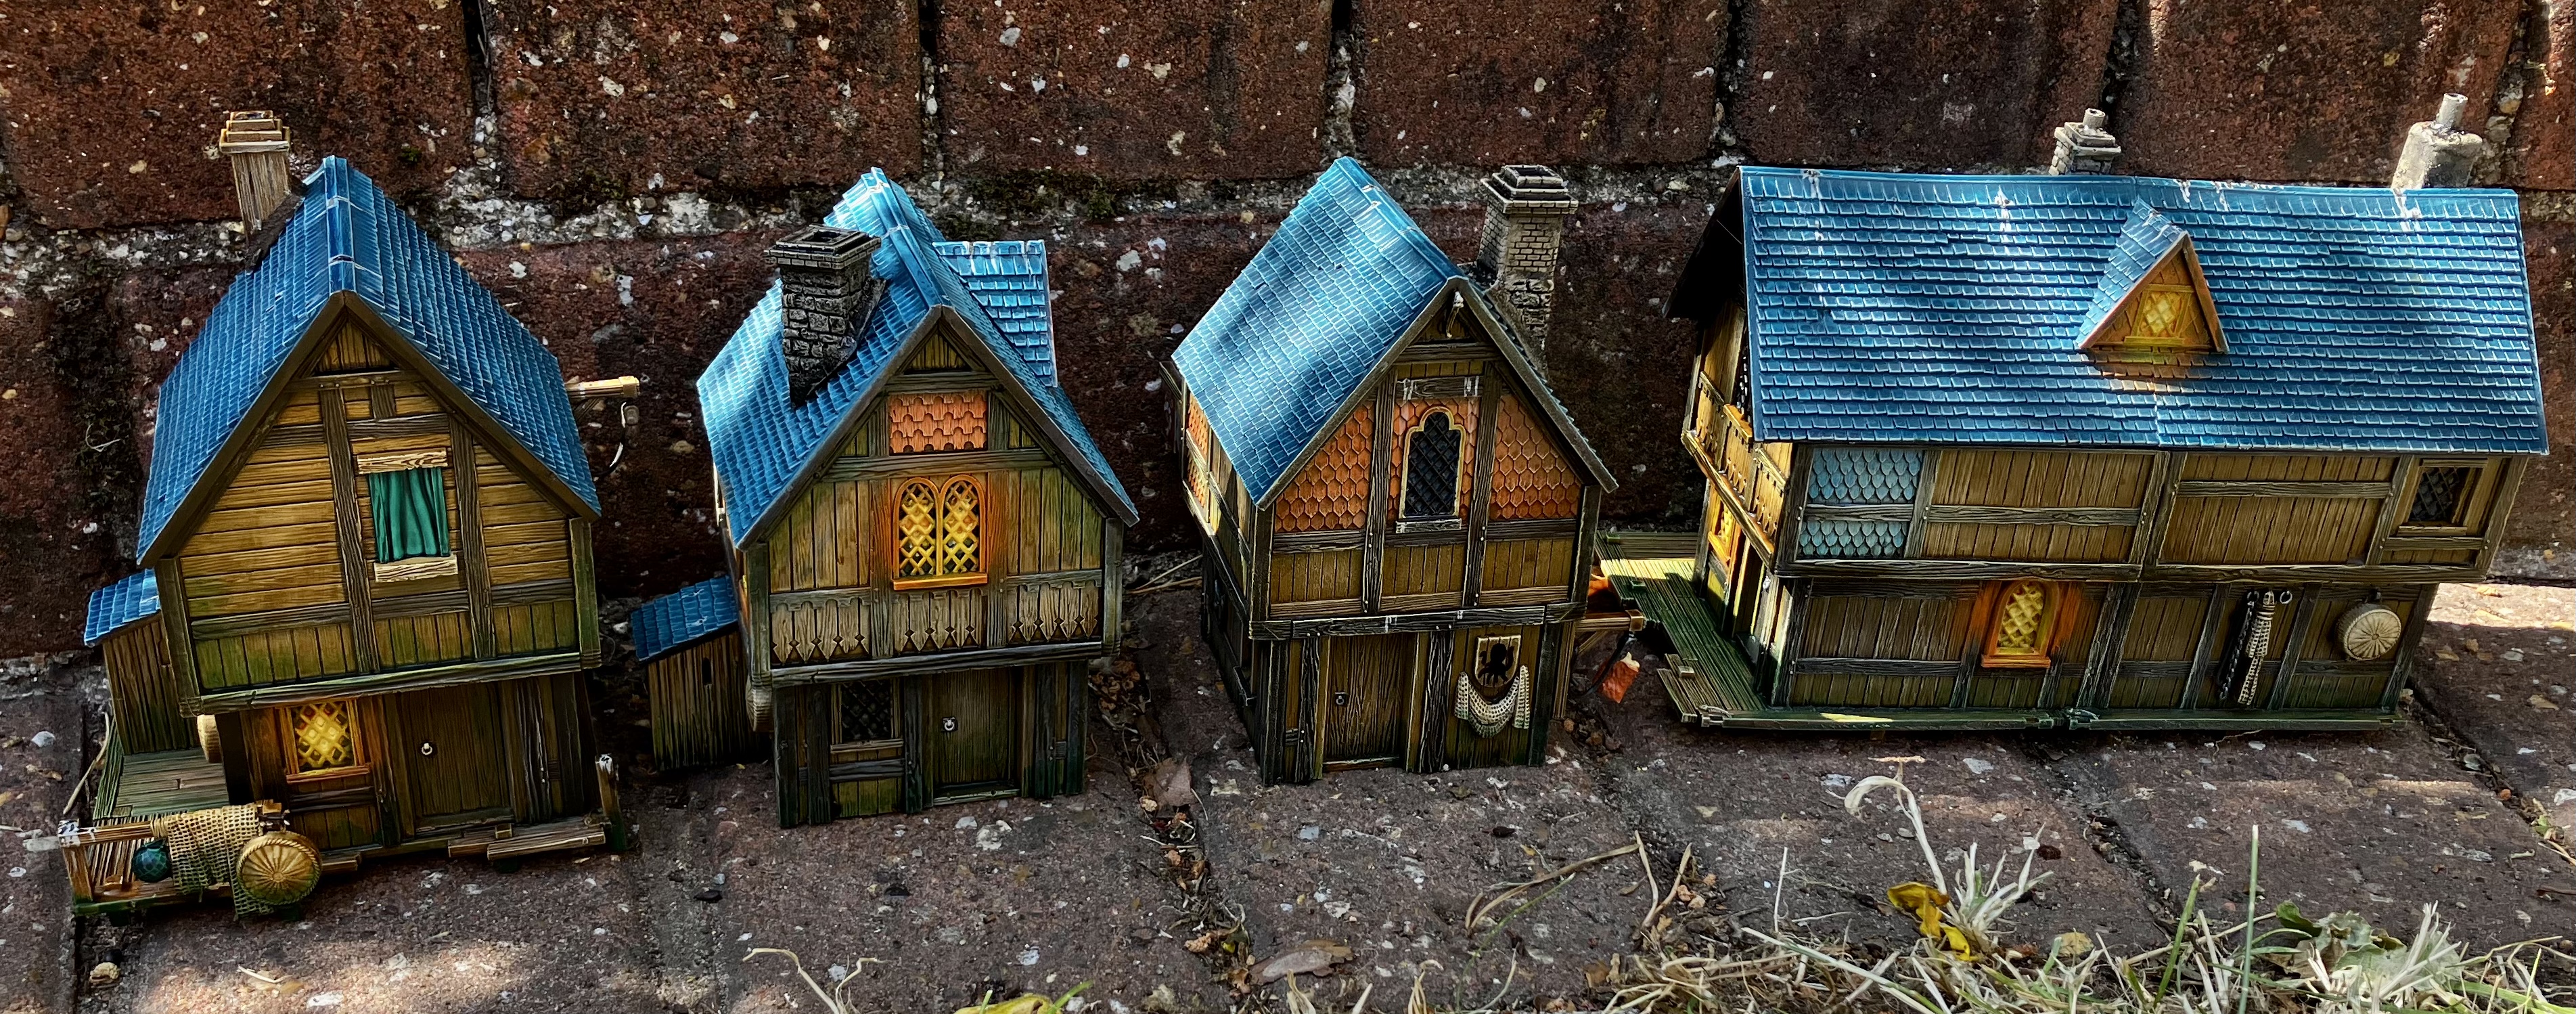
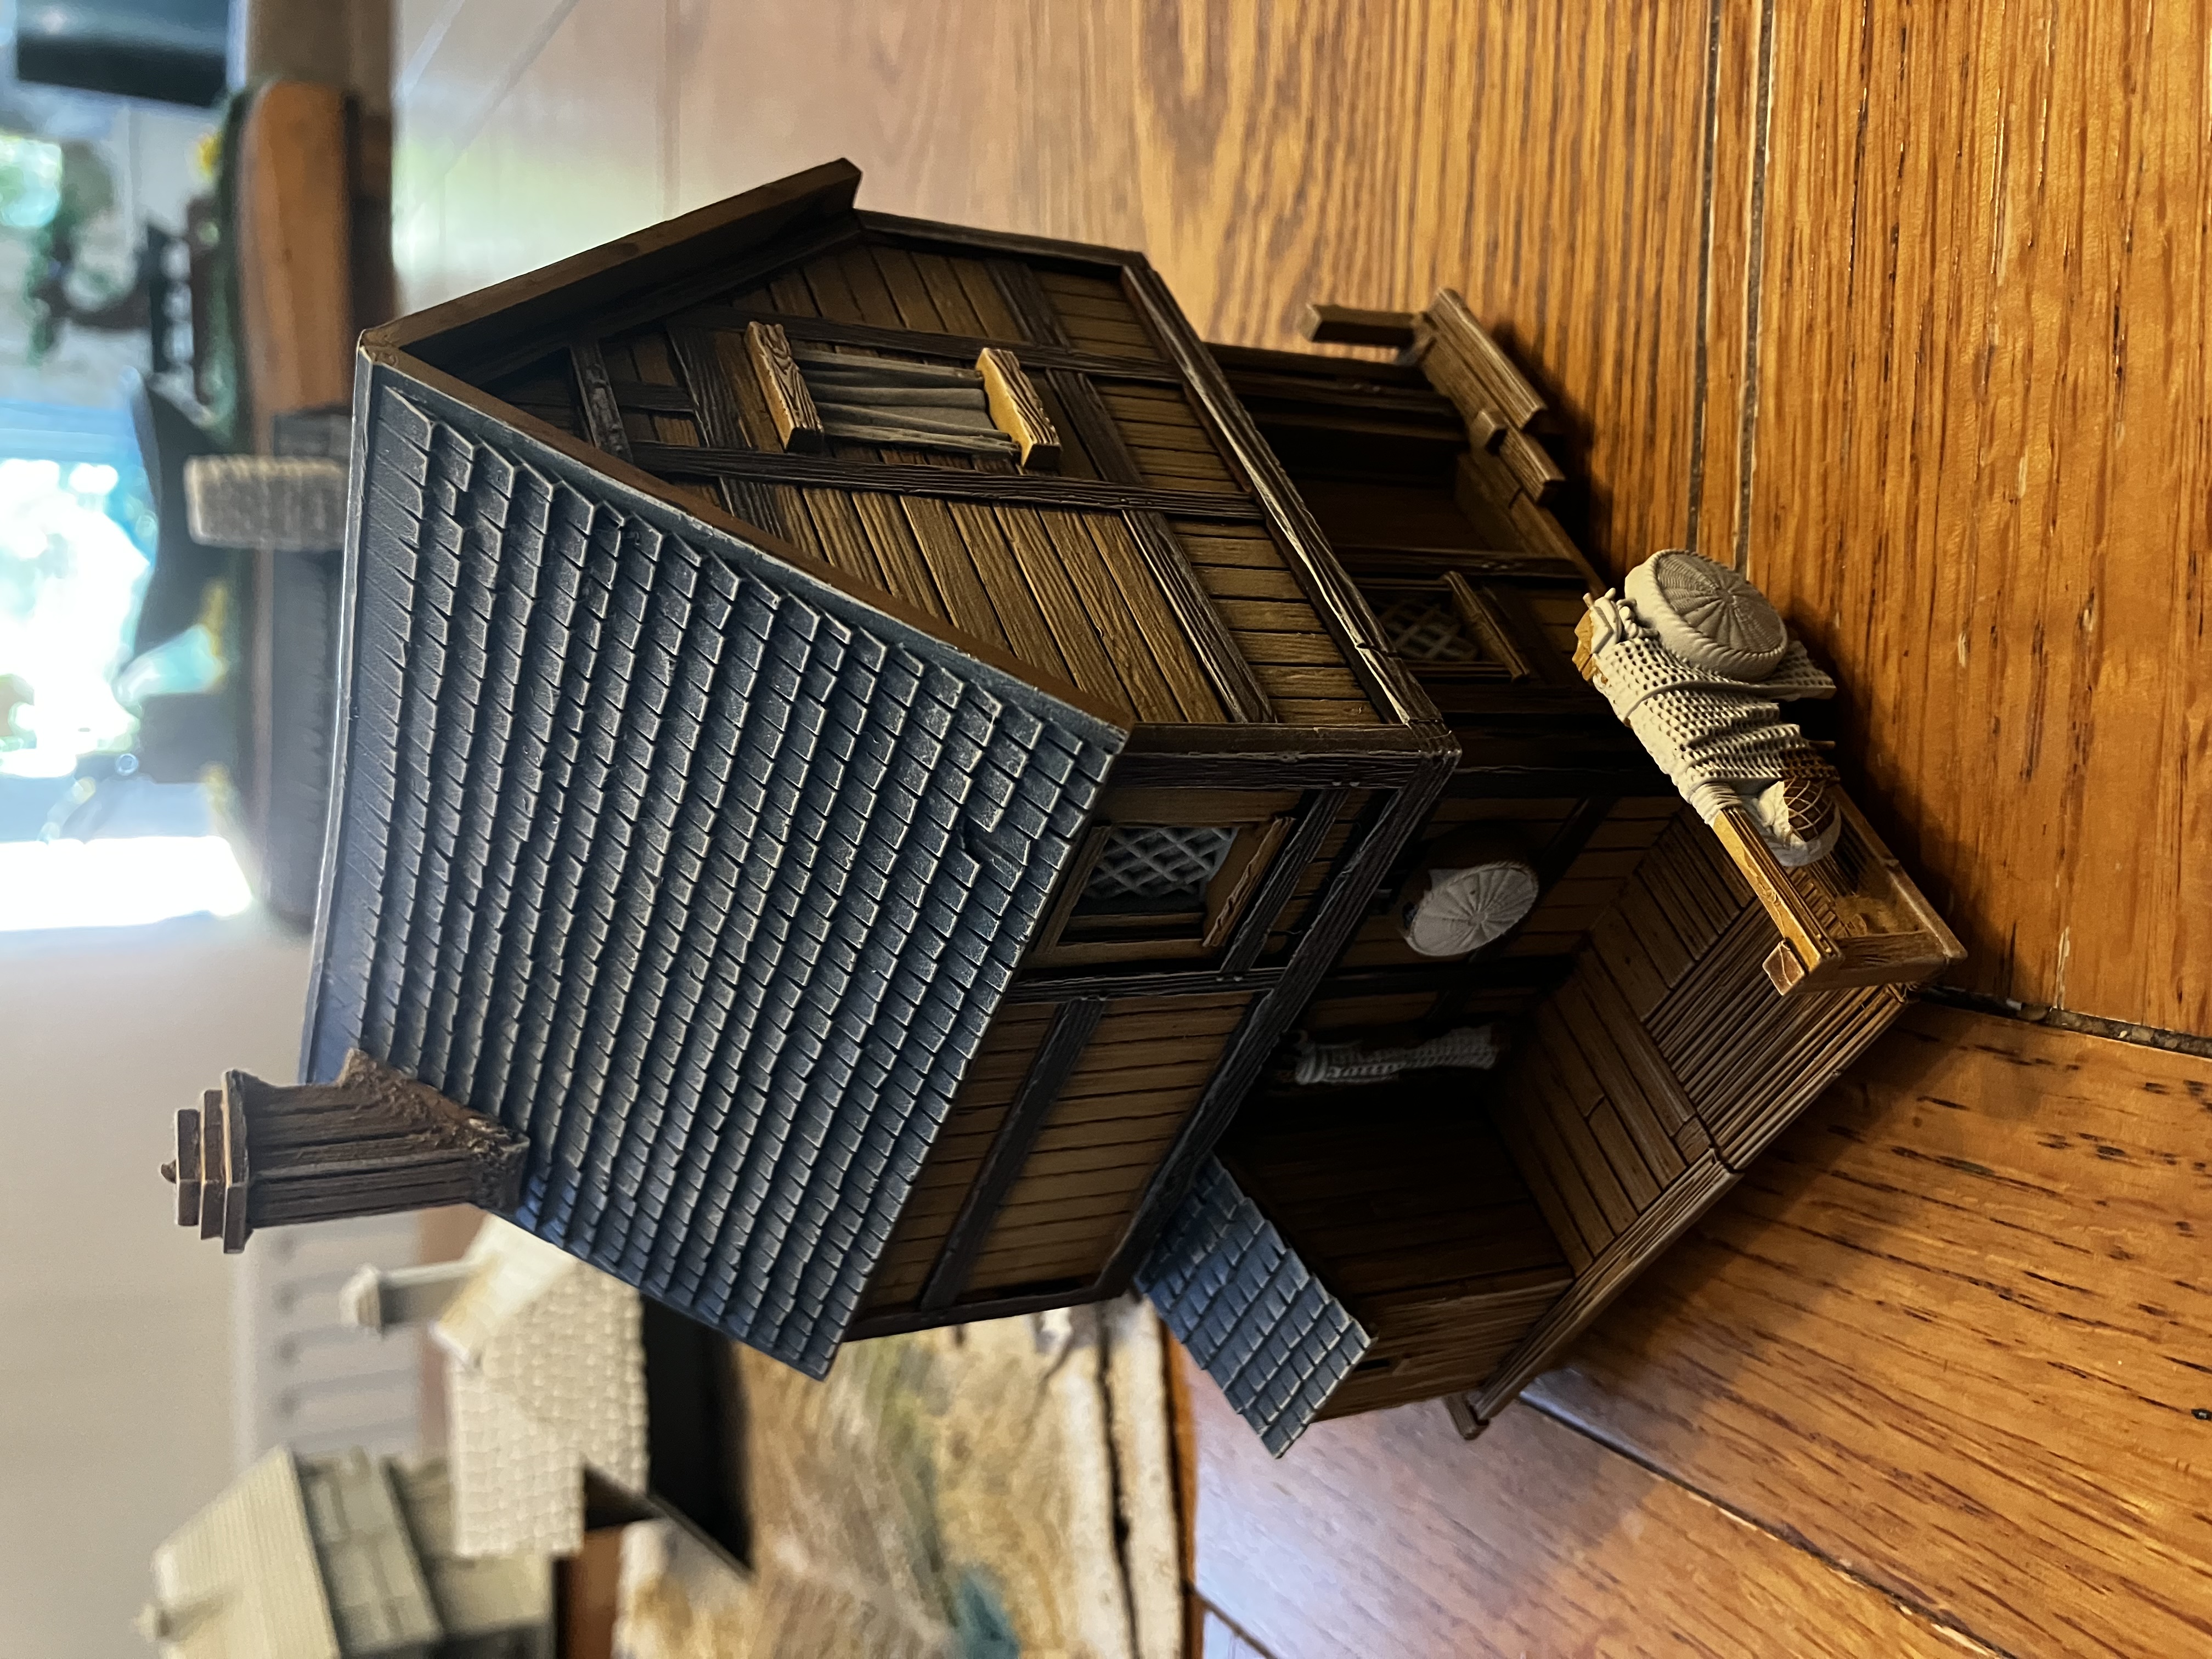
 A combined, larger house
Hobby outdoors!
Next post will contain some good close up shots and steps I e taken, but I’ve now got 4 houses all completely painted, weathered and (if I do say so myself, looking lovely)
A finished barge
Here’s a finished barge. It’s a resin piece from GrandManner. Painted using Snakebite Leather contrast and weathered with Warp Lightning for algae. I added a little freehand scroll on the prow to make it fit the world a little better.
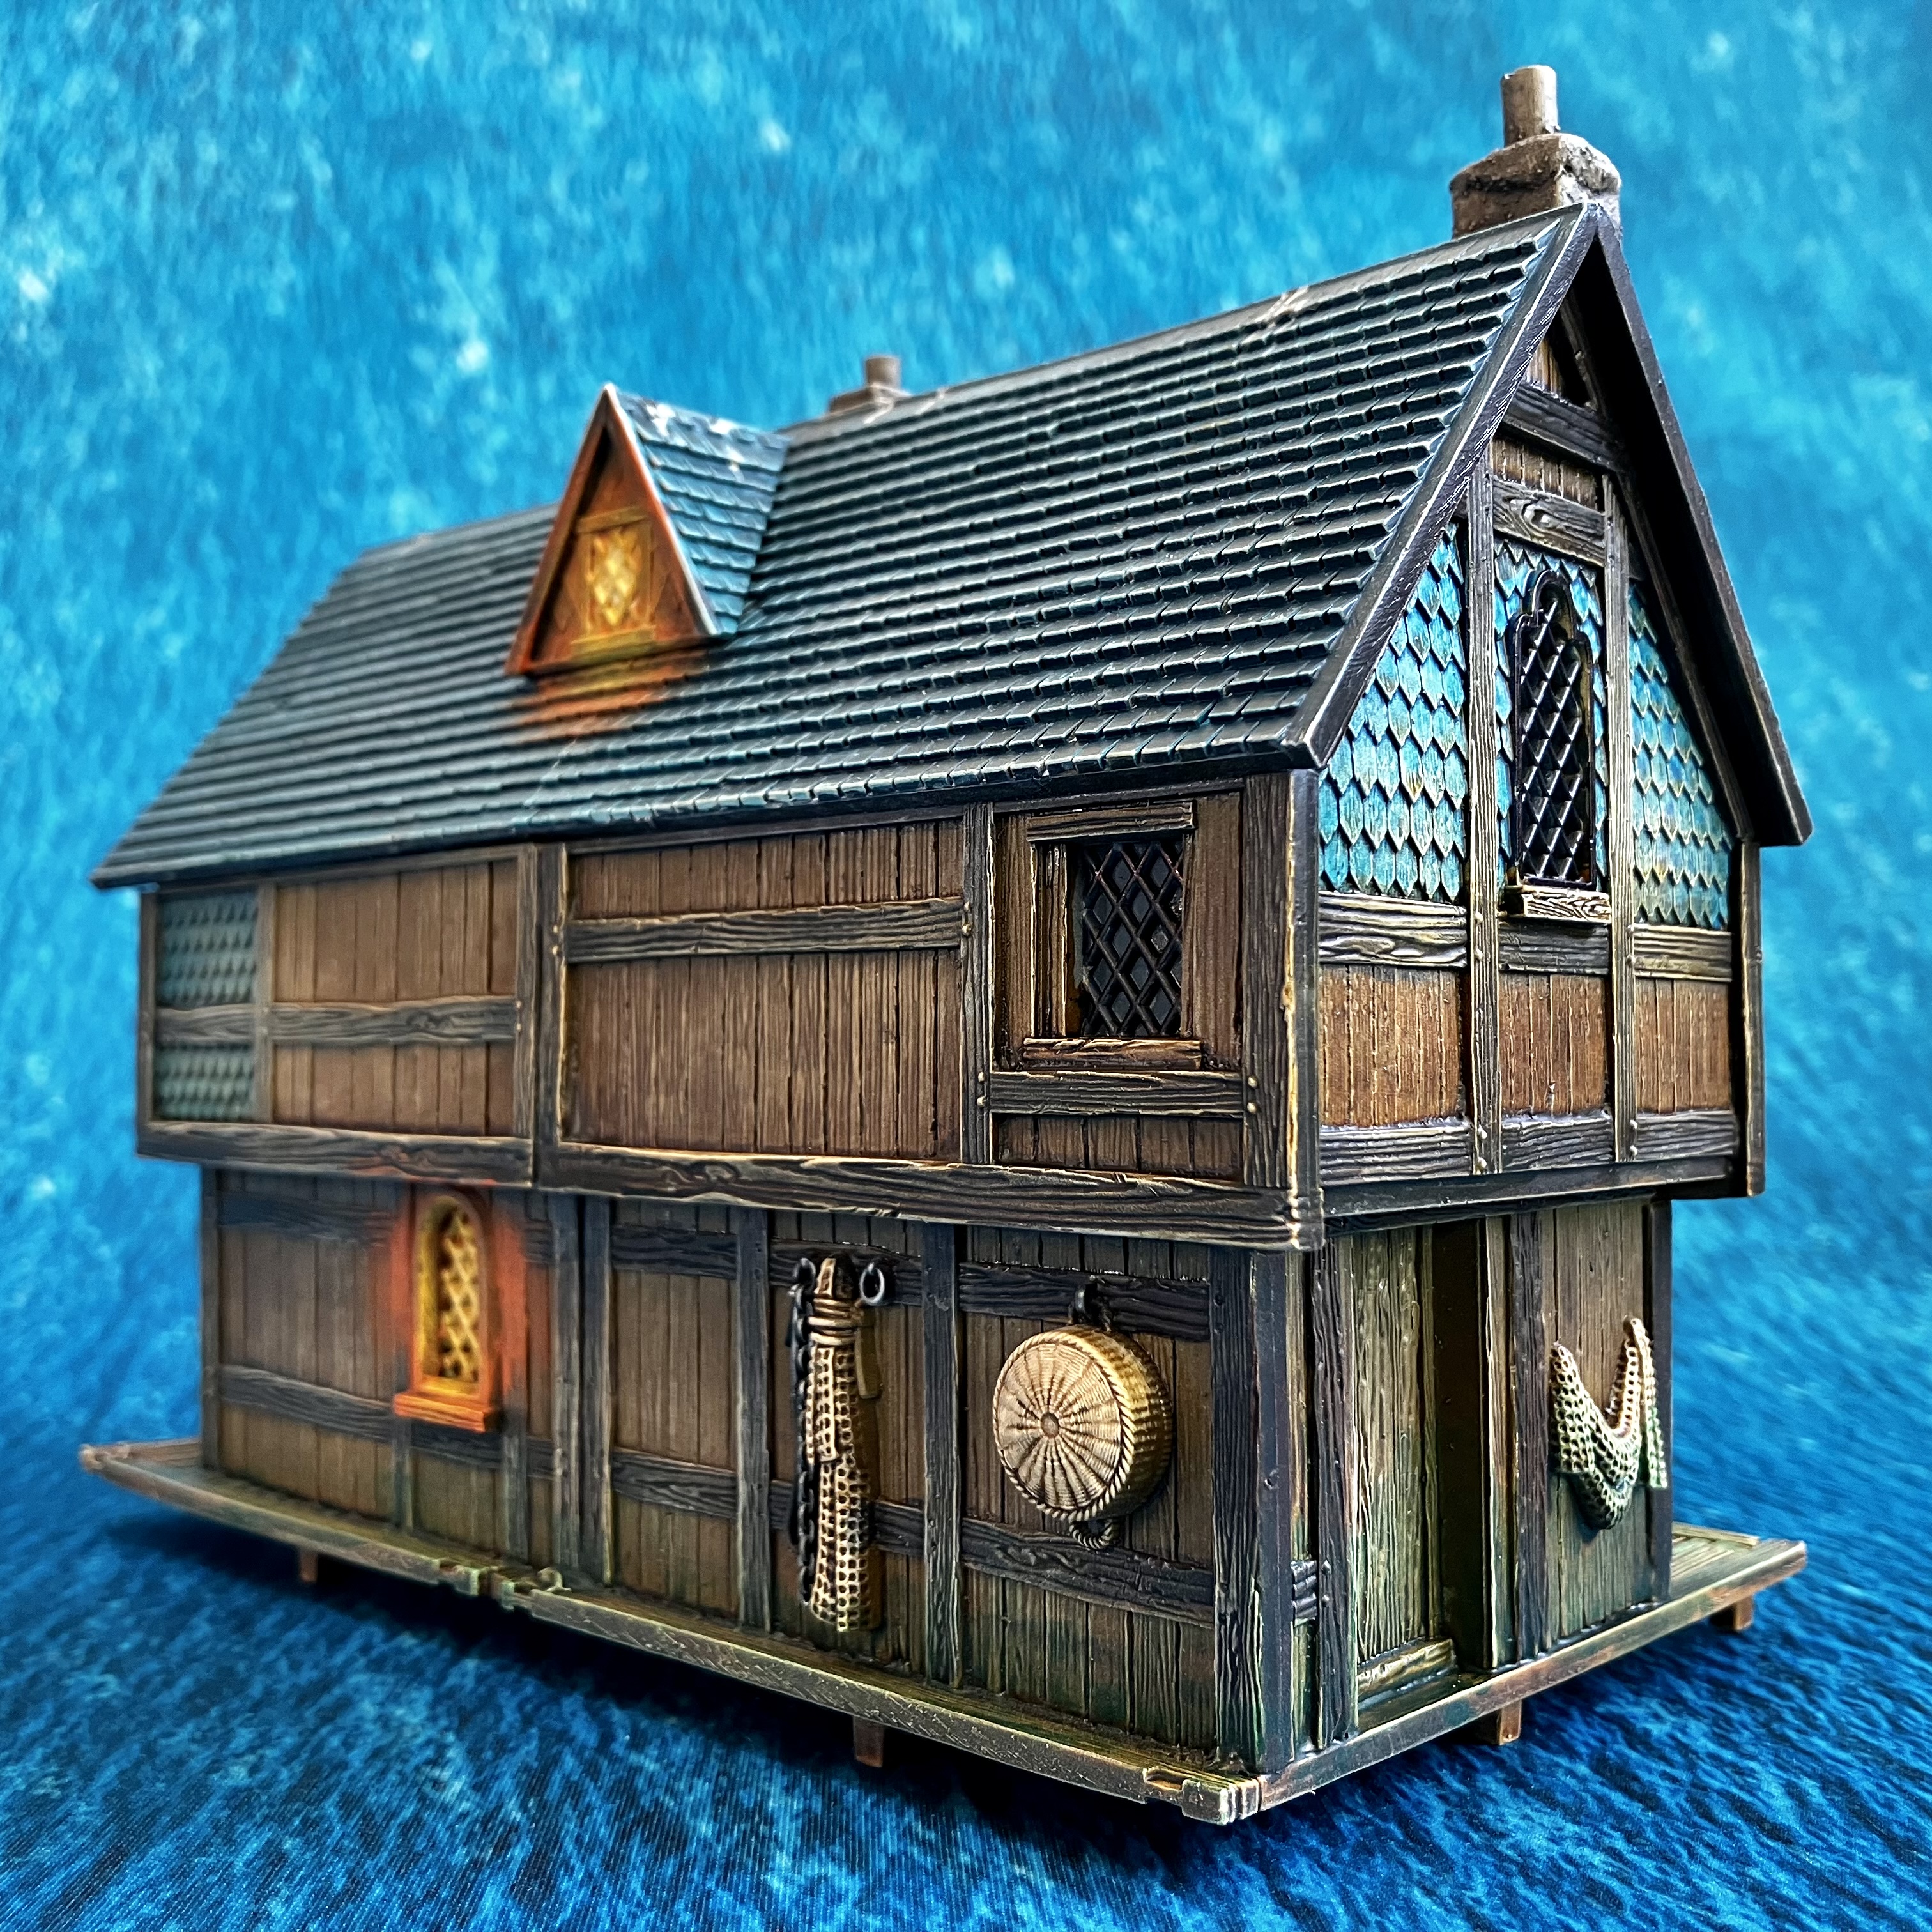
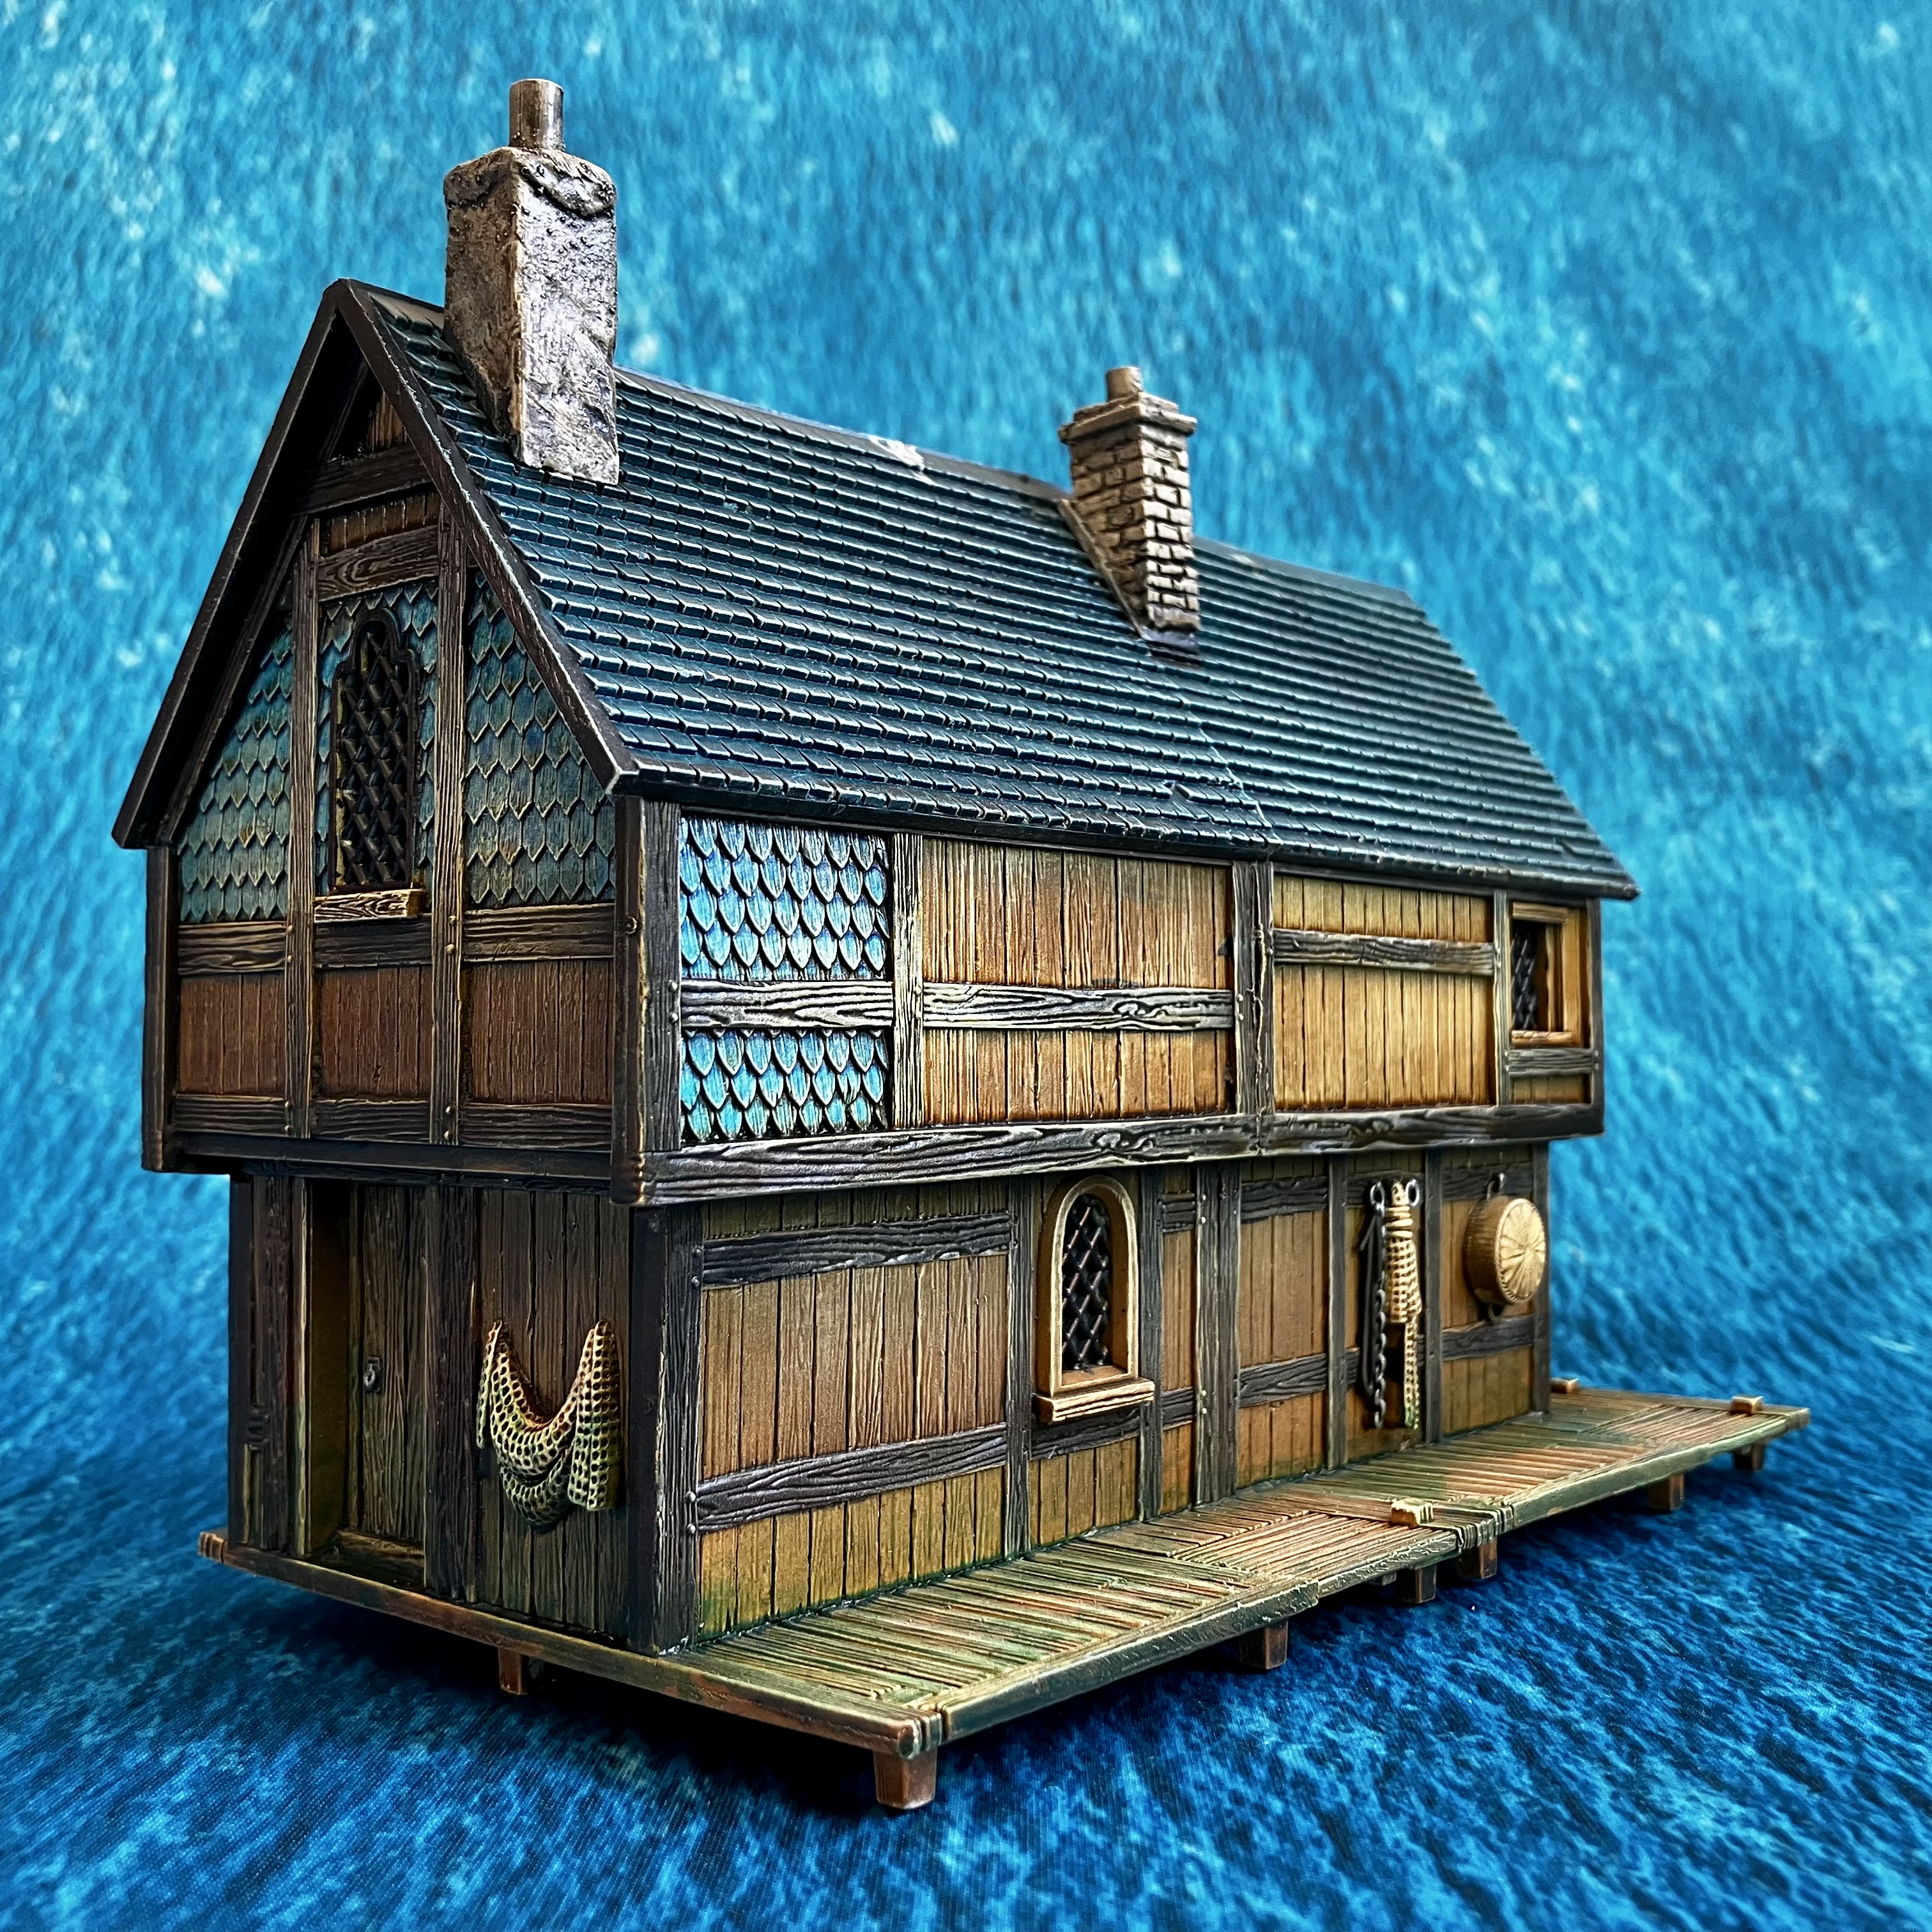
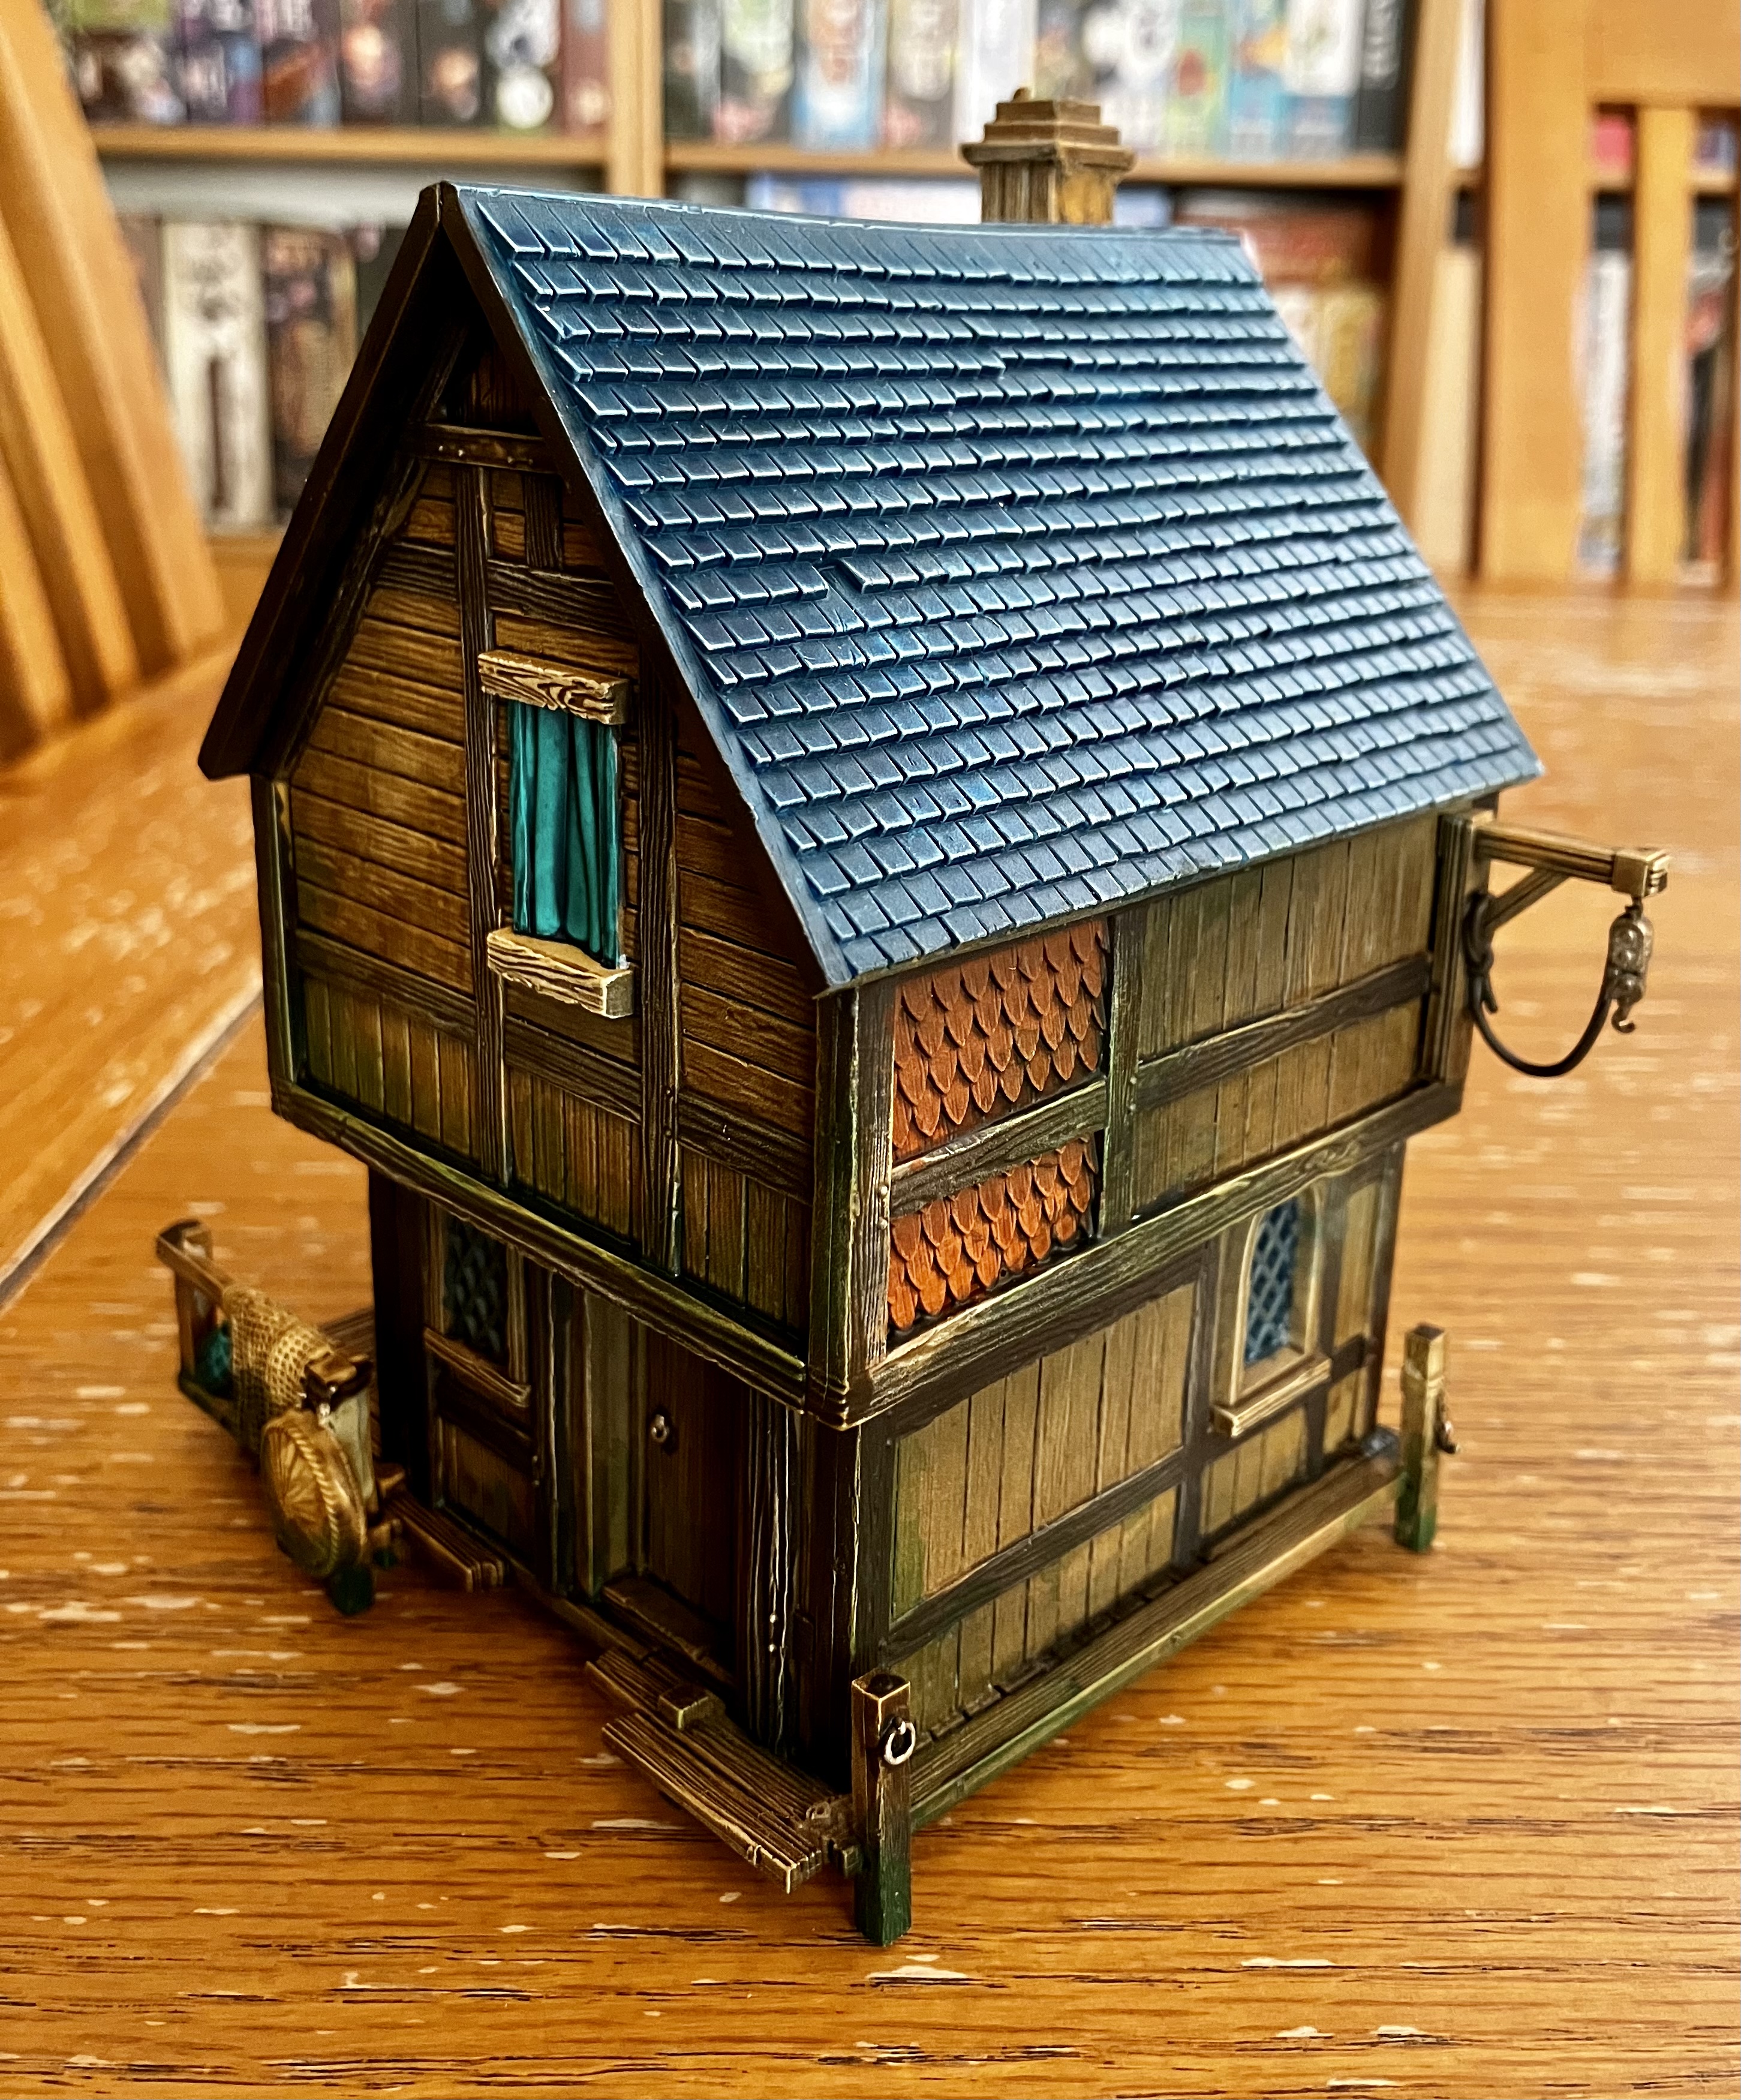
A finished LakeTown house
And here’s the first 99% finished piece (I’ll keep tinkering as the other buildings come along).
Really pleased that my simple techniques of zenith, contrast and selective drybrushing have come together so well.
You can see I’ve picked out a few details here and there, but have kept the piece very tonal and subdued.
Paints used:
- Snakebite Leather (wood)
- Cygor Brown (dark wood, ropes)
- Incubi darkness (roof tiles)
- Wraithbone (drybrush all over, re base baskets and nets)
- Aethermatic Blue (roof tiles)
- Gryph-hound orange (side tiles)
- Skeleton horde thinned with Medium (all over wood work, nets and baskets)
- Aeldari Emerald – curtains and glass fishing float.
- Warp lightning (algae/mildew)
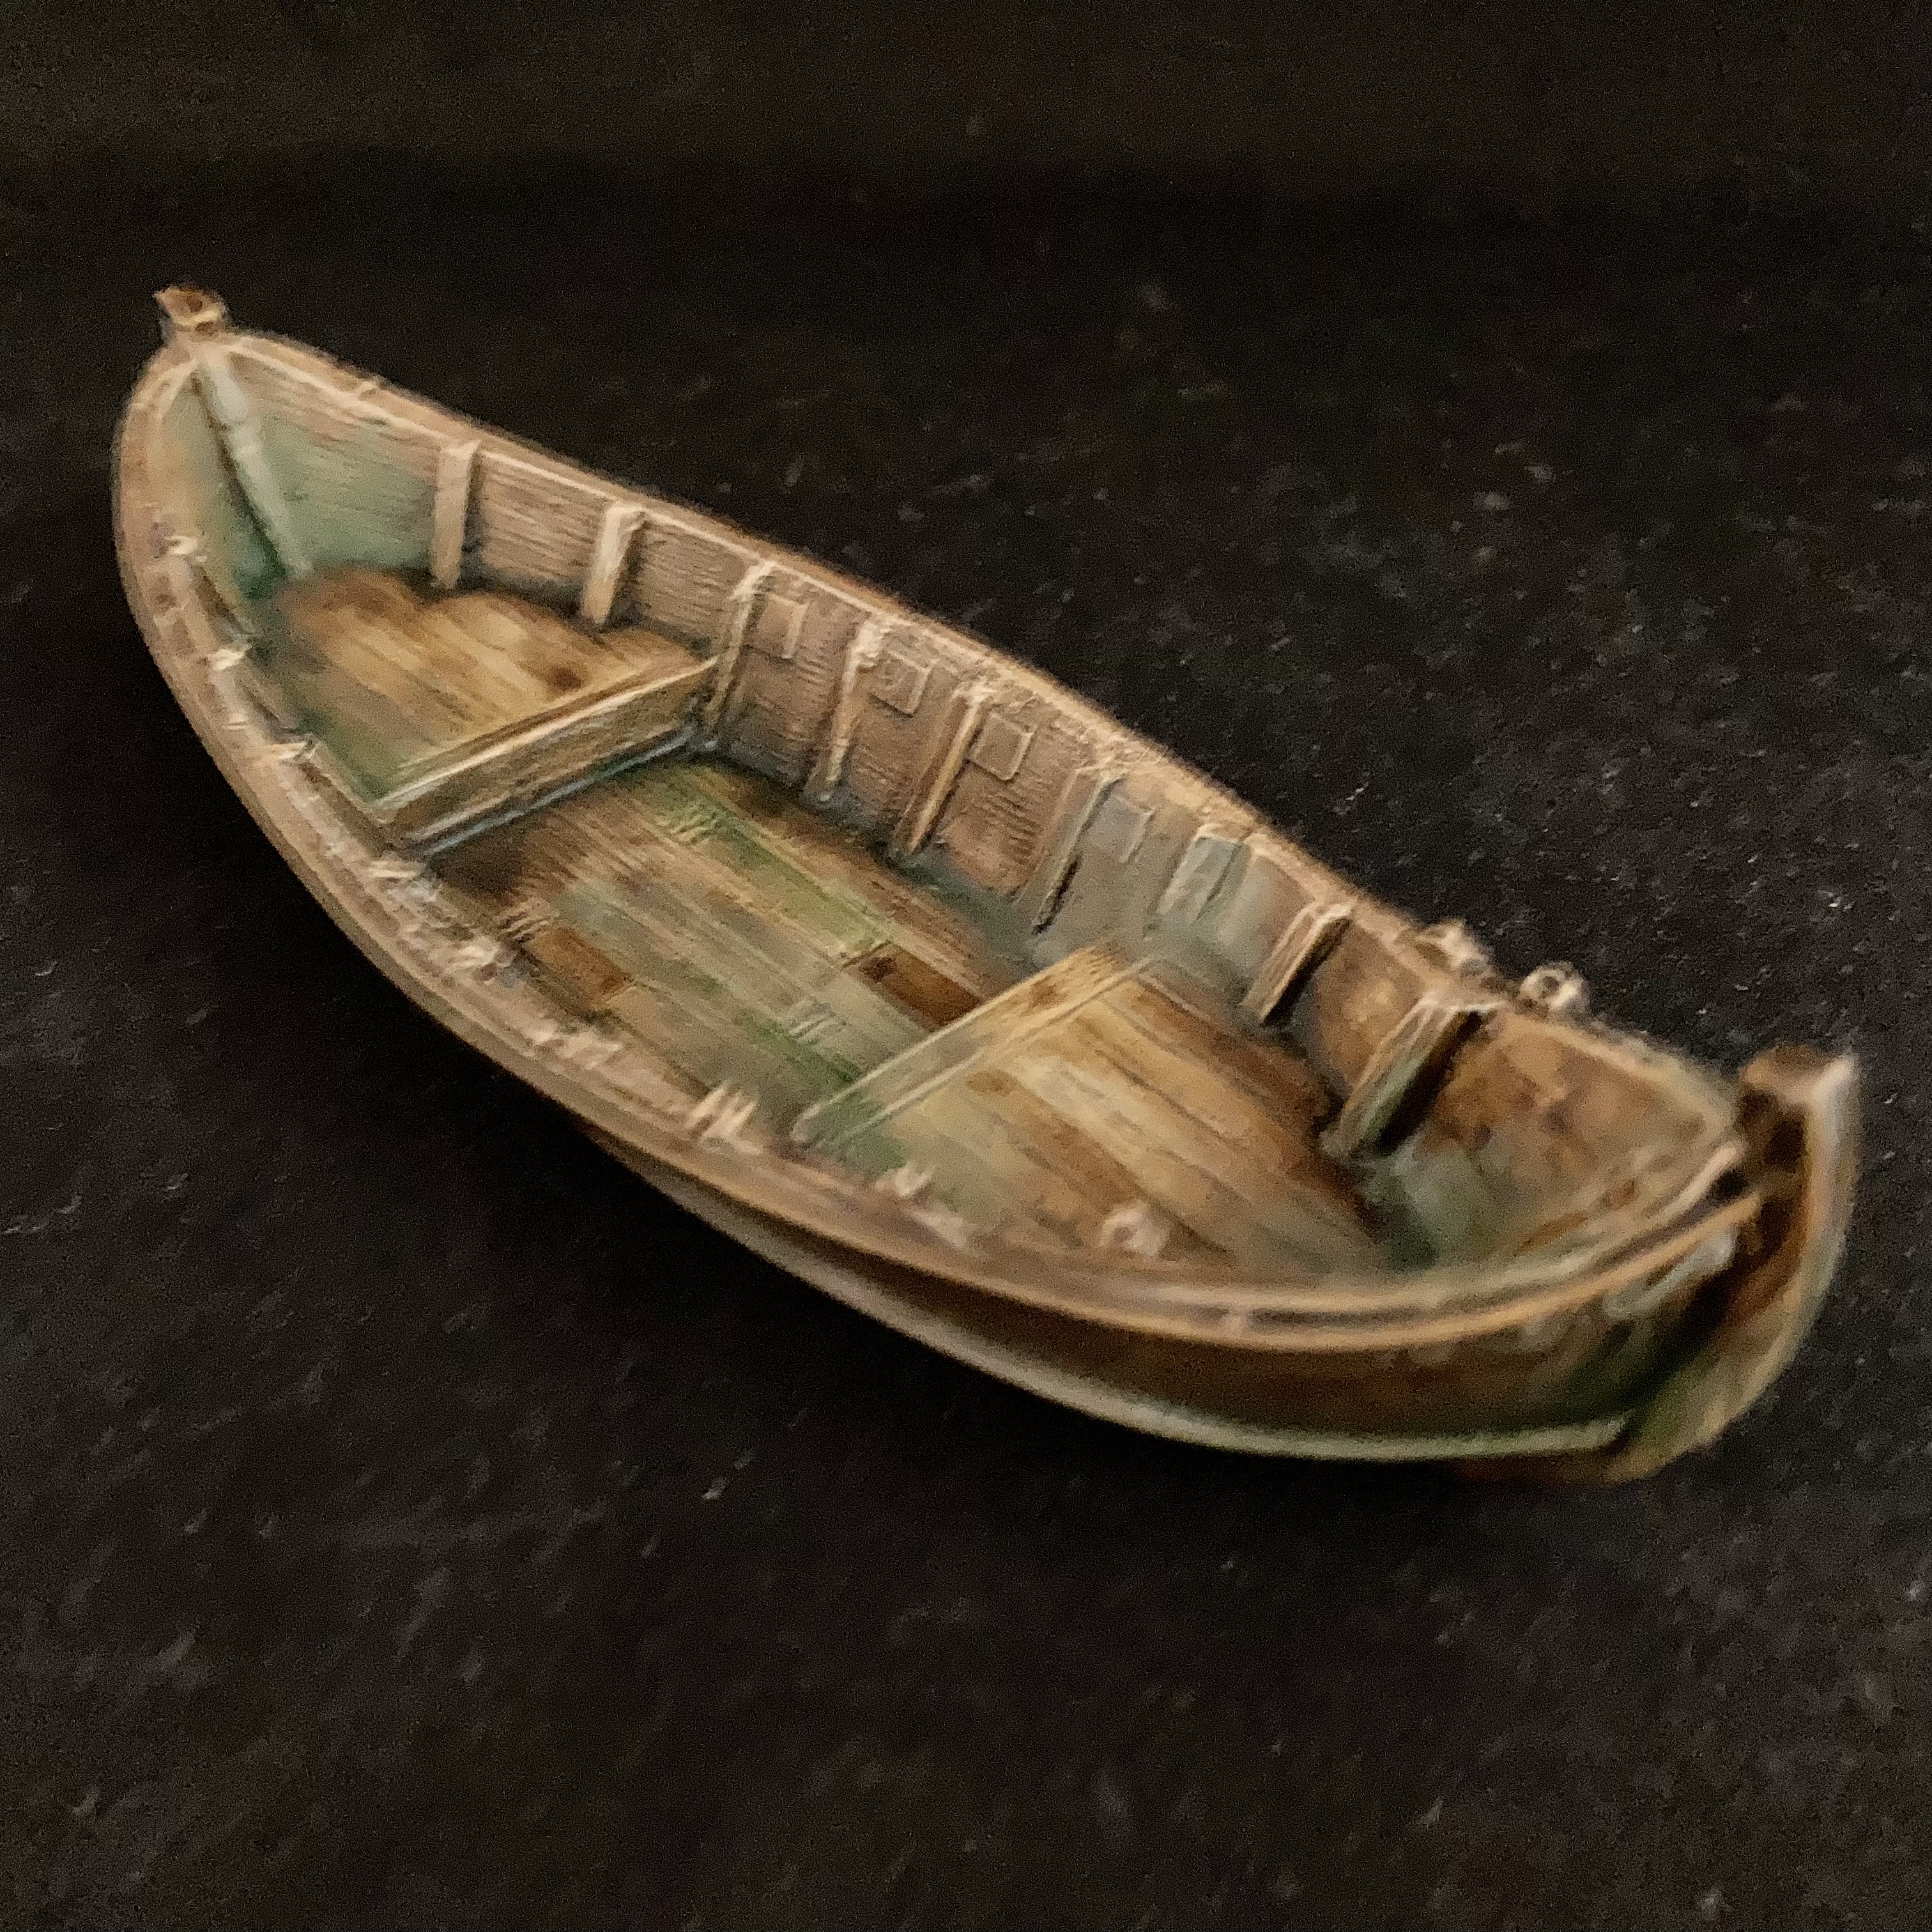
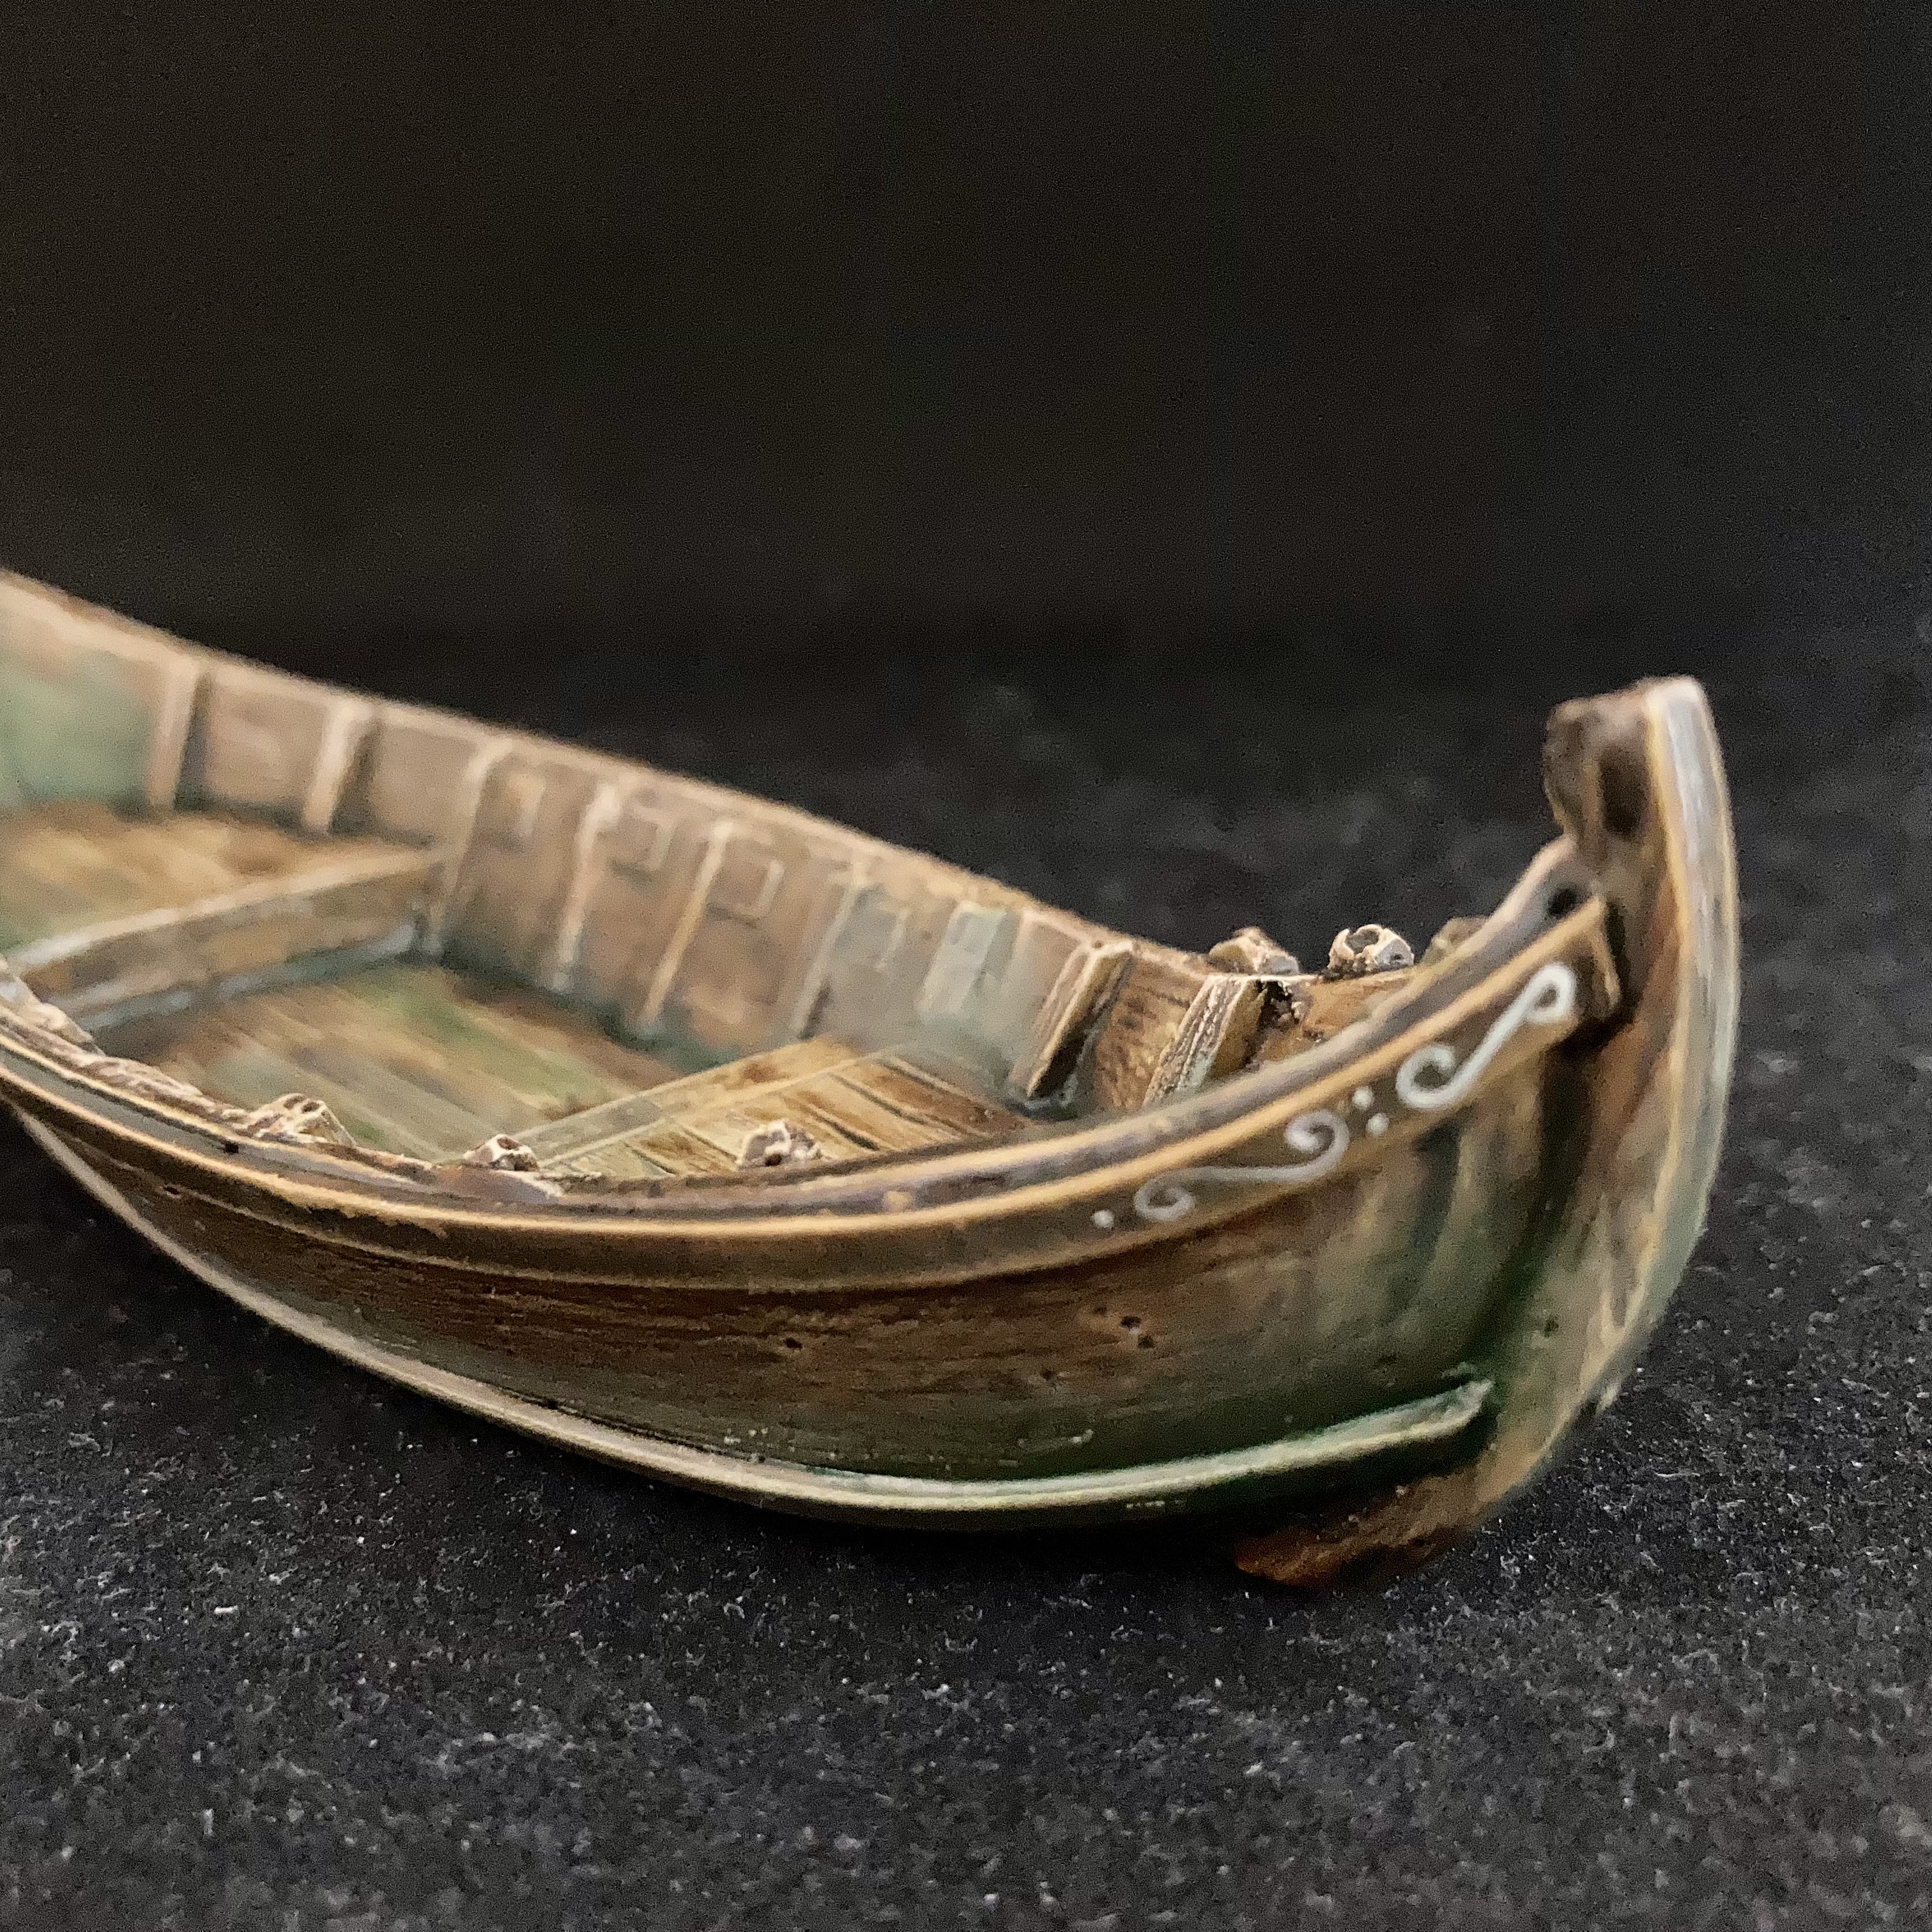
Painting up boats and scatter.
Another beautiful day here, so priming and basecoating some more pieces. This time, small boats (back-off Braverman and Sunak!) and scatter.
Zenith primed and then stained with Snakebite Leather – I’ll let them all dry before drybrushing and weathering.
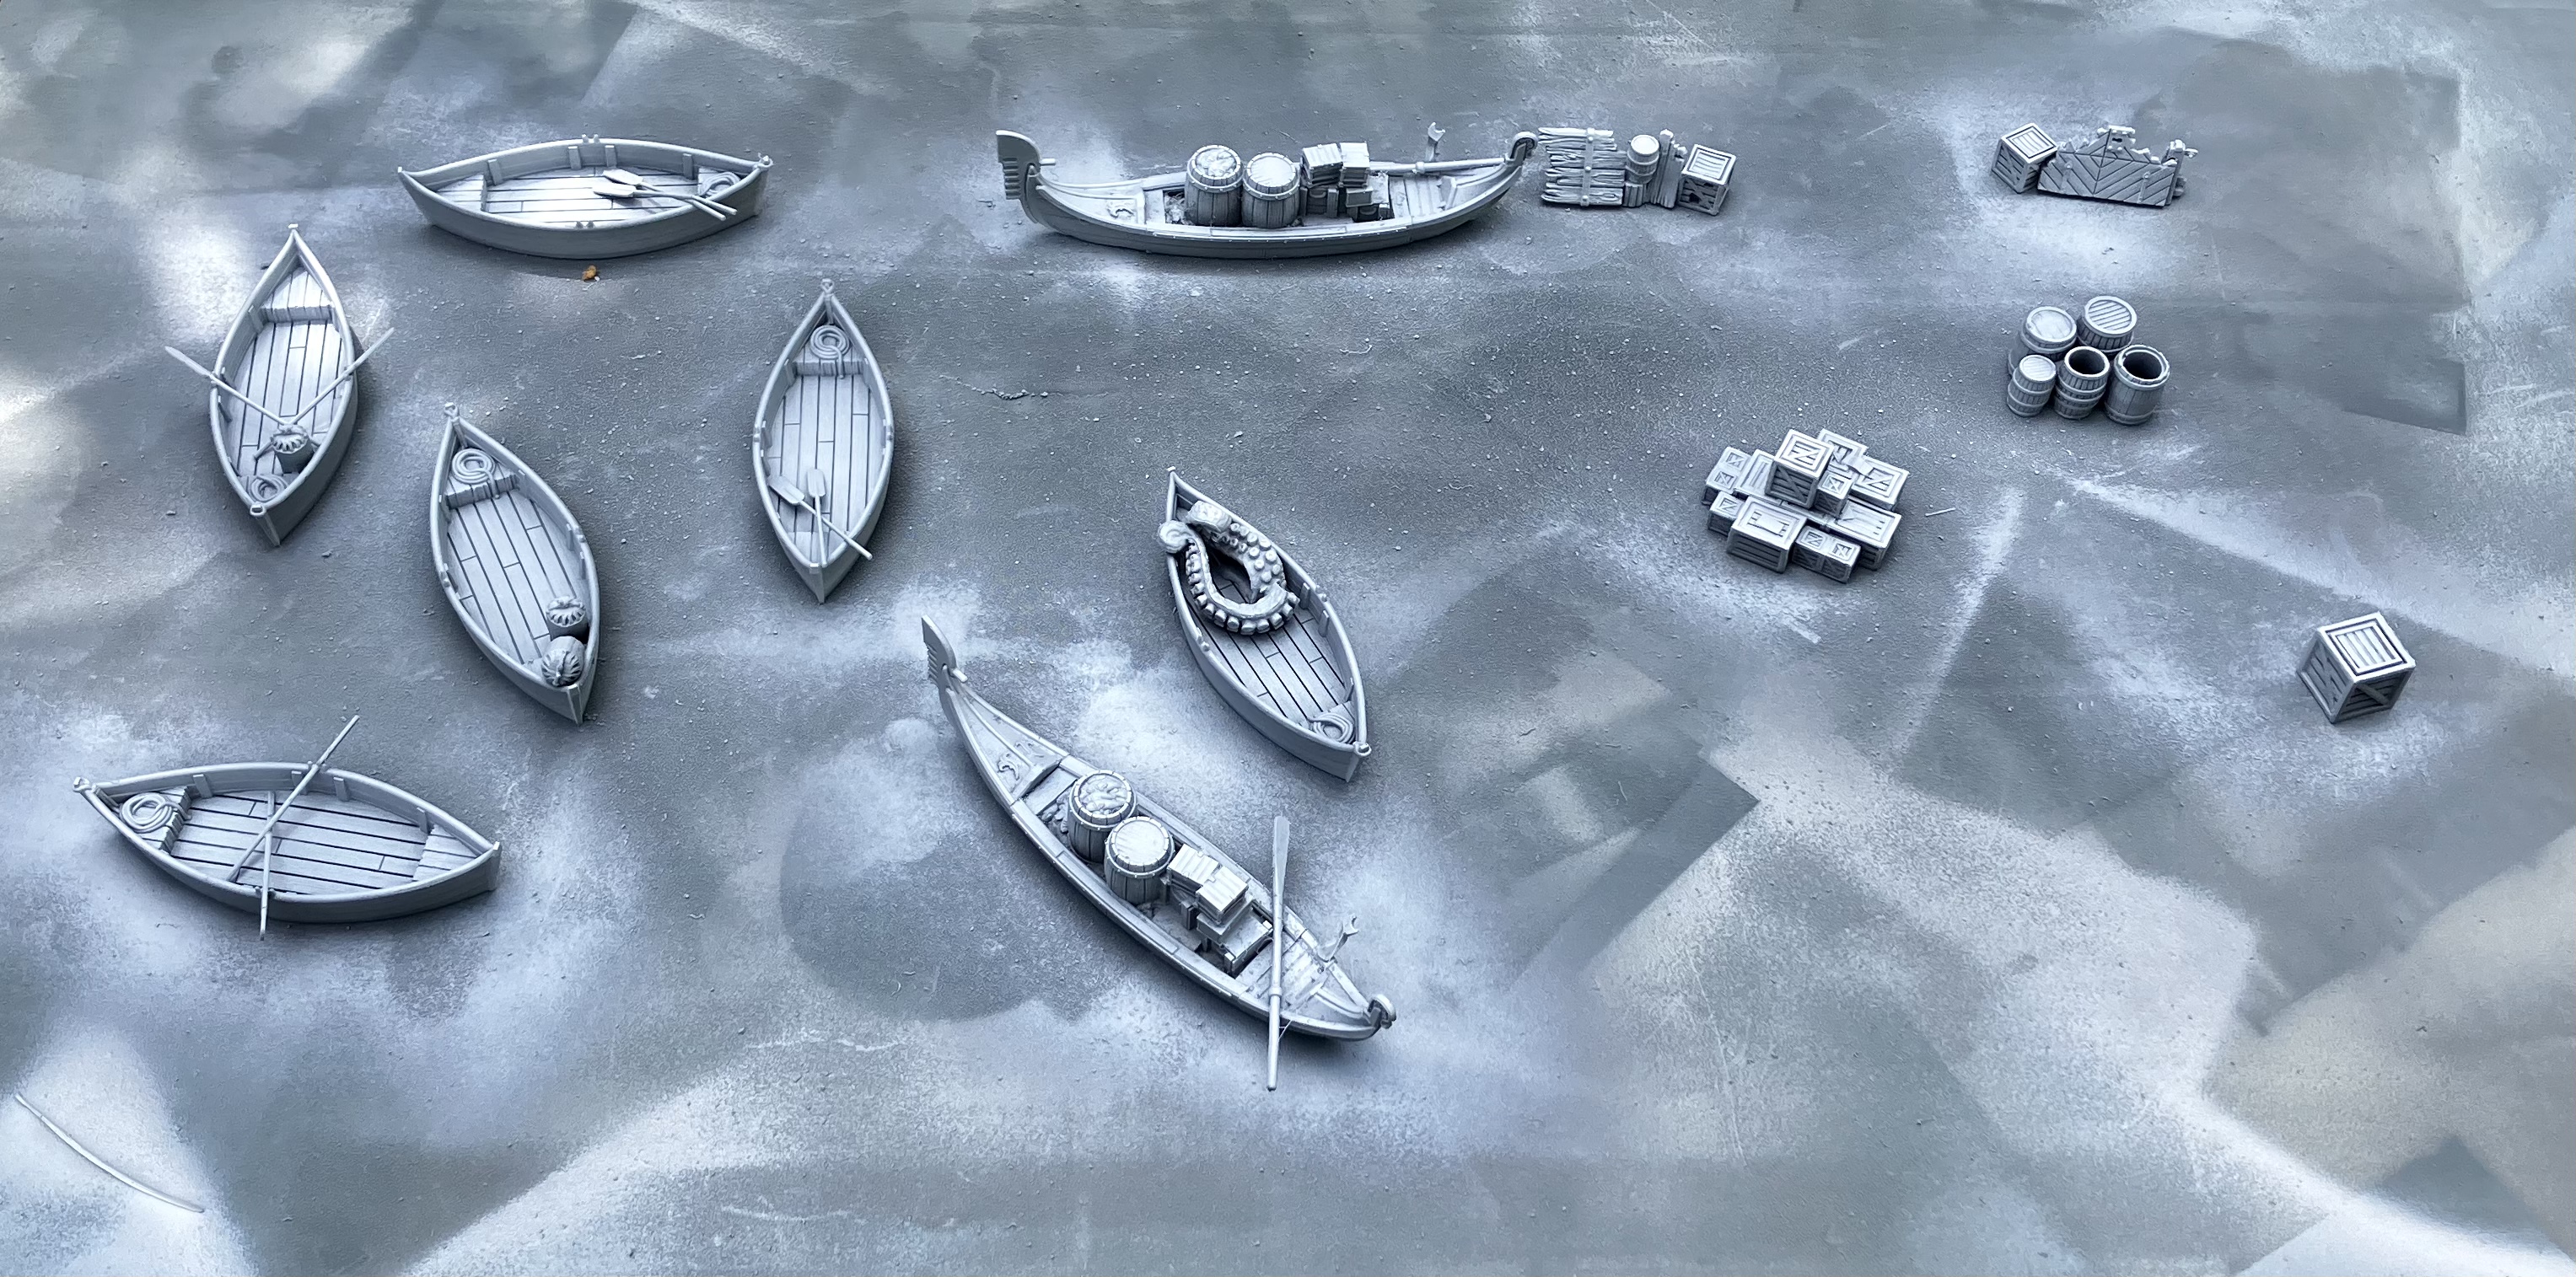 Zenith primed
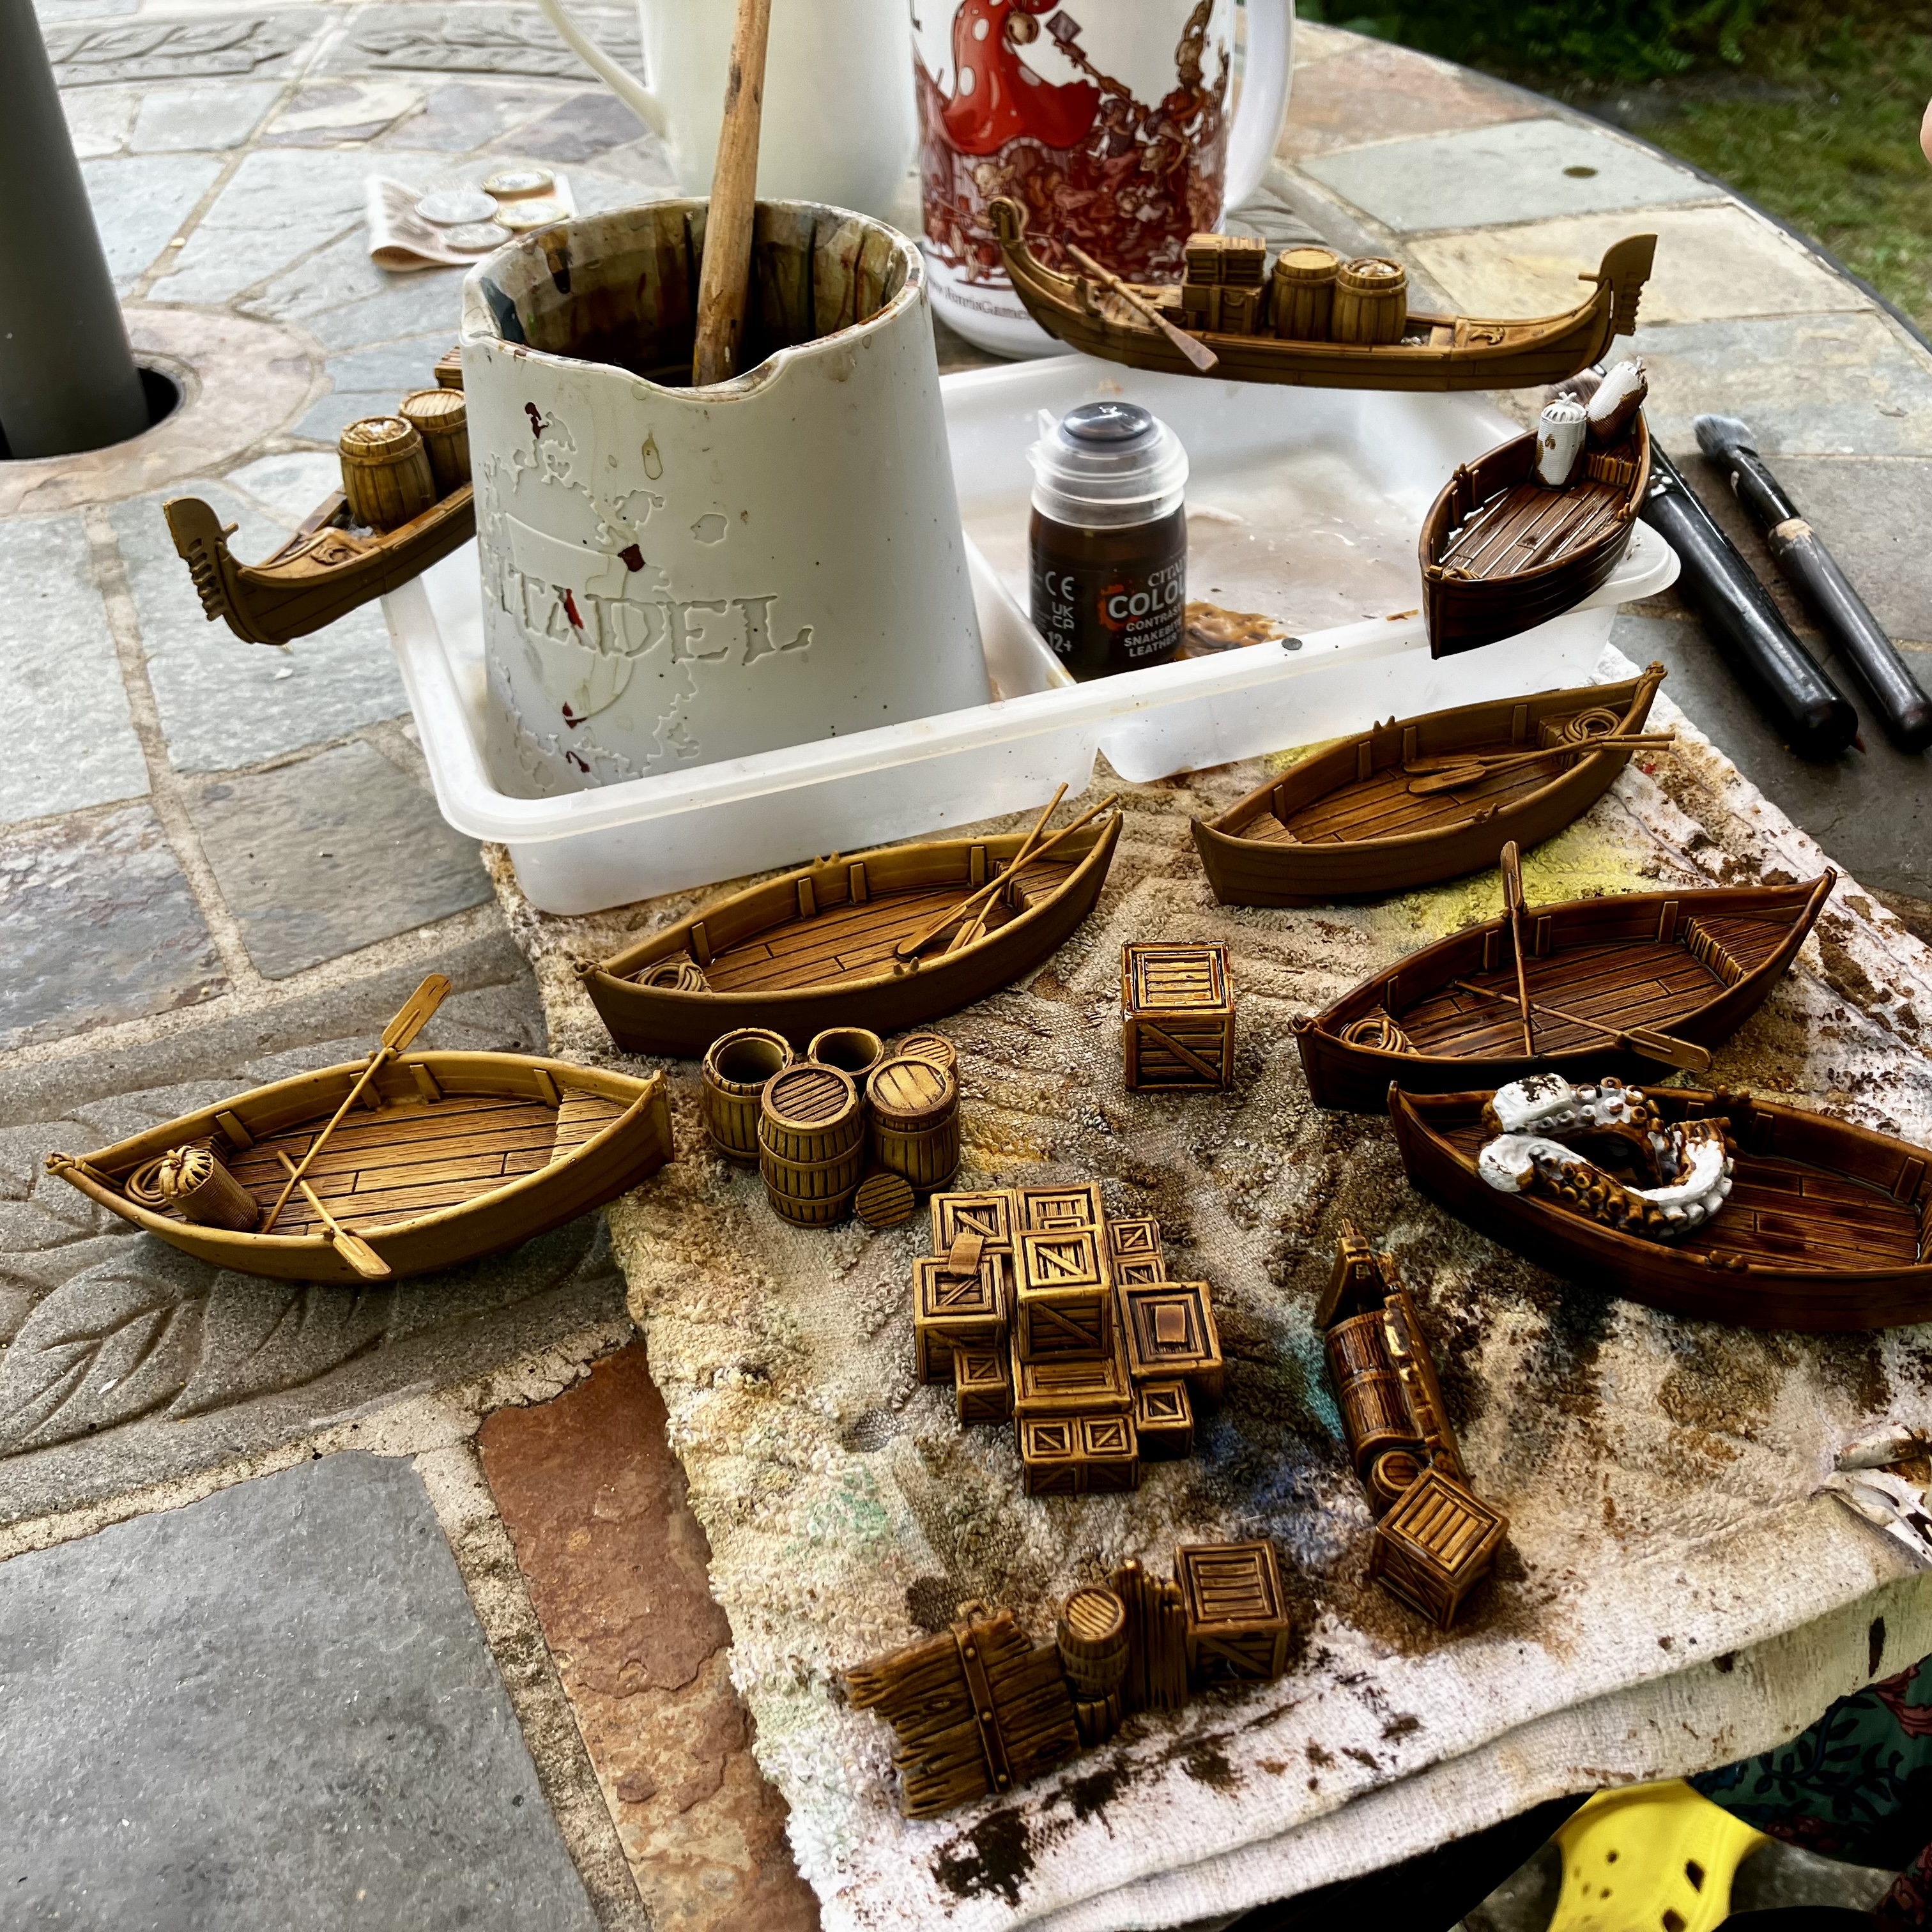 Stained with Snakebite Leather
Another build
This one of the Dunsmouth buildings I picked up. They’re pre-coloured laser cut MDF. Scale-wise, a little on the large side, but again I’m going for variety and ramshackle. Not every building in LakeTown is identical.
 Basic build, with additional cardboard tiles.
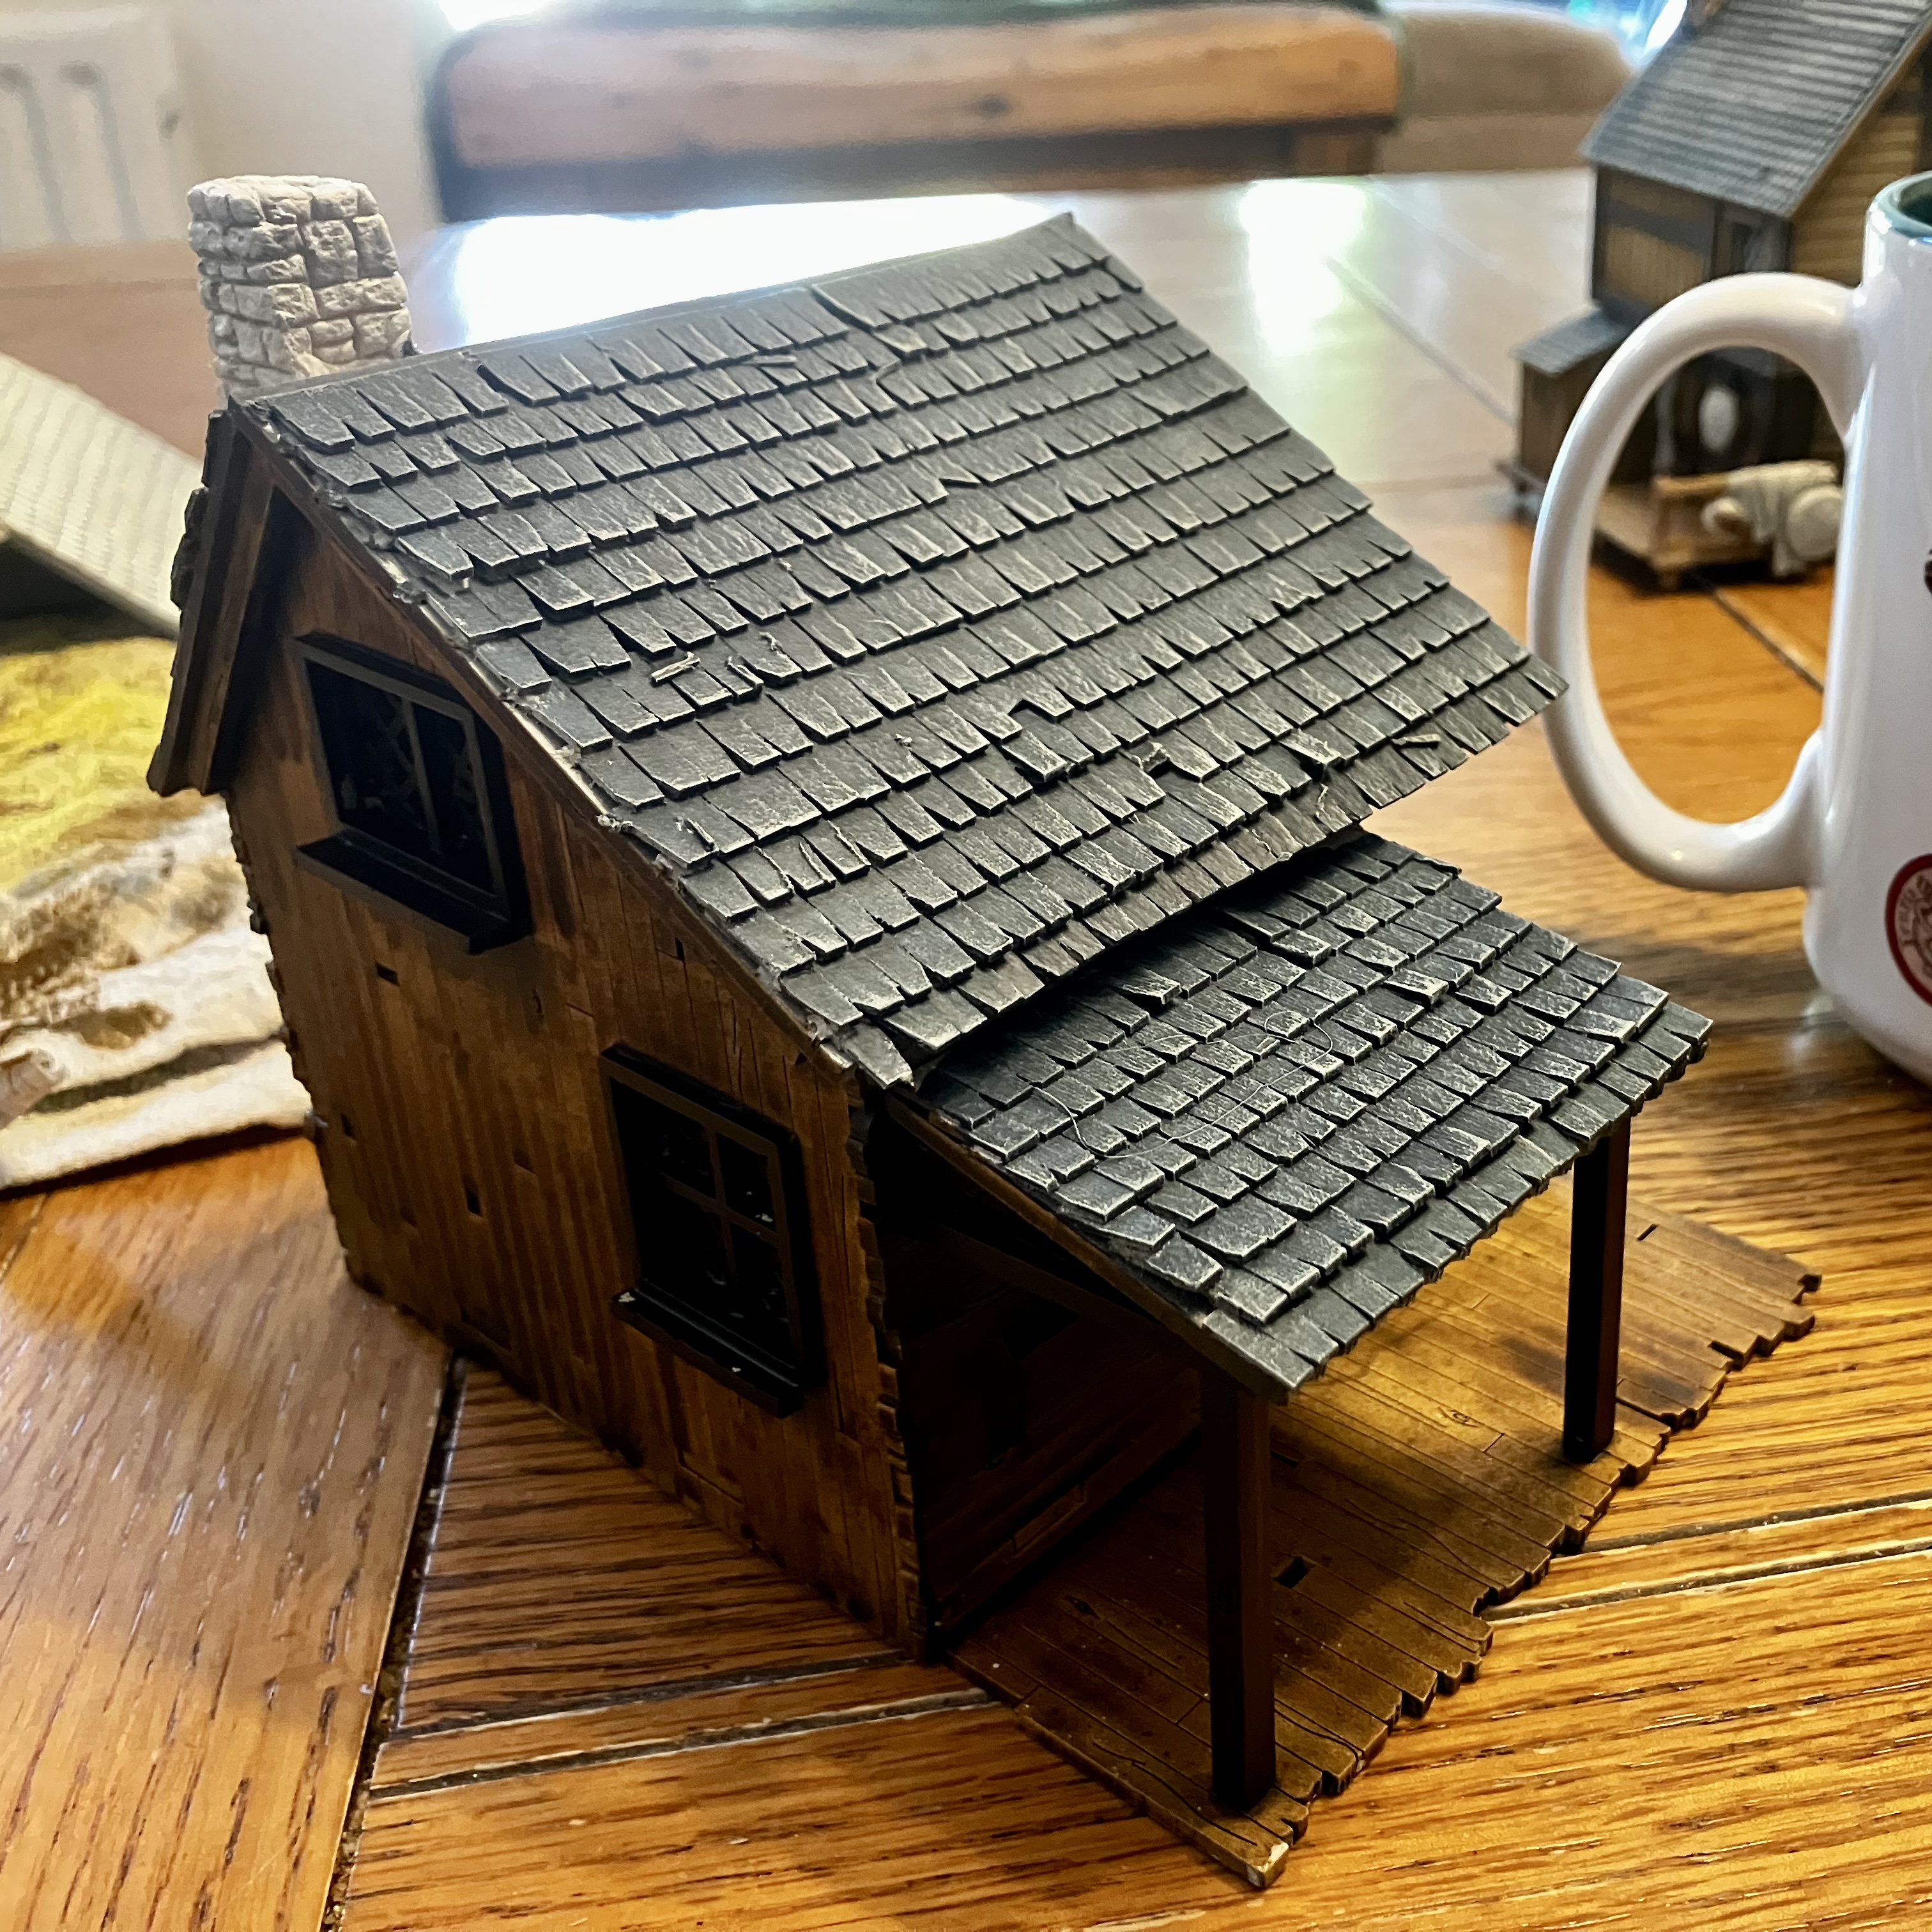 Getting some base colours down after being primed.
Using the same colours as listed in earlier post, this will start to tie the whole table together in a nicely themed way.
Slappin’ Paint
And here’s where we’re going with it. Snakebite Leather fir all basic wood work. Cygor Brown or Wyldwood for the main beams.
Roof basecoated in Incubi Darkness.
The whole thing is then given a light drybrush of Wraithbone so I can add some depth and tone over the top.
Primed backlog
A nice collection of completed buildings ready to start painting. Over the next few posts I’ll start adding colour and let’s see how they go!
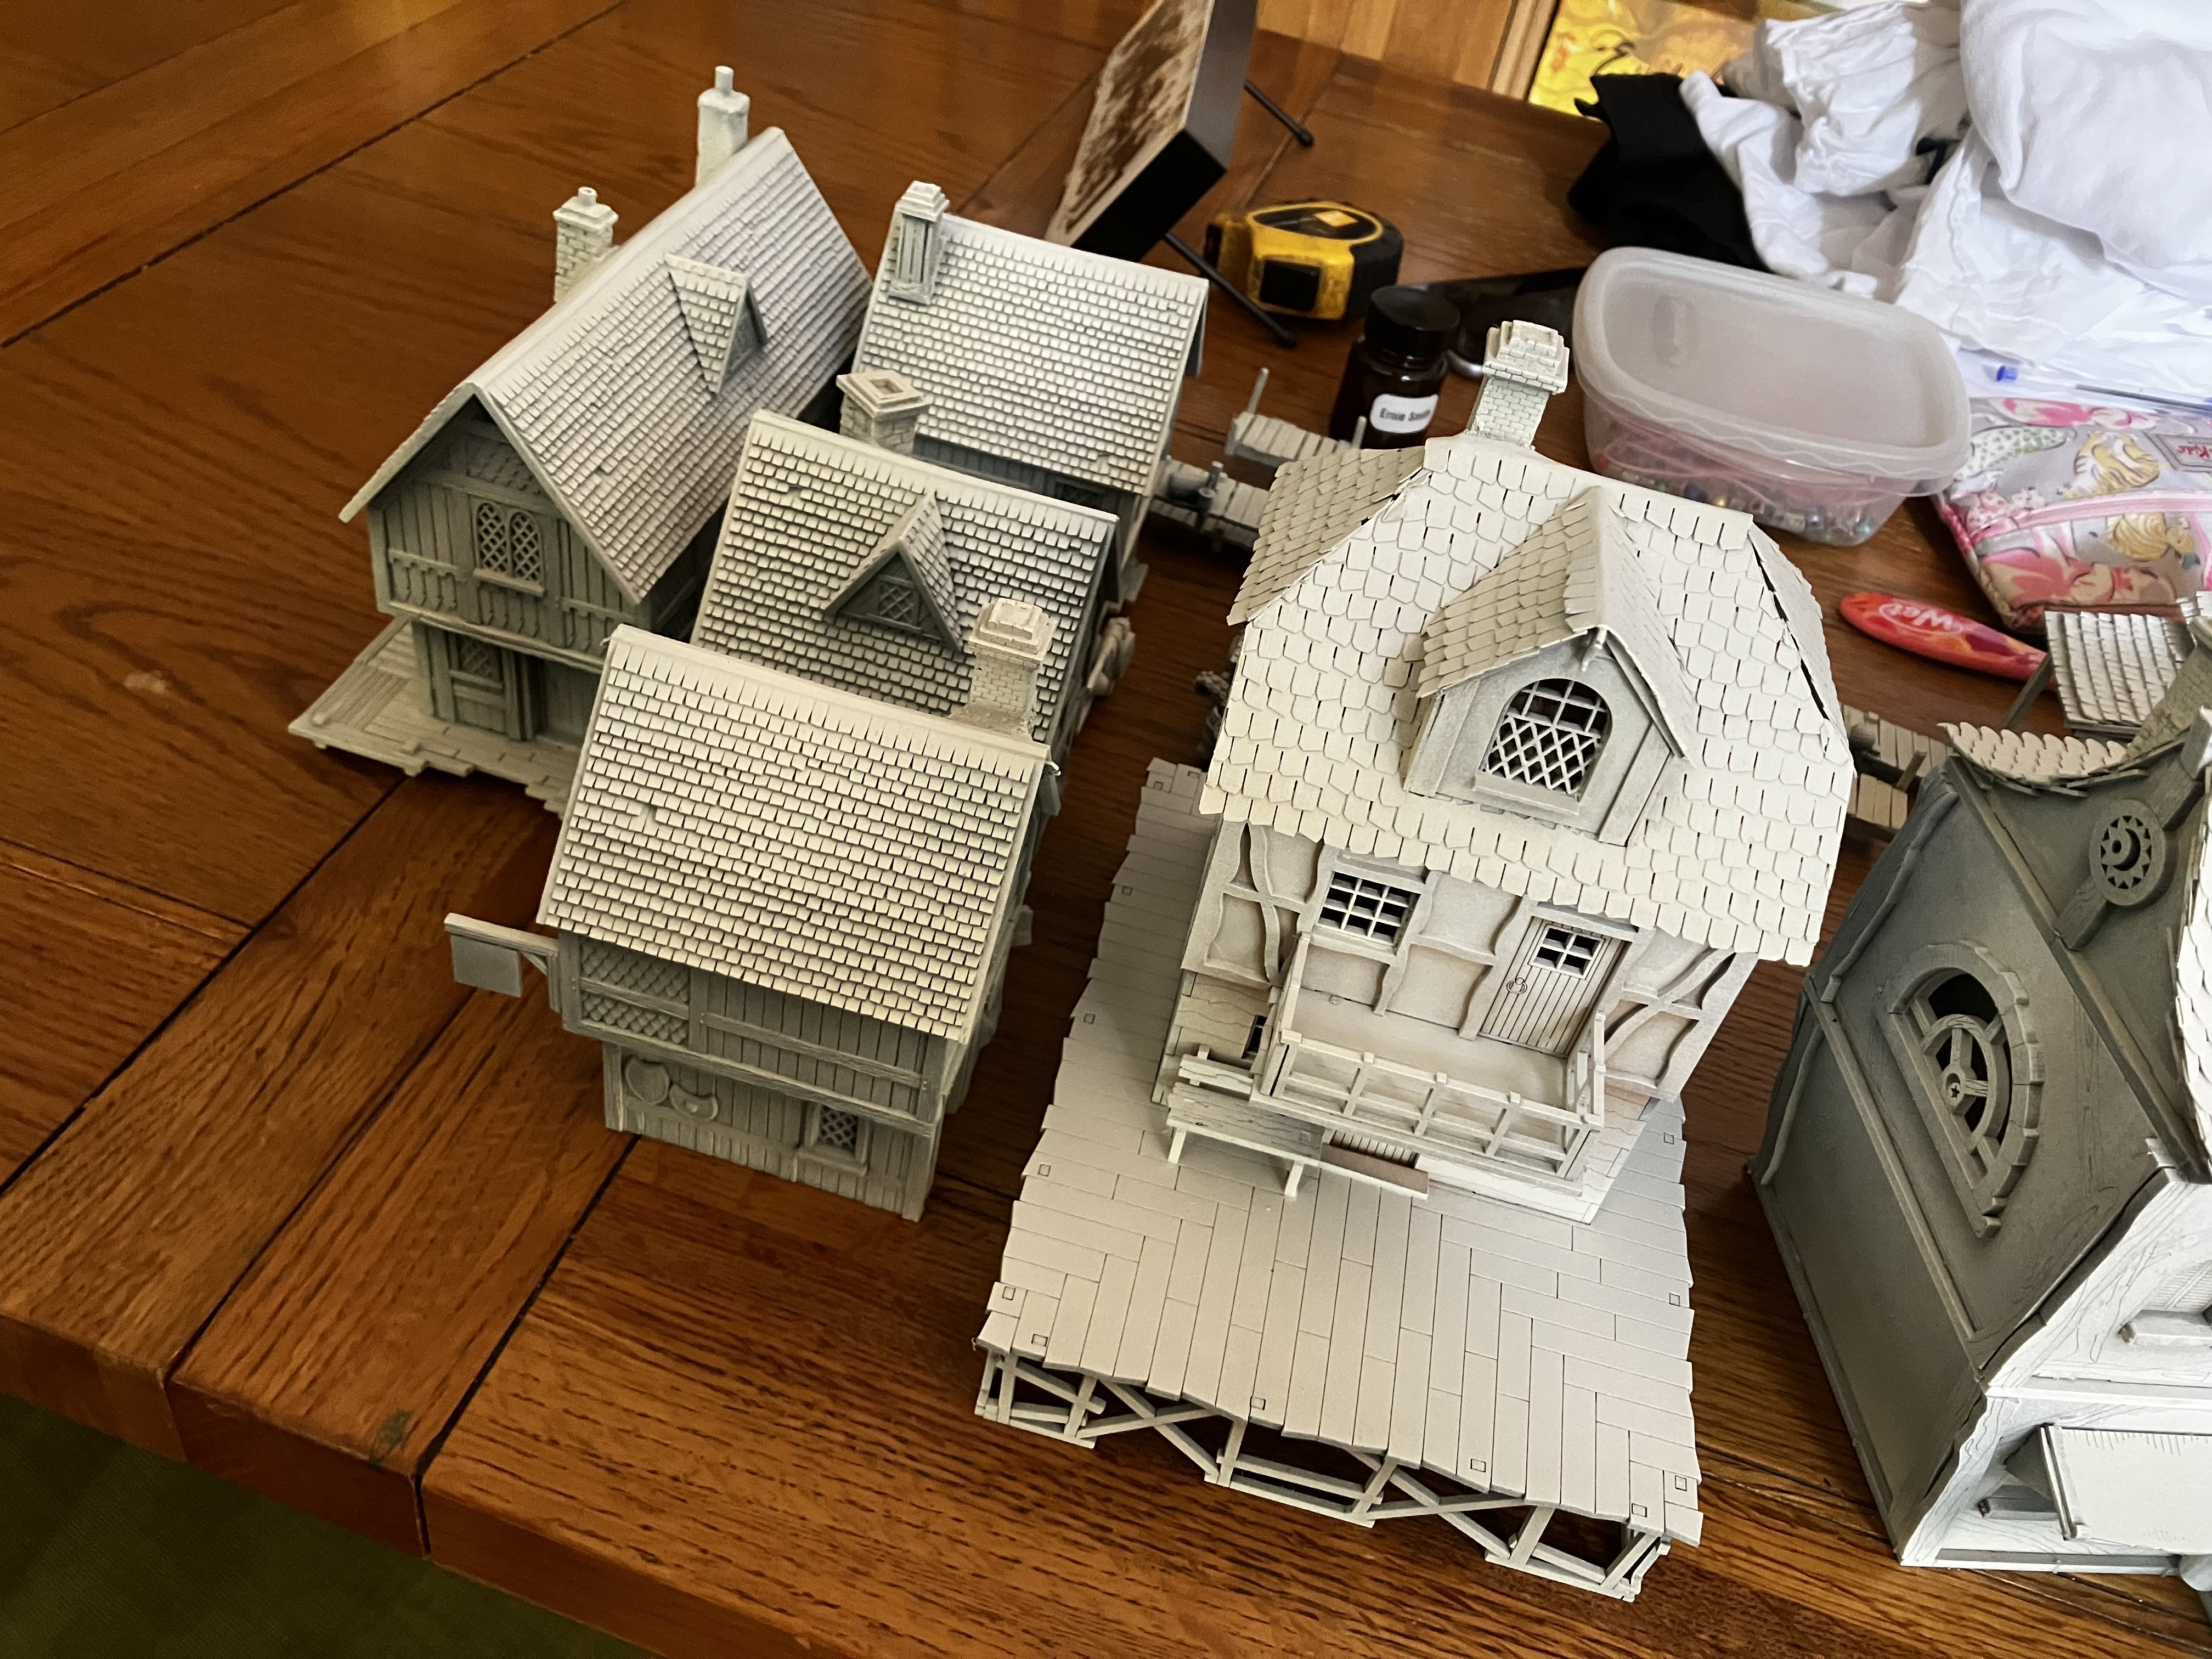
Prime time
Lovely weather today, so have zenith primed the buildings and walkways that are complete.
 Spray the undersides and sides grey
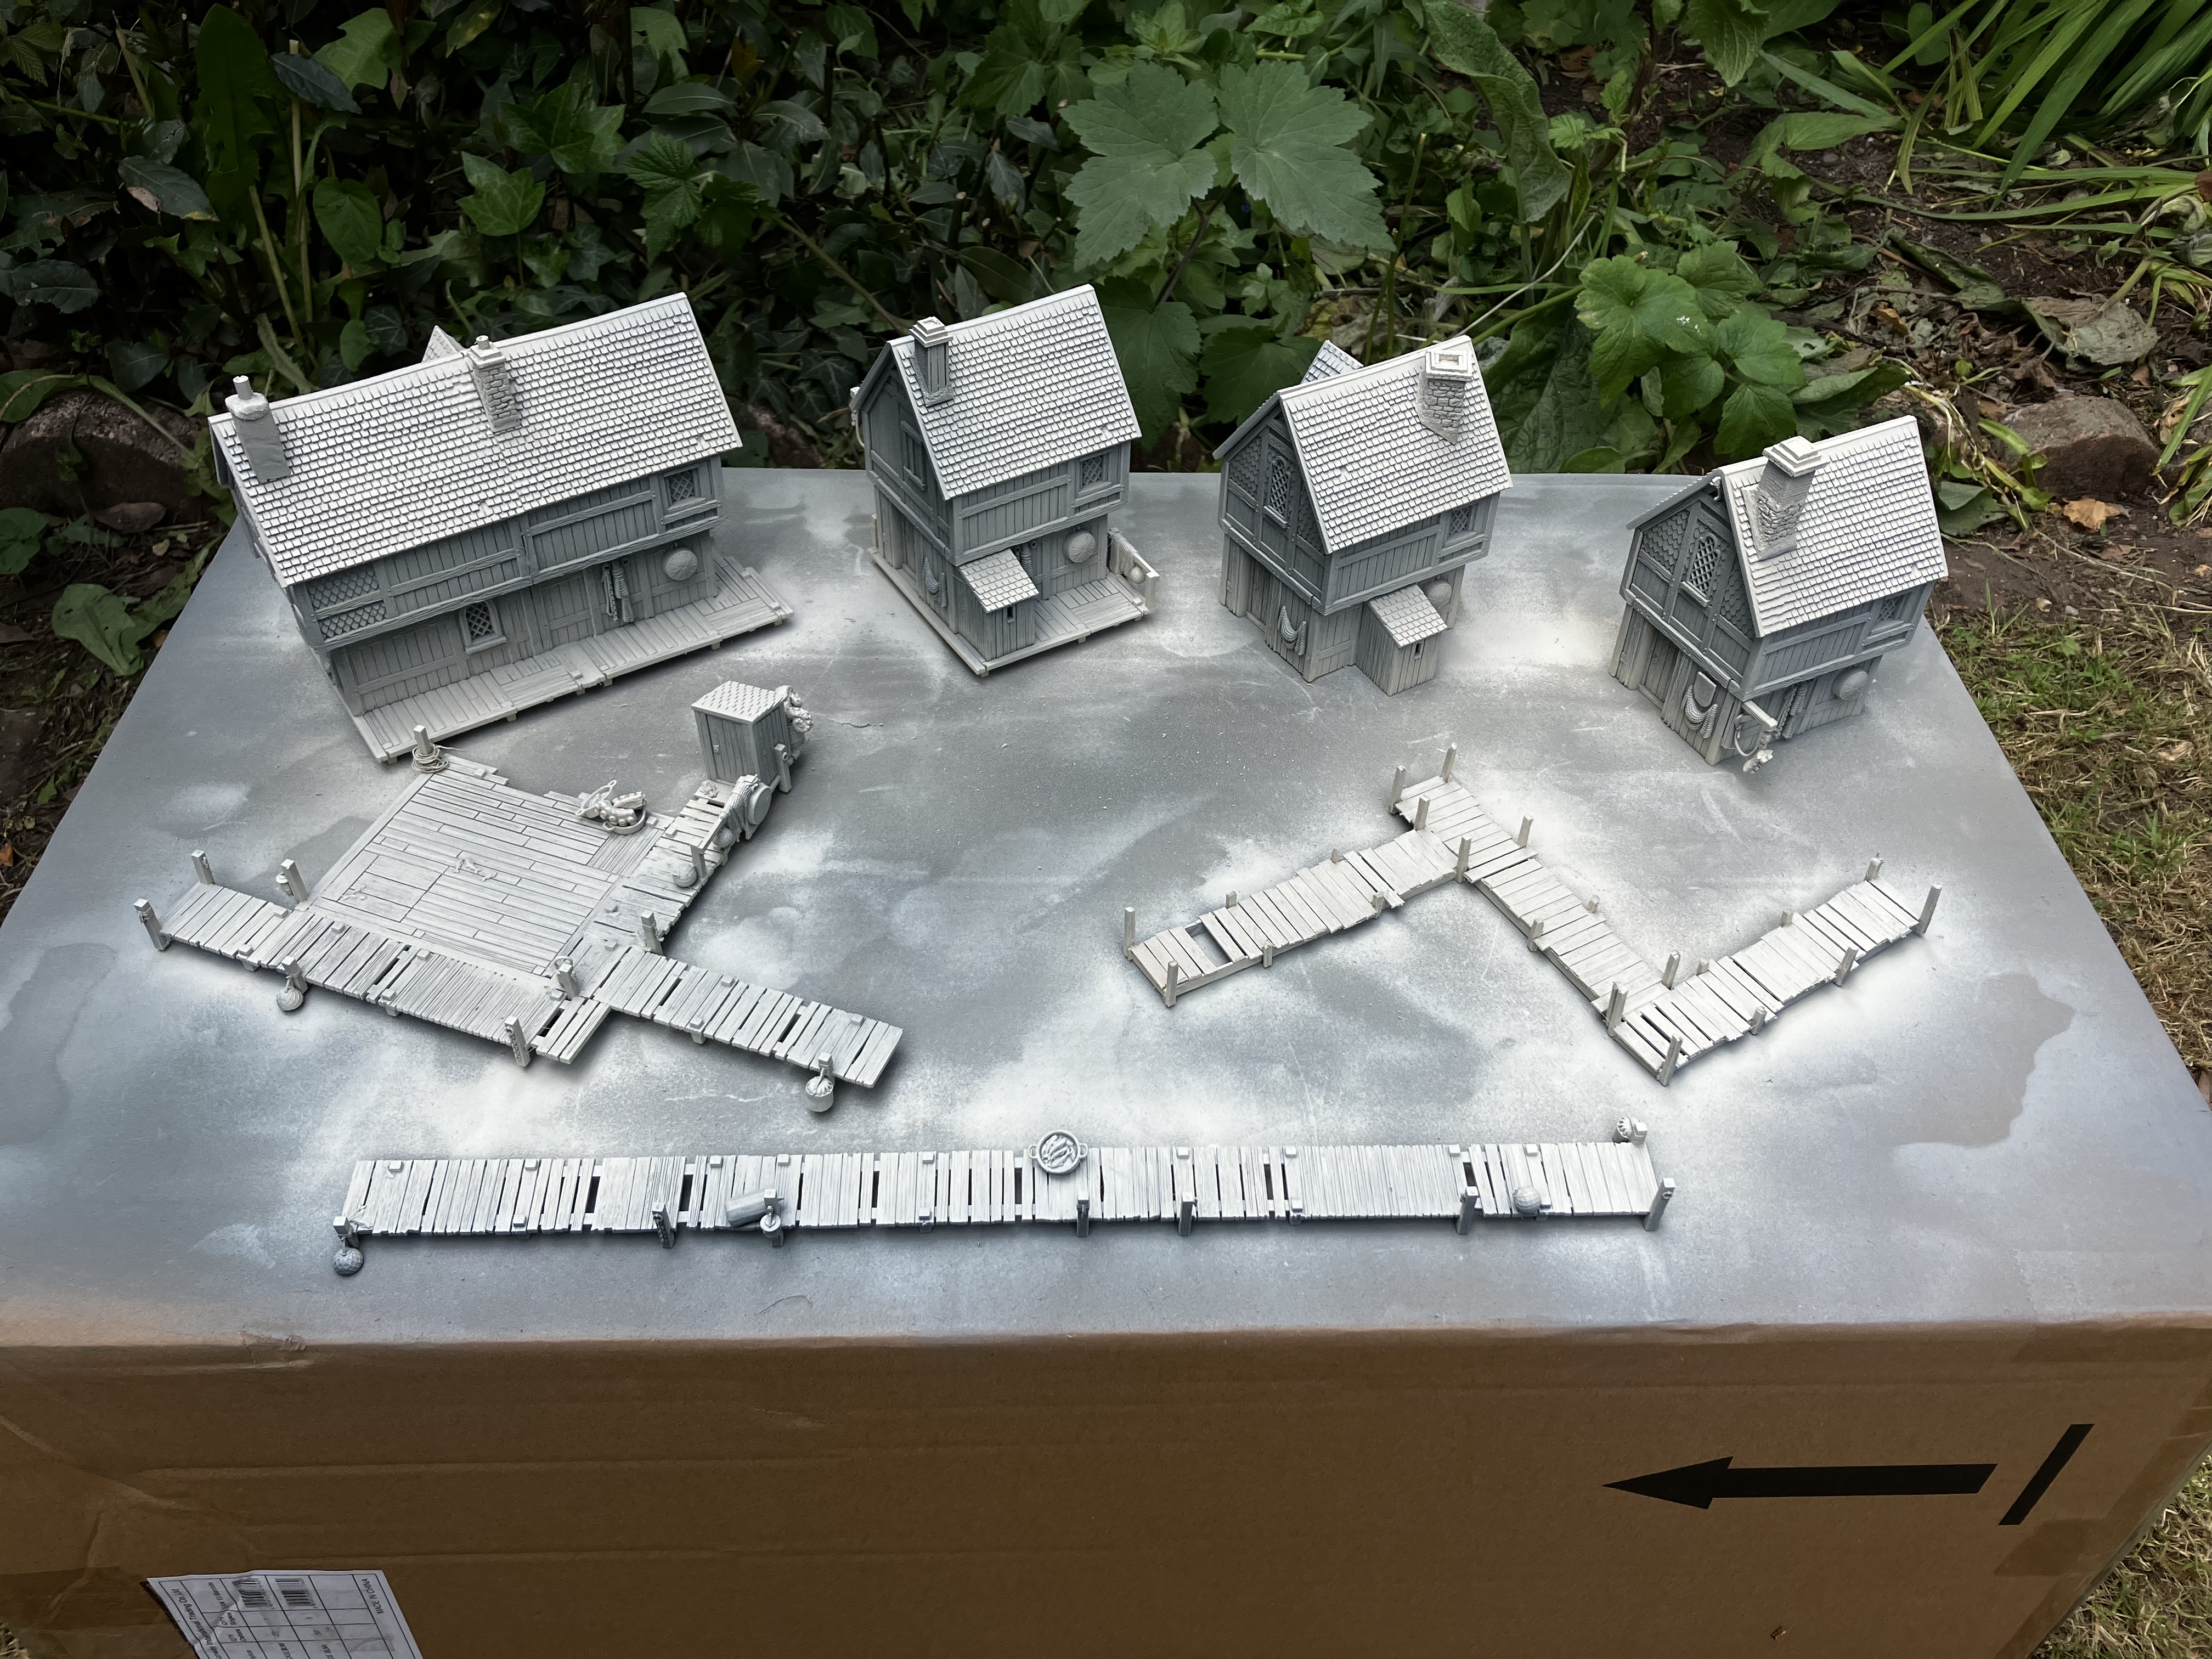 Spray wraithbone over the top
More buildings
Here’s a completed Lochbaile building, ready for paint.
similar to the others, I’ve tiled it properly and added a small chimney, plus a few other little details. Am keeping the roof separate as the inside a make handy storage for little row boats and street scatter.
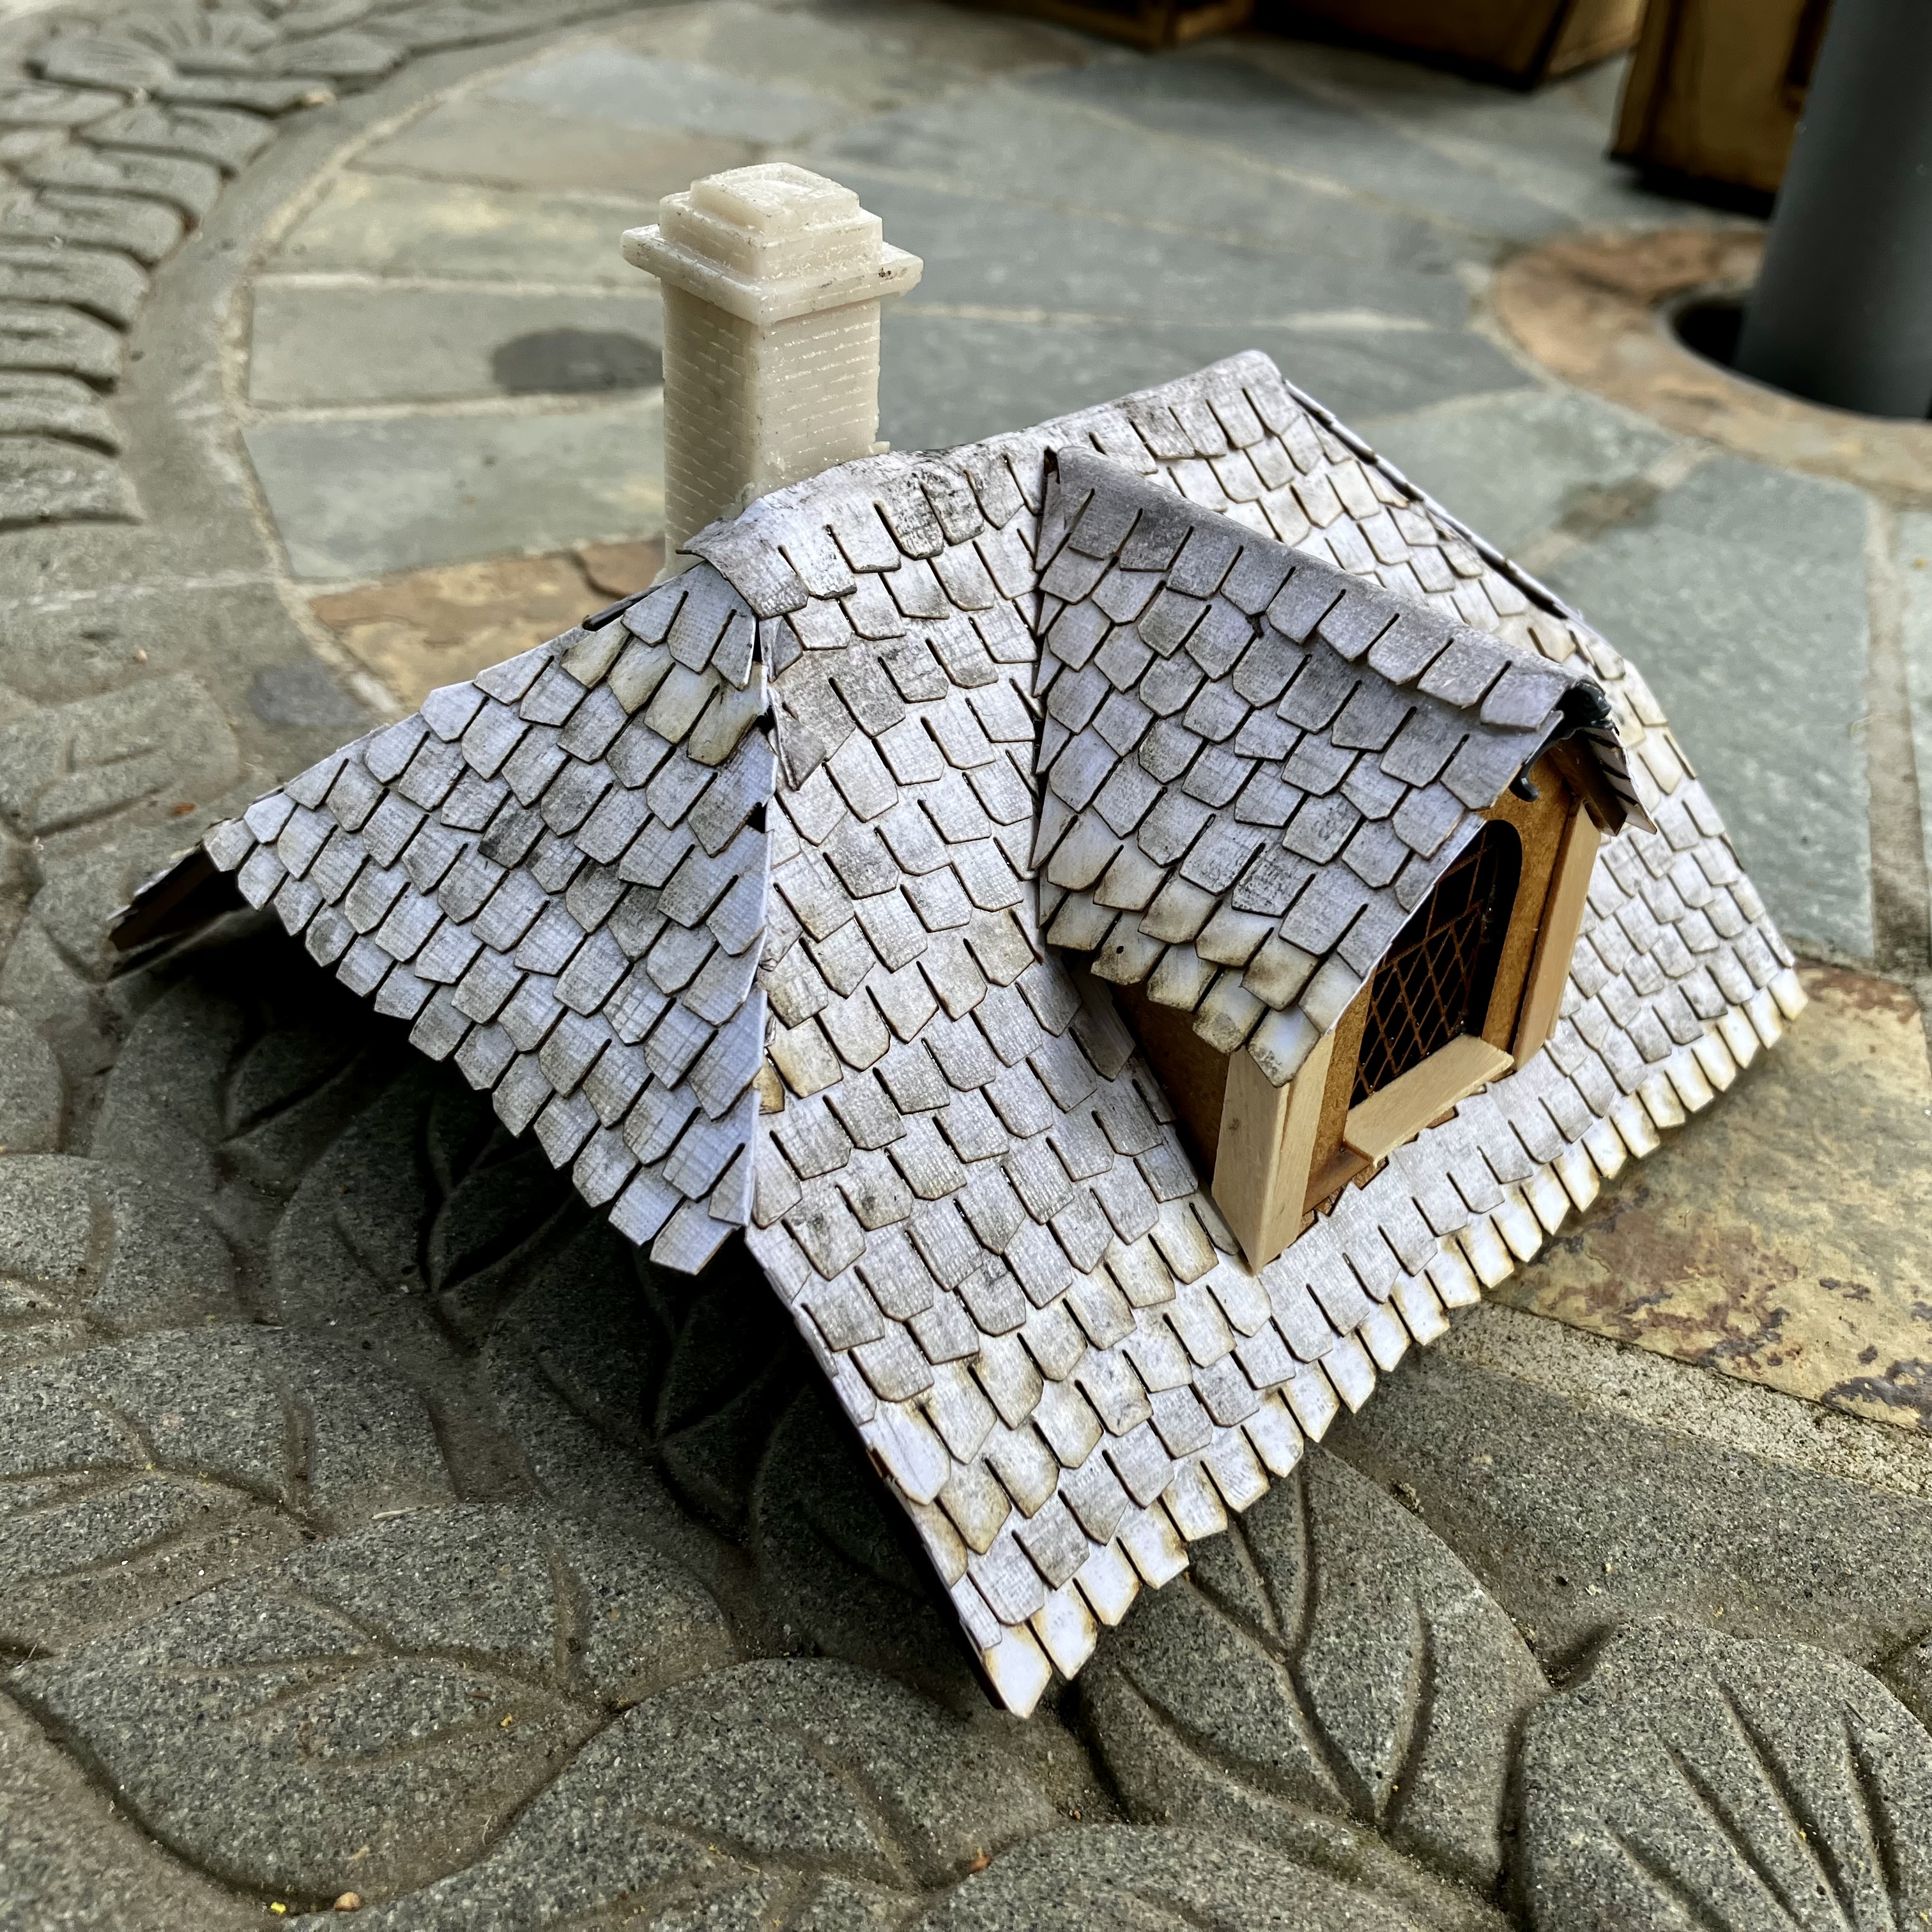
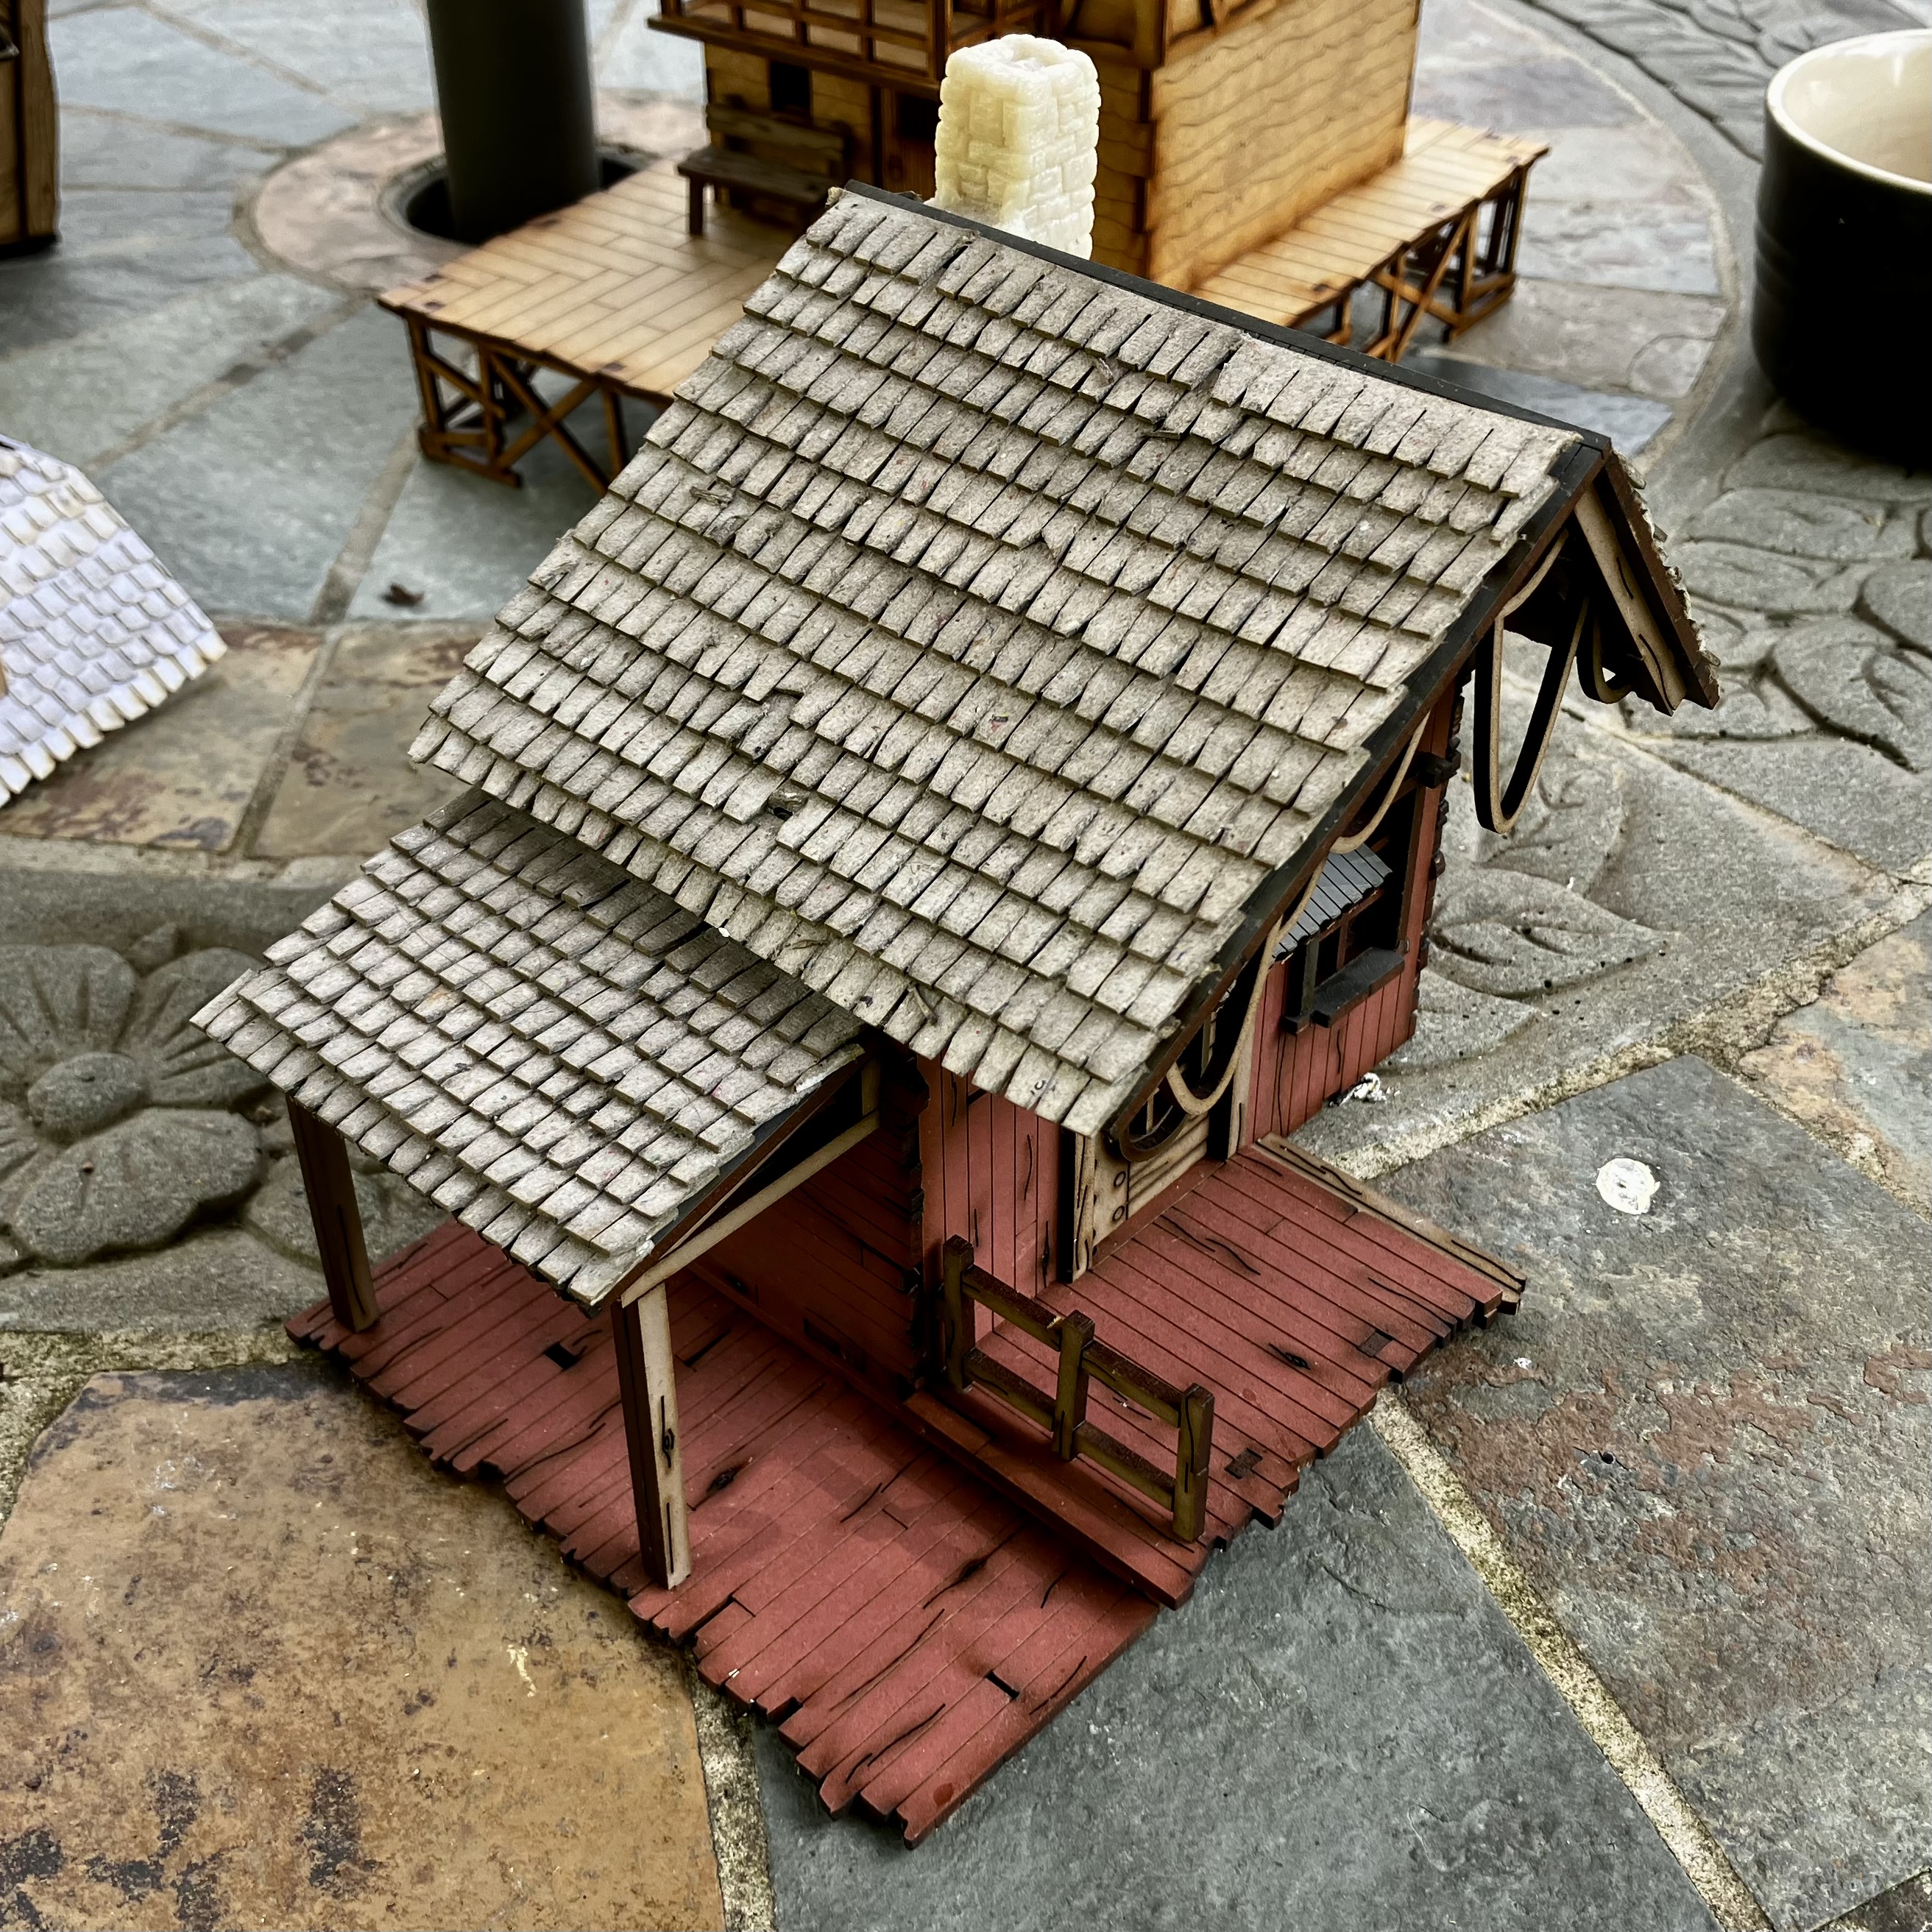
Completing the roof
With more tiles now in hand, I’ve been able to get the roof finished. I’m really pleased with the over-all look. Bit disappointed with myself that I’ve misplaced the beams I’d punched out for some of the walls, but a few coffee stirrers cover up the mdf edges.
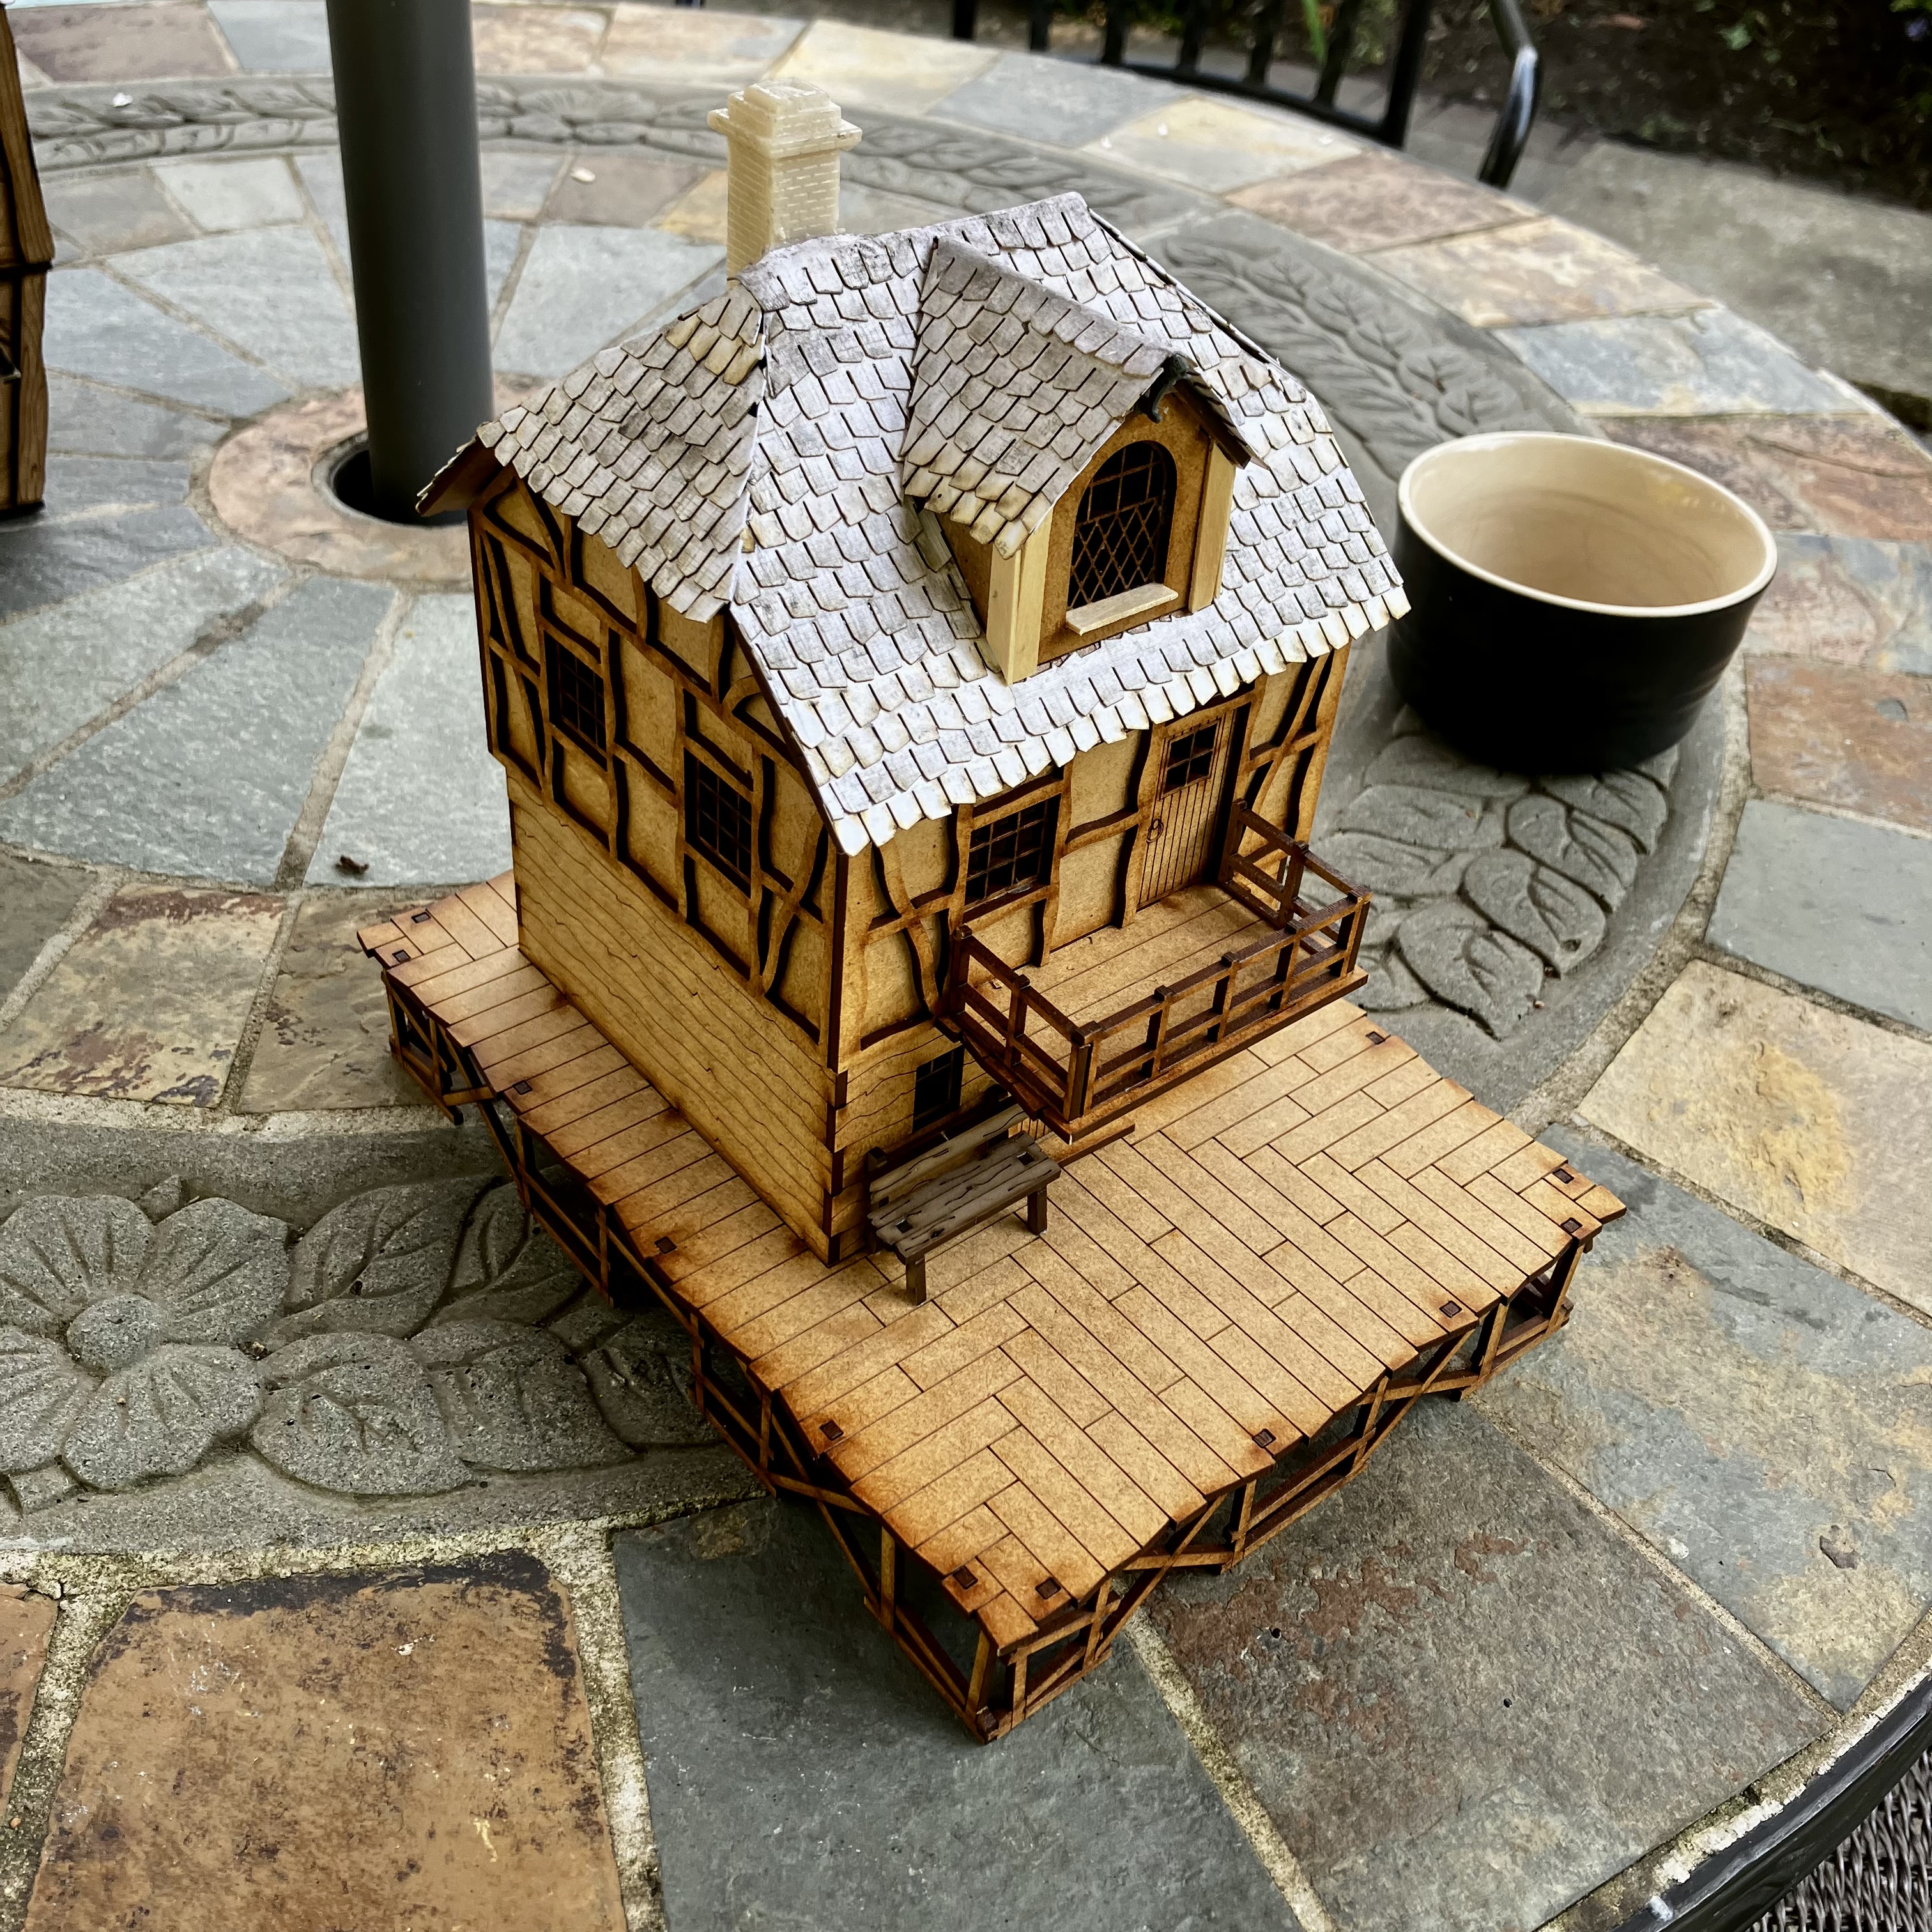
 The completed building
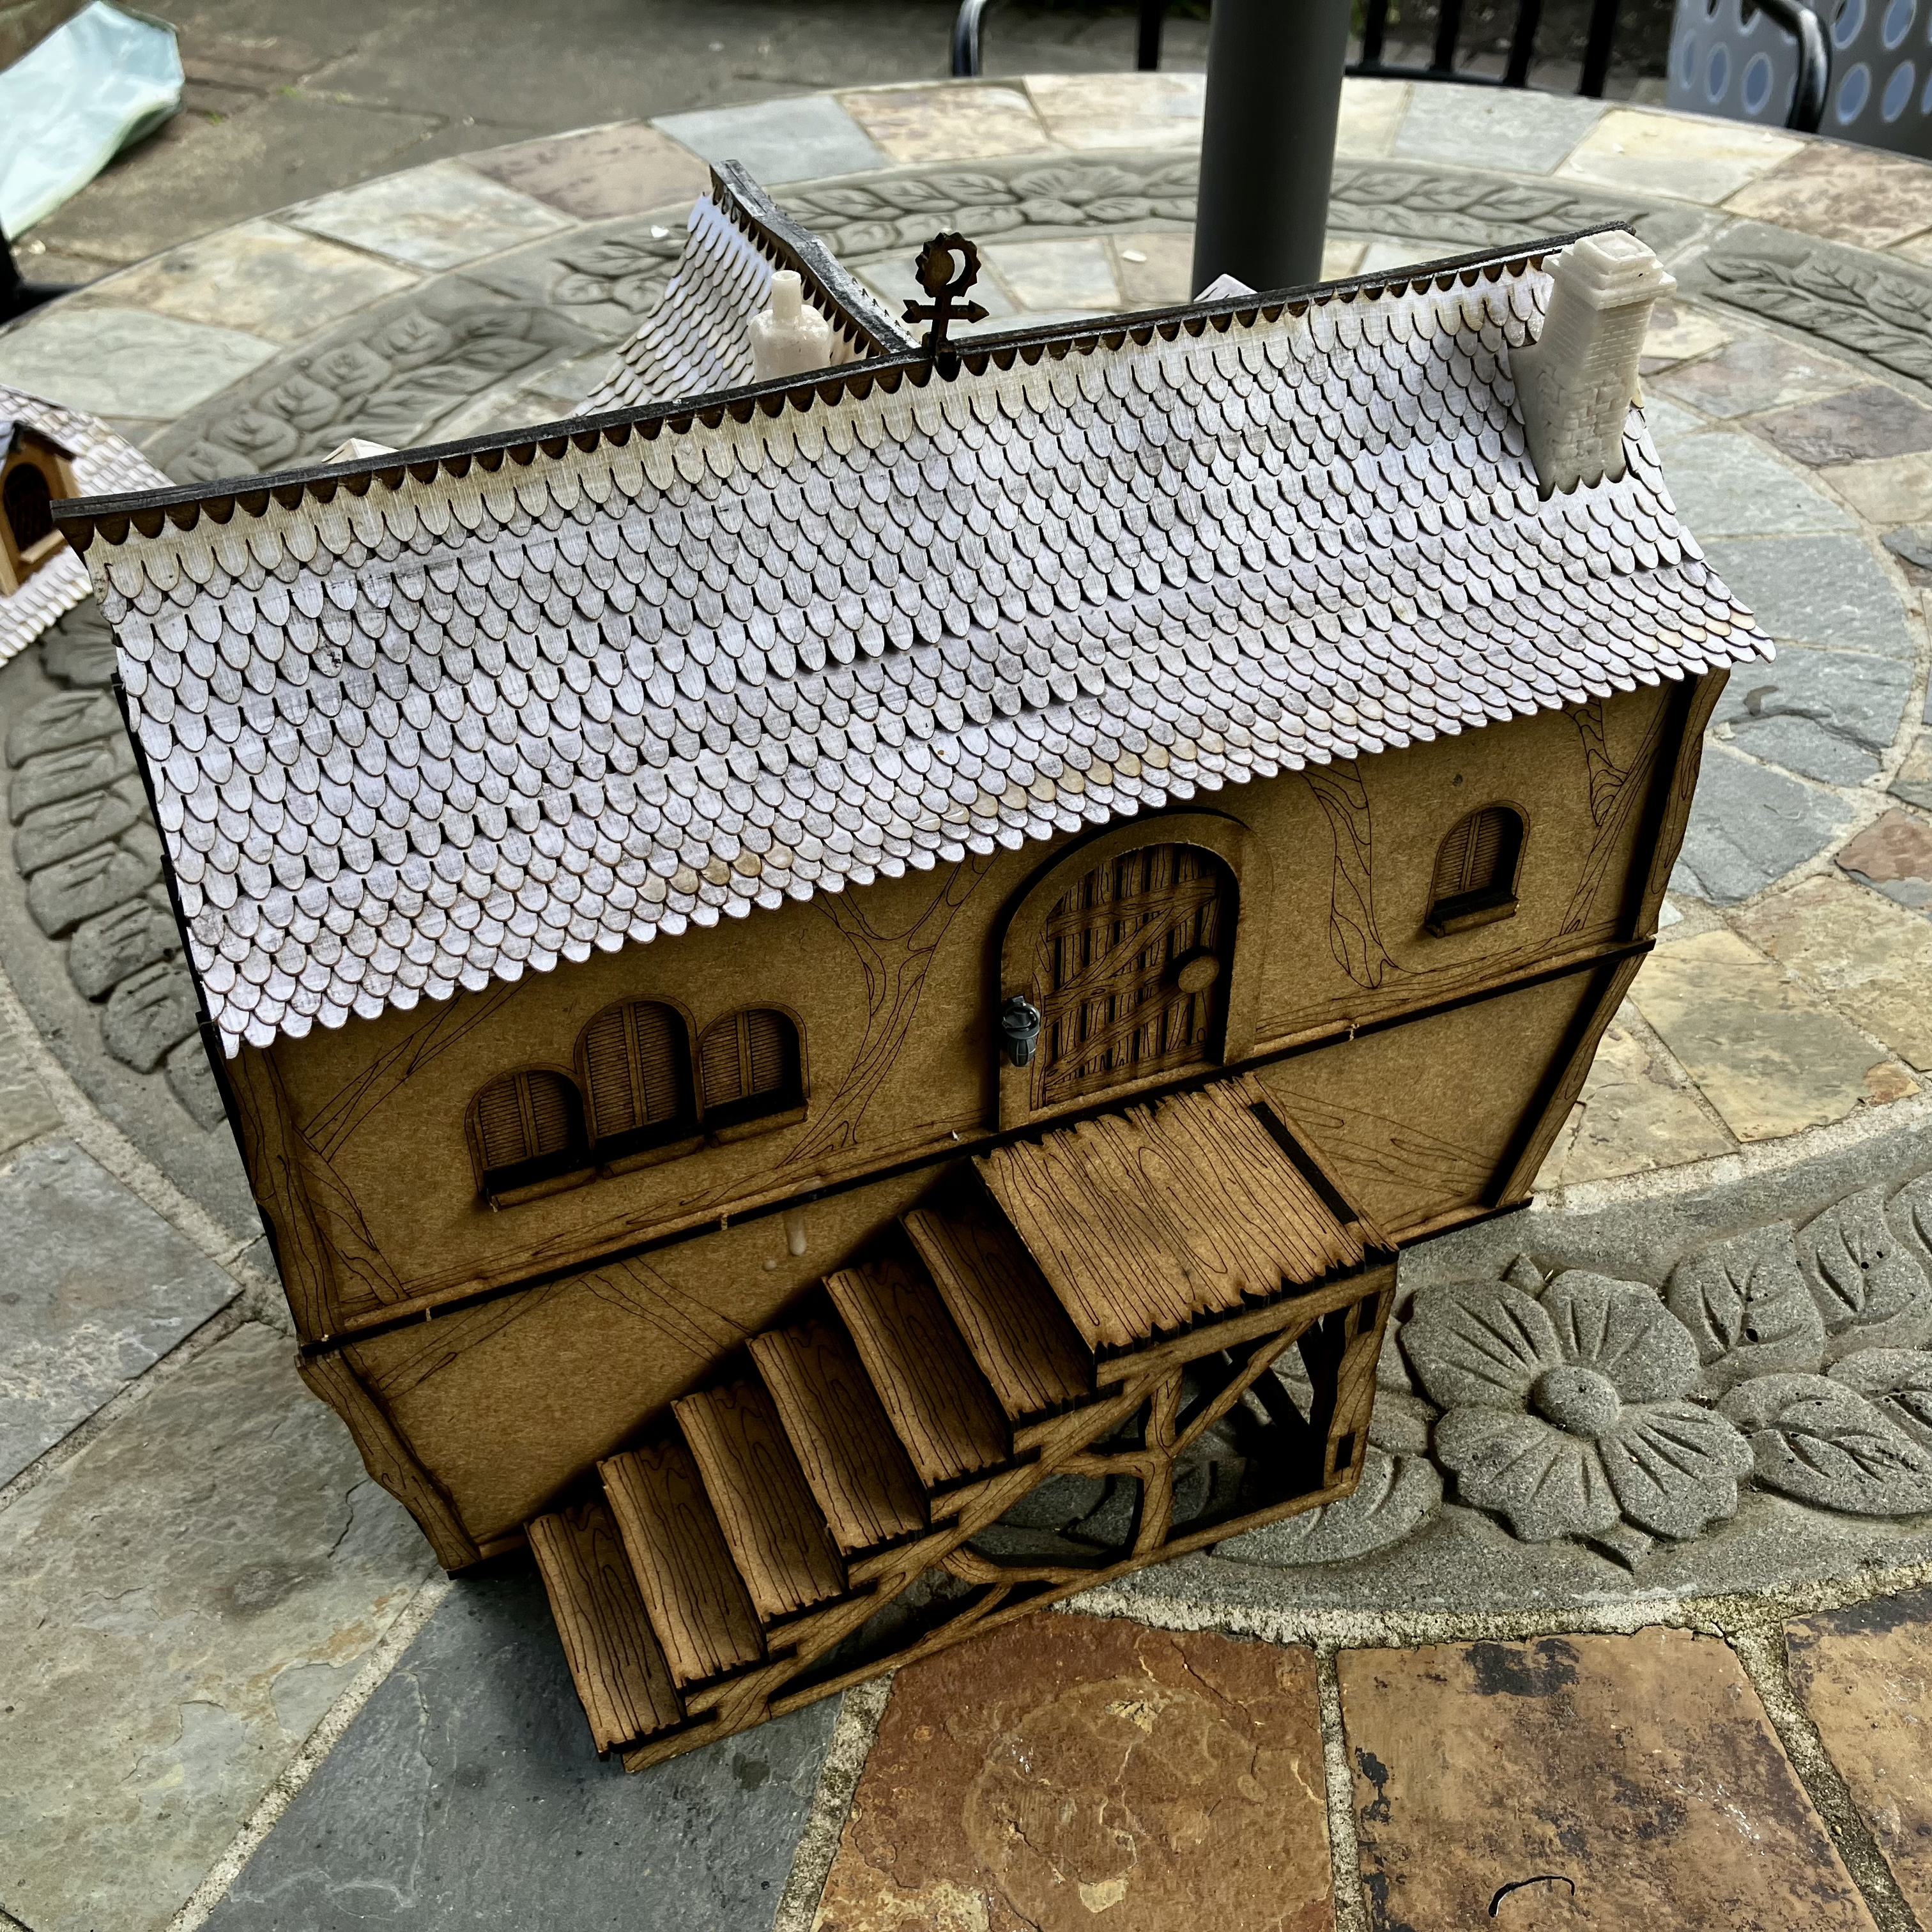 Rear view showing the steps. Ideal for a sneaky getaway with the gold…
Detailing the dormers
So when we left this, I’d got as far as tiling the roof, but had run out of tiles, so was waiting for some more to be delivered. Well, they’ve arrived ed so yay!
You might remember that the formers are just clear plastic protective corners, that I’d trimmed to fit the roof. Here’s how I’ve turned them into detailed roof sections.
 A basic plastic triangle
 I got hold of some 3D printed resin windows online. They were quite sticky on arrival but then I remembered reading that resin prints like ultraviolet light, so I popped them on the windowsill for a day and they seem fine.
Taking a window, I glued it to the front, underneath some beams I made from trimmed matchsticks.
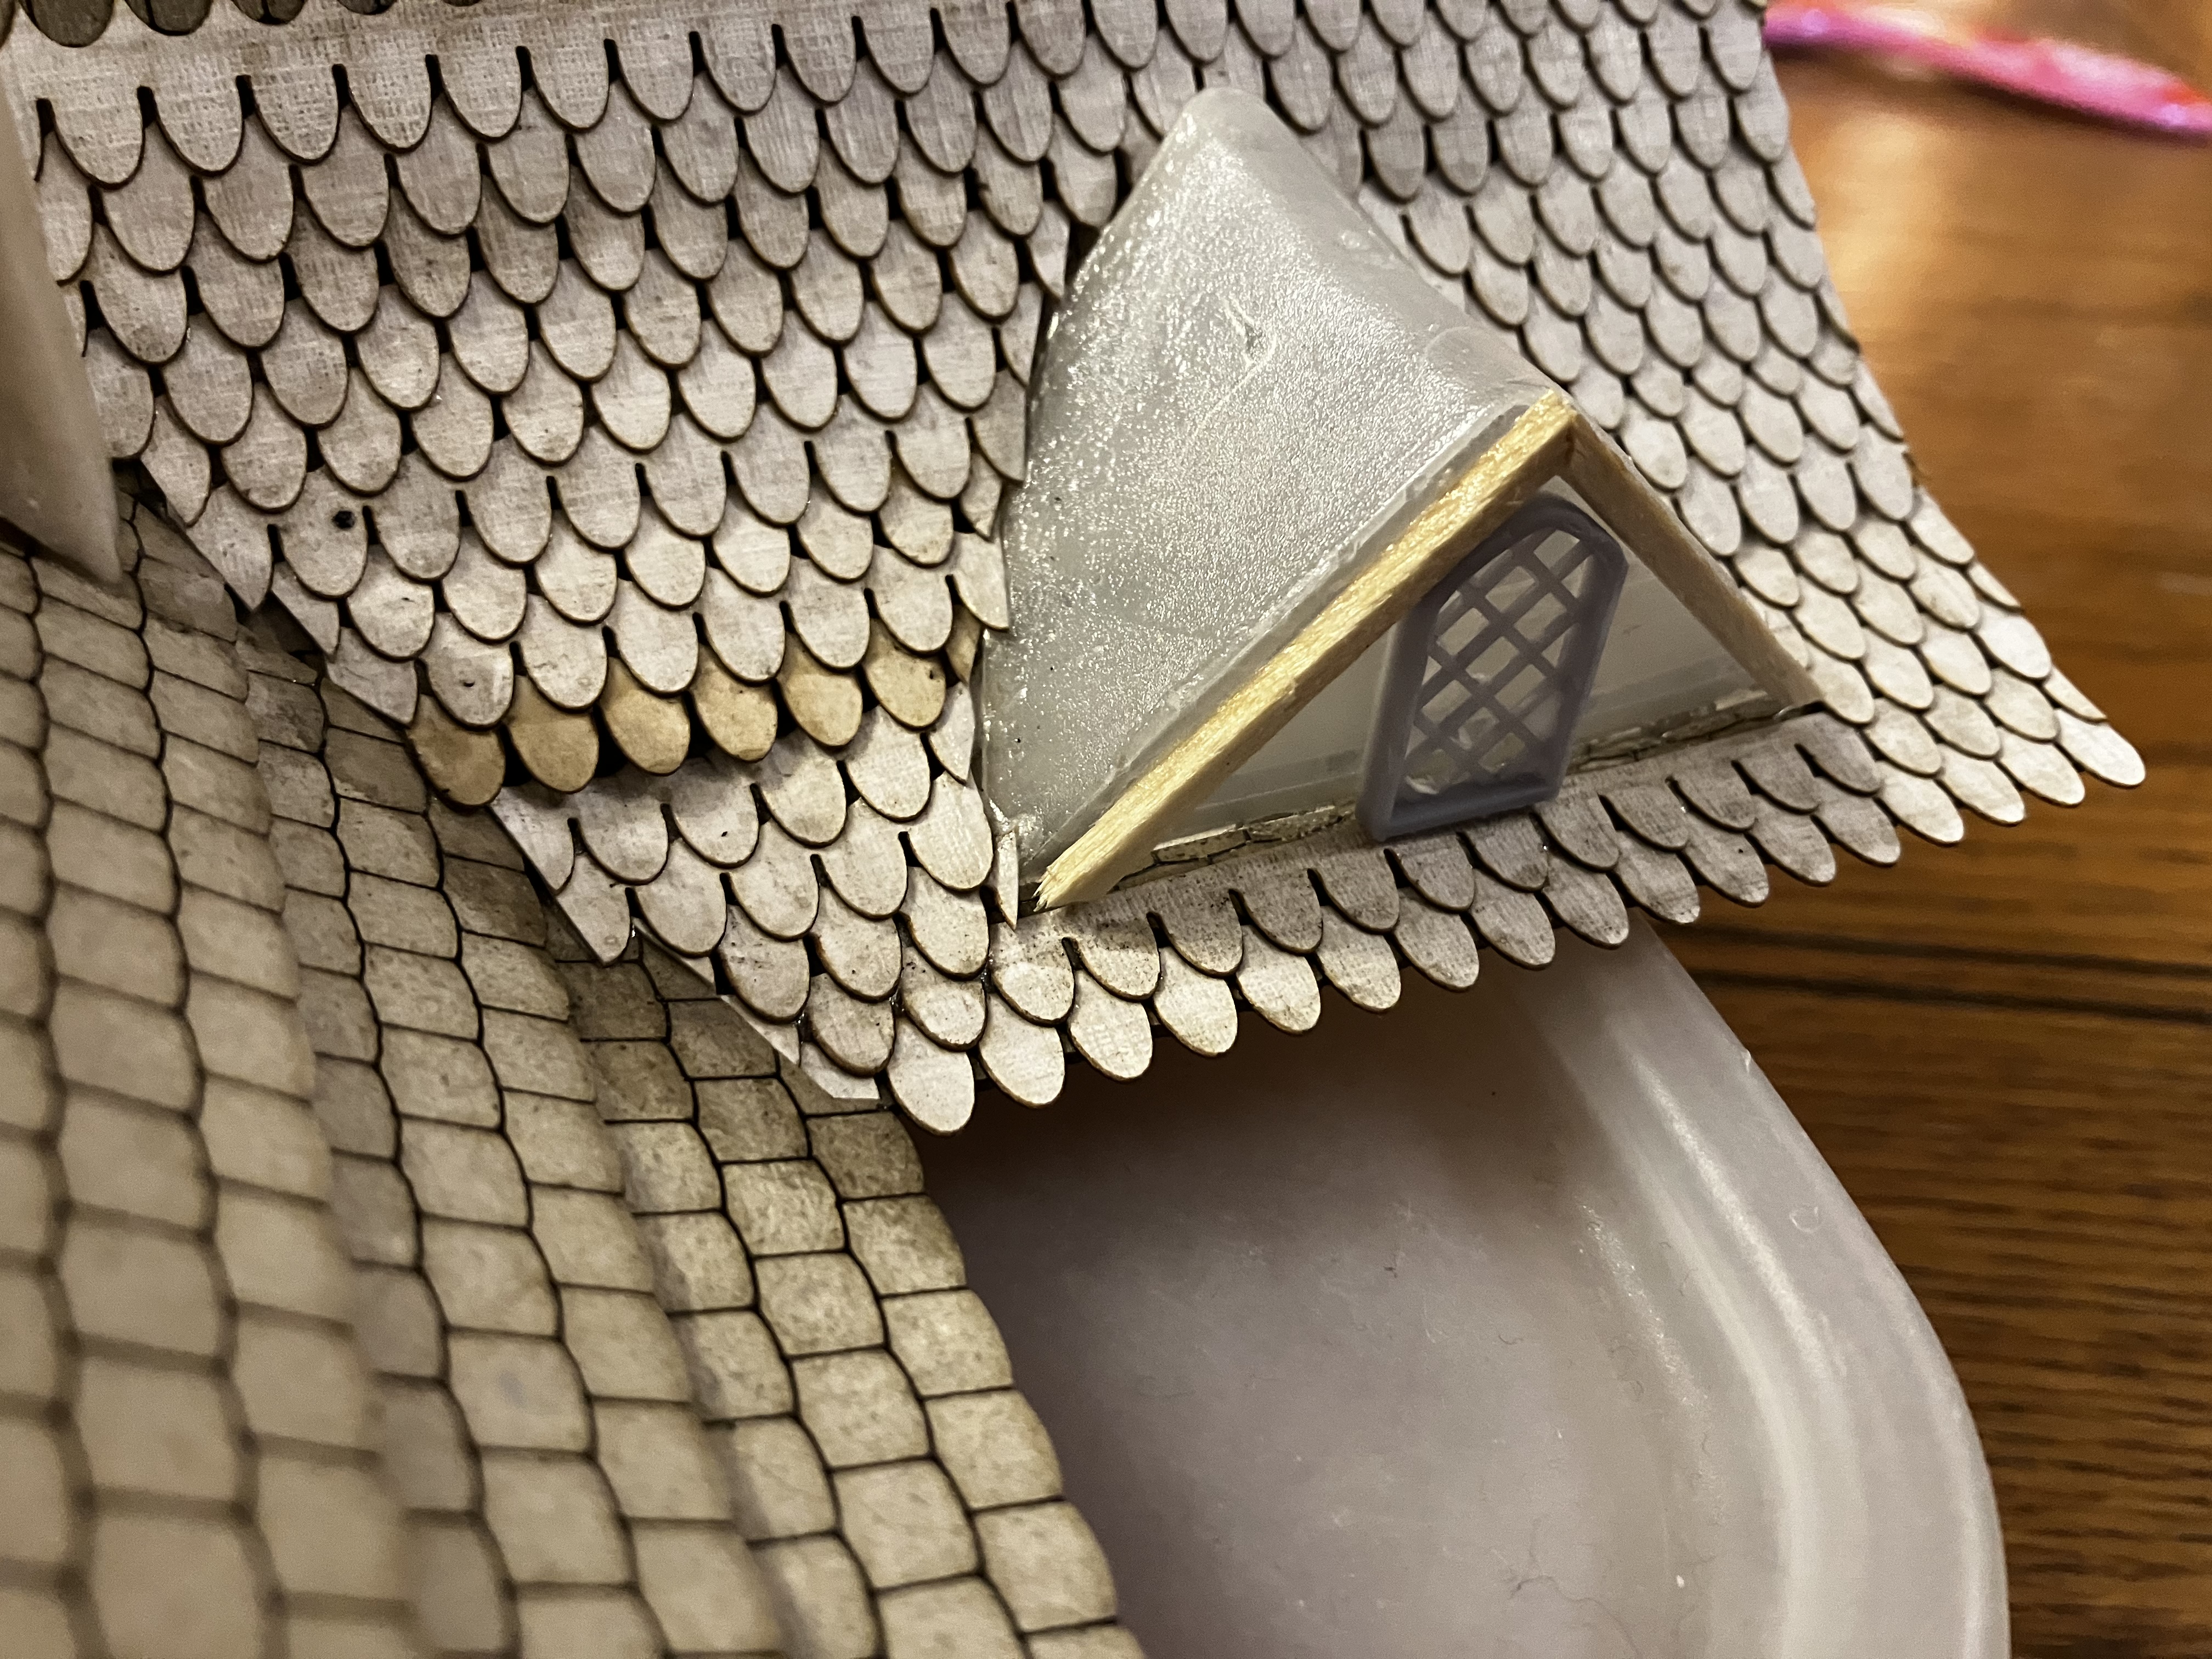 Matchstick beams and resin window
With that done, I then tiled over the roof using the same tiles as previously.
I cut some coffee stirrers into little angled pieces and glued them in place too as wooden cladding.
A little fiddly – but wow! What a great finished look!
 A finished dormer
I’m going to add a little leading where the former meets the main roof, and perhaps a matchstick windowsill, but this is great progress and really has given me confidence that these plastic corners can work on the other buildings too.
More MDF
Some other buildings I picked up last year are these rather swish Town houses from the Lochbhaile range by Warbases.
They’re really well priced and are seemingly designed with Lake Town specifically in mind.
In future posts, I’ll share more pictures of finished builds of these and how I’ve been adding additional details to bring them into my Lake Town table.
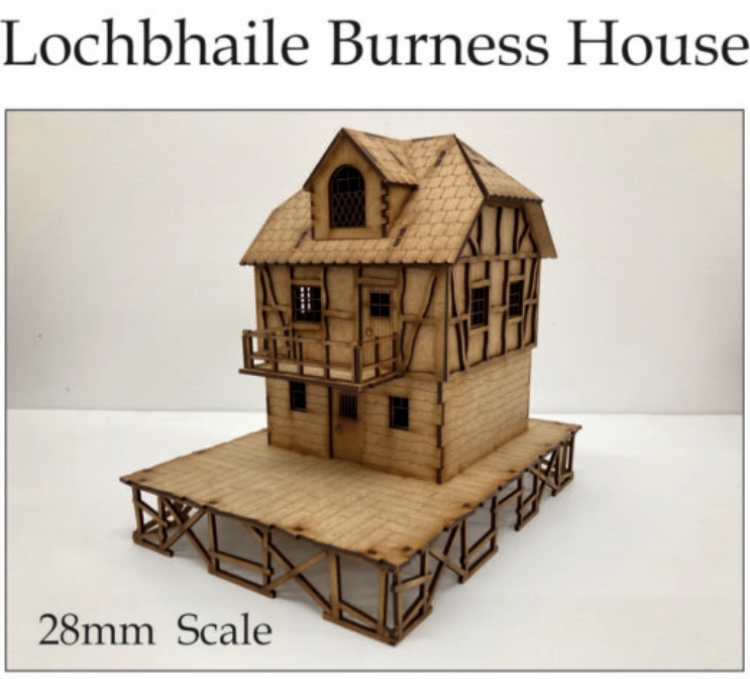 Burmese House
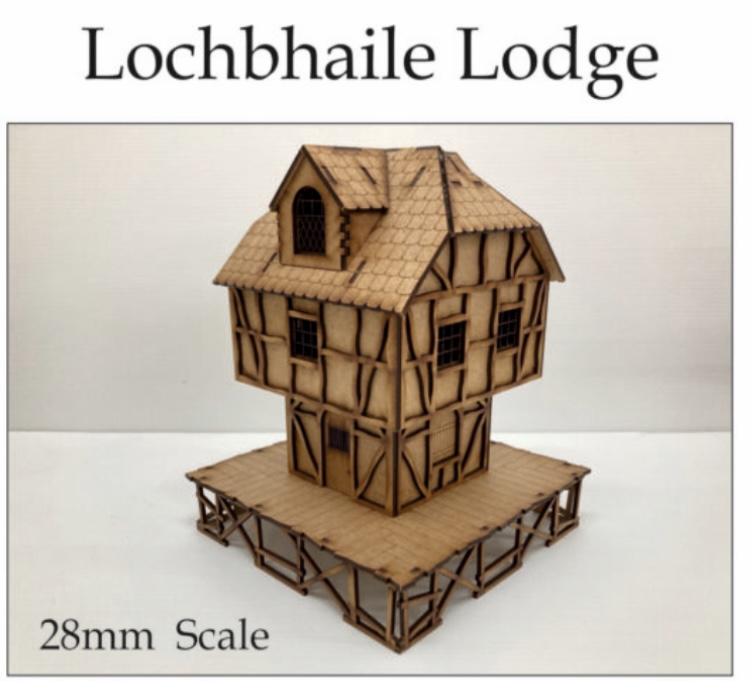 Lochbhaile Lodge
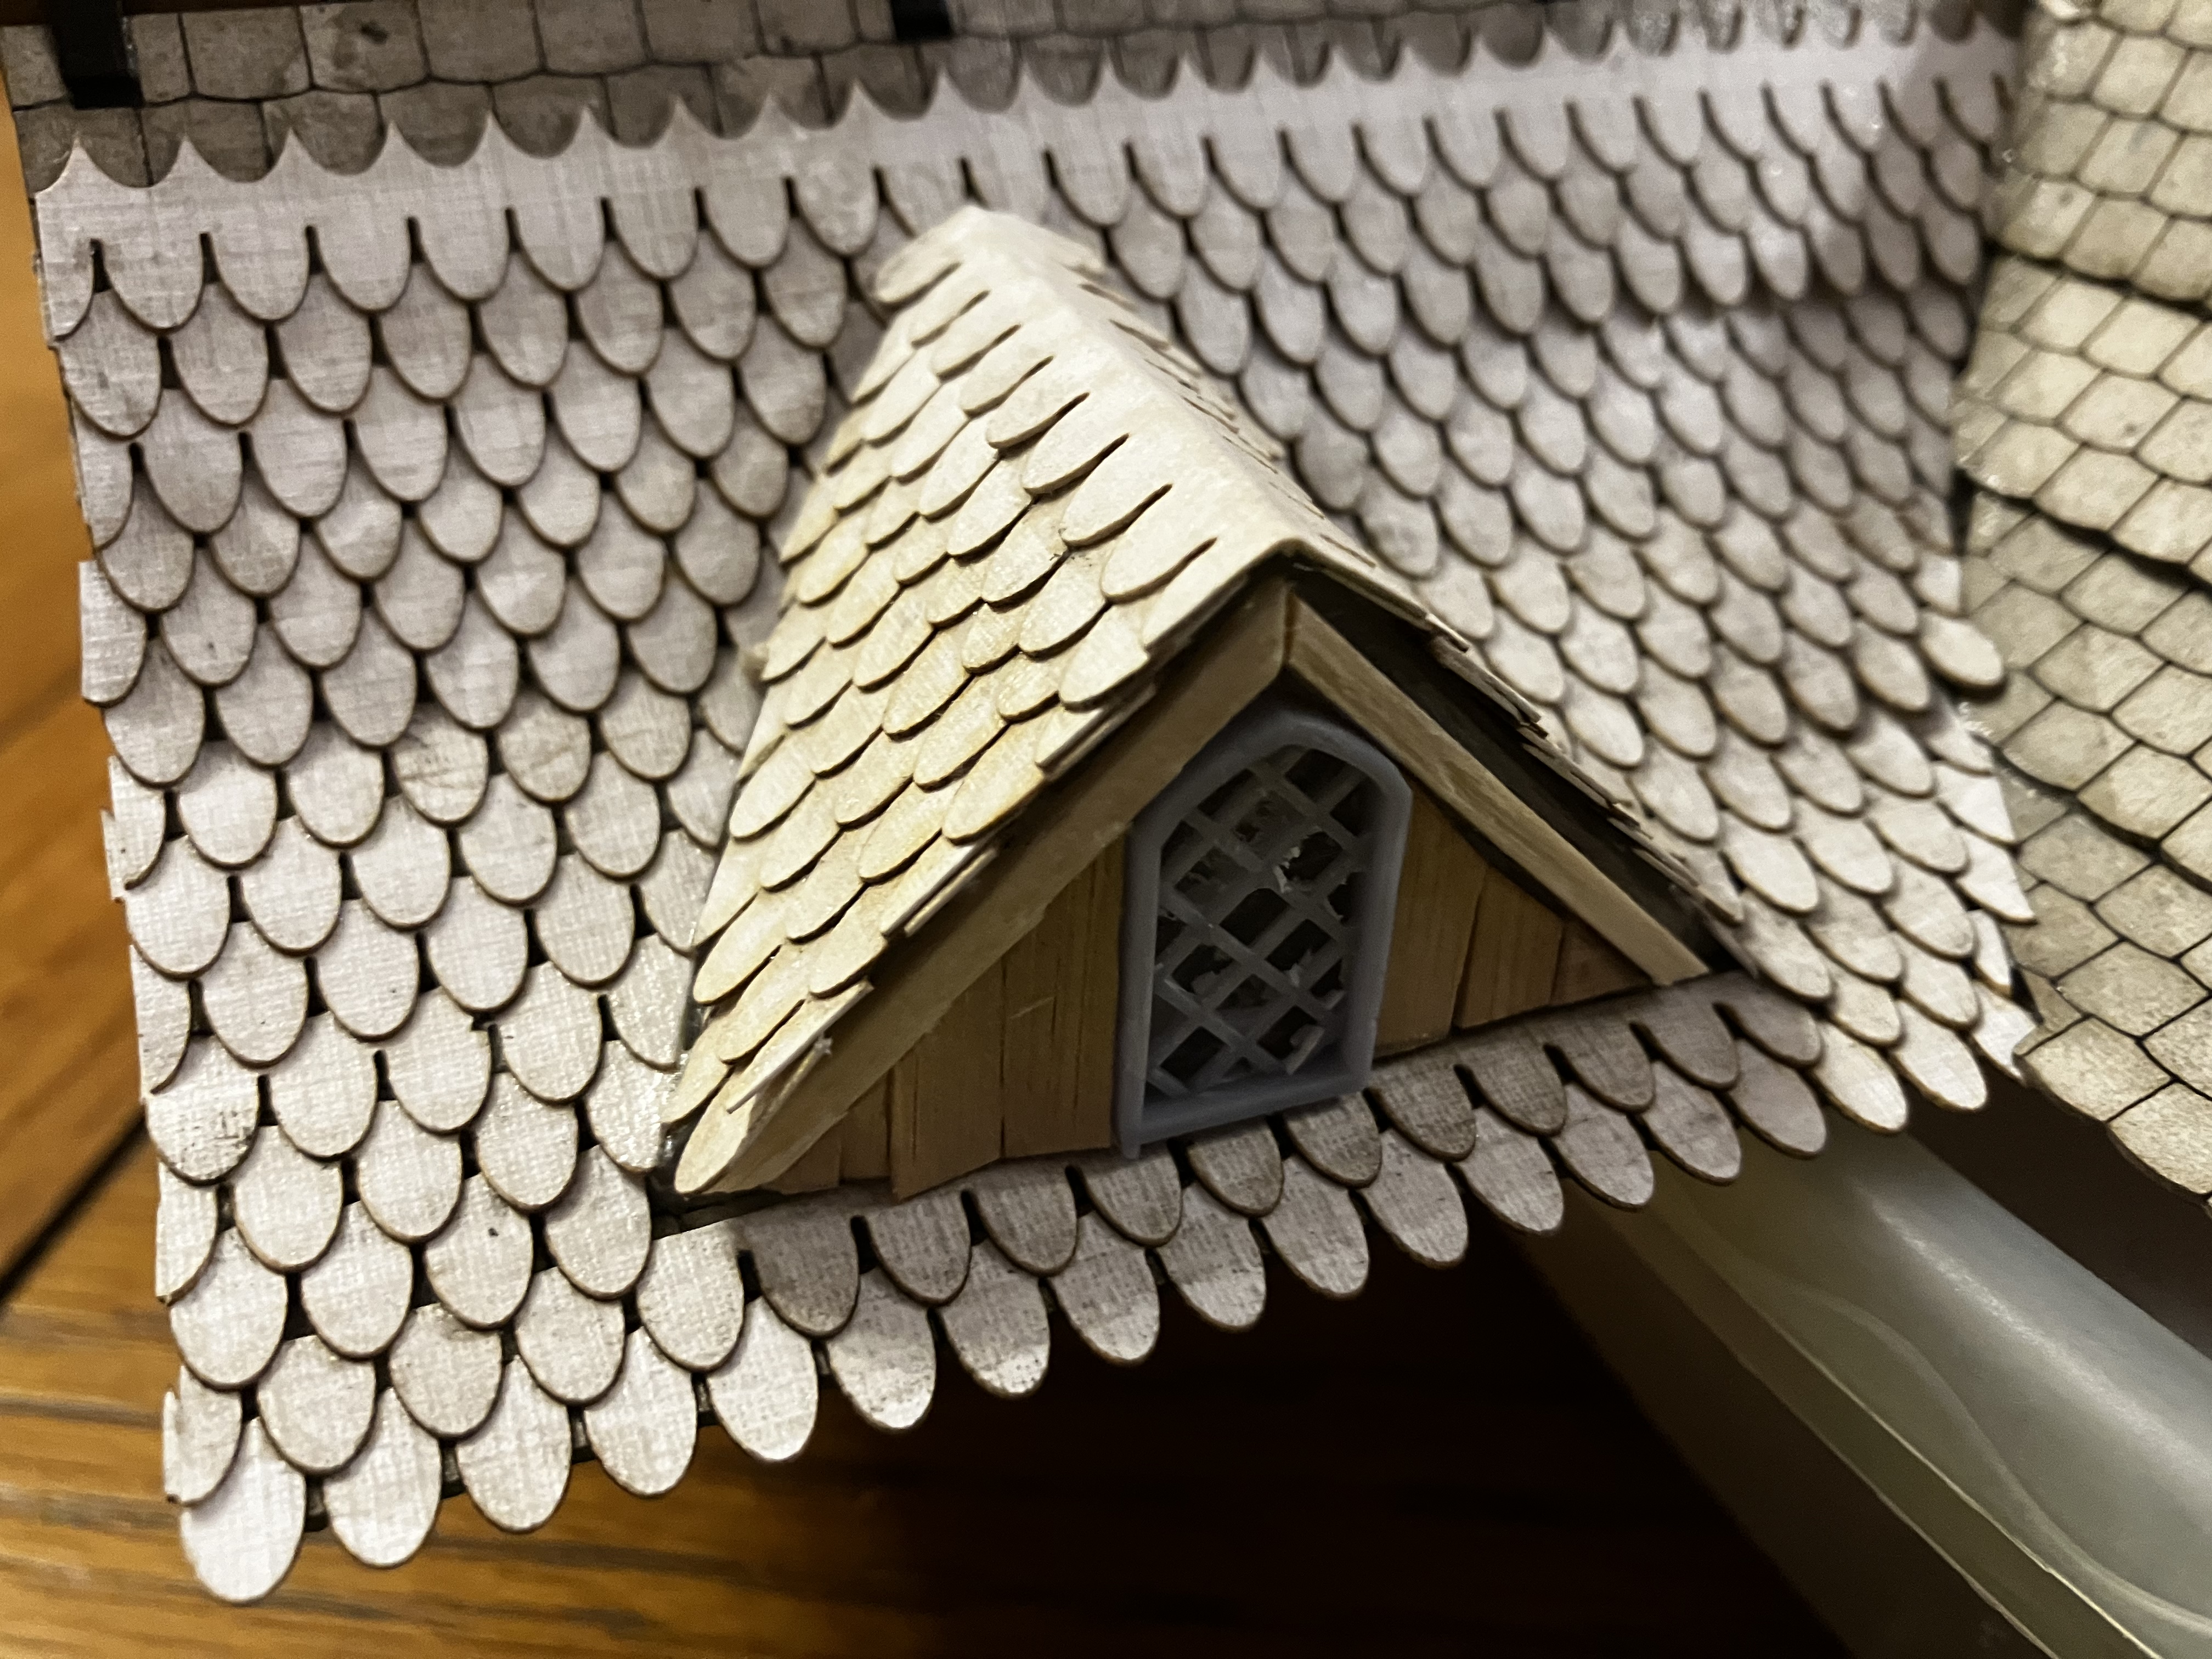
Through the roof
As you can see from the previous post, the roof of the Townhouse has some basic detail for the roof tiles, but I want to get a little more depth and dimension on them.
 These would paint up okay, but do look flat.
Using some tiles I ordered from Warbases, I started adding some better depth. These tiles are feet because they’re quite small, and also look posh. In The Hobbit movies, some of the buildings do have roof tiles close to this shape.
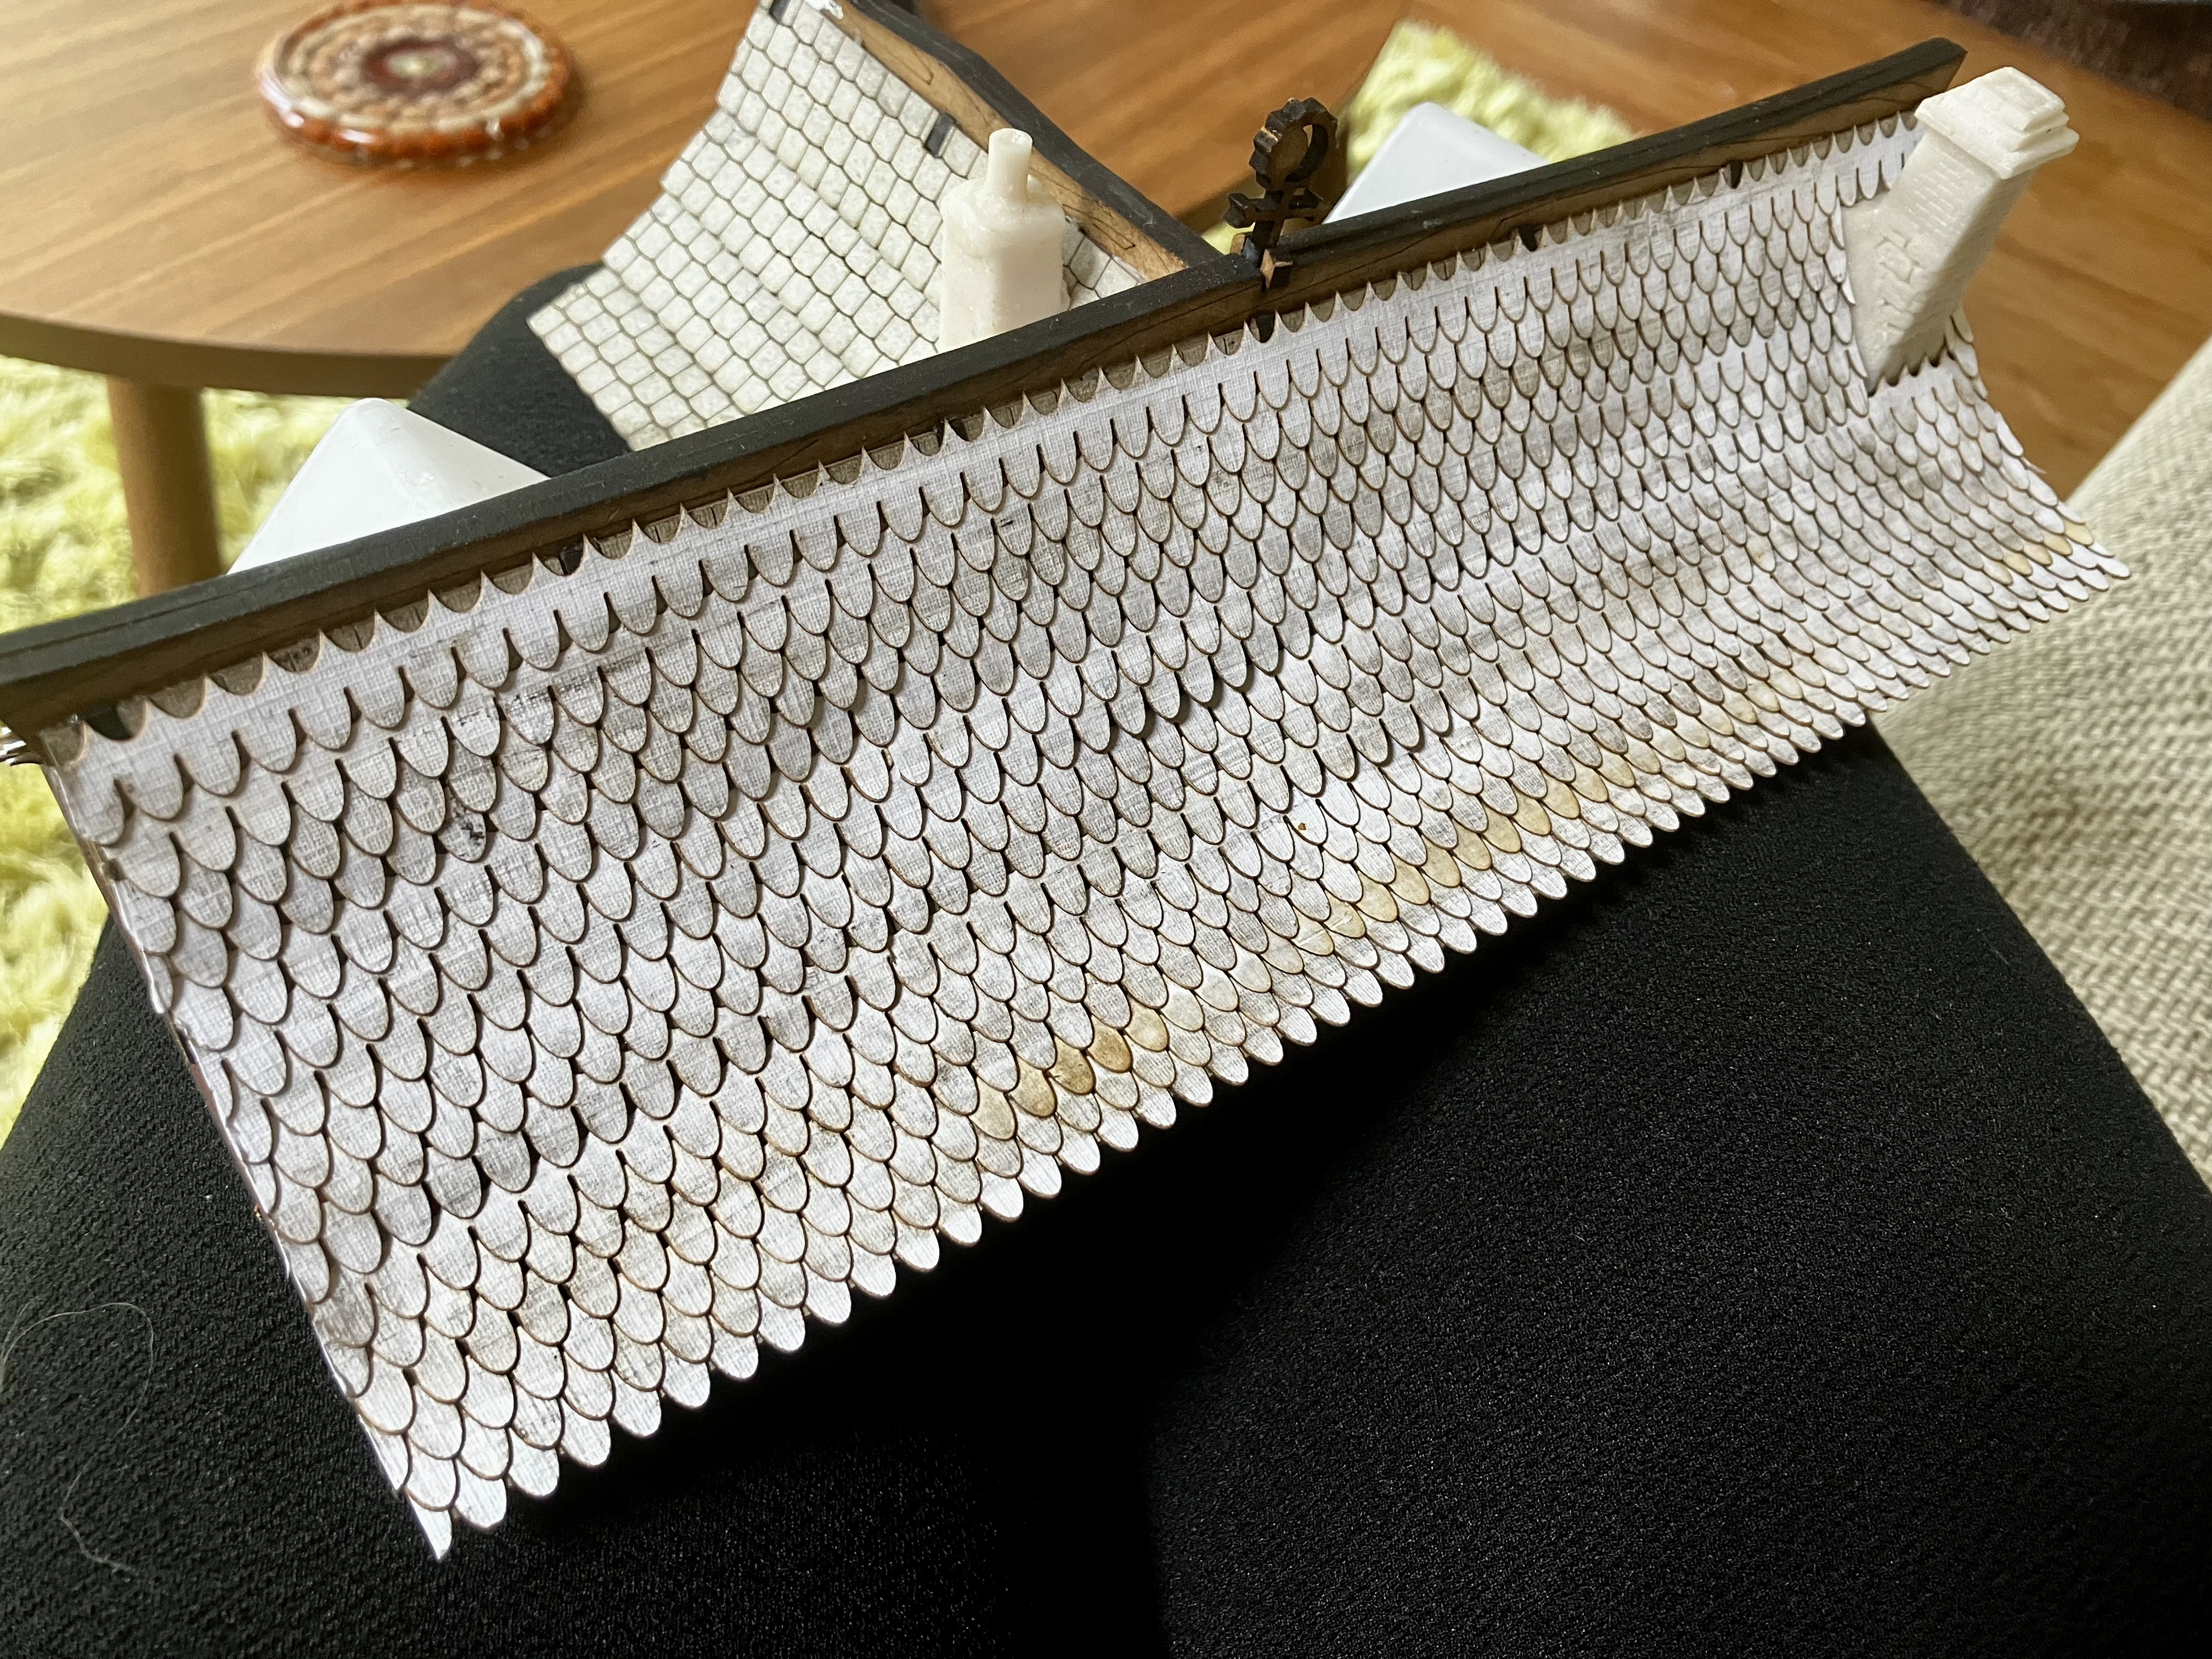 That’s the whole back roof
I definitely made this job harder for myself by deciding to add two additional dormers to a roof that already has two sets of inner corners!
It will look awesome when finished though. Just need to order another pack from Warbases!

To glue these on, I’m just using PVA woodglue, and my tiny scissors to trim as I go. Once a whole section is complete, I then apply a thinned coat of PVA and water to set all the tiles and really make sure they’re going nowhere!
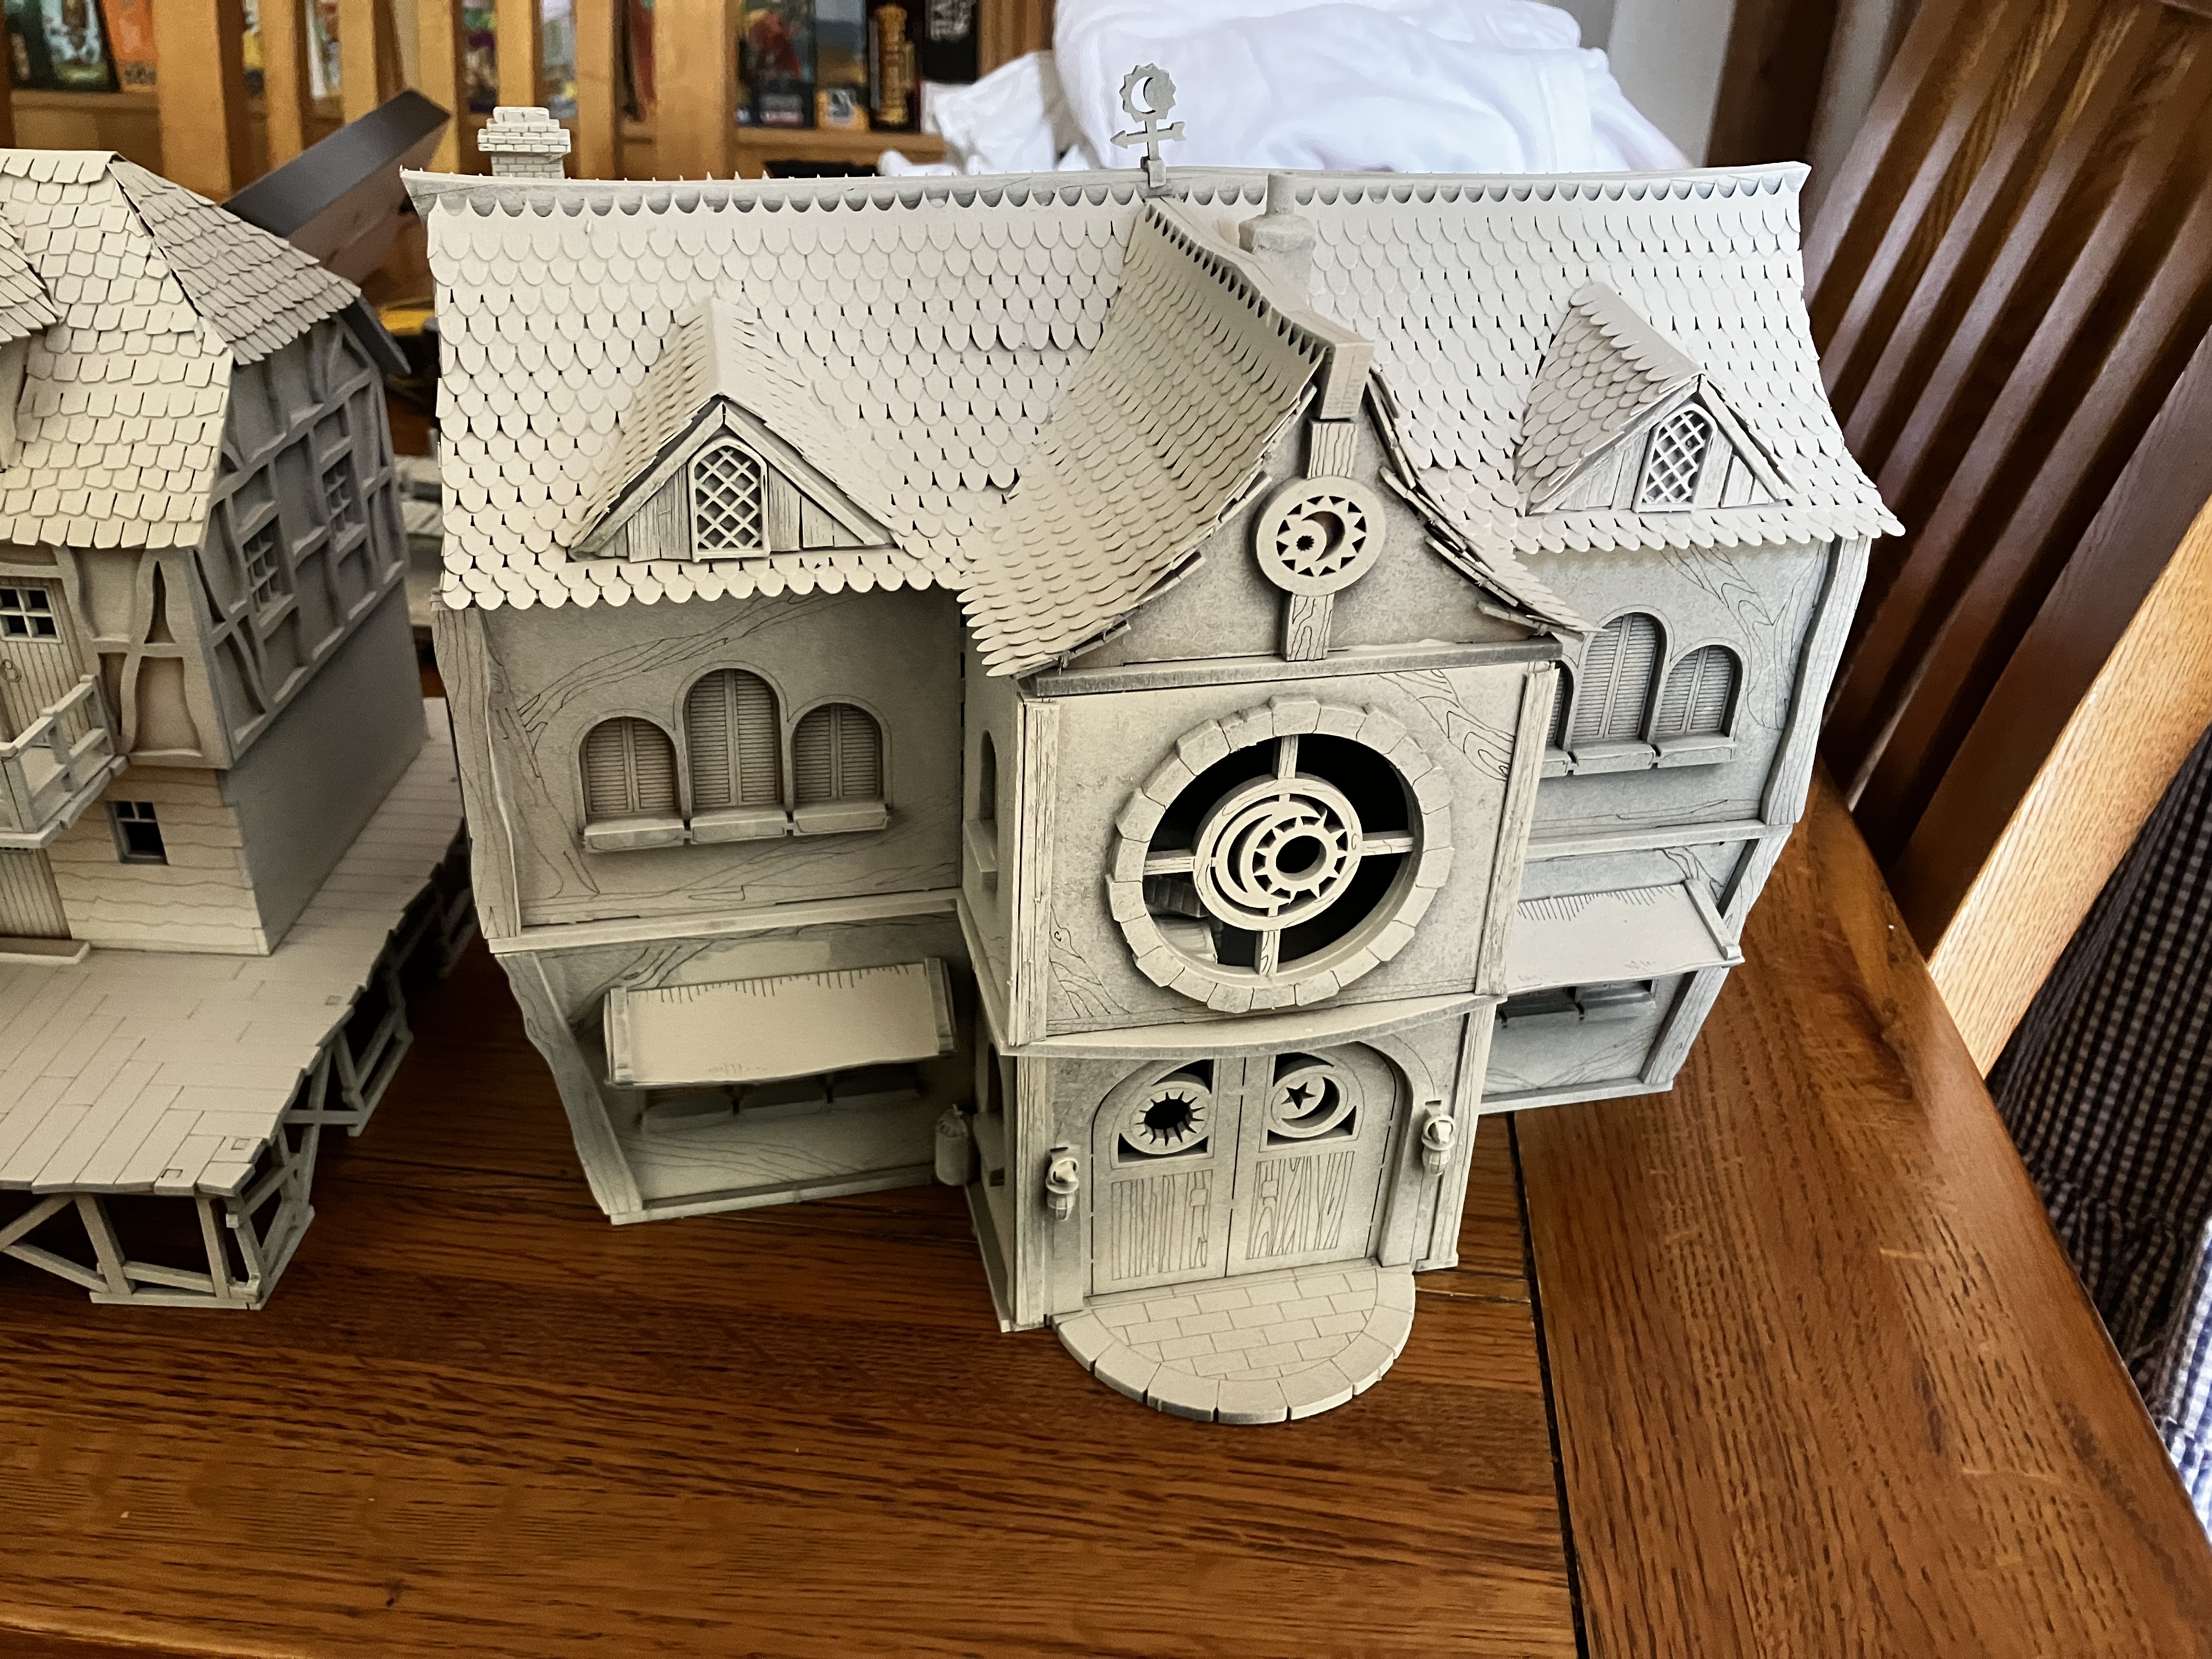
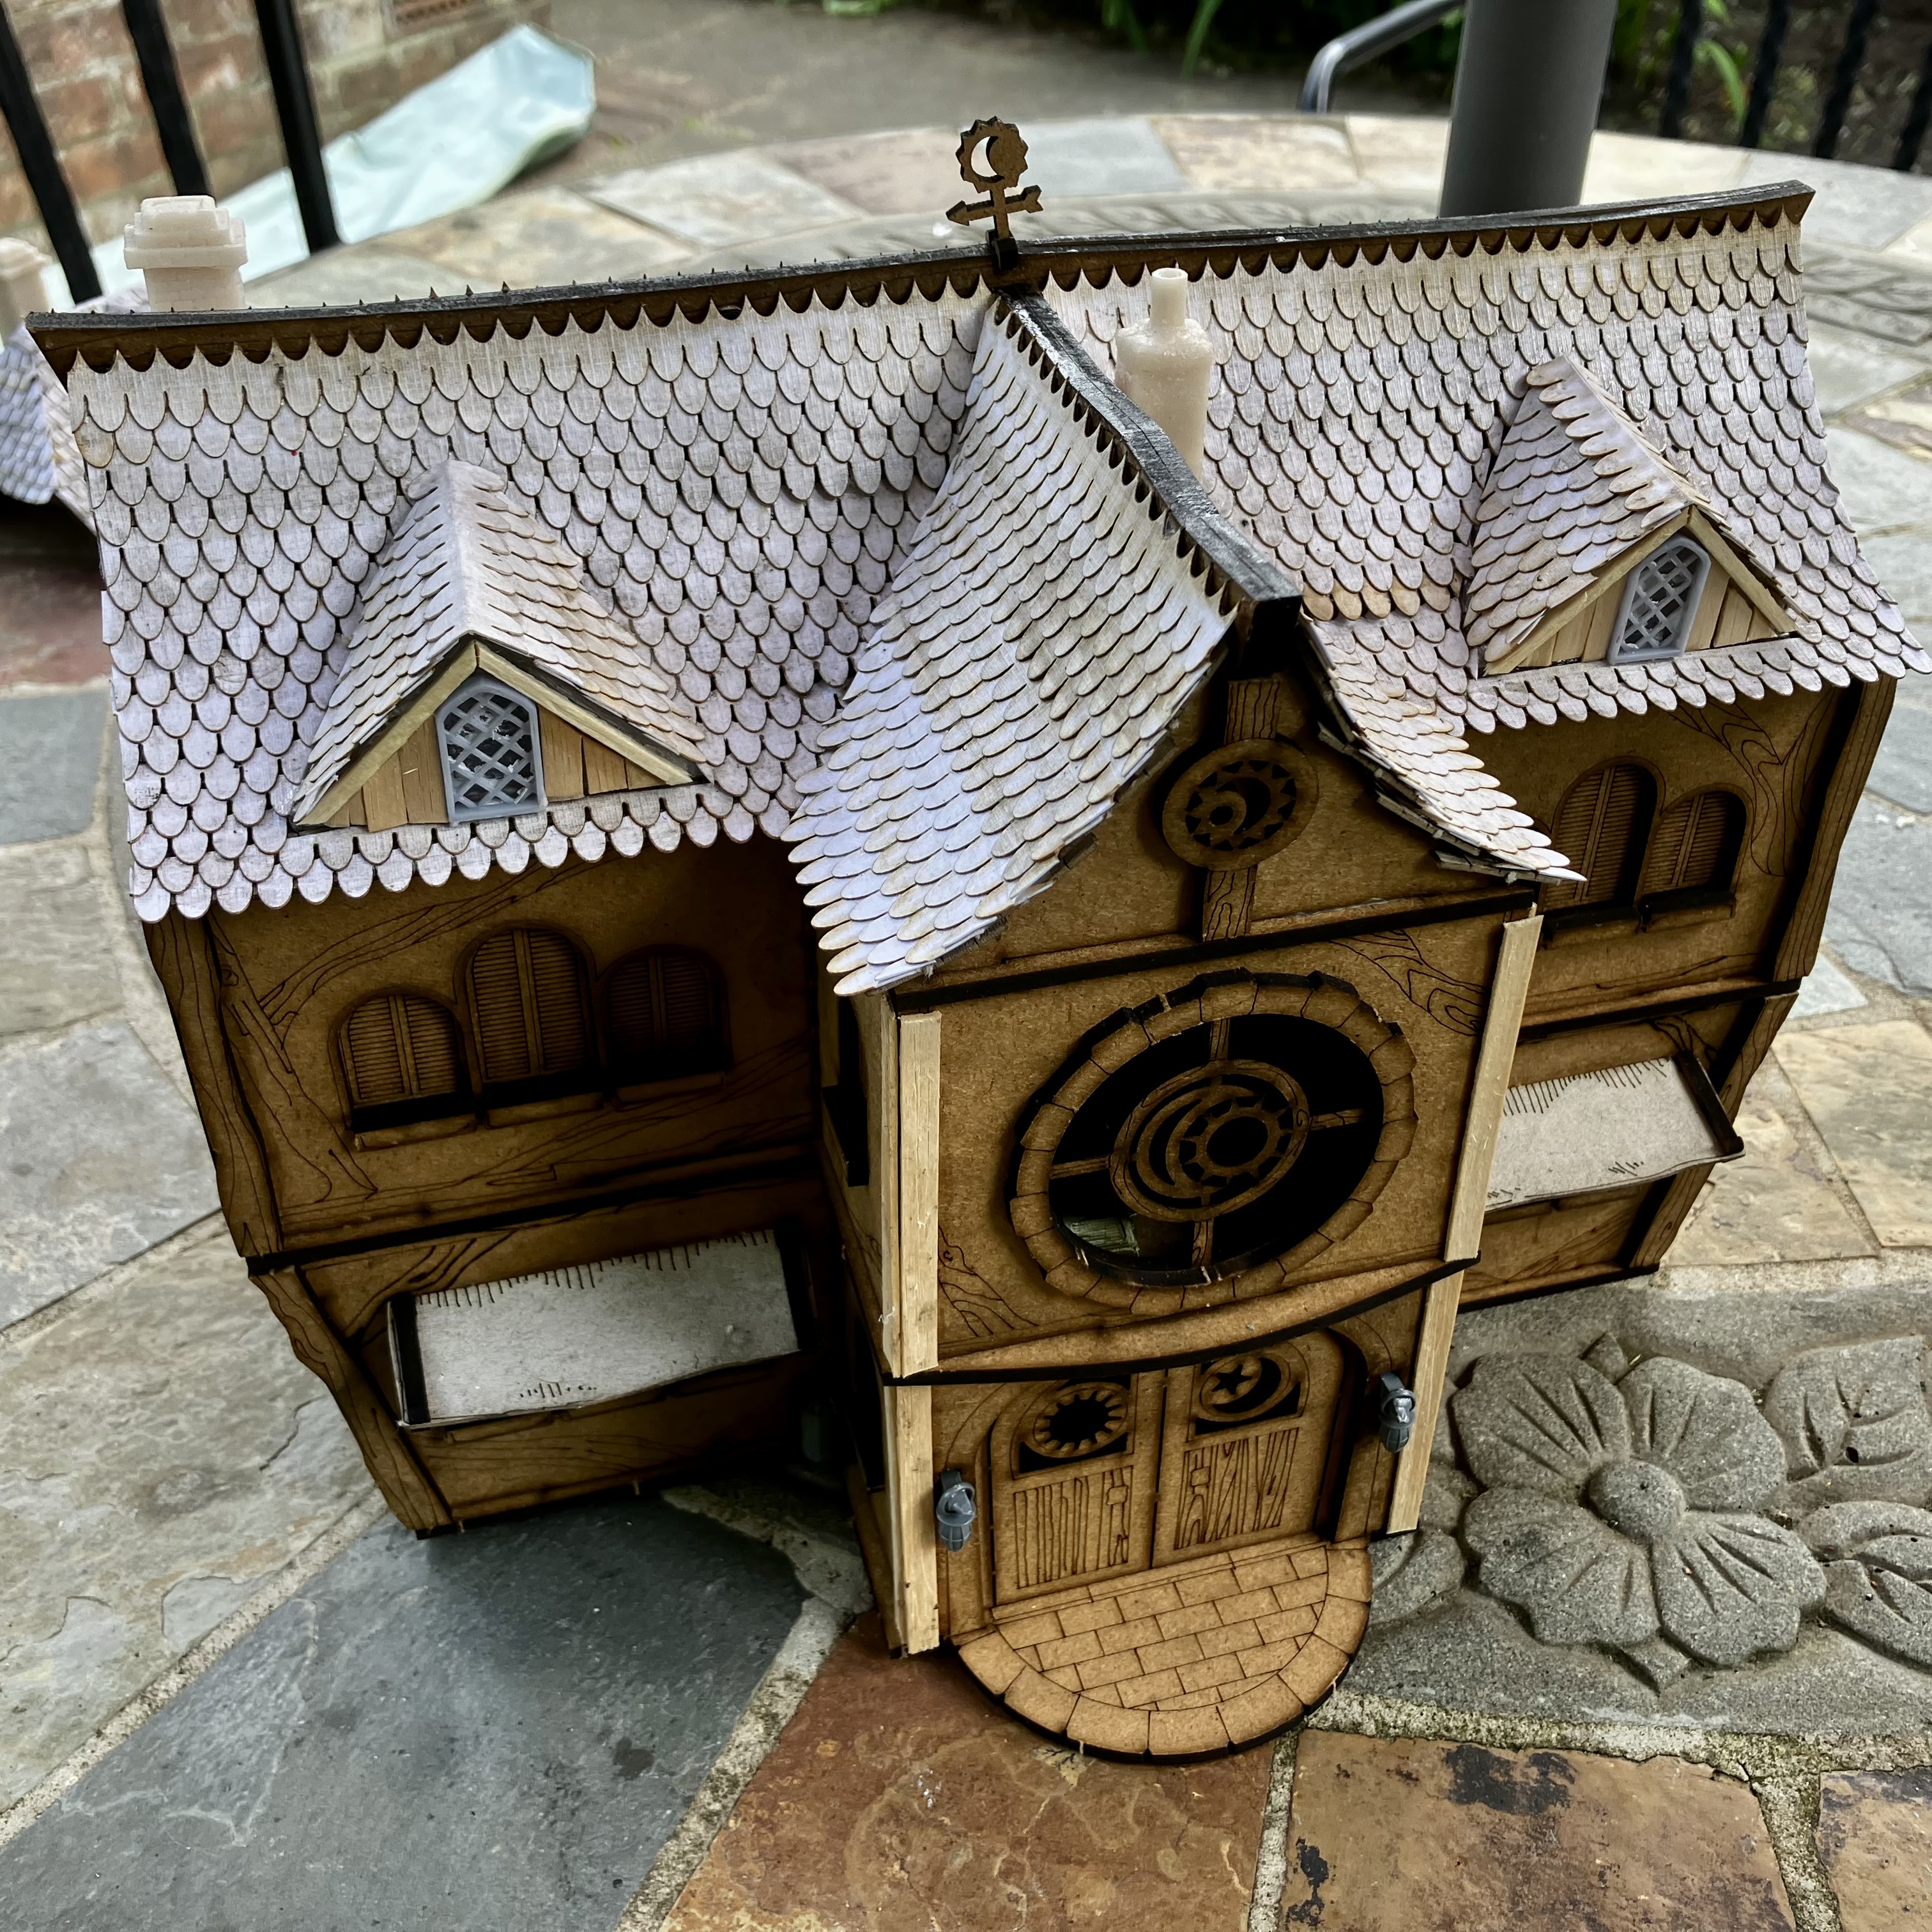
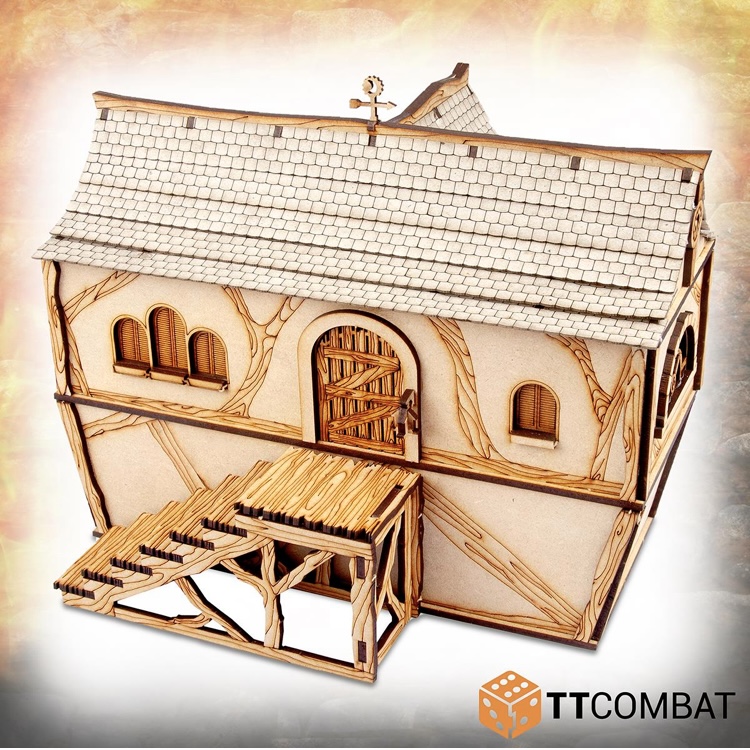
The Master of Lake Town’s House
I picked up this kit Fancy Hat’s Town House from TTCombat as I thought it’d be a really good building to represent the Master of Lake Town’s House. It doesn’t look anything like the movie version of course, but it looks suitably large and impressive alongside the other buildings.
it’s a really lovely kit and goes together really well. I’ve kept all three levels detachable so I can detail the inside using Mantic Terrain Crate bits.

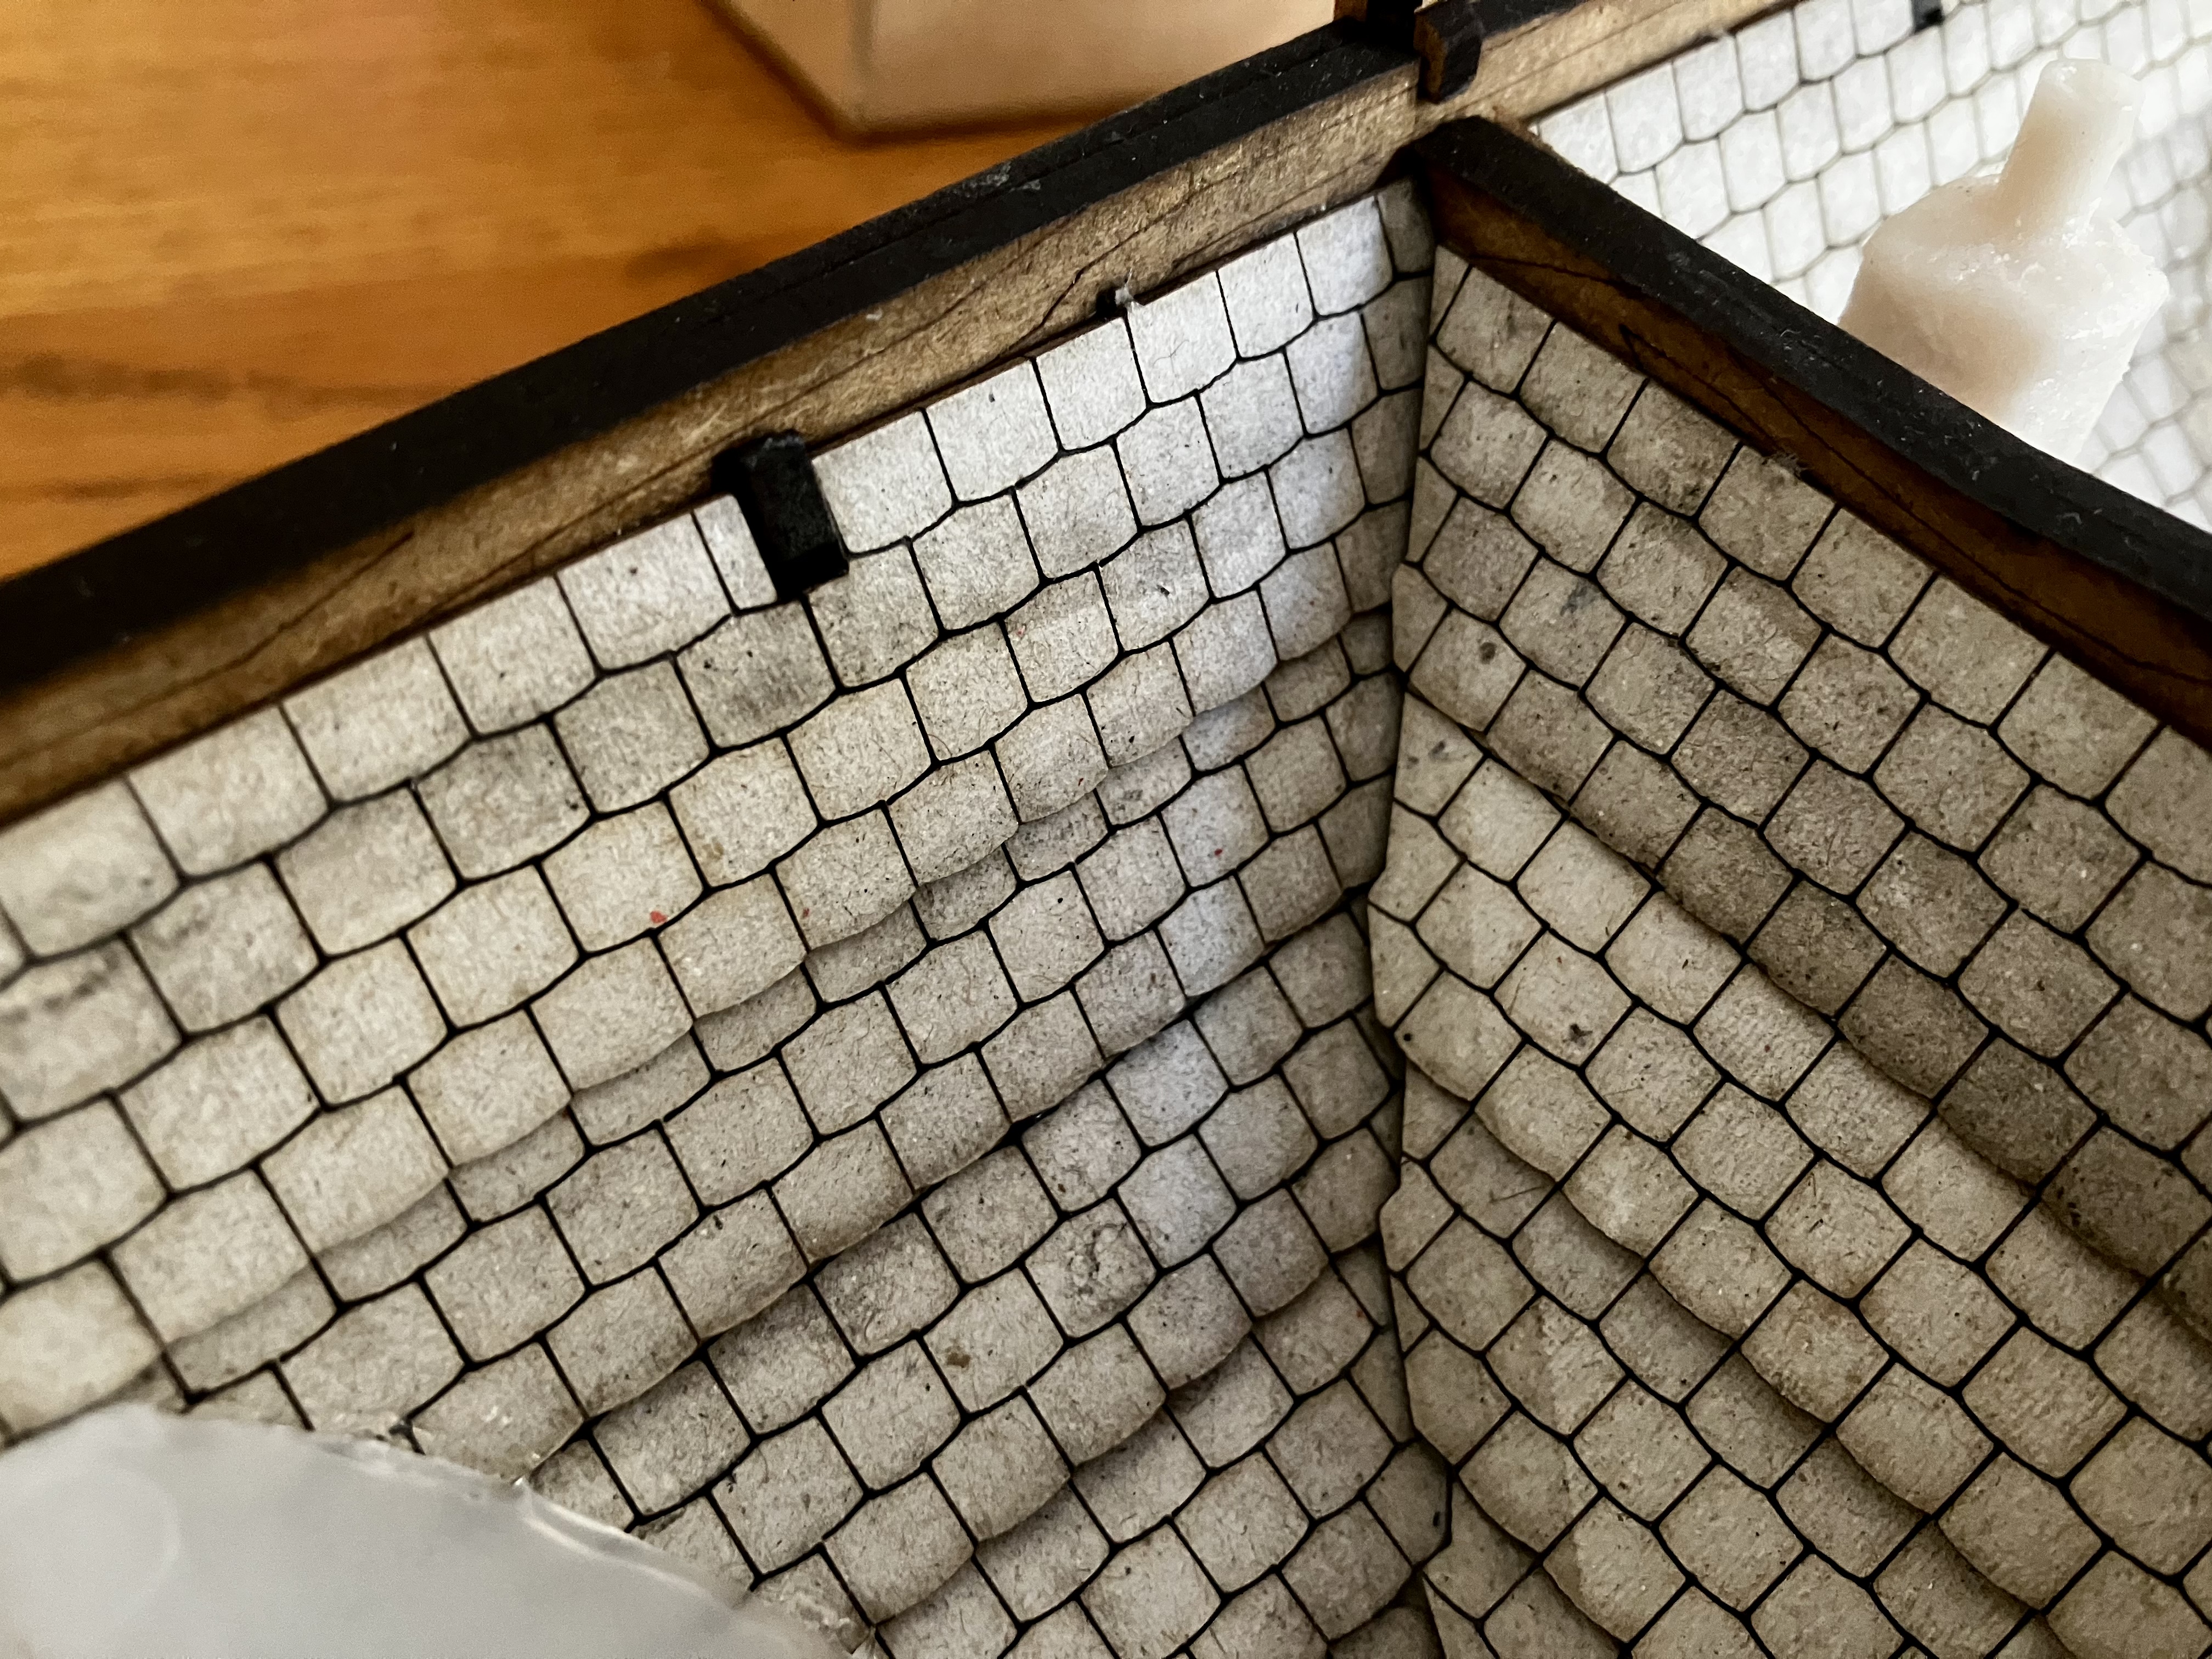
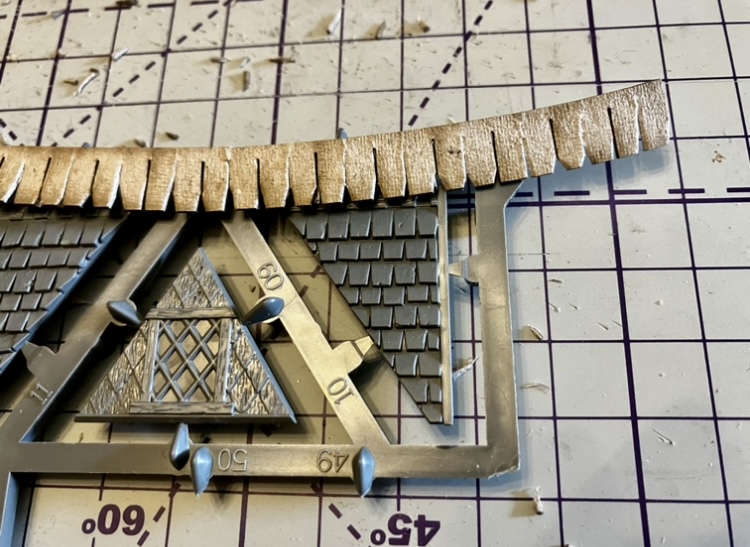
Tiling time
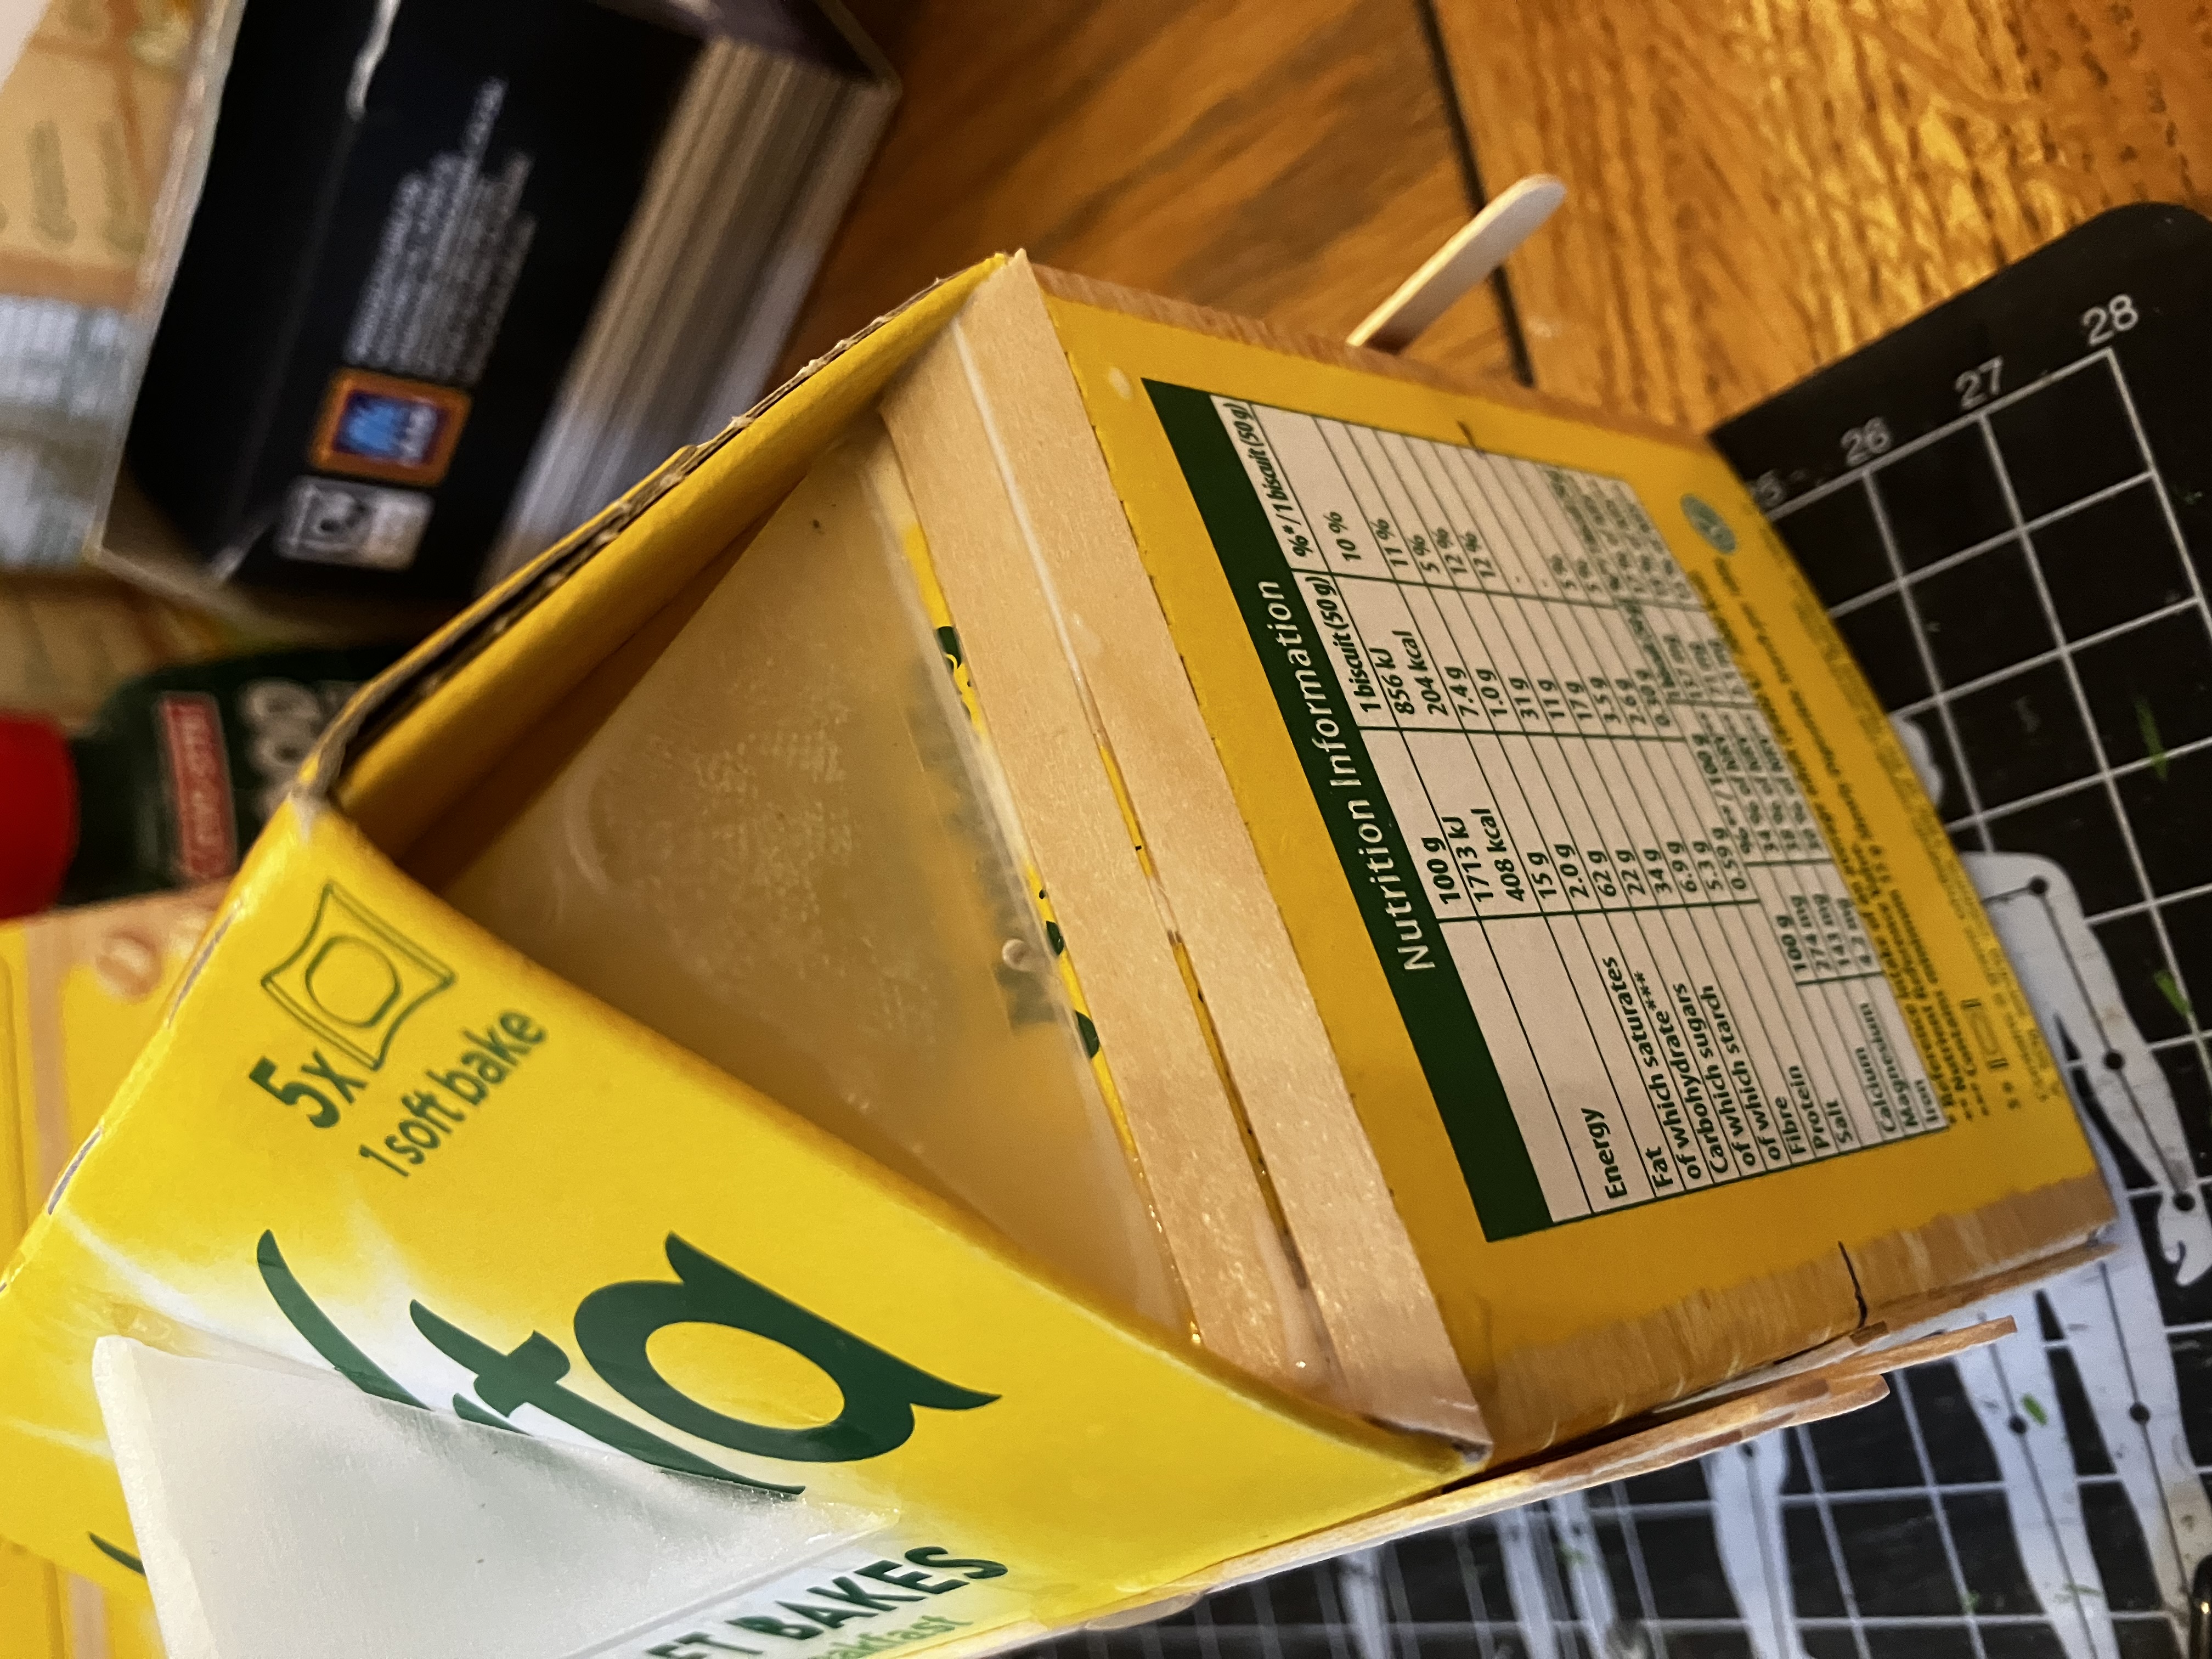
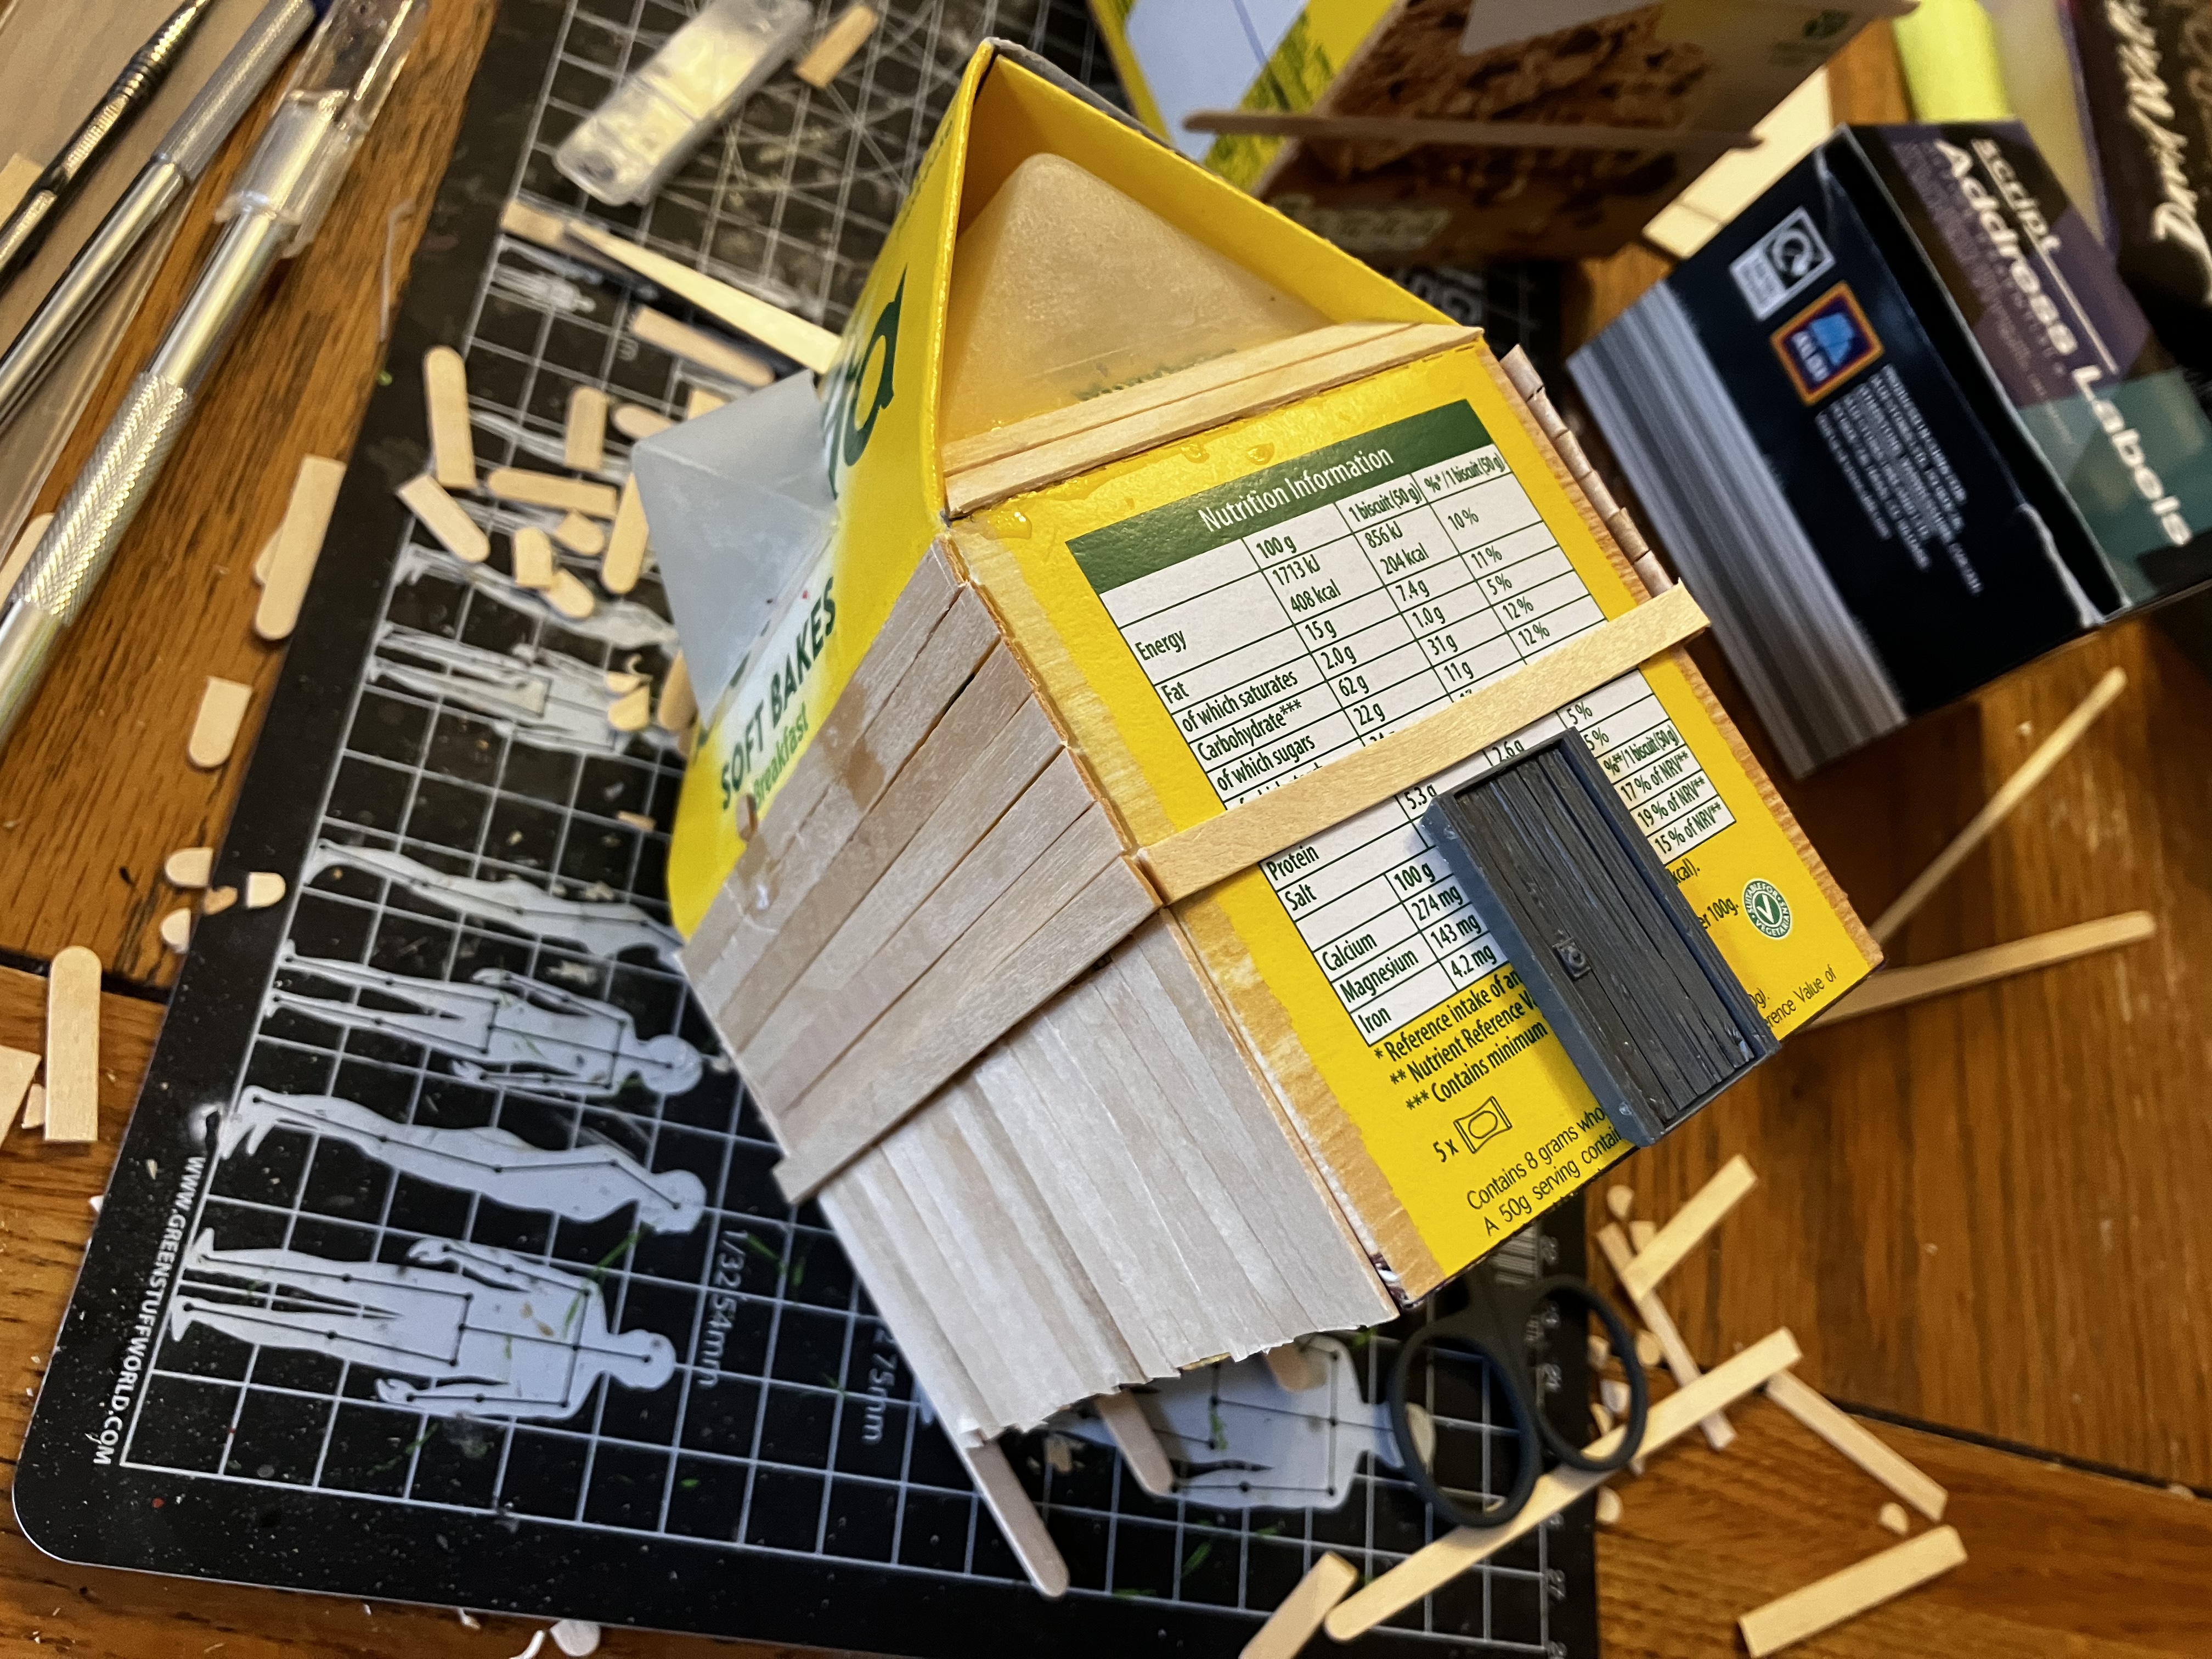
One of the things I think will really tie all the buildings together is consistency in the roofing finish. The GW kits use very small shingle tiles, all in a single side. The shingles themselves are tiny – 0.5cm in width and less than 1cm long. I haven’t been able to find any manufacturers making tiles that small, which is understandable. So I’m making my own.
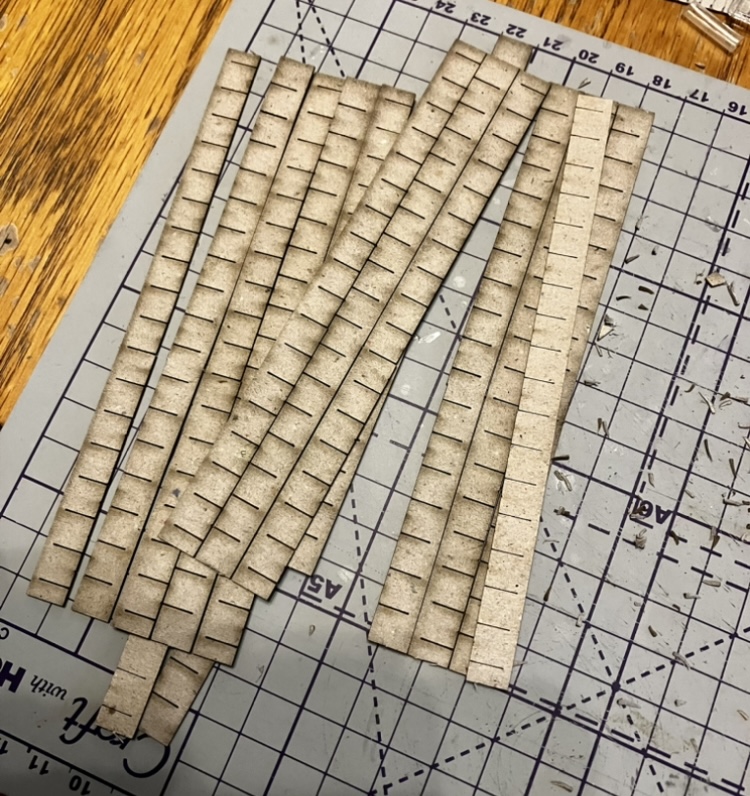
These are from Sarissa Precision, and are about 1cm wide.
Using my small scissors, I’ve snipped each tile up the middle.
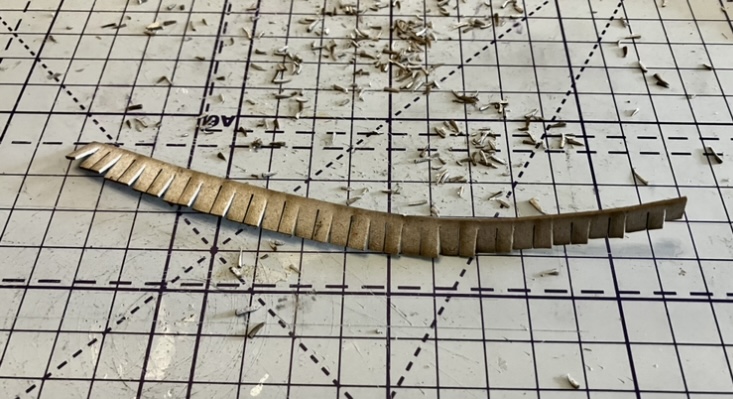
Then, going back along the row – trimmed, snipped, tapered and cut broken tiles to give them a closer finish to the GW kit.
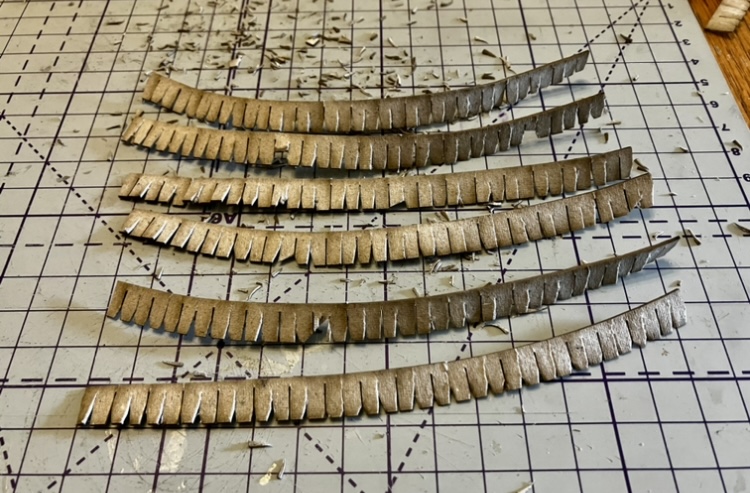
It’s time consuming, but pretty mindless activity, so I can churn out a whole bunch in a sitting.
I’m pleased with how close they look to the GW kit version, and think that they will add coherence and consistency across the different builds. I’d be really interested in your thoughts on this approach.
Some more detailing, making progress.
Spent some time thinking about other ways to detail, add visual interest and tie the scratch builds to the kits.
One challenge I faced was that that the pitched roofs also fold in under the eaves, making an unusual over hang at each end. I could just flatten them with cardboard triangles (and may do that on some) but for this one I thought I’d stretch myself a little. Cutting one of those shelf corners at the right angle, it fits really neatly as a gable-end dormer. Not anything I’ve seen in real life, but looks kinda right for a fantasy world.
You can see here that I’ve also glued one to the roof as a dormer. Once tiled and detailed, it’ll fit right in.
I also glued on a door from the GW kit. I’ll be using these on the scratch-builds to further tie them aesthetically to the other kits. Along with the generous supply of other details on those sprues, I’m hoping they’ll look contiguous.
You might notice that the door sits rather proud of the walls there. Once I add support beams either side and a very small tiled porch, I’m hoping it’ll blend right in.
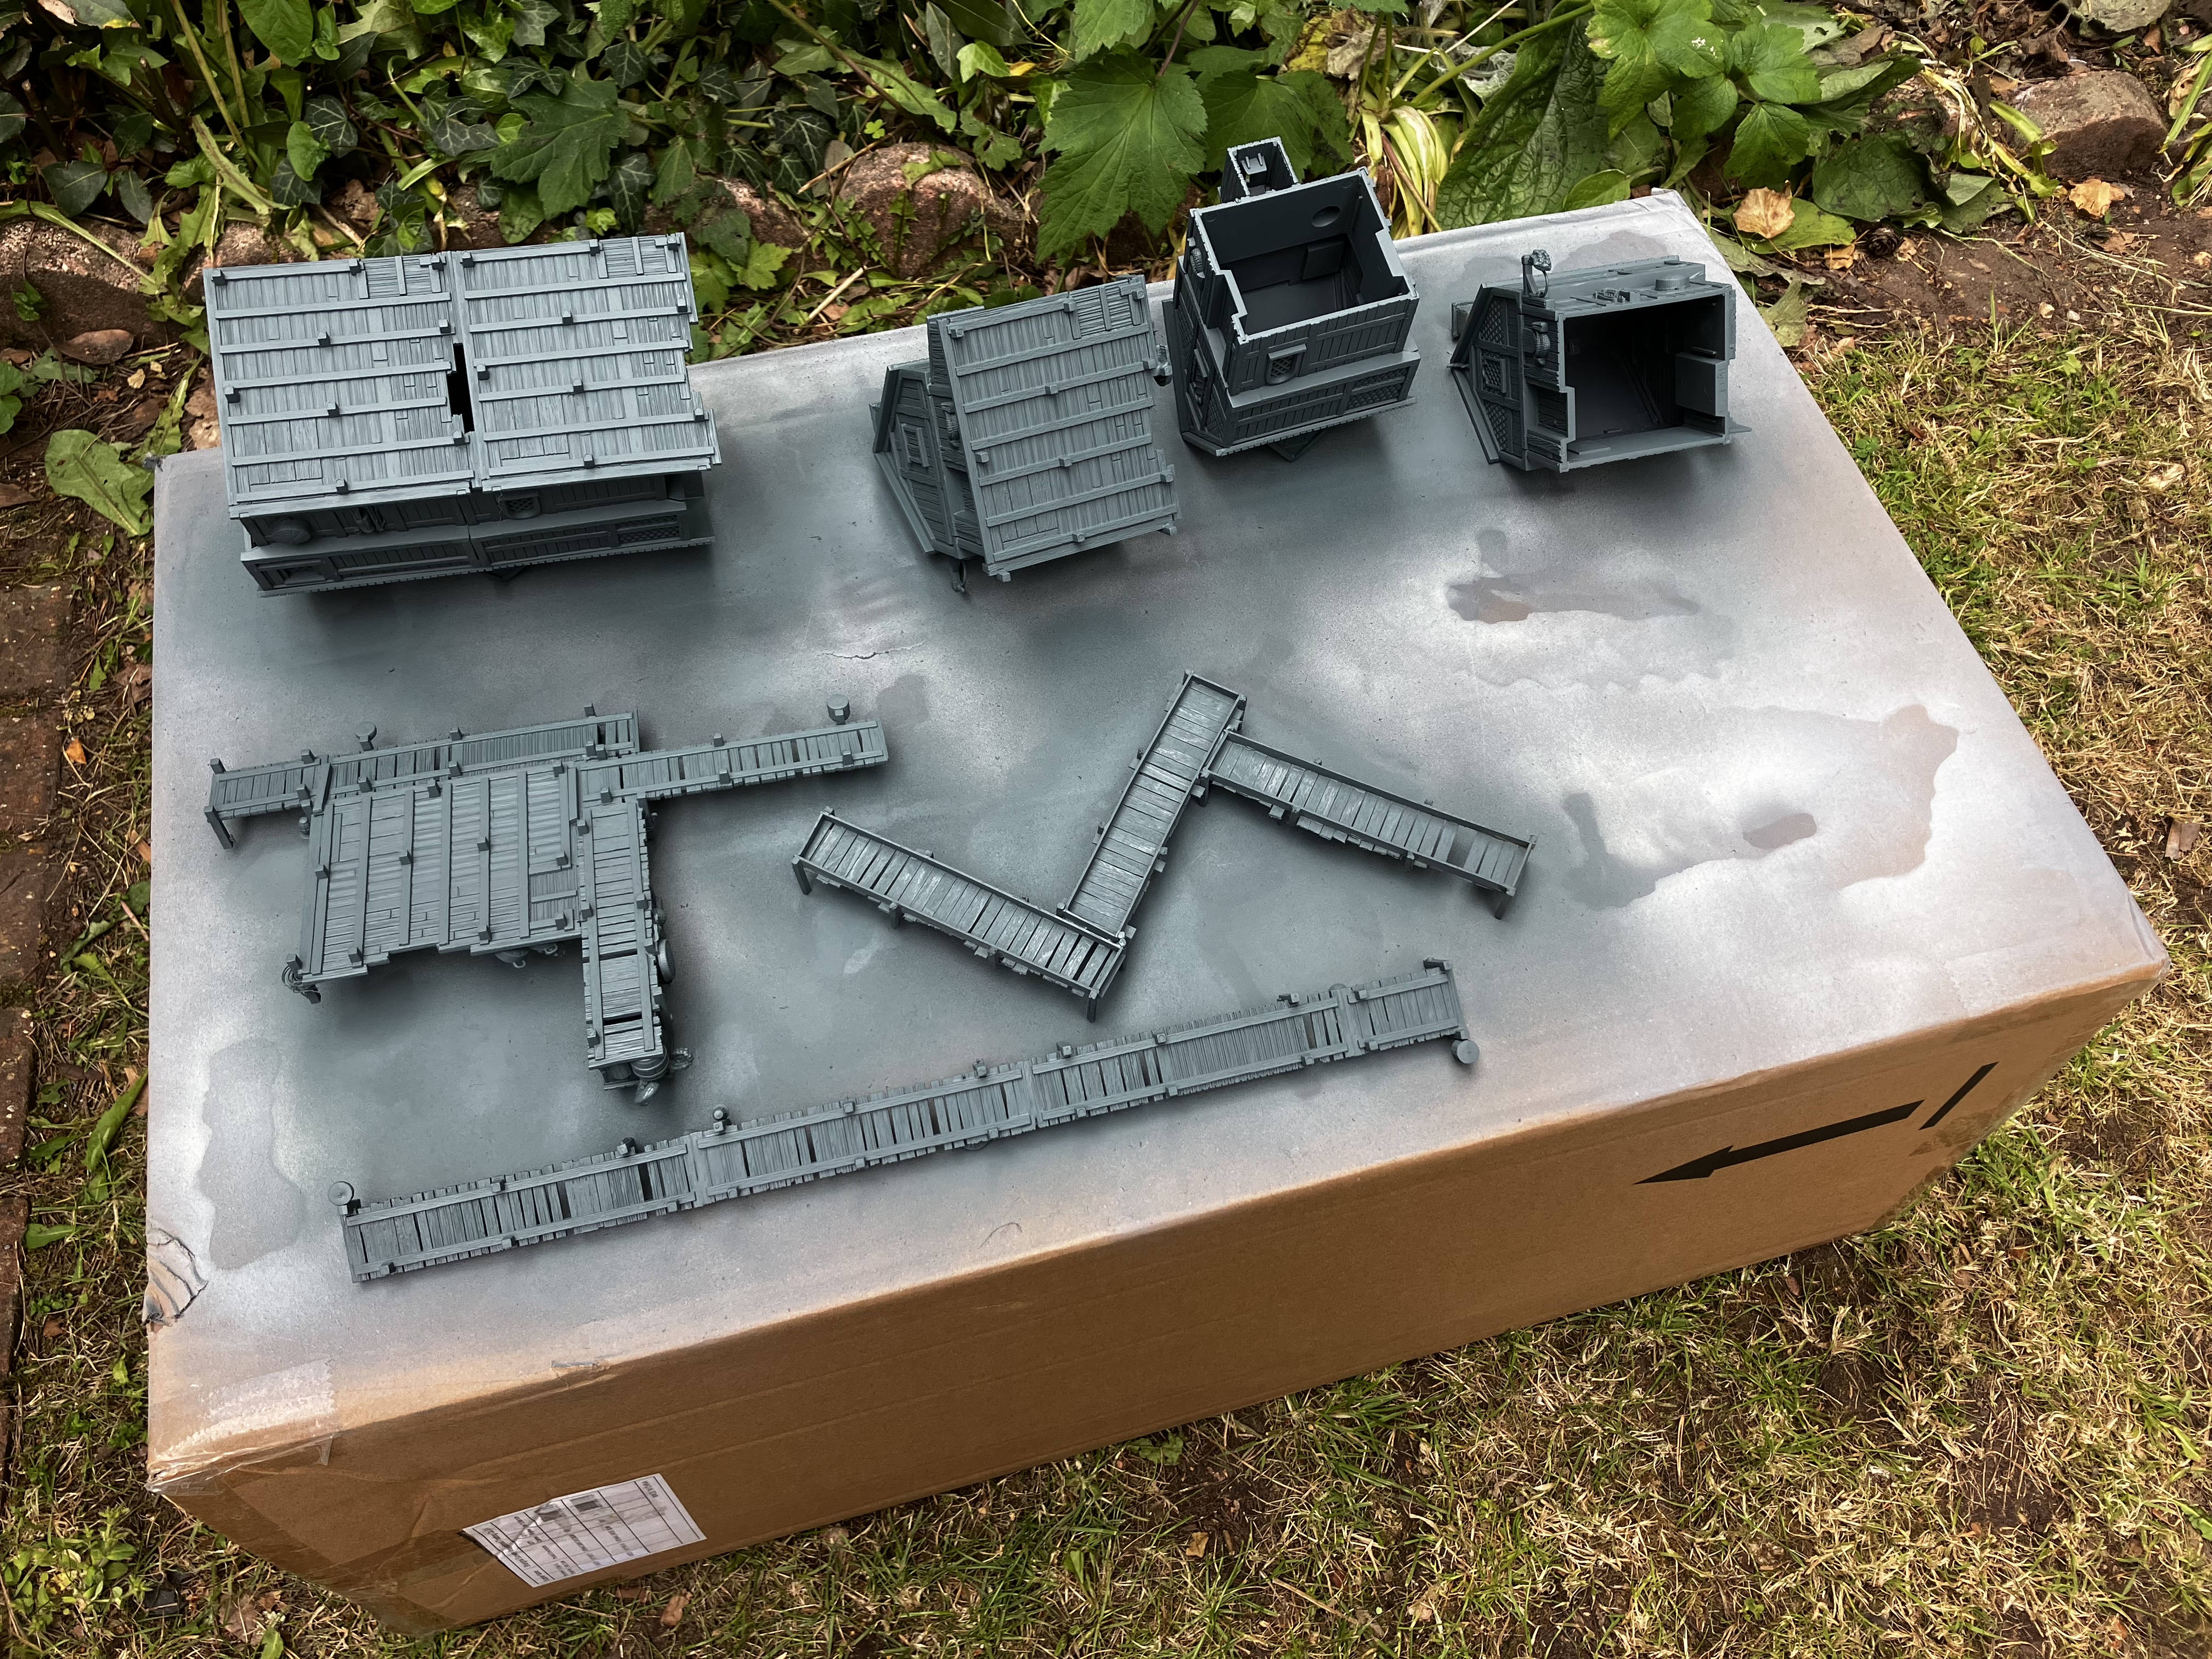
The tablescape so far…
Thought it would be fun to put together a view of everything I’ve got so far. You can see the mixture of plastic kits, MDF buildings and starting scratch builds that I’m aiming to tie together as cohesive whole. Laying everything out on the table has reassured me that I’ll have enough buildings (5 GW houses still to add there!), but the walkways, bridges and market places will be the key to creating a great modular set of terrain.
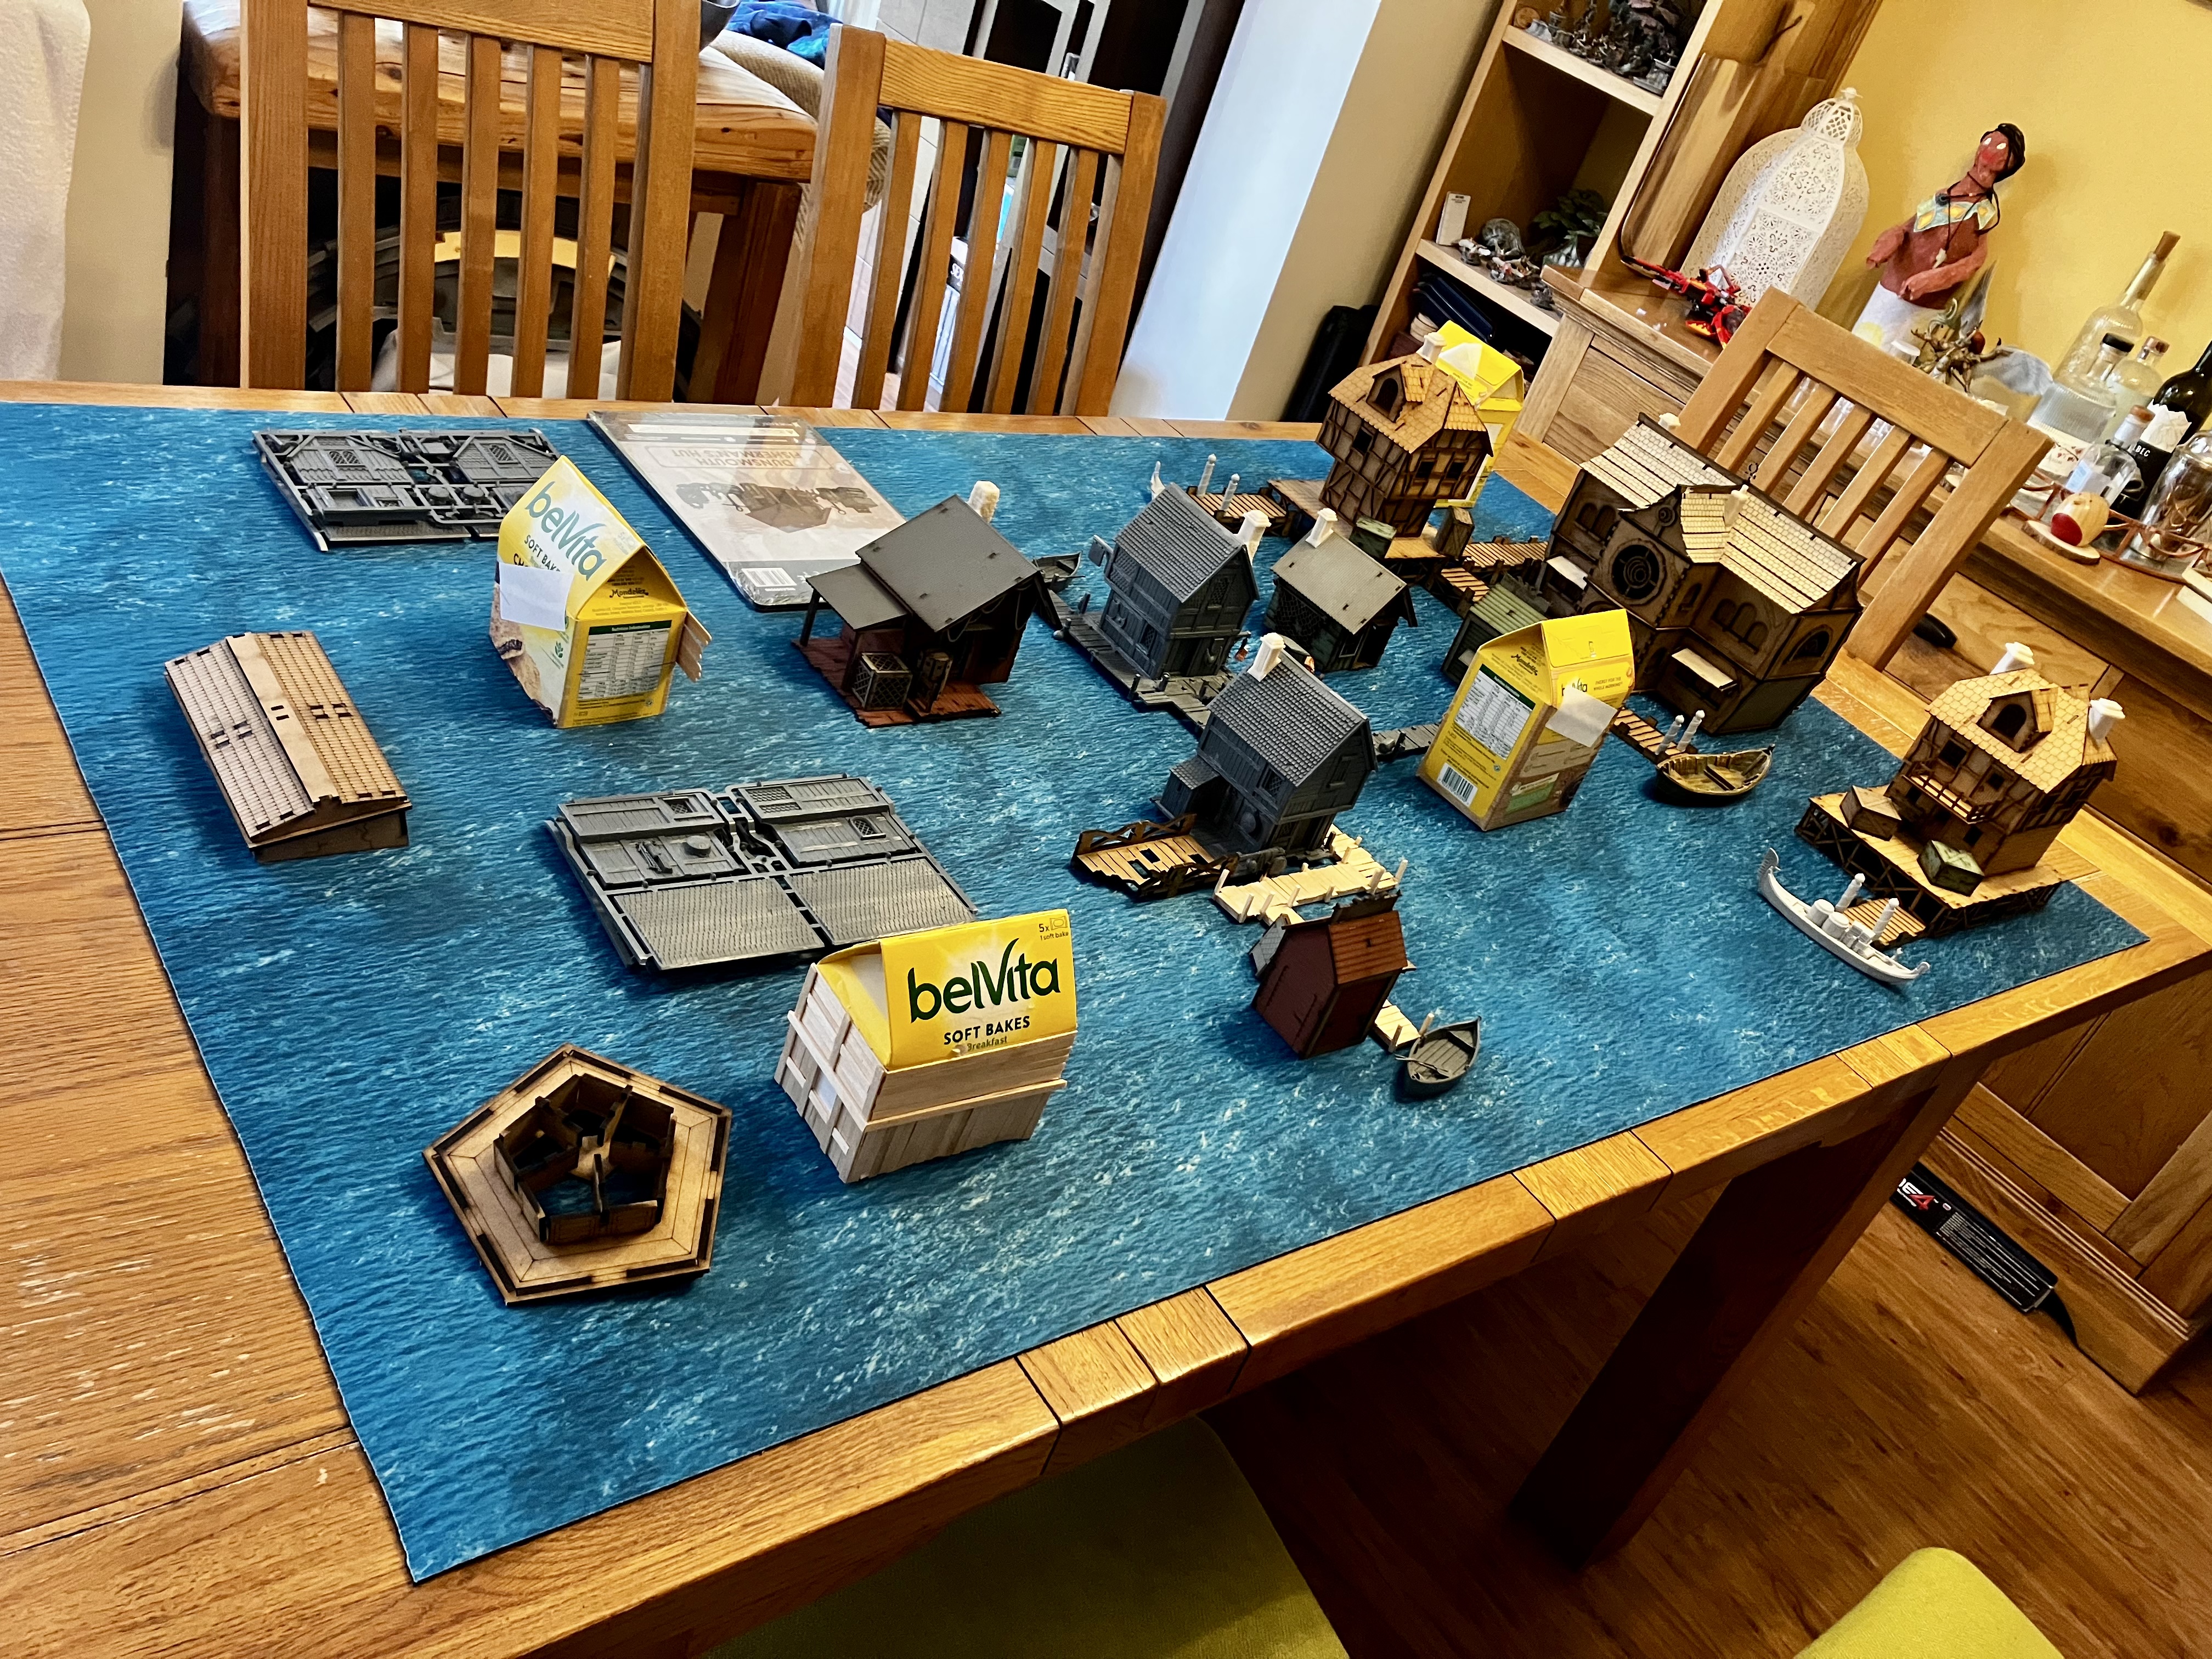
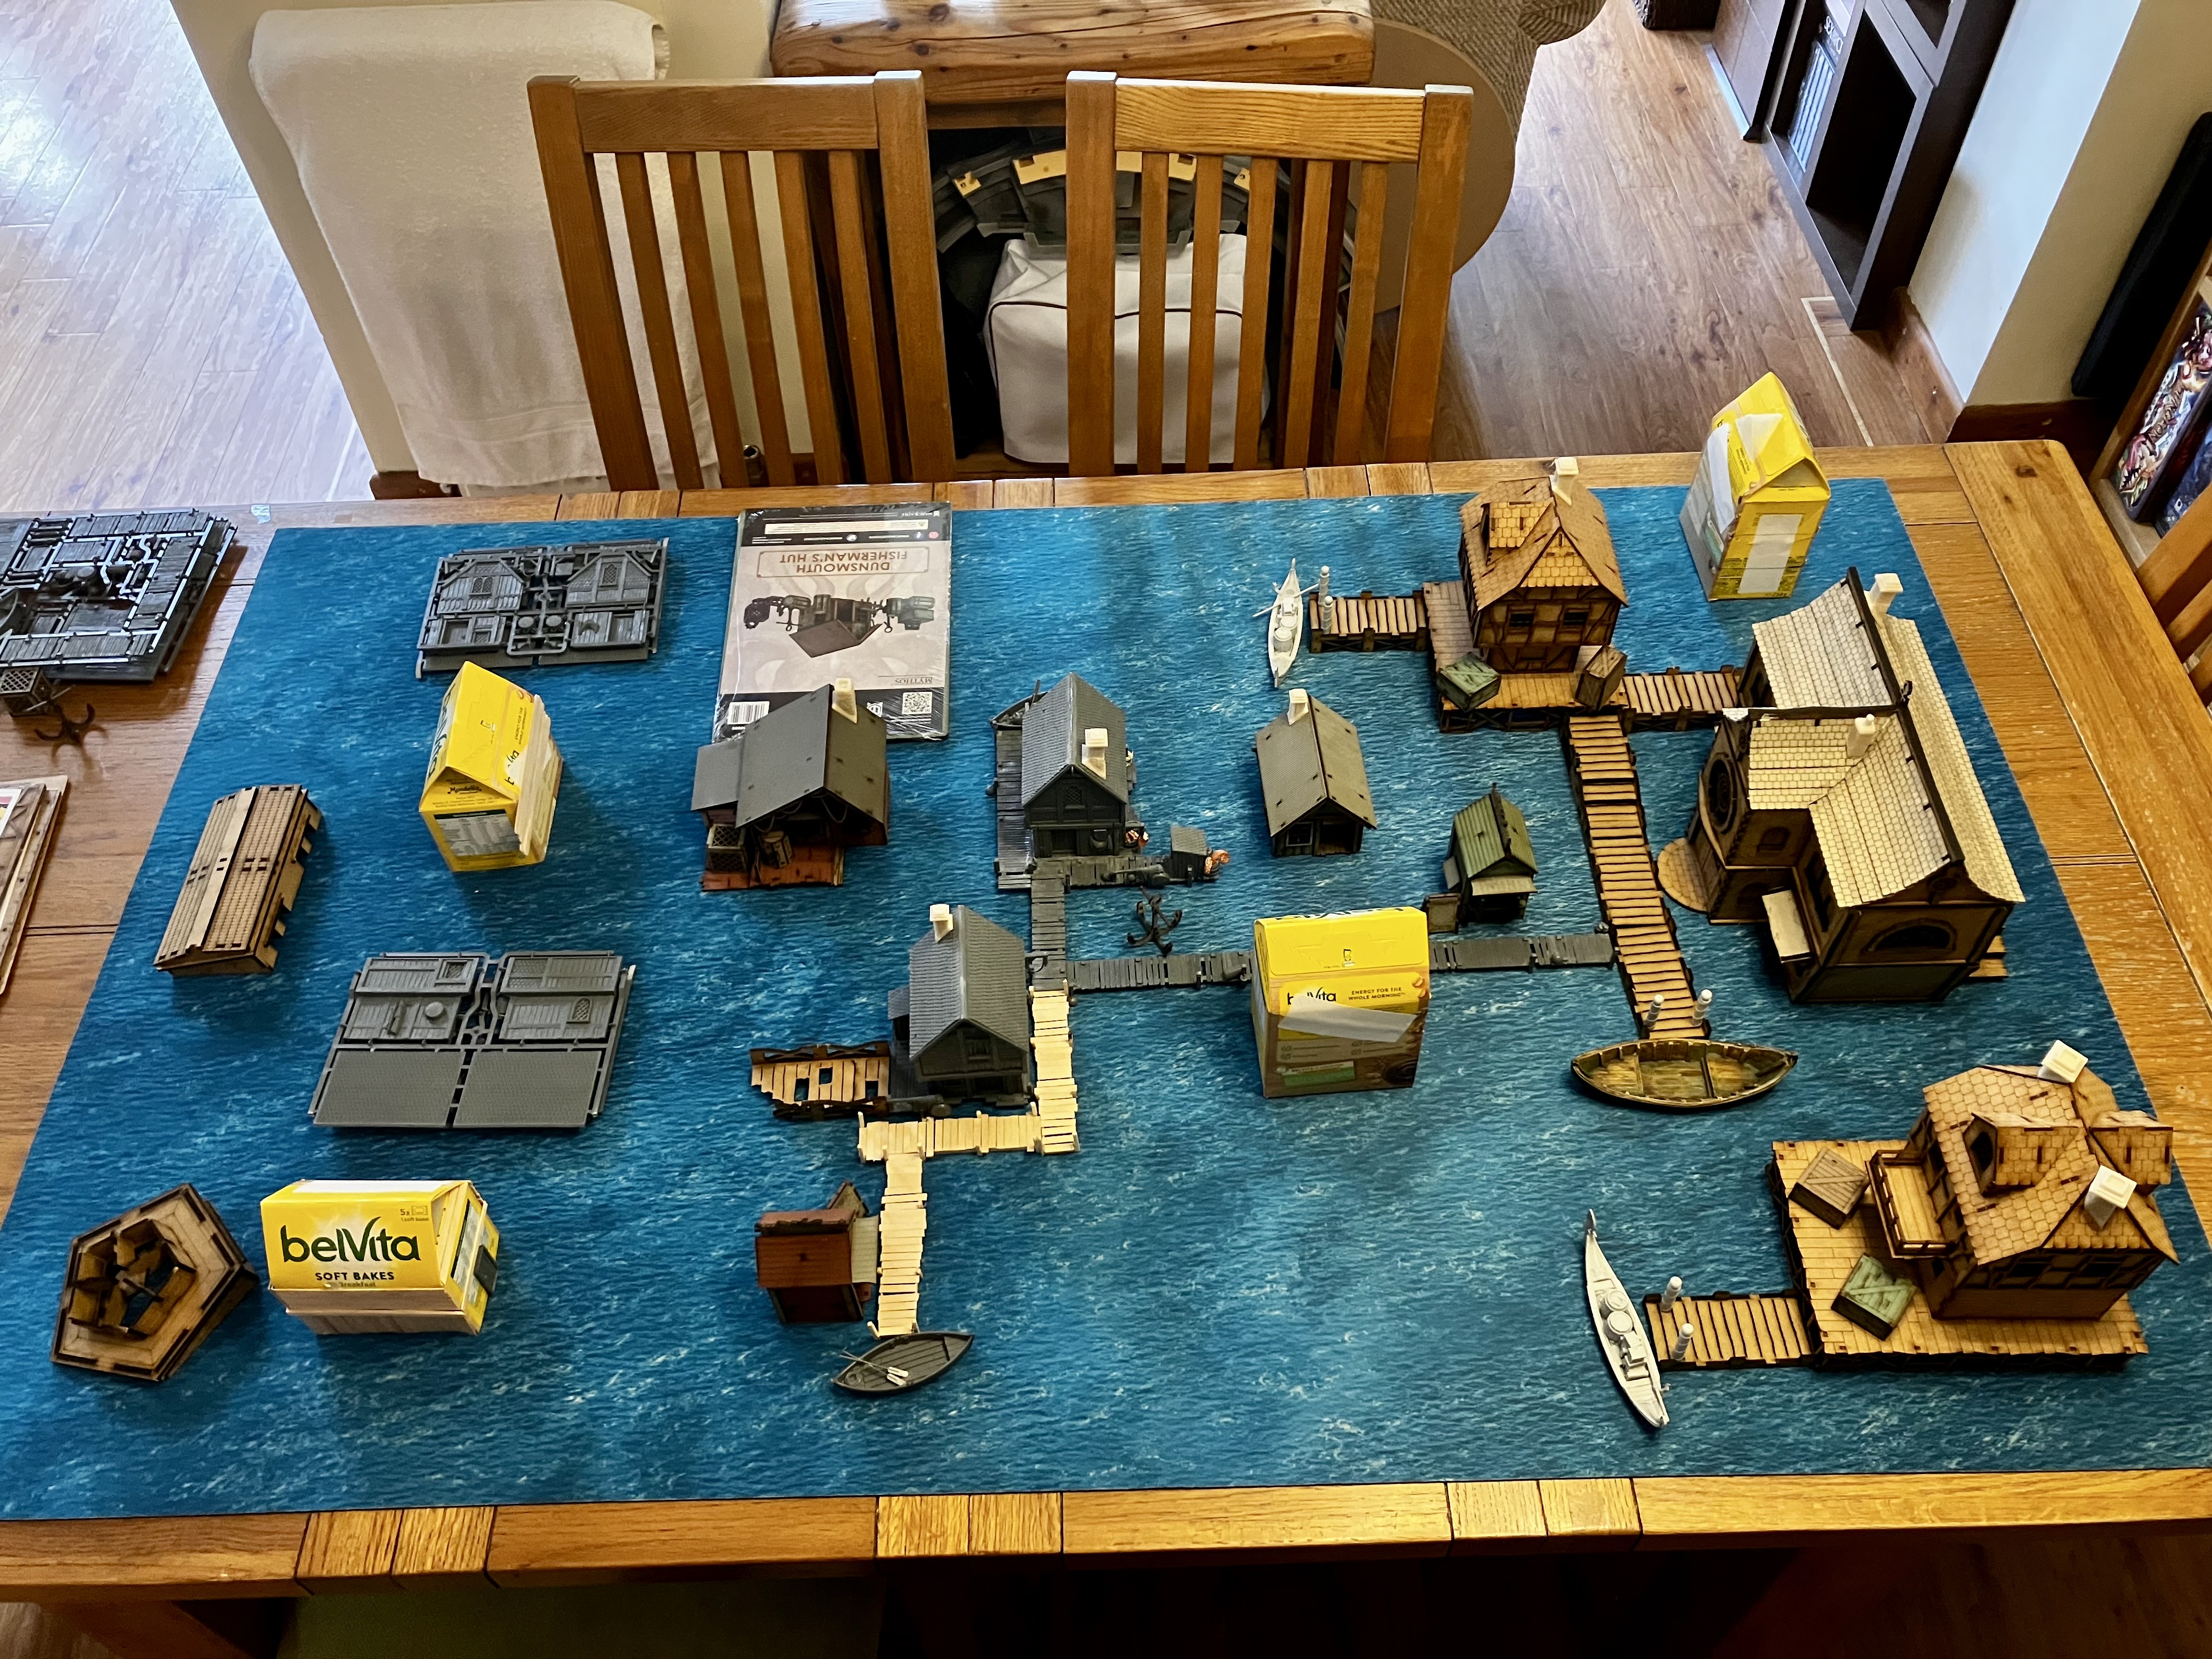
I’ll talk about and share close ups of the MDF kits I’m using in future updates.


