


Lake Town in need of Spring Cleaning!


Recommendations: 826
About the Project
Resurrecting an old project in which I started building a full tables-worth of Lake Town for Middle-Earth Strategy Battle Game. This project will make use of official GW kits, MDF kits and complete scratch-builds to bring Lake Town to life. Along the way, I hope to share some good Tutorials of how to make these pieces, and my Skills in painting.
Related Game: Middle-Earth Strategy Battle Game
Related Company: Games Workshop
Related Genre: Fantasy
Related Contest: Spring Clean Hobby Challenge 2023
This Project is Active
Mood Board
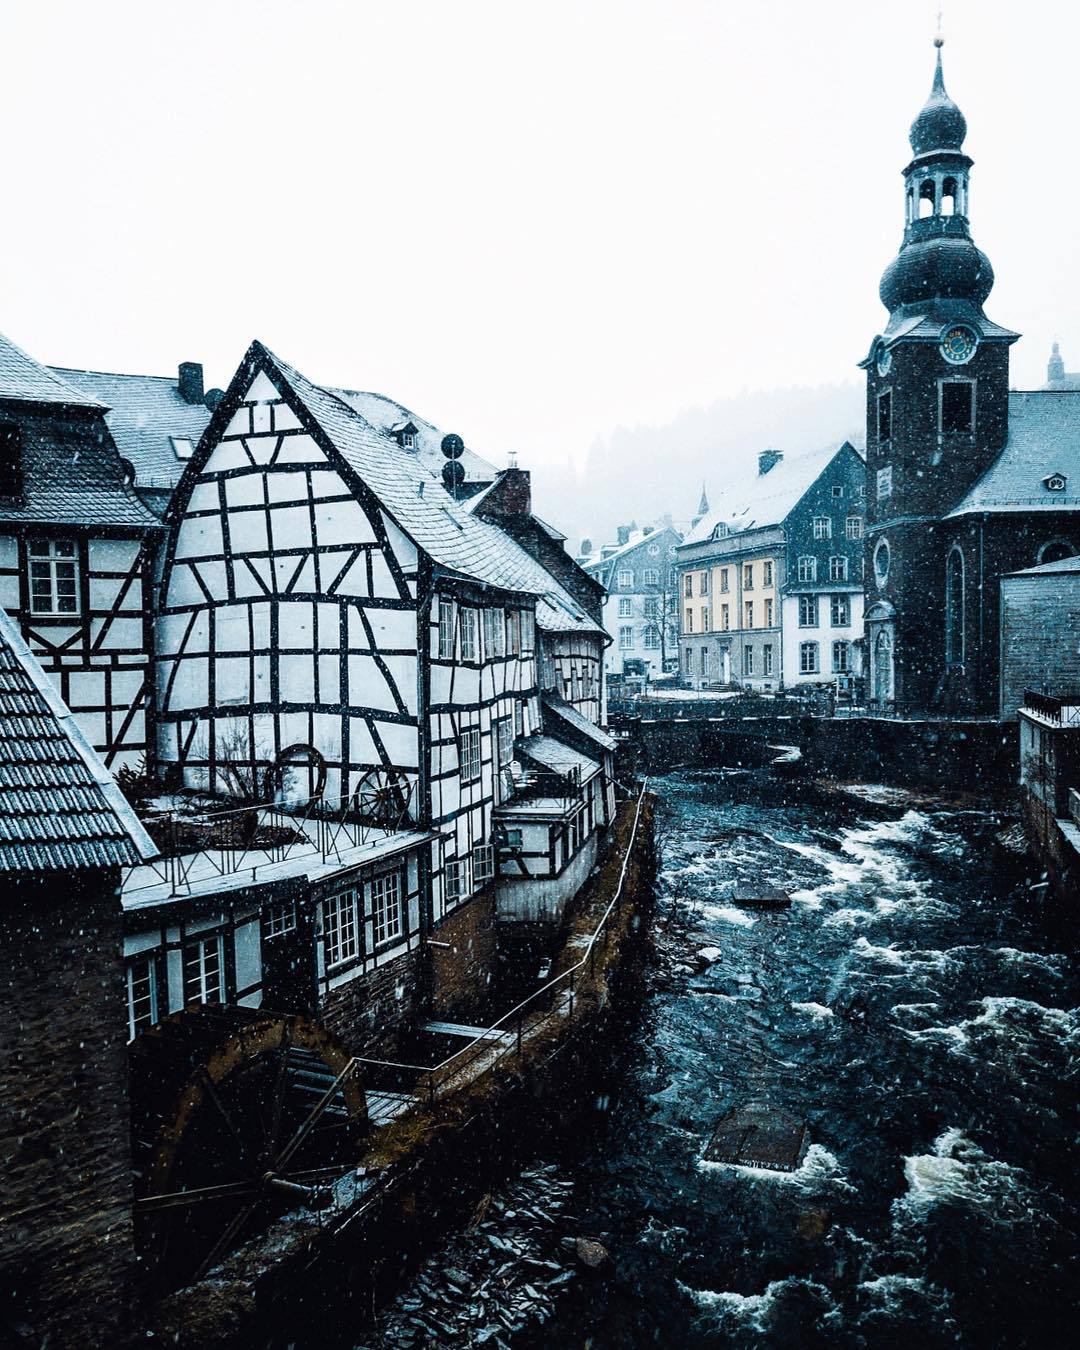
For a project like this, I think a mood board is a must. It’s really helpful to collect pictures that can be used as a reference and help guide the outcome.
I was surprised how hard it’s been to find decent Lake Town images, but here’s some I’ve collected.
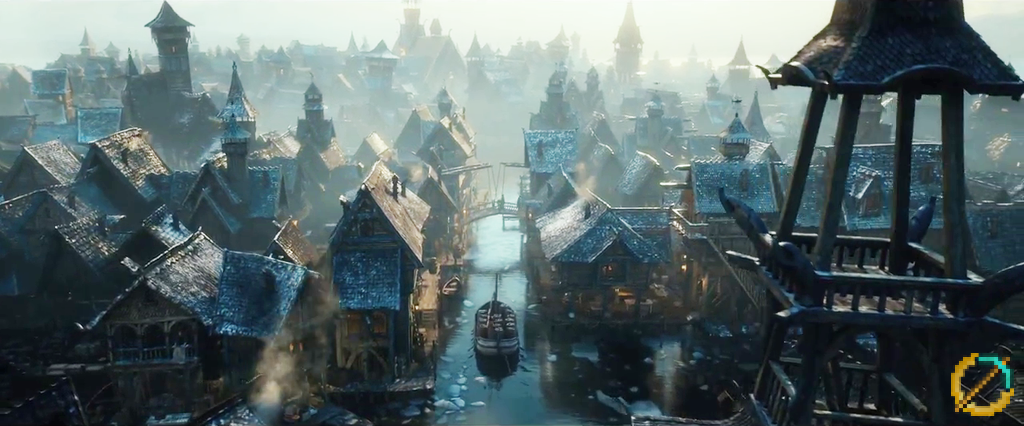
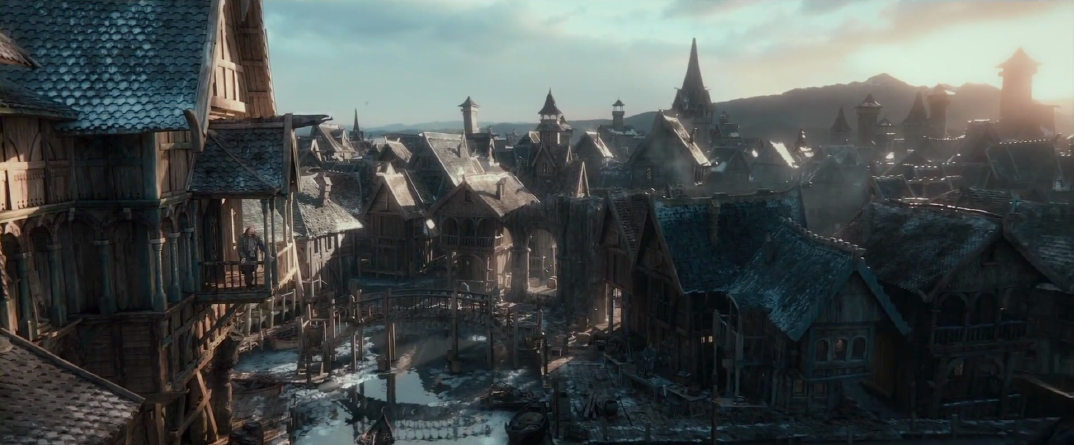 Lovely expansive shot. Note the colour palette and the style of the buildings

Re-adding the posts
Sadly this project didn’t survive moving over to my new account, so I’m adding the posts I’d previously made. If you could hit the little recommendation and upvote buttons on them, that’d be awesome x
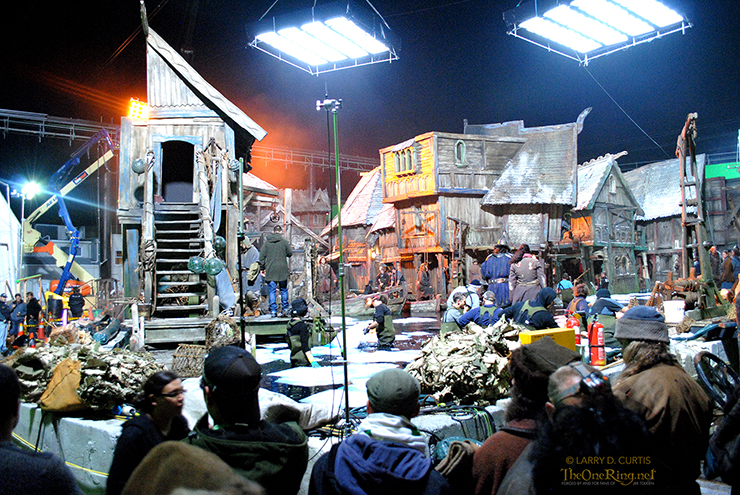
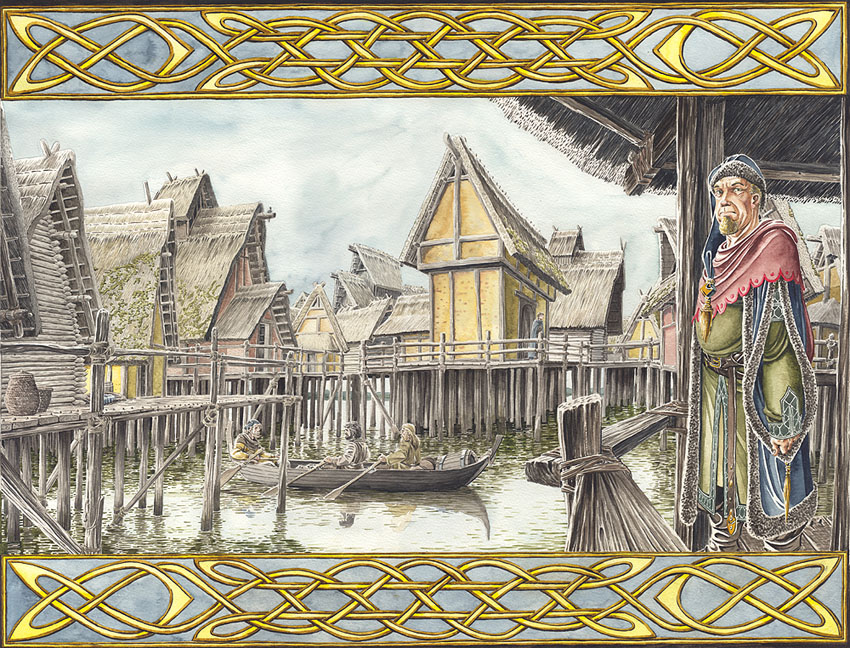 Beautiful illustration of Lake Town. Anyone know the artist?
The Lake Town House
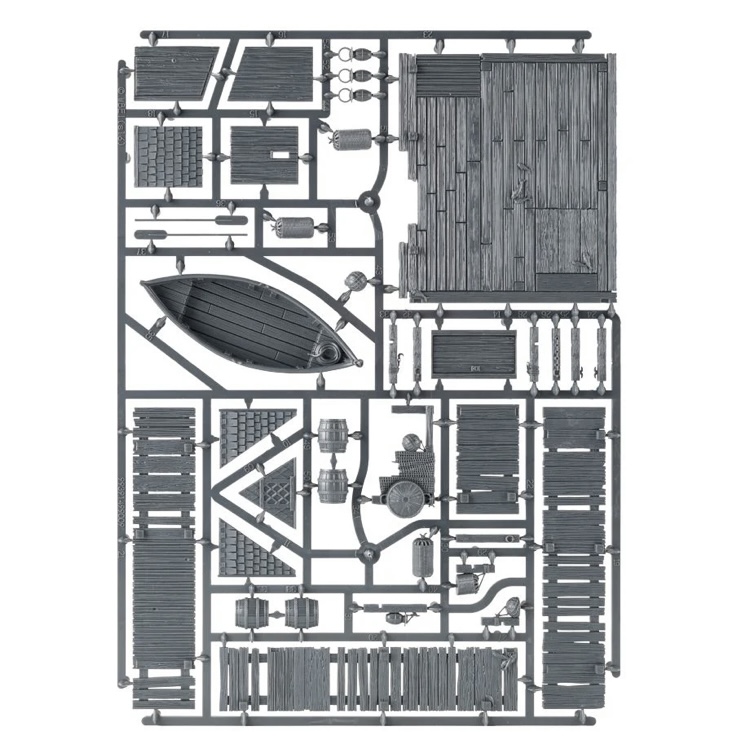
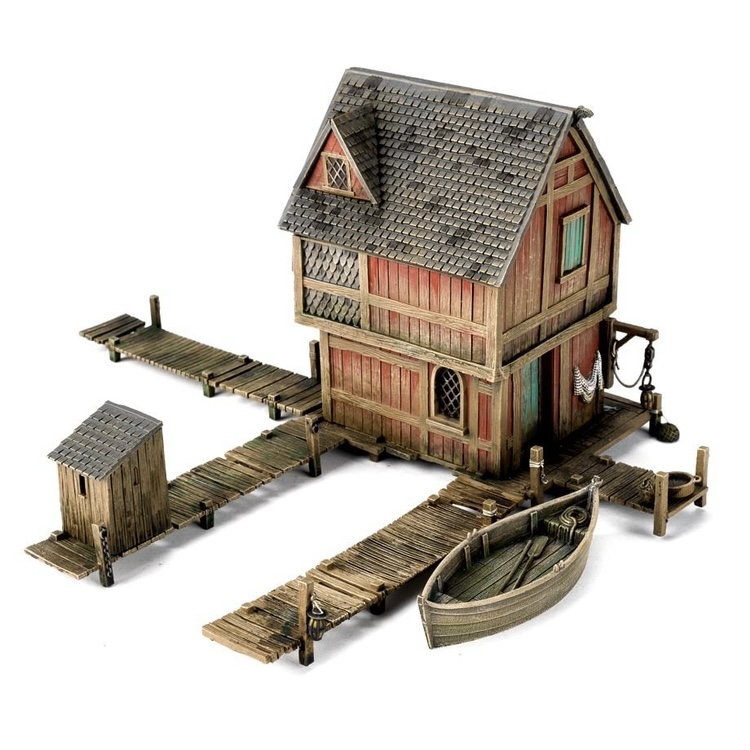
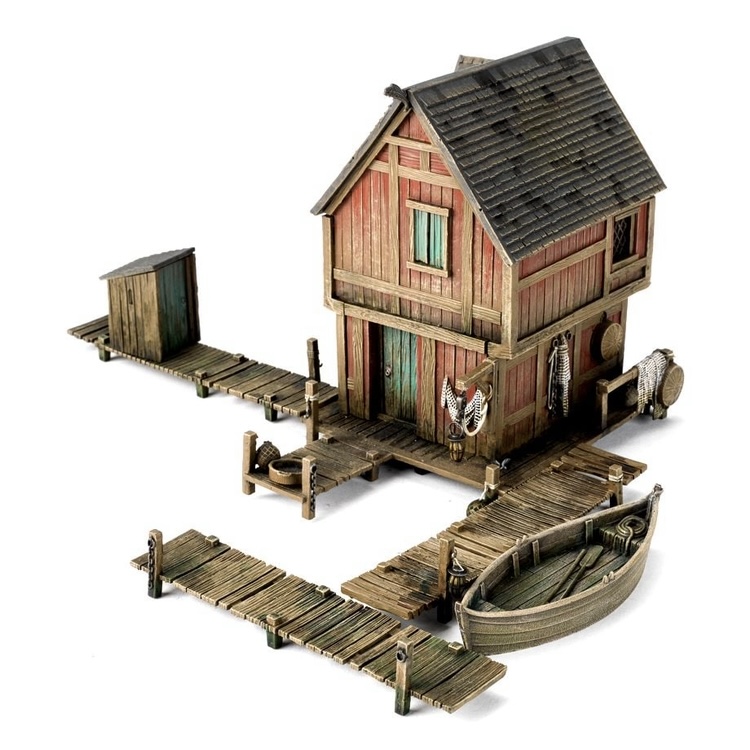
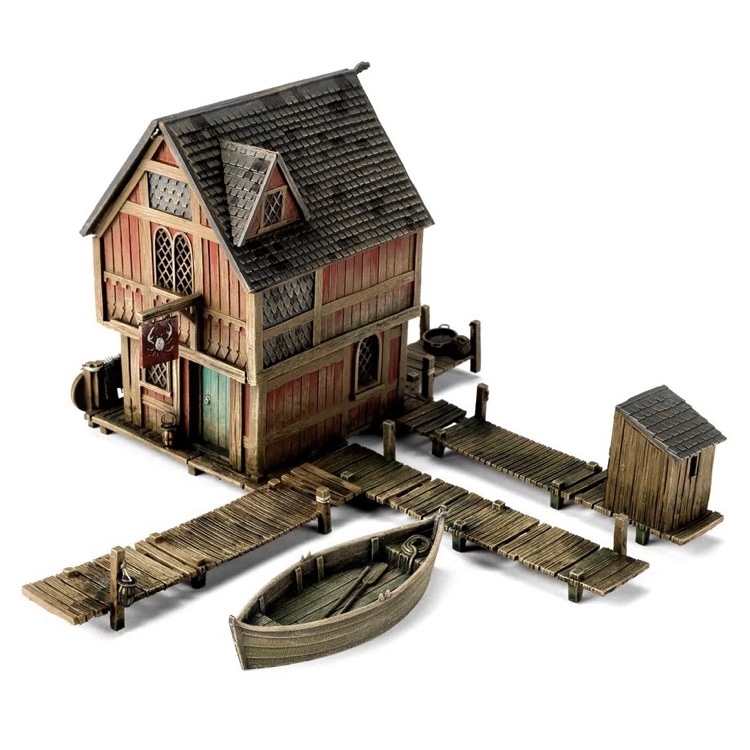
As mentioned in the project description, this project will make use of a range of methods to bring the buildings and terrain scape of Lake Town to life. A staple of this however, will be the official GW Lake Town house kit.
In my view, this is the best and most reasonably priced (in terms of bang-for-buck) kit GW currently make. Even better, get the multipack if you can – giving you 3 of the houses for just £70 (versus £30 individually).
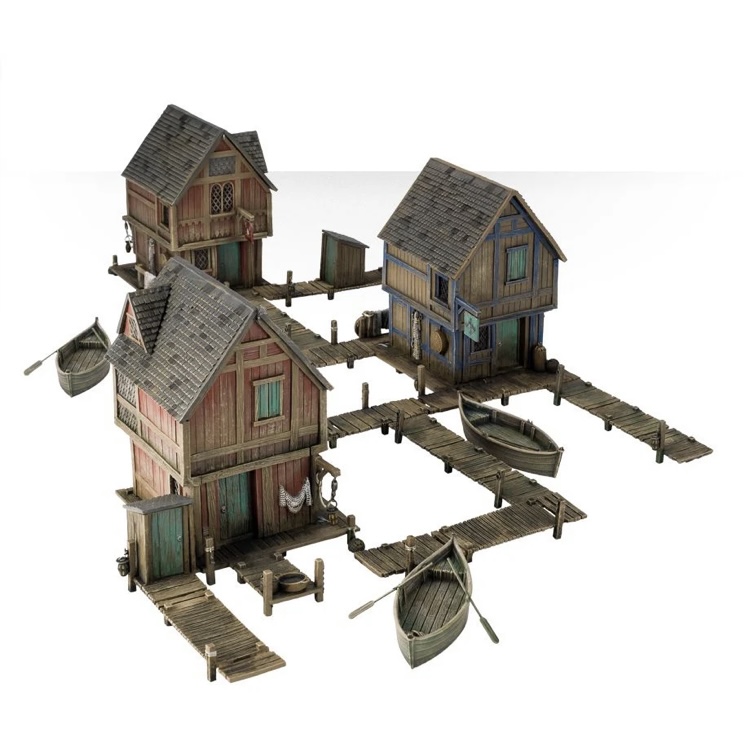 A trio of Lake Town houses
Each house comes on 2 packed sprues.
The house itself features reversible gable ends so you can make different styles, and the kit includes a ton of extras:
- 1 rowing boat with separate oars
- 2 barrels
- 2 fish baskets
- 1 glass float
- 3 lanterns
- 1 hanging sign board
- 1 outhouse, including seat and door
- 1 loading hook
- 3 long walkways and 1 short walkway.
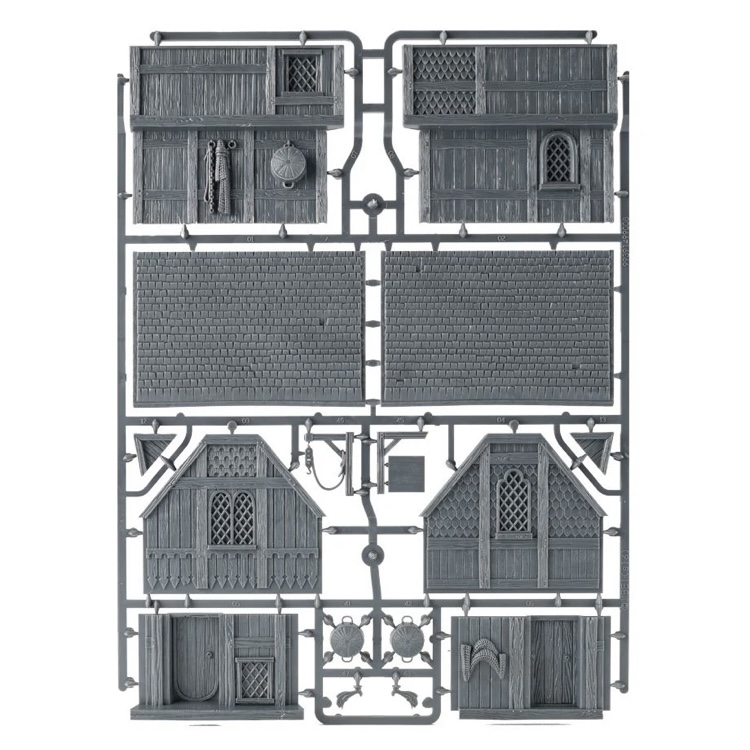
With a little extra effort and imagination, a whole range of variety can be created, and I’ll be aiming to show that through this project.
I currently have 7 of these houses, so am excited with the opportunities!
Little boxes, made of ticky-tacky
One of the advantages of being a hoarder (yes, there are some!) is that we develop an eye for spotting how things can be repurposed in different ways.
When I first saw these Belvita boxes, I just knew they would make perfect little houses for a future project. They even come with ready made pitched roofs!
These really are a perfect under frame for some fun scratch-builds. So I’ve saved half a dozen of them.
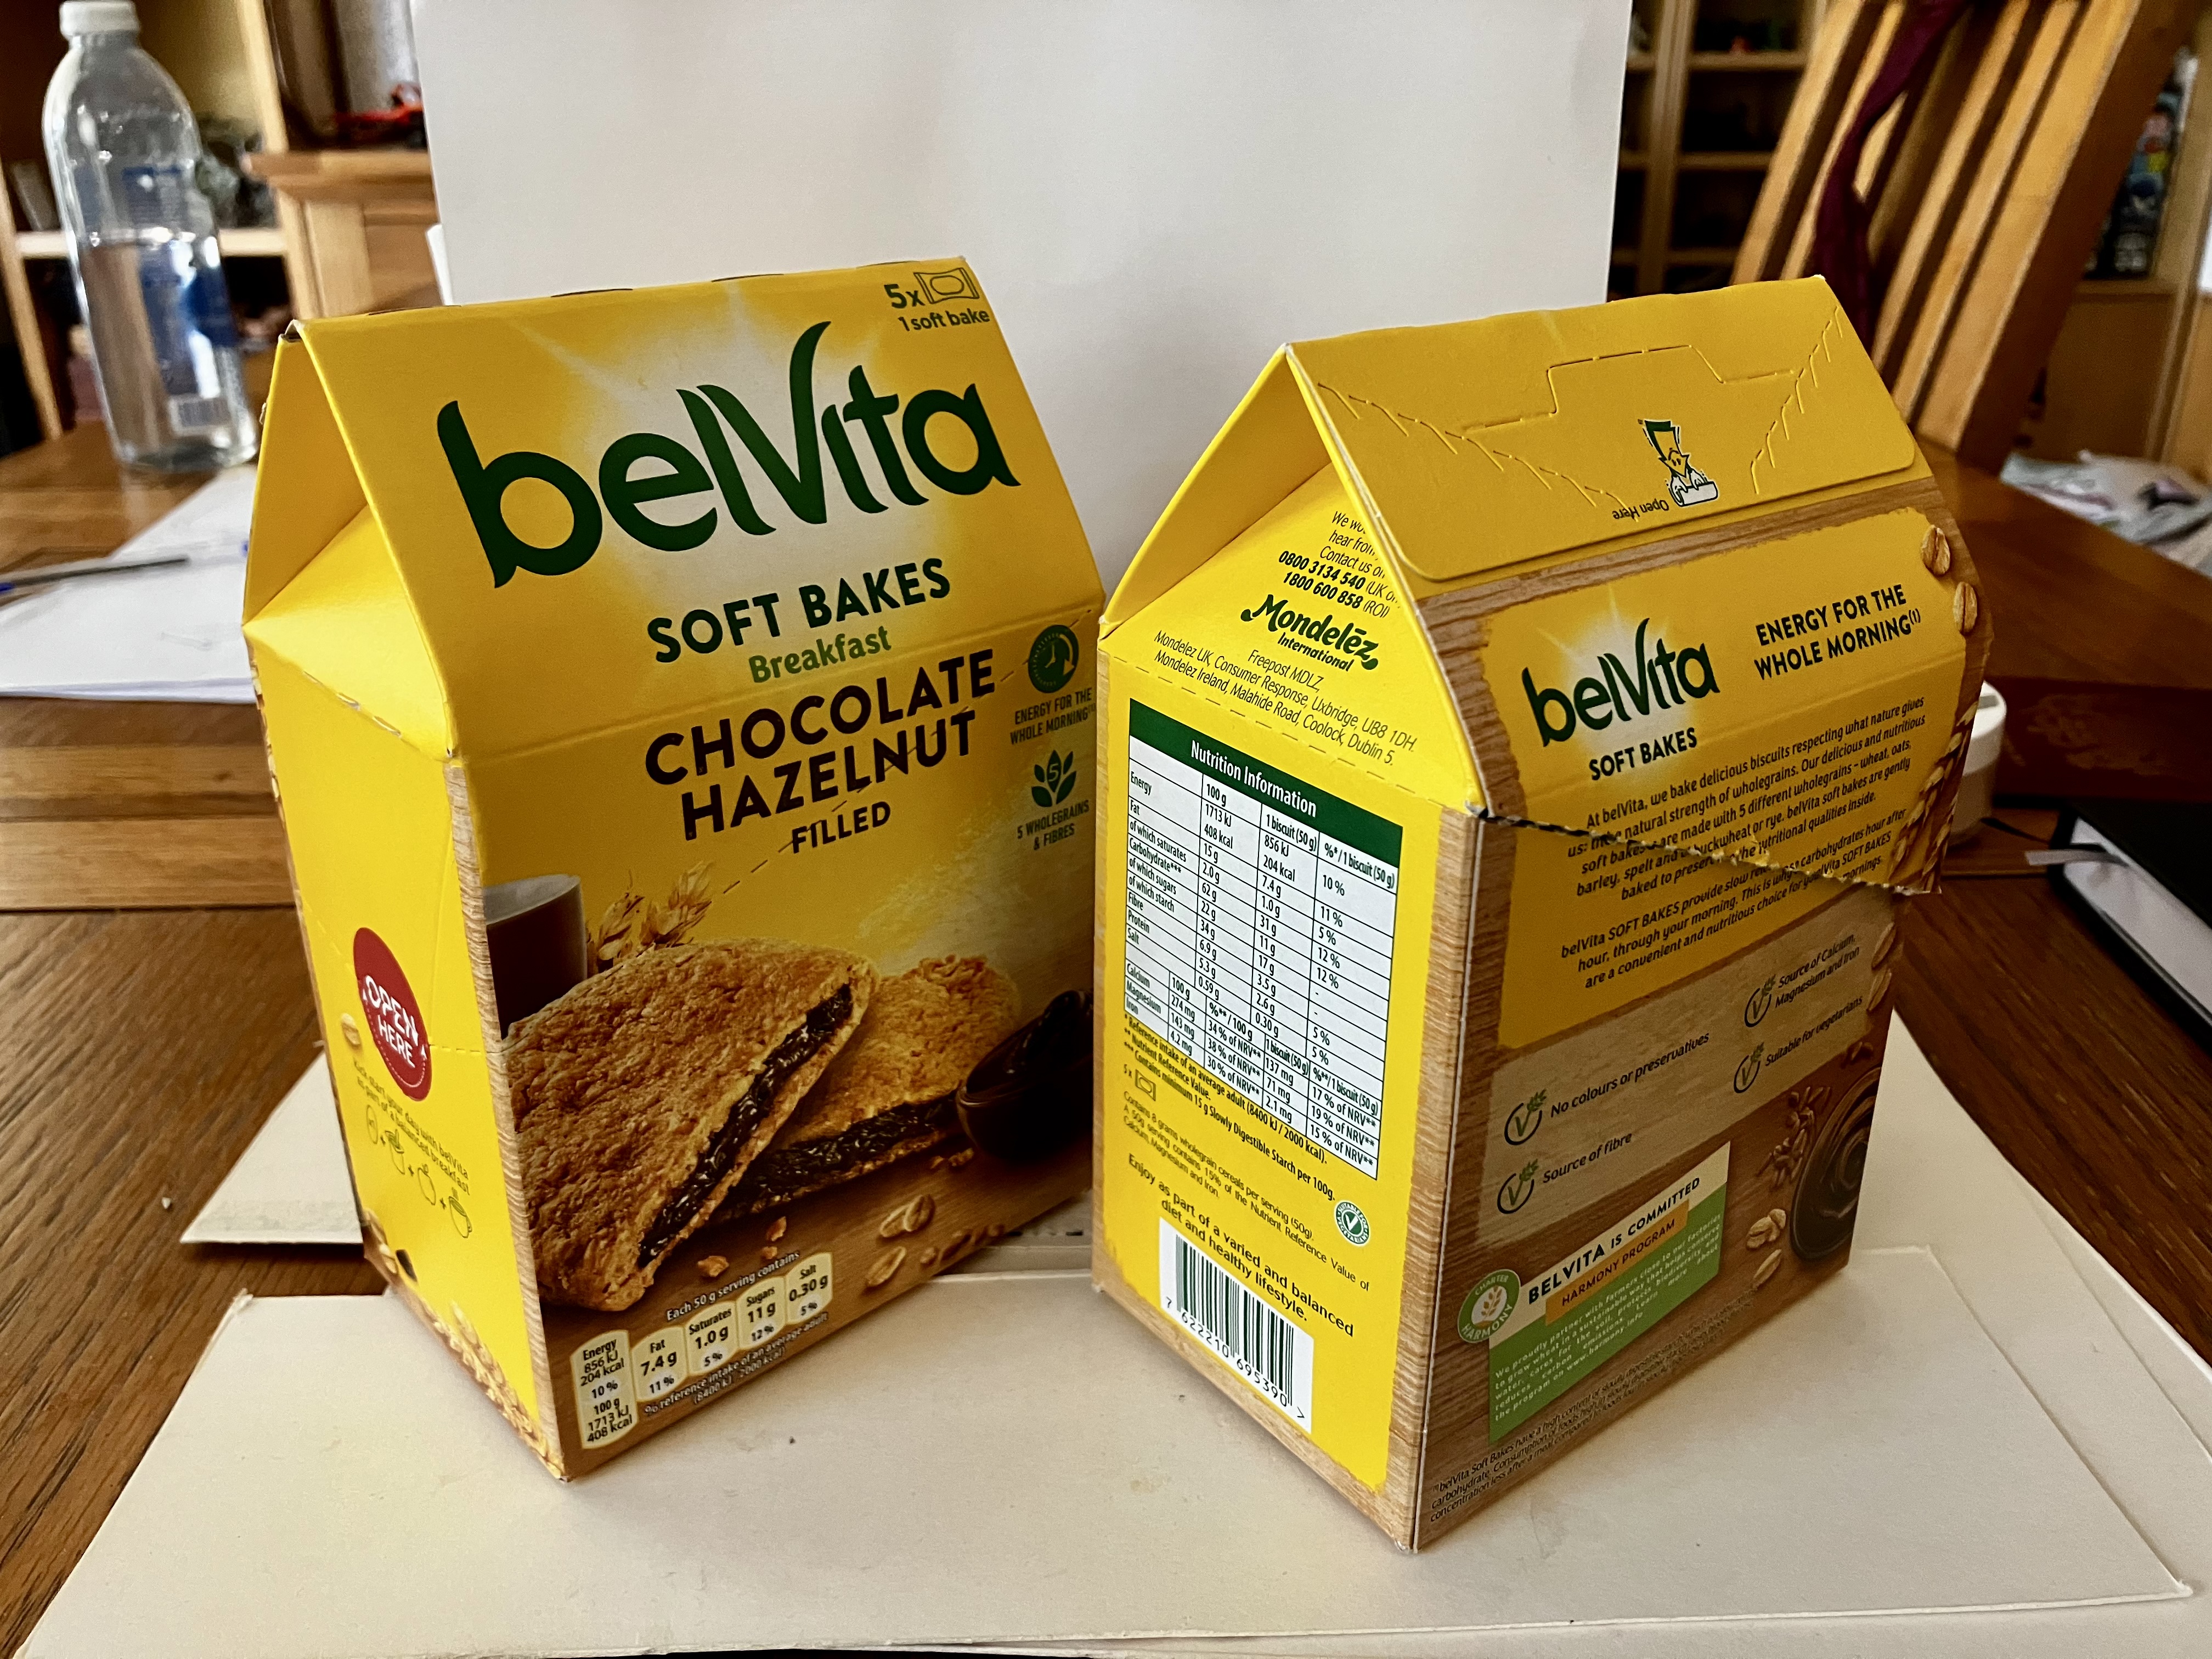 A pair of Belvita boxes
 They are a little taller than the Lake Town house kit, as you can see here. But, I’ve got some ideas for that!
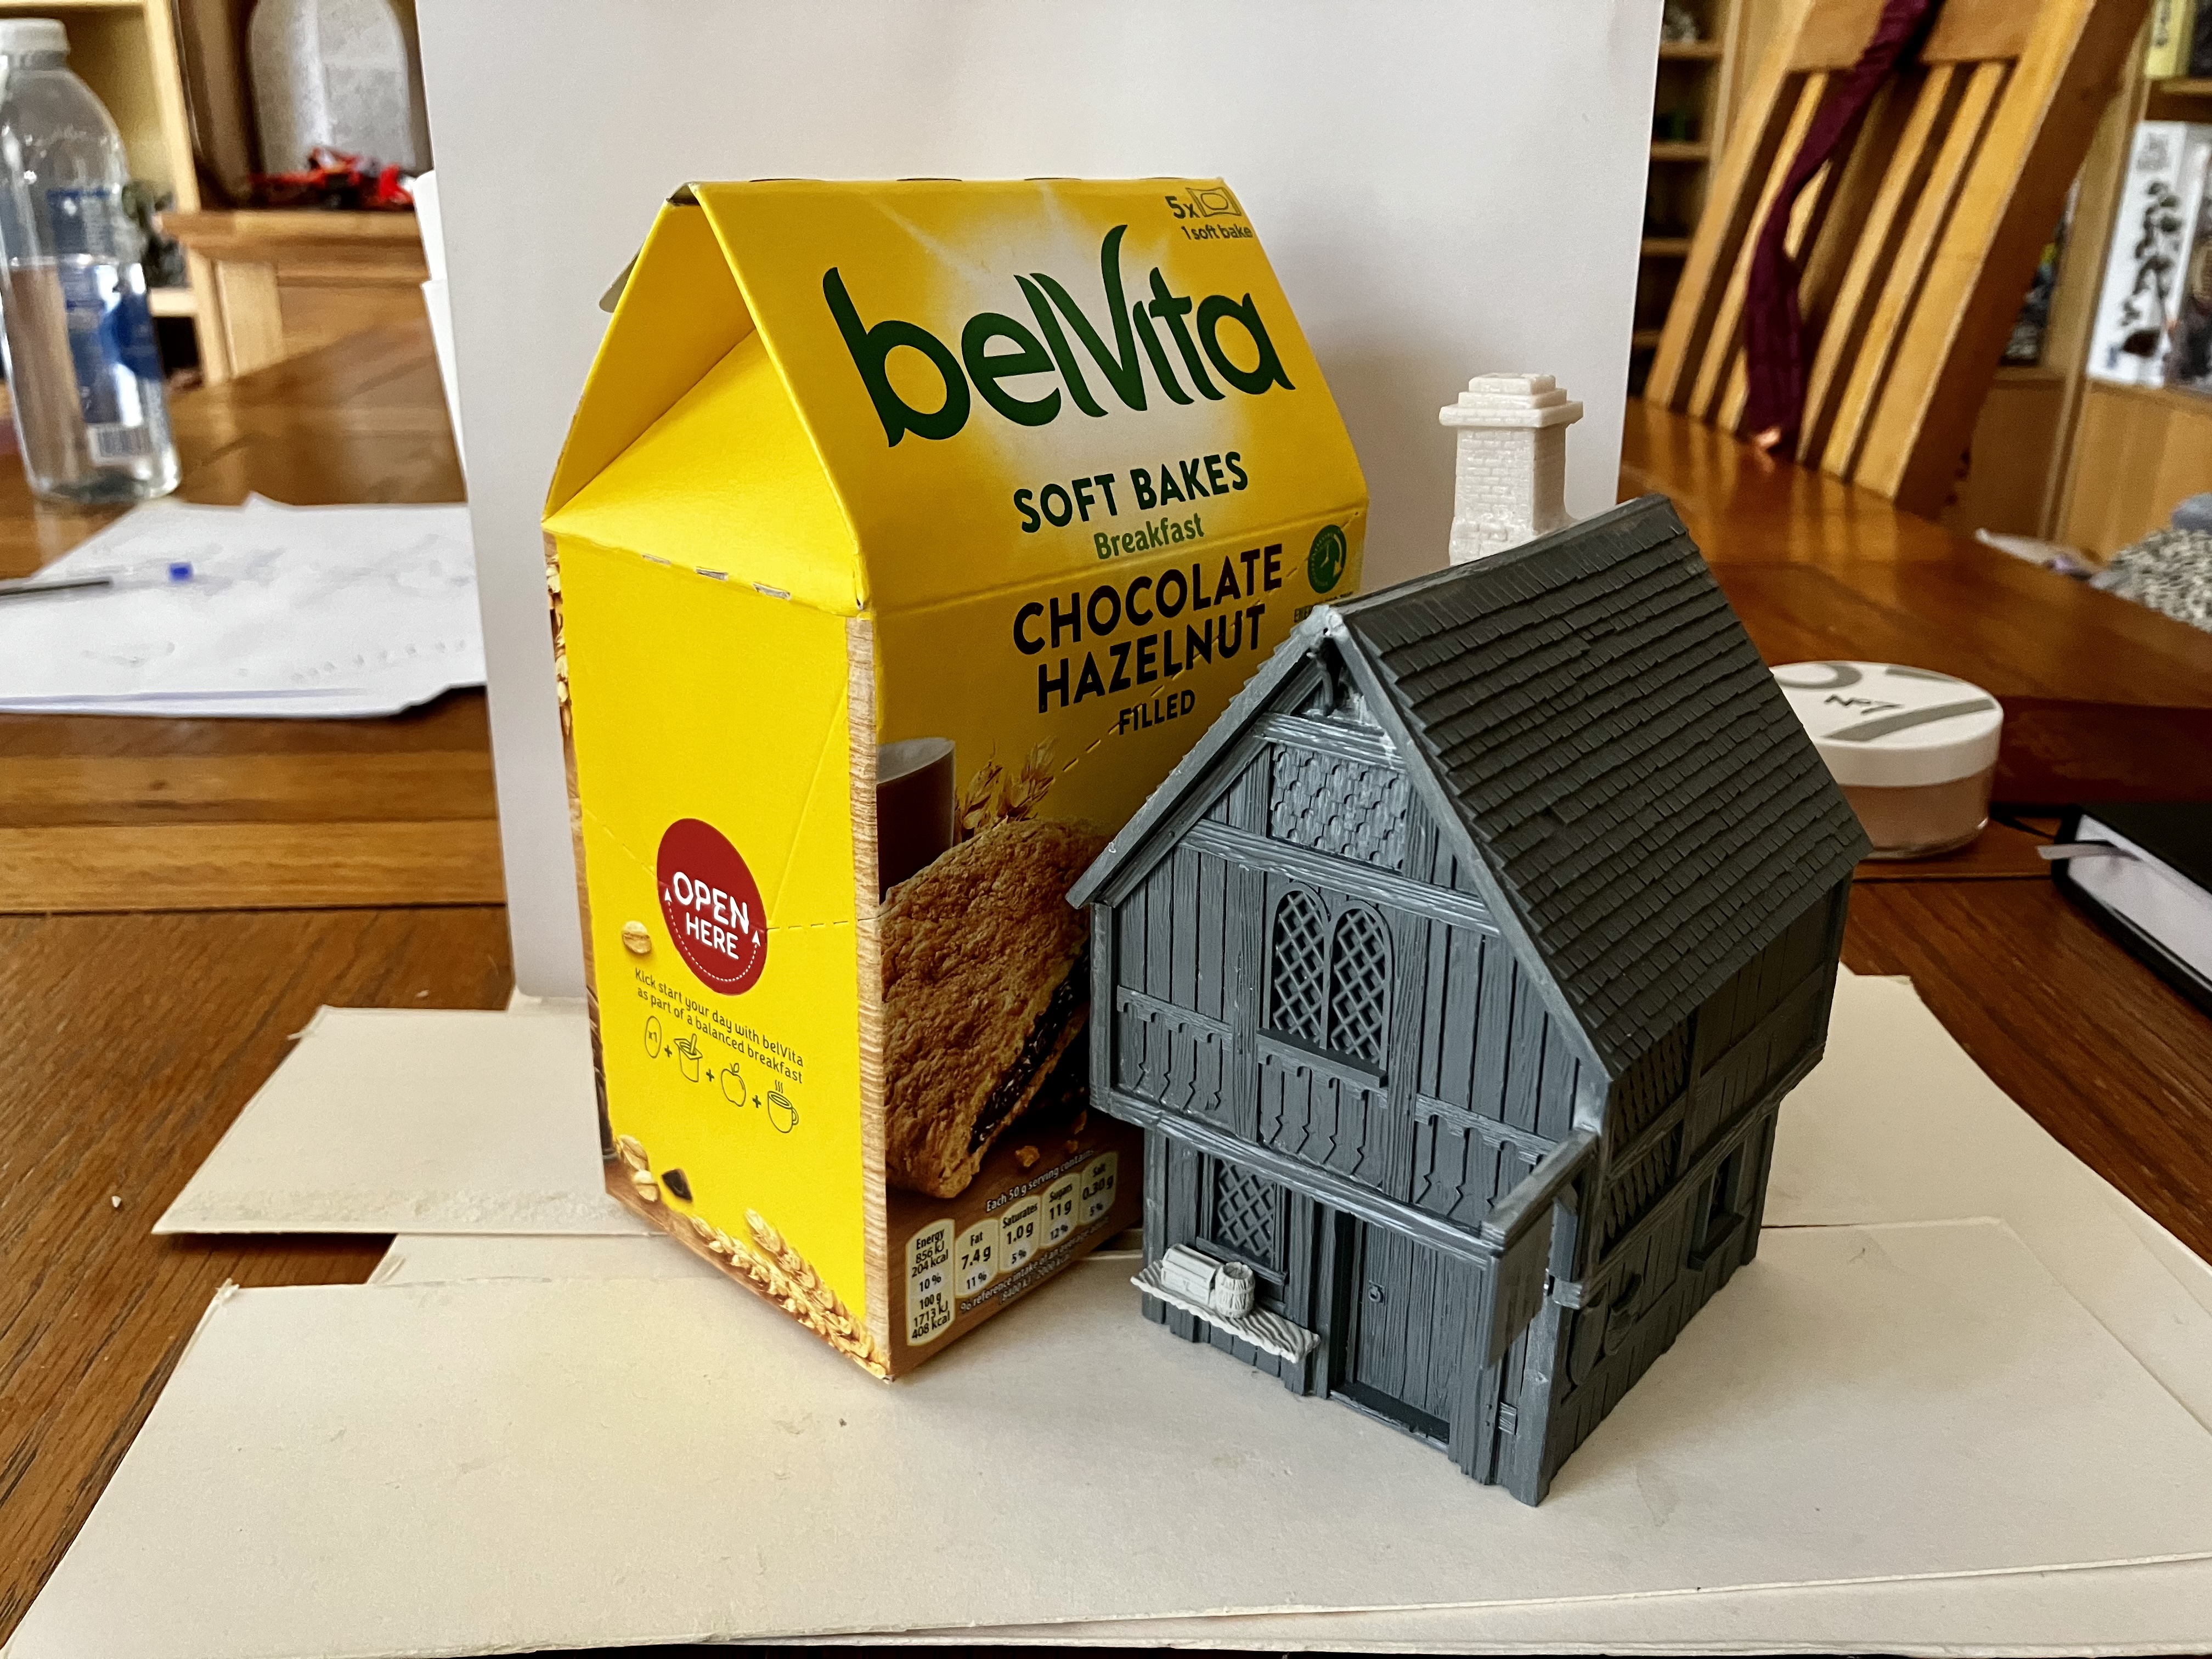 Size comparison with a Lake Town house
A pair of completed buildings…
…apart from paint, texturing and finer details!
These are 2 built GW Lake Town houses. One has been glued to the platform base, the other is currently loose while I figure out how to arrange them.
Hopefully you can see even here how versatile the kits are. I’ve given one of them an en-suite dunny!
These have had resin chimneys from Grand Manner added as some extra detail. Even though Lake Town is meant to be built entirely from wood, I figure that some elements made from stone would be acceptable.
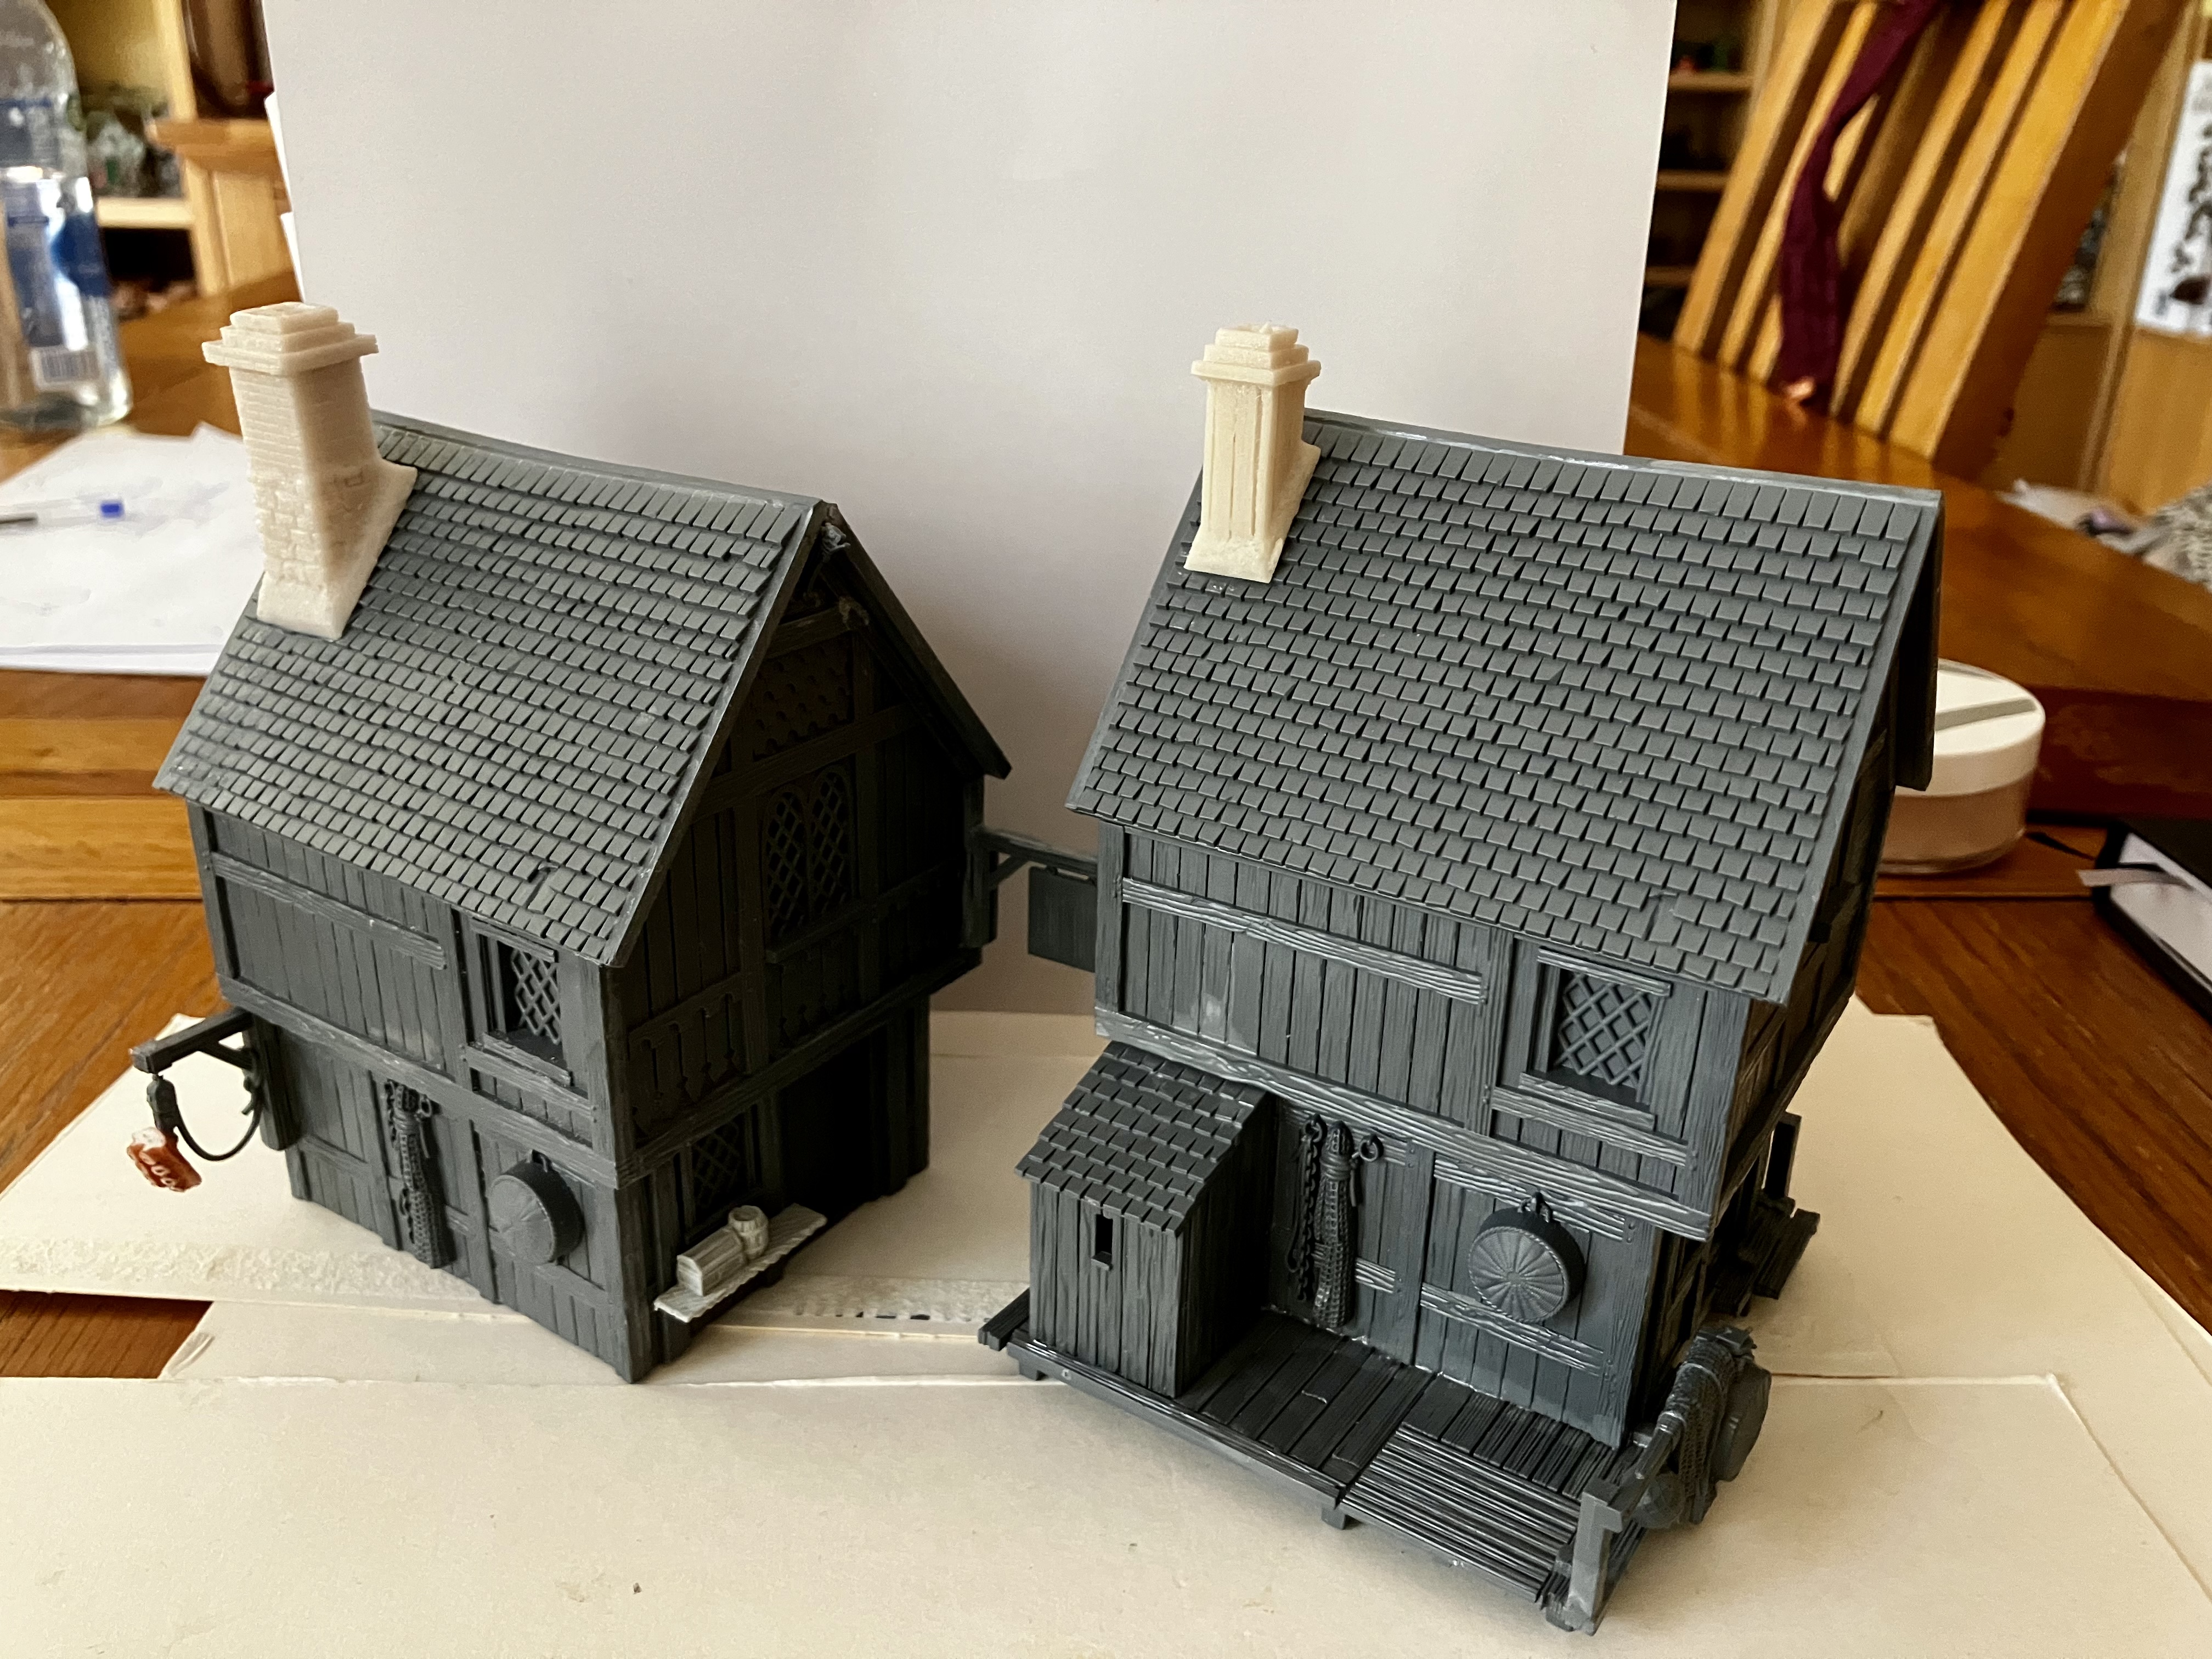 The two Lake Town houses
Starting some scratch builds
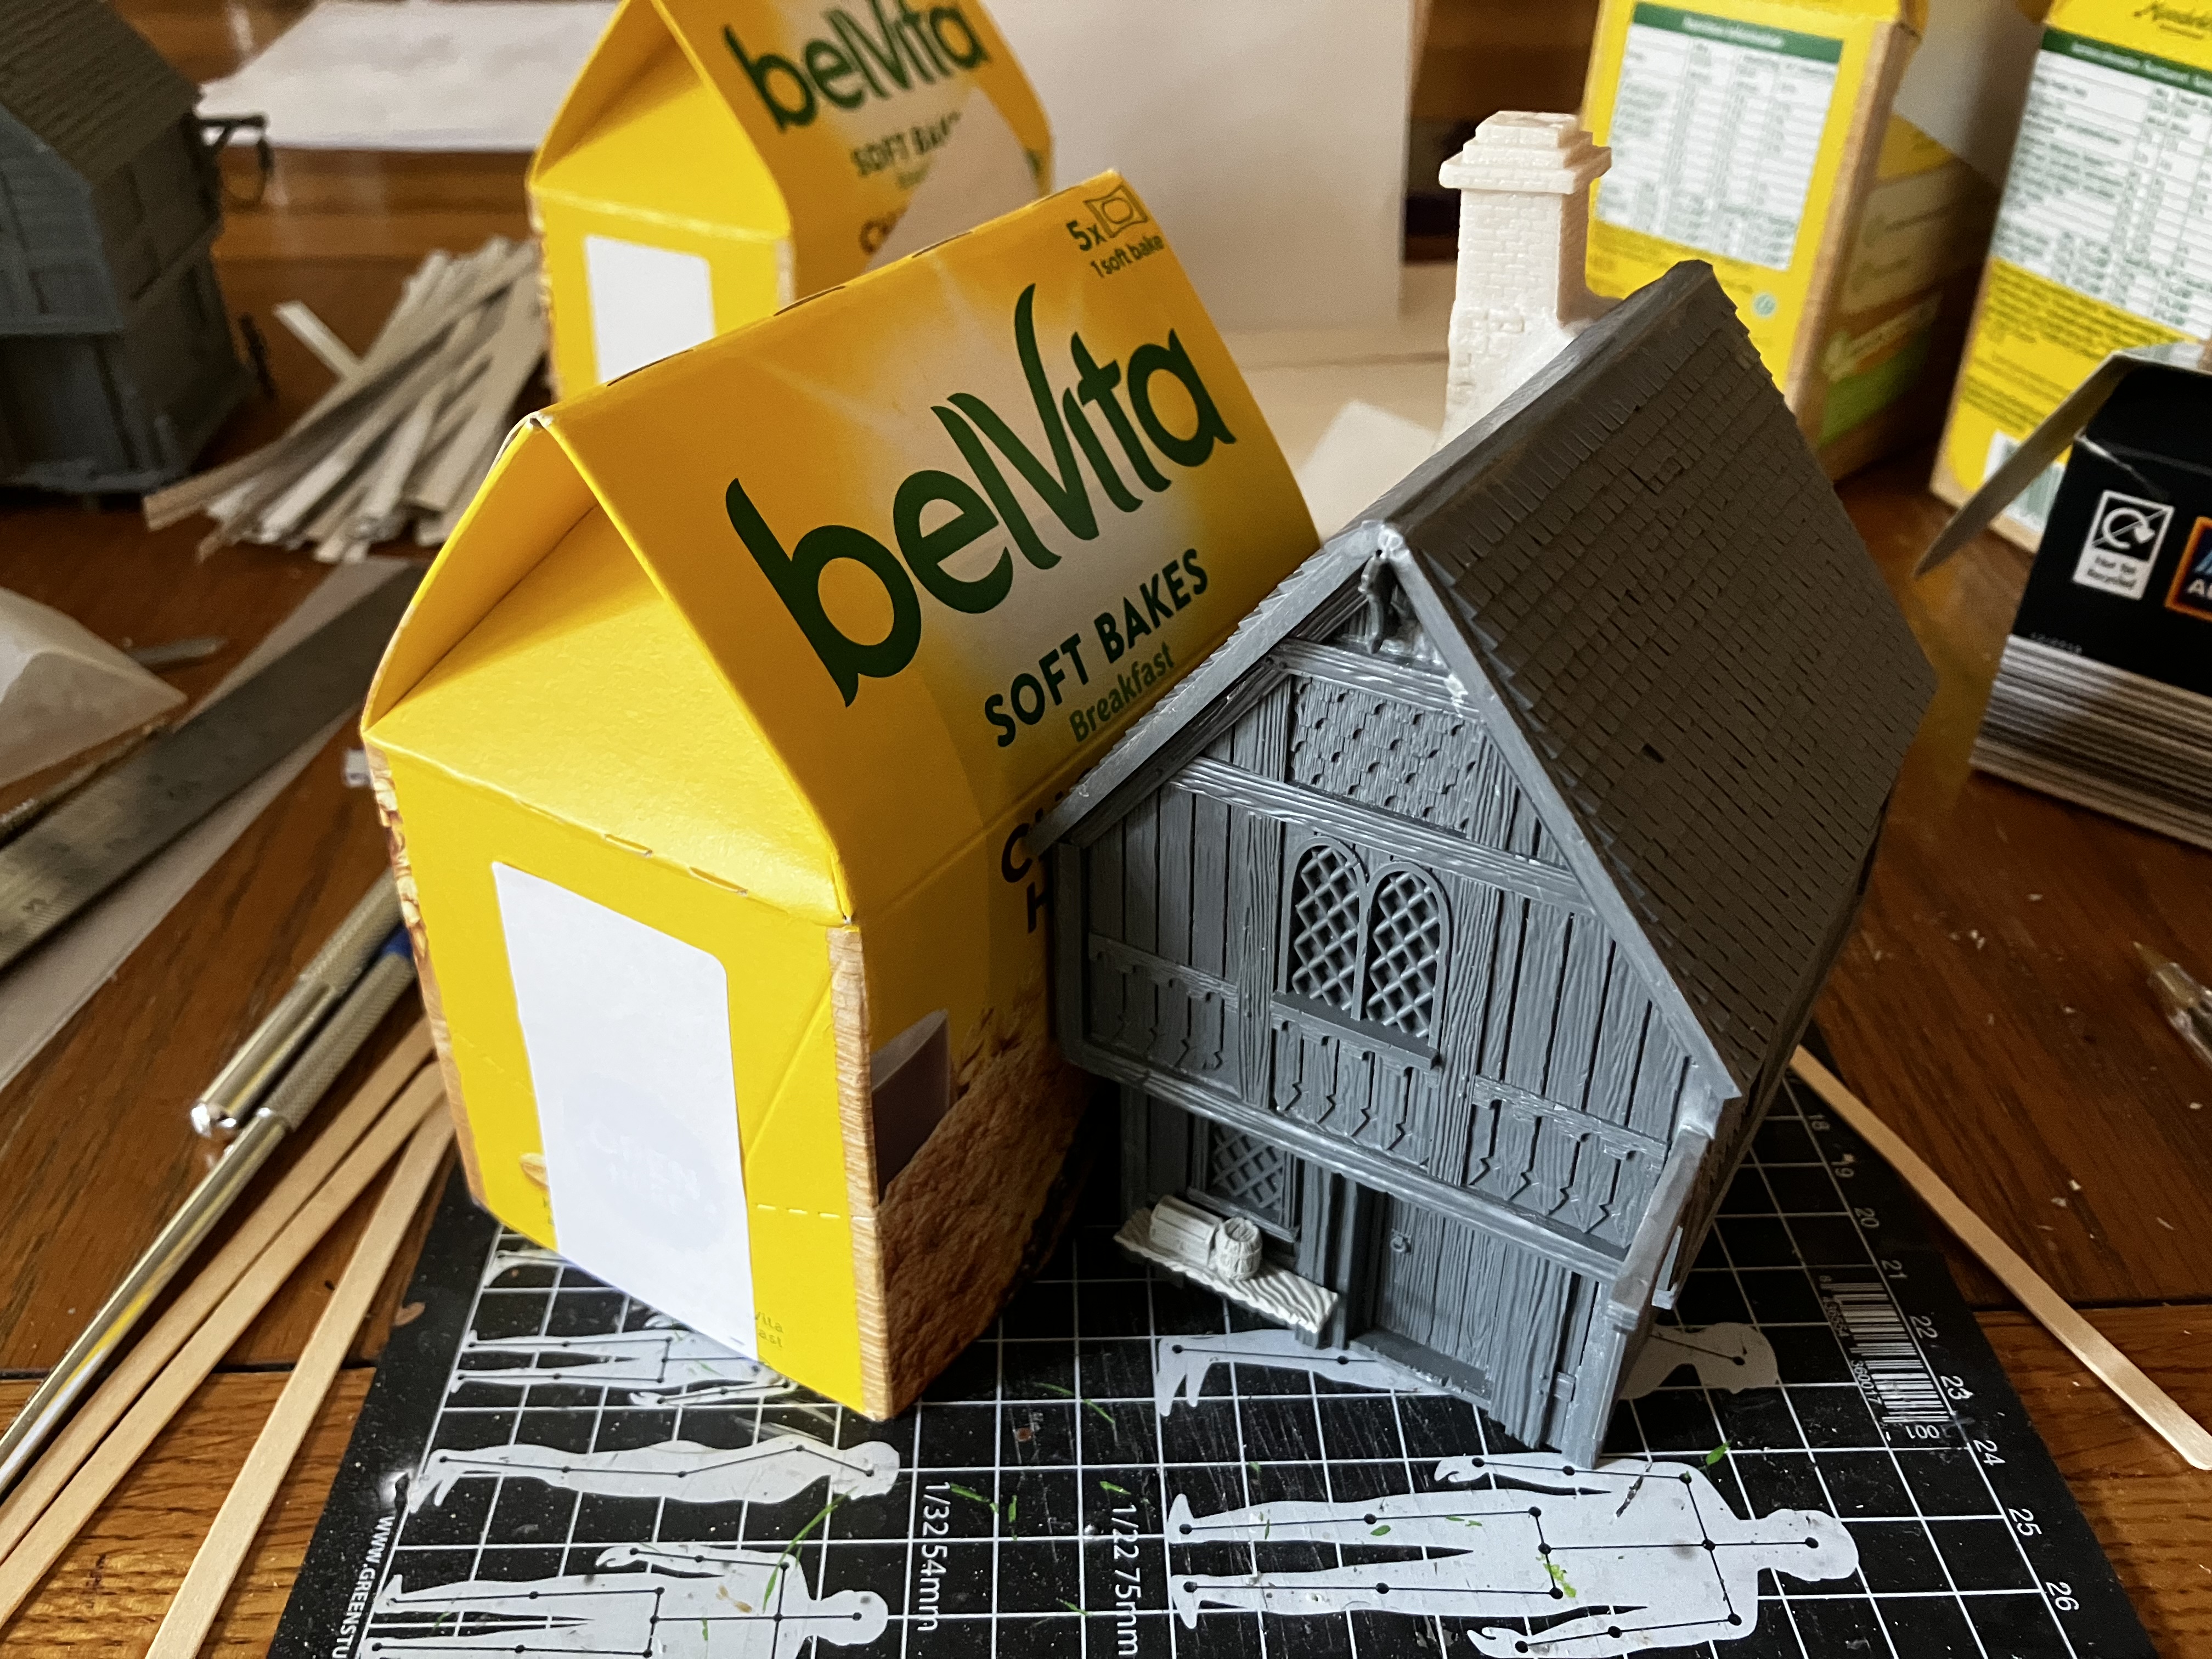
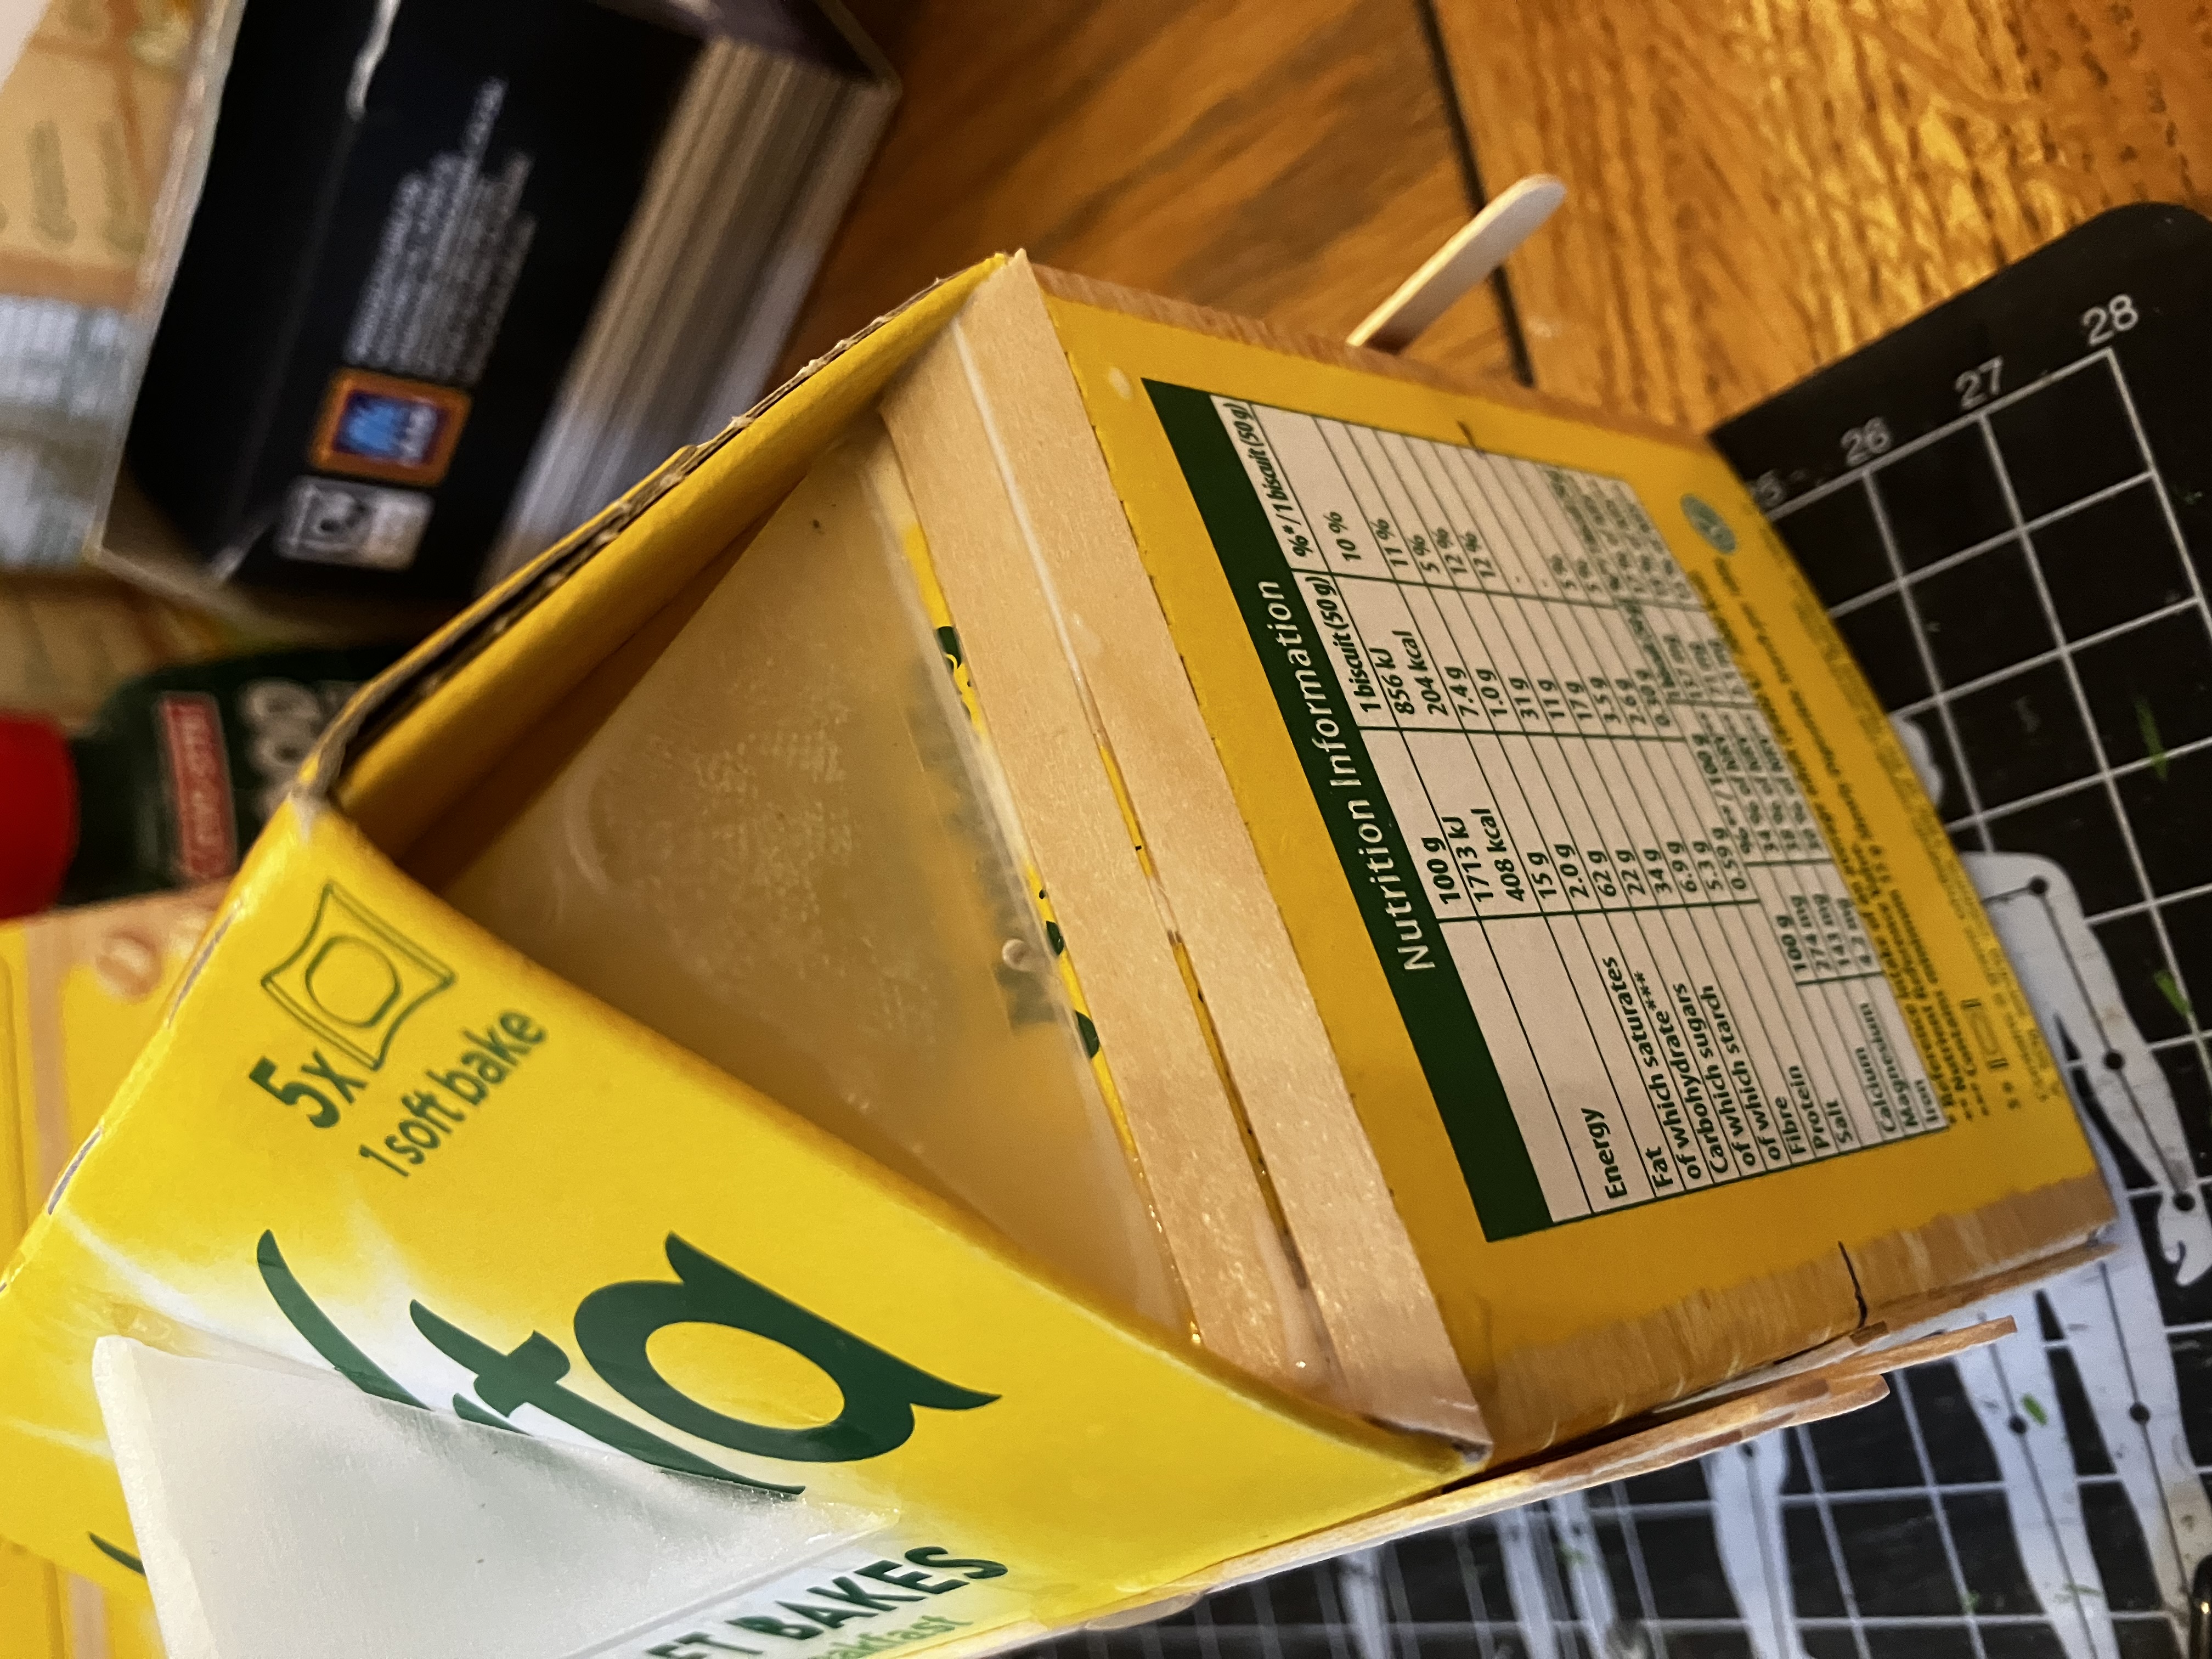
I carefully measured the height between floors on the Lake Town houses – 1.5 inches. Then I measured a Belvita box – 4.5 inches from base to start of the “roof”. Great! That means I can make a mixture of two-storey houses and taller three storey houses to increase the variety.
Here, I’ve marked off 1.5 inches and cut a box down, then marked another 1.5 inches so I can start glueing wooden coffee stirrers to demarcate the different styles of wooden planking I want. The plastic kits have upright planking on the ground floor and horizontal planking on the upper floor.
 A cut down box, really good height match
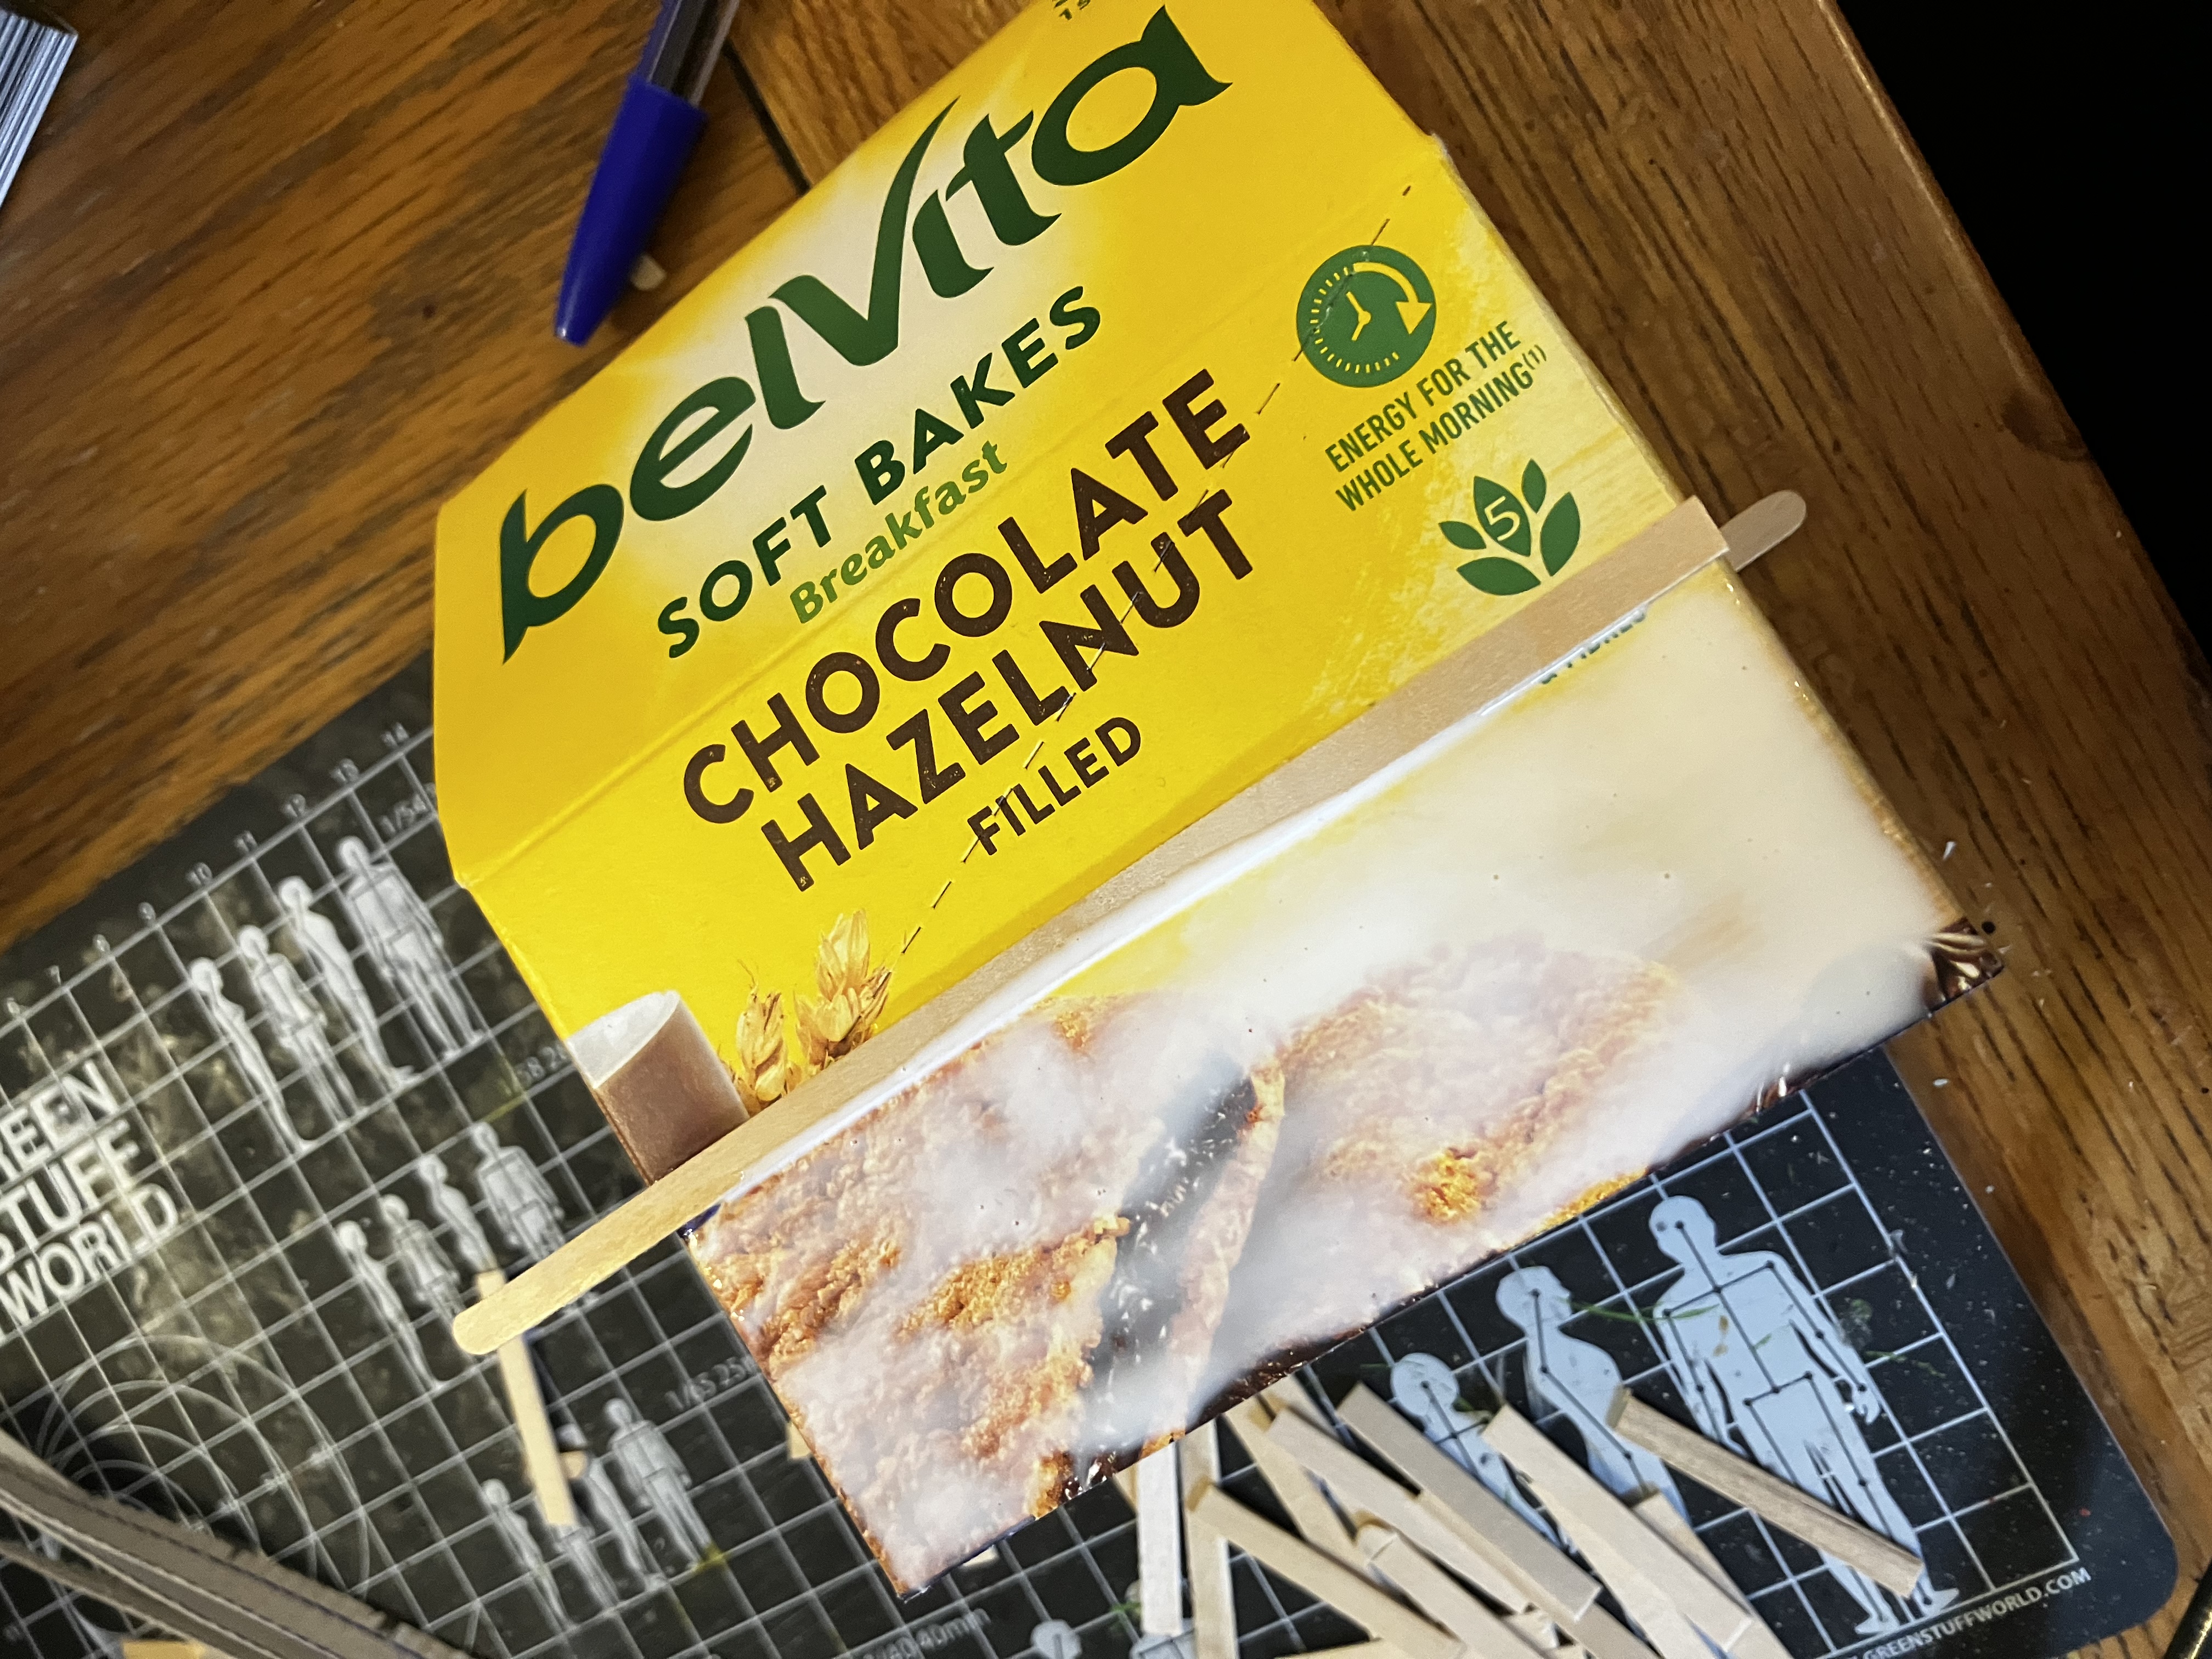 Gluing down guide stirrers.
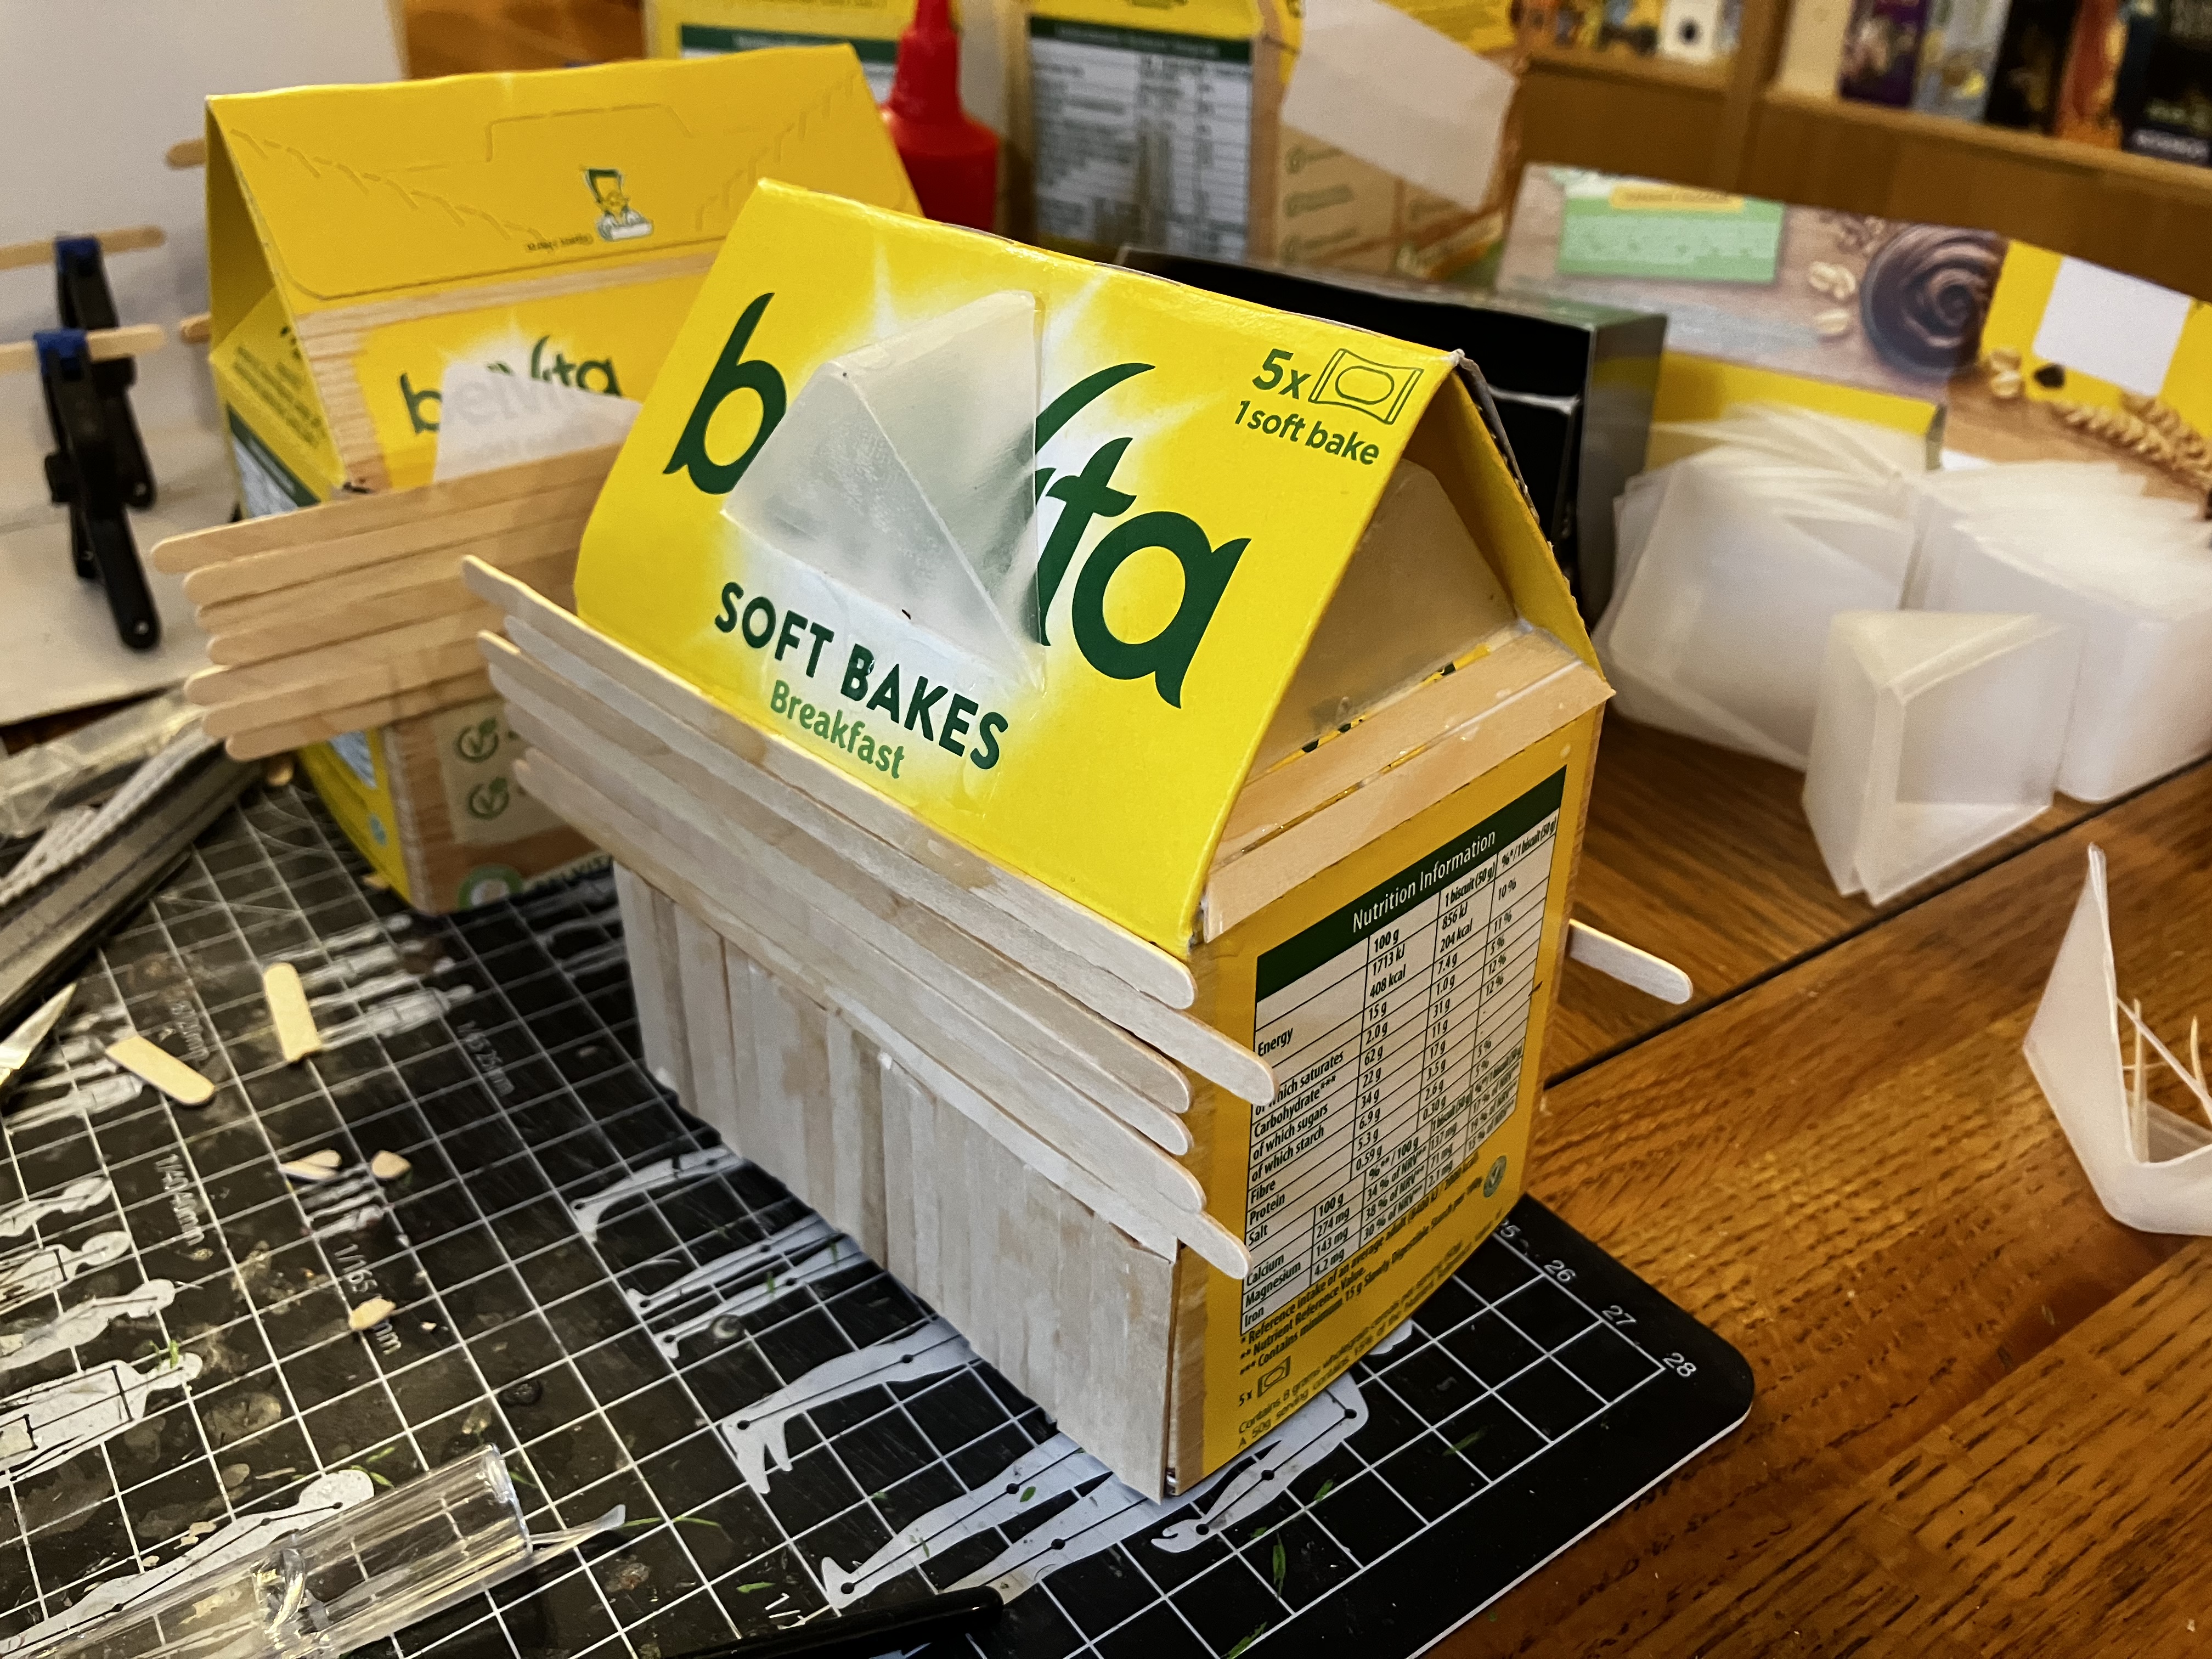 Vertical and horizontal planking on one side
Tools of the trade
I’m using lots of easy materials for this project, so I can keep the tools quite simple. Here’s the essentials.
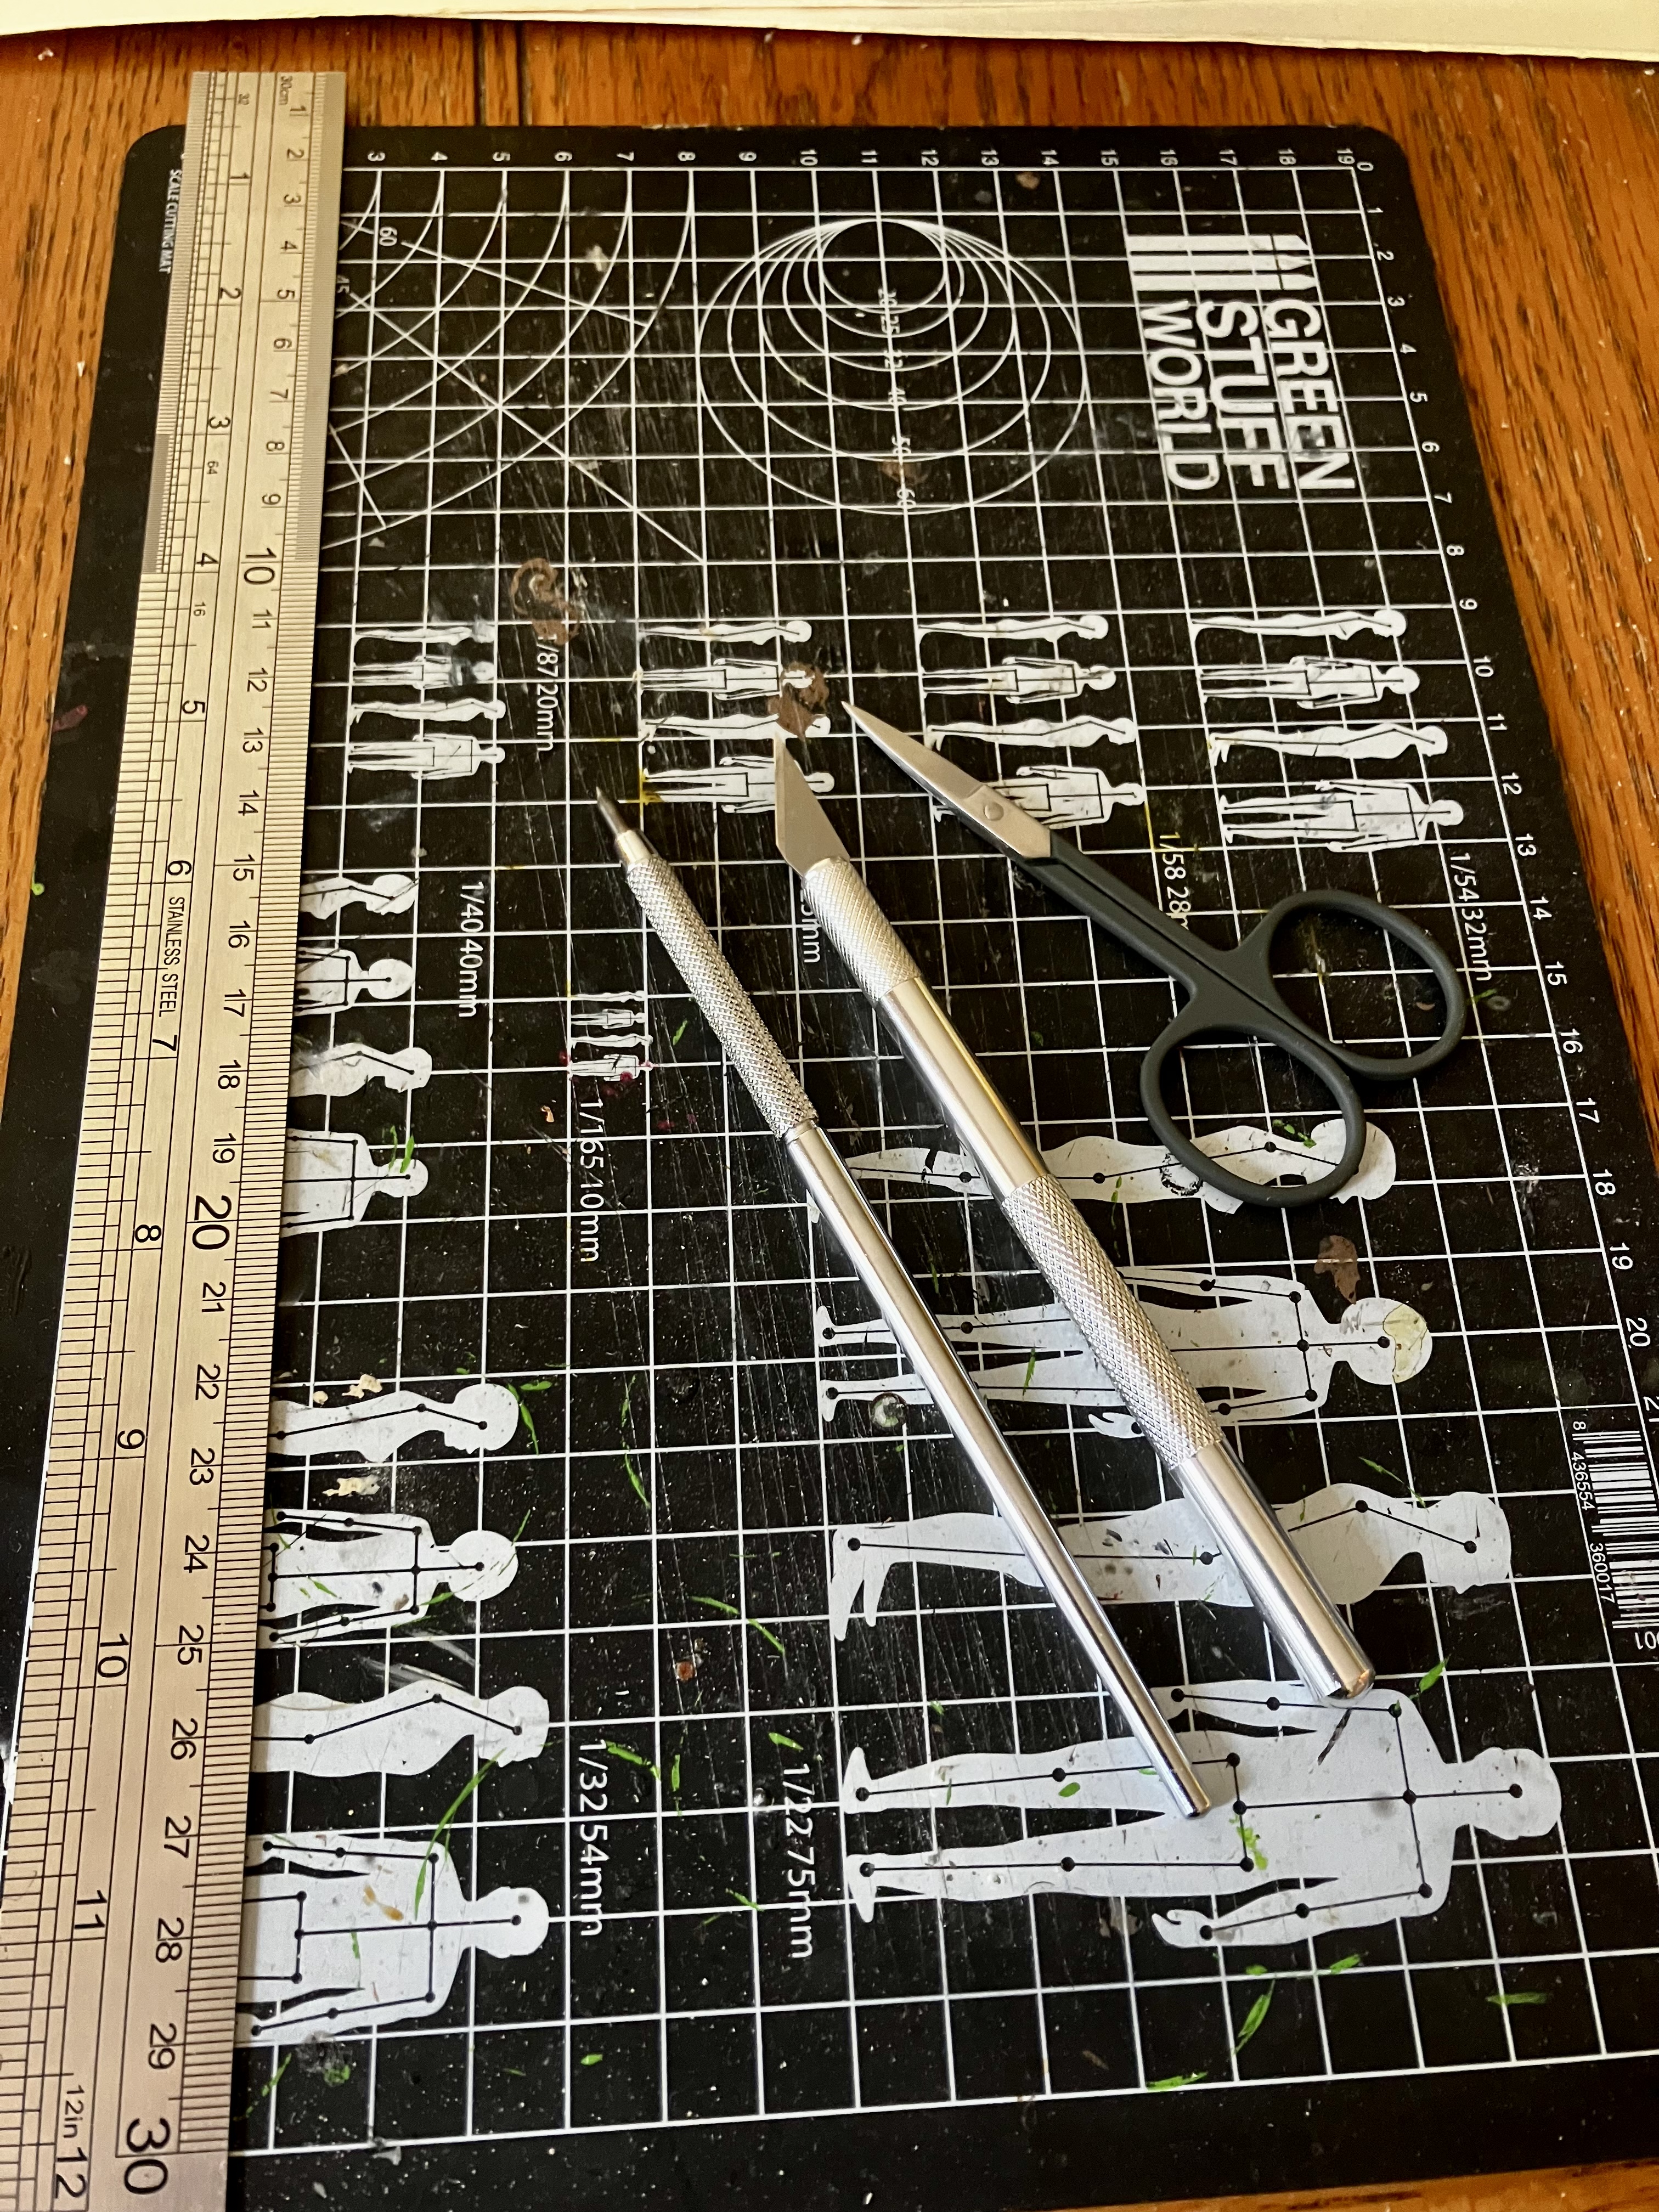
- Cutting mat. This one’s seen better days – but essential for making accurate cuts and protecting your table
- Steel rule. A good straight edge when cutting, and handy for measuring
- Craft knife. Sharp blades that can be replaced. This one has different blades including chisel tip that can be slotted in.
- Scribing tool. Basically a sharp spike. Great for adding texture into materials and making half-cuts when folding card.
- Small scissors. These are nail scissors I use exclusively for crafts. The tiny size helps when cutting small details.
In addition to this, PVA Woodglue – neat and in a dilute mix, and superglue are also essential.
Useful items for scratch building
As I mentioned in my last post, I’m using easy materials to help build out this Lake Town board. Cheap items and found items are my friends here. And if I can glue with PVA wood glue, that’s even better (I have an allergy to superglue).
Some materials:
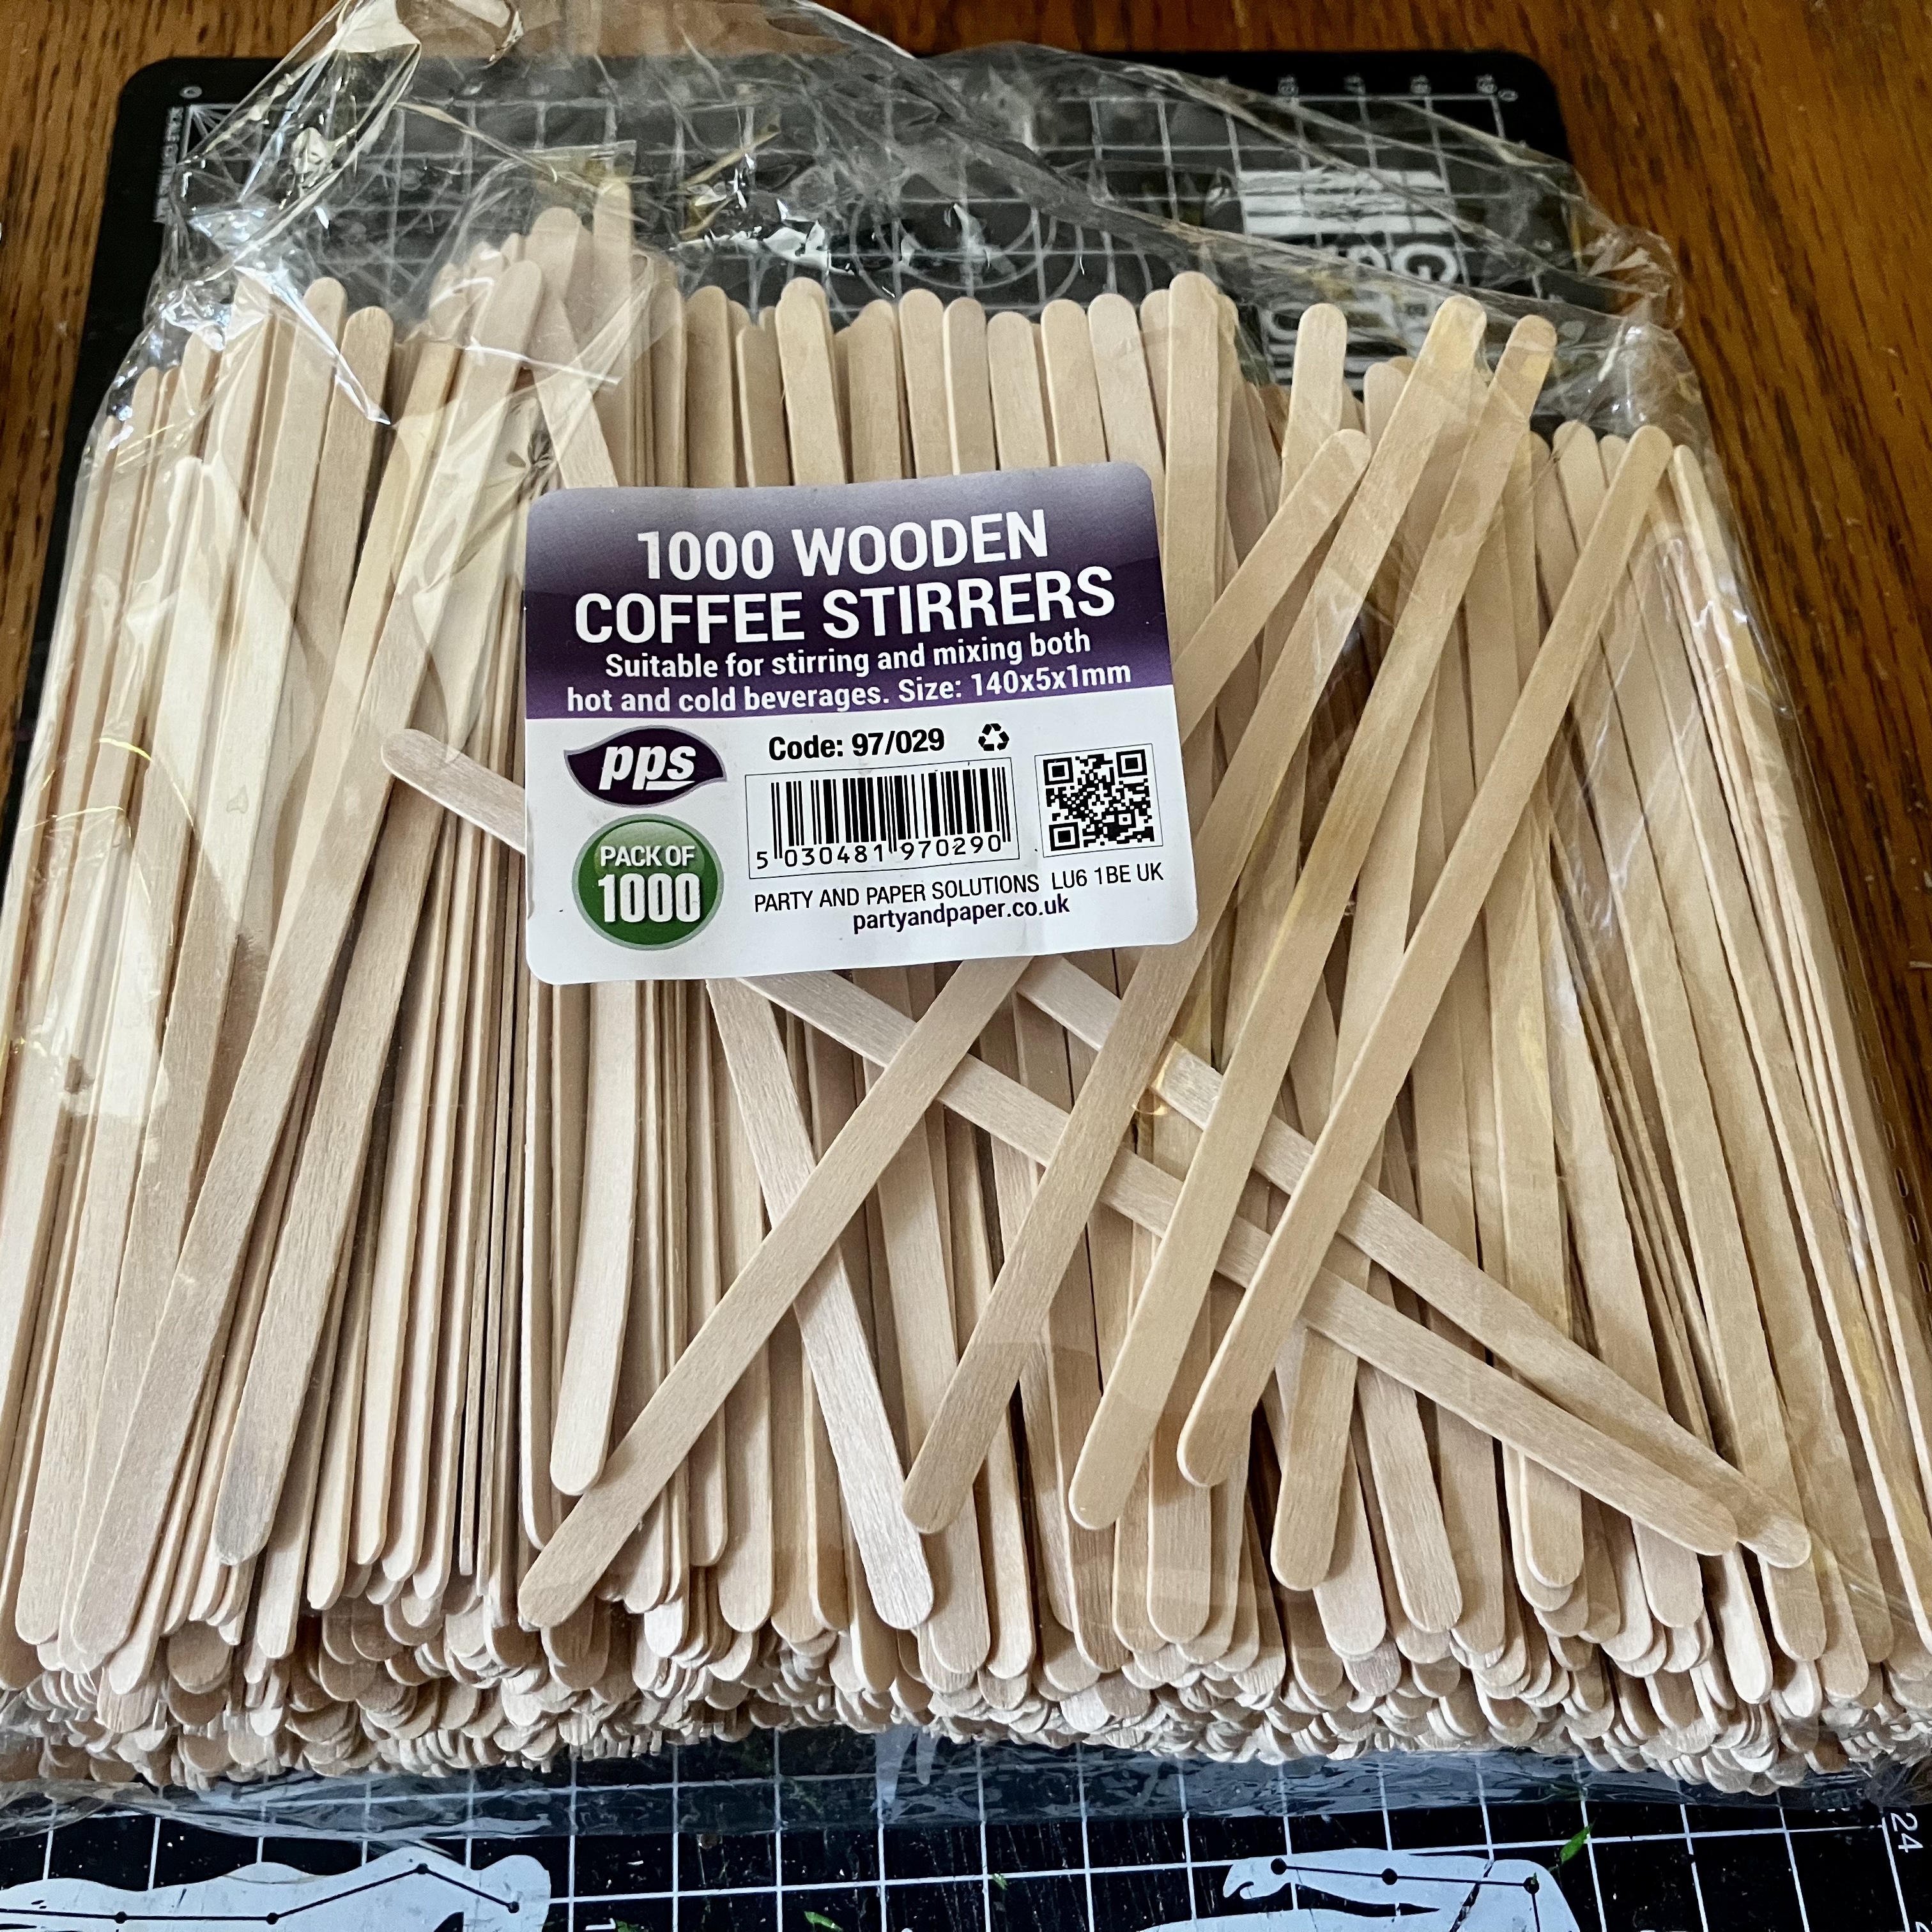 Coffee stirrers. These are planks, decking, support beams - a big cheap bag ordered online.
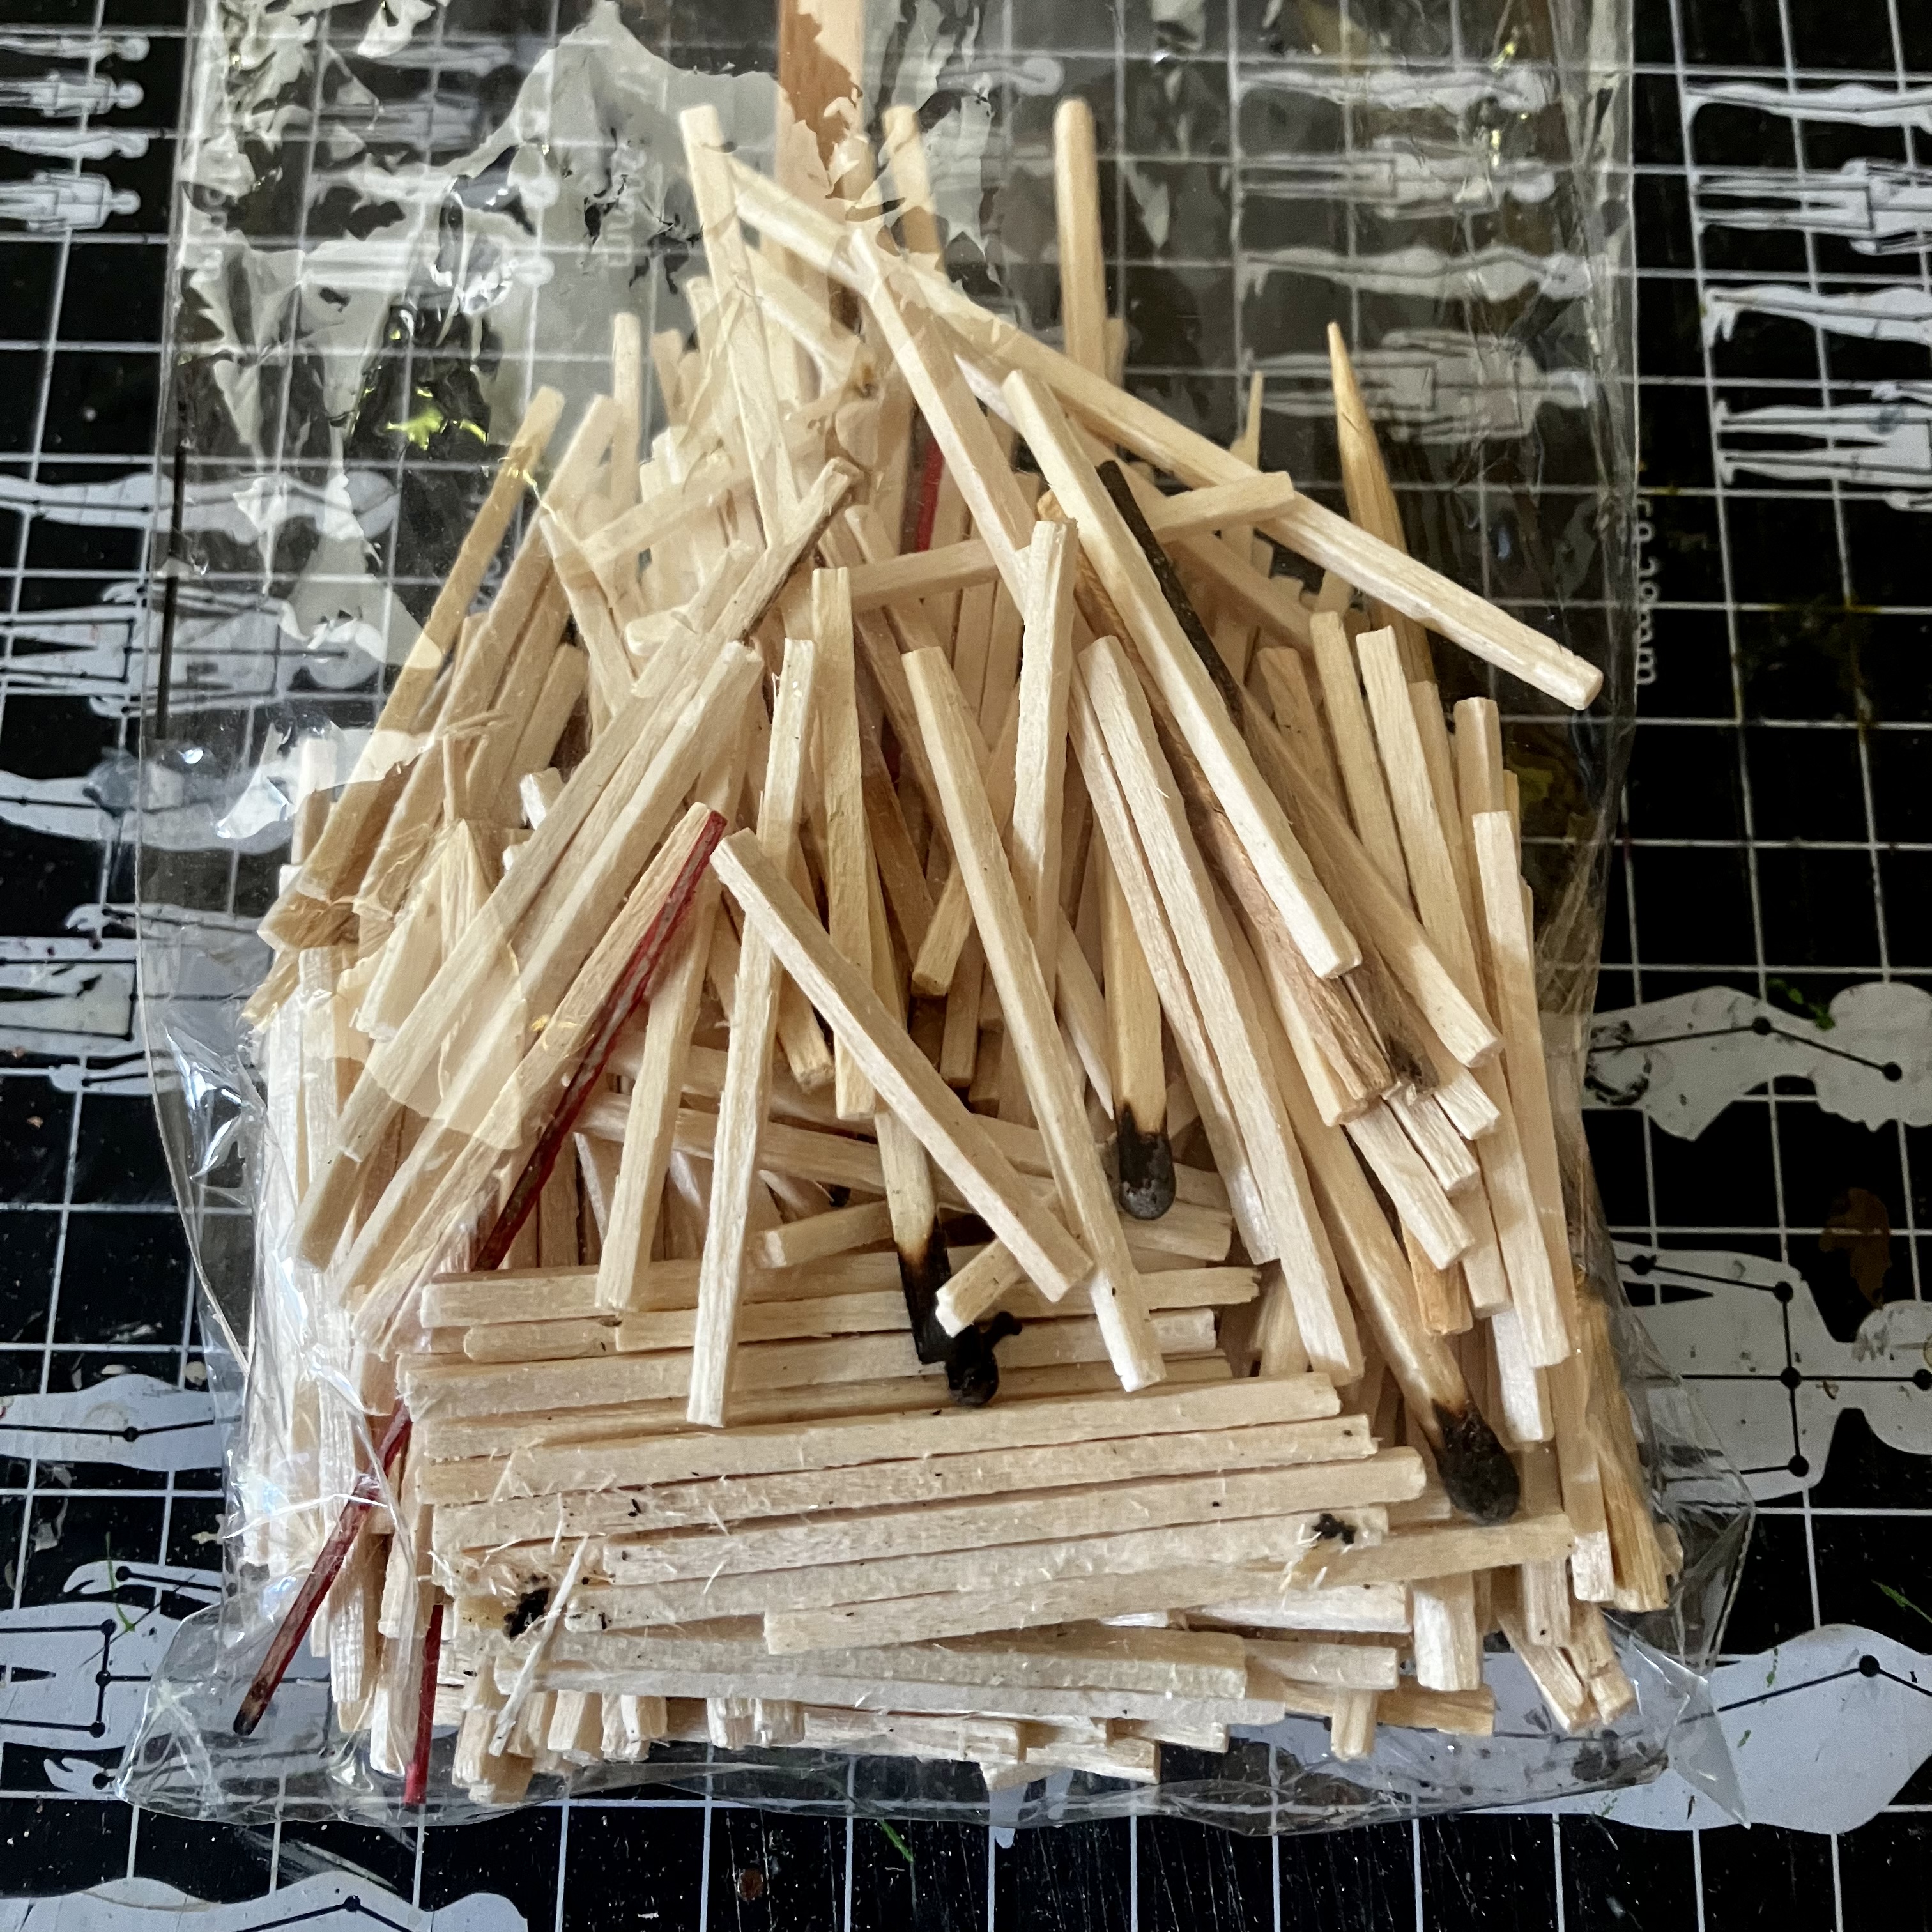 Matches. Great for adding details like window frames, but also for small pillars and jetty piers.
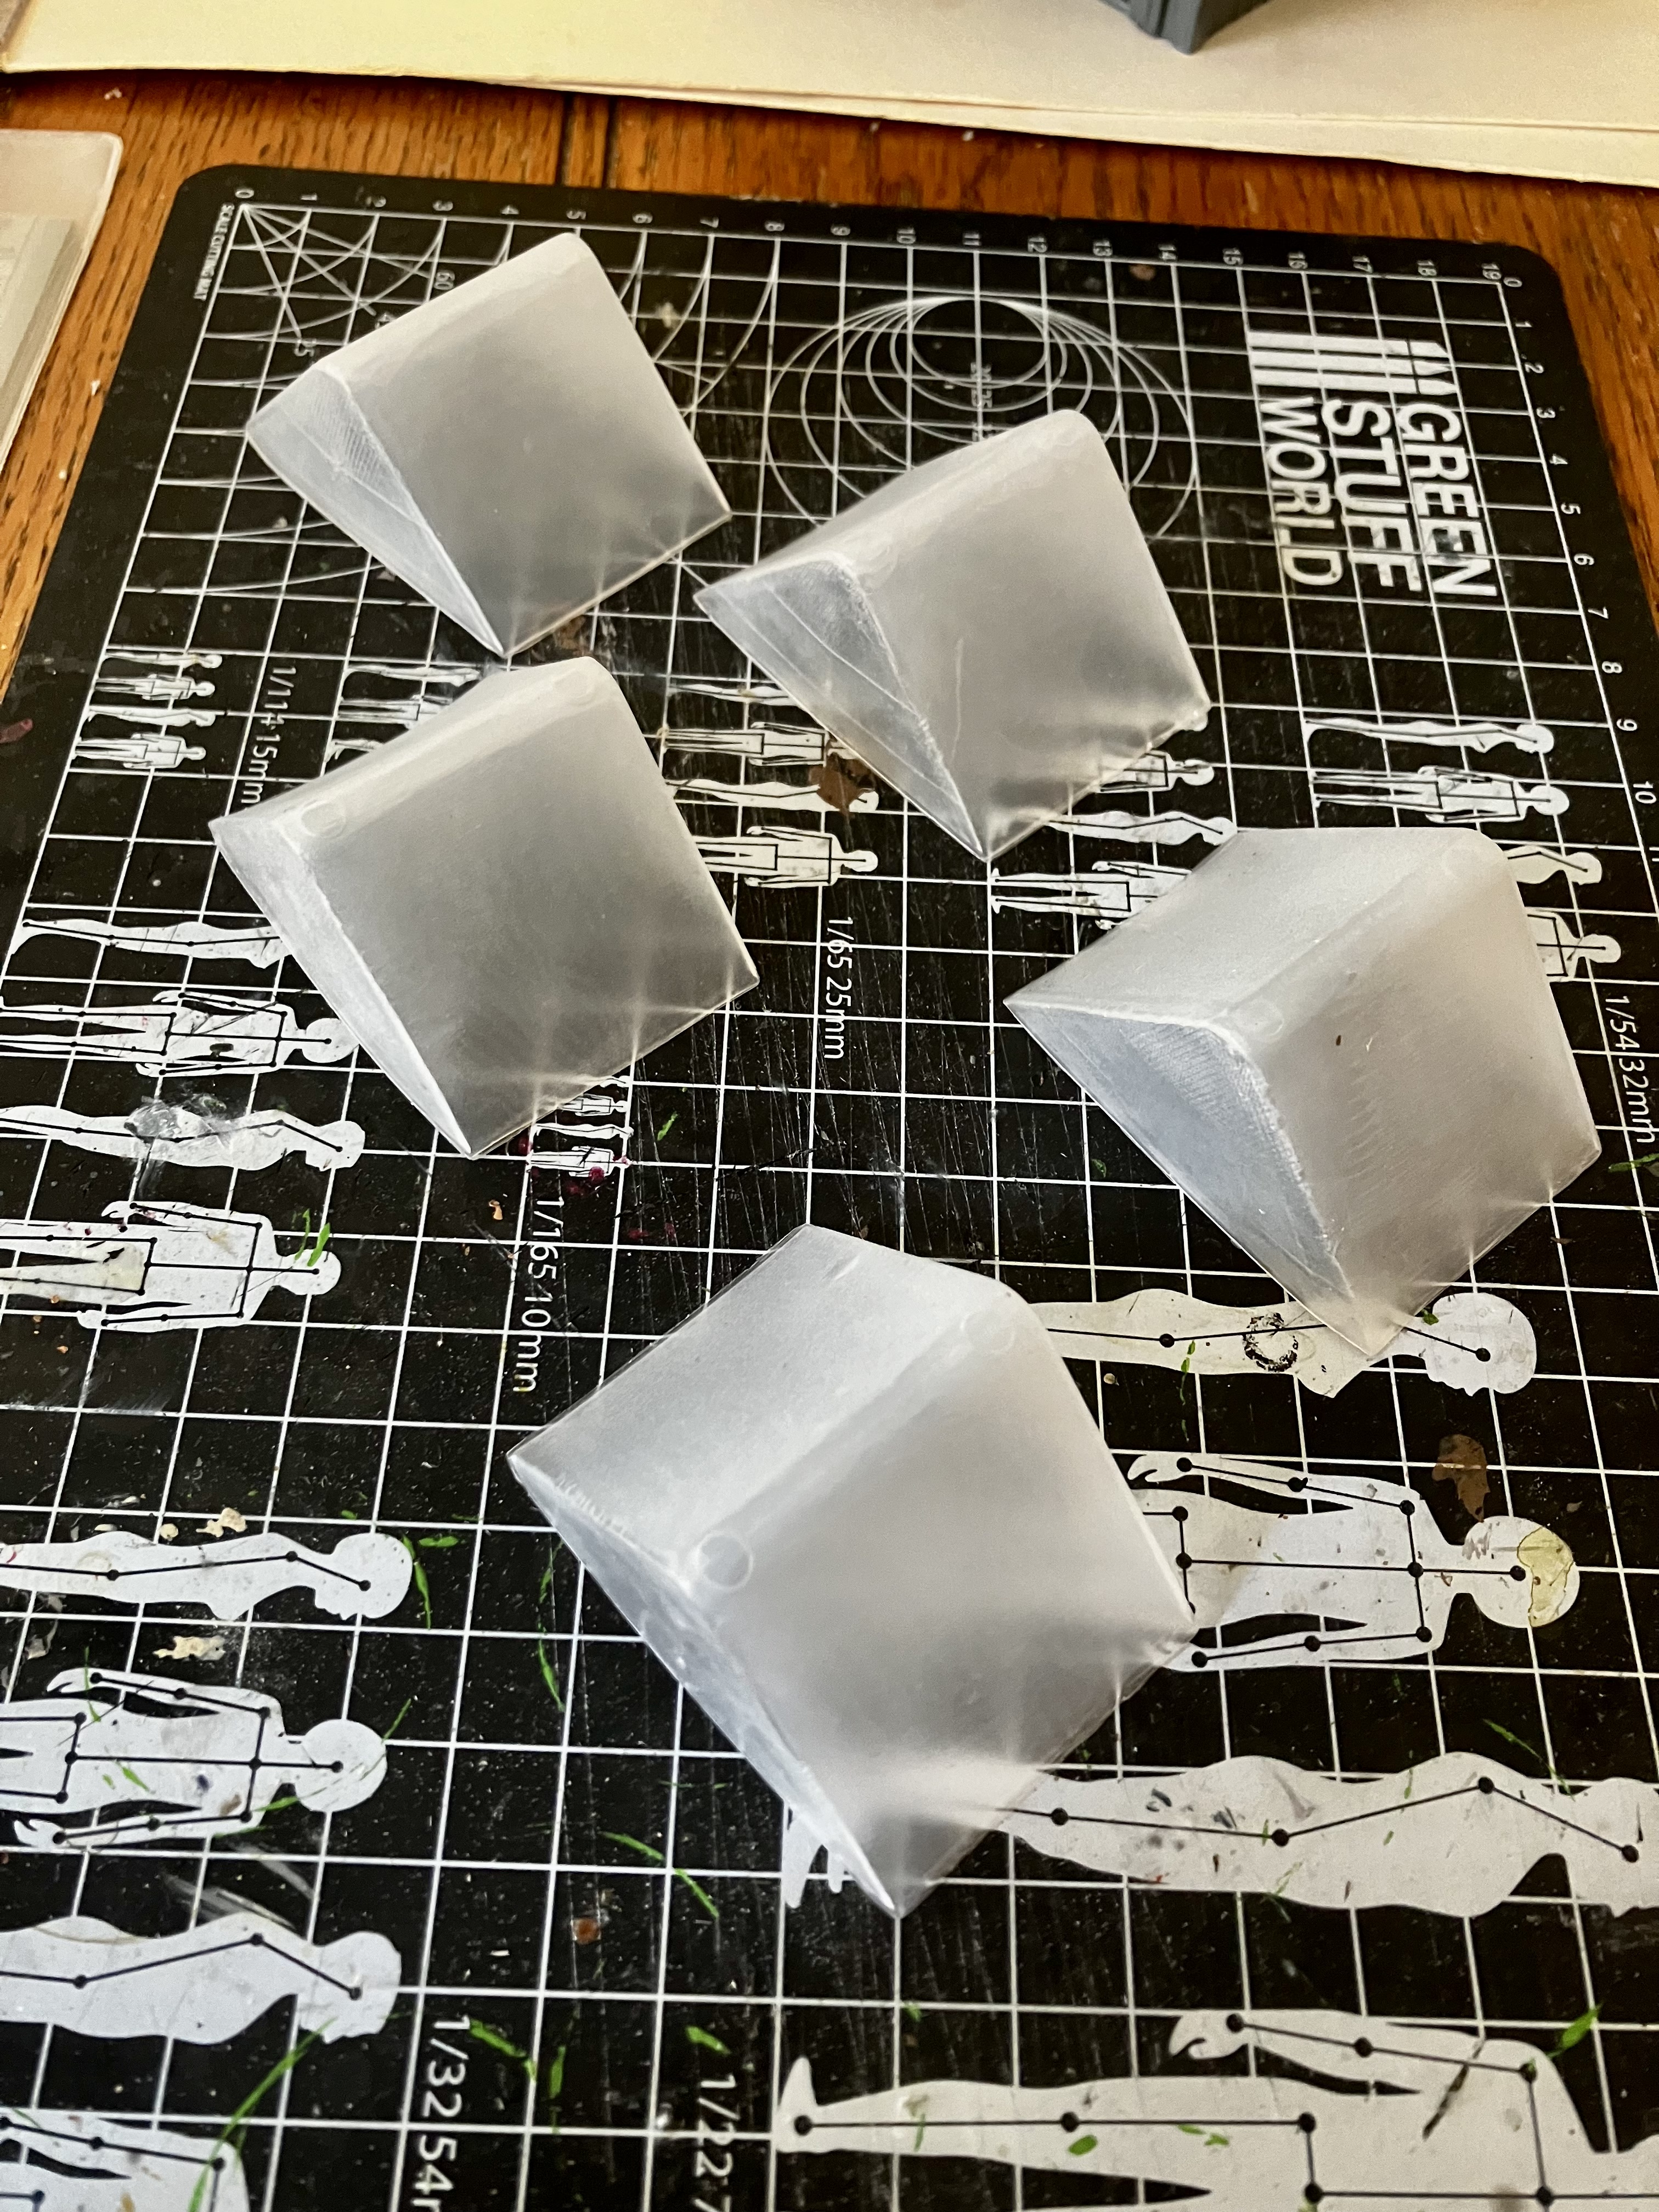 These were corner protectors from putting up floating shelves. Cut on an angle and detailed, they will make perfect dormers for roof spaces.
That’s a few examples of easy to find or re-purposable items for scratch-building. There’ll be more as this project develops, so hopefully you’ll follow along as I discover what works well – and what doesn’t!
Detailing out
With the base planking glued down, it’s time to start going in and layering up some details. Here, I’ve started adding some support beams, thicker beam to differentiate the floors, and room for a window. All of this is done using coffee stirrers (which can easily be cut with scissors). It’s the kind of job that can be done in front of the TV and still feel like you’re achieving something.
 Beams going in to place.
The tablescape so far…
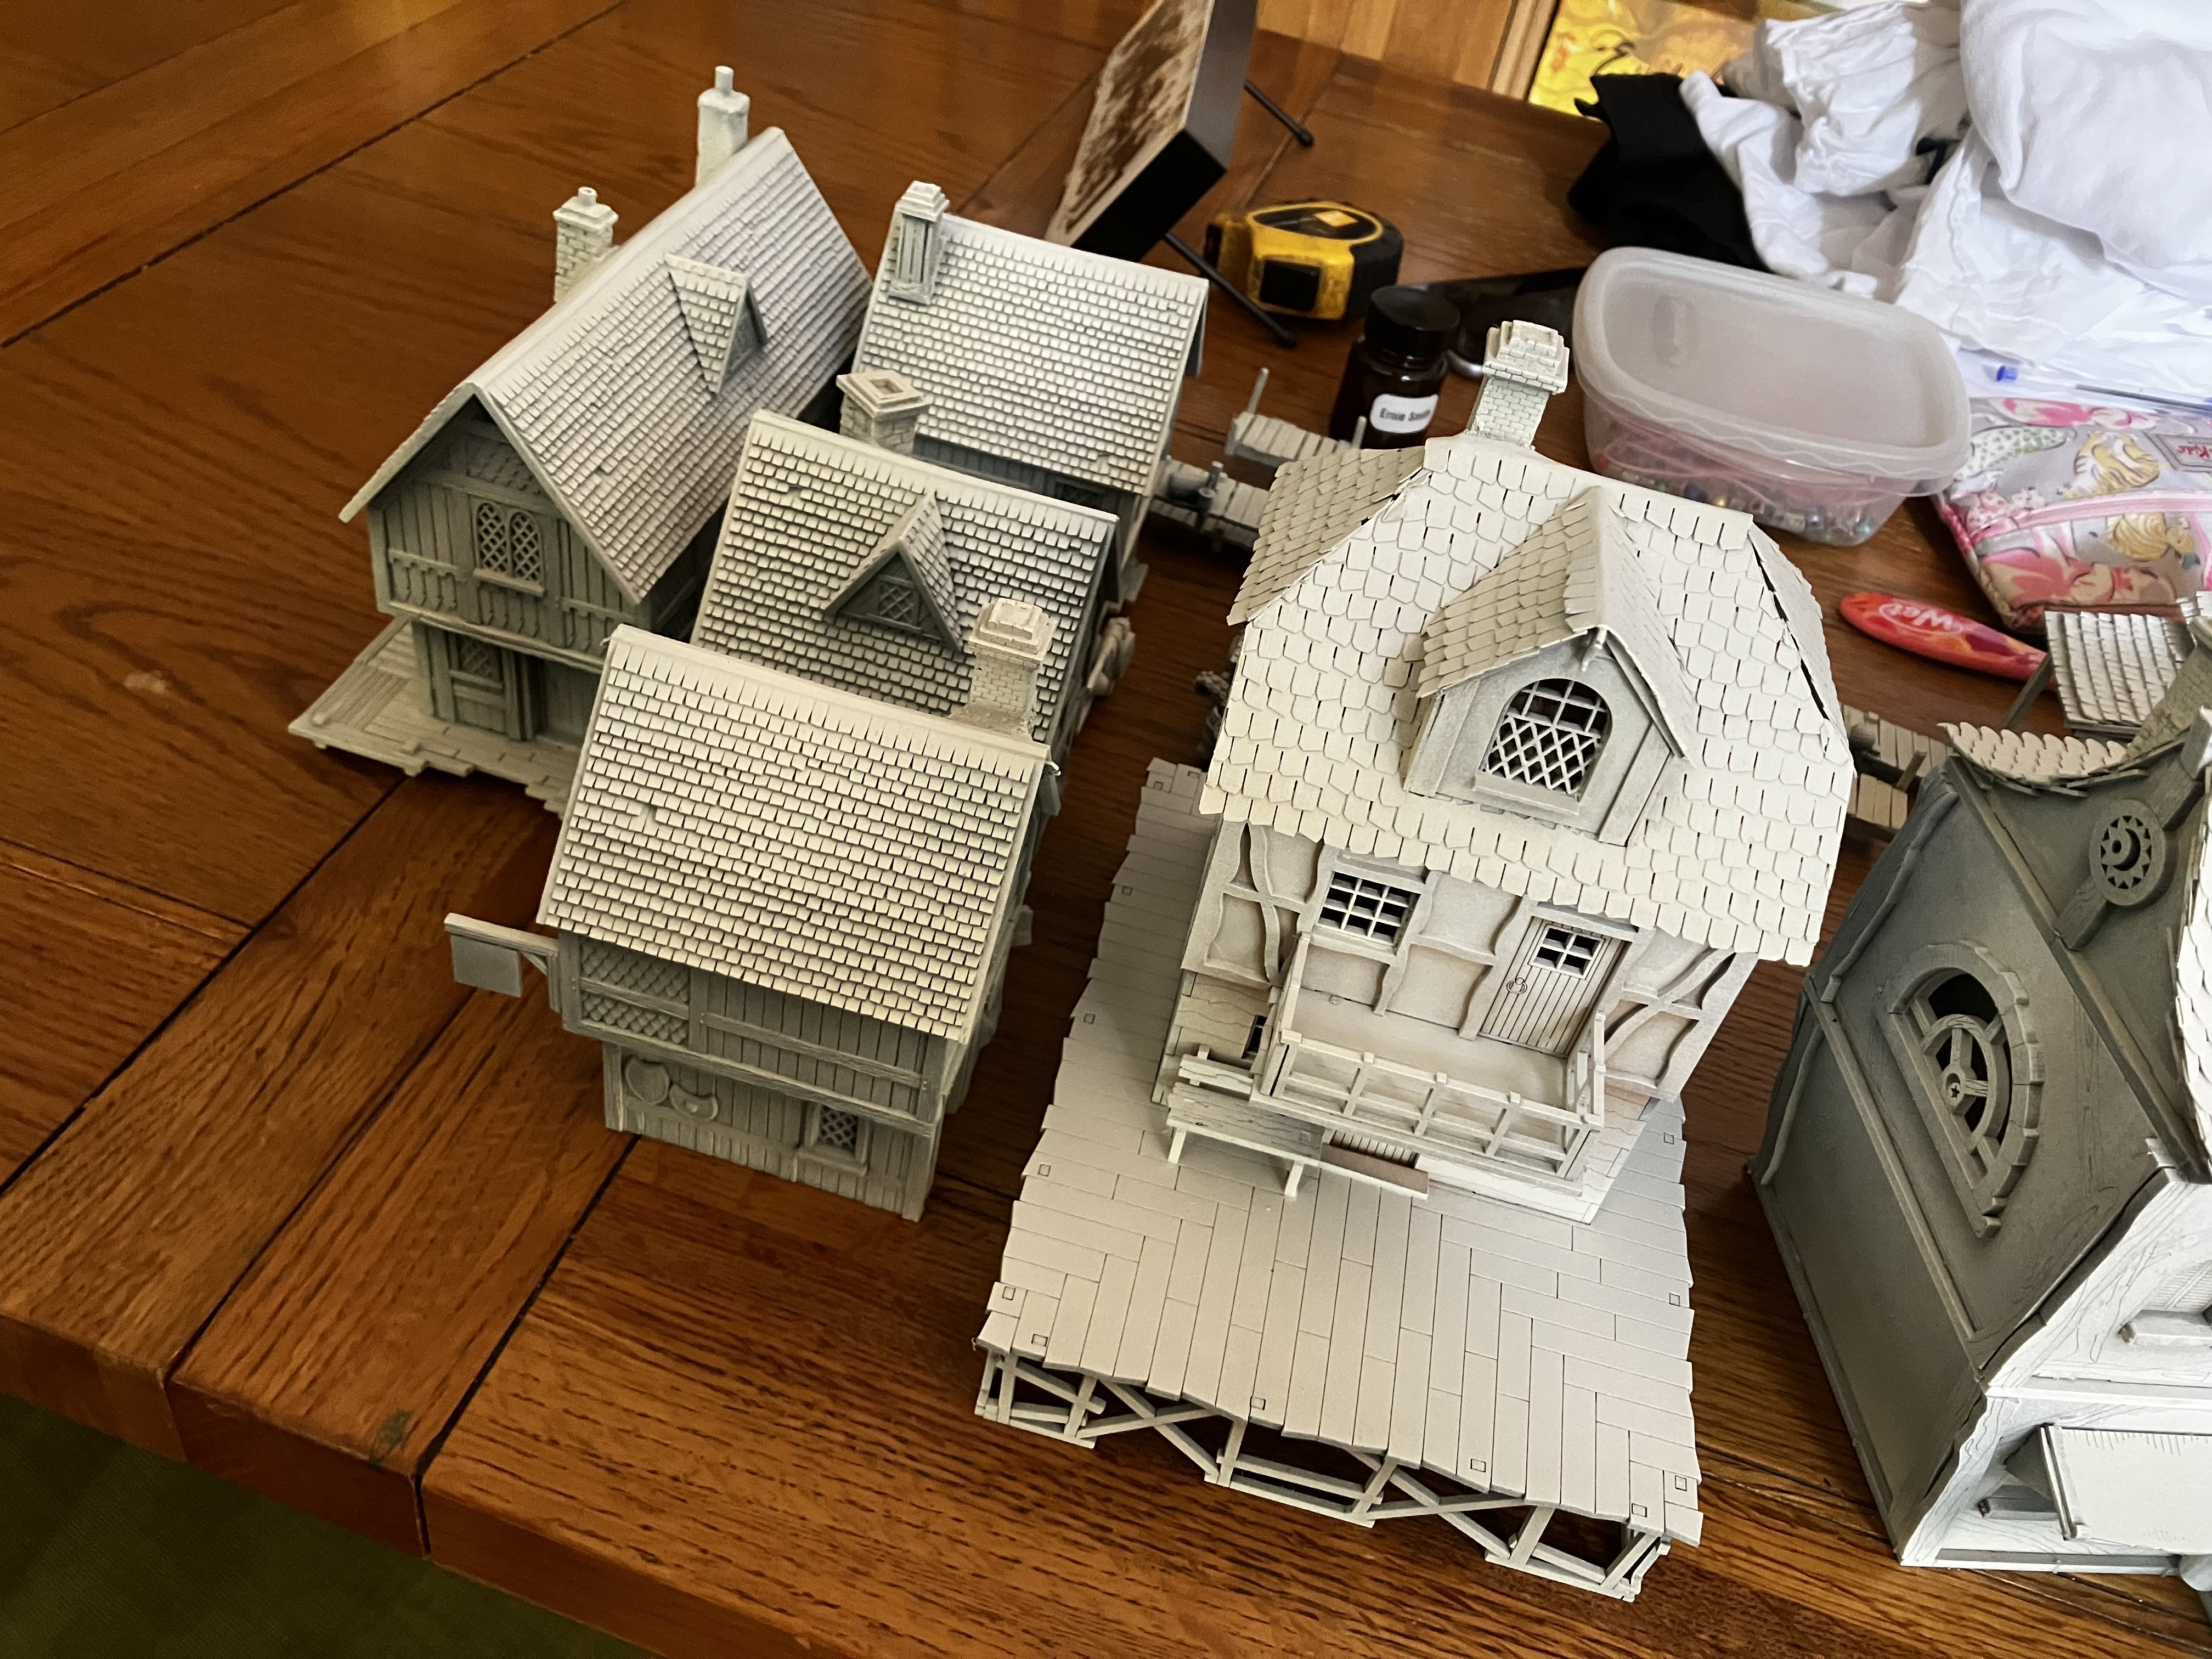
Thought it would be fun to put together a view of everything I’ve got so far. You can see the mixture of plastic kits, MDF buildings and starting scratch builds that I’m aiming to tie together as cohesive whole. Laying everything out on the table has reassured me that I’ll have enough buildings (5 GW houses still to add there!), but the walkways, bridges and market places will be the key to creating a great modular set of terrain.
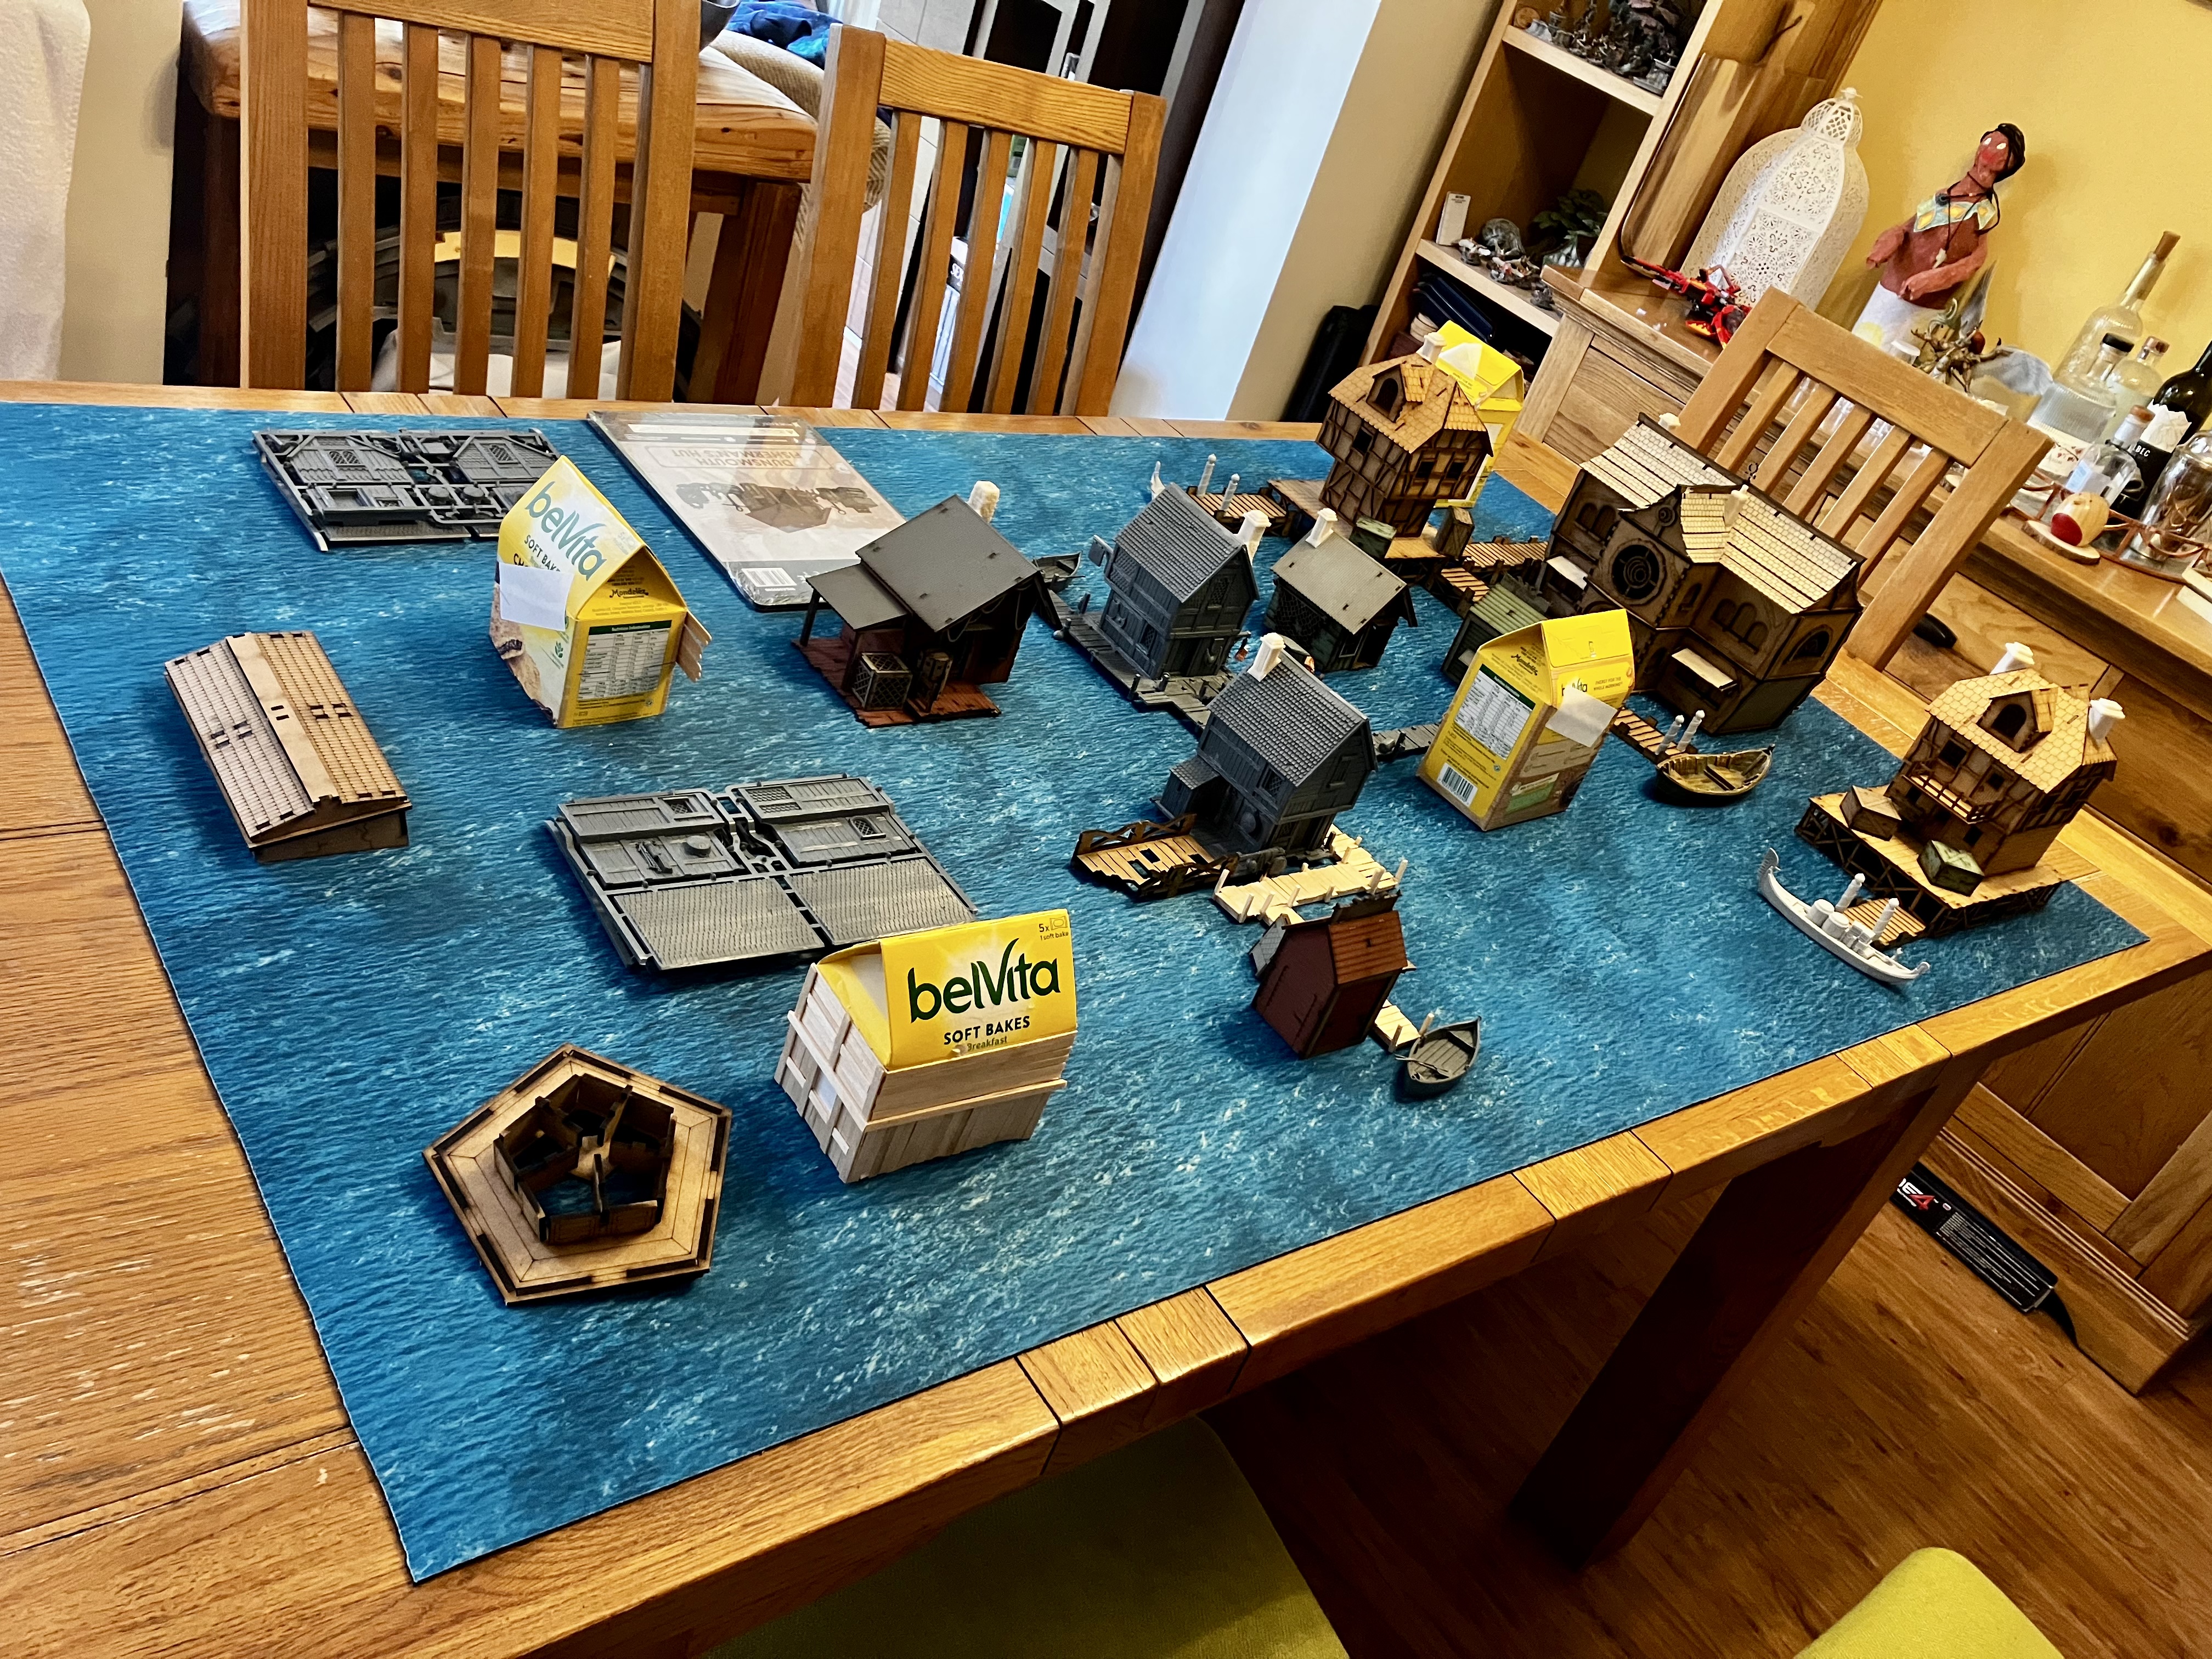
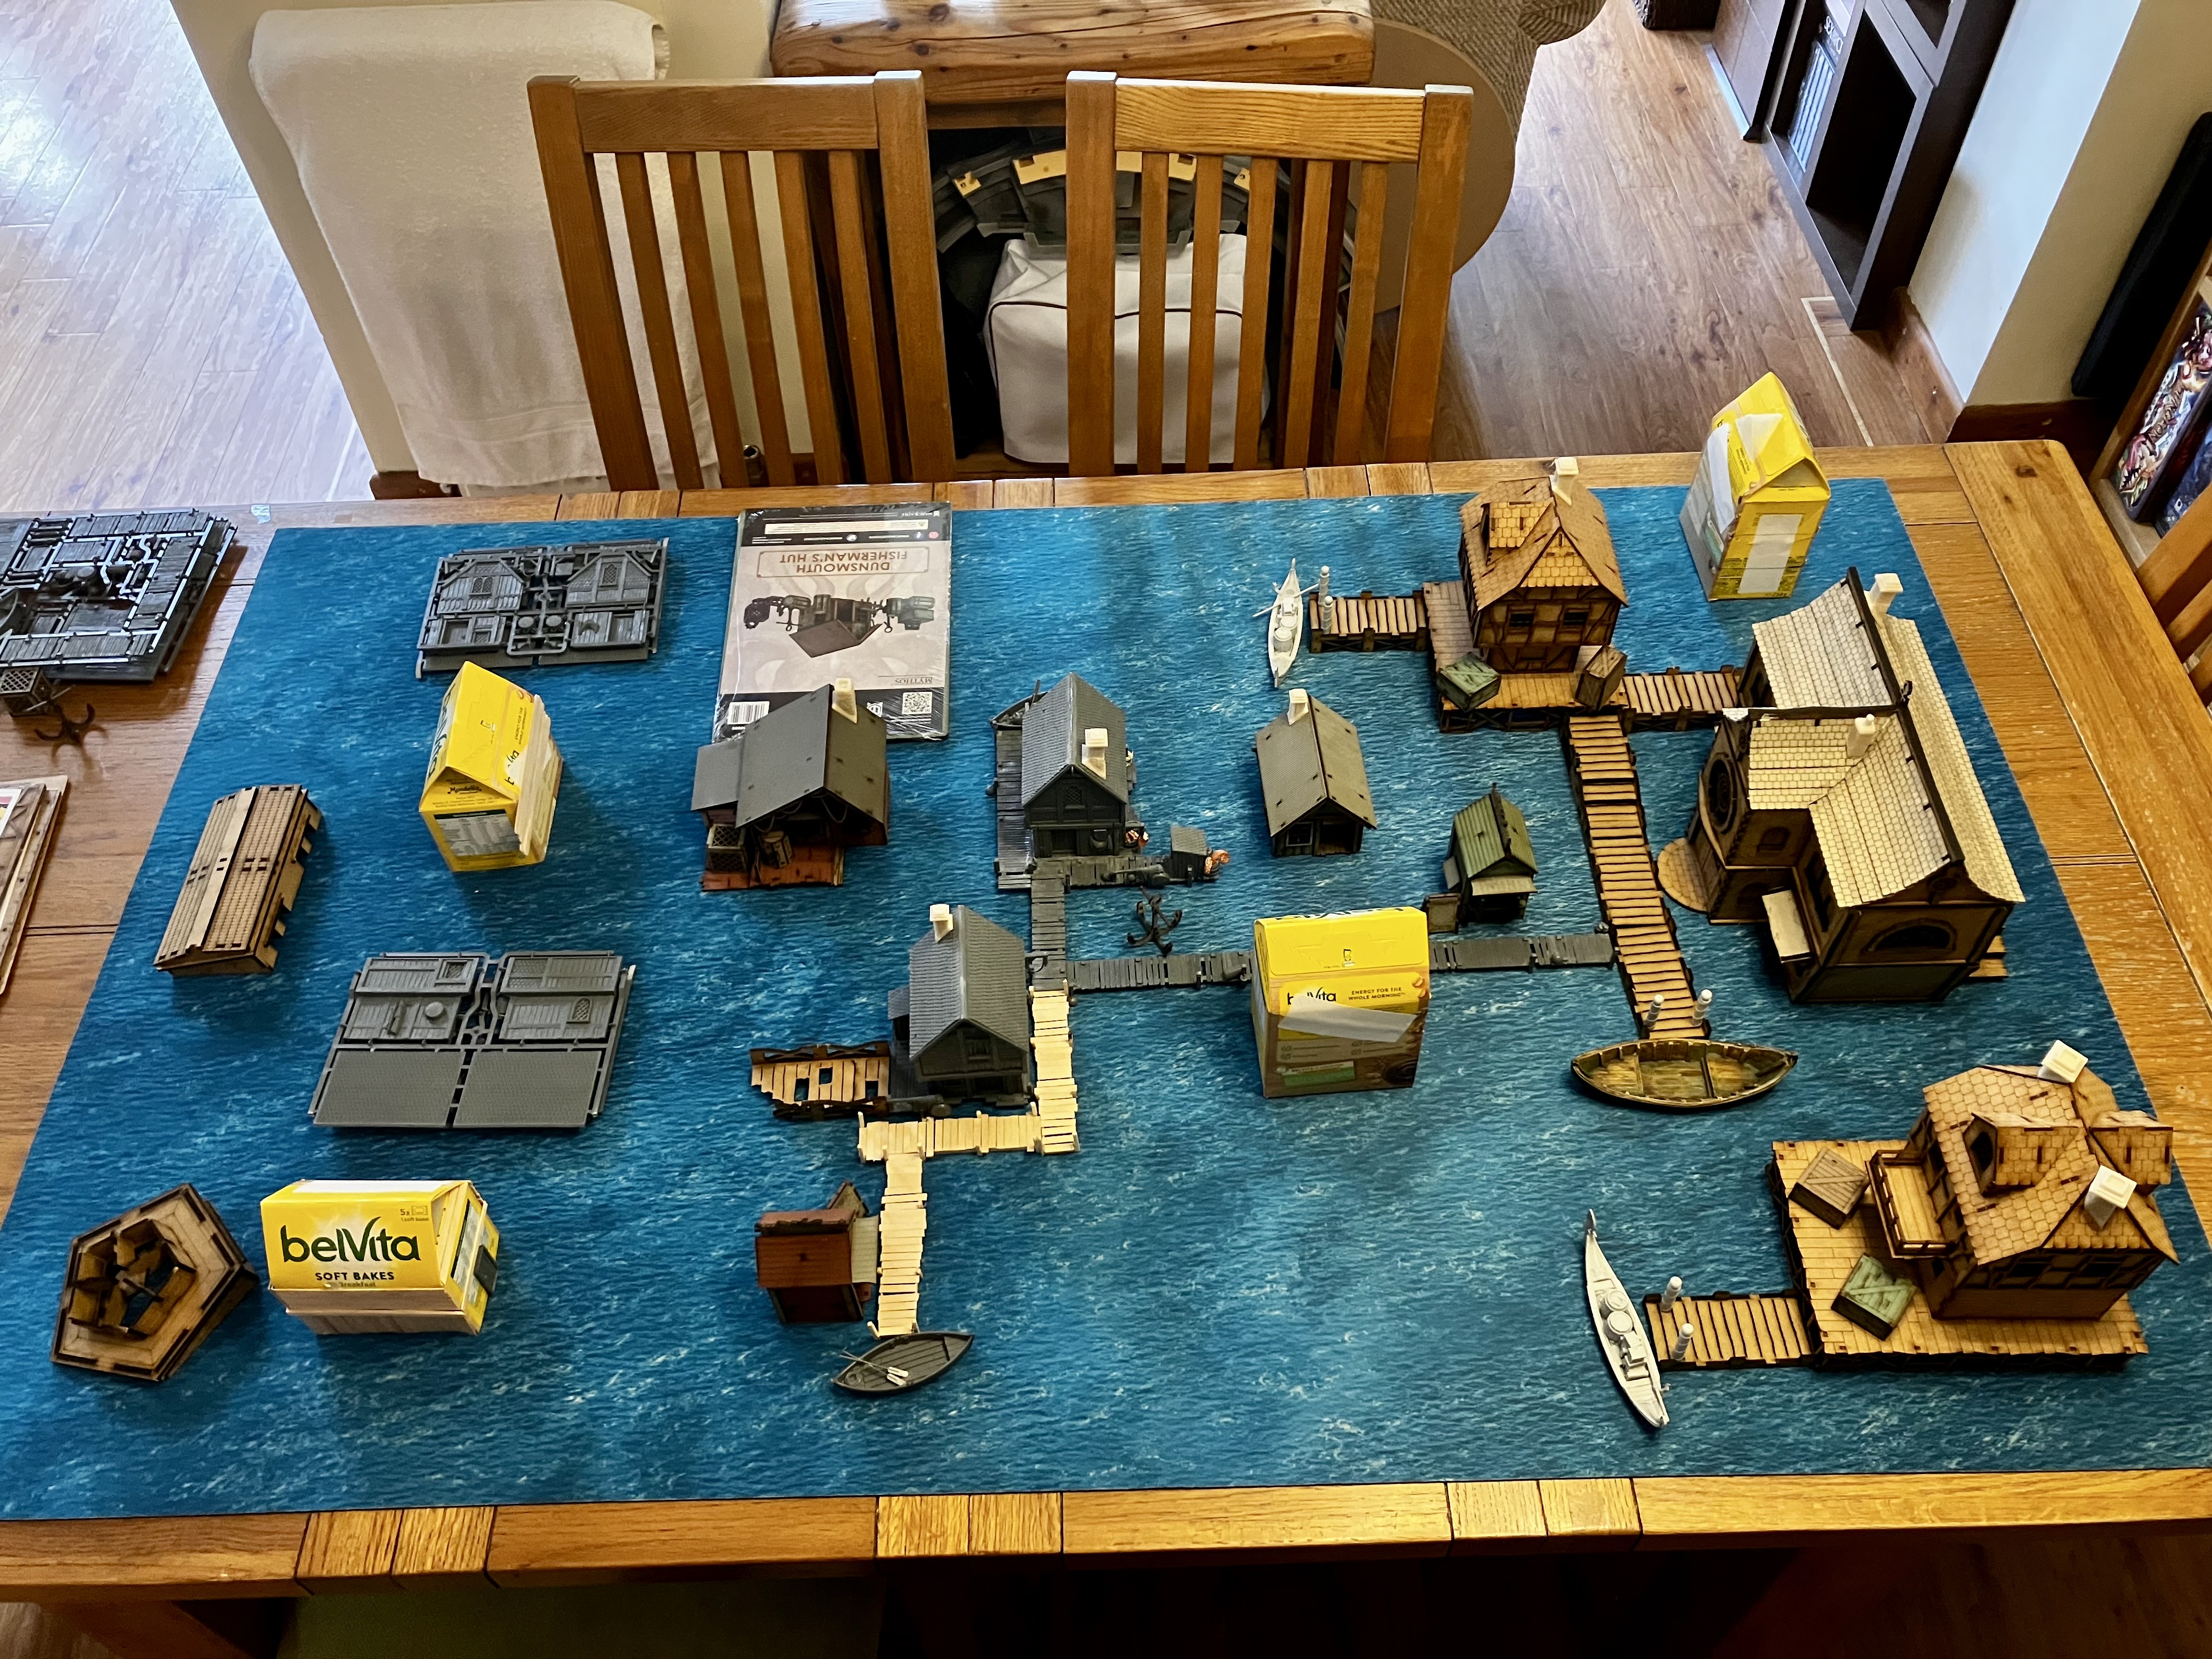
I’ll talk about and share close ups of the MDF kits I’m using in future updates.
Some more detailing, making progress.
Spent some time thinking about other ways to detail, add visual interest and tie the scratch builds to the kits.
One challenge I faced was that that the pitched roofs also fold in under the eaves, making an unusual over hang at each end. I could just flatten them with cardboard triangles (and may do that on some) but for this one I thought I’d stretch myself a little. Cutting one of those shelf corners at the right angle, it fits really neatly as a gable-end dormer. Not anything I’ve seen in real life, but looks kinda right for a fantasy world.
You can see here that I’ve also glued one to the roof as a dormer. Once tiled and detailed, it’ll fit right in.
I also glued on a door from the GW kit. I’ll be using these on the scratch-builds to further tie them aesthetically to the other kits. Along with the generous supply of other details on those sprues, I’m hoping they’ll look contiguous.
You might notice that the door sits rather proud of the walls there. Once I add support beams either side and a very small tiled porch, I’m hoping it’ll blend right in.
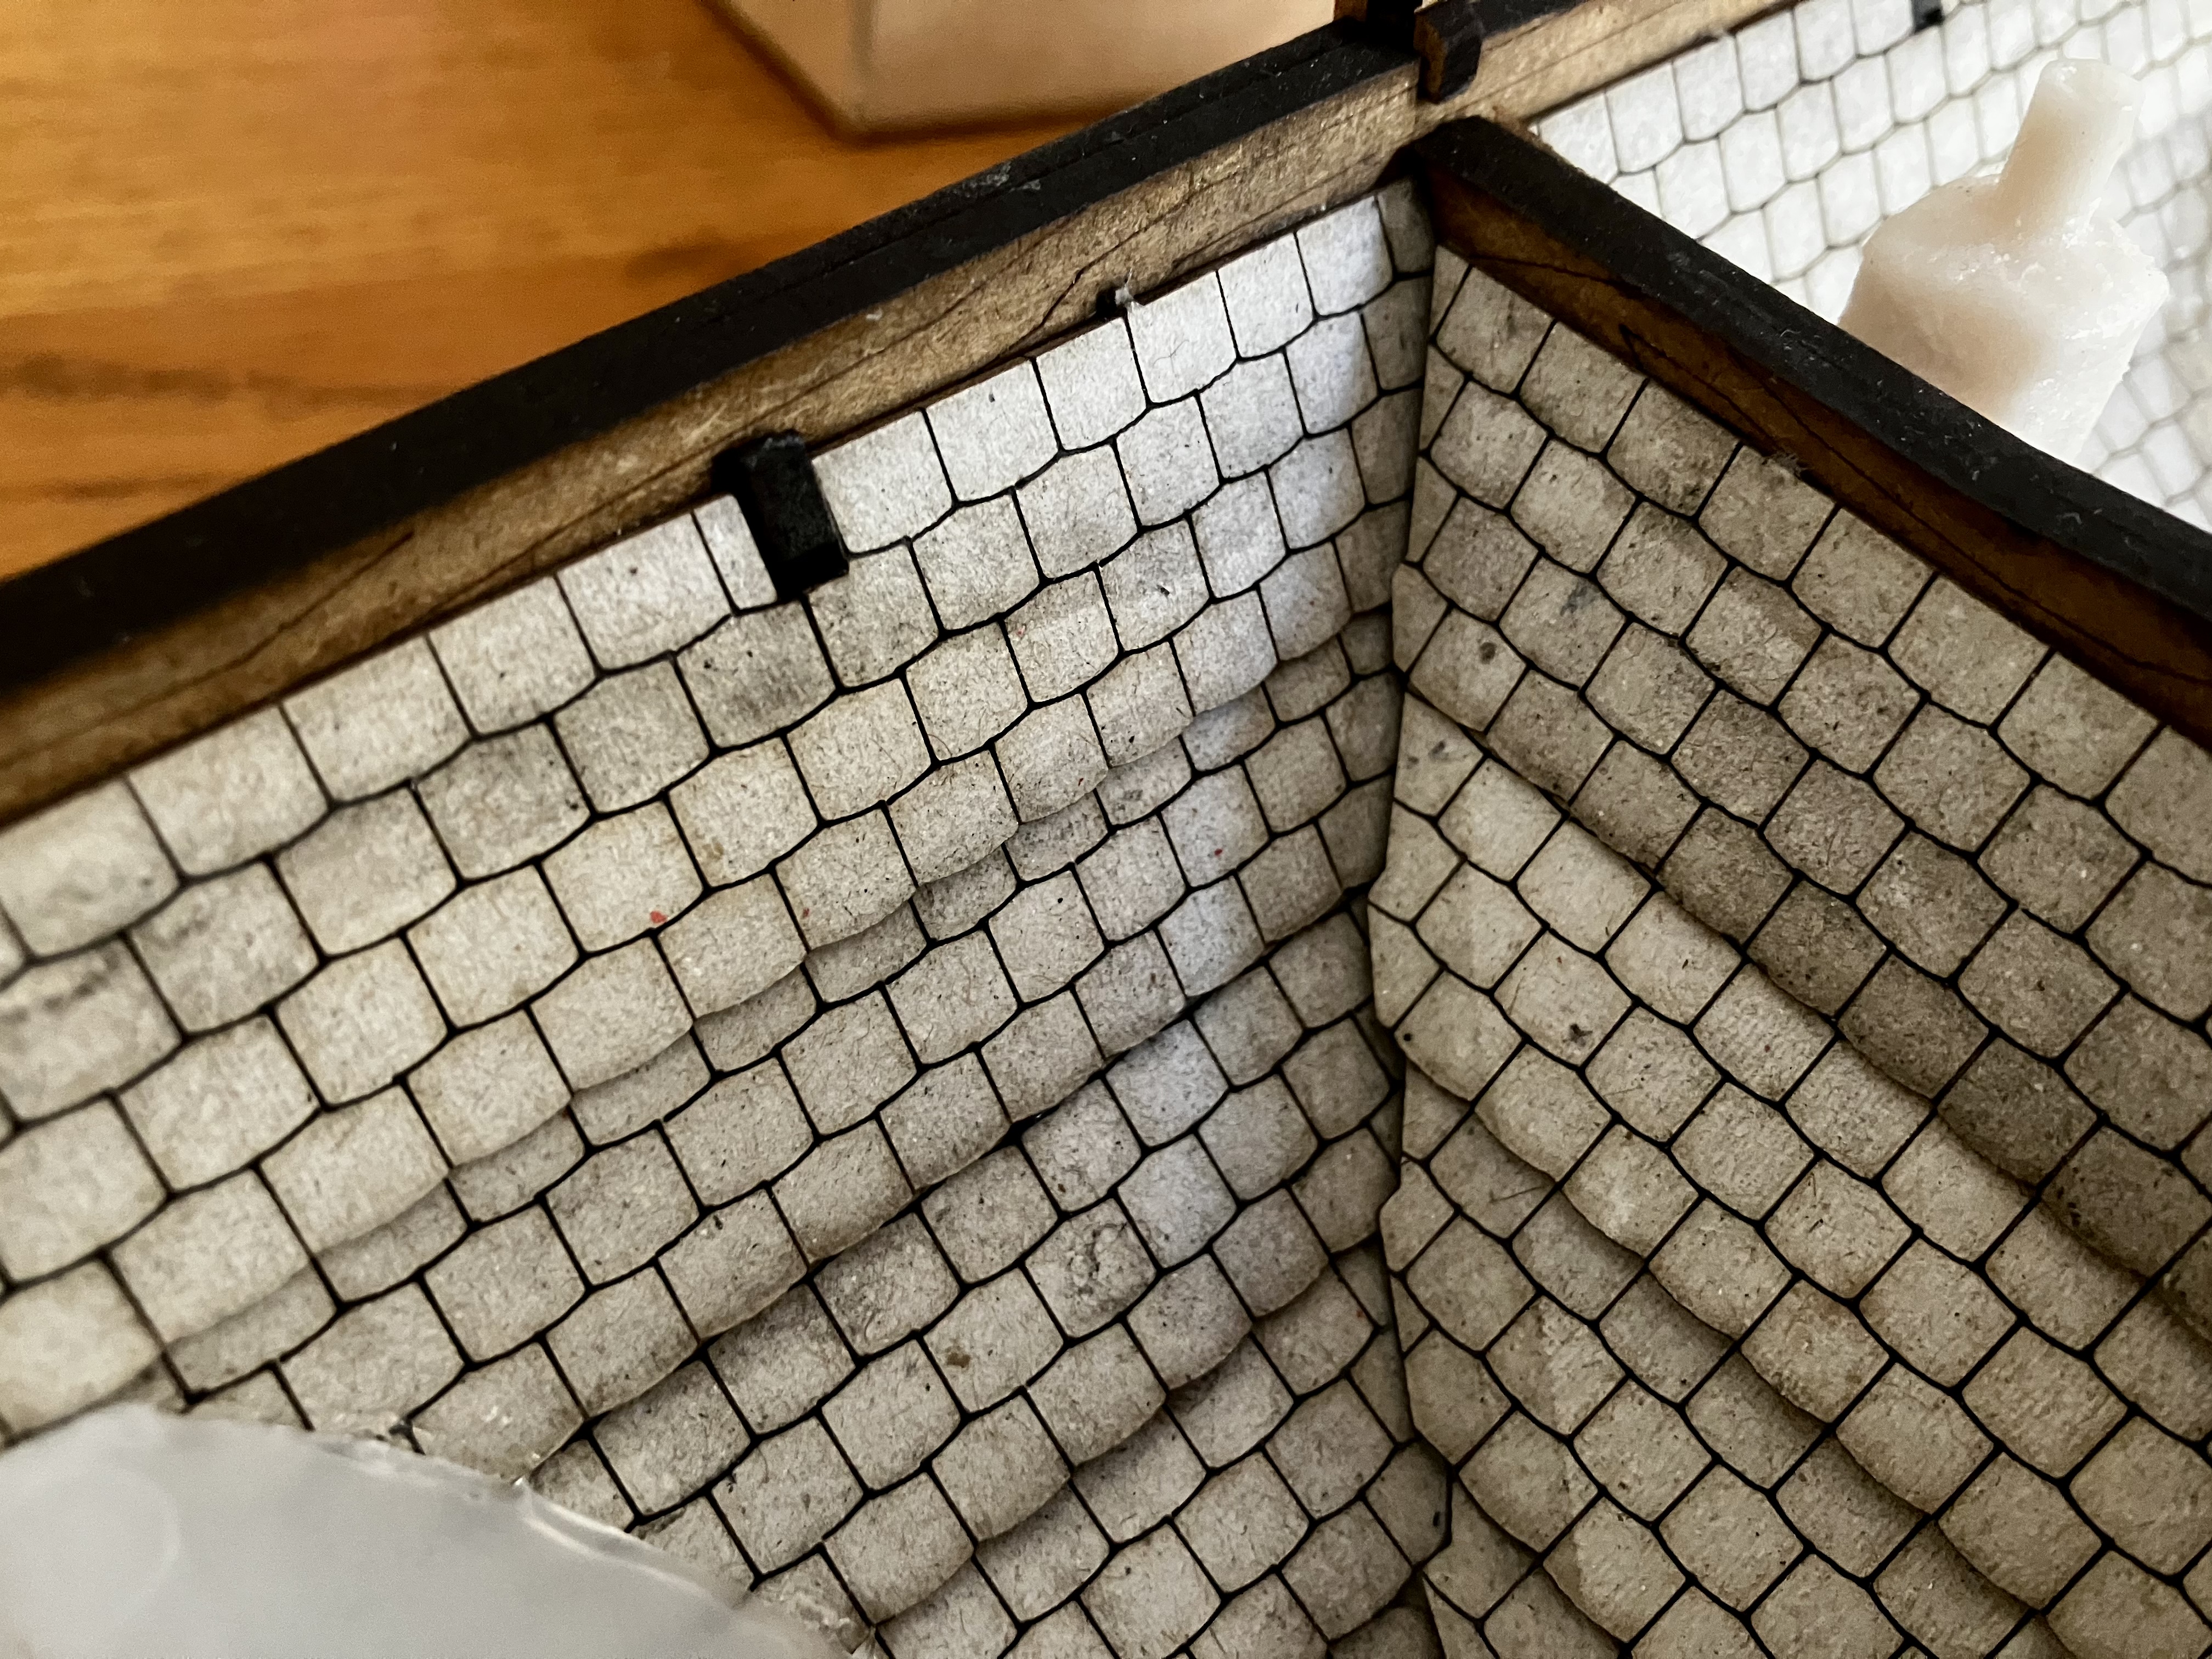
Tiling time
One of the things I think will really tie all the buildings together is consistency in the roofing finish. The GW kits use very small shingle tiles, all in a single side. The shingles themselves are tiny – 0.5cm in width and less than 1cm long. I haven’t been able to find any manufacturers making tiles that small, which is understandable. So I’m making my own.
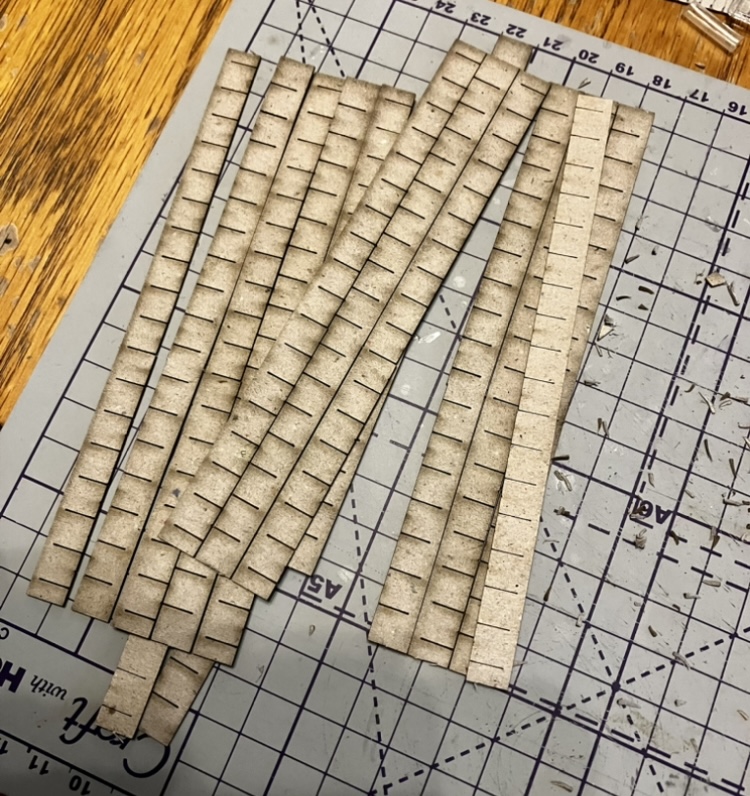
These are from Sarissa Precision, and are about 1cm wide.
Using my small scissors, I’ve snipped each tile up the middle.
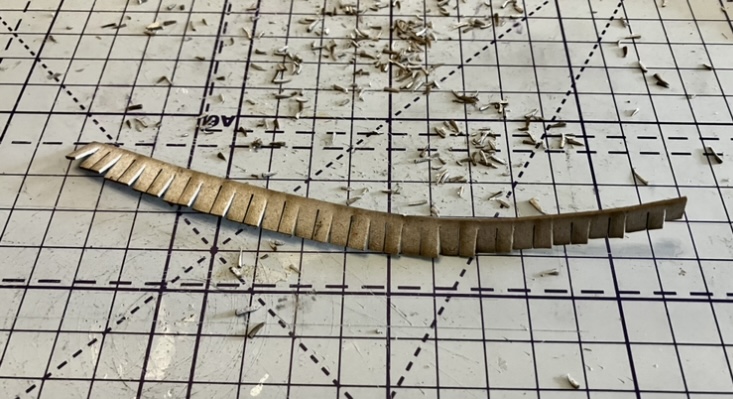
Then, going back along the row – trimmed, snipped, tapered and cut broken tiles to give them a closer finish to the GW kit.
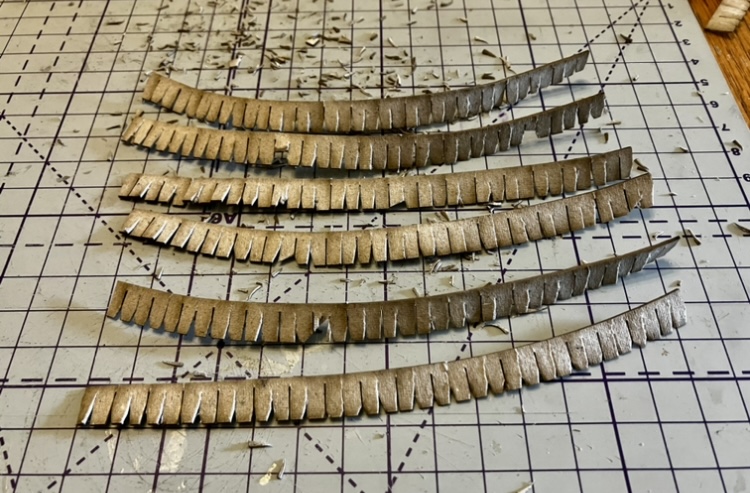
It’s time consuming, but pretty mindless activity, so I can churn out a whole bunch in a sitting.
I’m pleased with how close they look to the GW kit version, and think that they will add coherence and consistency across the different builds. I’d be really interested in your thoughts on this approach.
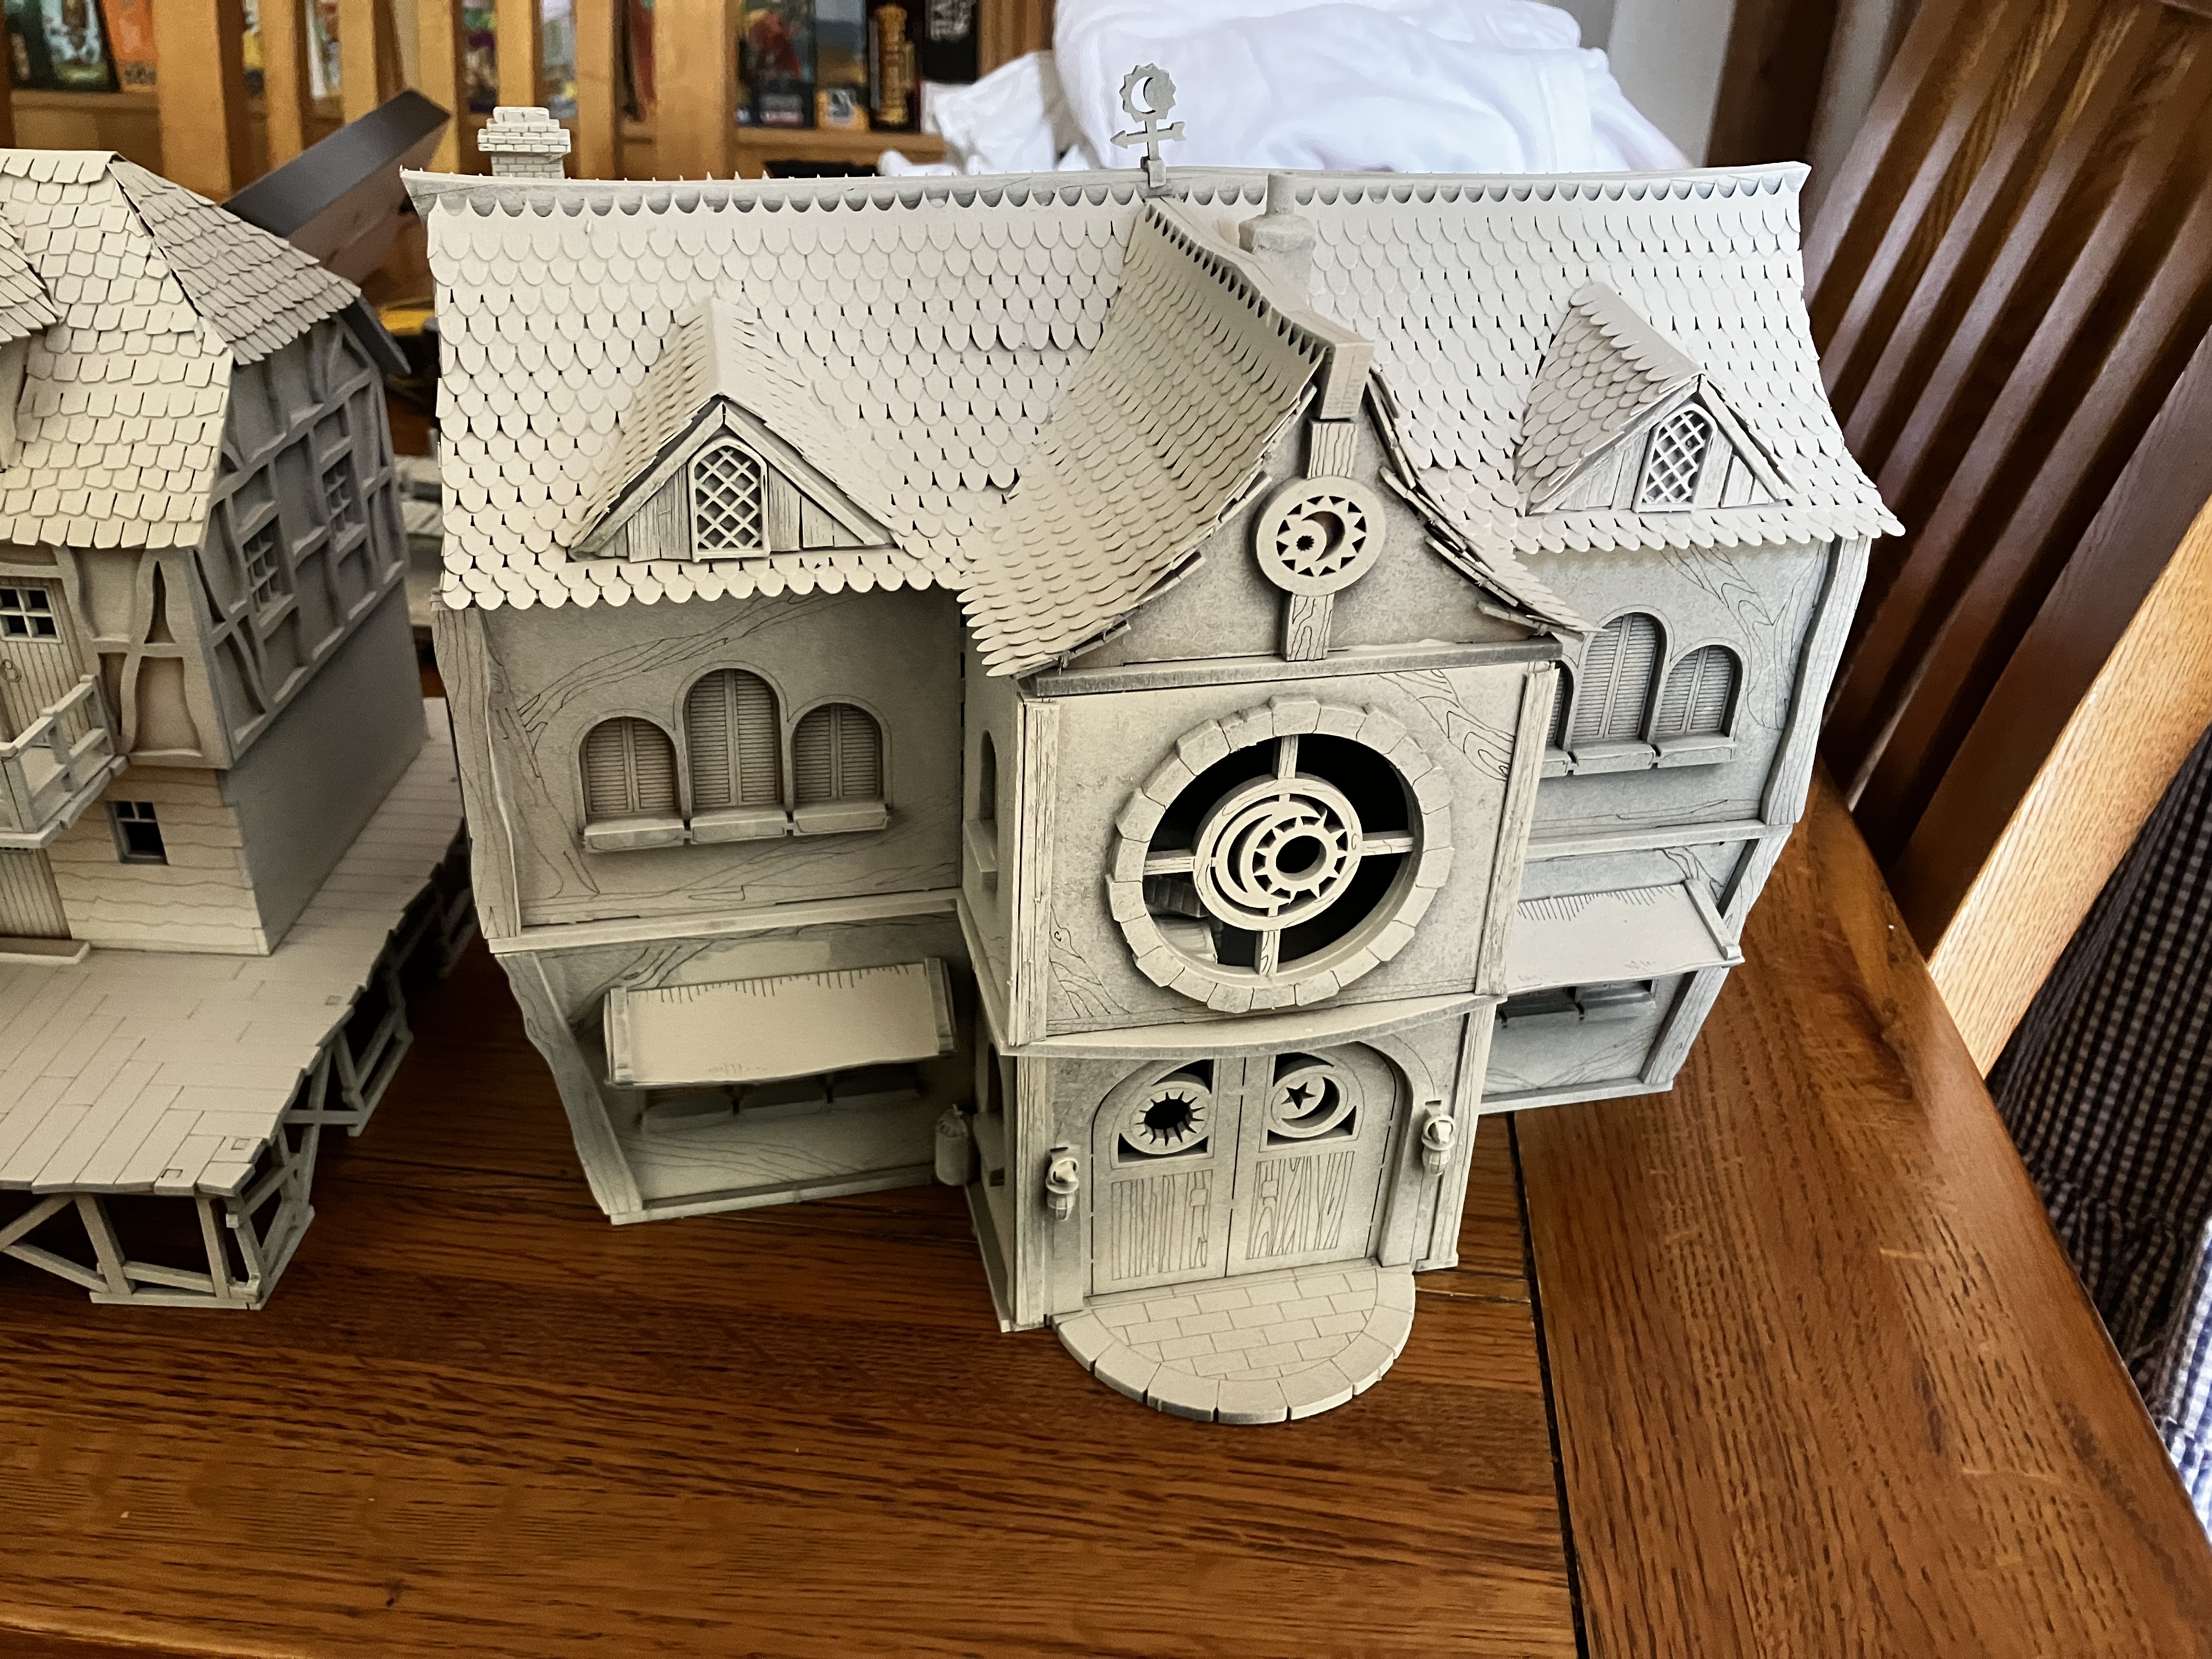
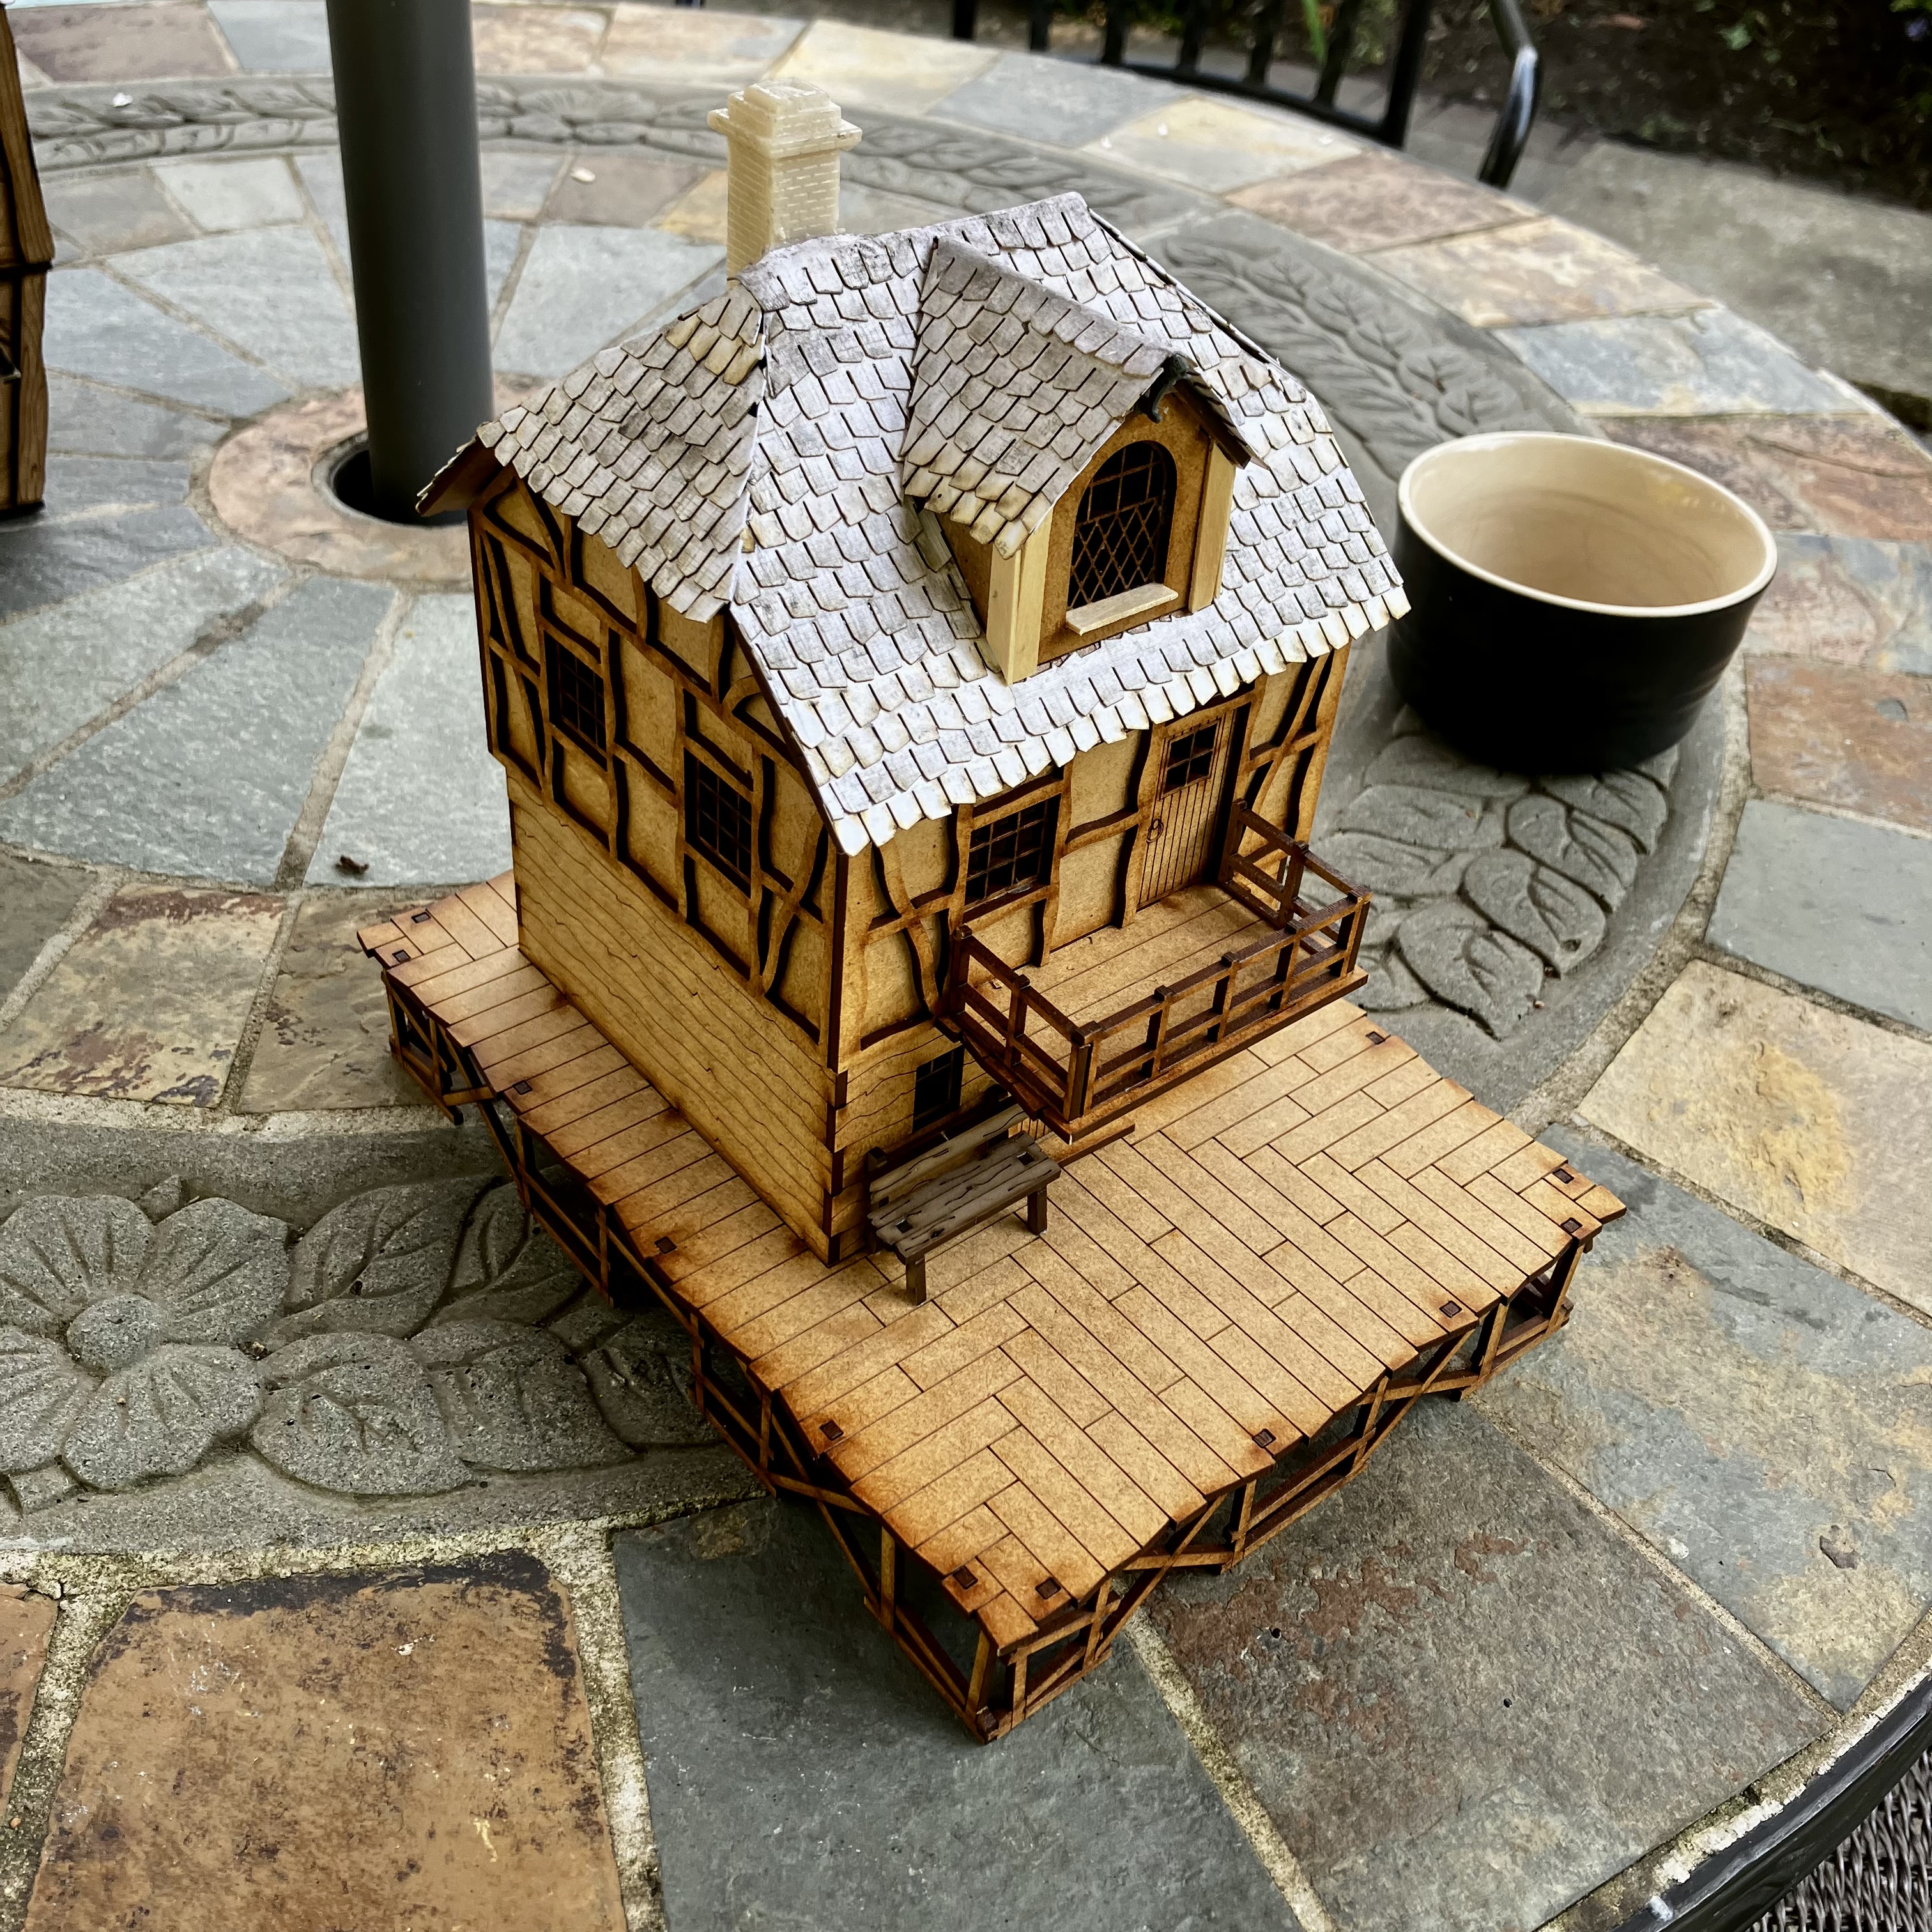
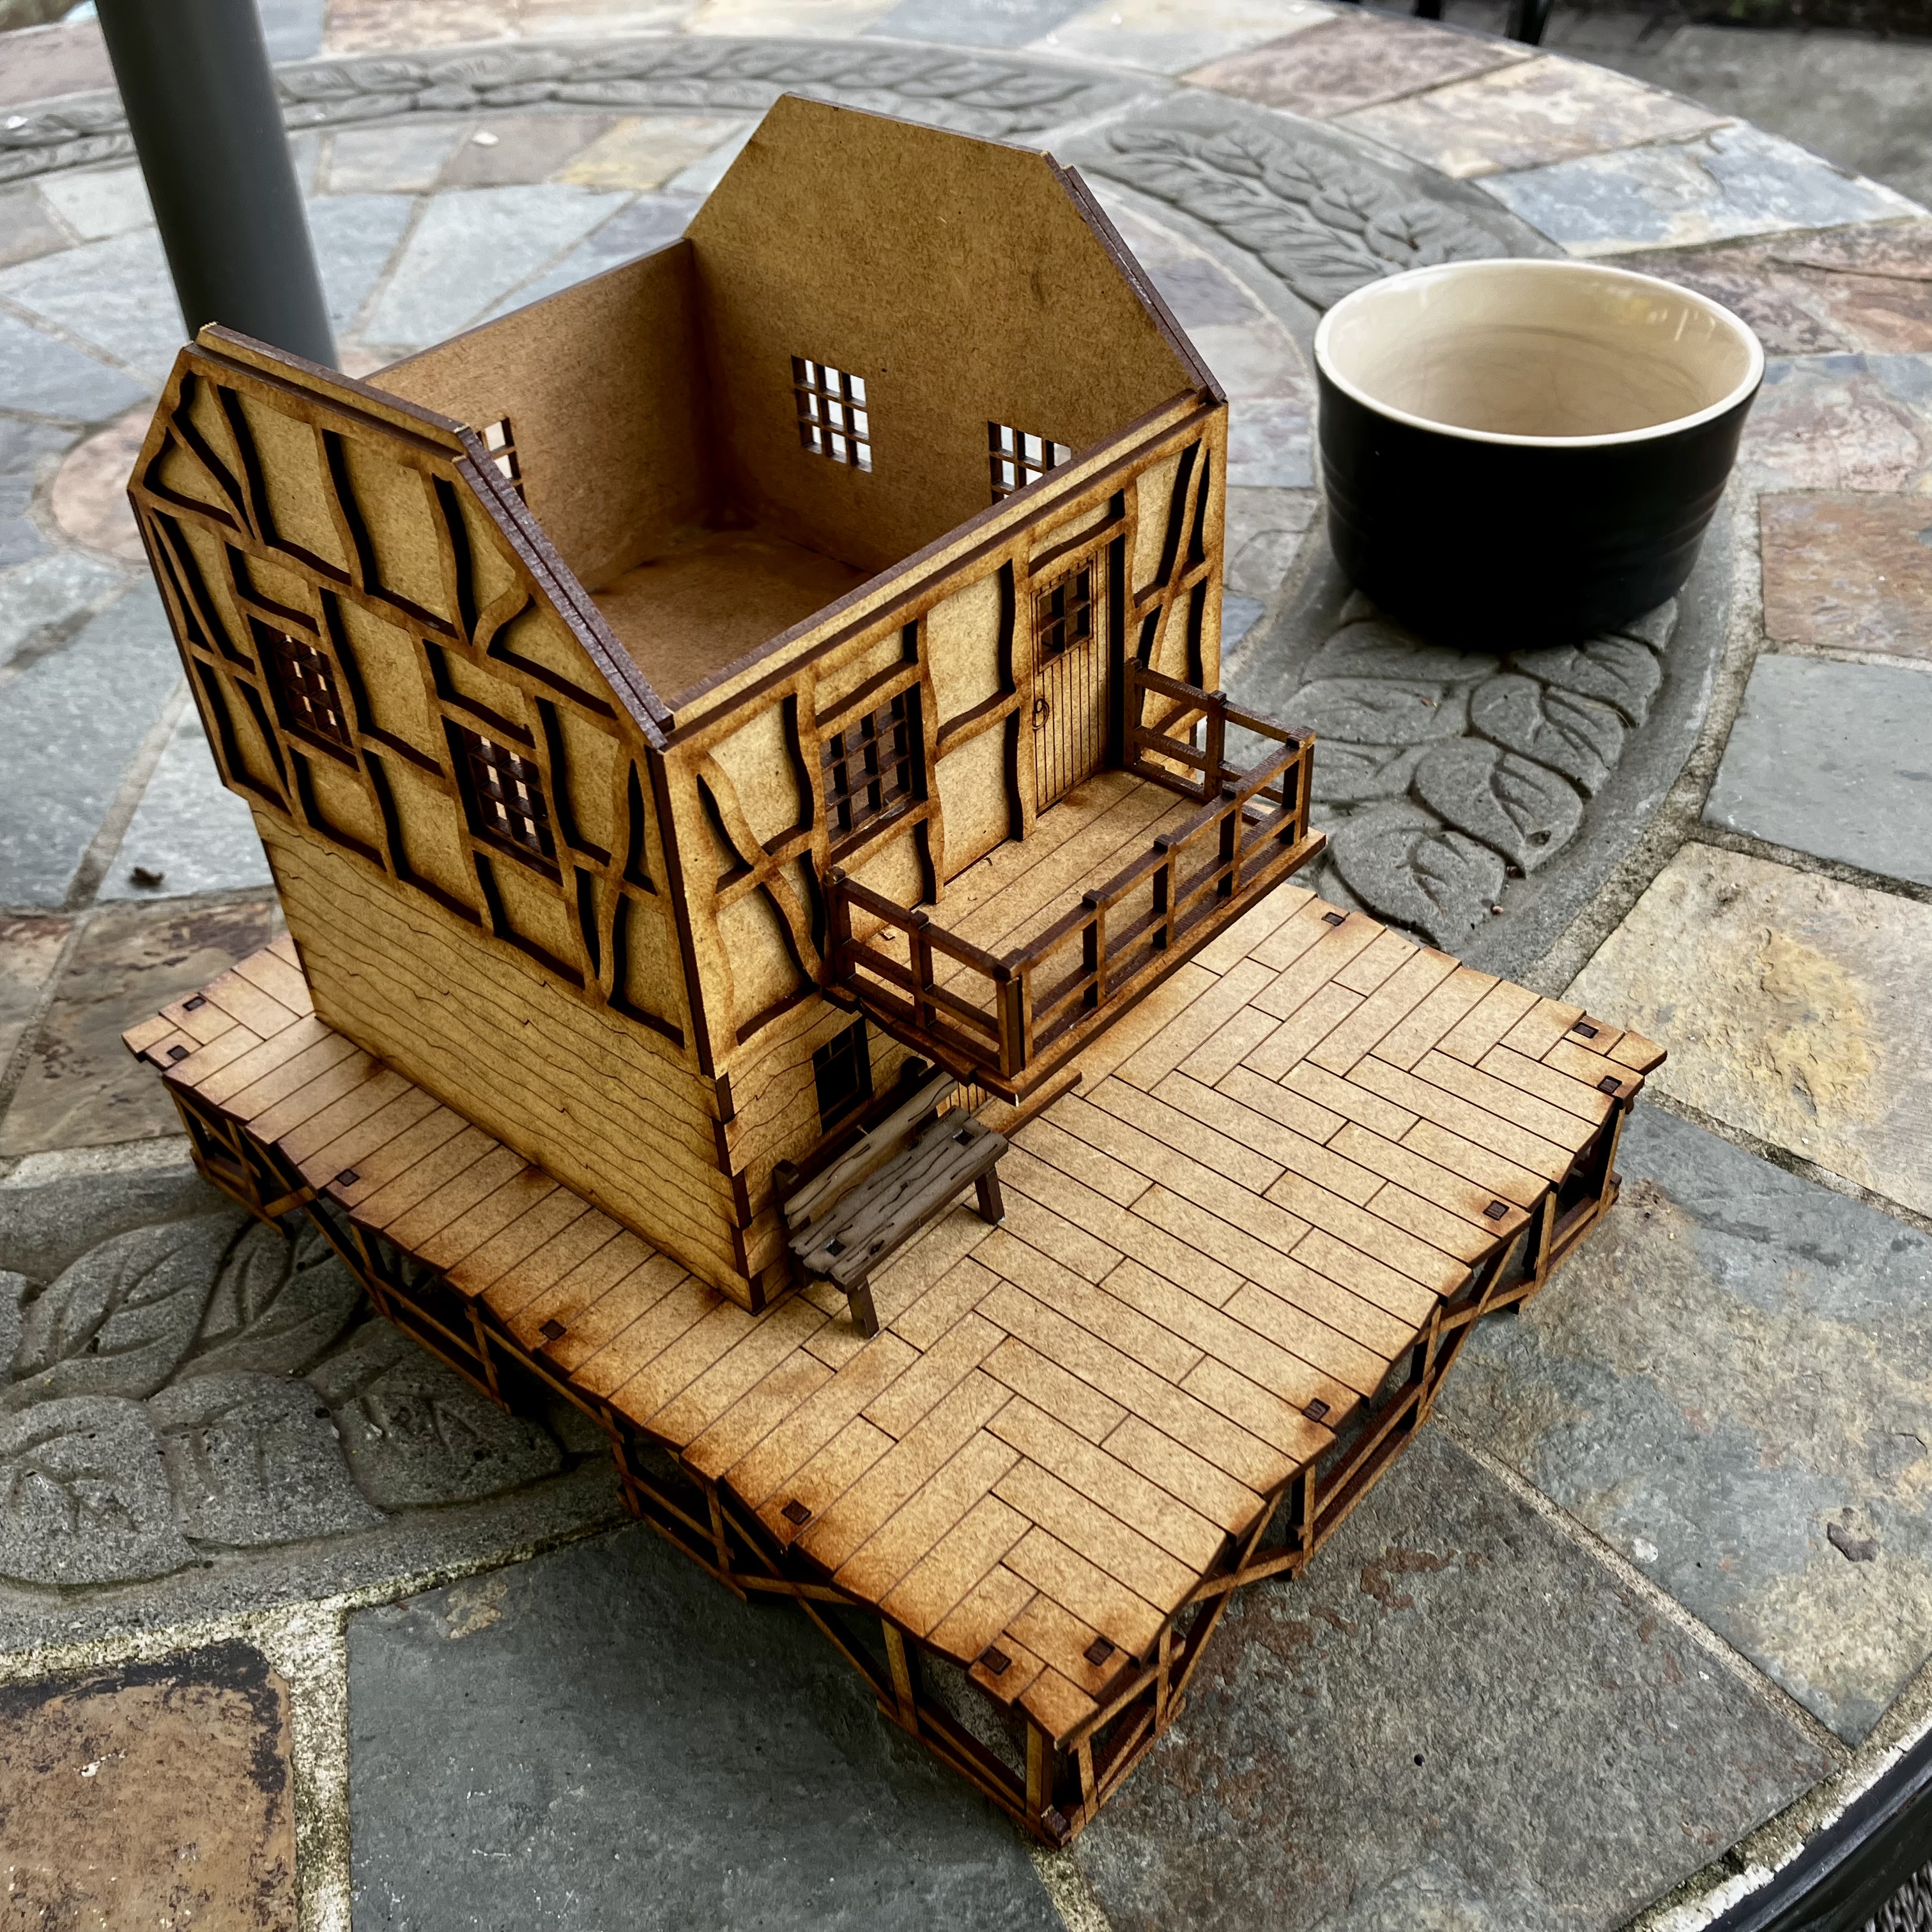
The Master of Lake Town’s House
I picked up this kit Fancy Hat’s Town House from TTCombat as I thought it’d be a really good building to represent the Master of Lake Town’s House. It doesn’t look anything like the movie version of course, but it looks suitably large and impressive alongside the other buildings.
it’s a really lovely kit and goes together really well. I’ve kept all three levels detachable so I can detail the inside using Mantic Terrain Crate bits.

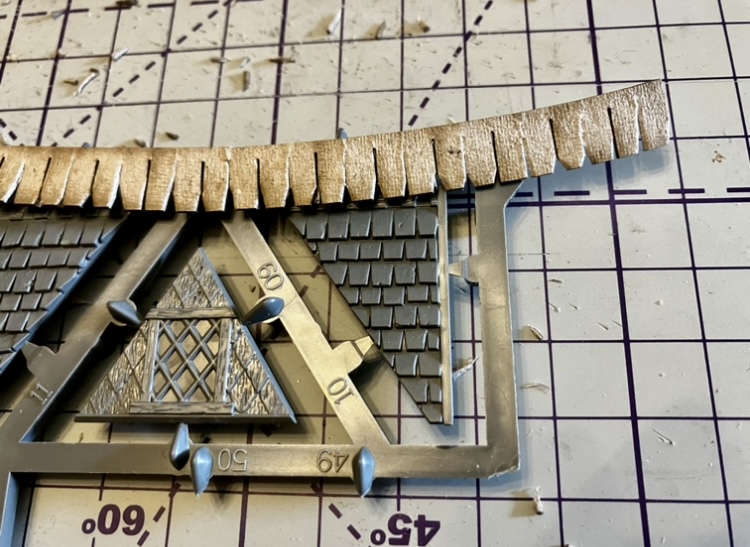
Through the roof
As you can see from the previous post, the roof of the Townhouse has some basic detail for the roof tiles, but I want to get a little more depth and dimension on them.
 These would paint up okay, but do look flat.
Using some tiles I ordered from Warbases, I started adding some better depth. These tiles are feet because they’re quite small, and also look posh. In The Hobbit movies, some of the buildings do have roof tiles close to this shape.
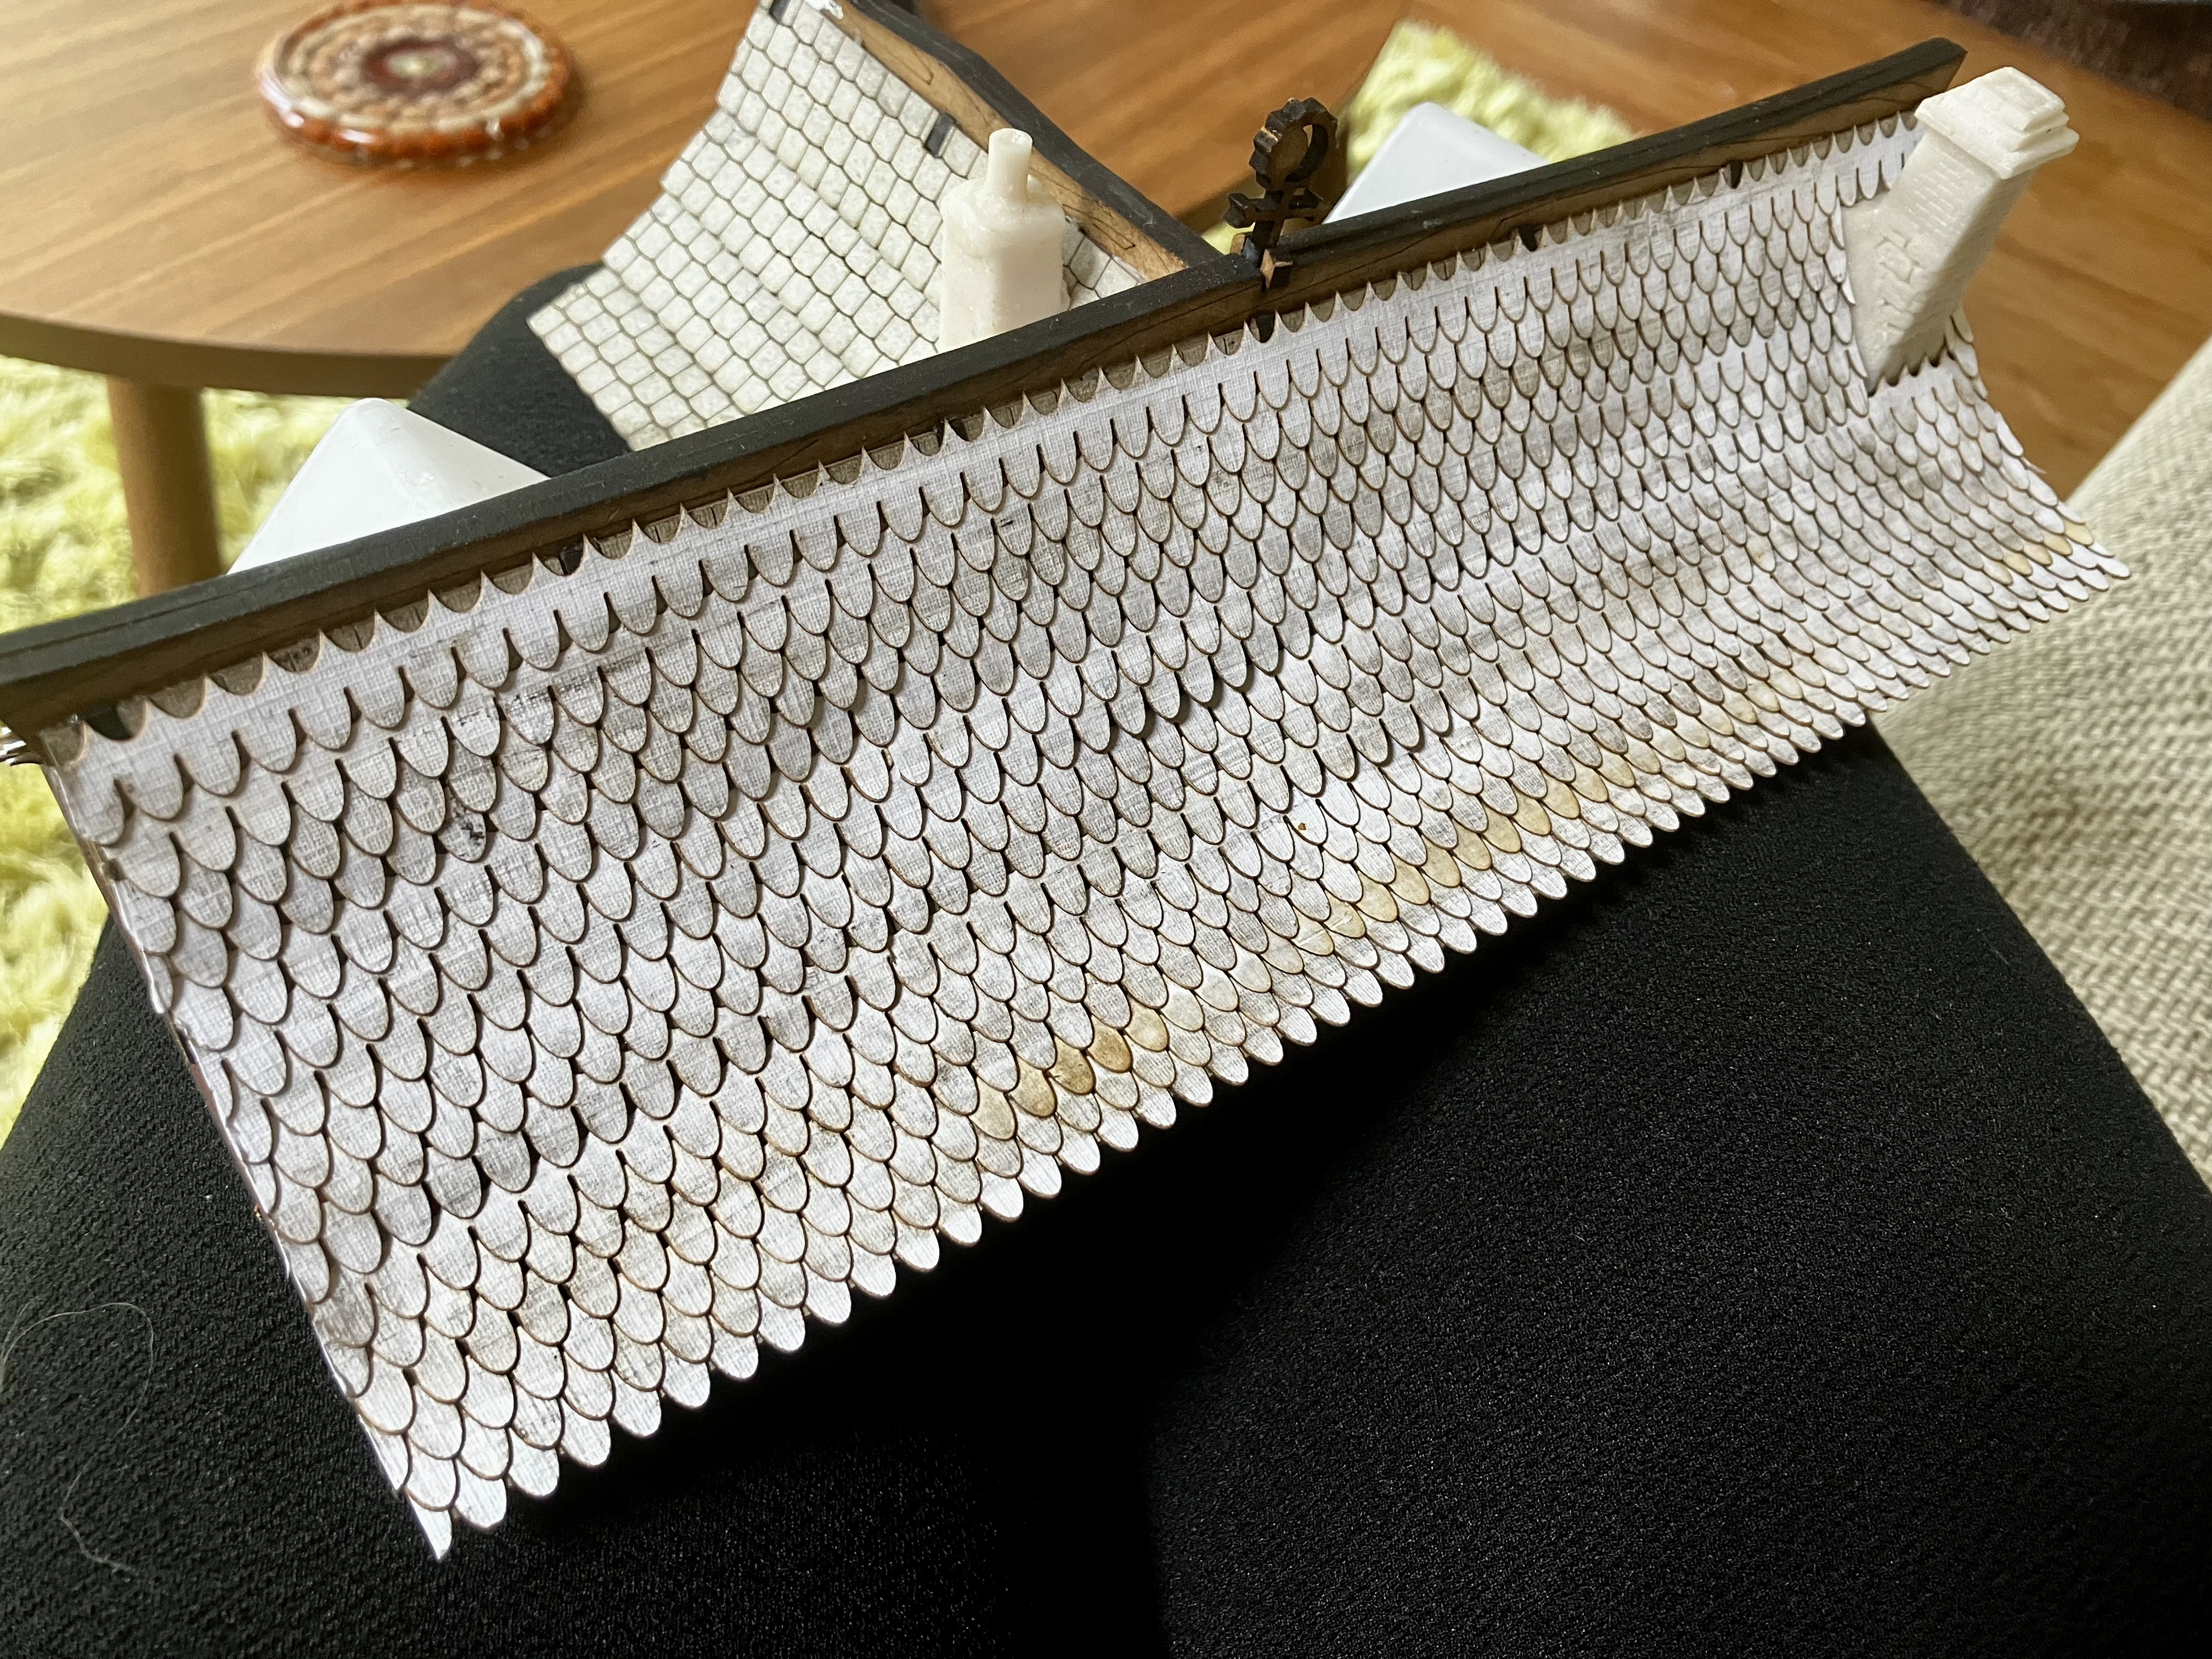 That’s the whole back roof
I definitely made this job harder for myself by deciding to add two additional dormers to a roof that already has two sets of inner corners!
It will look awesome when finished though. Just need to order another pack from Warbases!

To glue these on, I’m just using PVA woodglue, and my tiny scissors to trim as I go. Once a whole section is complete, I then apply a thinned coat of PVA and water to set all the tiles and really make sure they’re going nowhere!
More MDF
Some other buildings I picked up last year are these rather swish Town houses from the Lochbhaile range by Warbases.
They’re really well priced and are seemingly designed with Lake Town specifically in mind.
In future posts, I’ll share more pictures of finished builds of these and how I’ve been adding additional details to bring them into my Lake Town table.
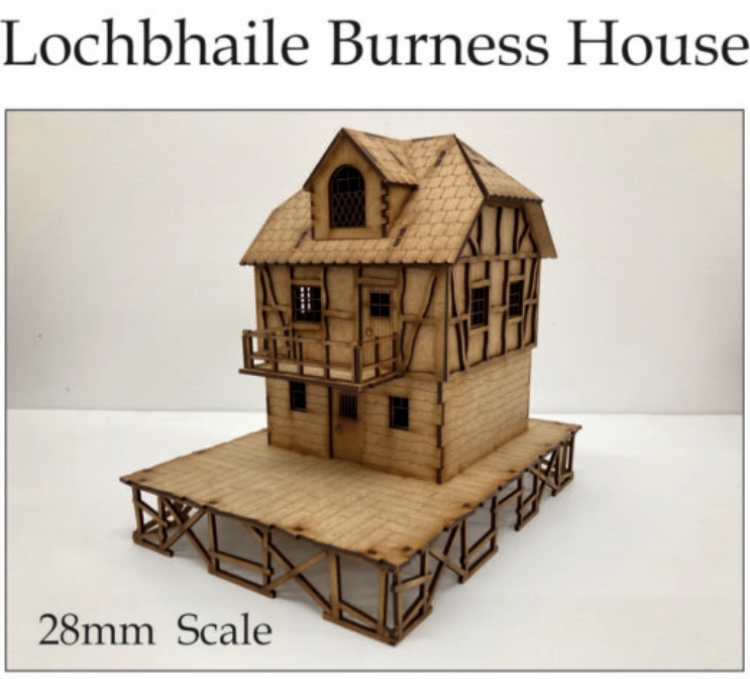 Burmese House
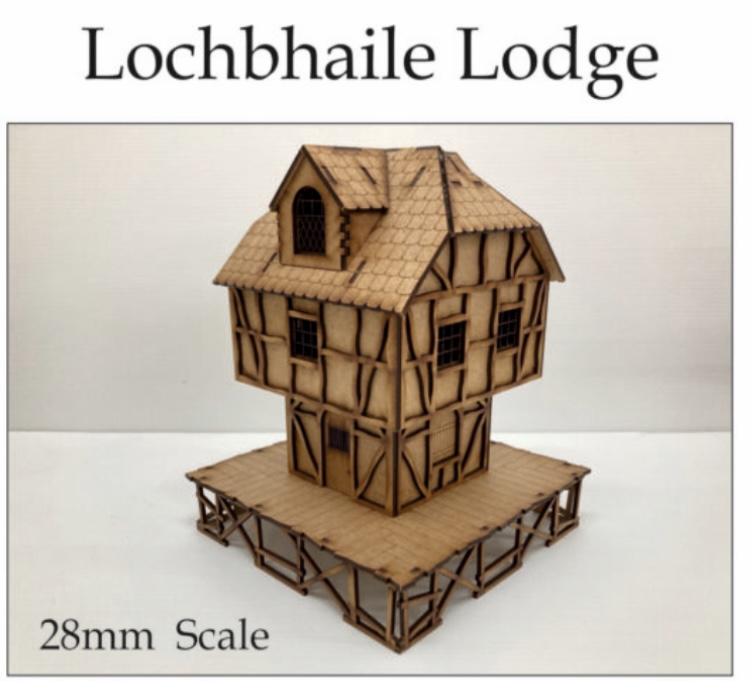 Lochbhaile Lodge
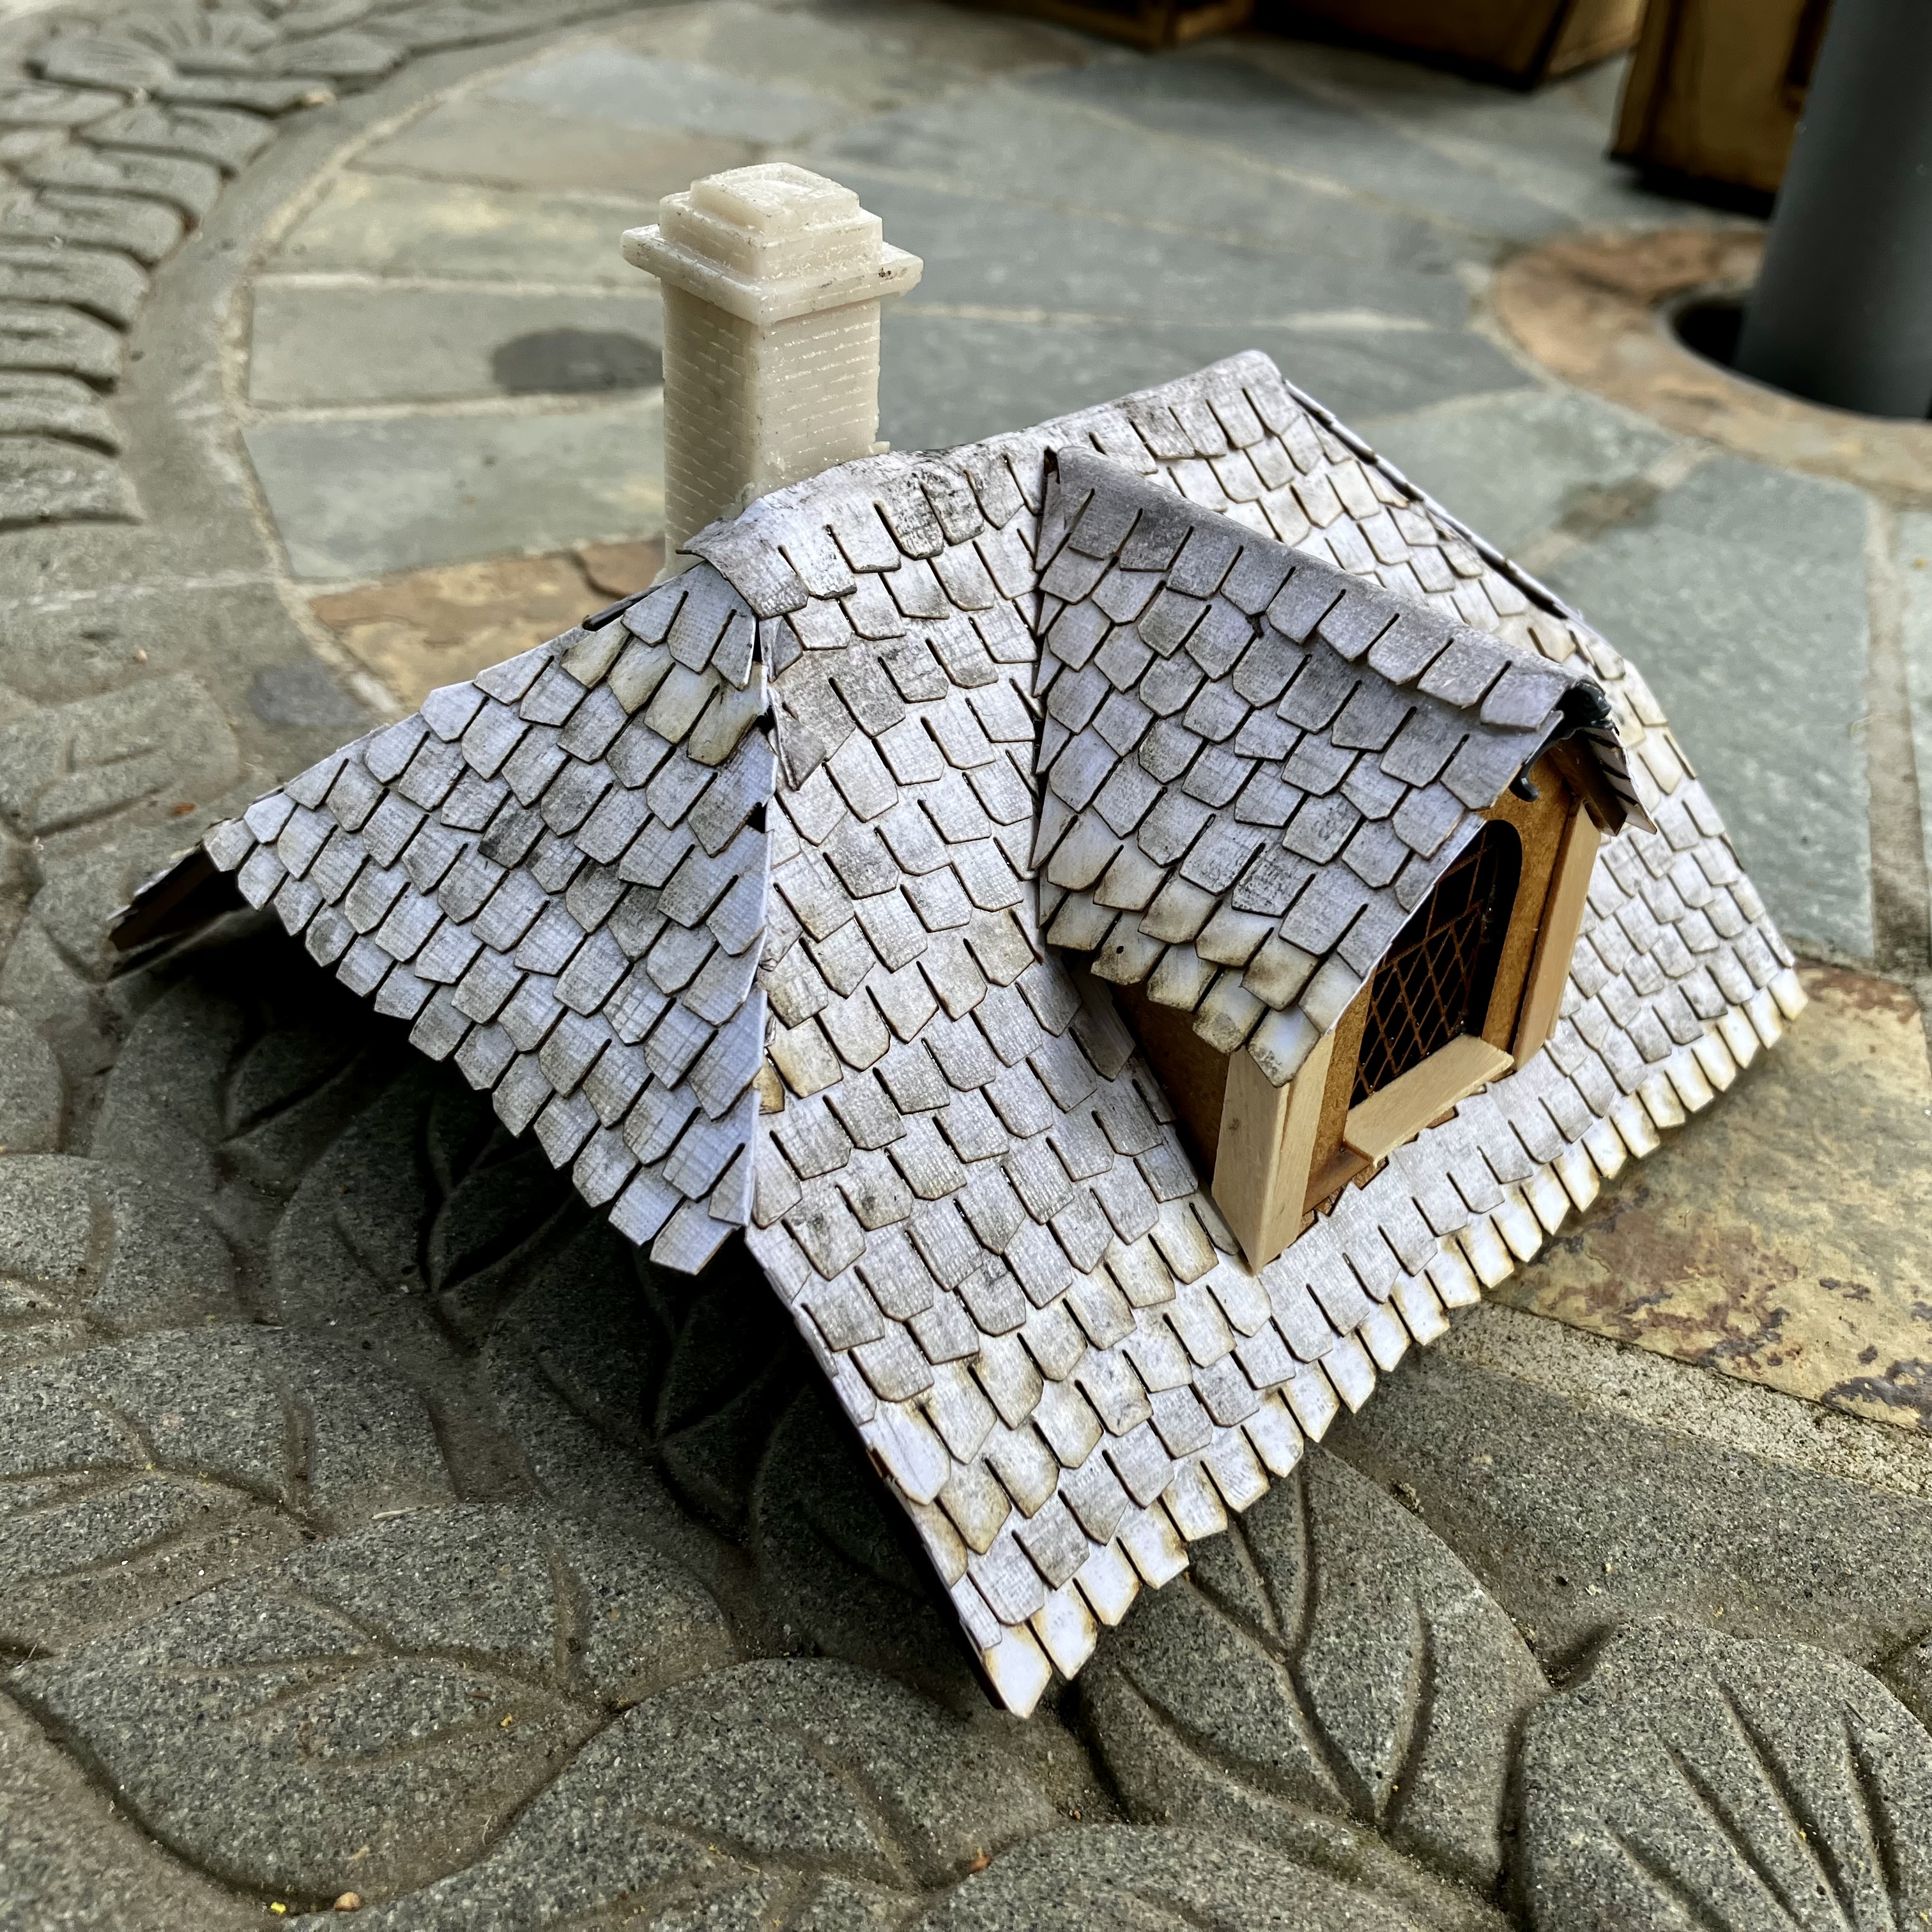
Detailing the dormers
So when we left this, I’d got as far as tiling the roof, but had run out of tiles, so was waiting for some more to be delivered. Well, they’ve arrived ed so yay!
You might remember that the formers are just clear plastic protective corners, that I’d trimmed to fit the roof. Here’s how I’ve turned them into detailed roof sections.
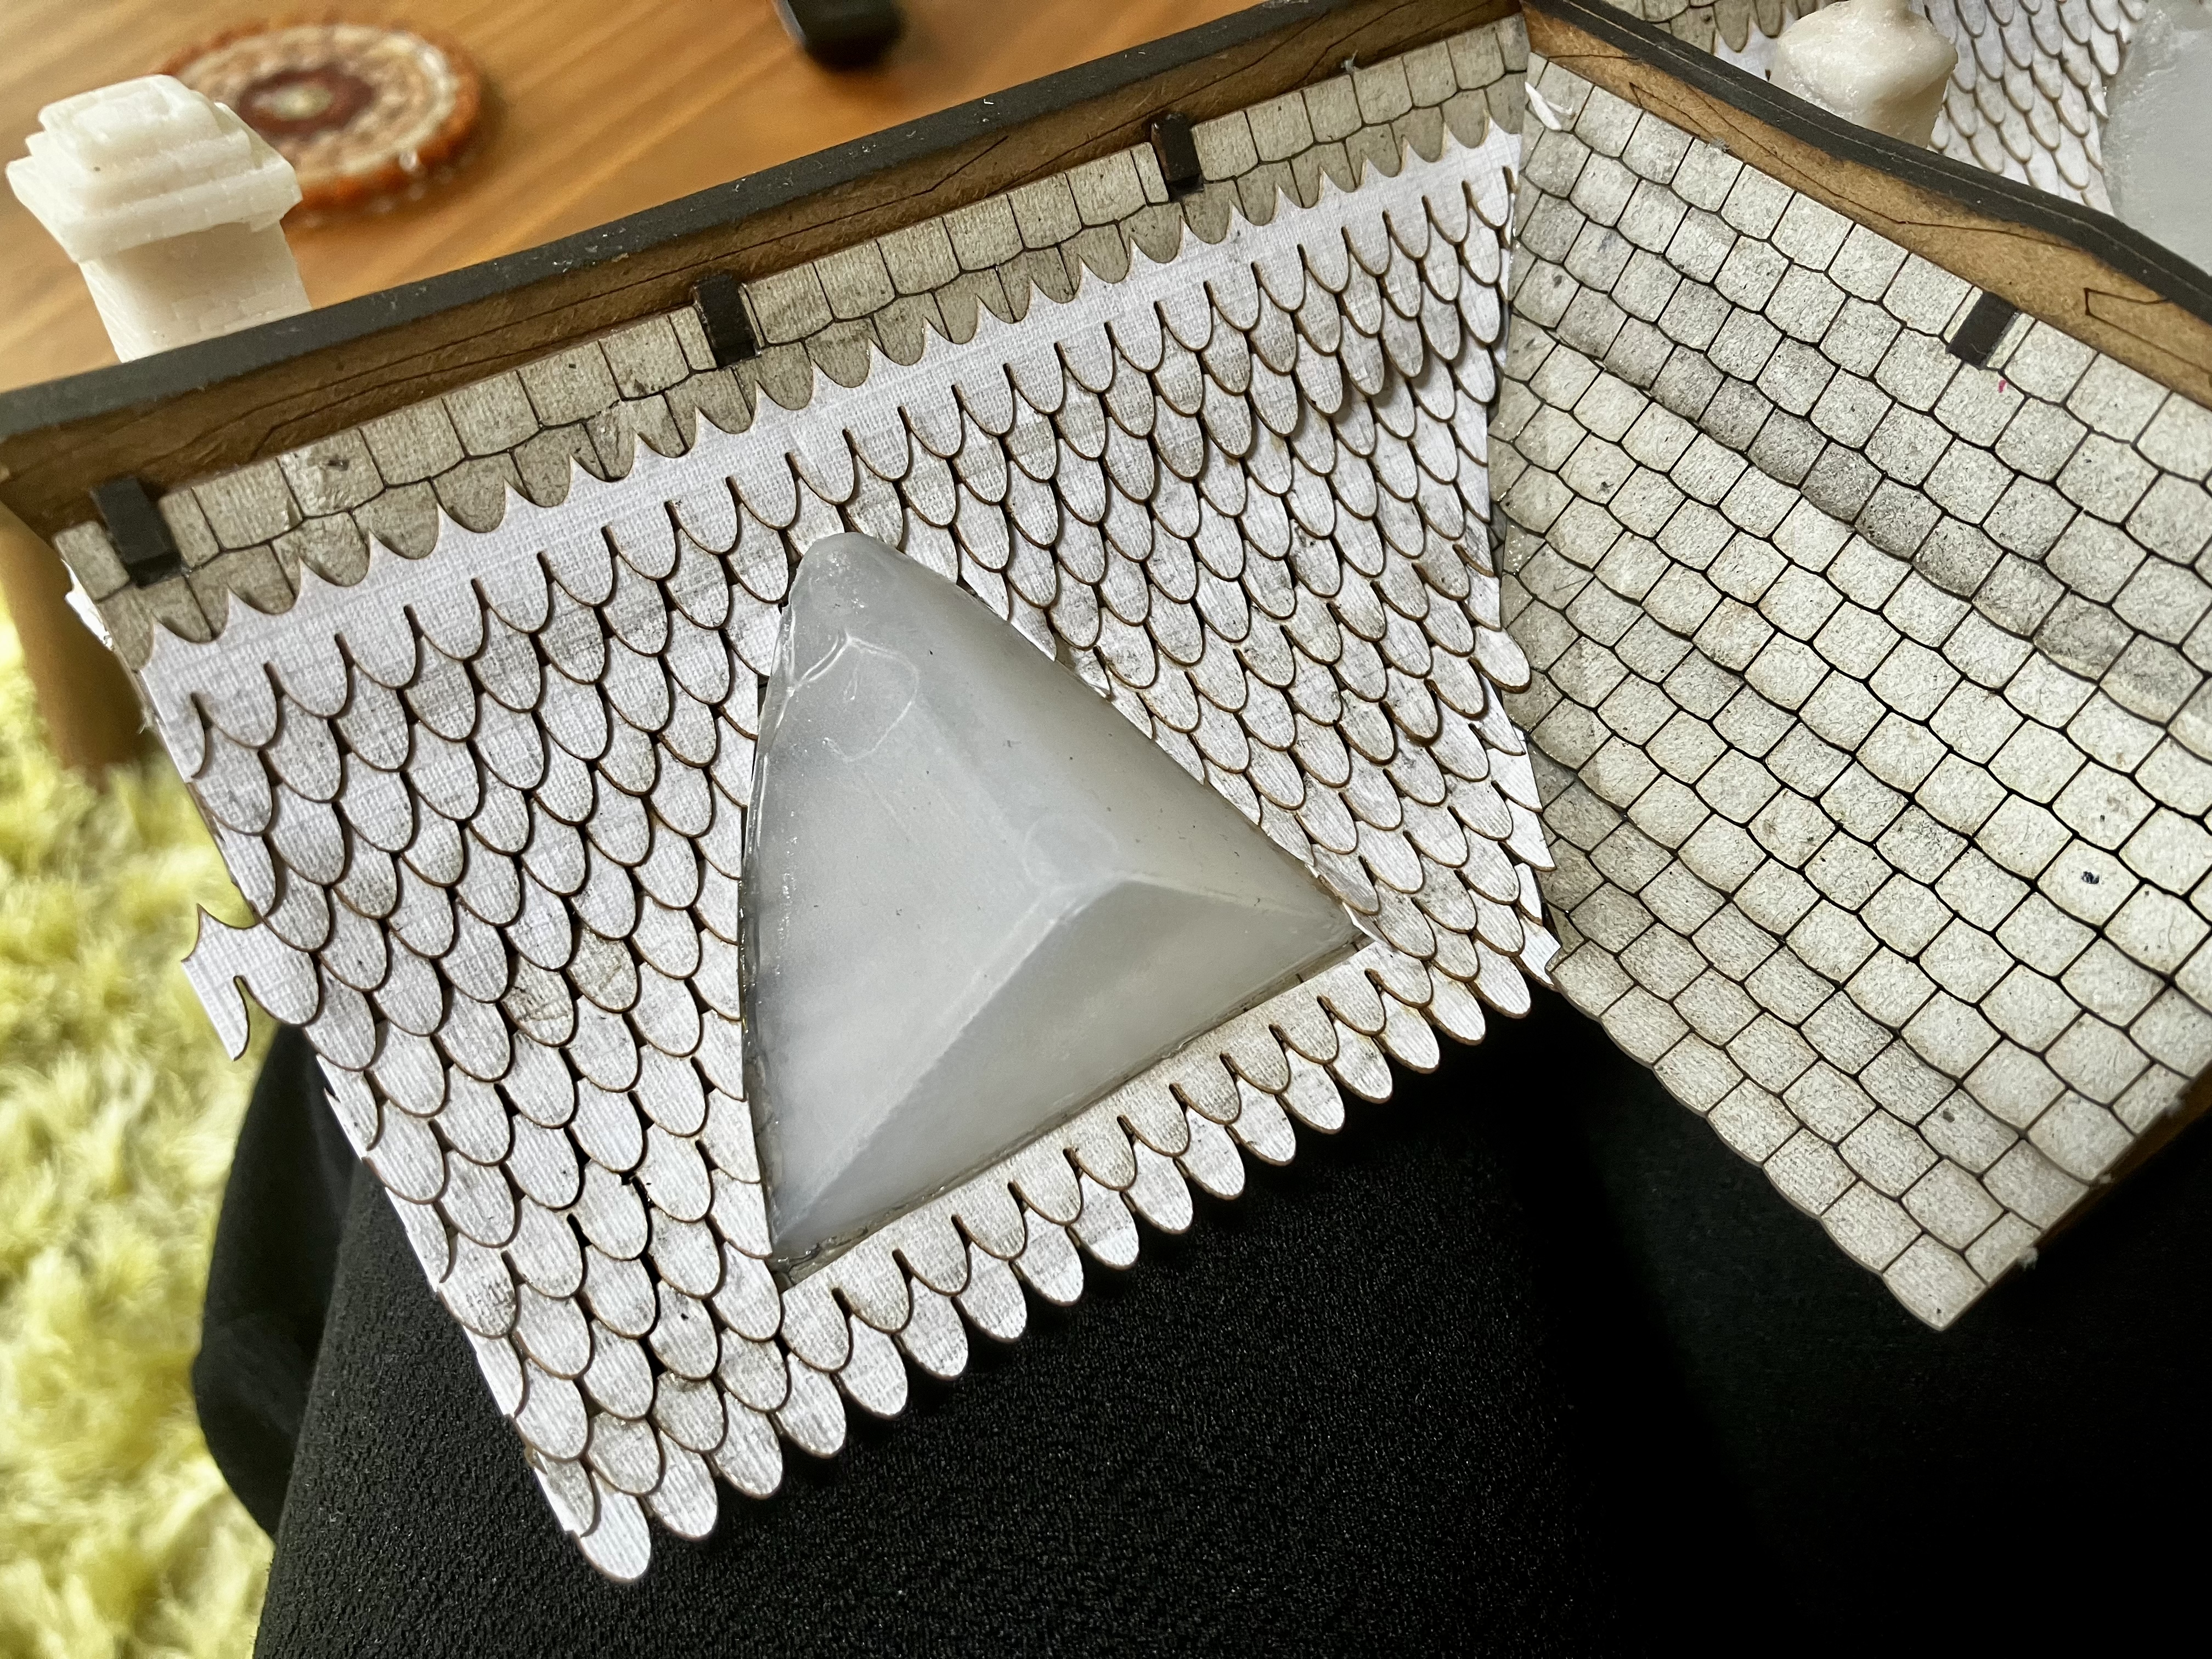 A basic plastic triangle
 I got hold of some 3D printed resin windows online. They were quite sticky on arrival but then I remembered reading that resin prints like ultraviolet light, so I popped them on the windowsill for a day and they seem fine.
Taking a window, I glued it to the front, underneath some beams I made from trimmed matchsticks.
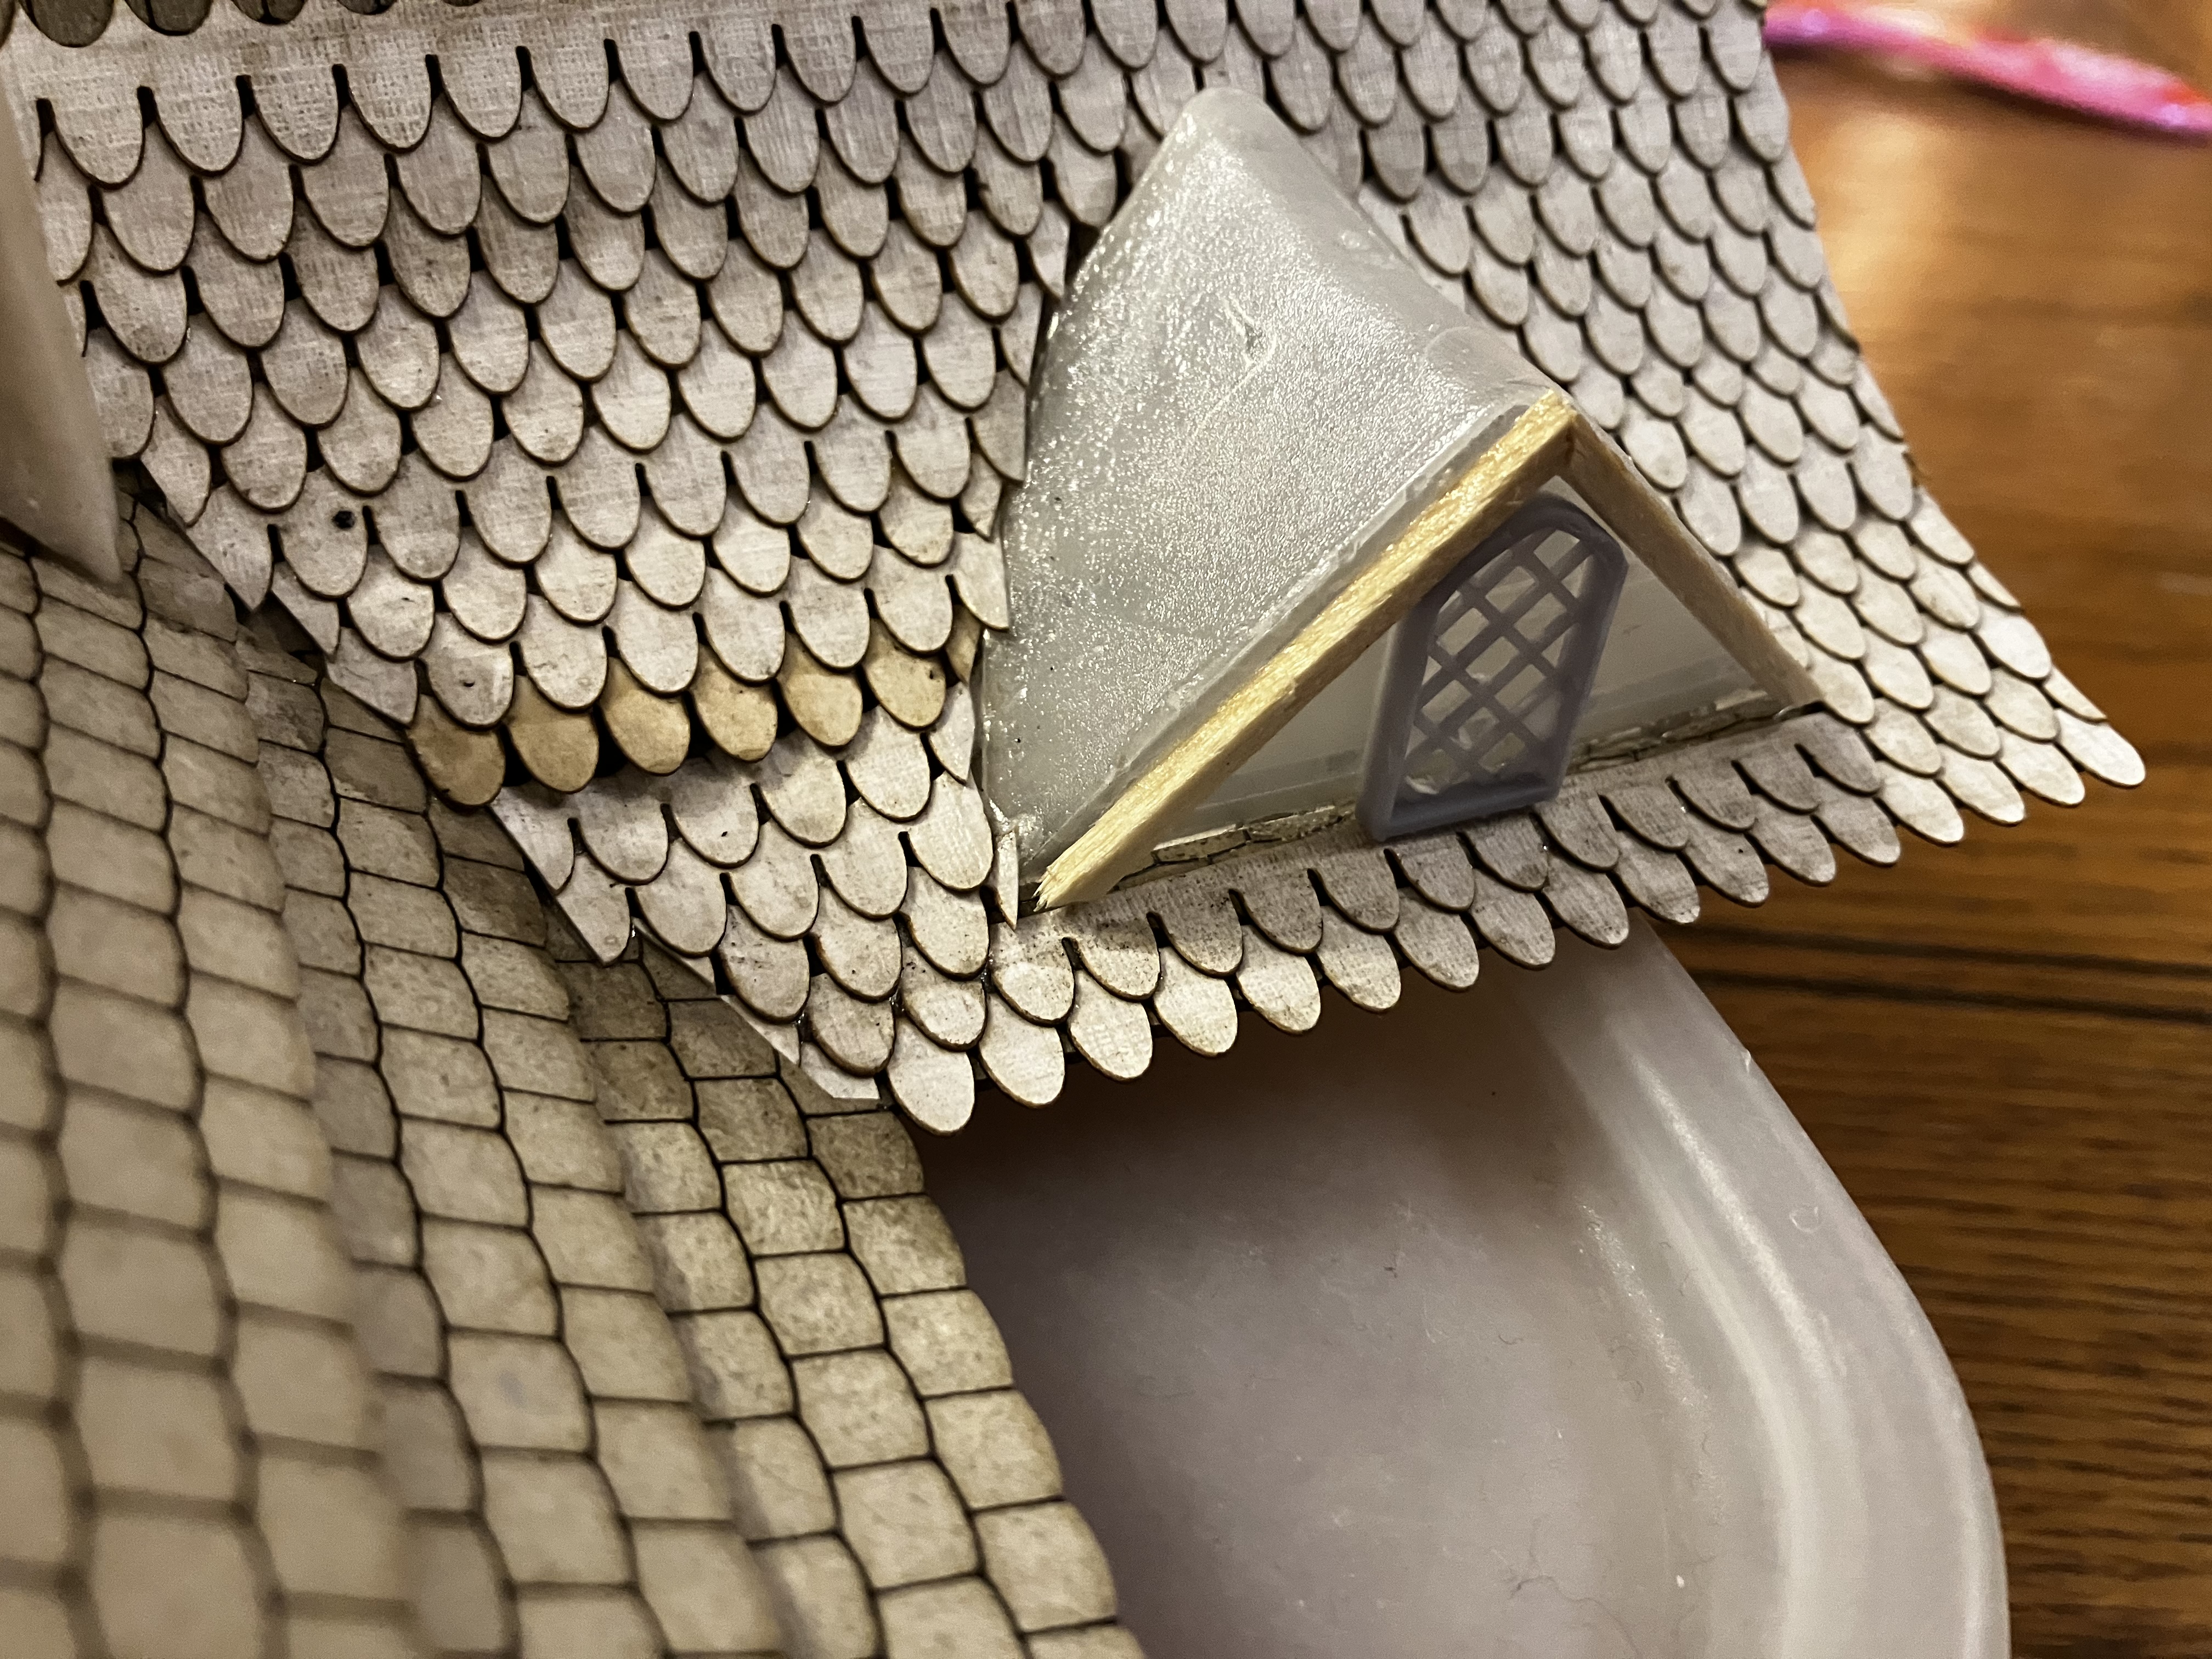 Matchstick beams and resin window
With that done, I then tiled over the roof using the same tiles as previously.
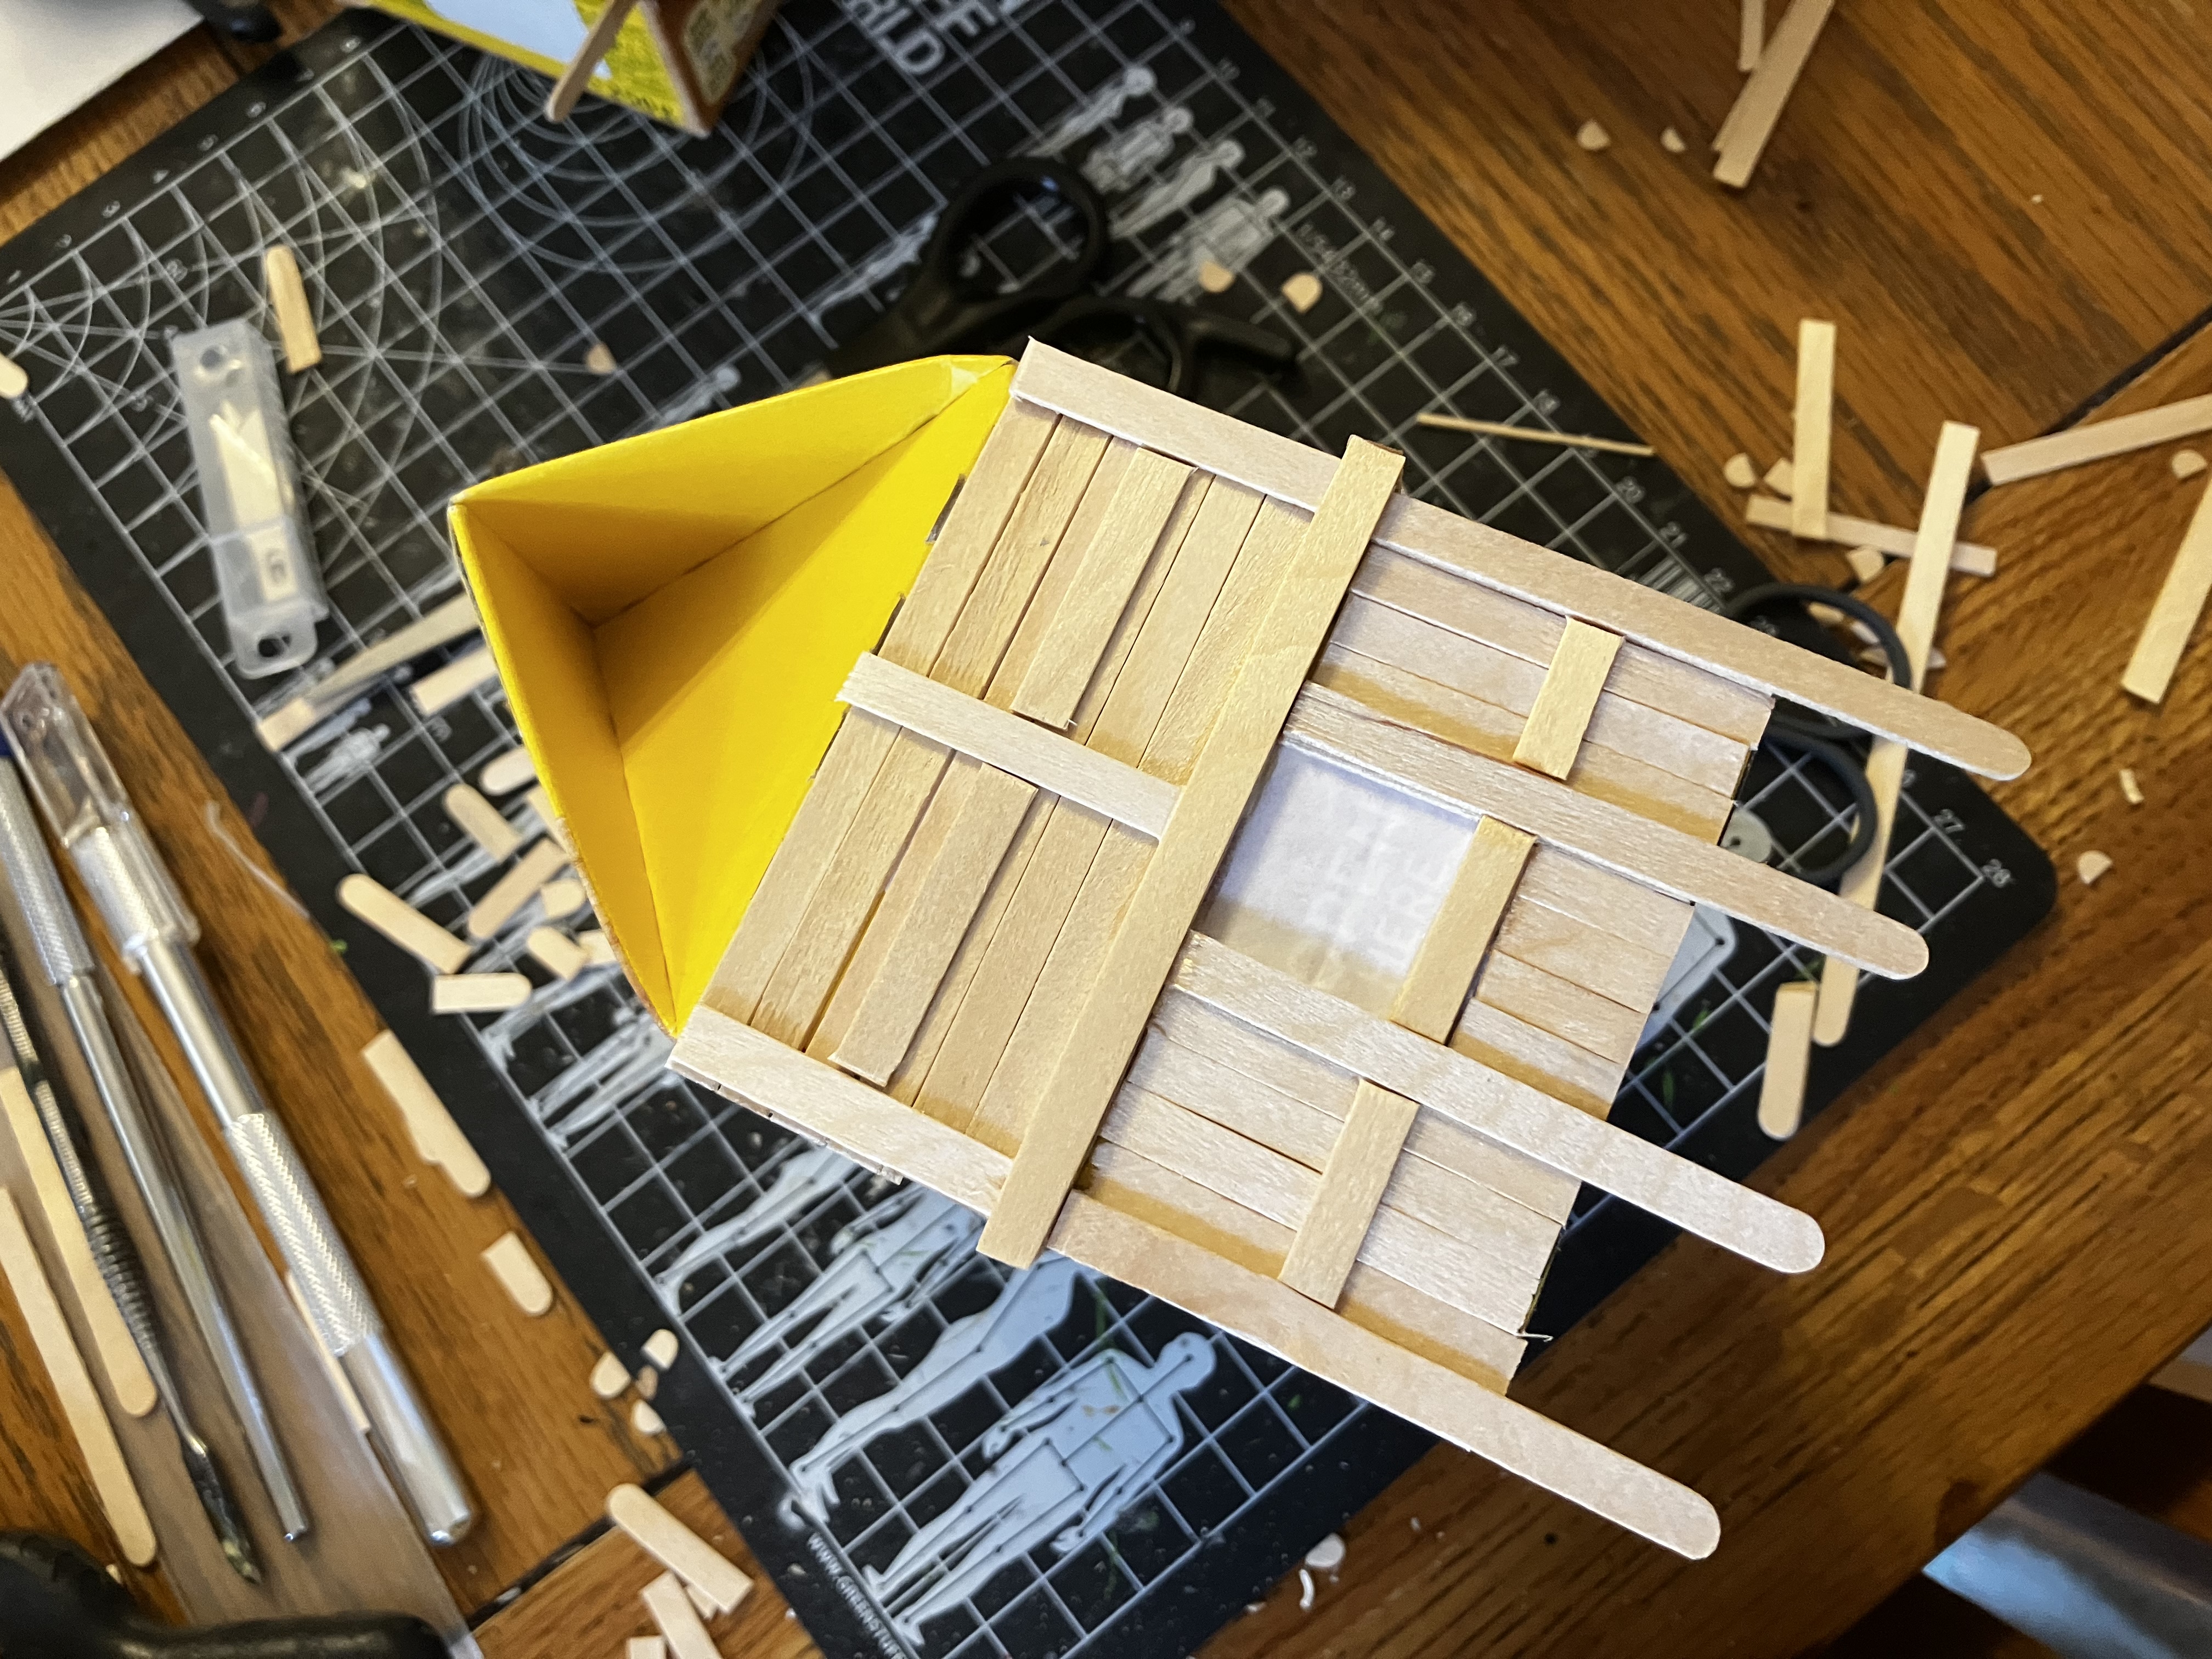
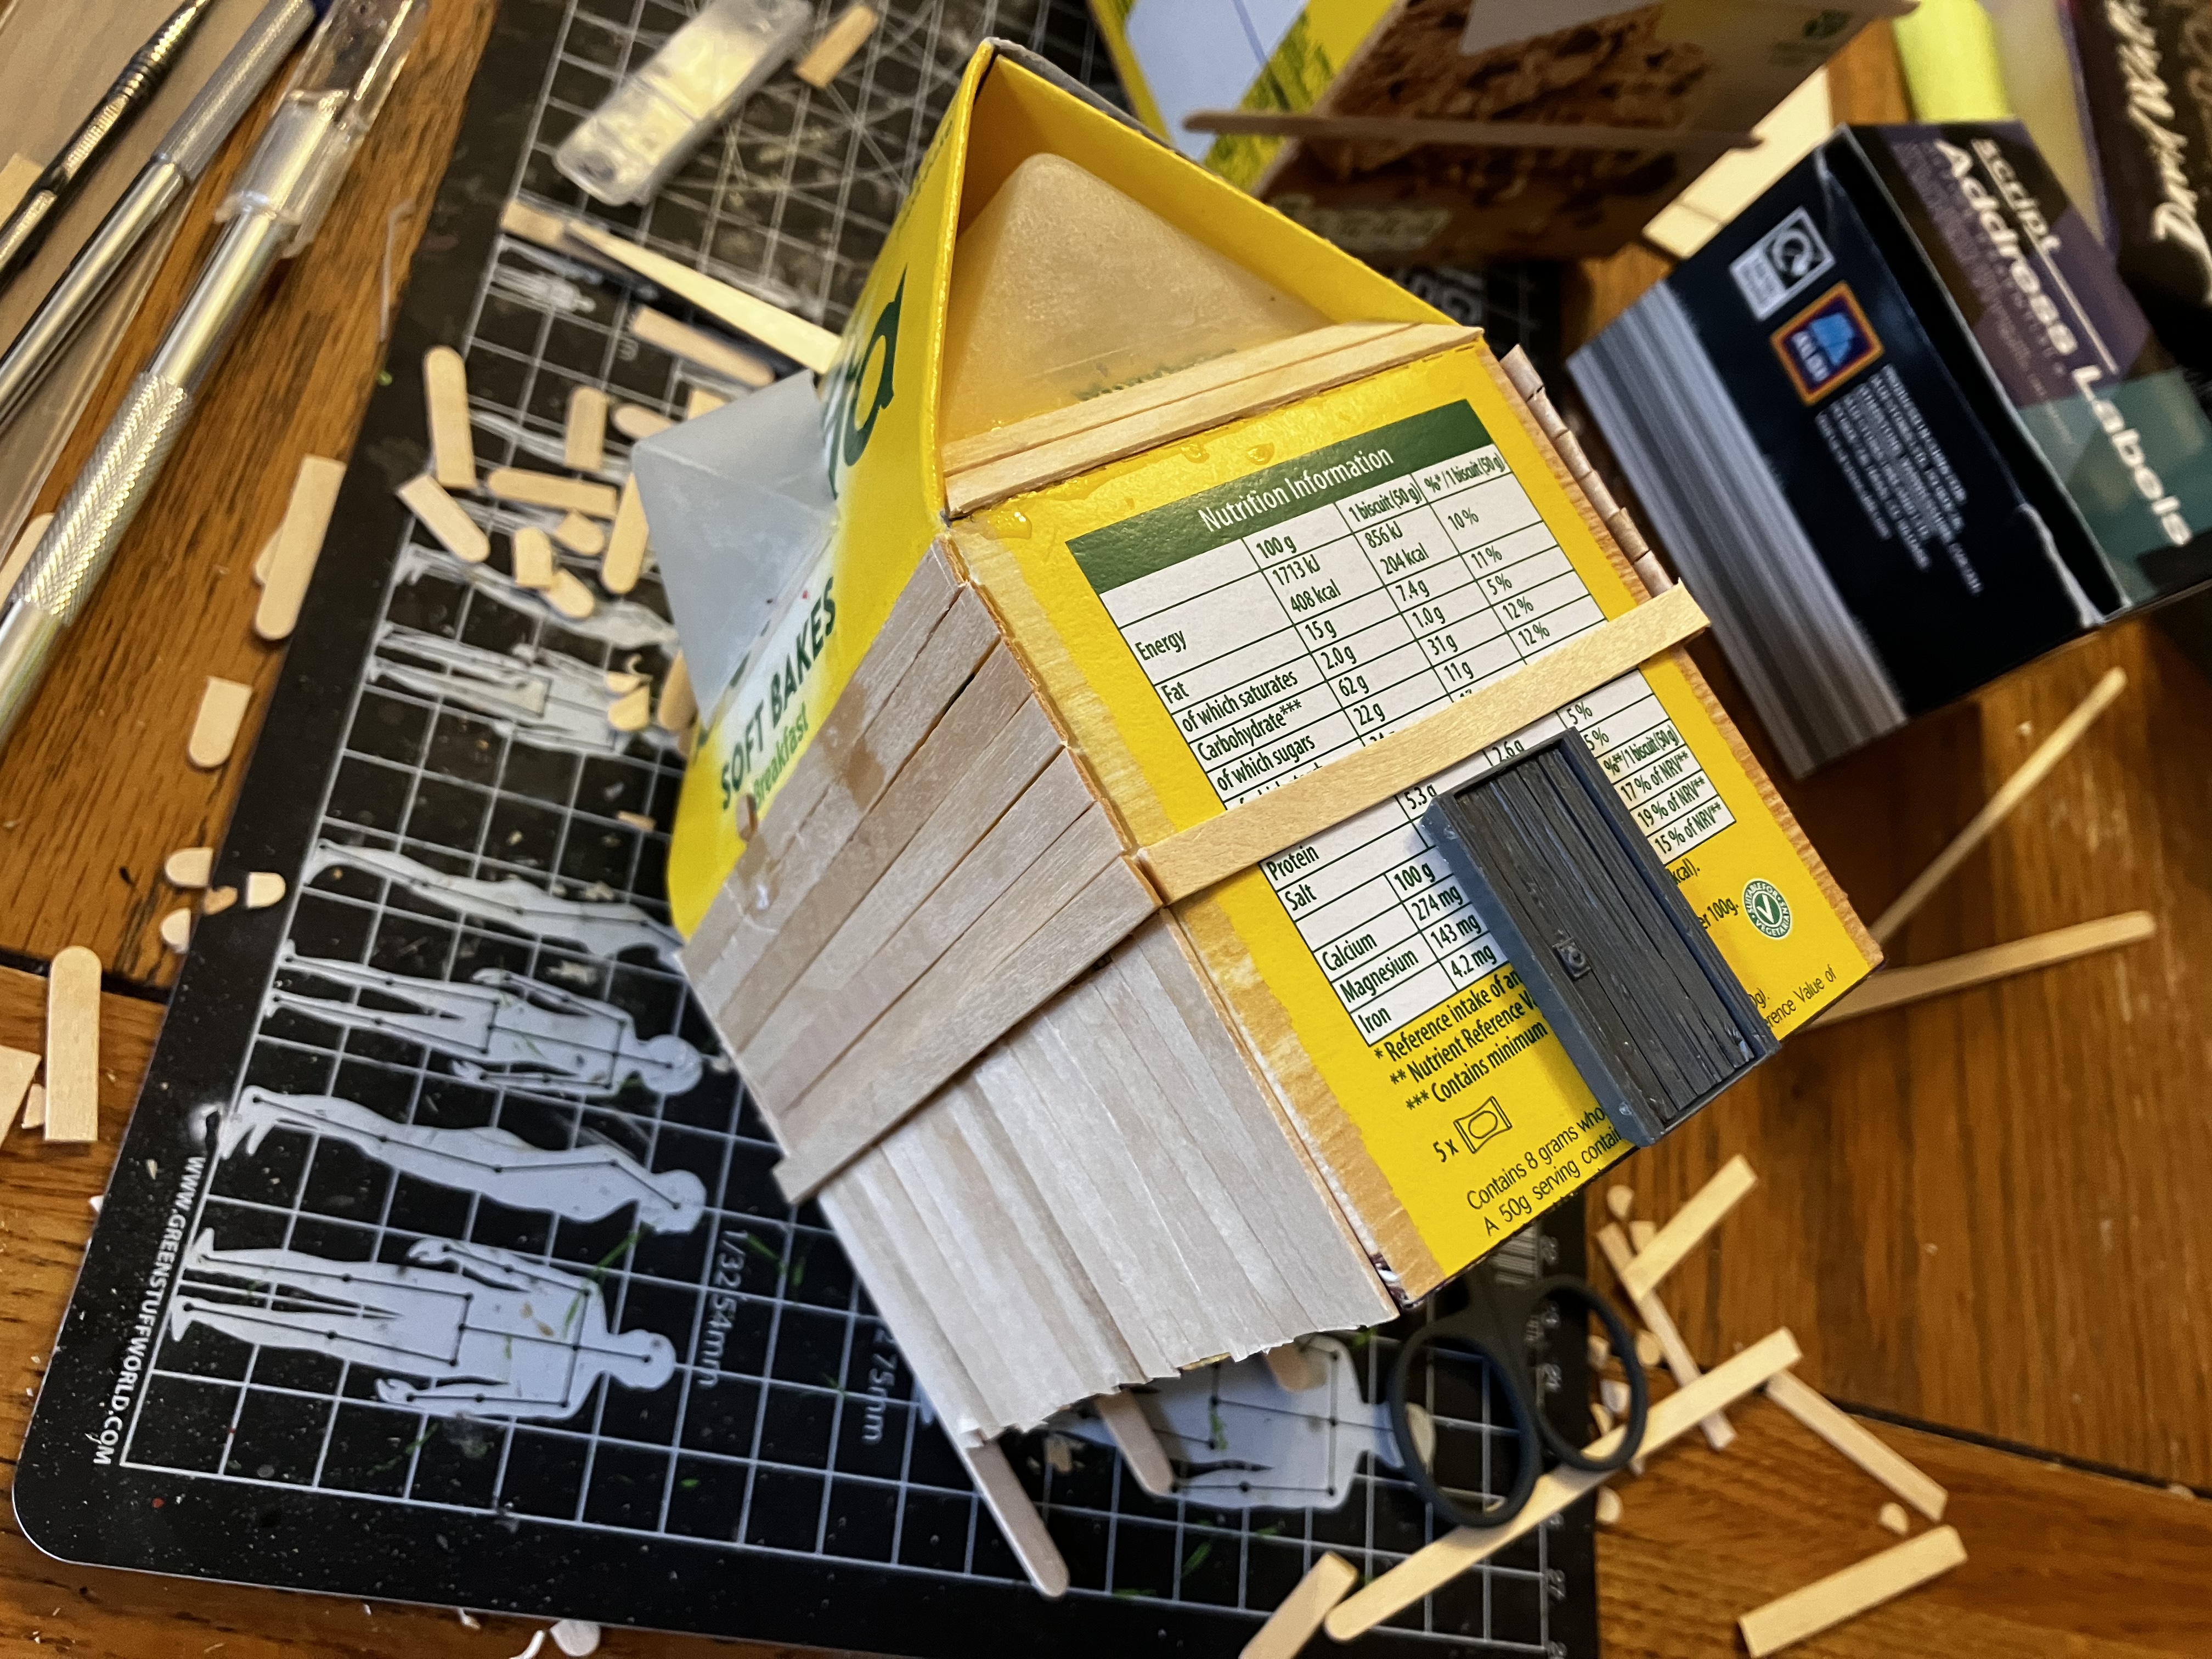
I cut some coffee stirrers into little angled pieces and glued them in place too as wooden cladding.
A little fiddly – but wow! What a great finished look!
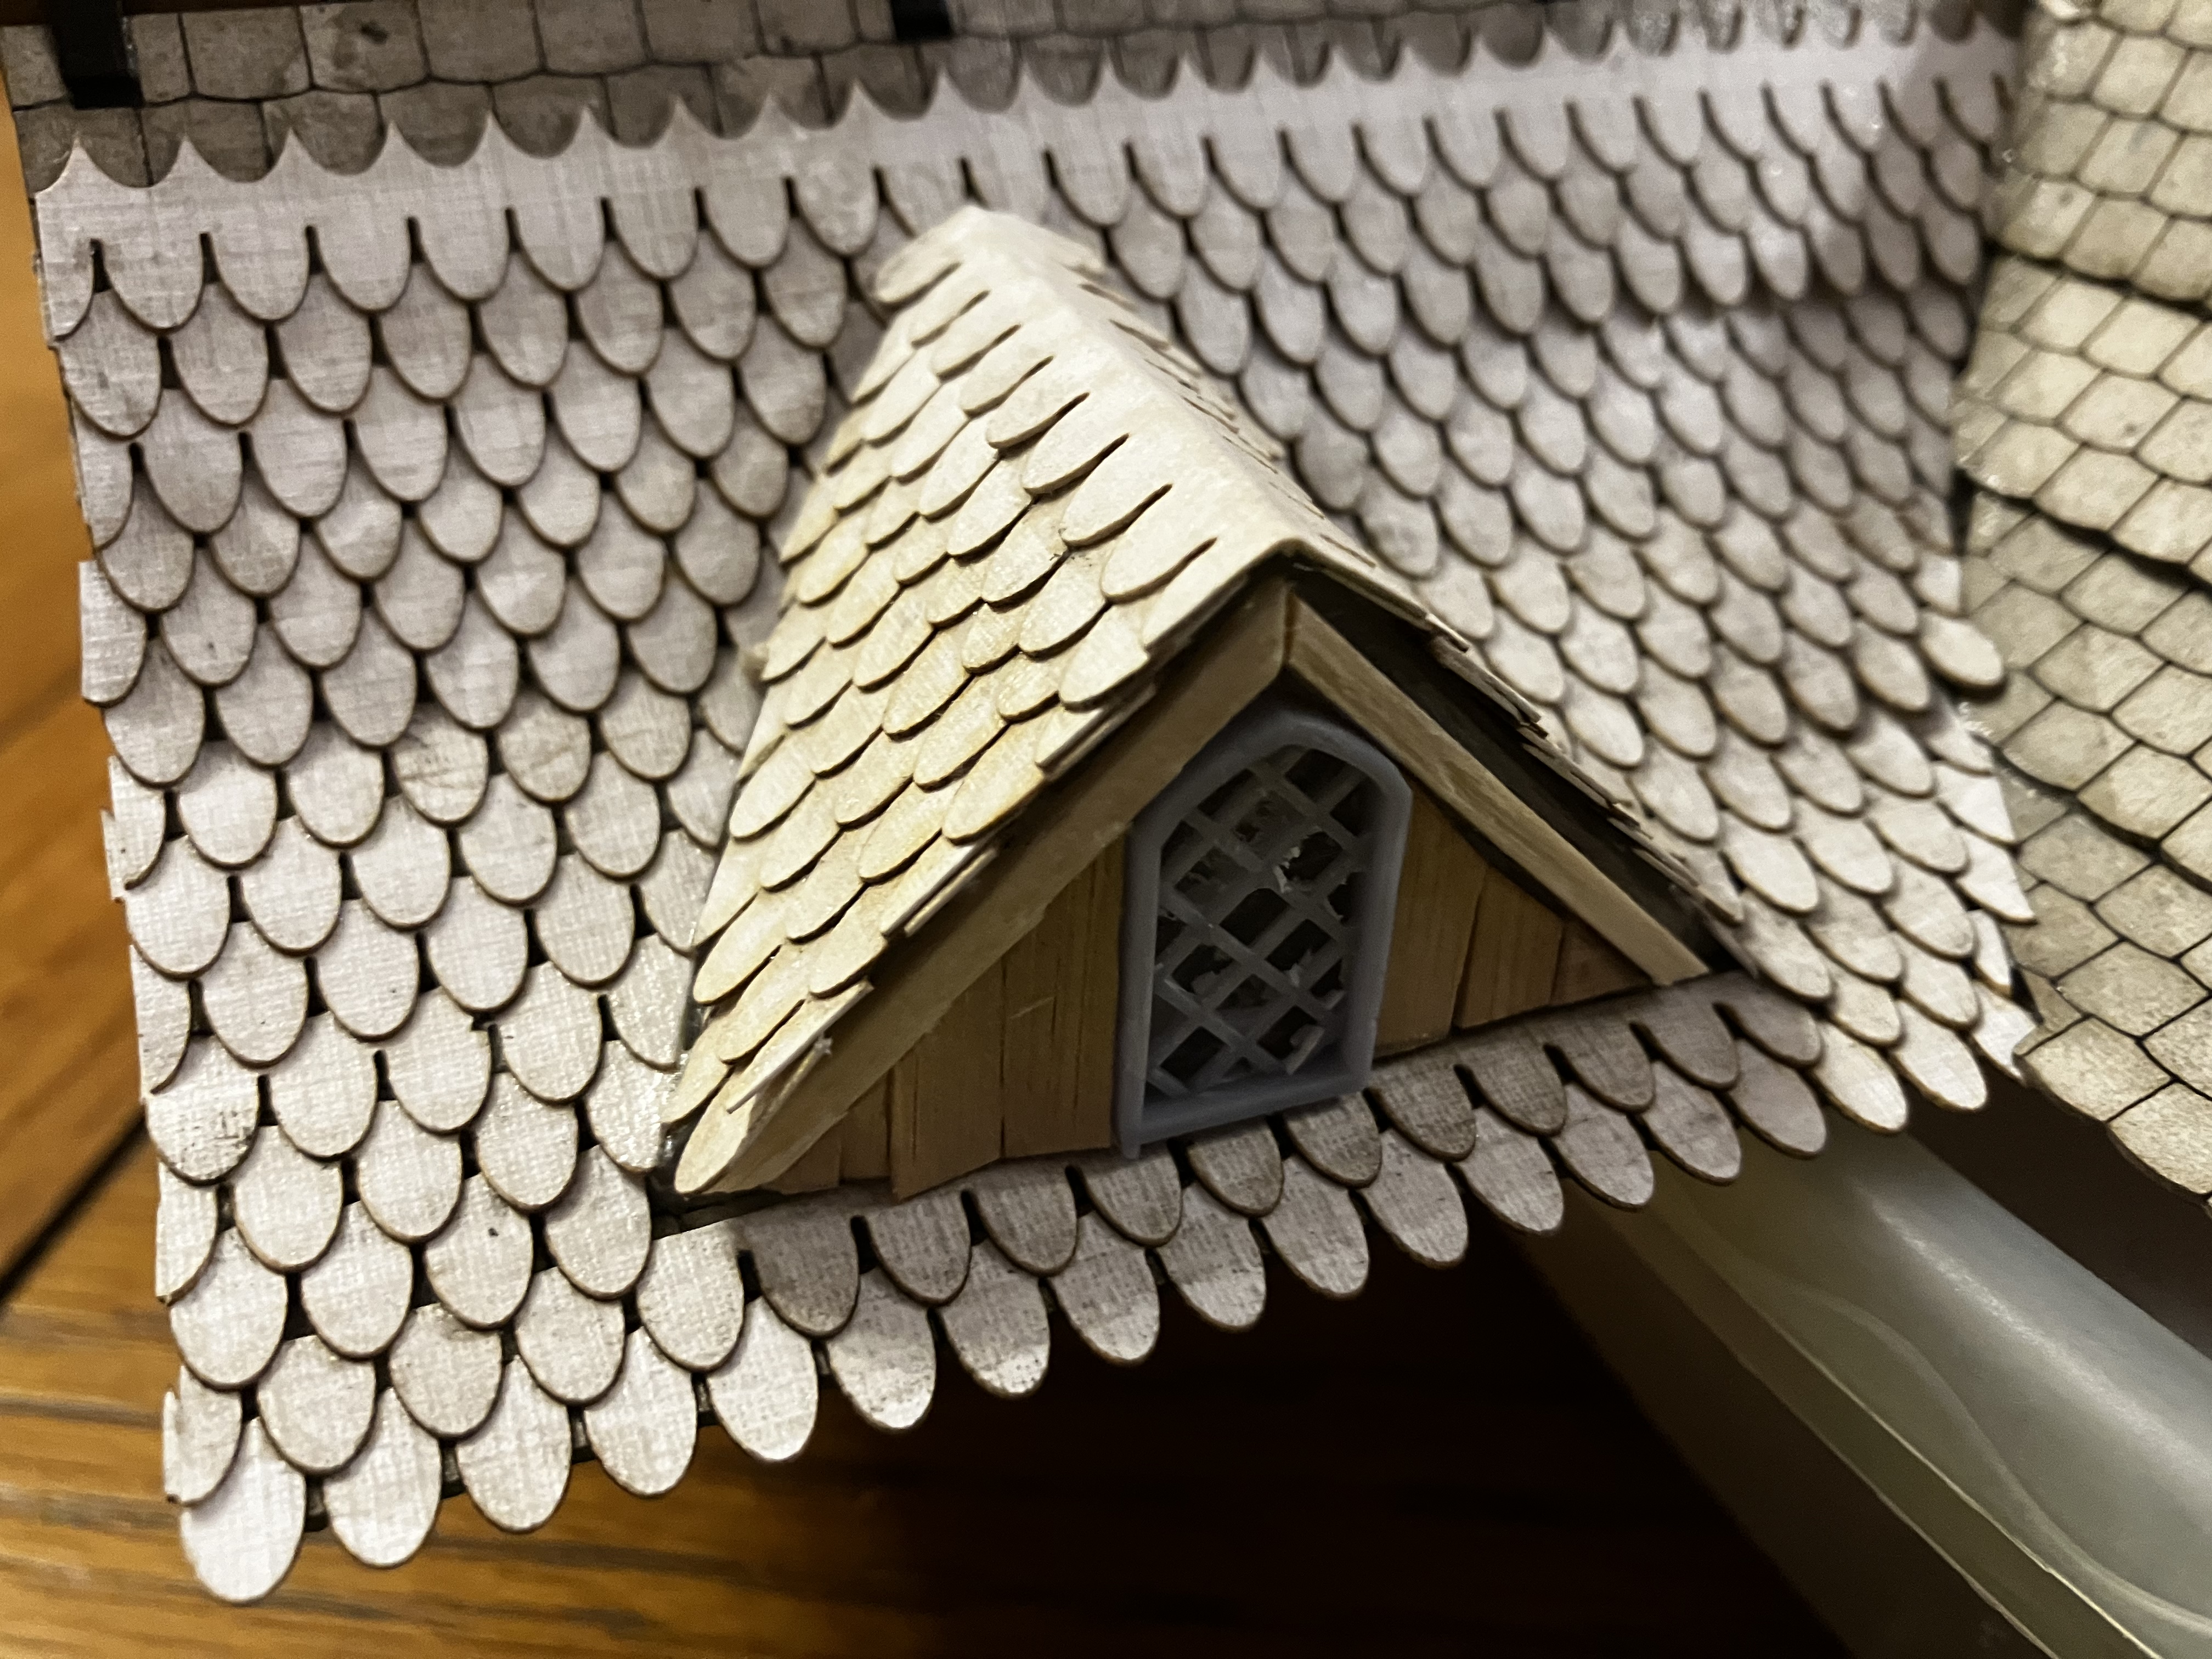 A finished dormer
I’m going to add a little leading where the former meets the main roof, and perhaps a matchstick windowsill, but this is great progress and really has given me confidence that these plastic corners can work on the other buildings too.
Completing the roof
With more tiles now in hand, I’ve been able to get the roof finished. I’m really pleased with the over-all look. Bit disappointed with myself that I’ve misplaced the beams I’d punched out for some of the walls, but a few coffee stirrers cover up the mdf edges.
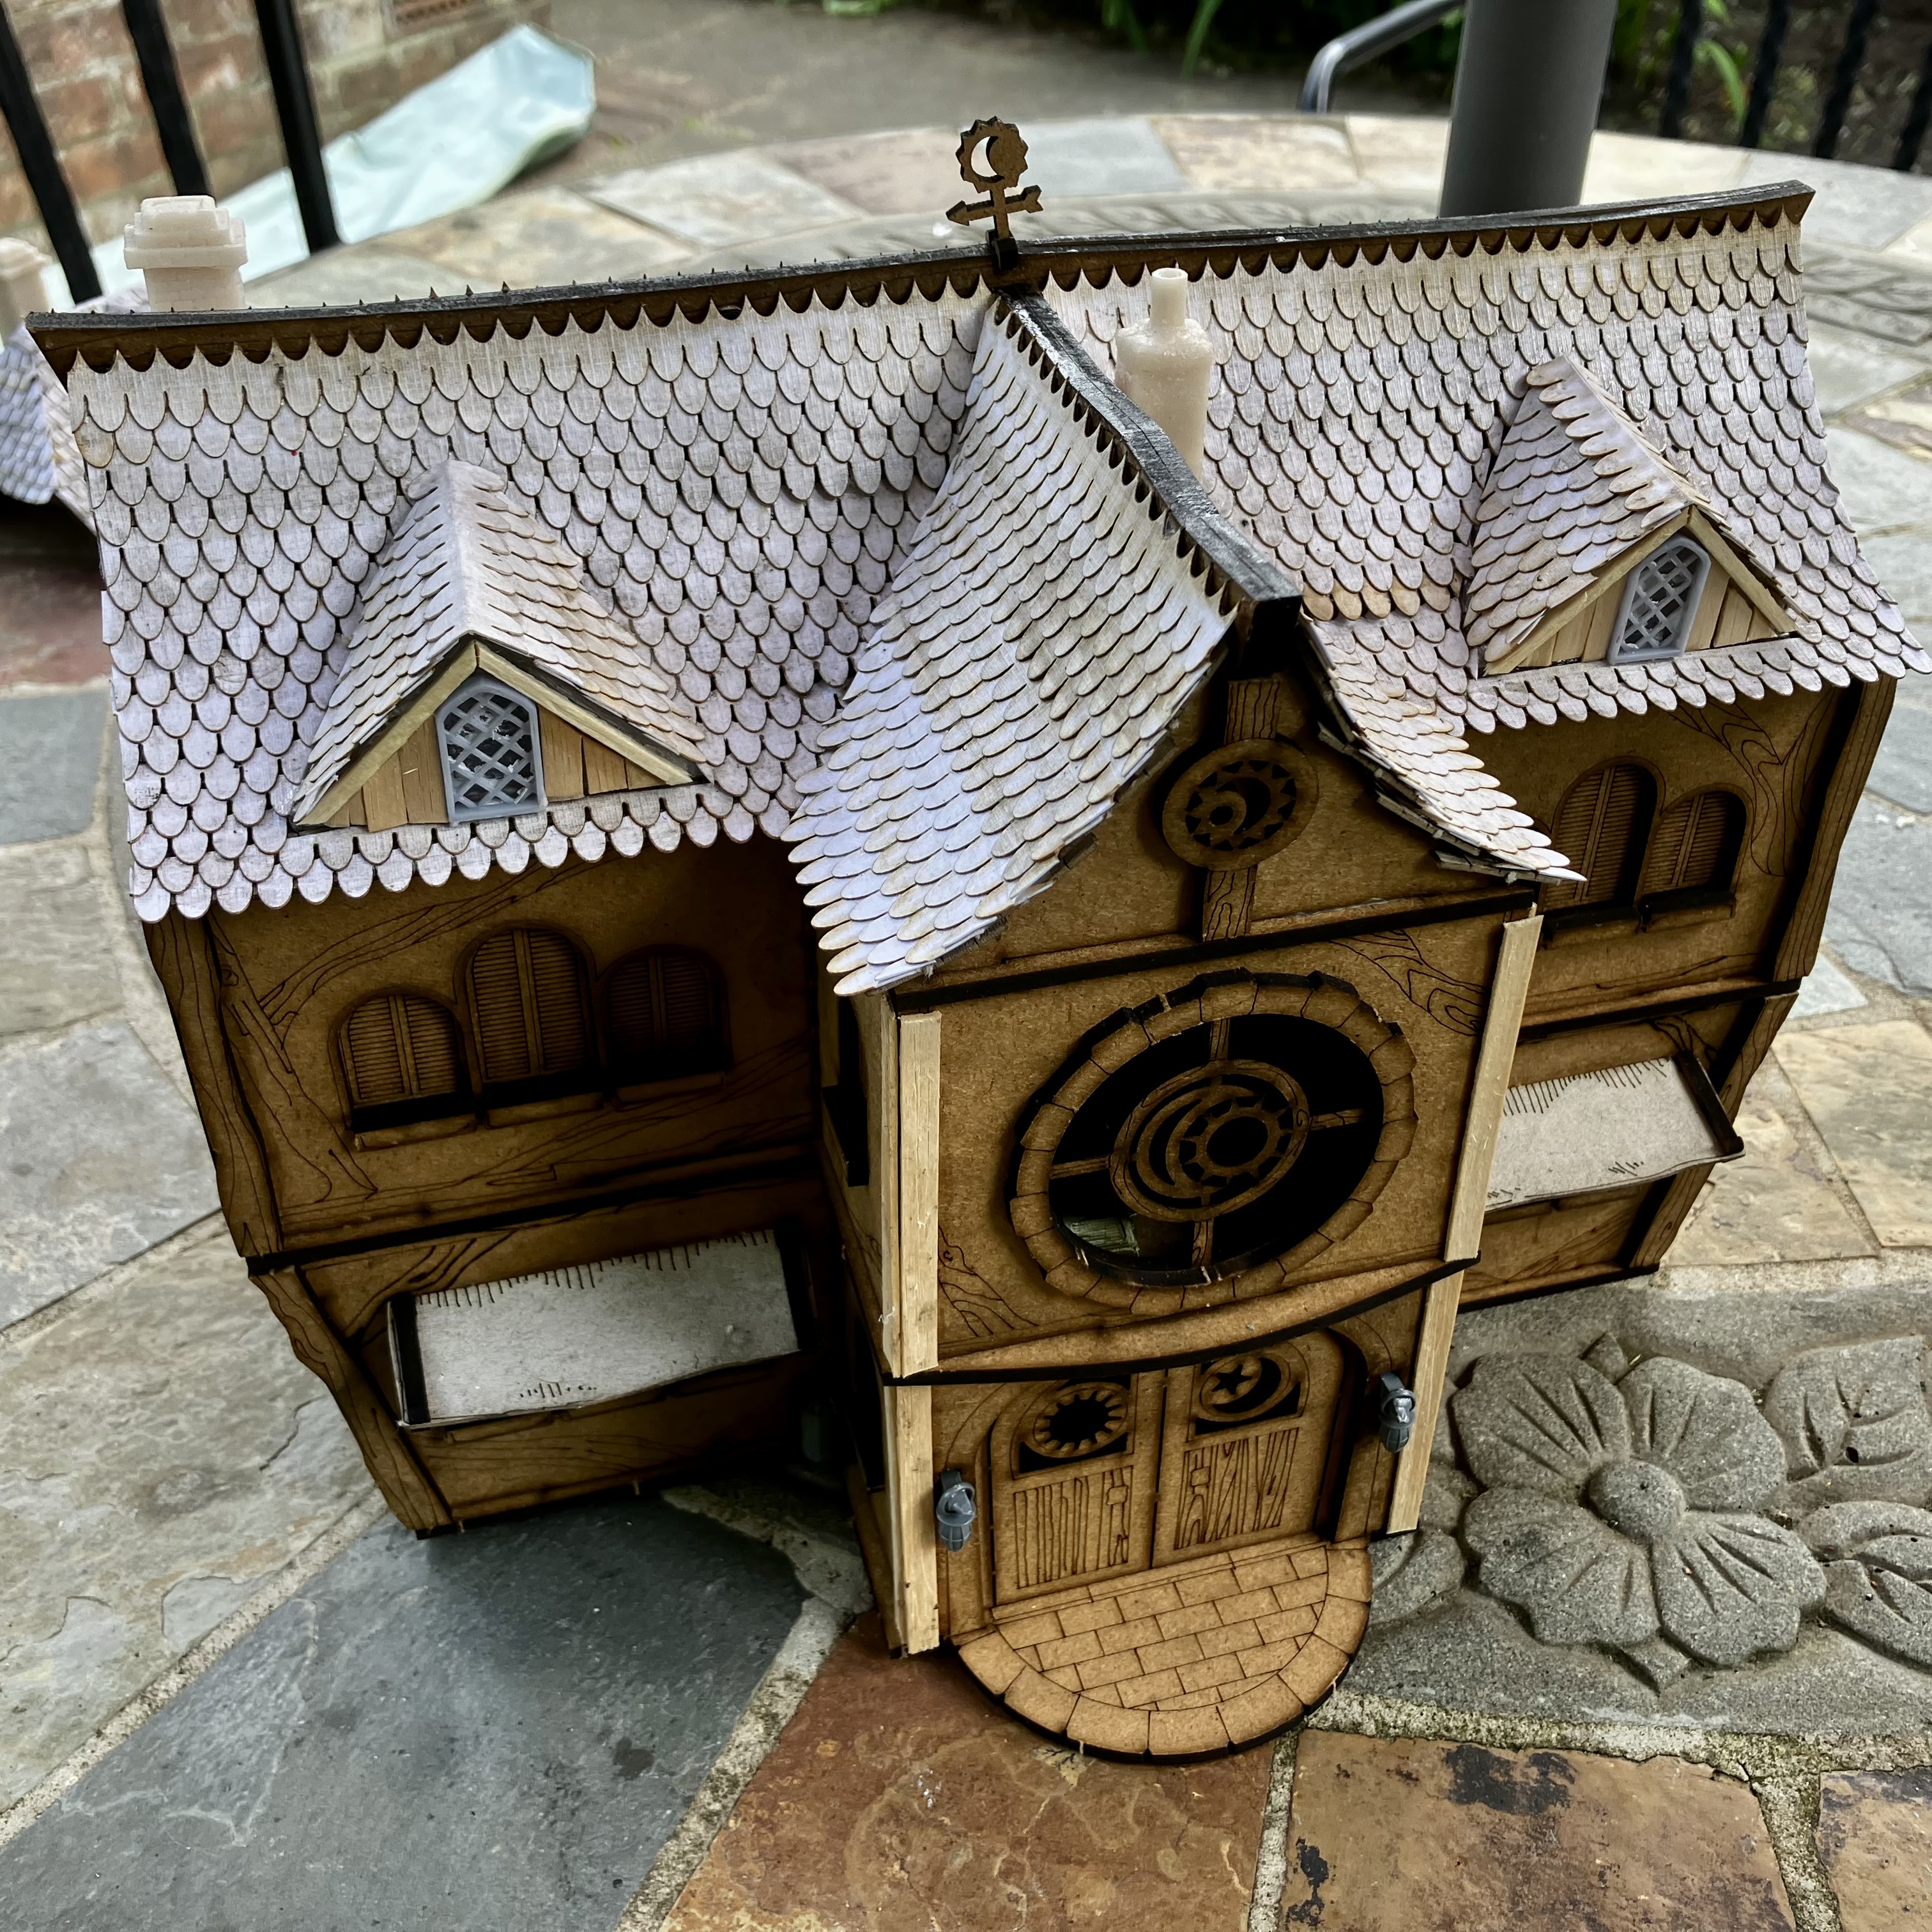 The completed building
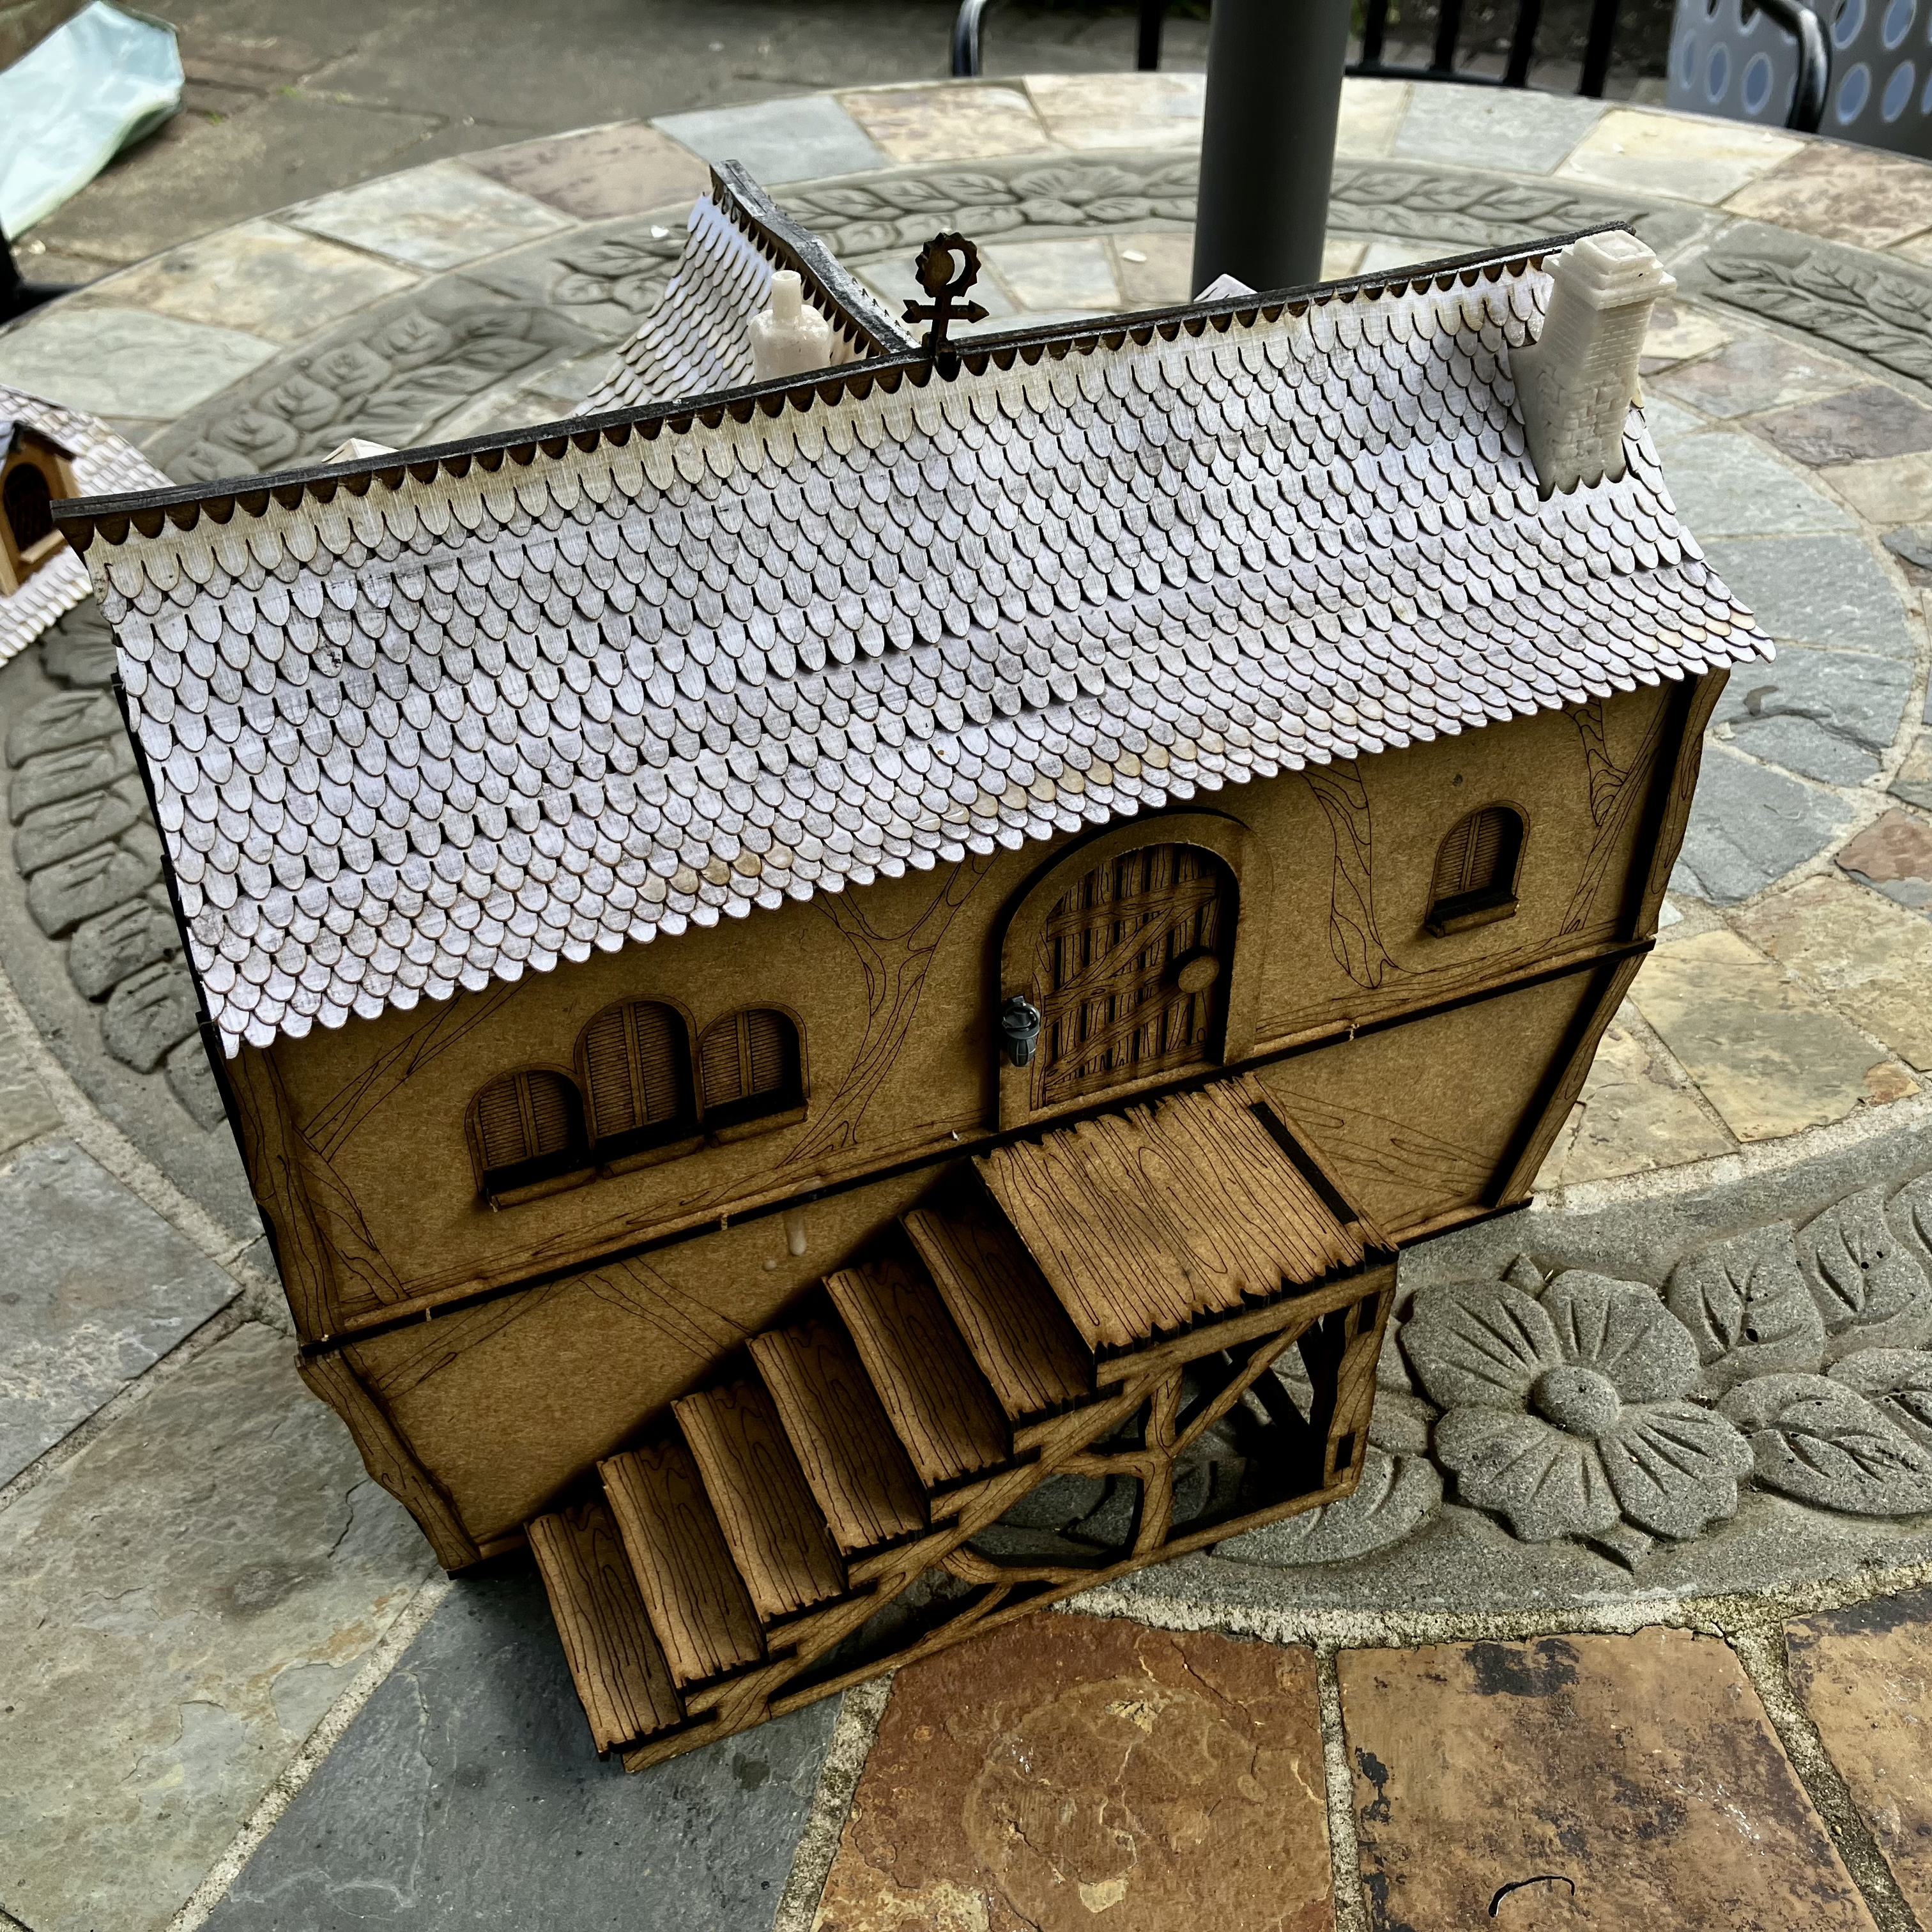 Rear view showing the steps. Ideal for a sneaky getaway with the gold…
More buildings
Here’s a completed Lochbaile building, ready for paint.
similar to the others, I’ve tiled it properly and added a small chimney, plus a few other little details. Am keeping the roof separate as the inside a make handy storage for little row boats and street scatter.
Prime time
Lovely weather today, so have zenith primed the buildings and walkways that are complete.
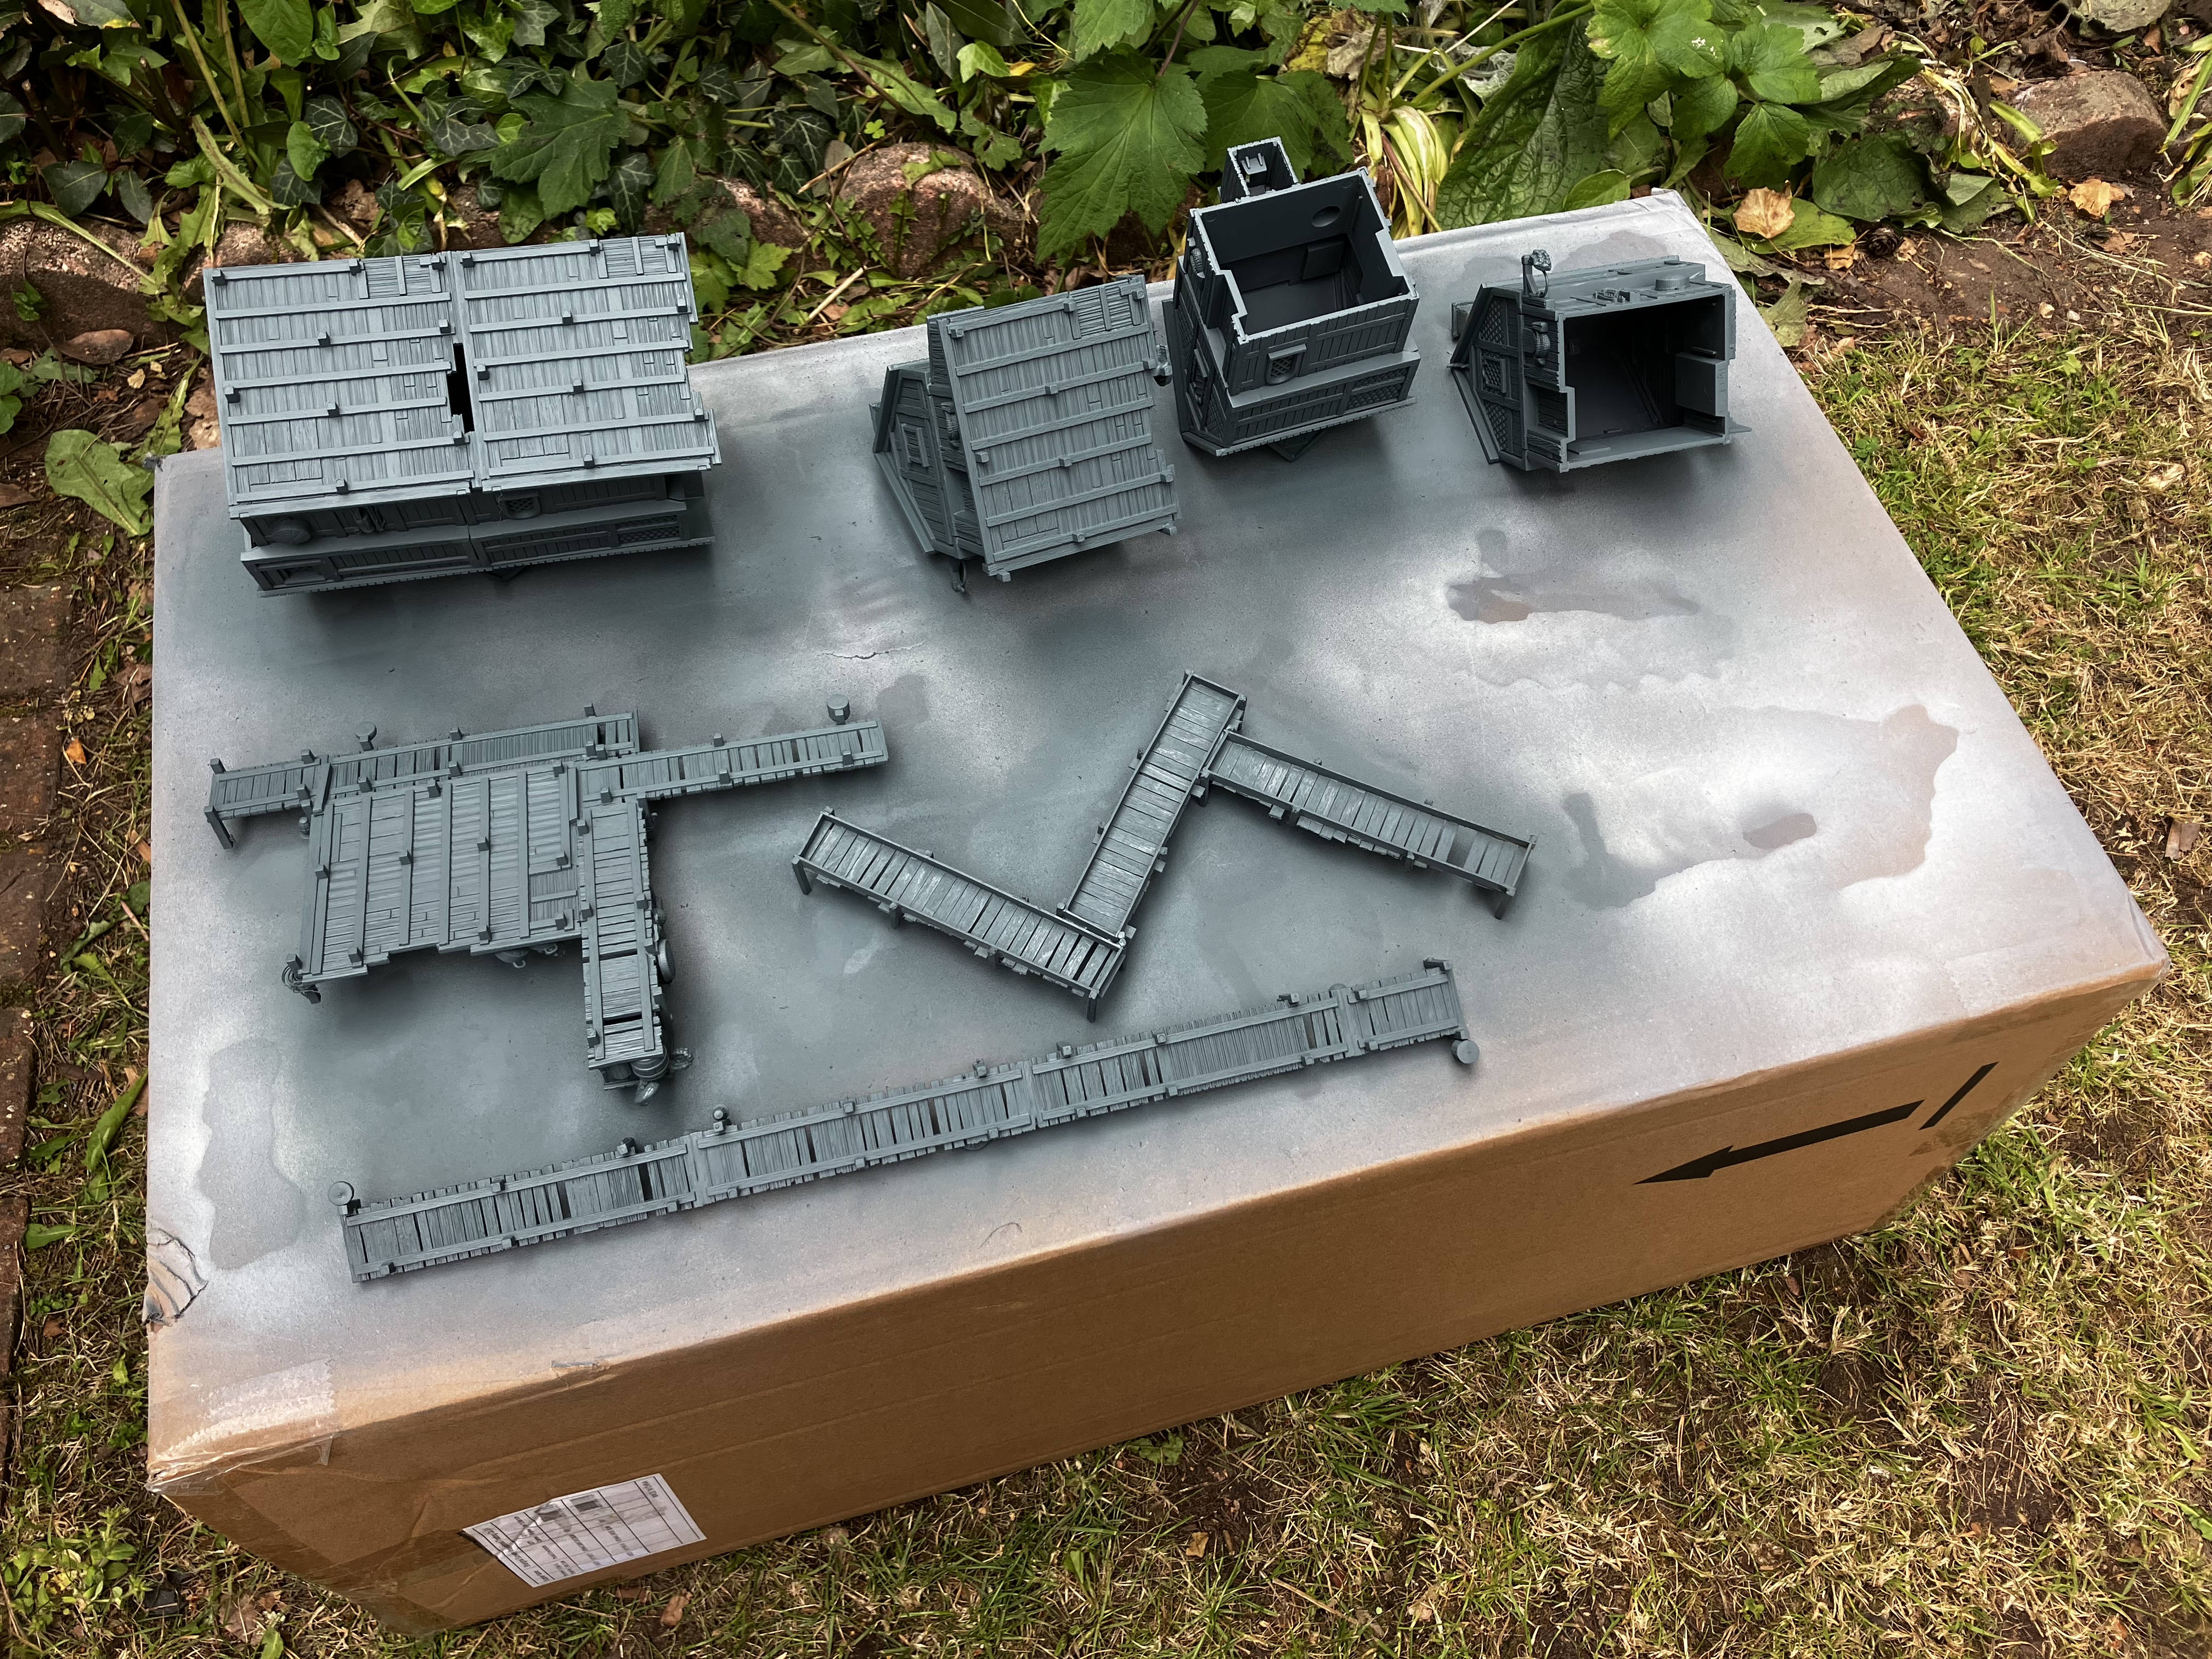 Spray the undersides and sides grey
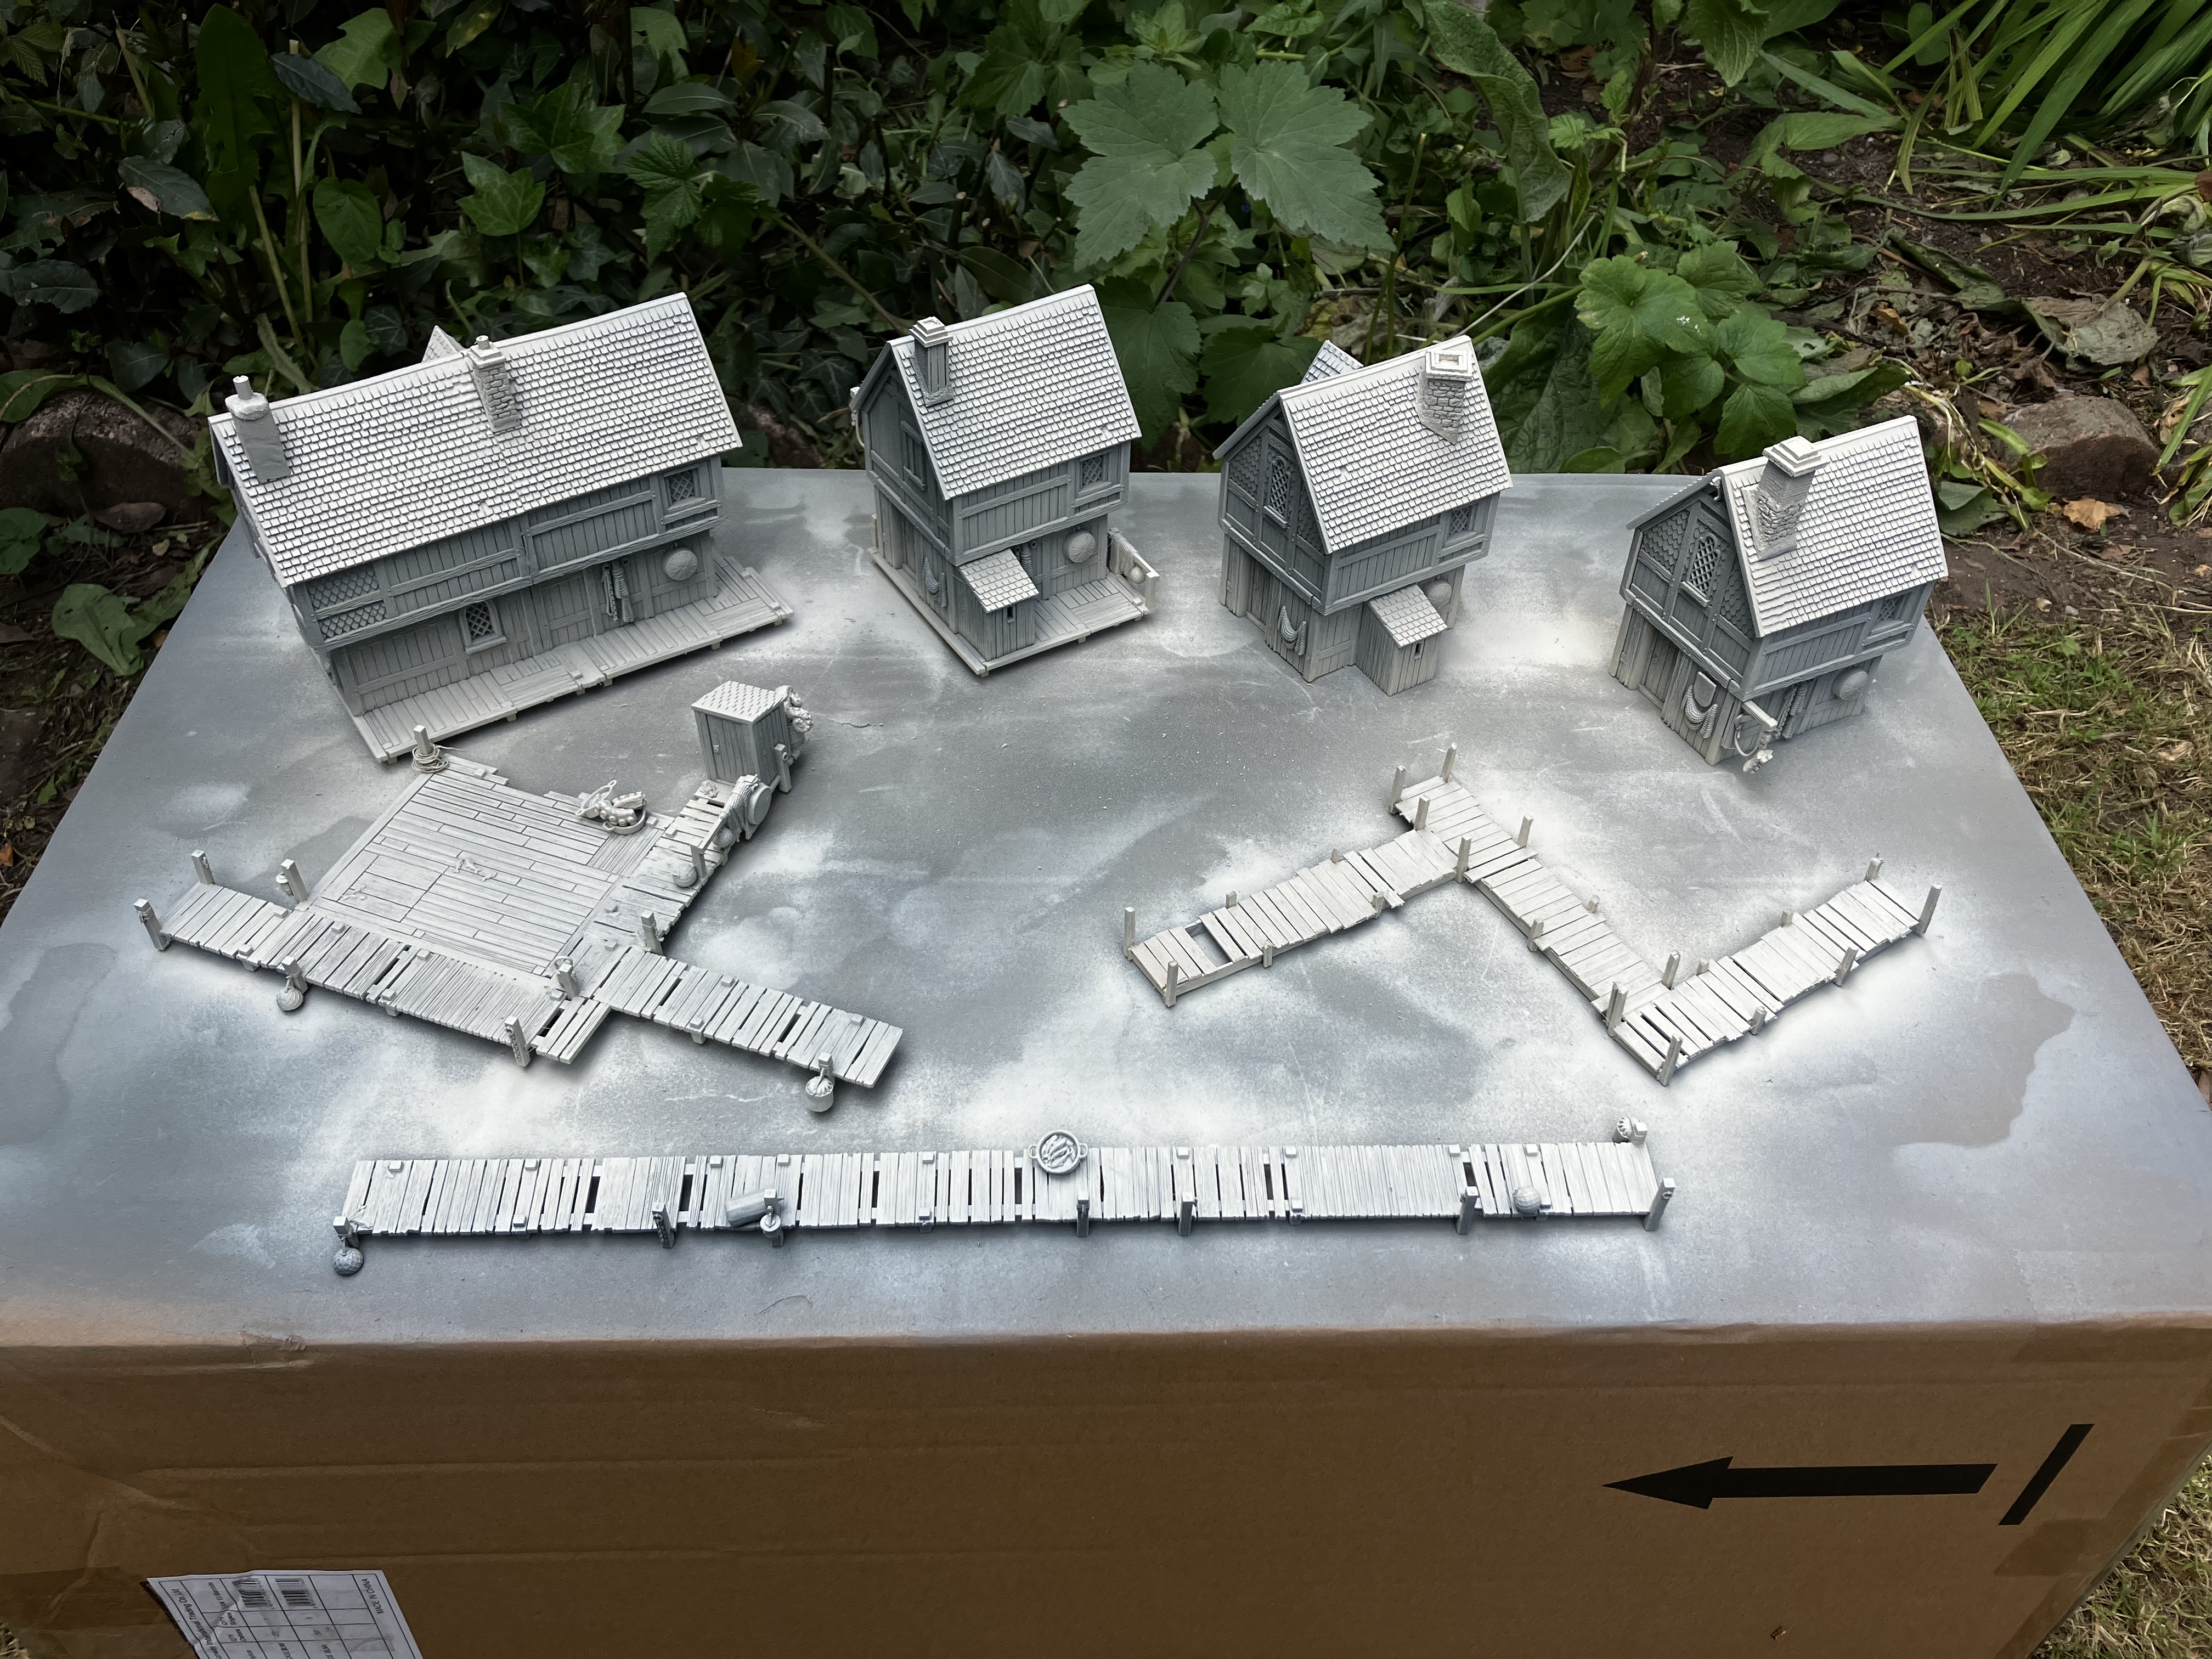 Spray wraithbone over the top
Primed backlog
A nice collection of completed buildings ready to start painting. Over the next few posts I’ll start adding colour and let’s see how they go!