![Wild Australia Wargaming? 28mm Ned Kelly Gang & Victorian Police Review [7 Days Early Access]](https://images.beastsofwar.com/2026/01/unboxing-traders-galaxy-australiana-ned-kelly-gang-_-victorian-police-coverimage-225-127.jpg)


To the Trenches! Chain of Command


Recommendations: 424
About the Project
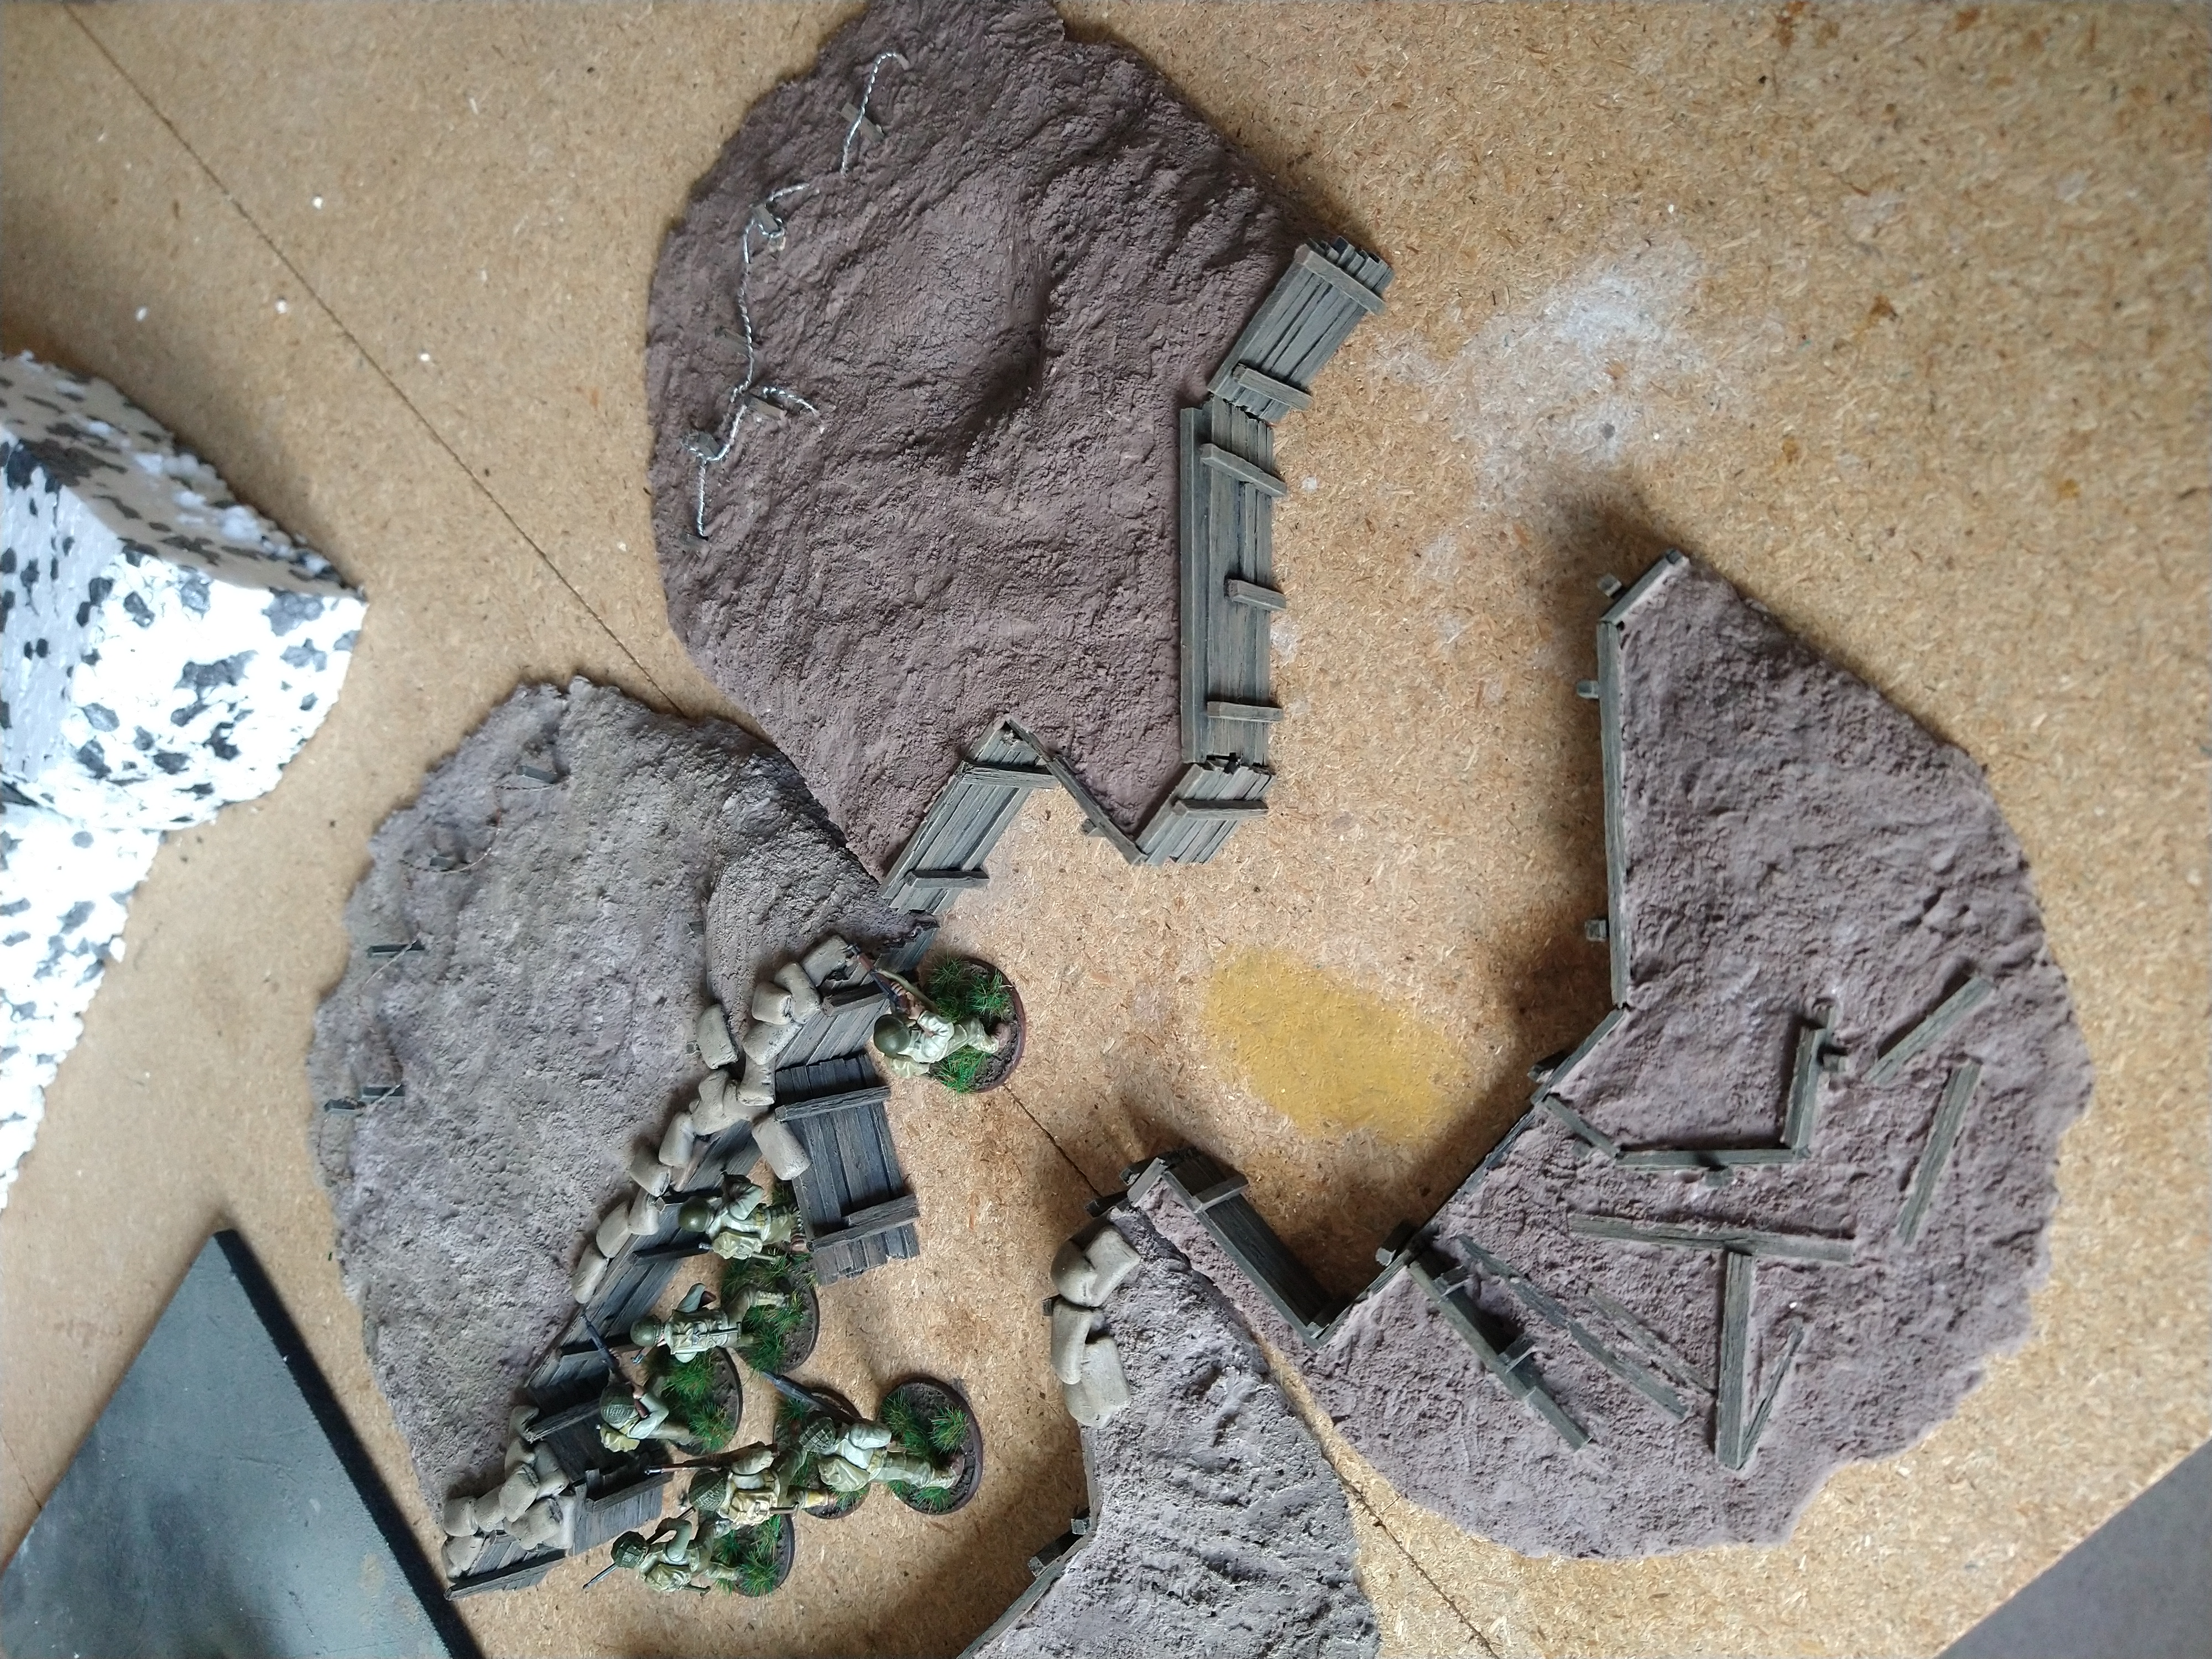
Recently have been able to get a regular number of games of Chain of Command in and has got me back into the creative space of building more terrain. Ive started with creating sections of a Trench network.
Related Game: Chain of Command
Related Company: Too Fat Lardies
Related Genre: Historical
Related Contest: Spring Clean Hobby Challenge 2024
This Project is Active
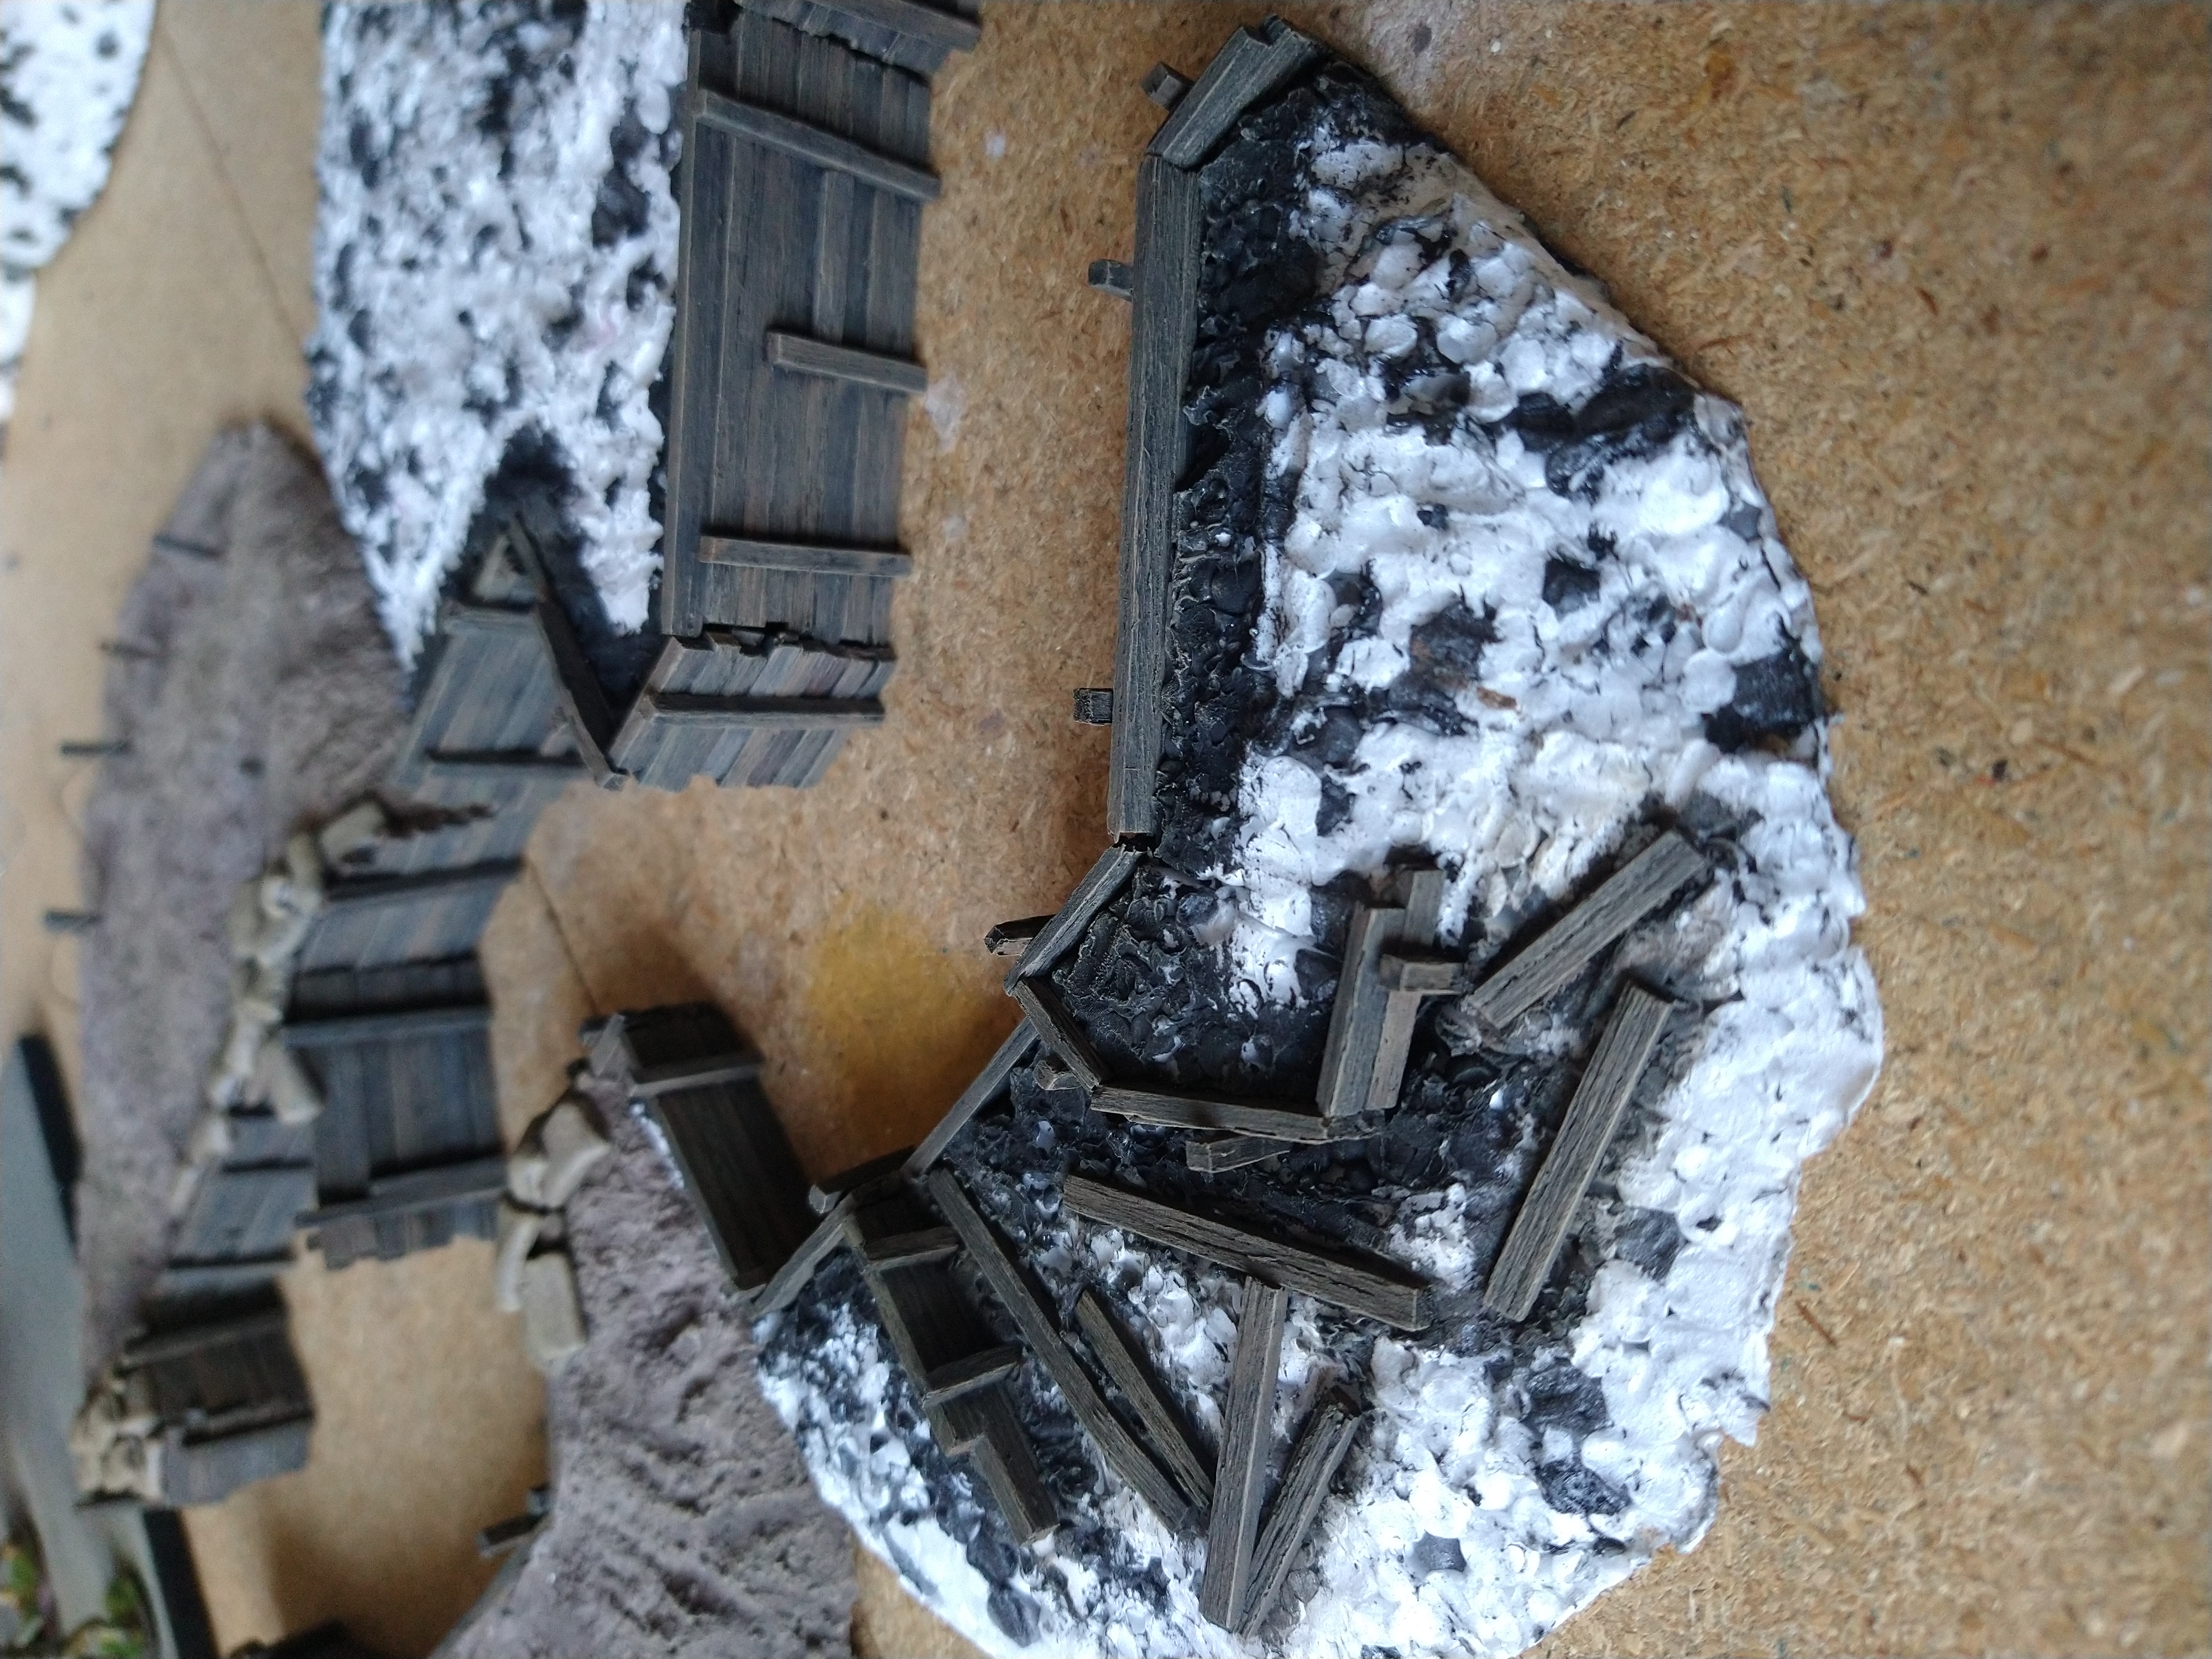
How its done .... Sandbags
Next I place the sandbags onto the ground, and form them into place so they look like they are laying as naturally as possible.
Once happy with the appearance, I then glue them in place with superglue.
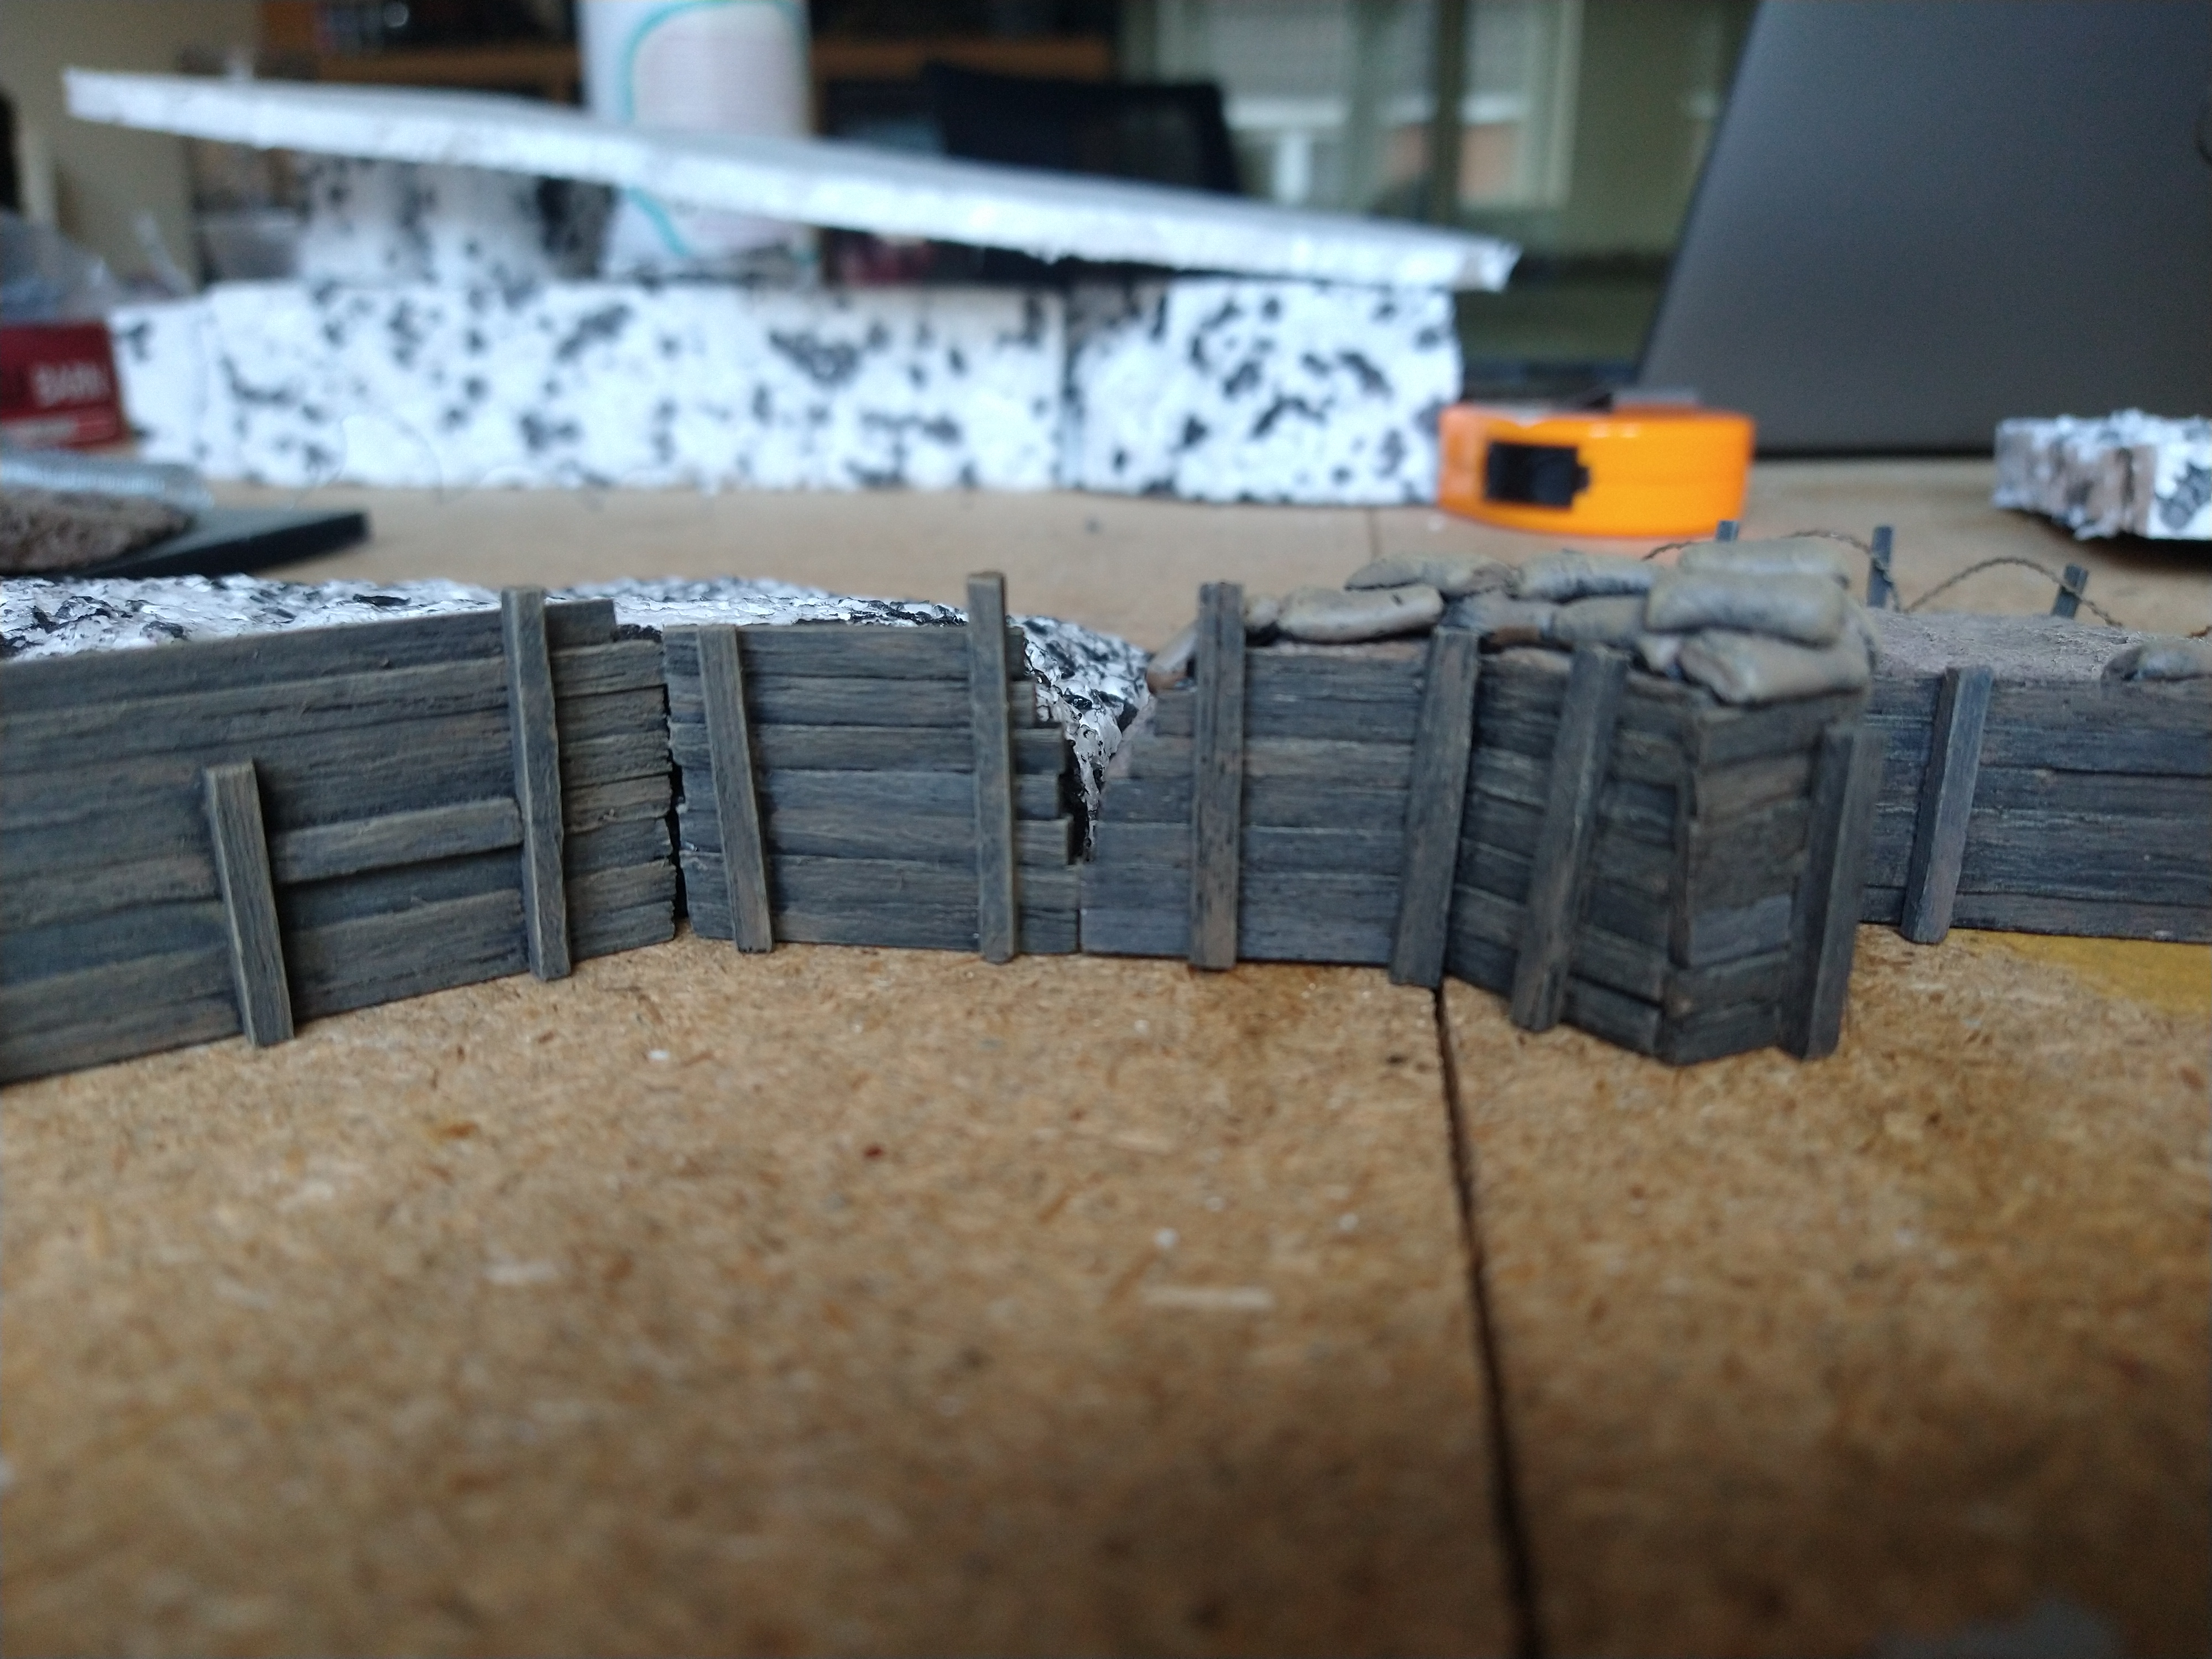
At each end of the piece I put a small batch of sandbags (and this is replicated on the test piece as well) so that it will help each piece blend in with each other a bit better and create some uniformity.
On this piece, I piled up the sandbags a few layers high in the centre to provide more “protection” to those entering into the trench system – all for visual representation, but no real effect on any gameplay effects.

How its done .... Sandbags
This is the part where the model reaches its final stage of construction. It starts out exciting but ill admit, does become a bit tedious the more you do it.
First I roll out some blue tac until its about 4mm wide.
Then I flatten the roll with a lolly pop stick – I find this gives a decent thickness of the bag, and also it naturally rounds the edges slightly.
I then cut the bags from the strip of blue tac. About 9mm ish. I try to keep the bag the size of a infantrymans chest to stomach as that feels about right.
Once they have been cut to size, I use a sculpting tool (to be fair a cocktail stick would work just as well) to score each end to represent a seam of the sand bag.


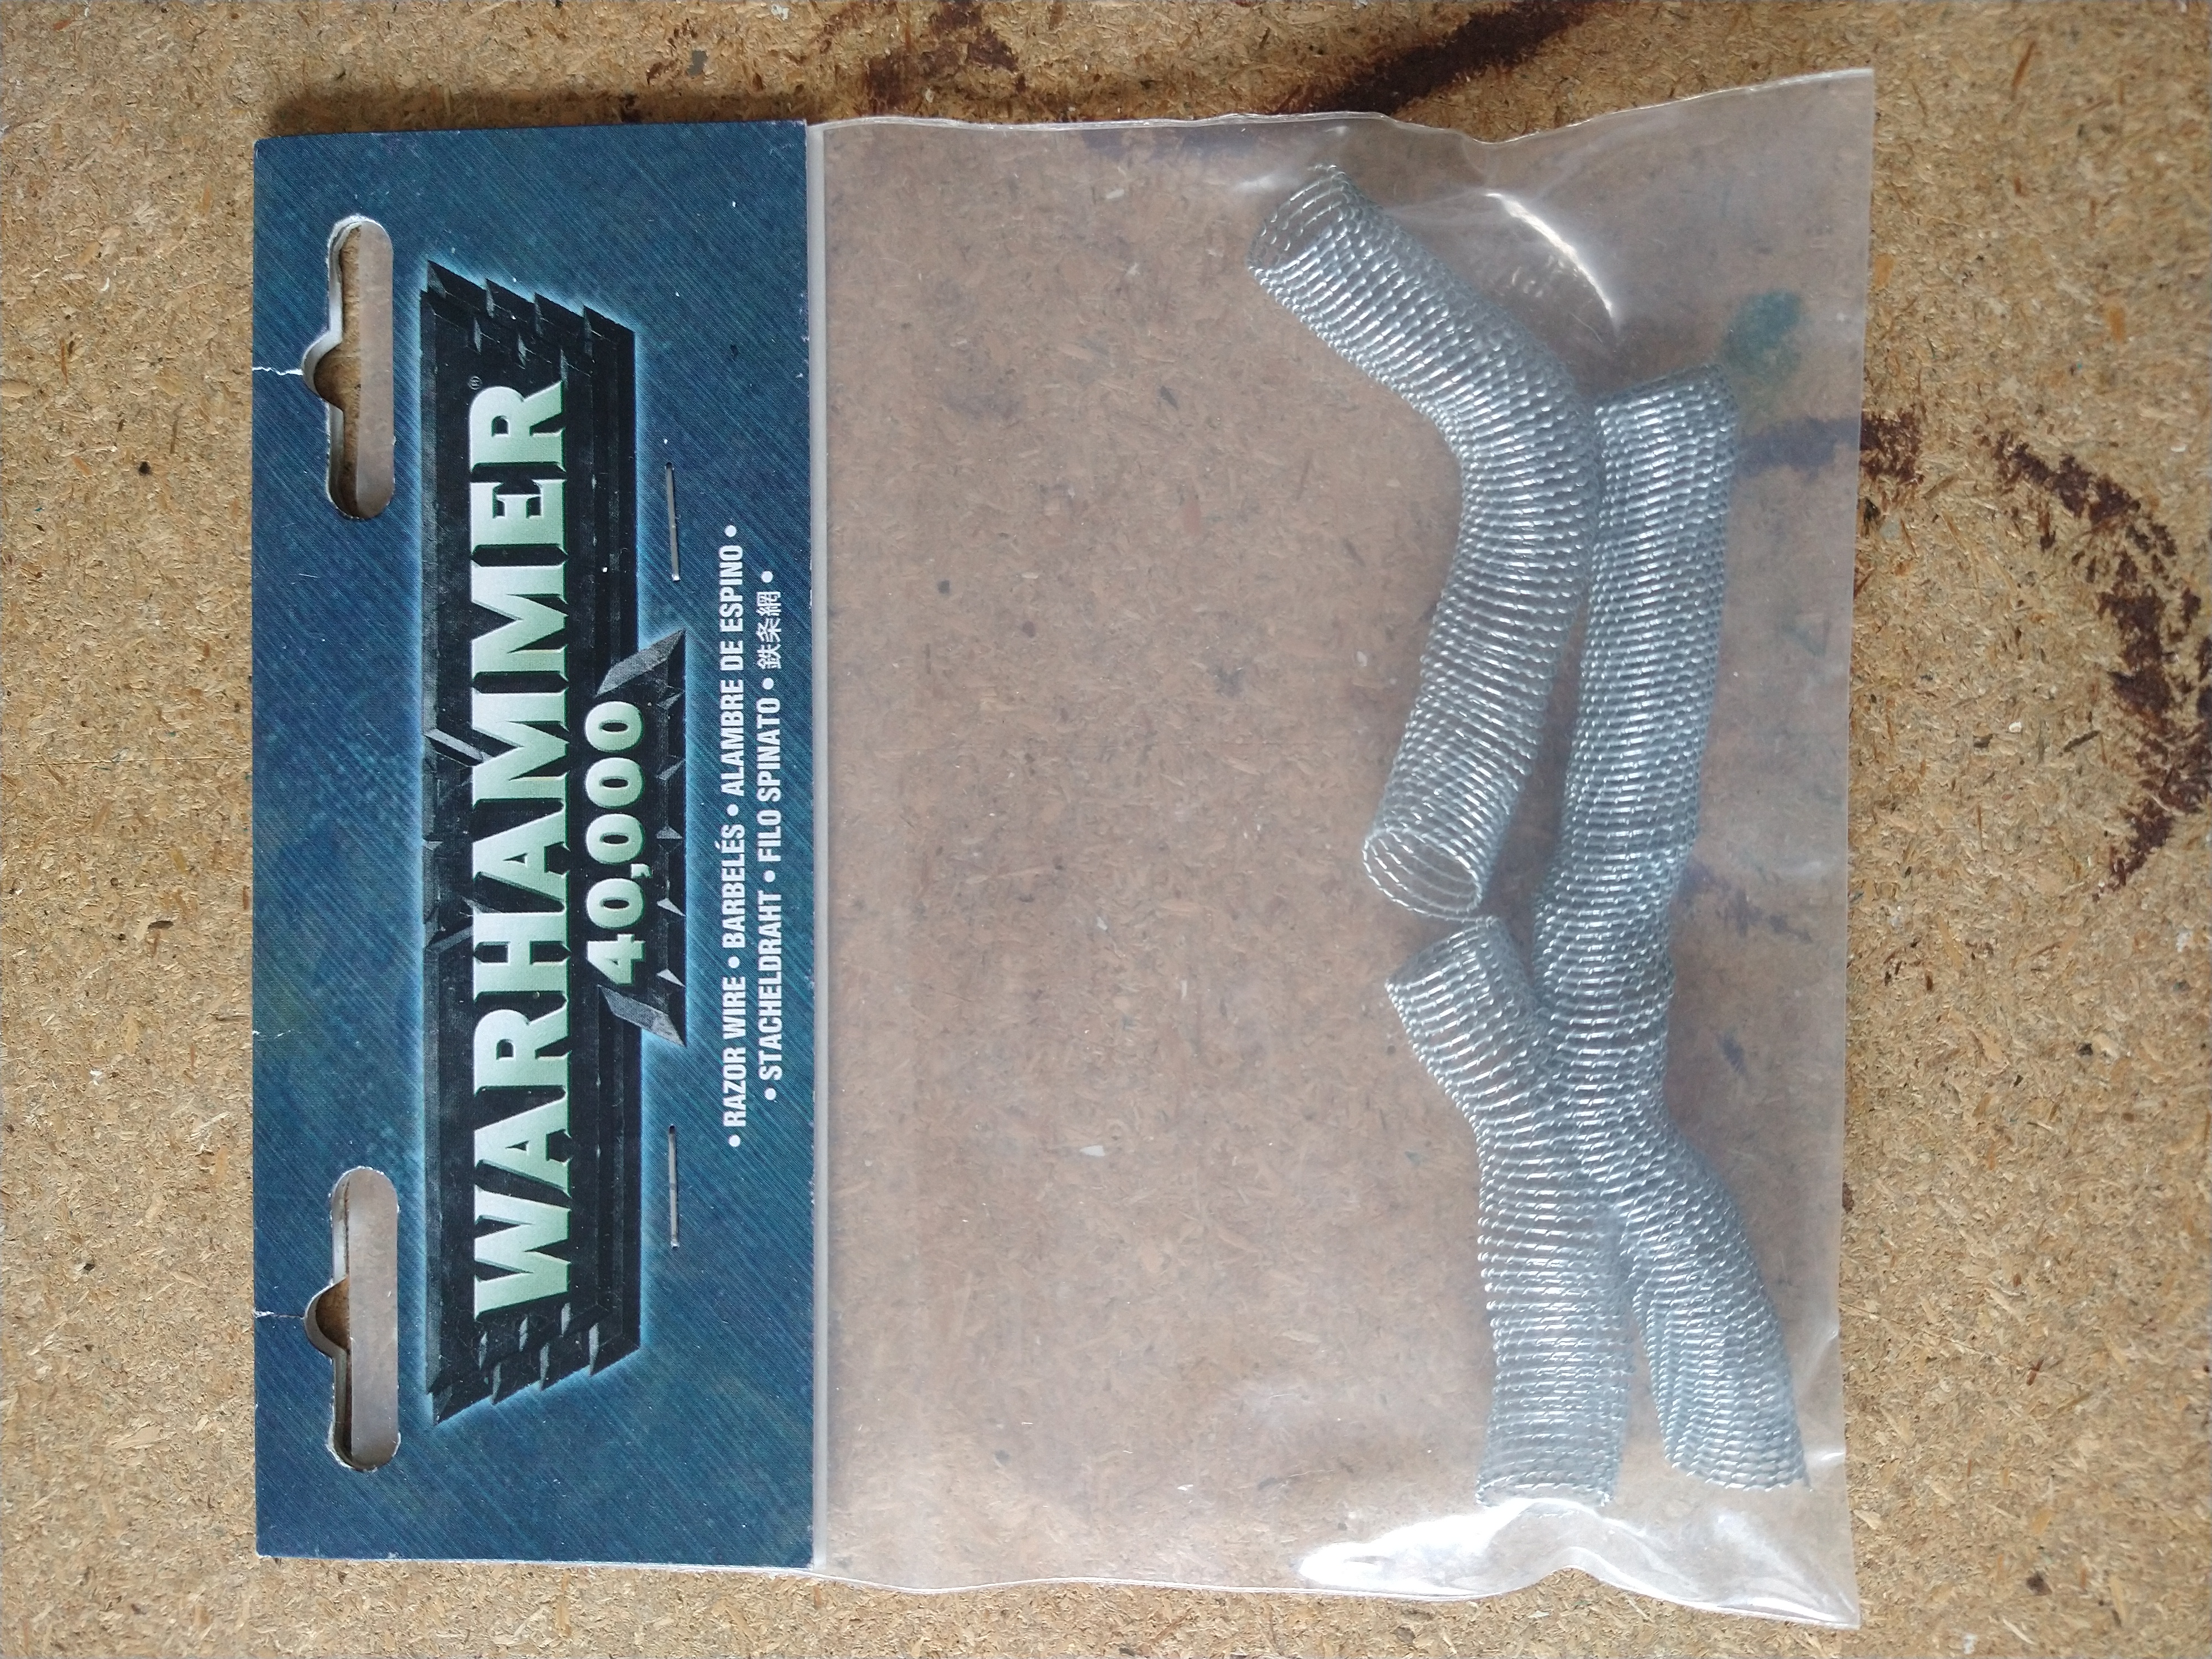
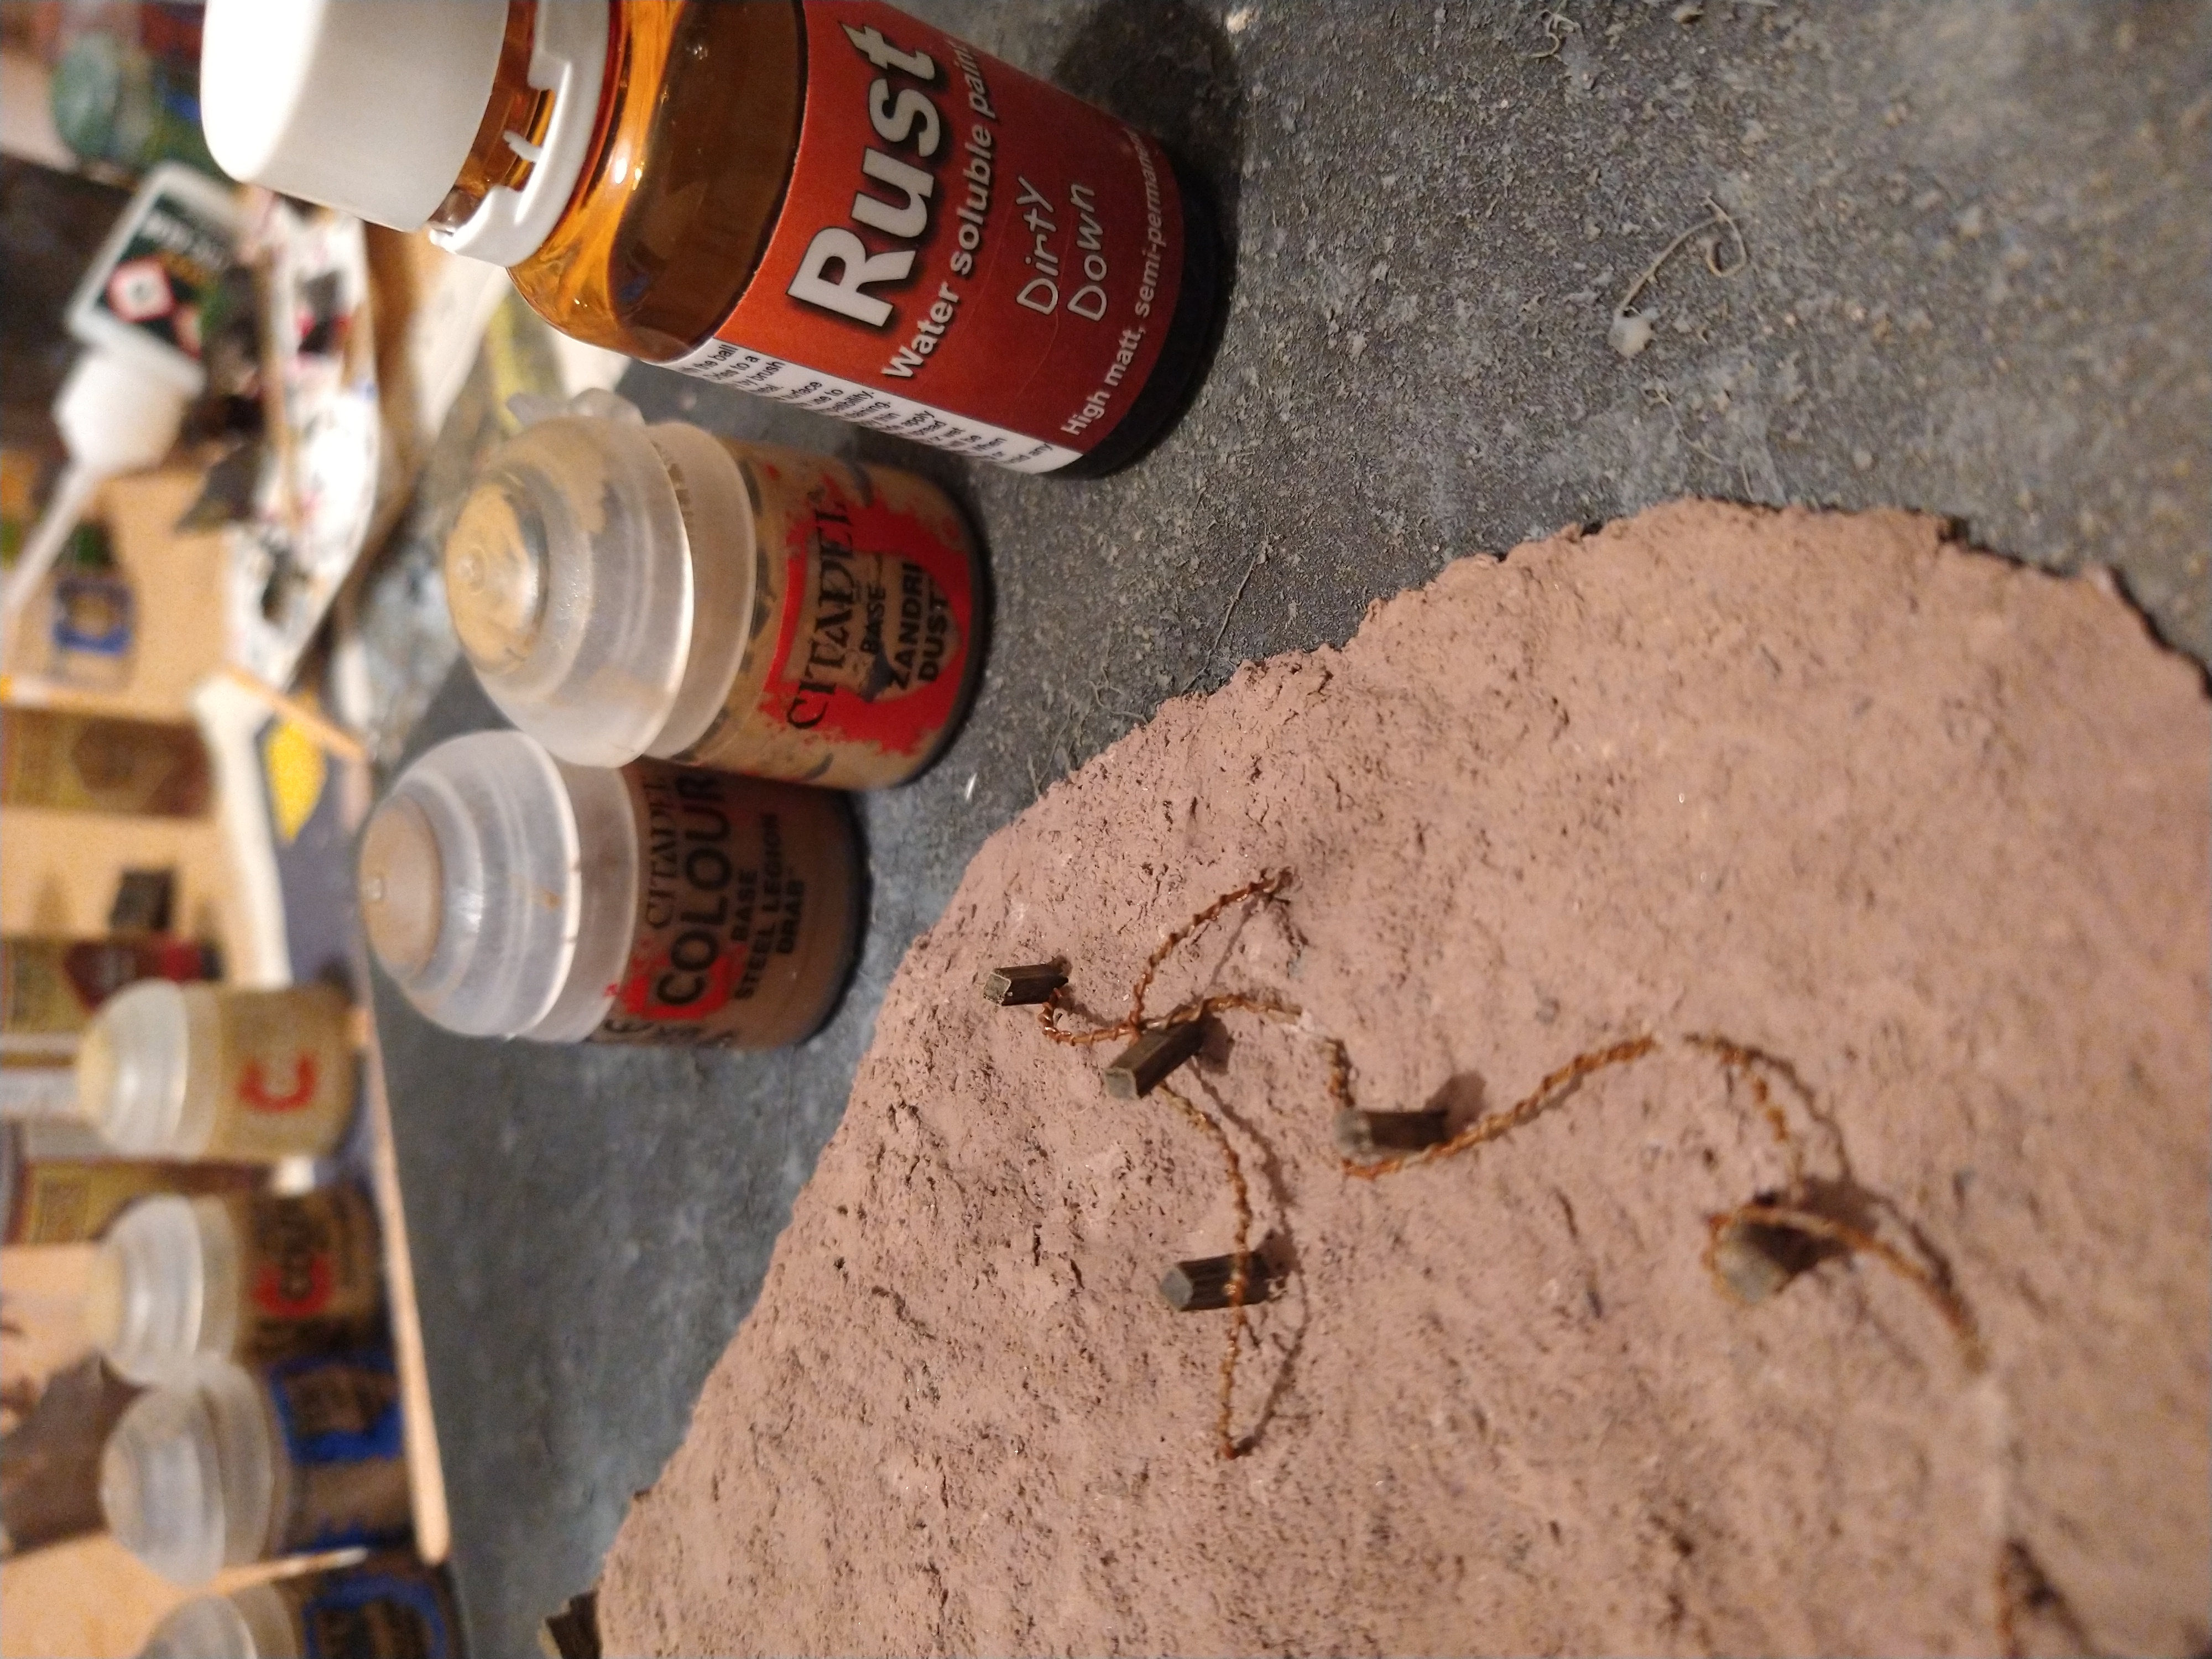
How its done .... Wire lines
Again, pretty simple, and using the same colour palette as already used previously.
Colours used for the posts – black undercoat, followed by Steel legion drab, and then a highlight of Zandri dust.
The Wire, (Came from a couple of packs of old GW razor wire I found in the bits box for what must be 15-20 odd years ago!) painted in Steel legion drab, with a Zandri dust hightlight.
Then I added in some rust effect in random places along the wire.
Simple but I think it looks effective and suits its purpose.
How its done .... ground texture
I didnt really take any photos of this process, but the paste was then simply spread on using a lolly pop stick, and in the areas close to any of the woodworks, I used a sculpting tool.
When this had been applied, I waited an hour and then used a stiff thistled brush and then dampened and tapped down onto the ground to give it a rougher texture/appearance.
Its also worth pointing out, that the small wire lines at the front of each piece, were pre-laid out prior to adding the ground mix, and then once the mix was applied, the posts and wire were added in while all still wet – this meant the filler would essentially help hold it all in place.
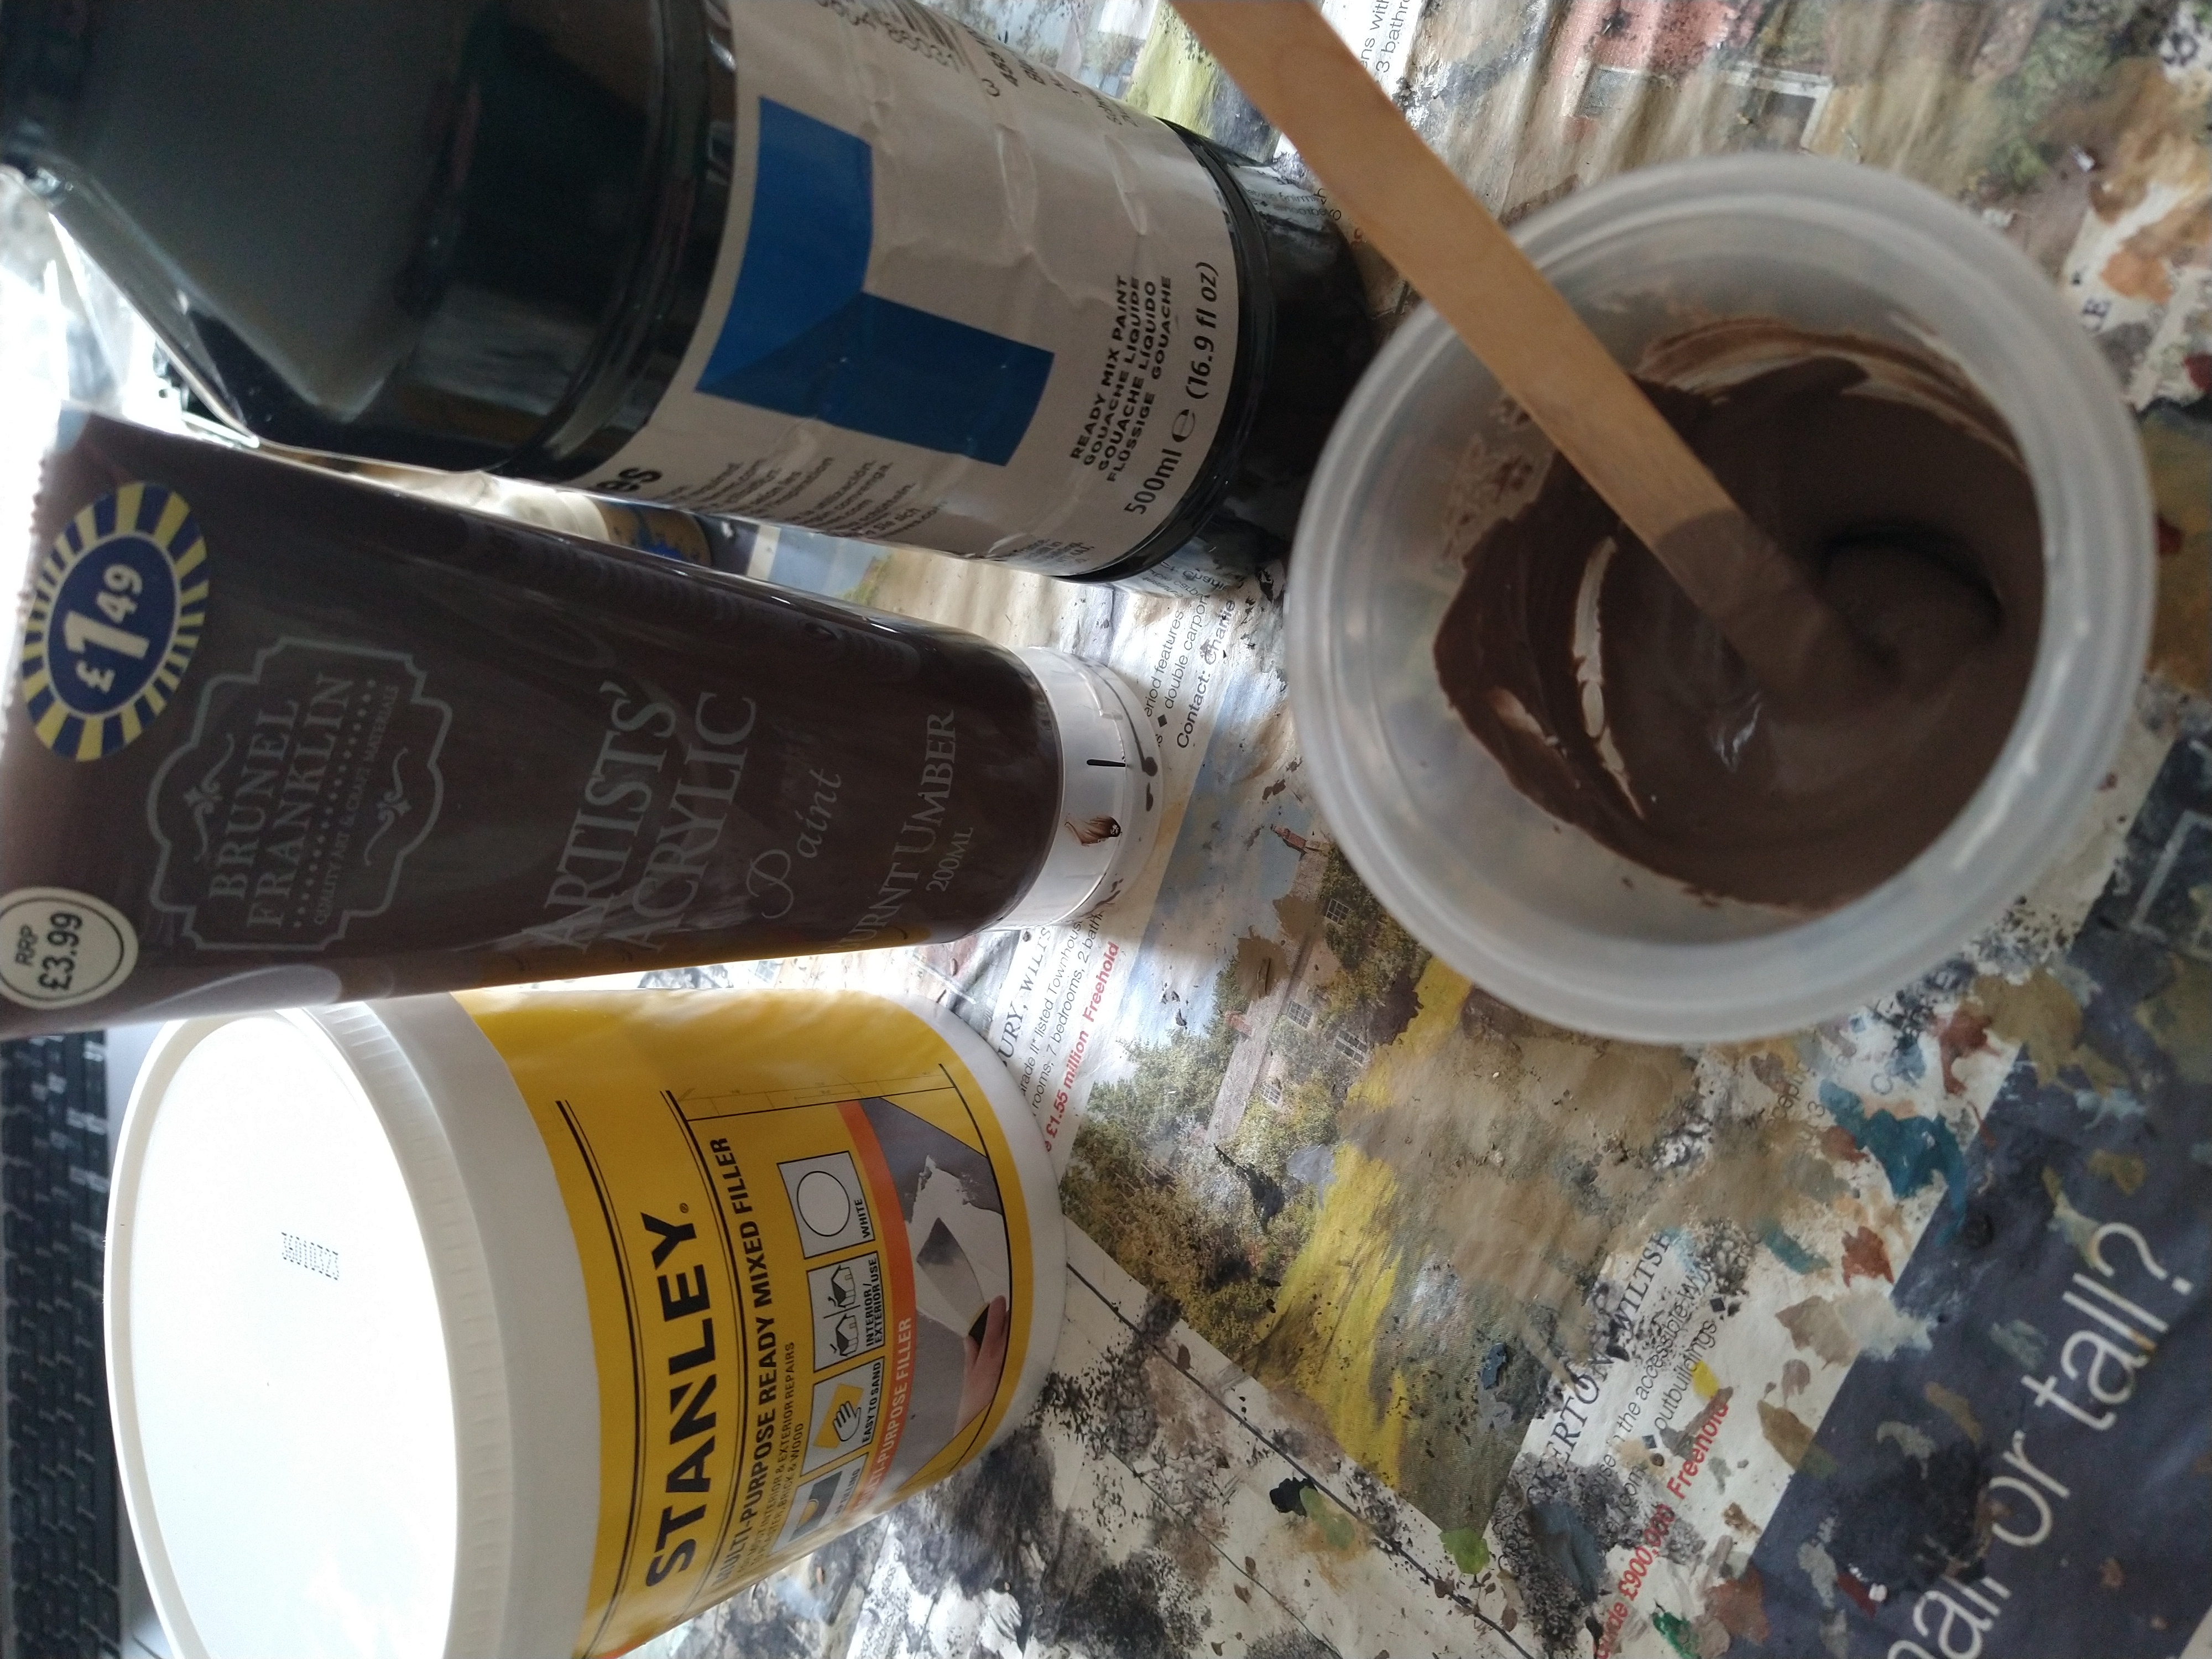
How its done .... ground texture
A Fairly straight forward process to create the ground texture.
Mix together ready mixed filler, Add in a small amount of black paint to turn the filler grey.
Then add in a small amount PVA glue
Mix in Brown paint and mix until the colour looks like a chocolate mousse colour/consistency.
Finally, I added in a pinch or two of fine sand.
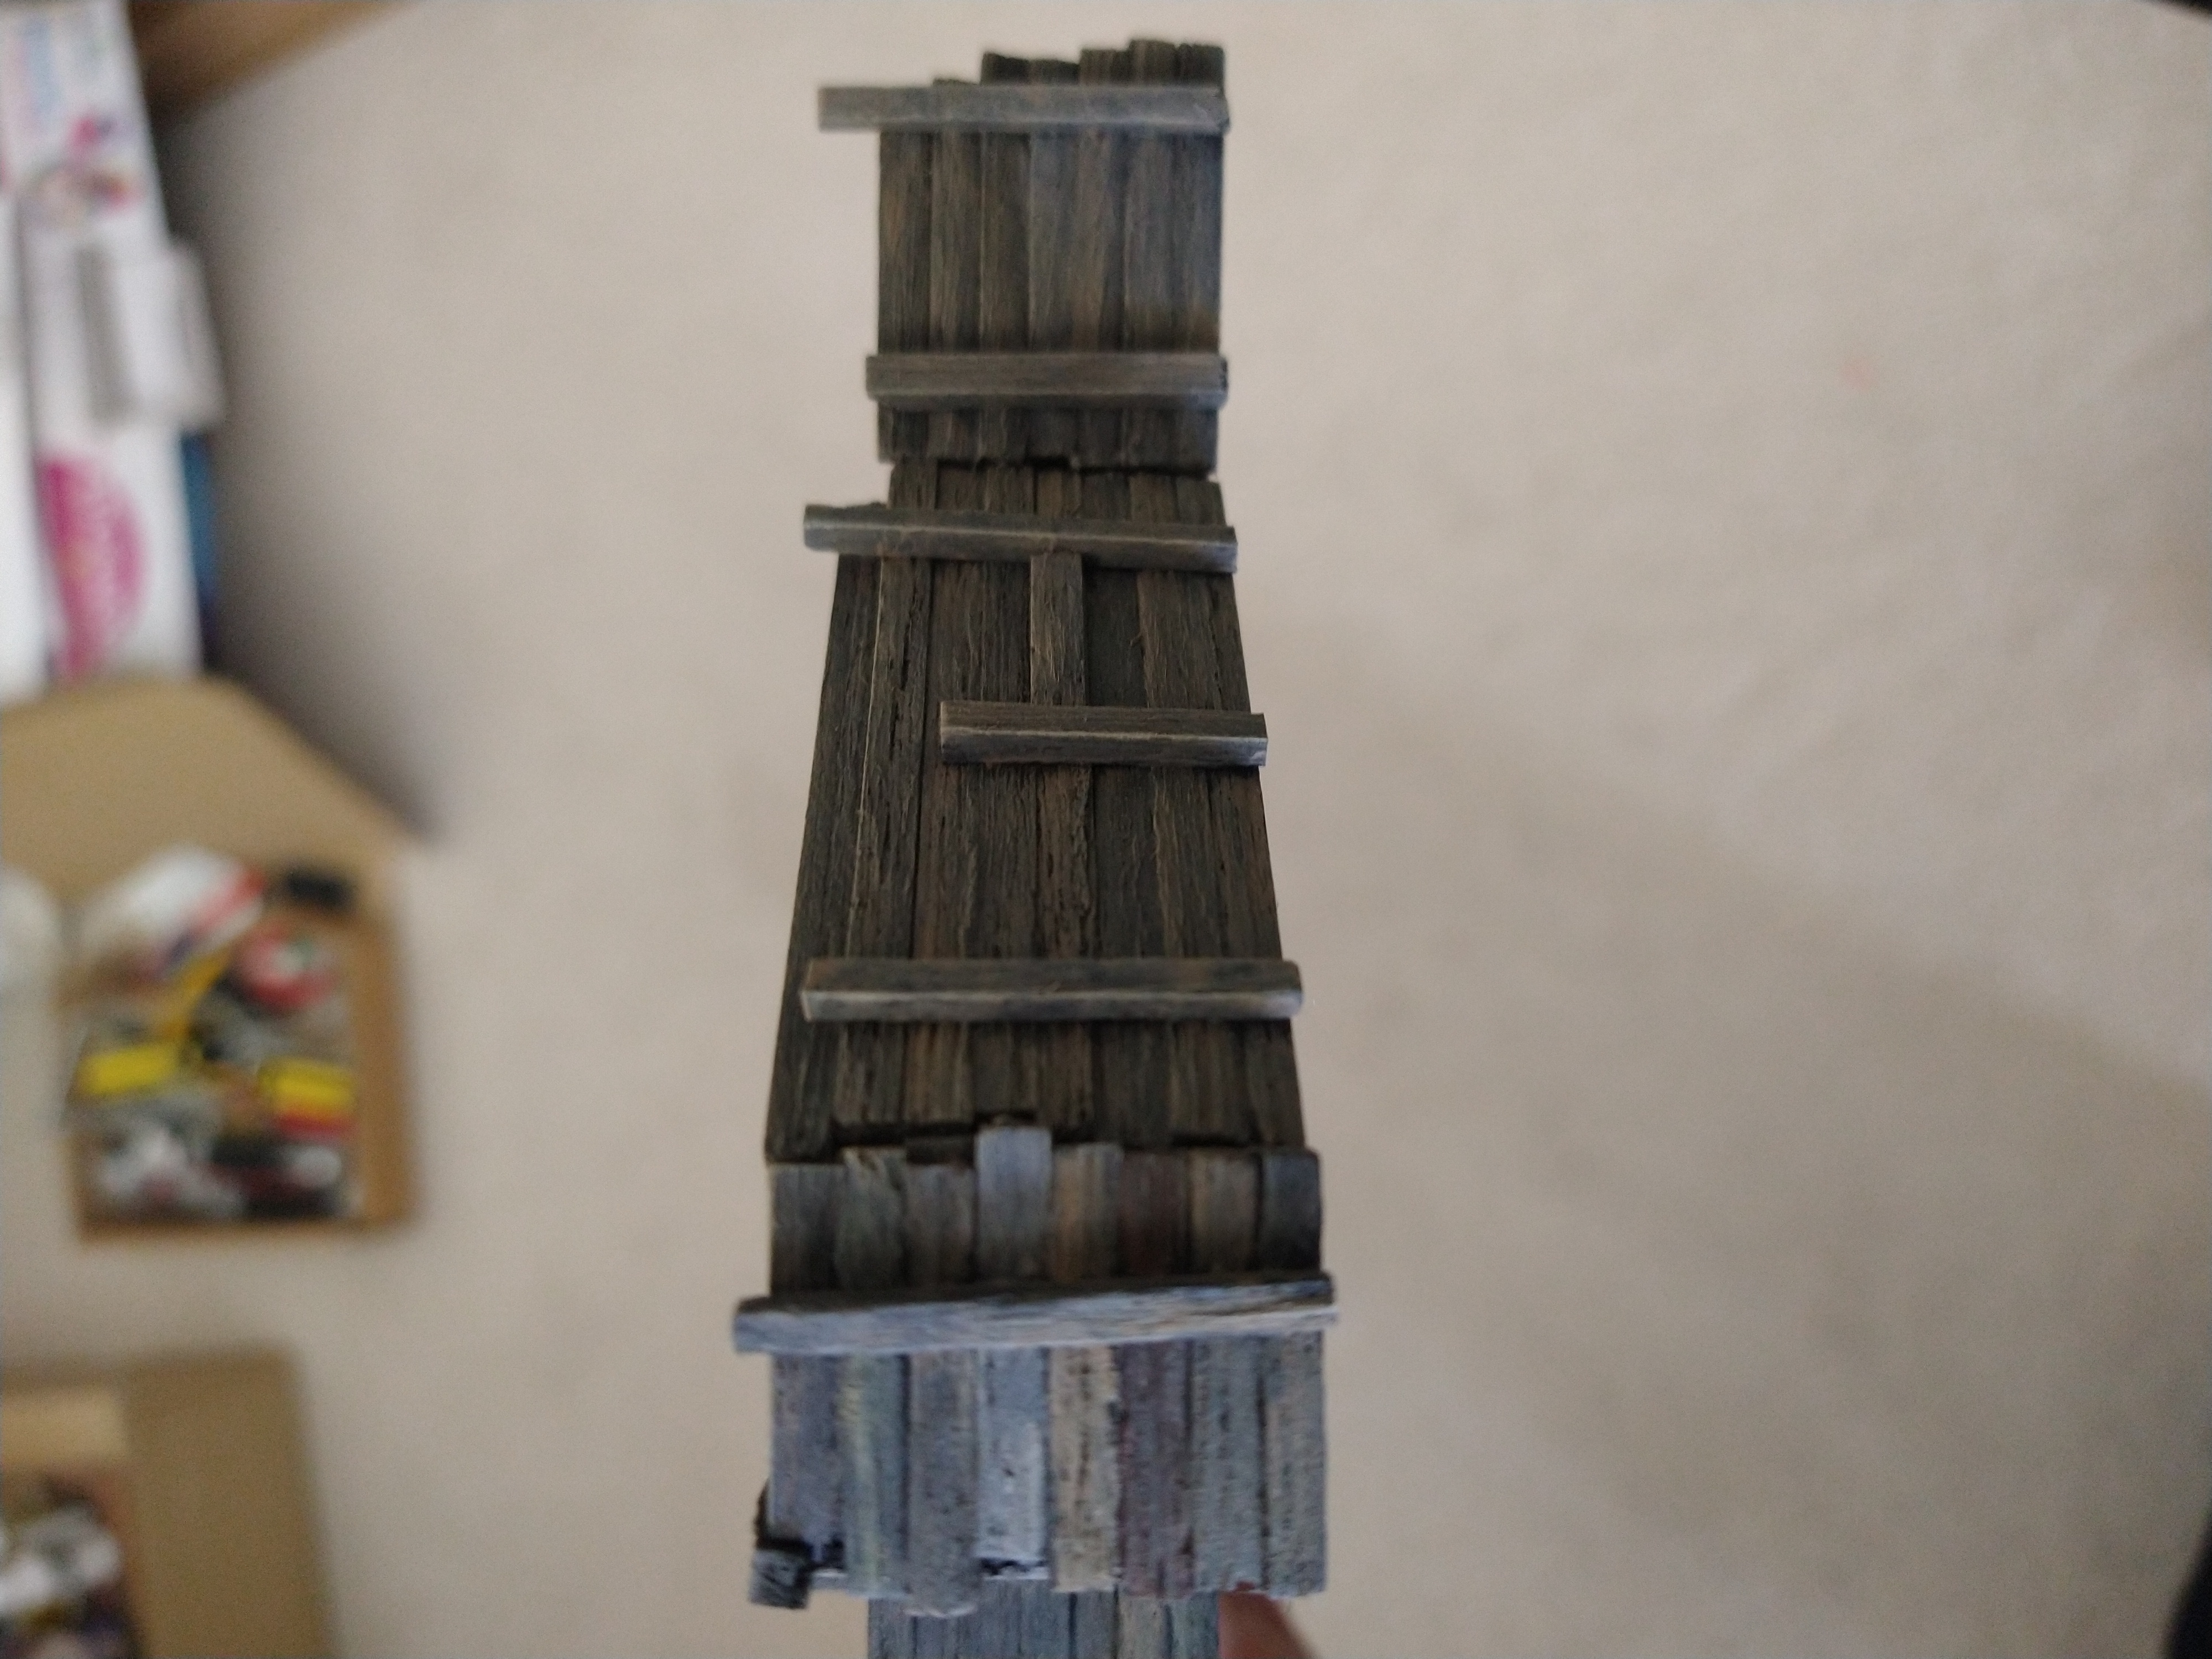
How its done .... Painting
And this is the rear section having followed the same process.
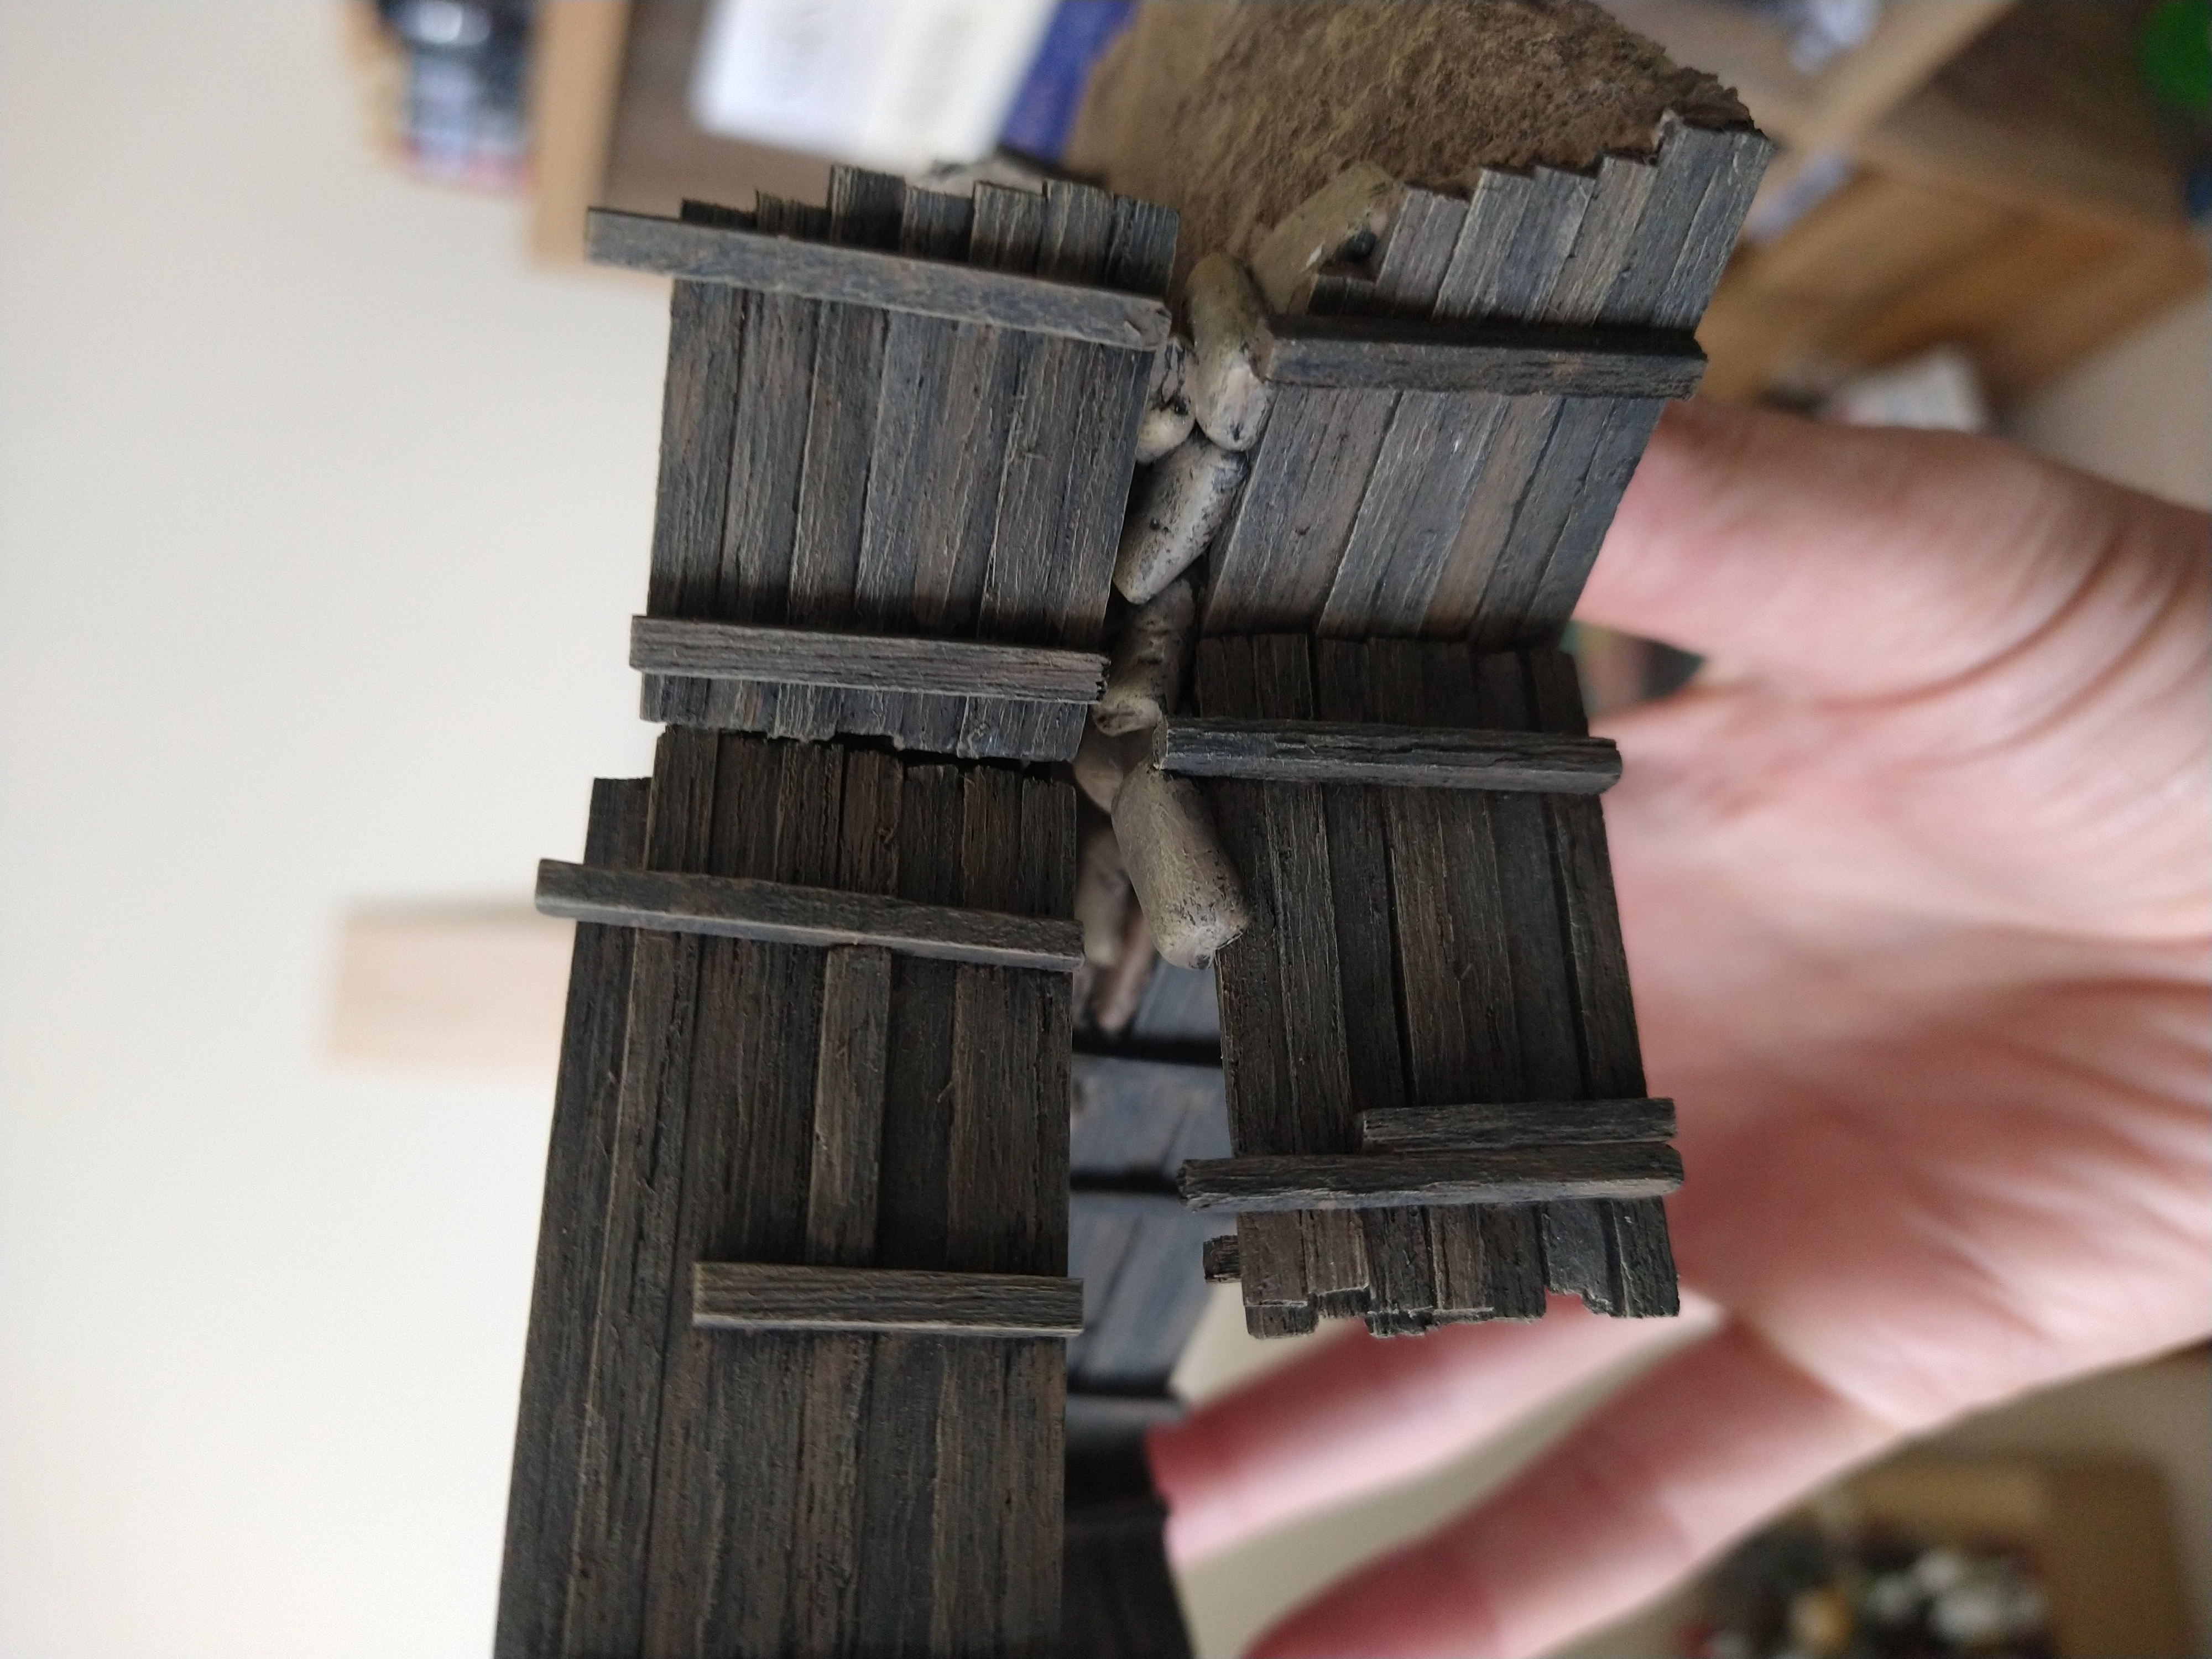
You can now see why part of the rear section was lower – as I wanted to represent a way into the trench system, and also added in a few randomly scattered duck boards.
This is also why, if you had noticed that the front wall was actually 8 planks high in the middle – to try and protect those heading into the trenches!
How its done .... painting
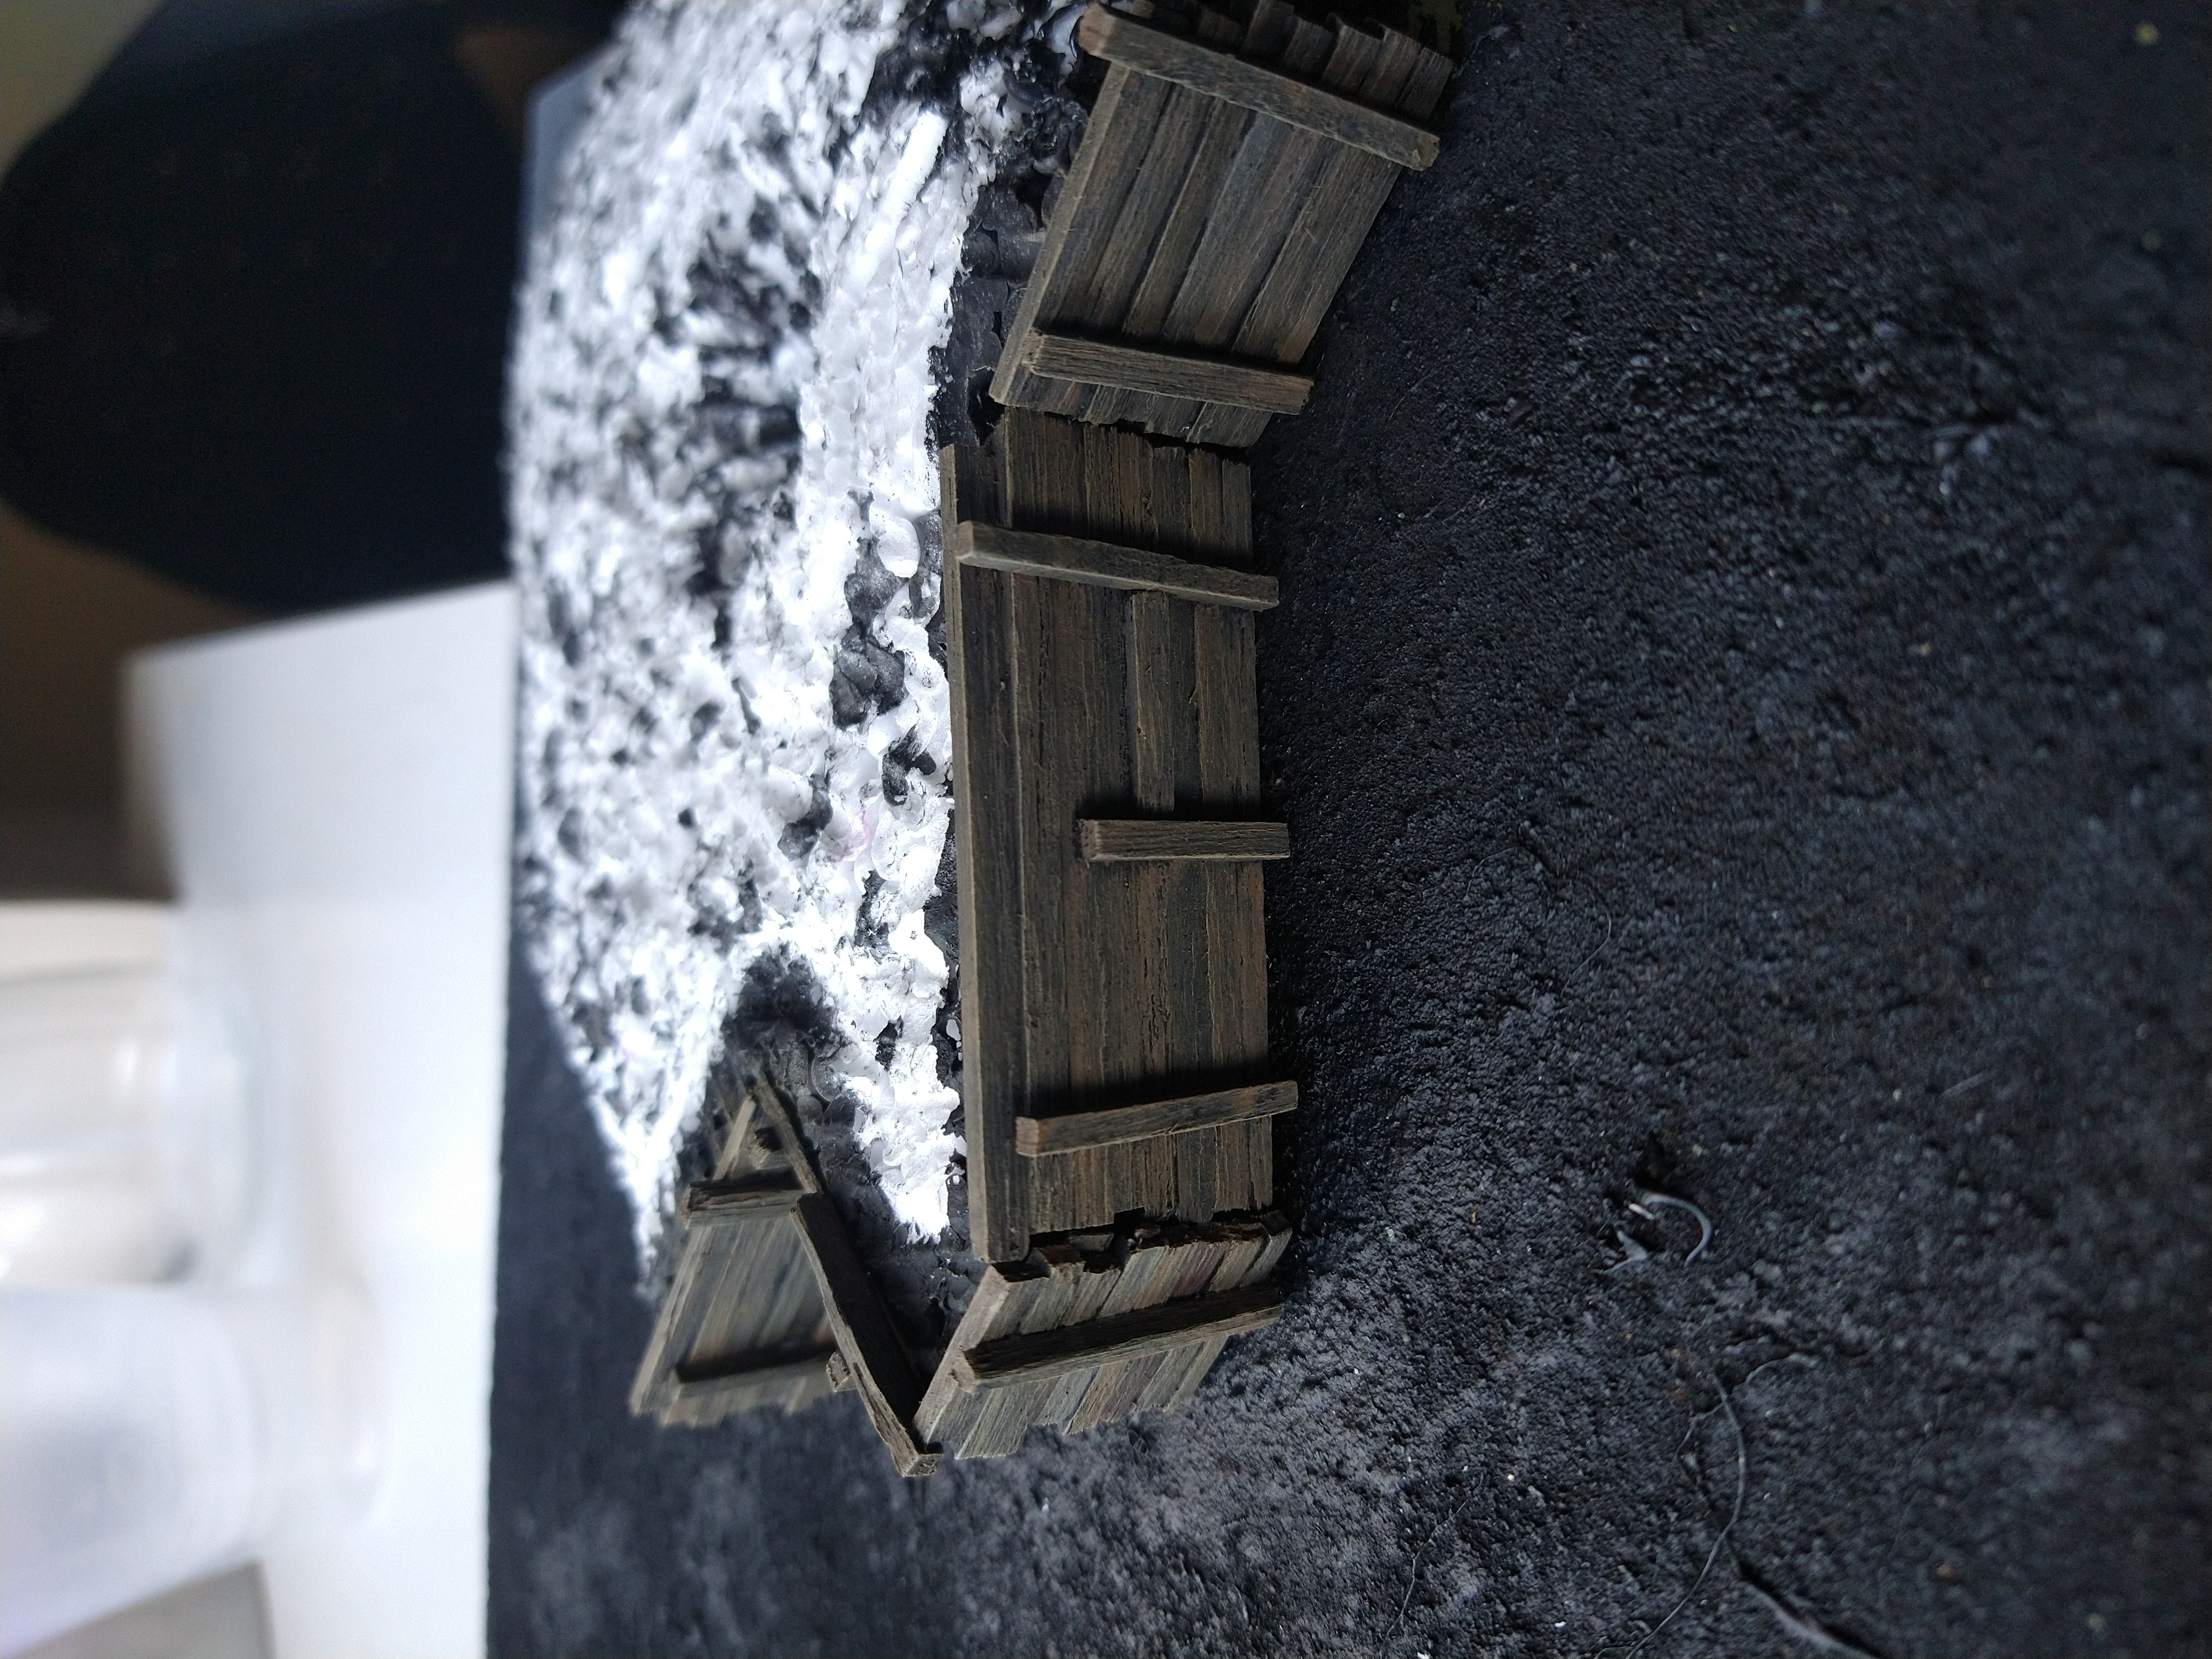
The front wood section finished, and shown next to the completed test piece.
Notice the ends of each sections are tapered in, this helps to get each section lined up a bit easier, as well as giving the option to use each section individually if required.

How its done .... painting
Once thats done, the wood is given a dry brush of Zandri Dust to tie everything in together.
You can see how the first few panels highlighted compare to the initial colour.