


![How To Paint Moonstone’s Nanny | Goblin King Games [7 Days Early Access]](https://images.beastsofwar.com/2024/12/3CU-Gobin-King-Games-Moonstone-Shades-Nanny-coverimage-225-127.jpg)


Spring Clean Challenge: If I build it – will they come


Recommendations: 320
About the Project
Last year the Spring Clean Challenge pushed me to DO something with my mountain of lead. But I still have a large “hill” left to do something with. So, I was wondering, as I have numerous “Skirmish” style rules and figures, perhaps a skirmish table might be the push I need to get THEM painted as well. I also recently acquired Mel the Terrain Tutor’s book and wanted to test out some of his ideas. So this is where we are this year. If I build the table, will the figures come to play? Let’s see how it goes.
Related Genre: General
Related Contest: Spring Clean Hobby Challenge (Old)
This Project is Completed
Planning: (what's that?)
Unfortunately, I’m not the most assiduous planner when it comes to gaming. I have always tended to just jump in and “go with the flow”. The results have not always been successful! This time I thought some planning might be a good idea. So I mapped out some basic “needs” for a Skirmish table.
It needs to be between 3×3 and 4×4 feet which encompasses most (if not all) Skirmish type gaming rules. For example I have models for “Cutlass”, “Rangers of Shadowdeep”; “Frostgrave”; Ronin”; “Test of Honour”; “IHMN”; “Bolt Action” (for smaller enganements); “Sharp Practice”; “Pikeman’s Lament”; “SAGA” – you get the picture! But hardly any of these are painted up so time to get it done.
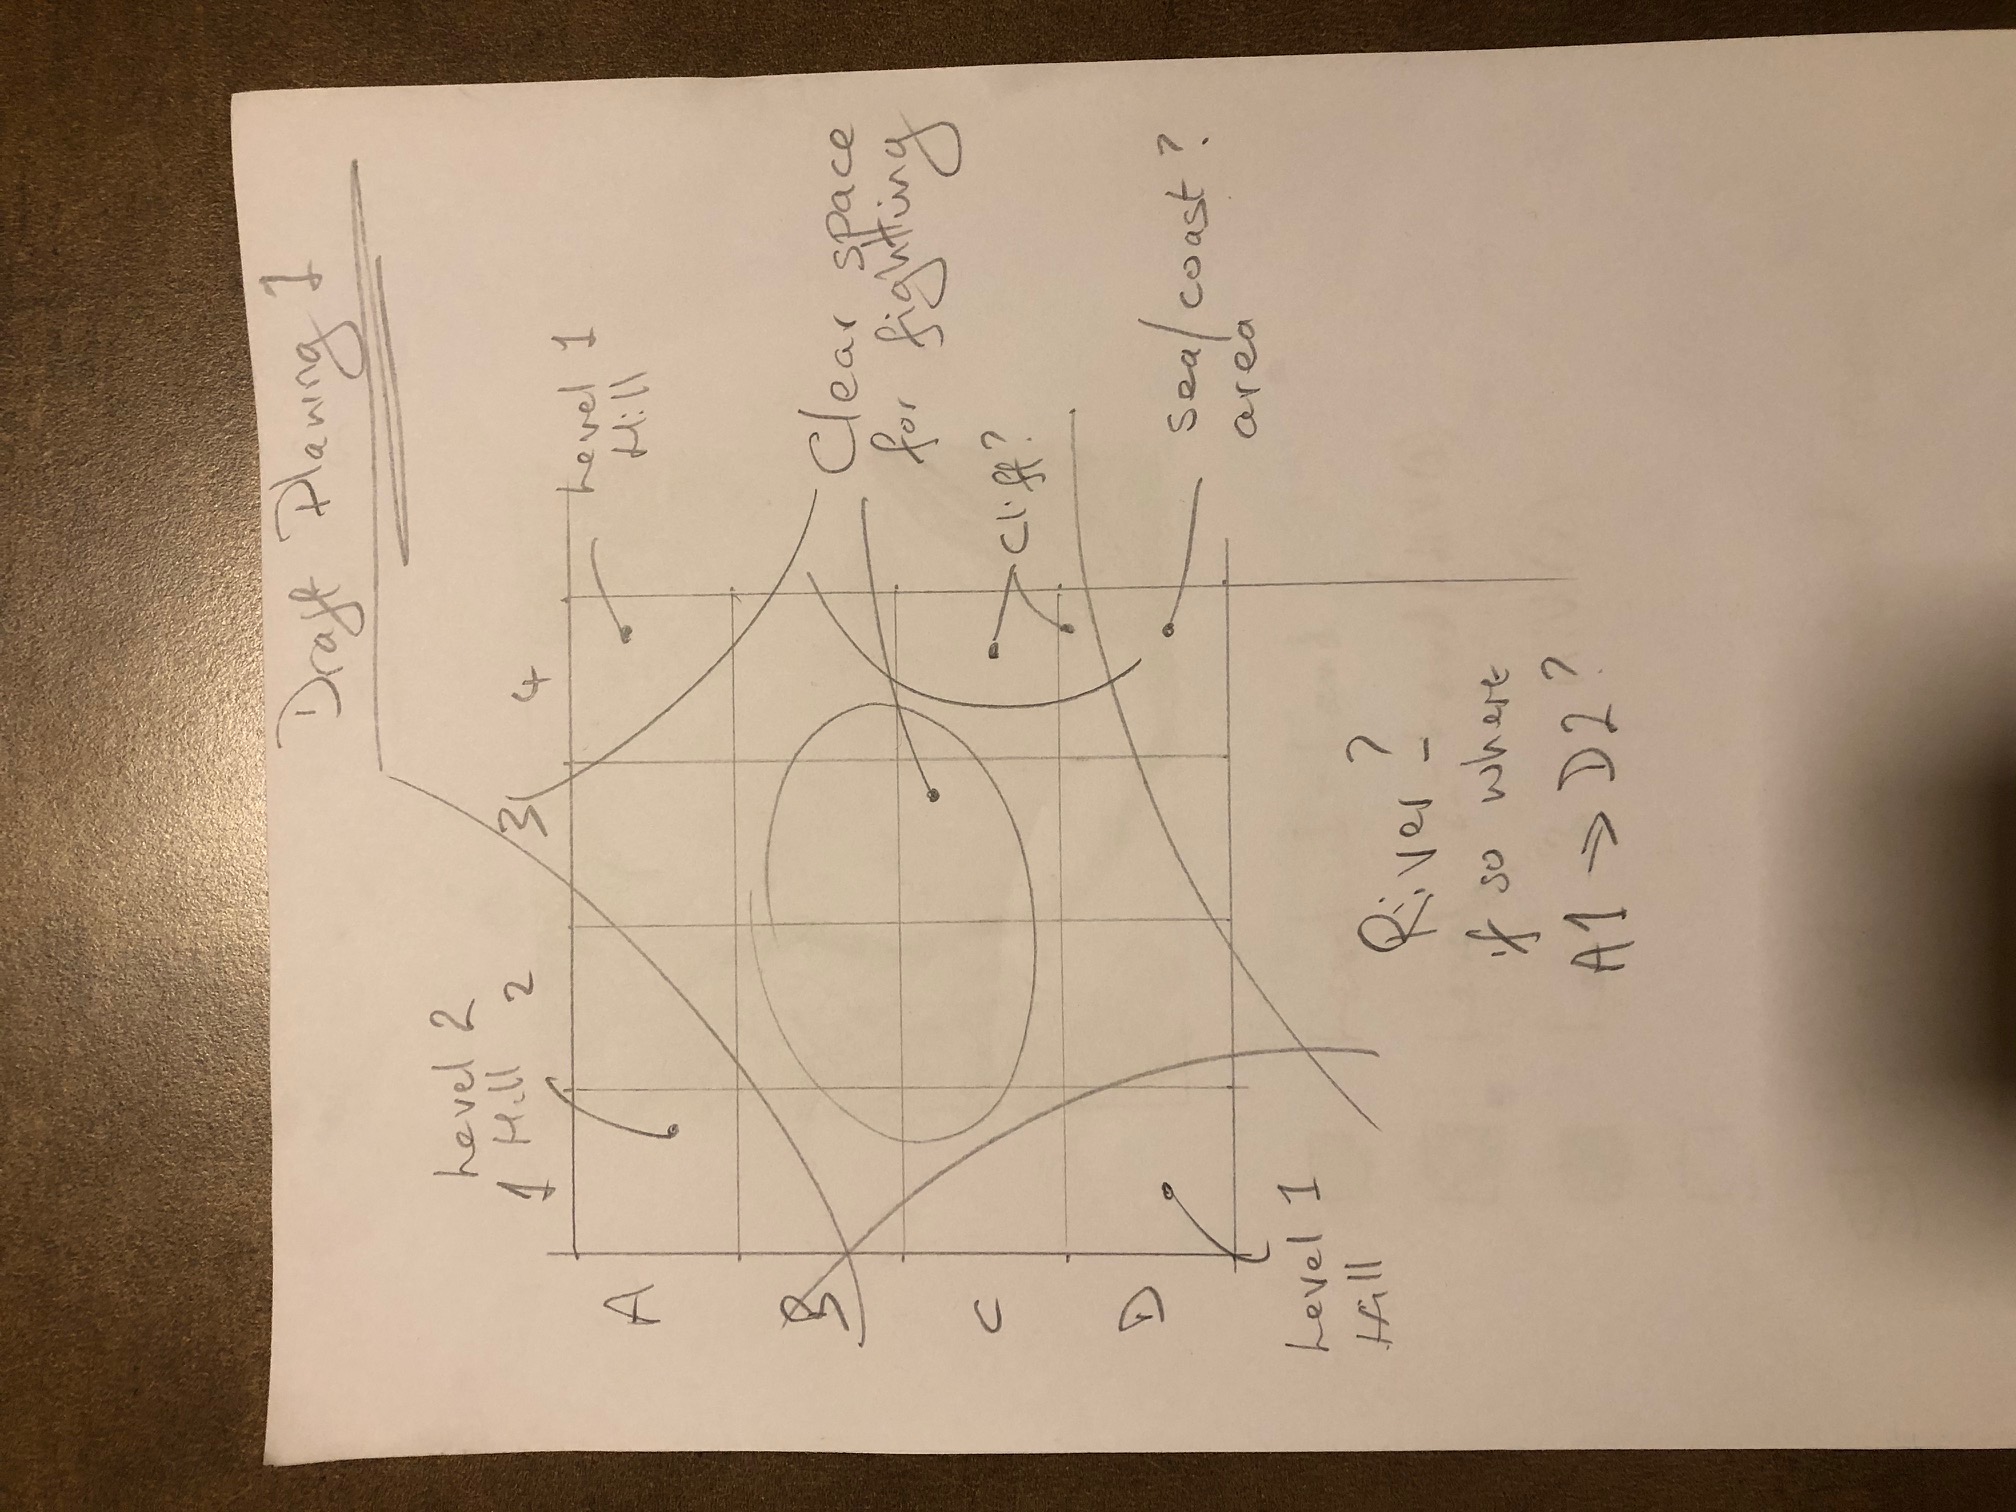 Initial thoughts on the table spaces
I need a reasonable open space for most of the fights. Then I also want some higher ground, but NOT dramatic heights. (I had in mind also using the table for small scale battles, e.g. 10mm/6mm). But, some hills to add texture and variety.
What about water? This is more of an issue to think about. I like the idea of some beach/sea front, but not one that dominates the space, and it would be some opportunity to texture a cliff. What about a river? Remembering this will be a permanent table, so maybe yes, maybe no. More thinking necessary.
Next entry will take the planning/thinking stage a bit further.
Best wishes to all other SCC projects
Planning continued
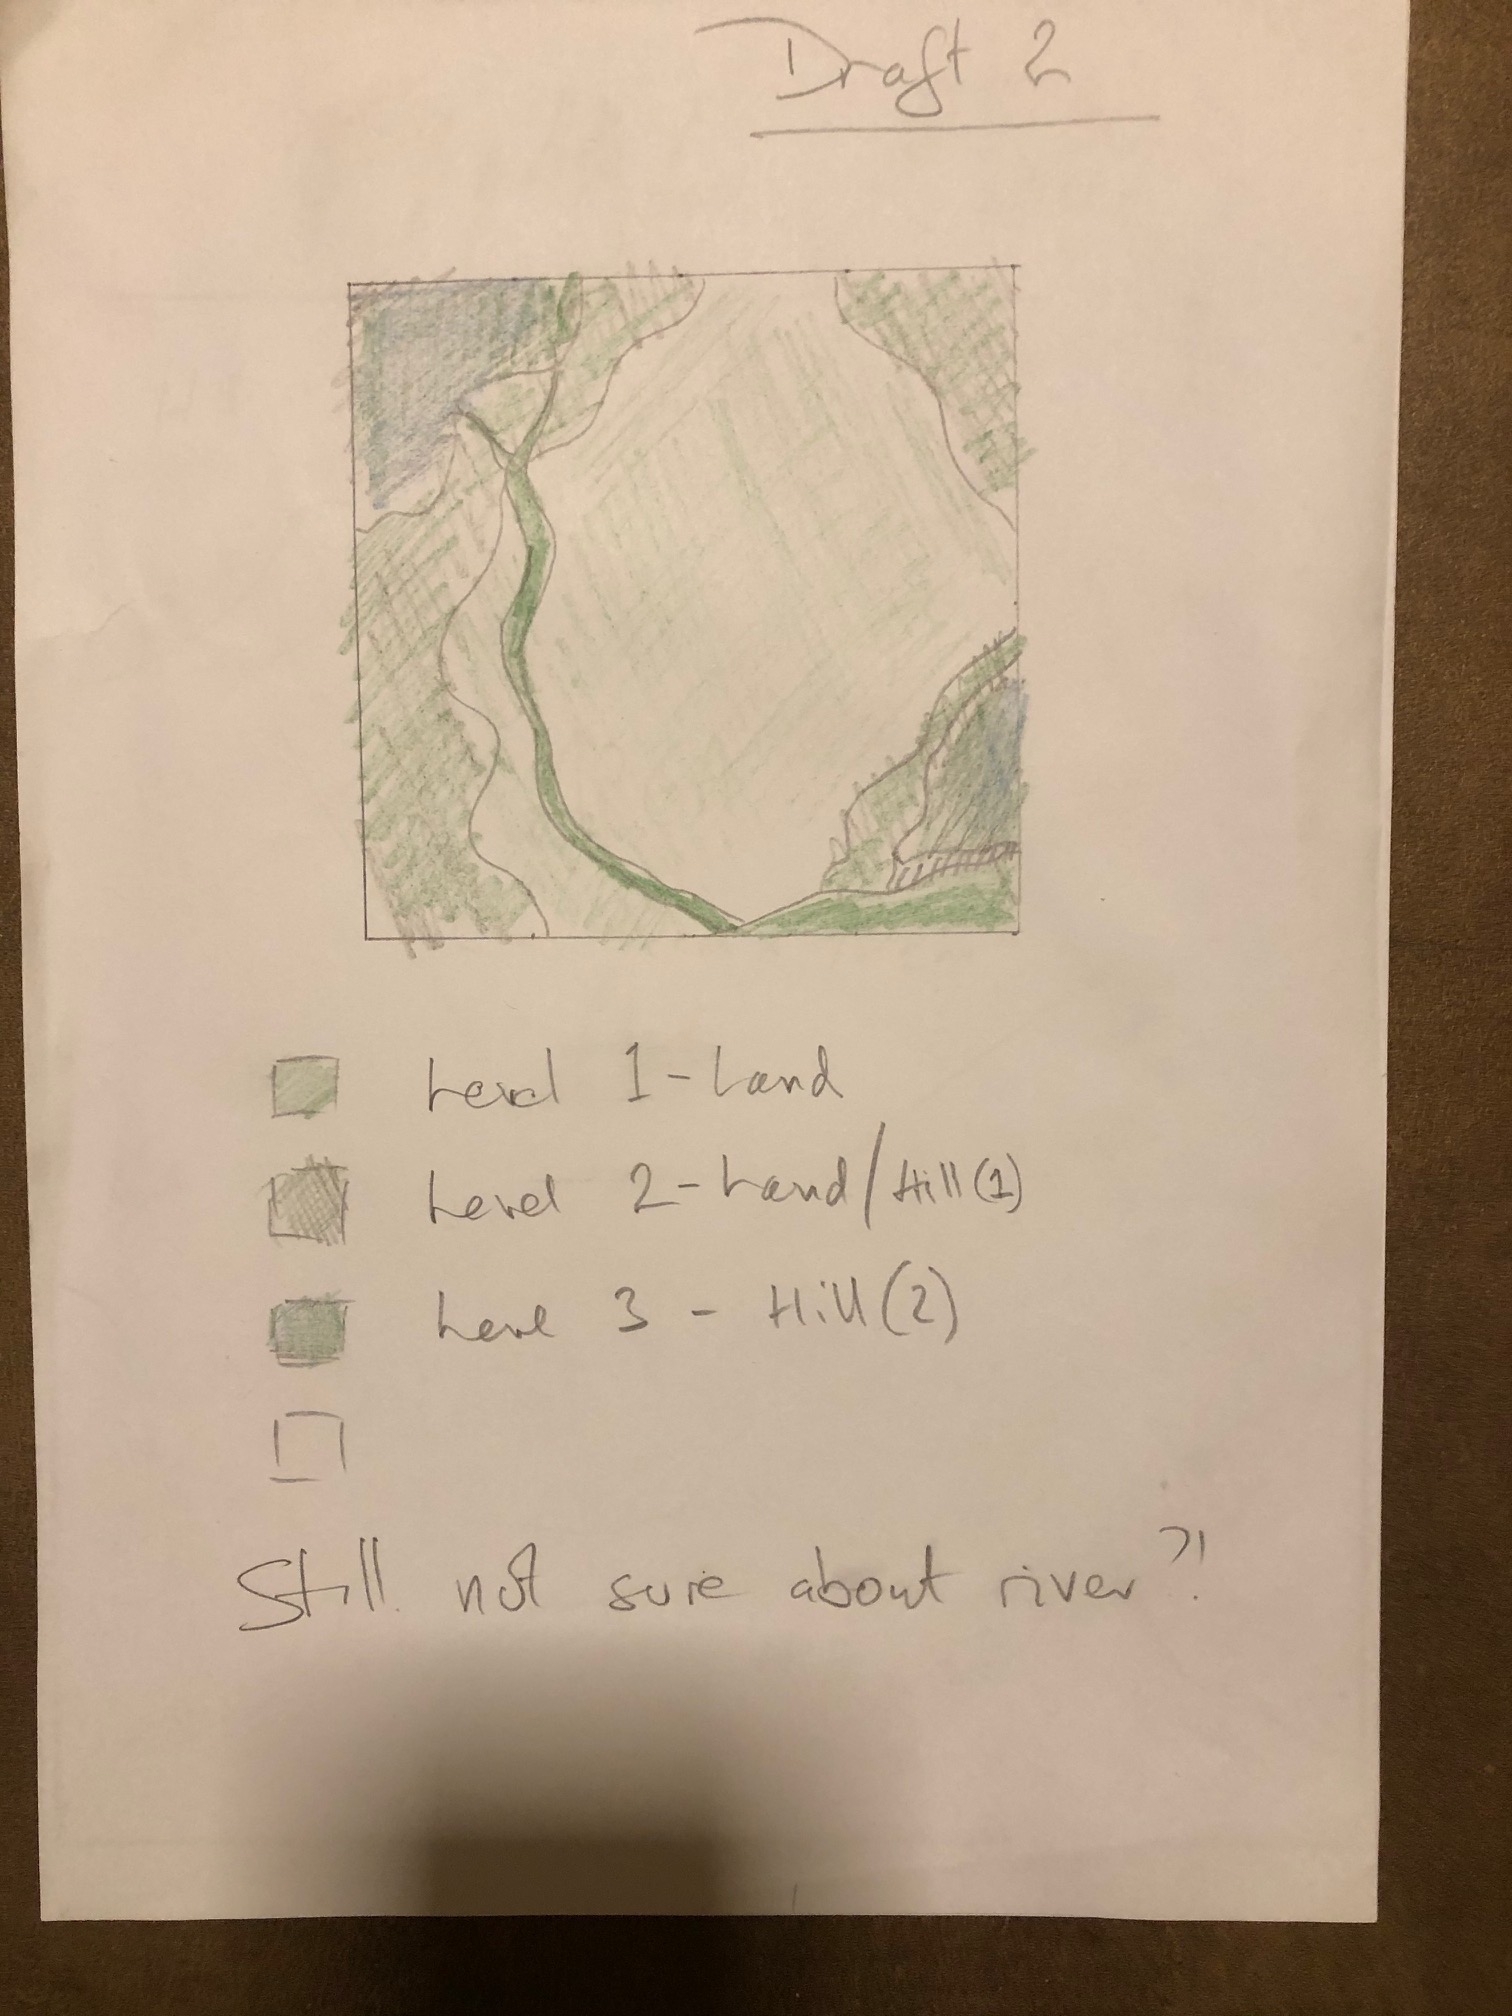
The following pictures show the development of my thinking on what the space should be and the benefit, or otherwise, of permanent features, such as rivers, sea, lakes etc. As I want to be able to use the table for a variety of games and periods and scales, having less specific geographical features is probably a necessity.
That said, I will still plan to have the hills quite gently is slope so that they are not difficult terrain but rather simply the natural lie of the land. This was smaller scales, say 10mm can still be used without them becoming a mountain range.
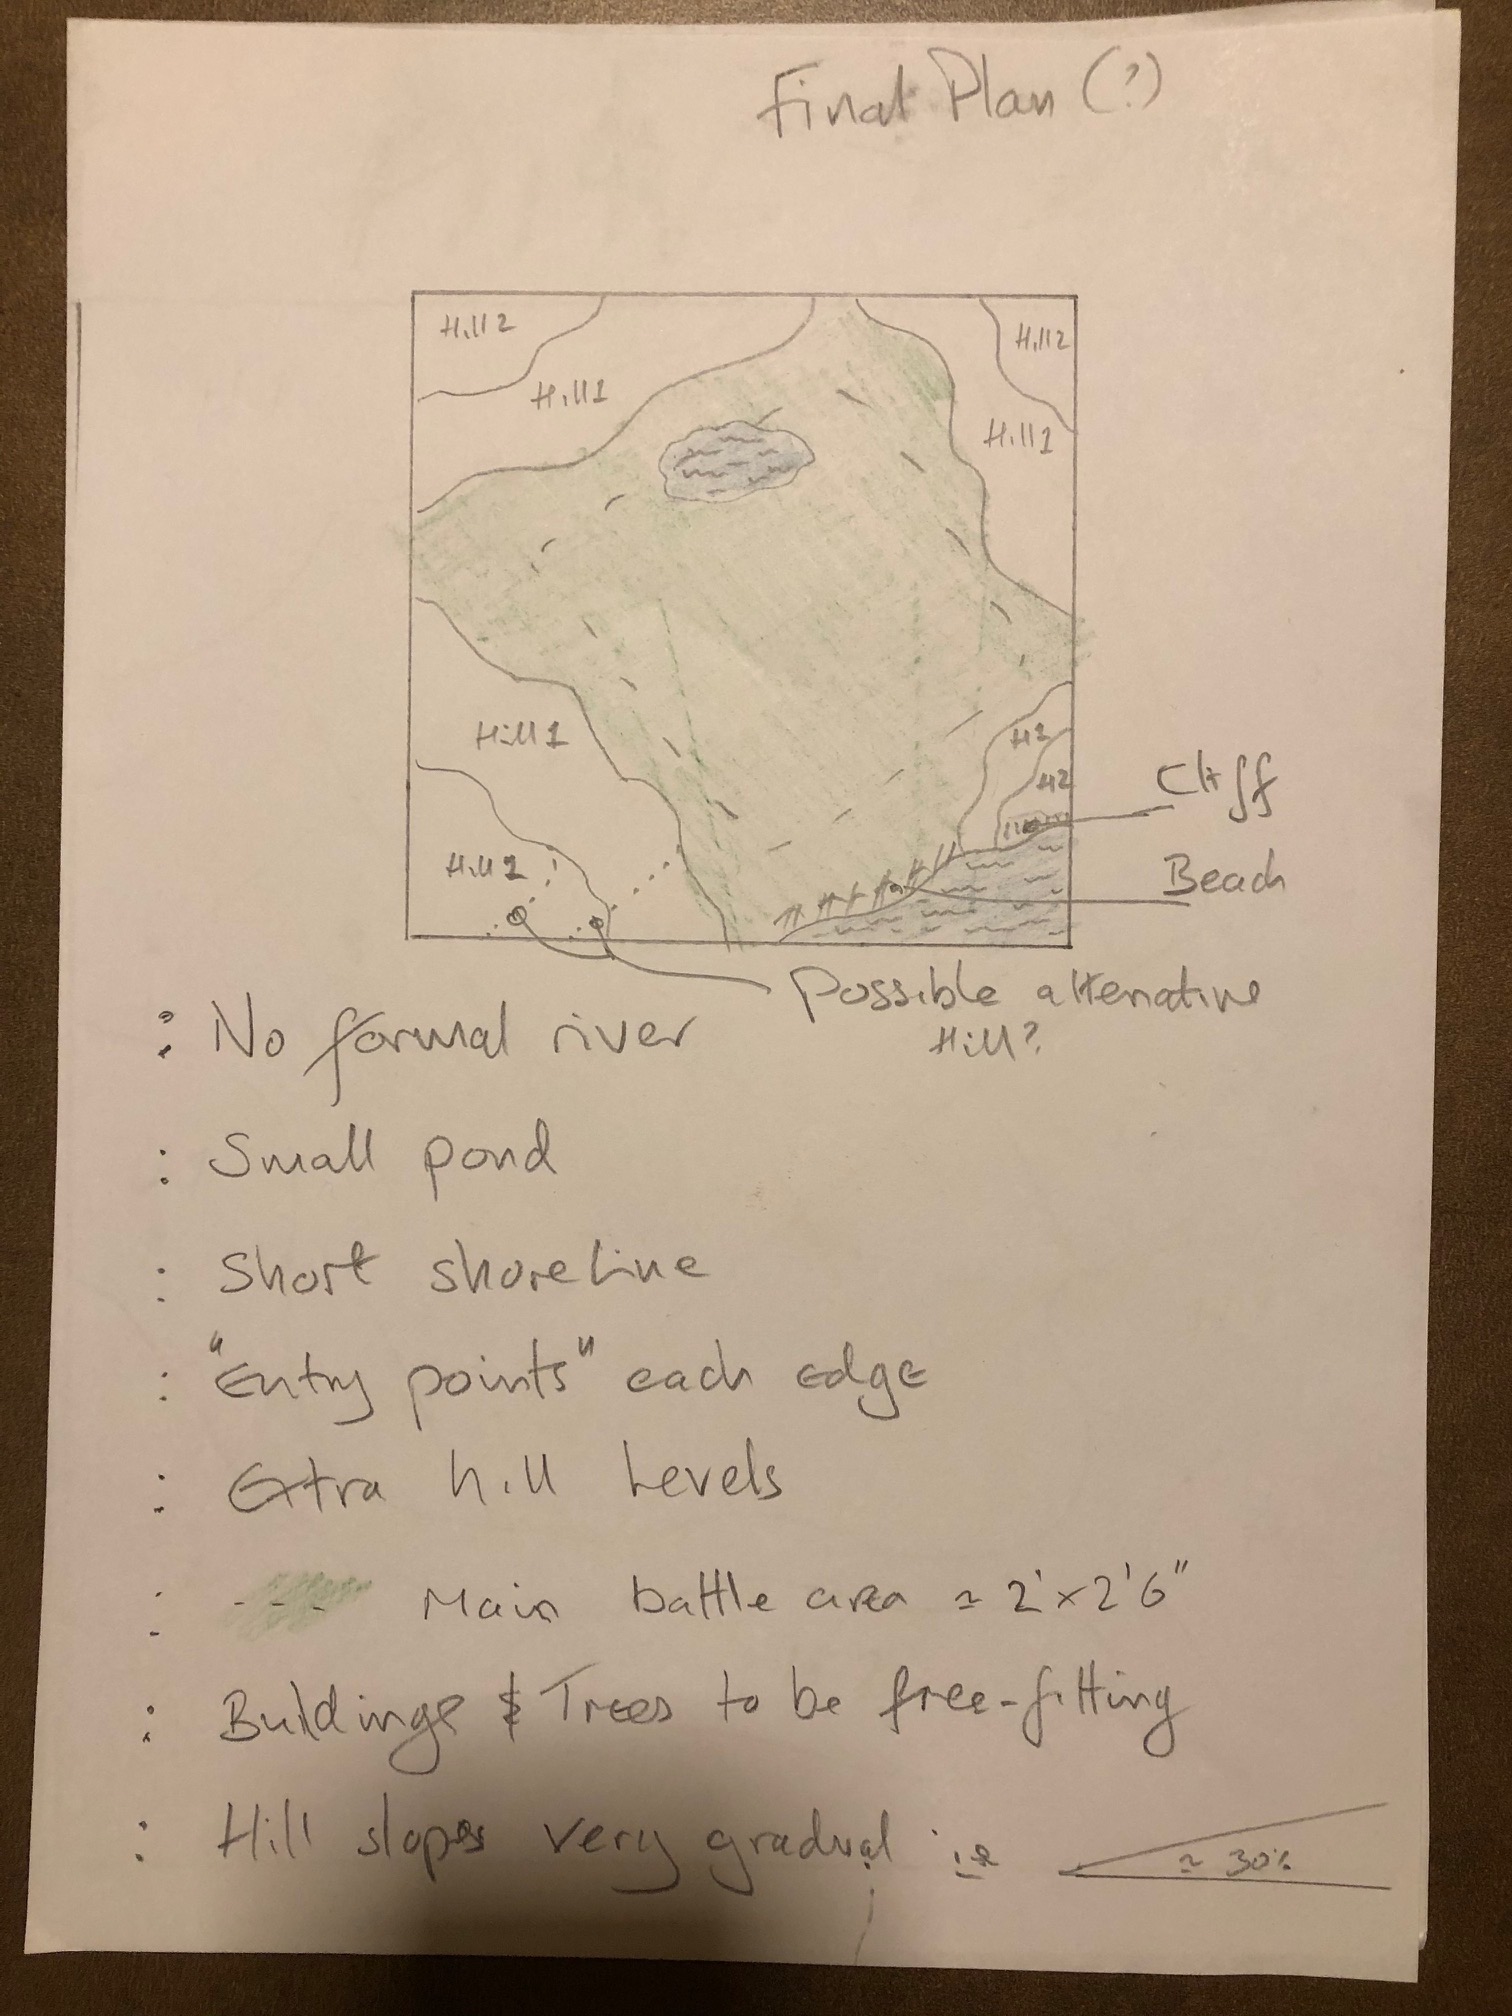

The final picture, amusingly tabled Final (Ho Ho) is probably where I will end up. I have decided that the sea / beach front isn’t really necessary, or indeed useful, and maximizing the flatter area will be more useful for the range of games I want to play on this table.
Also, it occurred to me that this would still permit an “add-on” table (perhaps only half the size) which could feature water, mountains, fortresses, whatever, without taking anything from the core concept of a Skirmish Board.
So, something close to the final picture is the direction I’ll go in.
Wargamers: We have a Problem
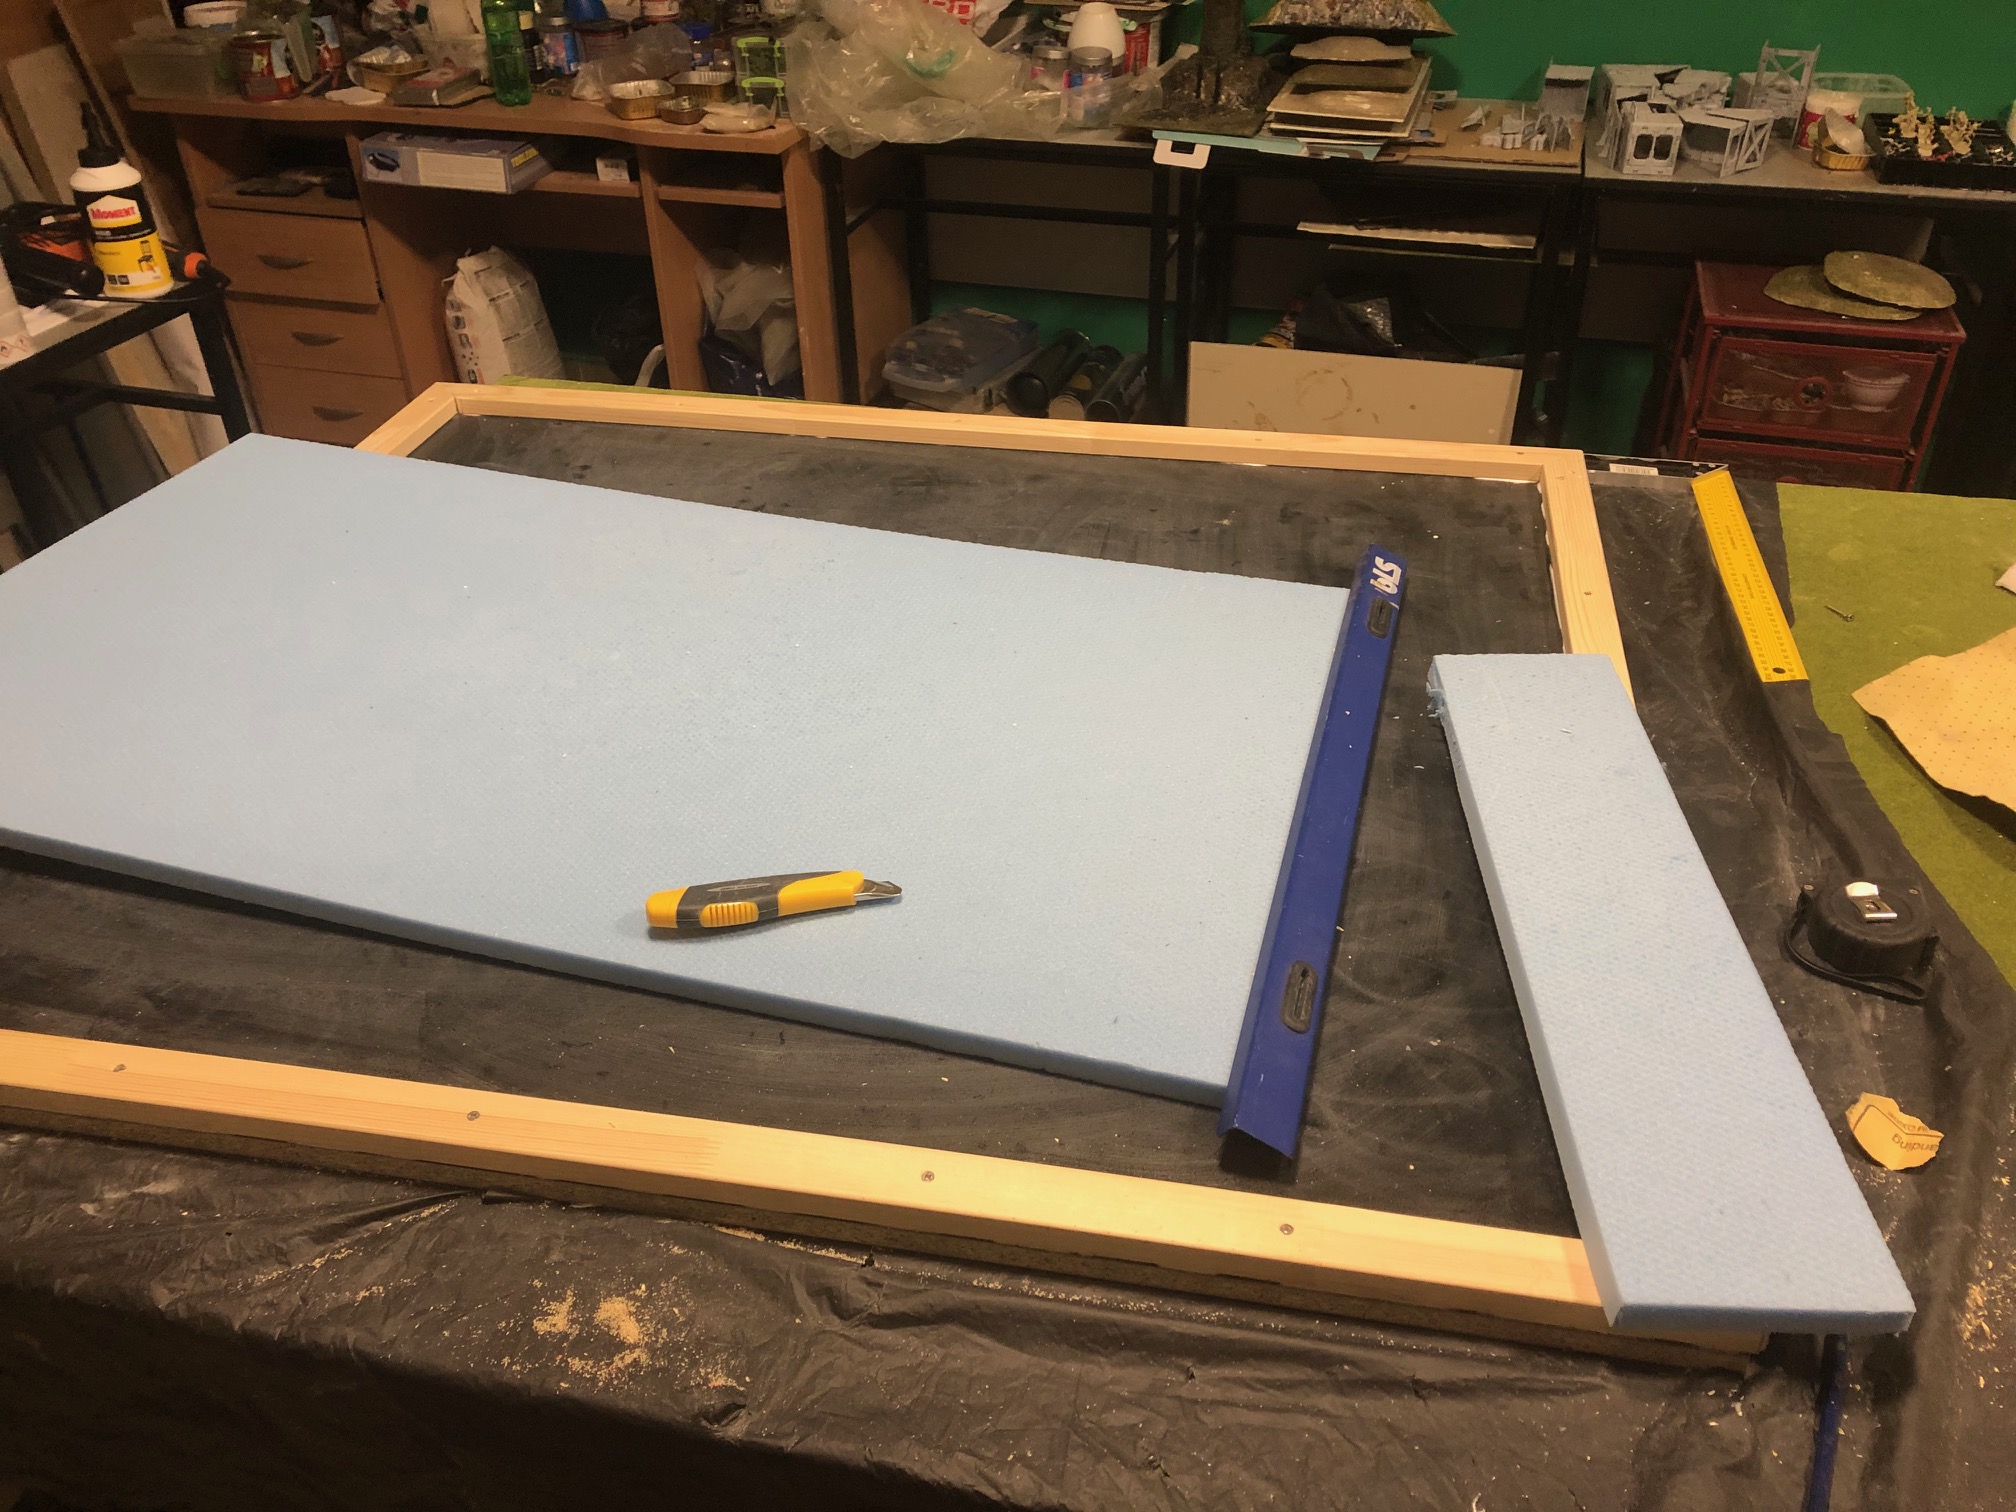
Well, perhaps “problem” is overdoing it. But where I am living (North Macedonia) there are no such things as wargame or hobby shops, or for that matter decent DIY outlets, so everything is either home-made or a comprmise. In this case, obtaining MDF is almost impossible, so the problem I had was thinking what to make the baseboard from.
In the end I decided to cut down a large sheet of “chip board” type panneling that I had intended to use for shelving. I think this will make the board heavier than ideal, but it serves a purpose.
The second issue was what to use as the building material for hills etc. In the UK I think I’d go straighht to the cladding material – usually blue or pink – which is a condensed kind of polystyrene. Here there is plenty of the white stuff commonly used in packaging, but I did manage to find something that approximates the denser cladding.
Wood strips are more easy to find but getting one of the right thikness to match the cladding took longer than planned! But in the end I managed to get something to do the job. Wood glue, srews etc. are common place, fortunately. So, here’s where we are with raw materials.

Construction will be the usual method which can be found all over wargame websites online/video etc. Batons put on each side of the wood base to make a secure framework– I will glue and screw these down; then cut and glue the cladding into the recess formed by the batons. I’ll use wood glue and weigh down the cladding and allow to set overnight – maybe longer.
As for the final look of the table, the geophysical layout etc. that’s still a bit up in the air, but I’ll certainly not have water as a permanent feature on the table. I’ll have to think through what I do about that a bit more.
Next update should see some progress on the construction.
Time to construct the frame
The construction of the table will be a simple one. Measure twice and cut once is an important principle, which I rediscovered after my first saw cut! I think I’m getting less intelligent as I grow older.
Essentially, cut wooden strips for each side, glue and screw these onto the board and “voila!” you have a frame. In this case as I was using a laminated chip-board base, I first sanded the surface with rough grade sandpaper to give a key to the PvA glue hopefully provide a more secure surface. I also resolved my issue with water / beach as it occurred to me that I had an “off-cut” of wood panelling from. original piece, and so pressed it into service as an additional area on which to make my beach and cliff face!
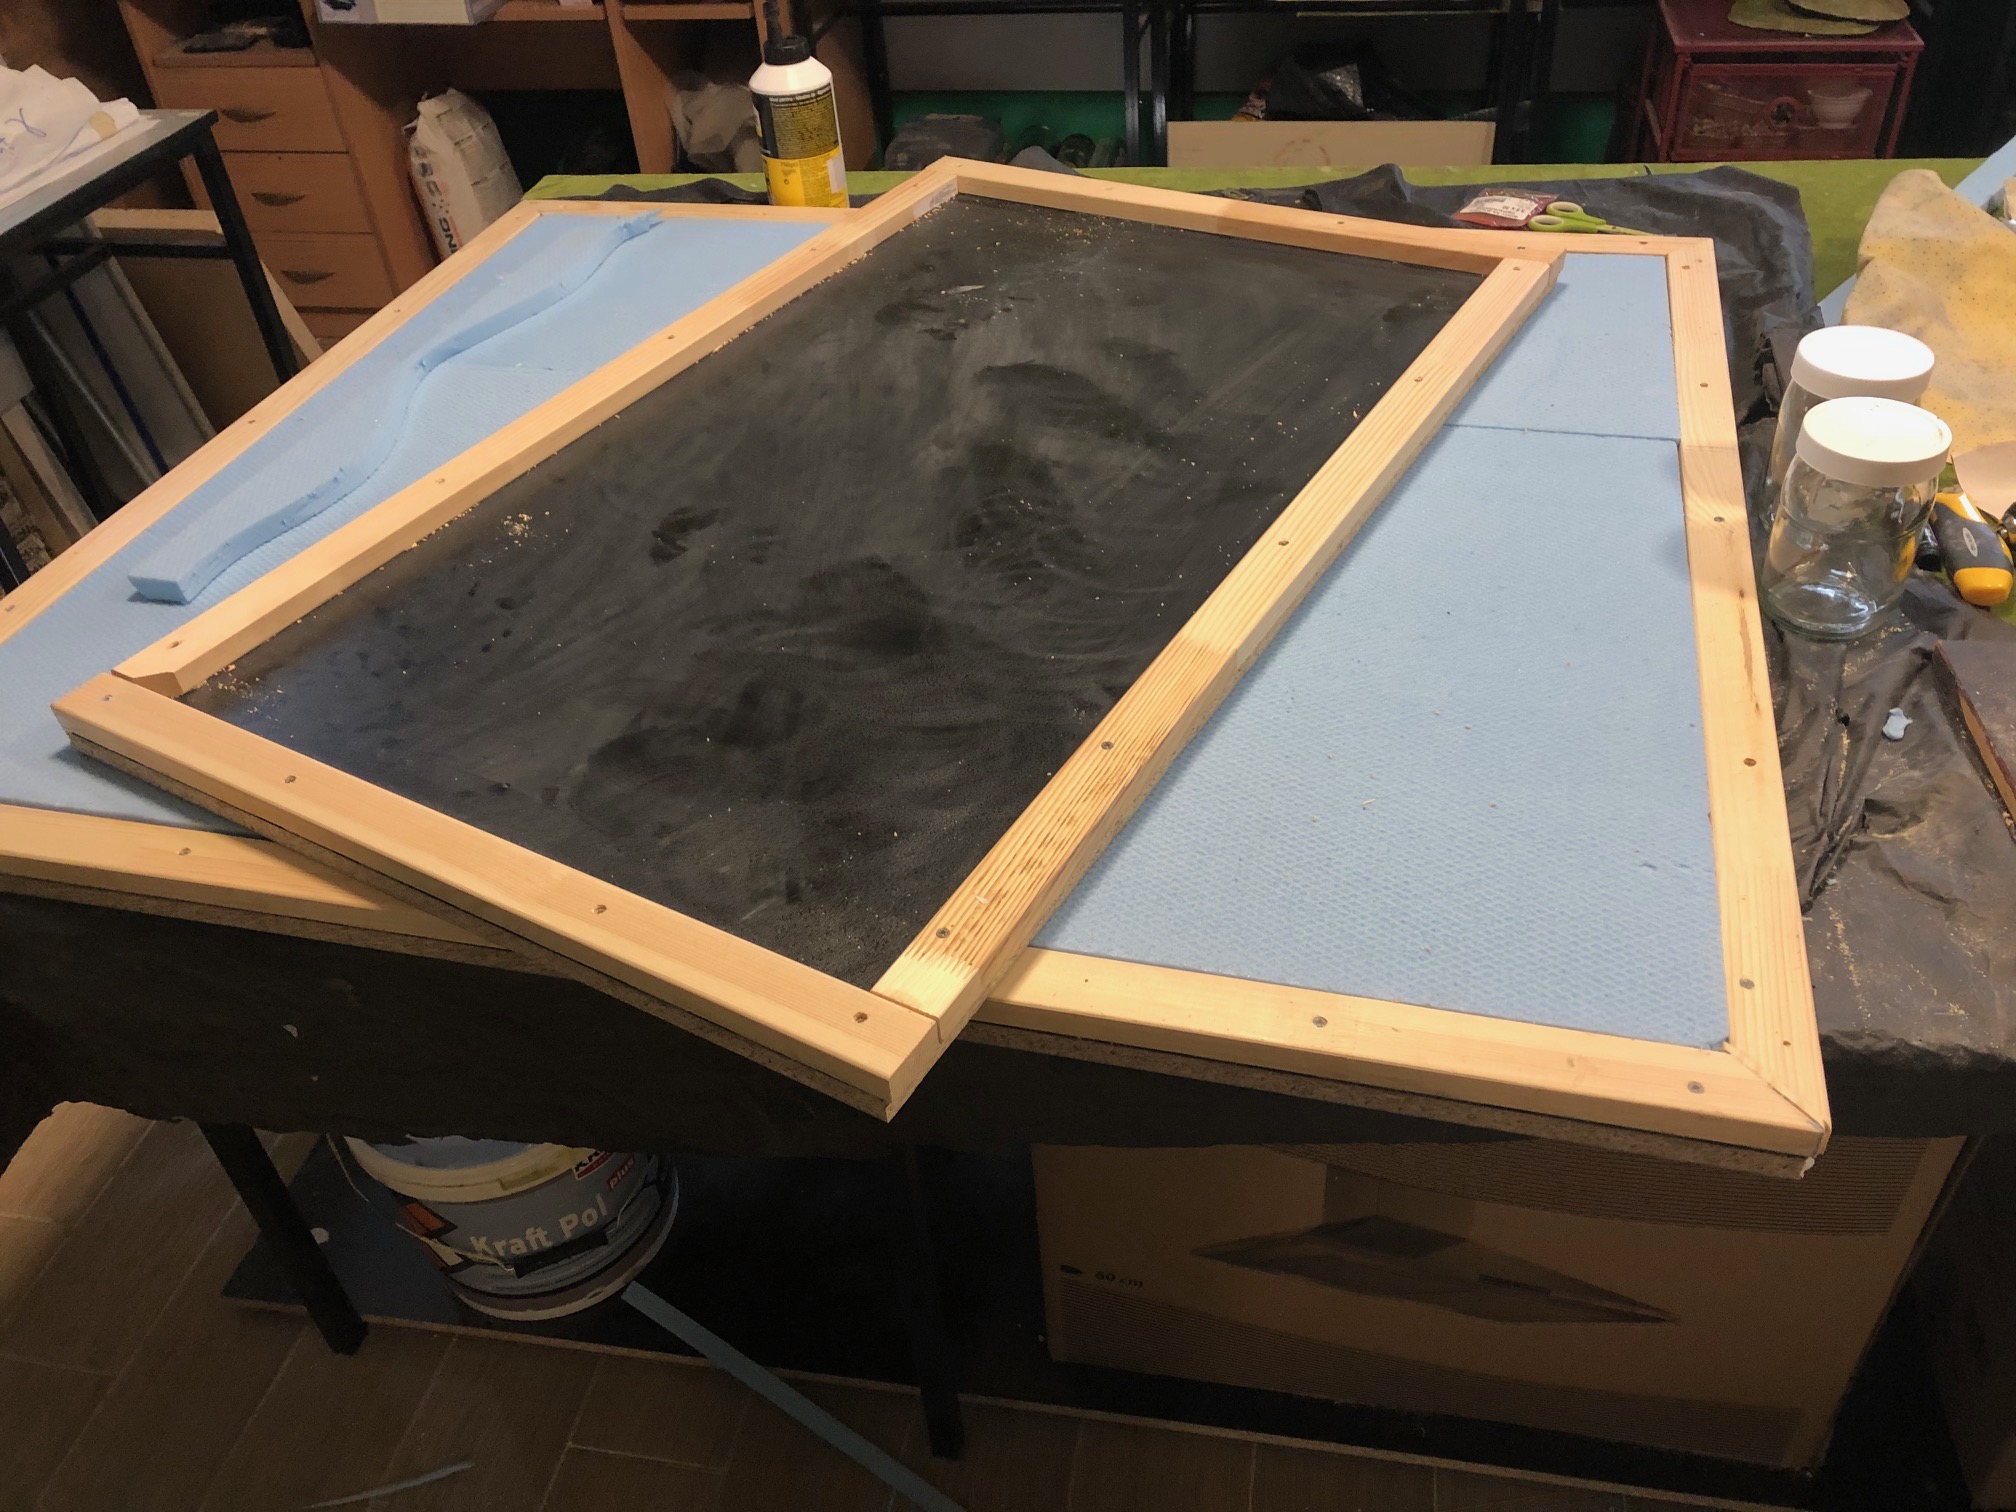

So in the first picture there is the basic frame for the skirmish table. It is almost square (actually about 120 x 103 cm) and gives a realistic fighting area of 2×2 or 3×3 for most skirmish wargame rules.
the second picture shows the original table with the blue foam glued down and the supplementary “beach” table and its frame in place. This will eventually be prepared to match either of the shorter sides of the original table and I am considering using small magnets to help in securing it in place during game play.
The final picture is the ‘beach’ table with blue and white poly in situ and glued. The books provide the weight to keep the poly in place while the glue dries.
Now I have to wait until the next step, which is the building of the geographical features of the table
Landscaping Part 1
With the base board completed and dry, it’s time to start making the land!
Before committing to the final shape or the landform, the “blank” sheets were cut to general size as shown in the picture, and two sheets cover the majority of the board. As I will have “entry points” on each side anyway, as they are slightly short of matching fully, this is not a problem.
 Board with sheets in place to check for size etc.
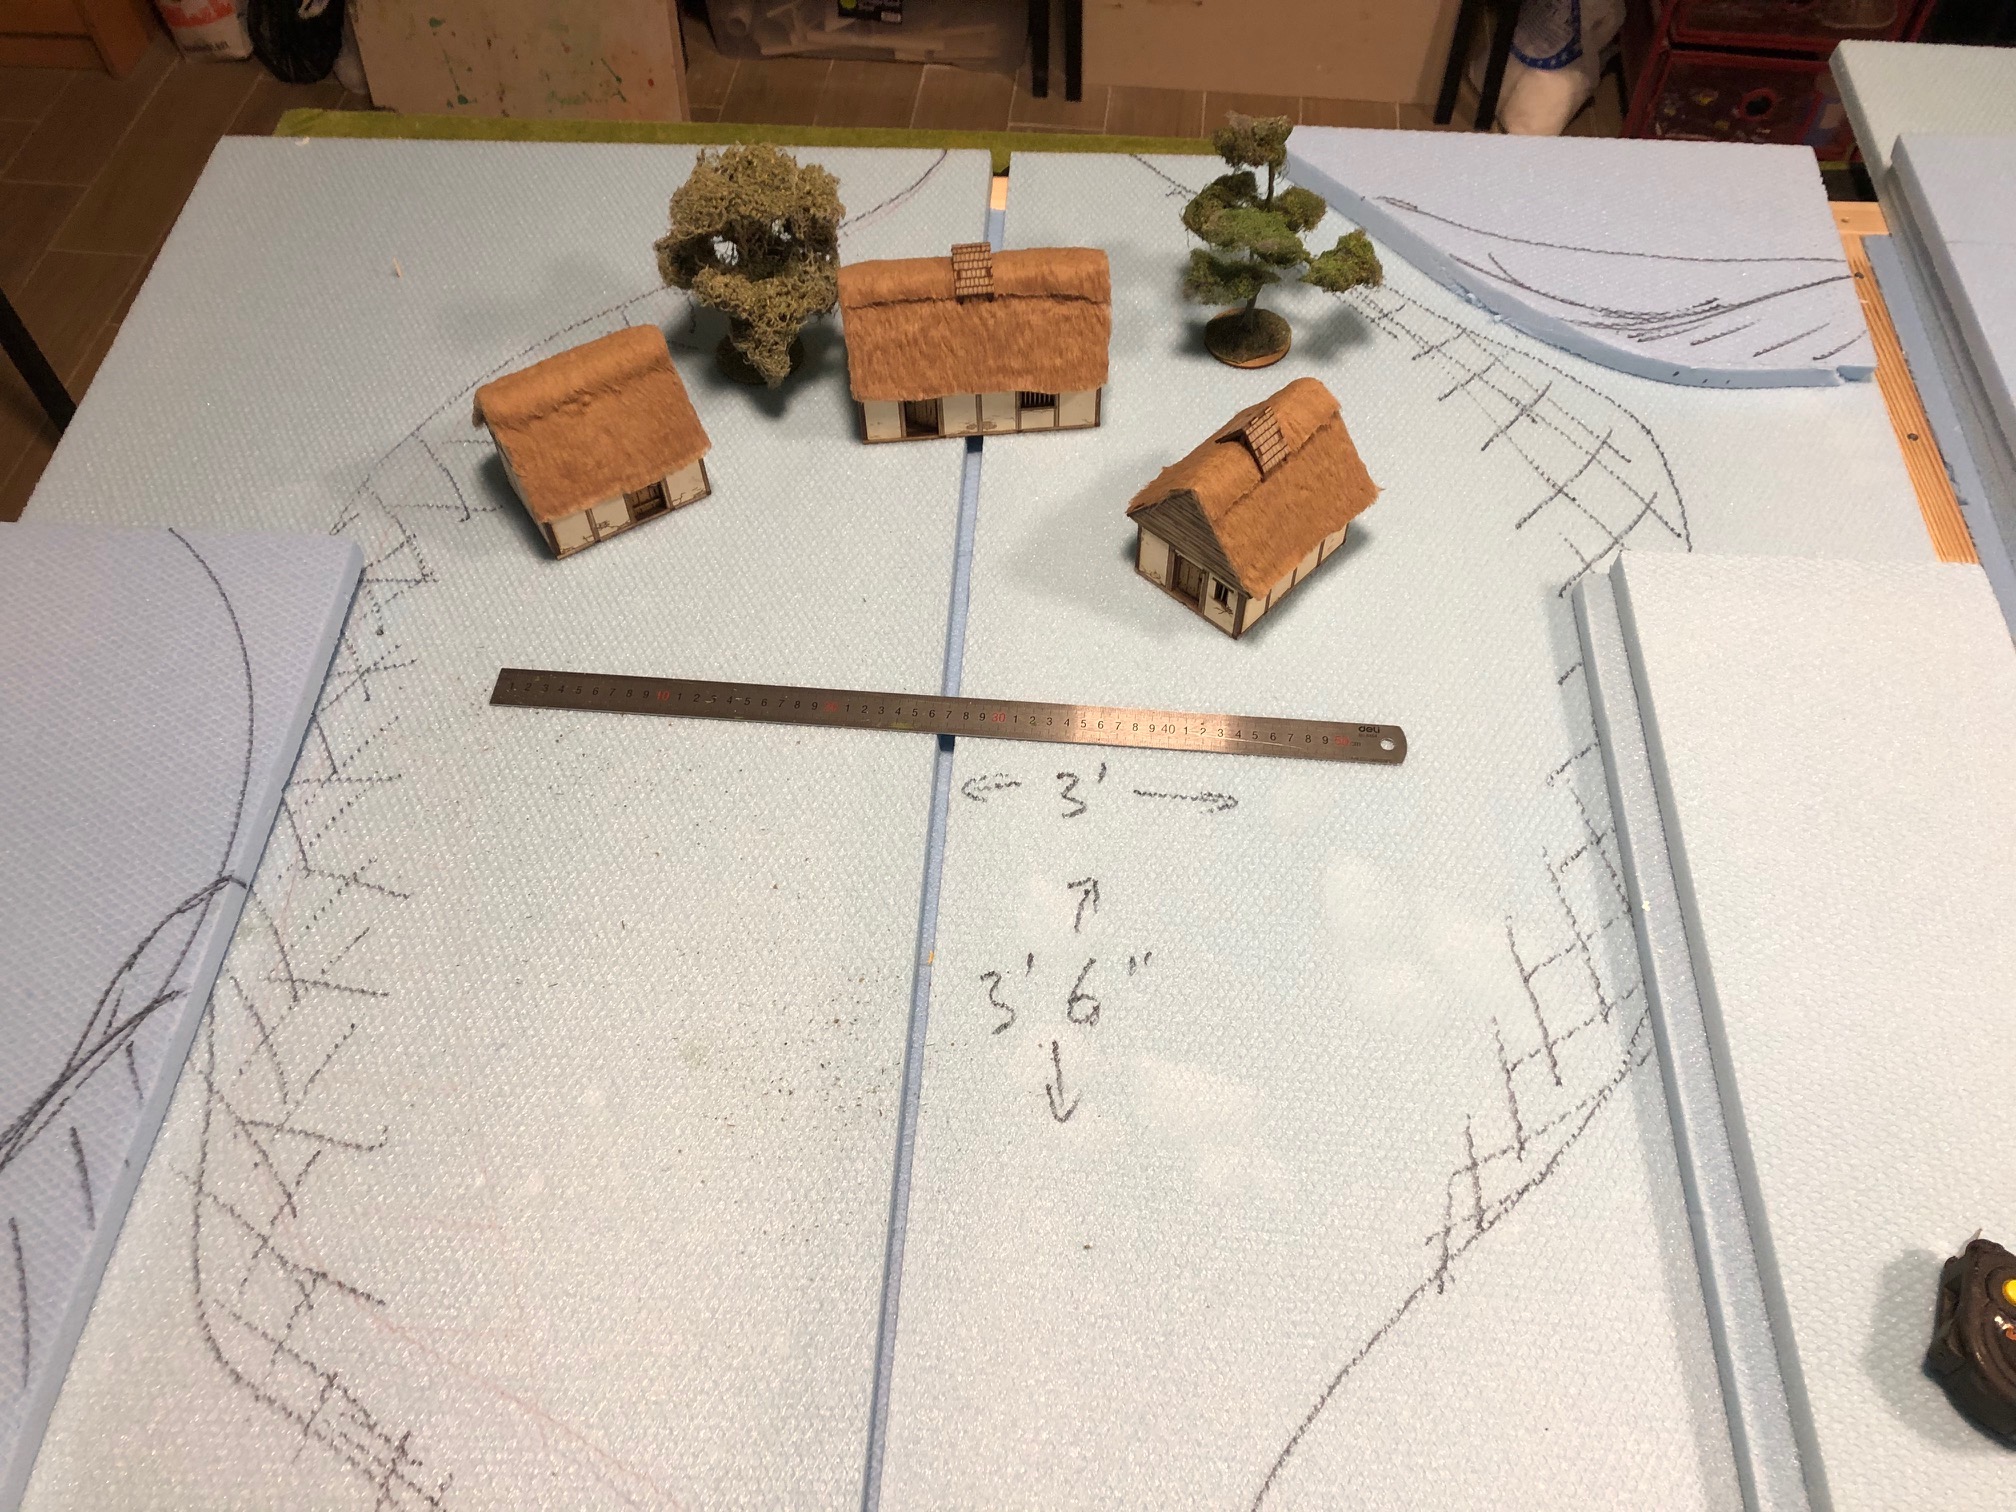
The next pictures show the approximate size and shape of the hill area and what this means for the effective fighting area. It should be reminded that anyway the hills will be gently sloping and not the Himalayas so from a practical point of view, an area of about 3′ x 3’6″ is really available easily.
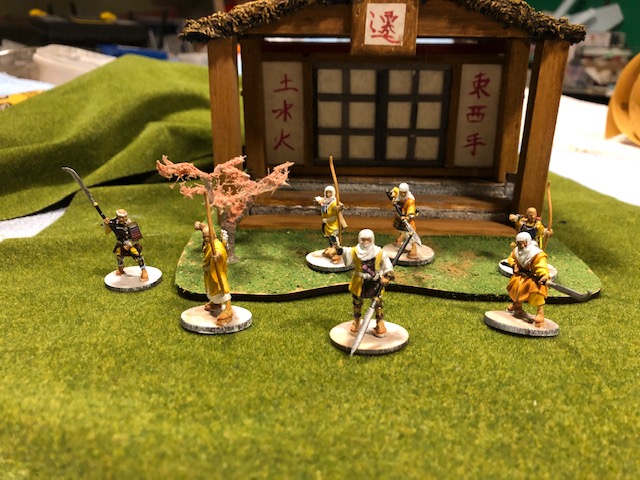
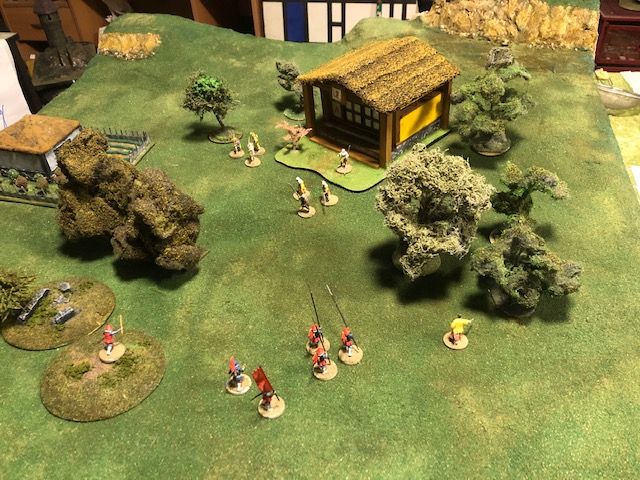
The pictures shown with models are there for illustration purposes, although the ones with the Japanese figures will be included in the second phase of this Challenge as the whole idea is to get the inspiration or incentive to paint up some more miniatures!
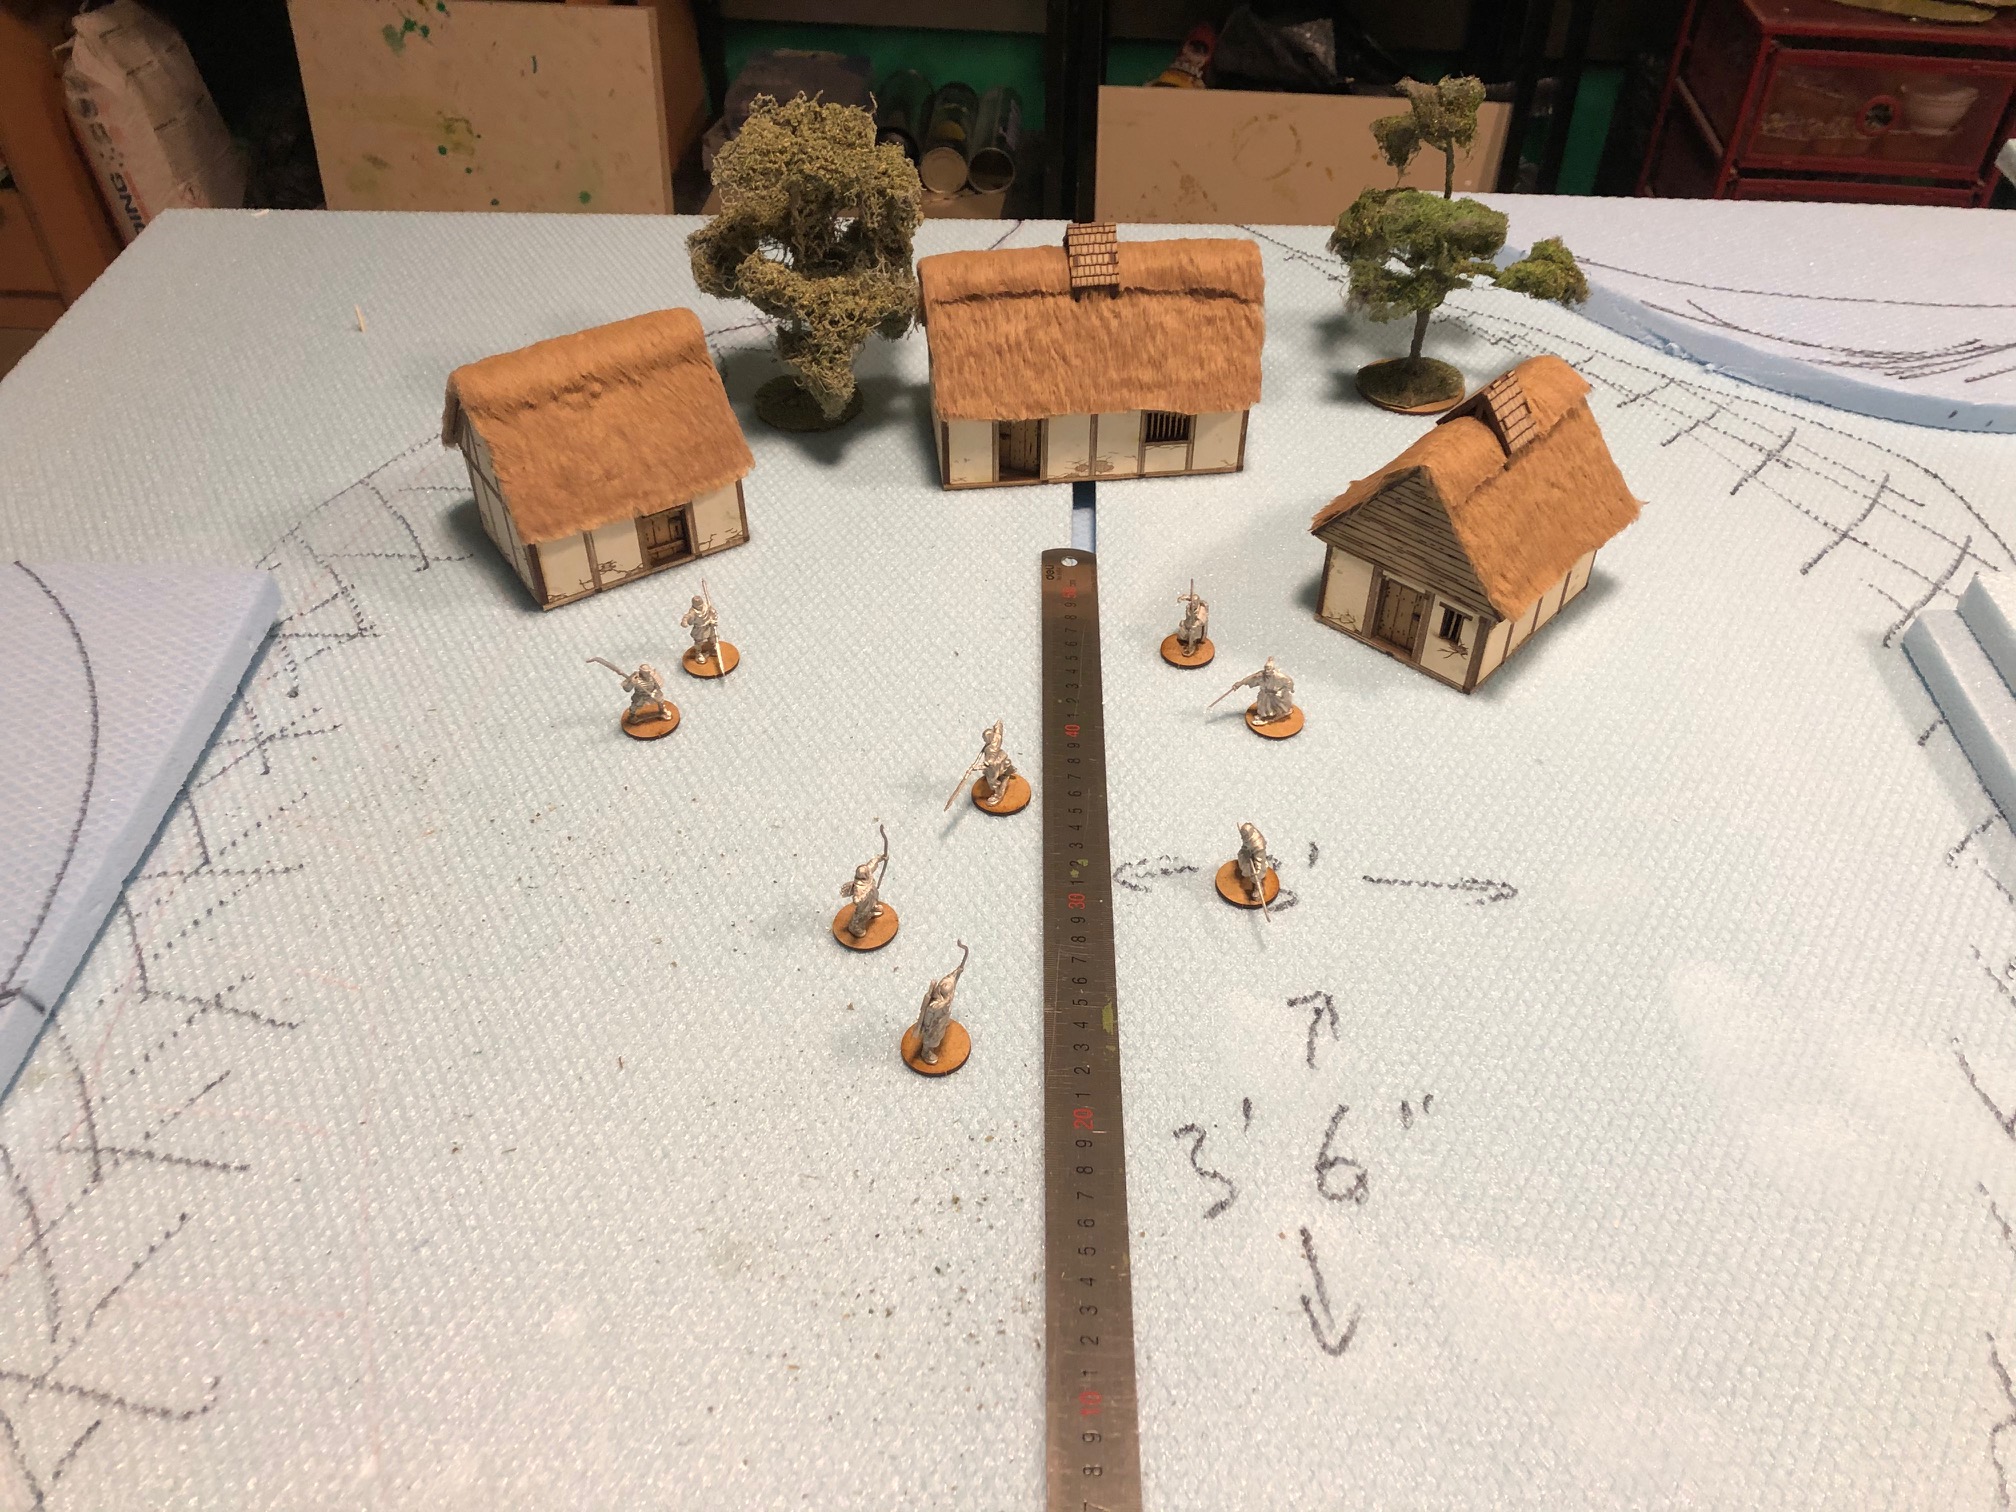

Models include some ECW from last year’s Challenge, although these will be unlikely to be used on this table as they were based up for large battles. However some of the figures I didn’t finish painting may well appear as Companies for Pikeman’s Lament!
Note the “shading” will be where the hills are trimmed into a gentle slope, but more of that in the next posting.
Landscaping Part 2
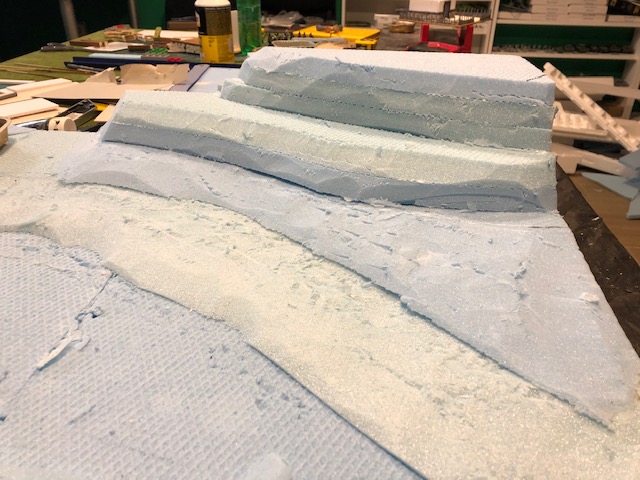
Things are moving alone slowly. One of the issues is “down time” as I wait for PvA to dry fully before adding additional levels of ground work, but as the images show, some progress is being made.
In addition my plans have, inevitably, developed further and now I have decided to have the landform of the two shorter edges different. One will represent gentle, sloping hills (which will be connected to the “beach” additional table) while the other will be more “dramatic” to give scope for cliffs or rock faces etc. This will still leave the majority of the table open for playing.
Some picture of the constructions to far.
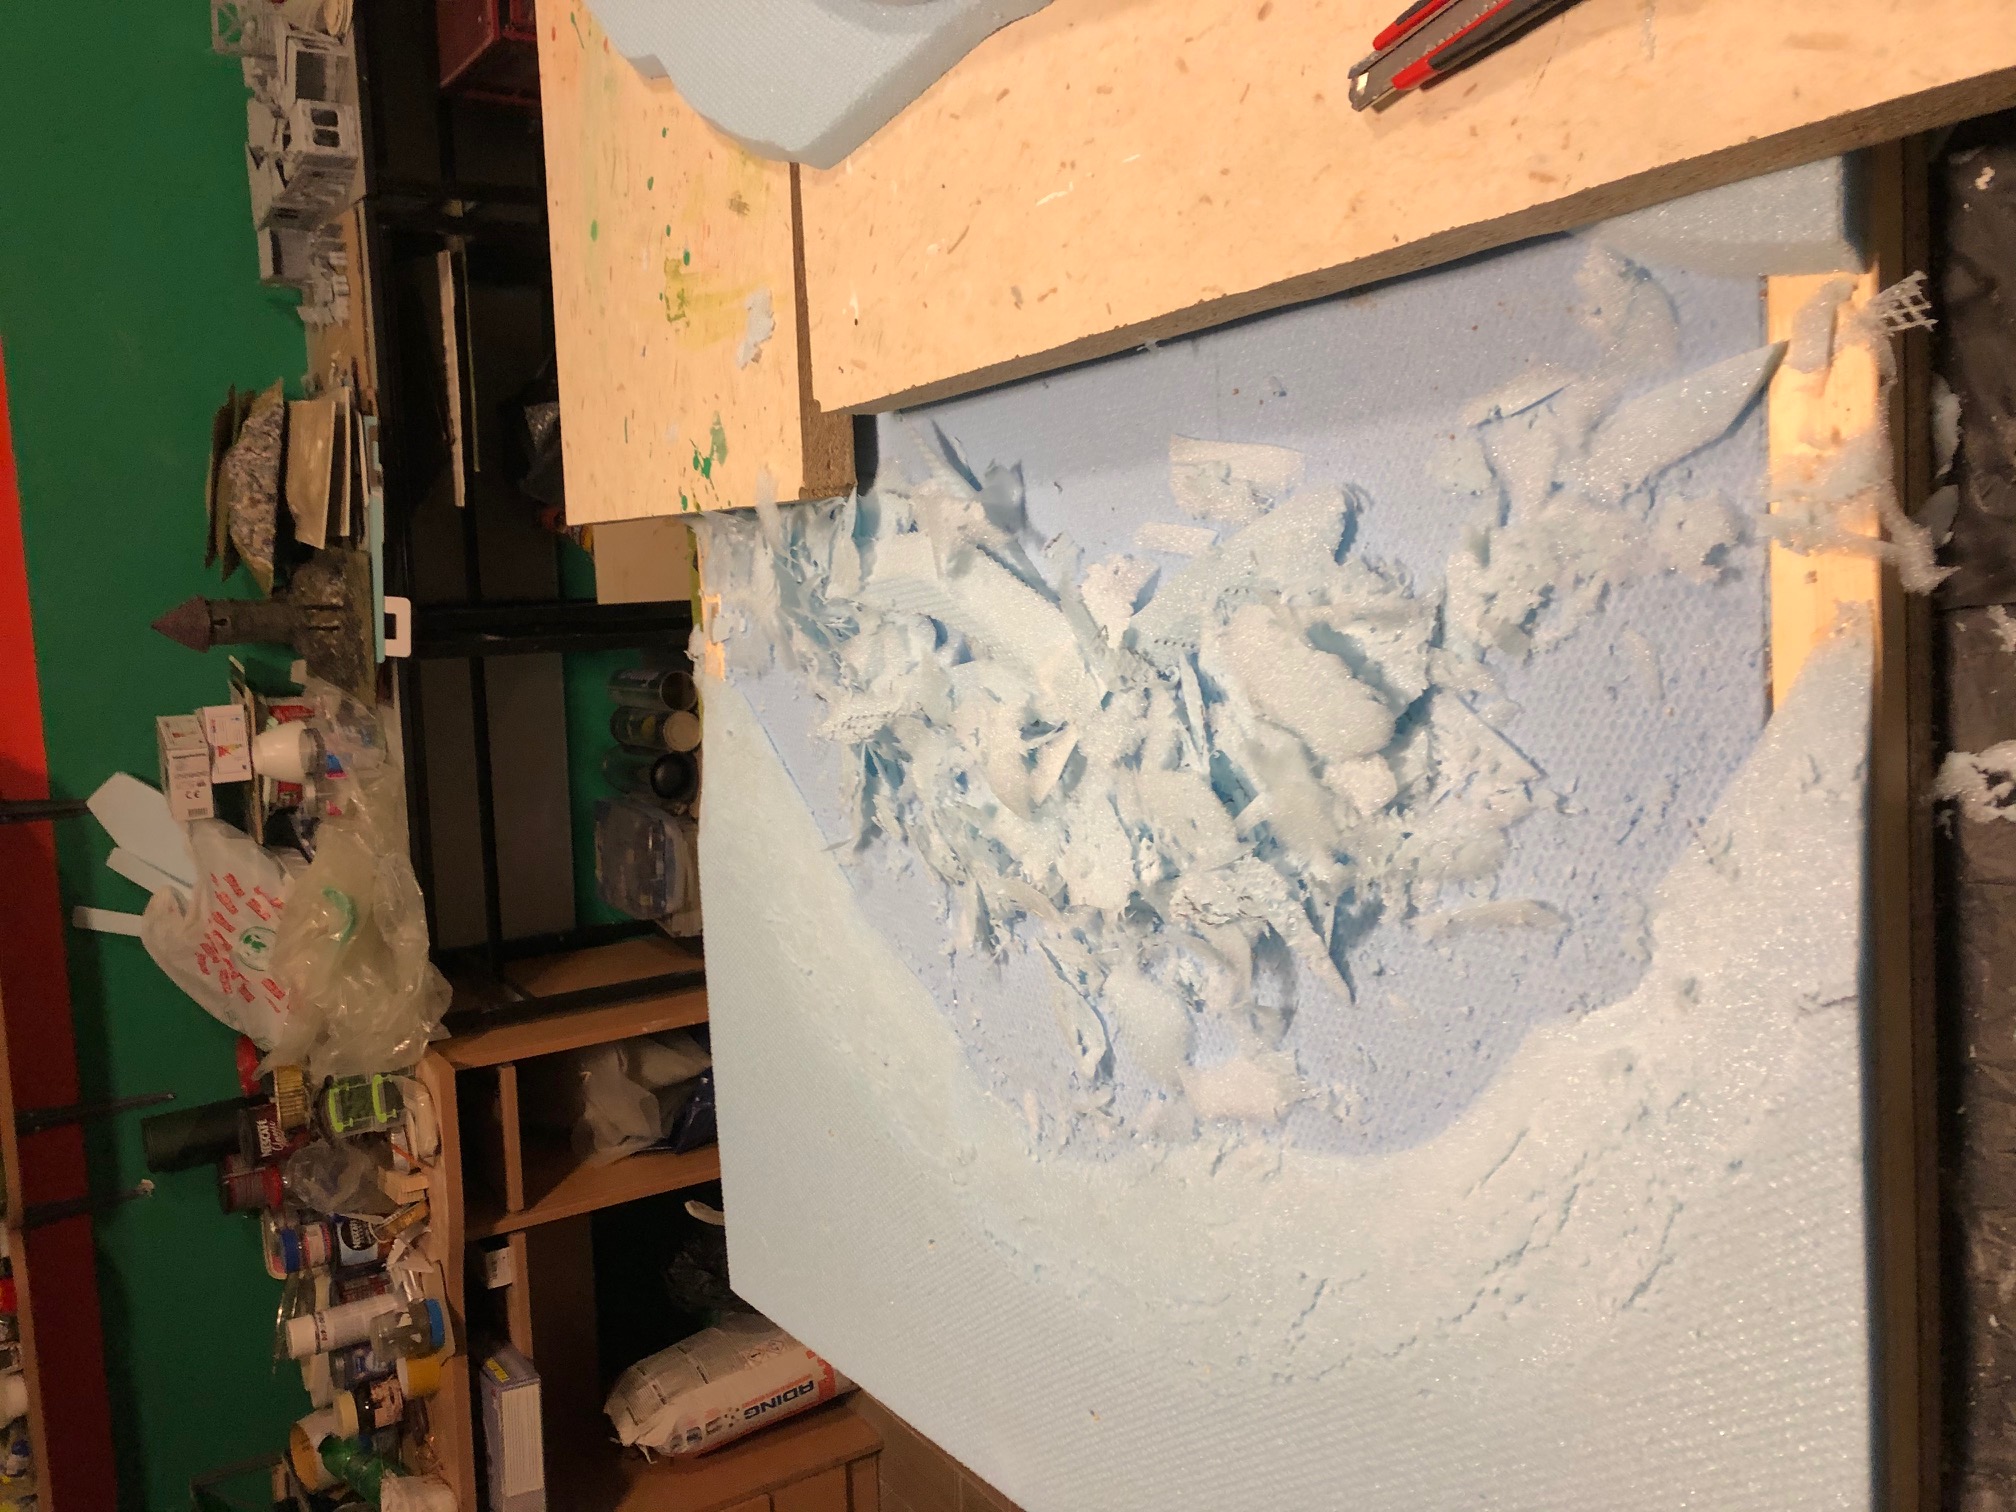
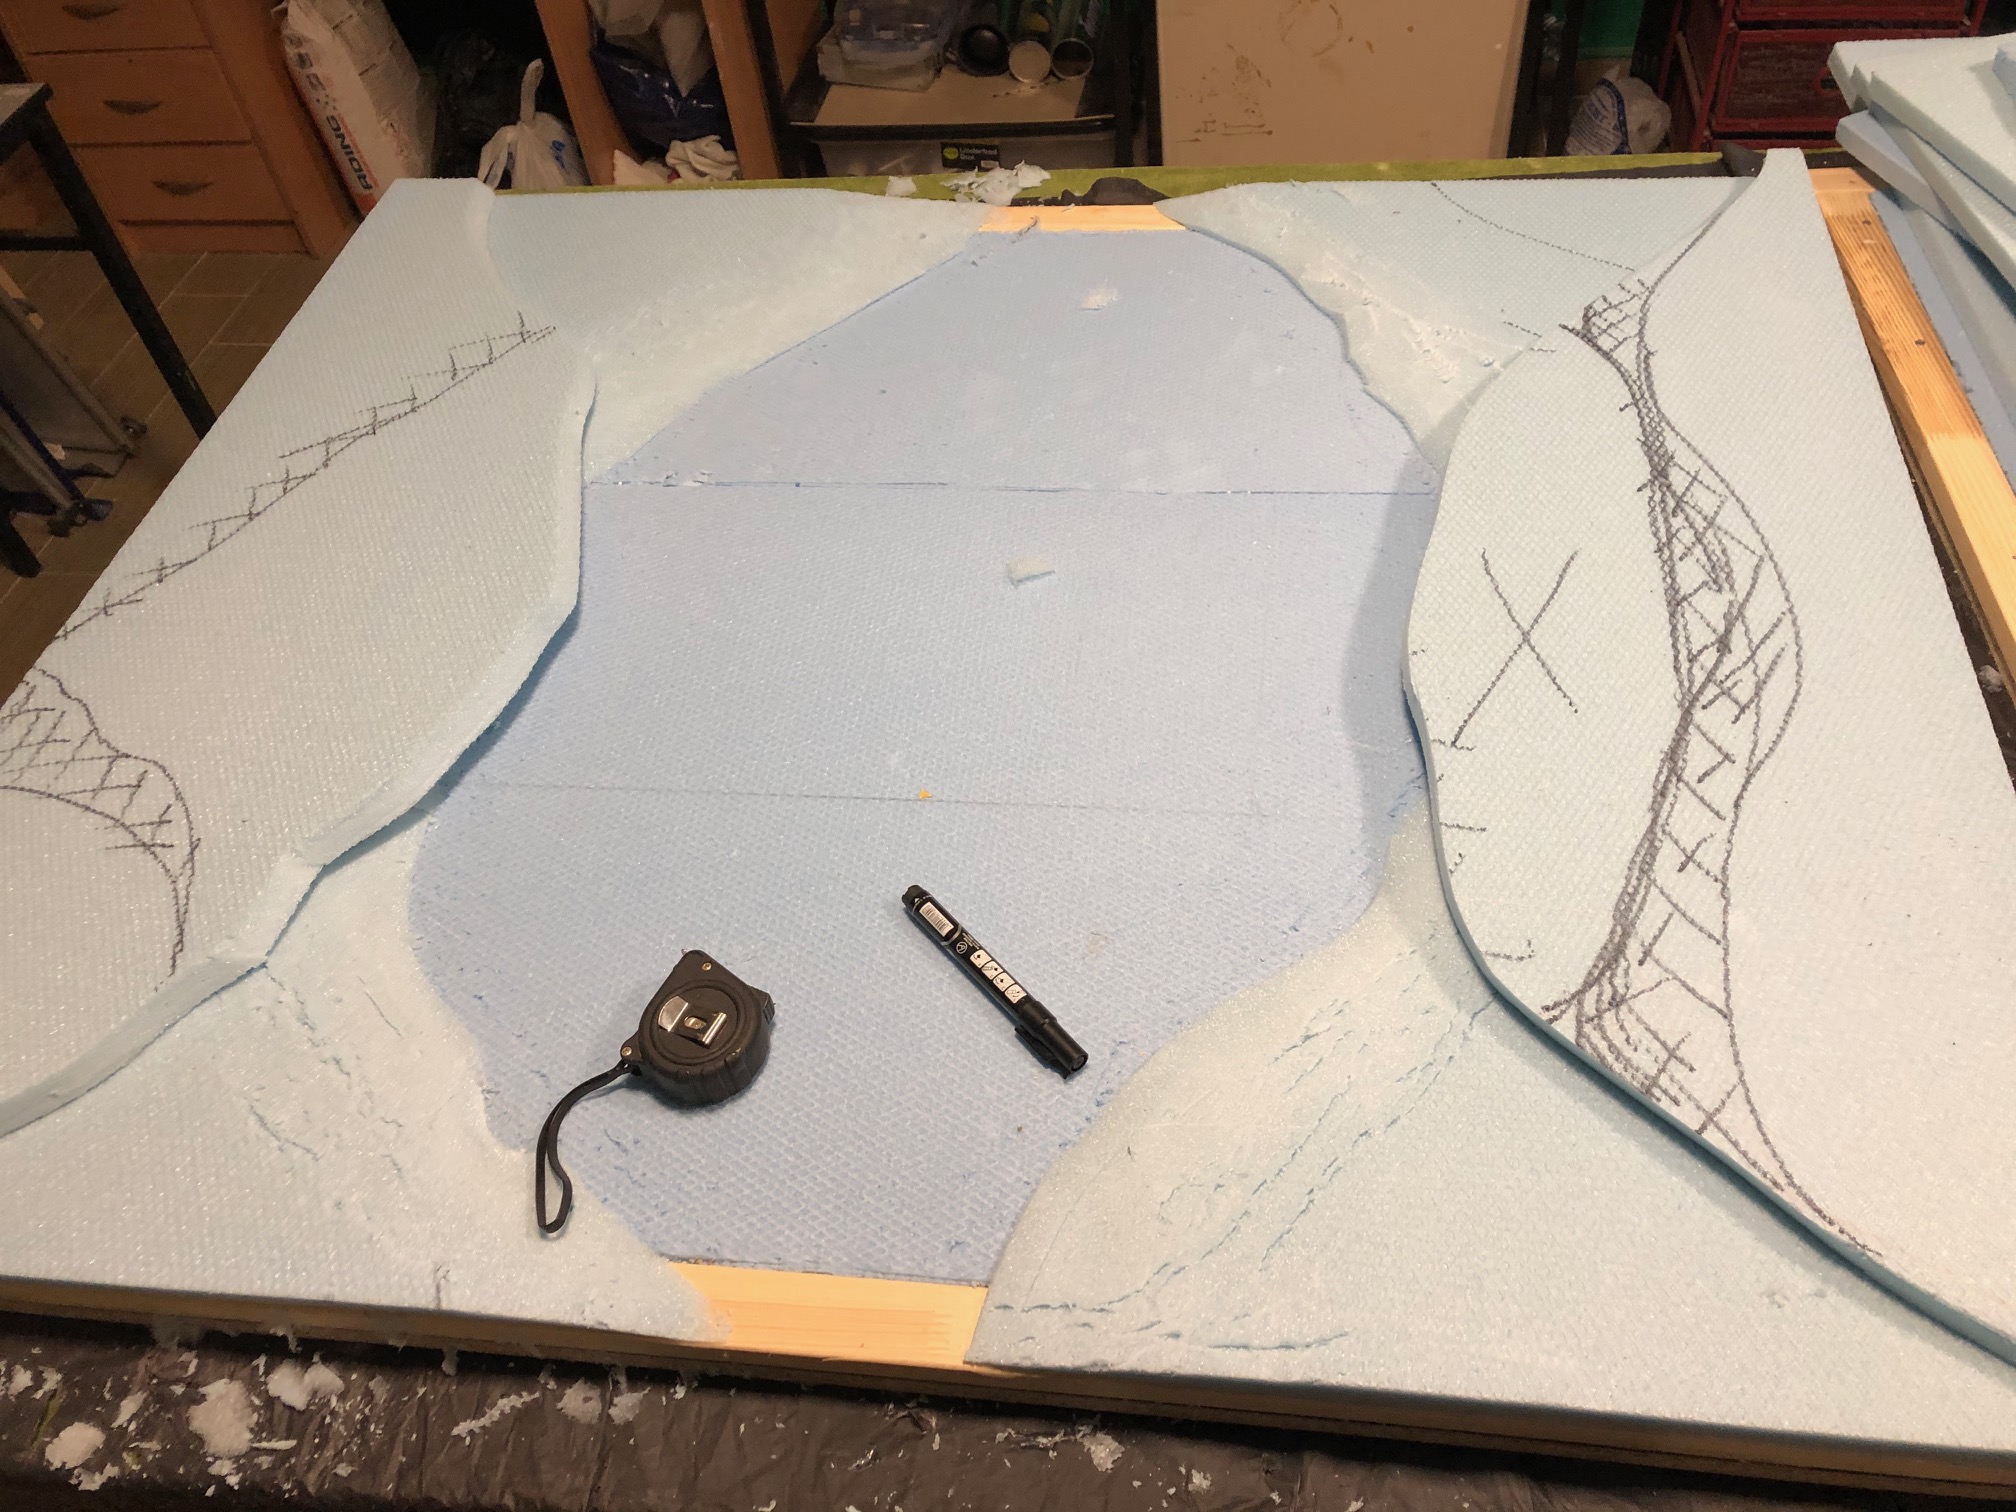
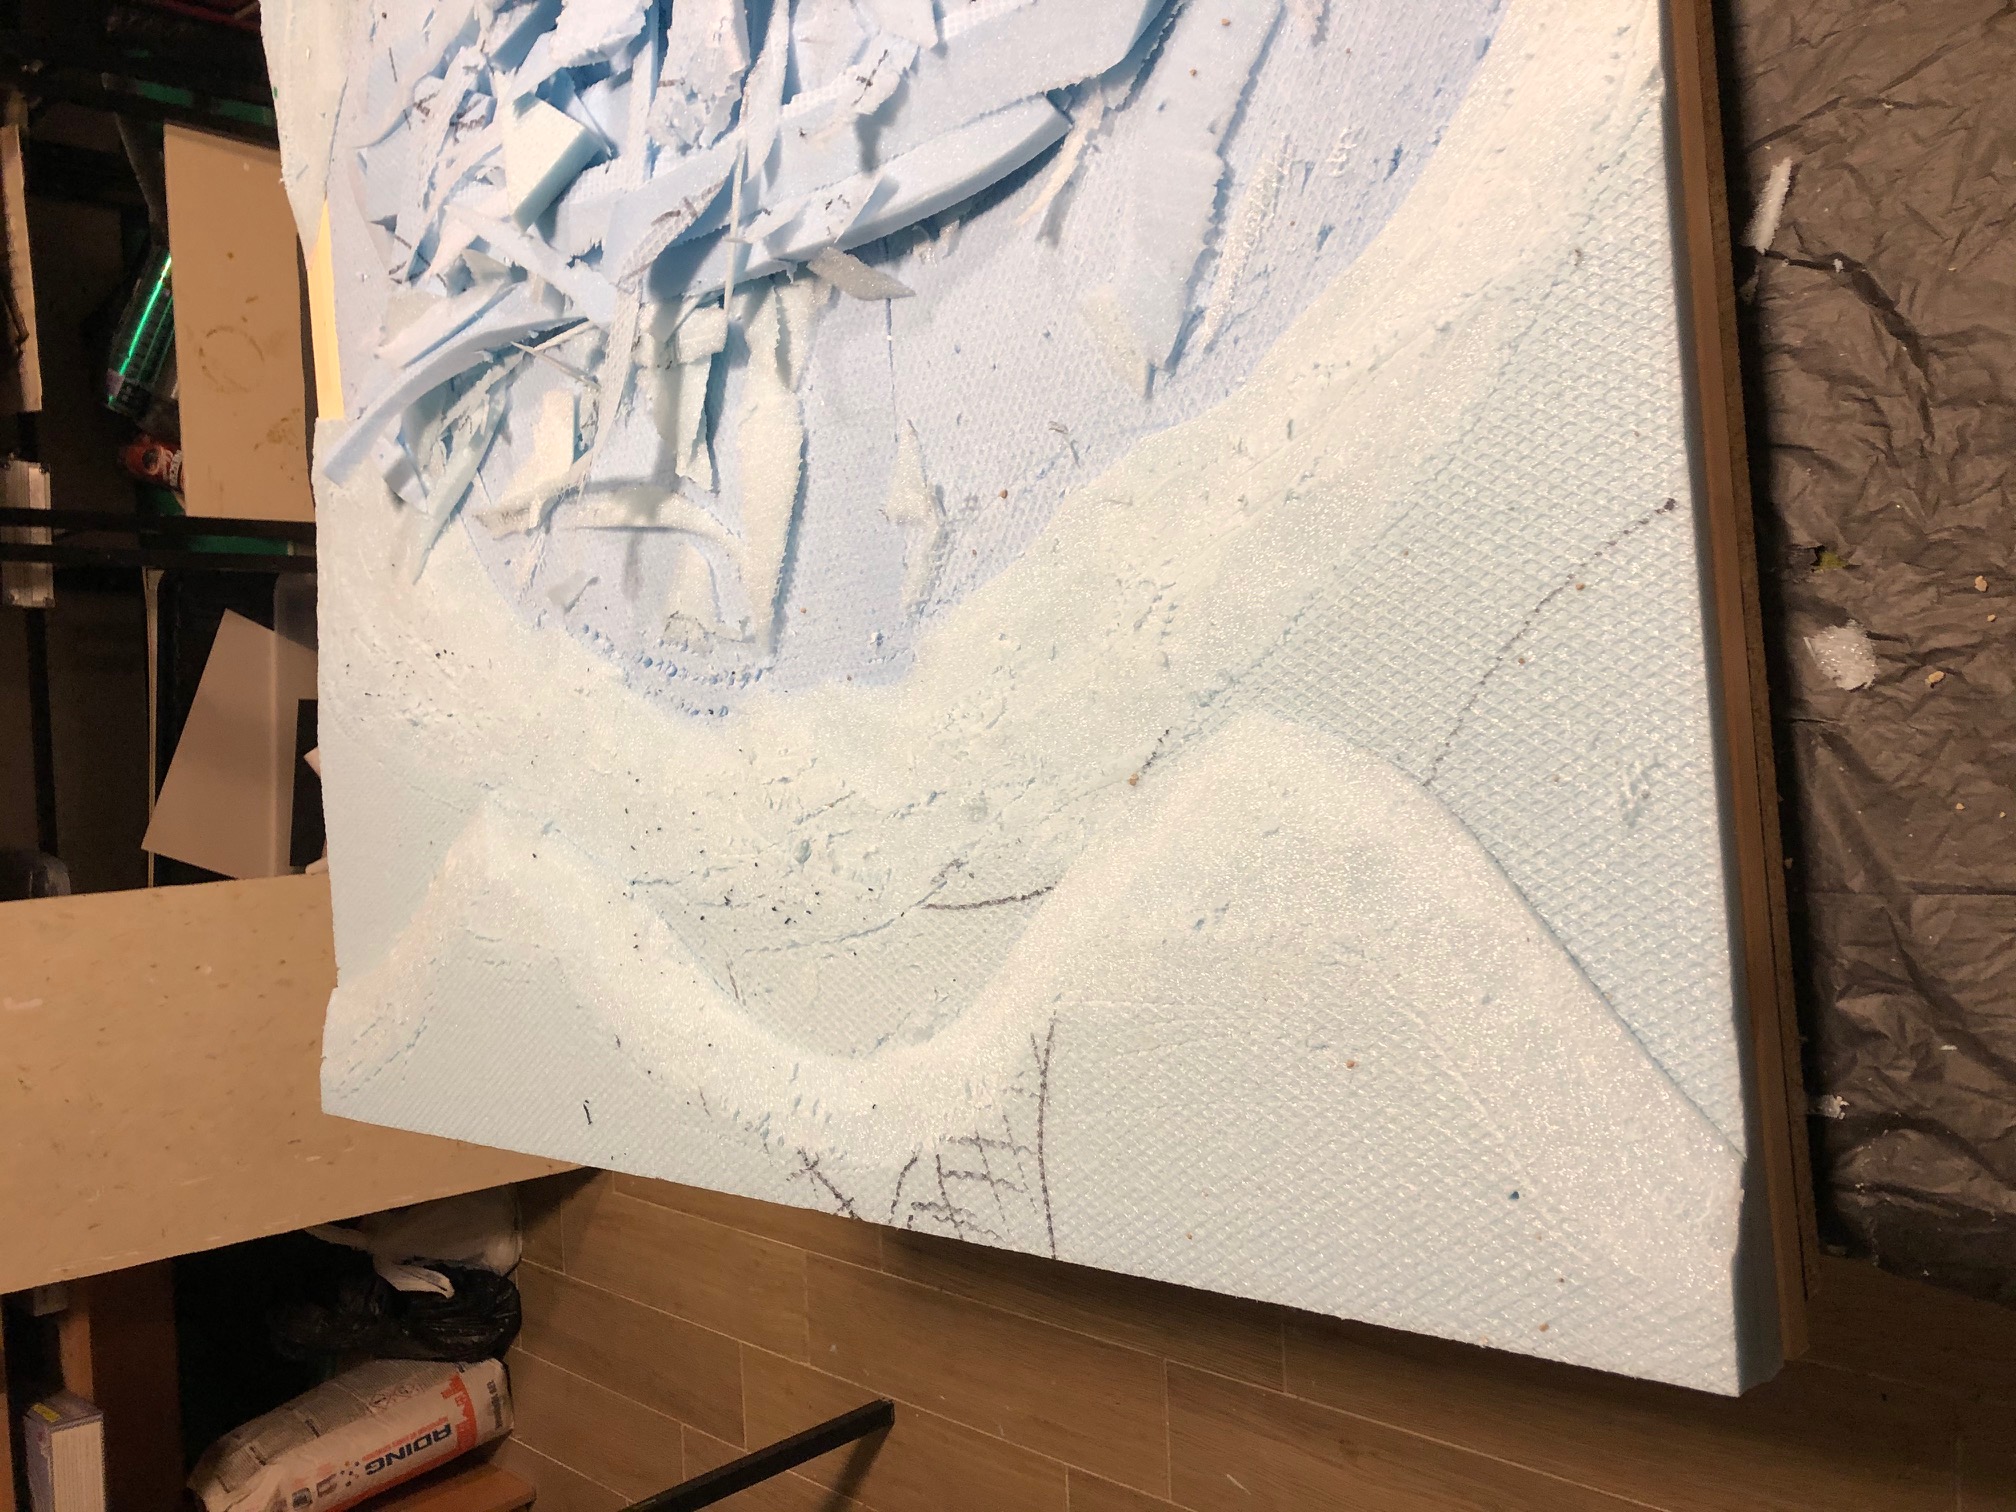
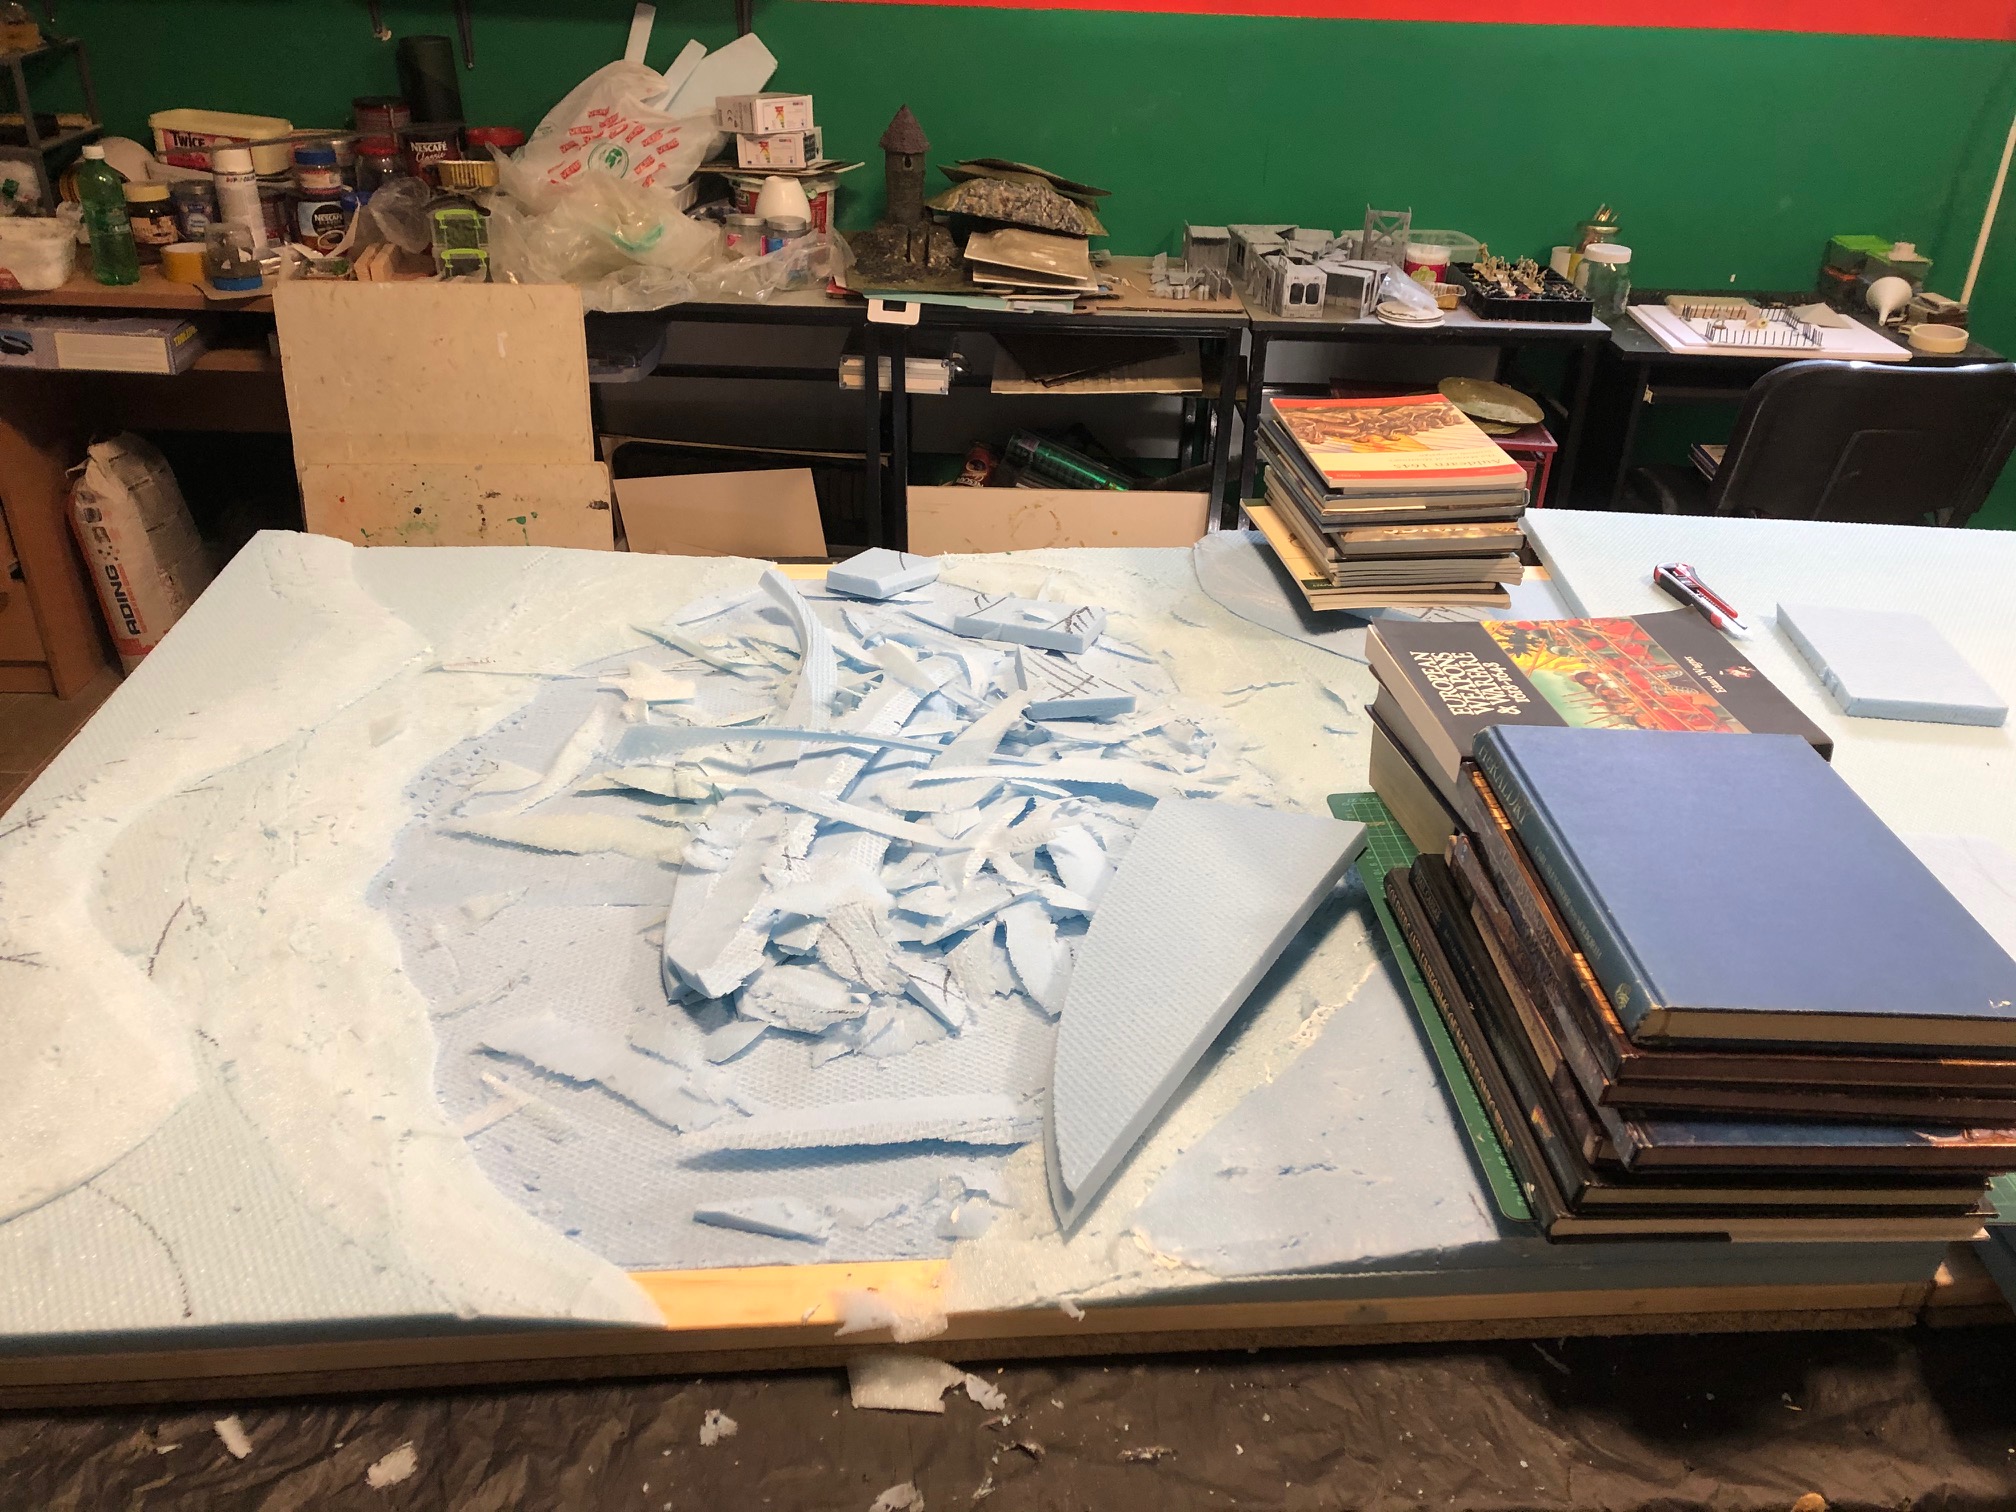
These images focus on the “Western” edge with the lower hills. The middle picture is my playing round with different ideas about the layout of the hill shapes and the “hatched” area being what the sloping would be. The final image is the hill in its current state. Note that the surface will be covered with some kind of plaster/paper combination which I will have to make based on the method on Luke’s “Geek Gaming” site.
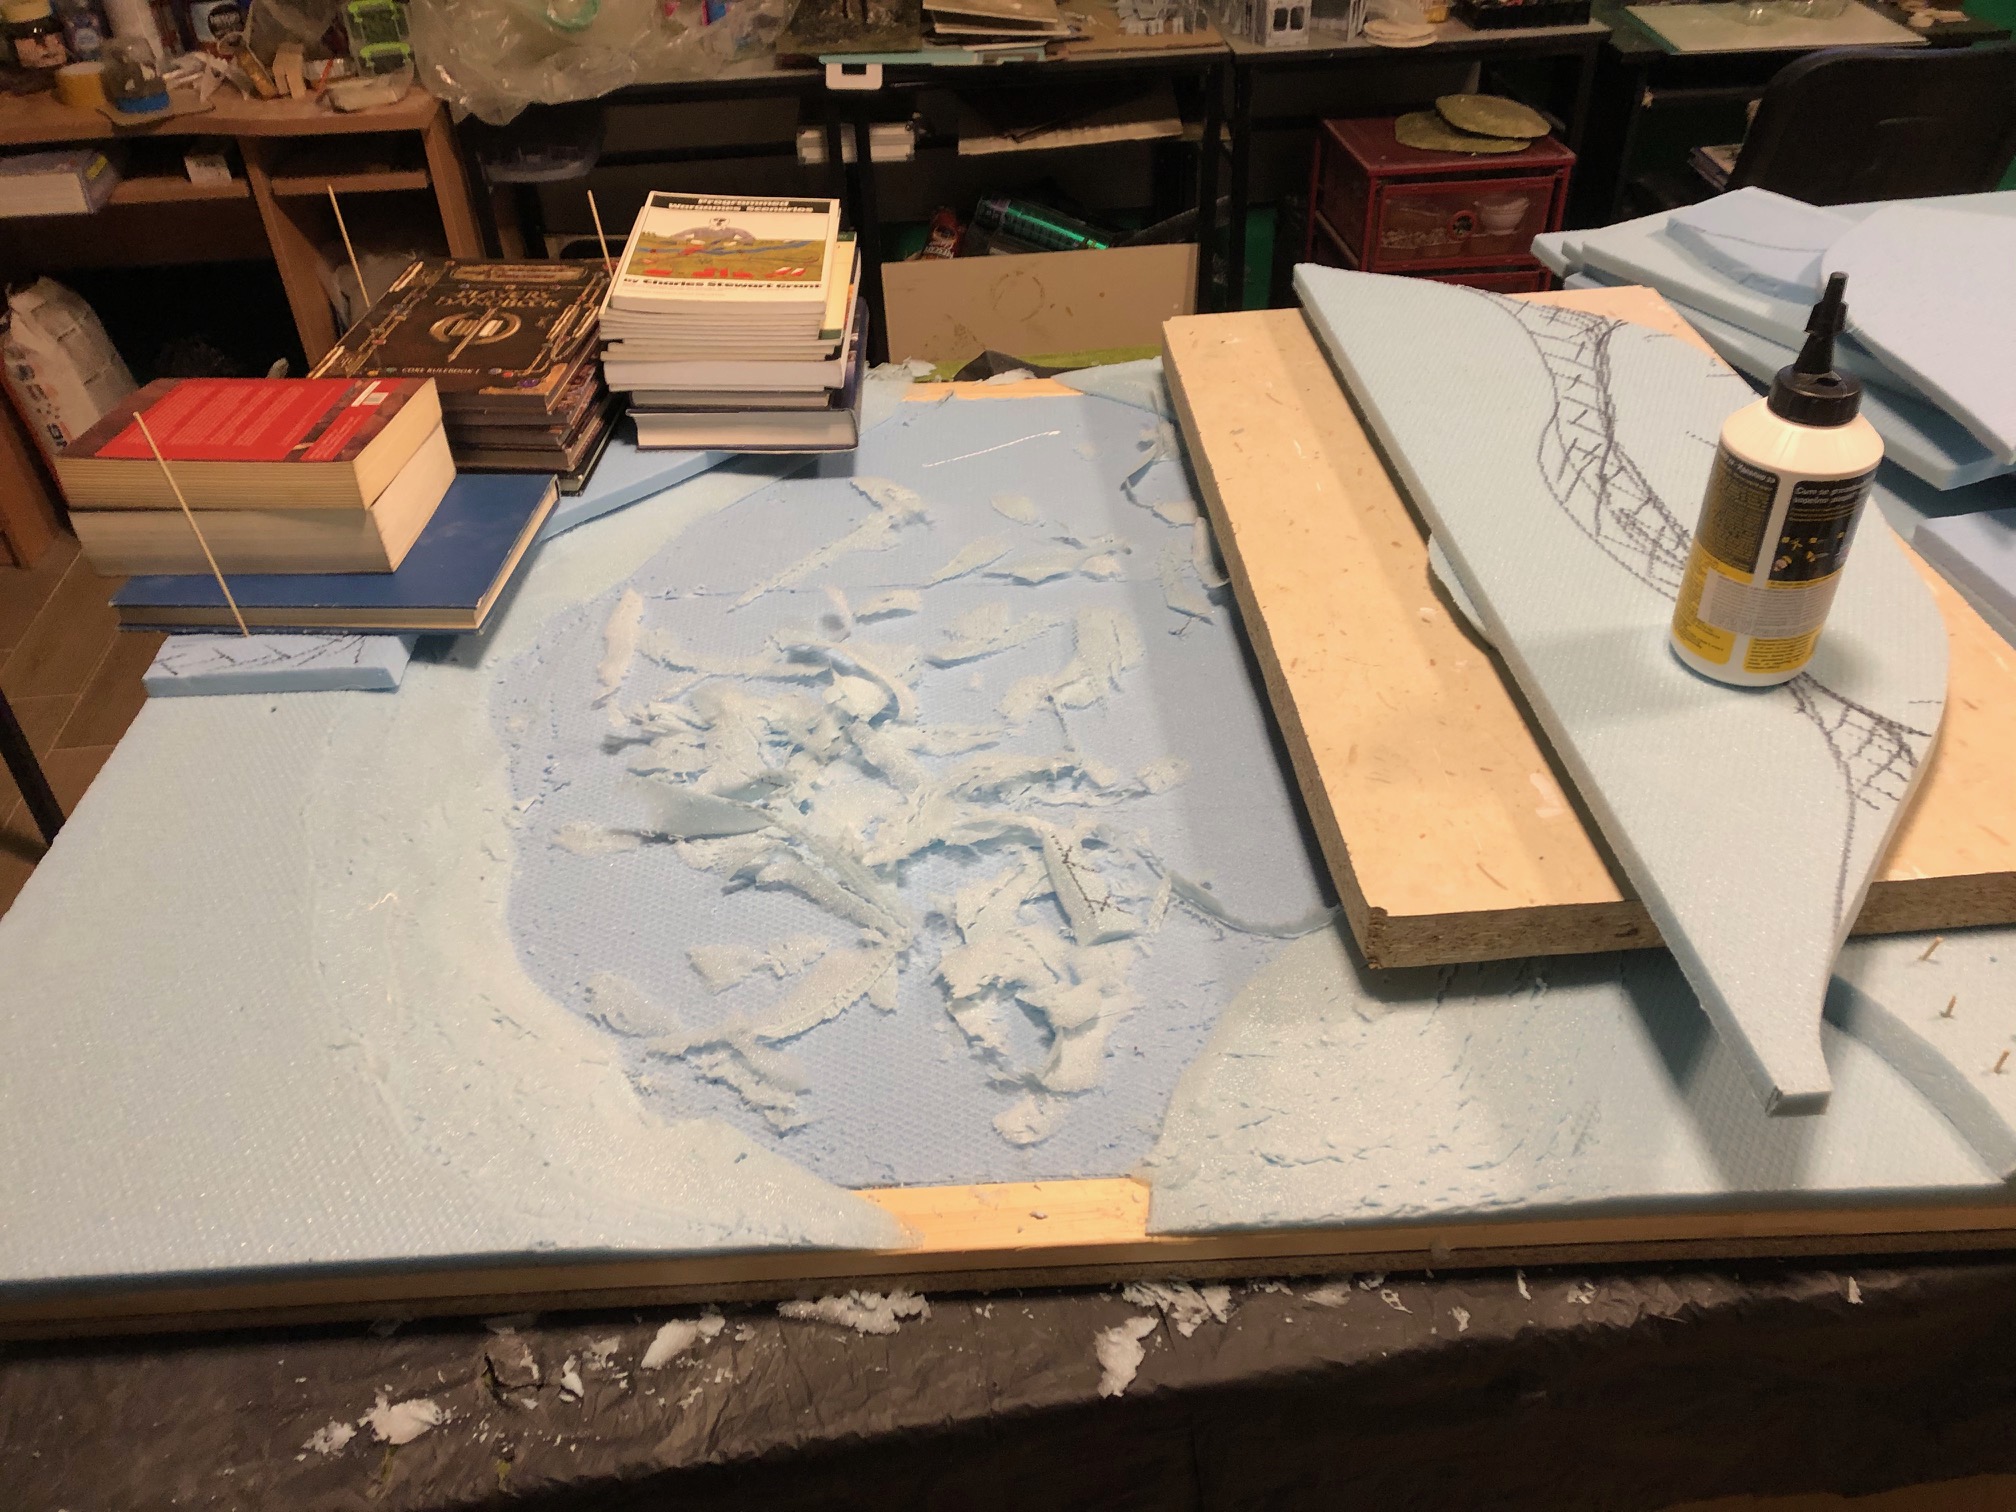
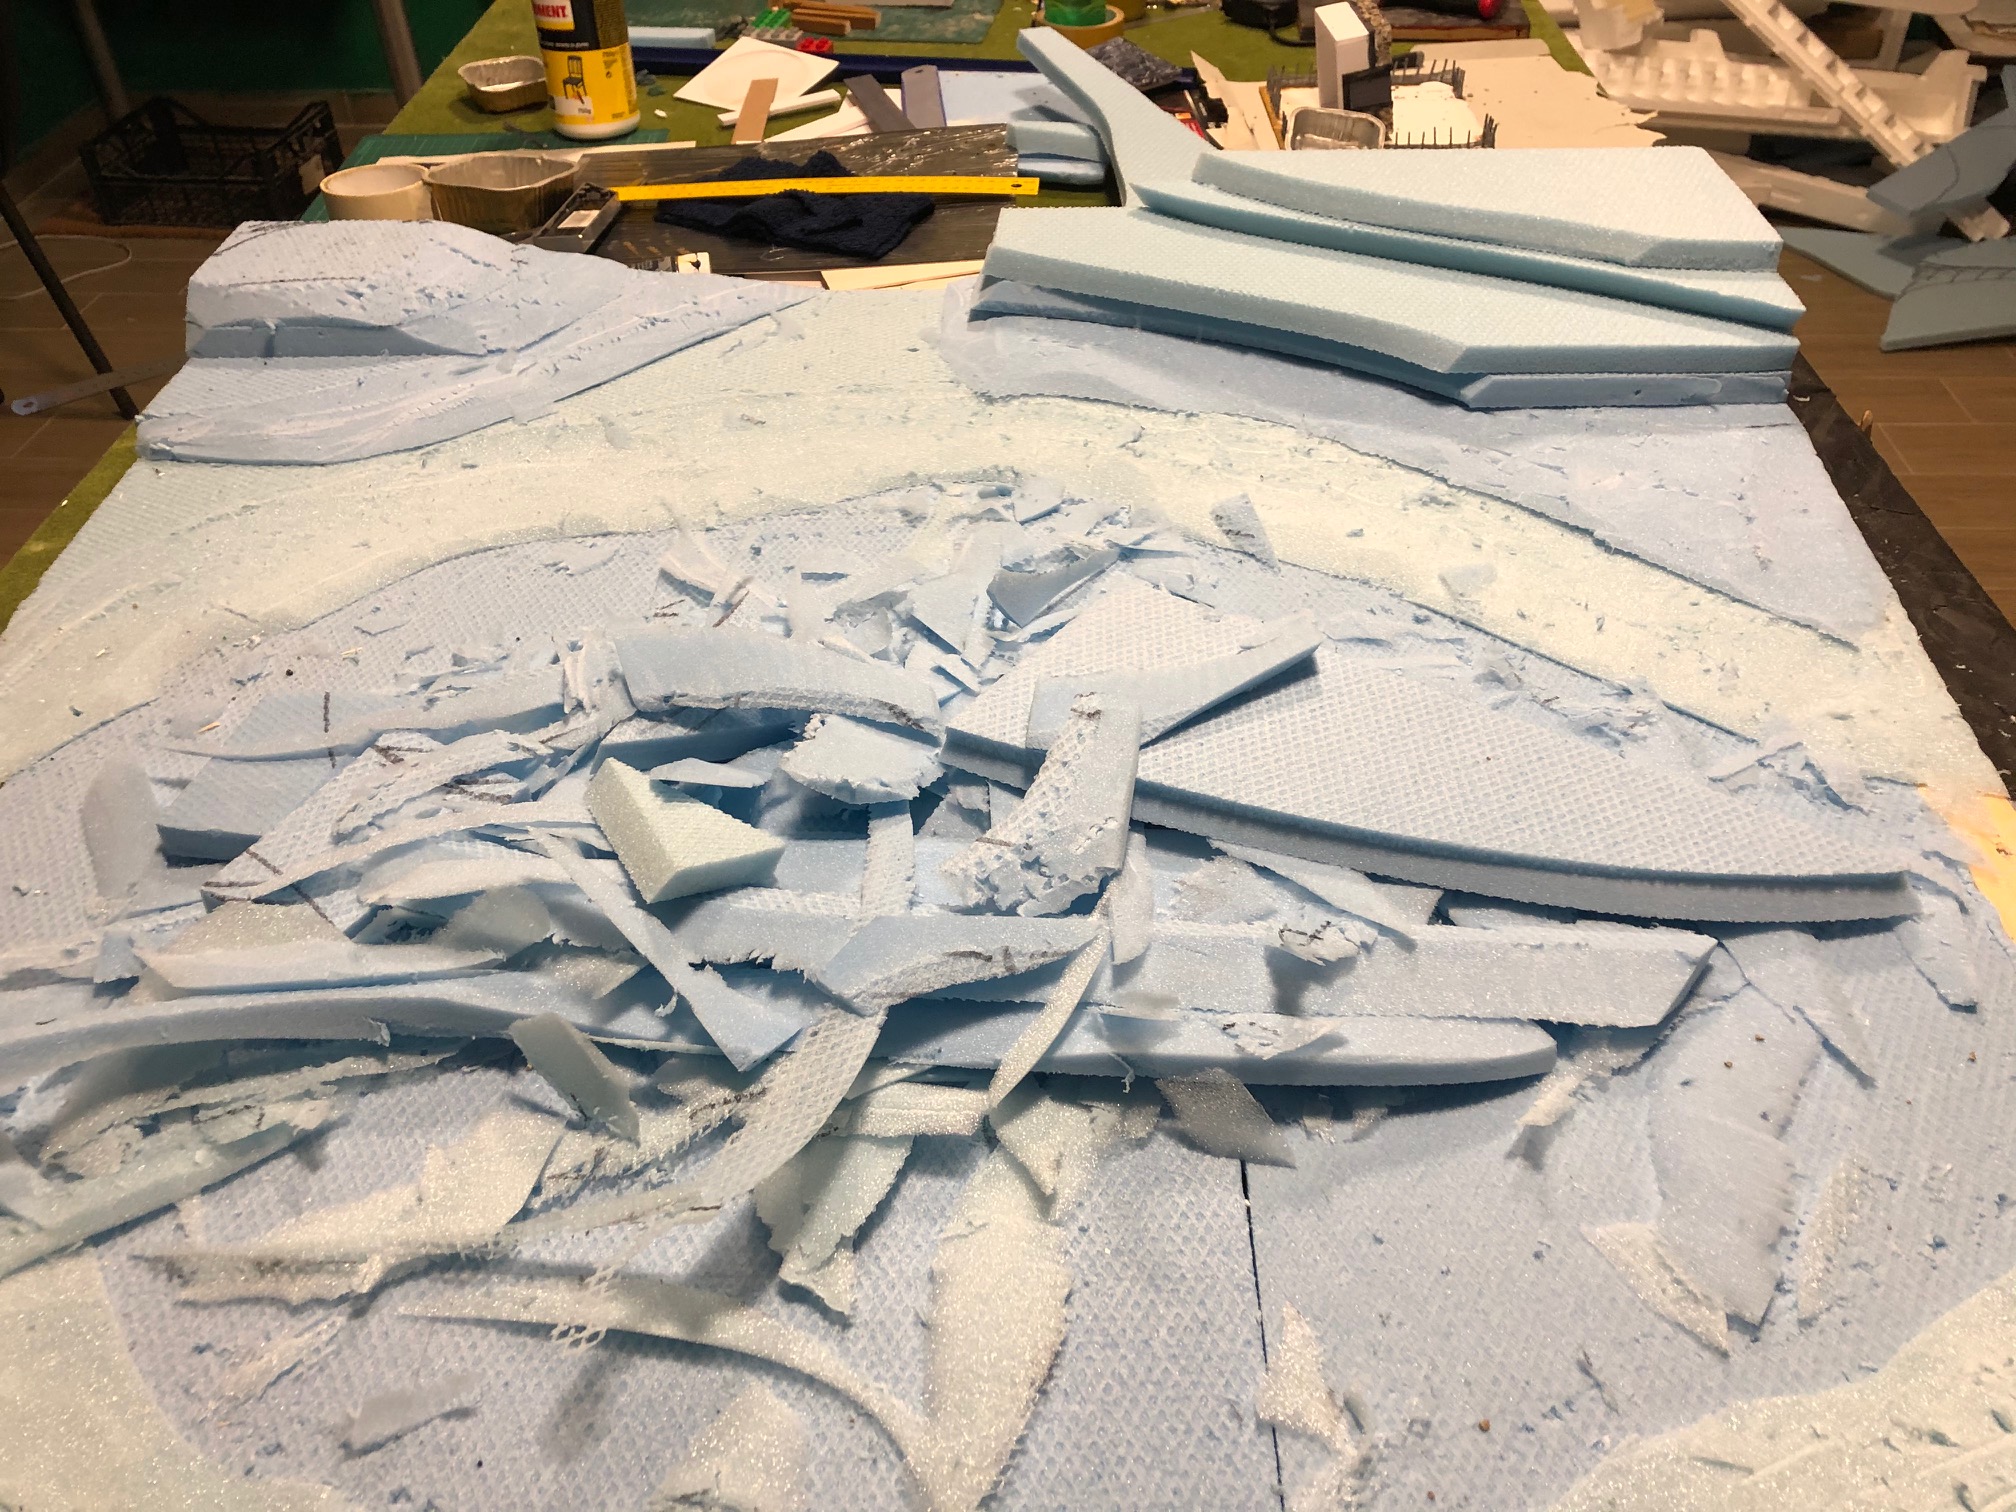
So now we have alternative landform which gives more opportunity to try out some different terrain techniques.
Also some advanced planning. As the PvA glue takes time to dry fully, in between mountain forming I have been working on buildings. More specifically a couple of Japanese style buildings to go with the Ronin/Test of Honor game. So more on that later.
Intermezzo: Samurai
While awaiting glue to dry fully before the next stage of landscaping, I wanted to share my ideas for one of the Skirmish games I plan to use the table for. SAMURAI
Whether this is Ronin or Test of Honor (or both) remains tone seen, but the colour scheme needs thinking about, particularly for the Samurai themselves. With this in mind I wanted to publish a set of twenty old (i.e. approximately 150+ years) prints of Samurai Heroes.
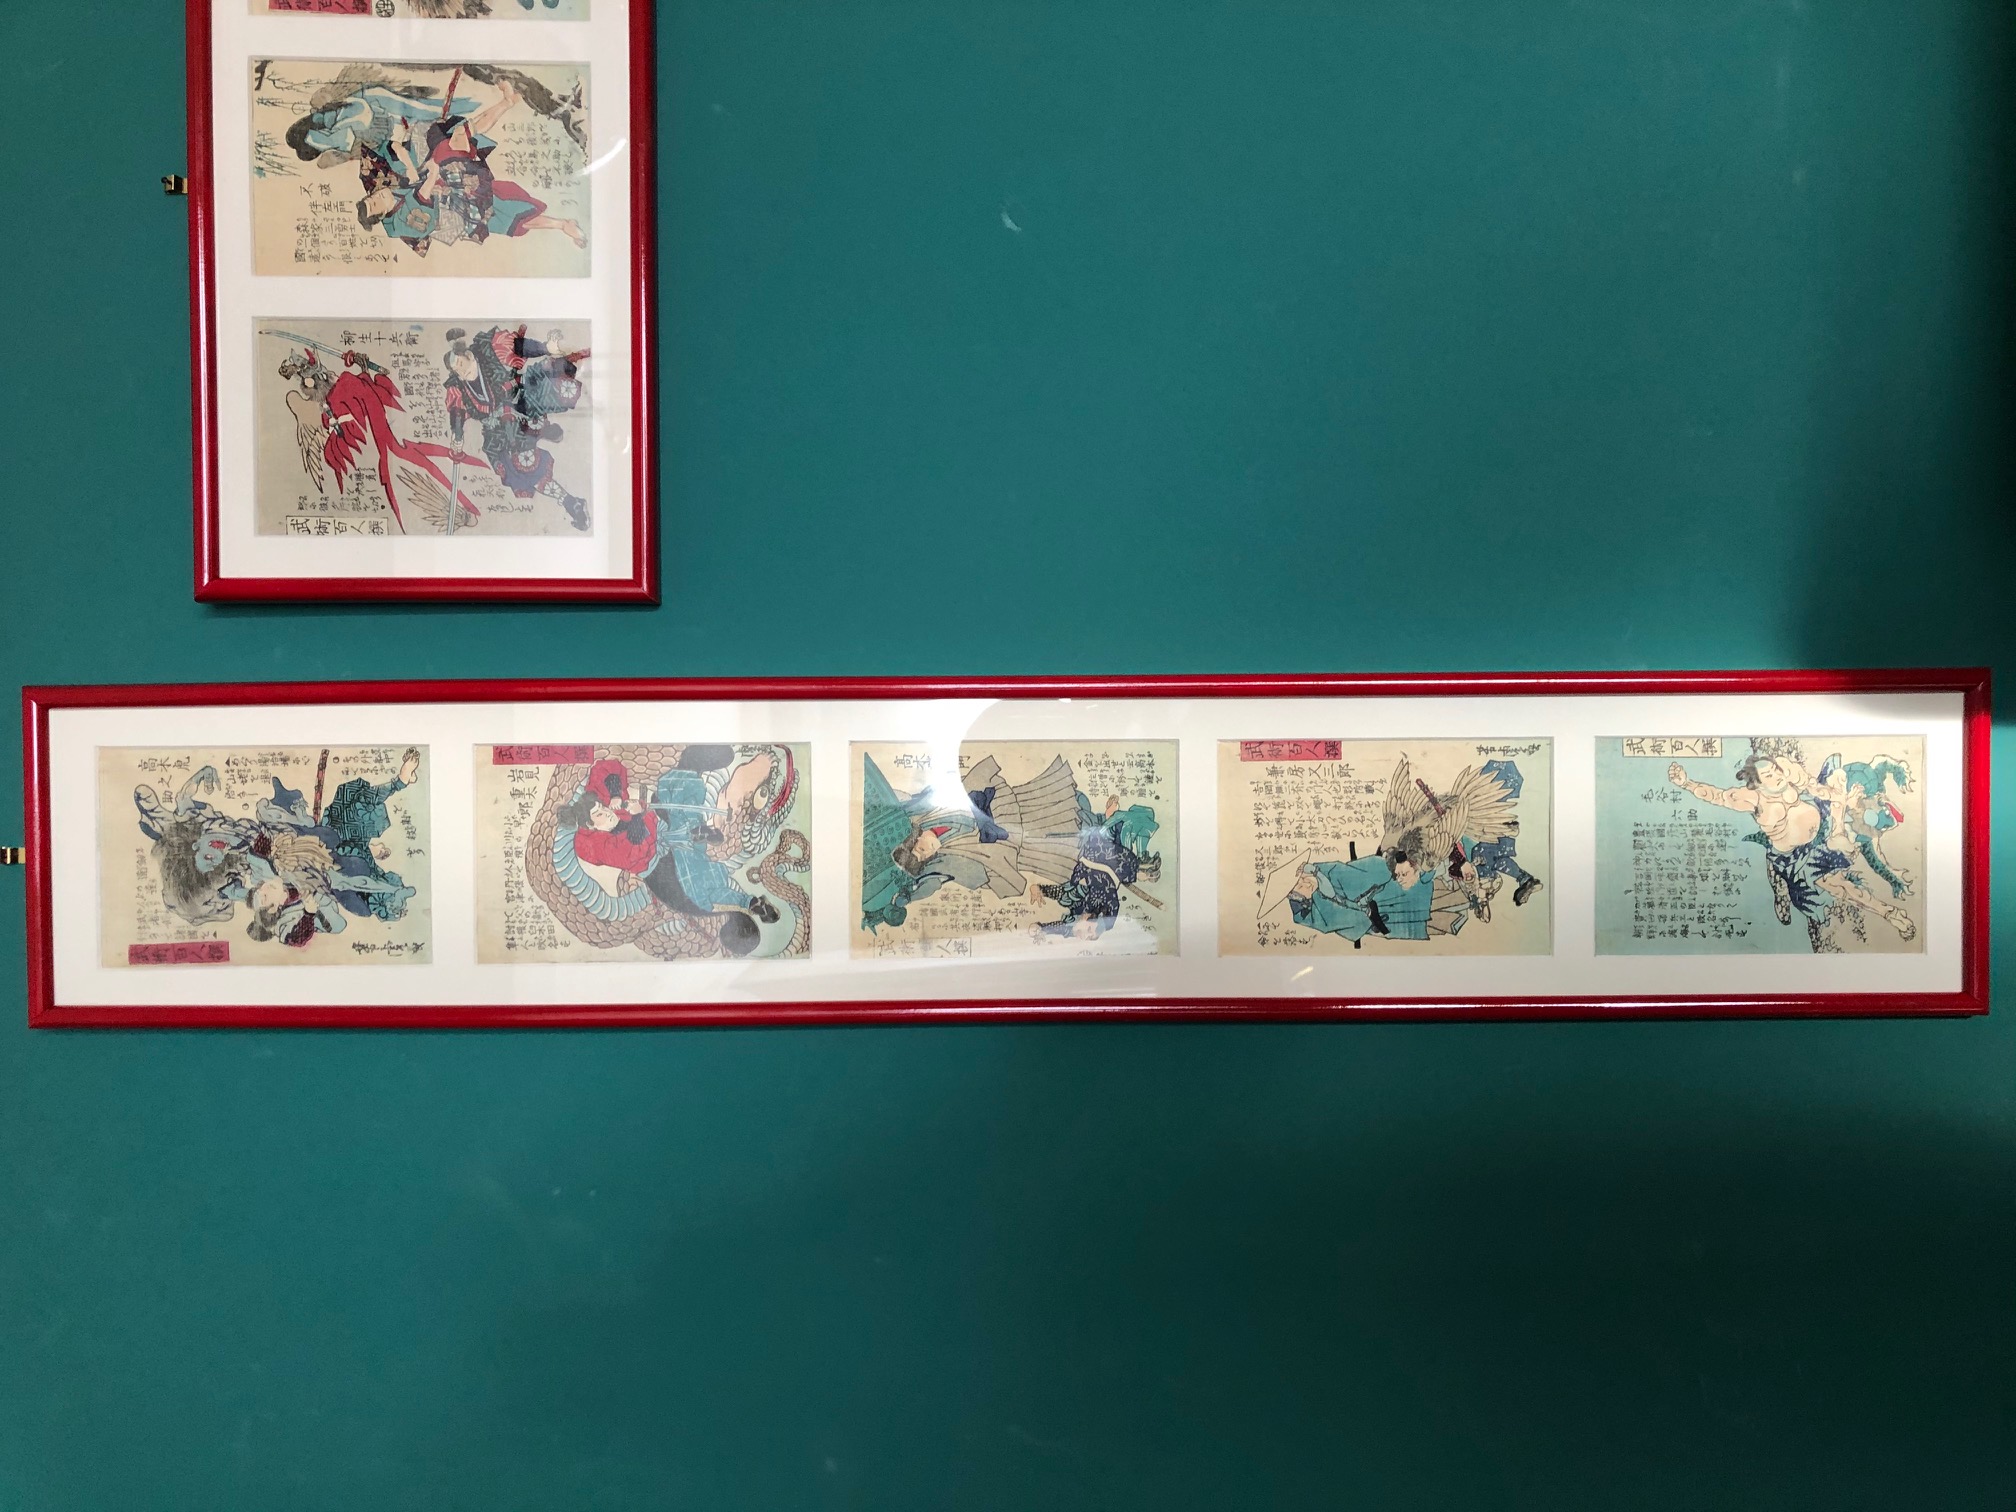


The prints are fairly small (approximately 11 x 17cm) and although I have had them for many years I have only just had them mounted and now displayed in the illusion of a Tori Gate.
They depict various heroic deeds of Samurai, and while they are from an earlier period than the setting for Ronin, I think the colour schemes are transferable. I am not sure how easy they are to make out from the pictures, but there is a diversity of dark and light colours as well as interesting juxtaposition of primary and secondary colors which might seem unusual to “Western” eyes.
Anyway, as I plan to paint up 2 or 3 different Samurai Buntai, hopefully there will be some interesting results. Hope you enjoy these beautiful prints.
A village hut
As I wait for glue to dry and other aspects of the build to move on, I put my mind to the issue of buildings for the table. As one of my main objectives is to revitalize my Samurai figures, I thought a couple of Japanese style buildings would be useful!
So with that in mind I decided on a village hut/small holding and later some kind of Sohei dojo/temple or whatever. First things first, what did I have in the box that would d the job. (I have a lot of stuff I purchased when last in the UK – prior to the CV19 pandemic – so did I have enough to do something?) And the answer was, YES probably.
First things first, planning!
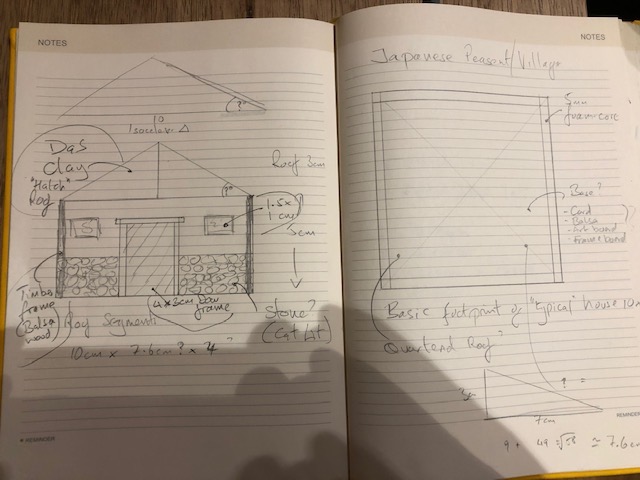
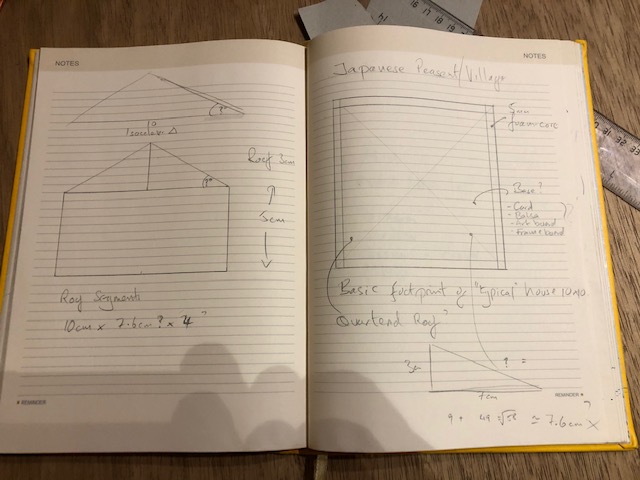
The pictures are the limited planning / design I did for a simple structure. The hut would be 10cm x 10cm and based on a 20x20cm Art board. I wanted to have a 4 sided roof, so a bit of “O” level geometry seemed to do the trick. The slope would be 3cm above the wall height which resulted in a triangle of 10×7.5×7.5cm
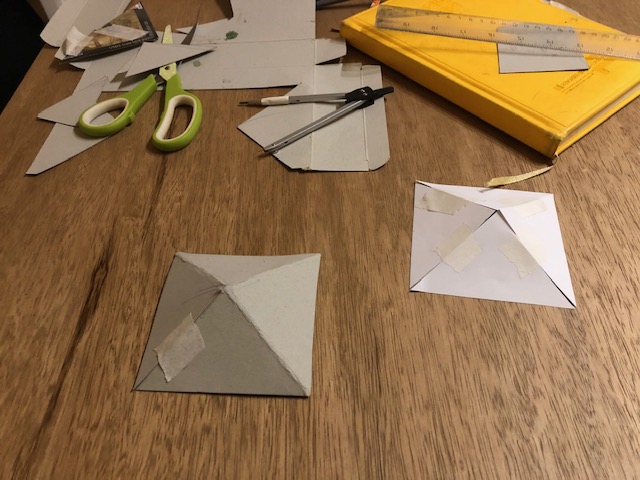

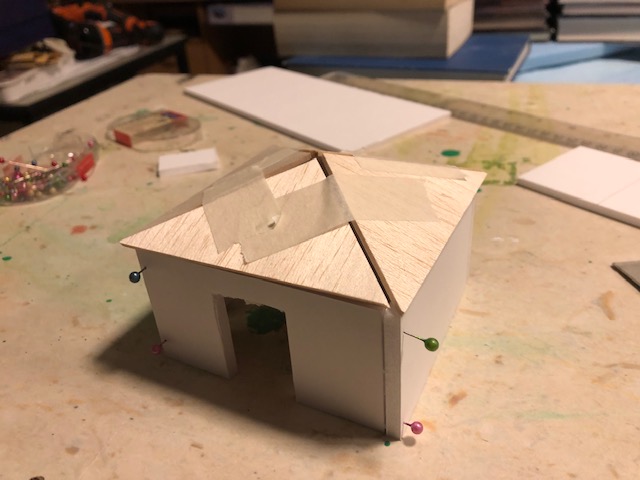
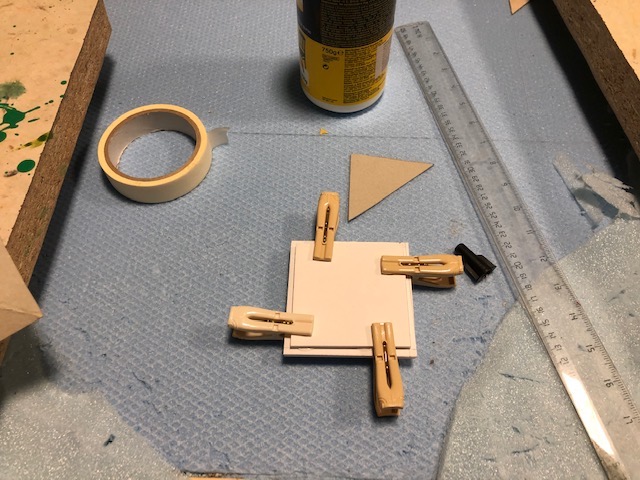
The images show the initial tester and the final construction of the roof. I added a central skewer to help hold the roof in place, and after the initial glue had set I reinforced them by additional PvA glue on each of the joints.
The roof base was constructed with 5cm foam core and a double layer as I want the roof to be removable to accommodate figures.
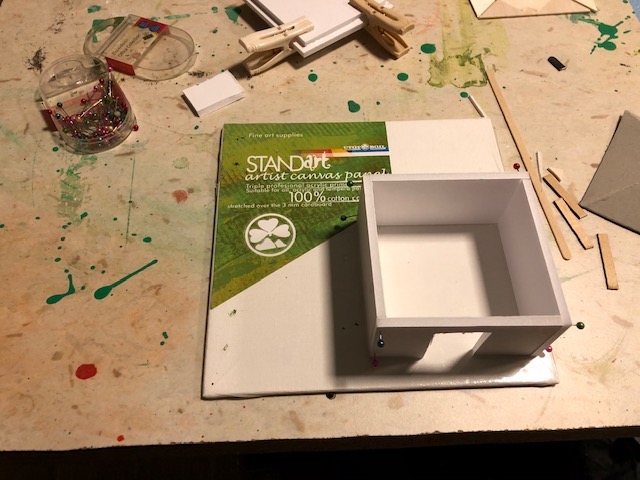
The hut is a simple square of 5cm foam core 9.5cm per side and joined with alternate “but joints” at each corner. The external dimensions being a 10cm square. PvA glue on edges where they join and pinned with tailors pins (the ones with the big ends).
The base is a 20x20cm Art board. I find these to be great for many terrain features or buildings as they are solid and with the art “canvas” glued on each side makes them attractive when completed.
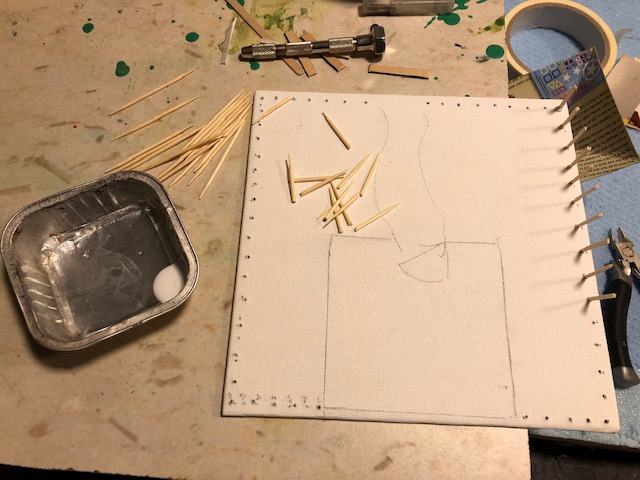
The second picture shows the base marks out for the “waddle” fences which I will make using toothpicks and yarn thread.

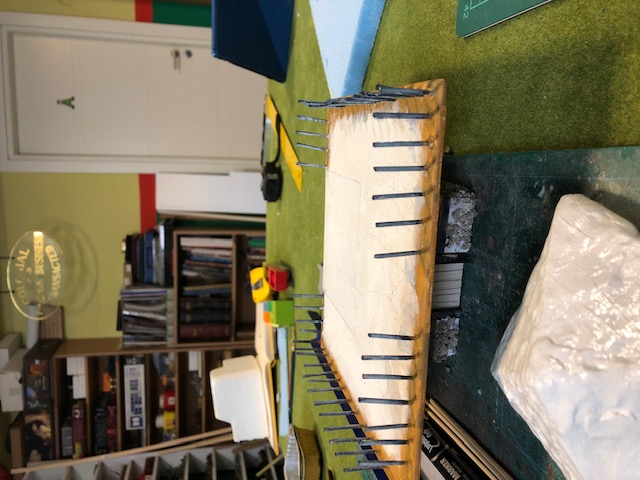
The Art board was marked out with holes every couple of centimetres leaving space for the hut and an opening. Holes were drilled to accommodate the toothpicks and these were glued in place and left to set. Each toothpicks was cut in half prior to gluing as these would be high enough to accommodate the terrain/wargame rules required.
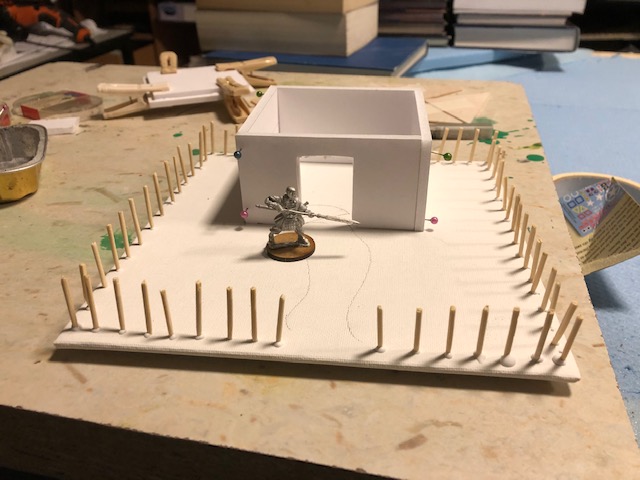
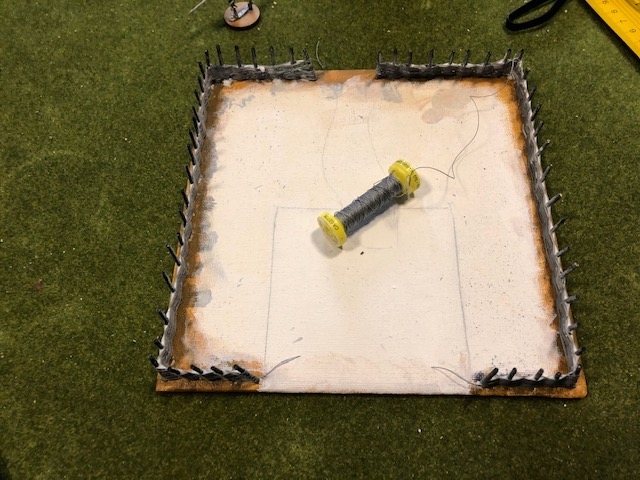
Once set, the toothpicks were painted black and then a rough dry brush on mid grey and lighter grey. Old wood tends to look more grey than brown in my opinion, and as the yarn was also grey, this seemed appropriate.
If doing this yourself (or something similar) make sure that there is an ODD number of uprights or the weaving will not work. It’s a simple but slightly tedious task to weave the yarn, so put on a podcast (The Weekender is a good choice), and weave away.
As I was running out of yarn, the hight of the waddle is a bit lower than ideal, but in the grand scheme of things, I think it still works.
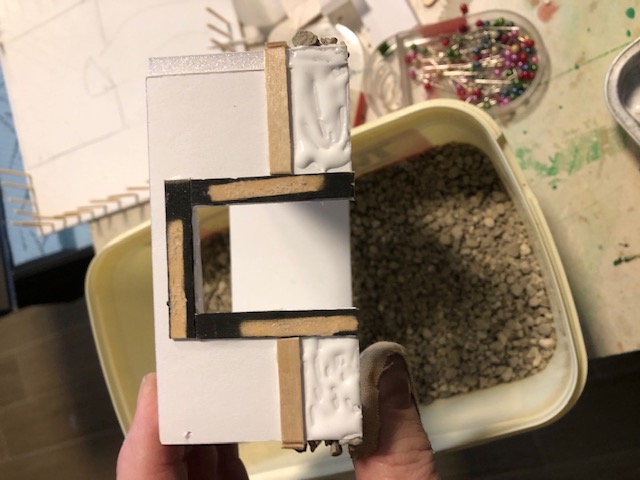
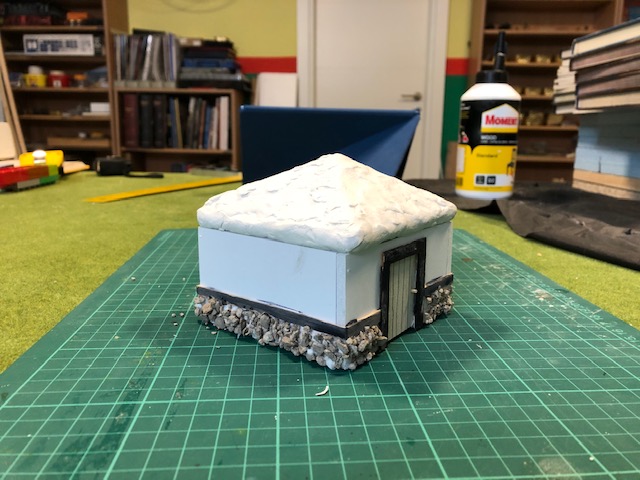
The finishing off of the hut was simply using well known techniques. I glued a strip round the building leaving space for the door frame, and glued “cat lit” to the lower walls to simulate a stone foundation. the upper walls were left plain.
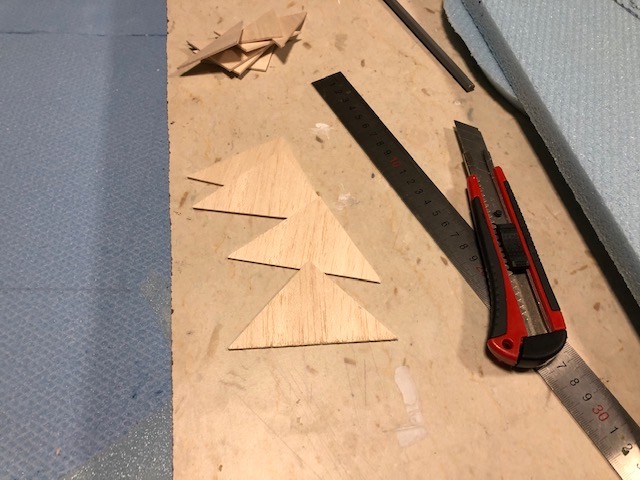
Painting was black/grey/white for the rocks. Black for the wooden strips and “uprights” at each corner, and black/brown for the door. All the wooden items were made with balsa wood cut from a long strip I had in house.
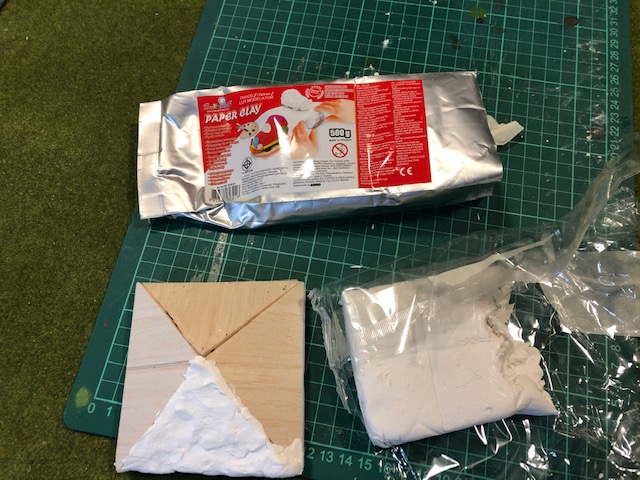
The roof was finished off by applying a product I found which was a paper based air drying craft “paste”. It really shrank when it dried, and although I added more to fill these cracks in, I’ll not use it again. I think next time I’ll either try DAS (I’ve used this before but had none left) or opt for some kind of thatching based on hand towels. (I might use this method for the Sohei dojo).
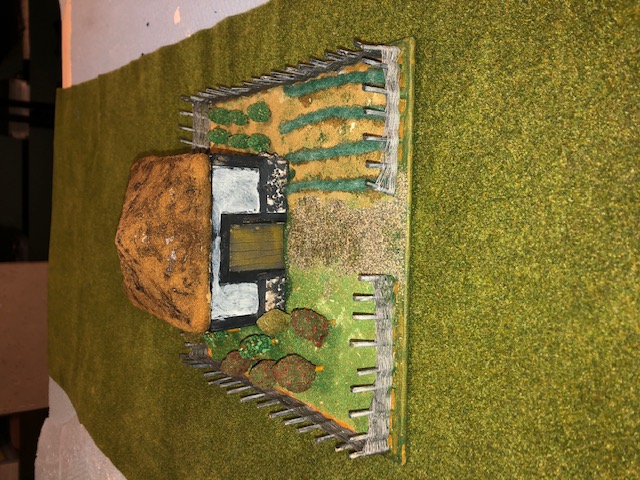 The completed hut
Landscaping Part 3
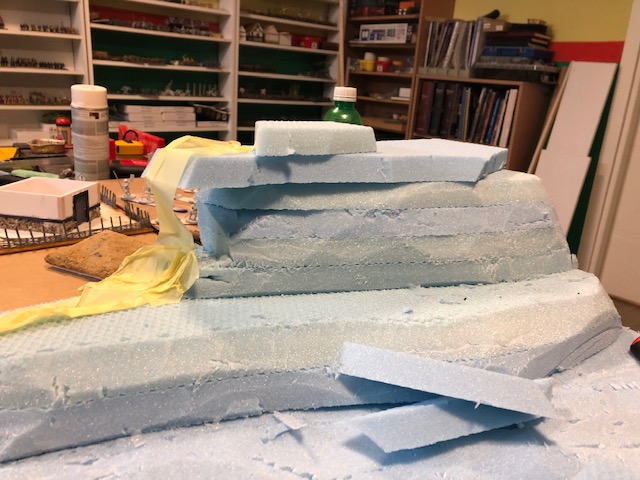
Been a delay since the last update – sometimes real life can interfere with things! So, where am I with the general layout of the table? So far, the base is now all in place. The table has the high r=ground on one edge, fairly flat area on two, and small hills on the opposite side to the higher ground as in the pictures.
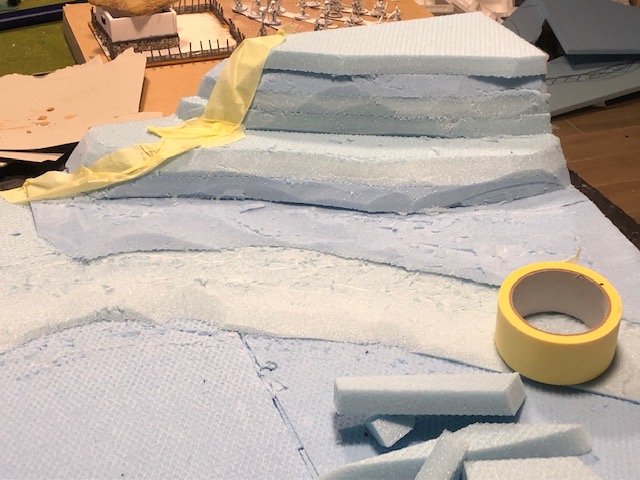
But I then started to think about adding some more features, and to Strat to learn some new skills, which was one of the main drivers fro the Challenge anyway. So I’m back to thinking about a water effect. However, I don’t want this to be on the main play area, so thought a nice idea would be to add a waterfall on the high ground.
To this end I added eve more height and the tape in the pictures is approximately where the waterfall will be placed.
While this will be mainly for the look of the thing, it would still be possible for someone to be on the high point – like a sniper etc. – so it still has some play value.
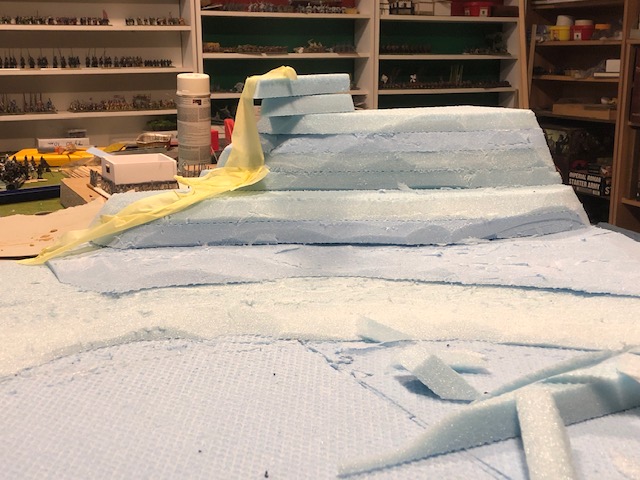

The final water effect is not yet resolved but will not be a massive thing.
However, this means I have to learn some techniques. I have no access to water terrain materials here, but I did see somewhere on line (it might have been Luke’s site or Mel’s – can’t recall) a way of using clear bathroom filler as a substitute, so that’s my next step. I am sure I can get the tubes of clear acrylic here, so some practice will be required. I’ll post my attempts on here.
In addition, I need some cliffs/rocks. I don’t have rock moulds either, but did see the way of using tin-foil, stoat’s the next step in my terrain building skill-set. I’ll post a separate blog on that side of things as well.
Finally, I want to coat the entire board with some form of surface to make it robust, and I have in mind “scuptmould” type materials. Again I will make this myself – I do know Luke has a video on this, and I will also check Mel’s terrain book.
So, lots of learning and experimenting coming up.
Landscaping Part 3
Been a delay since the last update – sometimes real life can interfere with things! So, where am I with the general layout of the table? So far, the base is now all in place. The table has the high ground on one edge, fairly flat area on two, and small hills on the opposite side to the higher ground as in the pictures.

But I then started to think about adding some more features, and to start to learn some new skills, which was one of the main drivers for the Challenge anyway. So I’m back to thinking about a water effect. However, I don’t want this to be on the main play area, so thought a nice idea would be to add a waterfall on the high ground.
To this end I added even more height to the ground itself and the decorator’s tape in the pictures is approximately where the waterfall will be placed.
While this will be mainly for the look of the thing, it would still be possible for someone to be on the high point – like a sniper etc. – so it still has some play value.


The final water effect is not yet resolved but will not be a massive thing.
However, this means I have to learn some techniques. I have no access to water terrain materials here, but I did see somewhere on line (it might have been Luke’s site or Mel’s – can’t recall) a way of using clear bathroom acrylic as a substitute, so that’s my next step. I am sure I can get the tubes of clear acrylic here, so some practice will be required. I’ll post my attempts on here.
In addition, I need some cliffs/rocks. I don’t have rock moulds either, but did see the way of using tin-foil, that’s the next step in my terrain building skill-set. I’ll post a separate blog on that side of things as well.
Finally, I want to coat the entire board with some form of surface to make it robust, and I have in mind “scuptmould” type materials. Again I will make this myself – I do know Luke has a video on this, and I will also check Mel’s terrain book.
So, lots of learning and experimenting coming up.
Sōhei Monk's dojo
While waiting to decide how to tackle my three skill deficits (sculptamould, tinfoil cliffs, and water) I made another building. This time it’s a kind of dojo/temple for the Sōhei Monks I have to play Test of Honor or Ronin.
The construction will be fairly typical, I think, main walls constructed with foam core, but as I had some off-cuts of wood and some balsa wood, I thought some experimentation was in order.
The main materials were:
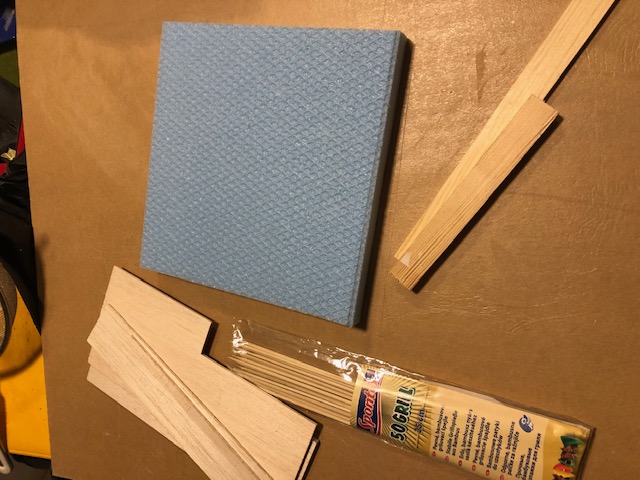

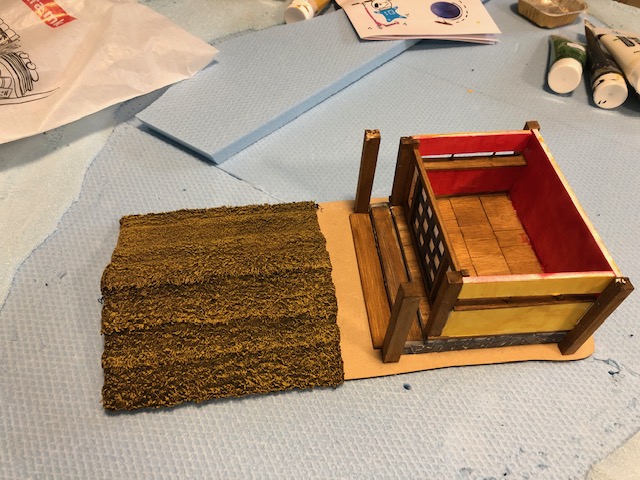
I started with a block of blue foam approximately 20×20 cm. I didn’t;t measure it at the time it was an off-cut that “Looked right” for the figures. I had already some random prices of balsa and the “tongue depressors” were to be the flooring.
All the wooden pieces were brushed over with the Sepia wash to give a “natural” wood effect. No other paining was done to the balsa except the wash.
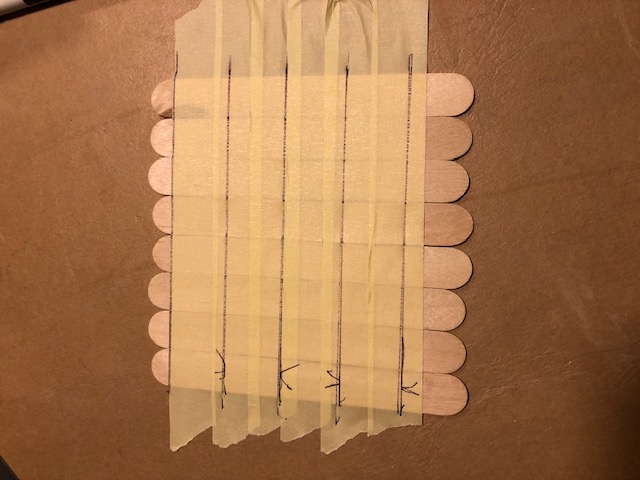
The sticks were taped together (either across) and a steel ruler was used to draw the parallel lines across the sticks which were then cut through with a craft knife (Use a sharp one, change the blade as necessary).
These were glued down to the blue board to create an “off-set” flooring. Each alternate row being off set and the “half” board removed from one side, replaced on the other side to make the effect. This will be clear in the pictures below.
The wooden steps were made from two off-cuts of wood strip I had used for a completely different task in the house.
The main walls were made from foam core (5mm) and glued in place with white glue. They were held with elastic bands until the glue set.


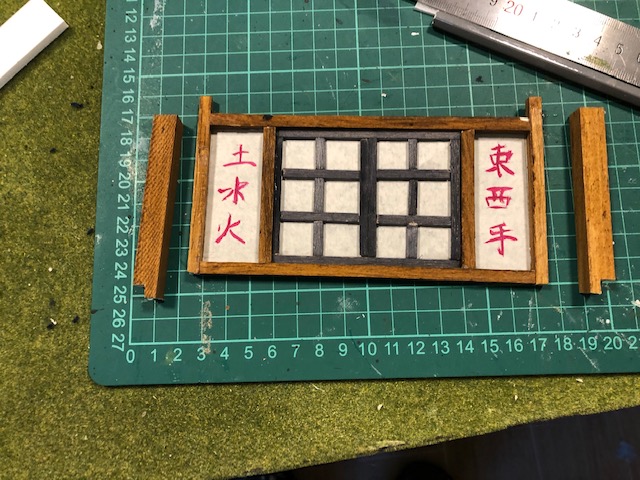
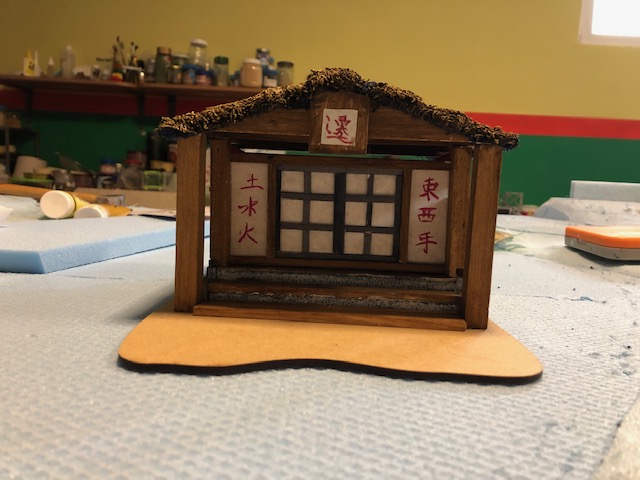
I wanted to make a simulation of a typical Japanese wood and paper door, and to do this I made a simple frame from balsa wood and colored it black. The paper was some light “tracing” paper (or something close to it) that I have had for years. It was naturally an off-white colour.
The Kanji are taken from a book of Kanji I had and have no real significance, I just liked to look of them. From memory they are a couple of characters for West and South winds and some numbers.
This was glued to the front of the dojo with supporting balsa uprights.
Next up was the roof. I used card from a box as the base and cut it across the corner joint so that it formed the angle of the roof. I had measures an approximate height for the roof, but mainly this was by eye as to what looked ‘right’. The roof was supported by balsa inserts as I wanted to to be removable for play.
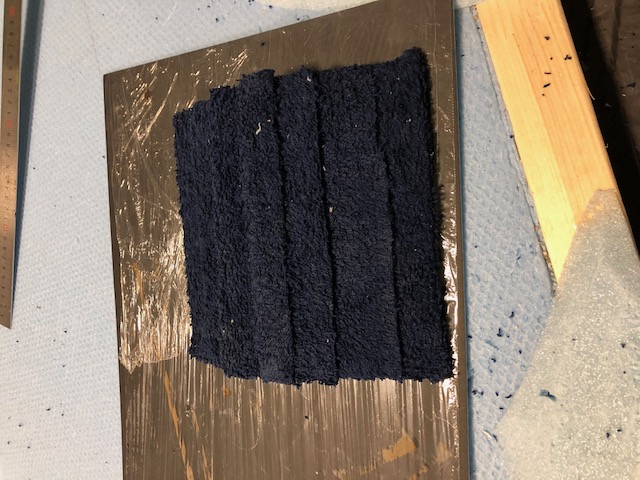
Once this was dry, I used an old hand towel to make a “thatched” roof. The towel was cut into strips and glues down with PvA, starting from the bottom and overlapping slightly up the roof. A final piece was glued down on the ridge f the roof. This was left to dry completely before the next step.
Once dry, a dilution of PvA and water (approximately 50/50) was brushed onto the towel roof and I used an old stiff hair brush to give an impression of thatching.
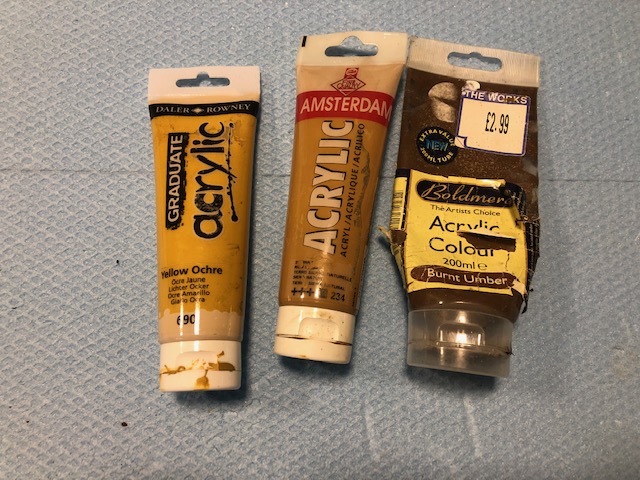
Once THIS had dried, the roof was painted with a dark brown acrylic paint, followed by successive dry-brushing of lighter paints. These were cheap paints for a “pound shop” I have had for a long time and purchased in the UK. I can’t remember from where anymore.
The paints I used were:
Brown – Burnt Umber
First dry brush – Raw Sienna
Final dry brush – Yellow Ochre.

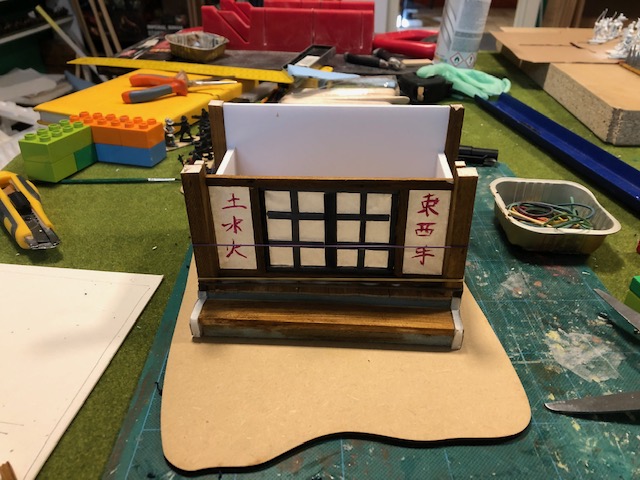
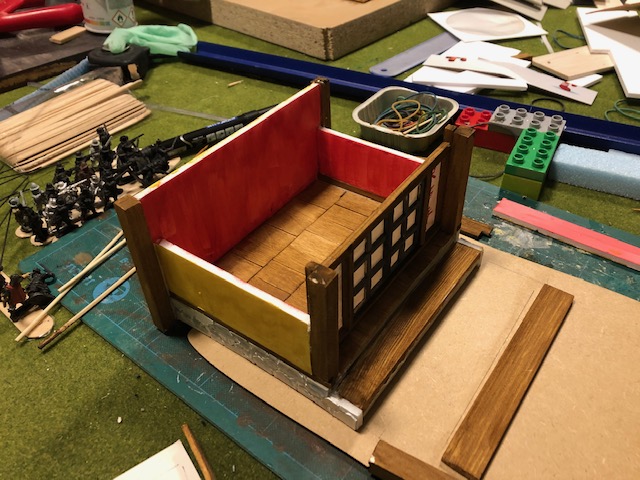
Putting it all together I added two columns at the entry to the dojo to help support the roof, and finished the sides with some cut up card to simulate rocks. These were painted with black and grey acrylic paints.
The walls were also painted with artist acrylics and maybe not authentic, but the yellow and red combination felt right.
The final pictures show the addition of a cherry blossom and some flocking. I want to find a small “Buddha” of similar statue for inside the dojo/temple and if I find one, I will probably make a small plinth for it to rest on.


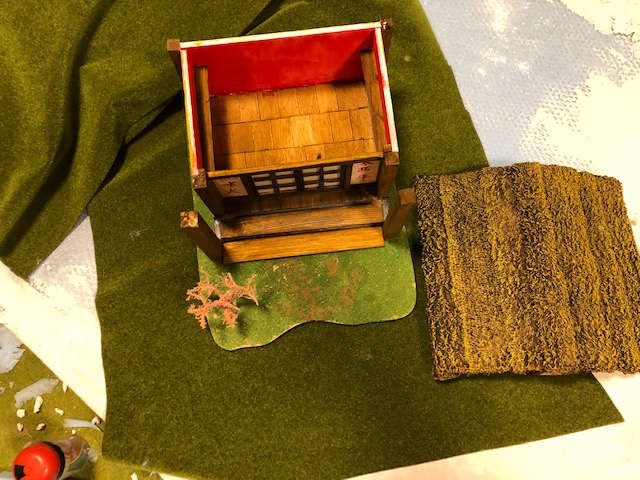
The miniatures in this final picture are the Sōhei set from Test of Honor (first edition) – not sure these exact figures are still available. I might show these in more detail later if anyone is interested. I need to finish off the basing and final touches, but wanted to show the building in situ, as it where.
Thanks for reading.
 Defend to the Death!
Skills learned
So after a long time (Life can be a B**ch) I have got to the end of the project and just a quick post on the subsequent skills I have tried to learn during this project.
I followed the basic concept for Skuptamould which Luke at Geek Gaming posted on YouTube quite some time ago, with a small digression. In his video he dries the papier mâché mix, but I just immediately used it by adding plaster powder to the “gloop”.

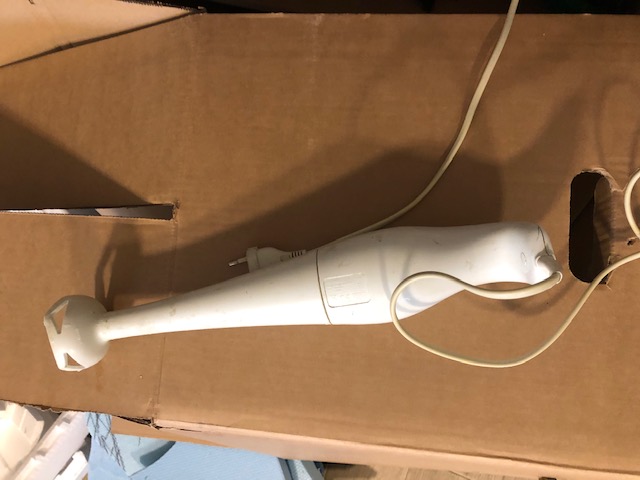
The process is simple. Take a couple of toilet rolls and break them down into small pieces. Put them in A LOT of water and mash them using some form of mixer. I had an old hand held chopping/mixing tool which works well.
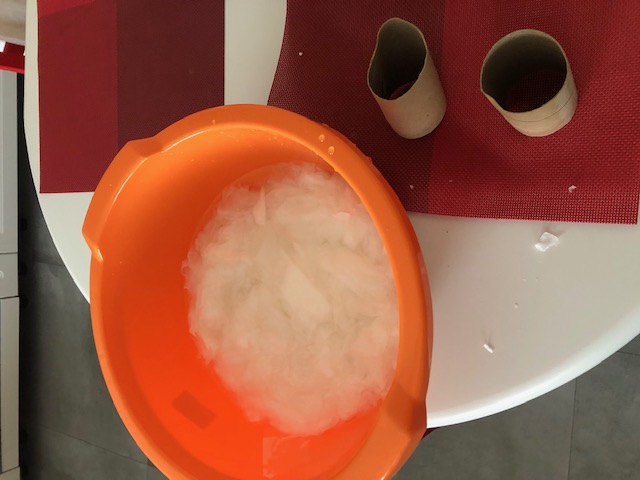
Keep chopping up the paper until it’s a mush. At this point you can take it out of the water and dry it off if you want to make a supply for later. I did not do this as I was using the mix immediately.
I took out the paper with a sieve and added an equal amount of player. (I only had wall plaster, but I’d imagine Plaster of Paris or another product would work as well). This was mixed to form a mush similar in texture to “cottage cheese (adding more water as required).
This final mix was spread on the board with a trowel tool and left to dry. One amount of papier mâché mix did a small section of the board as seen in the picture below
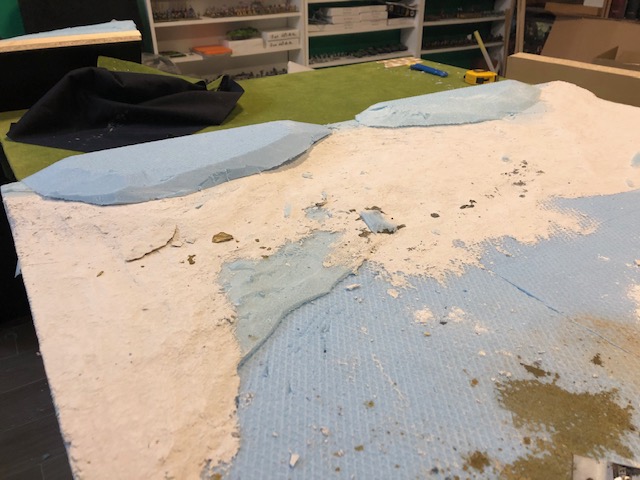 Initial "Skulptamould" mix
The work continued until the entire board was covered and it was also used to cement in place the rock faces. (see additional post on the plaster rocks).
Making rocks
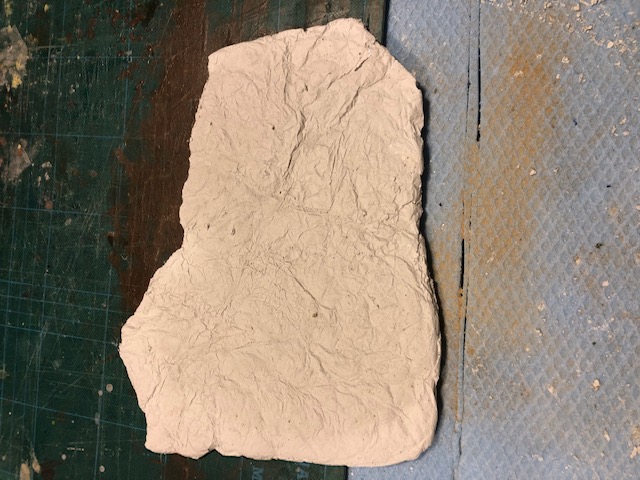
The second skill I wanted to learn was making plaster rock faces. As I do not have access to rubber moulds, I went down the aluminum foil route and had a couple of walk throughs to get the process as good as possible. (Unfortunately I forgot to photograph my final attempts, but the following pictures should give a good idea of the process).
Essentially it requires making a form out of several layers of tin-foil (I used 7 layers) glued with PvA glue to hold the shape. The foil is scrunched up then unfolded to make the “rock shapes” and my final attempt included depressing the foil in places to make more depressions in the foil. (My first attempt was too flat, as the pictures show).


The formed sheet was supported by a layer of “cat-lit” although sand would work just as well. A mixture of plaster was made, which I would say was the constituency of double cream, and pours into the foil mould. I banged the table several times to get most of the air bubbles out.
The plaster set fairly quickly. But I’d recommend leaving it for a few hours. When taking the plaster out the mould, it broke up anyway, but this is not really an issue as I used the smaller pieces when making the rock face.


Painting the rocks is a personal choice, but I tried both the usual “black/grey” approach and one with more colors. This was heavily diluted acrylic paints with a final black wash. I’d recommend experimenting with off cuts to see what works well for the look you are after.


The final picture is the rock face in suture on the board.
Making rocks
The second skill I wanted to learn was making plaster rock faces. As I do not have access to rubber moulds, I went down the aluminum foil route and had a couple of walk throughs to get the process as good as possible. (Unfortunately I forgot to photograph my final attempts, but the following pictures should give a good idea of the process).
Essentially it requires making a form out of several layers of tin-foil (I used 7 layers) glued with PvA glue to hold the shape. The foil is scrunched up then unfolded to make the “rock shapes” and my final attempt included depressing the foil in places to make more depressions in the foil. (My first attempt was too flat, as the pictures show).


The formed sheet was supported by a layer of “cat-lit” although sand would work just as well. A mixture of plaster was made, which I would say was the constituency of double cream, and pours into the foil mould. I banged the table several times to get most of the air bubbles out.
The plaster set fairly quickly. But I’d recommend leaving it for a few hours. When taking the plaster out the mould, it broke up anyway, but this is not really an issue as I used the smaller pieces when making the rock face.

Painting the rocks is a personal choice, but I tried both the usual “black/grey” approach and one with more colors. This was heavily diluted acrylic paints with a final black wash. I’d recommend experimenting with off cuts to see what works well for the look you are after.
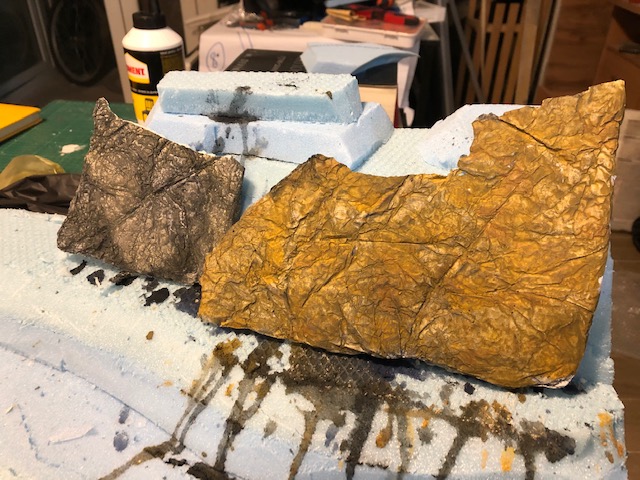
The final picture is the rock face in situ on the board.
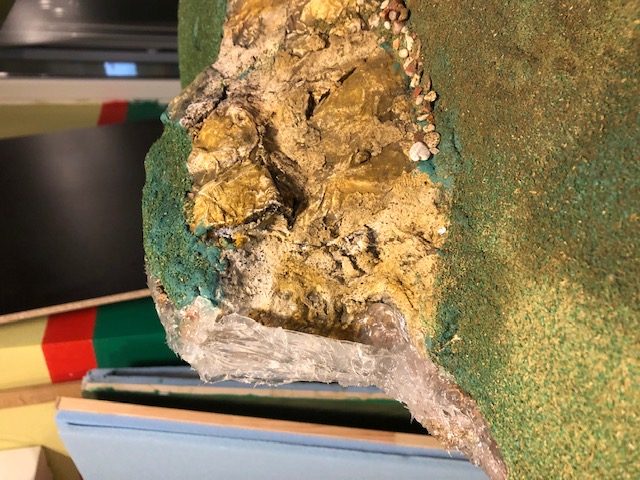
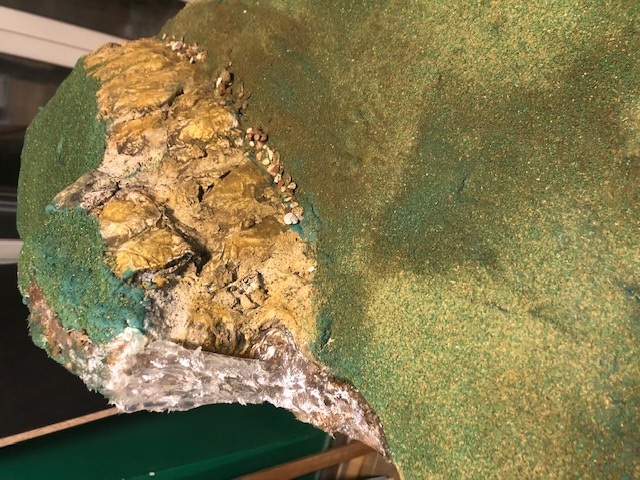
Making water
The third skill I tried to learn was water effects. Again as I was unable to obtain the propriety water effect materials, I used instead the acrylic material used in bathrooms for sealing washbasins/baths etc.
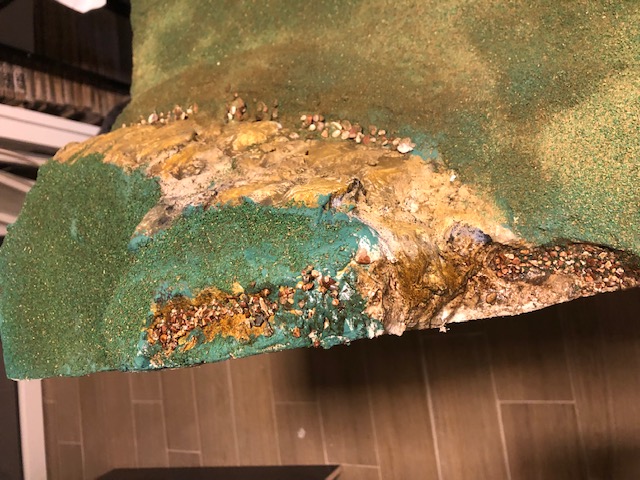
The small area where I wanted to have the effect was prepared quite simply. The “river” was filled with small rocks (glued in place with PvA) and when dry I simply used soft tone varnish to dampen down the rock colors and create a “brownish” surface for the water effect.
The waterfall was prepared by cutting a small piece of plastic from a figure pack and ‘gluing’ it in place with the acrylic. (See pictures)
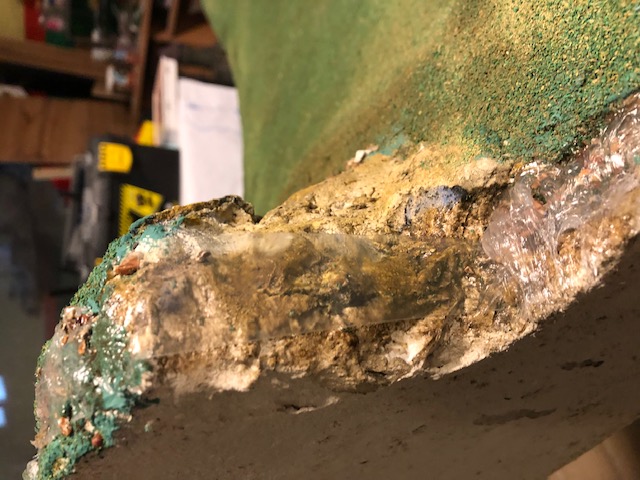
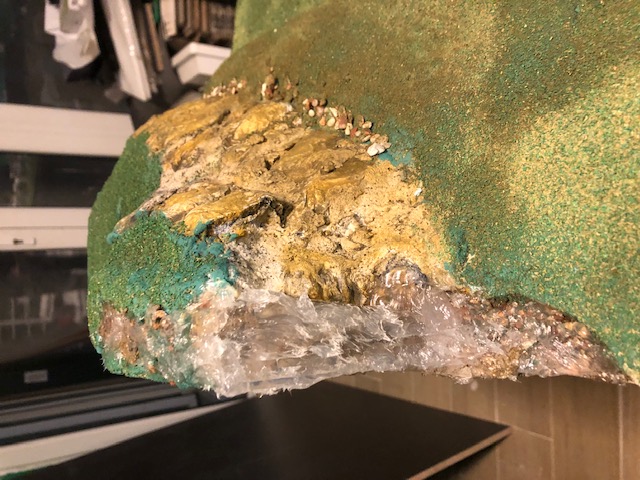
Finally, additional acrylic was pasted on the river and stippled to make a kind of foaming effect where the waterfall landed on the lower area. Some white paint was added for a highlight and “foam” to finish it off.
It’s not fantastic, but as it’s only there for ambiance and not for any practical wargaming purpose, I’m happy enough with the result.
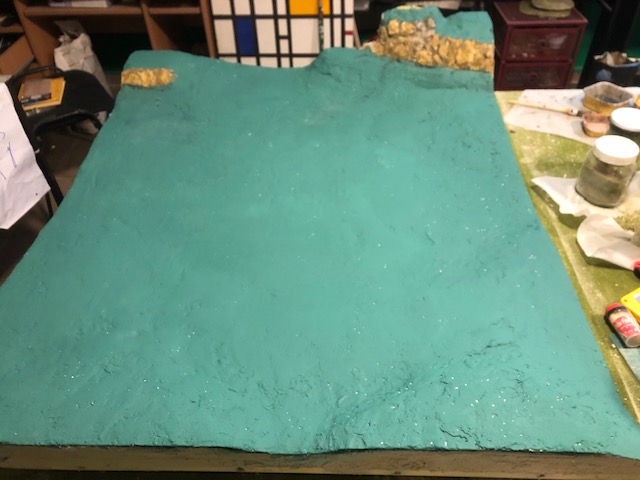
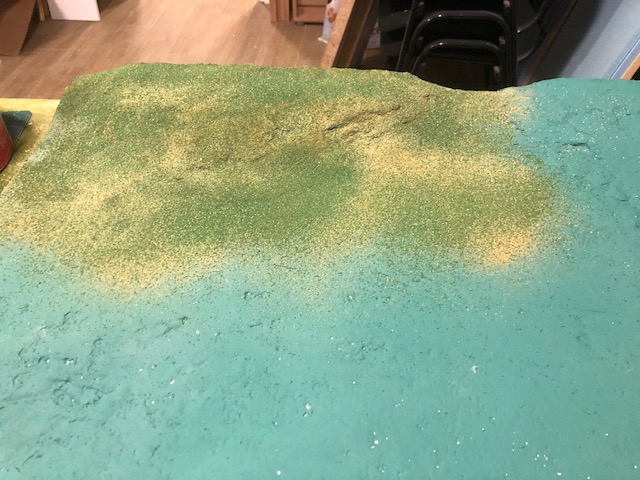
The final board
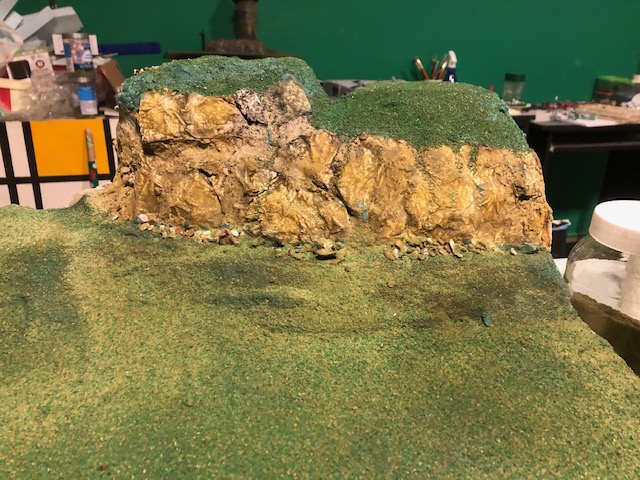
So, the board was completed by covering the raw surface with the Skulptamould mix and adding rocks and water effects. The entire “grass” area was painted with a household emulsion pain in green, and this was then flocked with my home-make flock in various shades of green and brown.
The cliffs were painted in watered down sepia and ochre paints, and then a final wash of black.
The water effect was done after all the other stages has been completed.
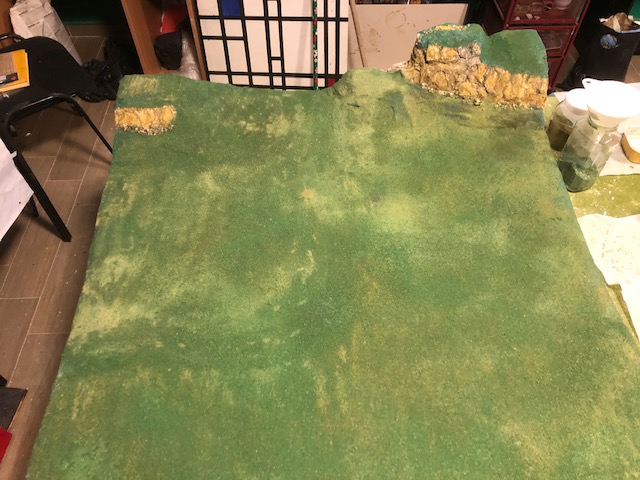
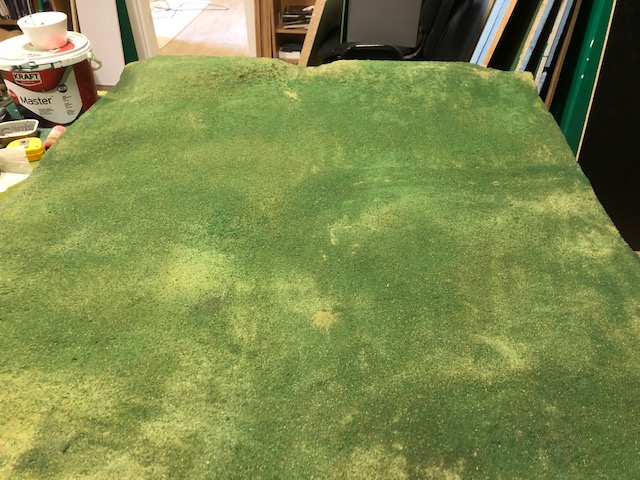
The table surface was them allowed to dry and a final PvA / water mix (approx 1:9) was sprayed over the entire board to seal in the flock. I did not add trees etc. as I intent to use the board for different scales so did not want to push the look too far in one direction.
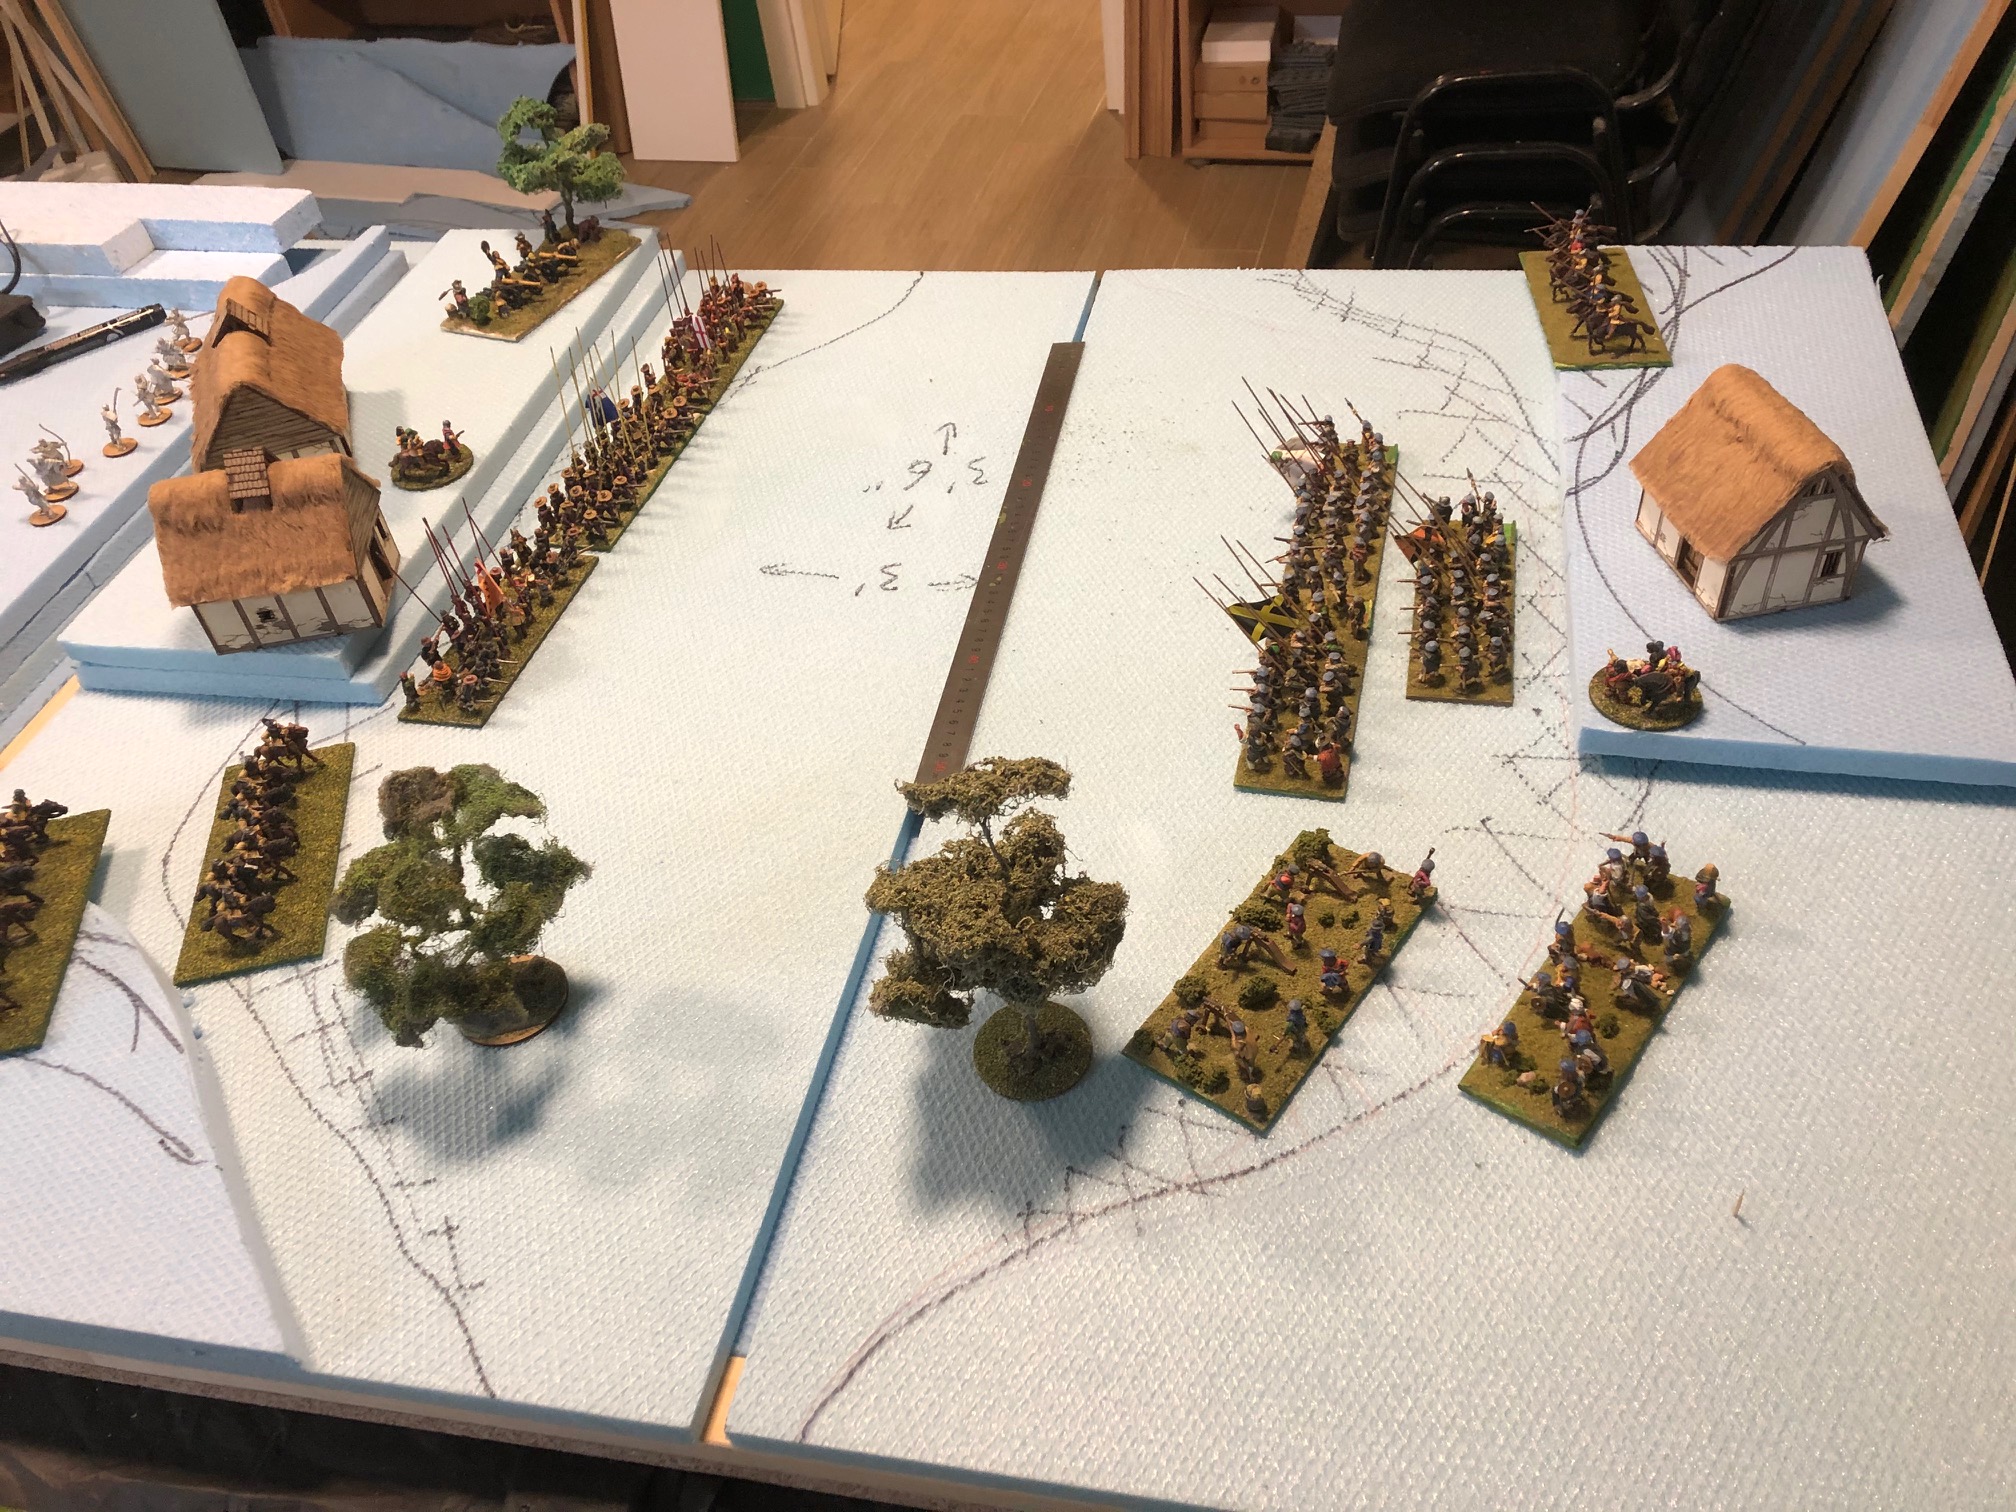
There follows a few pictures of the bard using different skirmish/small battle games. Ronin; Bolt Action Saga, and LaSalle

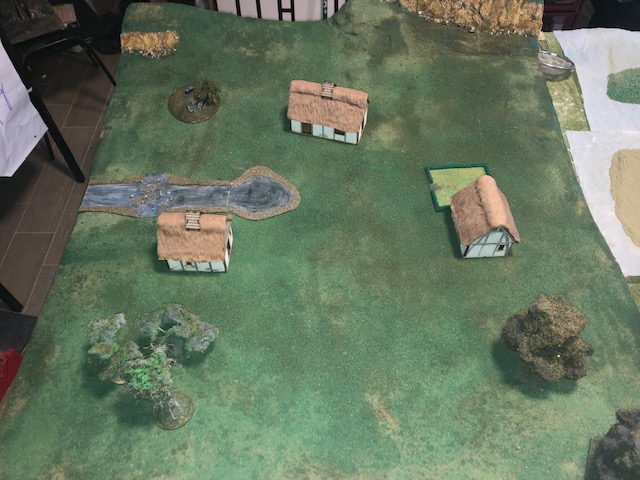
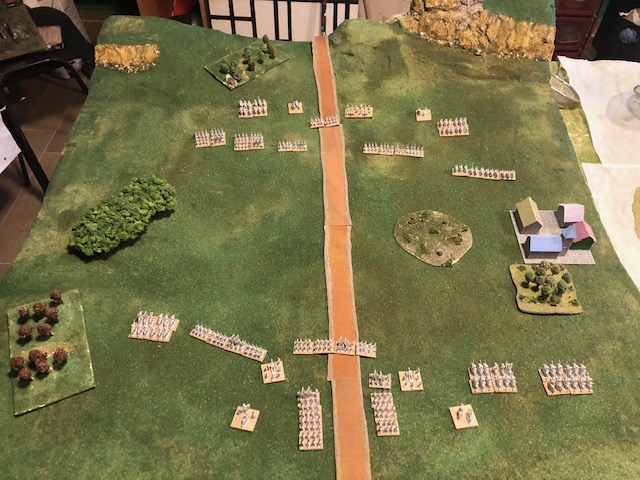
The final picture shows some SYW 10mm figures as yet unpainted. But now I have a board, there’s no excuse not to paint them up.
Thanks for watching this small project. And good luck to everyone


