
Its not a PUMA
plugn play
So in order to meet my first goal I have to achieve 2 things .
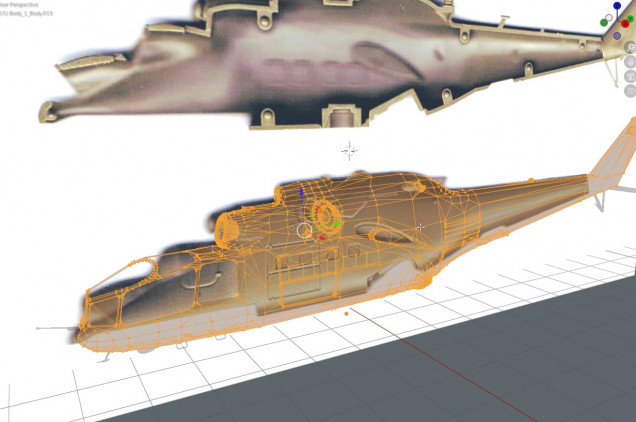
Make a virtual ‘solid’ and decide what parts of the battlefront plastic kit I want it to be compatible with.
Typicaly game models are just a colection of 2 dimensional faces that through angle, texture and shaders create the illusion of something solid, possibly even round and smooth. But I need something that will print with real curves and be geometricaly solid with no holes for calculations to leak out. The printer slicing and printing process will smoth out some ‘fractals’ but as I mve through stitching up holes and gaps I’m making a few extra subdivisions and smothing them out to avoid any issues later.
I’m also took a moment to lay battlefronts pieces on a flatbead scanner so I have a reference. My model only needs to match in a general way overall but I do need to acuratly model those areas that might share components such as wing stubs, rotors, and magnets for flight stands.
Right now I’m thinking I will leave modeling compatability for under-carriage till last. Maybe even do a test print and dry fit first to check this is all heading the right direction.
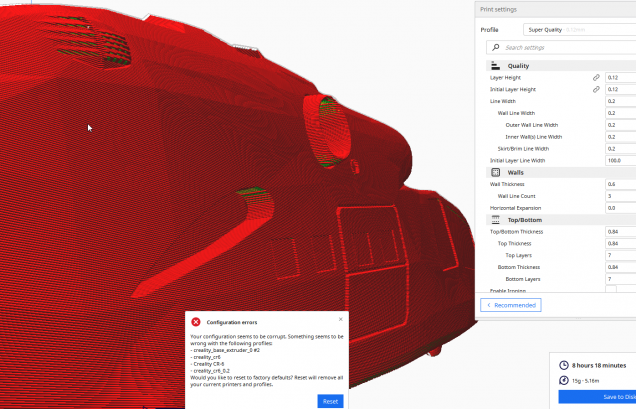
So after the main fueselage was stiched up I dropped it in the slicer to check for errors. The slicer was happy enough with the model but to my mind the resolution just wasn’t where I wanted so I went back and added polies for a couple of hours till I was satified.
Its printing now and and should be ready in about 10hrs for my breakfast.



















Leave a Reply