


Kingdom Death:Monster – What have I gotten myself into??!!!


Recommendations: 862
About the Project
I finally bit the proverbial bullet last year and jumped into the deliciously insane, macabre and horrifically beautiful world of Kingdom Death. It all started when one of my viewers over on Twitch sent me a mini to paint as a gift. Loved it so much so I had a renewed look into the game and all the minis that are part of the world. Then I was given another mini as a present from another viewer and I was hooked and got the core game from BackerKit. So all I get done for this amazing game and world will be going HERE! Hope you enjoy as much as I am :)
Related Game: Kingdom Death: Monster
Related Company: Kingdom Death
Related Genre: Survival
This Project is Active
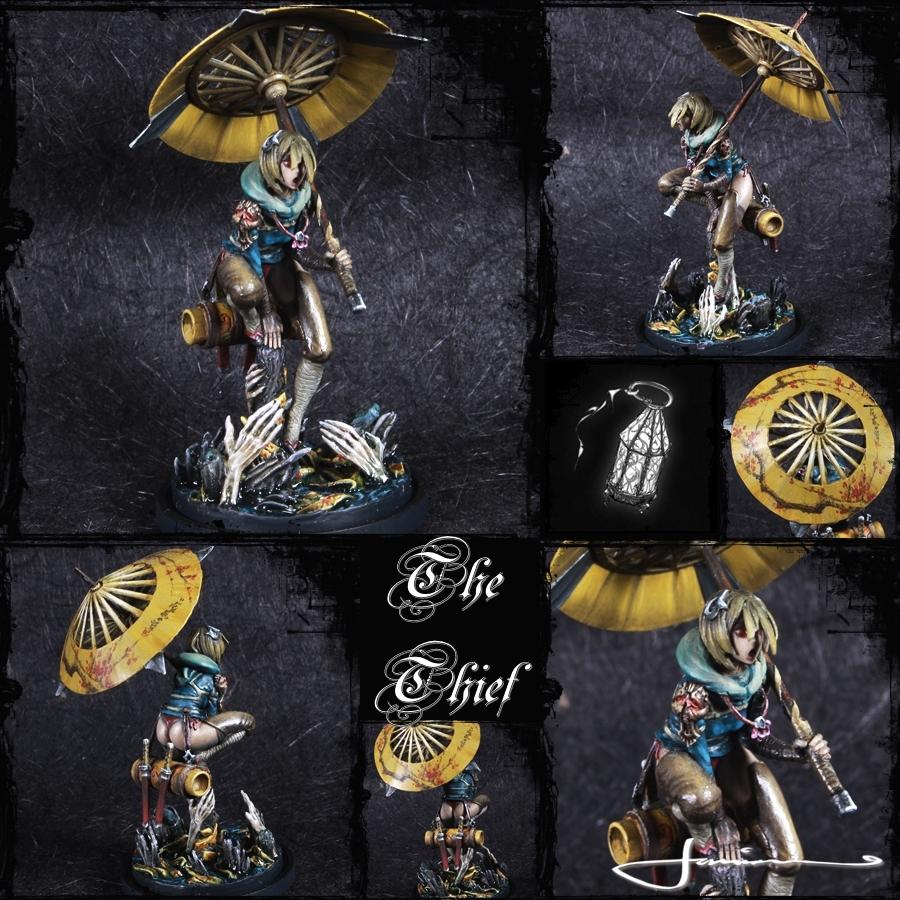
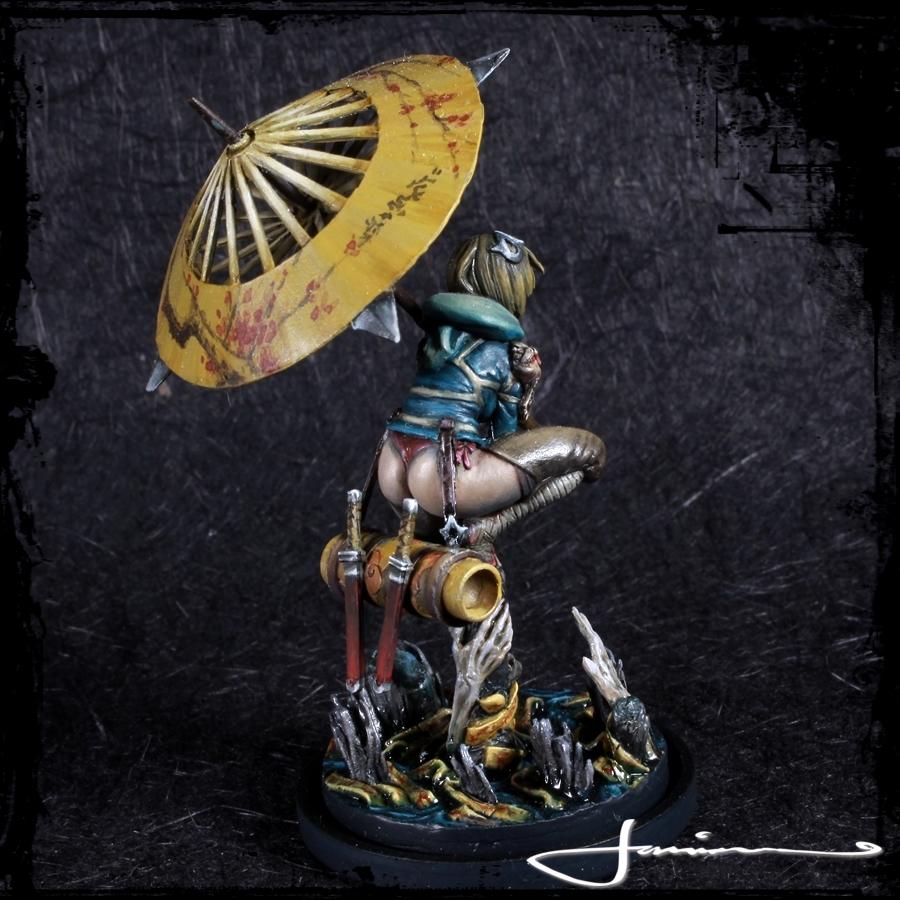
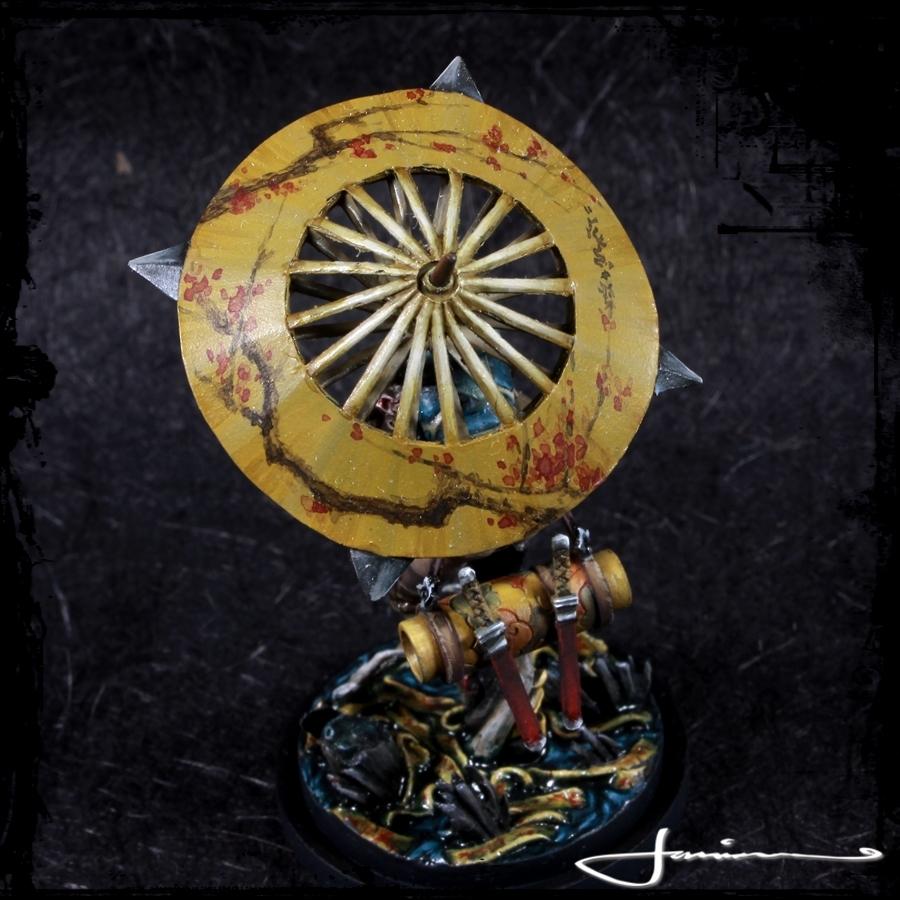
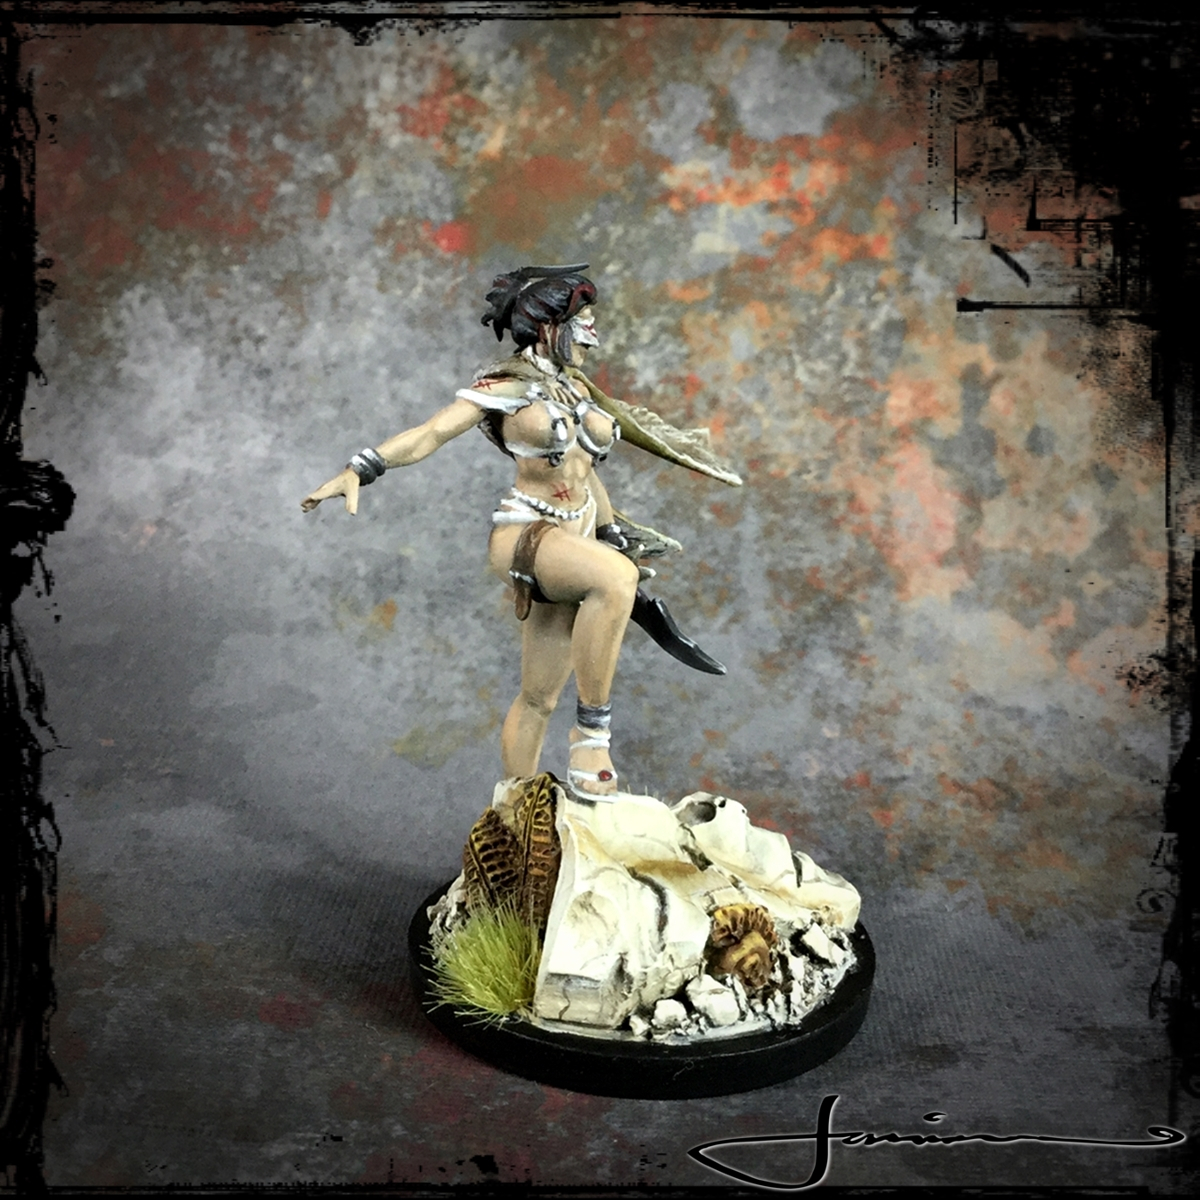
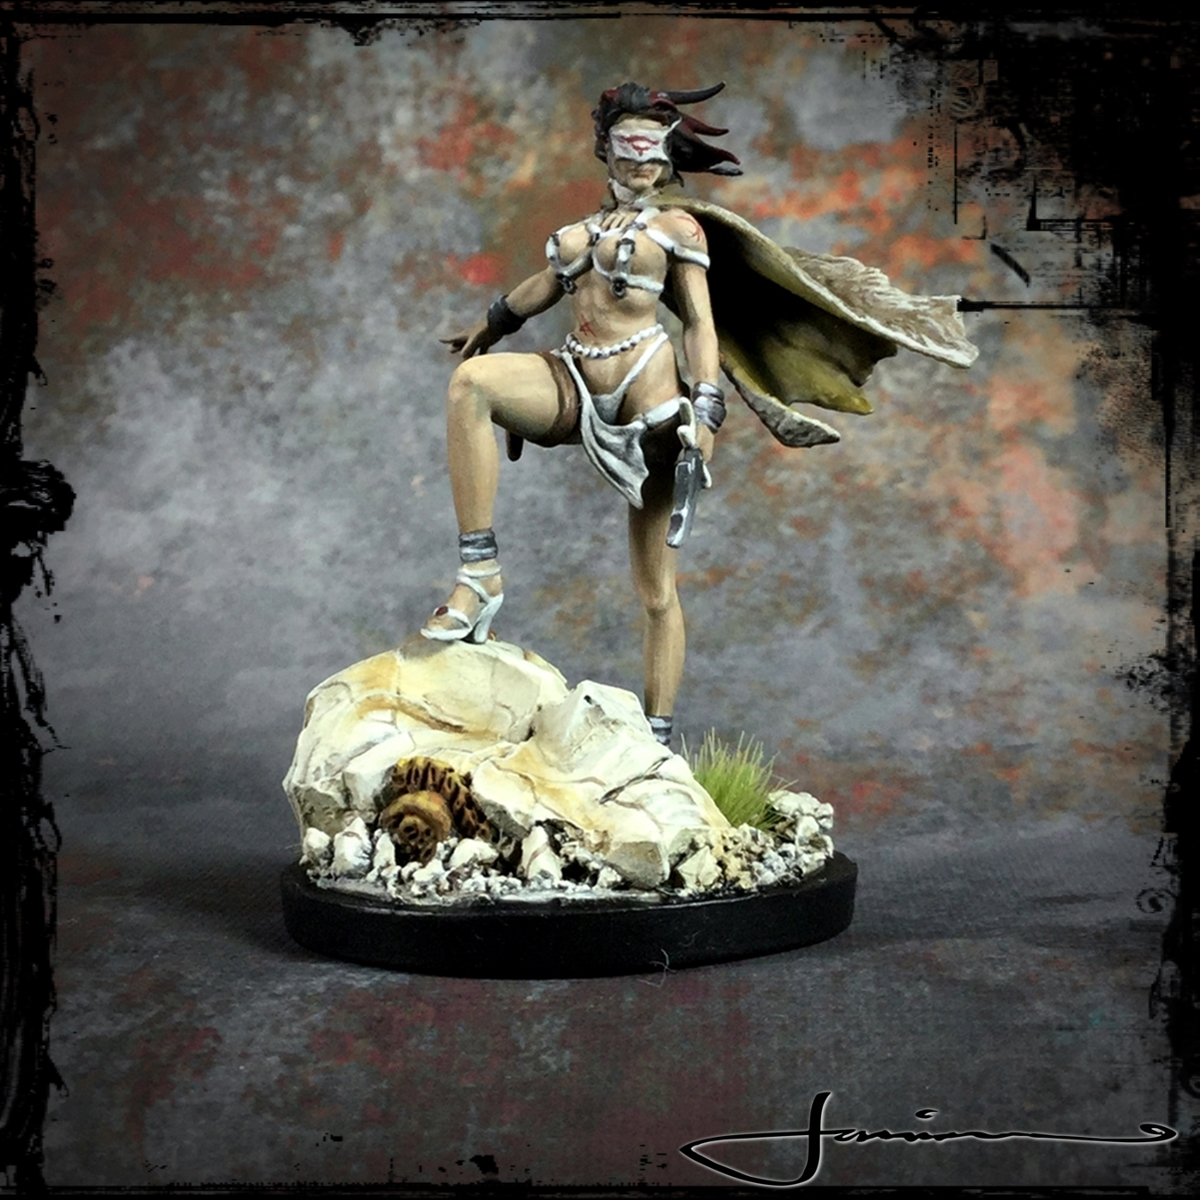
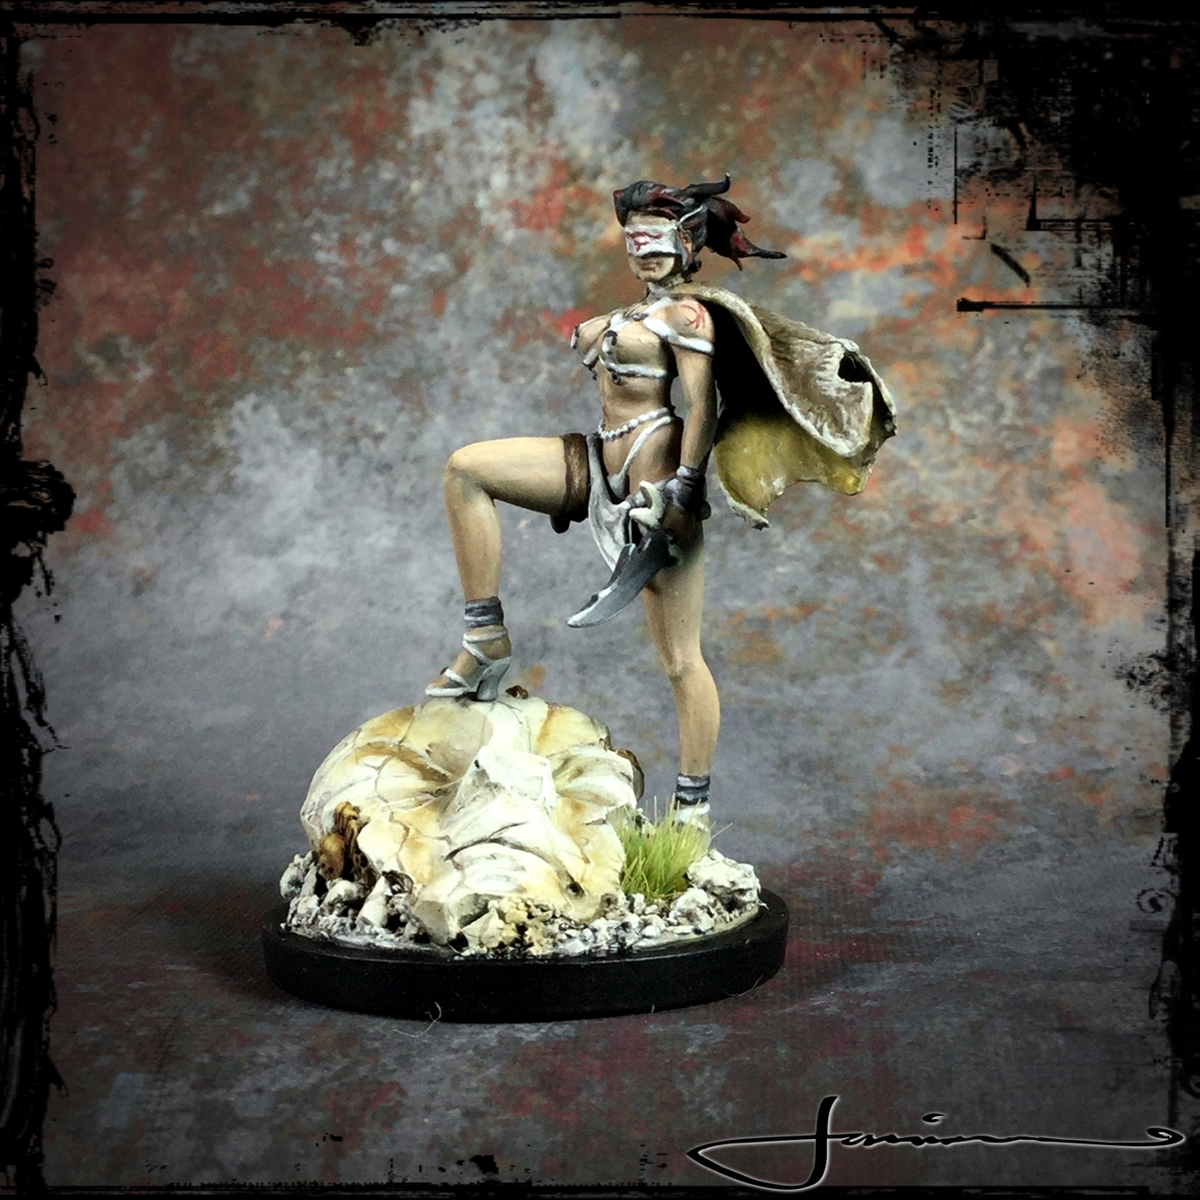
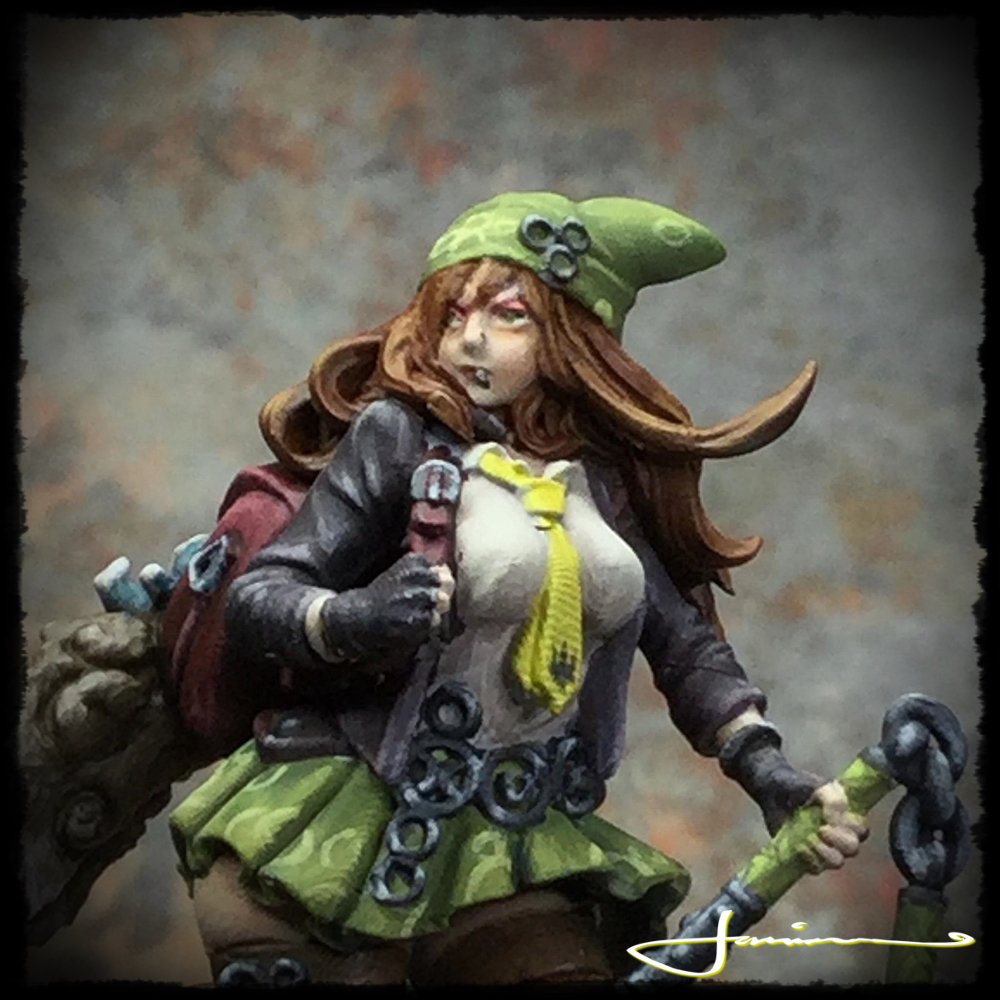
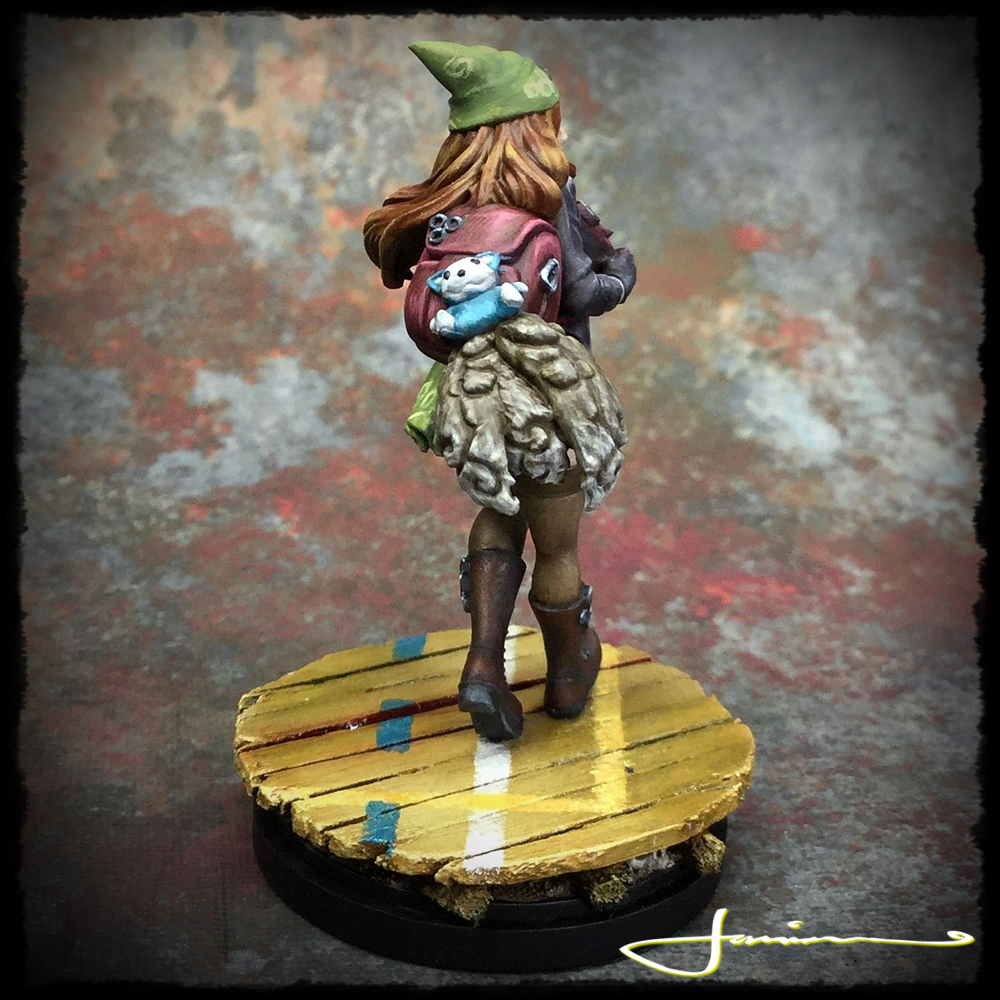
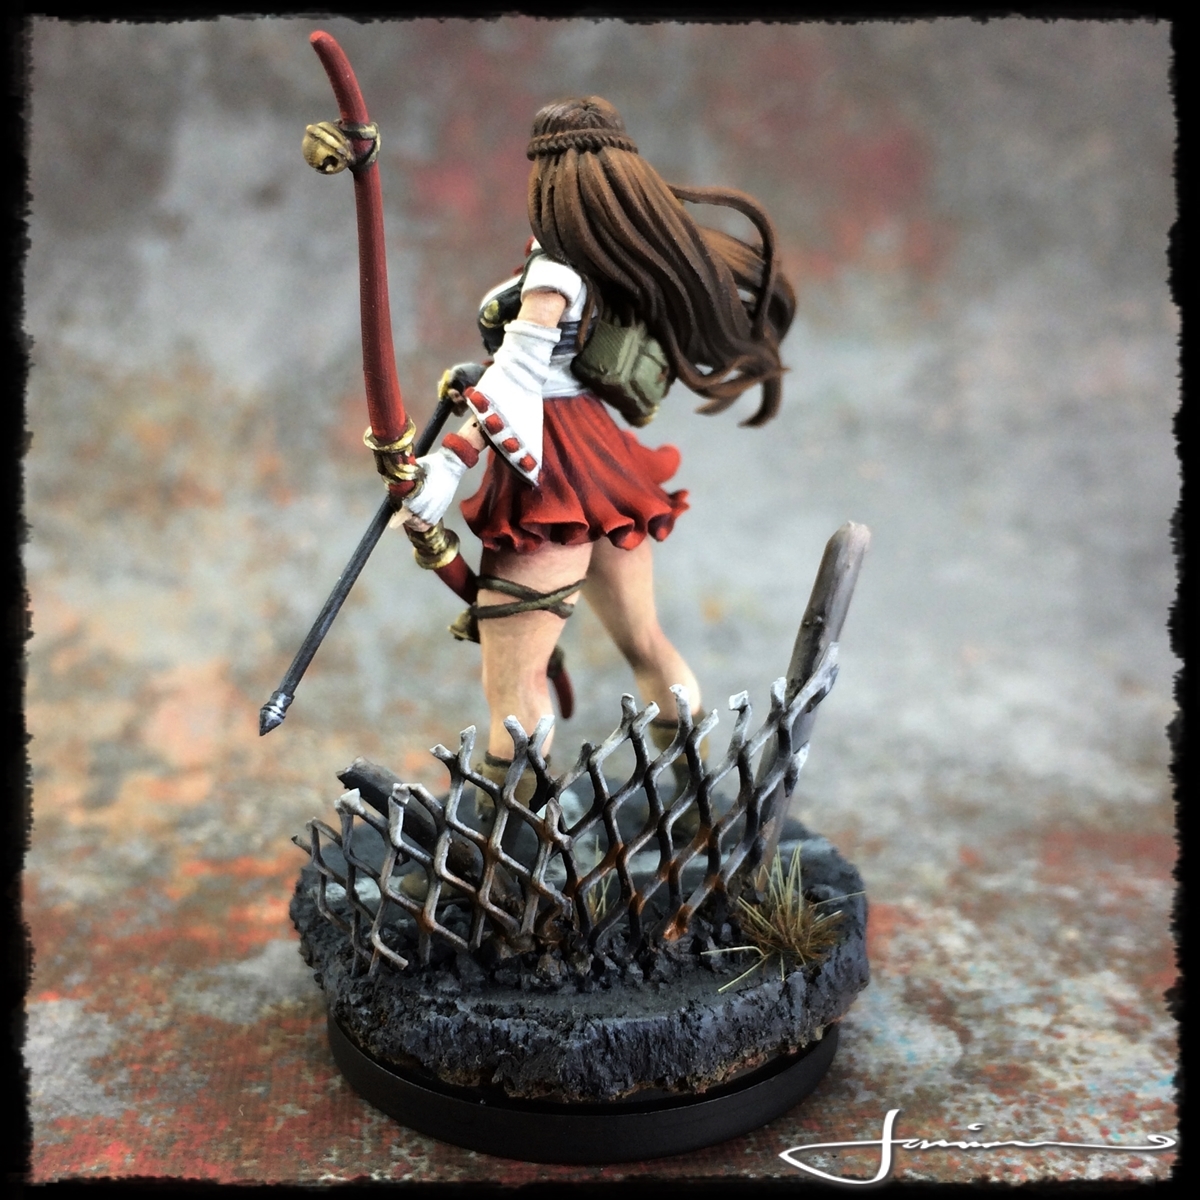
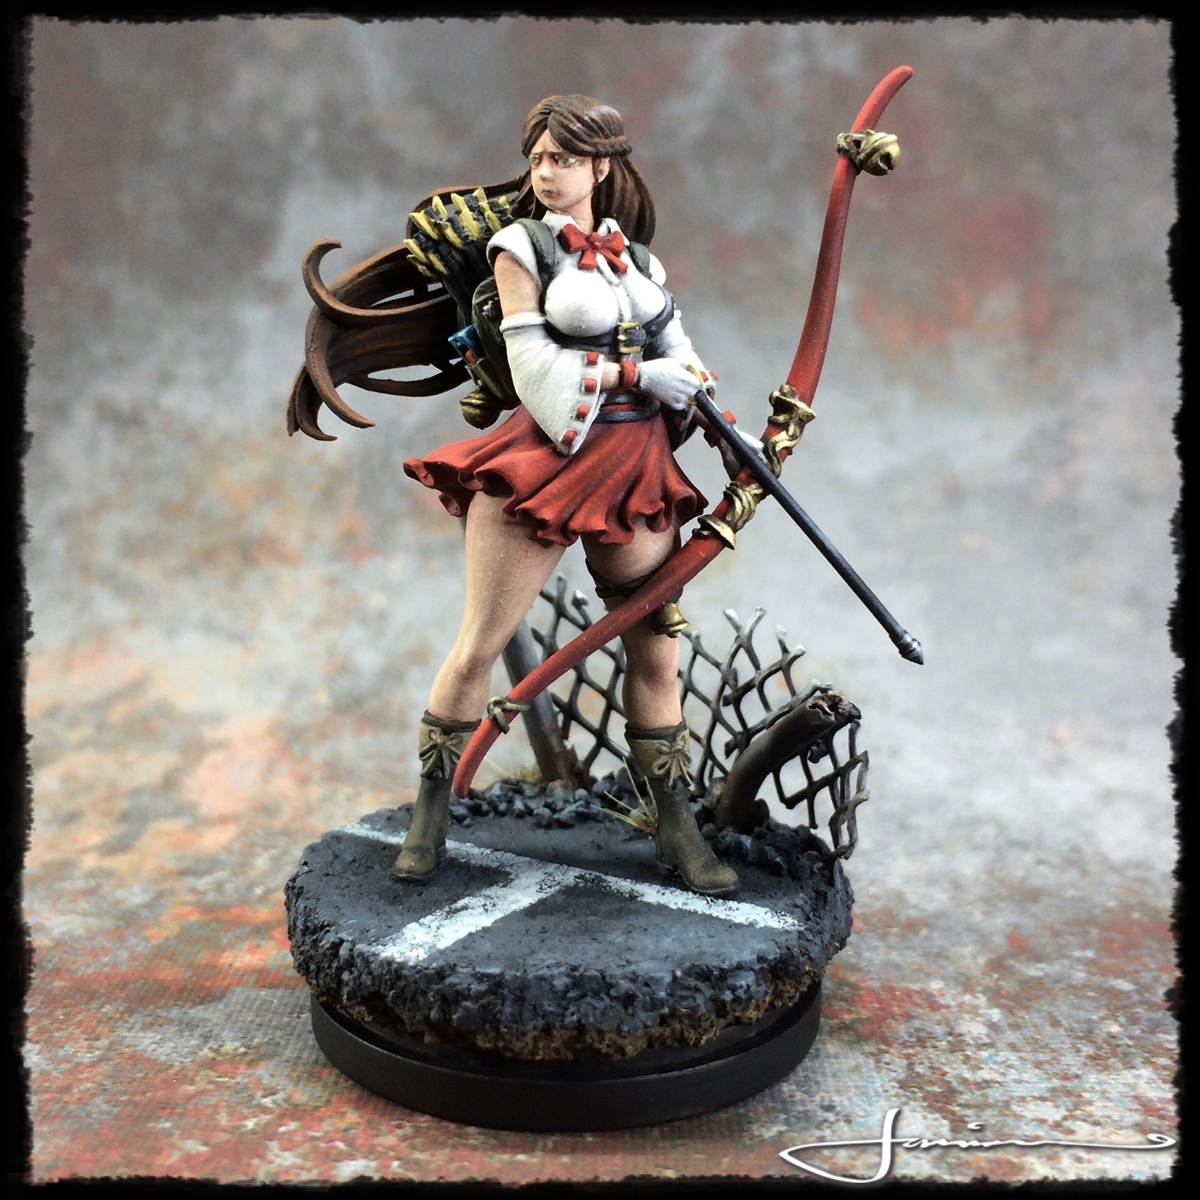
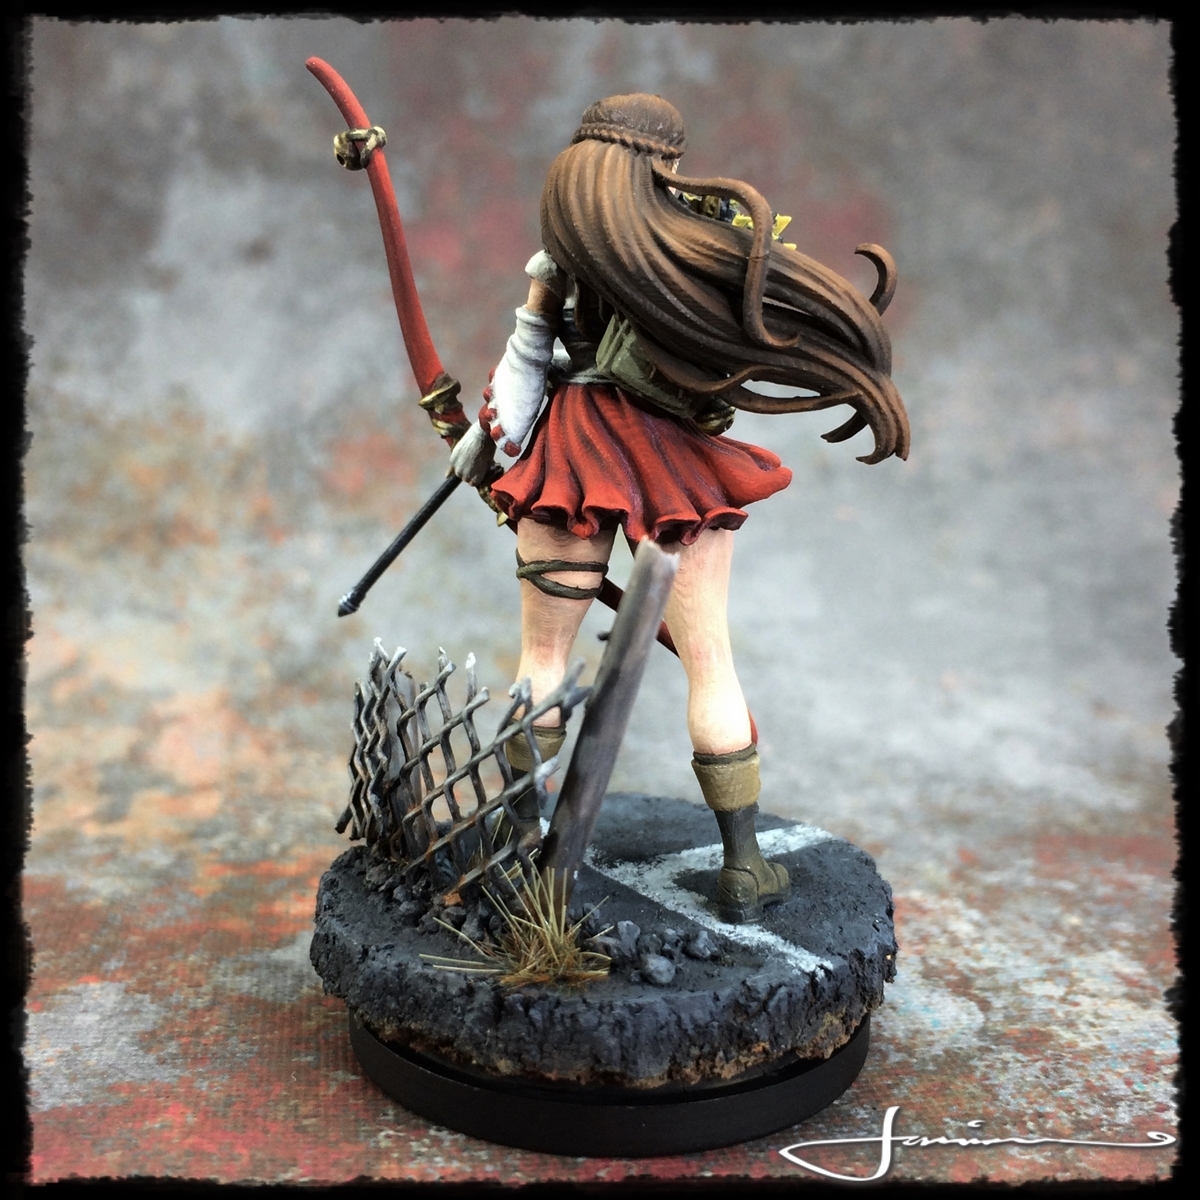
I am so far behind in my painting at the mo but hoping to get more done asap. The only one I’ve really finished so far is that first mini – ‘The Thief’ and here she is. Such a gorgeous sculpt and a beautiful if not insanely delicate mini to paint.
Still working them. Some nearly done, some not so much ><
 The Mountain Man, one of my favourite sculpts is neeeeeeeeearly done. Just need to finish off the tatts on his skin skirt. The fresh blood on the inside of the flayed skin was a pain!!!
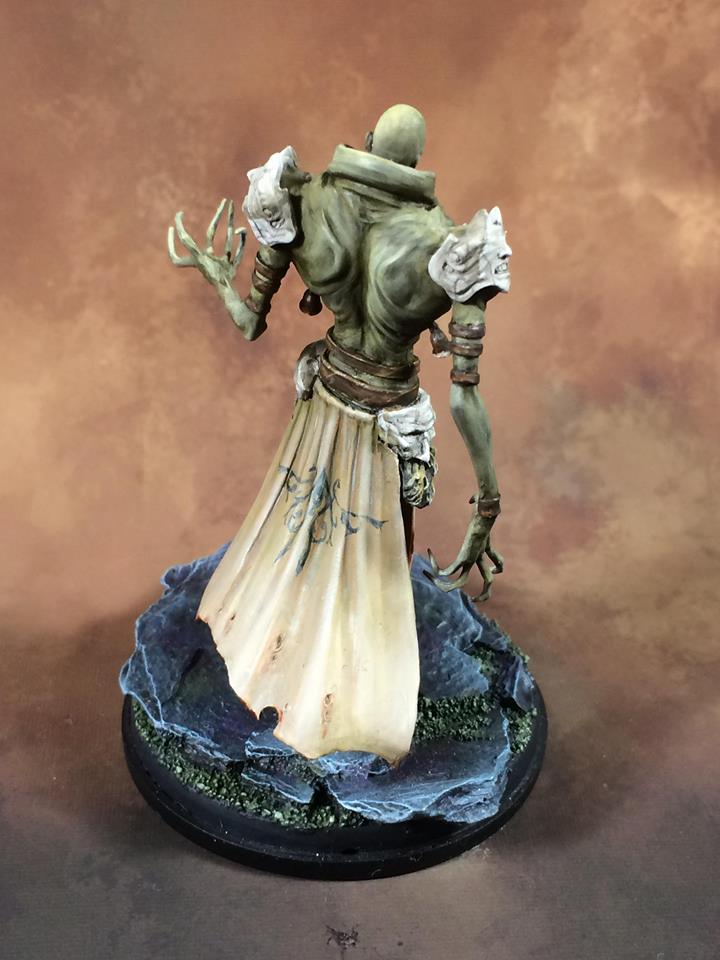
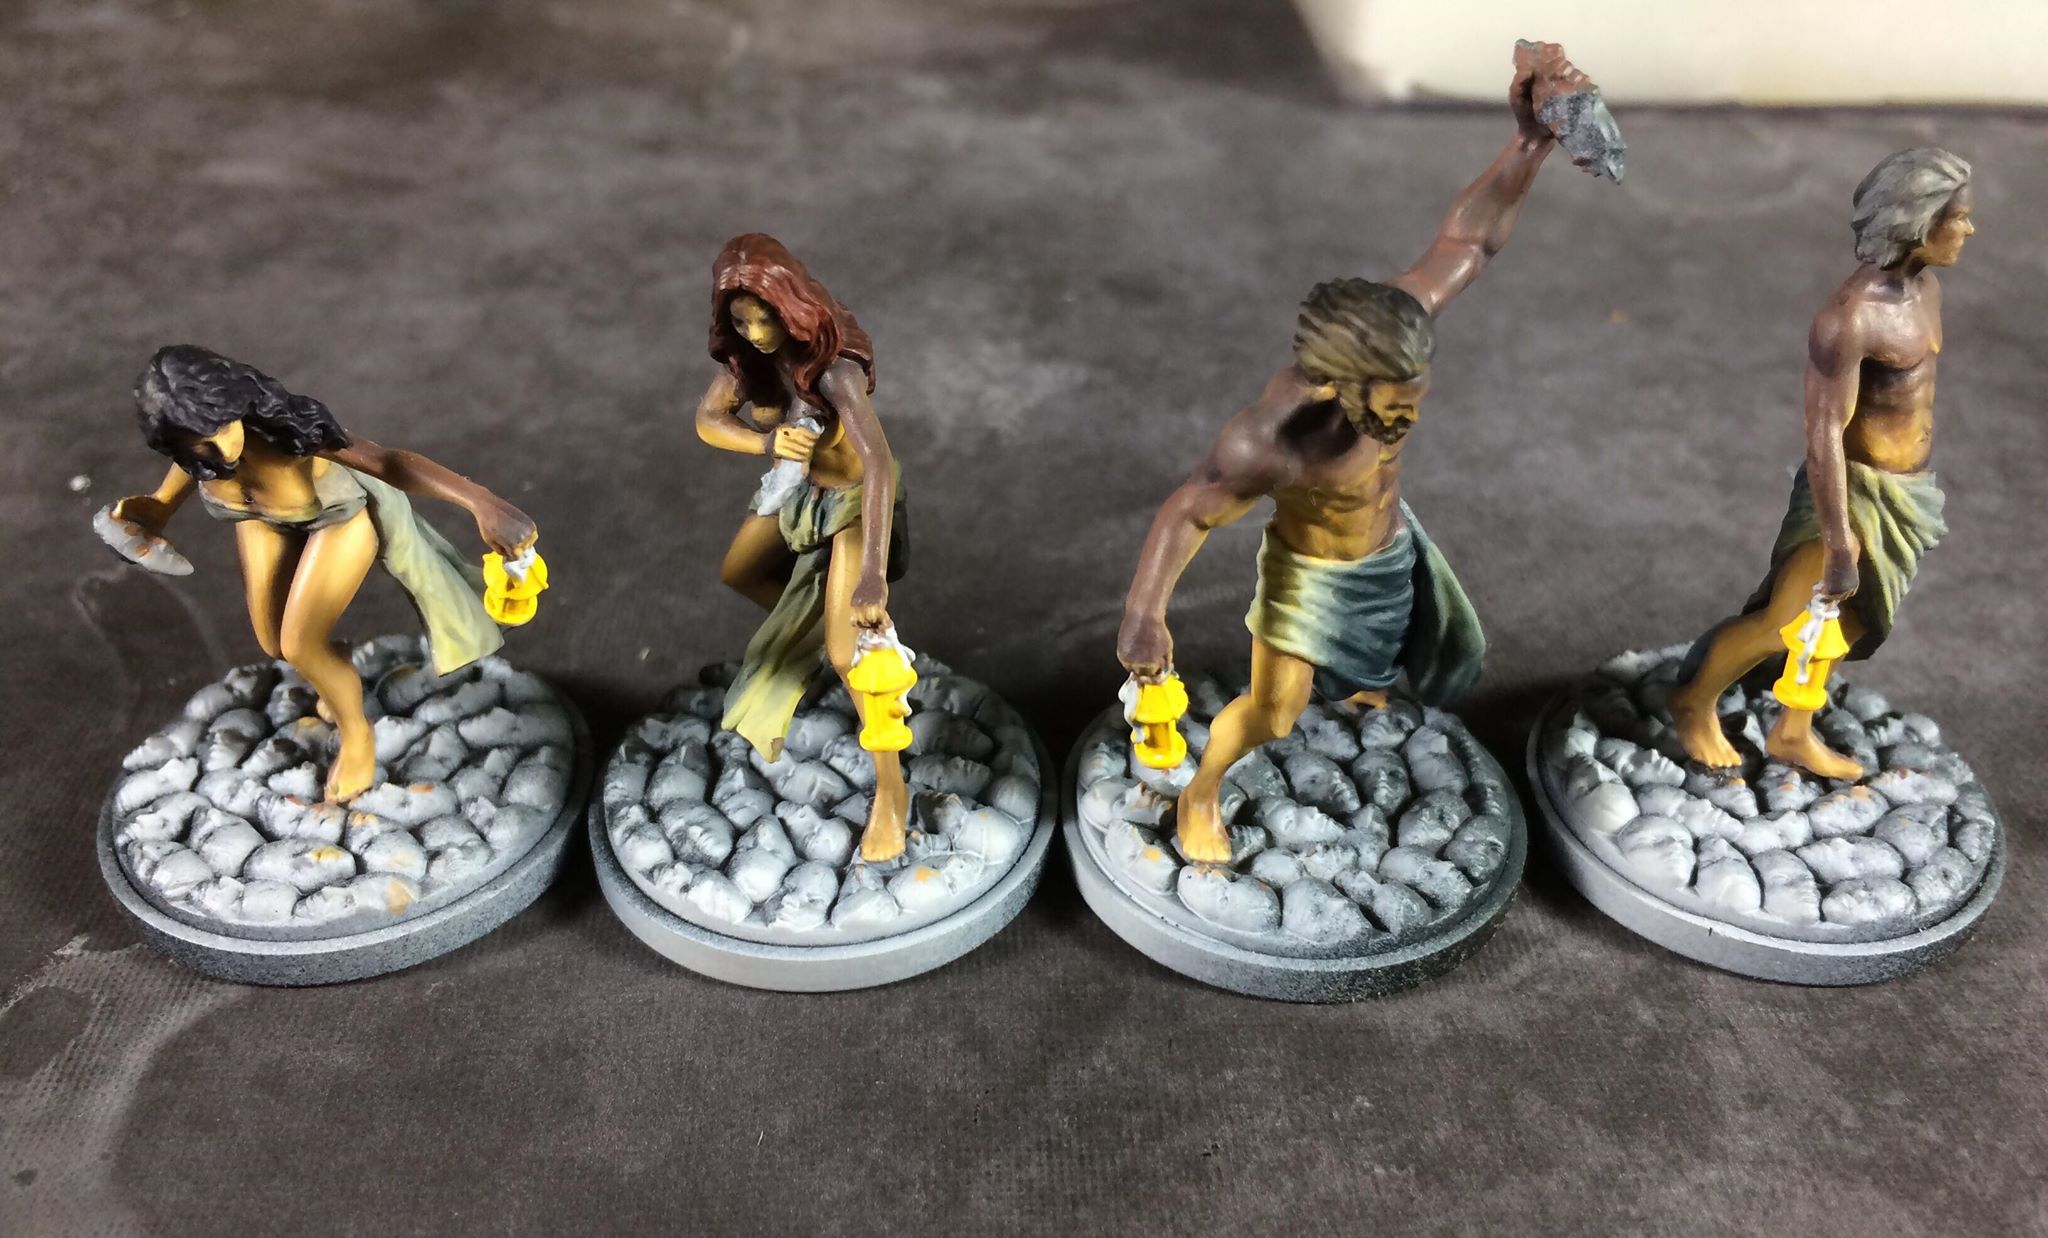
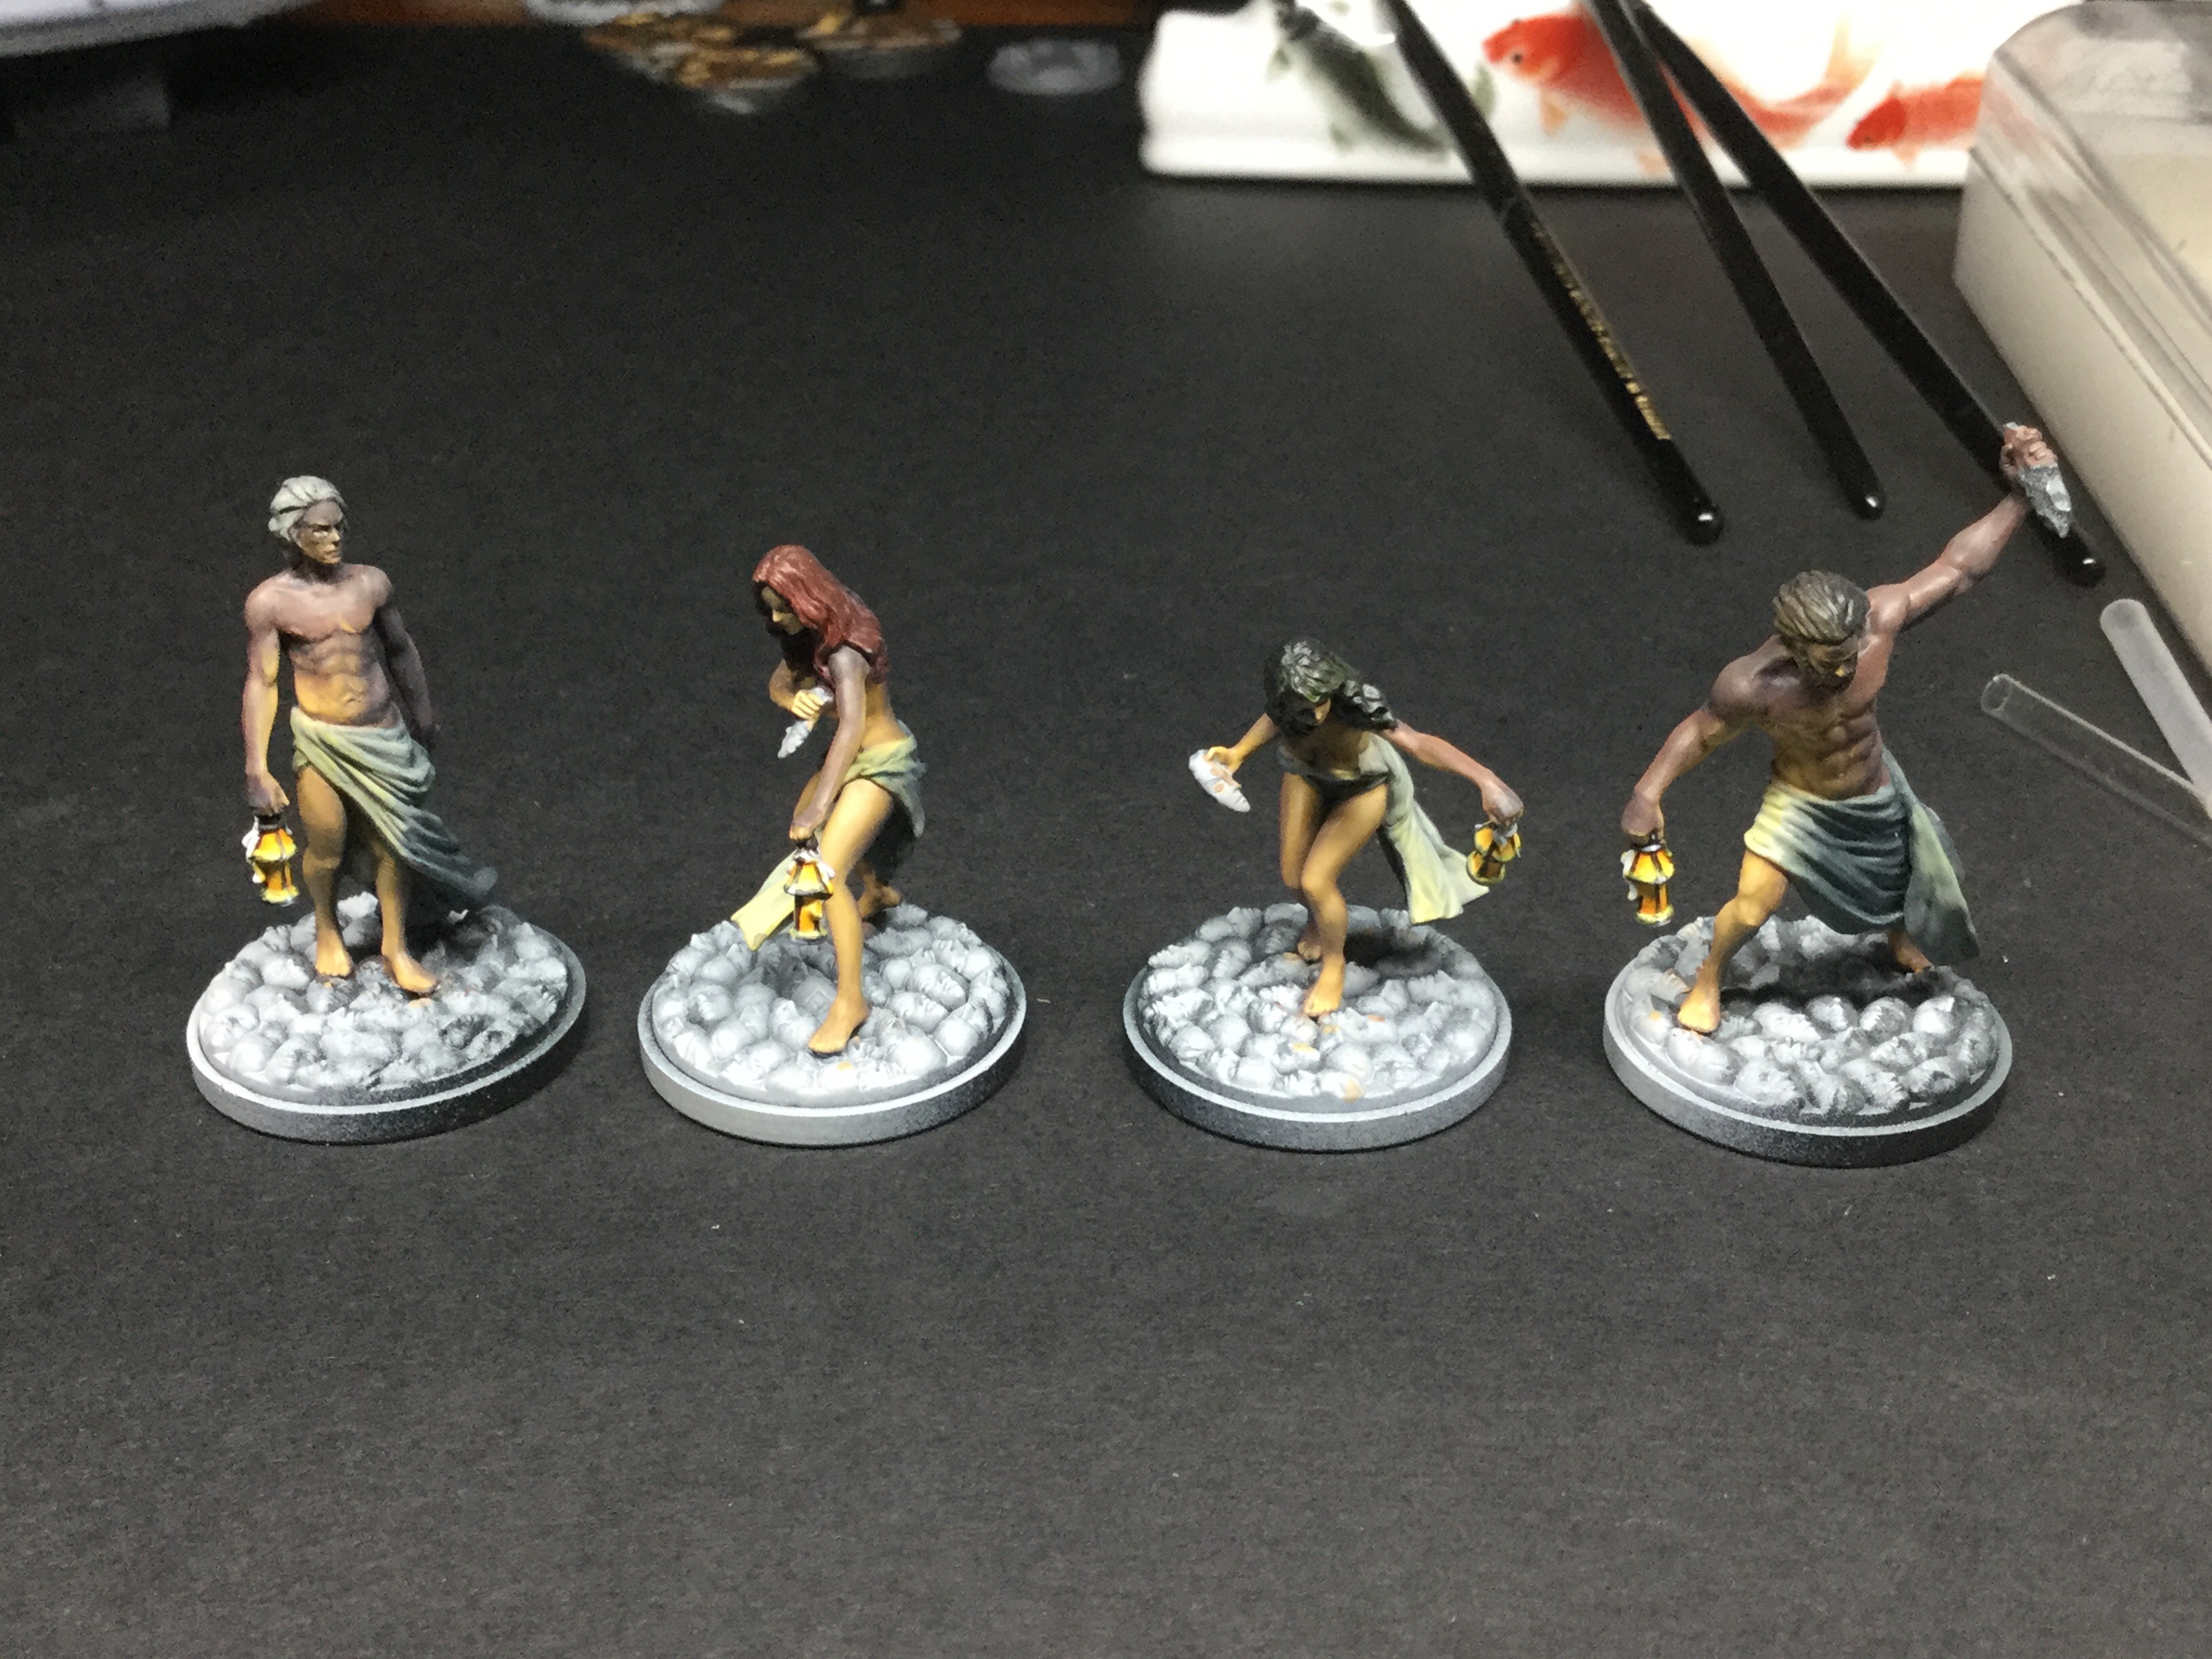
Still working away on my prologue surviviors – trying to do the whole lantern lite OSL thingy. Still sooooo much to do but happy how they are coming along. Still need to deepen the shadows some more then refine the robes, hair, ink eyes etc
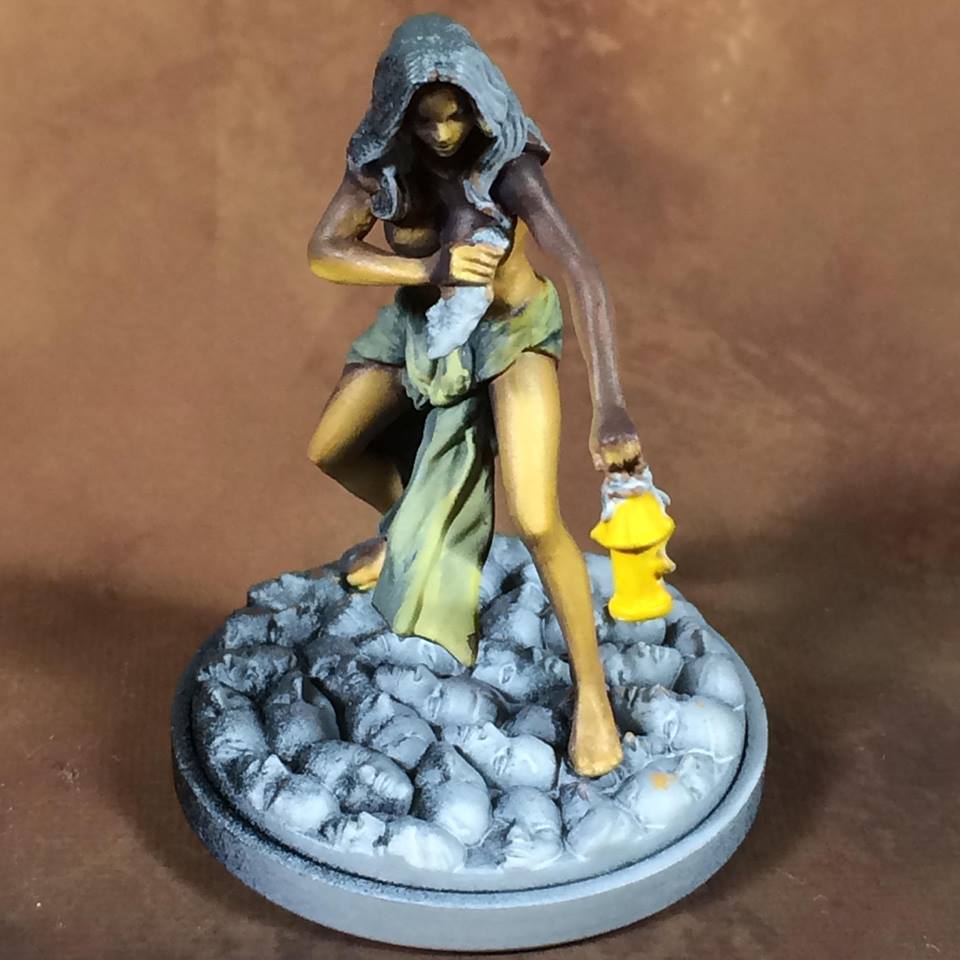
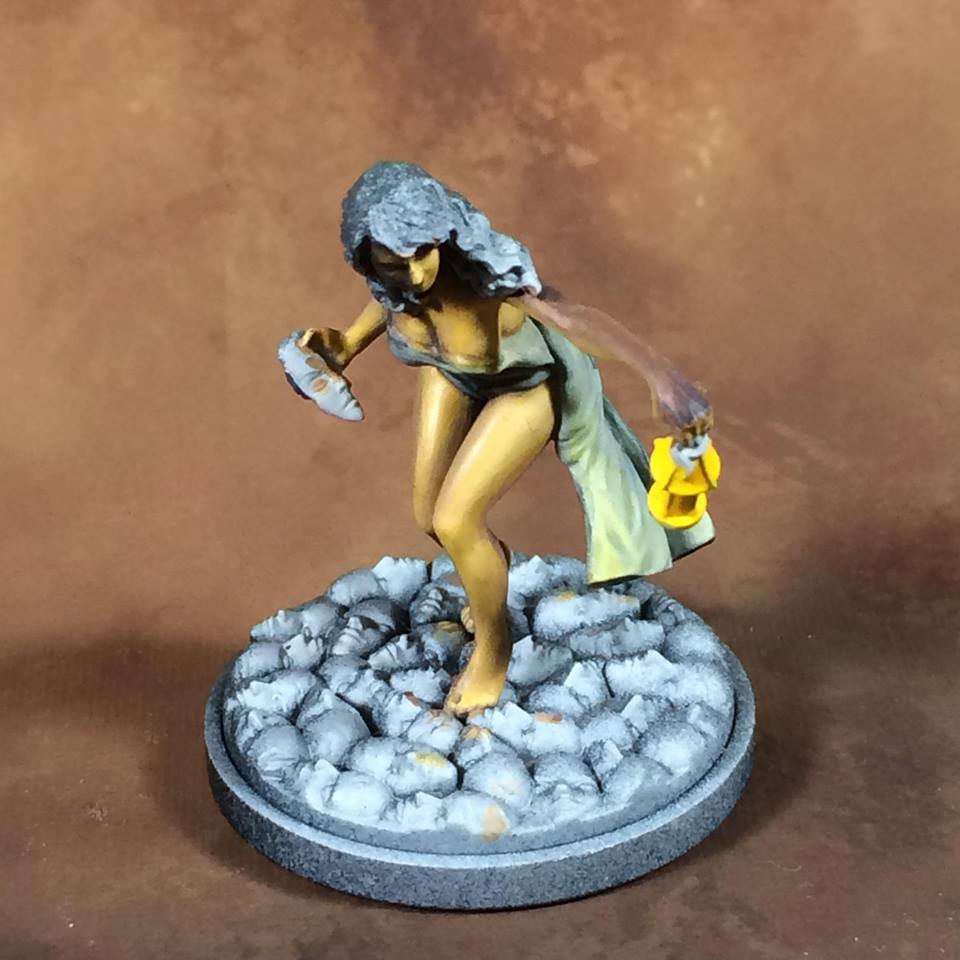

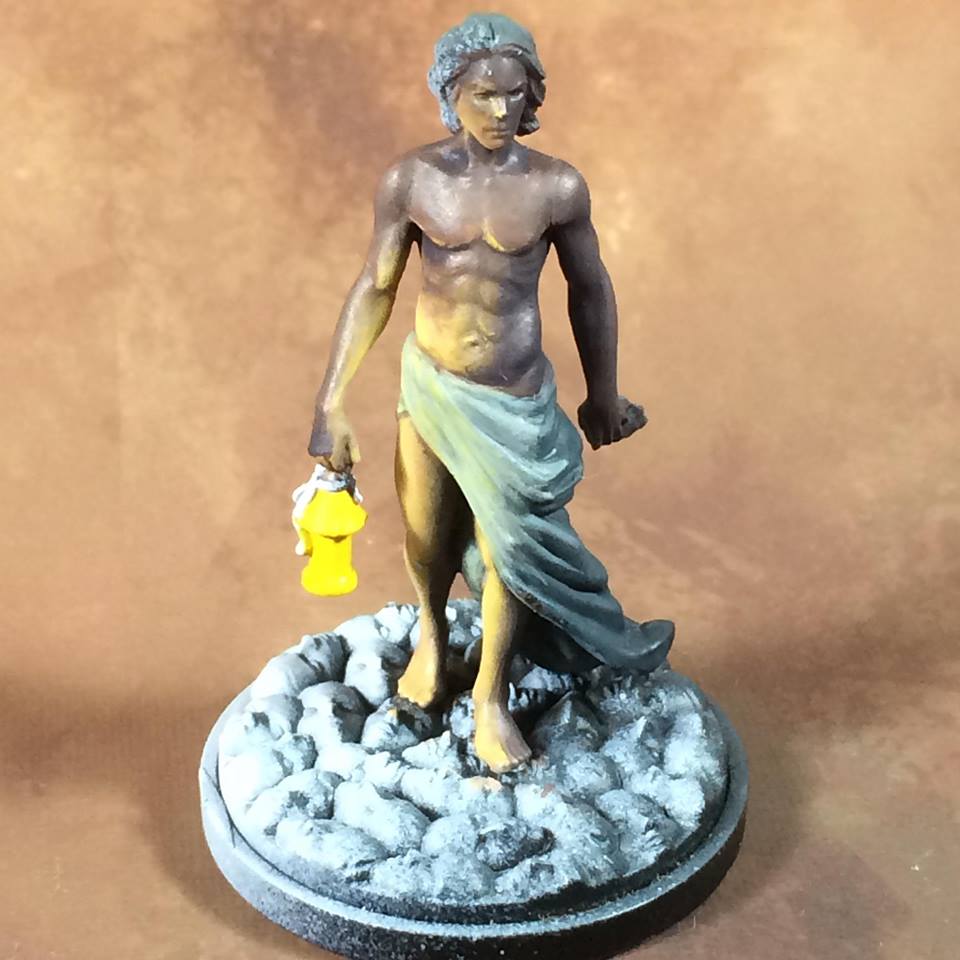
Lantern Light
Still trying to get these prologue survivors actually finished. Got a little bit more done y’day but still loads to do :/
Speak To The Mountain
Finally finished up two KD:M minis that have been sitting on my WiP shelf staring at me for ages!
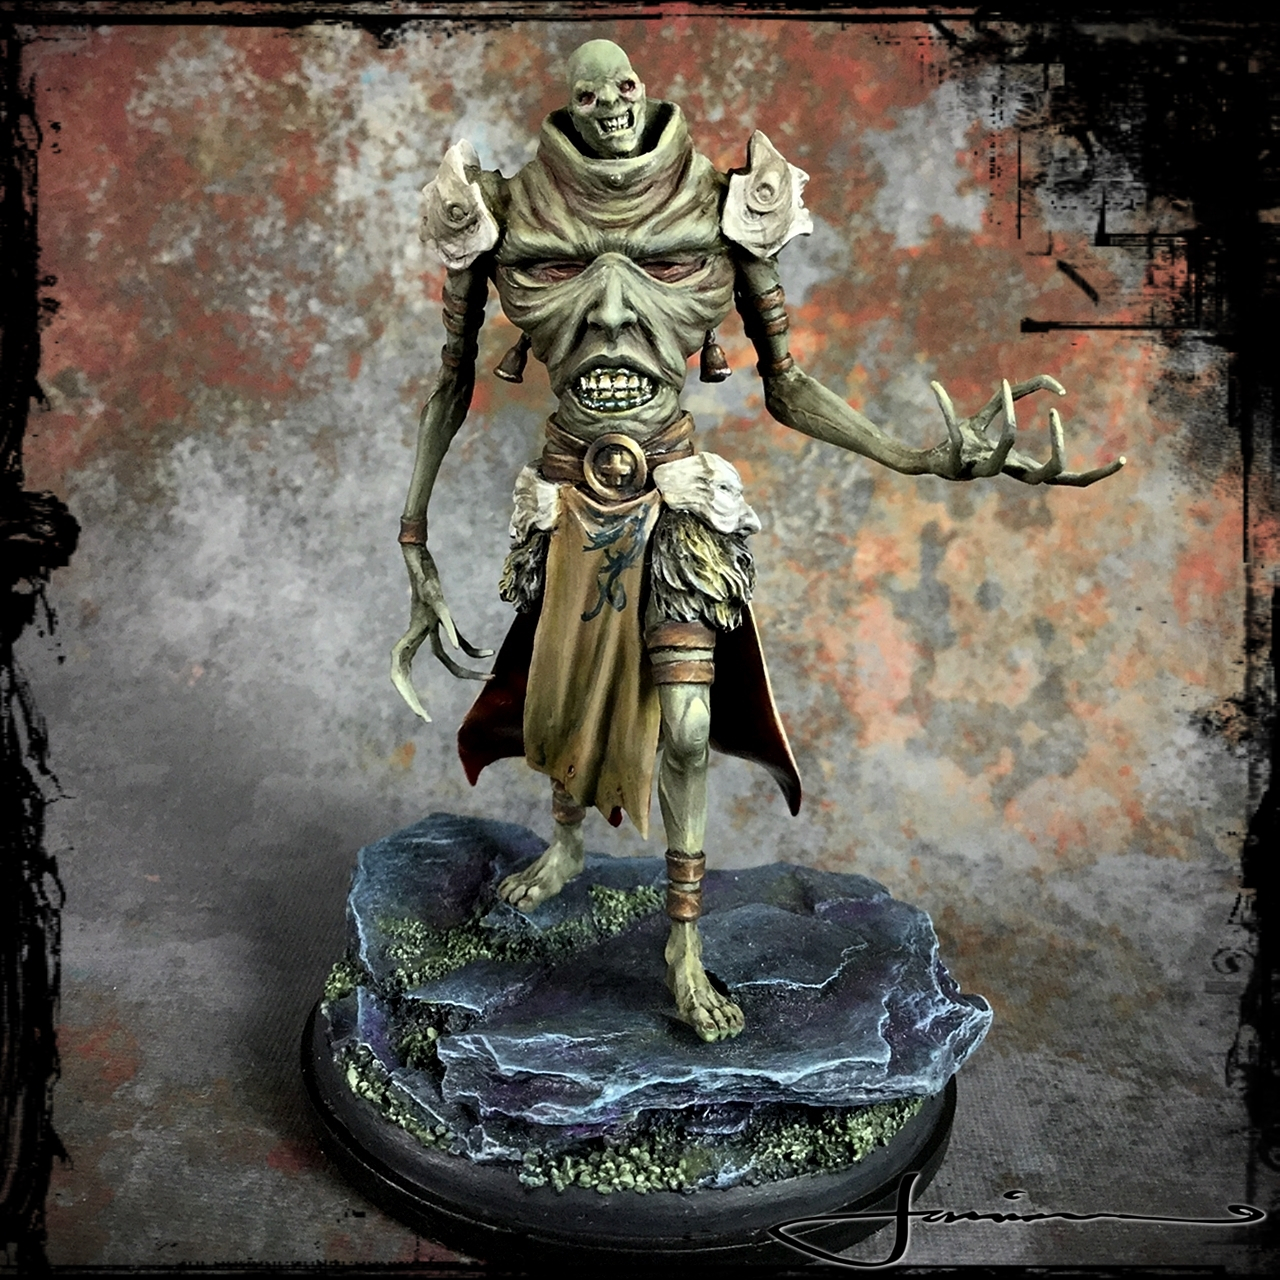
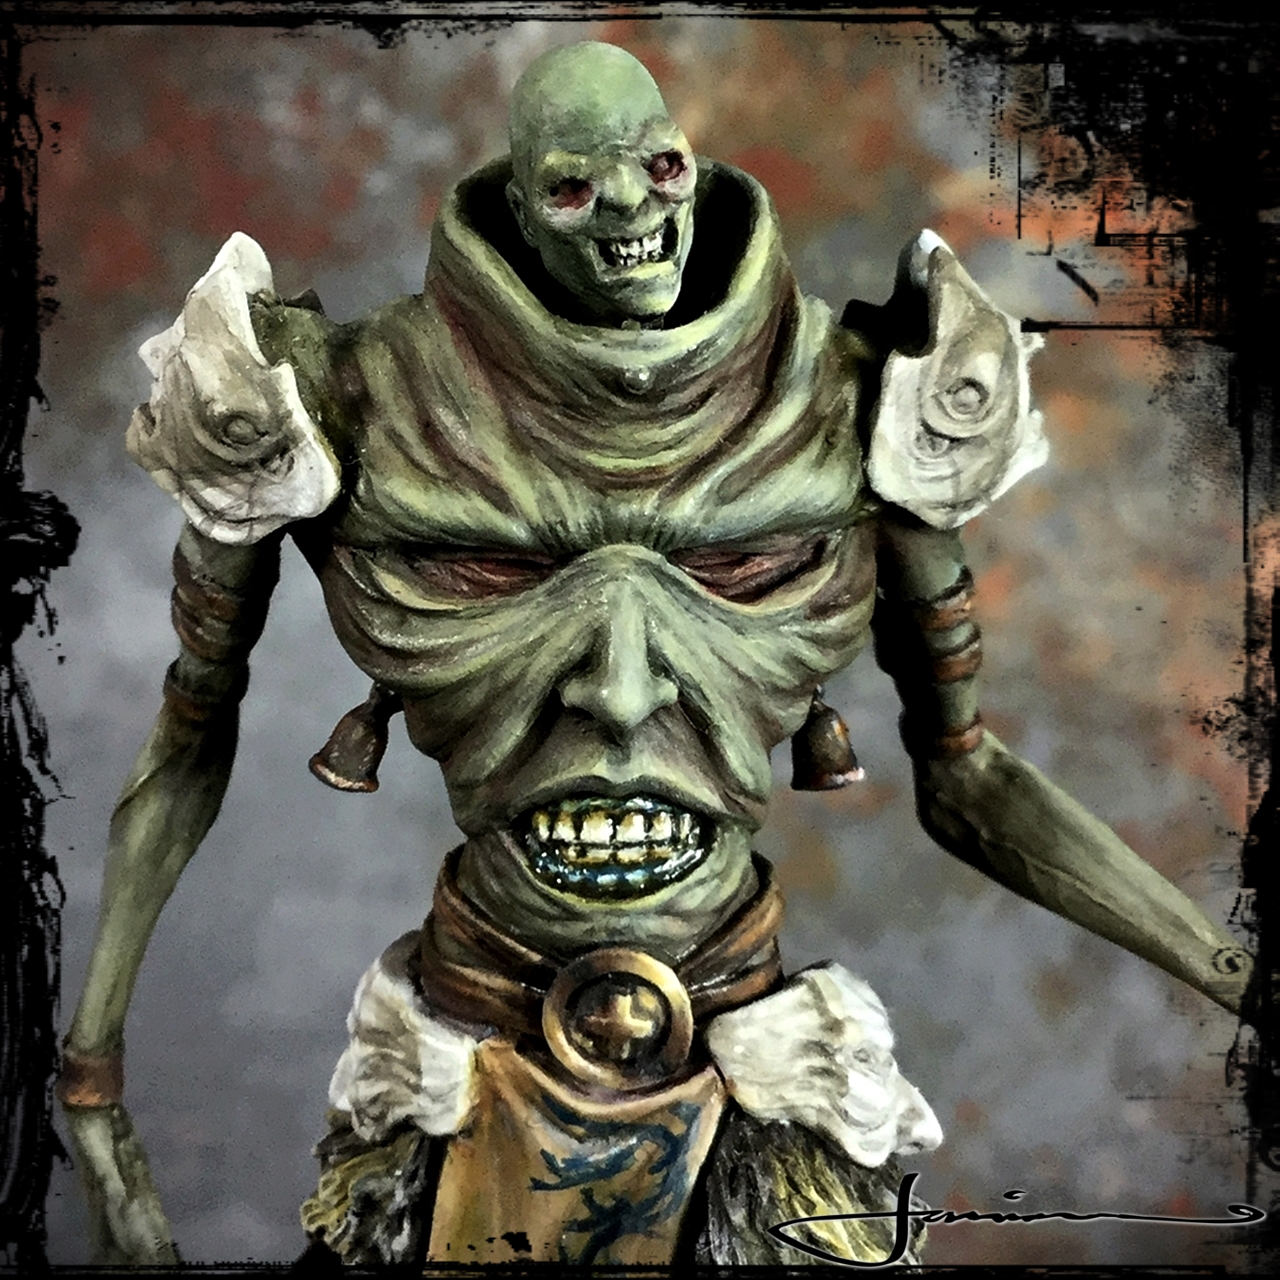
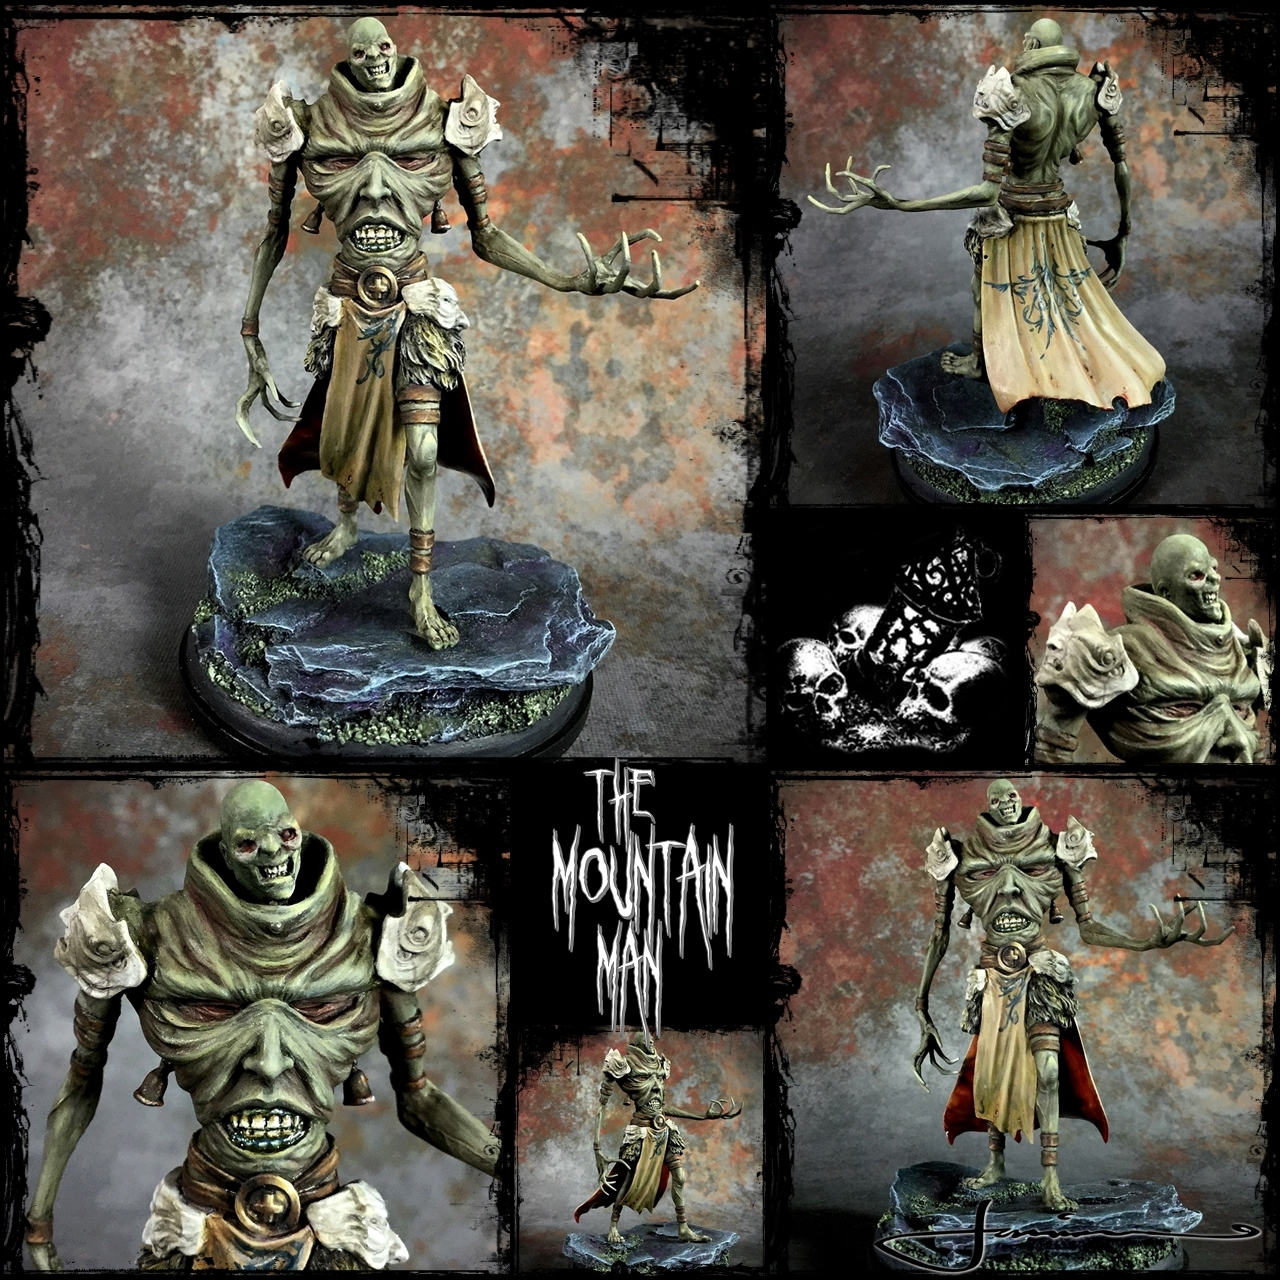 The Mountain Man
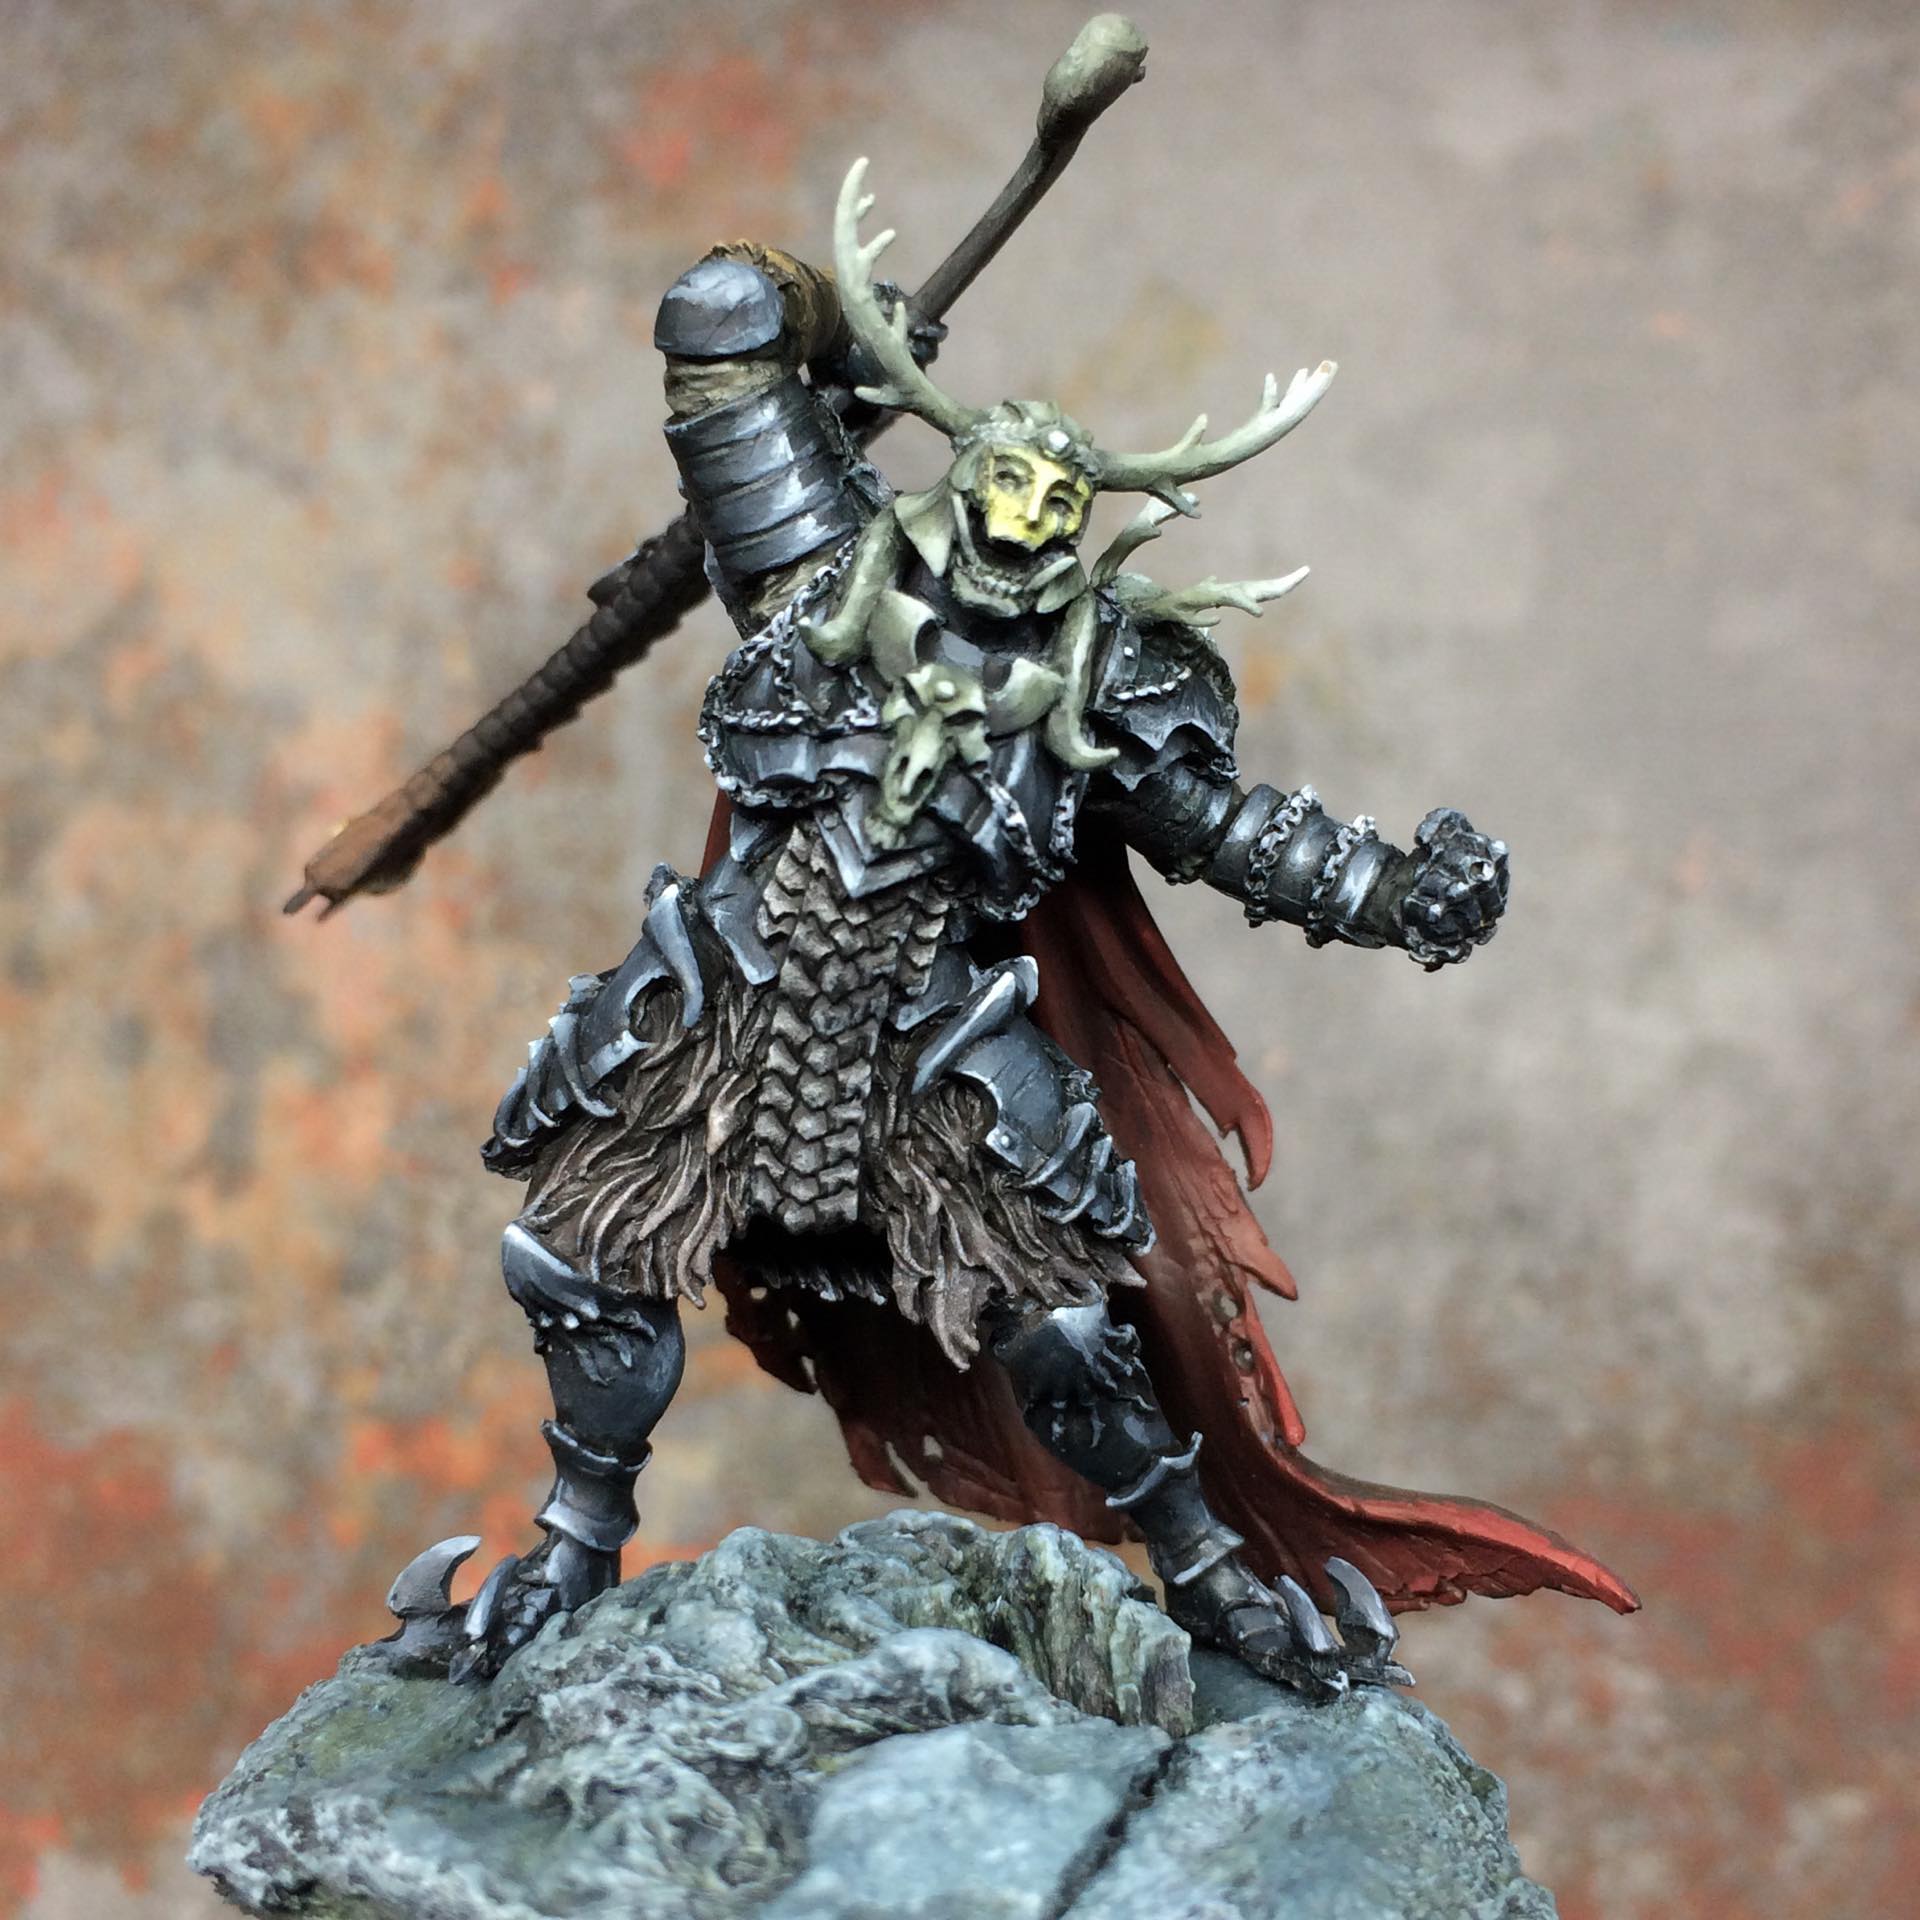
Frst up is the creepy but super cool Mountain Man. I absolutely adore this model and he was a pleasure to paint. I had to eventually call him done as I kept going back and fiddling around with a few more glazes etc.

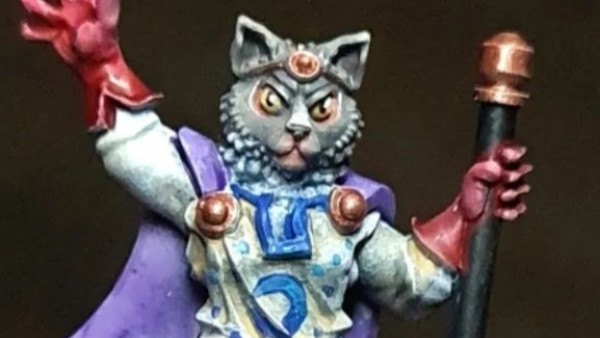
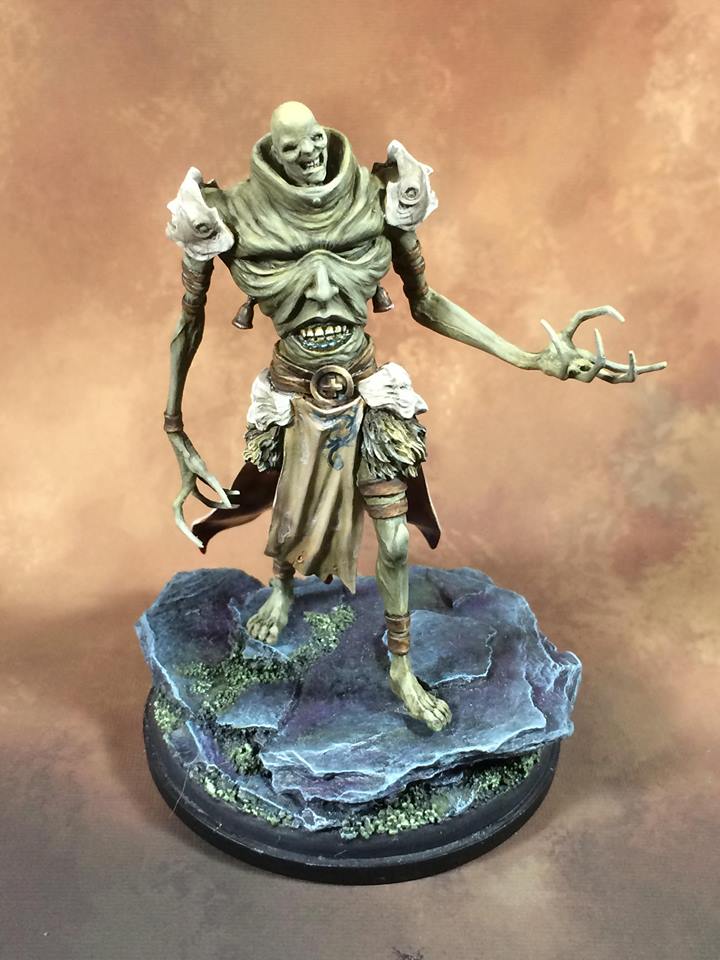
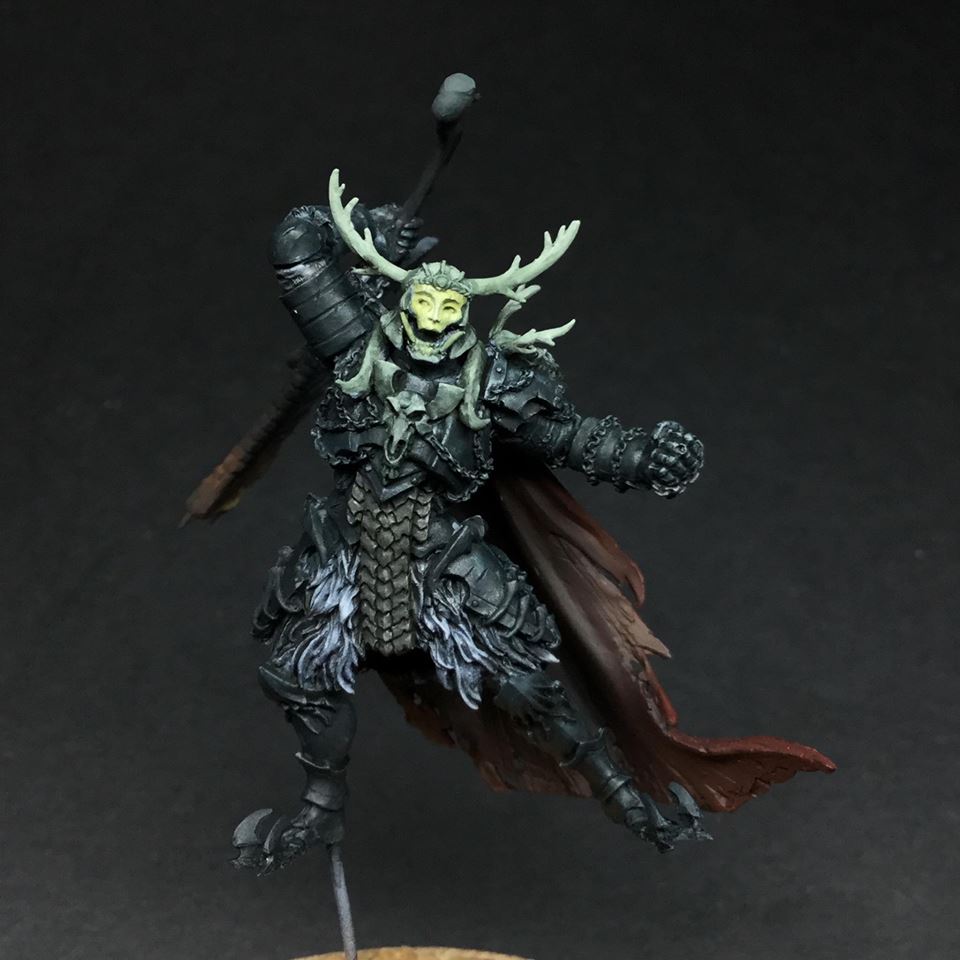
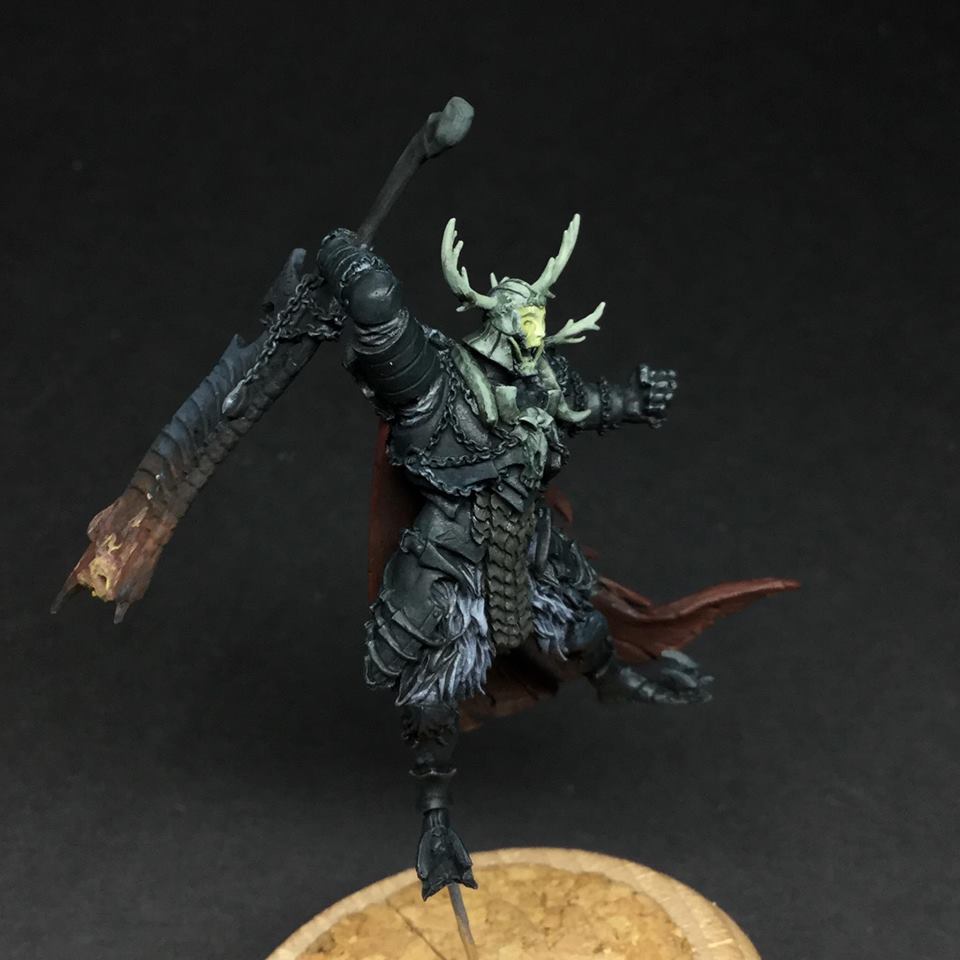
Secondly I finally got the White Speaker finished. I love the art, the lore and everything behind this model but for some reason she was an absolute arse to finish. Just …. not sure what. Didnt enjoy painting her as much as usually do. Meh. She’s done now 🙂
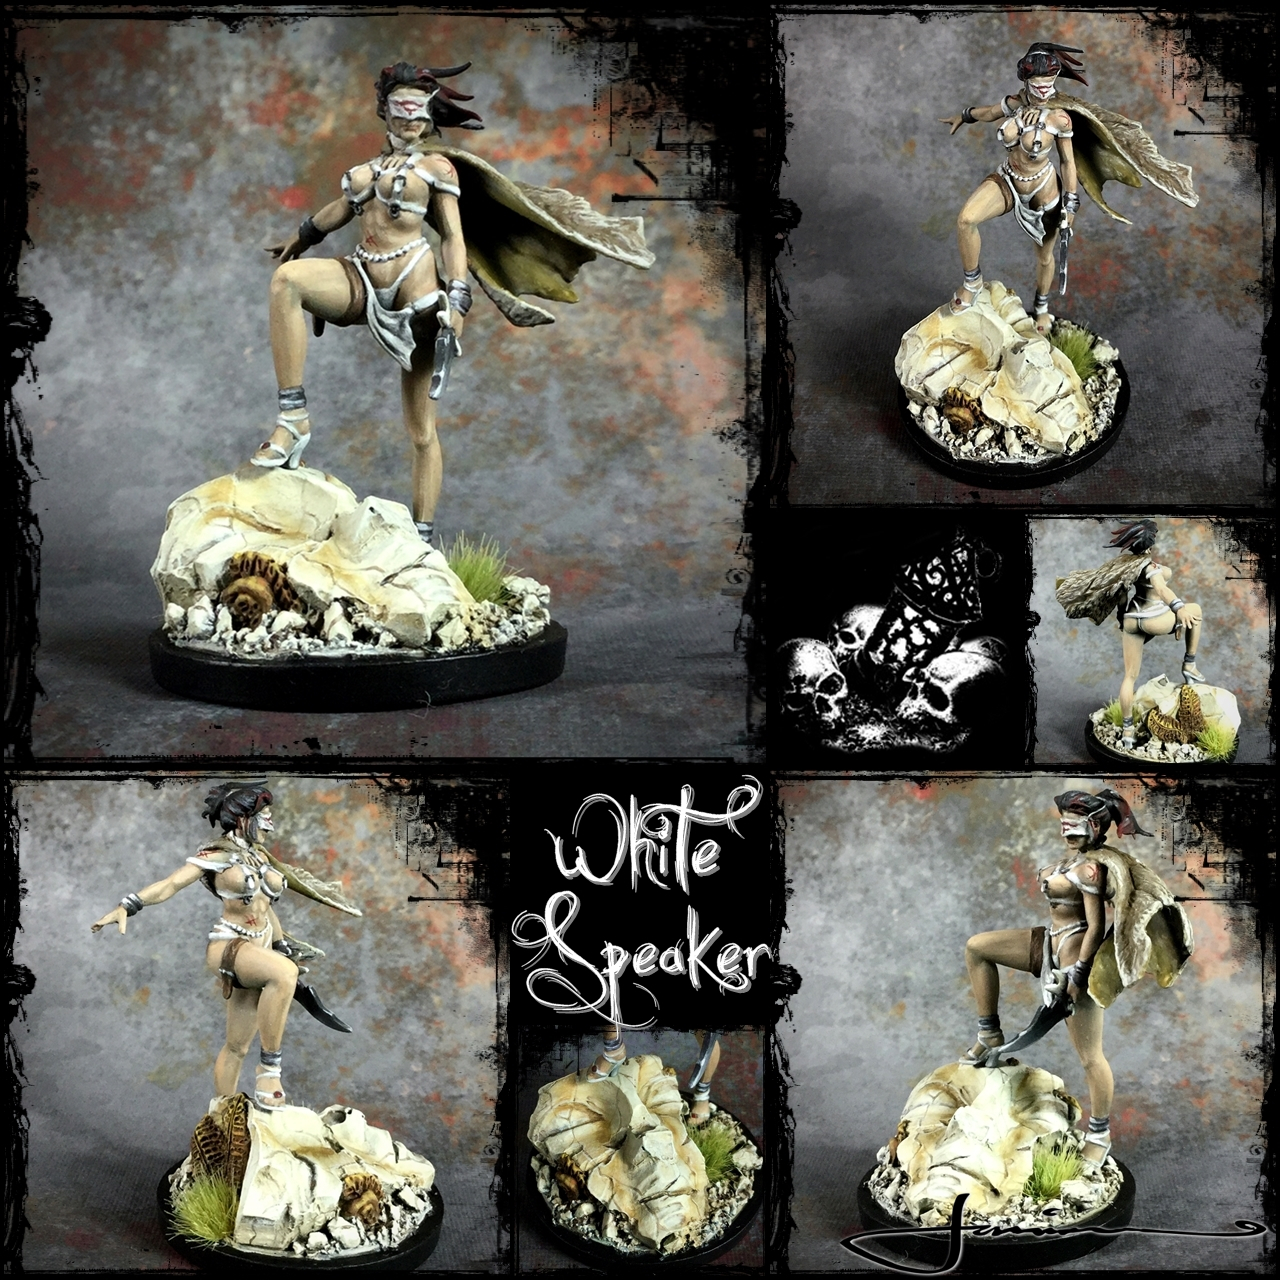 The White Speaker
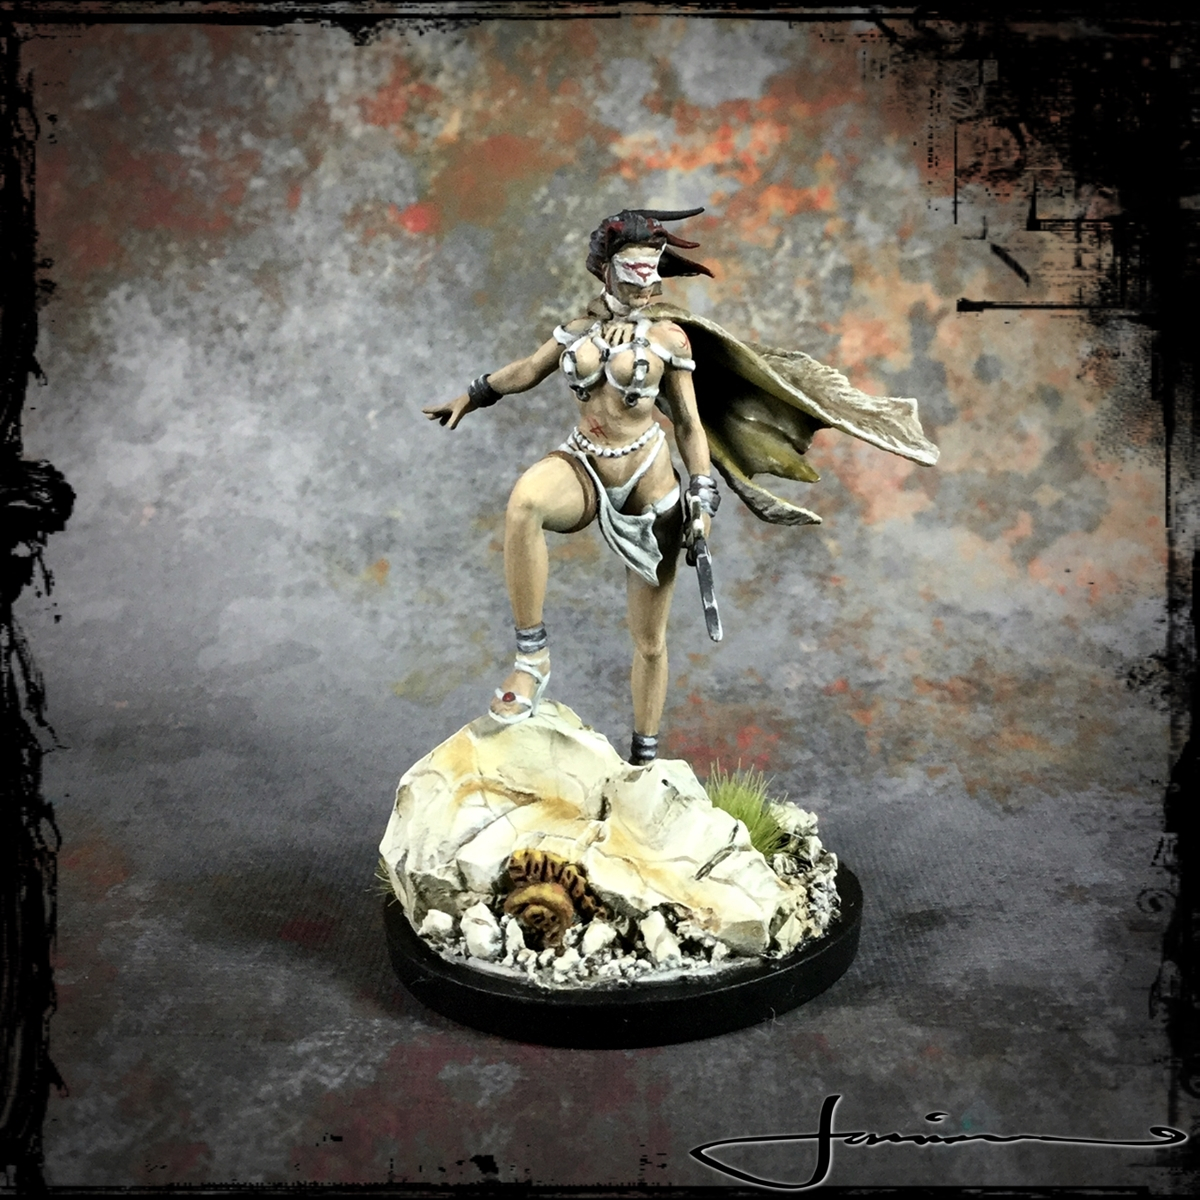


Now to just get on and actually finish up the prologue survivors adn finally make a start on the White Lion!!
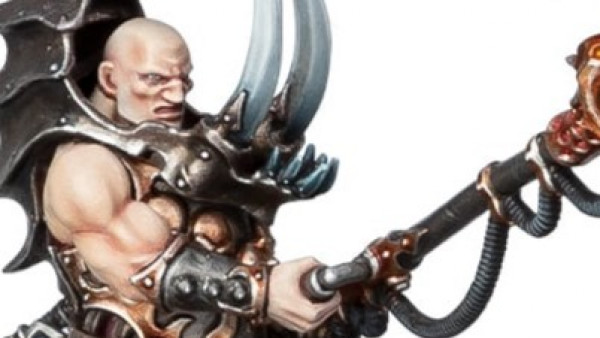
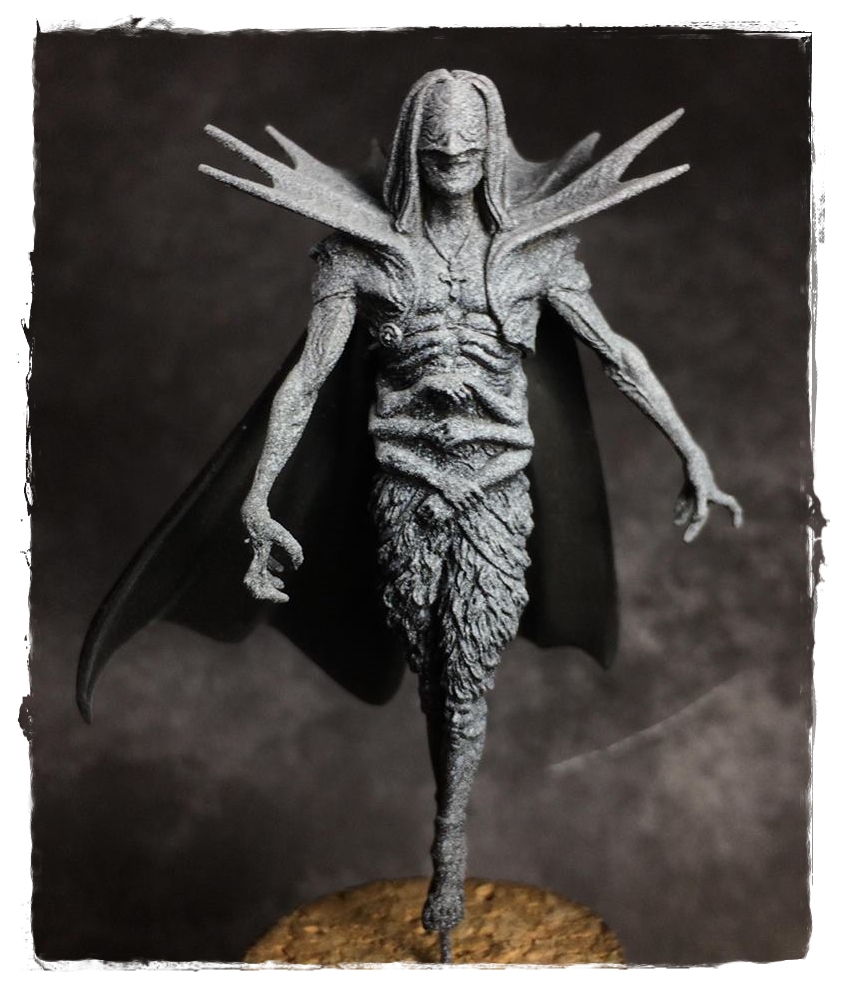
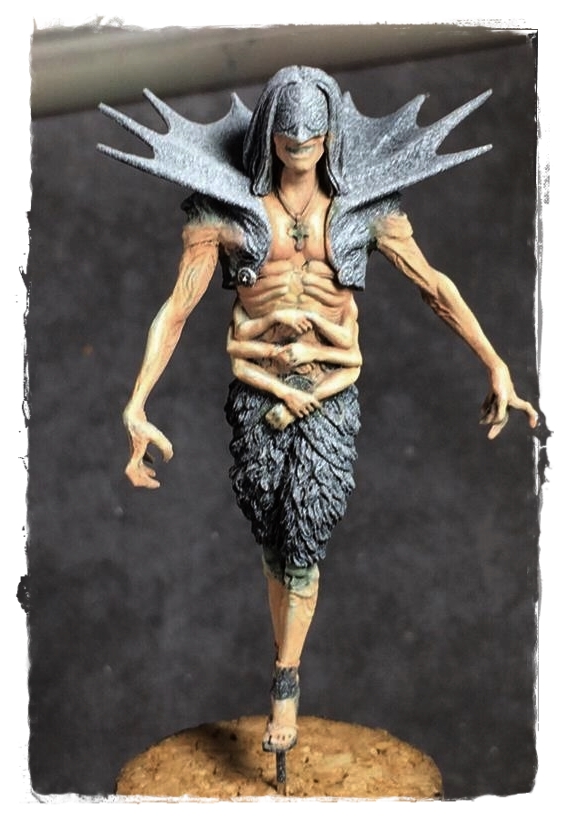
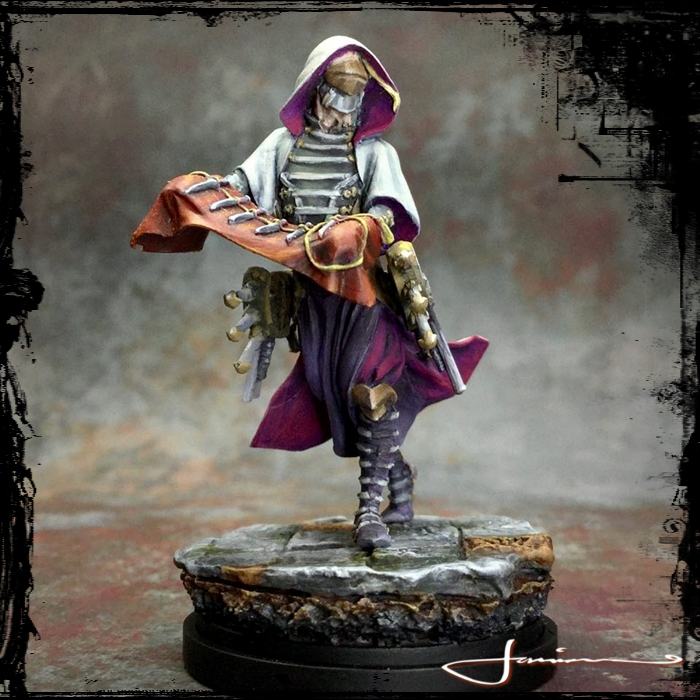
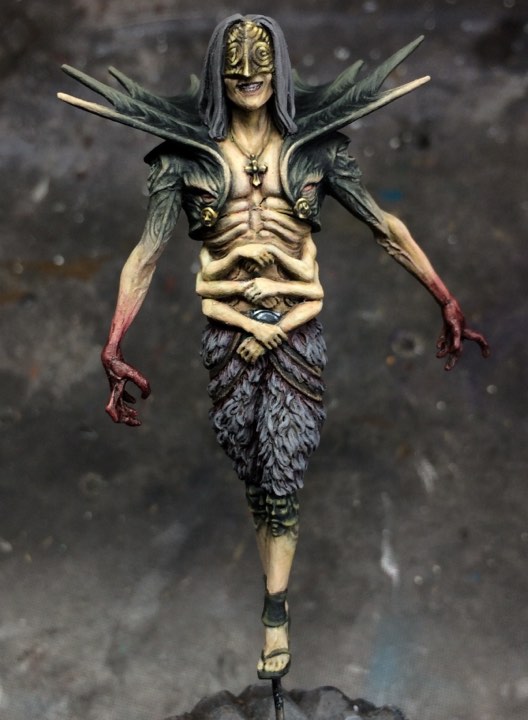
The Pariah
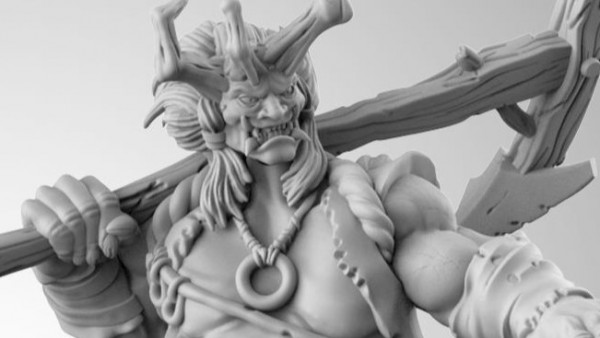
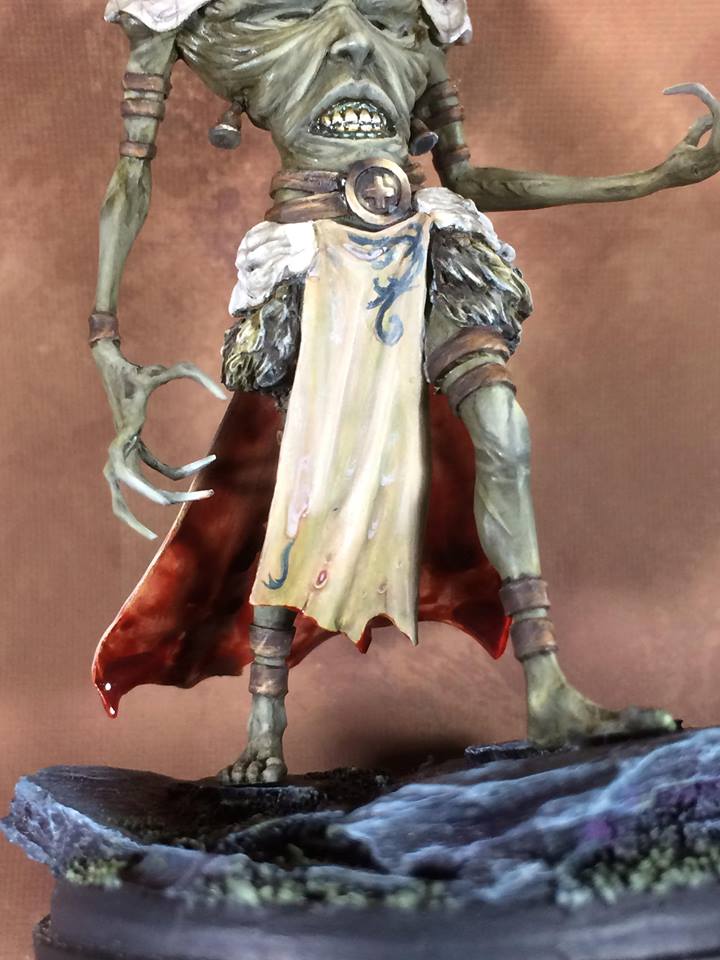
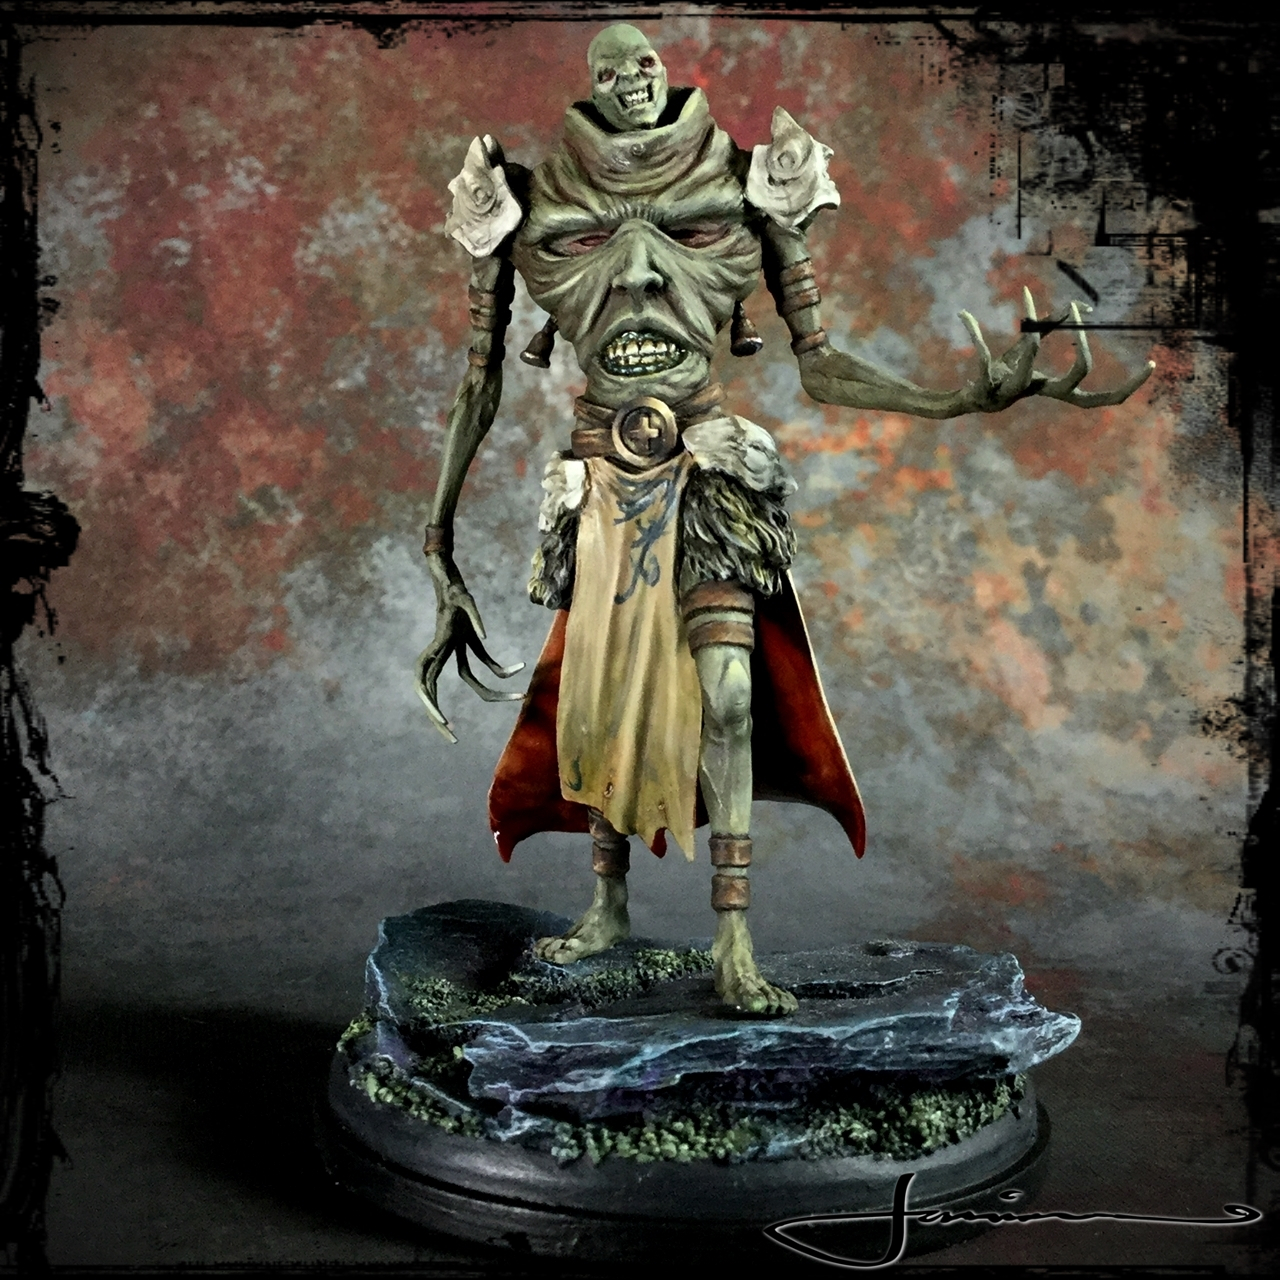
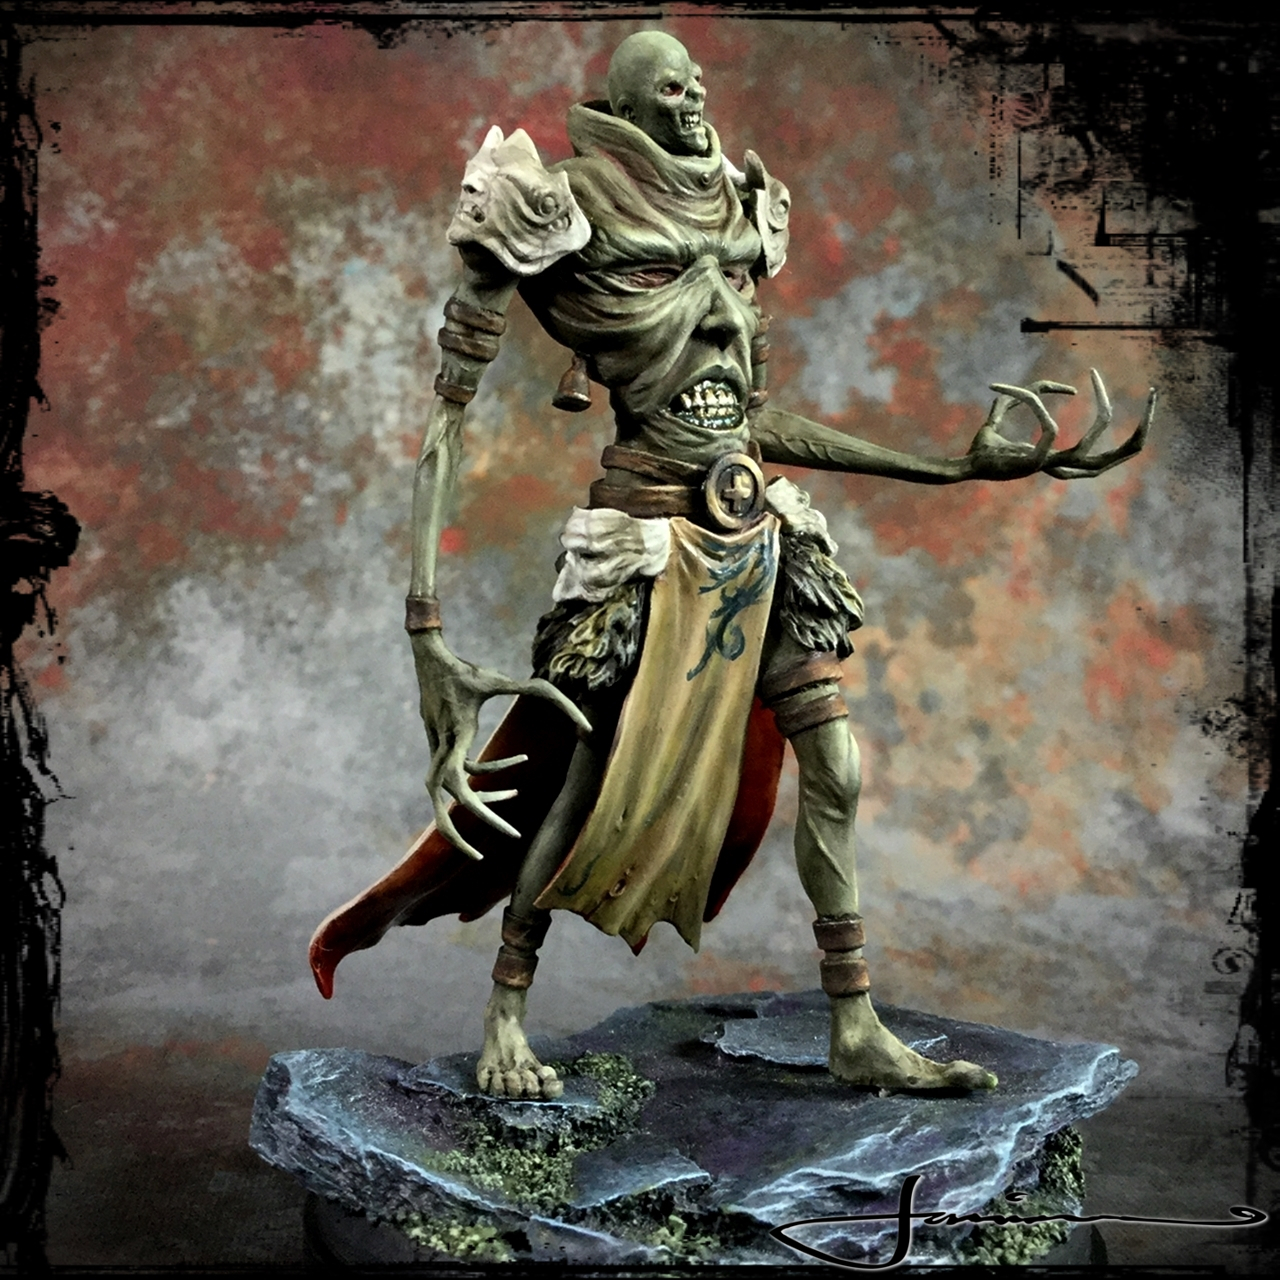
Started work on another of my favourite KD:M sculpts – The evil nasty that is The Pariah!! The fluff behind him is ……. well, judge for yourself!! from the Wiki –
”
The Pariah is the last male white speaker. He violated the vows of the white speaker cult by murdering countless white speakers, unraveling the quivering lobes of their brains, to piece together a forbidden story hidden in the cult’s members.
Once learned, the story bestowed the Pariah with Cyclopean Empathy, a means of communication so deep and personal that it could speak to the core of a person with a single gesture. The Pariah’s empathy is so complete that he can manipulate any wounded heart to obey his capricious whims.
The white speaker cult erased knowledge of the Pariah from all members save for the Red Witches who were tasked with hunting down the Pariah.”
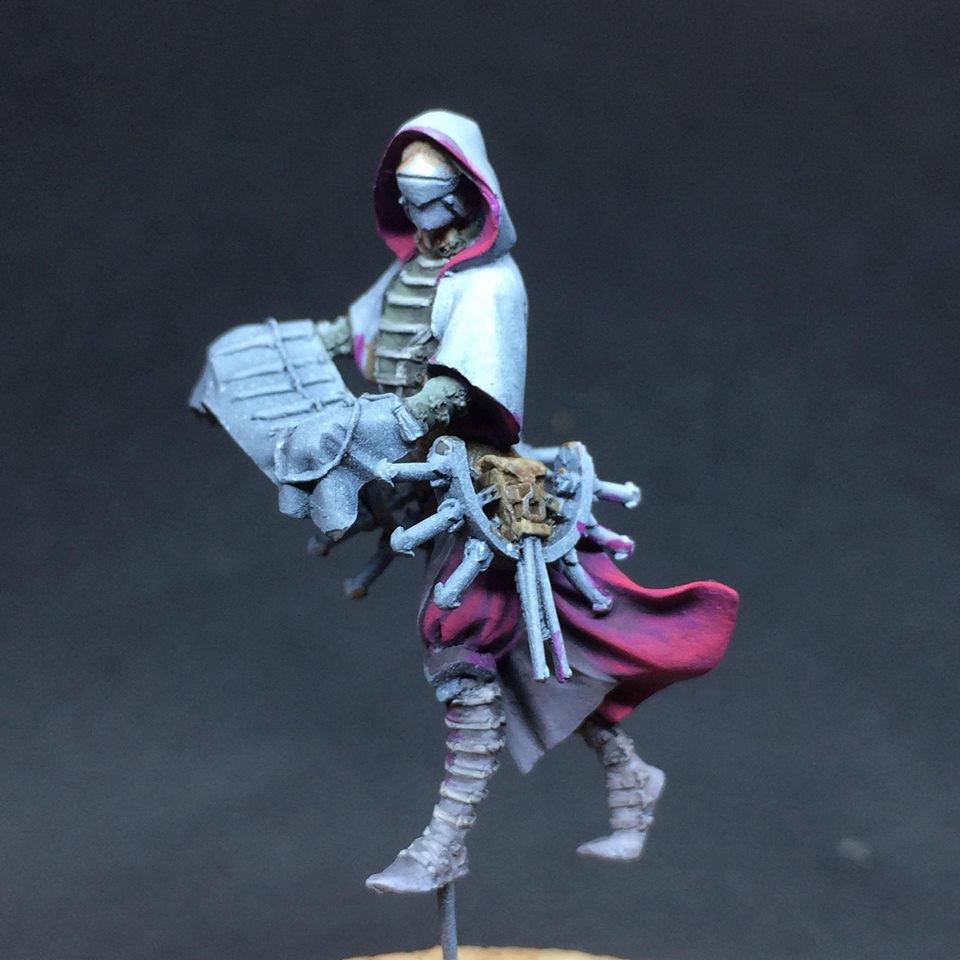
Skin is really not my forte at all and I find I tend to wing it alot and every model is an experiment. So with that in mind I decided to try and get a workup of some sort documented and written down.
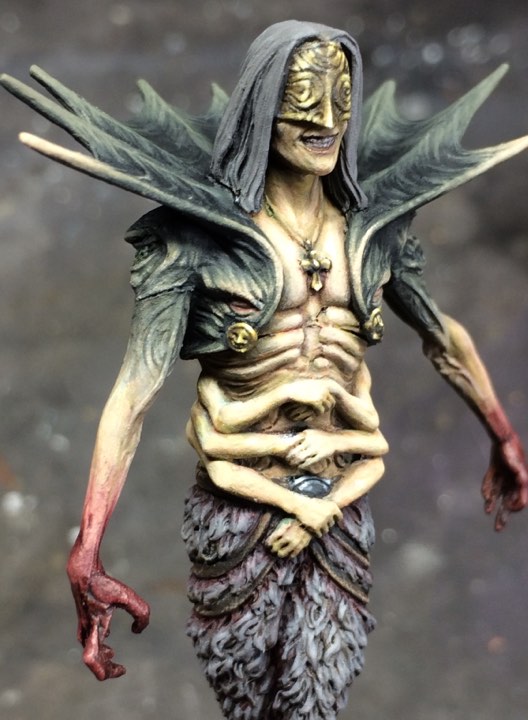
 Quick black then white rattle prime to kick off. Lateral priming (the white is sprayed not from the zenithal point directly overhead but from a high side angle)
Next should be a photo of the verdaccio undercoat but derpy me forgot to take a bloody photograph of that stage. Verdaccio is an italian underpainting technique used in frescos which i’ve been experimenting with a bit. I am planning on doing a post just on its usage later on. For now though – bascially you undercoat the model (over the primer but under the actual paints you are going to have as the final workup) with a dull olive gray green. I went for a desaturated grey green here in S75 field gray with a little drop of ardennes green mixed in. Once that was done I sketched in some highlight areas bu adding a little cold off white into the mix with S75 Nacar.
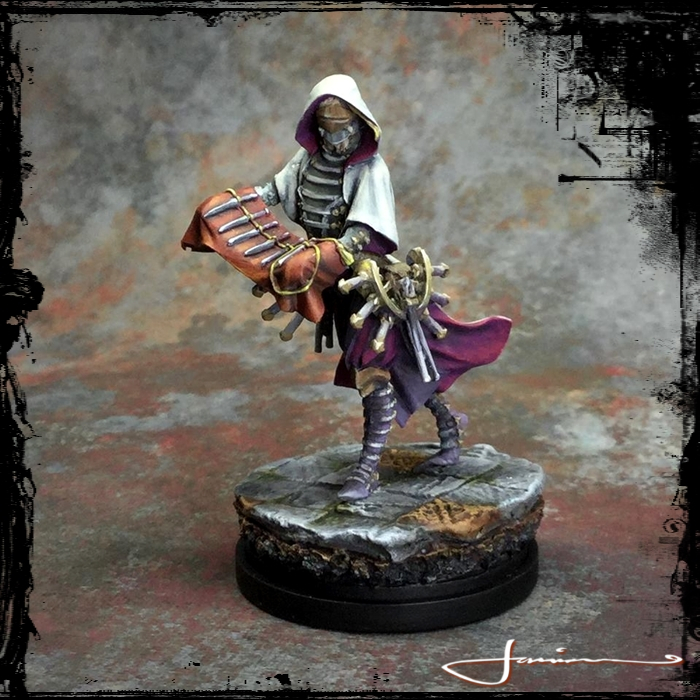
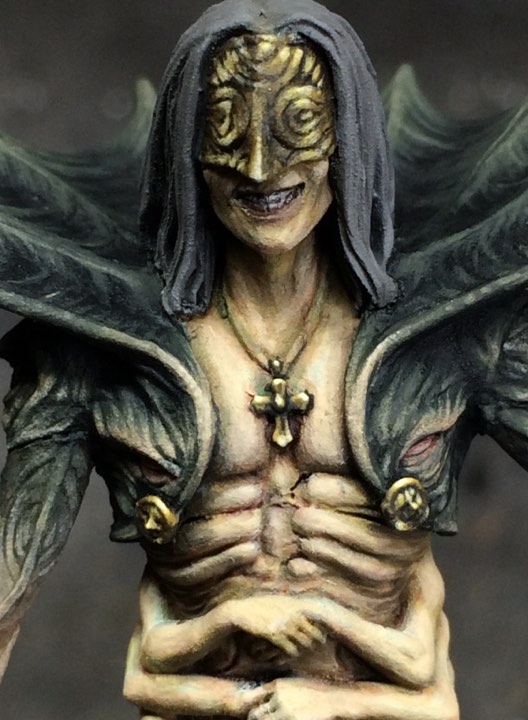
From that verdaccio base I used thinned mojave white as the base tone for The Pariah’s skin. Letting the field grey glwo through a little in the darker shadow areas but only subtley.
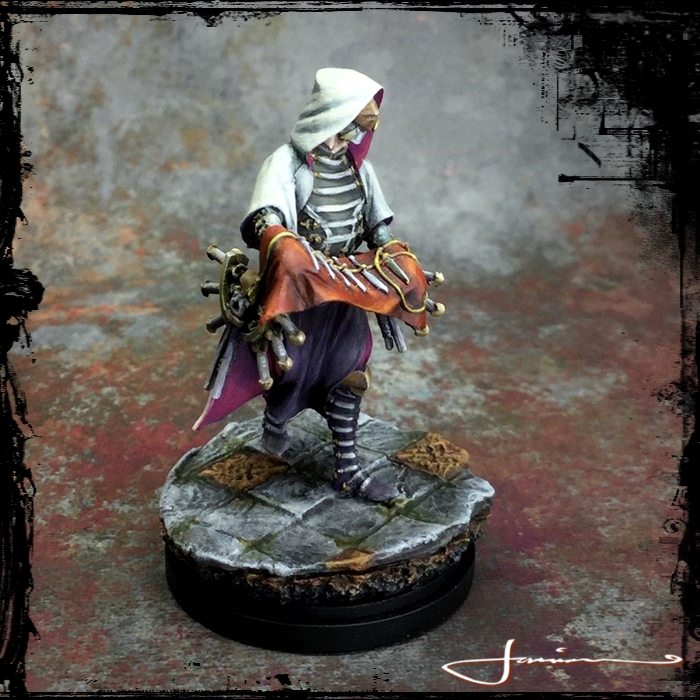
 Next I wanted to add some life to the skin. This stage is super important. Although I want the final skin to be very pale and unhealthy, I do not want it to look lifeless. This can be a big problem when painting pale skintones - it comes out looking dead and lifeless. Look at your own skin - you can see the life beneath the skin; the blood veins and vessels, the glow of whats keeping you ticking!!! So I went in with some glazes. First I made a reaaaaaaaally thin glaze from S75 basic flesh and glazed that into teh areas of midtone and shadow - leaving out some of the more lit high areas. Then I added a tiny amount of deep red into the glaze, thinned it further and pushed this glaze into the reccess and areas below the mid tone. Finally to make sure it wasnt looking too healthy - I glazed in a little S75 sherwood green just in the darkest areas.
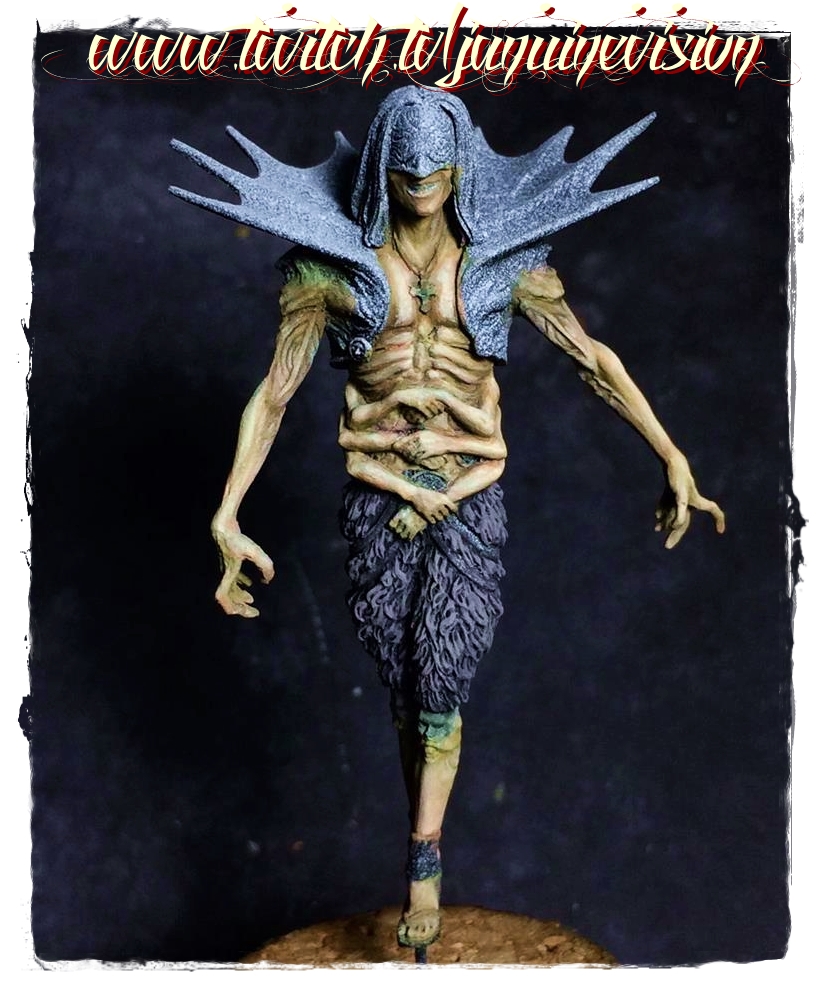
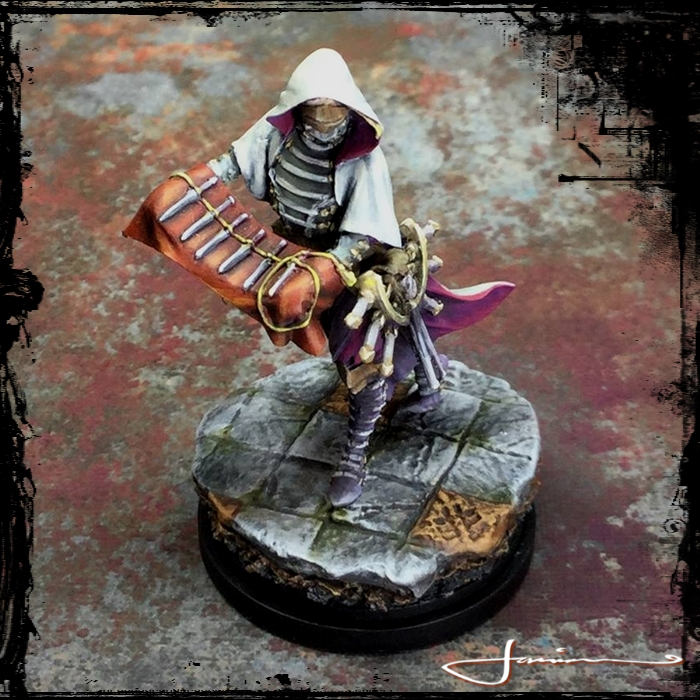
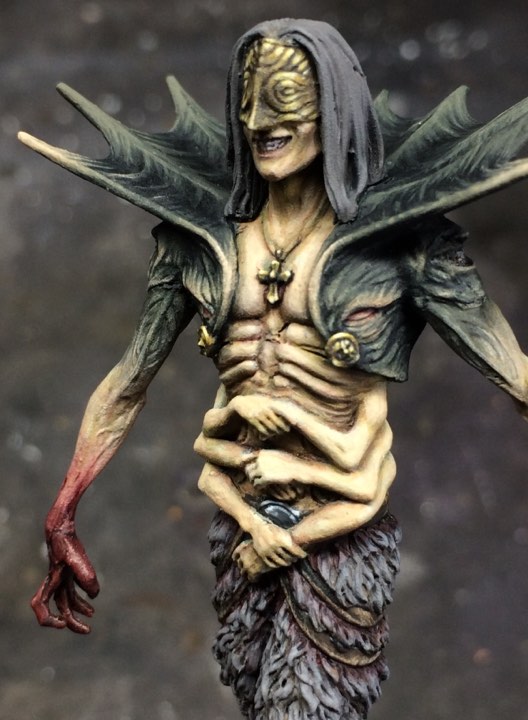
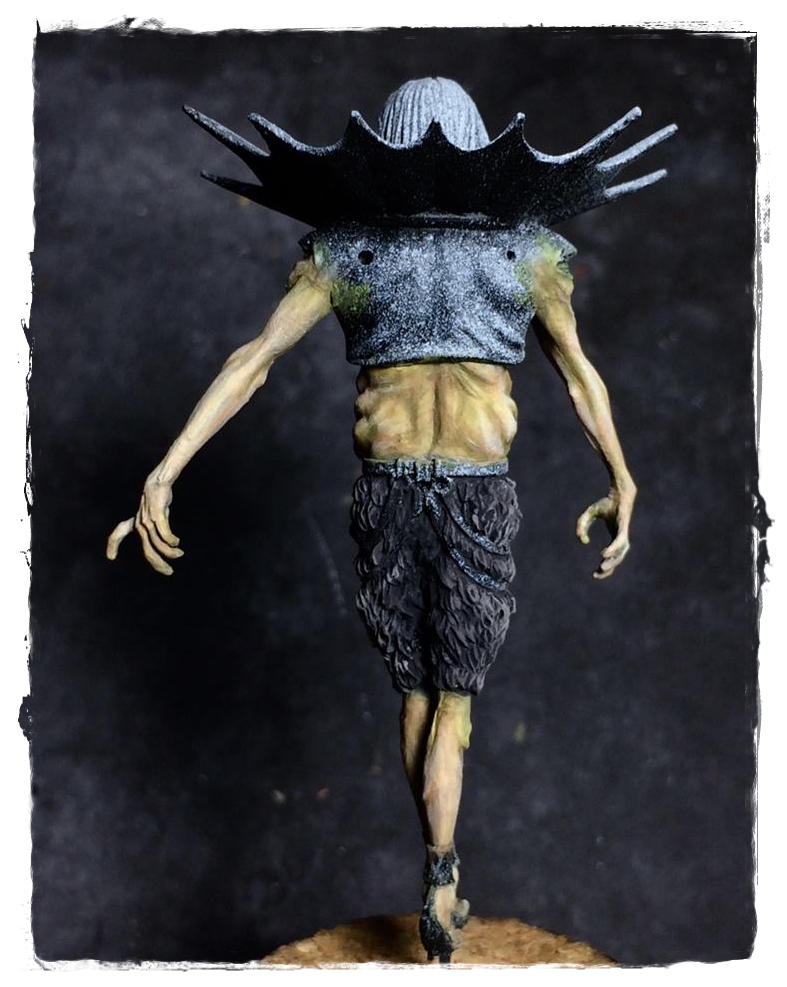 And this is where we are now. With thinned down S75 Mojave white and a brush tip of basic flesh mixed in I've started to refine the skin. Smoothing out and over some of the previous bright glazes to bring back the pale palour I'm wanting and also bringing up the areas most touched by the light source(s). So much still to do but that's its so far. Any question - plz feel free to ask :D
Surviving
Finally back home in Ireland and the new studio is up and running. First order of paintage – finish these damn survivors so I can start playing!
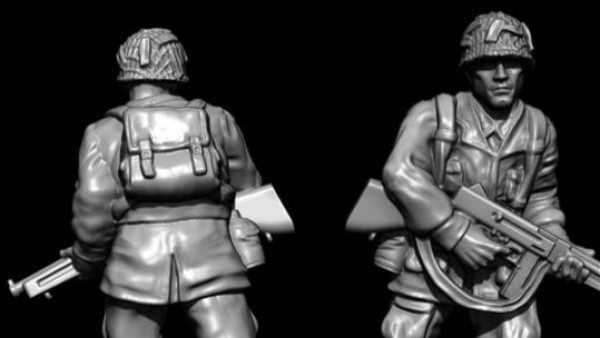
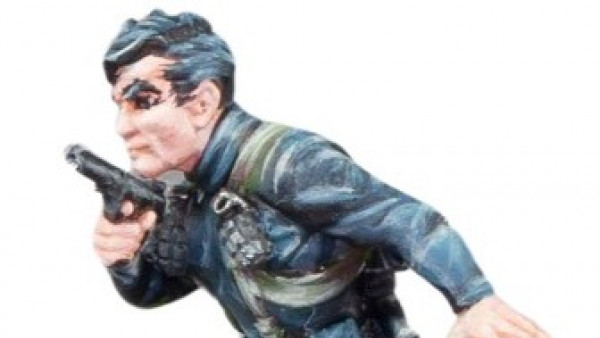
The Forsaker
Realised I had a load of the wee KD:M brown boxes that need the painty love. So broke two out, got ’em prepped, primed and ready to go. Started with The Forsaker – older sculpt and stil one of my favourites. The fluff behind him is simple enough – he’s completely off his nuts insane. Bonkers. Crackers n Cheese. Love him. There is still a fair bit of mystery about the character. Seems forsakers are actually survivors who lose it. Evenutally they become the Butcher???…..?!
Anywho – made a start on him. Base colours down and thats as far as I could go as I have no glasses till next week when I pick them up from the Opticians >< Arghhhhh!!!

Little bit of progress.......very little.
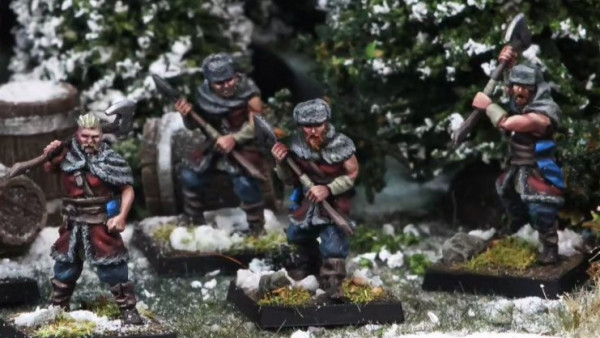
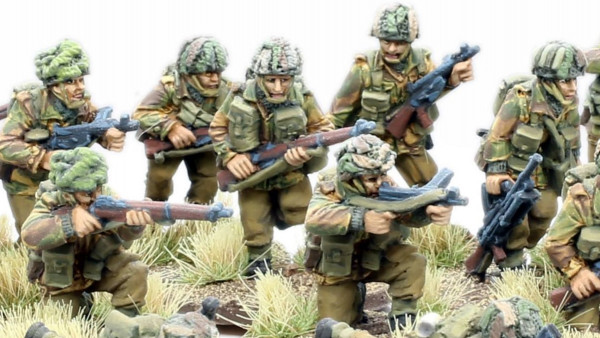
Prologue survivors finally finished and a crappy photo taken! Glad to have them done and dusted and ready for the meat pit 😉

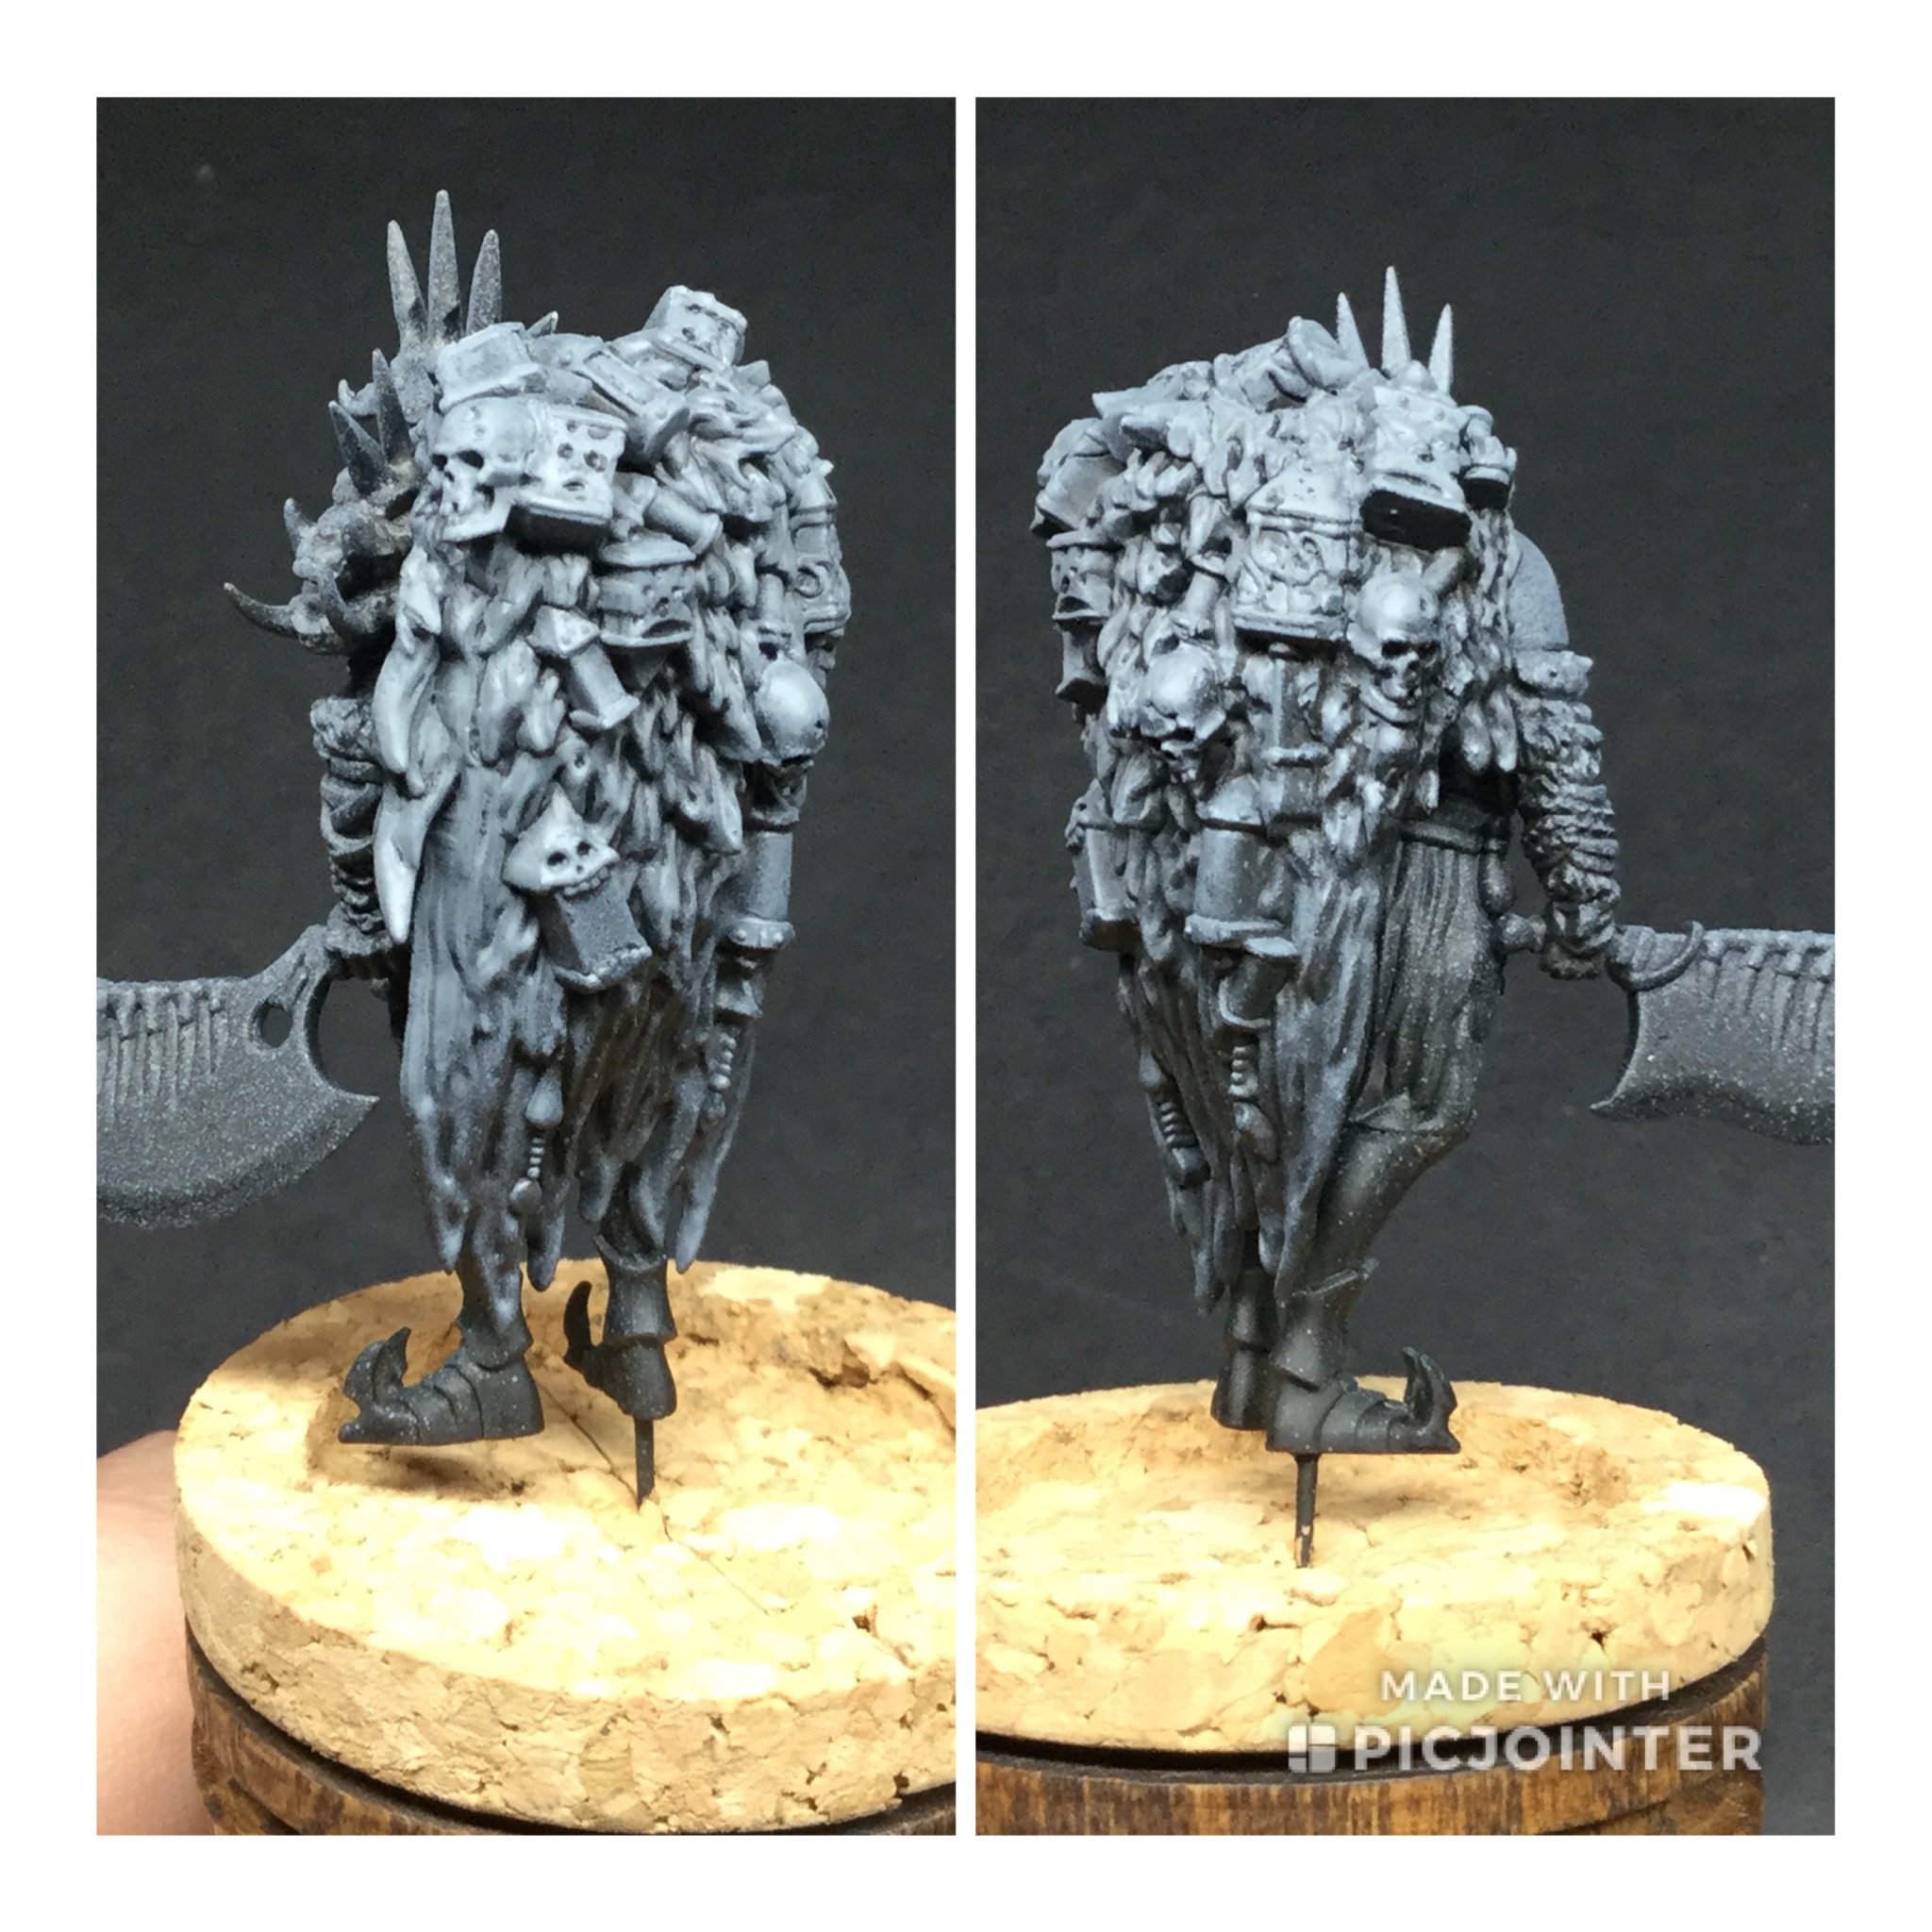
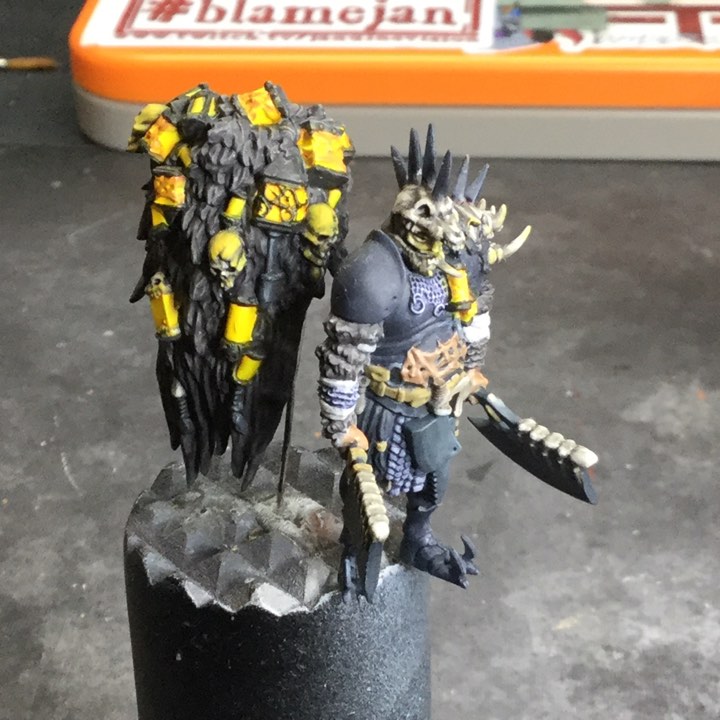
as my glasses are Still being awaited on ( >< ) more building and prepping goes on. The Cloak of the Butcher always bothered me as the skulls were kinda comical and looked more like they came from Tim Burton than Adam Poots so I fixed them. Gouged out the originals and sanded down the back of some skulls from the GW box of skulls as replacements. Much much happier now 🙂
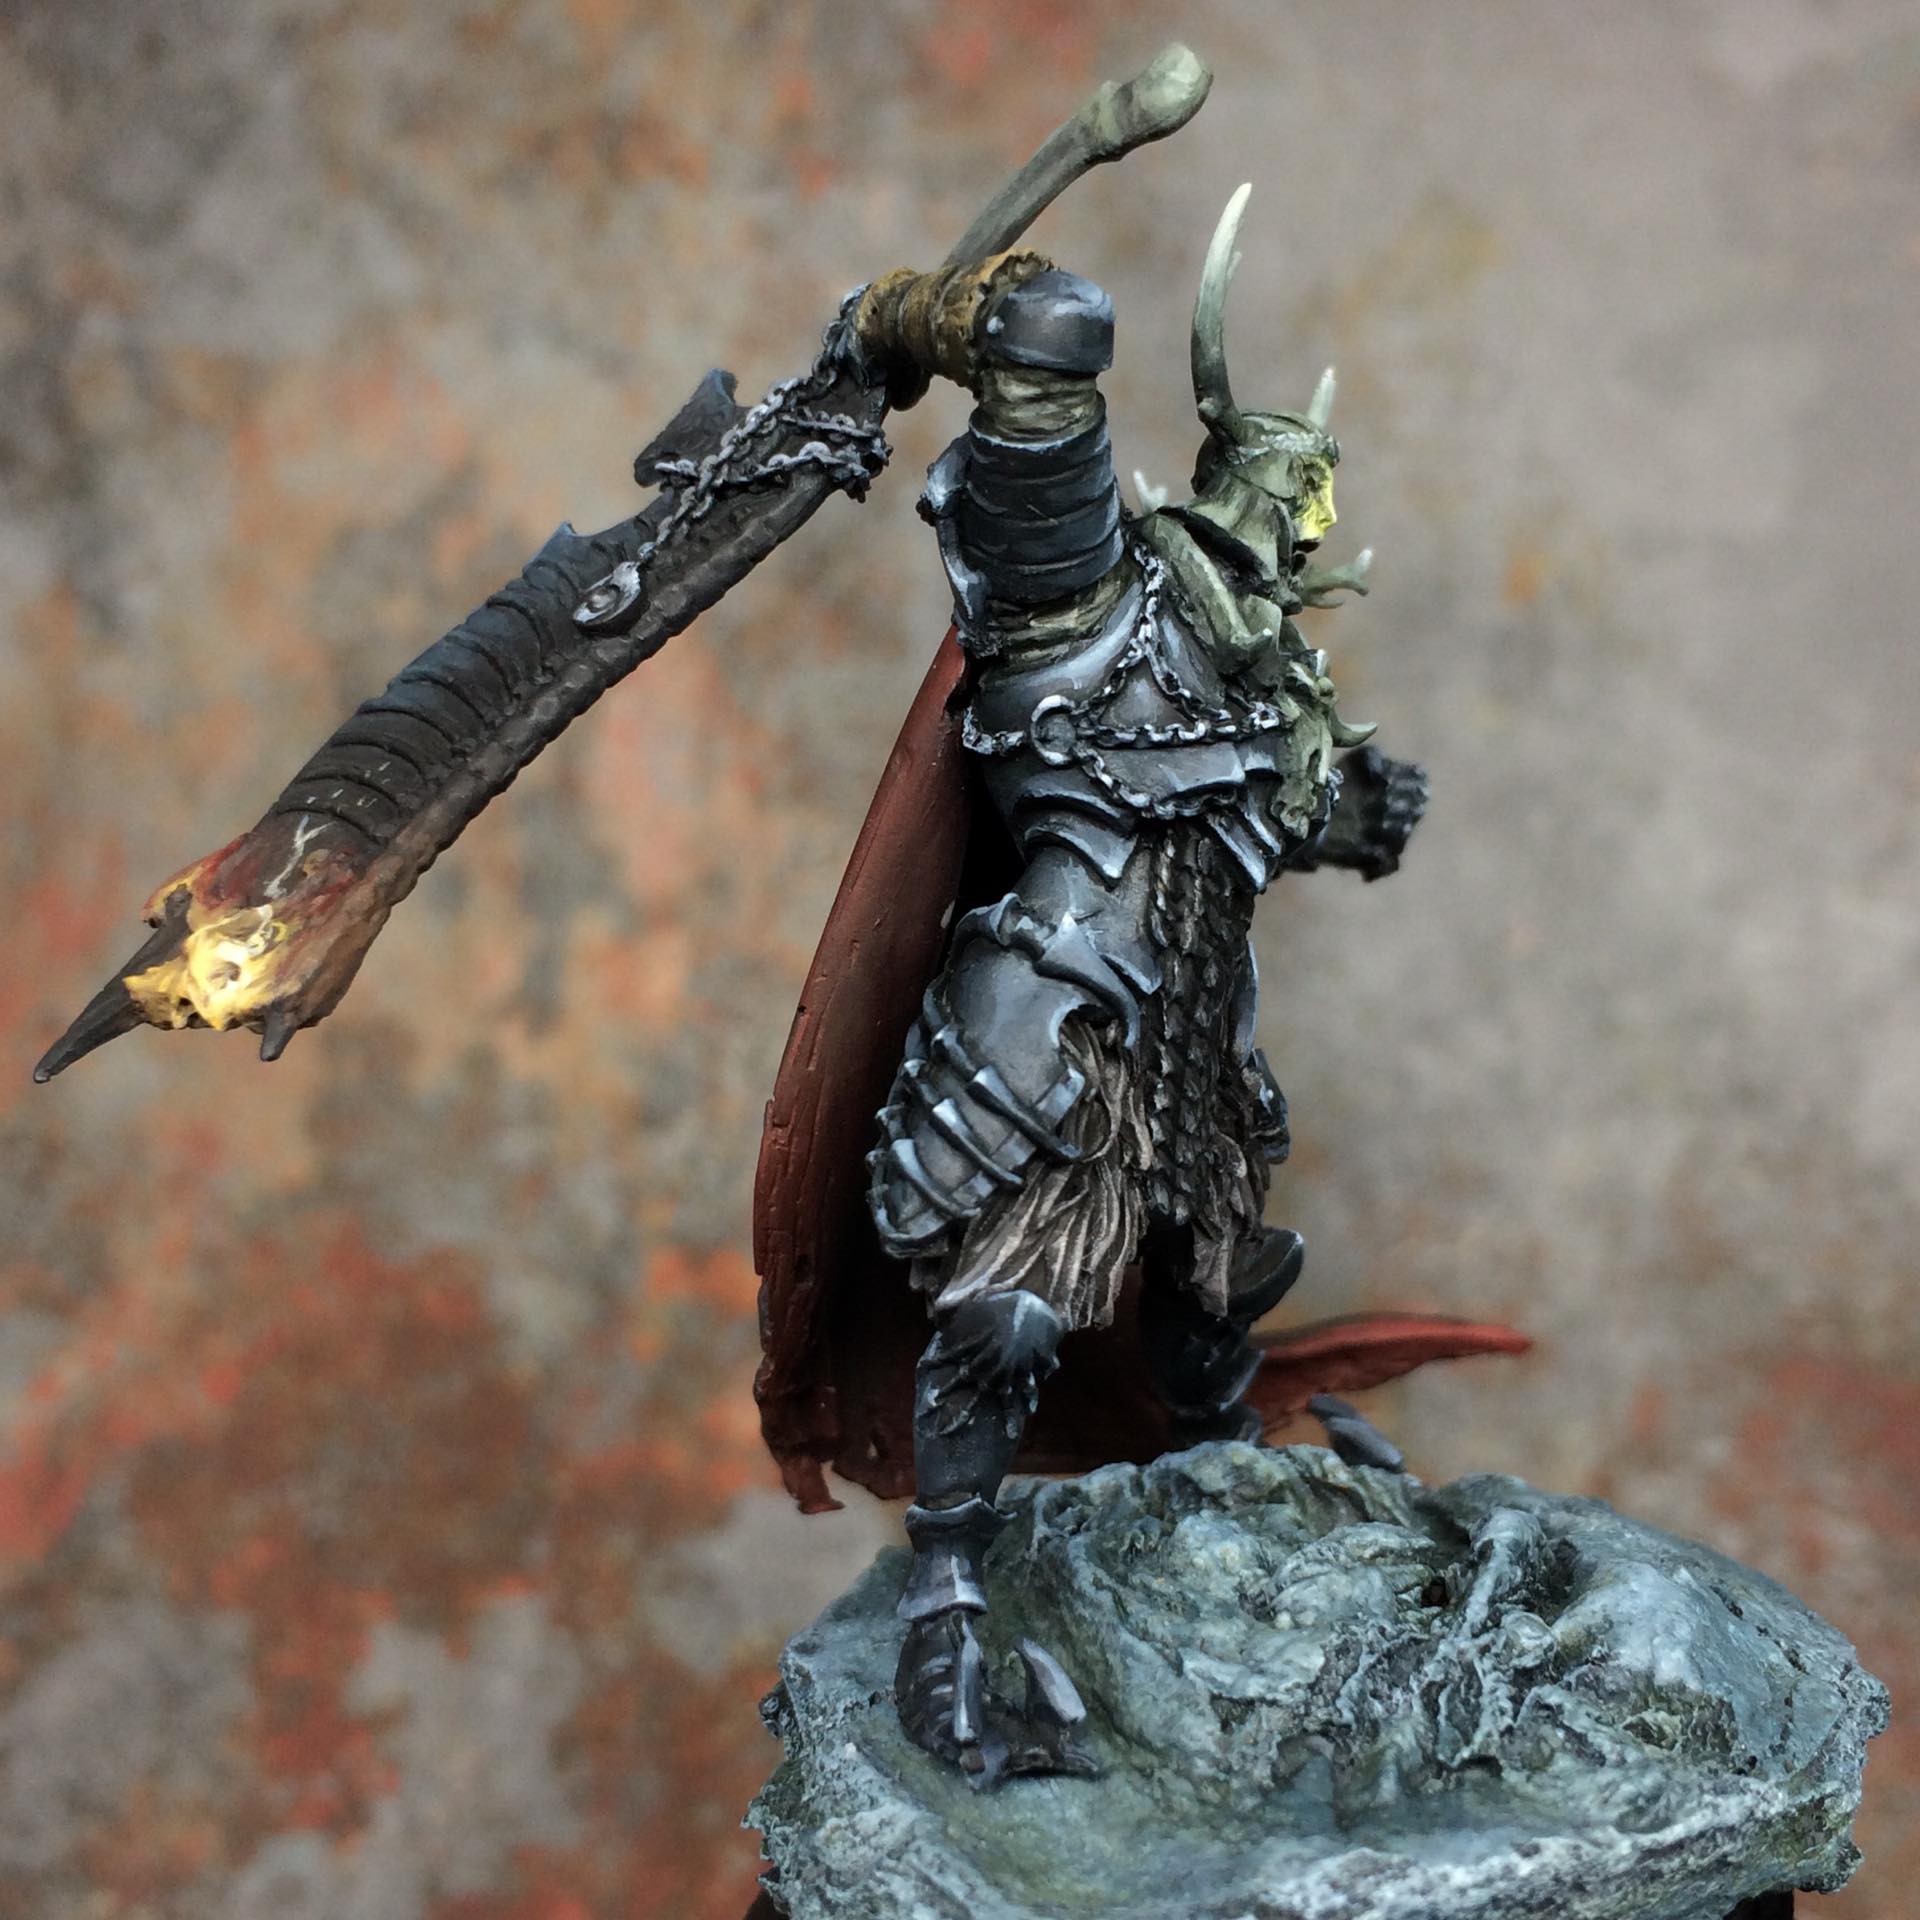
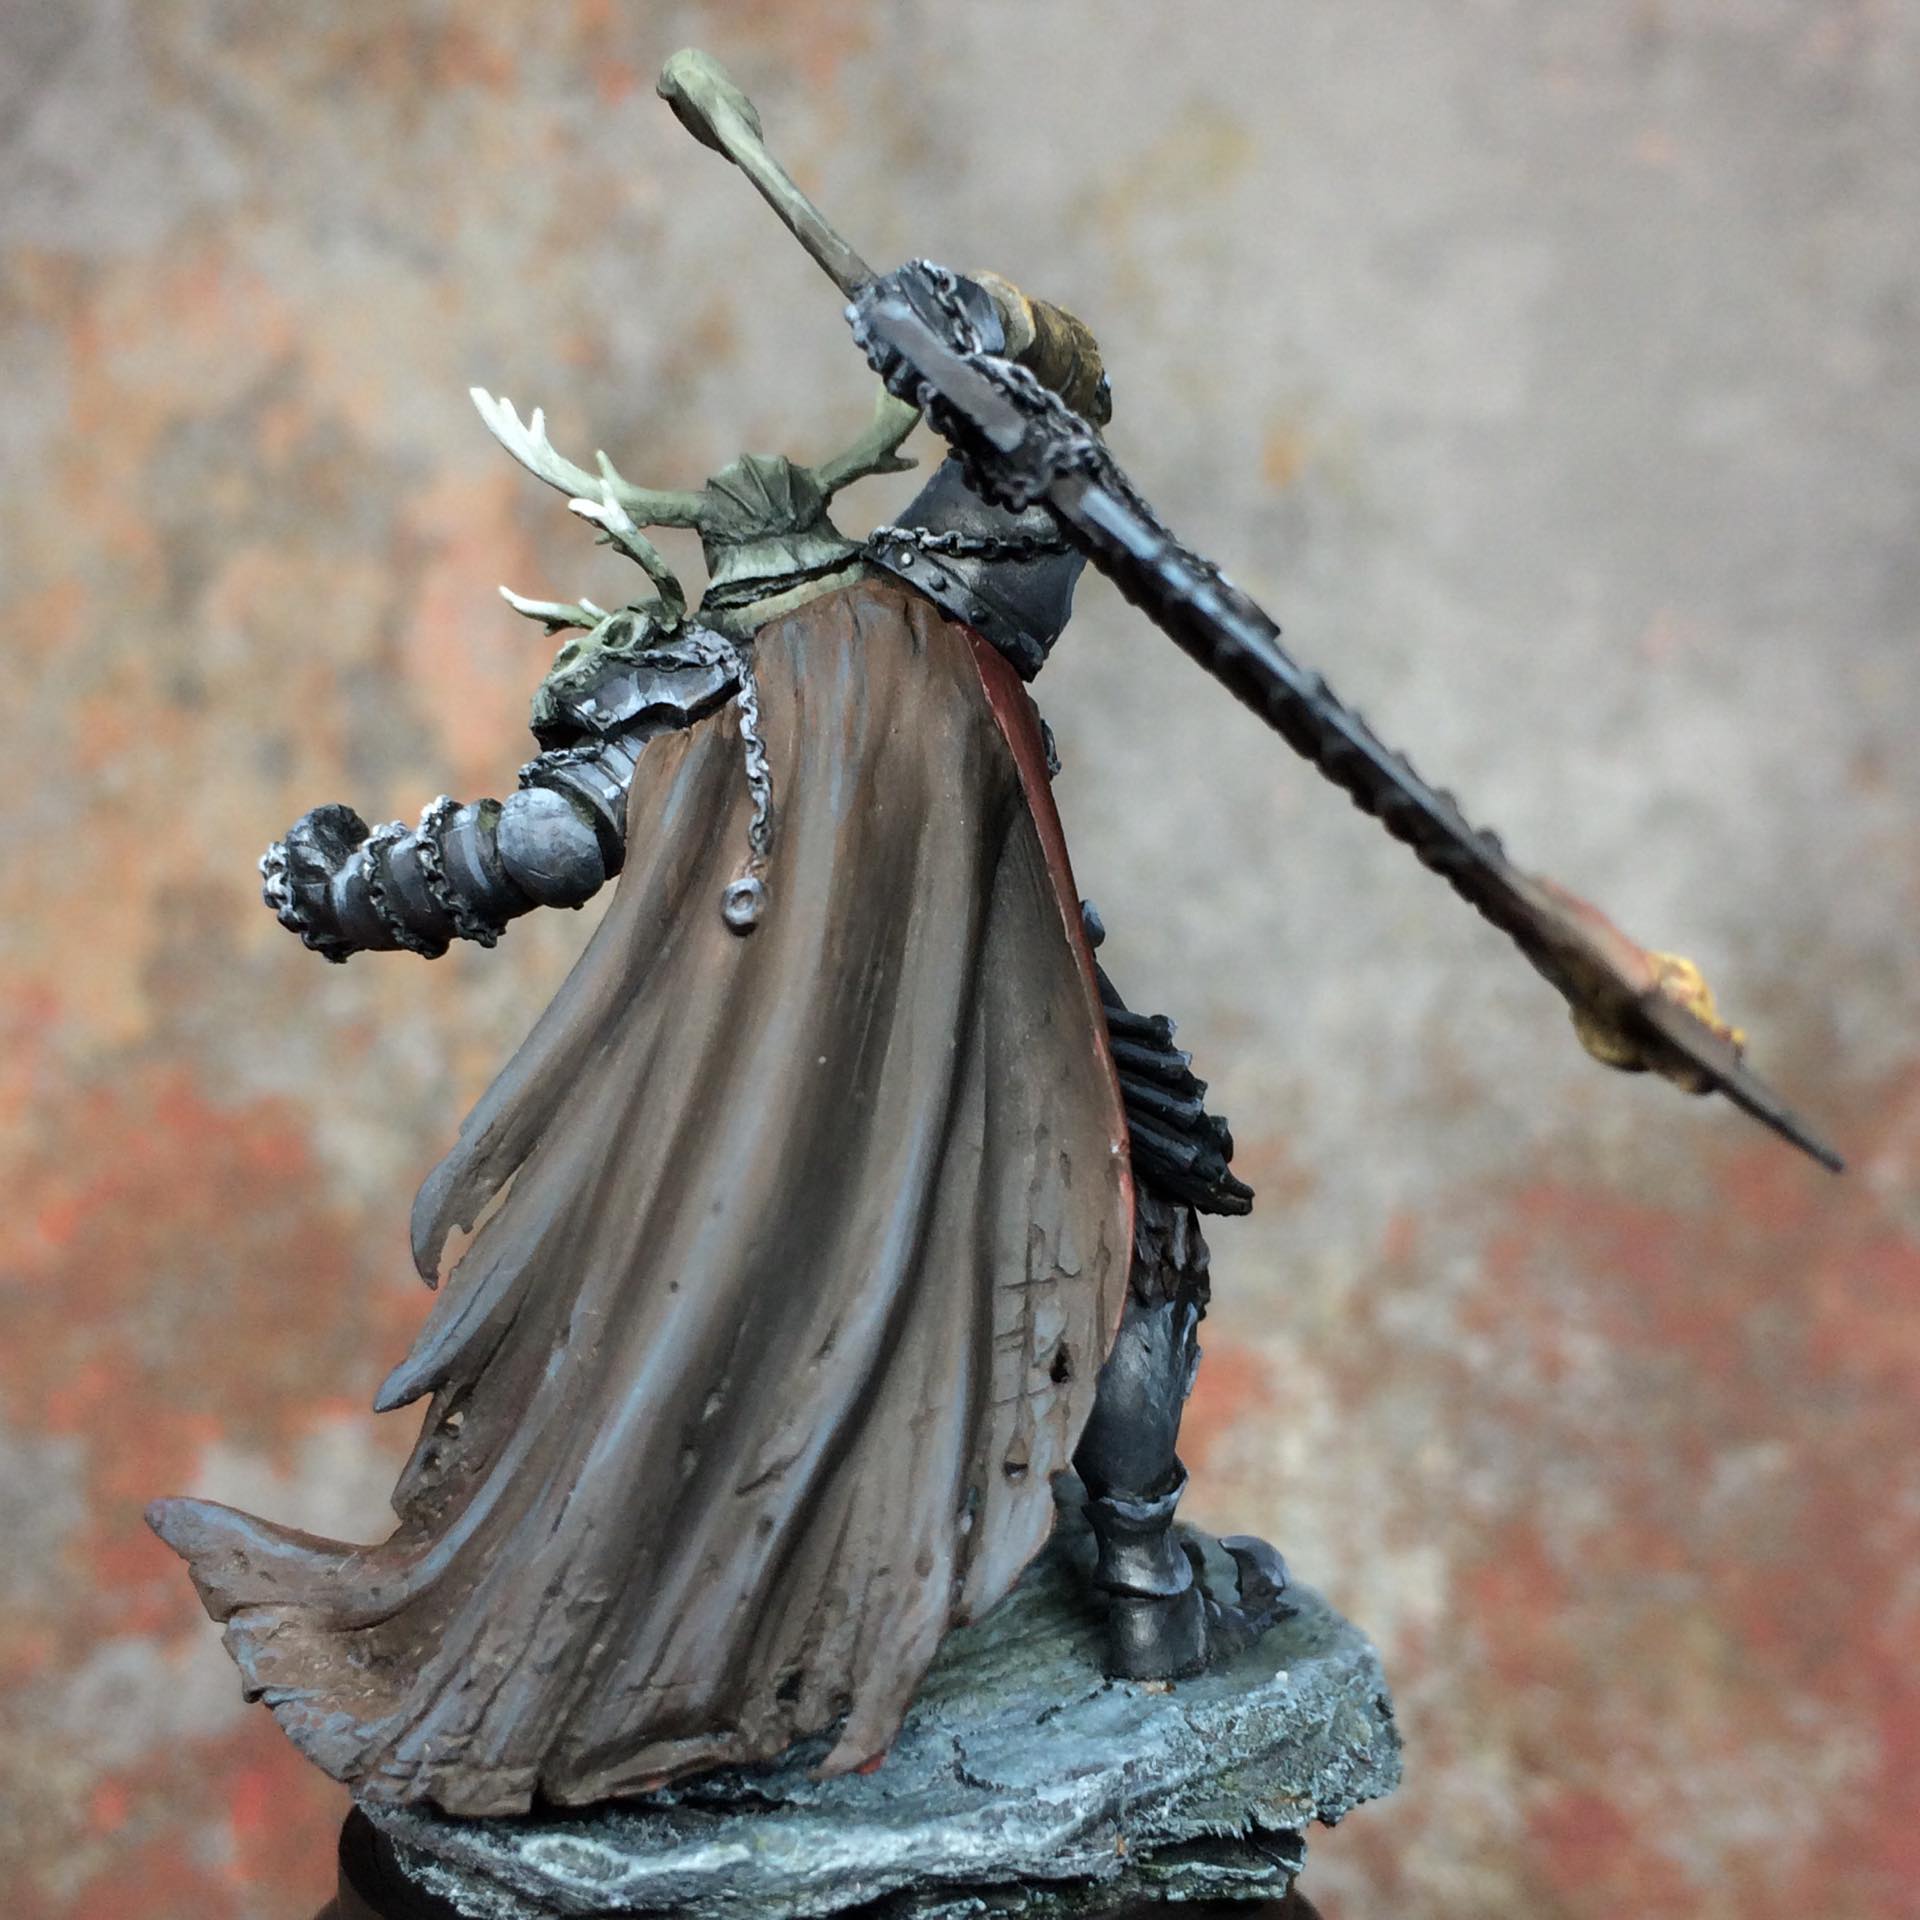
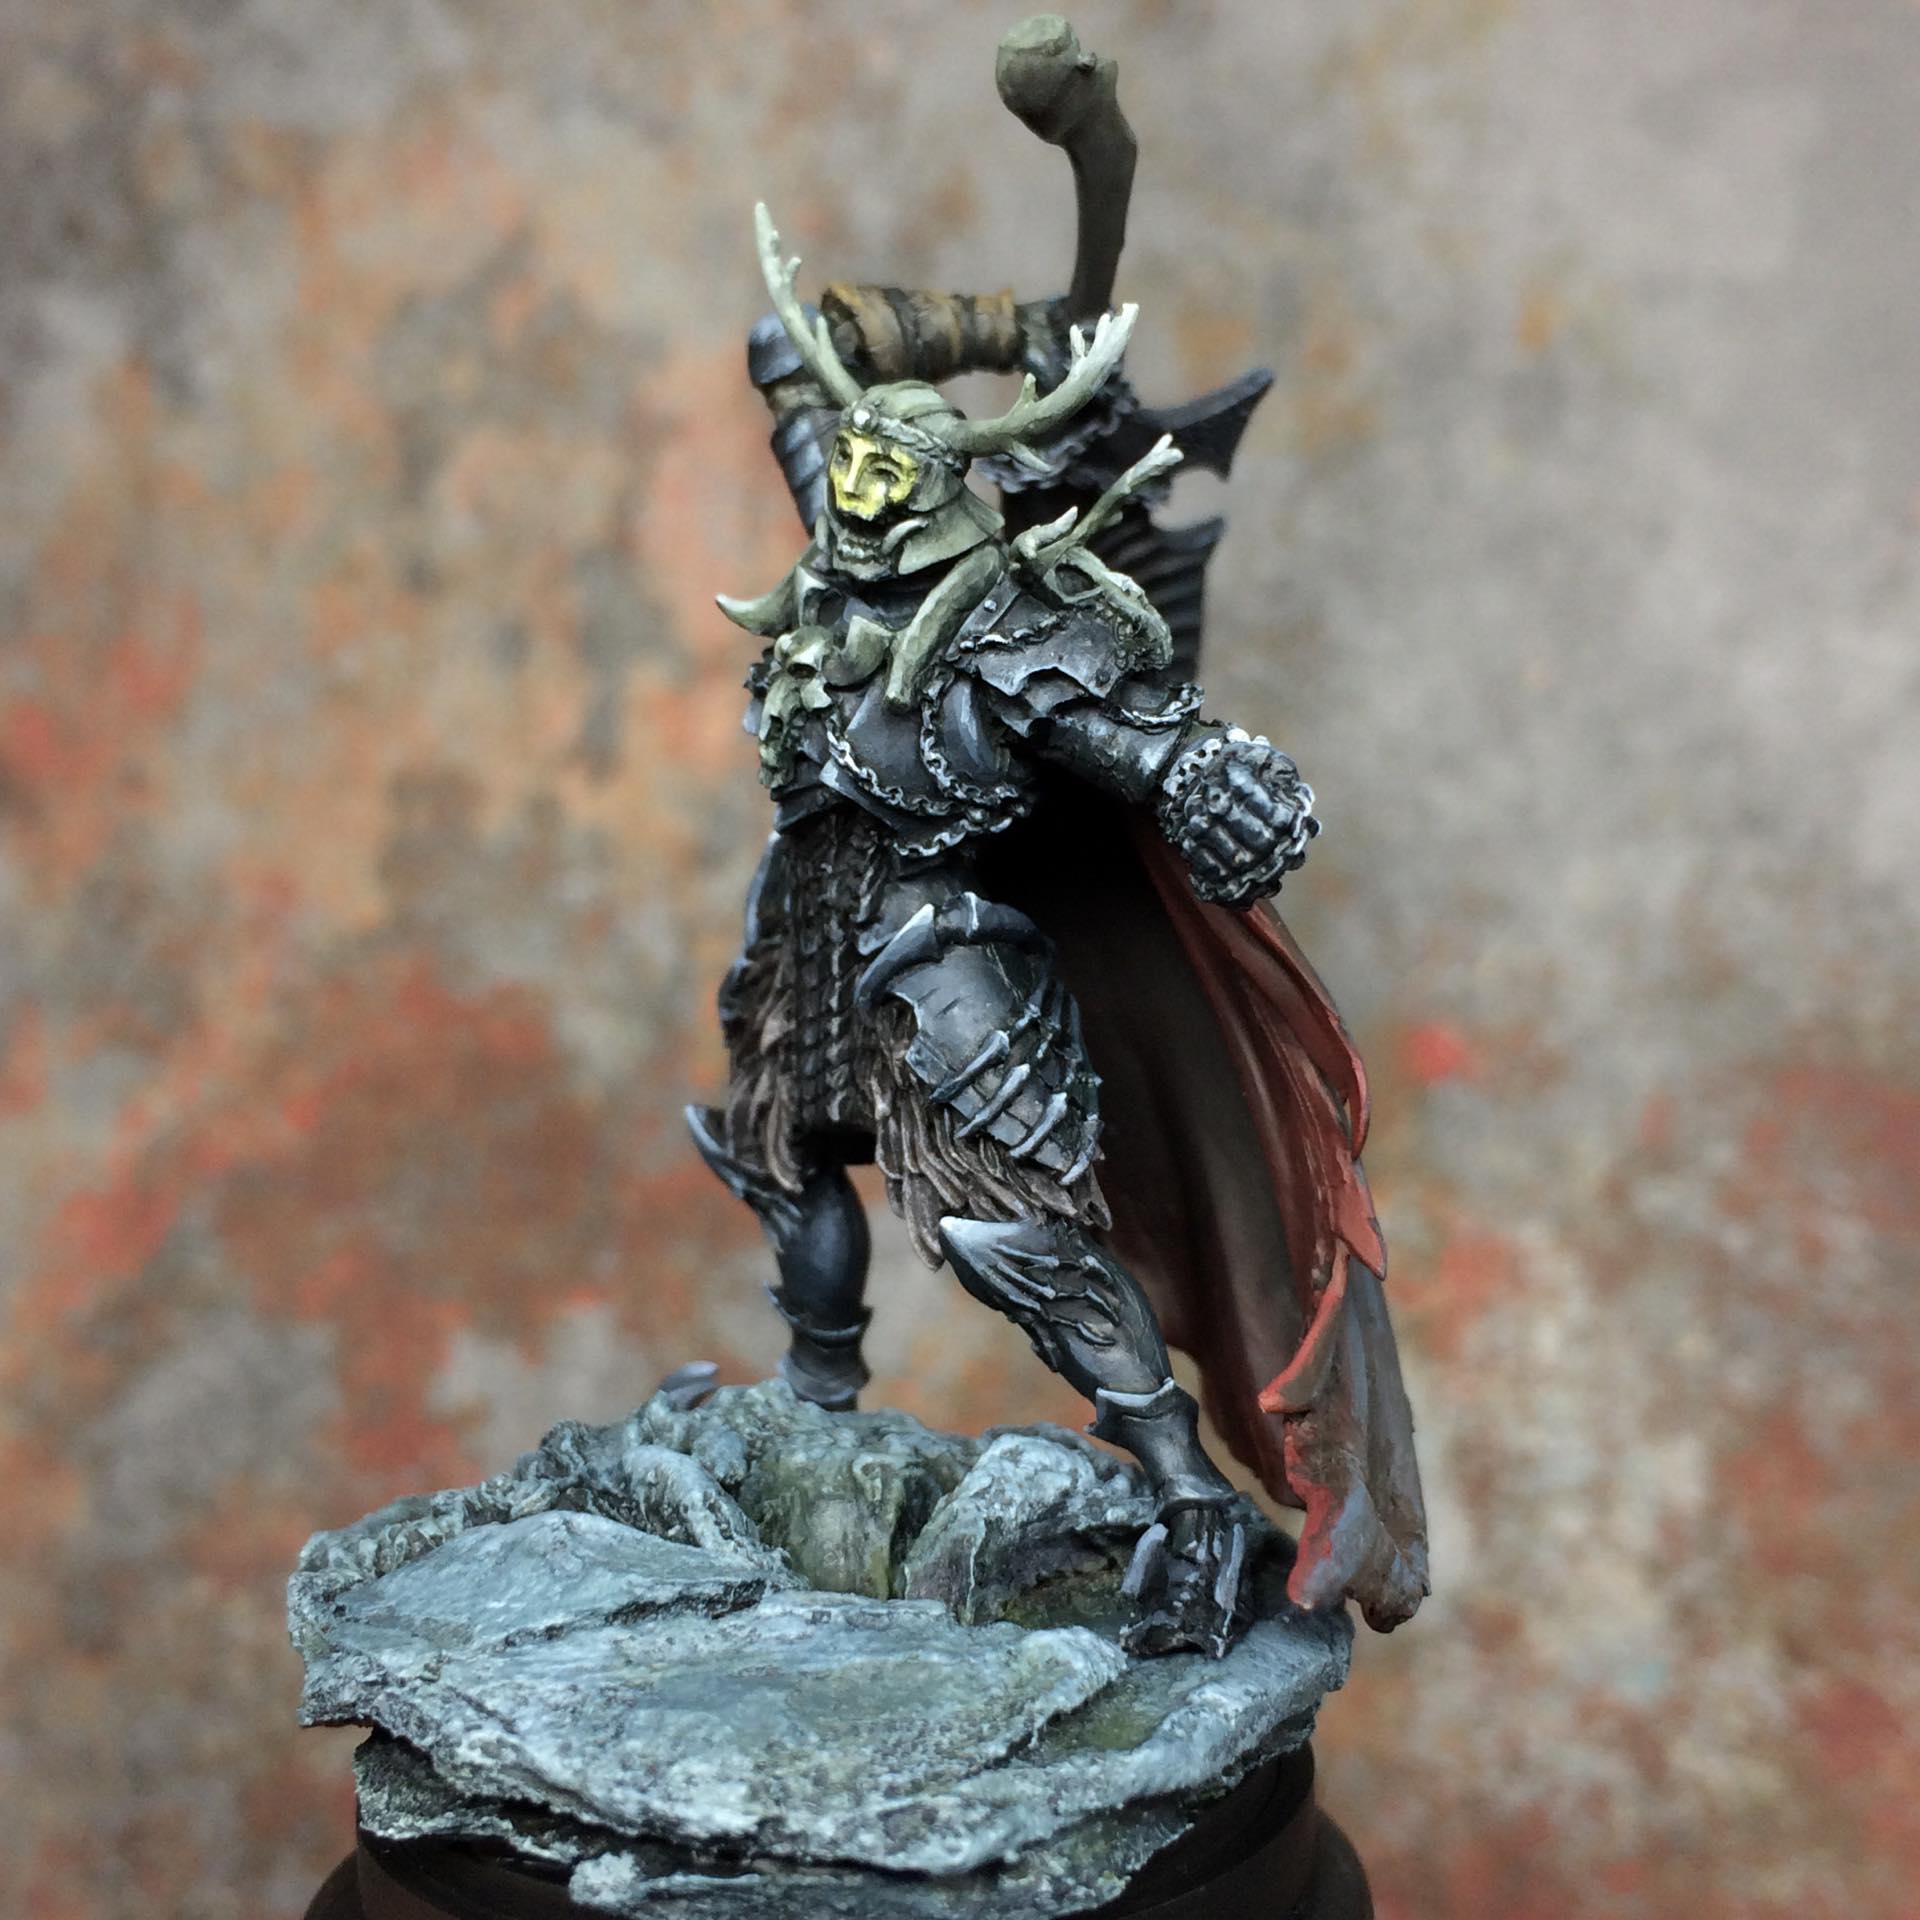
The Forsaker Finished
Finished up the Forsaker yesterday and well happy with him. The sword was a bit of an arse to get right but got there in the end. The base is very simply a bit of bark from the garden (Lawson Cypress apparently) painted up with some anthracite grey, ardennes green, graphite grey from S75, Schminke titanium white and washed back with a mix of nuln oil, coelia greenshade and lahmium medium from GW.
The Forsaker himself was done with a very limited pallet – VMC dark sea blue mixed with S75 flat black and anthracite grey for the armour then highlighted up wiht Schminke titanium white added. Helmet and mask – Ardennes Green, tenere yellow and ……….yup schminke white!!!
Any C&C – please feel free 🙂

No rest till Lion
Working on this bad boy all day. Not leaving my desk till he is finished!!! KD:Ms White Lion. Break out the coffee – one way or another – he’s getting finished today!!!!

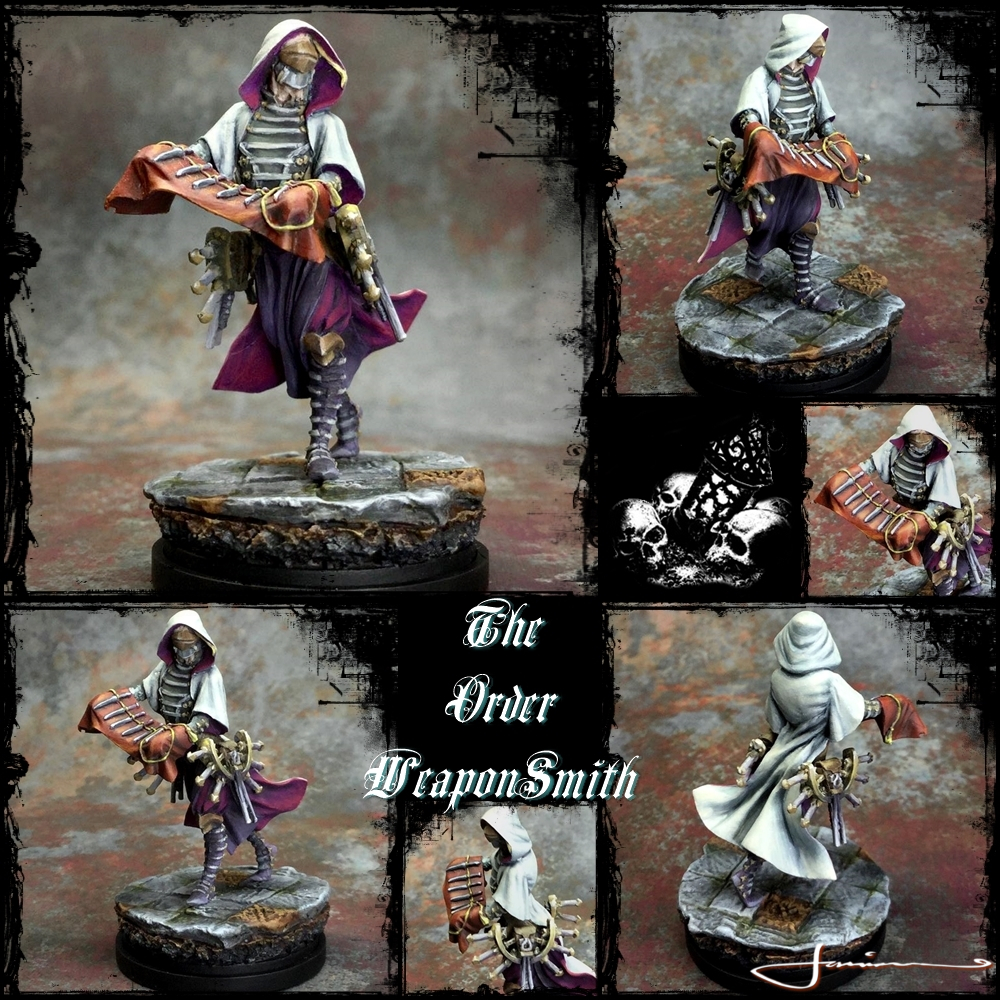
Smiths n Speakers
Havent posted in a wee while but have been busy at it. Since moving back to Ireland from Korea, life has been a bit………. hectic! Finally got studio set up and managed…. kind of…… to get back to streaming. Internet in rural Ireland is …… hmmm…..let’s put it this way, I have been considering looking into carrier pigeons o.O
Annnnnnnnyway – paint has continued to flow! KD:M wise I’ve been working on trying to clear a few more on the ridiculous stockpile I seem to have accumulated. Slowly working on the weaponsmith but still kinda stumped on a base to make for him…

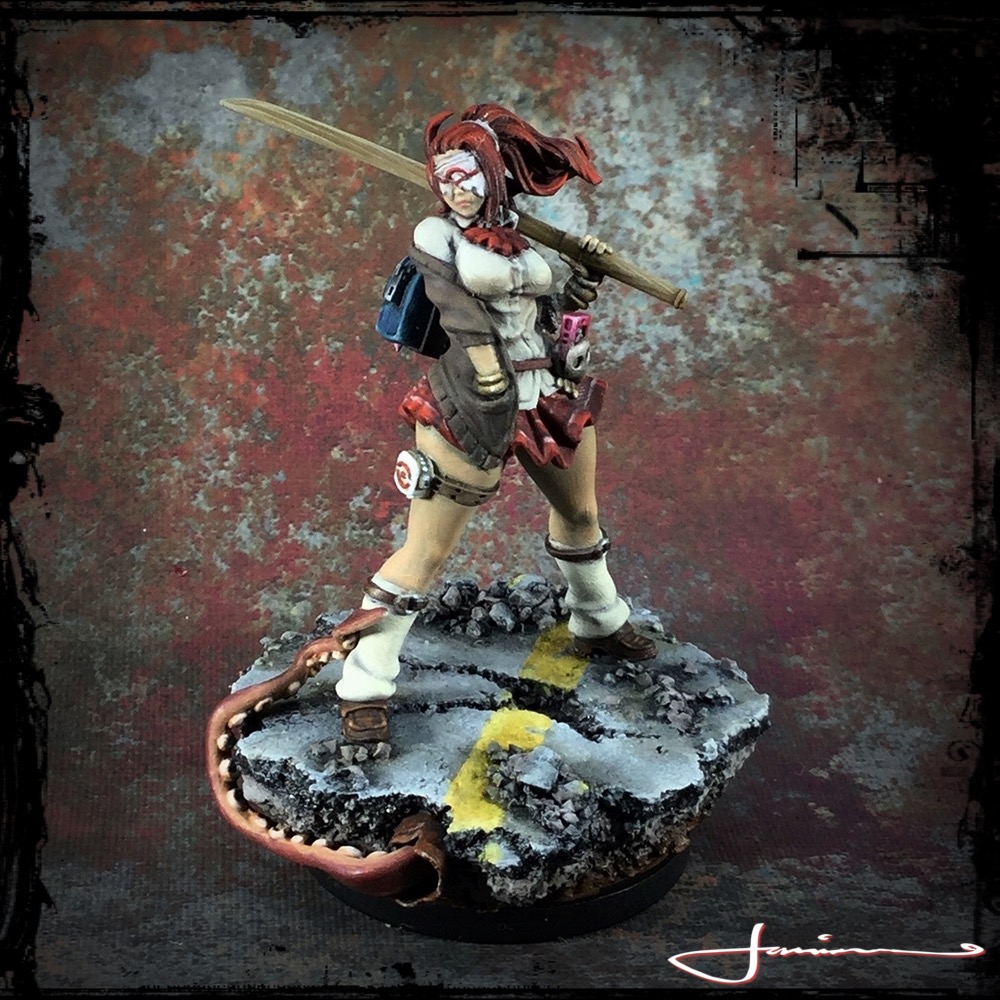
Weaponsmith has taken a wee bit of a back seat though to the Death High White Speaker. Love love this mini. She’s not finished yet but getting close. Just need to finish up her bag and bokun and then its to final touches.

The base was pretty simple to make but goes nicely with the mini I think.
Just two layers of cork beermat and then gravel and grit. The tentacle is simply made from greenstuff. The road was painted up in layers of differnt greys, washed back down, layered up, washed back down and then a final overbrush of highlight. Mini and base were done almost exclusively with S75 ScaleColour paints
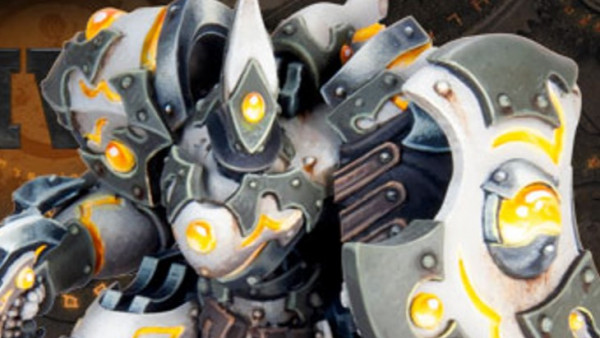
The Fugly.......I mean..... White Lion
Finally finally getting around to getting some decent photos taken of some of the minis n projects I have finished recently. First up from the KD:M prologue, one of the most irritatingly bad sprue cut minis out there – The White Lion.
After the horror of building this guy and ALL the damn filling he needed, he was a really enjoyable paint and I got to try out a few new things and learnt a lot along the way. Very happy with the result 🙂

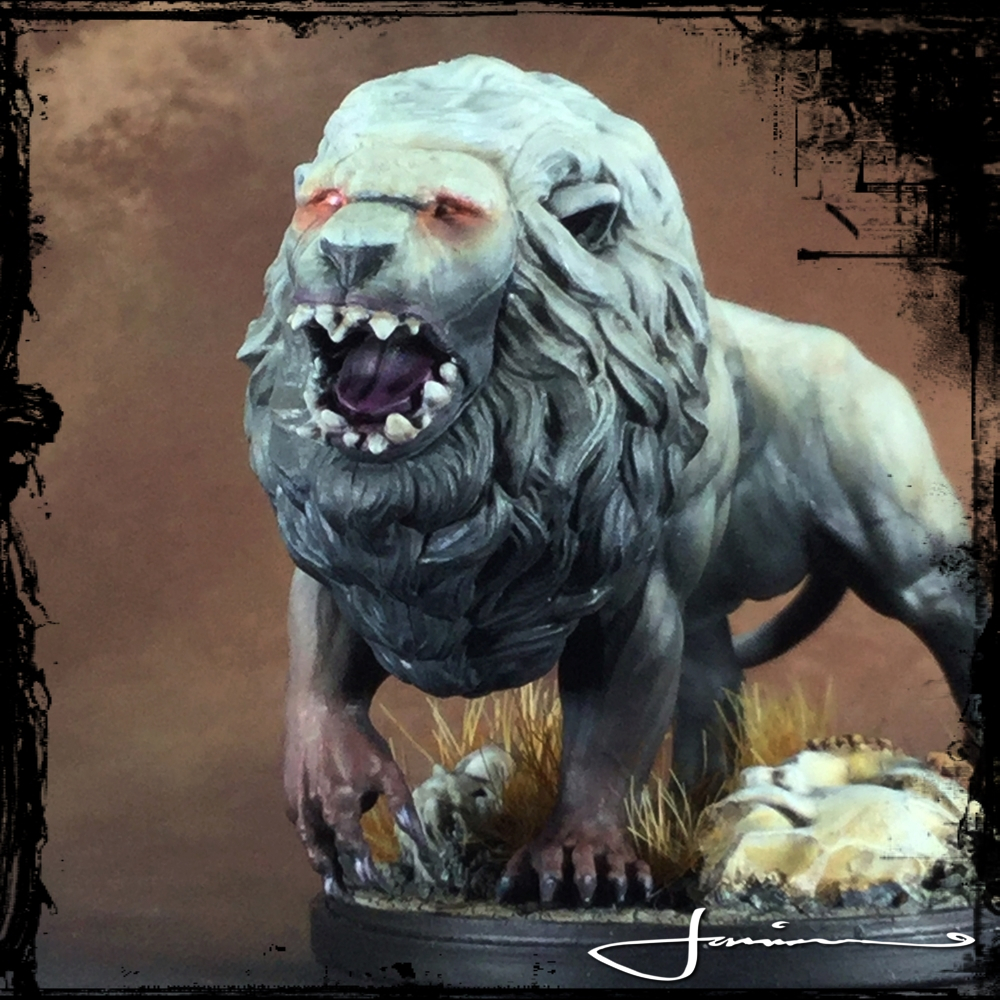
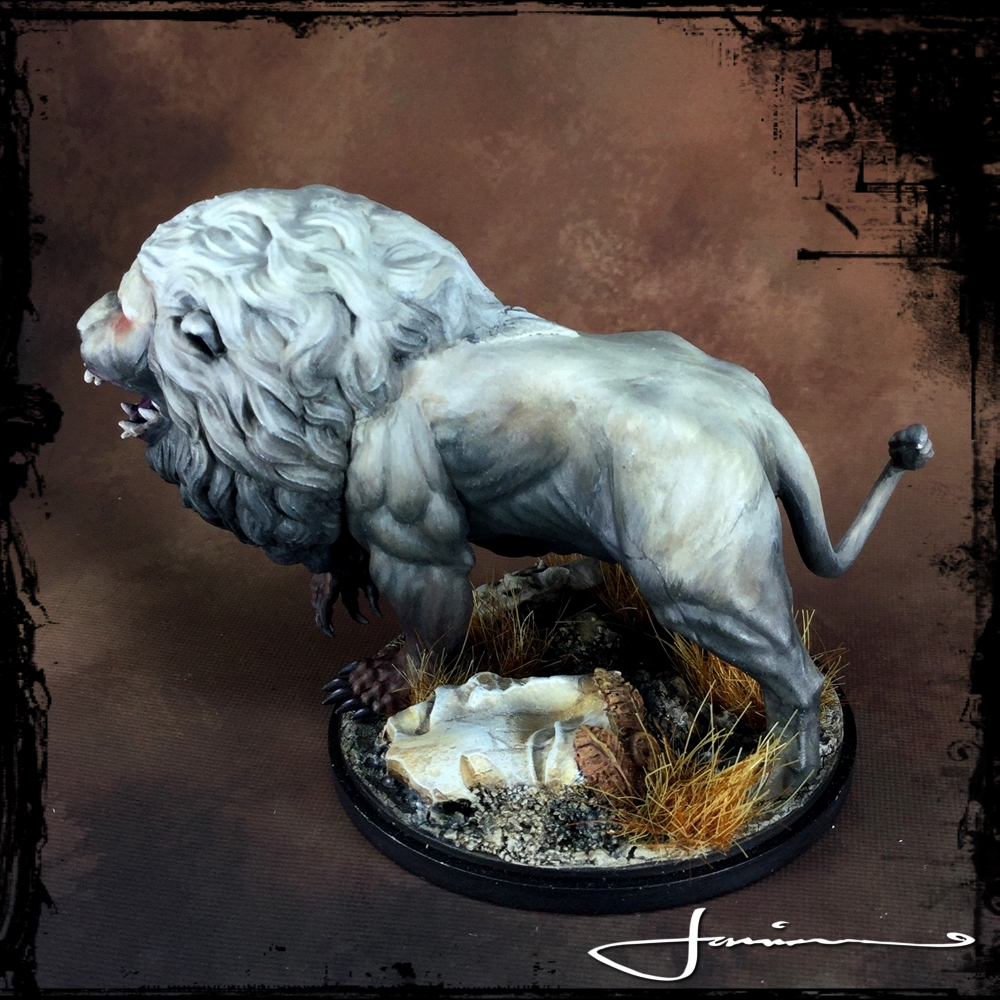
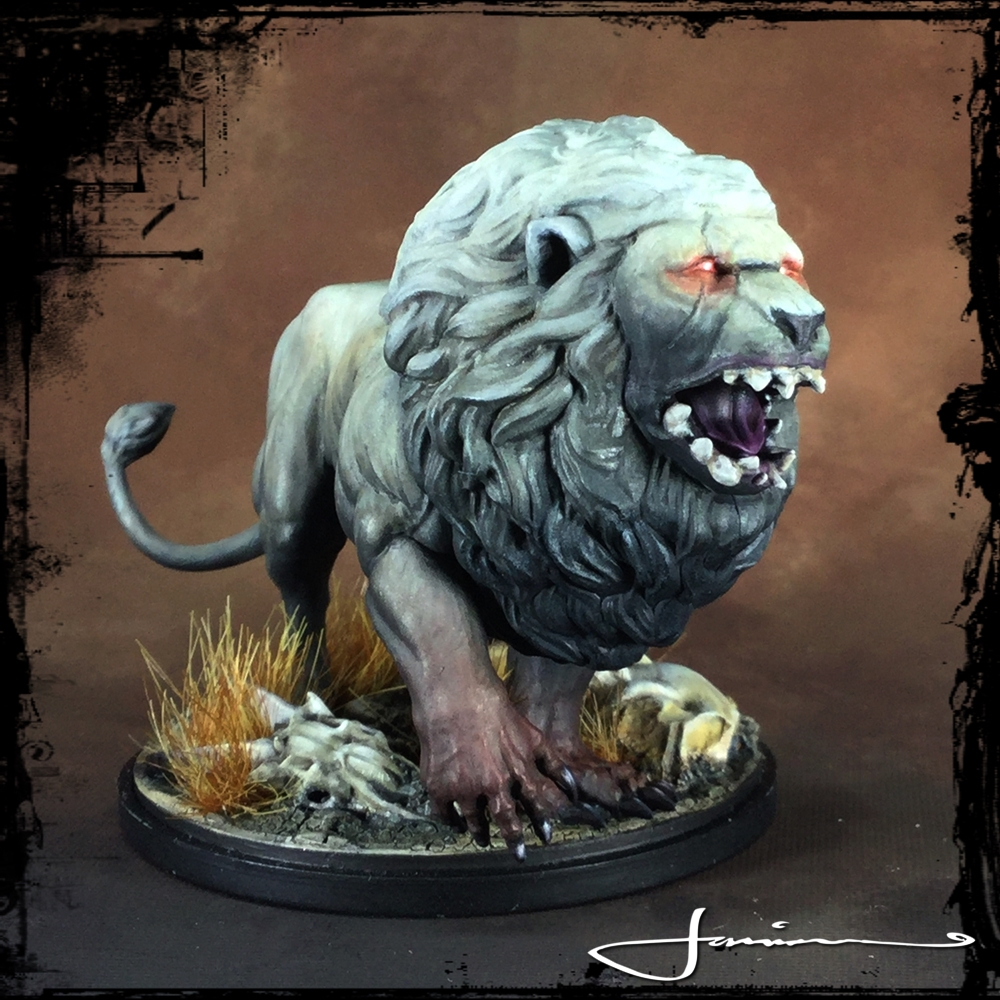

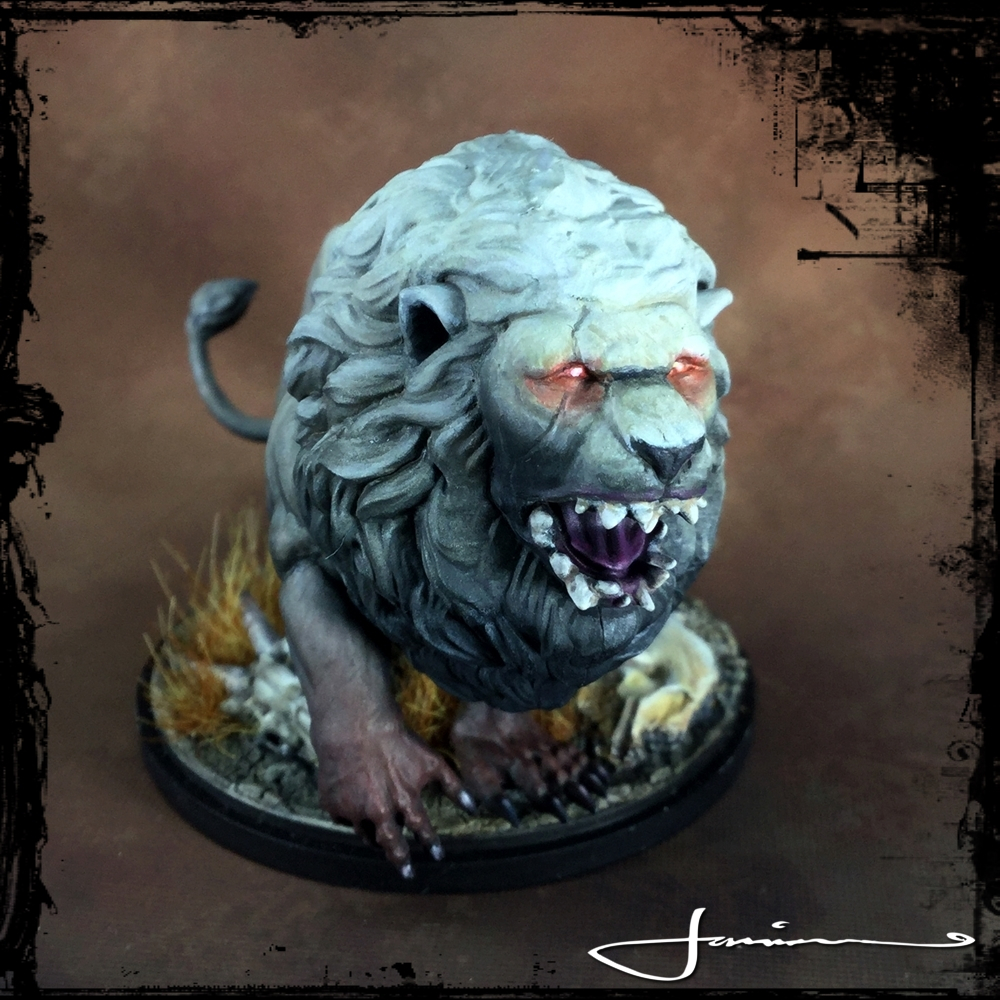

Hope you like him 🙂 More Kingdom Death coming in the next few days
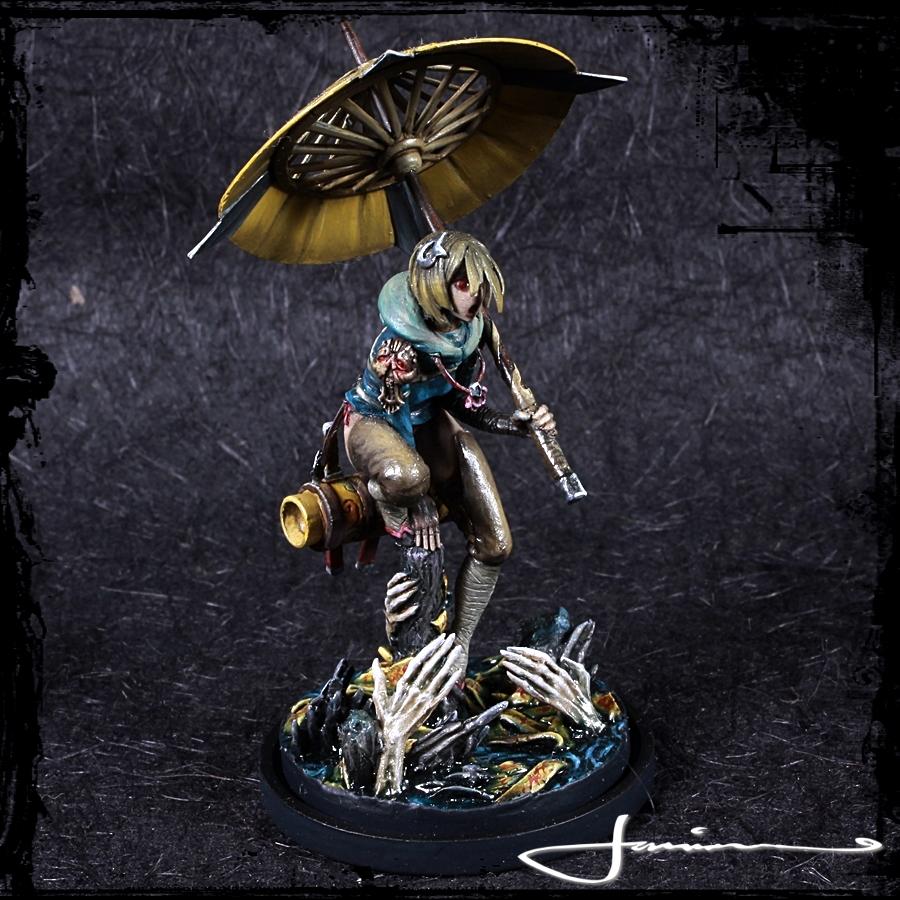
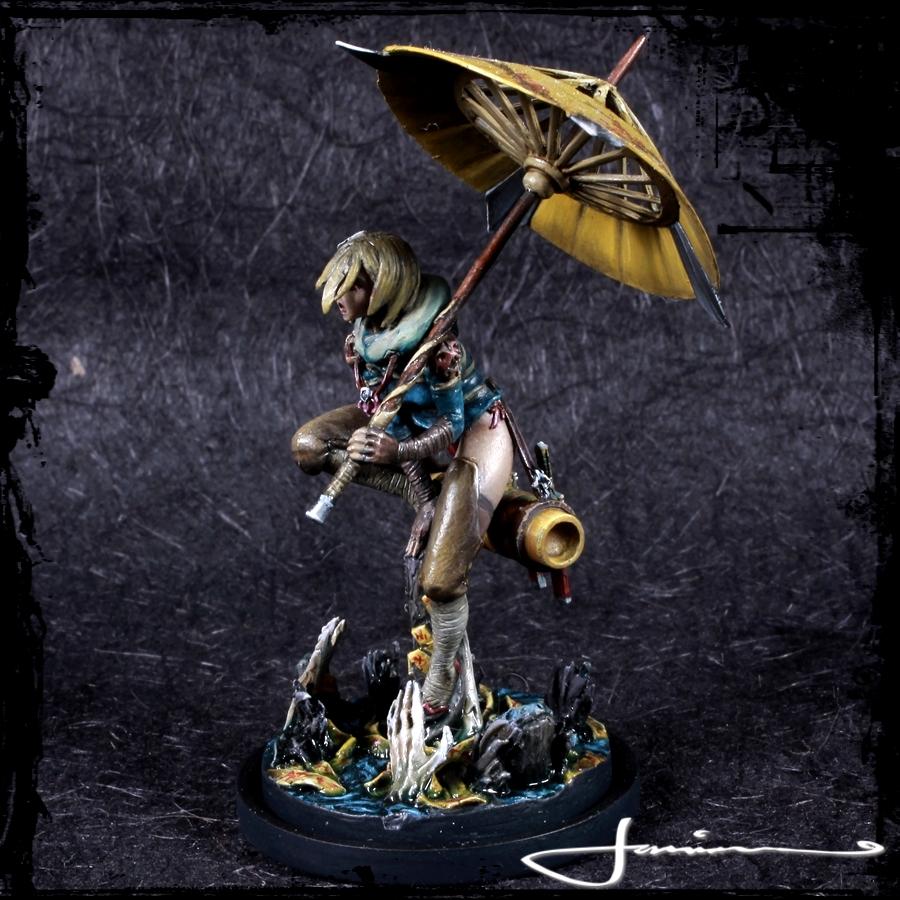
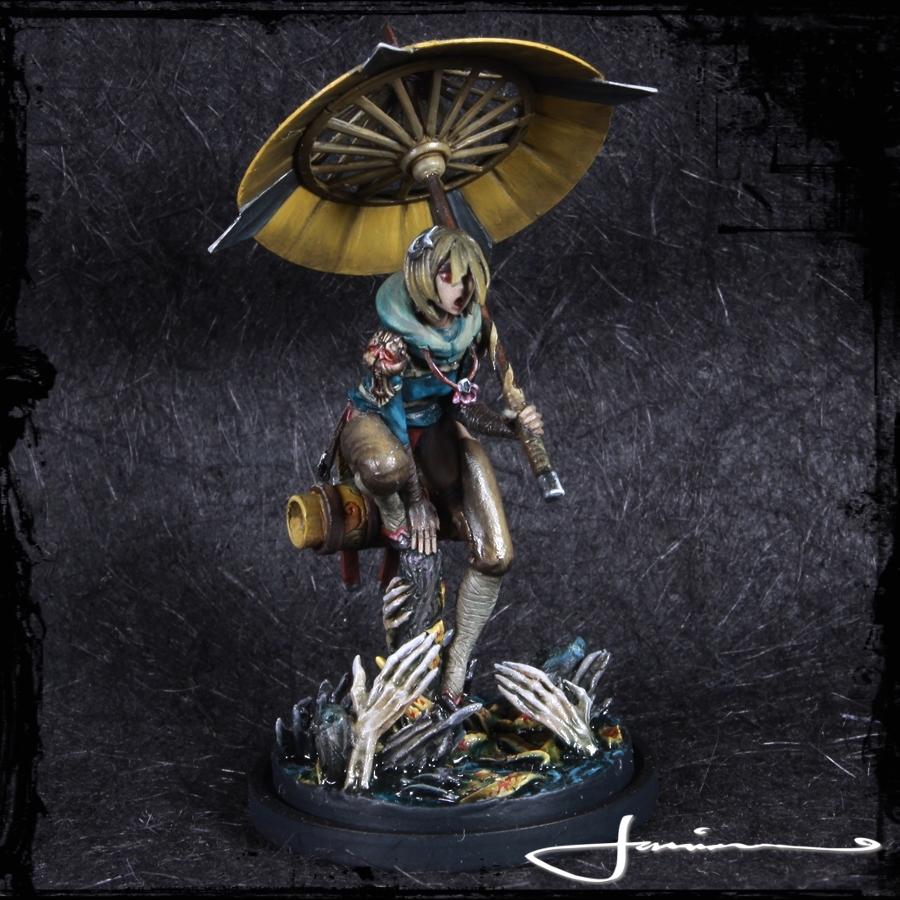
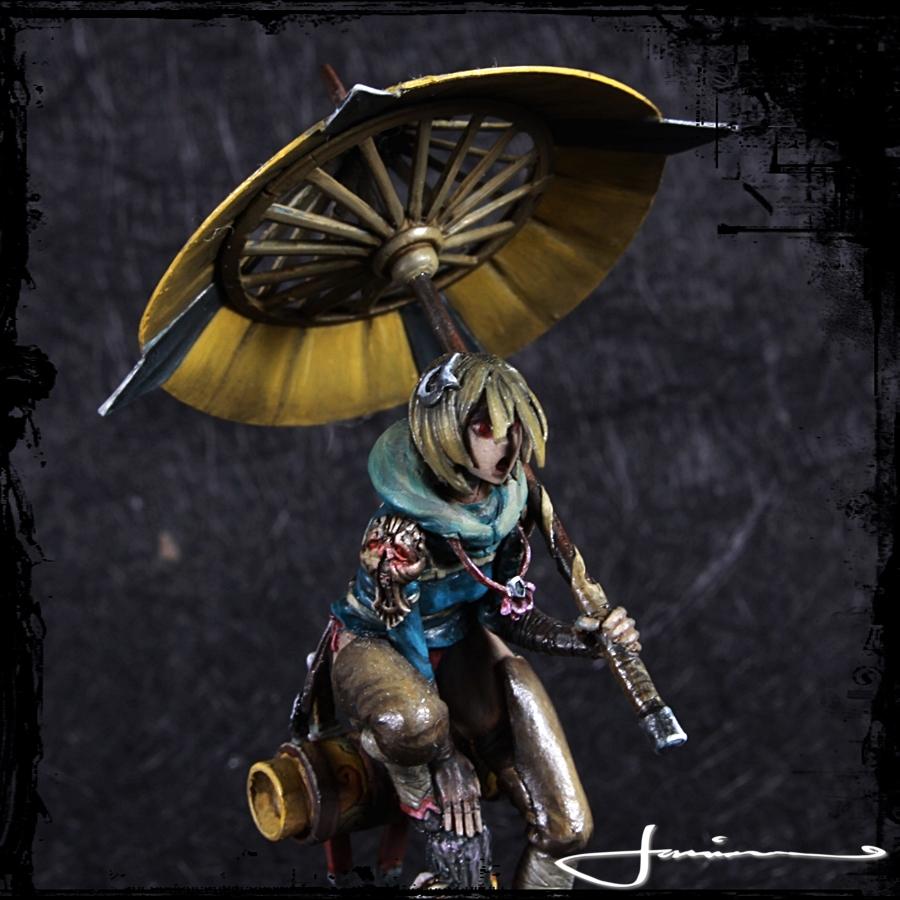
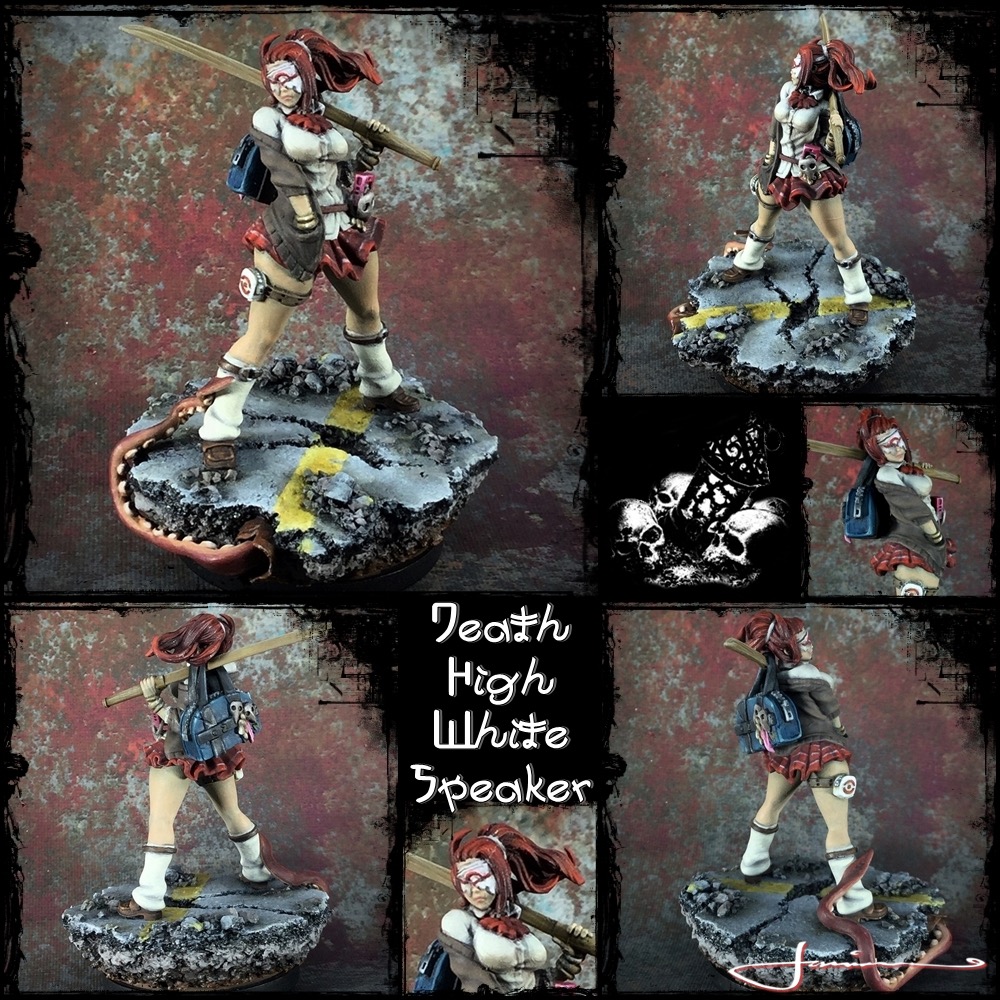
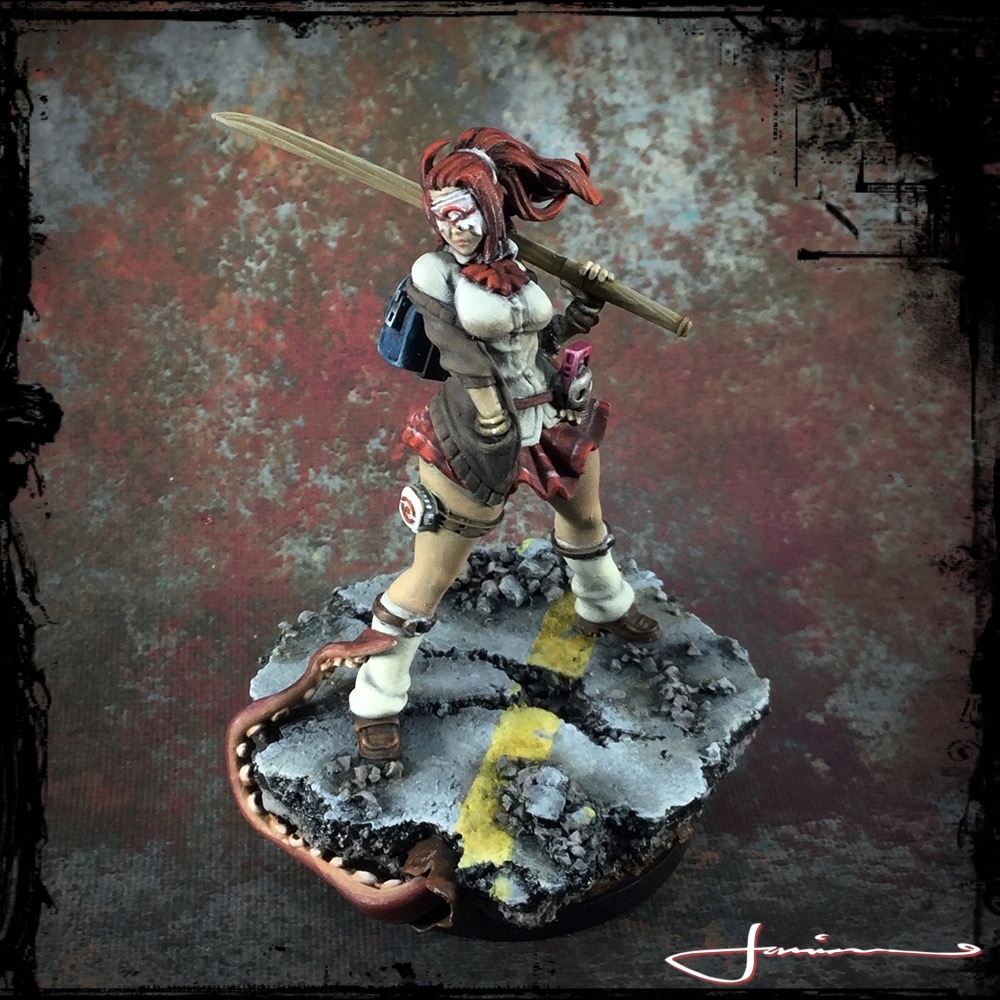
Death High Love This Mini!!
Furthering the quest to get some finished minis actually photographed, today we have one of my absolute favourites – The Death High White Speaker. An absolute joy to work on from start to finish. The base is scratch built simpley enough from cork coasters, grit/gravel and greenstuff for the tentacle for a cheeky wee nod to certain genres 😉 Hope you like her as much as I – Jan
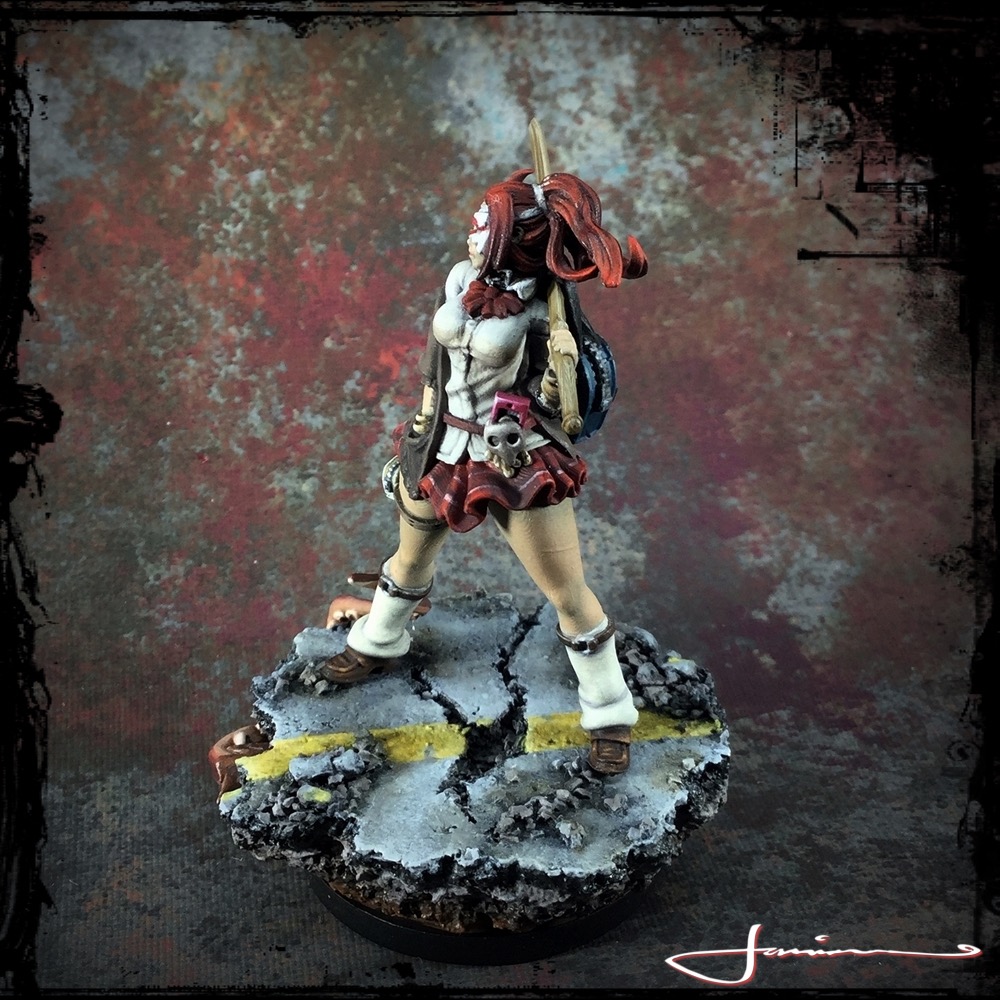
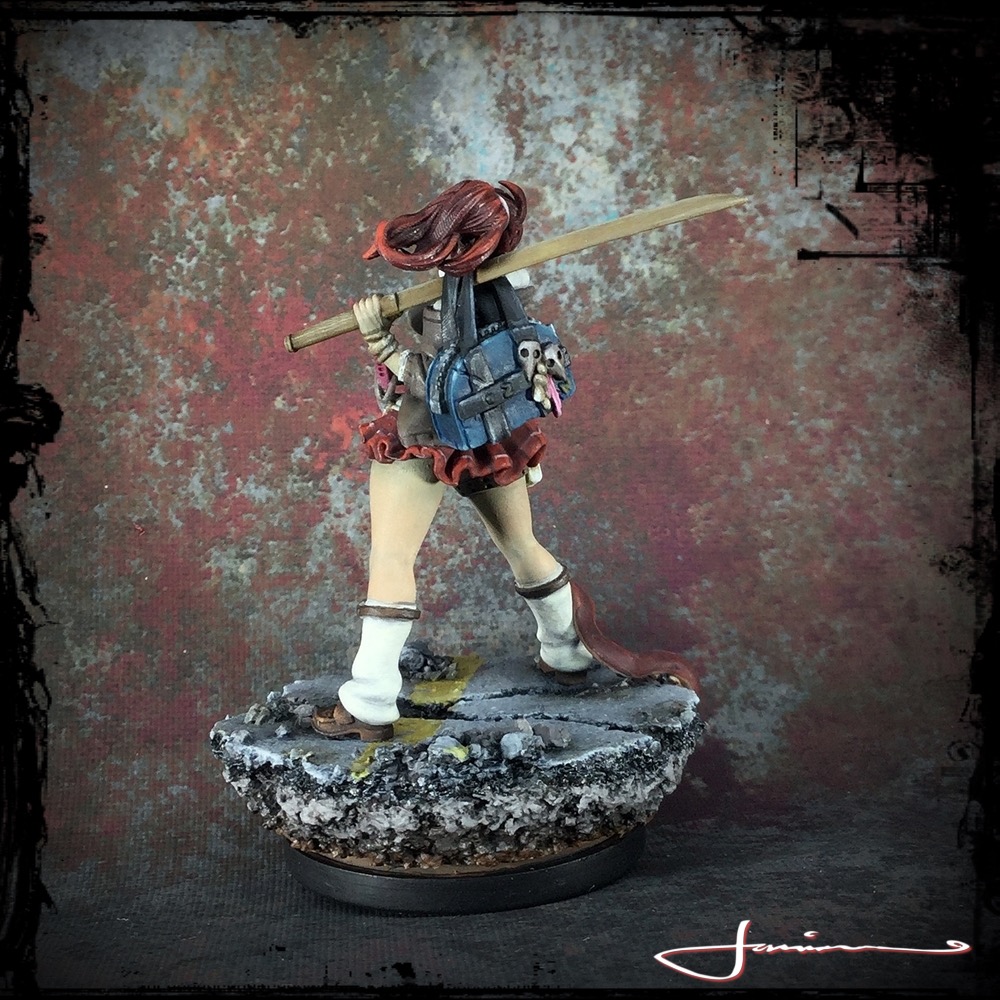

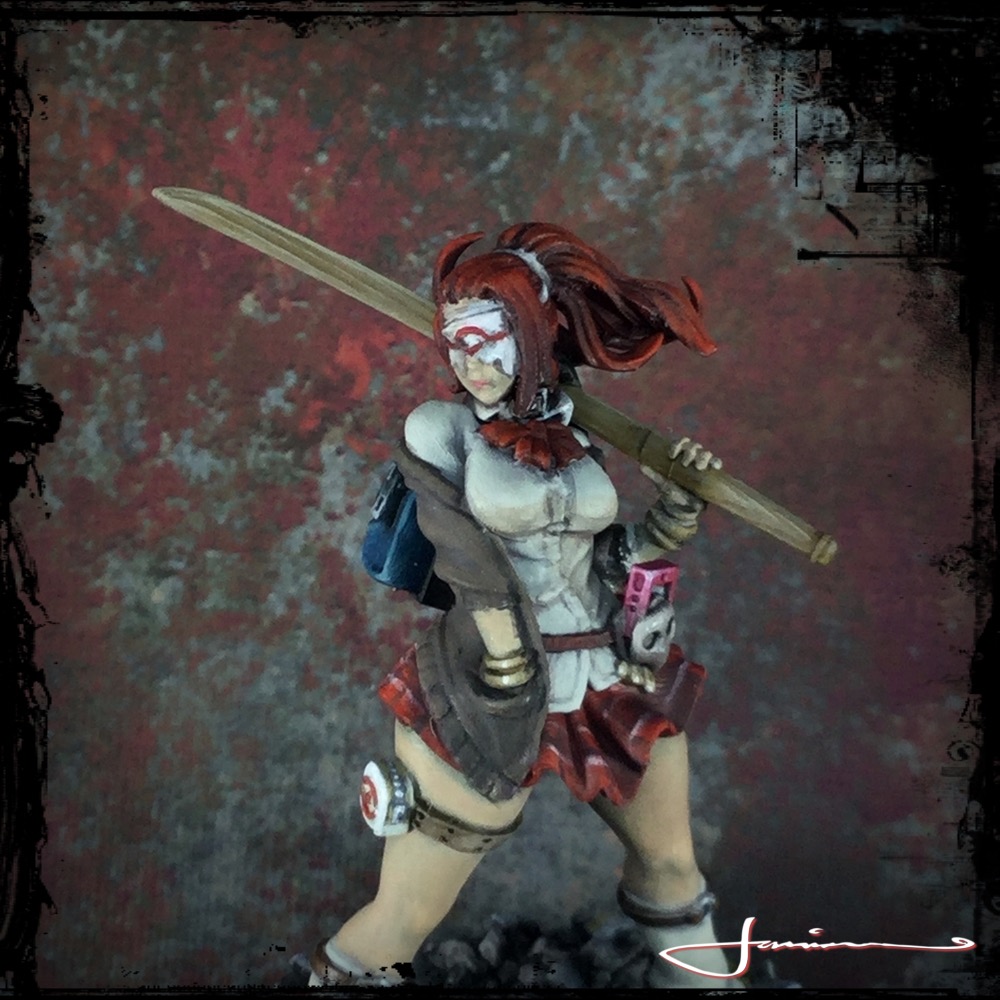

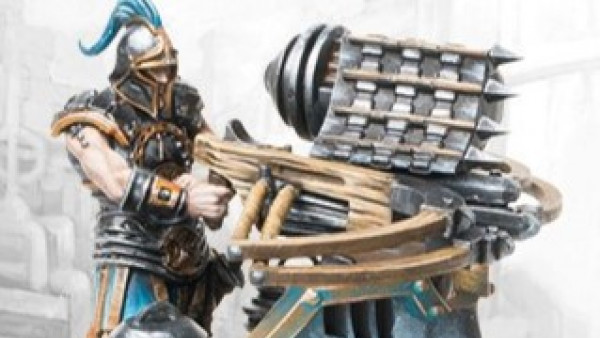
The Order Weaponsmith


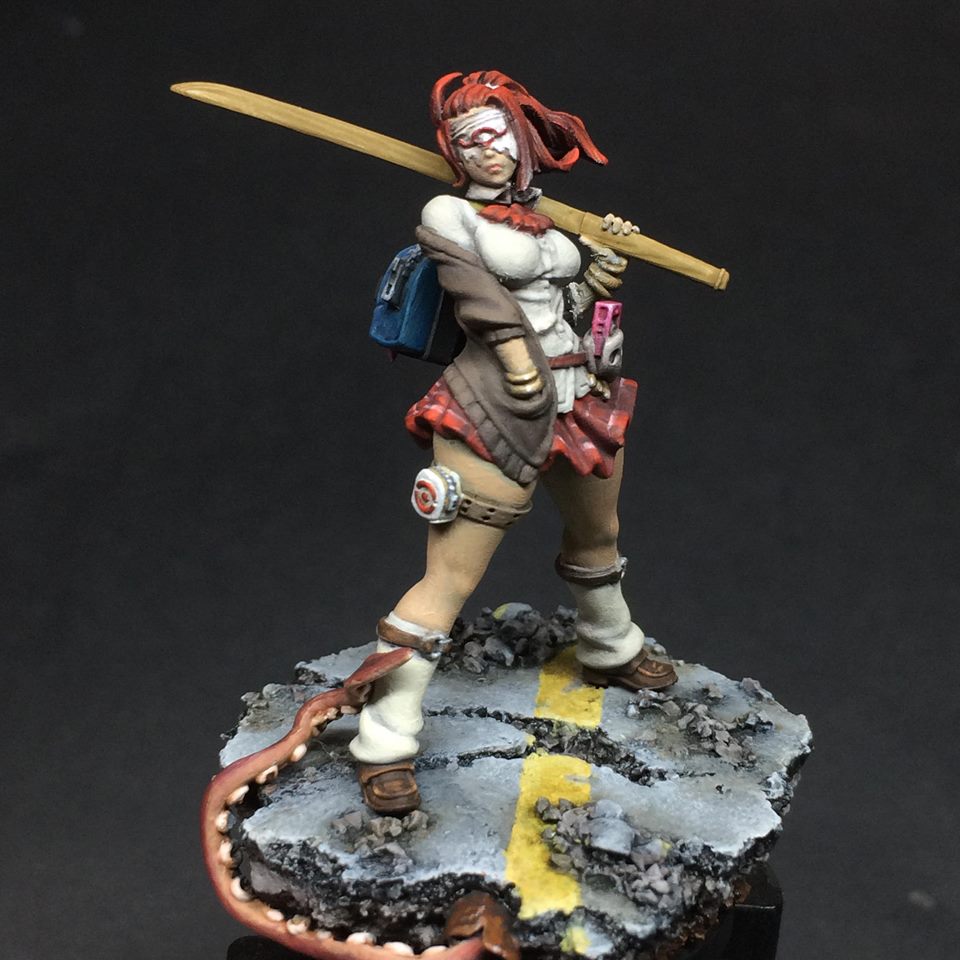
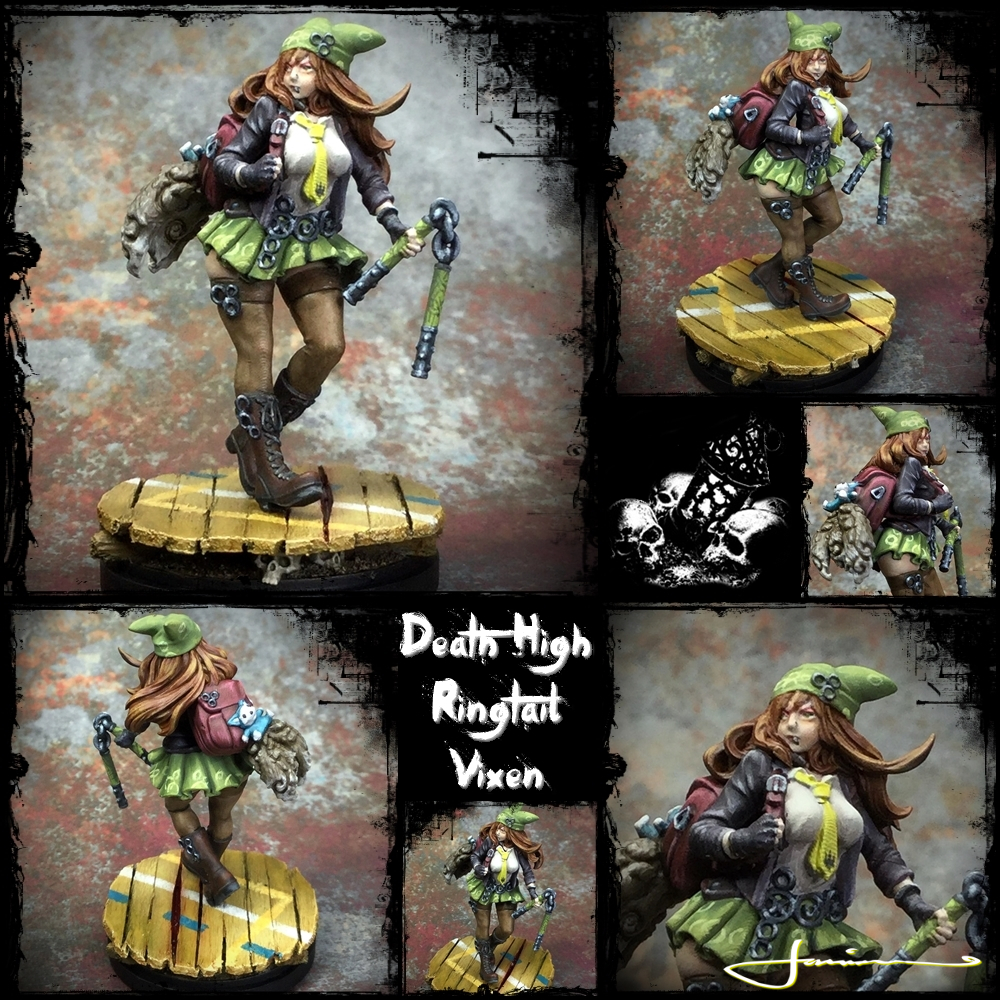
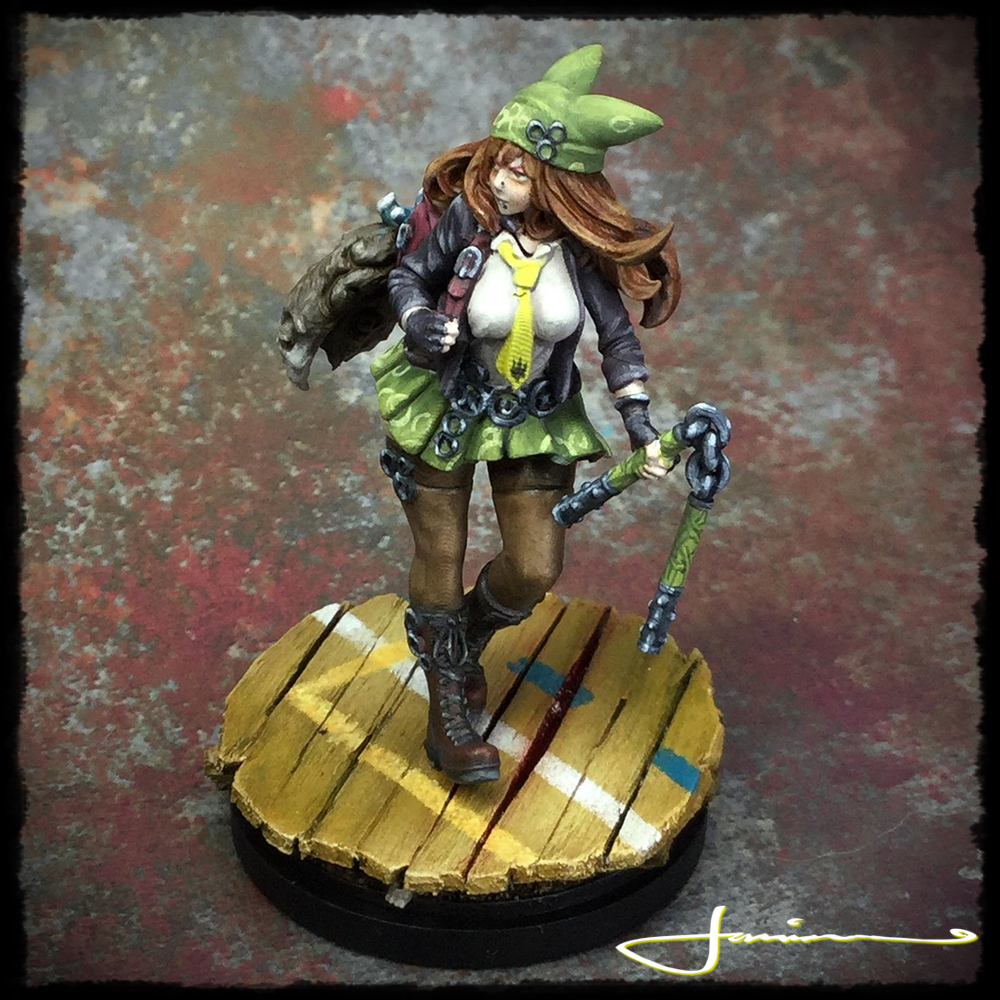
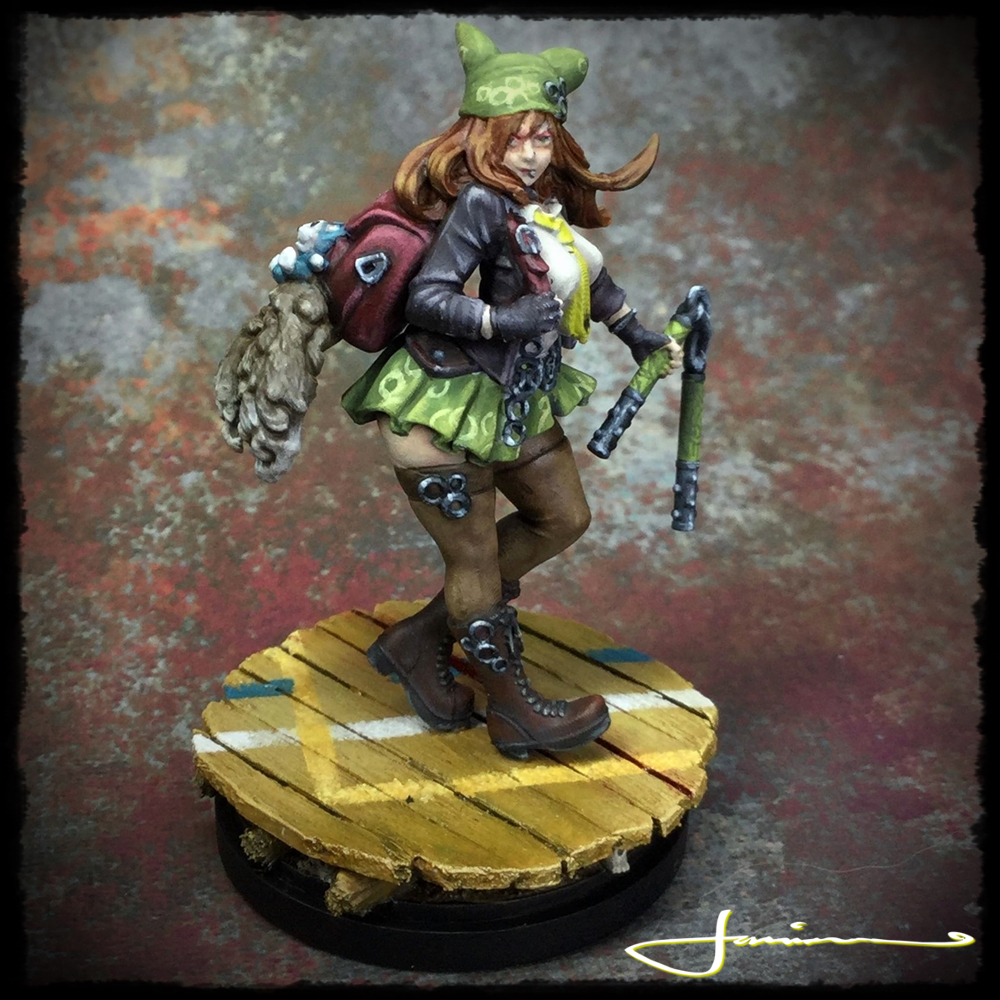
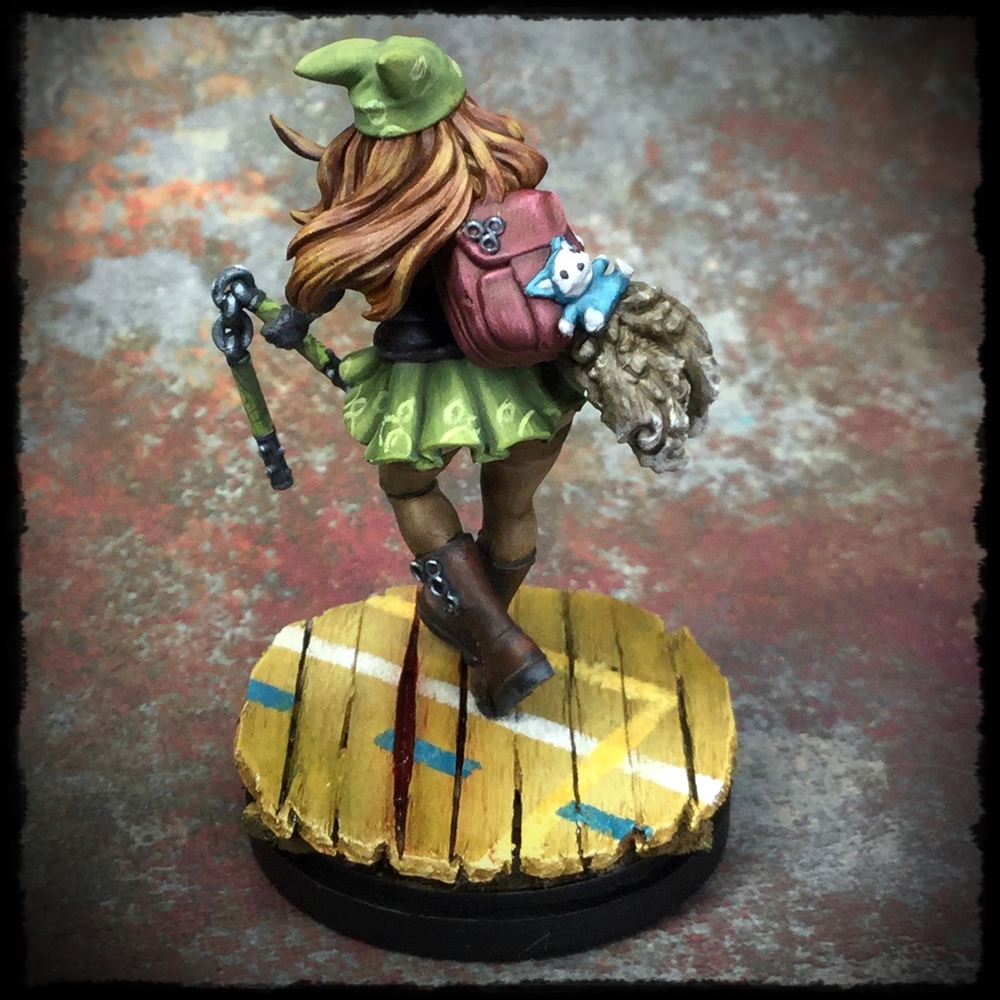
Death High - The Vixen
urgghhh it’s been a horrible amount of time since I updated my projects – I suck I know. Things have been crazy busy with RL, streaming and commission work BUT still managing to get a little KDM loving in! The Death High series are one of my favourite sub sets of KD and was gifted the second mini in teh series a wee while ago by a really kind friend and finally managed to get some paint on her.
The Death High Ring Tail Vixen


Butcher & Pariah
Two other KDM minis I’ve been trying ot work on and keep putting back on the shelves are The Butcher from the core box and one of my favourite characters/sculpts -The Pariah.
I started these two evil boyos ages ago and they’ve been languishing on (one of ) my WiP shelves for a while….. I need to get them done!!!

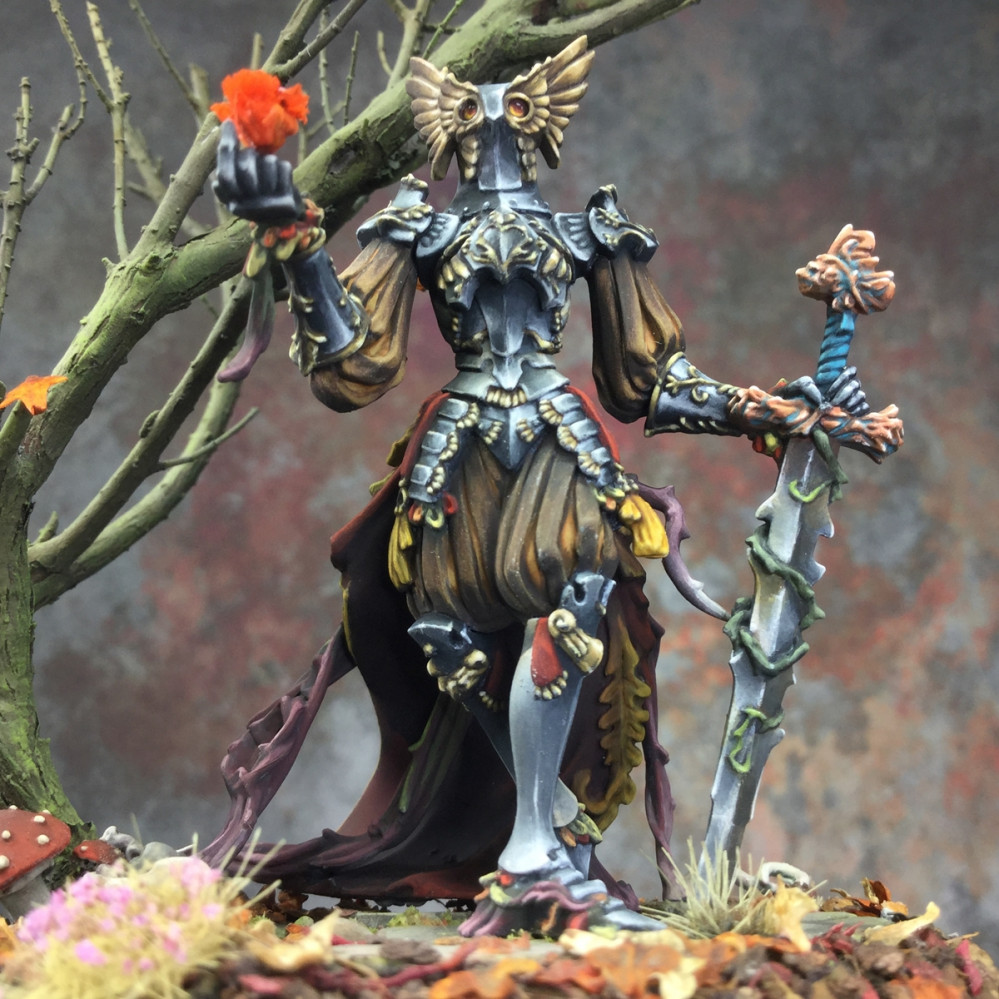
Autumn comes with The Flower Knight
I have been wanting to paint The Flower Knight for an absolute age. It is one of my absolute favourite minis from the house of Poots.
So was thrilled when a client approached me and basically told me to pick a KLD:M model to paint for them as a display piece rather than a game piece.
Initially I picked the black knight but the only copy of him the client had was already assembled and its really needs to be done in sub assembly. So I decided to go with the gorgeous flower knight.
The really nice thing about painting for display rather than play is that Im not constrained by the base size’s footprint. The Flower Knight plays on a 50mm base but wanting a little more real estate to play with I’ll be going with a 70mm diameter plinth for the base.
 Tripled primed and ready to go
After recieveing said knight of flowers, immediately got to the prepping, assembling and priming. Very nice kit and an easy build with no real gap fill or GS work being needed unlike some other of the monsters *cough white lion cough cough*
Standard triple prime that i usually go with through the airbrush: light coat of base black then a second lateral coat using grey and then a final top coat hitting areas of reflection and light using white. (All Stylynrez primers btw)
 Autumn Comes
Decided on an overall Autumnal theme for the knight – plently of browns, oranges, yellows n reds for any cloth and then silver and gold for the armour. Silver will be quite cold and then a nice older browning gold for the filagree, detailing and helemt wings. The roses on the pommel and crossguard of the sword may be done in a reddish copper for variety as well as keeping with the overall autumnal palette.
I started with the german puff and slash sleeves and knickerbockers the knight is sporting. Choosing a soft orange for the silk interiors and then a nice rich soft brown for the outer panels.
The outside of the cloak beneath the leaven bustle echoe the puff n slash but continues on into an ochre at the bottom. I will probably glaze in a more reddish brown to the top of the cloth disappearing beneath the leaves.
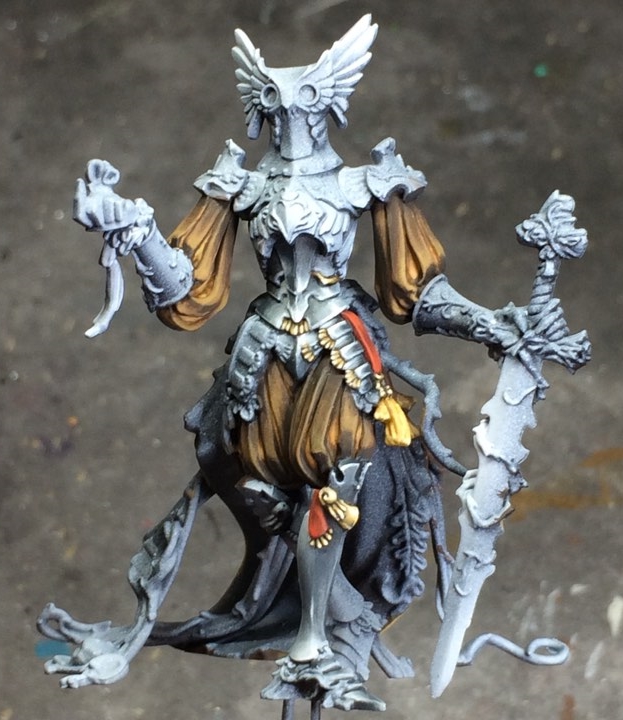

Unusually for me I am going nmm for the metals. With KD:M as a whole I have always felt that nmm suits the aesthetic better than tmm.
So made a start by sketching in dark silver of the many many armour panels on the knight. Ont he rare occasions when i turn my hand to nmm I usually sketch it in first and plot the main highlights while pushing fairly quick transitions from shadow to light. Any dodgy transitions can be smoothed out later when i add in some secondary tones and reflections from surrounding elements like a few touches of brown from the cloth reflecting form the cloth onto the armour.
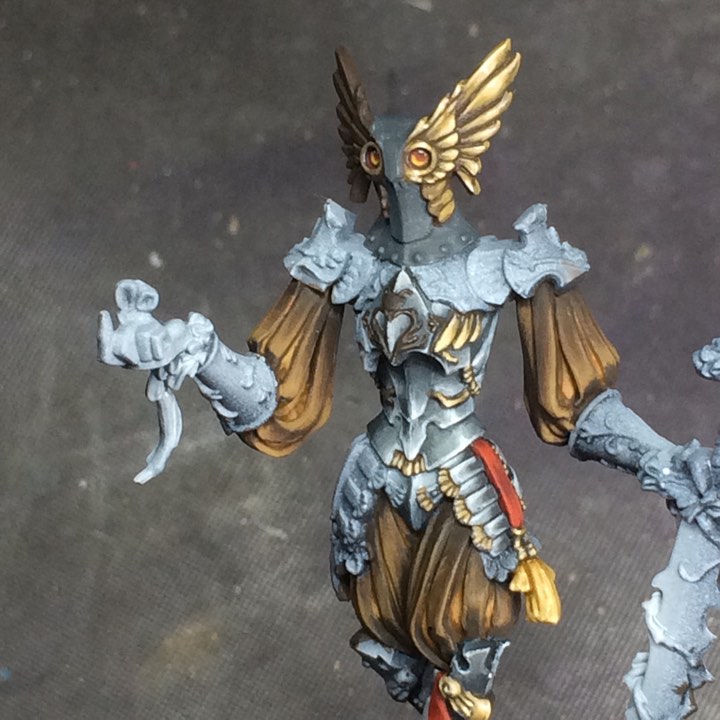
With the armour panels started, I then make a start on the gold filigree and elements to get an idea how it will play with and reflect on the silver panels and also to get an early idea/feel of how the overall paint scheme is working and that brings us up to current point.
Oh – for the eyes – I could have gone with a more complementary colour to the yellow/browns of the surrounding golds. As the brown here is really a dark and muted kind of orange going into yellow – the comp colour to that would blue- blue/green aand that would have worked very nicely BUT would have interrupted the autumnal palette I want to keep quite strictly to so I opted to go with analogous choices rather than complementary ones – yellow/orange/red for the eyes – focusing more towards the red end.
Catching up with the Hoorrrroor~!!
Been a while since I updated the KDM project log (well….. all the project logs) so let’s see what’s been going on!!
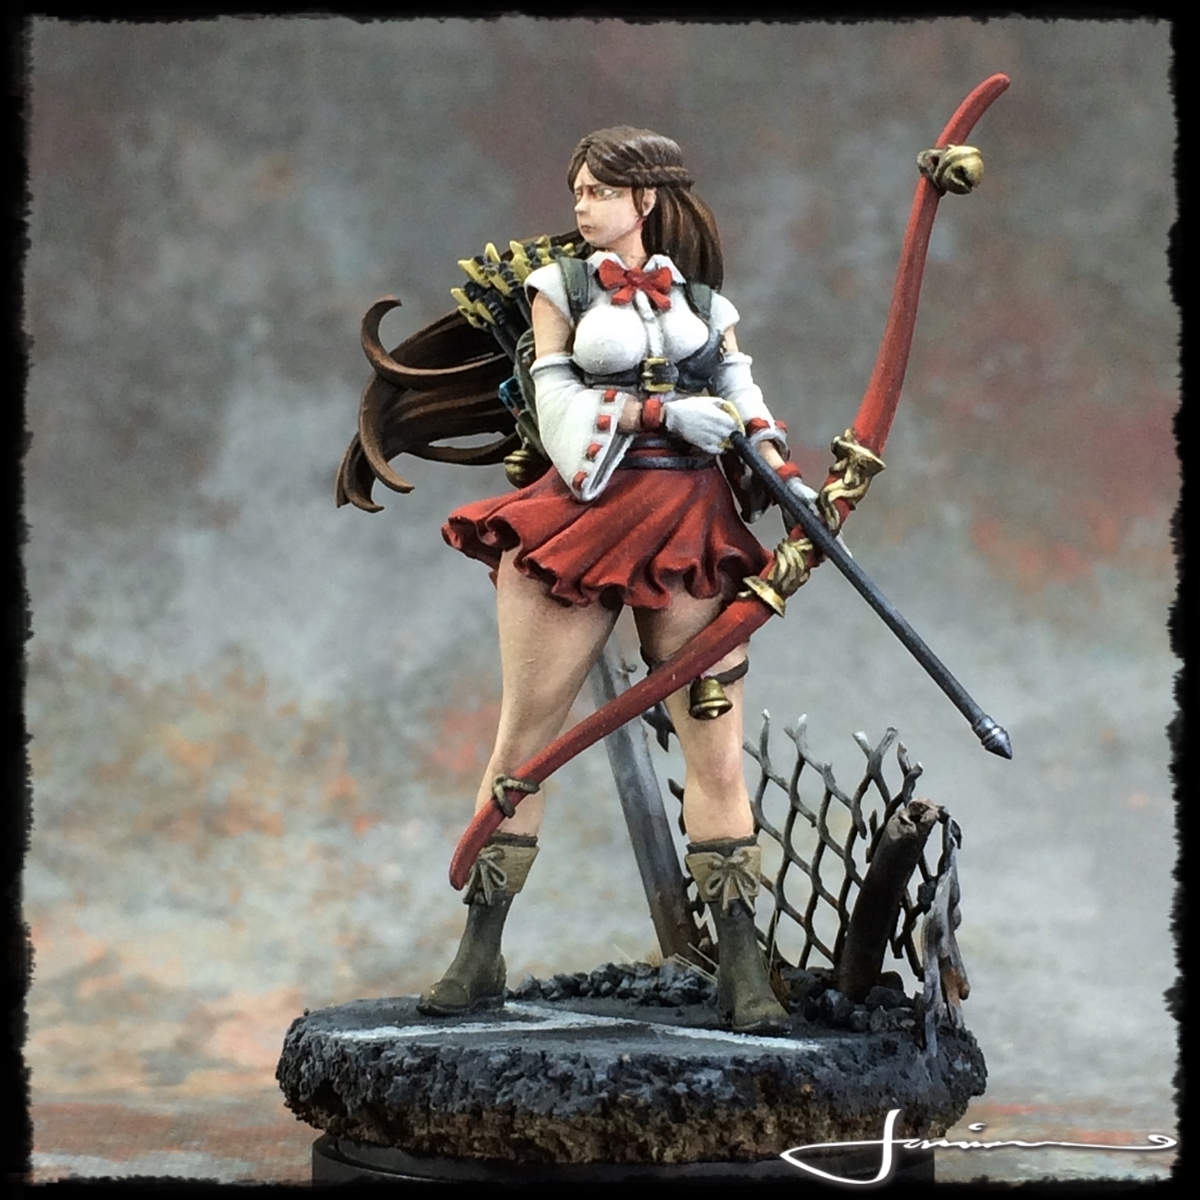
Continuing with the fantastic Death High series I finished and made a base for Miko. Love this mini, was a real treat to paint.
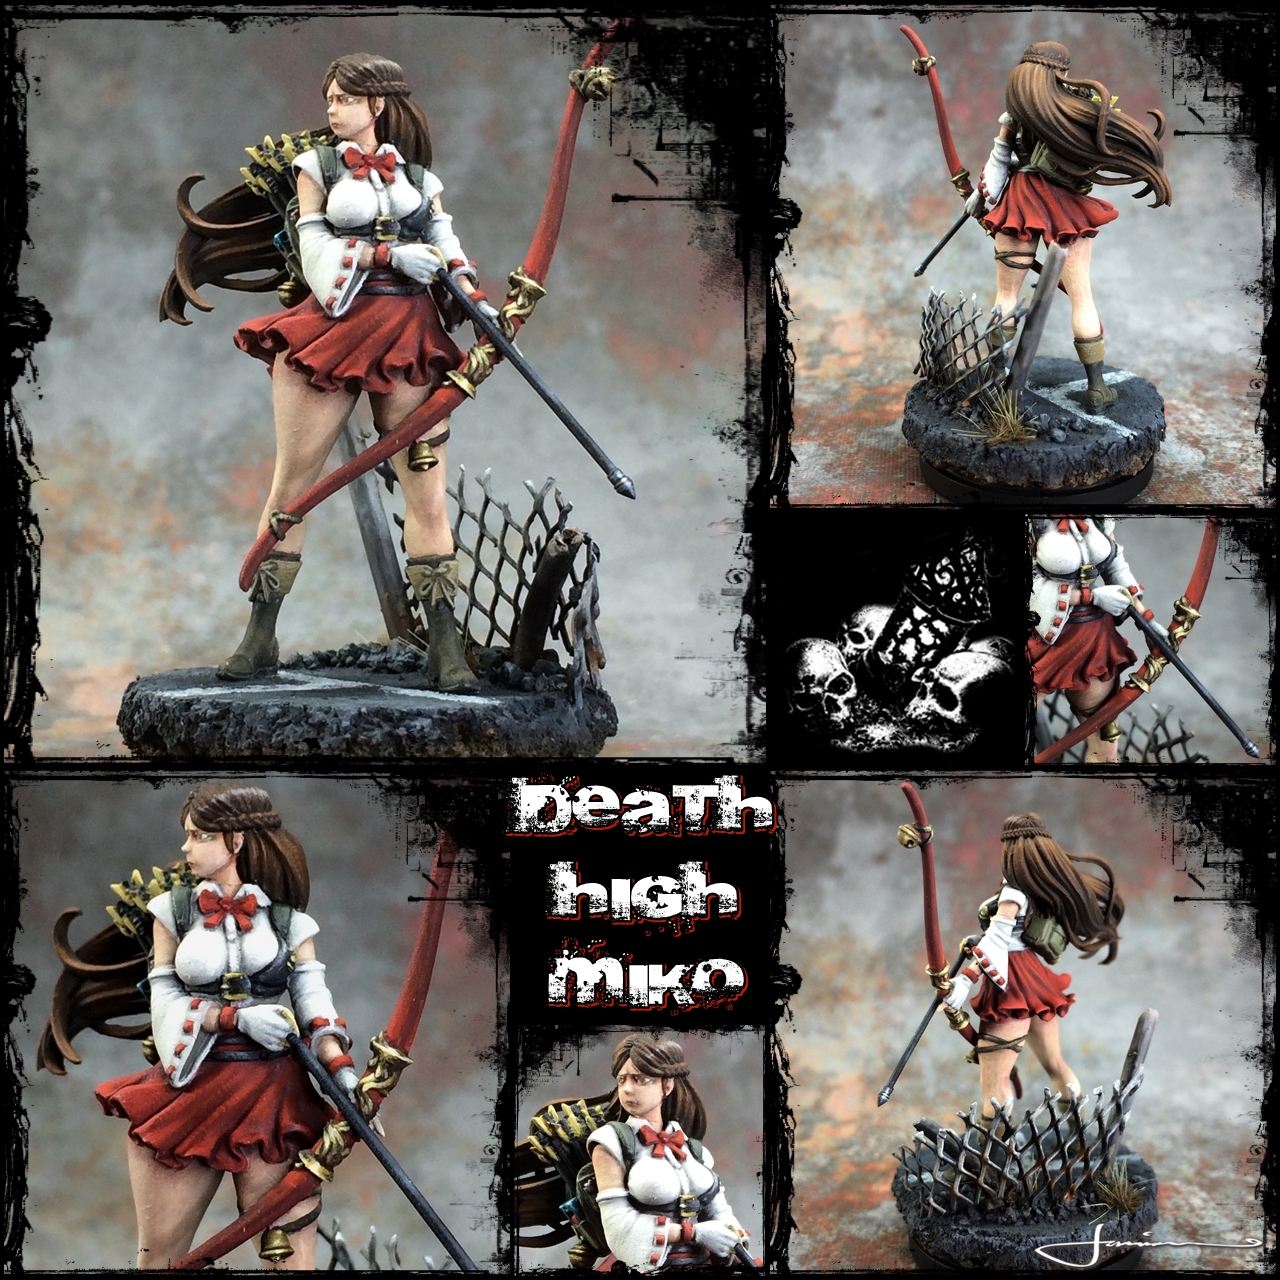 Miko
Miko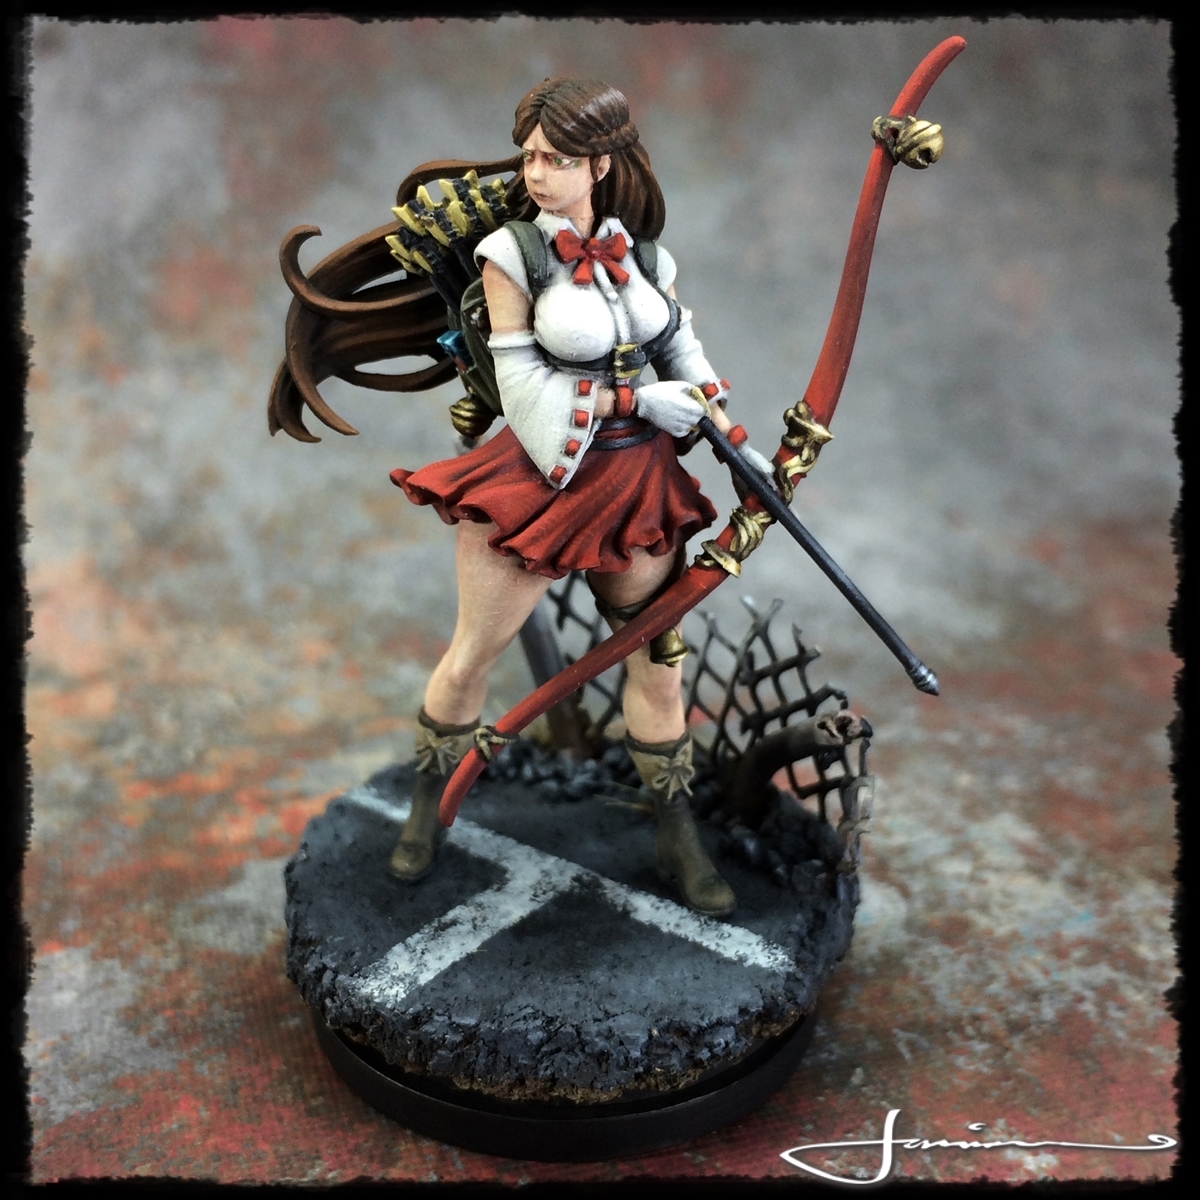

Also finished up the Female Preacher form the same series but still need to get a base made and painted for her so more on her later…………
 Female Preacher
Finally got to take back out the fantastically creepy and awesome Pariah from the White Speaker thread. Love this mini! He’s far from finish but getting a little progress in 🙂
And that’s us mostly caught up………… mostly 😉 maybe a wee sneak peak on how the flower knight is coming along before I go!

Sorry folks – I’ve been trying to upload this photos for 4 days now and ther site just keeps discarding them whenever i hit ‘update’ – Have tried uploading in groups, one by one, differnt shots …….. nothing. Have put up a message in technical support forum but so far no reply or anything. *shrugs*
Edit – photos now up!!! Seems Chrome was just having a hissy fit and using Edge as suggested by the fantastic @ninjily was the key to getting it to works. Sooooo, if you are having trouble uploading photos at all, try using Edge – worked for me 😀
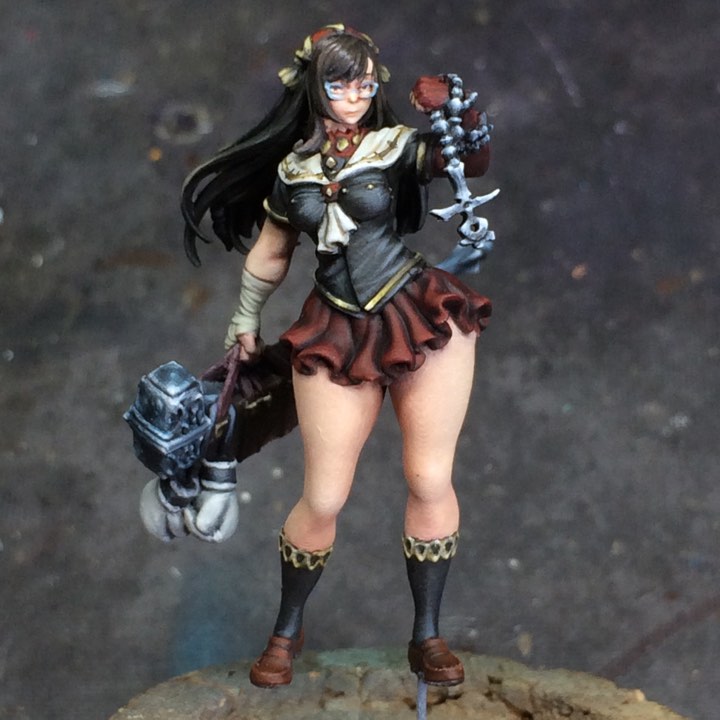
Death High - The Archivist
Very very quick update on the latest of the Death High I finsihed. The Archivist. She was a wee treasure to paint!! The base is made from scratch as I do wil all the KDM models as their bases are well…. shite. Tried a few wee new things out on here incl a really nice green triad made with scale fantasy and games paints for her skirt, straps etc. Hopefully get some proper stills taken soon but until then…..
The Flower Knight Returns - Building a Base Pt 1

So the work on the Flower Knight commission continues and she’s coming along rather nicely buuuuuuut It’s about time to make a base for her. A big old smexy vignette scenic plinth base!! Due to the limitations of how many entries per post, this is gonna take a few posts but stick with me and I’ll walk you through how I build the base for The Flower Knight from KDM 🙂
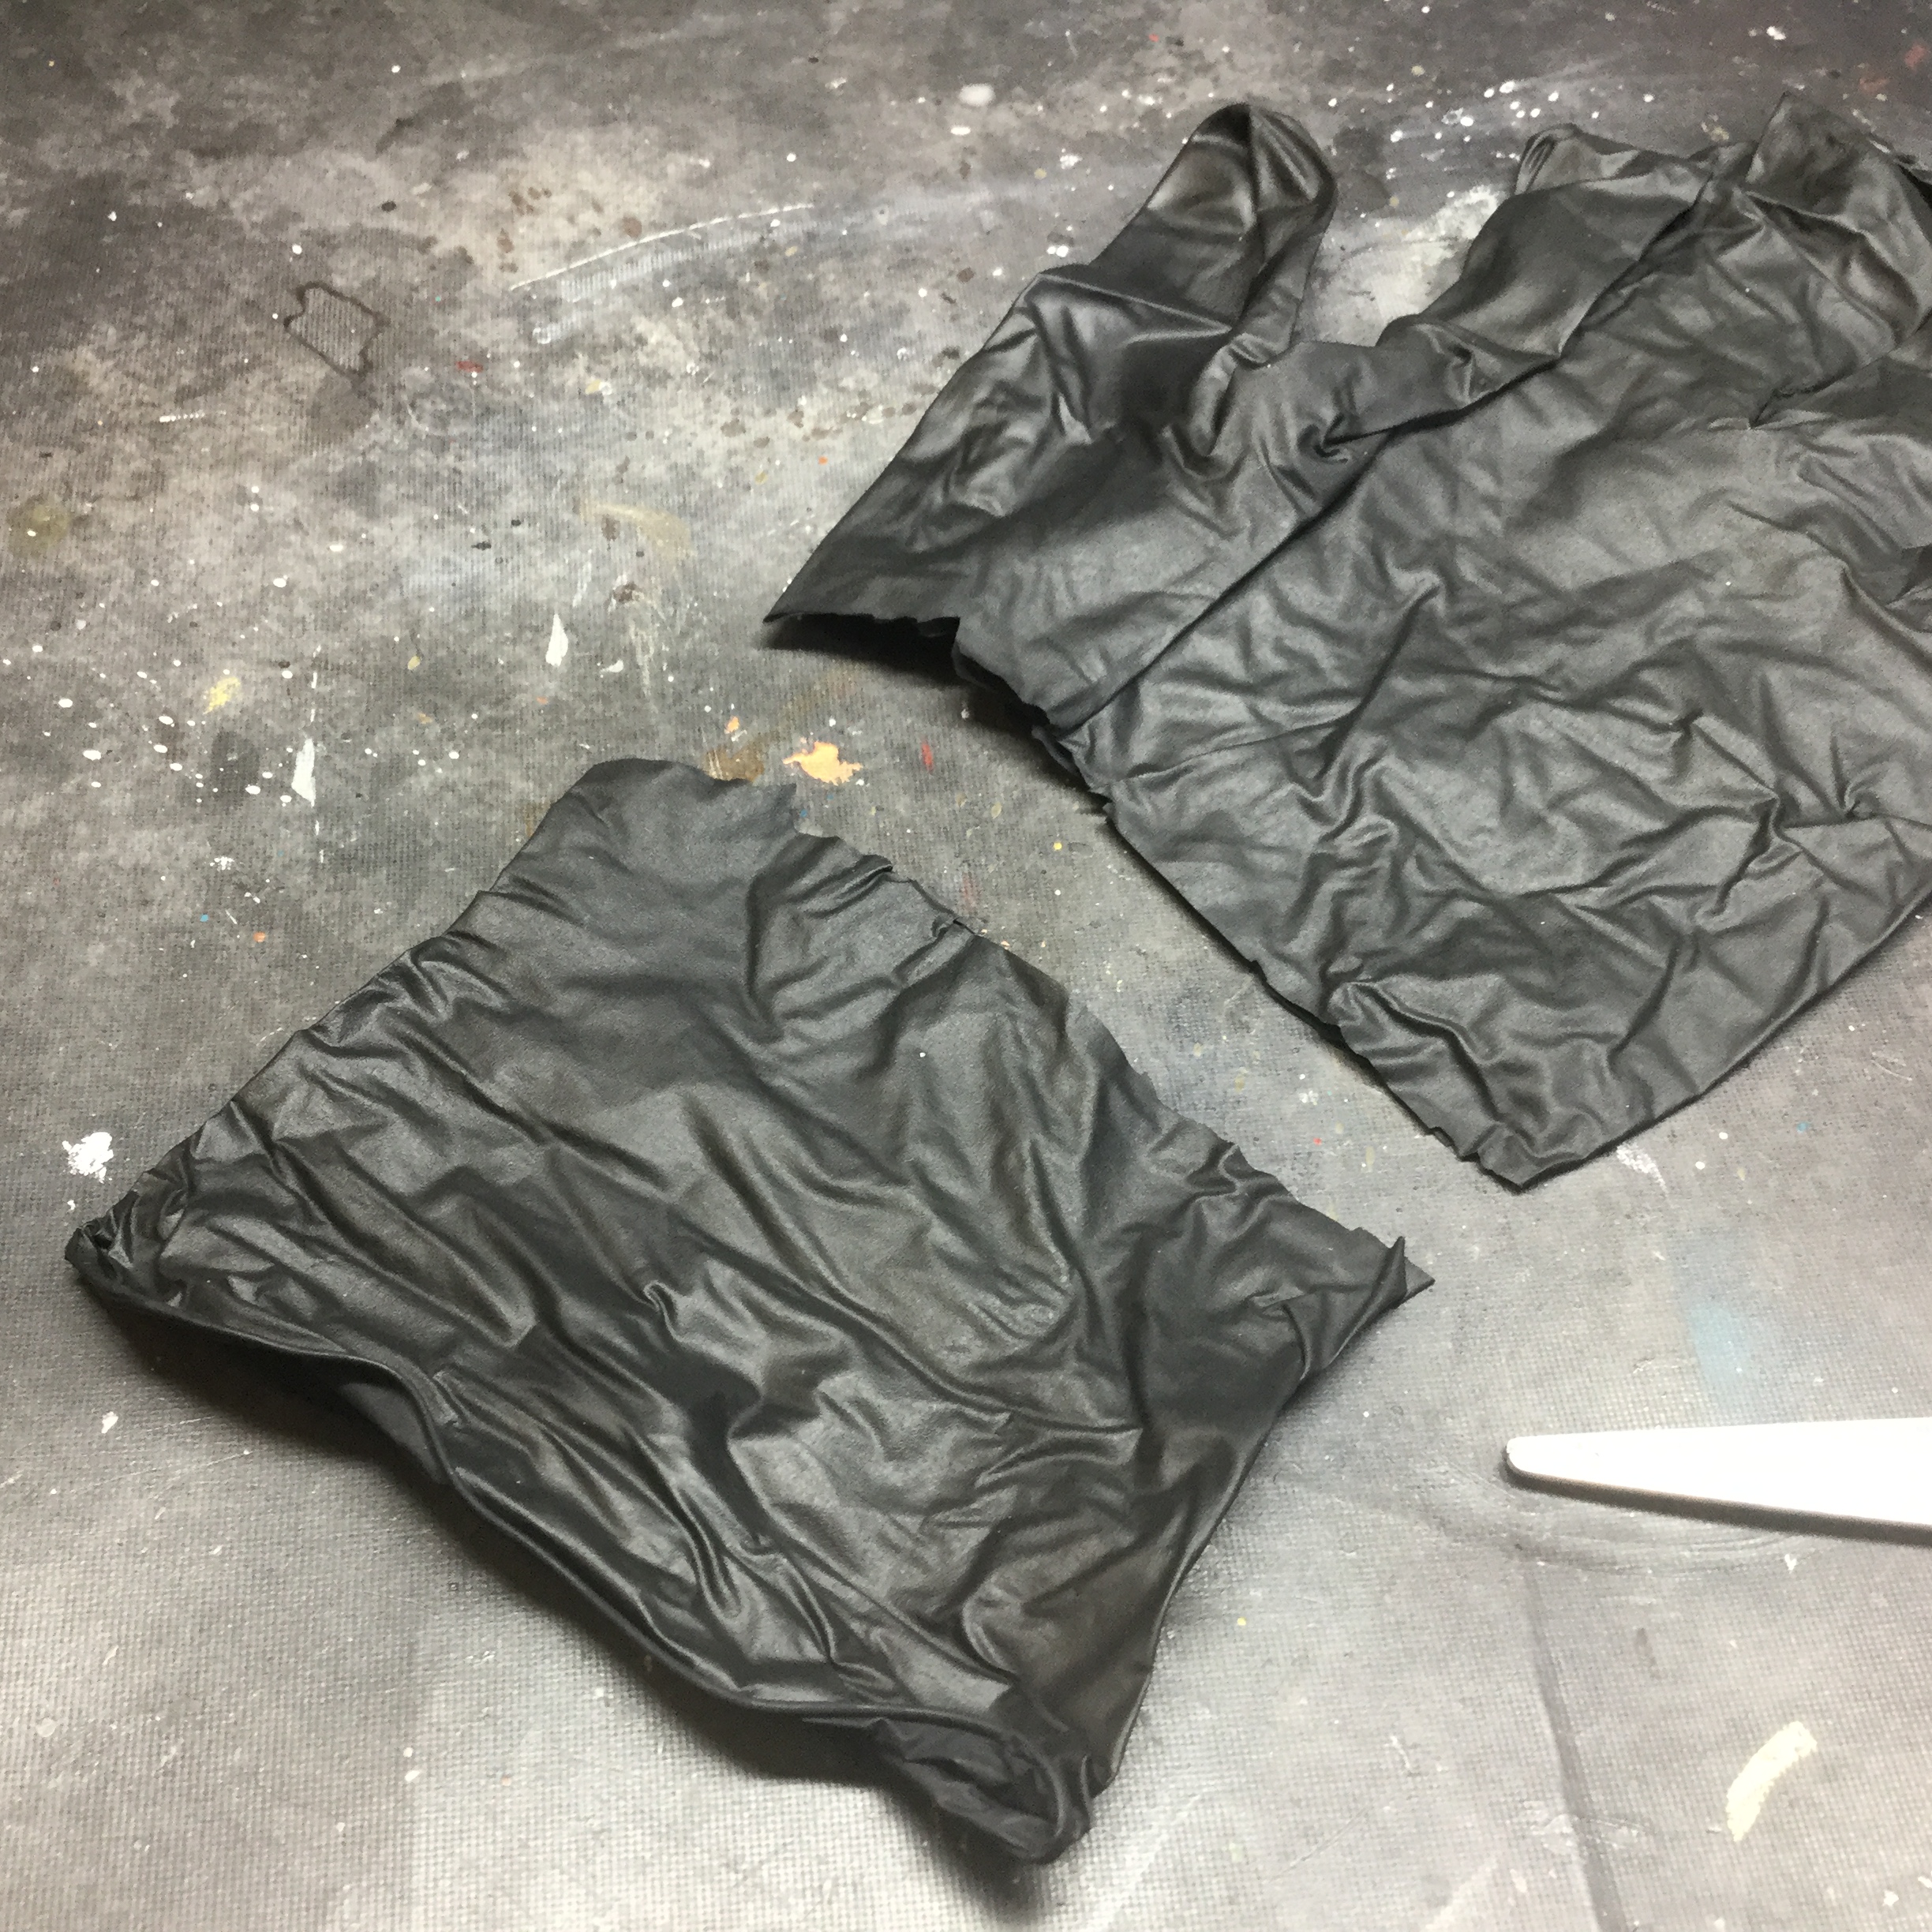
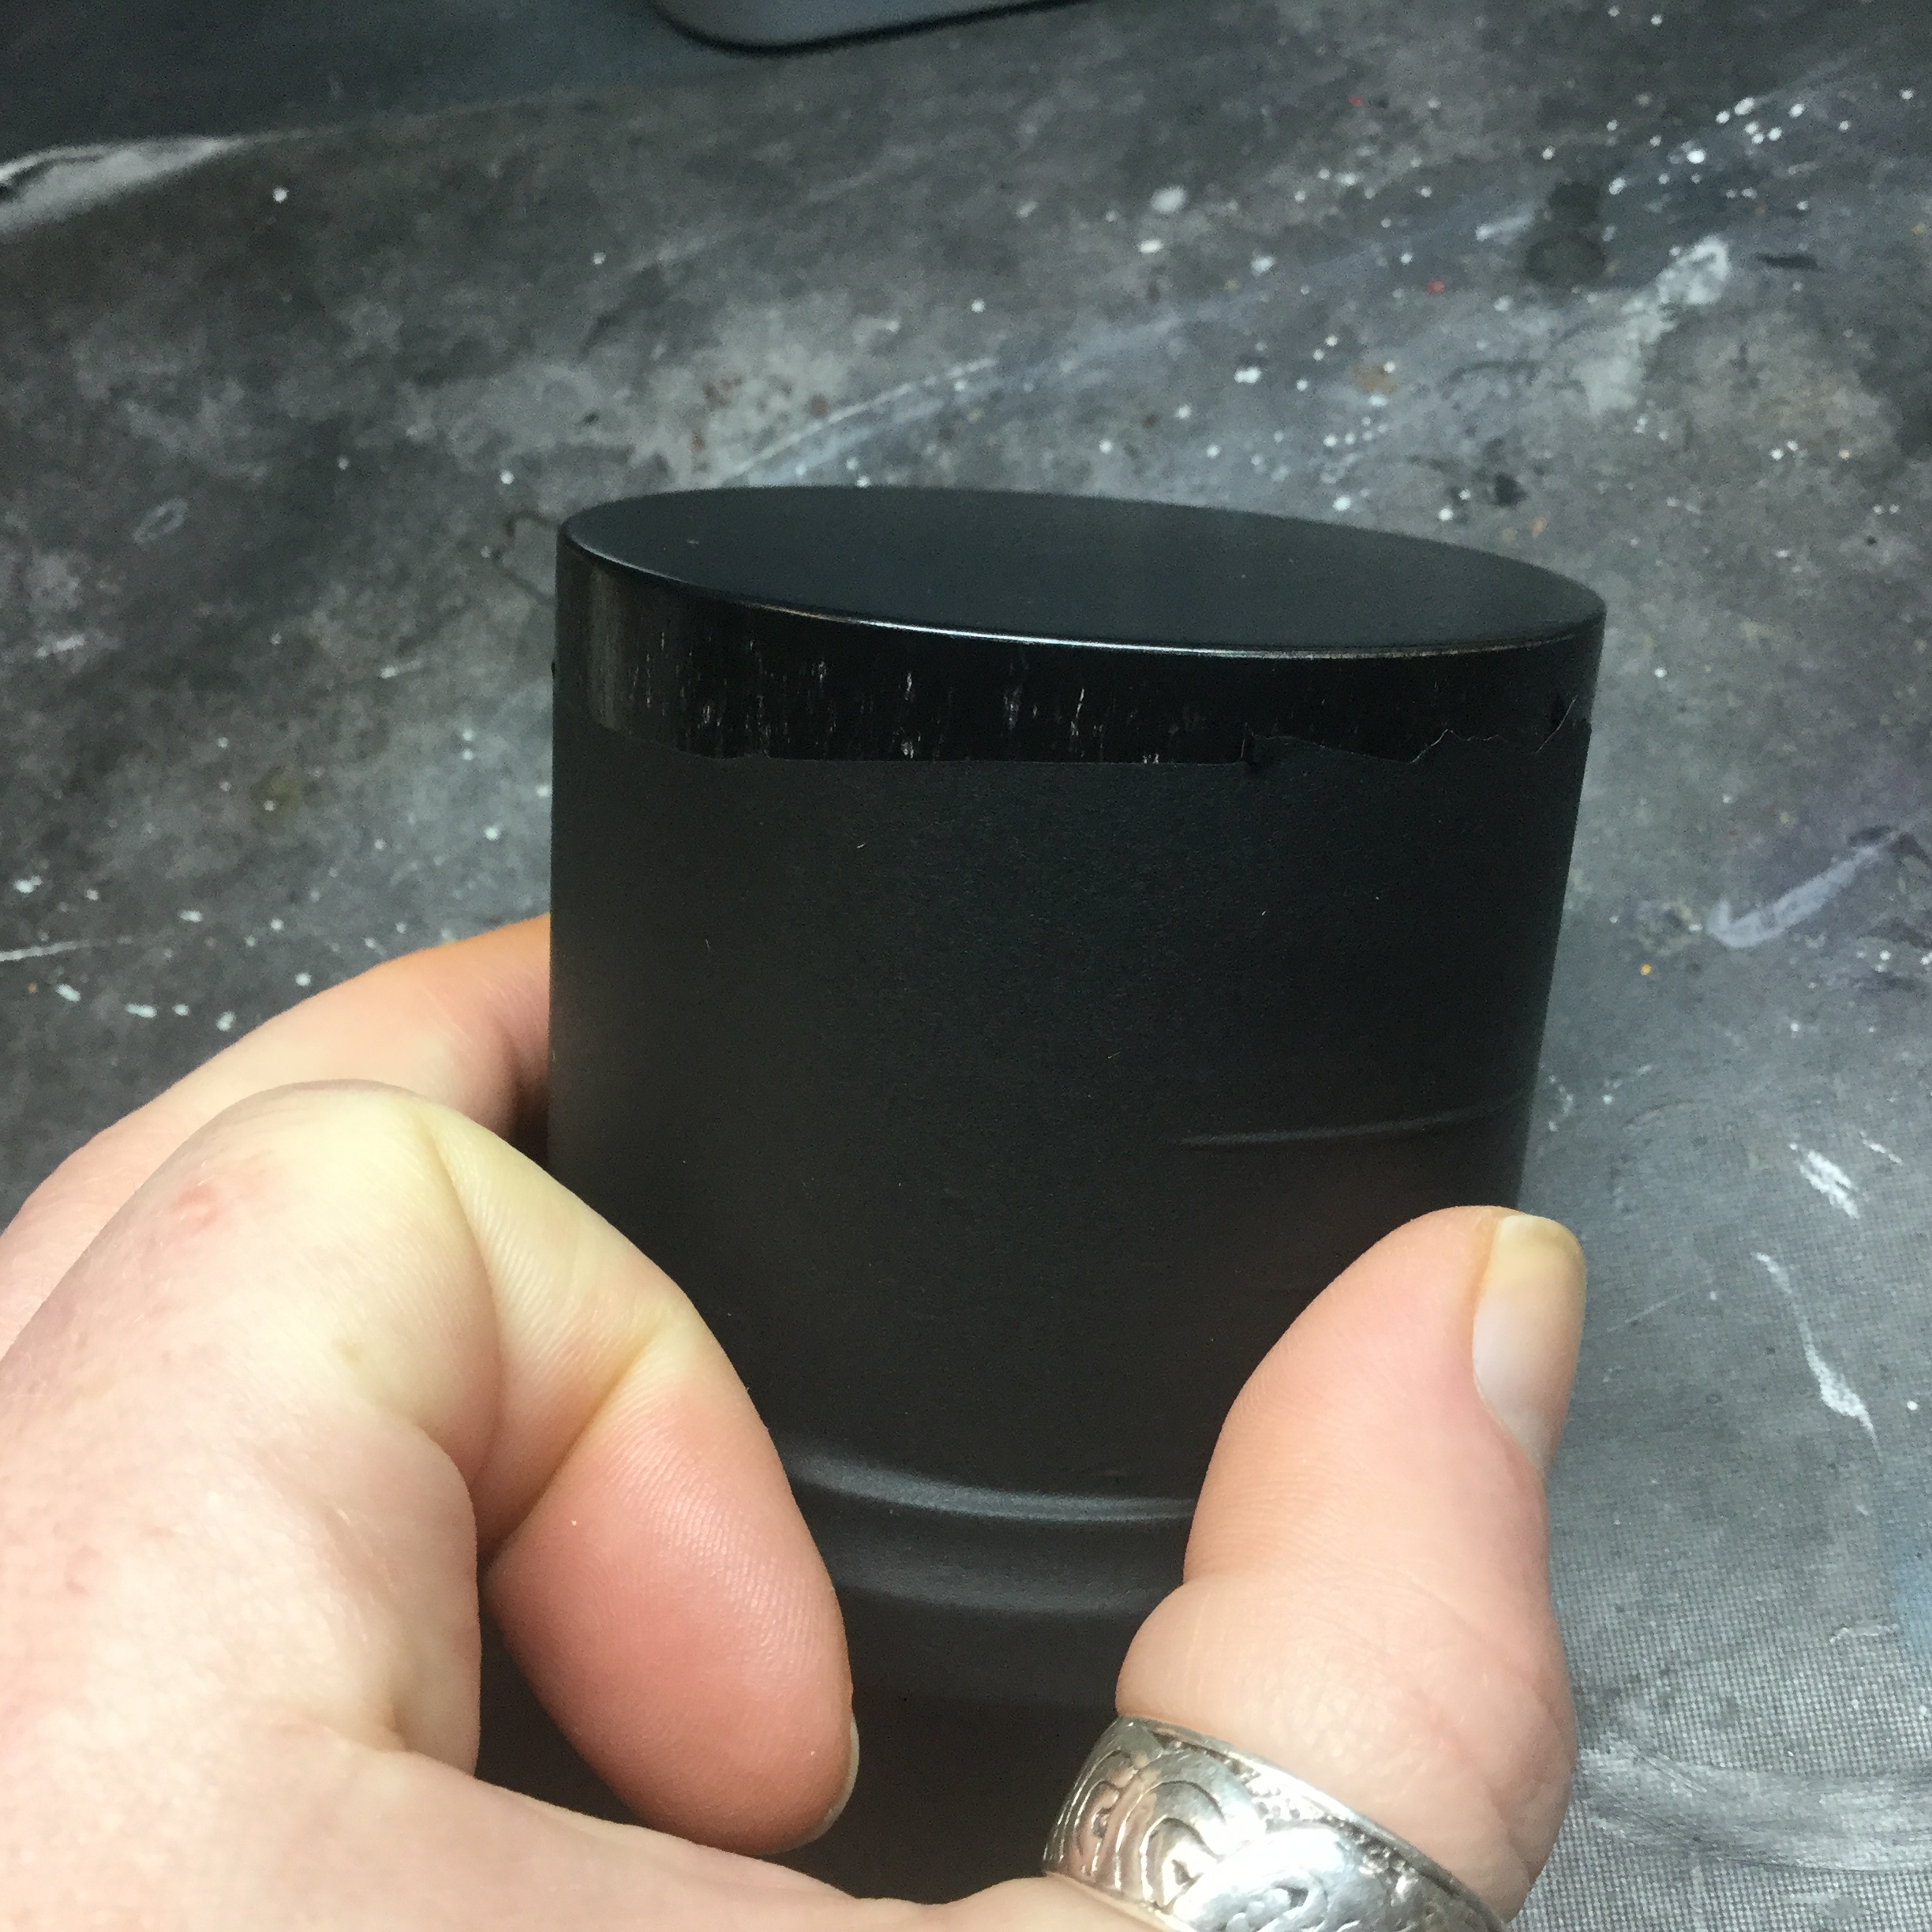
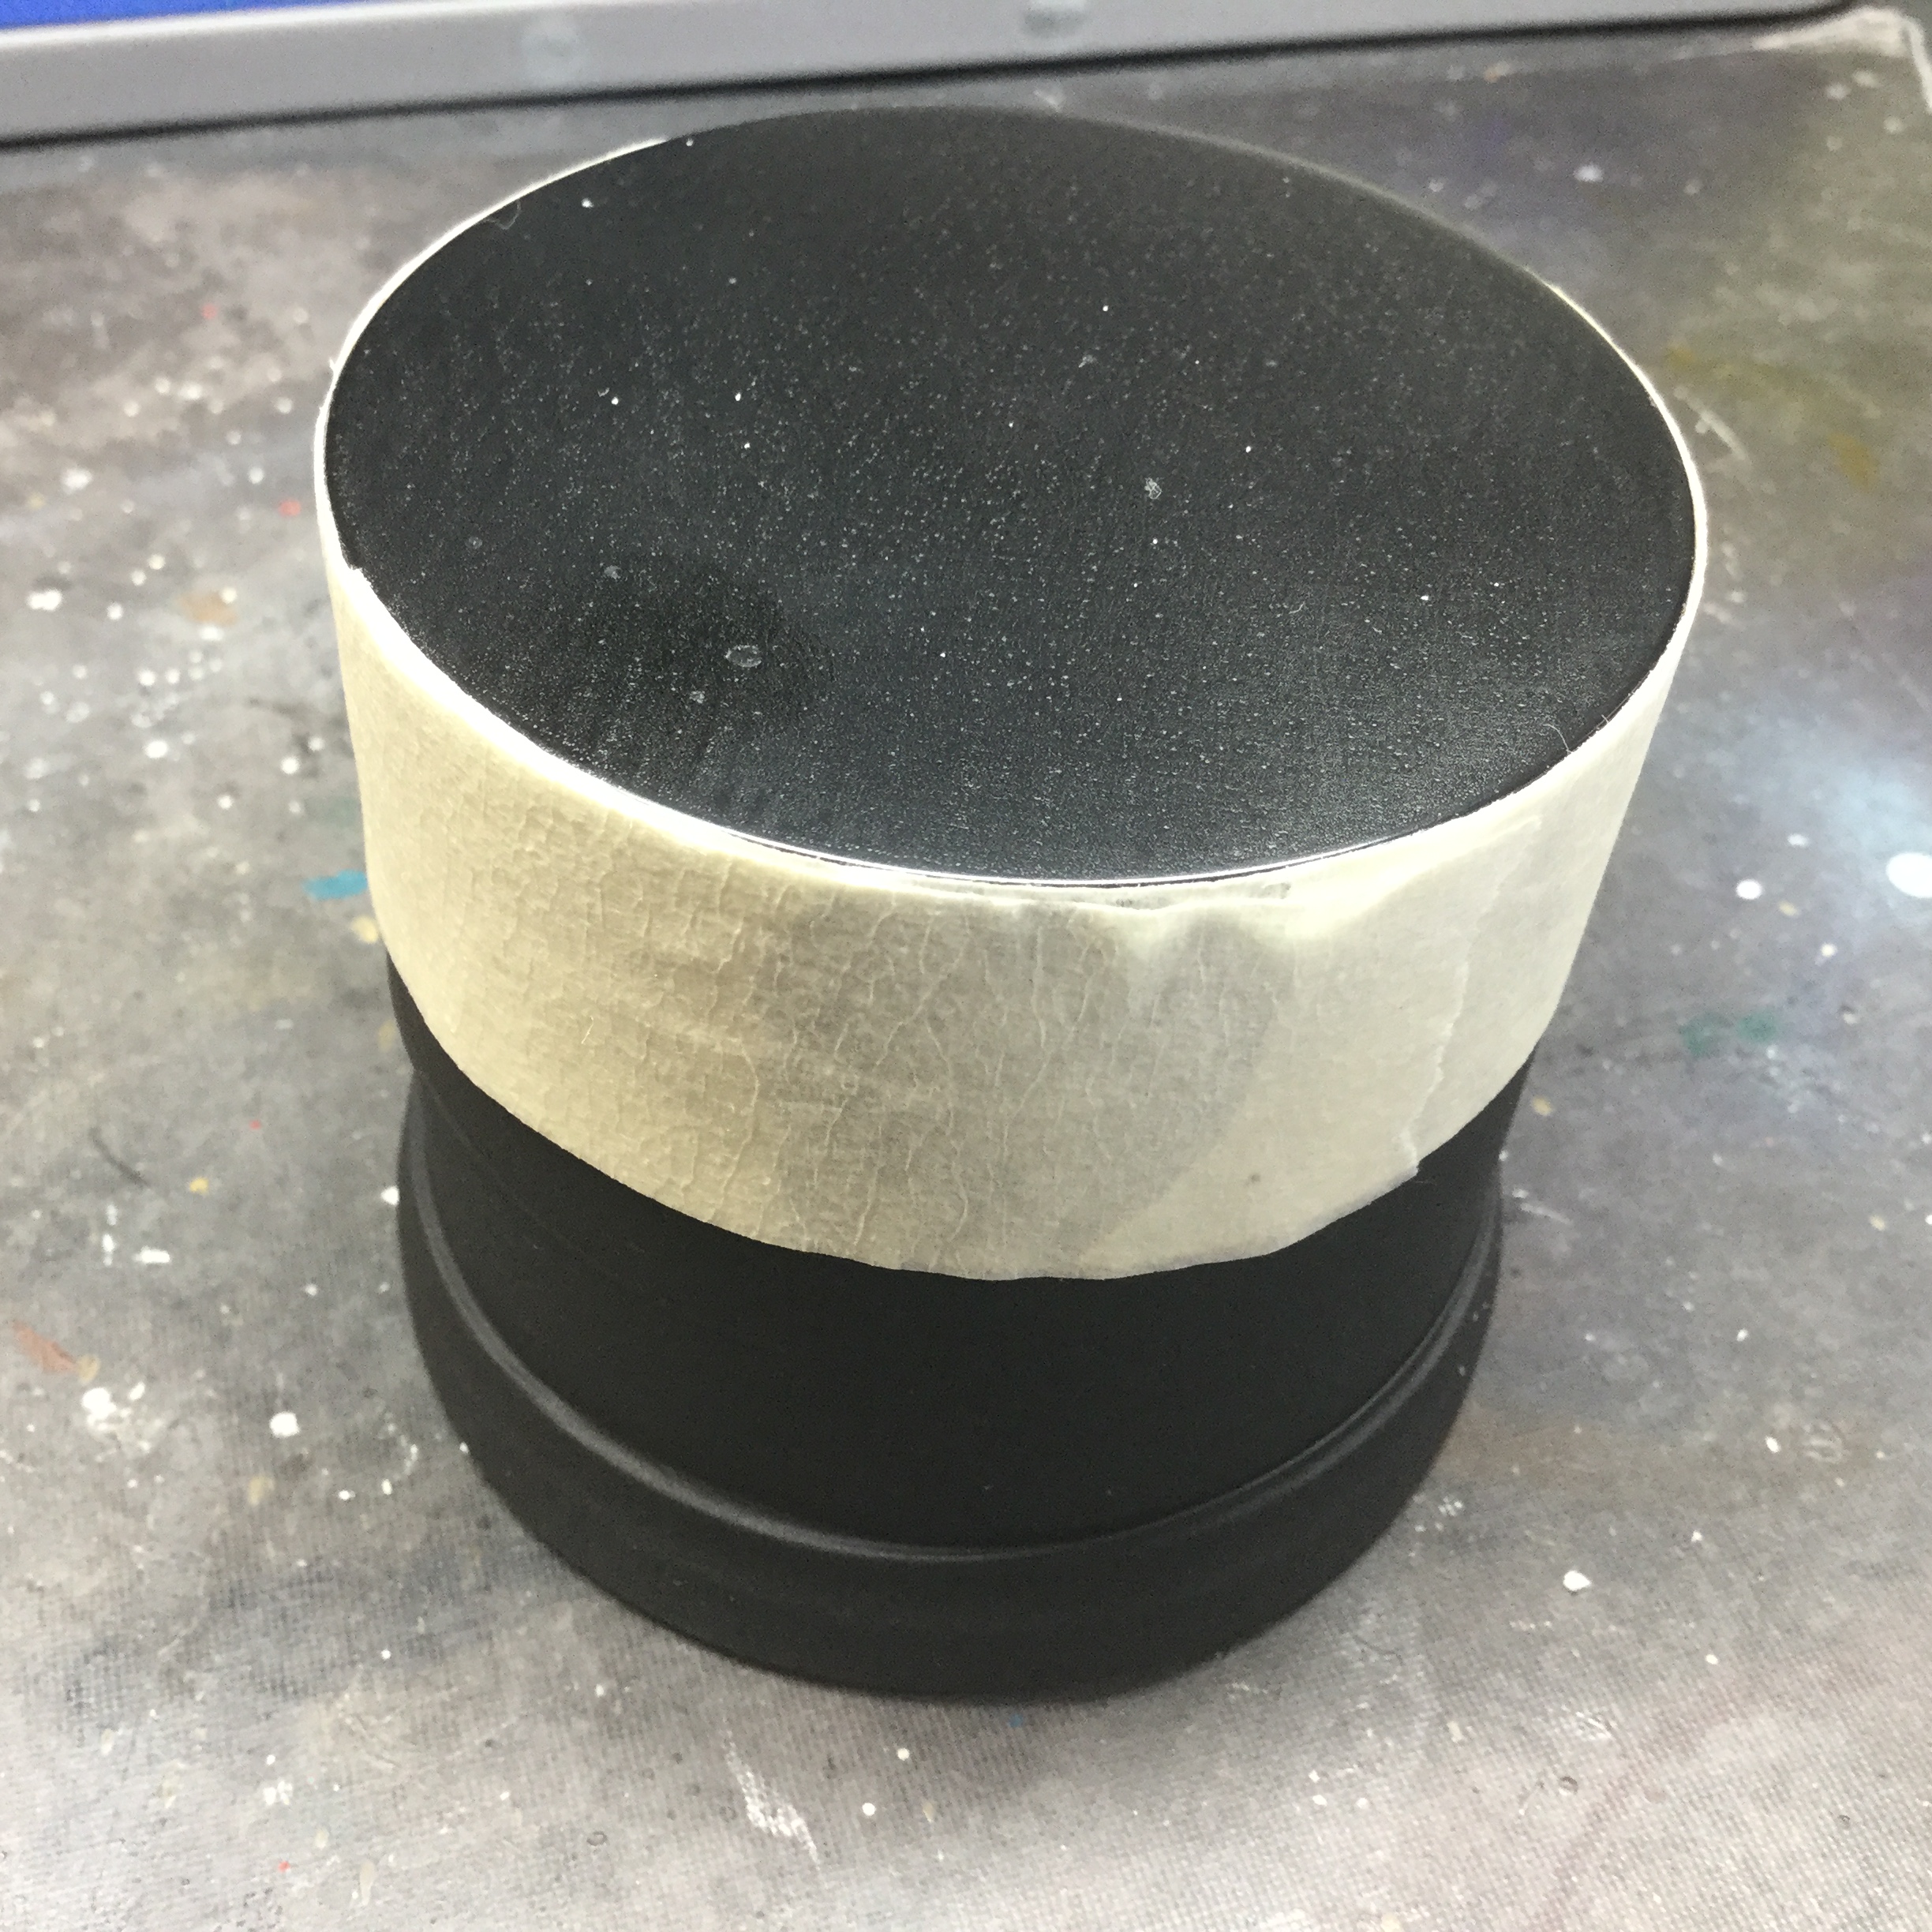
So first things first, let’s get the plinth ready. I chopped the arse….. ahem…. wrist part off of a nitrile medical glove and sleeved it up the shaft of a black lacquered wooden plinth I am using, then fixed it on with masking tape up to the top edge of the plinth. This protects the plinth while I’m working, building and later painting it and gives it a good grip to hold.
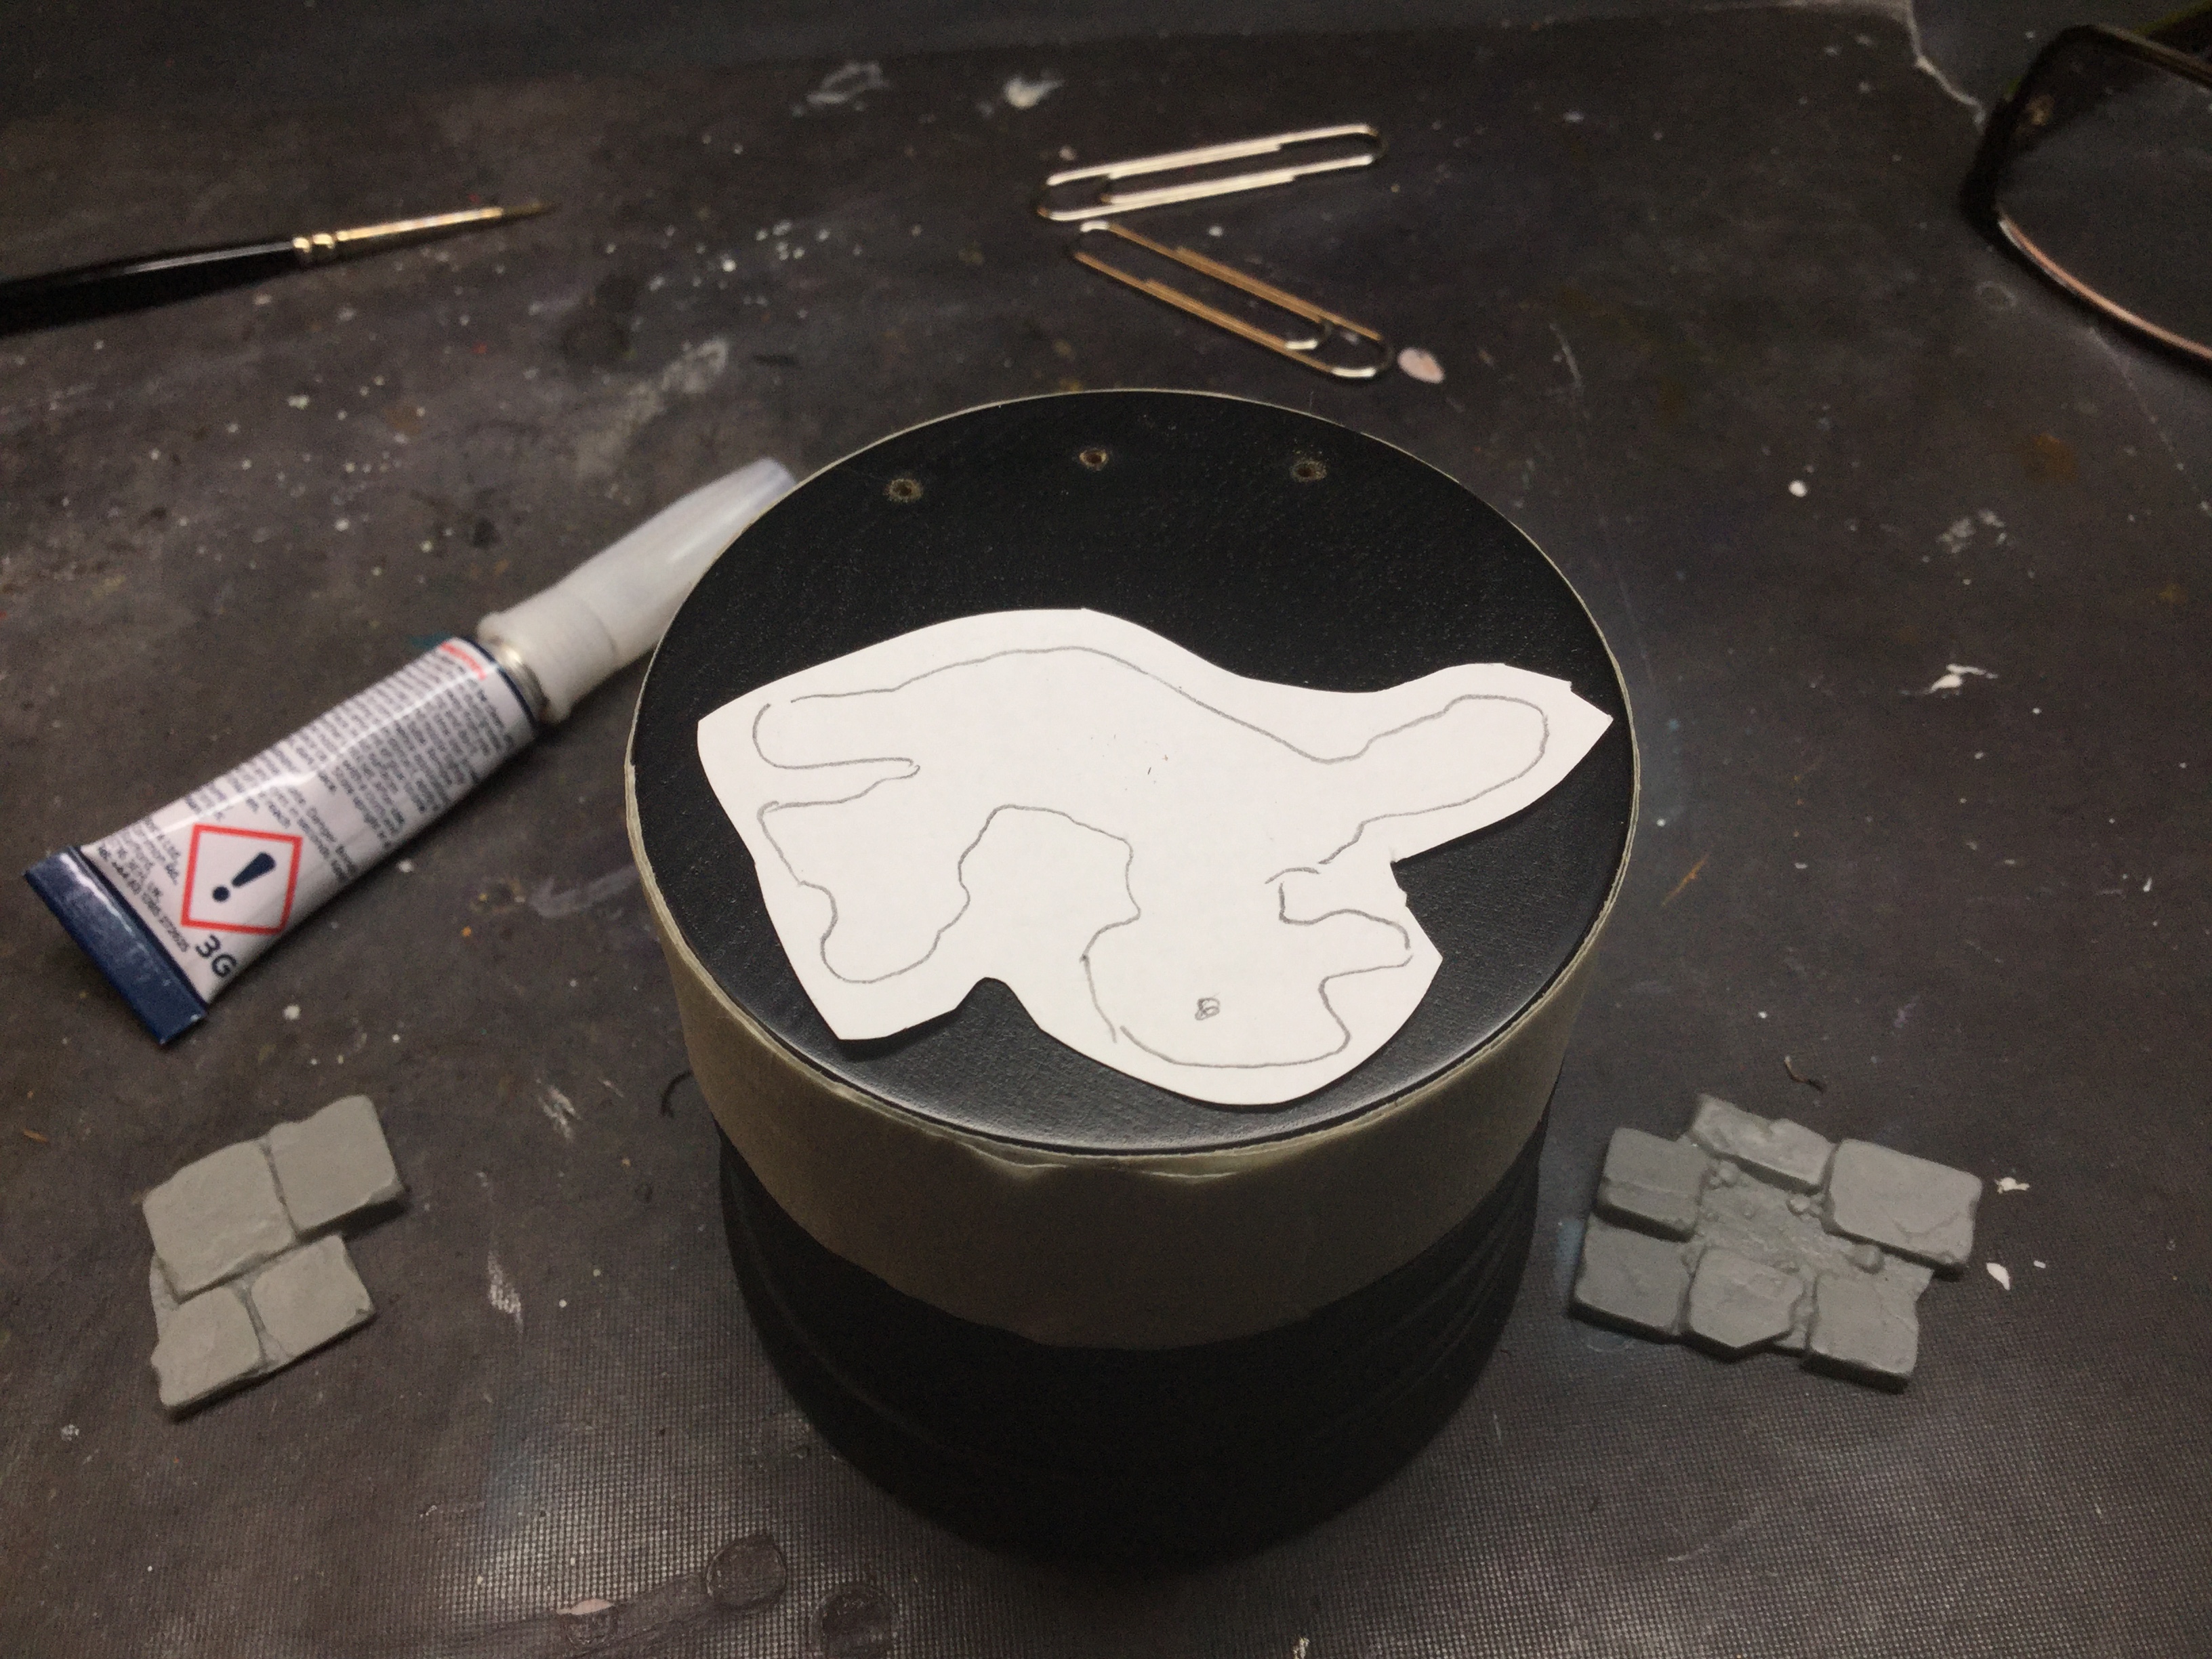
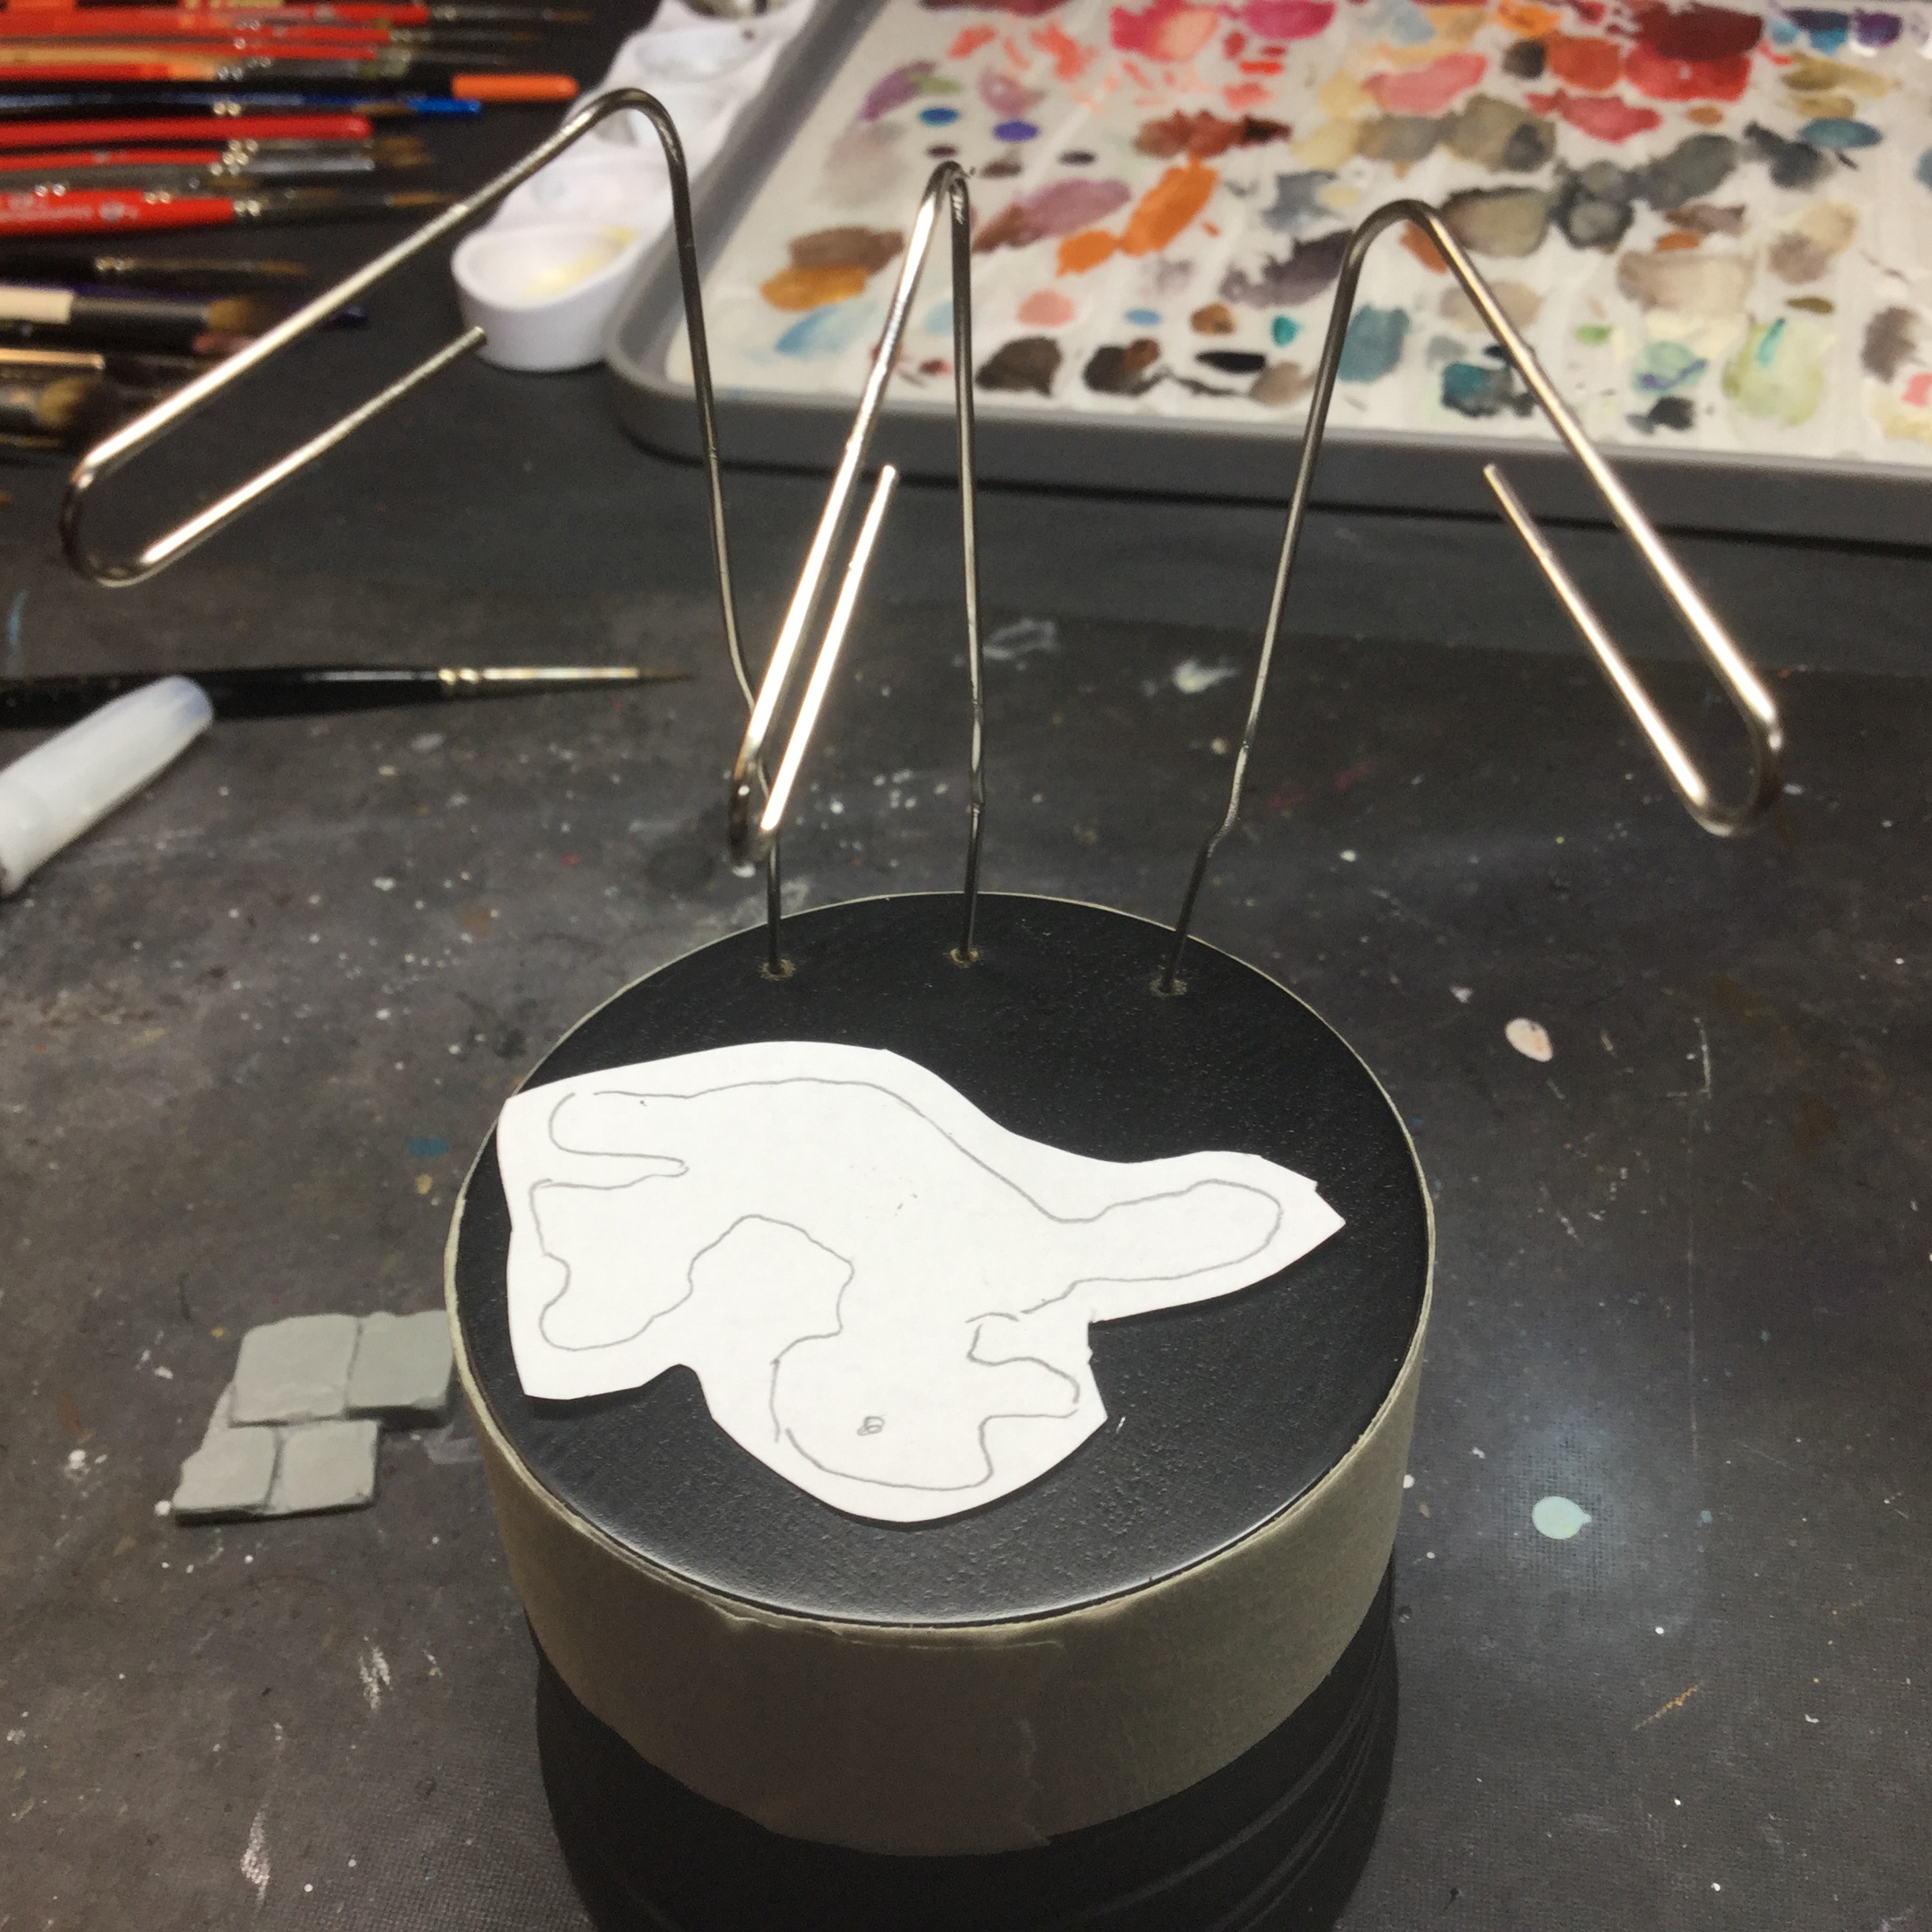
next I traced the ‘footprint’ of the model (that’s the odd little scrap of paper) so I could check easily as I built that the model would fit properly onto the scenic element I was planning to sculpt/build on top of the plinth.
Then, I drilled three holes into the top of the plinth and fitted and glued three large paperclips into the holes as the start of the armature.
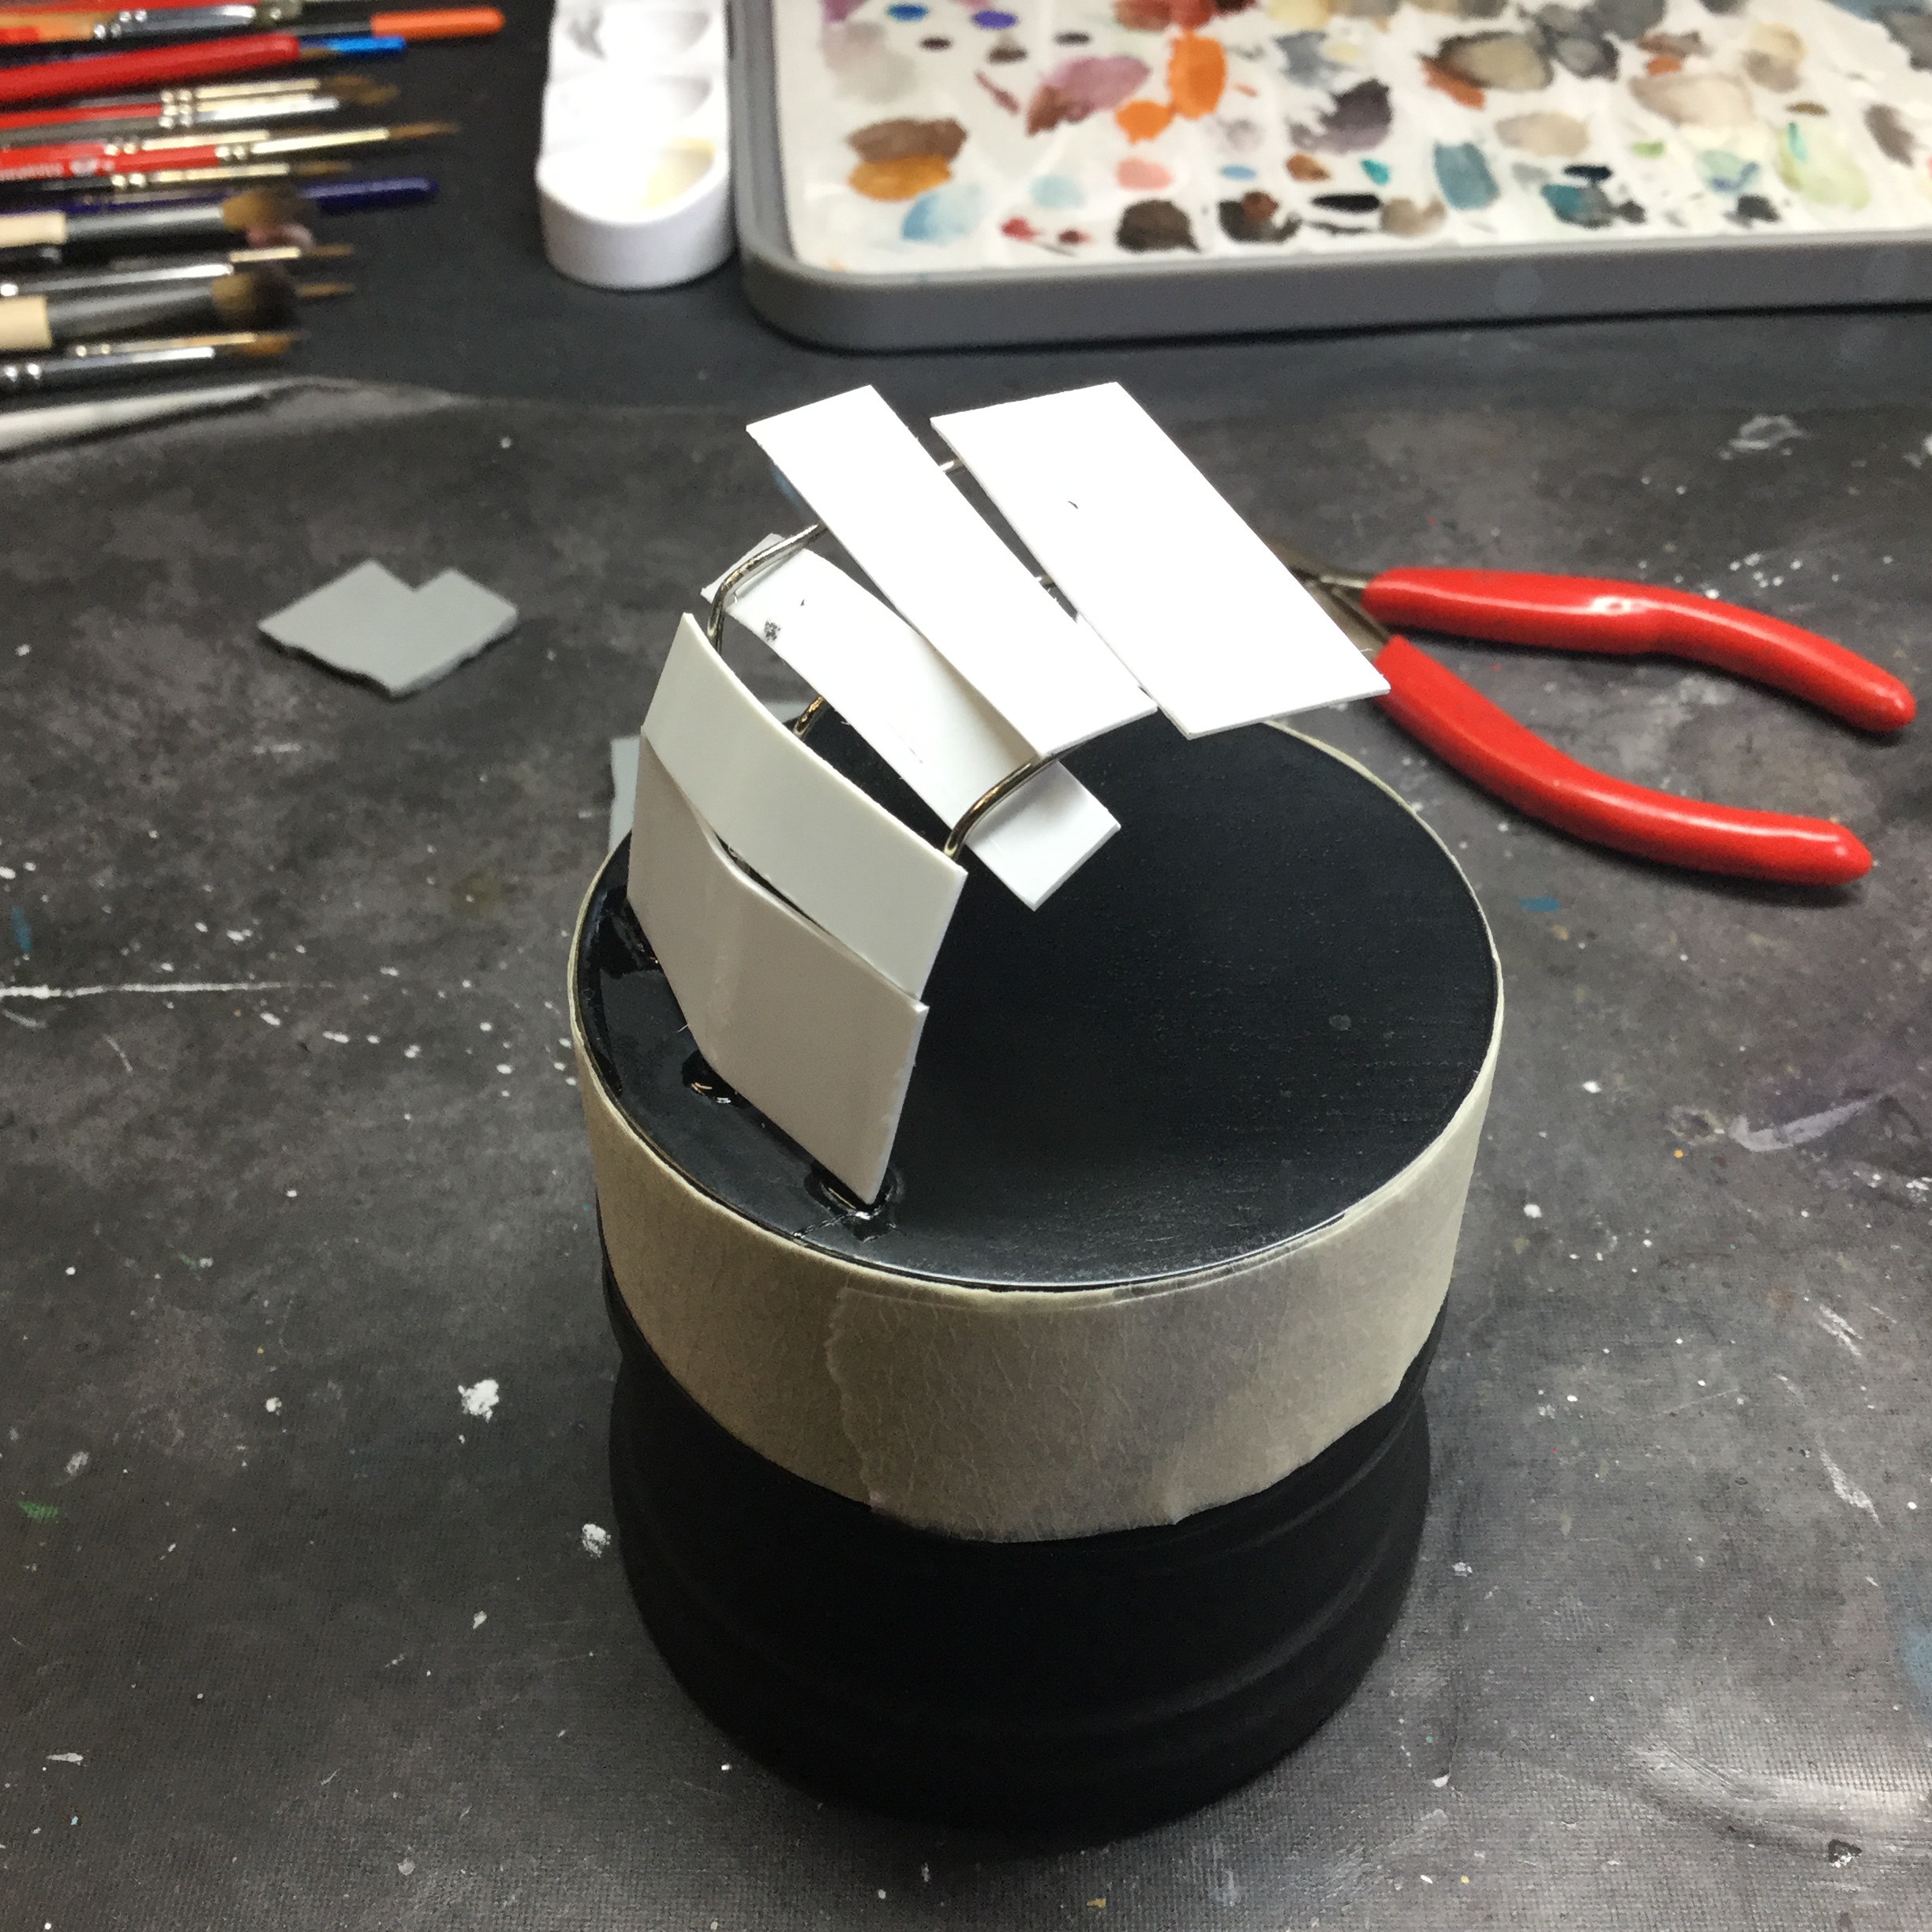
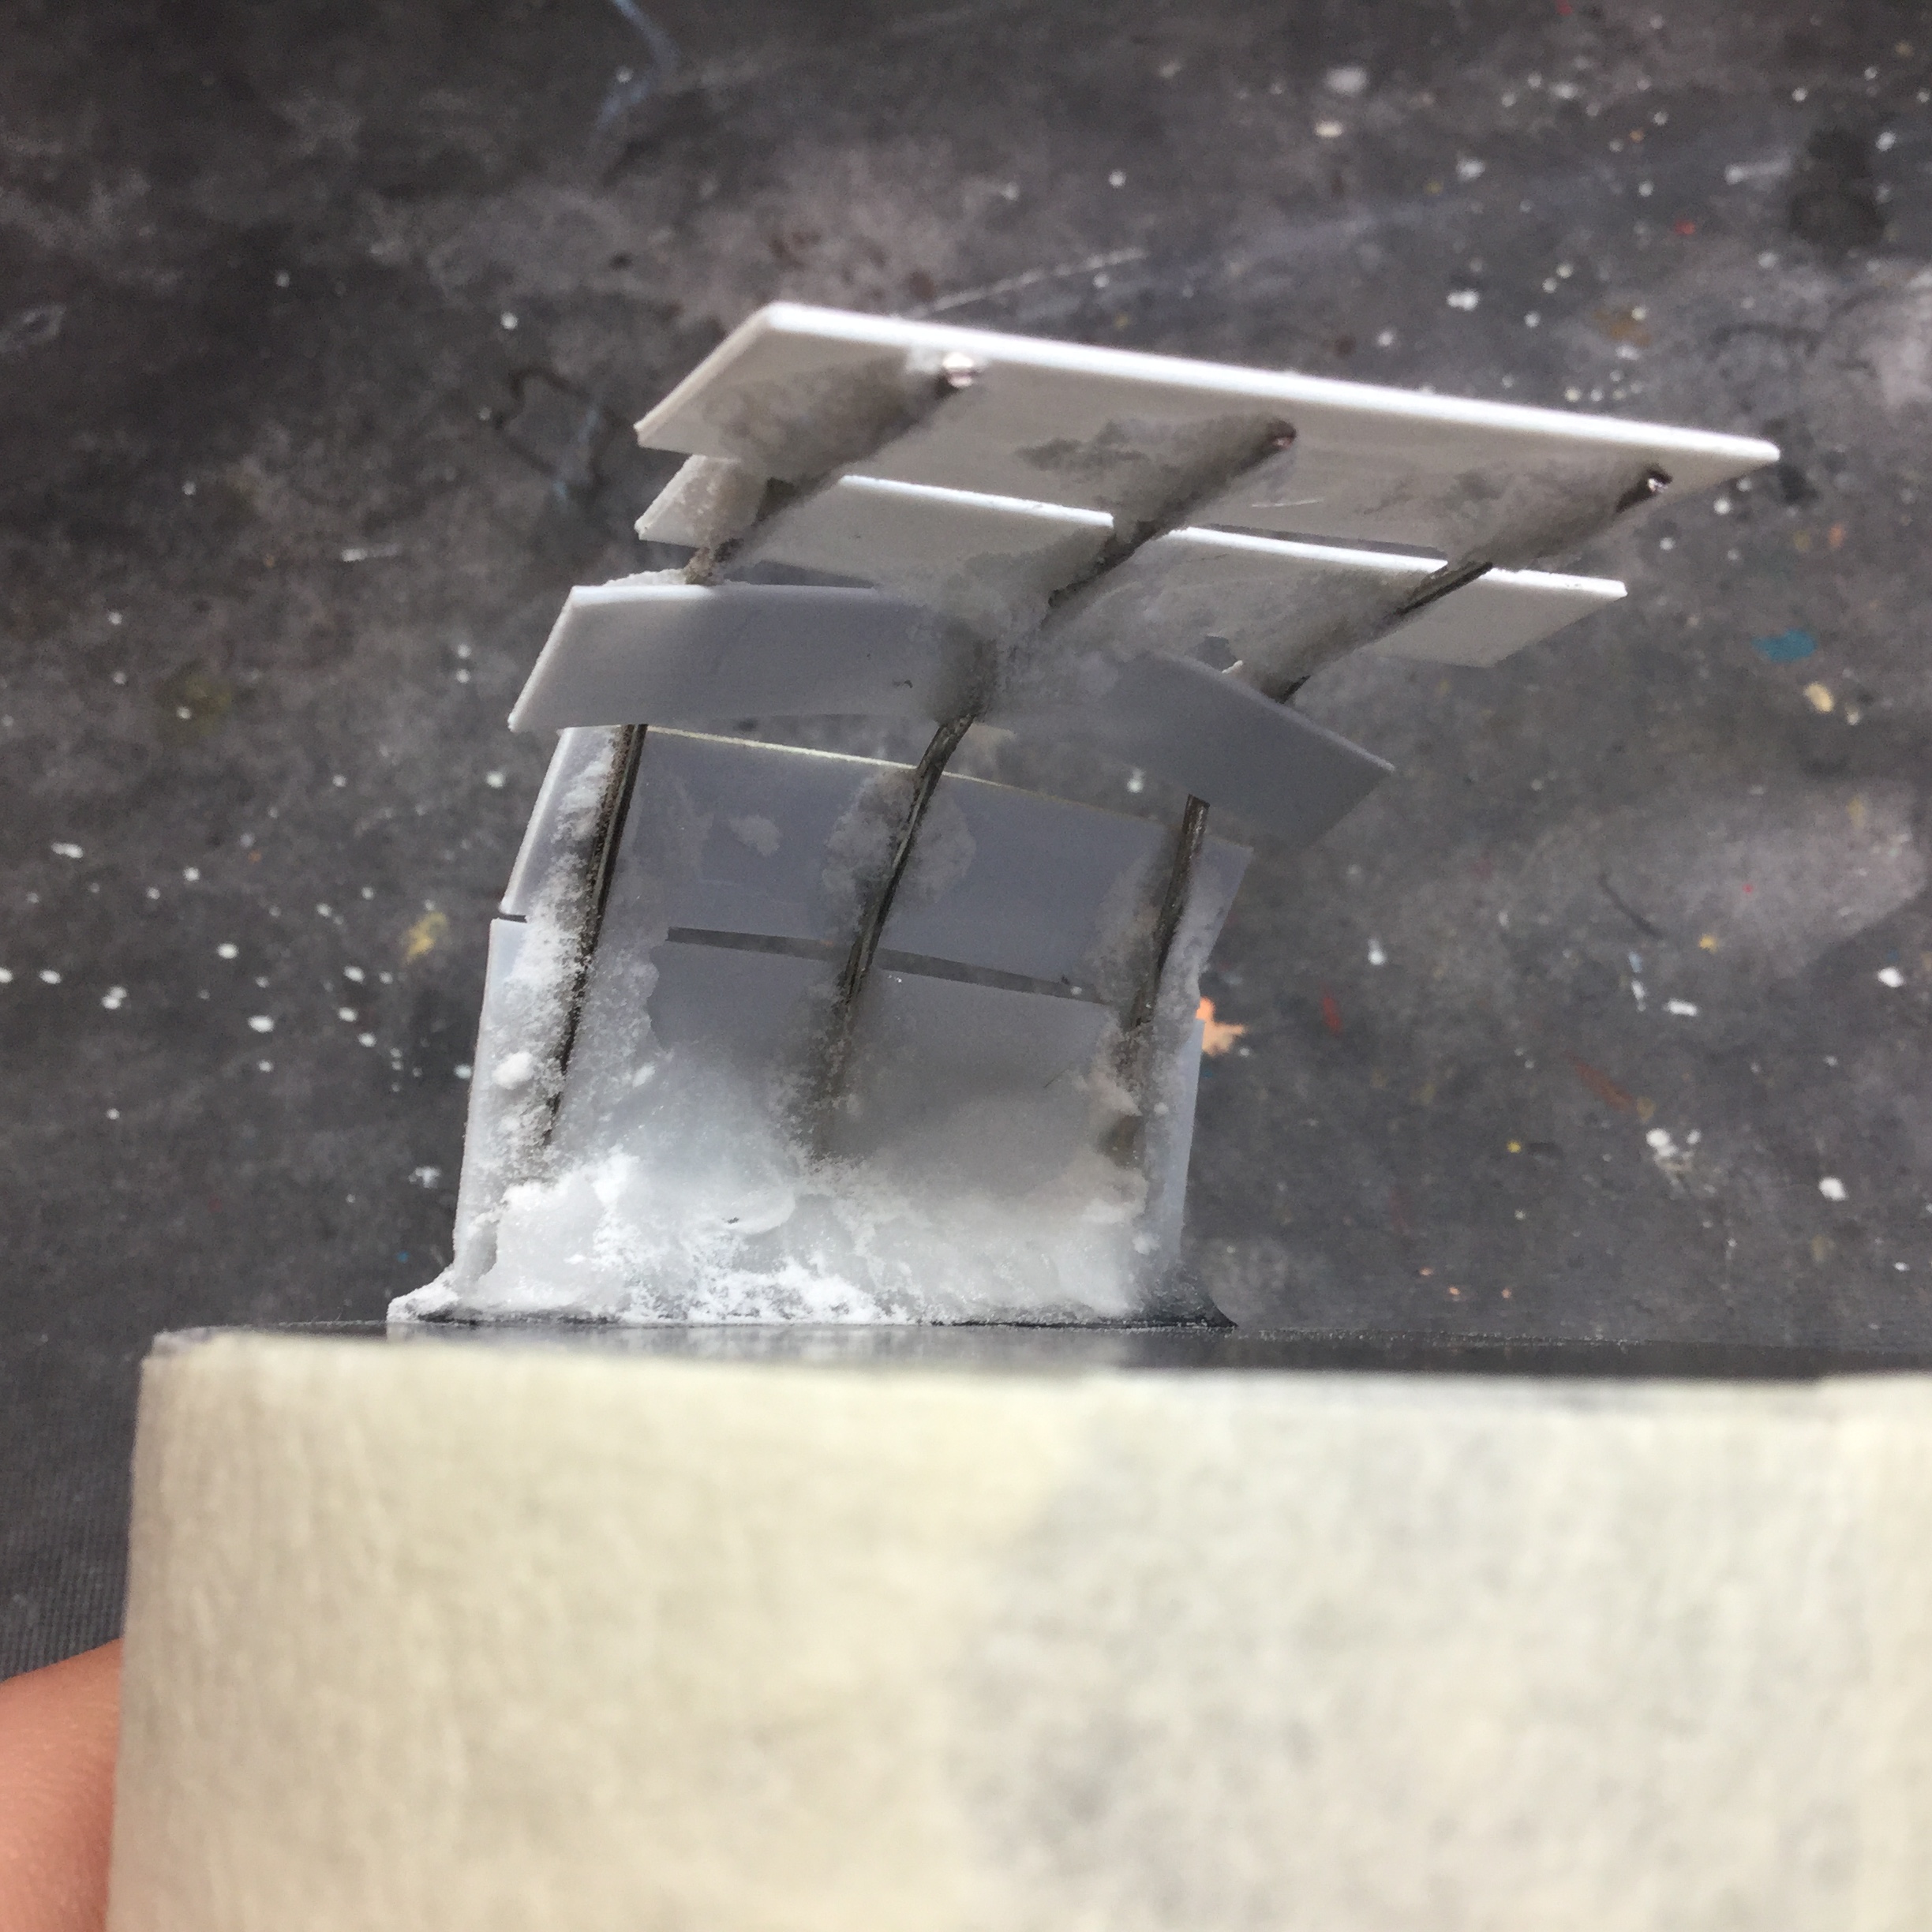
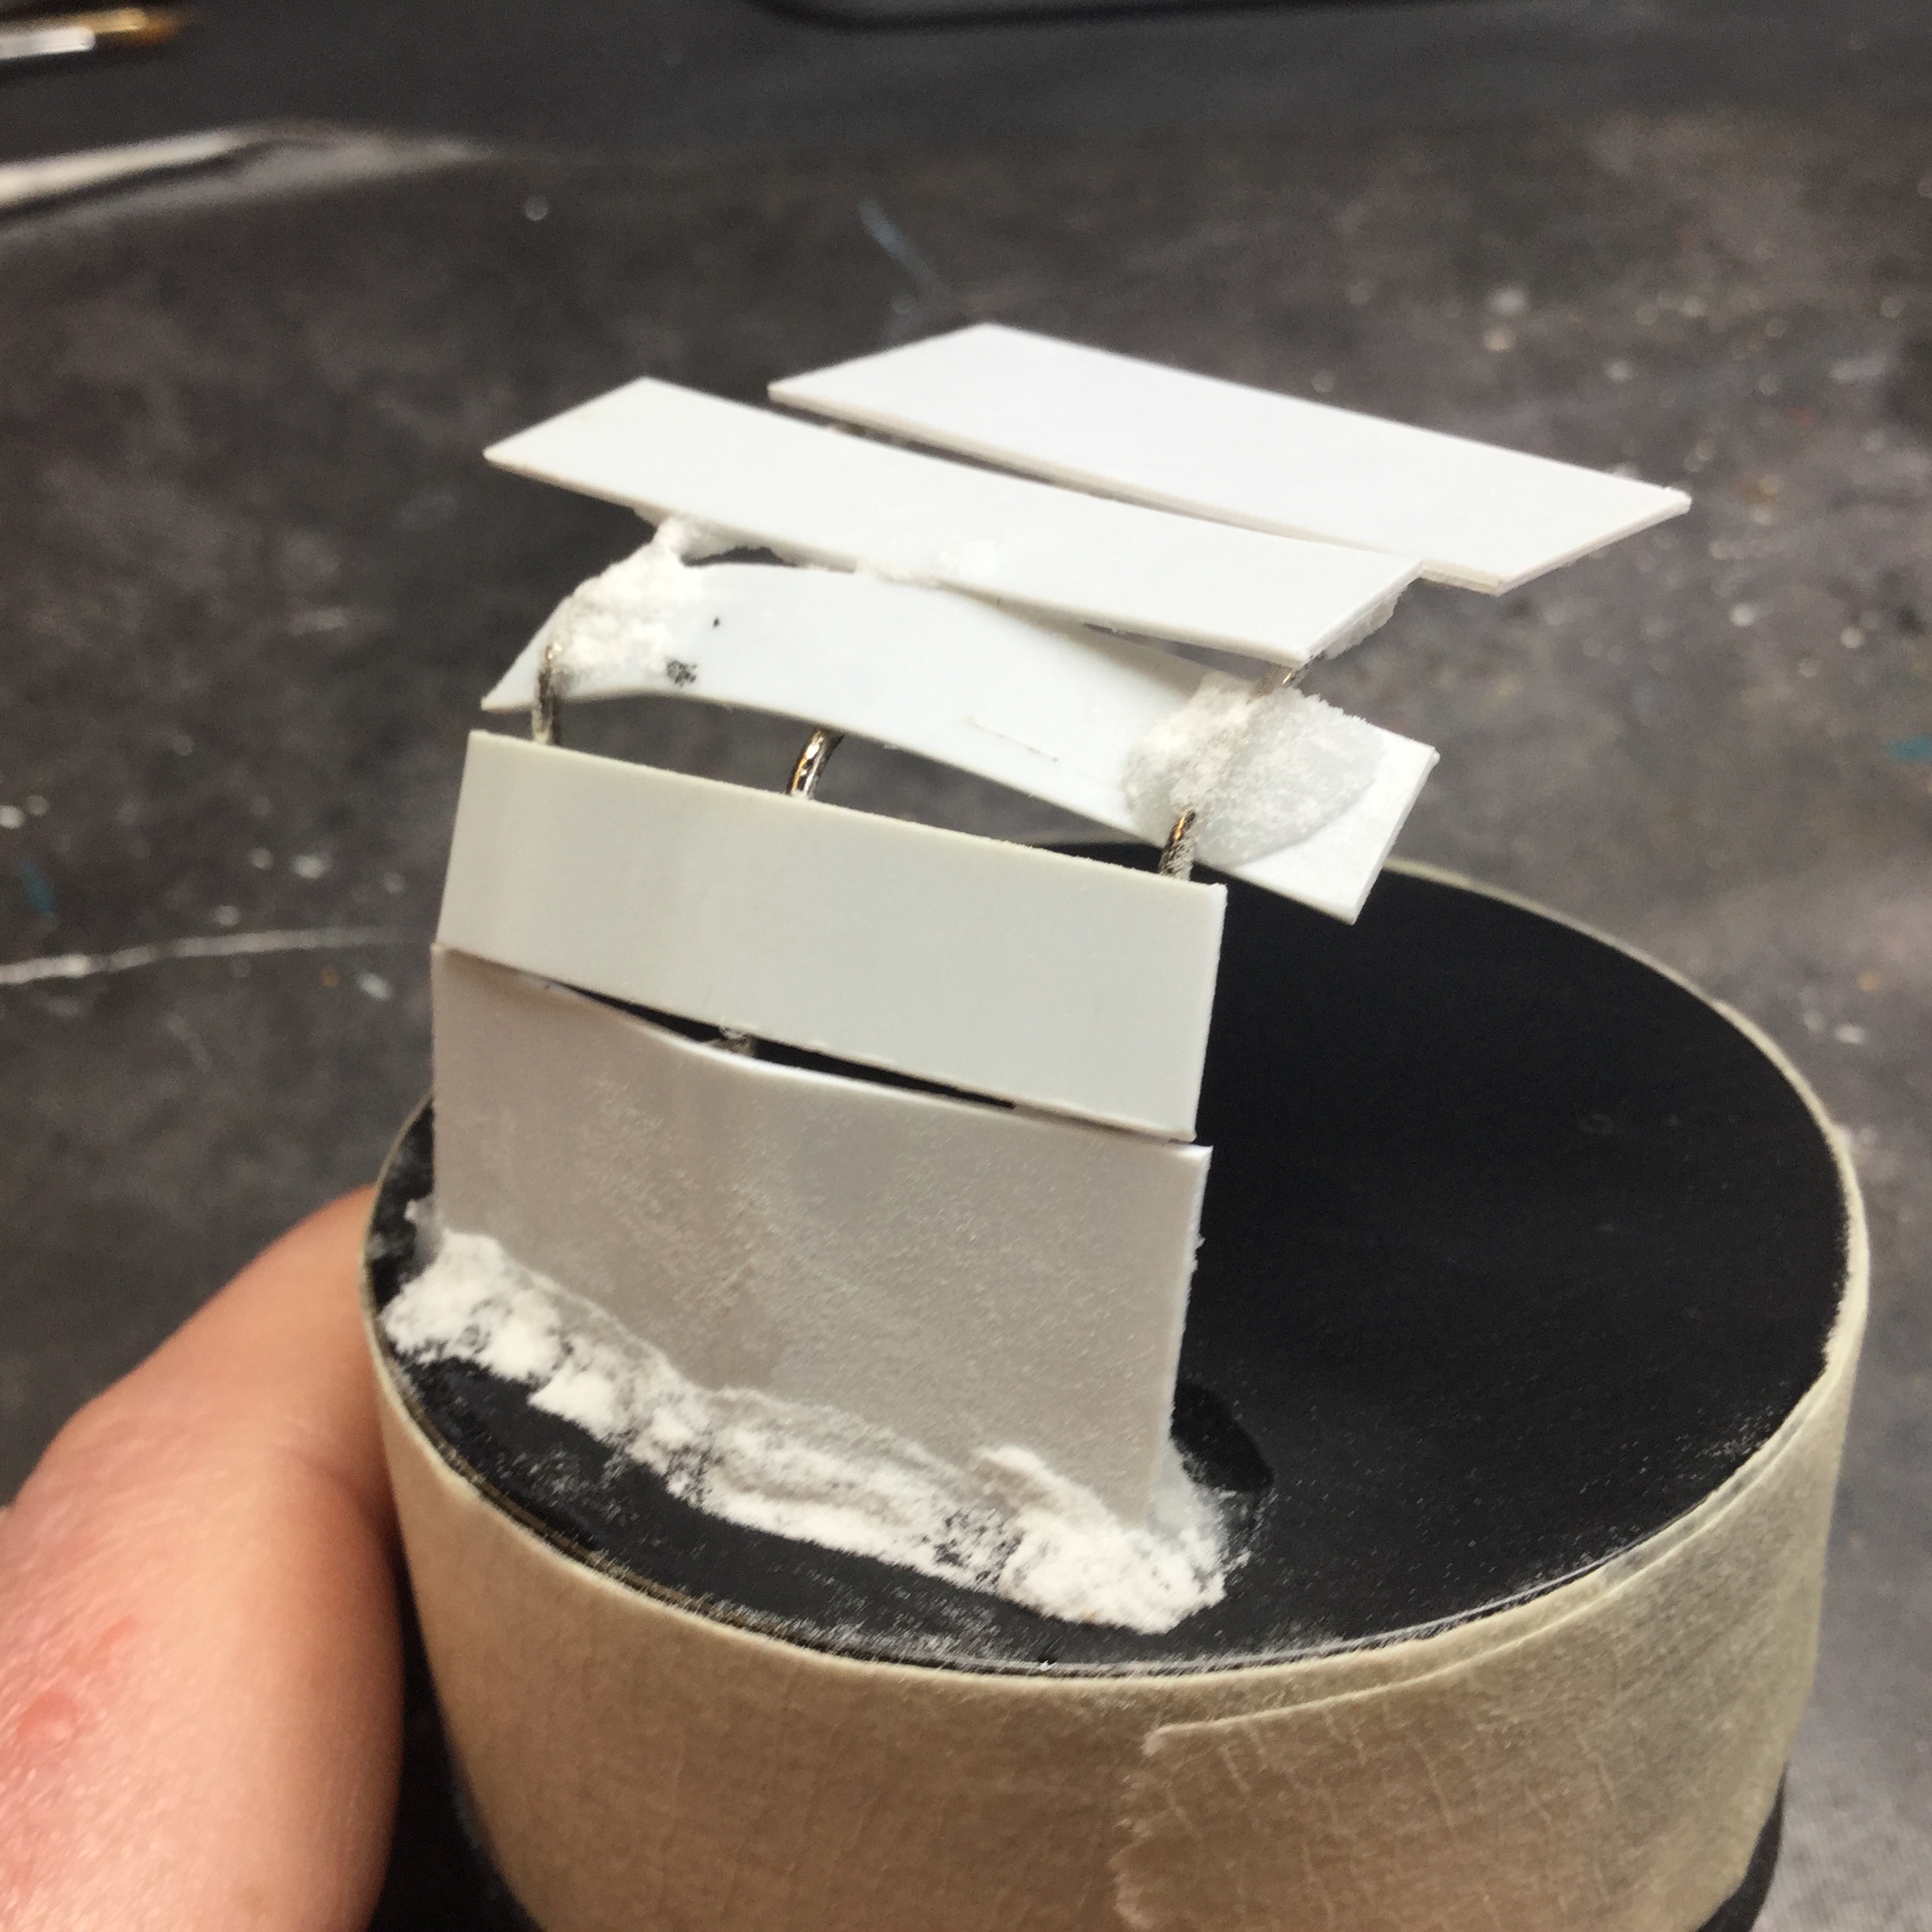
With the ‘pins’ glued in place, bent in the correct direction and trimmed back, next I needed to start added a platform around which to sculpt. I glued on pieces of plasticard to the wire armature then ‘cemented’ them into place with more superglue and baking soda. While some folk use baking soda as a cheap superglue accelerator for superglue, it also makes for a really hard cement with which to secure the armature.
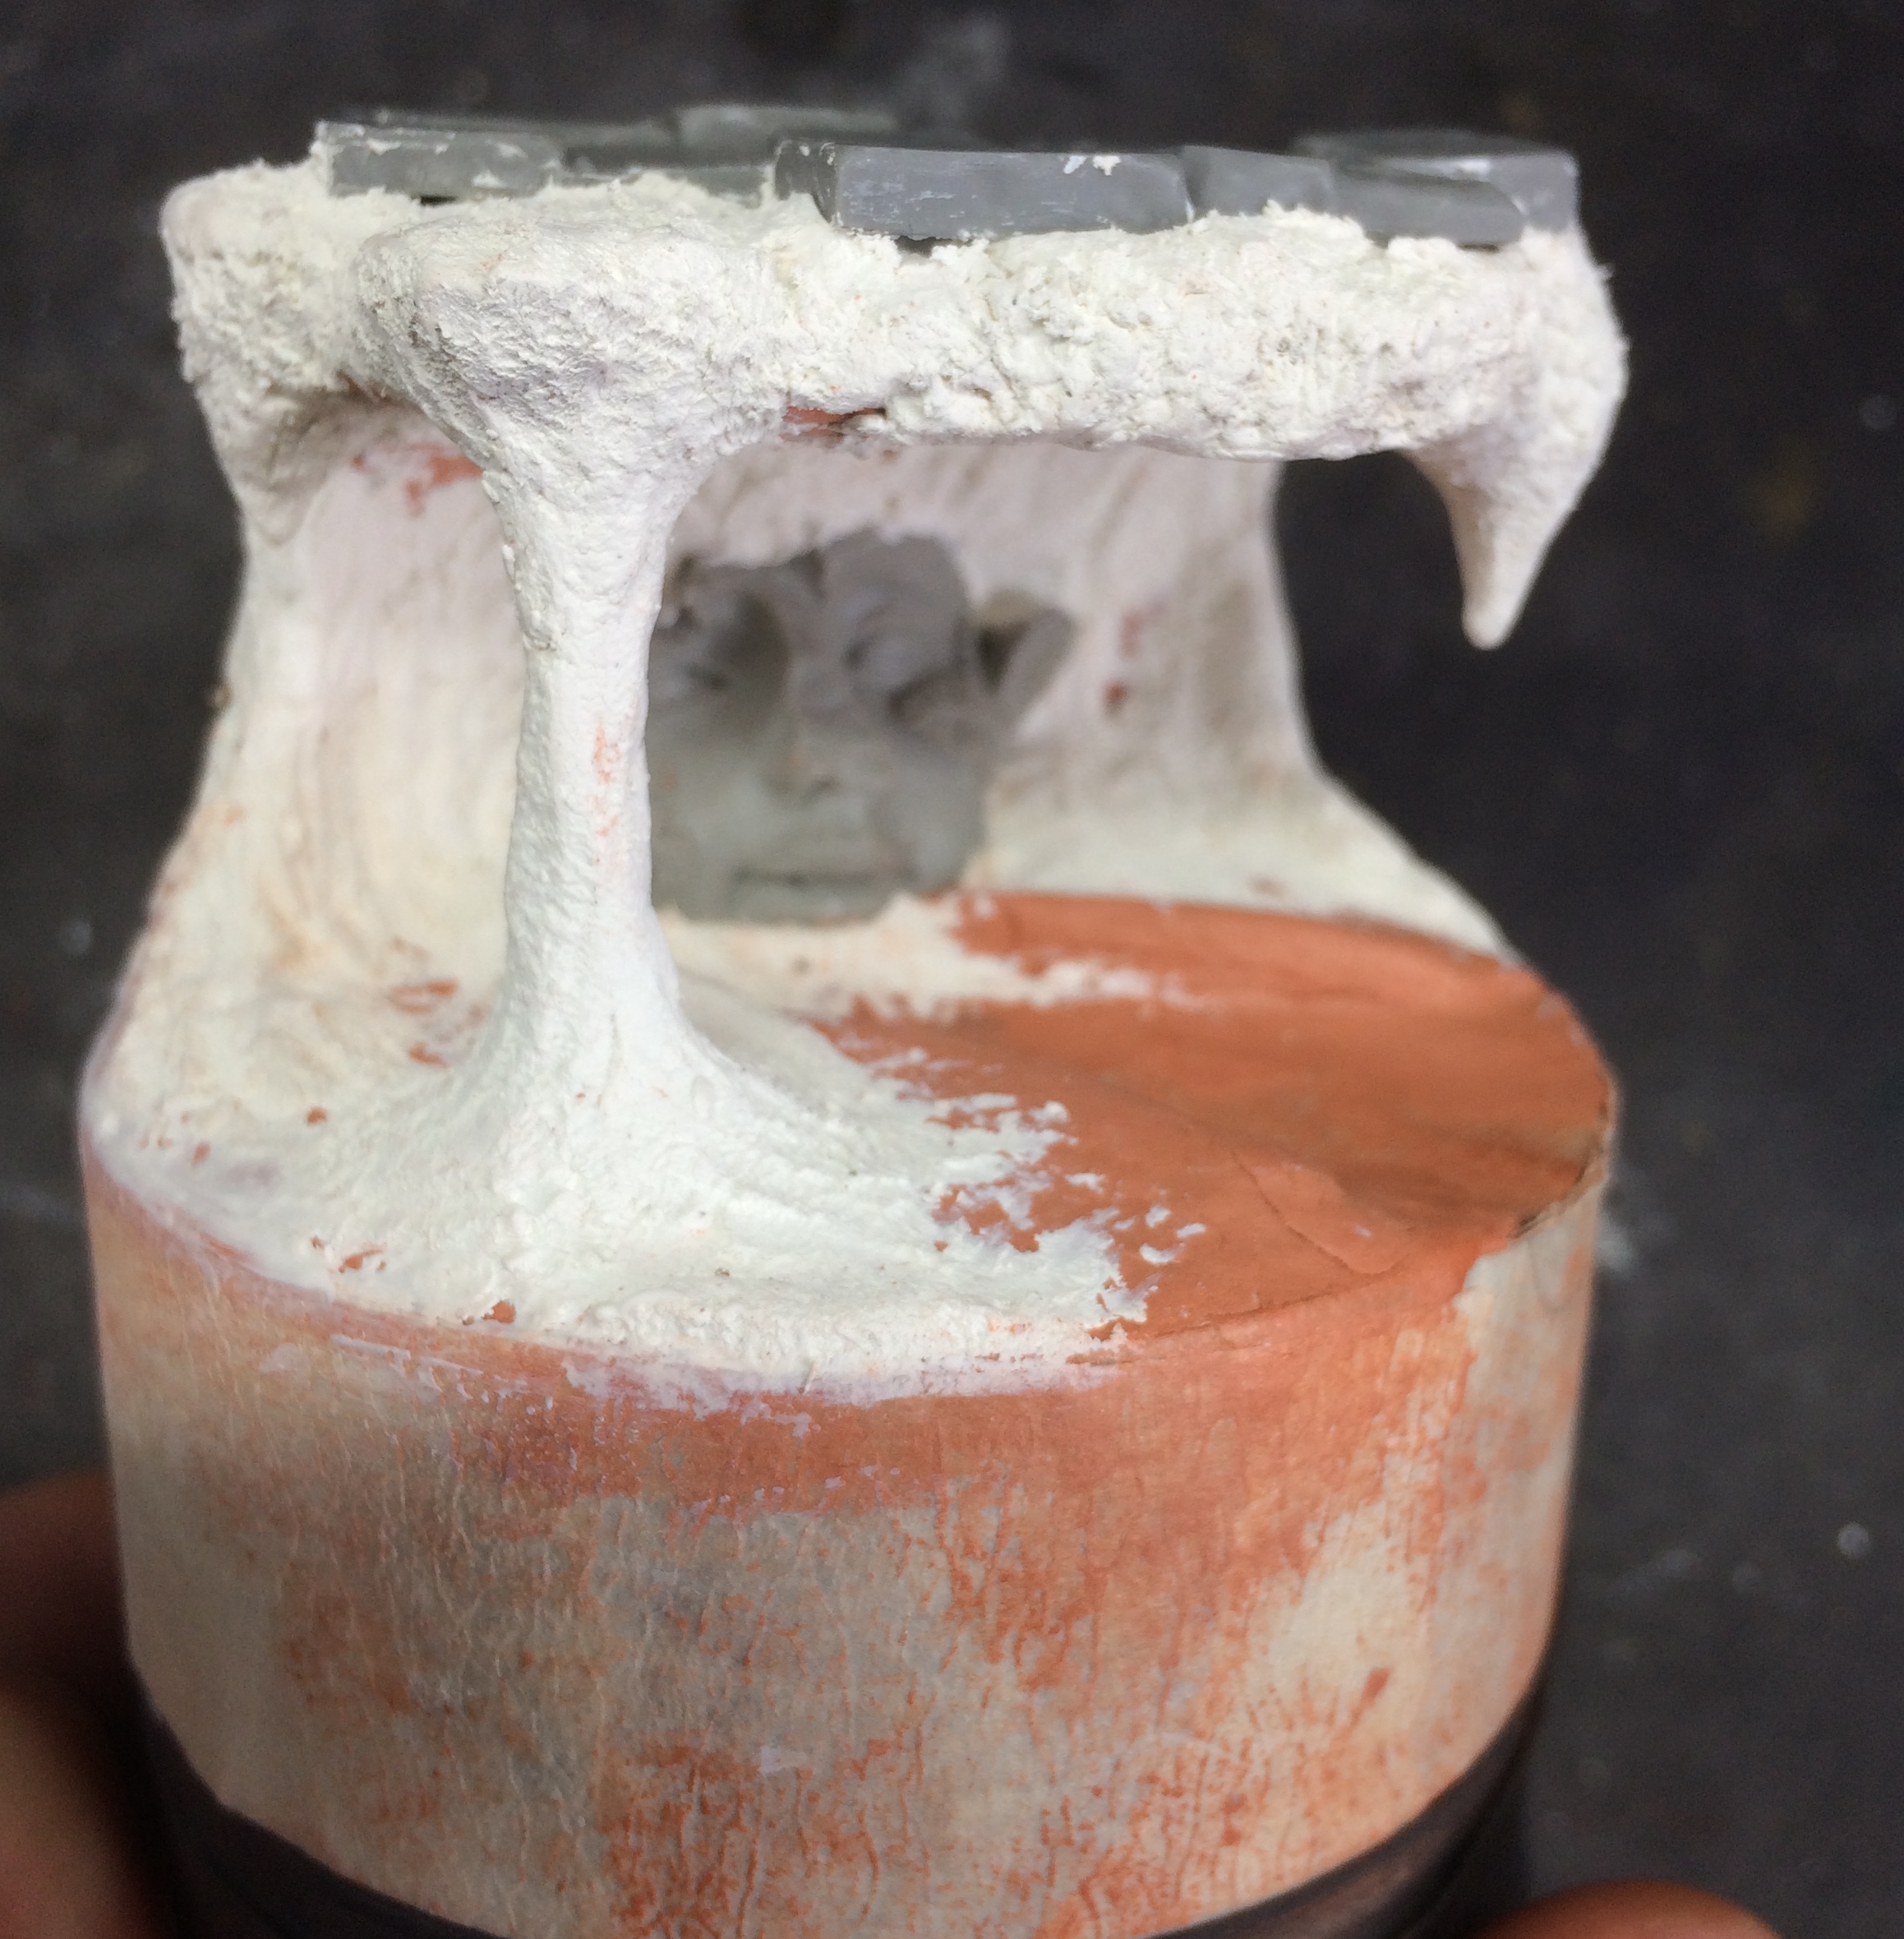
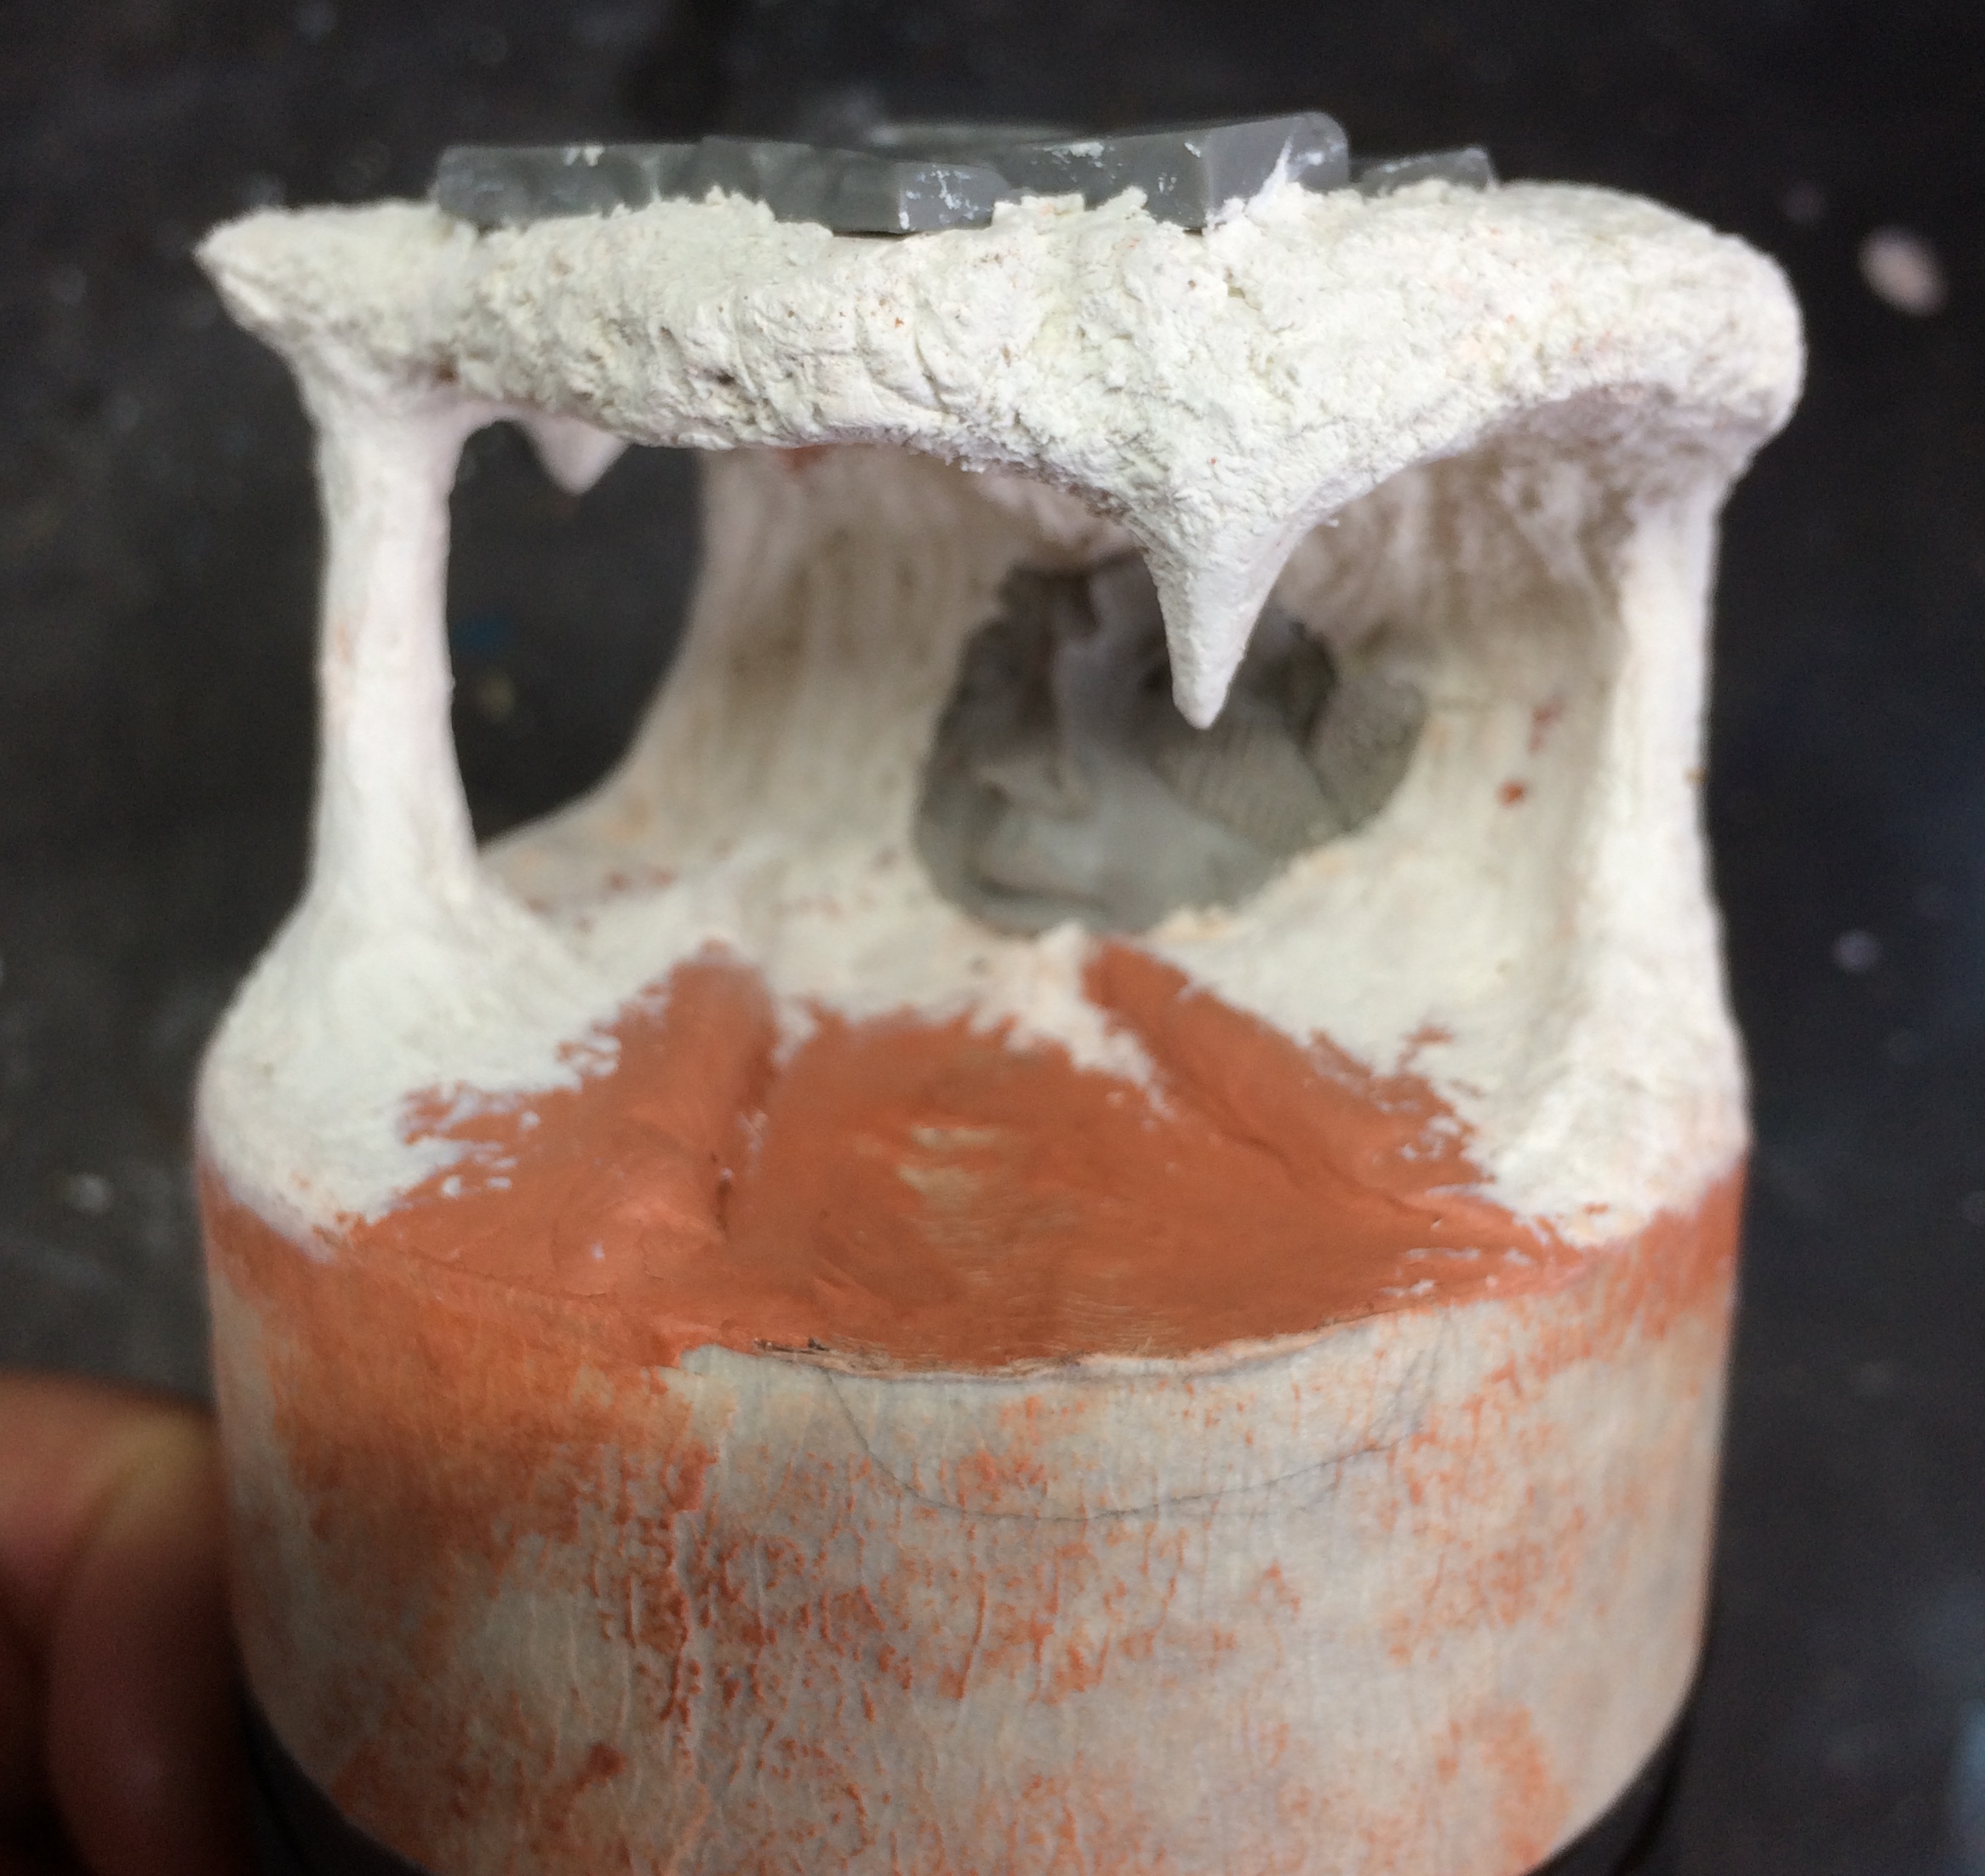
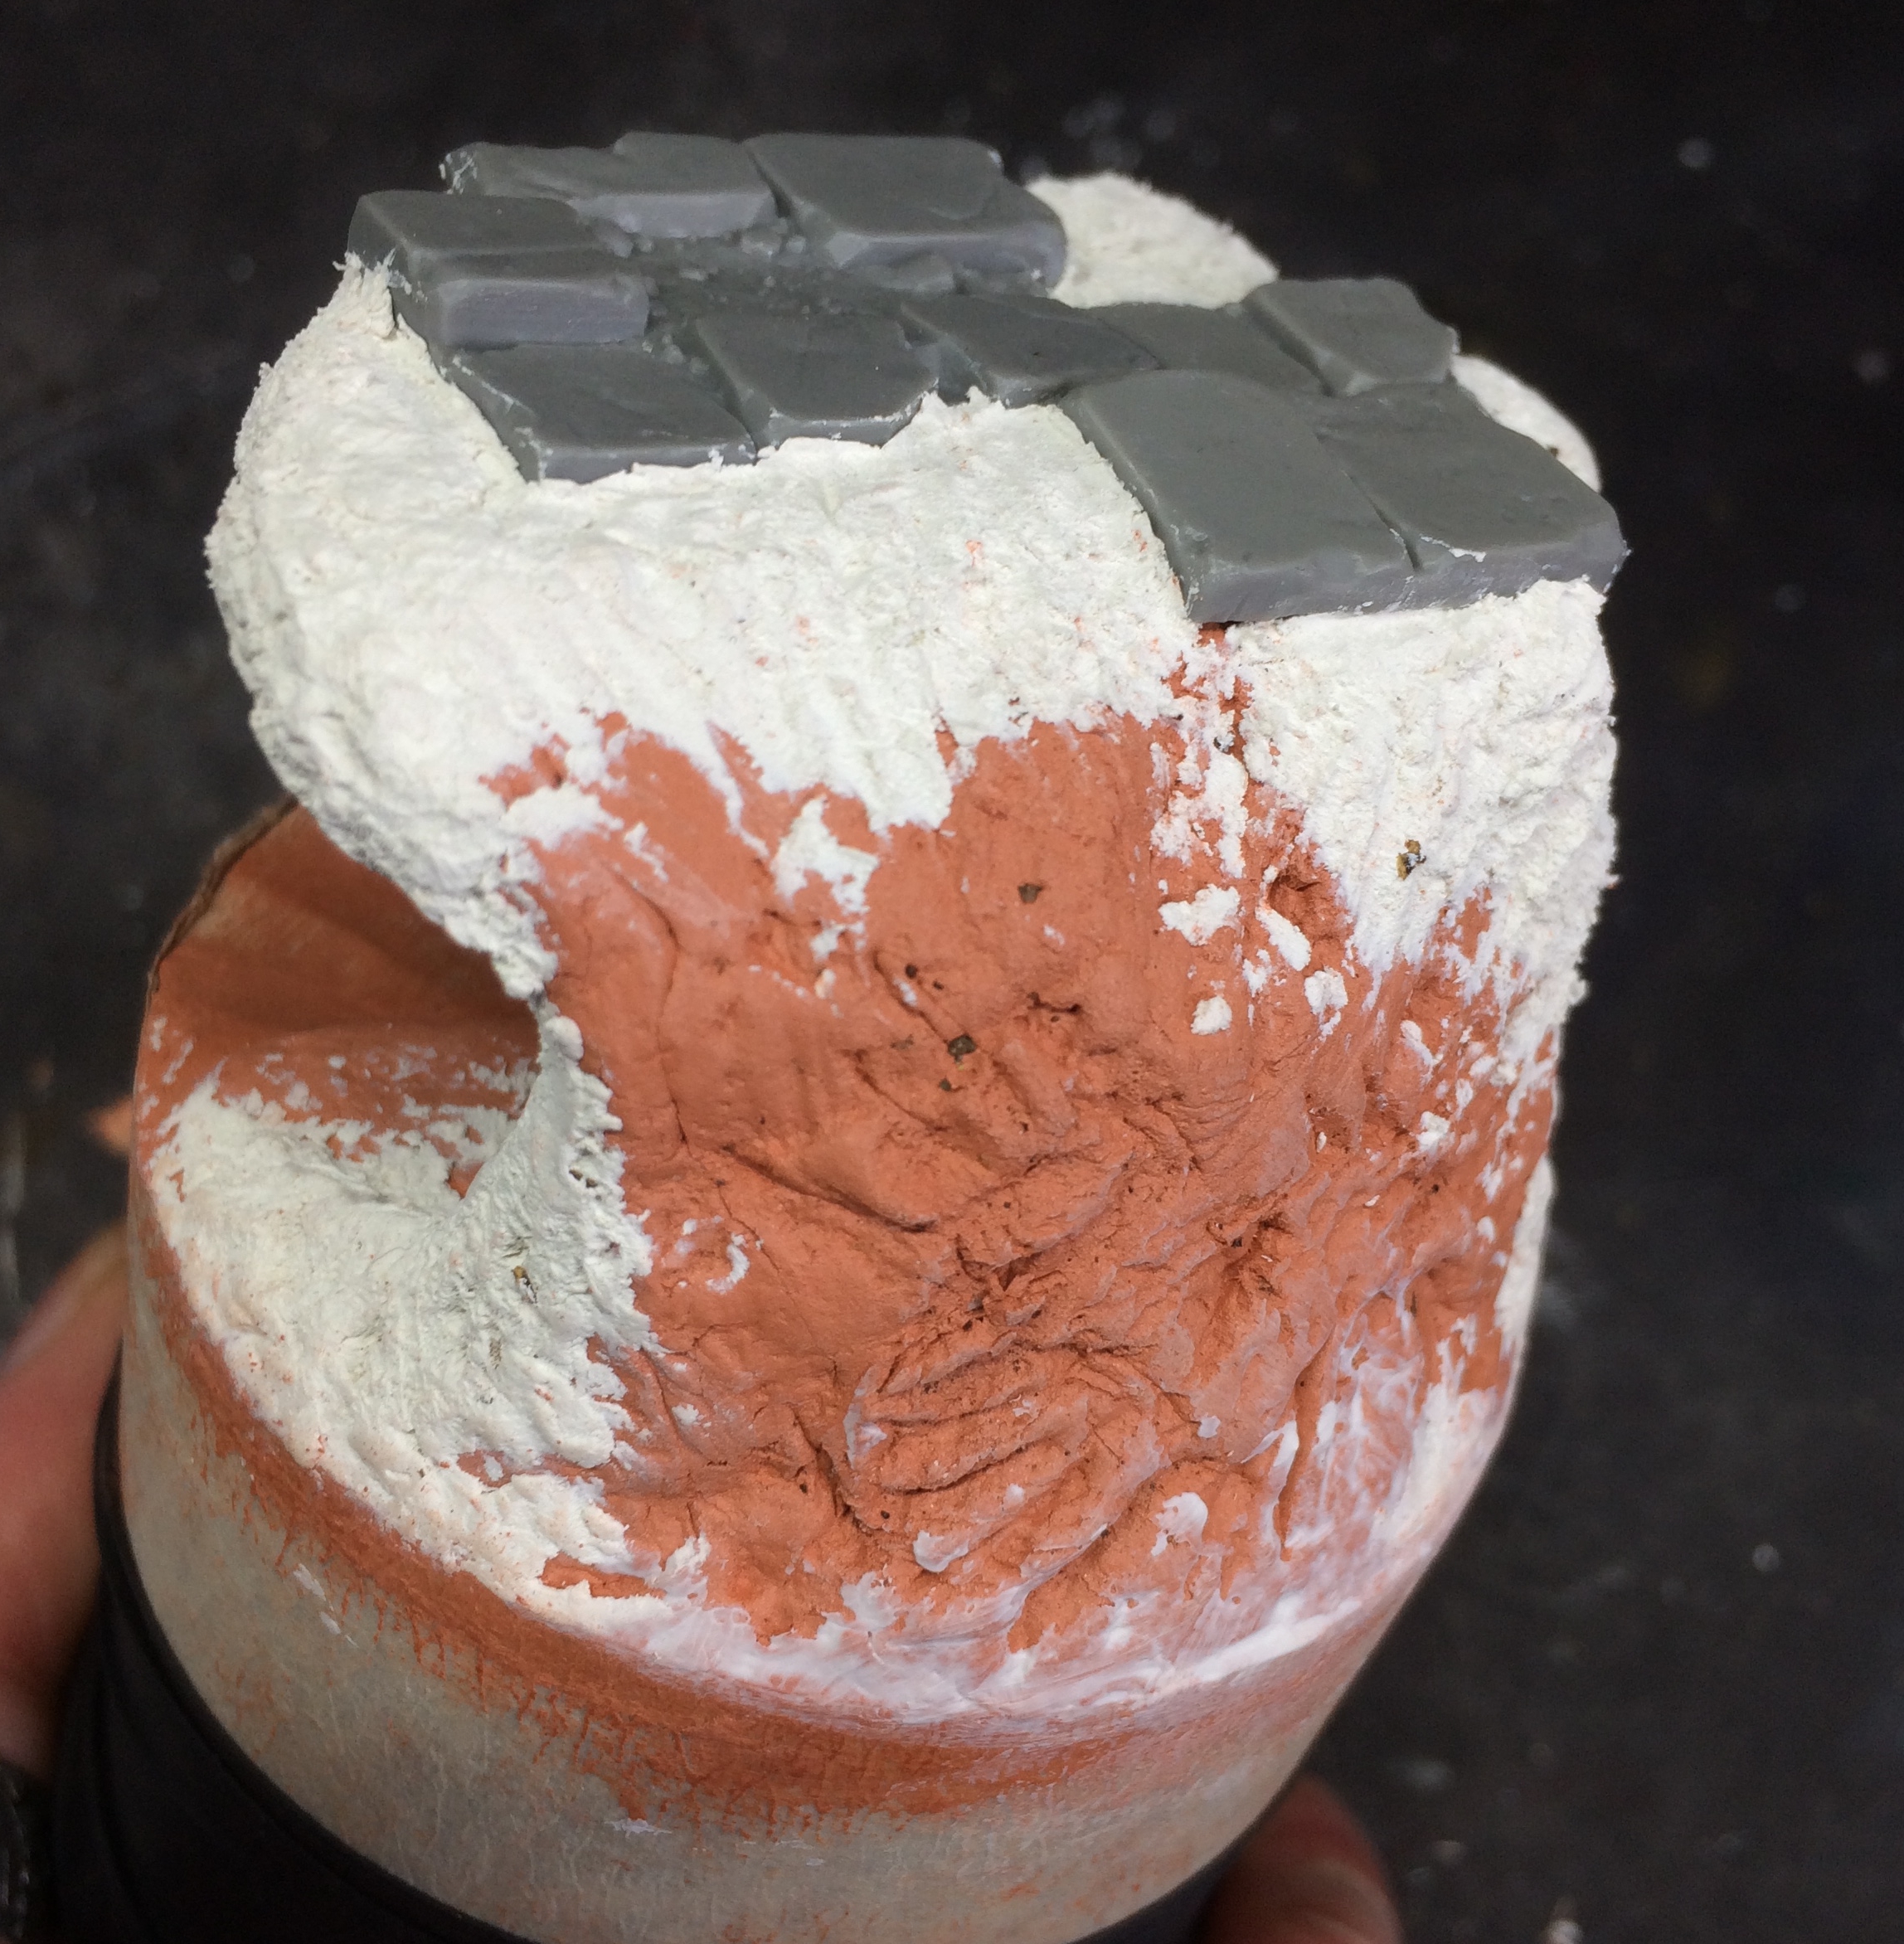
With the armature built and as solid as a Guinness shi……. house, time for some sculpting. First comes the core. For this I used DAS. I hate DAS for the most part as it takes forever to dry and is kinda greasy to work with BUT it is incredibly cheap so I use it for the hard core of a build and then once it (eventually) dries, I sculpted the outer form with milliput extrafine.
While bulking out and starting to refine the cave, overhang, stalligtites (or however you spell those down pointing buggers) cave column, stream bed and so on I pushed some temple flagstones from gamersgrass into the top and a face from Scribor into the back wall and moulded the milliput around them. I left some of the rougher textured DAS peek through at the back as this would be painted as a rock face.
Right – am knackered so off to bed!! Part II comes tomoro!!
Stay home, stay safe, stay hobbying folks 🙂