


![How To Paint Moonstone’s Nanny | Goblin King Games [7 Days Early Access]](https://images.beastsofwar.com/2024/12/3CU-Gobin-King-Games-Moonstone-Shades-Nanny-coverimage-225-127.jpg)


Game Inserts


Recommendations: 26
About the Project
Tom is a gamer with too many game components stored haphazardly, so it is time to set aside the paintbrush (temporarily) and get his DIY on. Armed with a knife and some craft materials, can he organize things and have game night run more smoothly? Maybe.
Related Genre: Game Aid
This Project is Active
Islebound (Part 1 of 2)
First off, apologies for the delay between this and the last write-up. I had to look into the wet footprints leading from the back door to my attic ladder.
 Probably unrelated to the attic man
Speaking of an uneasy sense of being watched and wet things… Islebound!
On our quest for game insert perfection, I’ll be using Islebound as our first example. And boy, did this one take some work.
If we pop the box open we’re greeted by the infamous ‘trench’ insert of Fantasy Flight fame.
 How's Luke supposed to get a torpedo in here?
Okay, to be fair, Red Raven’s insert for Islebound is roomier than the Armada’s and Rebellion’s of the world, but it’s still prone to what’s known in the insert business as “slippy slidey-ness or “vortex of approximately infinity tiny baggies”.
With no divisions in the insert, setup becomes its own game of ‘find the bag for each component‘ and teardown becomes ‘which bag did this come from, sweet mercy I want to die‘.
LAY OF THE LAND
Let’s just cover some of the basic principles at play here and how they’ll inform our design.
Ideally we want as few bags as possible, so a good starting point if you’re doing this for any game is to look at your components and determine what ones would be practical to make a division for. You’ll want to look in particular for square/rectangular tokens of a non-fiddly size when you’re doing this. Quantity will affect this decision as well. You know how the story goes; you punch out all the tokens and bag ’em up only to find that your once snug box is now bulging at the seams.
If your tokens are numerous enough that the bag is looking like it ate too much for Christmas dinner, you’ll probably want to make a compartment for those where possible and ditch the bag entirely. As we design our layout, there will naturally be pockets of empty space left over that can hold any remaining bags.
First thing’s first, let’s lay out the components and see what we have.
 Okay. So this game has a few components.
The next step is really a trial and error process of stacking your components into piles of roughly equal height and adjusting as you go. From there we can decide if we’re going to need two inserts or one deep one (spoiler: we need two).
Just a forewarning if you have company, it is almost impossible to not look insane when doing this.
Before we get into specifics, in general you want to remember that foam board is 5mm thick. So when you’re measuring your stacks and the inside of your box later, add your 5mm each time. It’s easy to overlook and if you want to add a lid, remember to leave at least 5mm leeway in your plans for it too.
Back to our example; our biggest components are the sea boards and player boards. They are almost the same size, so we can safely group them together and measure their collective height.
The crew tokens when stacked in two equal piles are about the same height as the boards, so they’re going to be on the same layer. Add 5mm to that height to account for the depth of the base and we know how tall our first tray is going to be. I’d recommend always adding about 2 to 3 millimeters of leeway to this just to be on the safe side, but if you suspect your game might be a tight fit, you could forego this.
Now, in this case the remaining height I had (accounting for a 5mm thick foam lid, more on that later) was an appropriate depth for my remaining components, but your mileage may vary. Your game may be small enough that you only need one tray, or you may need up to three (or of it’s Gloomhaven you might need to buy it it’s own summer house).
It really is a matter of sitting down and making stacks for a while; seeing what way you can arrange things to conform to similar heights.
The second tray is going to hold all the cards. When it comes to cards, you will want to save yourself some work and try to arrange your layout so that you have a row of card compartments. This cuts down on measuring and honestly, it just looks a bit neater.
On the subject of cards specifically, we need to talk about sleeved vs unsleeved. Whether you sleeve them or not is up to you, but usually this will depend on how frequently you see yourself playing this game or their role within the game (eg – will they be shuffled?).
If you have not decided about sleeving your cards yet but want to future-proof your insert design, I have found that leaving 2-3 mm extra space is sufficient to account for most sleeves, but feel free to leave a few extra. I use Dragon Shield, which tend to be on the thicker side and this has worked for me so far.
Different components may suit different compartment shapes, but for the most part you will find a simple ‘t-junction’ bracket is enough to hold most things in place, while leaving room for your finger to lift them out easily. Let’s take a look at it – in picture form!
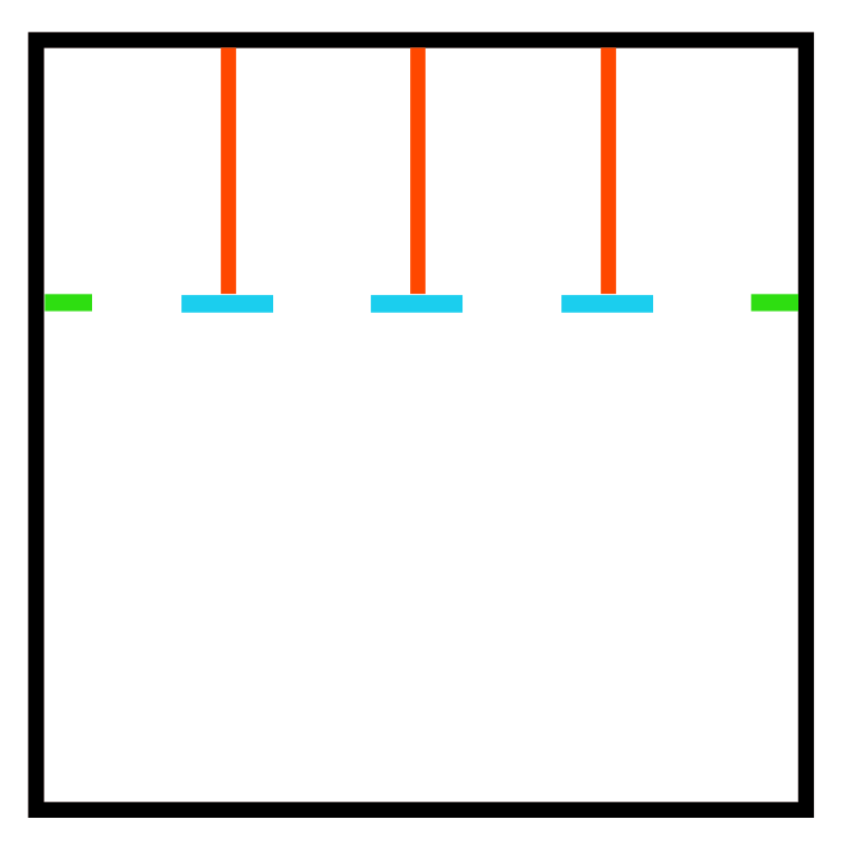
Red is your division (plus any leeway for sleeves etc), Blue is an end cap and Green is a smaller cap against the perimeter wall. Blue in conjunction with Green will form your ‘tab’ where you can lift the cards out.
The actual width of Blue is entirely up to you and will likely depend on your hand size or how crowded the insert is going to be – but I’ve found that between 30 and 40mm is ideal. It take’s very little at the end of your compartment to keep the cards in place. If your compartment is for something with an odd shape, you might want to consider making the gap narrower to prevent them for nestling their way out (see ship standees and book tokens in my finished example).
Green is always half the length of Blue minus 5mm (since each Blue is bisected by a Red). This way your divisions will be equal and centered, even against the perimeter wall. So in my case, Blue is 2.5cm, Green is 1cm.
If you space these brackets out according to the width of your cards (remembering that the divisions will be 5mm), then you can easily make a row of compartments. The rest of the work is just planning around these compartments for your remaining stuff.
But all of this is provisional until we have our base made and a better idea of what space there is to work with. This exercise is just to familiarize yourself with the components and how they could be stacked – once you have a base to work on top of you can begin arranging them more precisely.
GETTING STARTED
After measuring the box, the first thing you’ll want to rule out is your base sheet. I strongly recommend you take your time with this part because this is what you’re building your whole tray on top of. Give yourself more leeway than normal when ruling this out because it can be fitted and trimmed as we go.
An important note before you cut anything; stand to cut.
I know you’re comfy at your hobby desk but trust me, you will end up cutting something at an angle and you’ll have trouble lining things up later. Standing helps to keep things nice and perpendicular.
Once you have your base cut out, try sliding it into the box. We want a nice fit that isn’t so tight it’s impossible to remove but not so loose that it’s jostling around.
Use a cutting mat and a sharp box cutter for this. If it’s brand new you’re good to go, but I’d recommend breaking off a new segment of blade if it’s an older knife. Anything less than razor sharp can end up hacking bits out of the foam, which will look nasty and gross, like you went at it with a lawnmower. Not a great look.
But don’t stress too much if you do end up with some cuts that aren’t as clean as you would like, you should be able to orient them with the nastier side facing down (and glued to the base later).
Try to use the edge that’s already pre-cut wherever possible. Not only is this the most efficient way to get the most out of your board, but it saves you some work too.
It should be noted, don’t glue anything just yet. All we are doing right now is ruling and cutting our pieces; we can do a dry-fit once we have them all to make sure everything slots in nicely before gluing them into place.
The next step is to cut your perimeter walls. Two of your parallel walls will need to be 10mm (1cm) shorter than the other two to account for the join at the corners. Refer to the expertly crafted diagram below.
Before we move on from the perimeter walls, rule out a 5mm inset on each side of your base. Within this box is the area you have to play with. It’s time to take your stacks from earlier and lay them out to see how everything is shaping up.
(That’s all I have time for today. I’ll post the remainder soon and we’ll finish off this insert!)

Getting Started with Gaming's Foamiest Board
Well, here we are in the new year. The time of food and festivity now well behind us as we forge ahead into a brighter and better tomorrow.
Then reality set in as I walked into my kitchen and saw my paint station, dense with models waiting to be finished (though that is another project in and of itself) and several of my bigger board games in disarray. Bummer.
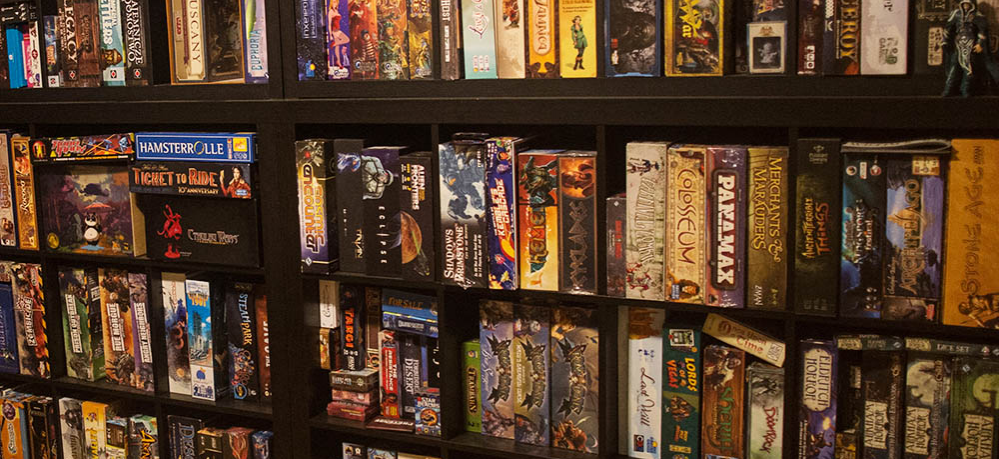
In the short time since New Year, I have had people over for gaming sessions. Leaving the game room between games to fetch something from my “expandable games” bookcase looked a little something like this:
 The worst part is, my tea will be cold when I return
You see, too many of my games are stored haphazardly; scattered over various deck boxes and plastic containers. Temporary storage solutions that, while they suited at the time, have blown out of all proportion as the games have expanded and added new content (and consequently, more inadequate plastic containers). An ever-growing, treacherous labyrinth of disorganized… STUFF.
Then Game Night comes around and the questions come;
“Can we play LOTR: The Card Game tonight?”
I’d love to, but I need a days notice to delve into the boxes, build decks and sort everything out.
“Where are the Descent monsters?”
Pfft, where AREN’T the Descent monsters.
“Can we play Monopoly?”
No. Get out. How did you get in here?
What do I do? Do I archive some of this? I don’t have a wine cellar, a basement or a garage. And I can’t go into the attic anymore, not since I saw… the man.
 Rummaging in the wall cavity I can deal with, but his new-found aerial advantage has me uneasy.
A problem for… another time.
No, the solution here, I think, is to optimize the storage space I have and condense things into as few containers as humanly possible (preferably making use of the original game box).
Feldherr foam storage is a pretty common route to go for board games; they make modular, custom-cut trays that fit neatly into the original game box they were designed for (or the various bags they also produce). However, this can be an expensive venture. *Some* of their products are available on Amazon, but you’ll find they are expensive, often with added postage charges by third party sellers. I have actually used their products (including the bags) to store my X-Wing stuff and for that, it works. But it is not a consistently priced/reliable avenue to get through everything I need to get through for my board games.
The other, more pertinent issue, is that the trays for board games are designed in such a way that you have to store your components by expansion, rather than storing all components of one type in one place. Say you’re playing Descent for example and you’re called upon to spawn a group Carrion Drakes. Okay… where are they? What expansion are those guys from? Check the monster card for a symbol… oh, we can’t. The monster card for Carrion Drakes is also in the expansion box that Carrion Drakes came from.
Some of the trays even have spaces for damage and strain tokens that came in said expansion, as if they are somehow specialized or specific to it. Why?! Damage and strain are universal tokens – you’re going to keep them with the rest that you got in the Core Set. Imagine this scenario “hey, we’re out of damage tokens, which expansions gave us more of those again?”
Insanity.
Same goes for new boards/tiles. You could be called upon to spawn any tile from #1-#60 and upwards (depending how much you have).
Descent has a TON of miniatures (and cards pertaining to those miniatures). When you have 30+ unique monster groups and a plethora of tiles in the game, you need your components sorted in a way that makes it quick and easy to find them, ie – all monster cards should at least be in the same place, maybe even roughly alphabetized. Tiles stored in one box divided into groups by number etc.
Don’t get me wrong, these Feldherr trays are great, they’re just not really suited to bigger, expandable games. This coupled with the expensive wooden alternatives and the fact that some games just don’t have inserts designed for them at all led me to conclude that a custom solution would be a good catch-all.
That’s when I discovered… Flex Foam!
 I sawed this BOARD in half!
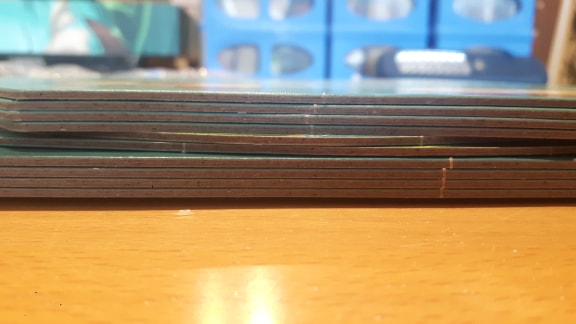
Moving Swiftly on, let me Phil you in about Foam Board.
What we’re looking at is basically two sheets of card sandwiching a foam… well, board (though it’s sometimes referred to as Foam Core).
Relatively easy to cut, sturdy, comes in black – this stuff is magic.
This is what you’re looking for:
 You can't ride it through shark-infested waters, but it's more than enough for our purposes.
And it’s actually more readily available than I thought it was. If you’ve ever made terrain for war games you have likely come across this stuff already, but for those looking, LPC (Limavady Printing Company), GE Kee (Coleraine) and The Range (literally everywhere) all stock it and for roughly £7-8 per A1 sheet – it’s yours.
In fact this stuff has become so mainstream that hobbyists like ourselves get the somewhat refreshing experience of making an inquiry that DOESN’T result in raised eyebrows and befuddled looks. Which can only be a bonus.
Easy to find locally. Check.
Cheap…(kind of, if you plan out your cuts and get the most out of it). Check.
Cuts nicely with a good blade. Check.
All we need now is a large cutting mat and we are good to go! Over the next few weeks I’ll be documenting my process making custom board game box inserts and hopefully pass on any useful findings through my trial and error to others looking to do this with their games.

Descent, Islebound and Hero Realms are among the first to receive this treatment, so expect to see them featured over the next few entries.
Until then, thanks for reading! I’ll be working at these in the meantime and pretending that the scuttling sounds coming from my attic aren’t real.


