


Seldon9 Is Painting HeroQuest


Recommendations: 642
About the Project
A friend asked me to paint up his HeroQuest set. I foolishly said yes.
Related Company: Hasbro
Related Genre: Fantasy
This Project is Completed
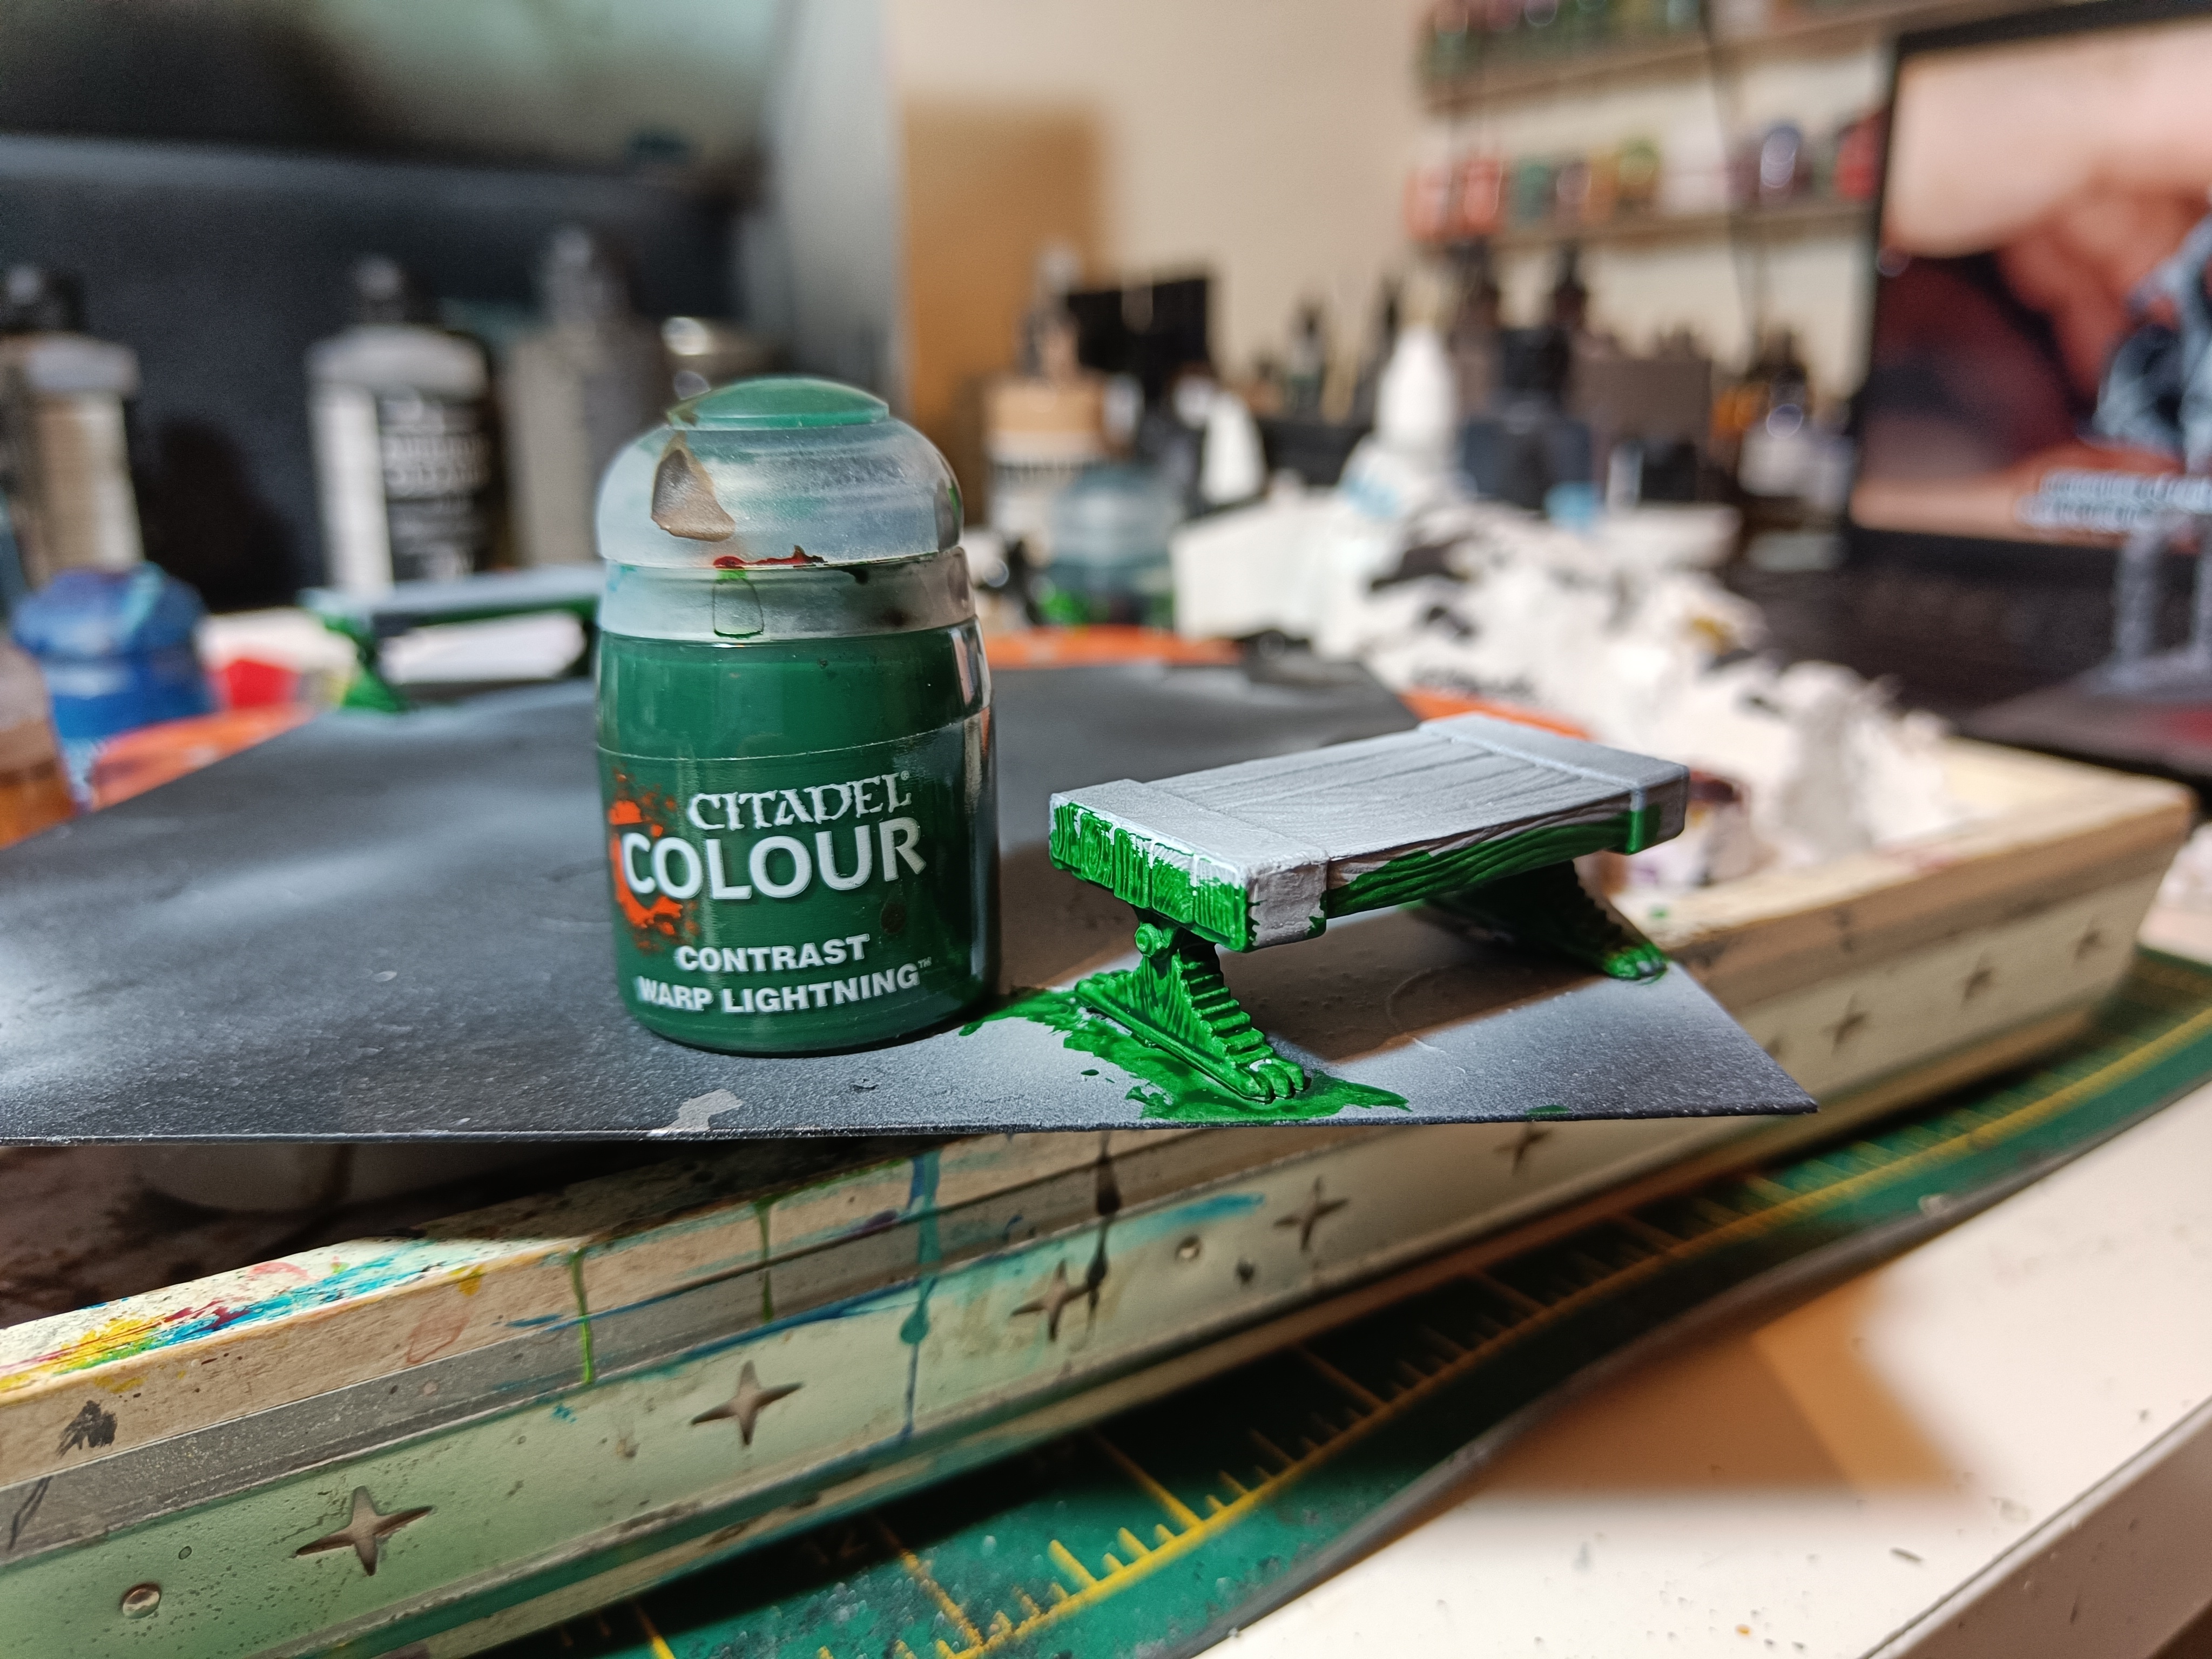
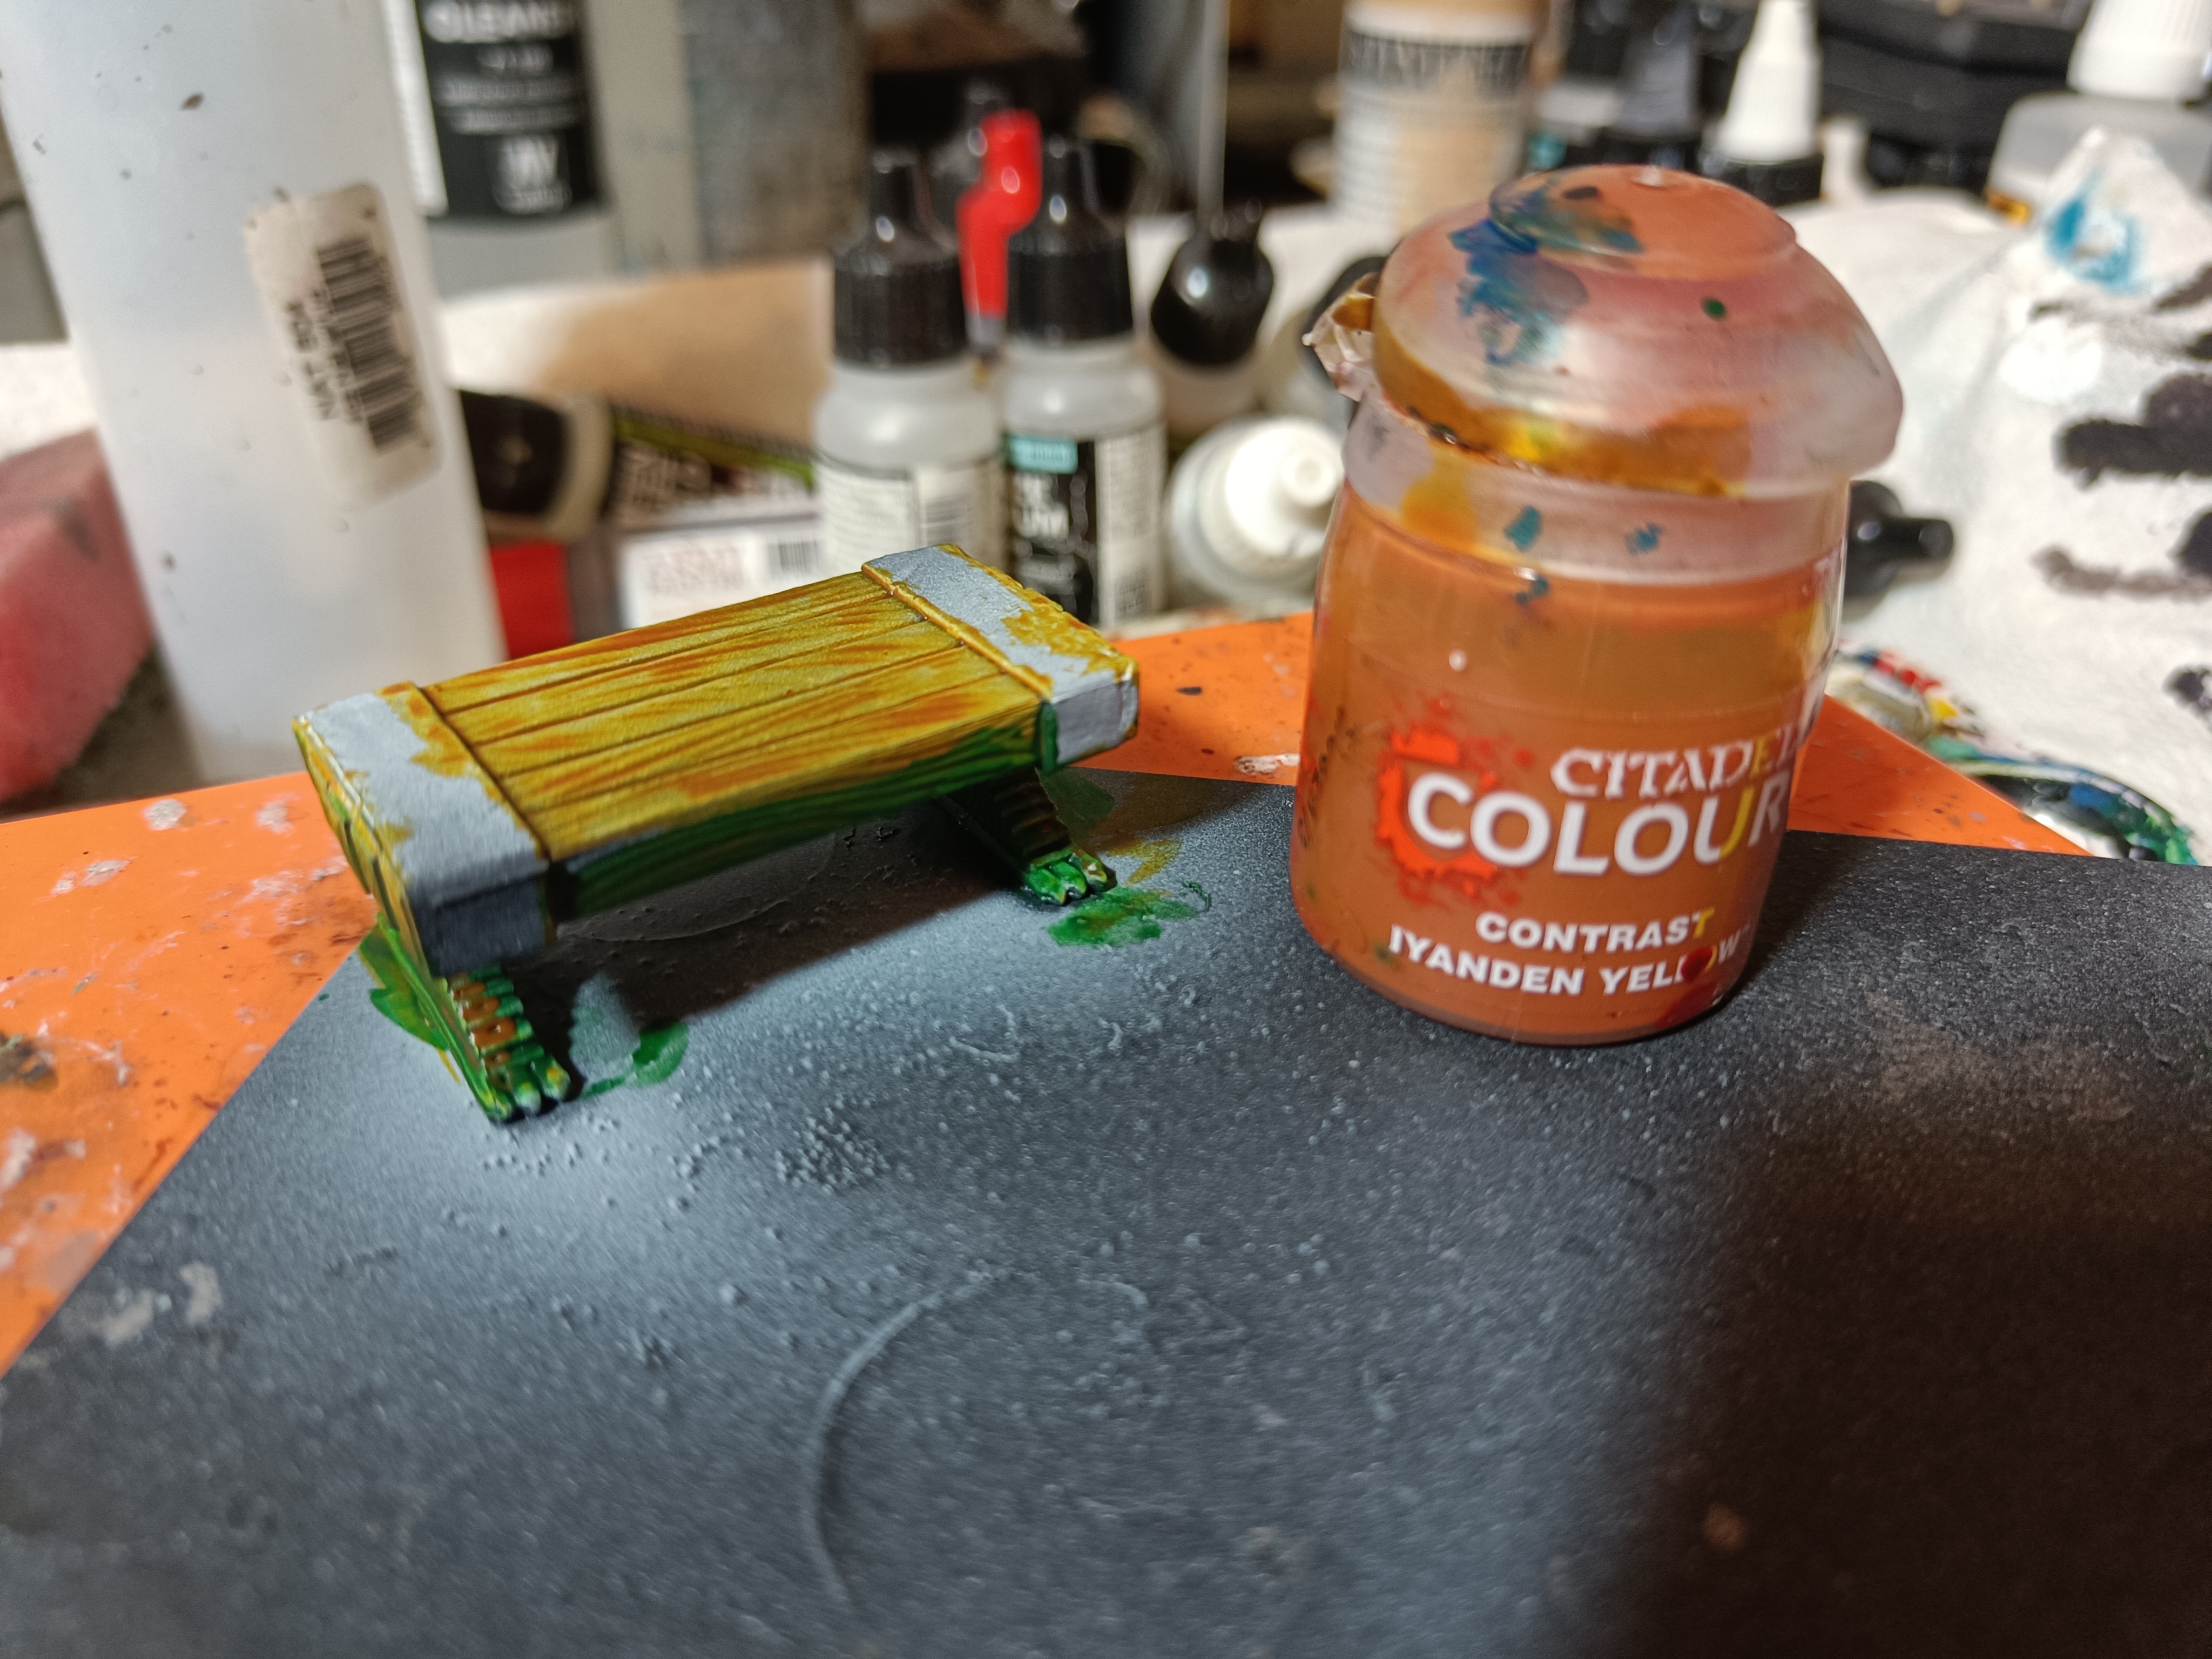
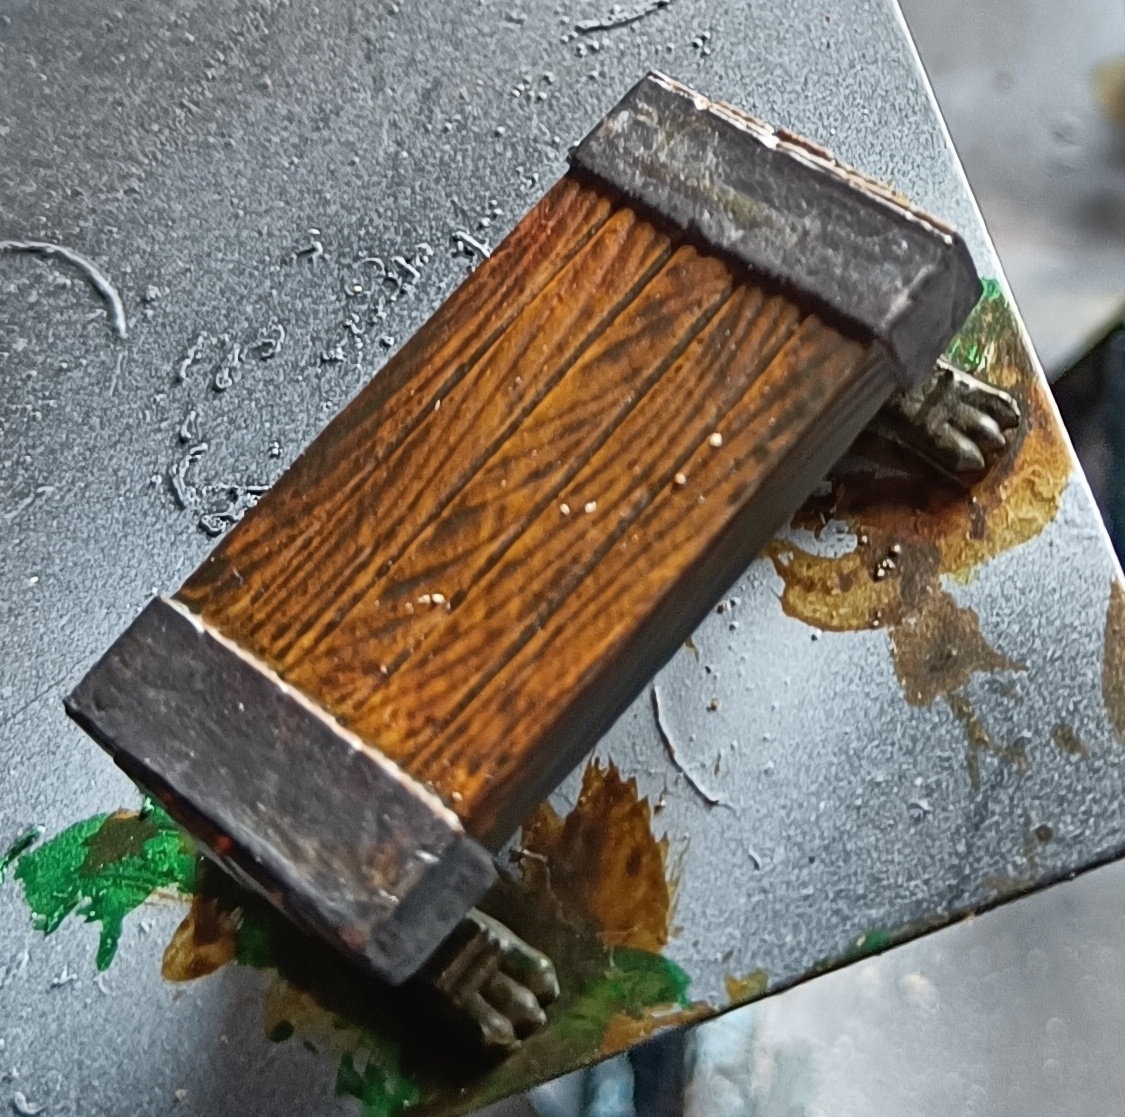
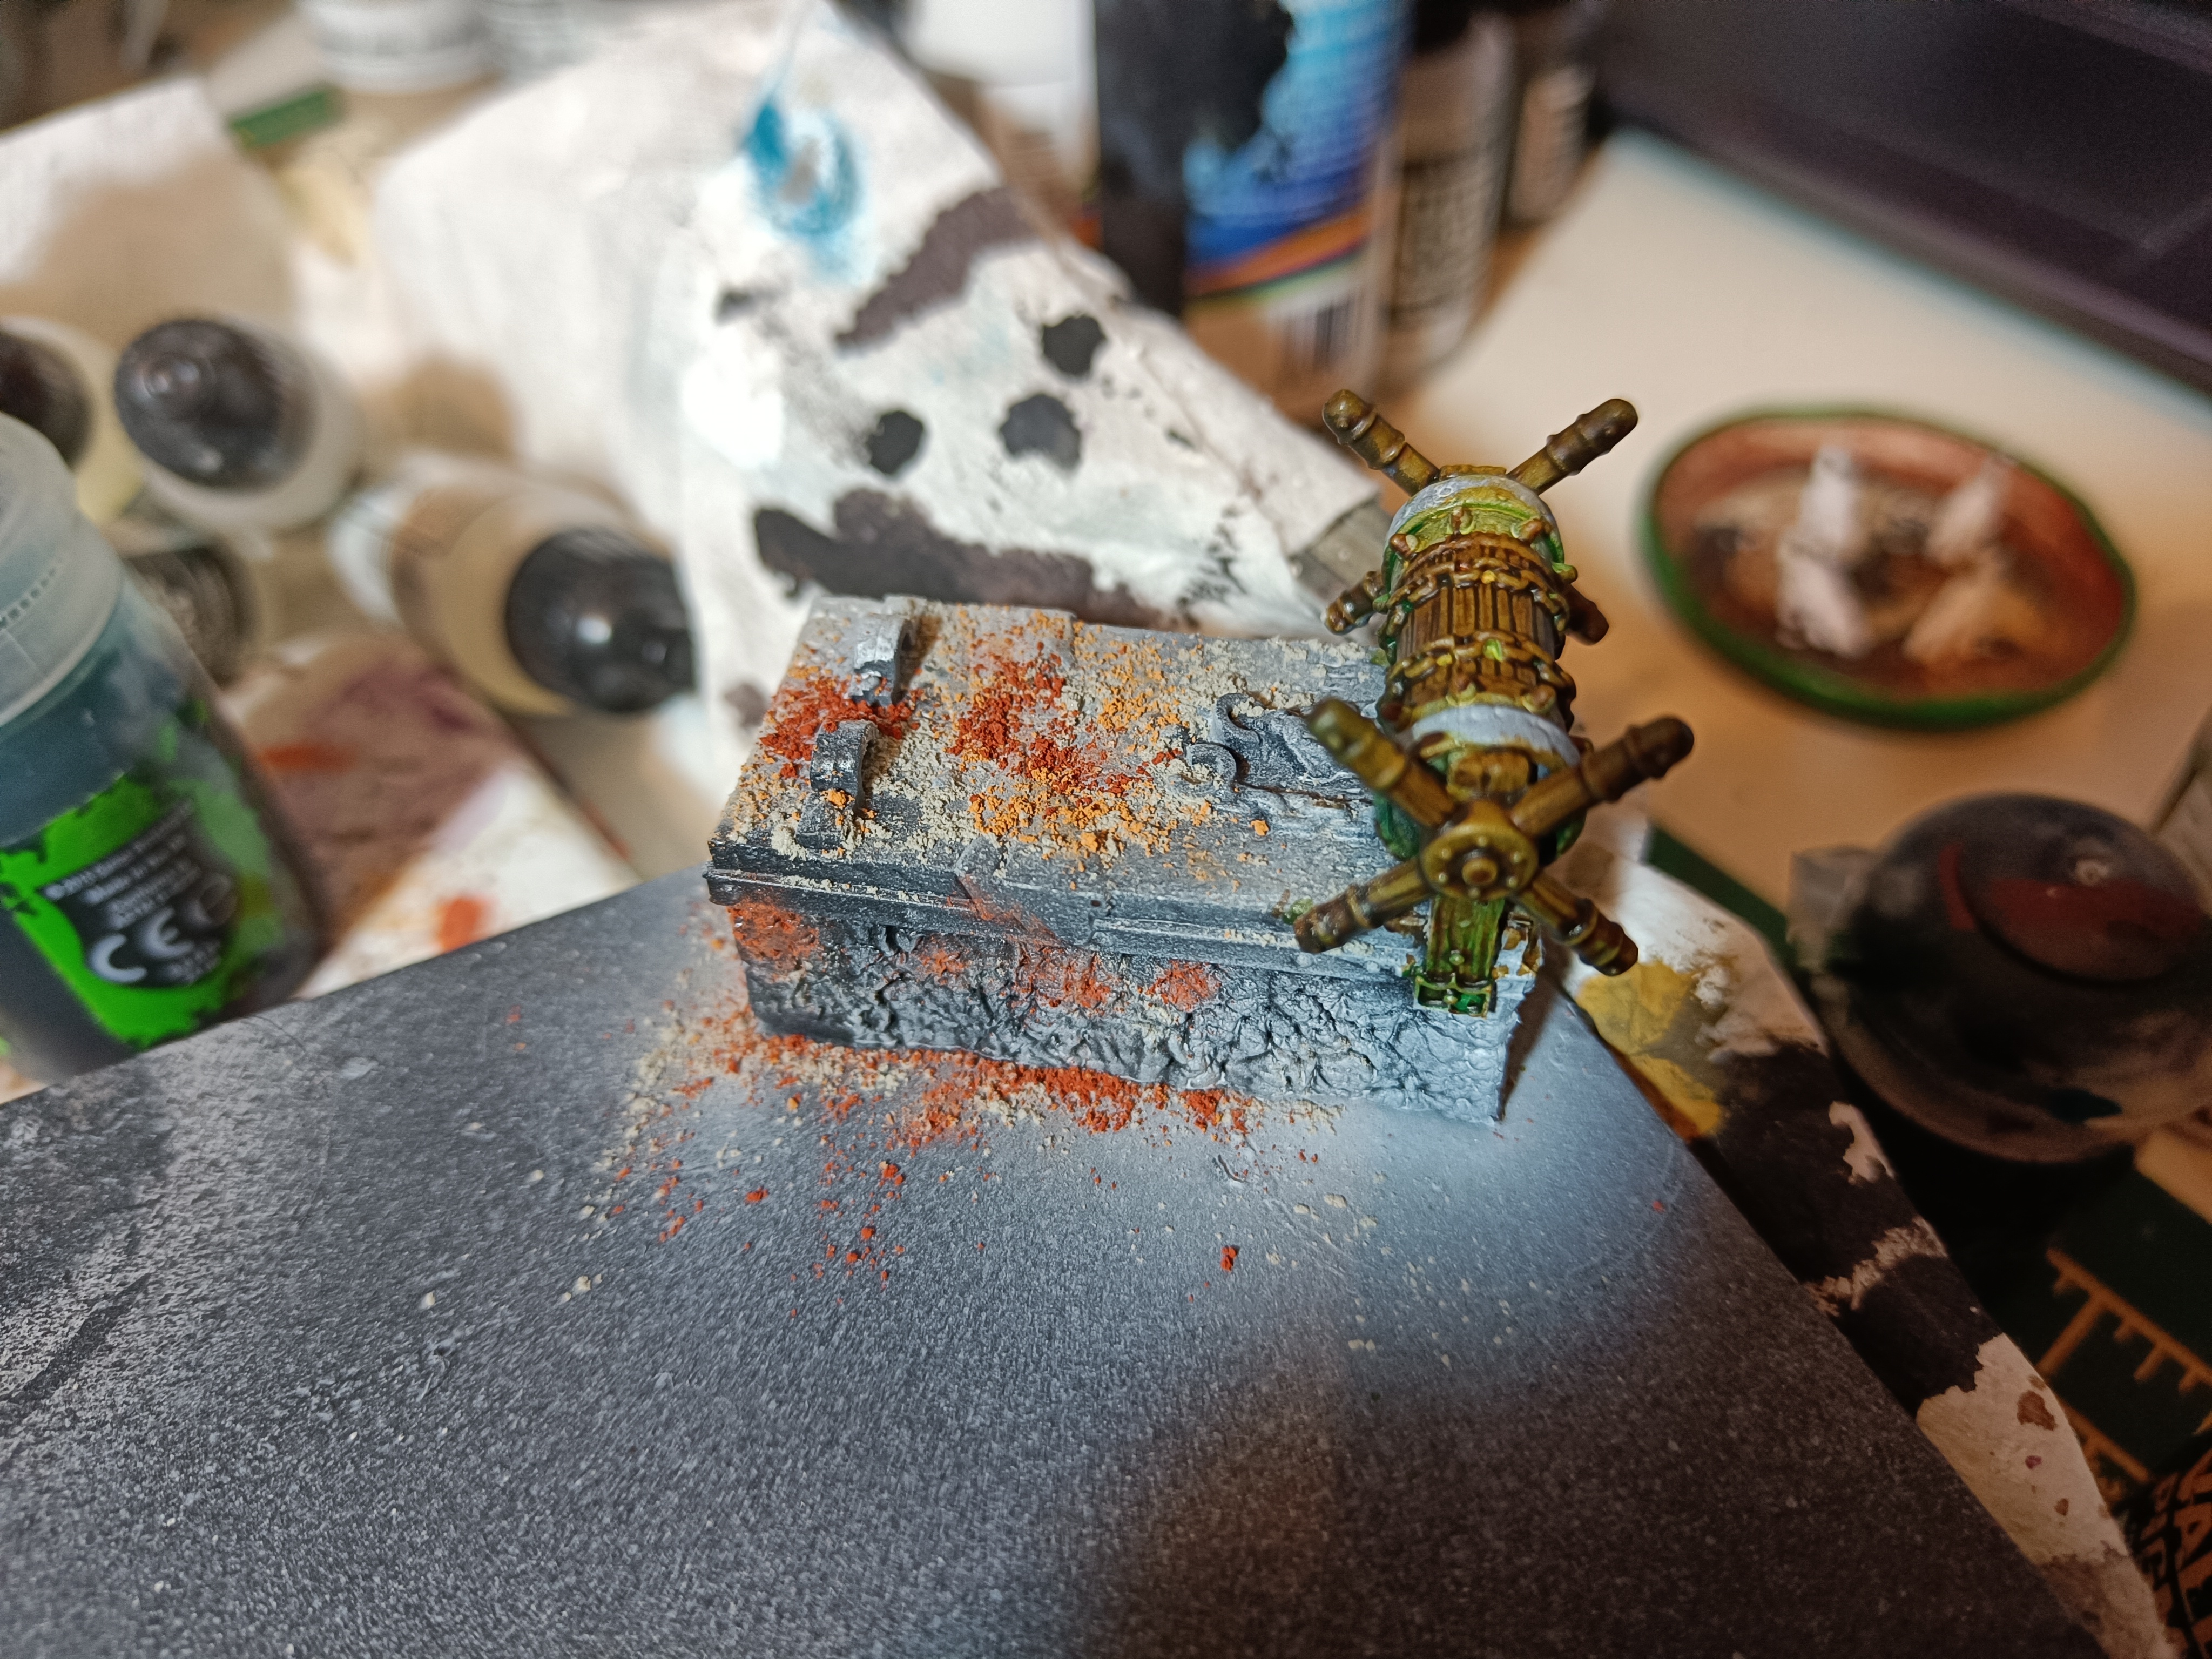
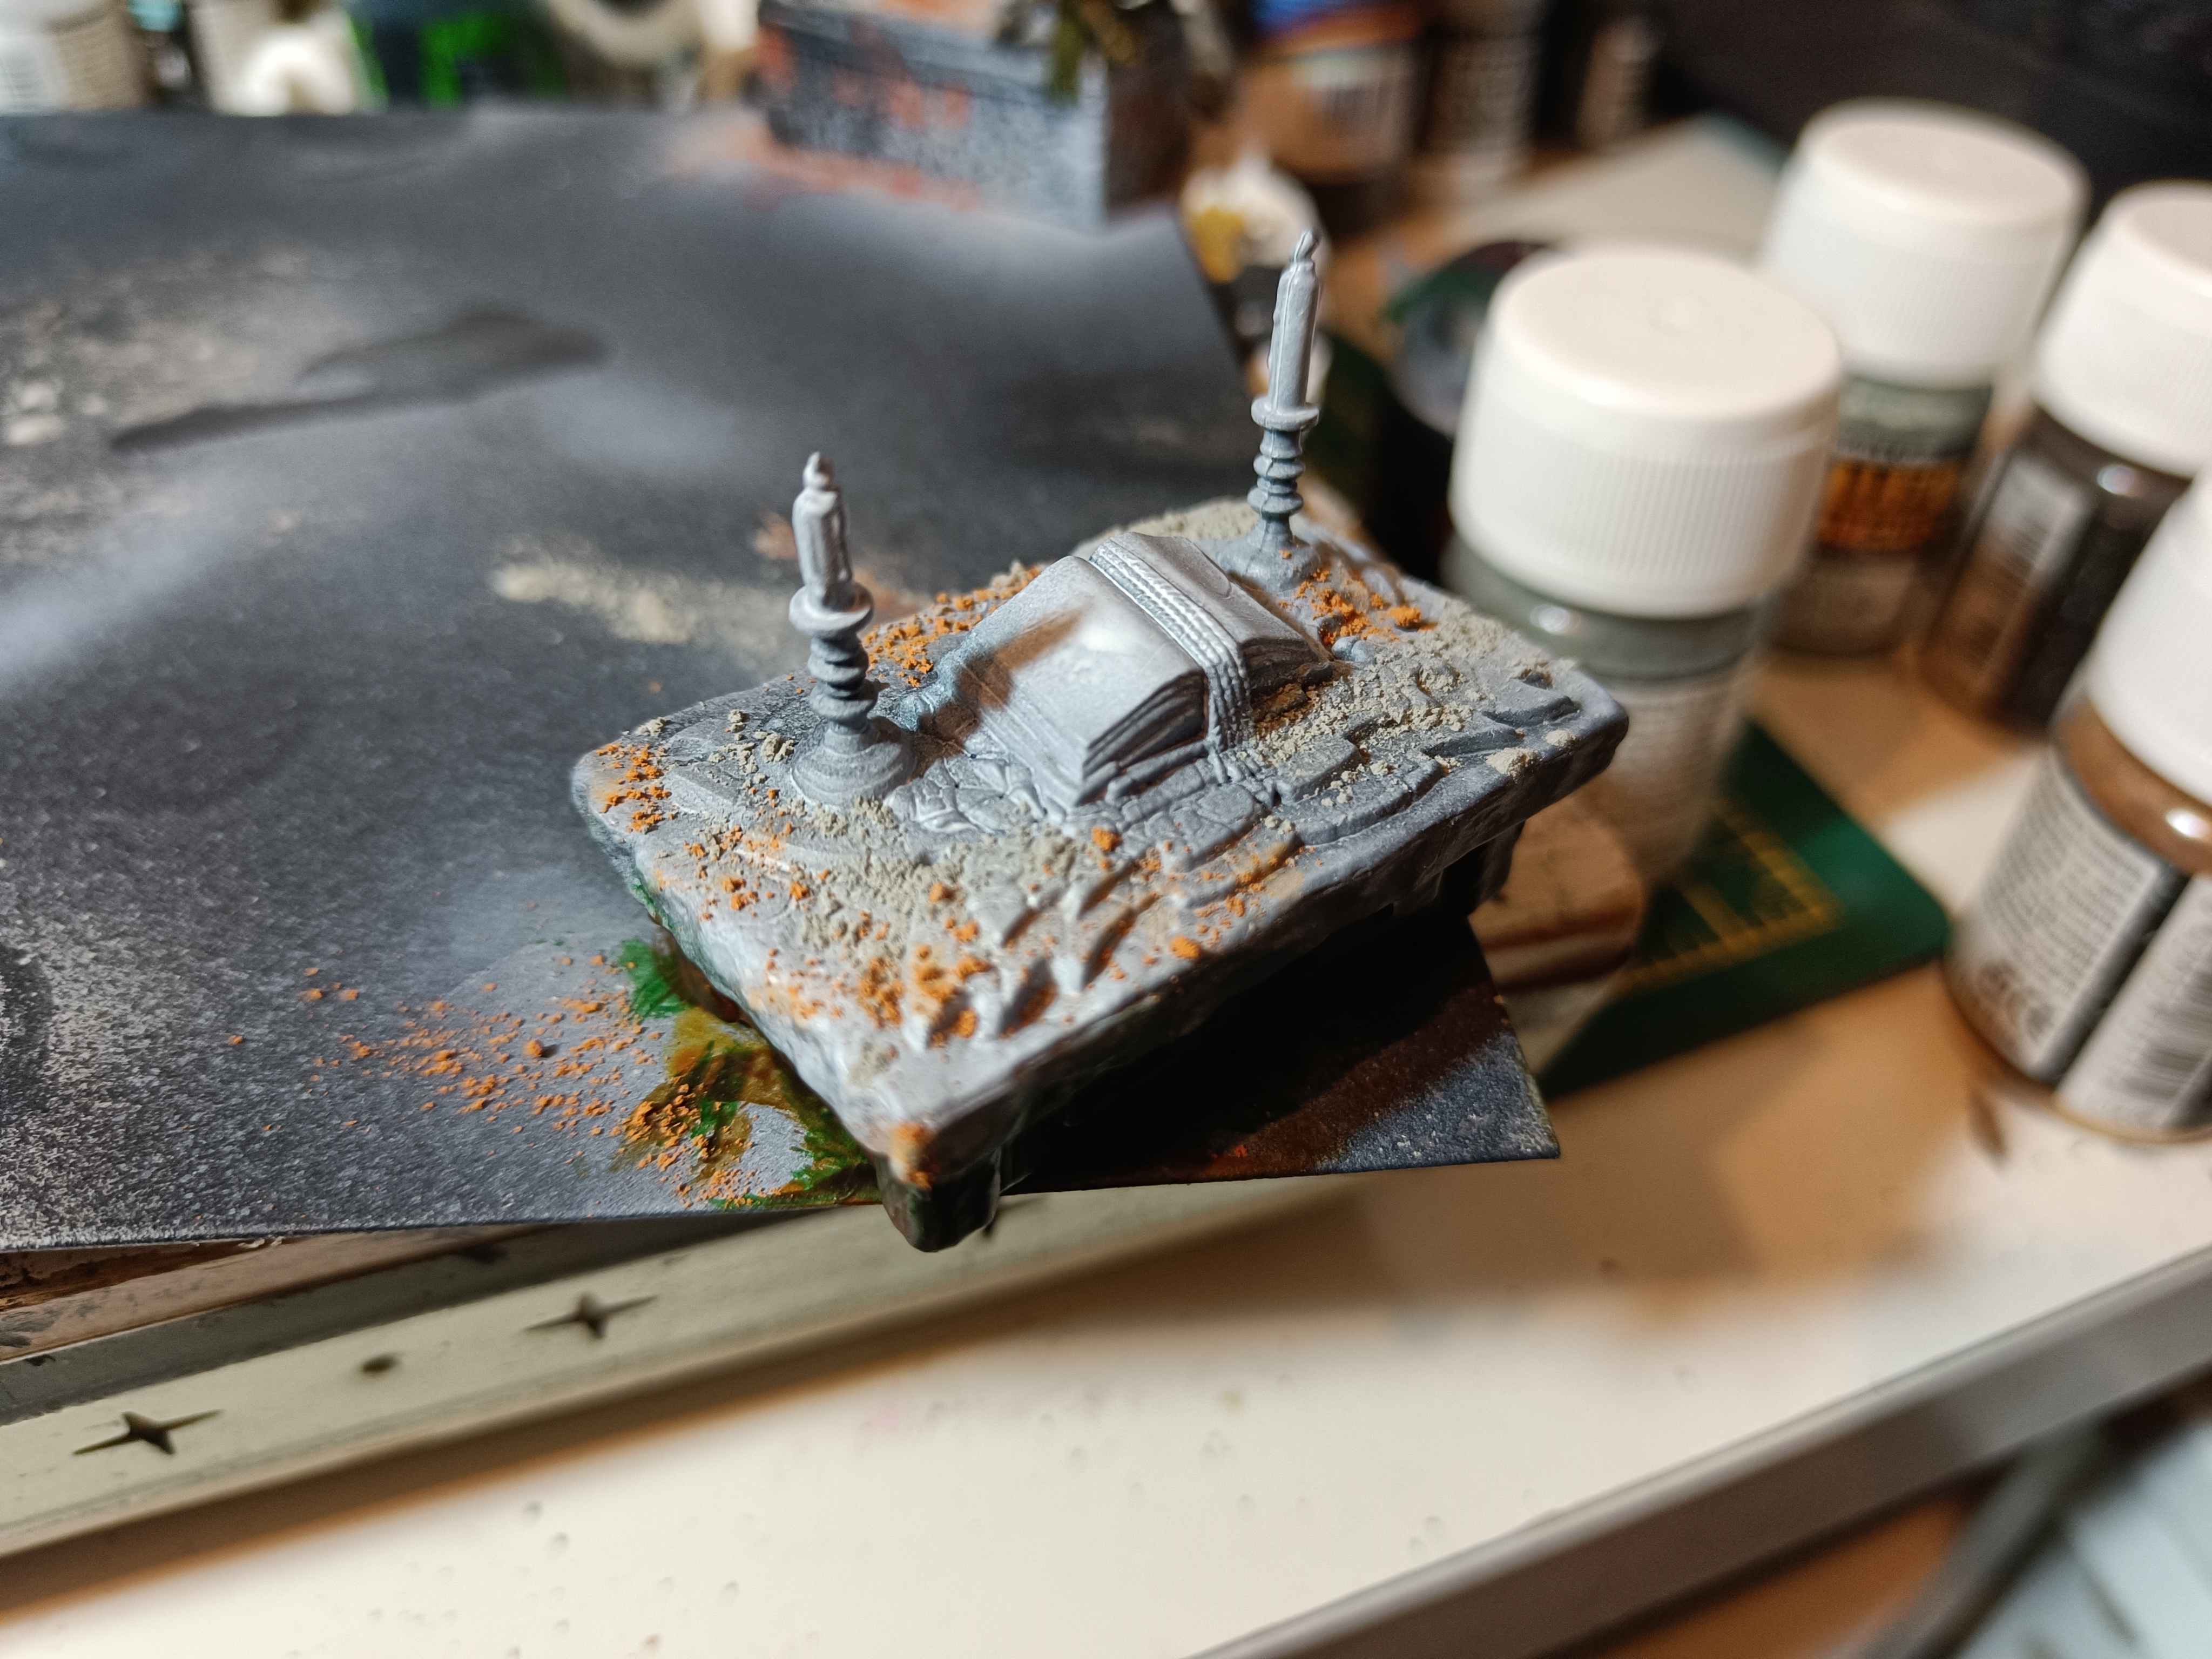
Furniture Part 2 - Wood
Once again I needed something simple. Start off with a preshade adding highlights from opposite corners.
Paint thinned Warpstone Green in the shadowed areas.
Paint thinned Iyanden Yellow in the other areas.
Go over all of it with a brown of your choice. I switched between Aggaros Dunes, Skeleton Horde and Snakebite Leather depending on how dark I wanted the colour. Thin the paint to make sure the undercoat shows through.
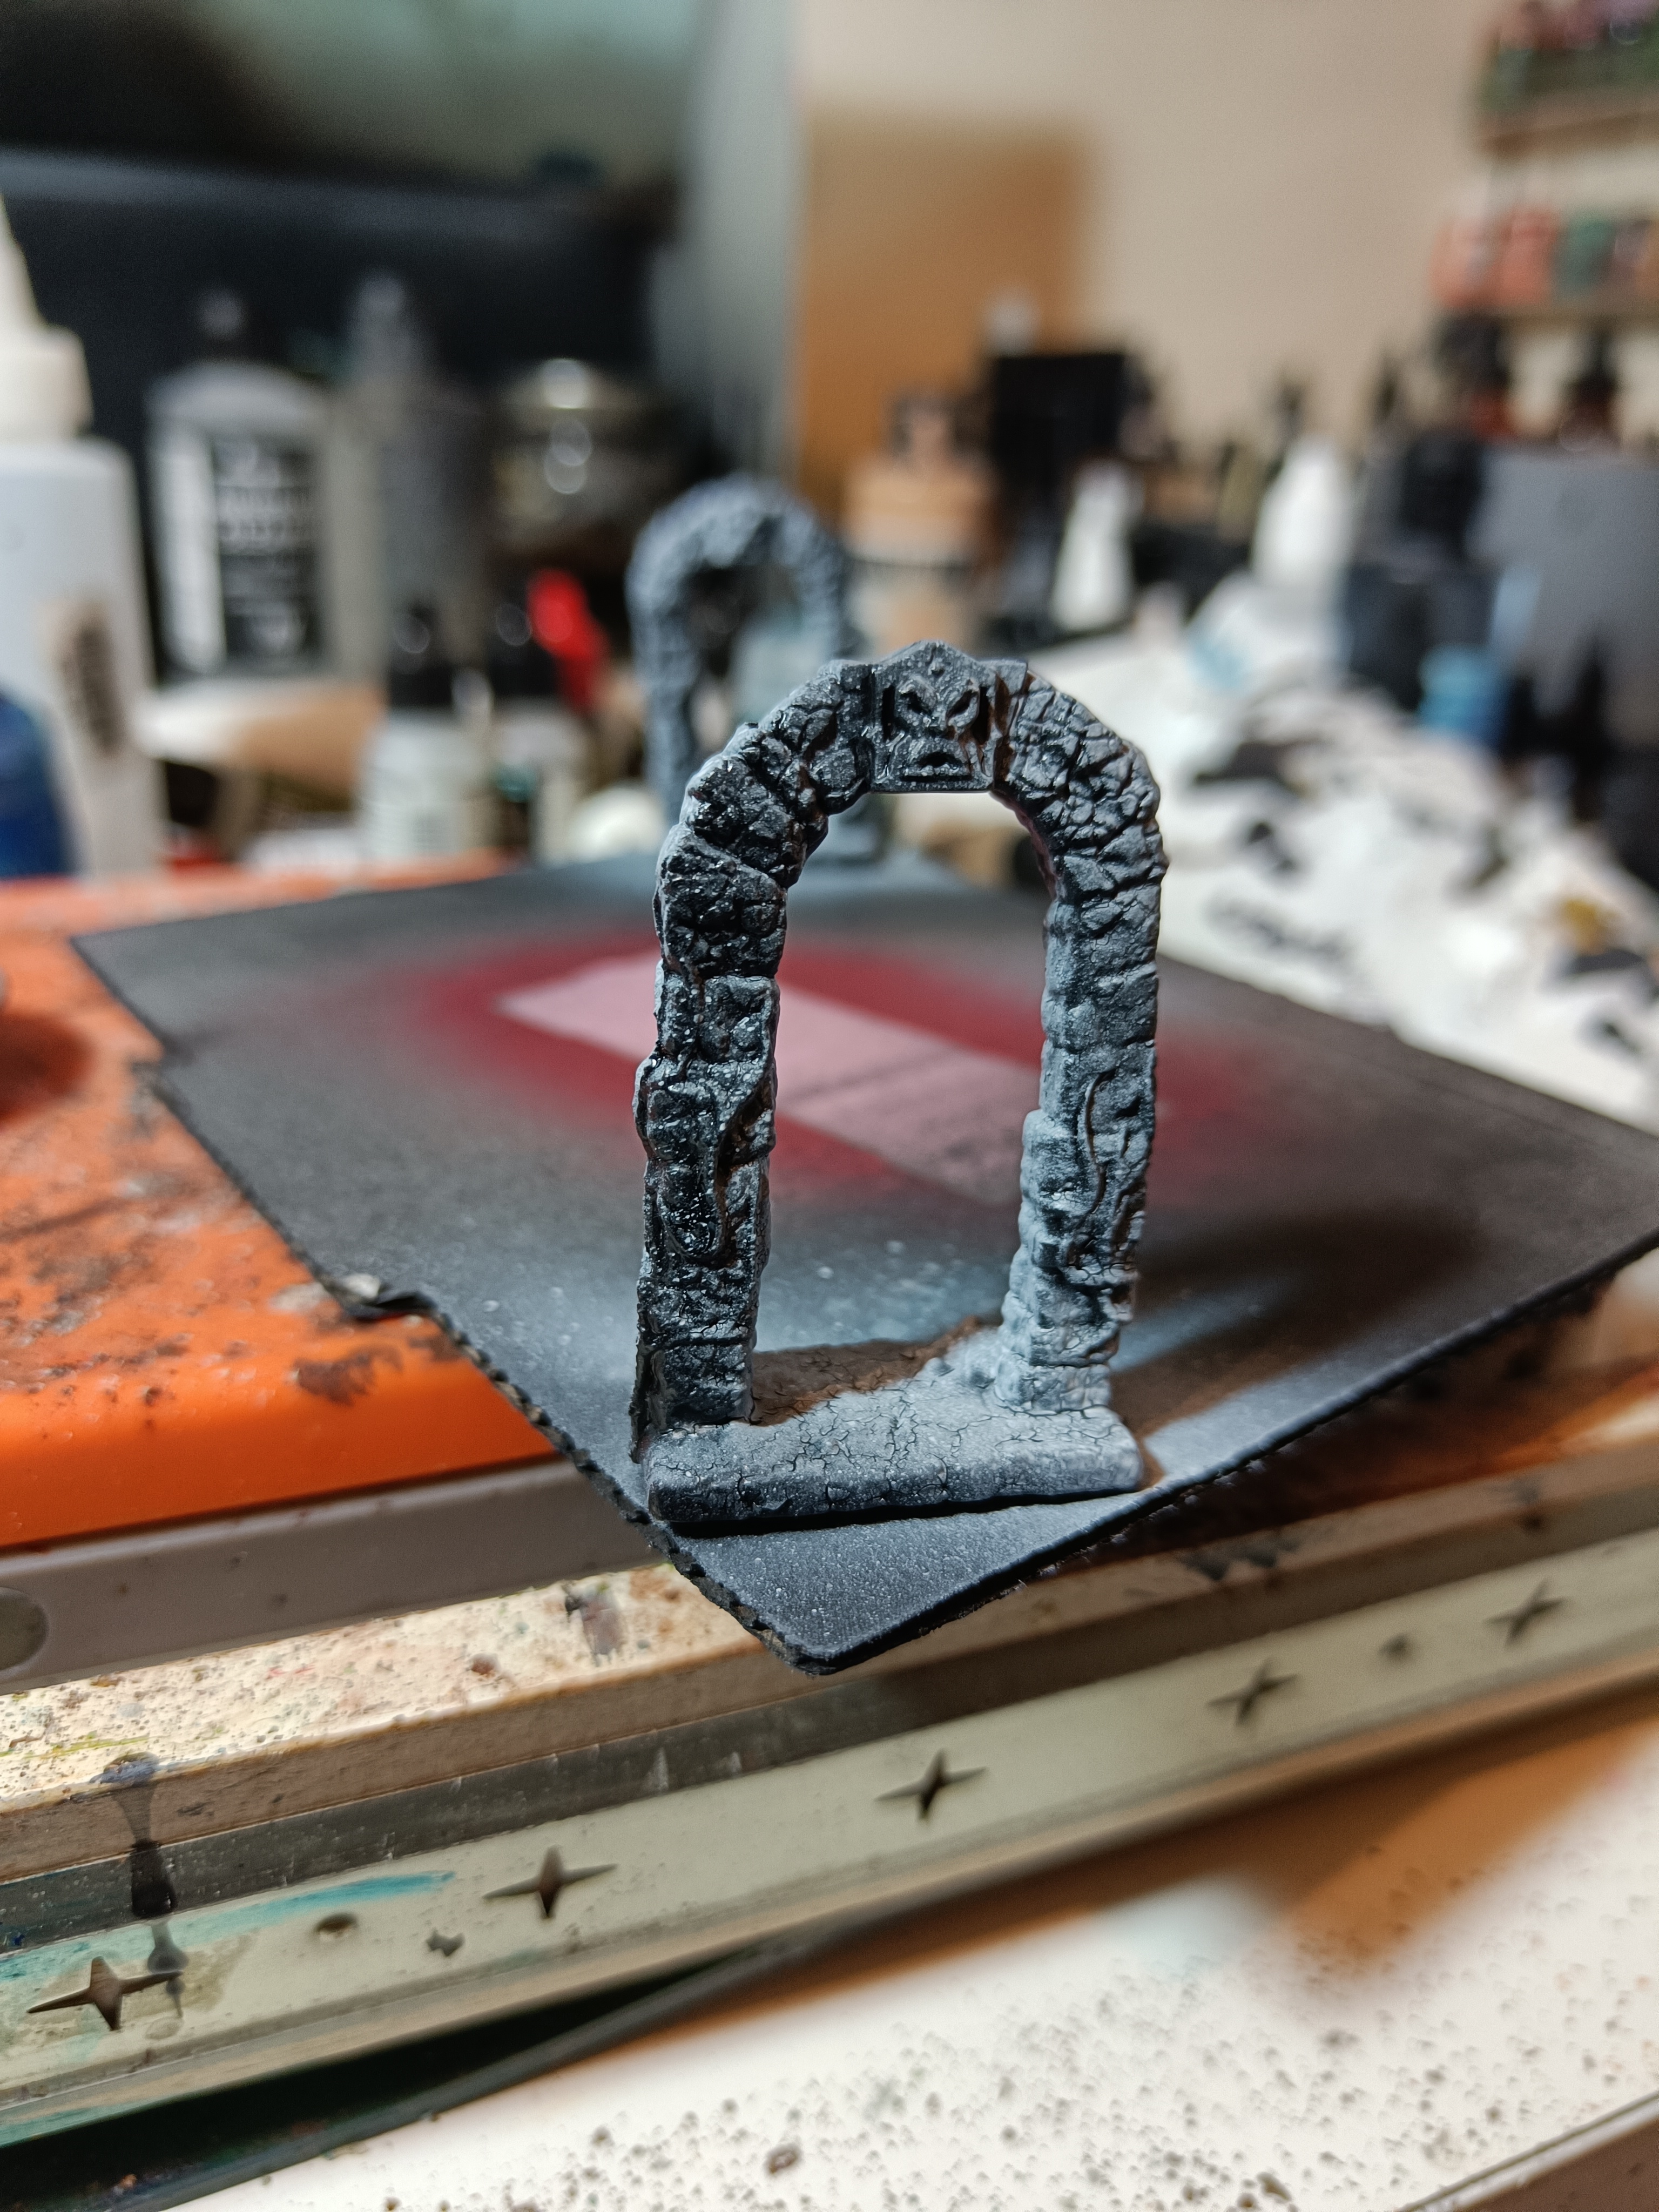
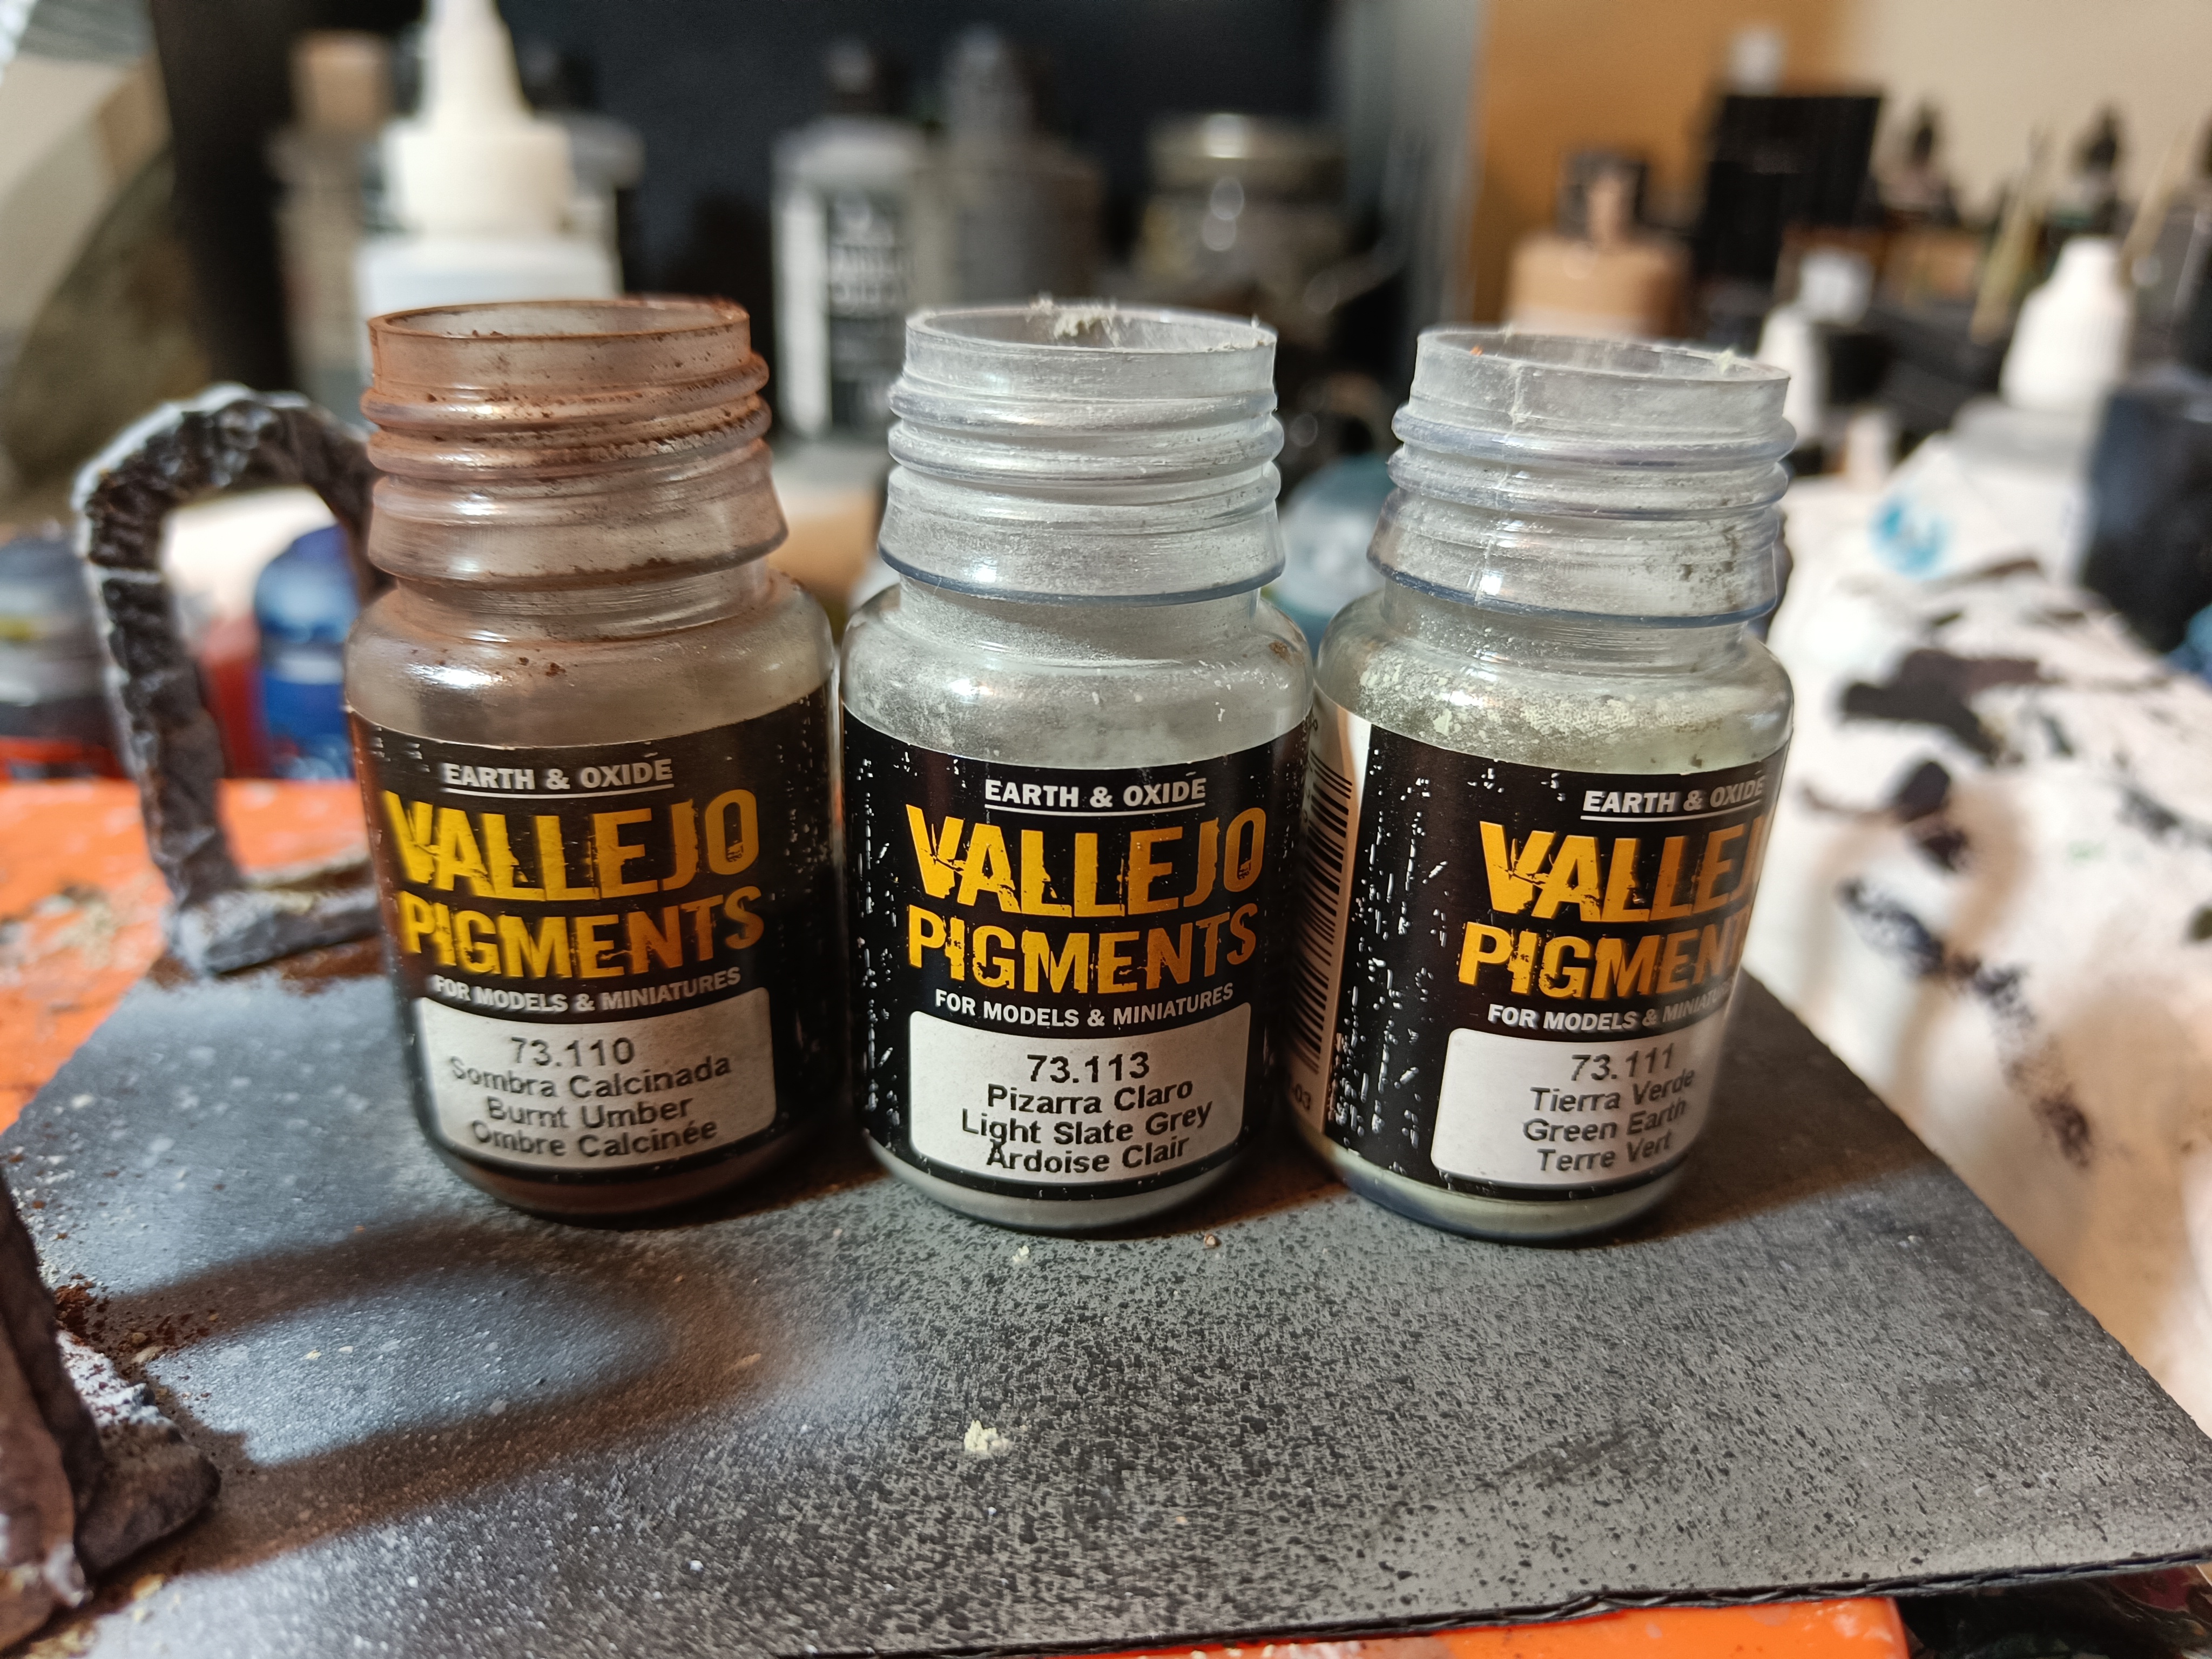
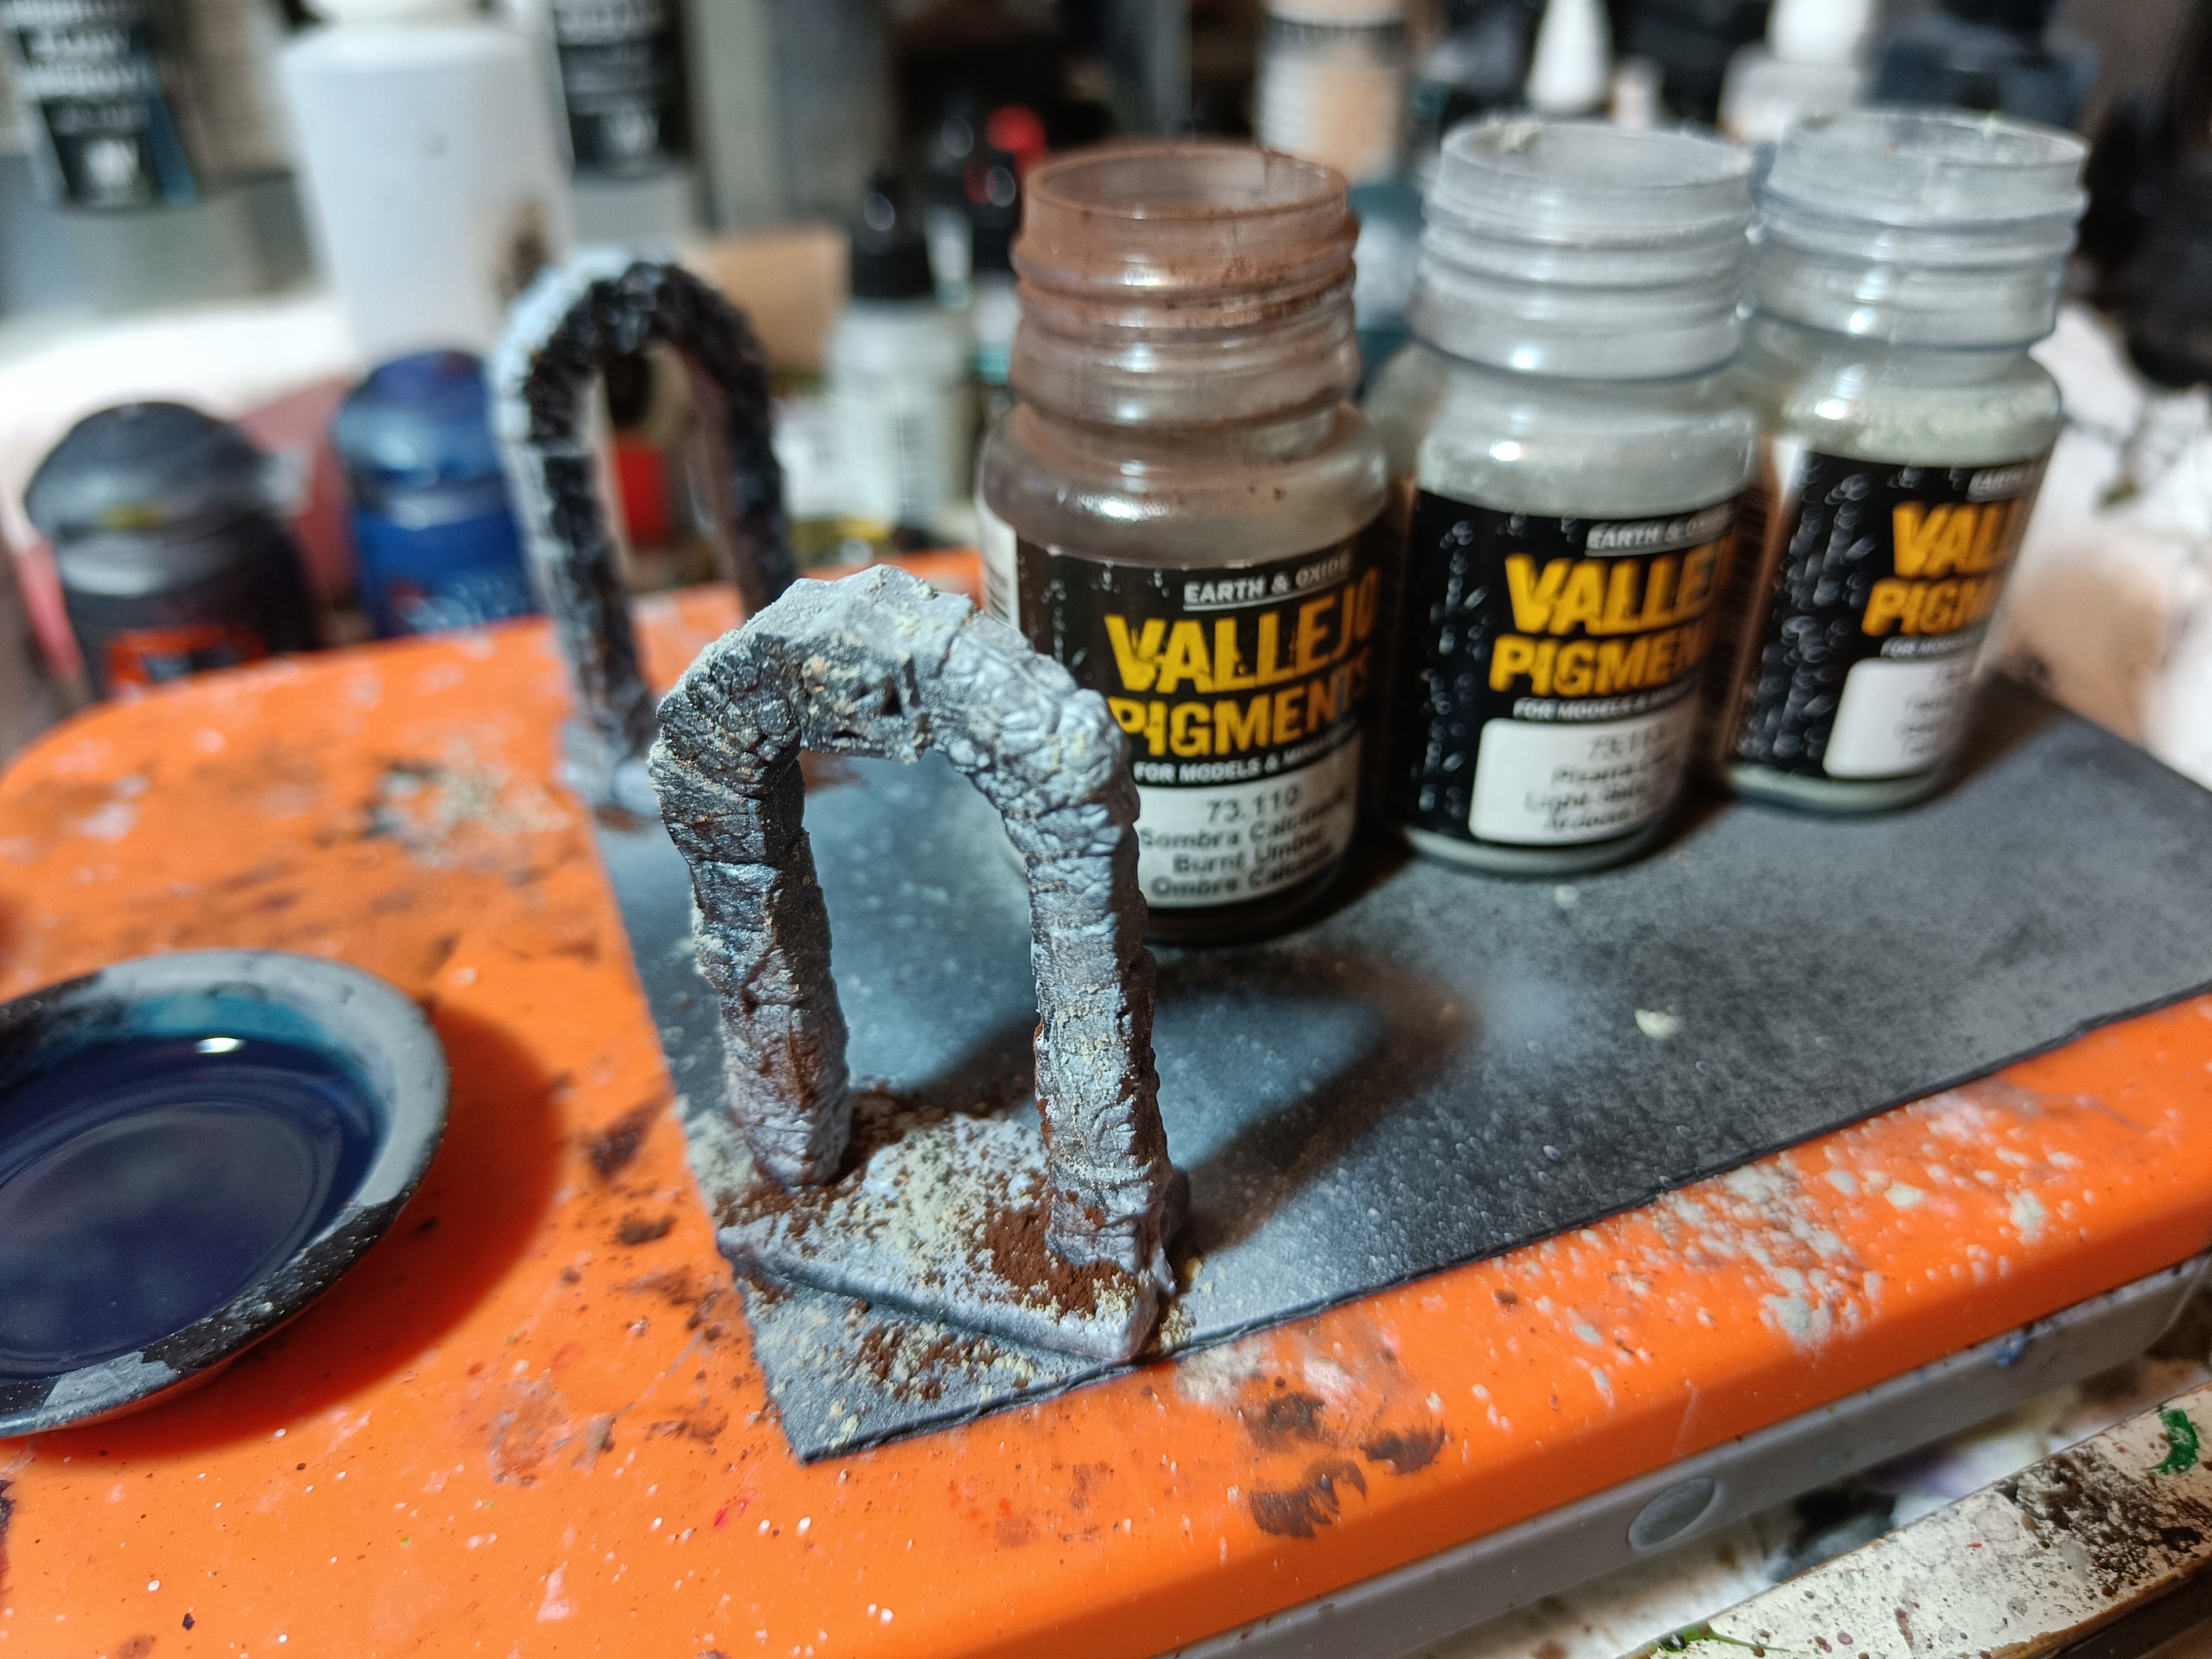
Furniture Part 1 - Stone
I needed a reasonably quick was to make some interesting stone effects. I’d seen a rather good GerryCan which I wanted to try out using pigments.
First up preshade the mini. I added higlights from two, opposite corners.
Next makea mix of Talassar Blue and Black Templar contrast pants. I needed to tone down the blue so I slightly favoured that over black in the mix. Not quite 50/50. Then I thinned the mix to make sure the preshade would show through.
Next I applied some pigments broadly by going light at the top and darker towards the bottom. I mainly used Vallejo Burnt Umber, Light Slate Grey and Green Earth. To bed them in I applied the contrast mix using stabbing motions with the brush. Typical brushstrokes would wash them pigment out.


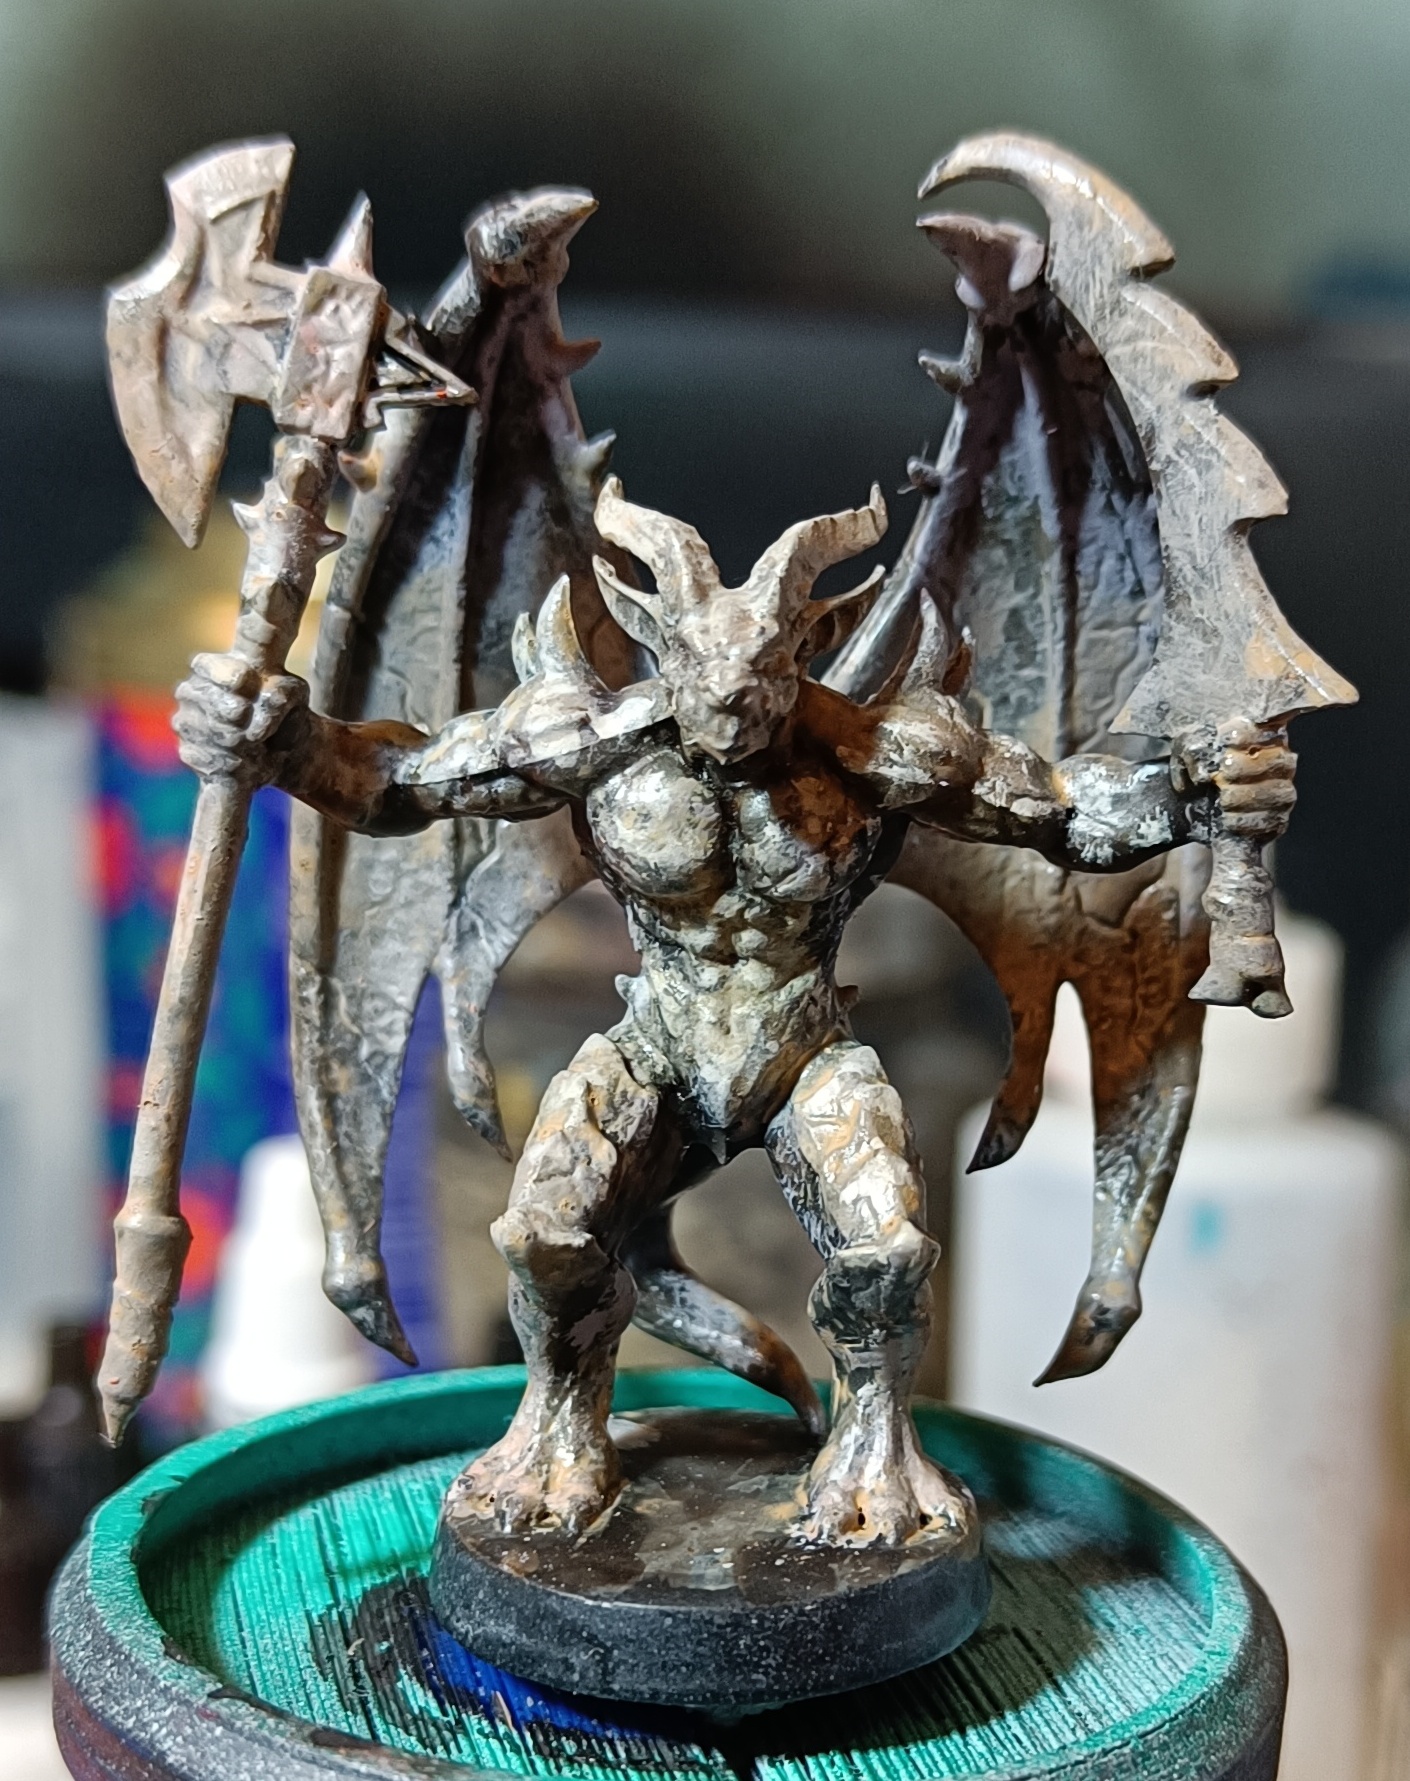
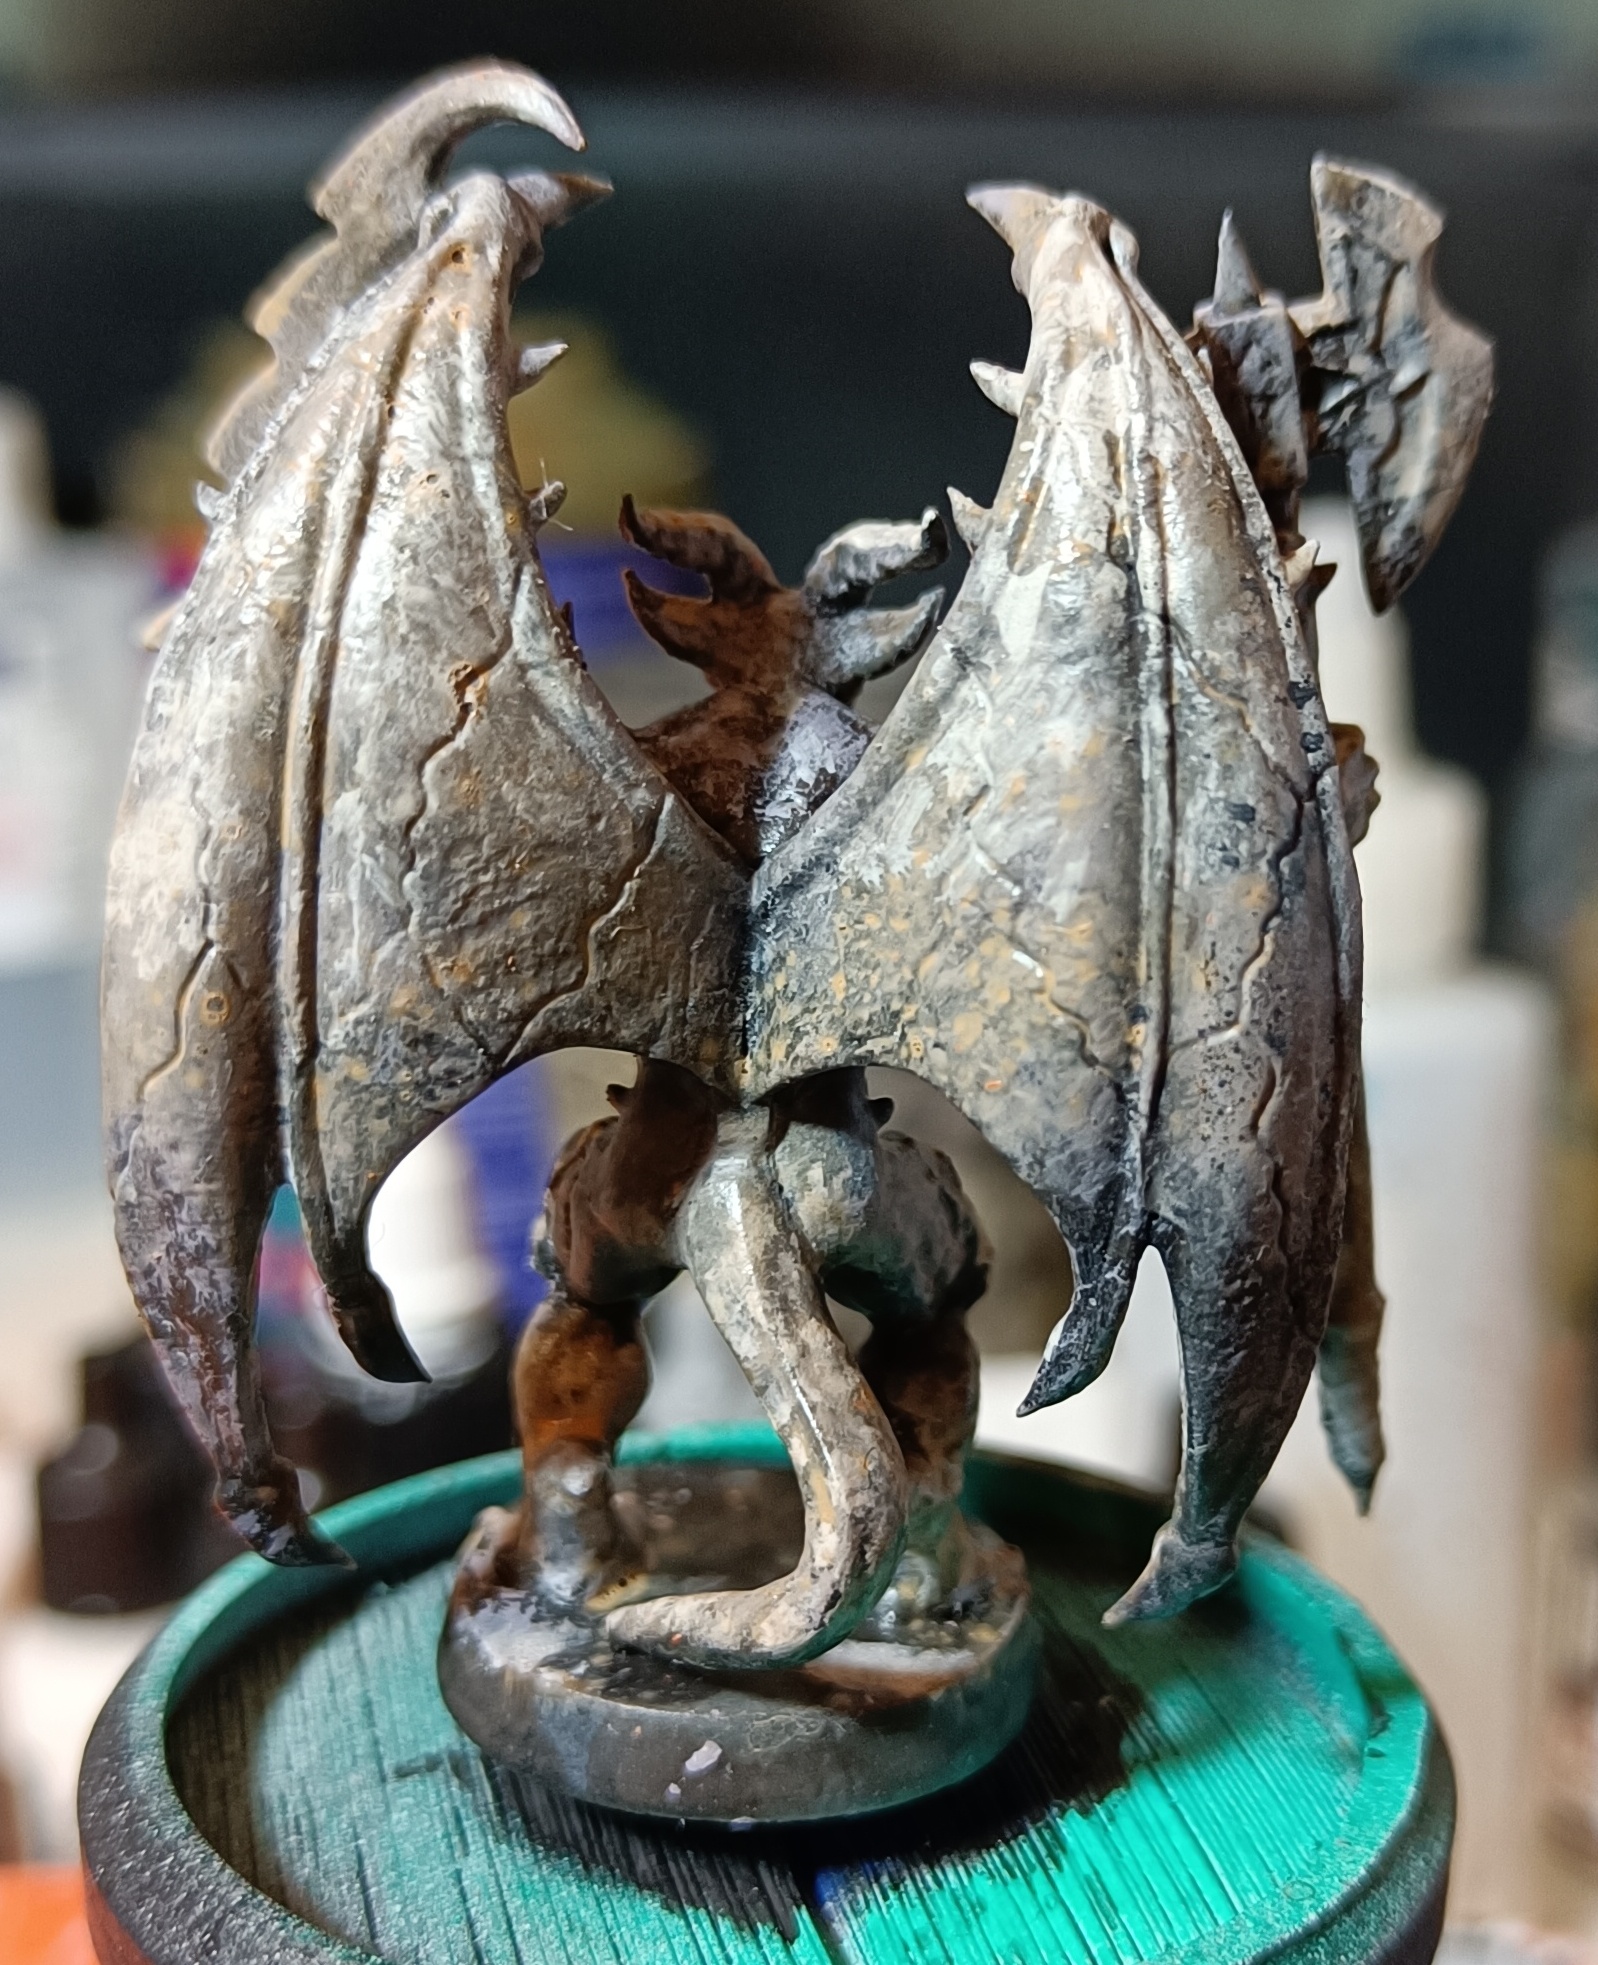
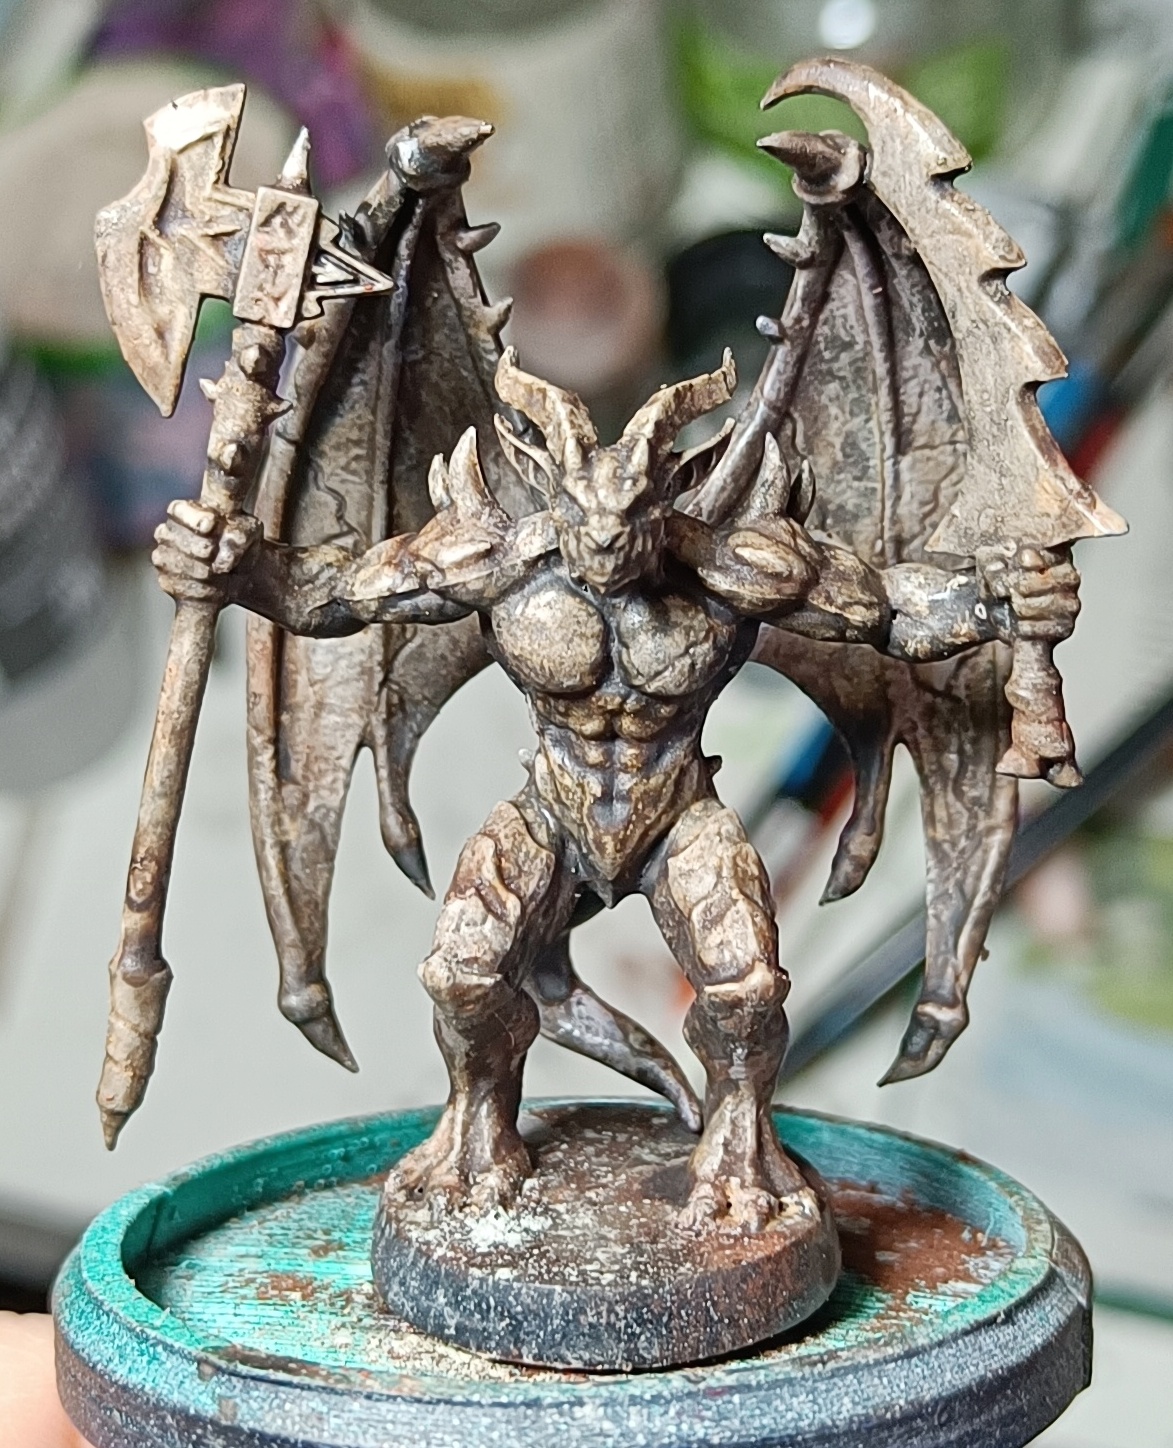
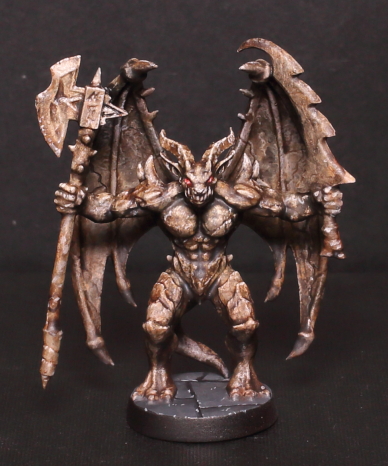
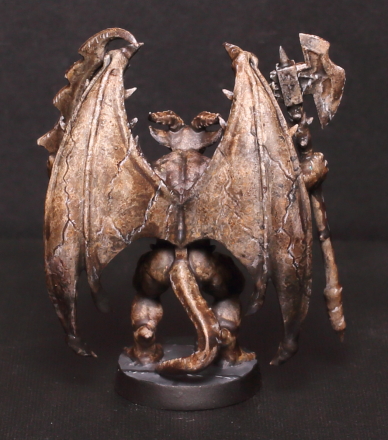
The Gargoyle
I was stuck on how to paint this and cast around for ideas. Progressively lighter, stippled tones was the approach I chose.
Using a rough brush I stippled the following tones going closer to the highlight with each.
– GW Slaanesh grey
– GW Rakarth fleh
– VMC Medium fleshtone
– Pallid Wych flesh
The result was good but the crevices needed defining. I used a wash of Army Painter strong tone and tried one of Gerry’s Gerry Can tricks for painting stone. Add some pigments and squadge them in with a brush.
After that a bit of painting to bring out the teeth and eyes and some stippling of the highest points and all was done.

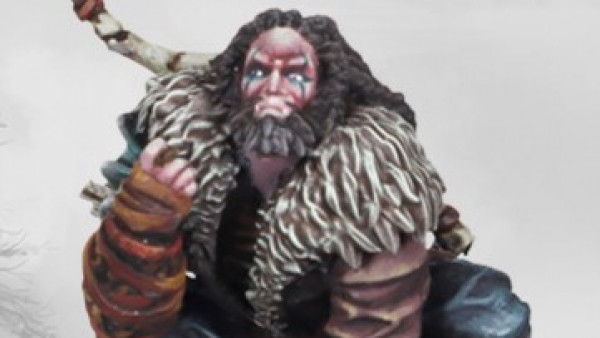
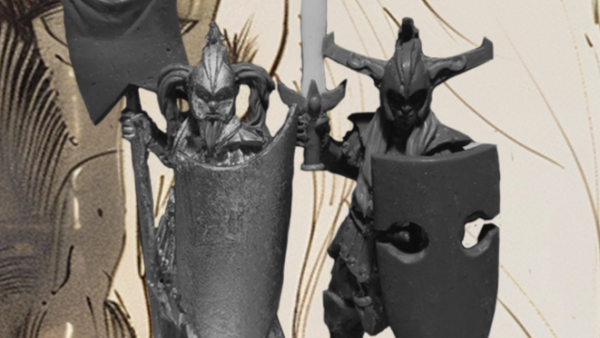
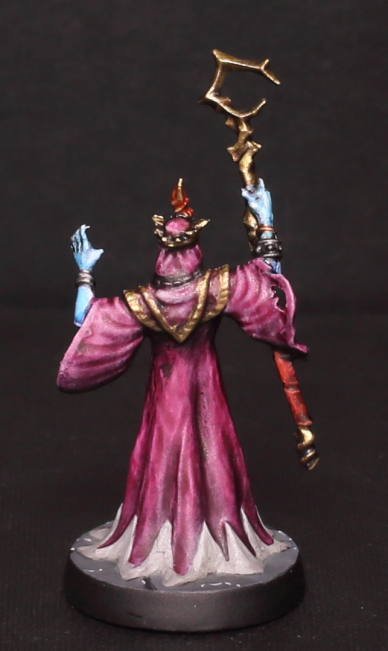
The Evil Lich
Well I think he’s a lich. I haven’tread the rules. I used the same blue skin tone as the zombies. Magos purple contrast skintone over the preshaded robes.
I tried to give the edging on his robes a pearlescent look by mixing Vallejo silver metallic with white. It’s ok but doesn’t really have the ffect I hoped for unless you look closely.
I tried to give some of his gold trim a boost by going over it with Blood Angels red contrast and re-edging with gold. I’m pretty pleased with the result. Progress was straightforward.

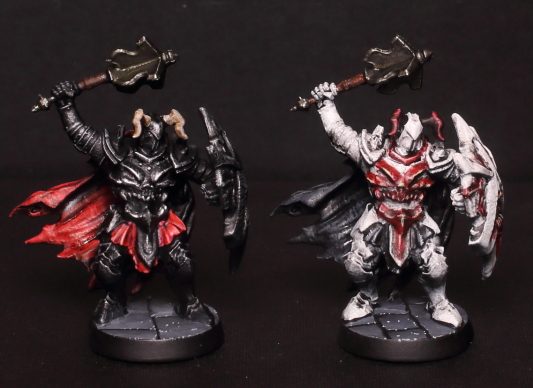
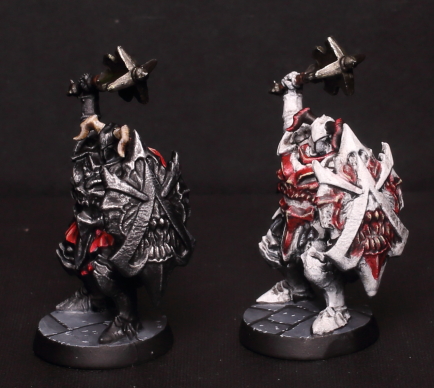
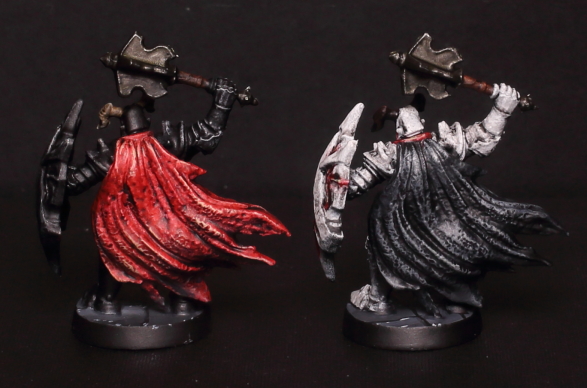
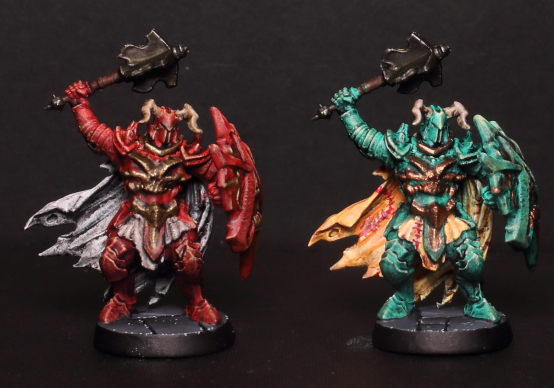
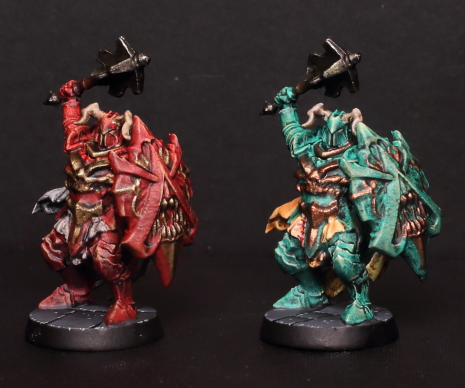
Dread Knights
I thought I’d try to personalise each knight so I came up with a scheme for each.
Black knight: black armour, dry brush silver with red cape.
Red knight: red armour, gold highlights and a white cape.
White kinght: white armour, red highlights and a black cape.
Green knight: green armour, copper highlights and a cape made of sewn flesh patches.

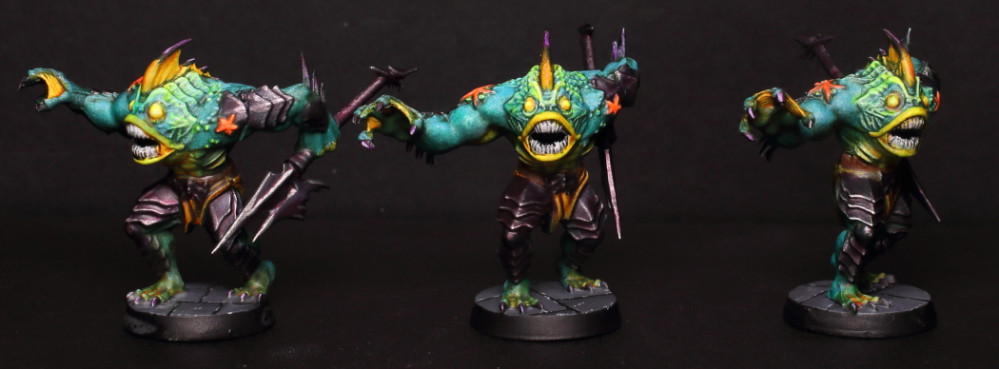
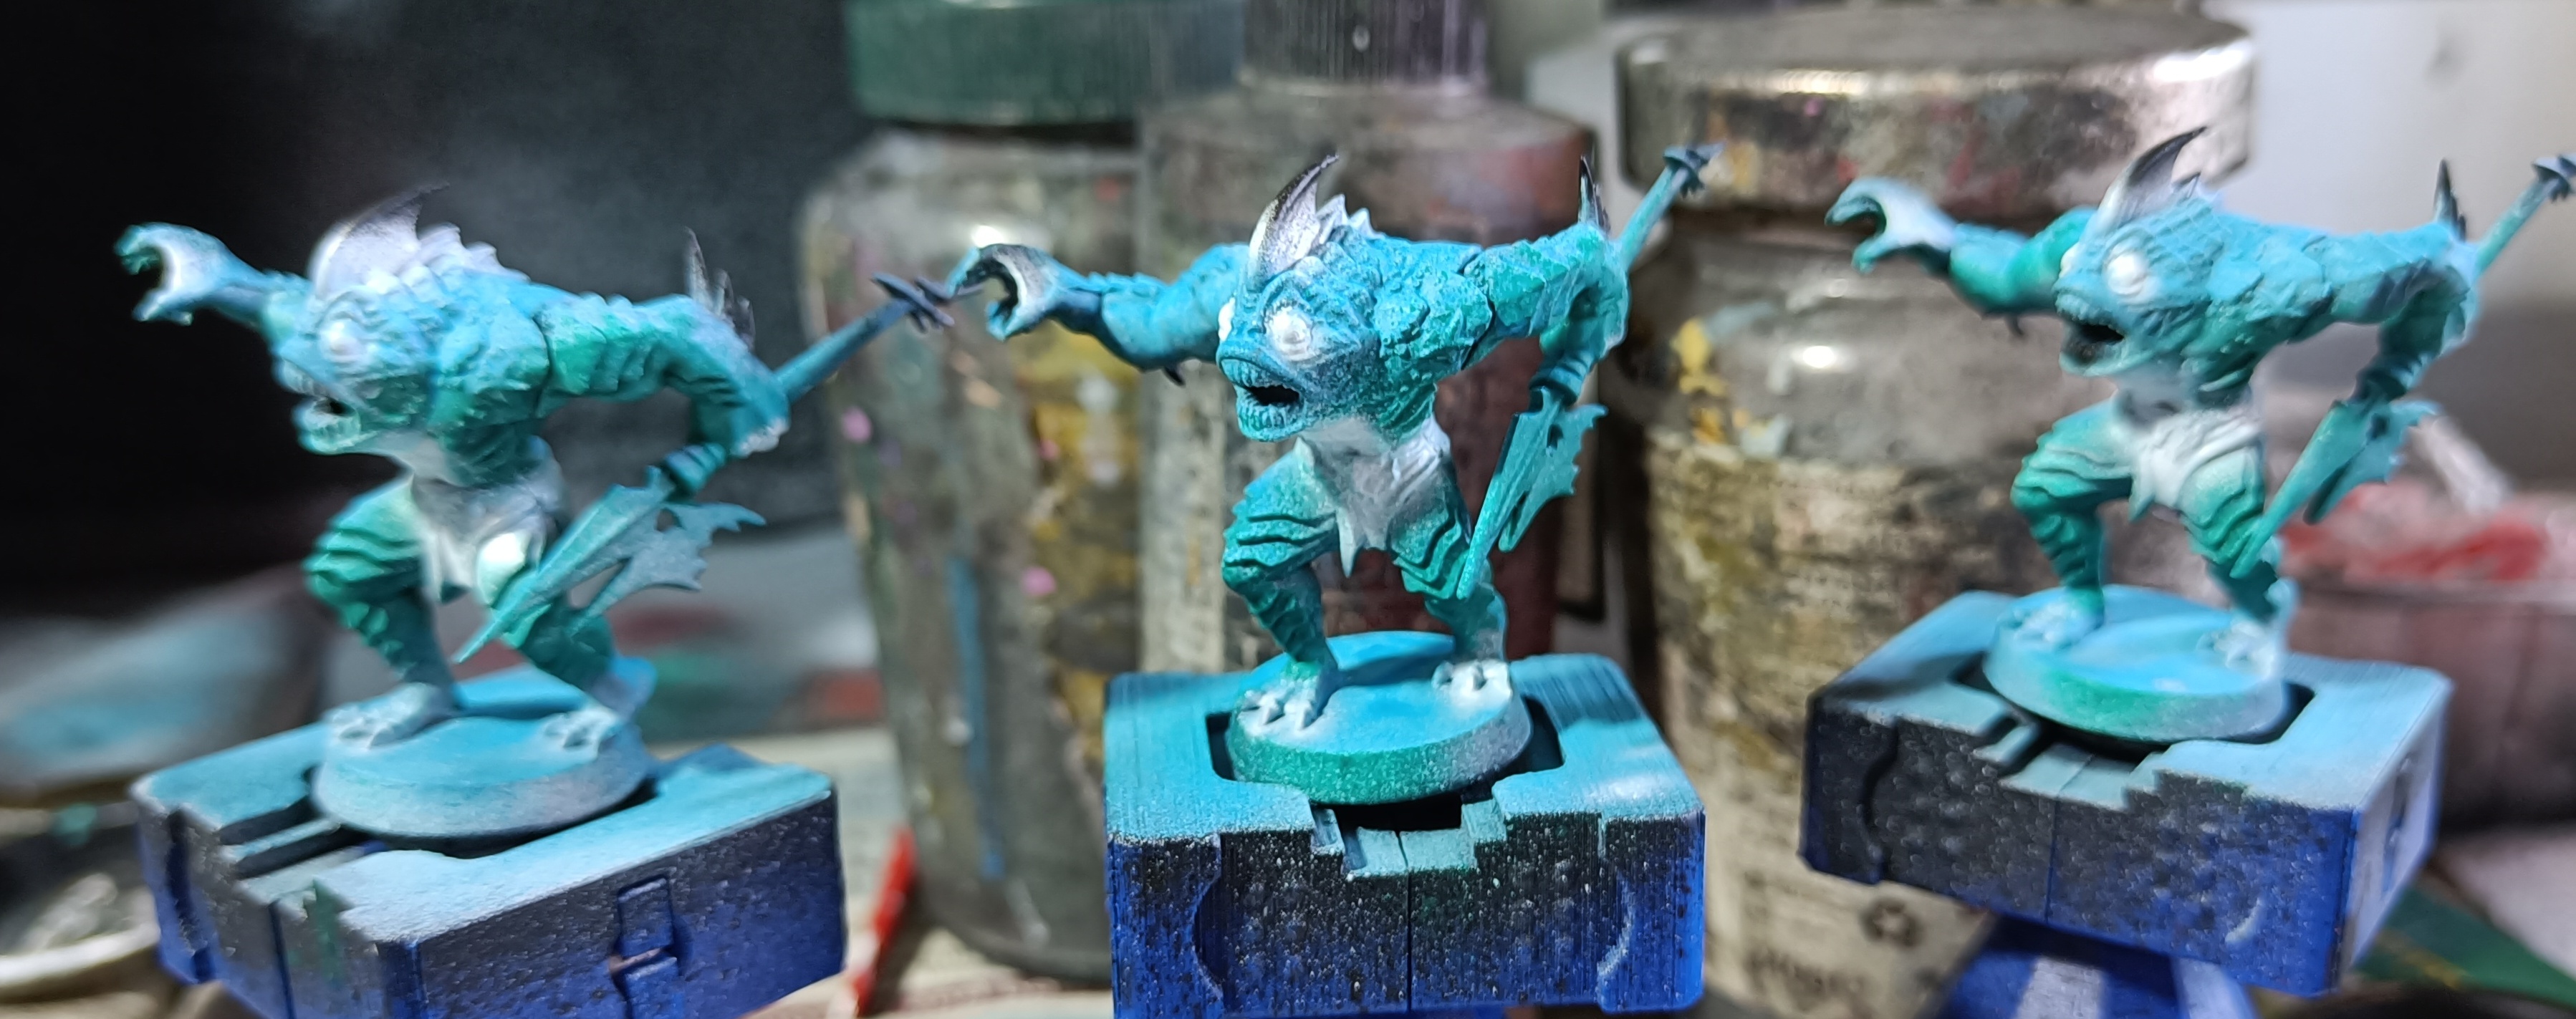
Abominations
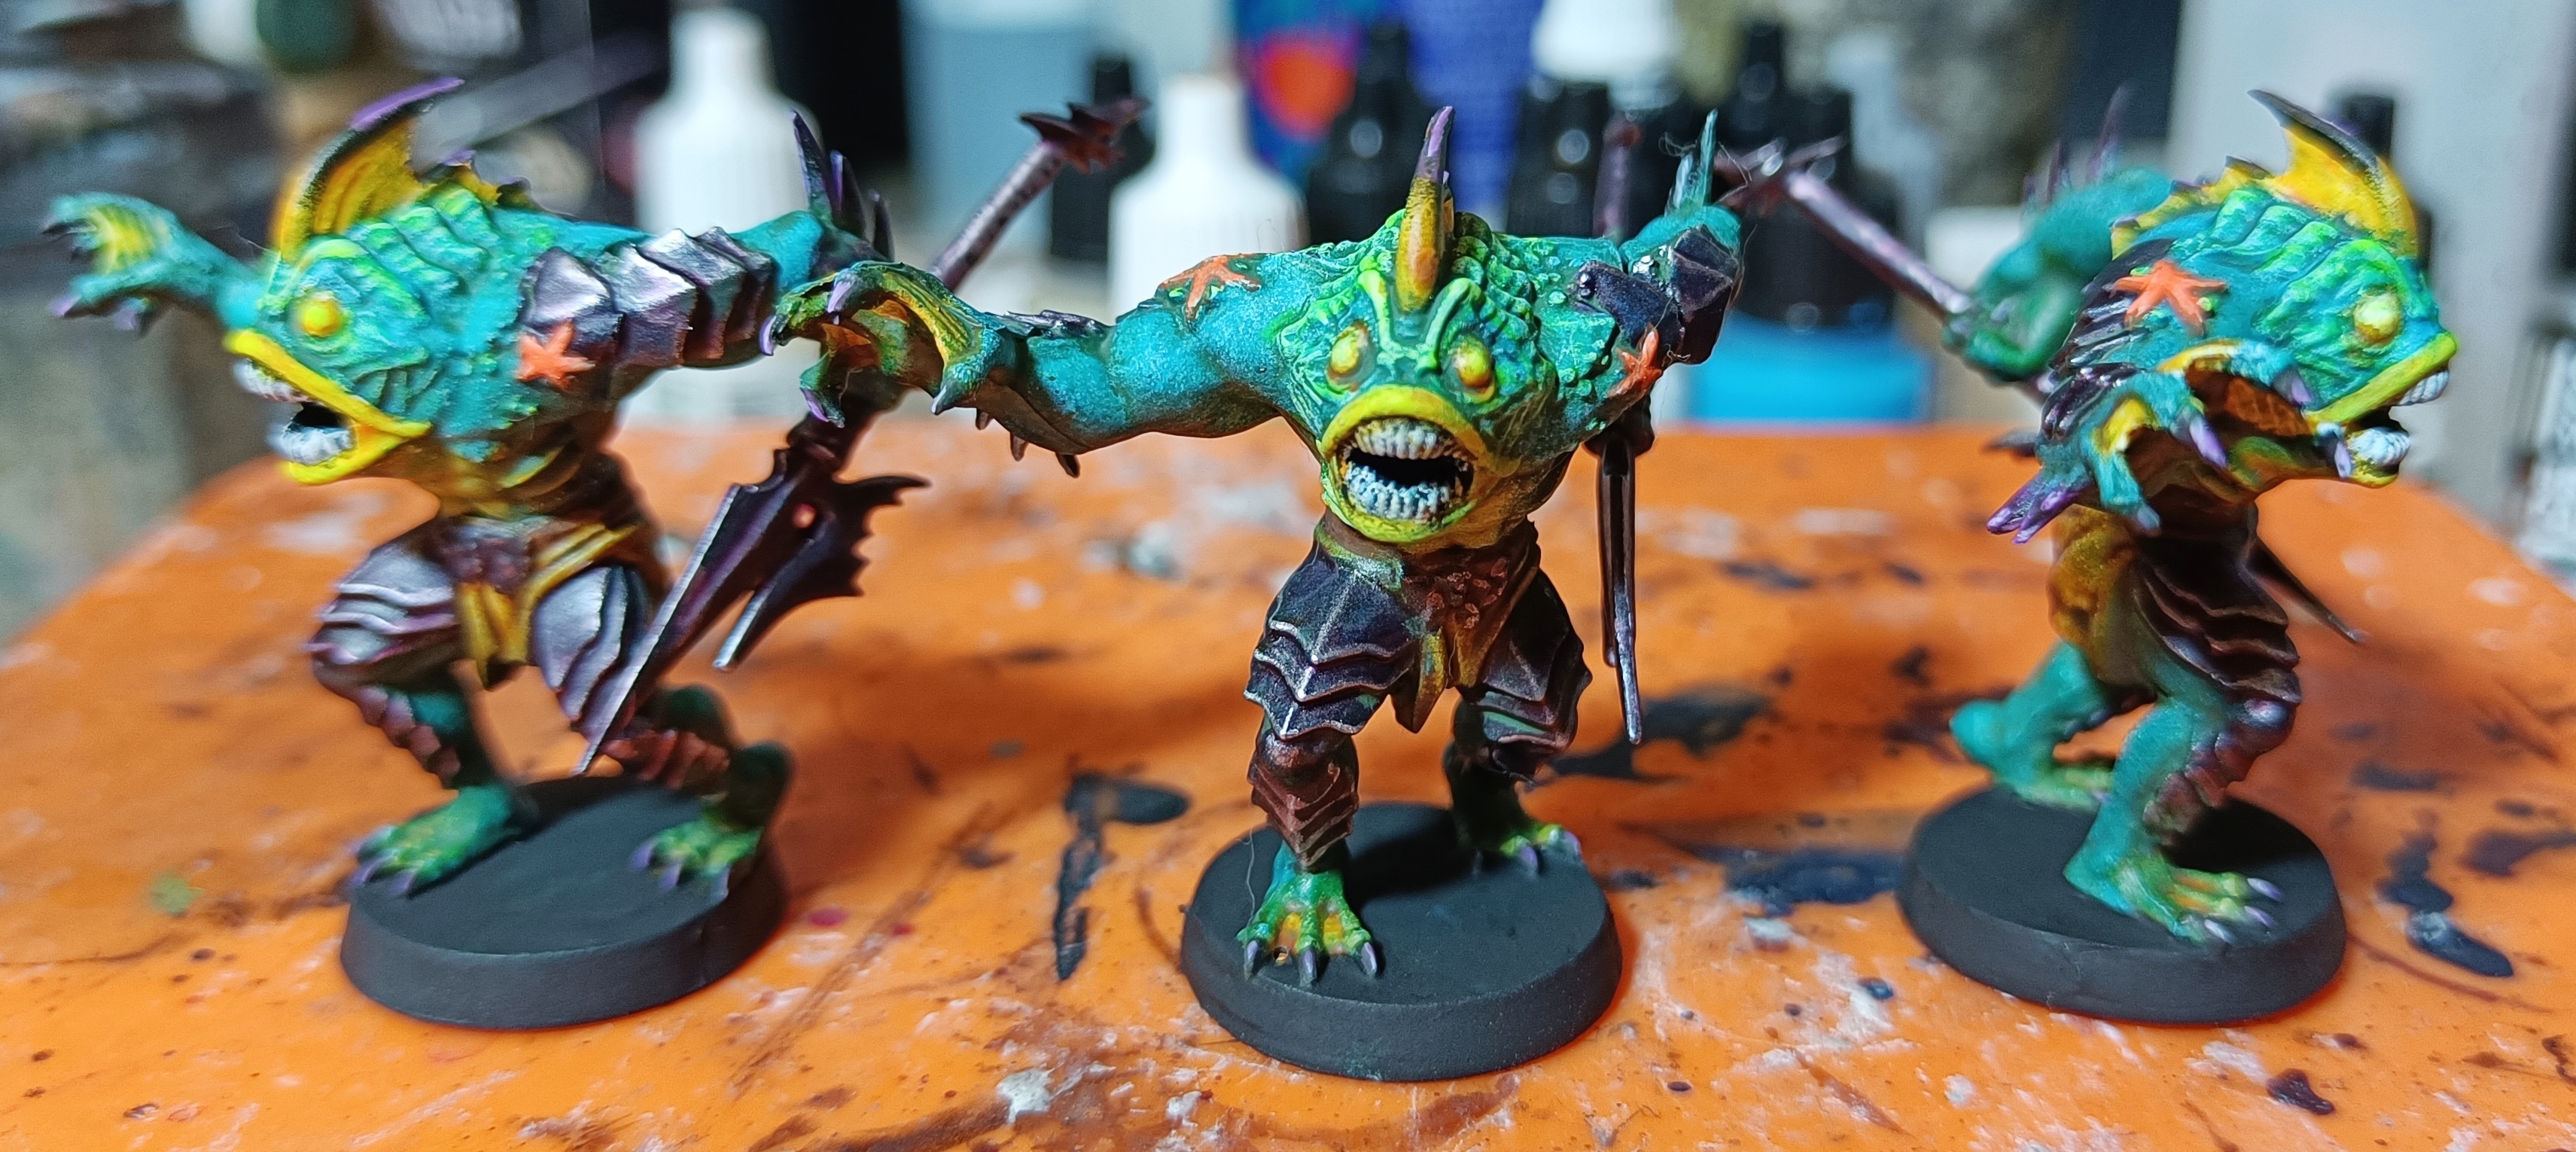
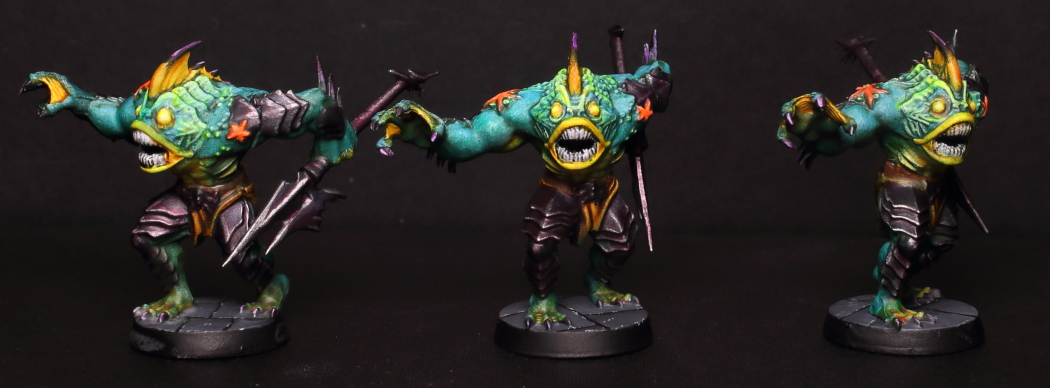
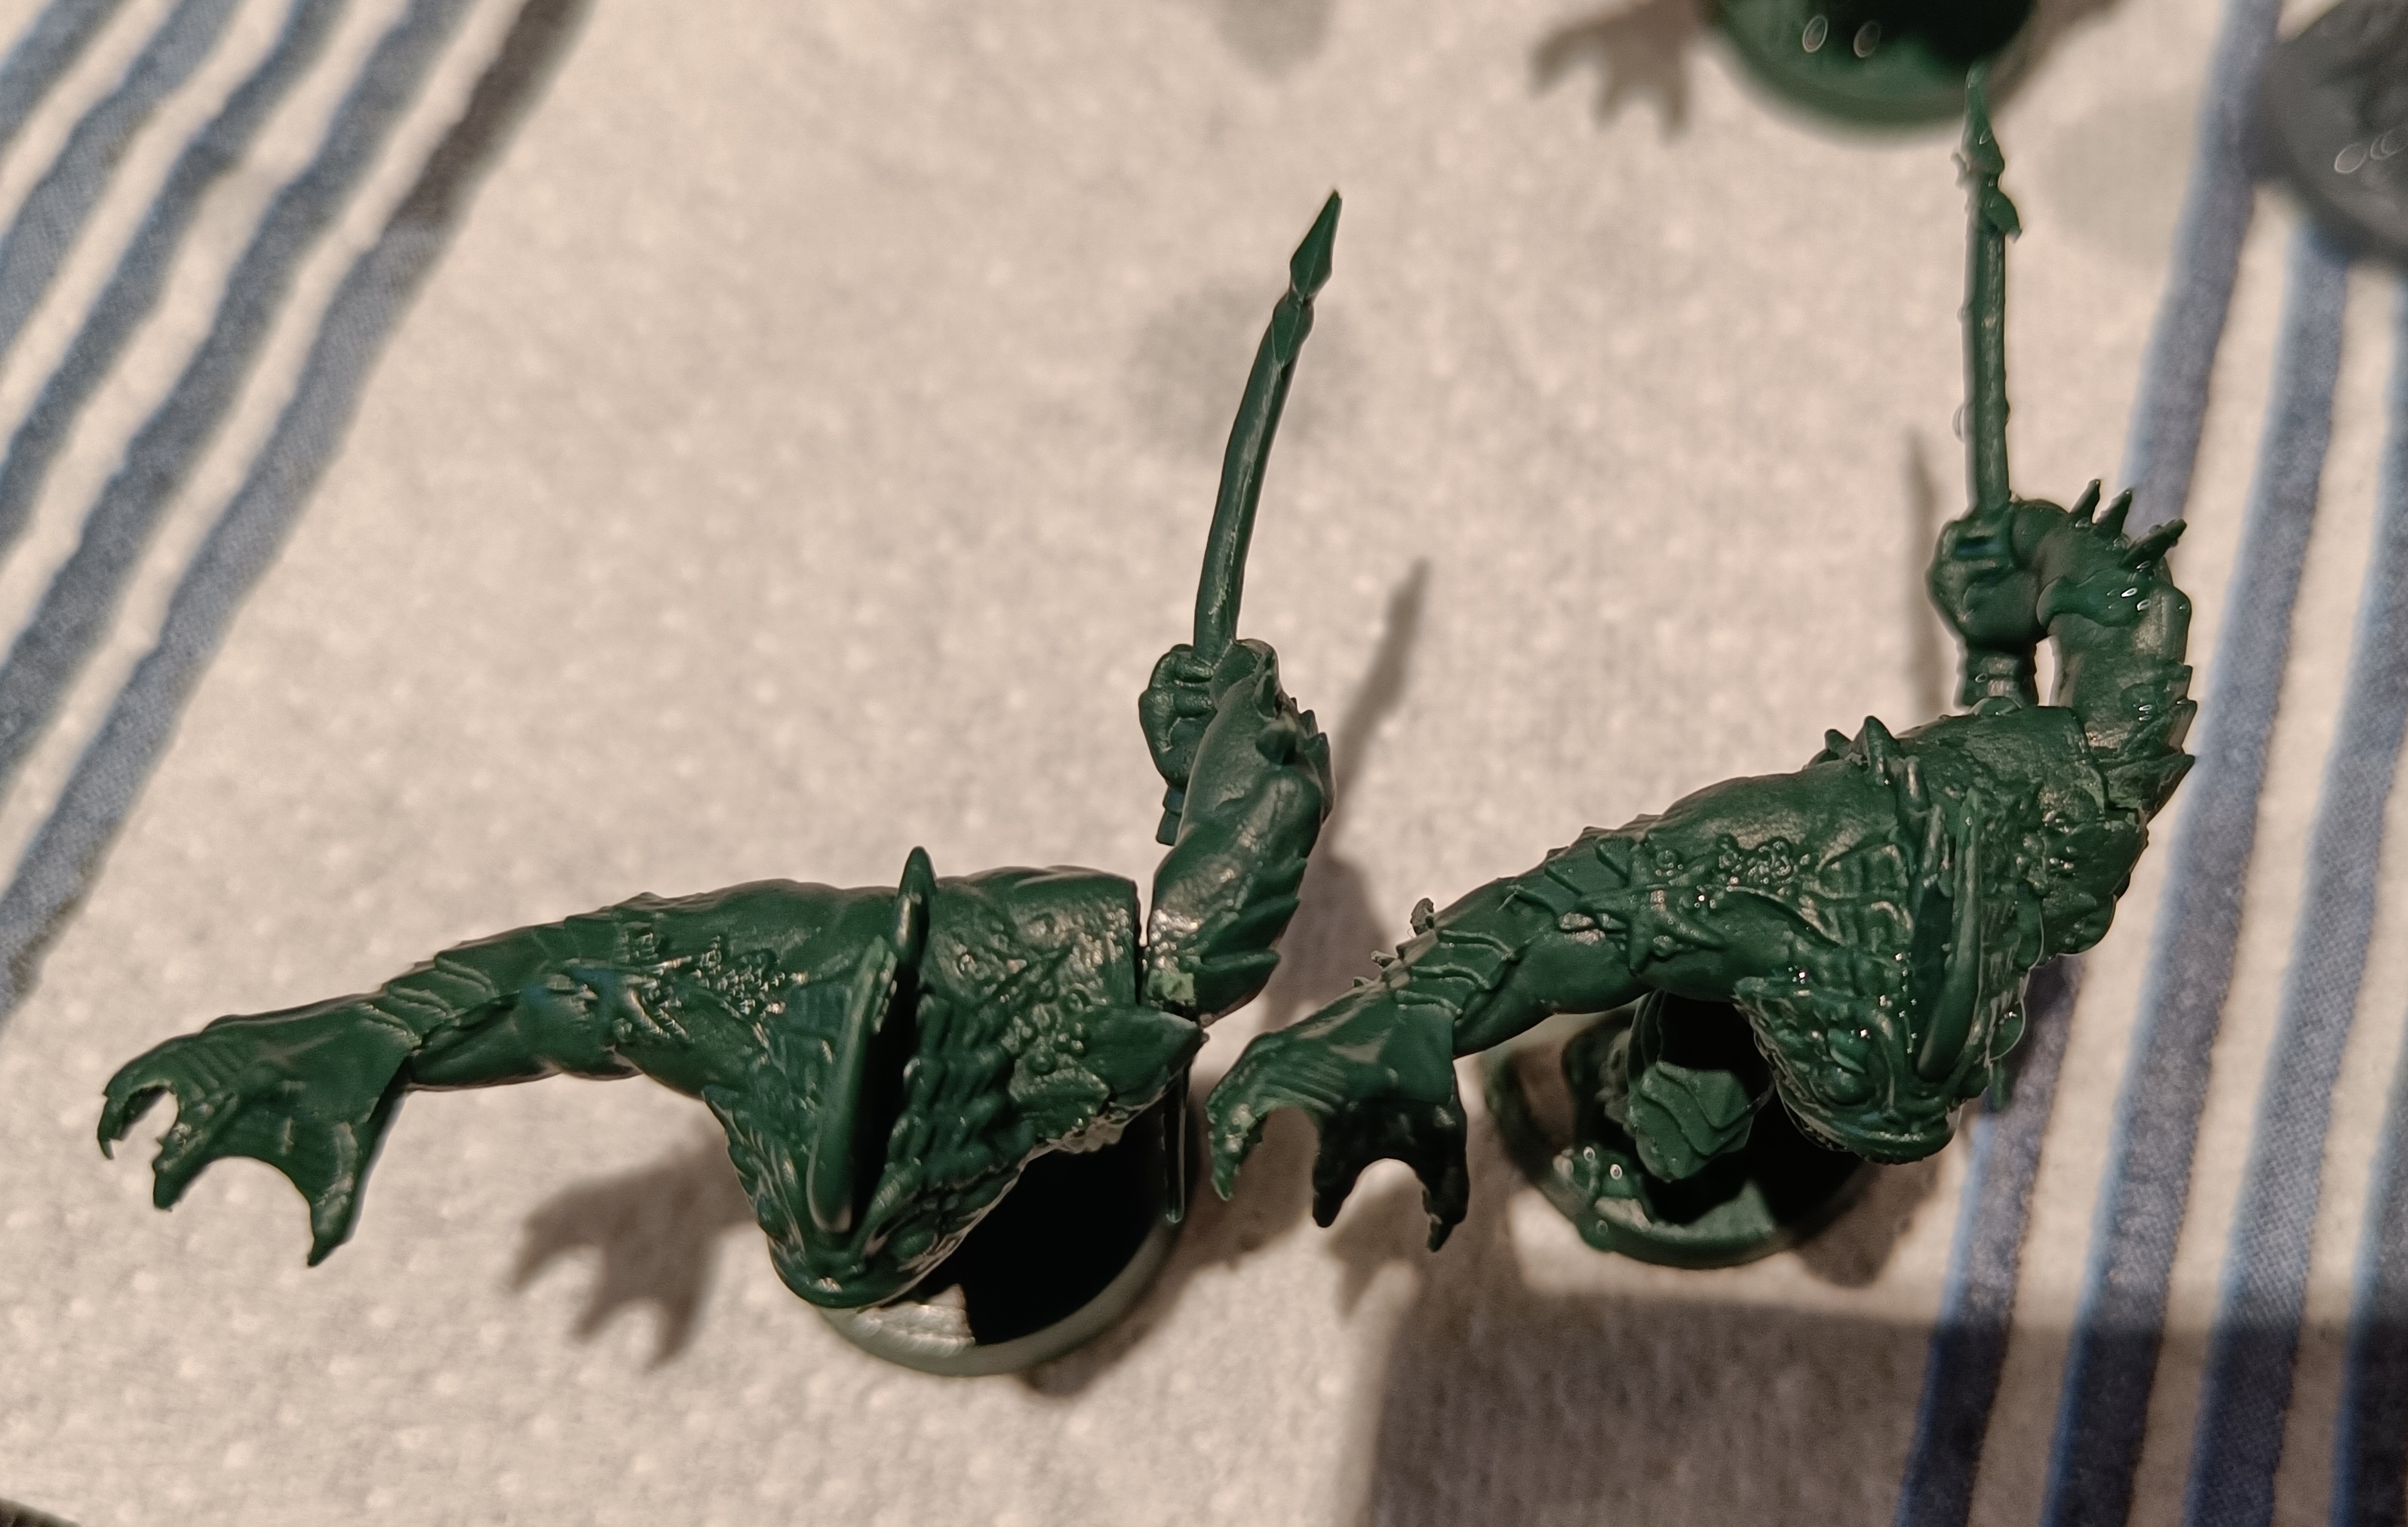
Weird fish men! I can’t recall what my original plan for them was but they gained a lot of colours inbetween.
The purple armour was Vallejo steel metallic mixed with purple ink and edge highlighted with silver.
The skintone was orignally a light blue then washed with a darker green. I’m afraid I lost my pic of the colours. I went back over the lighter colours with white and used Scale Colour fluorescents to really make them pop. On

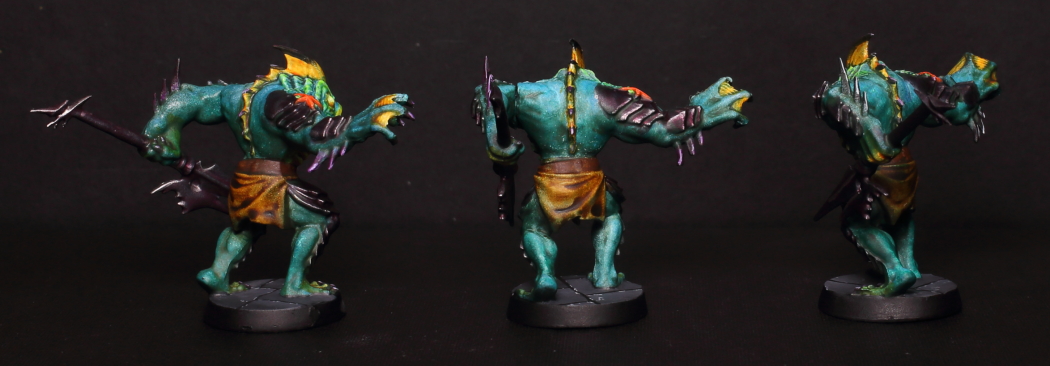
Mummies and Zombies
Given the amount of green in the units painted so far I decided to give the undead blue skin tones. I shaded the the preshade using thinned coats of Scale Color SC-51 Mediterranean Blue and shaded them with a purple oil wash.
The zombies weapons were treated with oranges and browns to give them a rusted look.


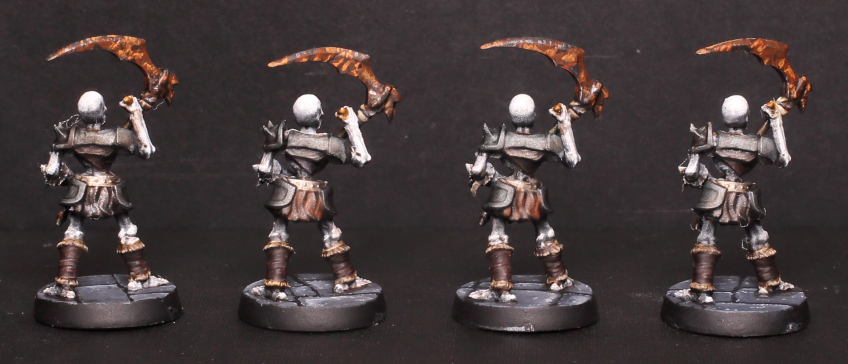
Skeletons
Pretty simple scheme for the skellys. Preshade to begin with. I used green – Biel tan wash – and brown – snakebite leather contrast – tones on the scythe shafts to give them an older look. Other parts were basecoated and given muted tones.
I tried to distinguish the scythe blades by giving them rusted tones using browns and oranges over a metallic steel basecoat.

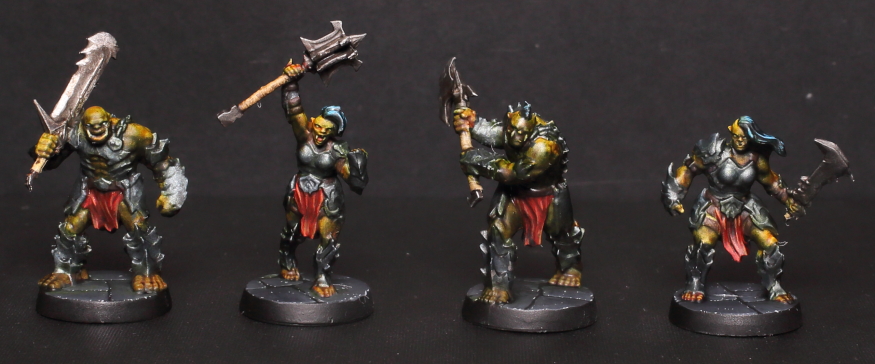
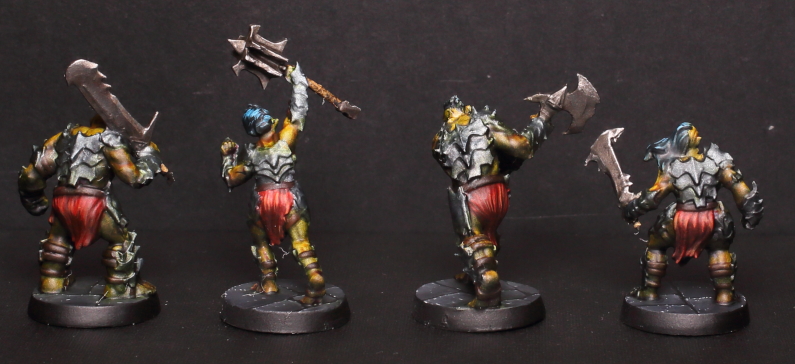
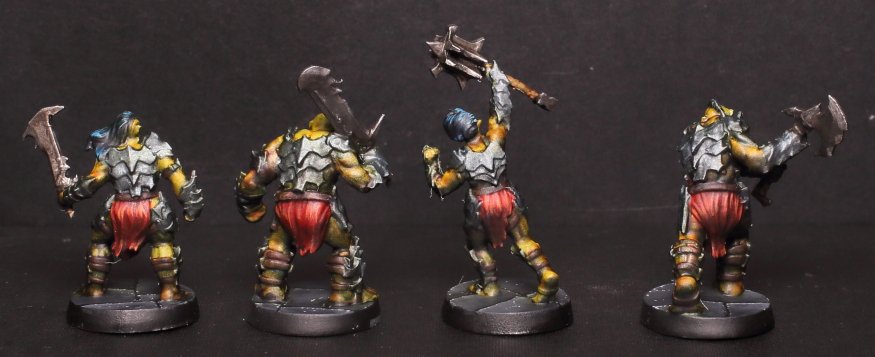
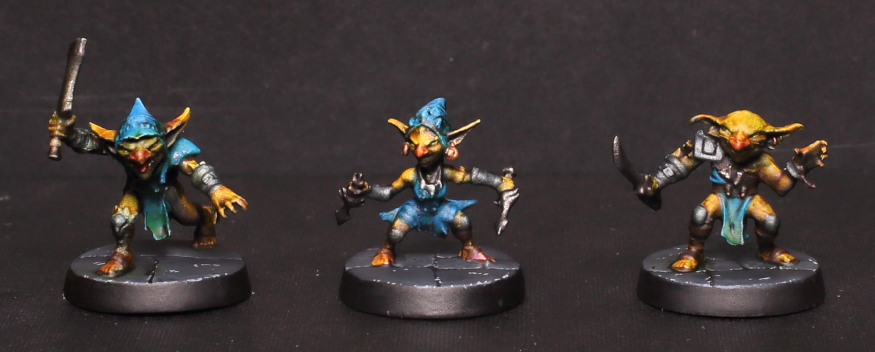
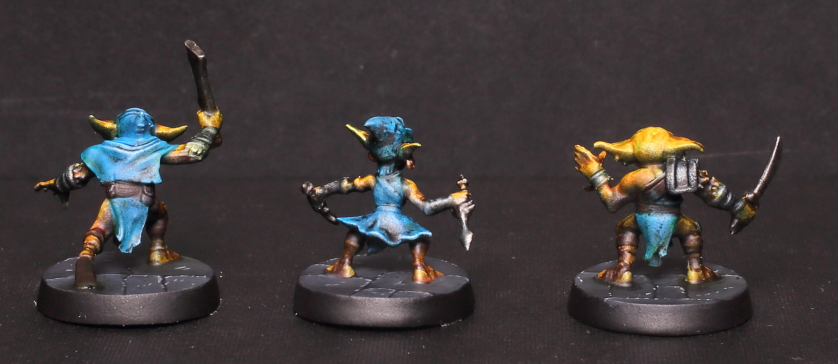
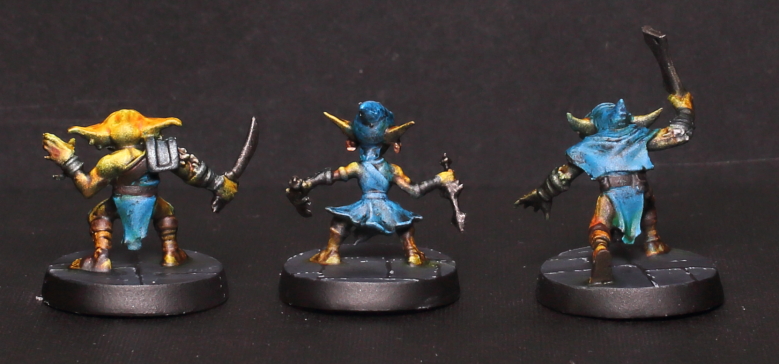
Orcs
I used the same skin tone recipe as that used on the goblins. The orcs had more pronounced armour which I tried to differentiate a little by mixing some blue in in with the Vallejo’s burnt iron metallic. The cooler metallic tone should contrast with the warmer red loin cloth and skin.

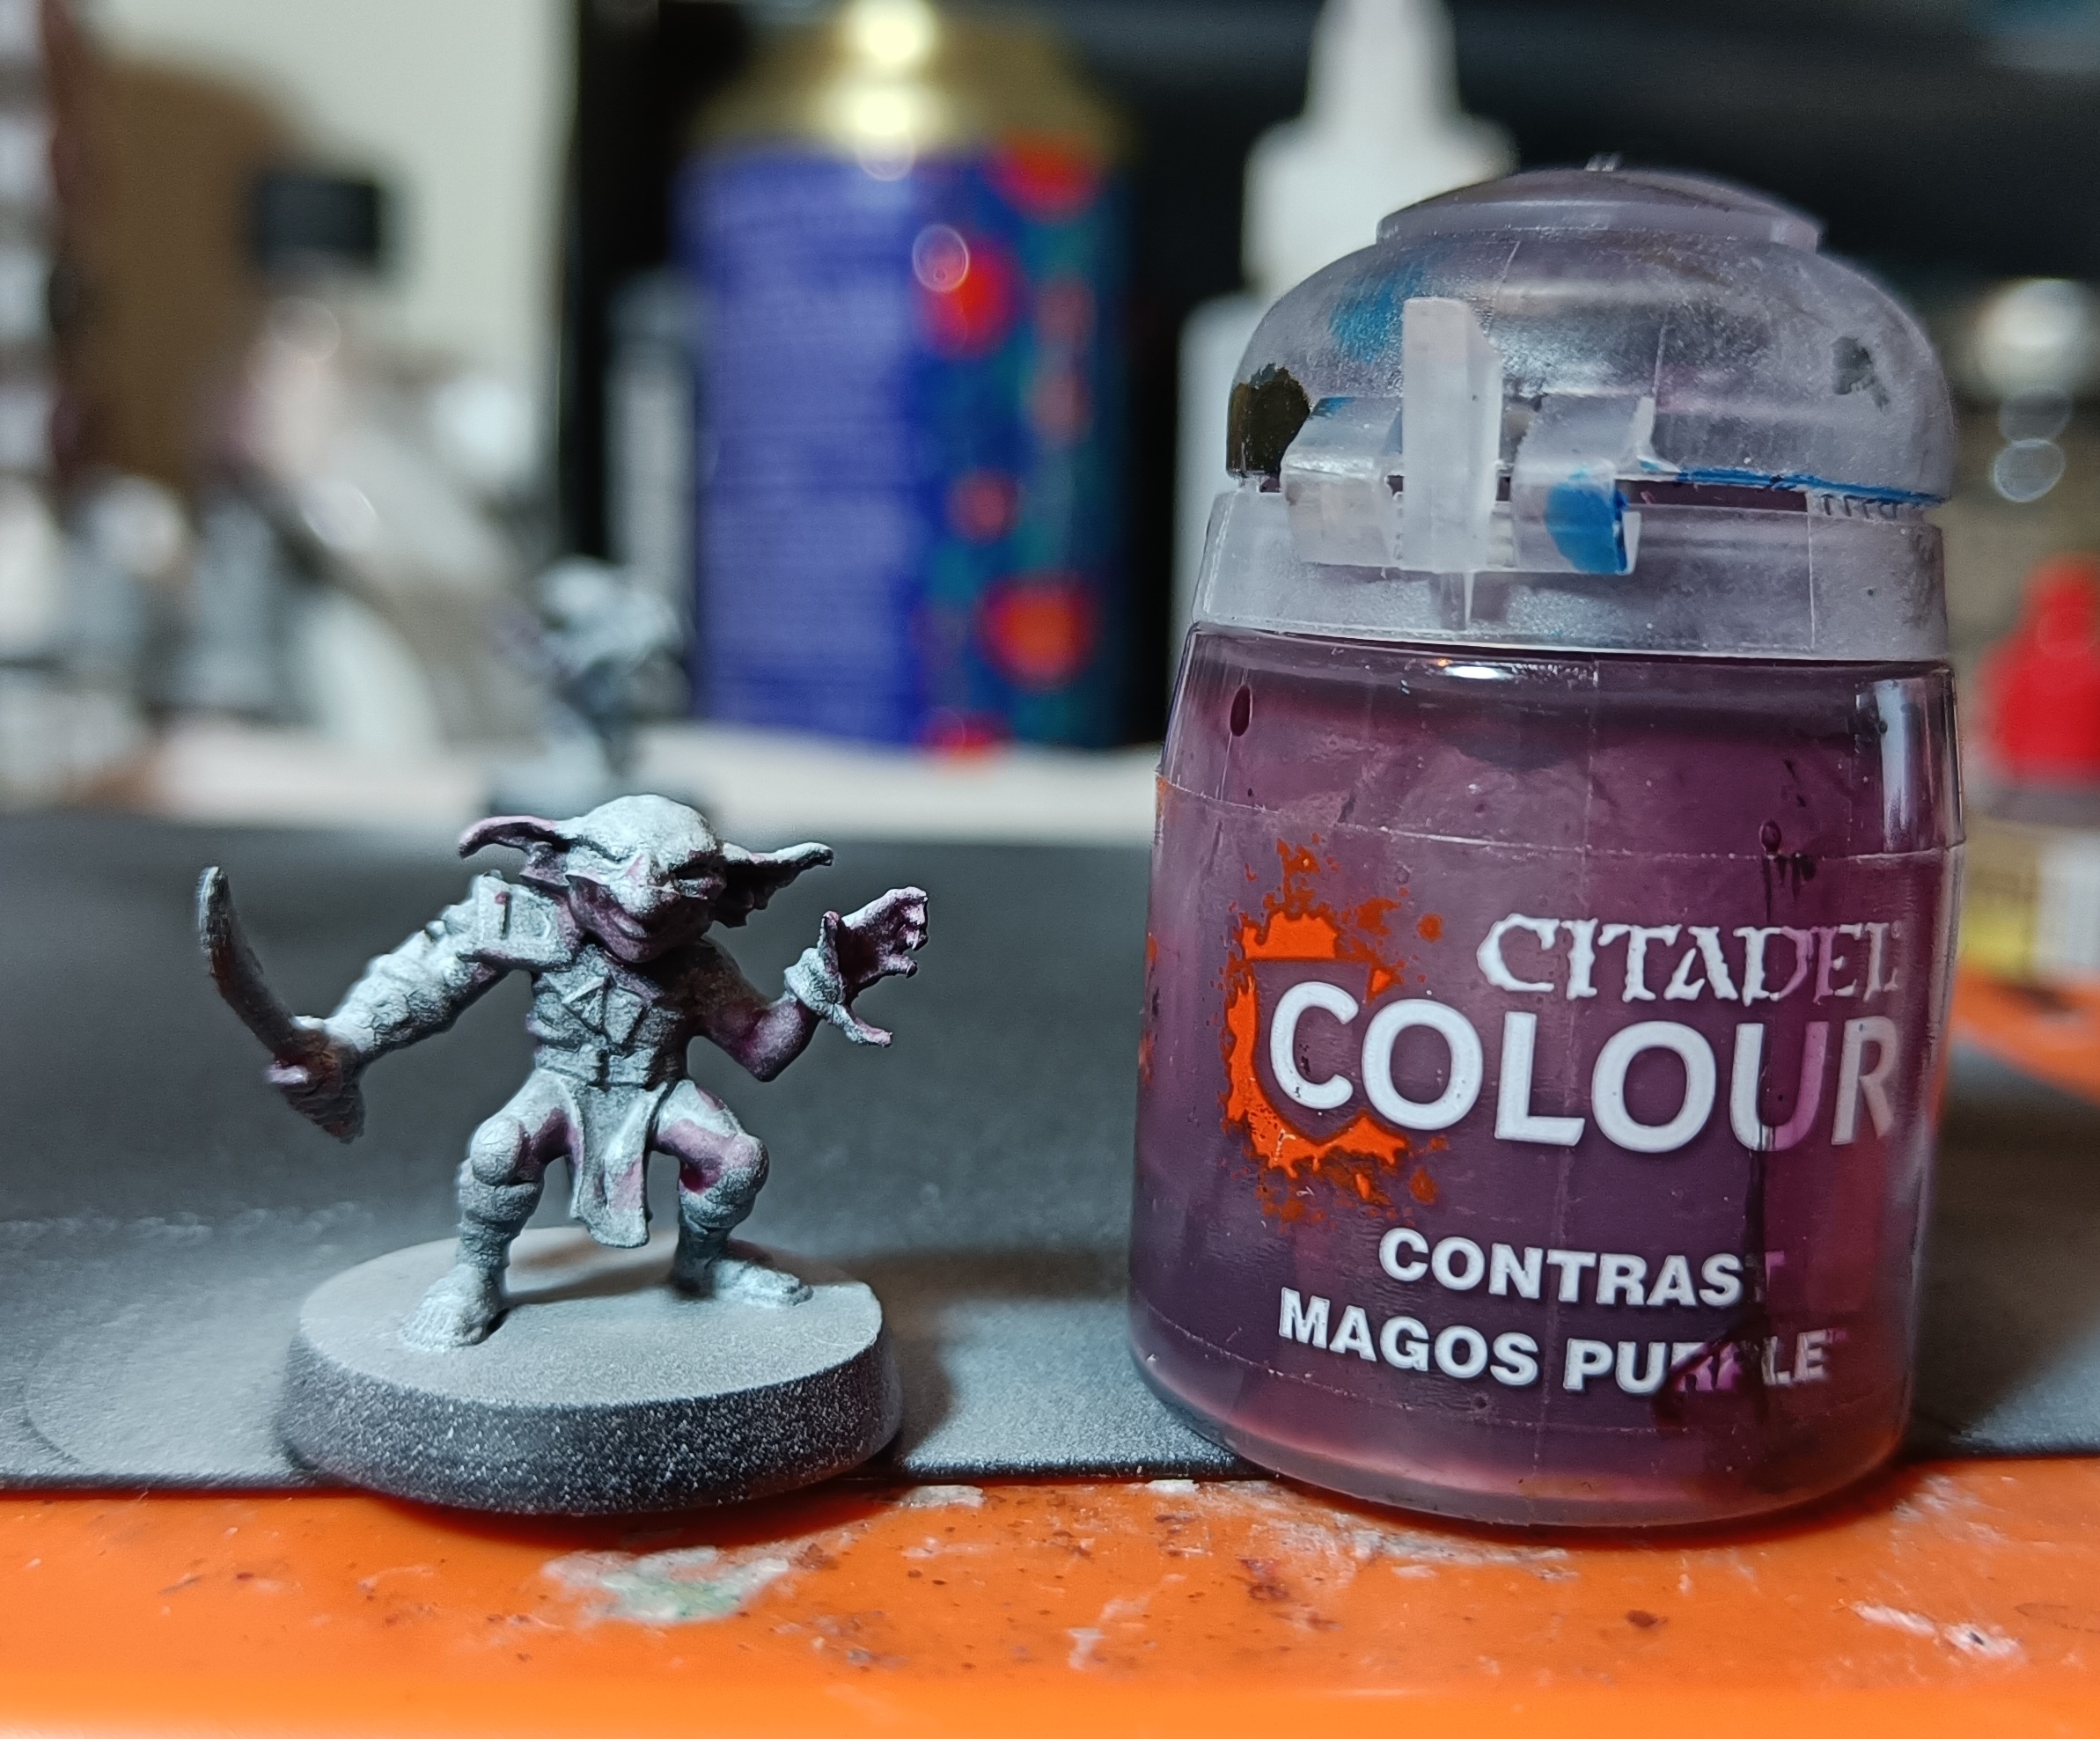
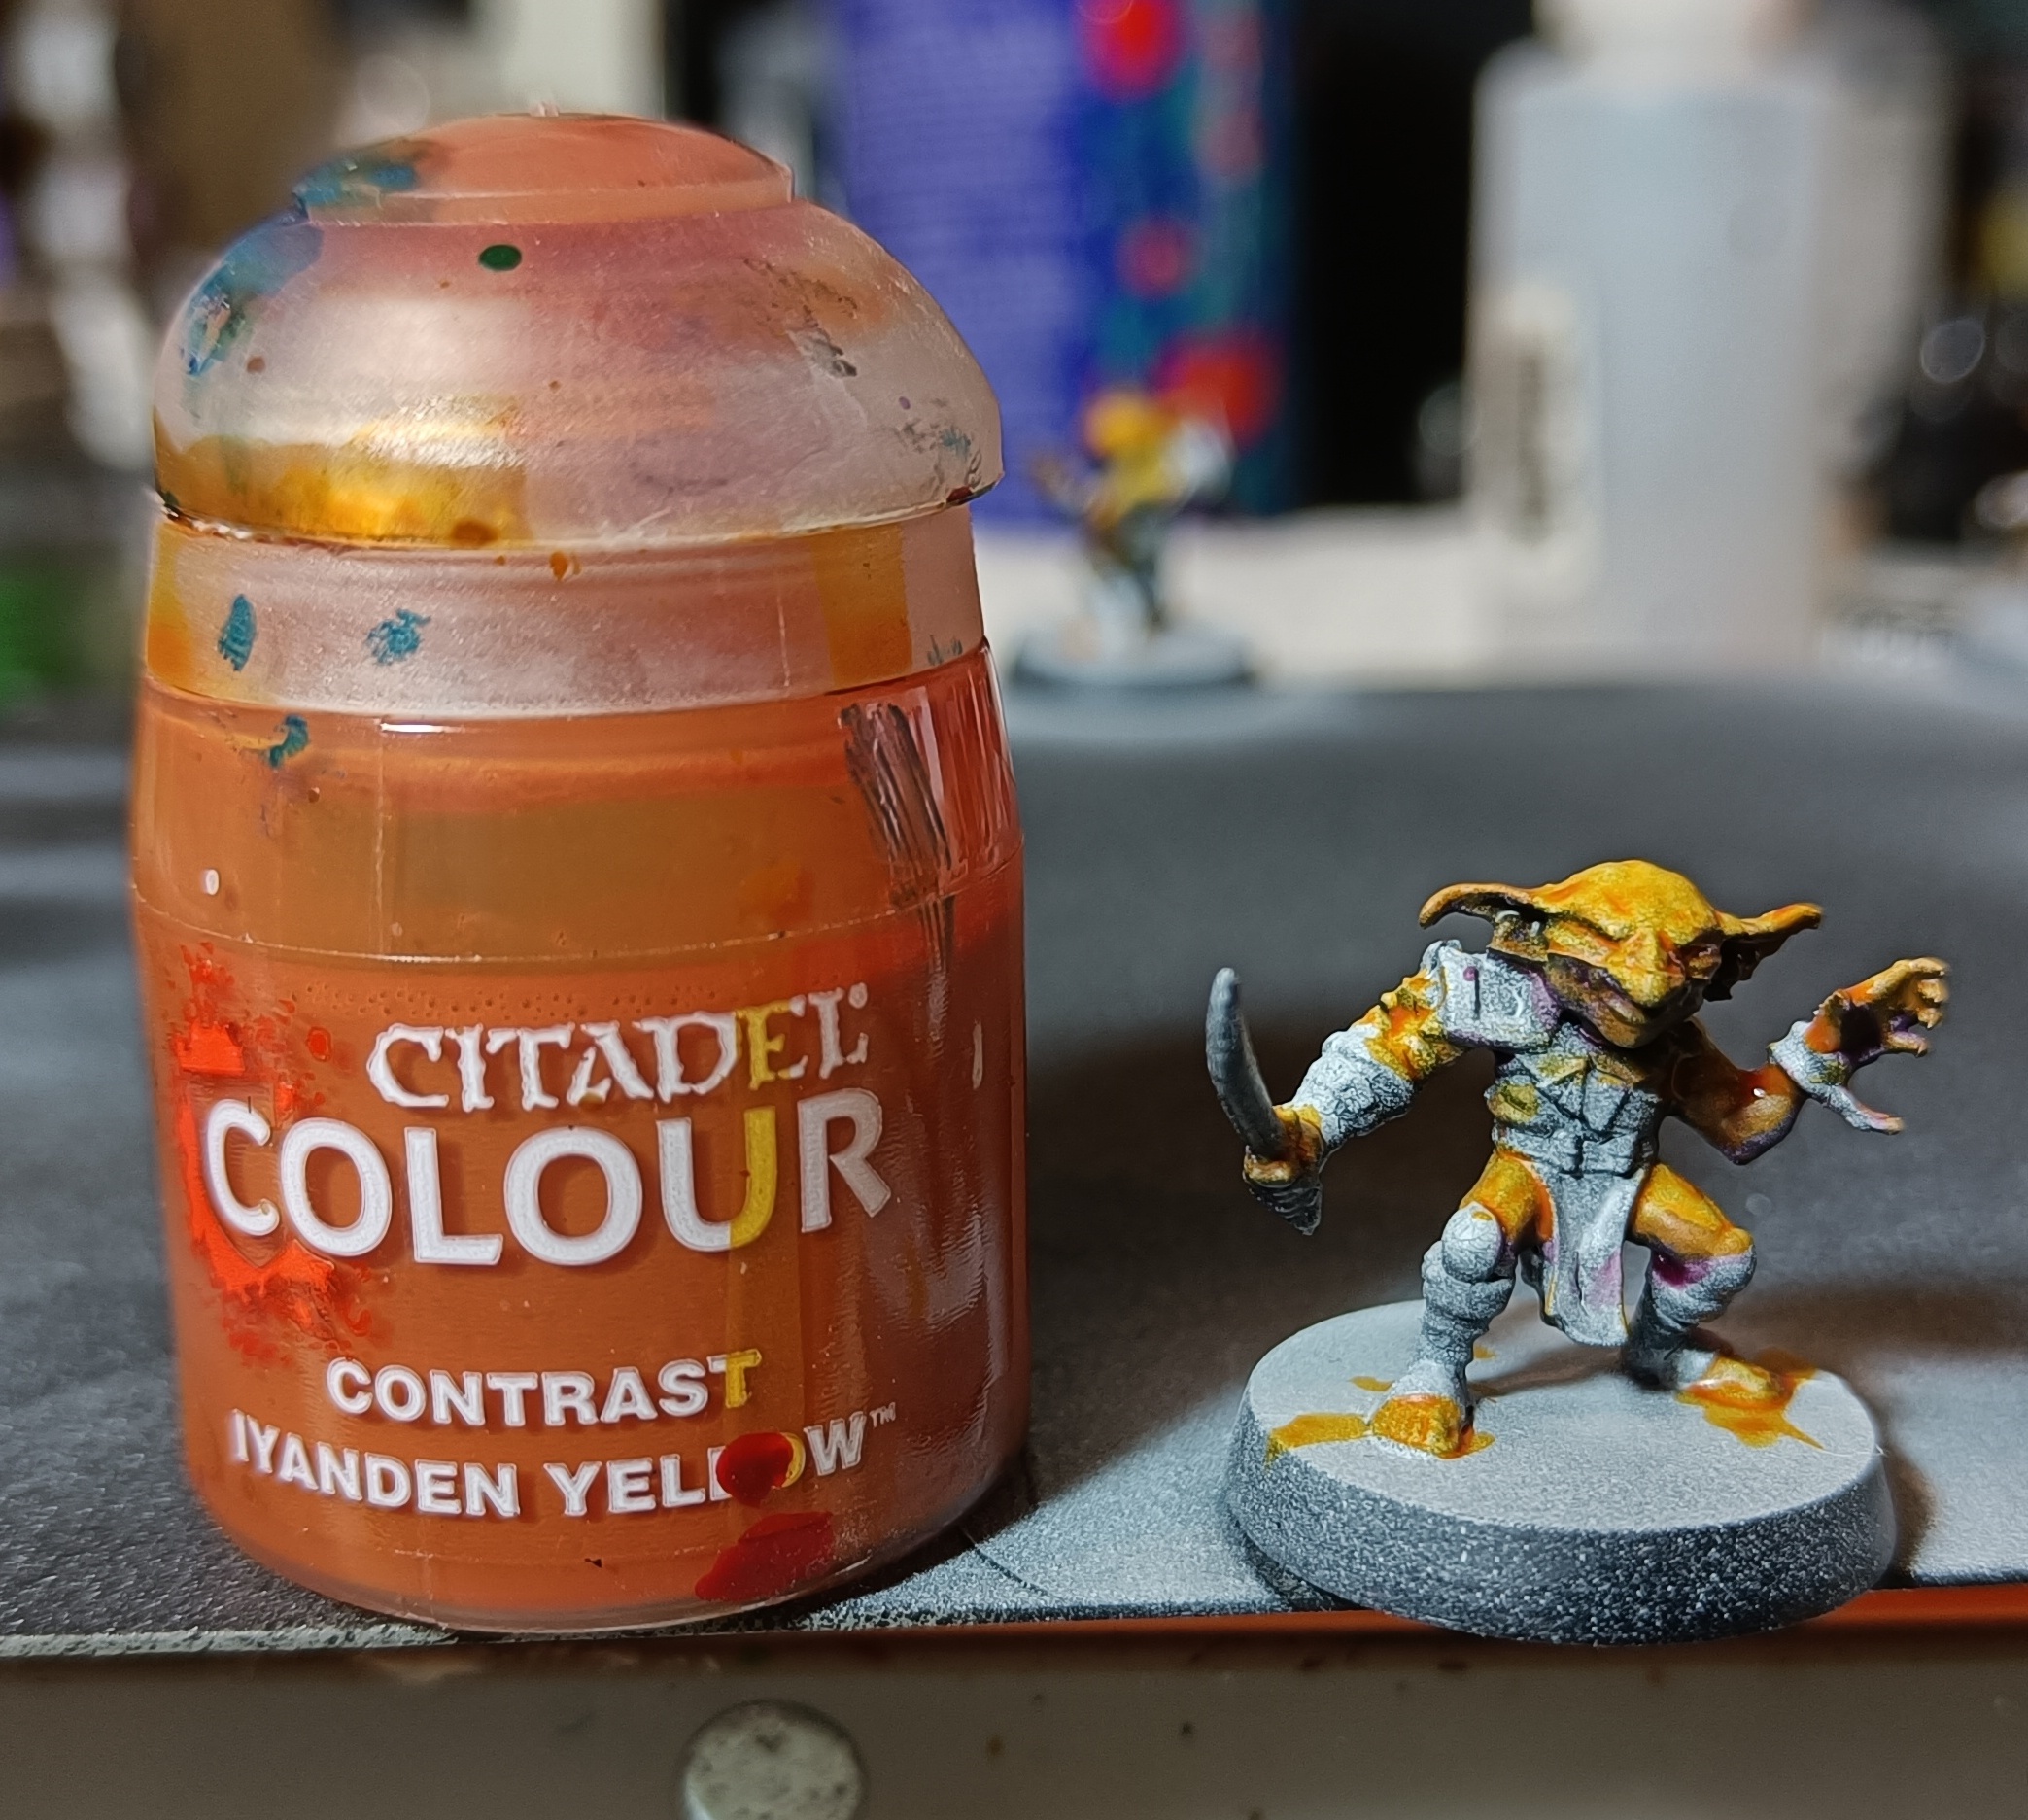
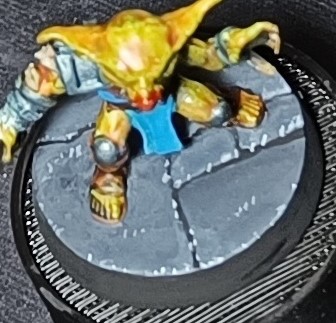
Goblins
The goblins most notable feature are their oversized heads and playfully evil expressions. So I put most effort into their skintones and kept hte other parts simple.
I began by preshading the figures. Then I ran with contrast paints:
– Contrast Magos purple in the shadows.
– Contrast Lyanden Yellow over the skin areas.
– Athonian camo shade in the recesses.
– Minitaire ghost tint green over all the skin.
– Contrast Blood Angels red thinned and applied to the tips of the noses.
After that I used simple base coats on the other parts of the figures.


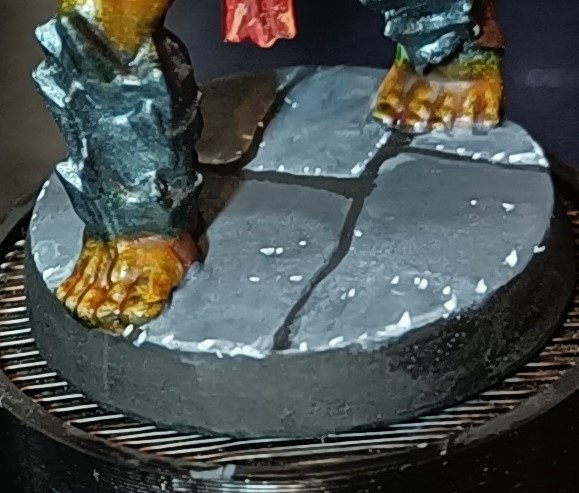
Bases
I thought the bases might not fit back in the packaging if I added stuff to them. But I didn’t want to leave them blank. So I painted in flagstones.
I used Pro Acryl black, white and dark neutral grey. Any three black,white and greys would do. I like Pro Acryl’s coverage.
I painted the base grey then use black to draw in lines delineating flagstones.After that I mixed intermediate tones and wet blended them from light to dark in the same direction on each flagstone. Finally I added catchlights.
Preparation
The models’ details are quite soft but I find them characterful. However a lot of them arrived with bent weapons and even bent bases in some cases. The plastic packaging has a kind of clip to hold them in place which appears to work if the models are put back correctly. However it’s not obvious how you clip them in and I think if you let friends put them back they may not be fitted correctly. Fortunately holding them in hot water saw them revert to their proper form or close to it.
The barbarian had a gap in his arm that needed filling but by and large I’ve been able to ignore more other defects. Mold lines are very much in evidence and removed where found.
In the beginning
A friend of mine bought the new HeroQuest set and a couple of expansions. He’s been 3d printing a board and it looks aces. So I’ve volunteered to paint up his forces and hopefully do something nice.