


![How To Paint Moonstone’s Nanny | Goblin King Games [7 Days Early Access]](https://images.beastsofwar.com/2024/12/3CU-Gobin-King-Games-Moonstone-Shades-Nanny-coverimage-225-127.jpg)


The Garden’s Protector – A Boxed Vignette


Recommendations: 110
About the Project
I haven't been painting since August. I was just wargaming and playing Silver Bayonet, DBN, Impetus and Fantastic Battles and having a good time doing it. In order to get back into the painting swing, I am embarking on a more casual showcase piece. This piece is called 'The Garden's Protector', and I envision a warrior investigating strange happenings in an enchanted garden and the disappearance of several townsfolk who have ventured into the garden out of curiosity. Hopefully, this will charge my batteries and give me the momentum to finish several armies on my work table!
Related Genre: Fantasy
This Project is Completed
Preparing the 'Box'.
Hi everyone,
So, if you have read the project description I am working on a little vignette in order to charge my painting batteries.
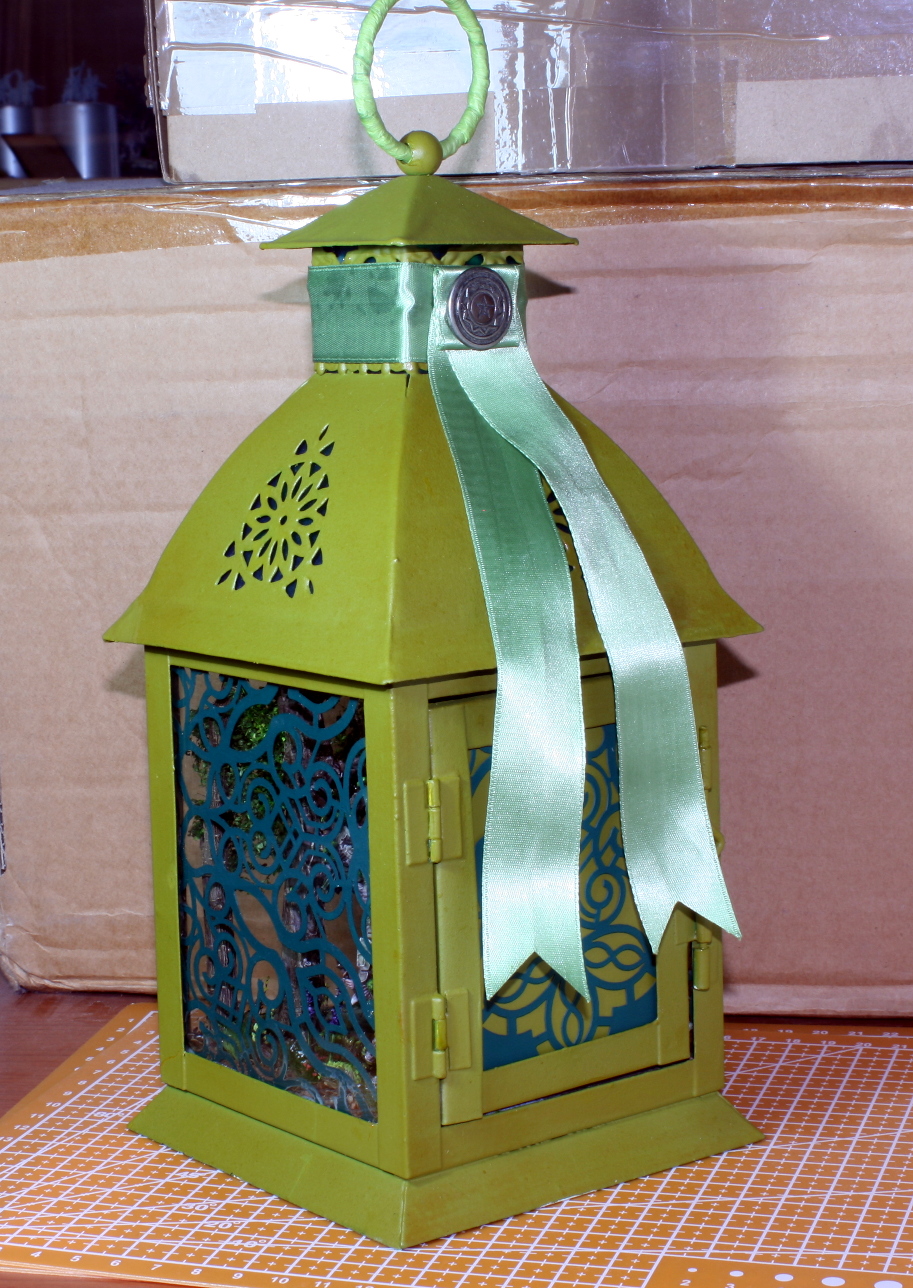
The vignette will be boxed, but I will not be using a framed box as used normally by most ‘boxed diorama builders‘, but an old lantern that my mum gave me.
This forced me to build this vignette like a bottled ship so to speak. From the inside to the rear, and from bottom to the top. It took a lot of planning and I made several big mistakes that I managed to fix or cover up.
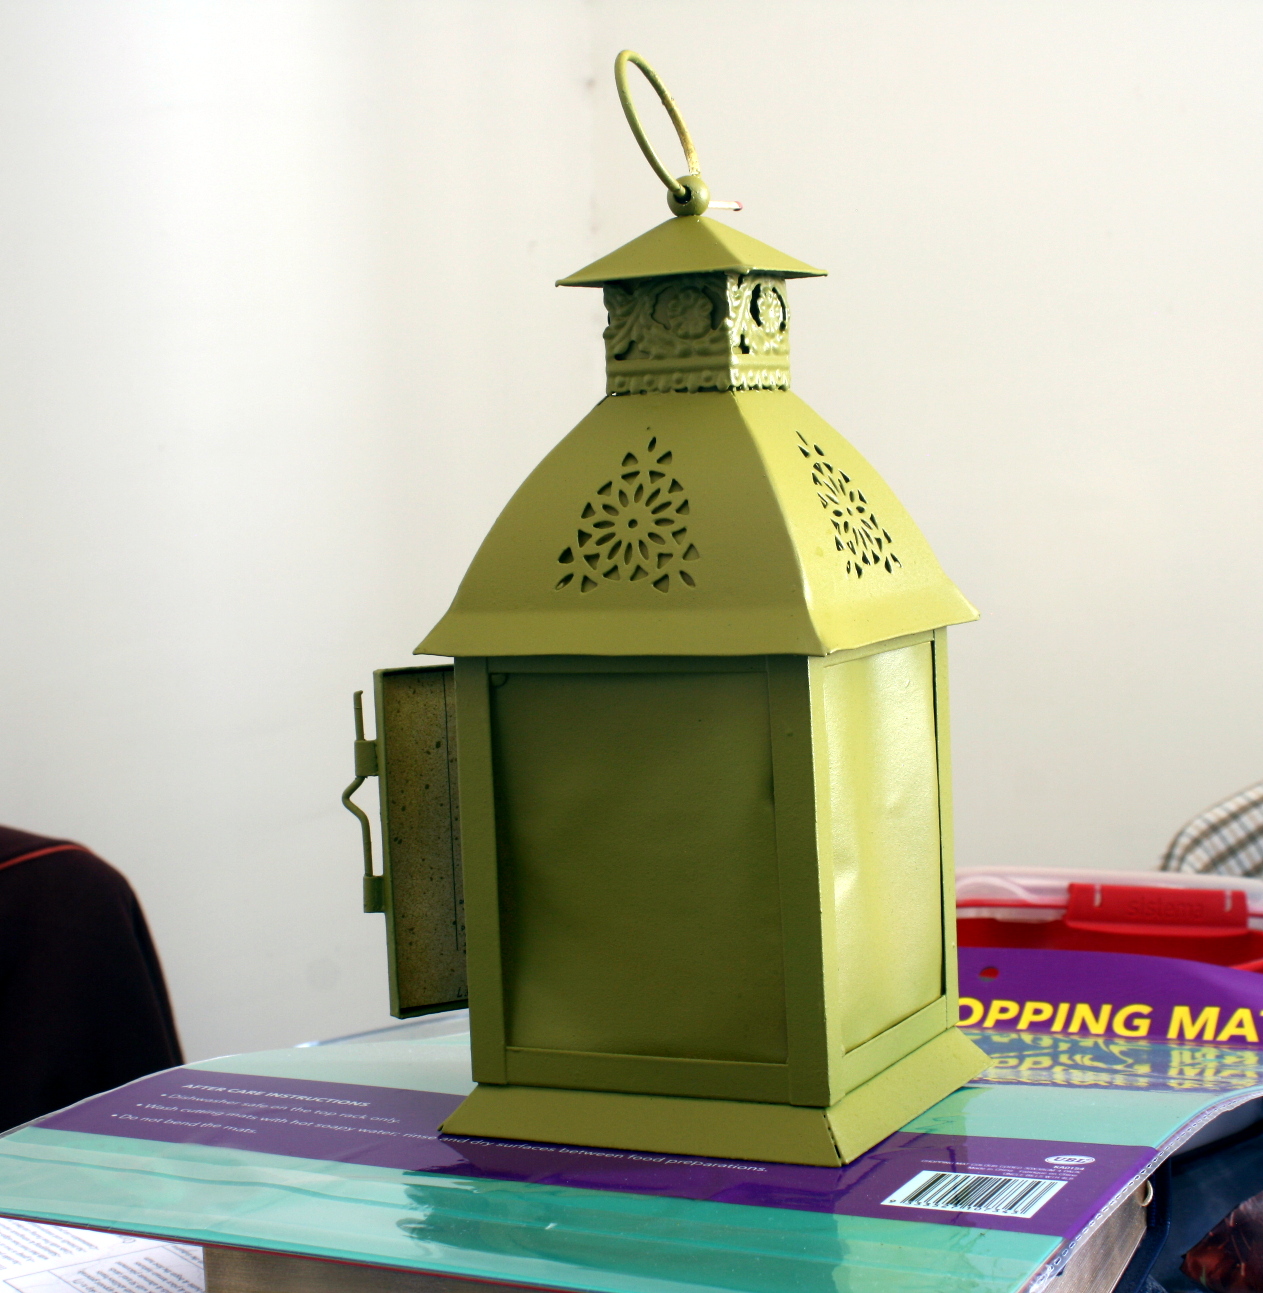
I cleaned up the old lantern, by sanding it down and smoothing out the old painting. I then spray painted it with a rattle-can paint. I wish I remembered to take a photo of the lantern in its original state – but I forgot to do it.
In the picture gallery below, you can also see the figure I am currently working on for the vignette. It is a modified version of the old Durthu model in metal. It is currently drying after the first modifications.
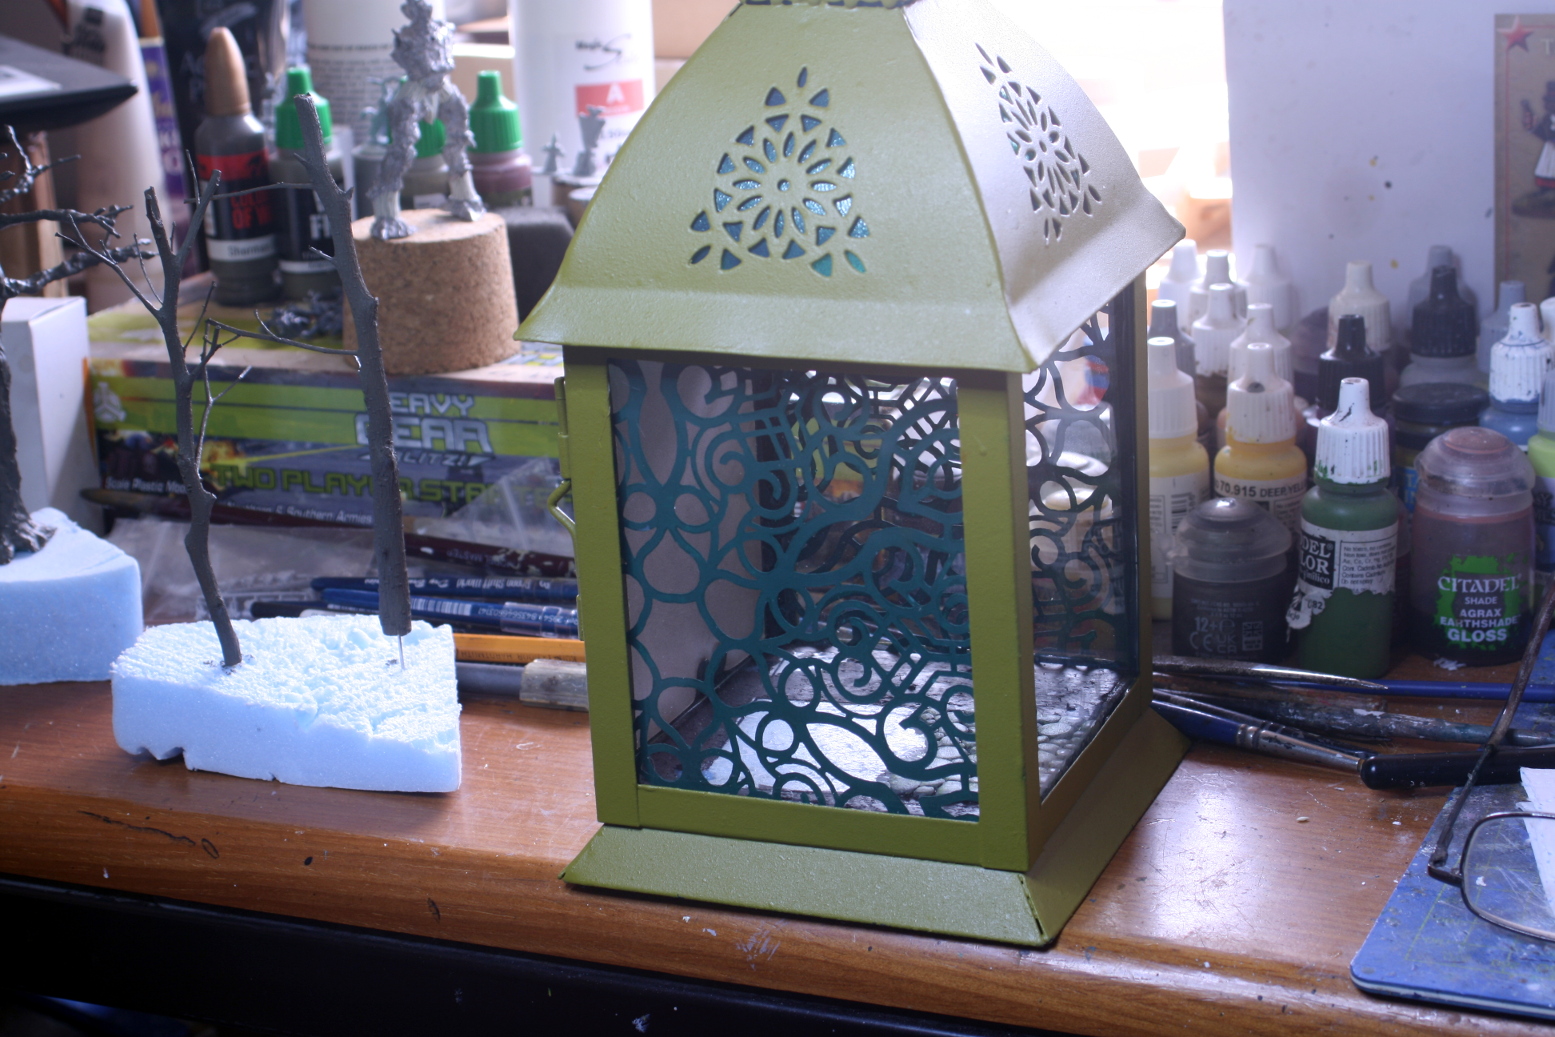
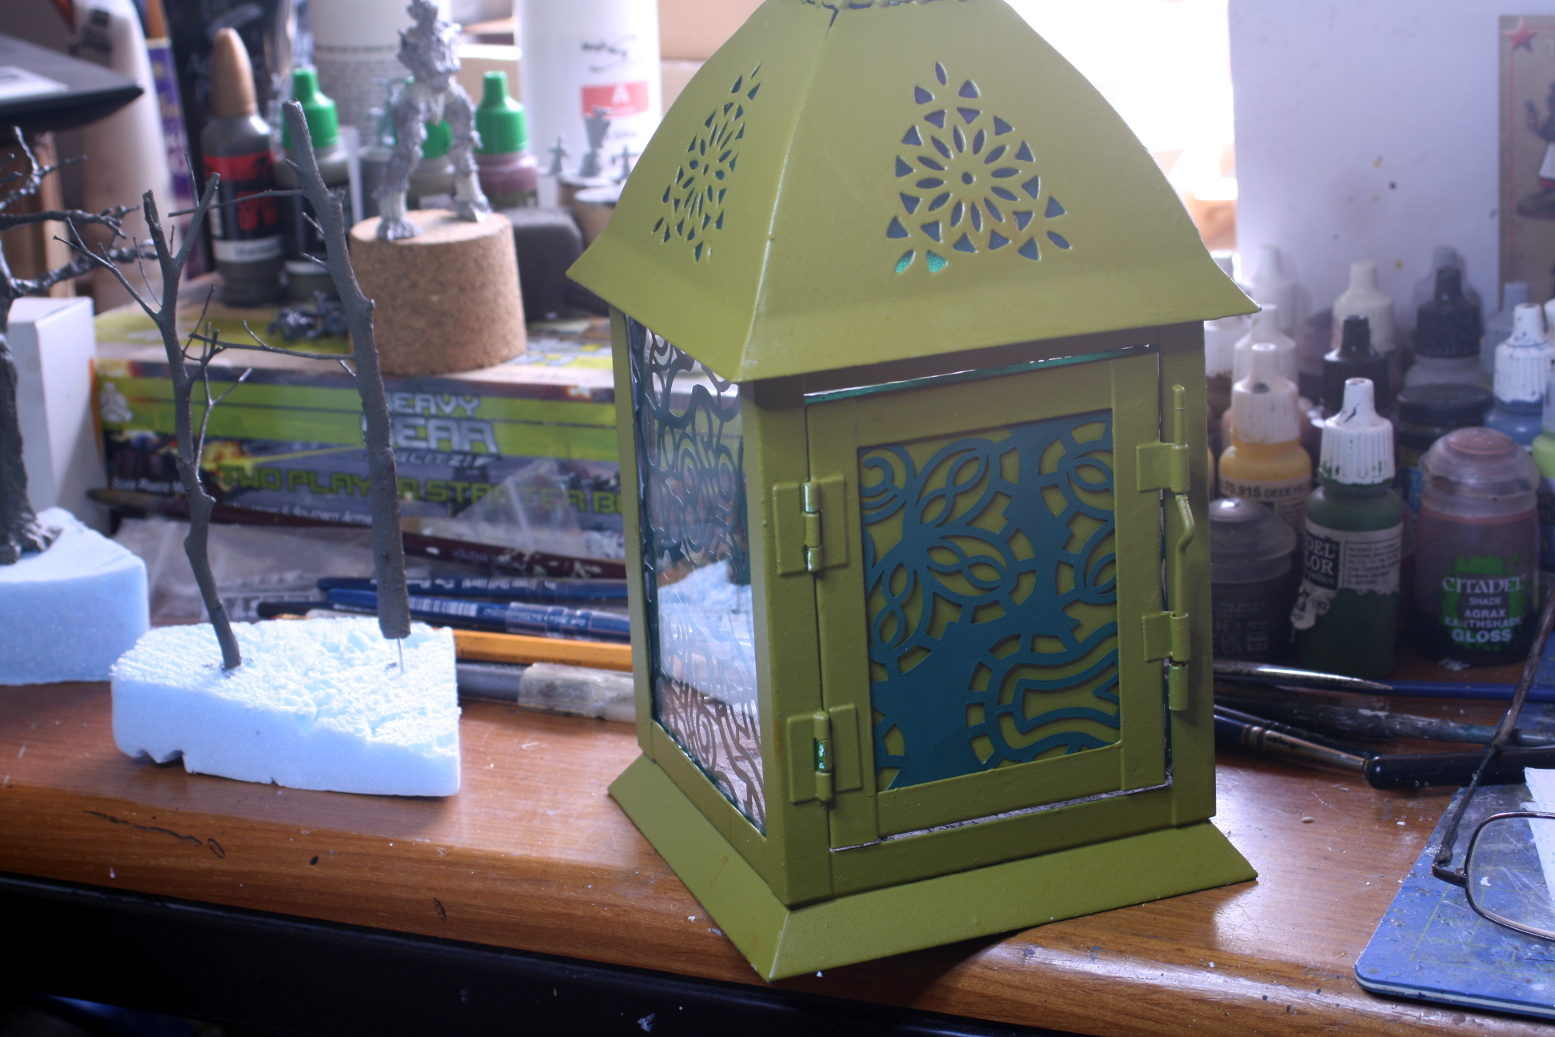

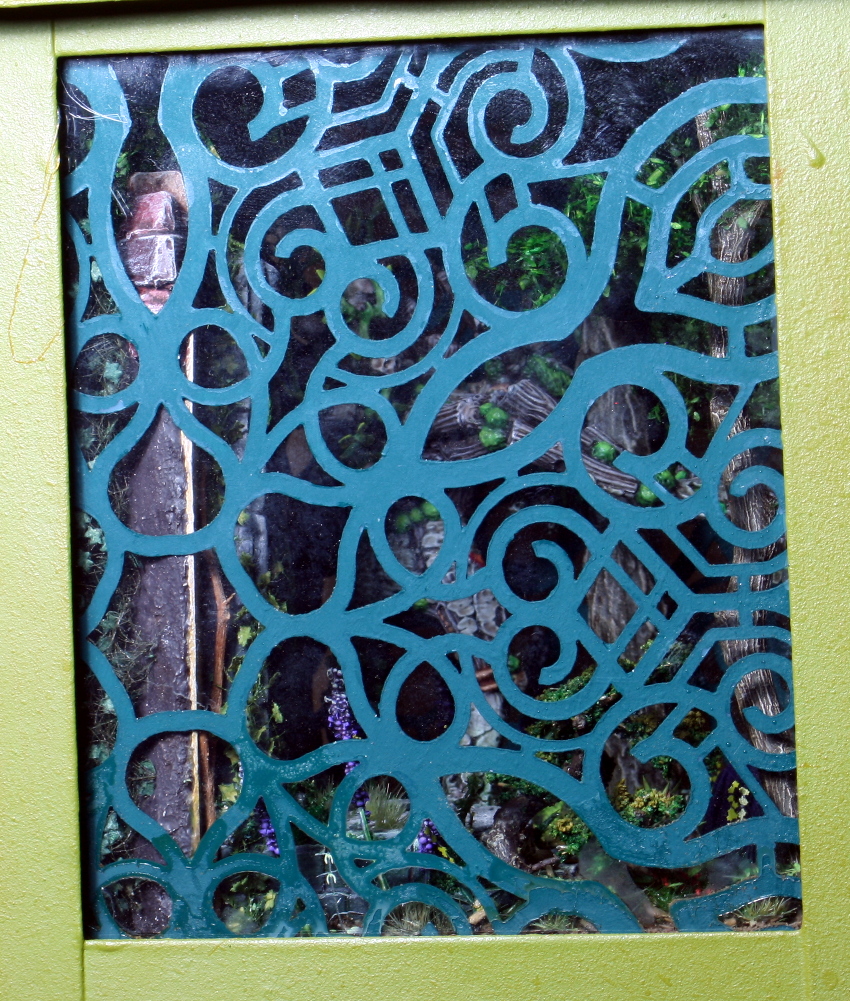
The next step was to clean the glass place them into position and place some designs along the side of the lantern.
I wanted the viewer to observe the work primarily from the front, so I thought that using the stencils as a framing tool to capture the scene was a good idea.
I am currently working on the garden wall at the back of the vignette and on a treeman conversion. I will probably post them up tomorrow or Sunday if everything goes well.
Until then,
Farewell and stay safe!
NR
Building The Wall
Hi everyone,
The next step in the process was to build the wall at the back. The biggest problem I had was that of fitting. It is one thing to imagine what you want to achieve and another to implement your vision.
After, my first attempt, I noticed I could not fit in the treeman. With my third attempt I noticed I could not work on the ground work after I put in the wall!
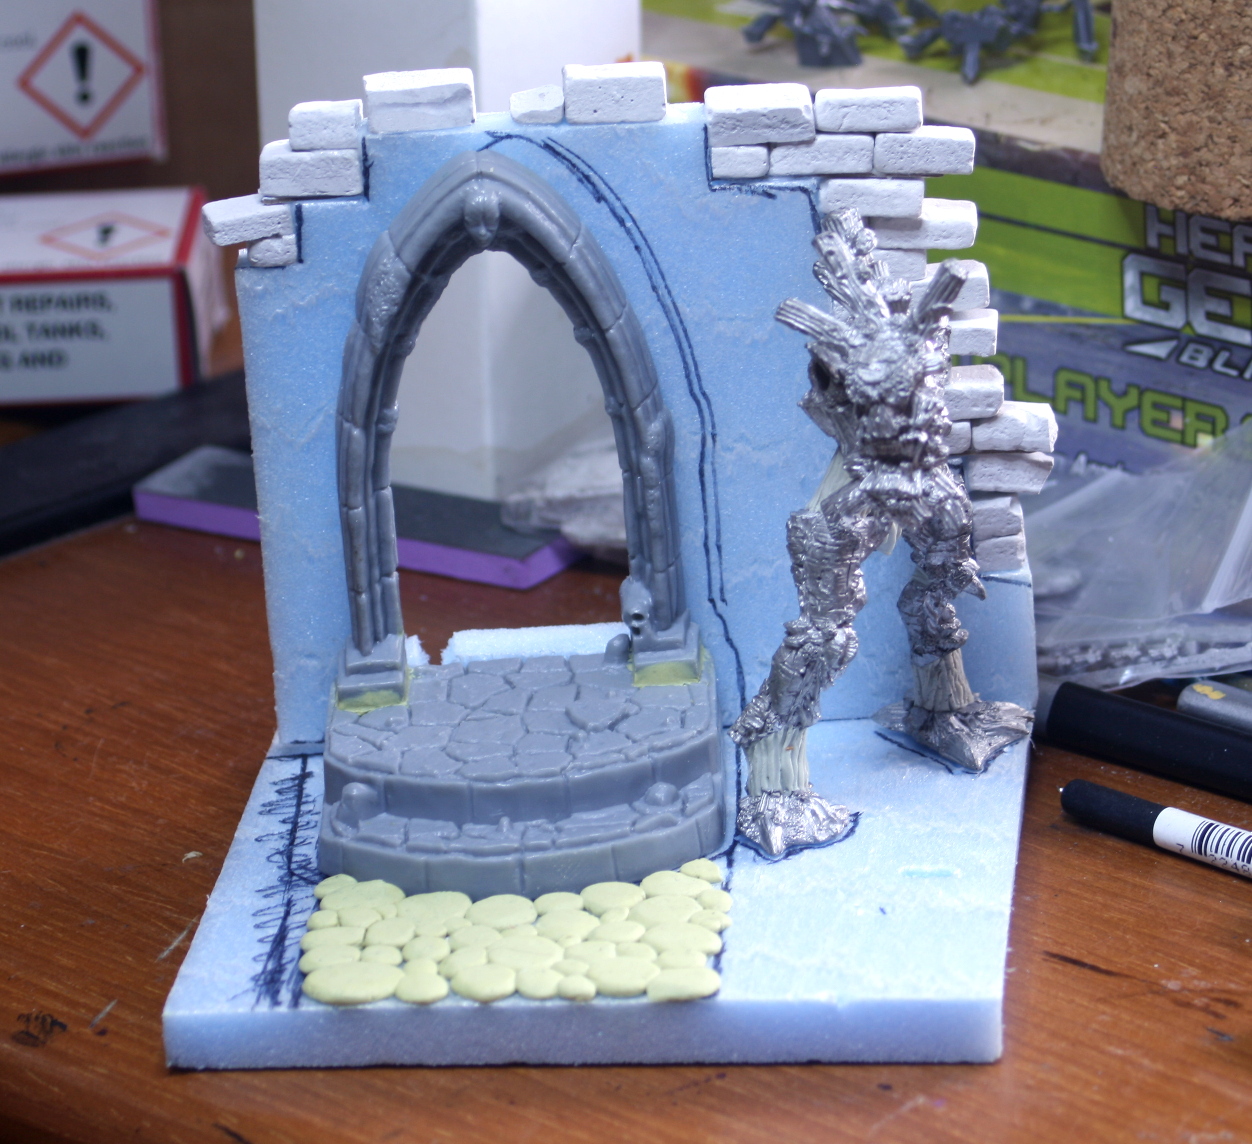 Using the treeman to determine the proportion of the wall.
In order the get the wall’s proportion correct, I had to wait until I partially finished the treeman. This allowed me to test fit the wall with the treeman before continung with the work.
 Creating the plastering with a thin layer of air-drying clay.
The door way is a Reaper miniature I bought off Ebay especially for this project. The structure is made from dense polystyrene and I used air-drying clay to create the plaster. The bricks are made from a plaster and a brick model.
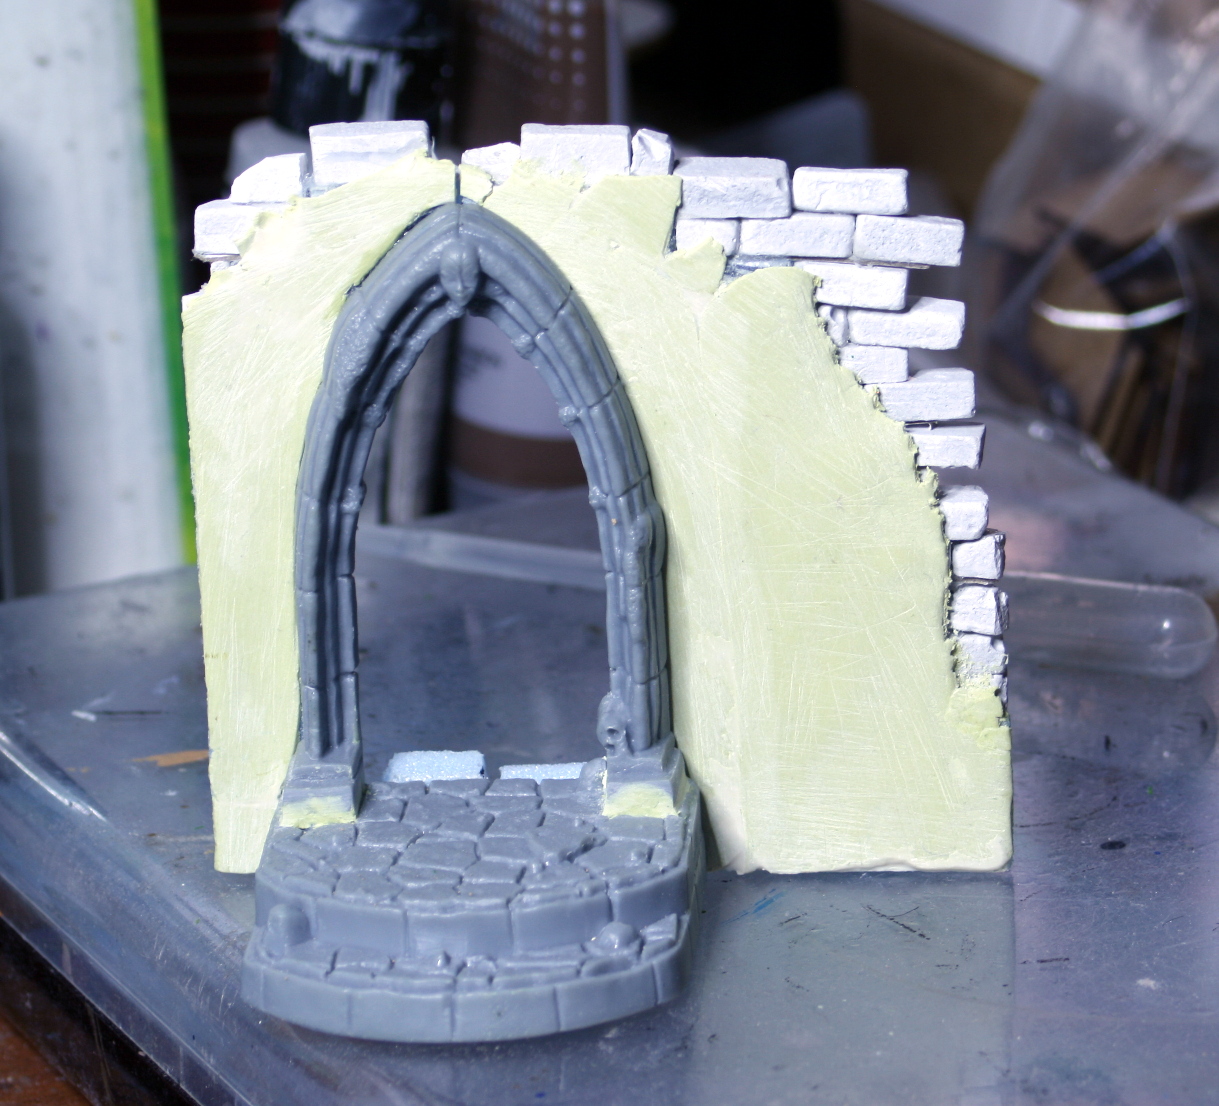
 Cutting the wall in half would help with the fitting.
Cutting the wall in half, would allow me to fit the fist half in, then touch up any terrain from the side and fit the treeman. Afterwards, I can closed the scene by fitting in the second half. That is the plan – I hope it works.
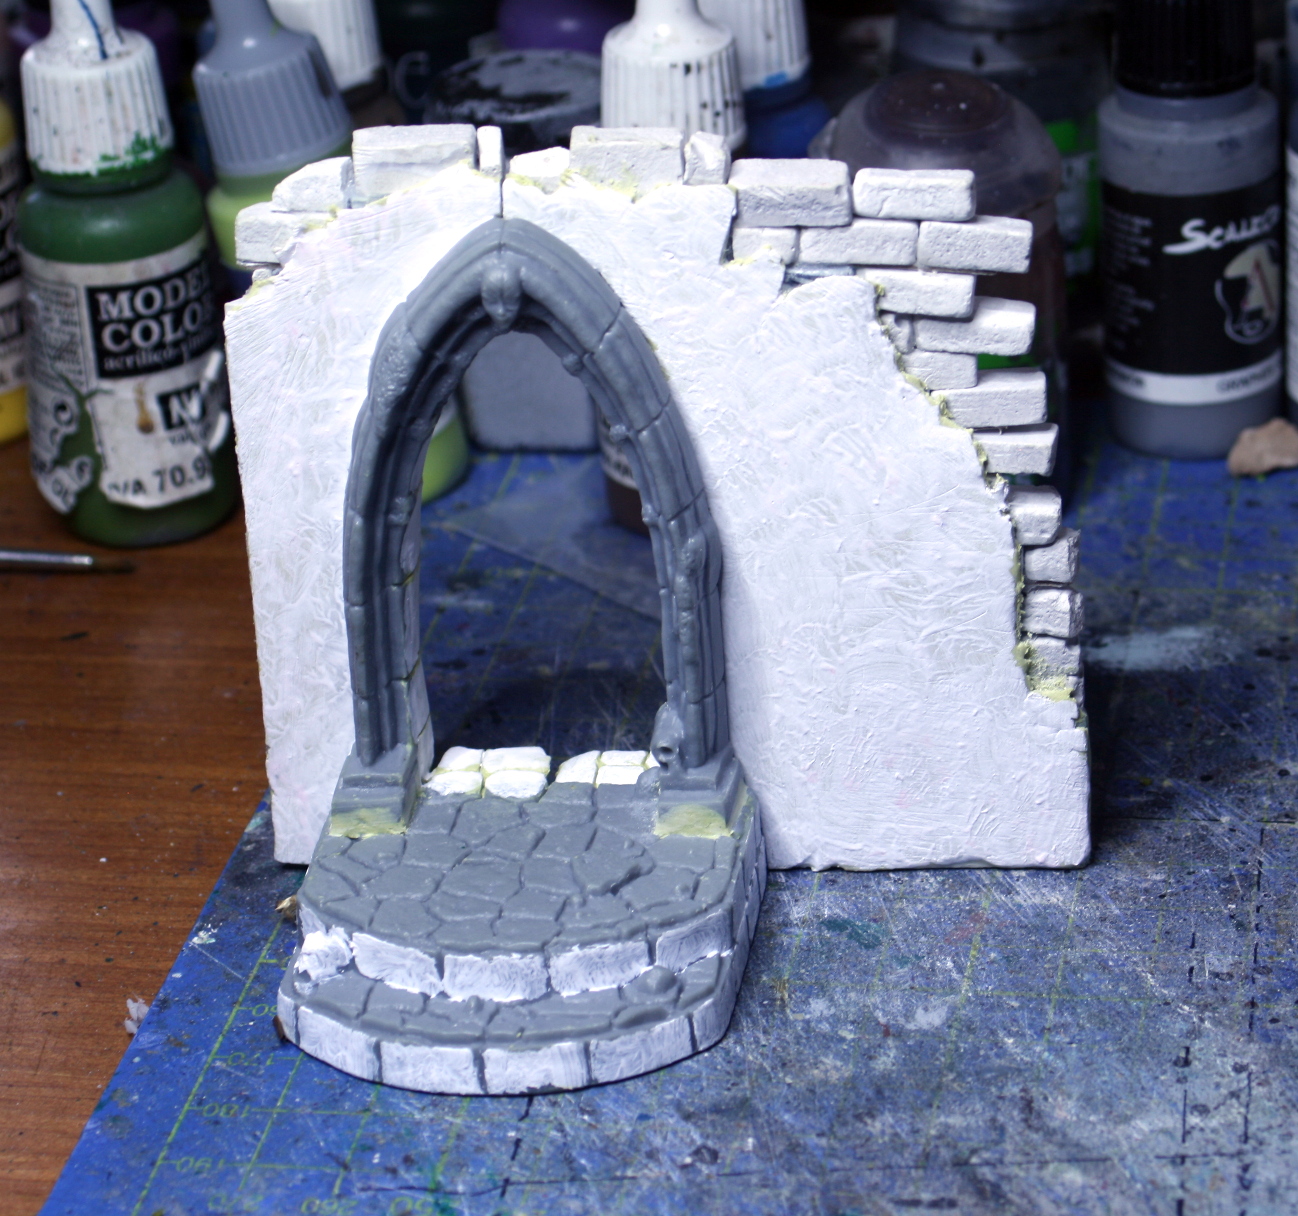 Adding stucco.
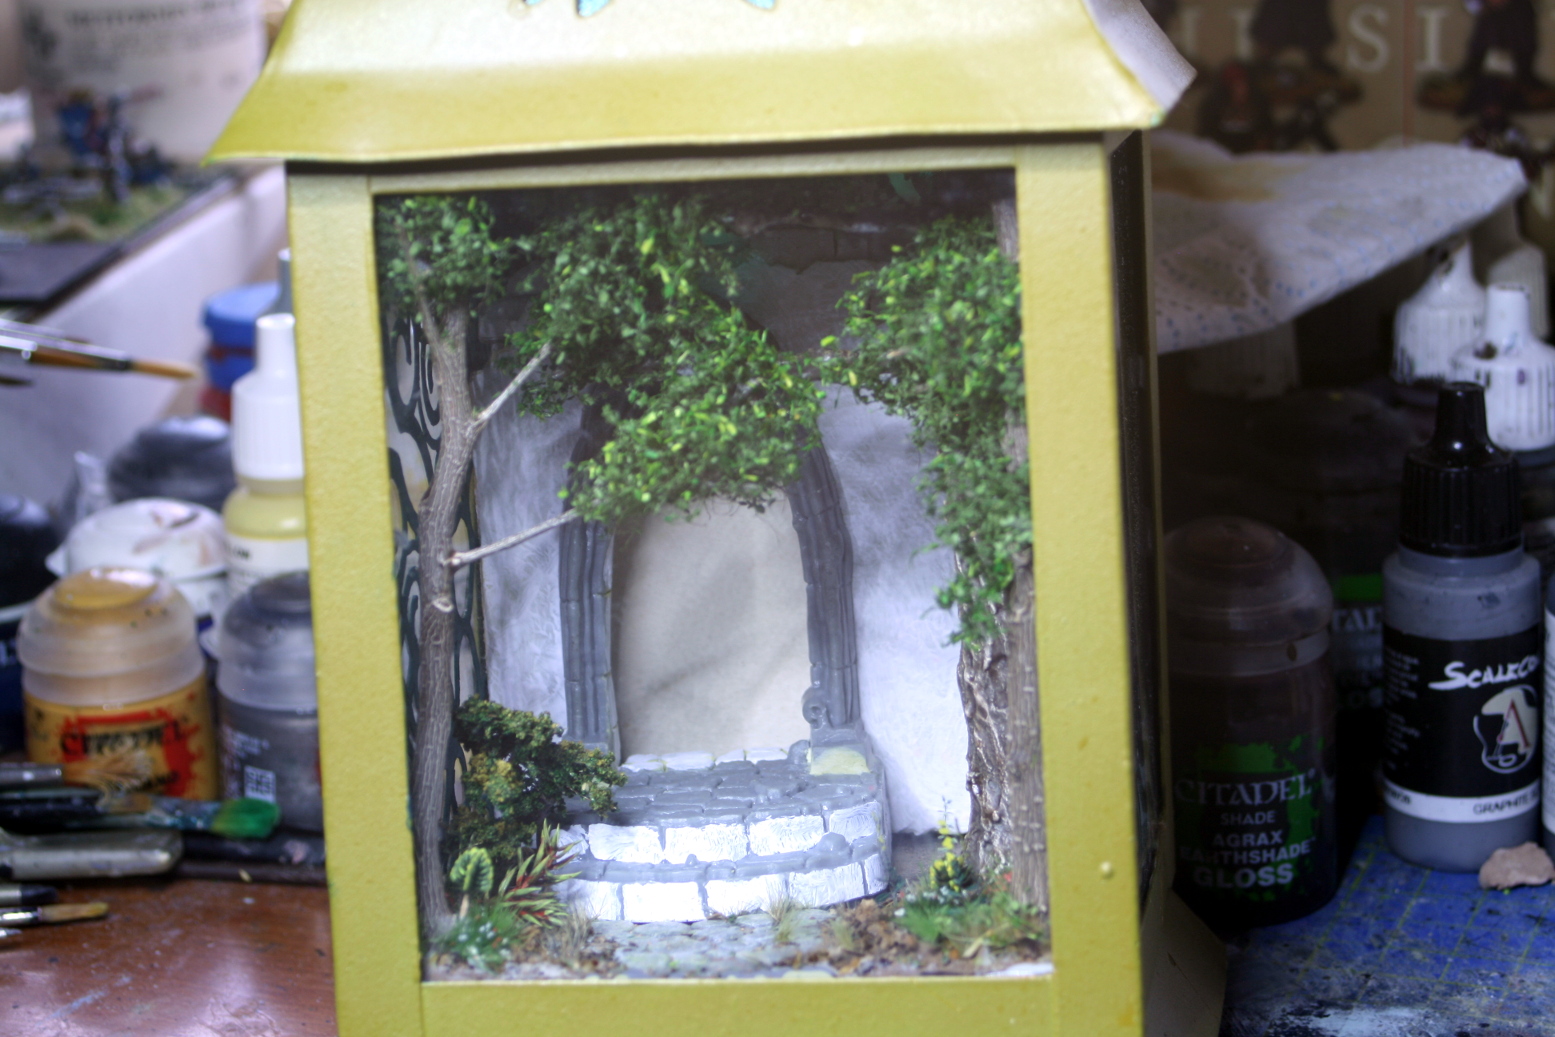 Last fitting before painitng.
The next step was to add stucco paste to give it a ‘plastered’ look and a few more fitting to make sure everything fits before painting. I also finished adding the trees and front vegetation before adding any of the miniatures.
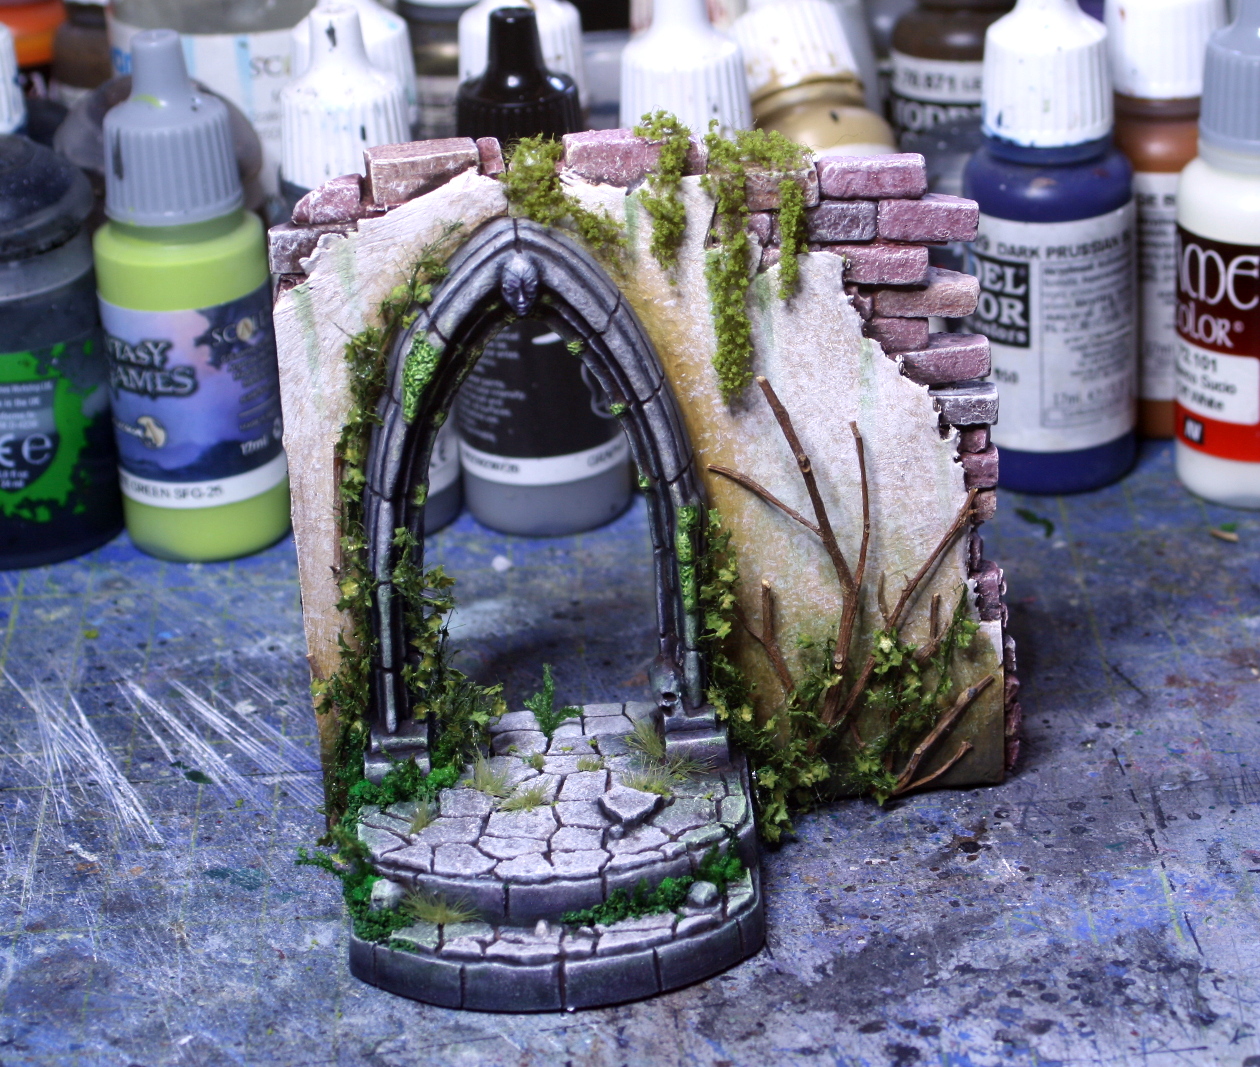 The wall is painted and detail added.
The last step was to paint up the wall and add some details in the form of vegetation.
That is all for today. The finished treeman will be next in a couple of days – if all goes well.
Until then farewell and stay safe.
NR
Treeman Modelling Finished & the Protagonist Painted
Hi everyone,
Last night I finished painting up the protagonist of my vignette, which I forgot to take a picture of before attaching it! It is a kneeling warrior from the Reaper Miniatures metal range.
The figure is great, and it actually was the source of inspiration of this vignette. When I saw it on Ebay I knew that I wanted it and what I was going to use it for. The rest of the planning and choices came about after.
I also added more vegetation to the front of the vignette, after permanently attaching the warrior and the ground to the scene.
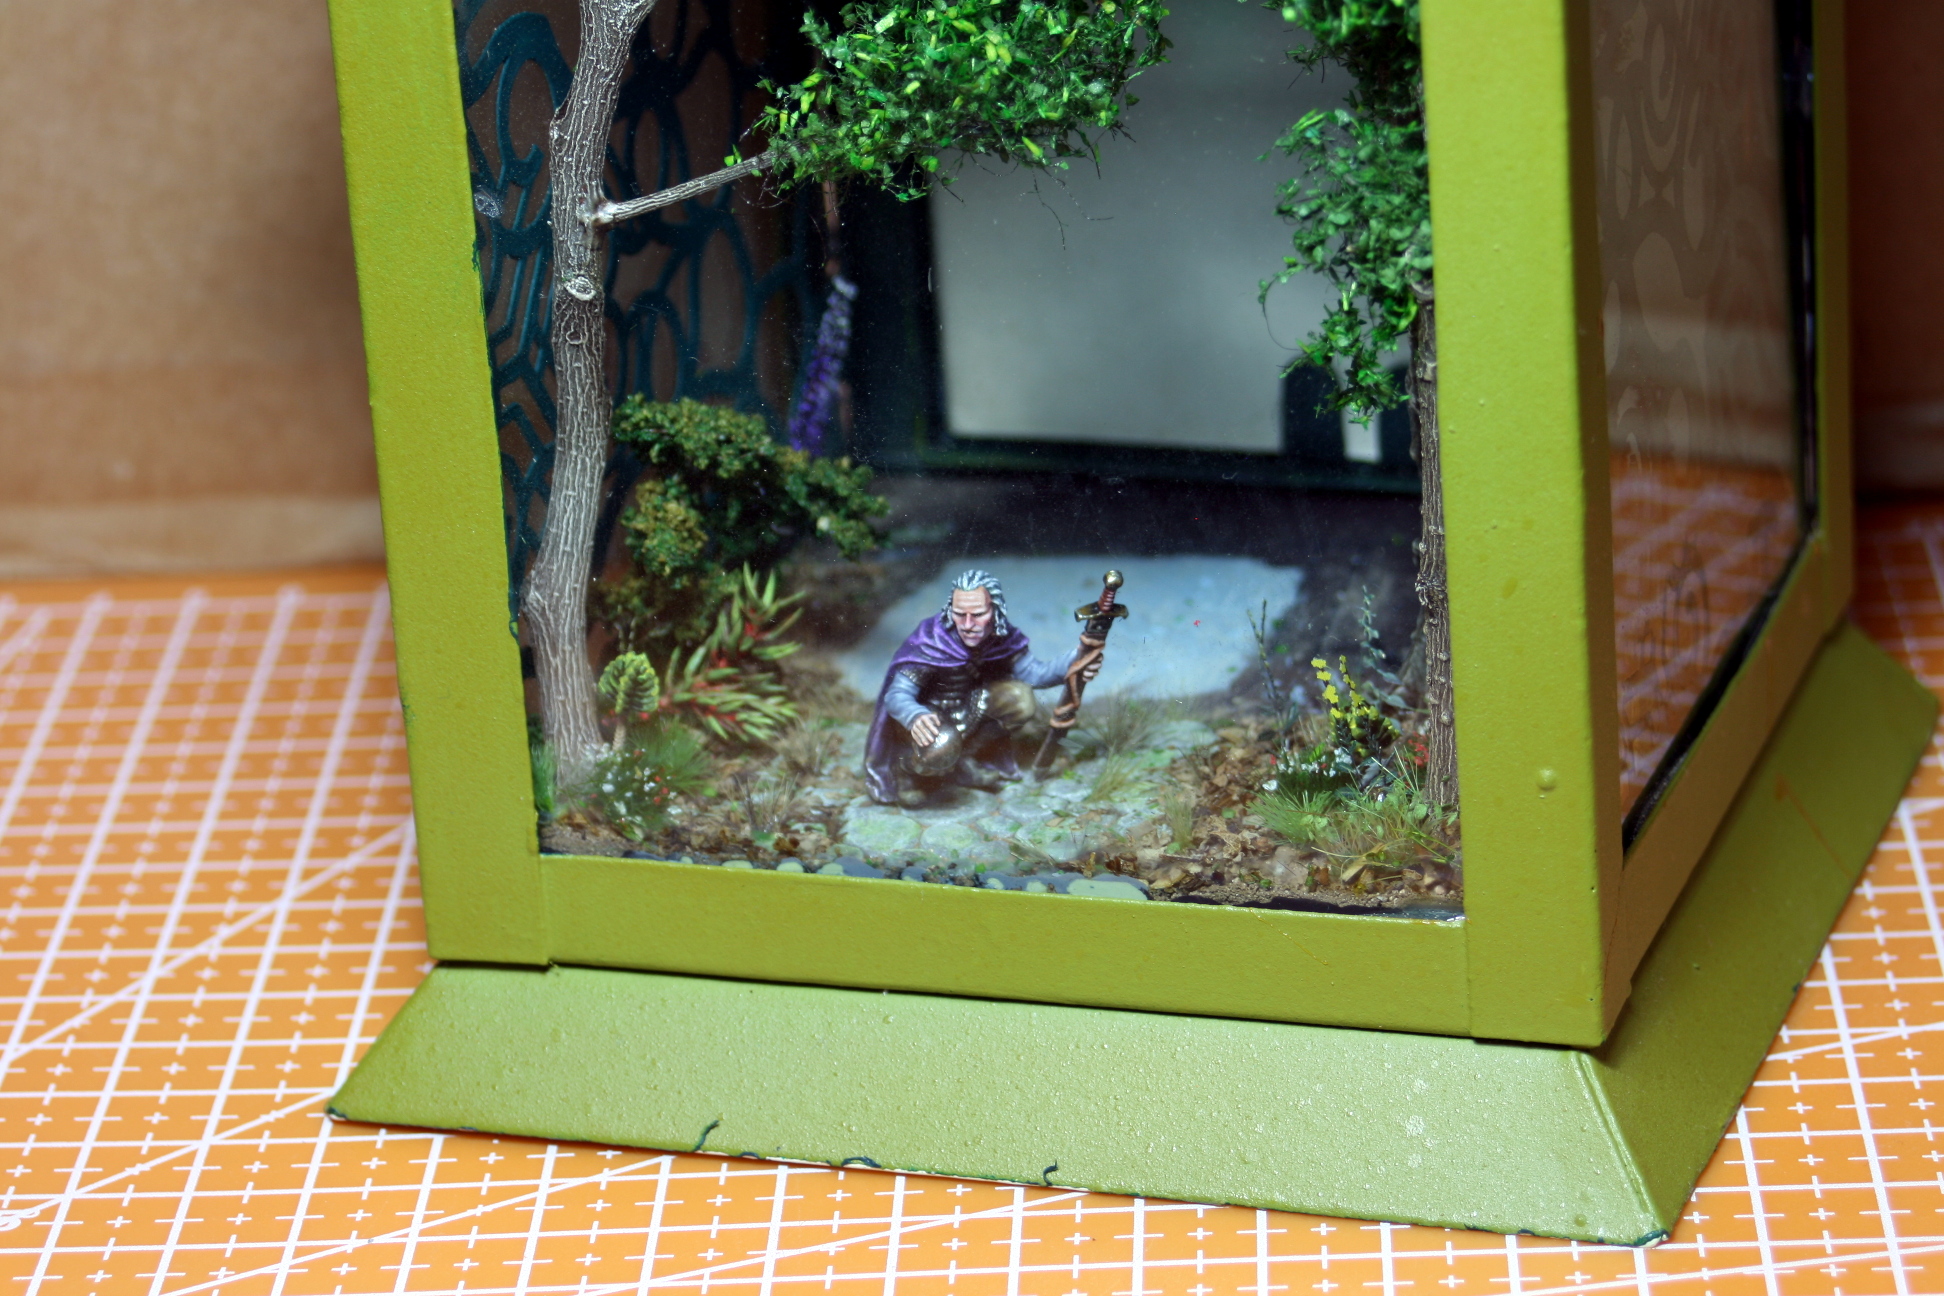 Figure painted and more vegetation added to the scene.
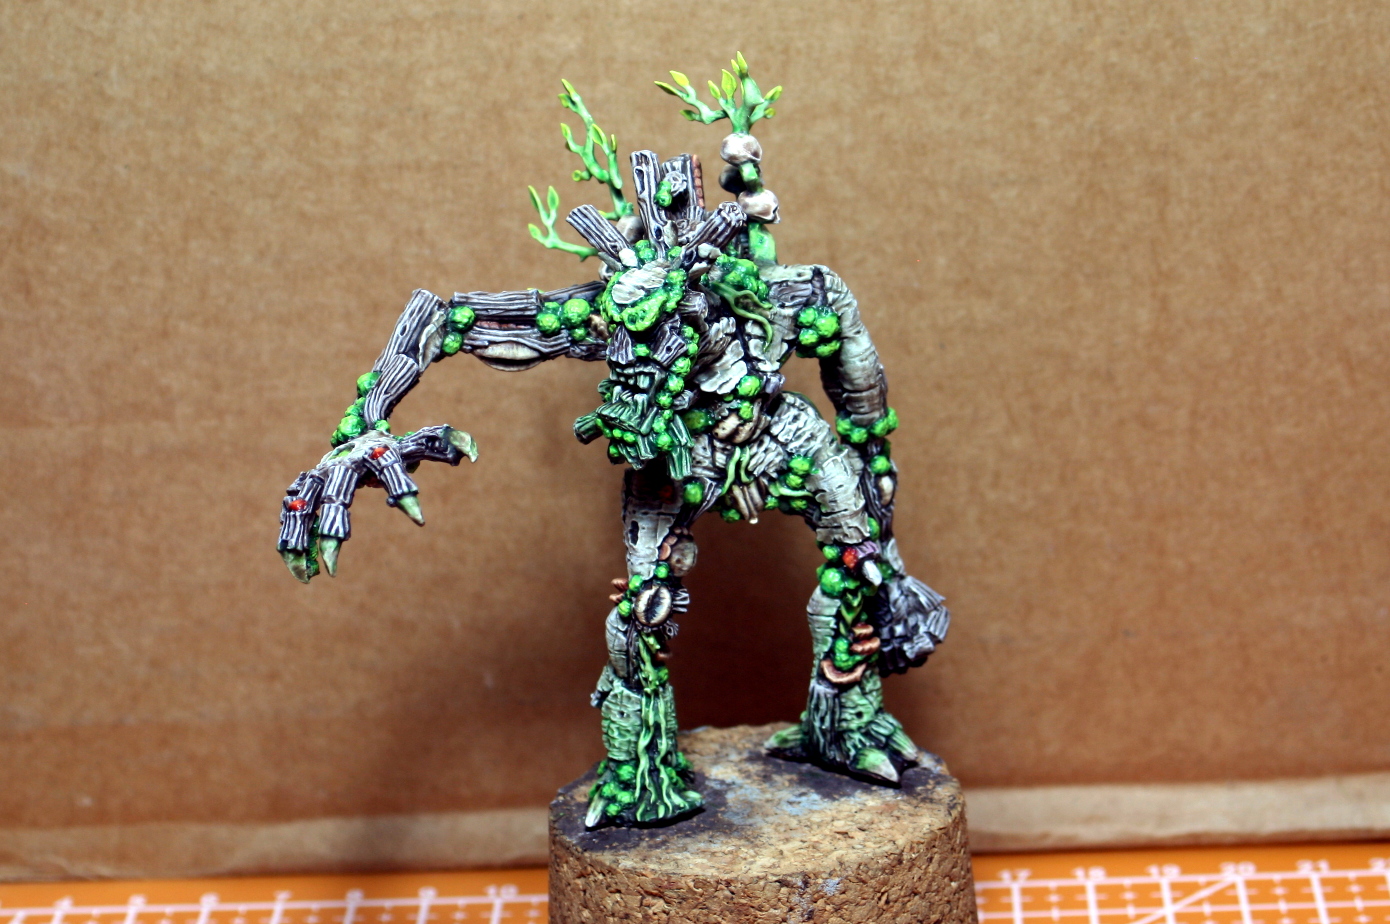
Over the weekend I also managed to finish off the treeman. This is an old metal Durthu miniature from the GW range. I had two of these, as you can see from the photo below, one I painted up ‘as is’, and is part of my Silvan Elf Army (still a work in progress).
The other used in this project was cut up; the parts re-attached and modelled to look taller with his arm extended. The modelling of Durthu was the part of the project I enjoyed the most.
 Comparison between original and converted metal Durthu miniature.
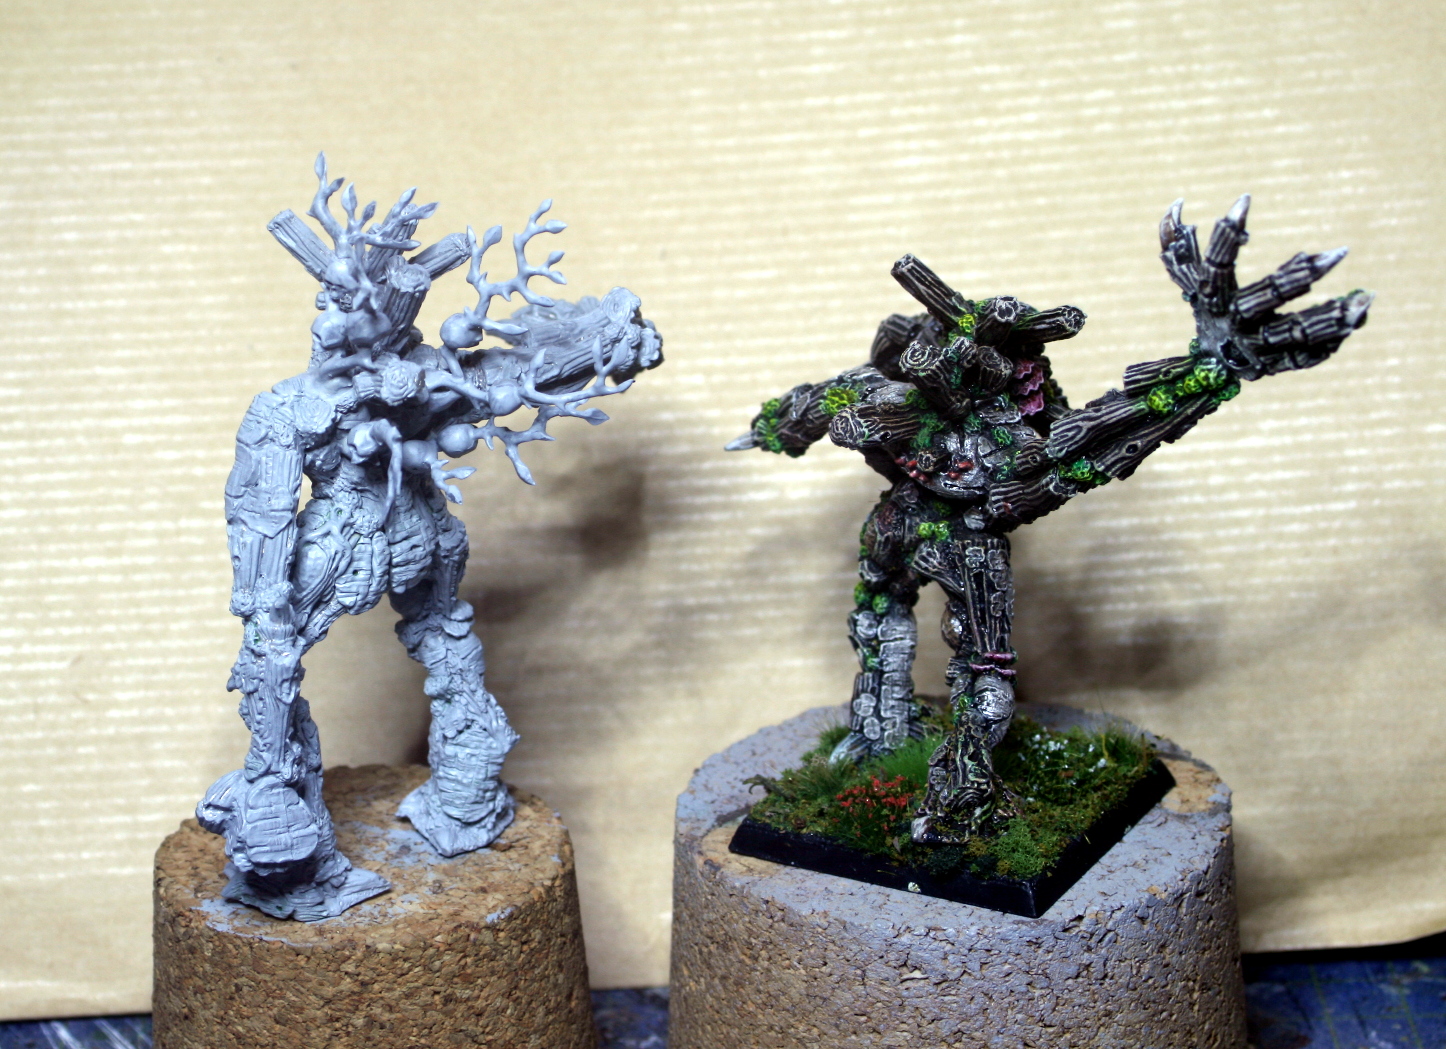 Plastic parts of the back are from the newer treeman kit from GW.
That is all for now. The next step is to paint up my new Durthu model and fit everything together.
Until then,
Farewell and stay safe.
NR
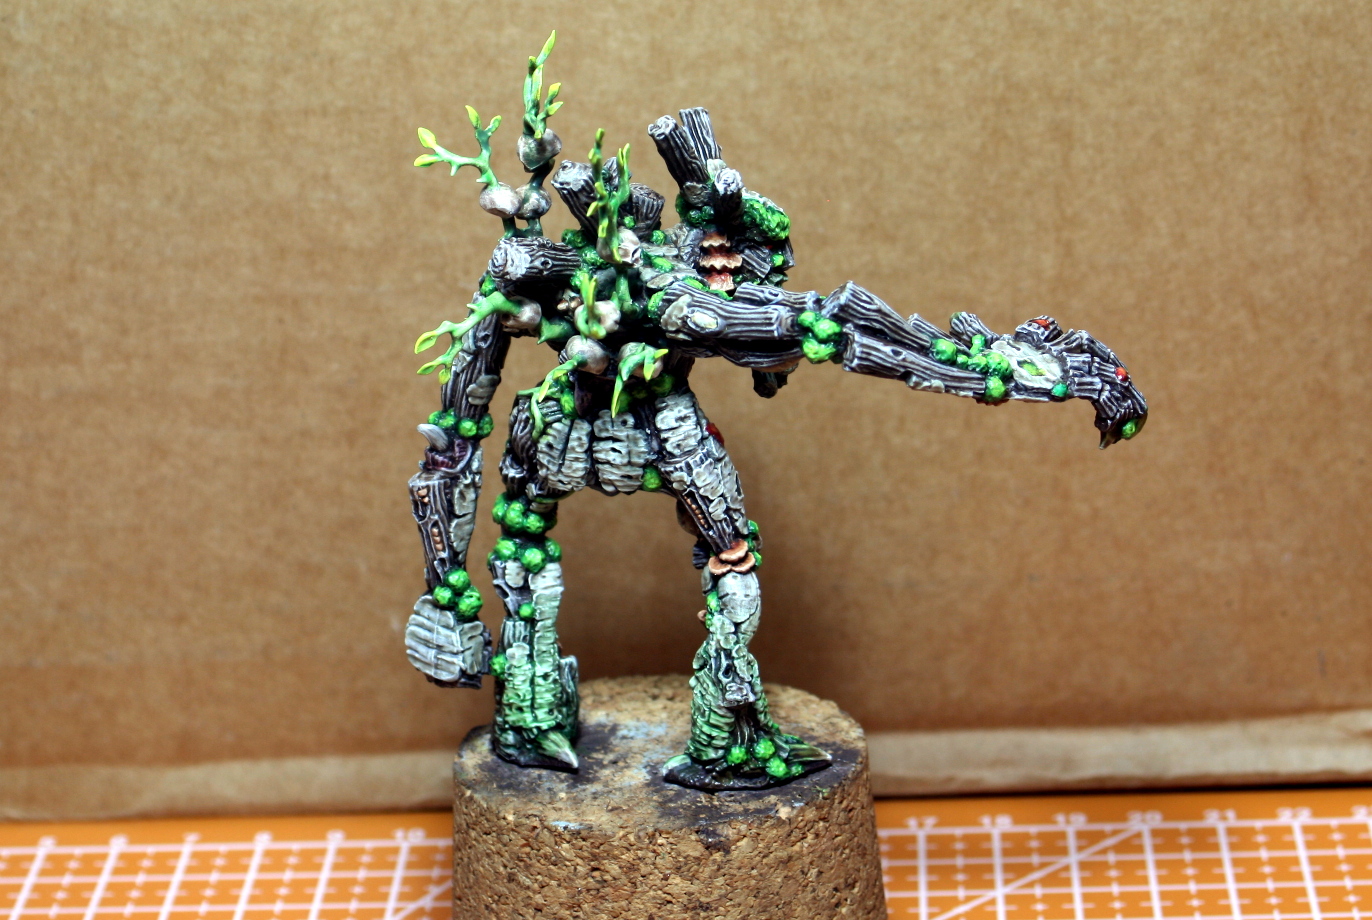
The Treeman Painted Up.
Hi everyone,
I finally finished painting up the treeman for the vignette. It surprisingly took longer than I expected, because the tone had to be changed several times to allow it to fit in to the scene – at least from my perspective.
Nonetheless, it is finished now and I am quite happy with it. All that is left is to carefully fit everything into the lantern with care and patience.
I will finish this project on Sunday, and hopefully I will publish the last post probably on Monday, time permitting.
Until then farewell and stay safe.
NR
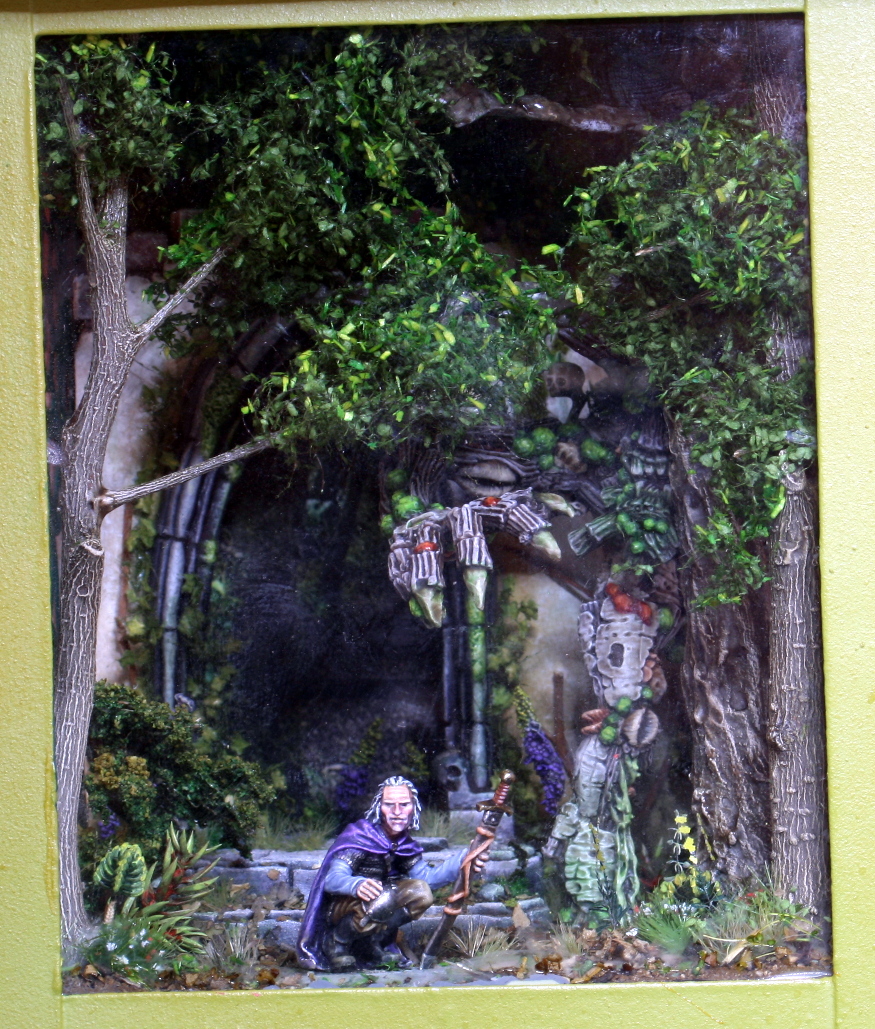
Vignette Finished!
Hi everyone,
The vignette is finally finished. I put in the final parts this afternoon. These were the photo of the stairs at the back and the tree-top at the back to cover the ceiling of the lantern at the back, besides the models and wall ofcourse.
The photo did not come out well in the pictures below. It is very strange, becuse seen with the naked eye it is very different. Maybe I should have used proper photographic paper?
My photographic skills are not the best and it shows in the photos below. Nonetheless, they are good enough to get the idea of what I have made.


I am now thinking on what to do next, maybe a single showcase piece or another 1/72 diorama I have been thinking about.
Until my next project, farewell and stay safe.
NR


