


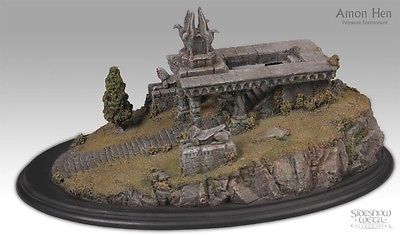
Amon Hen: Middle Earth SBG Terrain.


Recommendations: 110
About the Project
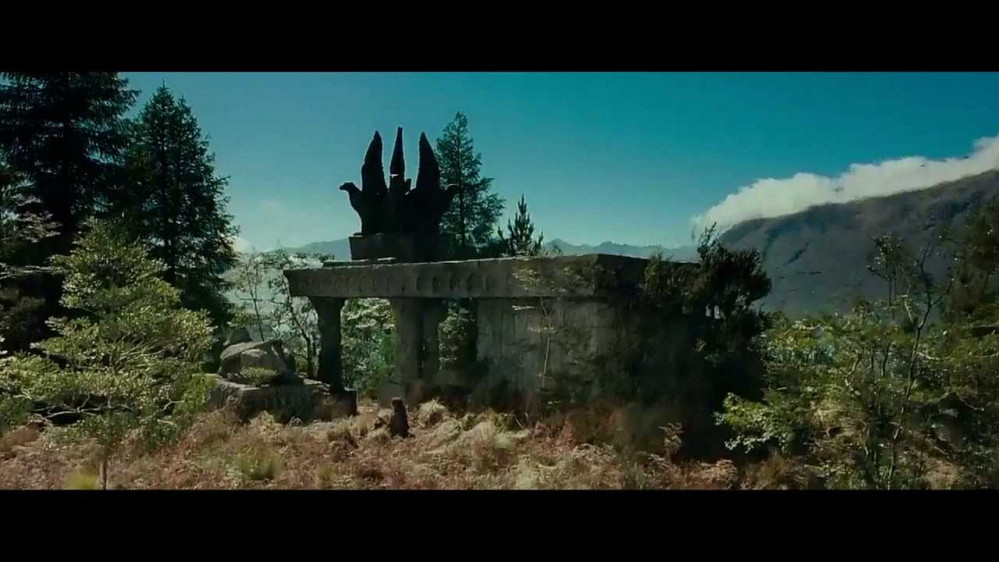
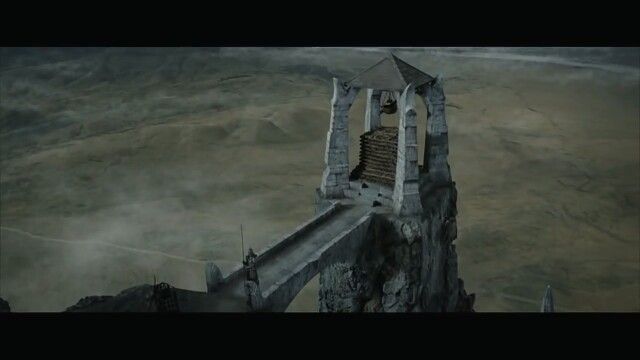
Since both Sam and Ben have brought me back to my favorite fantasy setting of Middle Earth. I just can't simply have a generic game table. This game is now so thematic, I need to bring the visualizations of the movies and the world to the table top. Most memorable one of these is Amon Hen the old watch of Arnor's southern border.
Related Game: The Lord of the Rings Strategy Battle Game
Related Company: Games Workshop
Related Genre: Fantasy
This Project is Active
Progress Pictures
Got Amon Hen meshed out this afternoon. And started breaking it down into parts for printing.
Time to start the printing process tomorrow.
Progress on redoing Amon Hen
Got a few hours in on redesigning Amon Hen. Until my computer locked up on me. I was tired and not paying attention to the poly count which was 1.2 Million. Computer was able to render this much of the model before it locked up. I do believe I could possibly finished meshing the model out tomorrow.
Some of the design changes.
-Steps are 20-21mm deep so minis should be able to use them.
-Pillars and Platform should now be tabbed correctly for the pegs.
-Stairs now properly lines up with the Pillars
-Redesigned the base section to have a void space instead of being solid. For future casting processes. Plus this should help speed up the print time.
-Cut 12mm off both sides X-axis and removed 25mm in the Z-axis.
-Increased the height by 10mm
Fallen King
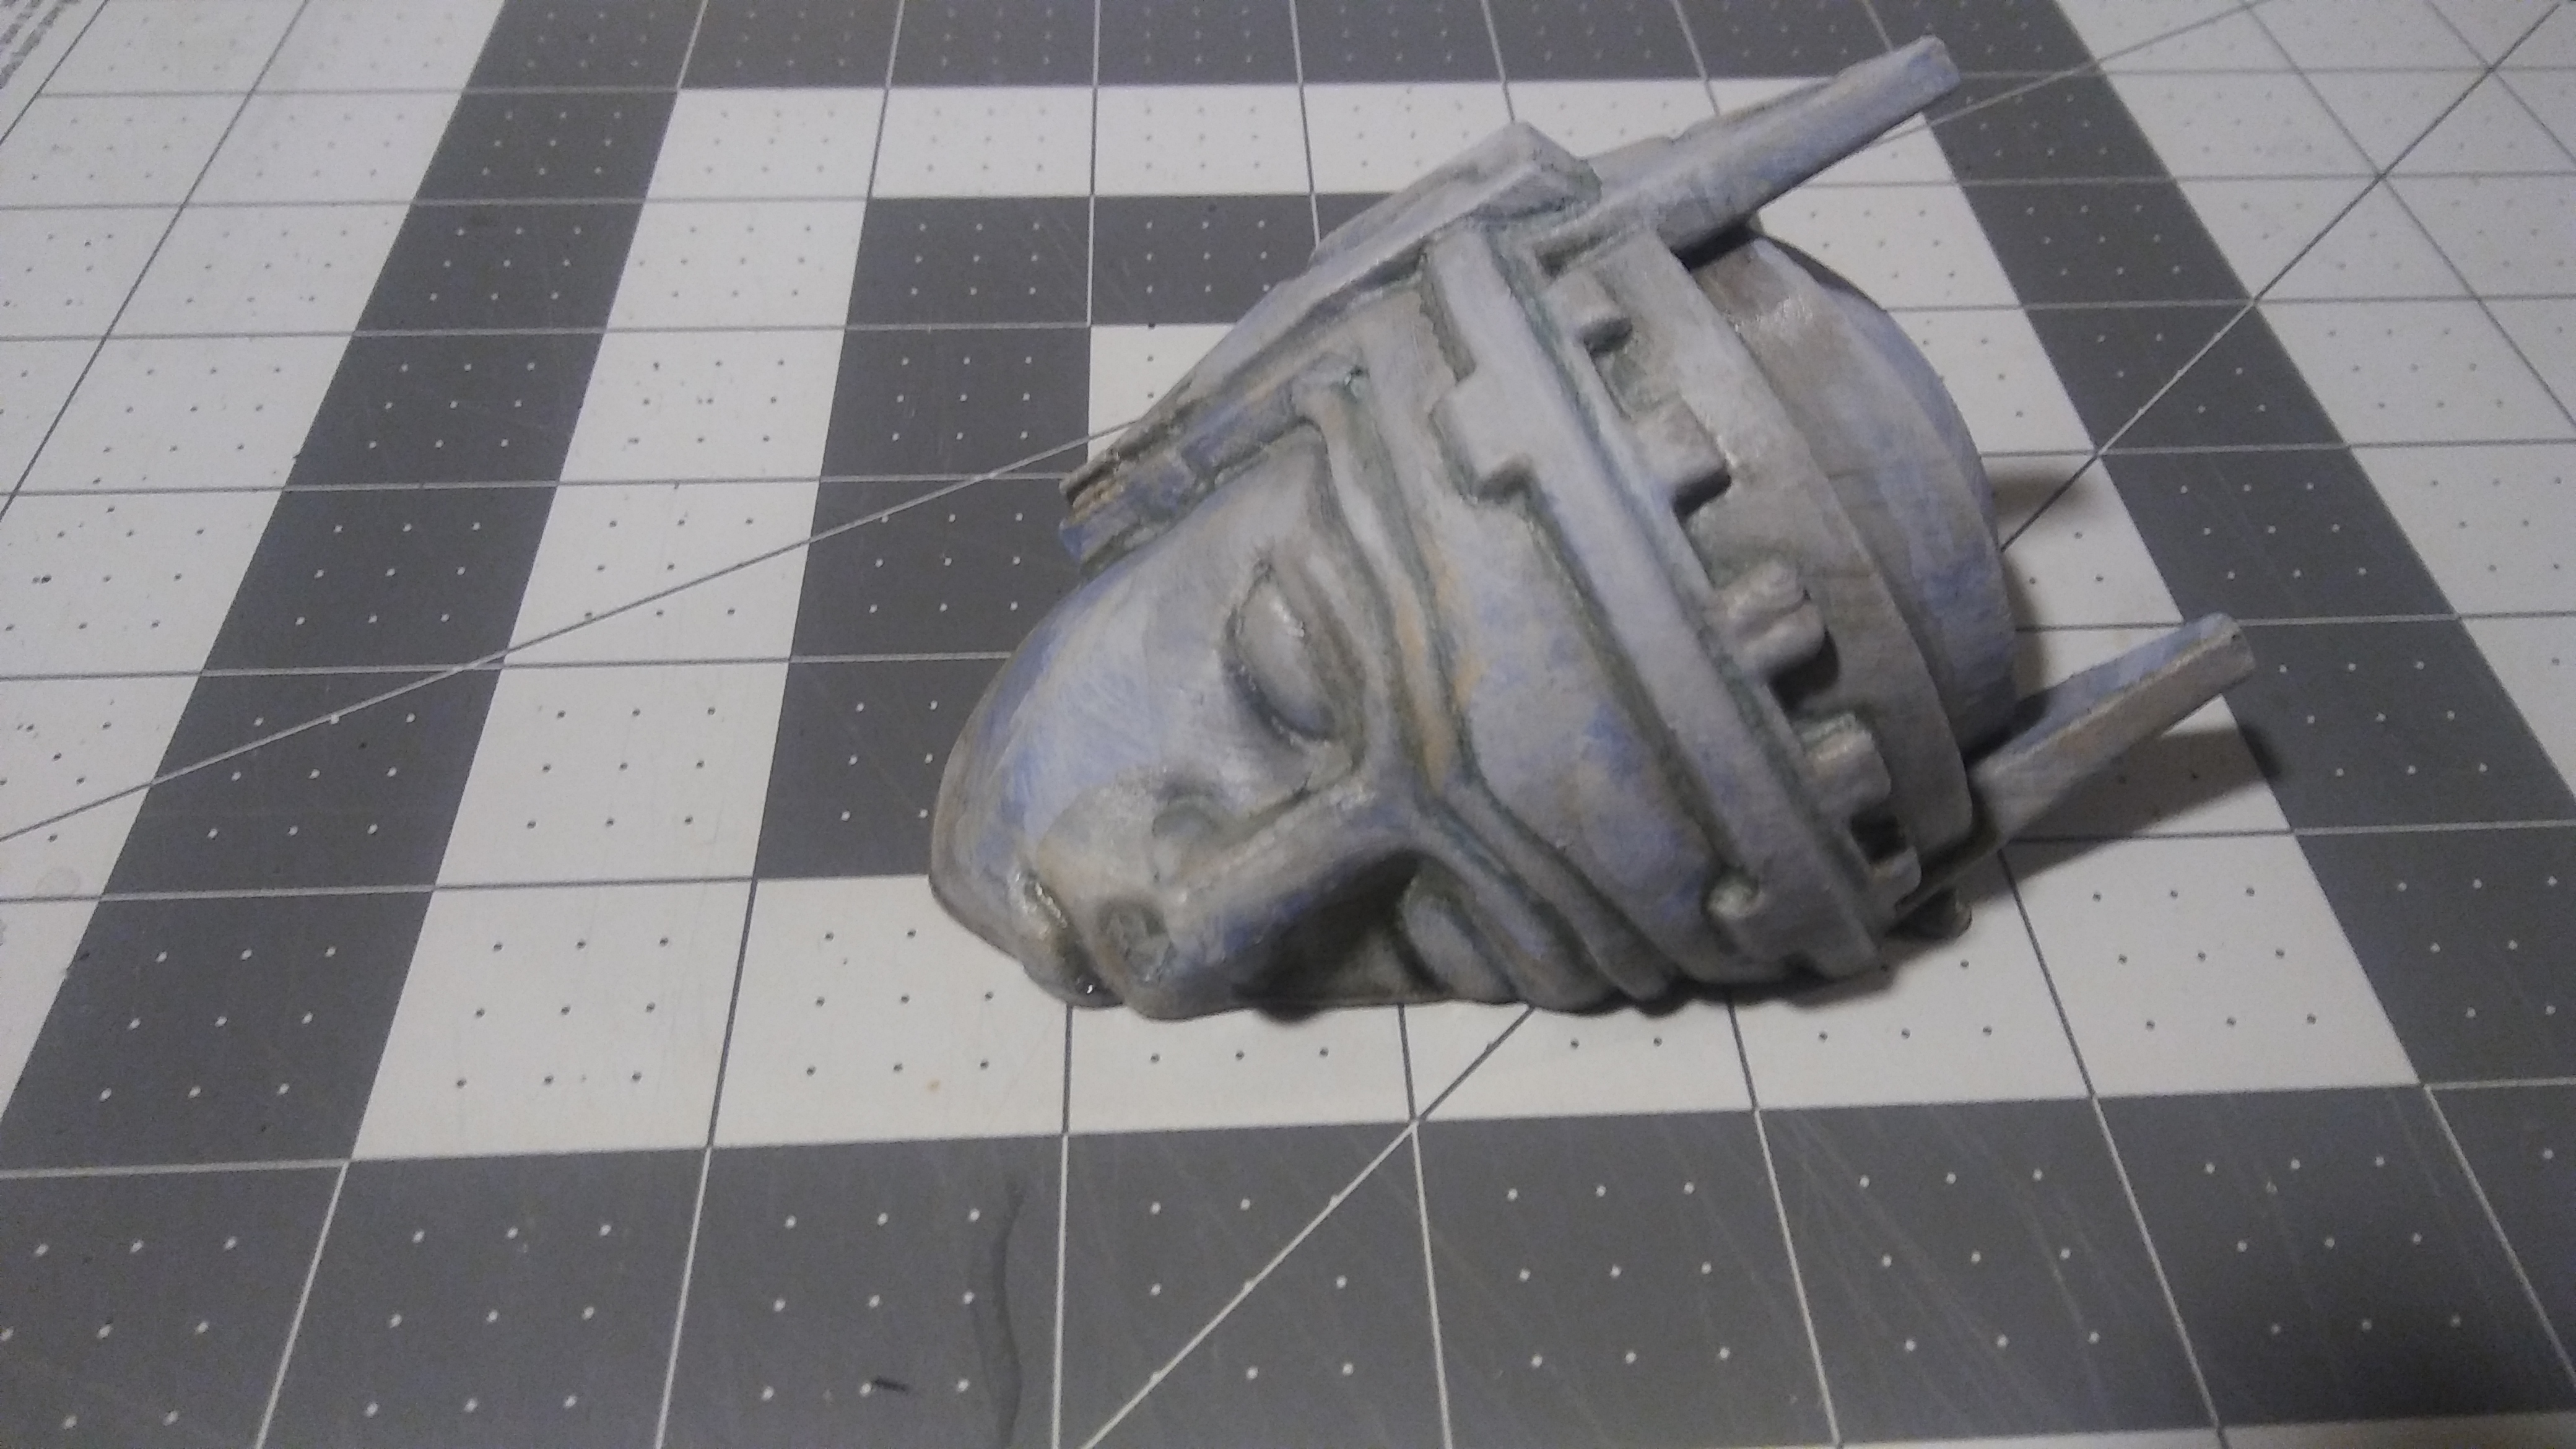
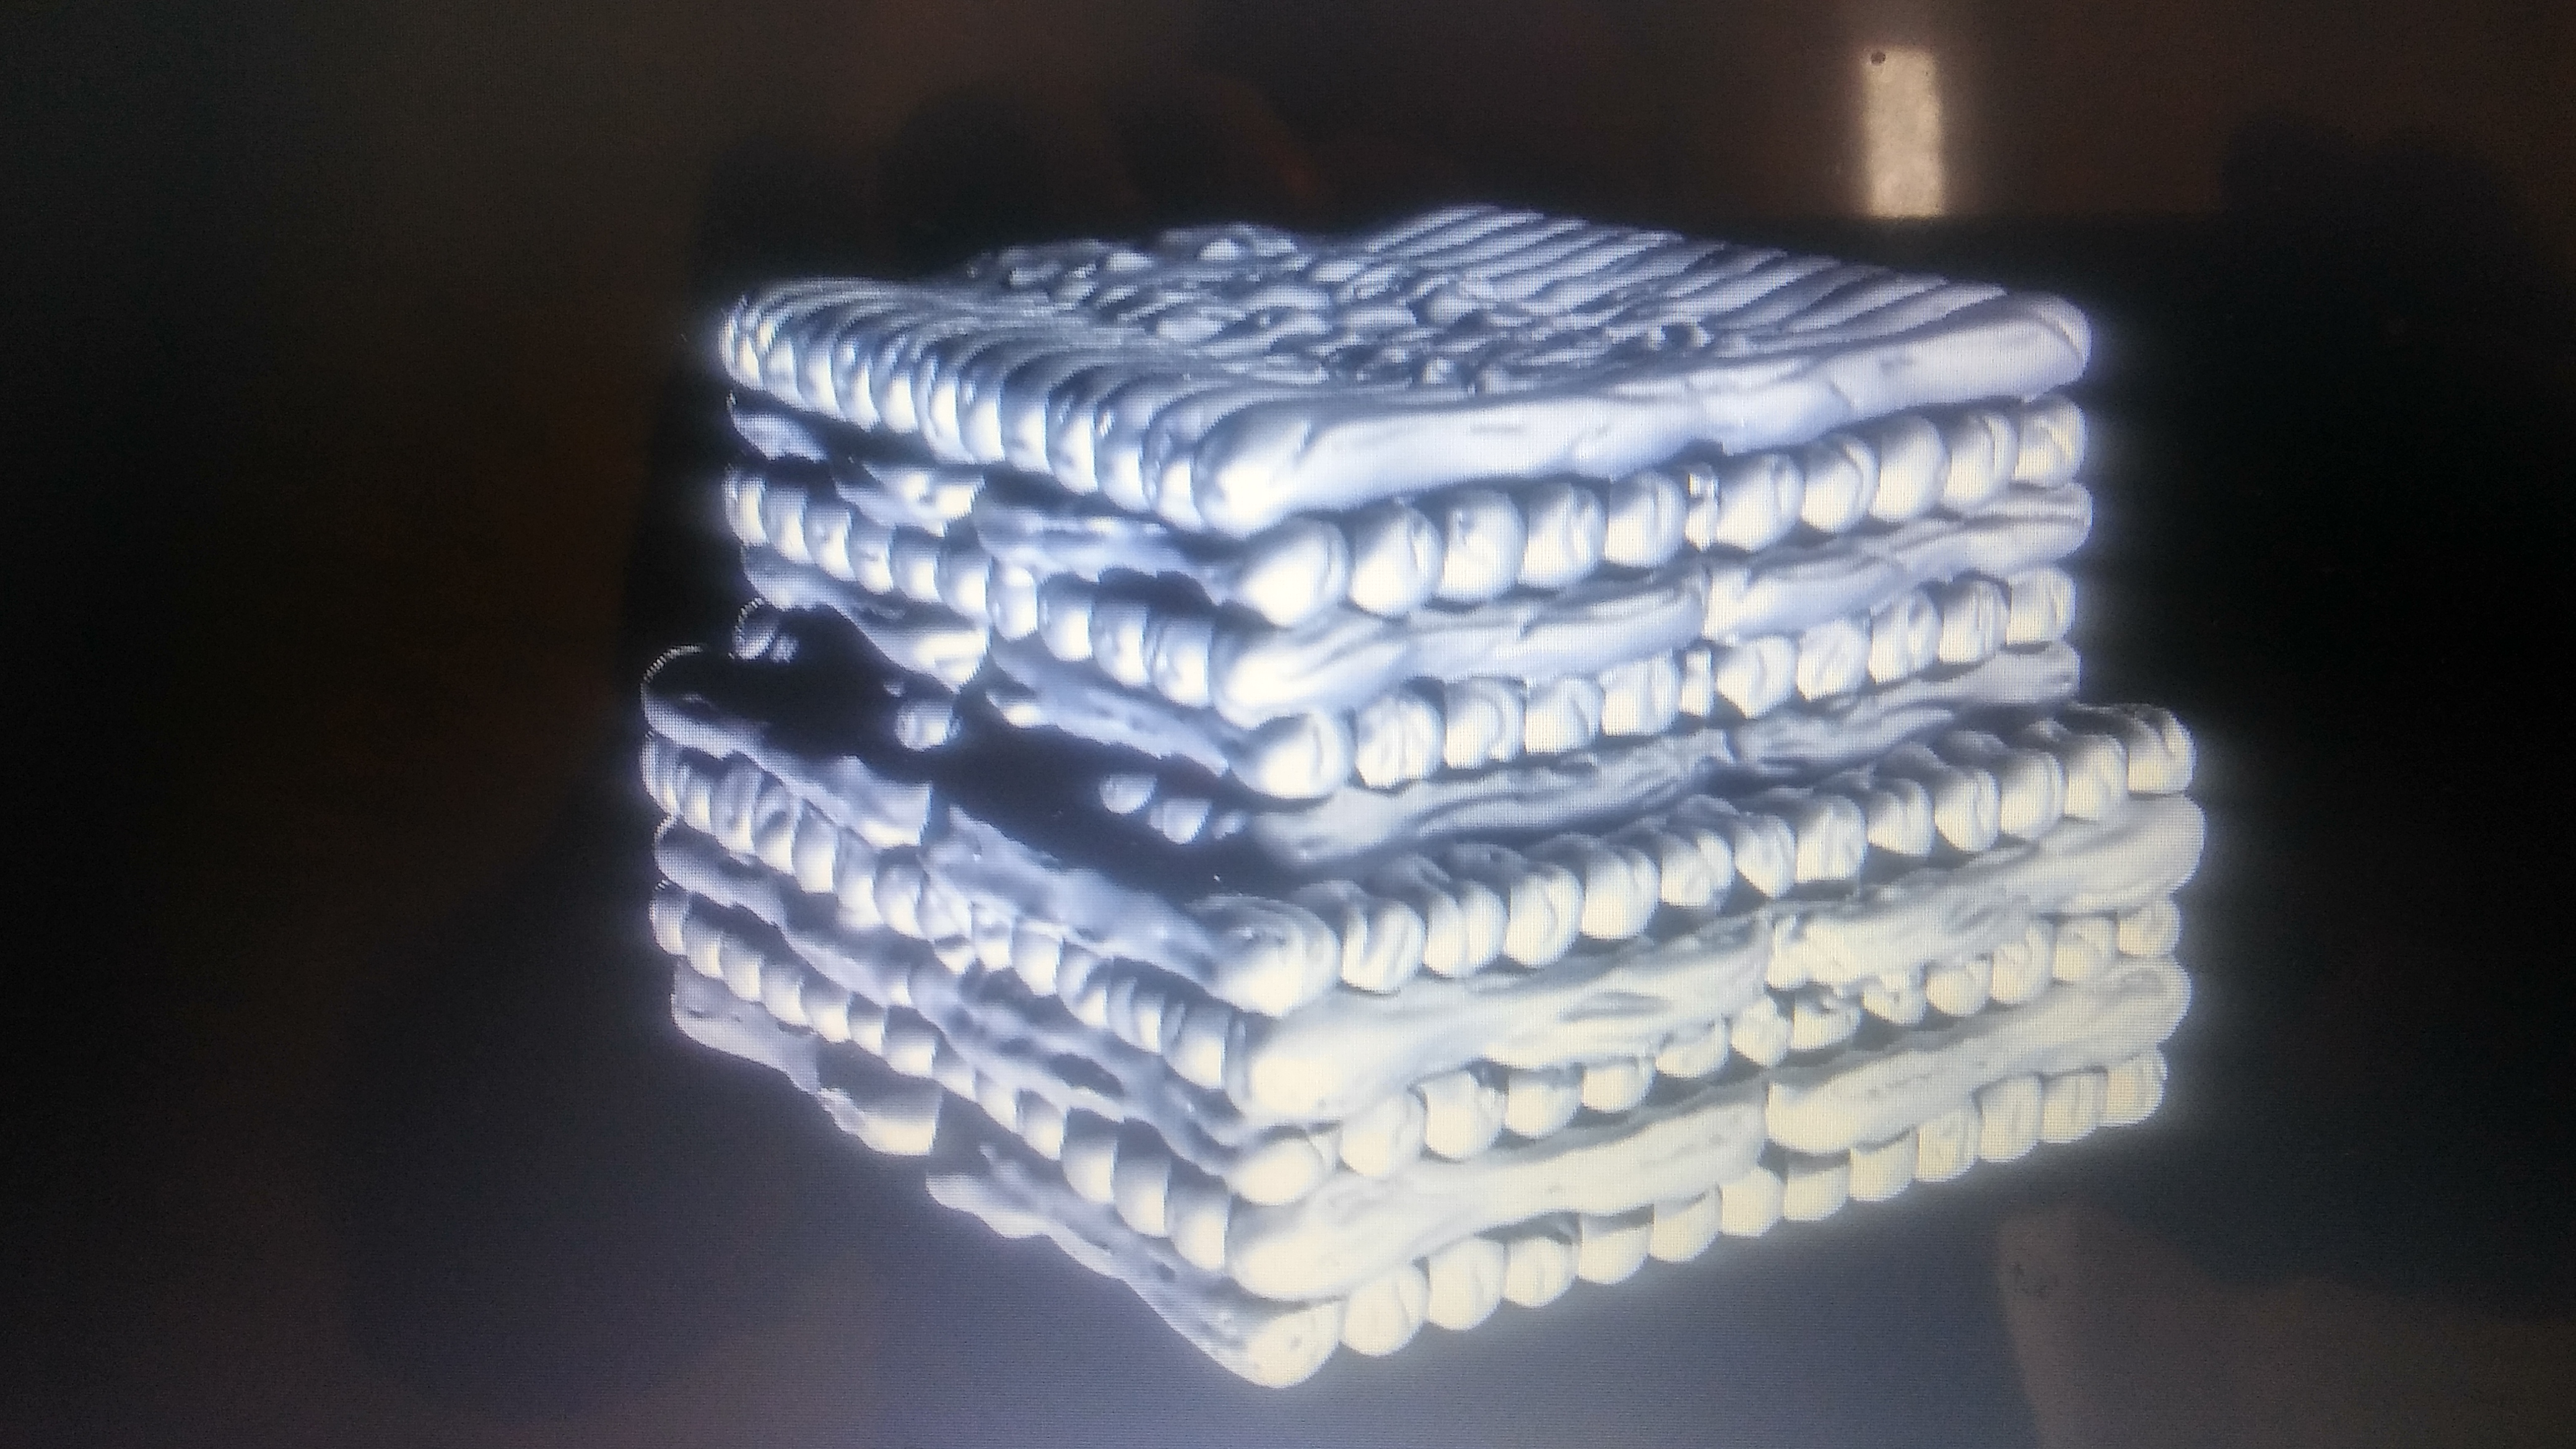
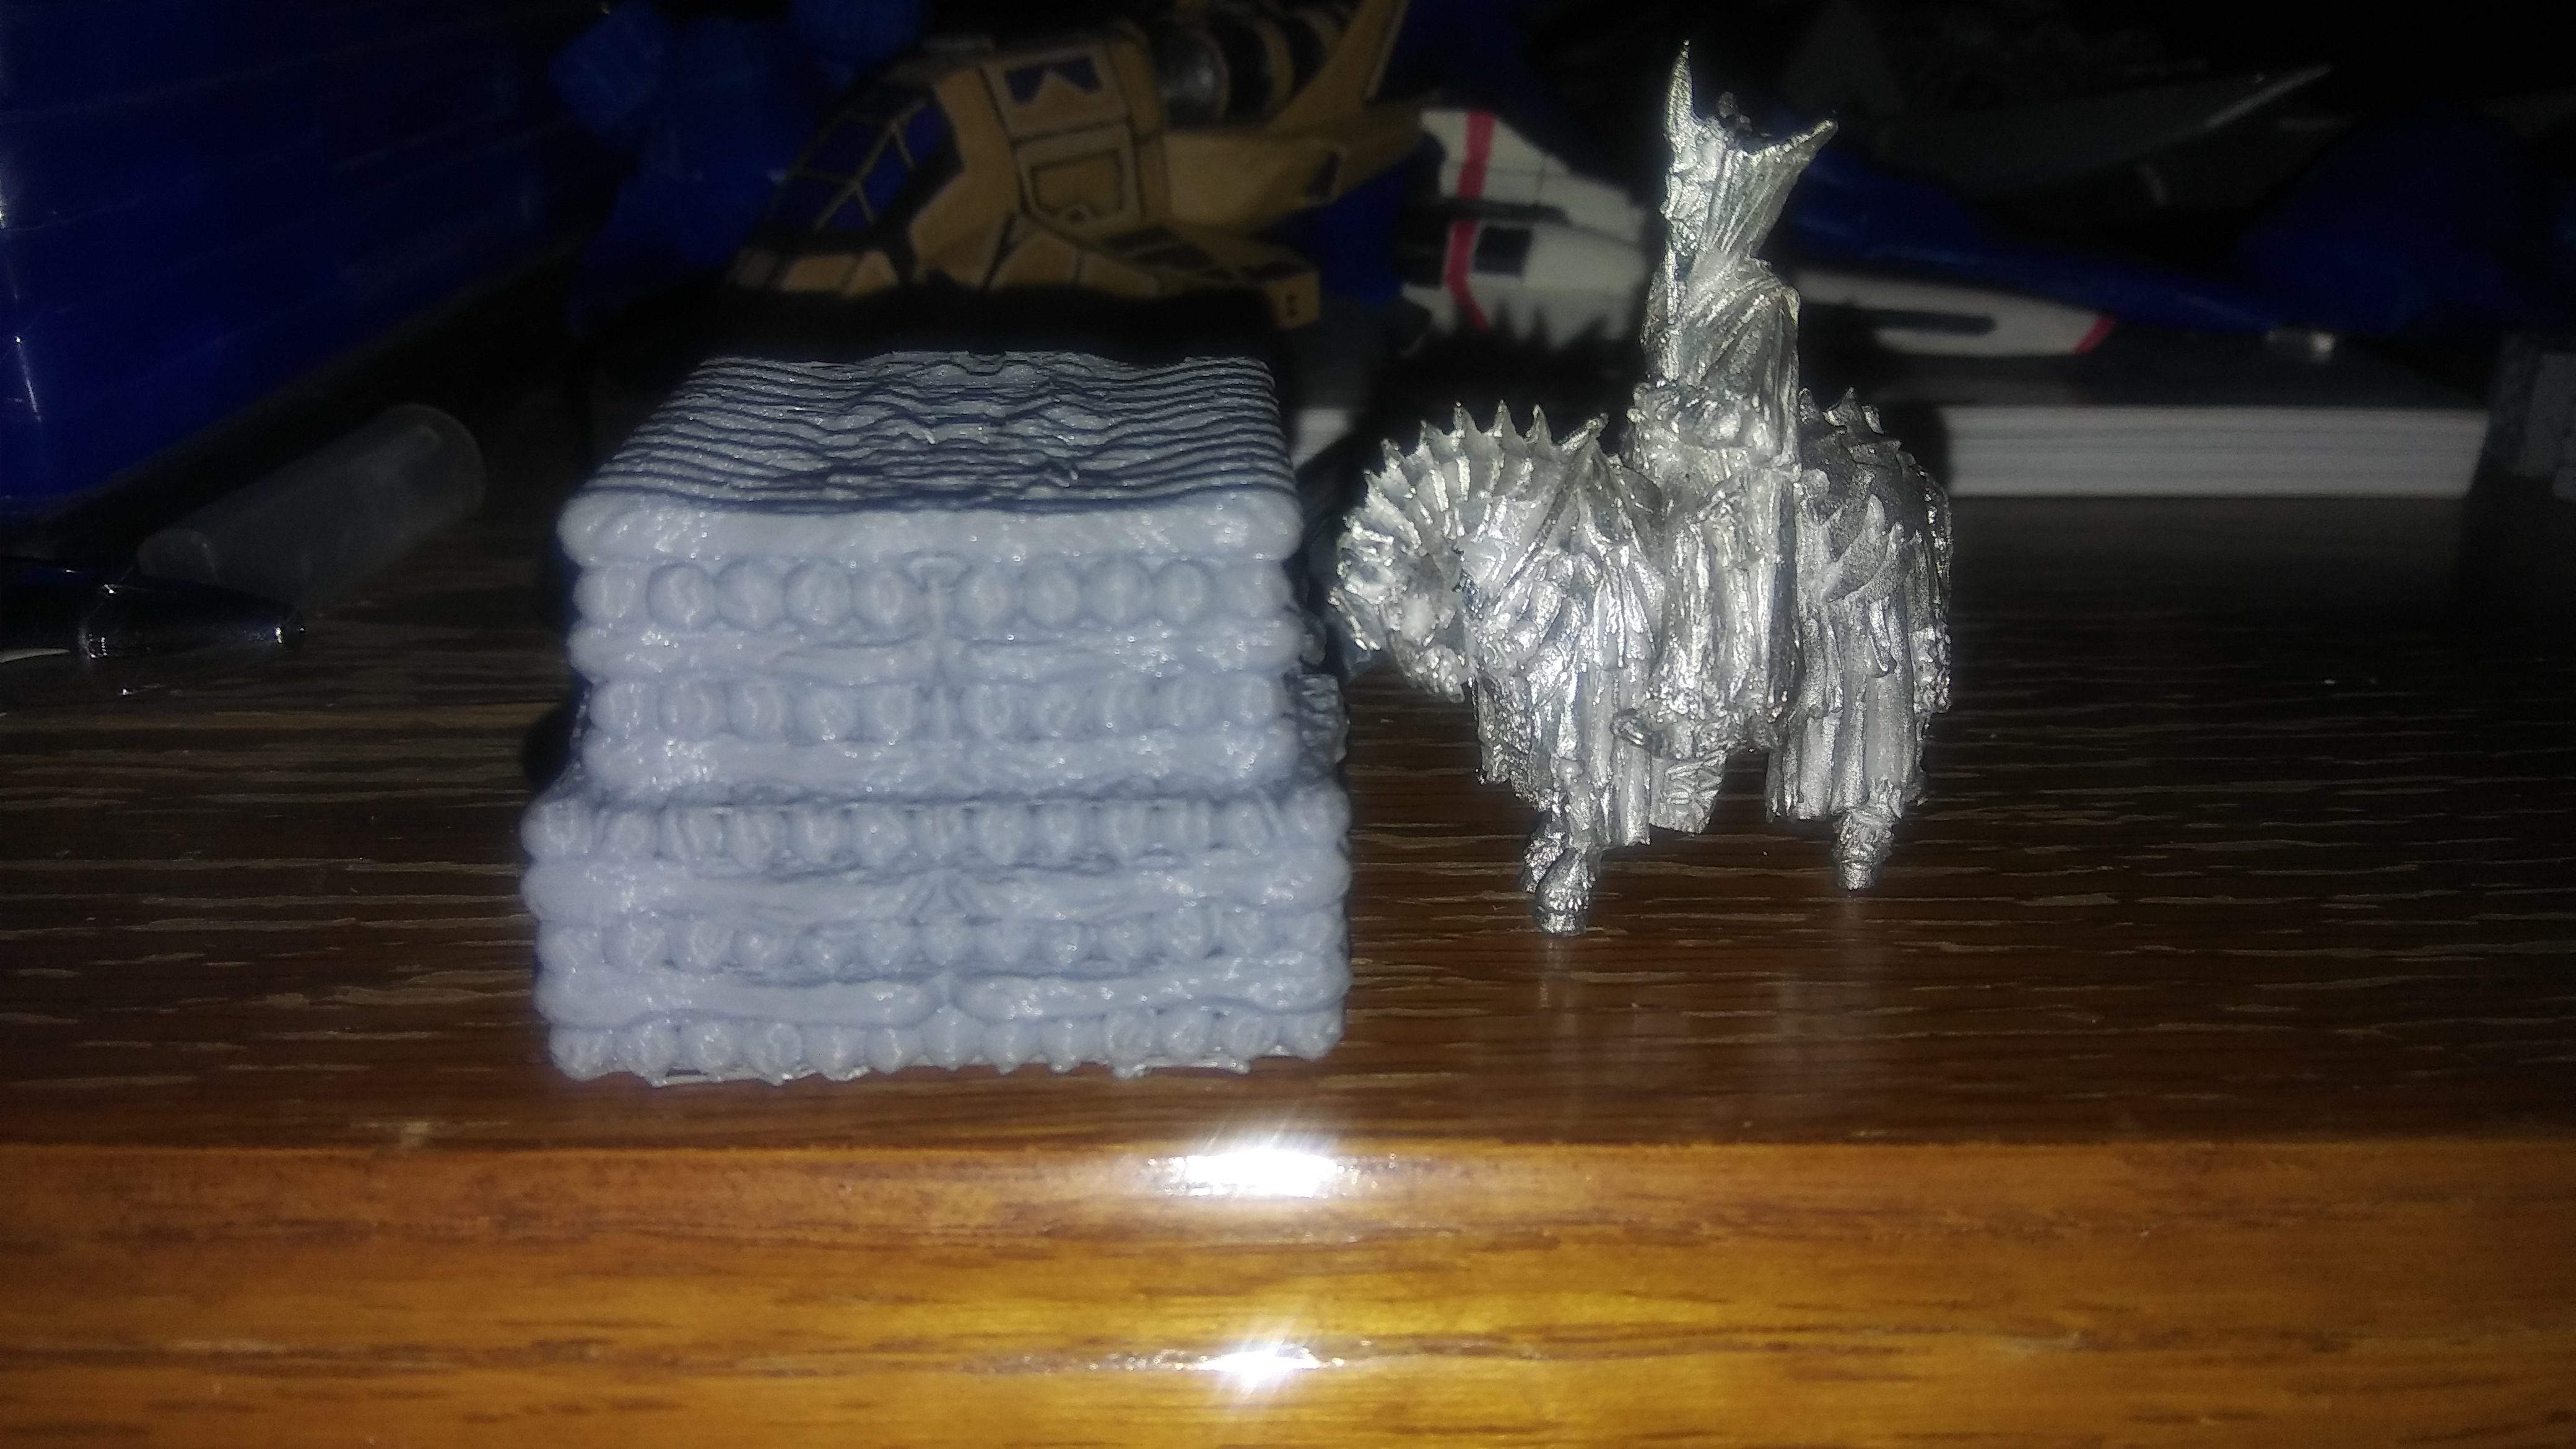
Got a nice jump start on weathering out the stone head late Friday night. Yet it was early enough to get a test print done.
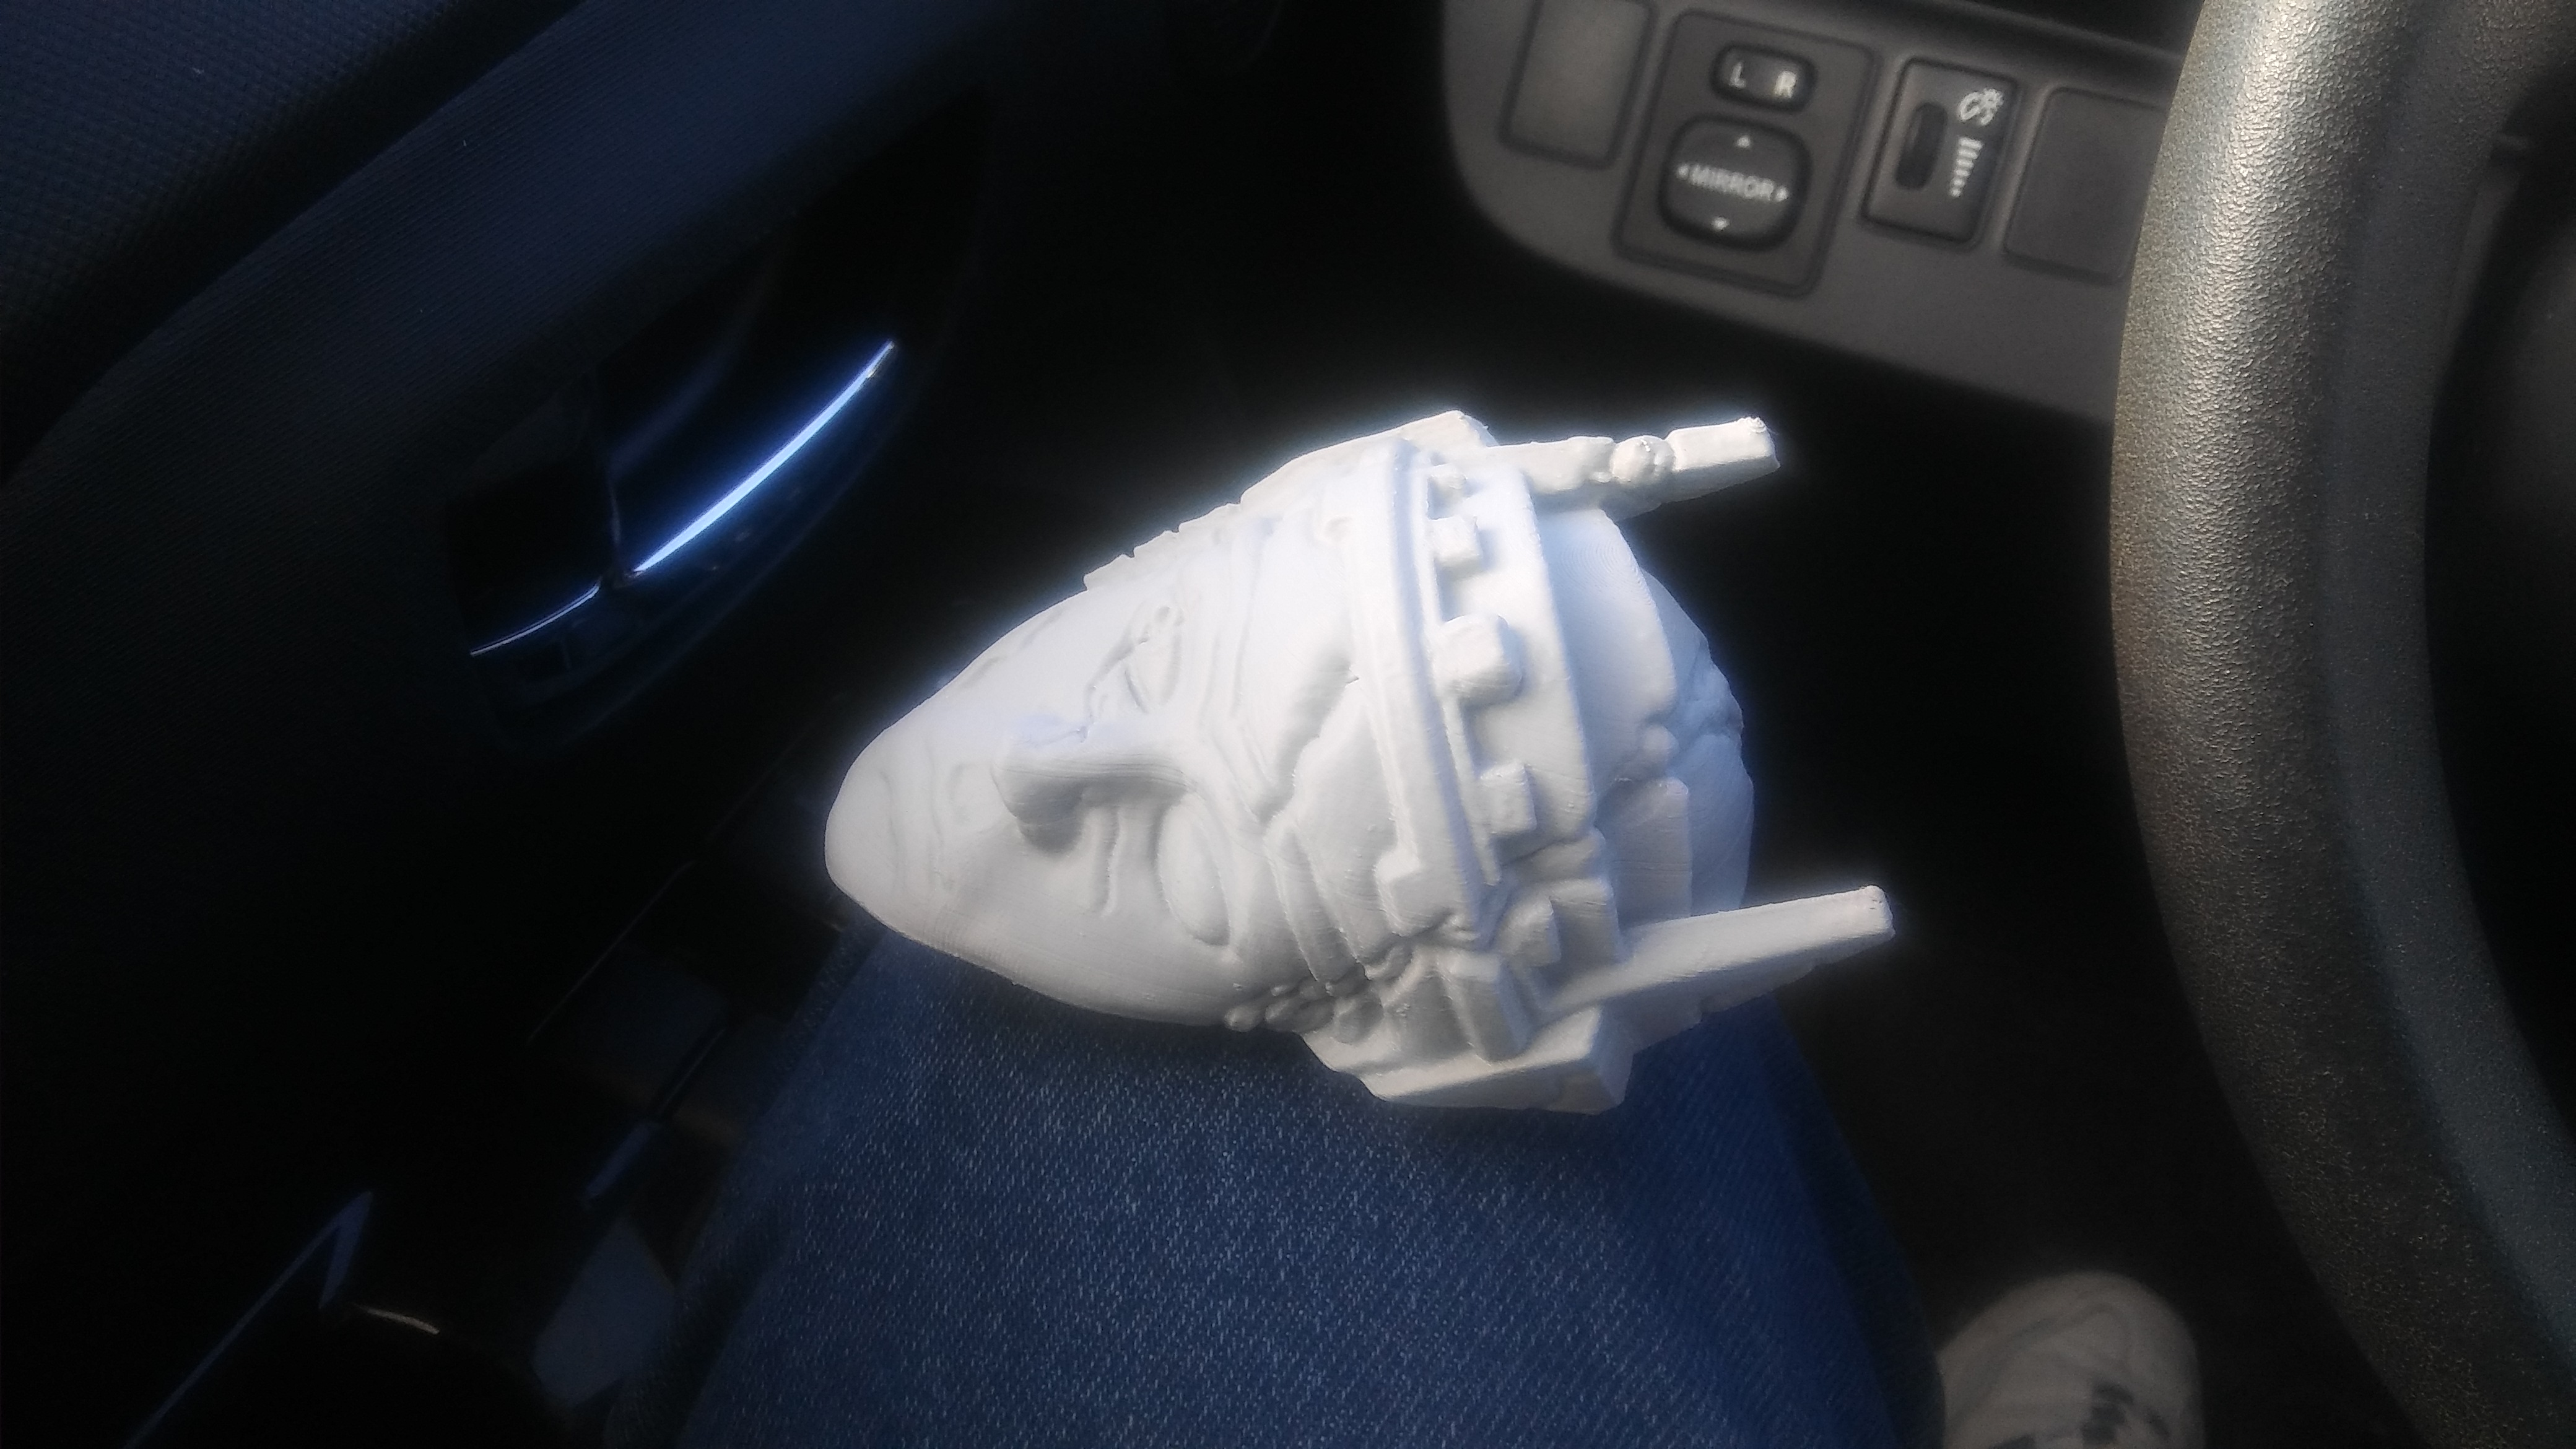
Not the best pictures in the world. But I was on my way to my local GW store when my partner asked how it turned out. Hey! When your Mordor Catapult arrives after being out of stock for awhile. You put the fallen kings head in your coat pocket and head to the store.
Slight Change in plans
Cryptic enough of a title??
Soo….. I am going to redo Amon Hen this weekend. Make the steps more miniature friendly. Rework the broken titles, to avoid any repeative pattern. And the most important of them all. Make it so it could be castable! =)
I am still in talks with a possible partner. Everything is extremely positive and I think we both agree pooling our resources and skill sets makes more sense. Than lone wolfing it and never getting to far.
So more of this will come as it progresses. Until then lets get back on reworking Amon Hen.
More posts will follow this weekend on the rebuild.
Weathering
Since I am still working on the seems for Amon Hen and waiting for glue to dry.
I did a quick weathering look.
1st pass was a great primer. 2nd pass was a light layer of stone grey over all of it. If some of the primer showed through. I didn’t care about it and encouraged doing so. This gives a layered look of possible aging. 3rd layer was a green wash around all of the edges. While going a bit heavy handed in areas closer to the ground. Think how moss and undergrowth takes over stone works . Once that was dry, I dry brushed a grey with a hint of blue in it over most of the surface. I did this going one dirrection starting where light would hit the object and go straight down. Think Noon till 6 position. After that had a bit to dry I took an fawn color and dry brushed a few areas where the light would hit the most. This would help break up the lightly colored areas where light would hit it the most. Again, its about the layers and breaking up how light hits the model.
By hitting the edges earlier with a green wash and then using a grey with a blue tint to it. This helps show some aging to the stone. So we are sitting at 5 layers at this point and we are going full circle again. By dry brushing most of the raised areas that would see light with that Stone Grey used back in step 2. This gives the model a look of minerals that maybe leaking towards the surface and trying to break threw that stone grey.
Last step was to use an Earth Shade wash to the areas closest to the earth or any area that may collect dirt and forest debri over the coarse of 100 years.
And if it looks good at this point stop. At the very least leave it along for a few days and look at it again with a fresh pair of eyes.
Next step would be adding basing material to it. This should bring enough color contrast to make it really show its again. Again using the green wash and the blue tinted grey will really make any green grass stand out.
Don't loose your head.
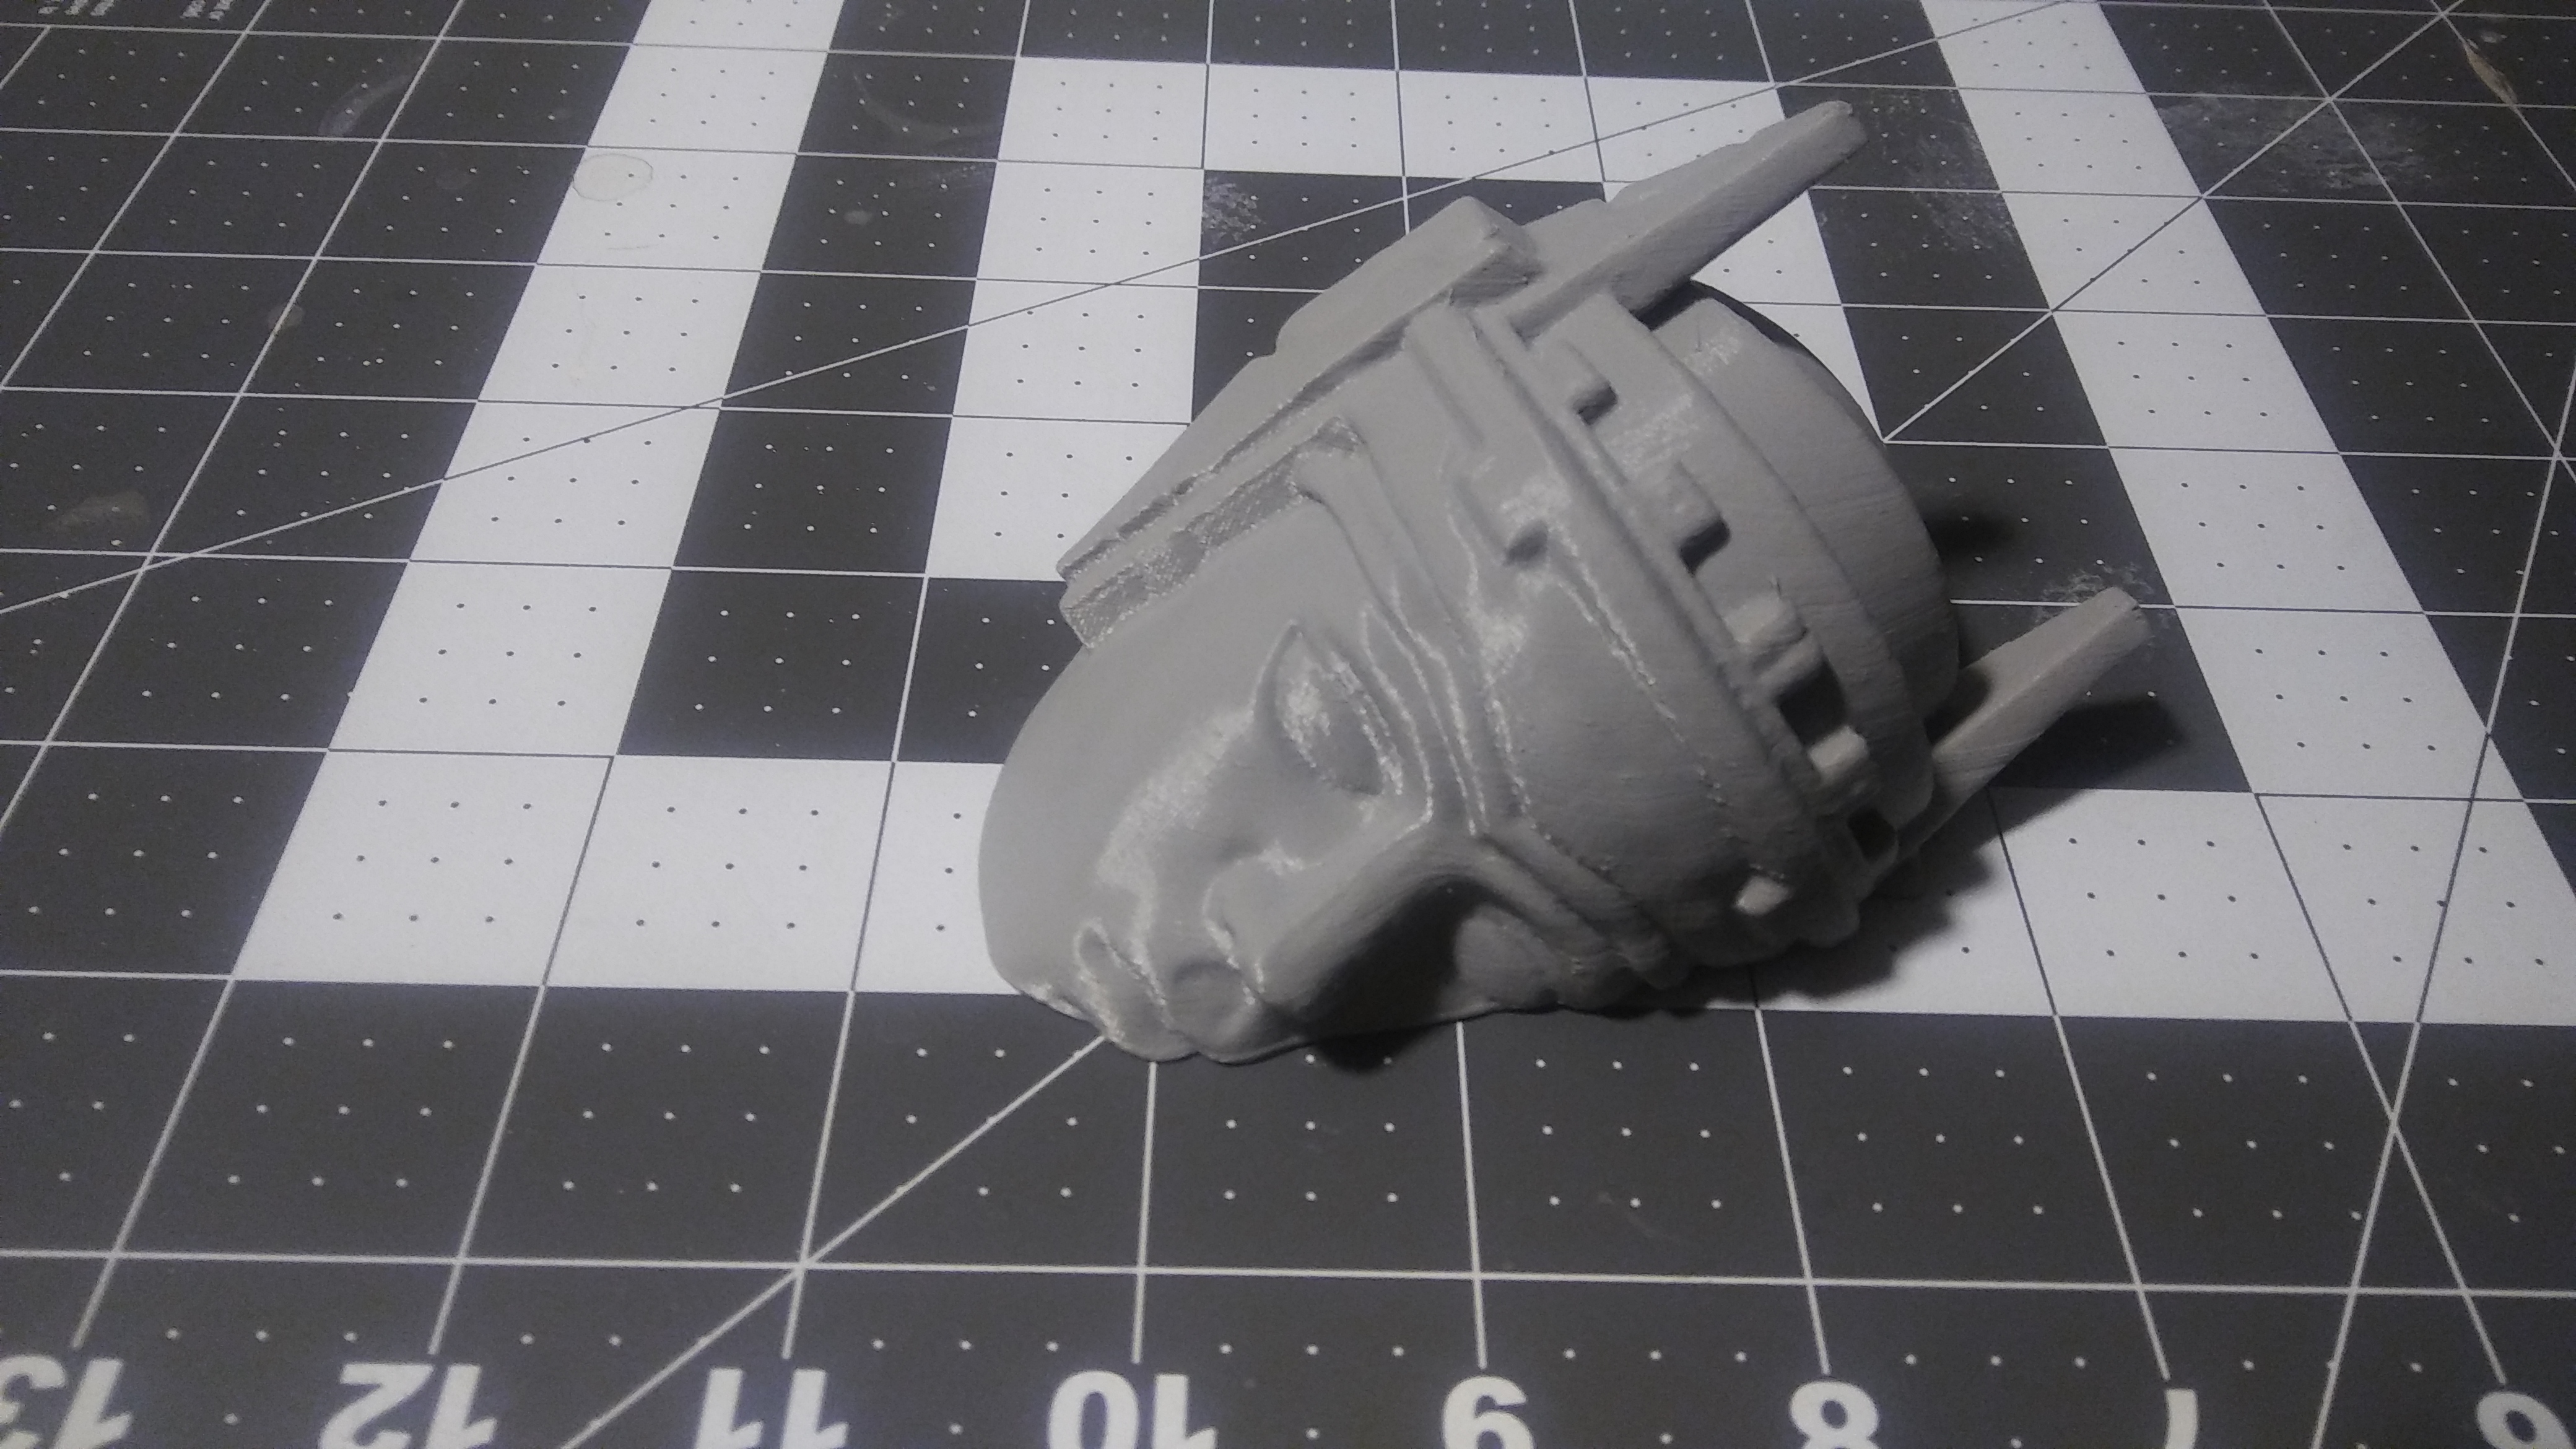
The test print finished some time earlier this morning. I grabbed a few quick pictures before I headed out the door this morning.
I was taken back how well it turned it out. I spent 5 hours trying to get this model to print correctly. One program was hallowing out the model and leaving paper thin walls. The slicer program would recognize these walls and calculate the printing path. But no slicer or printer can print out .001mm walls. So several hours of computer work, test print and failures until I found a work around. Oh the problems of working in 3 programs for 3D modeling. Each program handles exporting the file differently.
Next step is priming it up and learning how to paint statues.
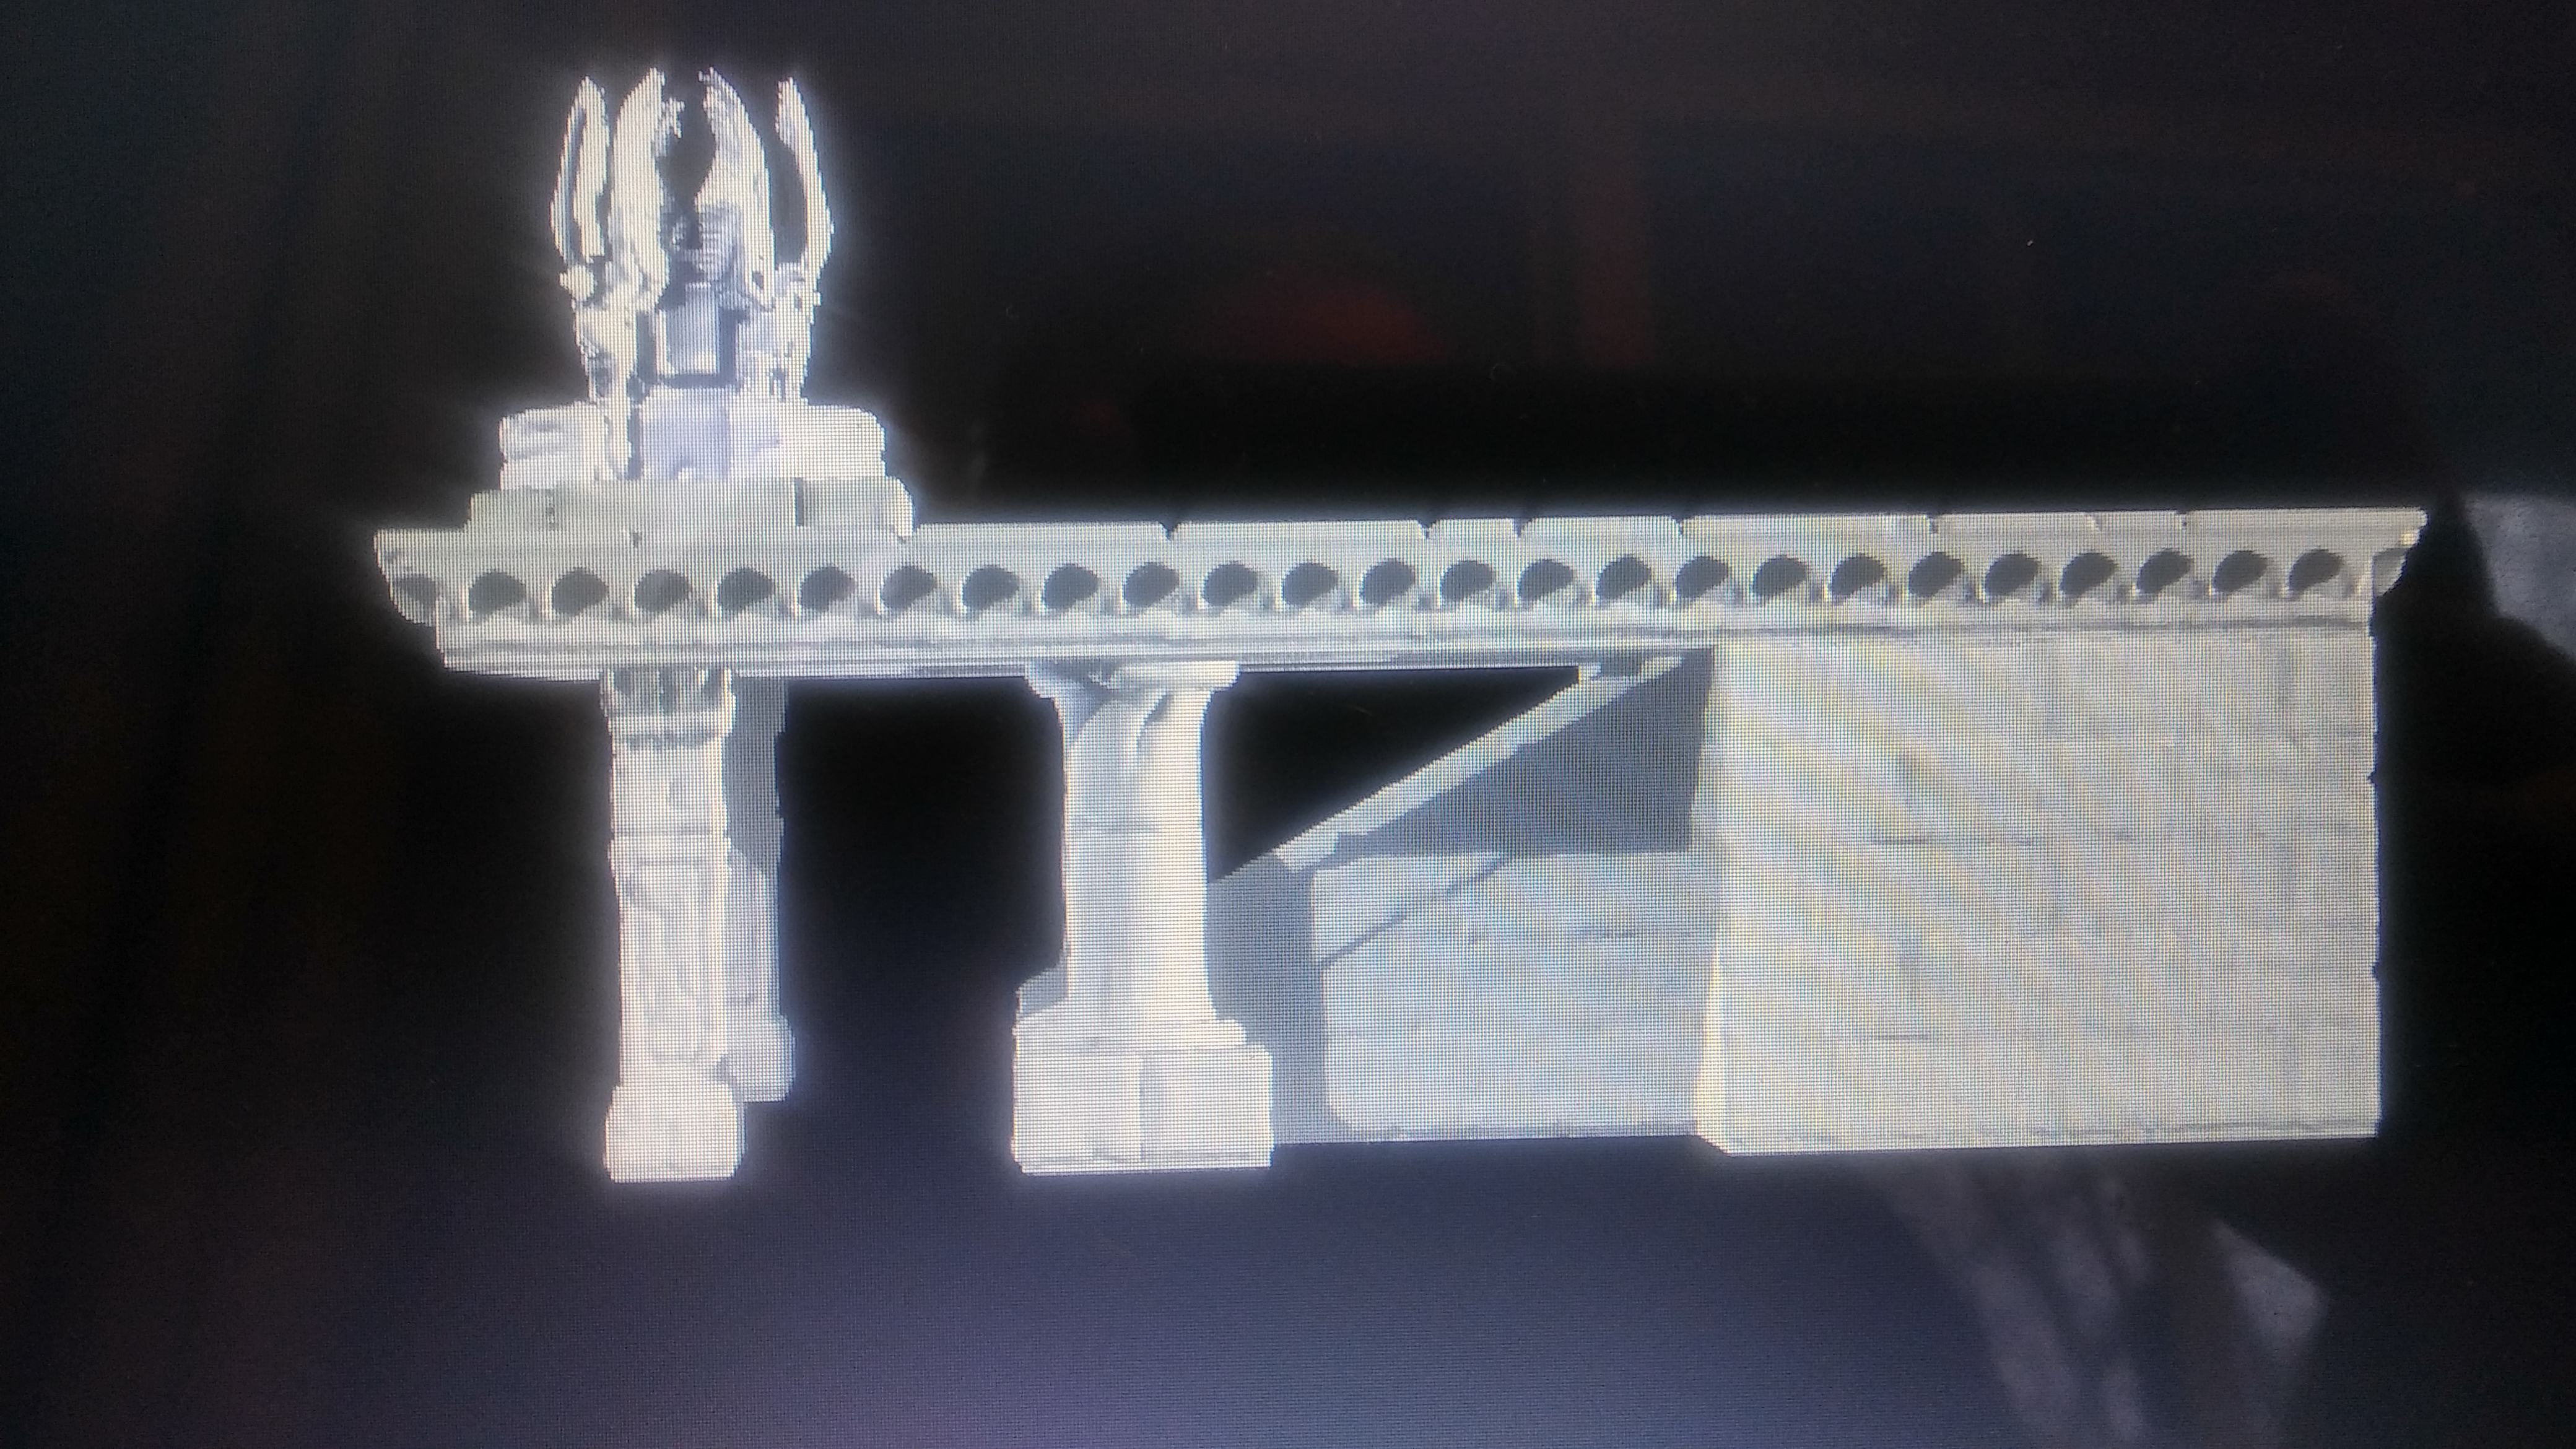
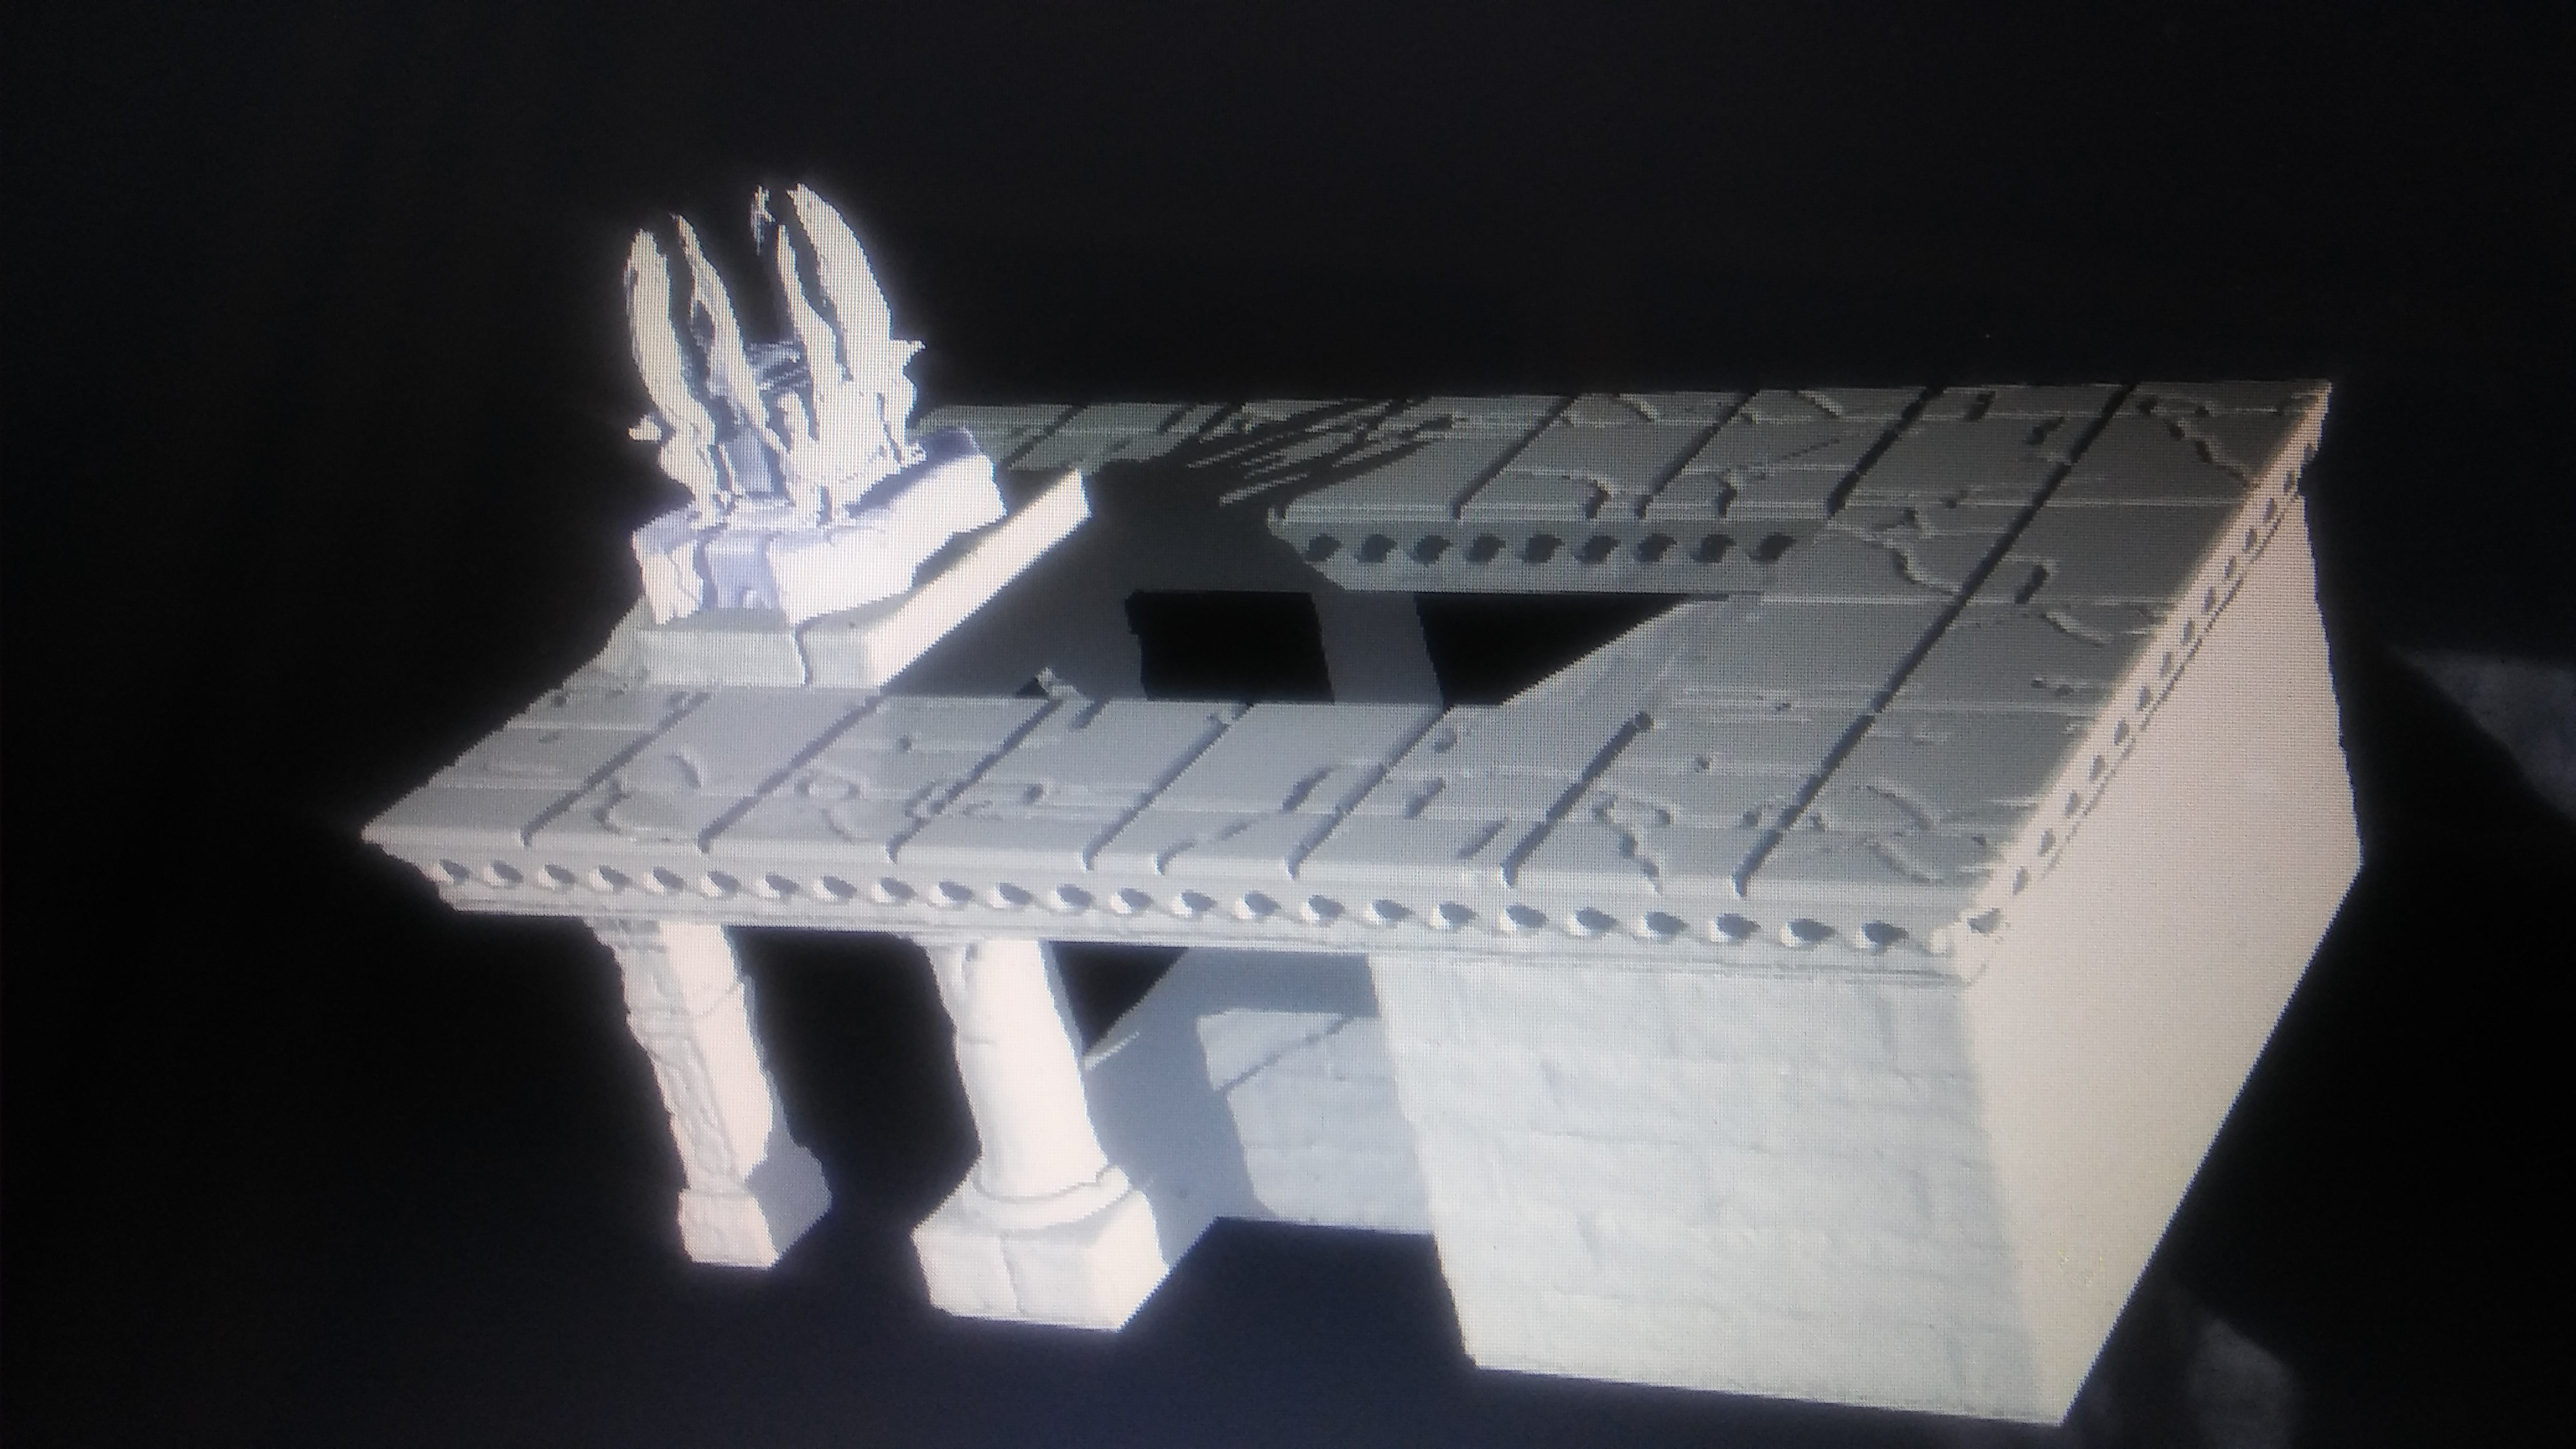
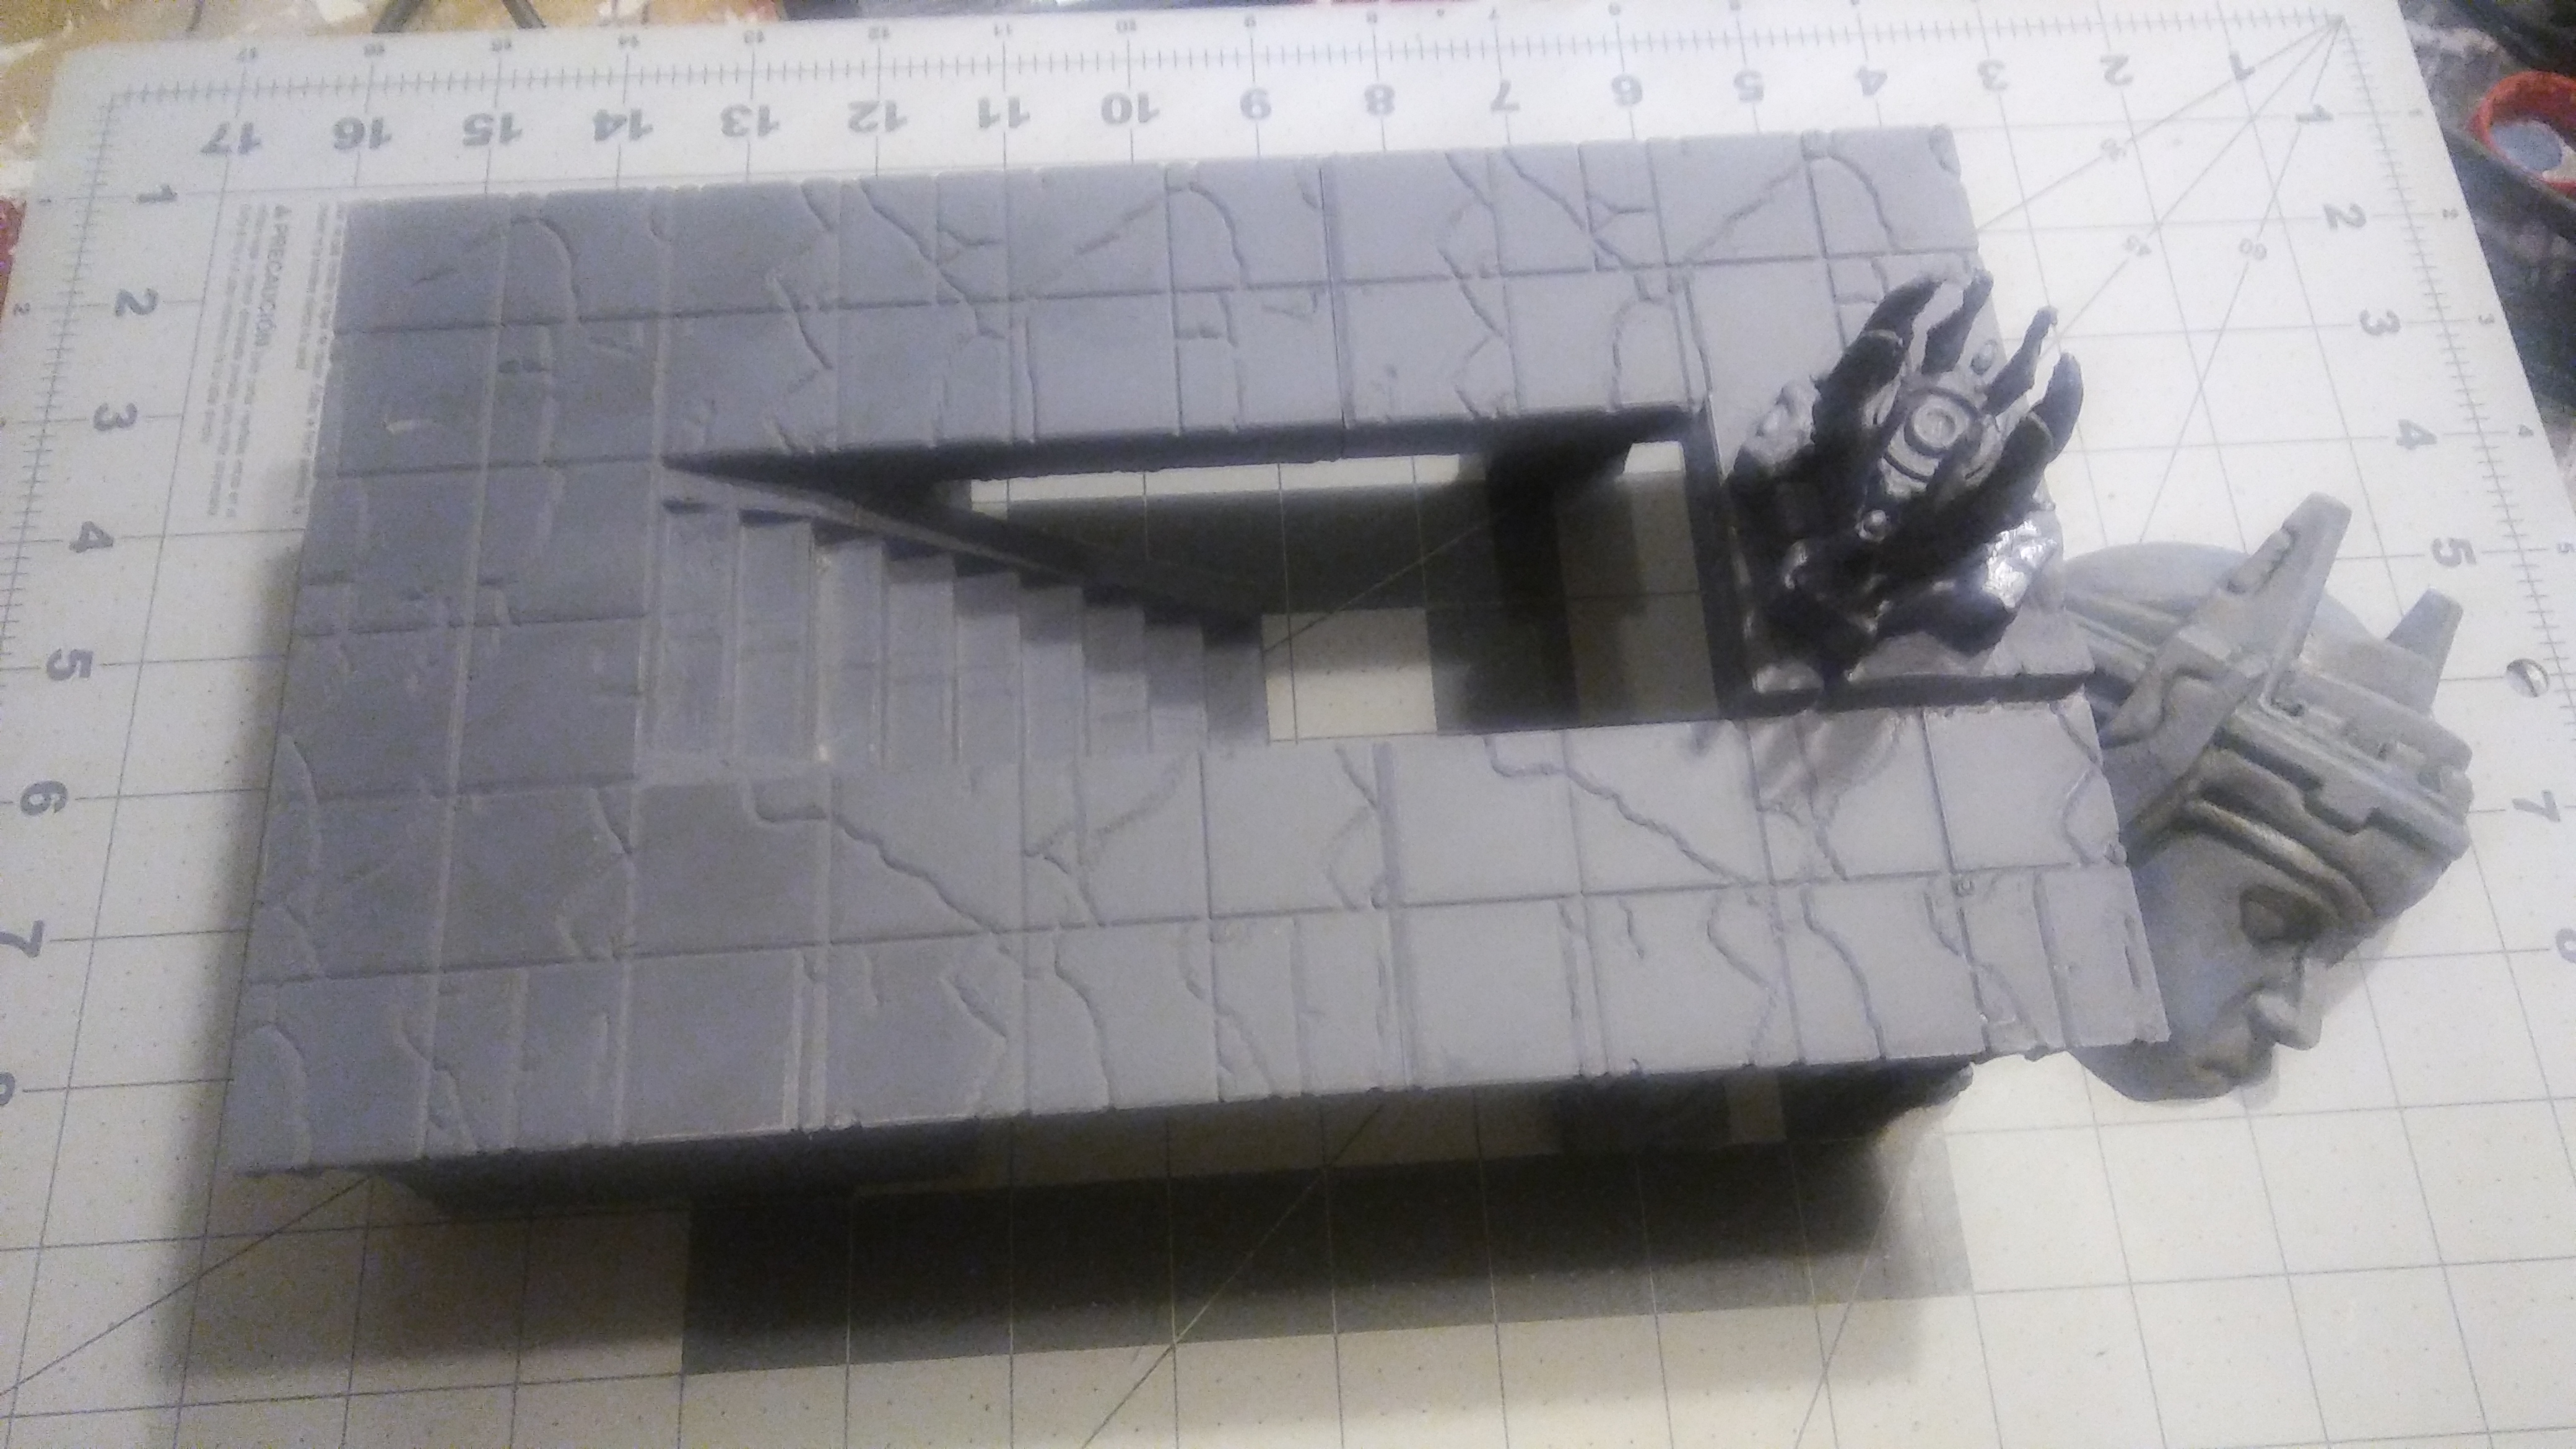
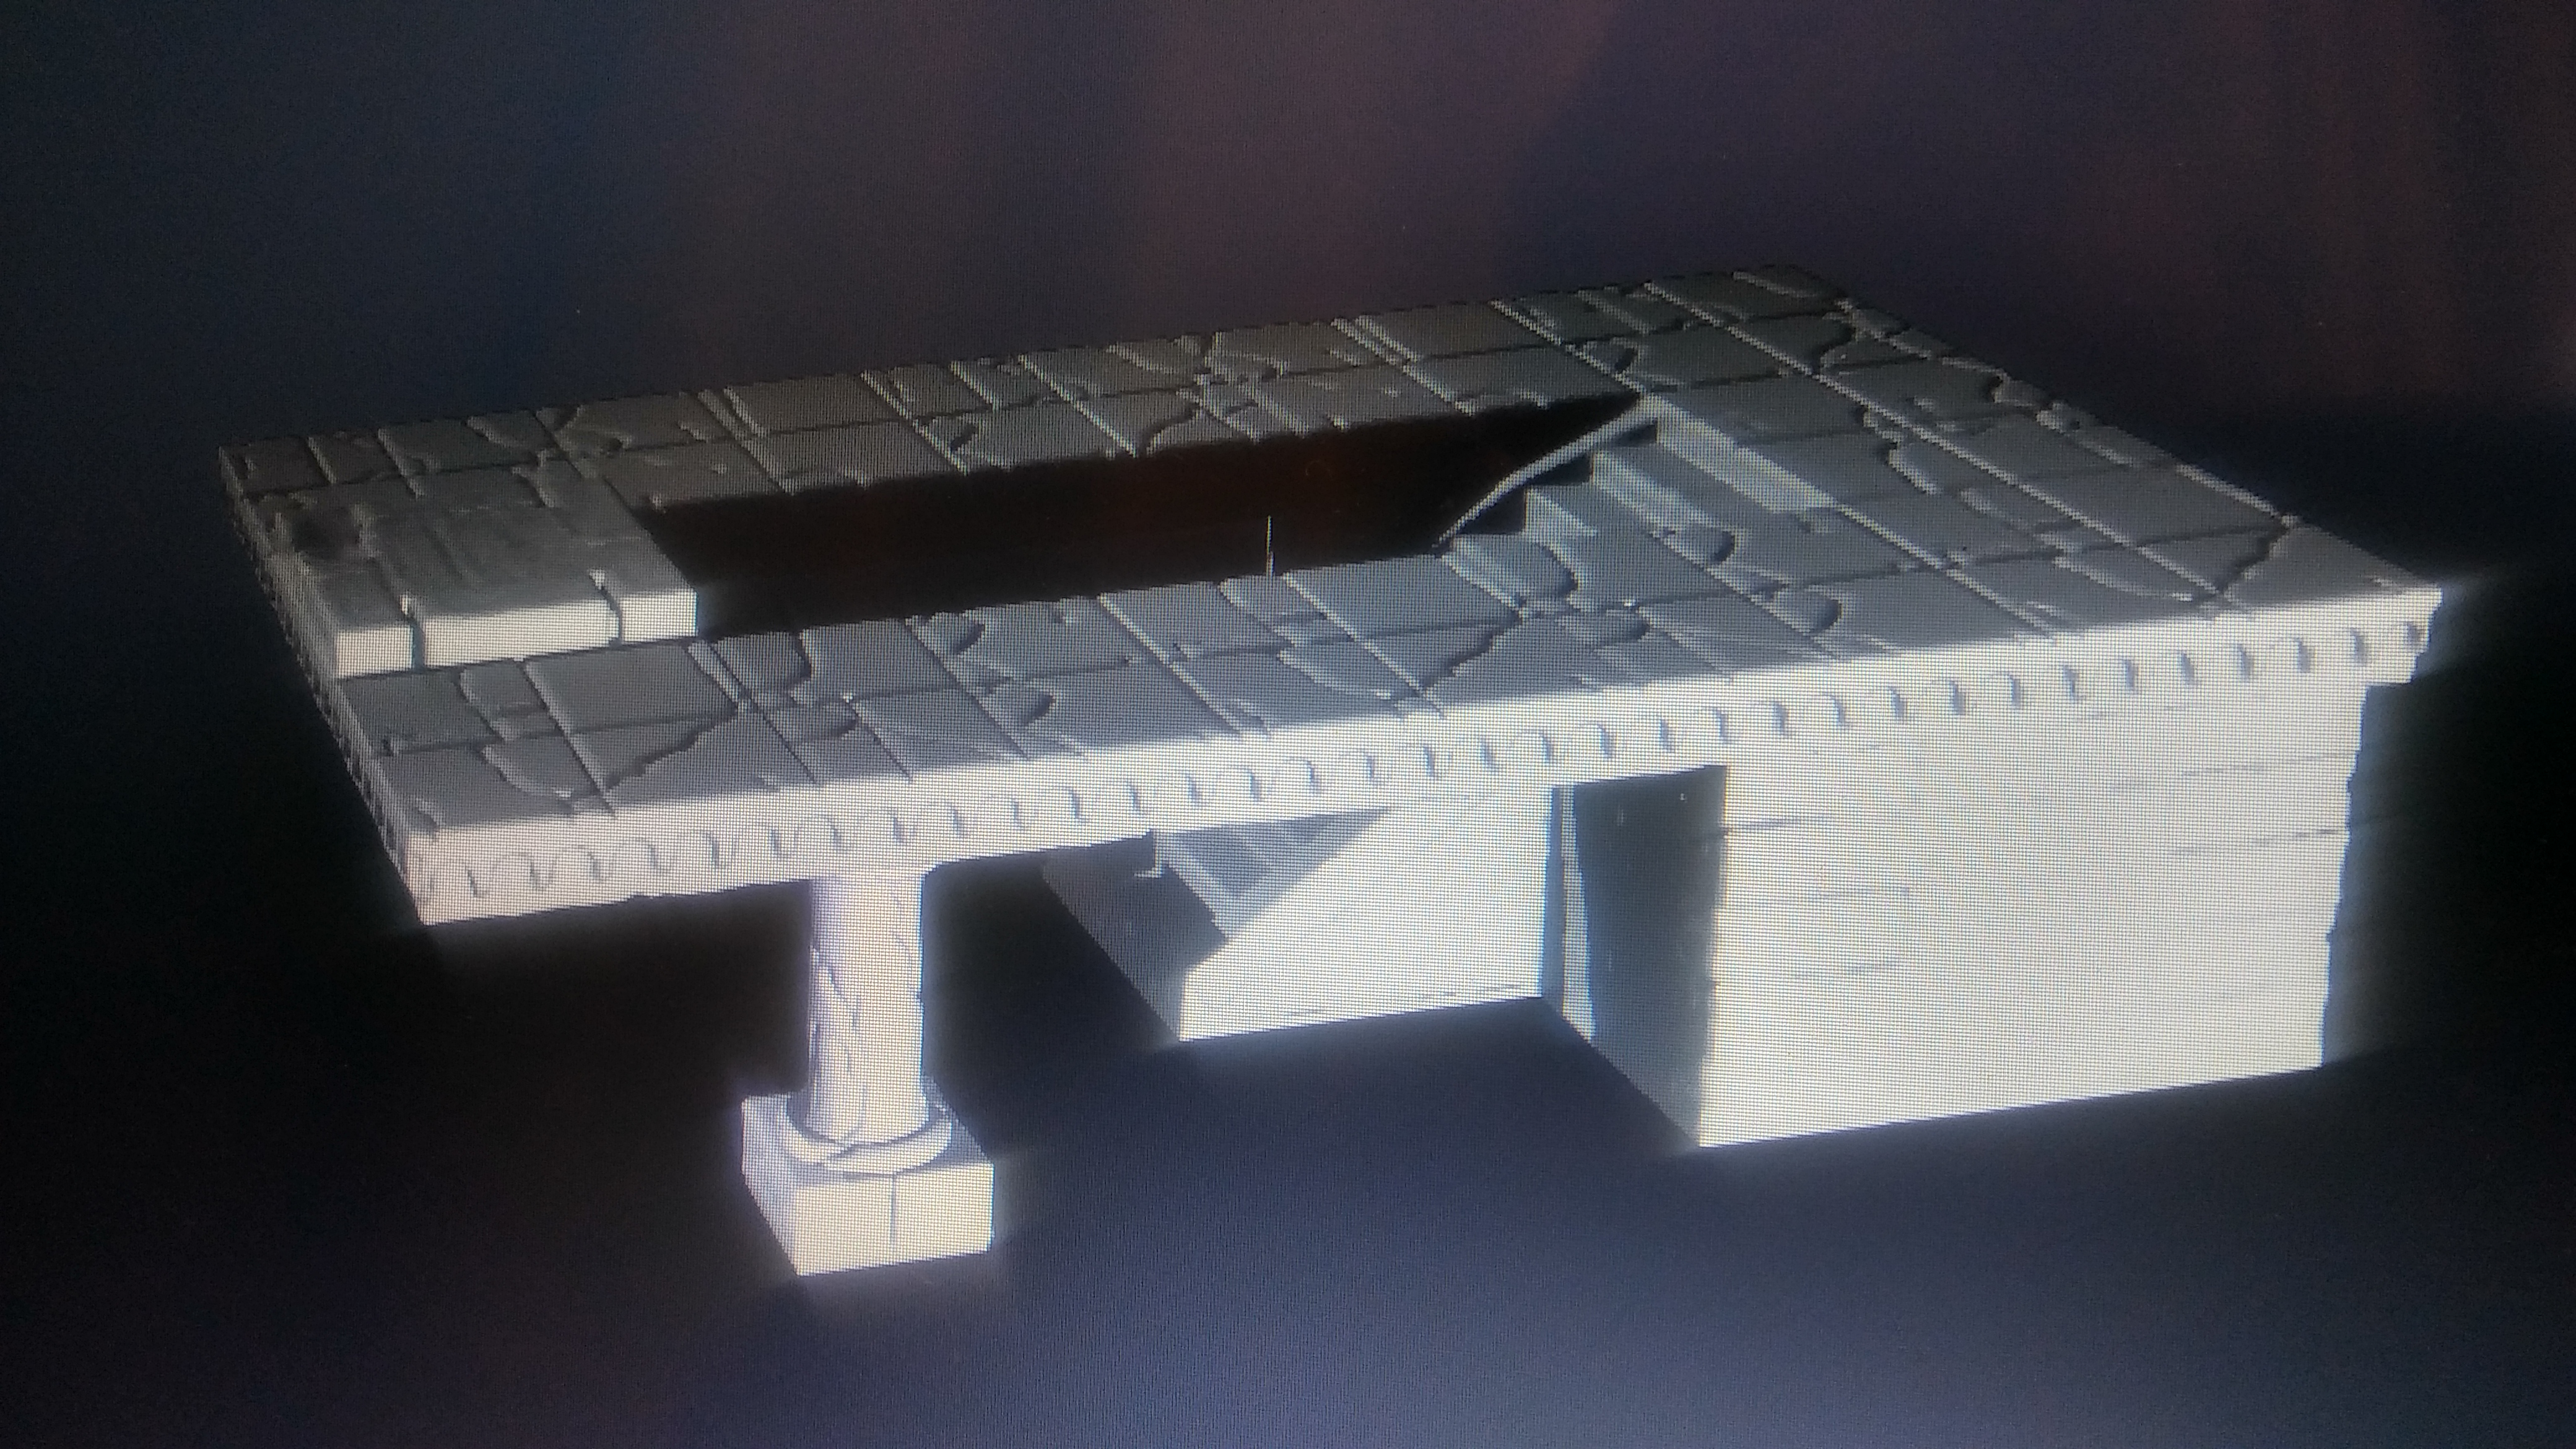
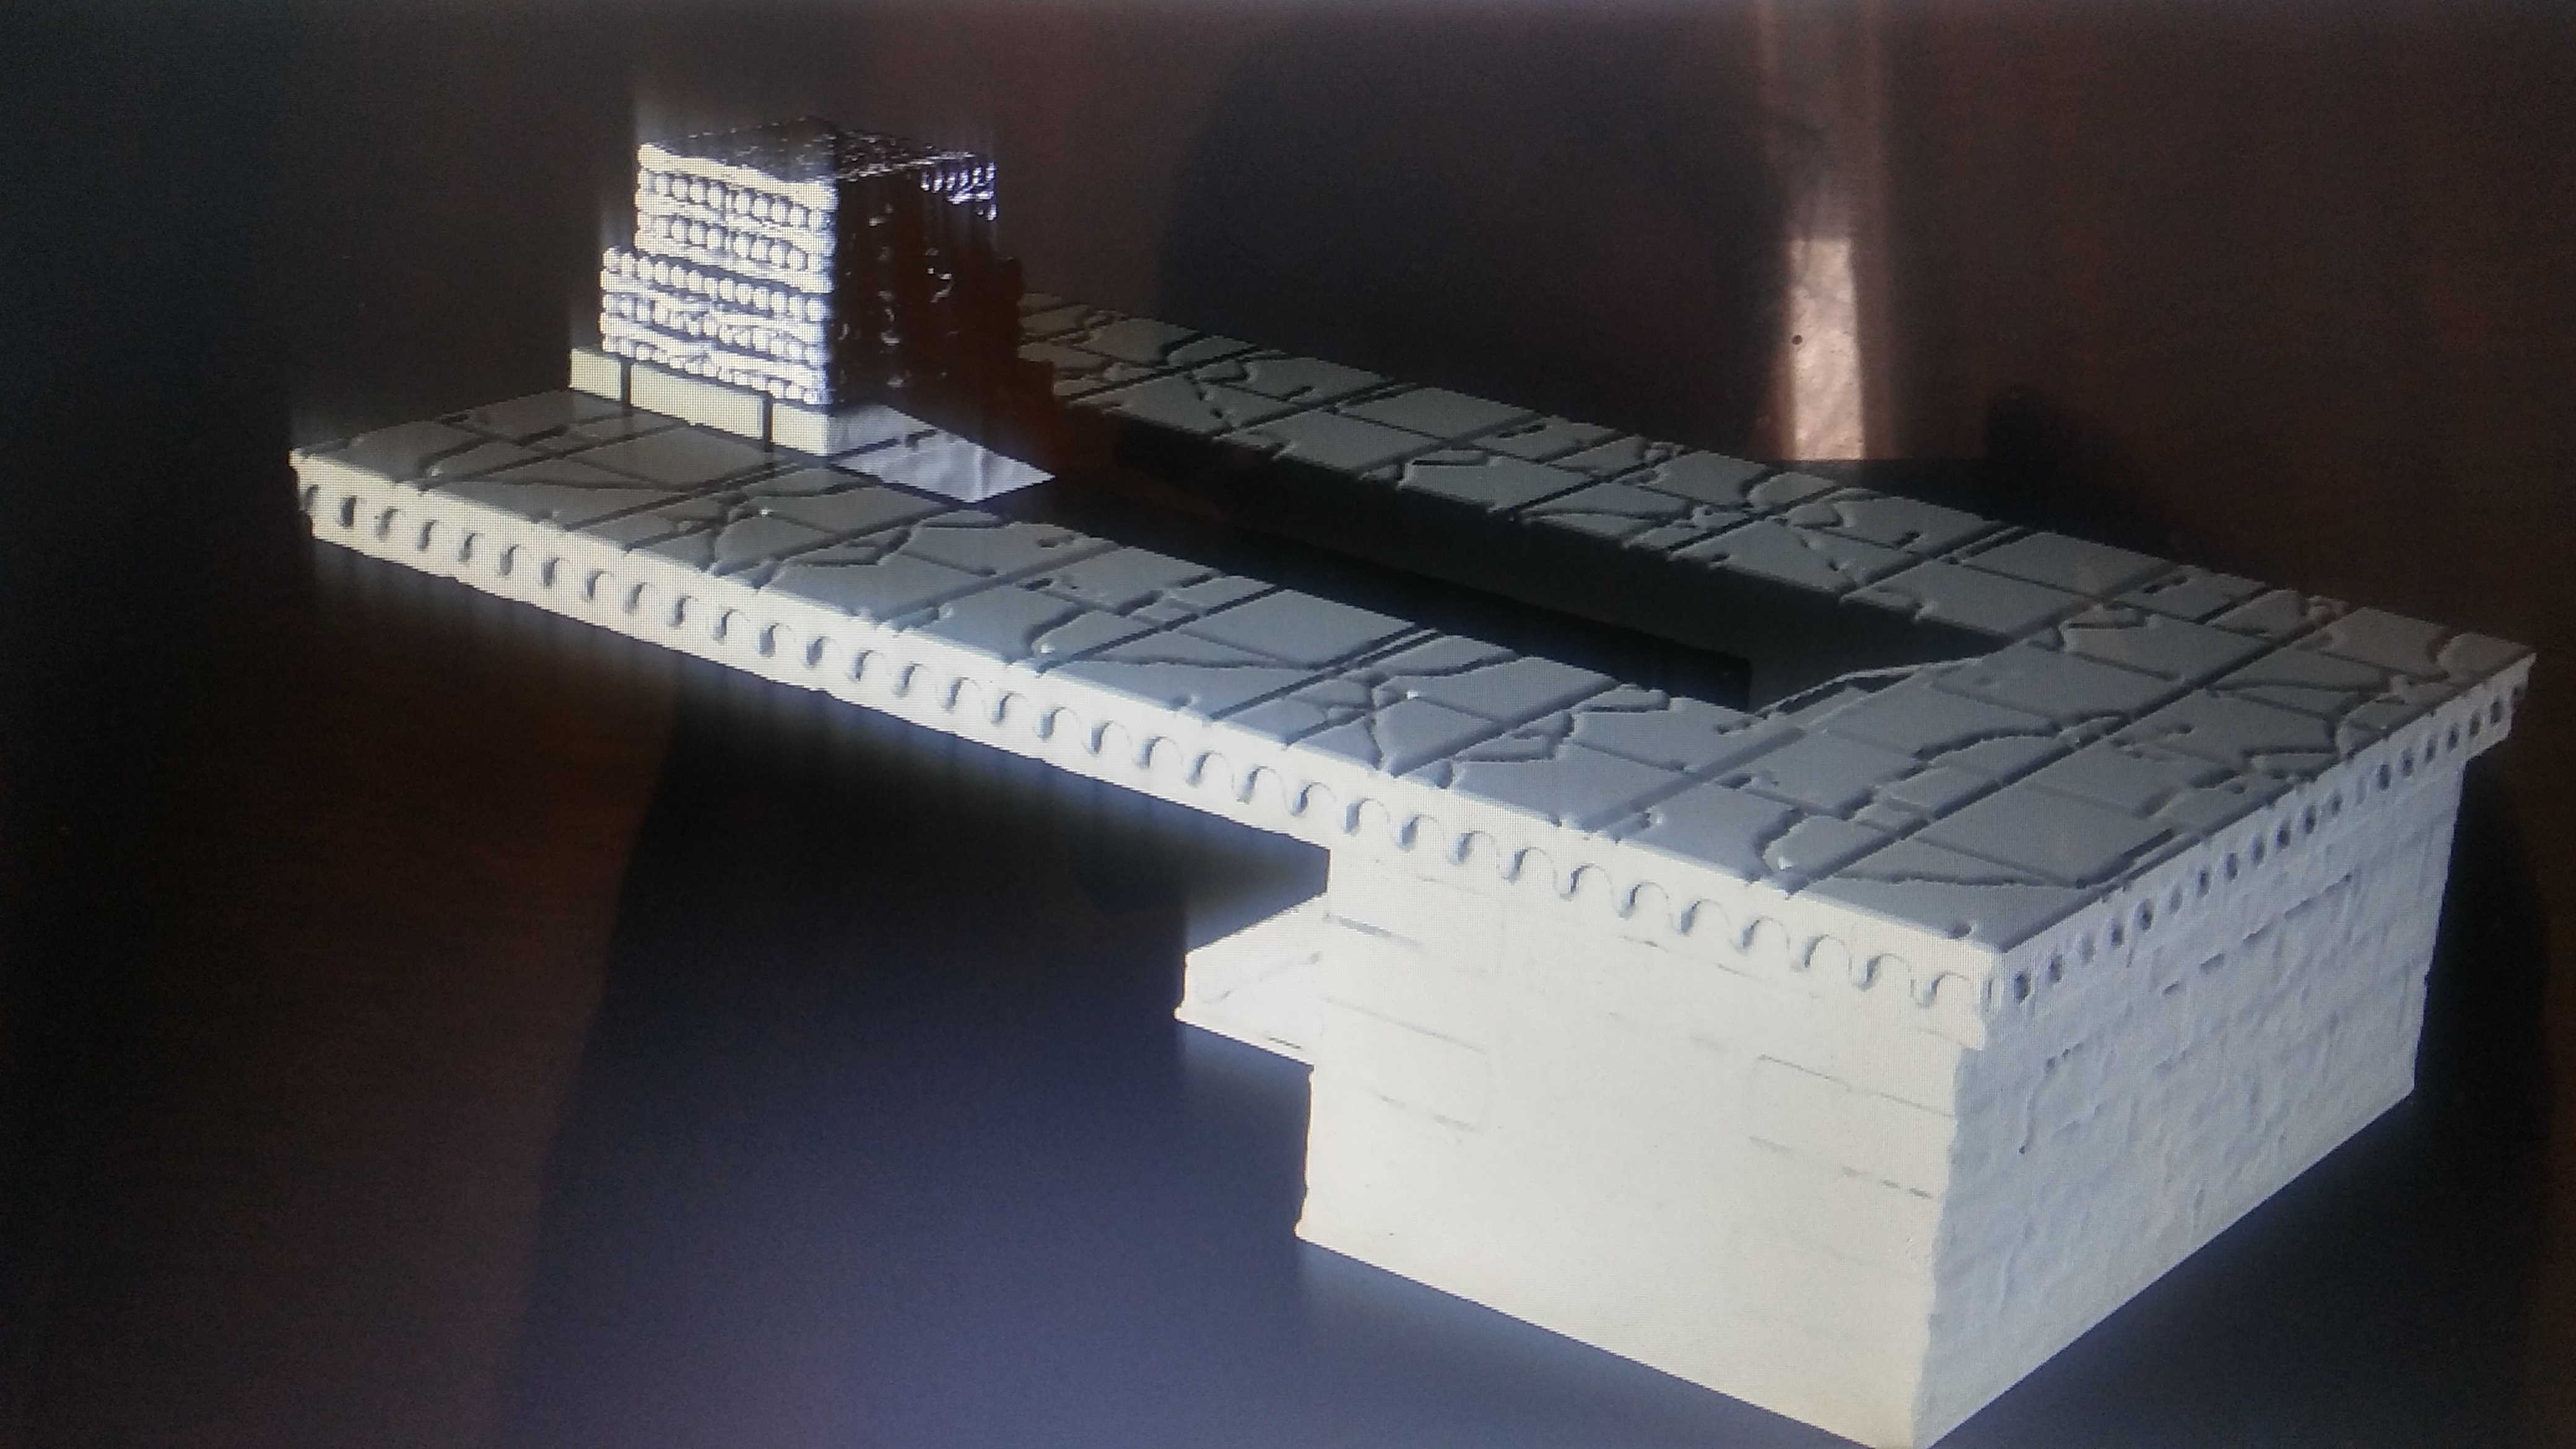
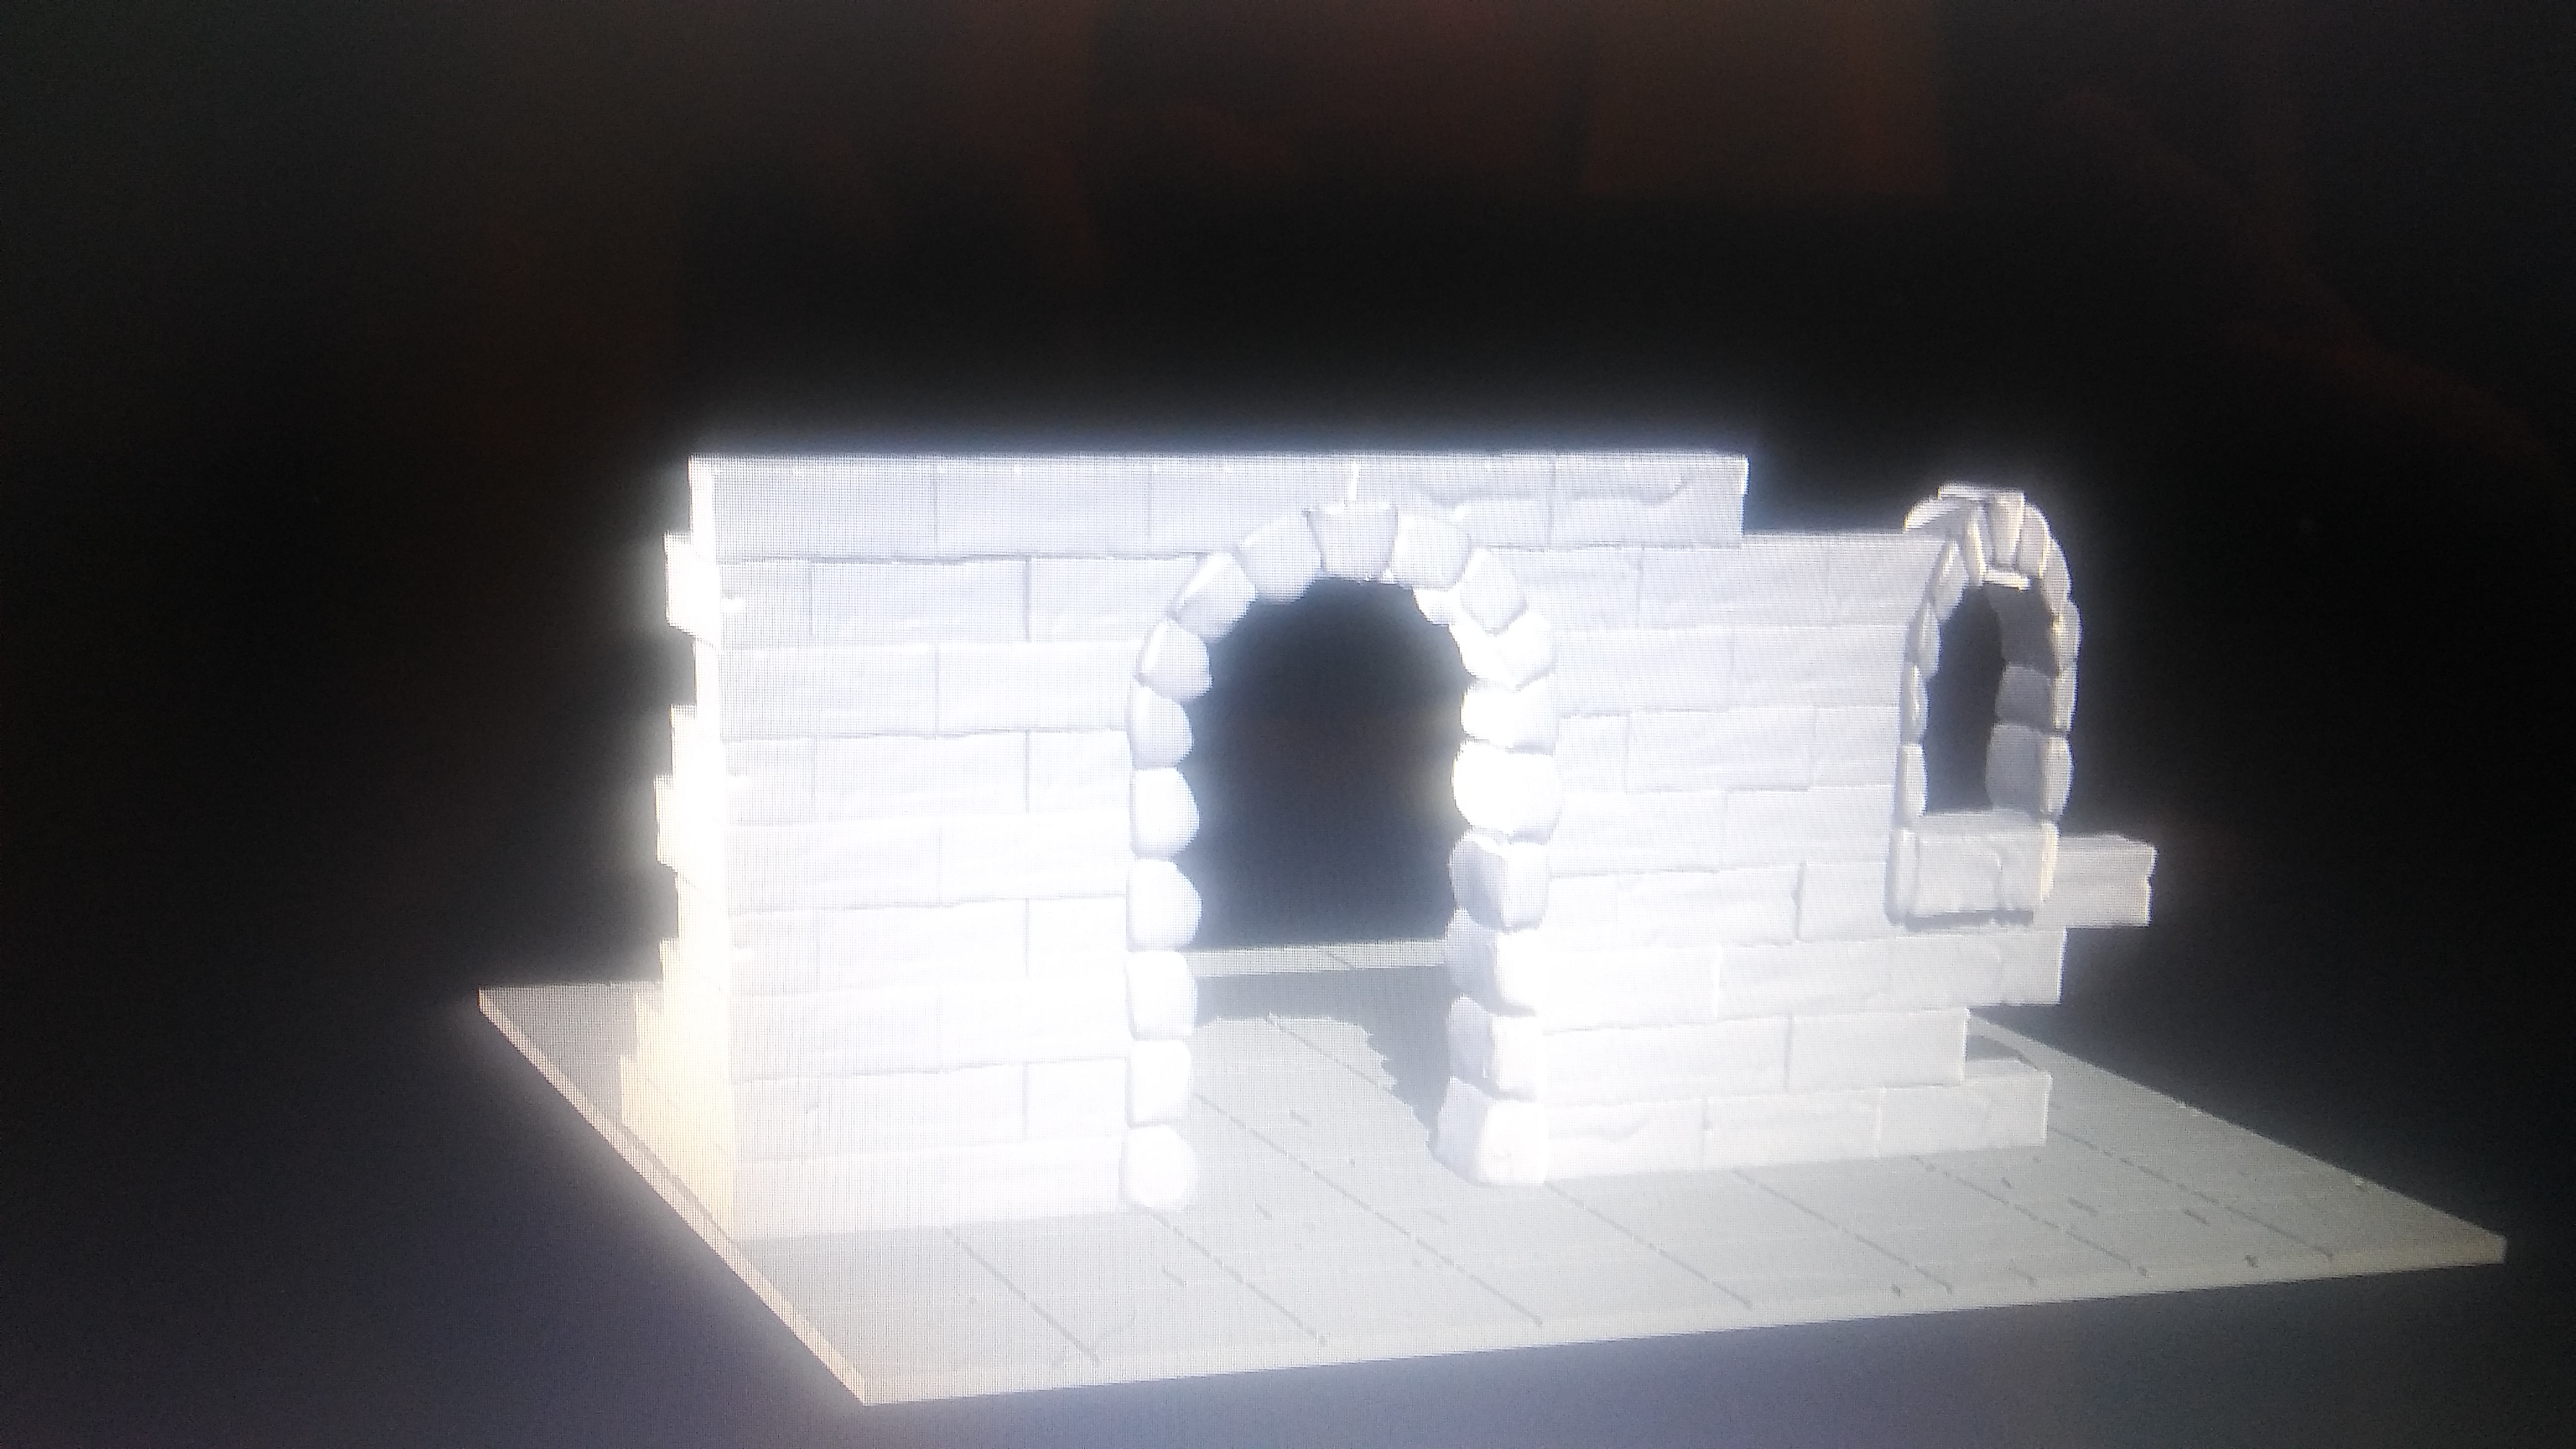
Amon Hen pieces
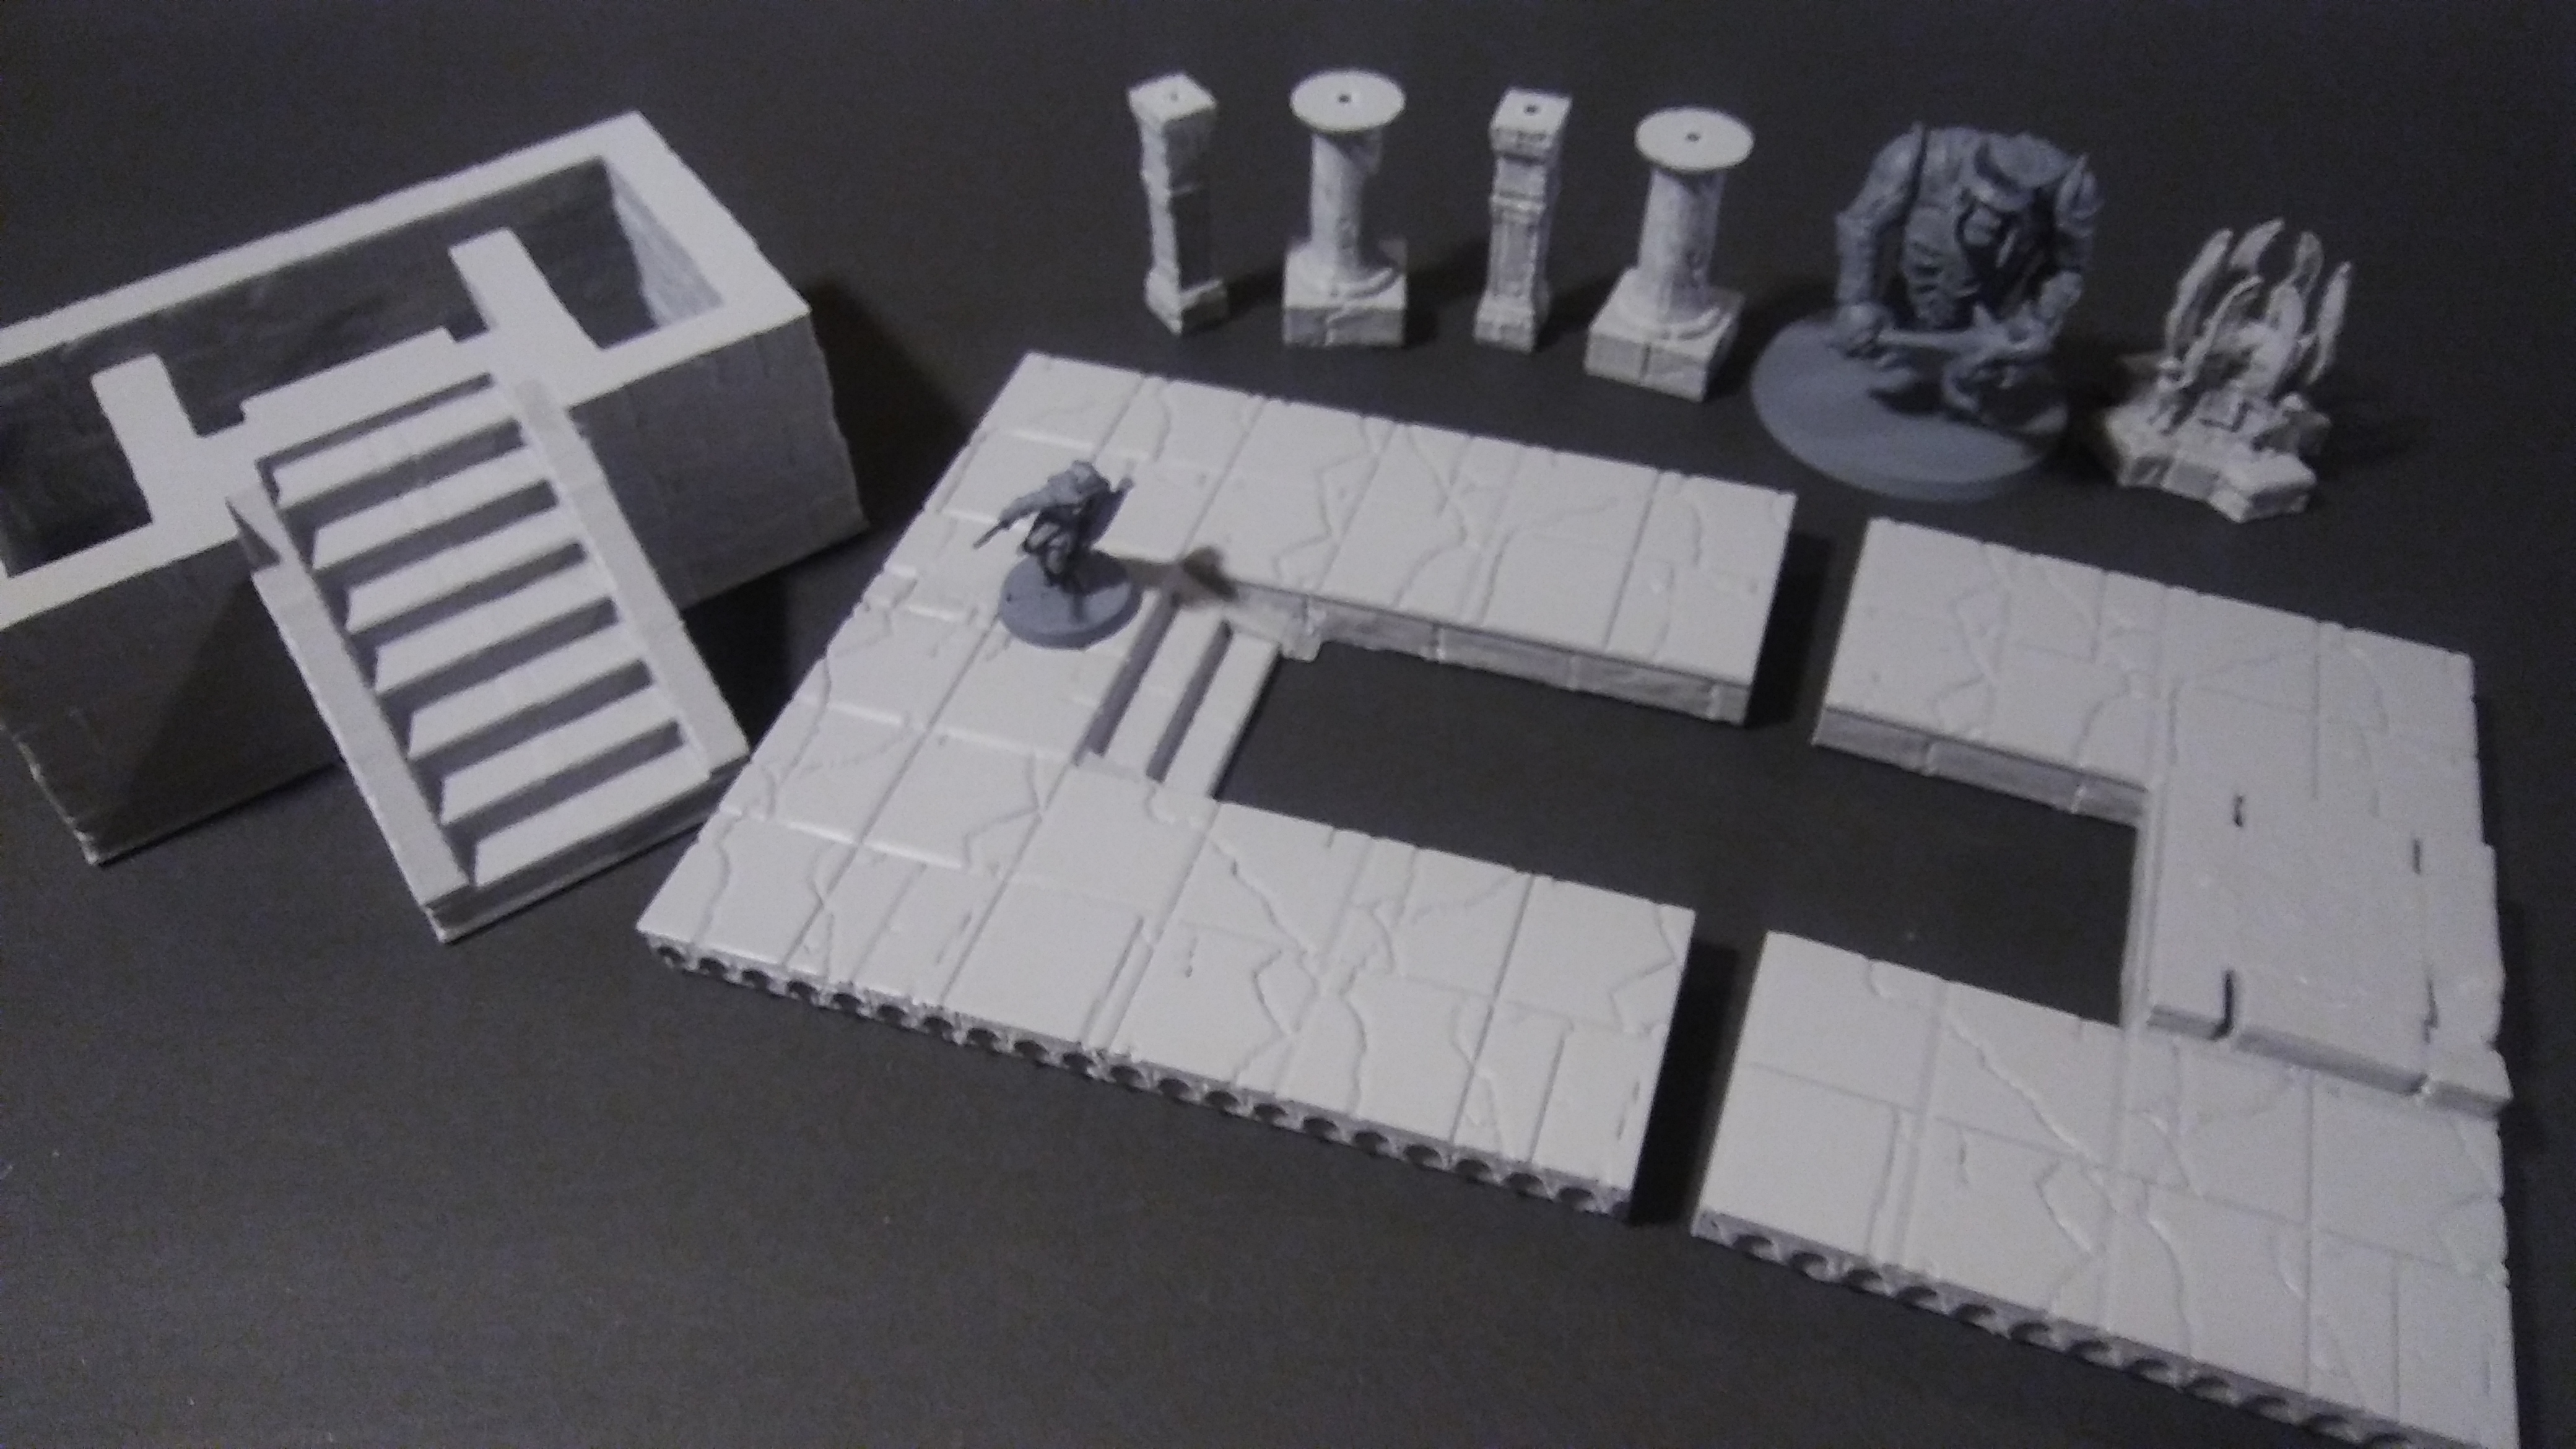
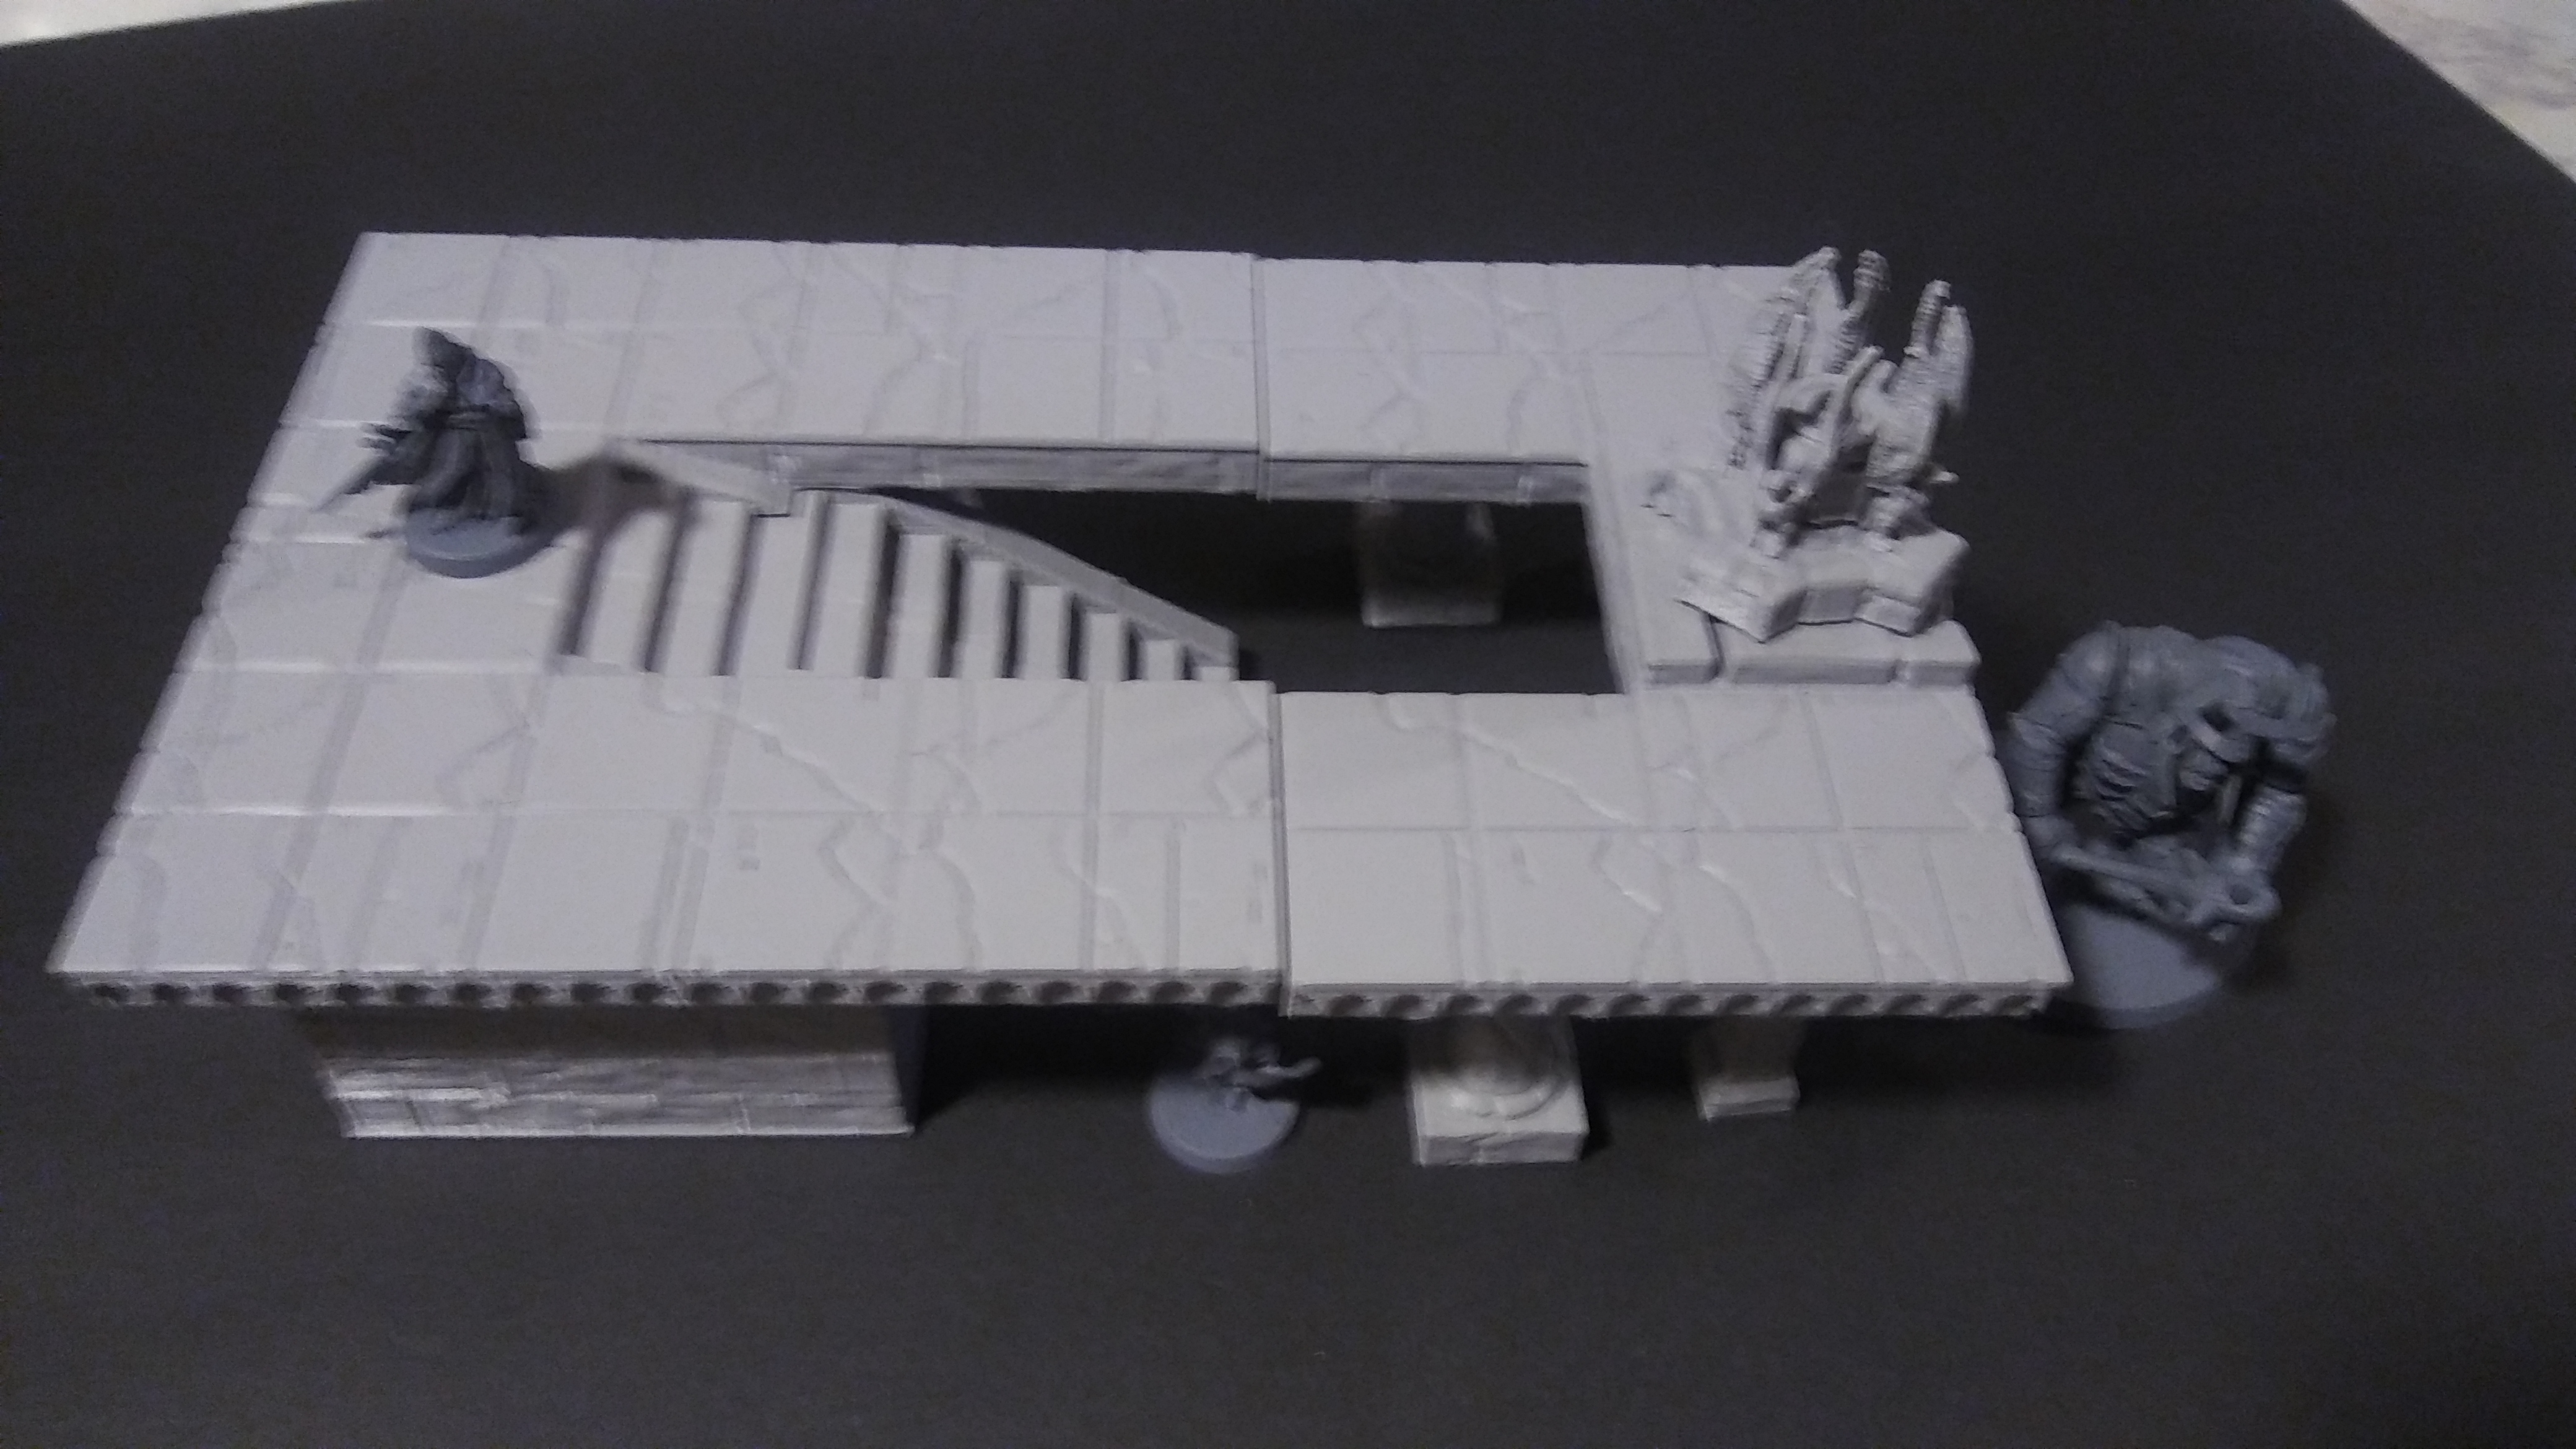
Here are all the parts to Amon Hen, minus the minis.
You will notice I removed the tabs off the pillars. The platforms recessed area for these to fit into where not deep enough. I need to make these holes 2mm deeper so they will fit properly.
Currently it is getting glued up so I can work on the seems and prime it.
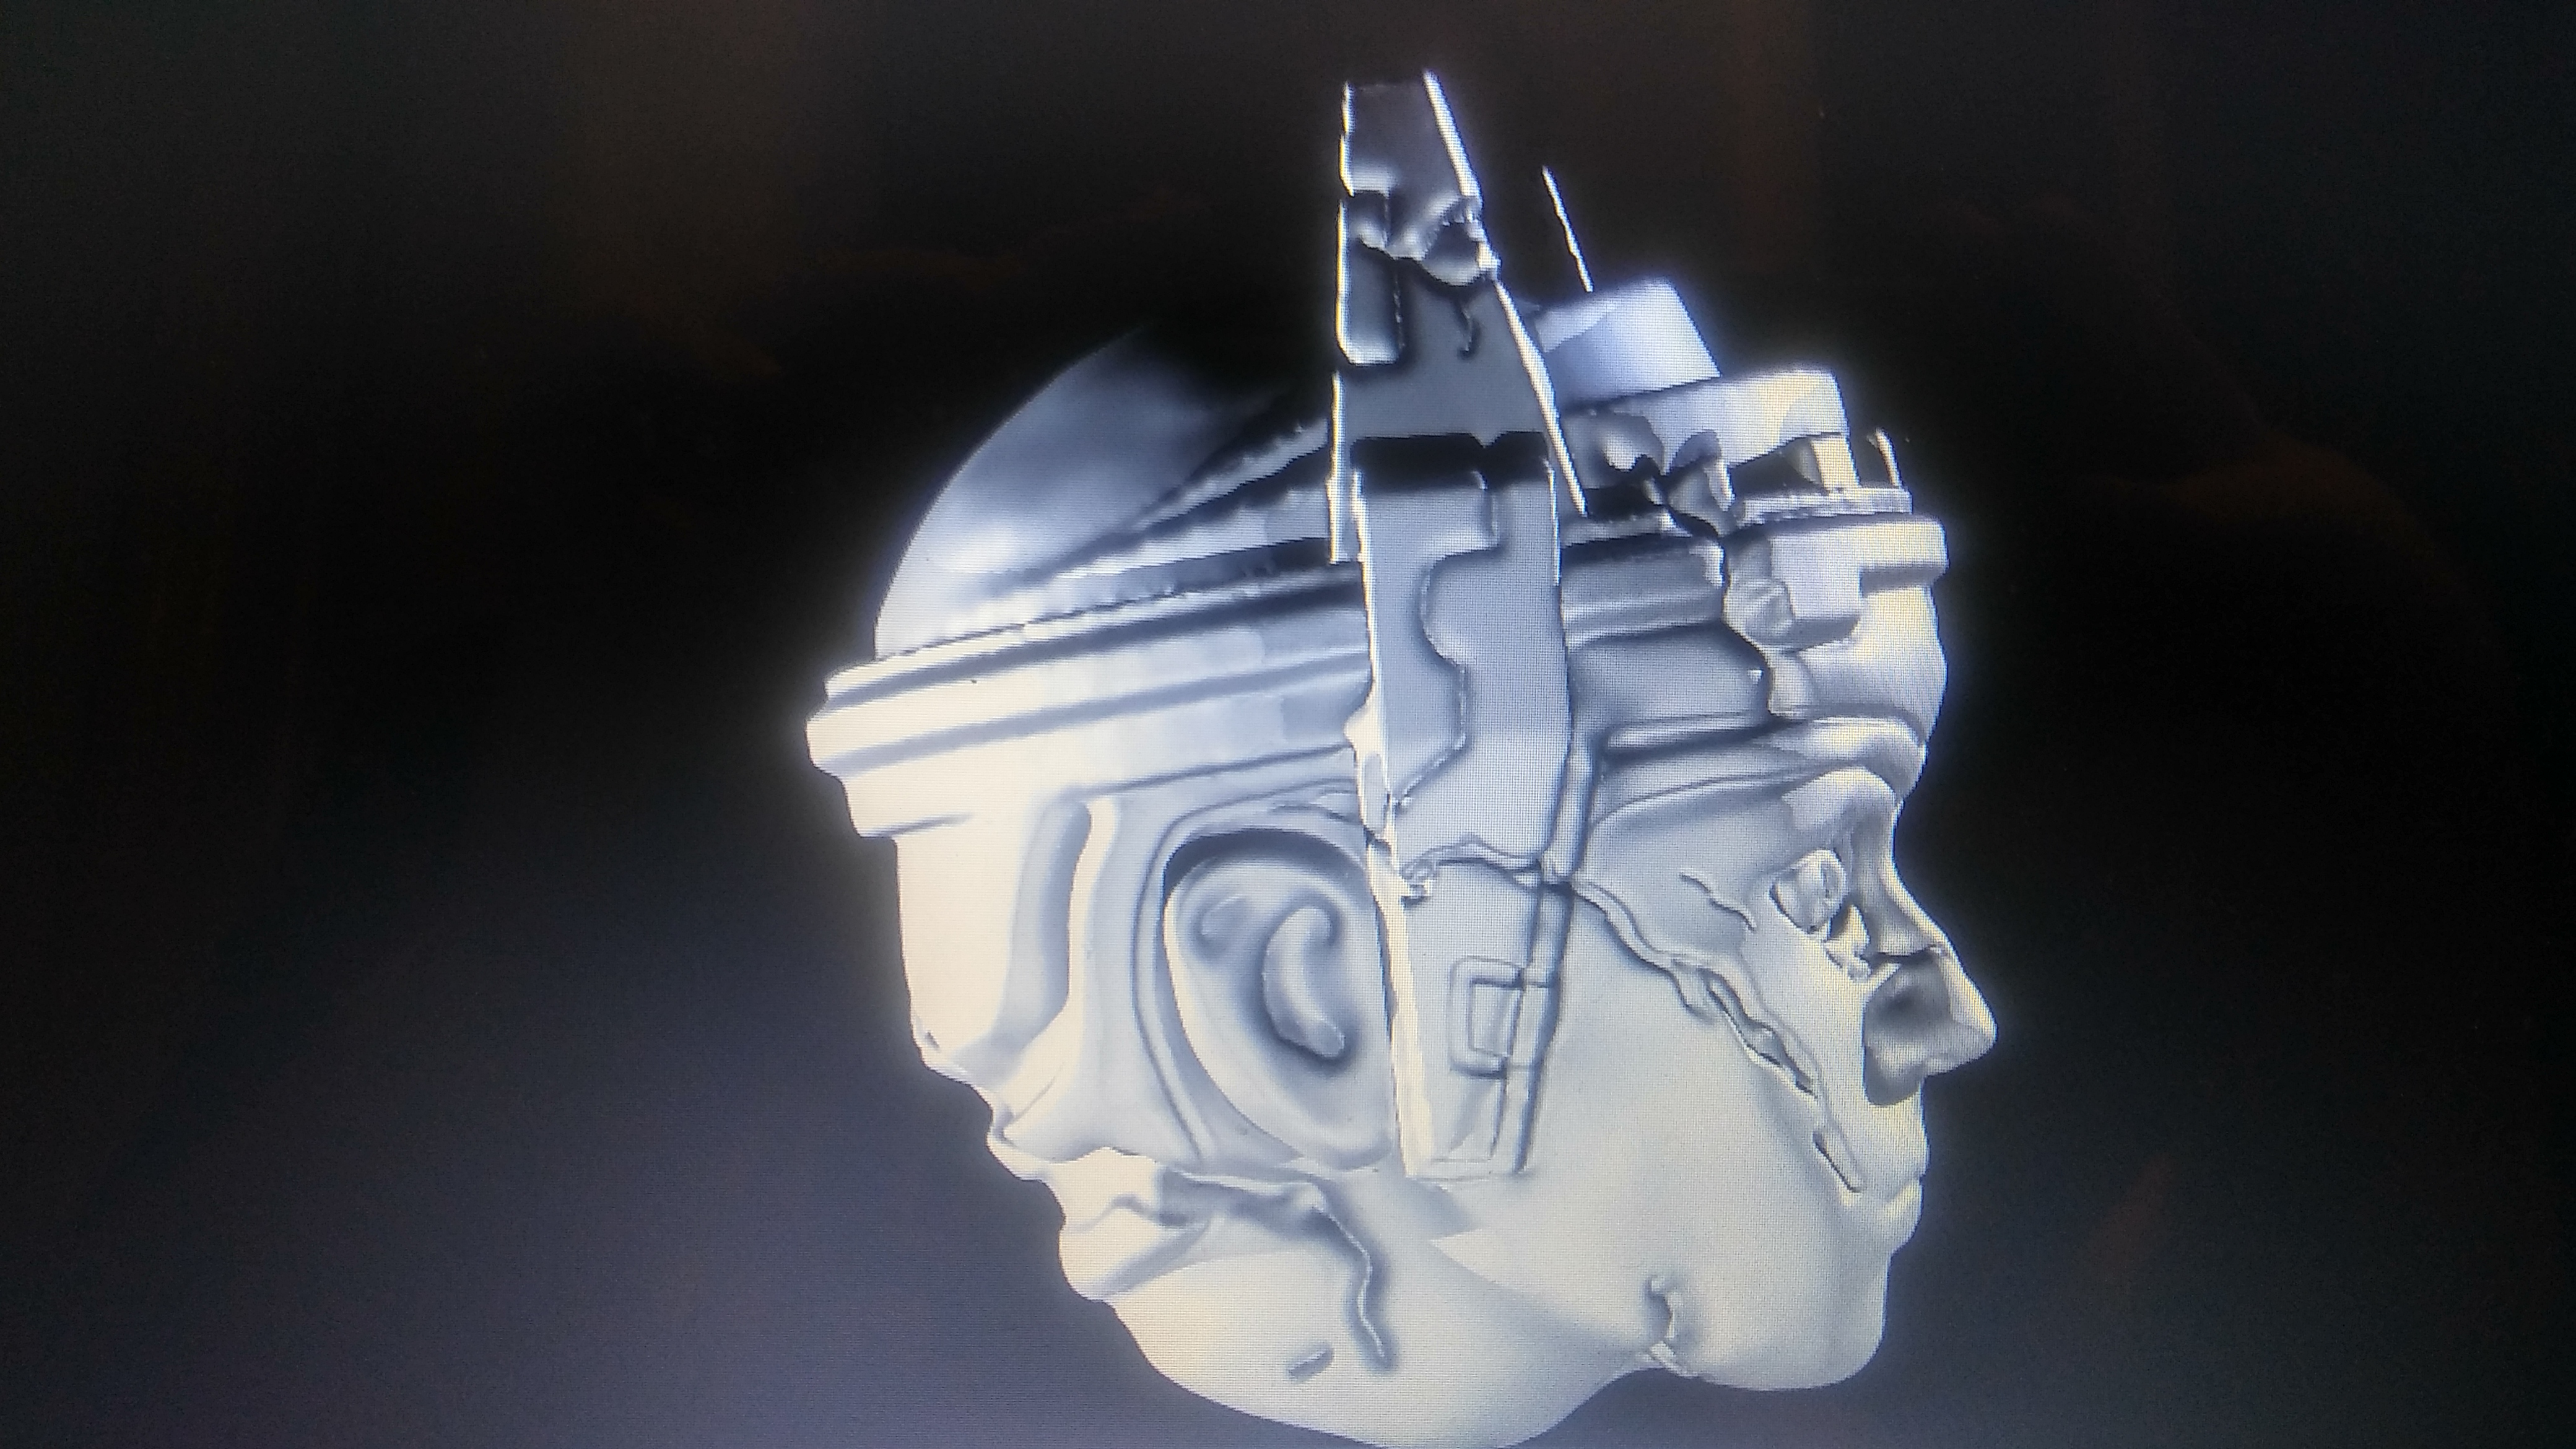
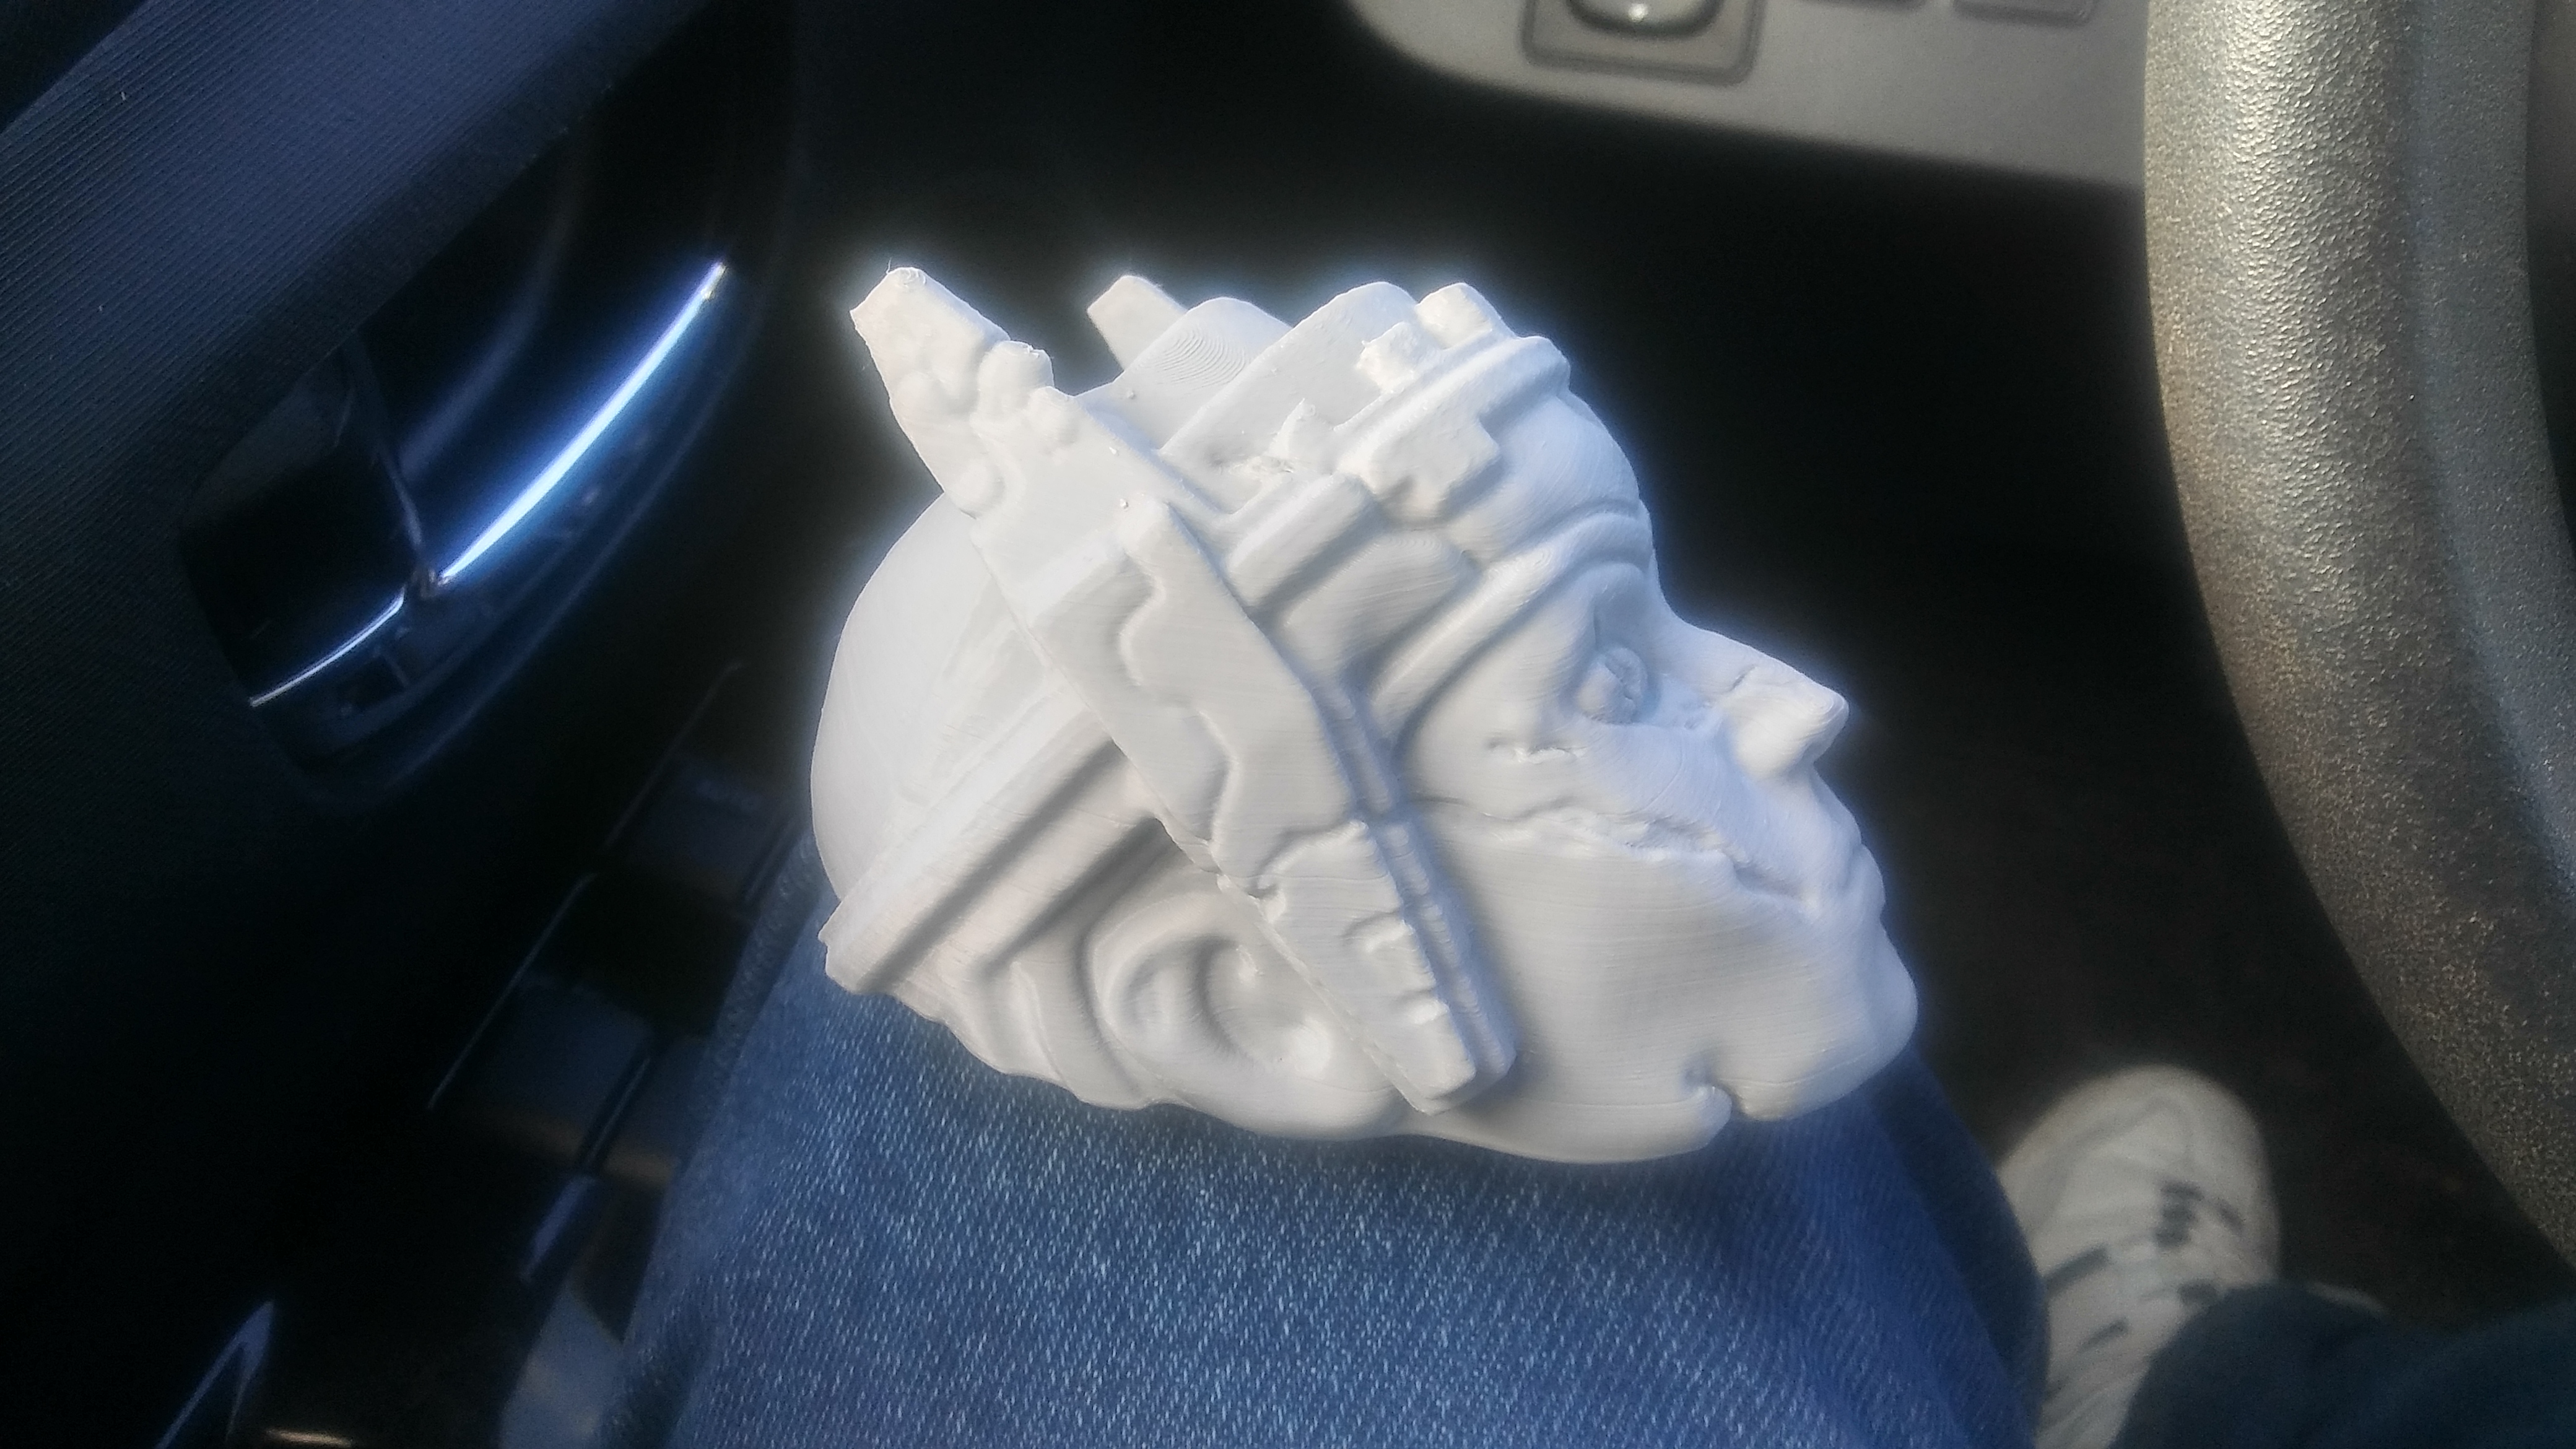
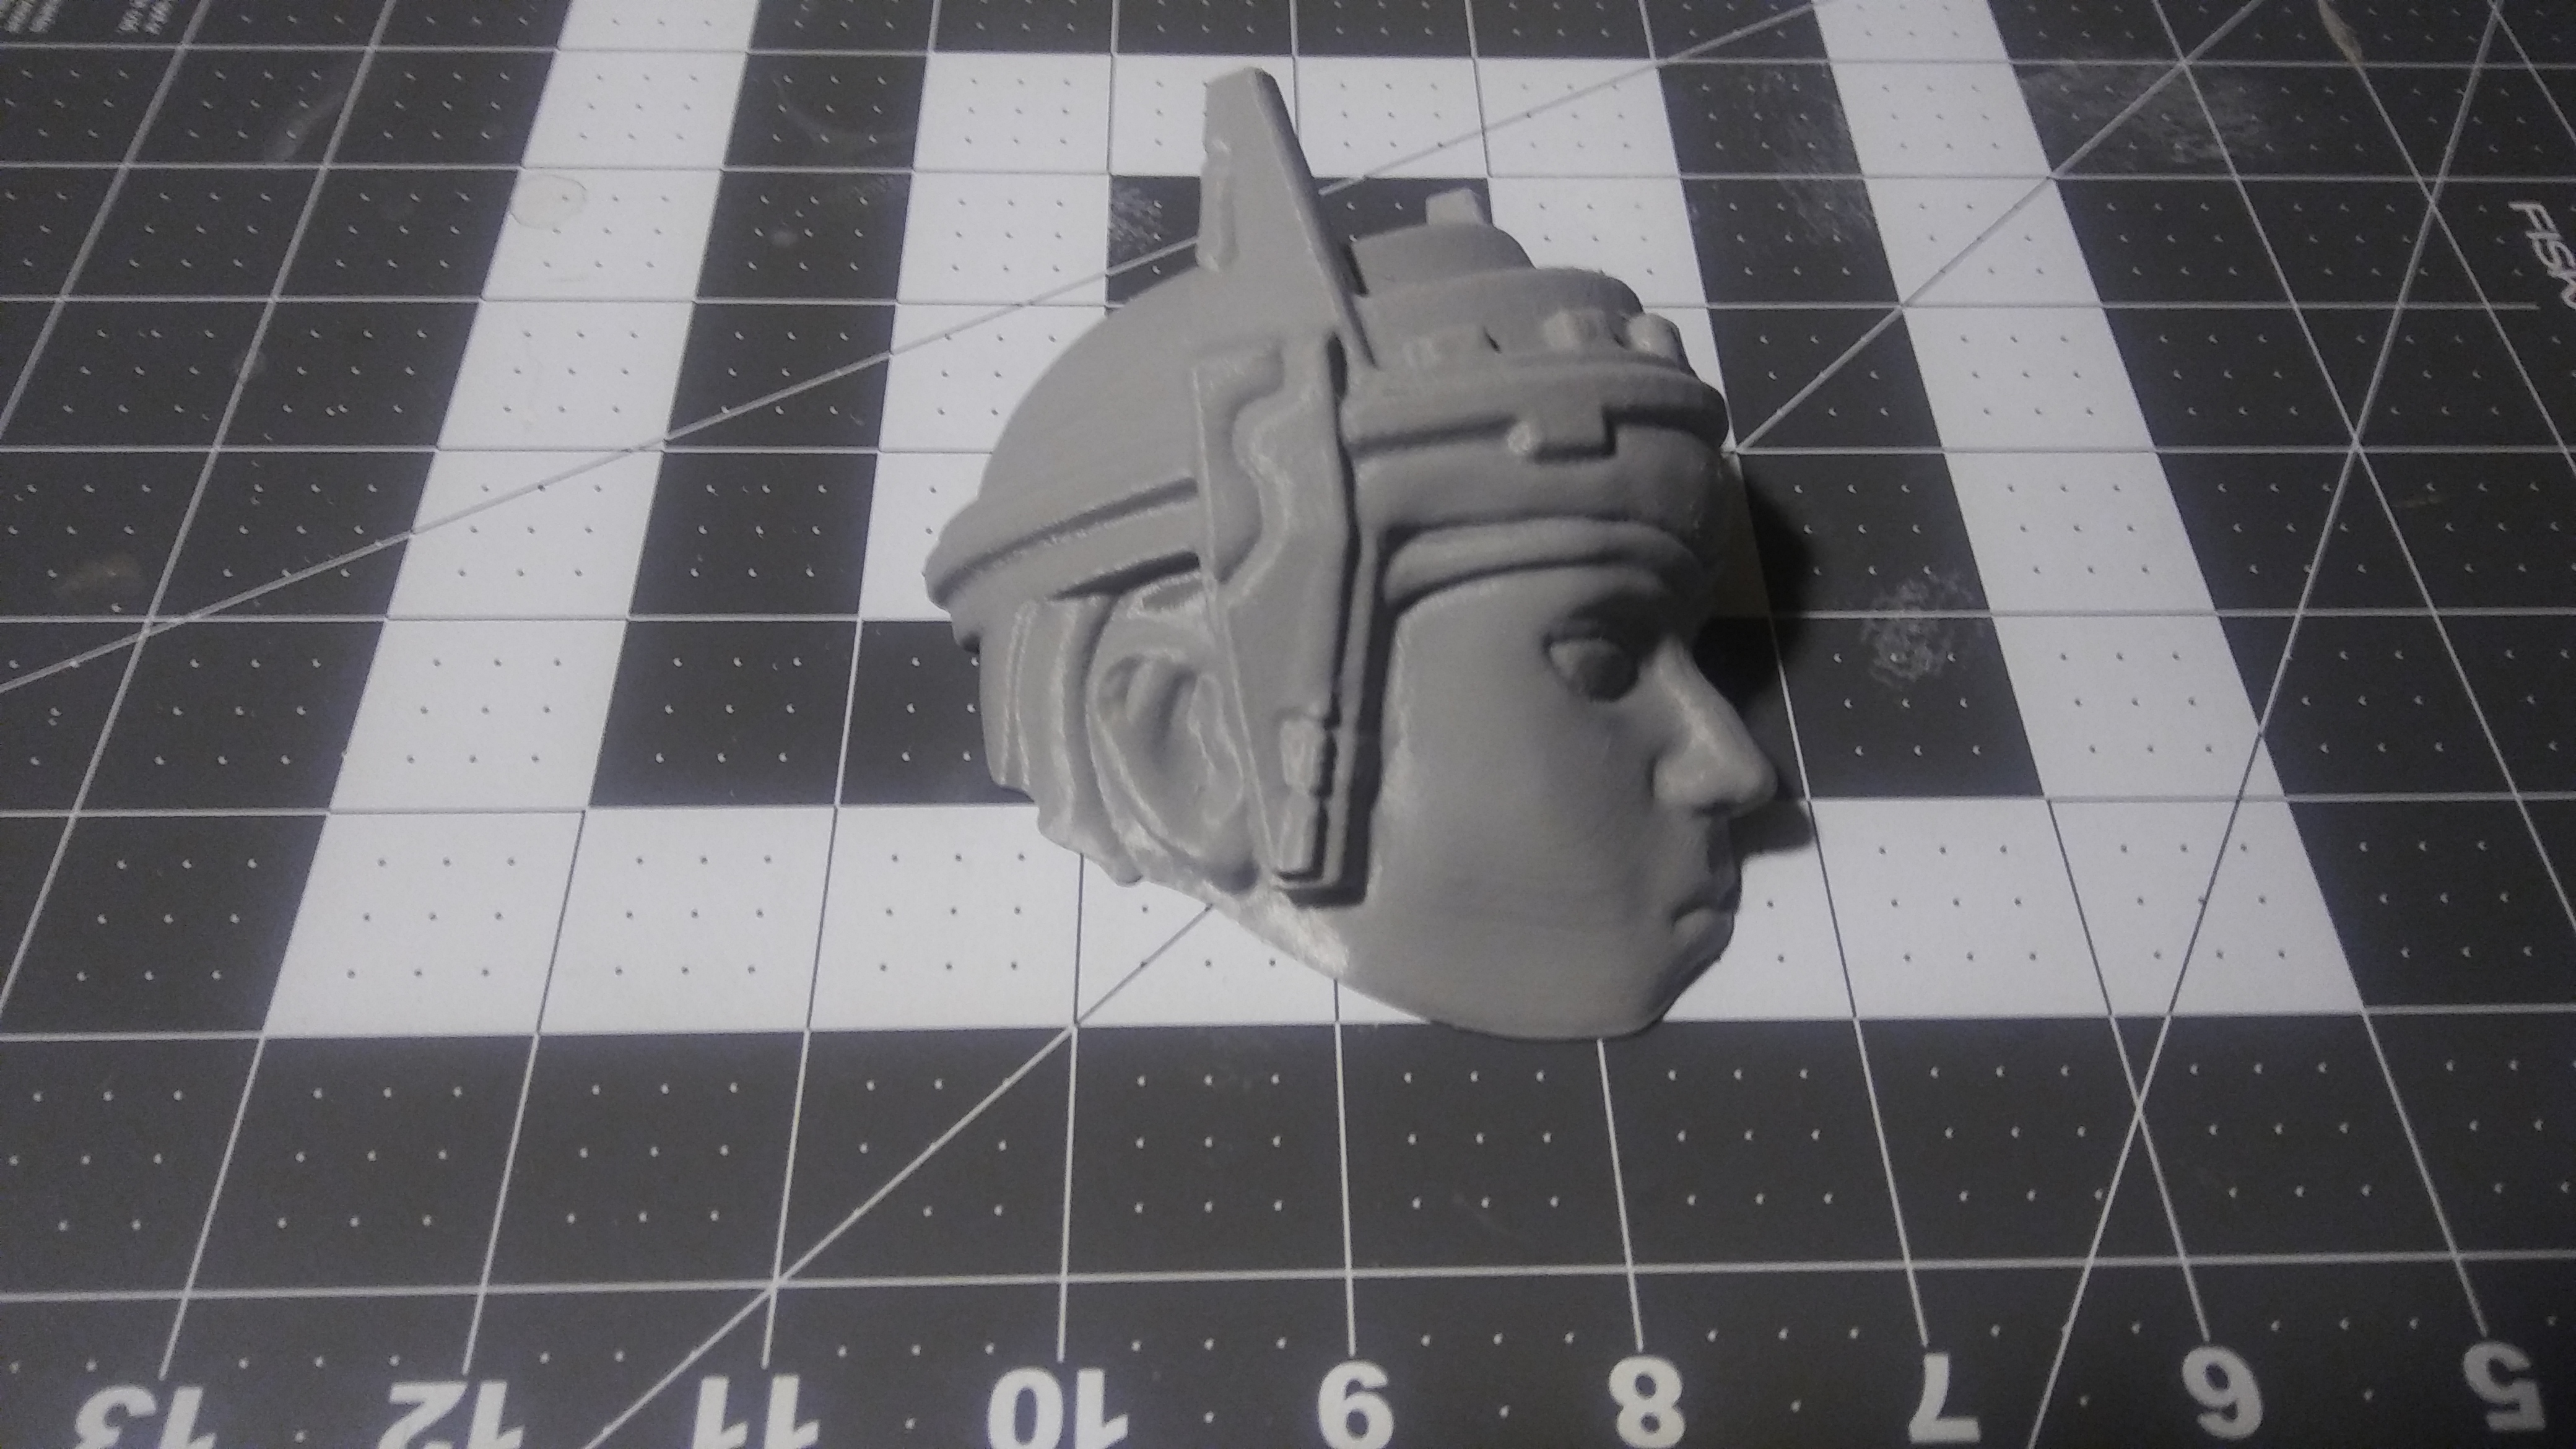
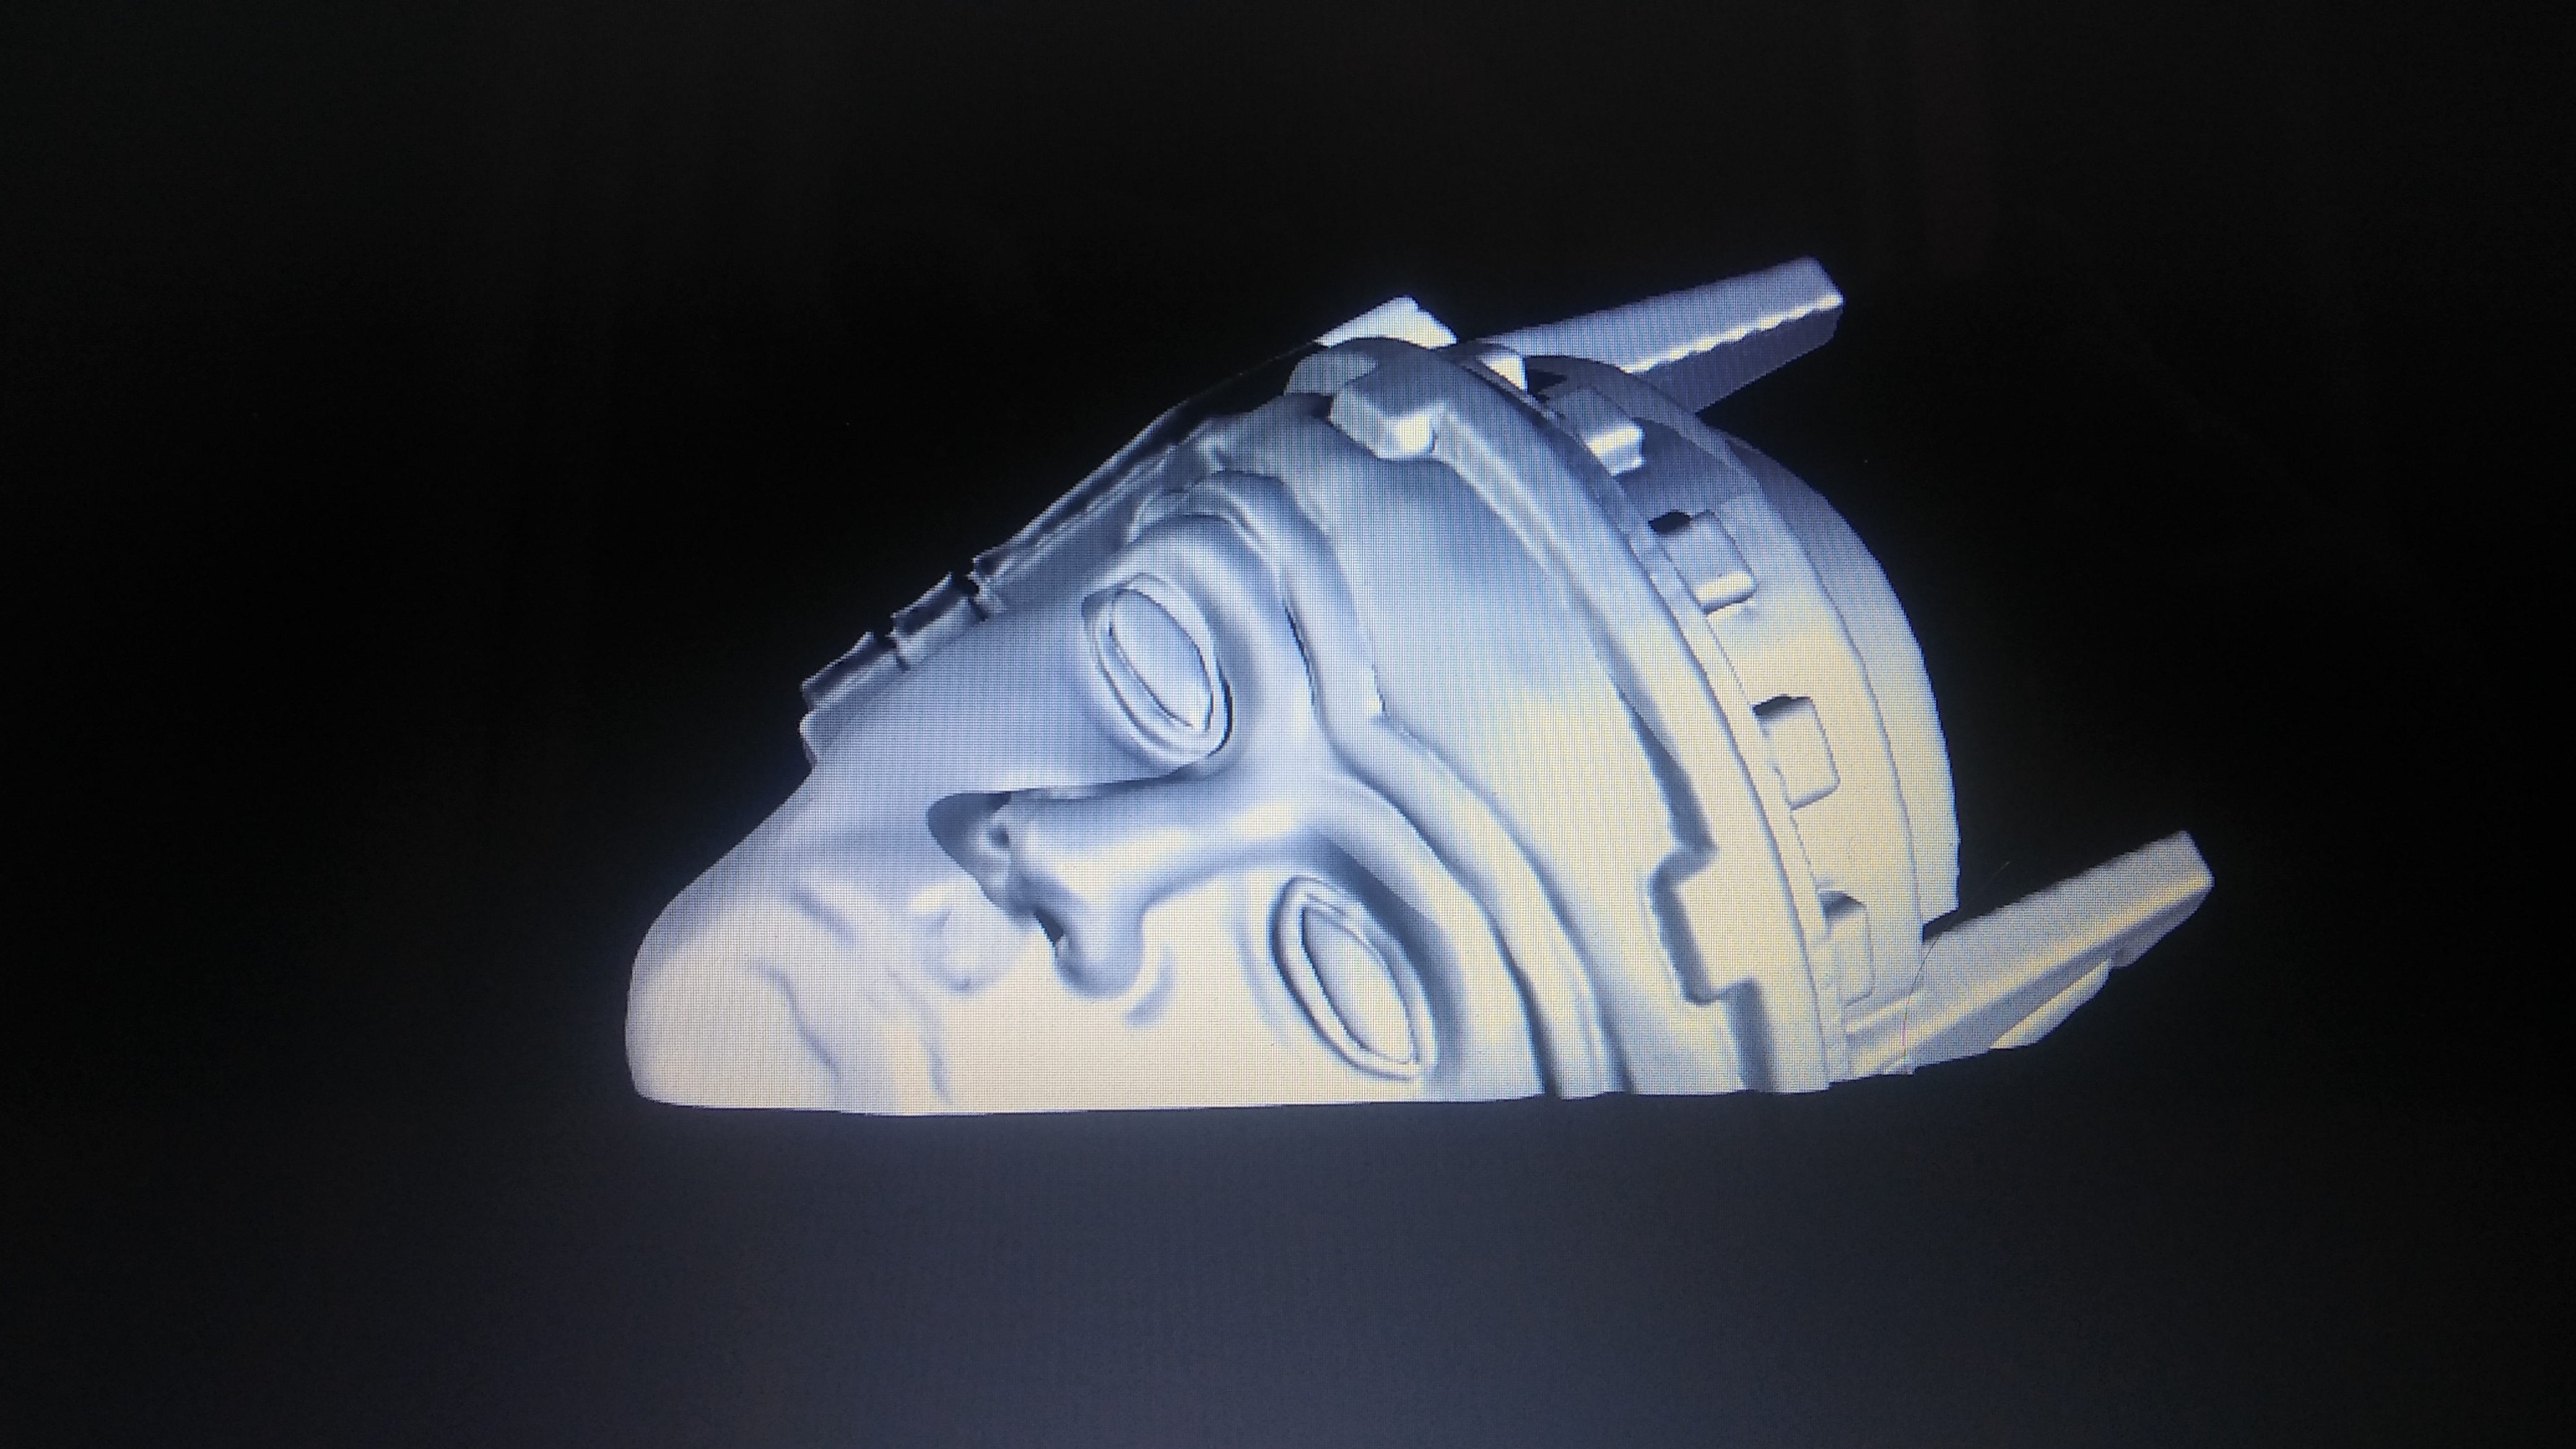
The eyes have it
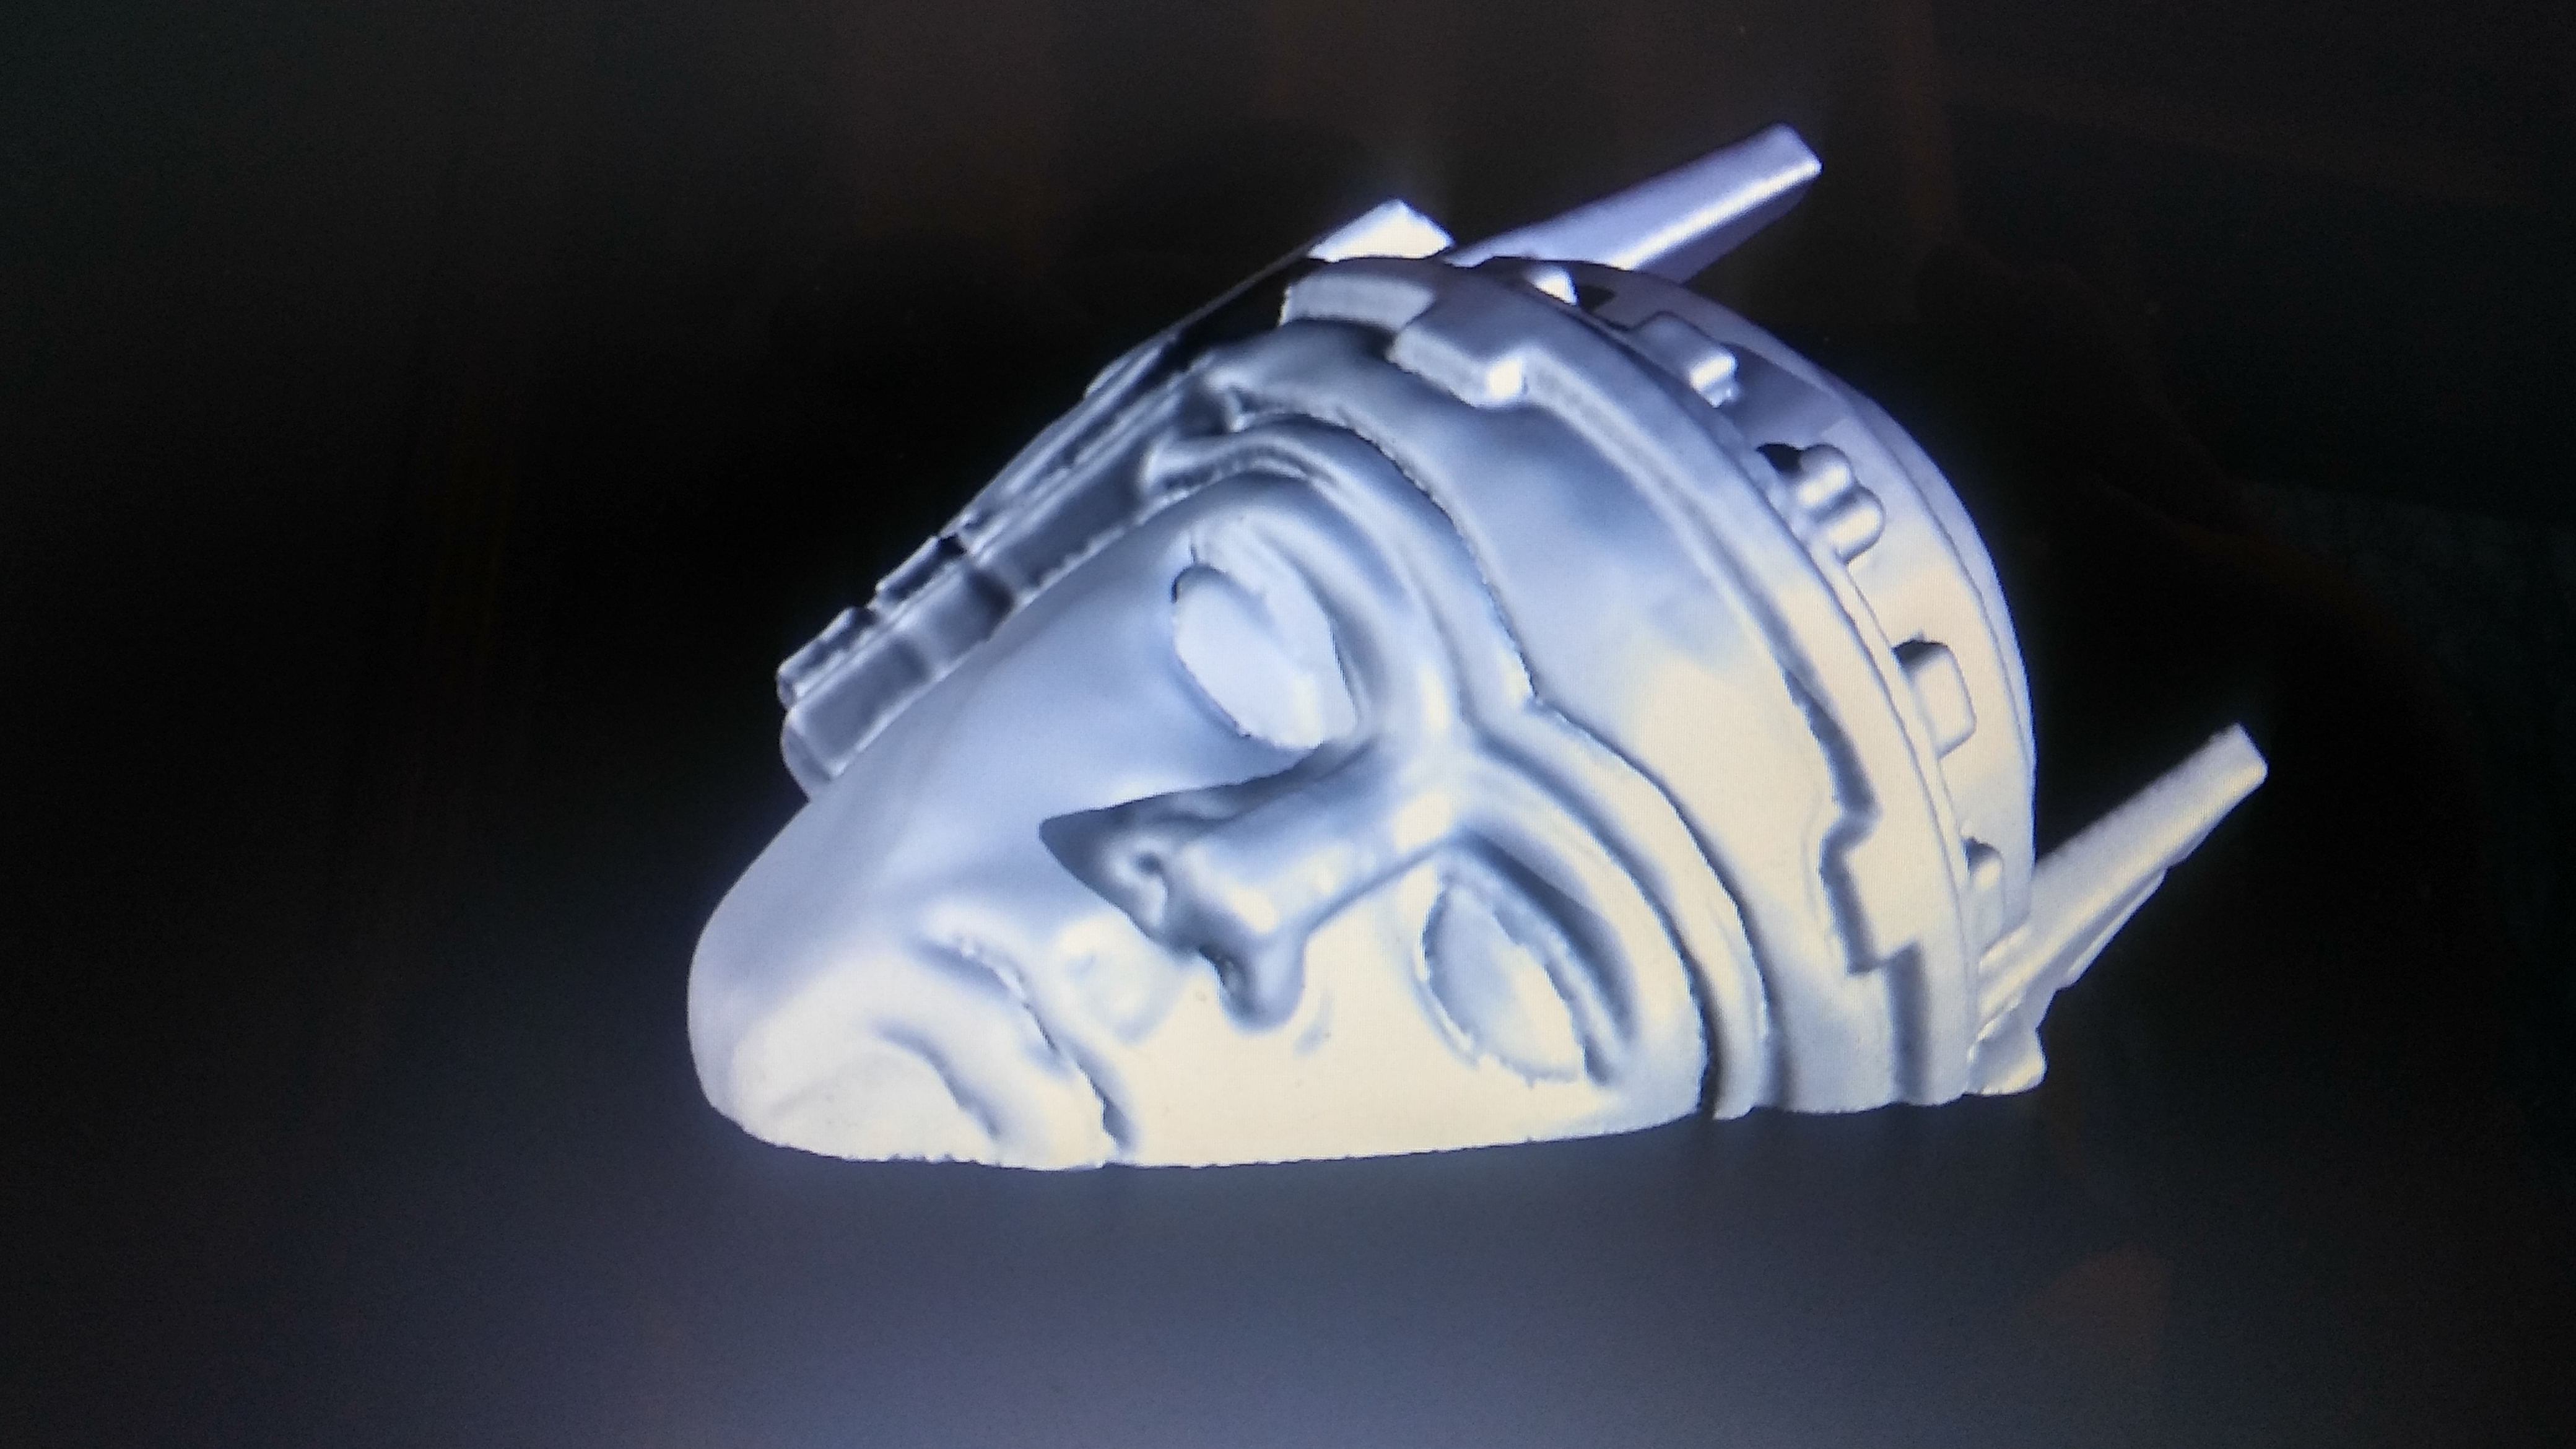
The eyes where really bothering me. They where not almond shaped enough. So I smoothed out that area and tried doing them again.
This version looks much better than the past posting.
Doing a test print of this Ruin of Arnor currently.
Ruin of Arnor
Since its been a solid week of printing out Amon Hen. I switched things up and Scuplted a Ruin of Arnor.
You roughly see this in the extended addition for a few seconds. All the orcs and trolls throughout the land destroyed these old statues.
This one will be about 4 inches long and maybe 2 inches high. It will take a good 10 hours to print.
I will have an up-date on the Amon Hen tomorrow. The last peice is just about done printing. 80 hours to print up all the parts.
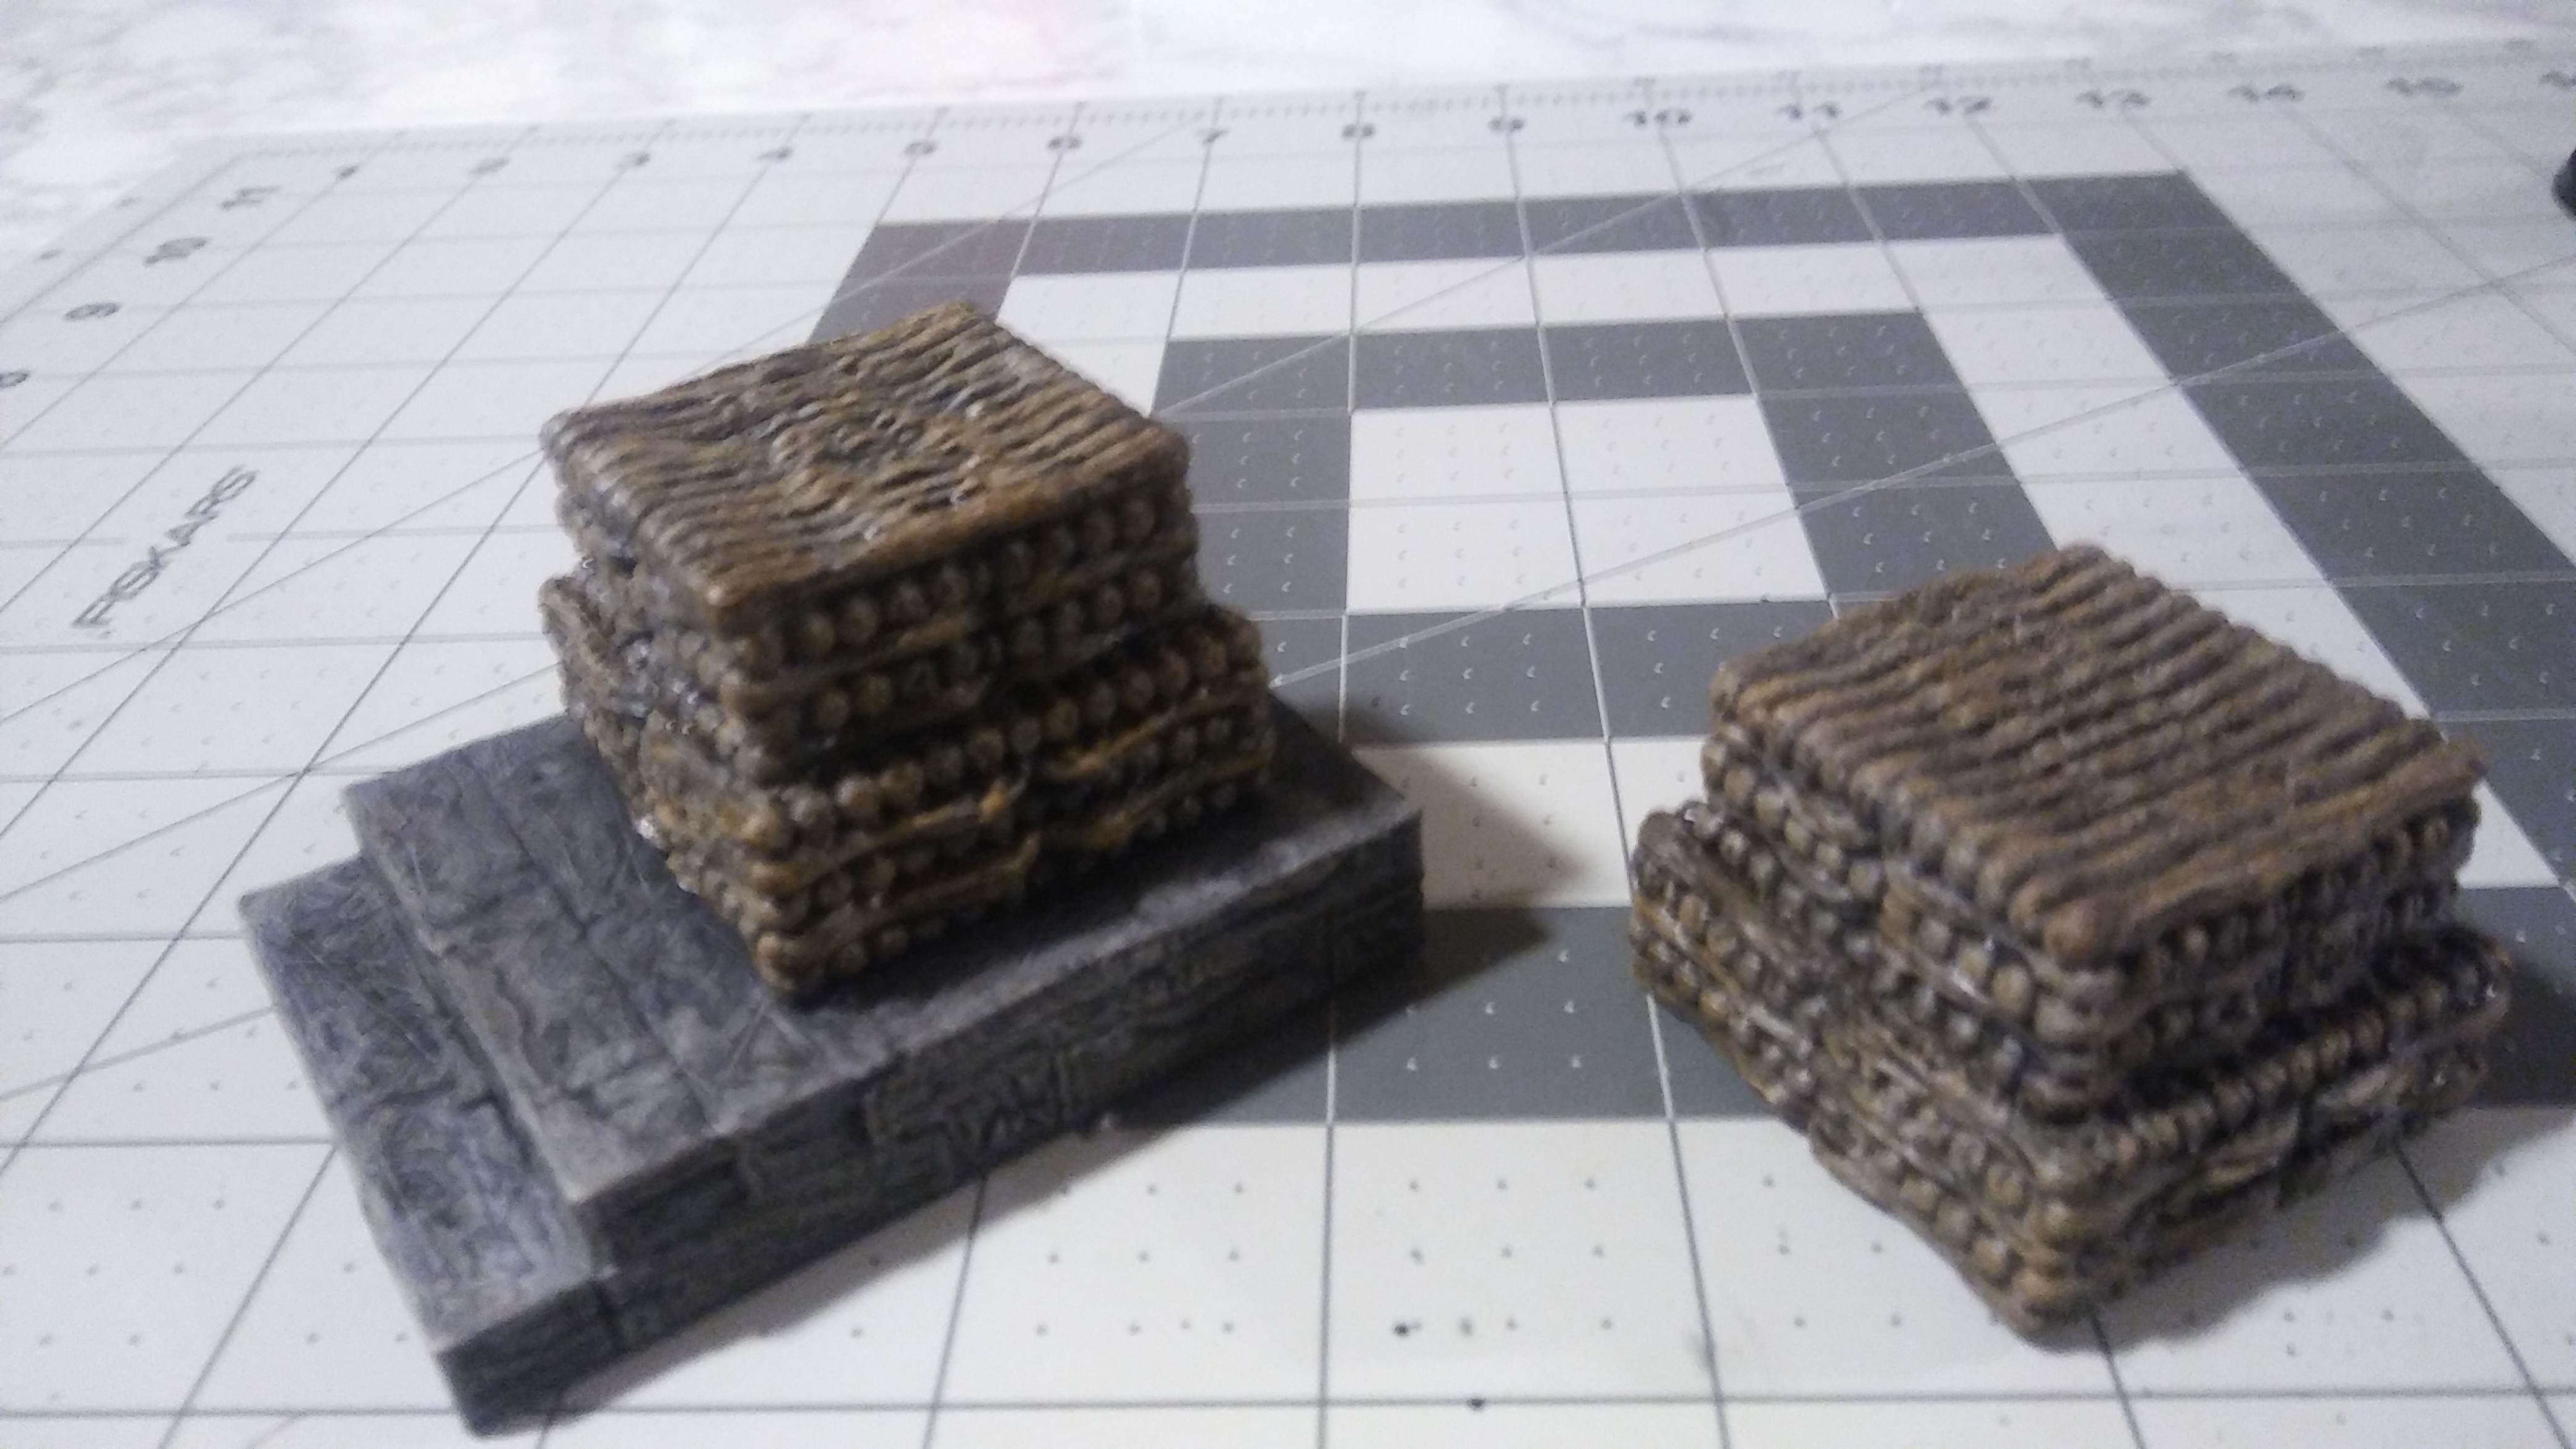
Got wood?
Noticed that I am running out of catchy Lotr title postings?
Well here is the painted Wooden Pyres.
I base coated both with a black paint. Then dry brushed a light gray over most of it at about a 45 degree angle. Then dry brushed few areas with an cream color.
Once those where dry, I did a thin layer of burnt number over it all. So the lighter colors underneath would sort of shine through.
After that dried I used a Army Painter Monster Brown and did a quick dry brush again. My next step was to use GW Agrax Earthshade to give it a real old and possibly oil soak wood look.
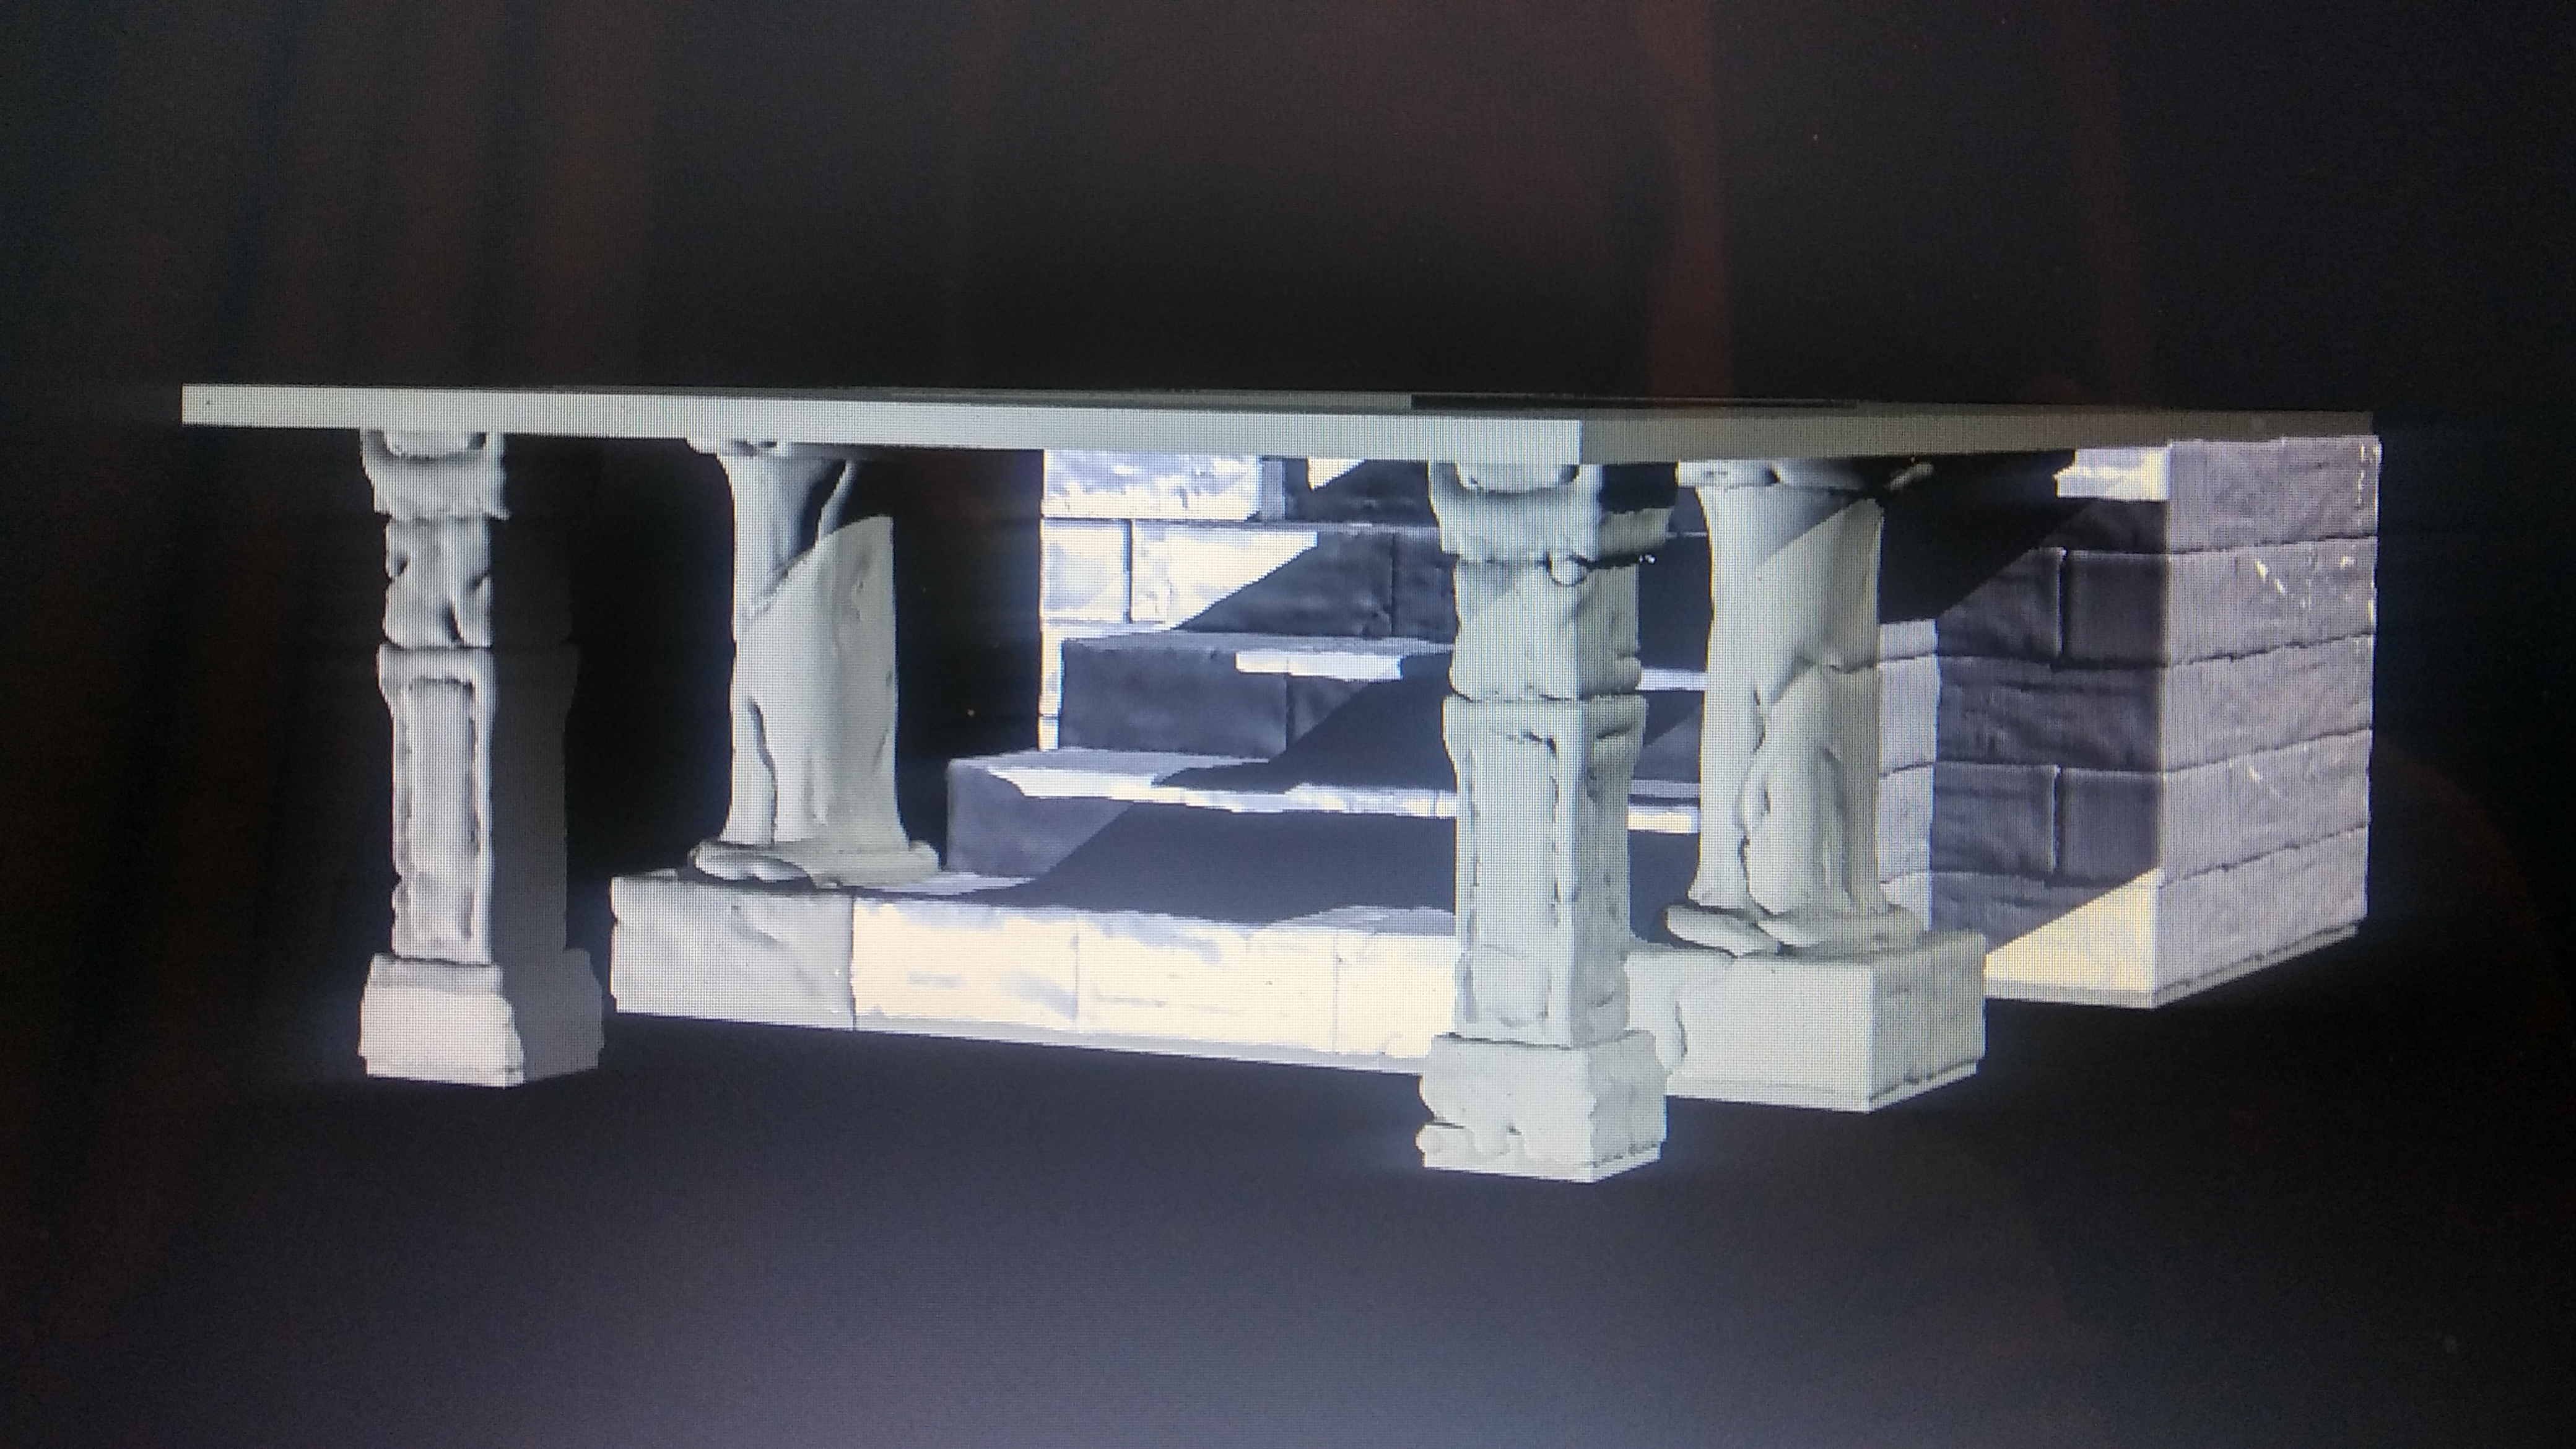
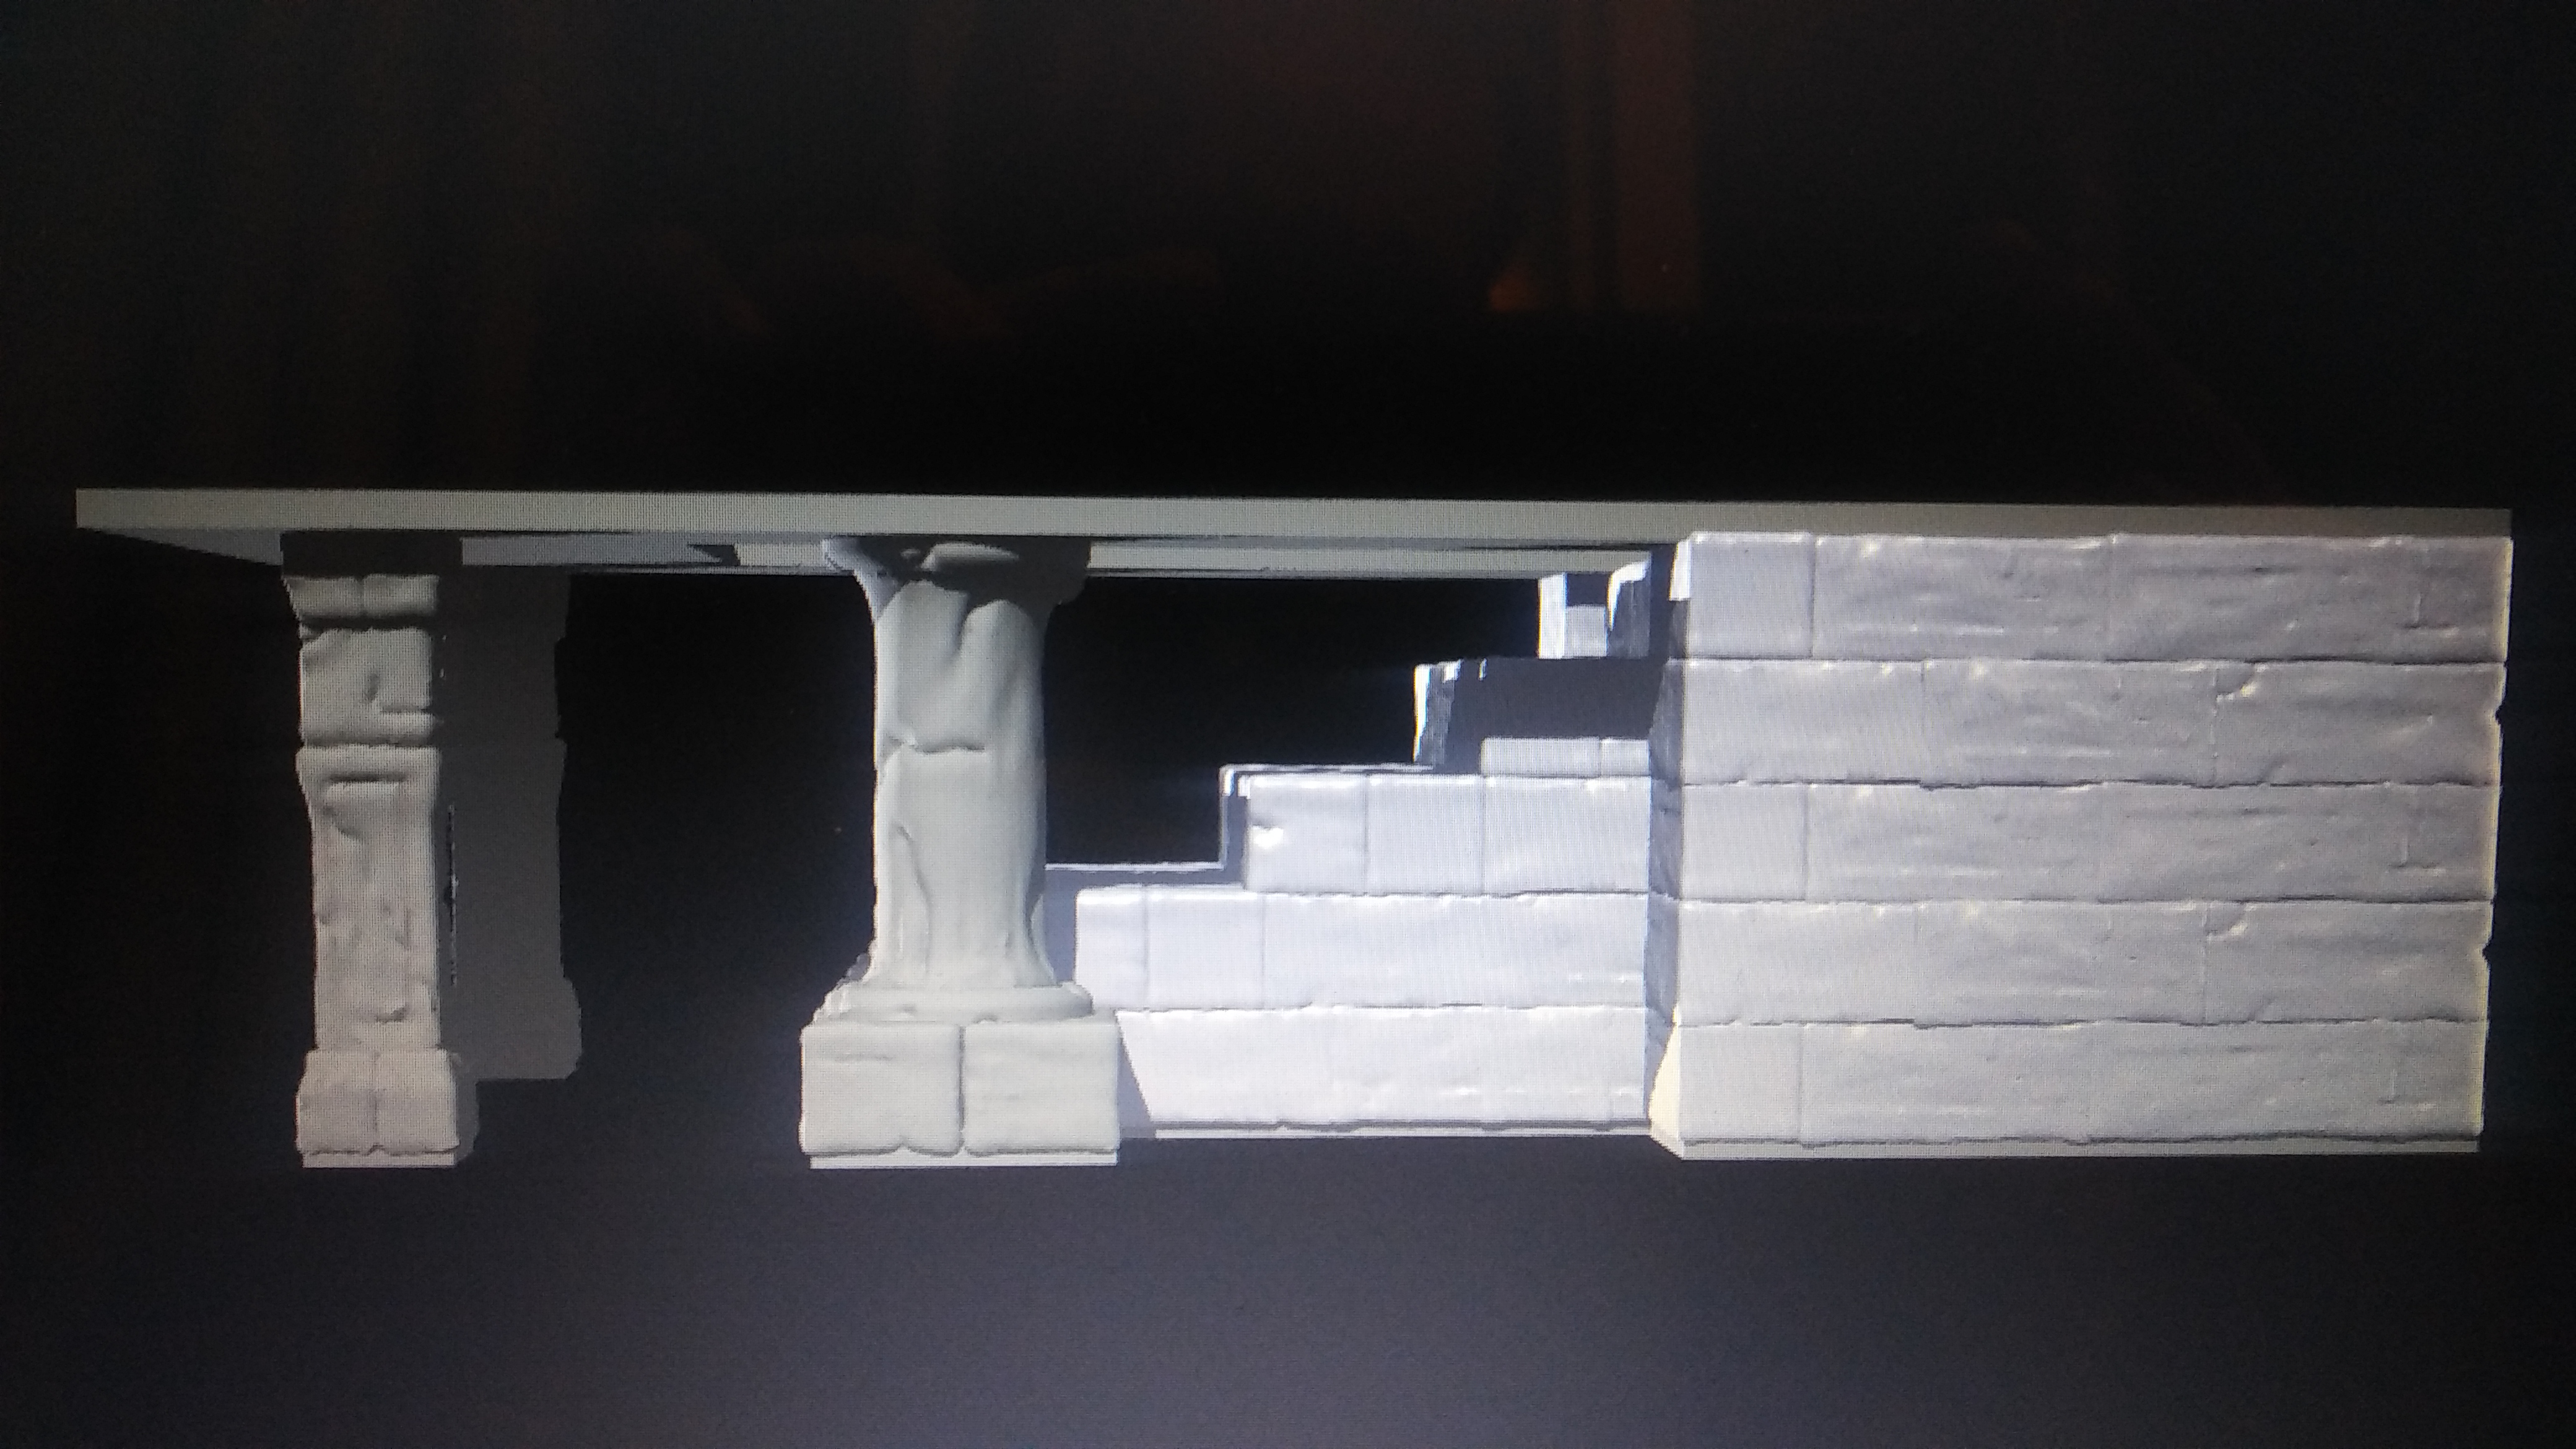
As you can see in these pictures the scale of them. The top step is just large enough to keep a figure in place. Unless its weight is not centered very well.
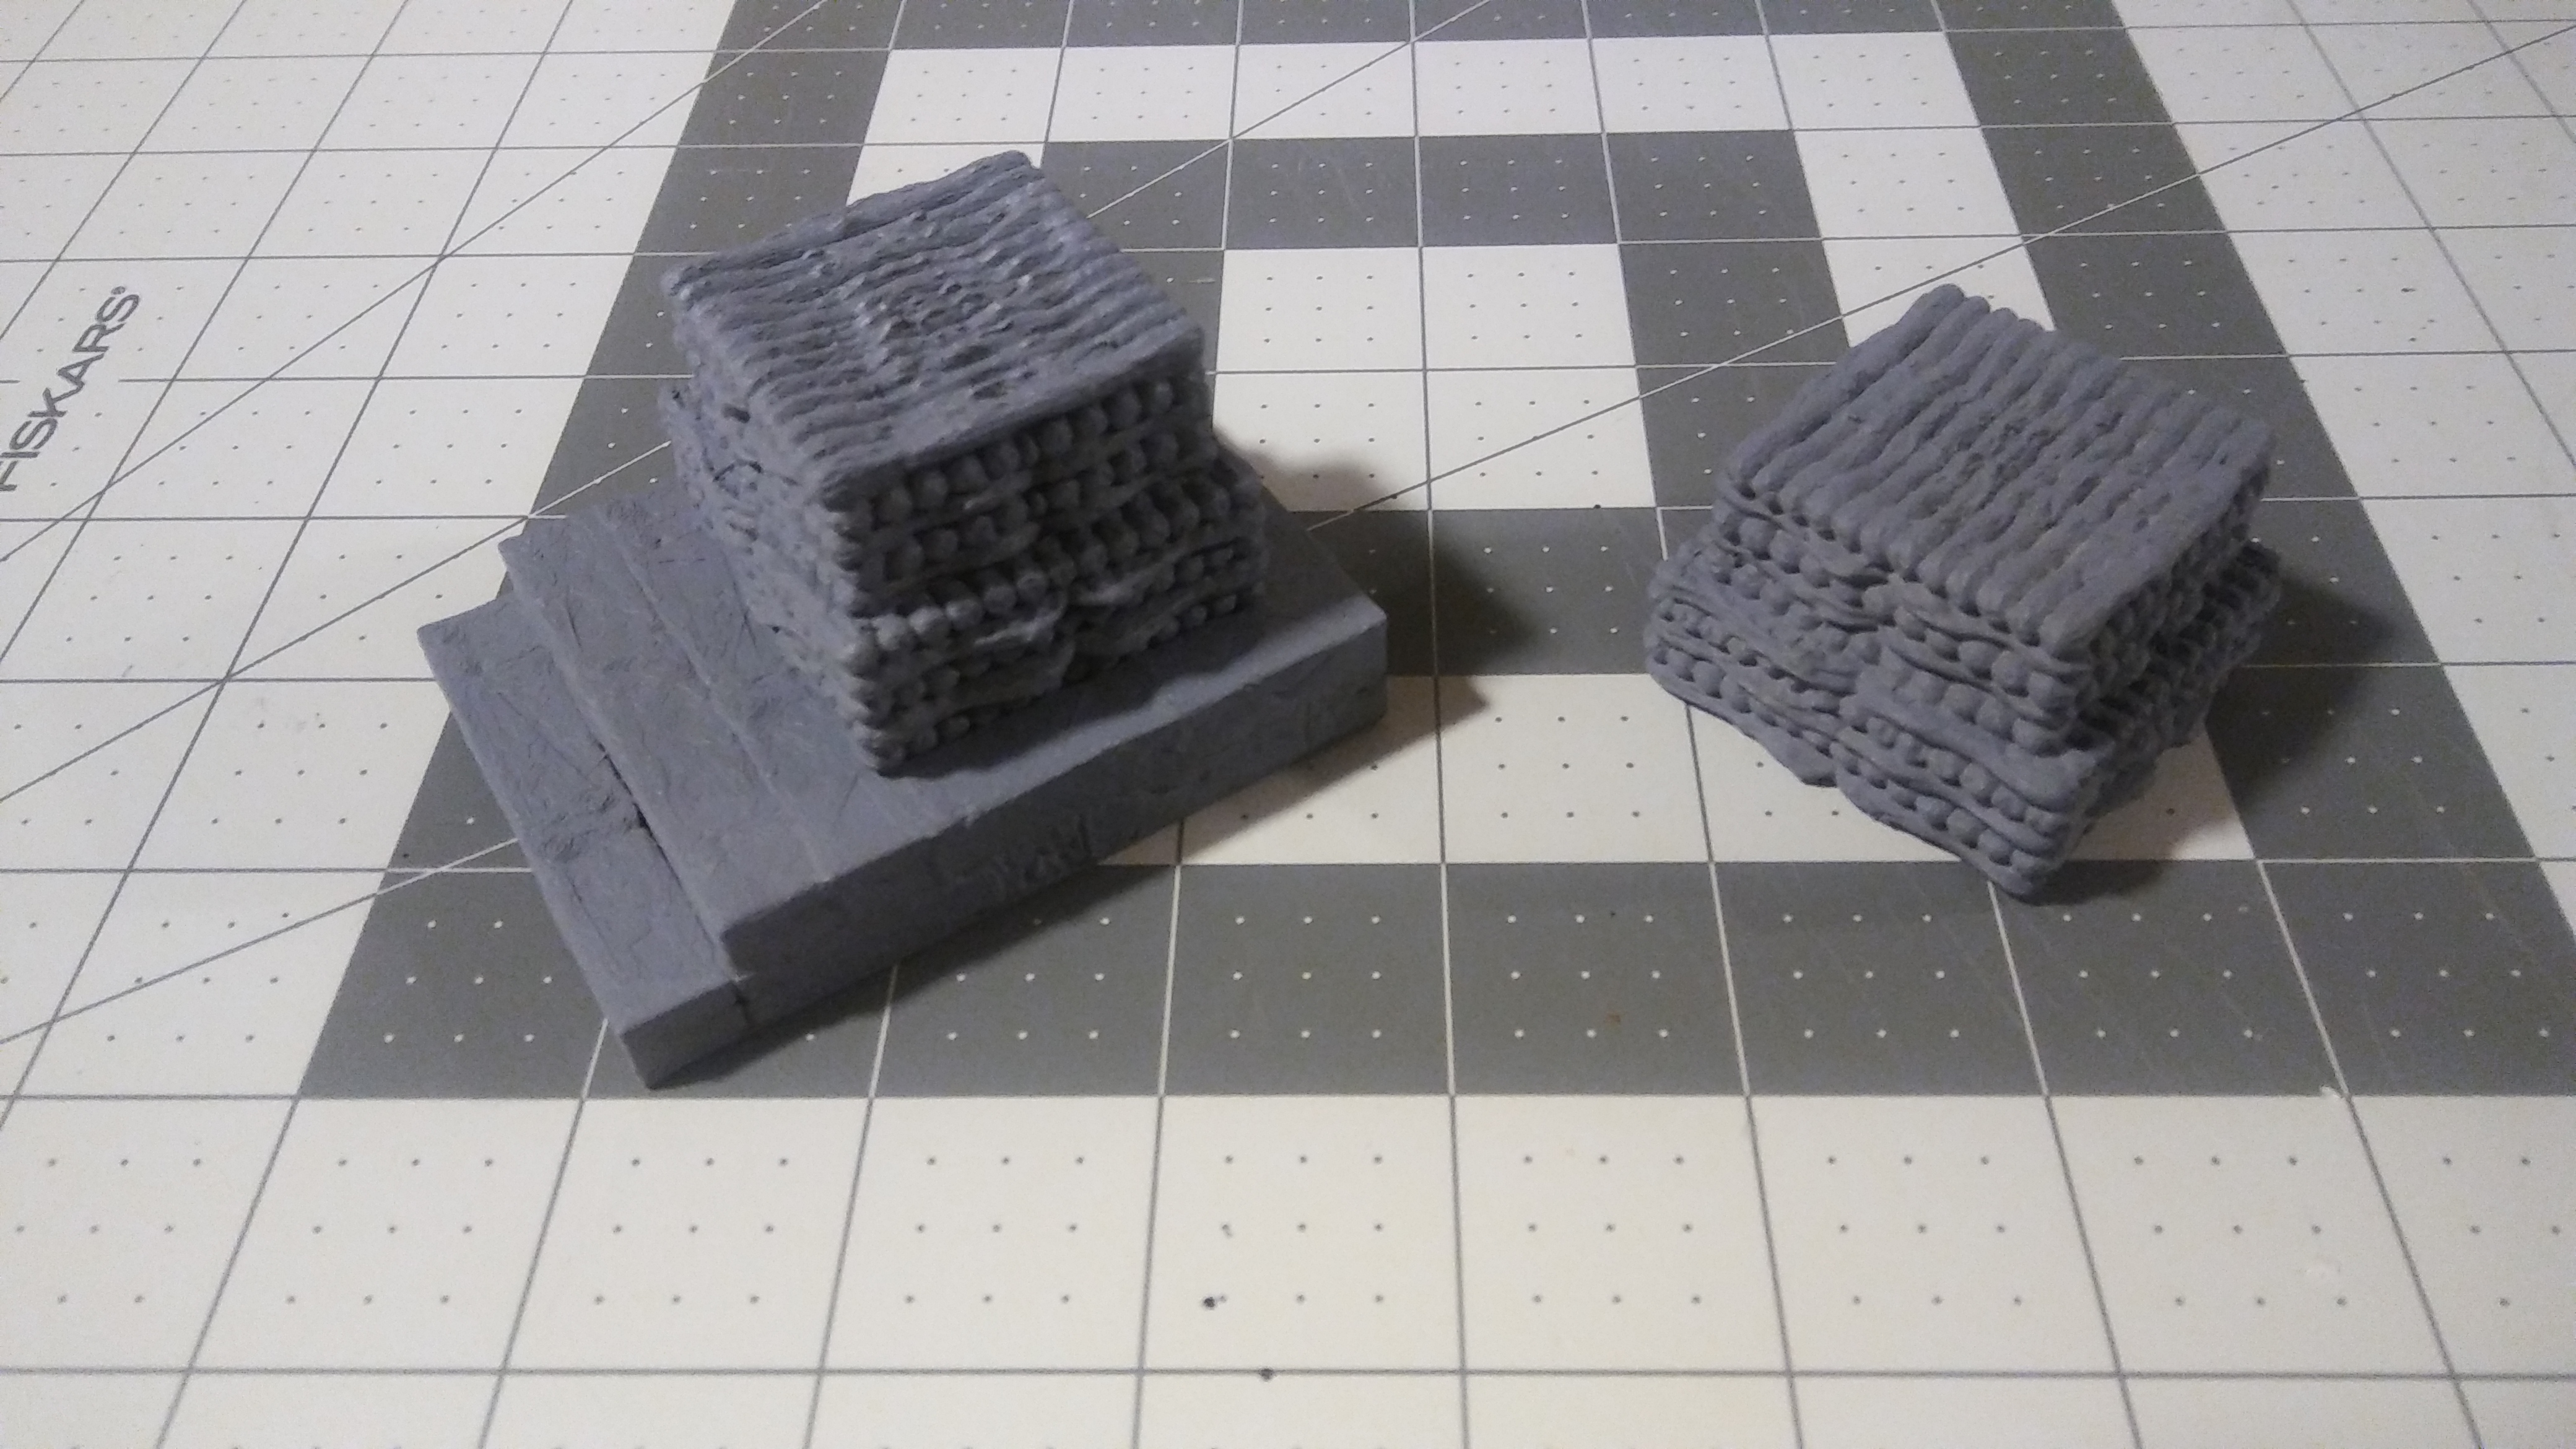
I was delayed...
I was hoping to show some pictures of the painted Wooden Pyres. But my base coat is taking way to long to dry.
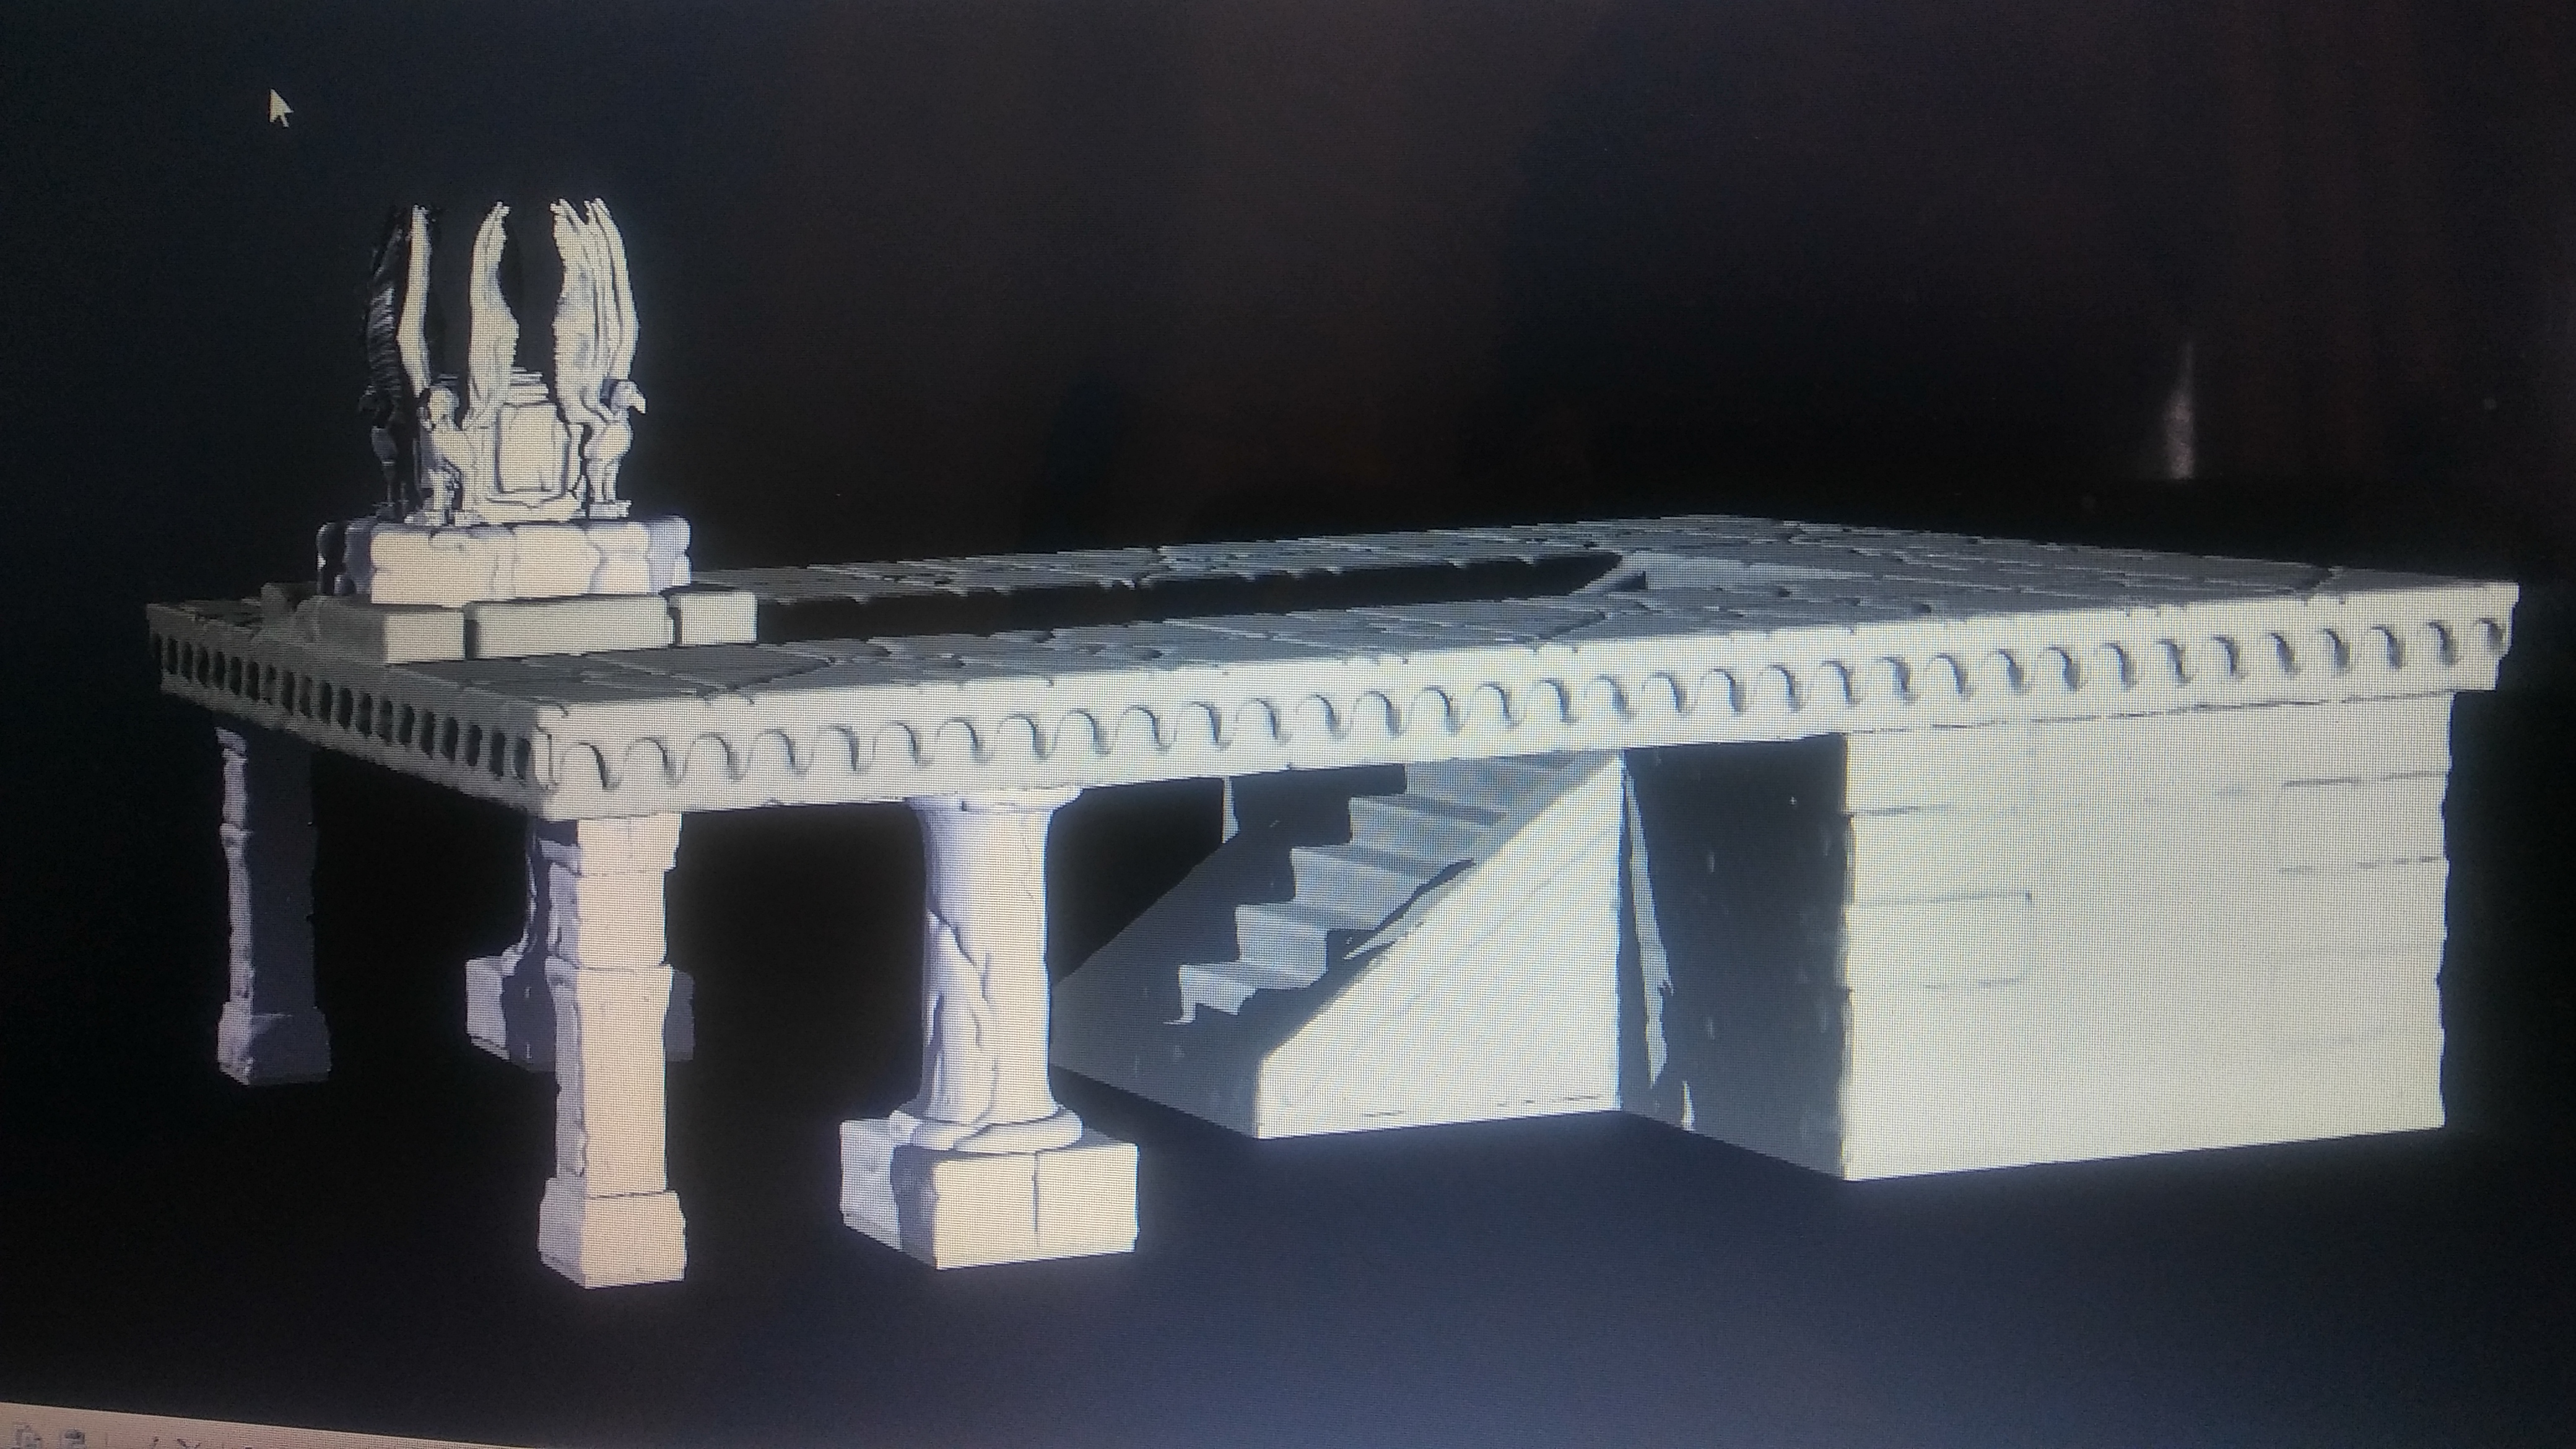
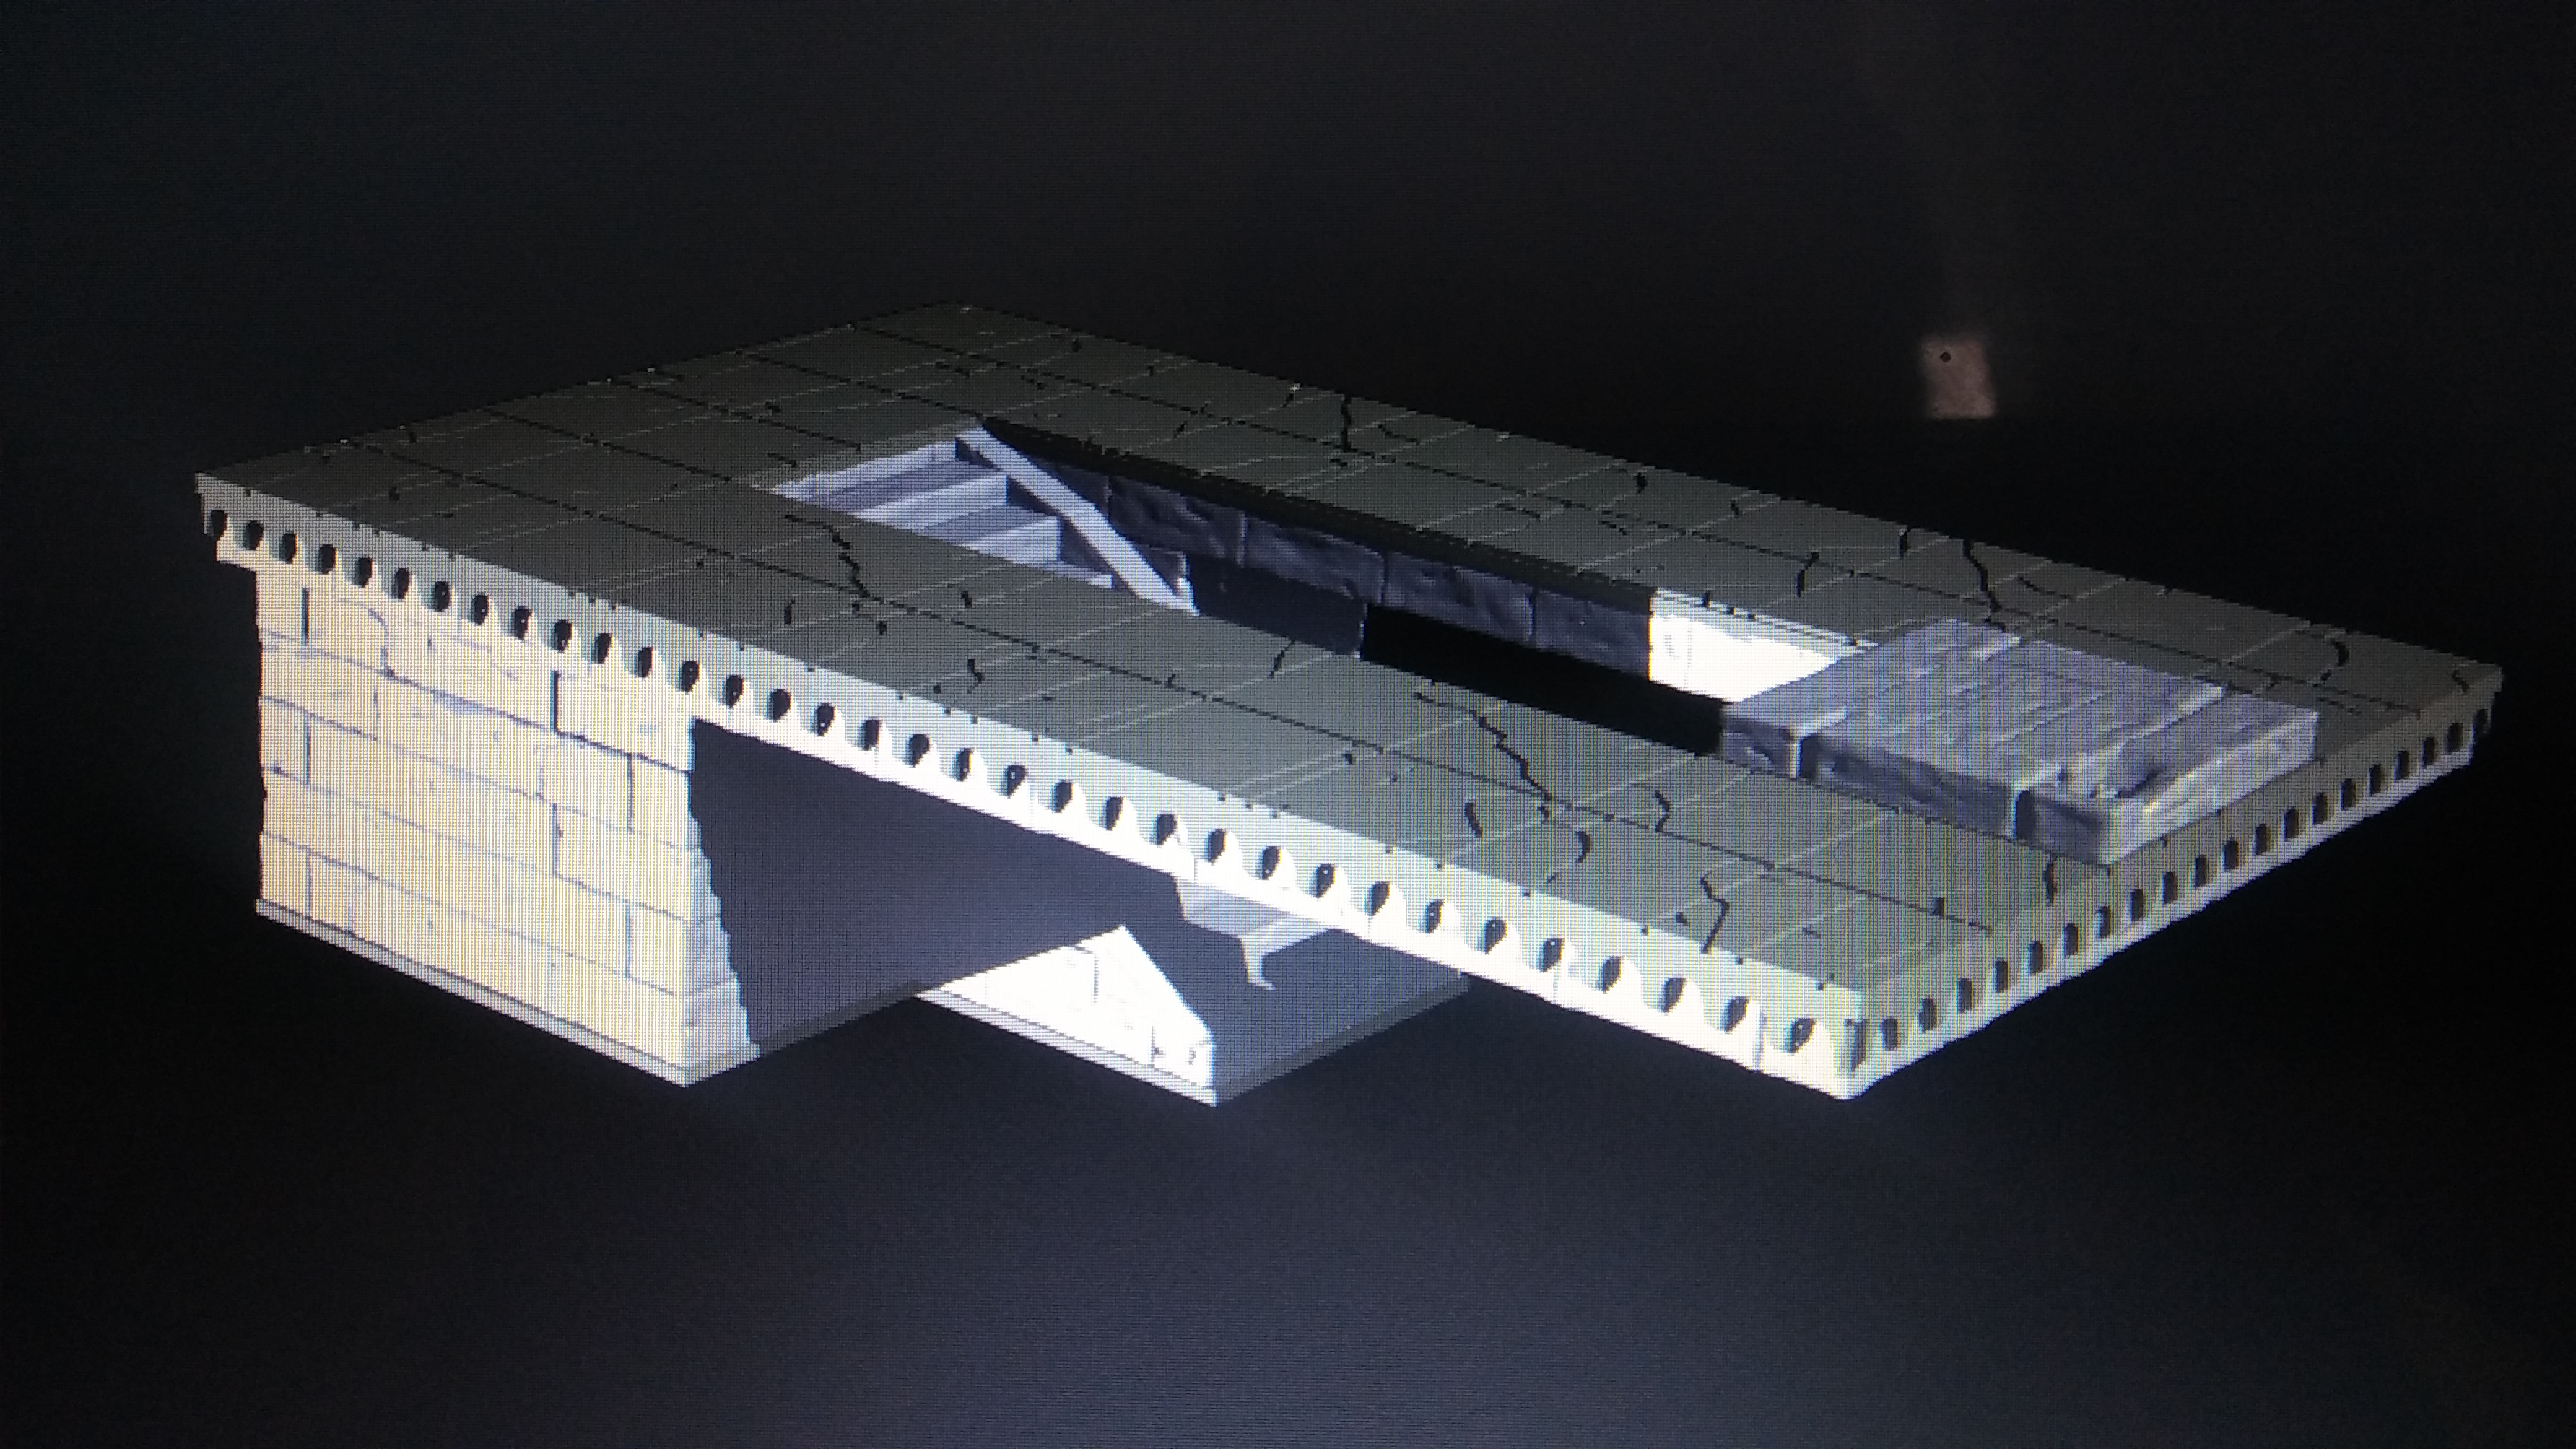
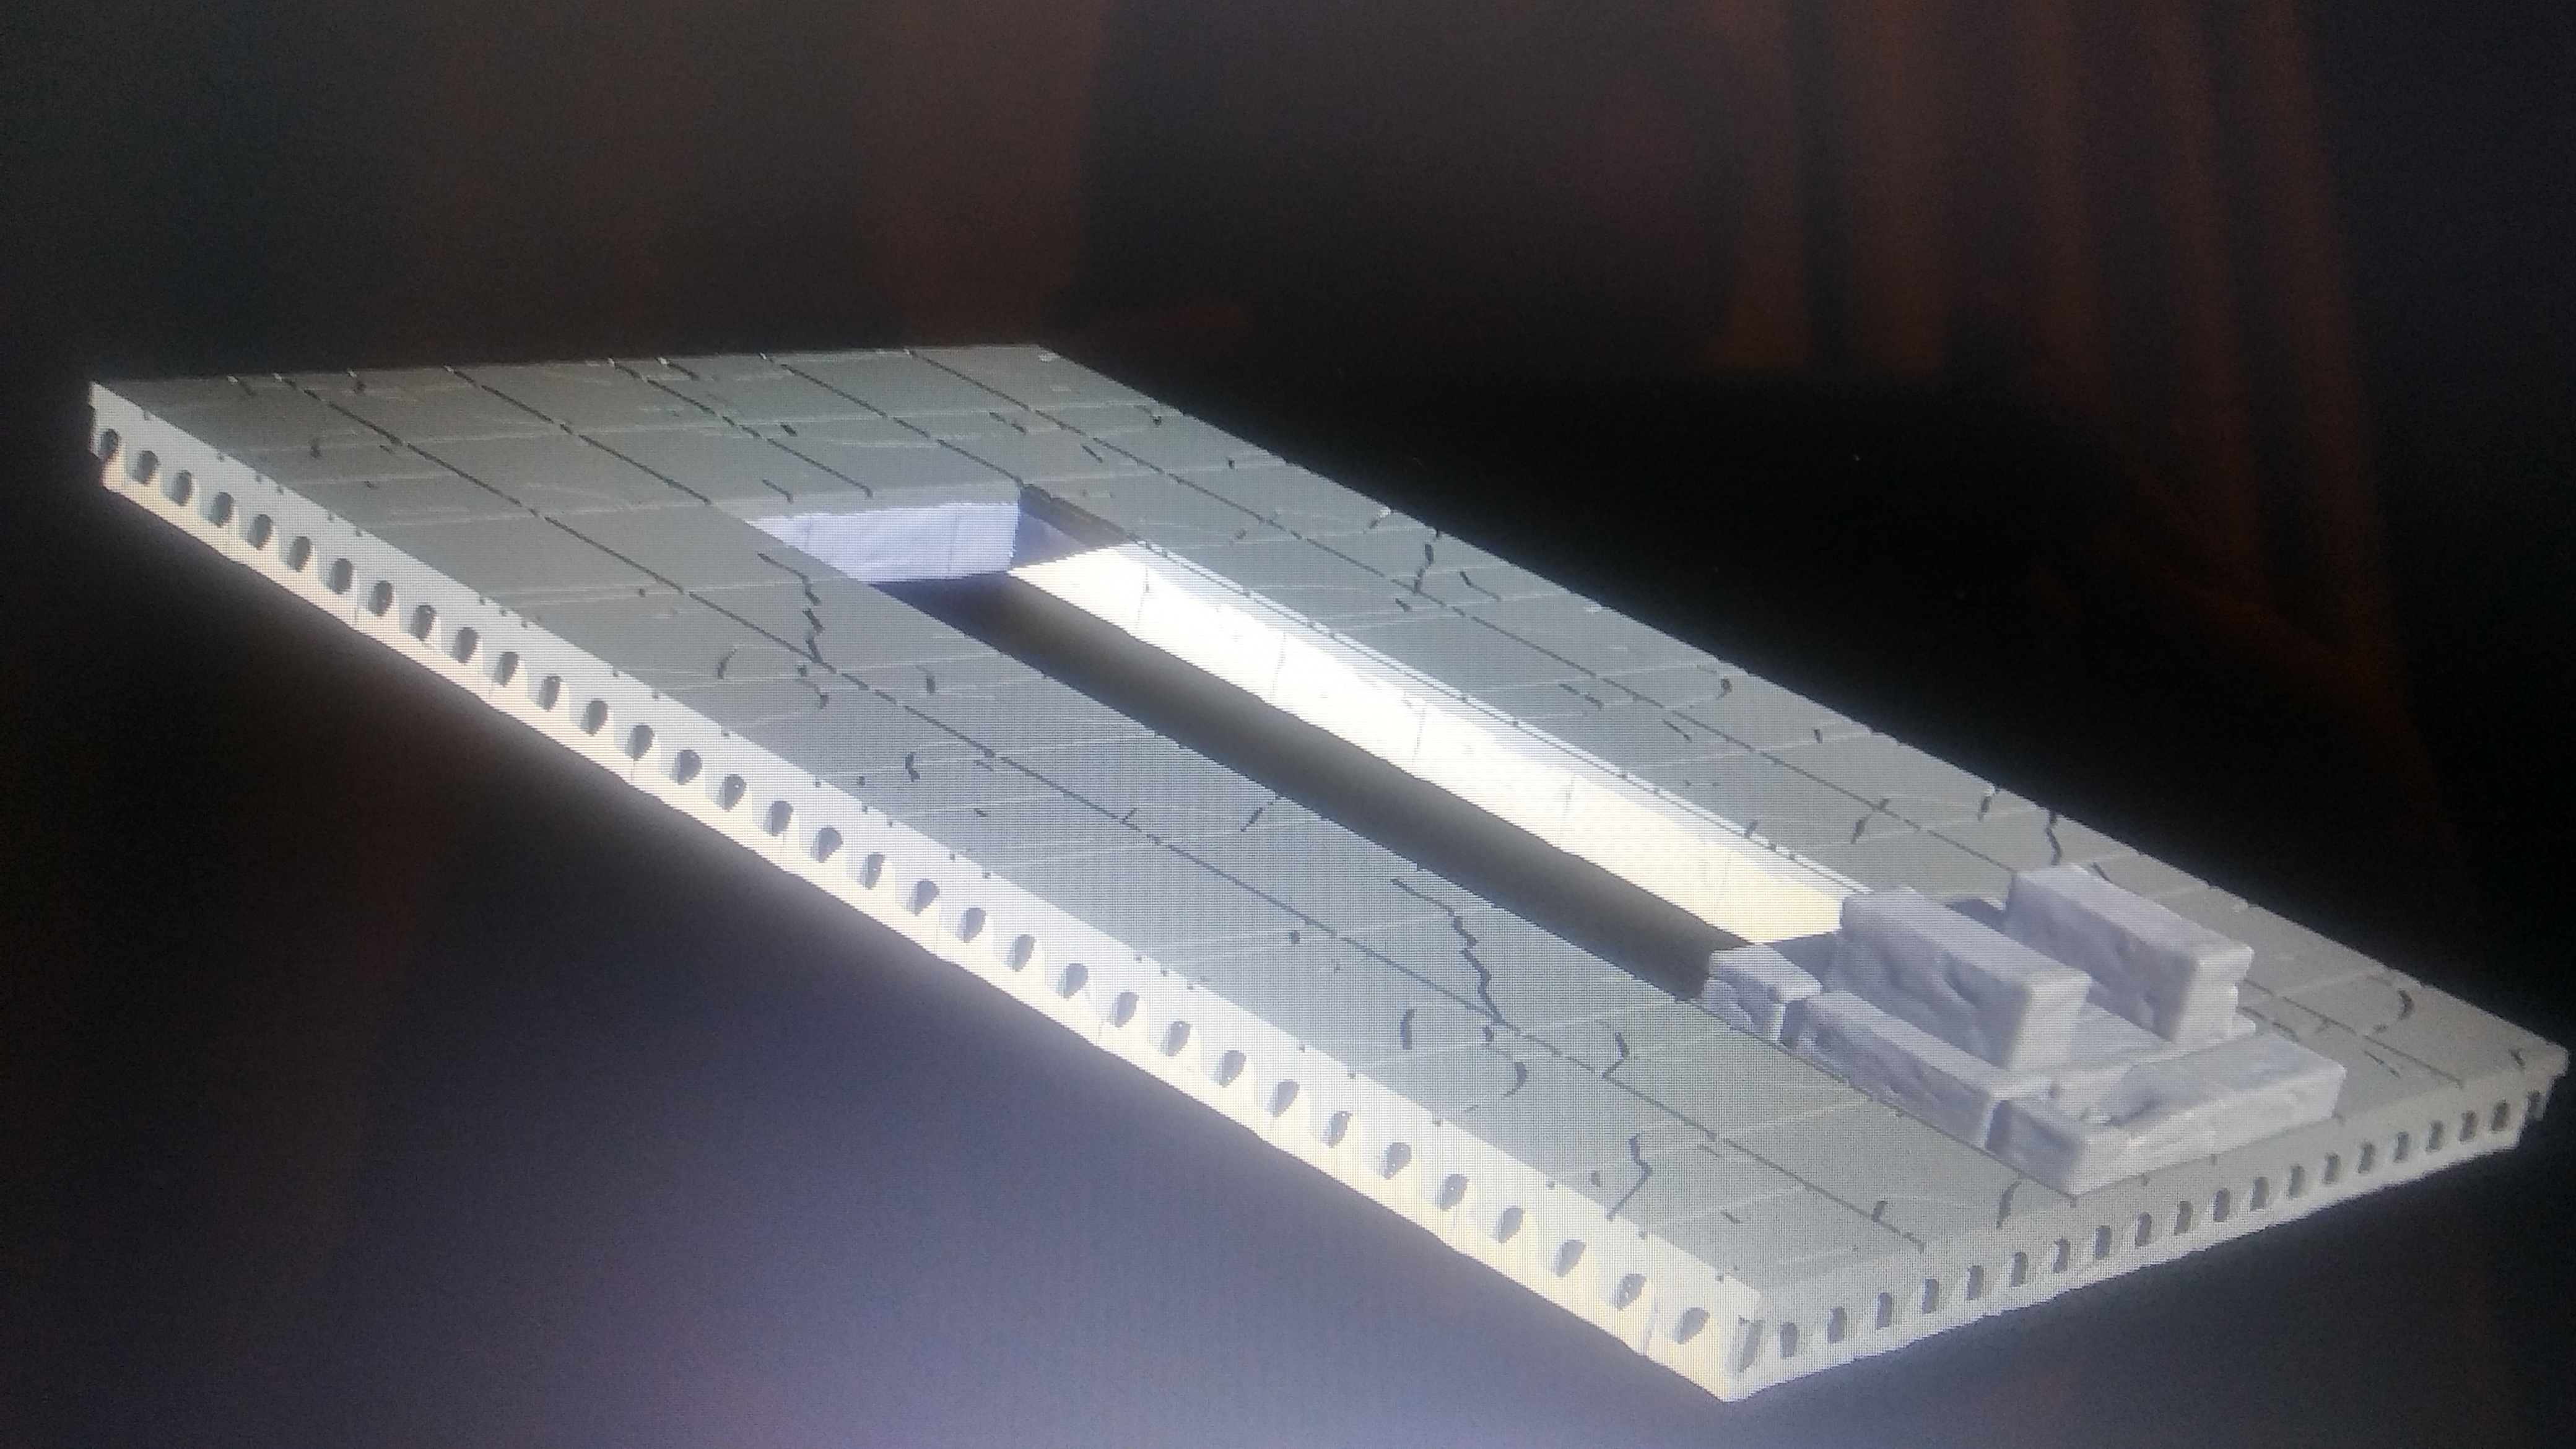
Since we are all dealing with that. I cut up Amon Hen into the 6 parts like I mentioned in the post earlier for 3D printing. If you haven’t guessed it, this also means the 3D model is finished.
Cutting up 3D models is something relatively new for me. It was a lot of trail and error until I figured it out. With the help Meshmixer (free program) and Angus from Makers Muse (YouTube channel). He made the process easier to understand.

Here was the progress shots of meshing out Amon Hen.
I did put small pegs on the pillars and the base. So these pegs will connect with the holes I put in the platform.
Side note: I have not forgotten the two statues to the left and right of Amon Hen. I will start working on those later in the week.
Conjuring of cheap tricks
So I have been trying to keep this build with in the spirit of Middle Earth. By trying to keep the visualizations in par to what we have seen in the movies. (With a little artistic leeway thrown in).
3D printing Amon Hen is going to be tough. Since of the large over hangs with little to no support. How the people of Arnor did it with actual stone would be amazing to see. Anyways, the point I am trying to touch on while I sit here on my lunch break at work is. Limiting the number of cuts/peices needed to 3D print.
And here is why, each time you cut a model in two parts. It will fit together just fine. But it creates a notice seam line. Some times you can hide those in between grout lines in tile and Some times you just can not.
Now I could cut this up into multiple parts and it would print just fine with next to no artifacts from 3d printed supports. Or cut it into 3 parts with supports and artifacts (huge mess to clean up).
My 3rd option is to break some of the visualizations/emersion and cut/seperate the whole upper platform. From the base with stairs and the pillars. Leaving the underside of the platform completely flat and not stone textured like it currently is.
Yeah I think I am going to do this 3rd option. I will figure away to make interlocking parts so assembling it together will not be a chore to do.
Here is what I am thinking on parts. The platform will be cut from the base and then broken into two parts. The base with the stairs will be its own part. The four pillars will be grouped into right and left sections. So two more parts there. Then we have the eagle statue. So roughly 6 parts to print to make Amon Hen.
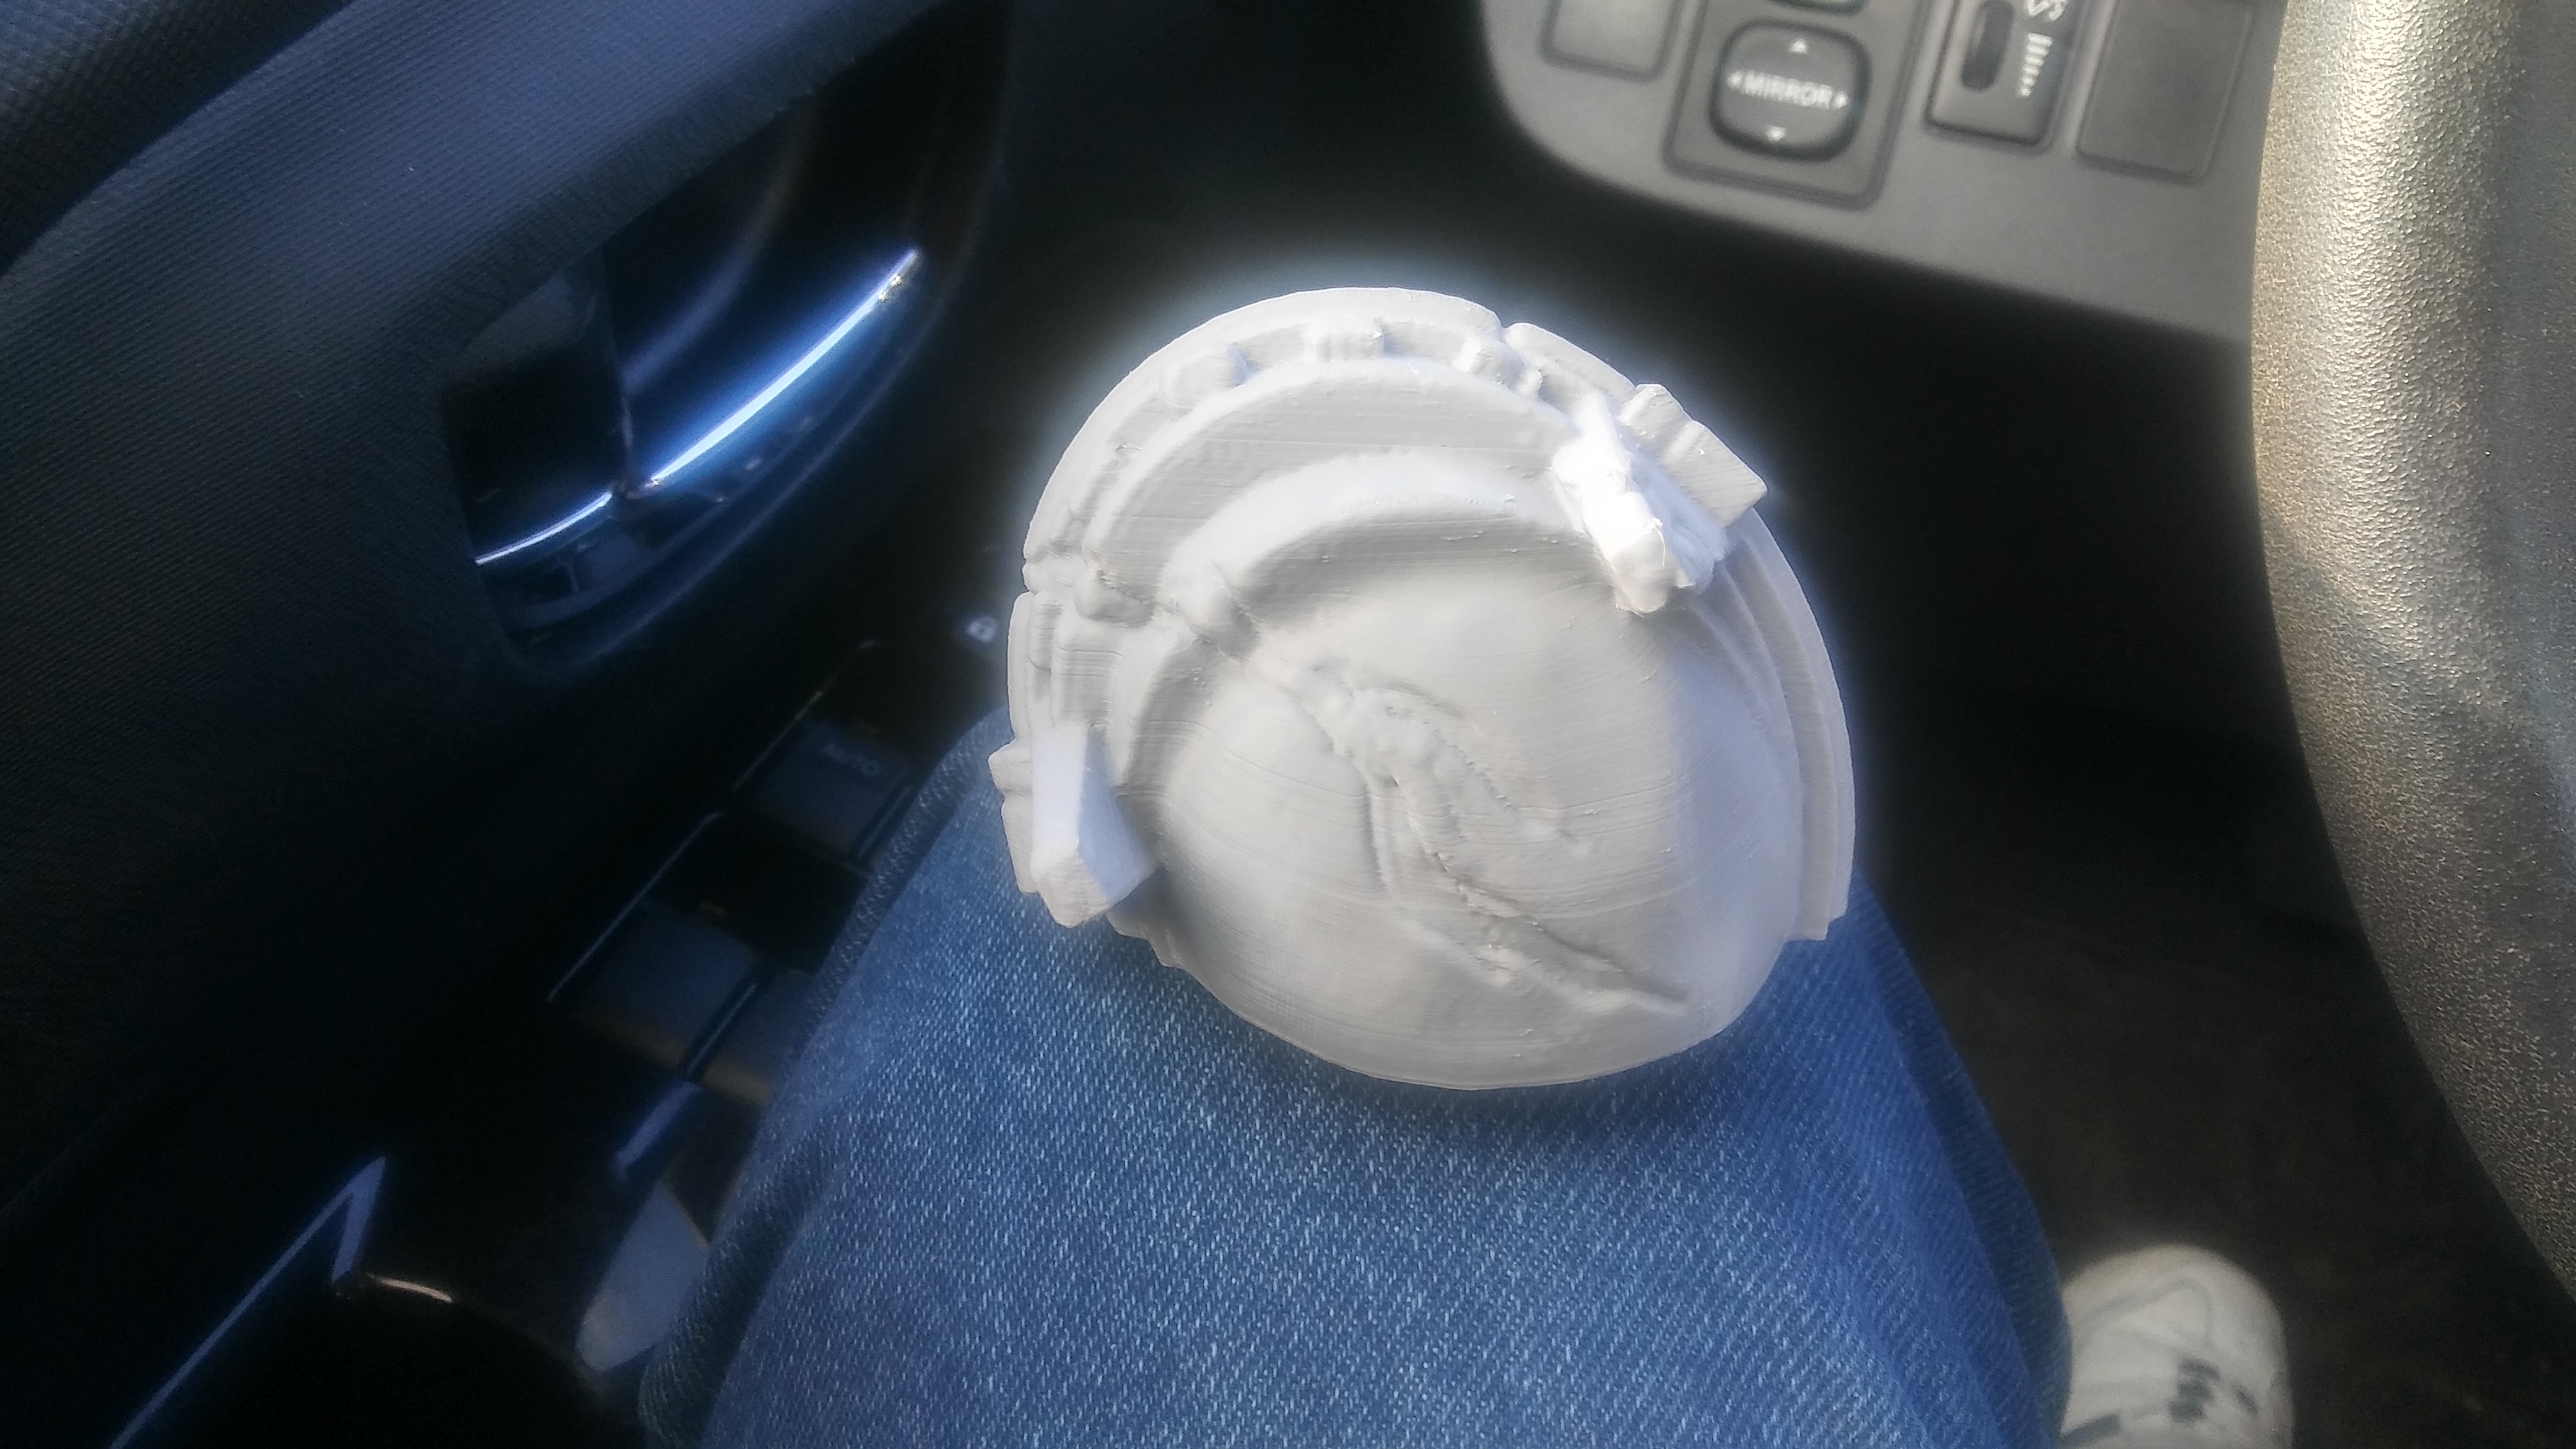
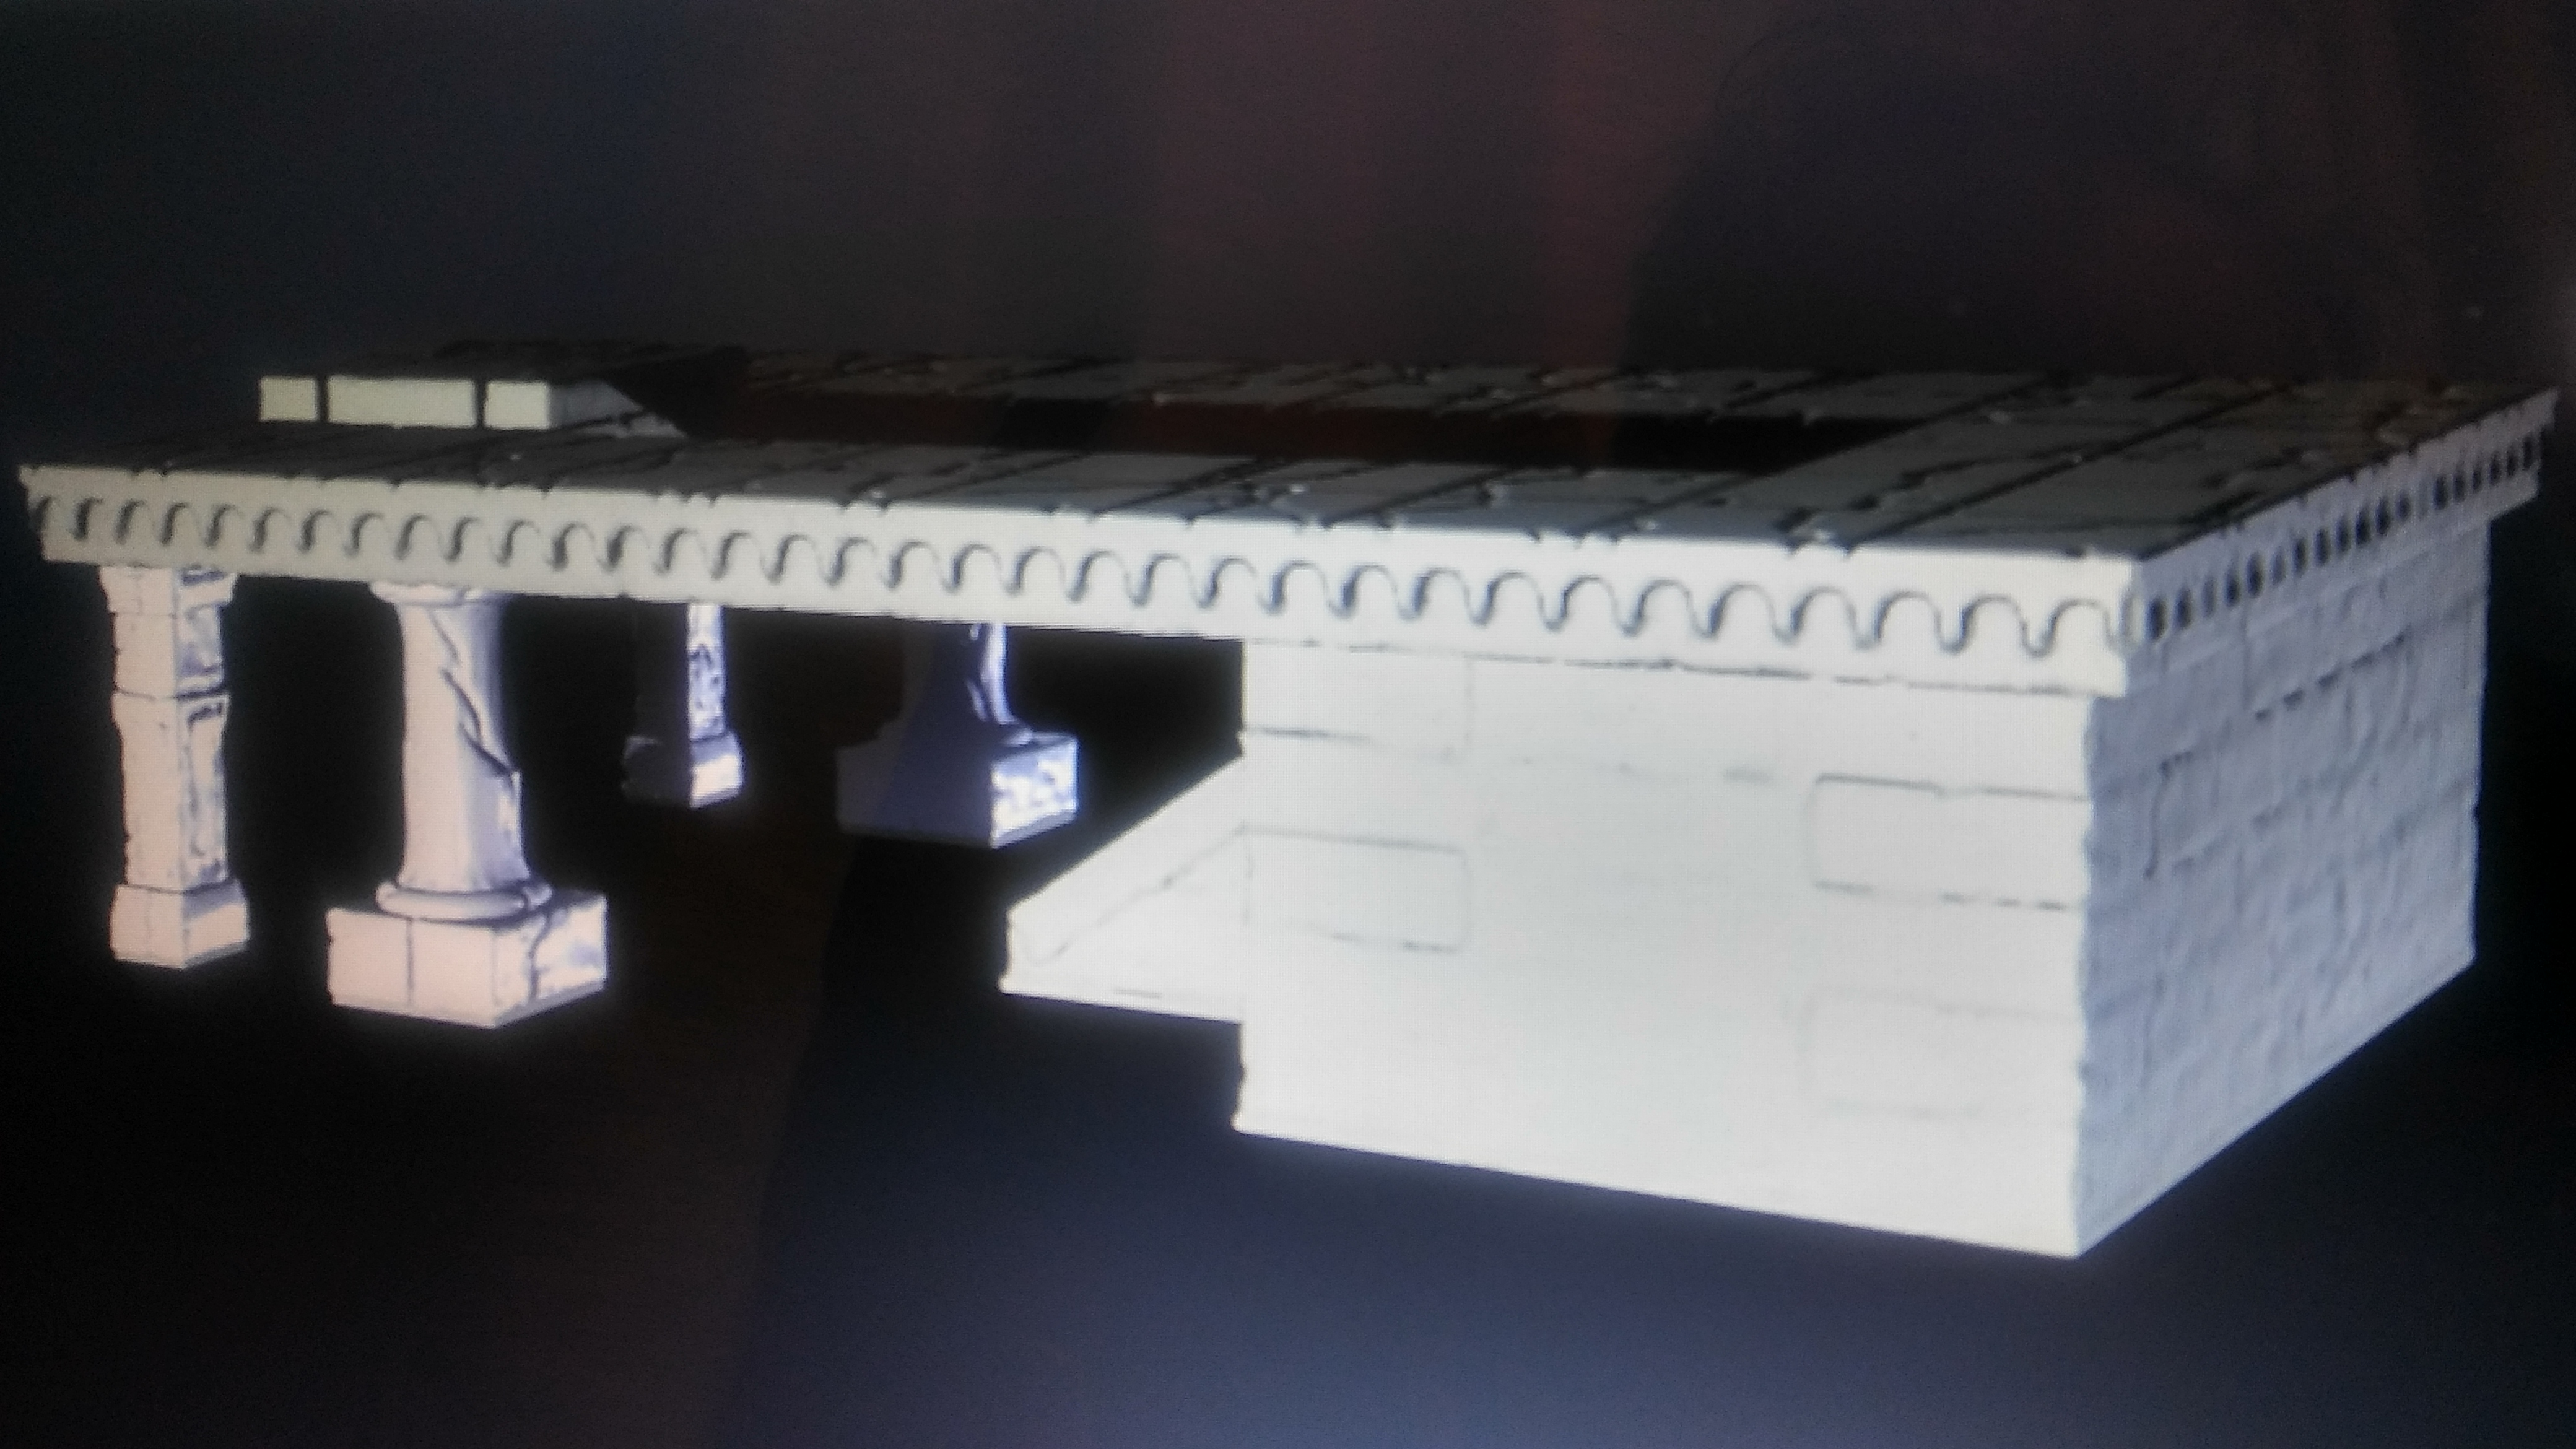
The....the Eagles are Coming!
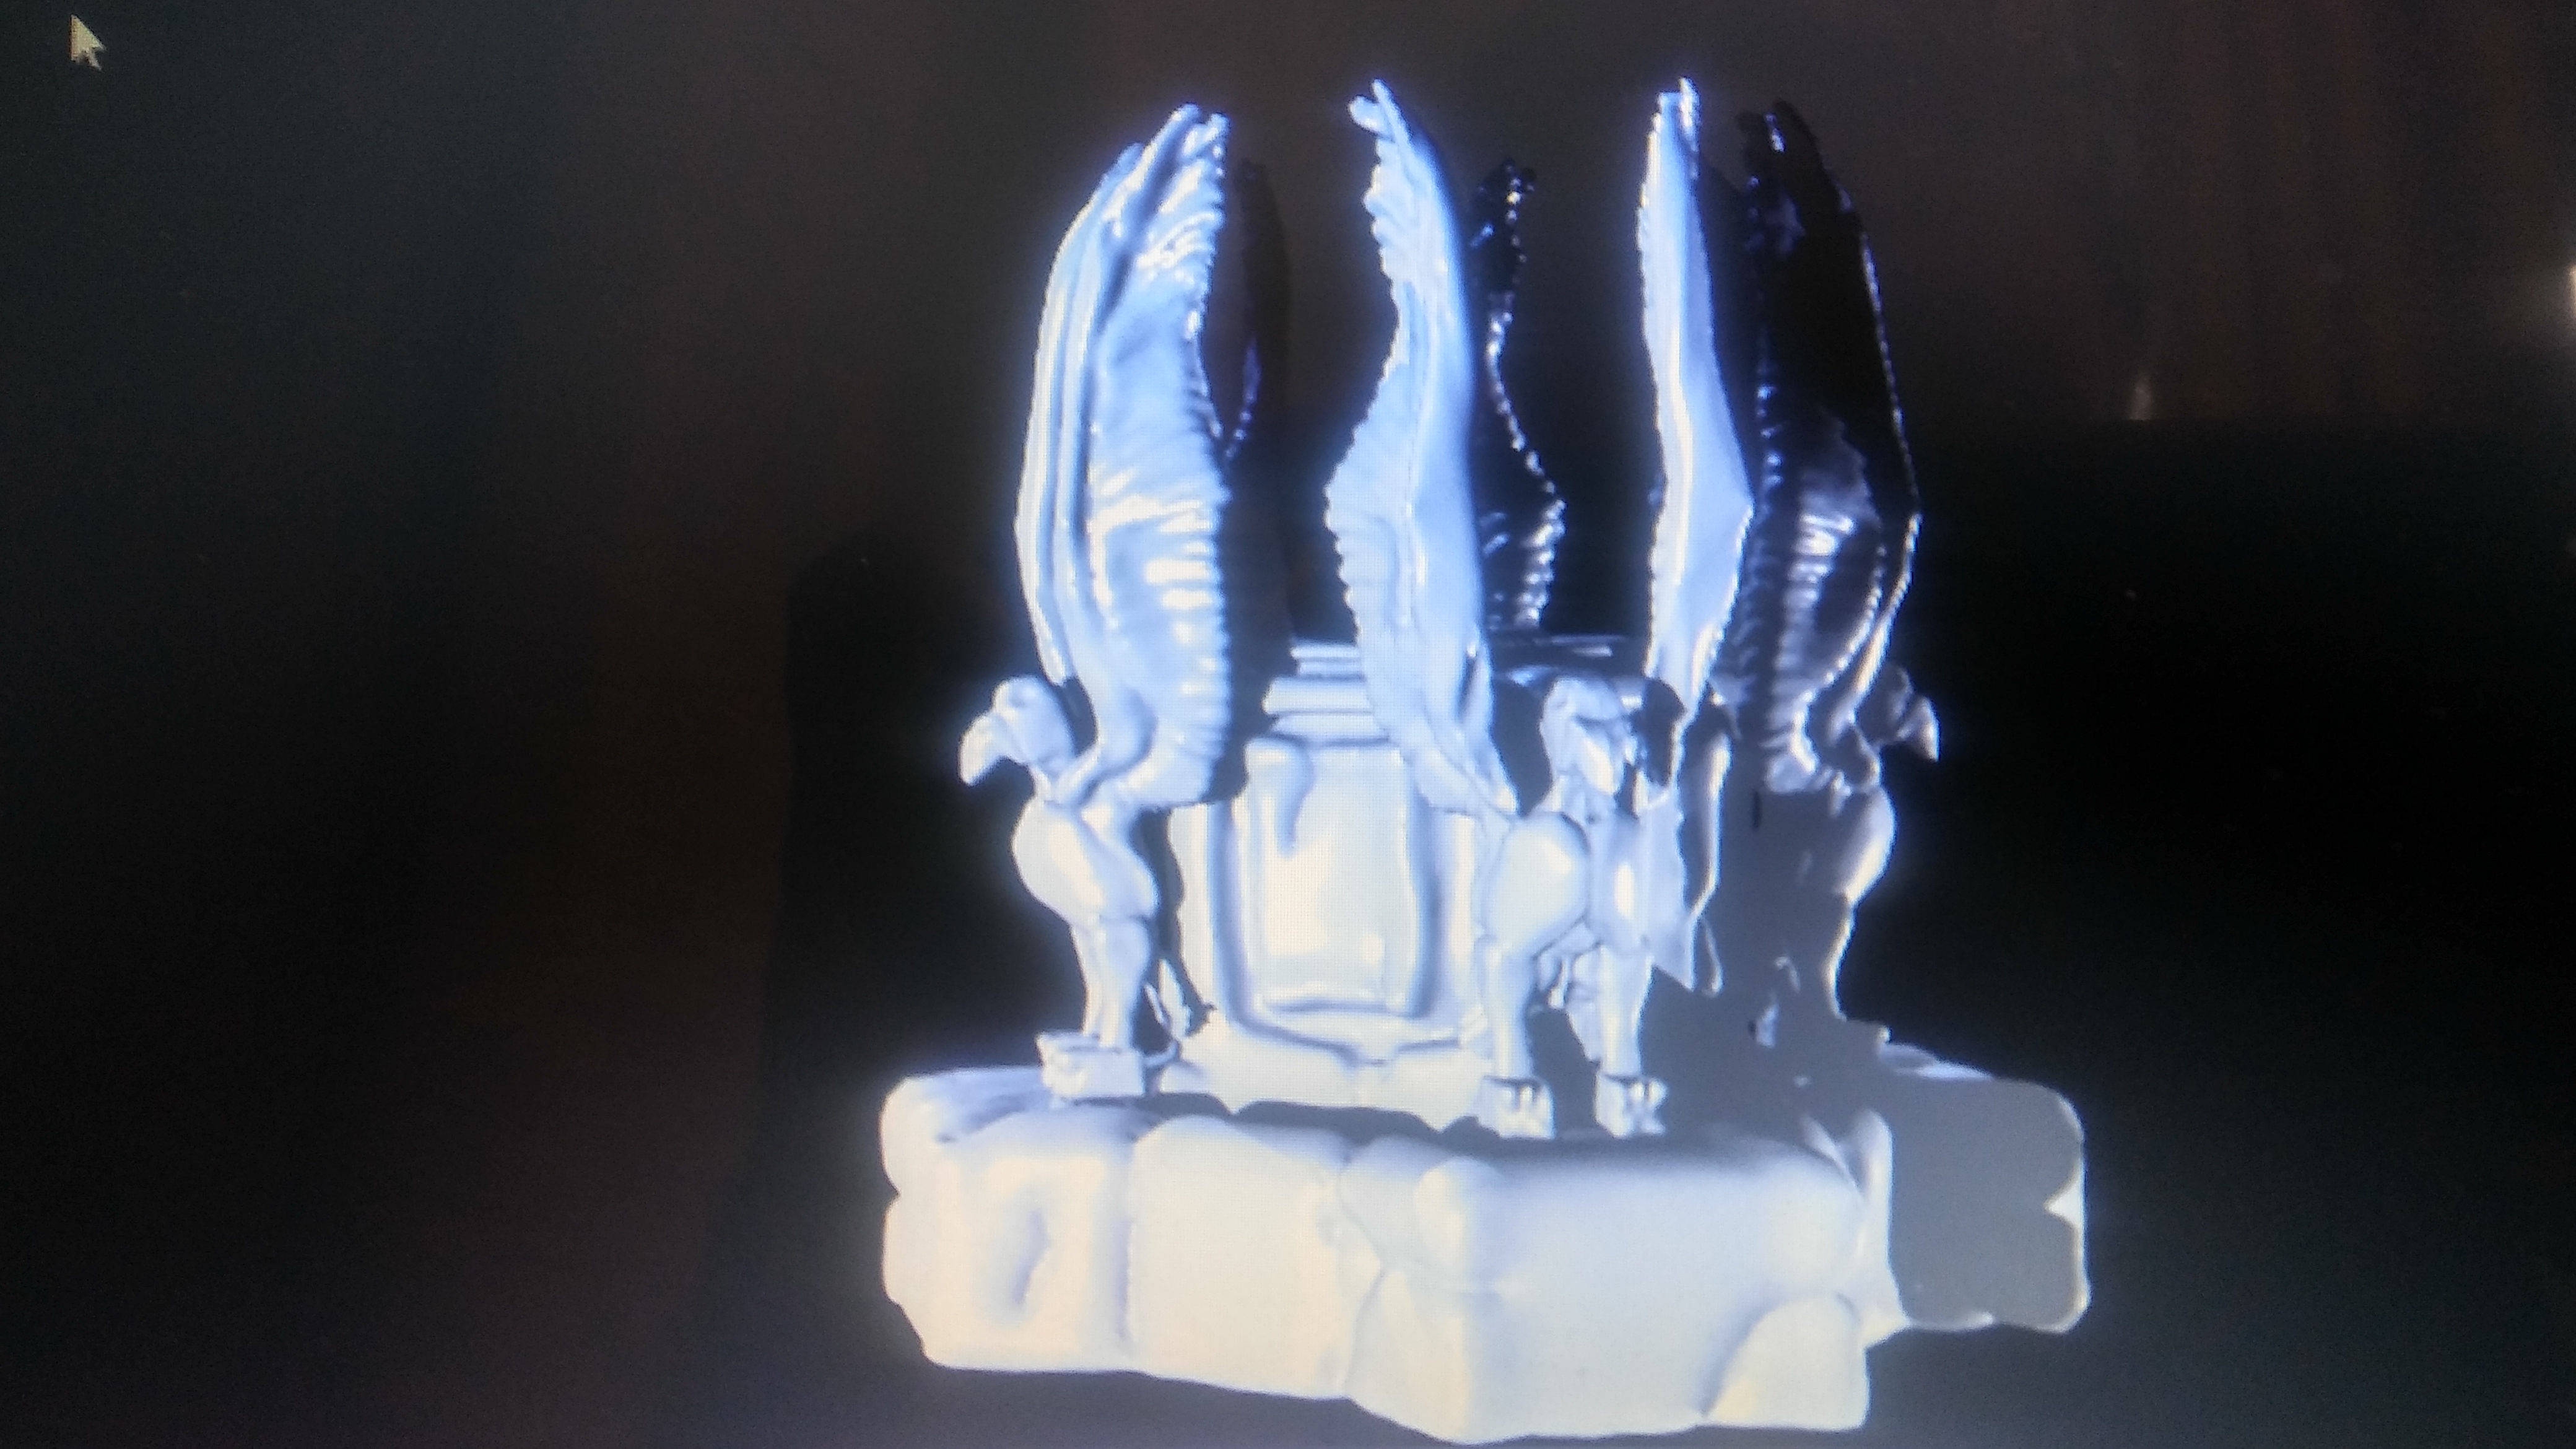
Since I am still waiting for my test print to be finished. I spent some more time working on Amon Hen. This time the focus was on getting the eagles that safe guarded a possible Palantir finished.
The pedestal between the eagles has a bowl like indentation. So you could place an object like a Palantir (glass Marble) there.
I am going to print this peice seperate. So I can switch it out with the wooden pyre. A little bit of poster putty should help keep it from moving to much.
Sculpting the Eagles was a bit of a task. I’ll share what I did to make them in a later post.
Stupid...Fat....hoBbit's!

Yup…ran out of filament during the print.
The good news! The stone work looks good. Very subtle and the very few layer lines that you can see plays in well with Stone brick.
Oh I should of mentioned this. Most people tend to print at .1 mm layer heights with terrain. It speeds up the print process but the trade off is more noticeable layer lines.
I normally print at .08 mm layer heights. It may add a few hours to a project. But if you are already printing something for 6 hours at .1 mm what’s an extra hour at .08 mm. My CR-10 and Monoprice Mini can both hand layer heights down to .04 mm with out an issue. So .08 mm isn’t over tasking them.
Well 3D printer has been reload with filament and currently redoing the test print. It should be done close to 8pm (7am currently as I write this). It may go over in time, those slicer programs always under estimate the print times.
Gondor calls for Aid!
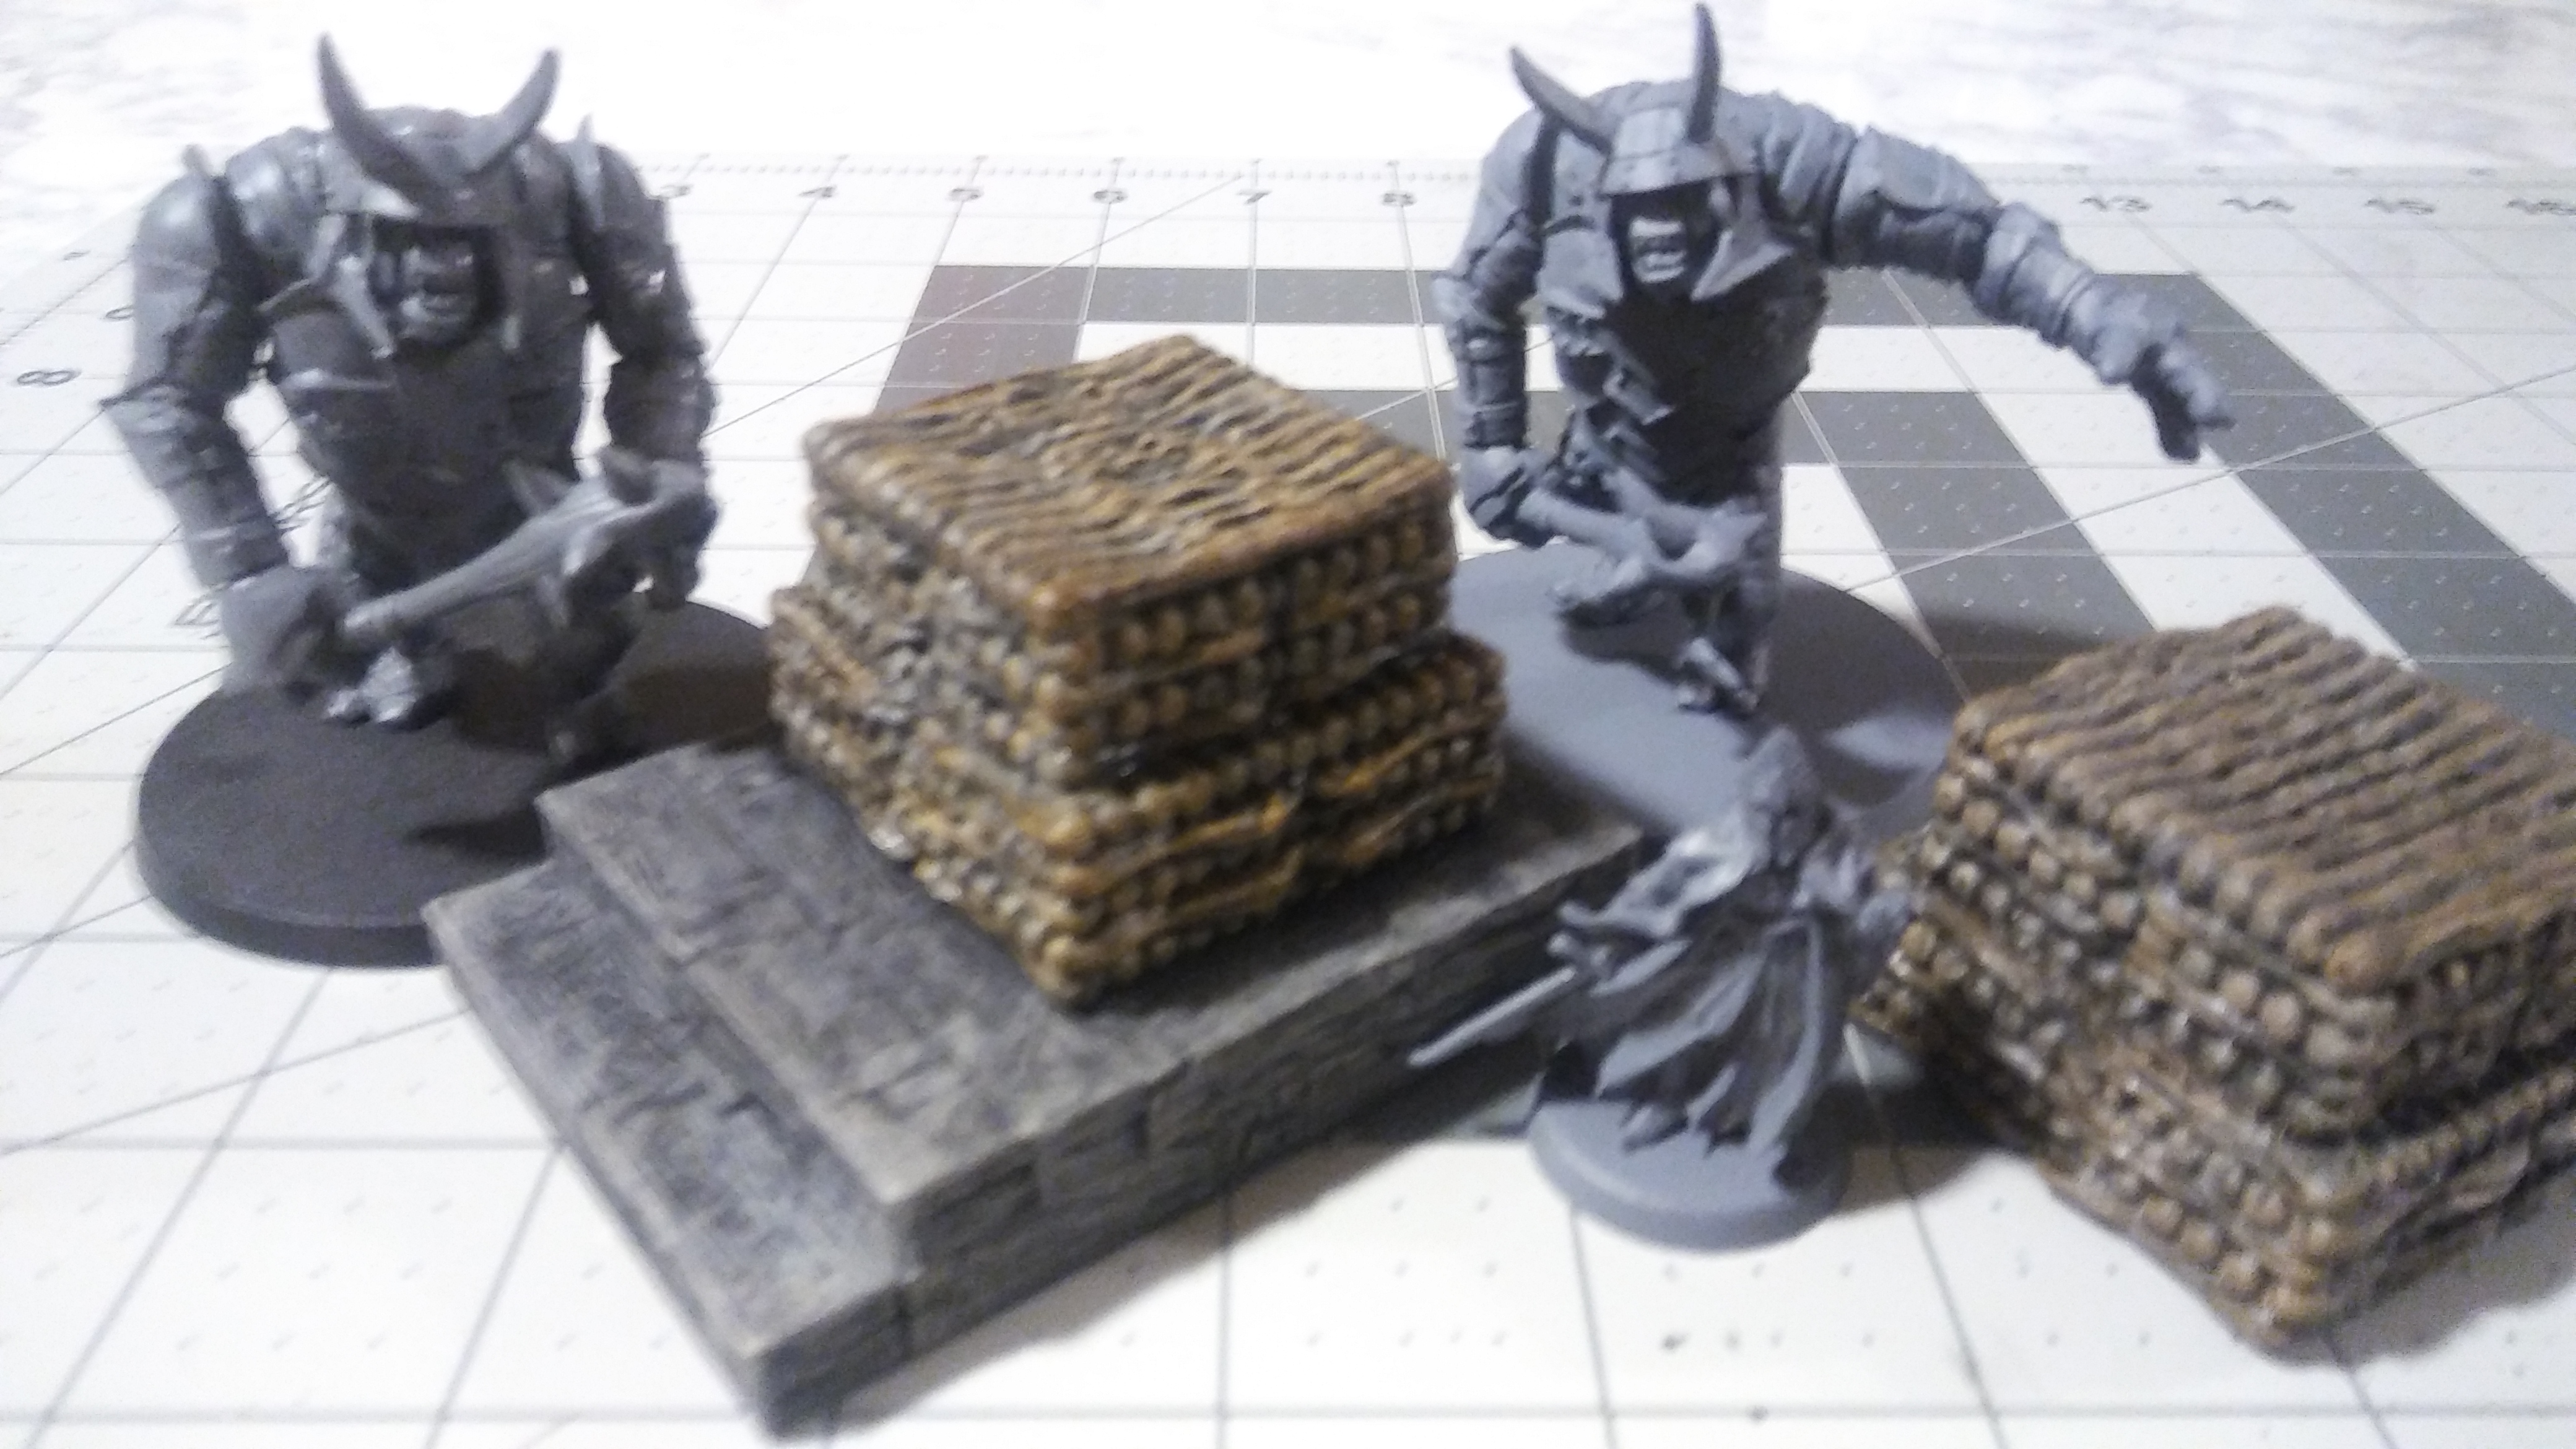
So I had this random thought. I like my terrain peices to have multiple uses. Just building Amon Hen is a great undertaking. Now giving it more options to be used on the table is always an excellent idea.
So I originally was going to make a Gondorian Beacon. Before I tackled a place like Amon Hen. Then I heard Ben talk during the Hobby Hangout. “Someone should build Amon Hen…” Well Ben, I heard you loud and clear!
I am just going merge these two projects into one.
As you can see I skipped showing off building the base of Amon Hen and the stairs. So I can show off the modular side of this project.
The wood pyre and the statue that most like housed a Palantir will be interchangeable. Giving you at least two different uses for this terrain.
Due to this wooden pyre is when I learned how many polys my system could handle. The 1st wooden pyre was 1.1 Million polys which I imported into the Amon Hen build which was floating around 350K polys. After many crashes and the computer processing this for 20 minutes with no results. I had to go back and reduce the pyre poly count down to the 50K range. During this time my original saved file never truly saved due to the poly count. Thankfully I had a reduced poly count back up to work with.
Once the pillars and other objects around its base are done. I will have to throw this model back into sculptris to increase its detail.
So I did a quick test print of the wooden pyre.
Not the best picture but it just came off printer 20 minutes ago.
I will paint this up tomorrow and see if those tiny details will show up.
Mean while, who wants just one beacon? You need many to signal Rohan.

This was the result, a simple two stepped platform to the Beacon. The top step is roughly 20mm deep so models should be able to come into contact with it. And not worry about falling over all the time.
This one gets printed tomorrow (Sunday). I will paint this one up and post pictures hopefully by Monday.
2nd Breakfast
First step for Amon Hen was getting the size about right for Middle Earth SBG.
So lets start with the top of the structure.
So I spent the majority of my Friday night. Just adding those bricks I created to some tiles I worked on earlier this week. Each one of those broken tiles are 25mm which is the same base size for a standard unit. The bricks are also 25mm long so they line up with the tiles. It is hard to see the details in the brick work with this picture. Plus the crown work at the top covers most of it.
Keep in mind I spent from 4pm till 9:30pm just getting this basic shape in place. It is a very slow process in which I used 7 different bricks. I did my best to remove repetitive patterns in the brick lay out. A simple fix was to just simply flip a brick to its other side. This then gives me 14 different bricks to use.
That crown peice I would sculpt out later. To conserve polys until most of the shape was laid out.
One does not simply....
I started planning out this idea a few weeks ago. I had several hurdles I needed to break in order to attempt this.
One was my 3D modeling program, Wings3D, (free program) doesn’t handle scuplting very well. On the other hand Scupltris (free program) handles sculpting like a champ! Only issue is reigning in the control of keeping things flat in Scupltris. Having a flat bottom surface is a must when your 3D3D printing.
So I did a few tests.
And realized I could pull off textured Gondorian brick work.
Keep in mind this picture was after four hours of playing around to get the desired result.
So what I did I created a brick in Wings3D. And I exported that brick out as an .obj file.
I then imported this brick.obj file into Scupltris. And I subdivided the object once. Which made the entire brick ball on out and completely loose its shape. Since subdivide increases the poly count of that file. My thought was to increase the polyps of the brick in Wings3D before I import it in.
So back in Wings3D. I cut the object into 5 sections on the ends and 10 sections along its length. Then exported this new brick into .obj format again.
Going back to Scupltris I imported this new brick and hit subdivide again. Kept its shape fairly well and then I did it a second time. Which kept it shape but gave the ends a slight hump.
So I found the key to do be able to start texturing this basic brick shape. The hump was not an issue, in fact it worked in my favor. This gave me a nice cut stone look that I needed.
From here I just sculpted into the brick. I would made cracks and imperfections where ever seemed right. Which would put this one brick over 20,000 polys. I would then reduce that brick down to 5-6,000 polys. Then export it out as brick1. Next I would smooth out as much detail as I would like. Then sculpted in more detsil. Reduce the polys again and export it as brick2. While keep repeating these steps until I had several bricks created.
If you are wondering why make a detailed brick at 20K polys and then reduce it diwn to 5K? Well my laptop can only handle and function right around 1.2 Million poly range. If each brick was 20K there would not be much of a structure I could build. Plus reducing the polys which affects the detail gives it a more weathered look. Ancient stone that has been laying around for 500 plus years.