


Another Star Destroyer?!?


Recommendations: 112
About the Project
The Imperial II-class Star Destroyer DOMINATOR I built from april to september this year could use an escort ship. So, I have embarked on another rather ambitious model building-project. I will build an Interdictor Cruiser in scale to the 60cm-model of the DOMINATOR. The Interdictor Cruiser has been introduced in the Star Wars REBELS animated show and seen some significant action there. Since no kit exists of the ship - no less at the size I need it to be - I will scratch-build the whole darn thing using renders of the model used in the show as a reference point for shapes, angles and proportions, but adding details and changing a few things to translate the simplified art style of the show to the bristling look of the models used in the original movies. And this time, I plan to light it up right from the get-go.
Related Genre: Science Fiction
This Project is Active
Switching on the first lights.
The upper half of the model is now painted – had to manually draw on all the panel lines as the second-to-last step. After giving the whole element a matt finish, I proceeded with drilling in 0.5mm holes and I’m currently installing the fiberoptic cables for the pin lights. Here’s how far I got and a little improvised lighting test:

Painting the Interdictor has begun!
All details have been added now, and the last two days, I started painting the model, starting with the upper half of the ship.
The usual method which I already used on my Star Destroyer: Priming with USAF-grey, misting with white, then painting and picking out all raised details with a very ight grey and/or dilluted white, using a brush. That part is finished already, and now I’m in the process of drawing on all the panel lines using a very sharp pencil and shading all the different panels:
Some re-building, finishing of the basic structures - now on to working on details...
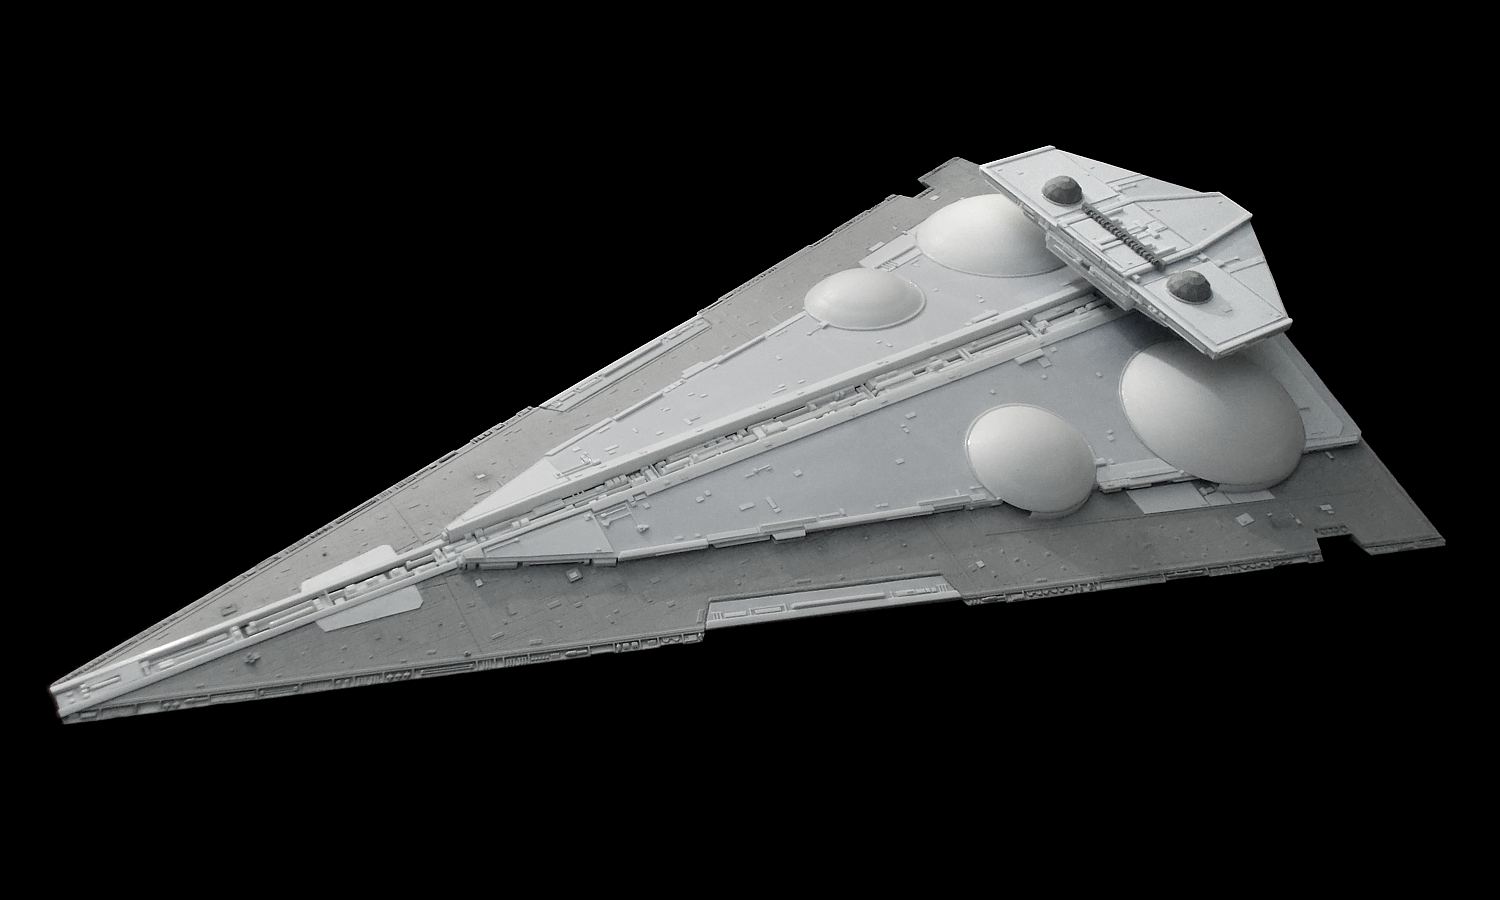
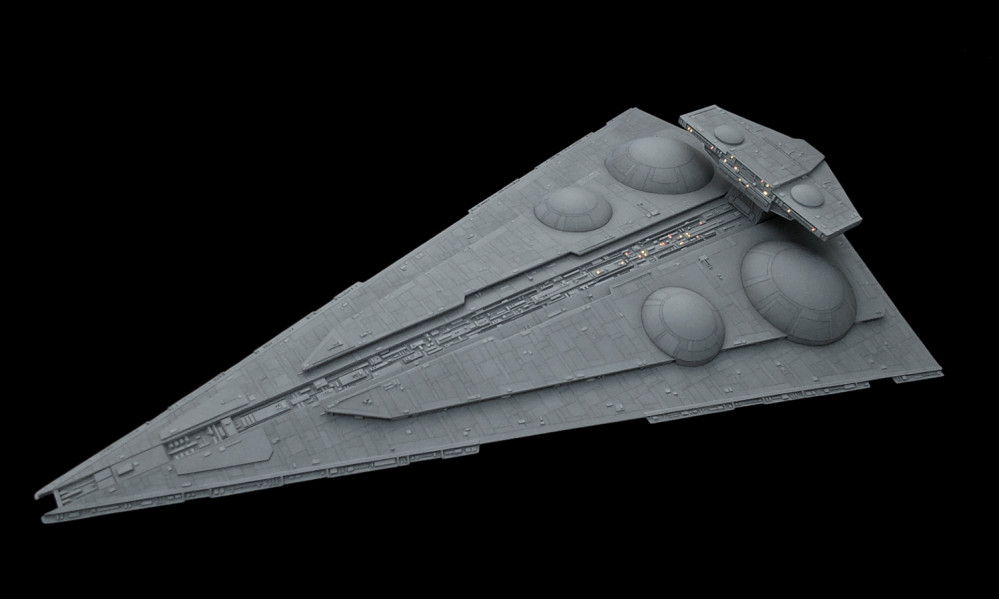
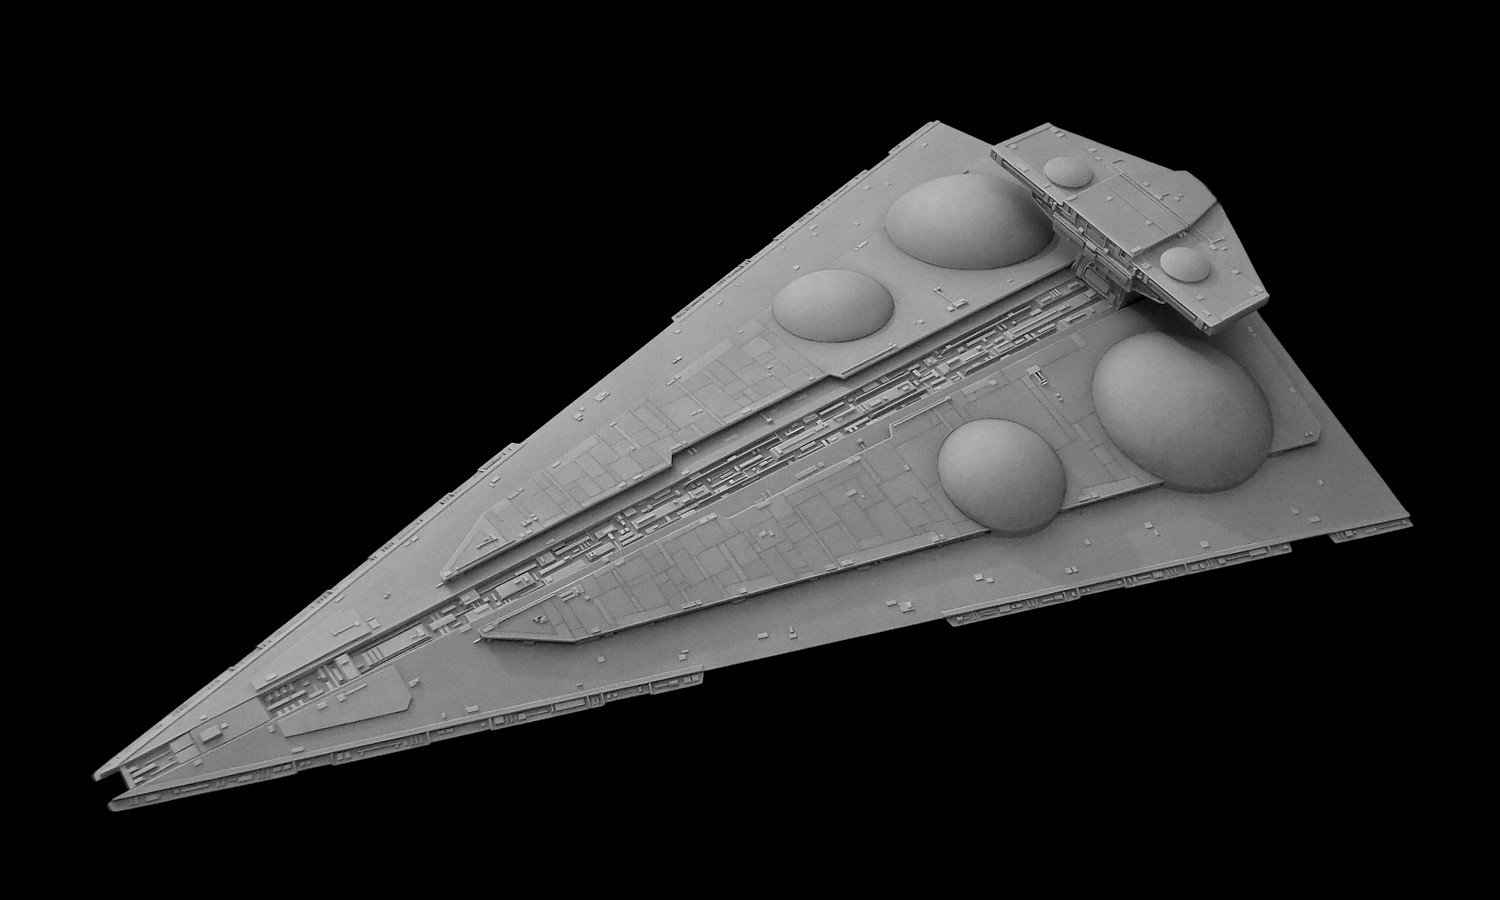
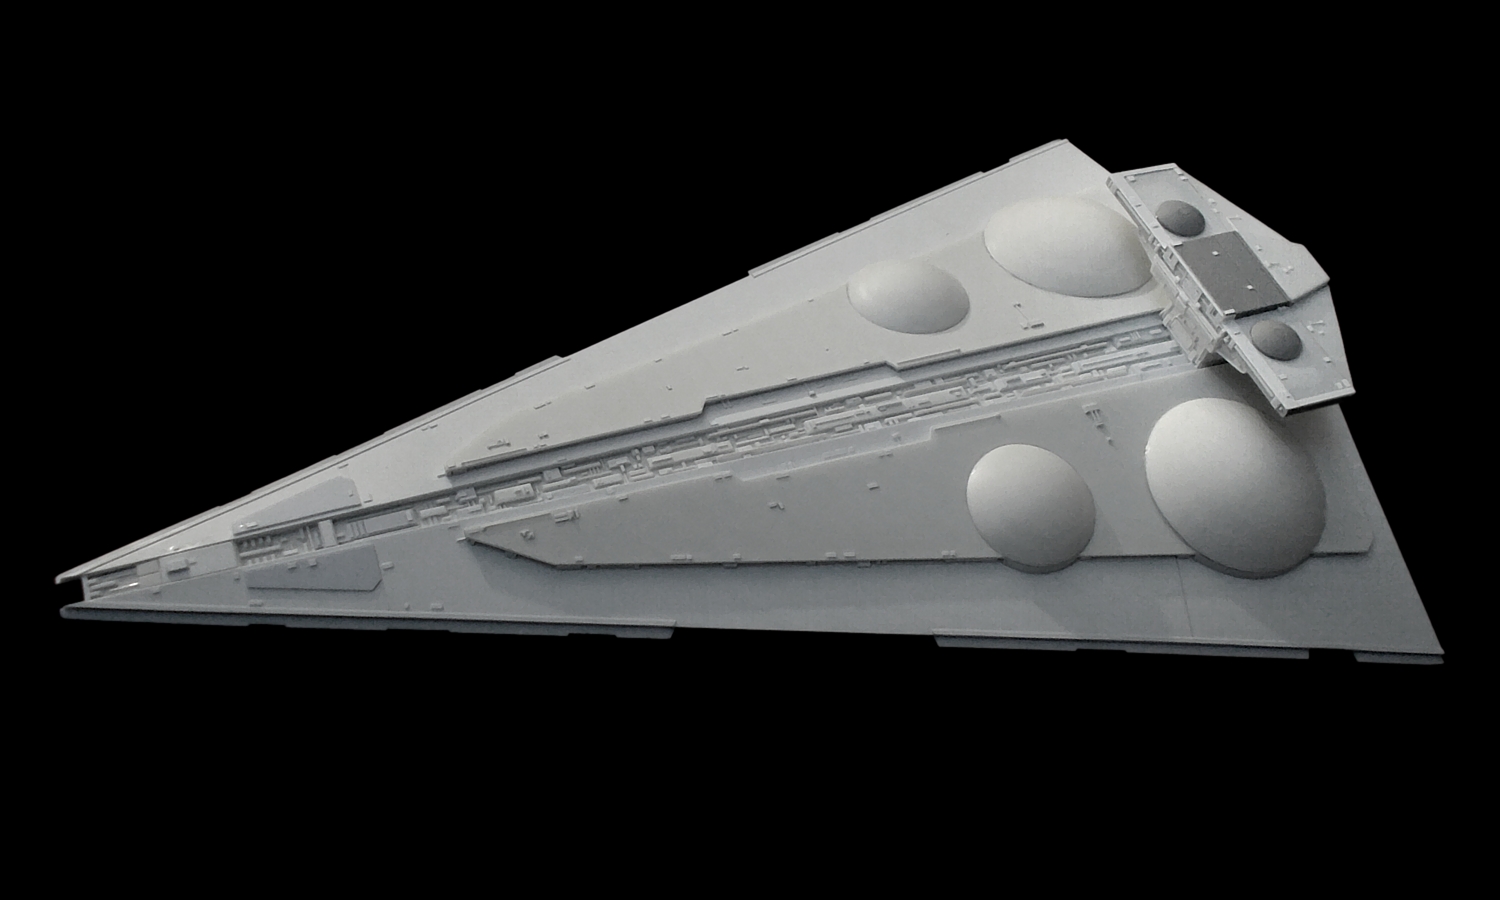
Work is progressing on this model, too. Since I felt that the upper half of the hull did not match the source material from REBELS well enough – which was particularly due to the fact that I decided to use a modified part of a Zvezda Star Destroyer kit – I decided to build a new one, and this time completely from scratch using plastic card, including the bridge section.
I learned a lot from building the lower half of the hull, which I needed to build from scratch, and I utilized the lessons learned to build a version of the upper hull which is accurate and has a clean, well-structured build. I’m happy I did this, and I’m very happy with the result.
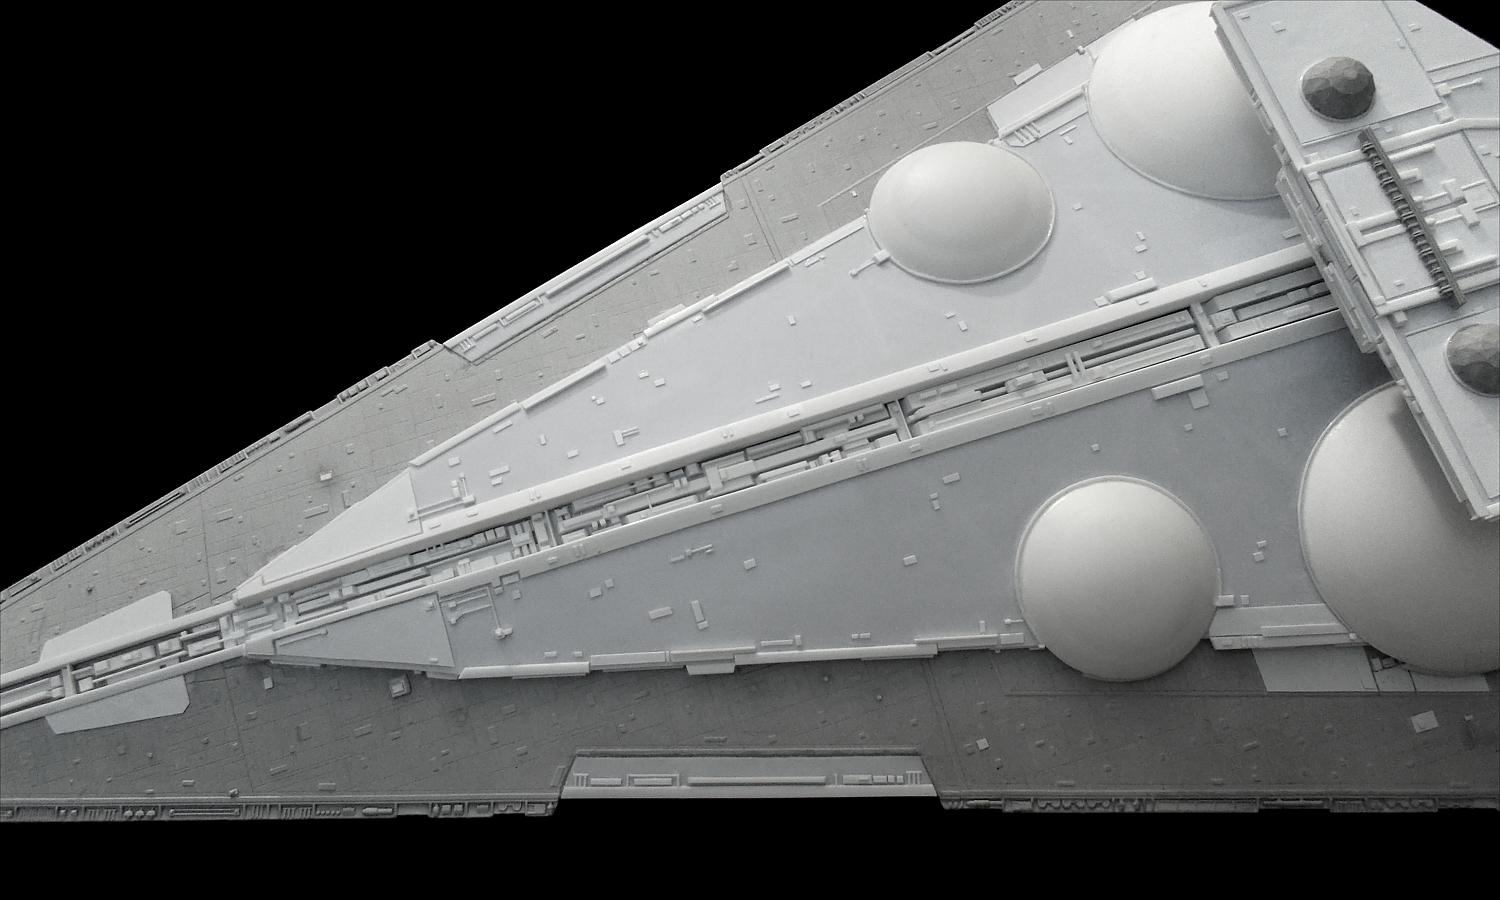
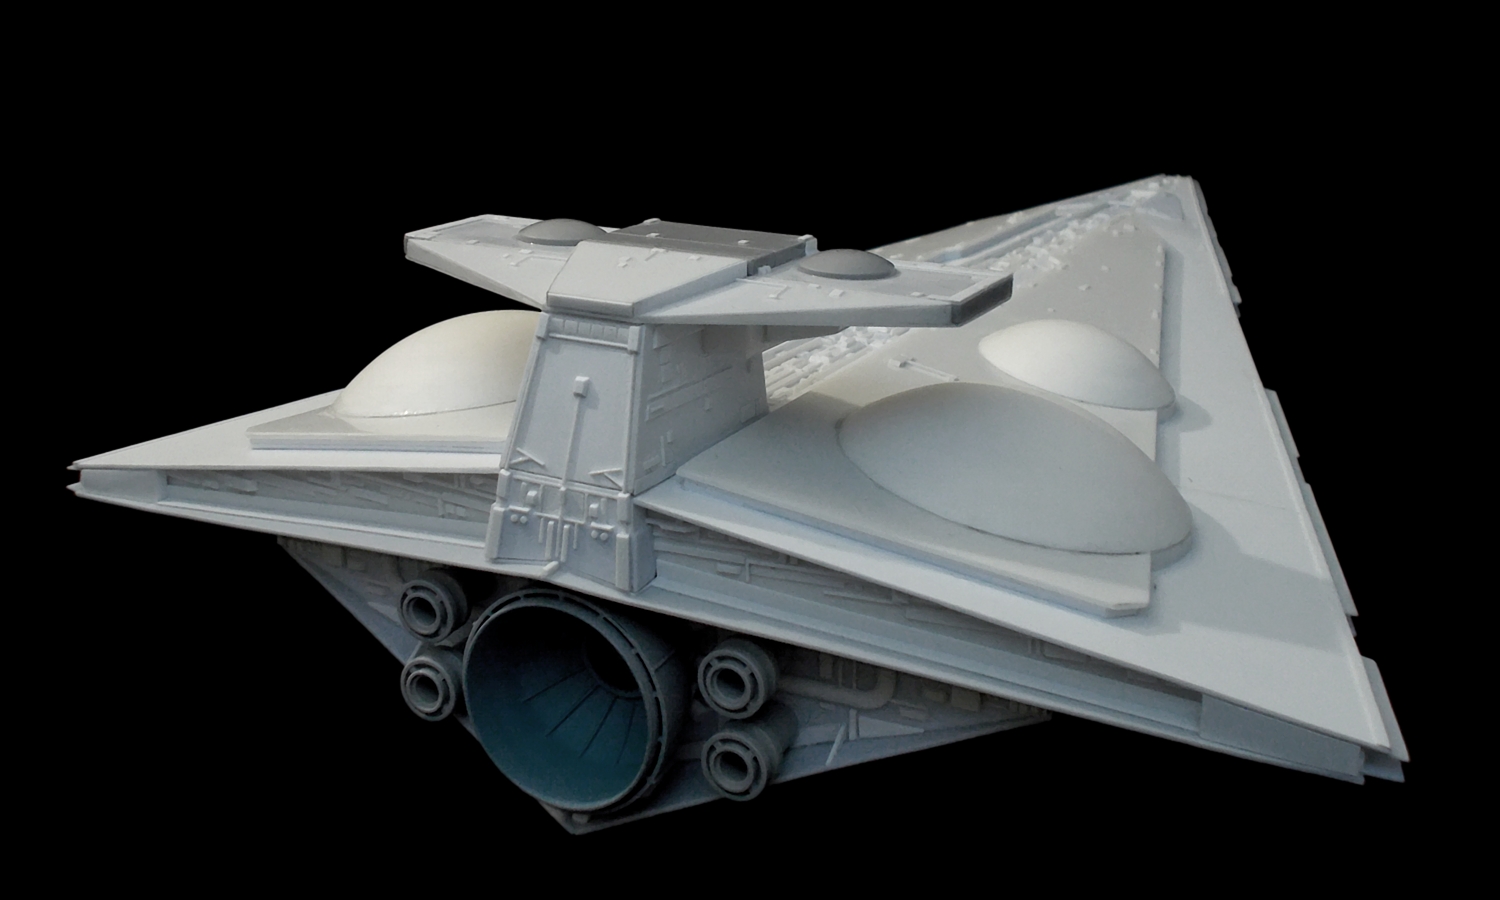
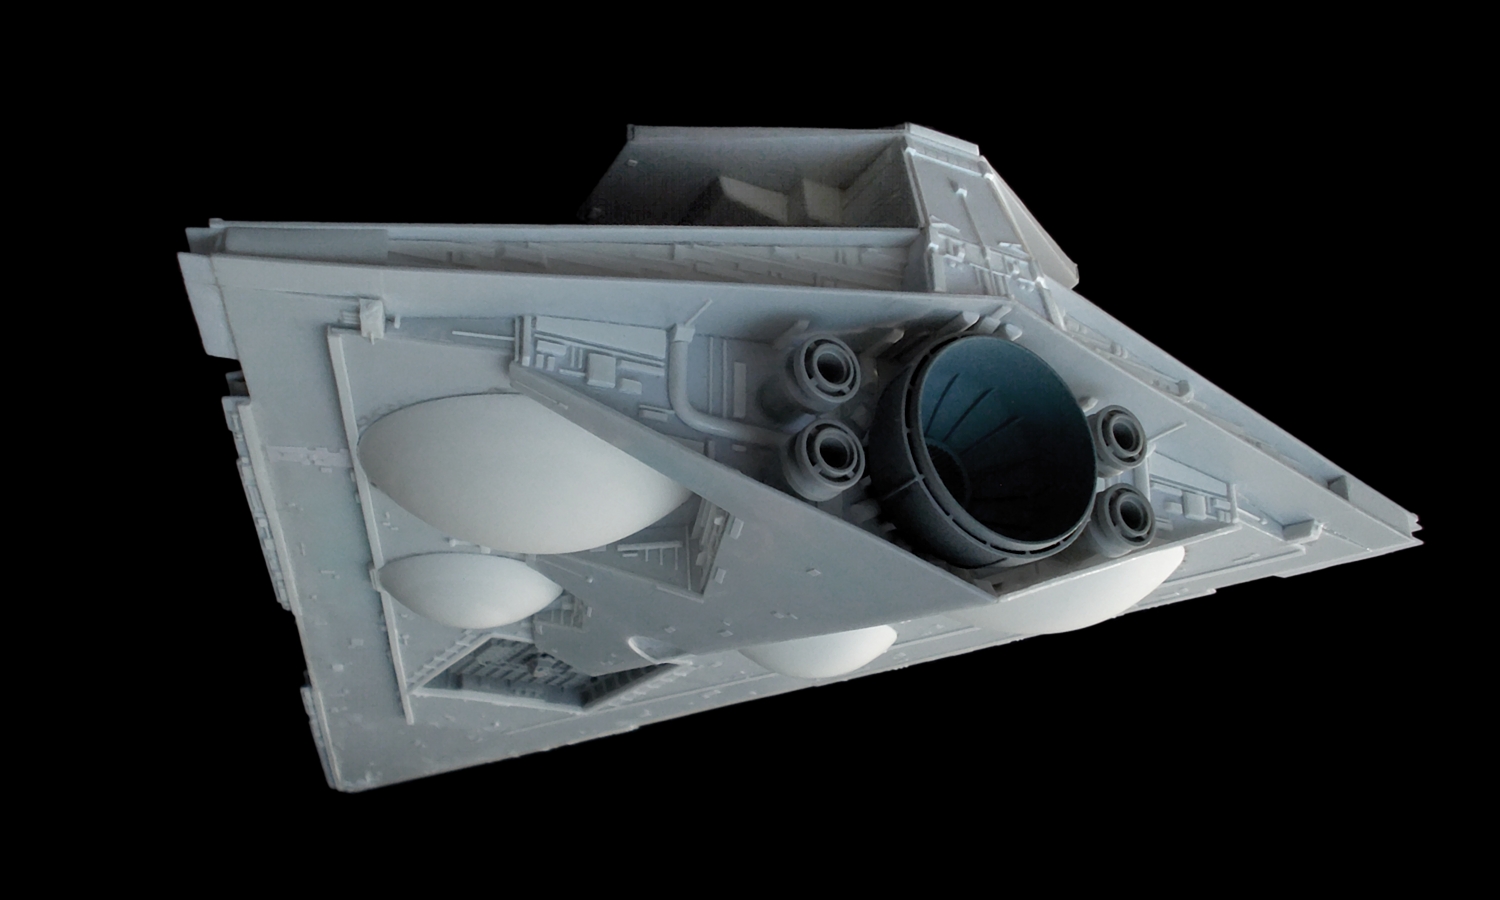
At the moment, all basic and major shapes which comprise the ship are finished, engines are added, and a lot of detail work has been done – although quite a bit of deteil work still has to be done. But I’m getting there. Here are some images of the progress of both halves of the ship:
"It's a Star Destroyer!" "No, this is something else..."
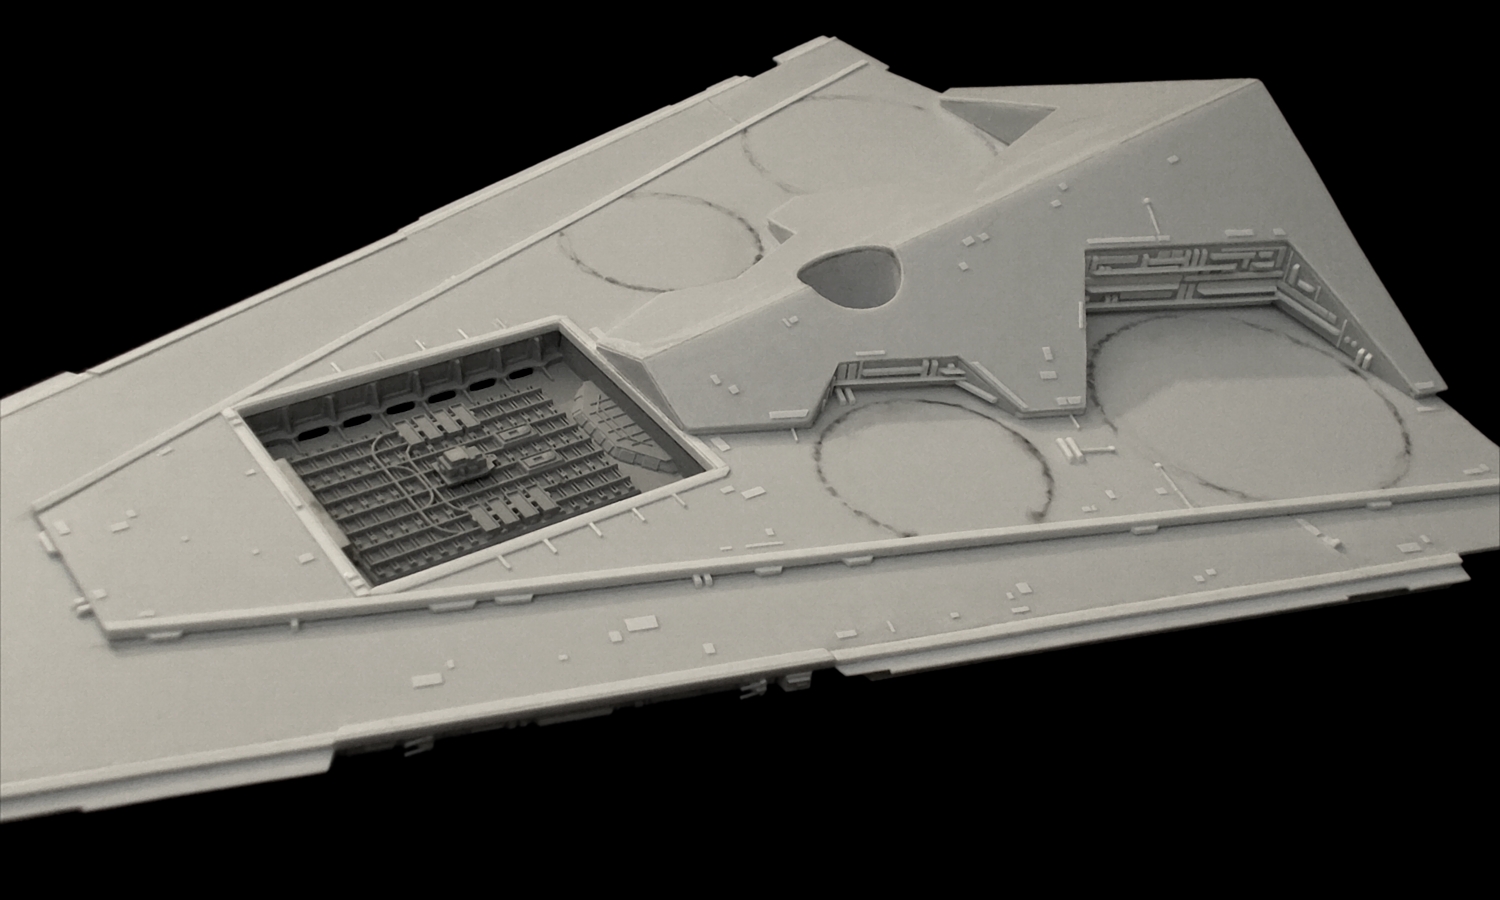
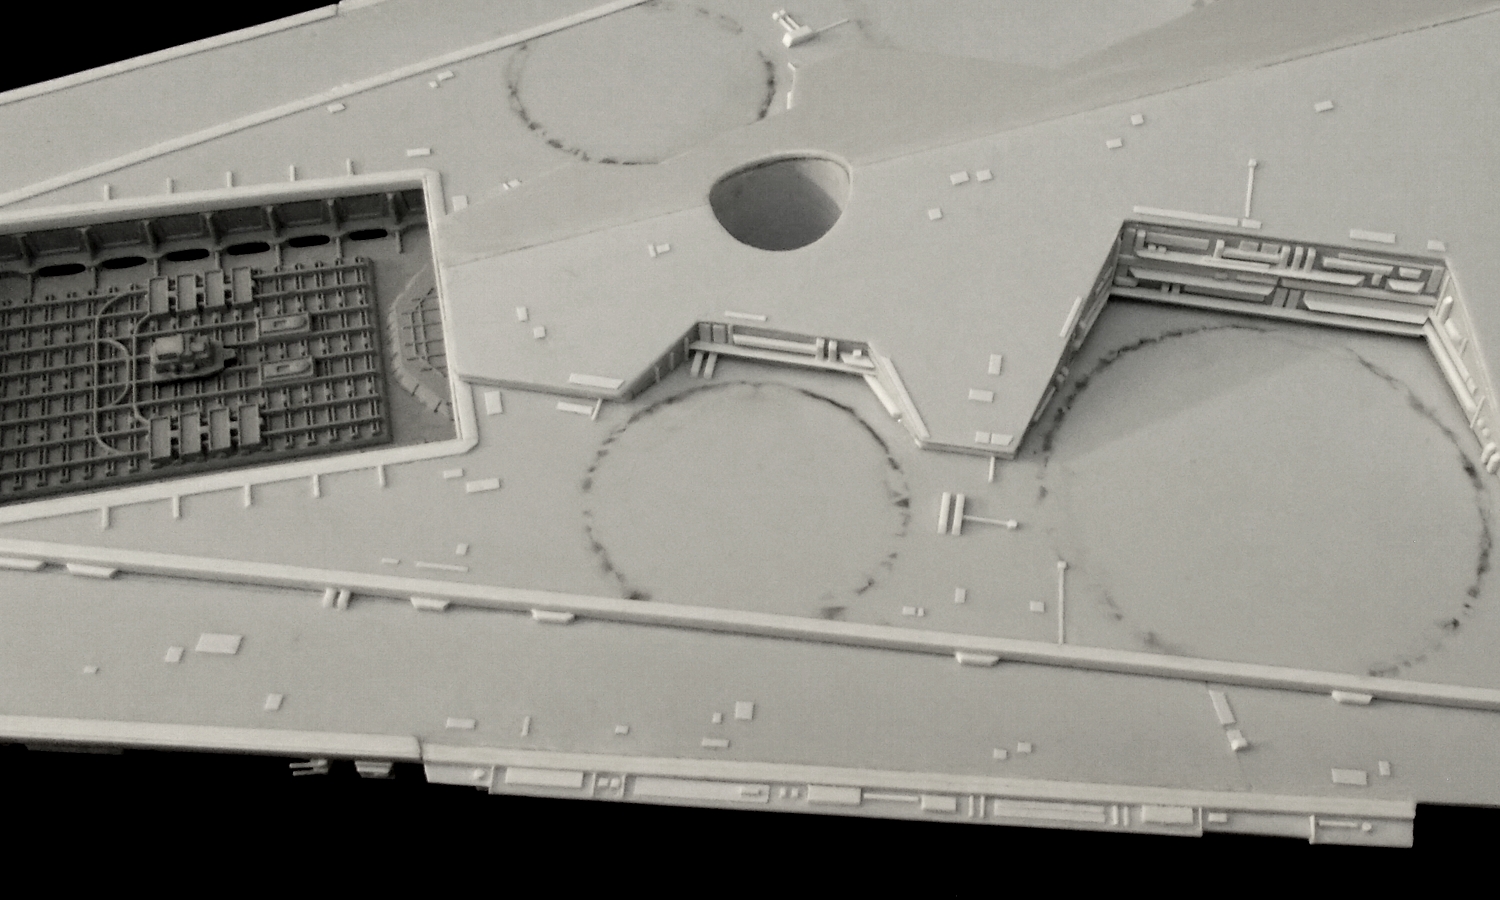
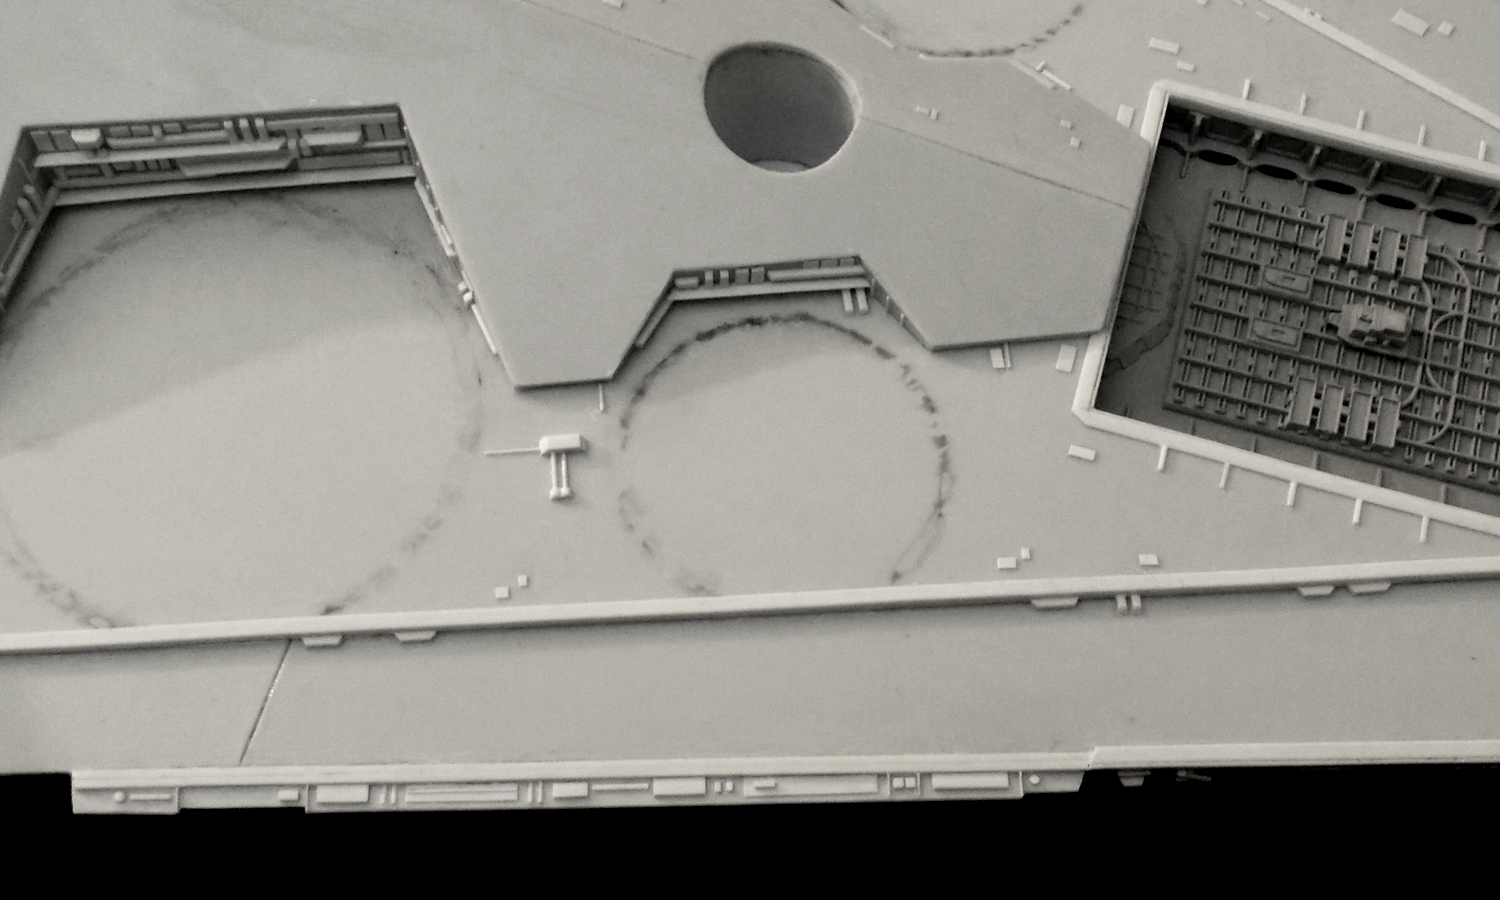
I started by building the basic structure of the upper main hull. I used the front 42 centimeters of another 1/2700-scale Zvesda Star Destroyer I had lying around, and cut it in half along the middle axis. I then cut and filed away approximately 0.4-0.5 cm from the middle edges of both new halves to make space for the characteristic trench, which I then built from plastic card and conneted both halves to it. I also started to build the large flat superstructure to both sides of the middle trench and started adding detail to the build:

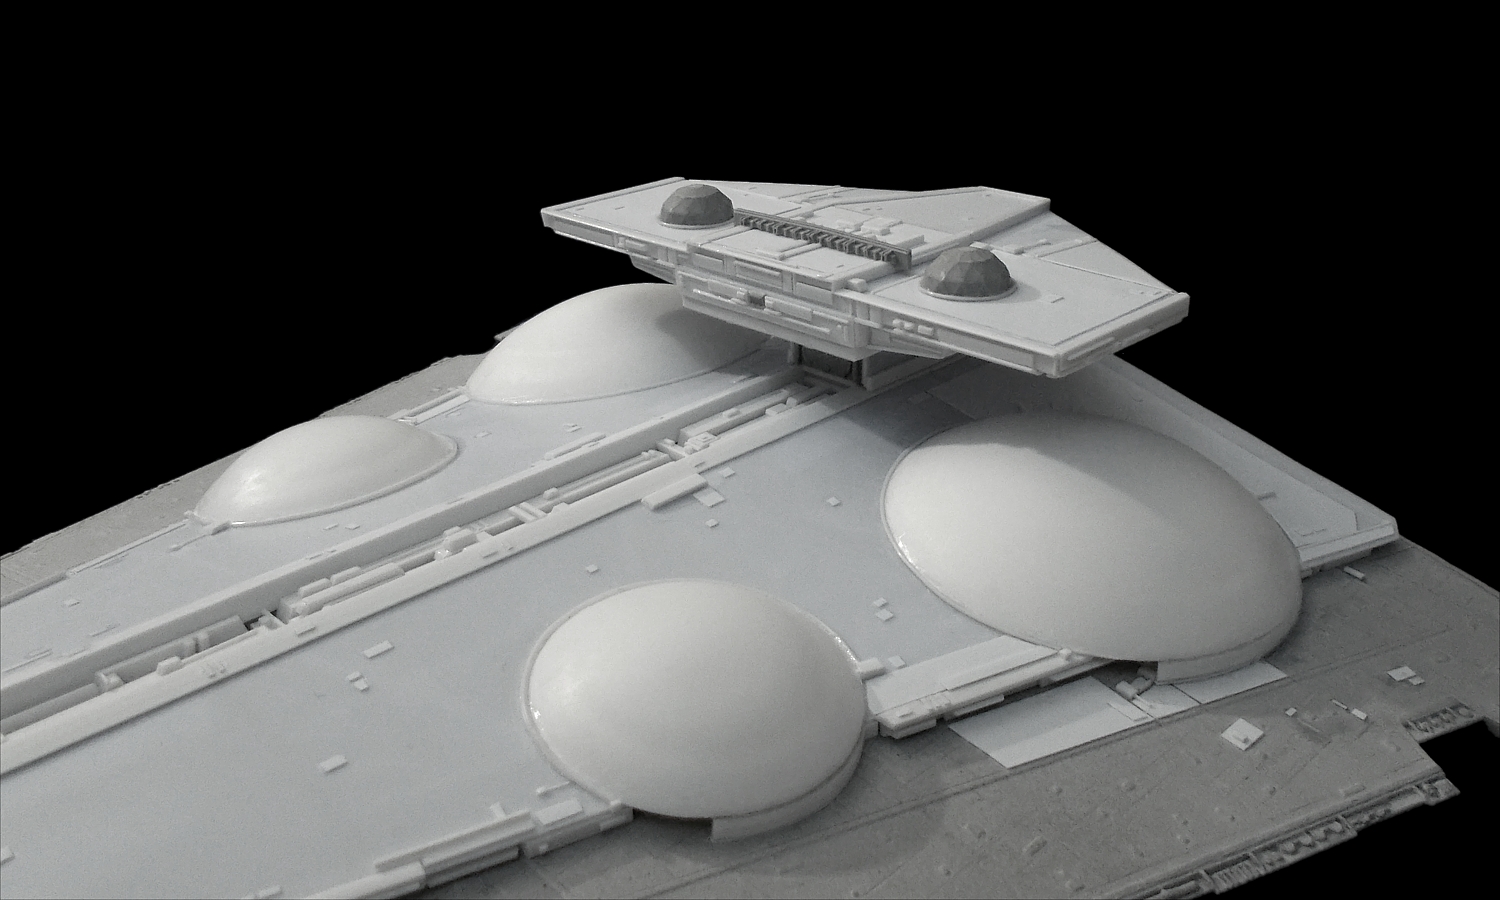
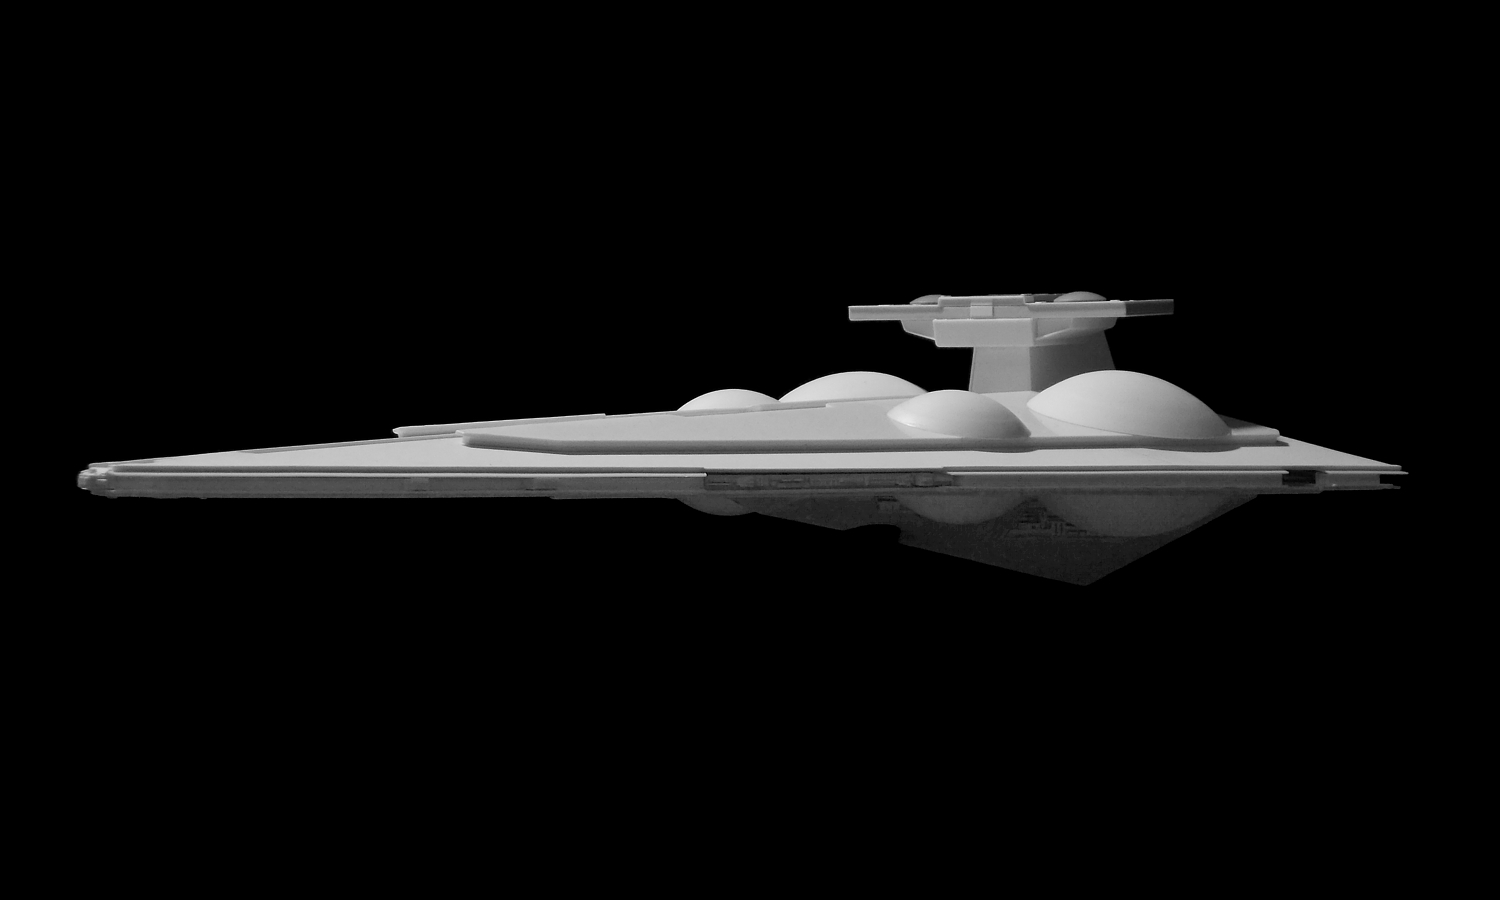
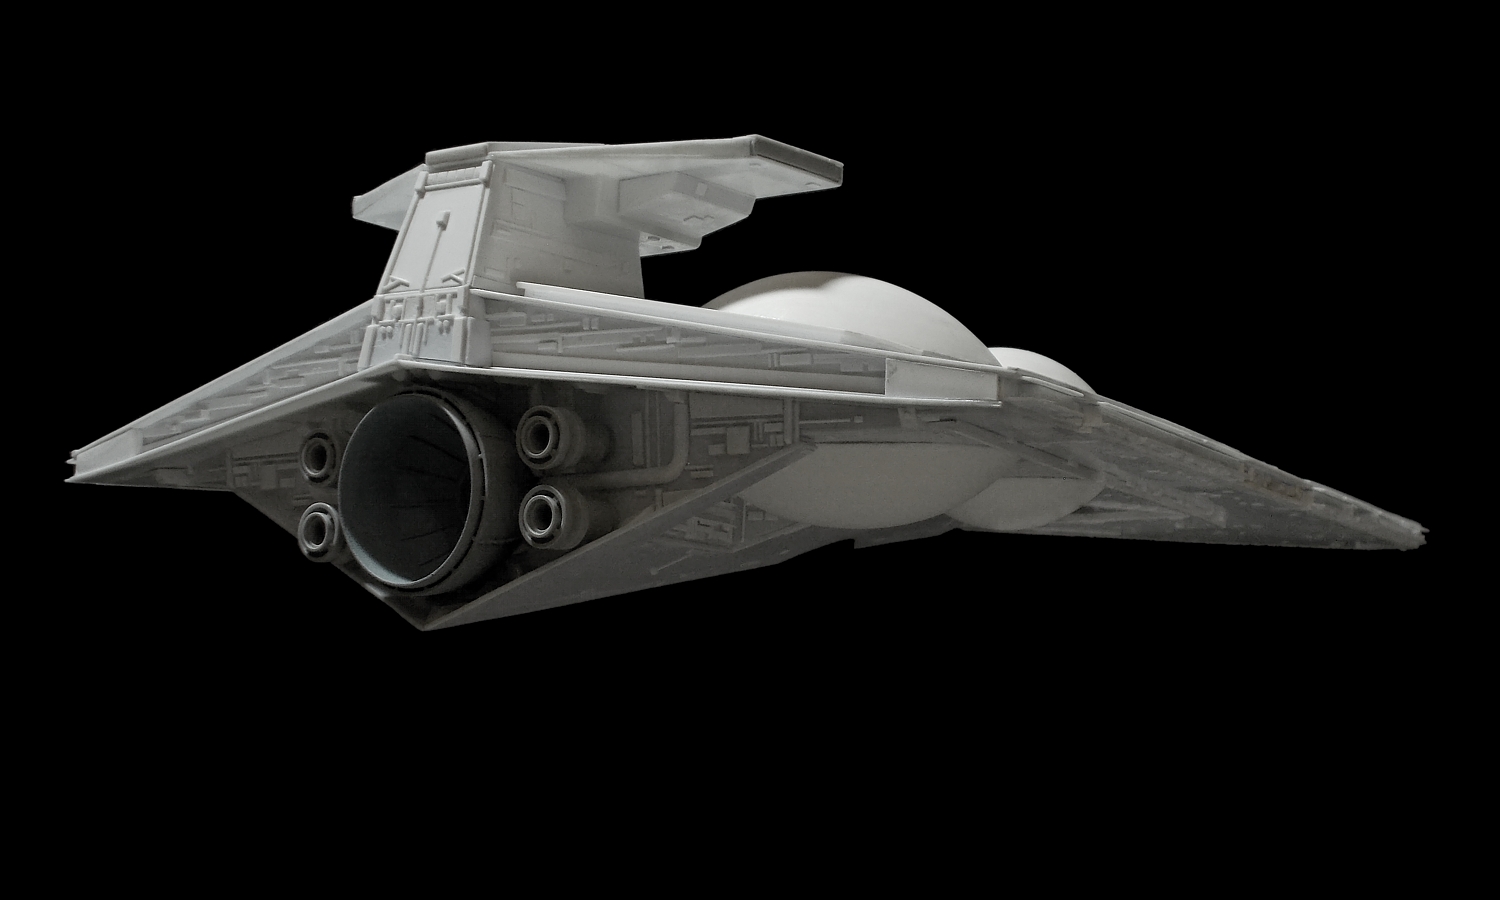
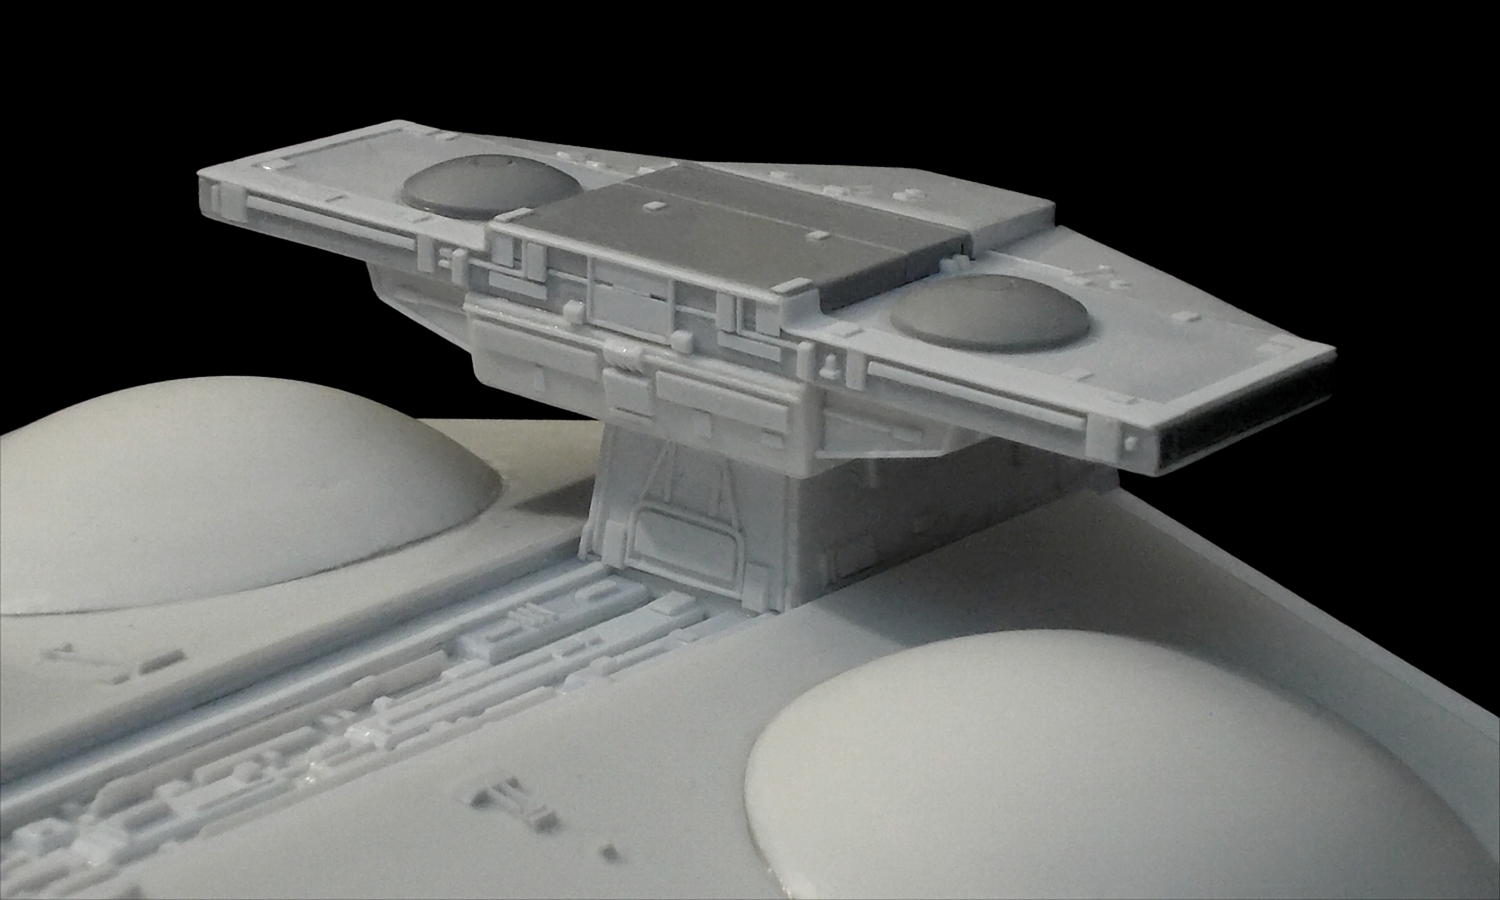
Next, I built the basic shape of the bridge section and the neck connecting it to the rear of the upper hull and dry-fitted it to see if everything aligns neatly.

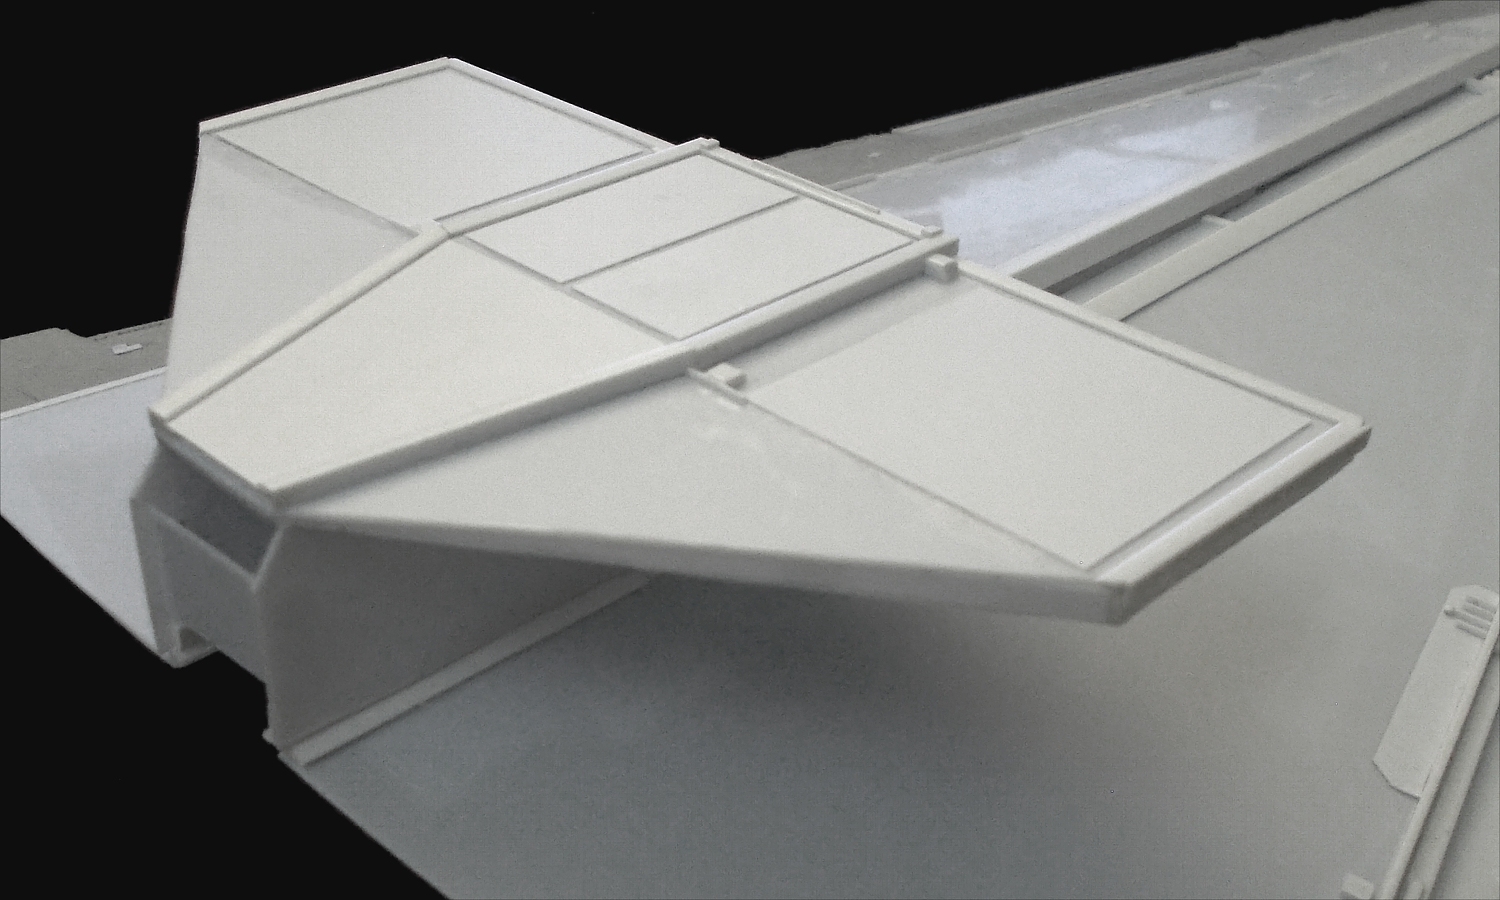
With that done, I proceeded detailing and finishing the bridge section. I used some details from the Star Destroyer kit like the shield projector domes, the communications/sensor array as well as the front and back elements of the neck to create some visual paralles between both models and represent the modular building style of the Galactic Empire. As you can see on later photos of the build-progress, the shield projector domes will both move a bit more inwards later.
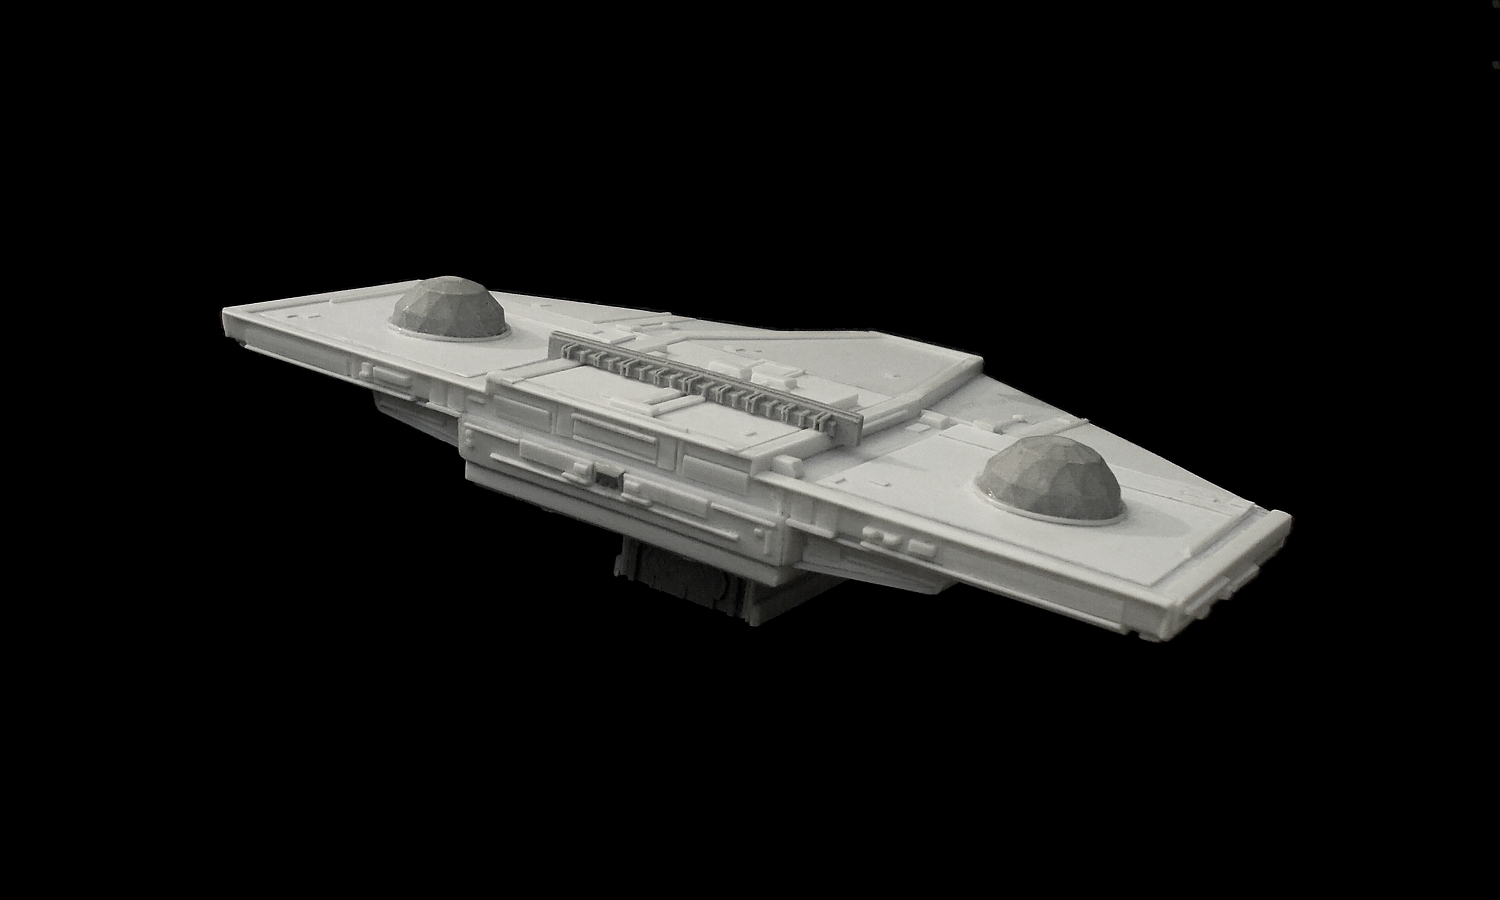
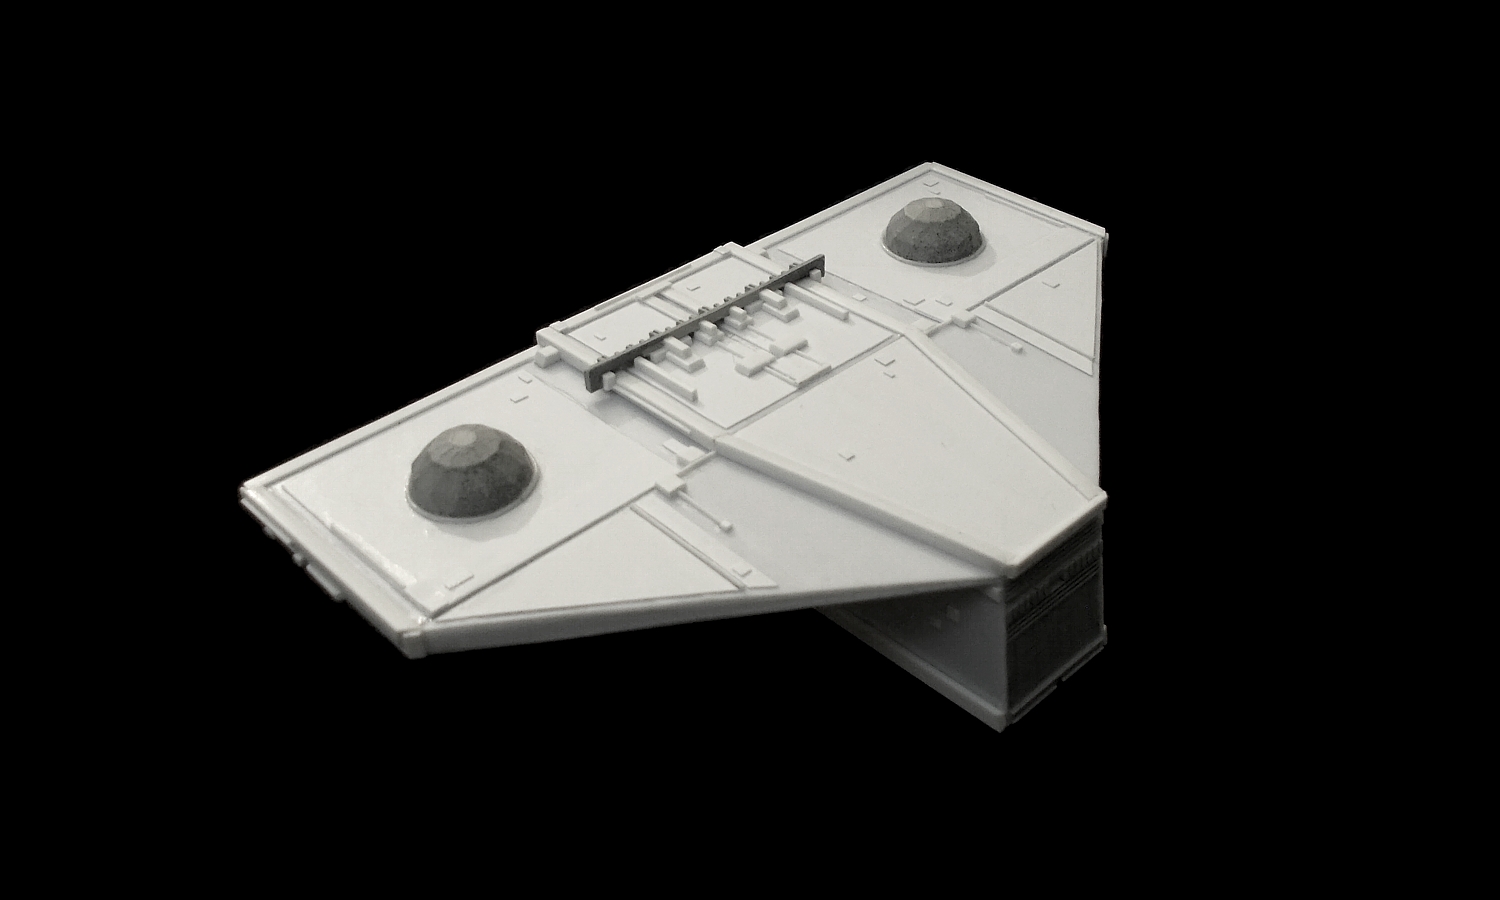
The flat domes of the gravity well-generators proved to be challenge. I couldn’t build them and make them all look nice and even, so I had to find something with the right shape and size. After some searching, I purchased a few white door stoppers in 4 cm and 6 cm diameter. Fortunately, the material was way more rigid than I thought, so I didn’t need to support them from the inside.
With these glued in place, the upper half of the ship is starting to take shape. I proceeded to build and add details – loads of details, especially to the middle trench, and the build of the upper half is now almost finished: