


Mordheim (sort of…)


Recommendations: 1134
About the Project
A collection of ruined buildings and terrain for a custom skirmish game. It's not for Mordheim per say, but it can offer some inspiration for Mordheim, Frostgrave or similar setting.
Related Game: Mordheim
Related Genre: Fantasy
This Project is Active
3 - Basing the Beast
I laid down some tiles made from cheap clay (same as the Wizard Tower project).
I painted the base dark brown before laying down the tiles as I found painting between the tiles afterwards to be a painful and long process.
 Tiles made out of clay
I sprinkled a lot of small rocks and coarse sand all over the base with PVA glue.
To make sure that the sand really sticks to the cardboard, I like to apply a second coat of watered-down PVA glue all over the sand. I tried a slightly different approach this time. Since this is a very large project, I need to speed things up: I apply a coat of watered-down PVA glue mixed with Burnt Umber paint. This would act as a basecoat for the base.
 Sand and gravel
 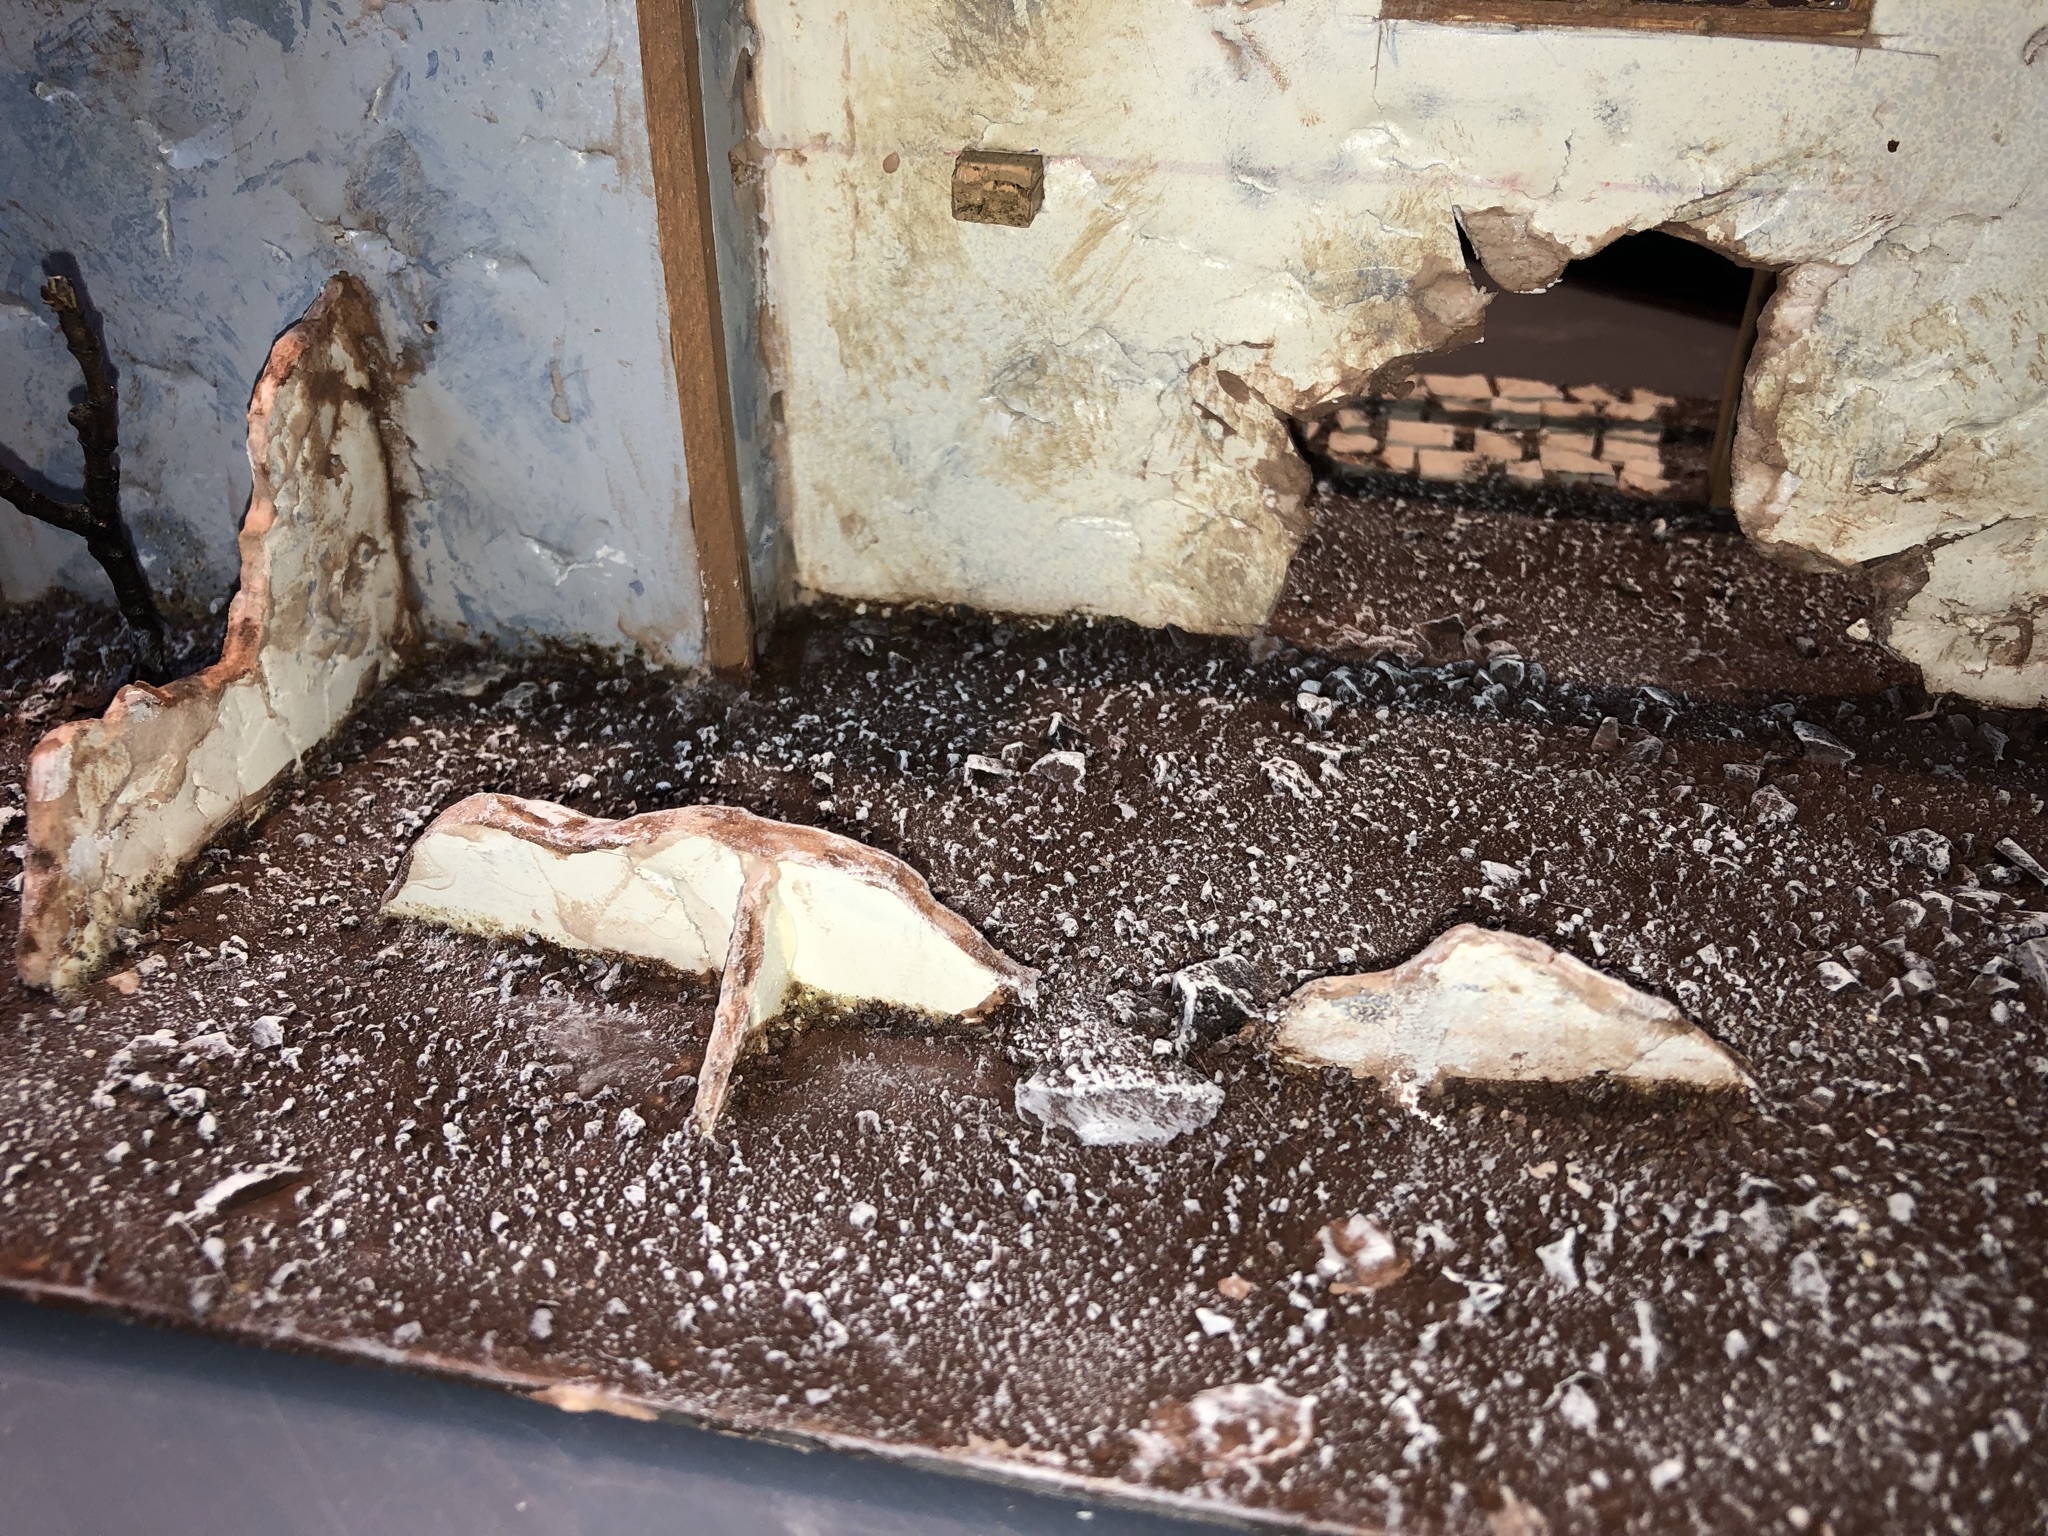 Base painted brown, than drybrushed
 2- The Beast Assembled (WiP)
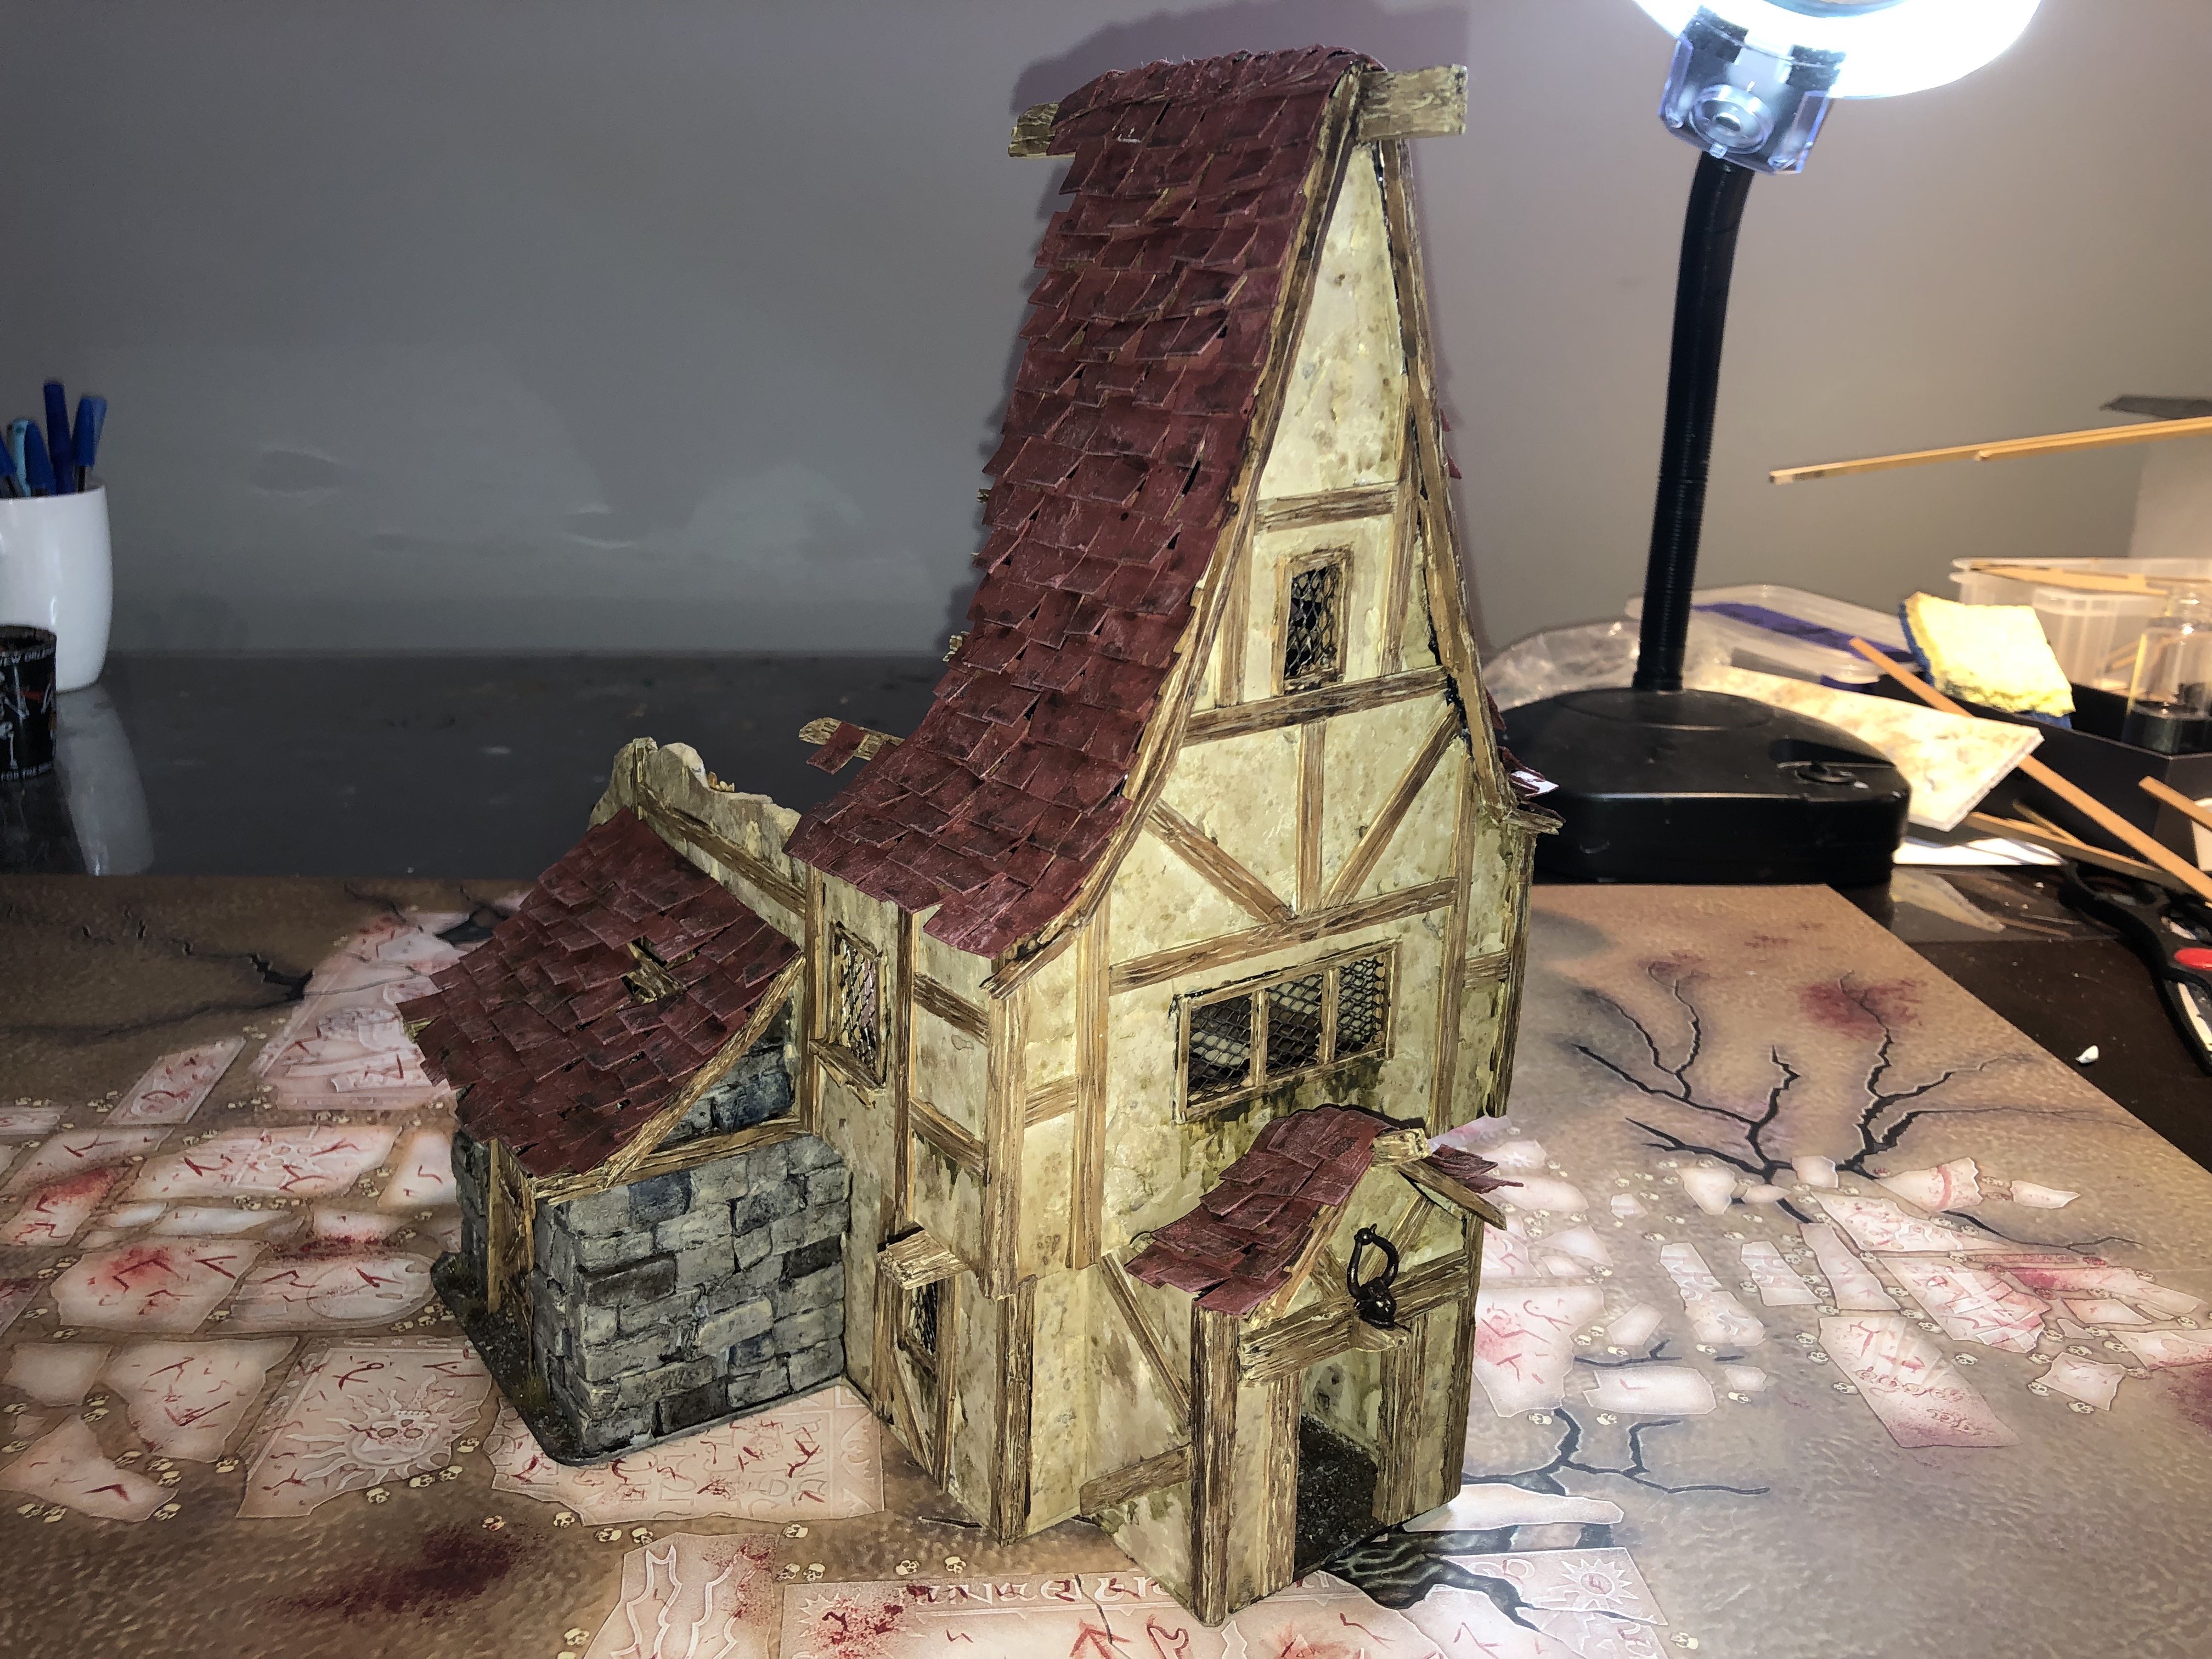
The three parts were assembled on a base.
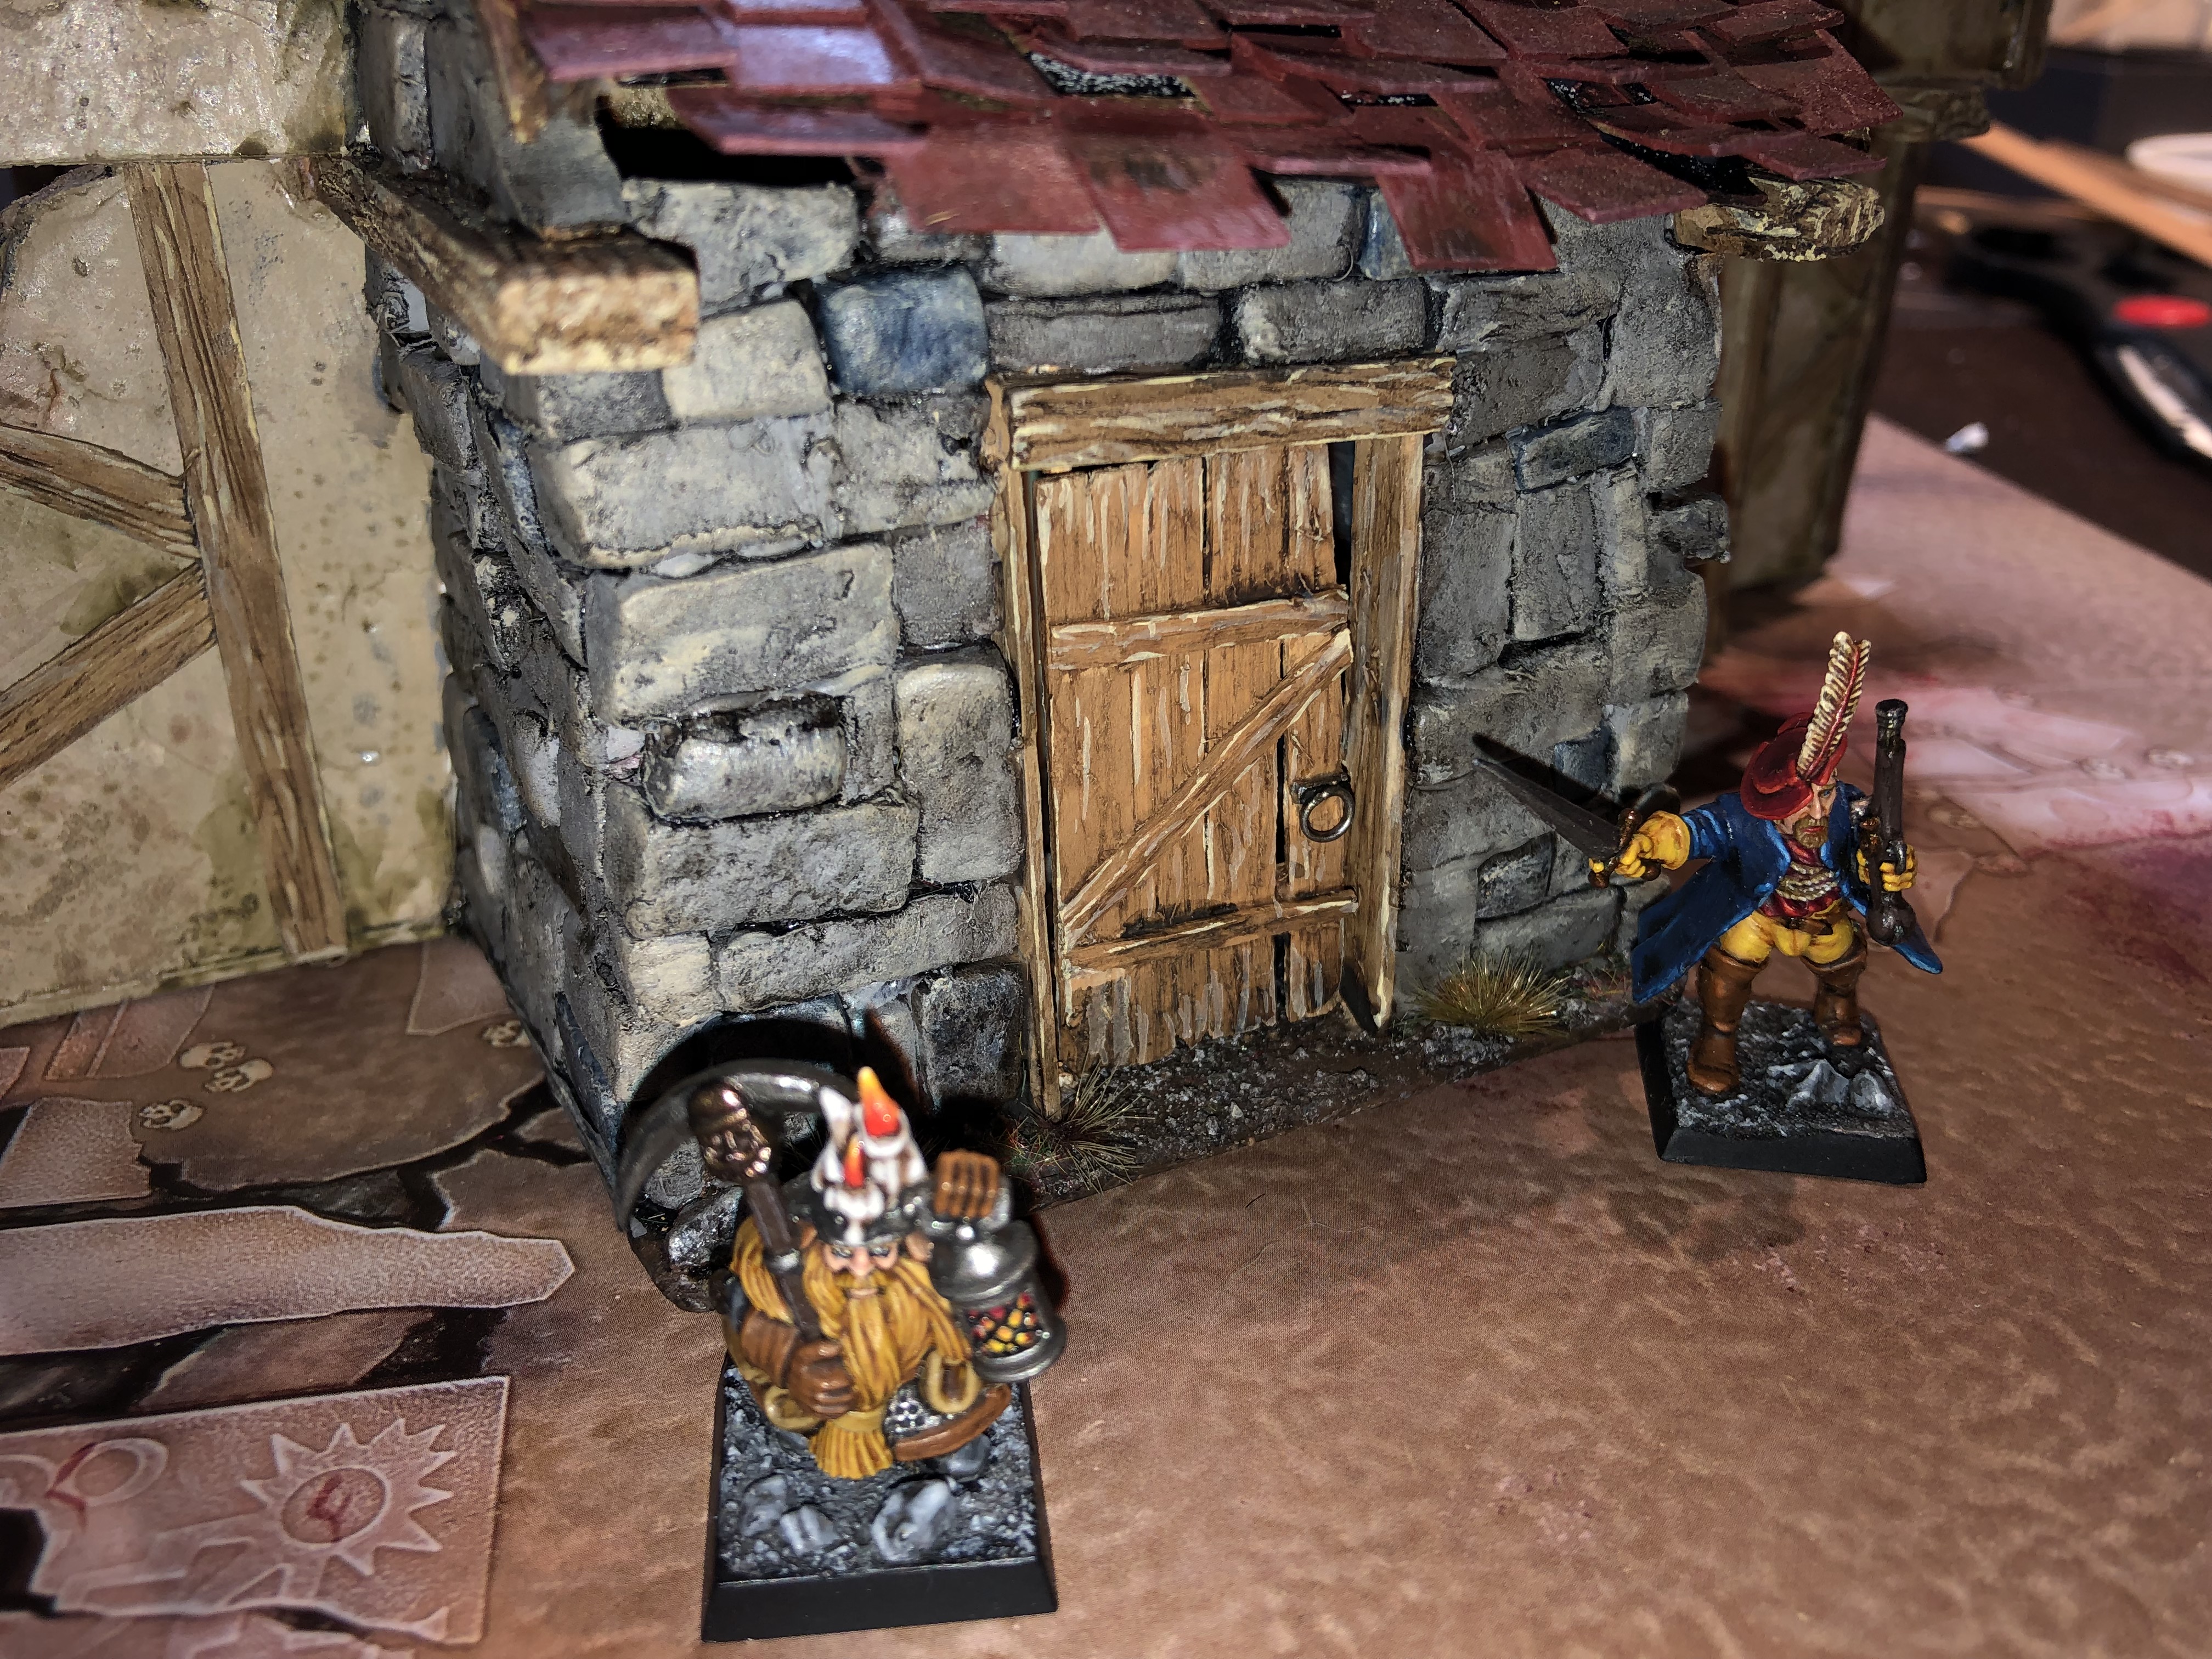
Playability is a very important concept when designing buildings. I made some nice terrain before that do not see very much use on the game board as they don’t have enough access point.
For this big project, I made sure, they were would plenty of ways to enter/leave the building.
The house on the left has two doors that lead outside, plus an entry towards the middle junction.
The middle junction part has a huge entry in the front and in the back.
The tower on the right has a door and it leads to the other parts of the complex.
 Front view
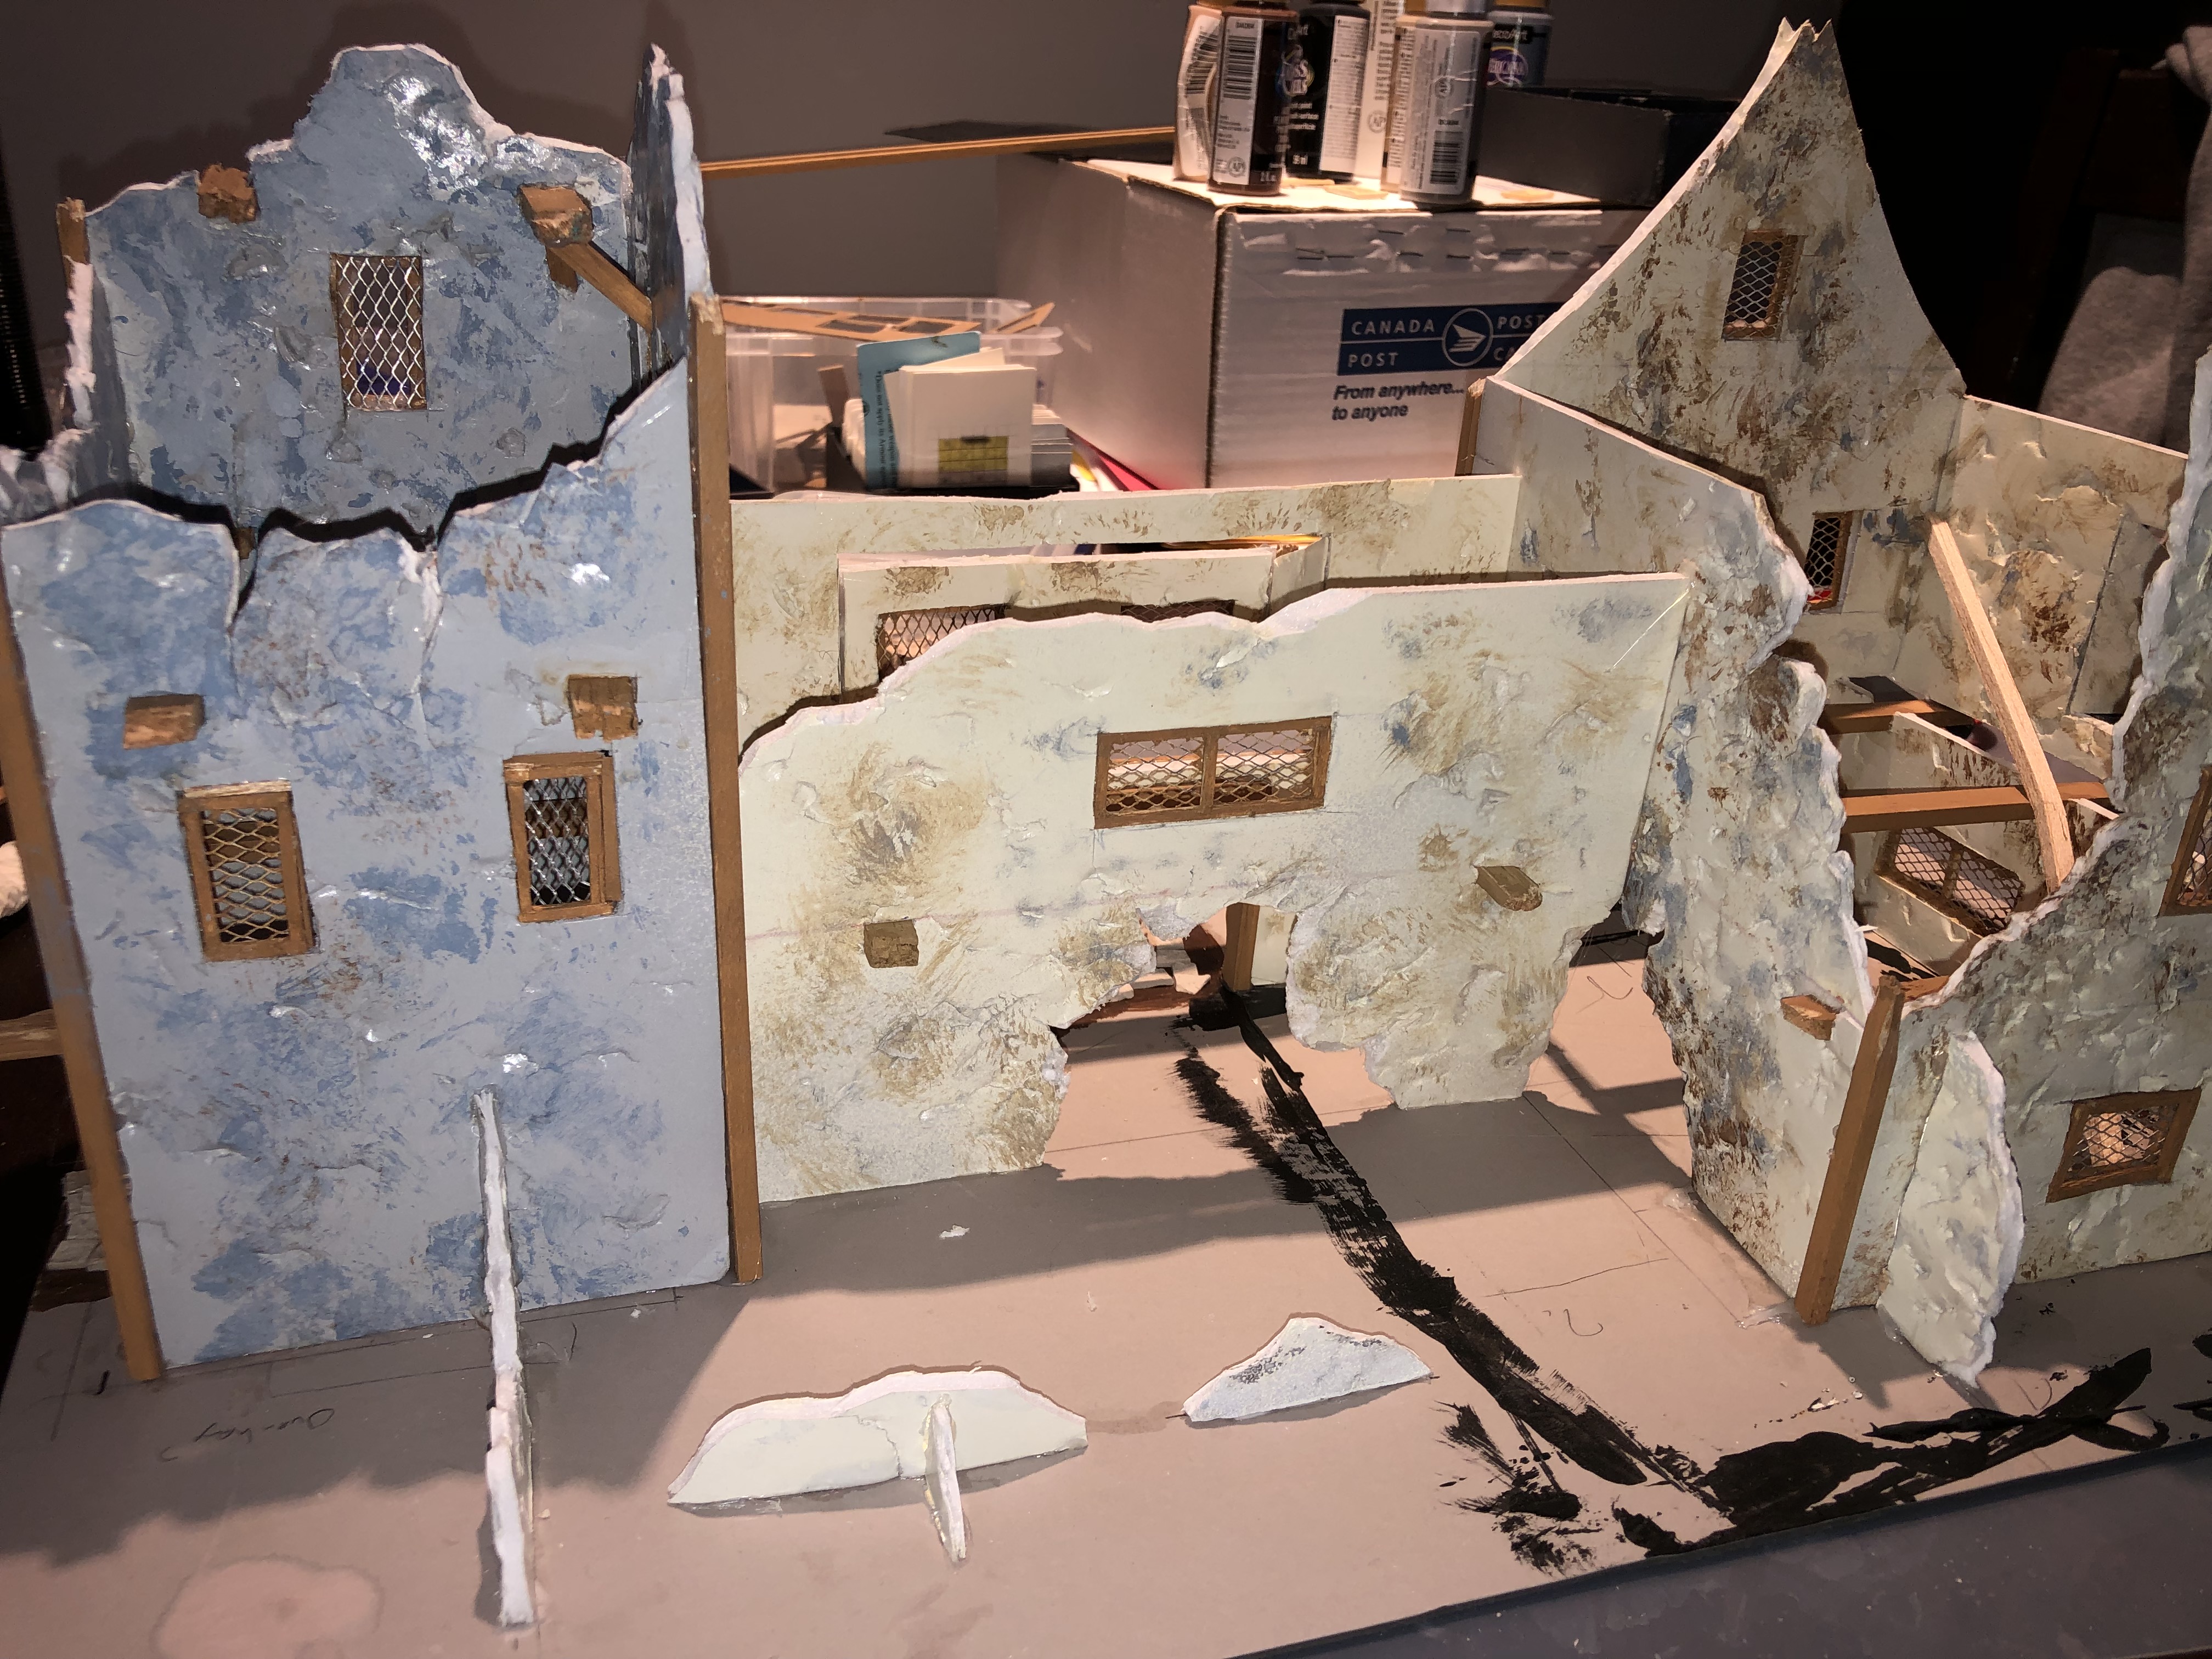 Rear view
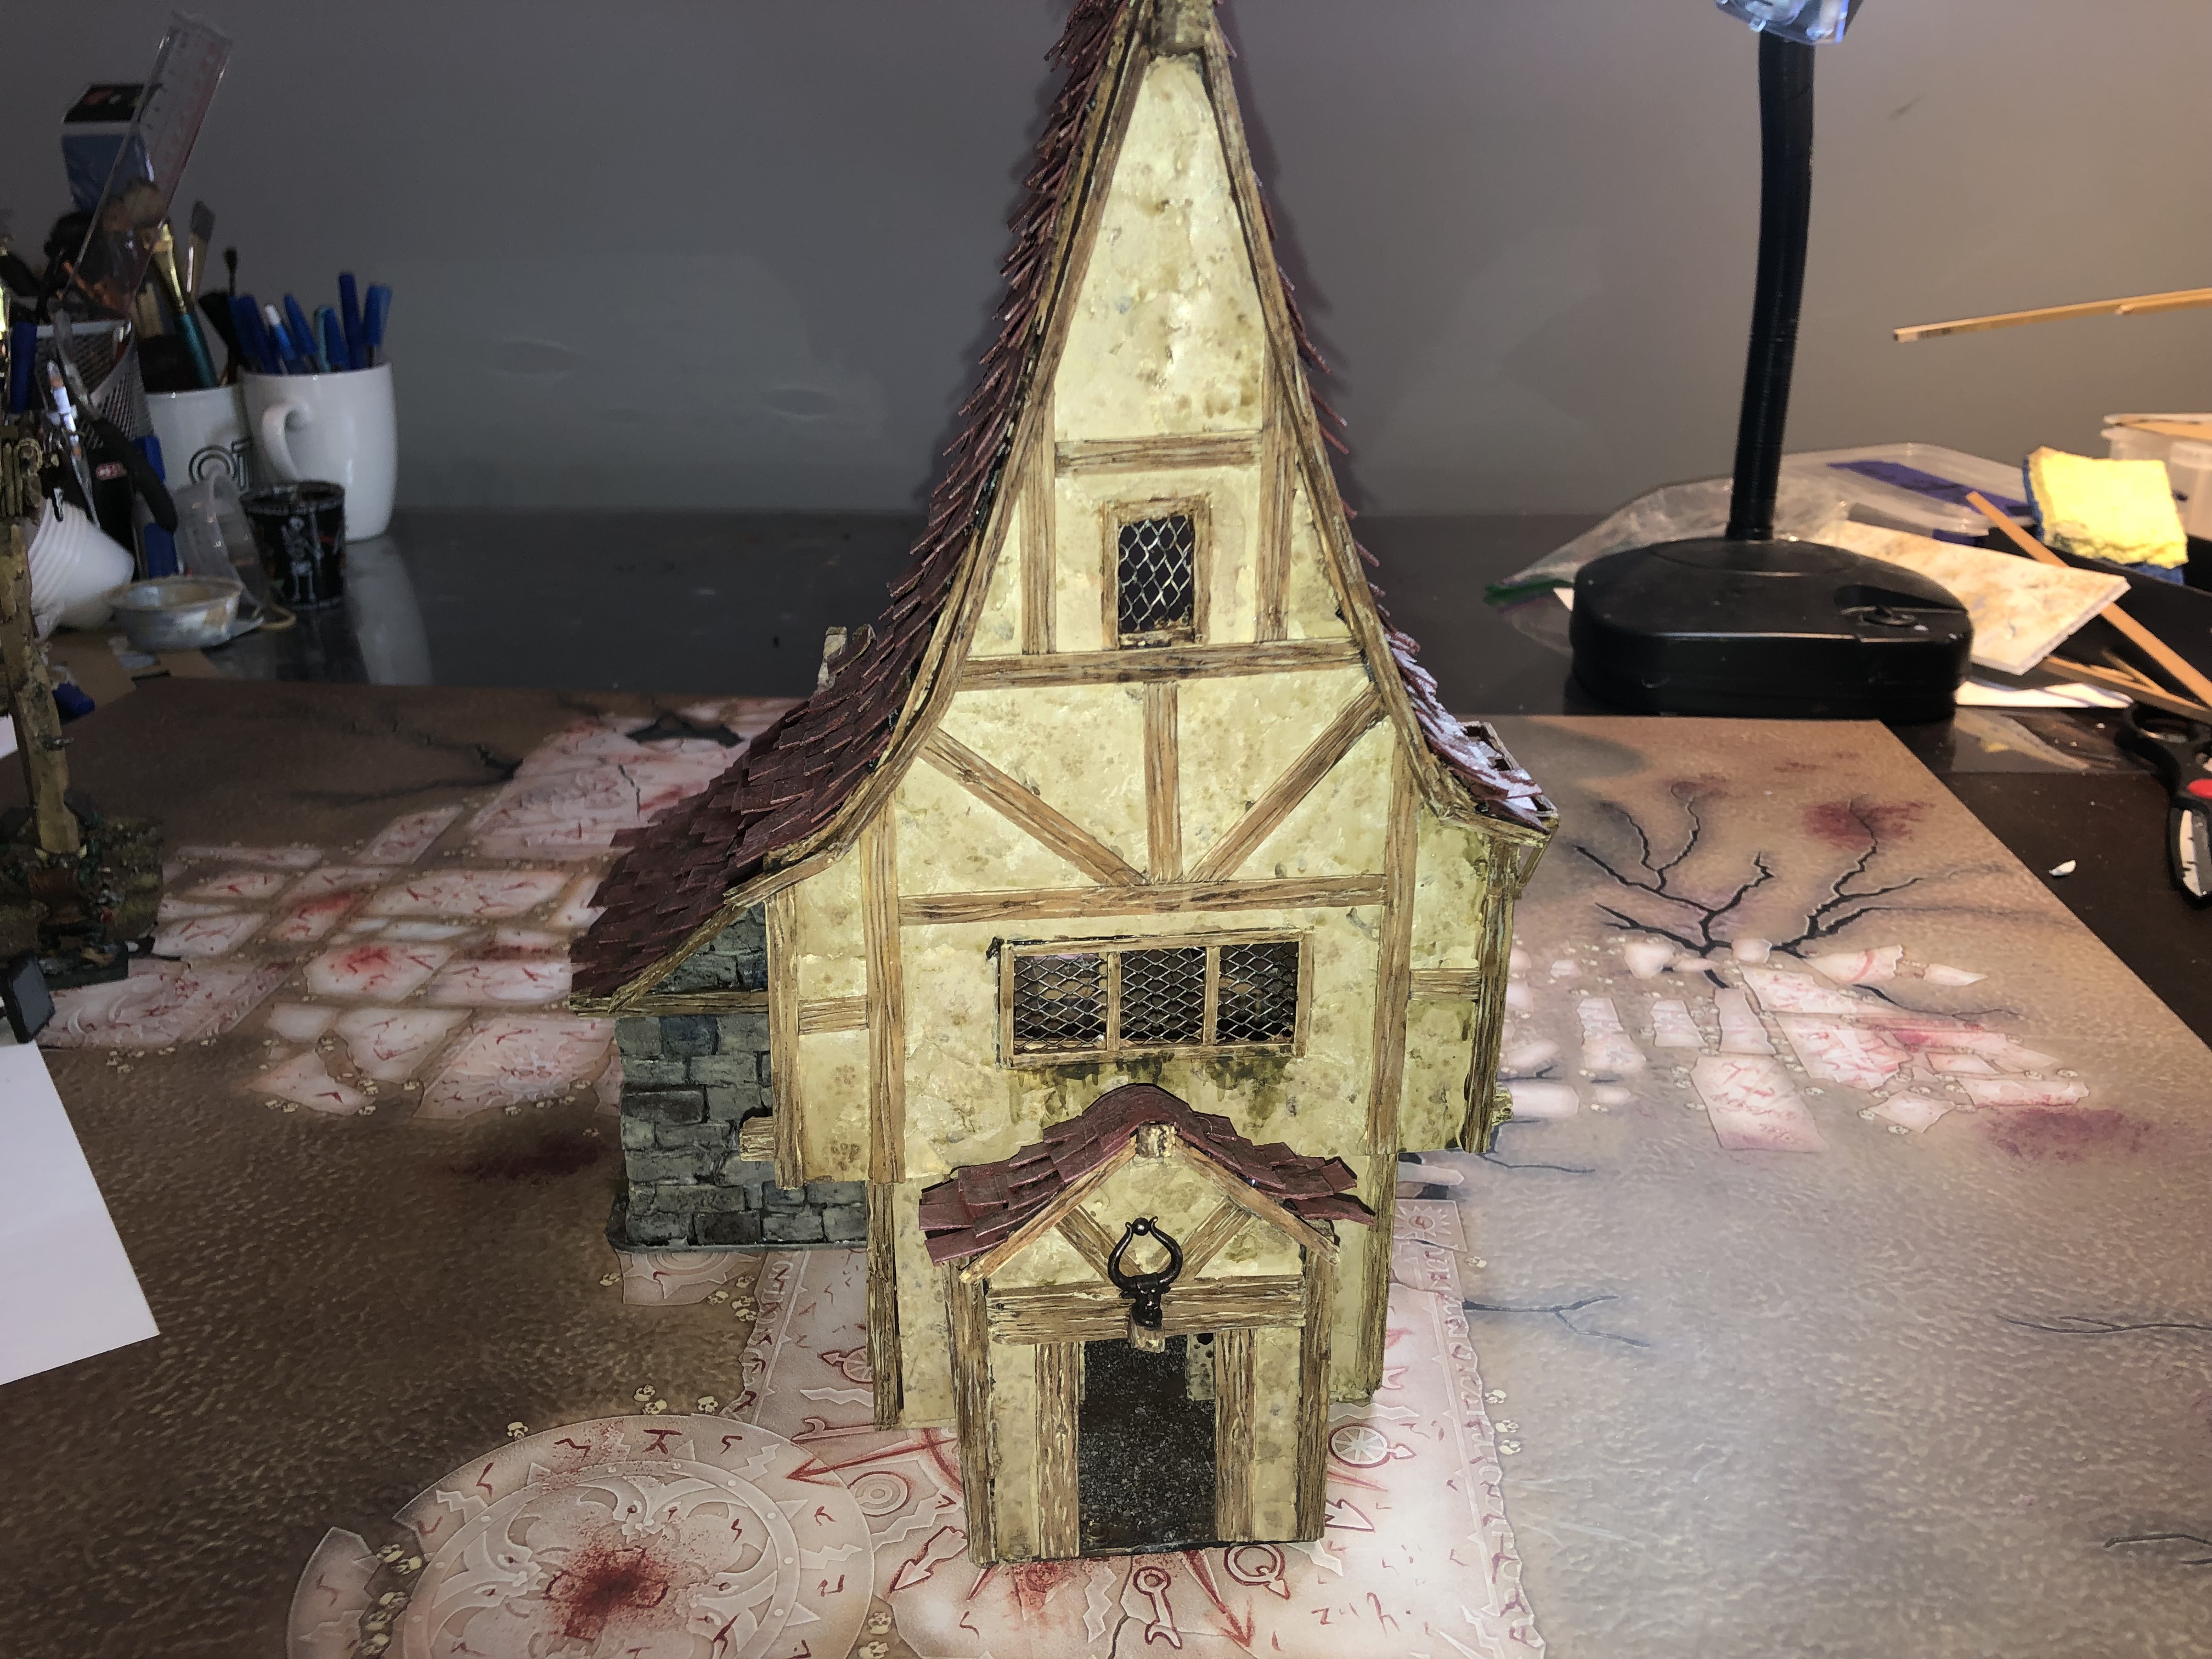
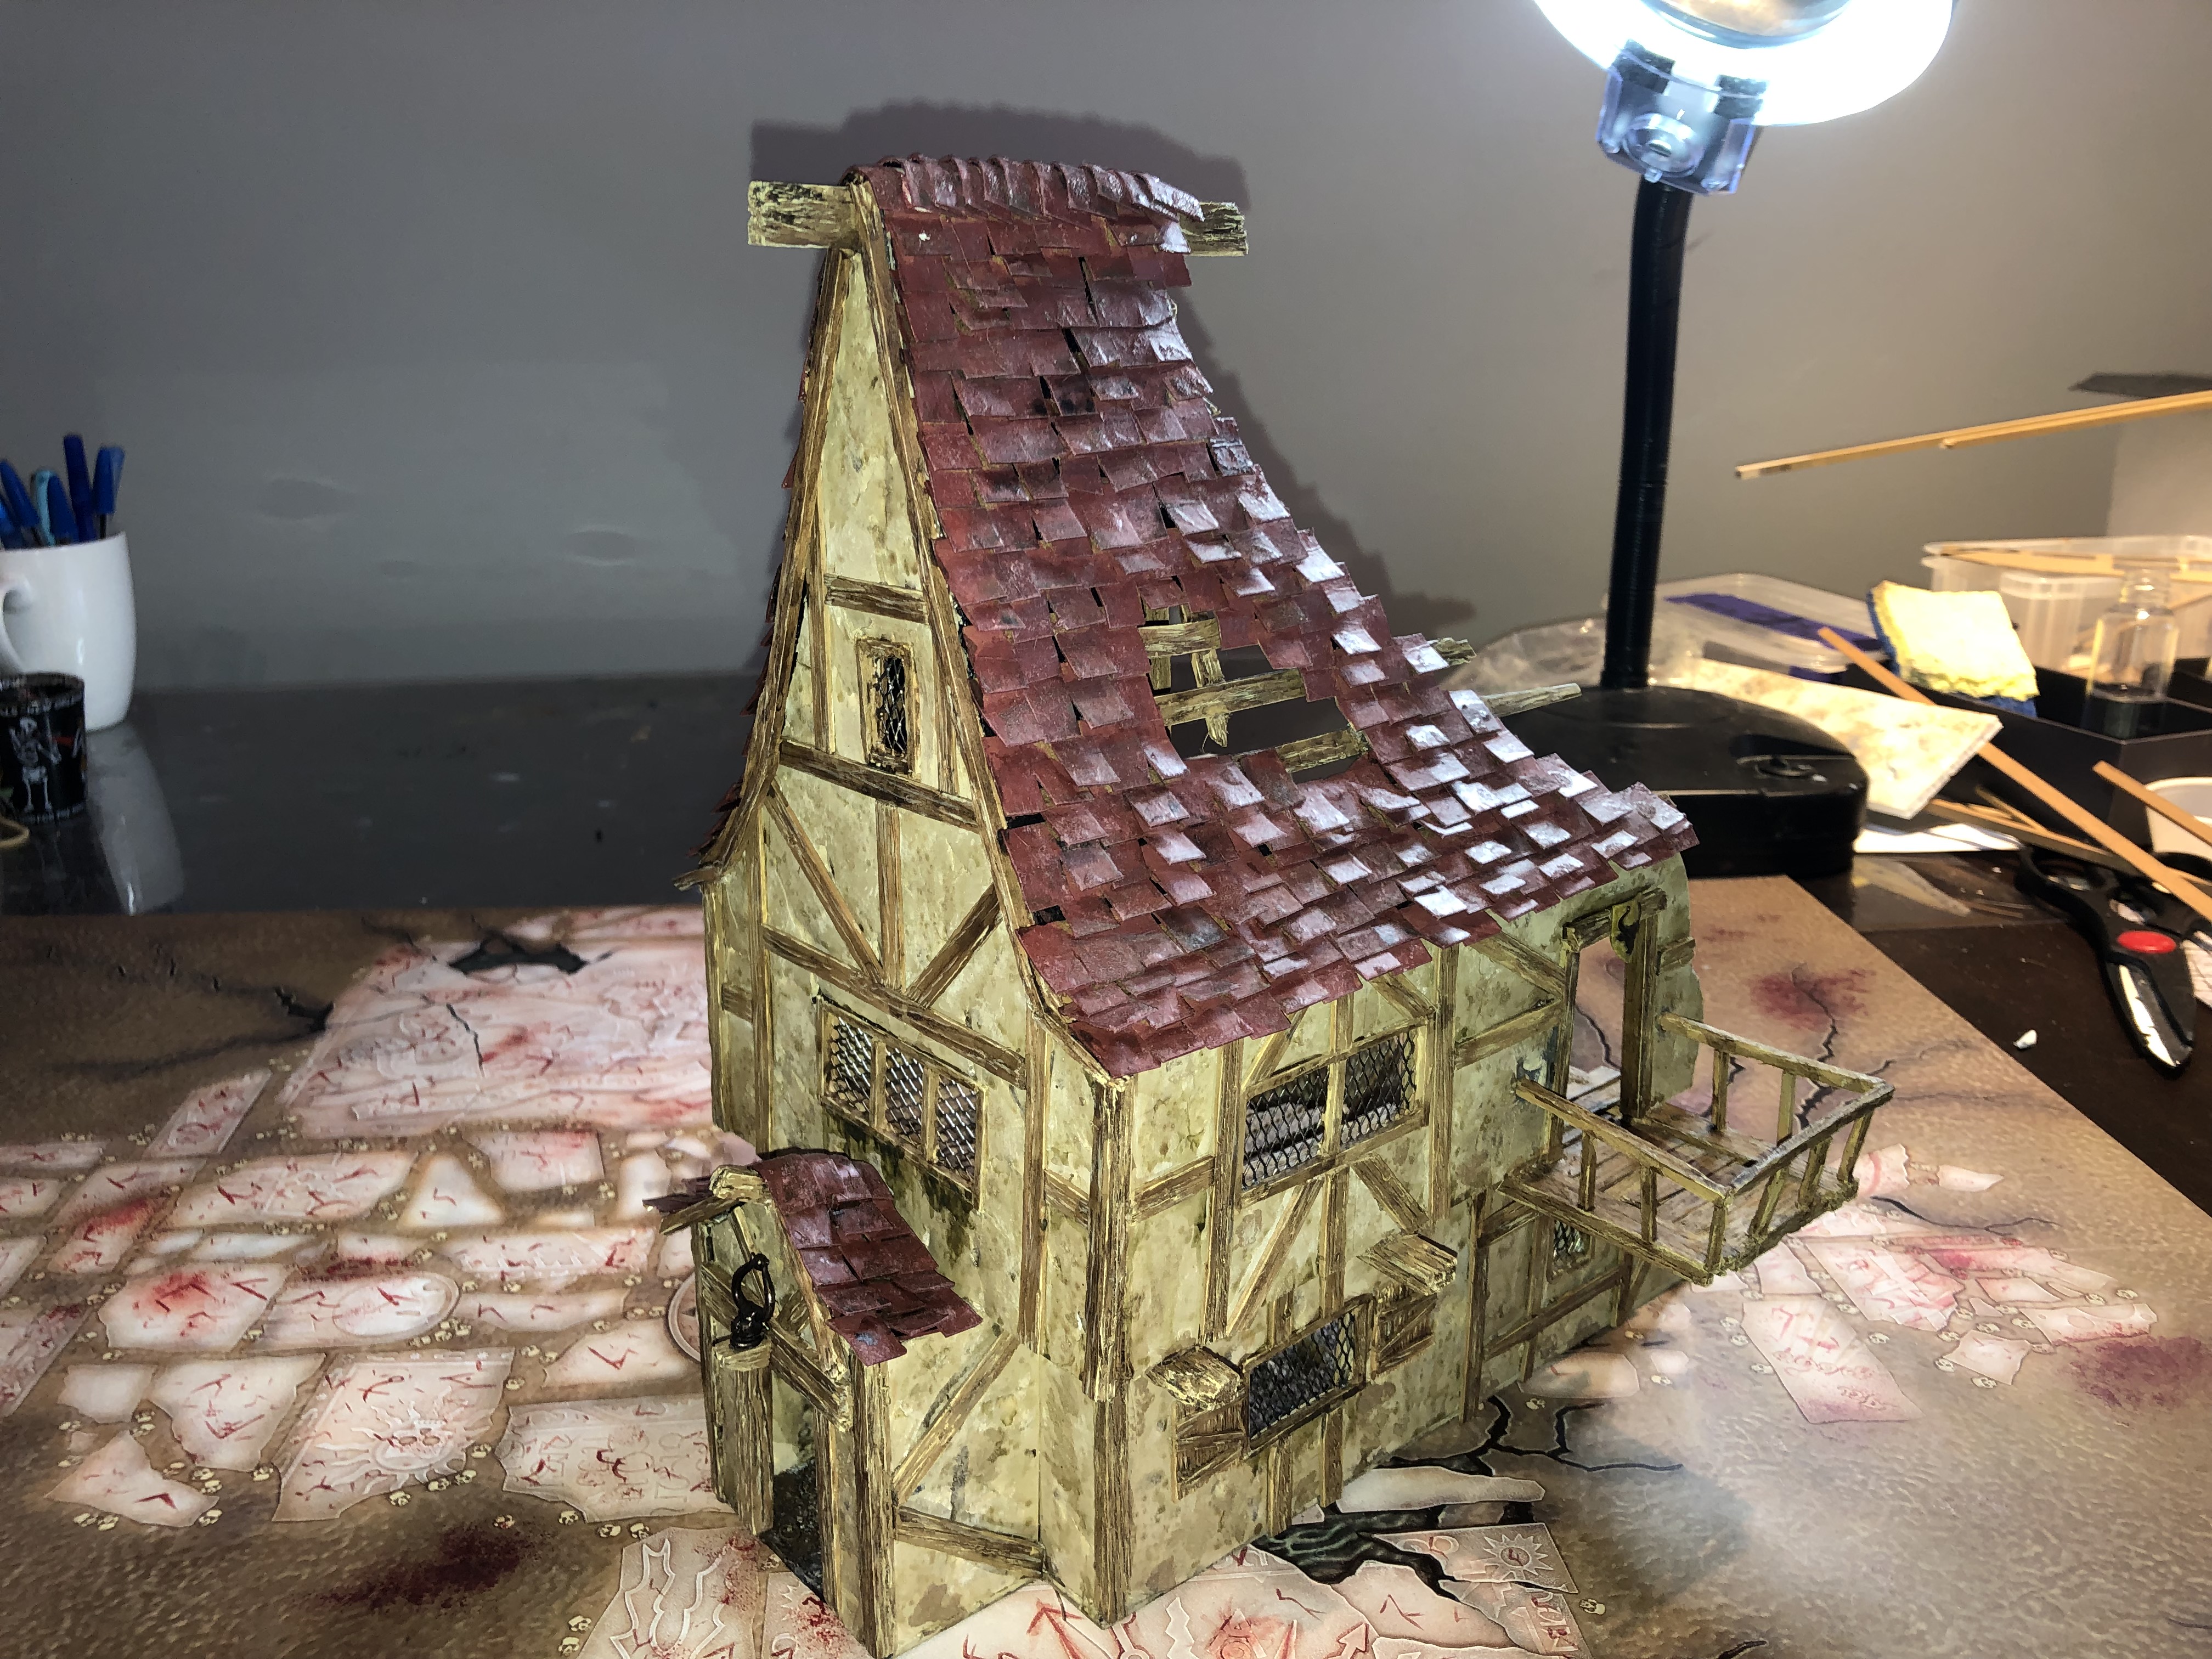
WiP: the Beast
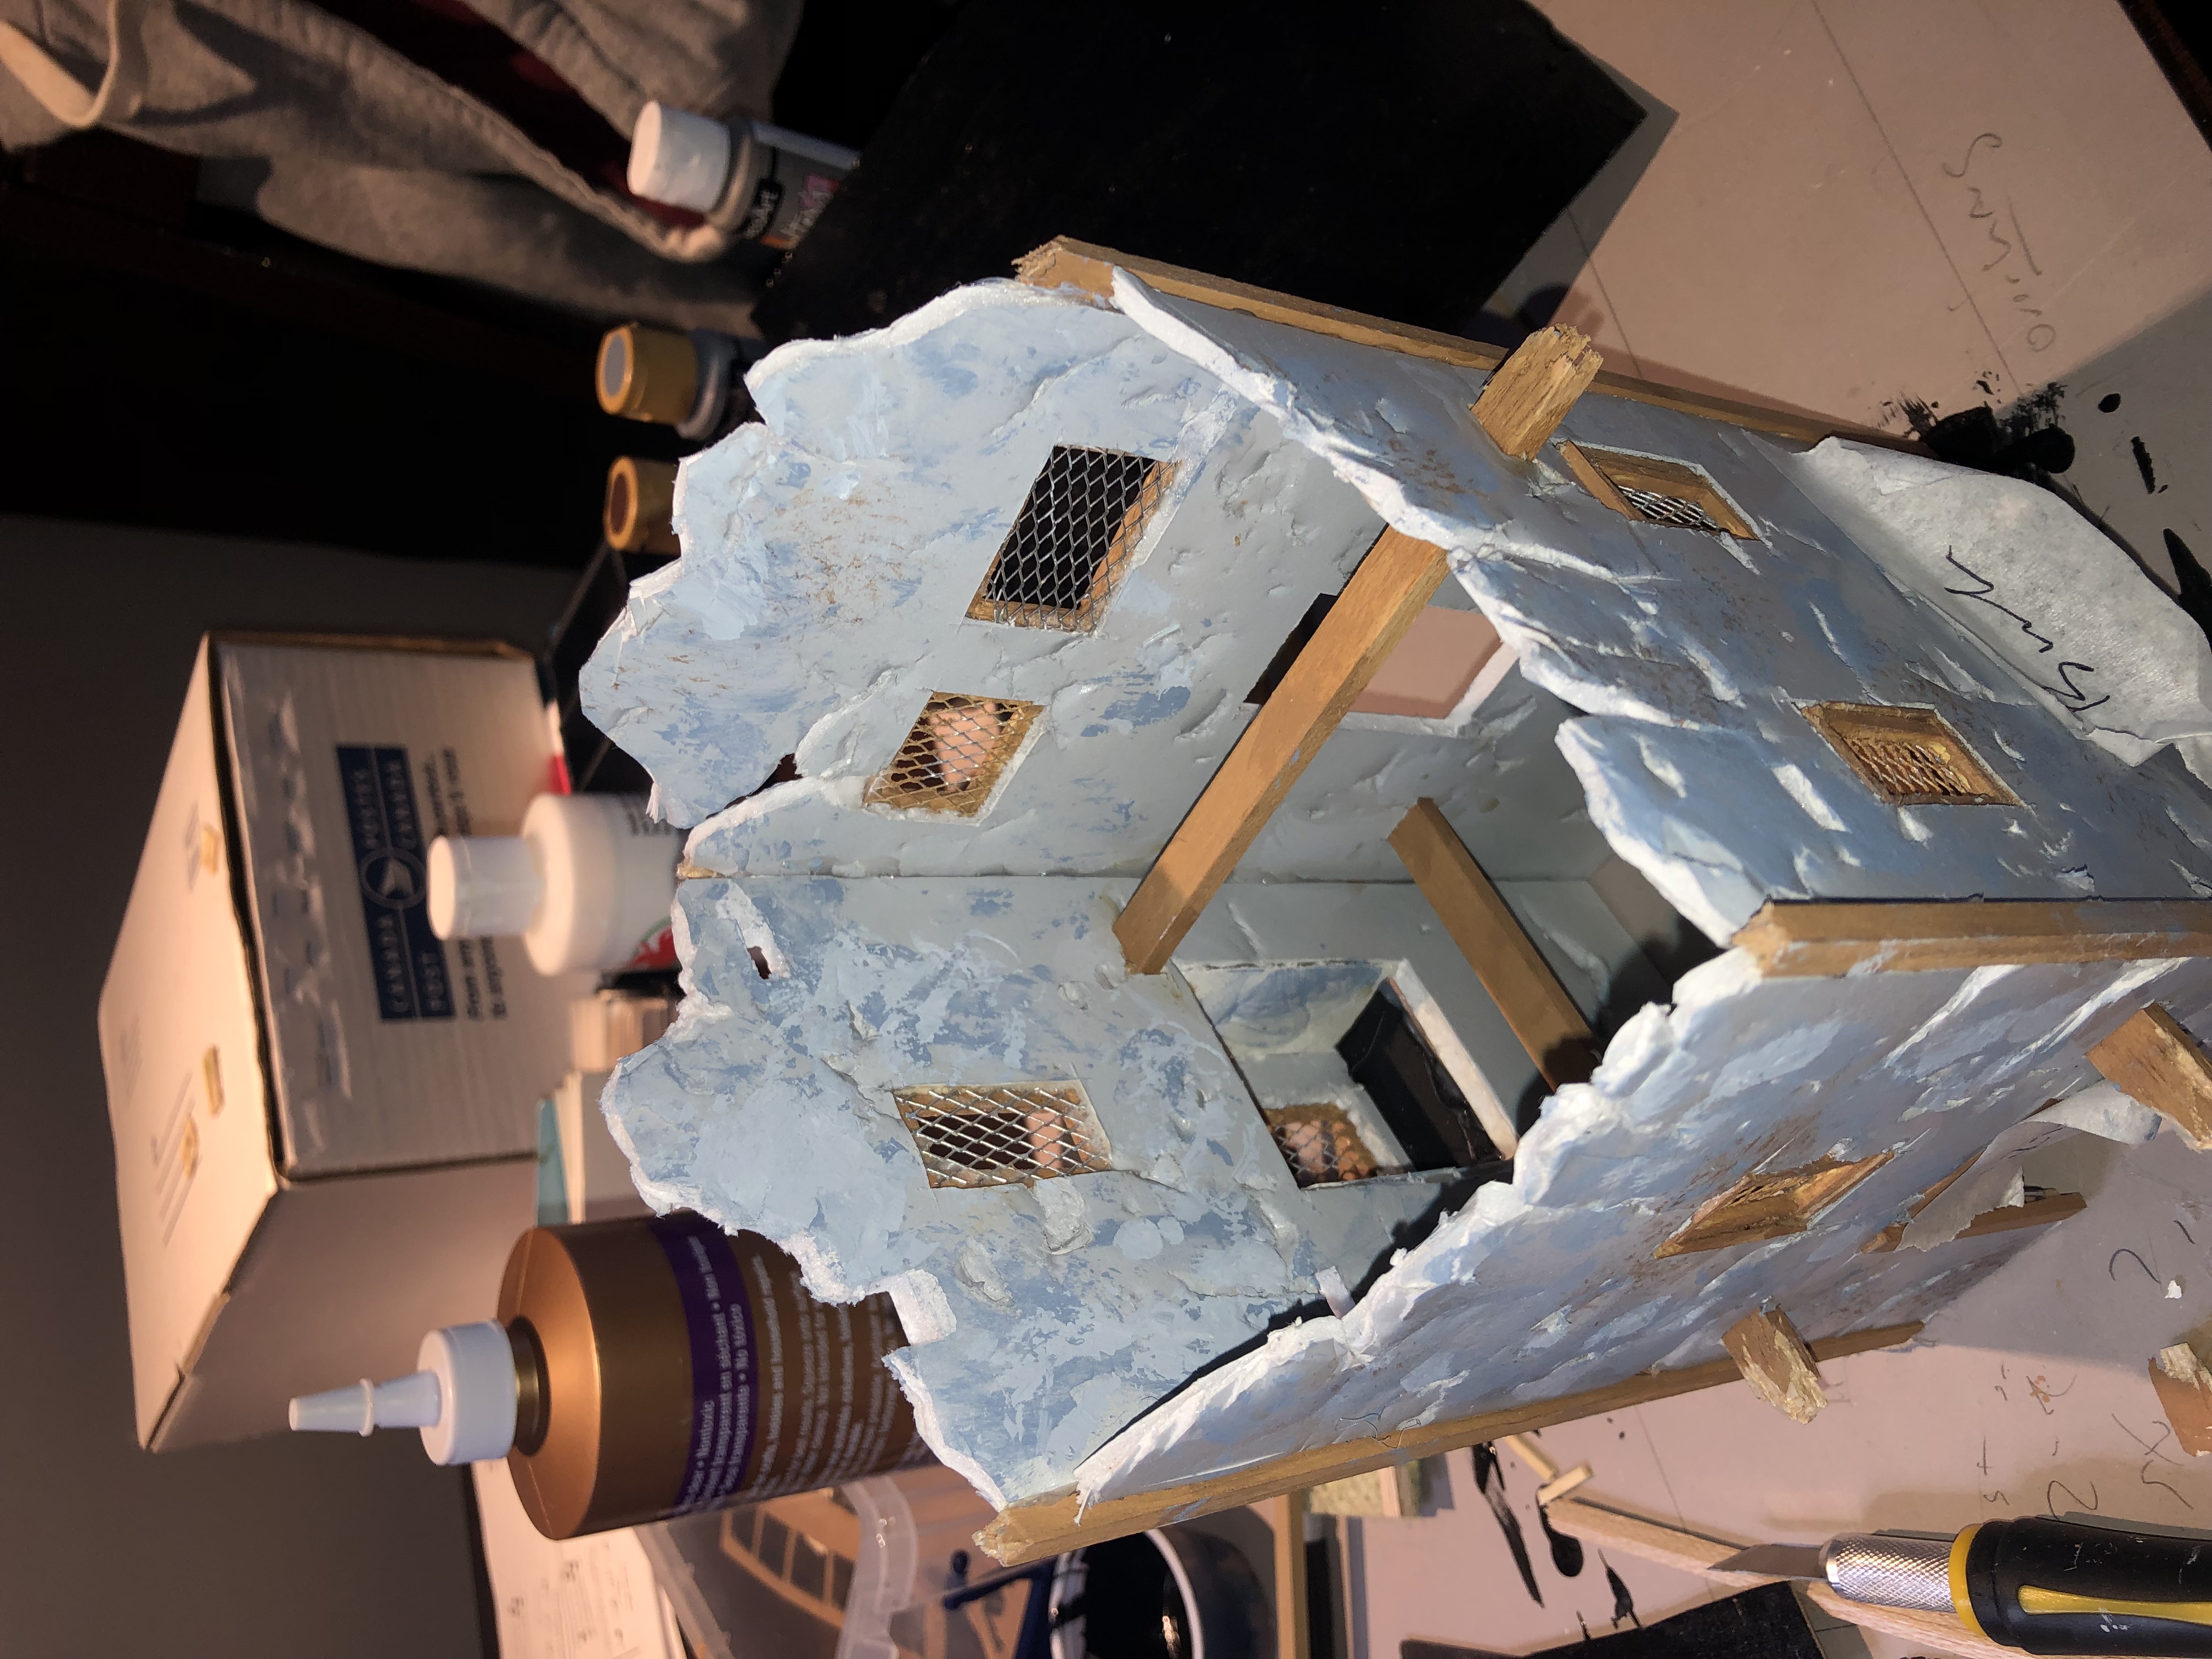
Three-part giant building I am currently working on.
The whole structure is foam board.
To speed things up, I won’t use any XPS bricks as they are nice, but time consuming.
I don’t have an airbrush yet (shame on me), so to facilitate the painting process, I like to paint all the sections separately before assembling them.
I sprayed the foamboard/walls with an off-white.
I assembled separately the window frames from matchsticks and painted them with a tan colour (coffee lattee from Folk Art or a similar colour). I then glued the wooden frame over some meshwire with tacky glue.
At the end of the project I will apply some washes to blend all the different elements.
 Piece of foamboard
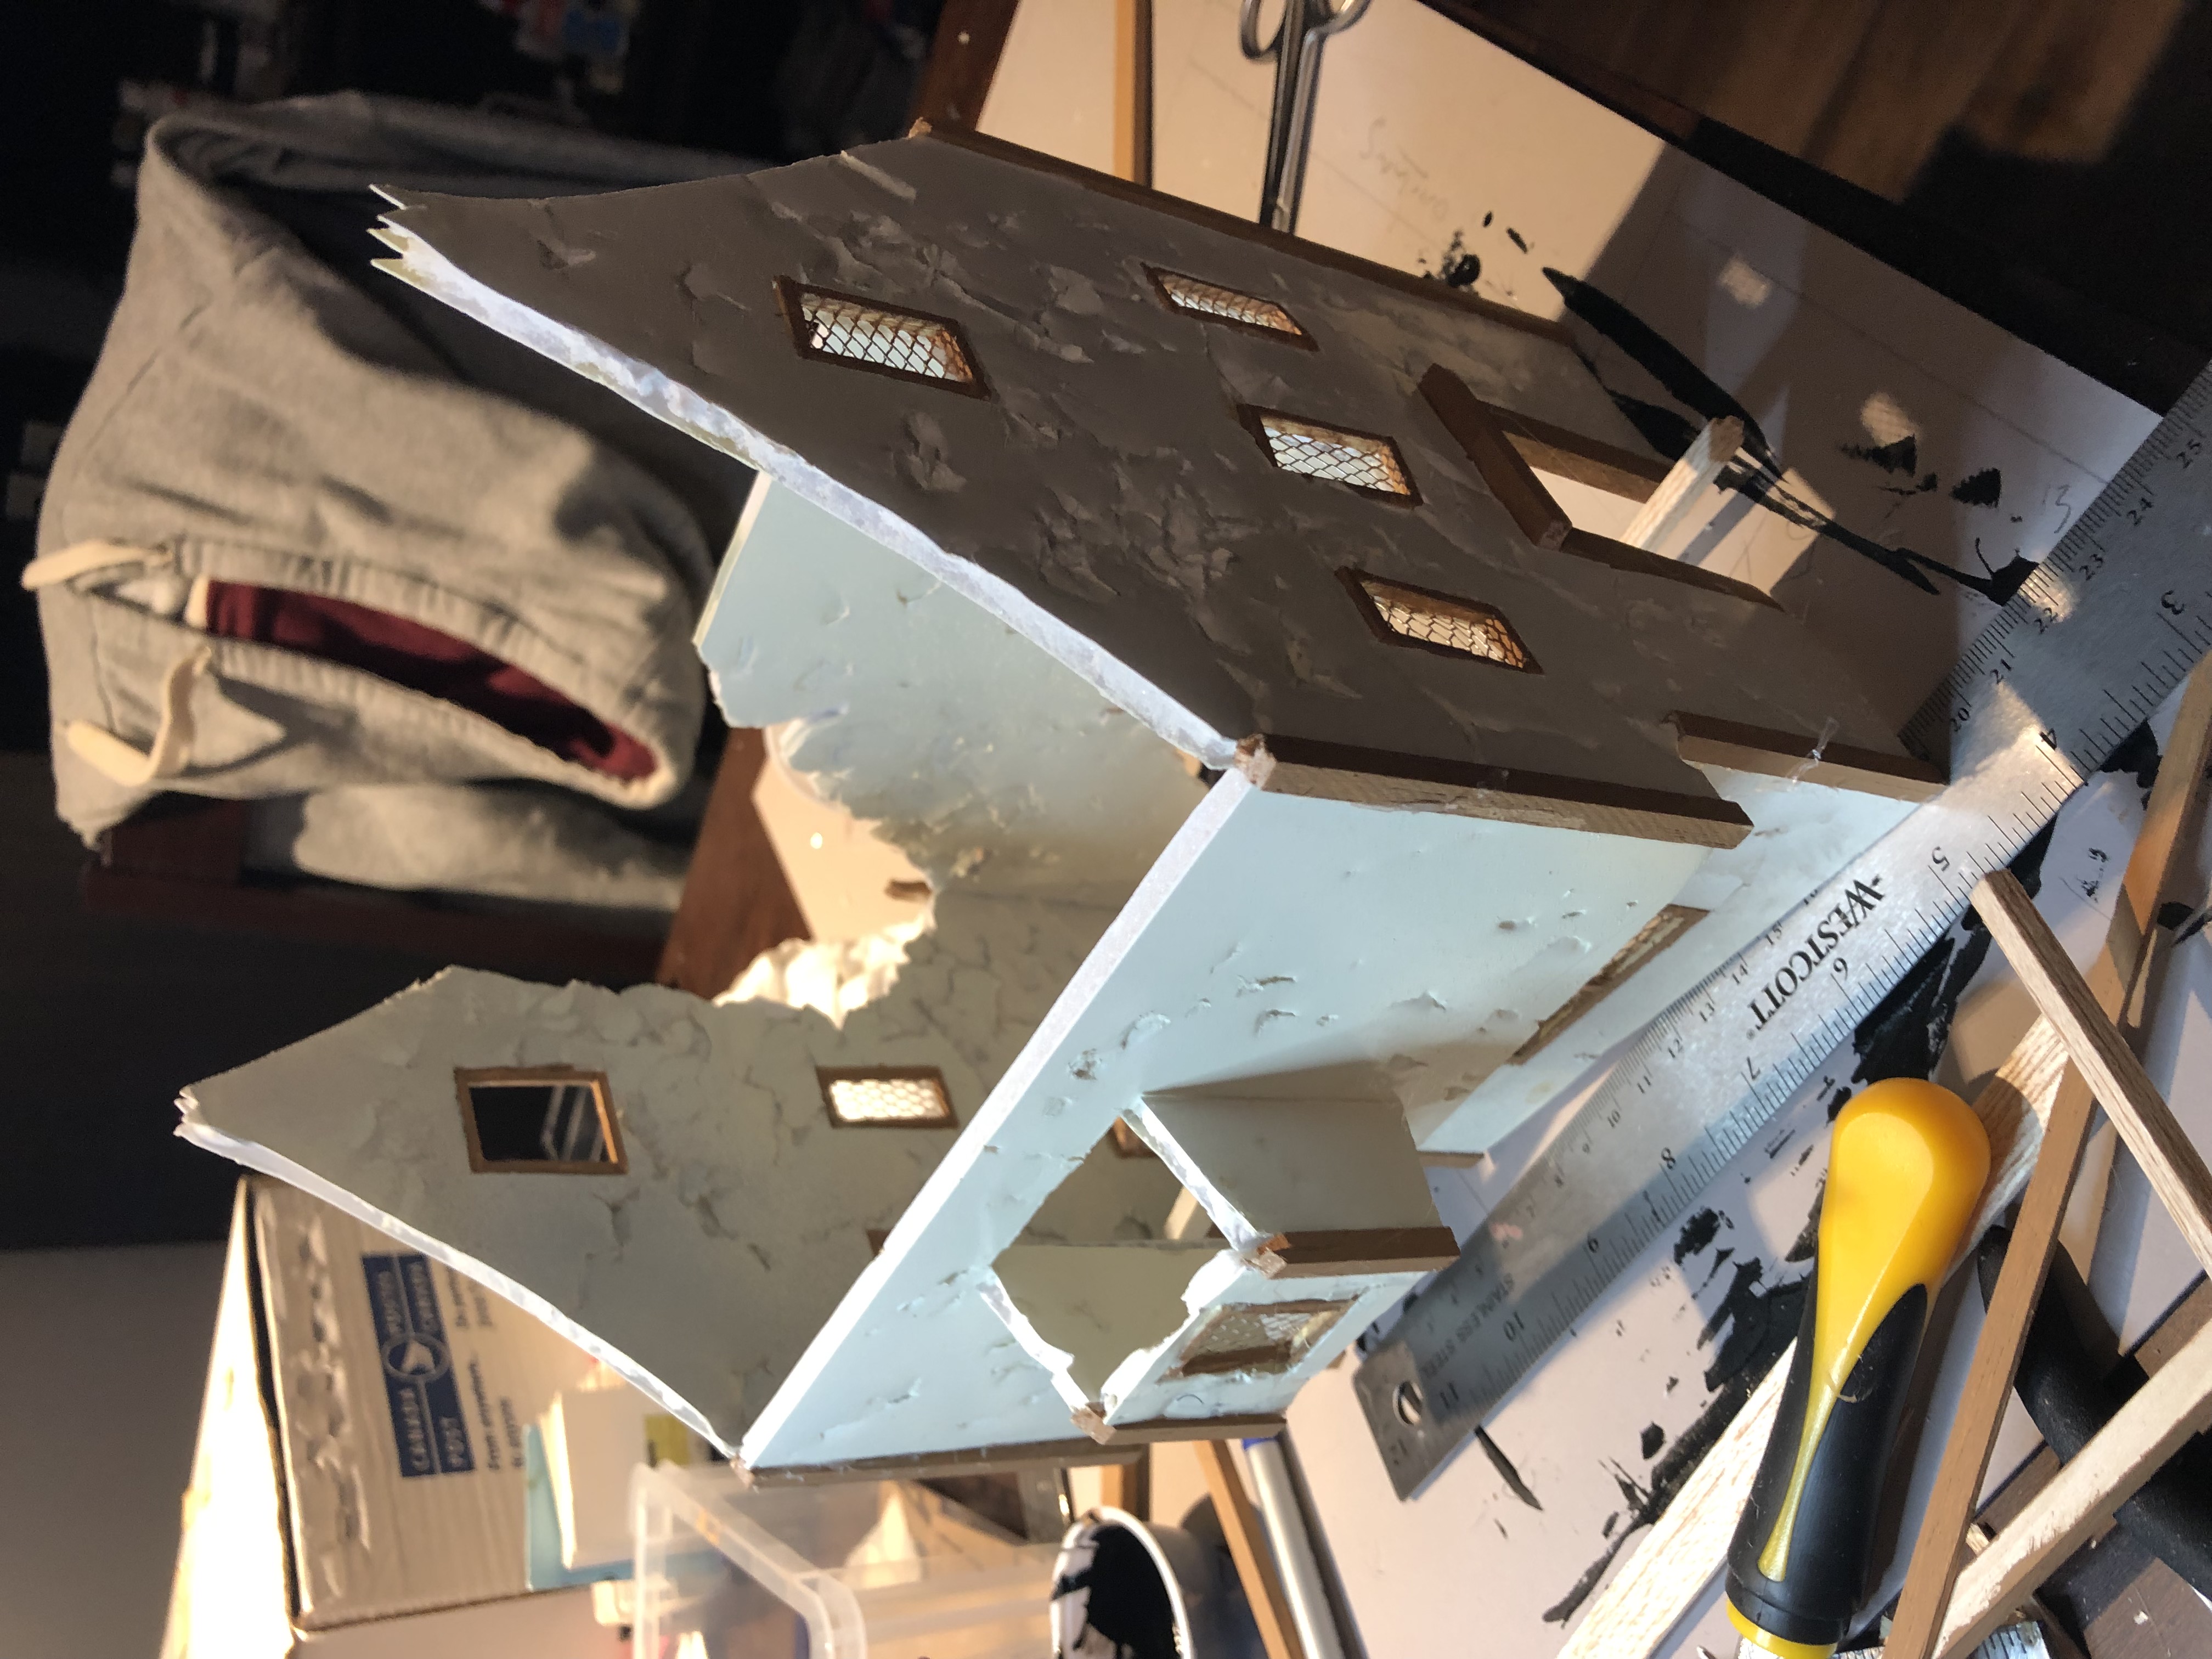 One part of the giant complex is a simple house
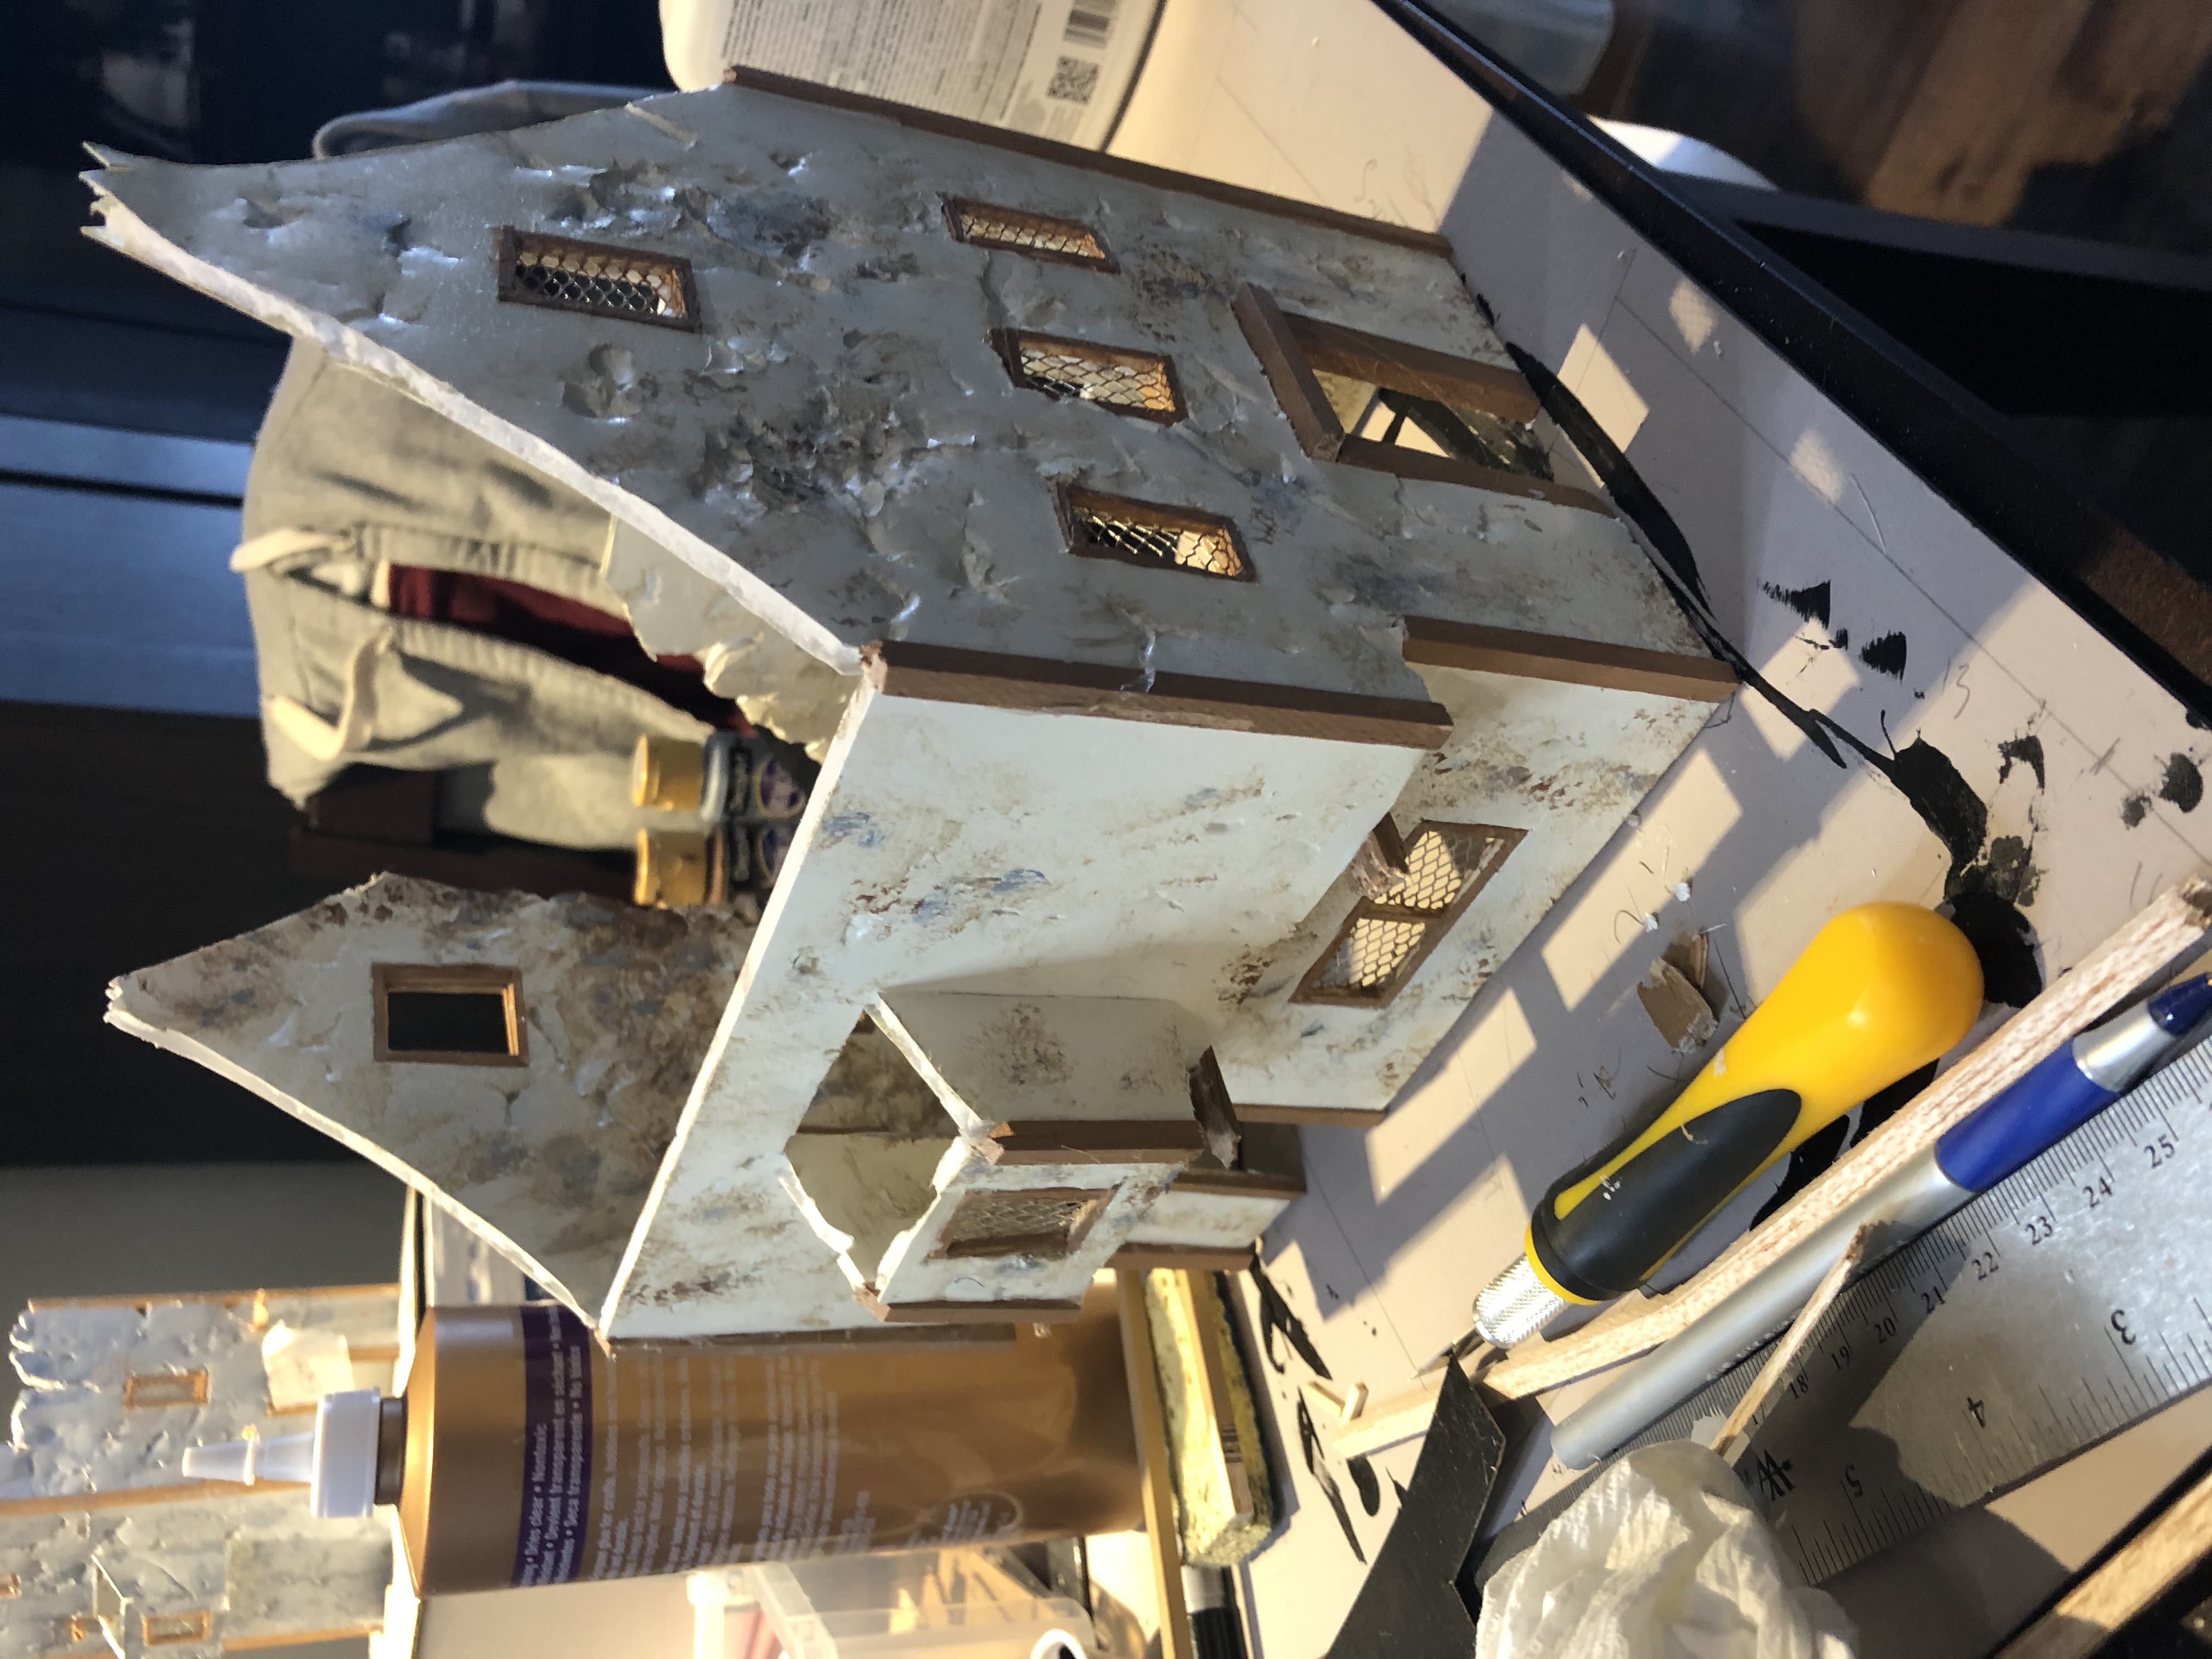 Same structure with a bit of sponge weathering
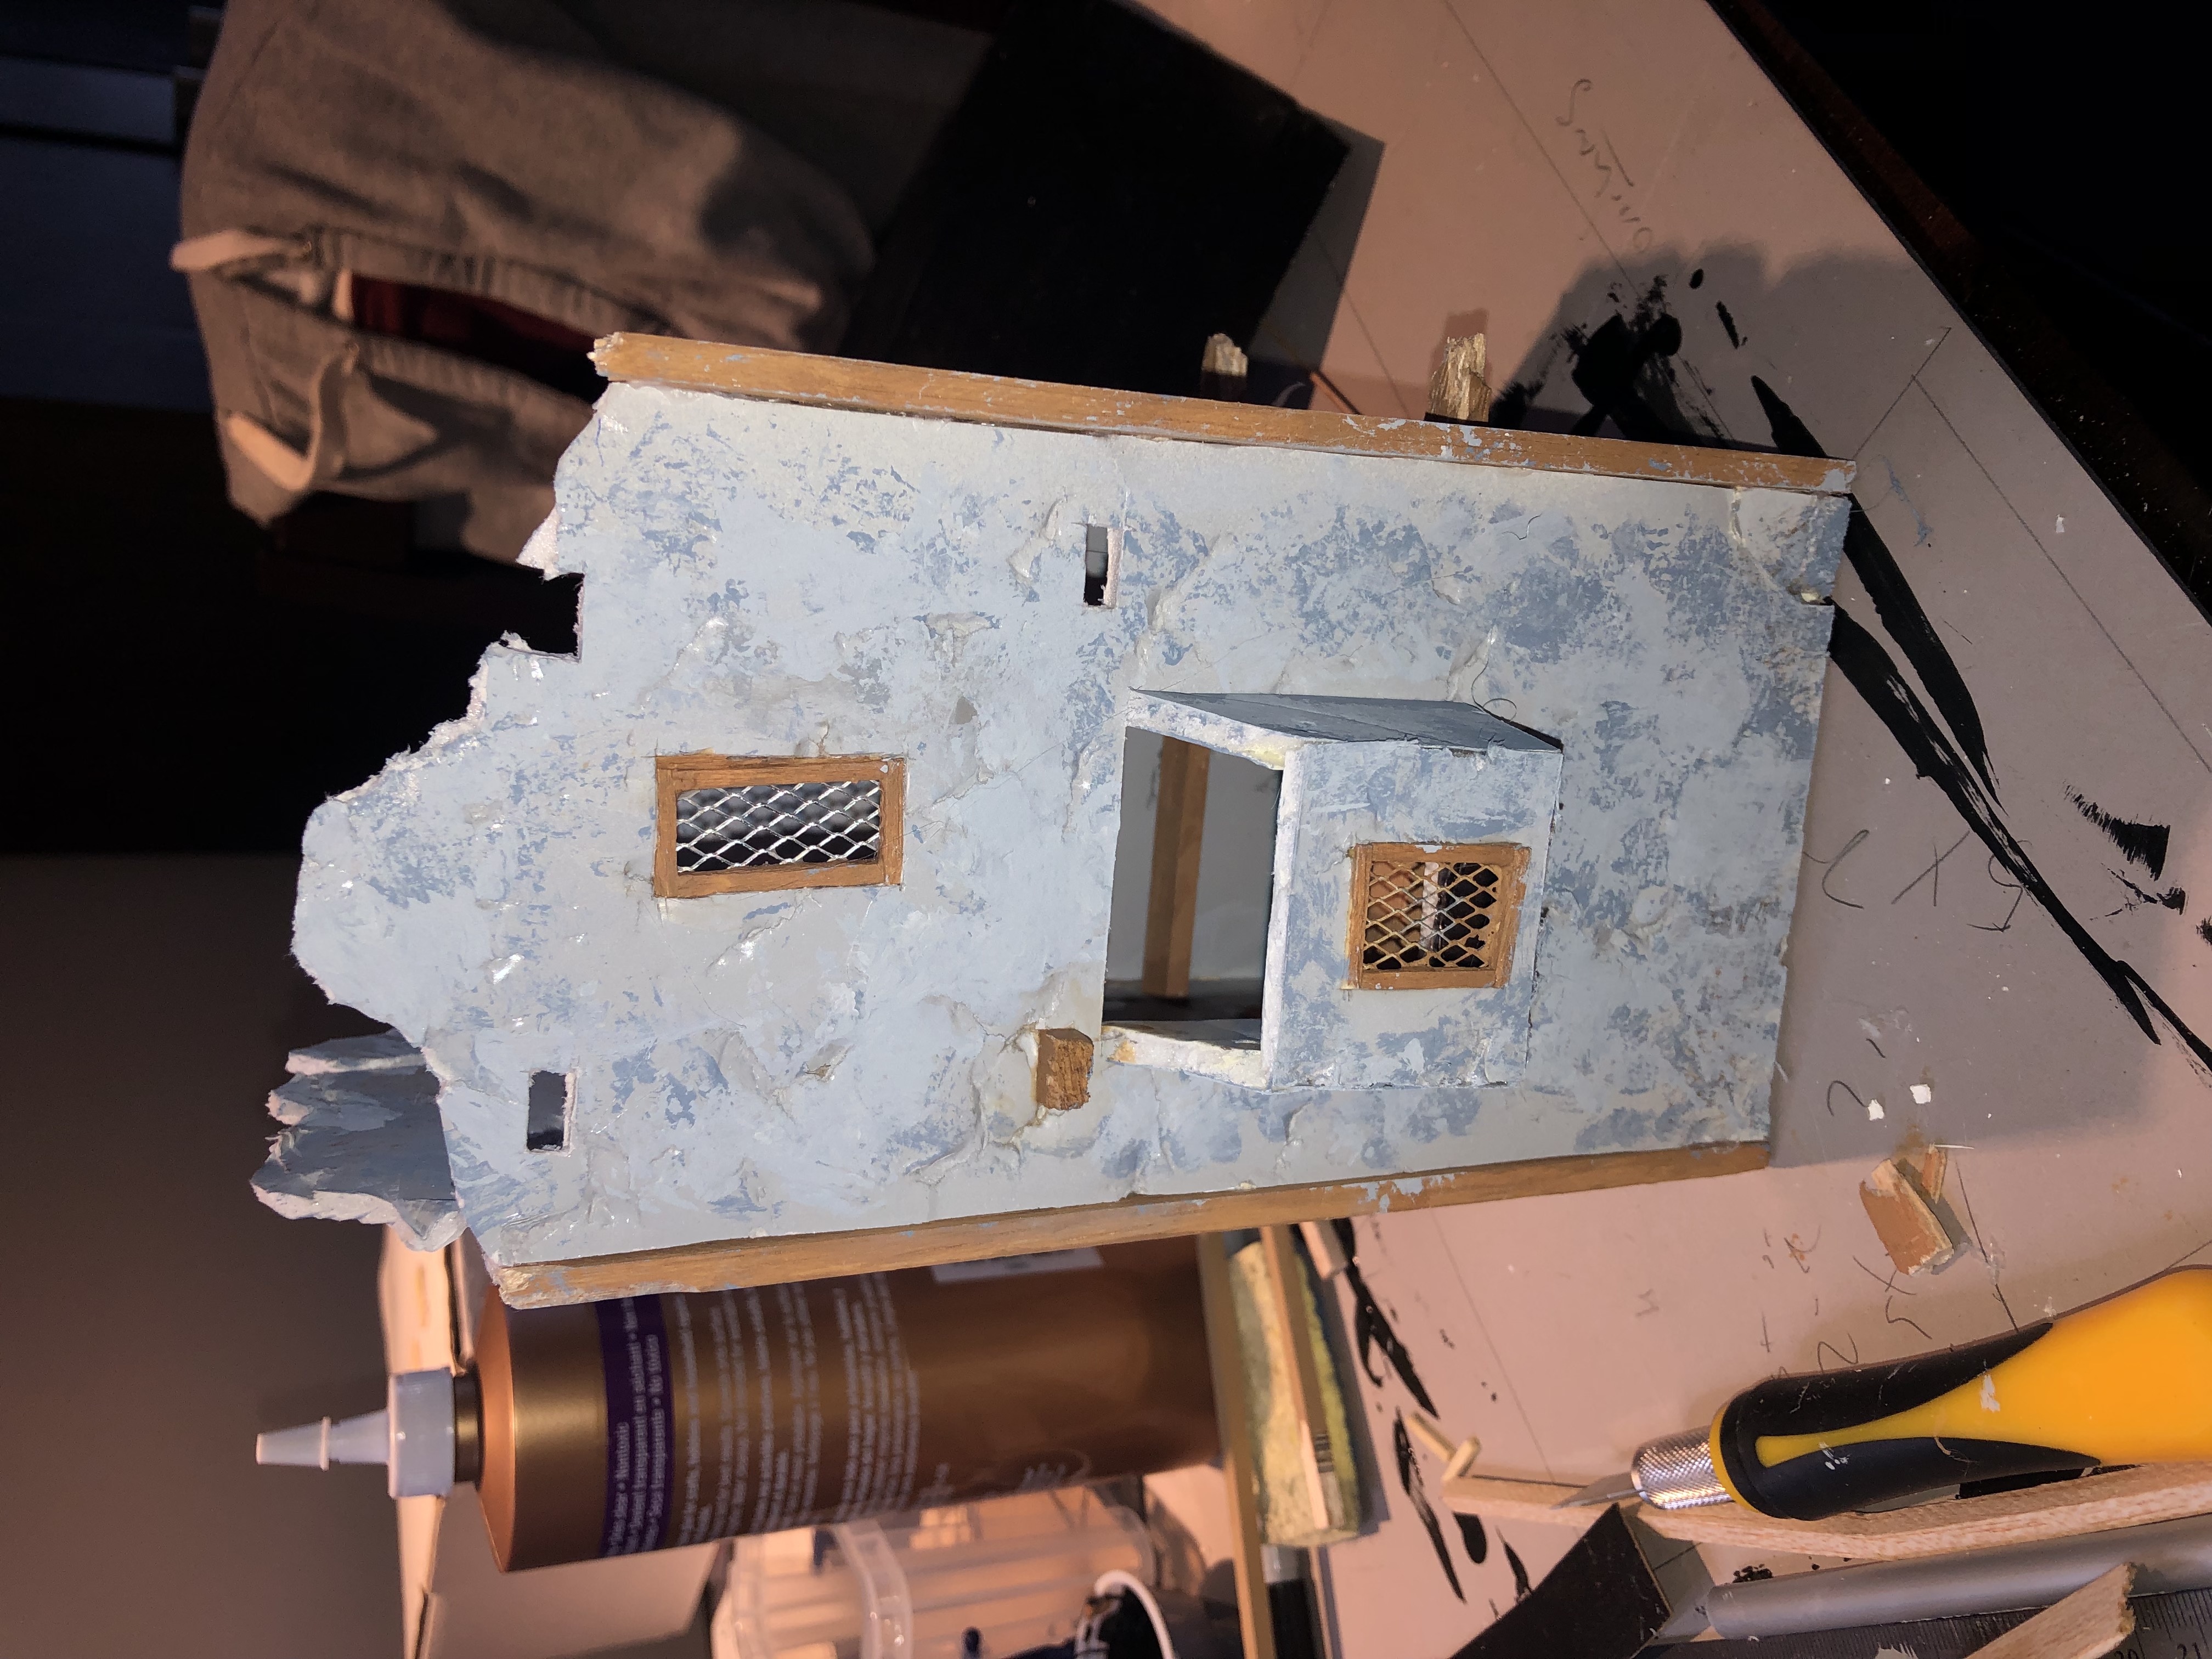
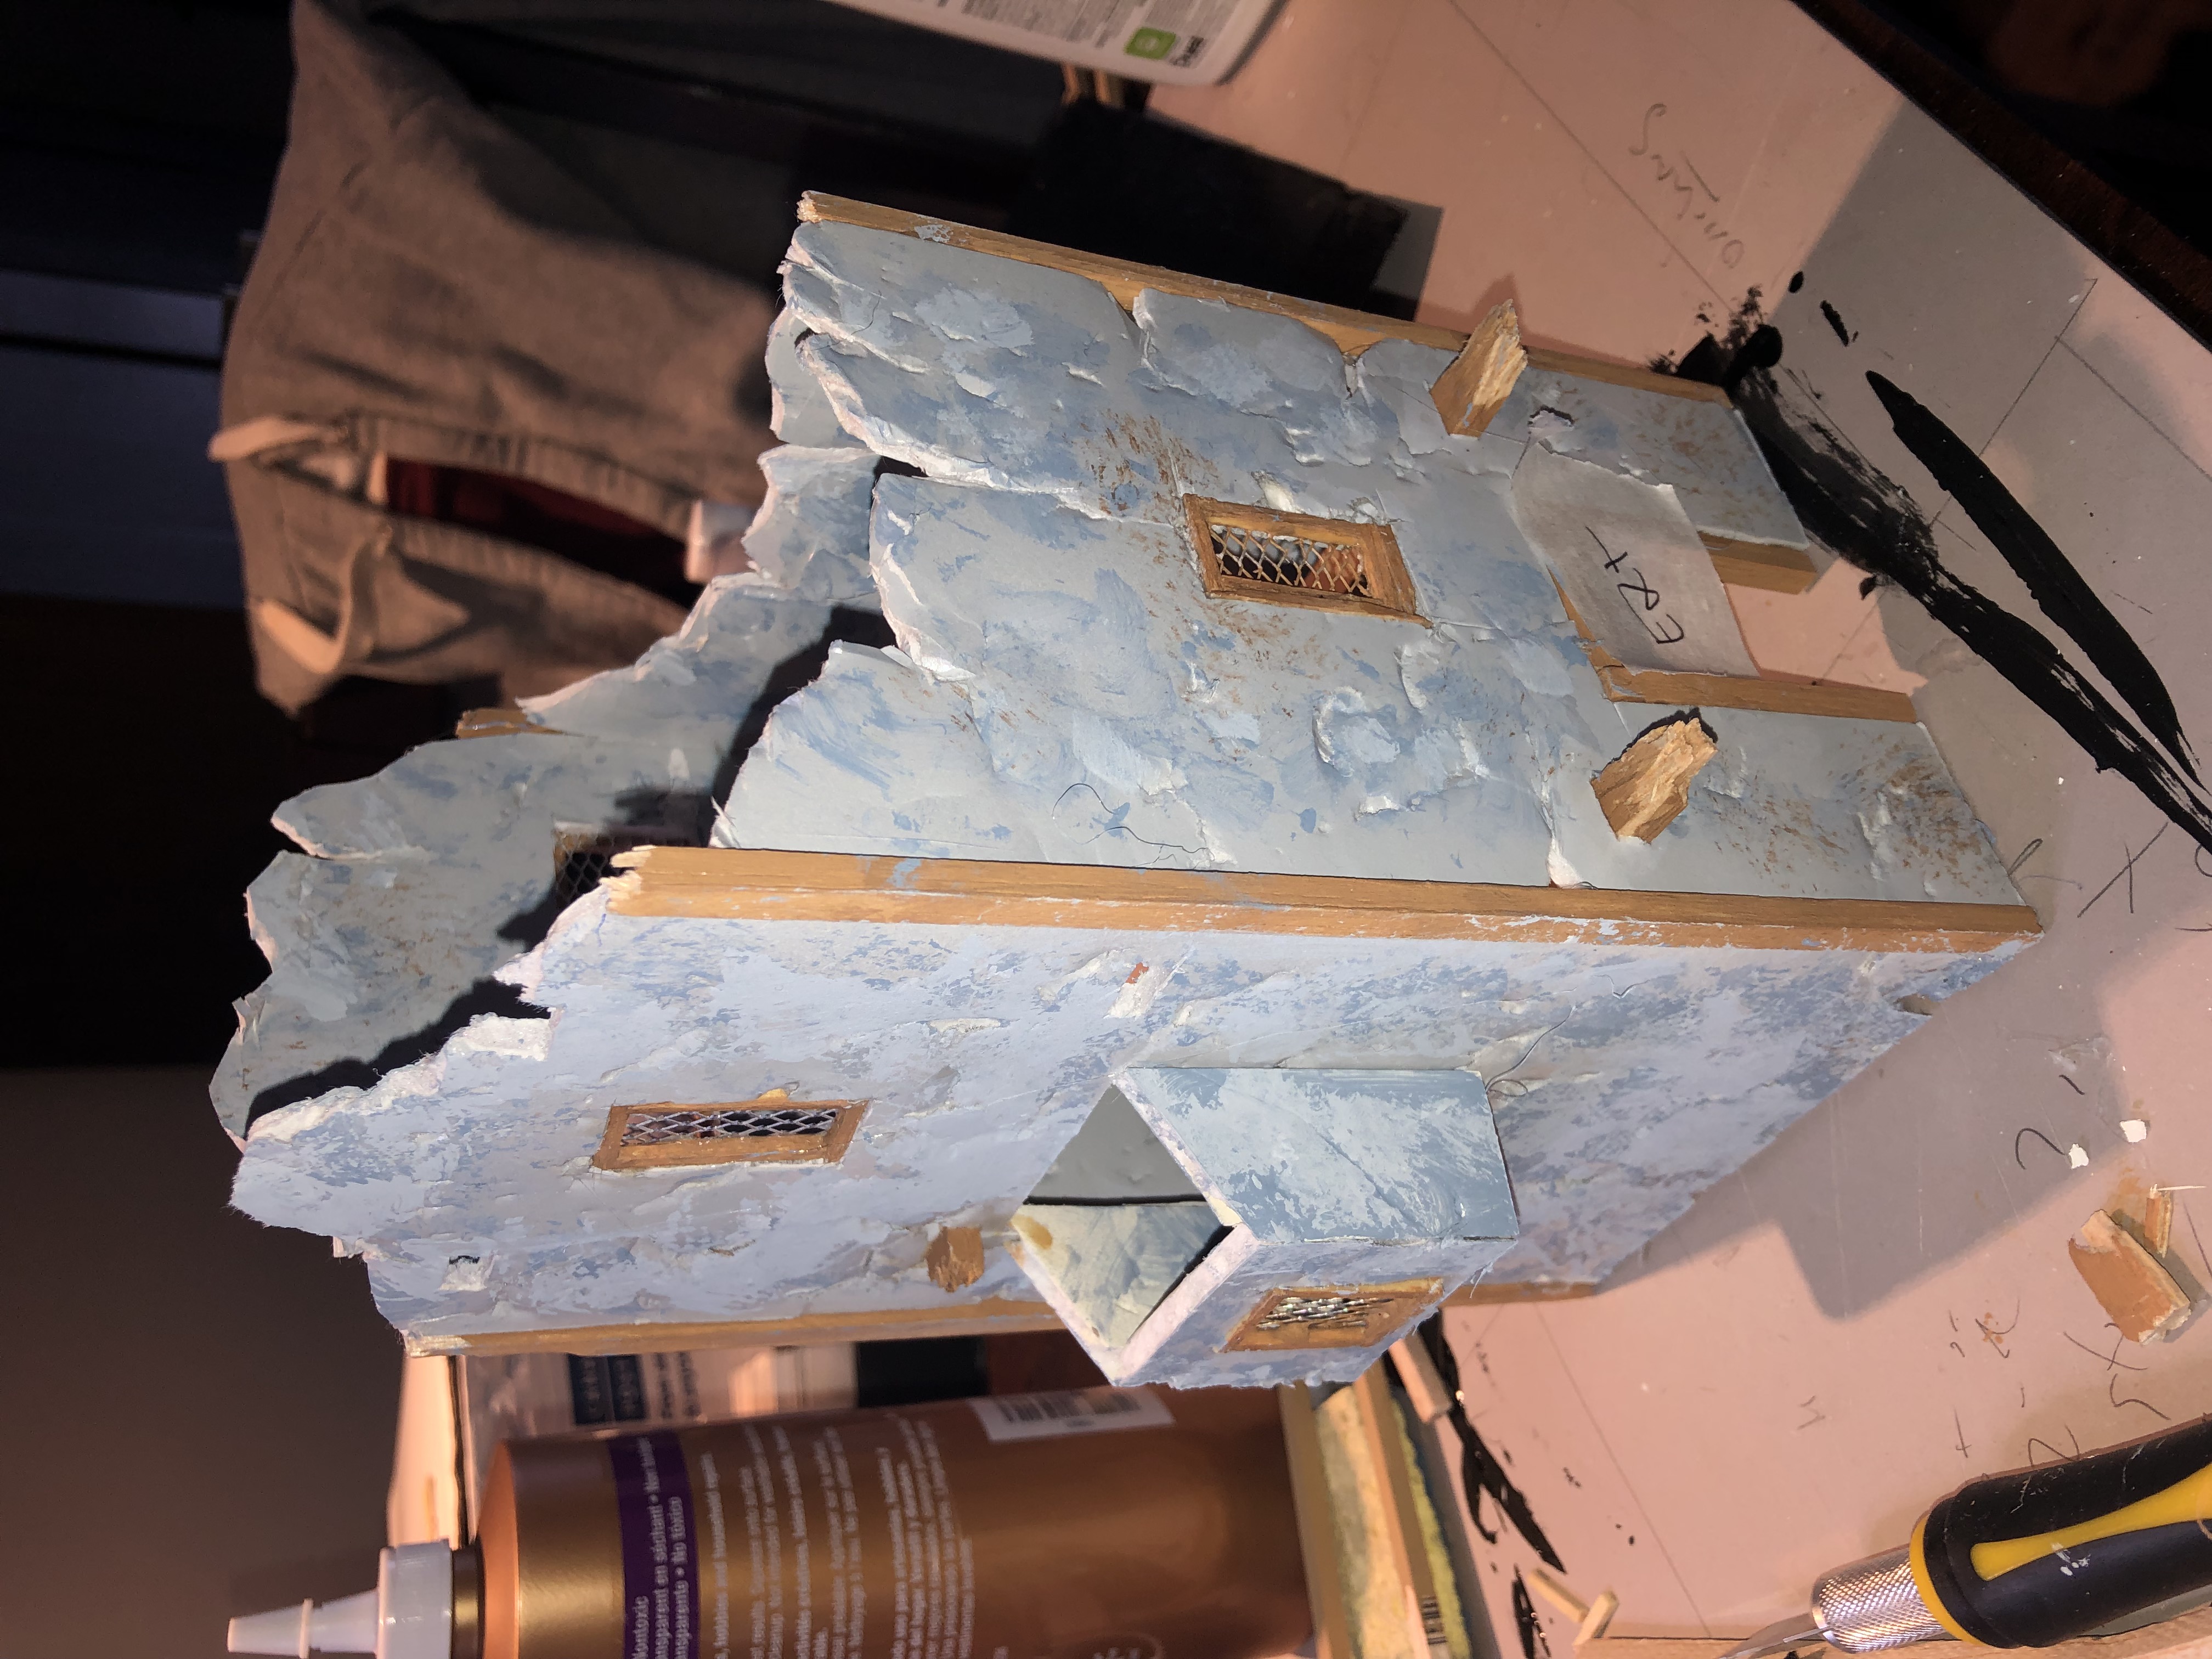
A simple square tower will be the other end of the building complex
Large Tower
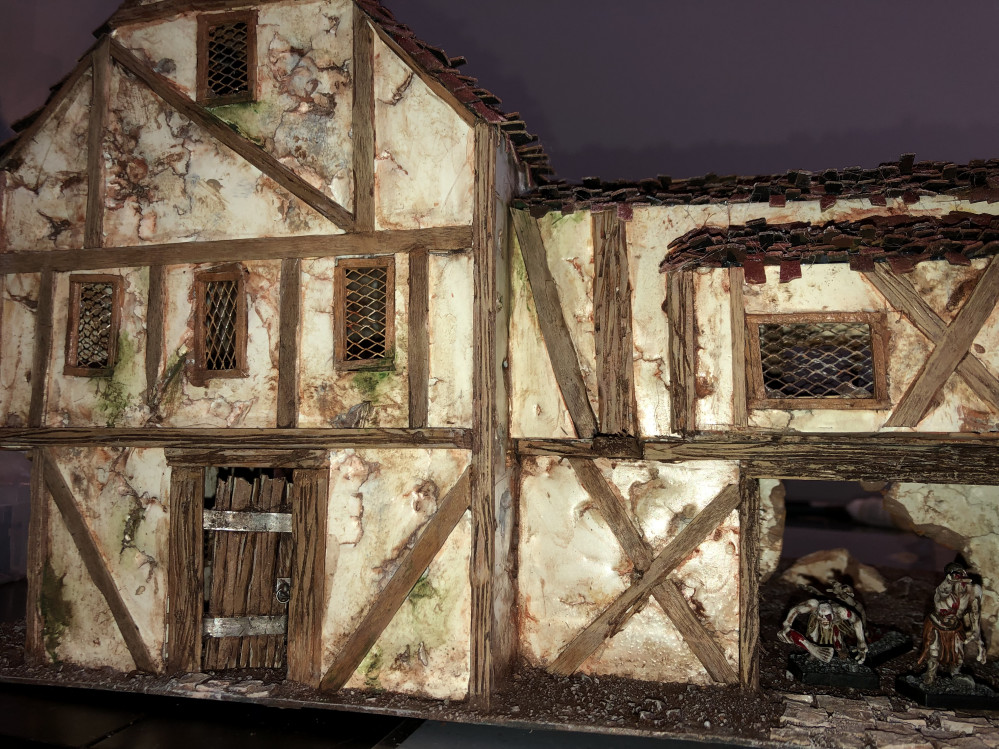
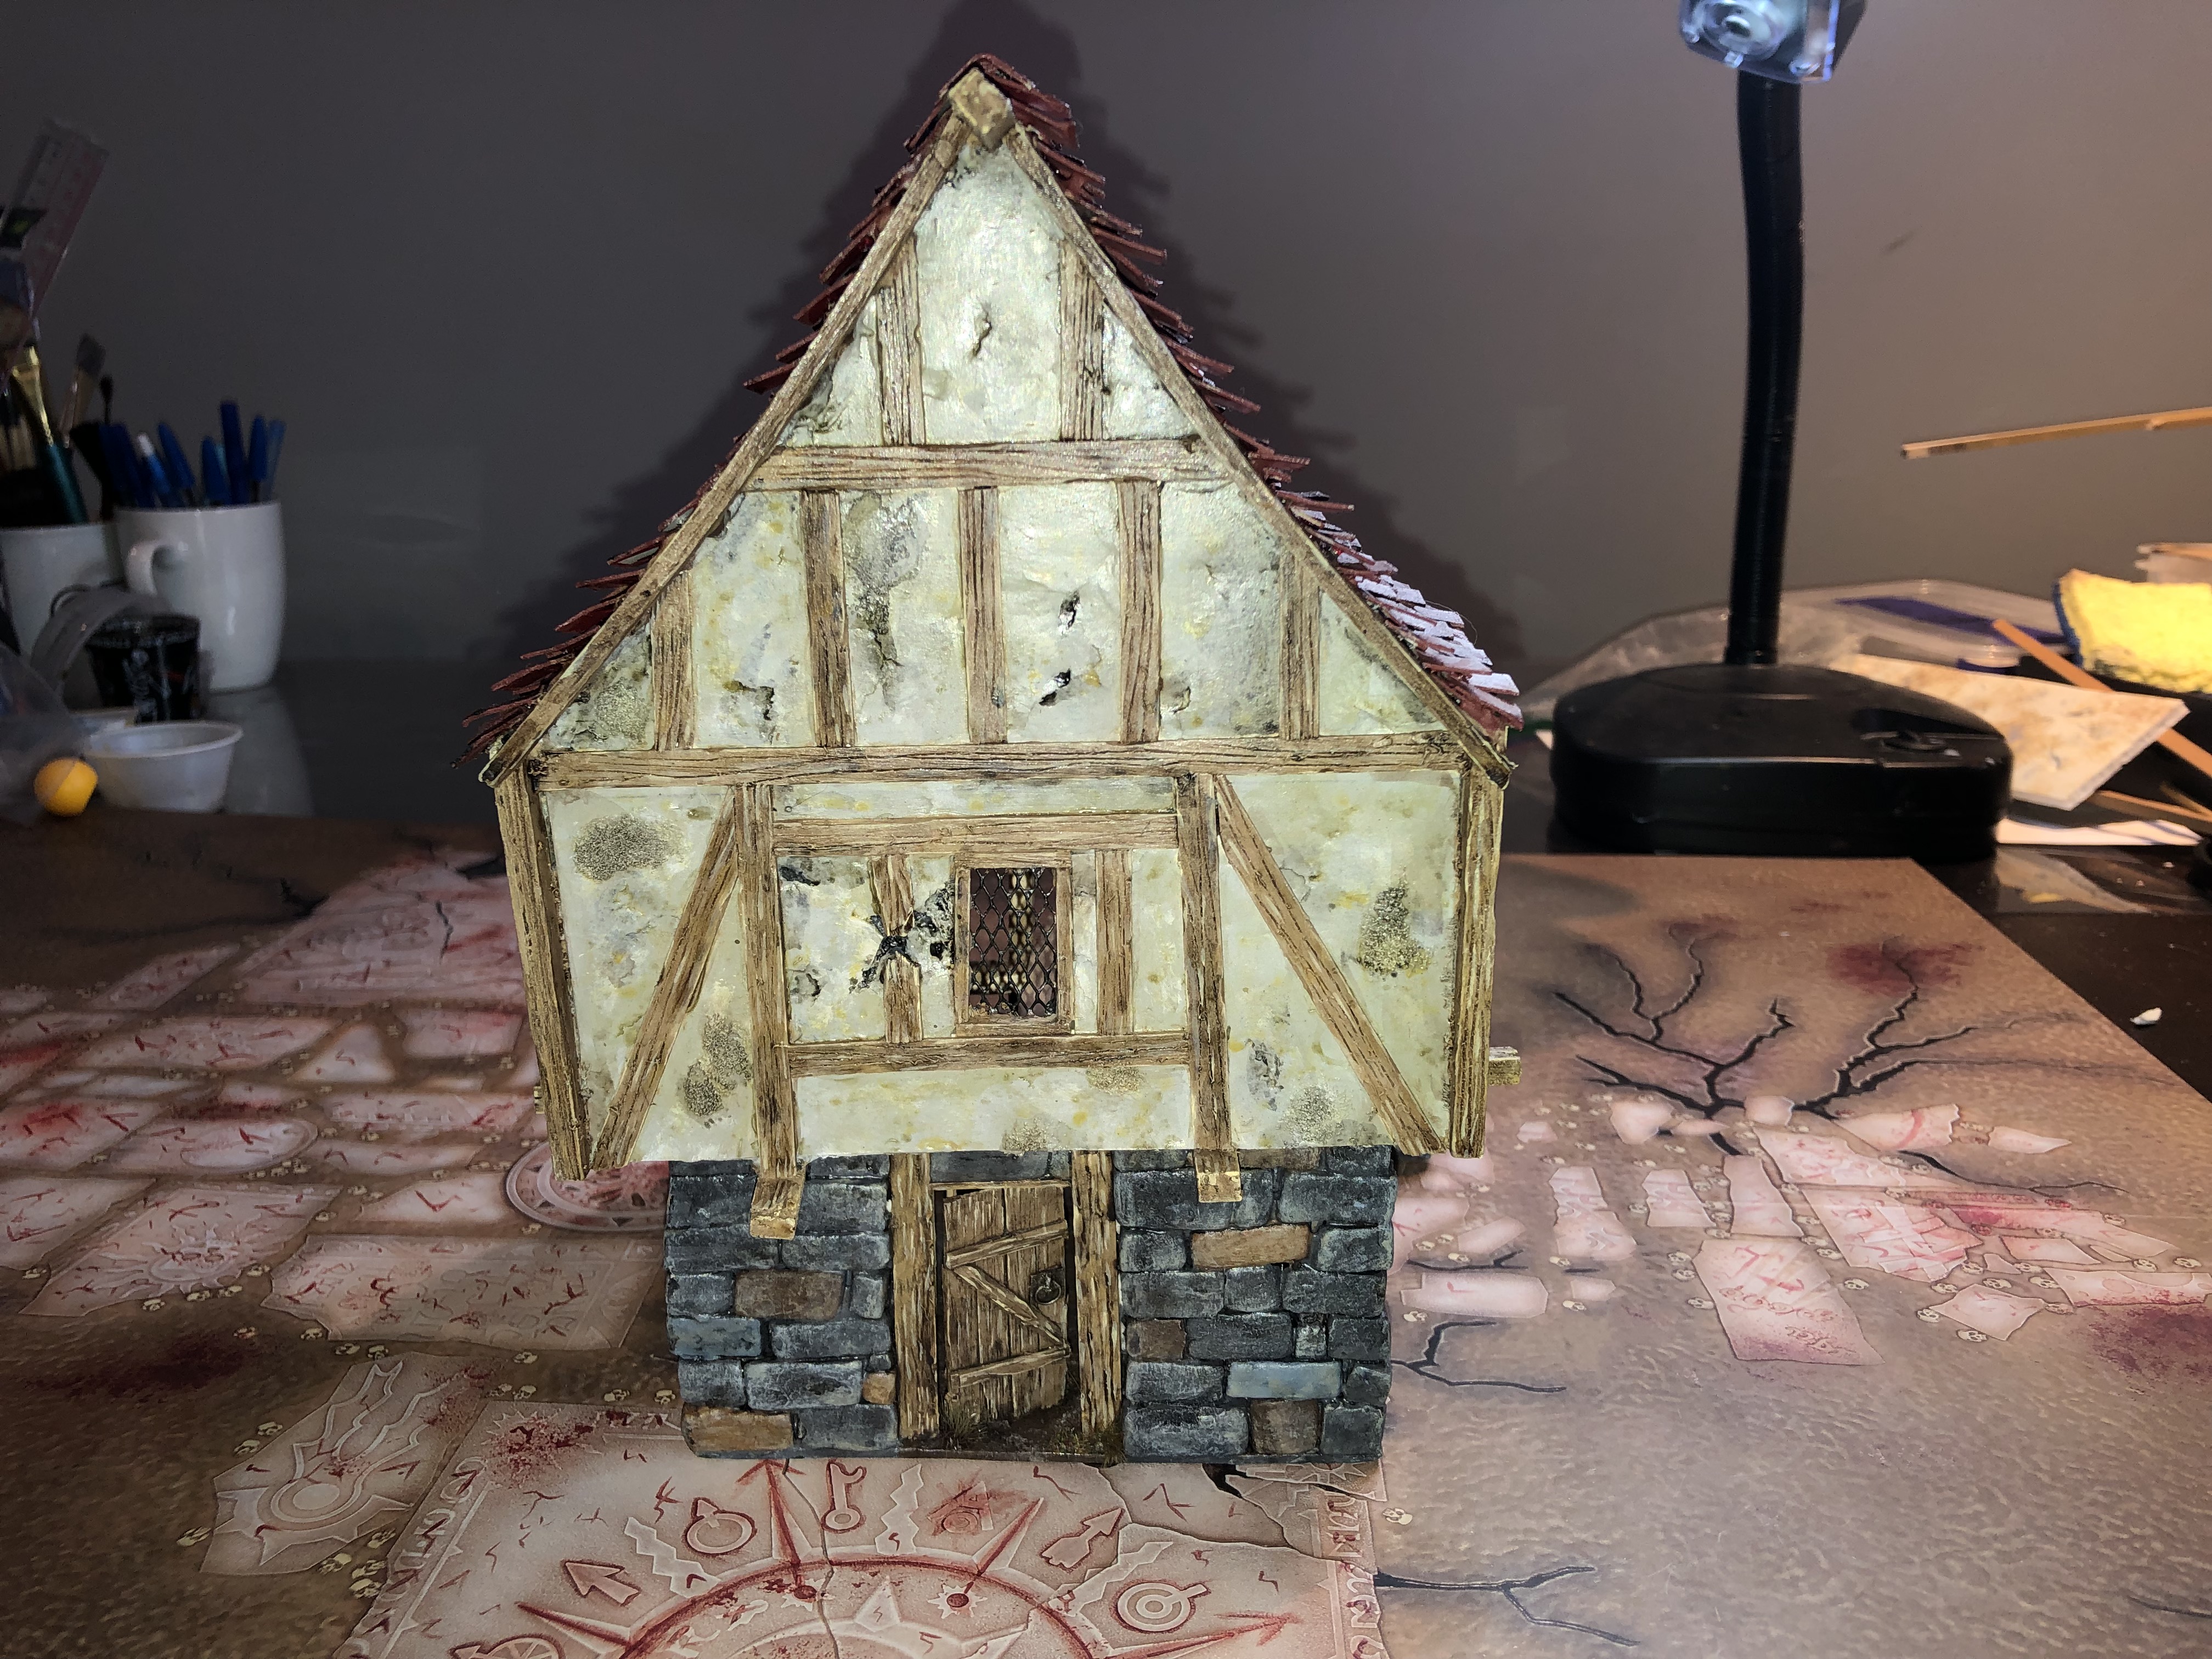
My favorite piece so far: it has a classic Tudor feel to it, although it is clearly a fantasy building. It is ruined, but not too much.
The walls were painted an off-white with a lot of weathering over it. I think it looks better than a beige primer.
The roof tiles are smaller than my first two buildings and I added some backing soda/mod podge mix to add a bit of texture to it.
Playability-wise: the first story can easily be accessed by a small ladder. There is enough room to place and move models anywhere within the building.

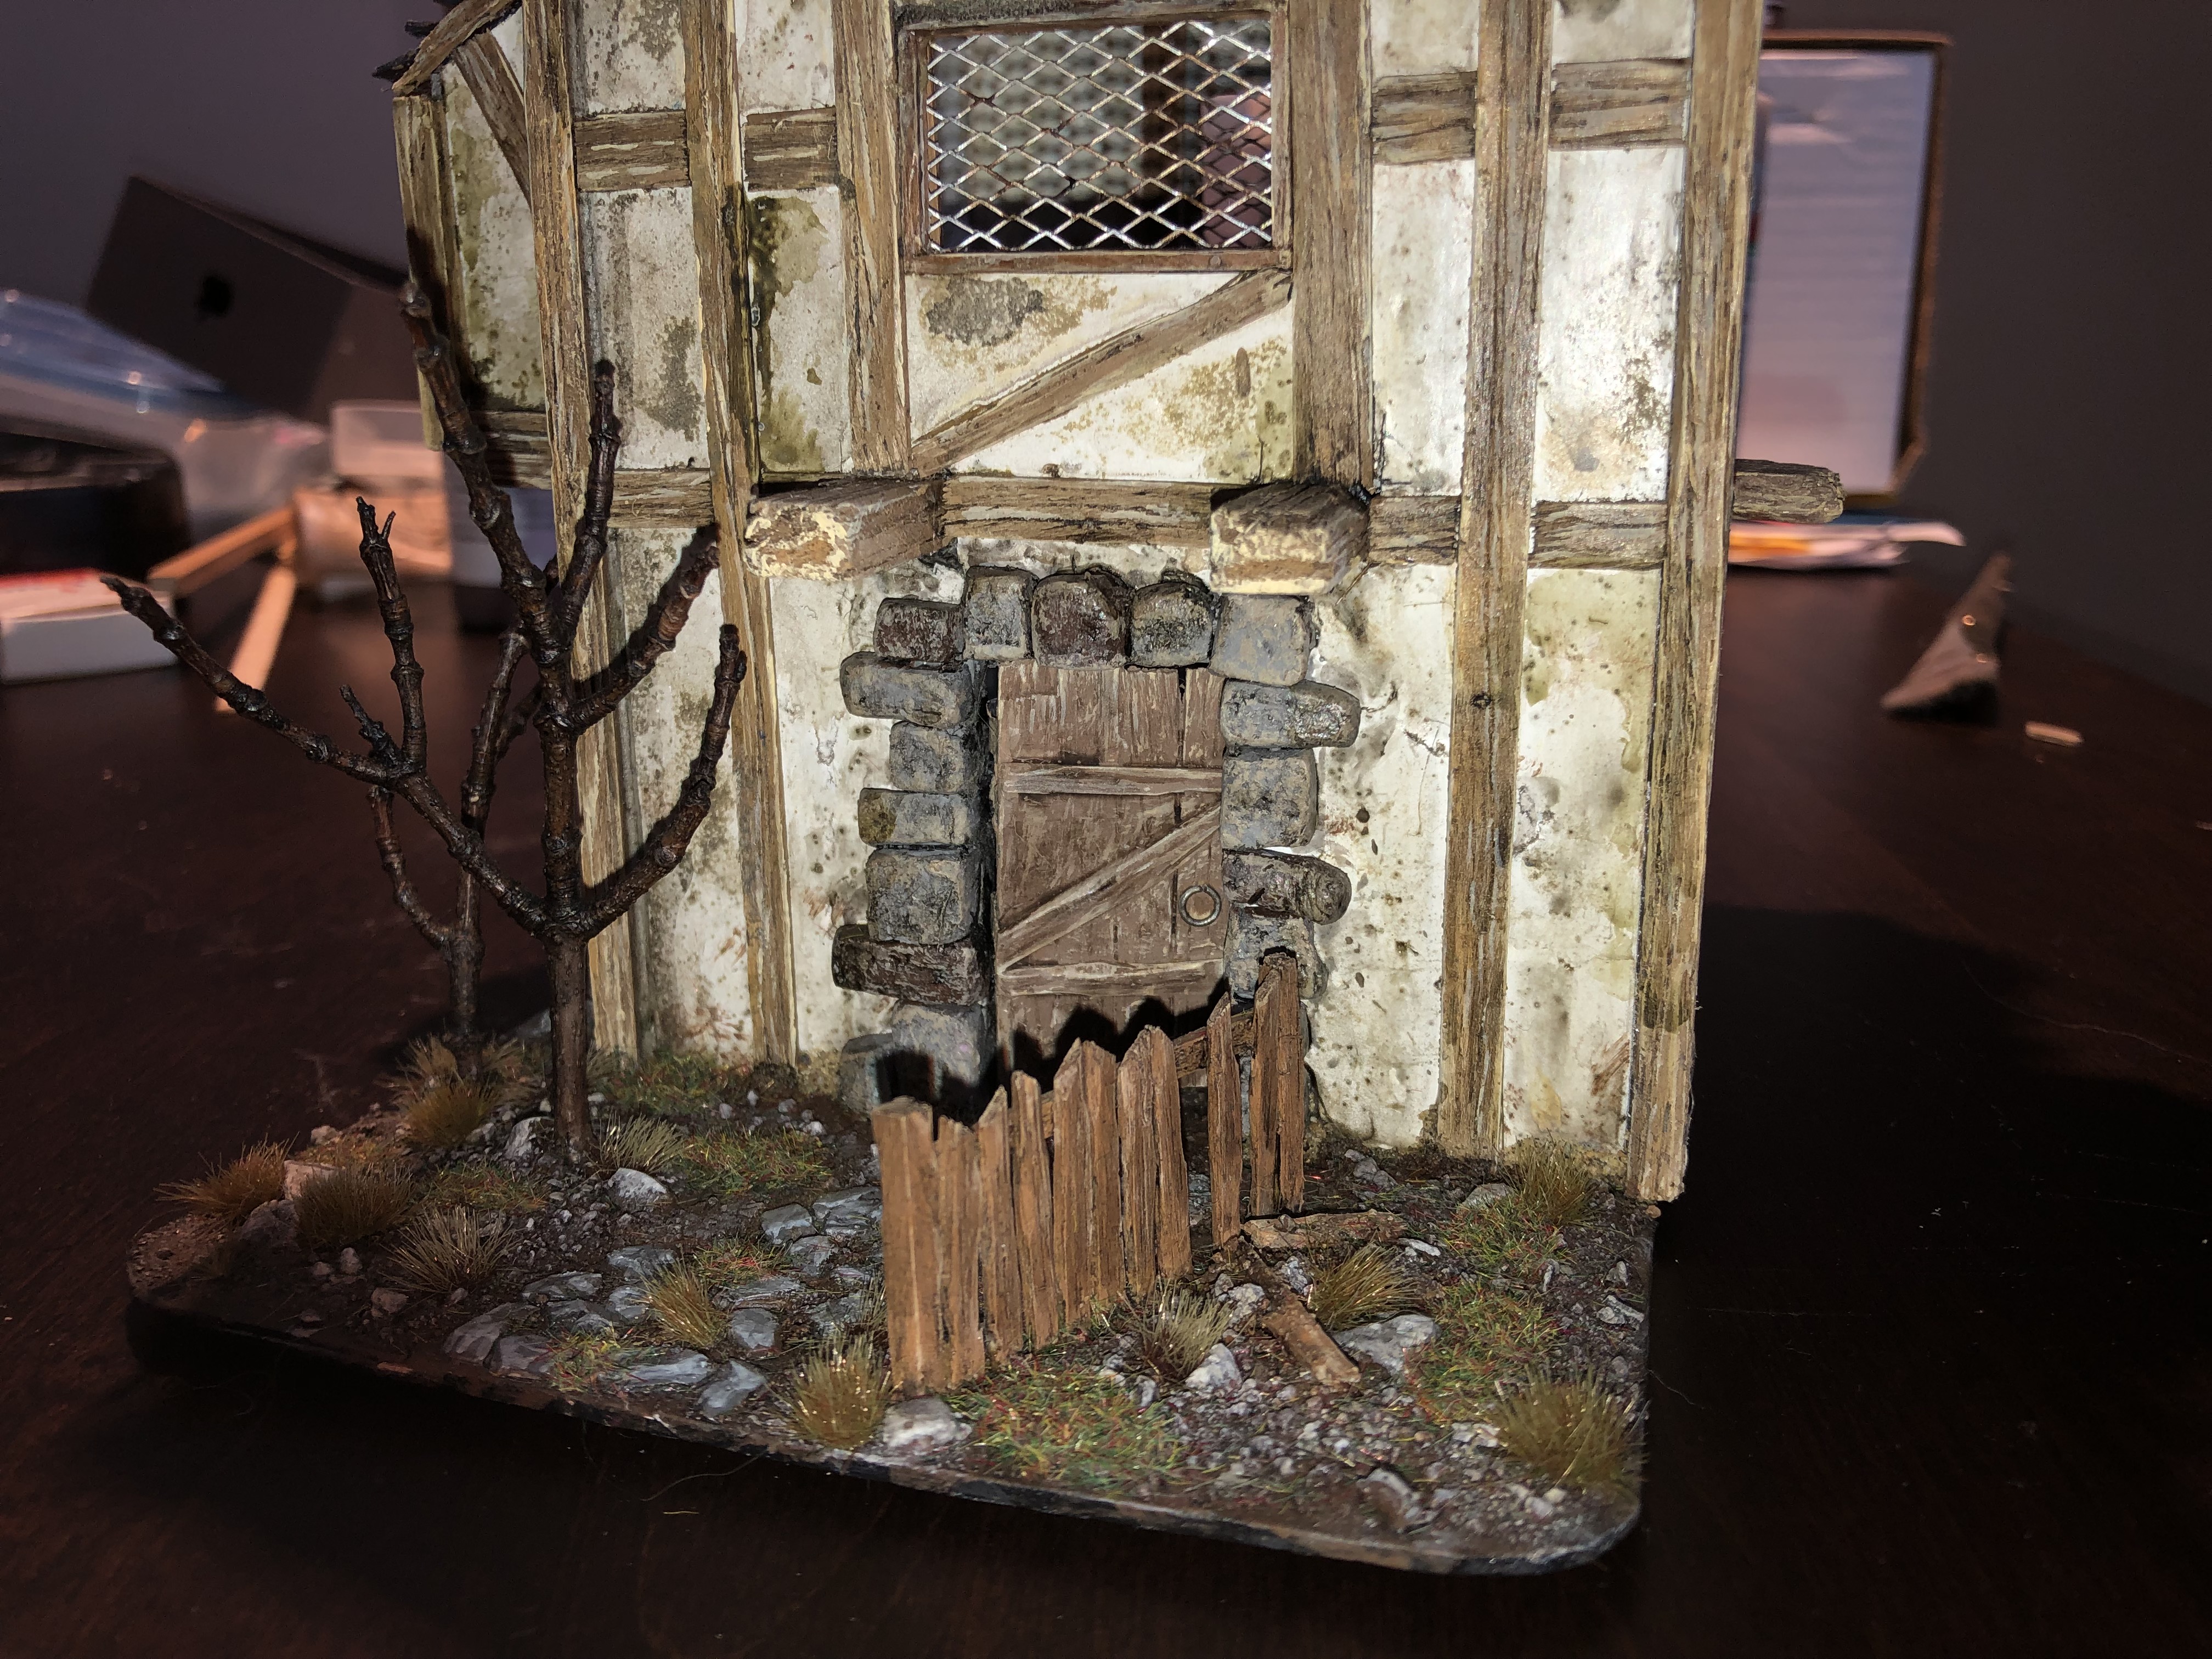 Once again, the trees and the wooden fence that is falling apart adds an interesting gloomy feature.
My next blog entry should be about my current work-in-progress three-part giant building ?
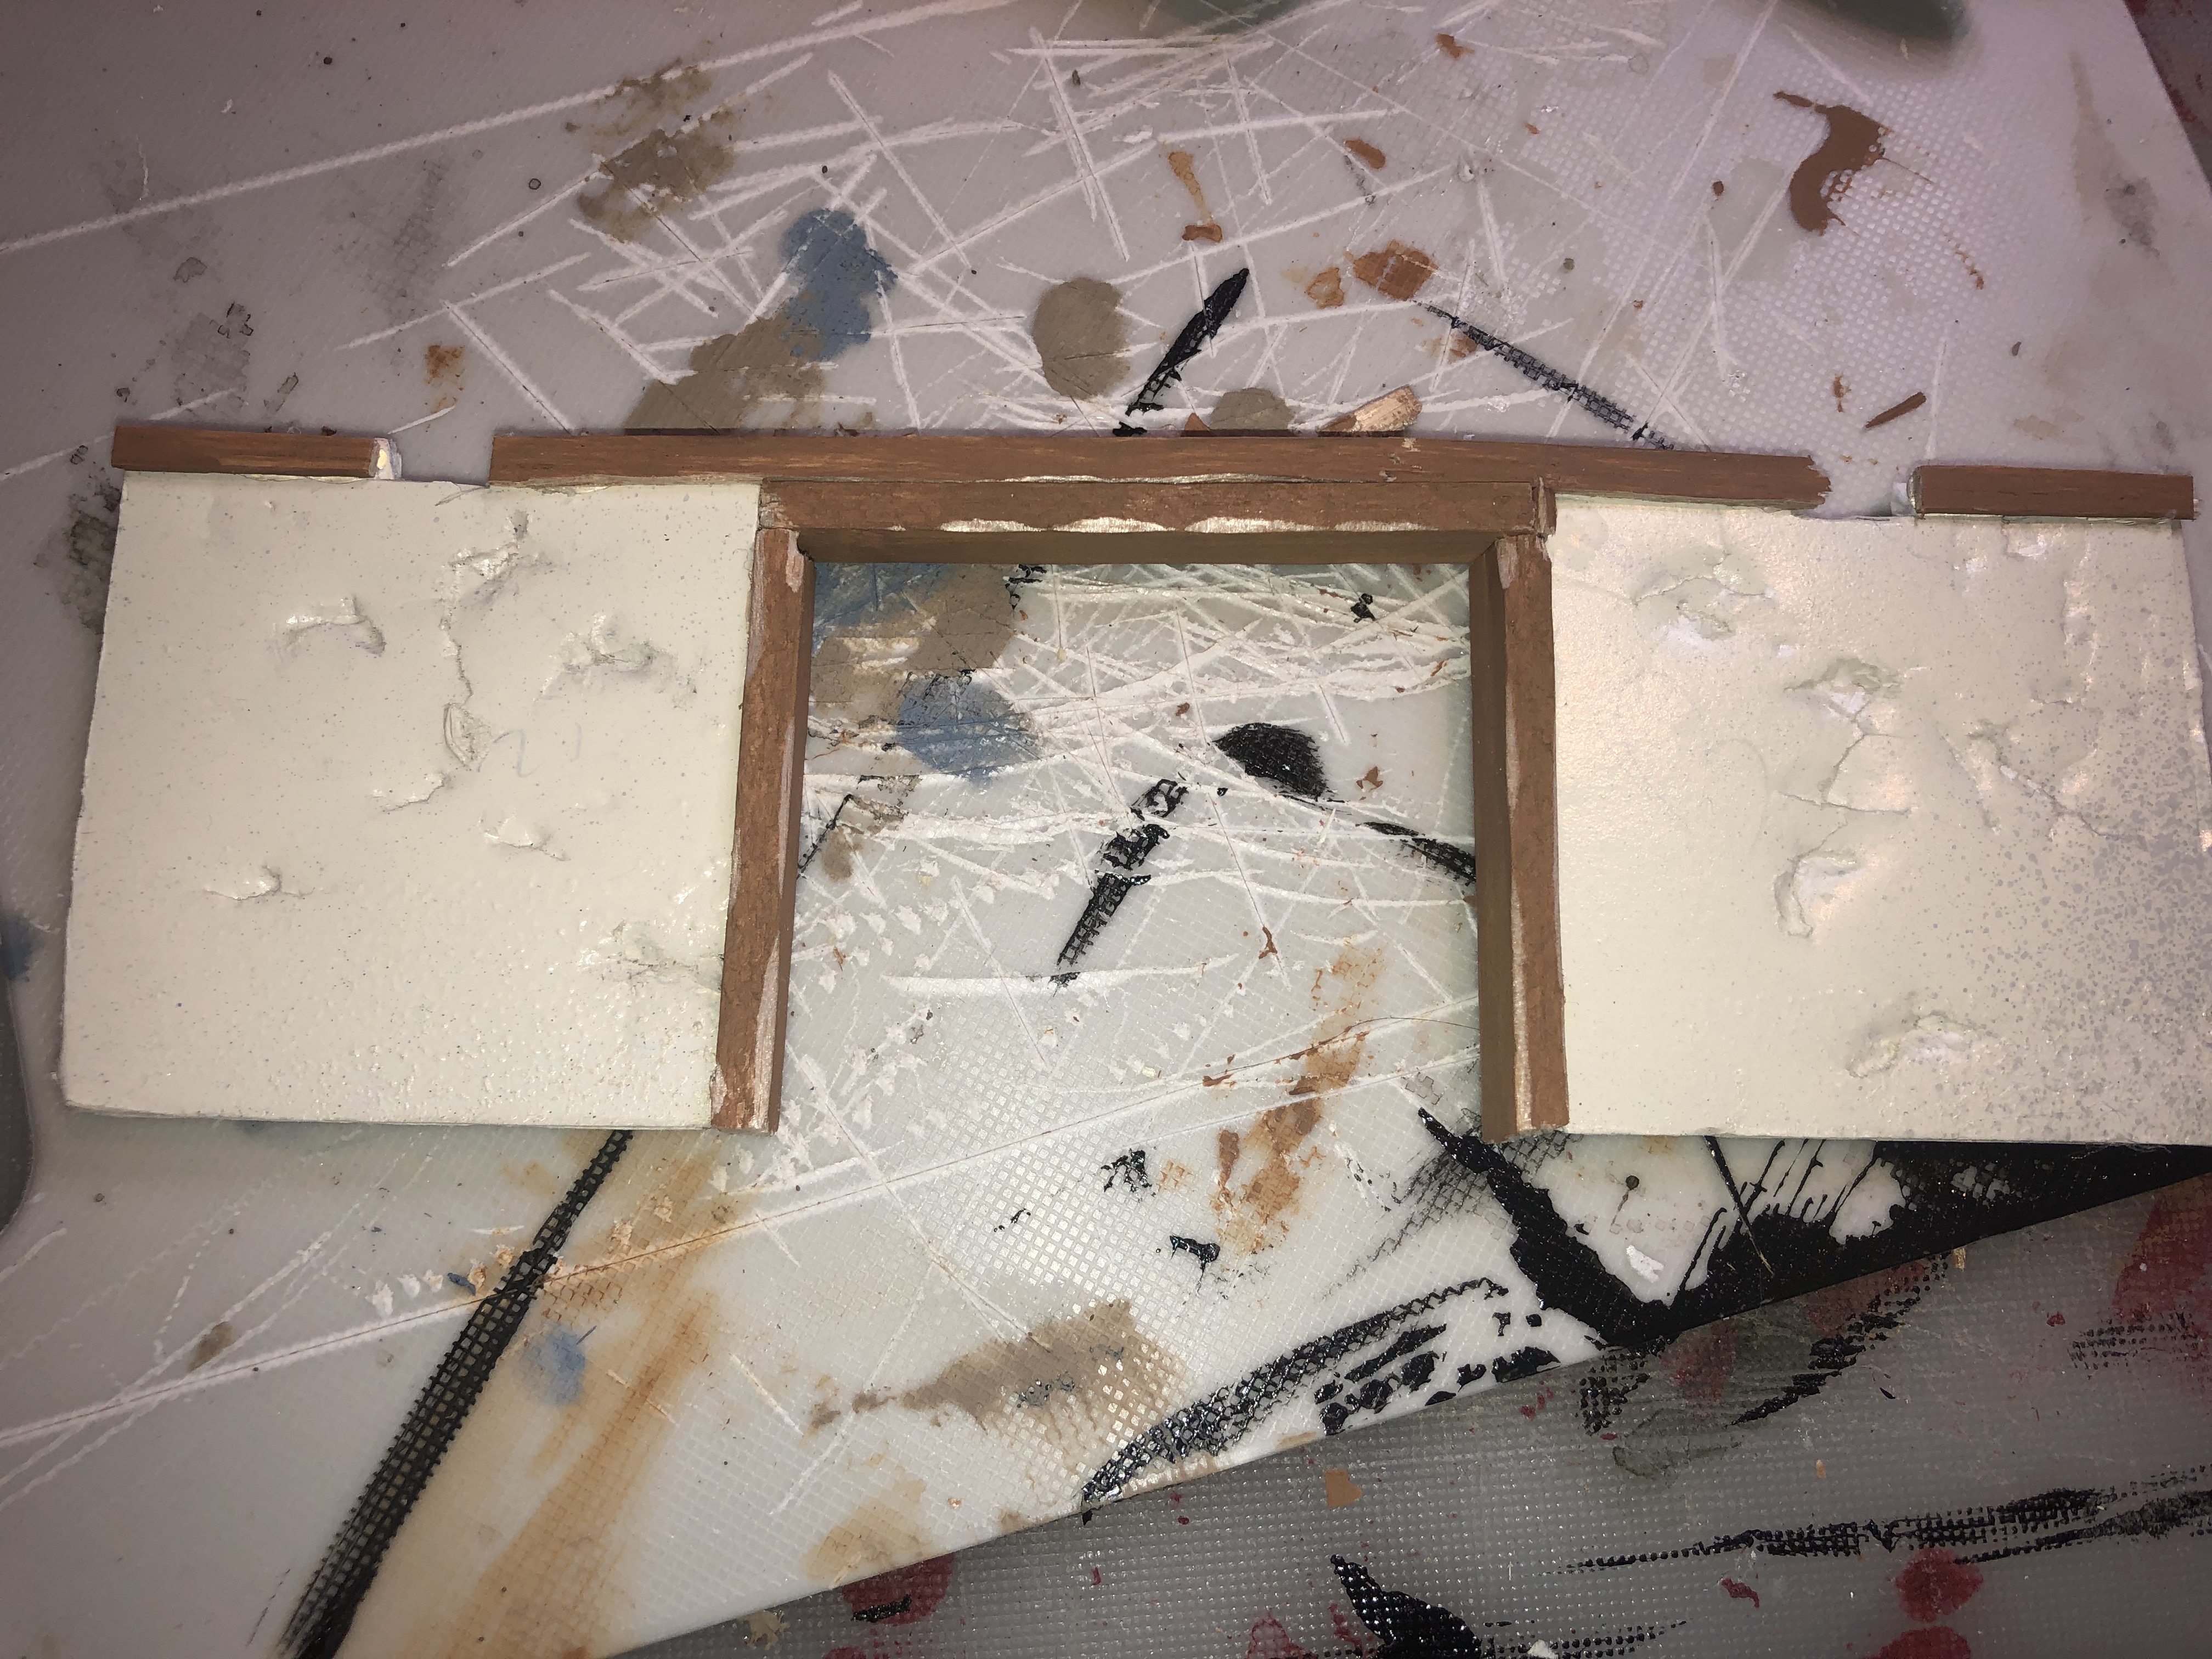
Crafting Windows (A quick and easy guide
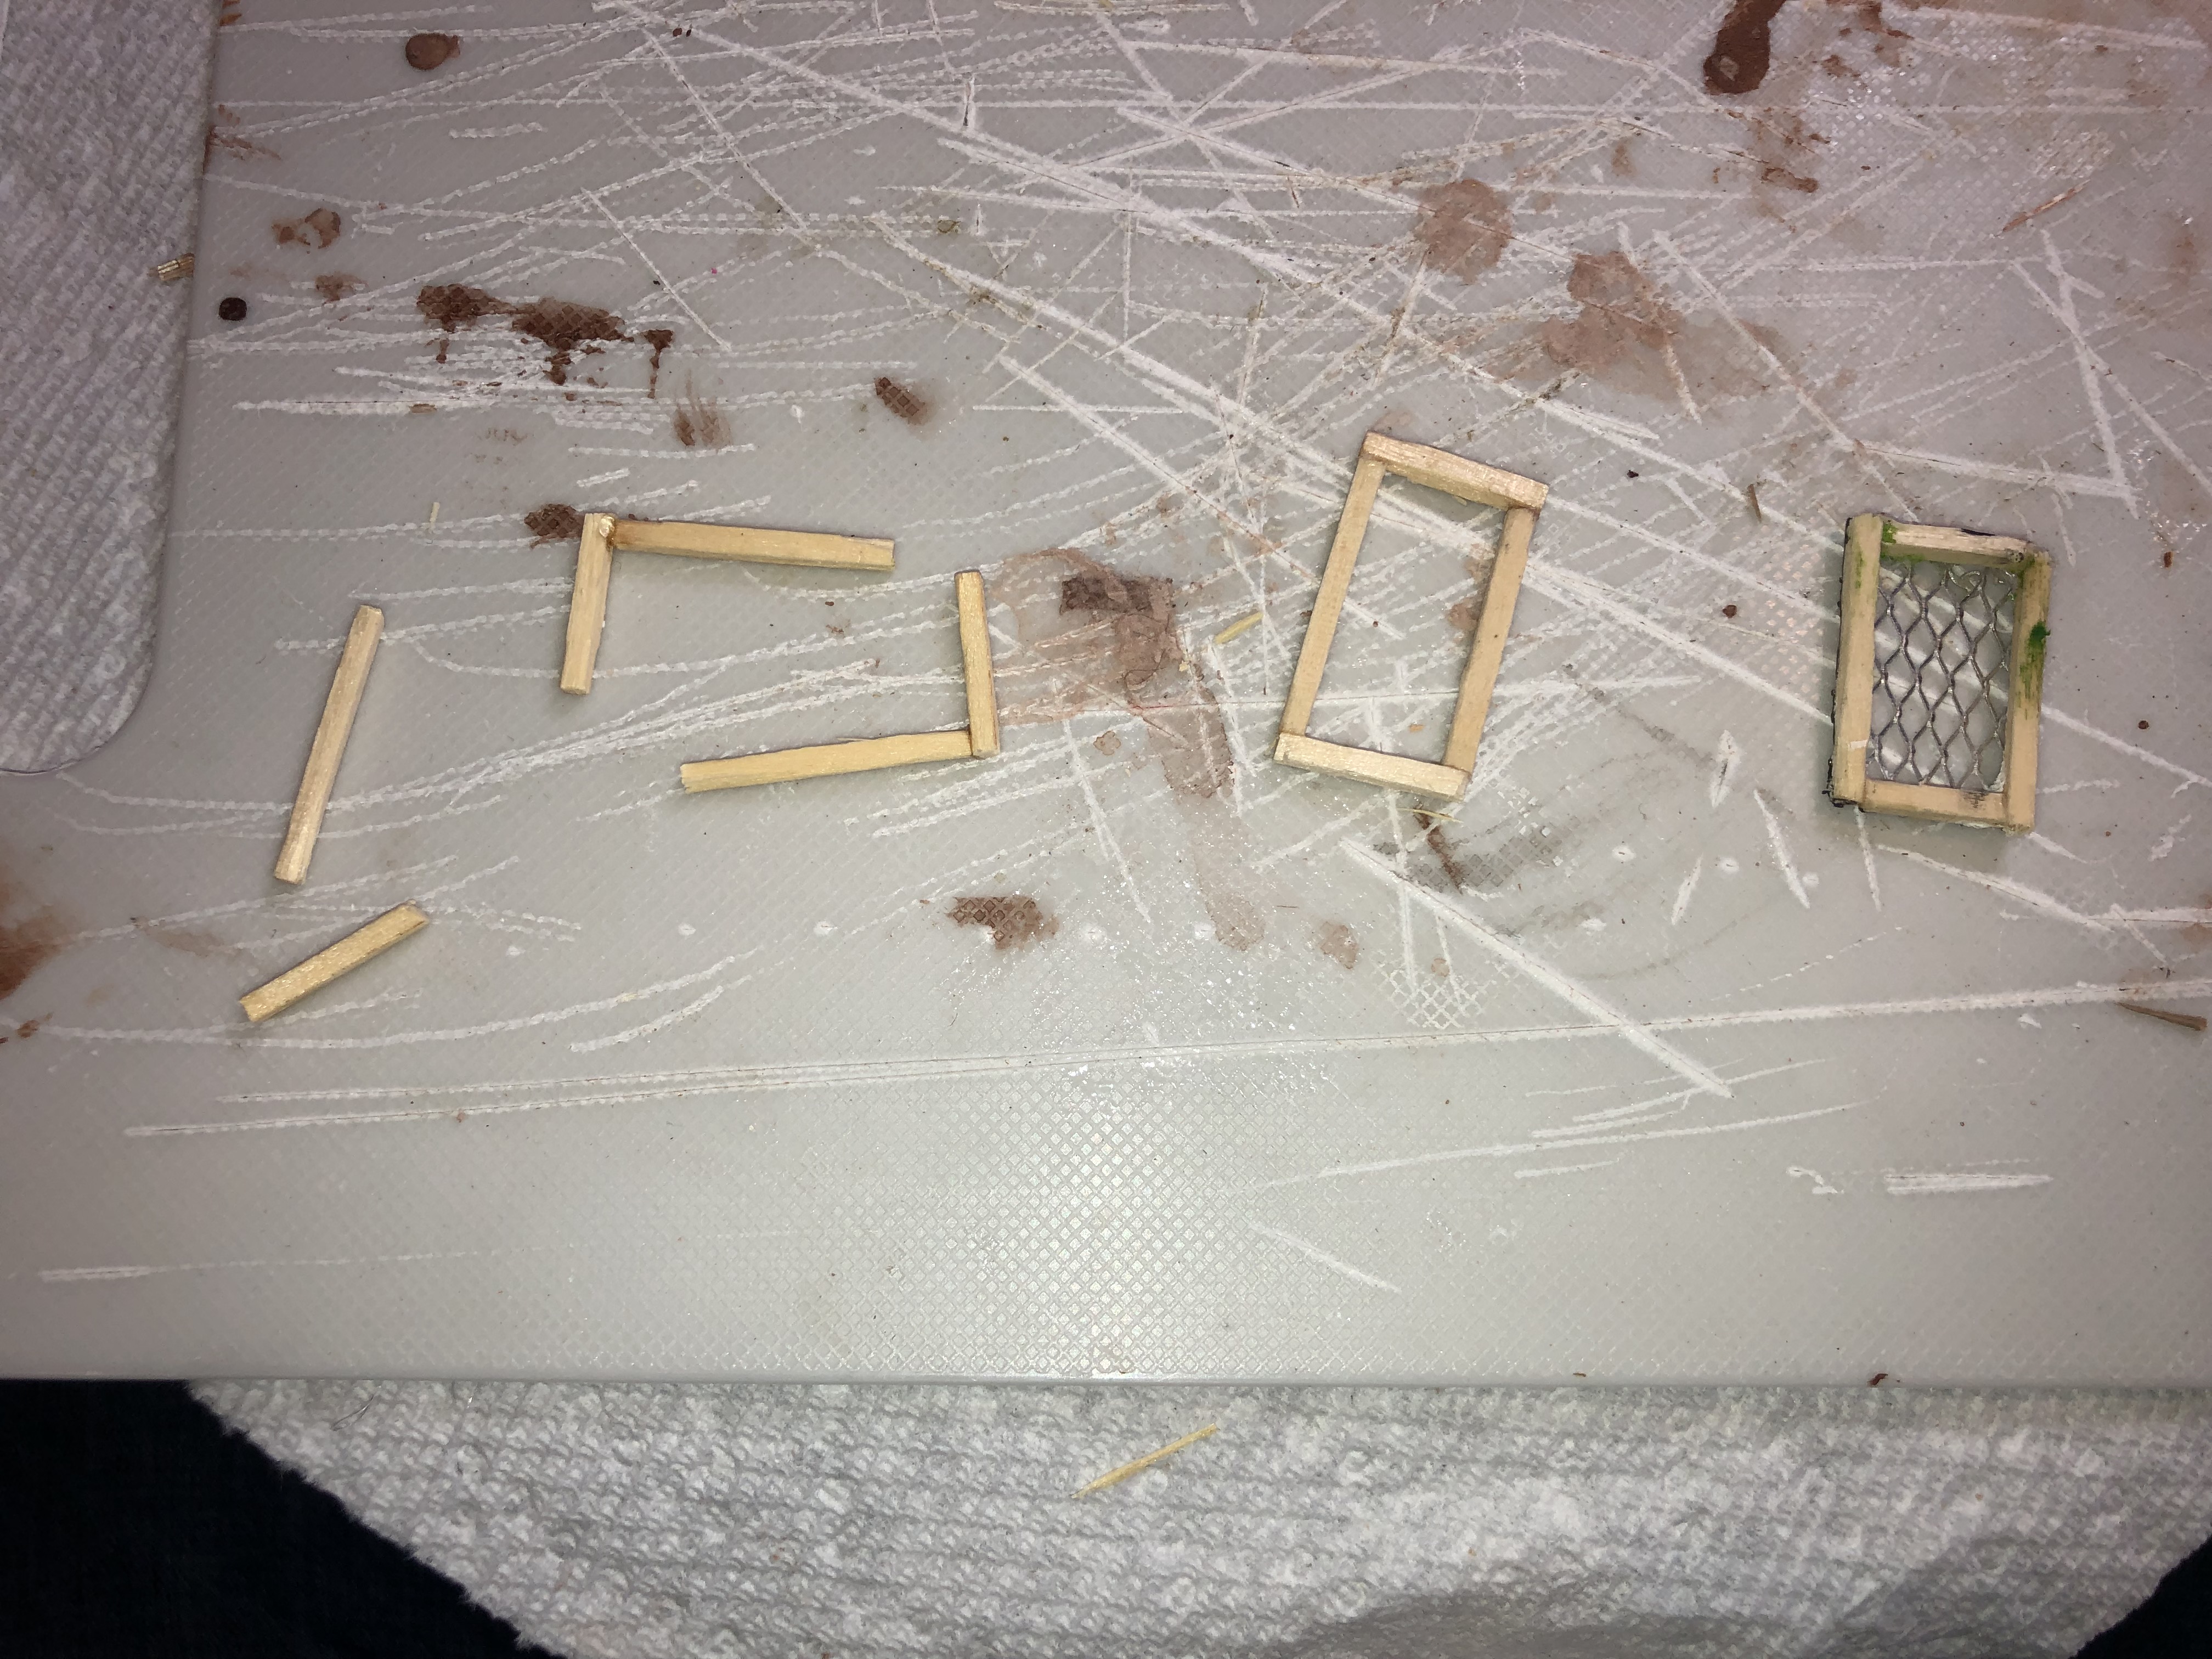
I used matchsticks to assemble the frame. I used either crazy glue or Aleenes tacky glue.
I normally assembled two pieces at a time (L-piece). Once dried, I glue two “L-pieces” together. You can try to glue the four pieces in one go, but it often does not stick properly or it doesn’t look square/rectangular enough.
The frame tends to be a bit on the flimsy side at that point, so once everything is dry, I often apply an extra layer of watered-down pva glue.
I like to paint the frame at that point. It’s faster and it’s a bit cleaner.
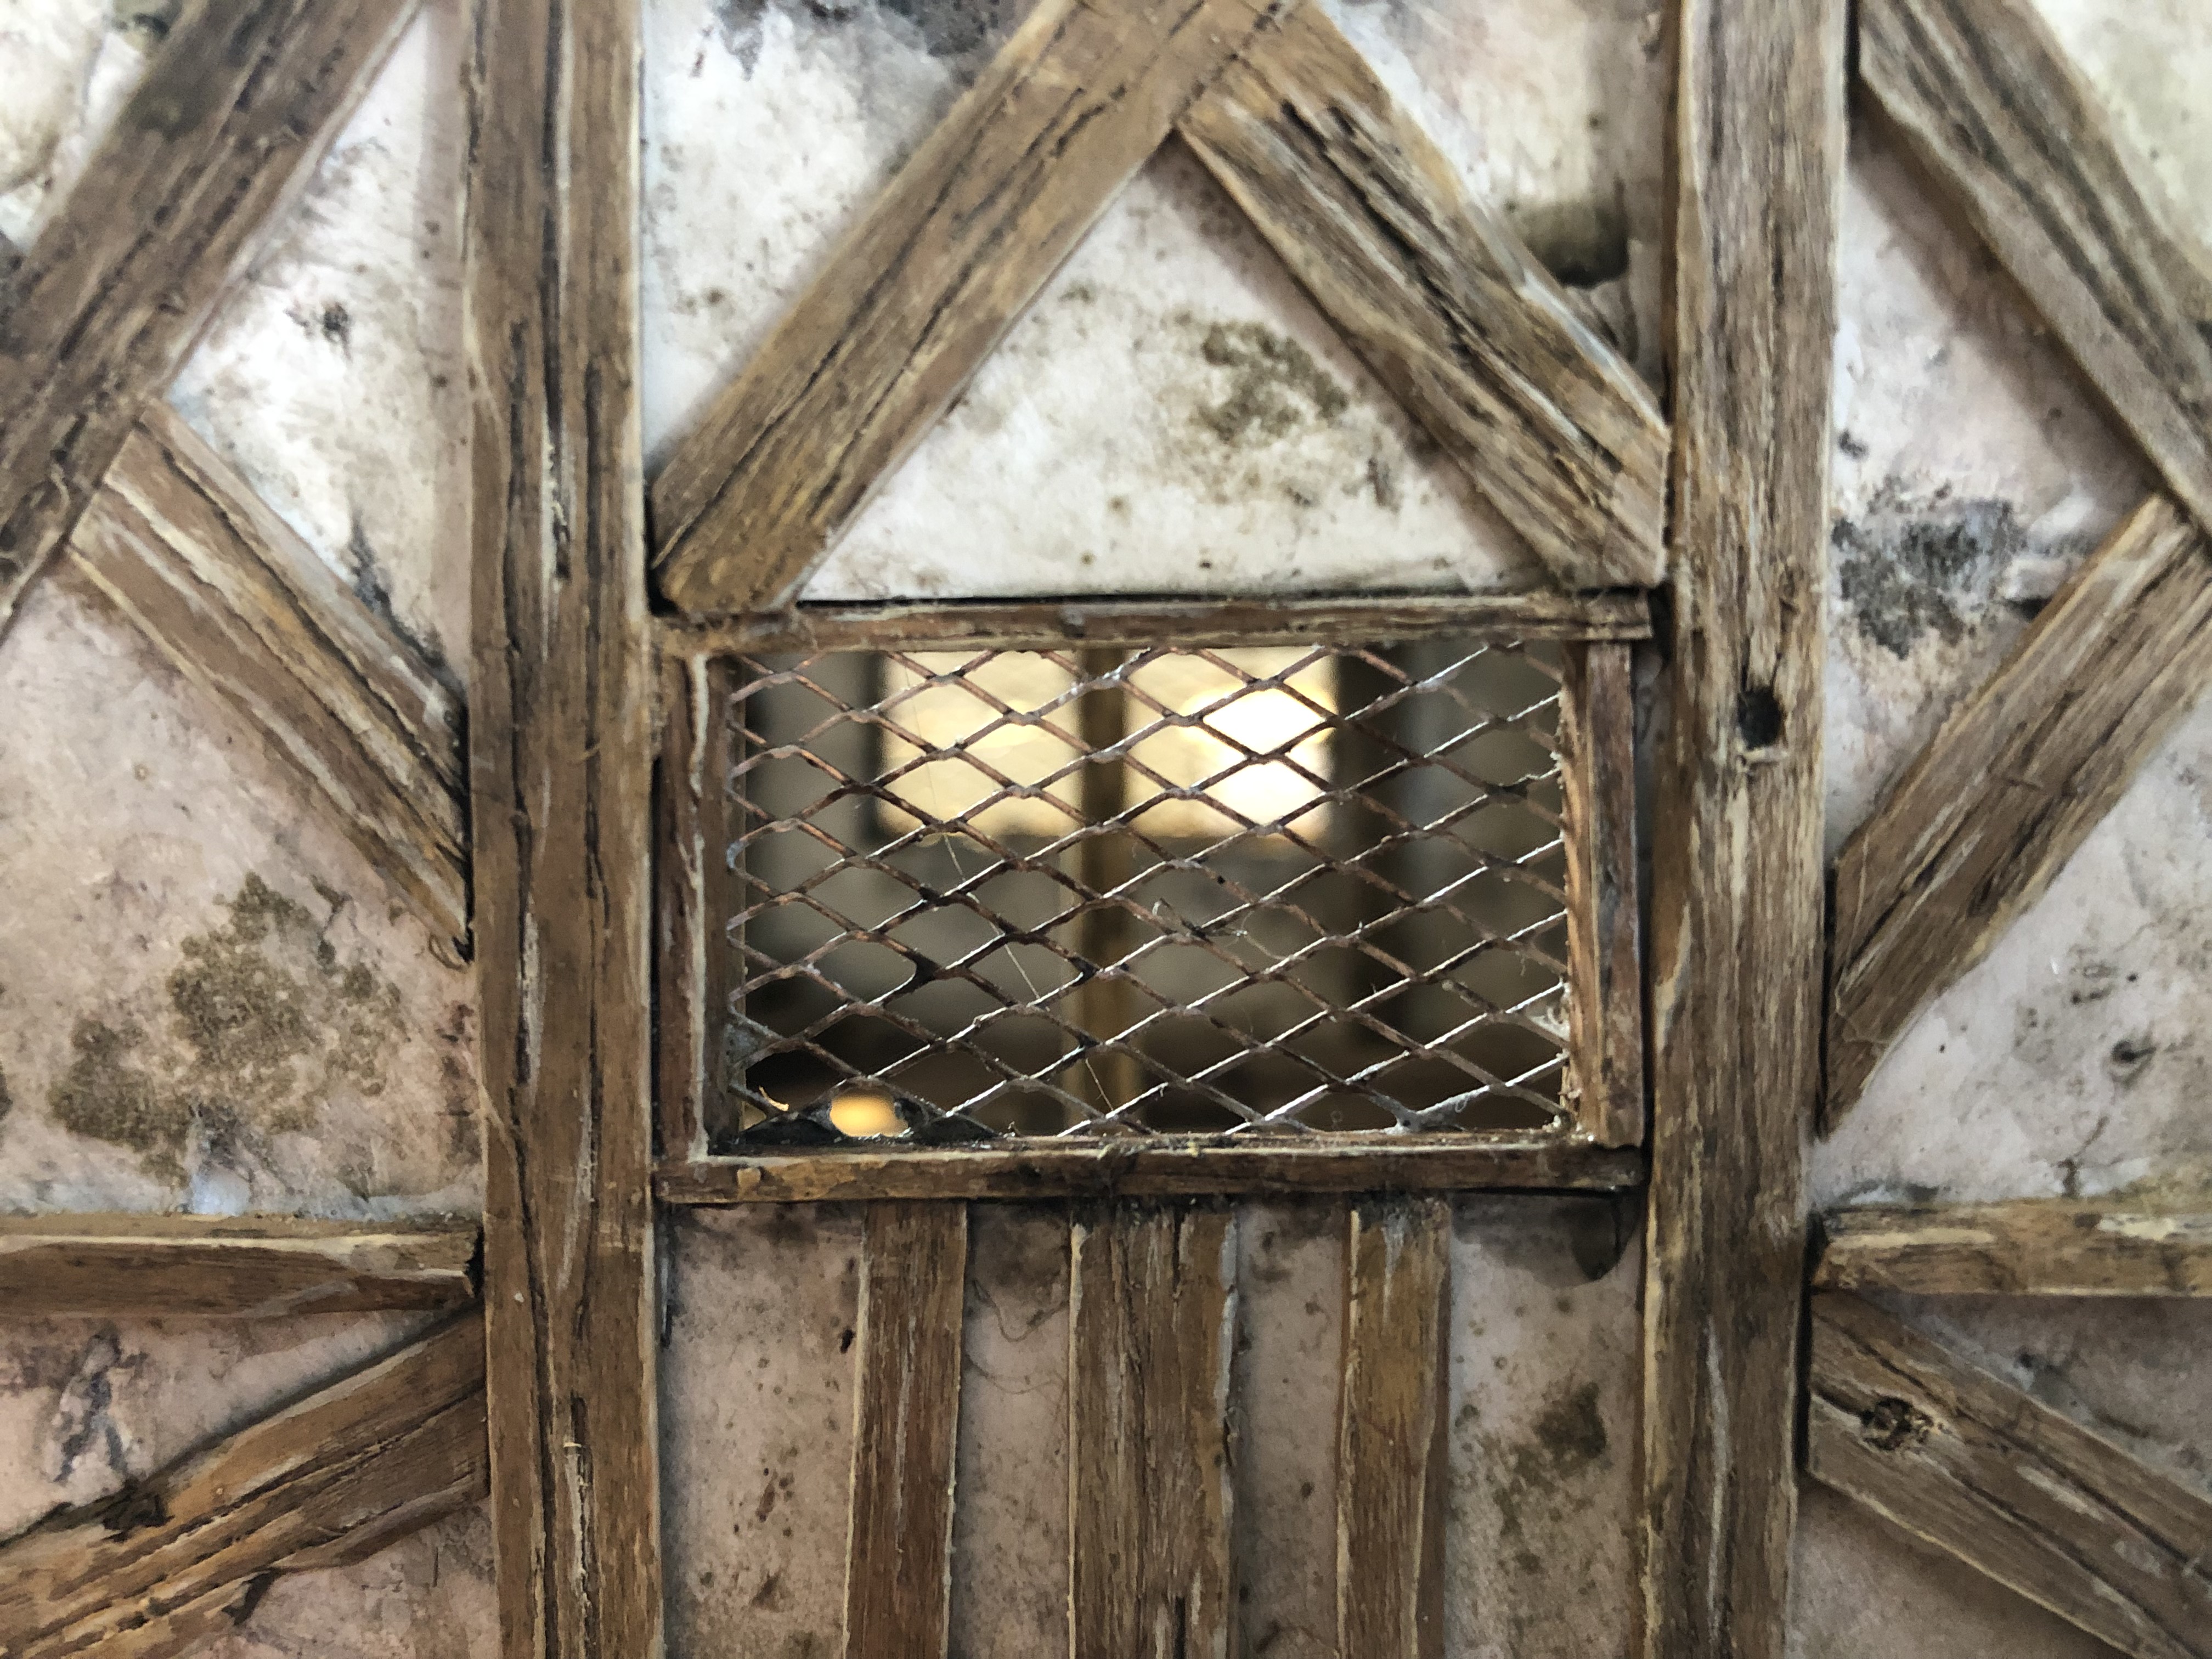
Once the paint is dry, I glue the frame onto meshwire with Aleene tacky glue. I often sprinkle some baking soda over the glue. It seems to form a slightly stronger bond, since the contact surface between the meshwire and the frame is relatively small.
And there you have it: a nice small medieval-looking window for a fancy ruined building 🙂
After cutting the foamboard into wall sections, I cut the window “space” onto the foamboard before I assemble the whole thing.
To speed the process, I tend to mass produce the windows at the beginning of a build.
As you can see, the holes in the walls don’t always fit the window frame perfectly. I fill the space with extra wood pieces or I fill it later with plaster/spackling compound.
 For variation, I made some double/triple windows, boarded-up windows, shutters to go with some windows, and so on
Wizard Tower: details and techniques used
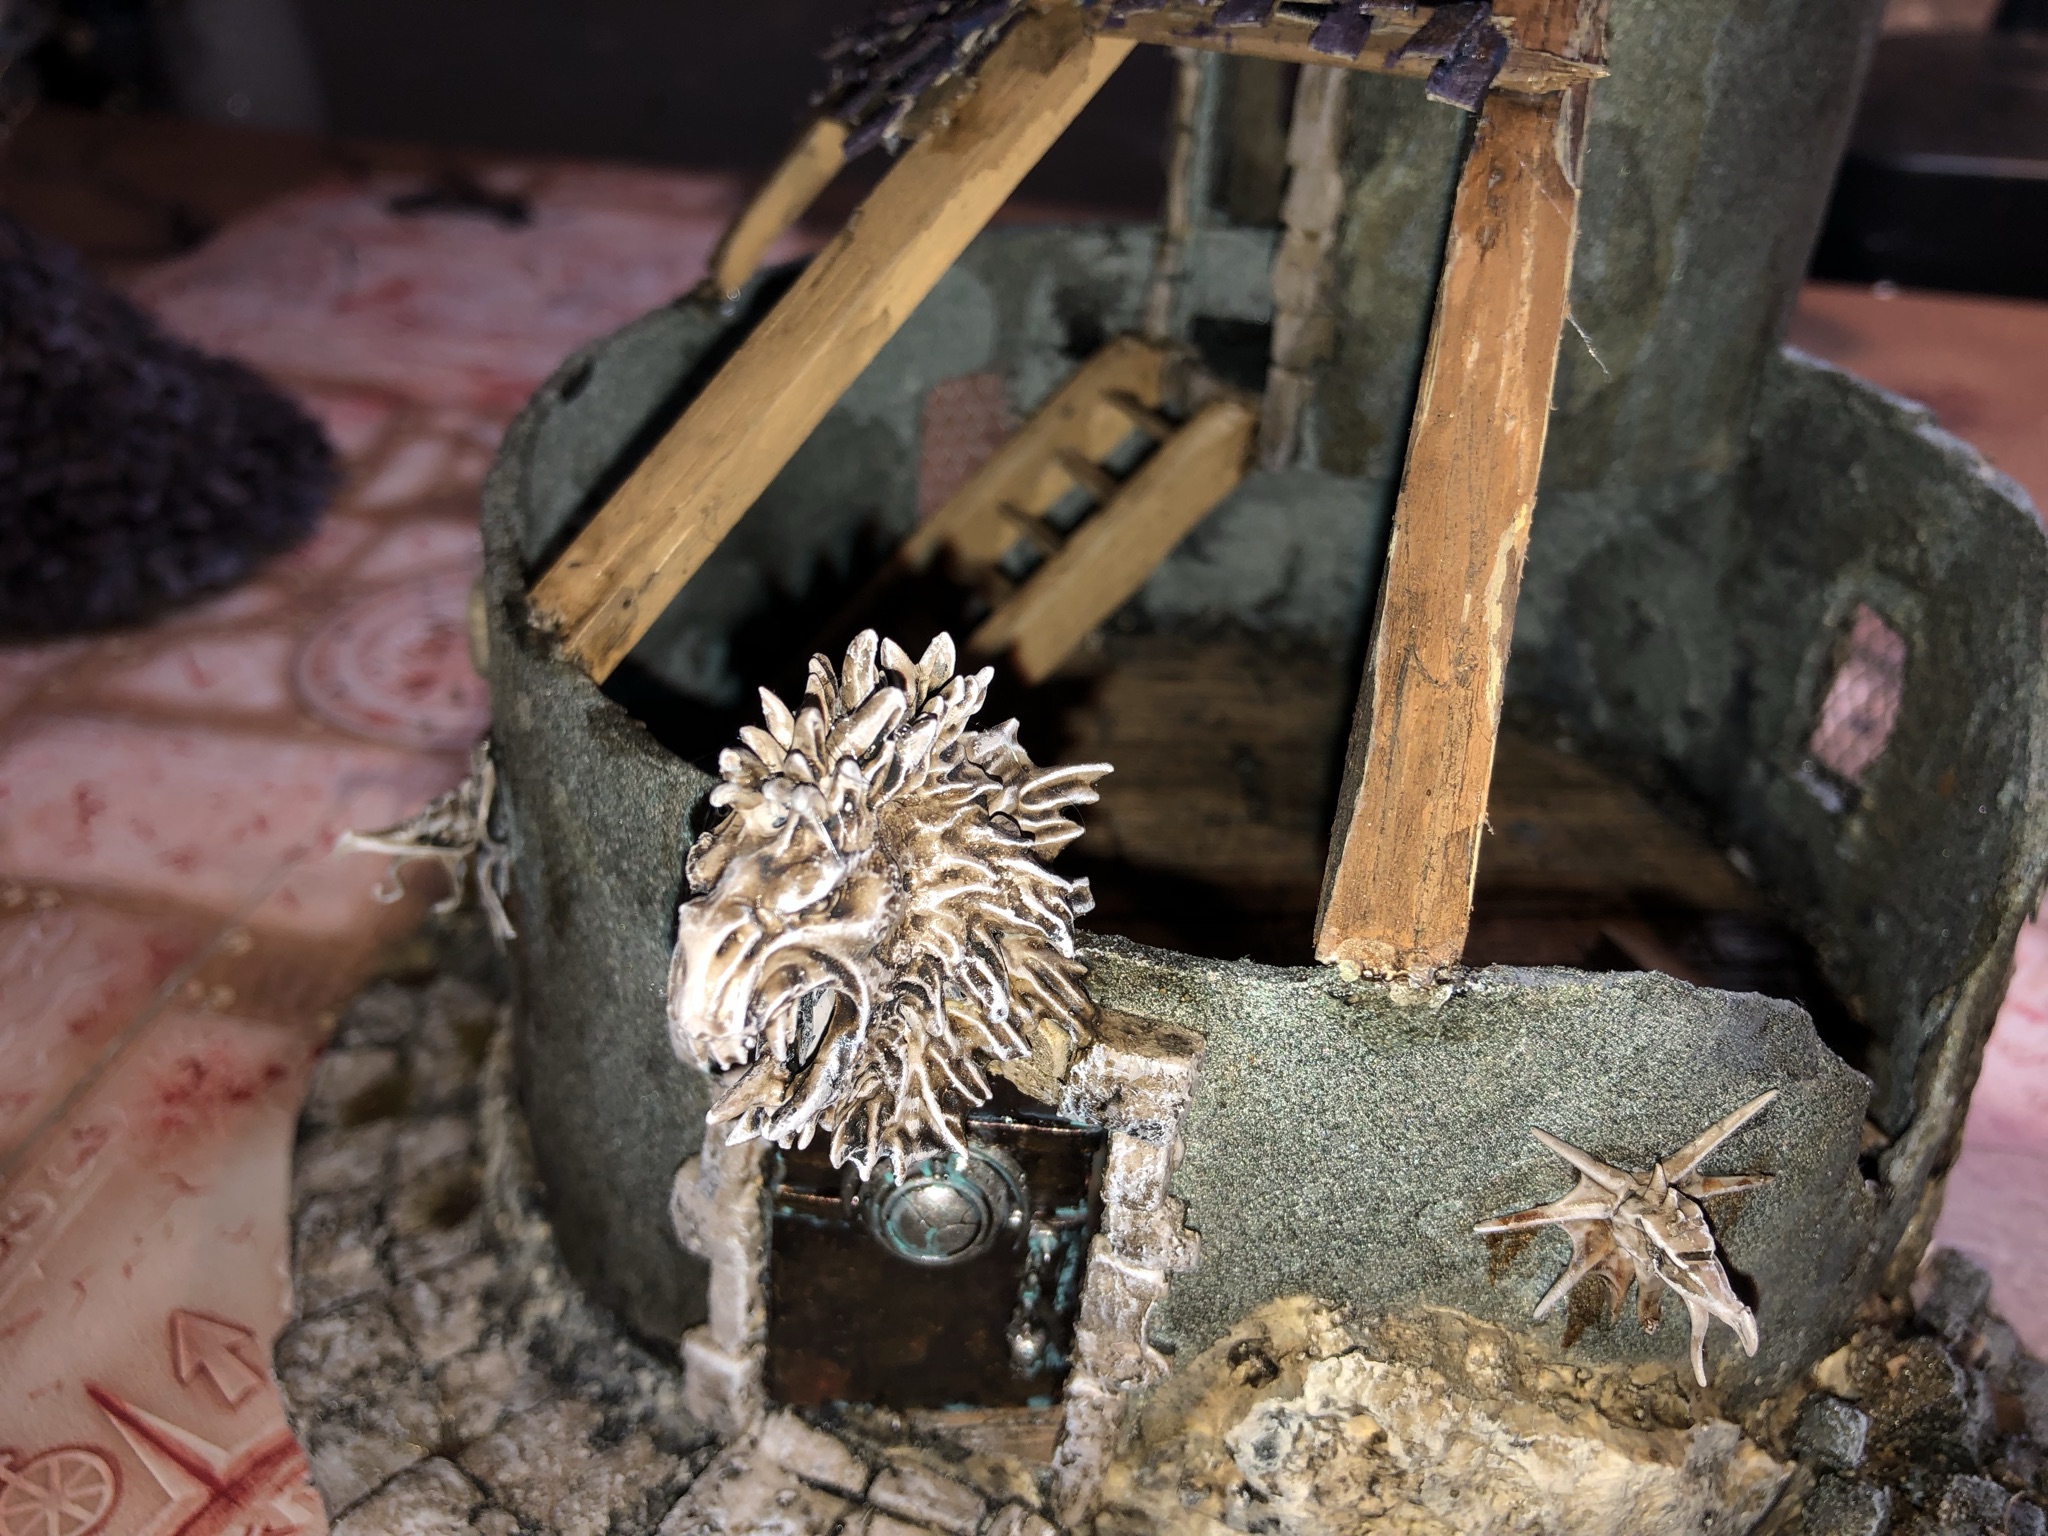
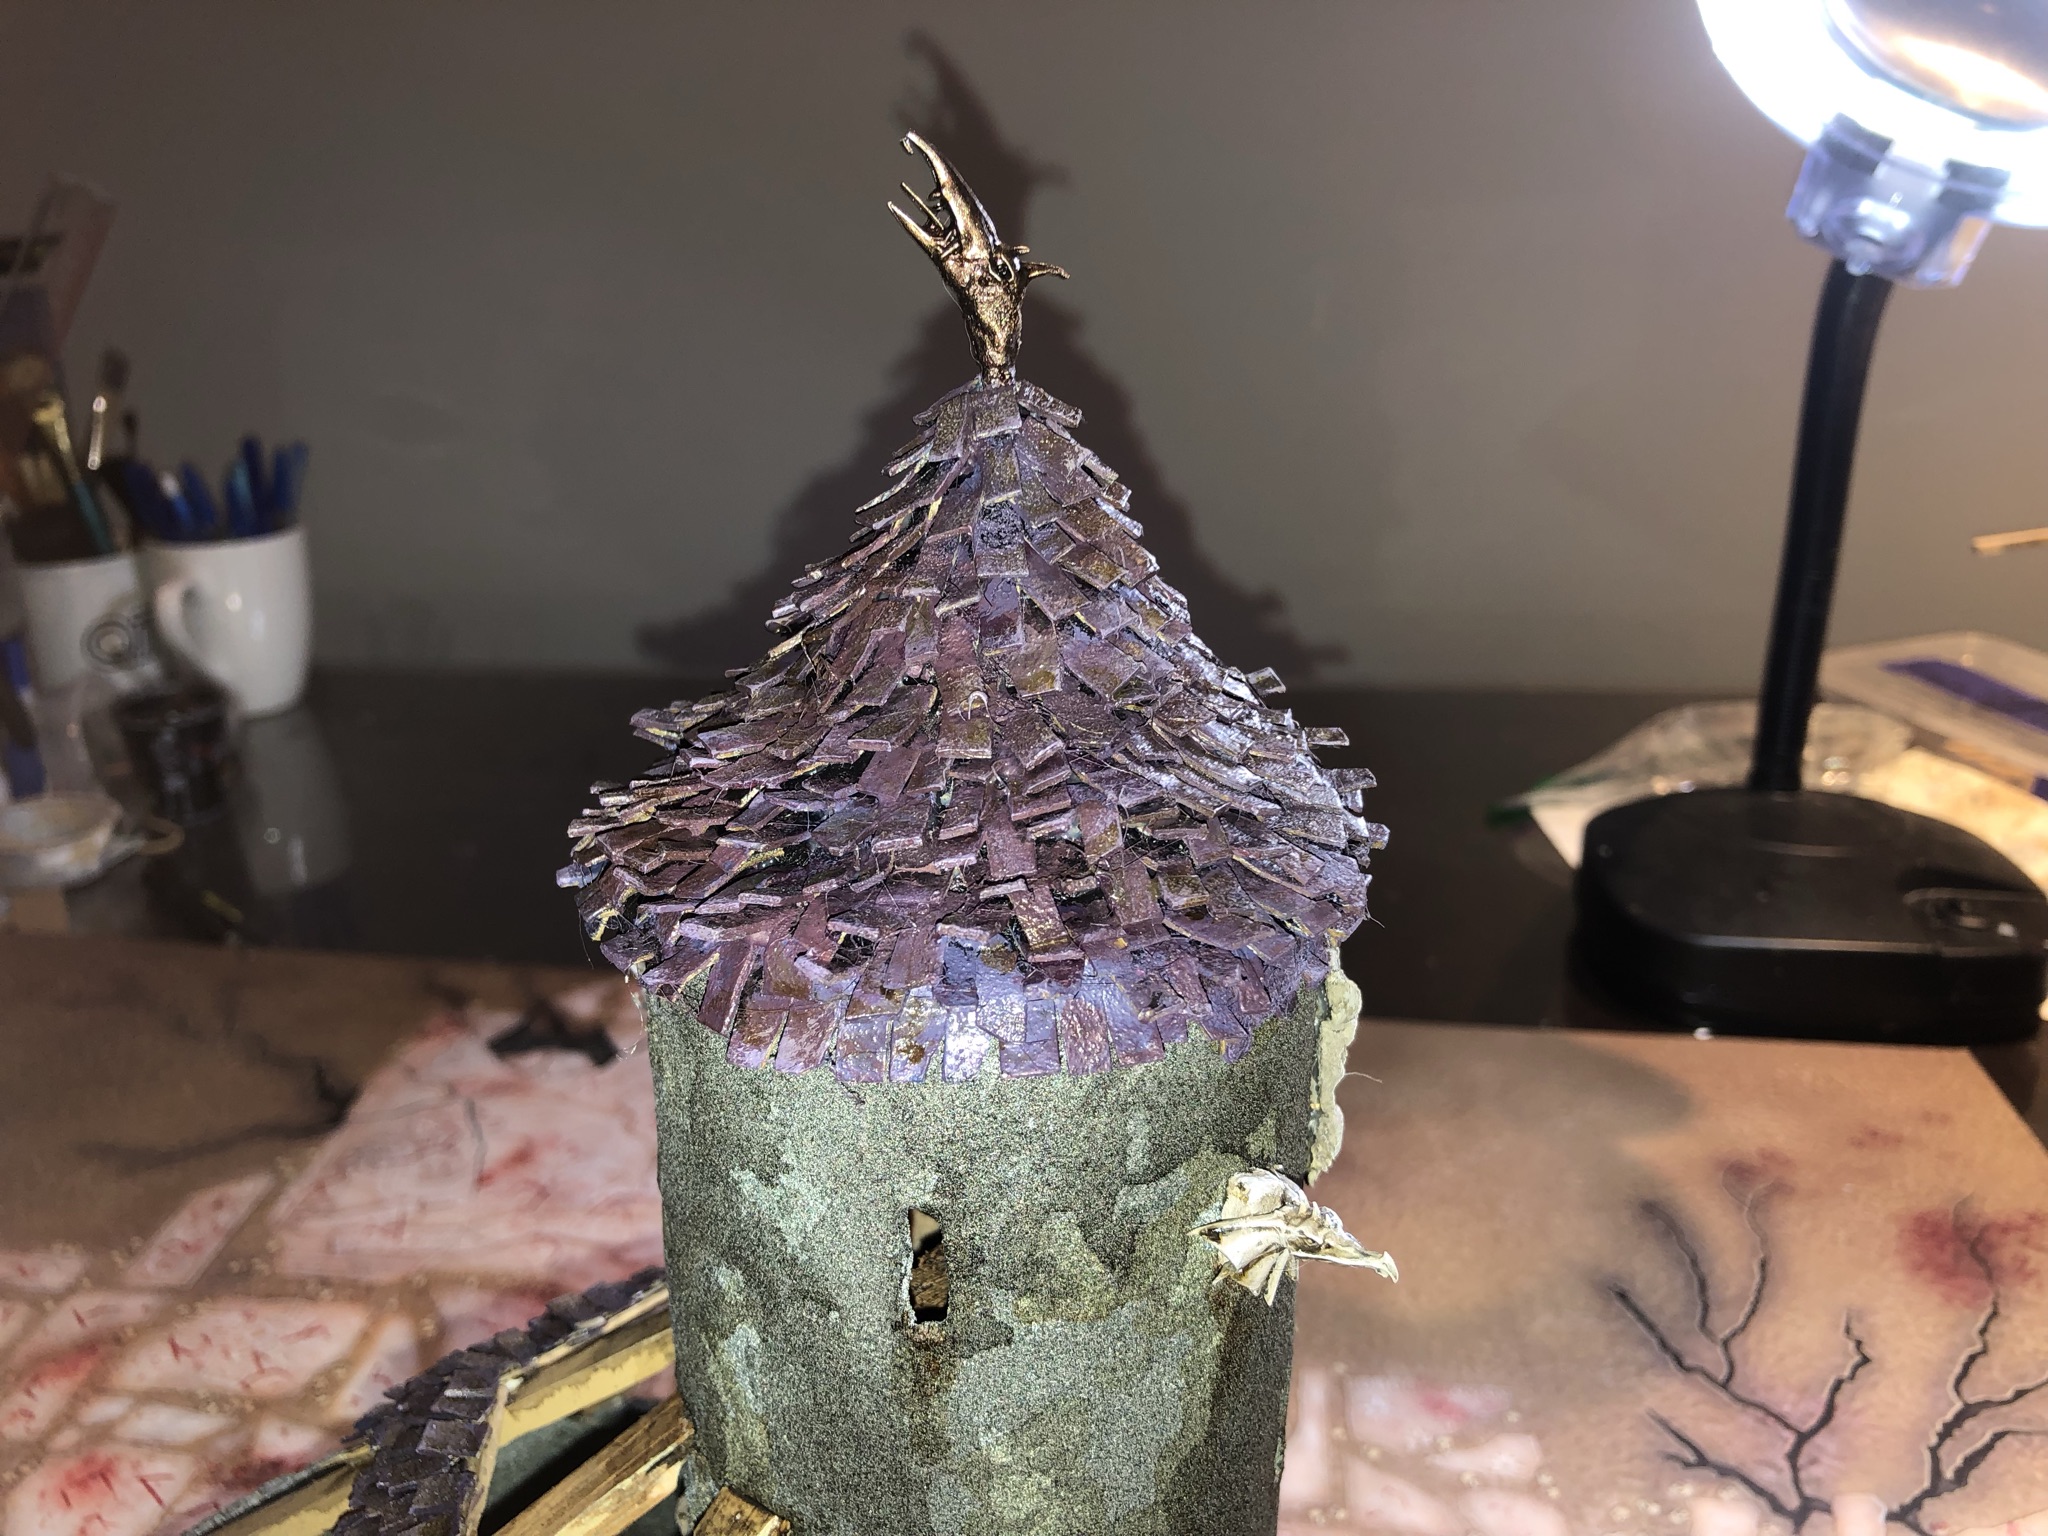
The gargoyles’ head came from Warcry (raptoryx which I think are ridiculous models). The manticore head comes from my Chaos bits box.
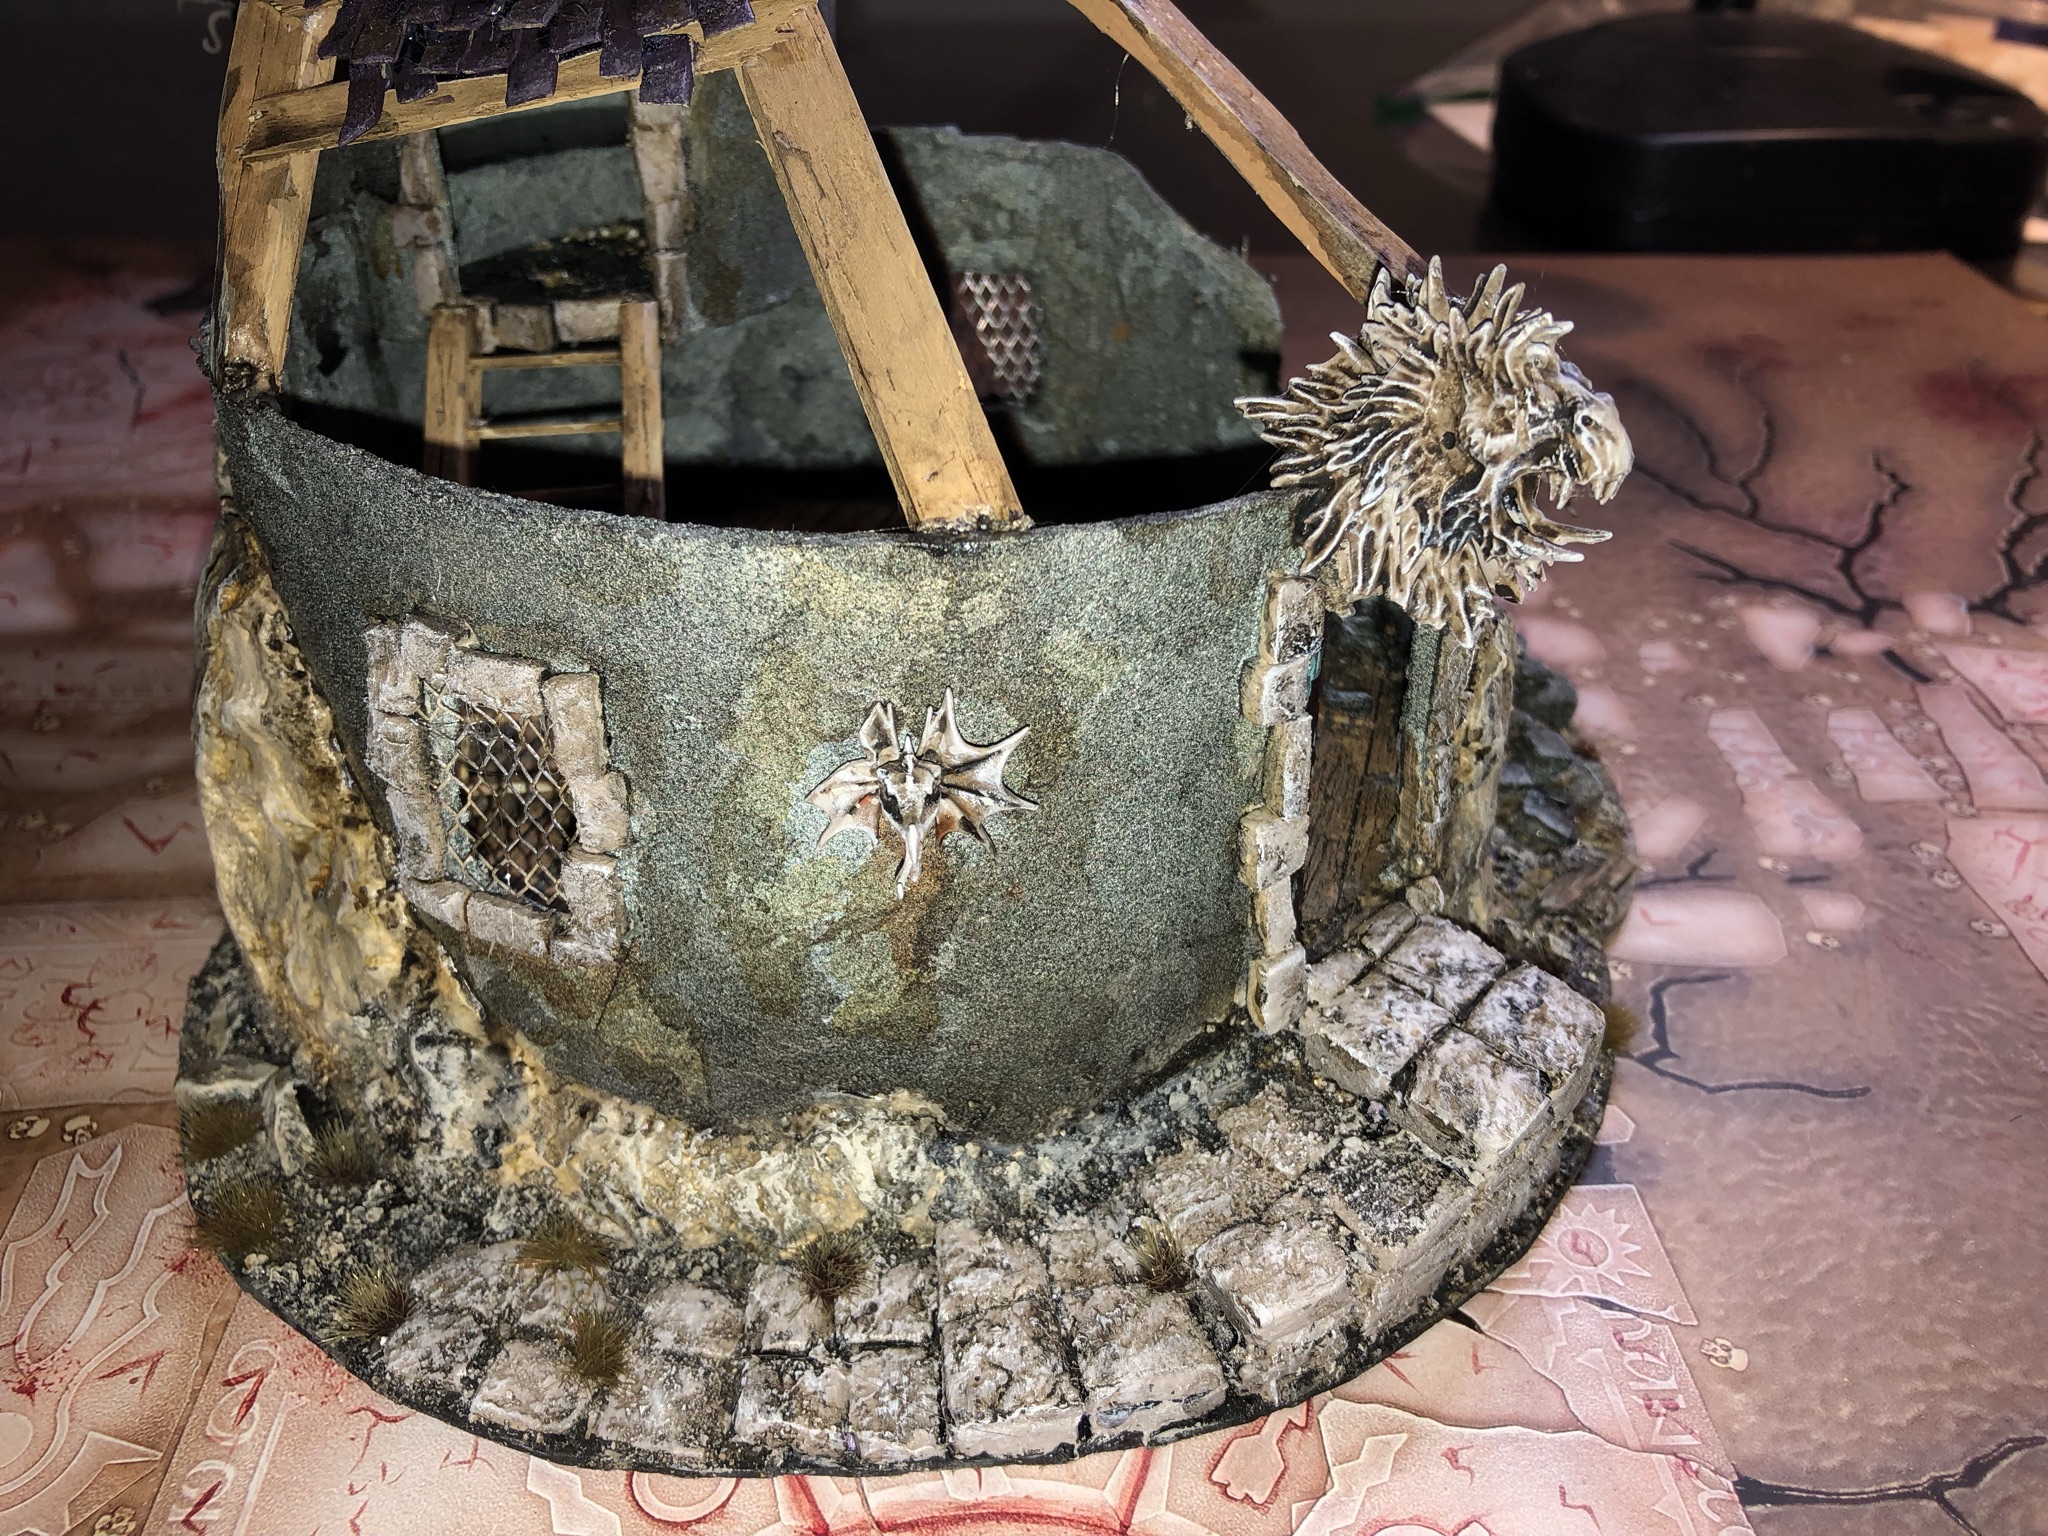

I tried cheap Dollar store clay to make the rocks and some tiles. I was really impressed with the result. It was easy to work with, and it dried quickly. I use actual rock to impart the stone texture on the clay.
The only thing I would change next time is to mix a bit of PVA glue with the clay before: it would prevent some of the cracks I had when the clay dried.

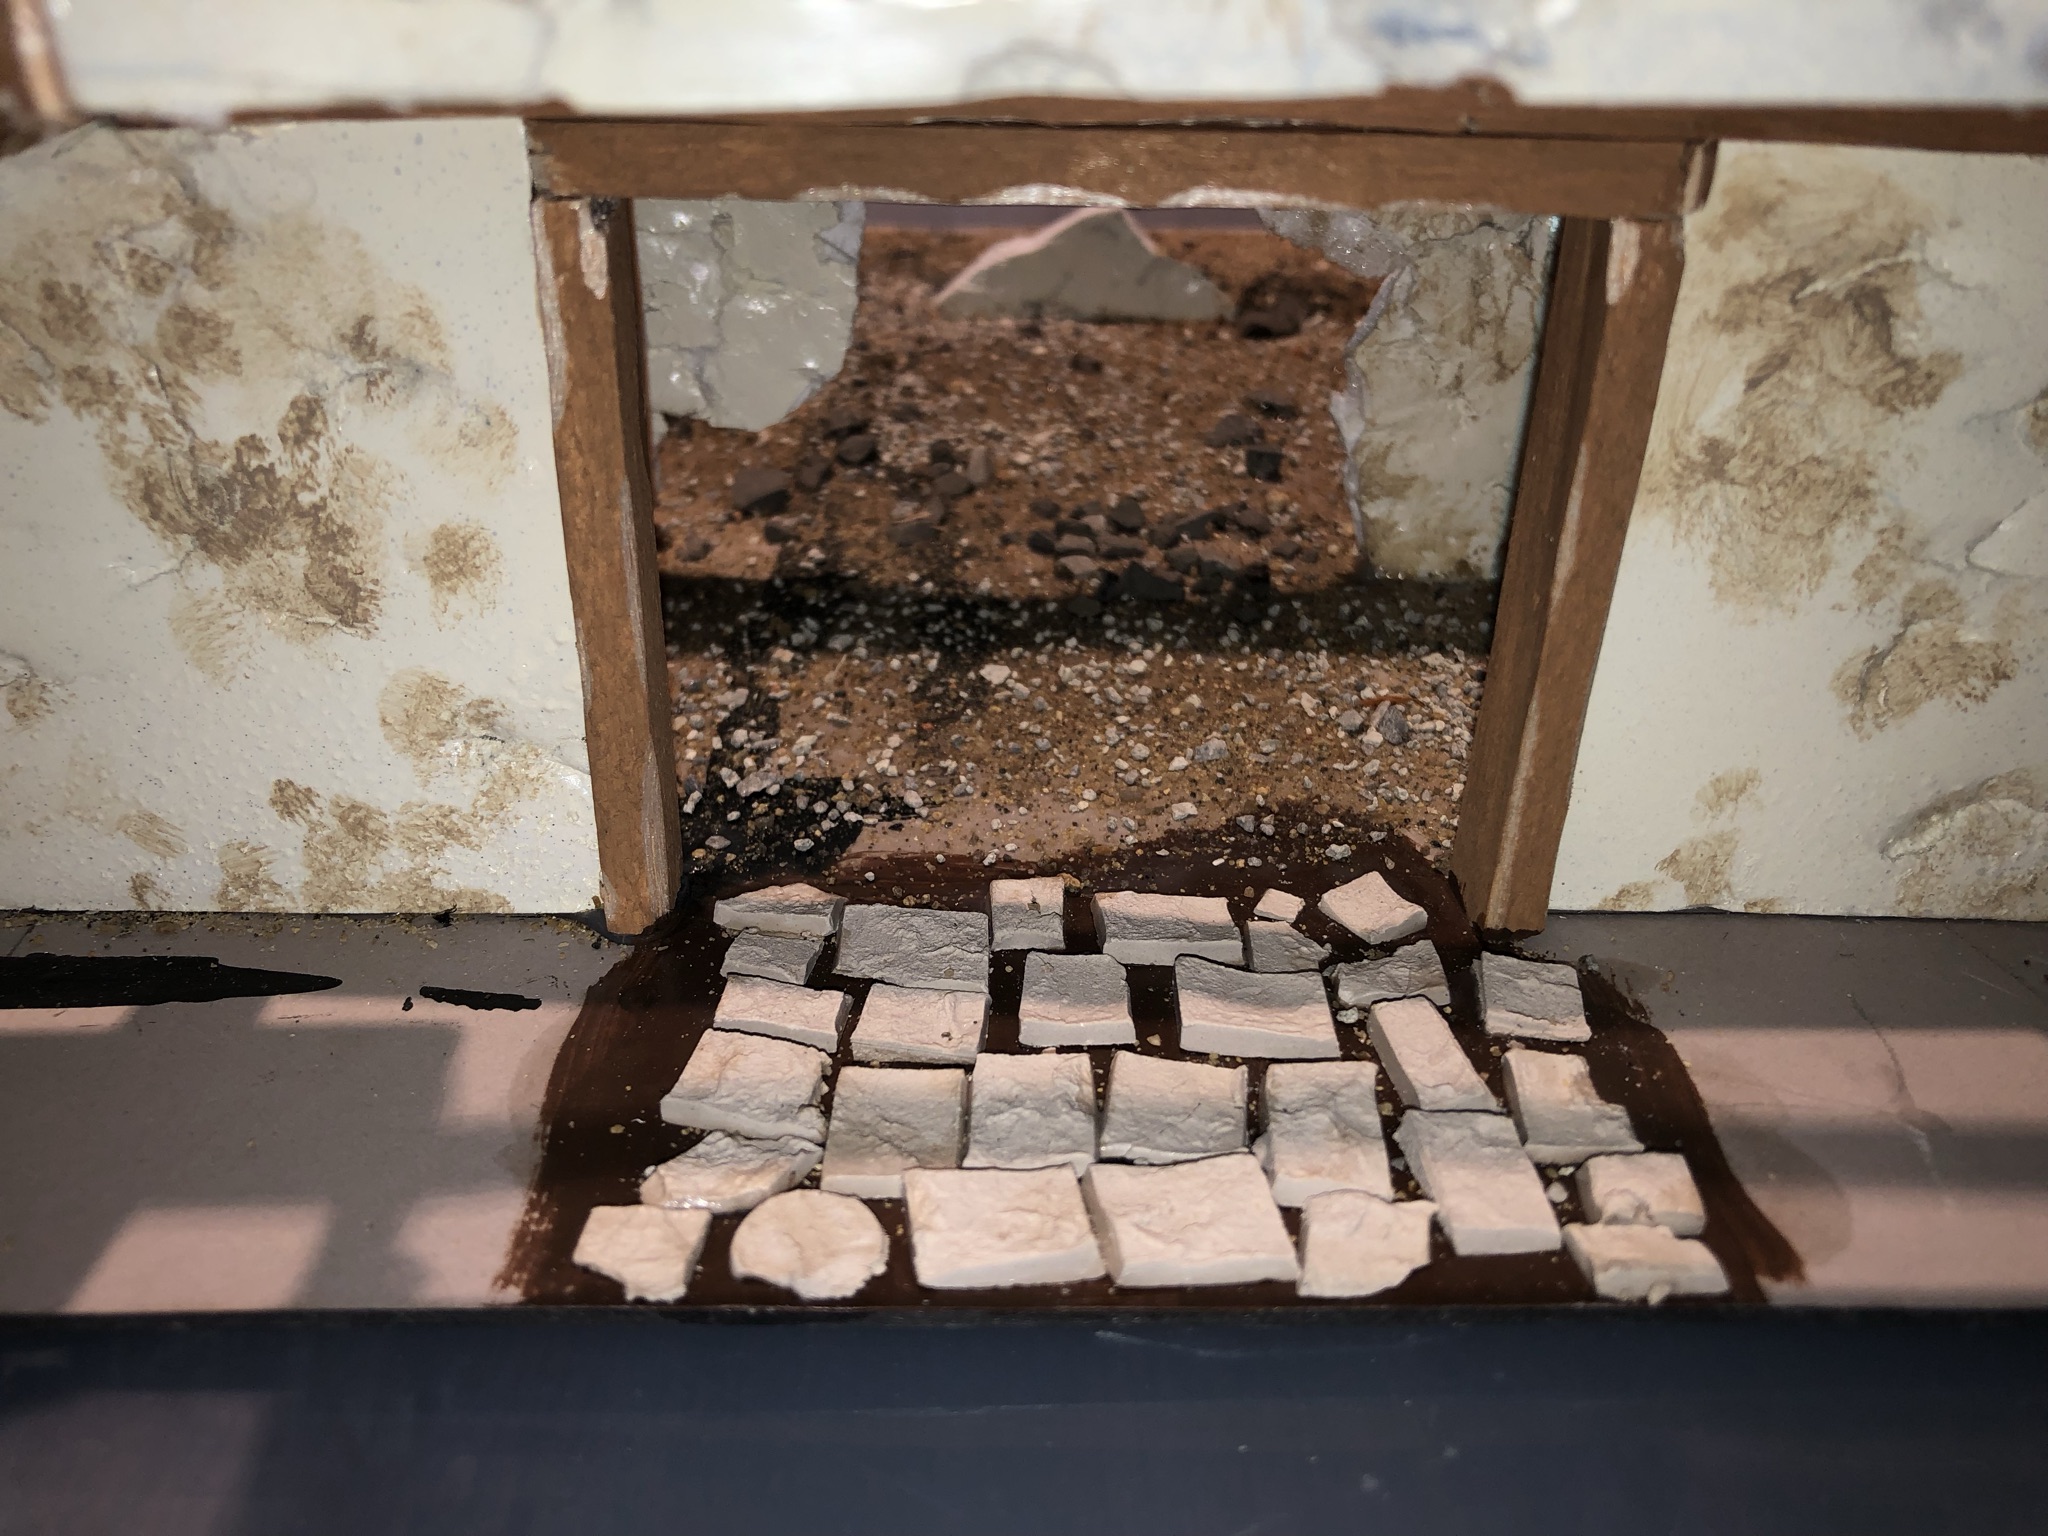
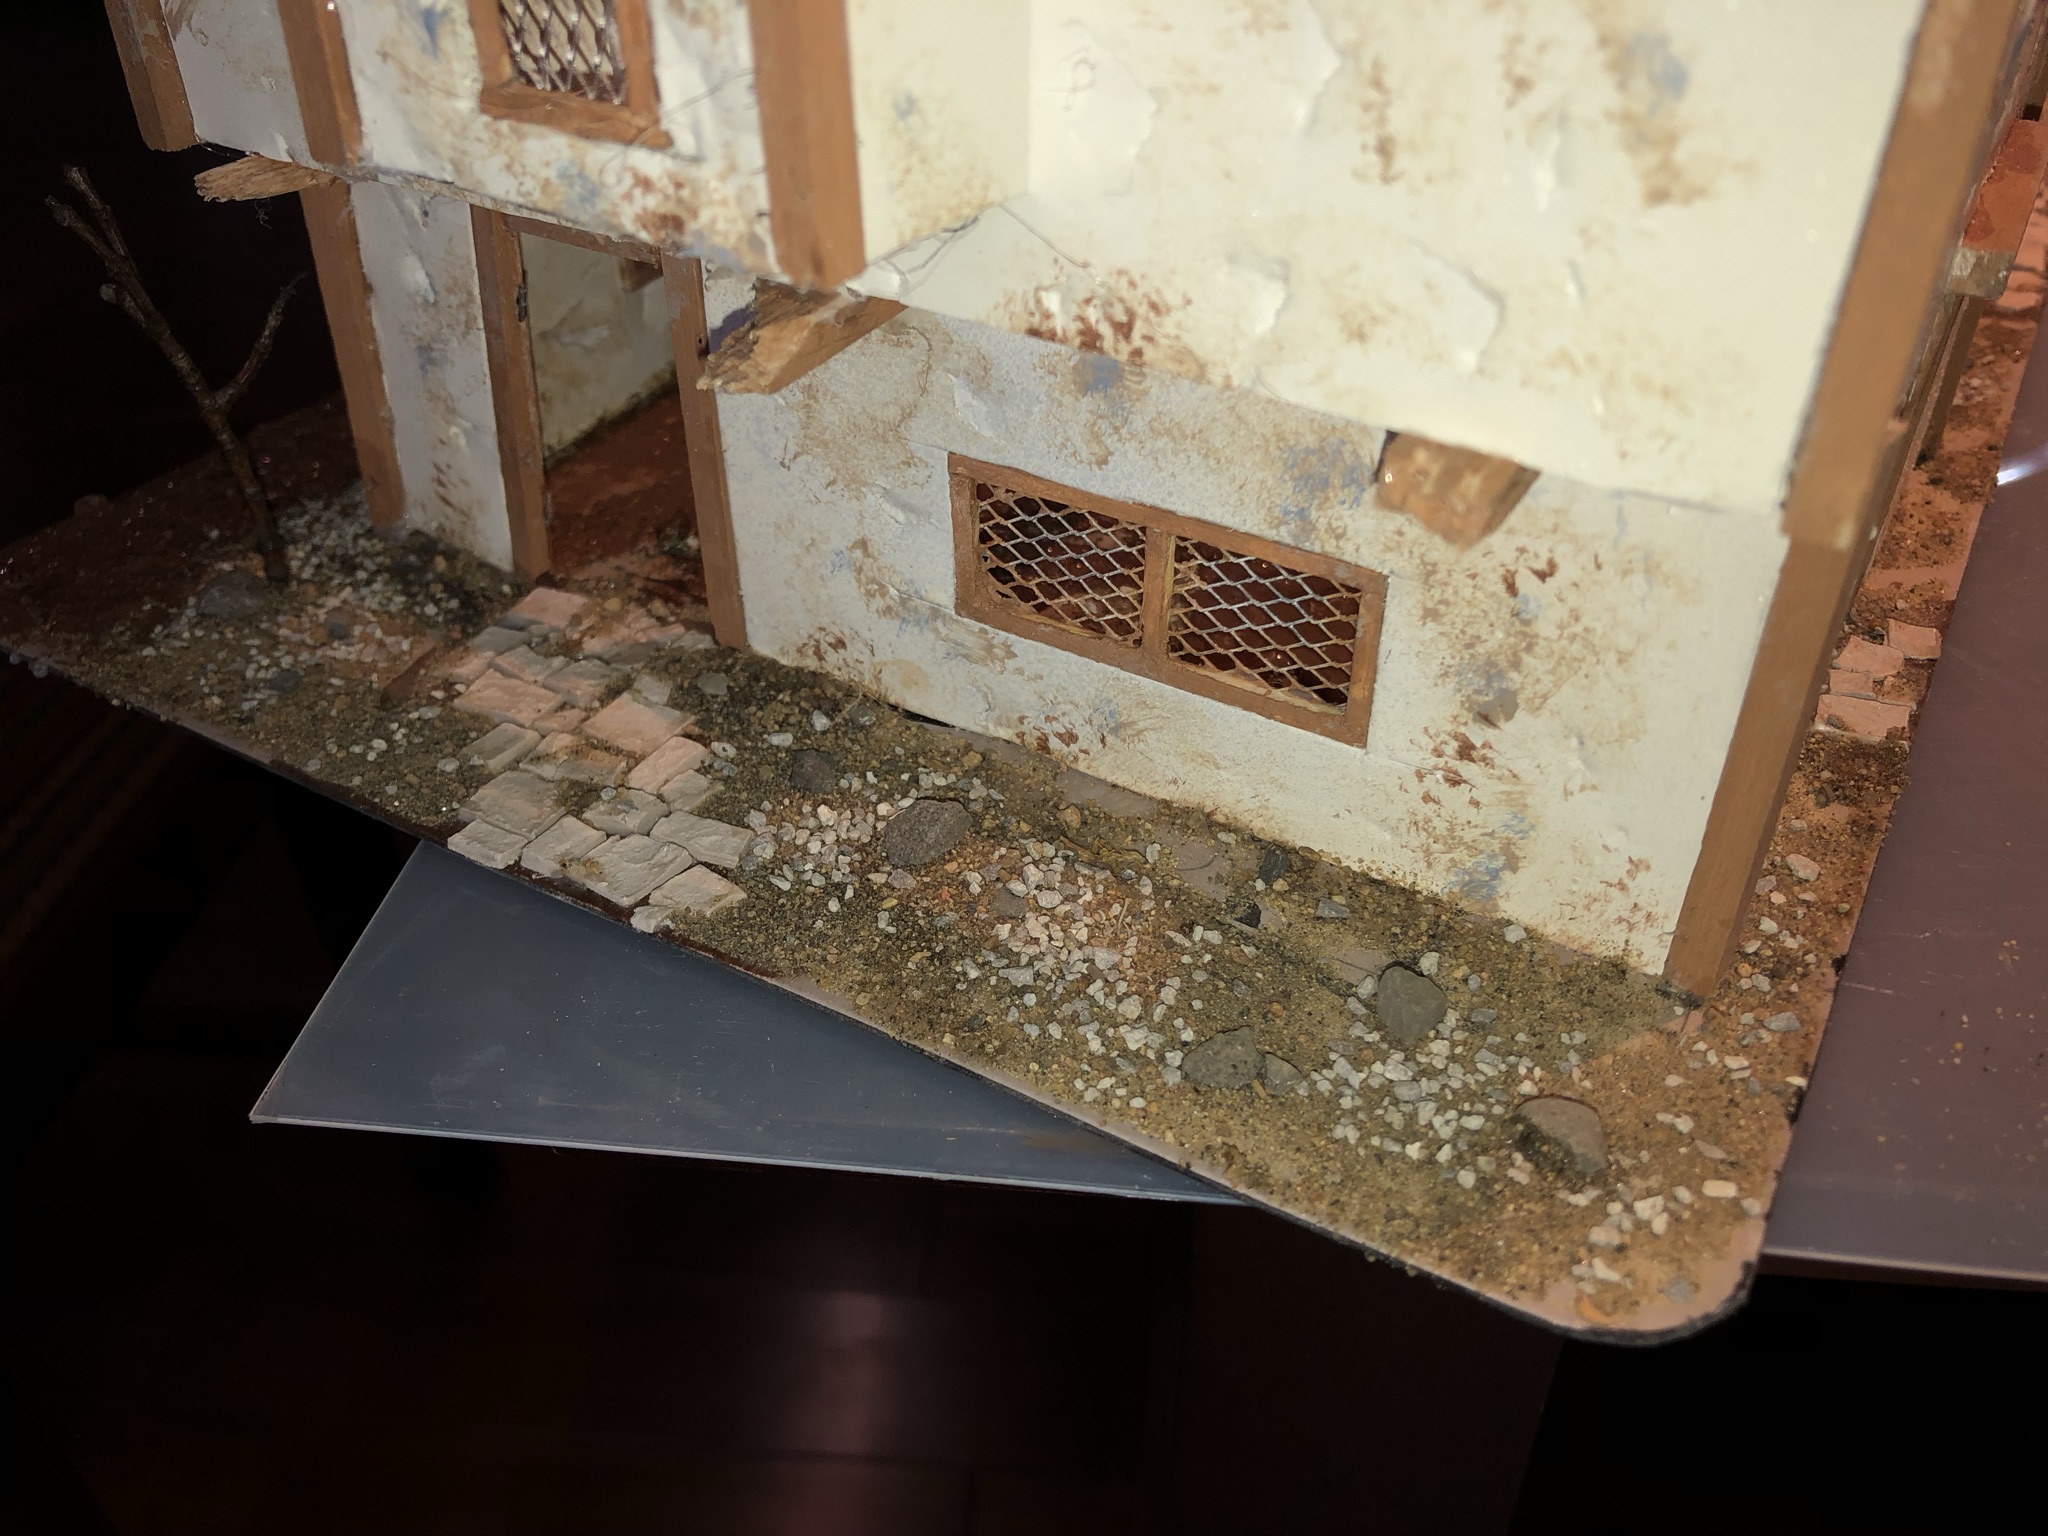
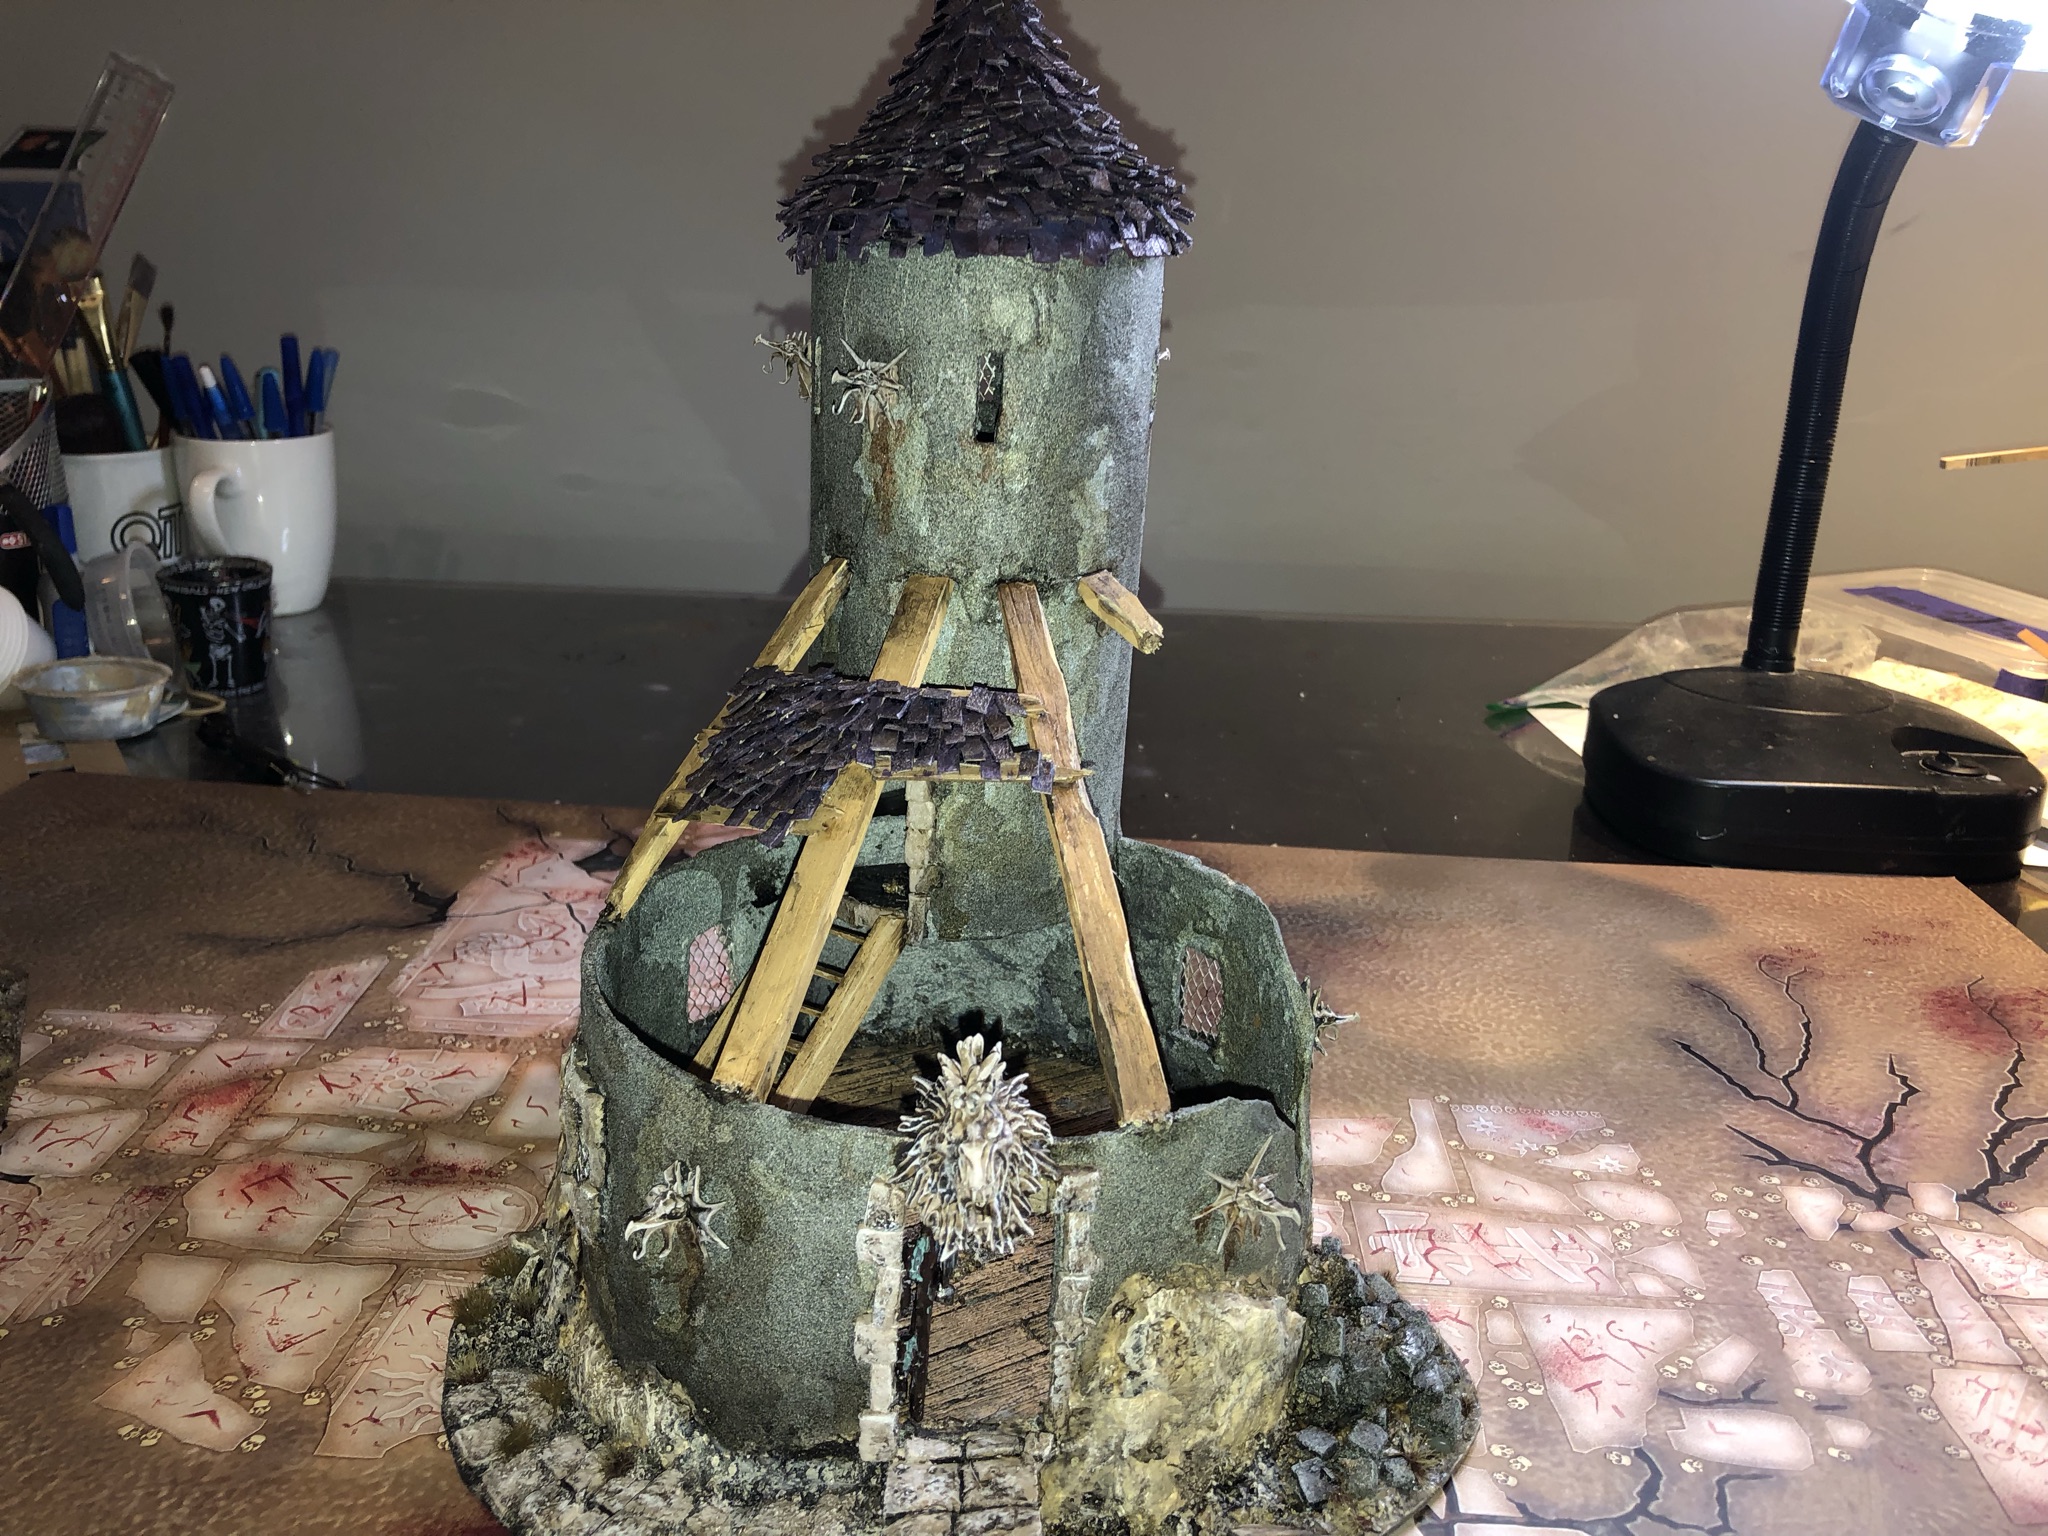
 The crumbling wall functions as a second entry point into the building. I made sure there was a level space on the fallen bricks to place a mini.
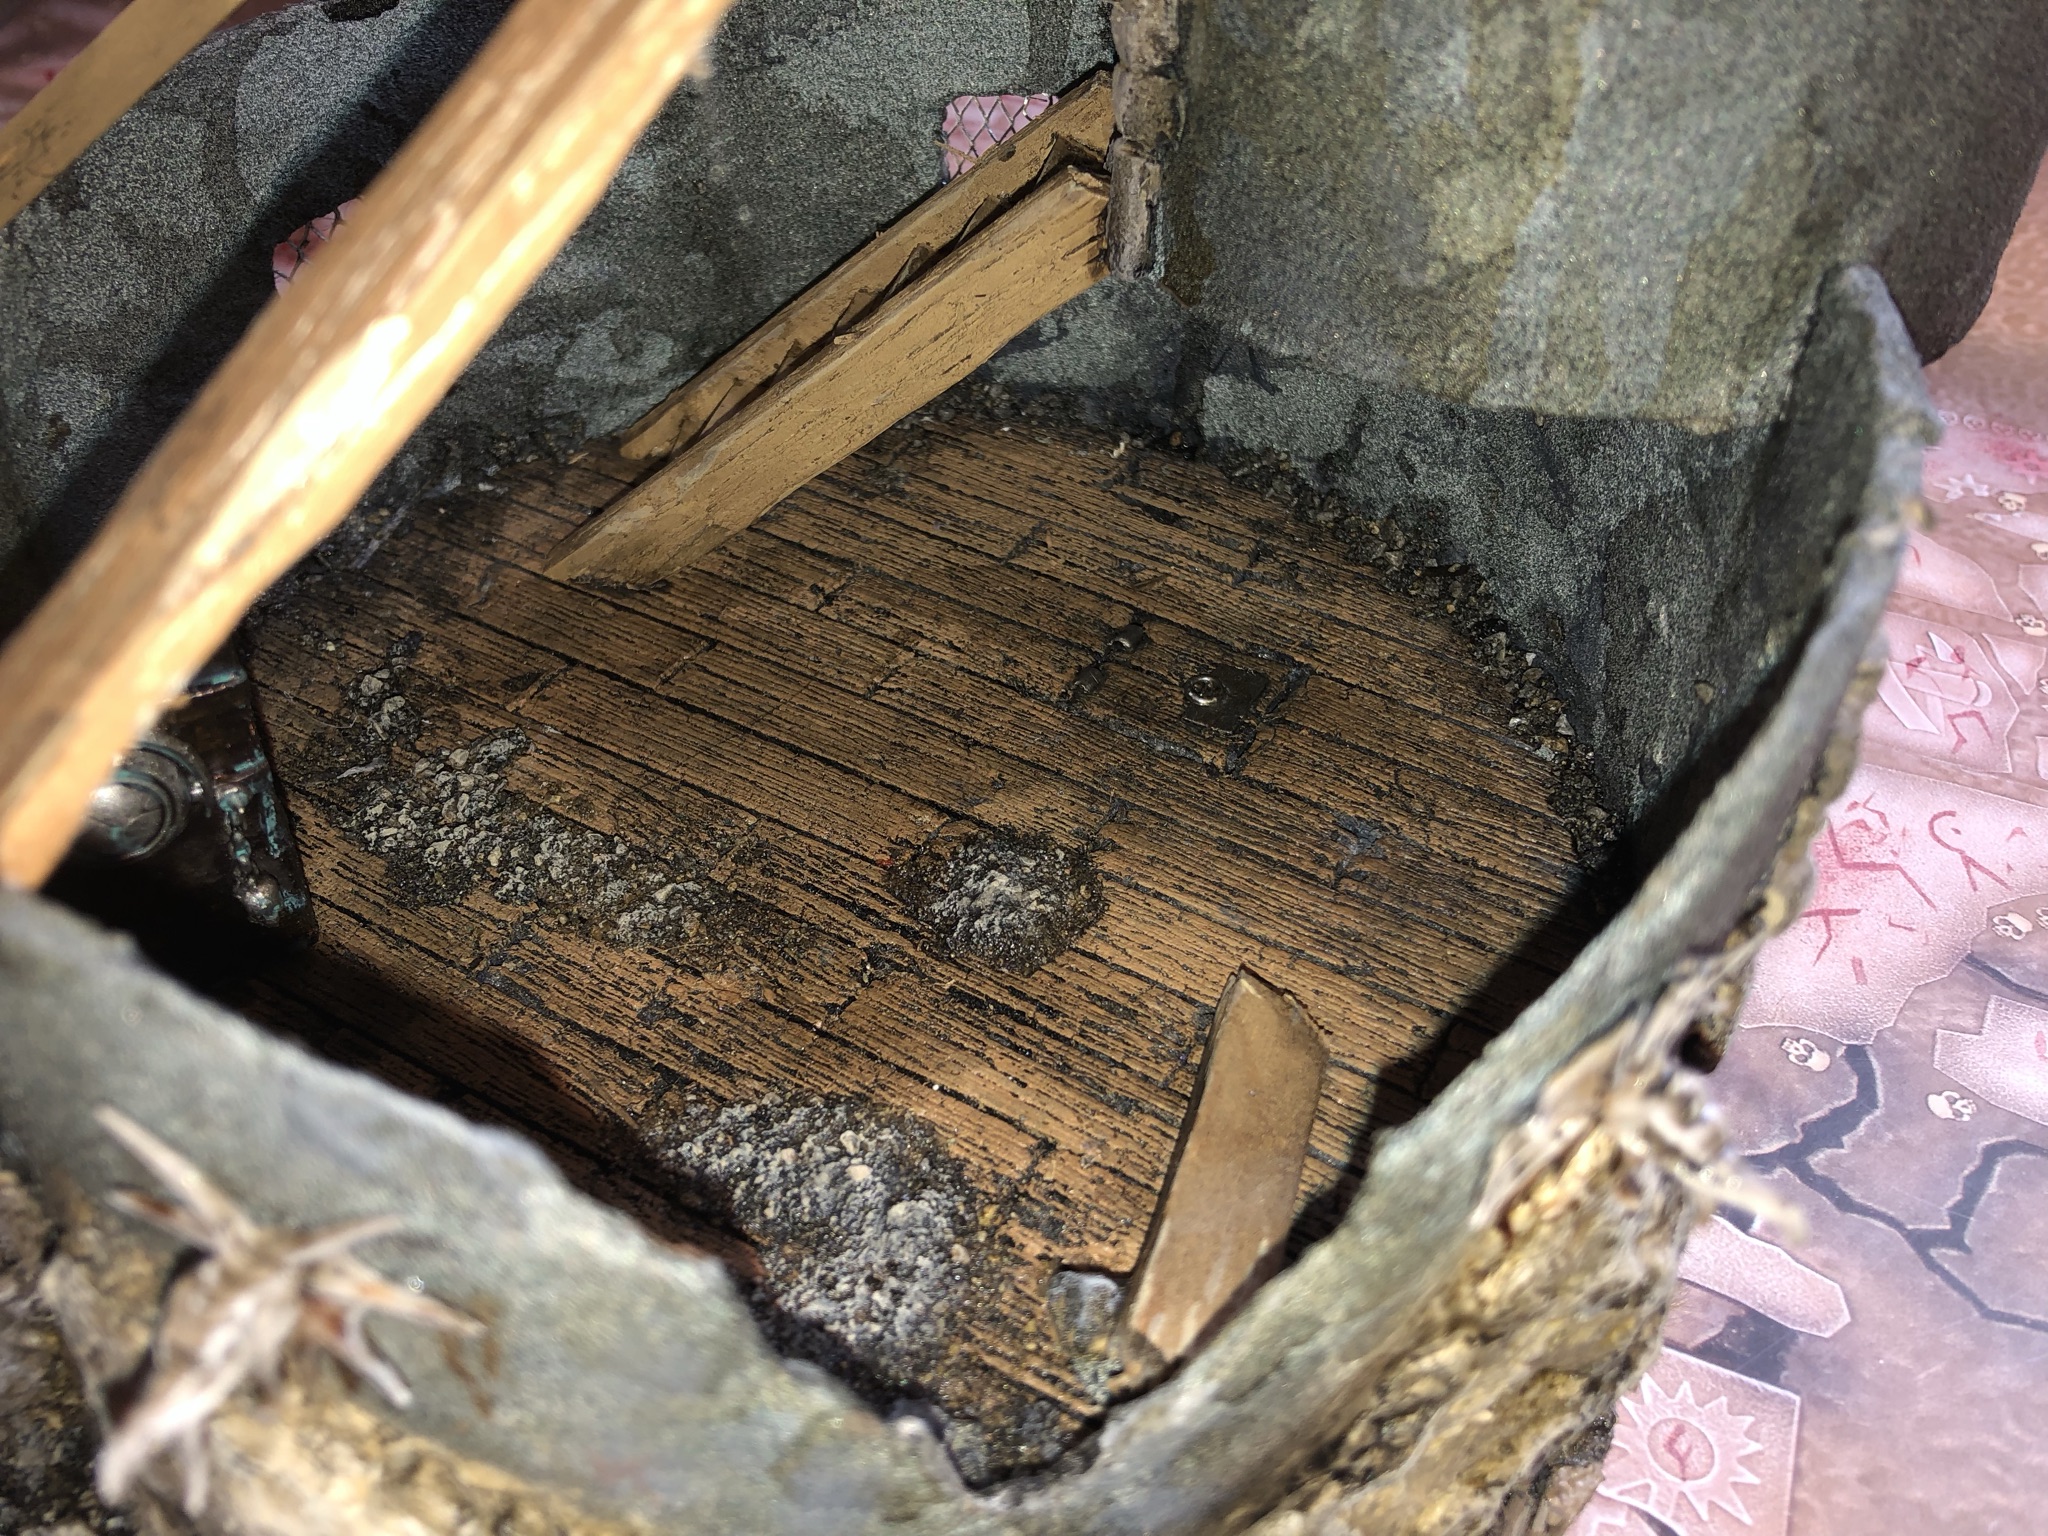
 For the first time, I used XPS foam as the inside floor. It was easy to texture with a wire brush. I am happy with the result.
I also added a small trapdoor: this can be a secondary objective as something could be hidden under the trapdoor.
Wizard Tower
This was a bit of experiment with a few new techniques.
I chose purple shingles as it makes it stand out from the other buildings.
The overall structure is made out of two cylinders of cardstock.
What did not work as expected: I used a textured spray can to paint/texture the stone walls (krylon granite textured primer). In theory, it would texture AND paint the surface in one go.
In practice, it did not produce a very pronounced wall texture. I should have stick to good old fashioned xps bricks (which can be found around the gargoyles’ head).

More Elaborate Barricade
This one is more like a barricade than a fence (and it makes more sense in the setting).
The door and crates were made with balsa wood.
A lot of highlighting, but I like how it came out.
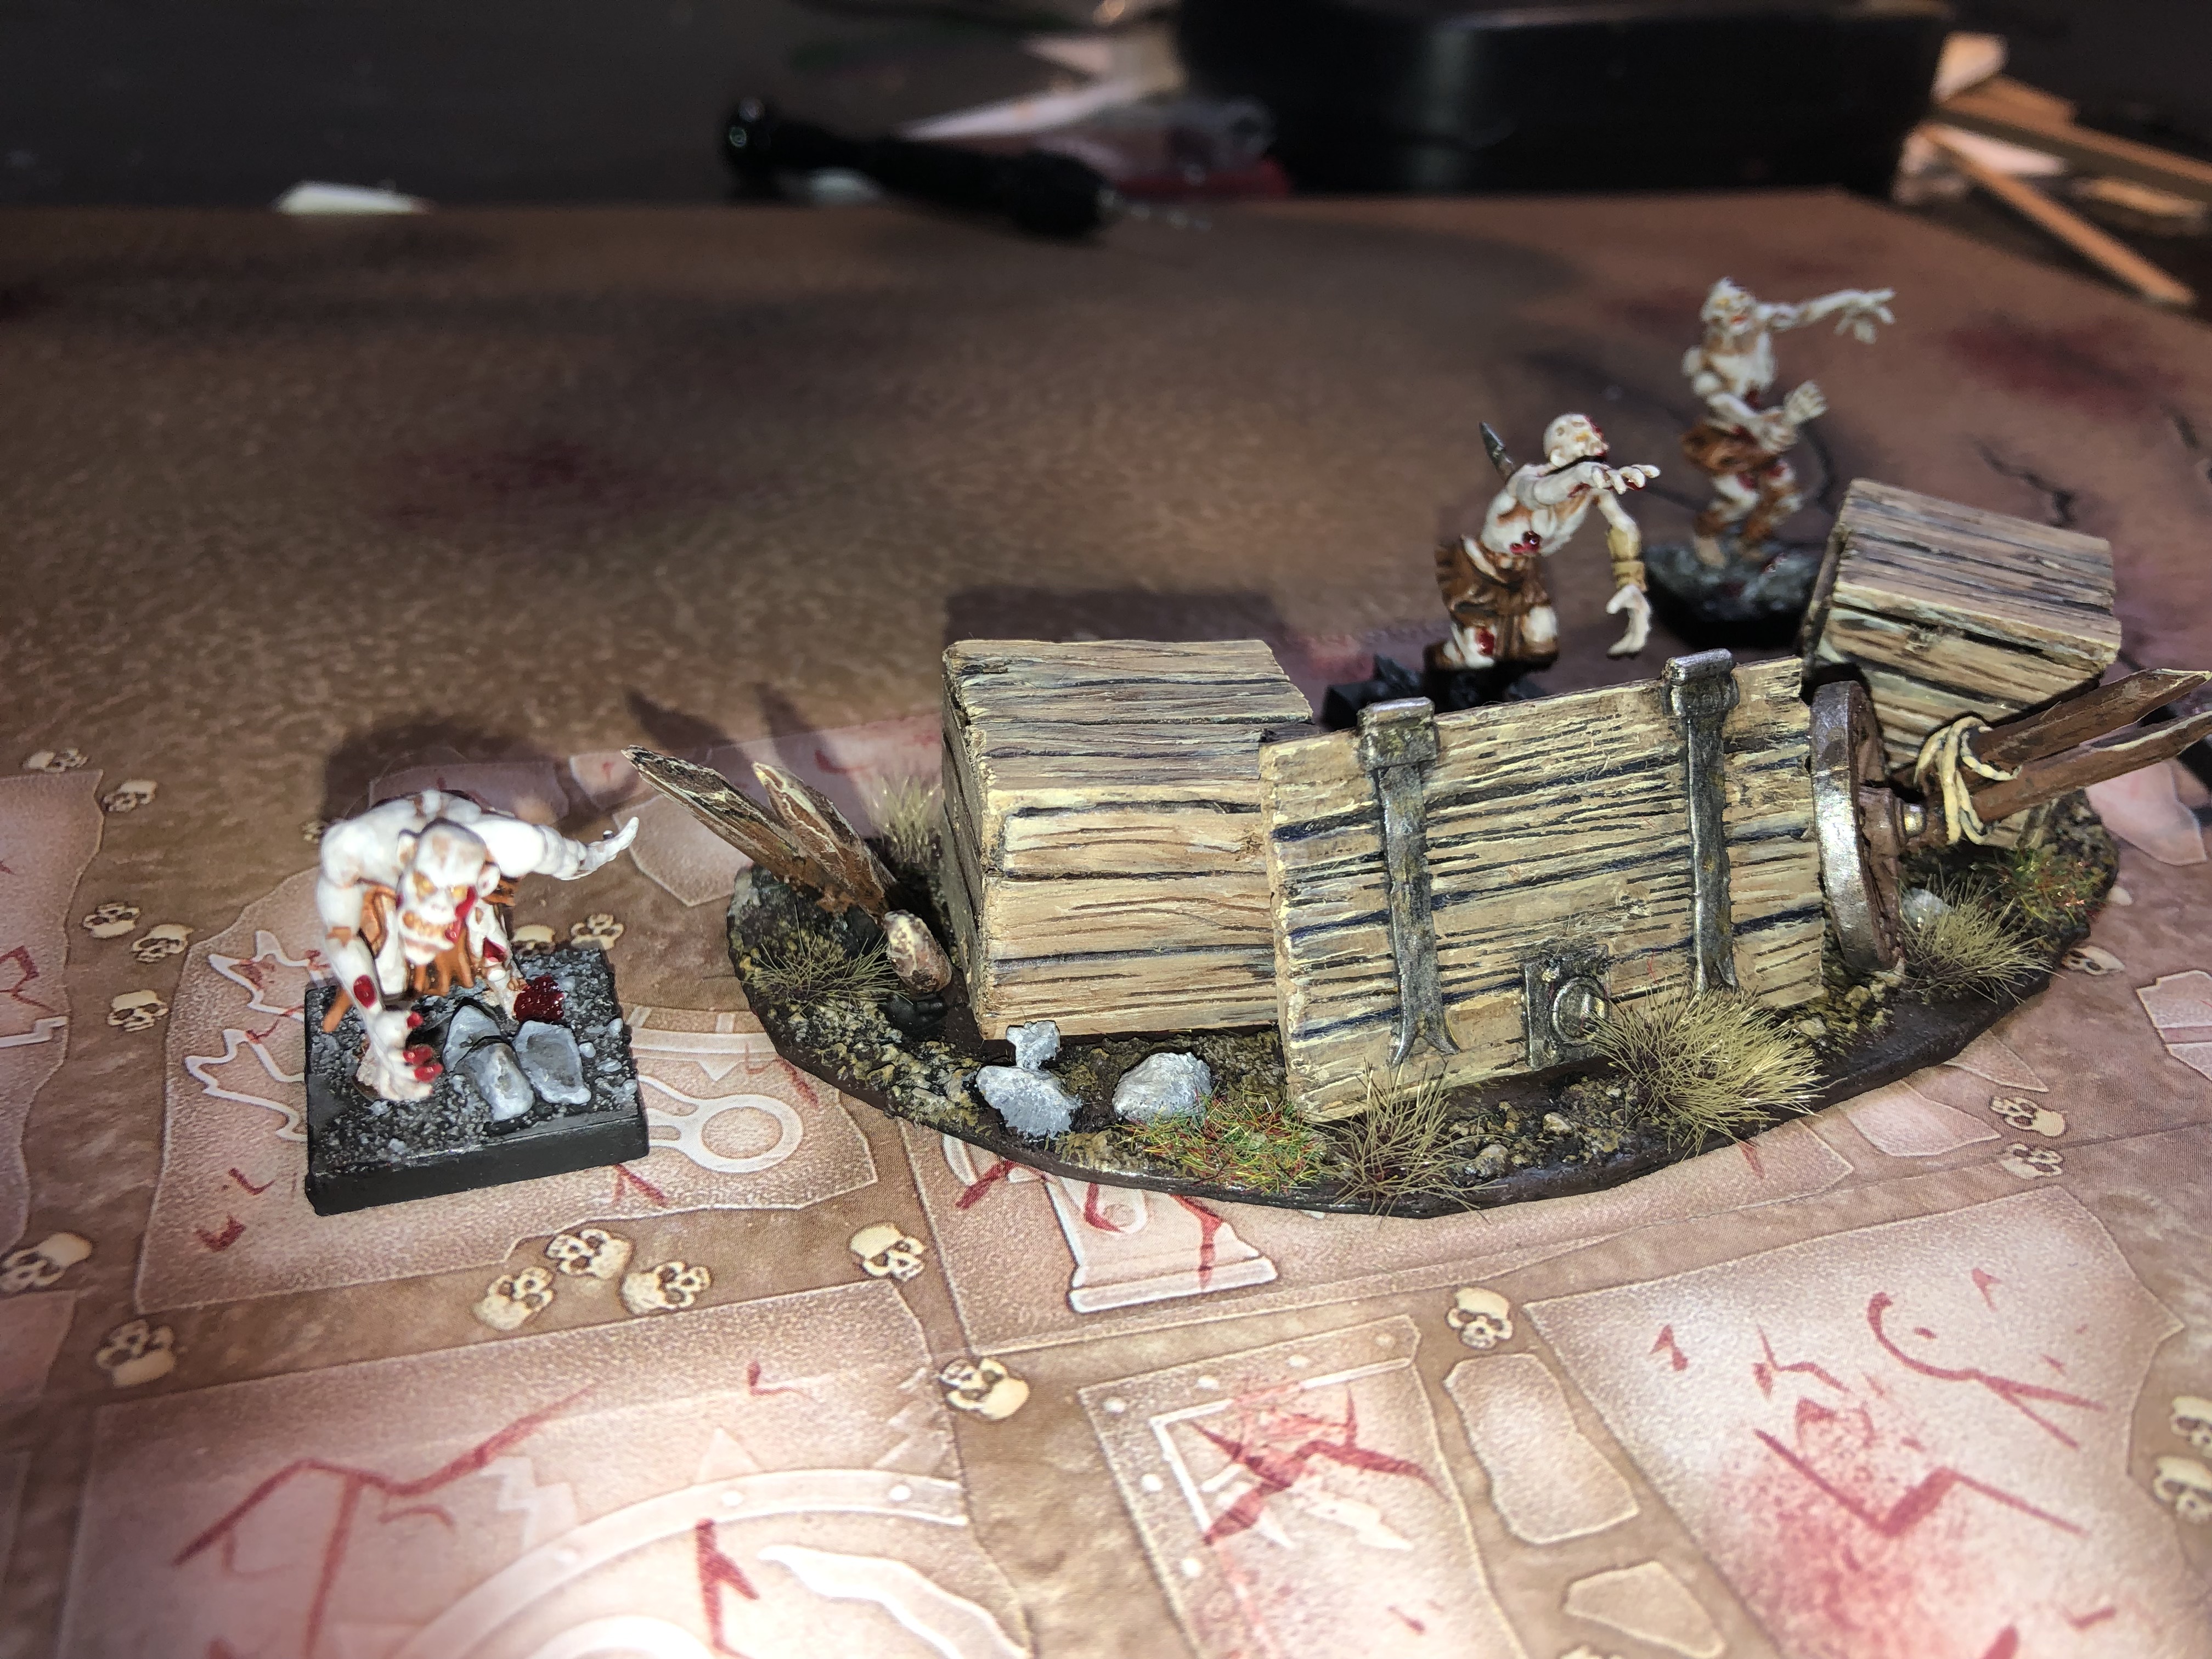 Everything looks better with zombies…
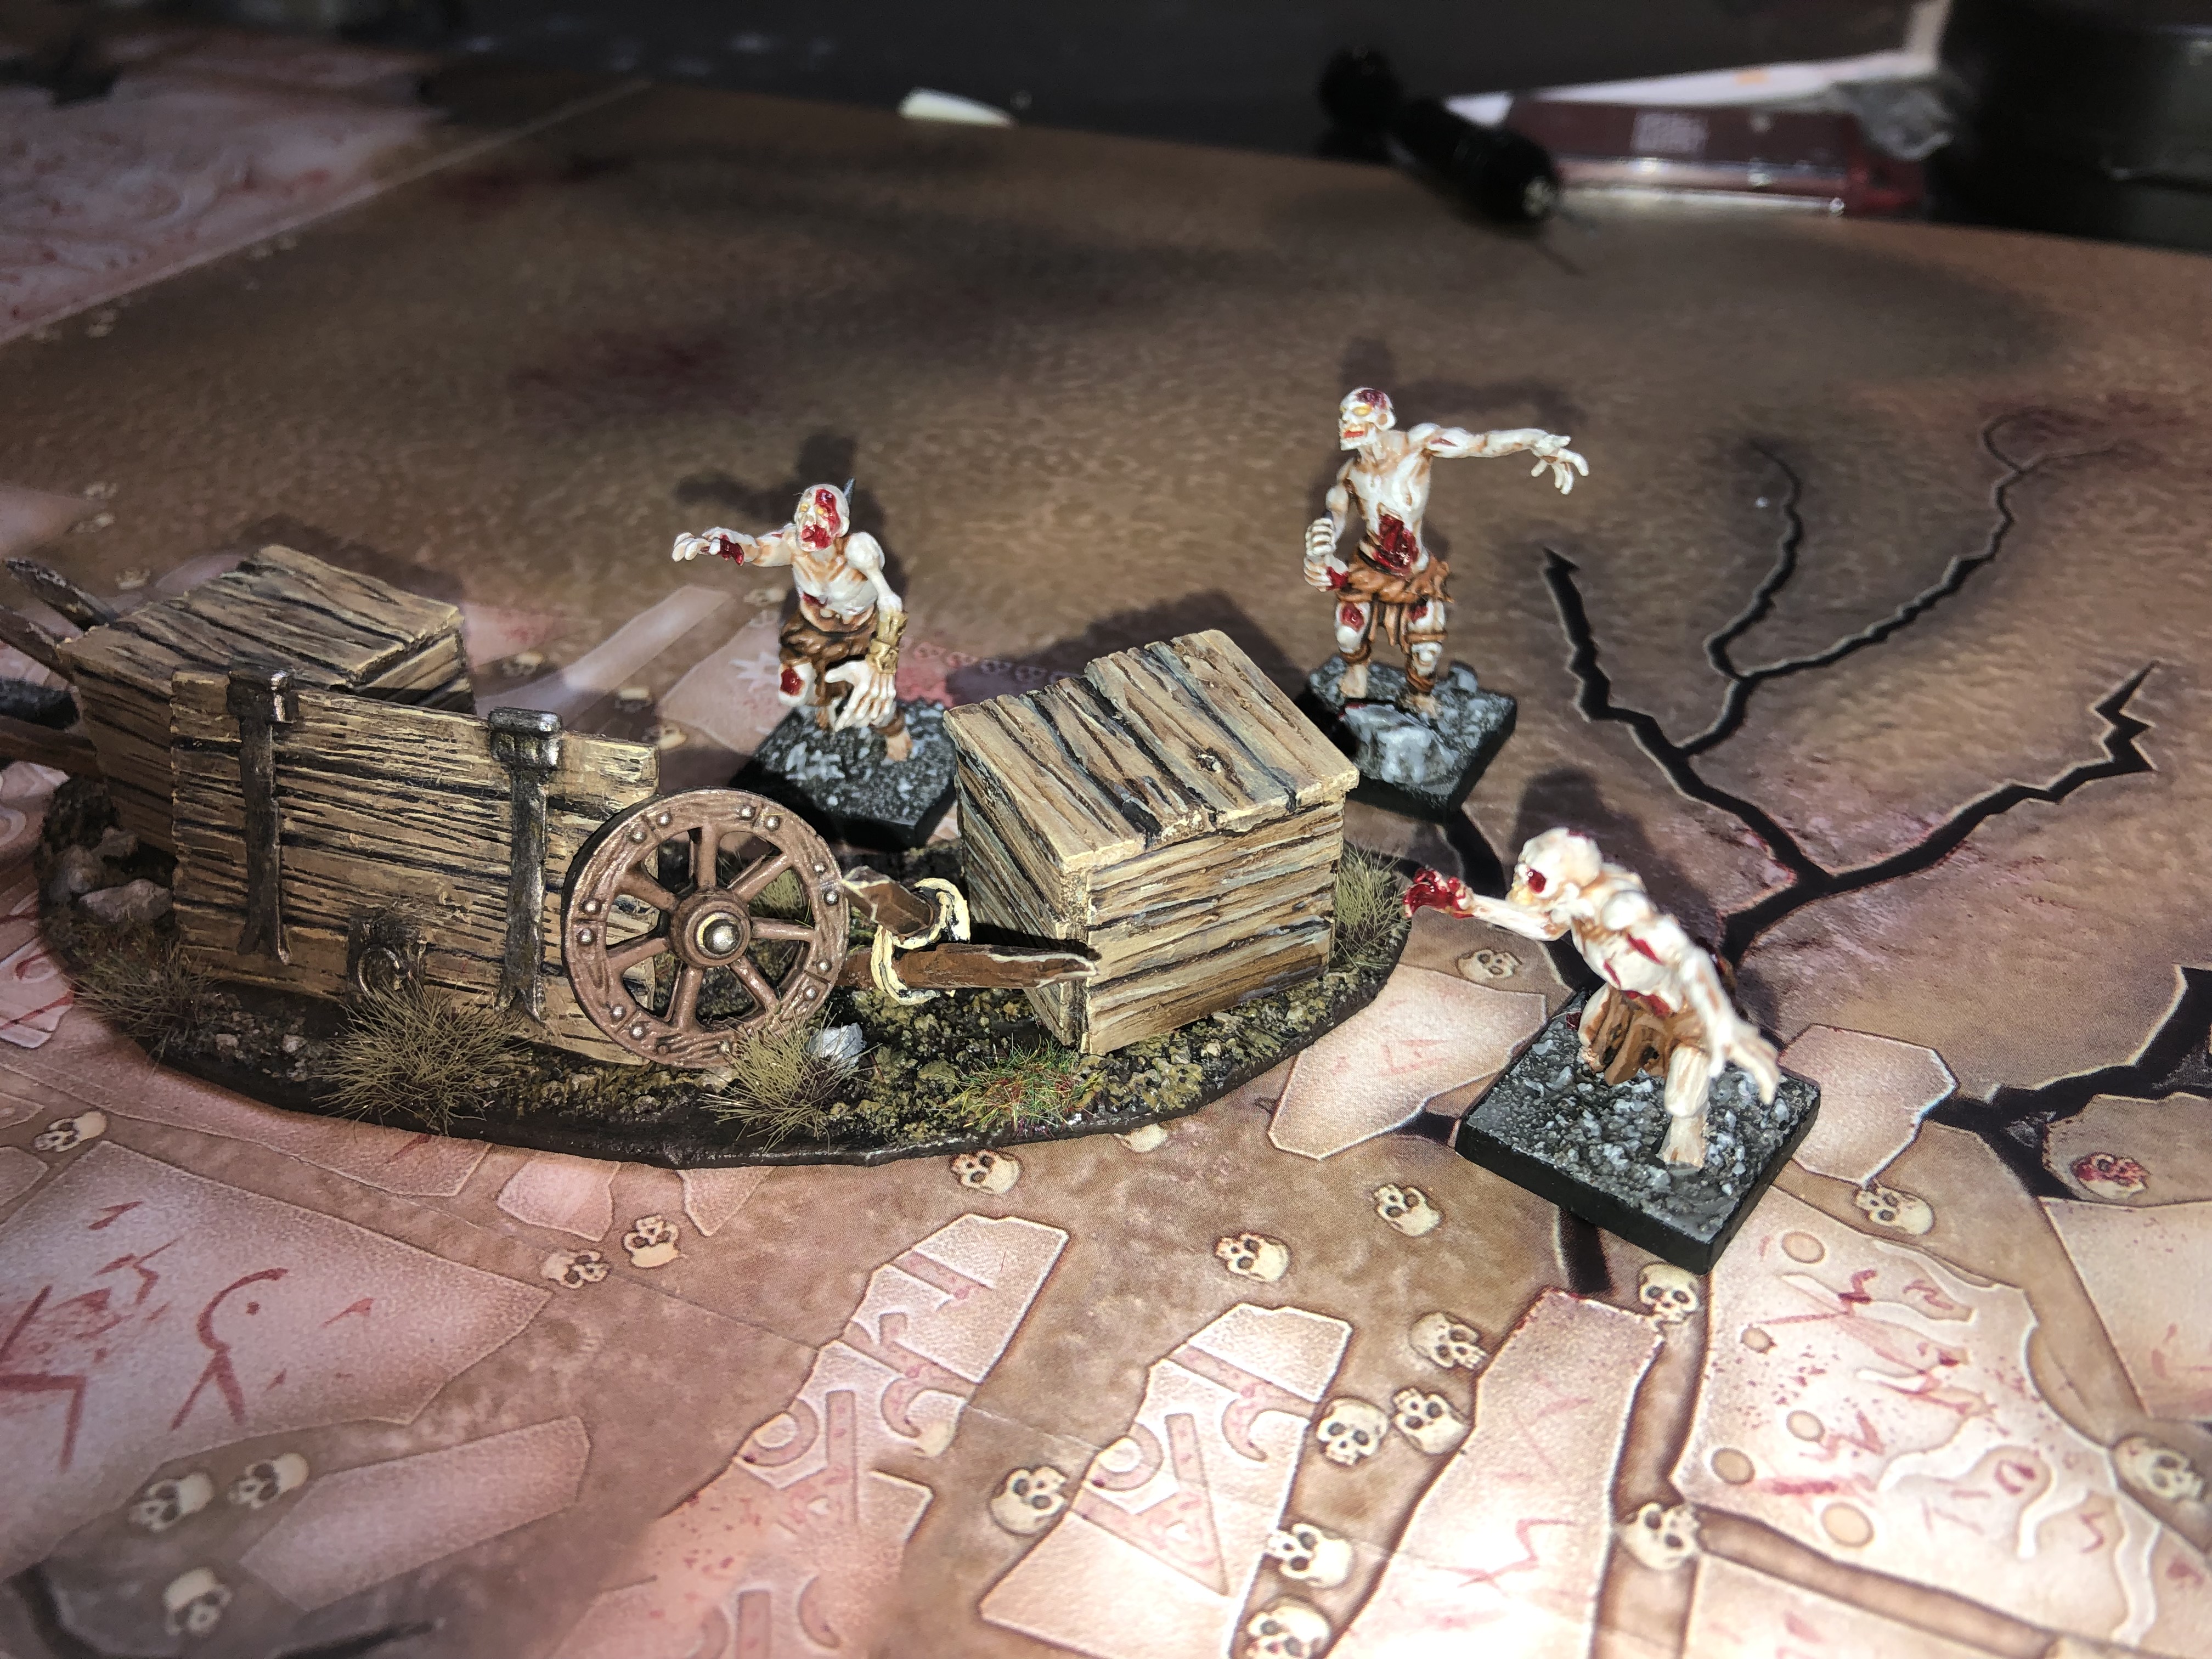
Simple Fences
Simple fences to offer some cover.
The wood is matchsticks (bought at the Dollar store) and some balsa wood.
It was an opportunity to try different color scheme to paint wood. I settled on base coating with a light tan (instead of brown), washing it with Agrax earthshade (GW), and some highlighting with Dark Sand (Vallejo).
 Always nice to add some arrows sticking out. Plus it adds a bit of color :)
 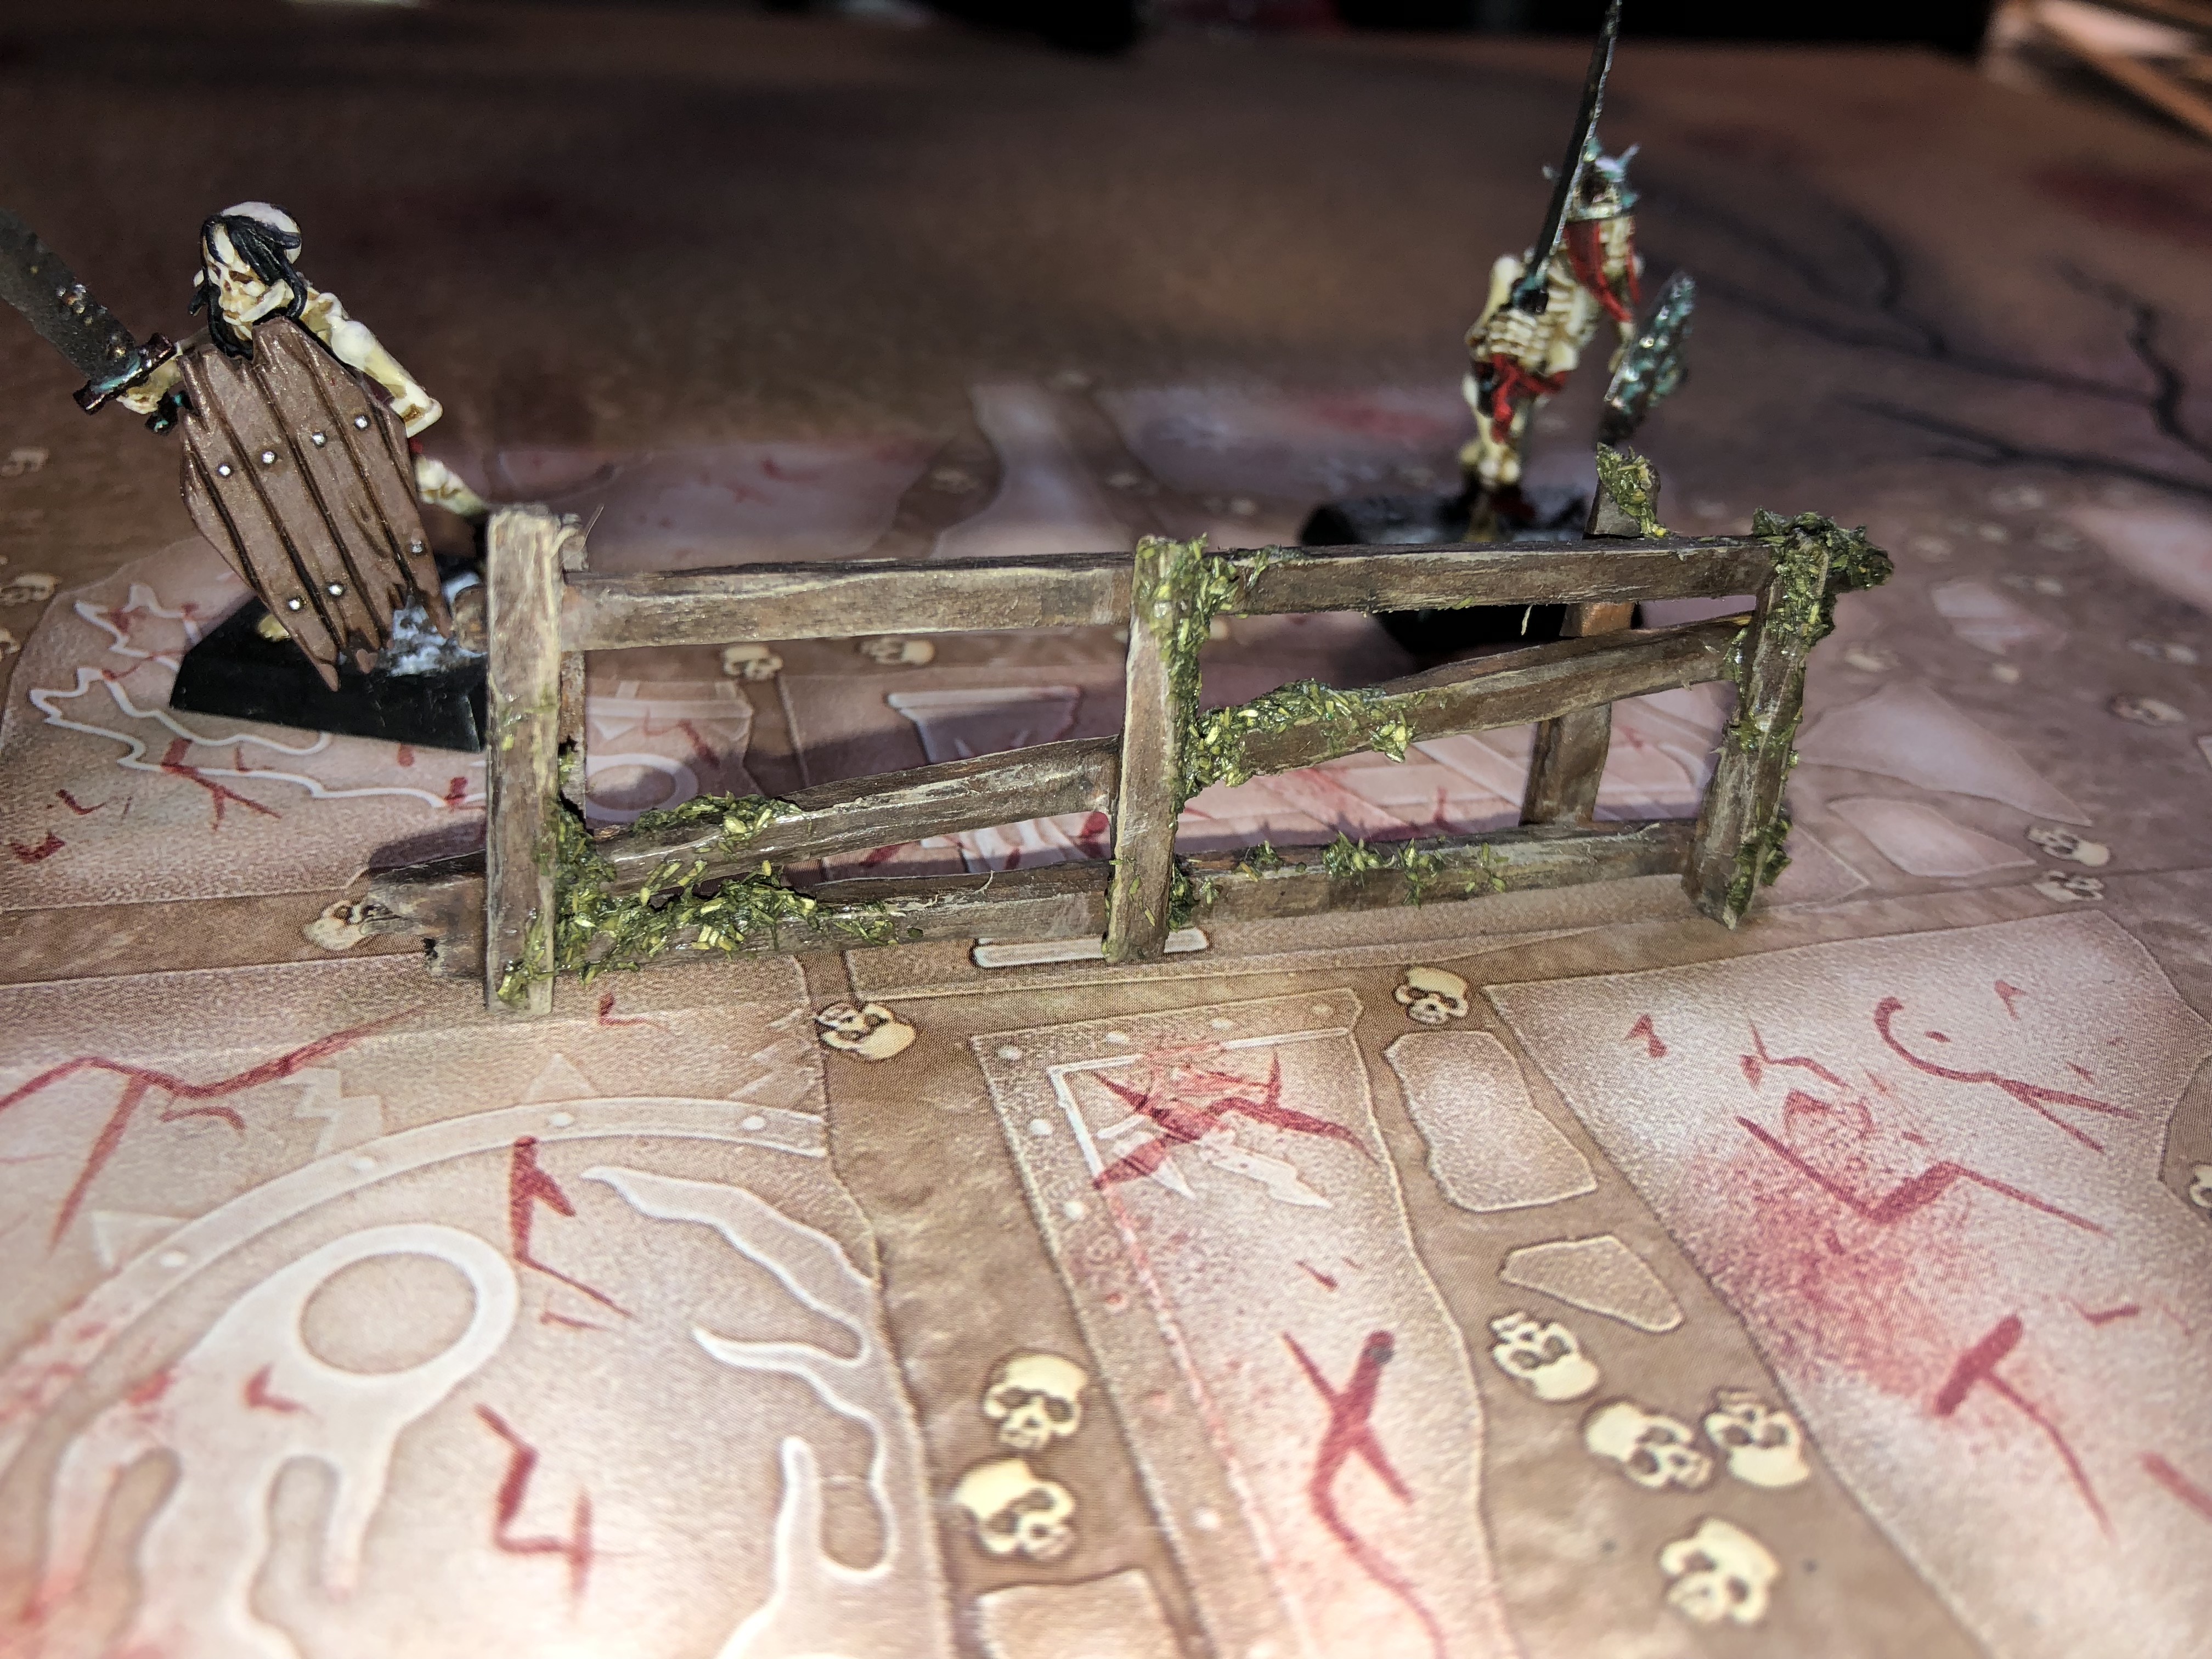 This one would fit more in a farm than a ruined city setting...
  Orc barricades/fences that also match my Orc Watchtowers set
  And for last, my favorite fence
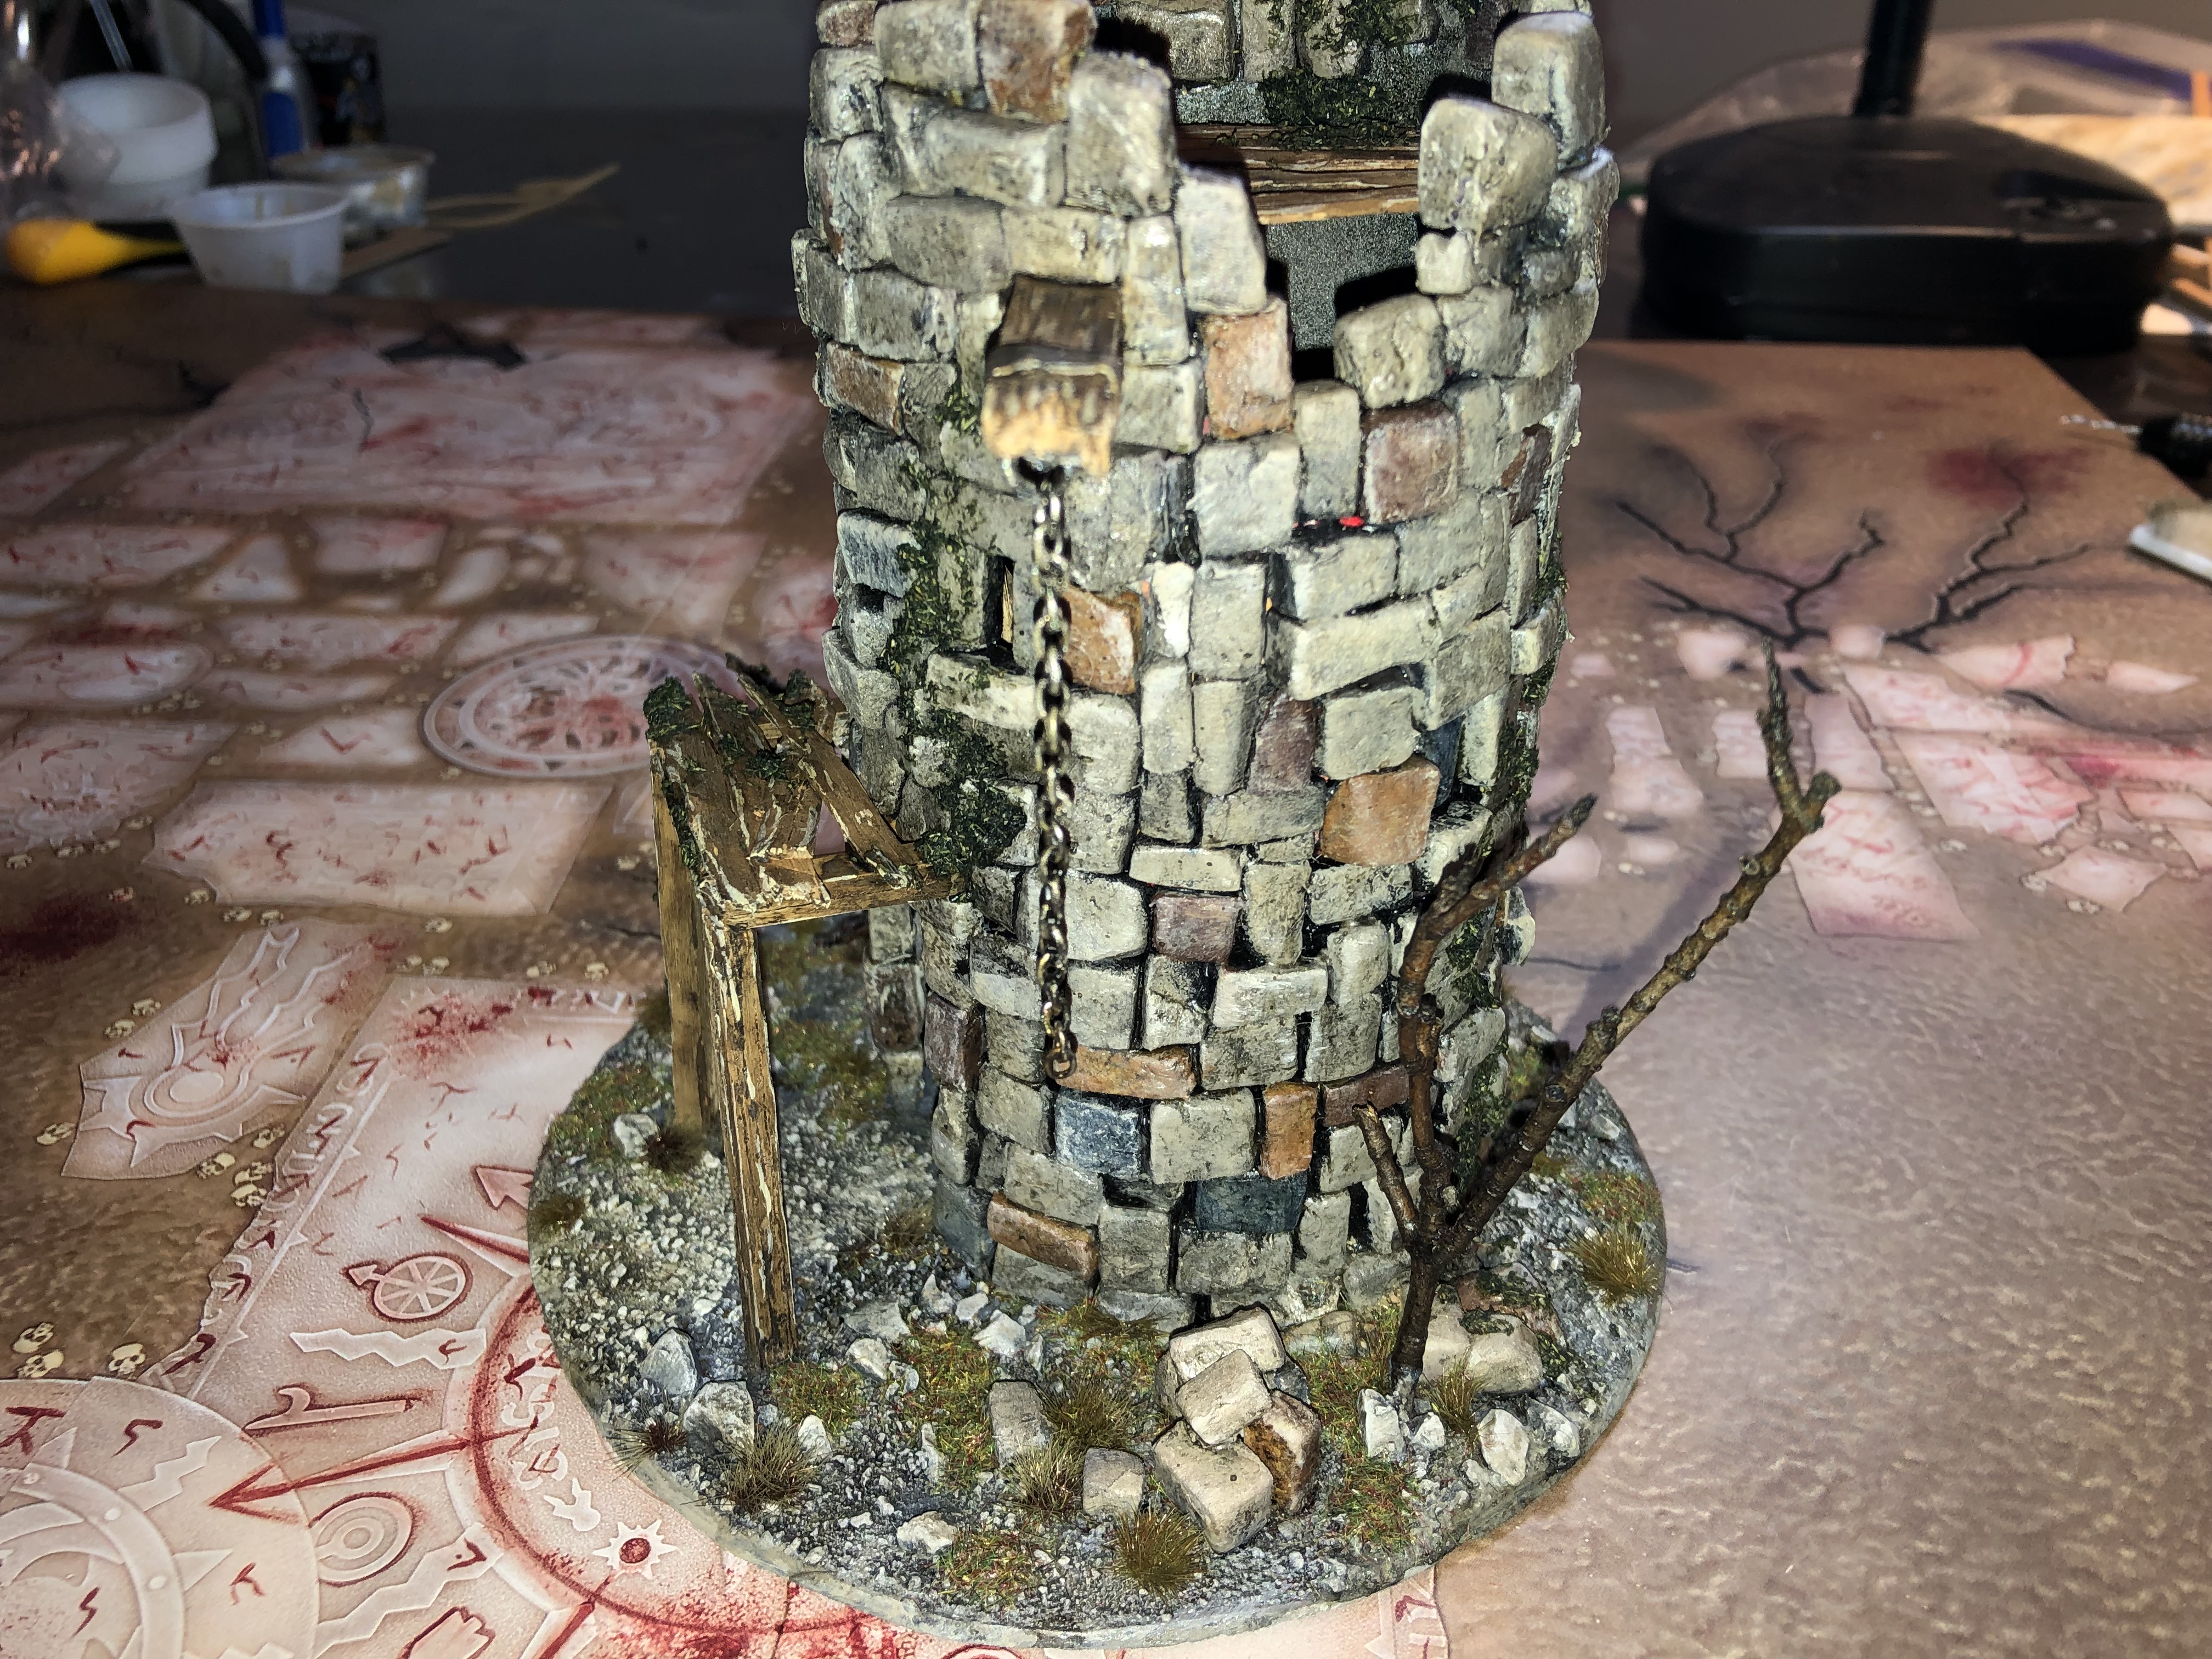
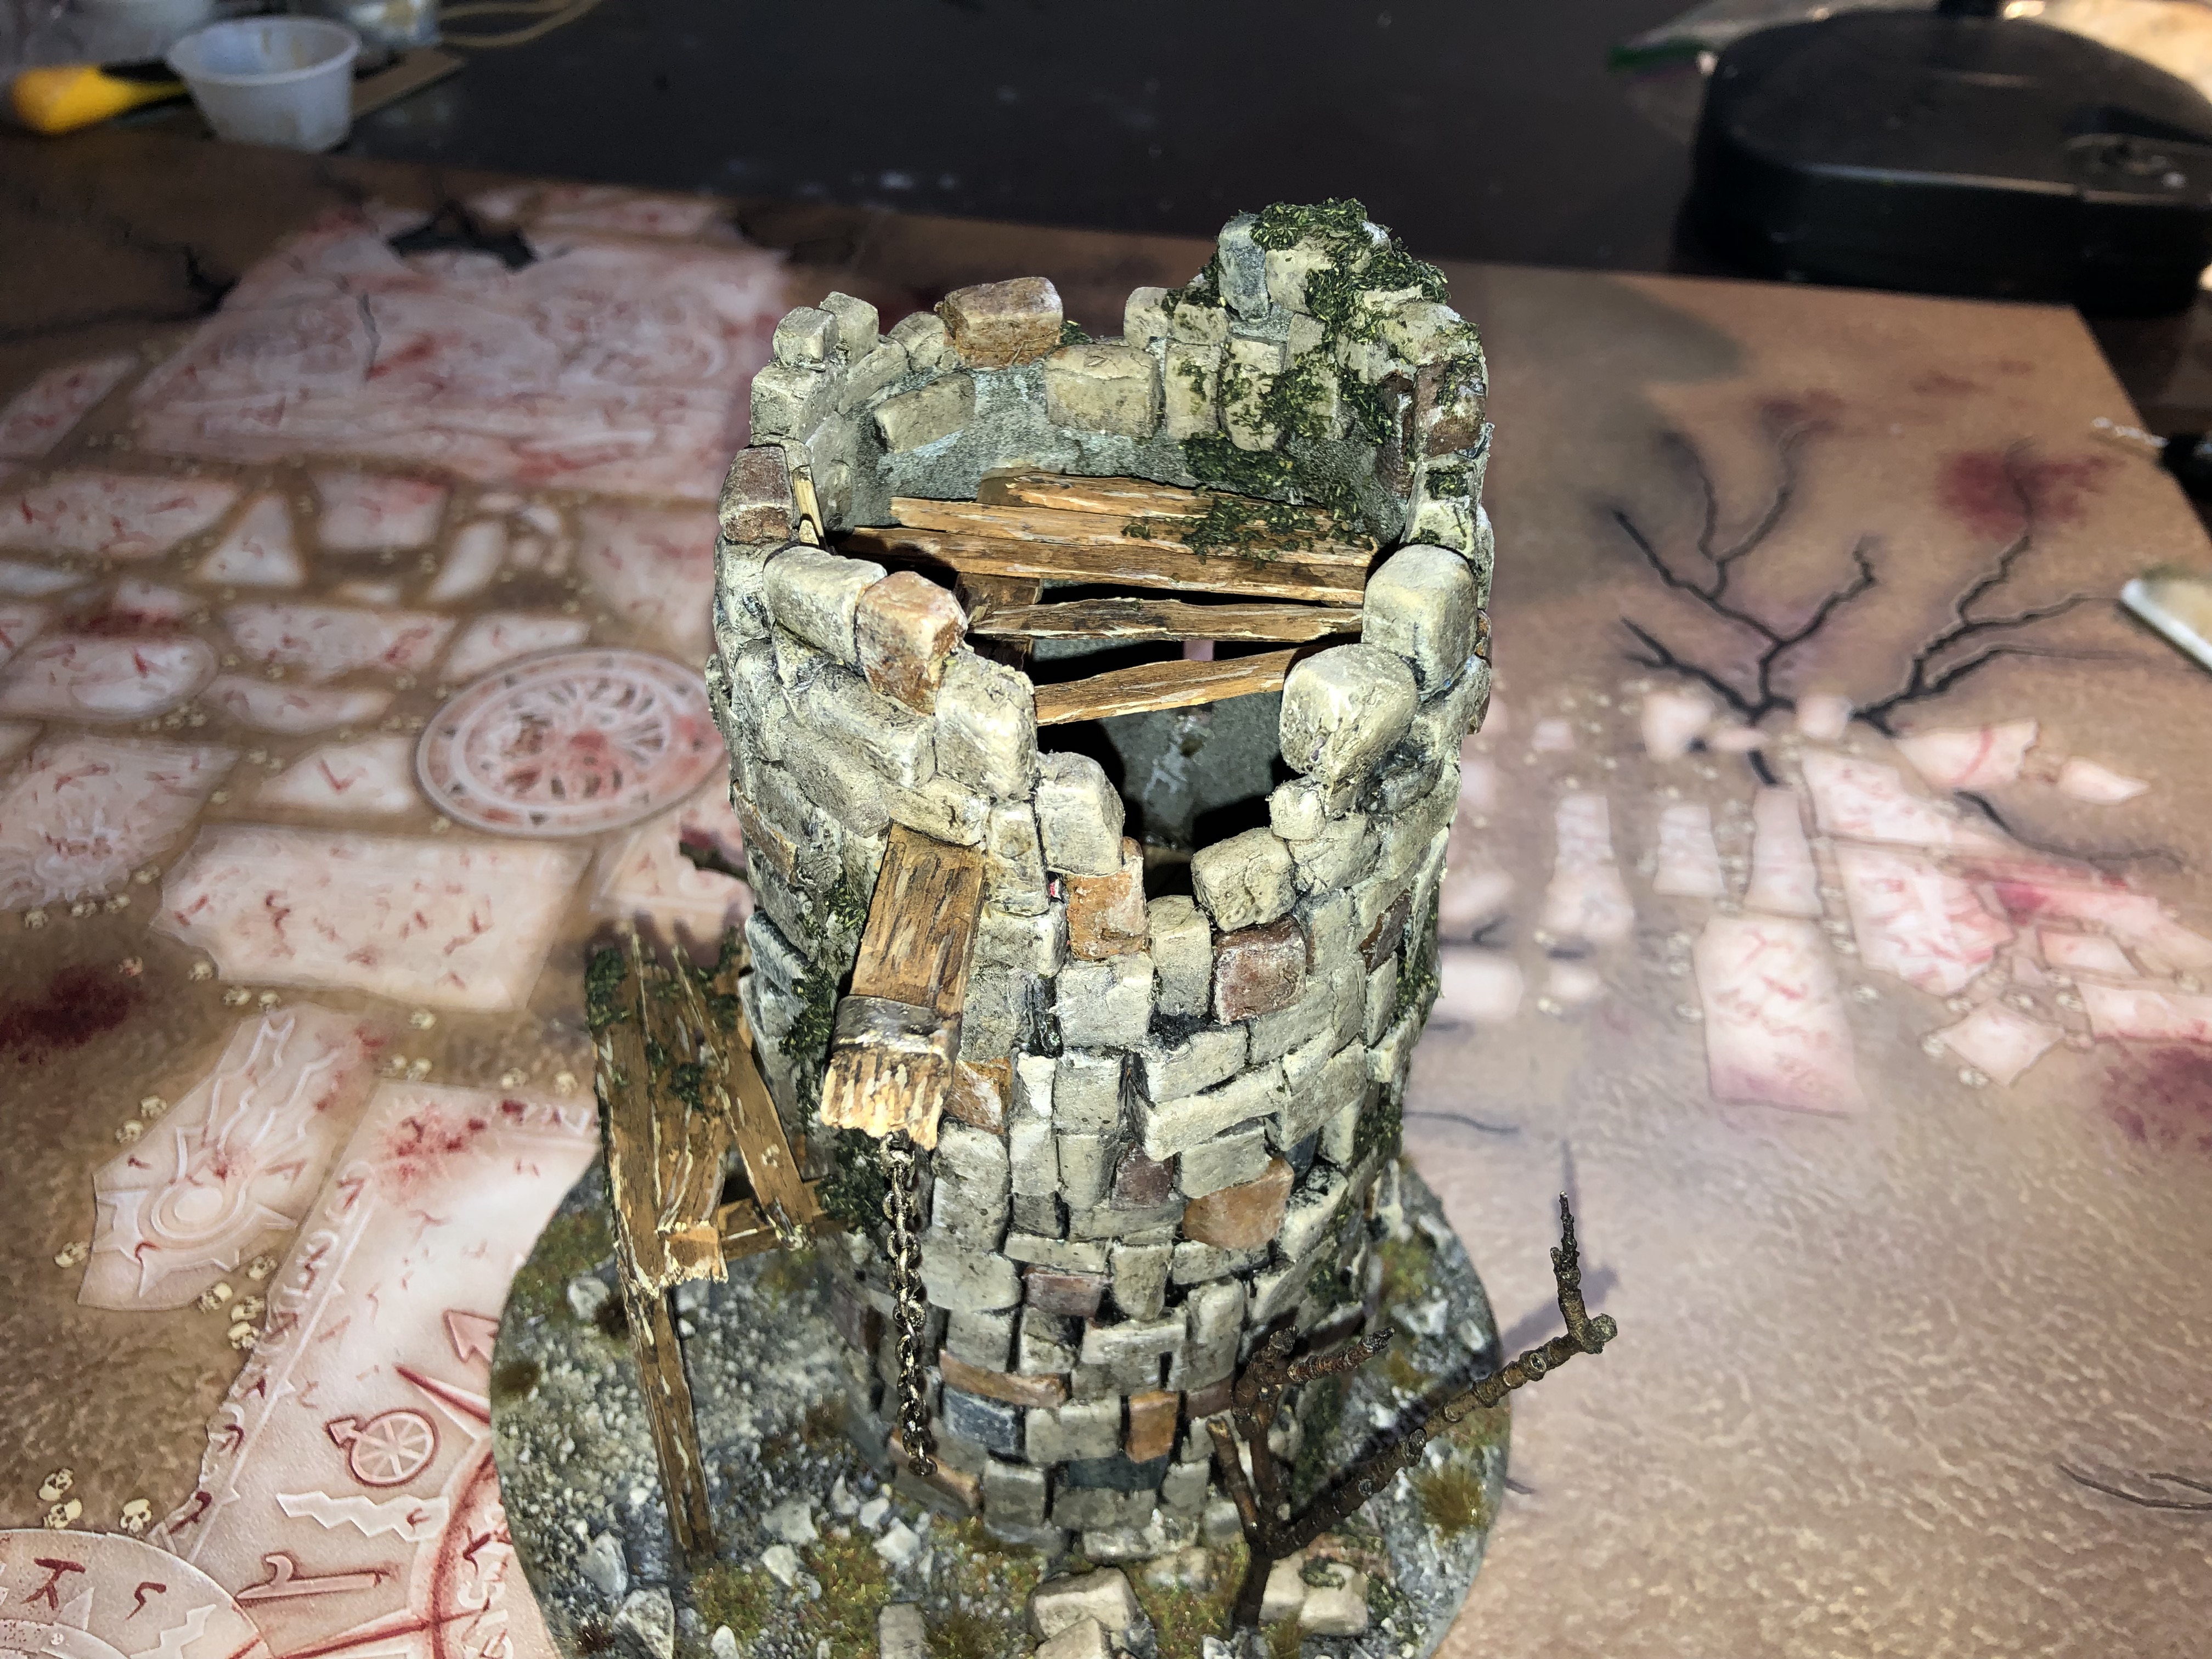
Ominous Stone Tower
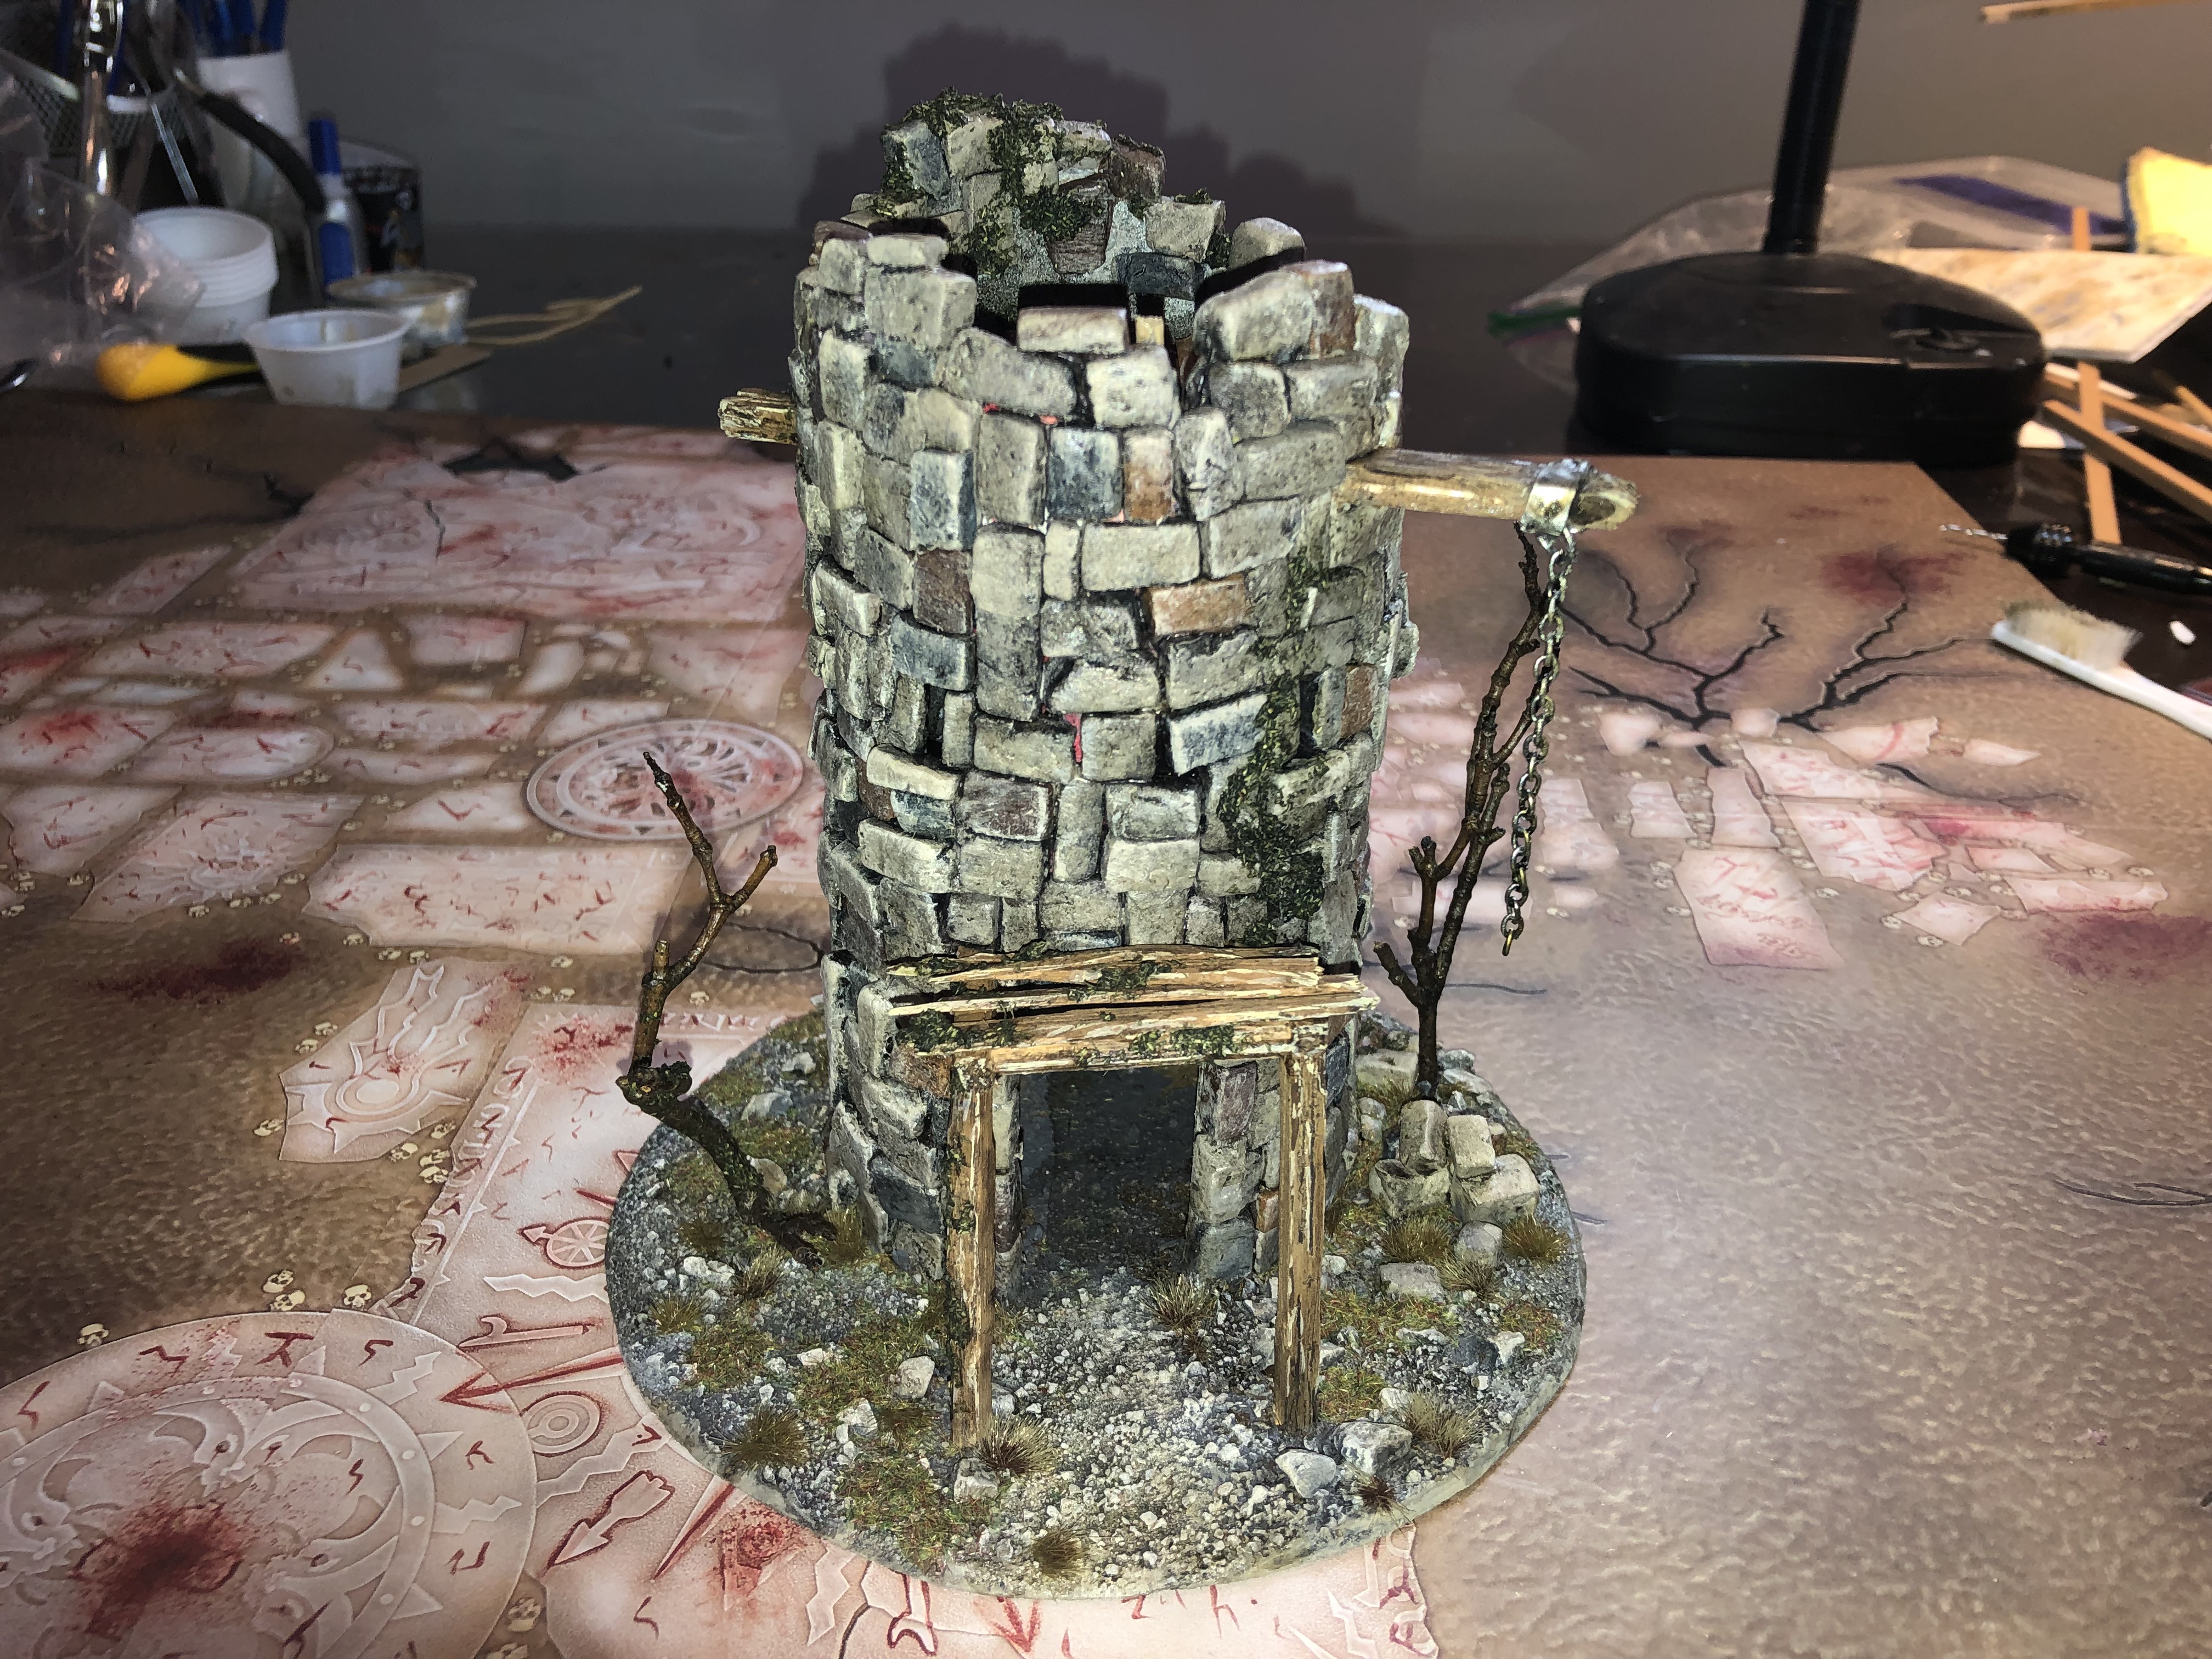
One of my favorite piece of terrain. The dead trees add an interesting gloomy feature.
XPS foam bricks glued over a cardboard cylinder for structure.
However, it’s not the best piece for playability: there is only one way inside the tower and the second level can only be reached by a very long ladder.
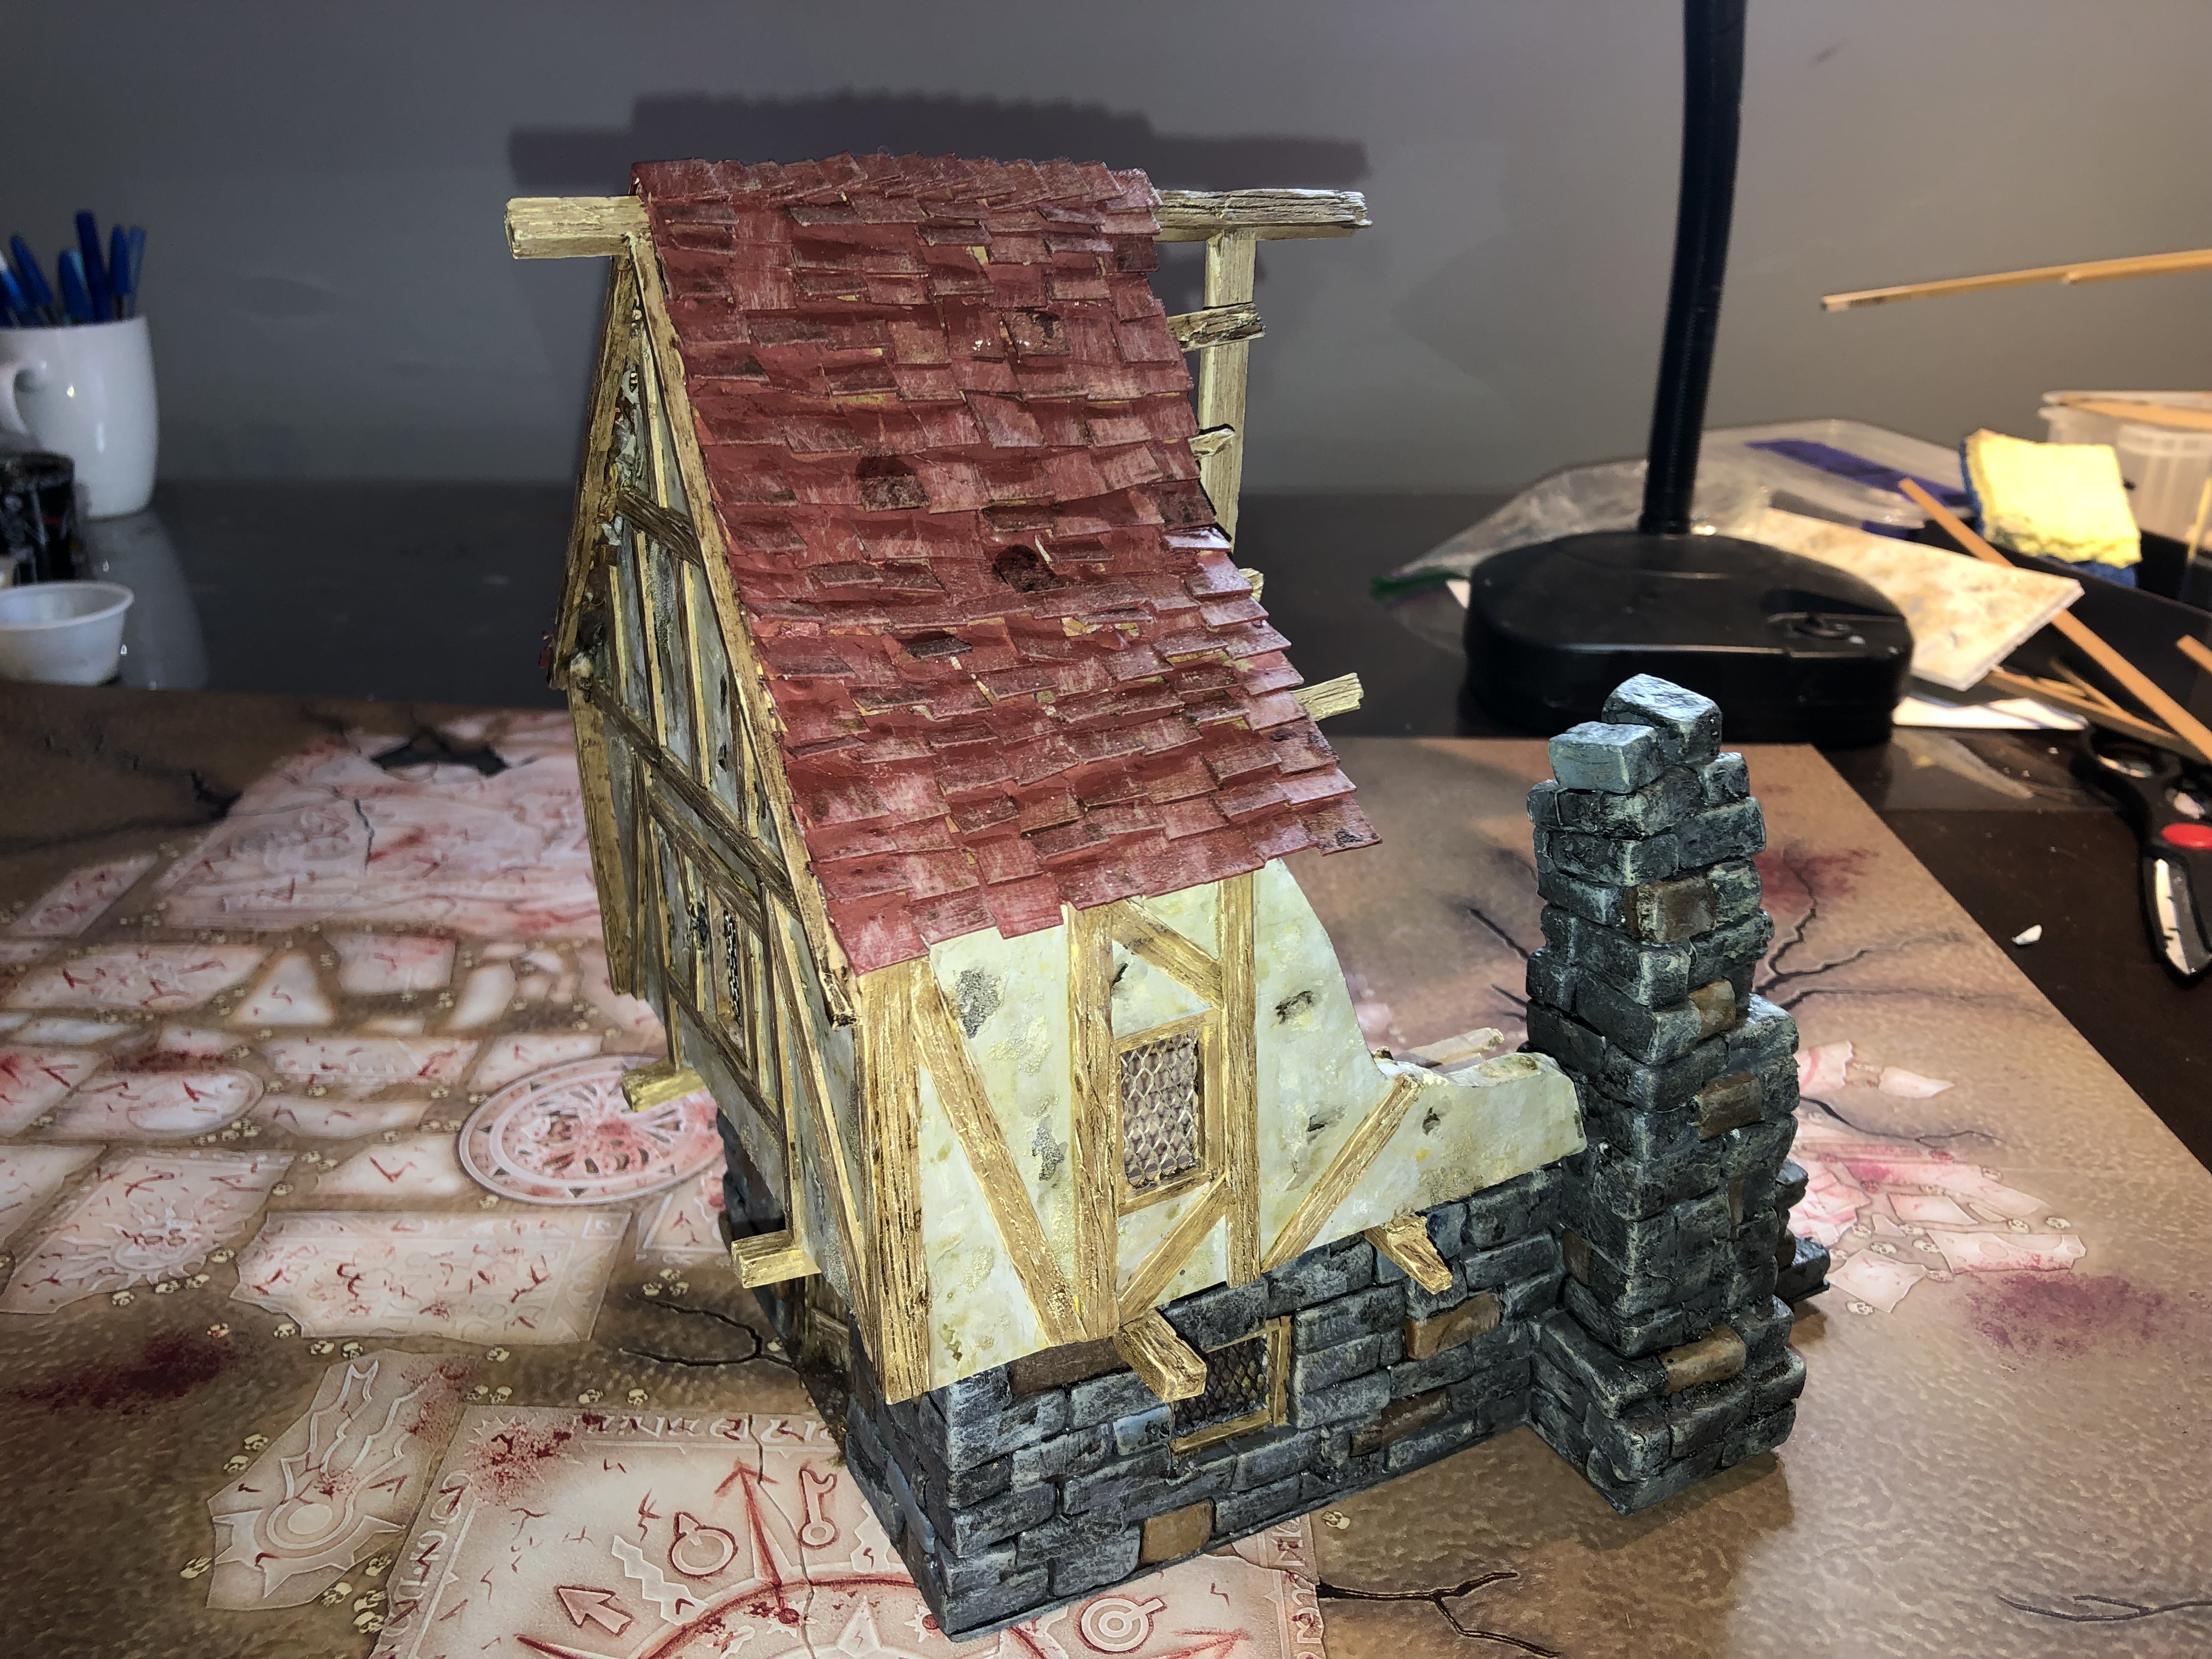
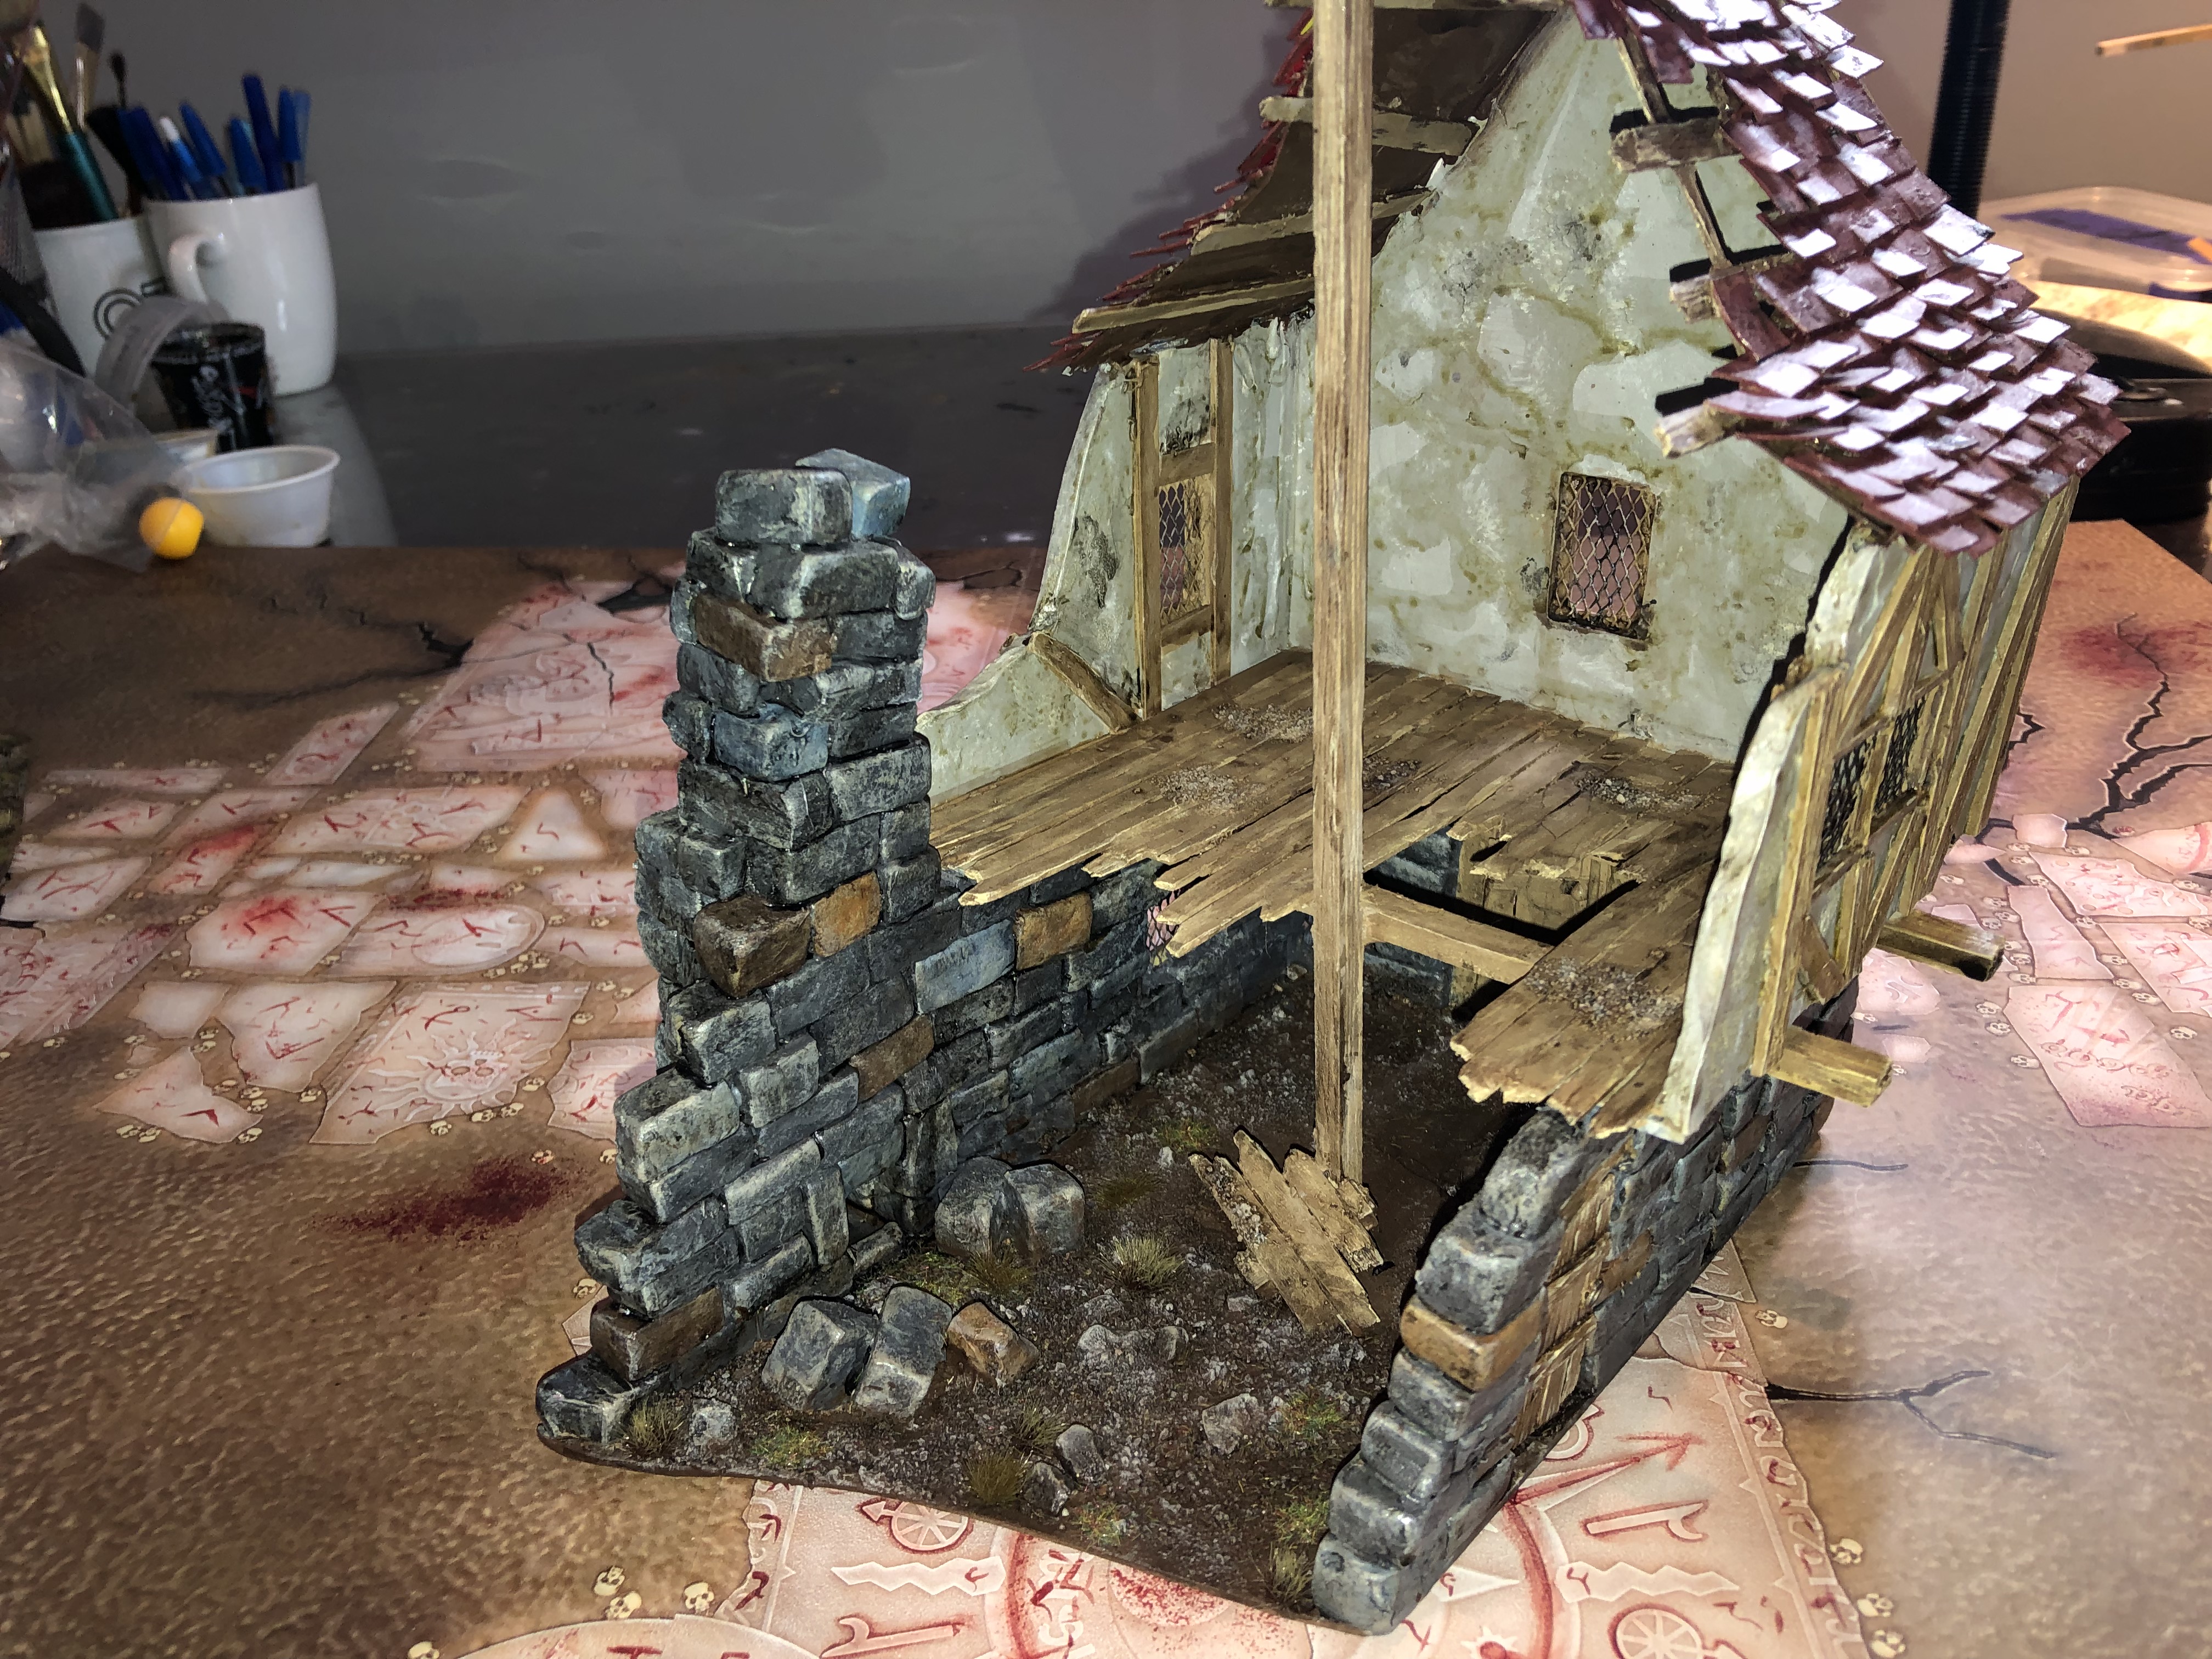
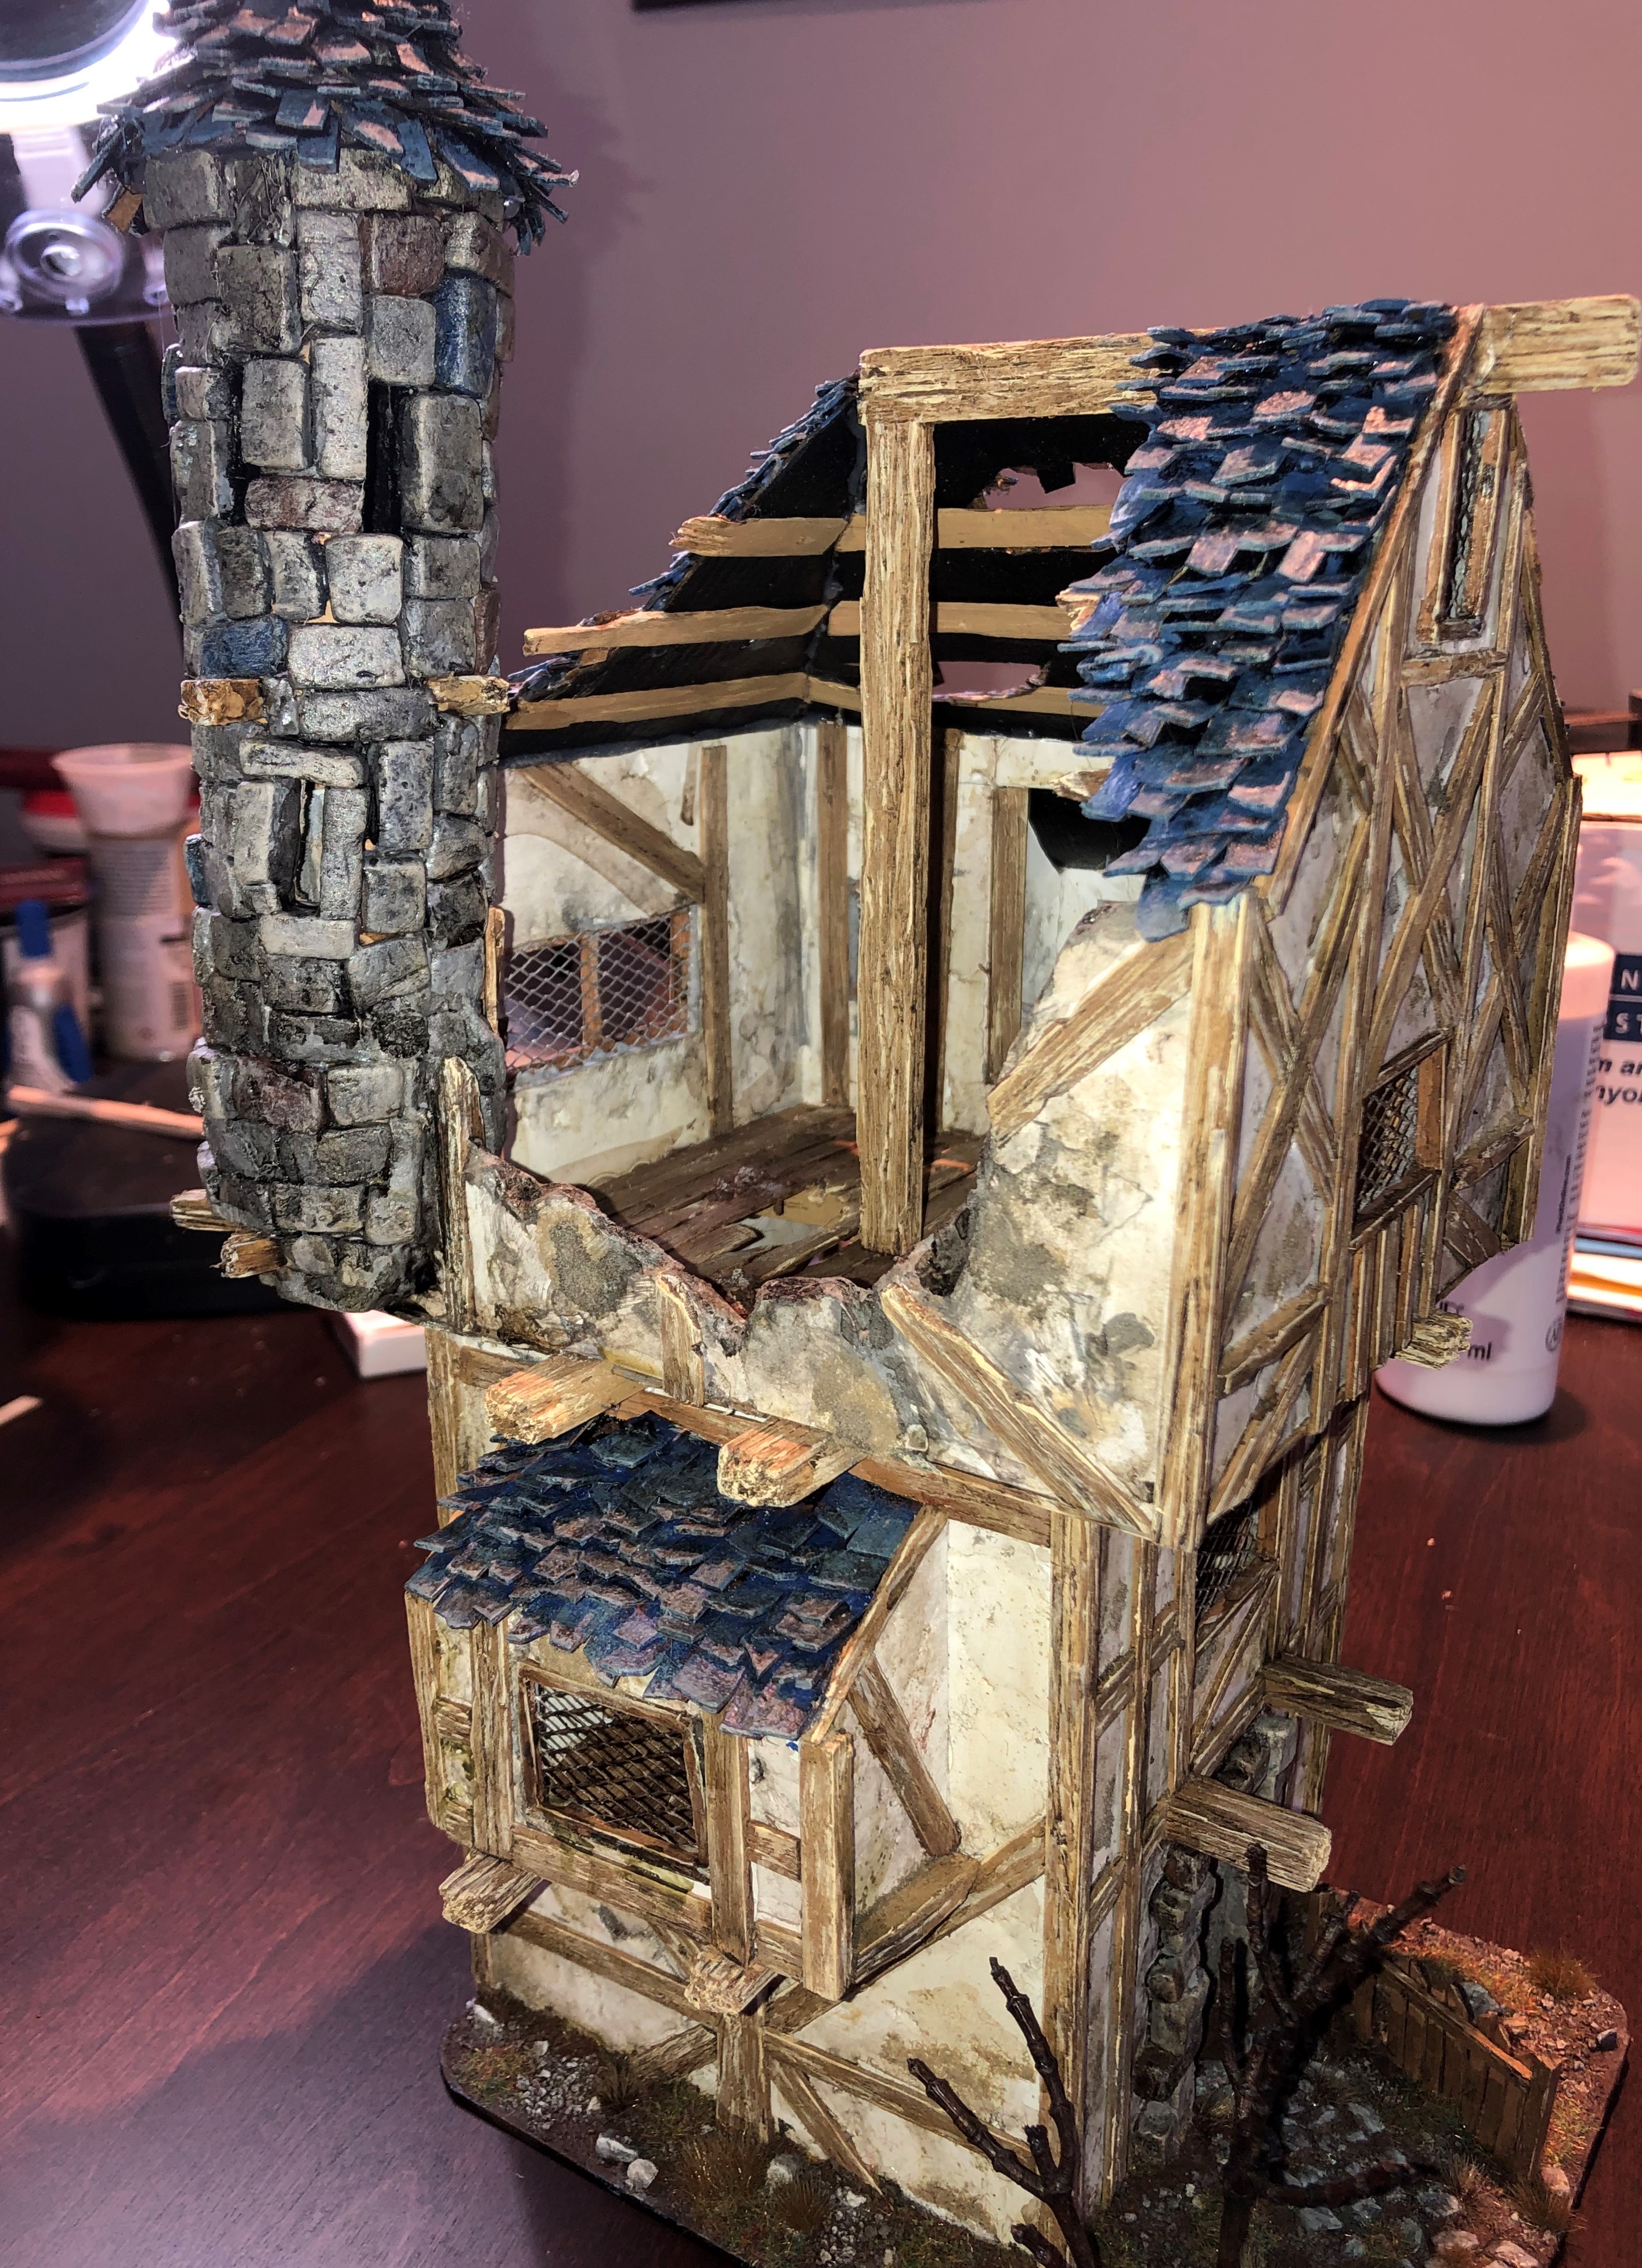
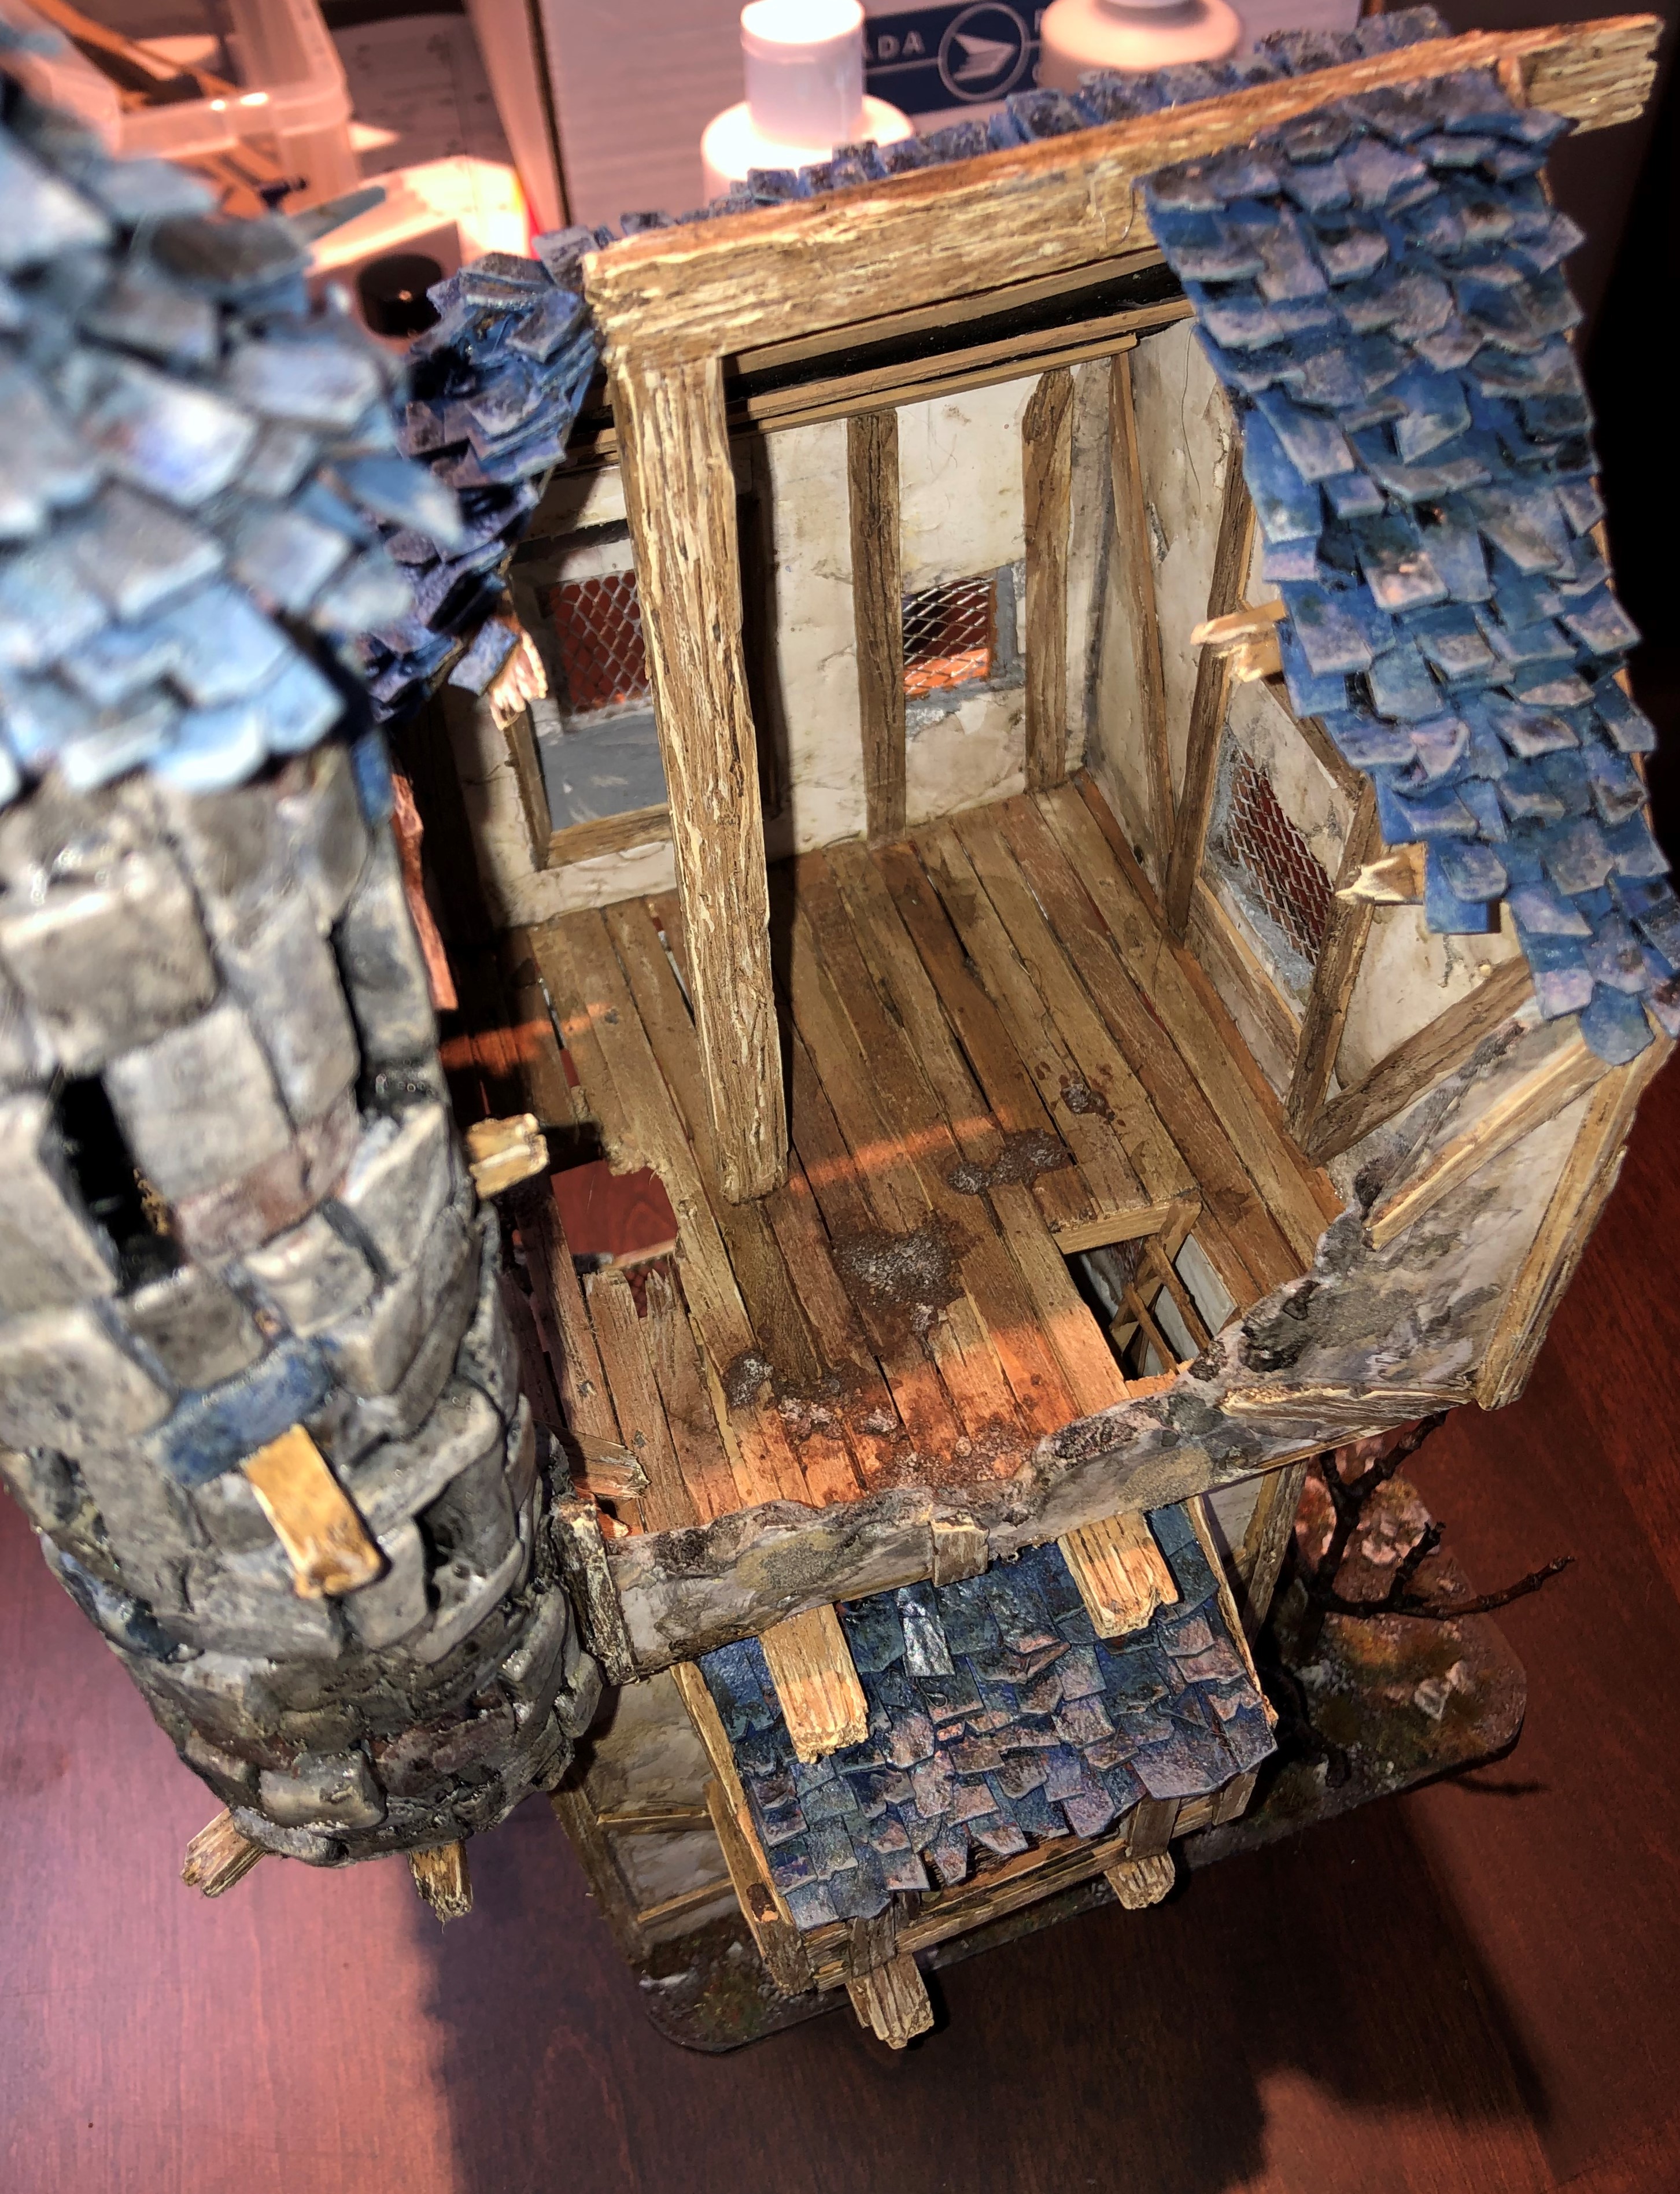
Additional shots of the Second Tudor House
Since I couldn’t load all the pictures in one entry, two additional shots of the second house.
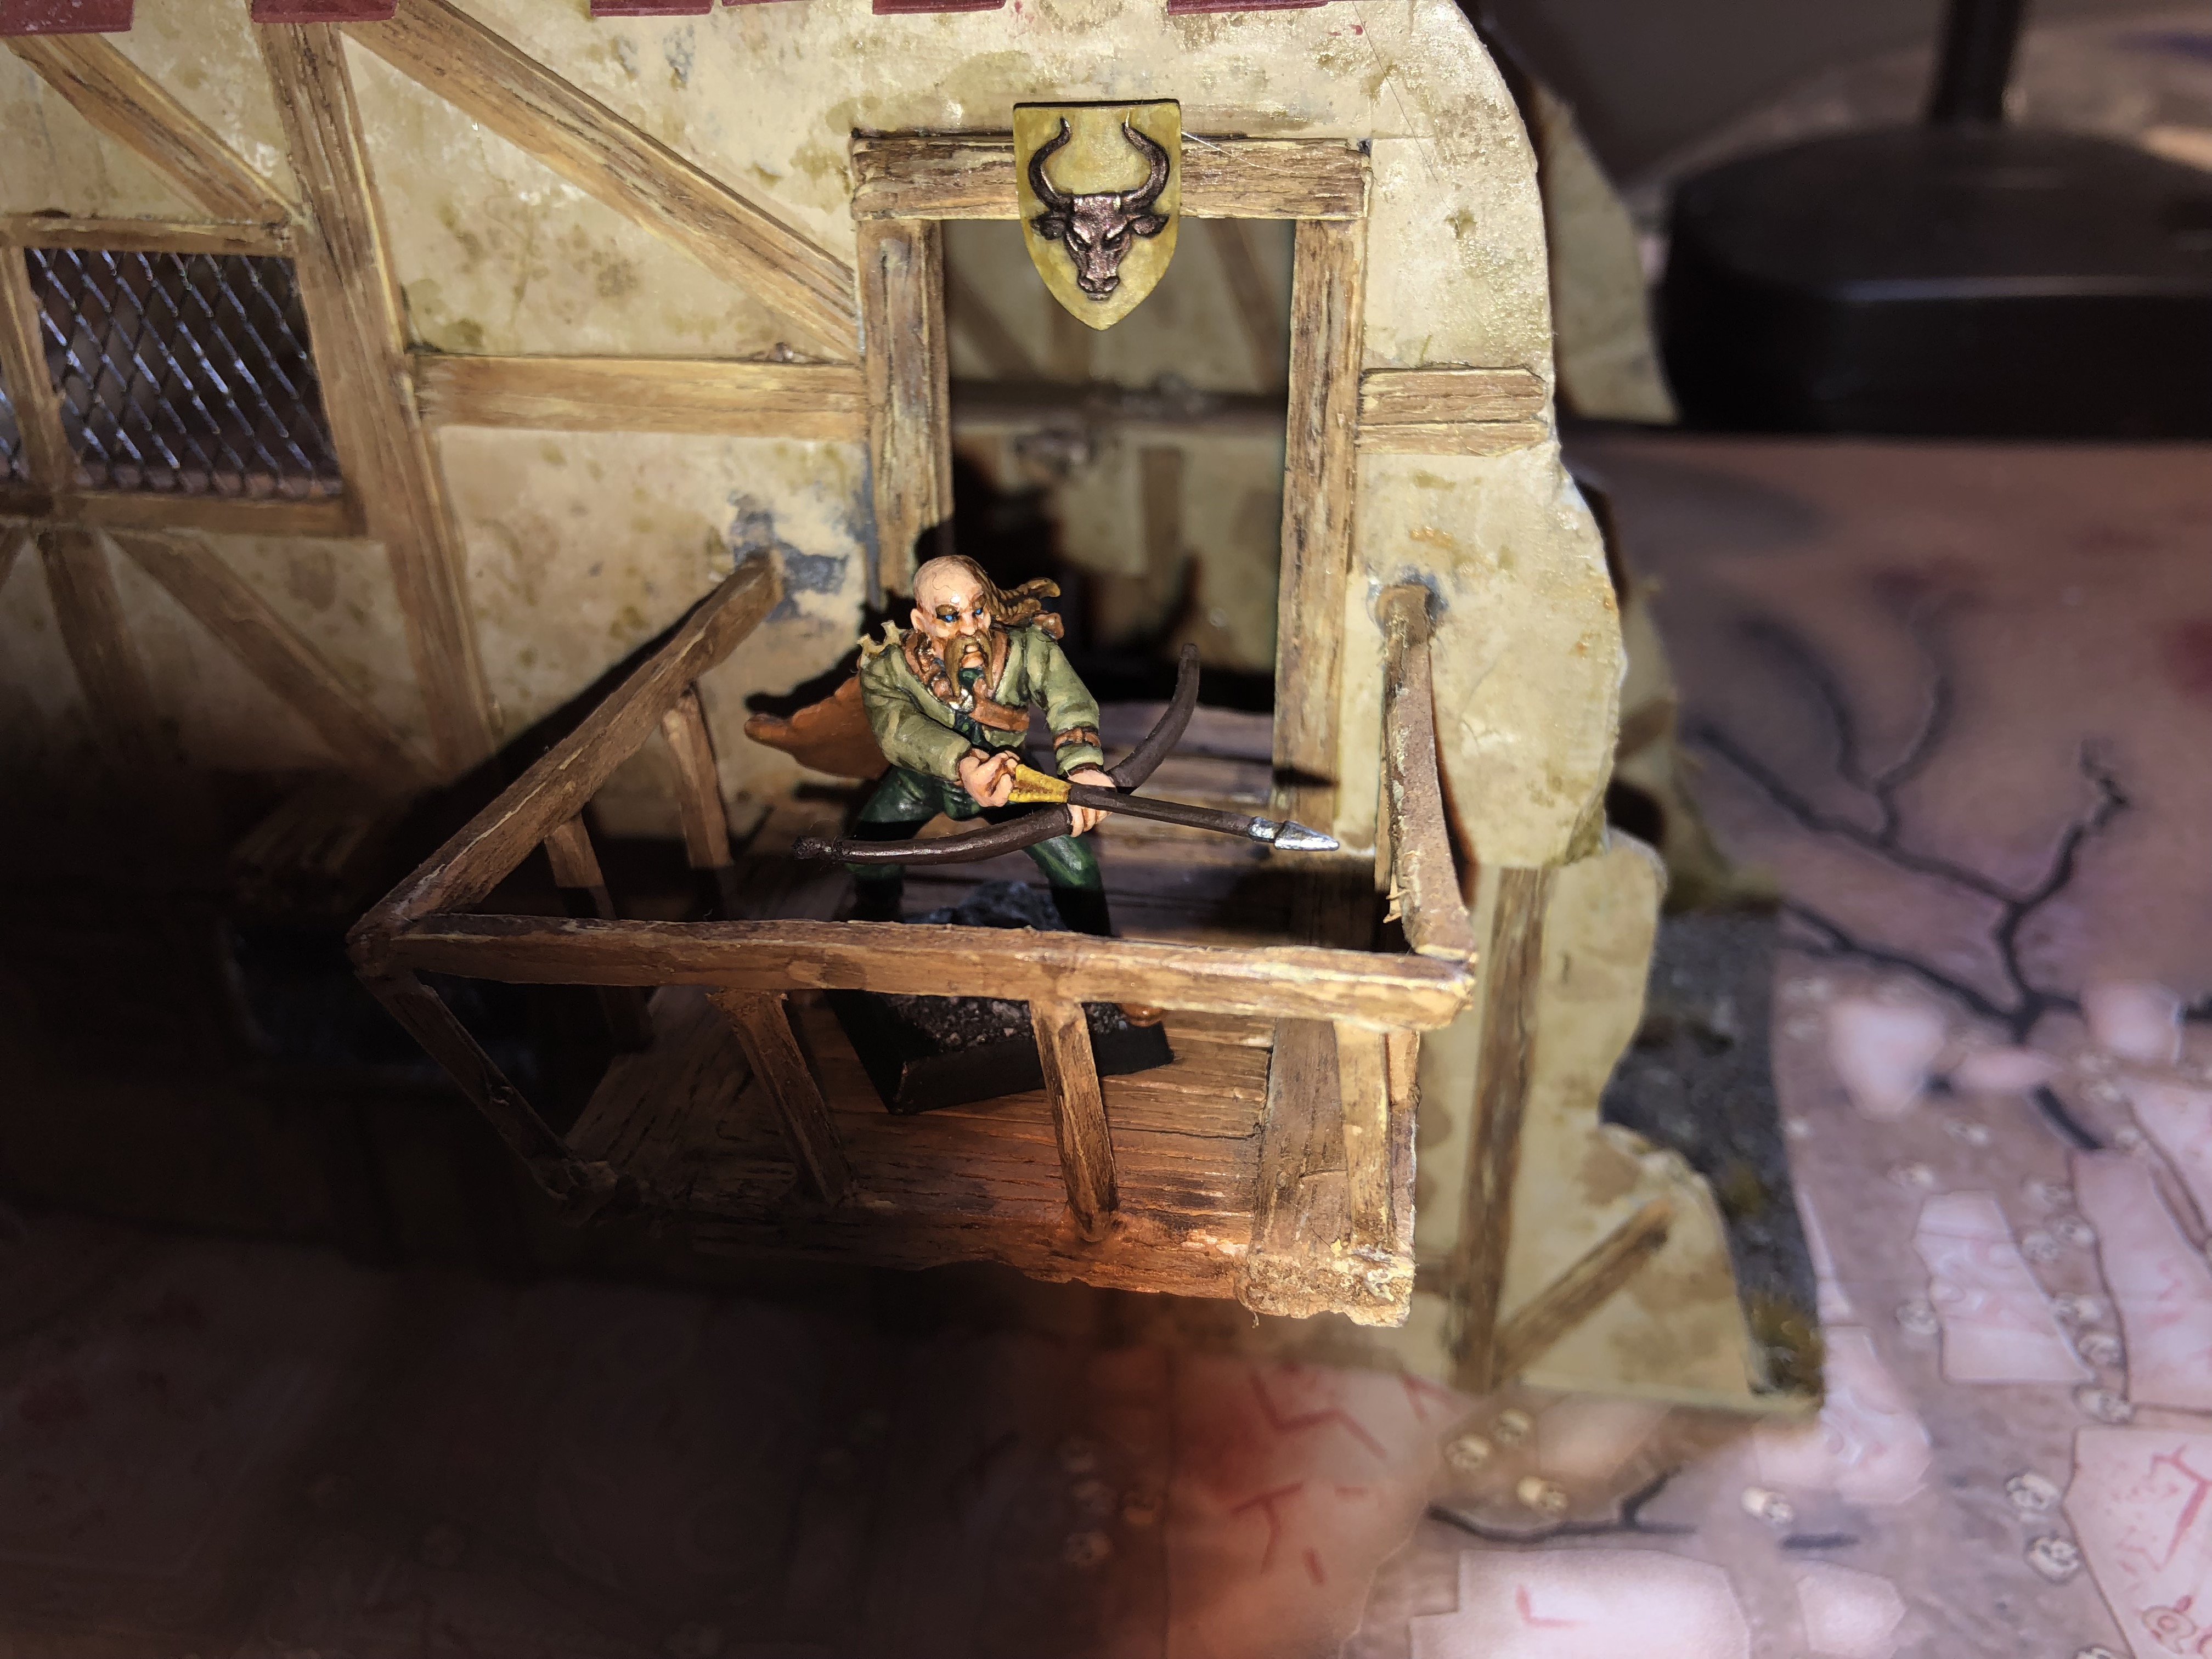 A nice balcony that makes a good vantage point
Tips: in general, smaller details (smaller bricks, smaller tiles, and so on) look better, but they do take more time to craft.
(The roof tiles are still too big on this one, but at least the bricks are getting smaller 🙂
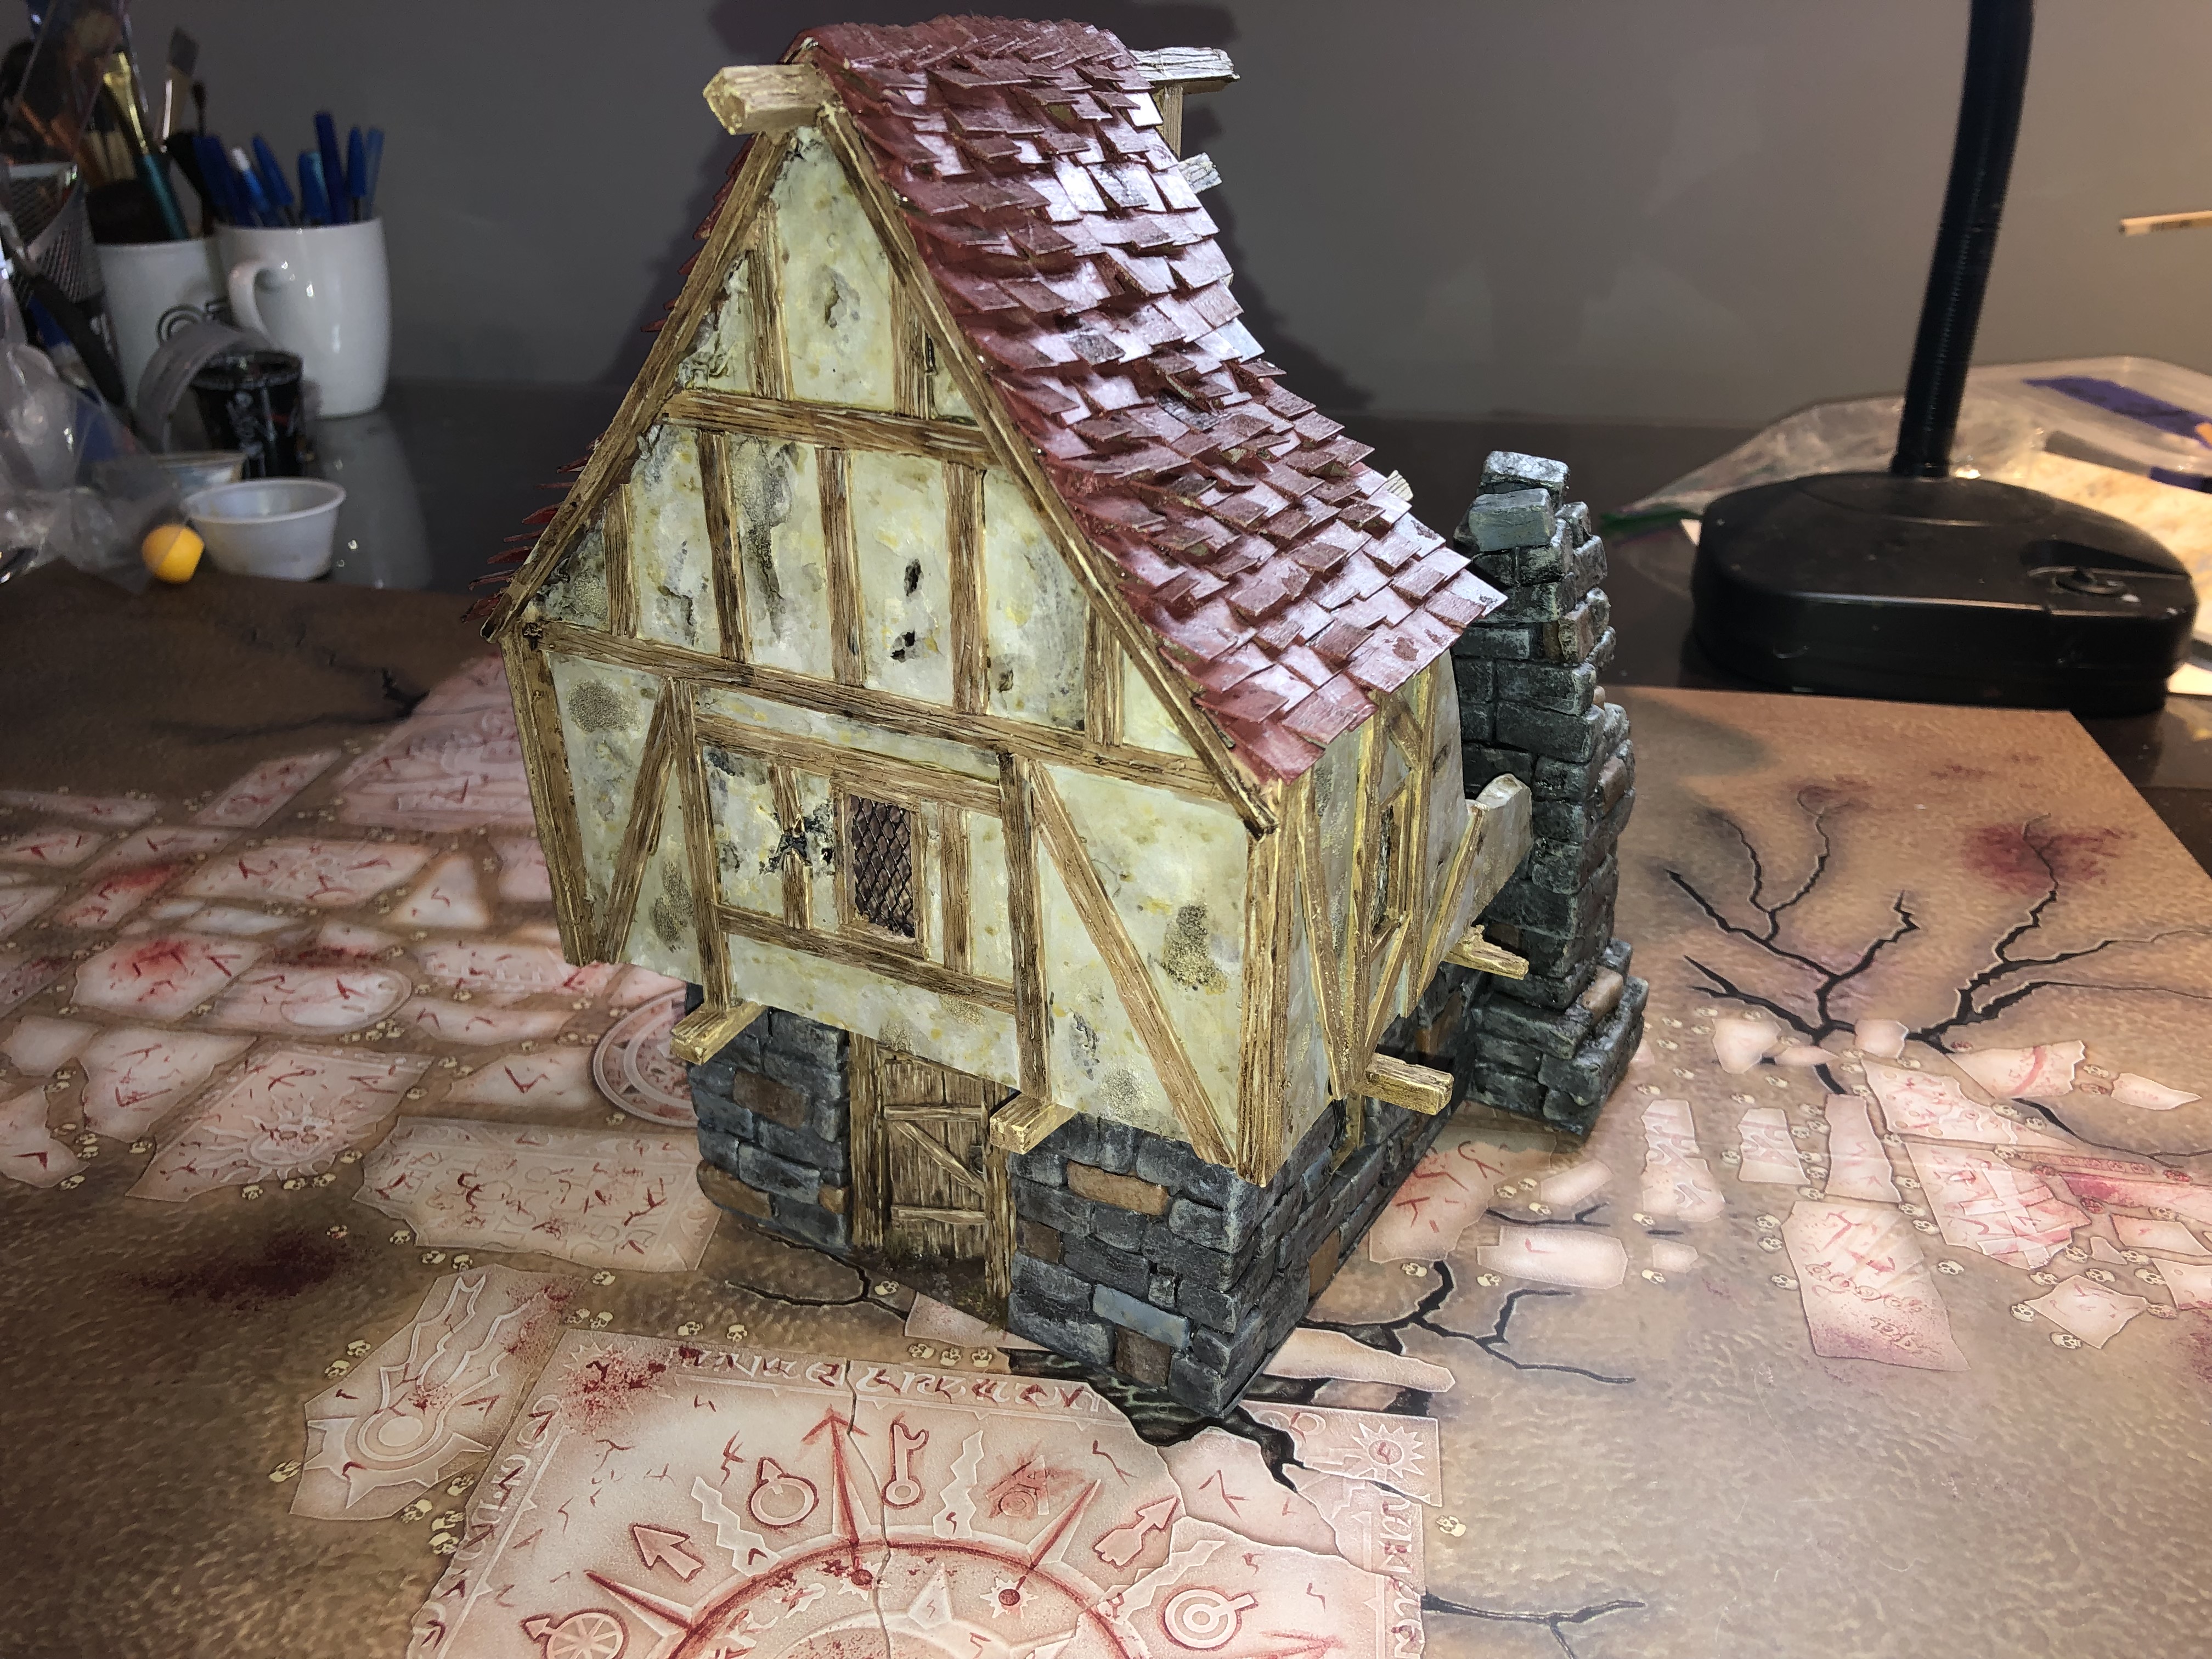
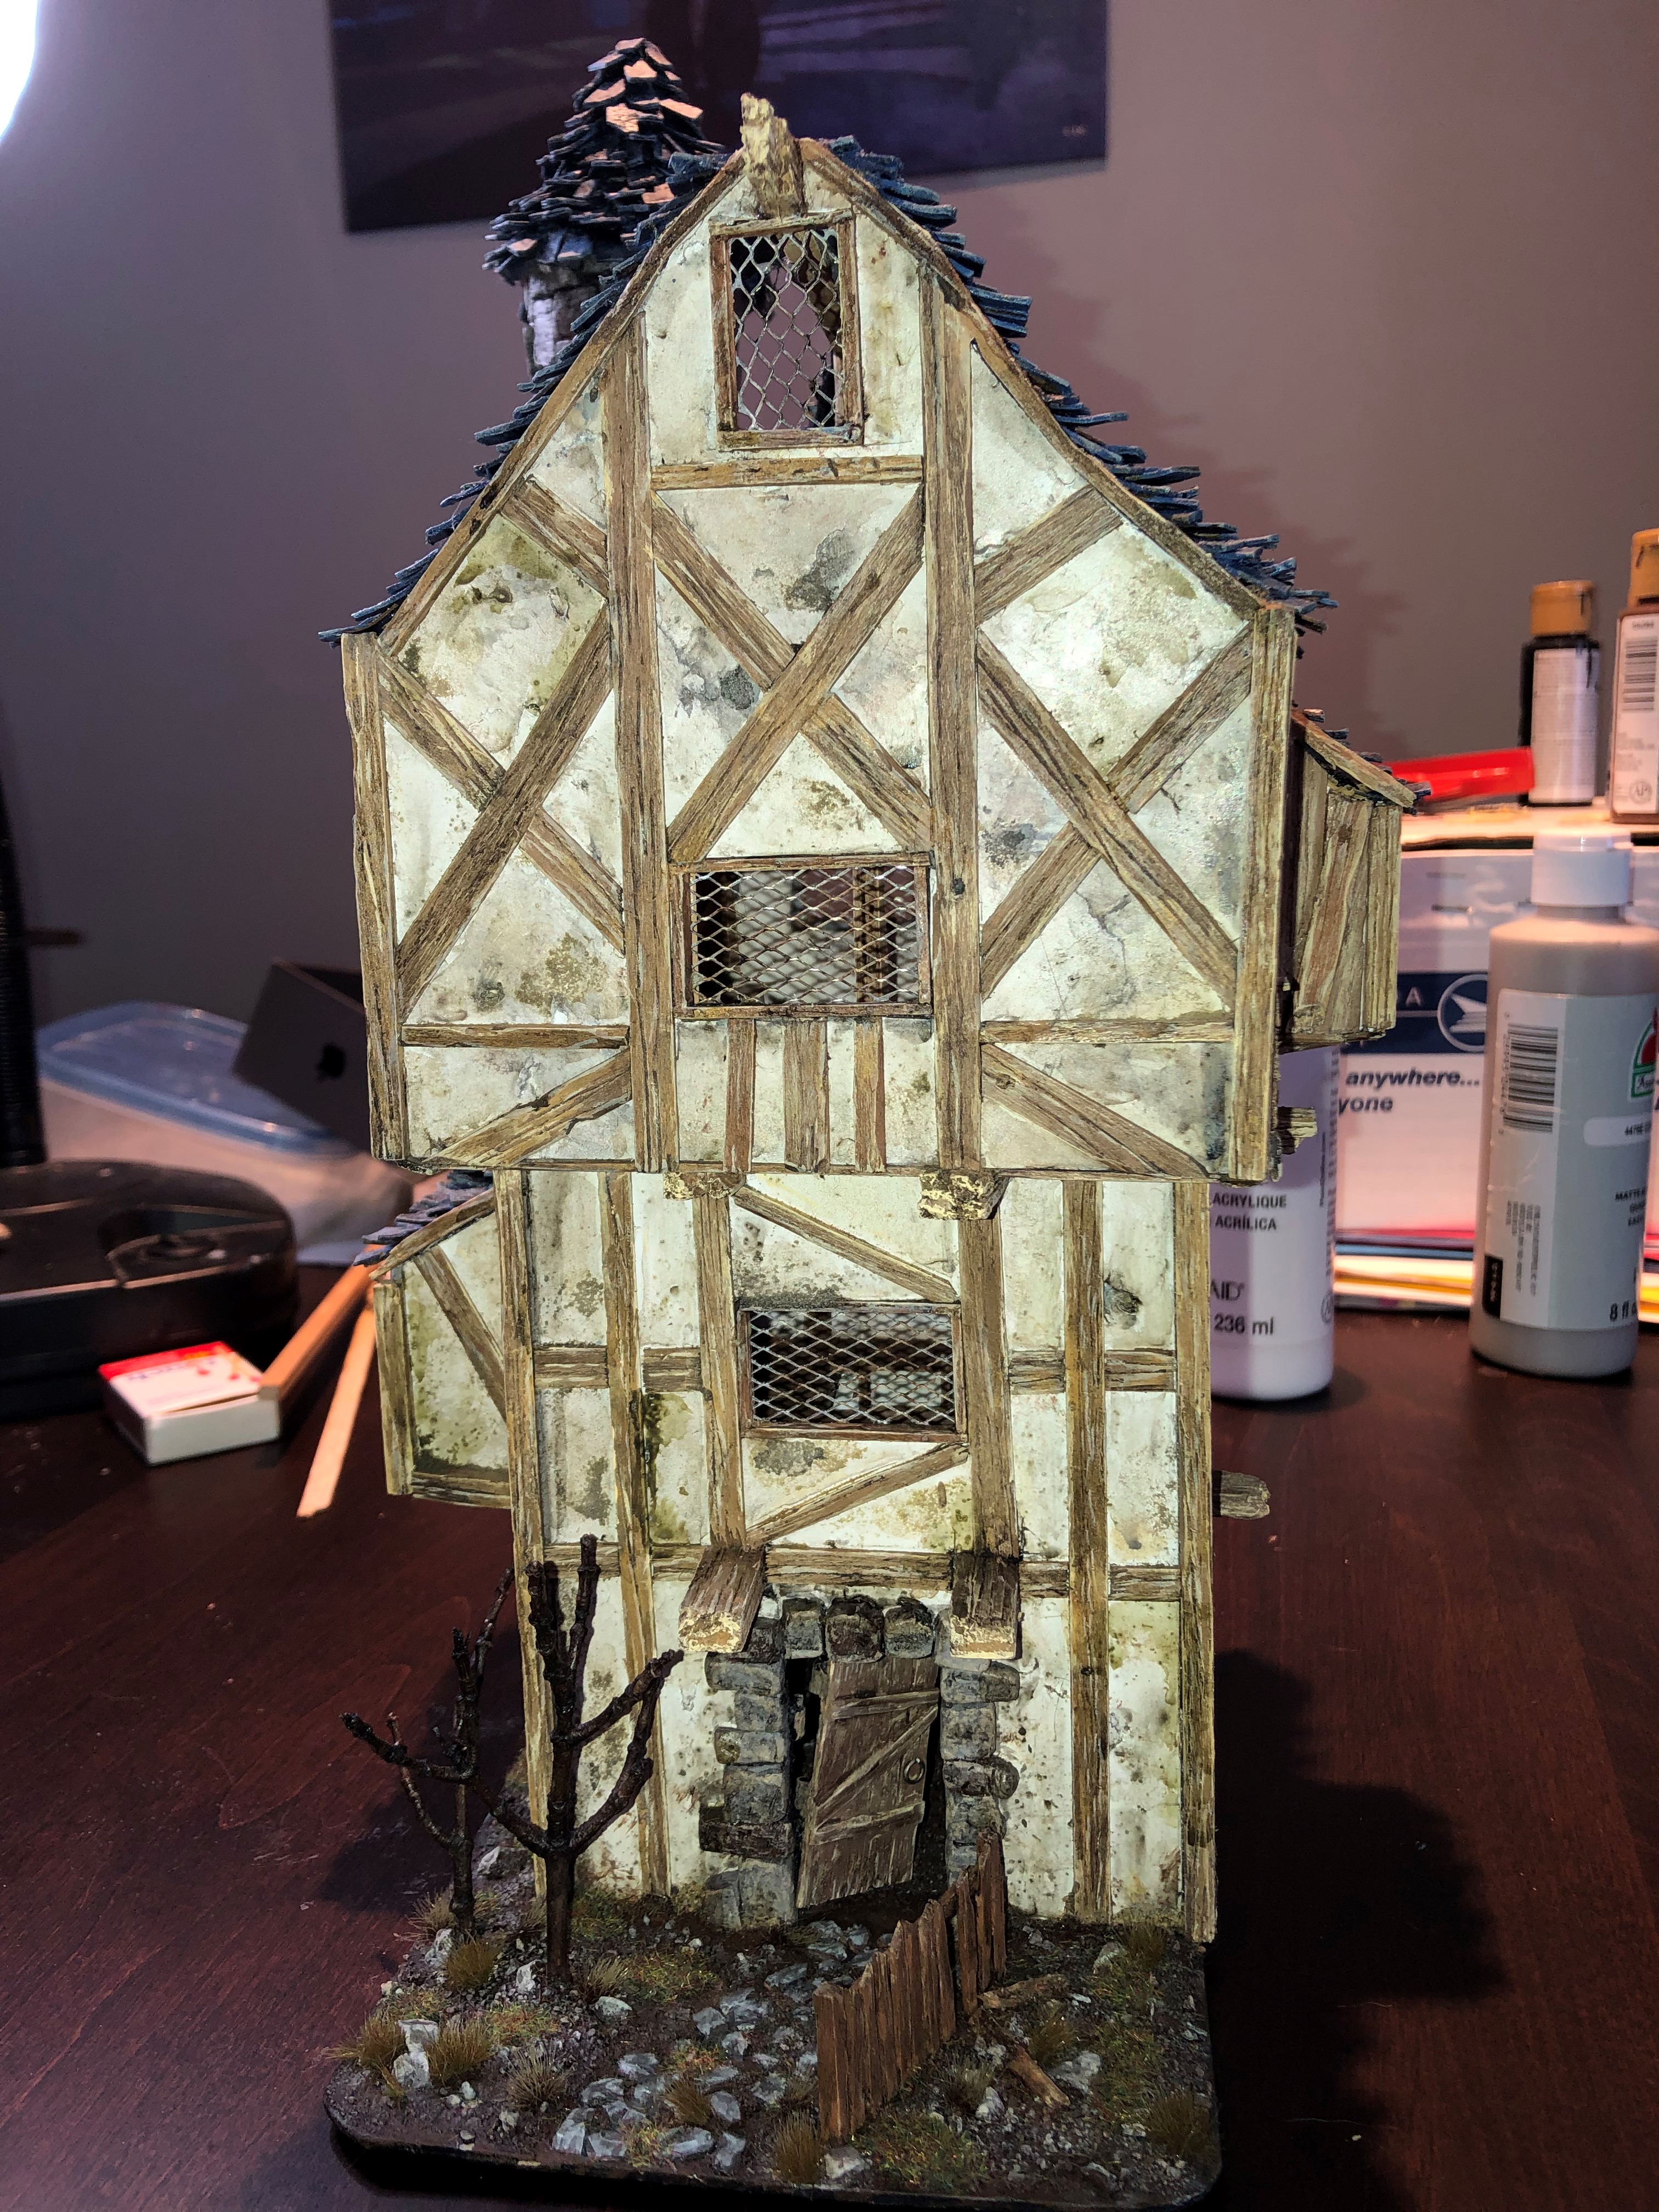
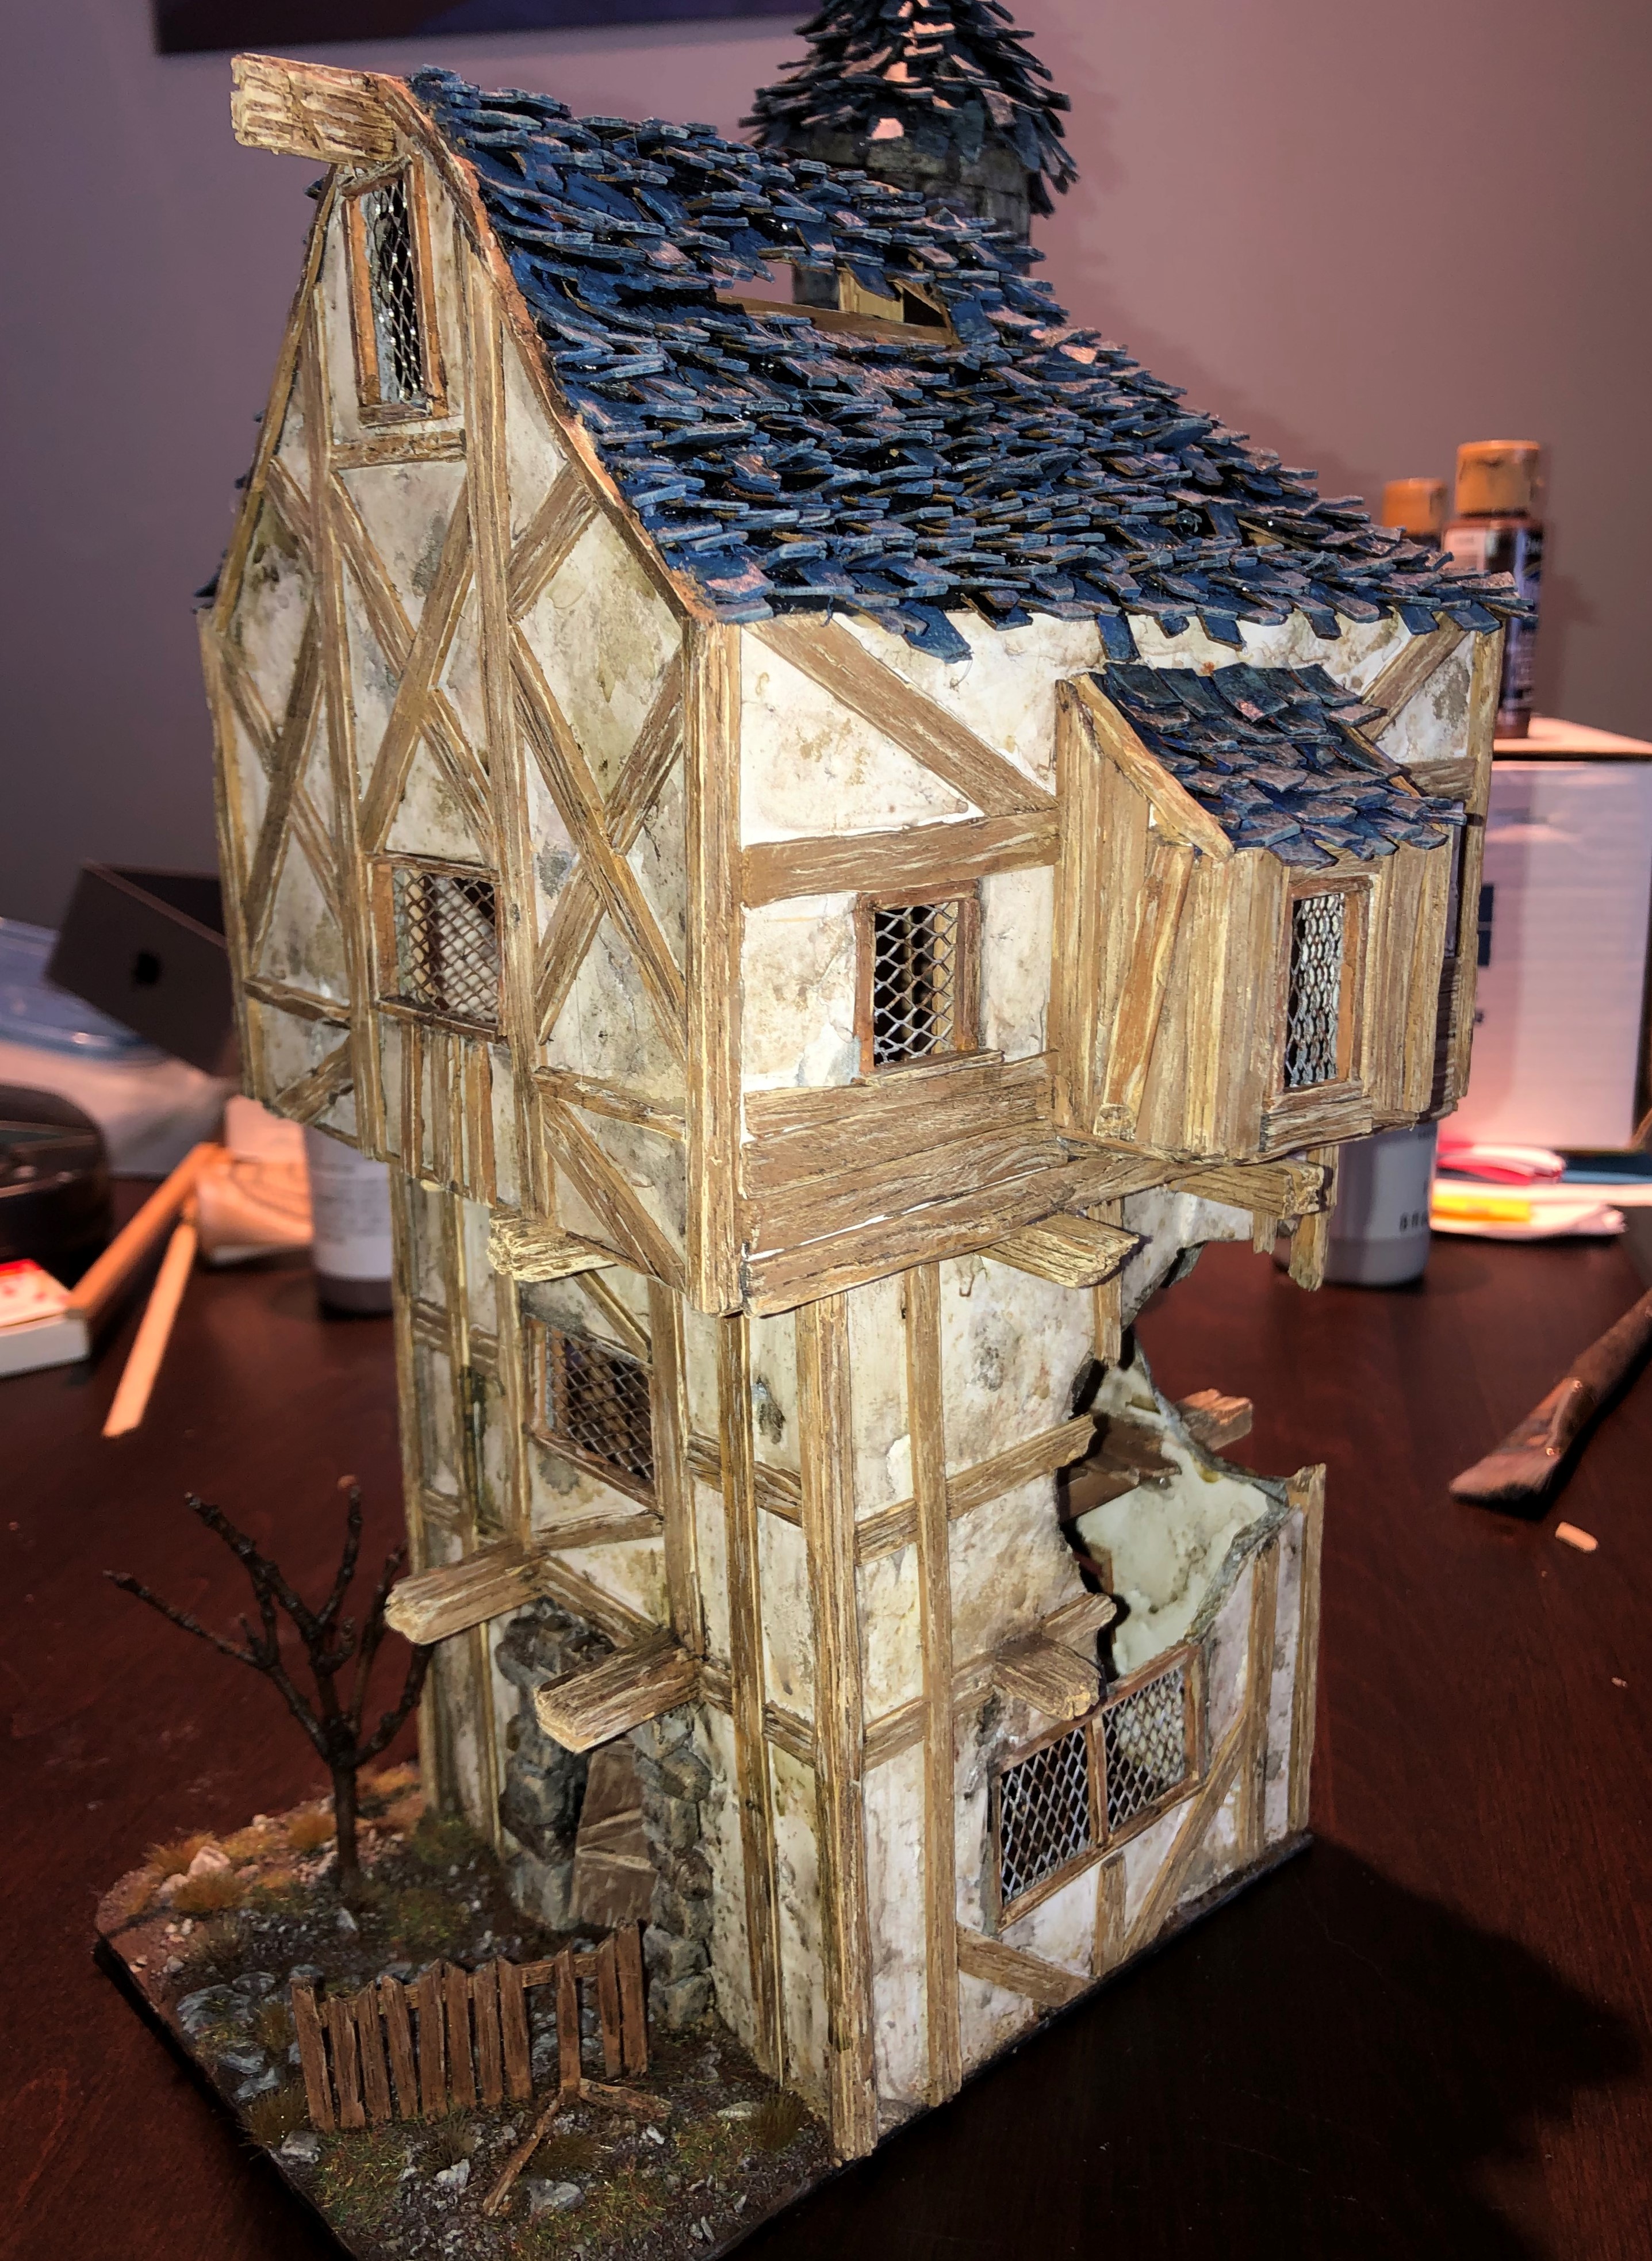
Second Tudor House
A similar design, but with a narrower profile and it is a bit taller.
Improved upon some details
⁃ more windows
⁃ A balcony (a nice shooting lookout)
⁃ Smaller bricks
⁃ More details on the interior
⁃ Removable roof for the side room

The First Tudor House
My first try of making a ruined Tudor house. Happy with the overall result, although there are a few details I will improve on for the next build.
The bricks are made out of XPS foam. The walls are foamboard. The wood is balsa and coffee stir sticks.