


Optimus Prime & Co.: A Newbies attempt at Gunpla


Recommendations: 97
About the Project
A few years back Justin showed off his Gunpla kit and made it sound like building one would be fun. I've never gotten in to Gundam and have too much other stuff to build so I've not looked in to it yet, until a Podcast mentioned Transformers model kits! Now I have my first Gunpla kit to build. Lets document the experience from the viewpoint of a wargaming painters first time.
Related Genre: Science Fiction
This Project is On Hold
Eva-05 High Grade Model Series 008 by Bandai
I’ve been keeping an eye on eBay for a while and this guy went by at a reasonable price so I snapped him up. He’s from the anime Neon Genesis Evangelion which is a must see (The original English dub is terrible, but I hear the Netflix dub is better. I’ve seen it twice with subs and I’ll definitely be watching it again). it might look like a typical kids fighting kaiju in giant robots show, but this show has extra layers that’ll mess with your brain for years to come. It’s the gold standard all other kids fighting kaiju’s in giant robots shows try to emulate.
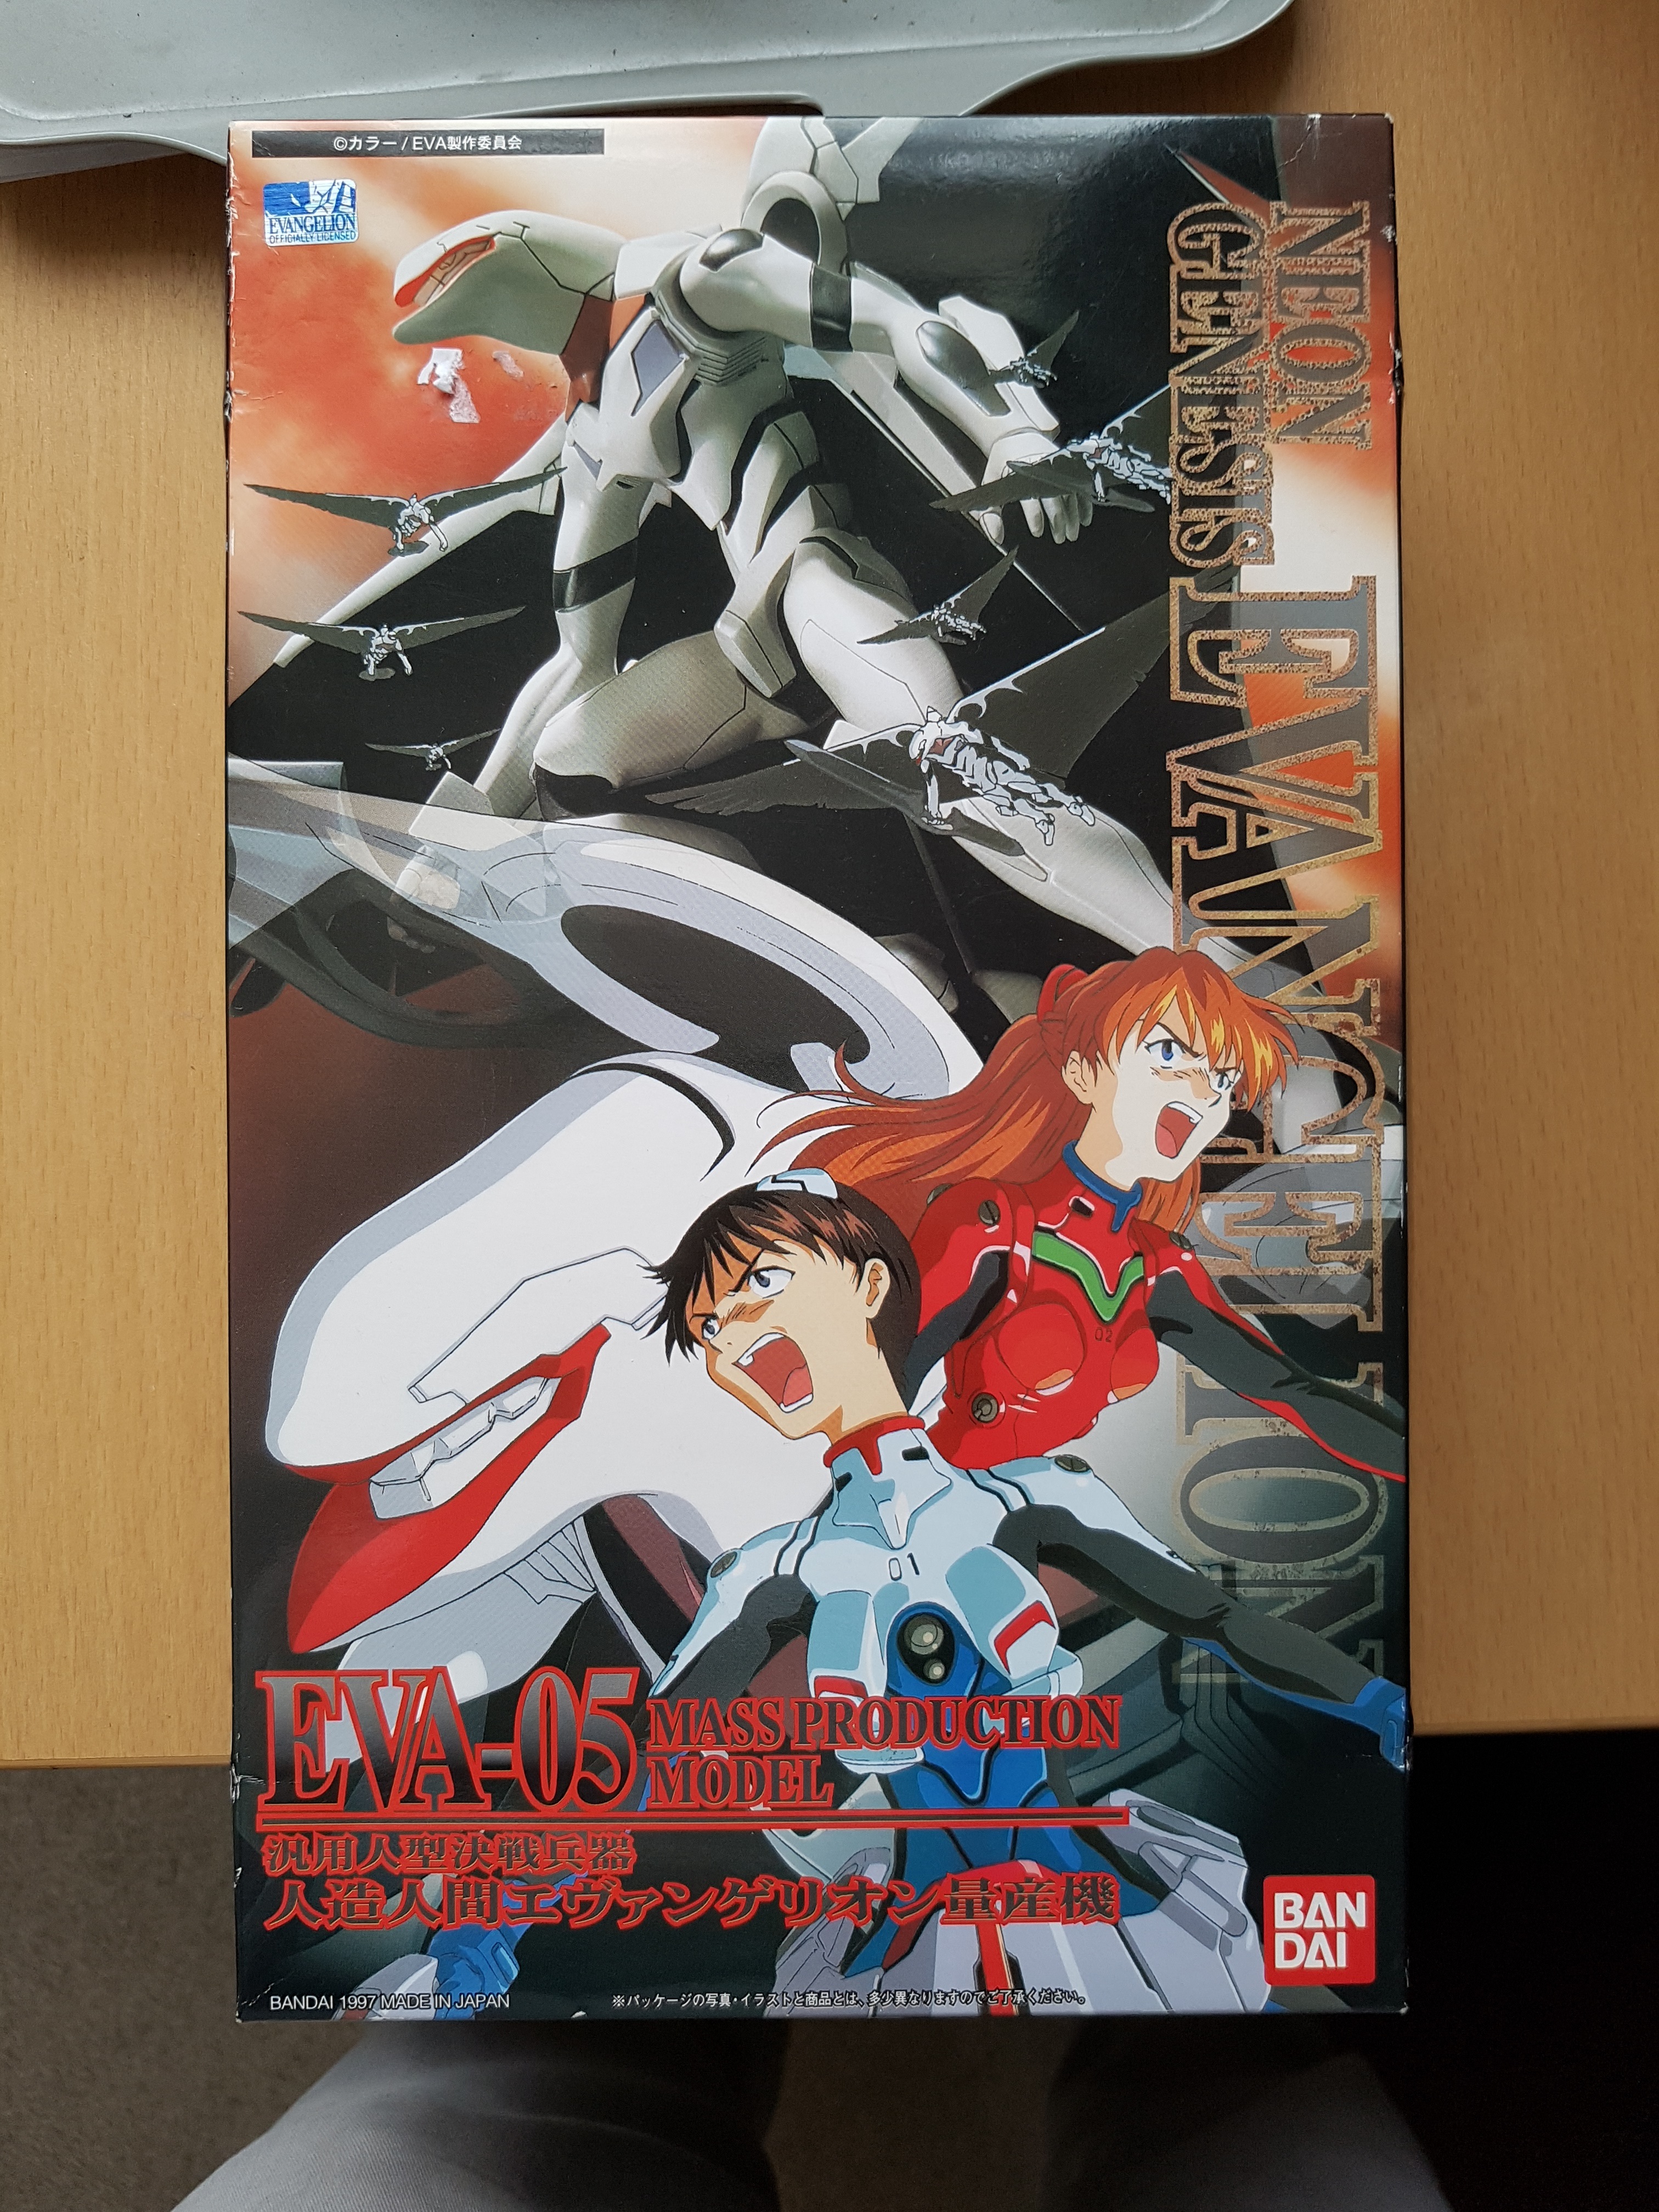 The box front
It’s a High Grade model kit. Bandai model grading is a little confusing so I keep having to look it up. High Grade is confusingly their lowest grade model kit. High Grades are the smallest and simplest kits. Next up is Real Grade which are High Grade size but with some of the more advanced innards and tech from the next grading, Master Grade. Master Grade is bigger and more articulated and is the standard, and best most people will get. Then there’s Perfect Grade. PG’s can be bigger than small children, can have optional extra electric components and all kinds of fancy stuff, but you’ve got to chose if you’re gonna buy a PG model, or buy food that month. They also don’t make PG for most designs.
I’d say that Optimus Prime and I assume the whole Furai line are above HG in terms of quality, but maybe not by a whole lot? I’d have to try a MG or RG, which I hope to some day. Finding a kit that interests me is tricky as I’ve never watched Gundam and without the show those models don’t interest me yet.
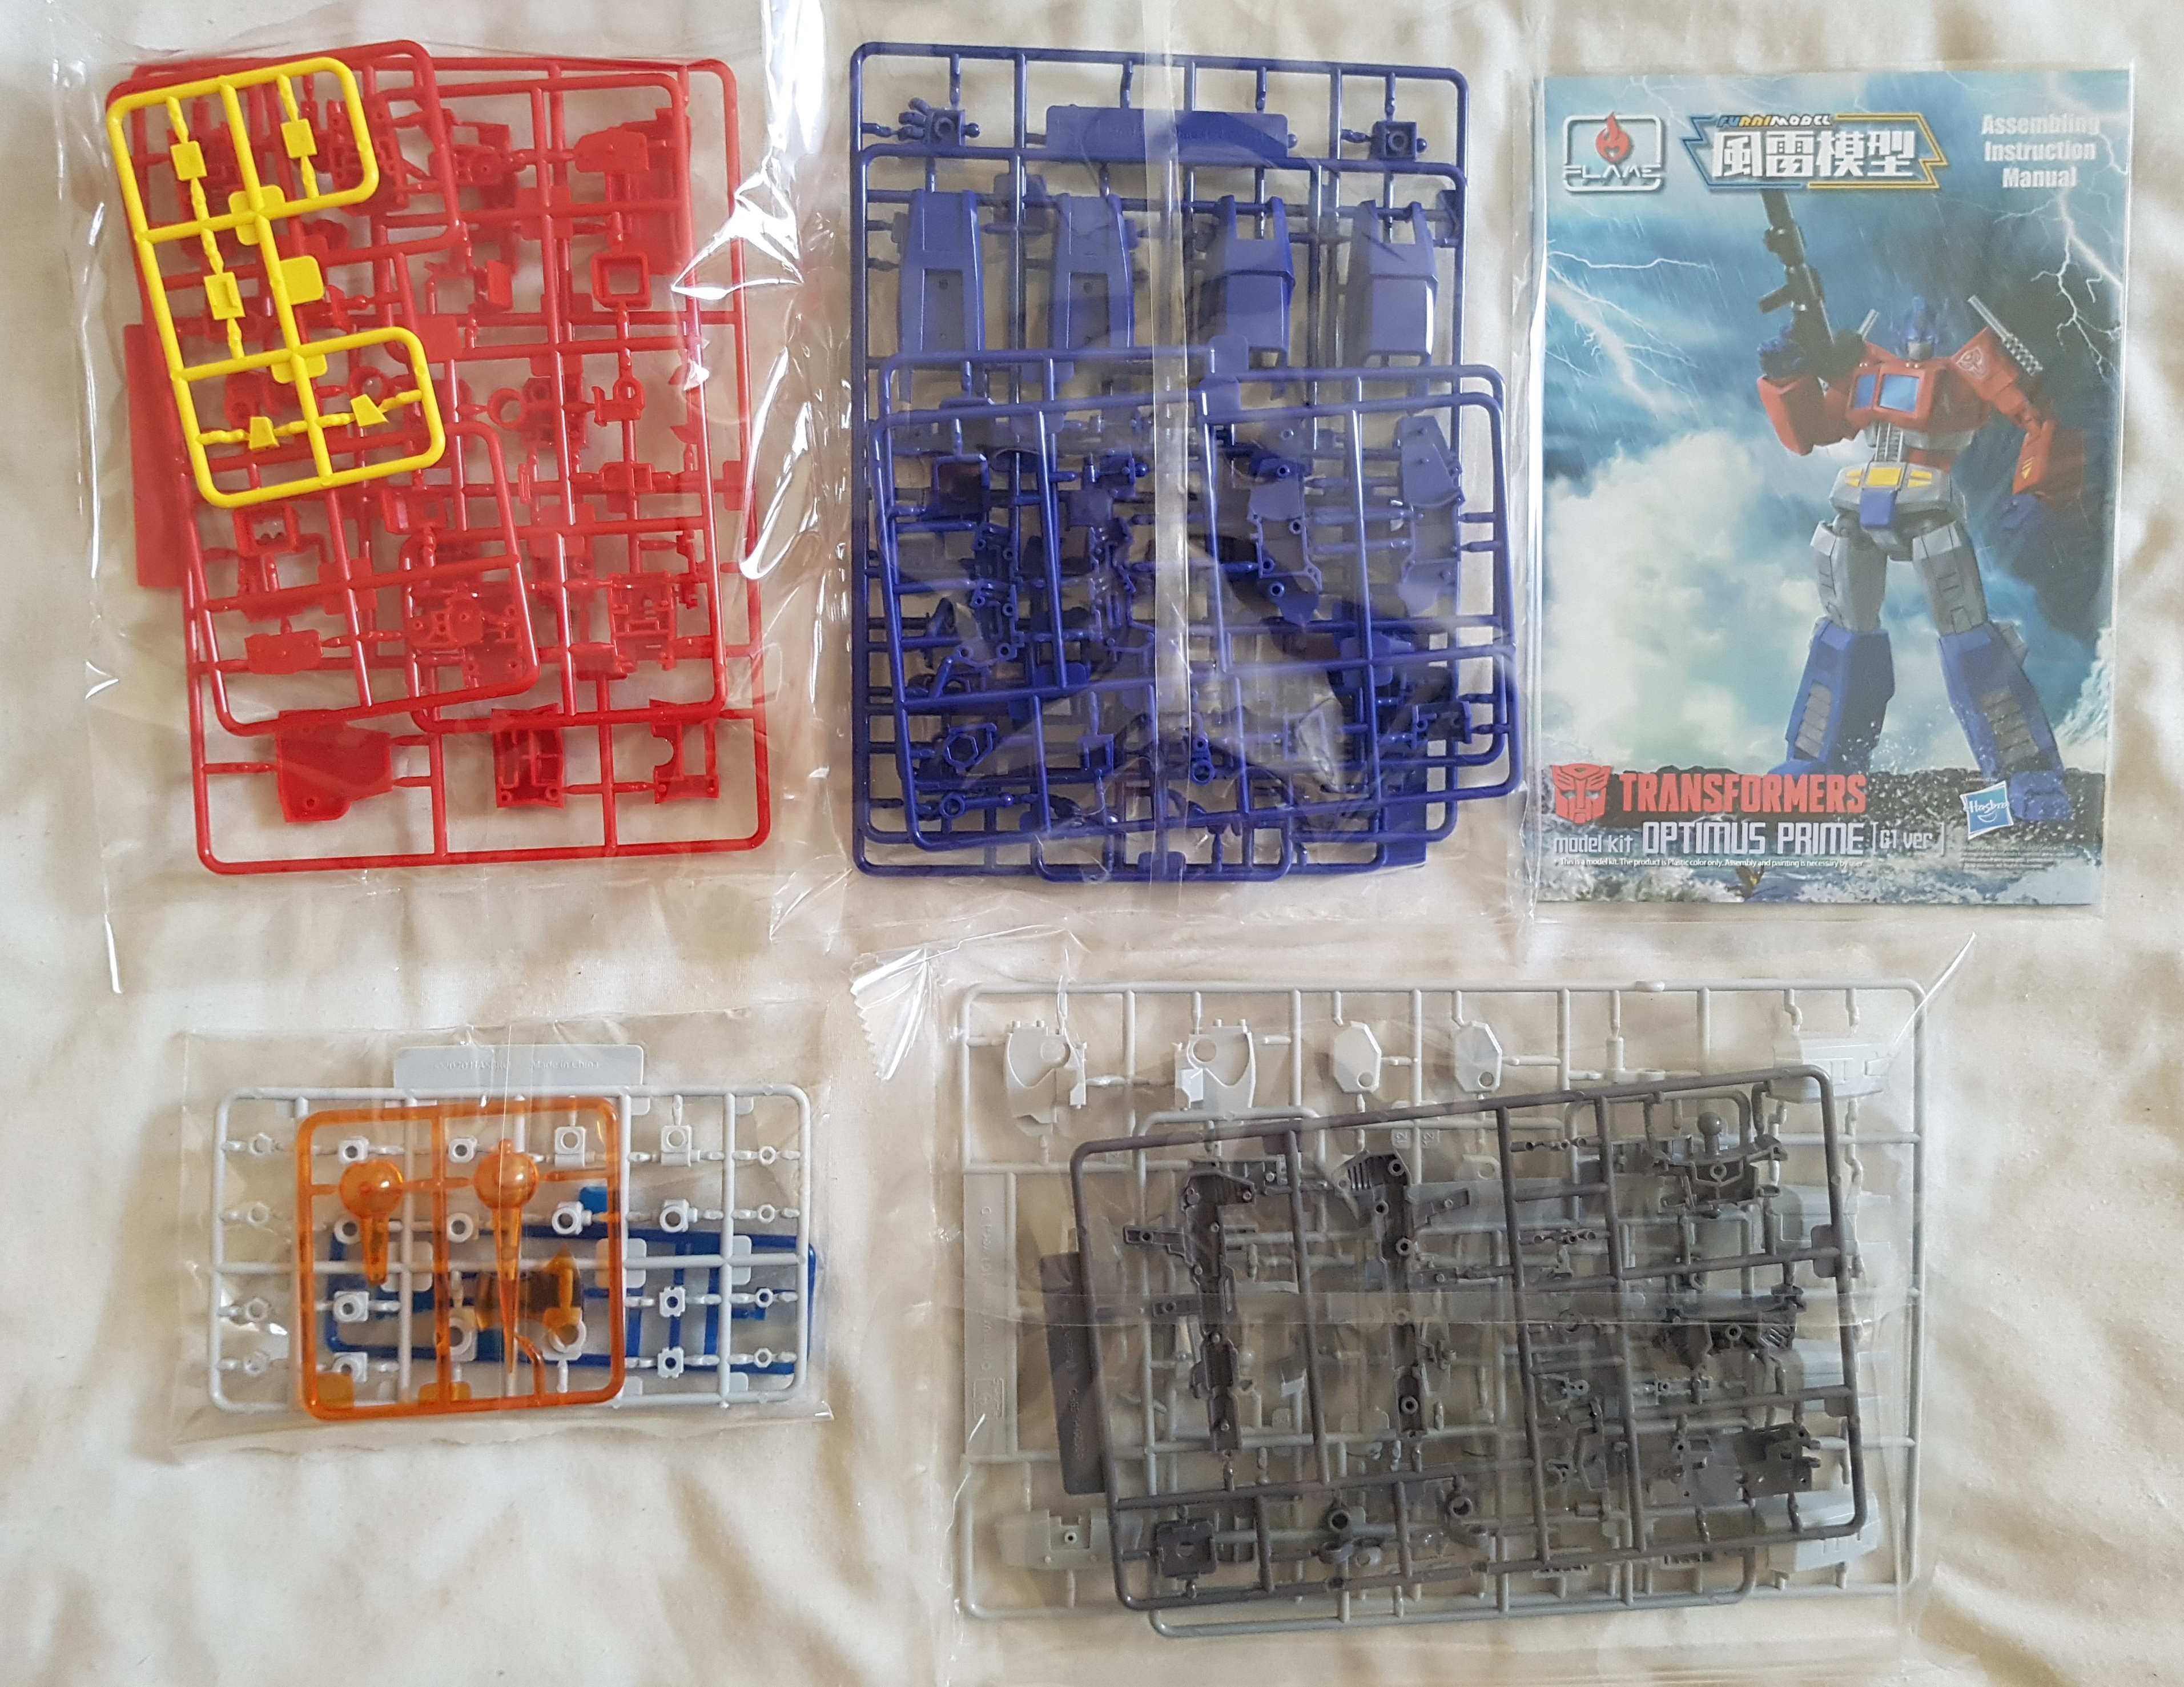
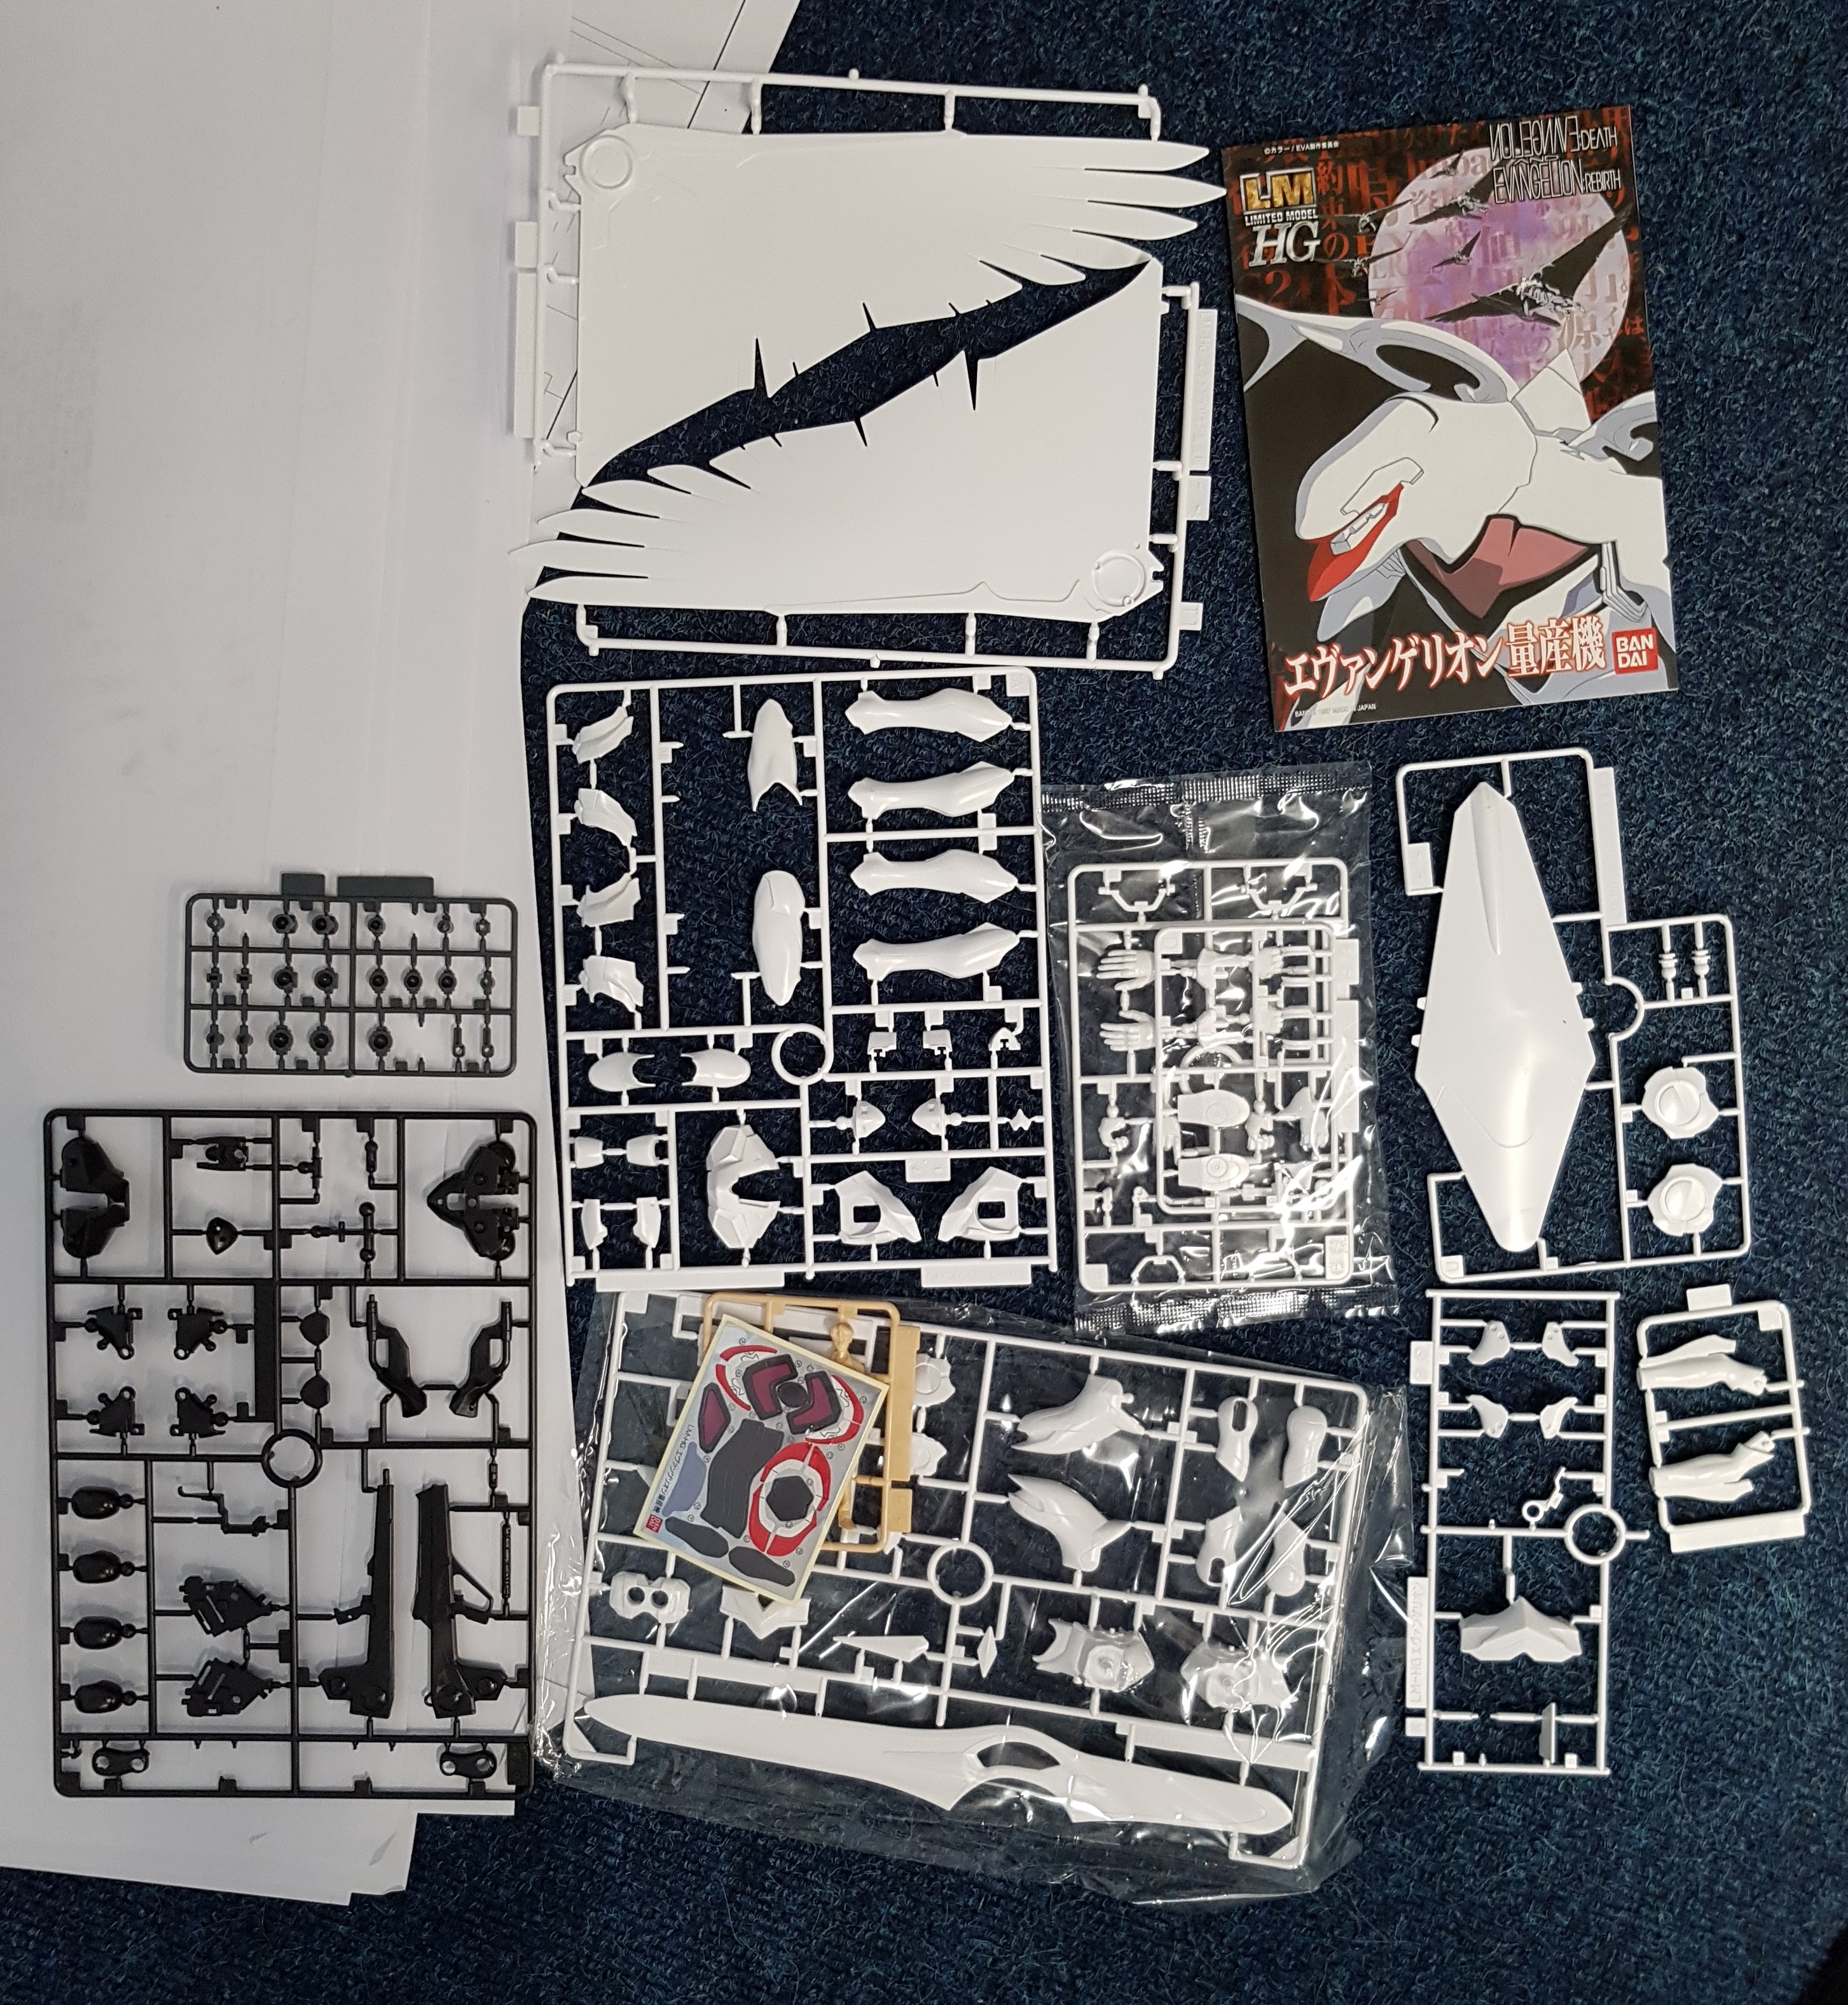 Box contents
I wasn’t timing myself this time around, but I think he took 3-4 hours to build. The instructions were in Japanese, which mostly wasn’t a problem as all the sprue parts were labelled in English. The only issue was the stickers. They were labelled with individual Japanese characters. Once I worked out which way up to hold the stickers it wasn’t too difficult to match them up though.
Some parts of this kit needed to be painted. I didn’t realise that until I started to build it. There is a colour guide in the manual, but it’s entirely in Japanese. I could try using Google Lens to translate it, but it didn’t seem necessary. This guy is black and white. The pin lining was done with a marker pen, and the inside of the wings and blade were painted with black primer. That’s all that needed doing. Maybe 2 hours worth of painting, and the black lining was done during construction.
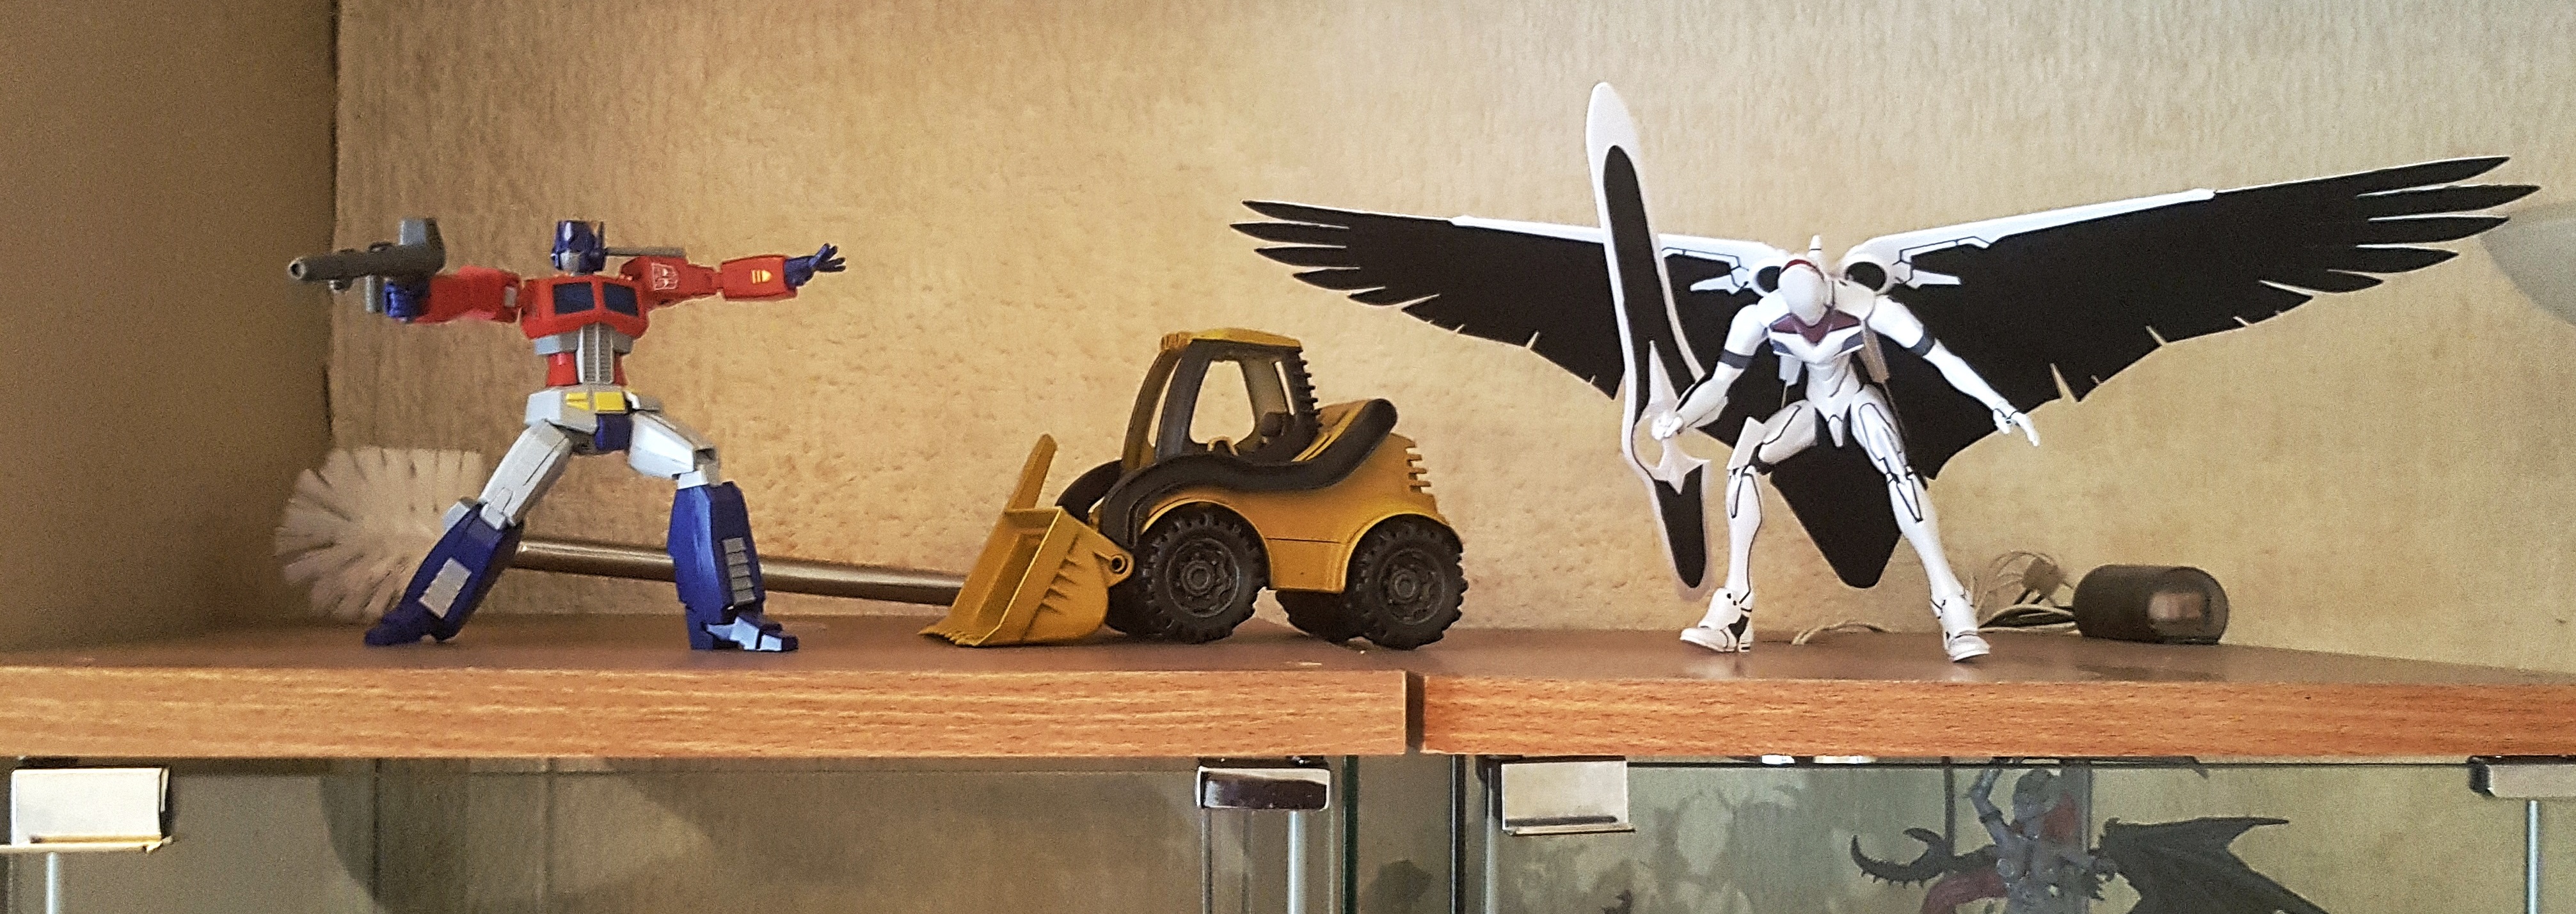
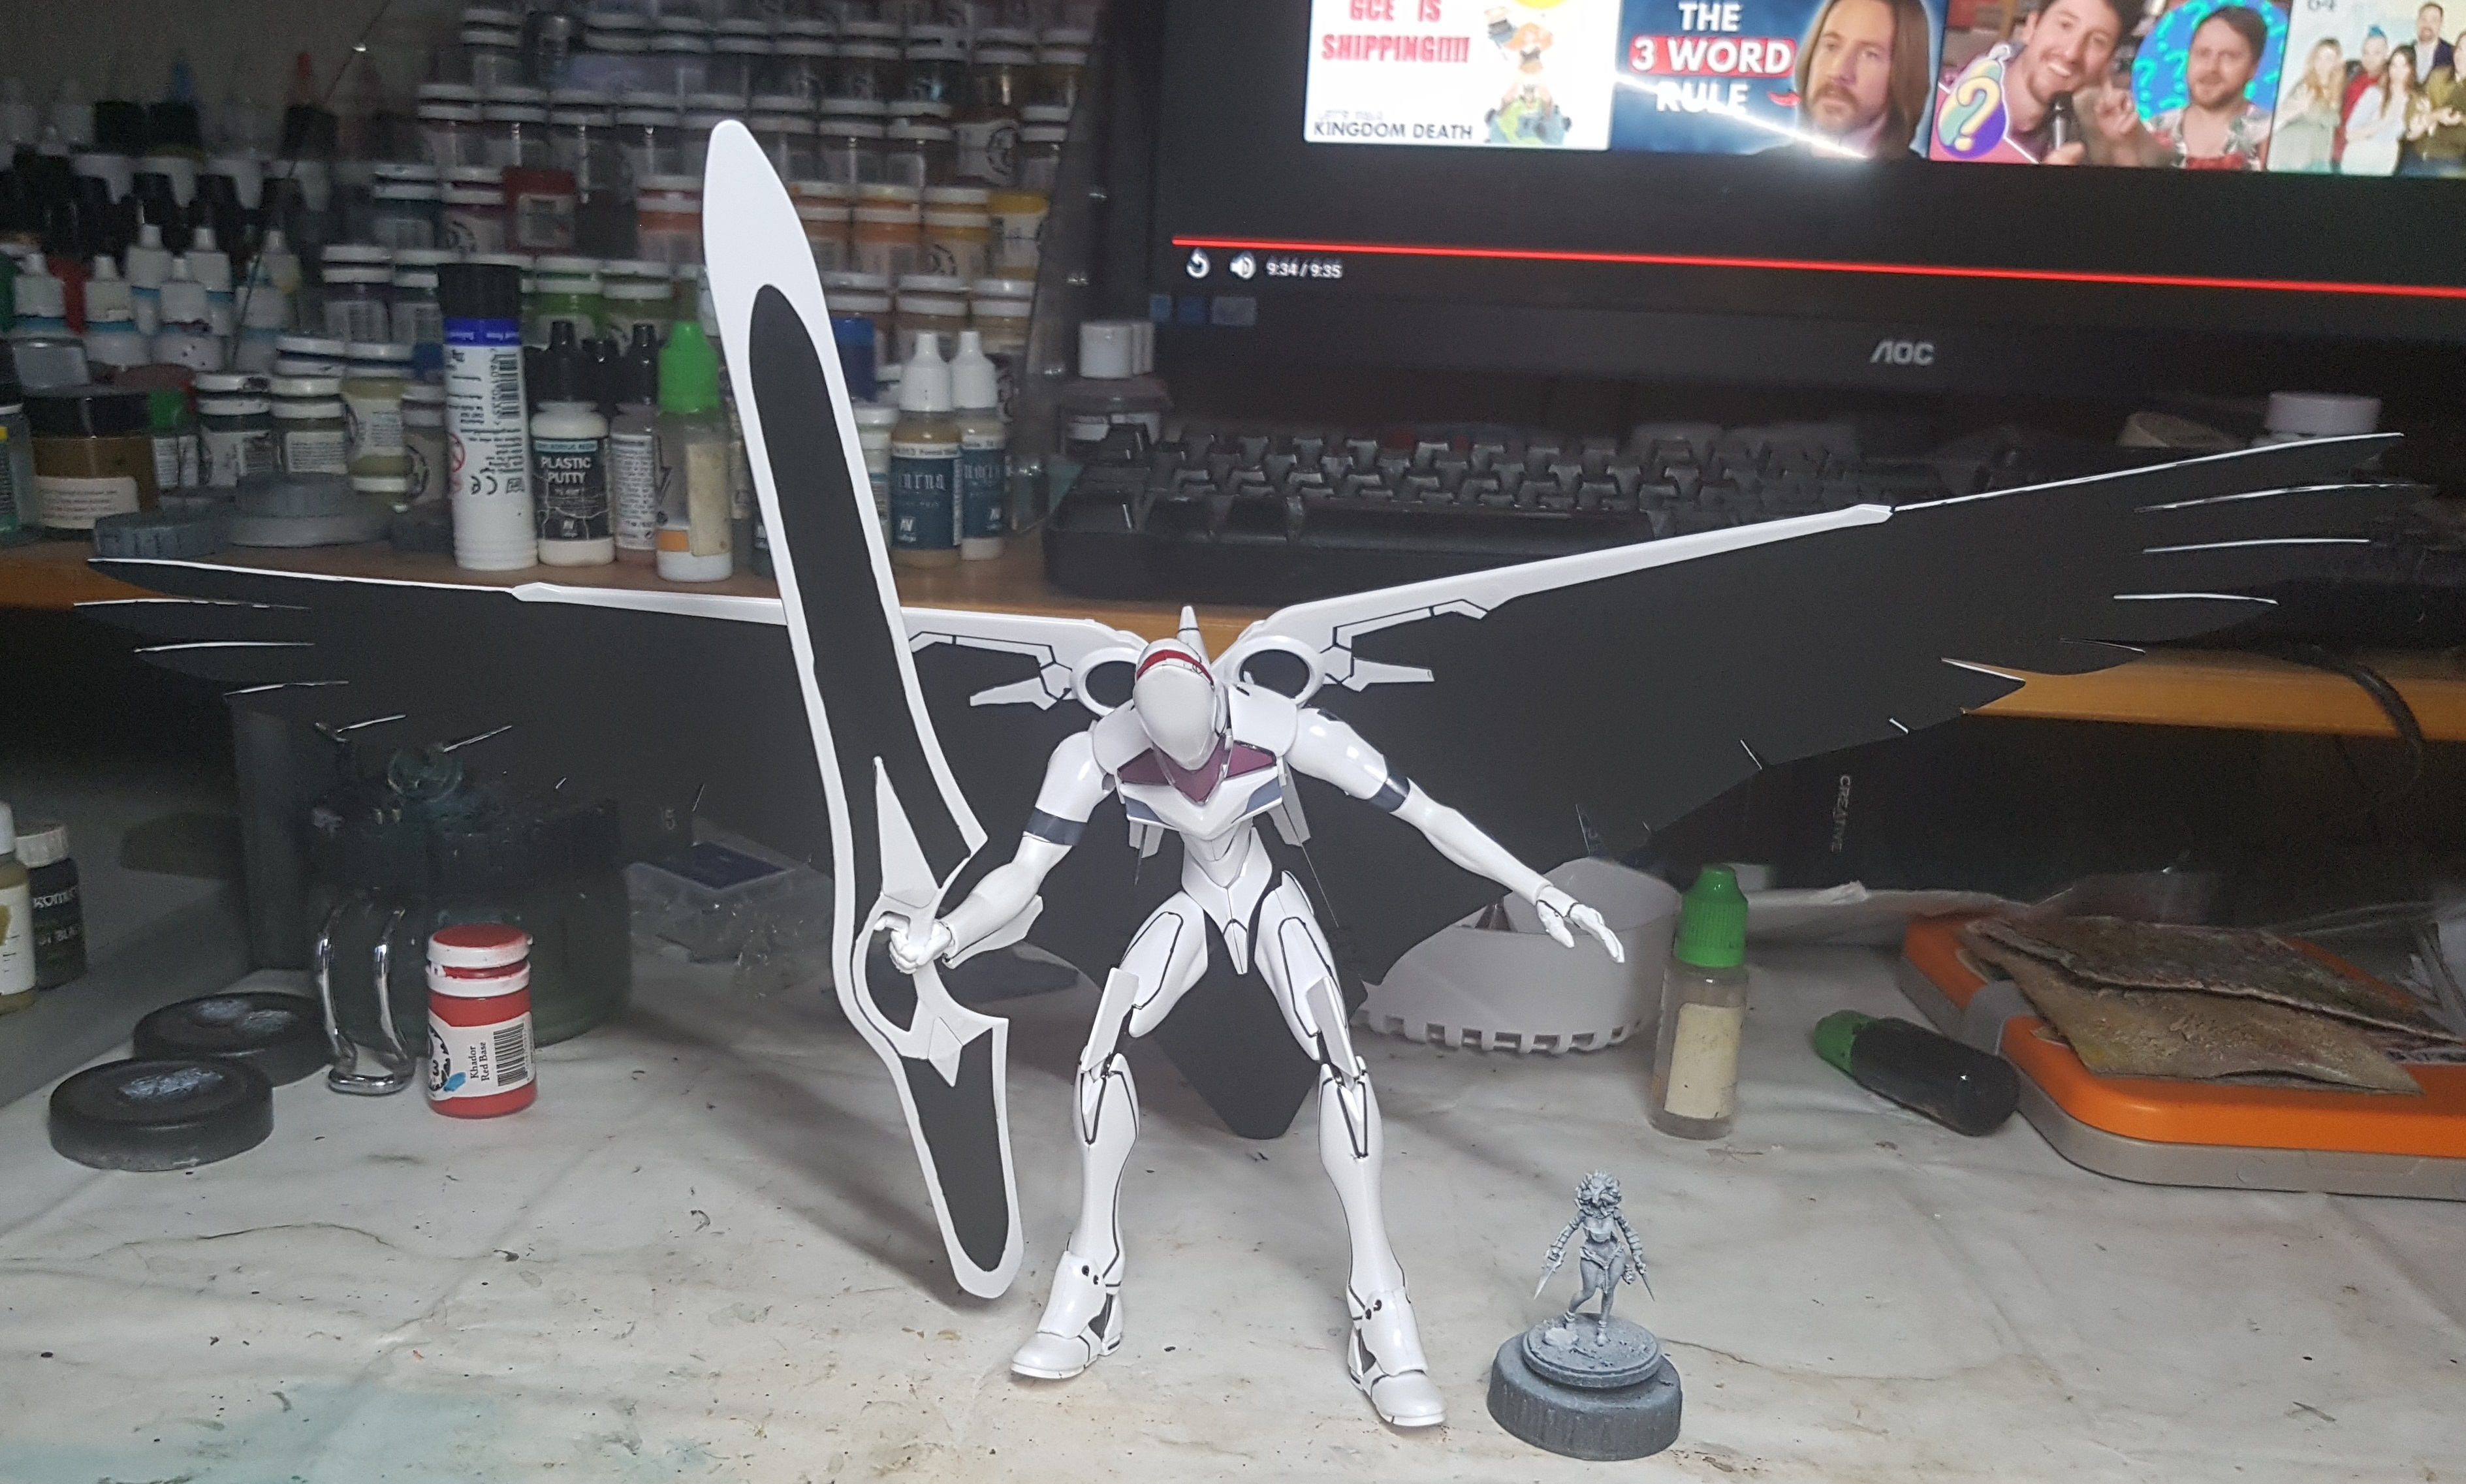 KDM model for scale
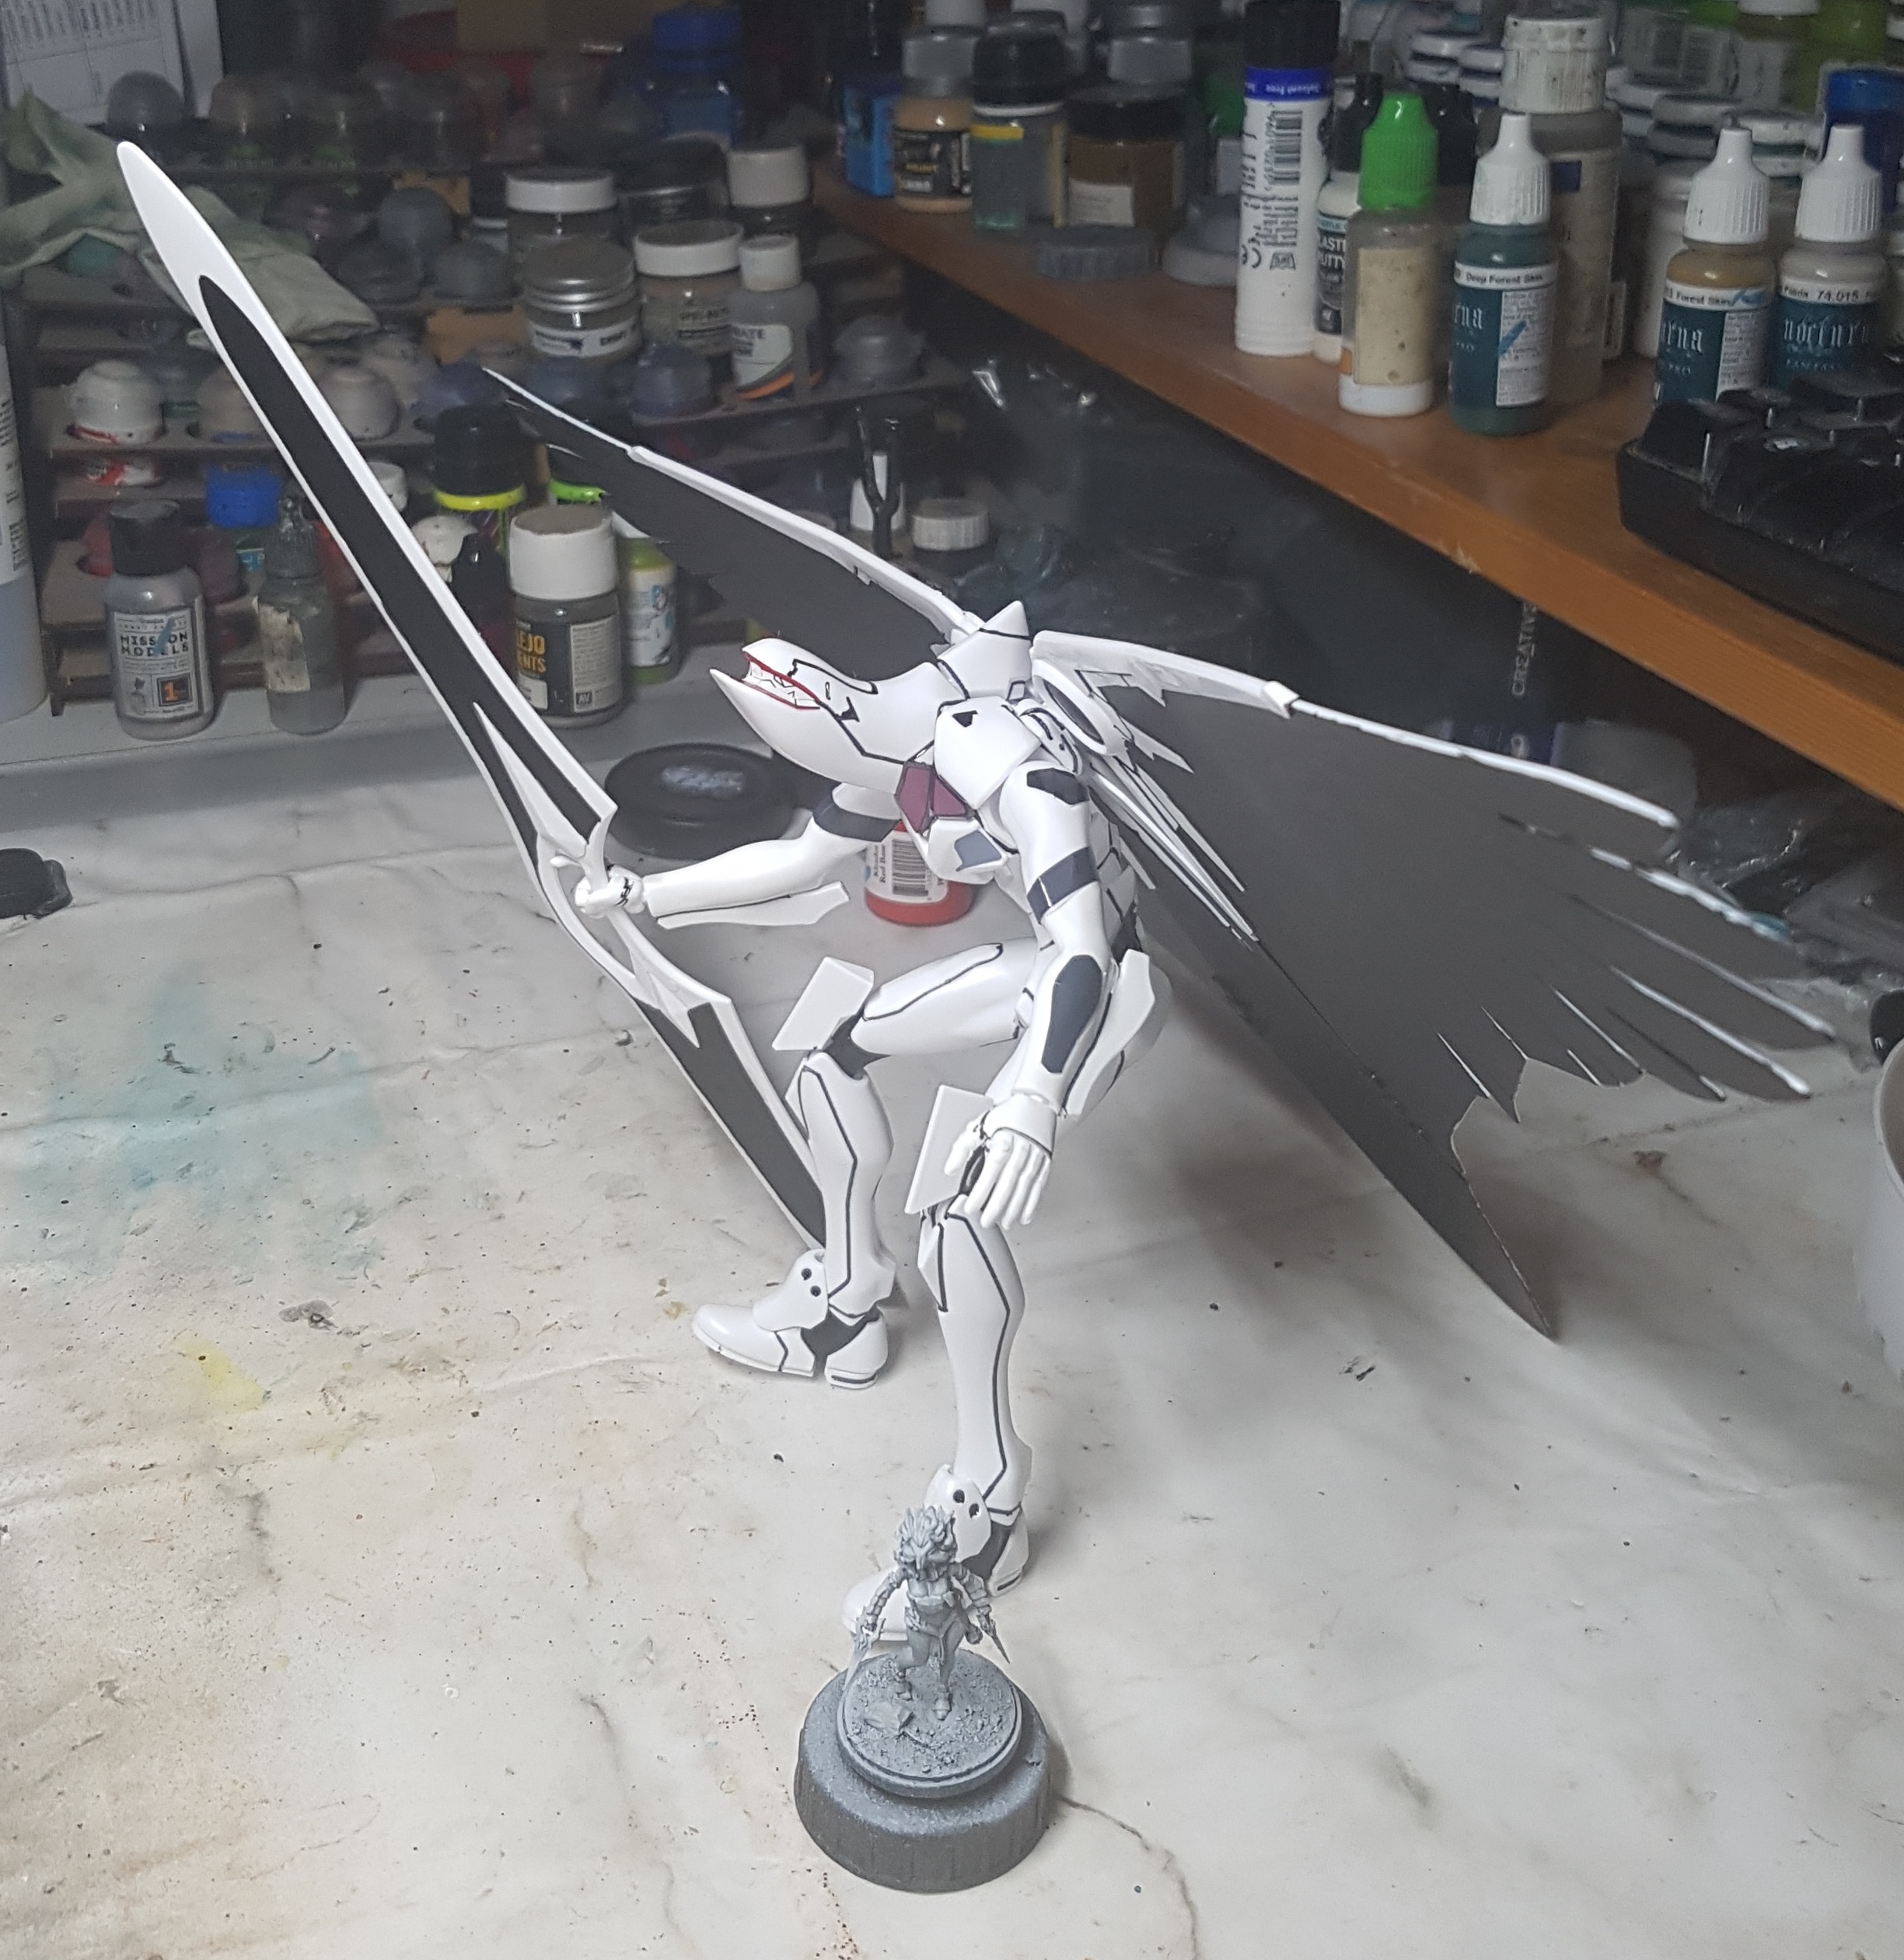 KDM model for scale
a Bandai HG kit appears a bit bigger than my Furai kit. Some of that is definitely the wings making him look bigger, but even once you factor that in, he’s still notably taller. Bear in mind he’s hunched over in this photo. He also doesn’t like to balance as well as Prime does. A lot of that is those wings throwing off the centre of gravity. They are removable, but they really make the model and that’s how he was shown in the show.
He comes with different hand options, and a less derpy head (I like the derpy head. In the show it really makes them look more “other” and unwelcome), and the wings can be removed and replaced with plugs that blend in to the armour. There were also a lot of leftover parts. I assume this means some of the parts are common across multiple kits and they just share some sprues. He also came with 2 bonus single piece models for painting later. The plastic feels a little bit rubbery and the detail seems a tiny bit soft/soapy, but we will see how they look once they’ve been zenithally primed and that shine is gone. That’s not happening any time soon though. I’ll add them to my box of stuff to be painted when all game related plastics are done. They don’t excite me, but they’re a nice extra I suppose. They didn’t need to be in there.
I hear Wayland have started selling some kits. I may have to have a nose. Not that I should buy anything. If anyone knows a cheap place to get stuff like this, or knows of similar kits that aren’t based on Gundam please let me know. I’d be interested in getting more Transformers, Evangelion, Zoids (Chaotic Century was actually really good), but I don’t really know what else is out there. I want to try my hand at some higher grades at some point, but money is always tight and time is limited and needed elsewhere.
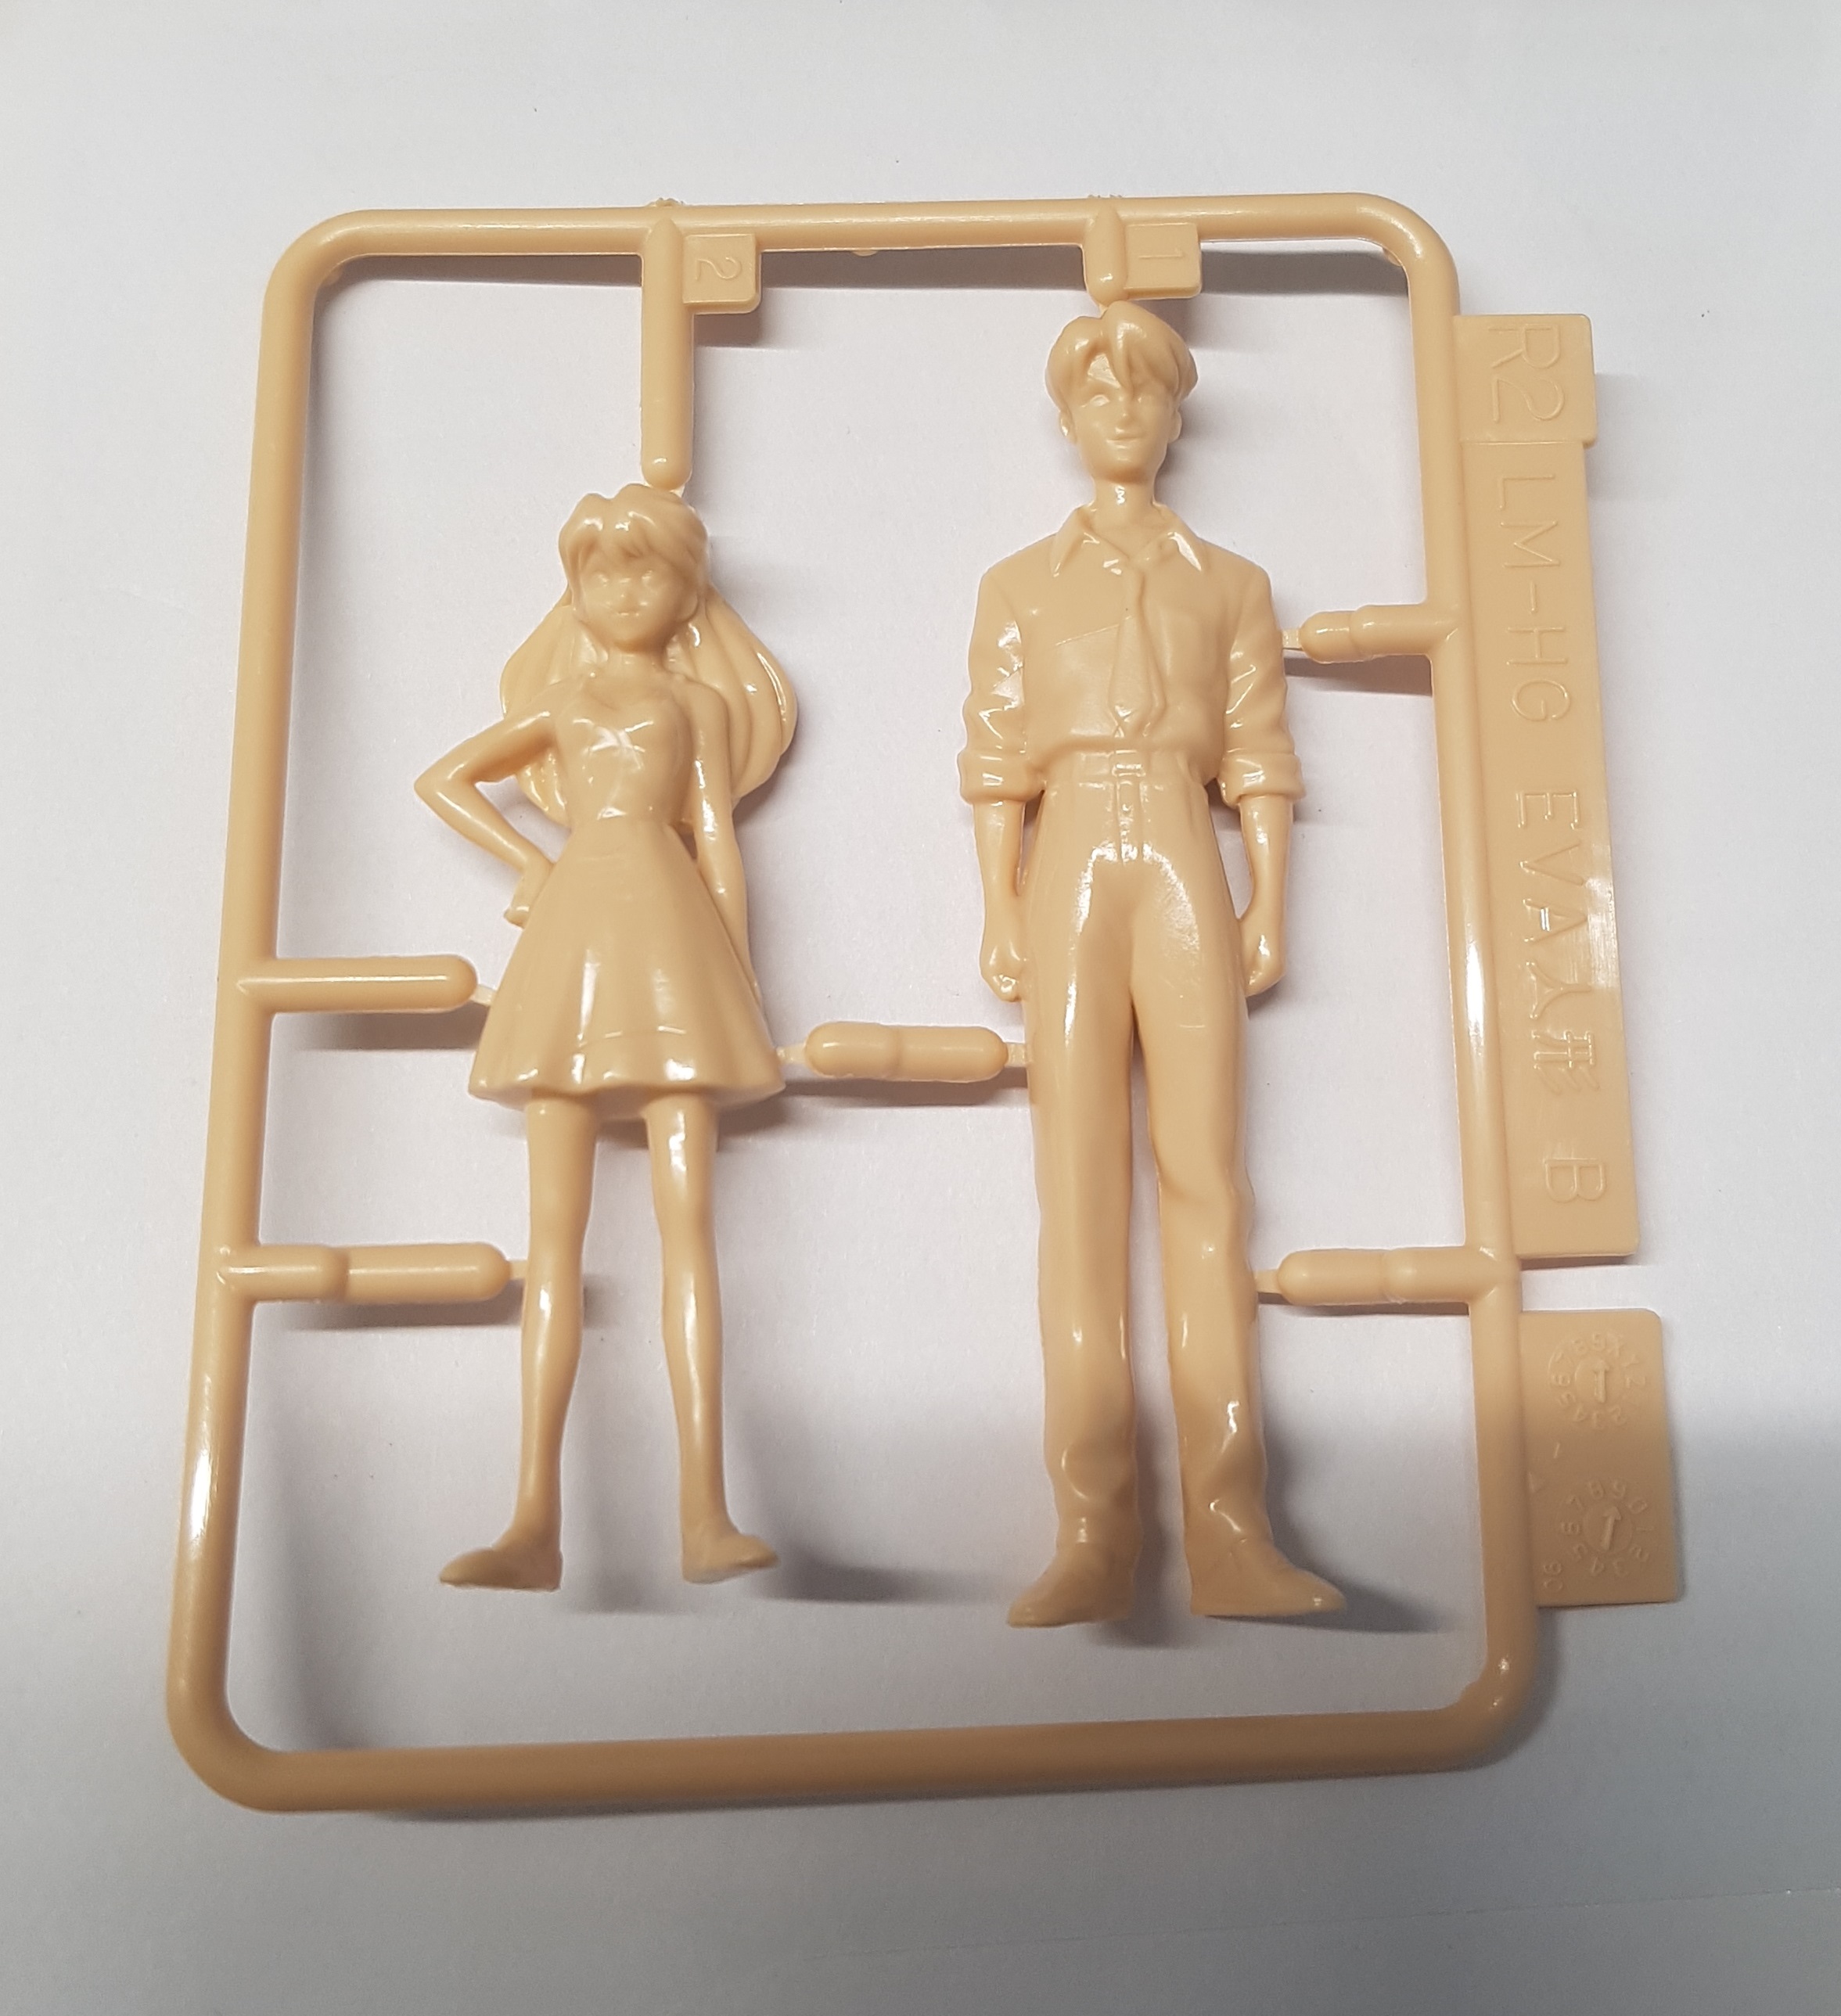 Asuka in her yellow summer dress, and Shinji in his school uniform. He's about 70mm up to his eyes.
By George kimosabes your smashed up, blotto friend, soon like brand new with ninety day warranty all iciban parts and labor is!
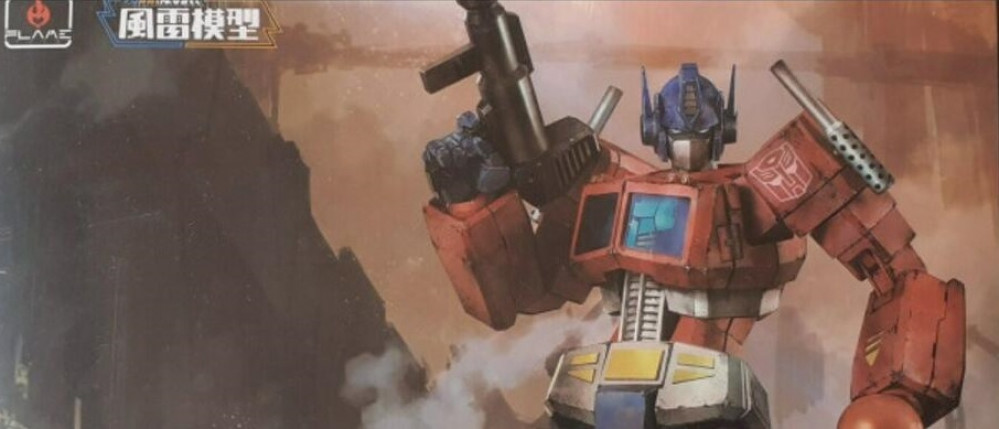
I built Prime this weekend. He took around 5 hours. I was able to watch the Weekender and Critical Role in the background, so it wasn’t too intense. Glue wasn’t needed, but it was recommended for the windshield. I’ve worked with GW push fit parts before and I’ve usually had to file down the pegs to make them fit. I never had that problem here. I did have to thin out one or two axle type parts to make them fit, and the Matrix cover flap thing had to have some plastic shaved off to make it work. Otherwise, everything worked first try.
The instructions were much shorter than I expected. The steps were mostly quite clear. At first I thought they were putting too much within each box, but then I noticed they have a sub-build order within each step. This makes it real easy to follow usually. Problems can arise if you get carried away and ignore this build order, as some stuff needs to go together in the right order or it won’t go together. I had to remove a part at one point and broke an internal peg and nearly damaged some visible parts. Usually, things only actually fit together one way due to shaped pegs and good design. The parts on the sprue are usually put on in number order. Part 1 is next to 2, which is next to 3 etc. None of this GW stuff where parts 1, 2, and 3 might even be on different sprues.
There were times when the steps could have used more pics to clearly show how things went together. There were axle/peg parts in the arms that went in half way and stopped. It was only by looking up videos on youtube that I found out I had to force them another 5mm deeper.
I had issue with the stickers. The logos went on fine, but the cab lights were too small to apply by hand. I used the tip of my hobby knife to lift them up and transfer them to the model. Two went fine, but the other two came off with paper still attached so lacked a sticky surface. I had to glue them in place, which could have resulted in frosting where I really didn’t want it.
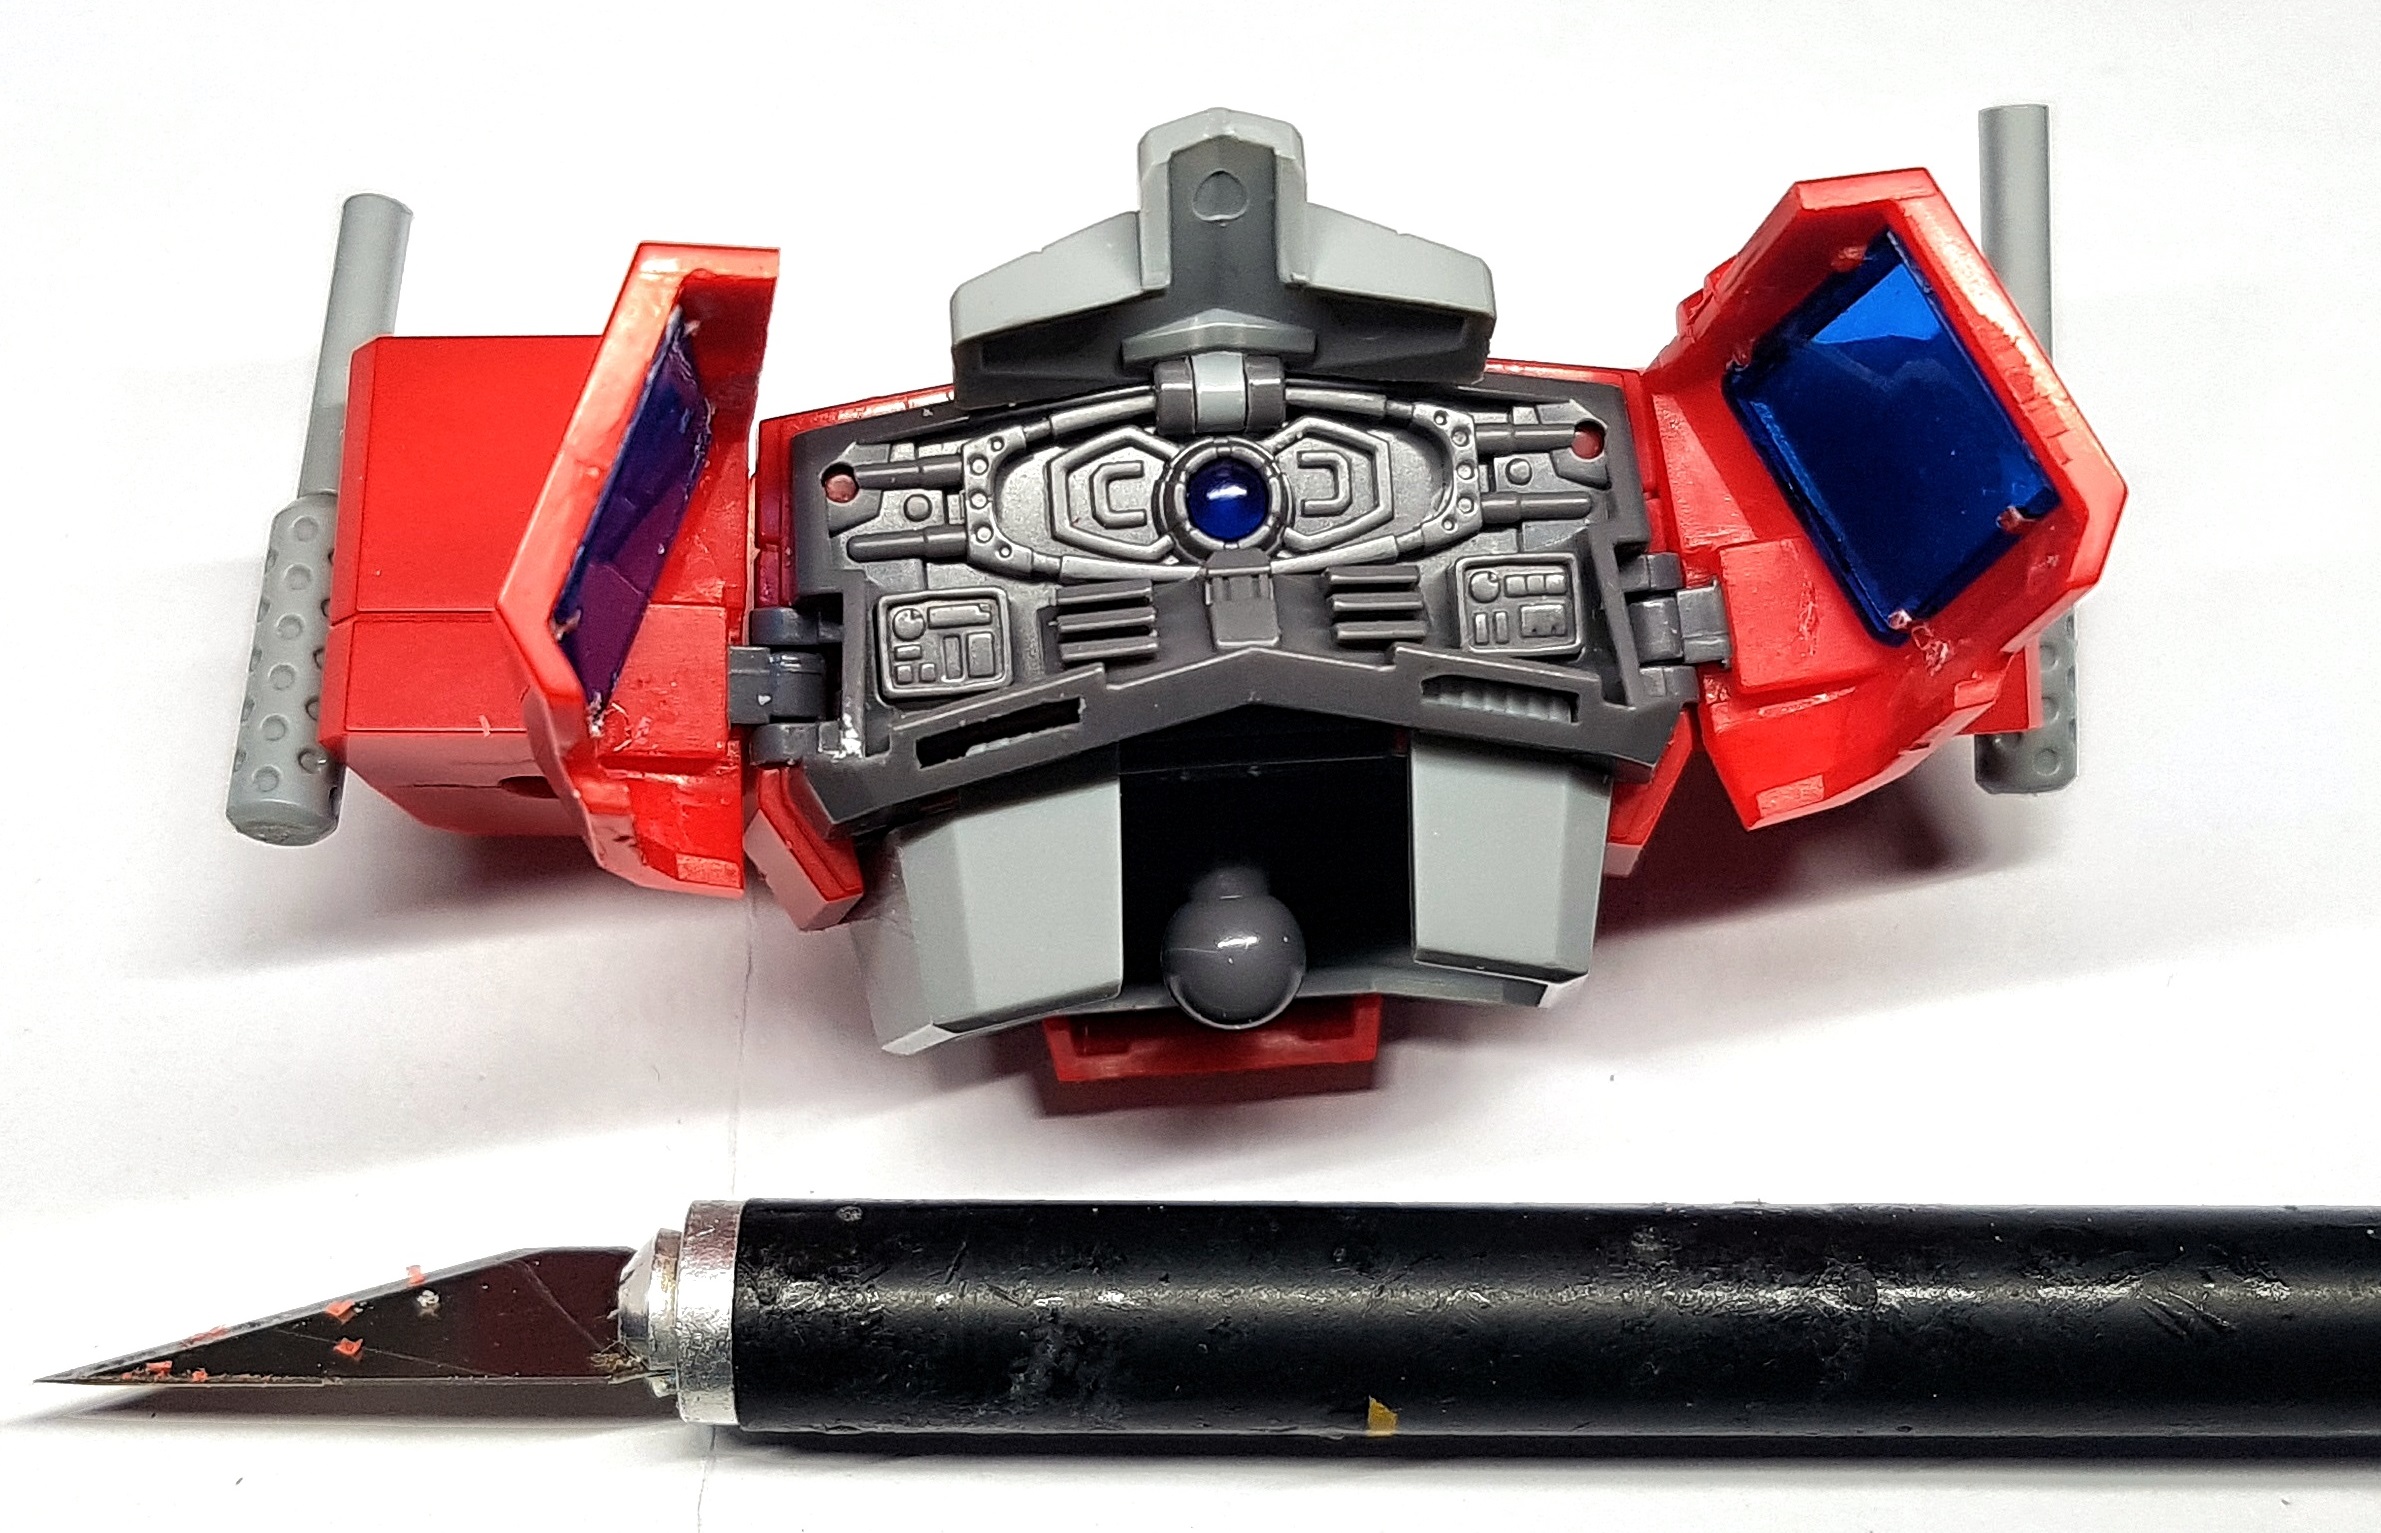
On that subject, the windshields needed gluing in to stop them falling out later (the cab opens up and his chest folds forwards to reveal the Matrix). There’s just no way of hiding this once the cab is open, and my glue did turn white.
The Energon Axe, his eyes, and the Matrix are all made of transparent plastic, which is cool. However, there’s no way to get light behind the eyes or Matrix. It would be nice if there was an option extra lighting kit to have light pass through everything that should glow. I wouldn’t know where to begin doing that myself, and I’m not even sure there’s room to hide the parts inside him.

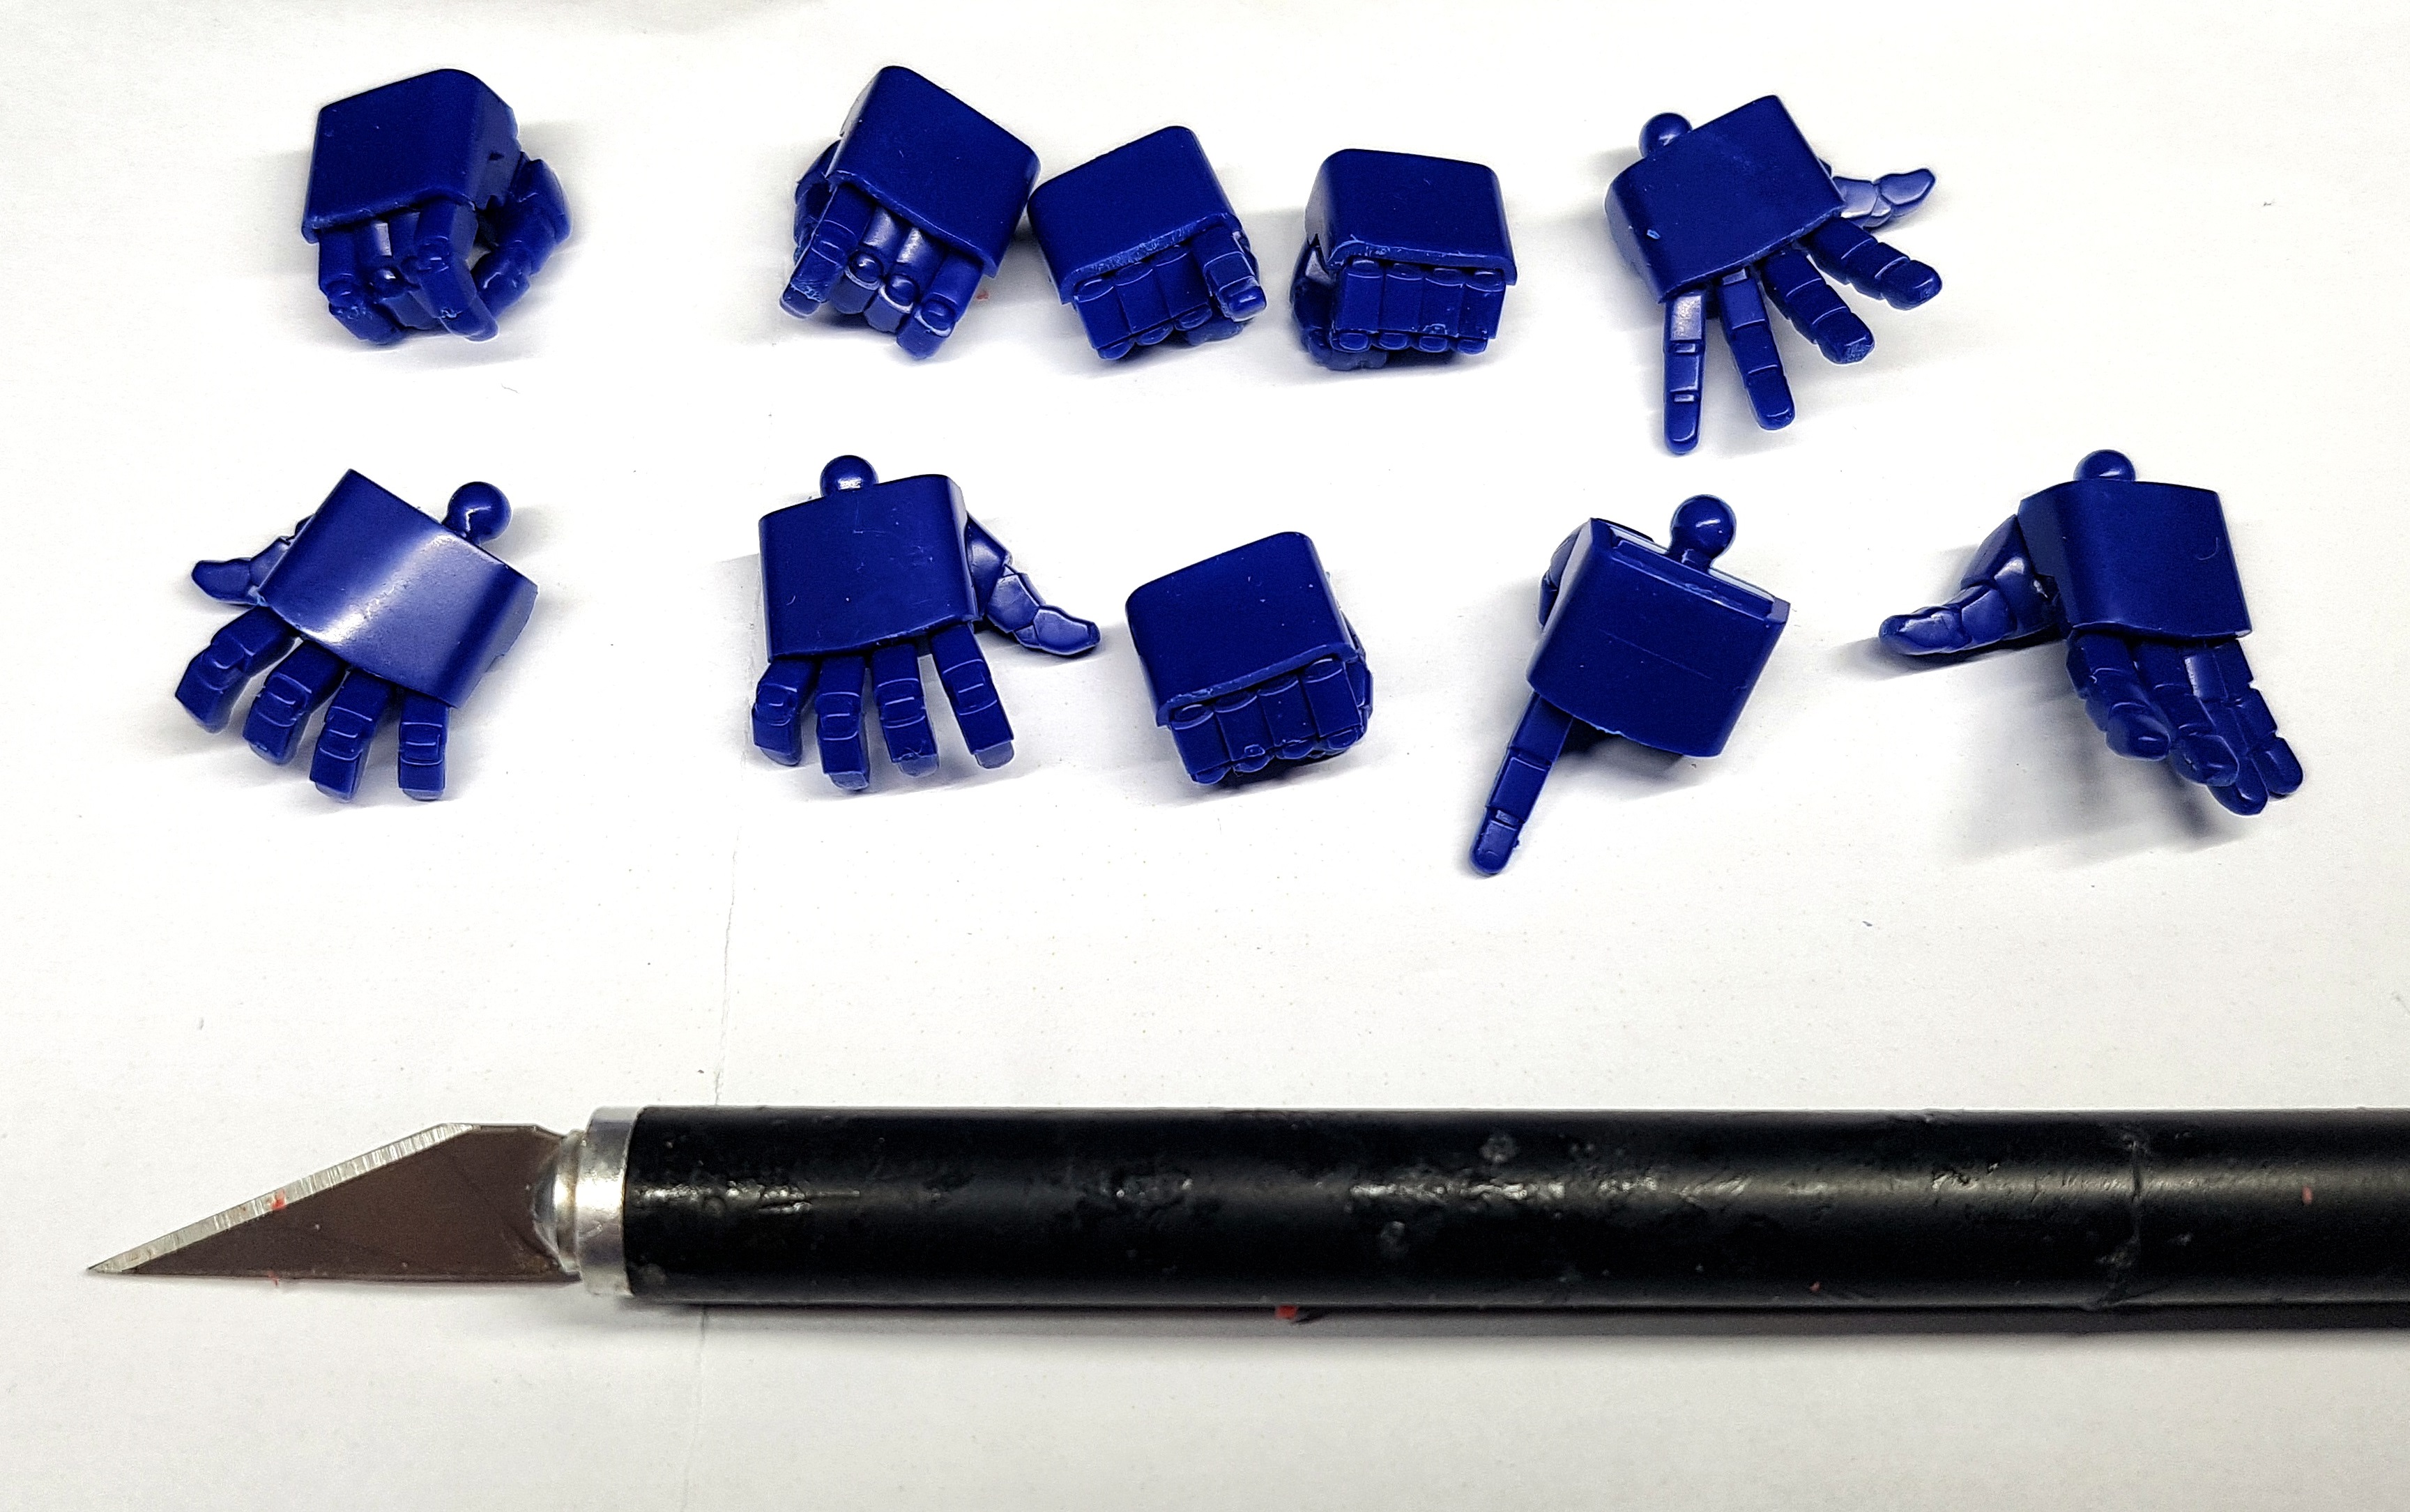
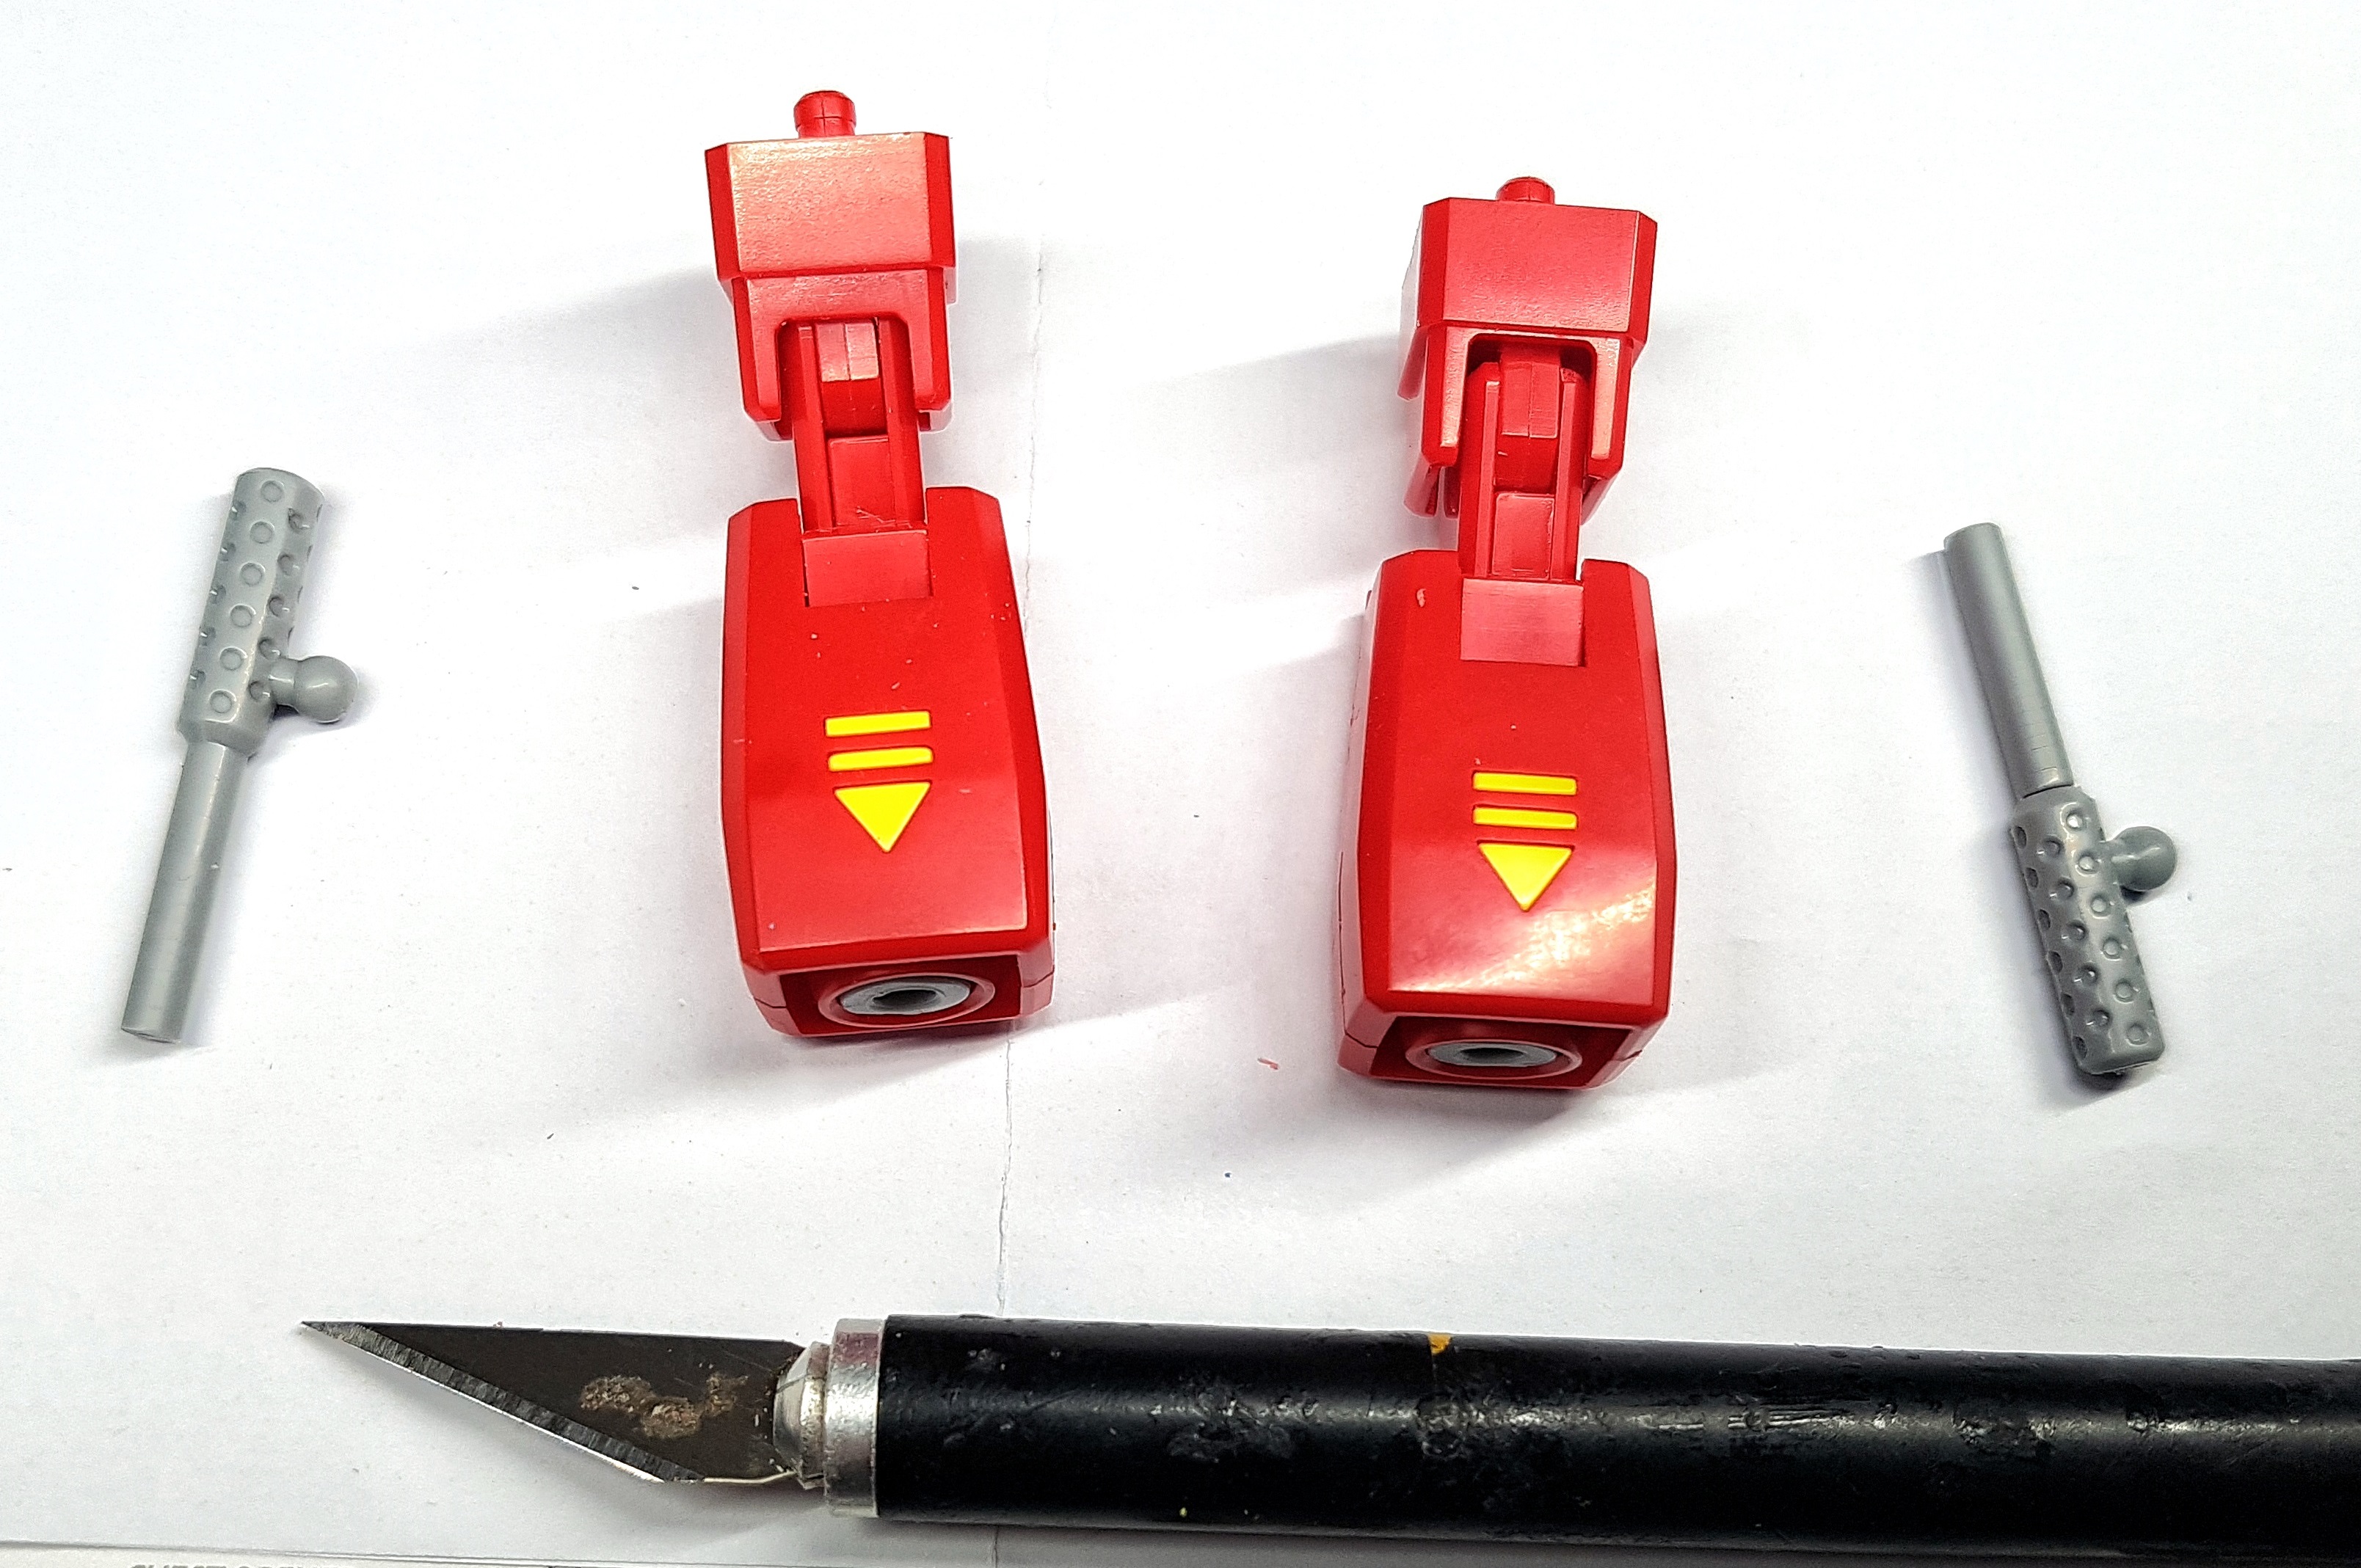
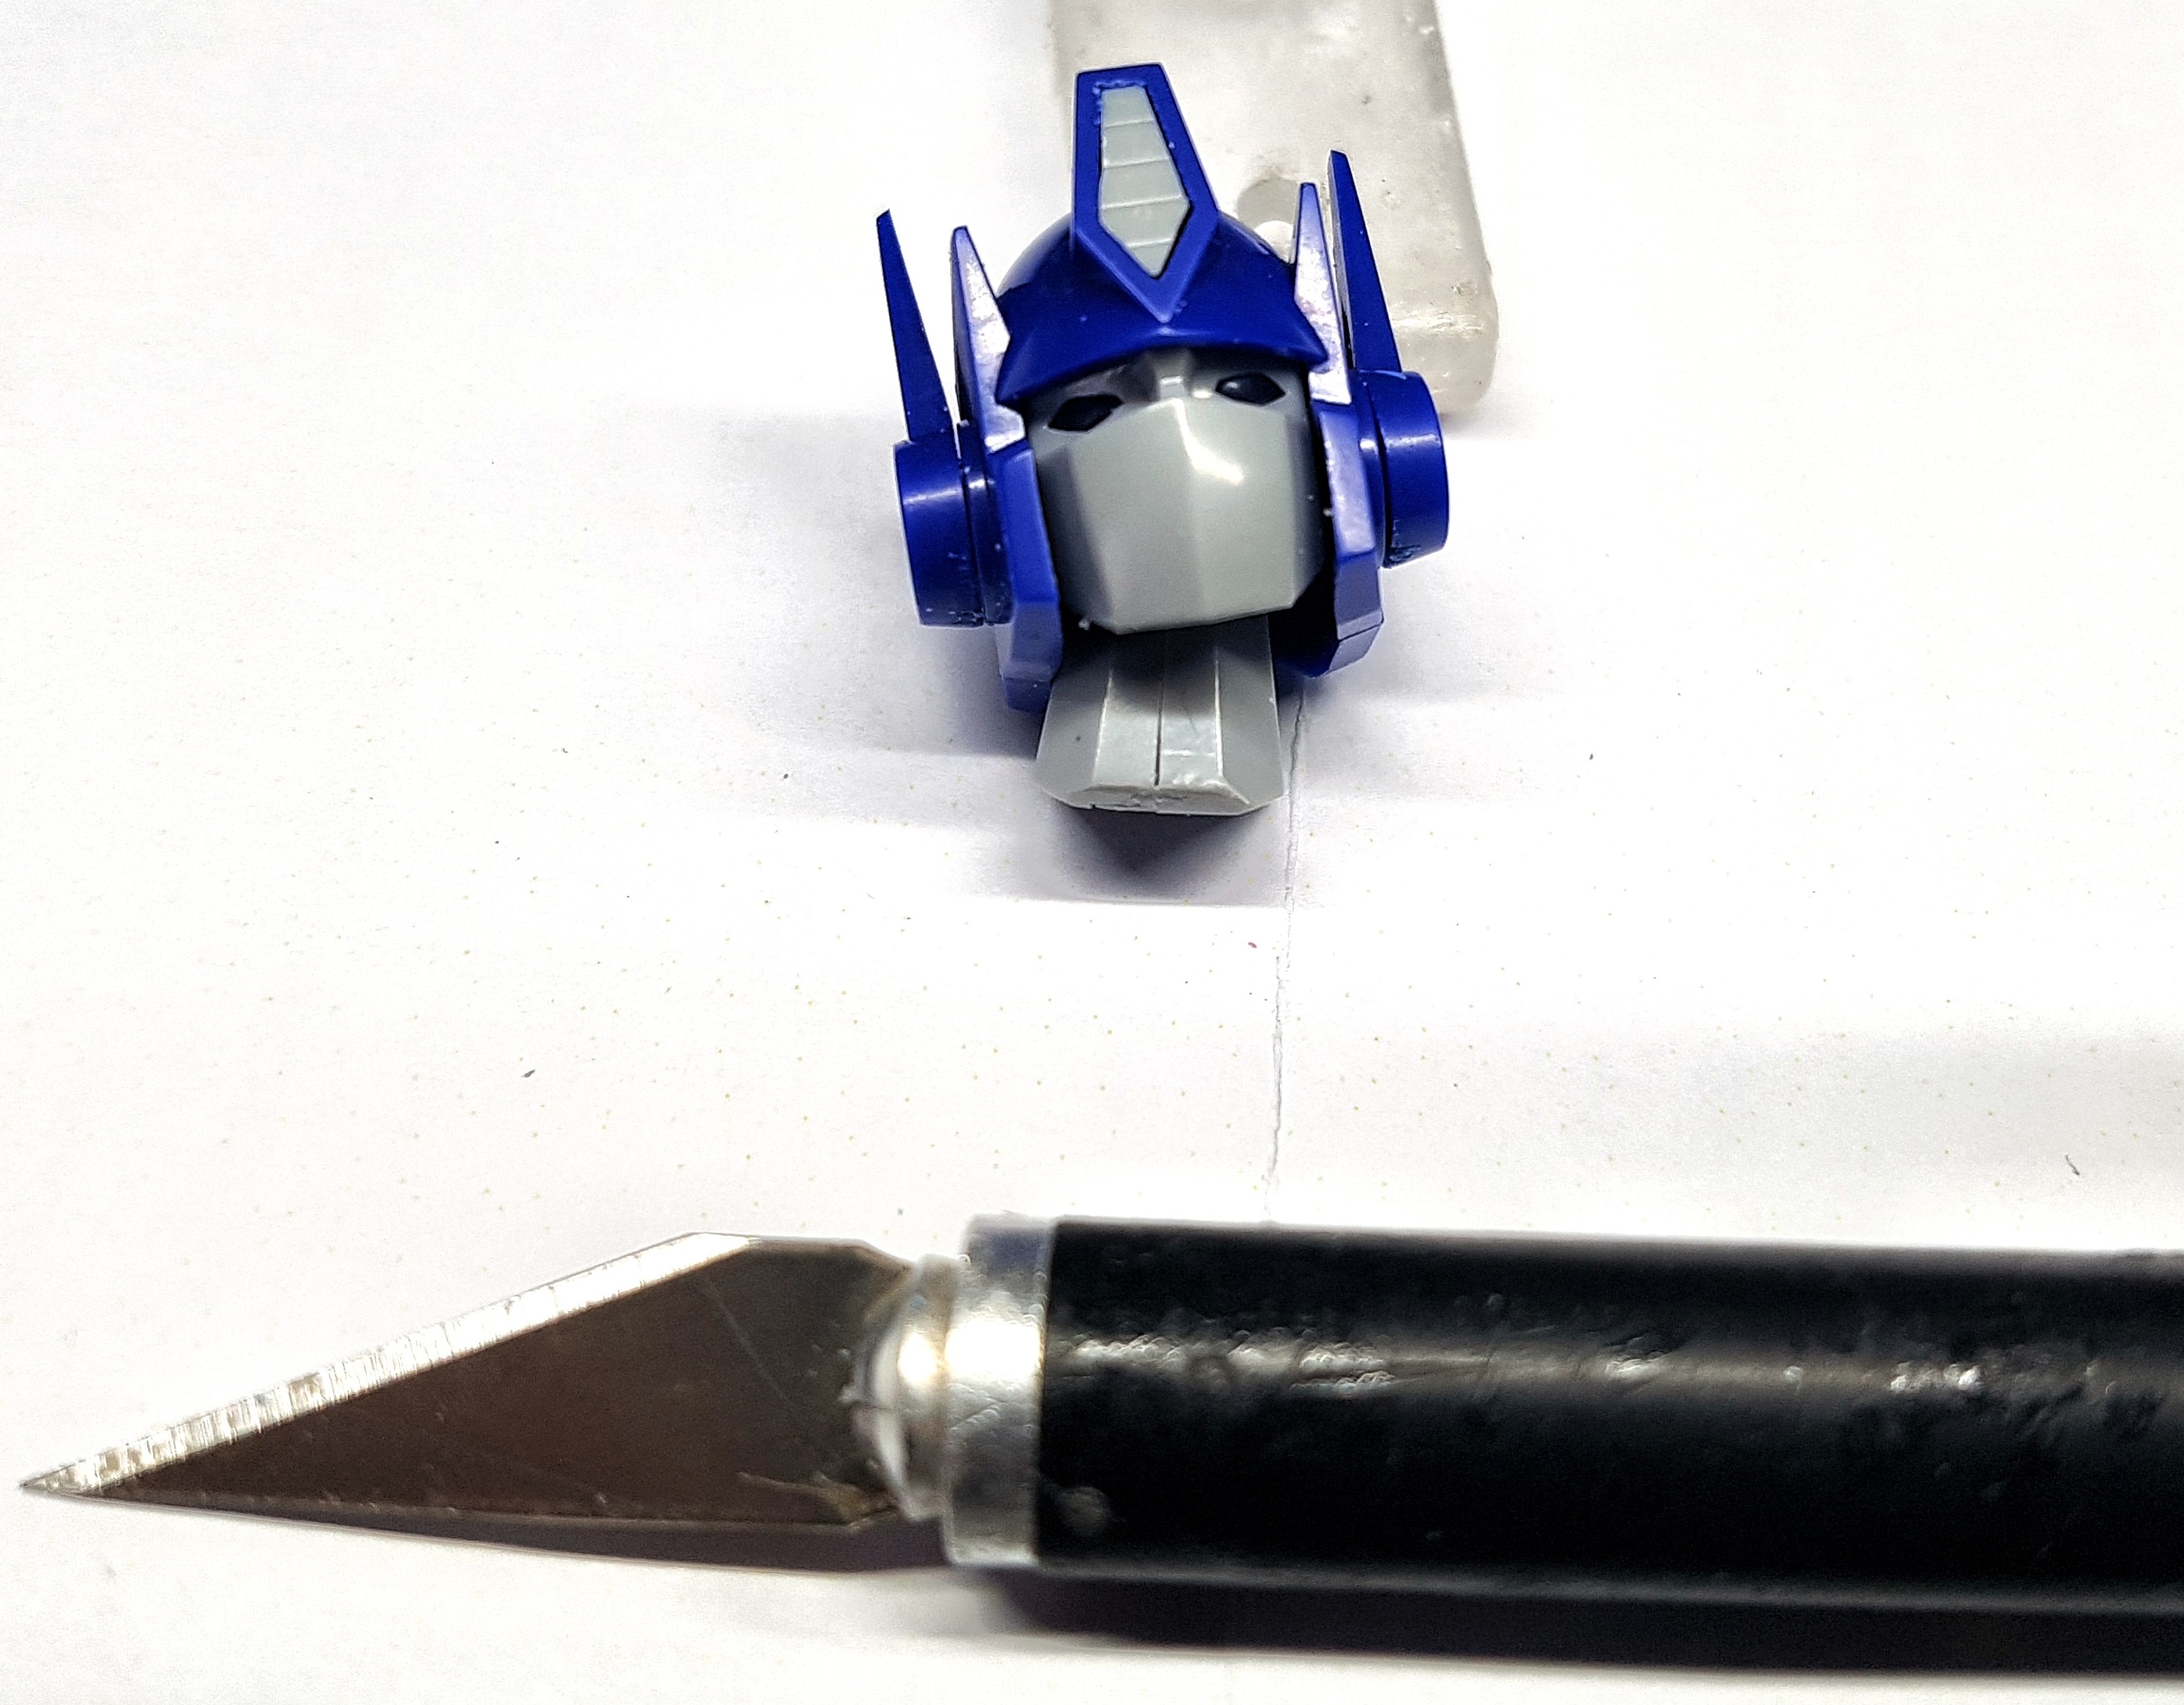
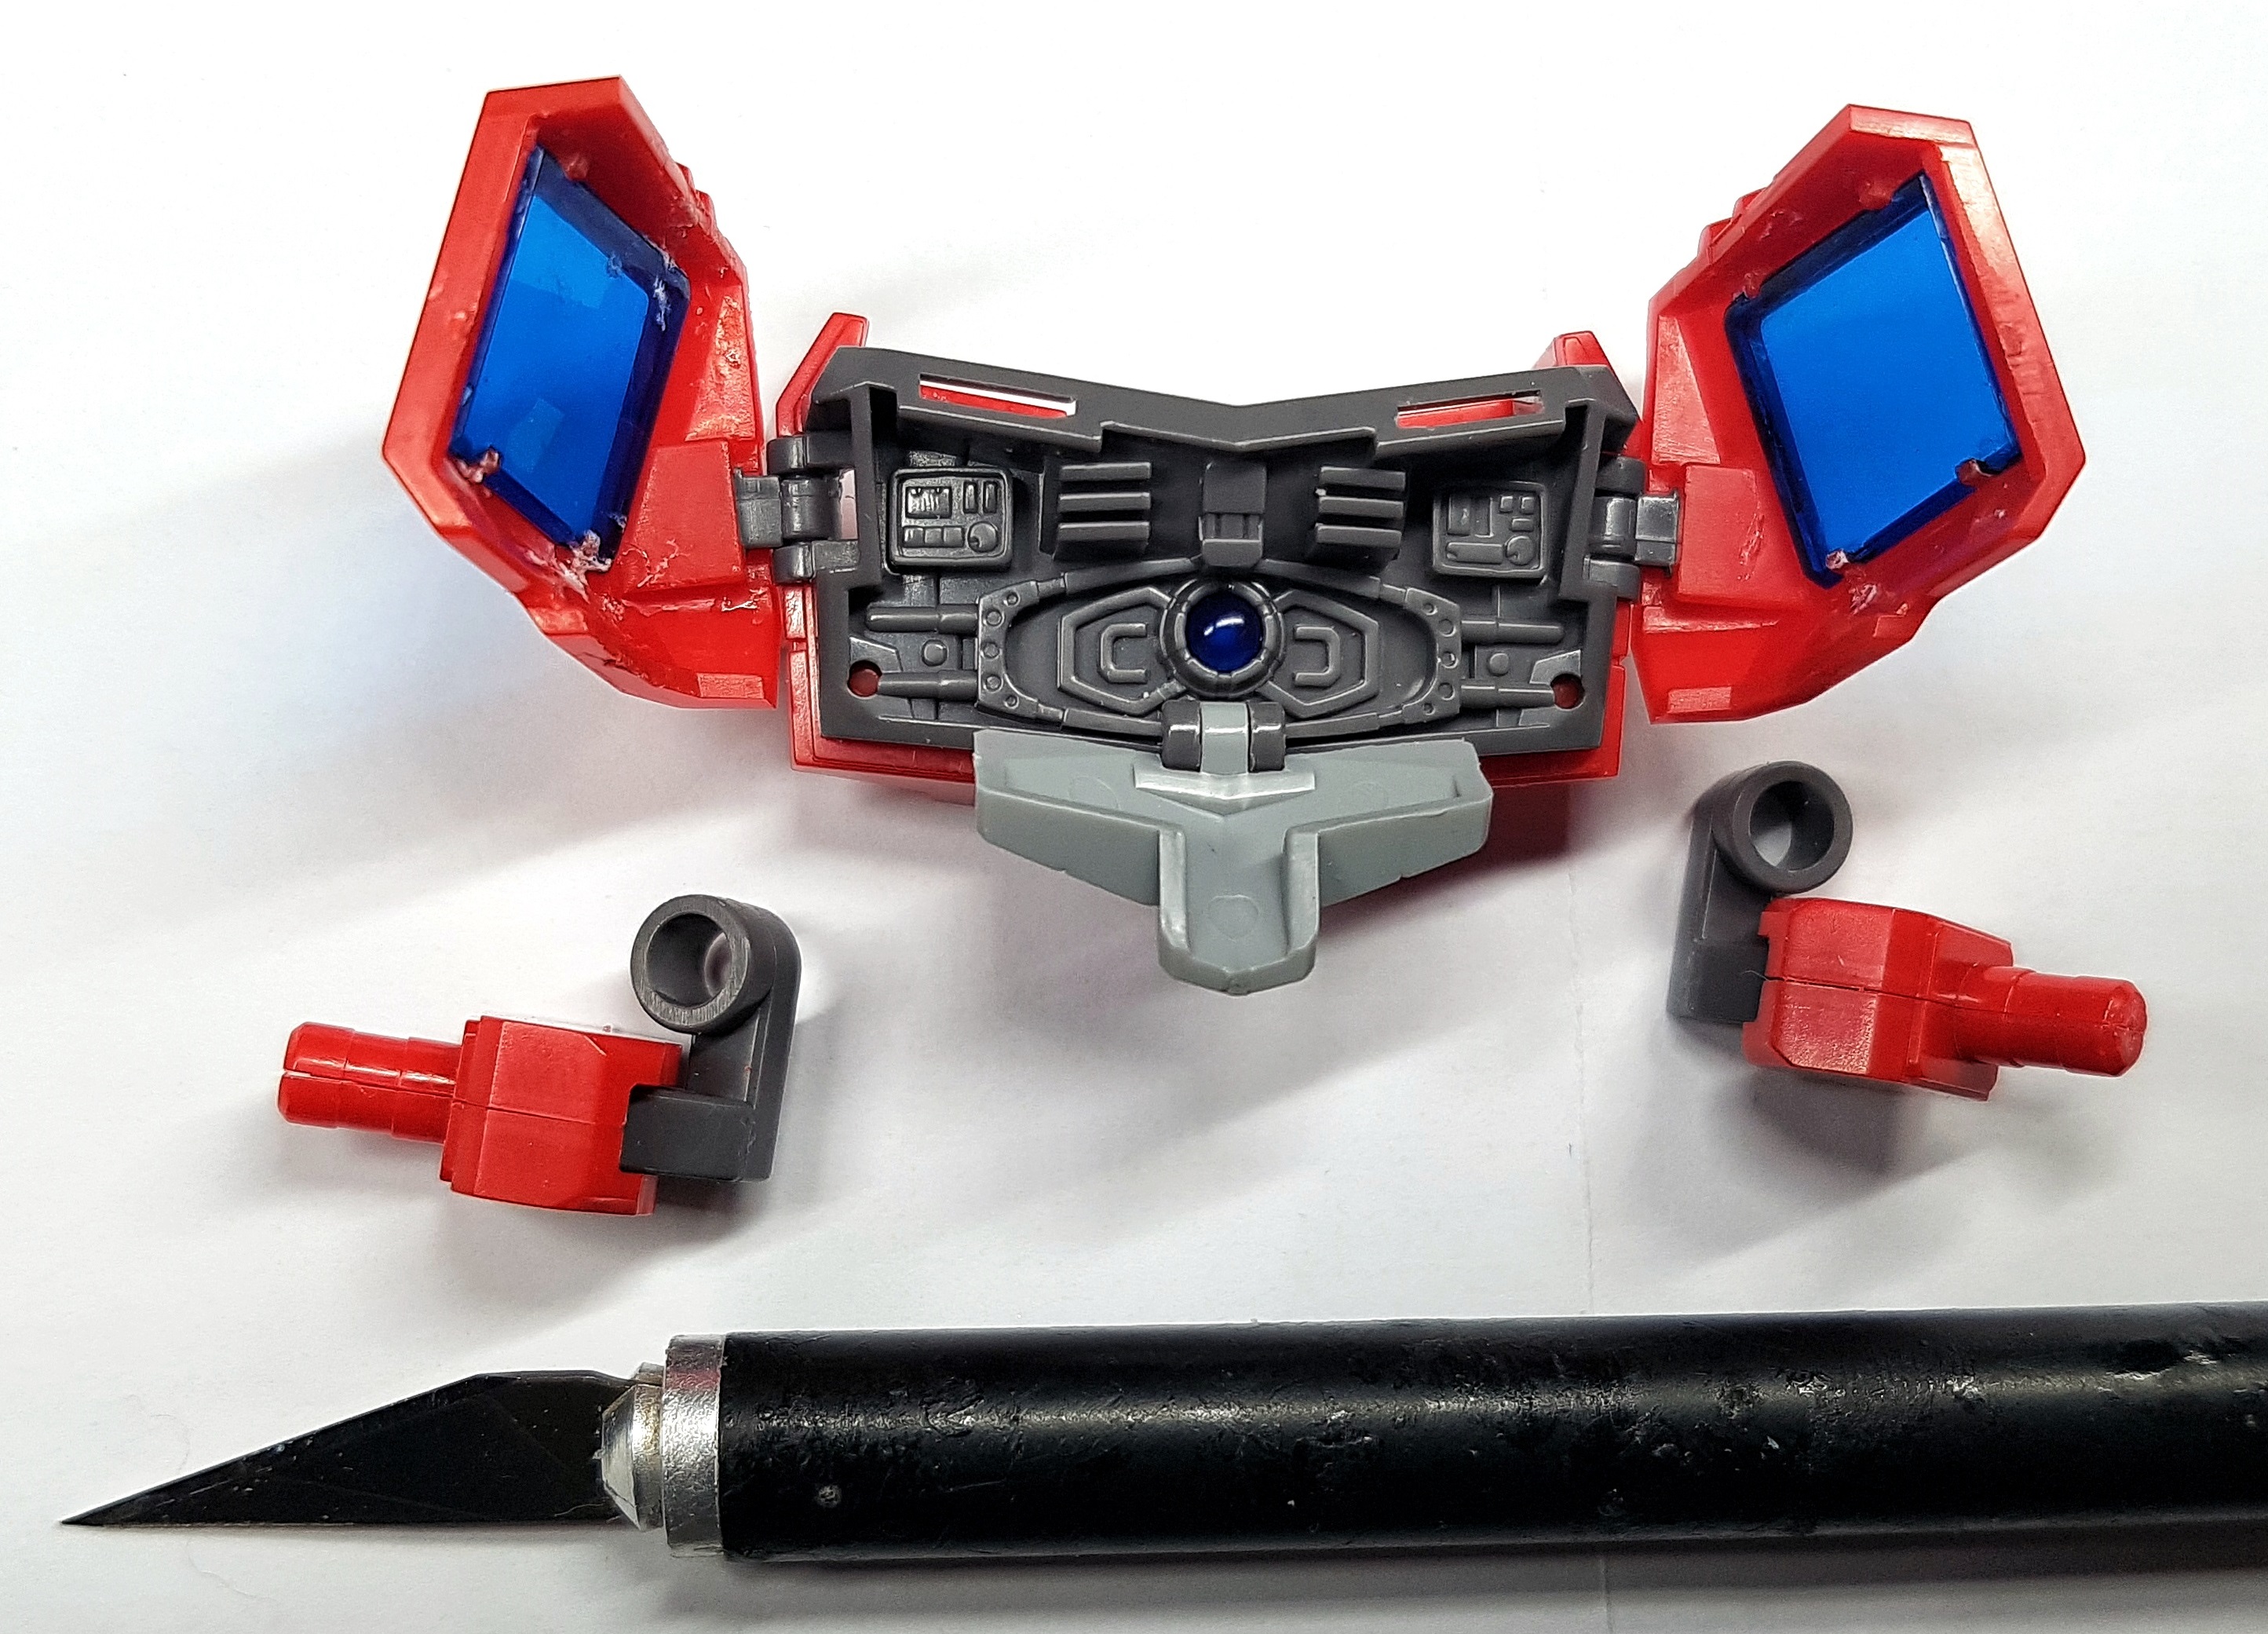
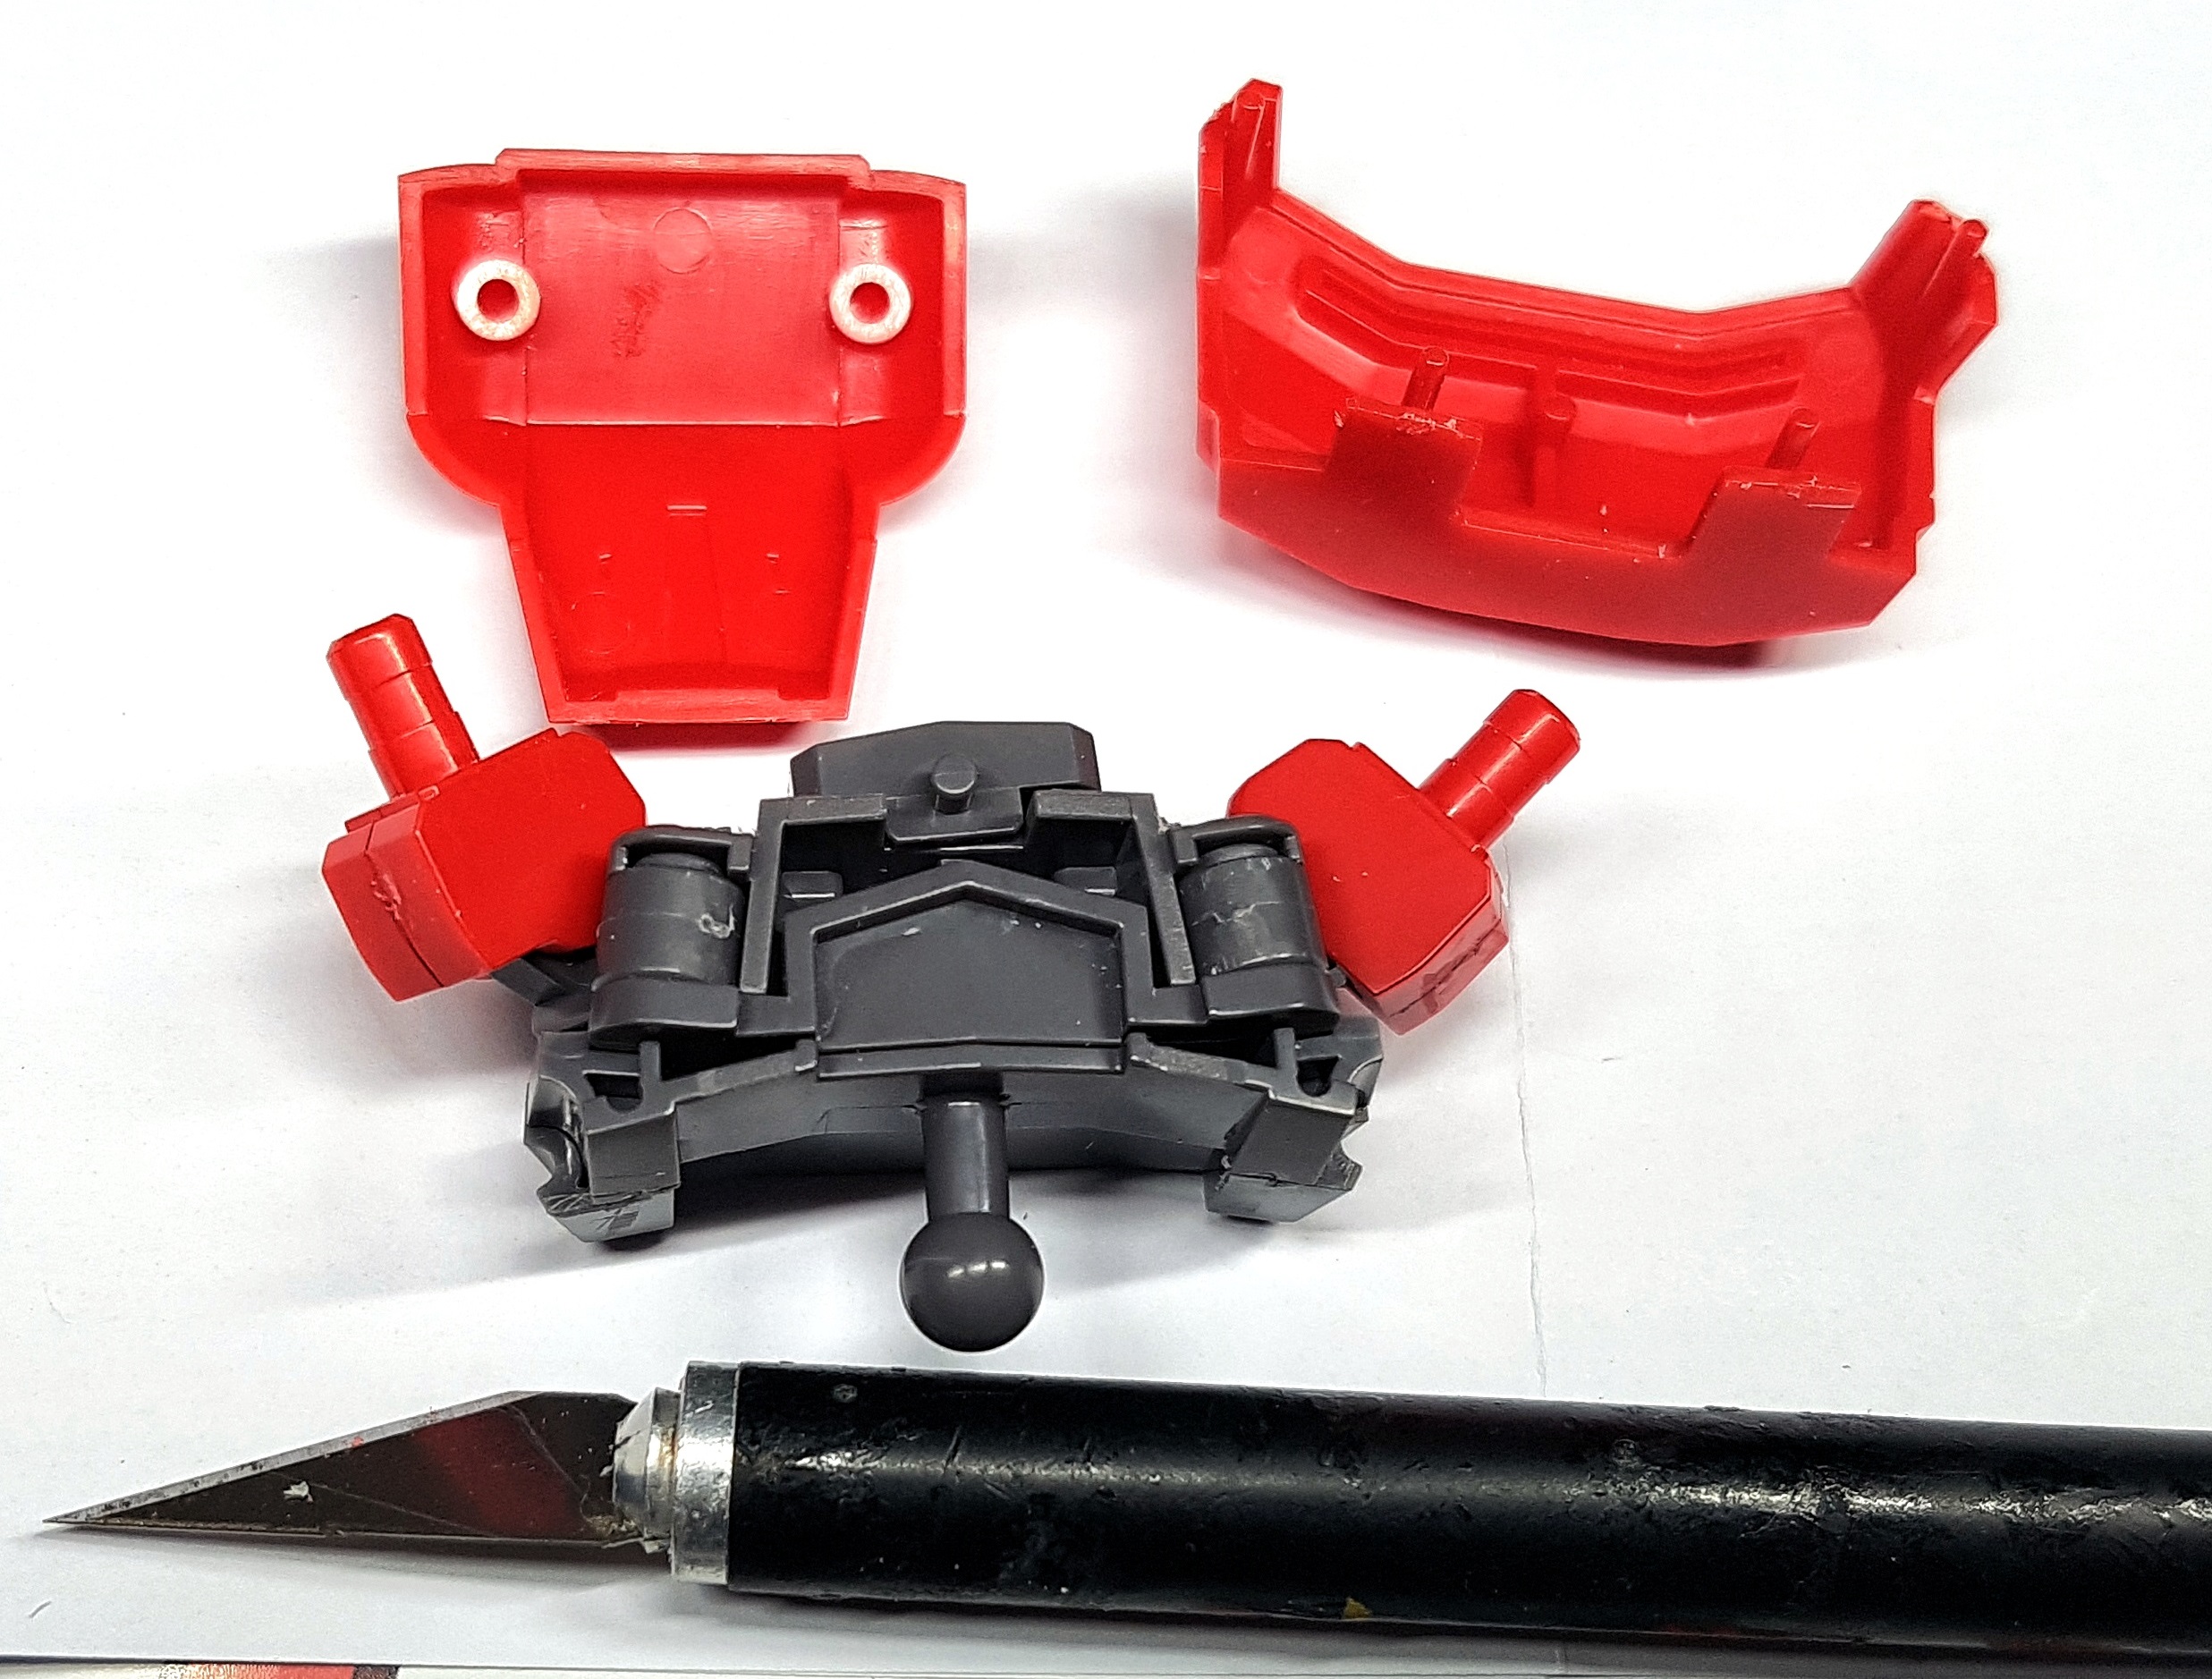
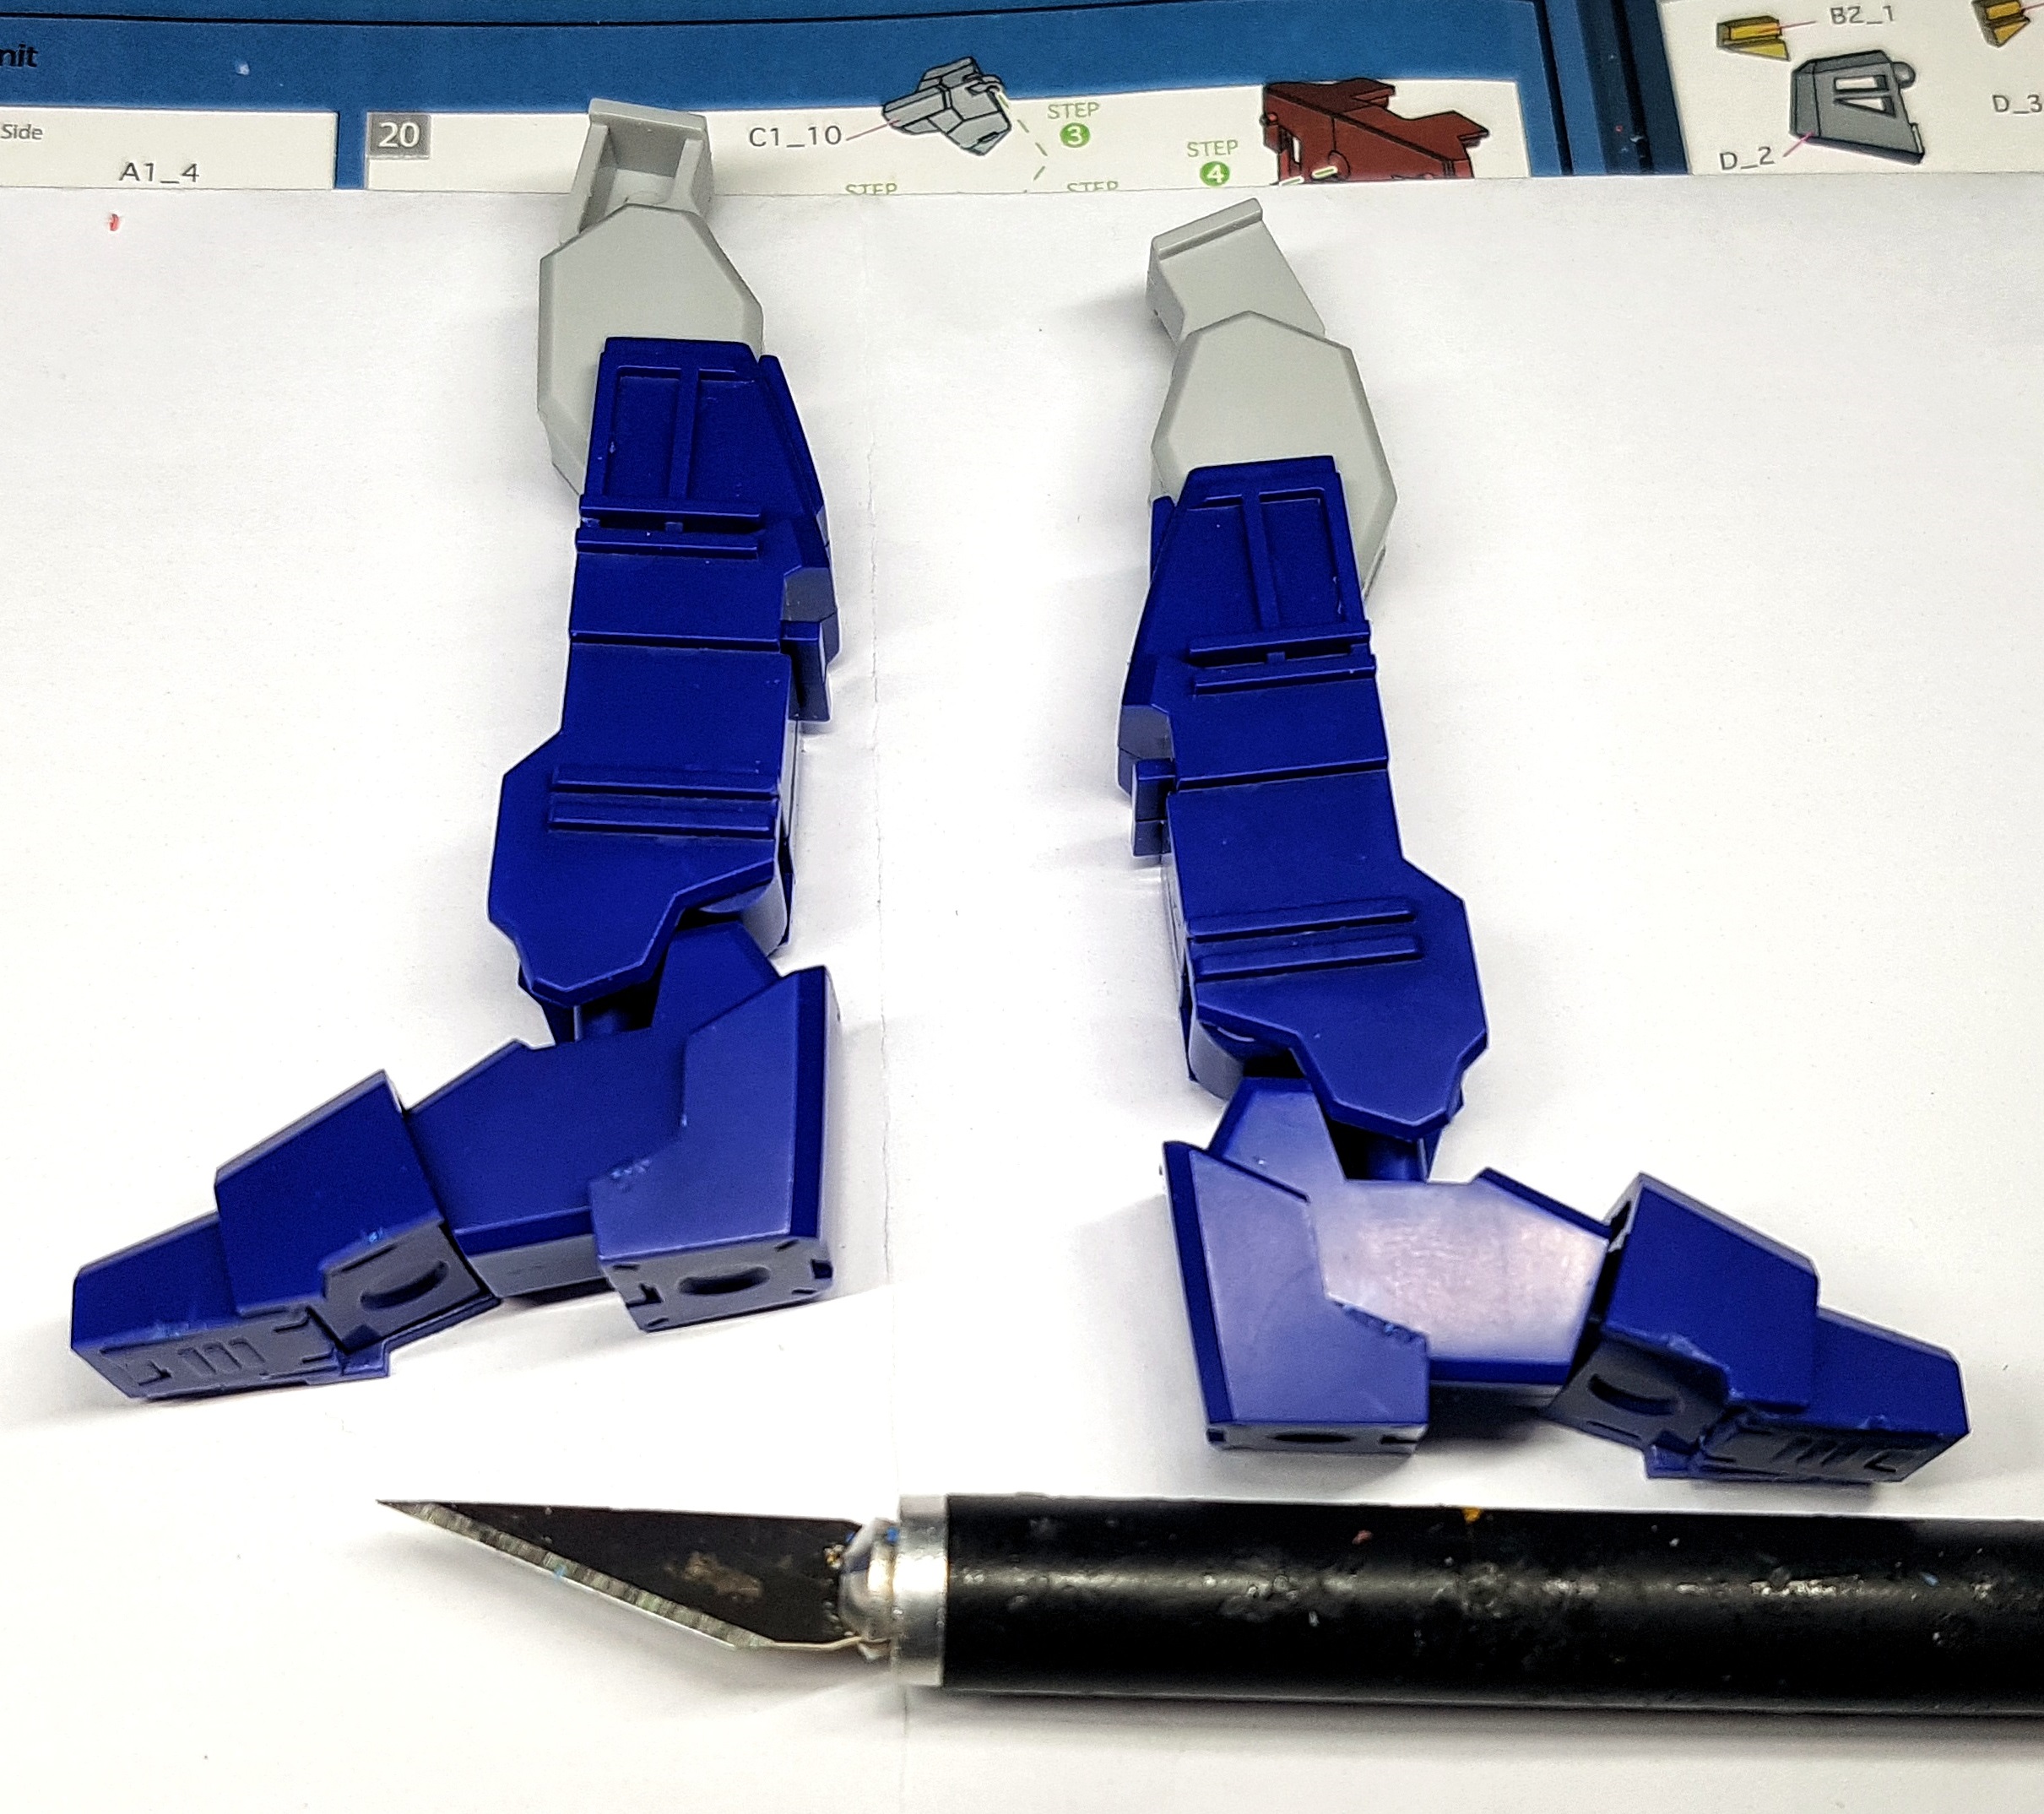
I kept notes as I was going on how long each stage of the build took me, but I don’t have them to hand. I’ll likely come back later and add that information, perhaps with any relevant notes on that stage. Here’s a gallery of the sub assemblies, in order. The hobby knife is included for a sense of scale.
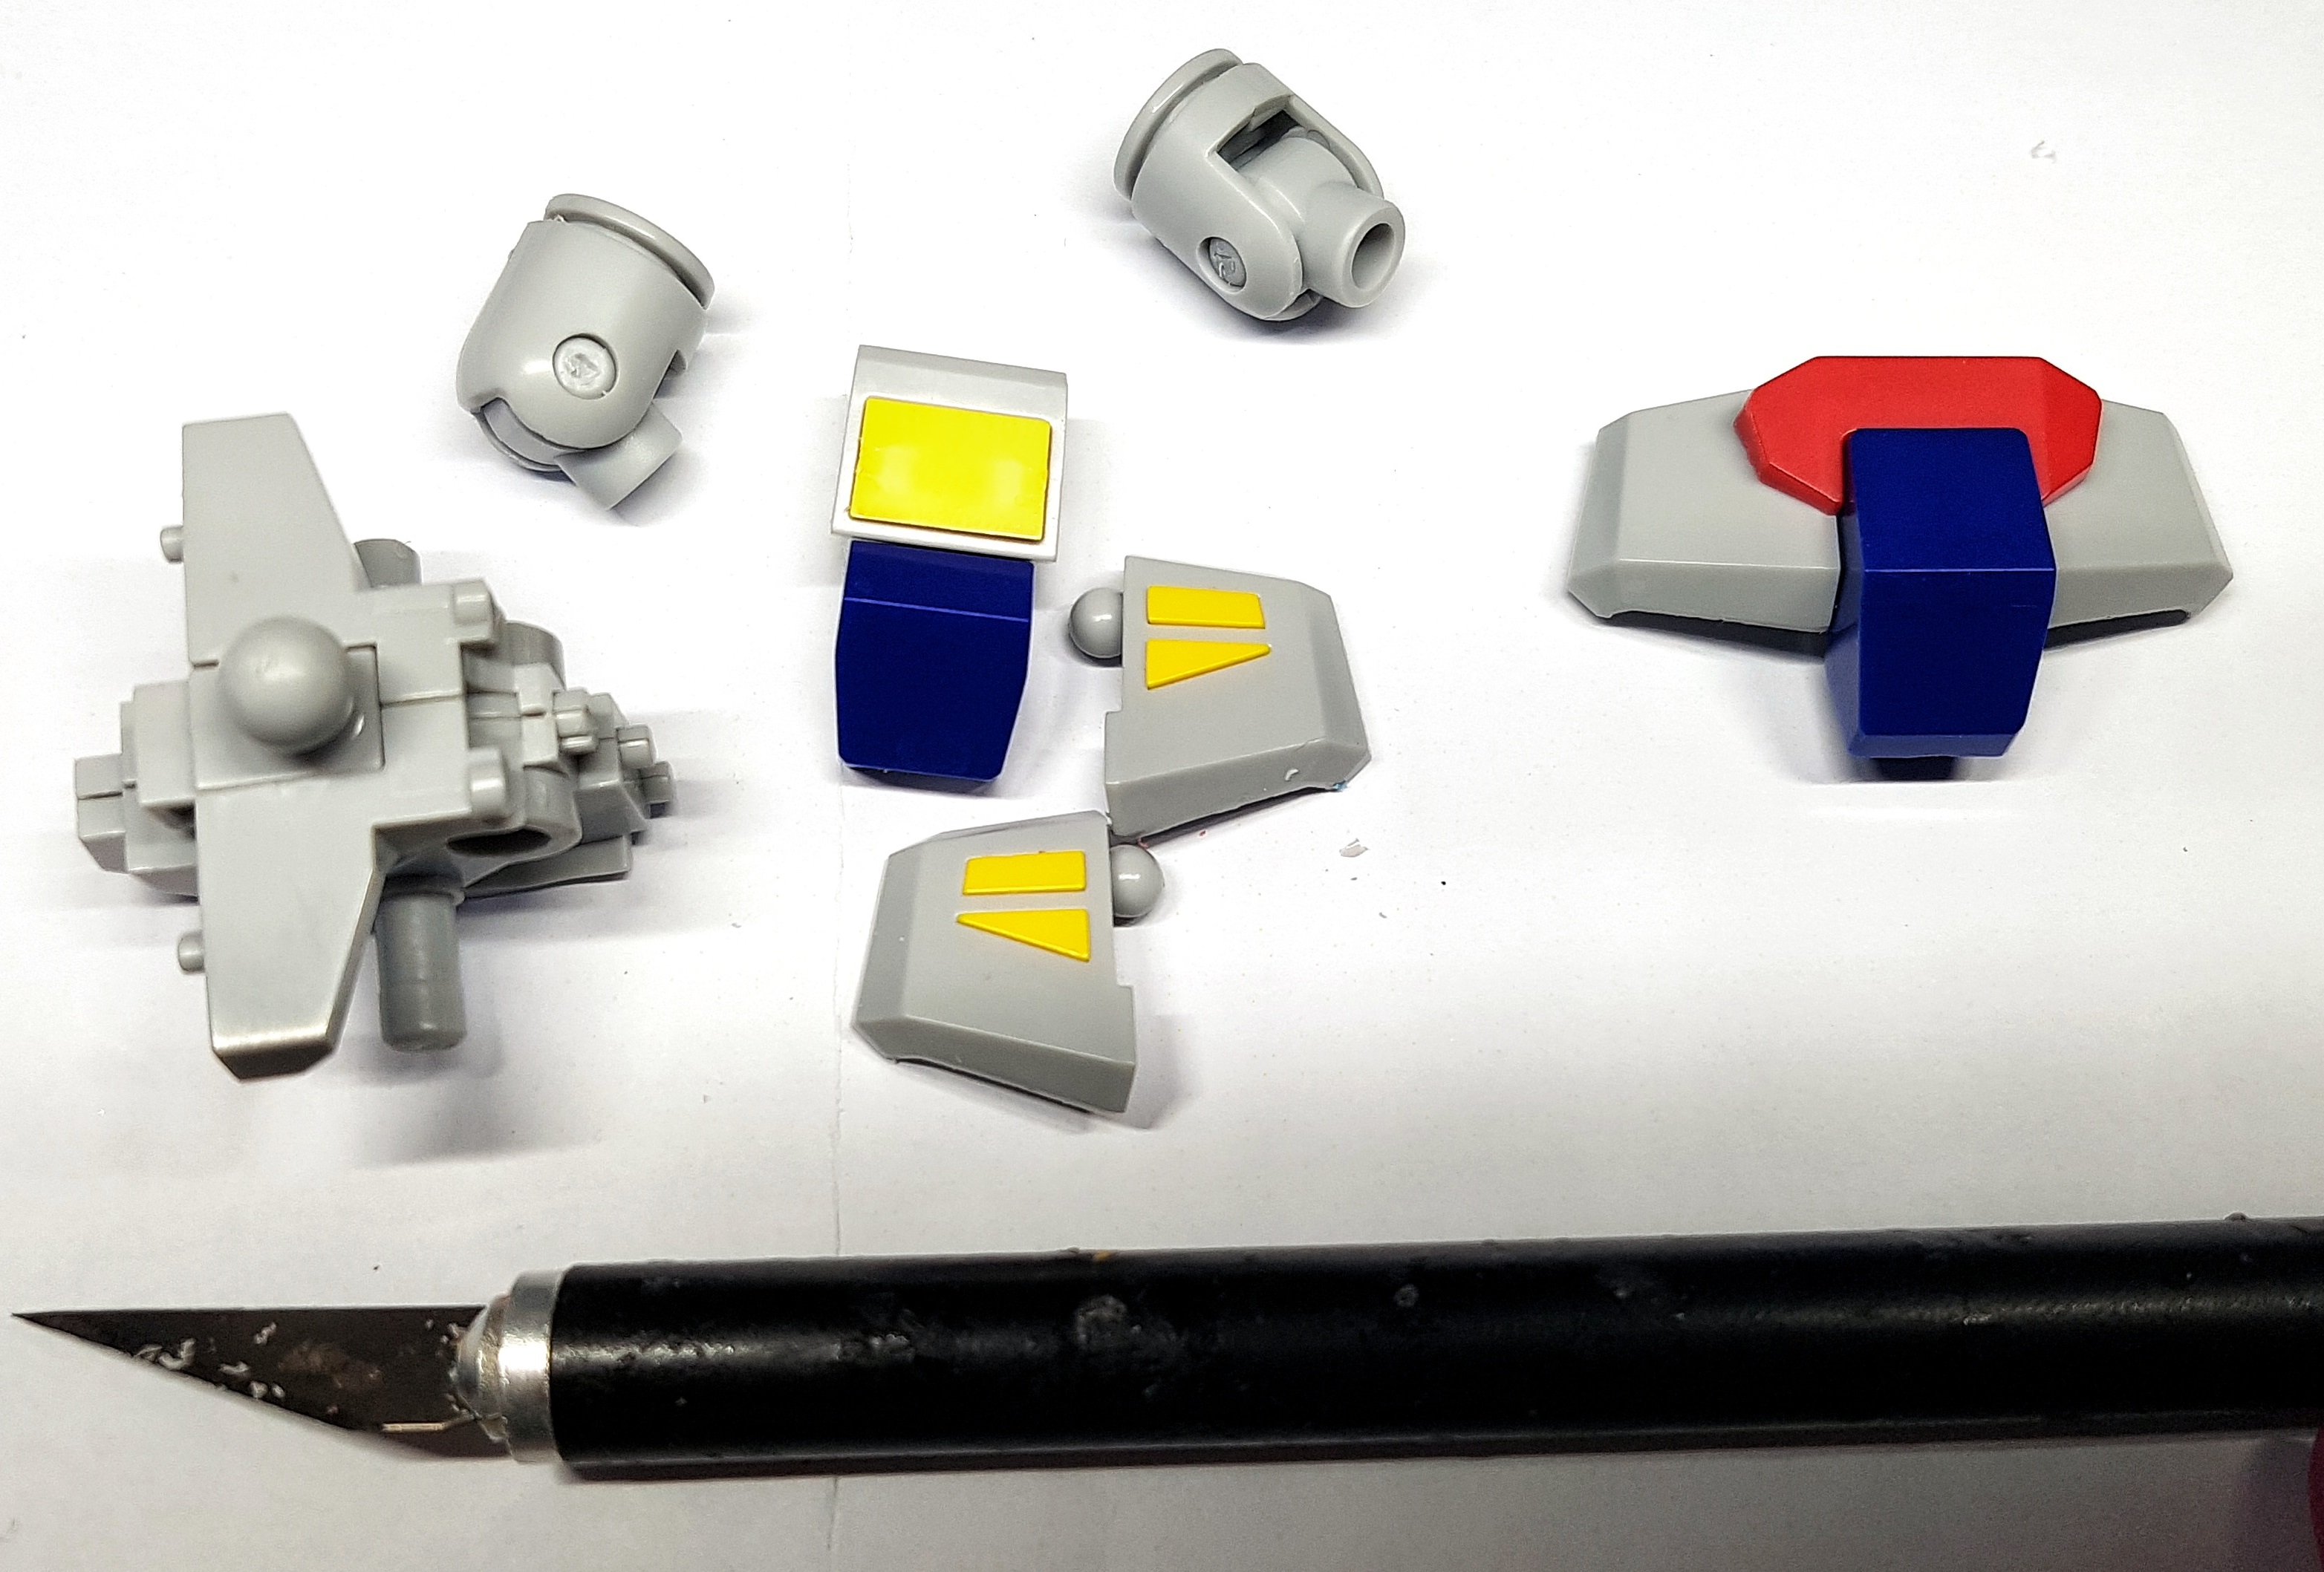
Pic 1 – Hands: It apparently took me 40 minutes to build all 10 hands. I guess most of this was finding the right numbers on the sprues and working out which sprue I wanted. It should have been simpler though, as most of them were on the same sprue, which was entirely used up by the end. Had they not mentioned Sprue E until after I’d finished with G it might have been simpler.
Pic 2 – Arms: 40 minutes for 2 arms. The diagram was intimidating at first, until I noticed it had an order to be done in. One of the parts is shown joining the wrong way around, but it all only fits one way so it’s an easy fix. I always liked finding and fixing mistakes in old lego instructions anyway. It’s part of the fun.
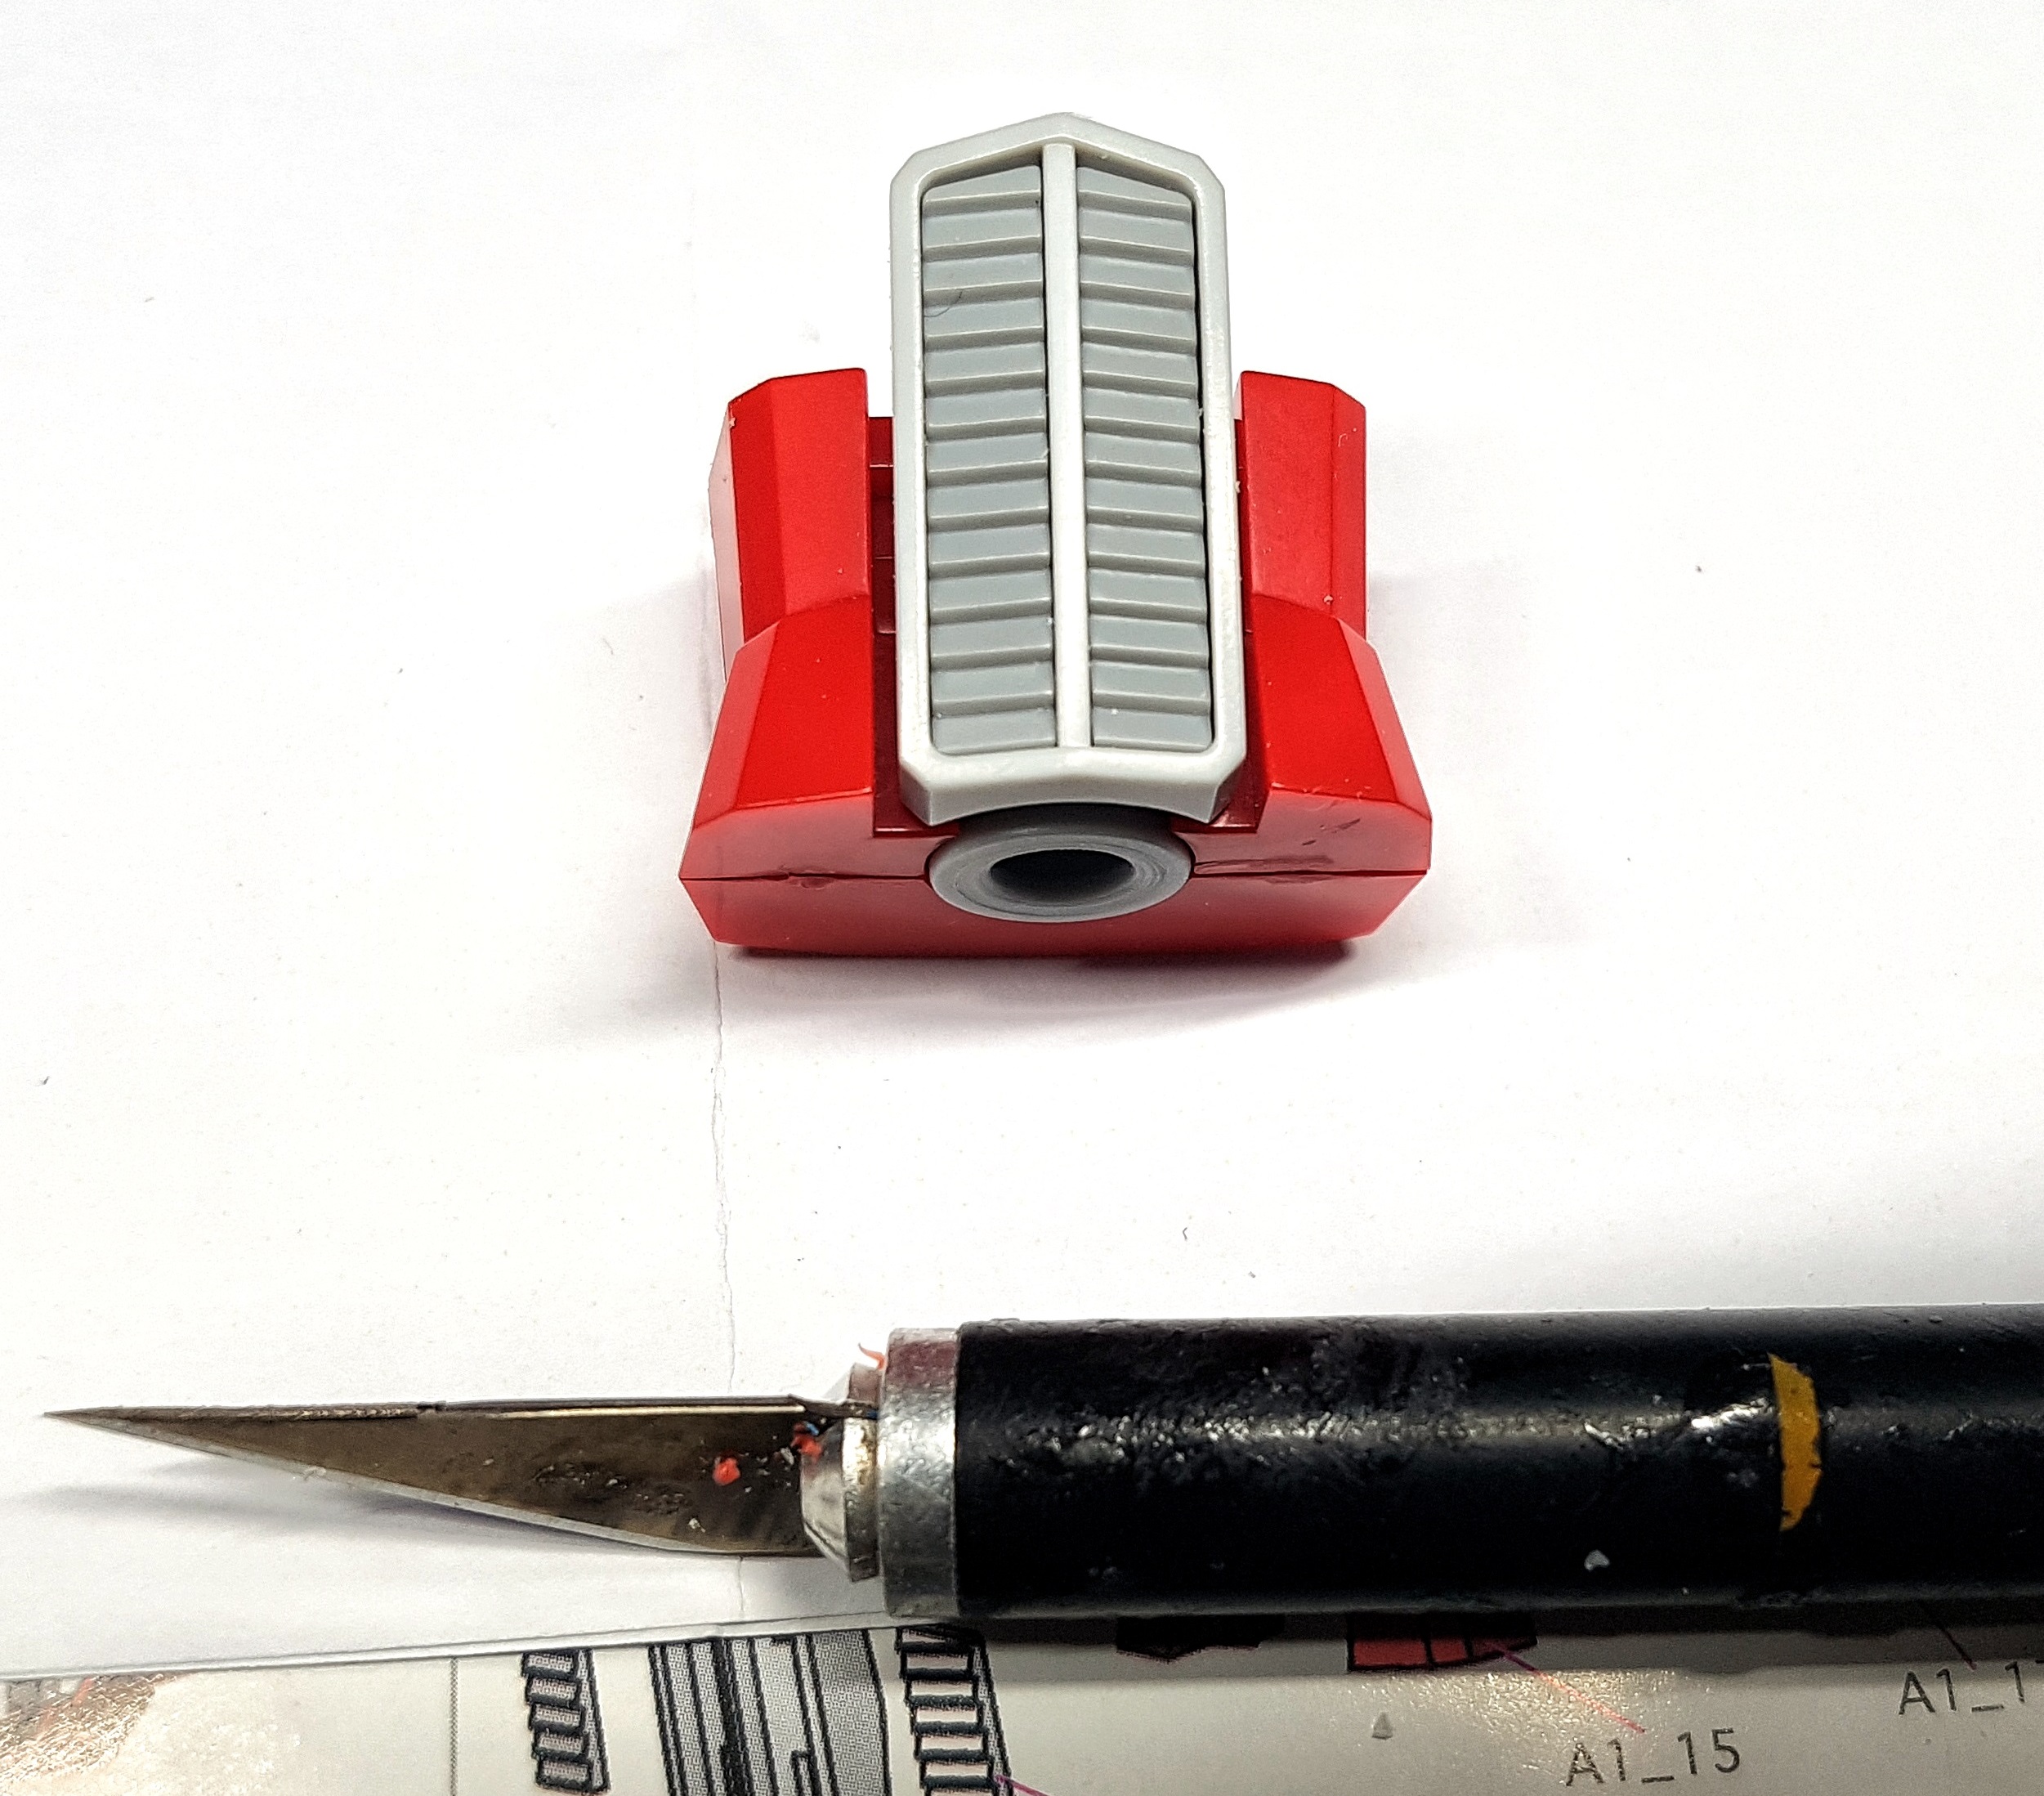
Pic 3 – Head: 15 minutes. A simple build, even if the eyes were tiny and fiddly.
Pic 4 – Chest Front: 40 minutes. This would have been a lot less, but the Flippy matrix cover was too big to slot in and flip. I had to shave off some plastic to make it work, and I wanted to be real sure I needed to before i did anything I couldn’t undo.
Pic 5 – Back: 12 minutes. A simple stage
Pic 6 – Torso & shoulders: 25 minutes. The joint between the shoulders and the torso was tricky. The peg/axle popped in but left a 3-5mm gap, which was plausible. it wasn’t until a few steps later that I figured out the shoulders would fall off still. I watched Youtube build videos and saw the gap wasn’t supposed to be there and I had to heavy handedly force the peg/axle to go further, even though it didn’t feel like it wanted to.
Pic 7 – Midriff: 10 minutes. No challenge here
Pic 8 – Pelvis Parts: The peg/axle running through the middle did not want to go. I think I had to file inside the hole to make it a little wider.
Pic 9 – Pelvis Assembled: 28 minutes all in for this robo-crotch.
Pic 10 – Inner Legs: 45 minutes for the pair. Again, one of the axle/pegs above an ankle was stiff and got stuck. I couldn’t get it all the way on, and I couldn’t remove it to widen it. I had to wiggle it about and file at what I could access and finally got it in place, and it seems to move fine now. Part of the issue was a lack of grip and leverage with small parts and fat fingers. Once the rest of the plastic is attached there is sufficient leverage for the joint to move as it’s supposed to.
Pic 11 – Legs assembled: another 16 minutes to clean up and clip the outer shells and joints on.
Weapons: It took 7 minutes to build the weapons. The end cap for the gun didn’t want to go on, and took some filing and enlarging.
Stickers and final build: 10 minutes. As I said above, I had issues with the stickers. The logos went on fine, but the cab lights were too small to apply by hand. I used the tip of my hobby knife to lift them up and transfer them to the model. Two went fine, but the other two came off with paper still attached so lacked a sticky surface. I had to glue them in place, which could have resulted in frosting where I really didn’t want it. The build was simple enough otherwise. The ball joints should pop on and off with ease when I want to swap out hands. I found a dramatic pose from the box and went with that for now. He’s now looking cool, standing on my DVD shelves in my living room.


So he’s now fully built. Am I happy with the experience and would I build more? Yes. I enjoyed it, and he looks cool guarding my DVDs.
Was it worth the money? That’s a tougher question. Everyone has a different sense of the value of a pound/dollar/whatever. I’m not a very well off man so I like to get value out of what I spend. Here’s a little something I’ve been using for years now to work out if games or toy solders are value spends. It’s out of date but it’s a helpful metric. A two hour cinema trip costs about £10 (See? Out of date), so 1 hour of special entertainment costs about £5.00. If I get more than 8 hours play from a £40 game then it’s earned it’s keep (8 x £5 = £40) and was good value, for example. Prime cost me £60, after postage. I paid through the nose as we couldn’t find him for sale anywhere else. I’ve seen the other models in the line going for £40ish, but stock is an issue.
I didn’t hit my value threshold from the build, so whether or not these kits are of value to you comes down to how much you want the final piece. I’ve always kinda wanted an Optimus Prime to sit on my shelf, and this guy is cooler than the original boxy toy while remaining faithful to the spirit of the piece. I also know how I feel about Gunpla now, so that adds value. Would I pay £60 again for a similar piece? Probably not. £40? Perhaps, depending on the model. I’ll certainly be looking for bargains in the hope of picking up Starscream or NGE EVA01, and keeping an eye out for new releases. Windblade is tempting, although I don’t know that character. She’s a little after my time. It’s a nice model but I fear it’s the male gaze-iness of it that’s tickling my fancy. I fear I’m a smidge aroused by a robot plane and that’s why I’m tempted. If I were to find more G1 Transformers model kits under my Christmas tree I’d certainly be very happy.
I would also be interested in trying a more complicated kit that takes a whole lot longer, but has more going on. Do kits with electric components tend to need access to soldering irons or any other electricians tools or skills? Anything I wouldn’t already have or know from building wargaming models?
Does anyone know of any price comparison sites that might help me keep an eye out for a good deal, or any sites that are known for good sales?
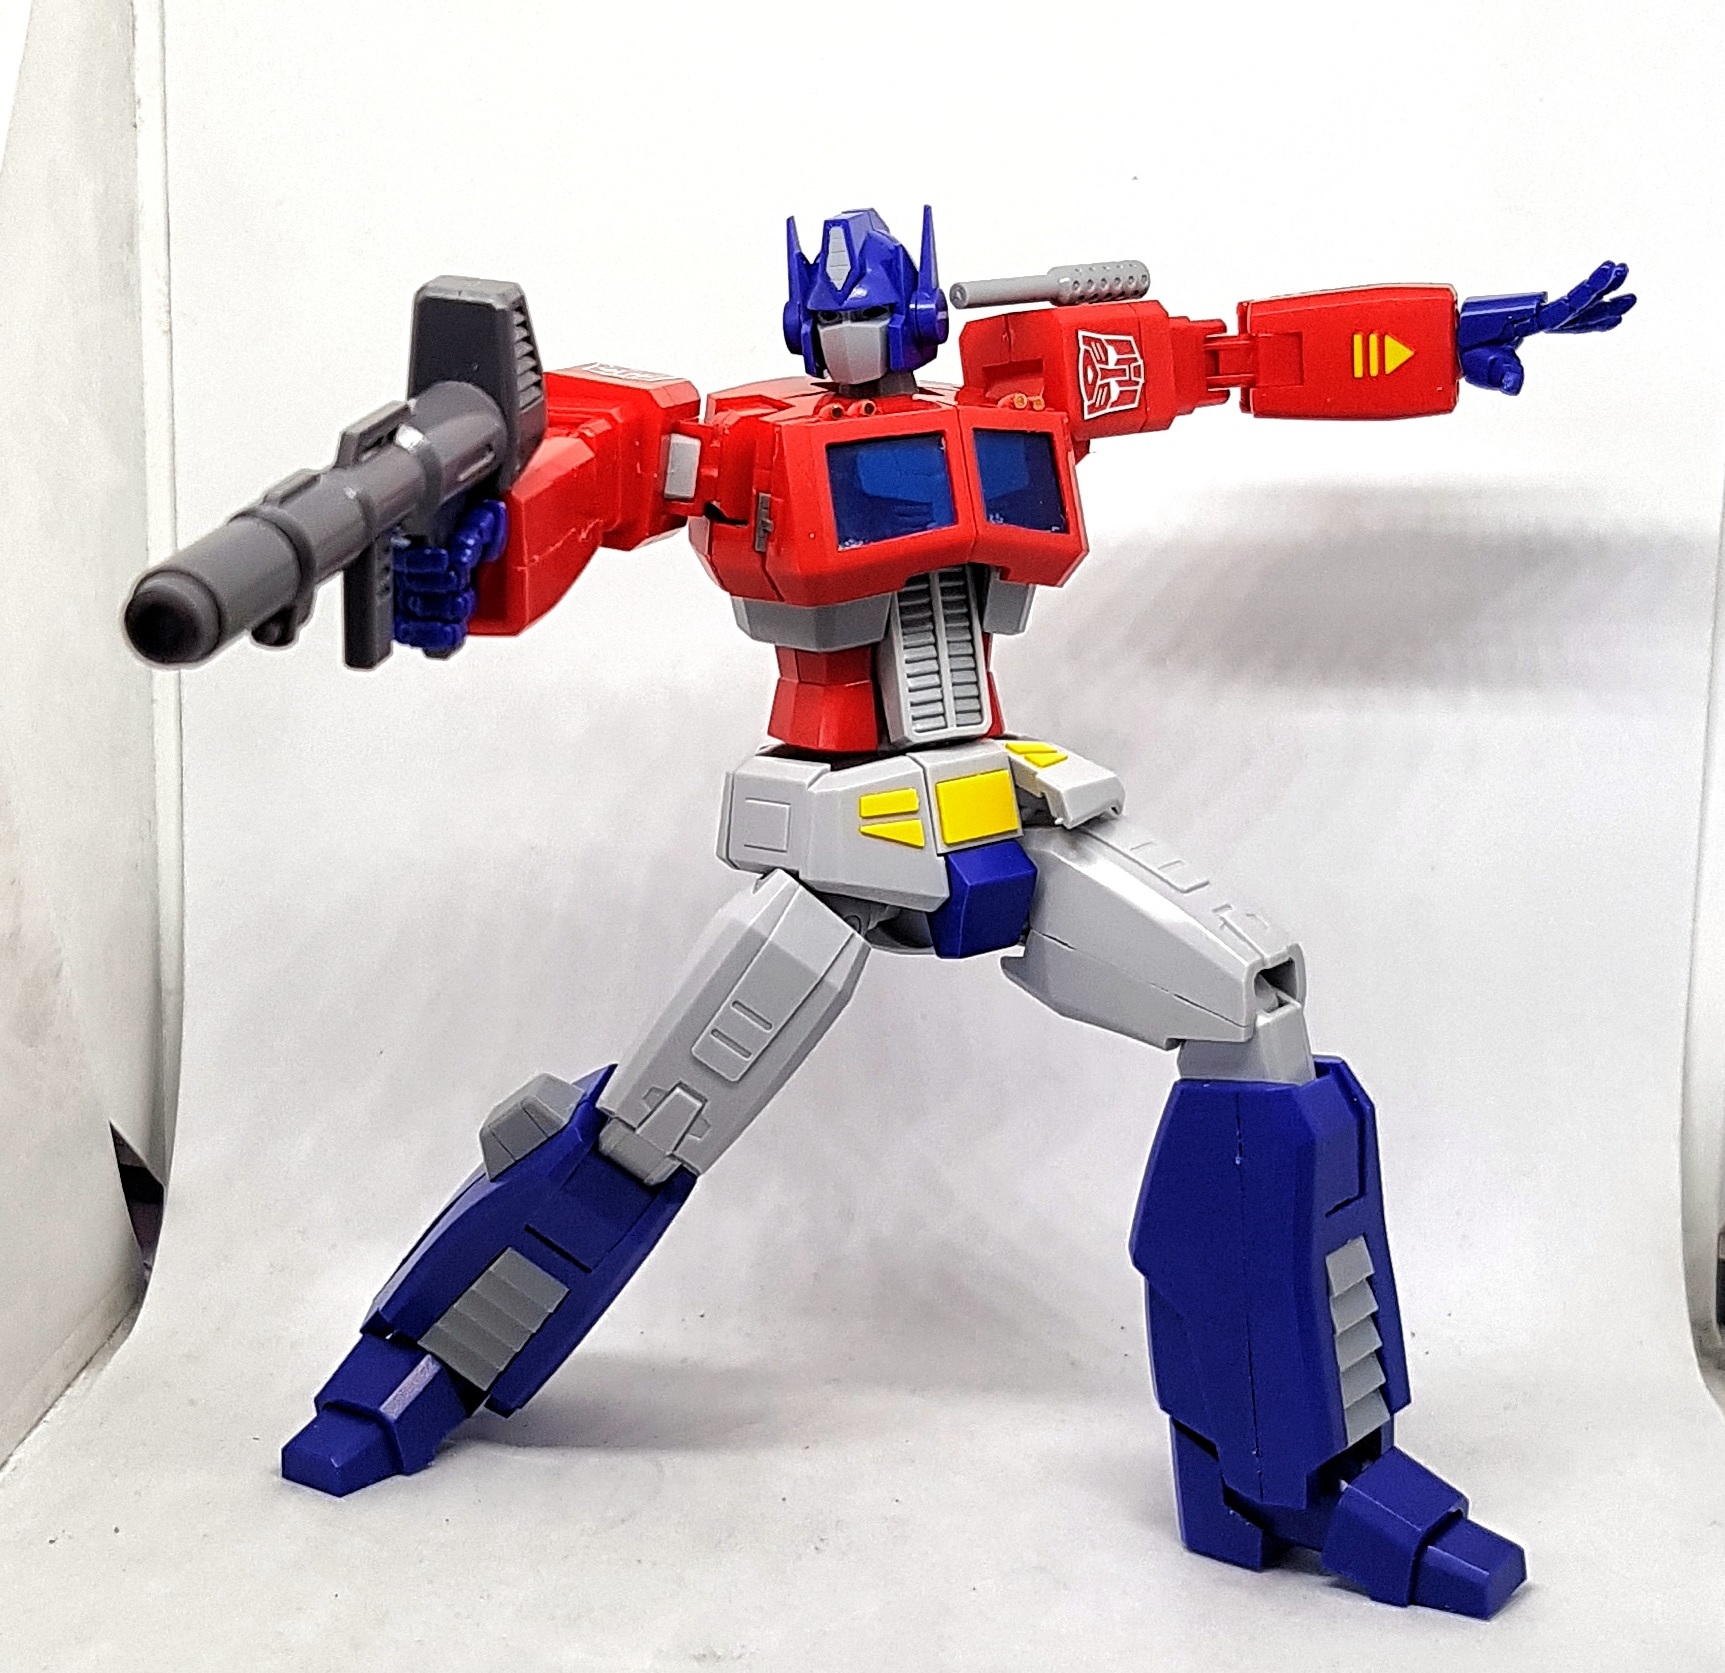 I went with one of the dynamic poses from the back of the box. He's looking pretty cool.
 Robo-booty!
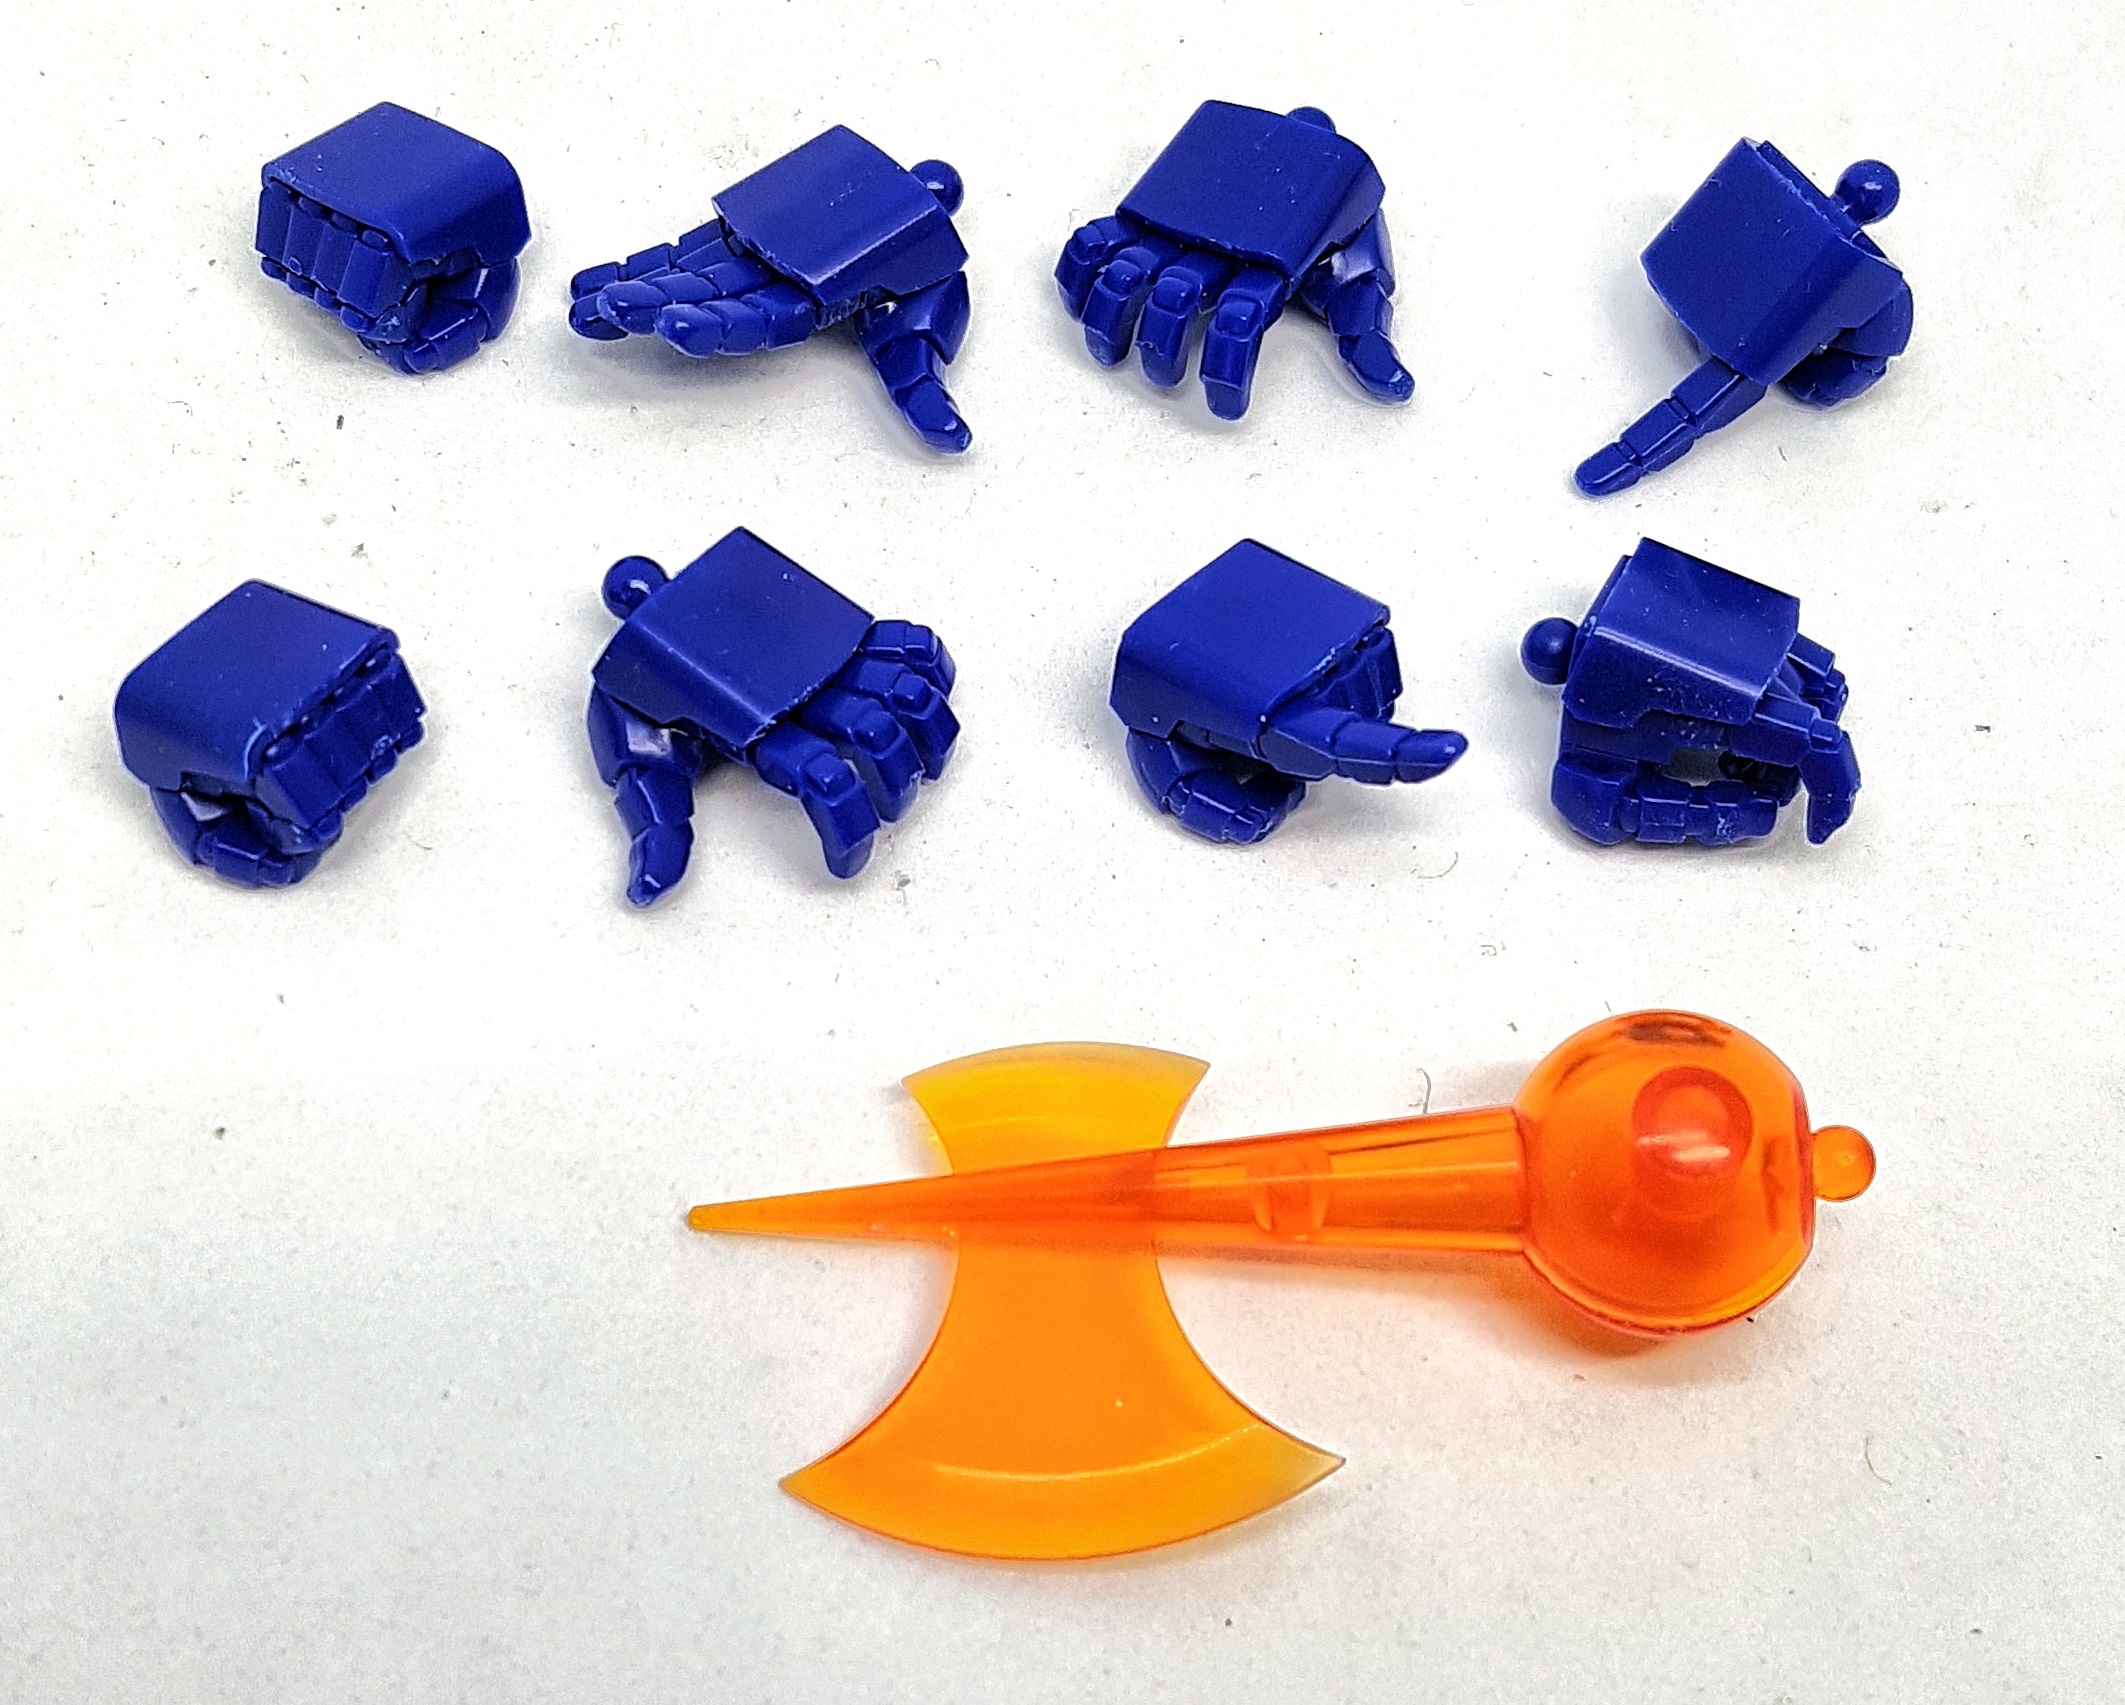 Here's the spare hands. For some reason, they chose not to fully articulate every finger.
I meant to use the sprues to test how well the plastic takes primer and paint, but I forgot to do this when I got my airbrush out later in the weekend. I’ll have to revisit this project once I’ve done some tests. I can say that Gorilla glue worked without issue, although it did turn white. That happens sometimes and I think I introduced moisture thinking those areas would be hidden inside out of site. I wanted them to dry fast so no vapours trapped inside could cause fogging on the glass.
No Disassemble
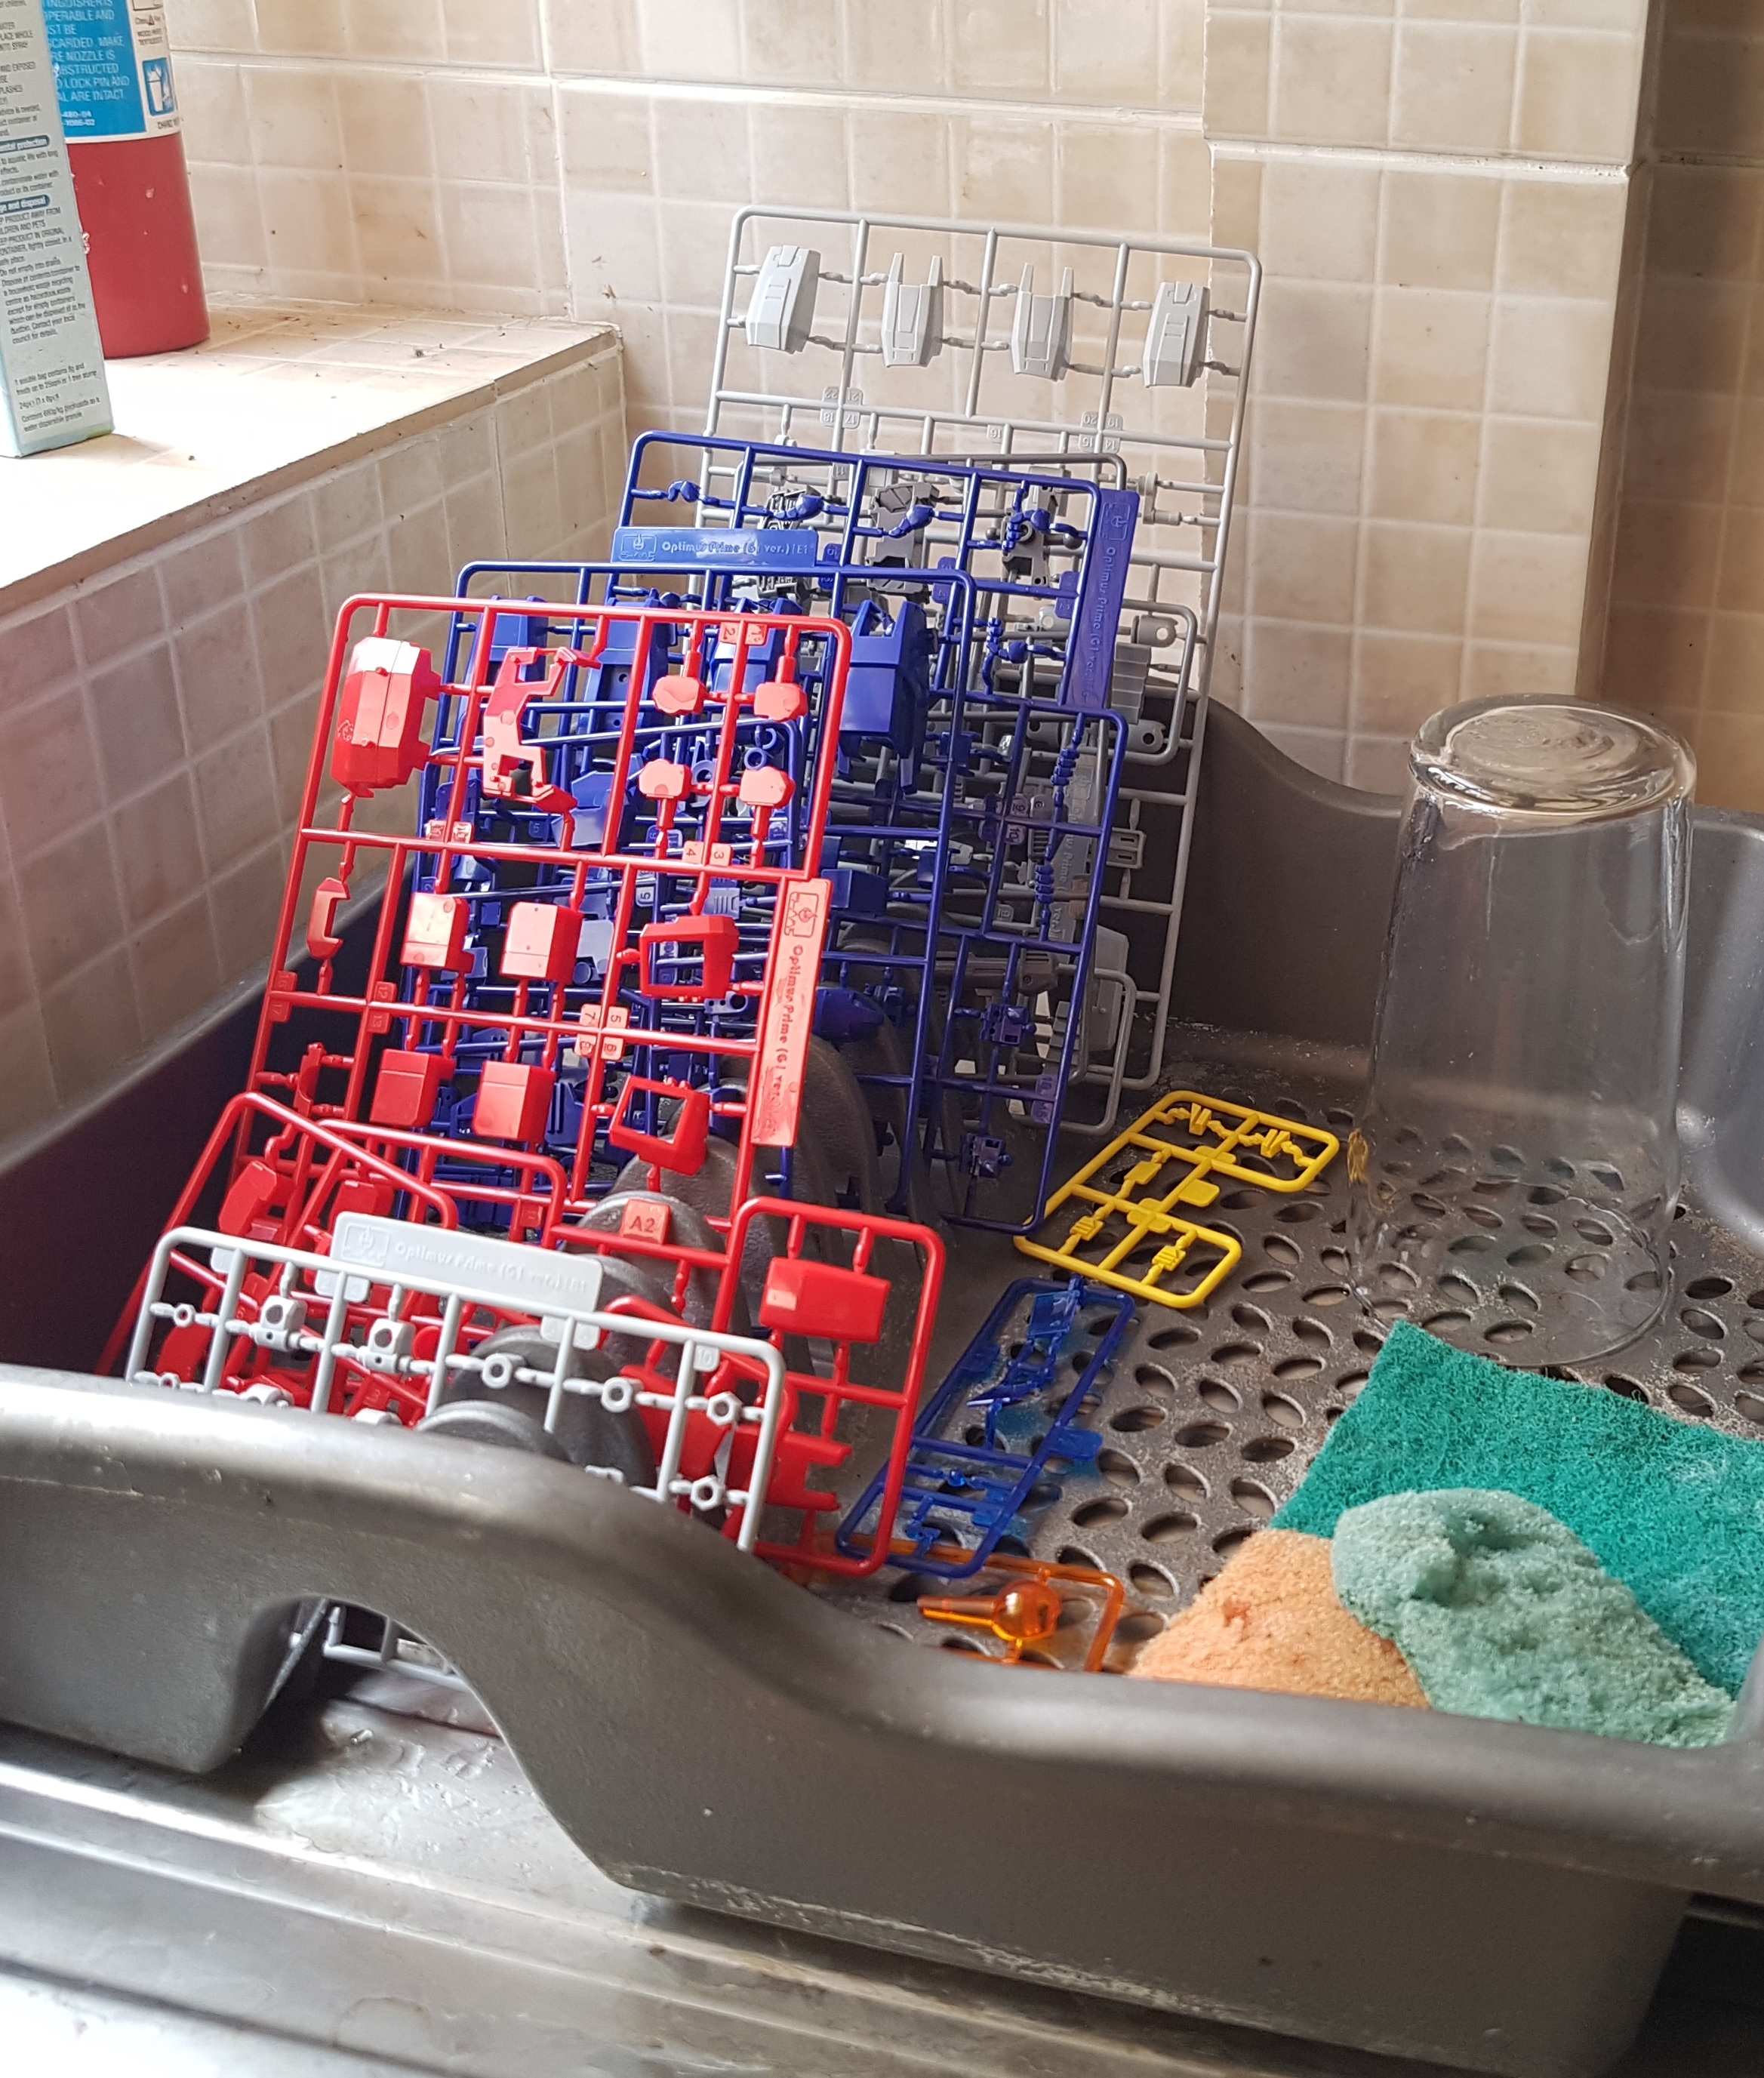
I finished my Dreadball Spring Cleaning challenge this week, so I think I’ve earned a reward. I think I’m going to start this guy this weekend. It occurs to me I didn’t take a pic of all the sprues I have to work with, so I took a quick pic before heading to work this morning. There’s a fair few, but it’s not a vast amount. I wonder how long this will take? I fear it’ll be over too quickly, or take frustratingly long. I also fear I’m going to leave obvious marks where I cut parts off the sprue. I’ve a selection of cutting, sanding, and filing tools ready to go.
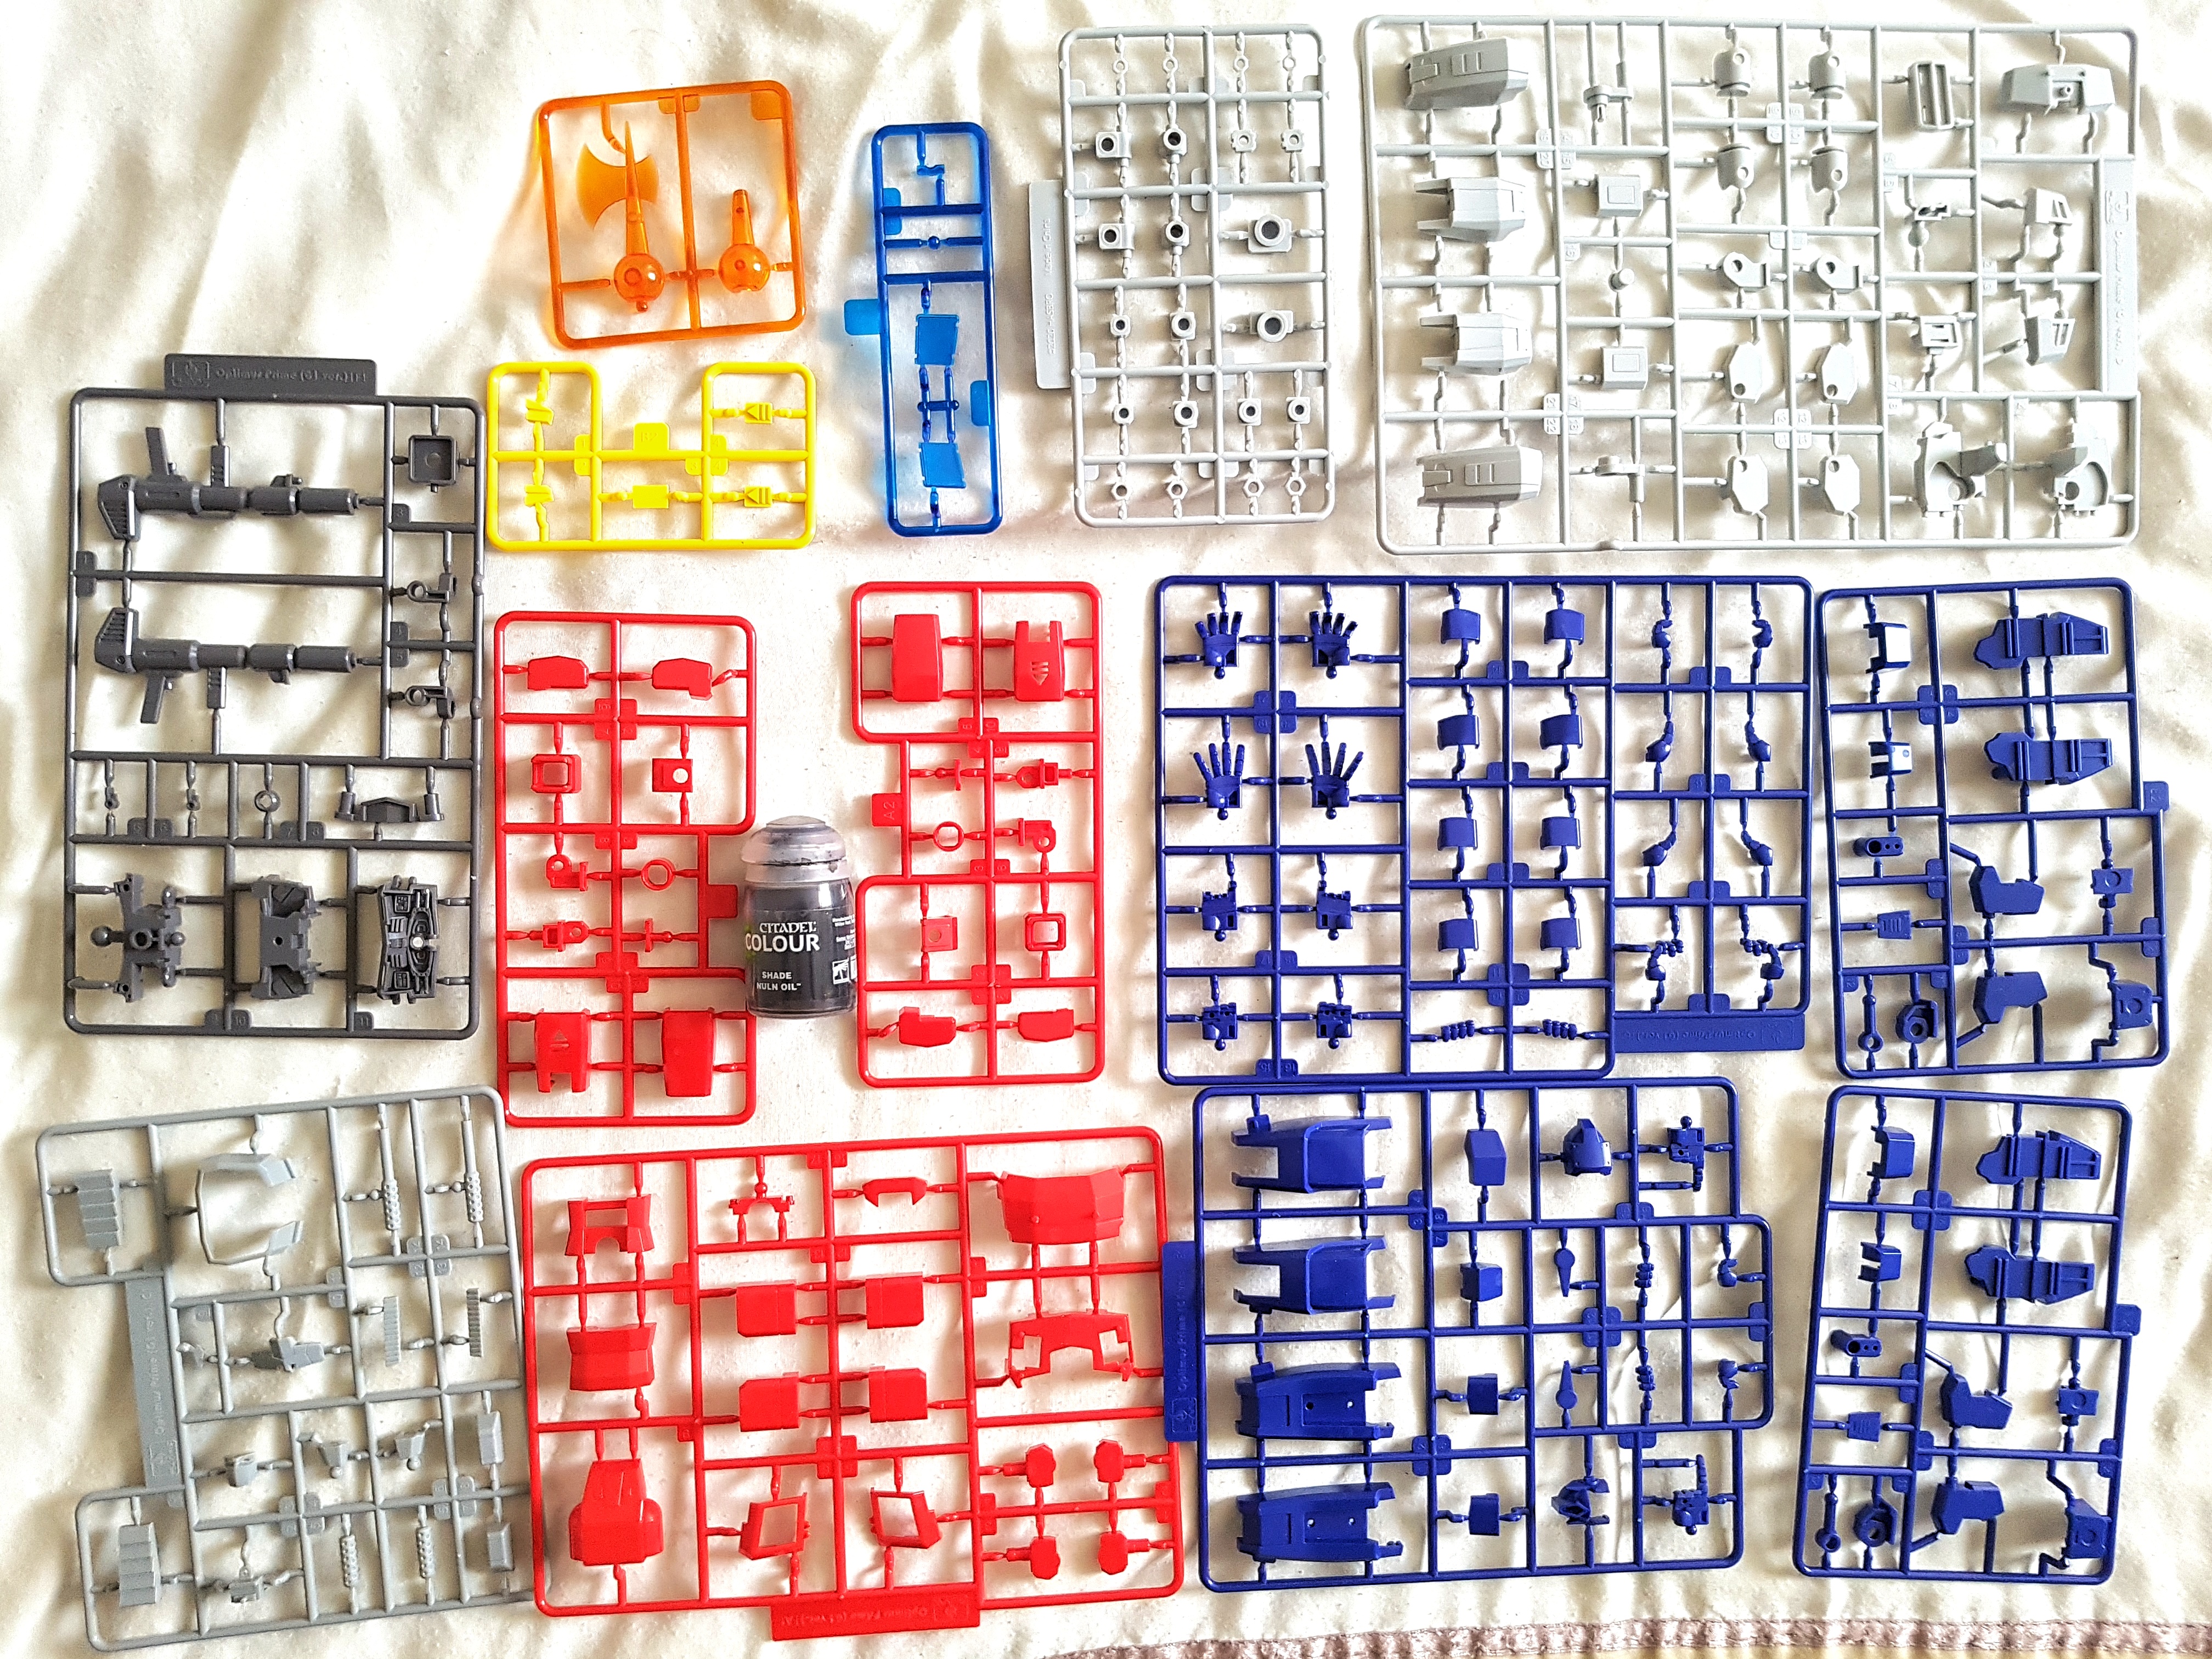 All the sprues from in the box. The paint pot is for a sense of scale.
Bah-weep-Graaaaagnah wheep ni ni bong
A long long time ago, back in the forgotten Before Time, Justin came on the Weekender (At the SAME TABLE as other people! No masks or anything!) talking about a Gunpla model kit he’d got and was looking to build (I can’t find the footage. The search functions aren’t giving it to me). I’d previously assumed they were not much different from Airfix kits, which don’t greatly interest me, but he made it sound like a lot more fun to build them. He got me interested. I’m not in to Gundam though, and a lot of those models look more or less the same to my uneducated eyes, so I filed it away at the back of my brain as something to perhaps look in to later.
A few months ago I was listening to a Podcast and the host started talking about his Transformers models and something clicked. Do they do Gunpla kits of Transformers? That could be cool! I then spent a while googling to see what’s out there, and there is a company who makes a handful, and they are within my price range. They were mostly out of stock in the UK, but Dawfydd was a huge help and tracked one down for me (It instantly went out of stock so I may have got the last Optimus Prime in the country). I paid £60 after delivery. Pretty sure I’d seen it closer to £40 elsewhere, but no one had stock. It’s a bit pricey, but as a one off it’s not too bad. If I get in to it I’ll be a more patient and frugal shopper.
I figured if I was going to do this, I may as well share and review my experience. Perhaps others in our hobby are curious if it’s worth it, and how long it takes to build, and if there are different challenges or skills needed.
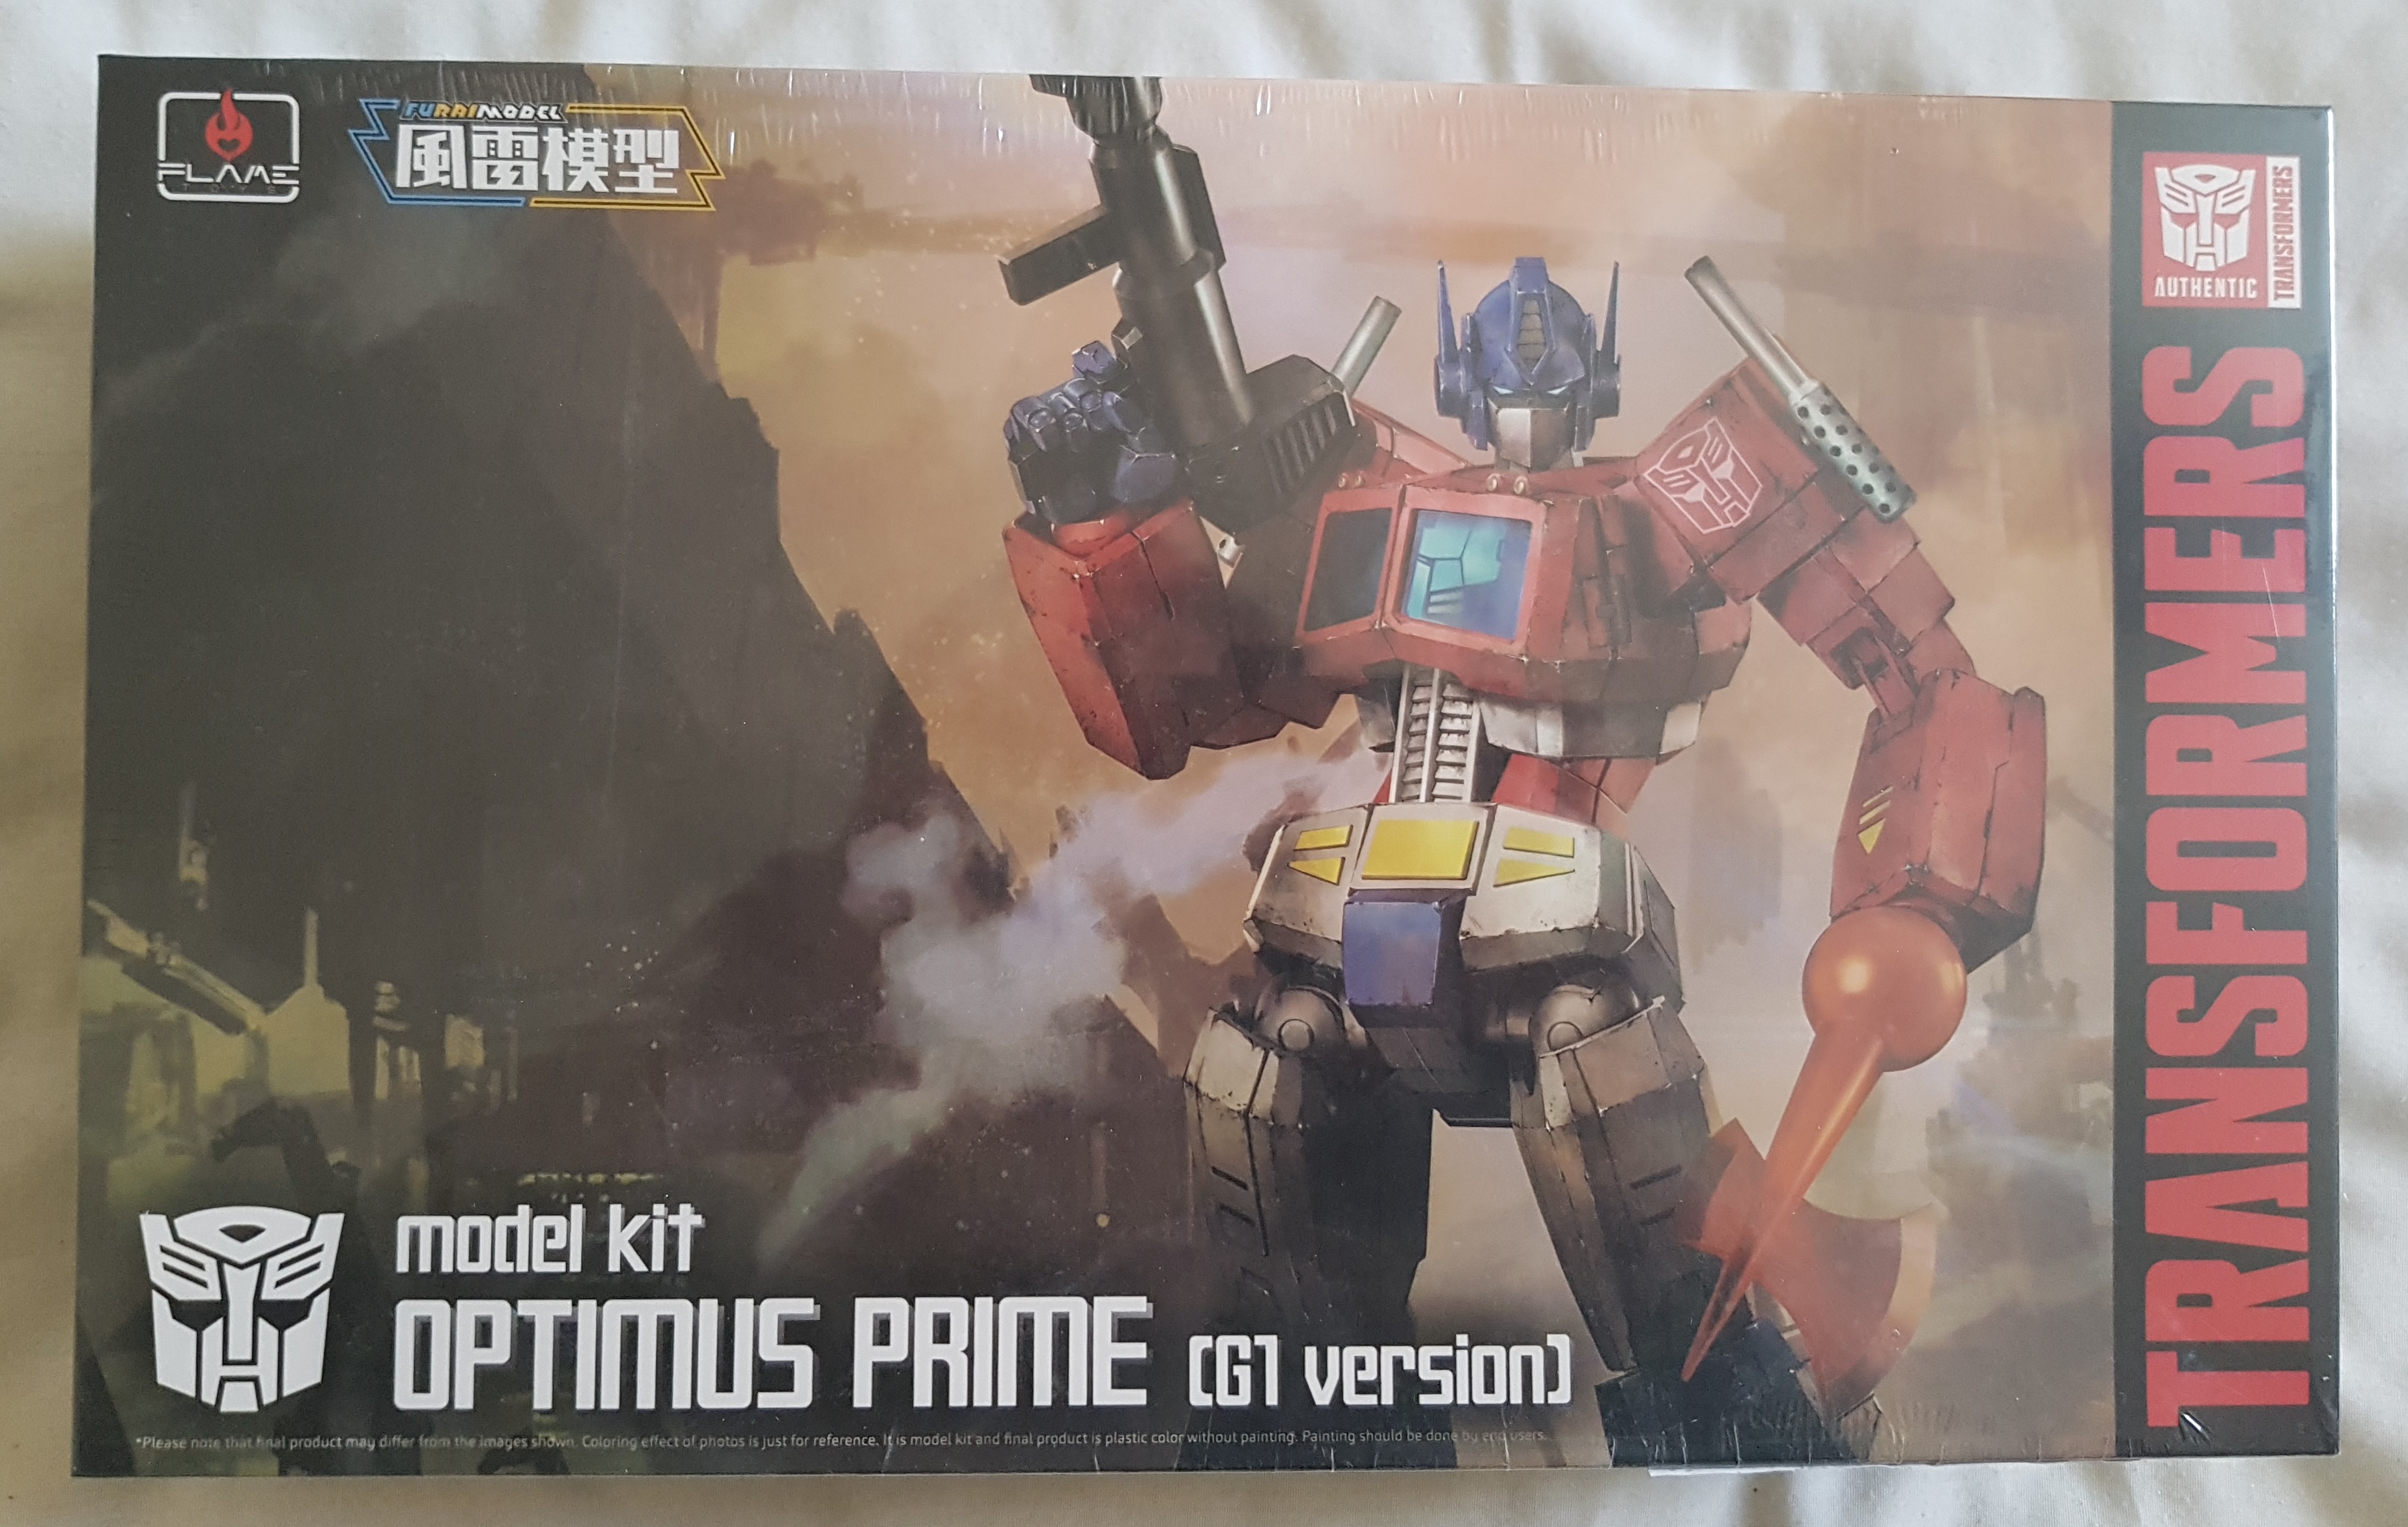
So what did I get? Flame Toys make a fair few Transformers models based on the different continuities. I wanted a classic cartoon design. The G1 version. They also do different types of model. Most are pre-built display pieces / action figures. Their Furai Models line is their kits. In my hunt to see what’s out there, I often found it unclear if what I was looking at was a DIY kit, or a pre-built piece. It would be nice if more boxes made it obvious. If you go shopping for your first kit after reading this please make sure you’re getting what you think you are.
There’s not many in the Furai line yet, so I was keen to start with a classic: Optimus Prime!

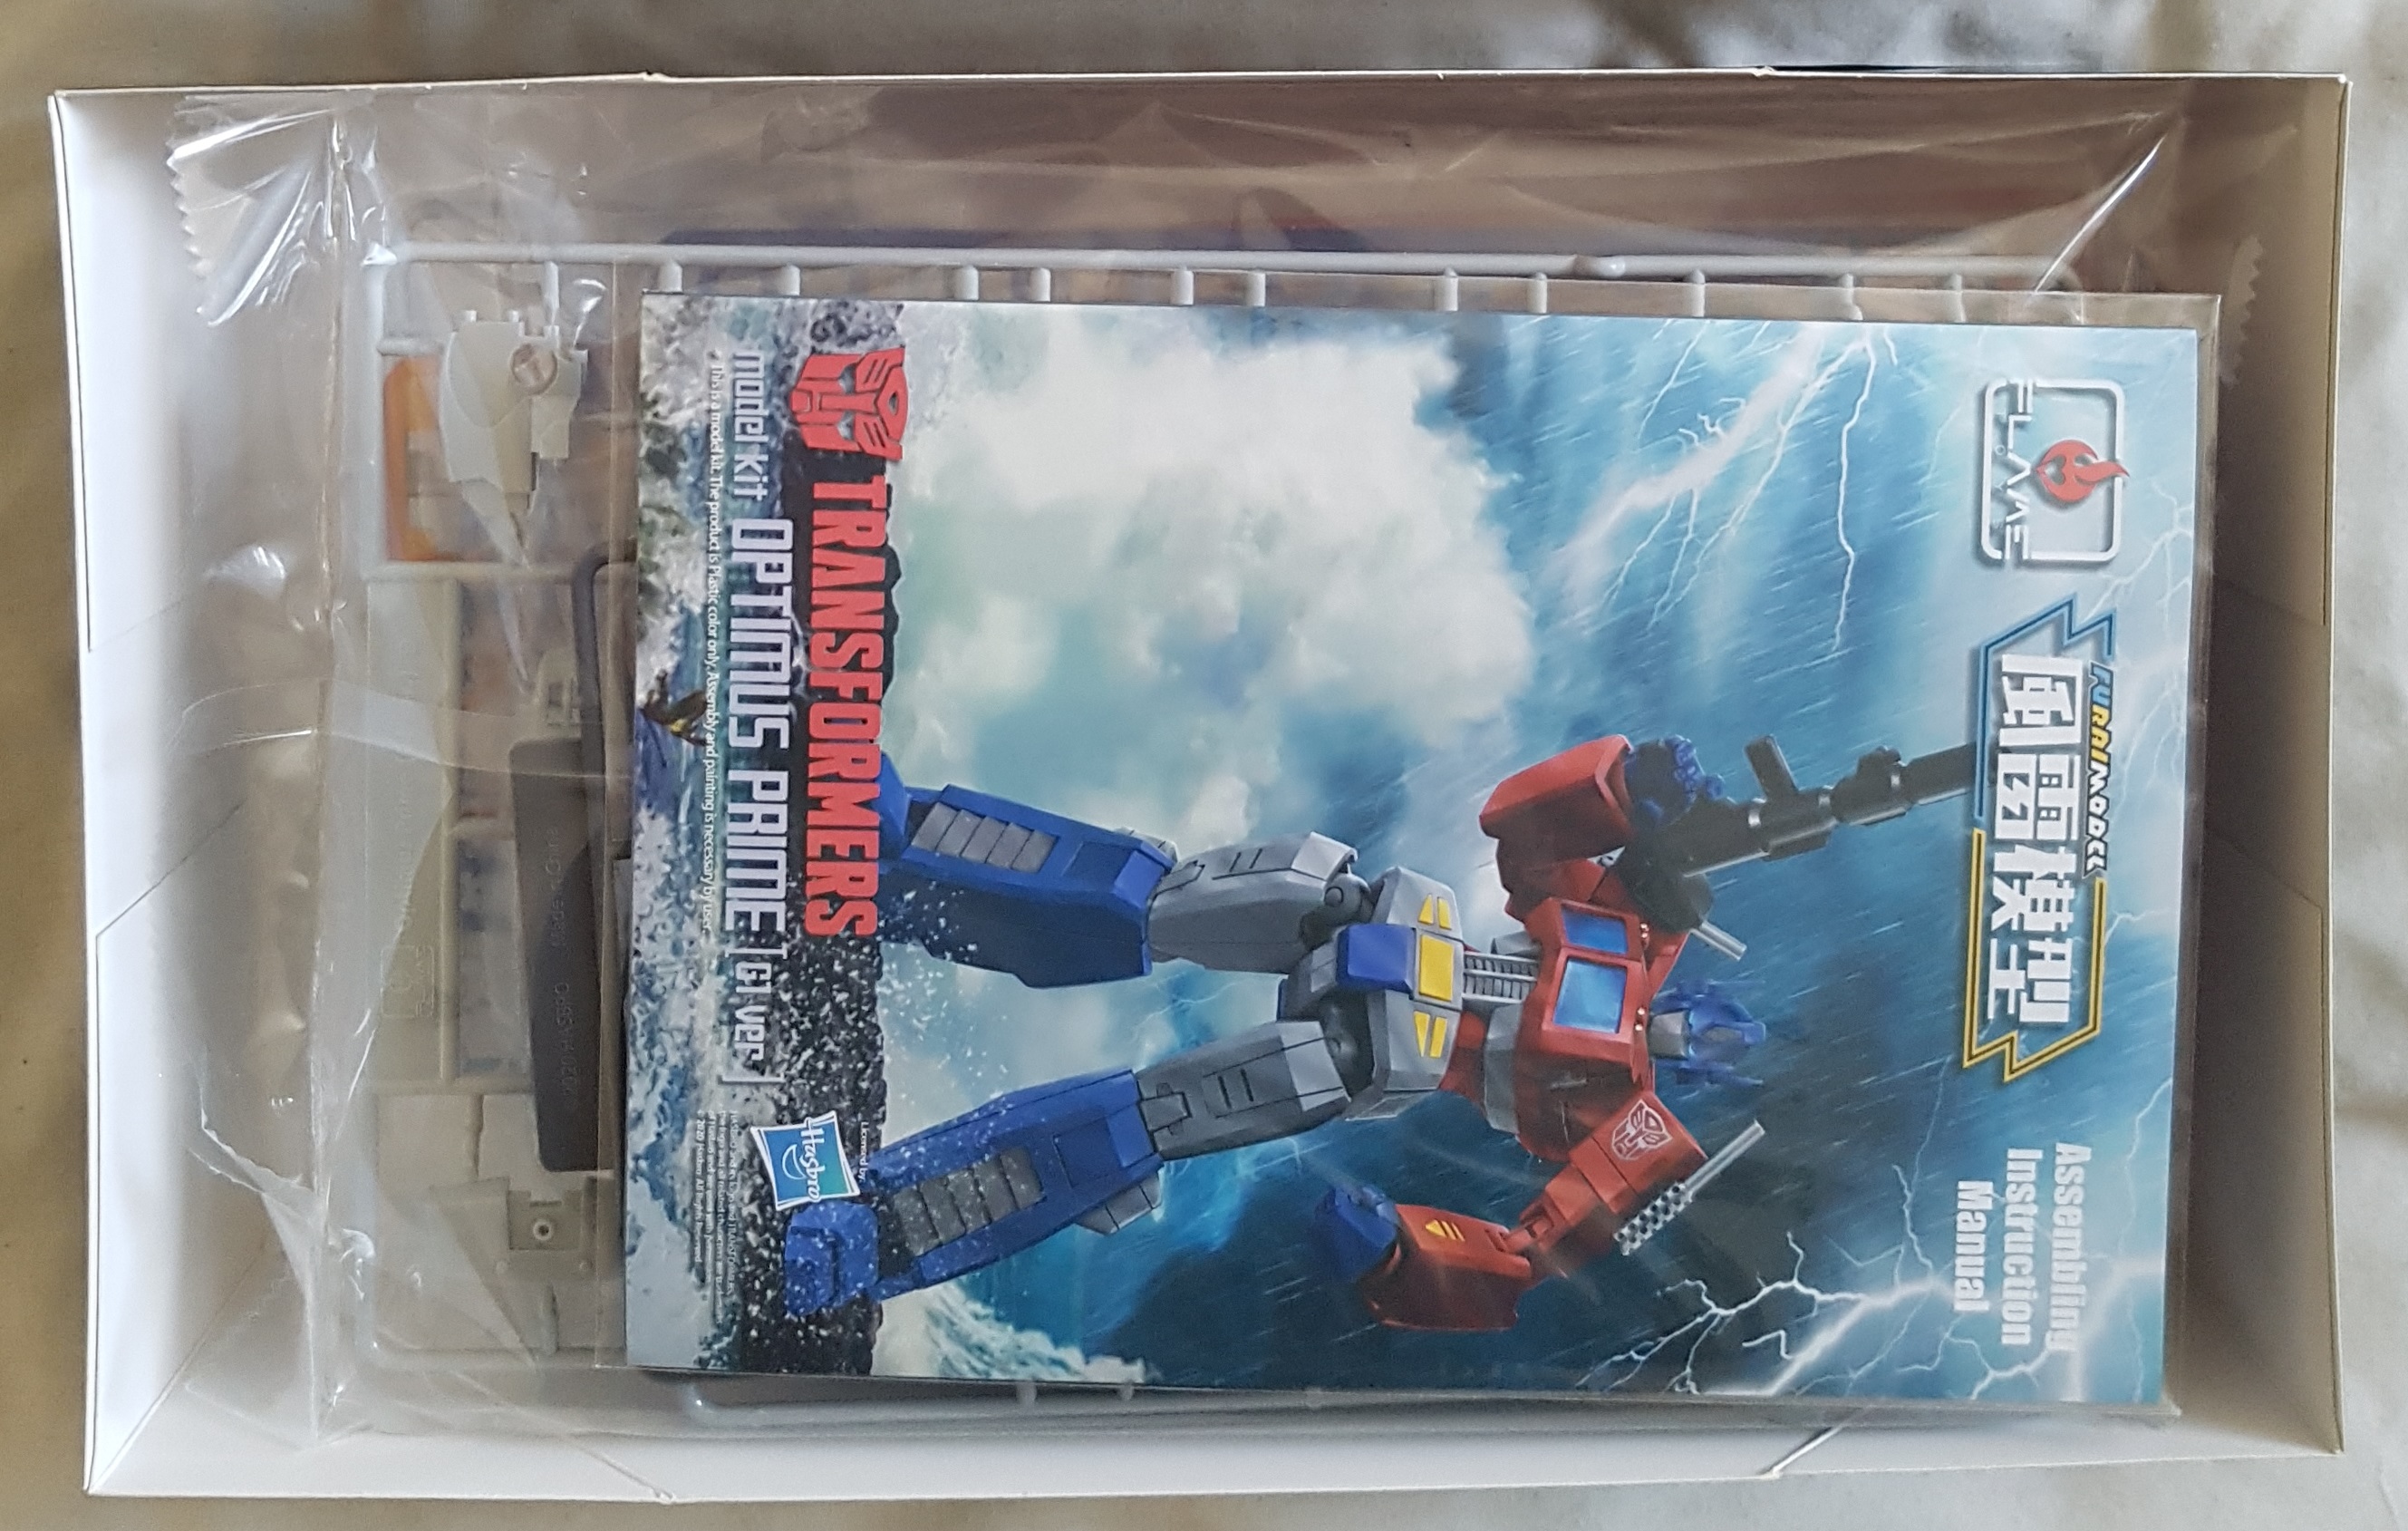
So what’s in the box?

I’ve no idea what standard practise is at this stage, but as a wargamer it is my reflex to wash everything before I begin. This kit doesn’t require glue, and comes pre-coloured so it doesn’t need painting. Washing it should be unnecessary. However, should I decide to pin wash some shade and depth in to it, this may help prevent issues. I see no harm in was the sprues, and only possible benefits, so I did. perhaps someone more experienced will tell me I did a bad thing?
They were given a gentle rub with a toothbrush in warm soapy water and then left to air dry.
If you’re reading this and you know of other licenced model lines I might be interested in please add links in the comments. I’ve seen there’s some Evangelion kits out there. If I enjoy this I’m tempted by Starscream, and EVA 01.
I need to finish off my Spring Cleaning Hobby Challenge and perhaps get some other bits taken care of before I build Prime, but I washed him over the weekend while waiting for paint to dry, so I took some pics so I could prepare this project. This may sit untouched now for a while, but I’ll be back.


