


![Flames Of War – Villers-Bocage 80th Anniversary Battle [Catch Up Now]](https://images.beastsofwar.com/2024/06/Flames-Of-War-Villers-Bocage-80th-Anniversary-LIVE-BATTLE-225-127.jpg)


Draconis does…. TerrainFest 2023 (Deadzone, KoW Vanguard and Mordheim)


Recommendations: 87
About the Project
If this had come out last year then it would have been perfect for me, as I had two projects that involved a lot of scenery. My Warcry project https://www.beastsofwar.com/project/1770283/ and even more so my Deadzone project https://www.beastsofwar.com/project/1787958/ However, in the spirit of just getting involved I thought I would give it a go anyway. It will likely be some Deadzone, some Vanguard and some Mordheim (also work for Vanguard). I may lump the last two together as ‘Fantasy terrain’ perhaps. Not sure how far I will get, or if I will finish any of it – but we shall see 😊
Related Genre: General
Related Contest: TerrainFest 2023
This Project is Completed
Back to the Deadzone
2nd October 2023
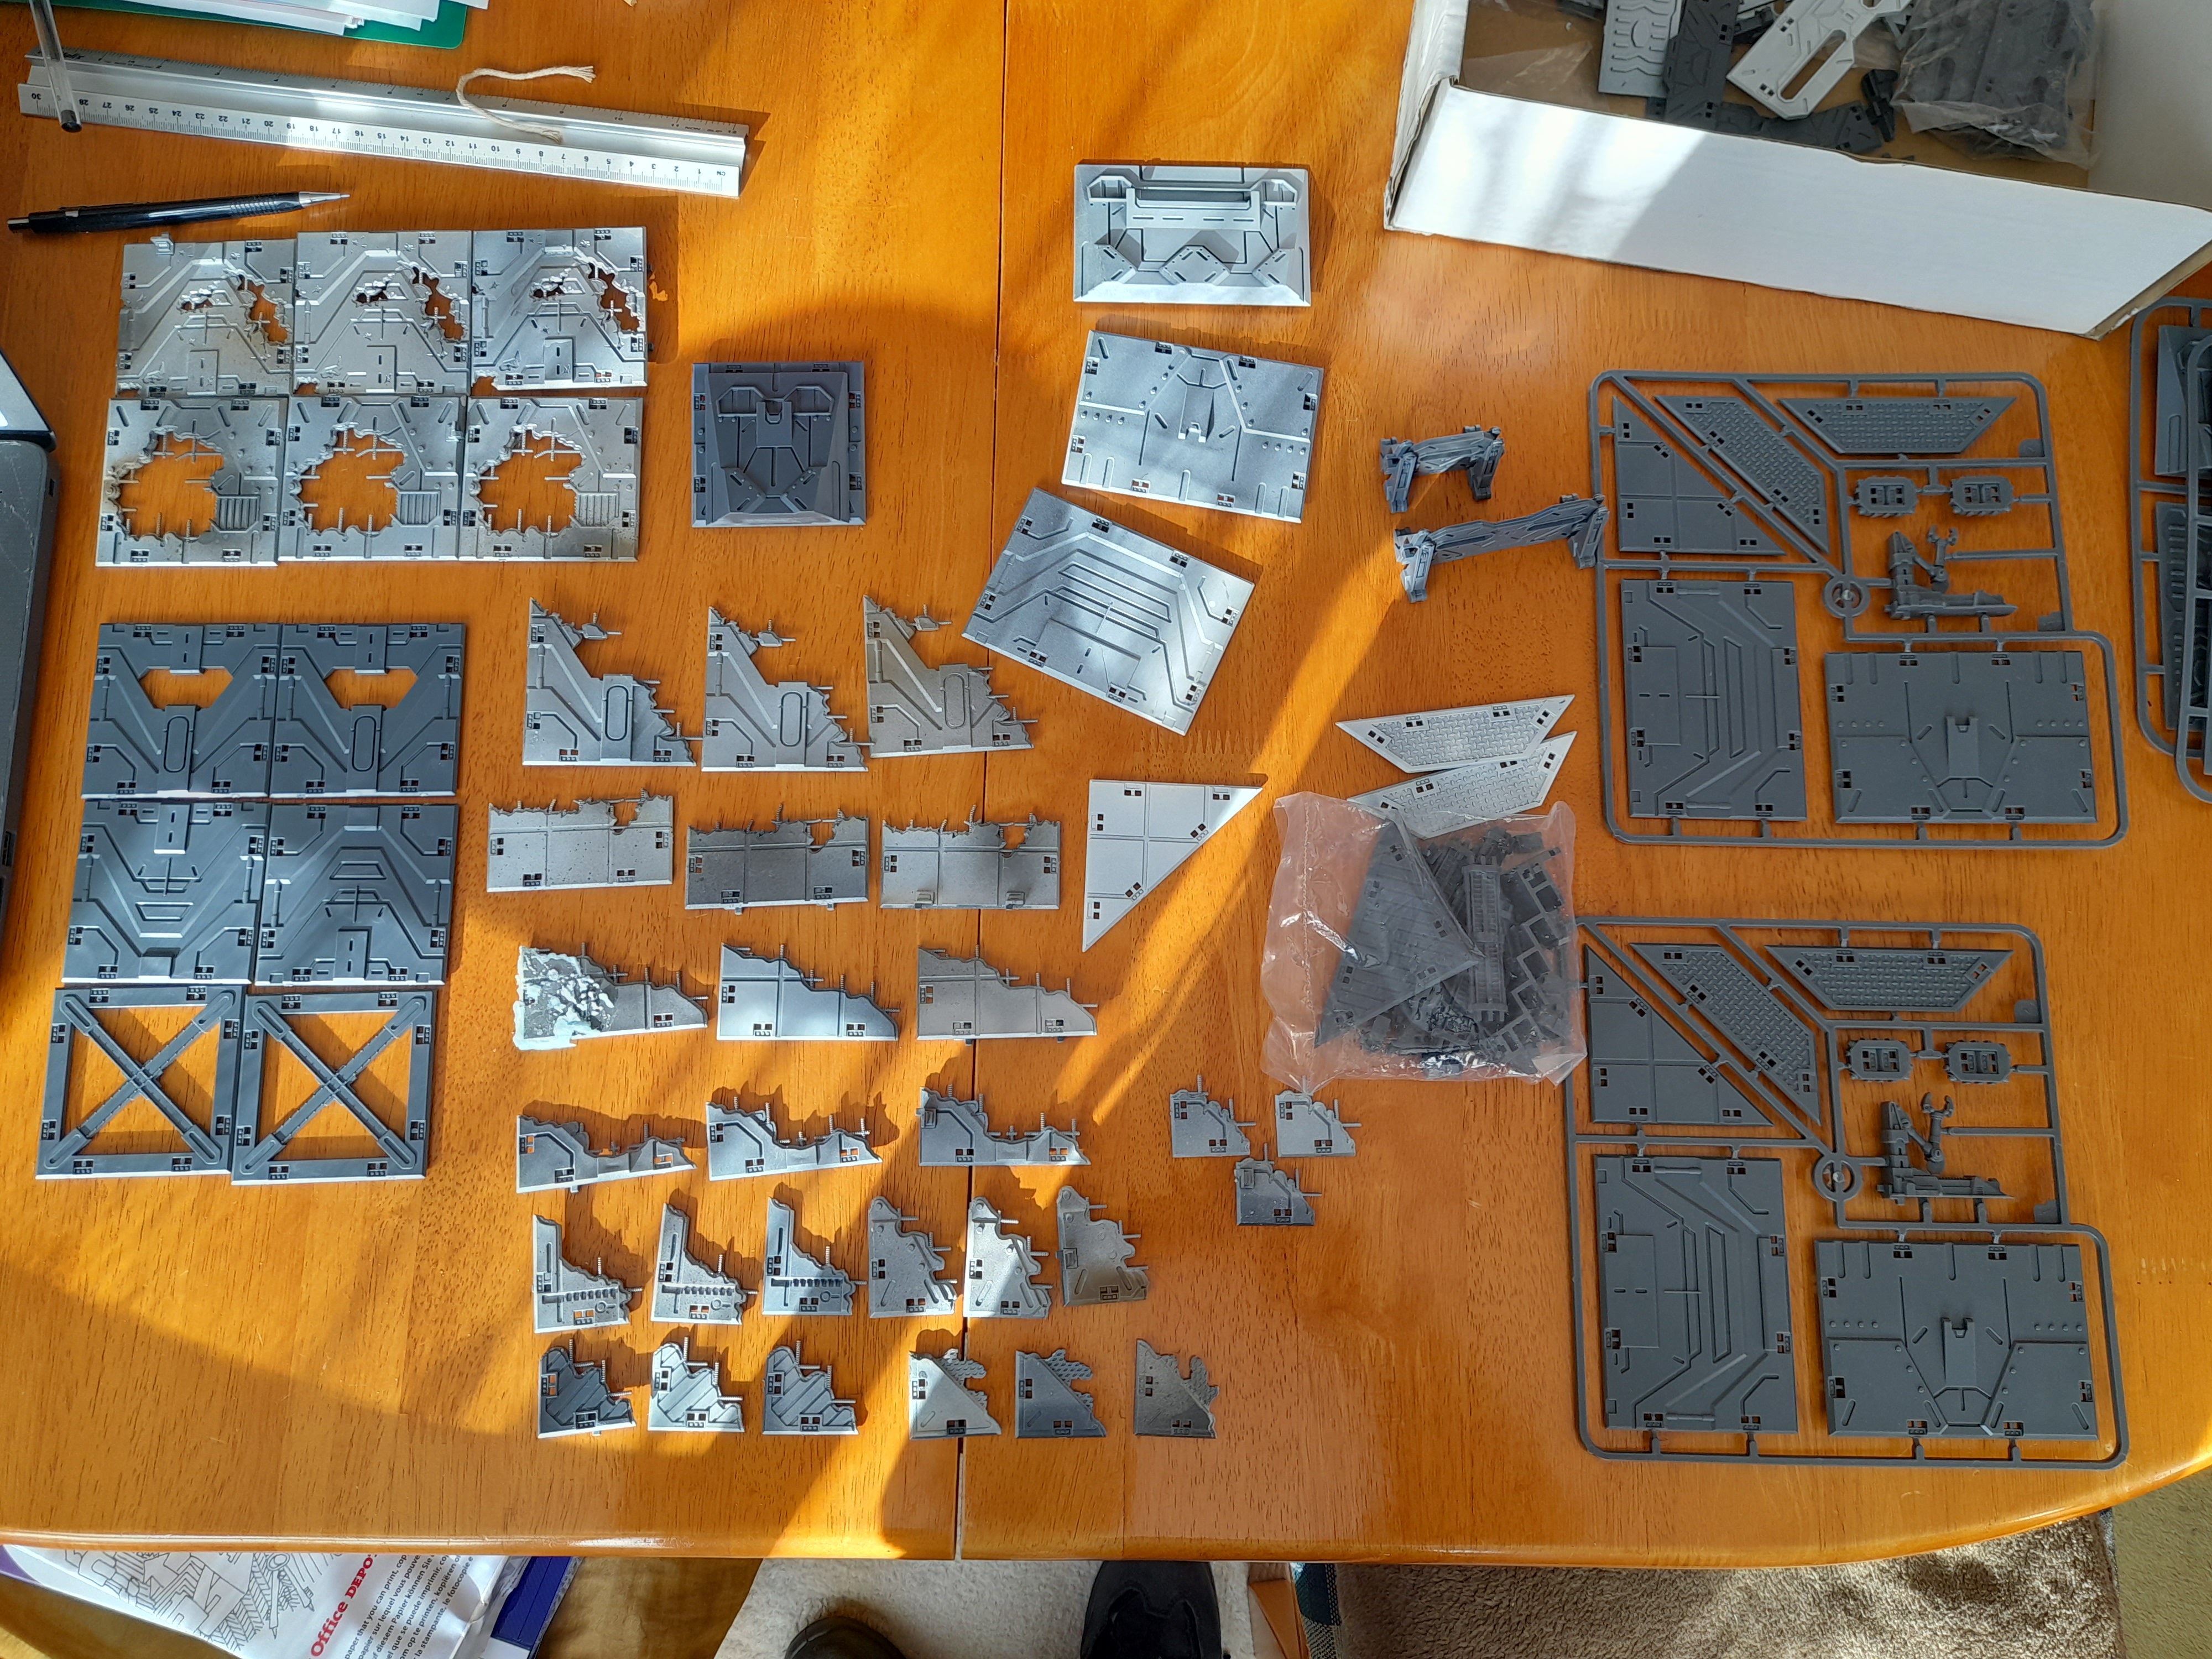
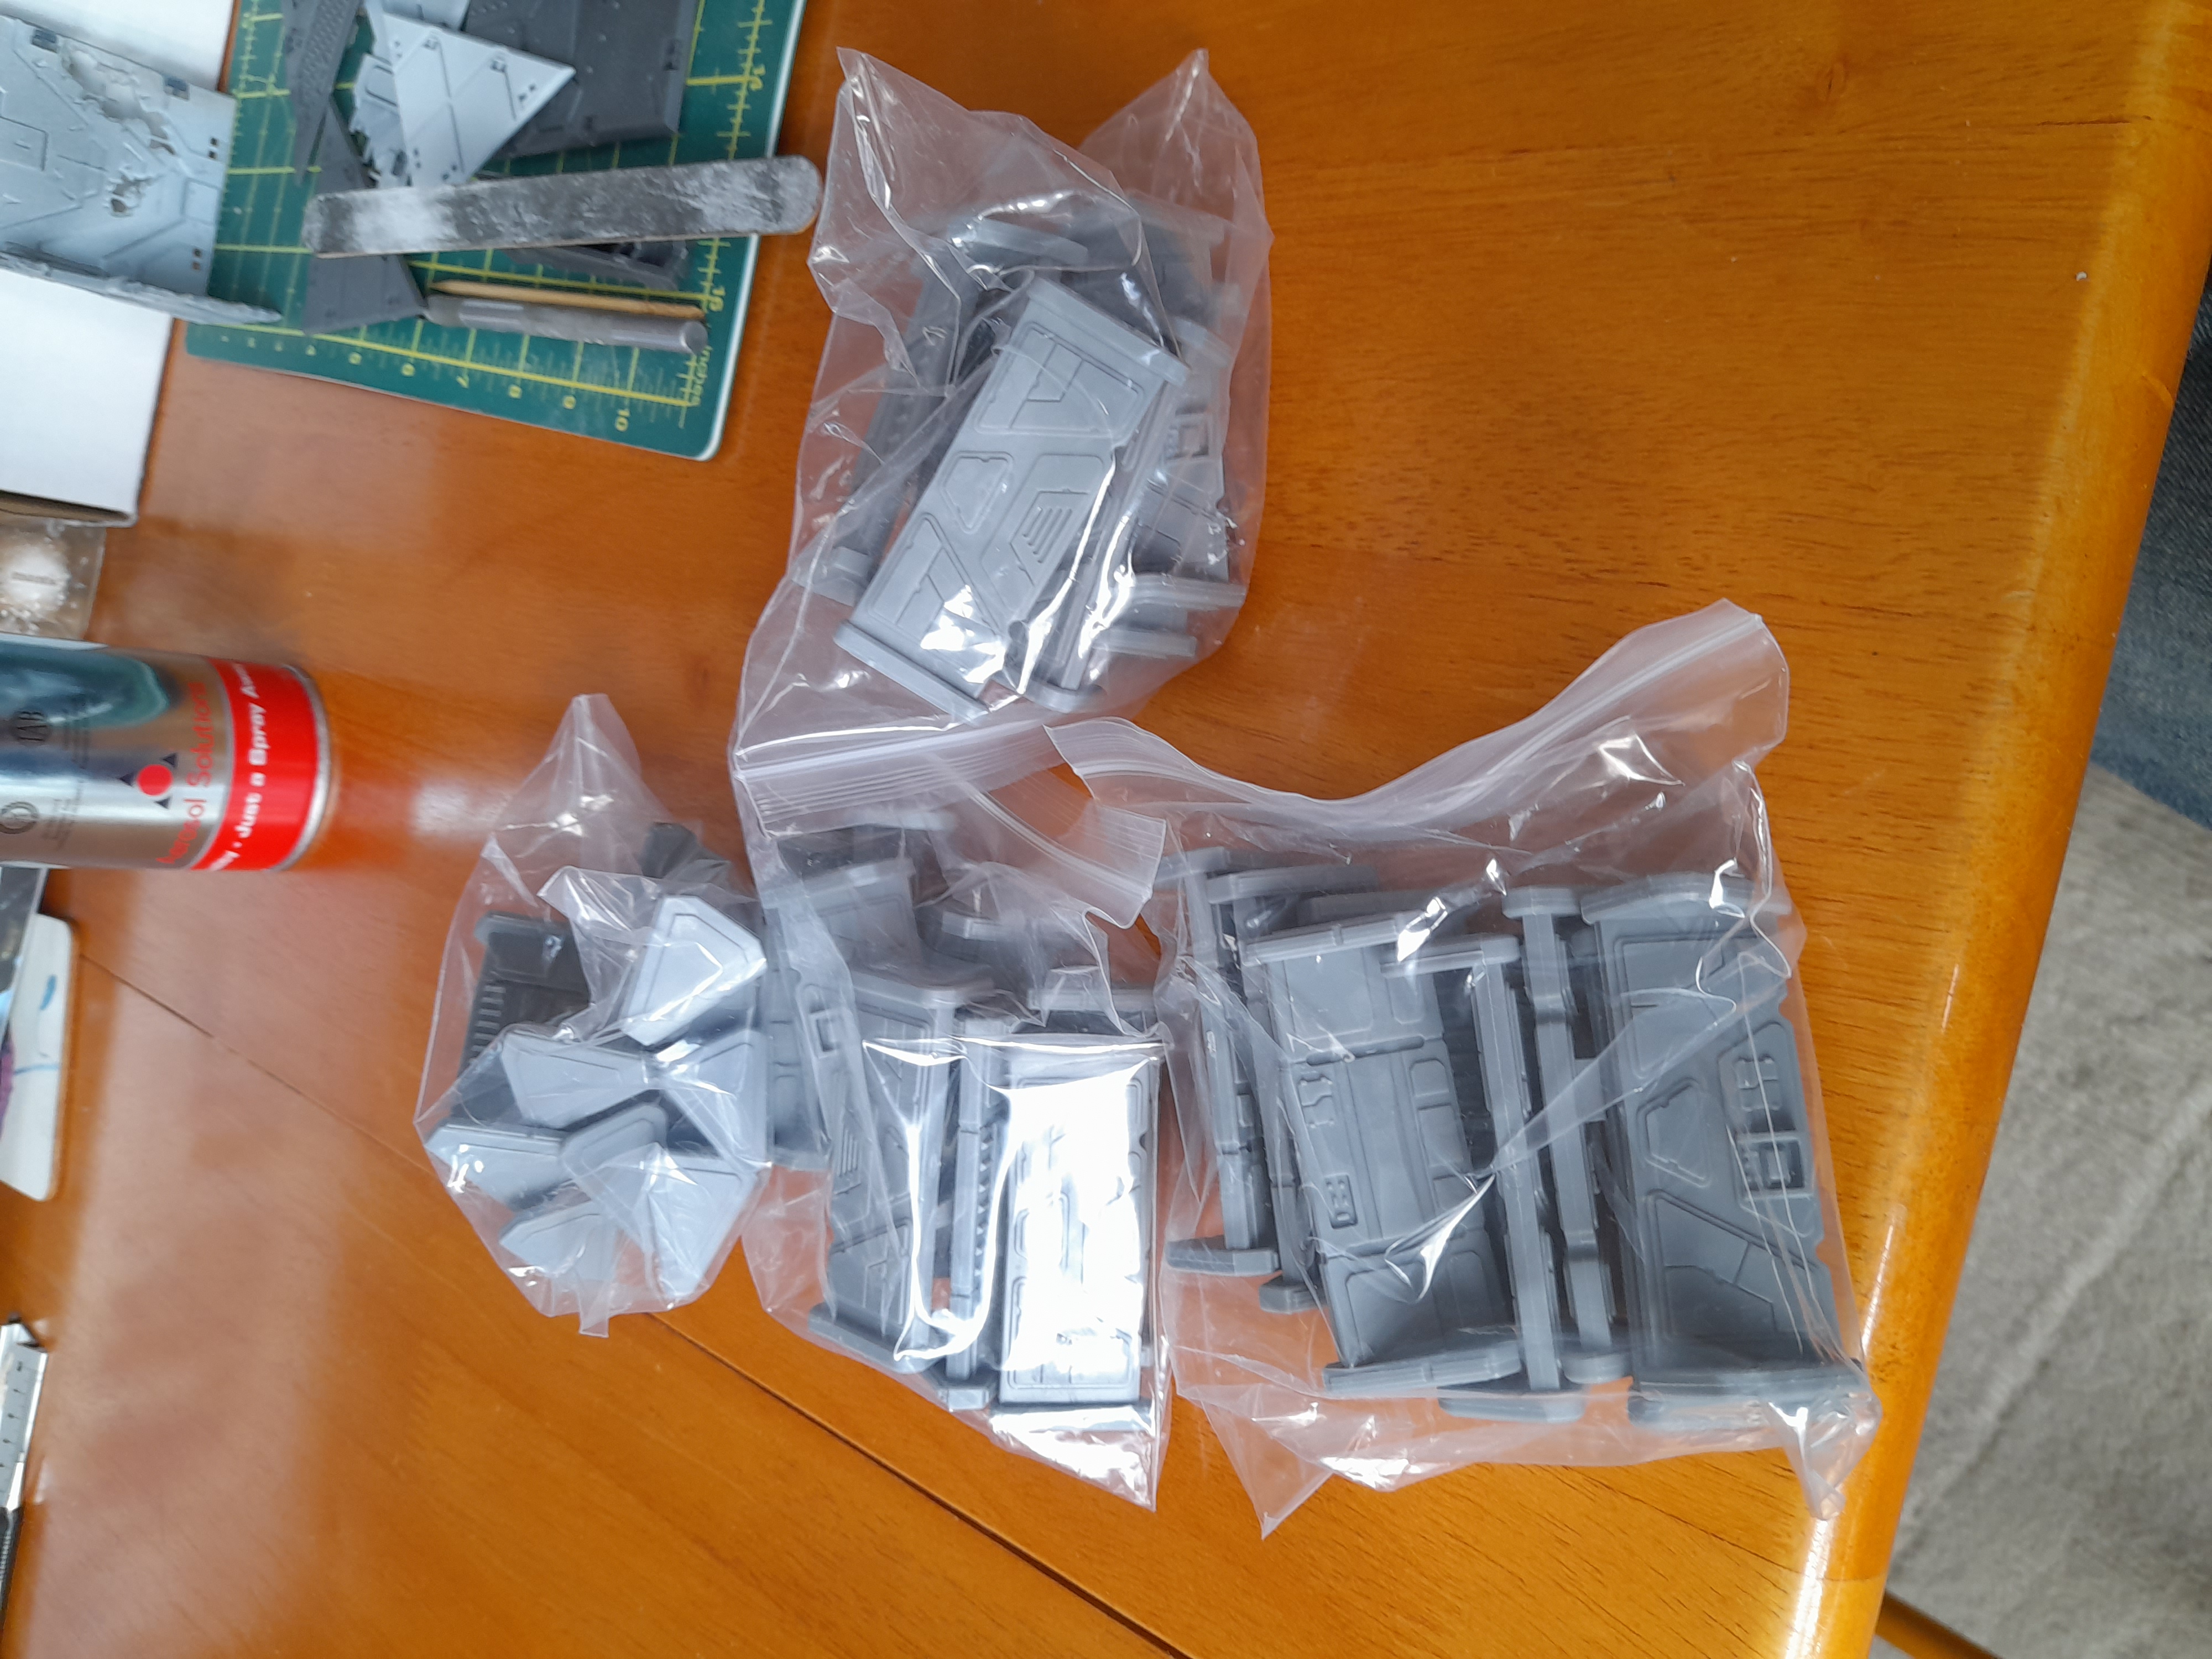
Last year (and into this) I built a lot of terrain for Deadzone, using up all of my standard tiles. Earlier this year I picked up a Mantic crazy sci-fi box – it did have some deadzone terrain sprues, but none of it were standard tiles sadly…. Plenty of the 1.5 length bits and some triangle pieces I could have done with during the project 😊
Recently I picked up a box of bits from my local store owner, and, although most of it is repeats of spare stuff I can’t use, there were some ordinary deadzone tiles in there – enough to build another building.
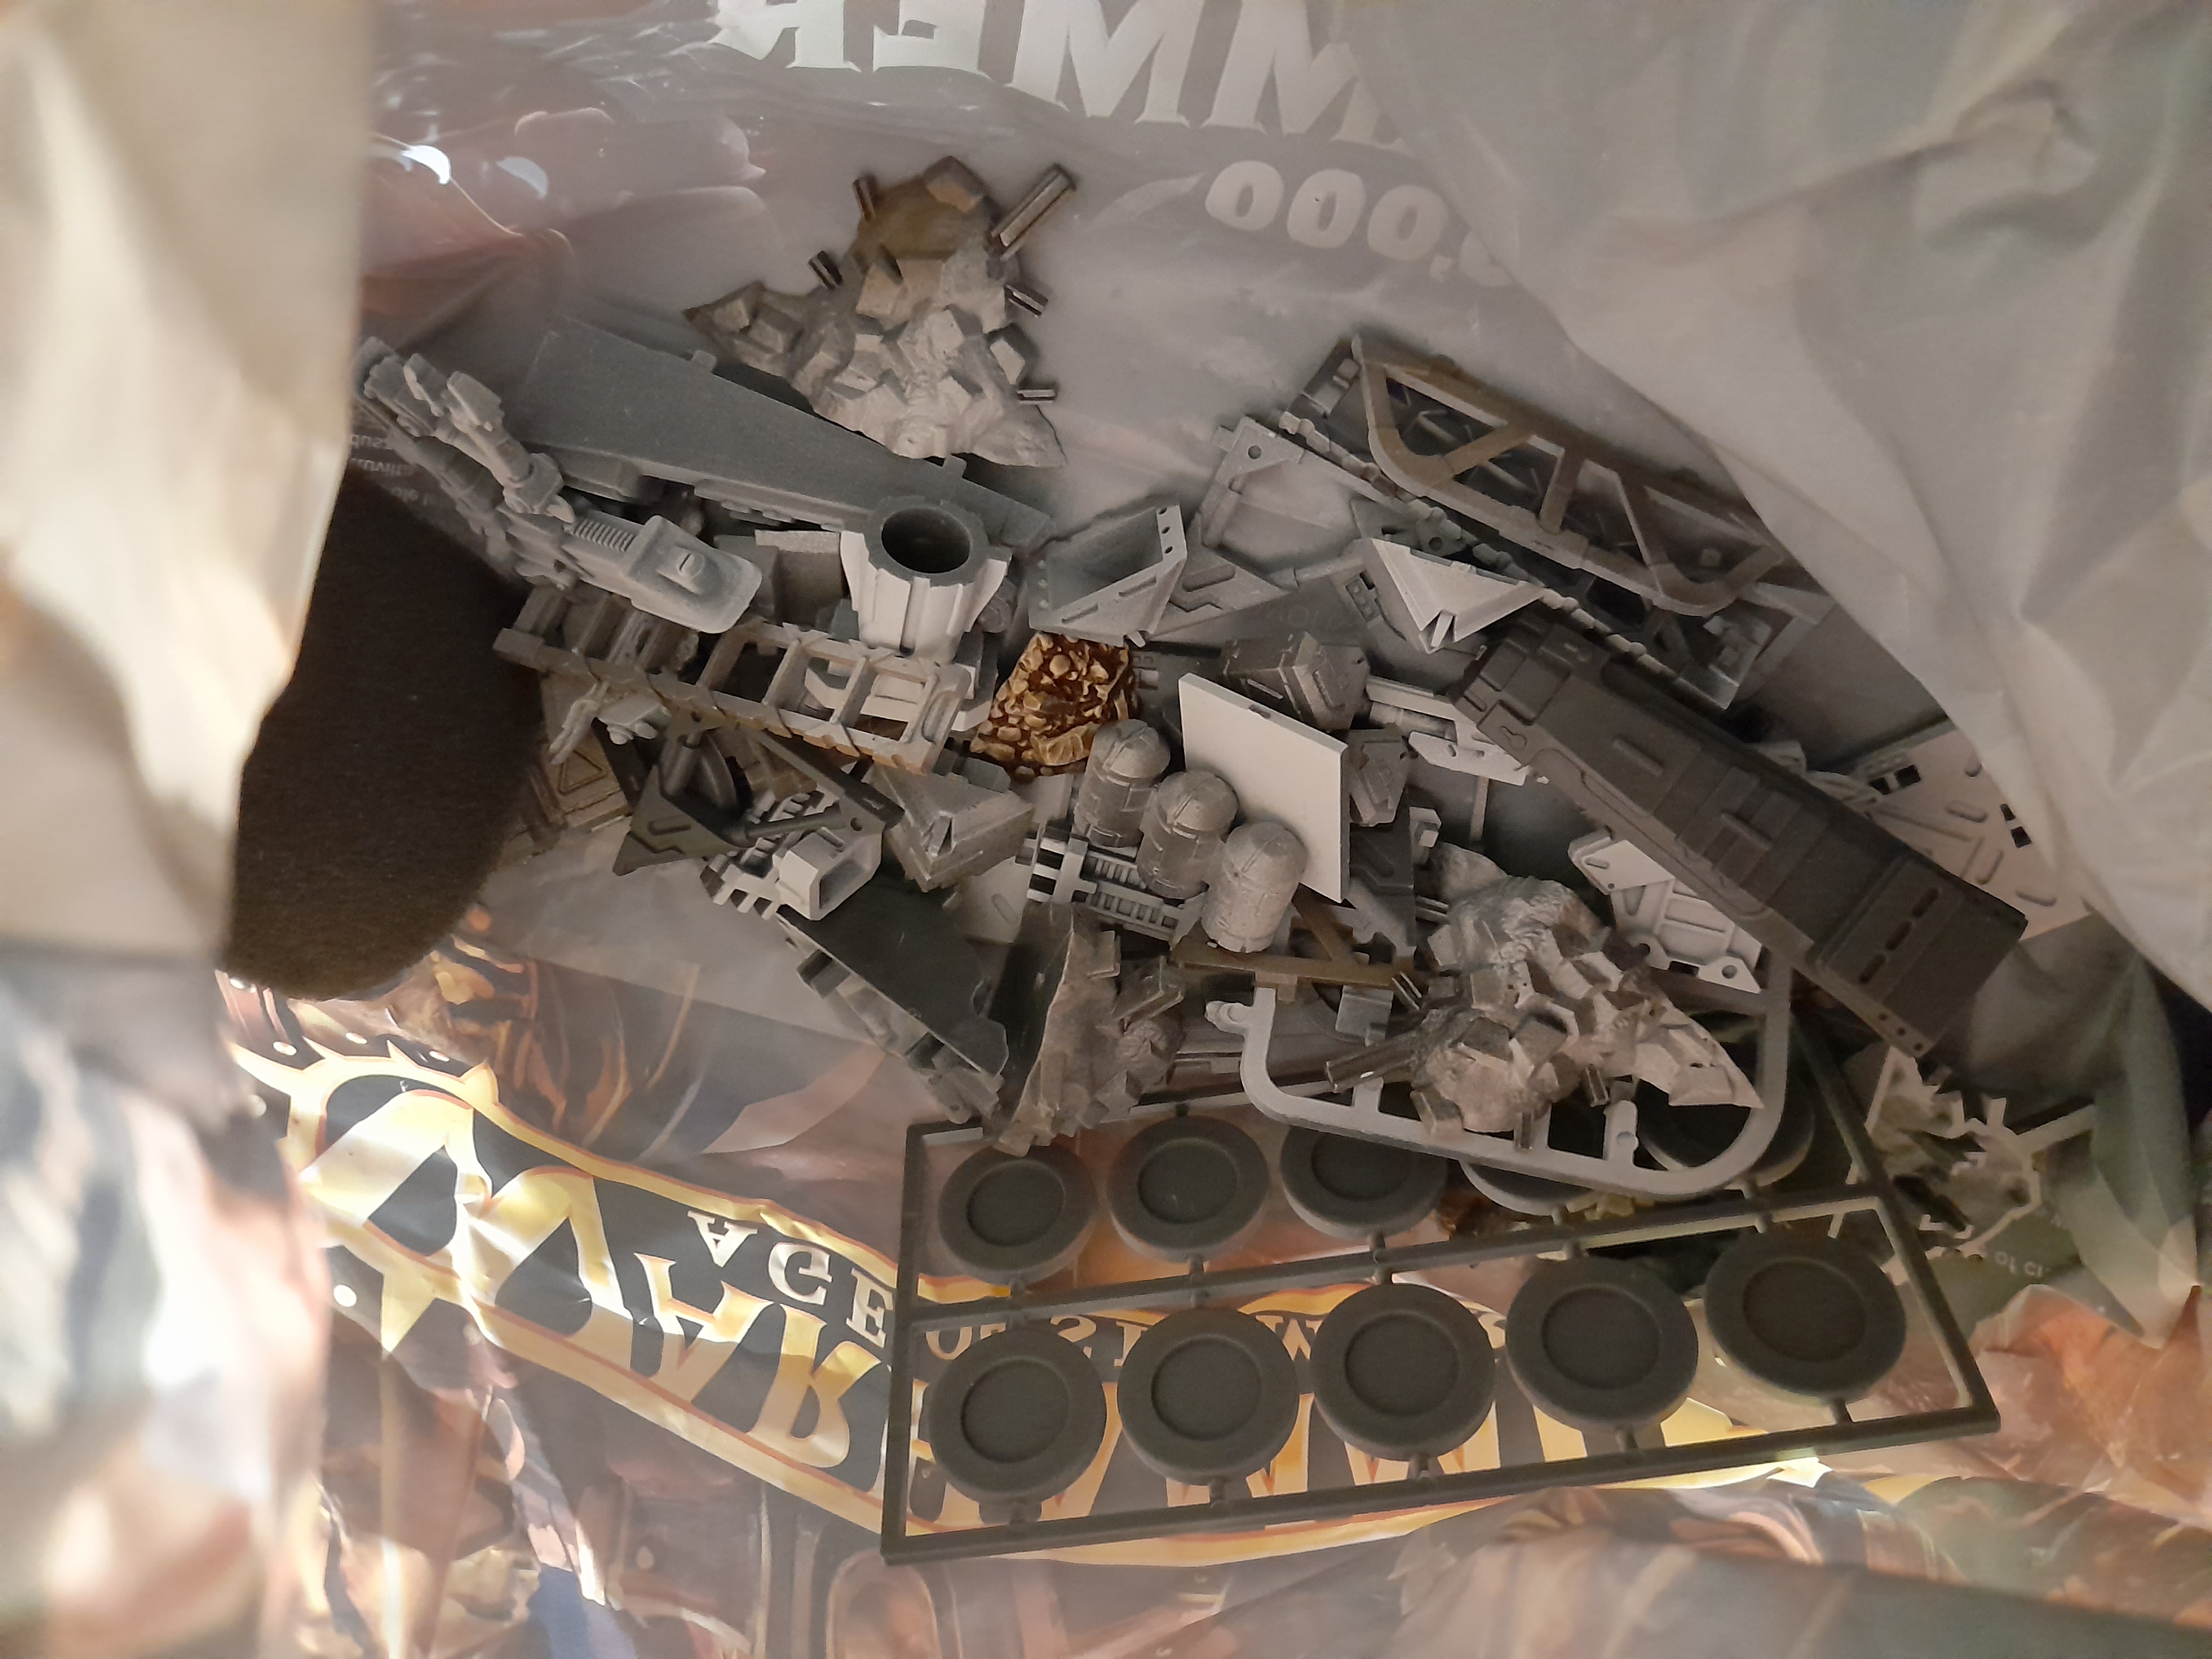
So, I need to come up with a plan of how to make best use of my very limited remaining stock so that it is a worthwhile addition to my deadzone terrain set.
 An example of my current deadzone terrain laid out
Vanguard objectives
2nd October 2023
For Kings of War Vanguard I have a set of terrain objectives to work on.
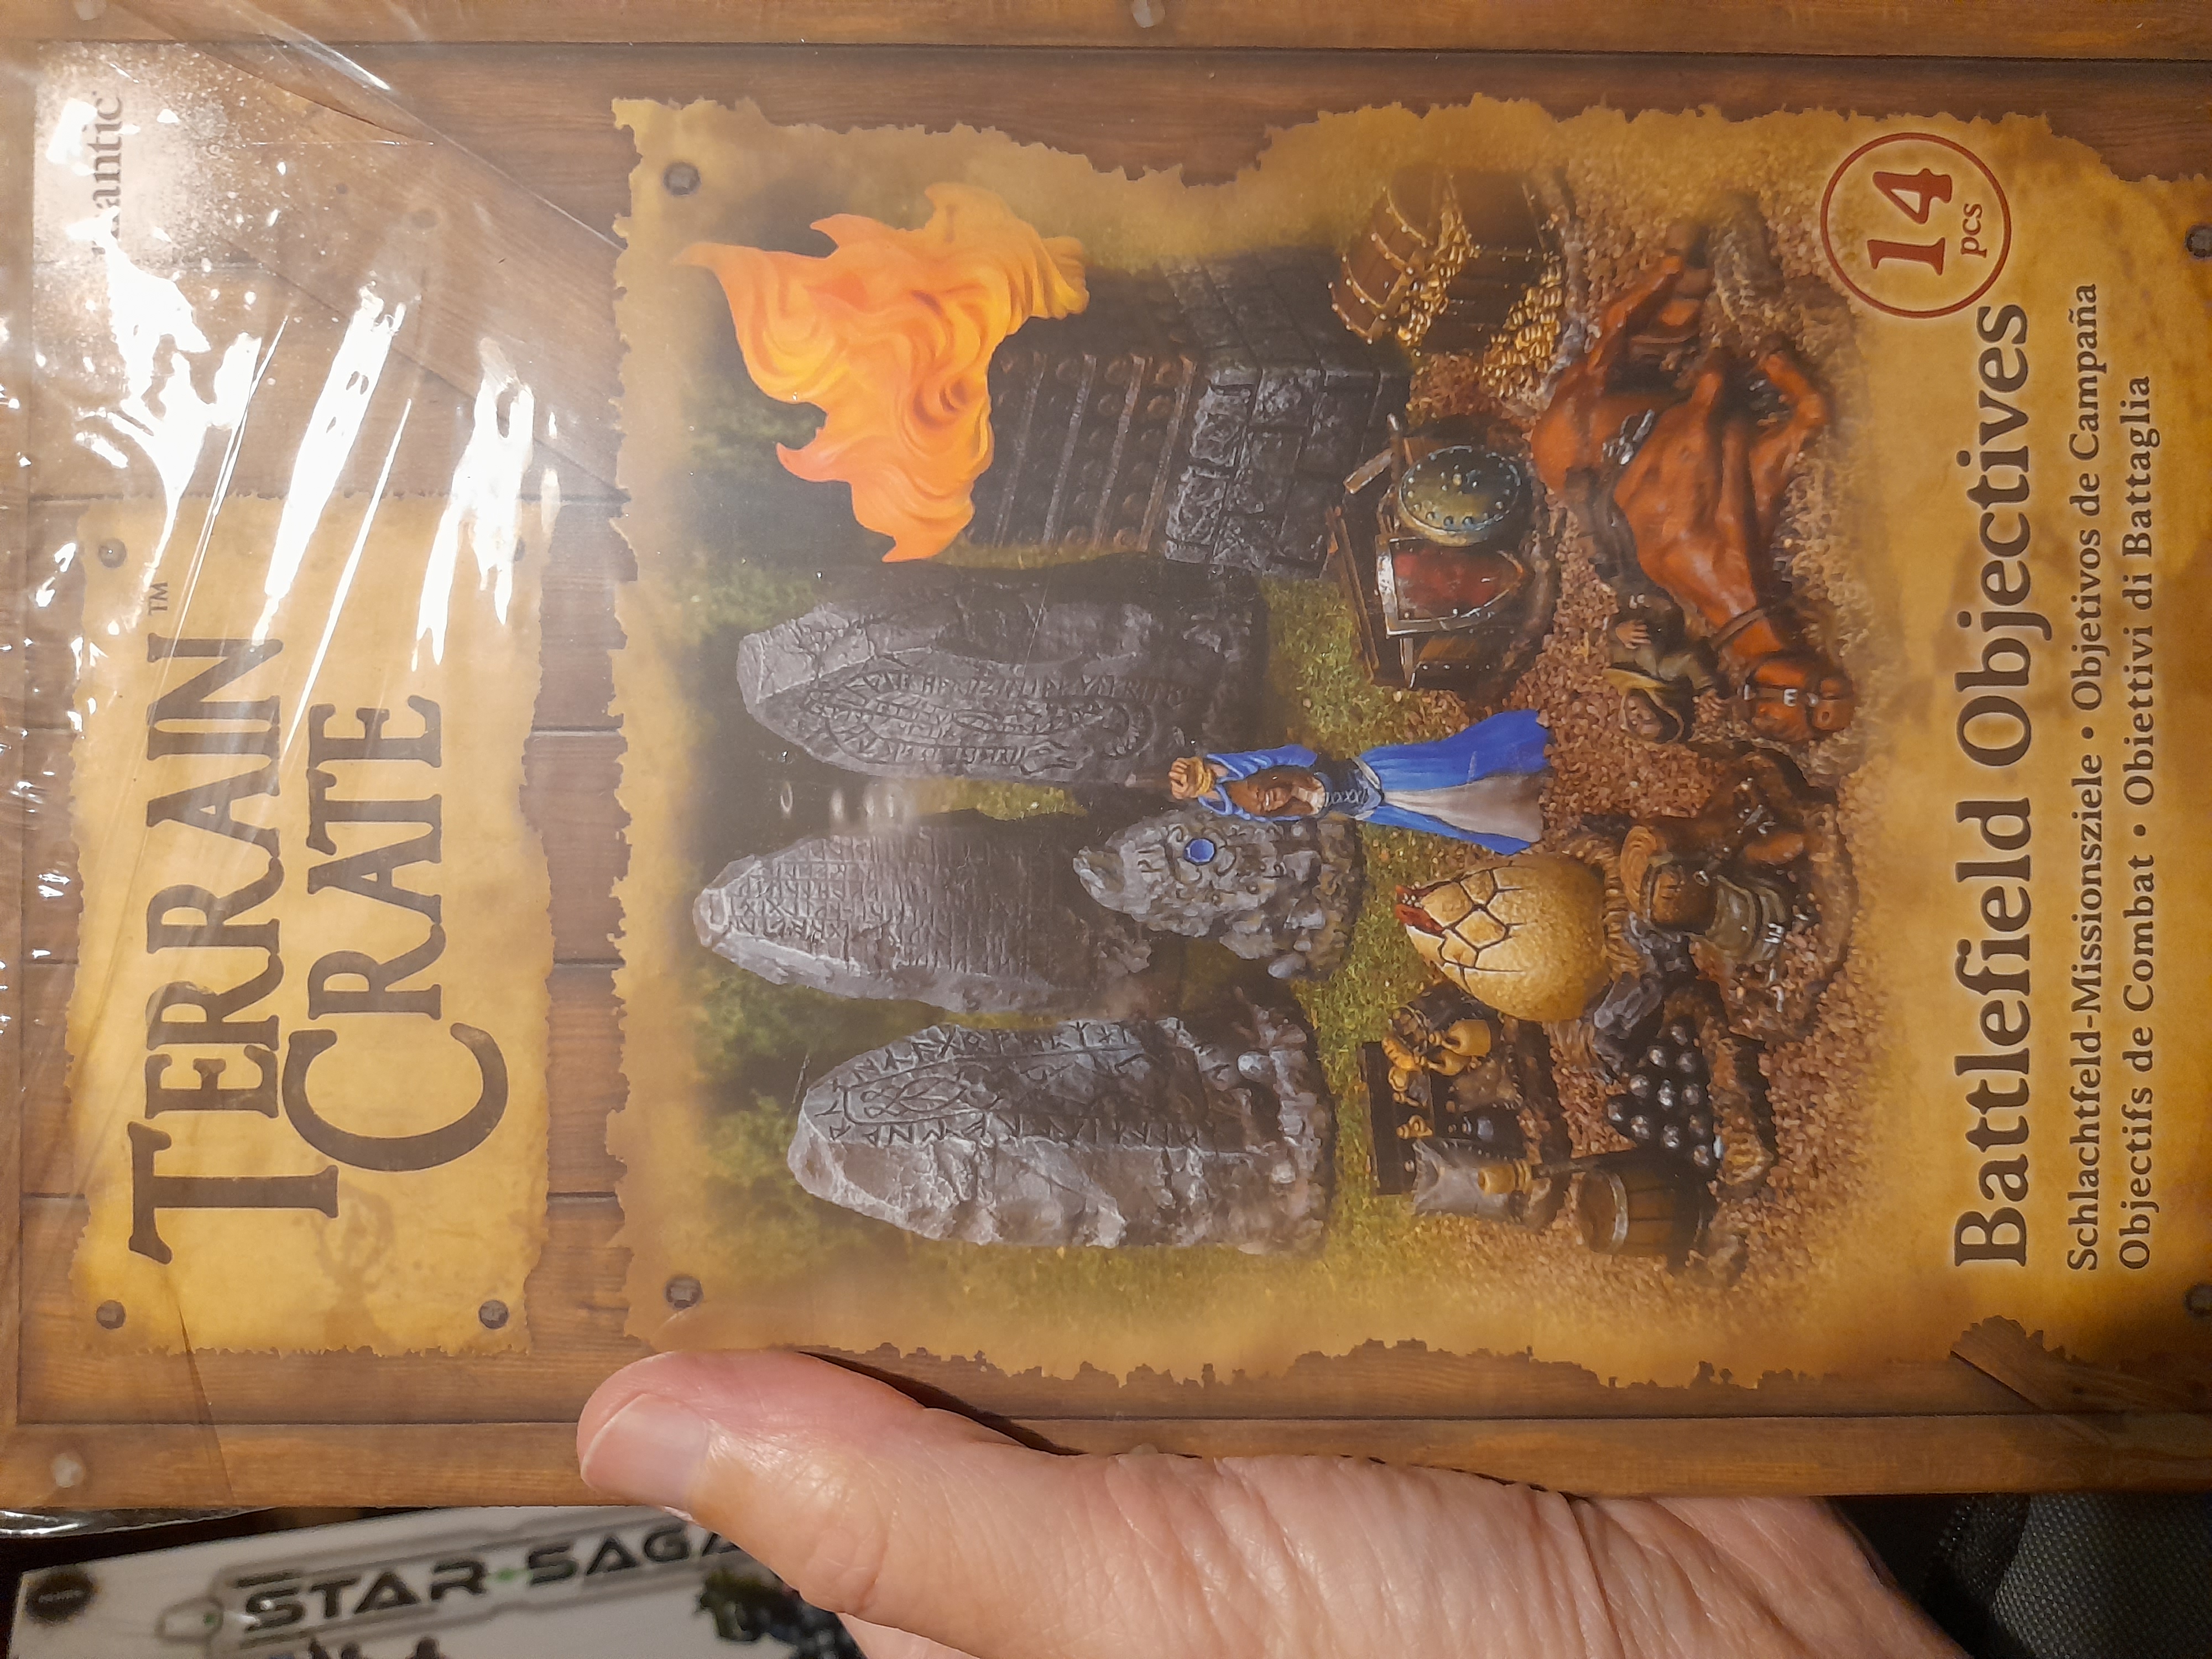
Should be straight forward I hope. They were going to be part of my Kings of War Vanguard project that is ongoing, but with Terrain Fest underway they have been promoted to here 😊
Deadzone dilemma
8th October 2023
I found myself in somewhat of a quandary…. I couldn’t quite decide what to build with my limited supply of tiles (and having no doors…).
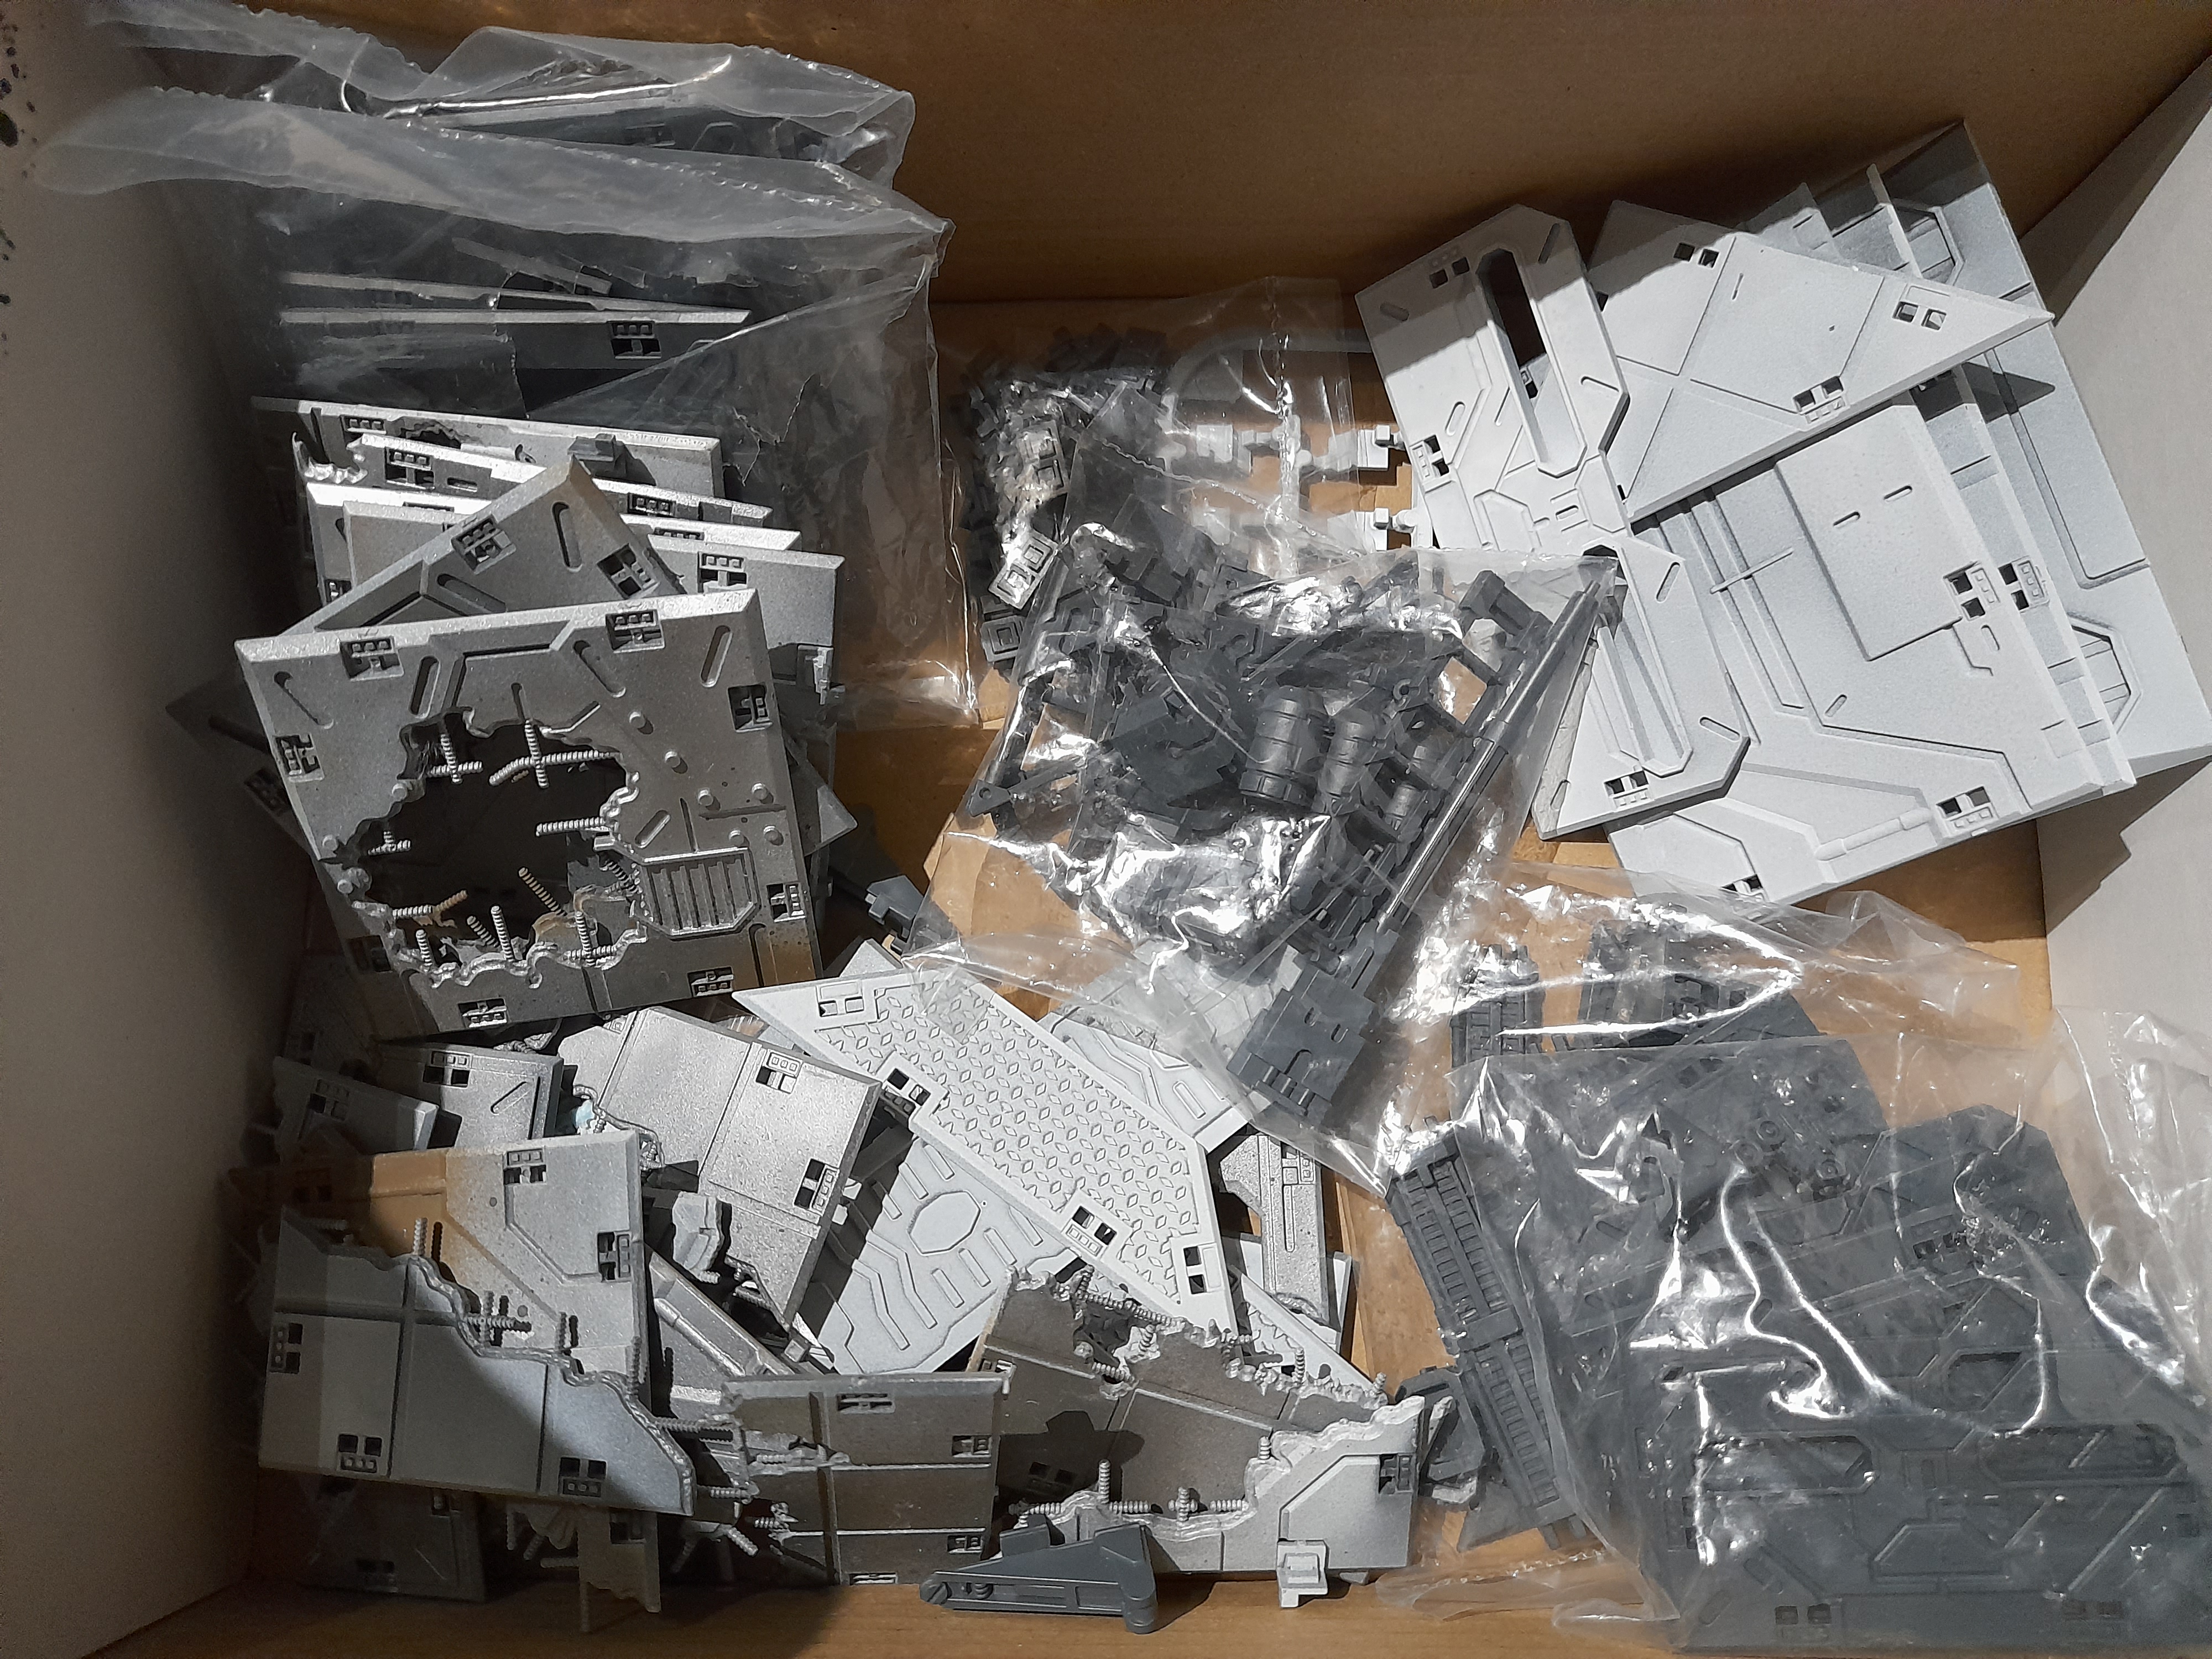
So, as I often do, I decided to knock up some sketches in order to get my grey cells going. But first I needed to take better stock of what tiles I had available.
Initially I thought I was going to make a 2×2 cube block building – but that wouldn’t make use of any of the triangle tiles, and I felt that I should try to make use of them since I now had some.
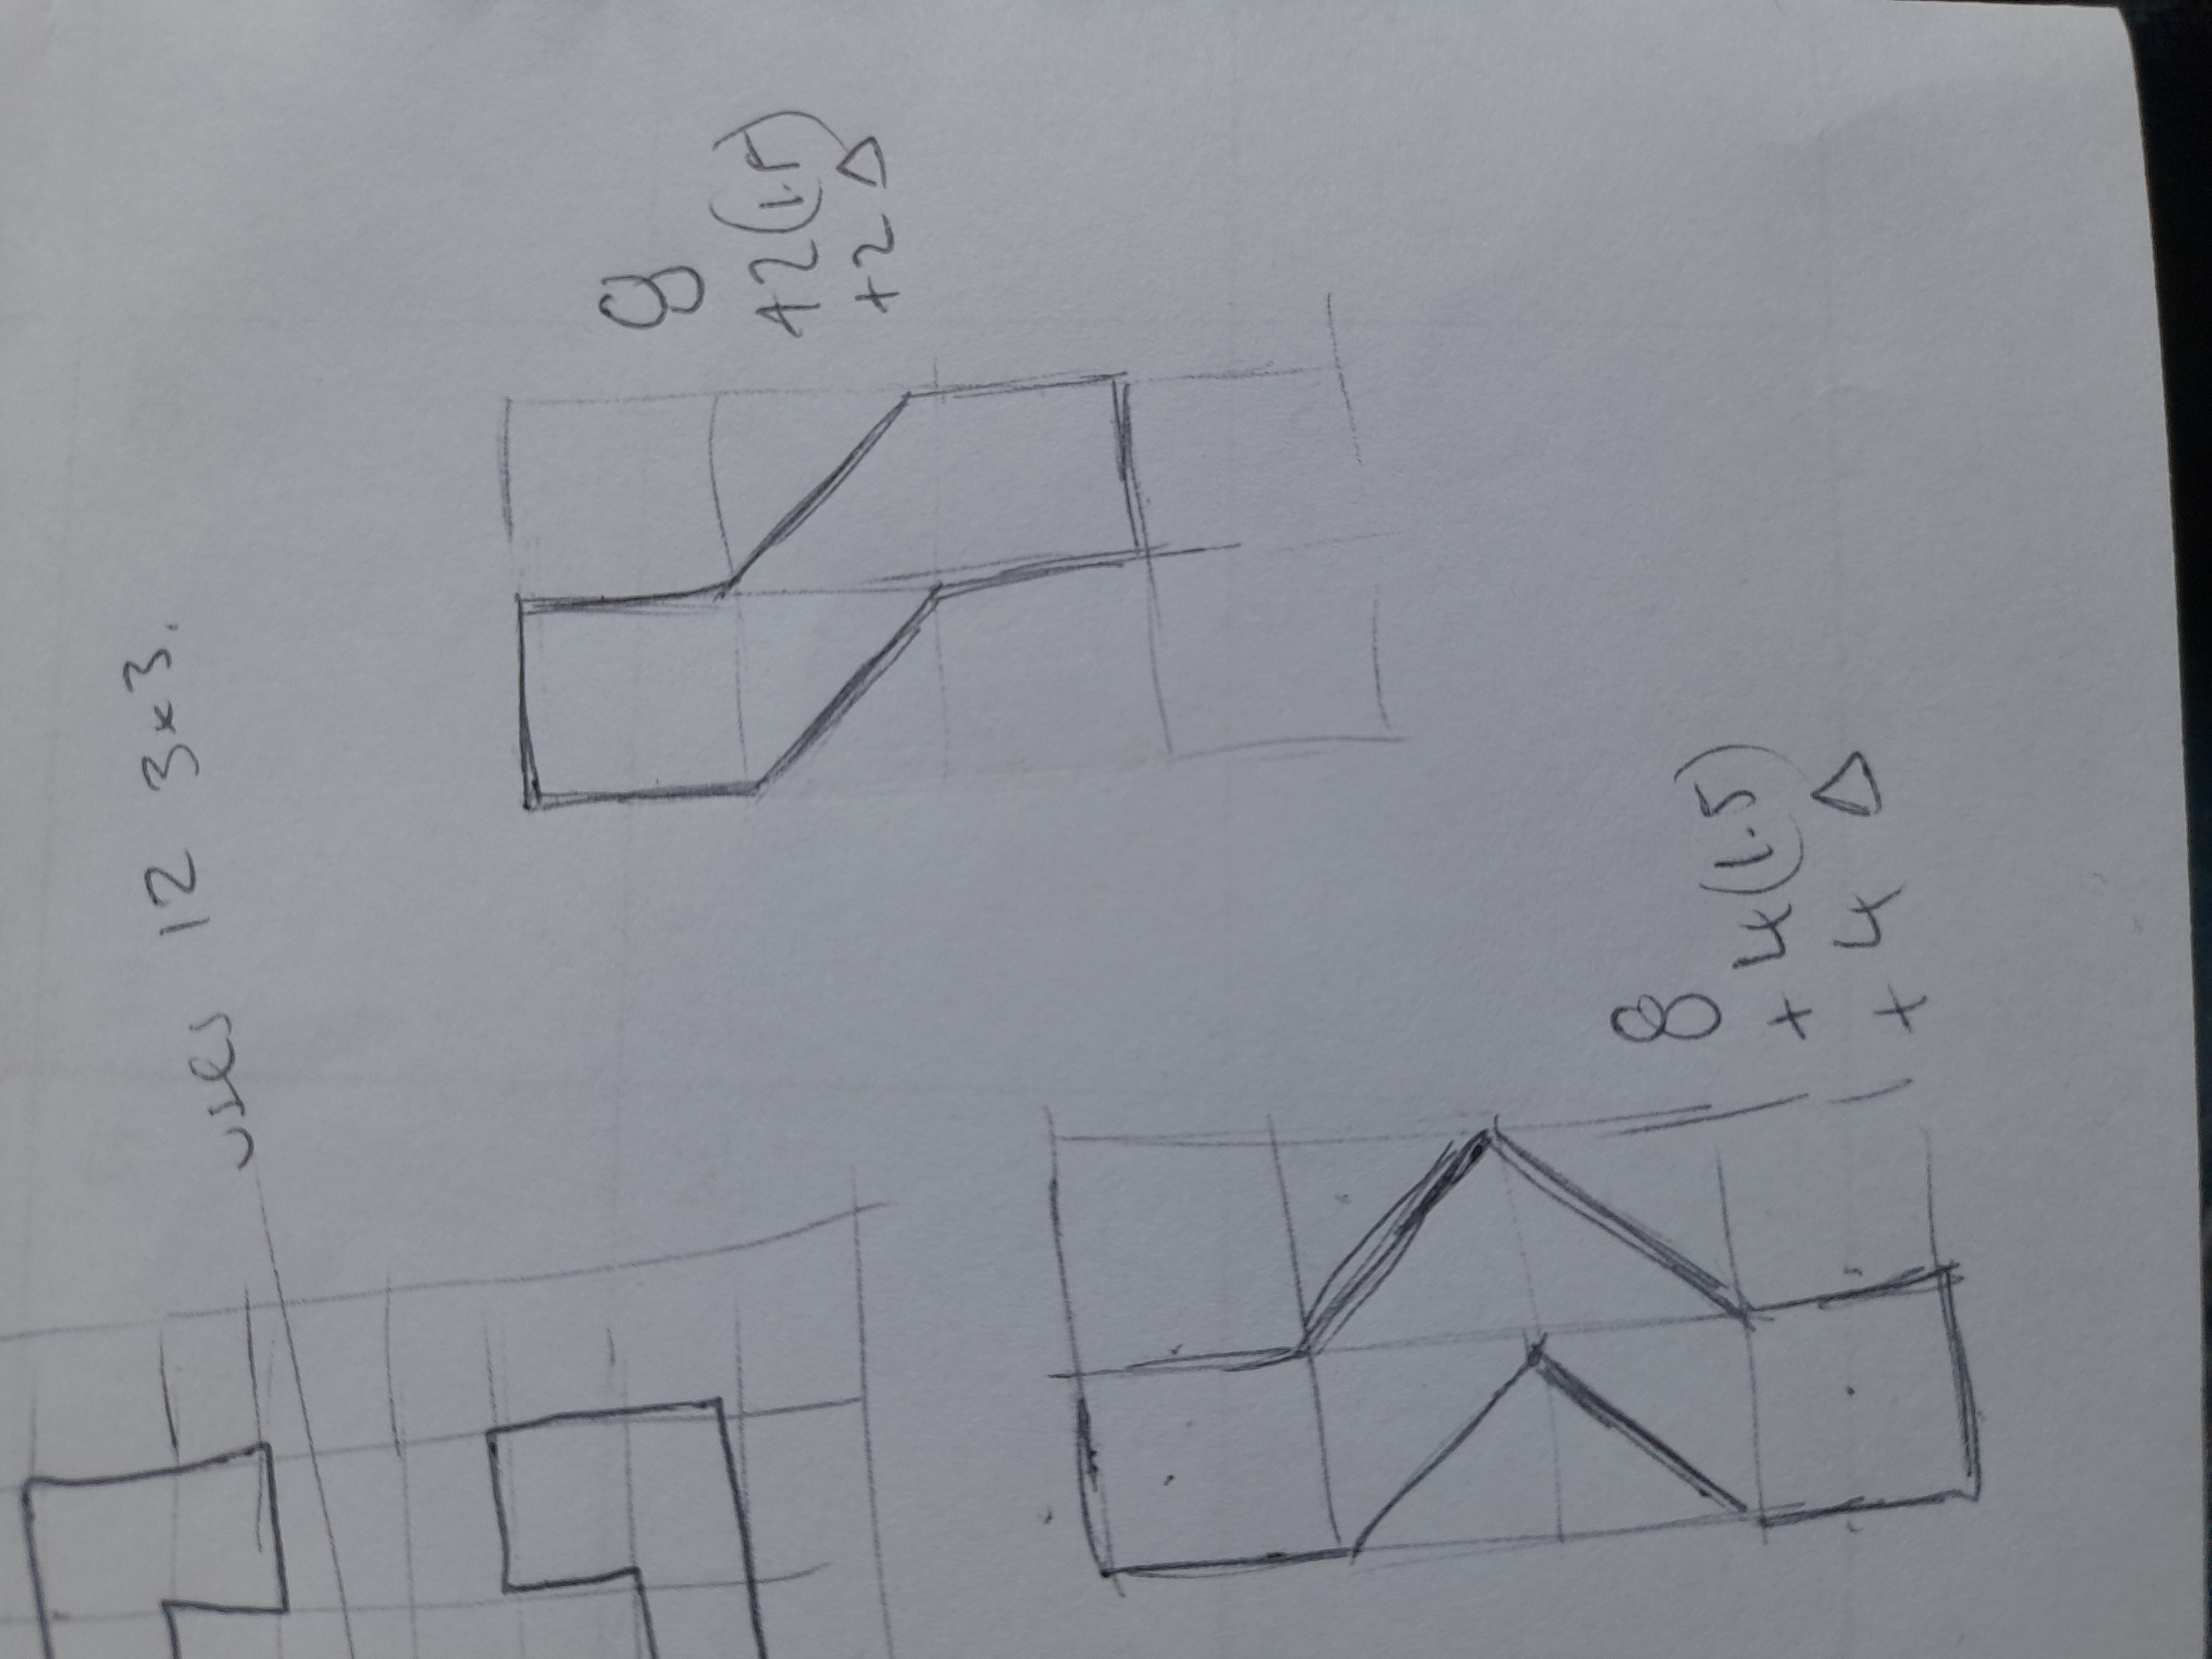
Finding some scrap paper I sketched out some thoughts on potential layouts, then added more and more….
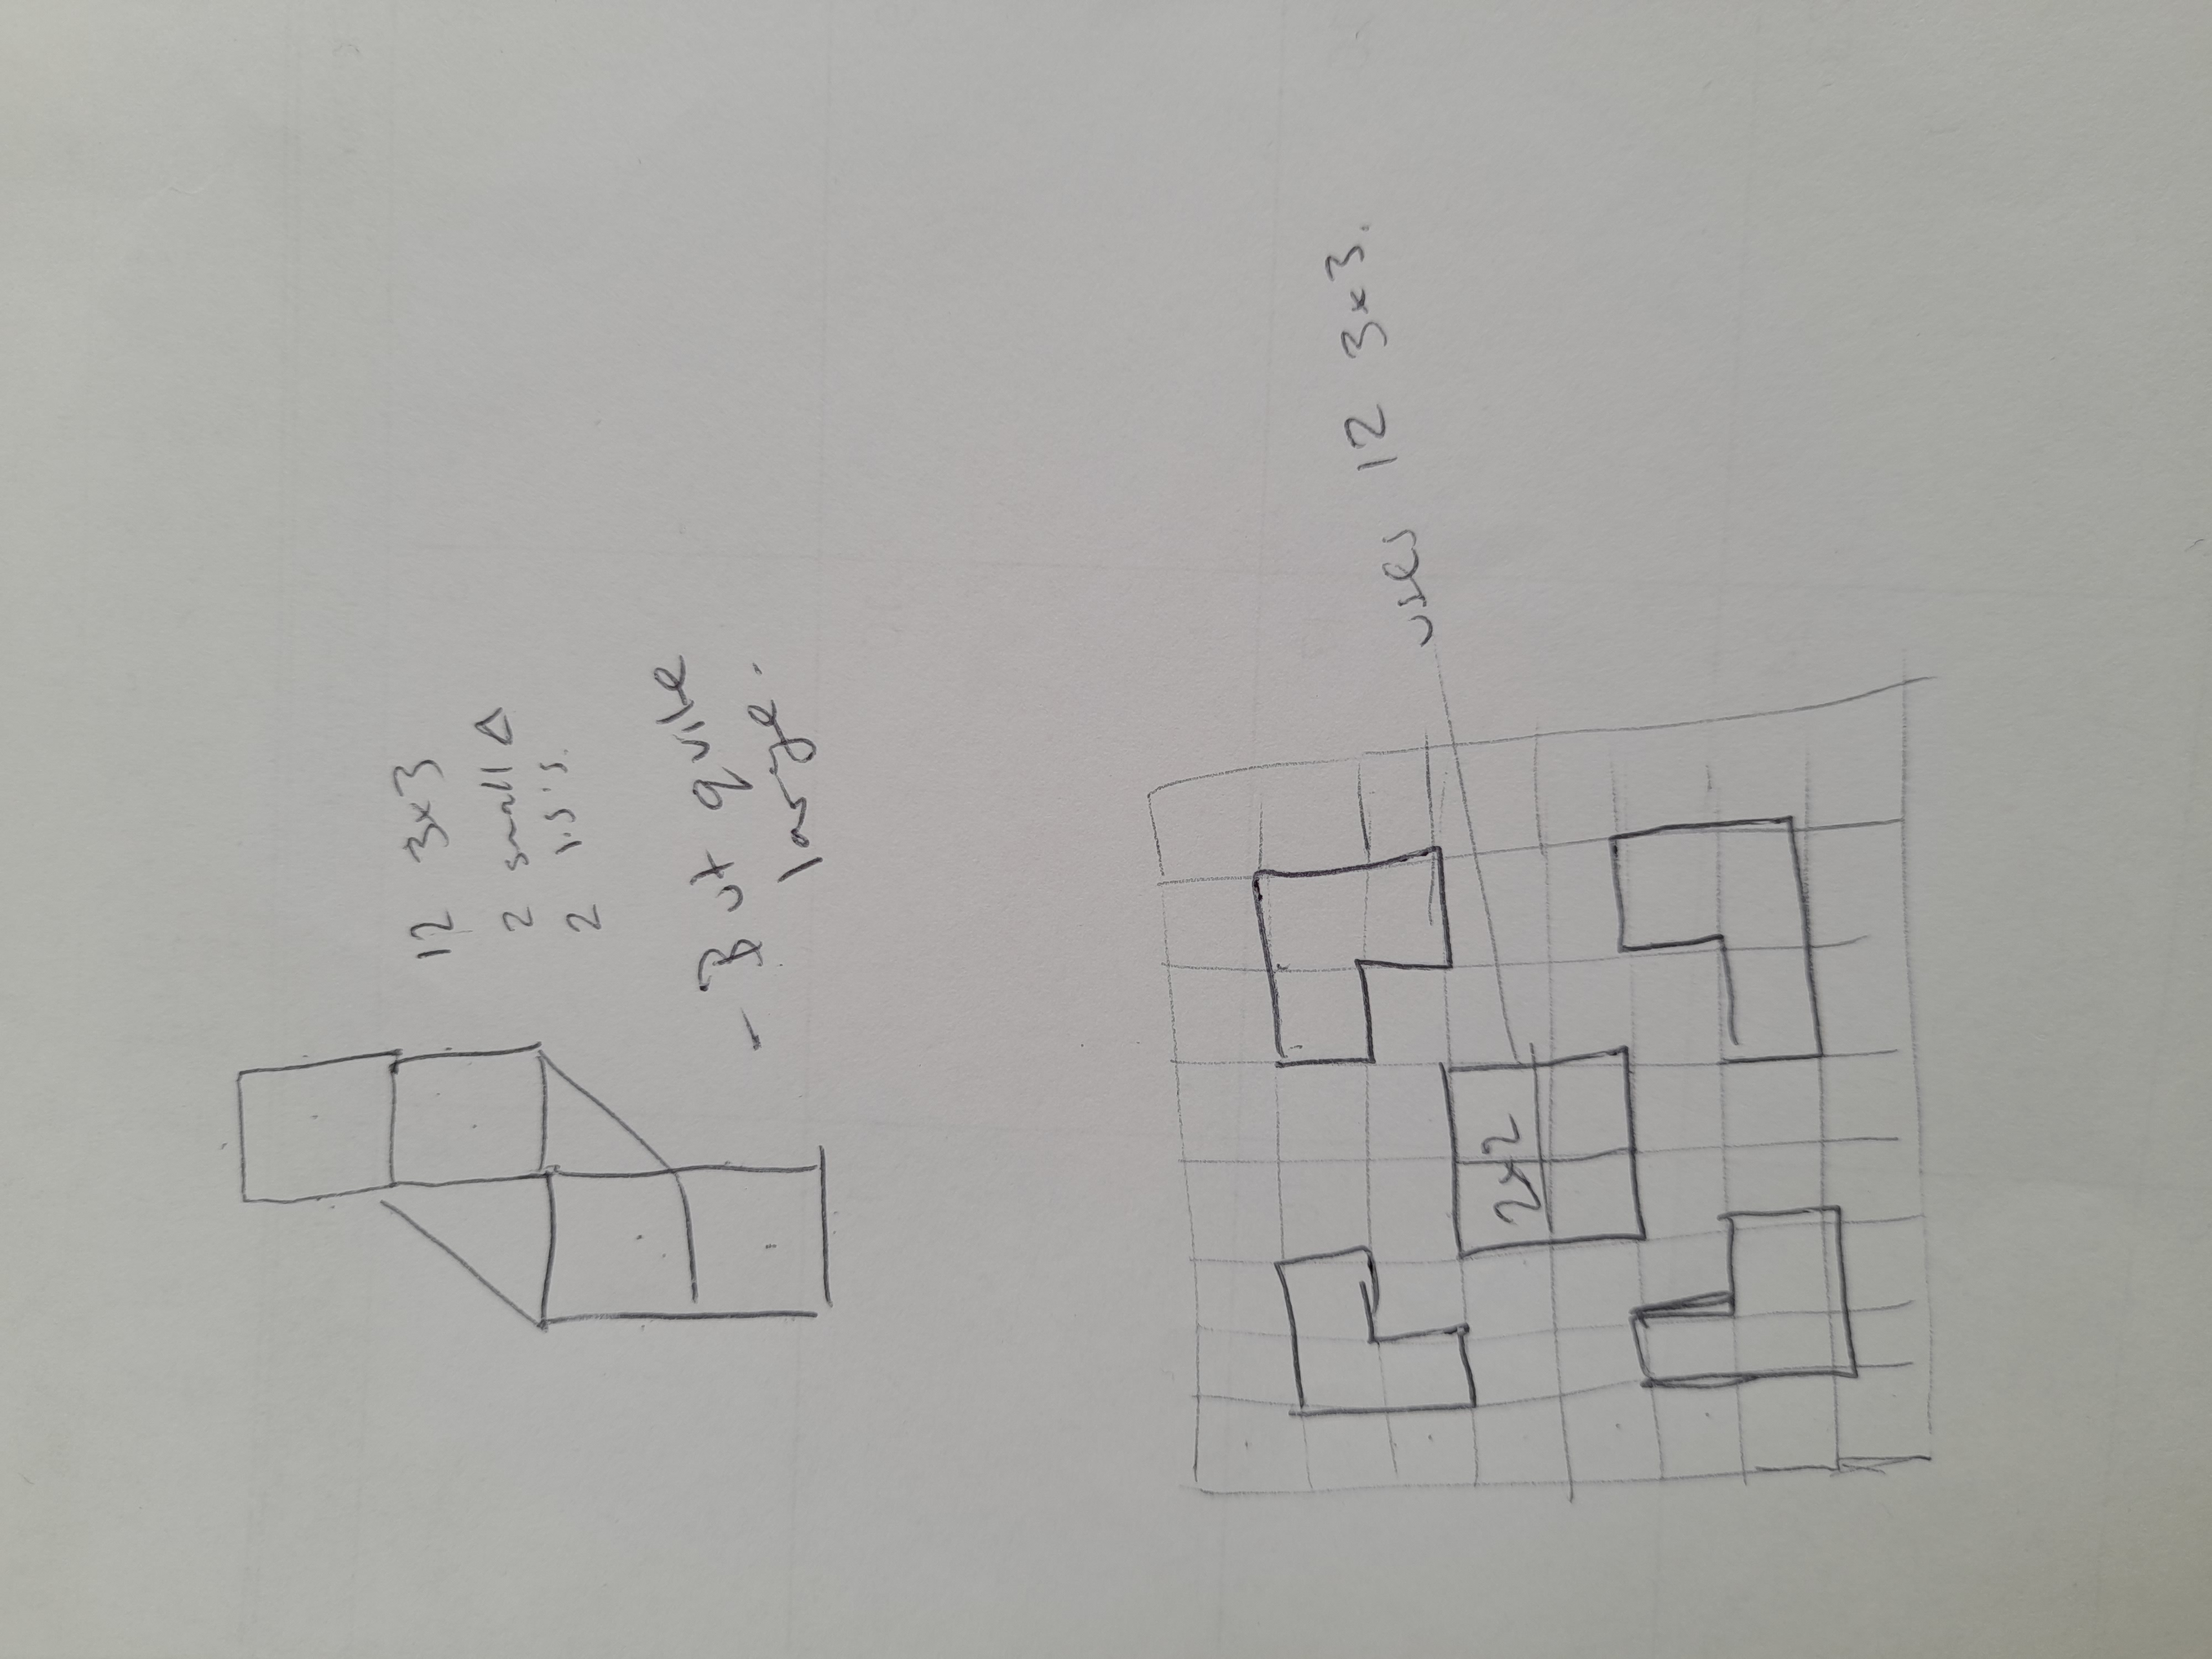
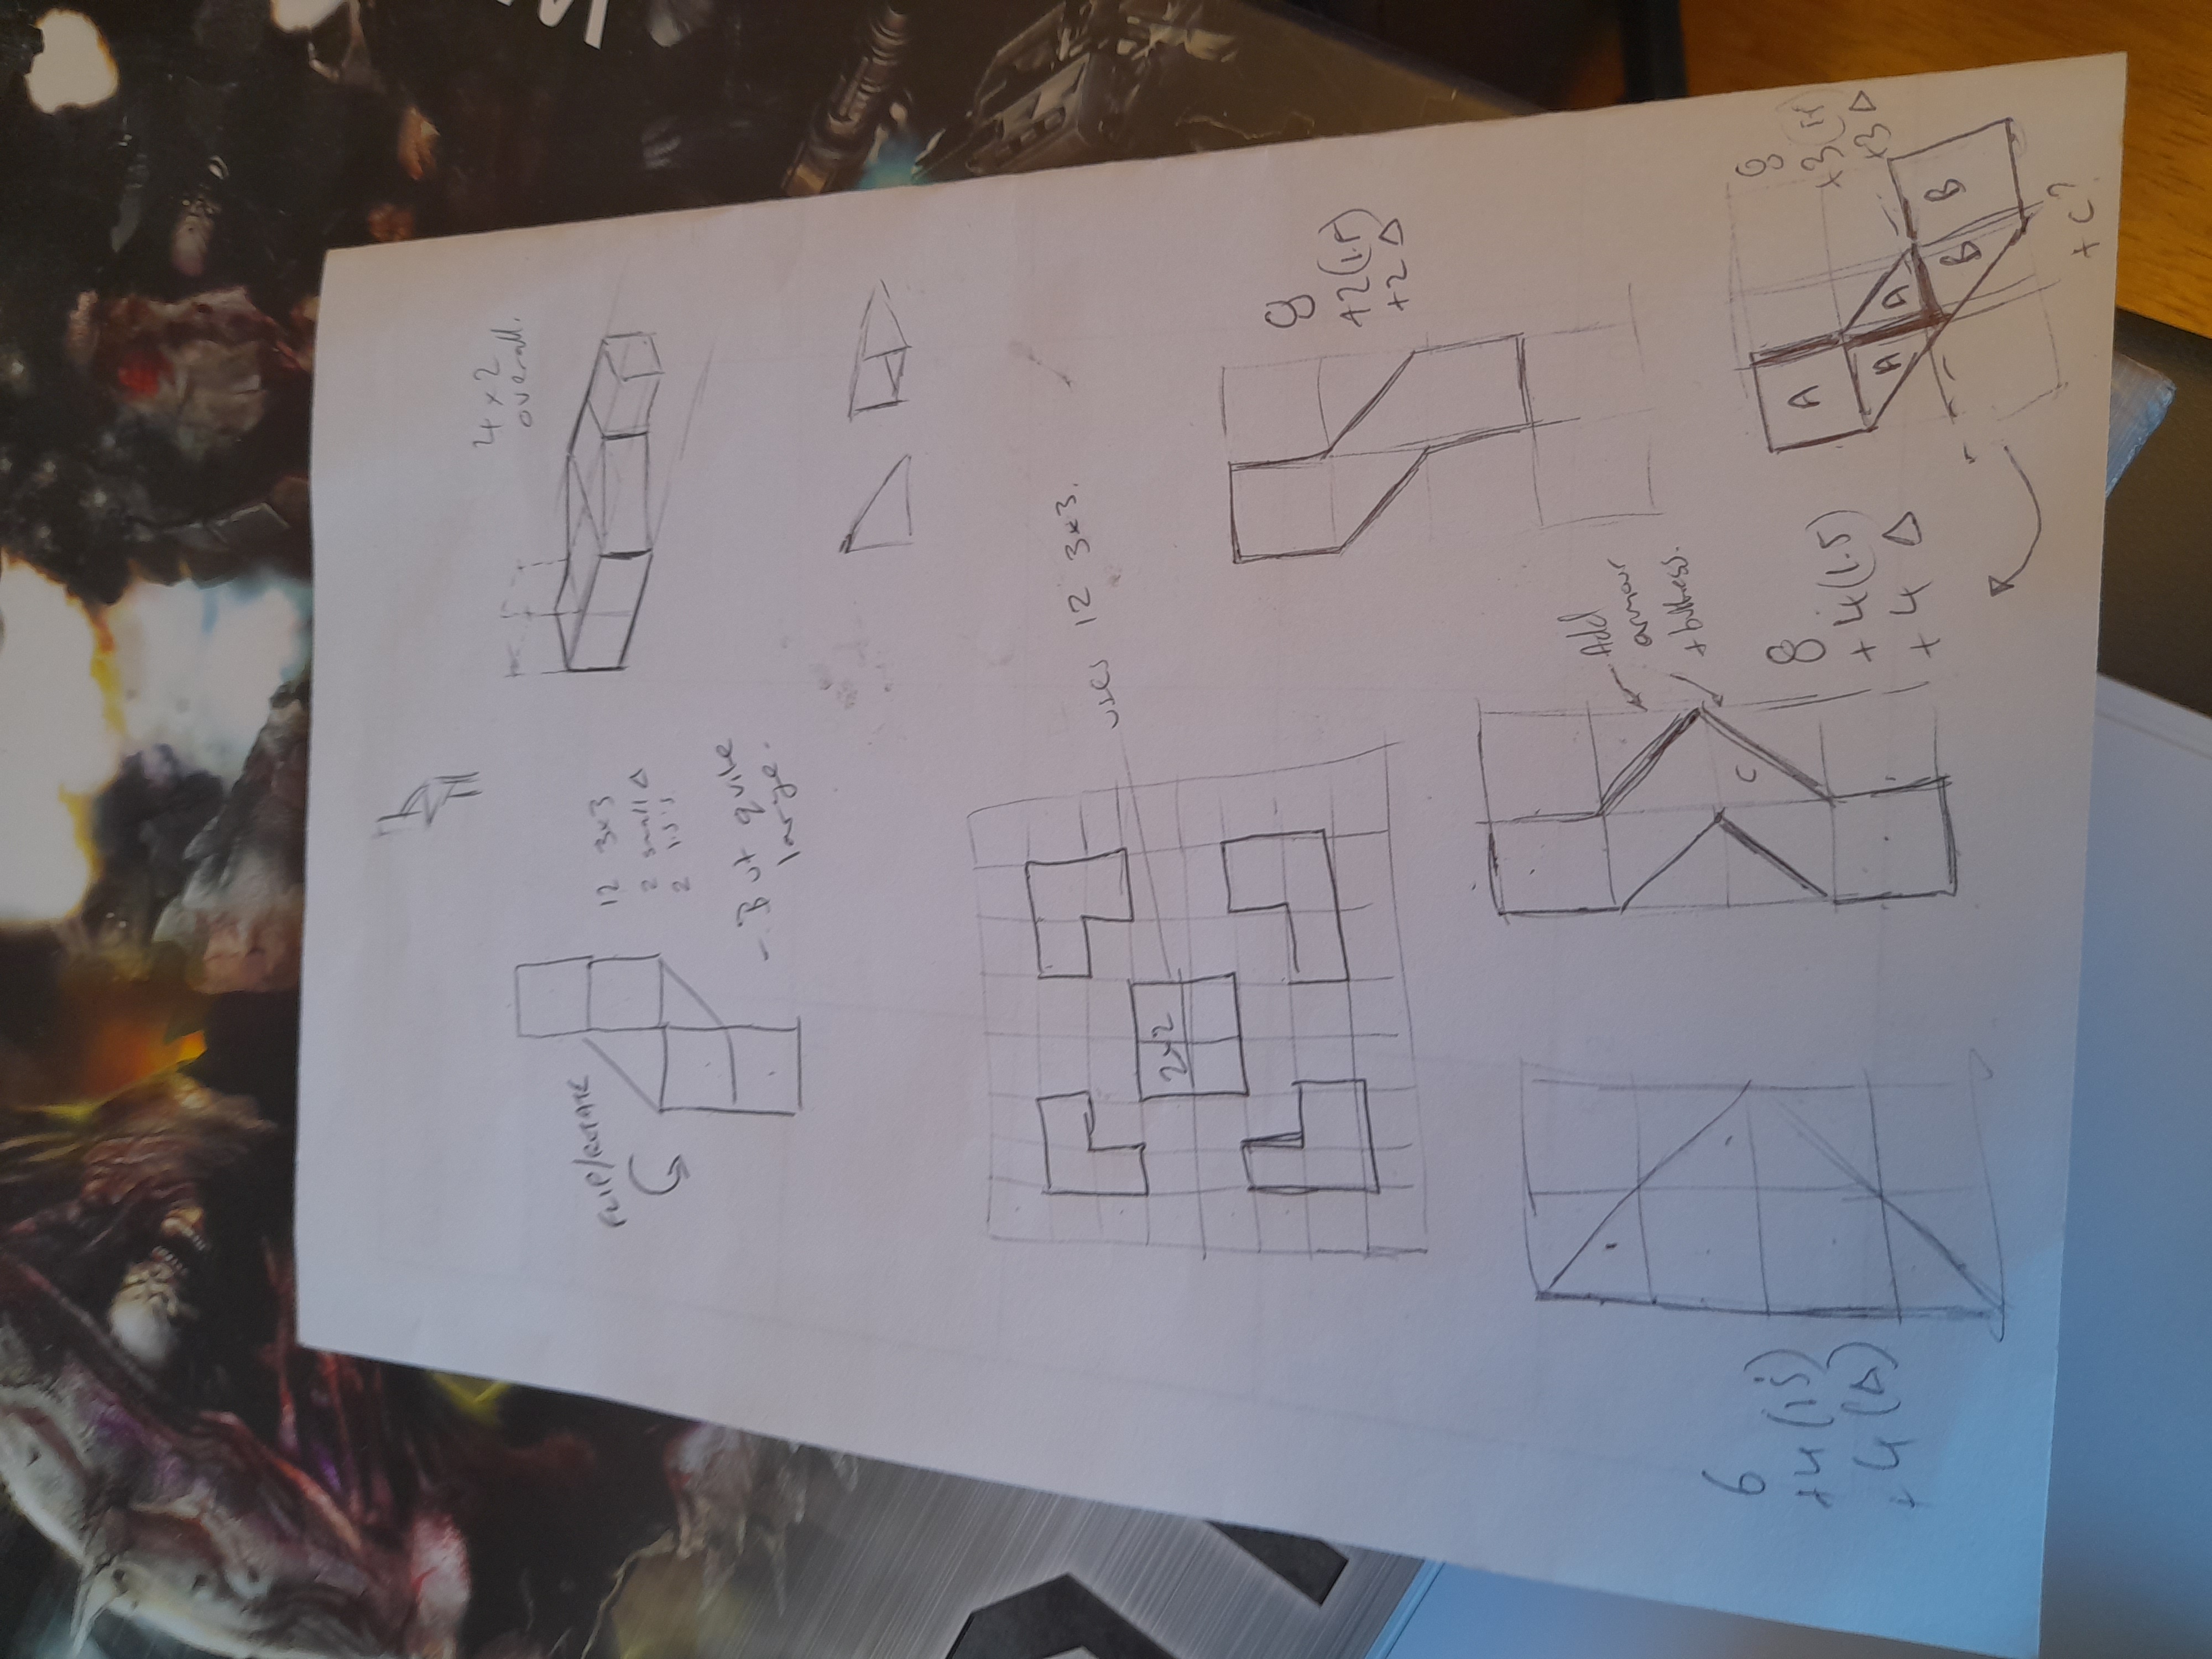
Feels like some progress – and I think I will do the same soon for my Mordheim/Vanguard construction thoughts.
Deadzone – making some headway
9th October 2023
With some relief (not making any progress was getting me down a little) I managed to get construction underway at the end of the weekend.
First off cleaning and prepping the tiles – an important stage to ensure a good close fit on the joints.
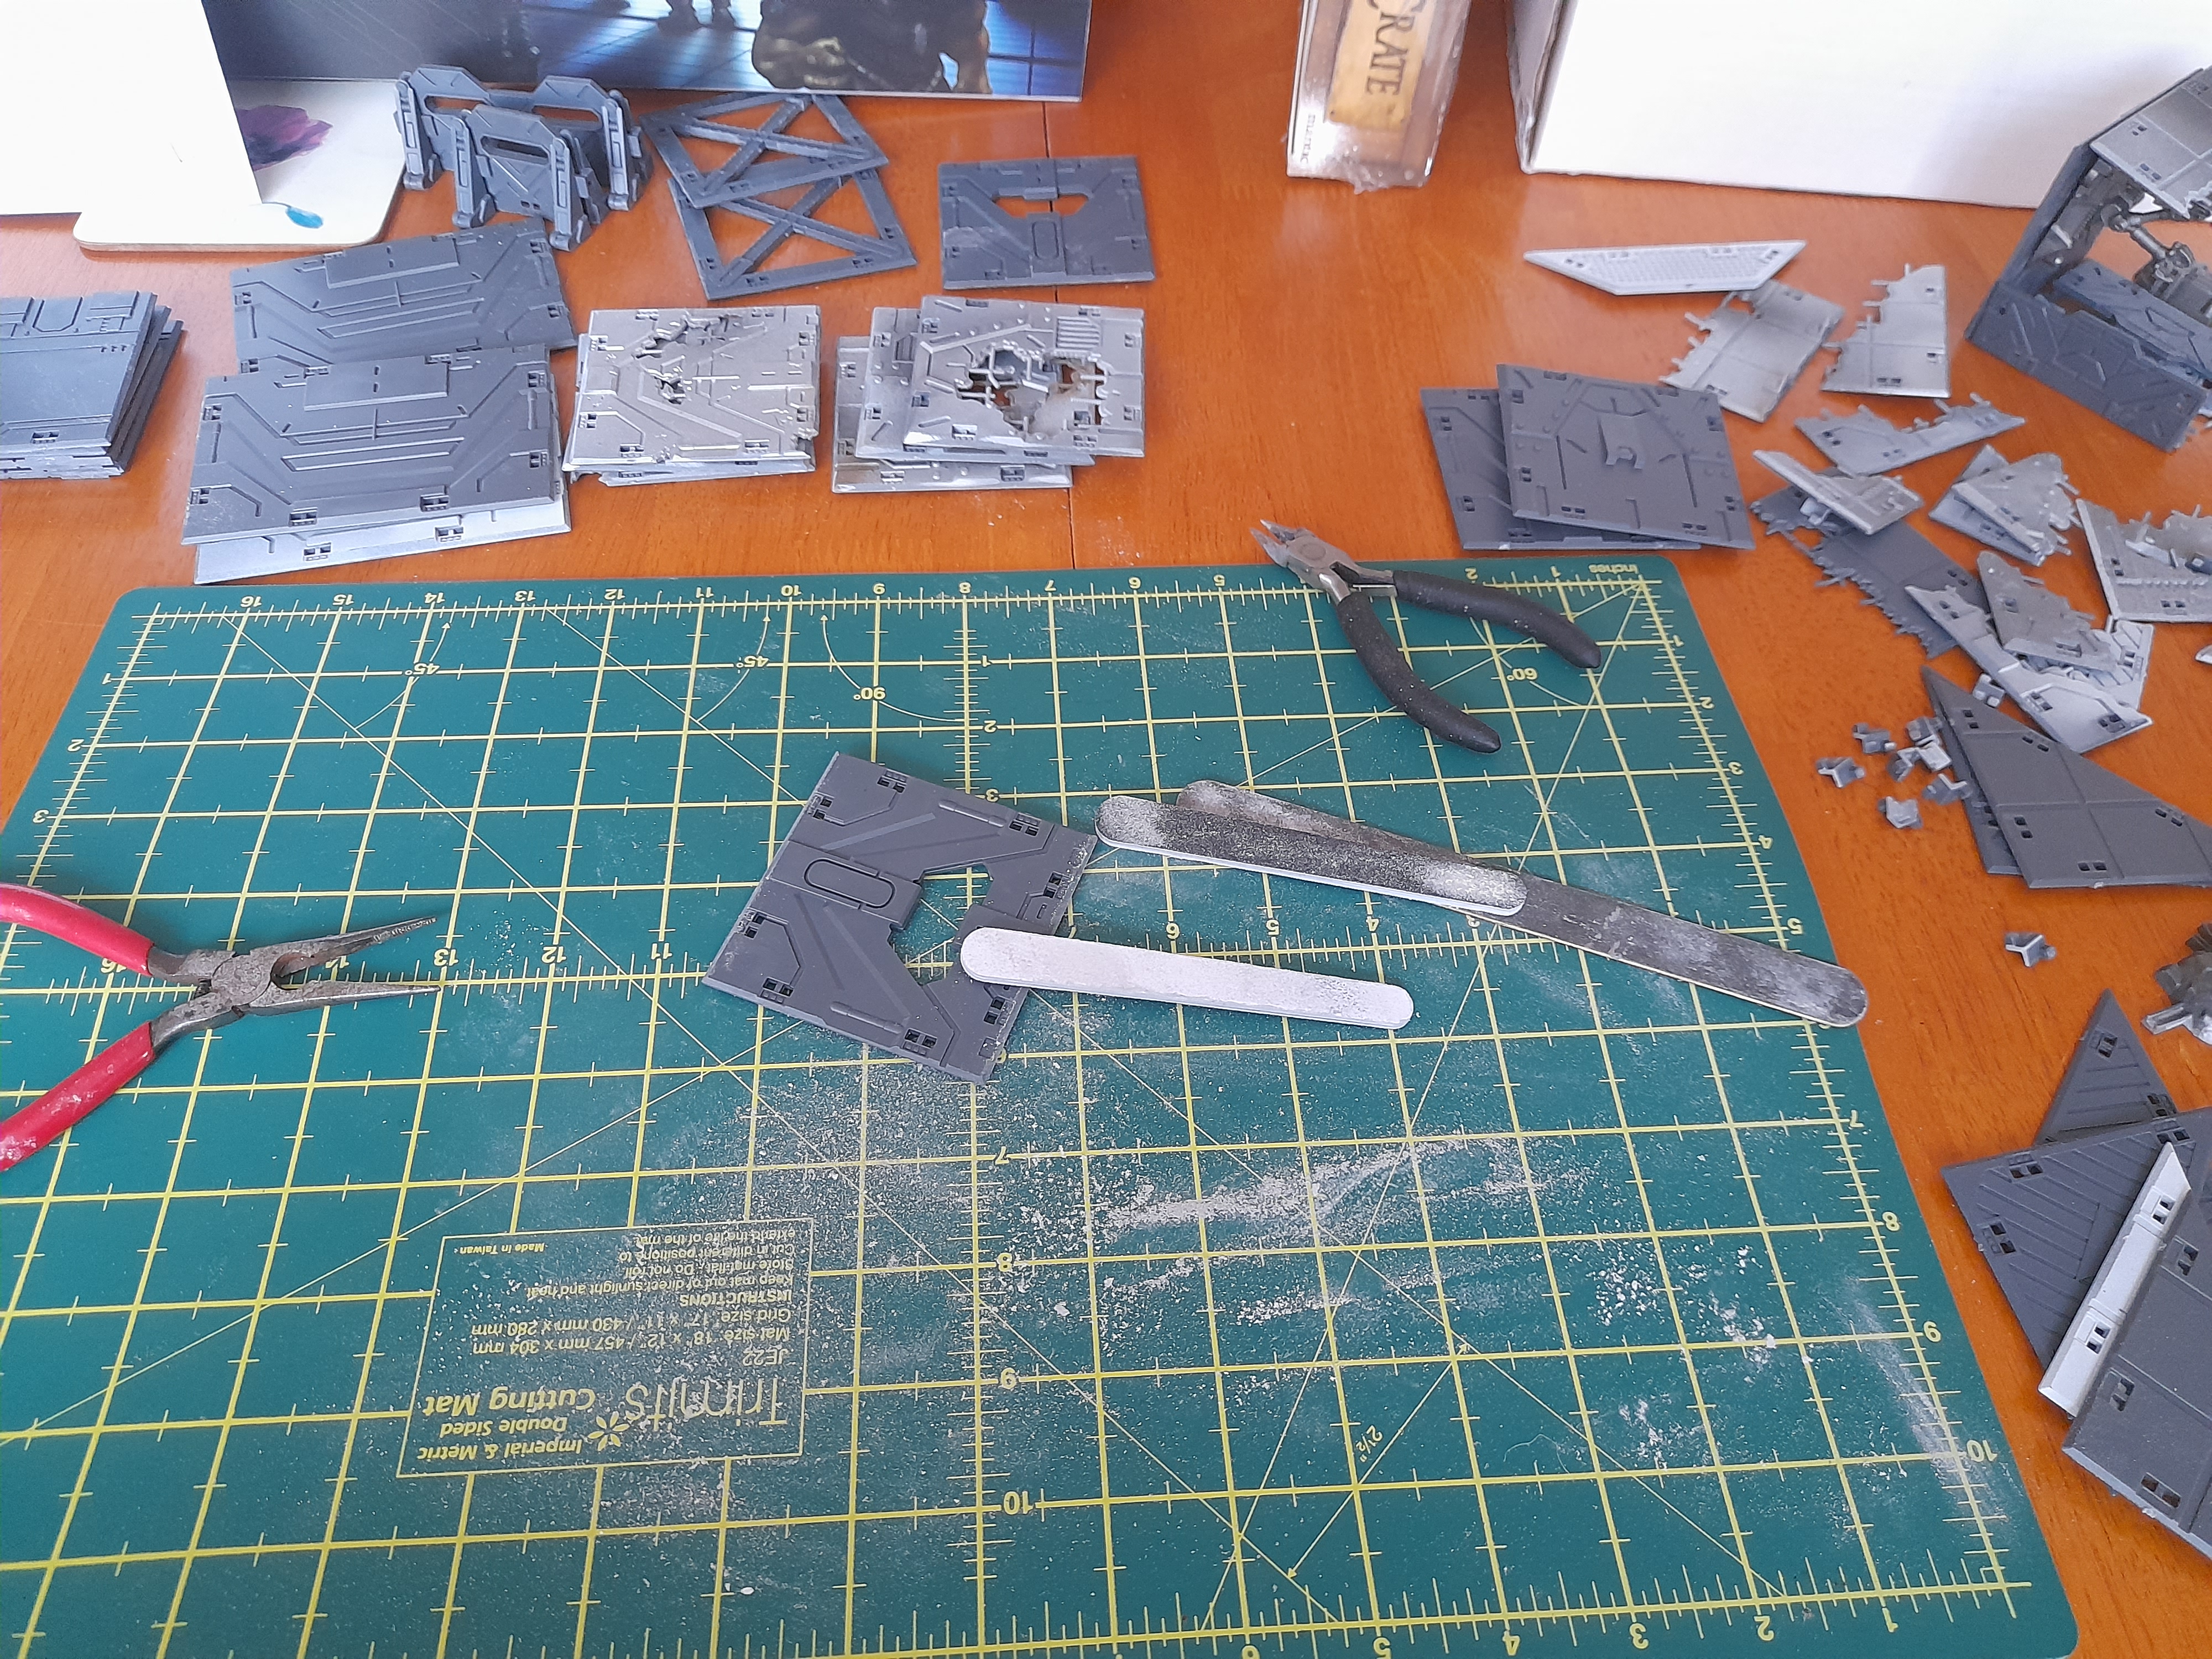
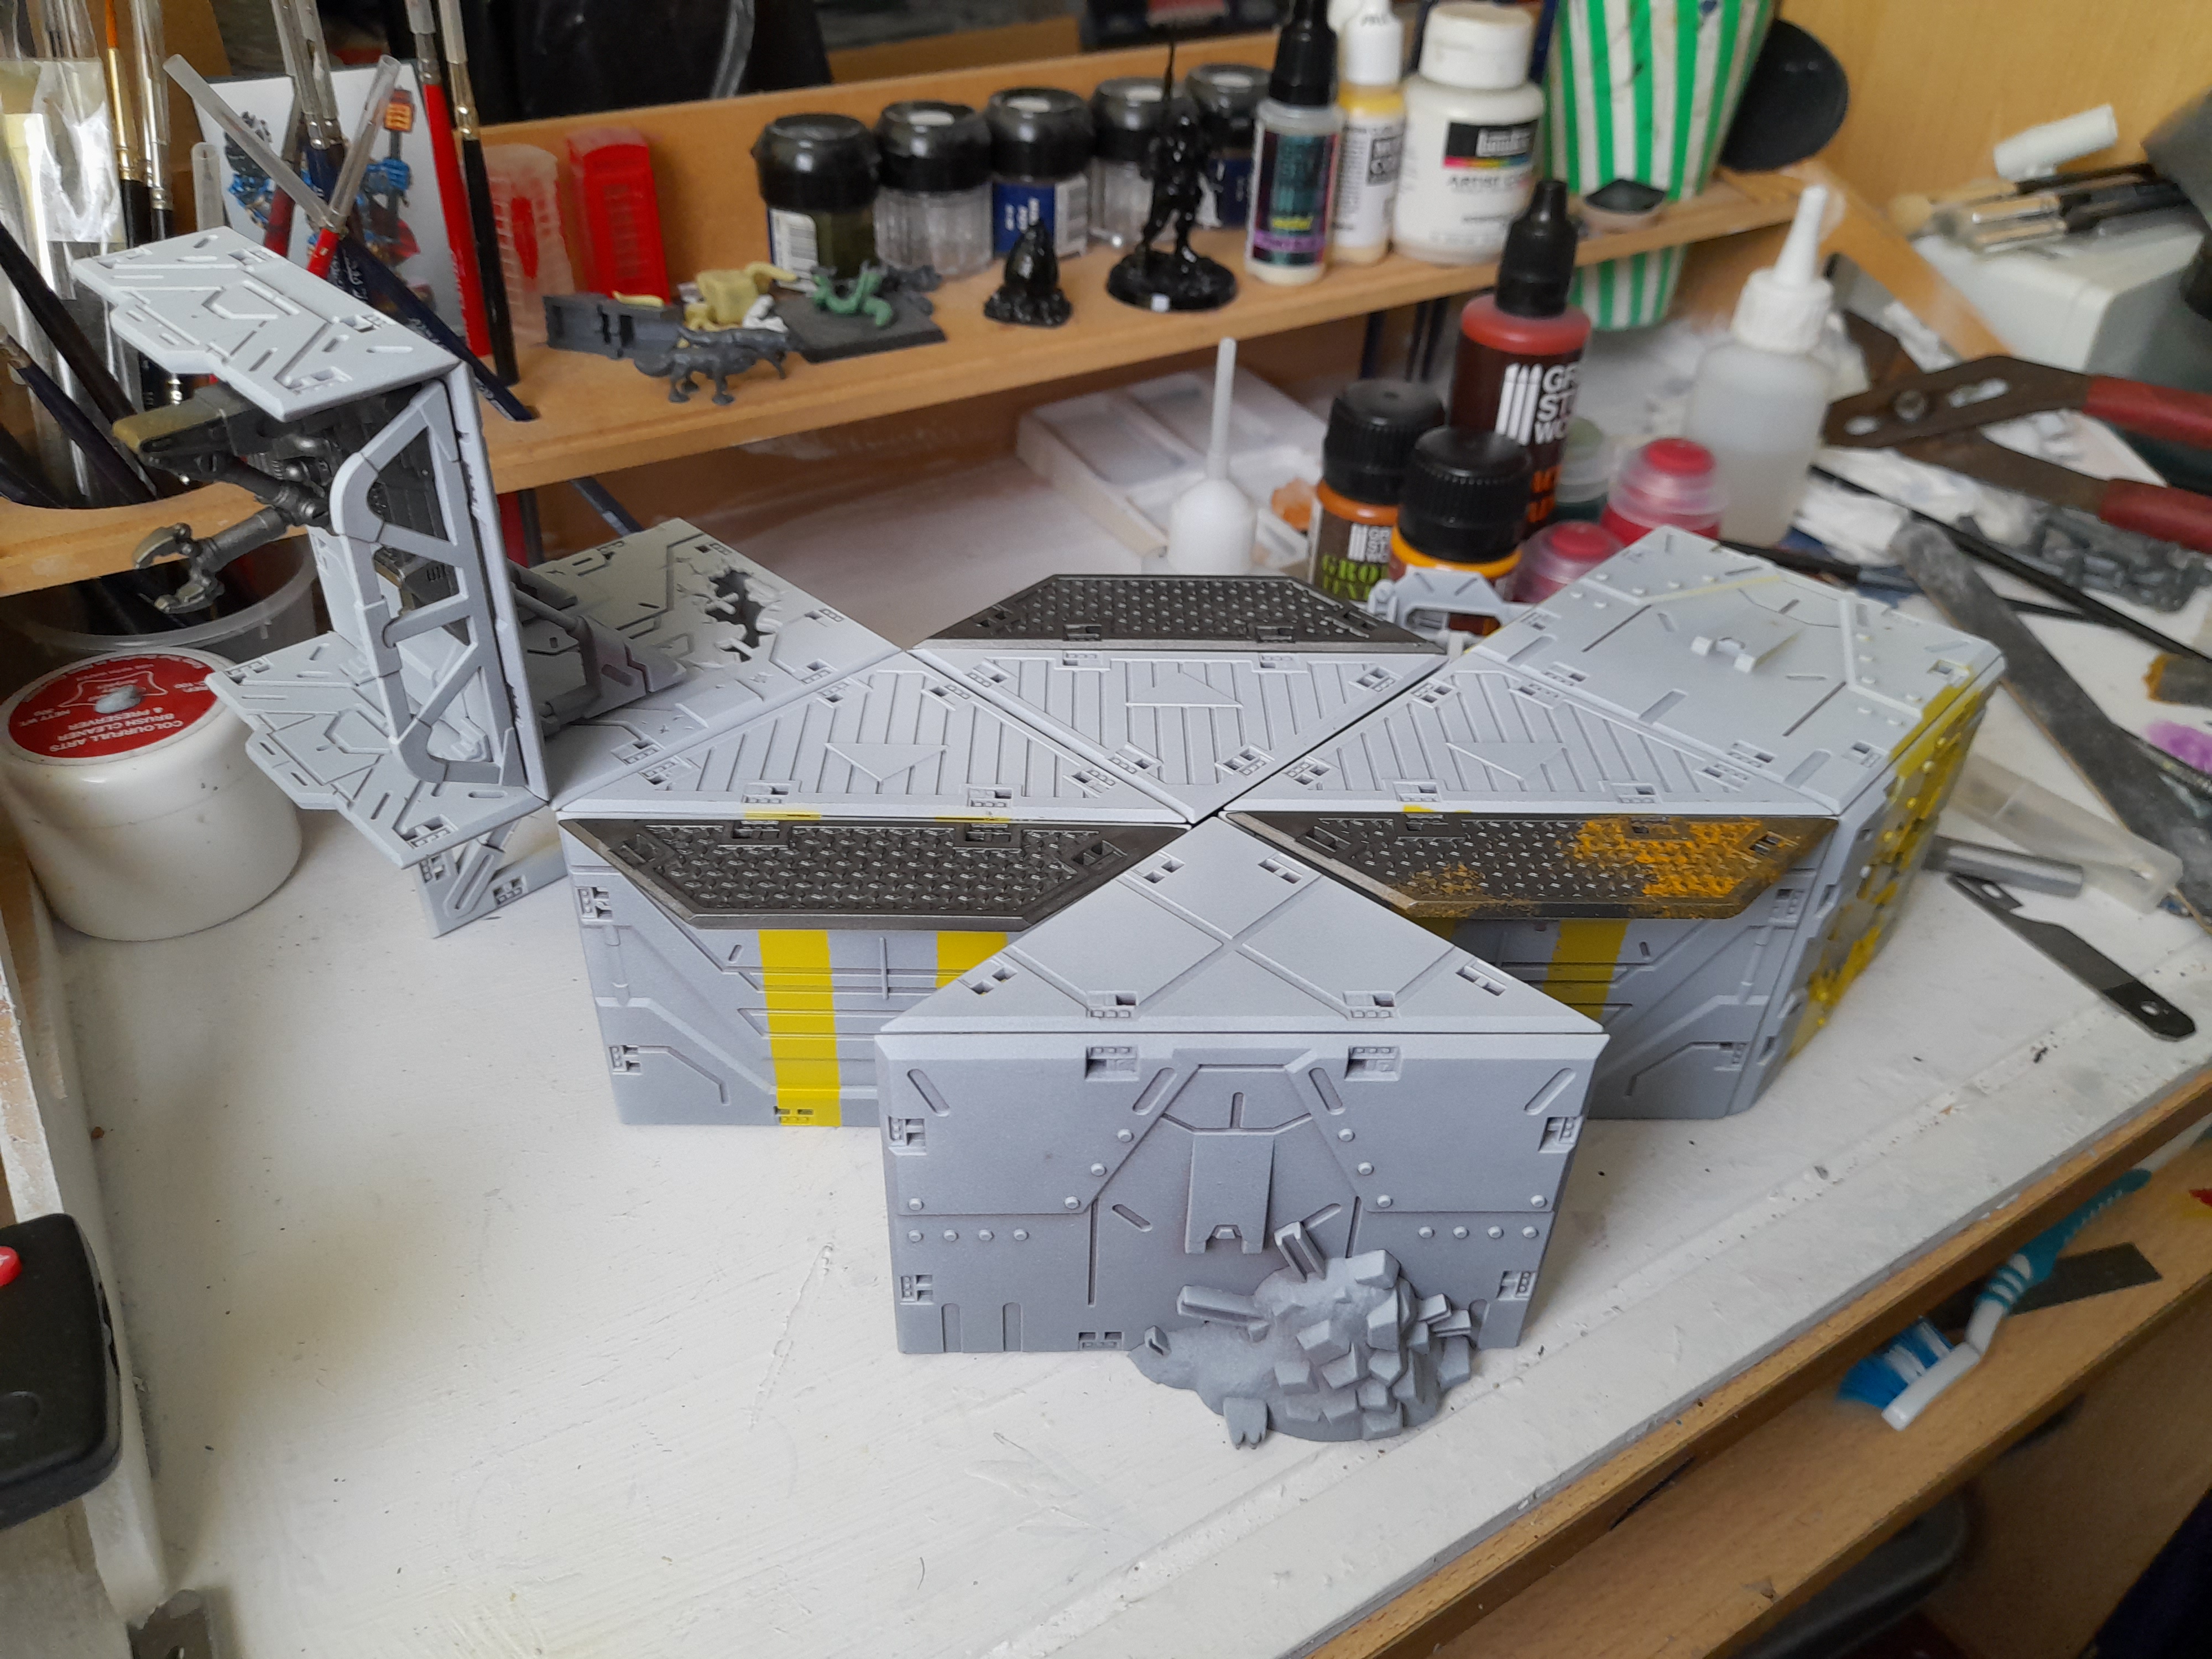
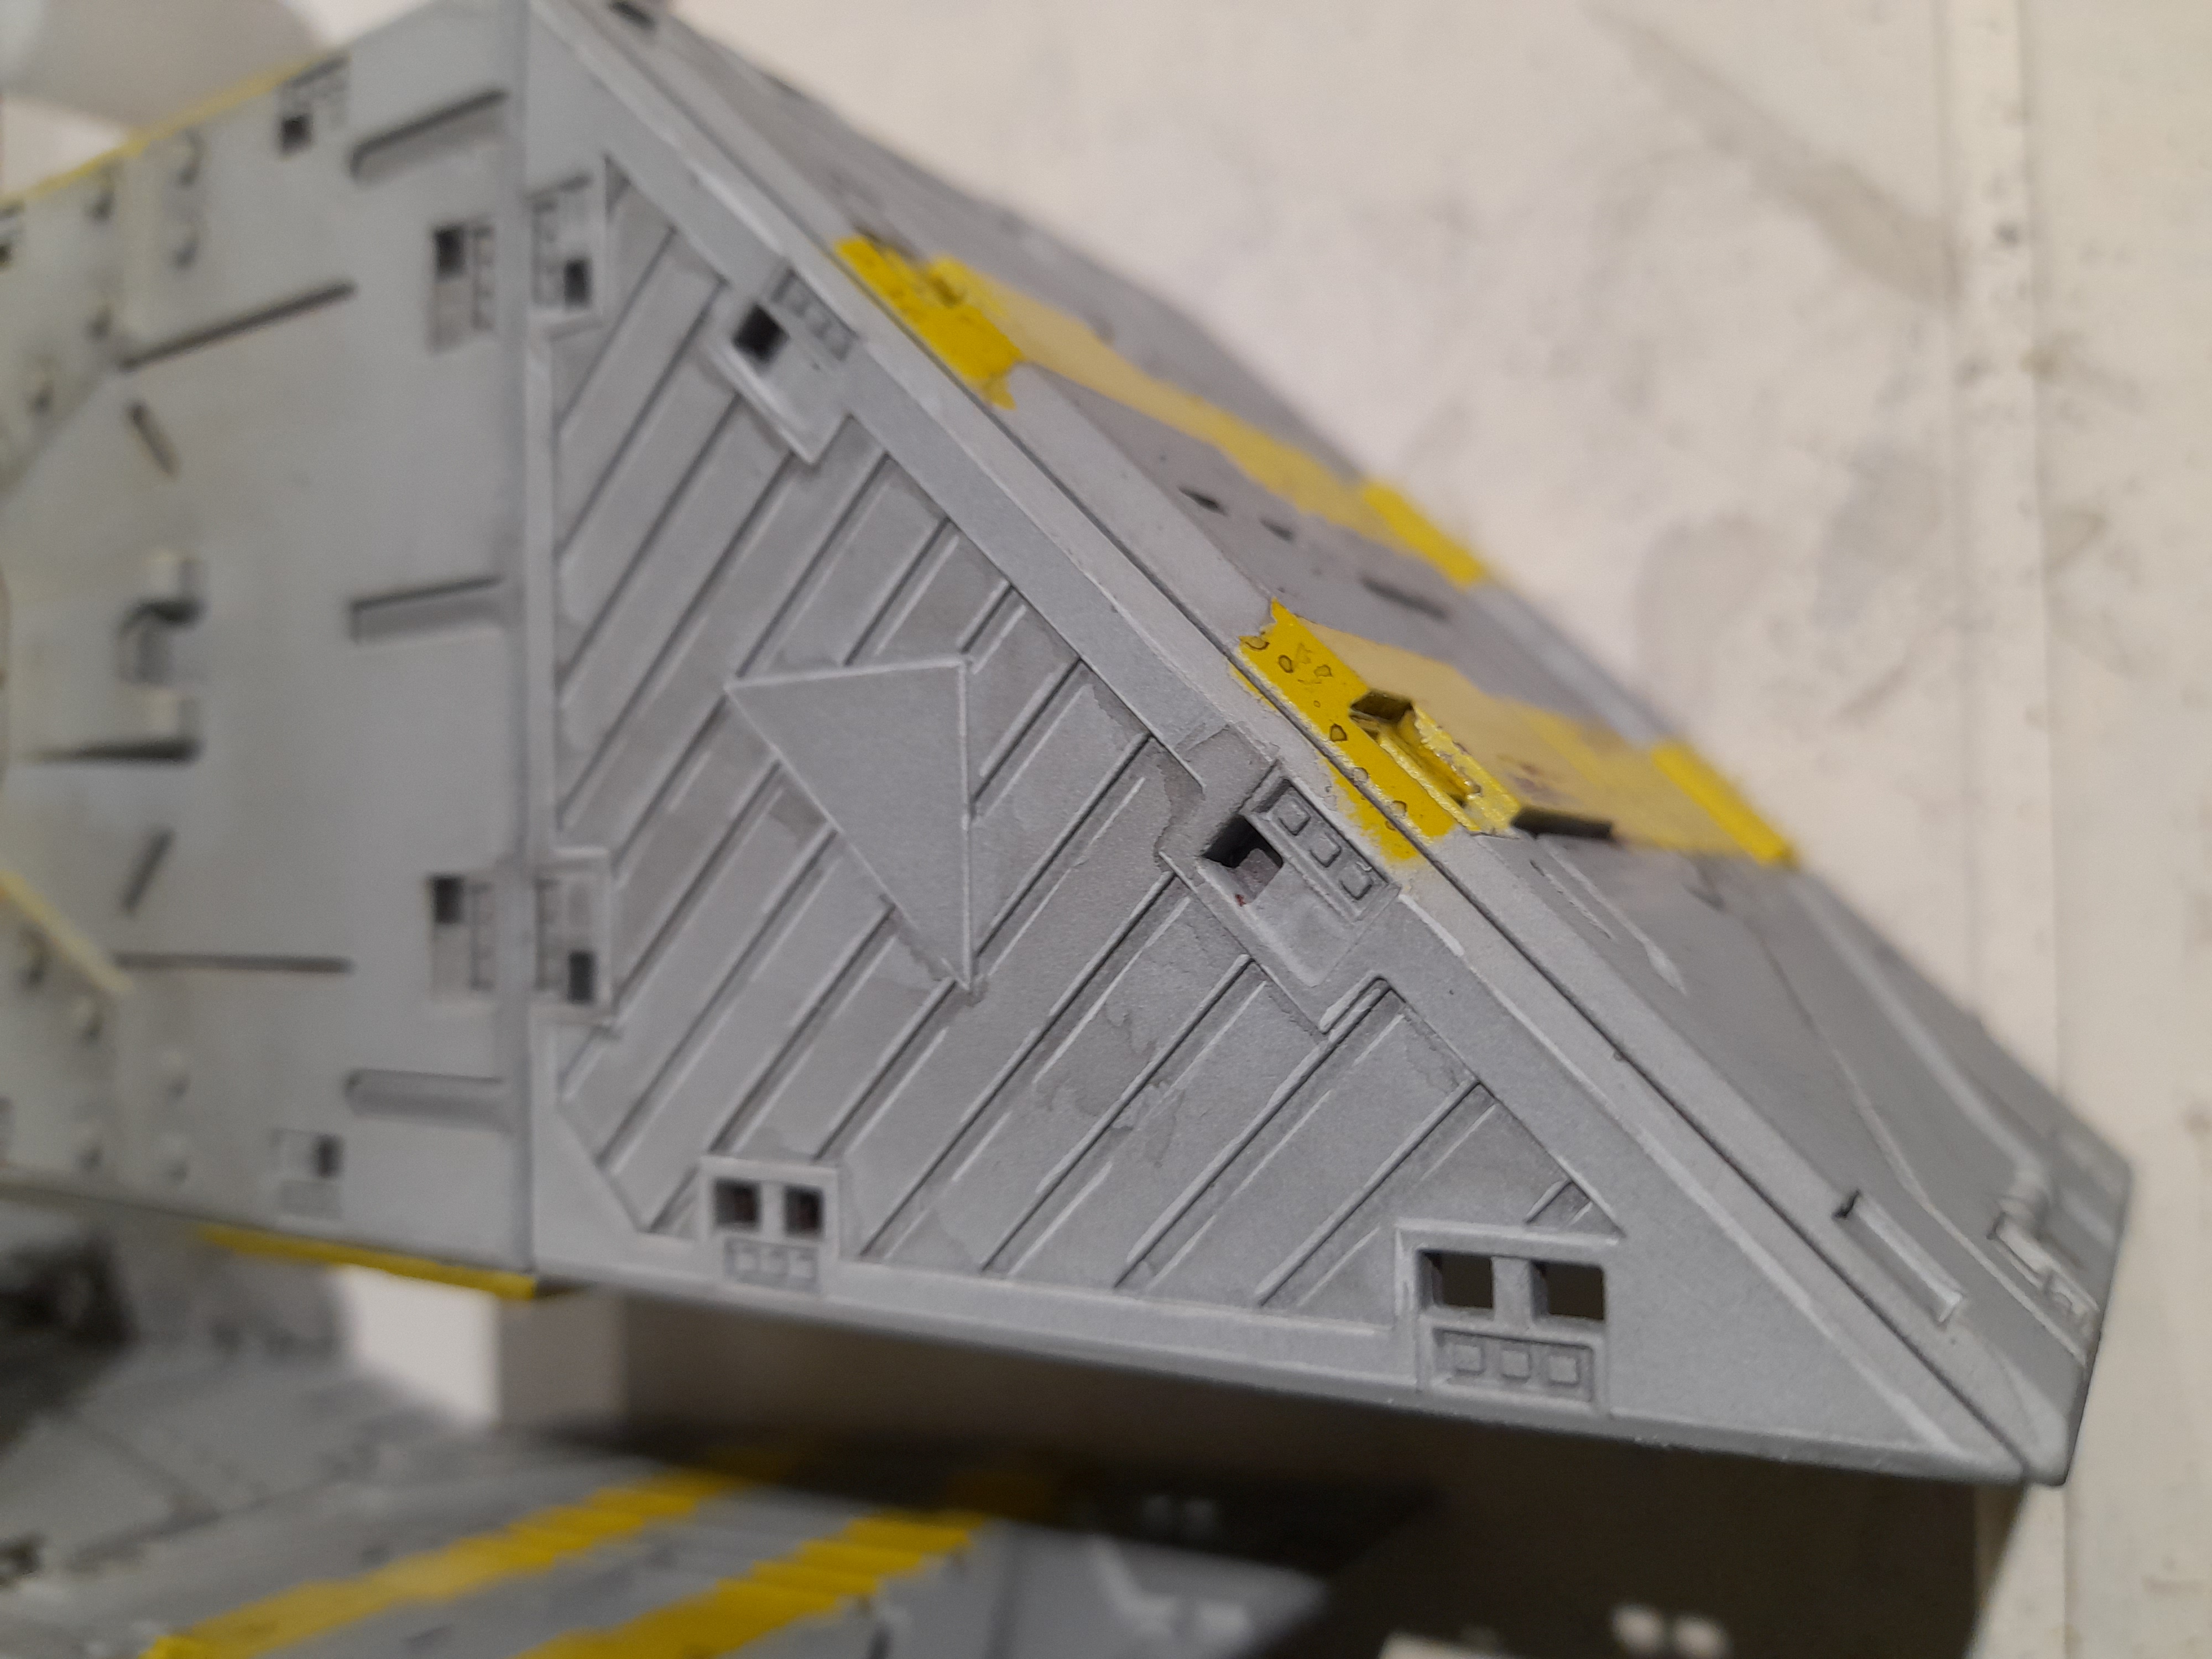
Then into the construction. I finally decided on a mix of a couple of designs.
Thinking back to my main Deadzone project I remembered my build plan was about modularity, so I opted to break down a couple of the designs into parts, and working out extra pieces that would be needed to make it work.
To paraphrase, and in the voice of, Bardic Broadcasts (regarding Heroquest)… ‘Look at the Modularity’ 😊
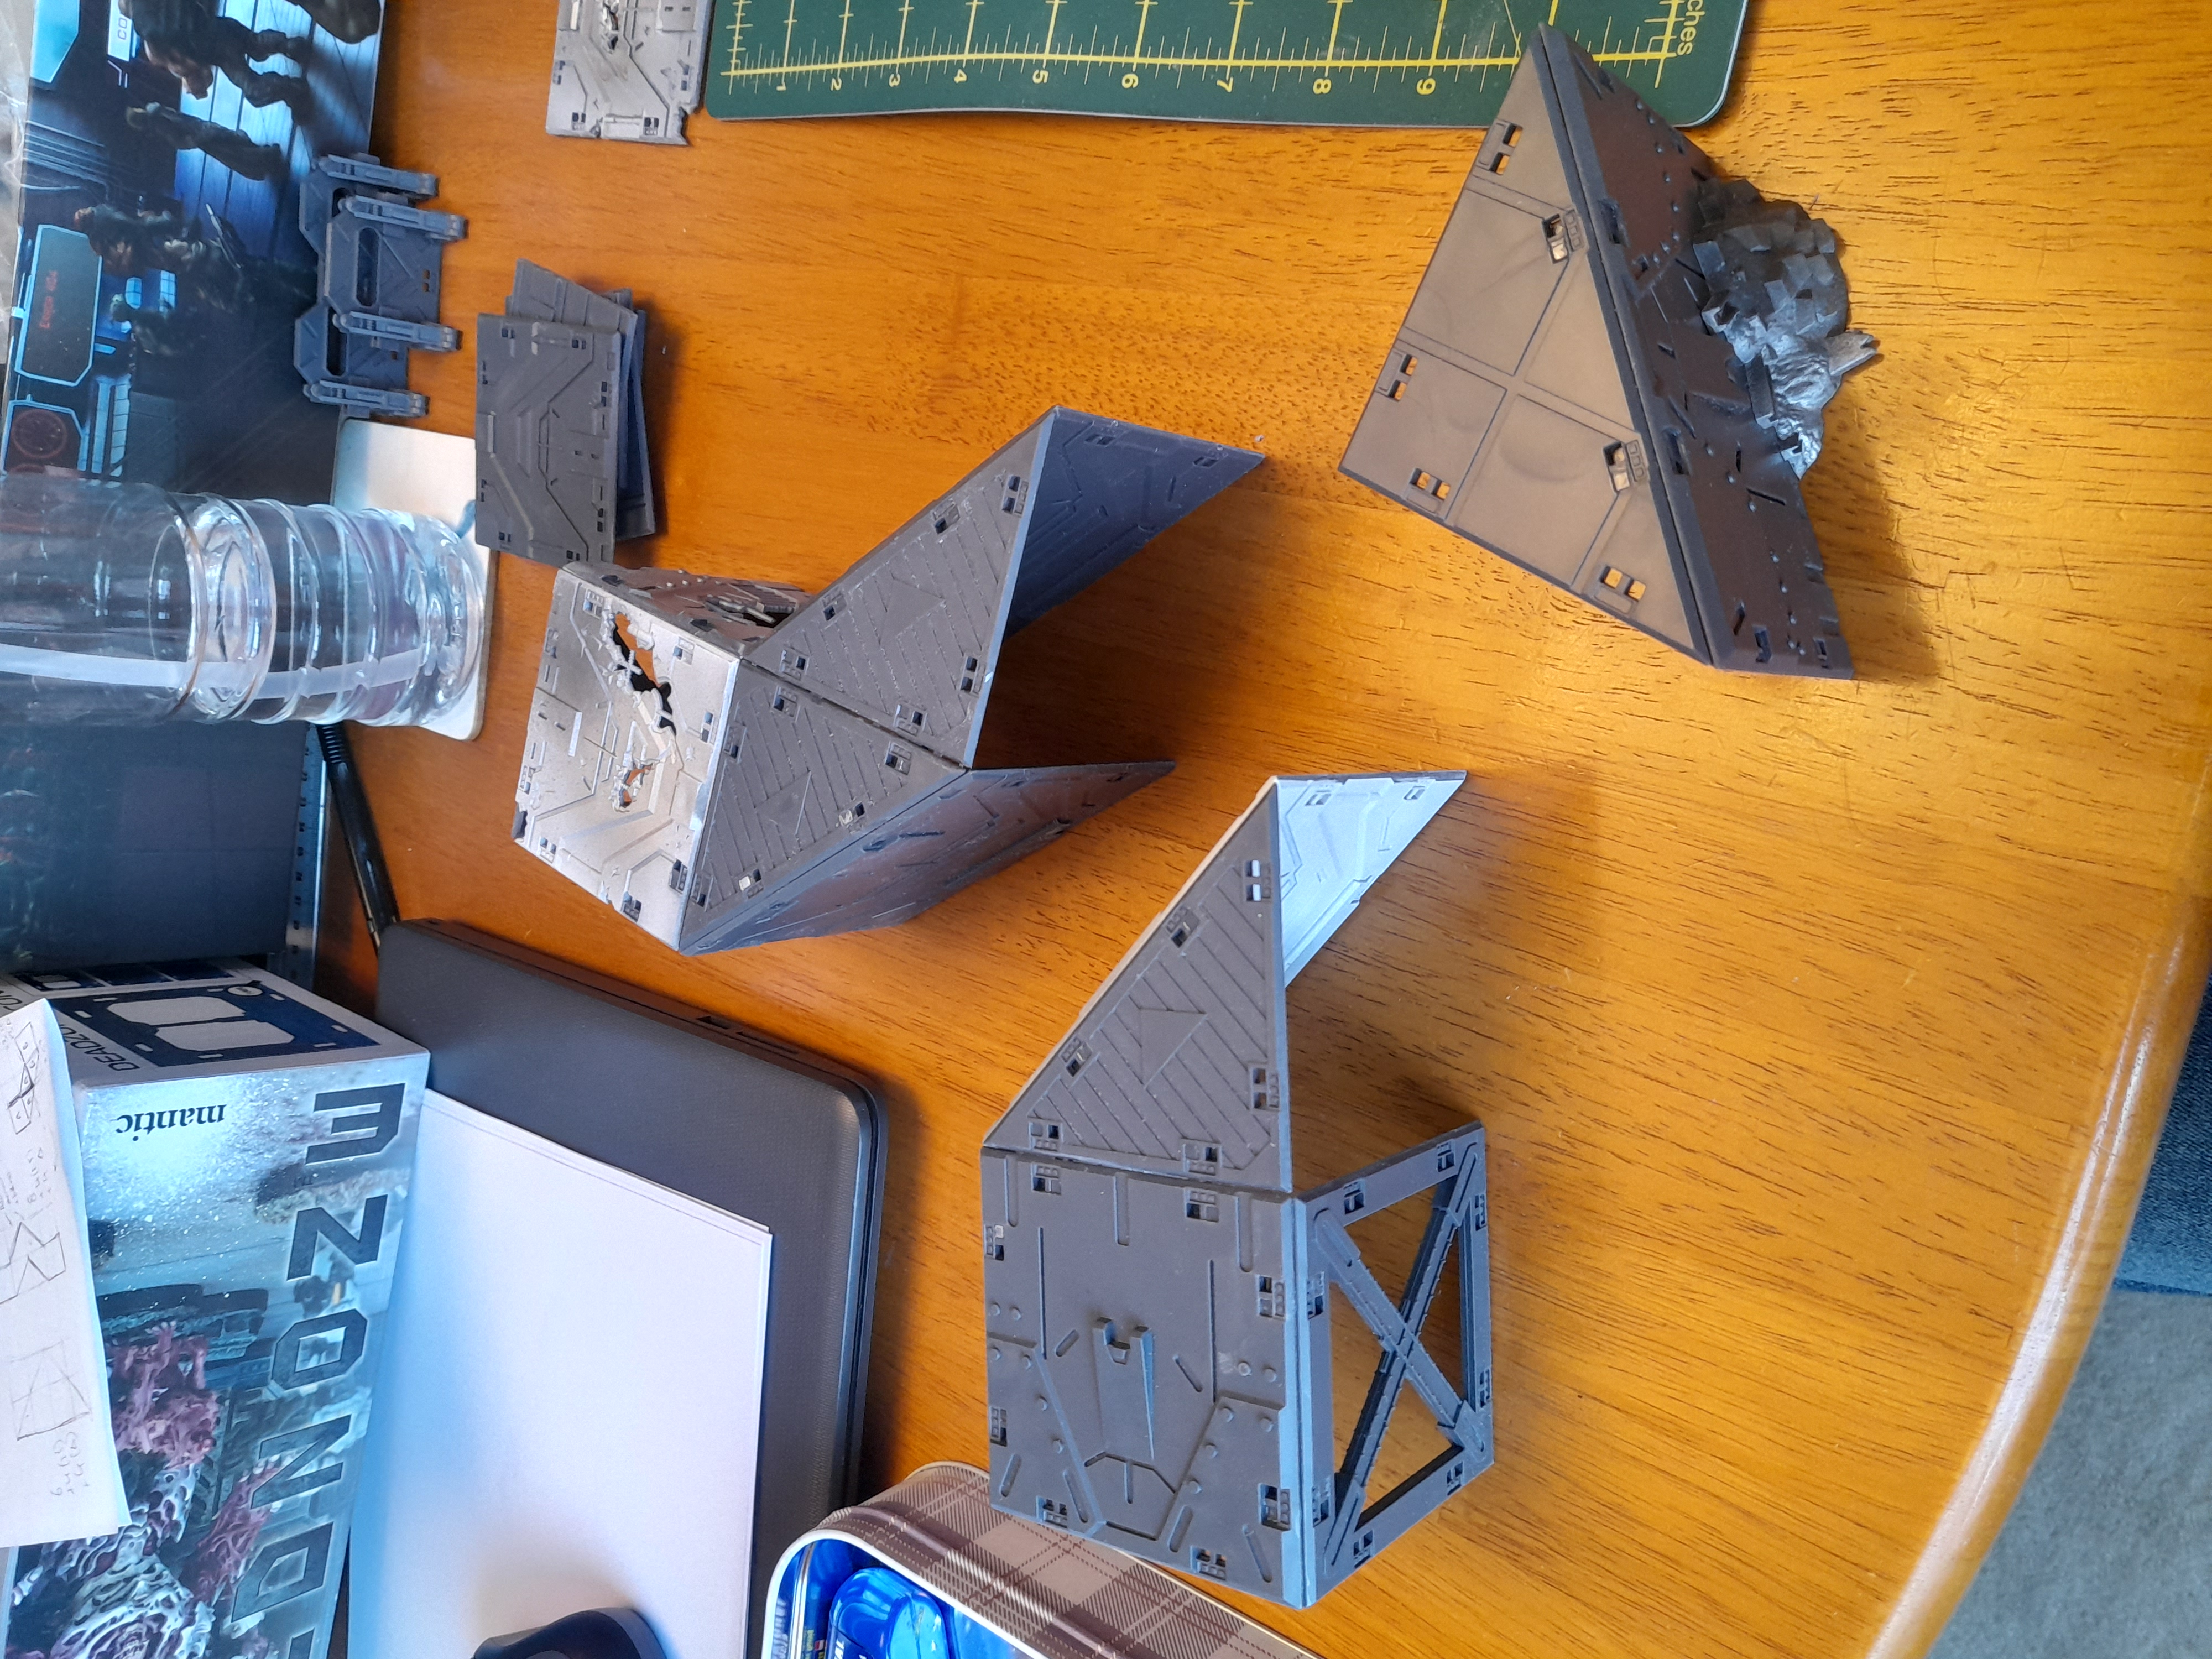
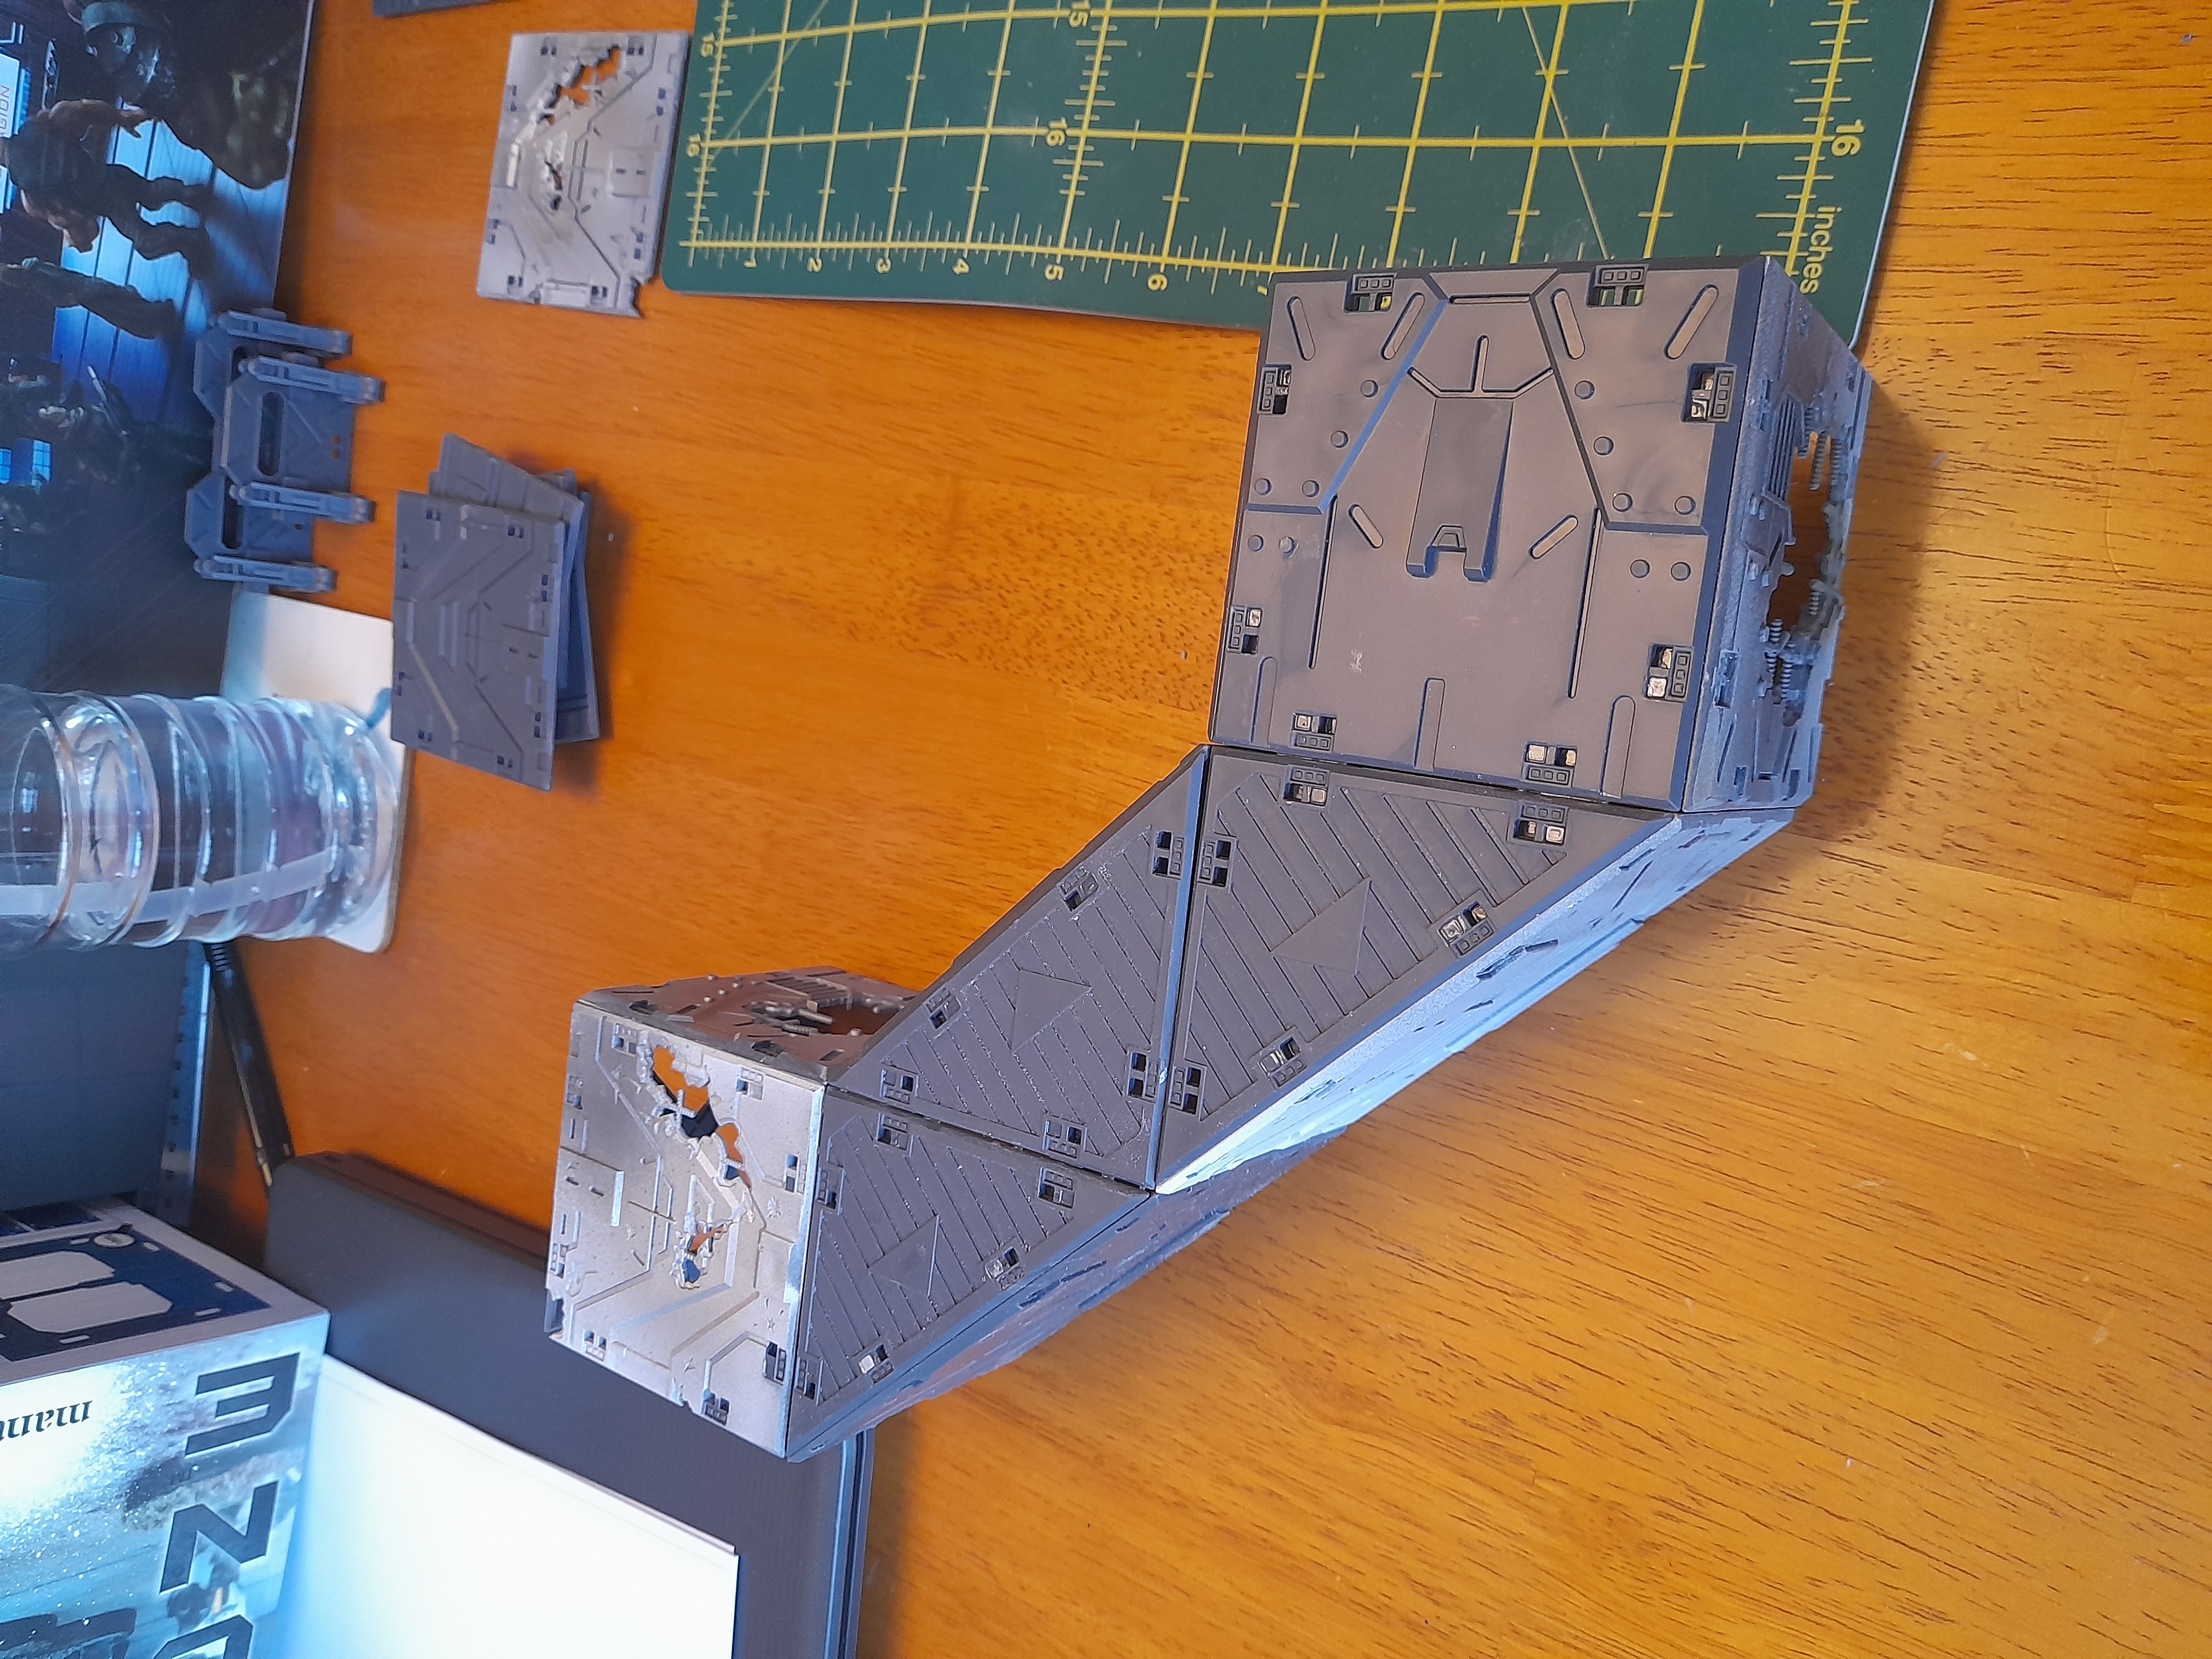
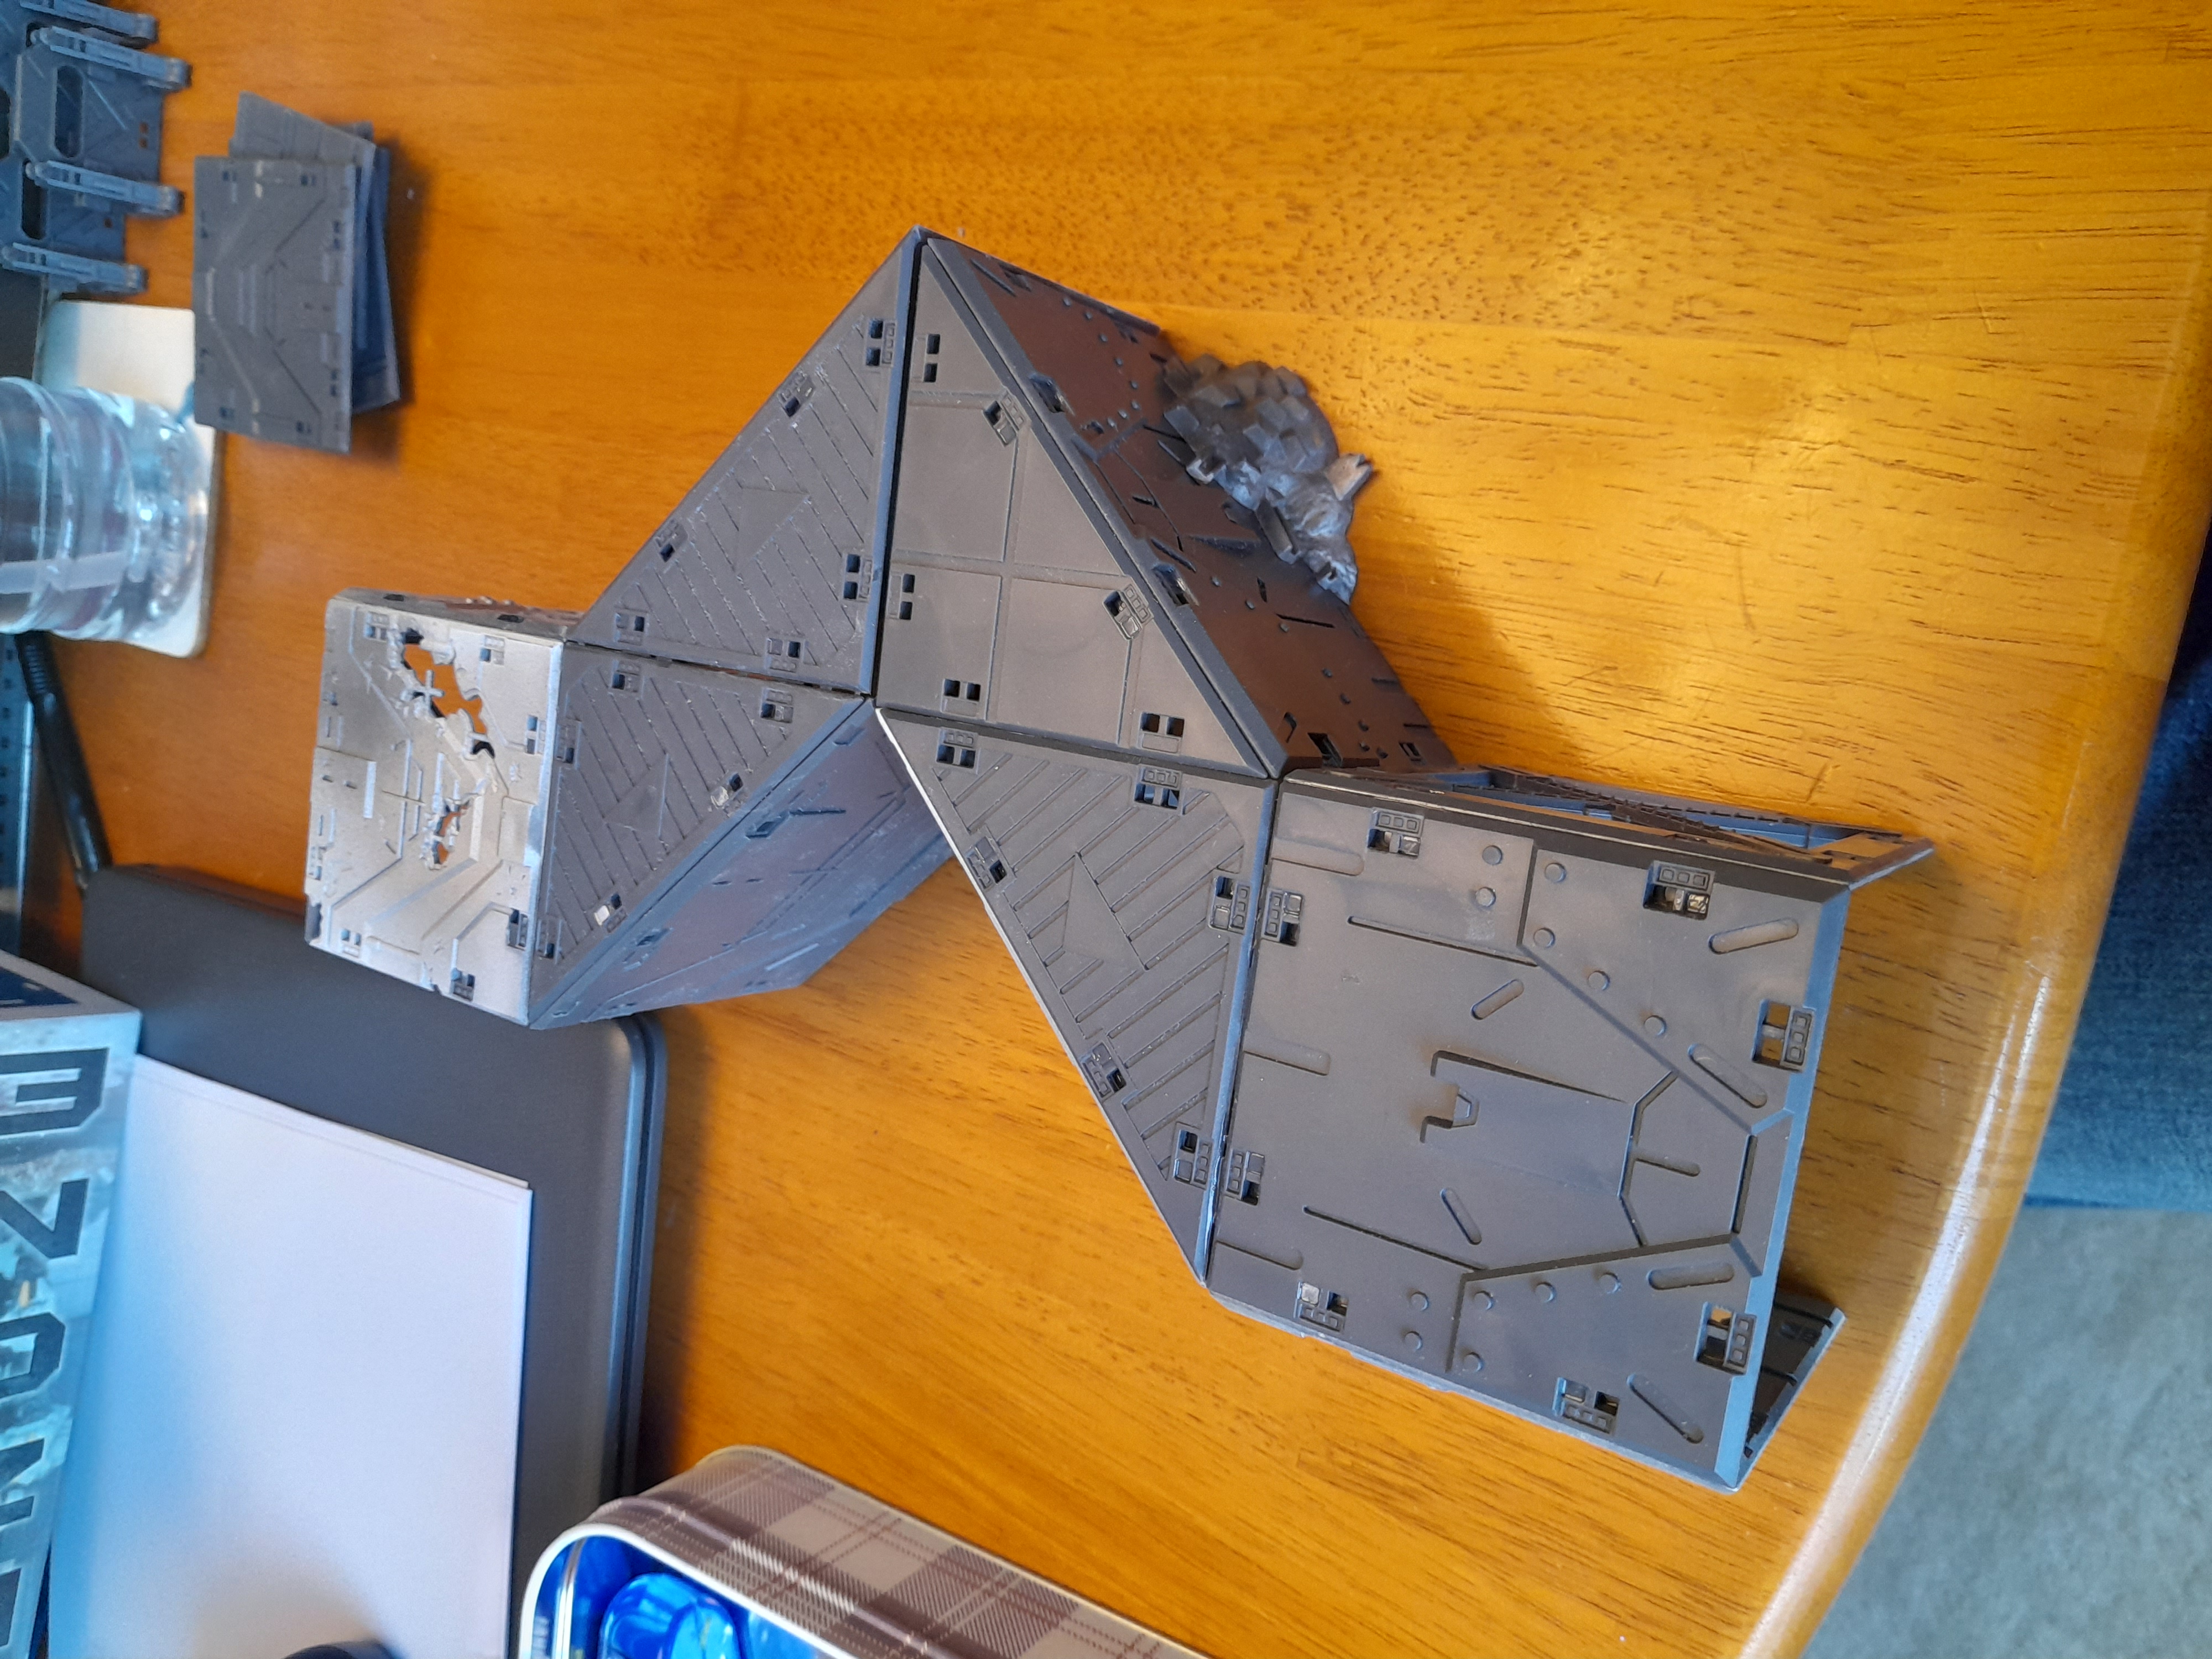
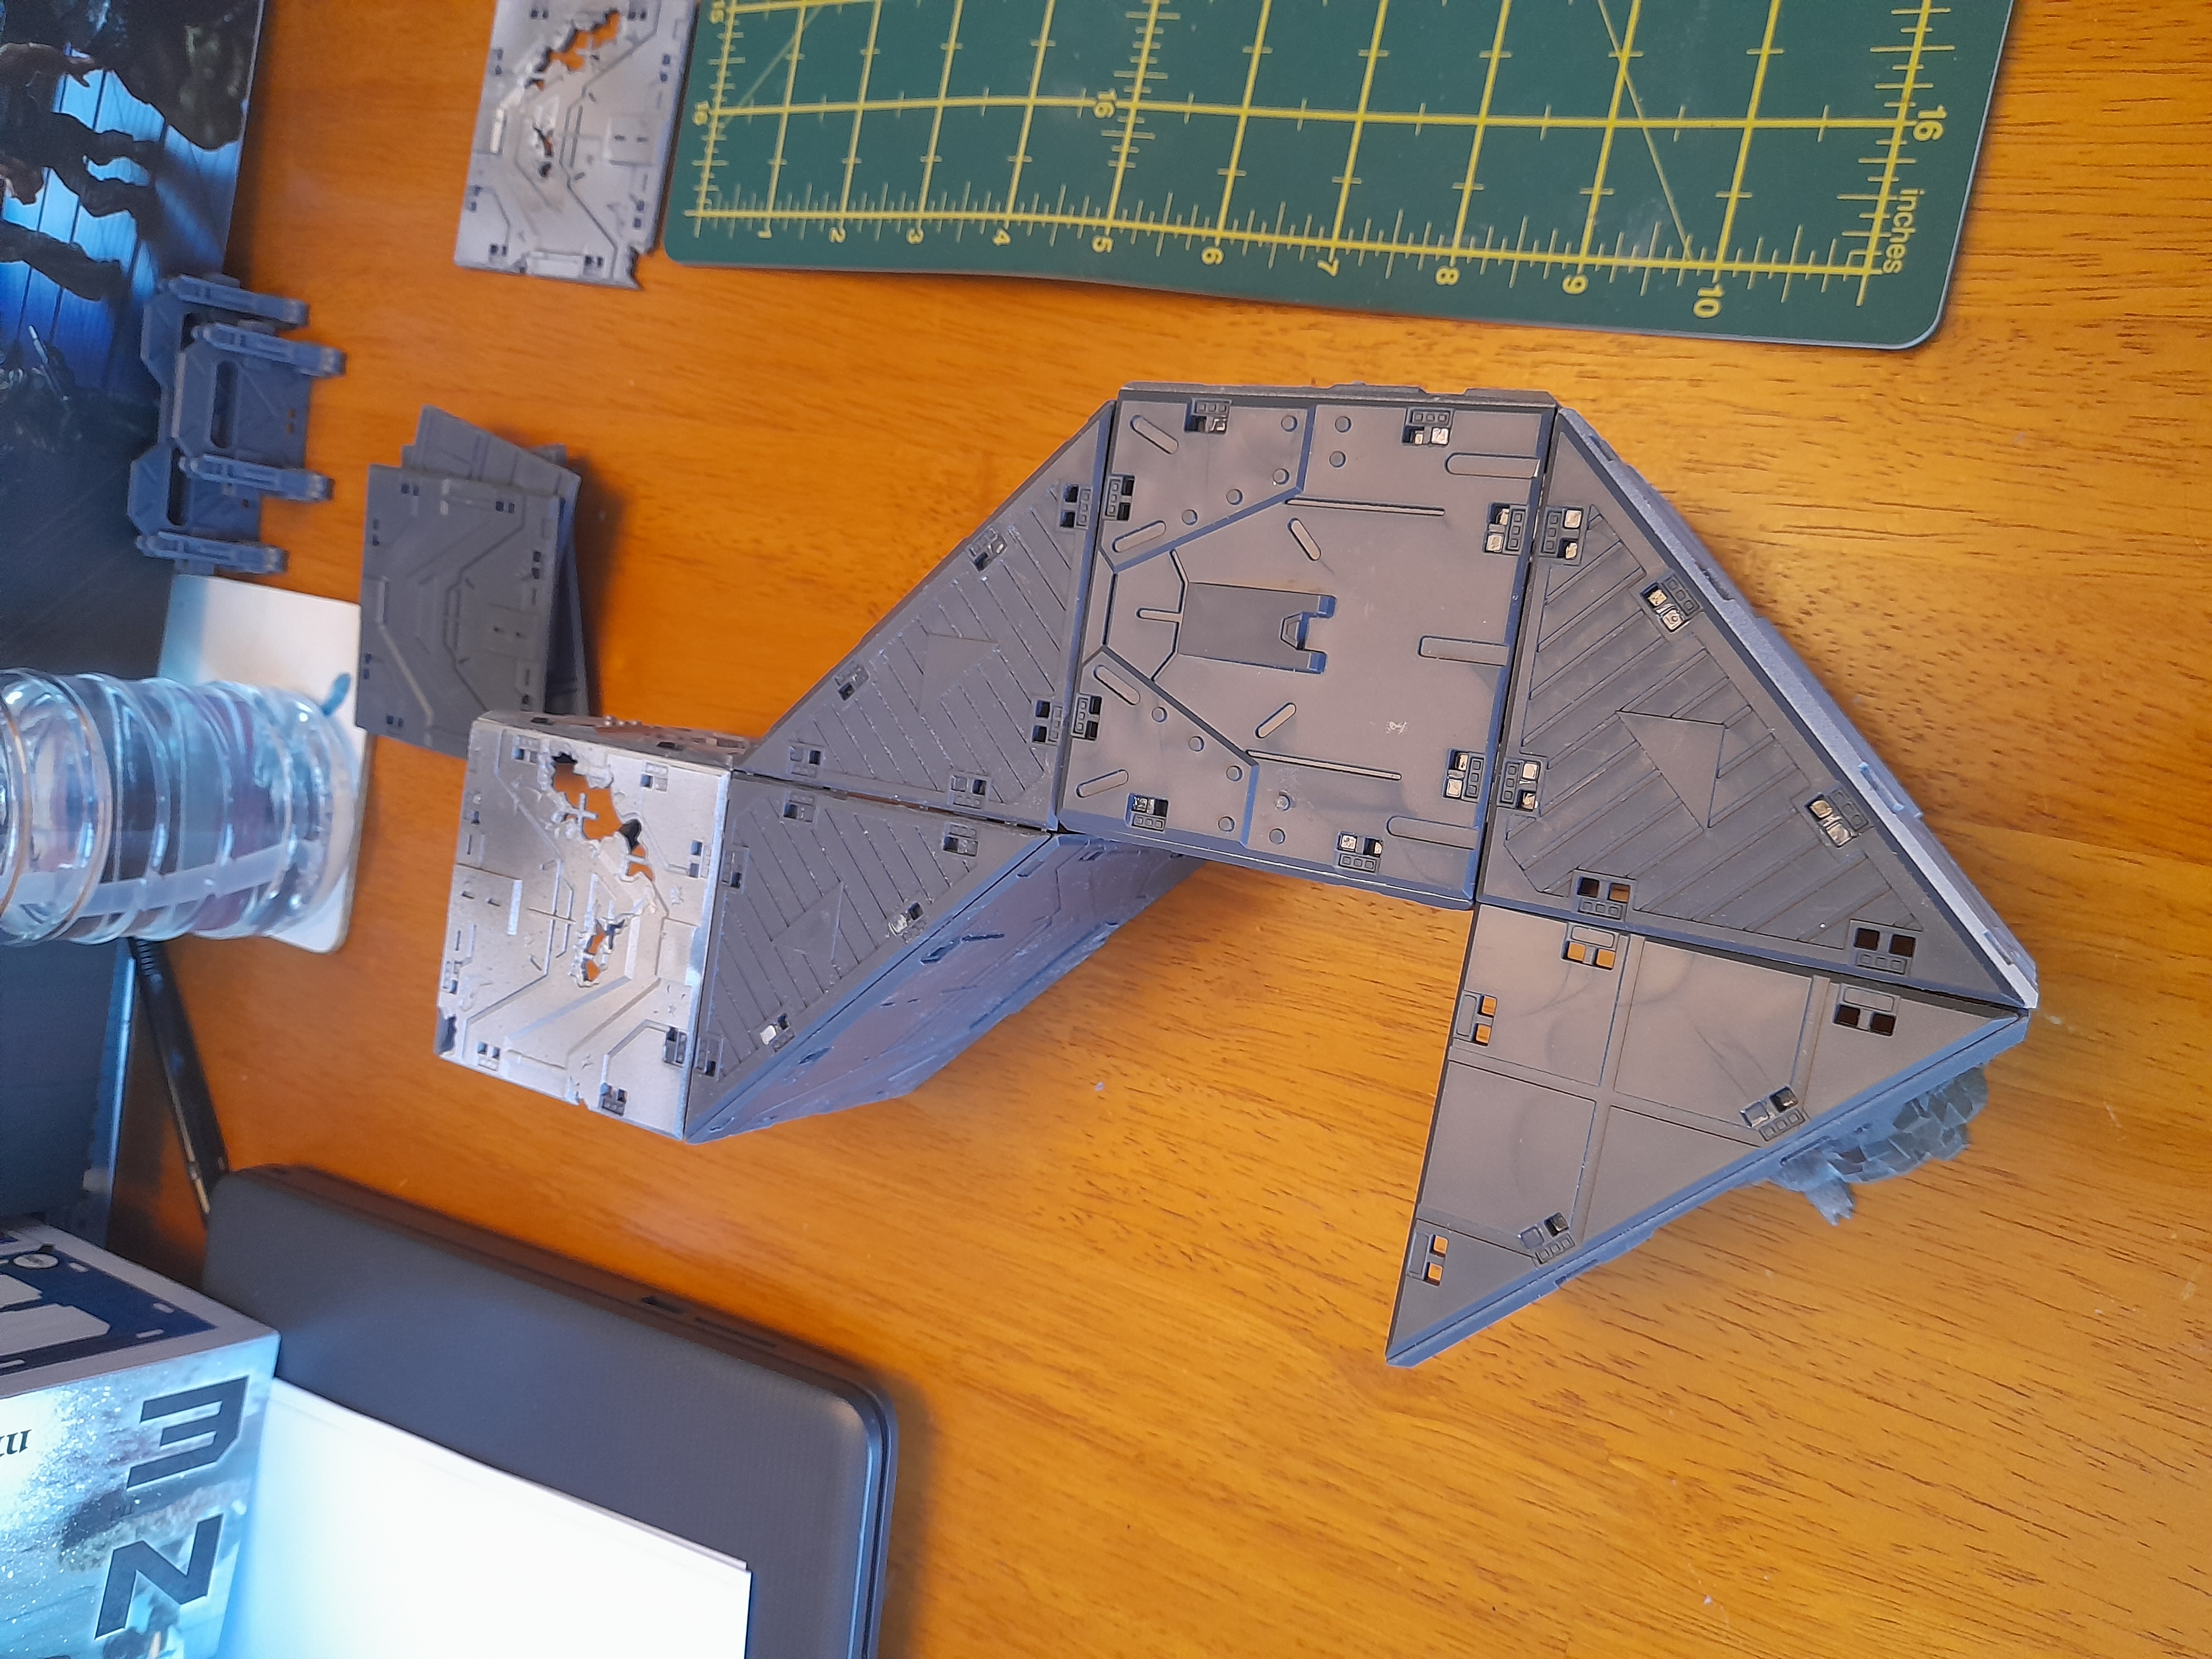
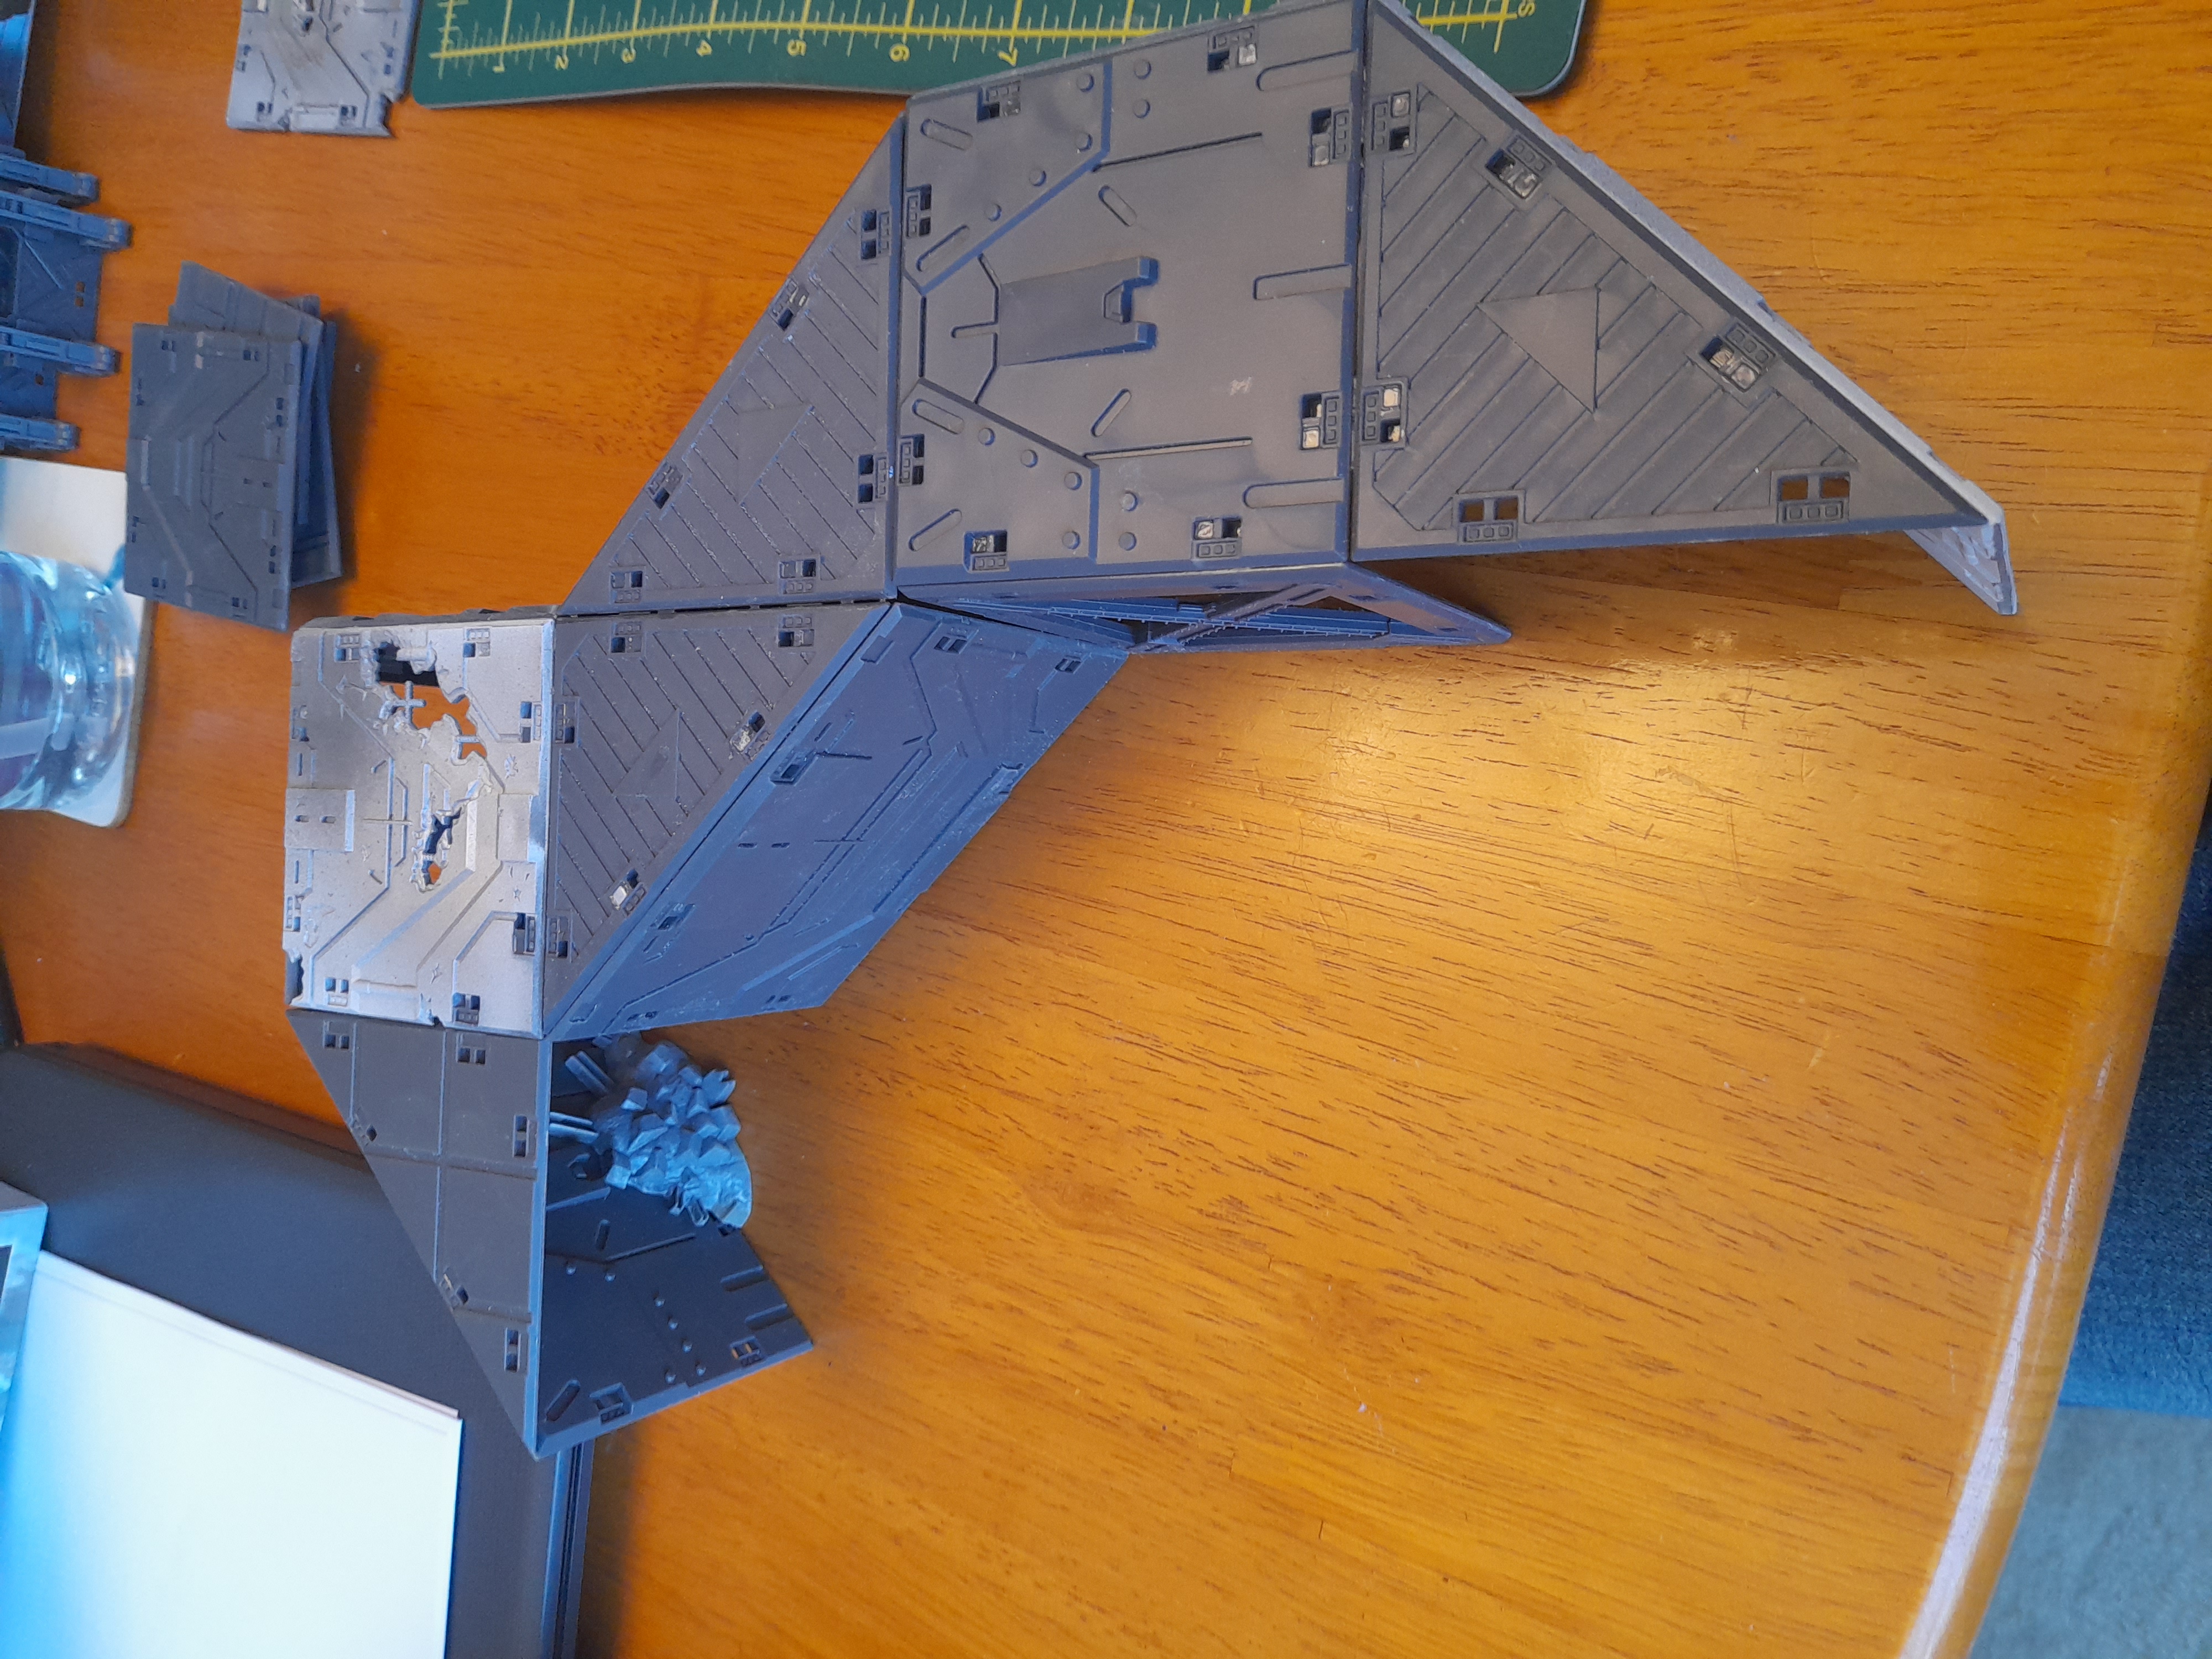
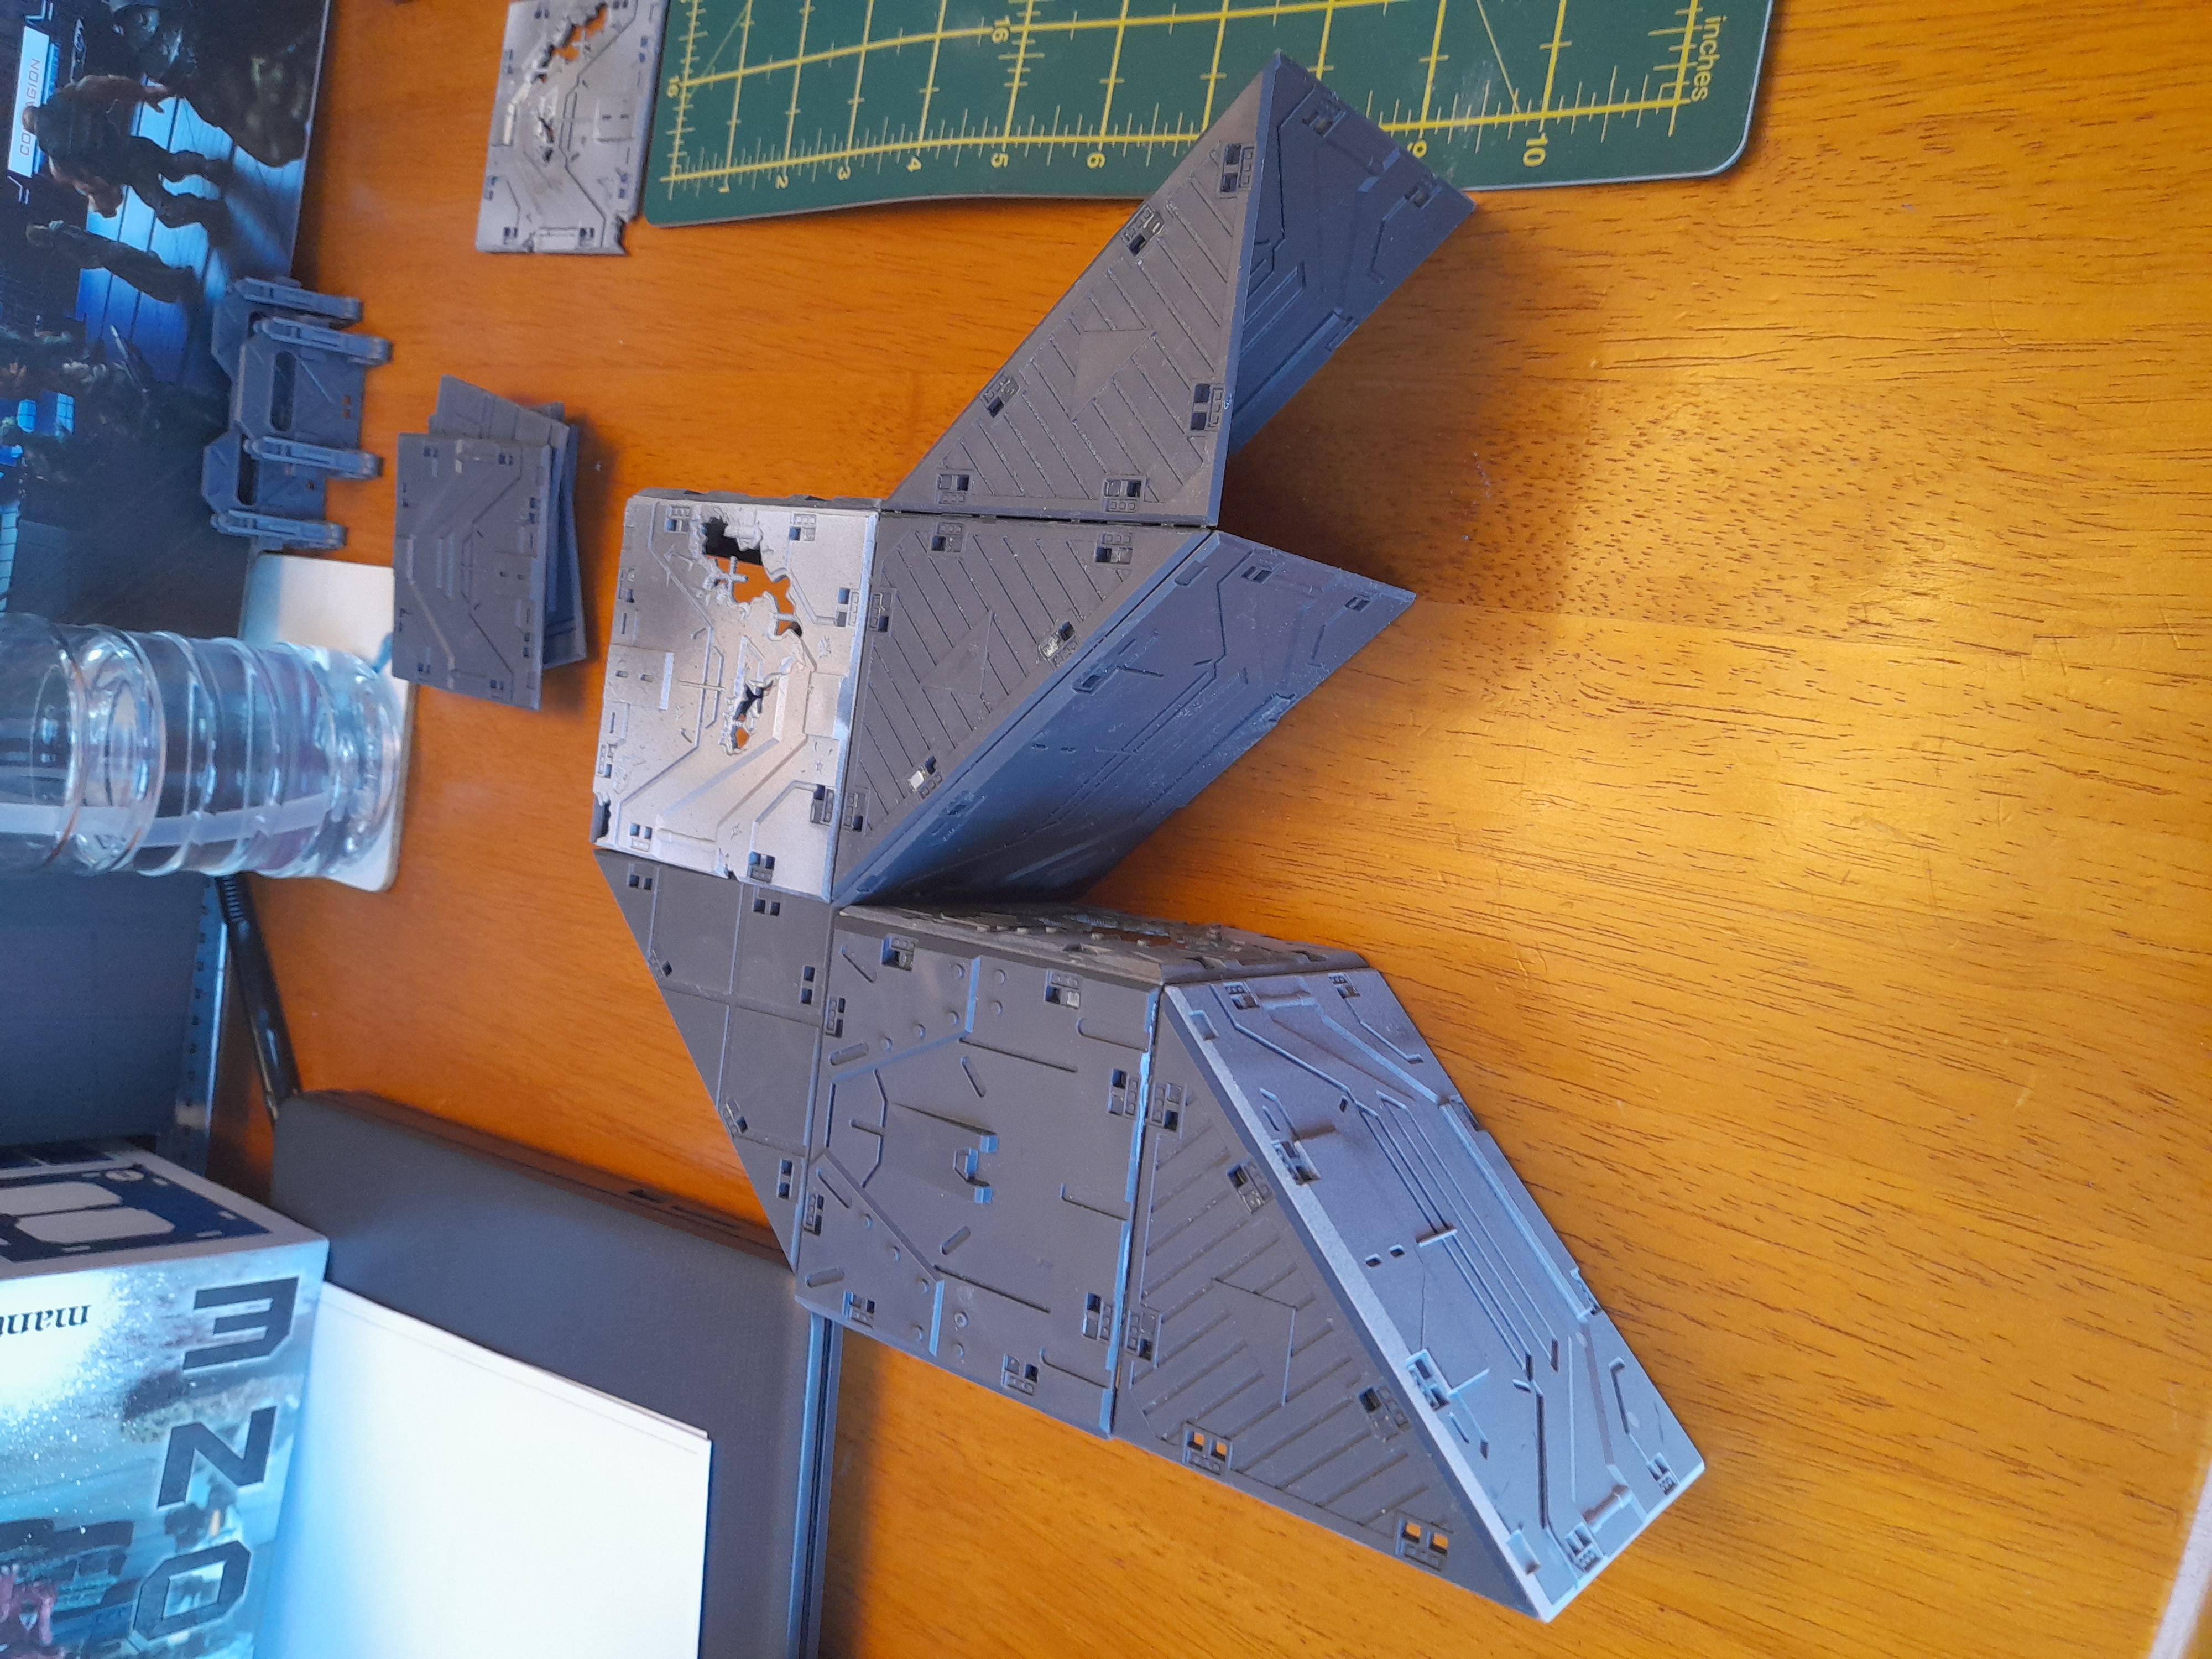
Since I had no doors I have just left open sections to represent entrances. This does mean that I actually used less of the 3” tiles than planned, so have some left over for potential other construction.
However, I don’t want to rush in and just use them up, so I will think on this more.
Mordheim designs
11th October 2023
With work and other things I haven’t made any significant further progress, so may be a bit of a hard push at the end of the month.
To try to keep a little focus on the terrain work I laid out a few rough designs for some Mordheim style buildings that could be used for several fantasy games.
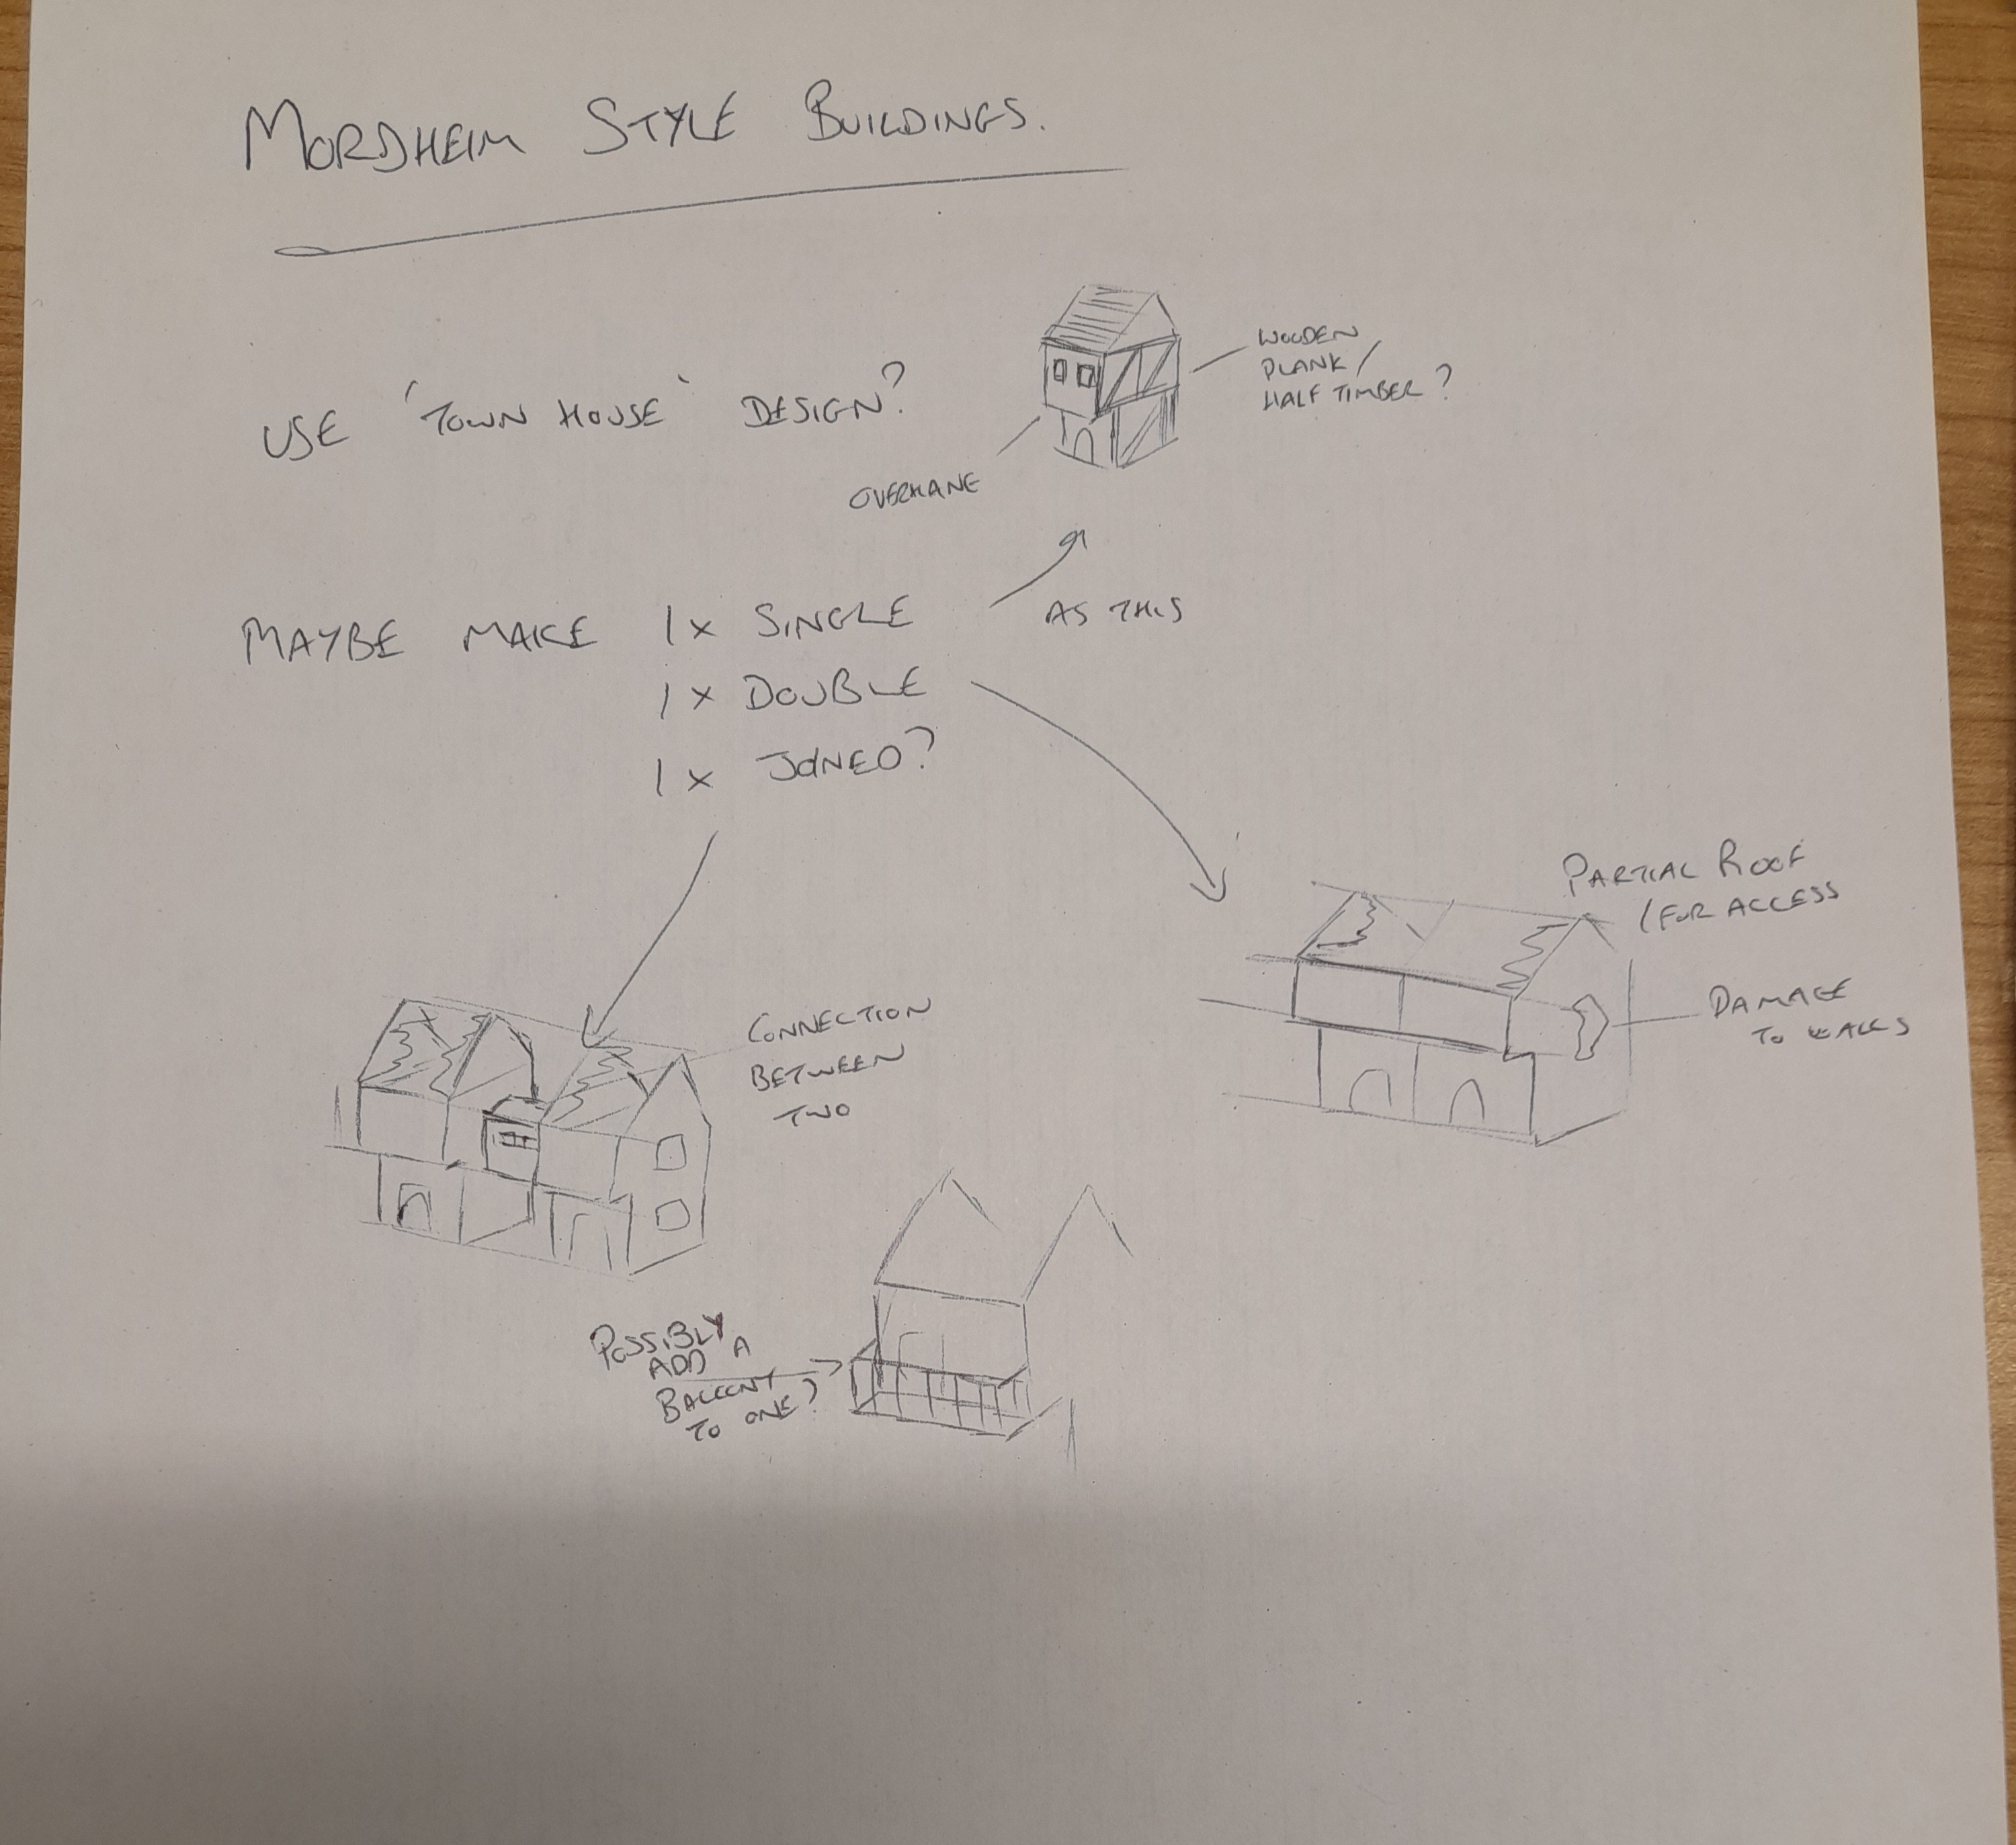
These will be constructed using foam core board, balsa wood, match sticks and coffee stirring sticks as the main materials.


Adding these to the existing work initially seems like a bit of a mistake seeing how far I have got so far – but I figure that if I get creatively stuck on the Deadzone I can come across to these and hopefully still get some overall progress – we will see how well that pans out when it comes to the end of the month 😊
Terrain Progress…. Rattle cans don’t last very long
16th October 2023
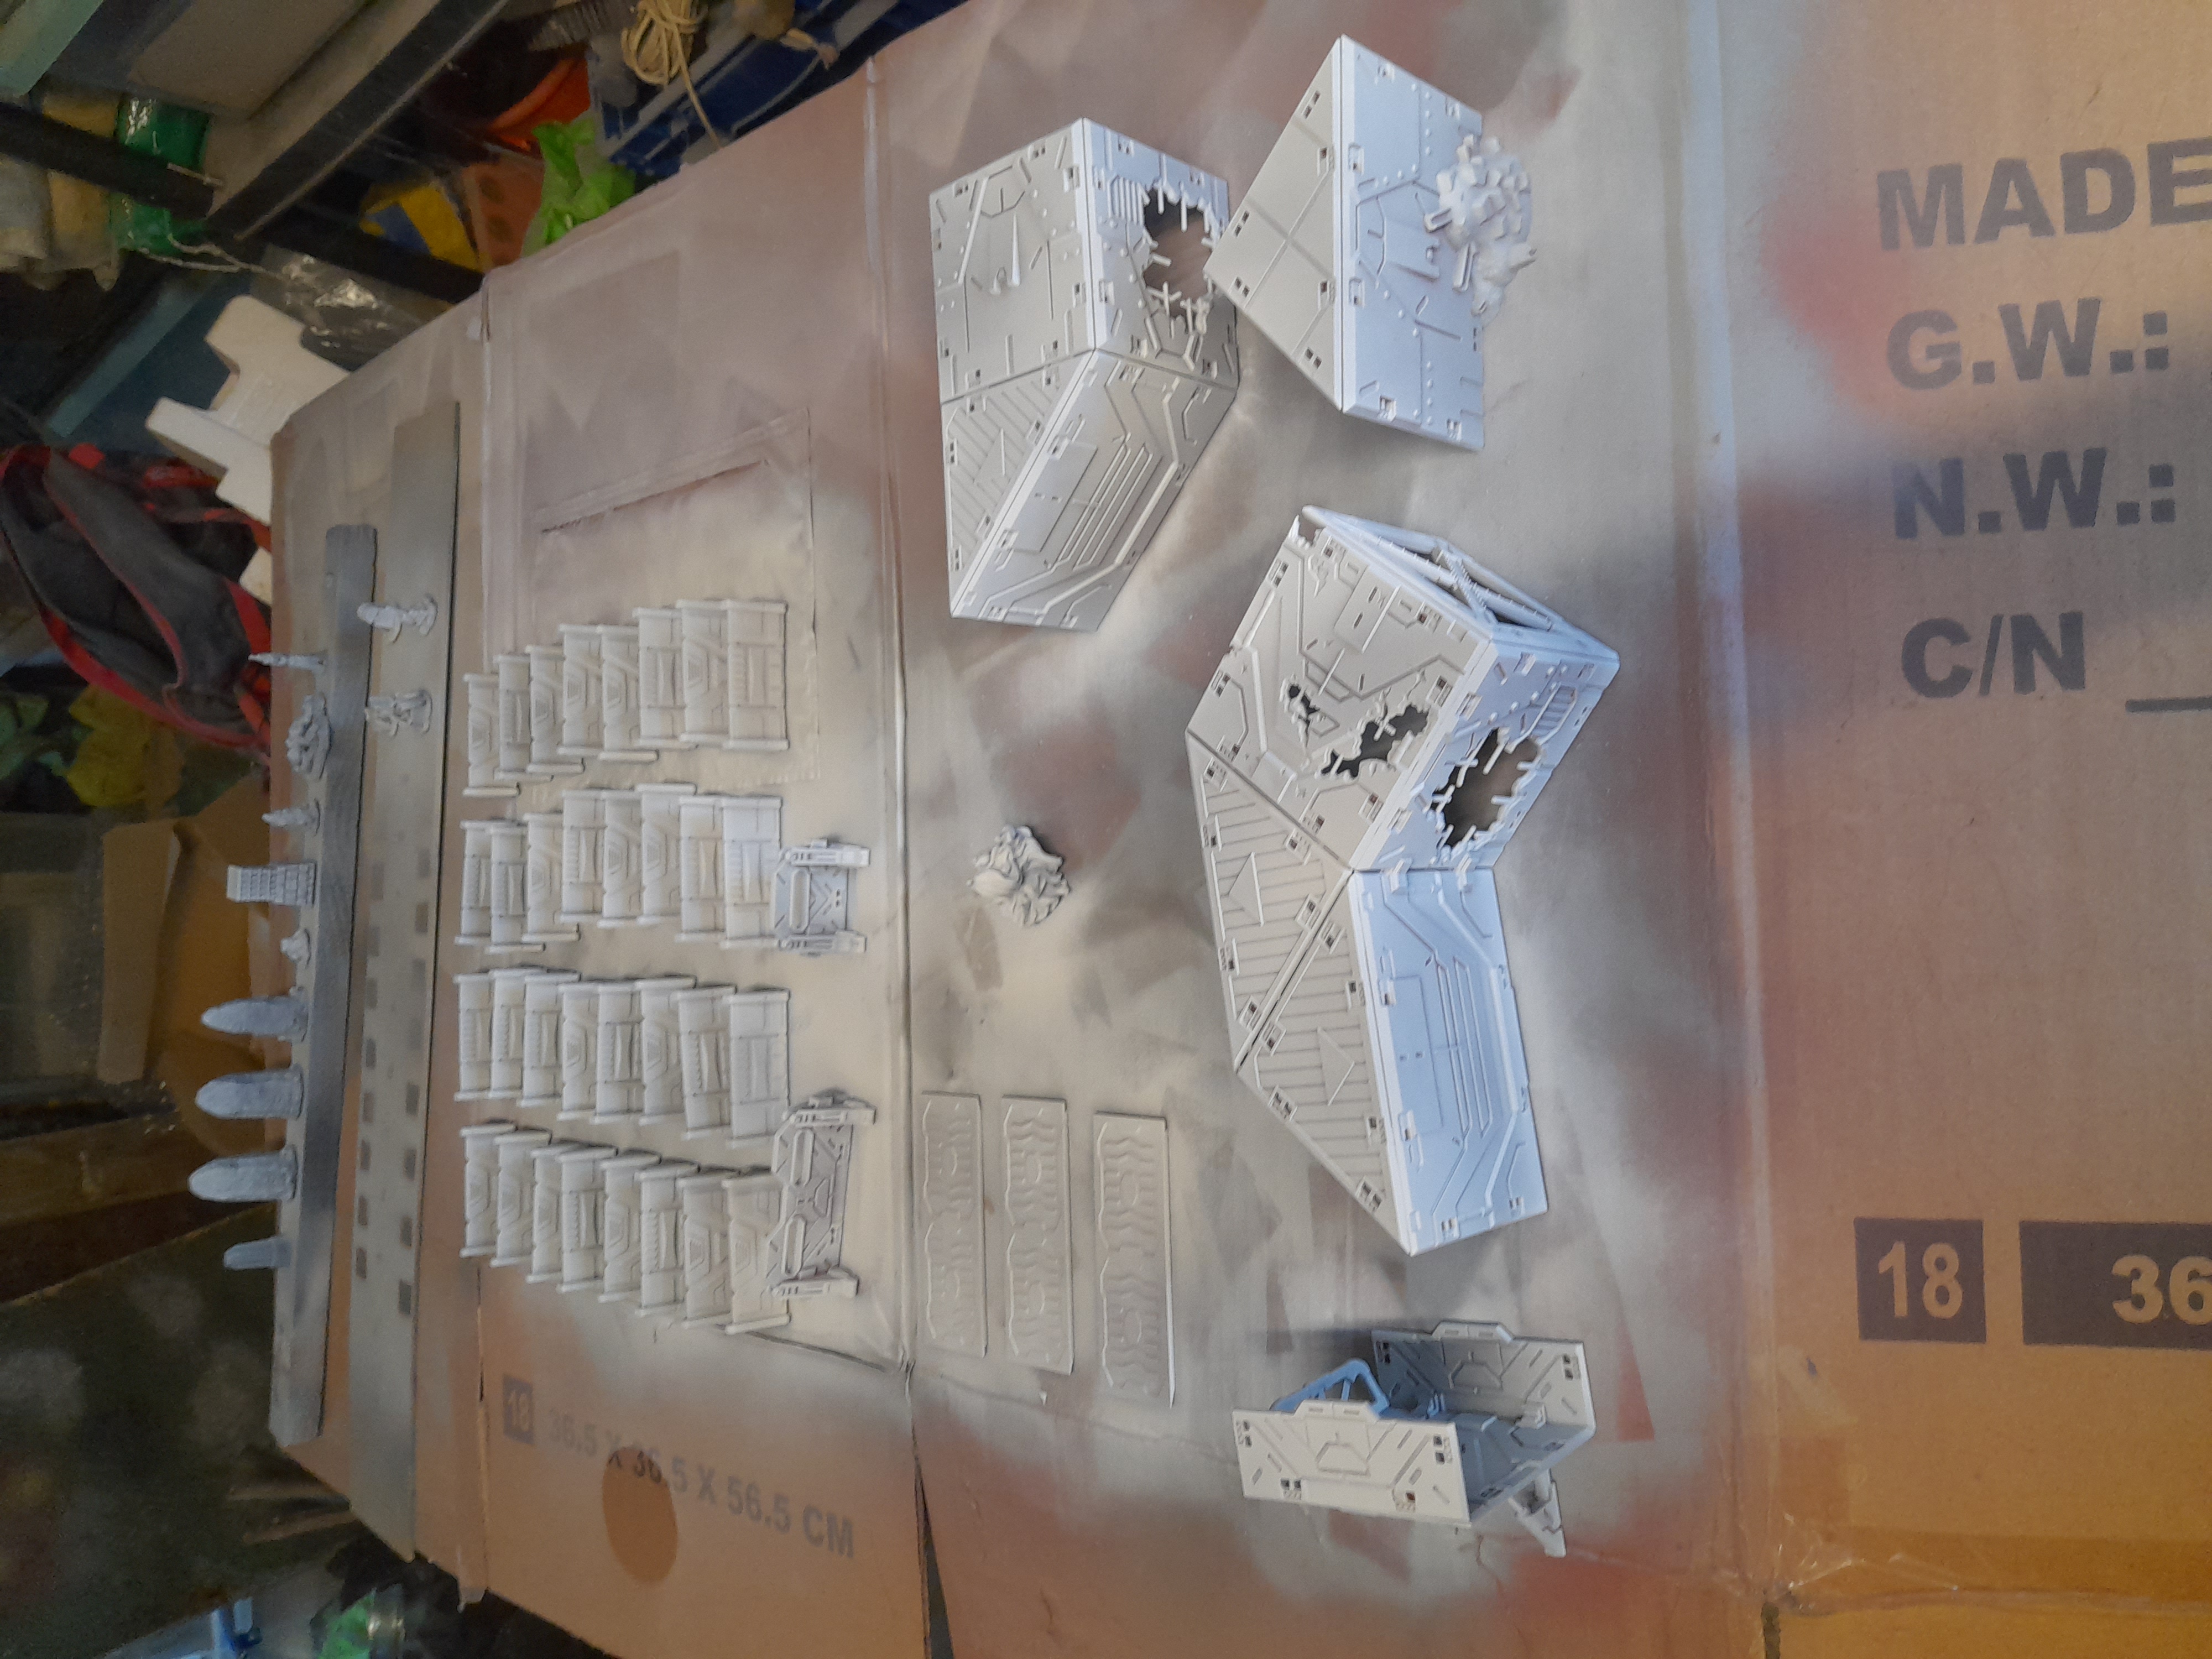
Over the weekend I managed a couple of early morning rattle can sessions.
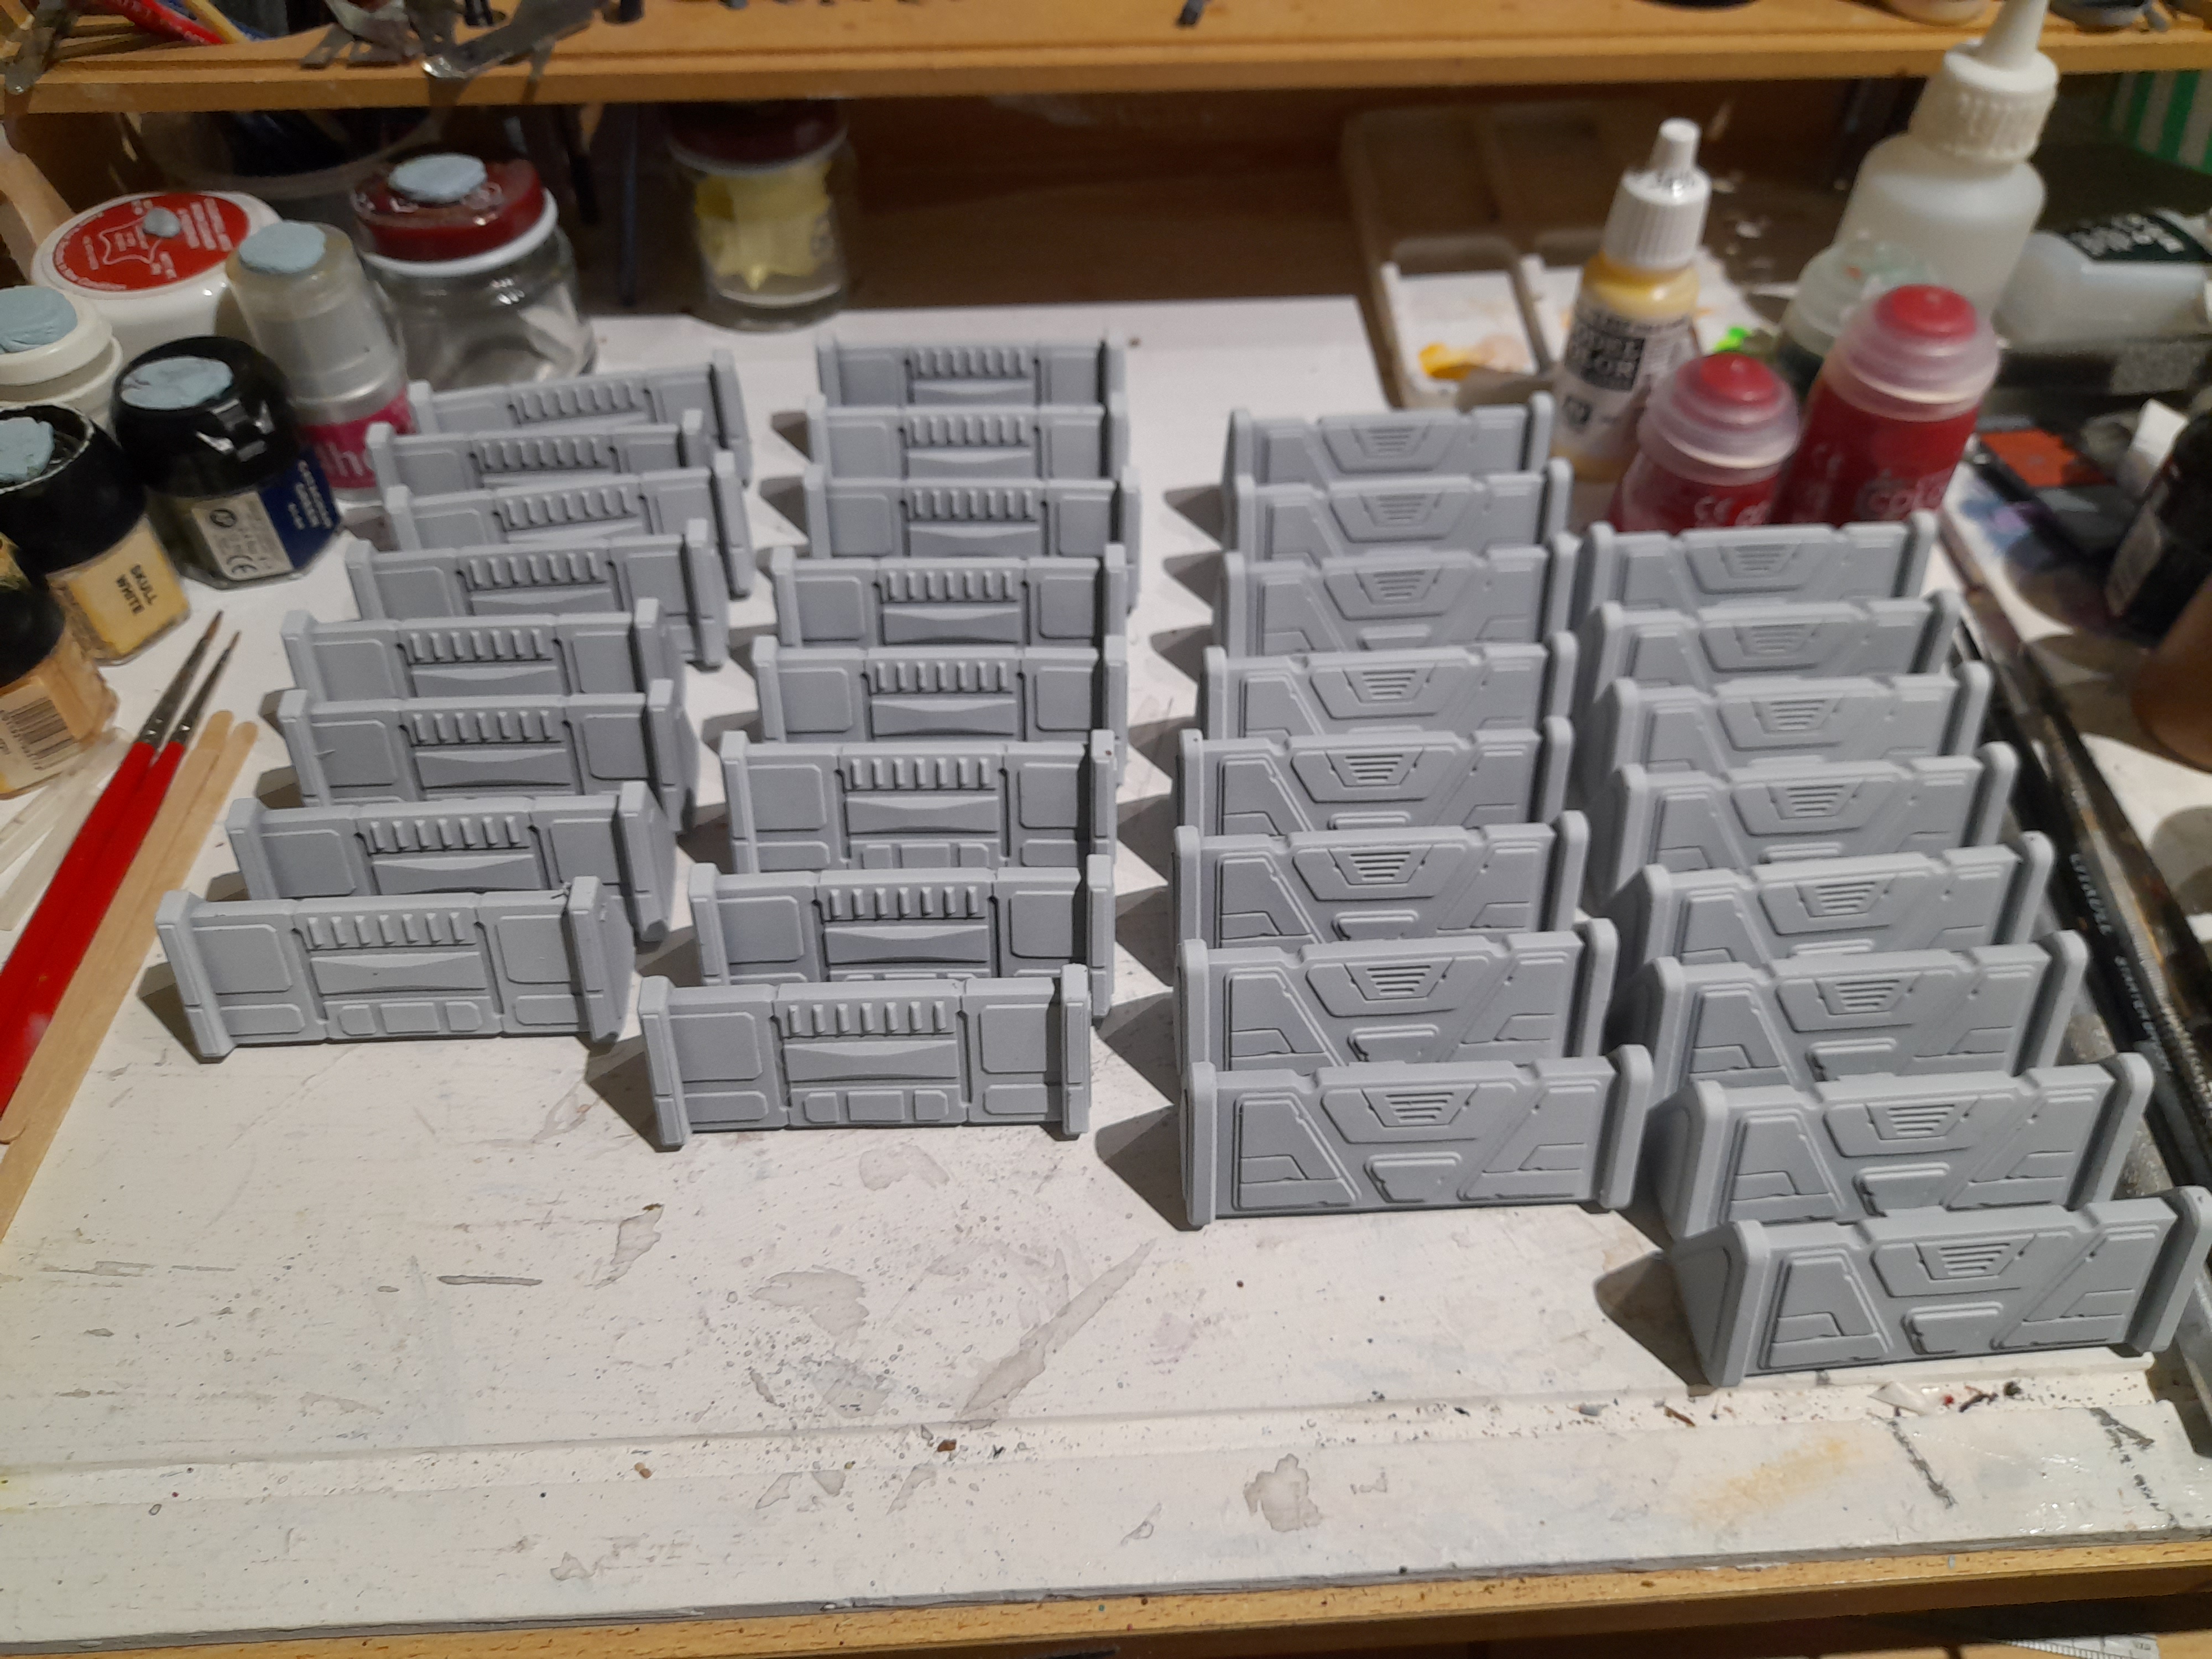
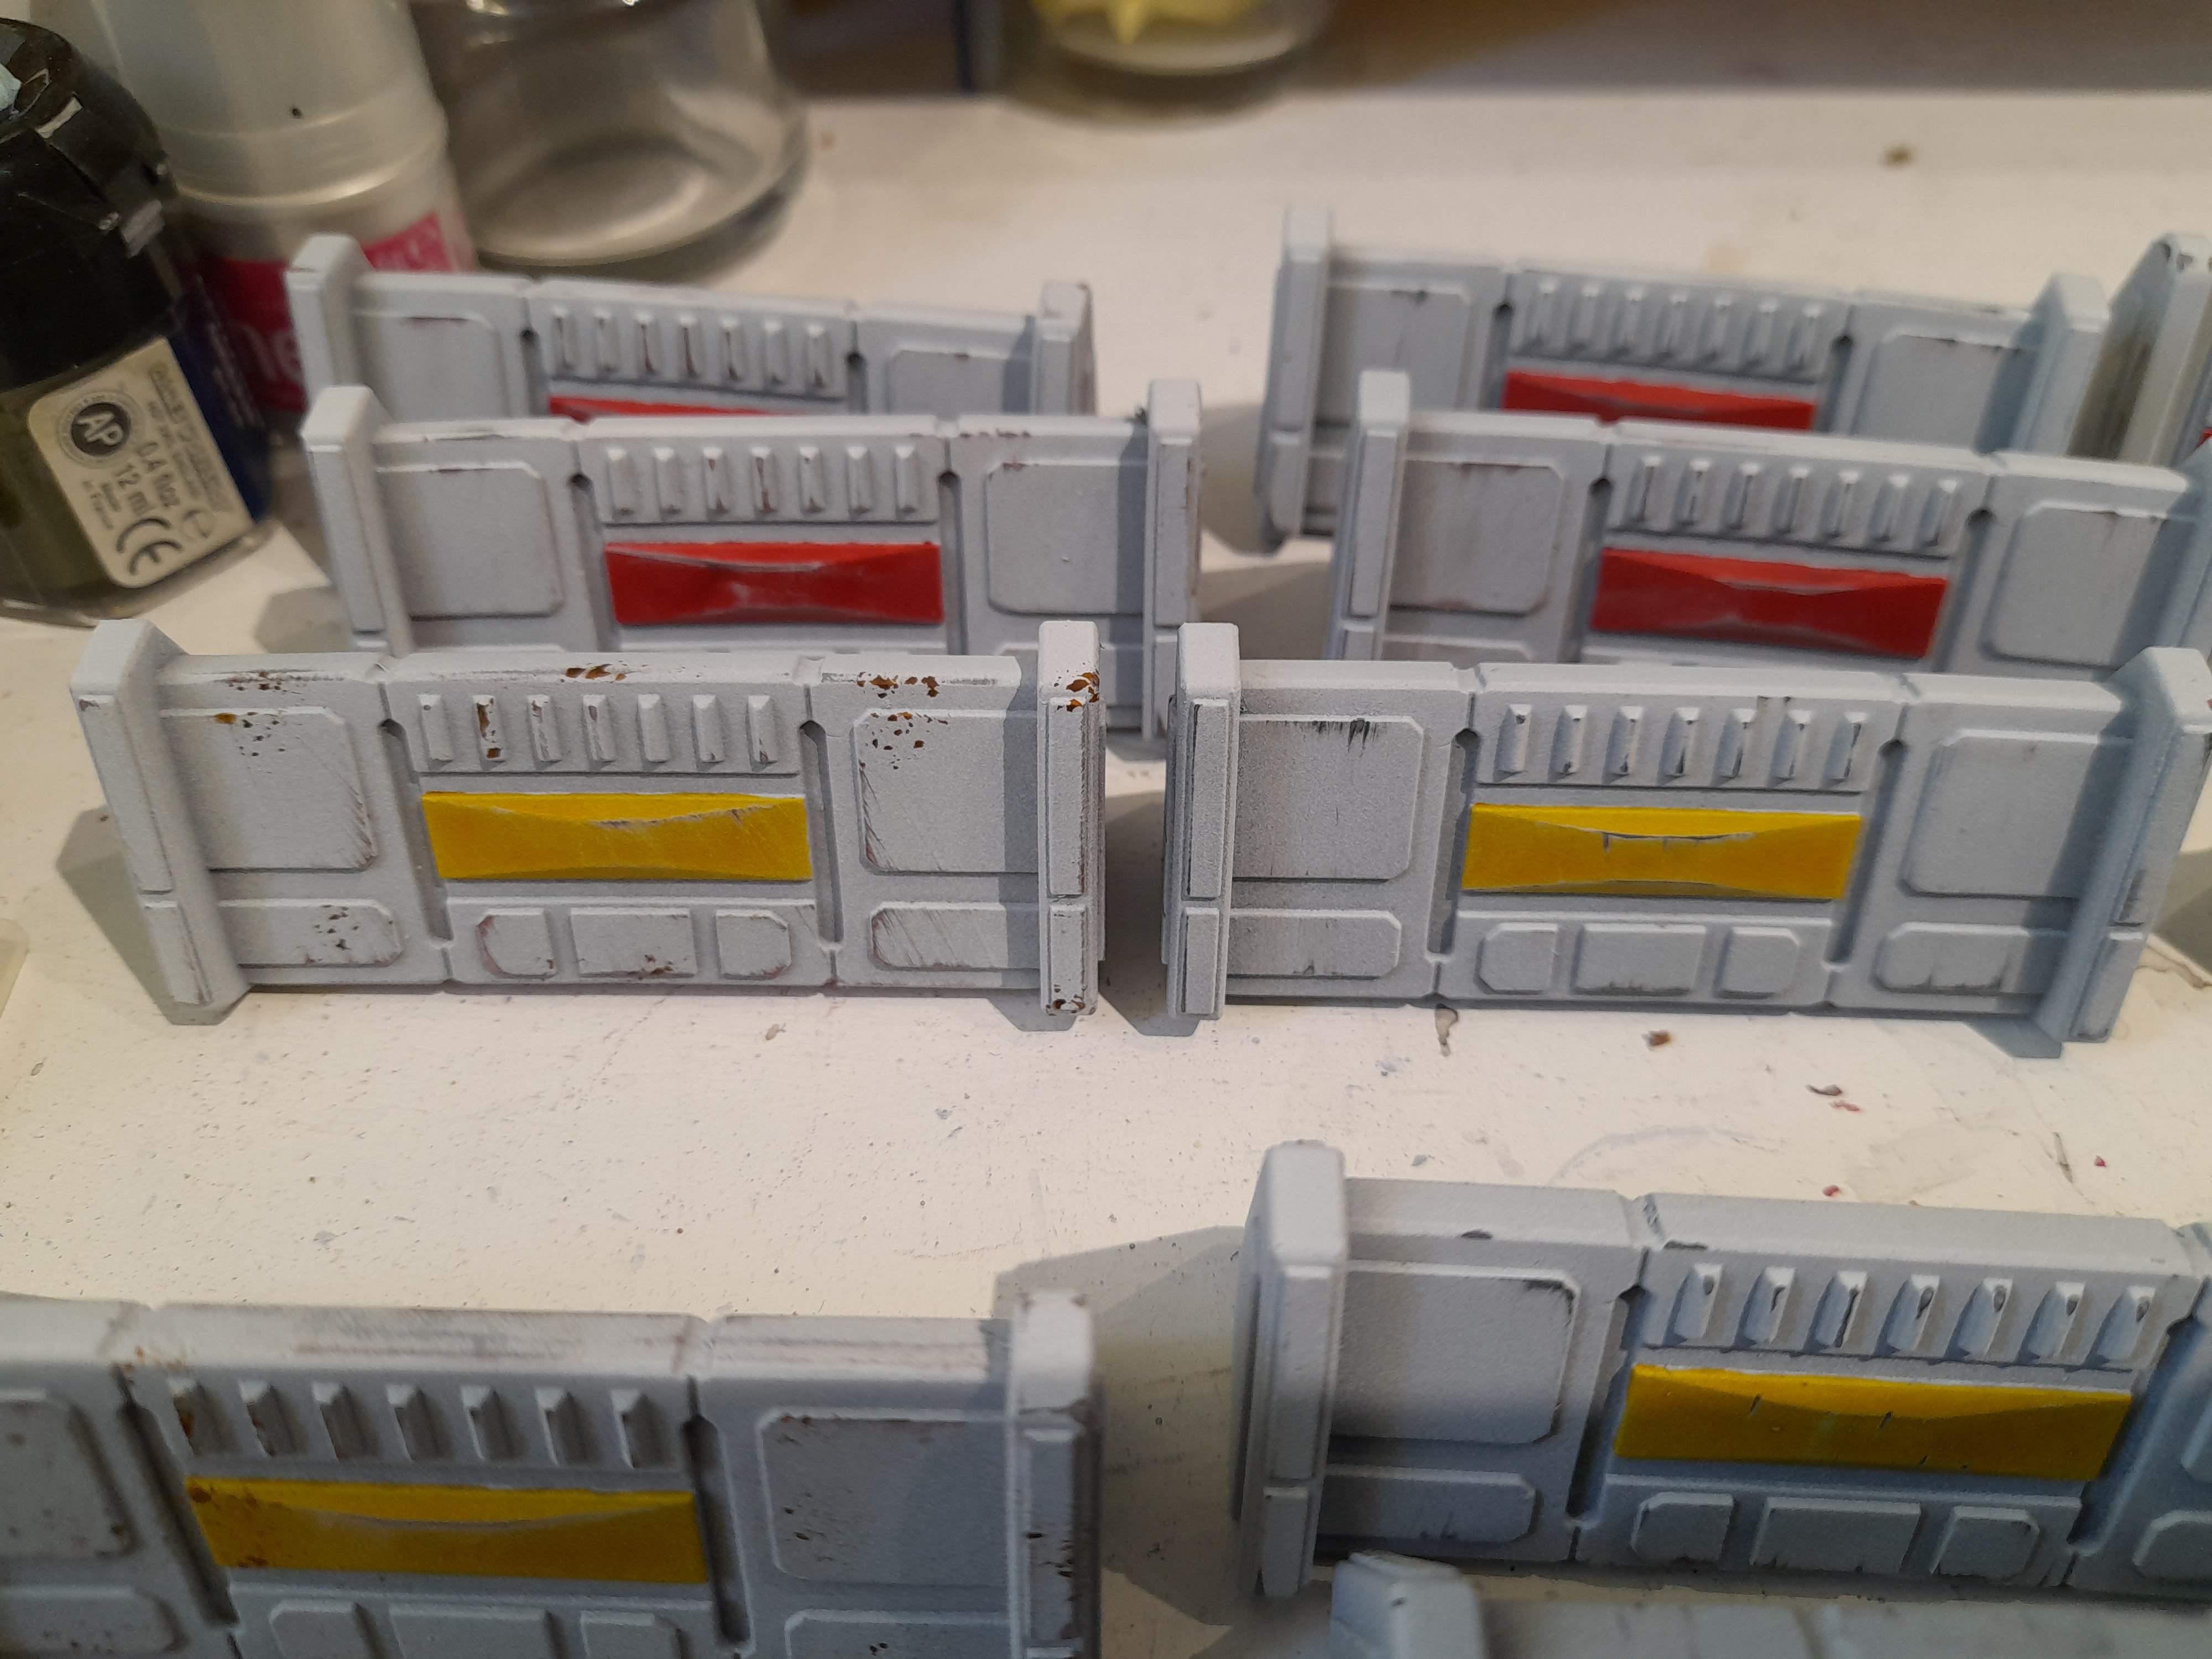
While prepping the terrain for spraying I decided that I would also paint the barricades from my Star wars Legion boxes….

They all had quite prominent mould lines, but conscious that I had limited time and needed to get the spraying underway I just cleaned off the most obvious ones. (Sundancer – plenty left for you to spot 😊)
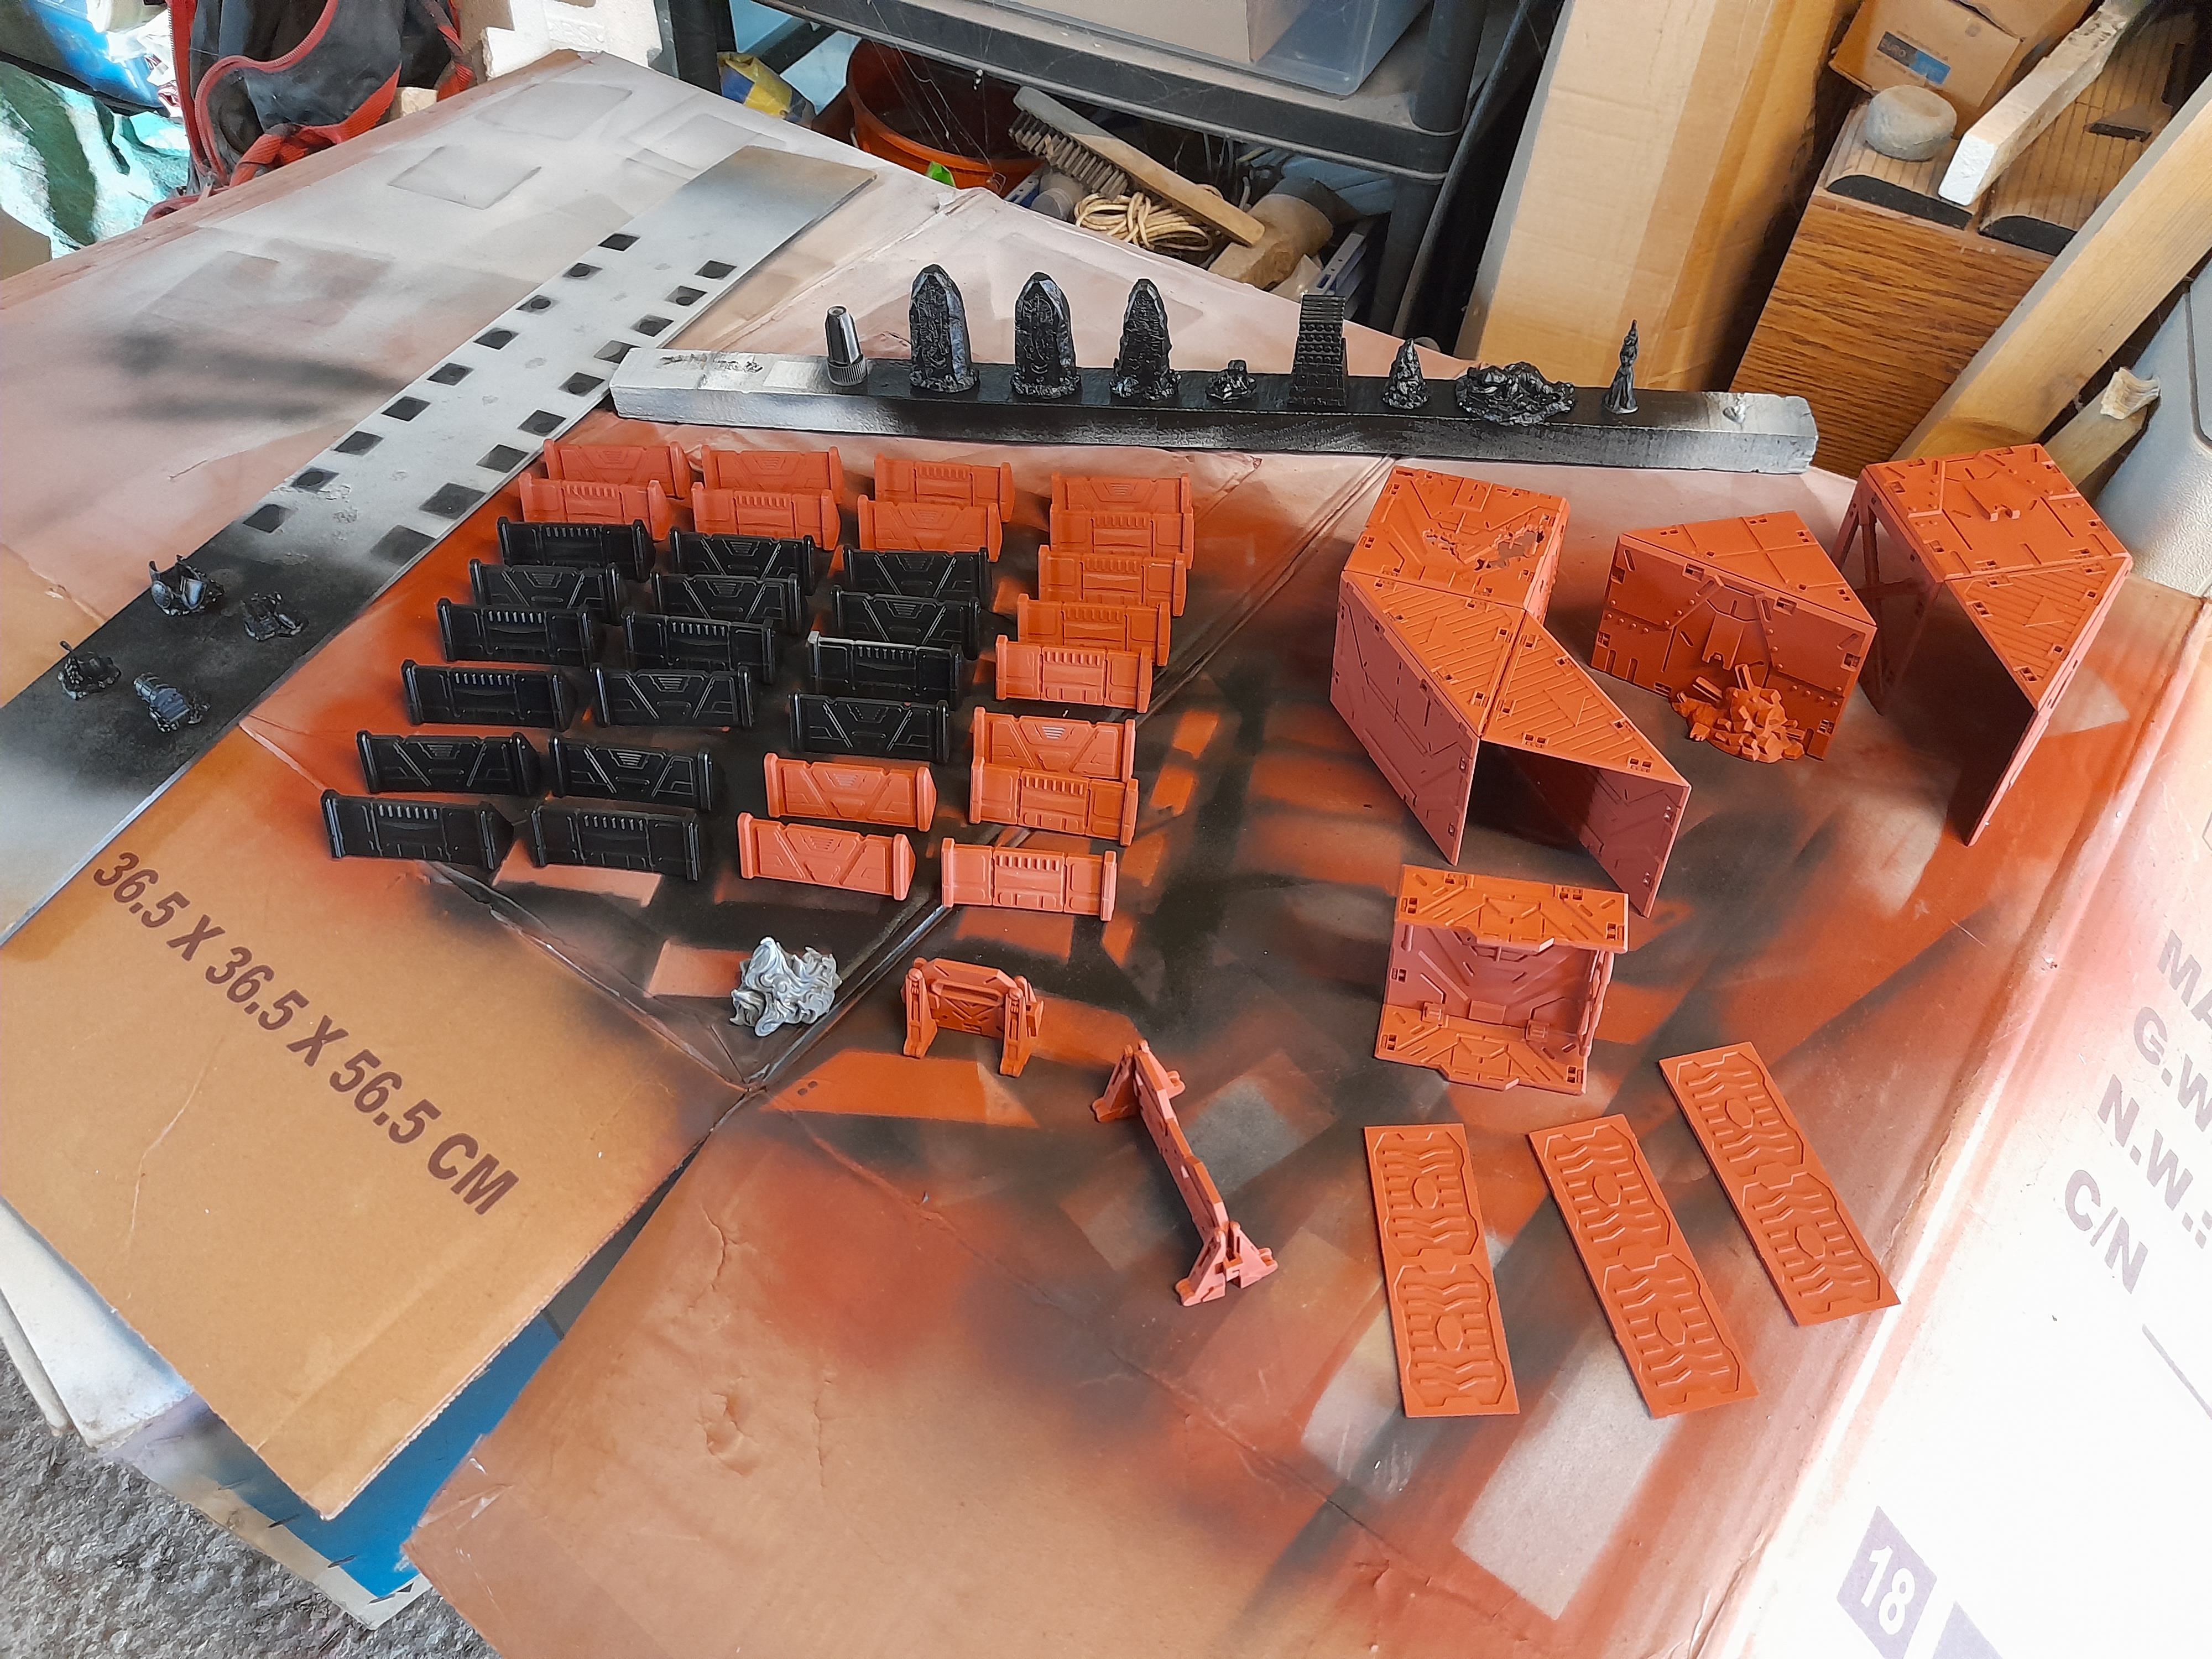
The Deadzone terrain was to be sprayed red first, and the Vanguard terrain black. I also decided to spray half of the SWL barricades red first and half black, to give some more tonal differences in the final look.
They then all had a zenithal spray of grey, followed by a lighter spray of white (although the rocks for Vanguard only had a very light touch of white). This ate through the spray cans quite quickly….
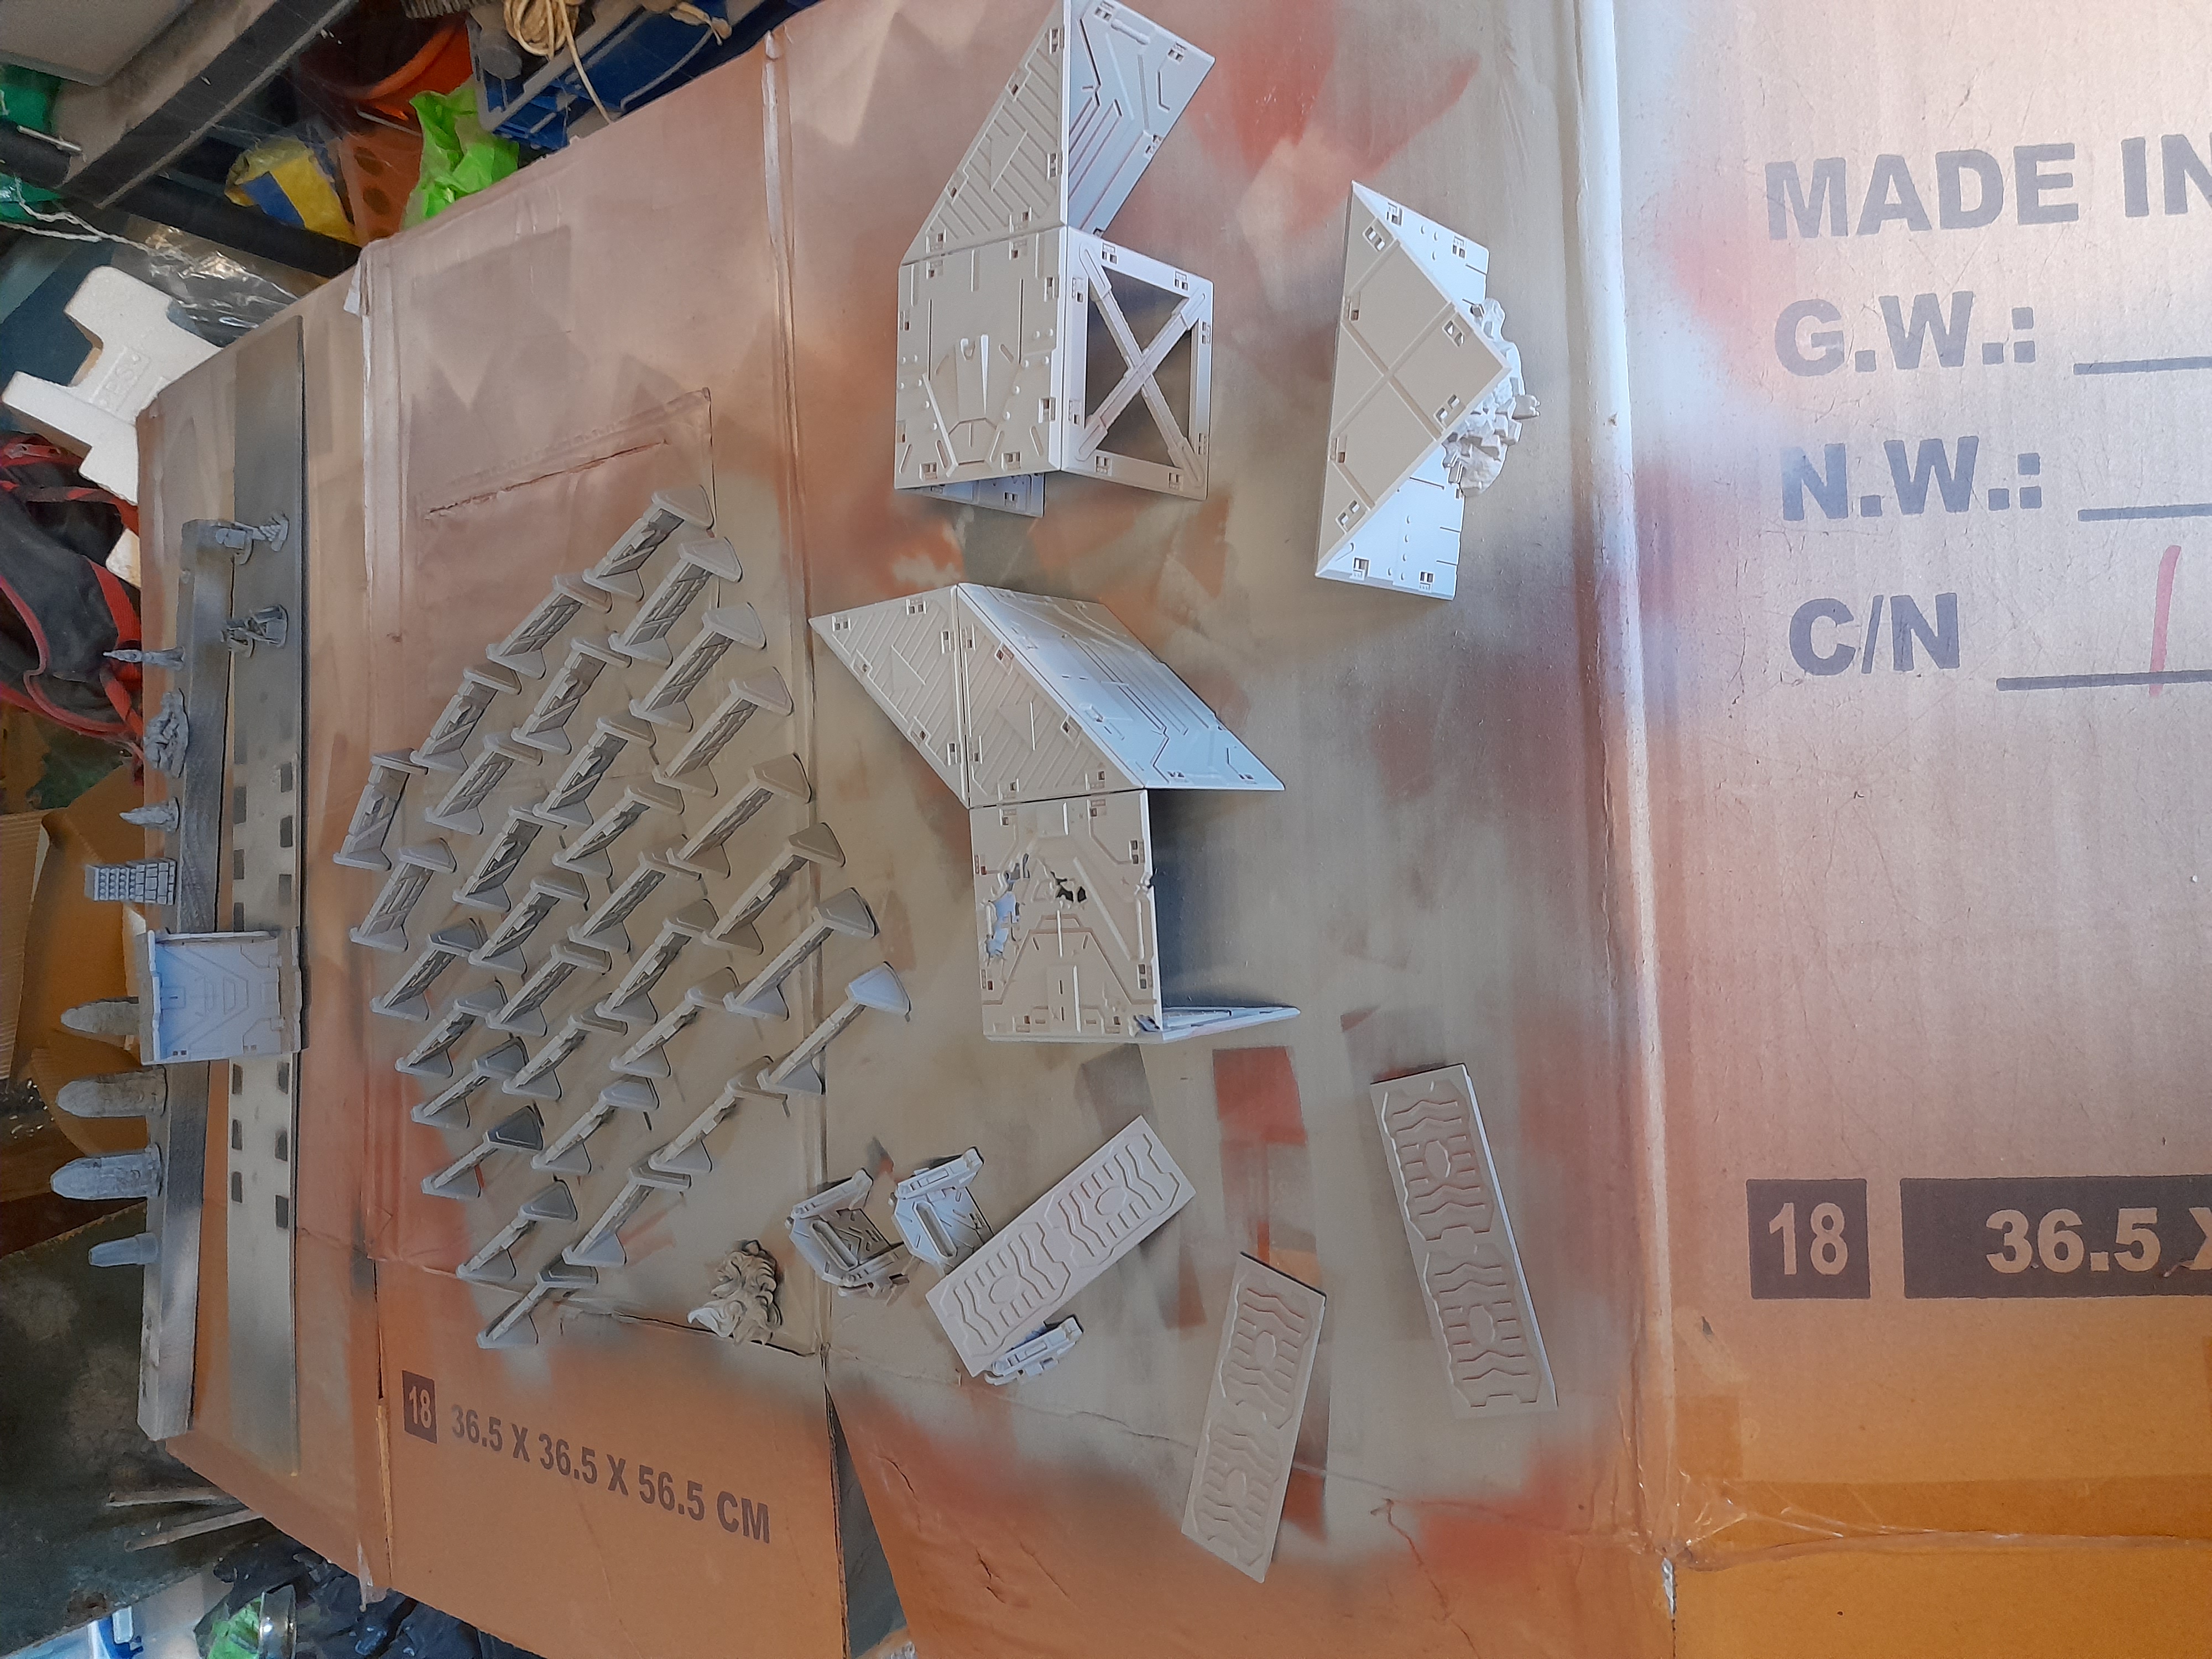
It was then that I noticed I had a duplicate of one of the stones in the Vanguard objective set, but was missing another. Oh well, can’t be helped now.
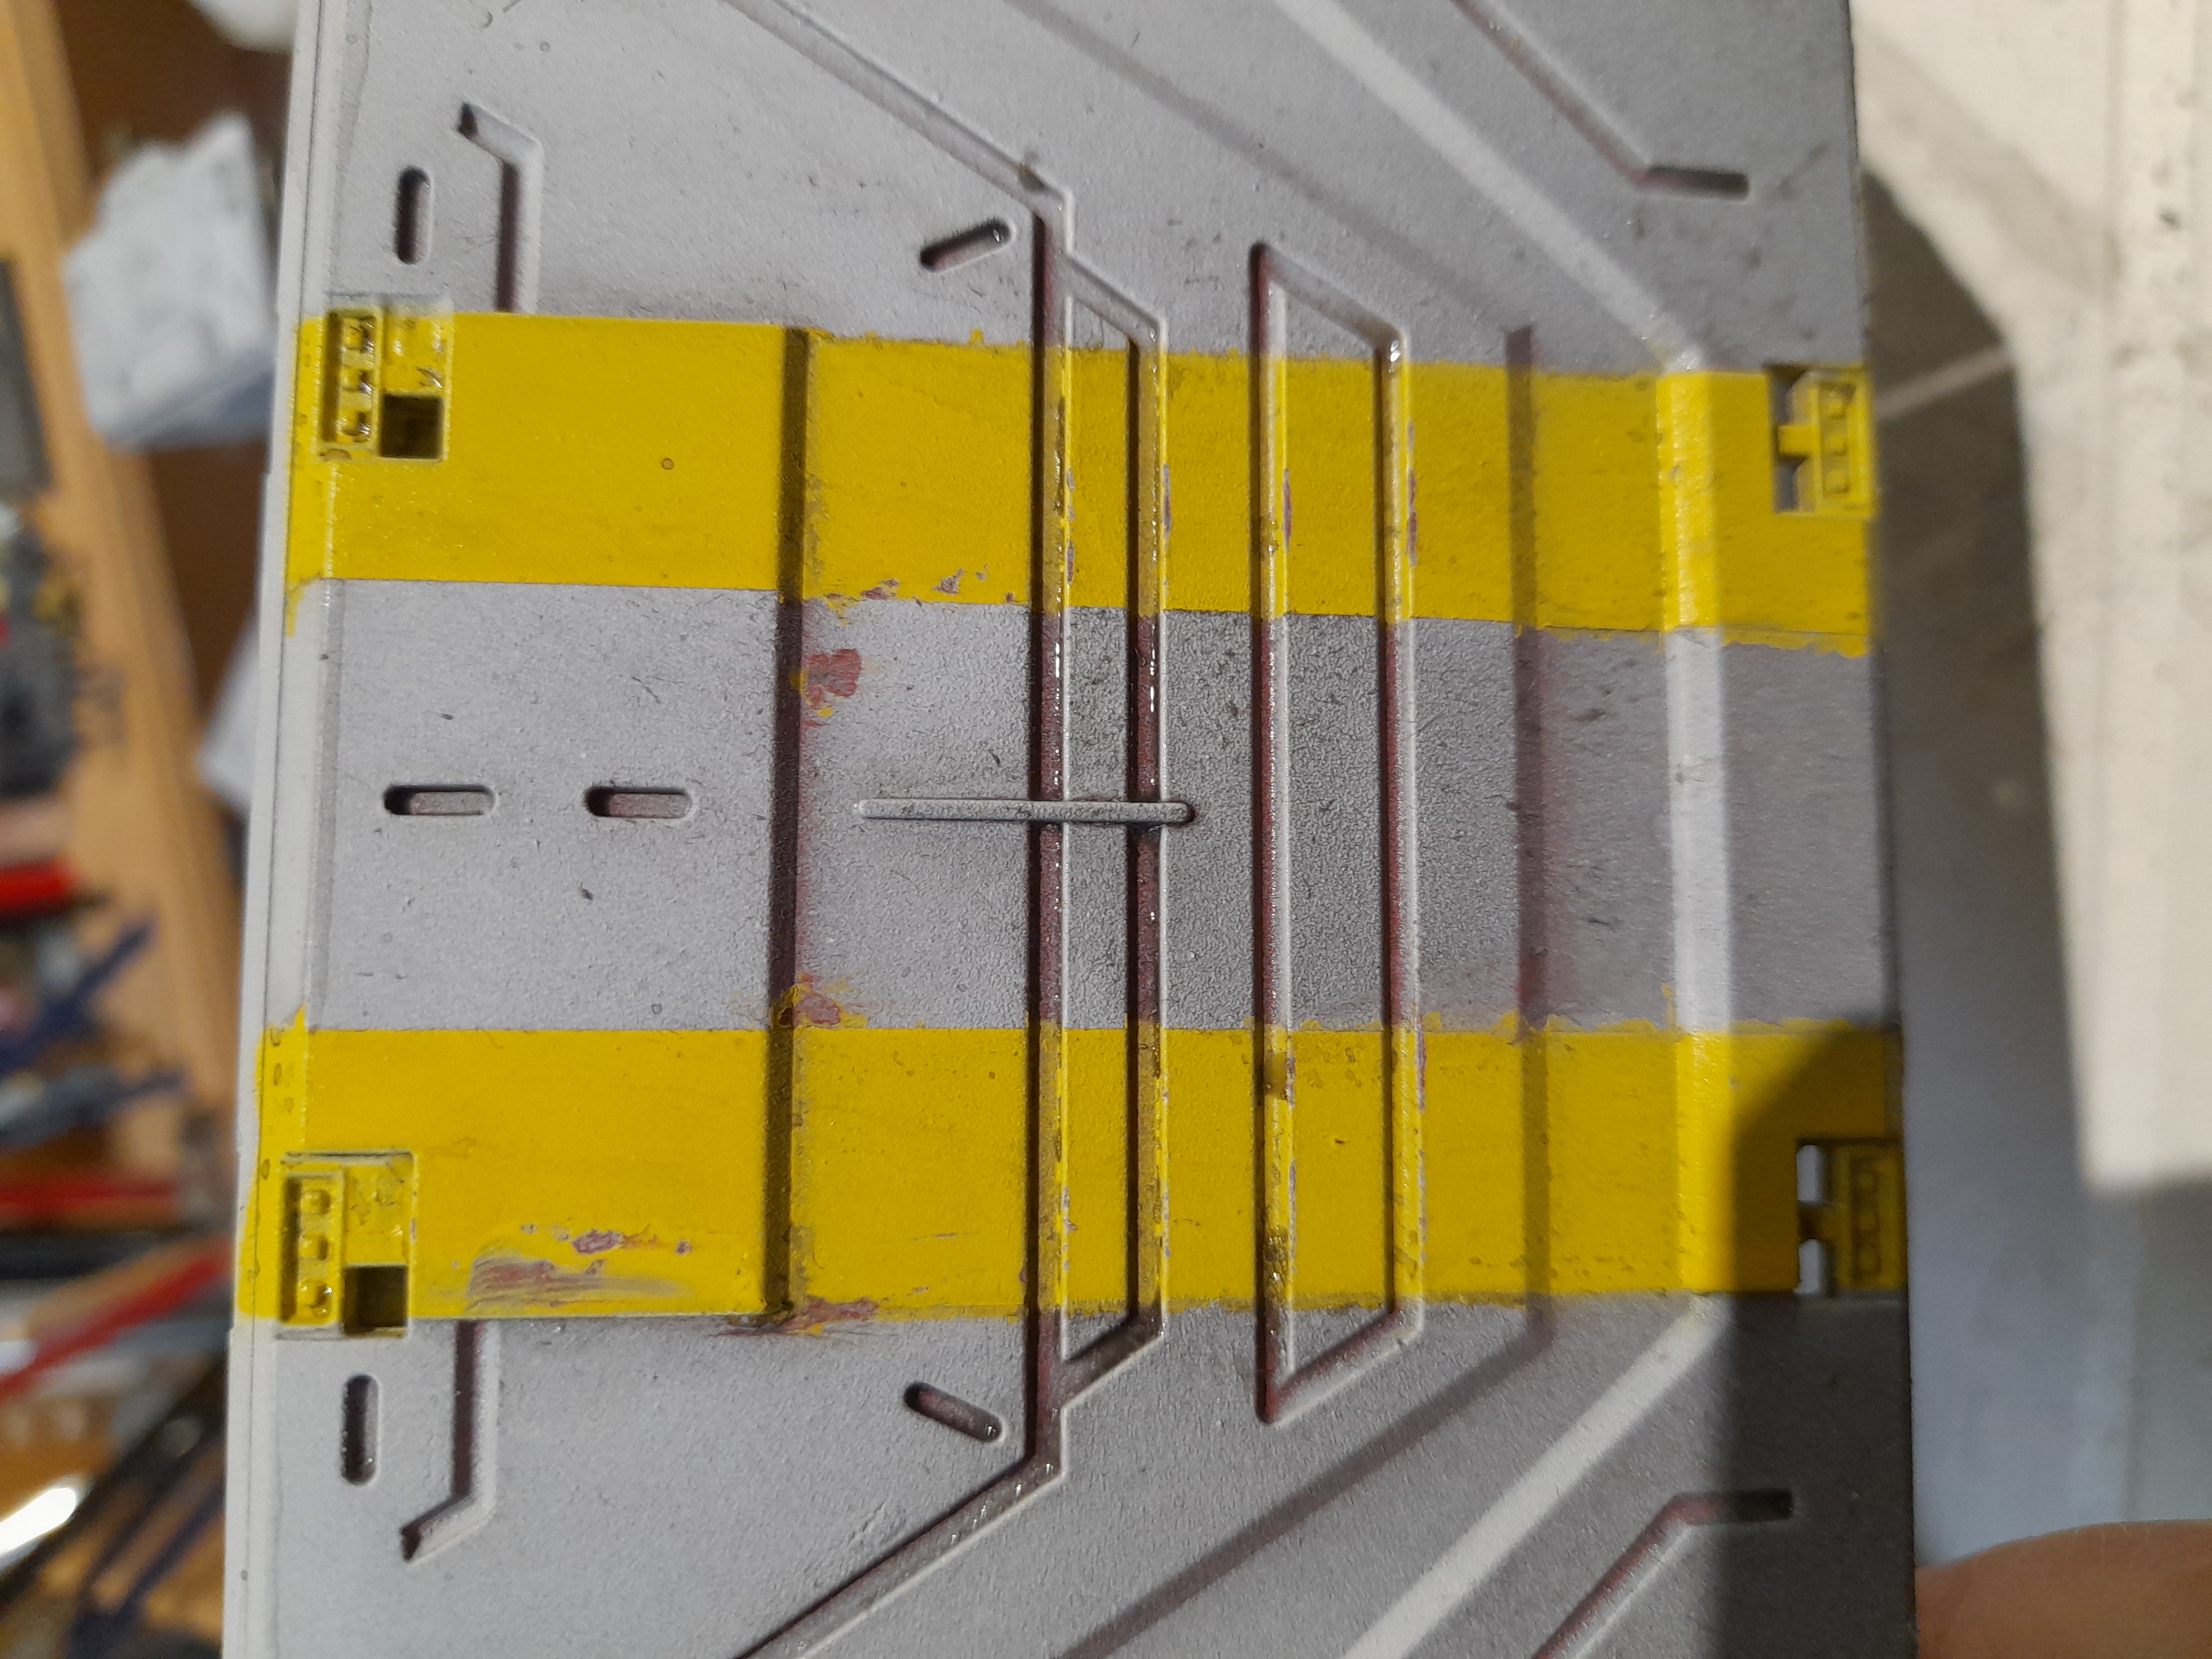
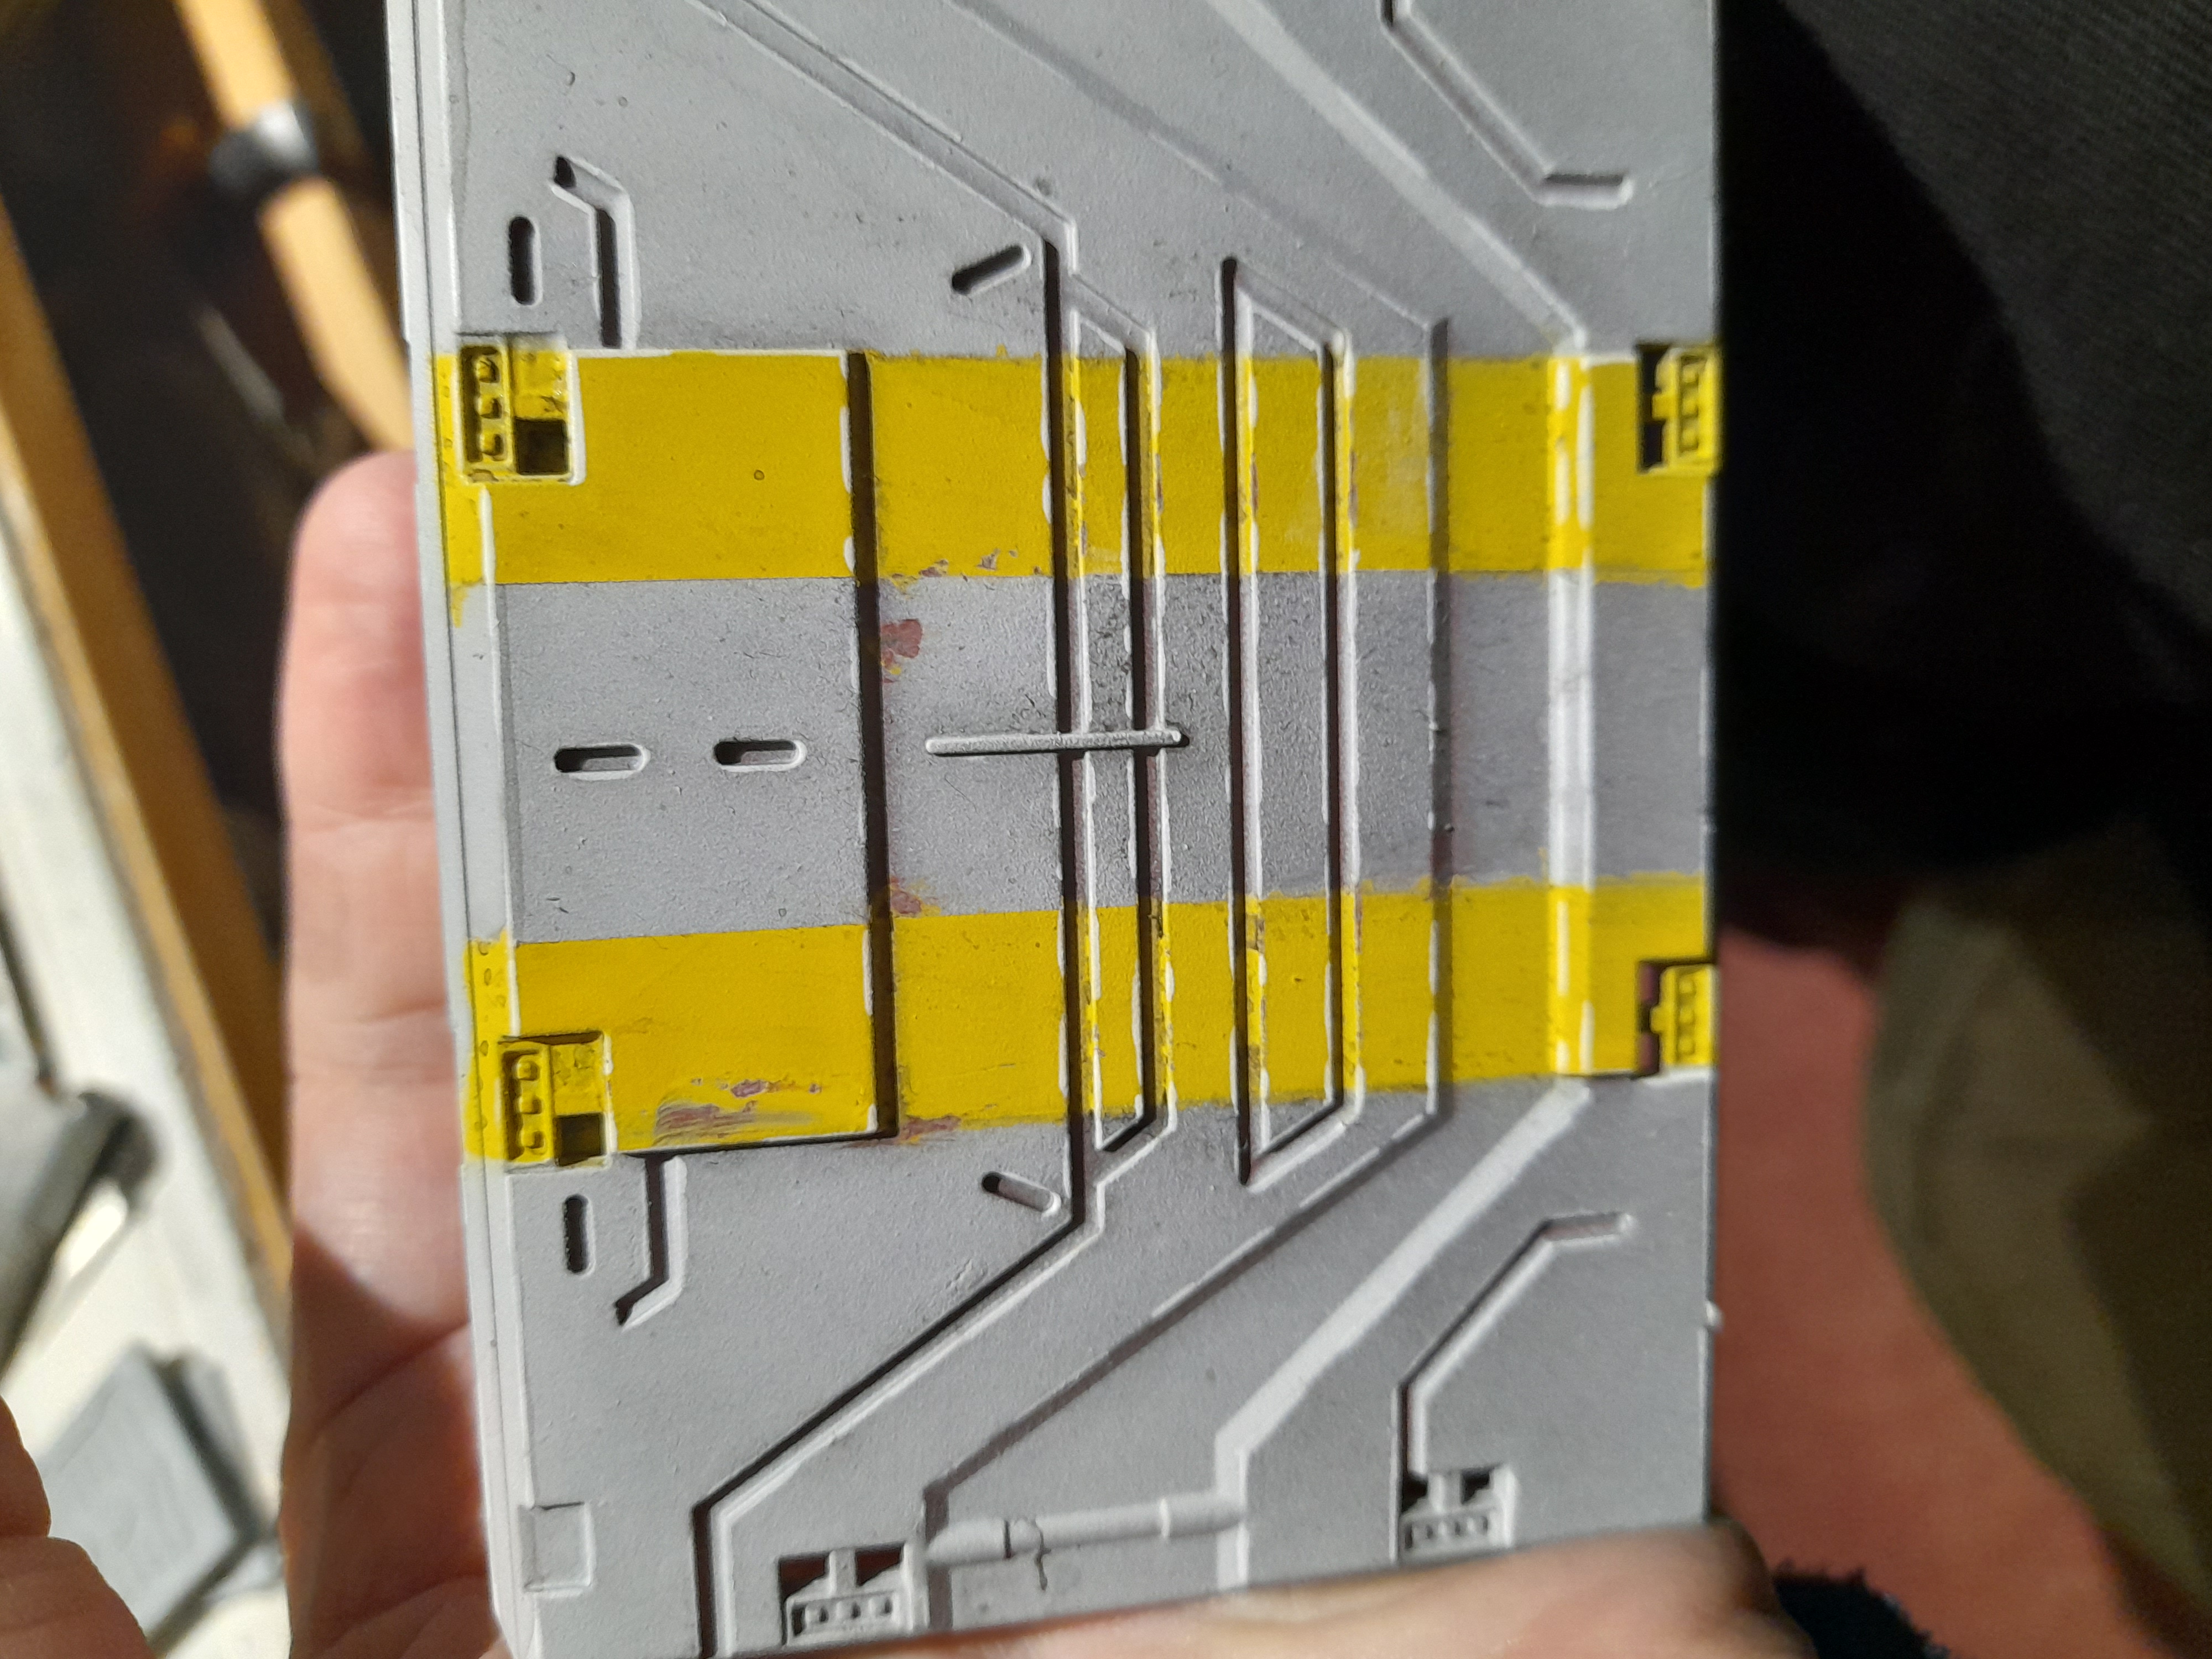
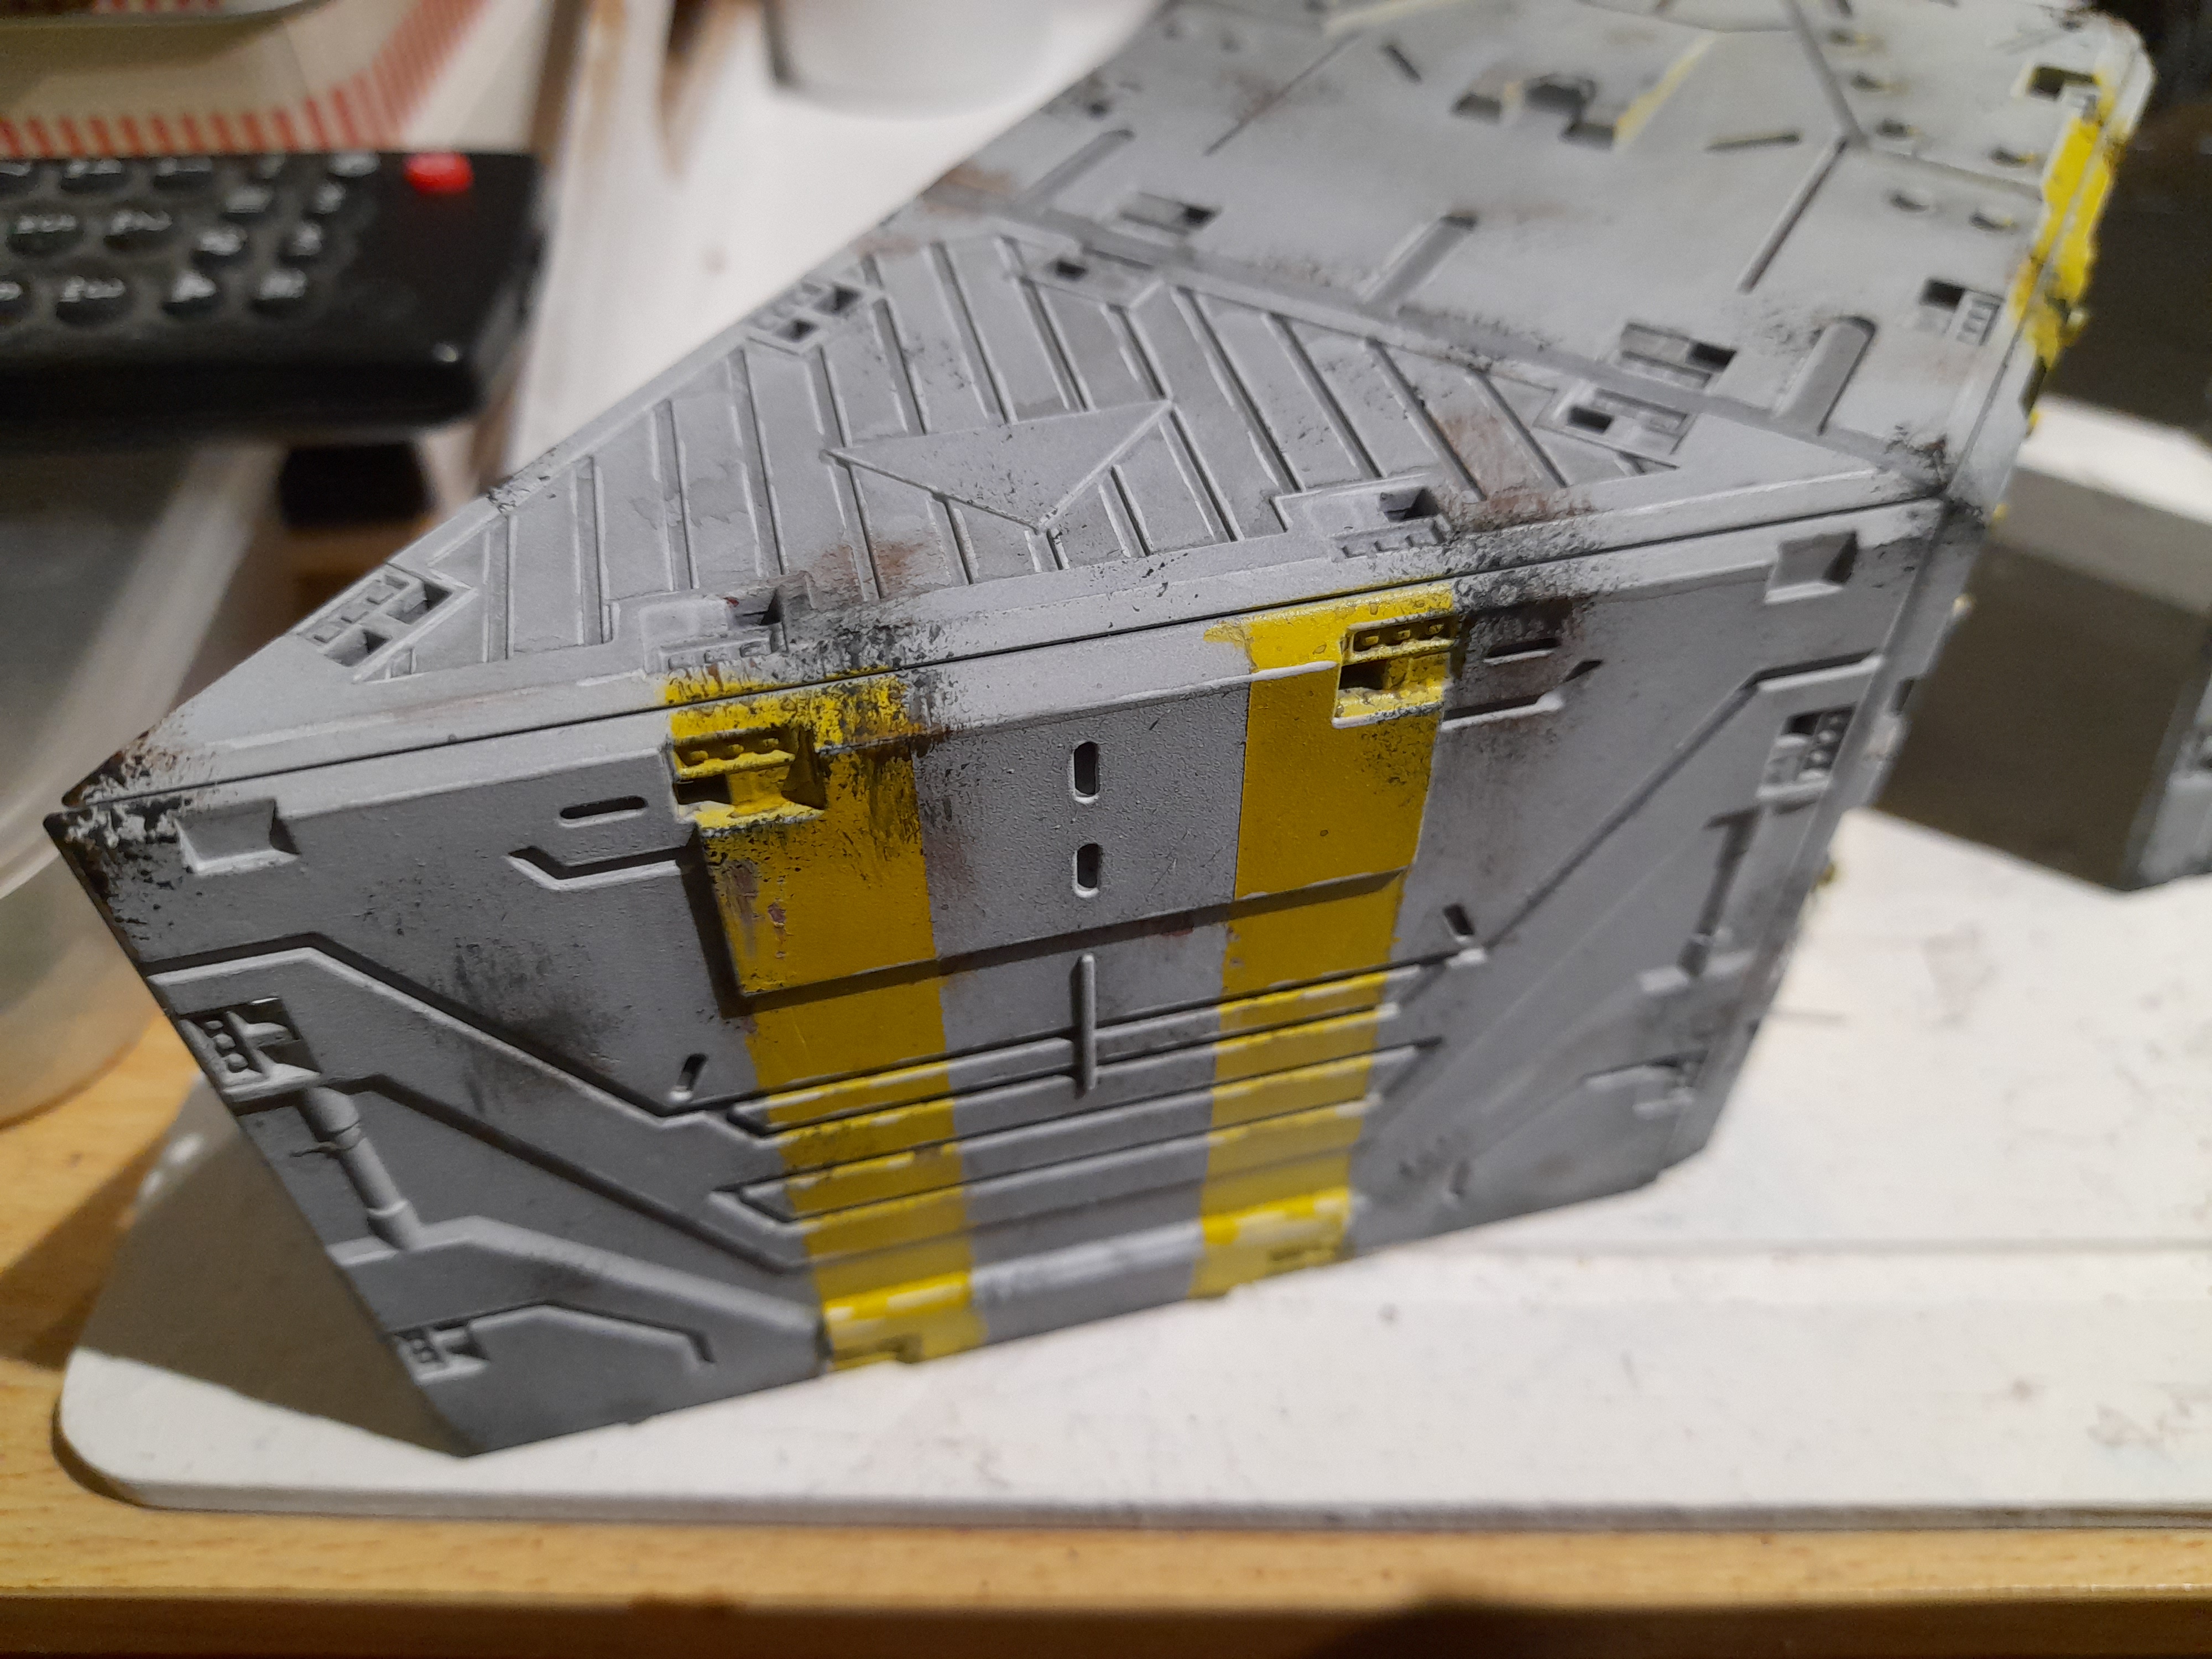
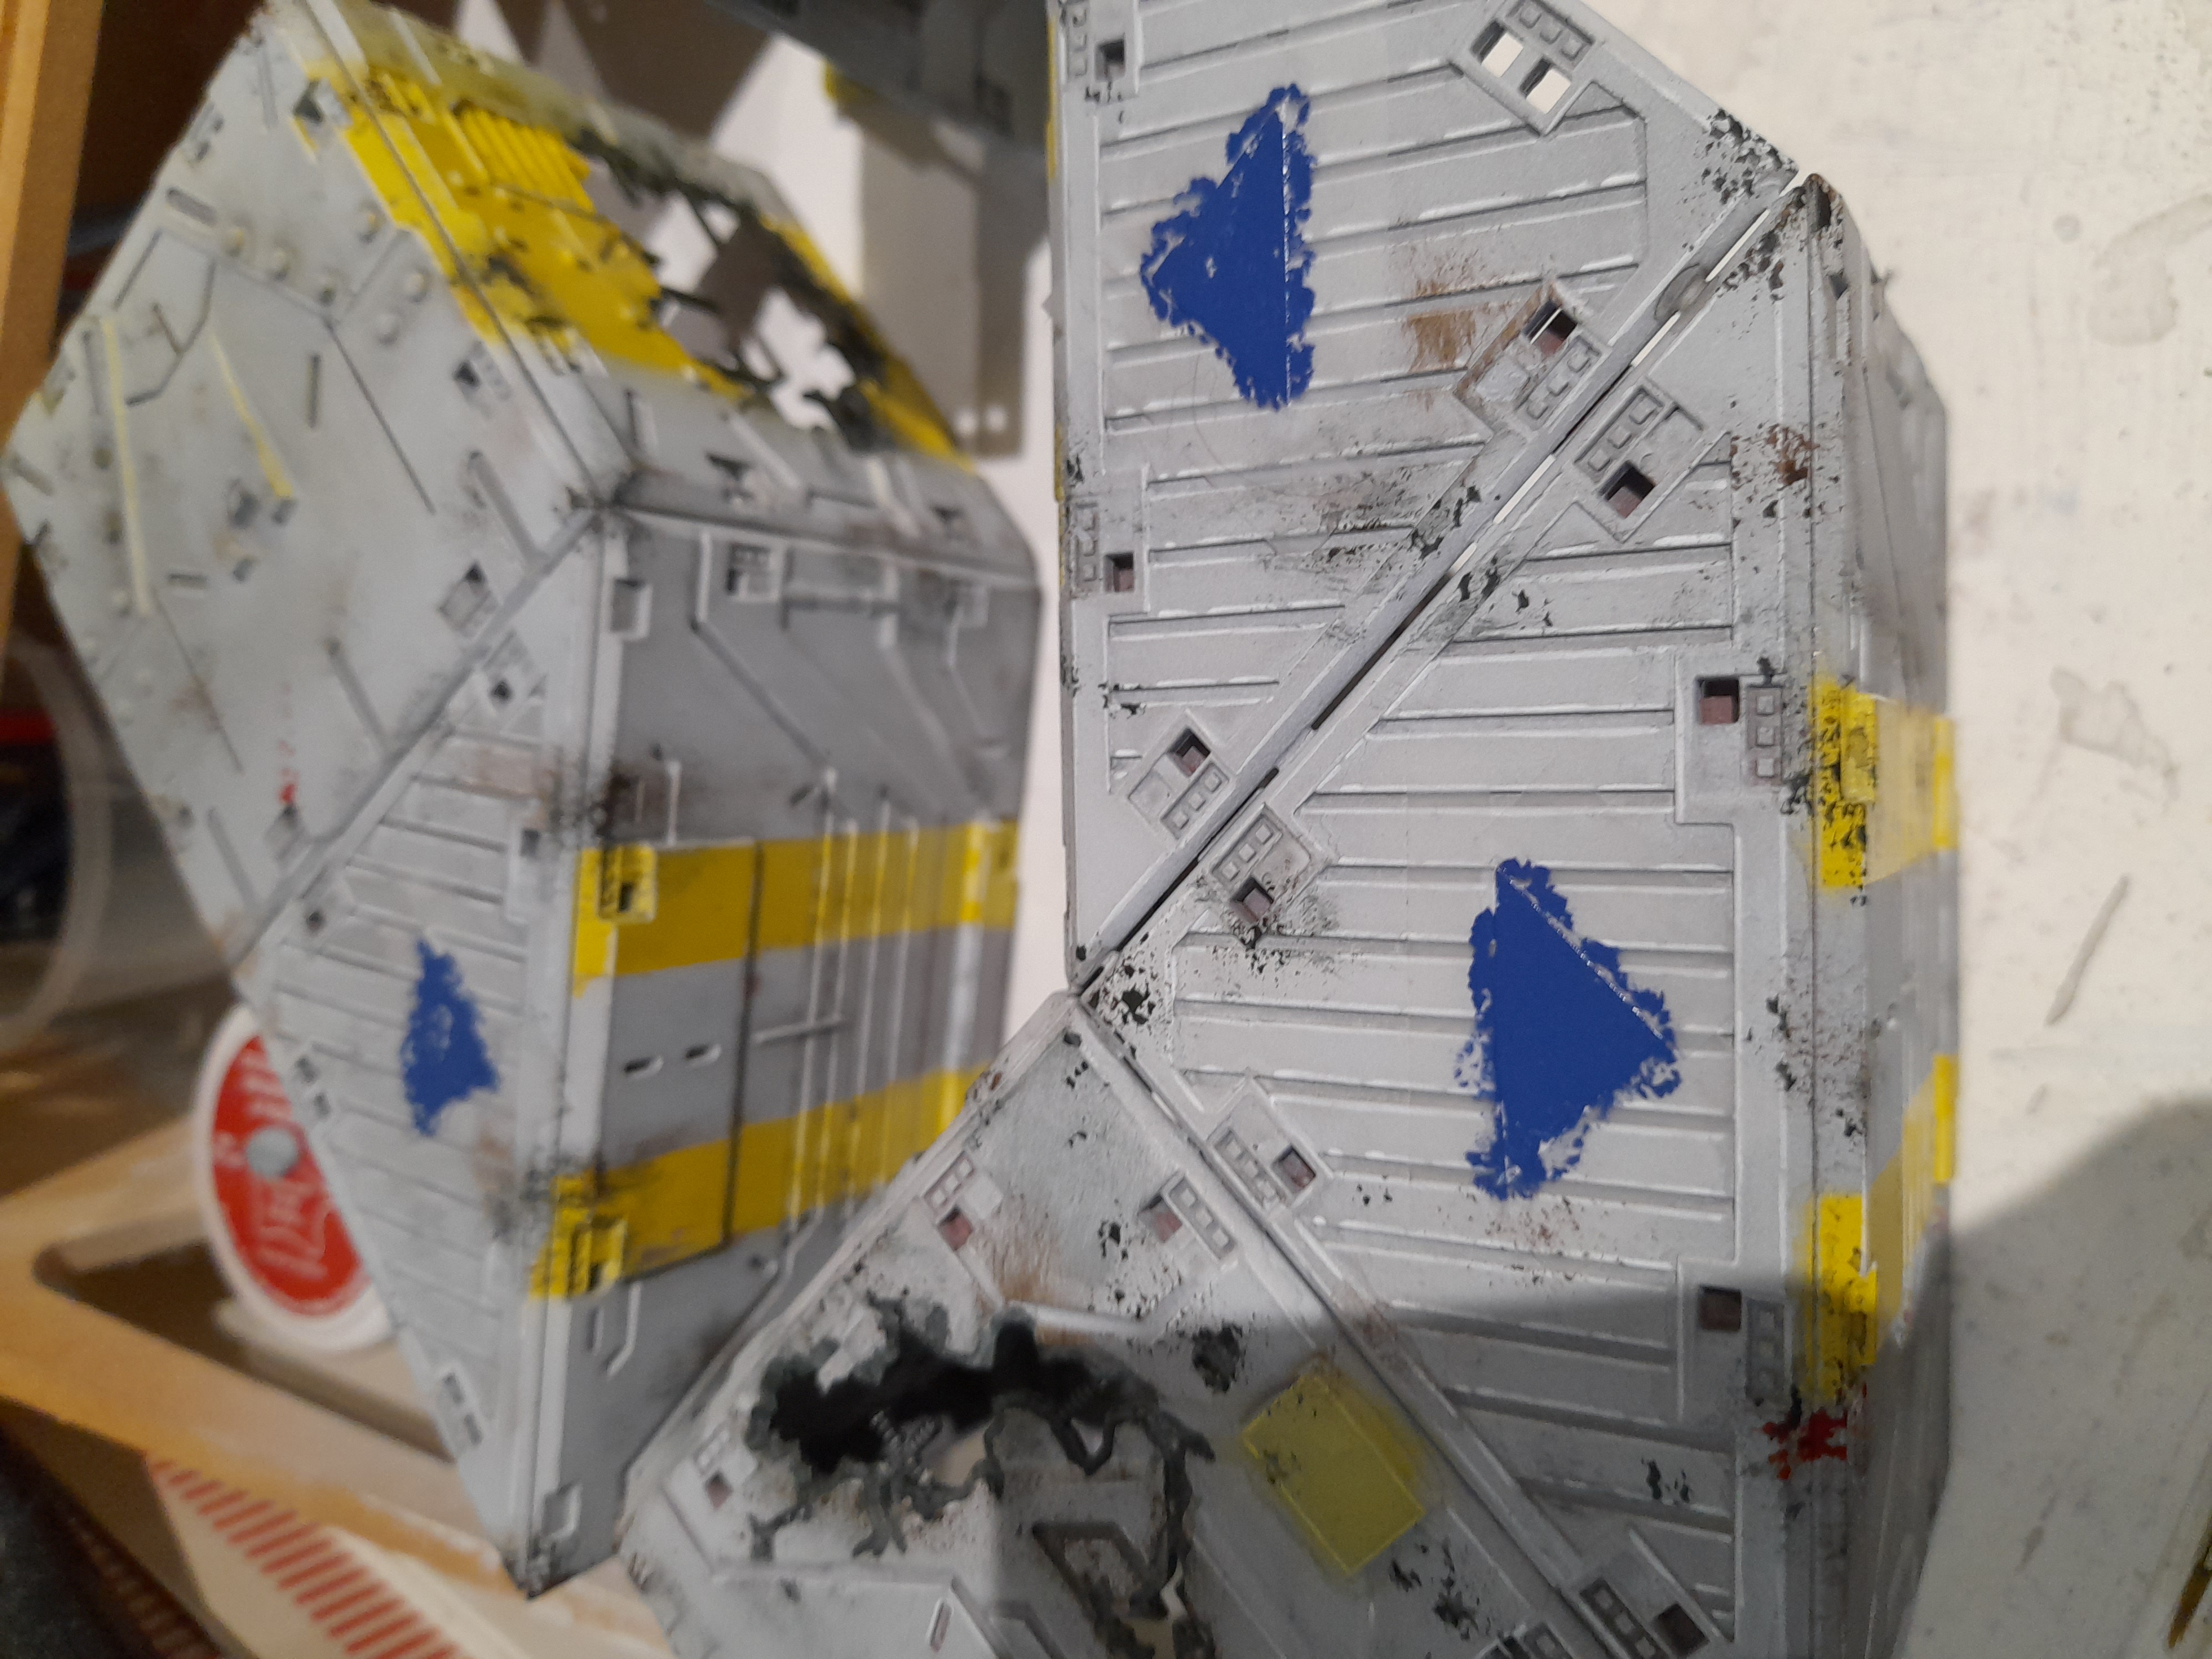
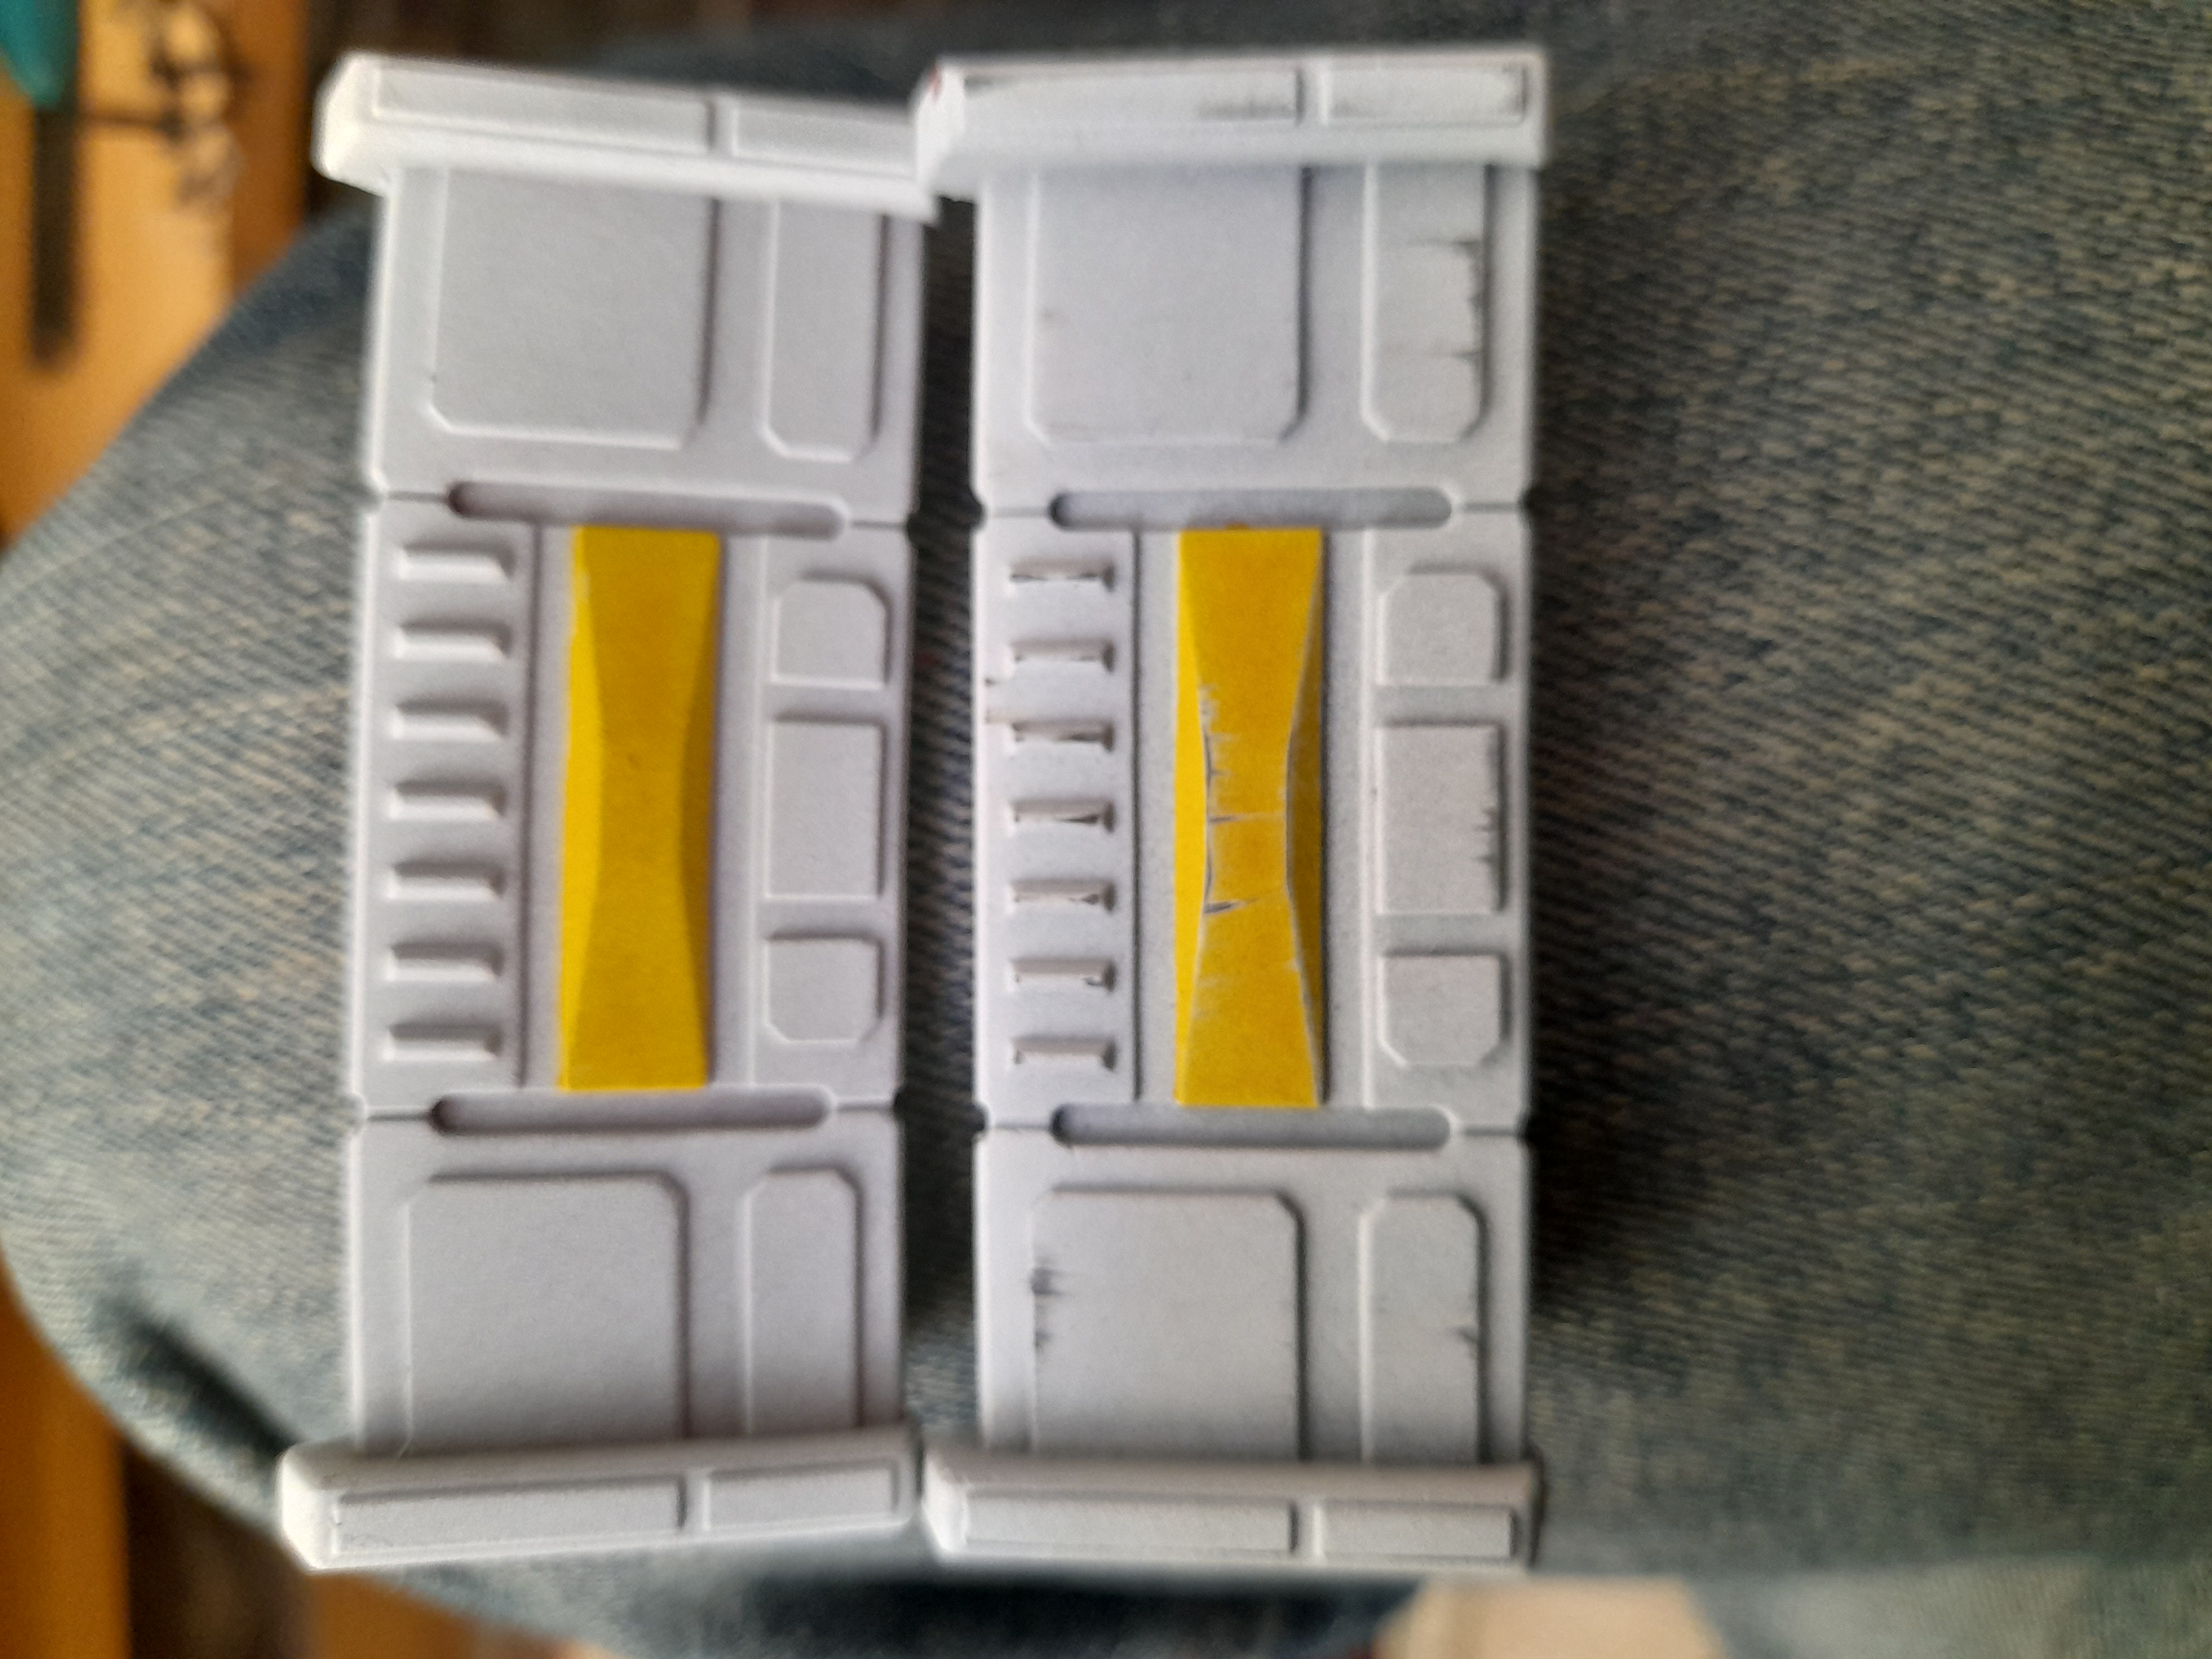
Next up for the Deadzone terrain was some of the yellow splash colour that I used in my previous project.
I masked up the pieces, using some clear tape (low tack) as I ran out of my masking tape.
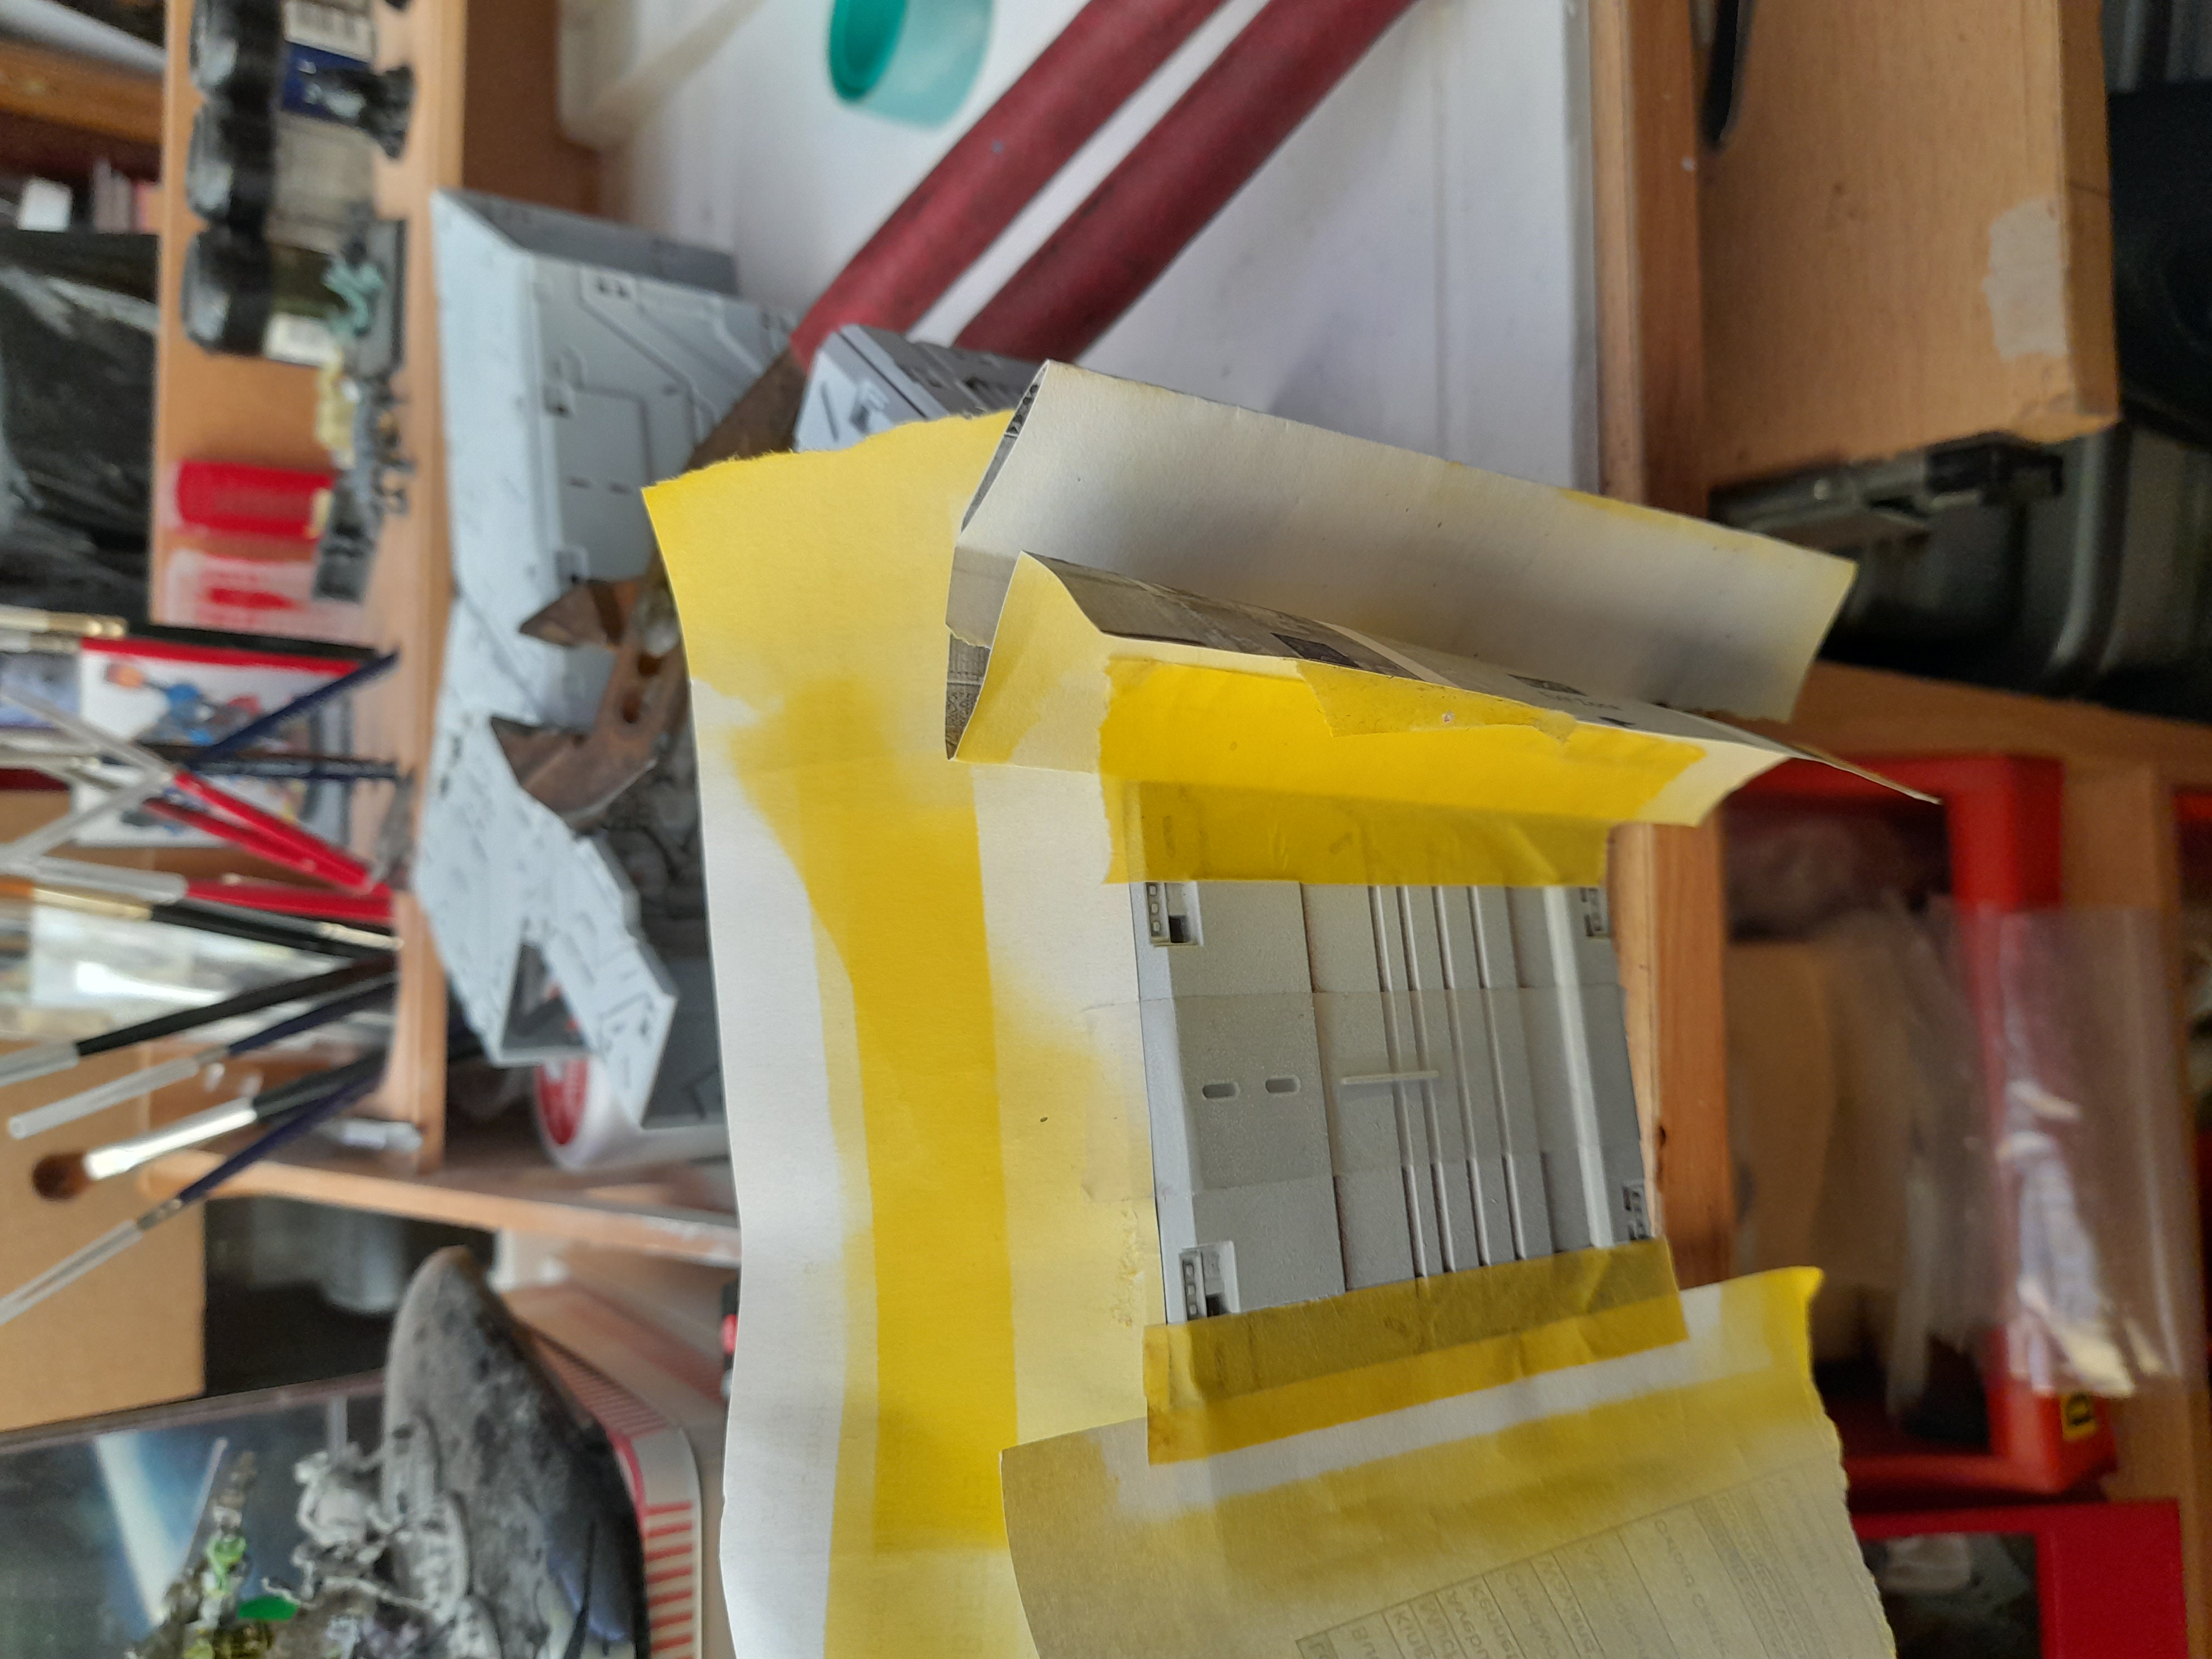

With the last remnants of the yellow can I just about managed to cover all the parts I wanted to.
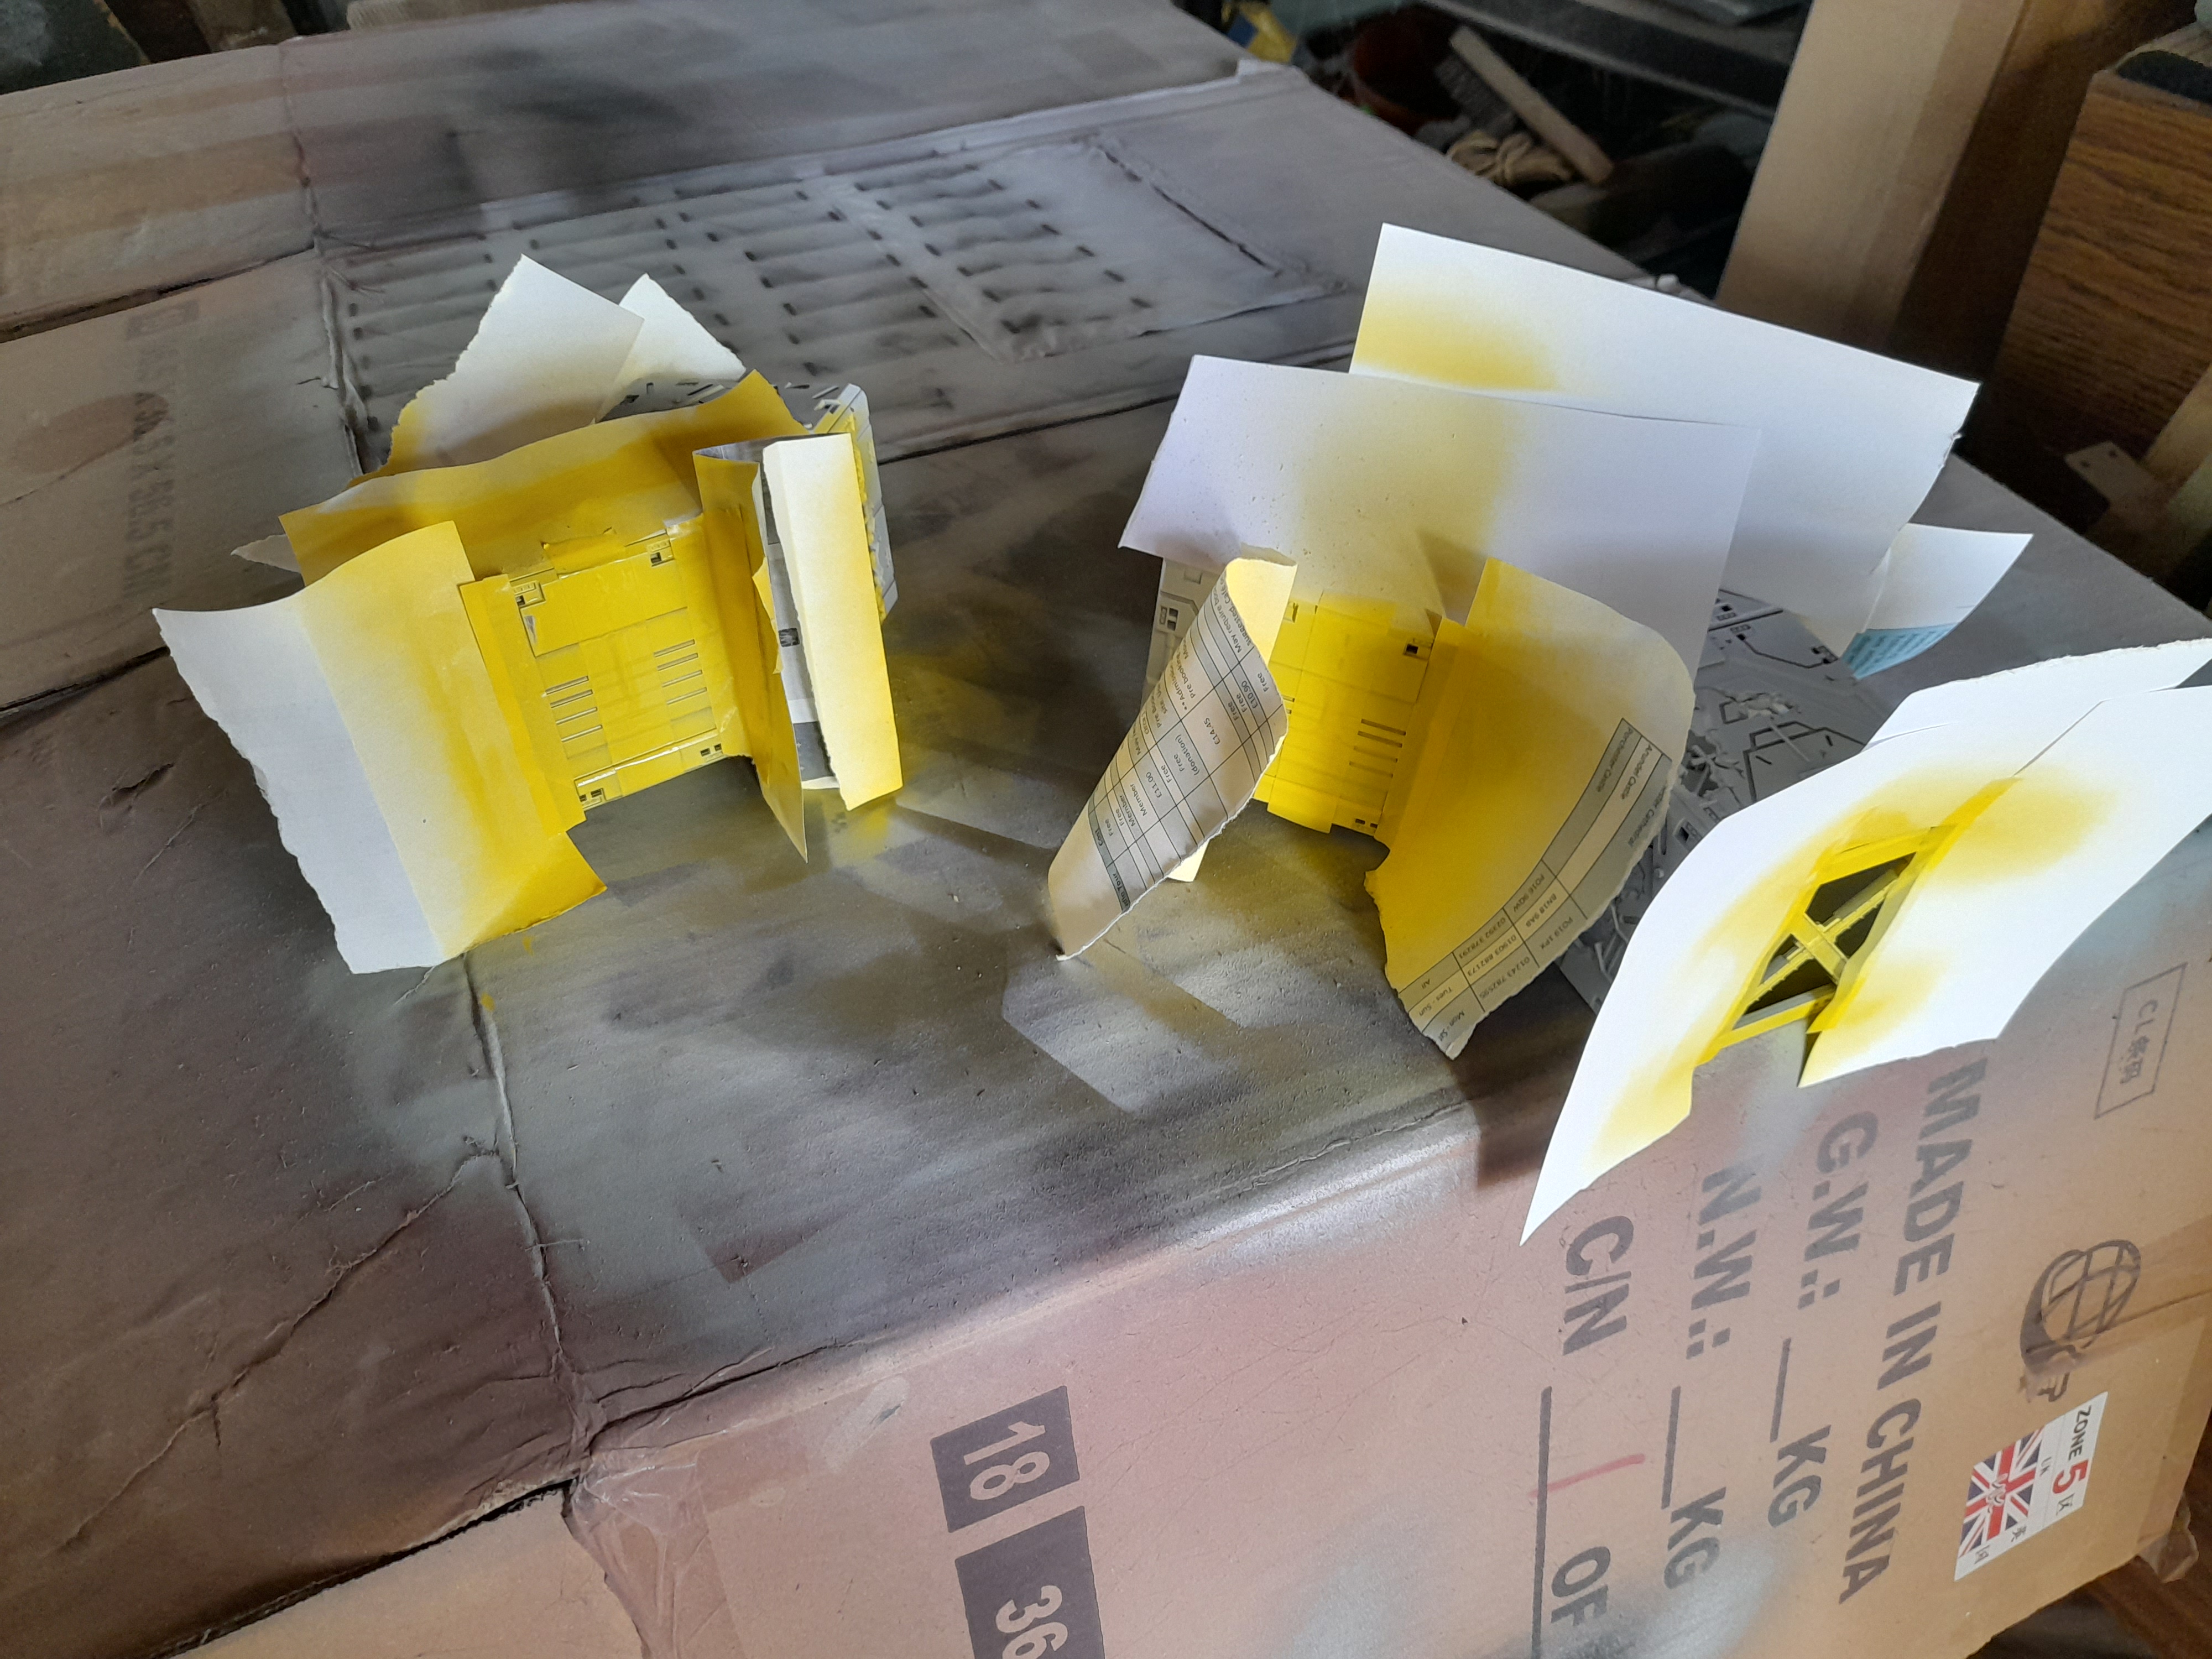
The fun part with masking is always in the peel off. I had a little bleed under with the tape, but where it was looking too much I scraped away at it with my finger nail. Since it had three more layers of paint underneath scraping it back here makes it look like wear and tear revealing the primer underneath – since it was exactly that 😊
Detailing the Deadzone
18th October 2023
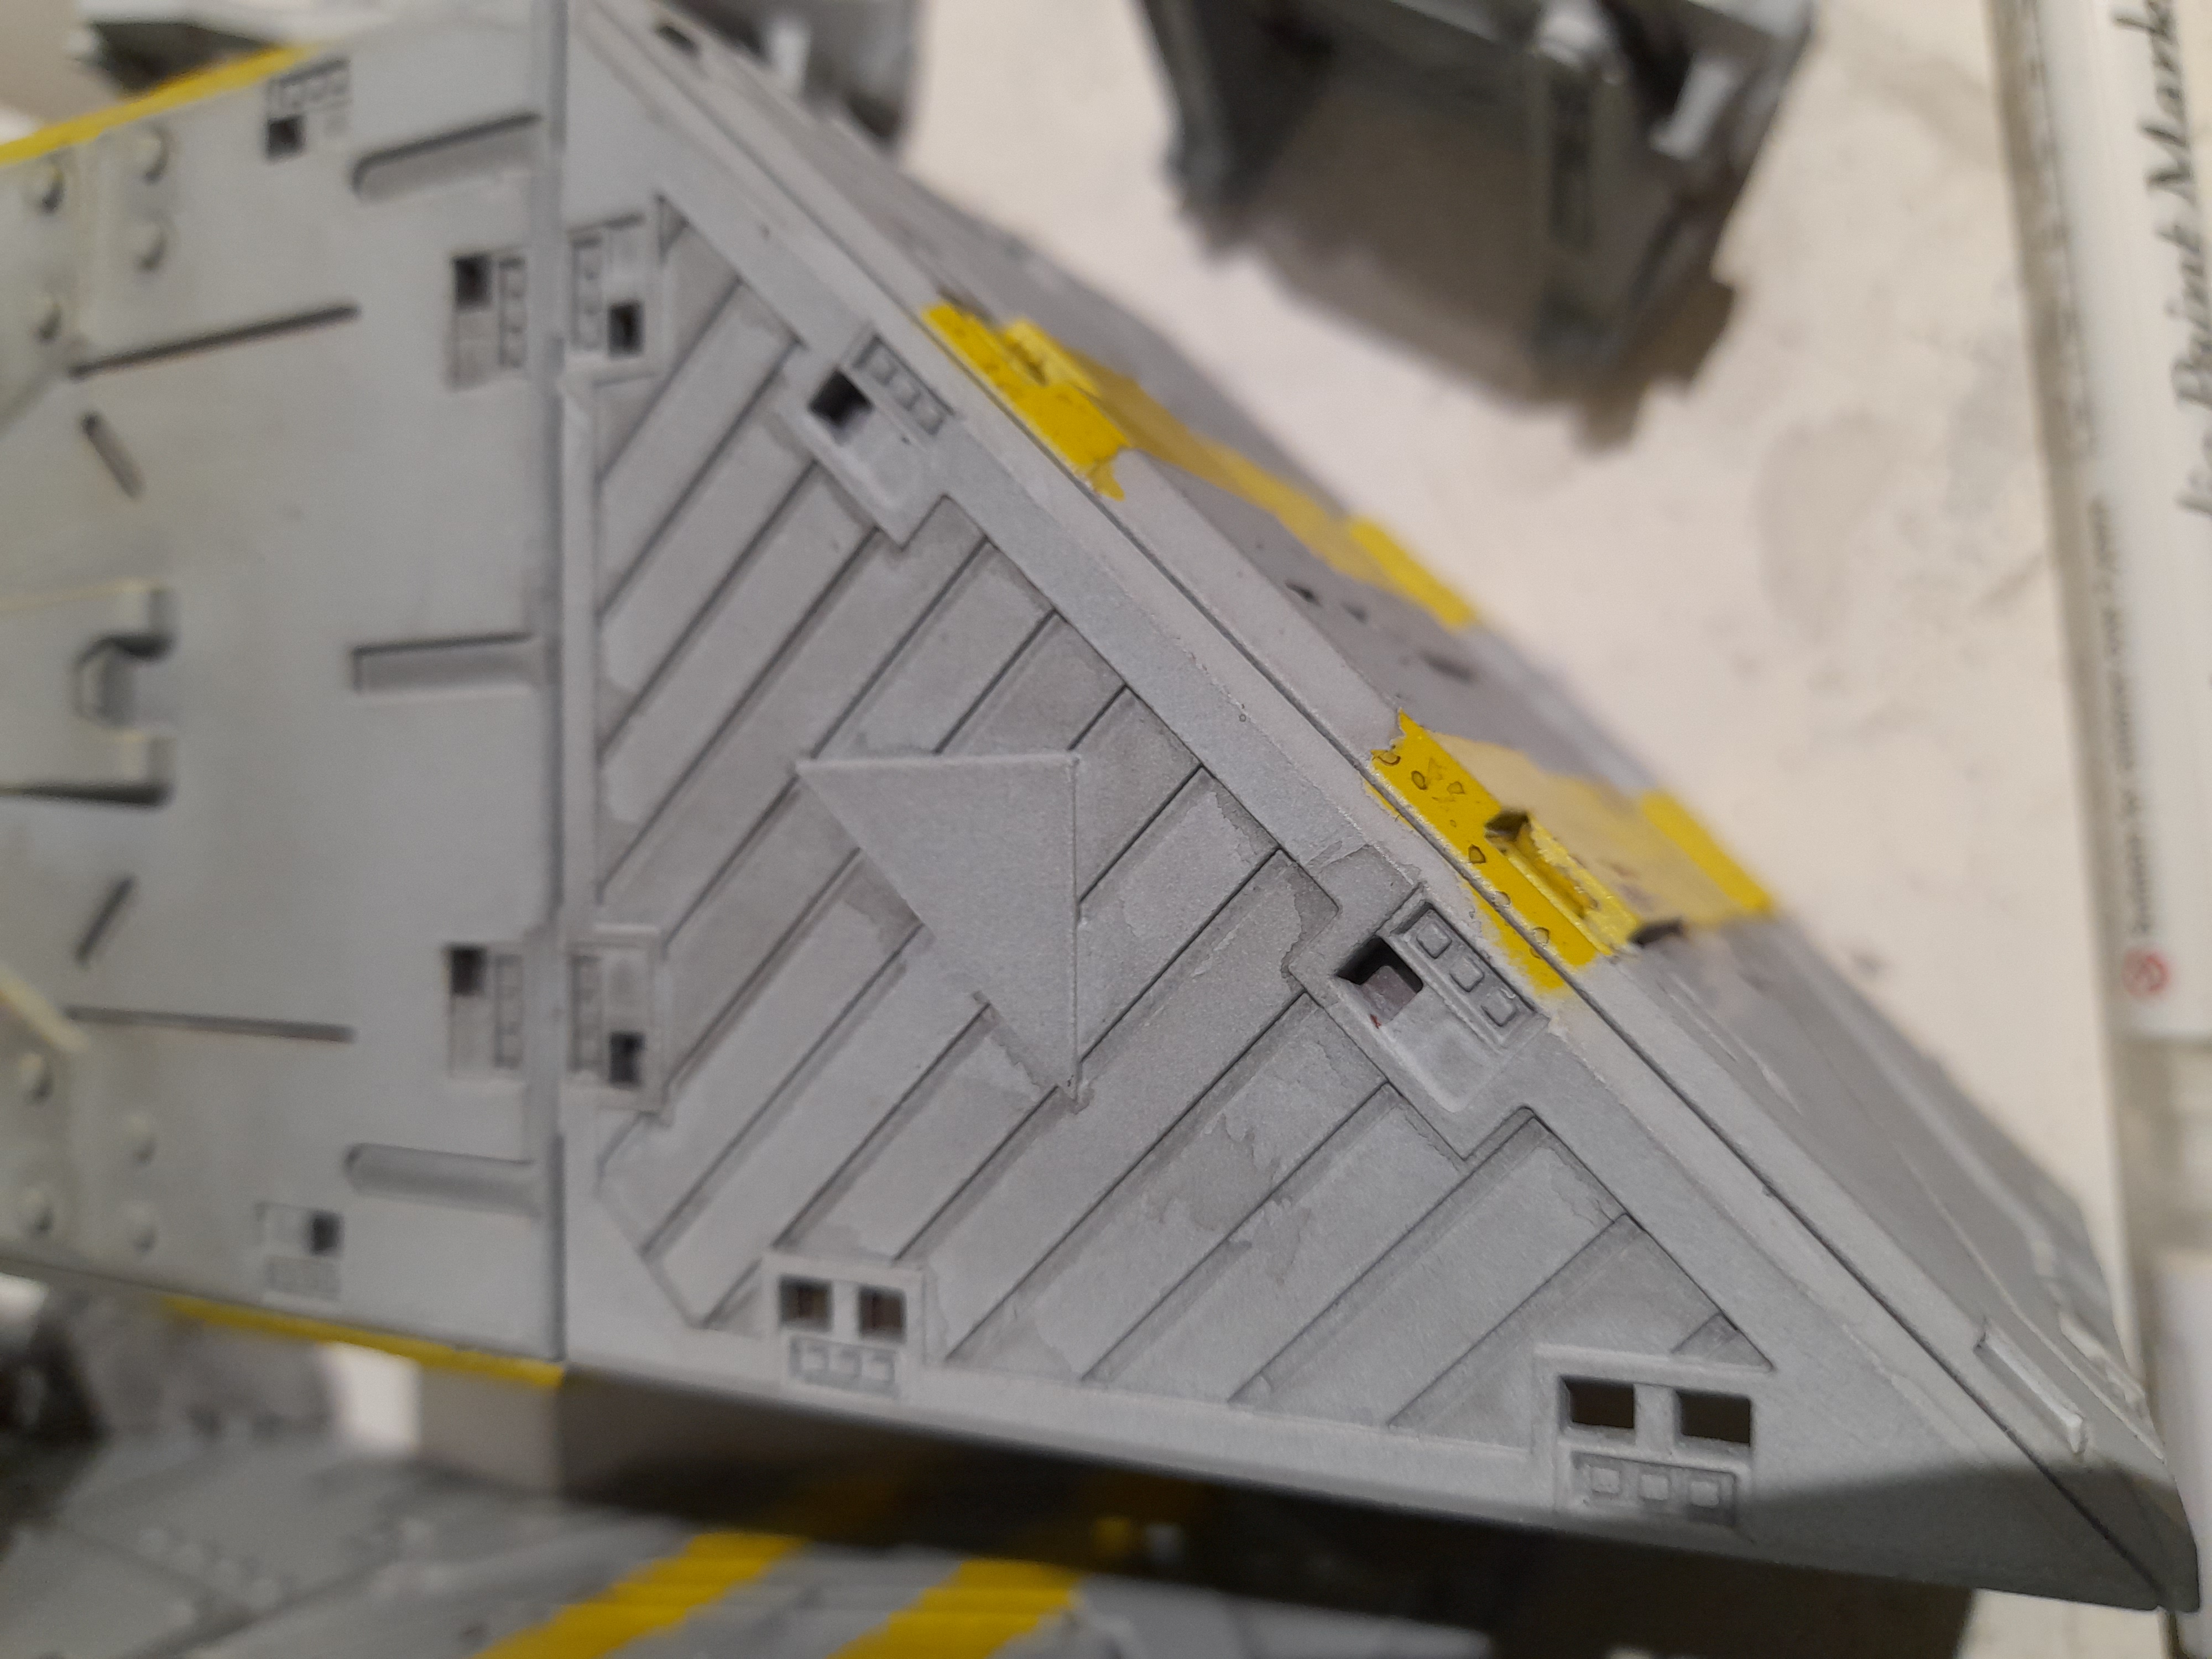
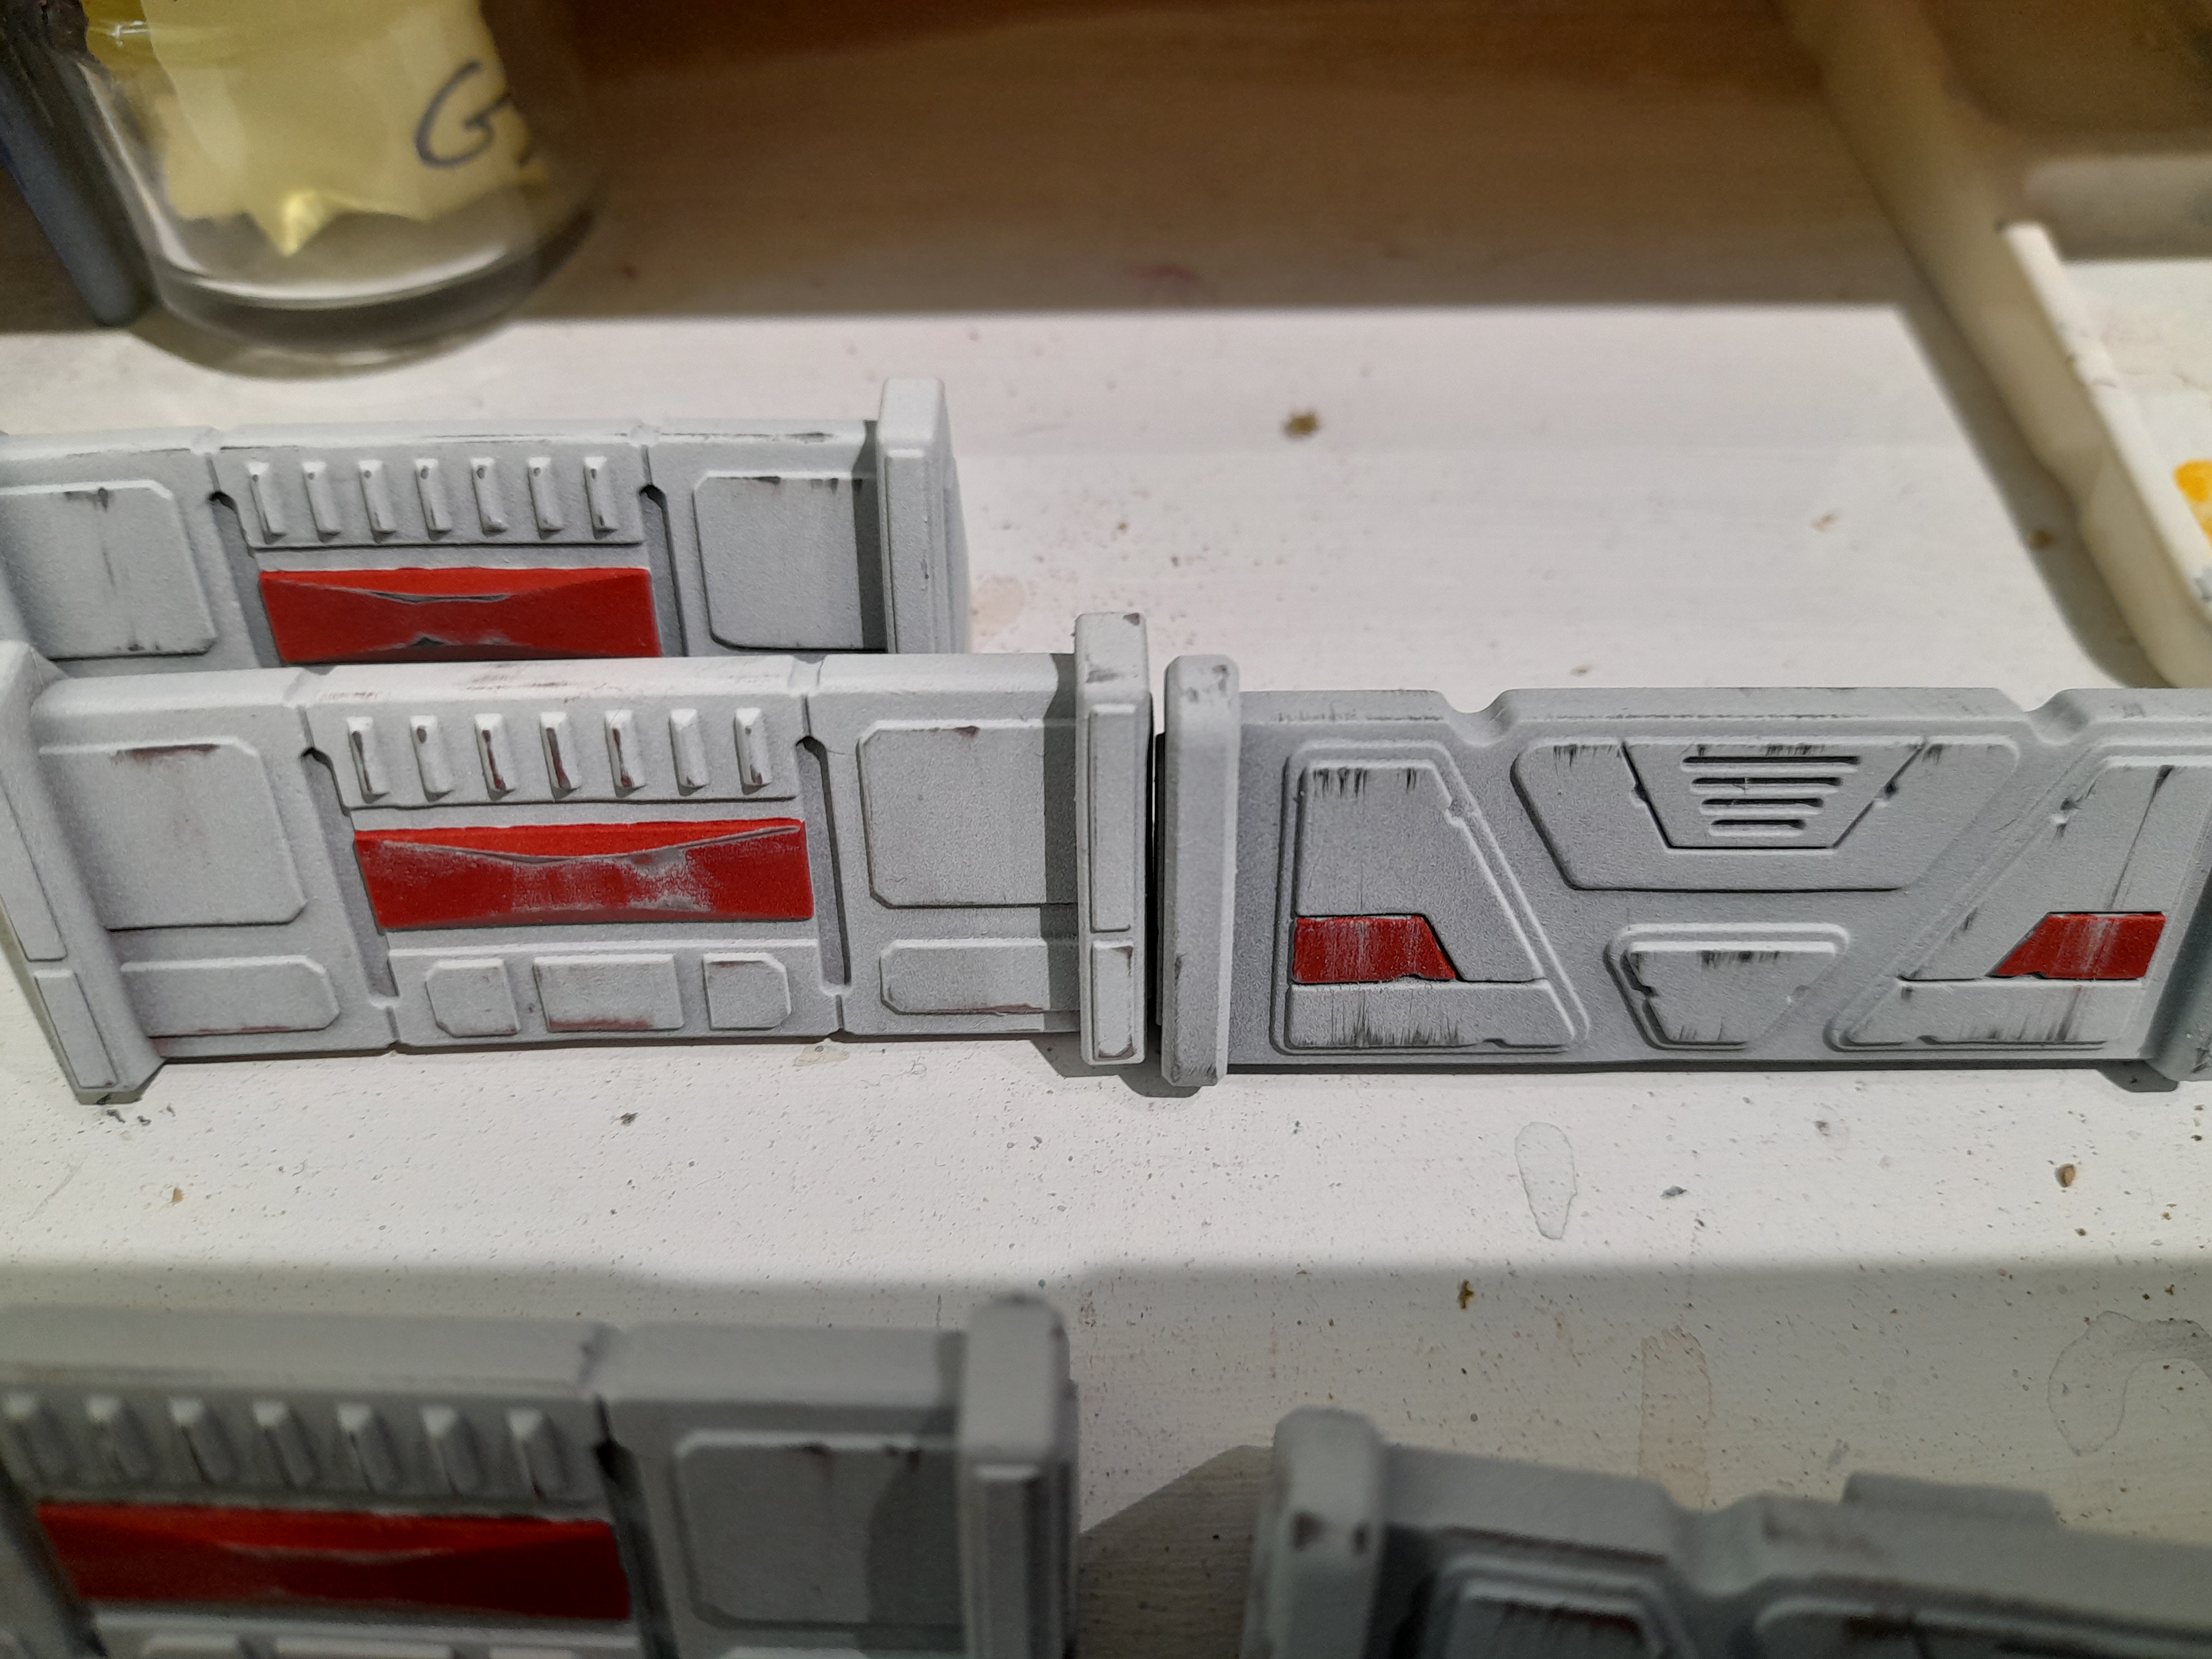
With core colours down it was time to add some detail and weathering, to hopefully bring things to life a bit more.
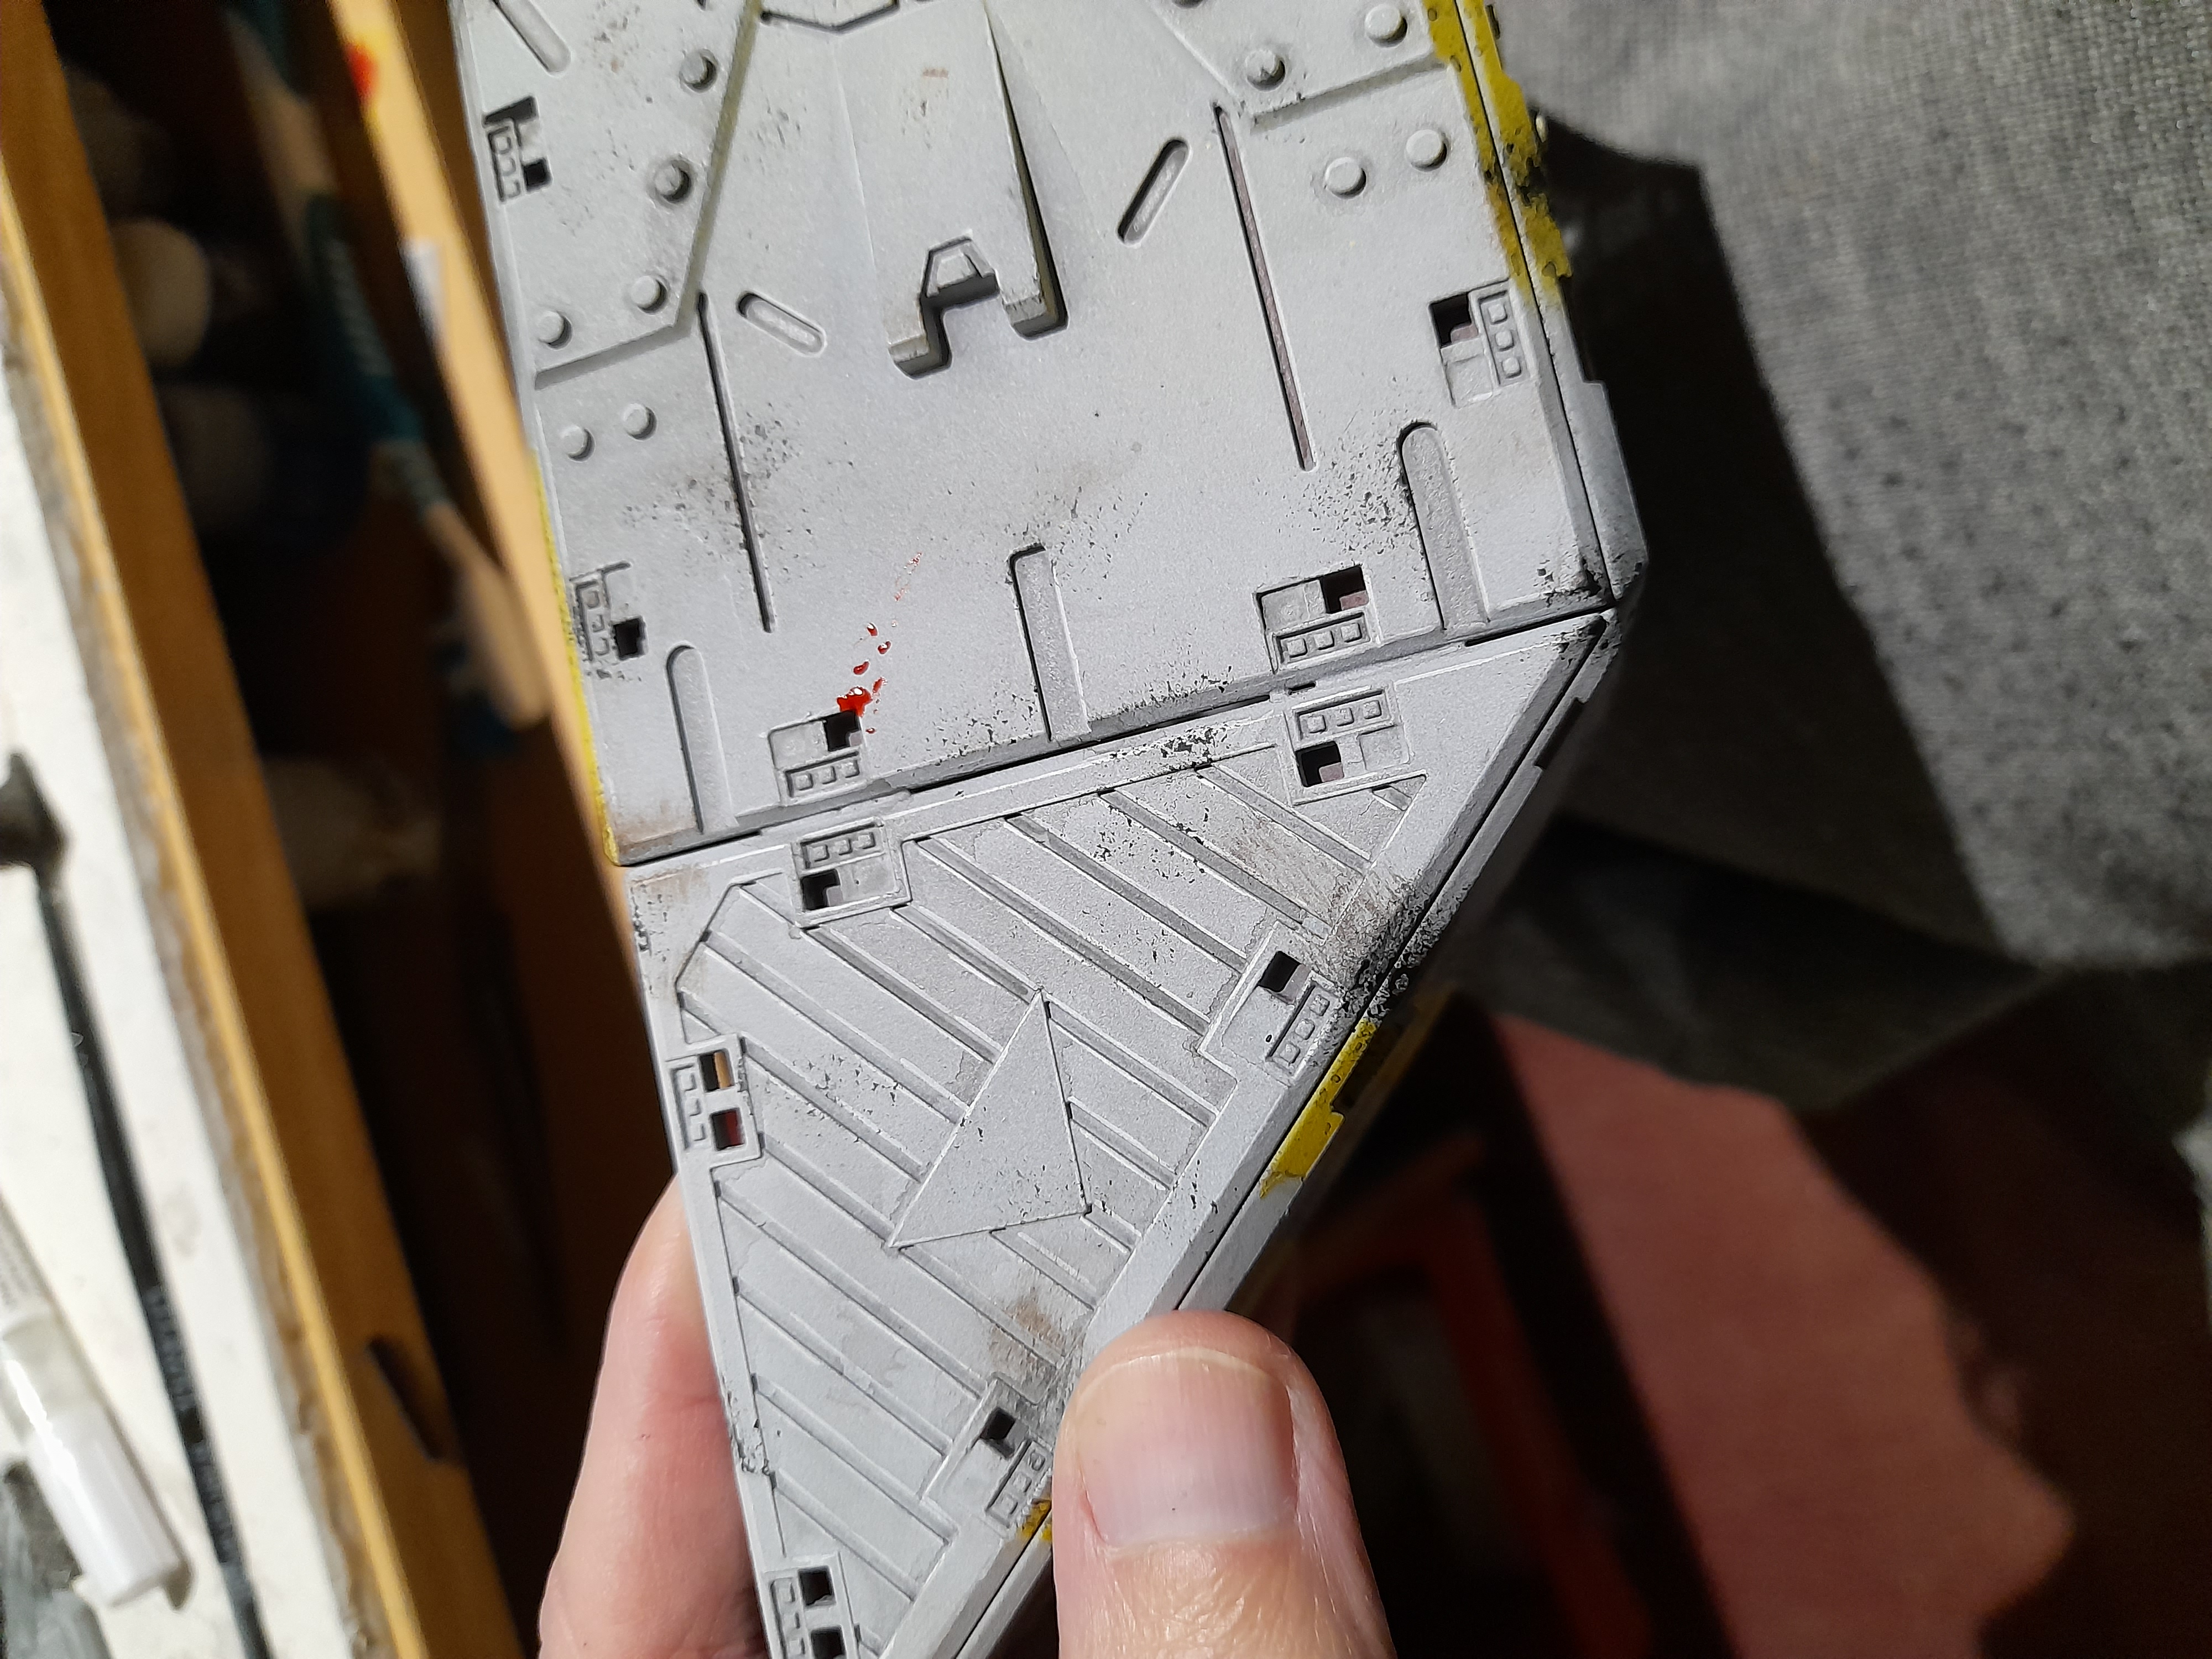
Started out with a thin black wash over all of the panels.
Followed this up with edge highlighting across all of the edges, using a white paint pen. This stage is pretty tedious to be fair, but does (in my opinion) give a good result.
Using black legion contrast I sponged it on in numerous places across the terrain pieces to add areas of wear, chipping and general dirt. When the sponge started to get a bit dry I would then use it to smudge areas wear on the surfaces, before loading up again with contrast.
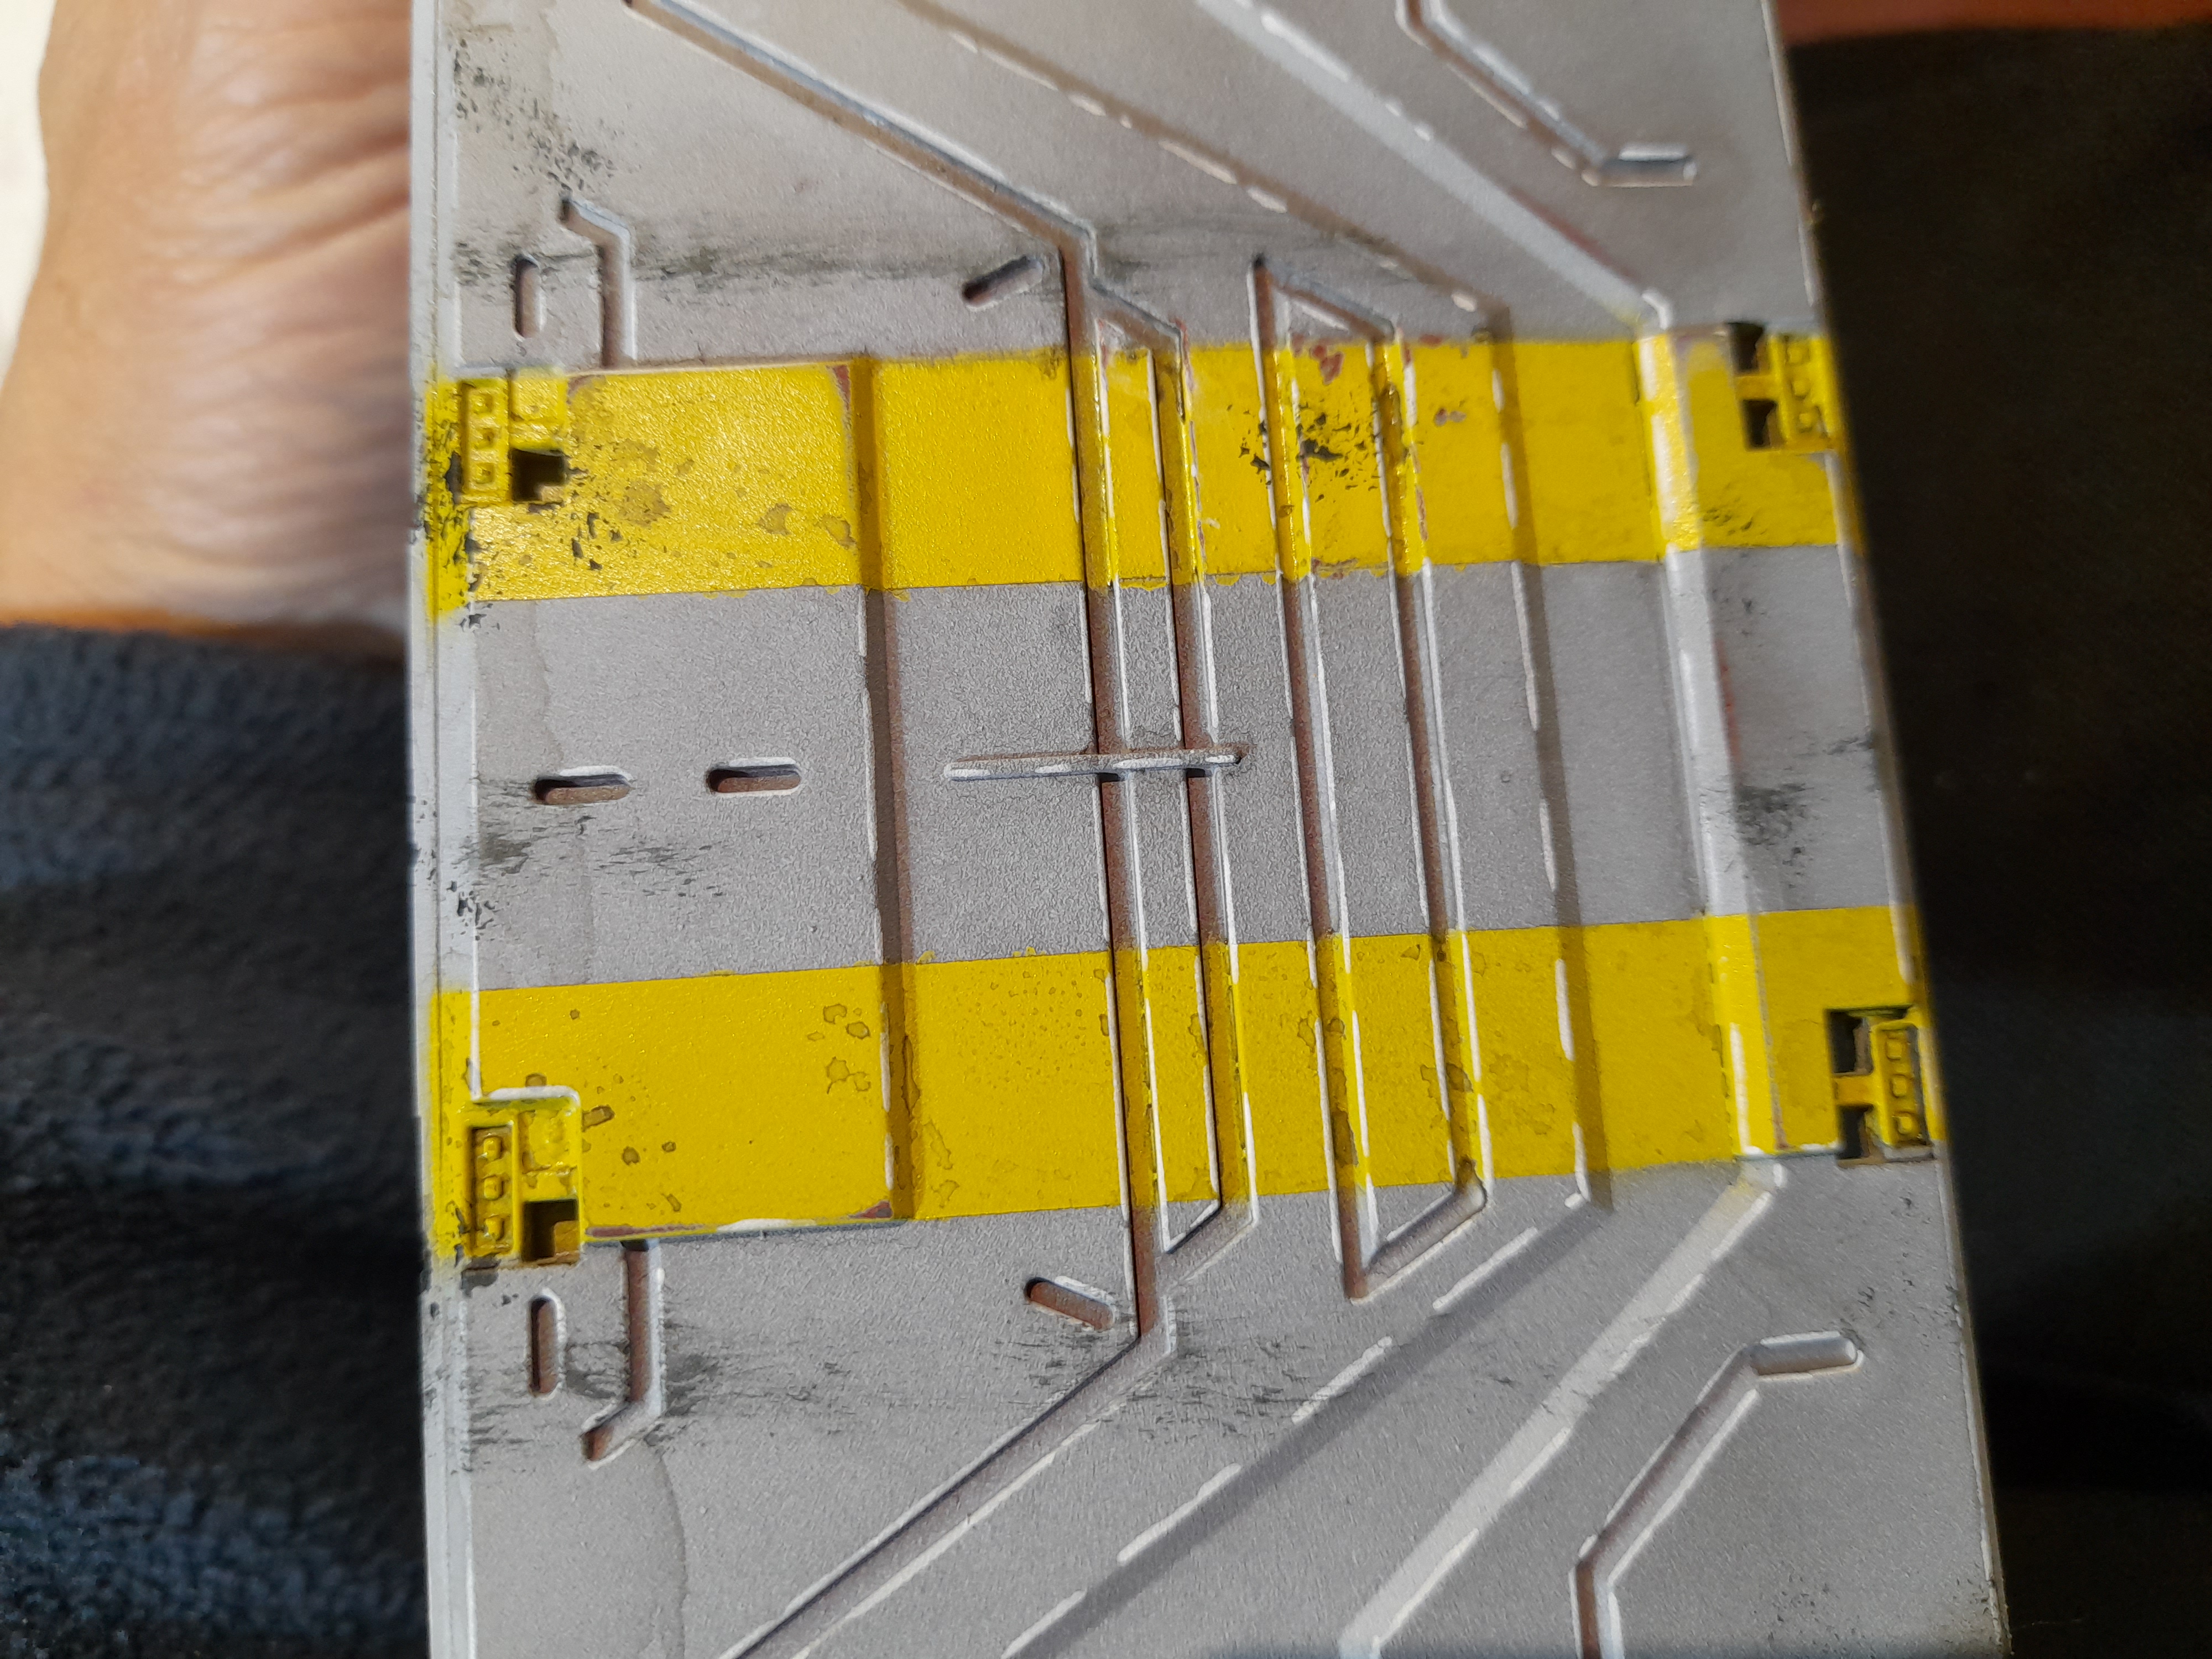
Next up it was adding some black templar contrast to the edges of all of the battle damaged areas.
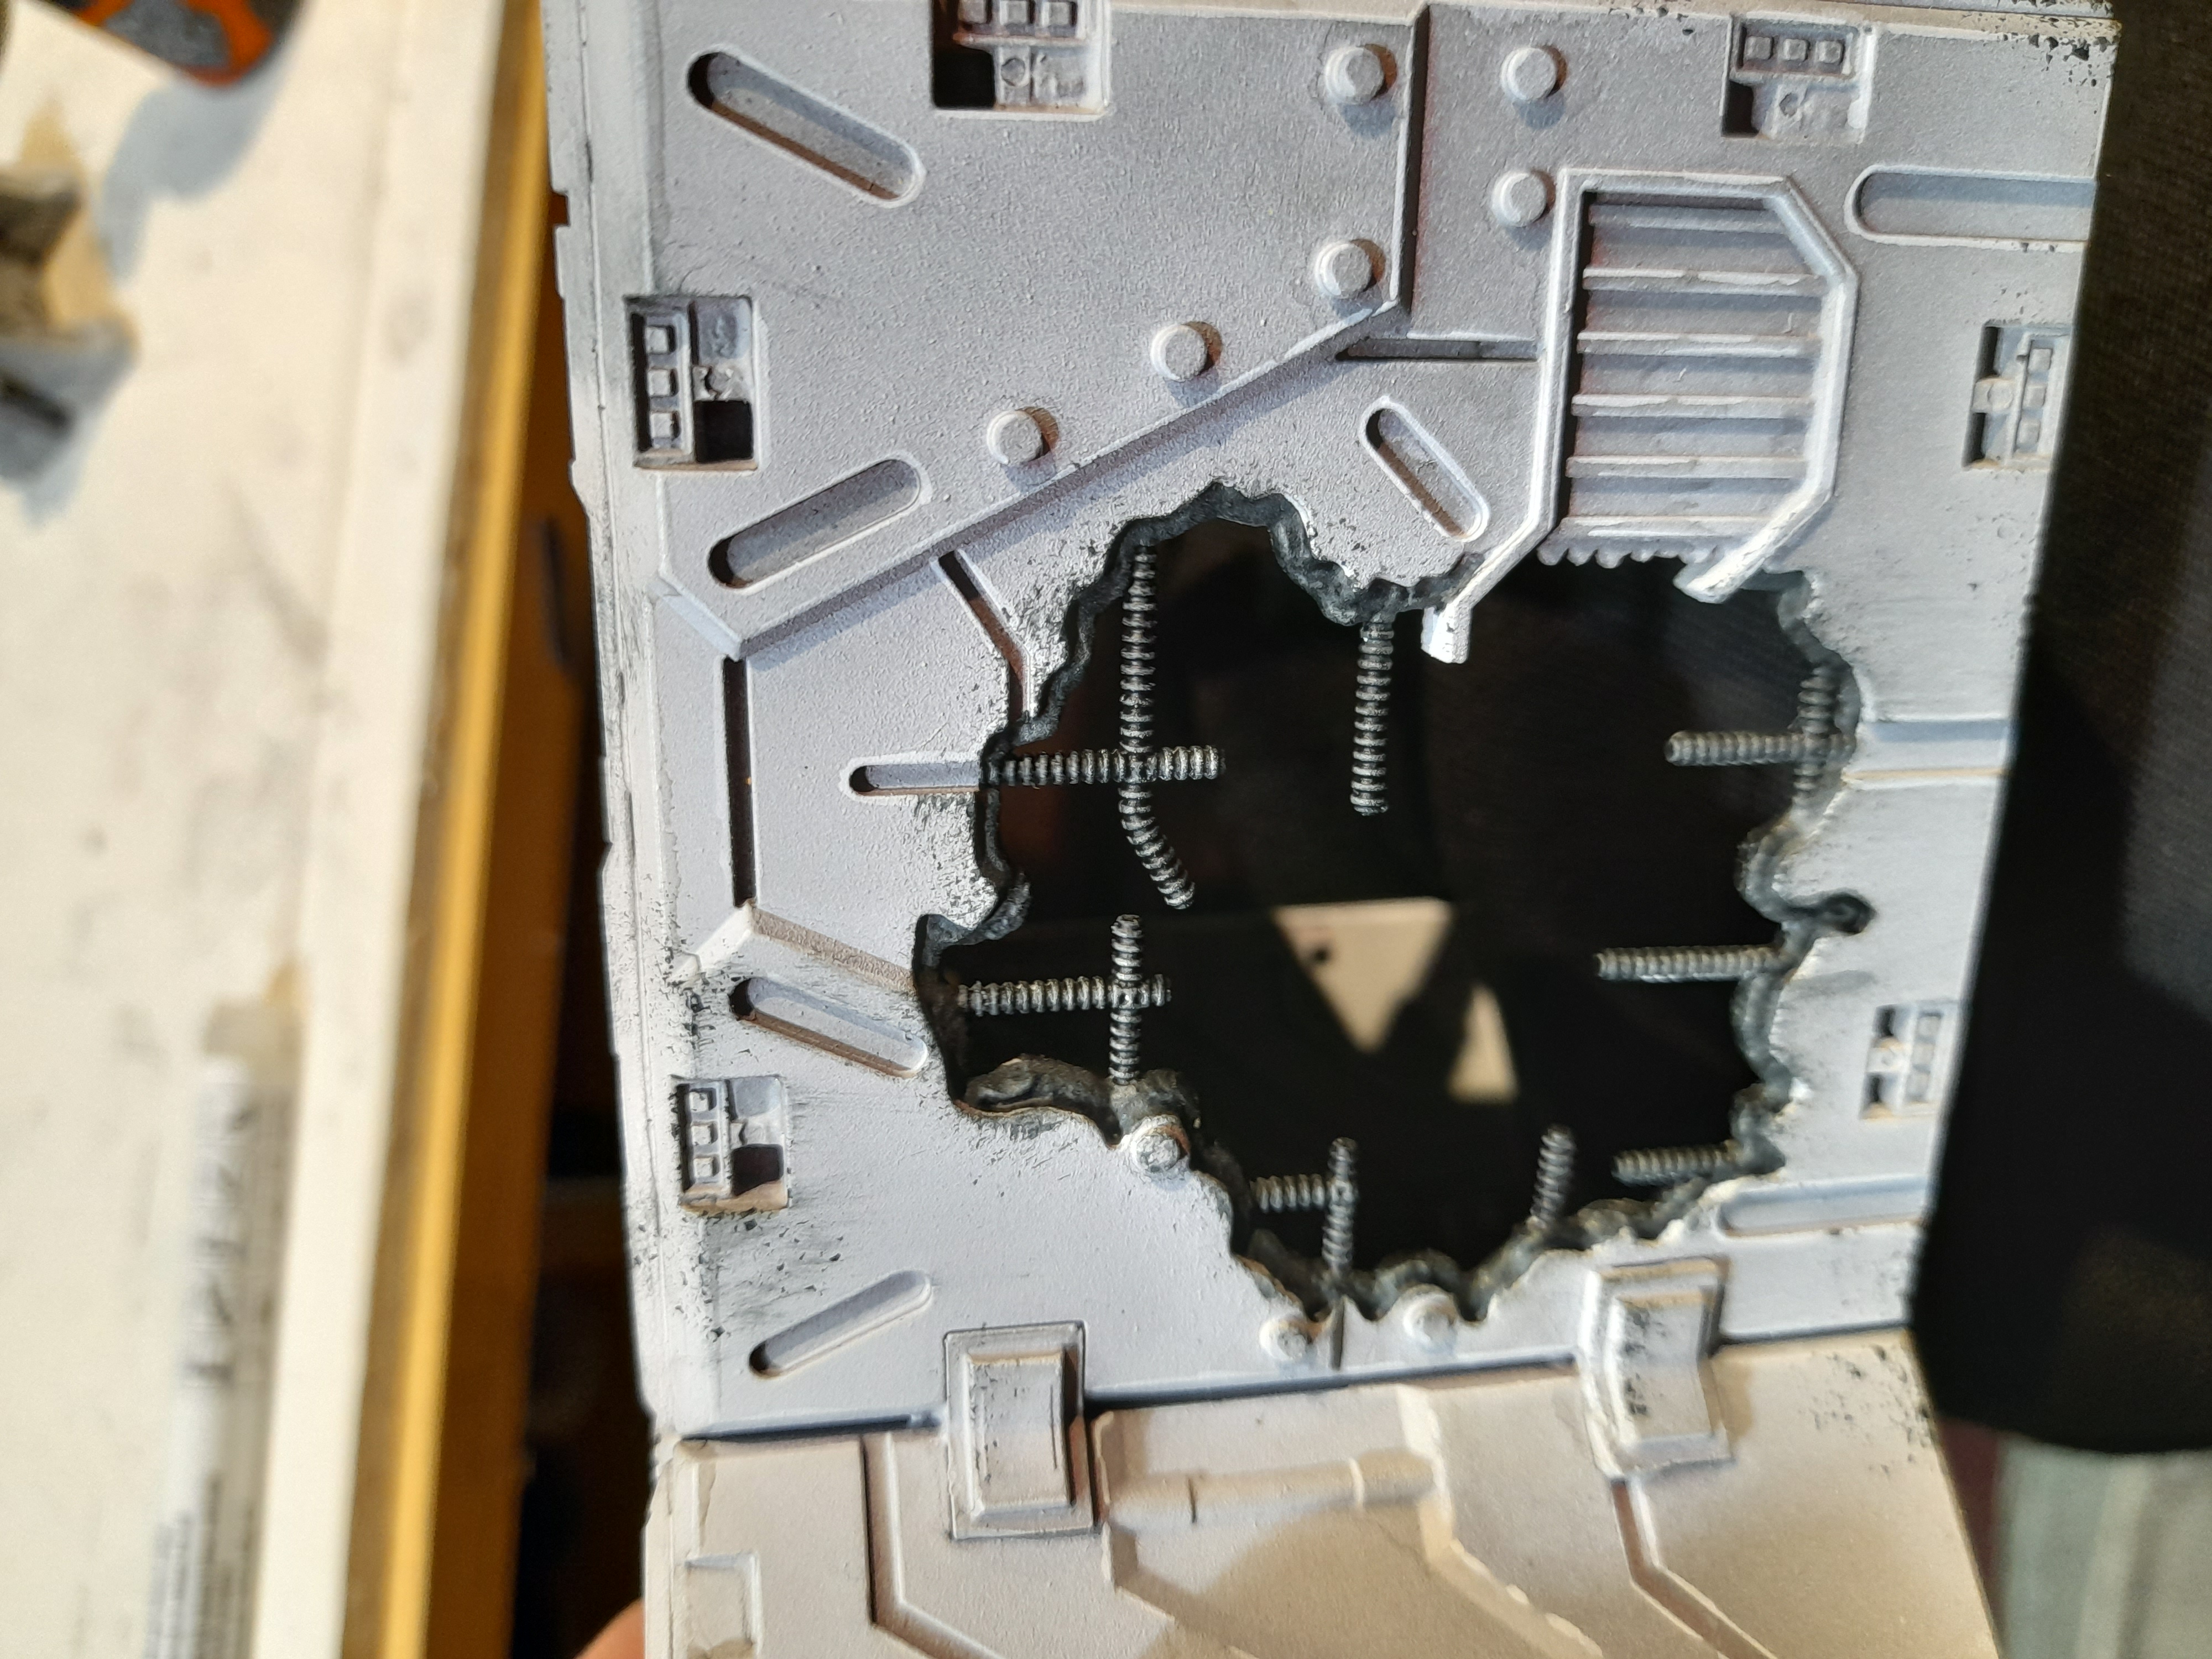
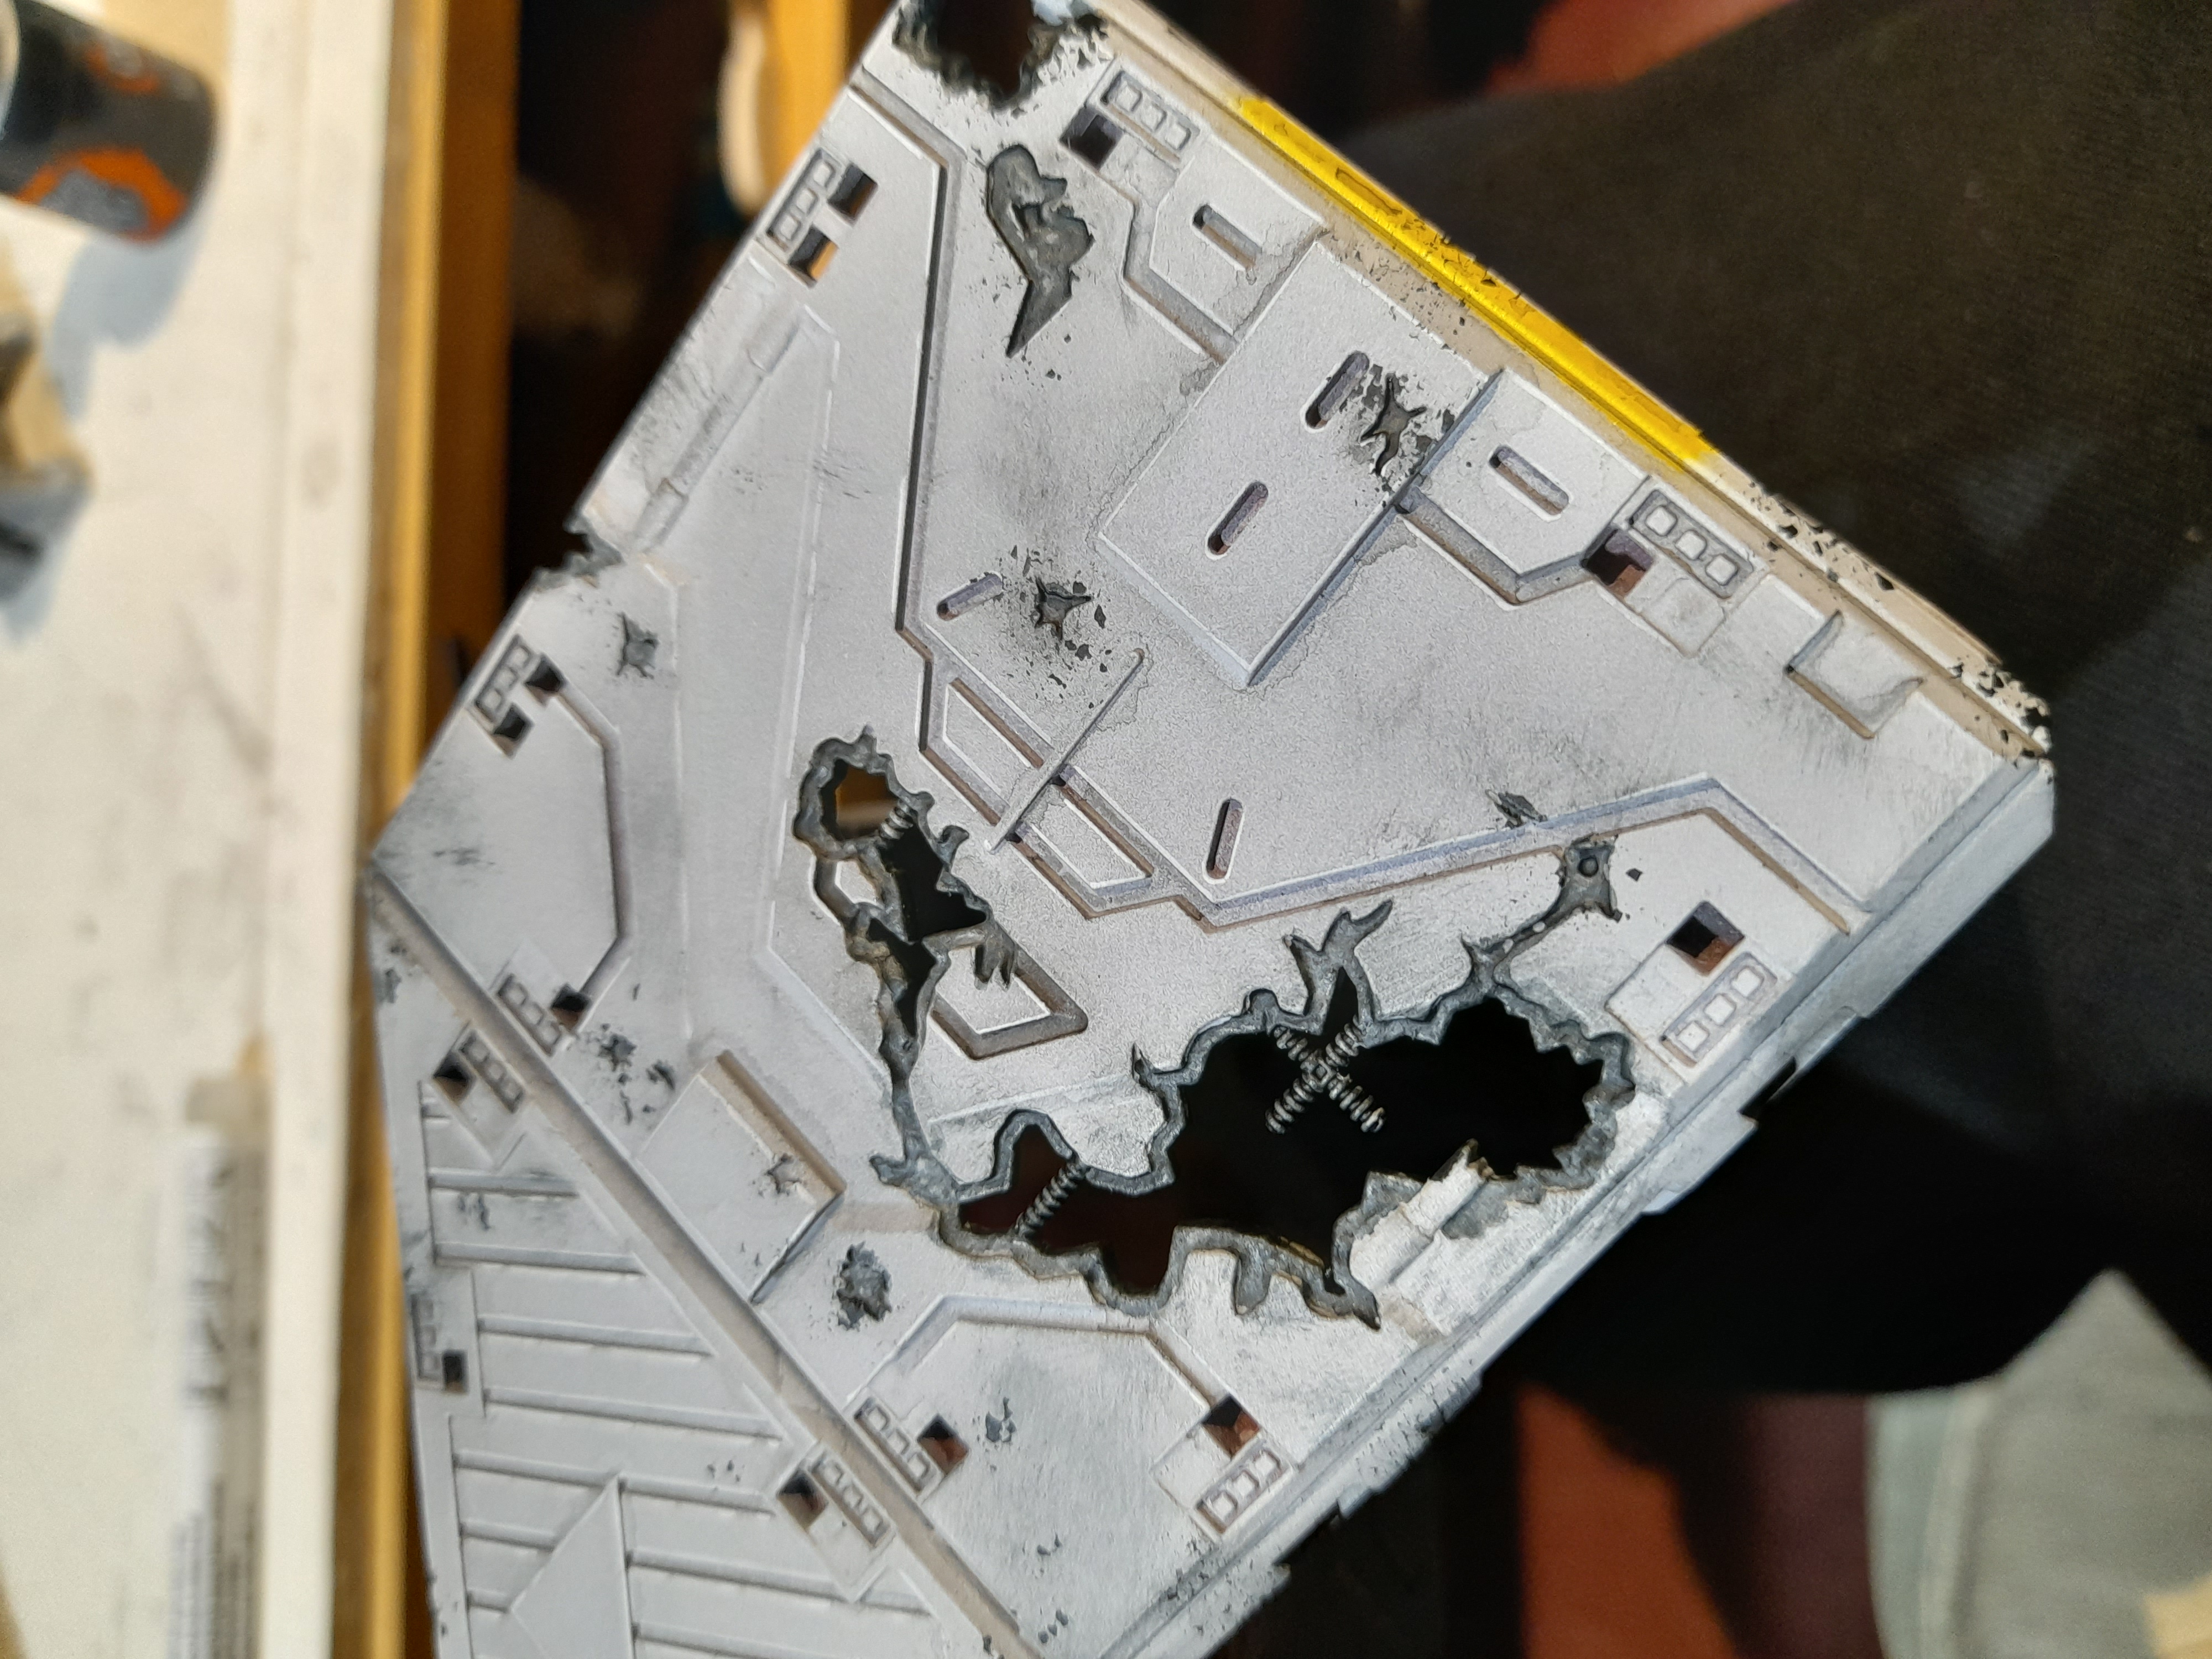
With this done I then turned to a brown contrast and carried out the same process. In some places I overlaid the brown on top of the black sponging, in others it was separate.
At some points I felt that perhaps I had gone a bit too far – but when I took a break for a bit and came back it looked ok to me 😊
Still more to get done, but it’s moving along now.
Need to roll the brown out across the rest of the pieces, add some metal chipping, some more blood splatters and also perhaps some spot colours around the small crane arm piece and the small barricades.
I quite enjoy the weathering stages with sponge work – just need to find the correct balance for it really.
Finishing the weathering
21st October 2023
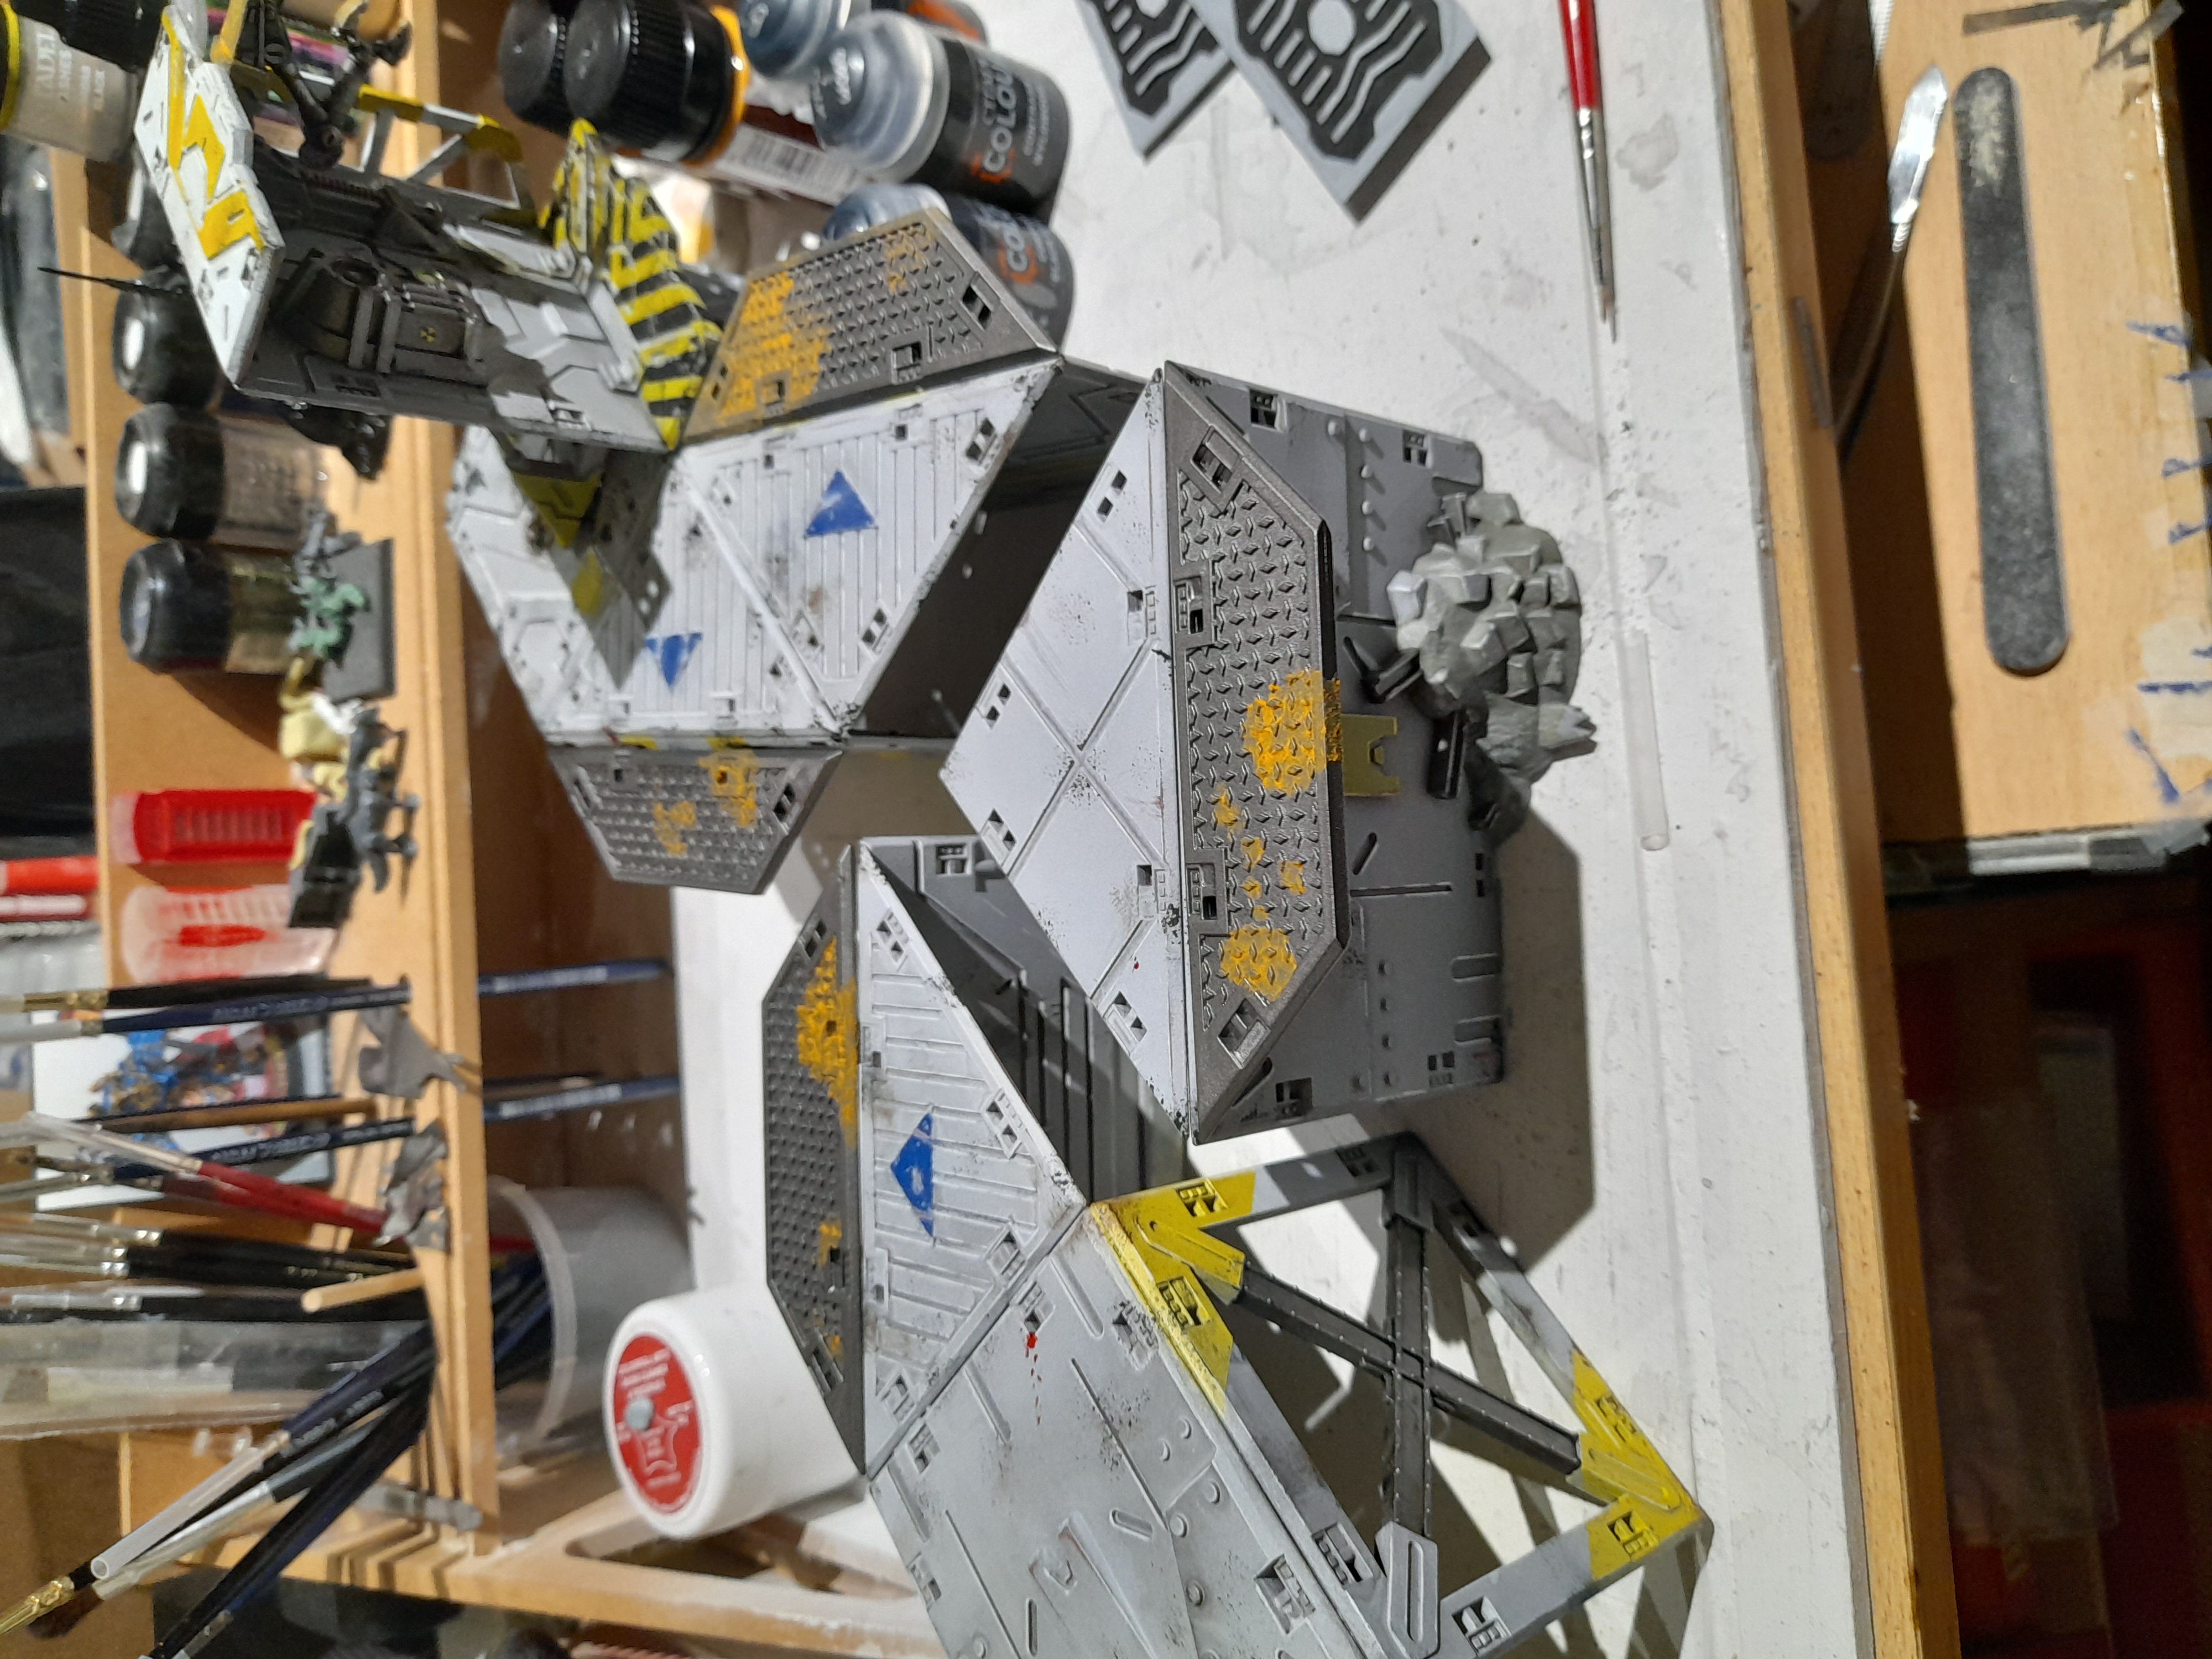
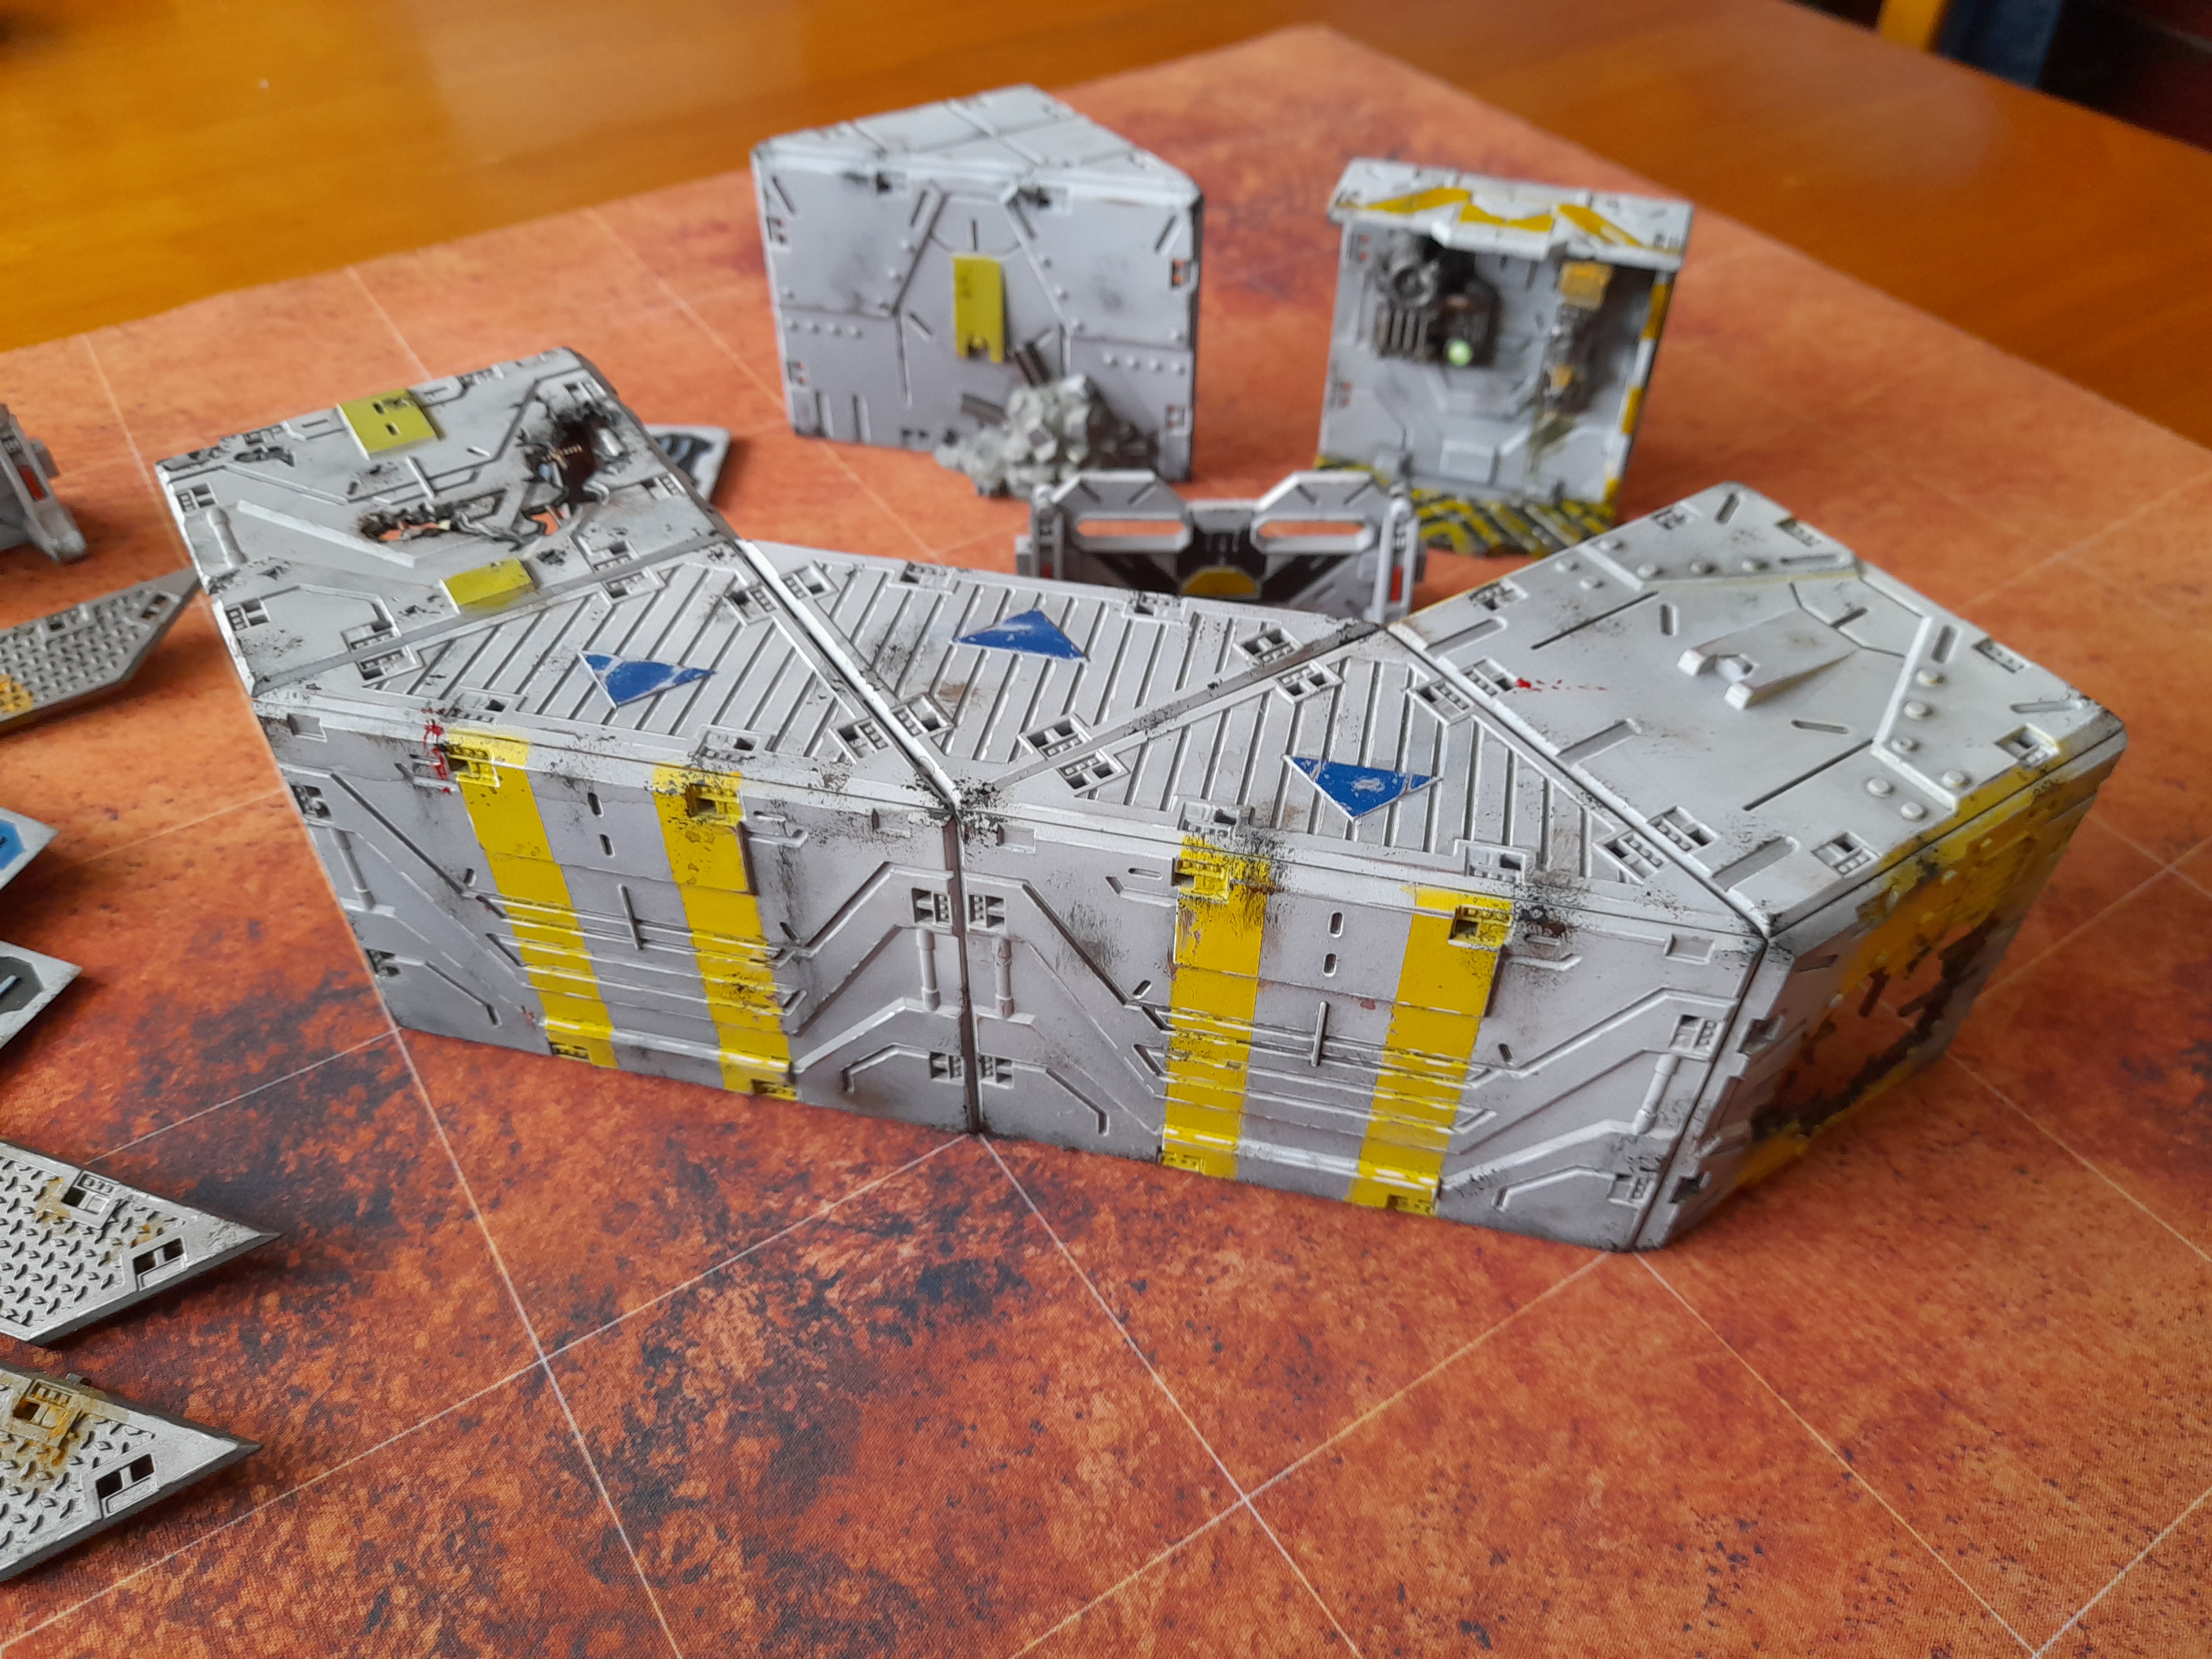
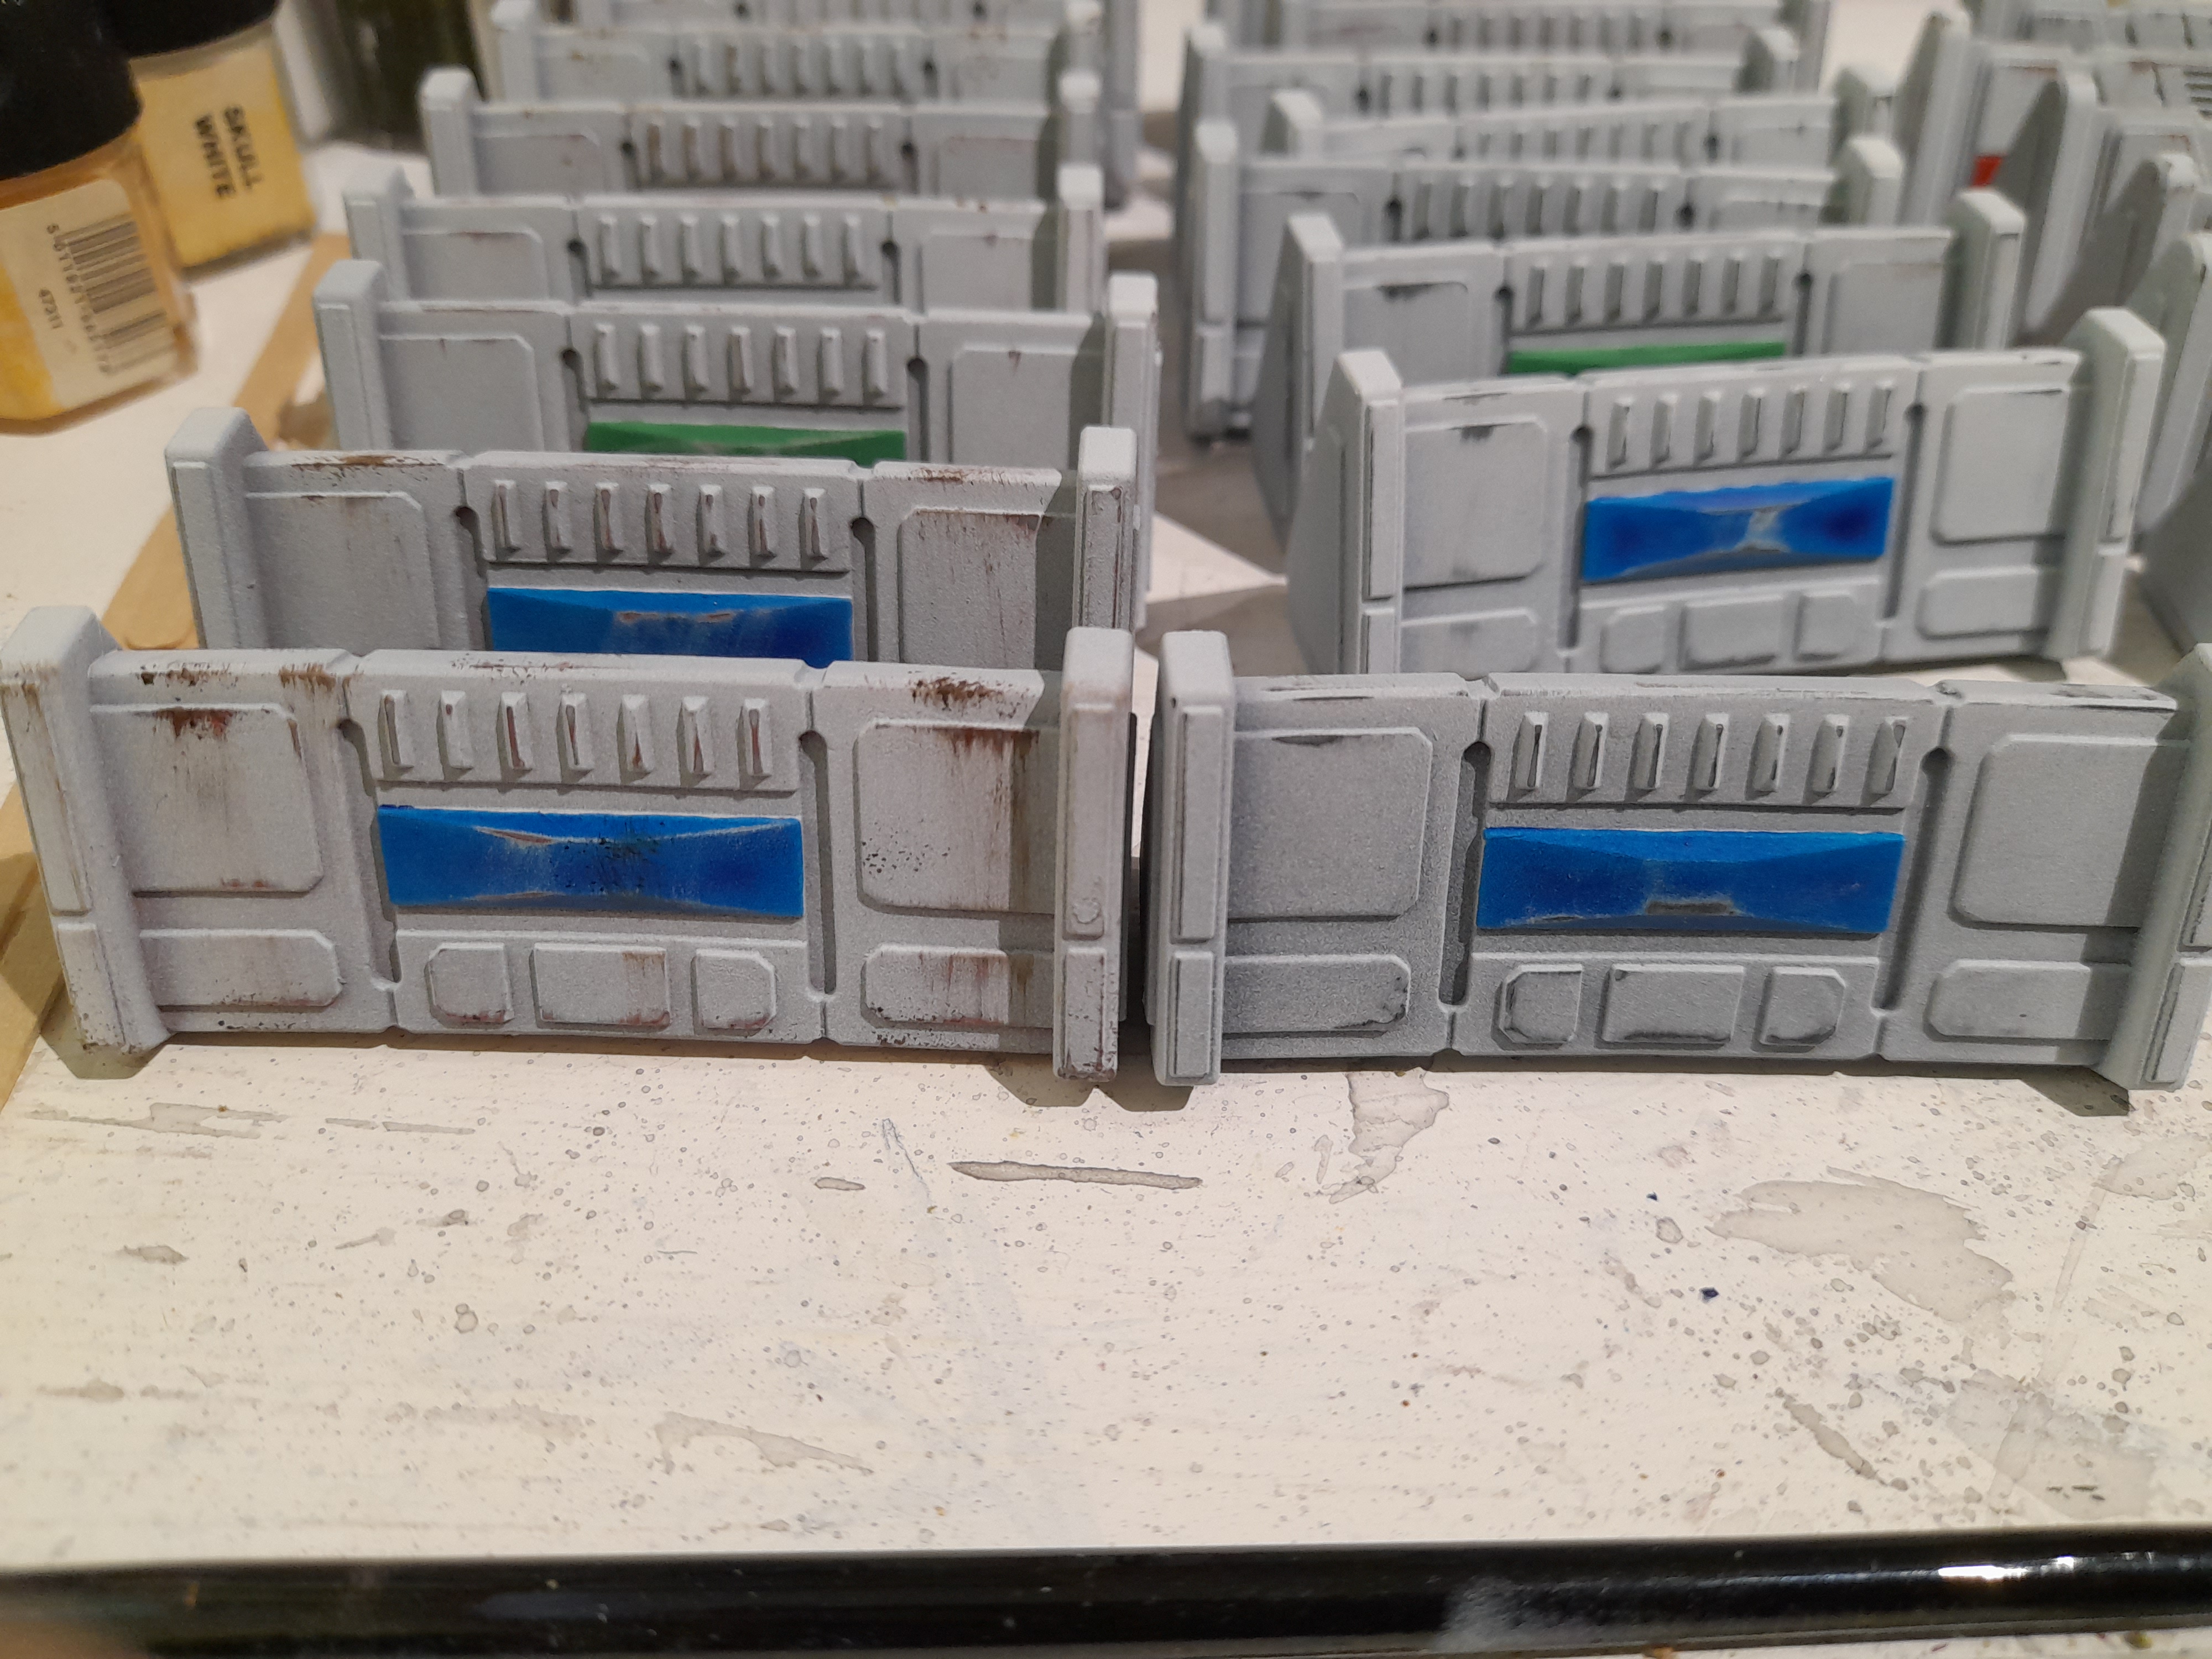
I carried on by rolling out the brown weathering stages to all of the pieces.
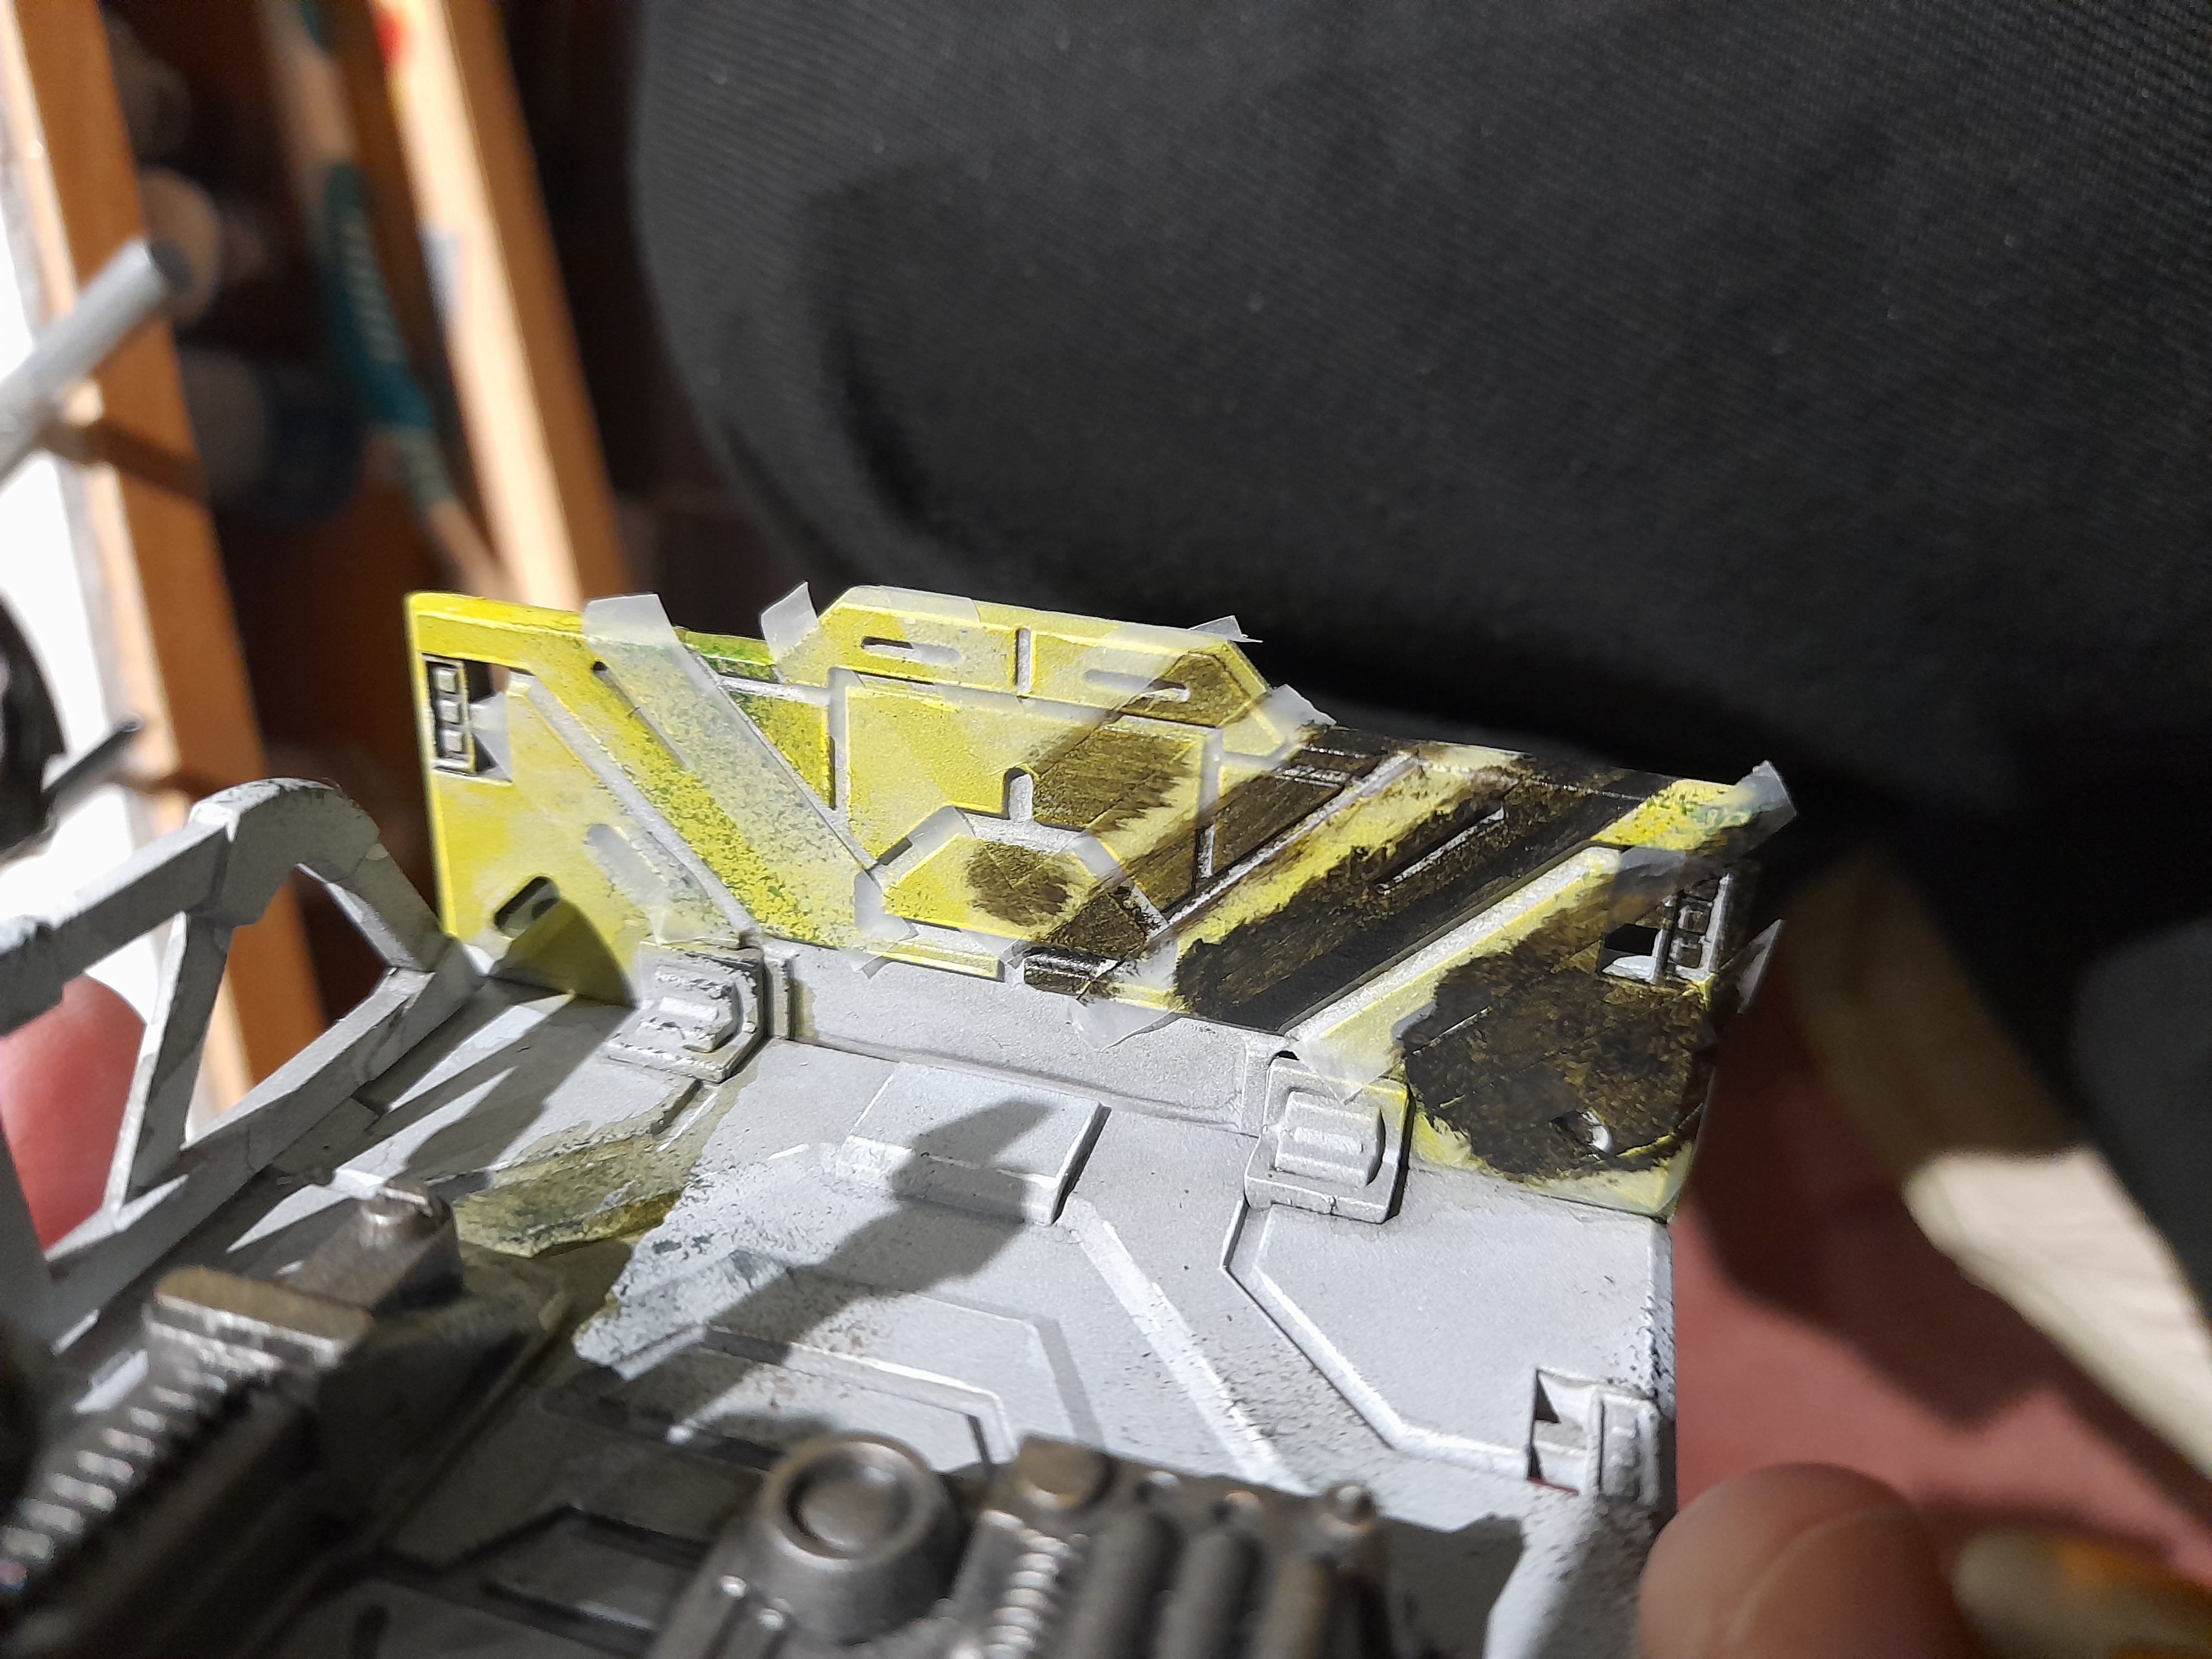
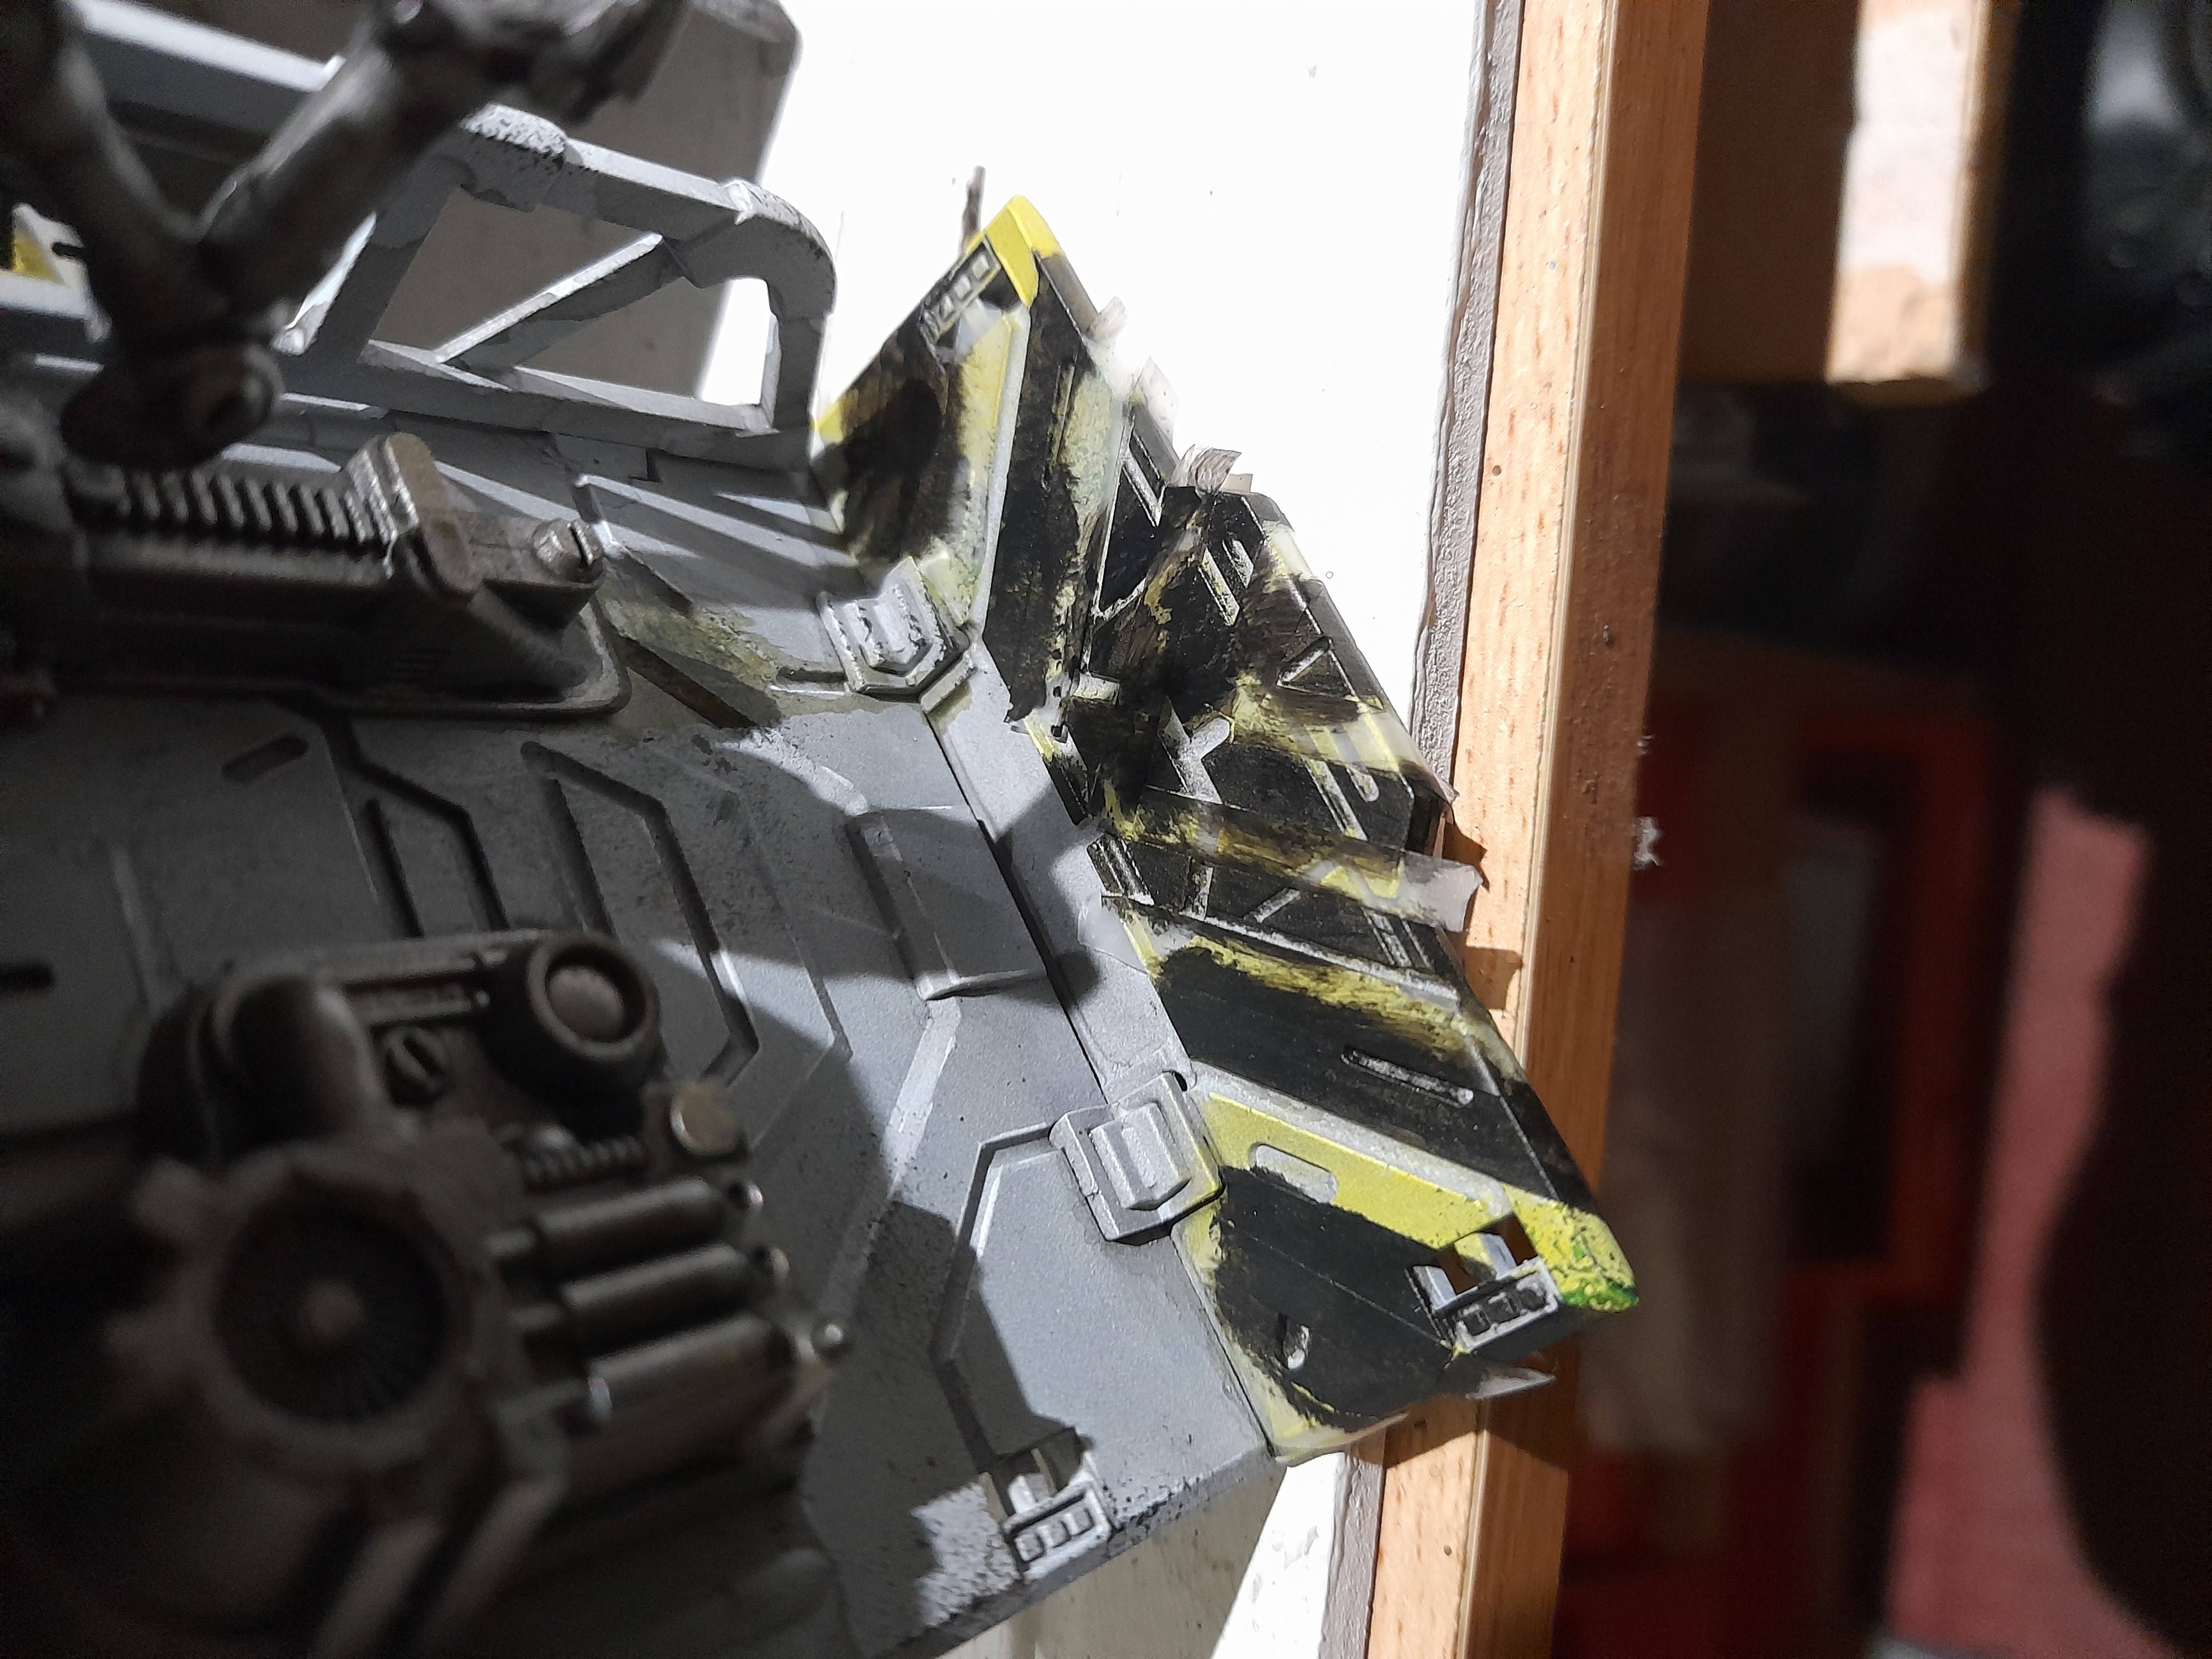
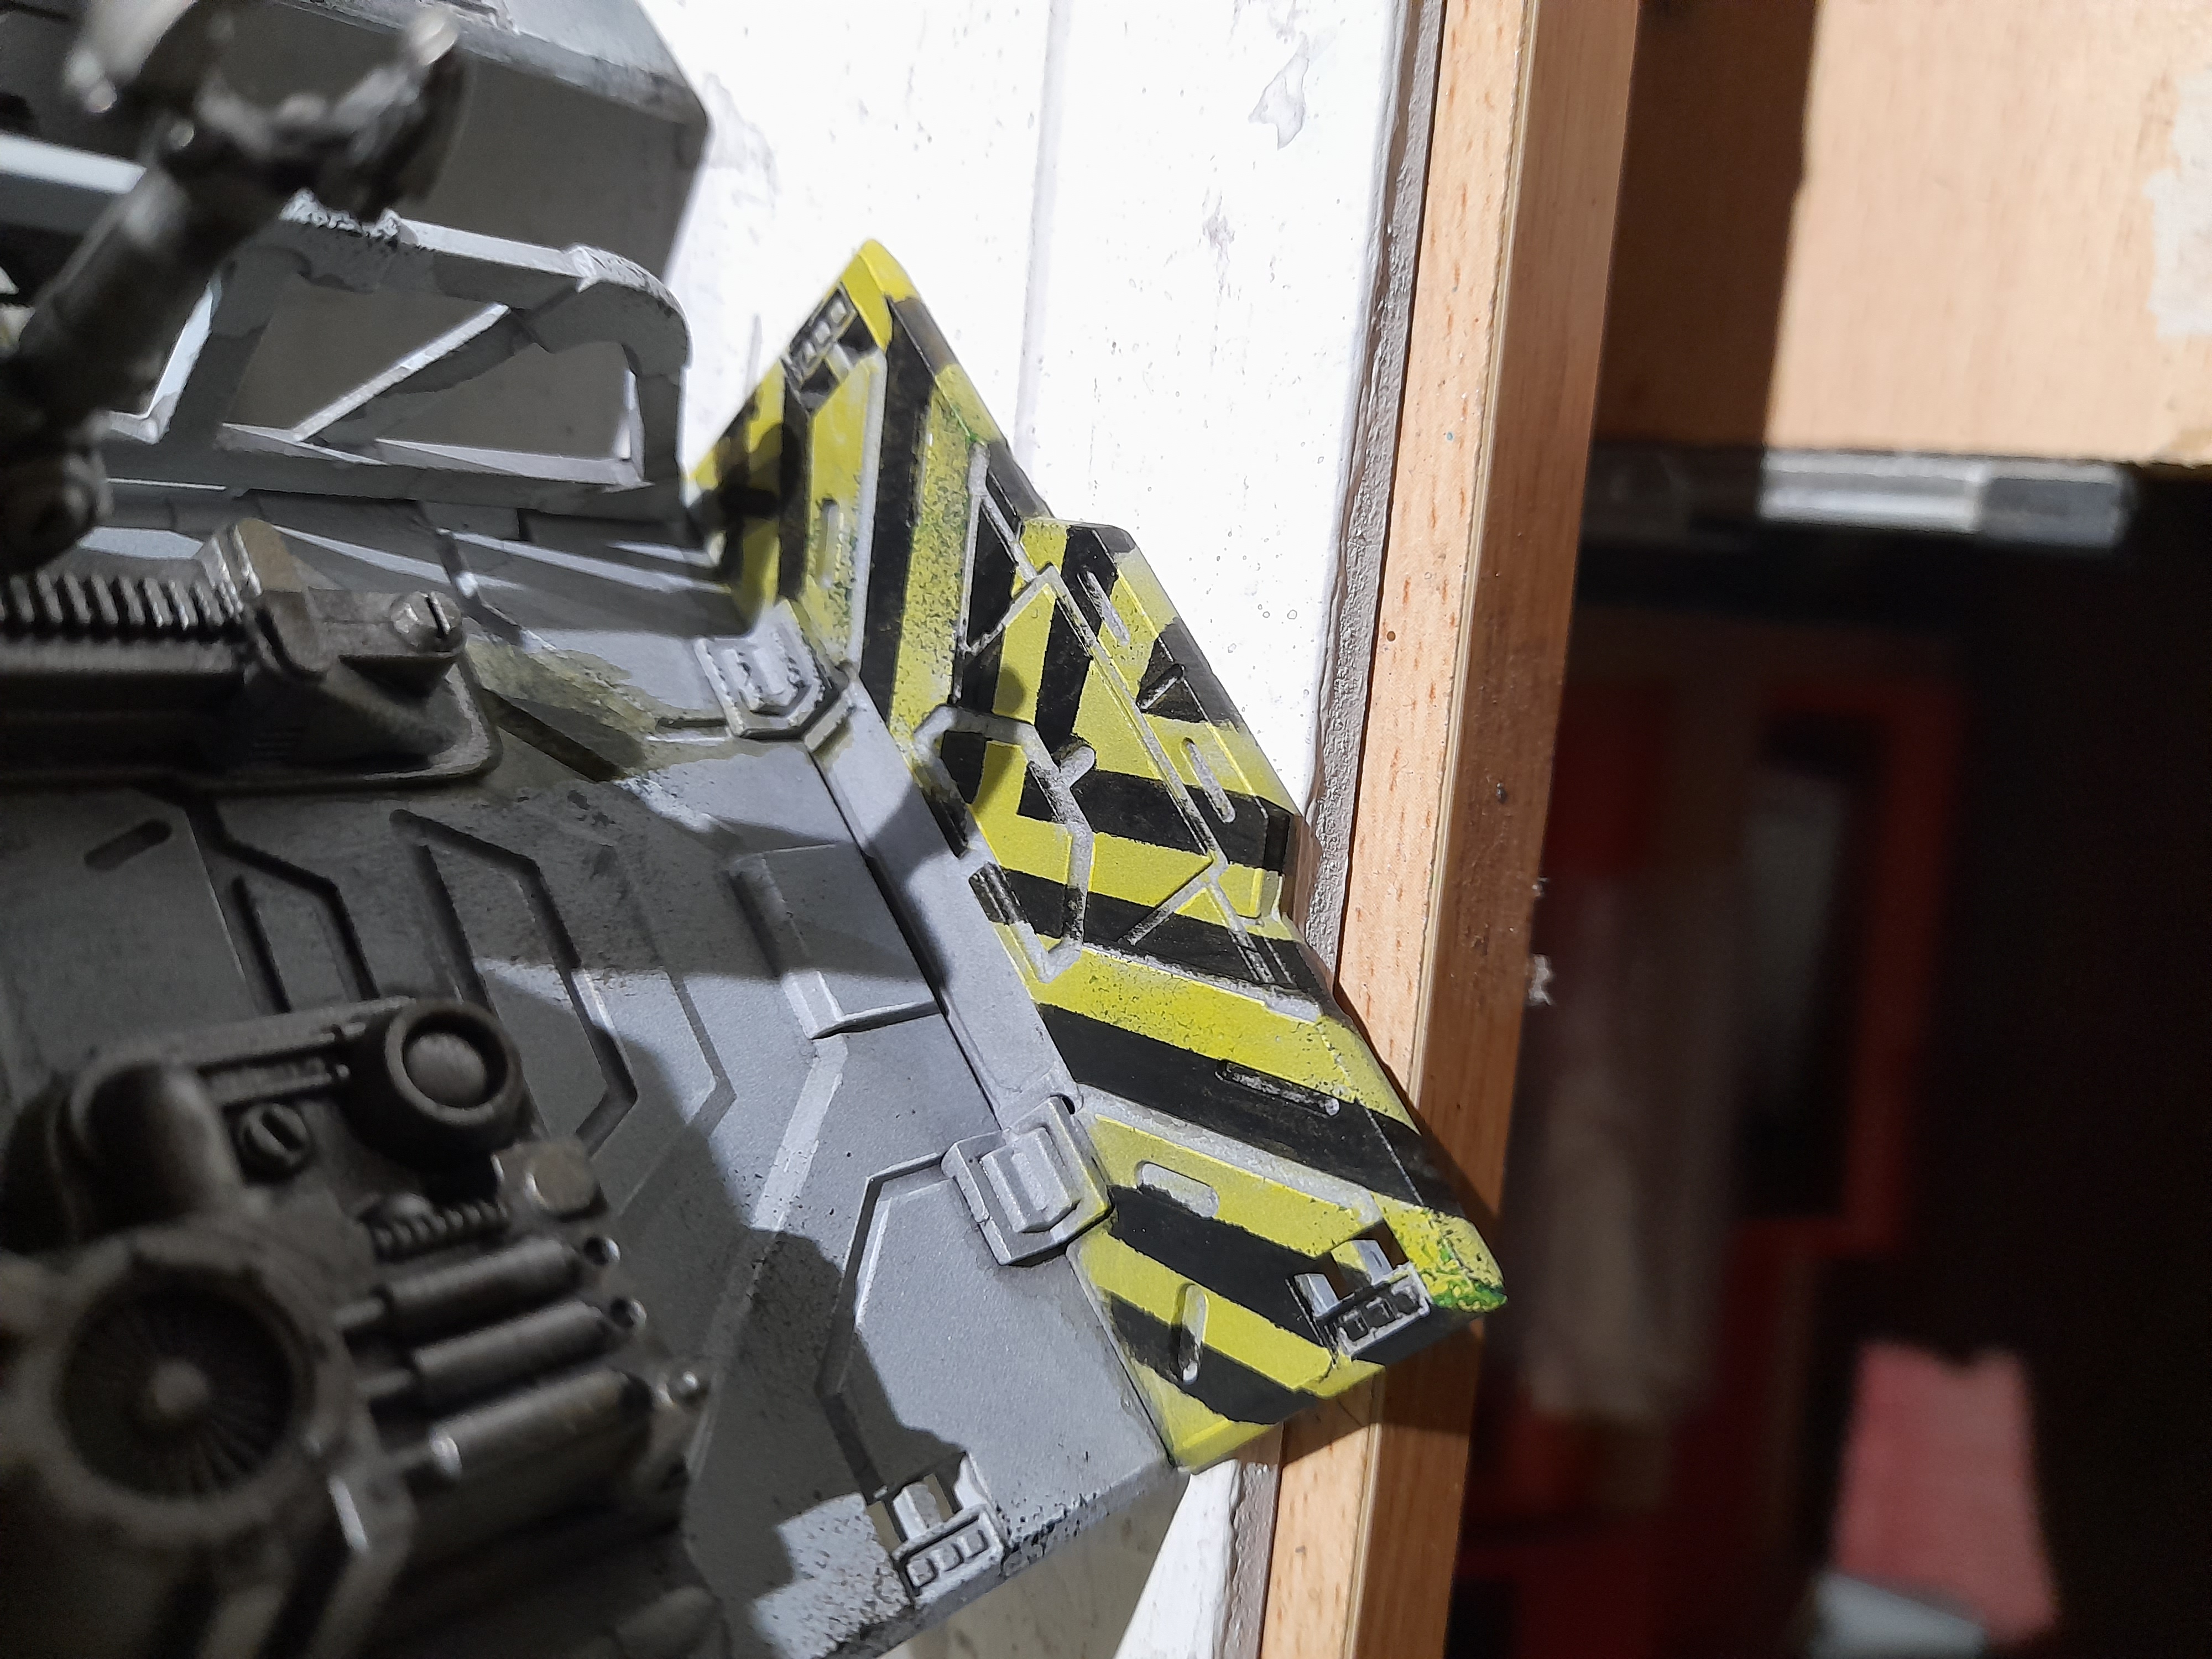
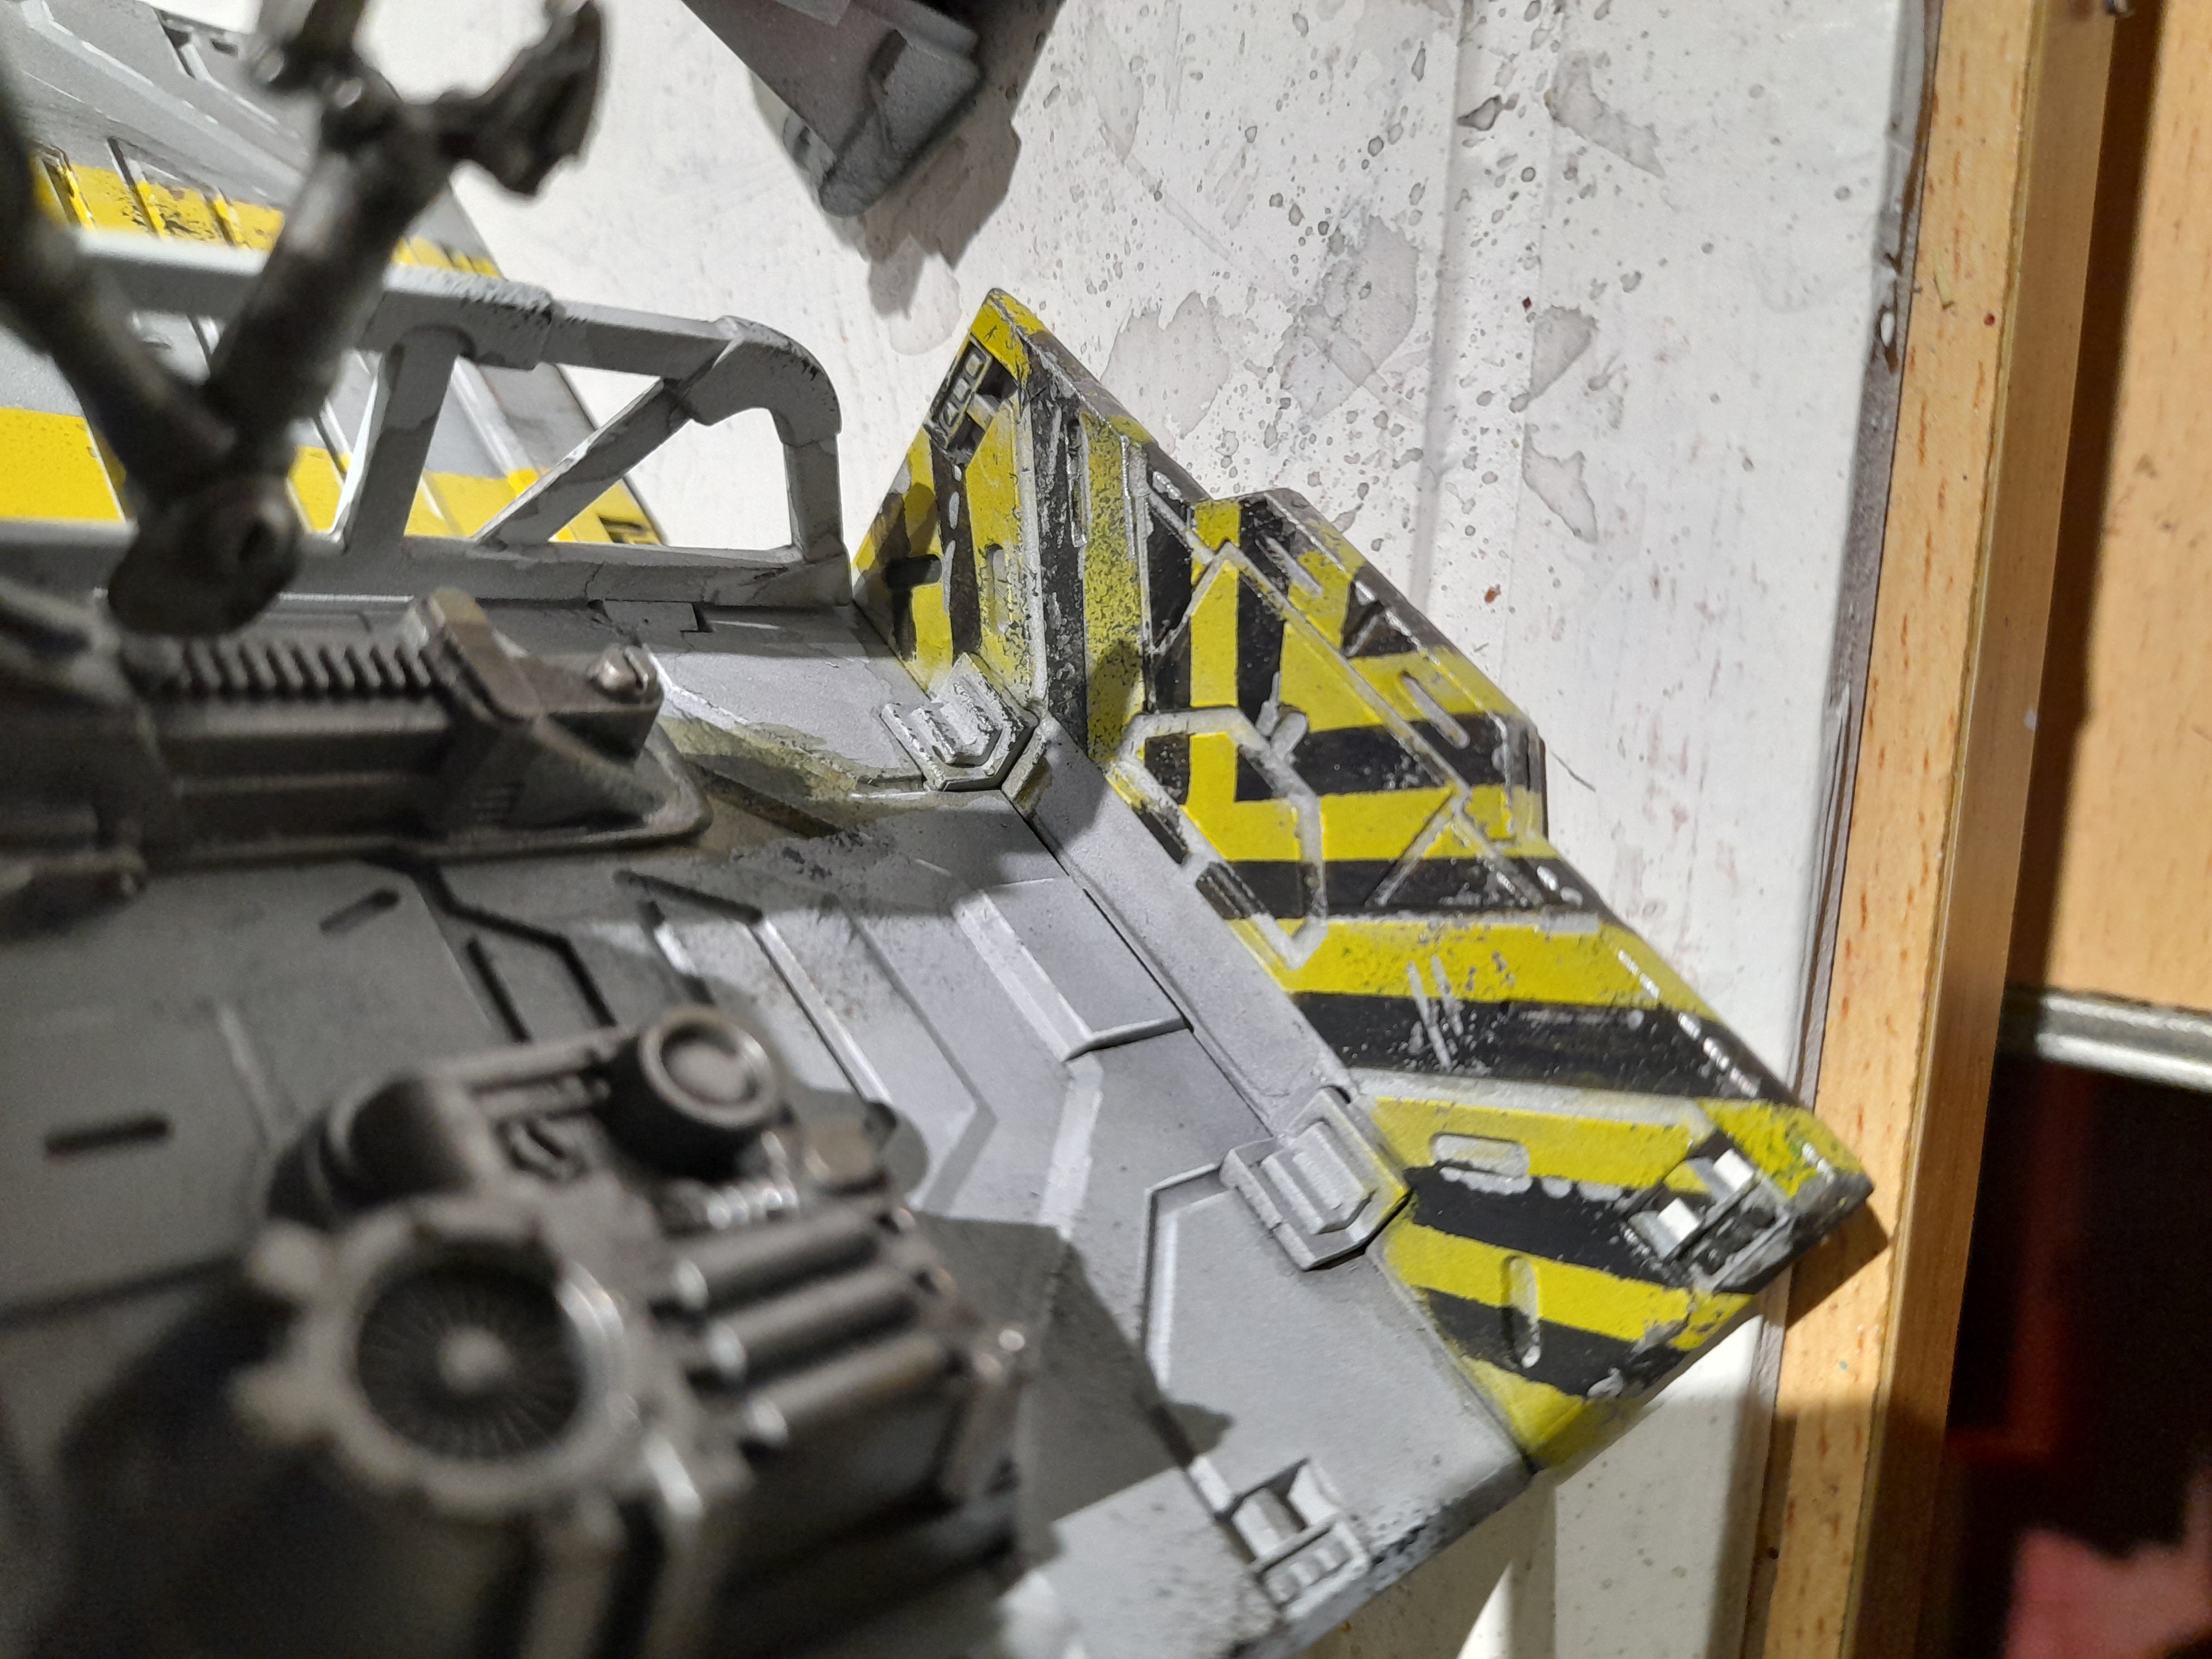
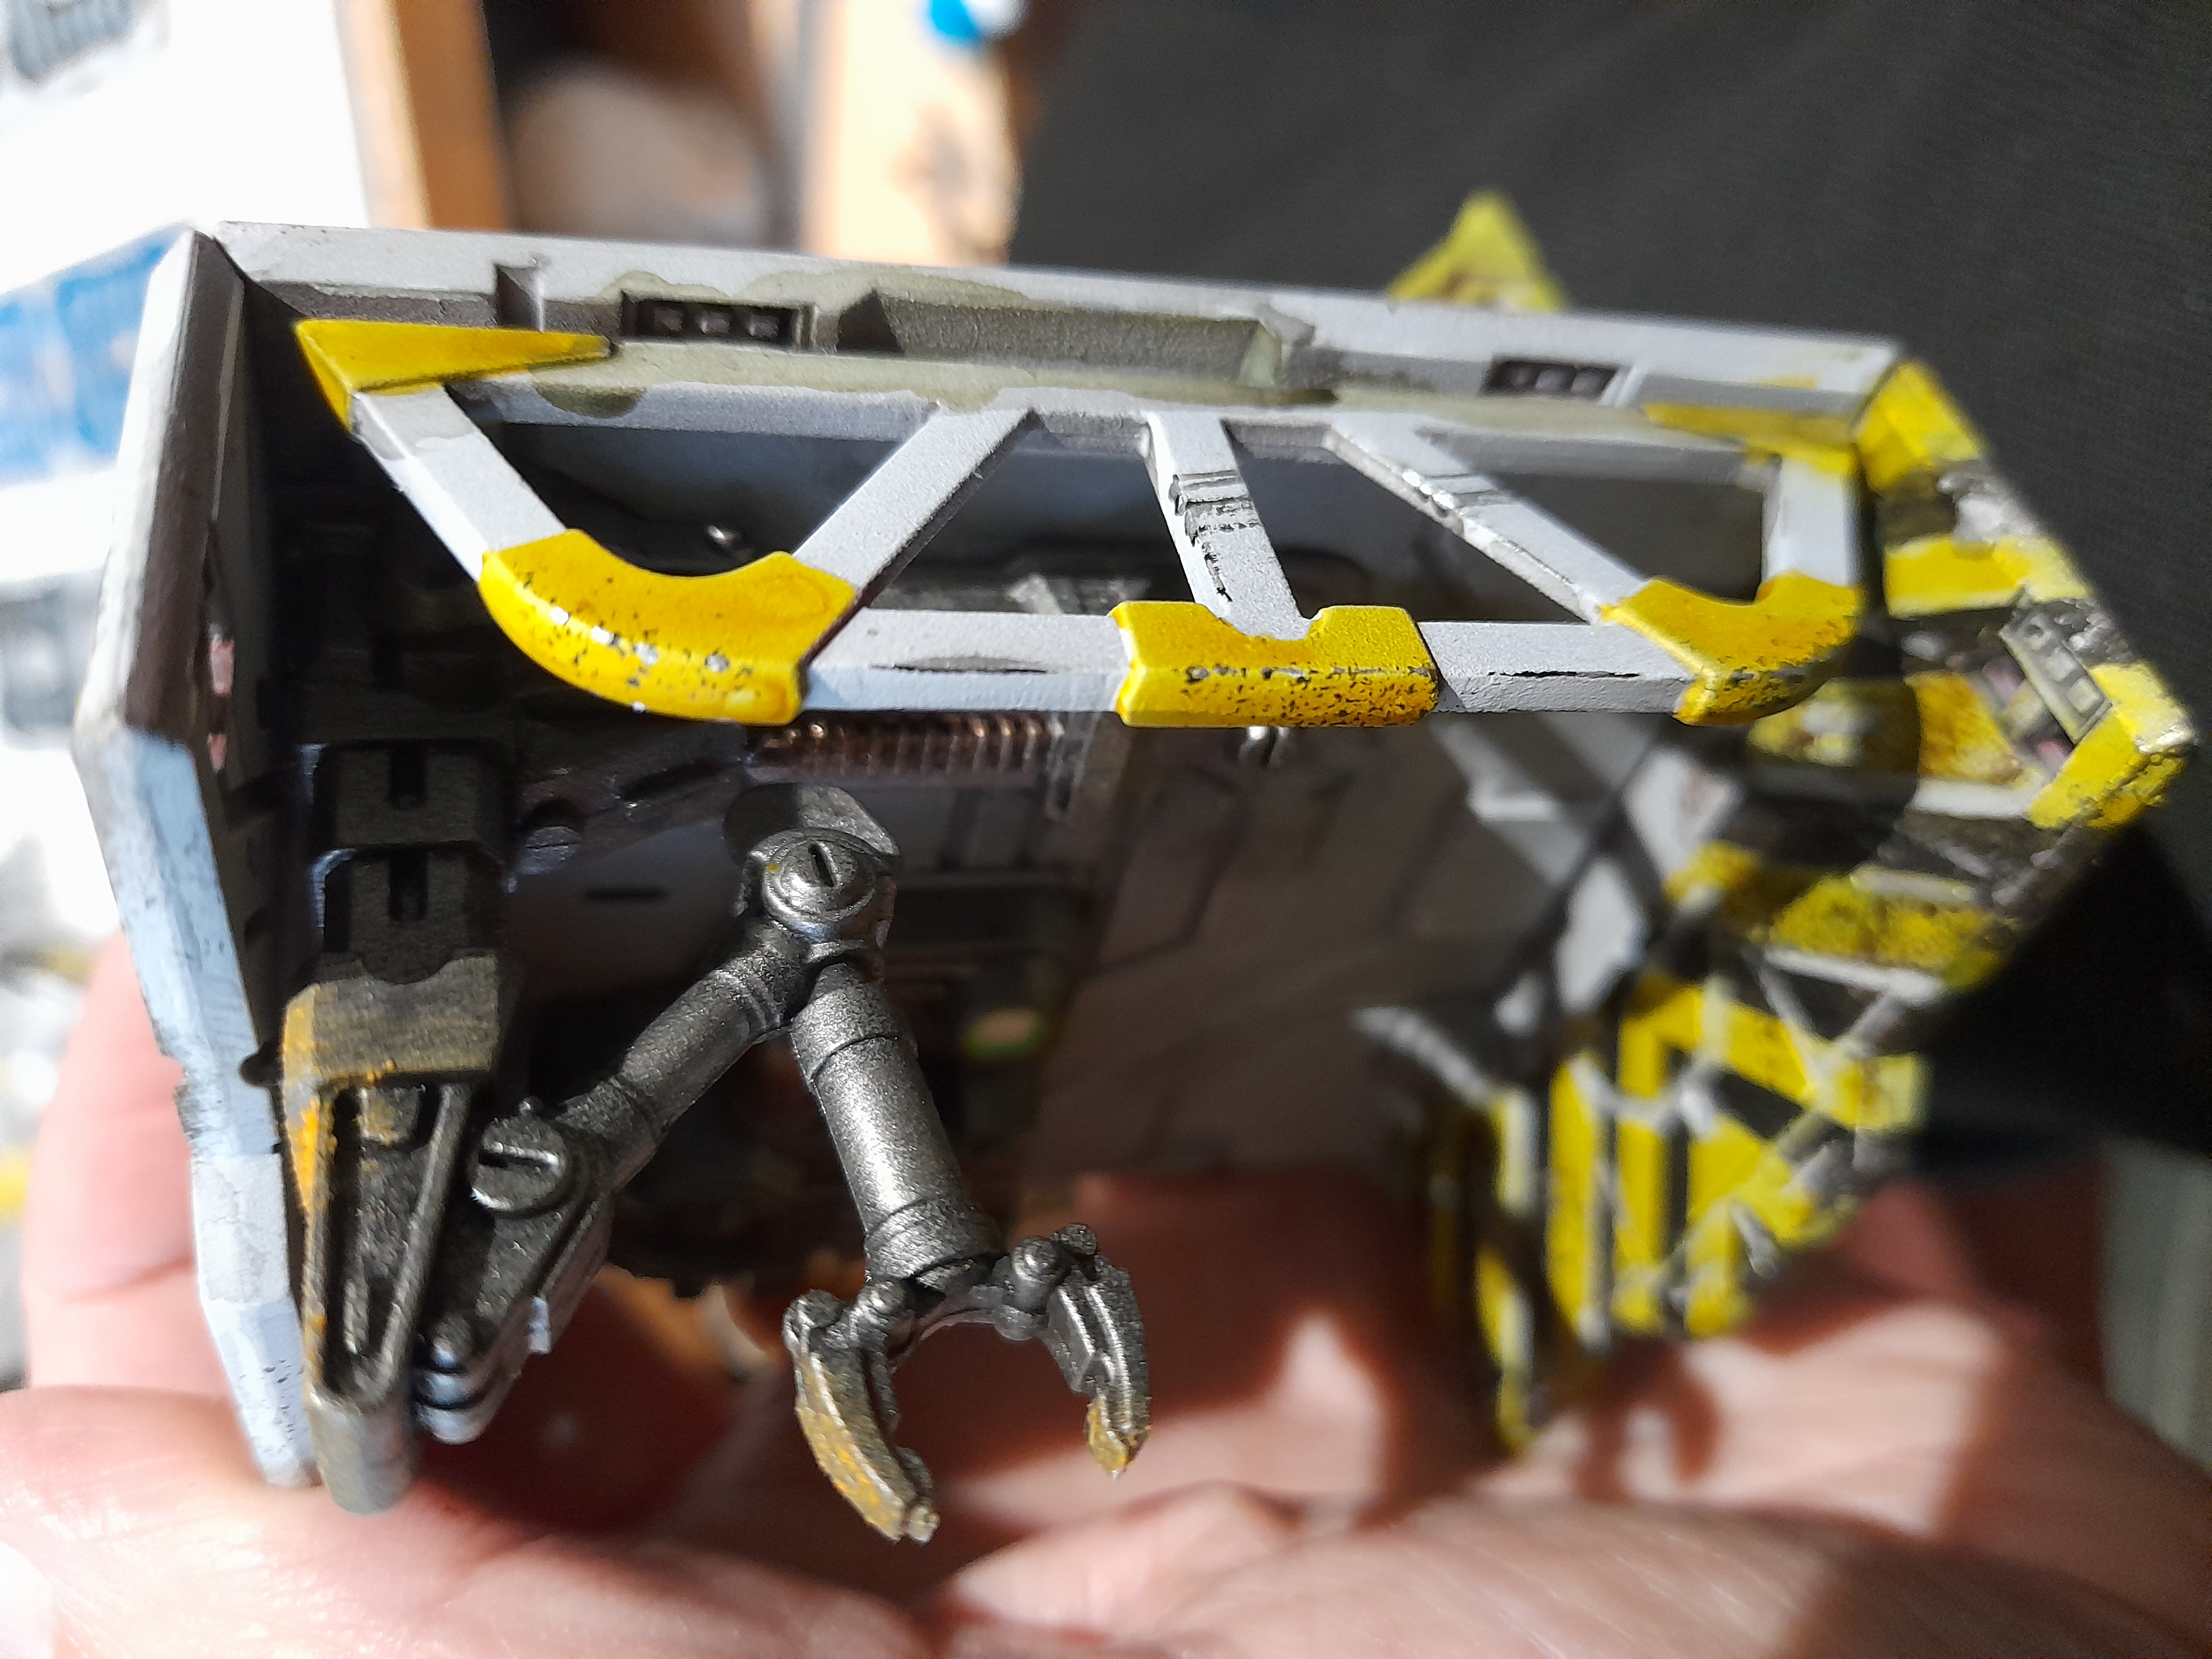
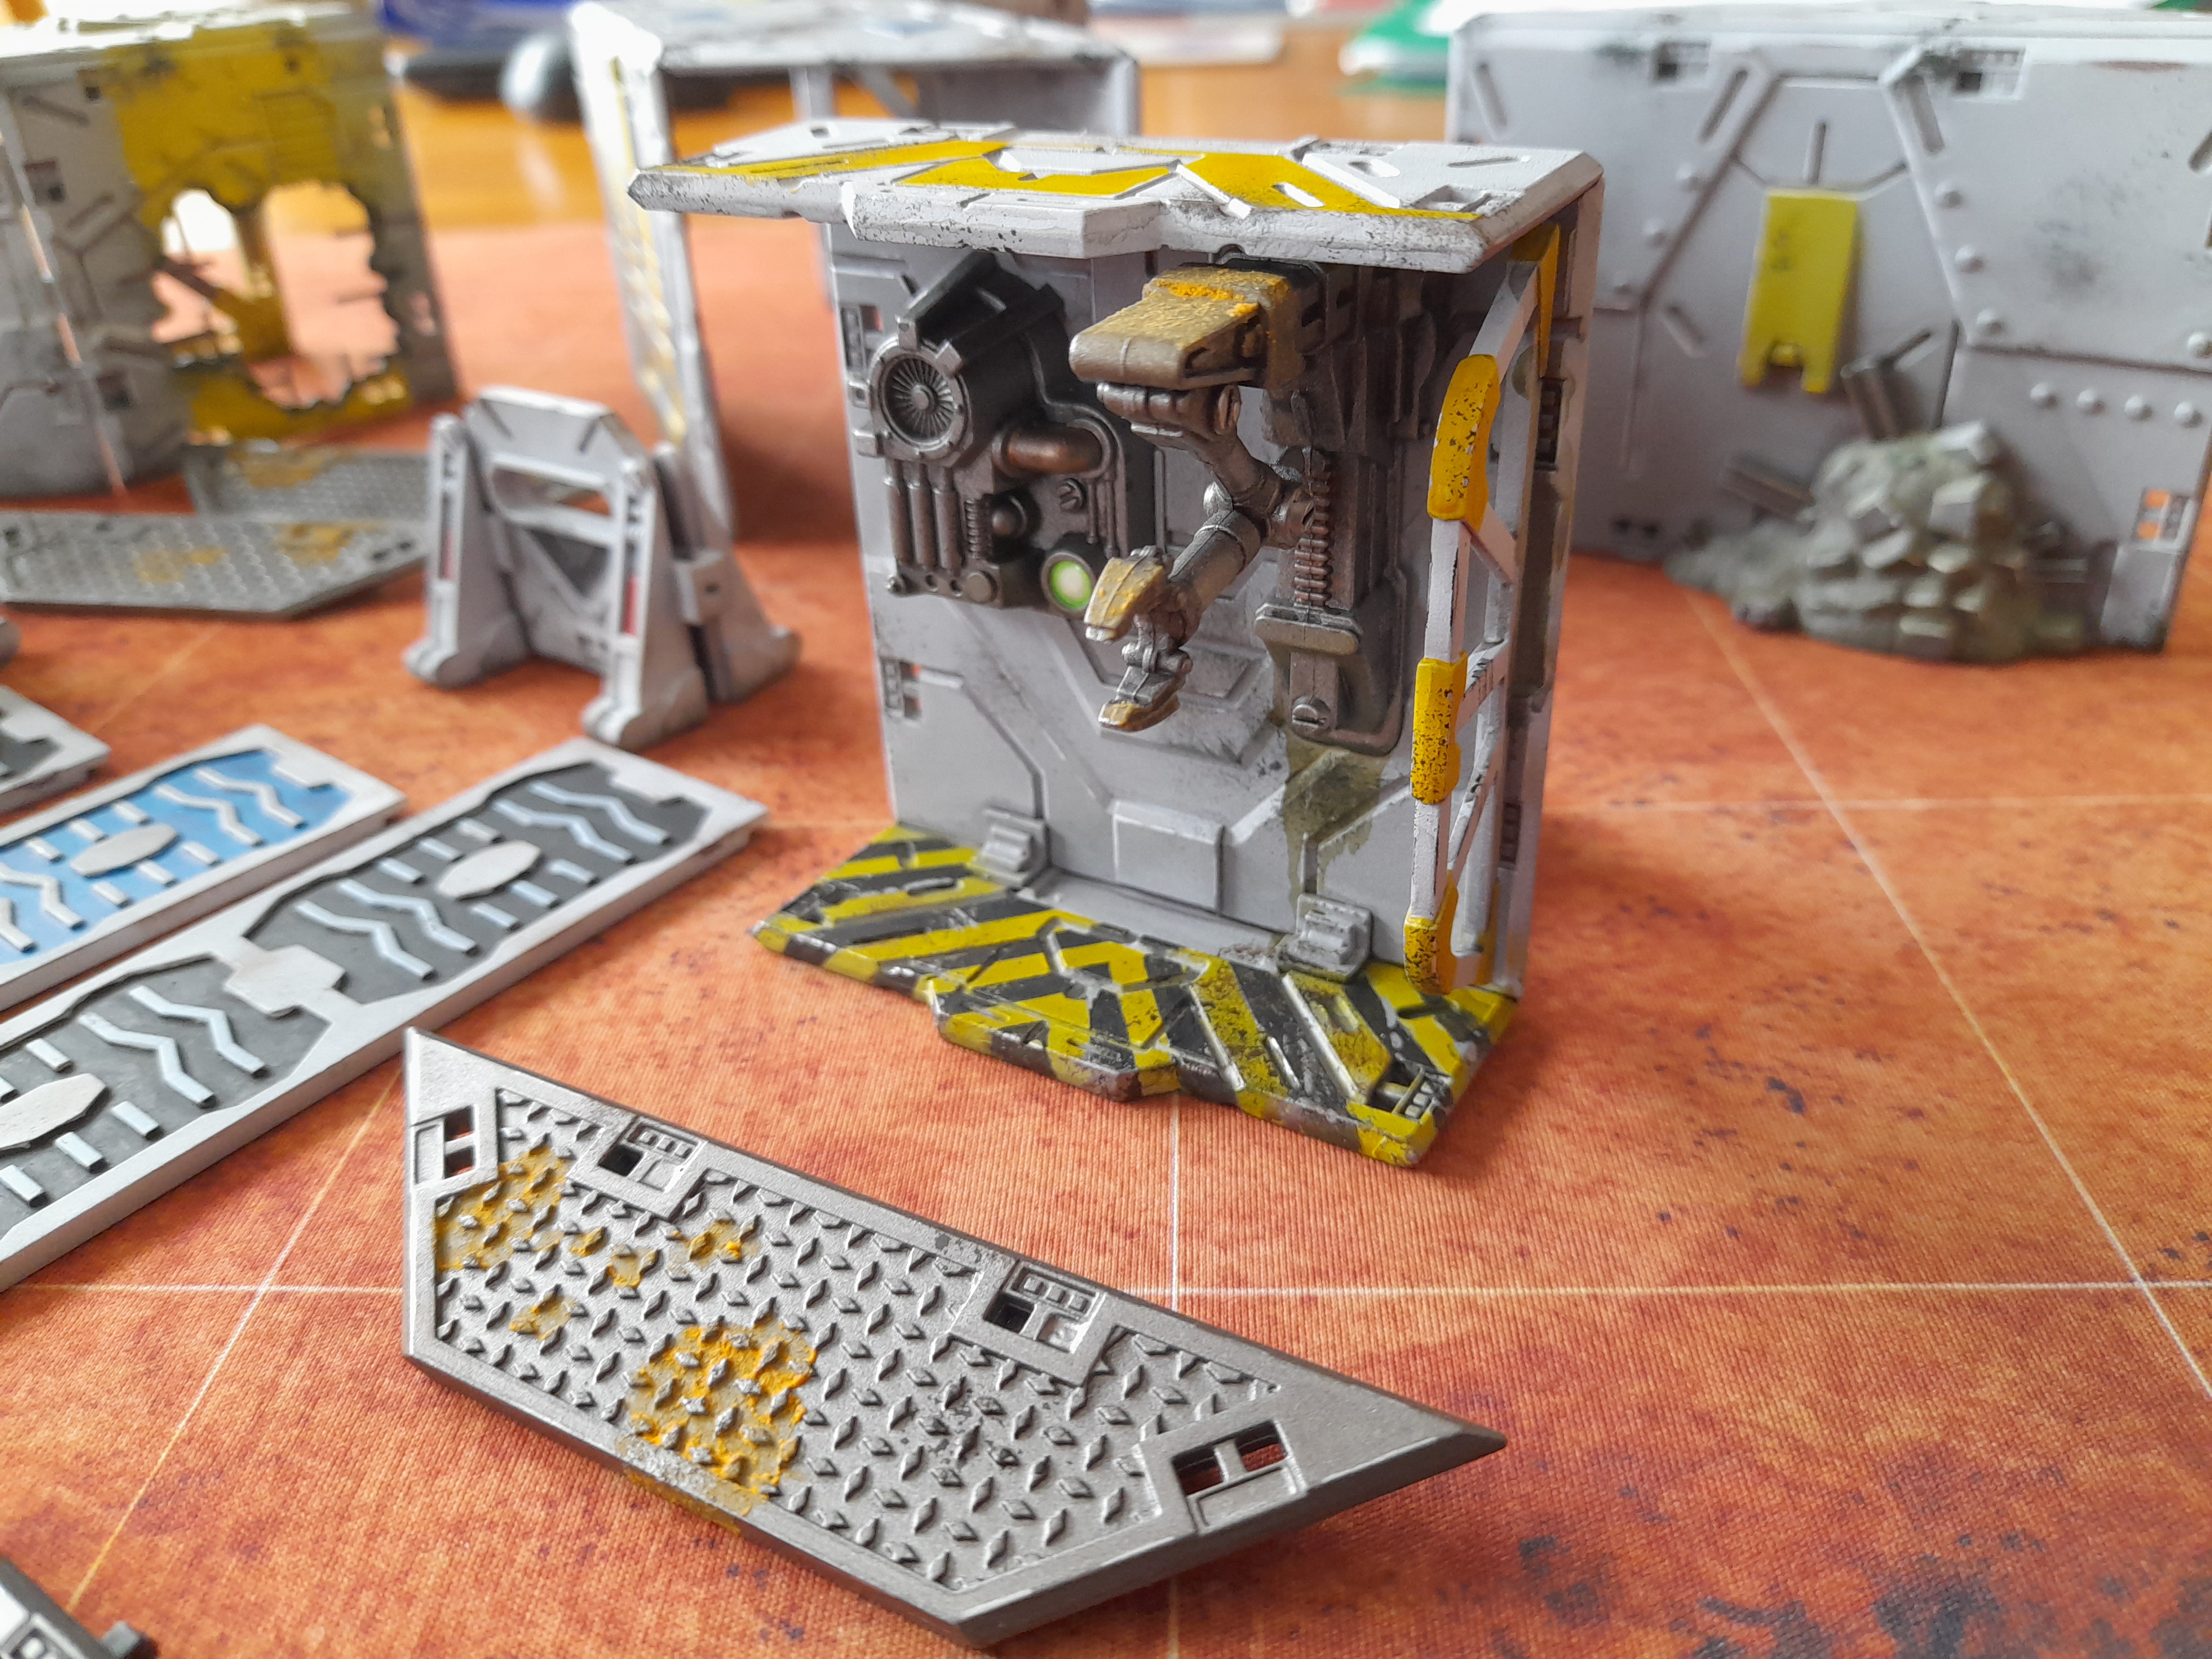
The small crane arm piece received some more detailing work, adding some hazard markings (health and safety is paramount in the deadzone) by painting yellow then masking off and stippling on black. Then there was extra chipping and weathering over that to make it look well used.
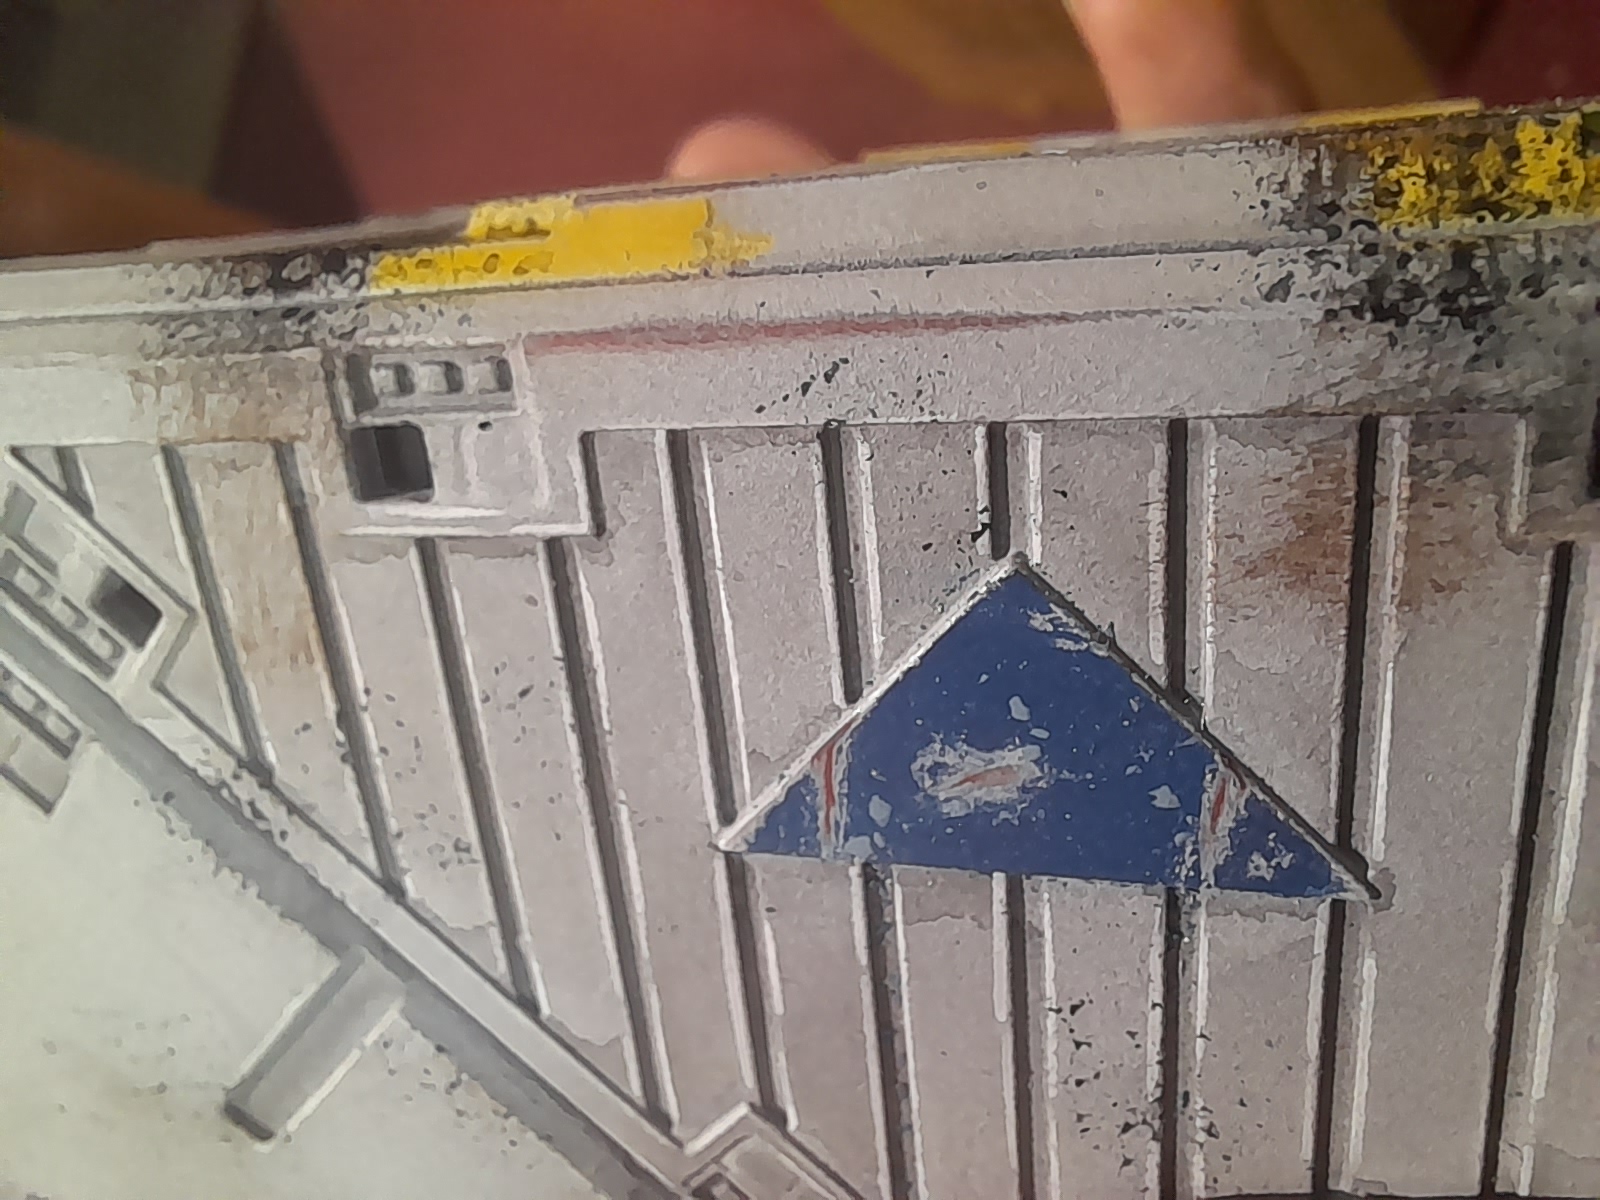
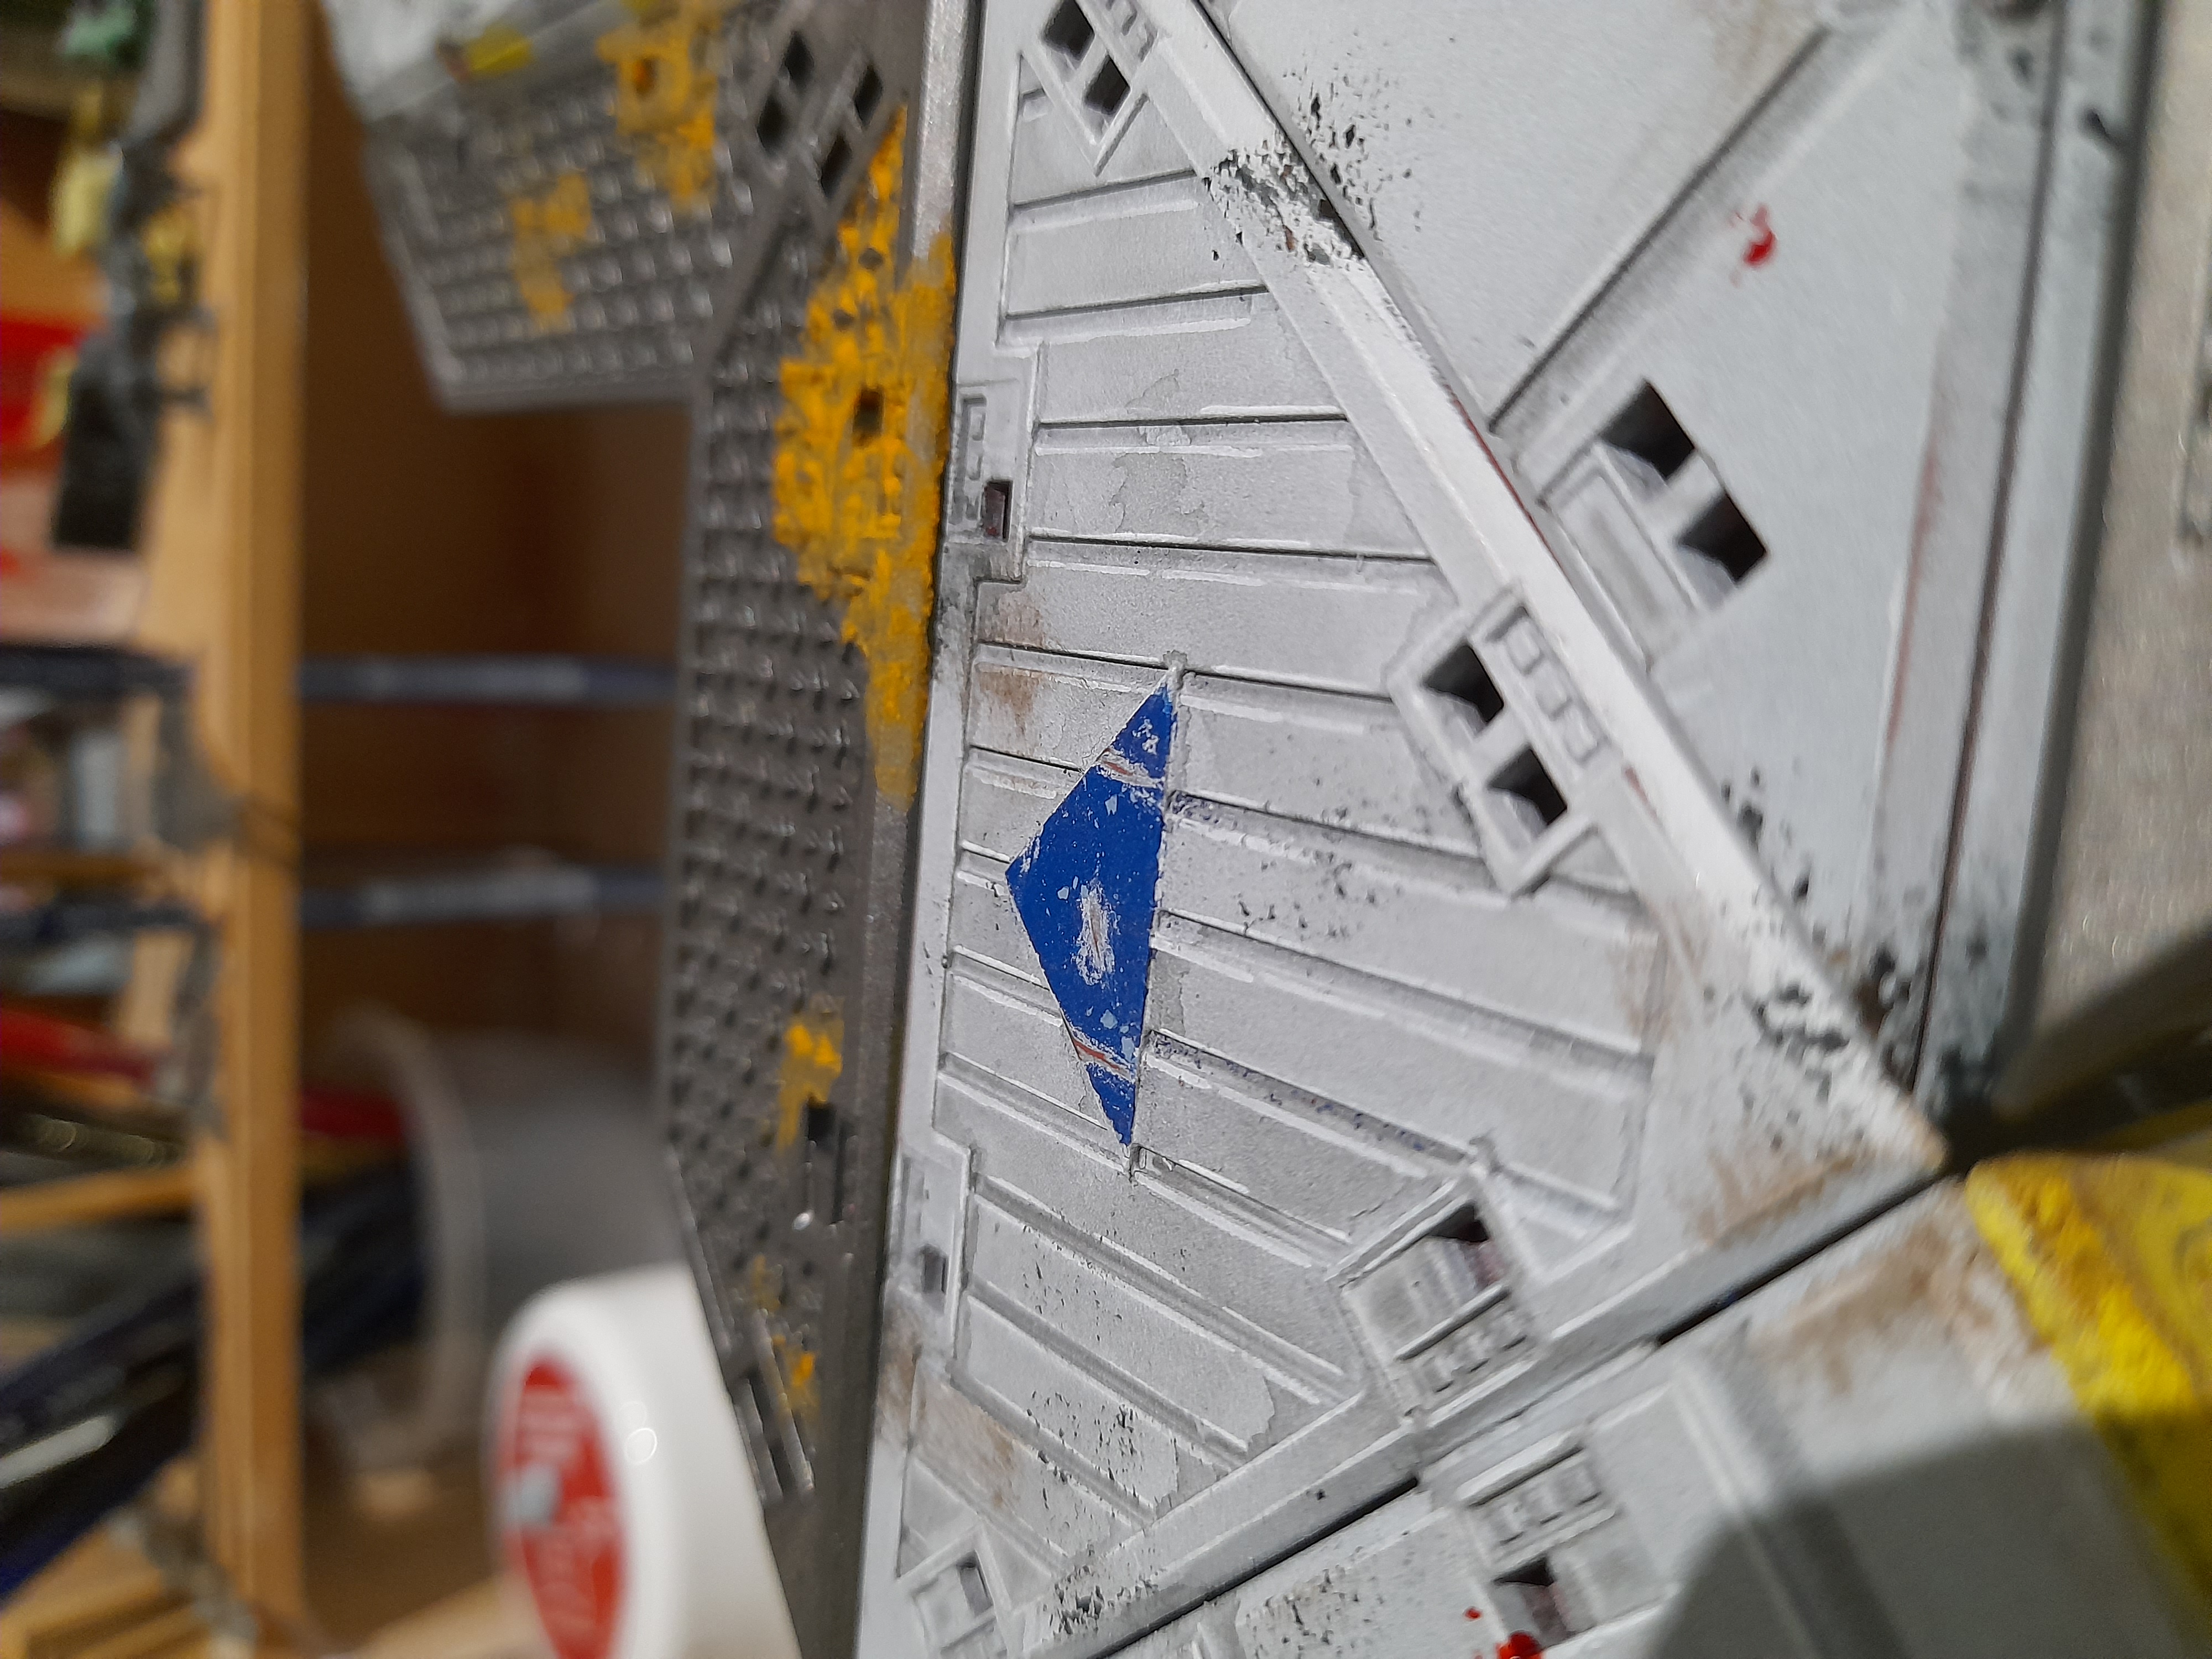
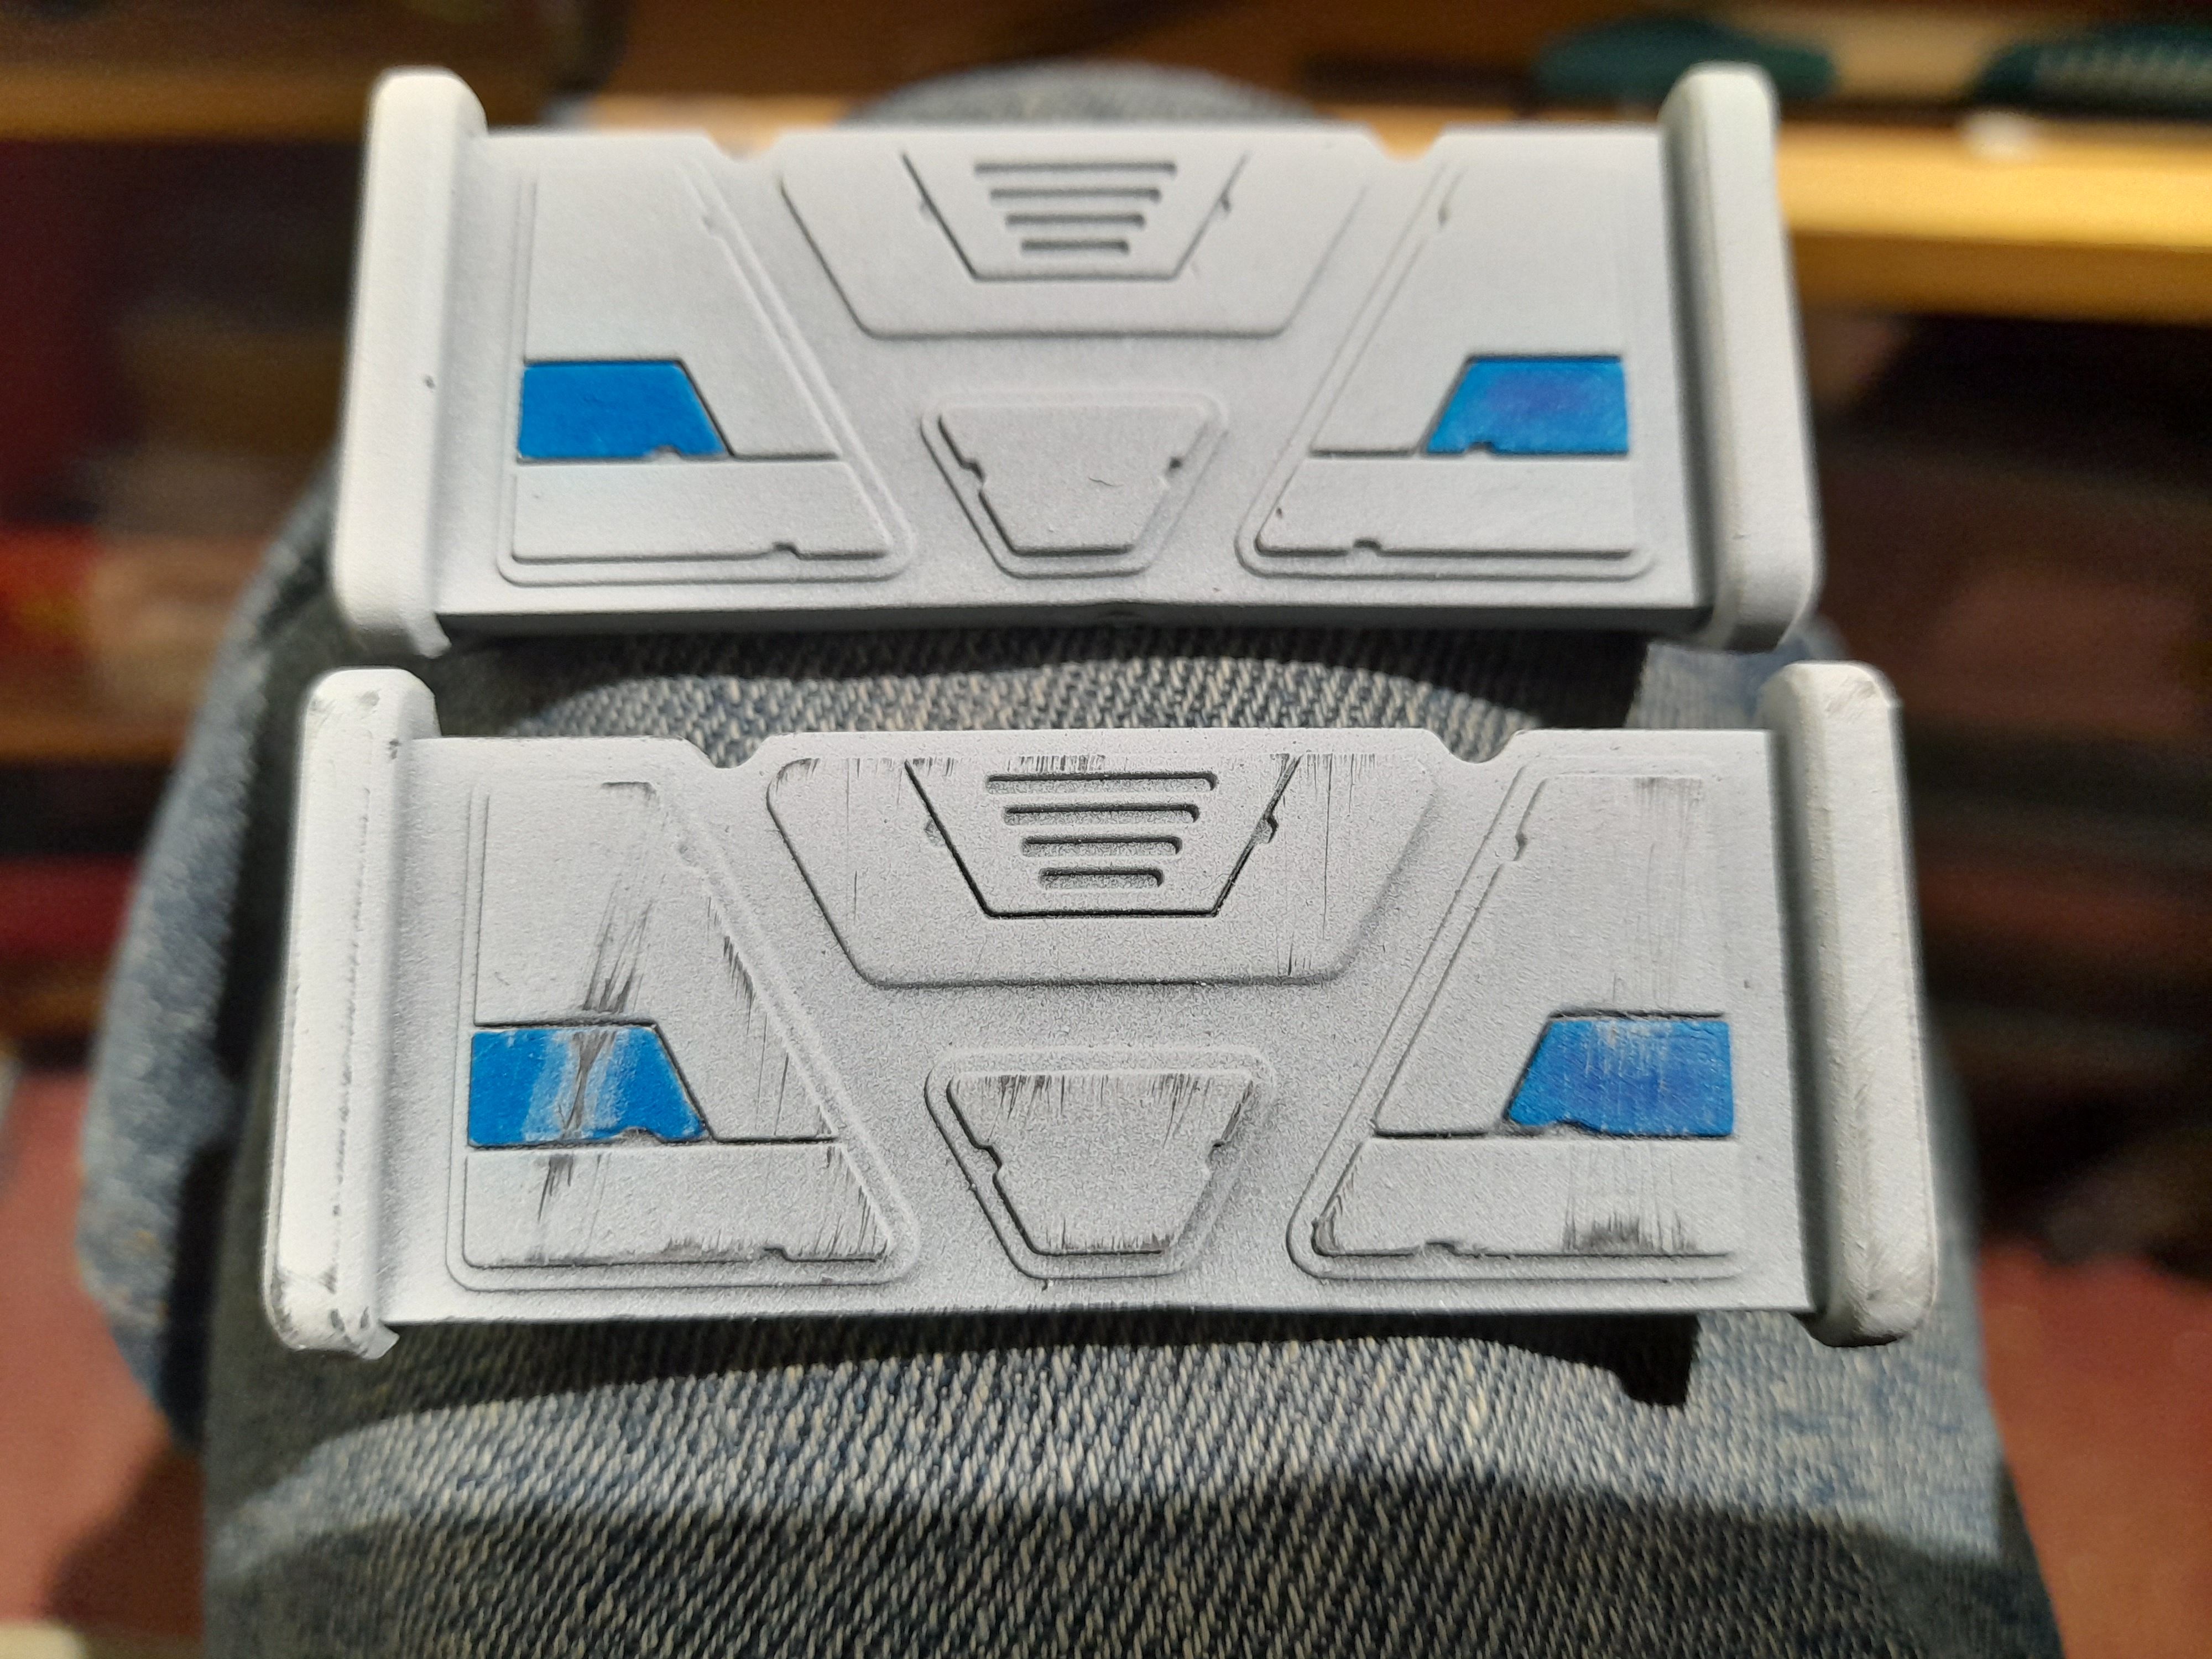
I added extra colour to the roof sections by colouring in the small triangles with blue. I masked off with tape, then stippled on some shades of blue. This was followed up by a weathering pass of sanding. I sanded panel edges and also the newly painted blue triangles to make them look well worn.
For the metal walkway extensions I used some of my new rust effect texture to add rust patches across them. May have done a little too much, but maybe its been very rainy there…
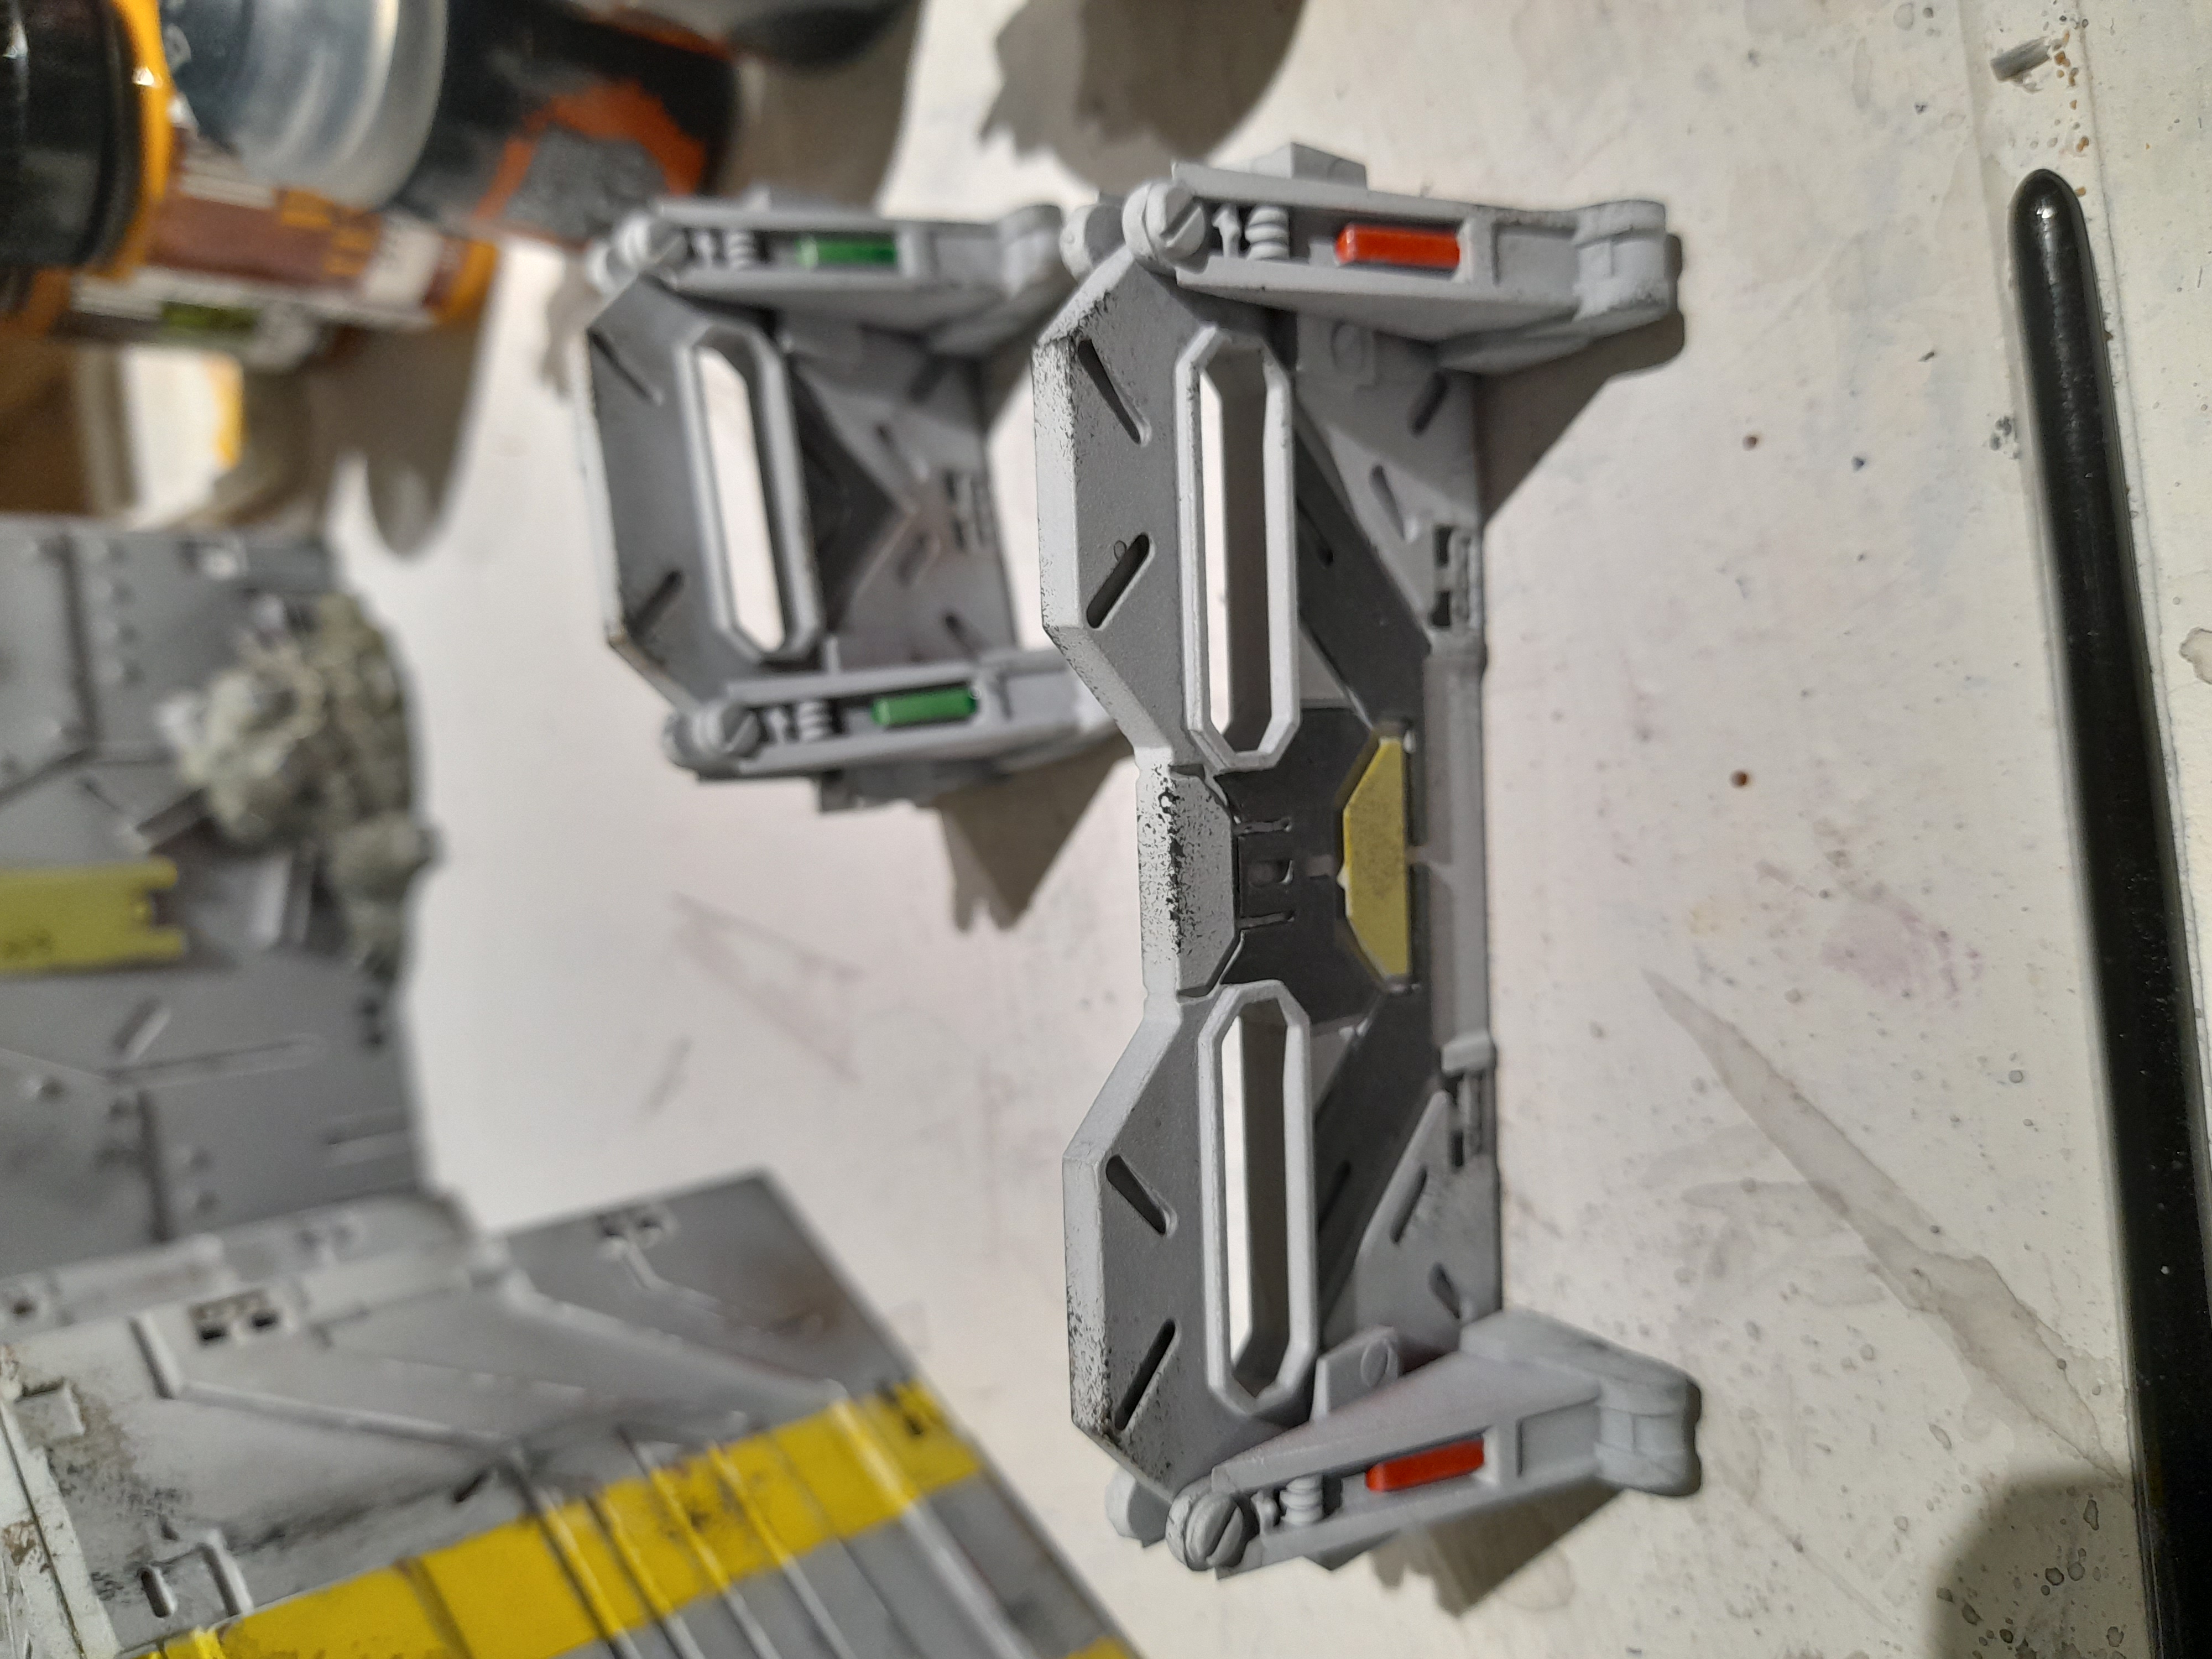
The barricades and walkways were painted up and weathered too…
Then I went back to the crane piece and added some more detail and weathering, plus a small radioactive symbol on the side. This was one I printed out quite some time back – just cut out, glued on and weathered a little.

Deadzone Terrain addition completed
22nd October 2023
A few extra little touches, final weathering etc and the Deadzone add ons were completed.
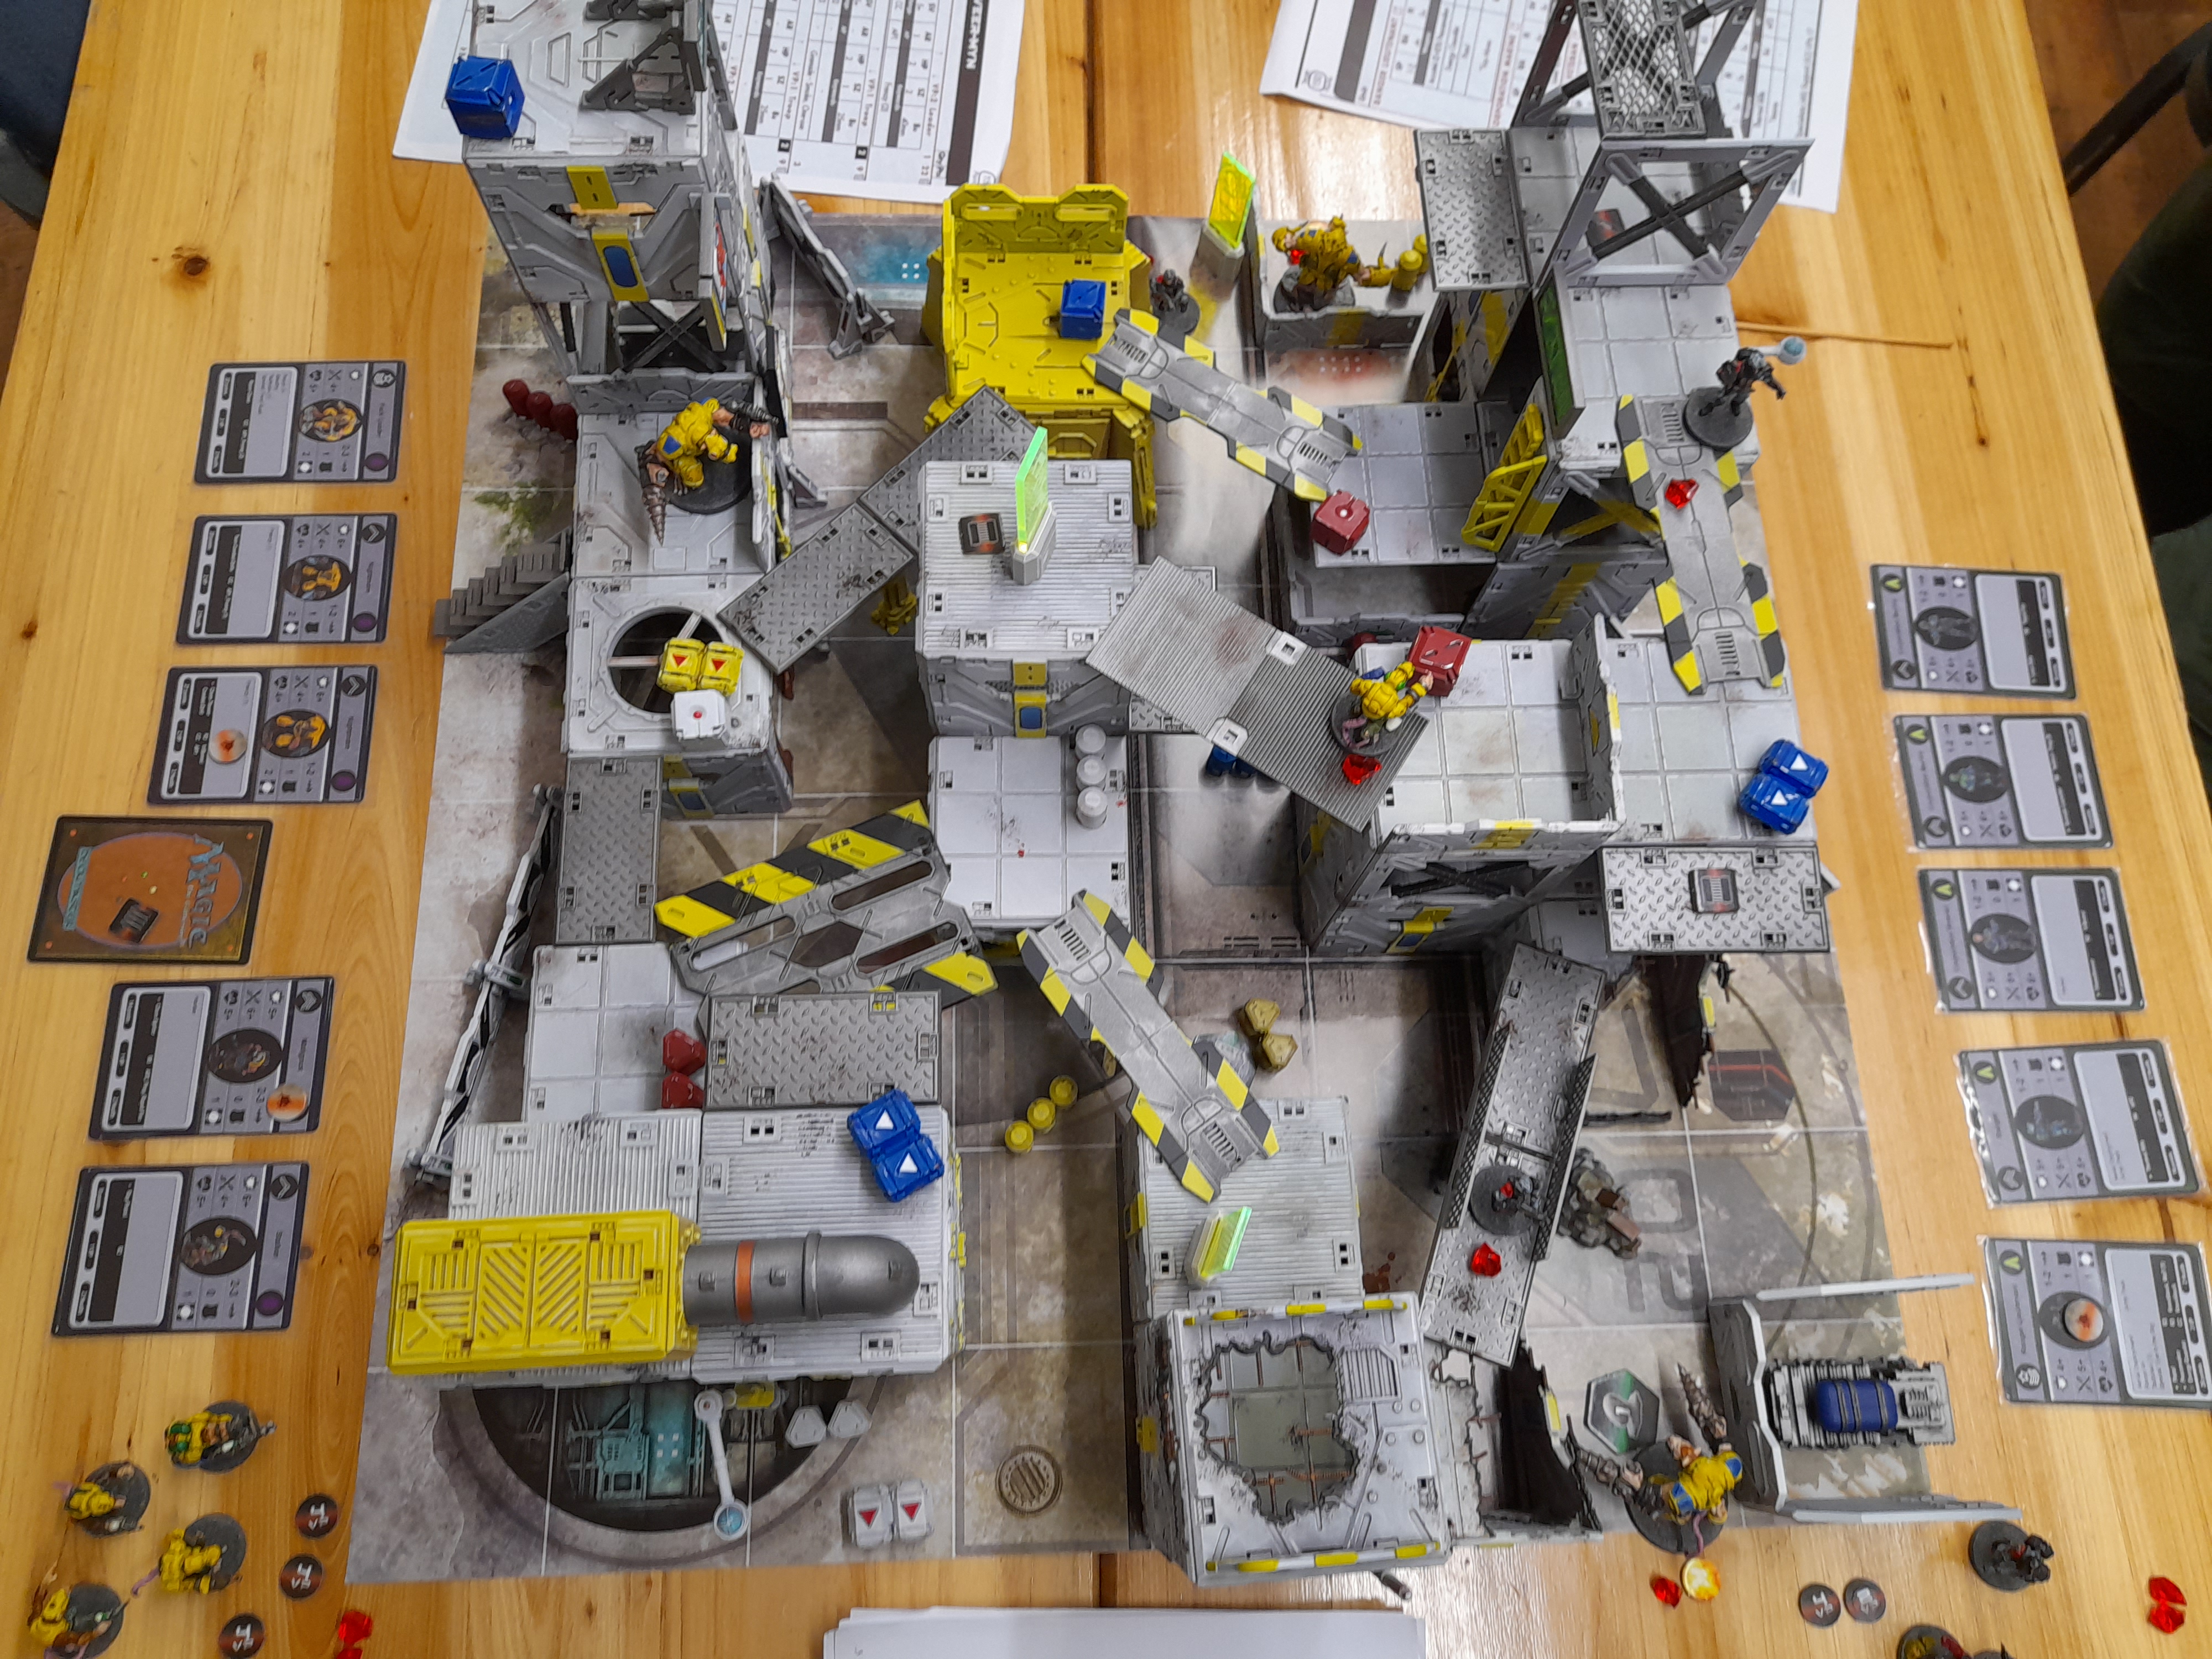
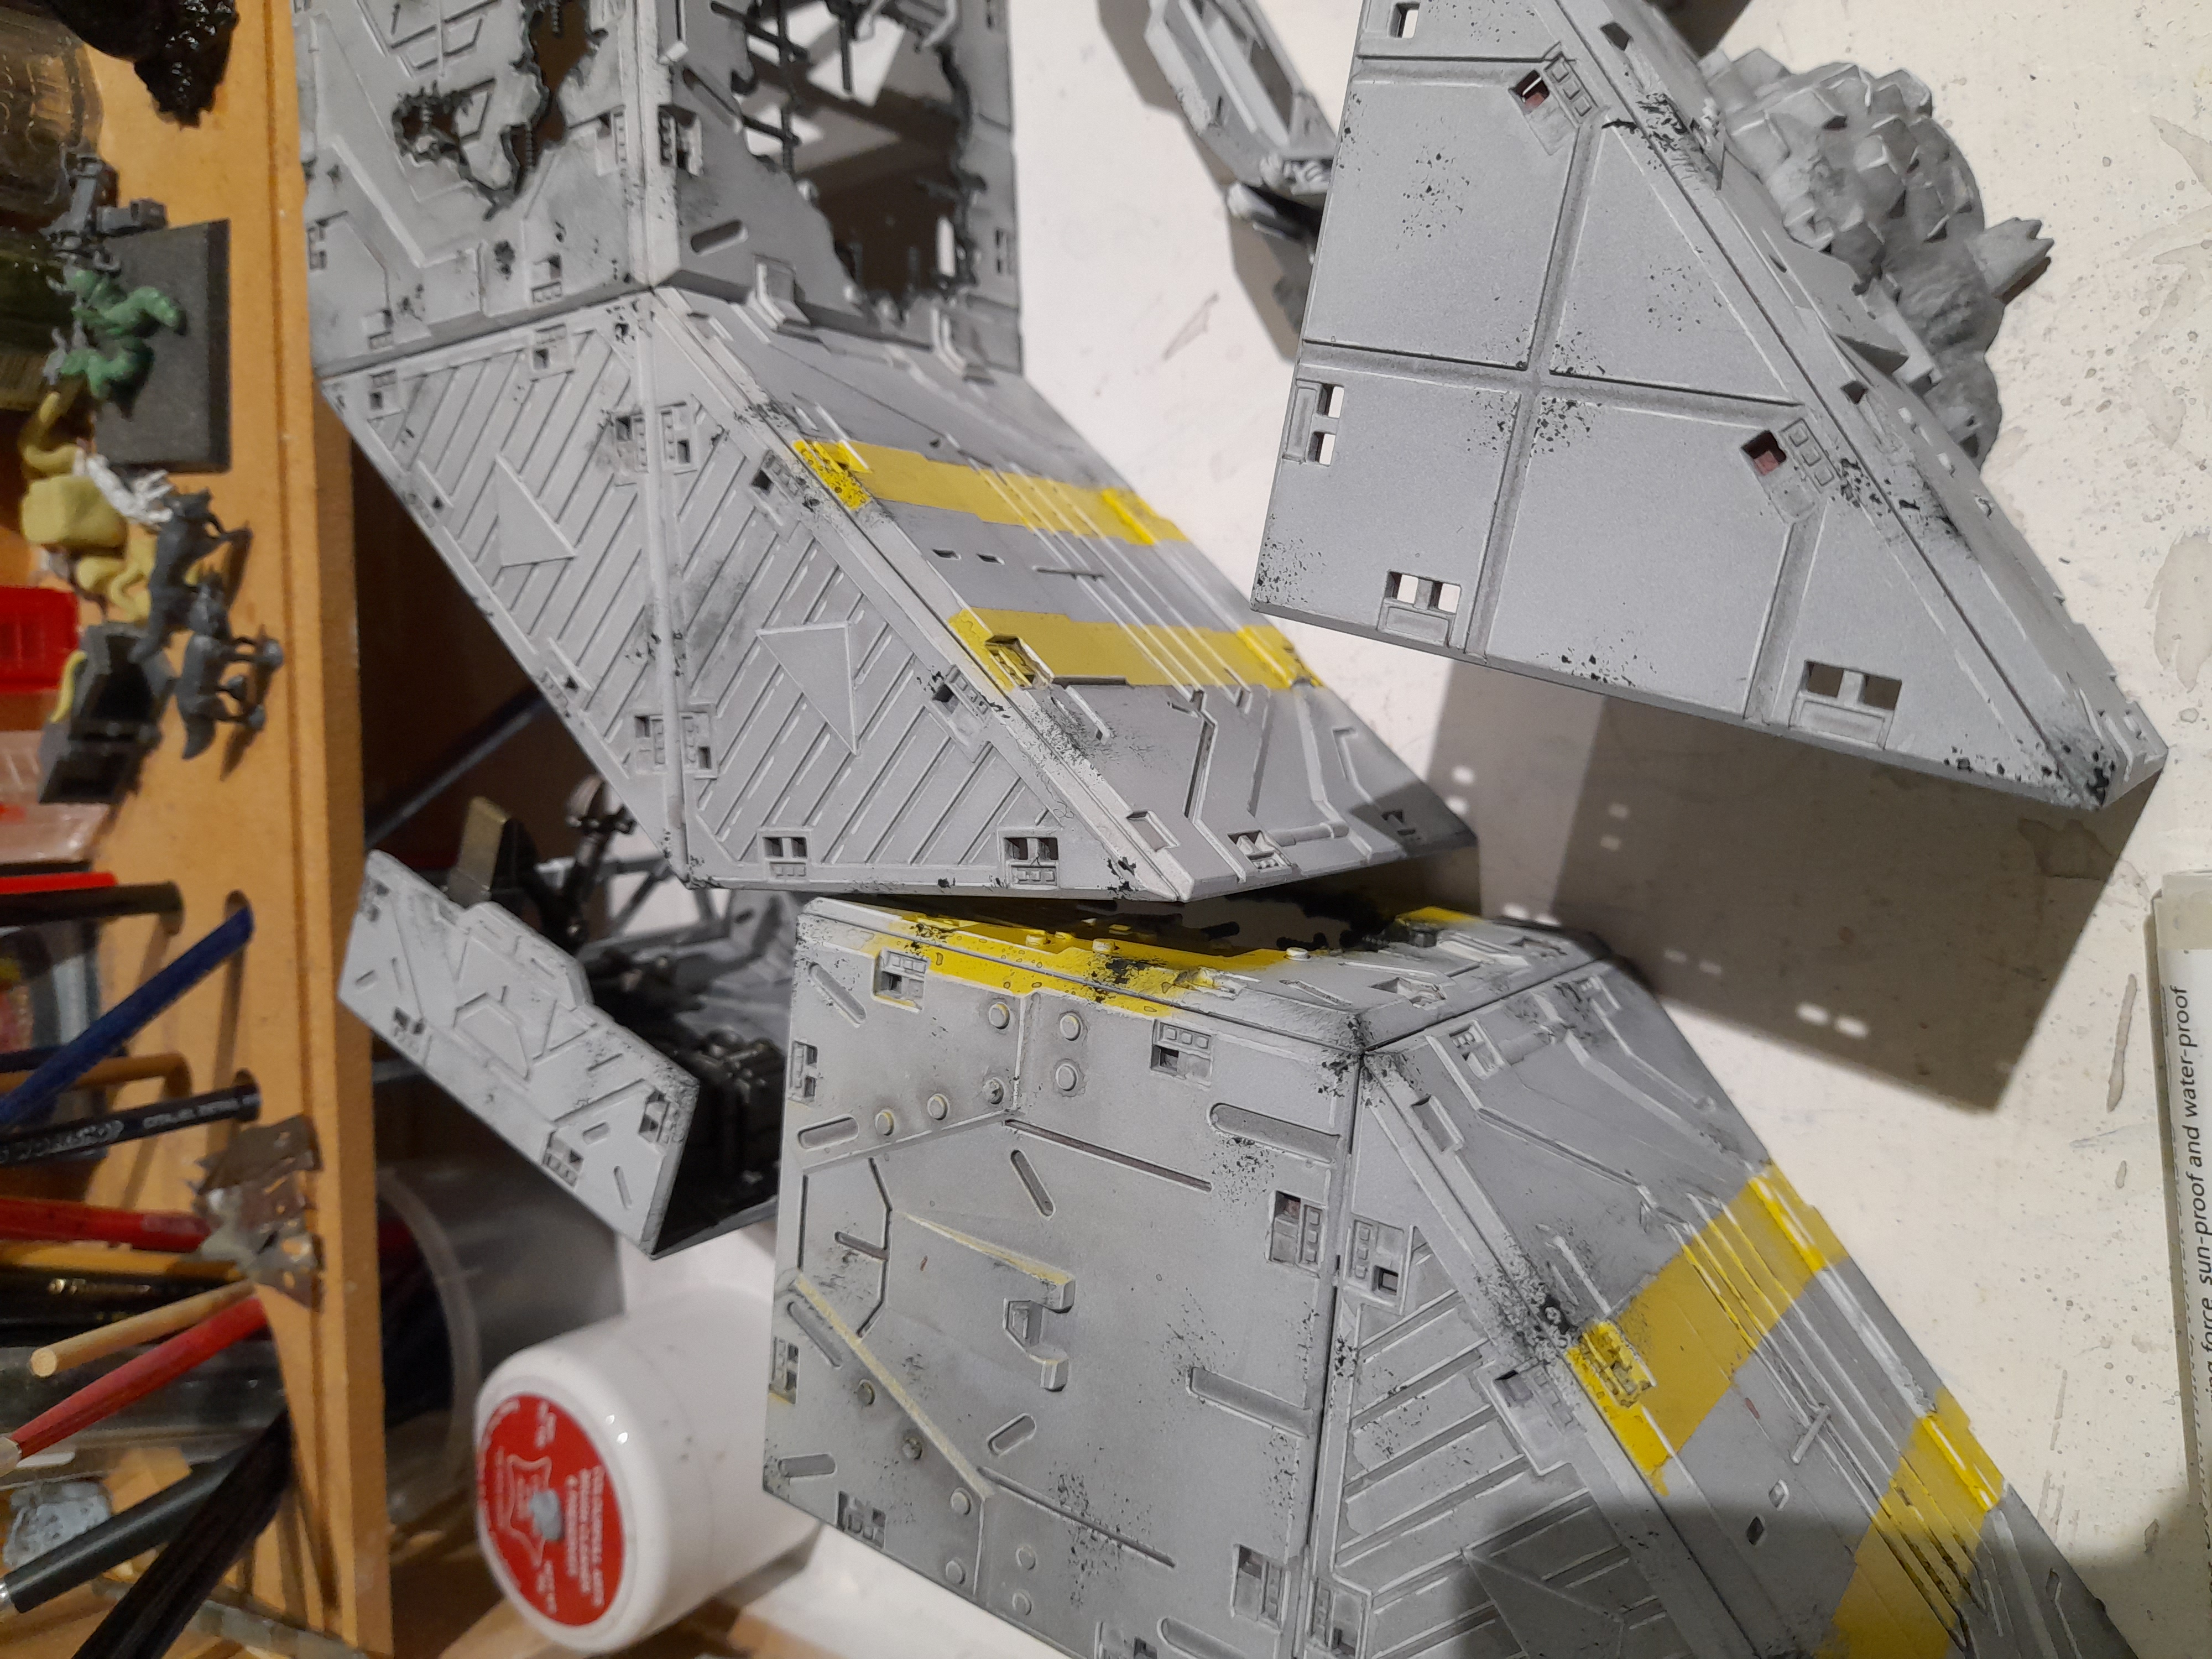
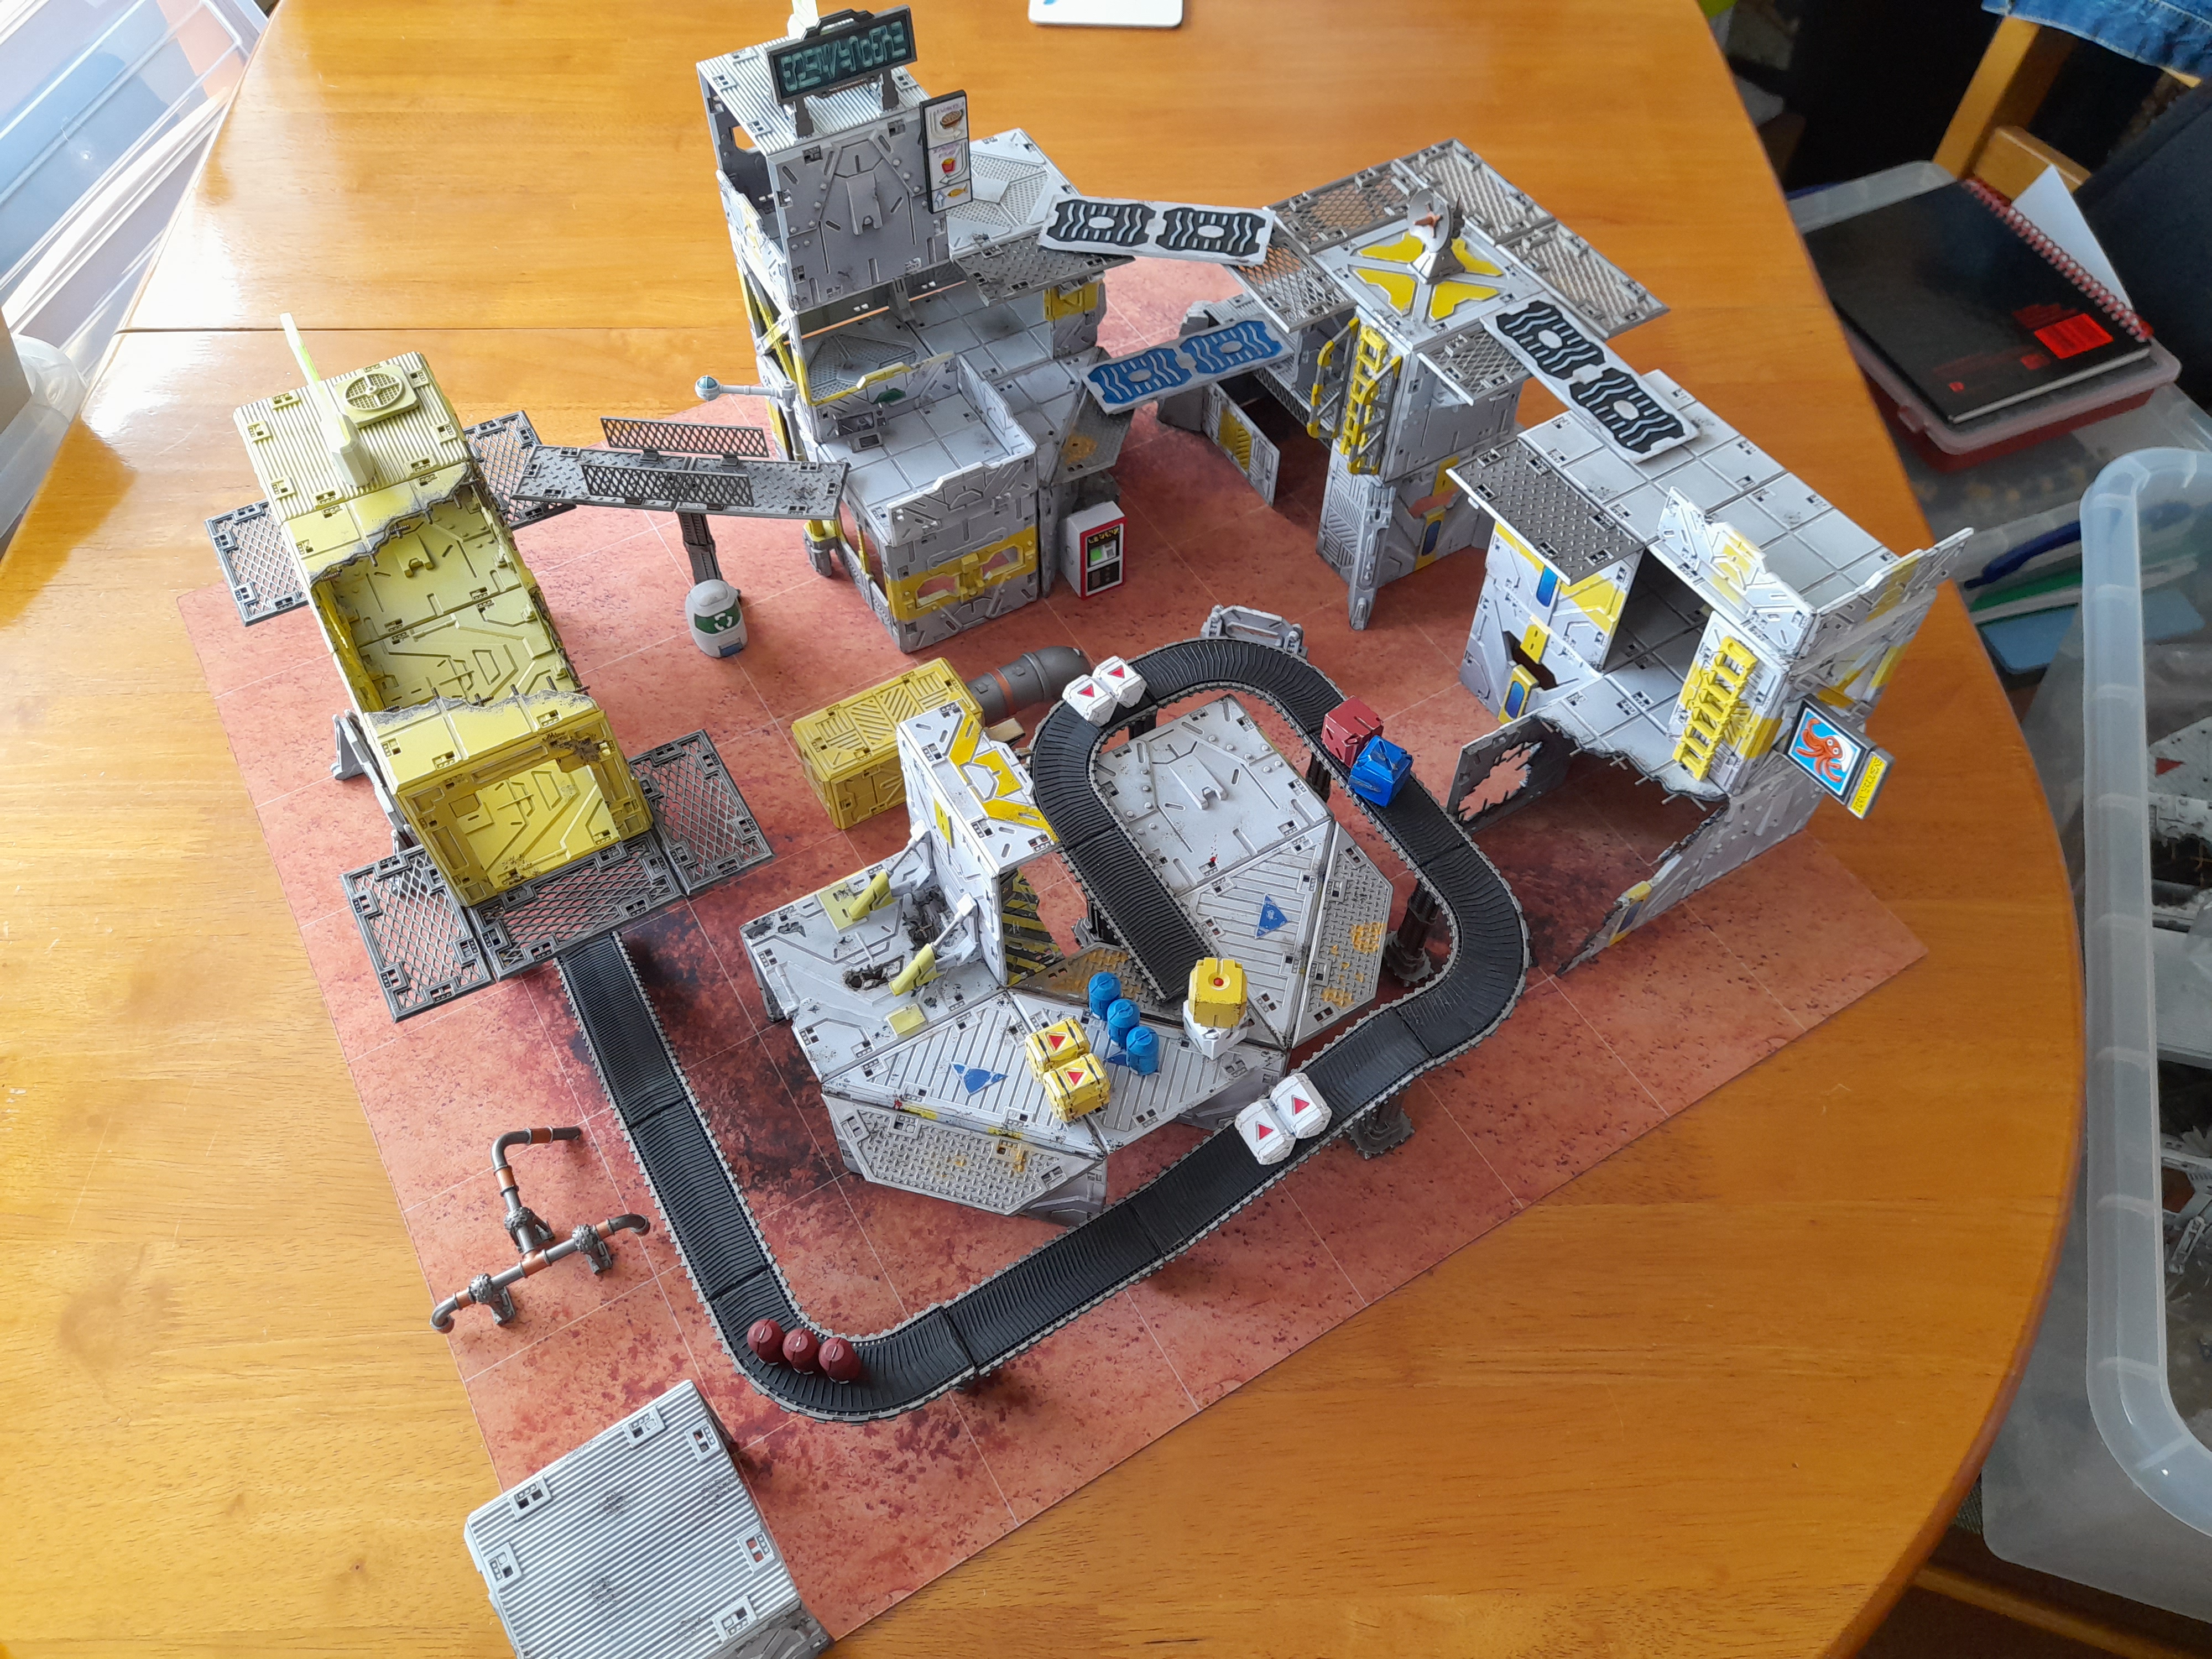
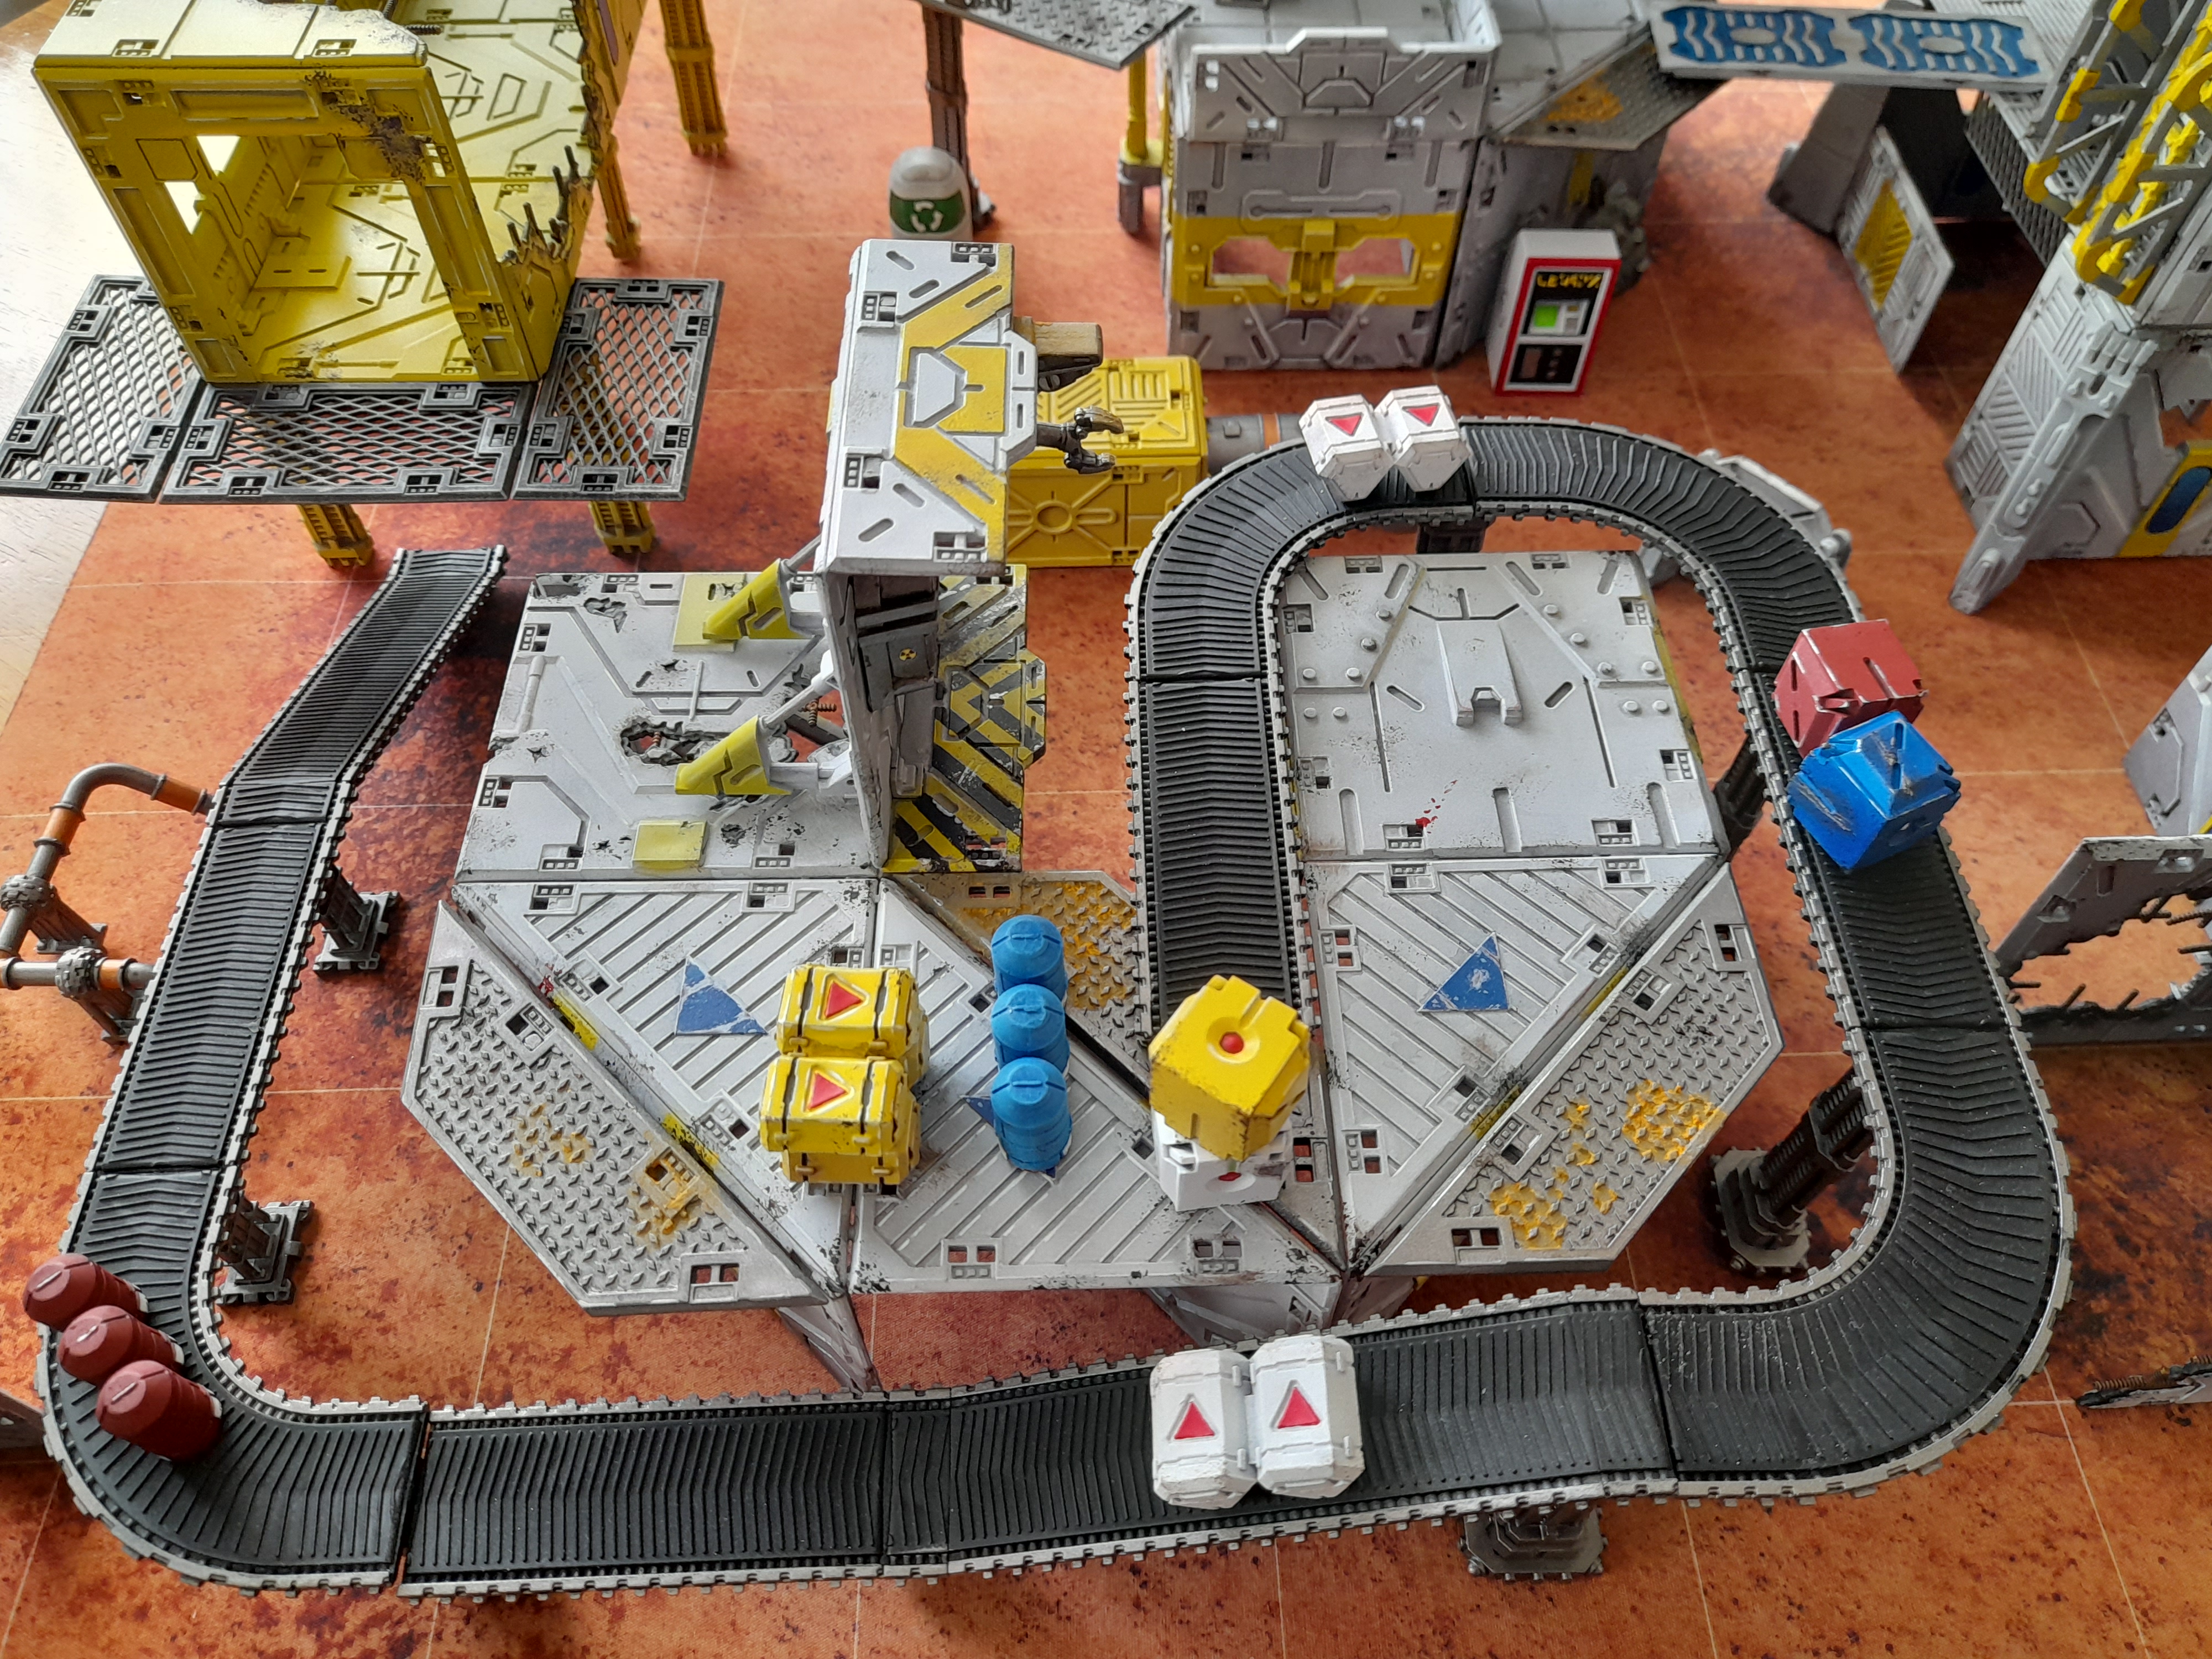
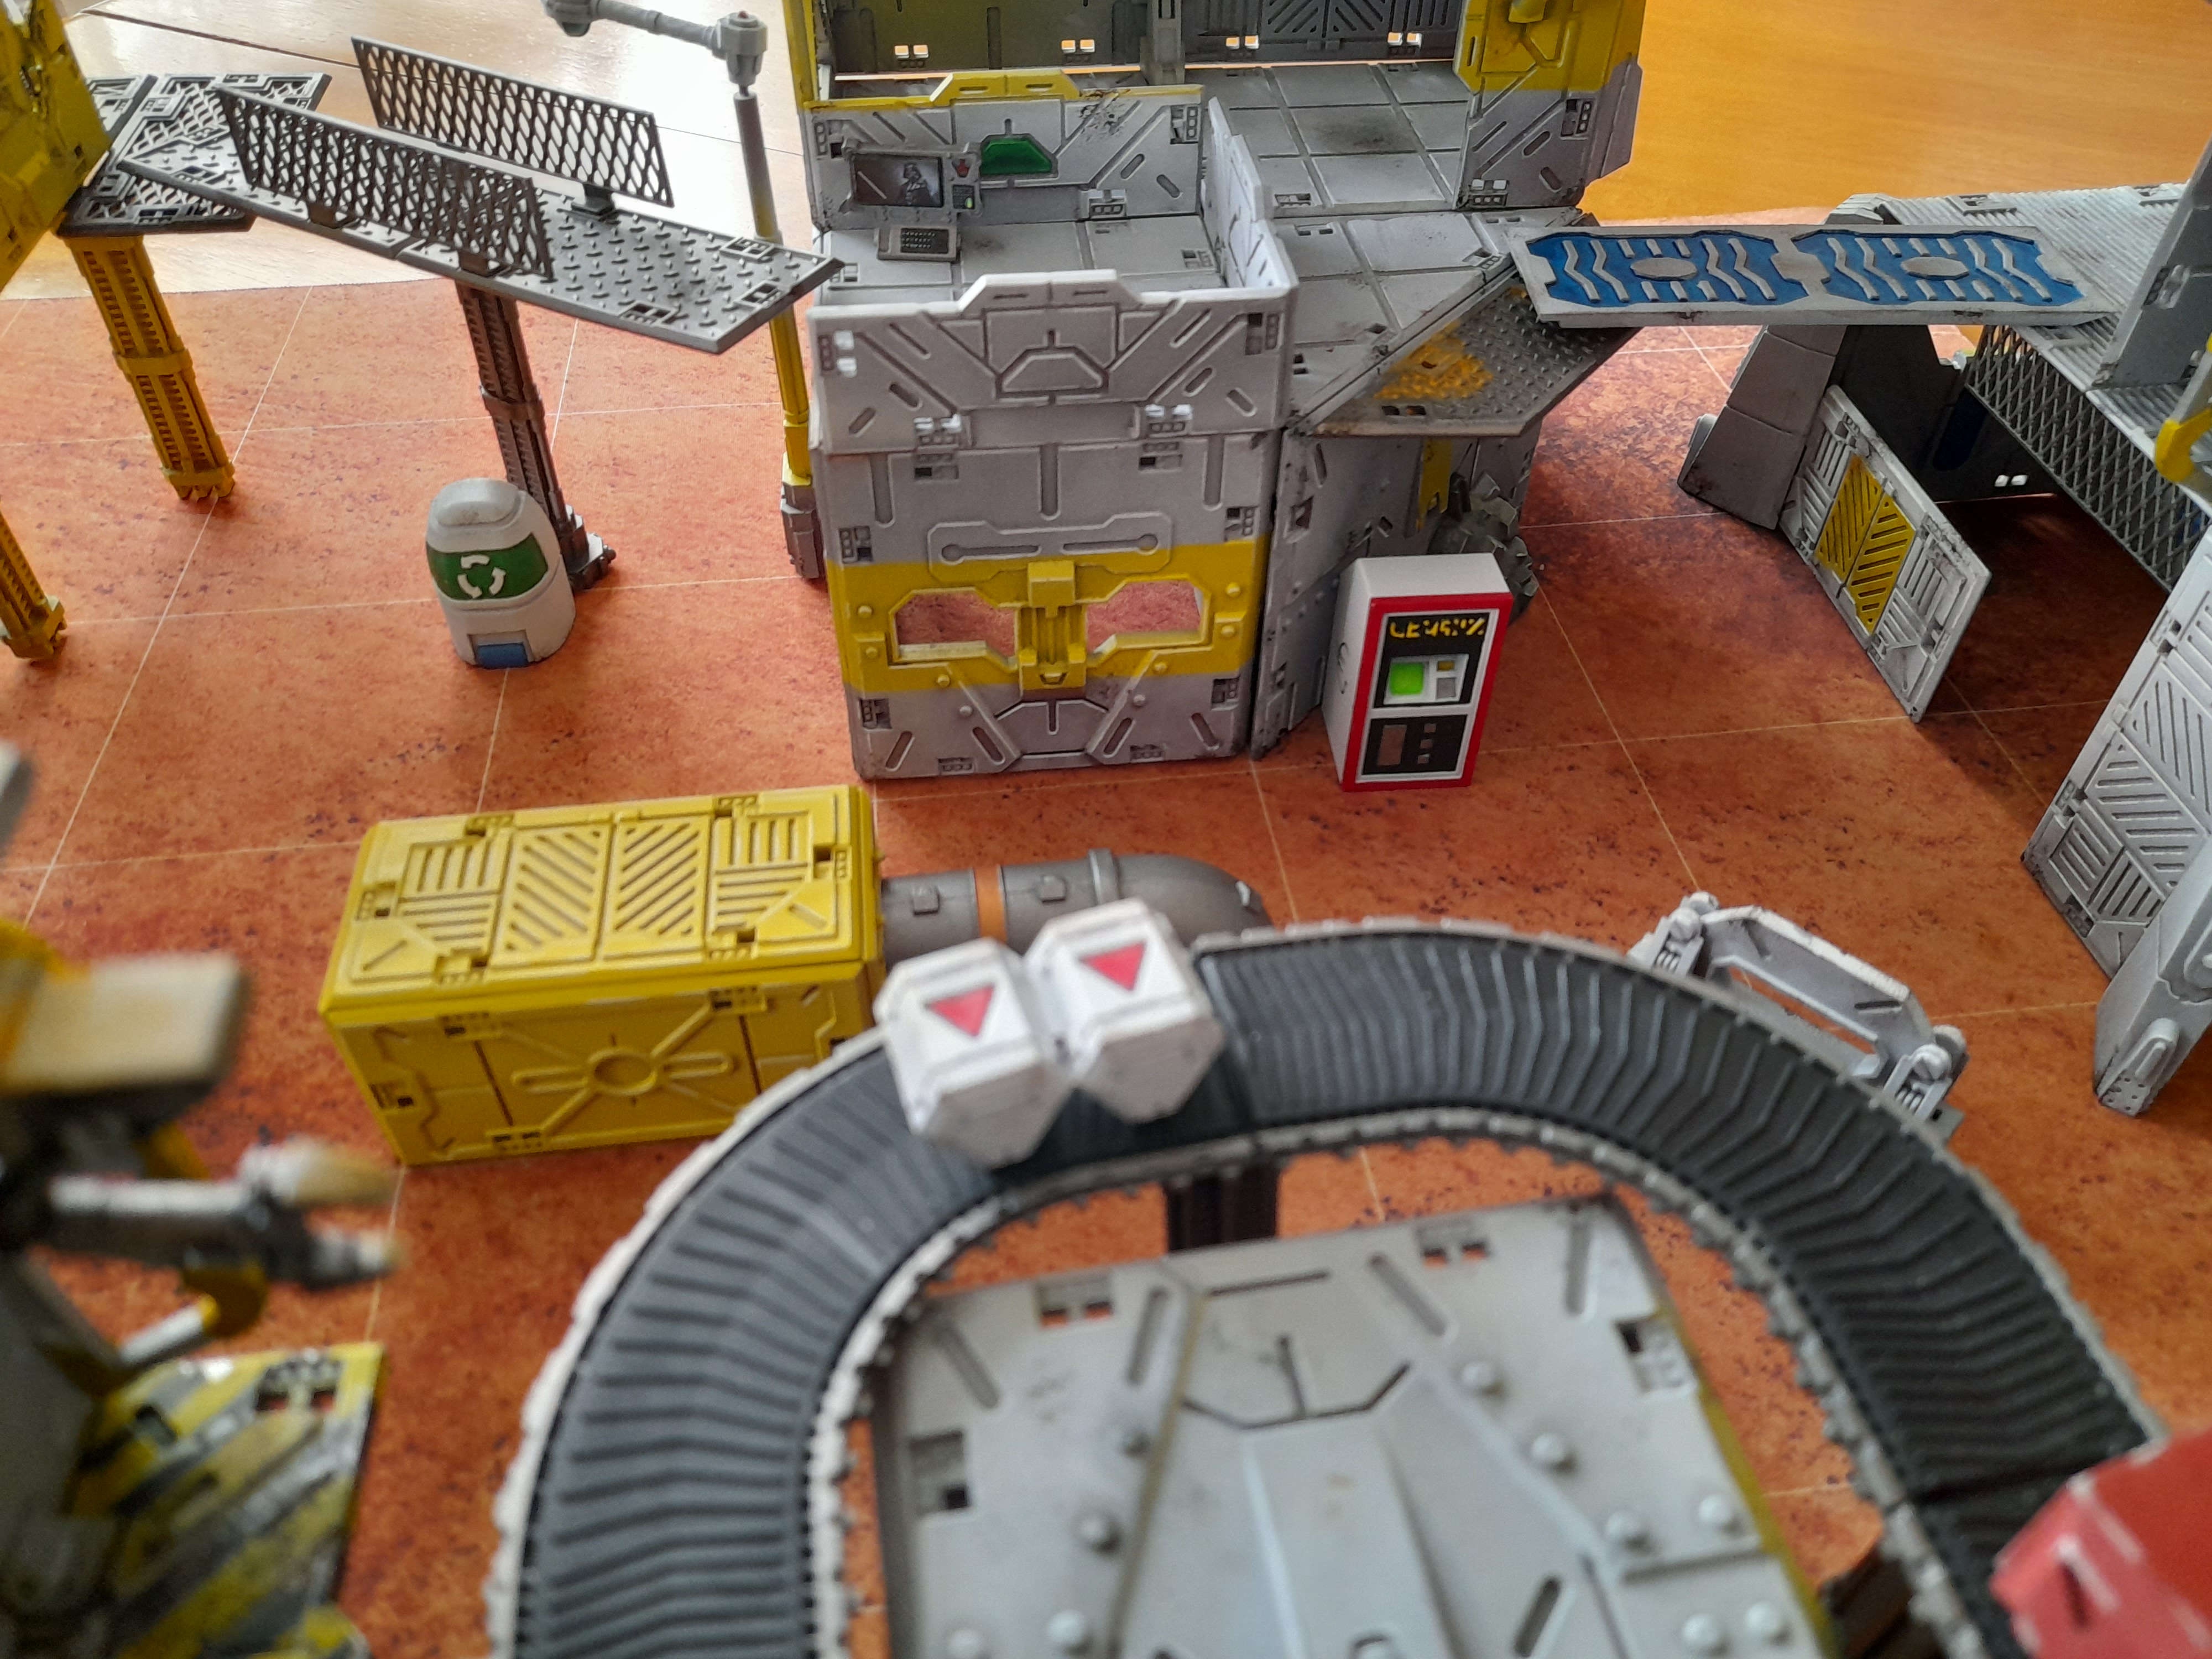
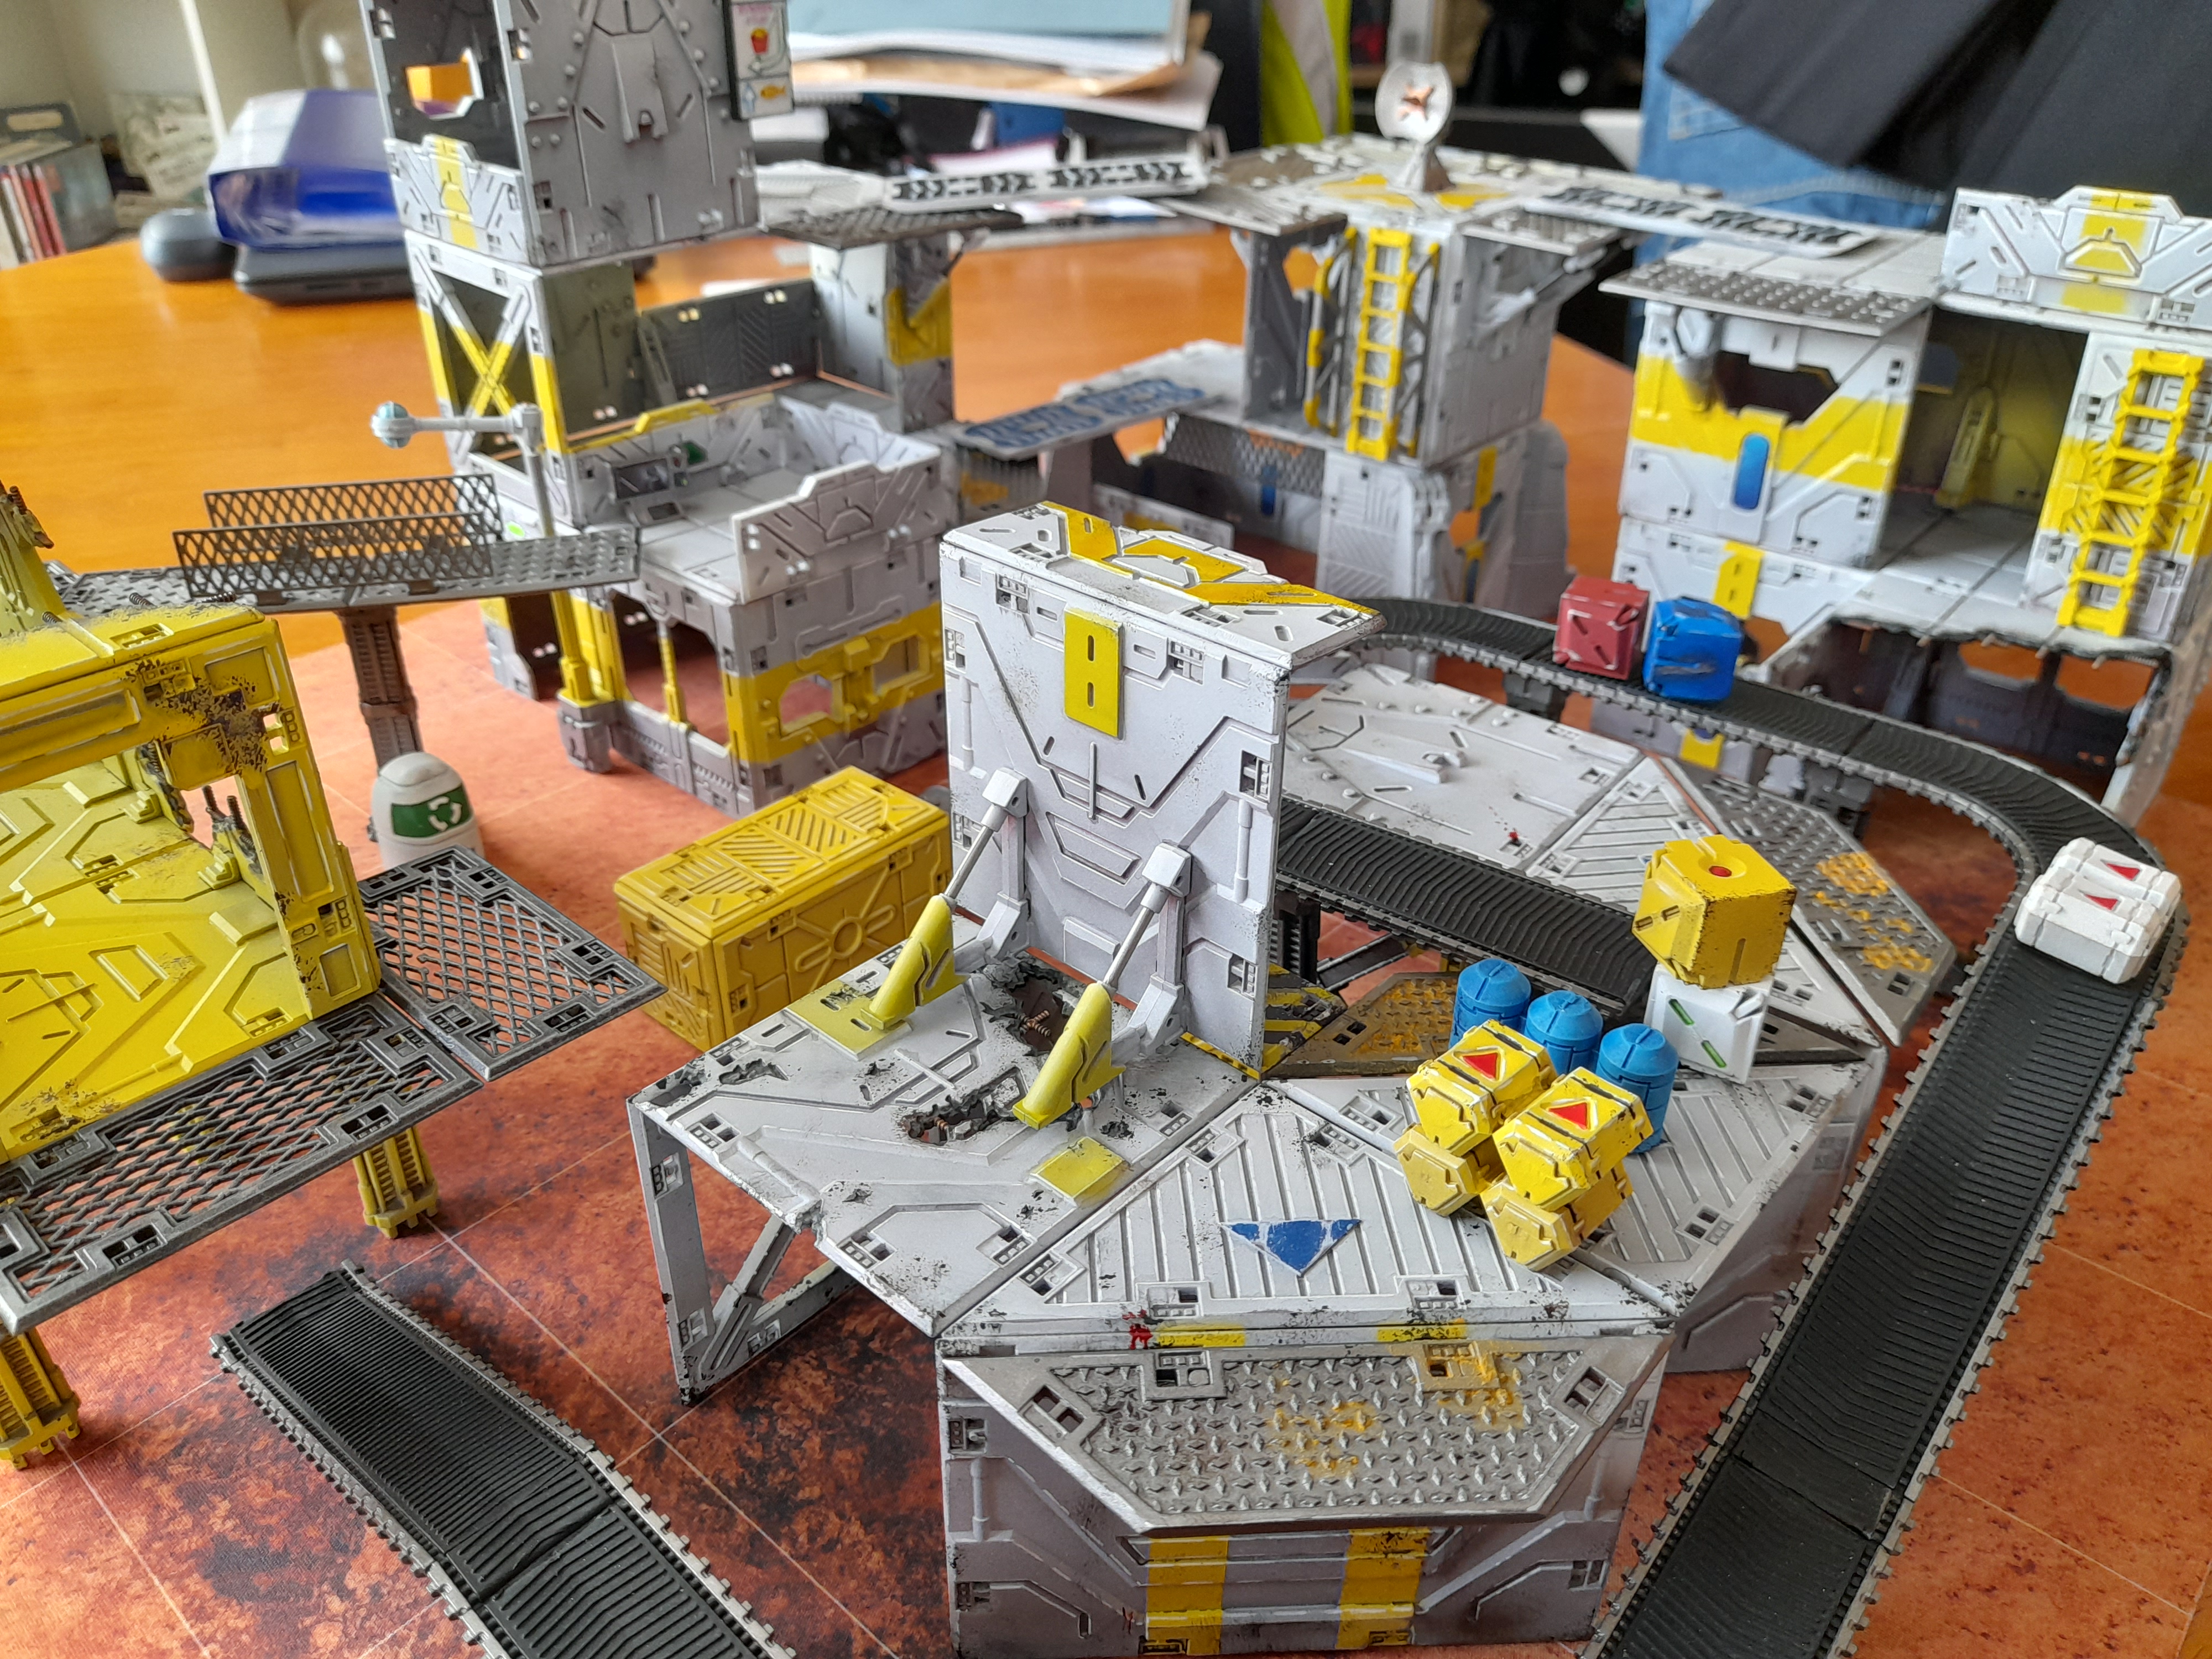
I laid them out on my martian desert mat so they would pop a little more.
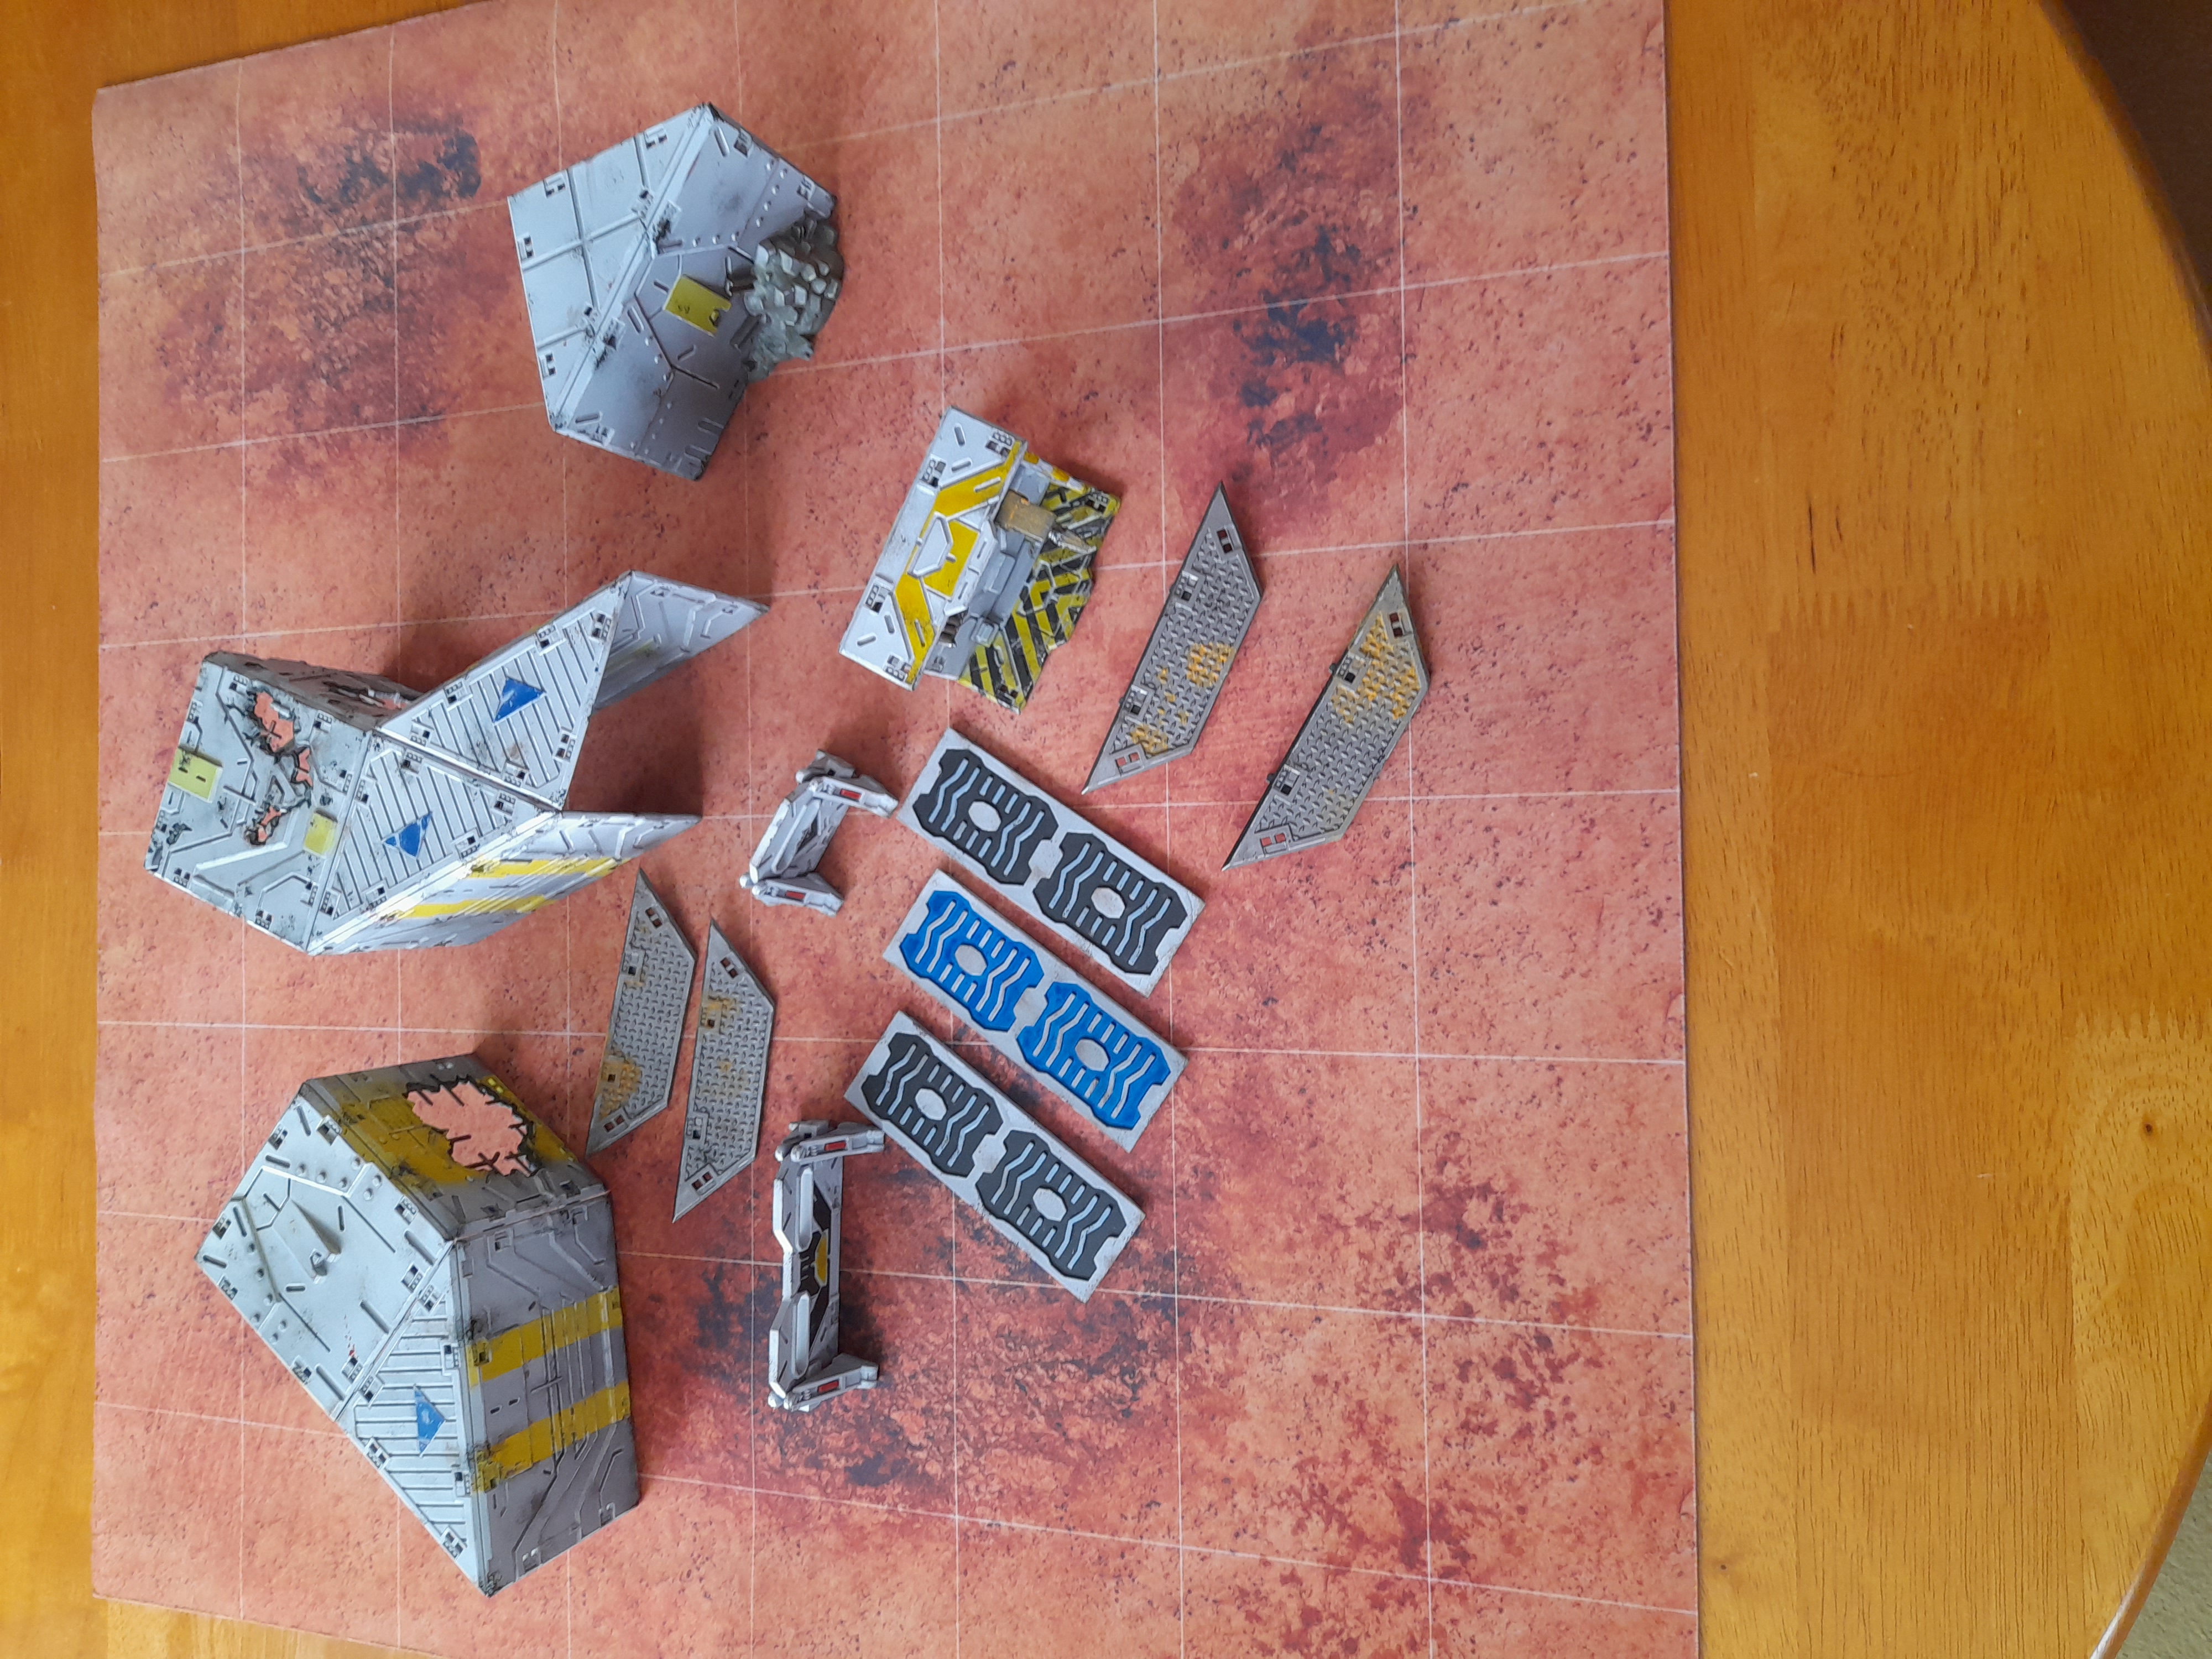
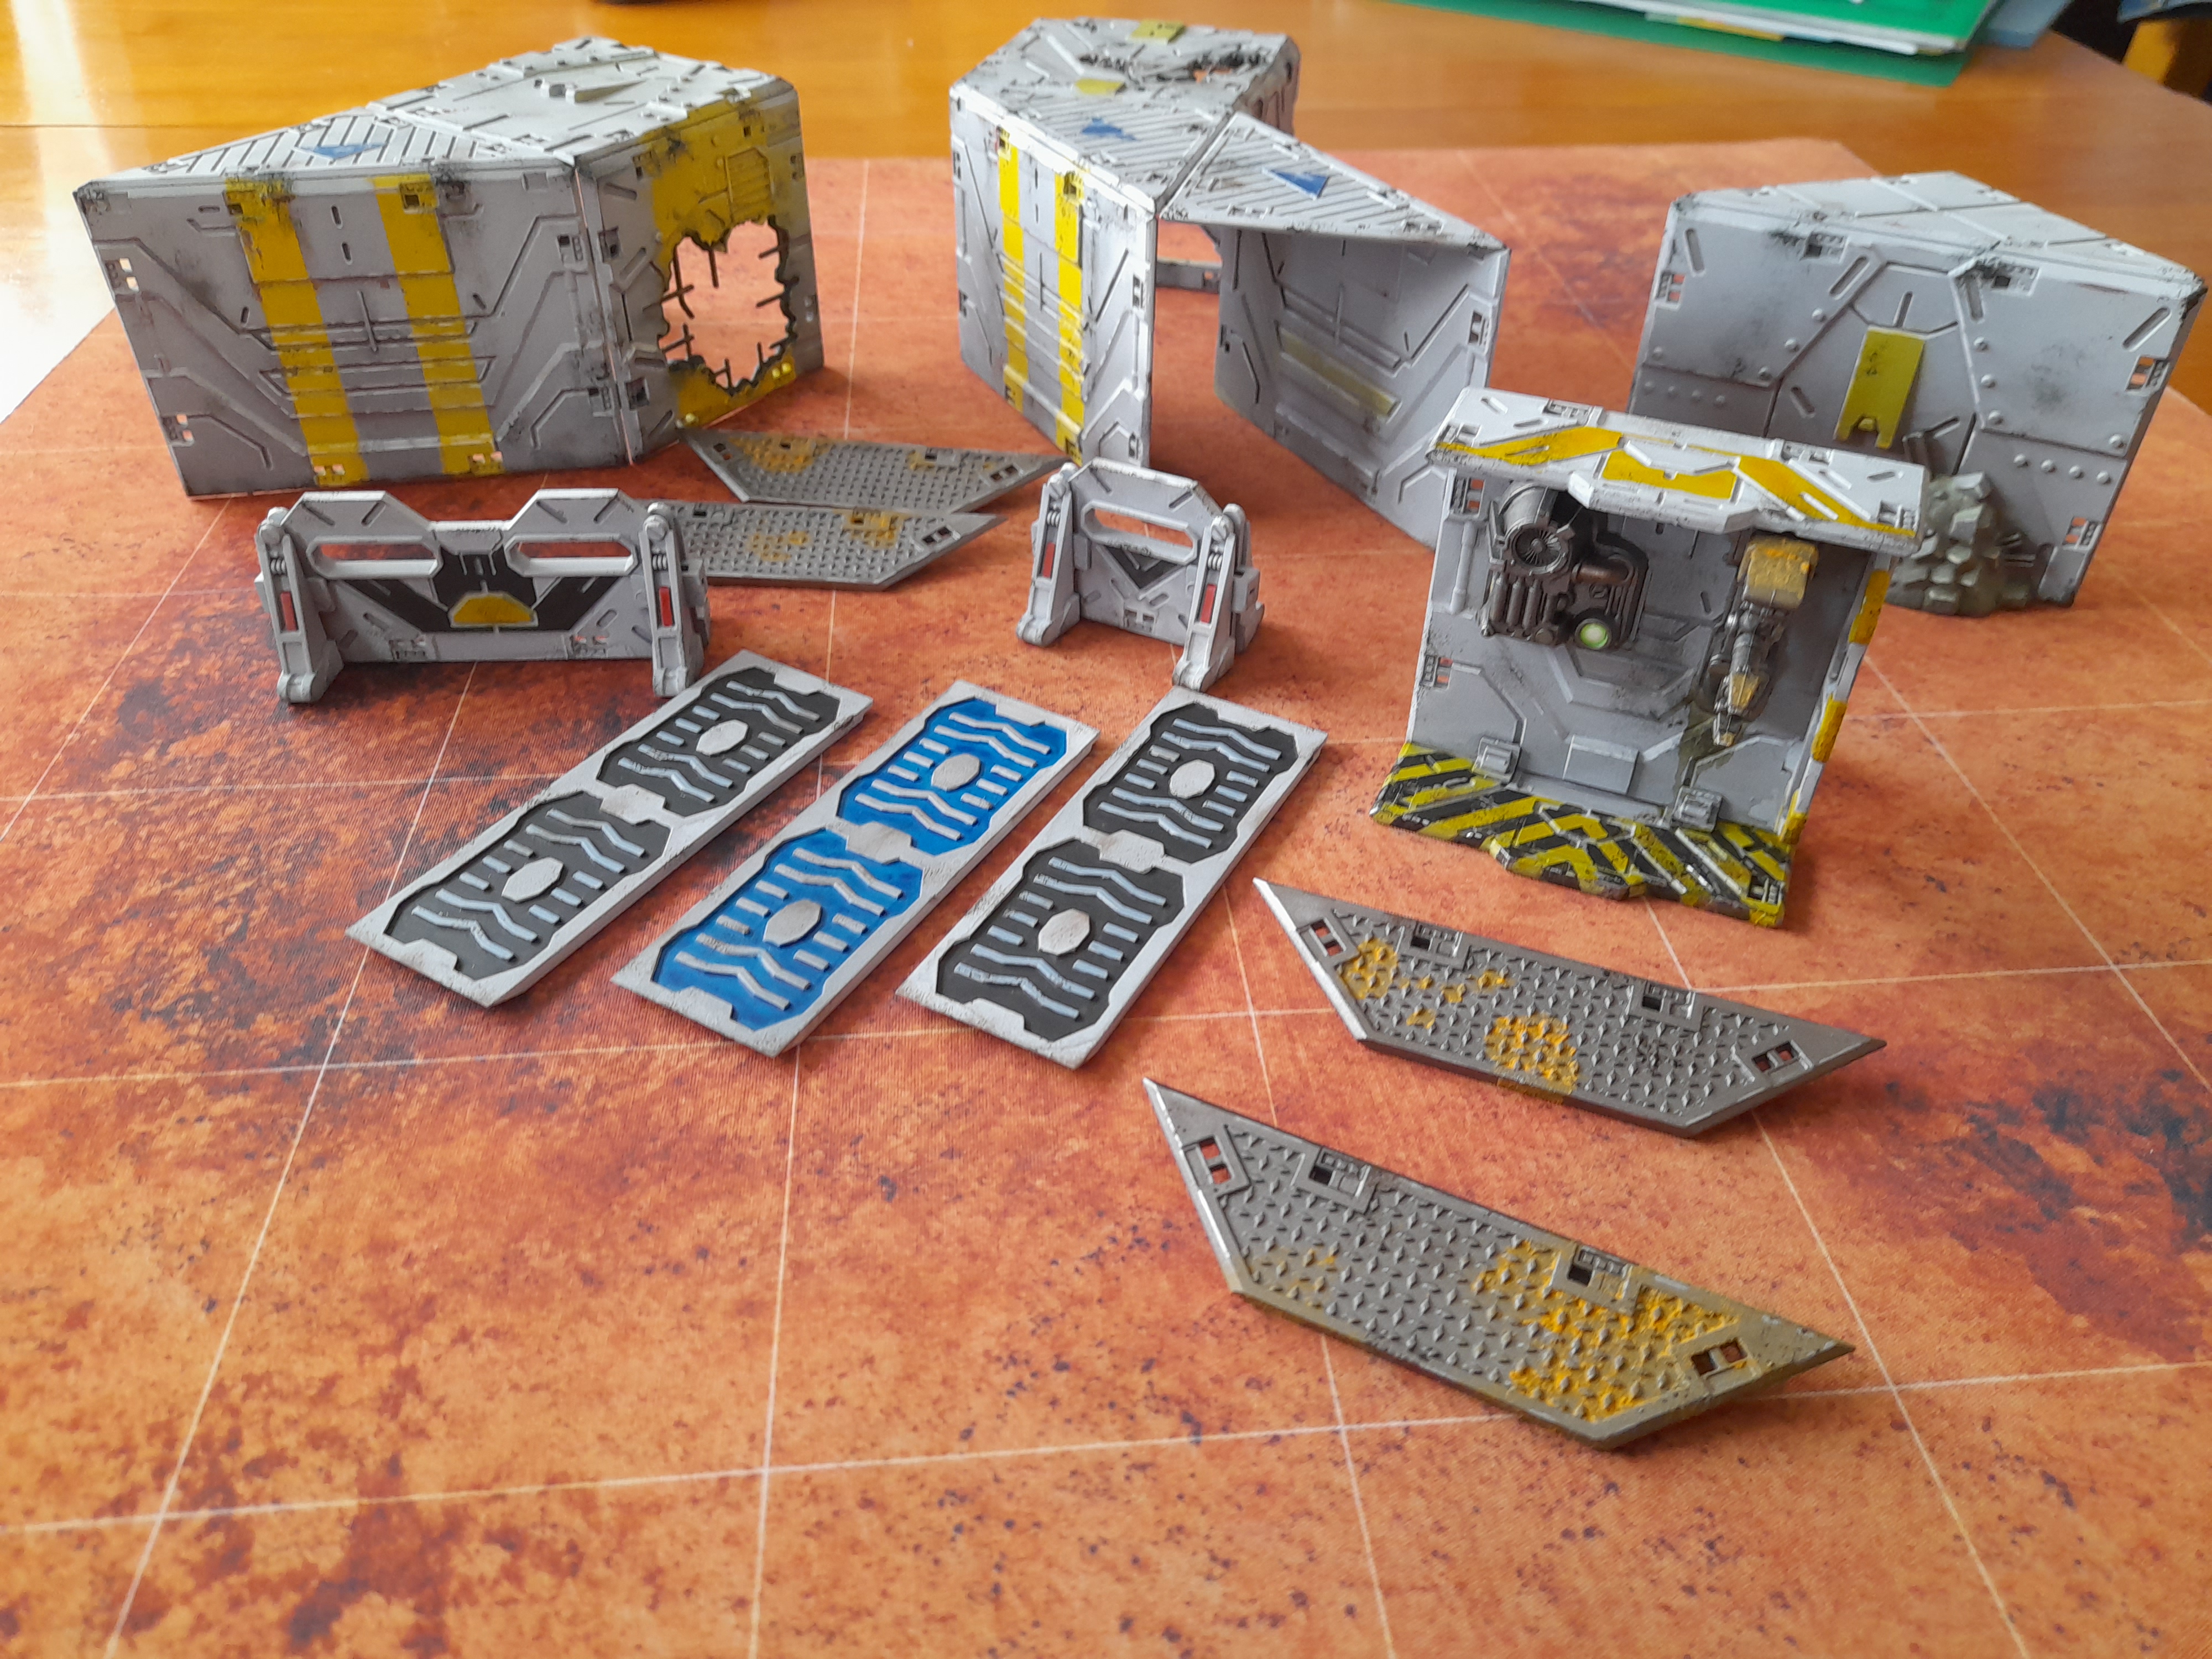
Then I put them together in a number combinations to try out the modularity.
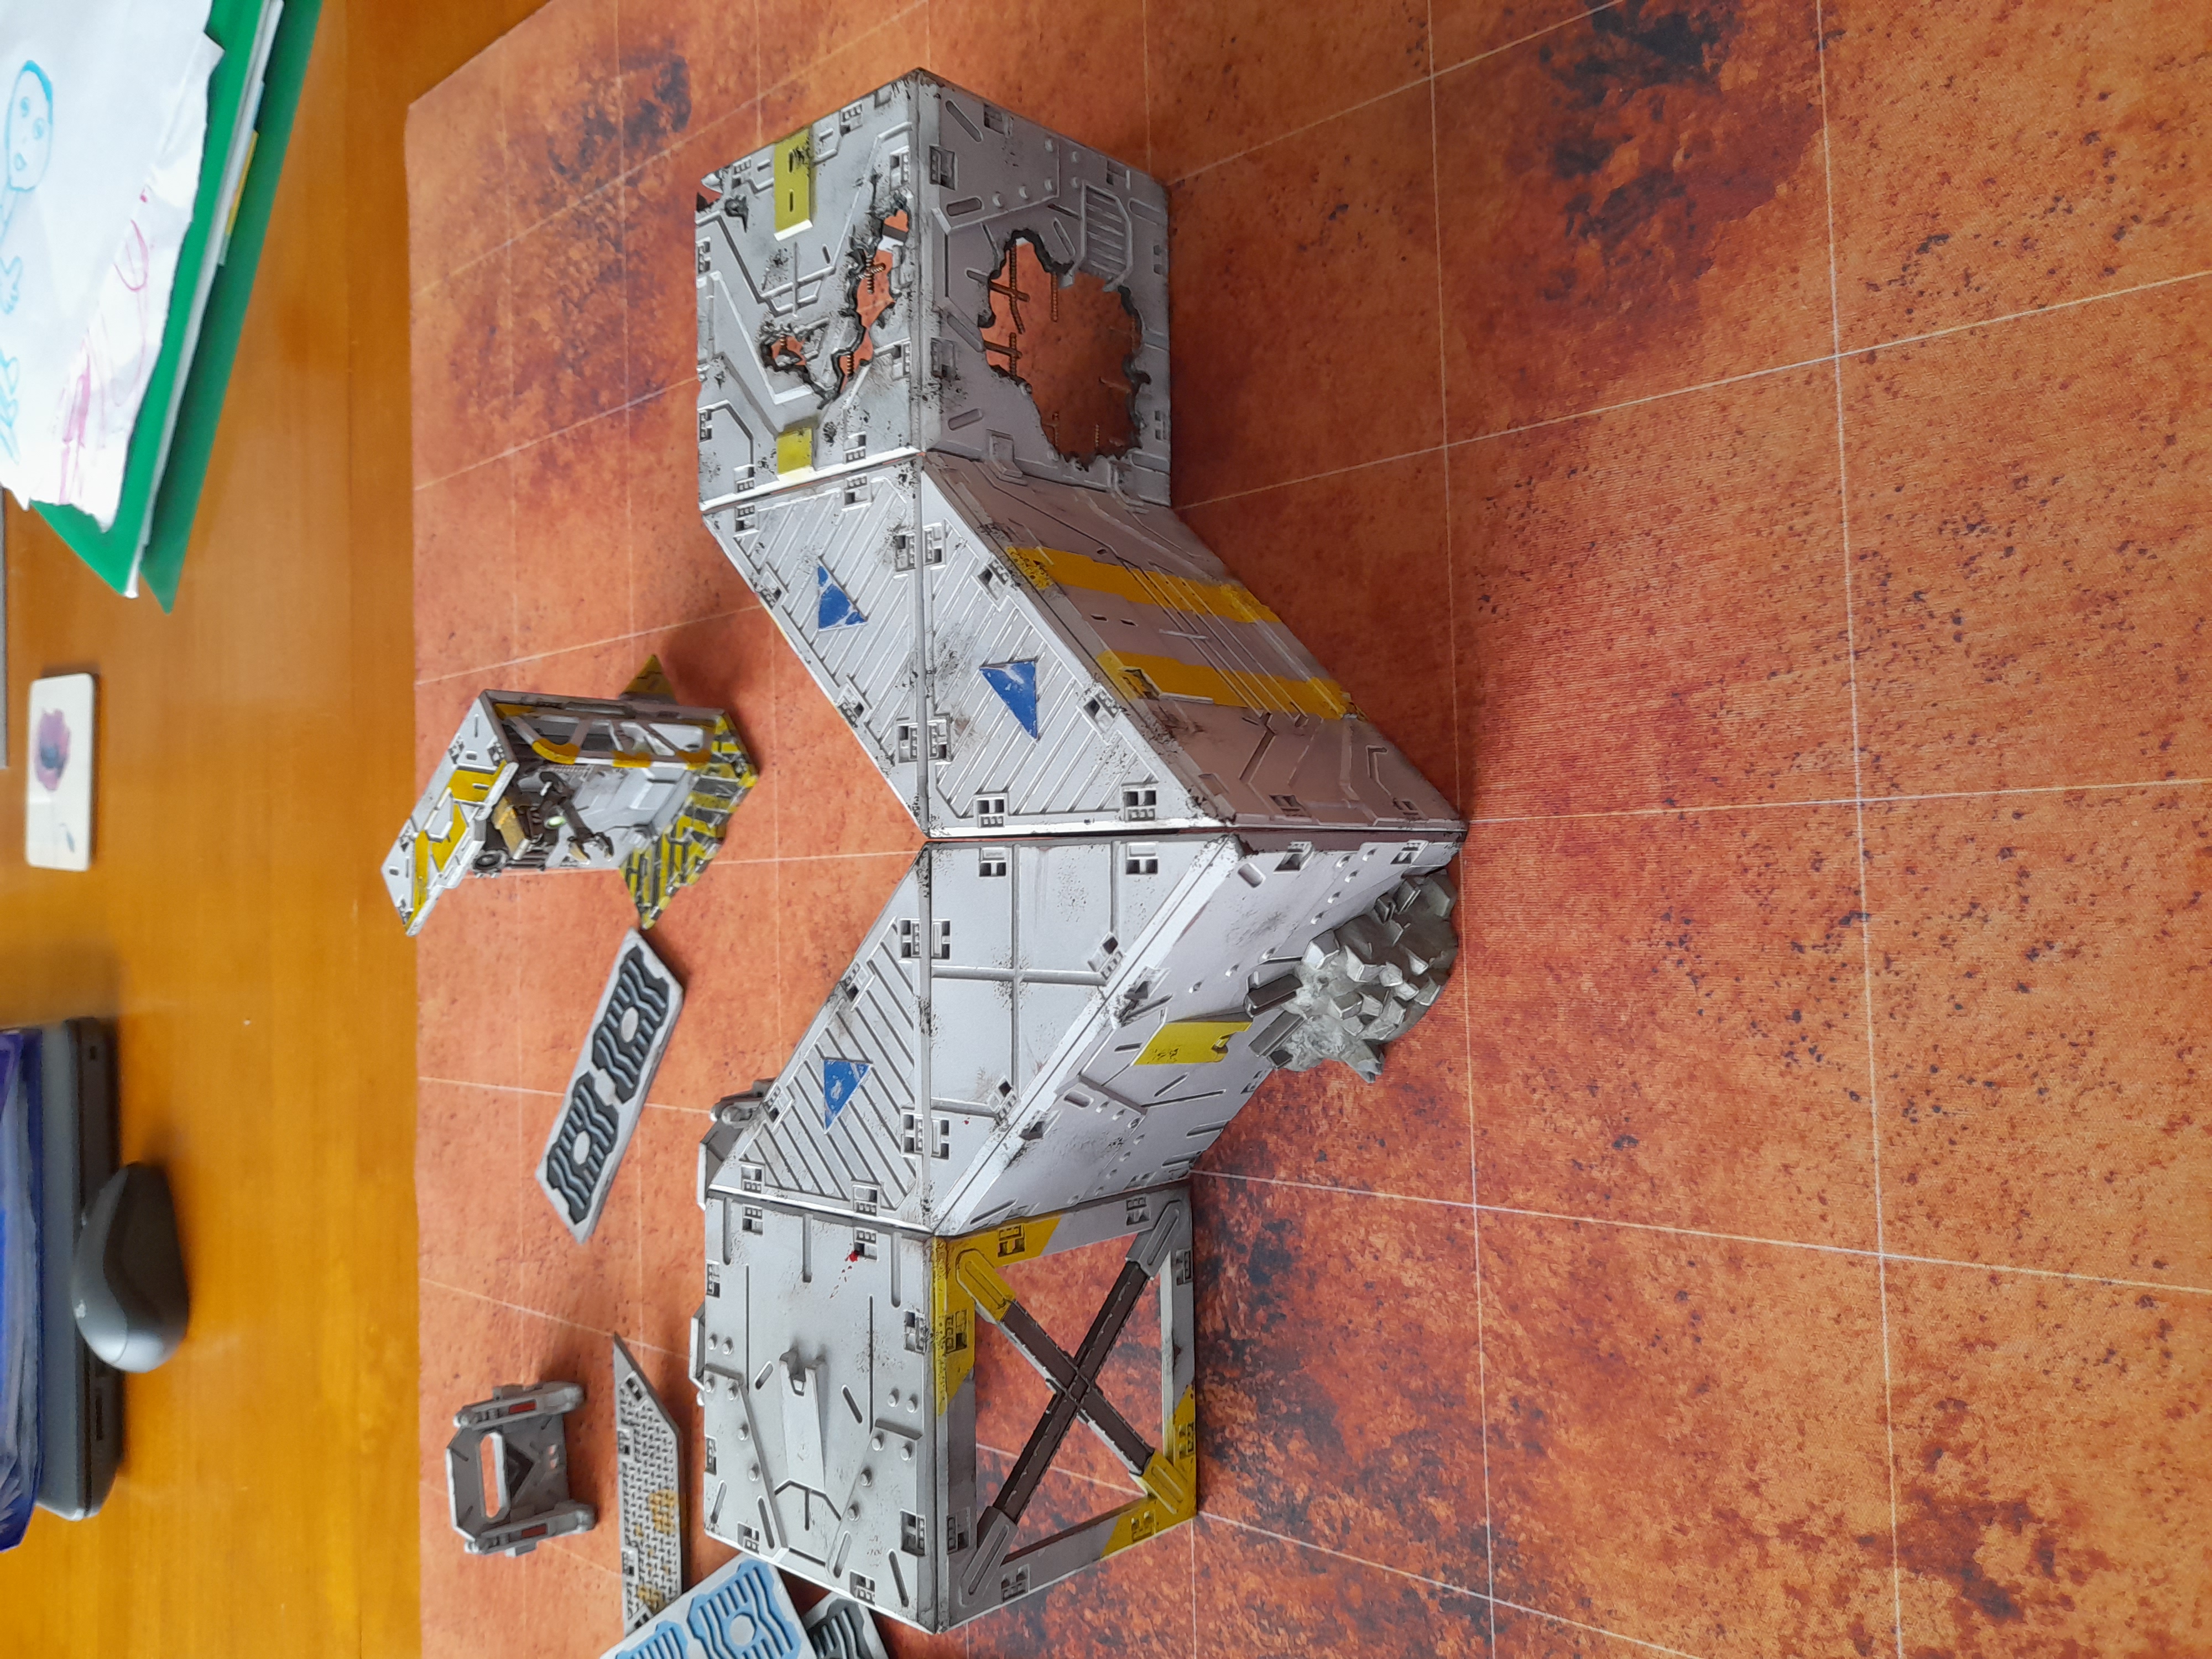
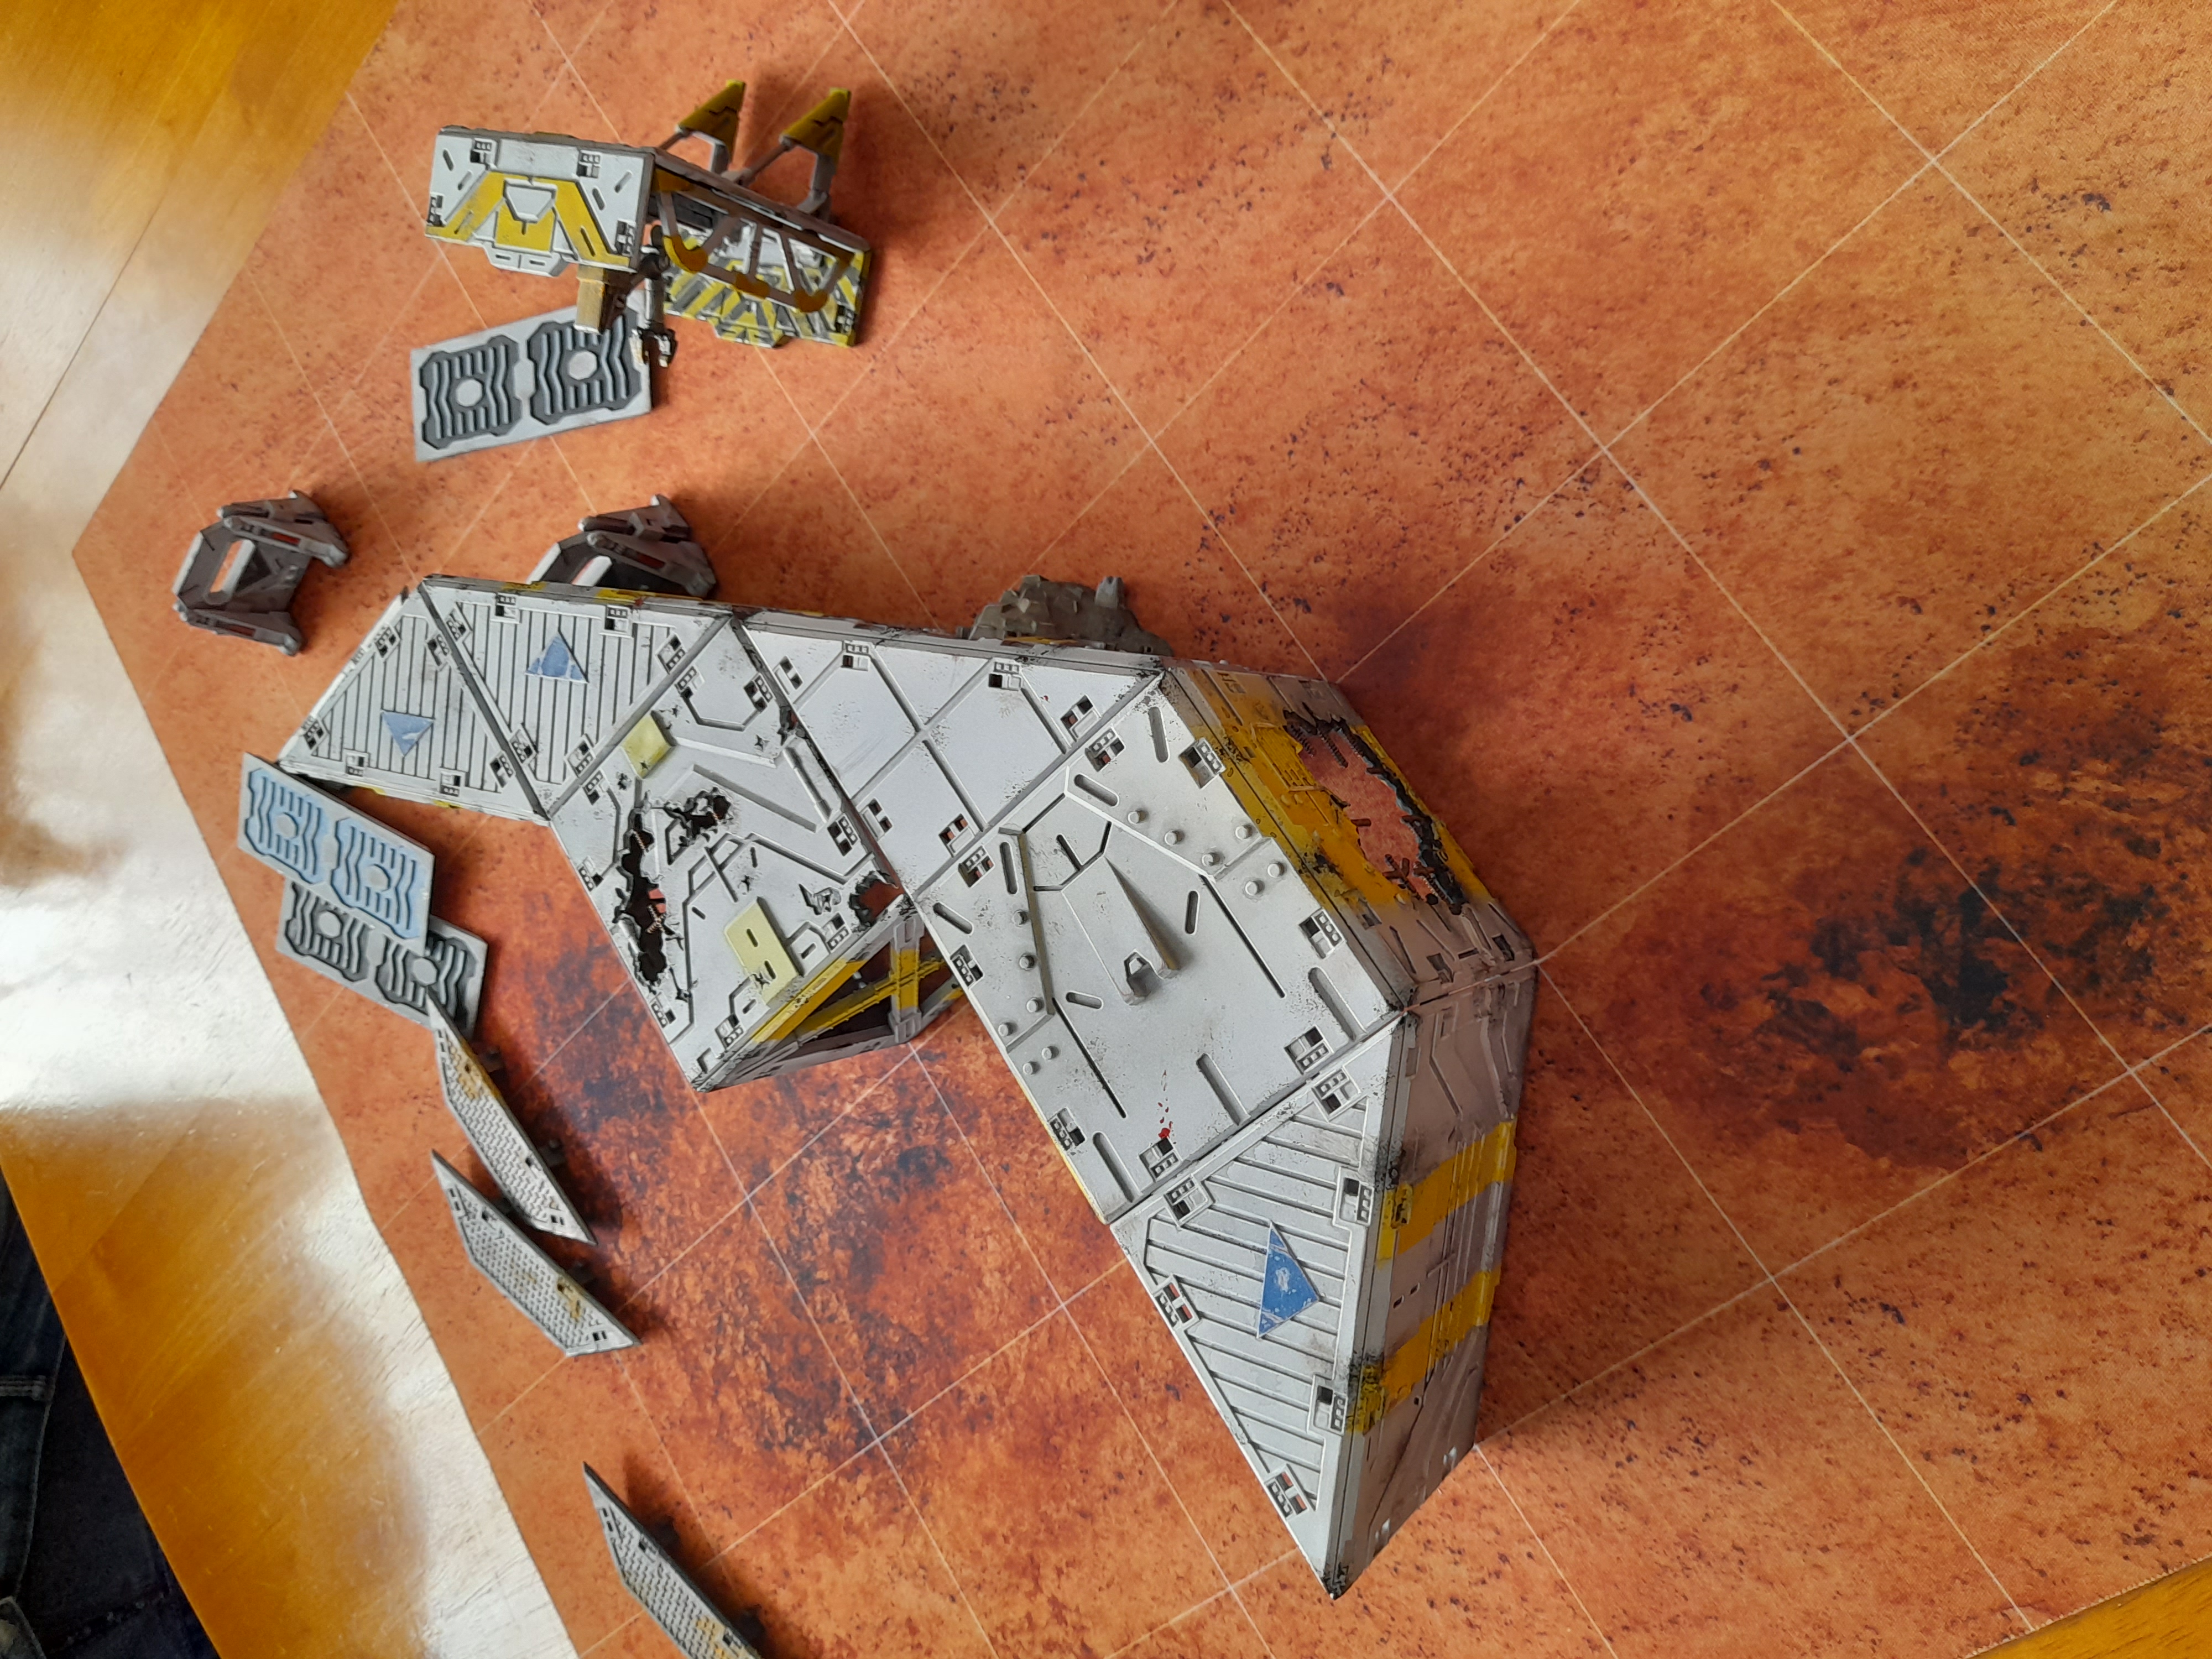
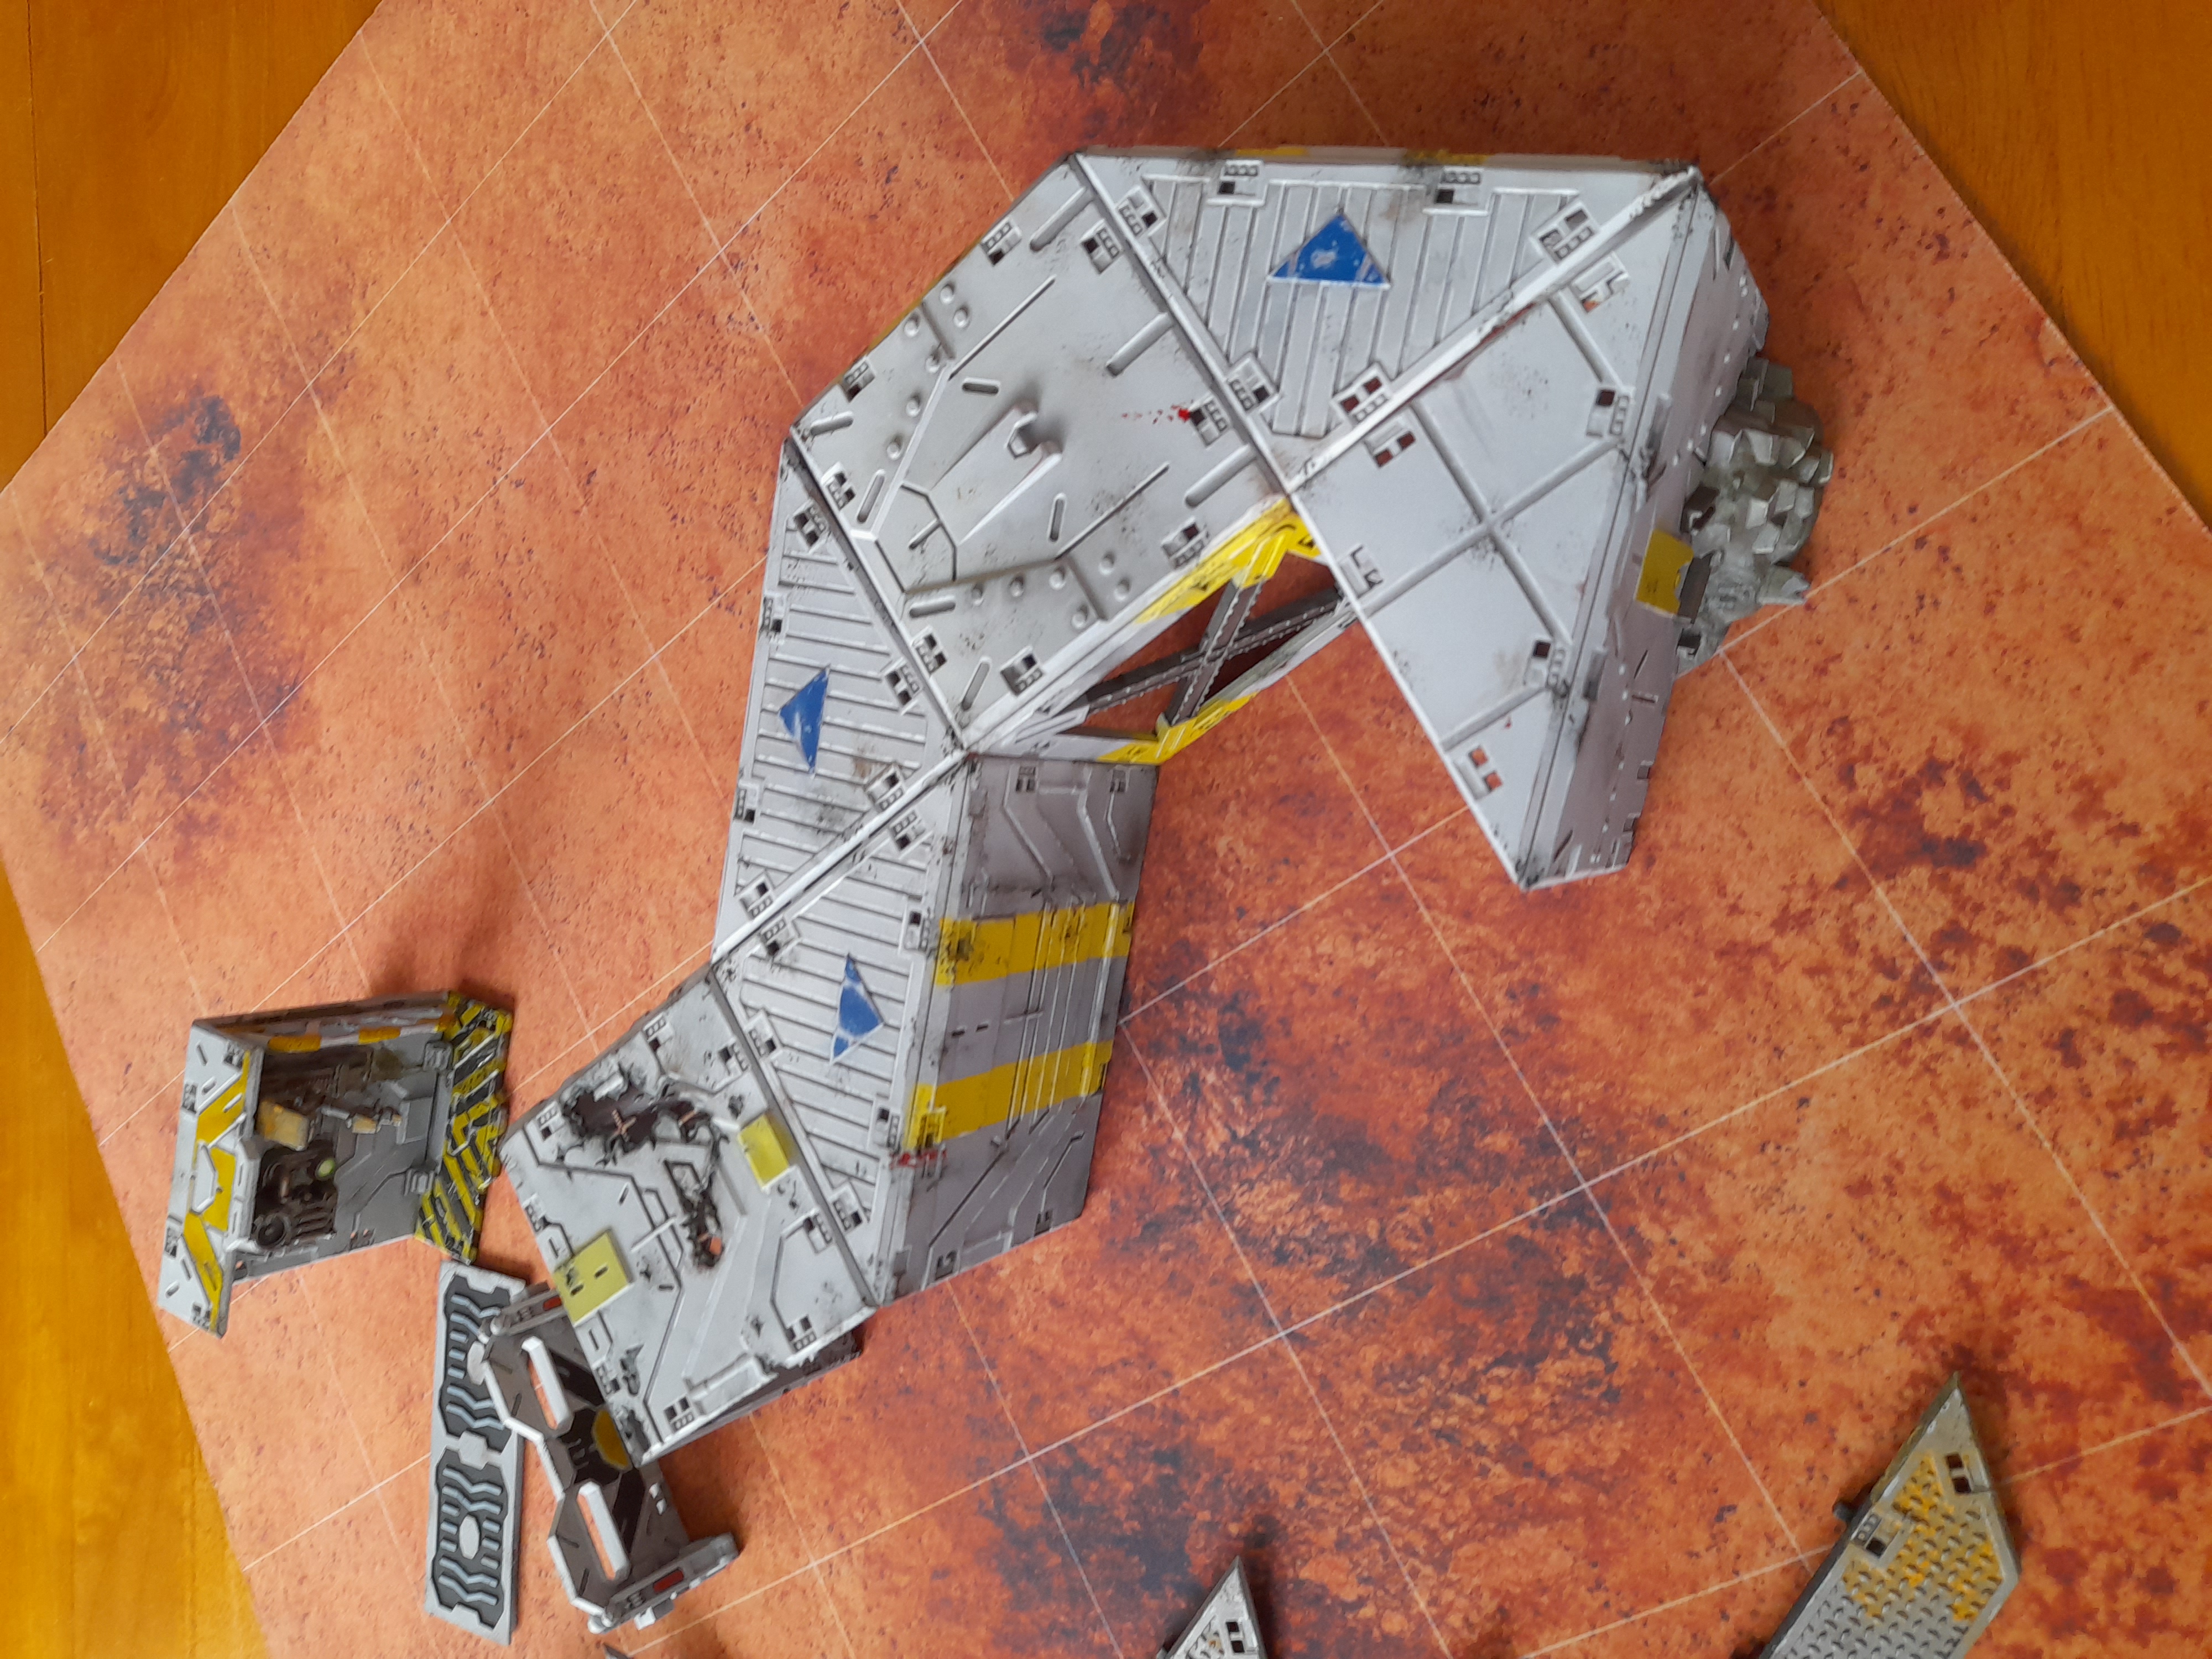
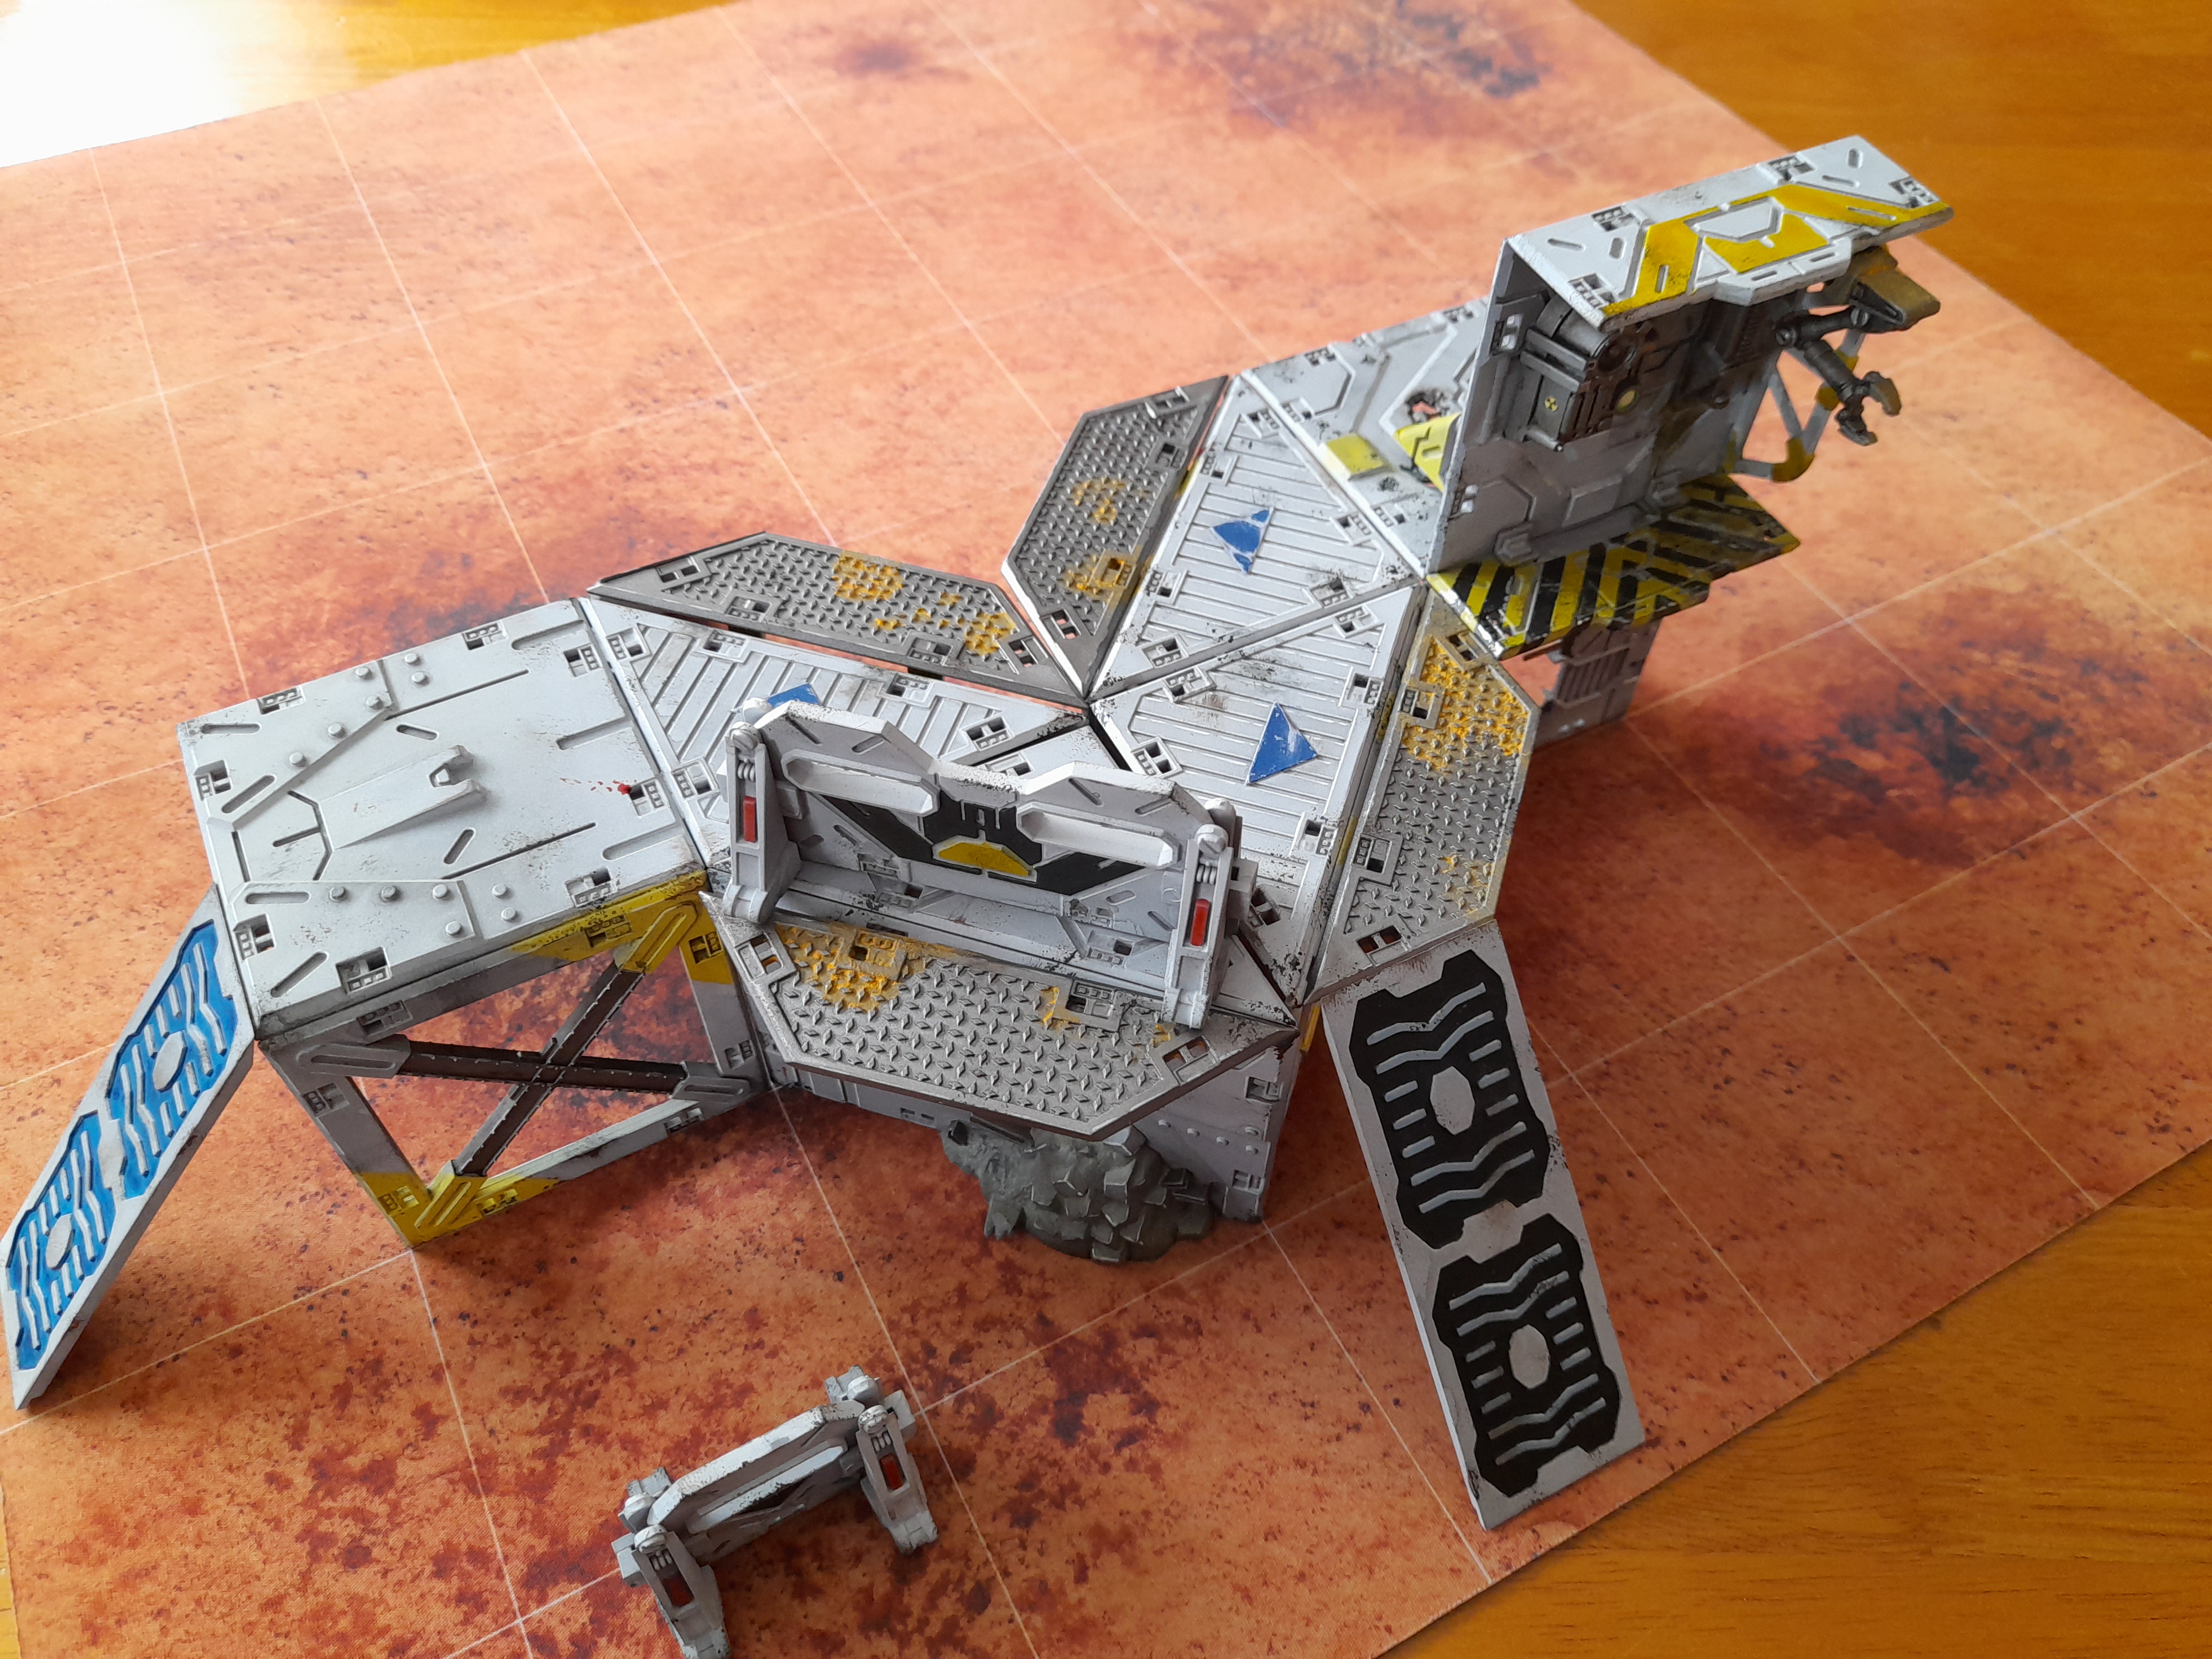
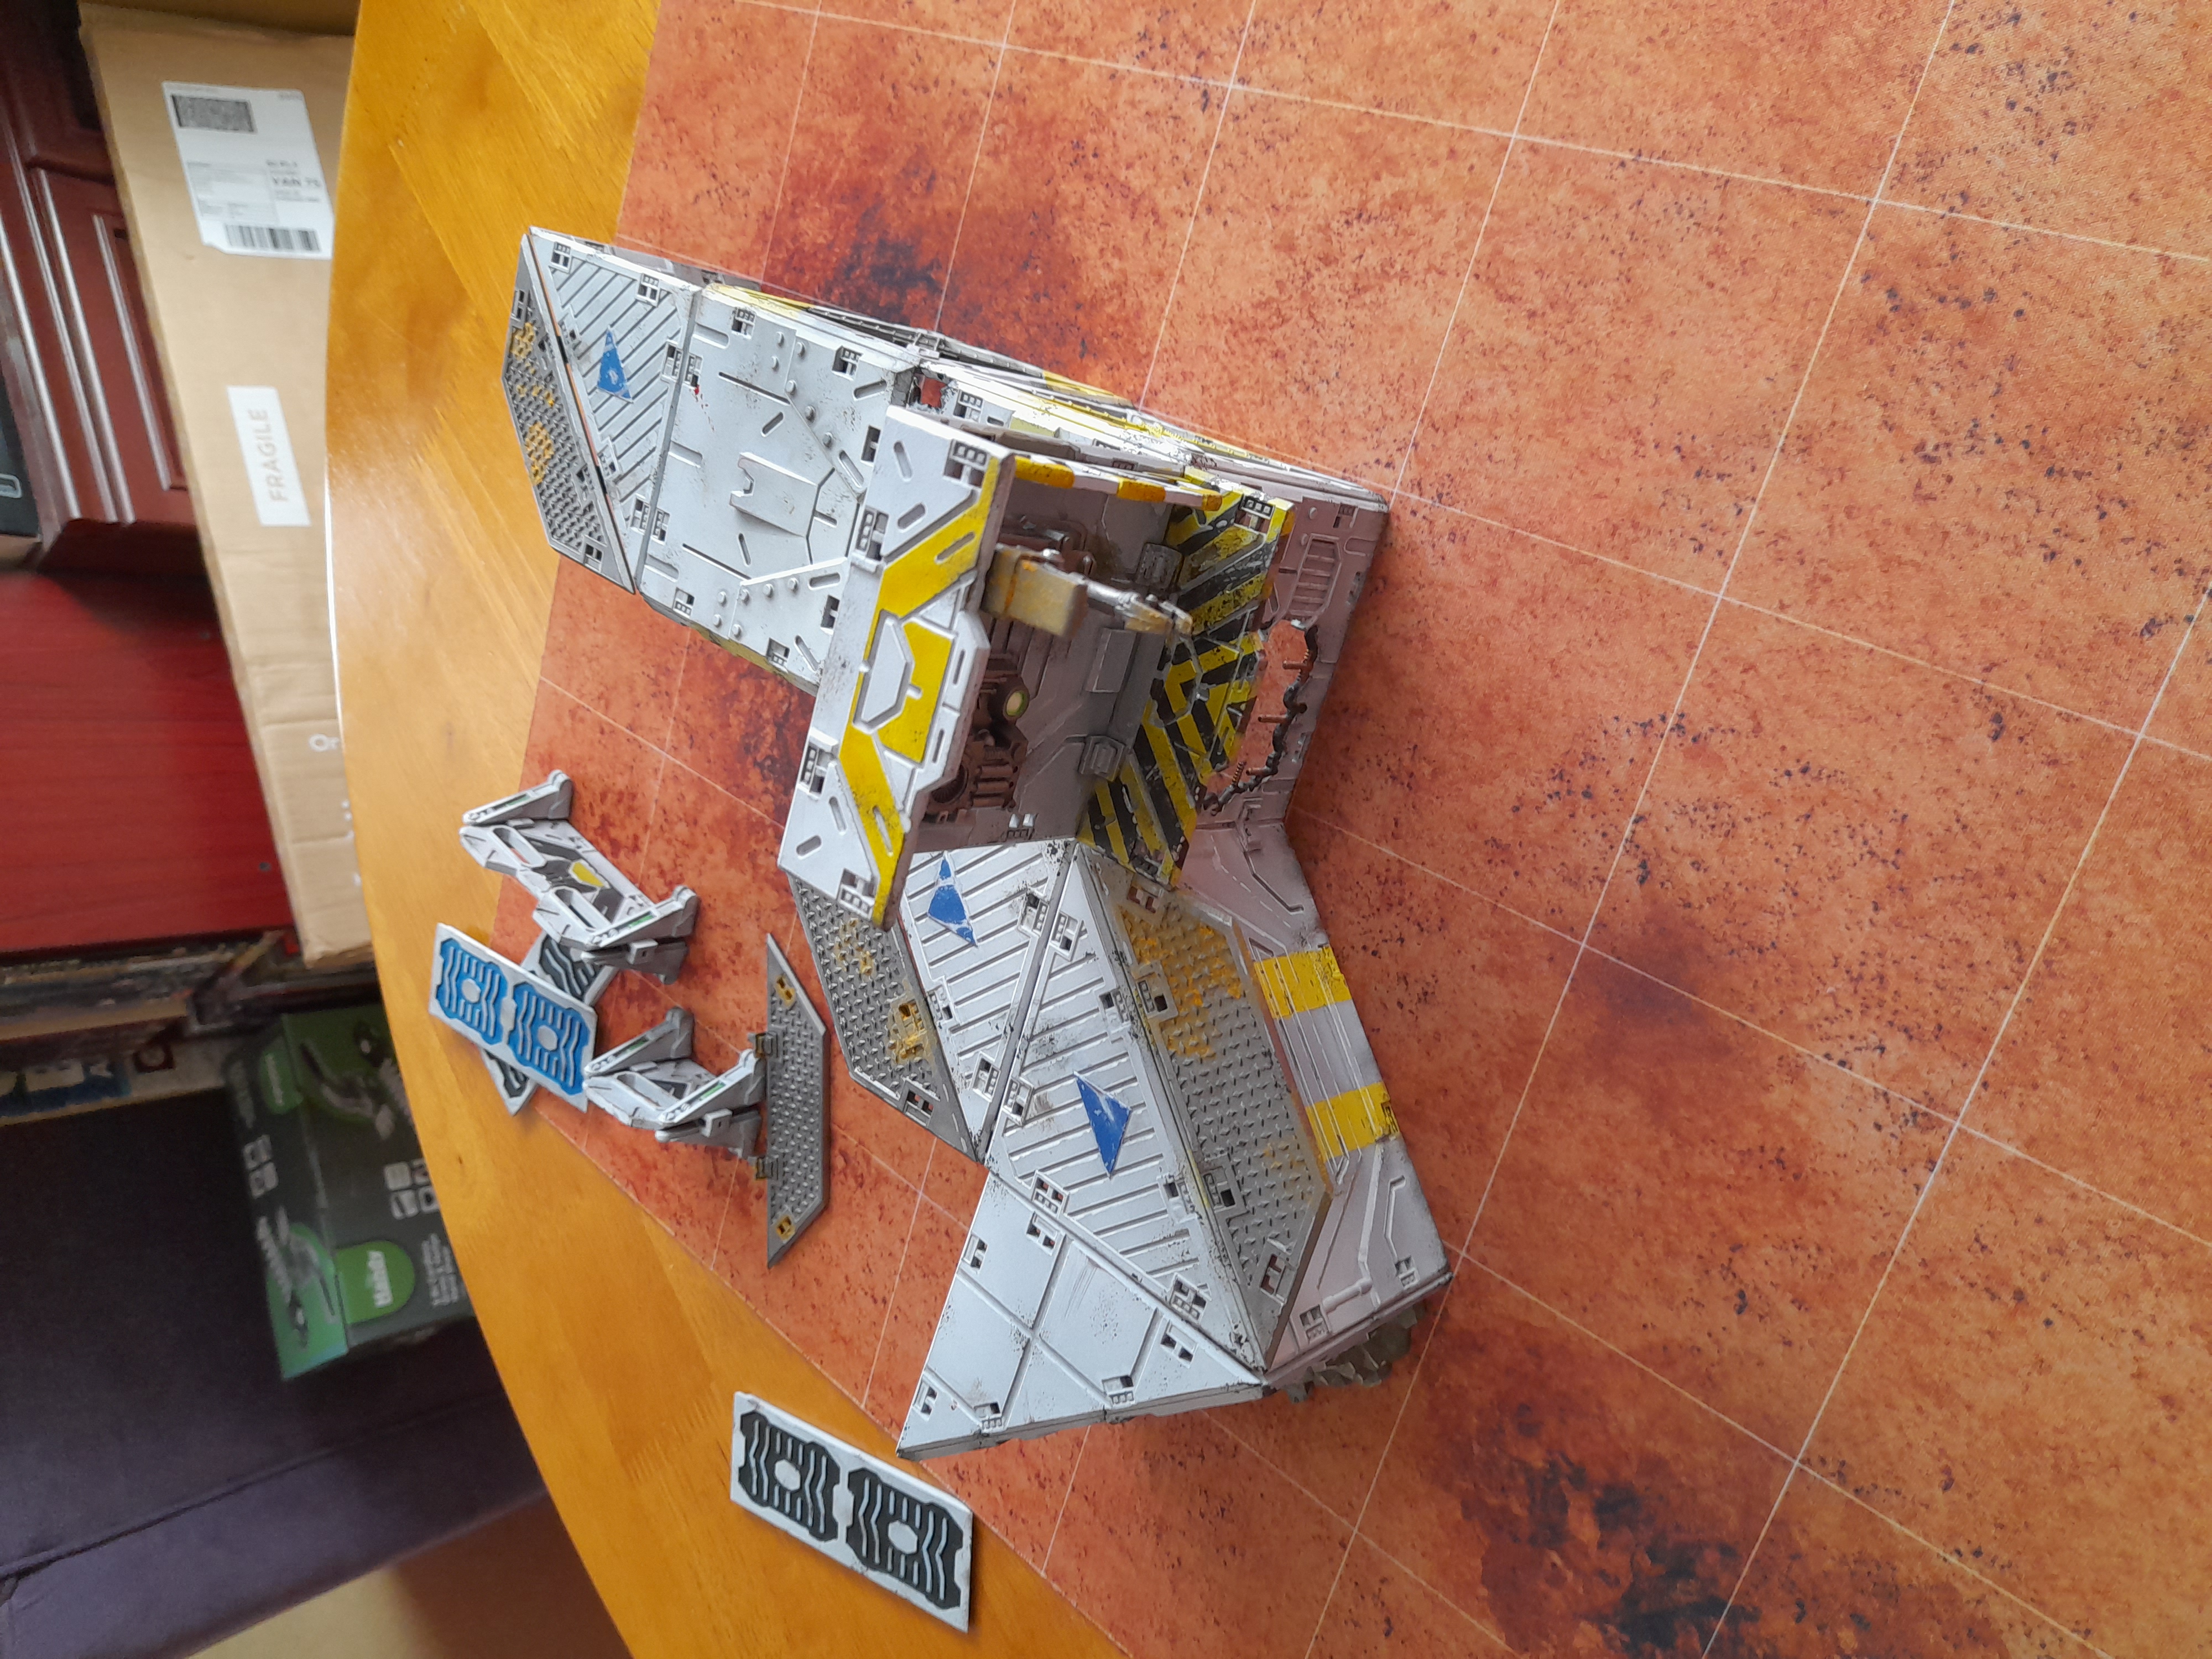
While I had the mat out I also grabbed some of the rest of my terrain and put out a small layout combining the new pieces, old pieces and made an effort to add in the conveyor belt system, as I hadn’t used that much.
They mix really well I think, so the weathering didn’t go too far… this time 😊
Vanguard objectives underway
24th October 2023
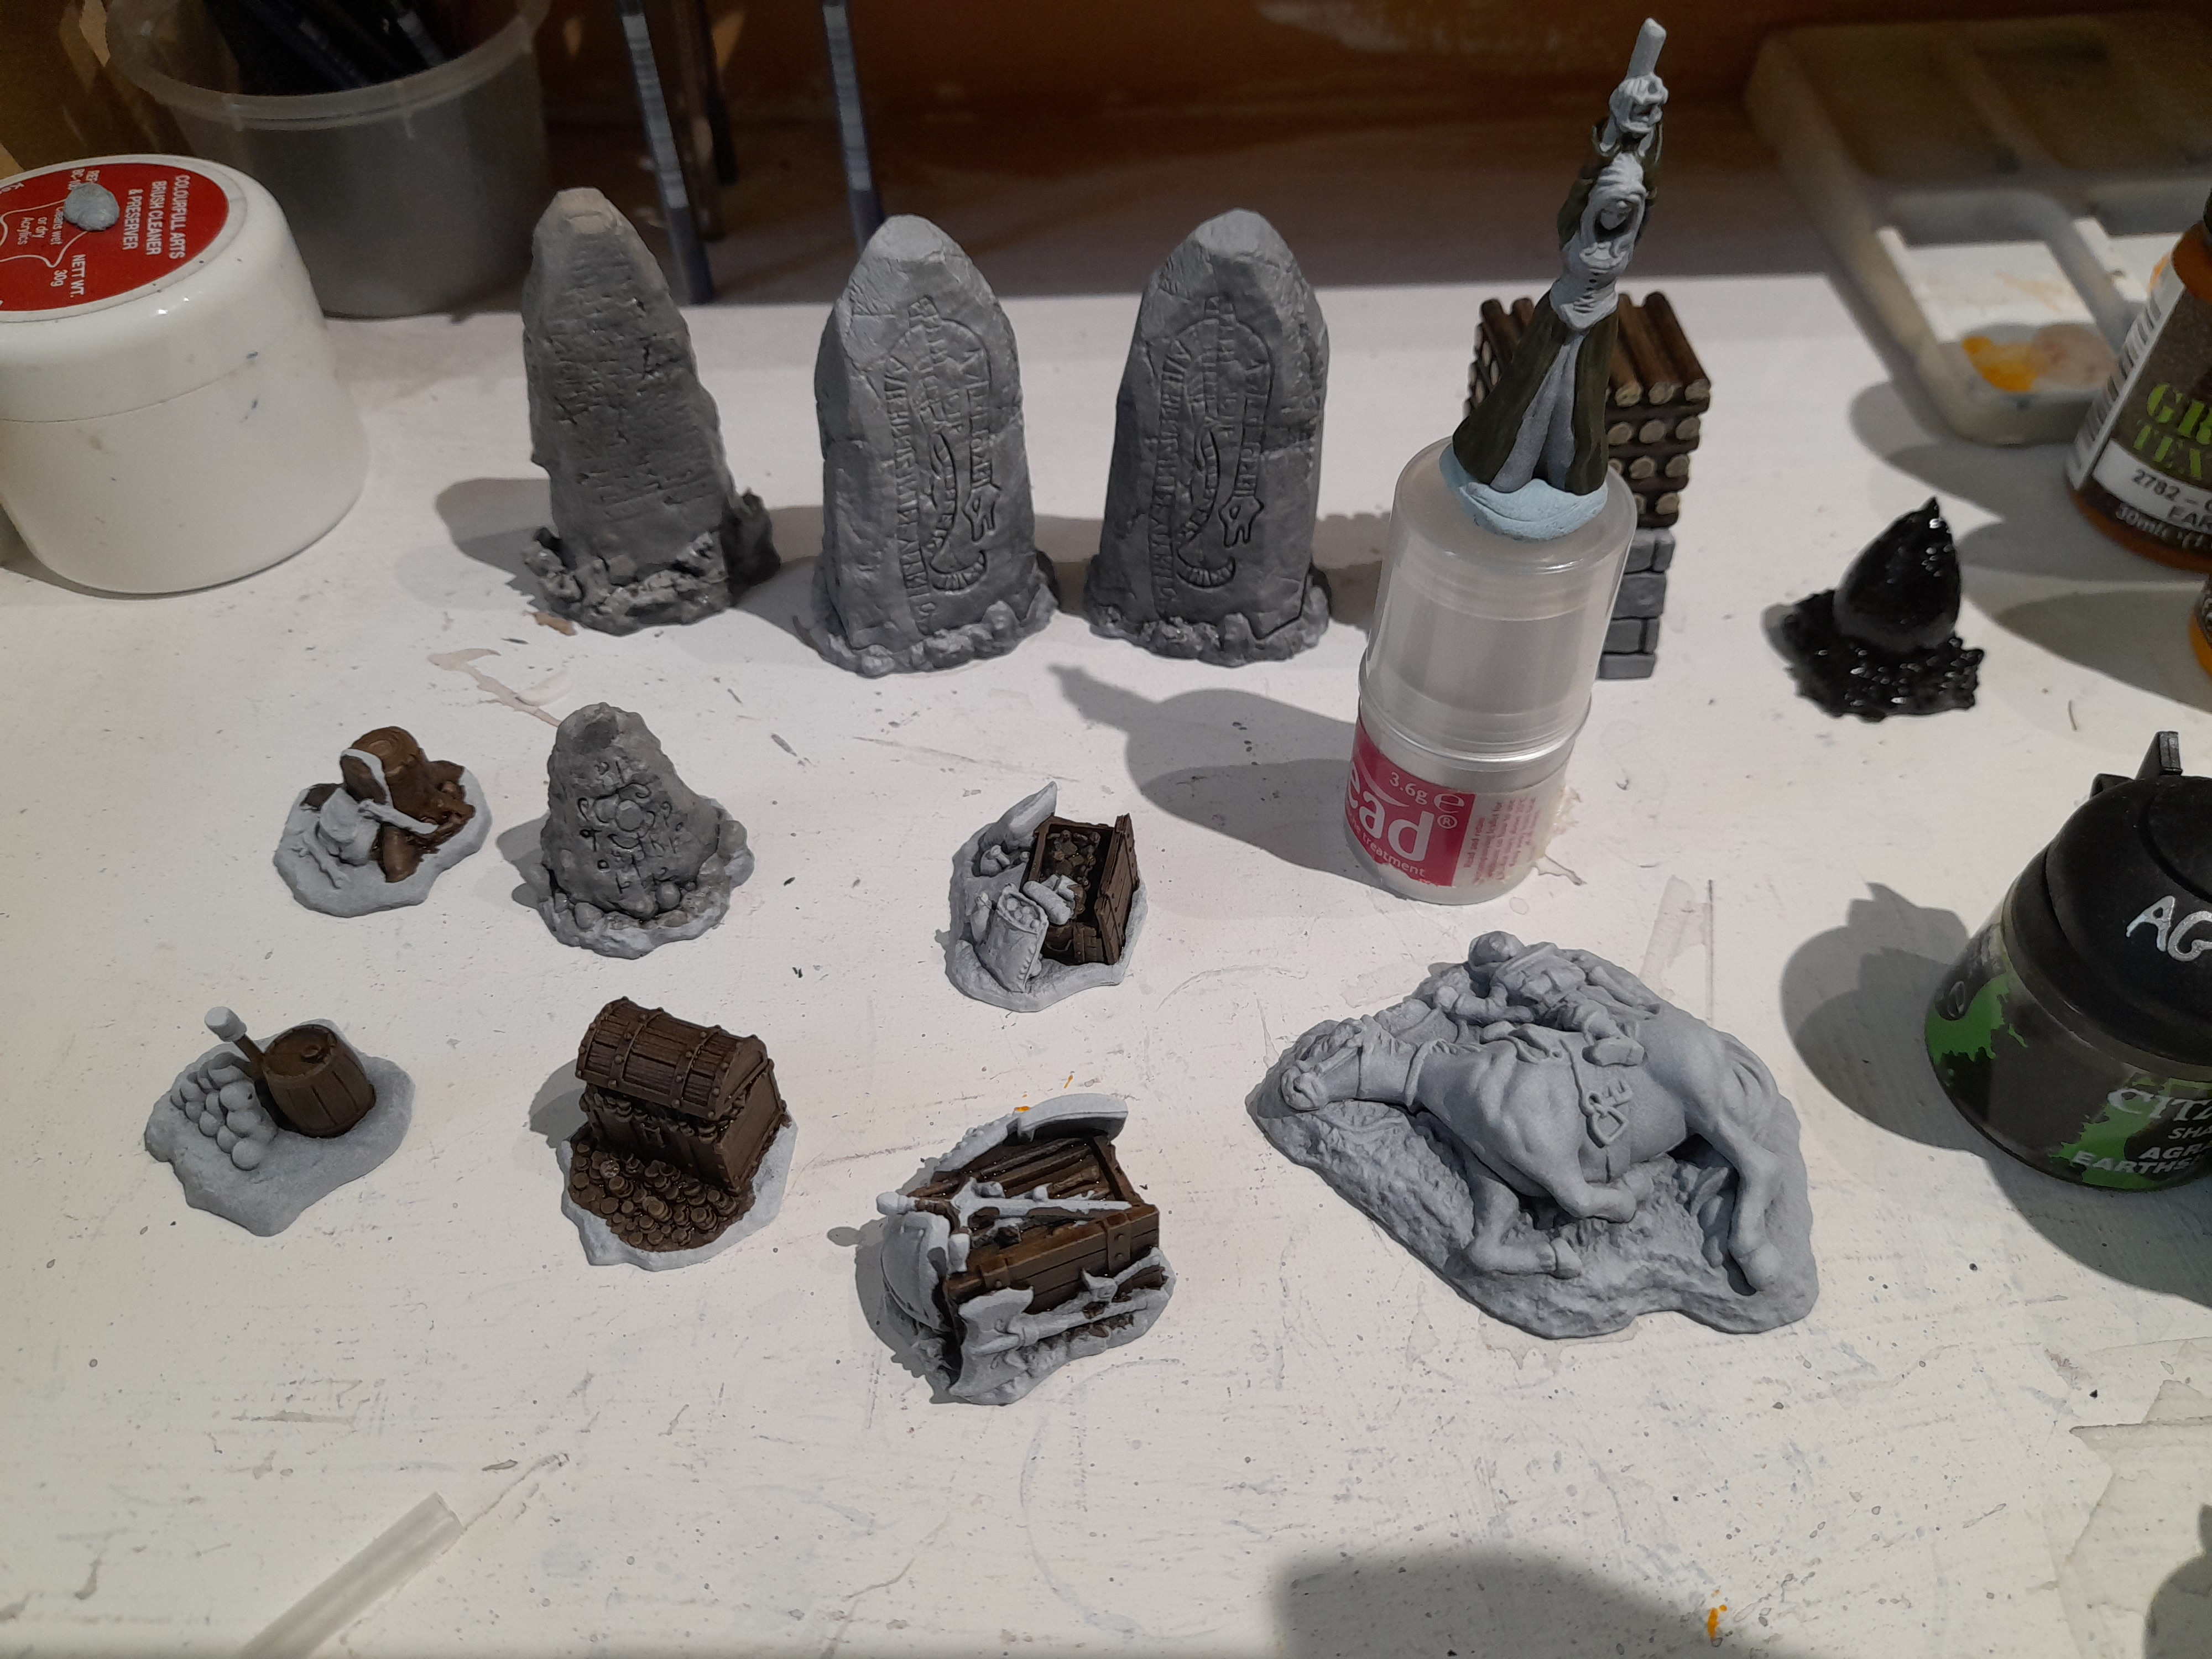
With the Deadzone bits finished I cracked straight on into the Vanguard objective set.
These had been sprayed at the same time as the Deadzone pieces, so I had a good head start.
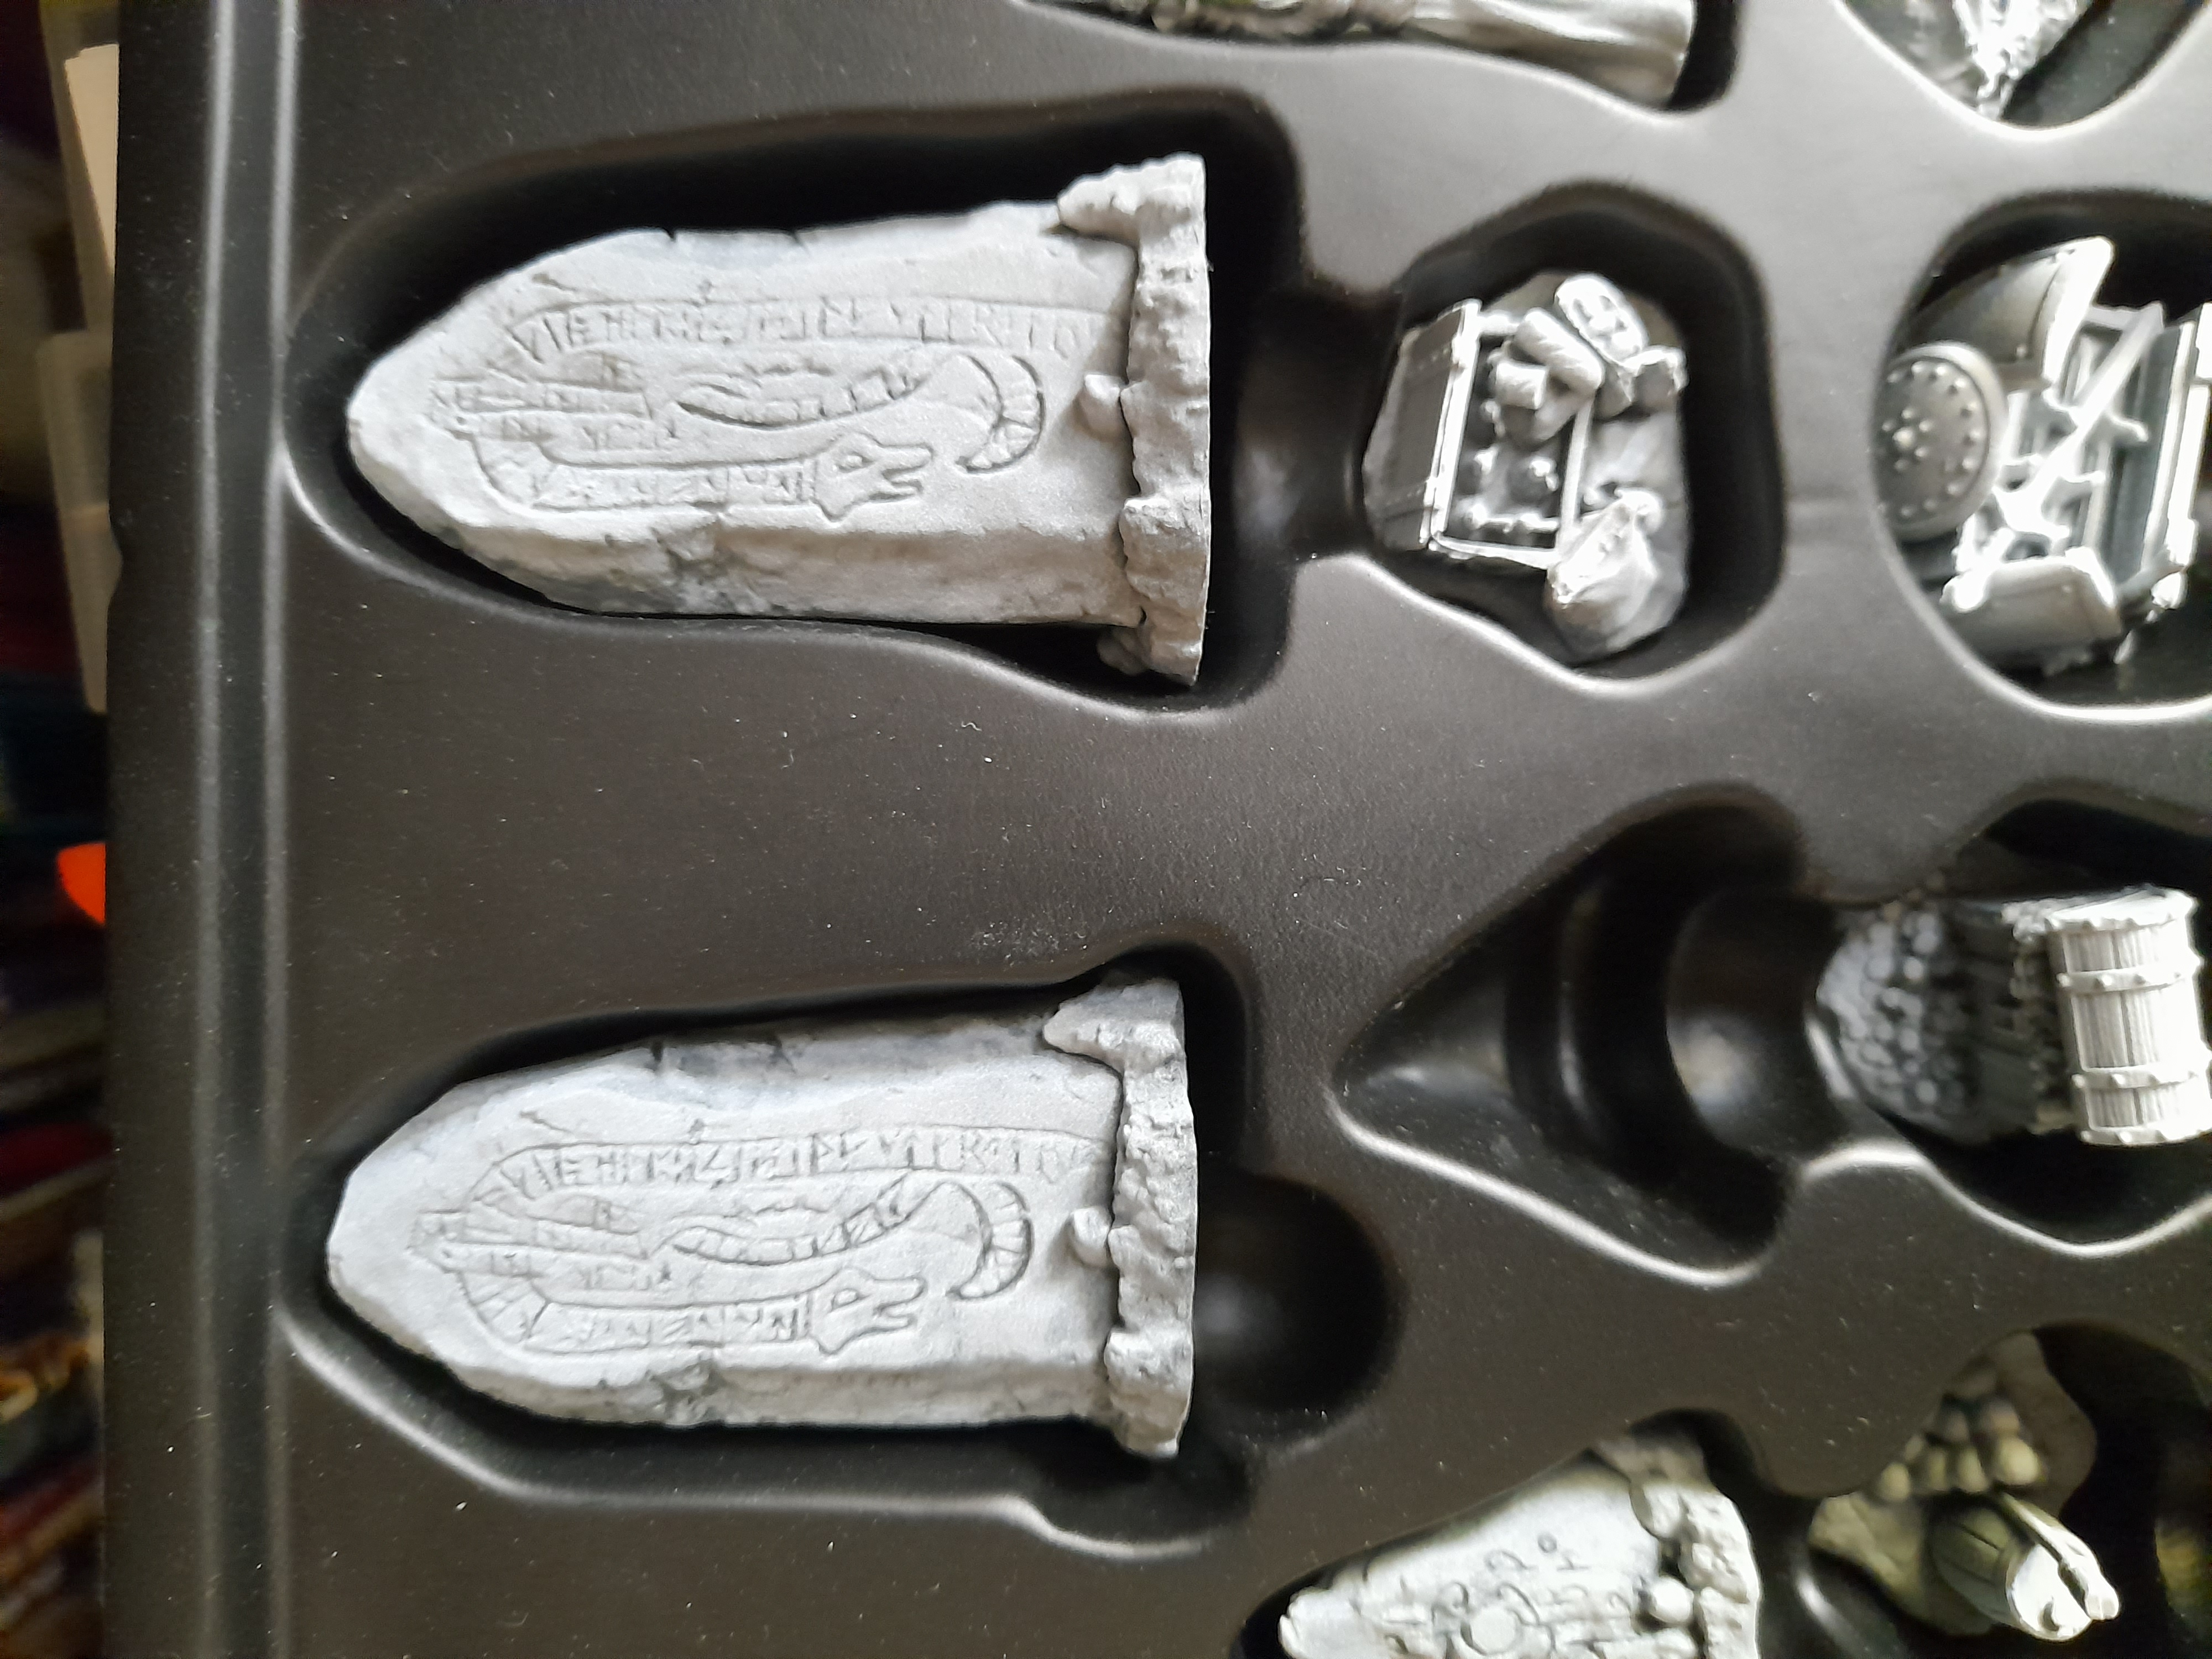
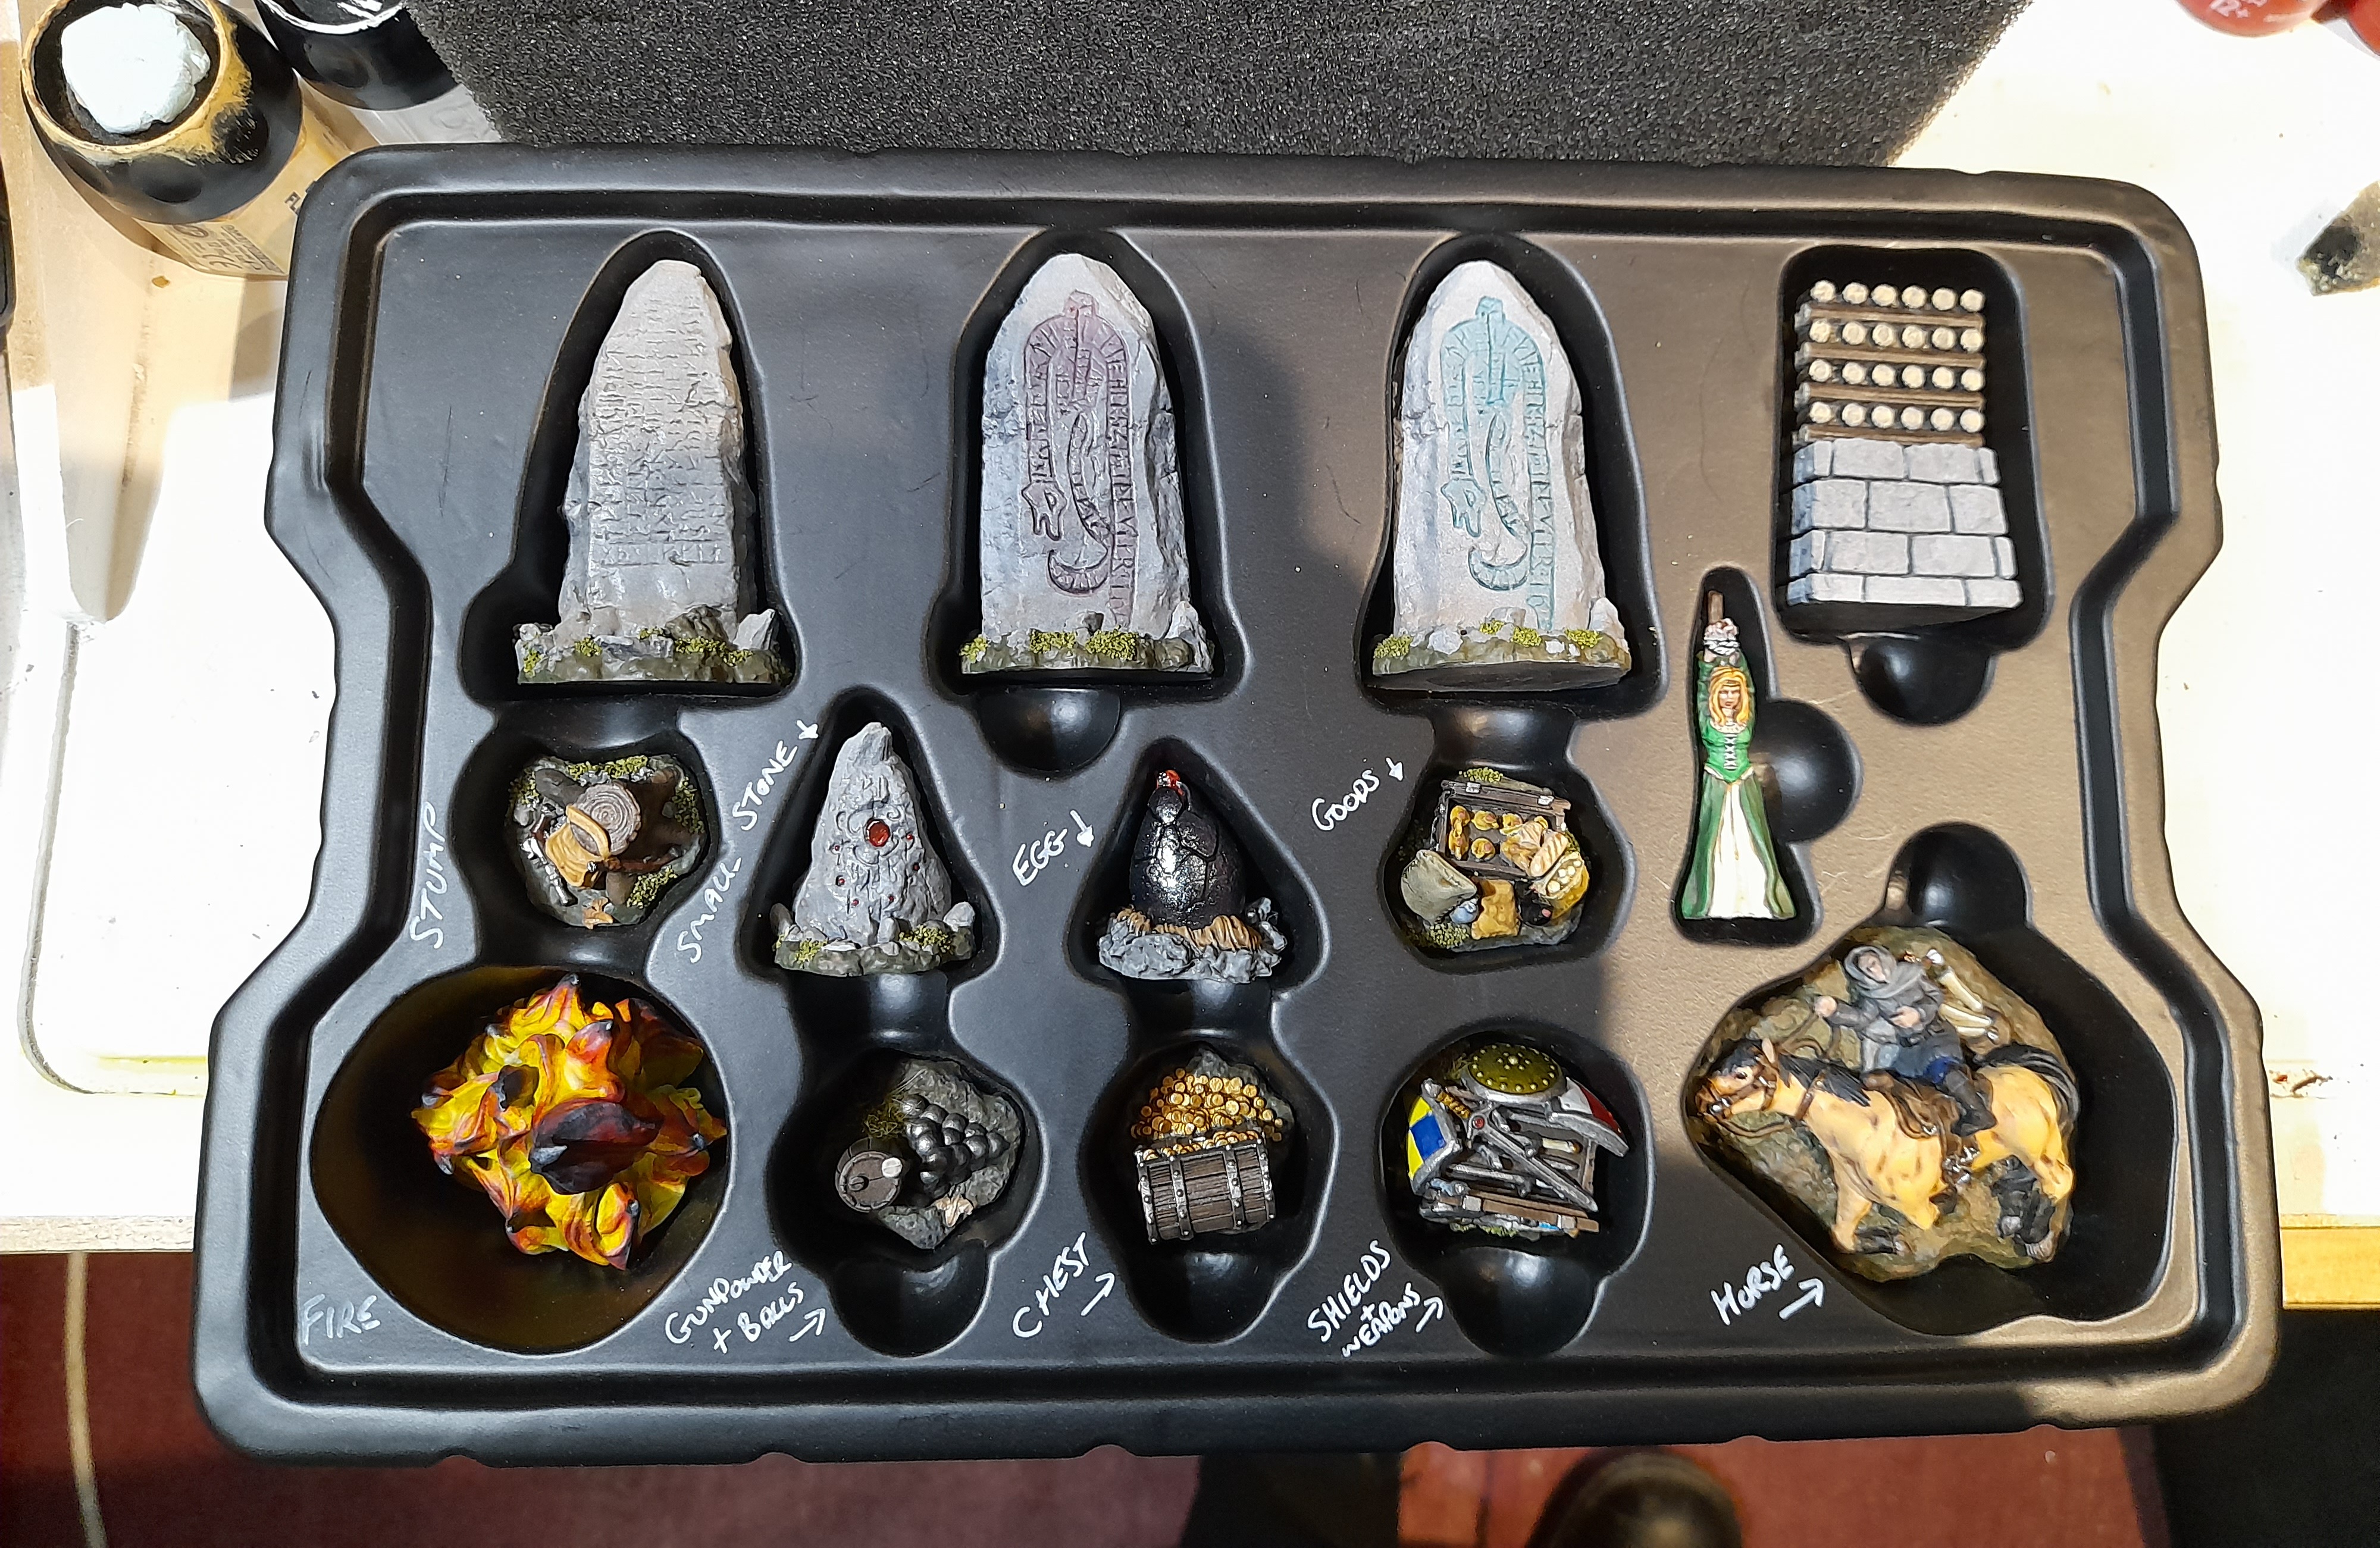
 Labelled the tray so I know where they go back in
I gave the rock parts a couple of washes with thinned black and brown, but they will definitely need some more weathering applied.
The wooden parts I gave a coat of brown contrast.
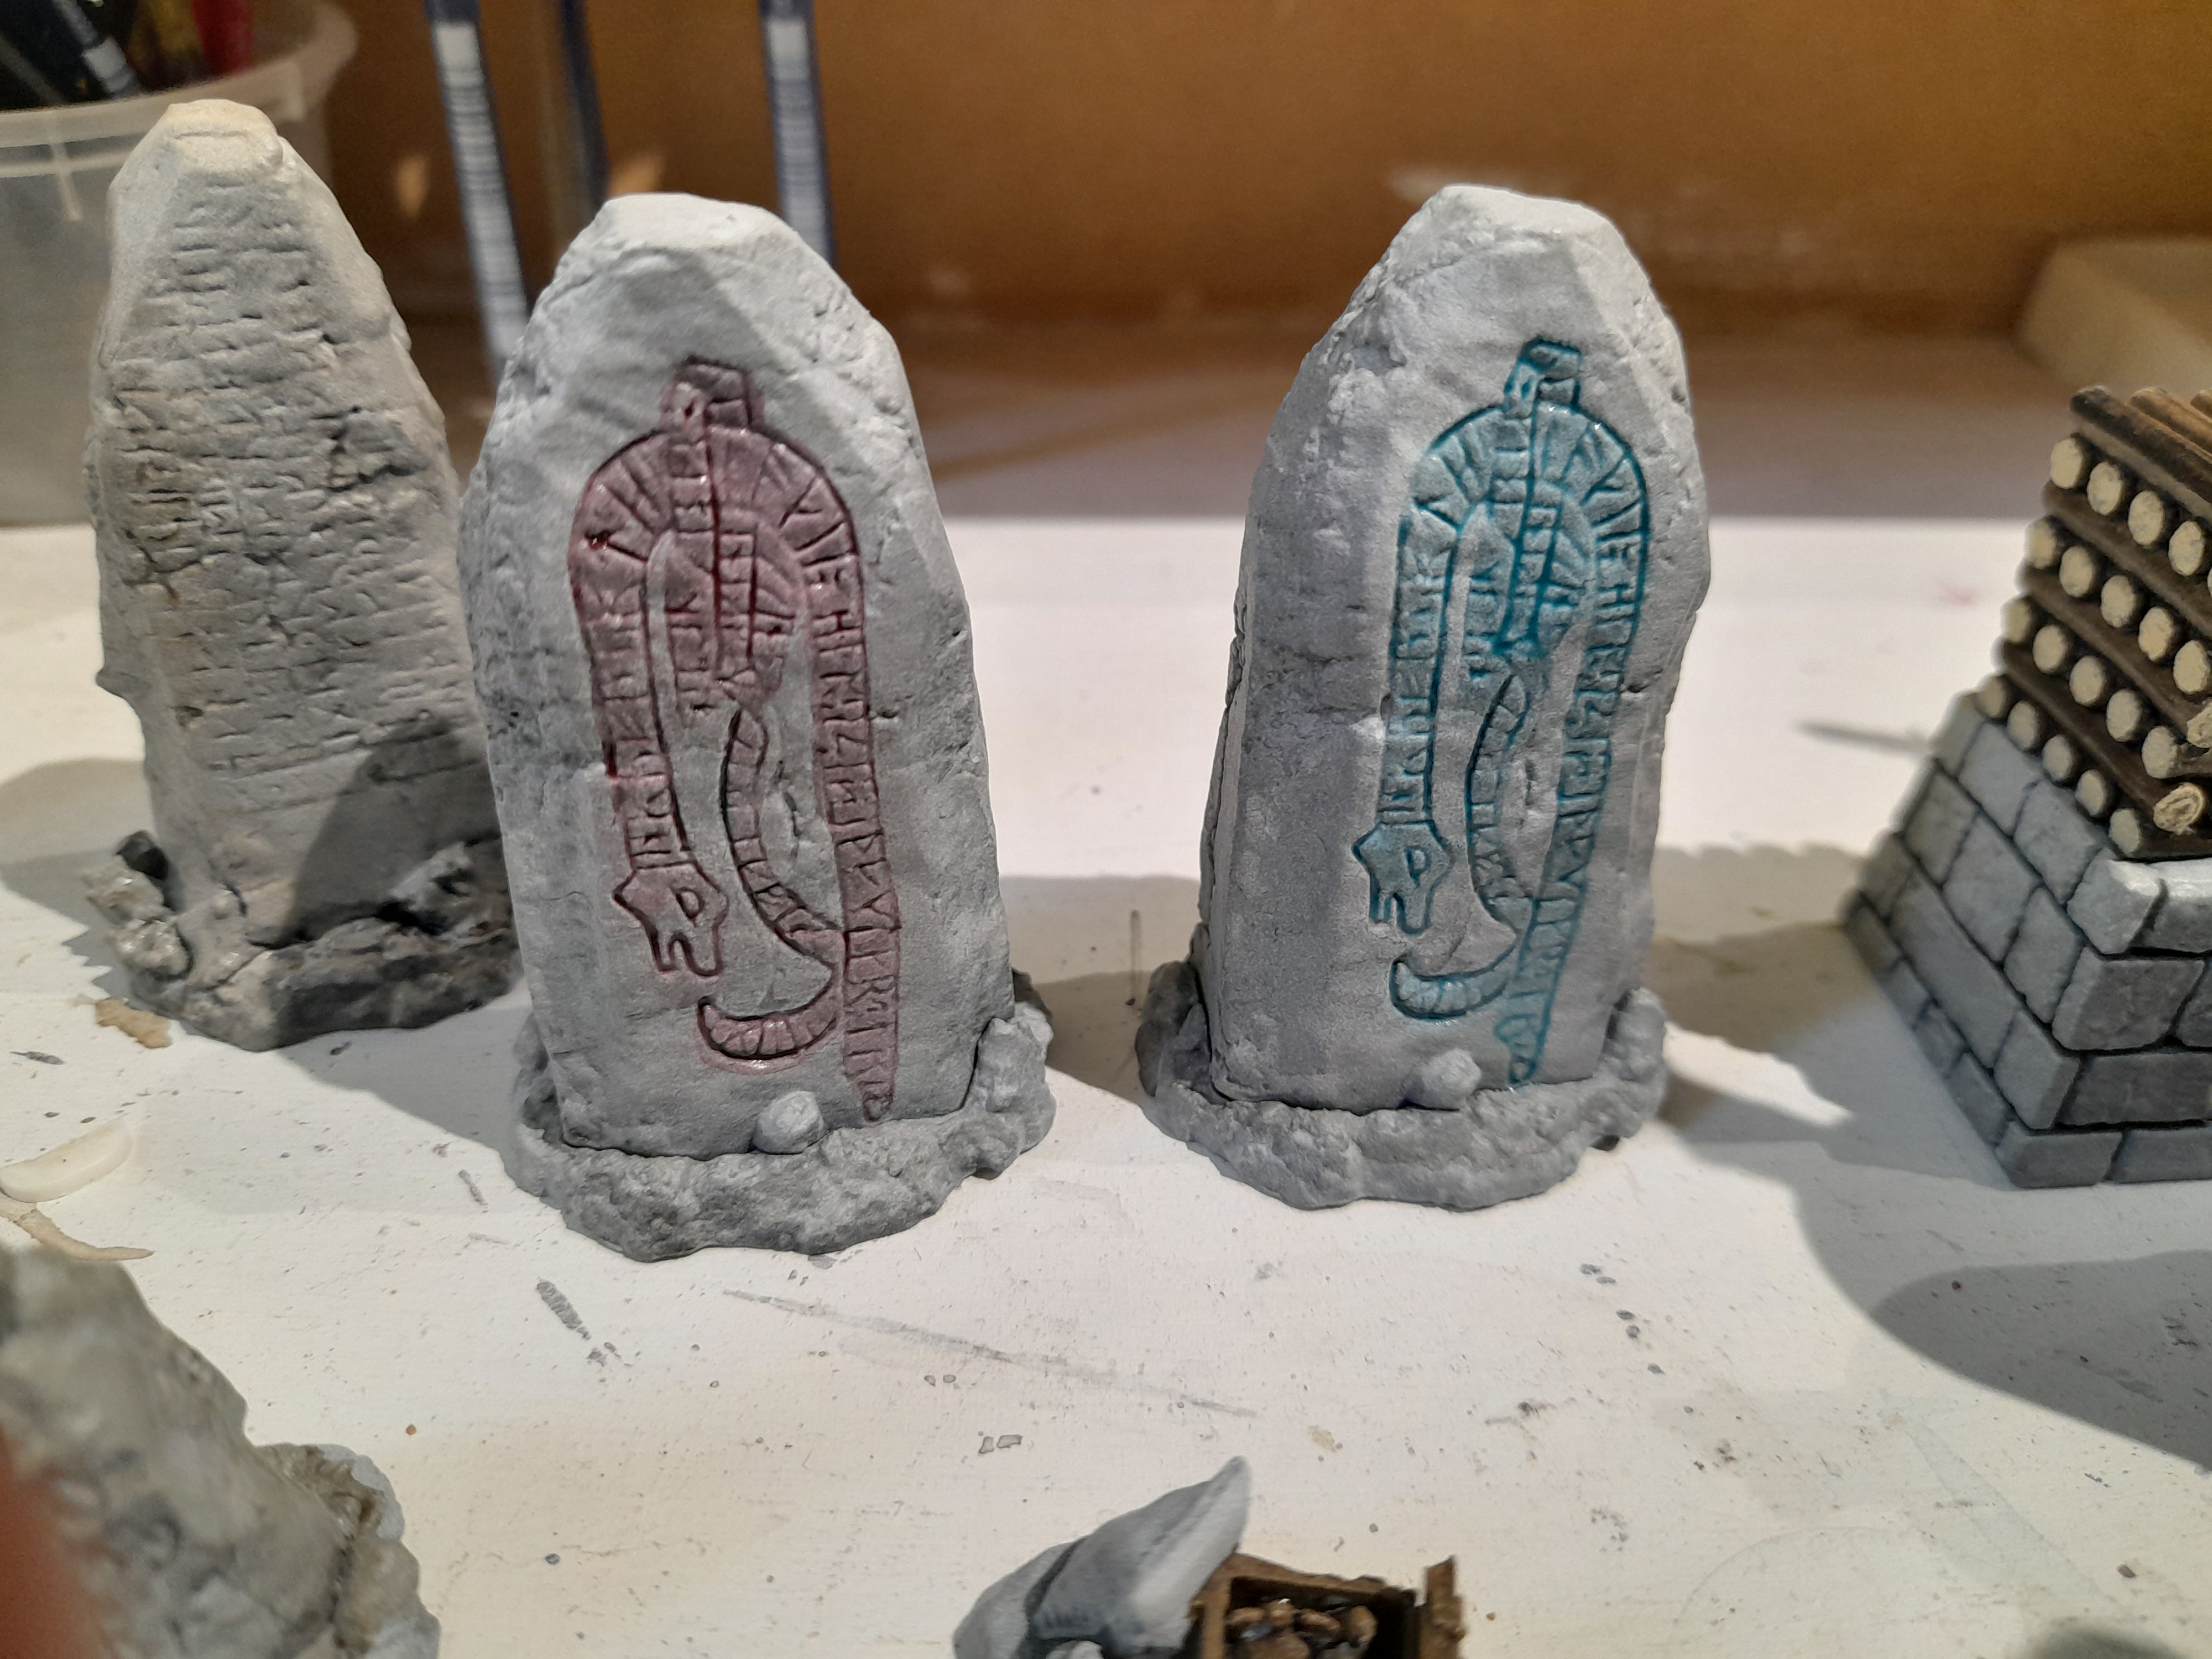
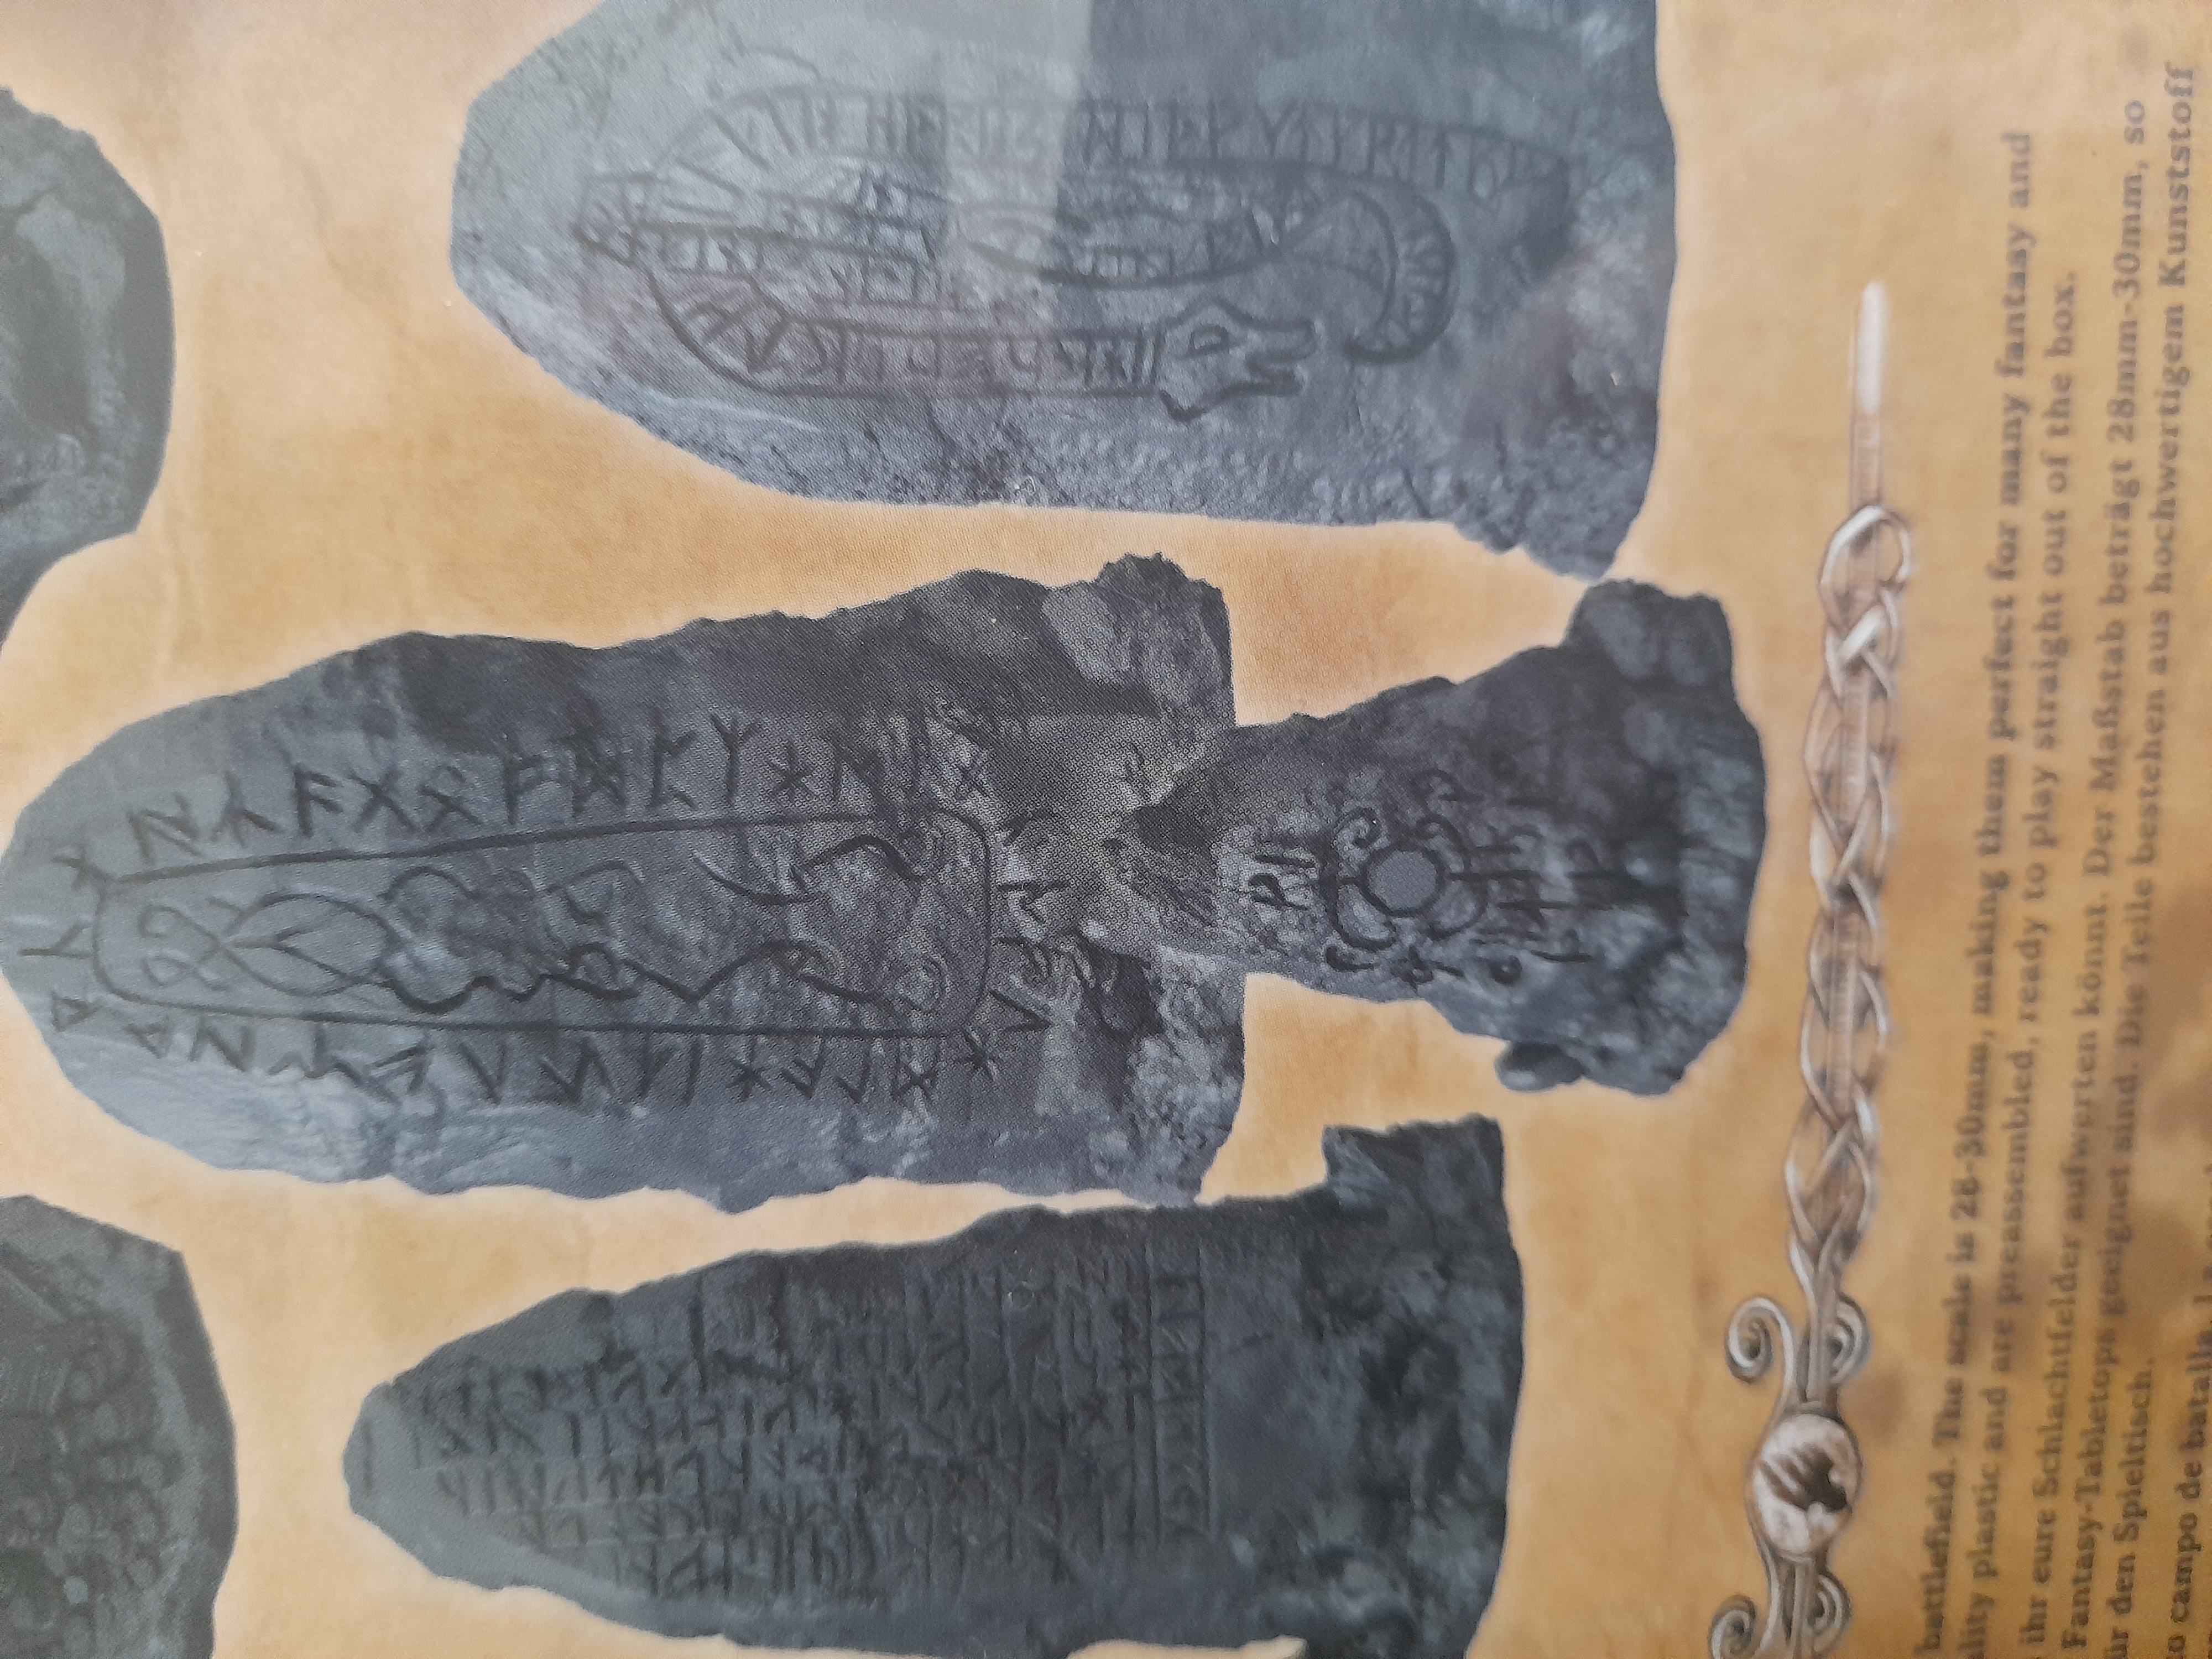
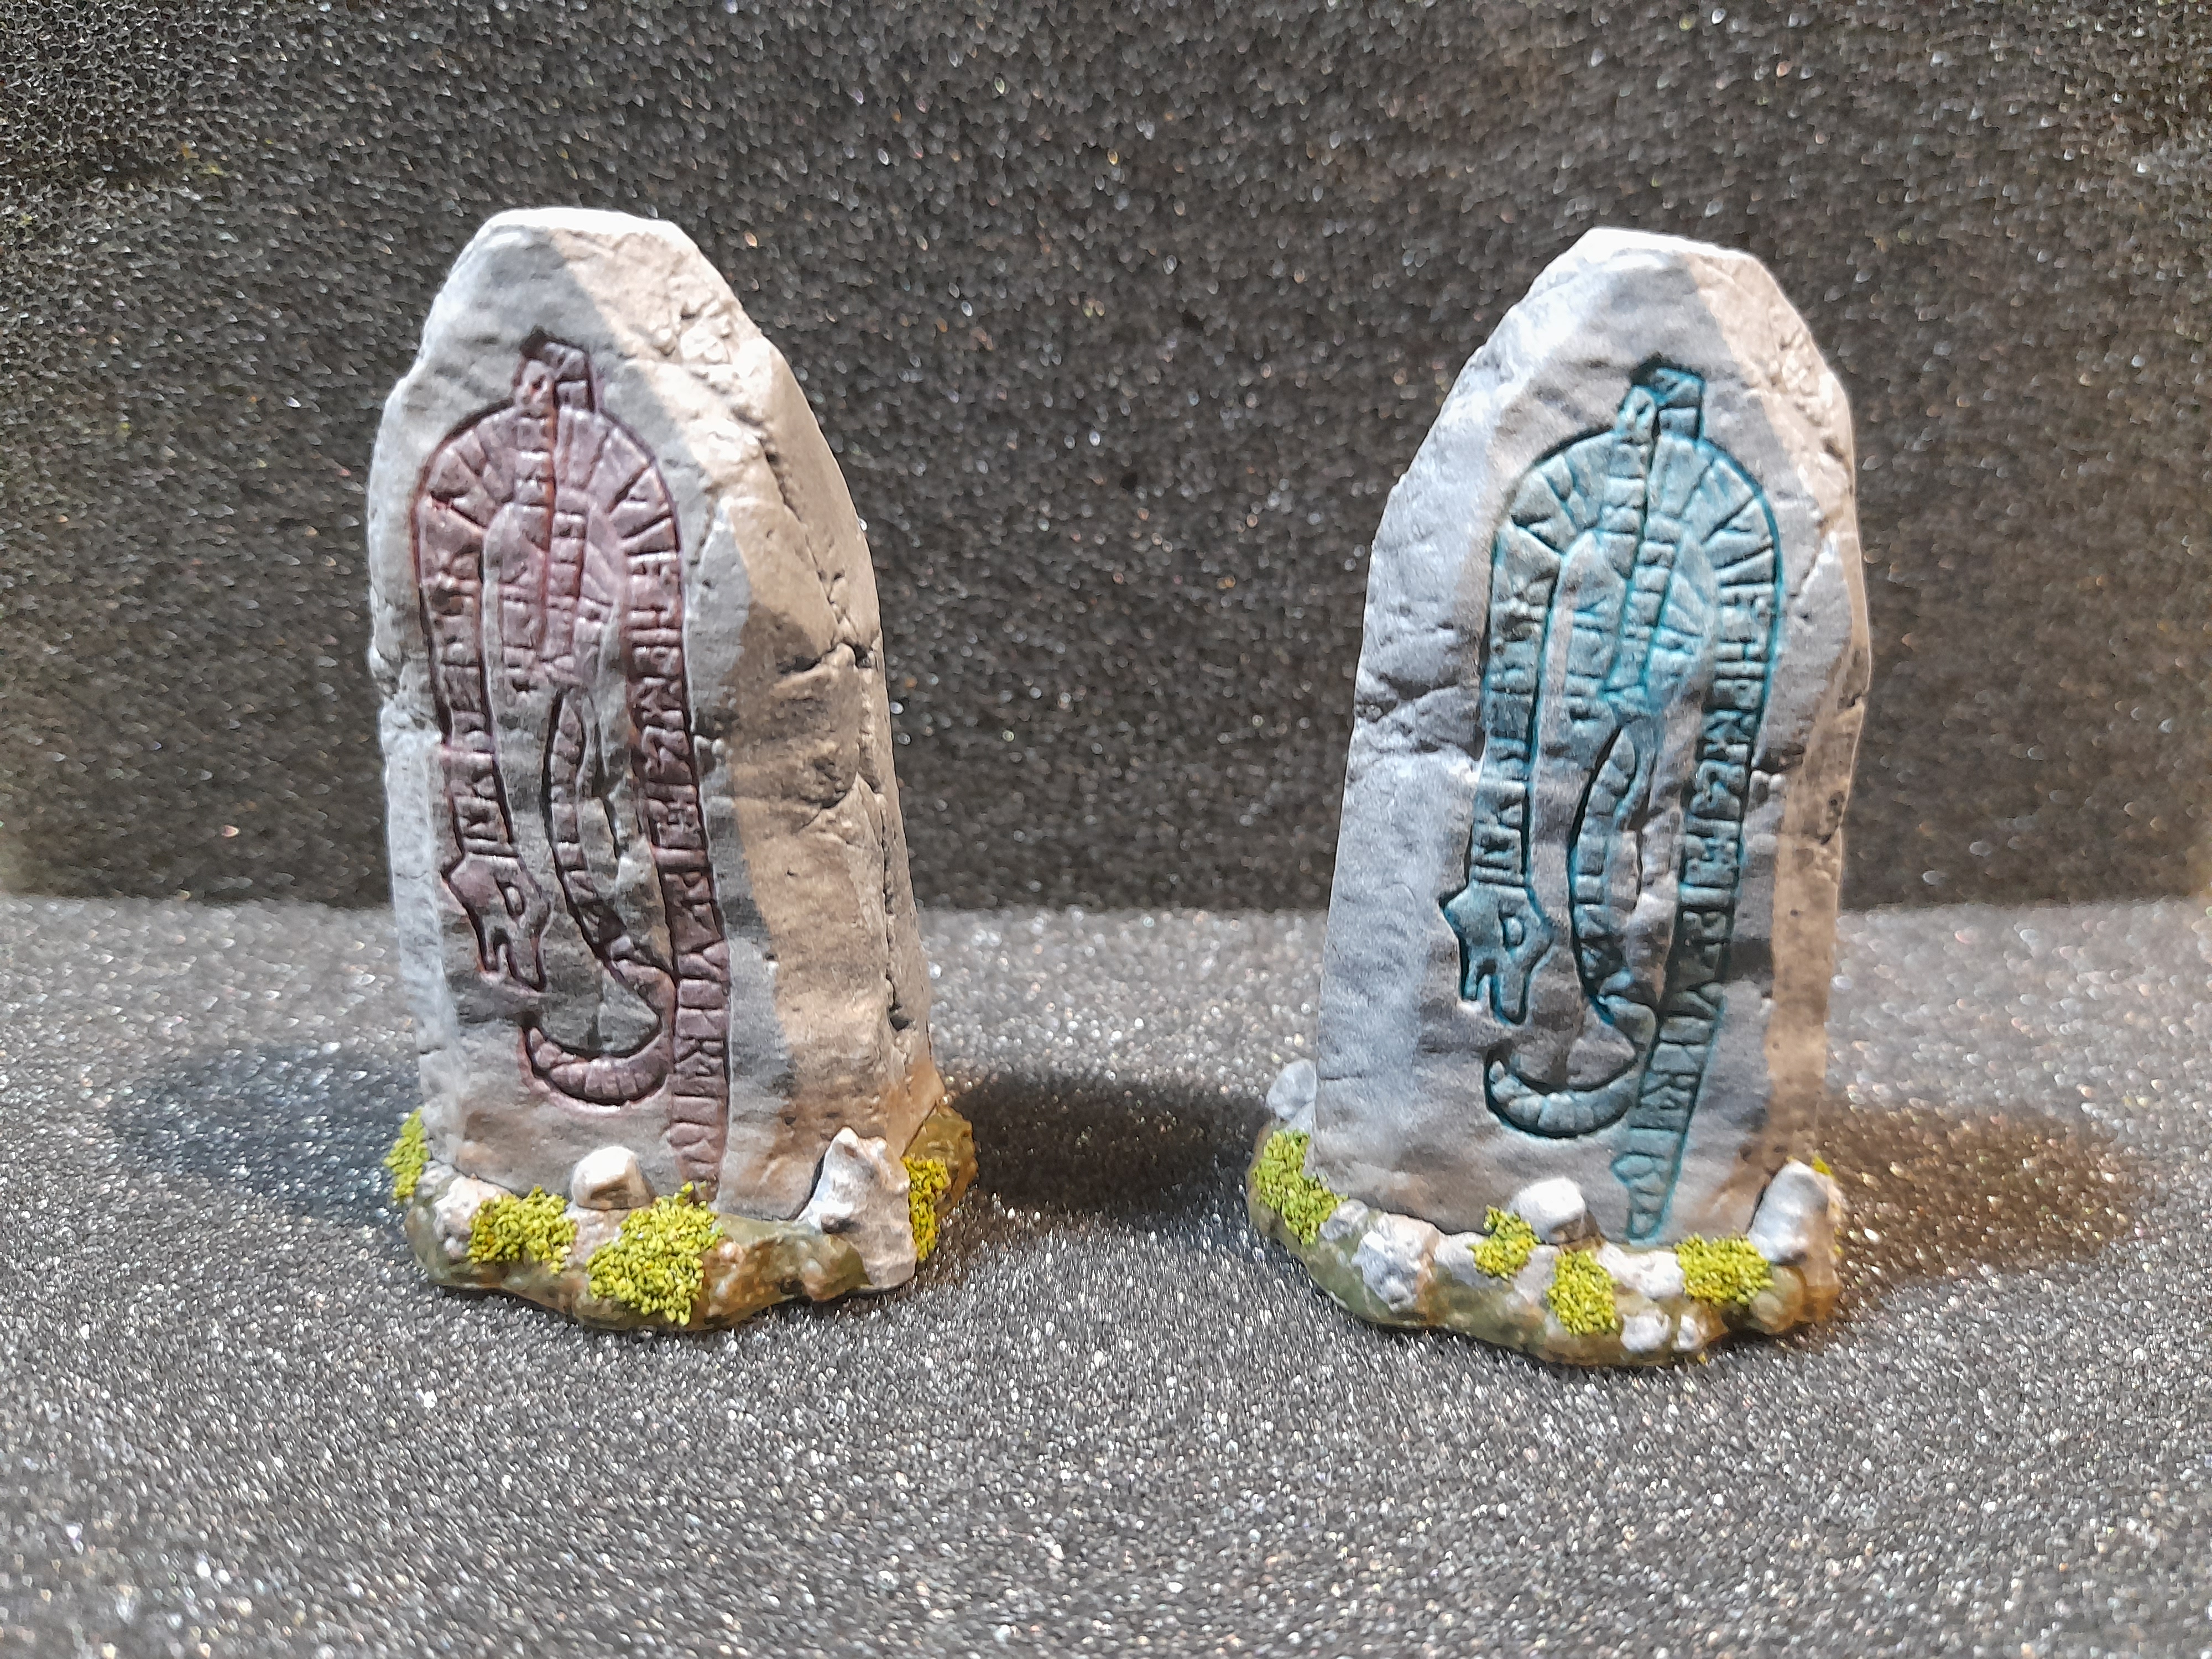
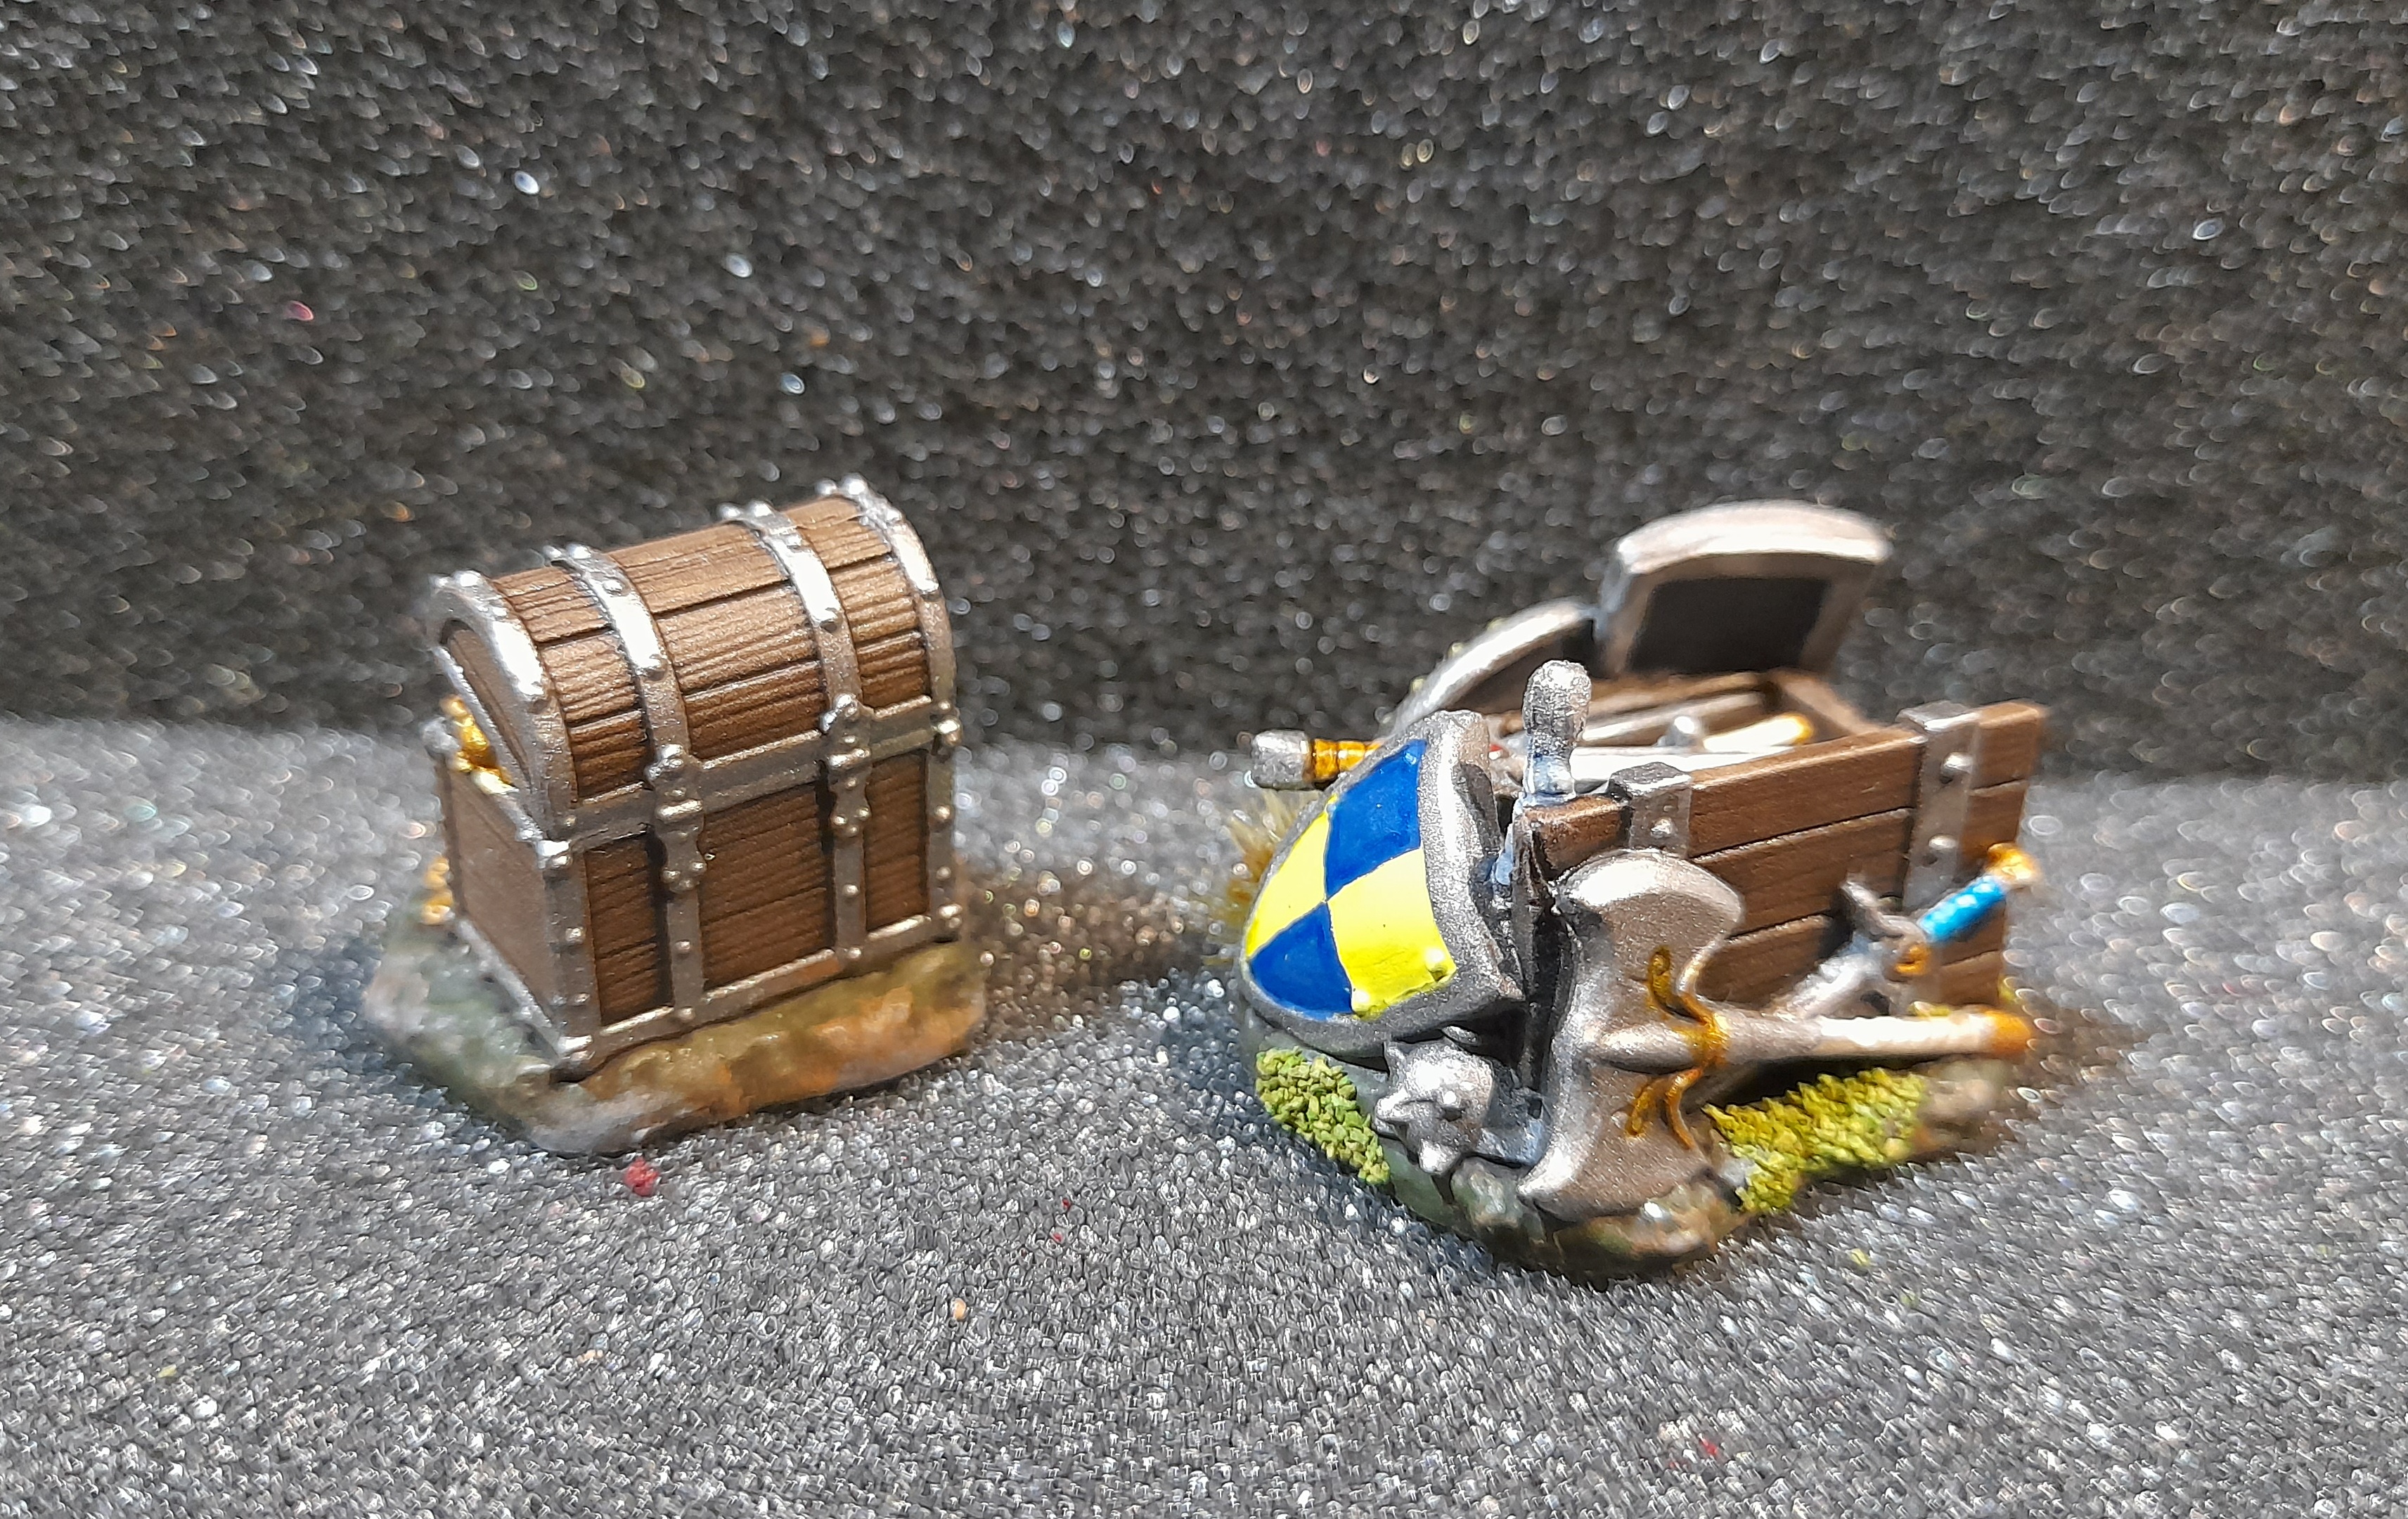
For the rocks with the snake/dragon engraving (duplicate) I chose to add a touch of colour by washing the engraving on one side. I went for a red and a blue. These may get a stronger colour at a later date perhaps – will decide once I have done the weathering and the base.
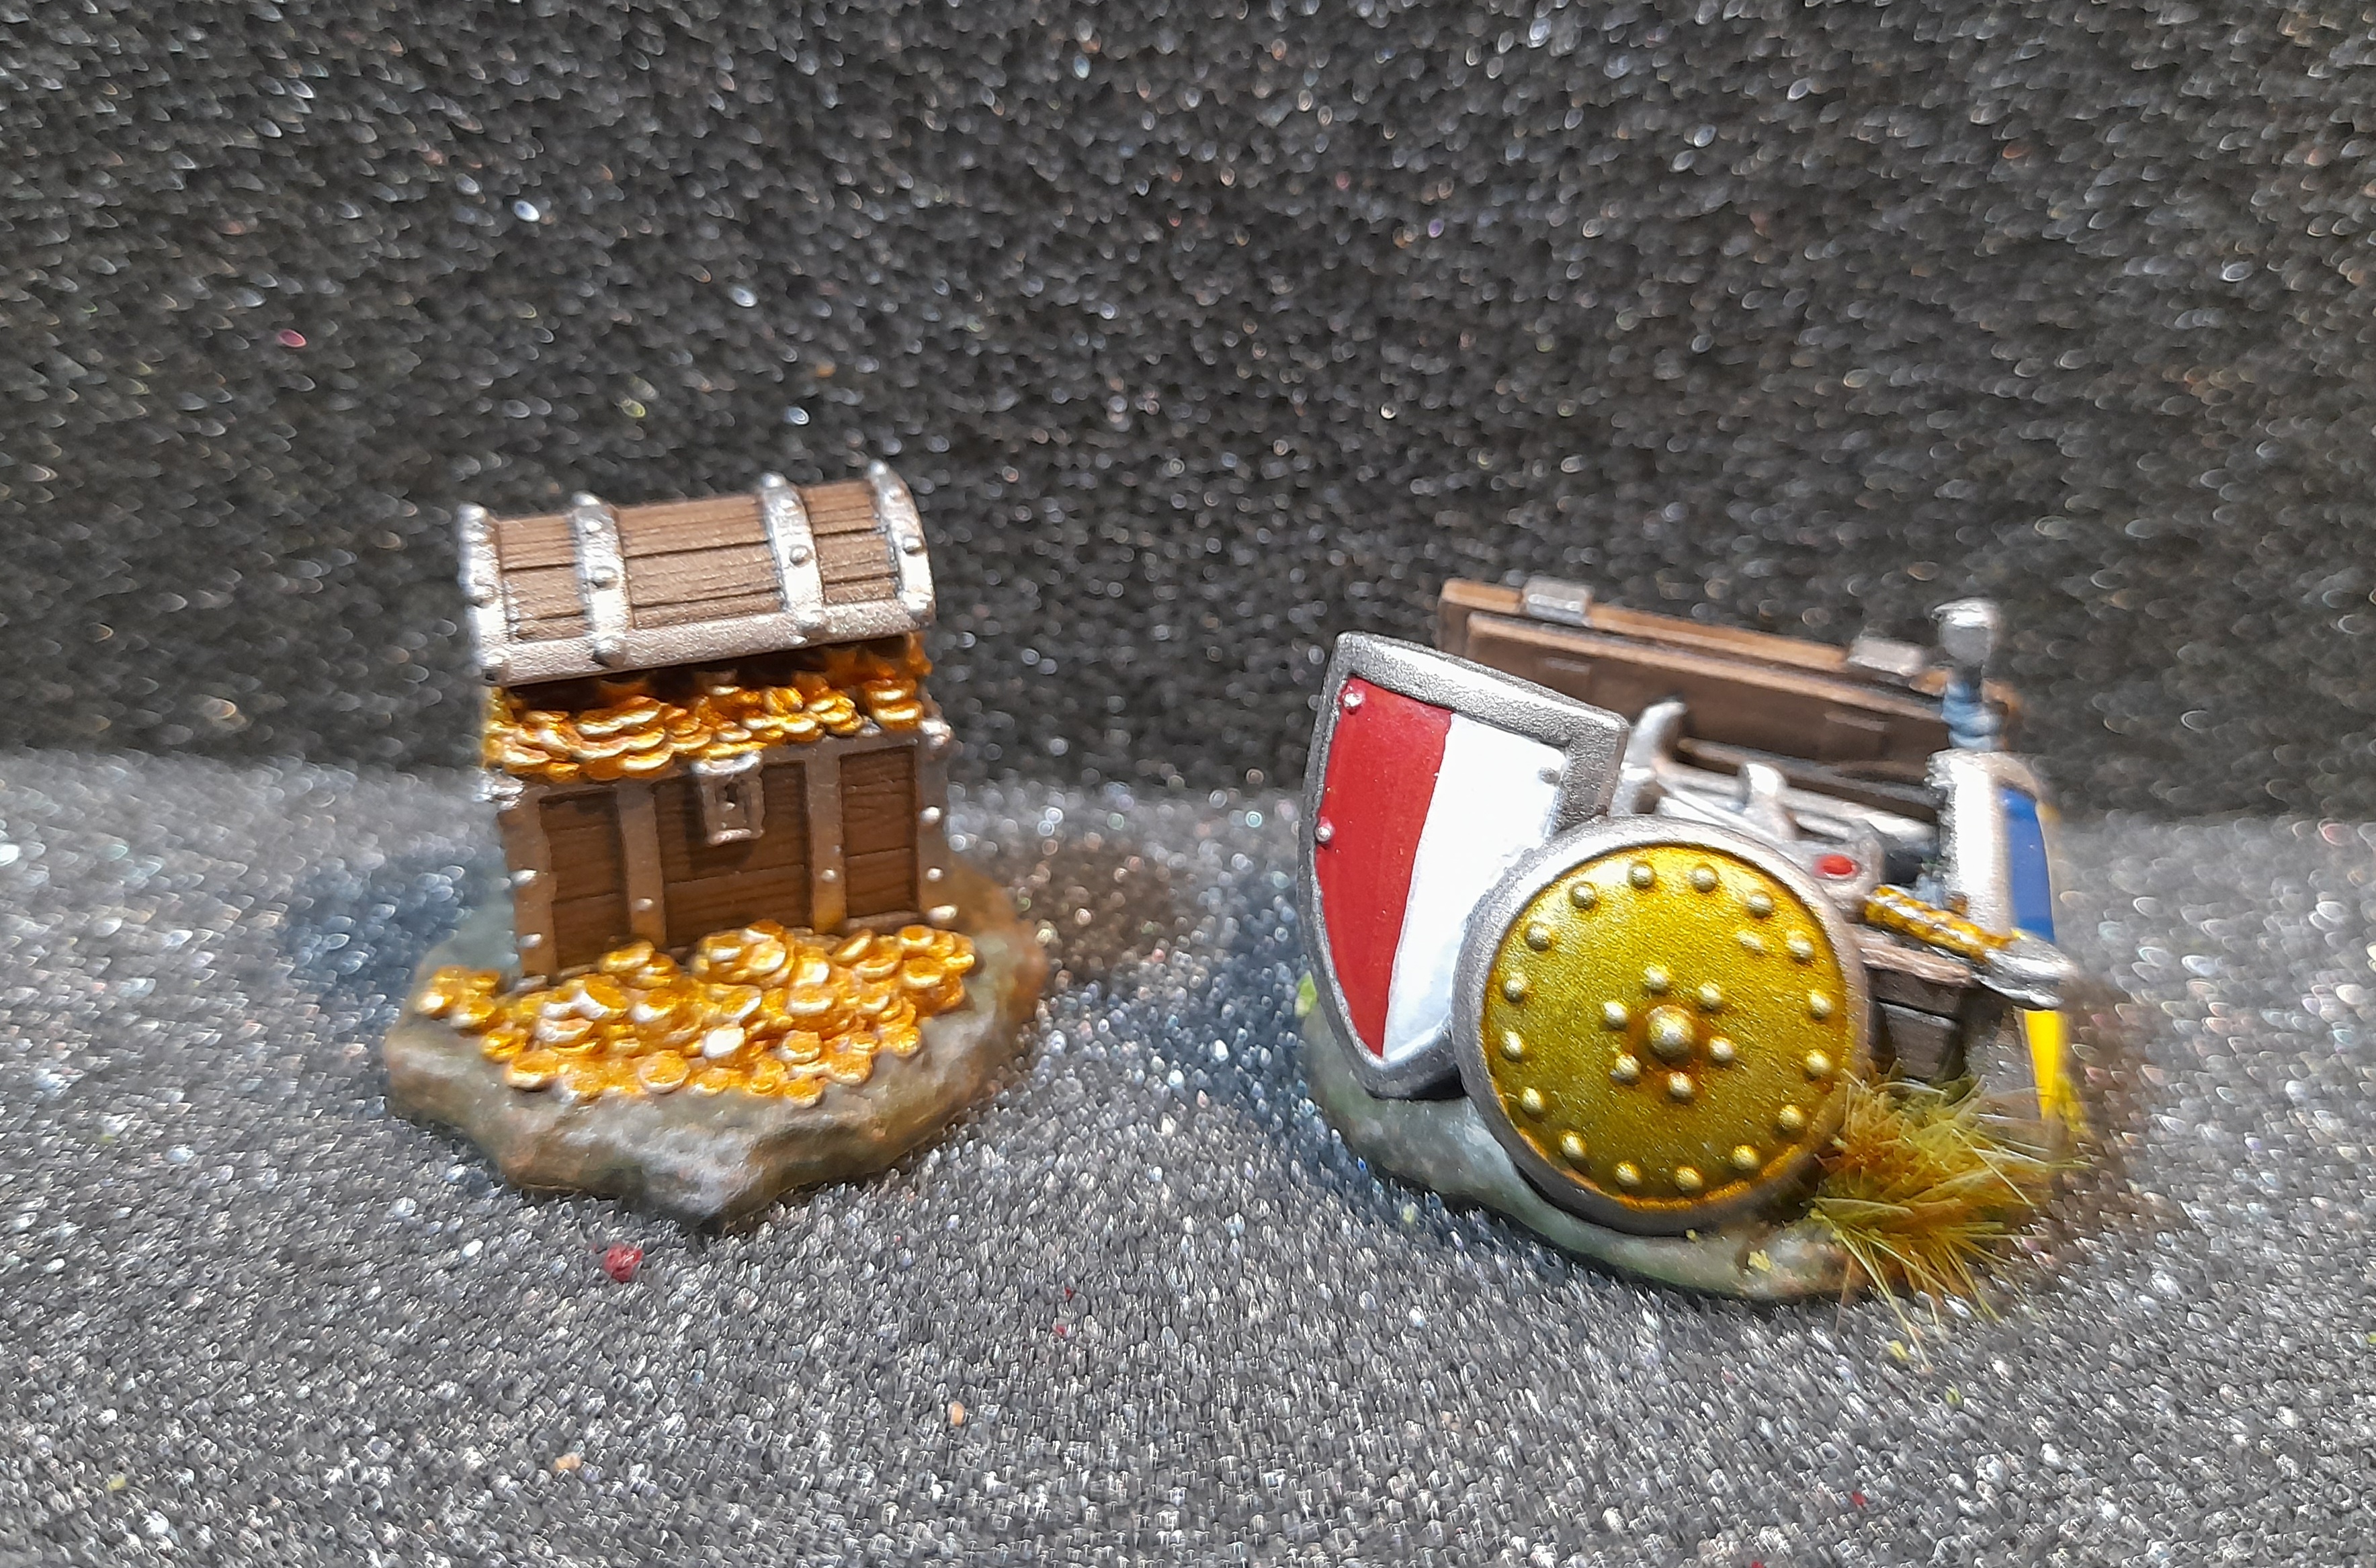
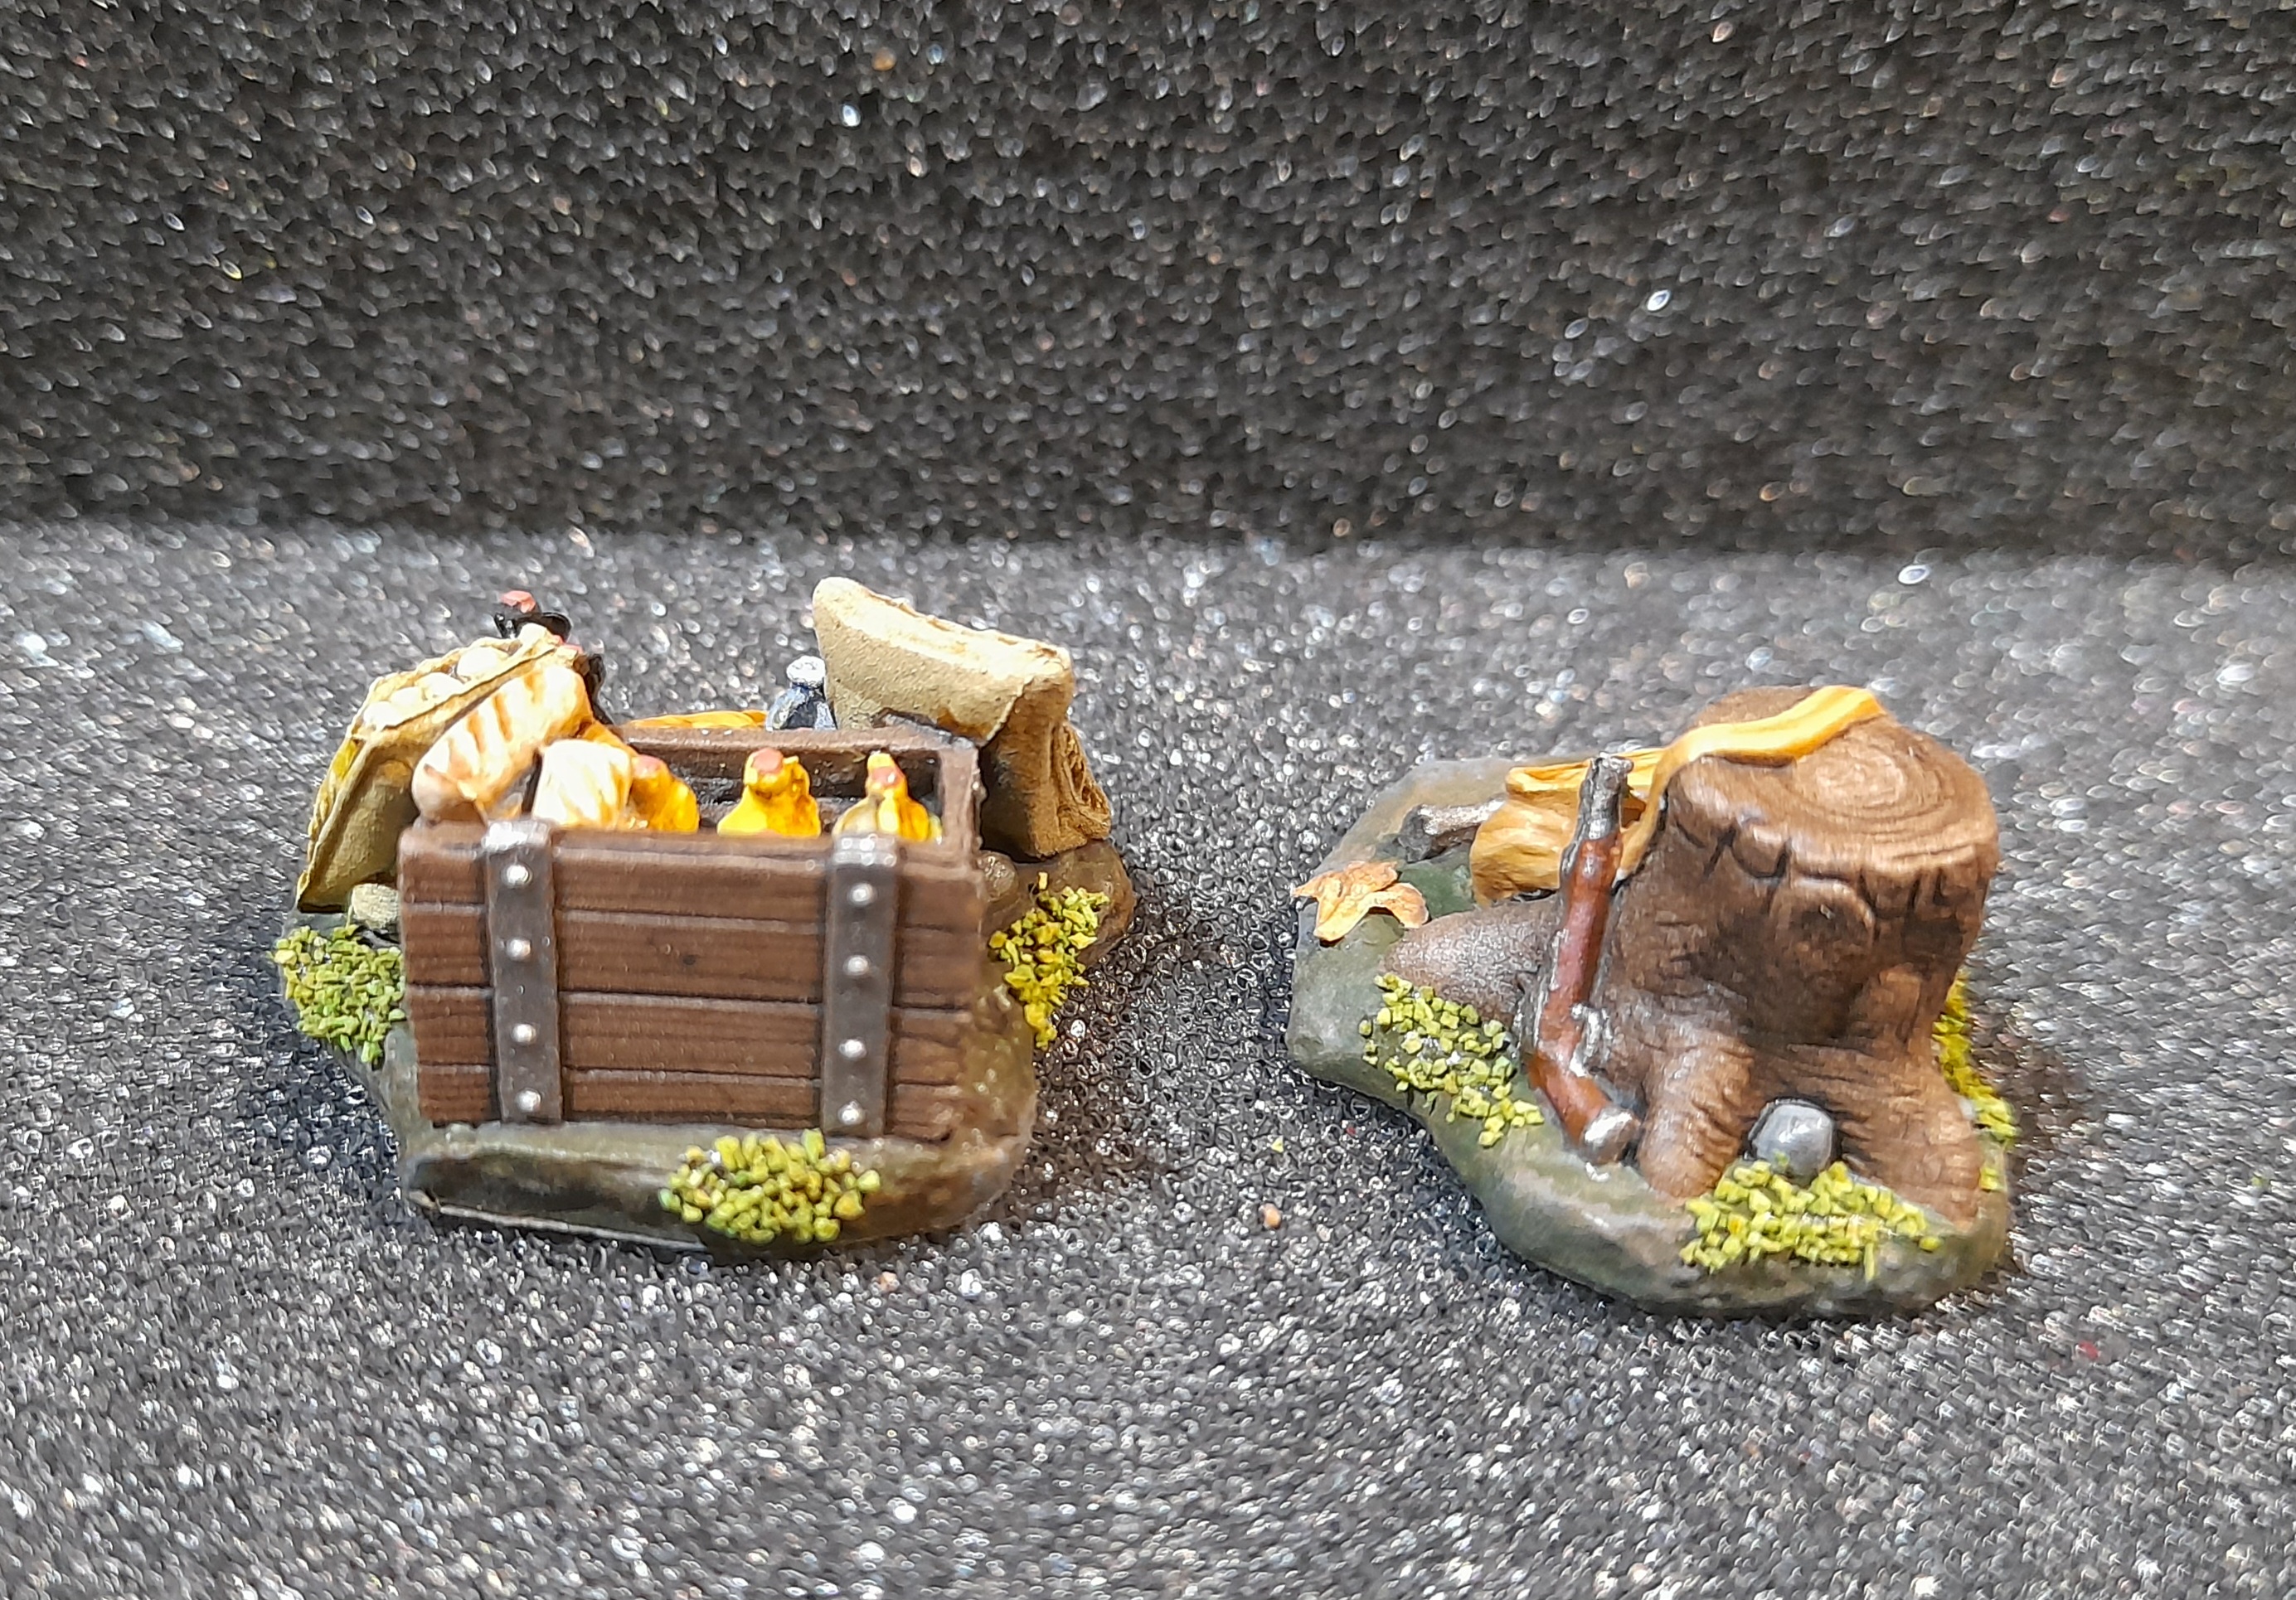
Then I worked on some of the ‘loot’ piles, picking out weapons and suchlike.
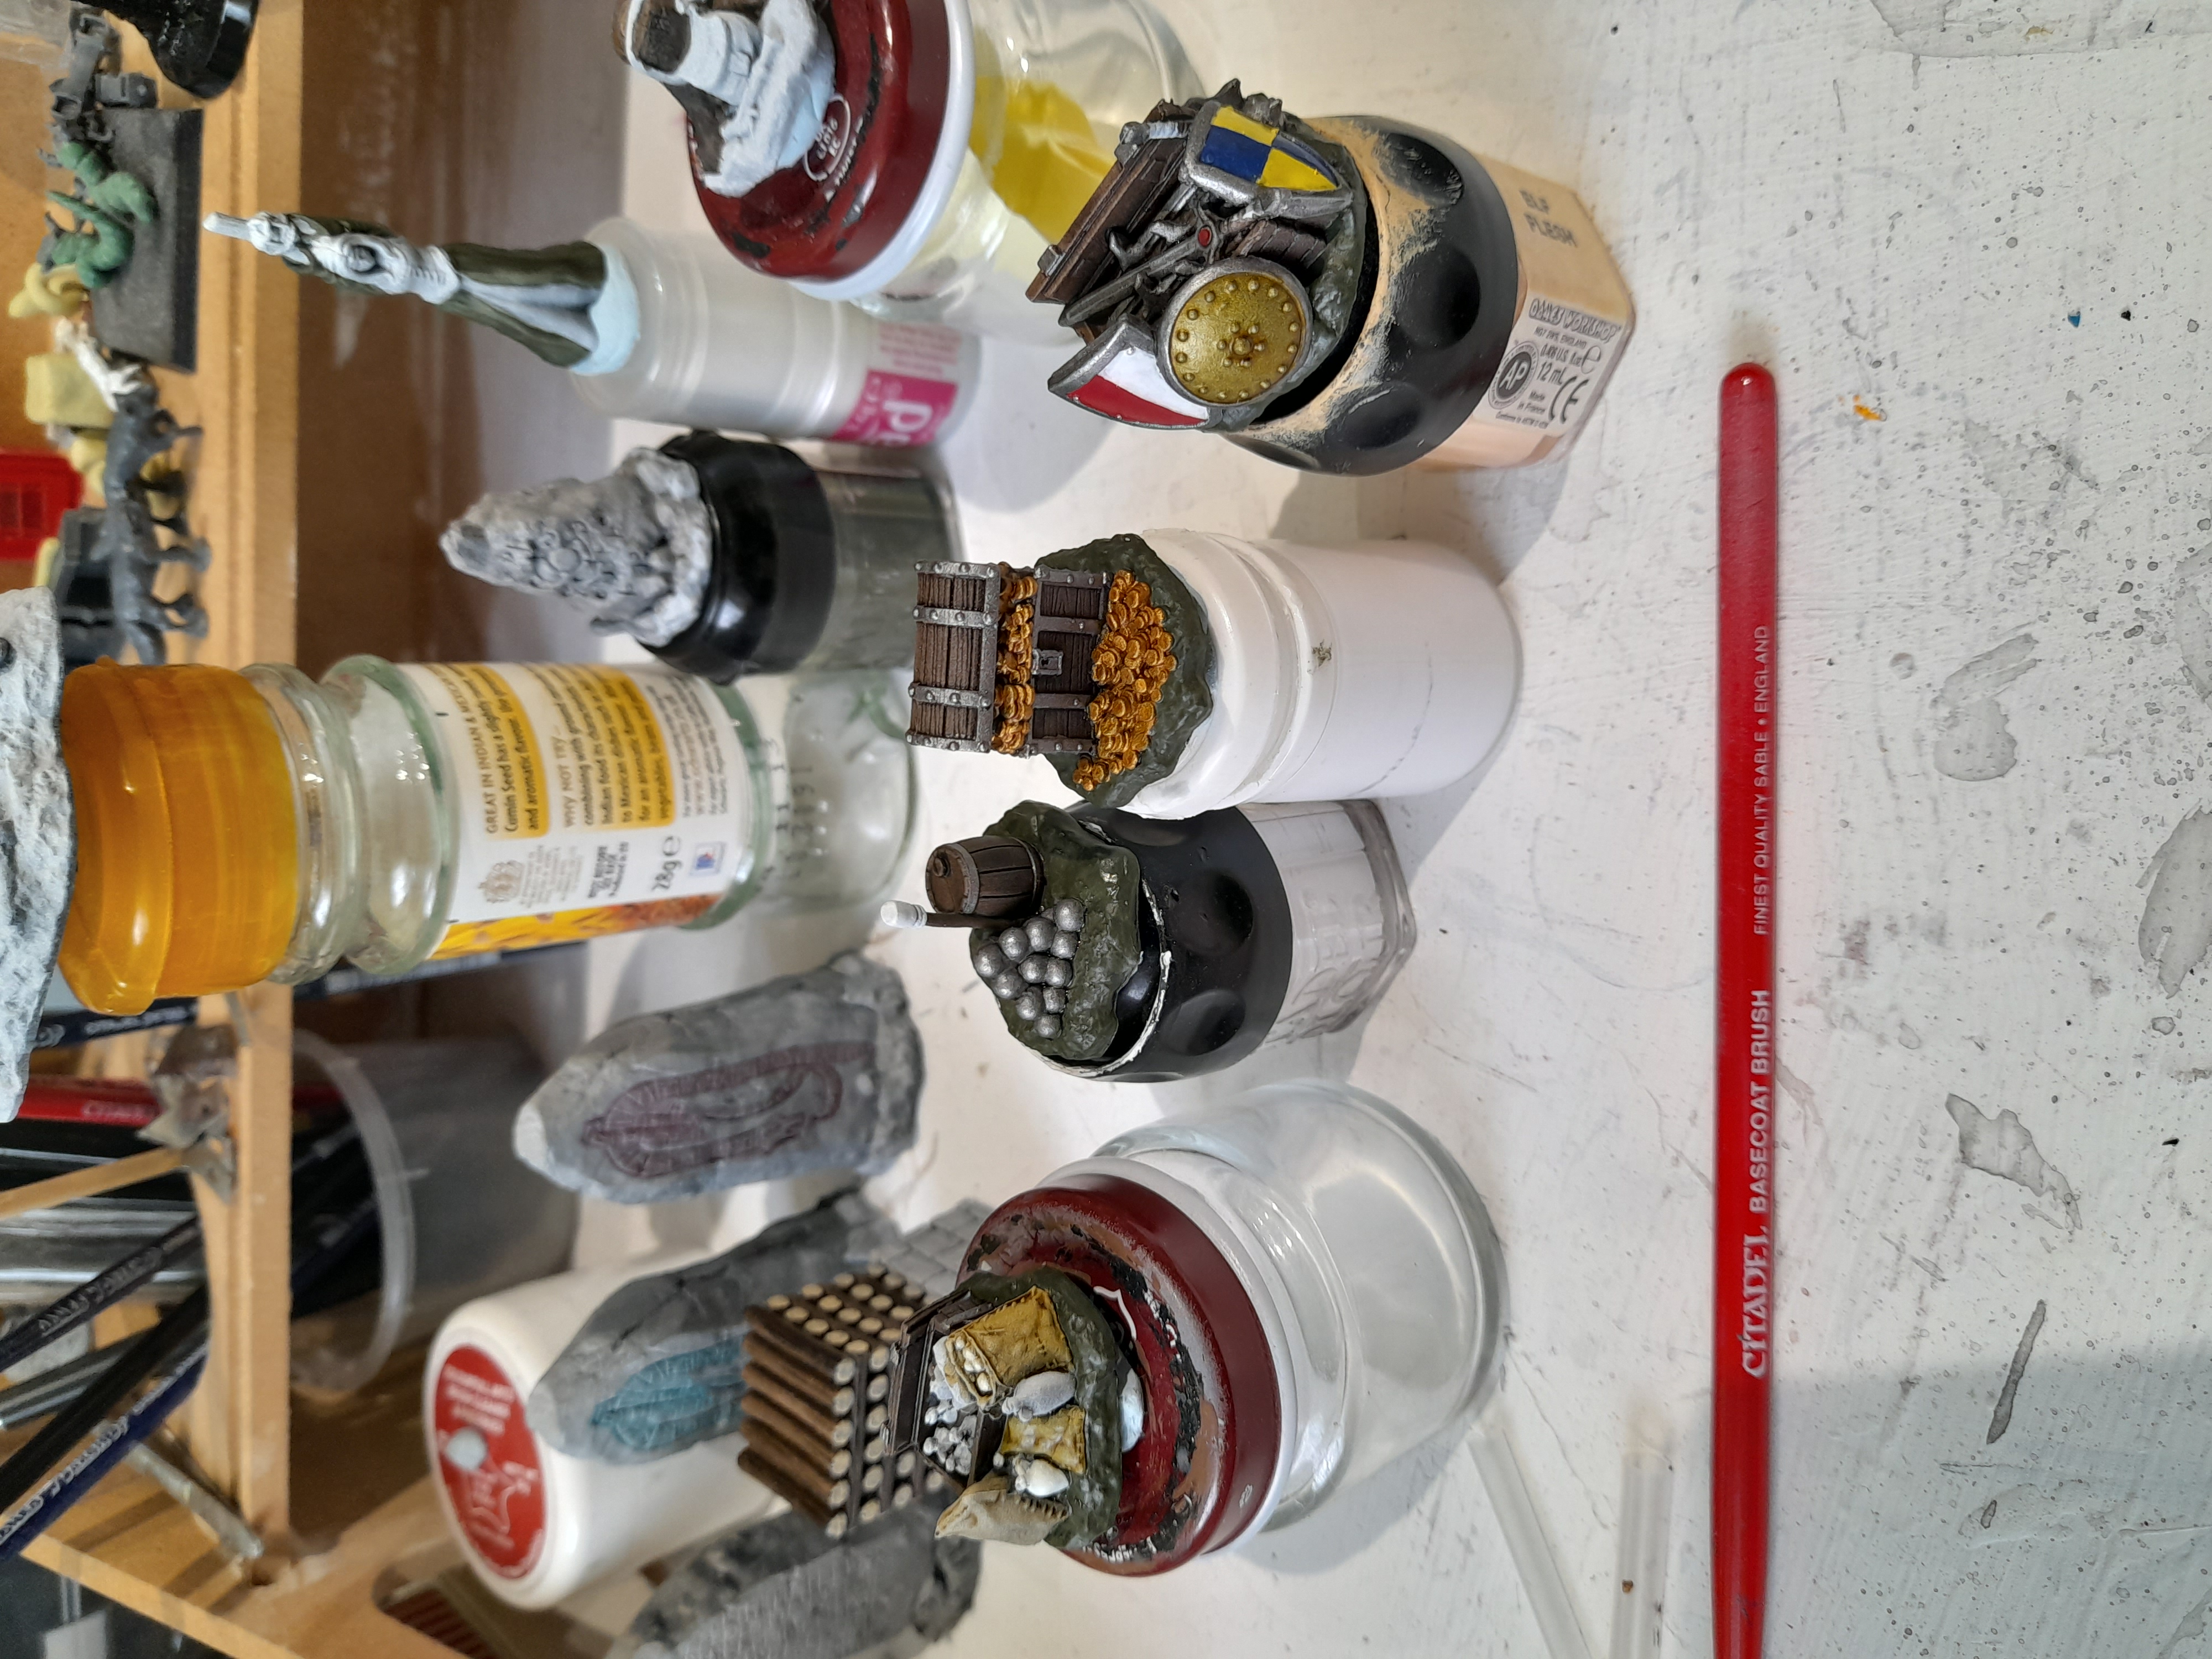
Three are pretty much finished now, just need to decide how I finish off the bases. These have so far had a coat of a naturalistic green, a brown wash then a highlight. But they still look a little one dimensional.
Vanguard continuing
27th October 2023
Just a quick one on this, as I am aware I sometimes put up too many pics…
The Vanguard objectives are continuing.
Further detailing added to them, and I have been working in stages.
Most are close to finished now, and once complete I will post up pics of them, and a group shot.
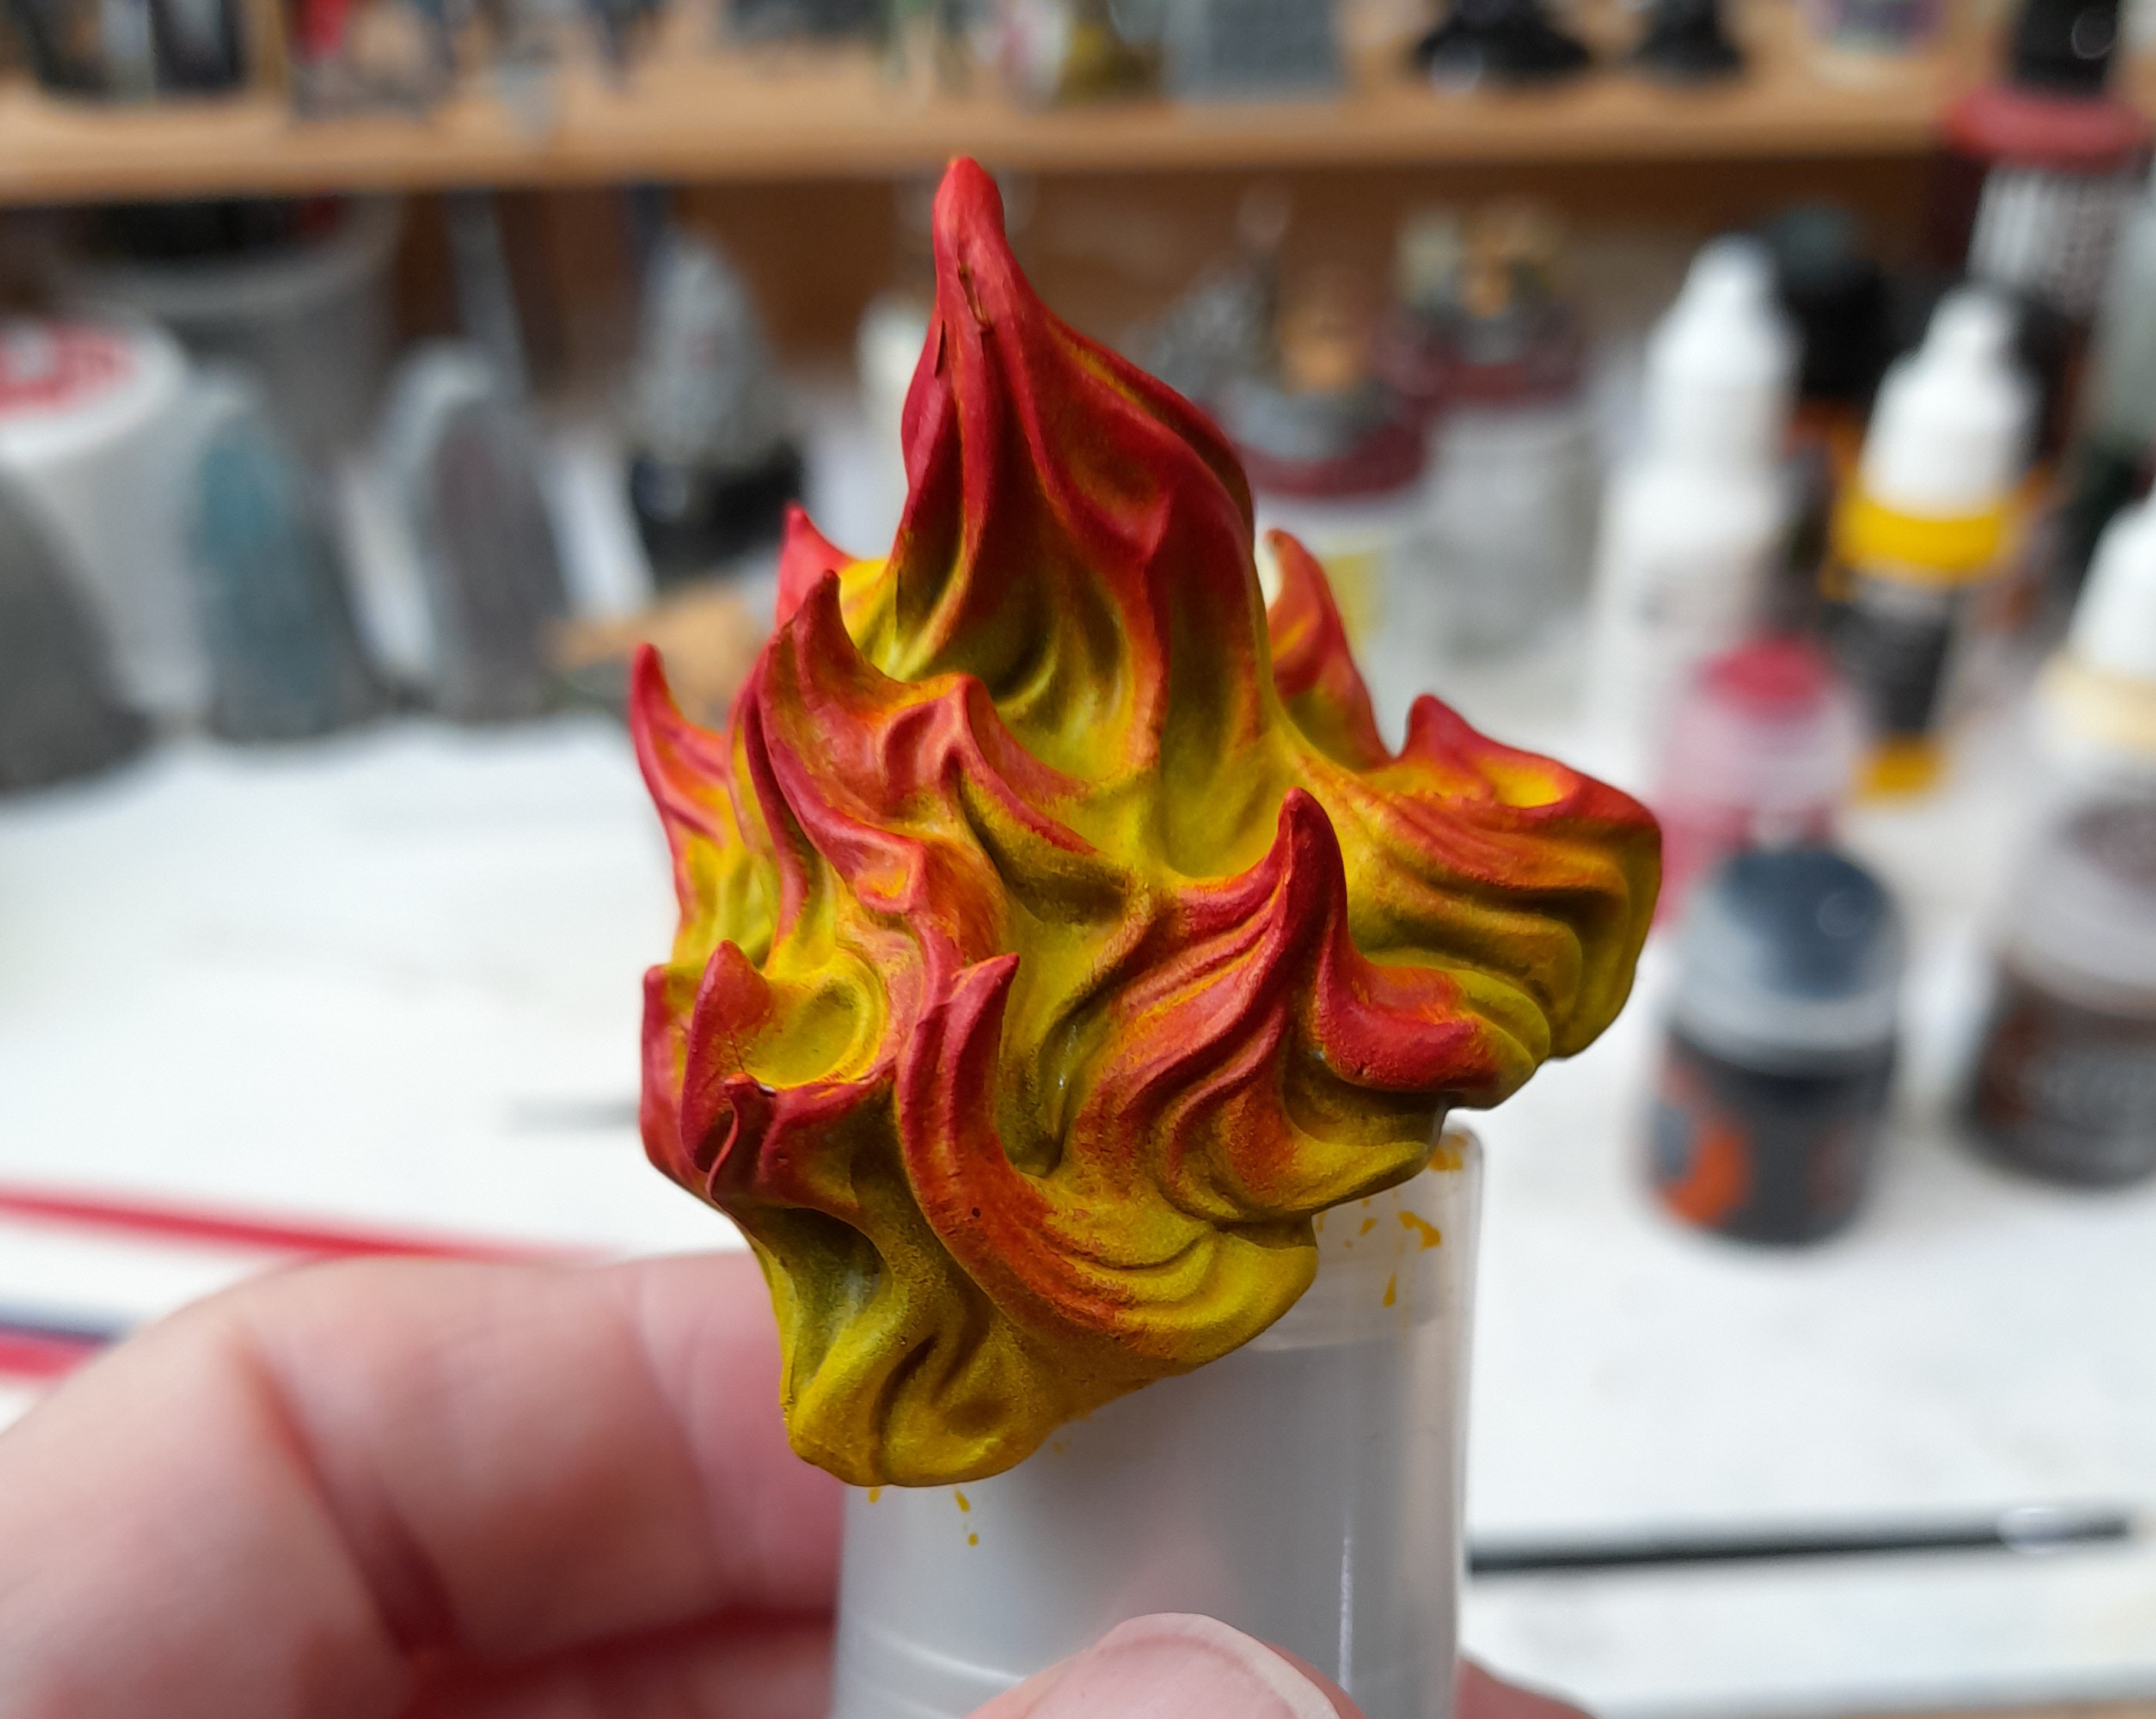
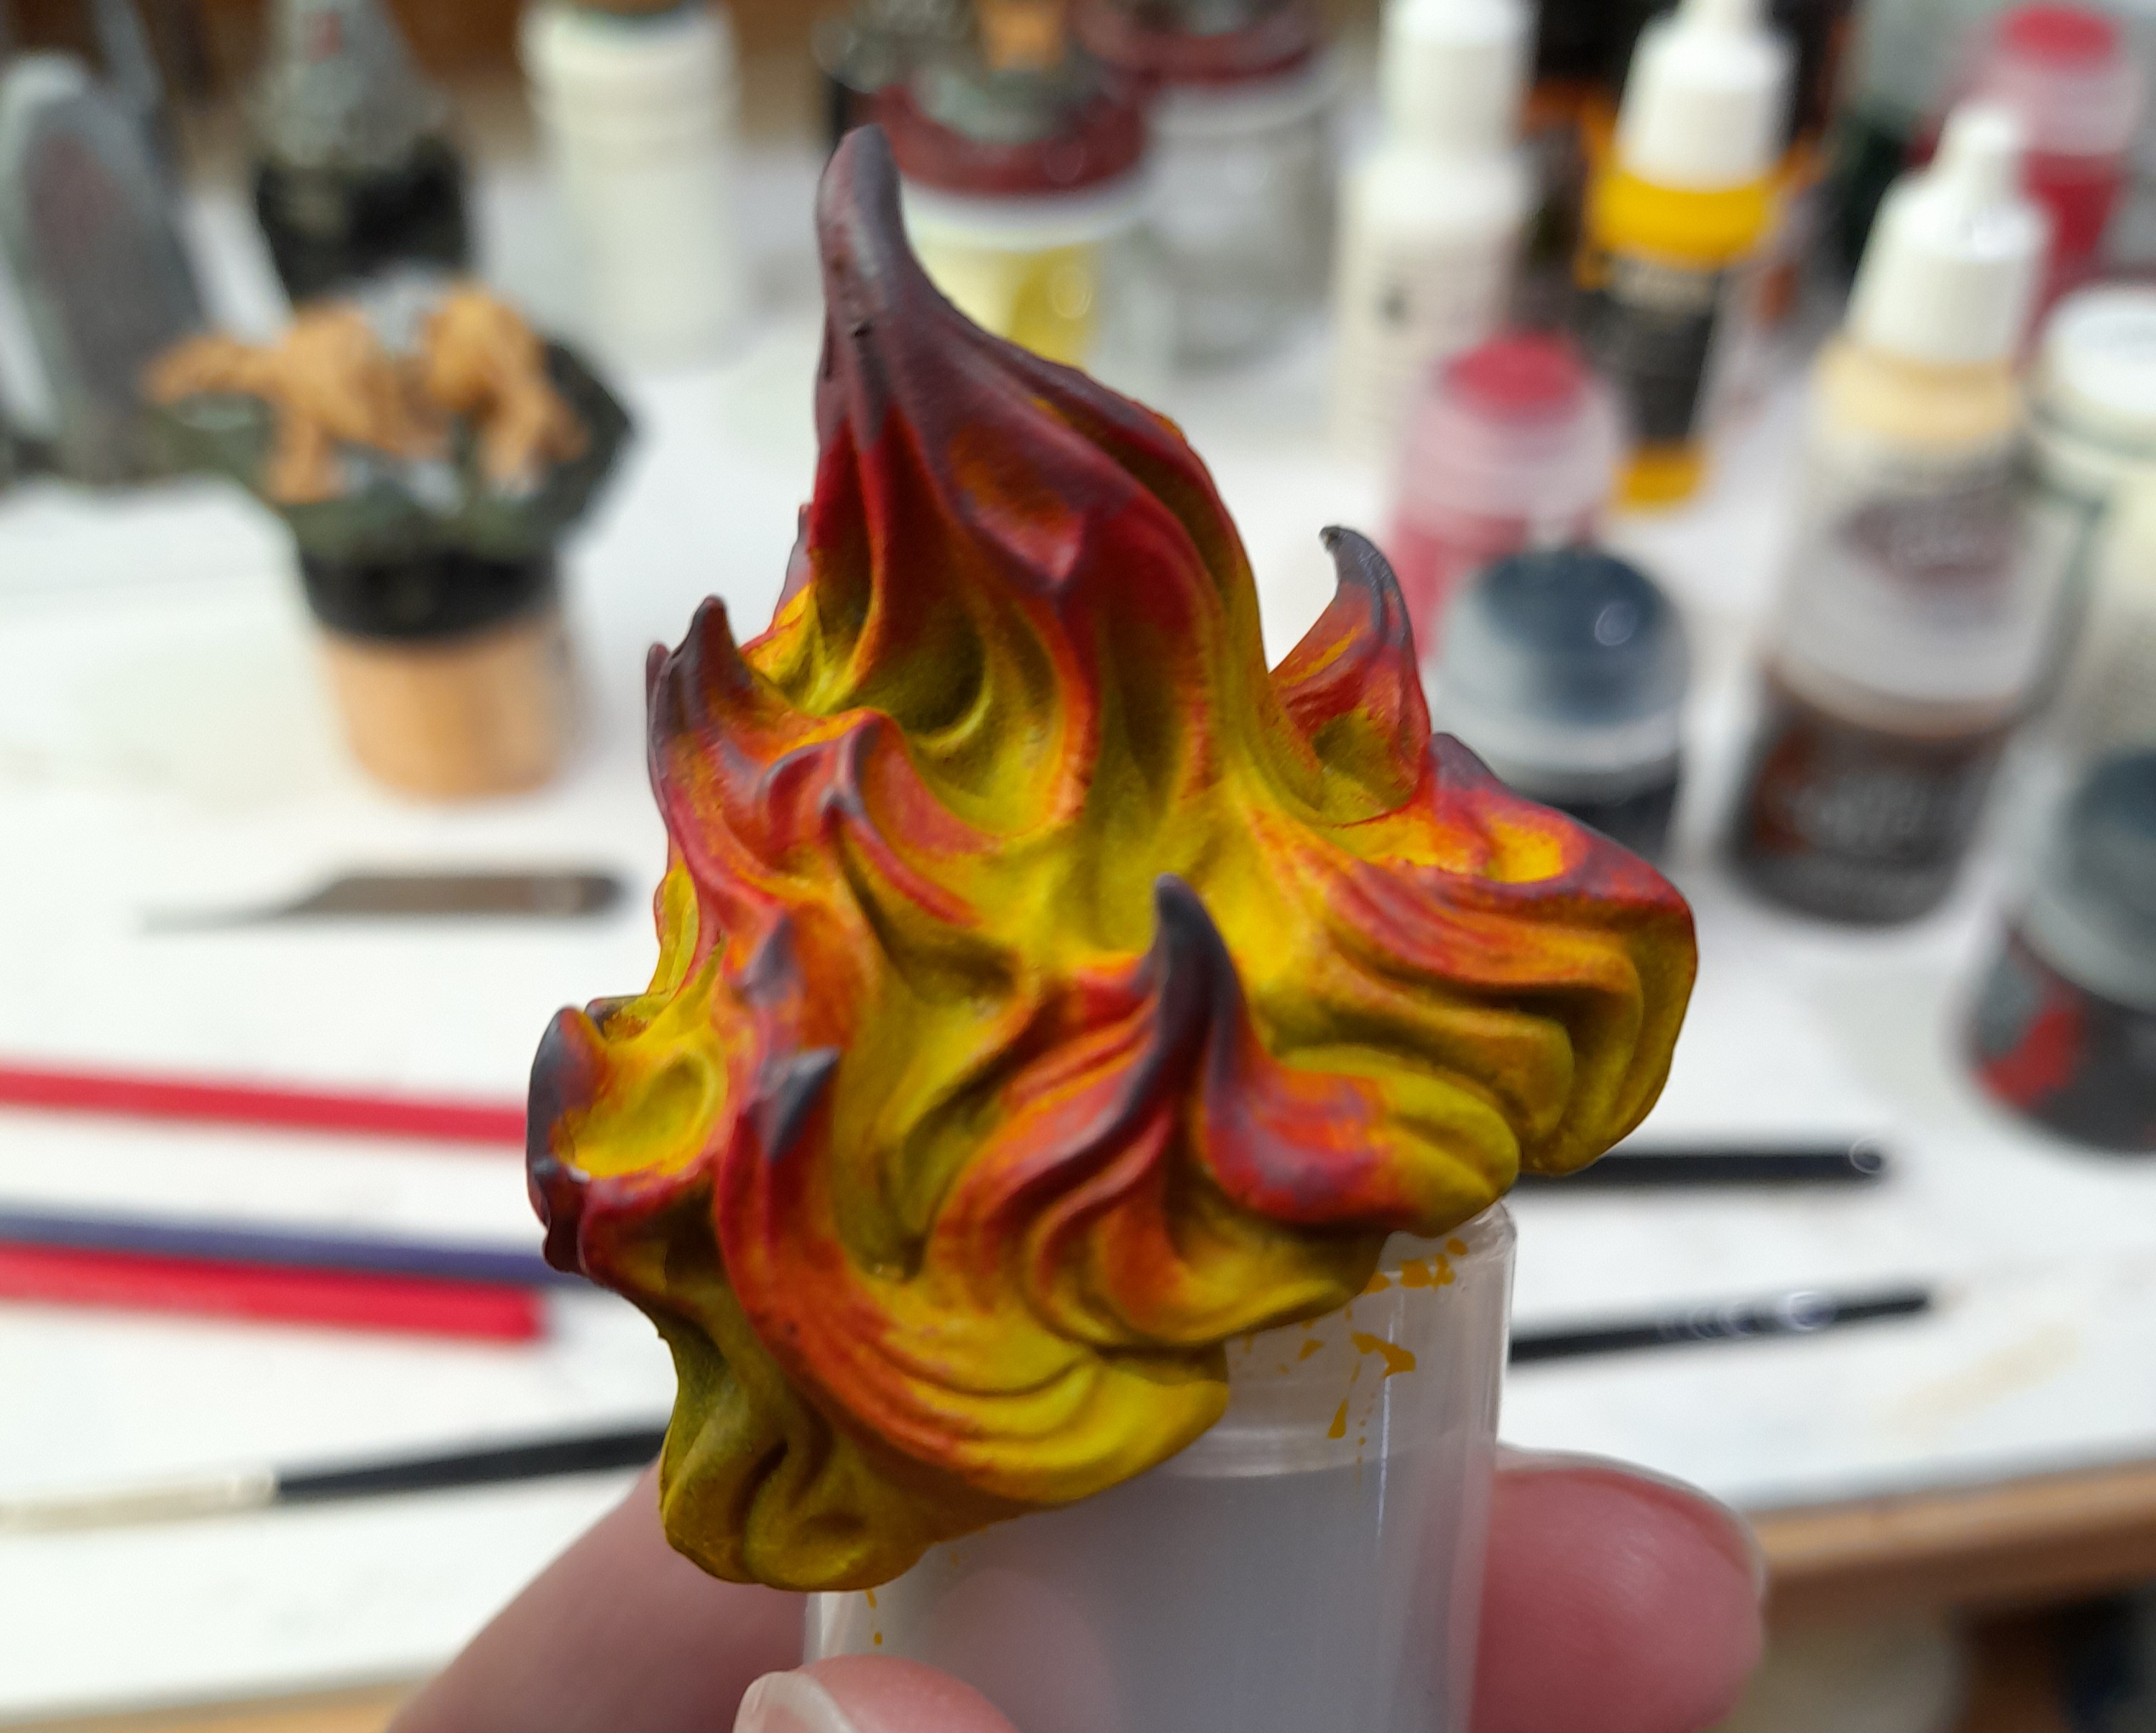
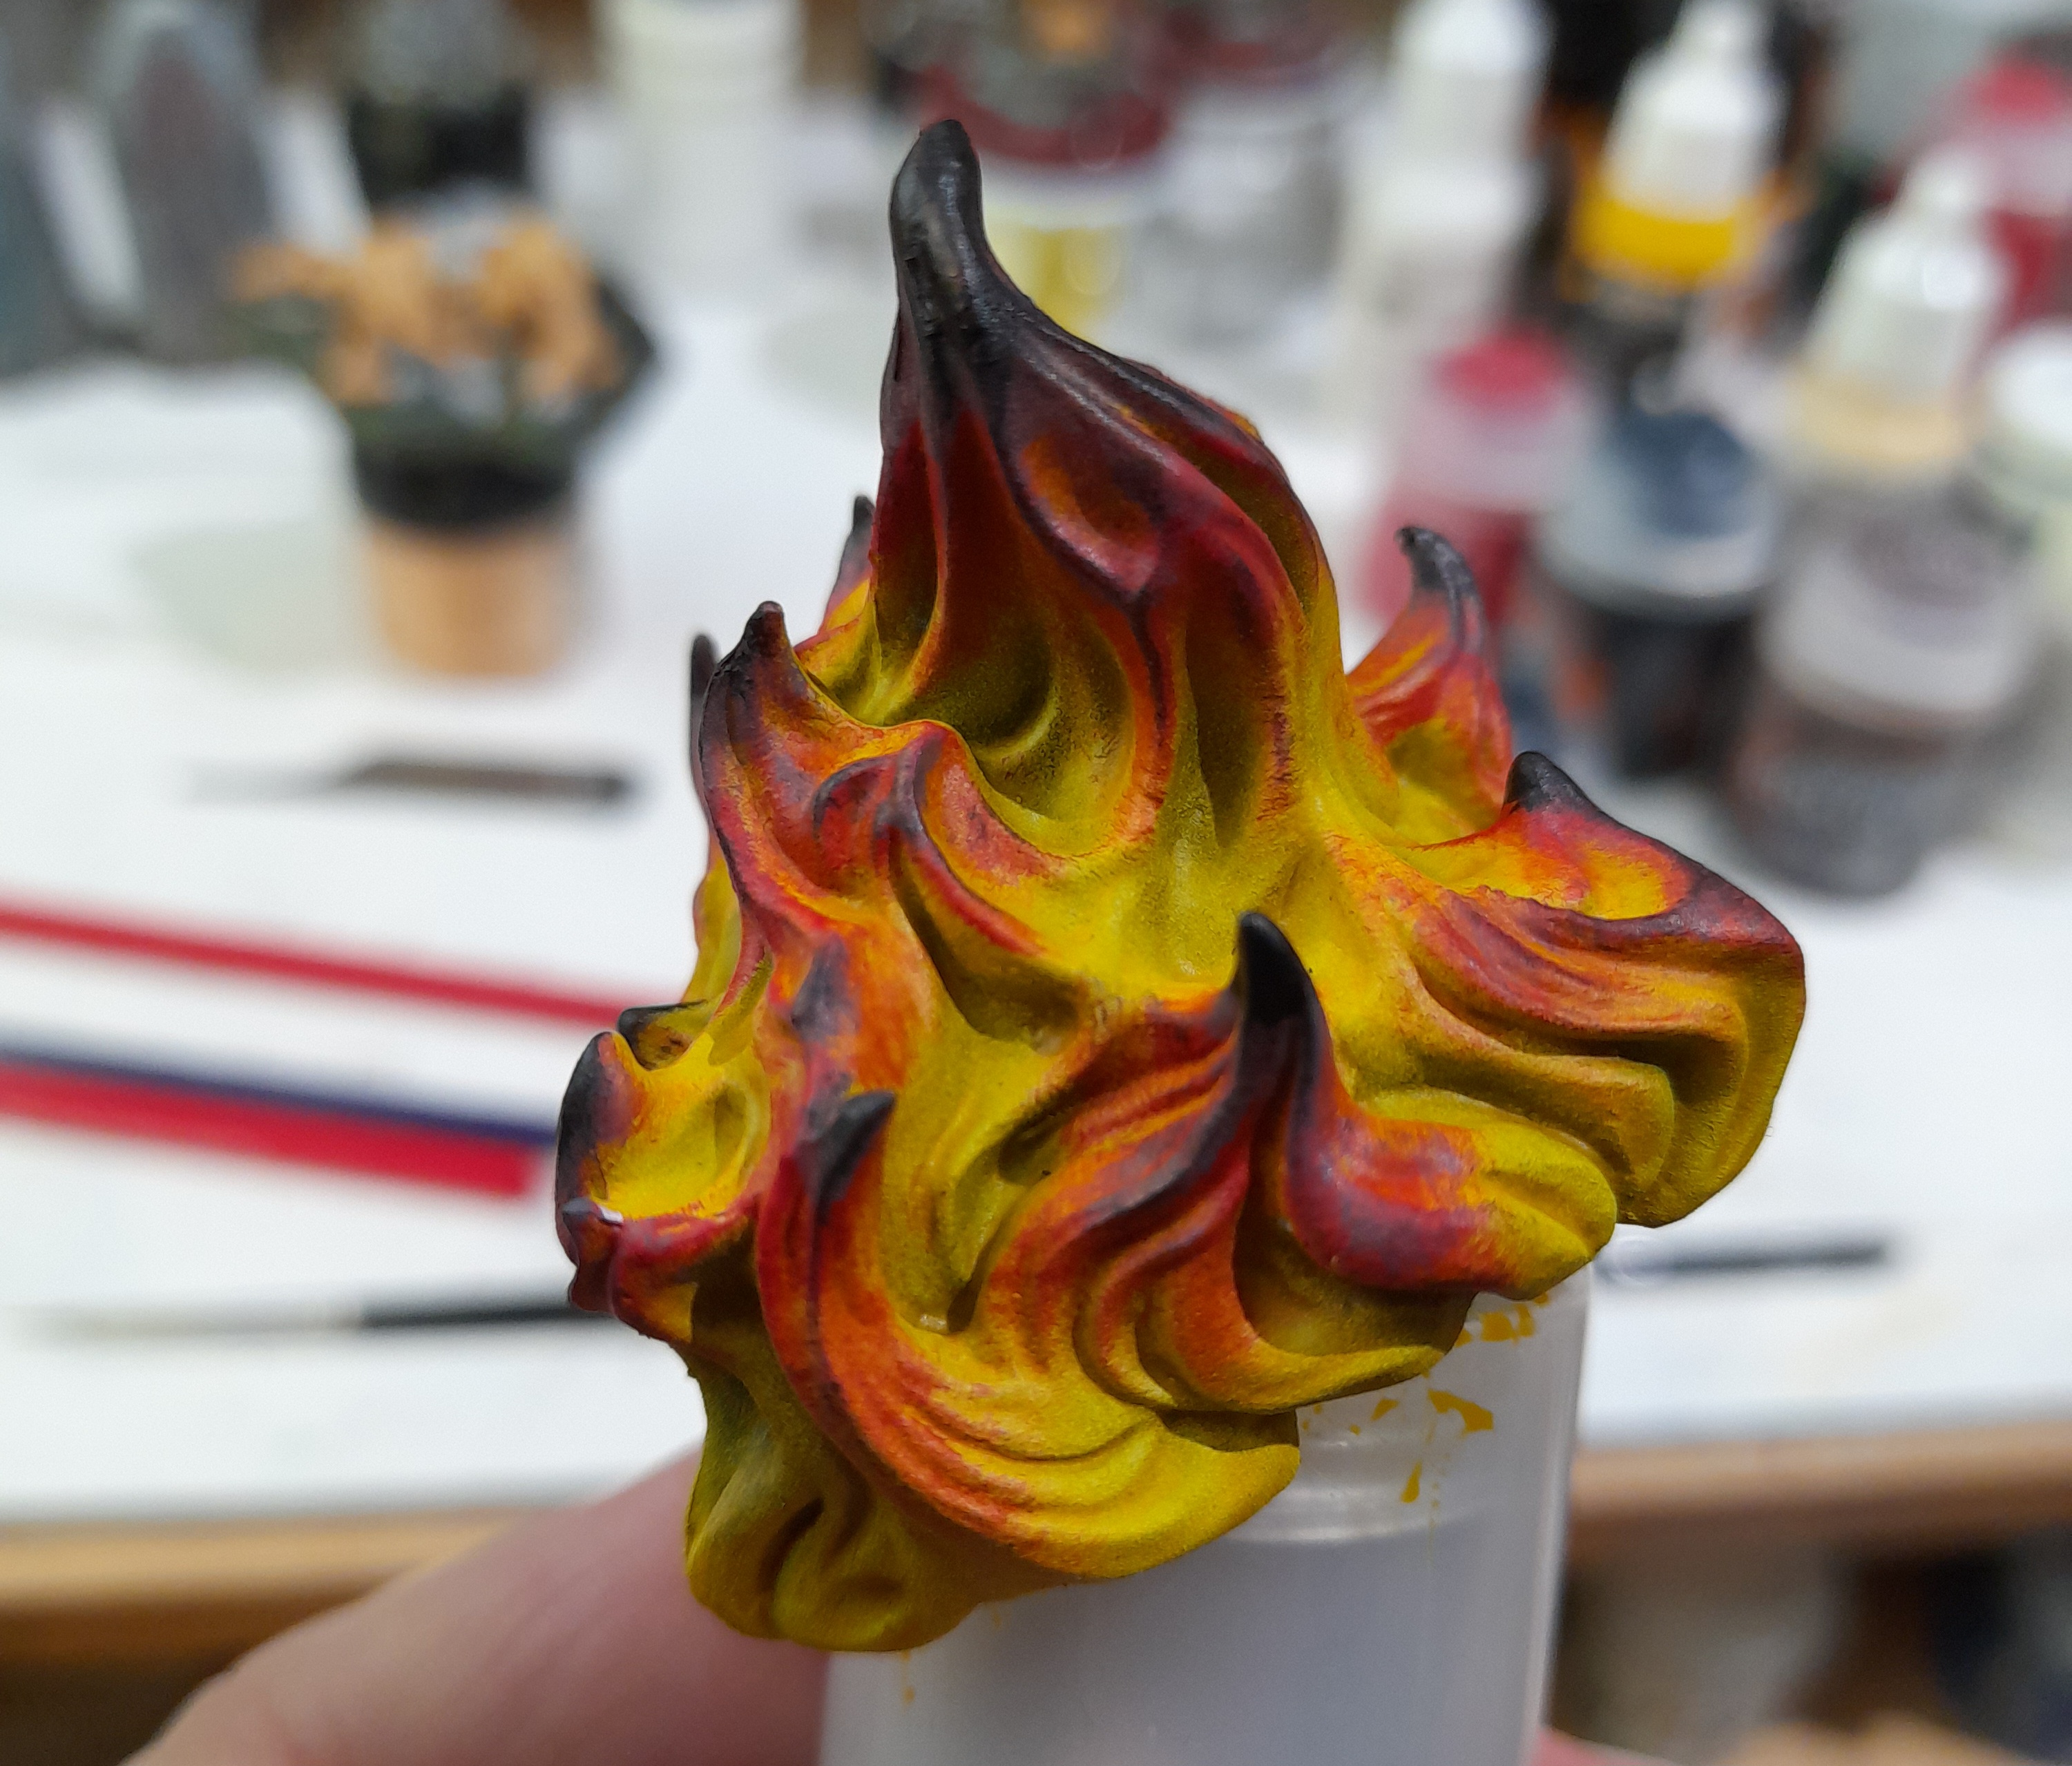
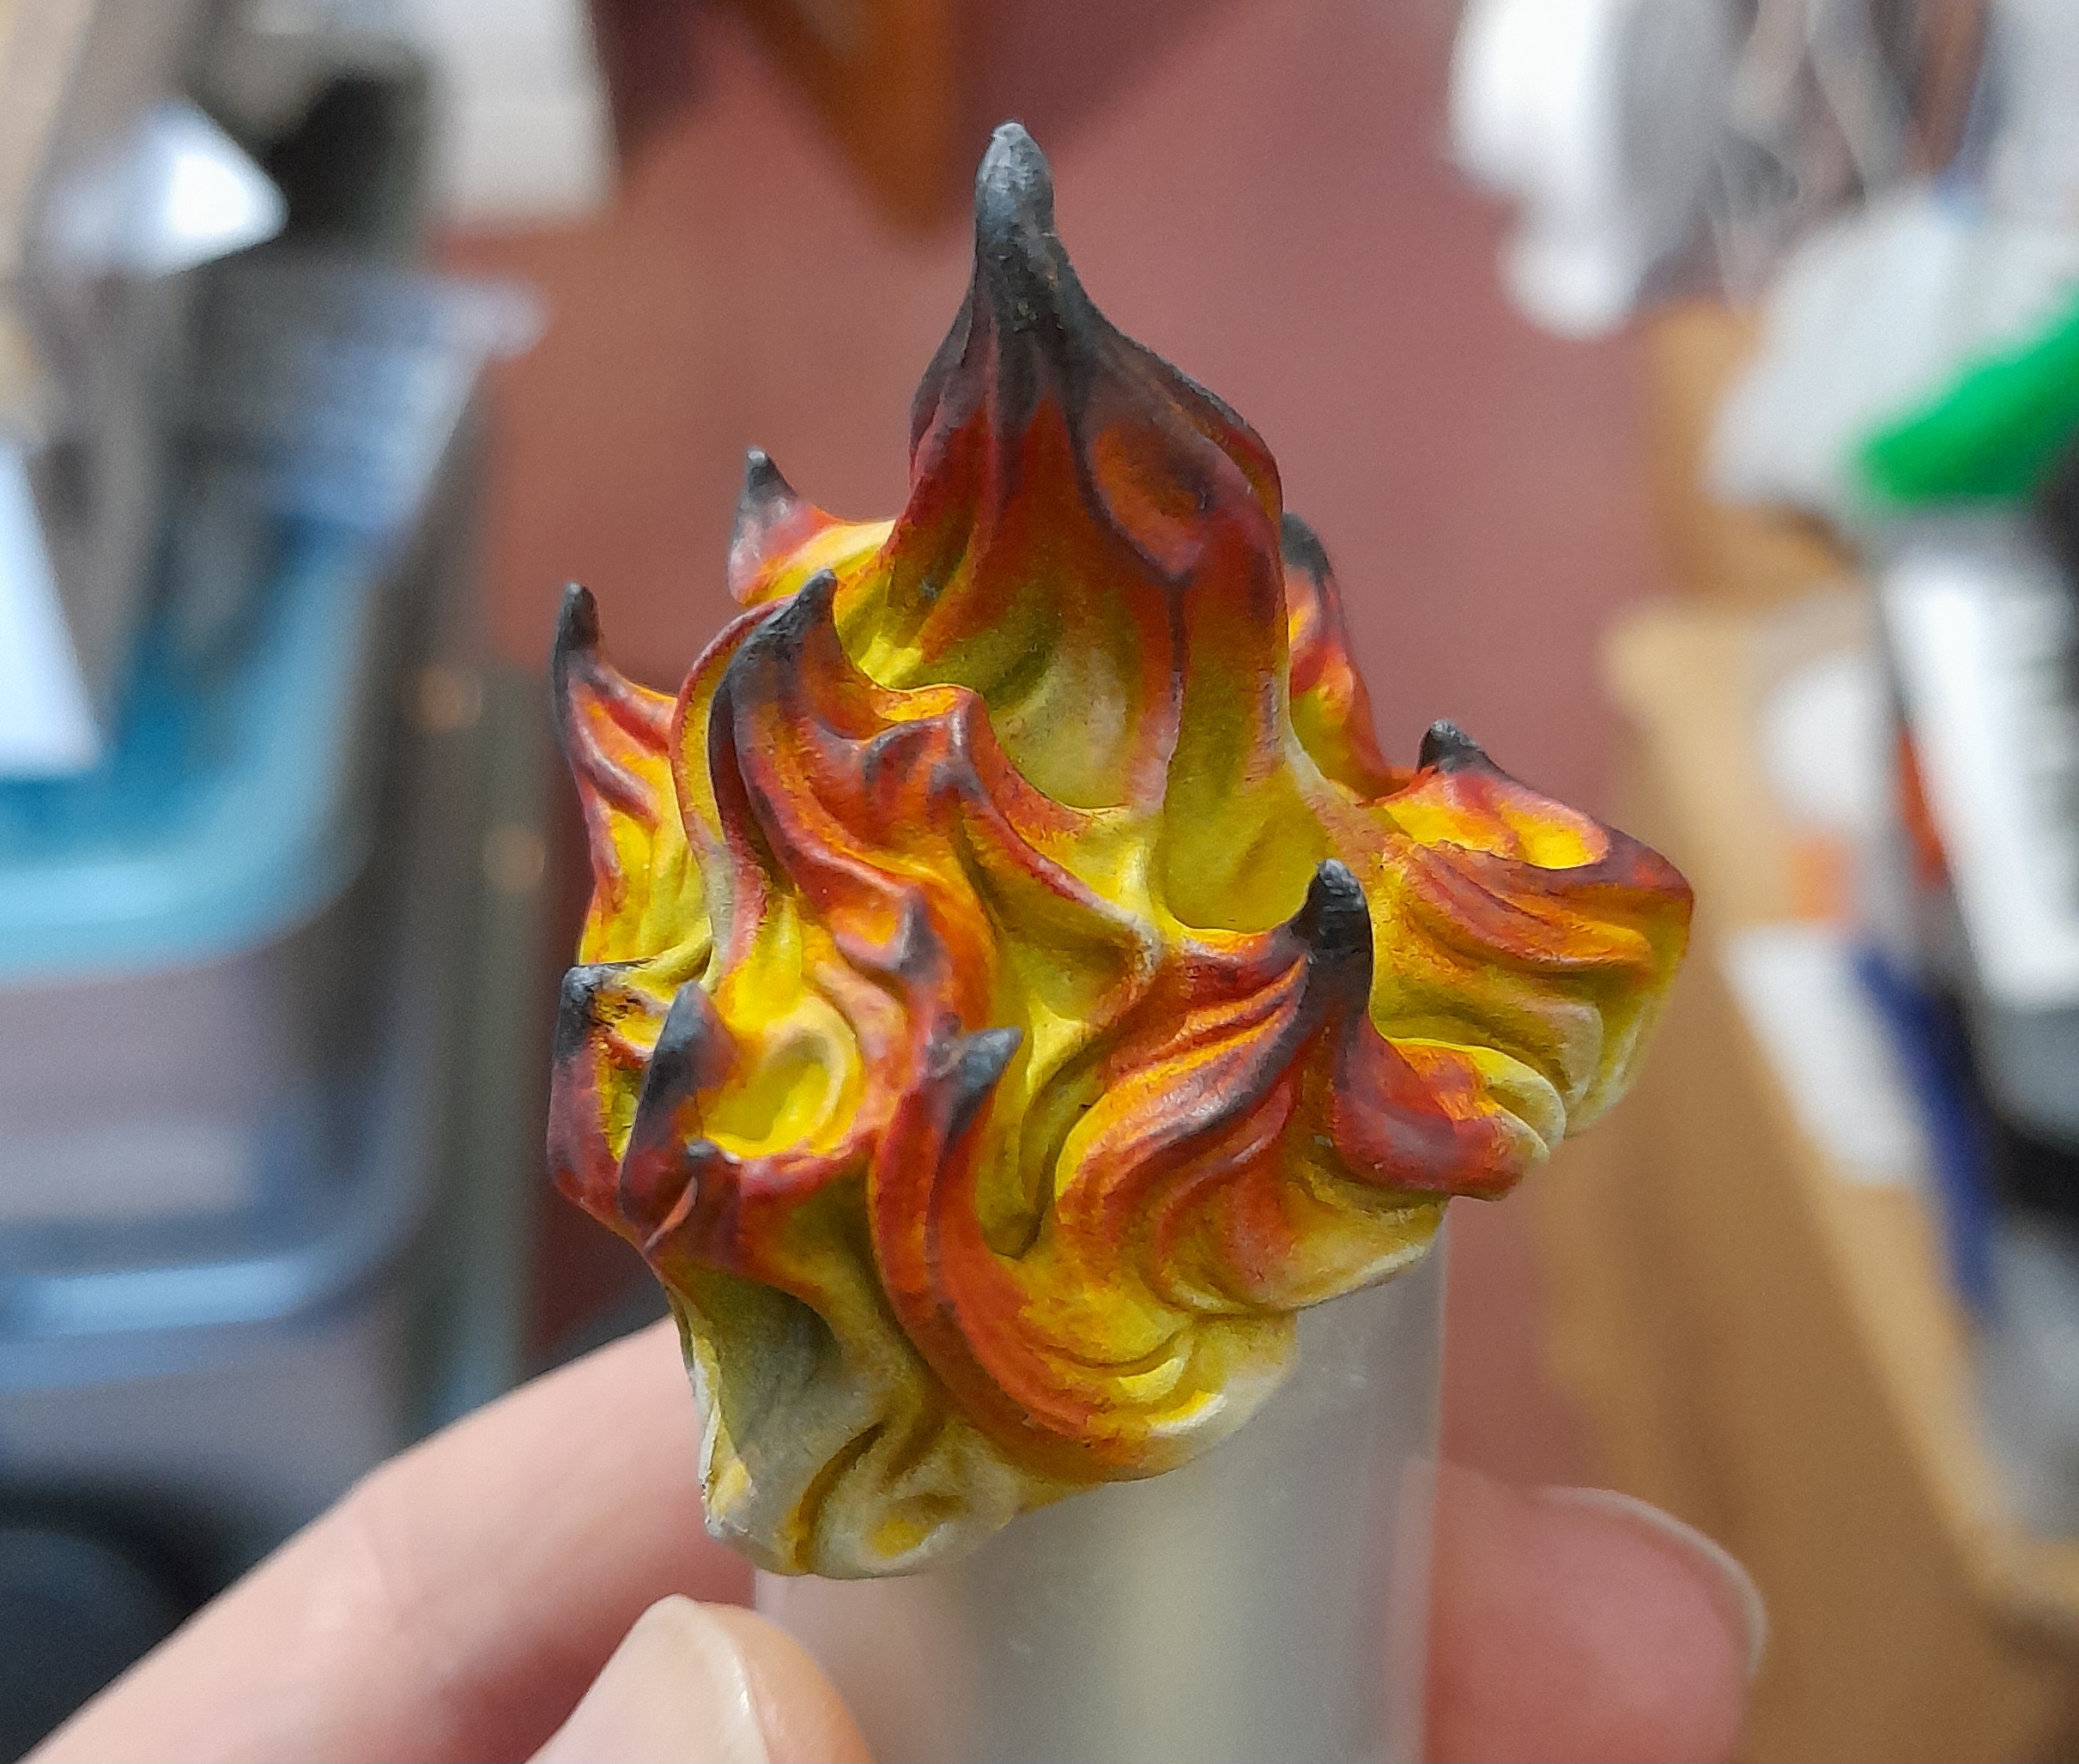
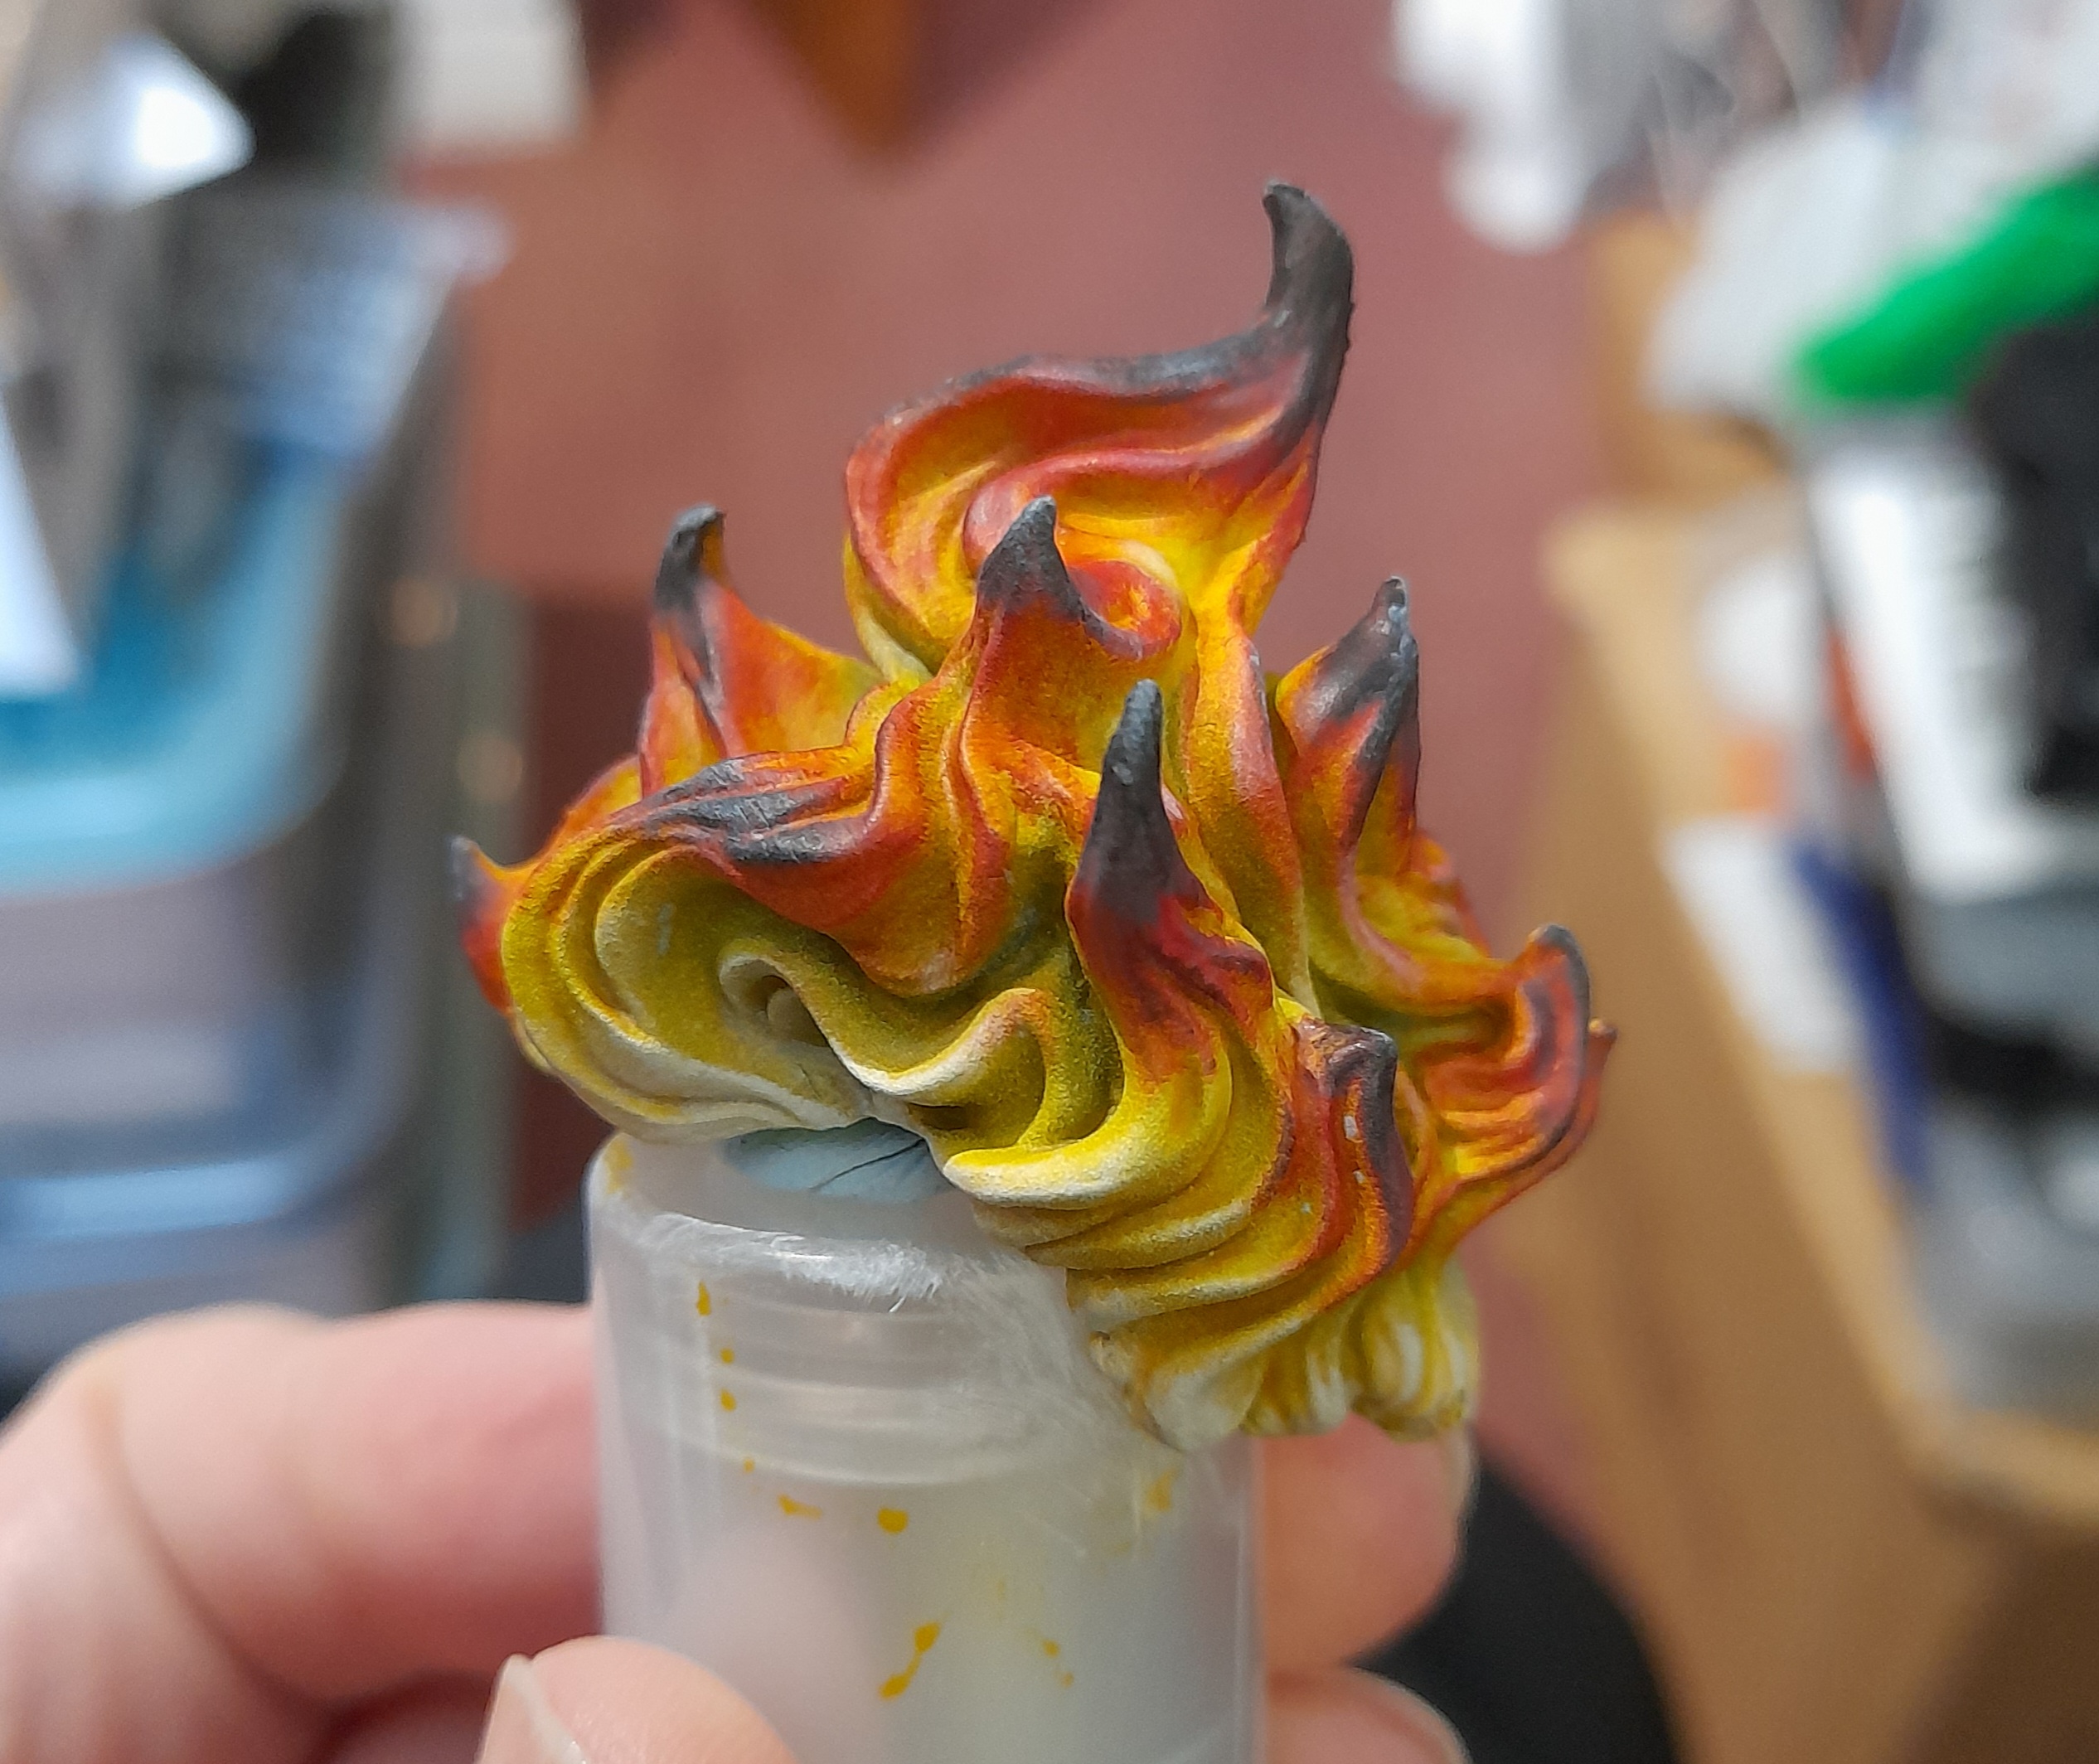
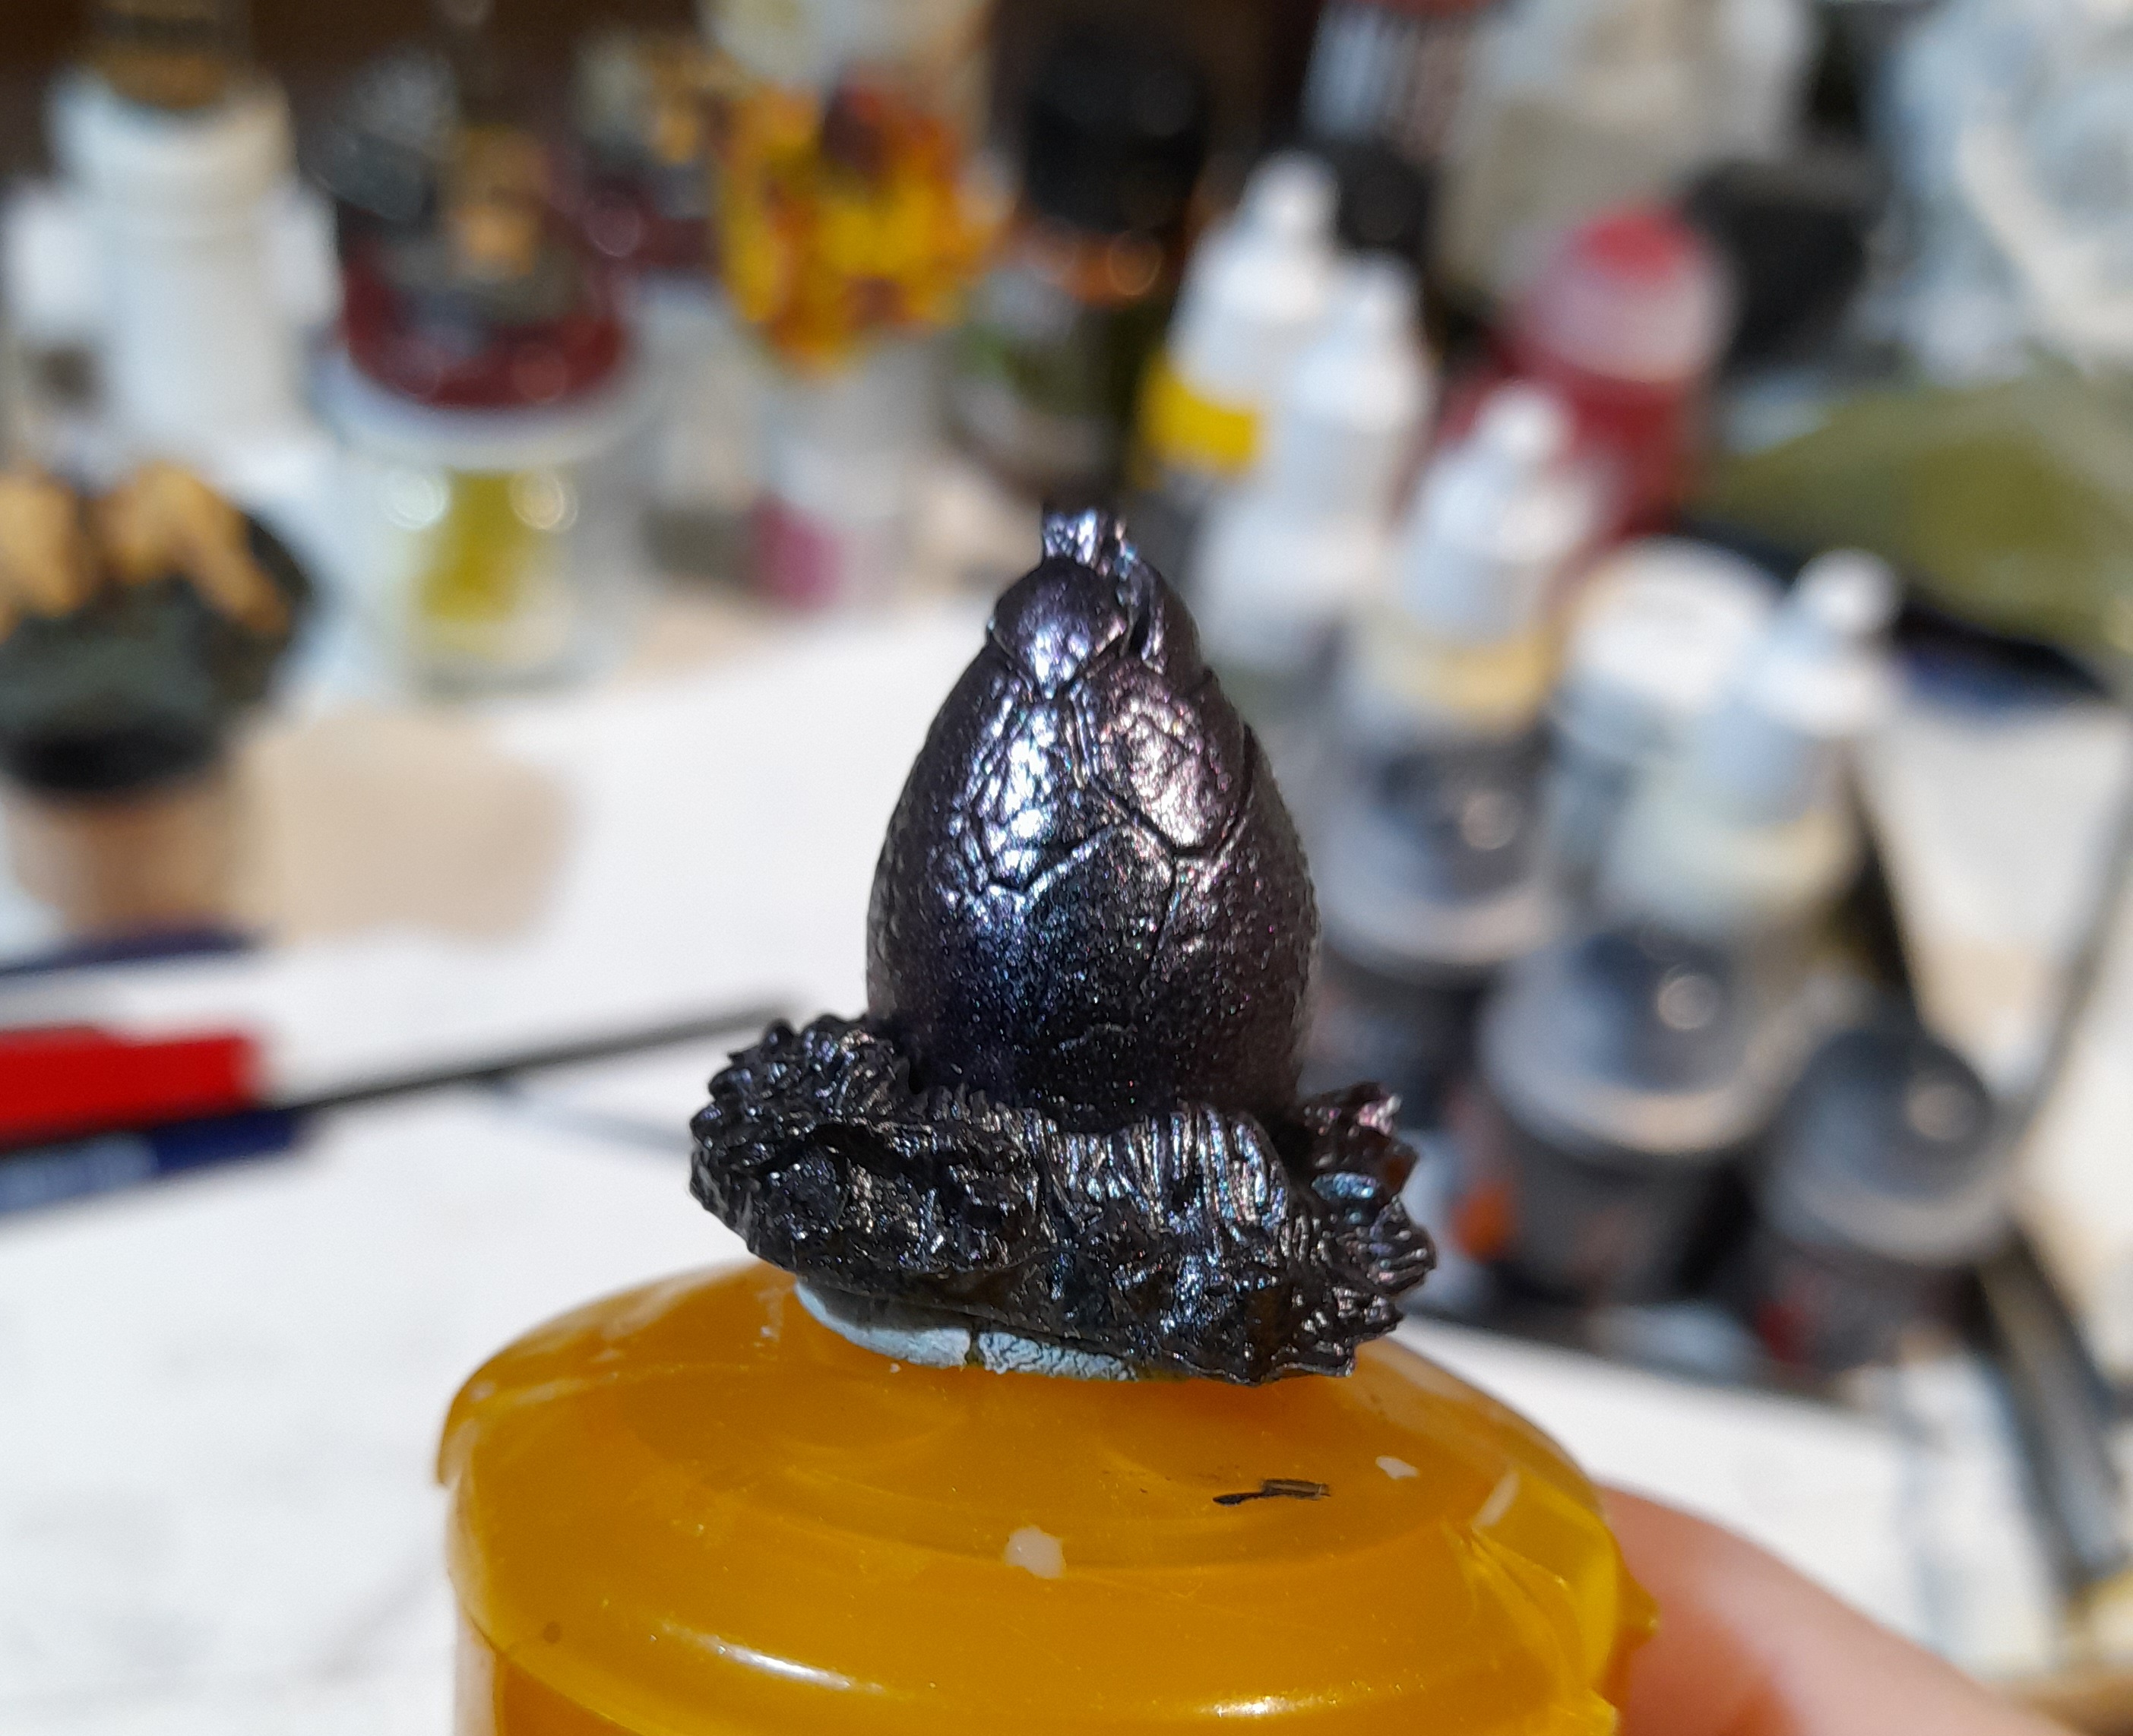
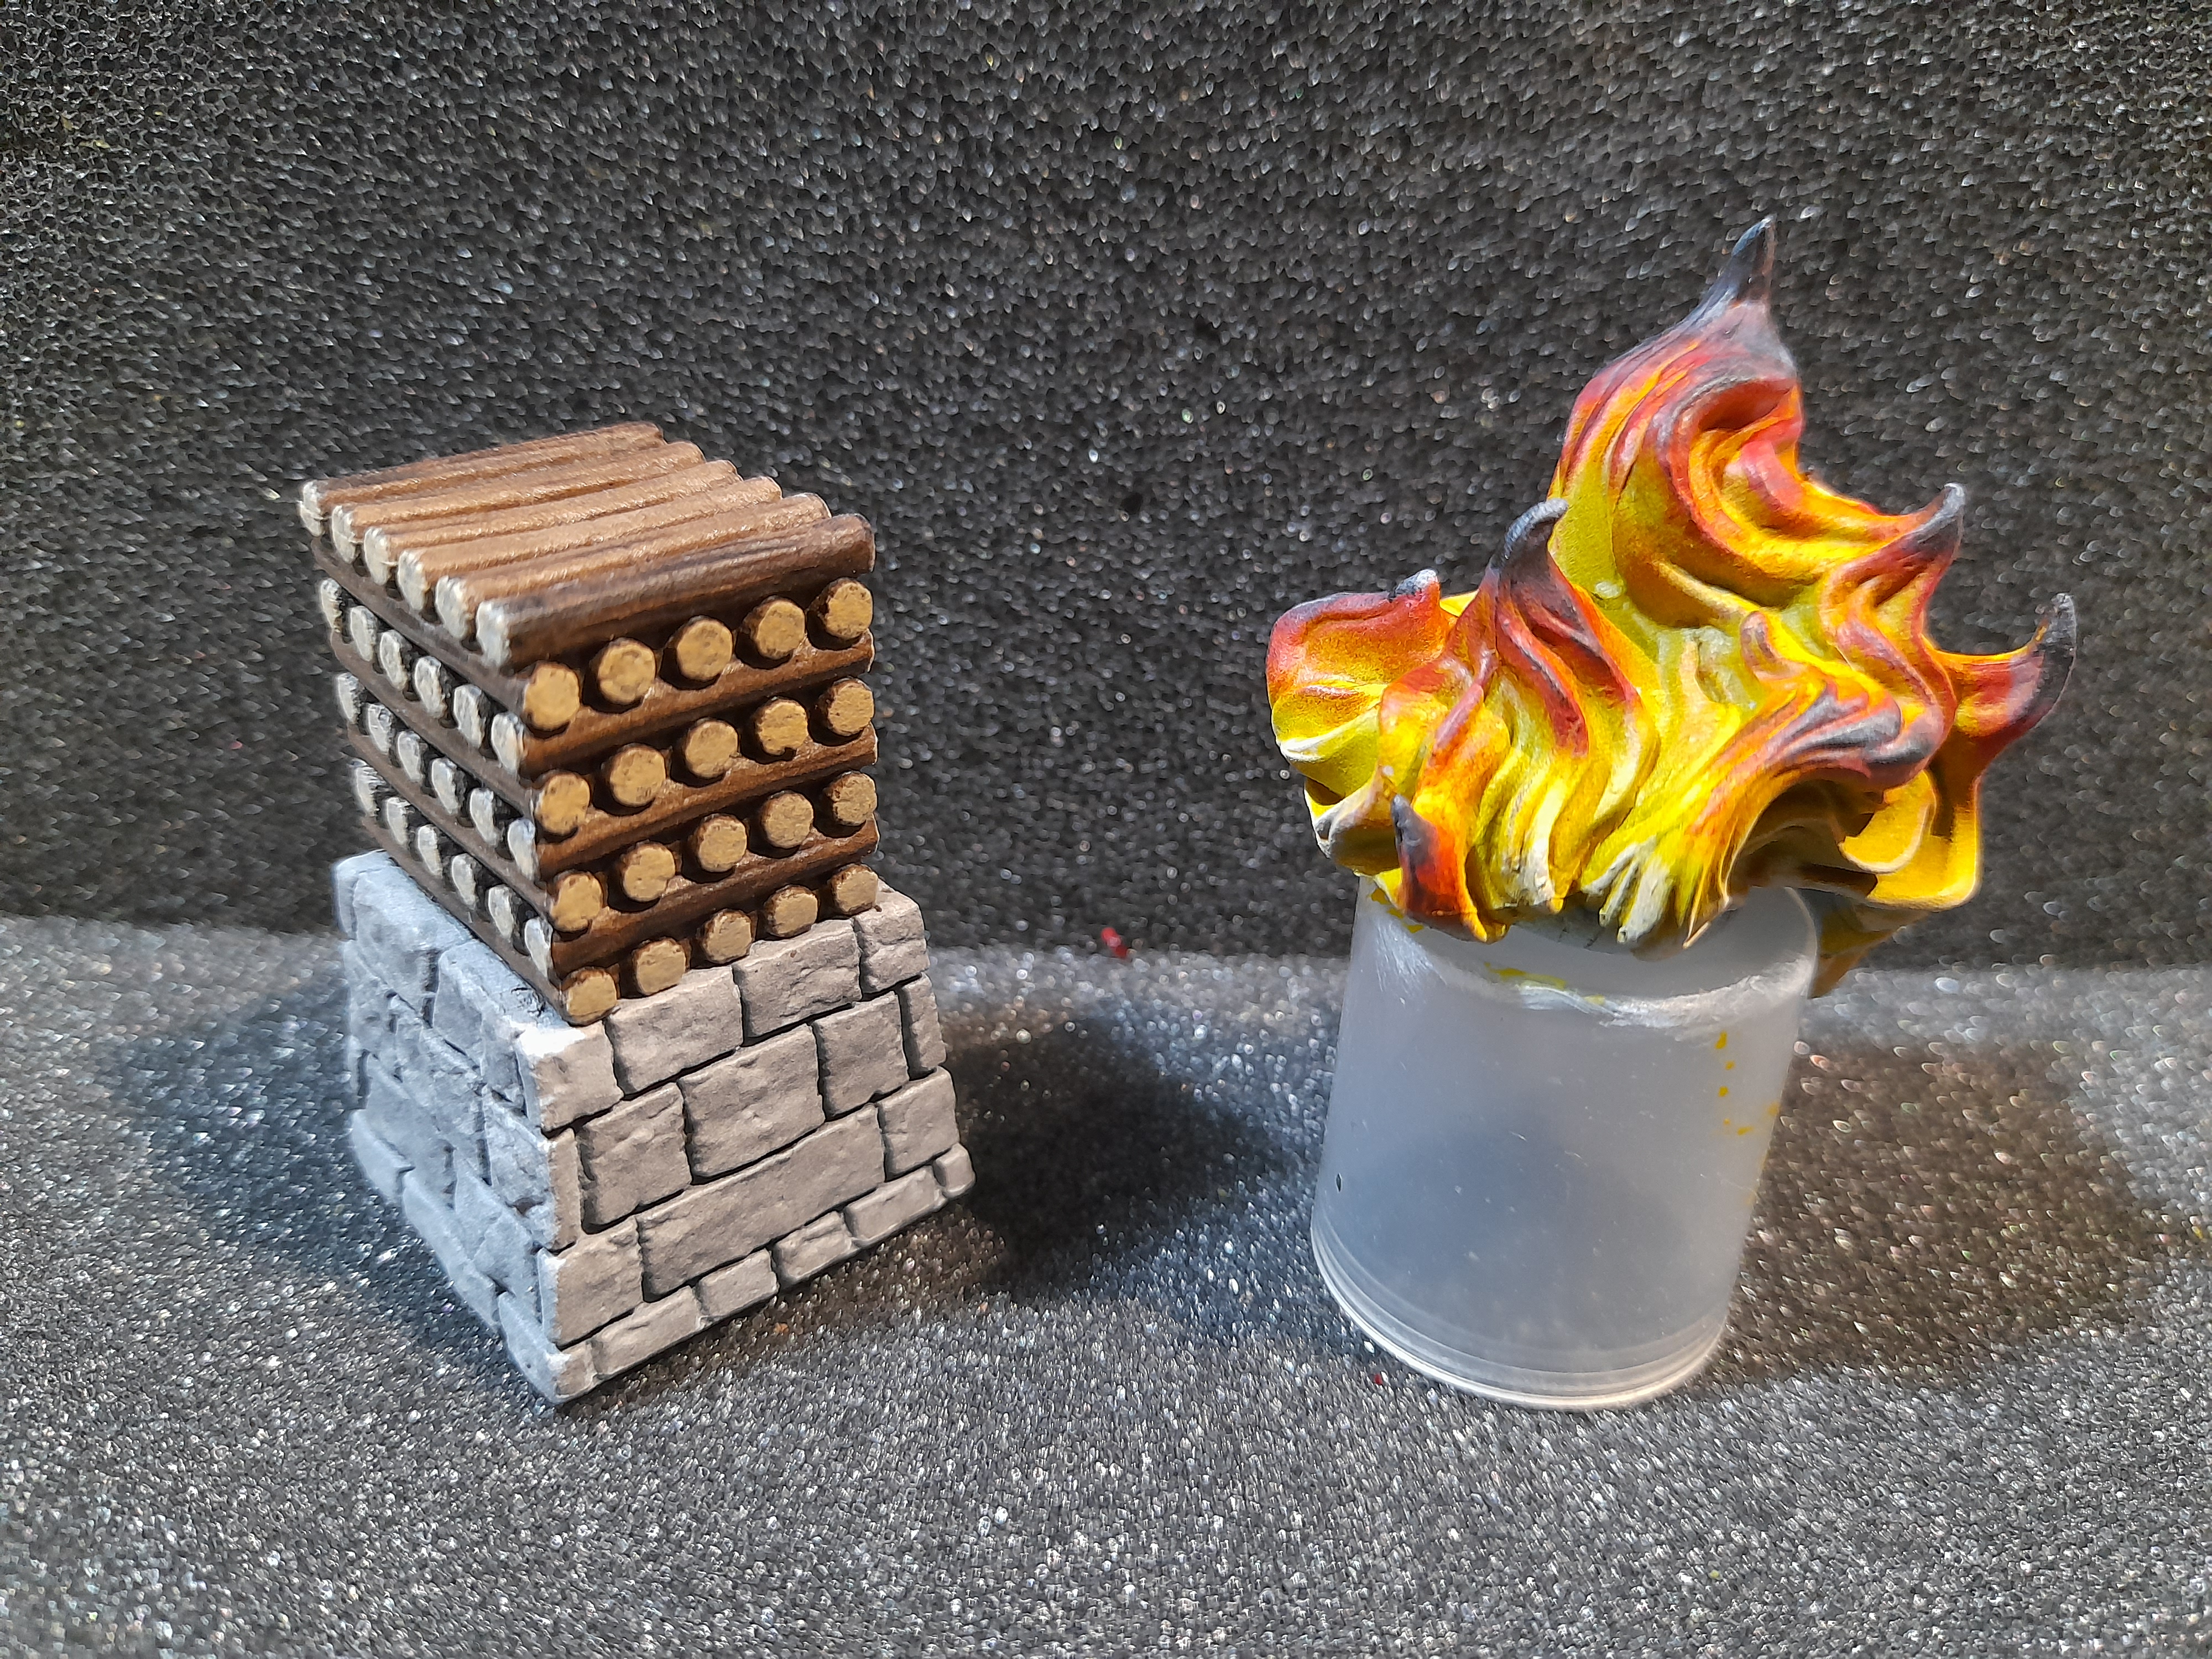
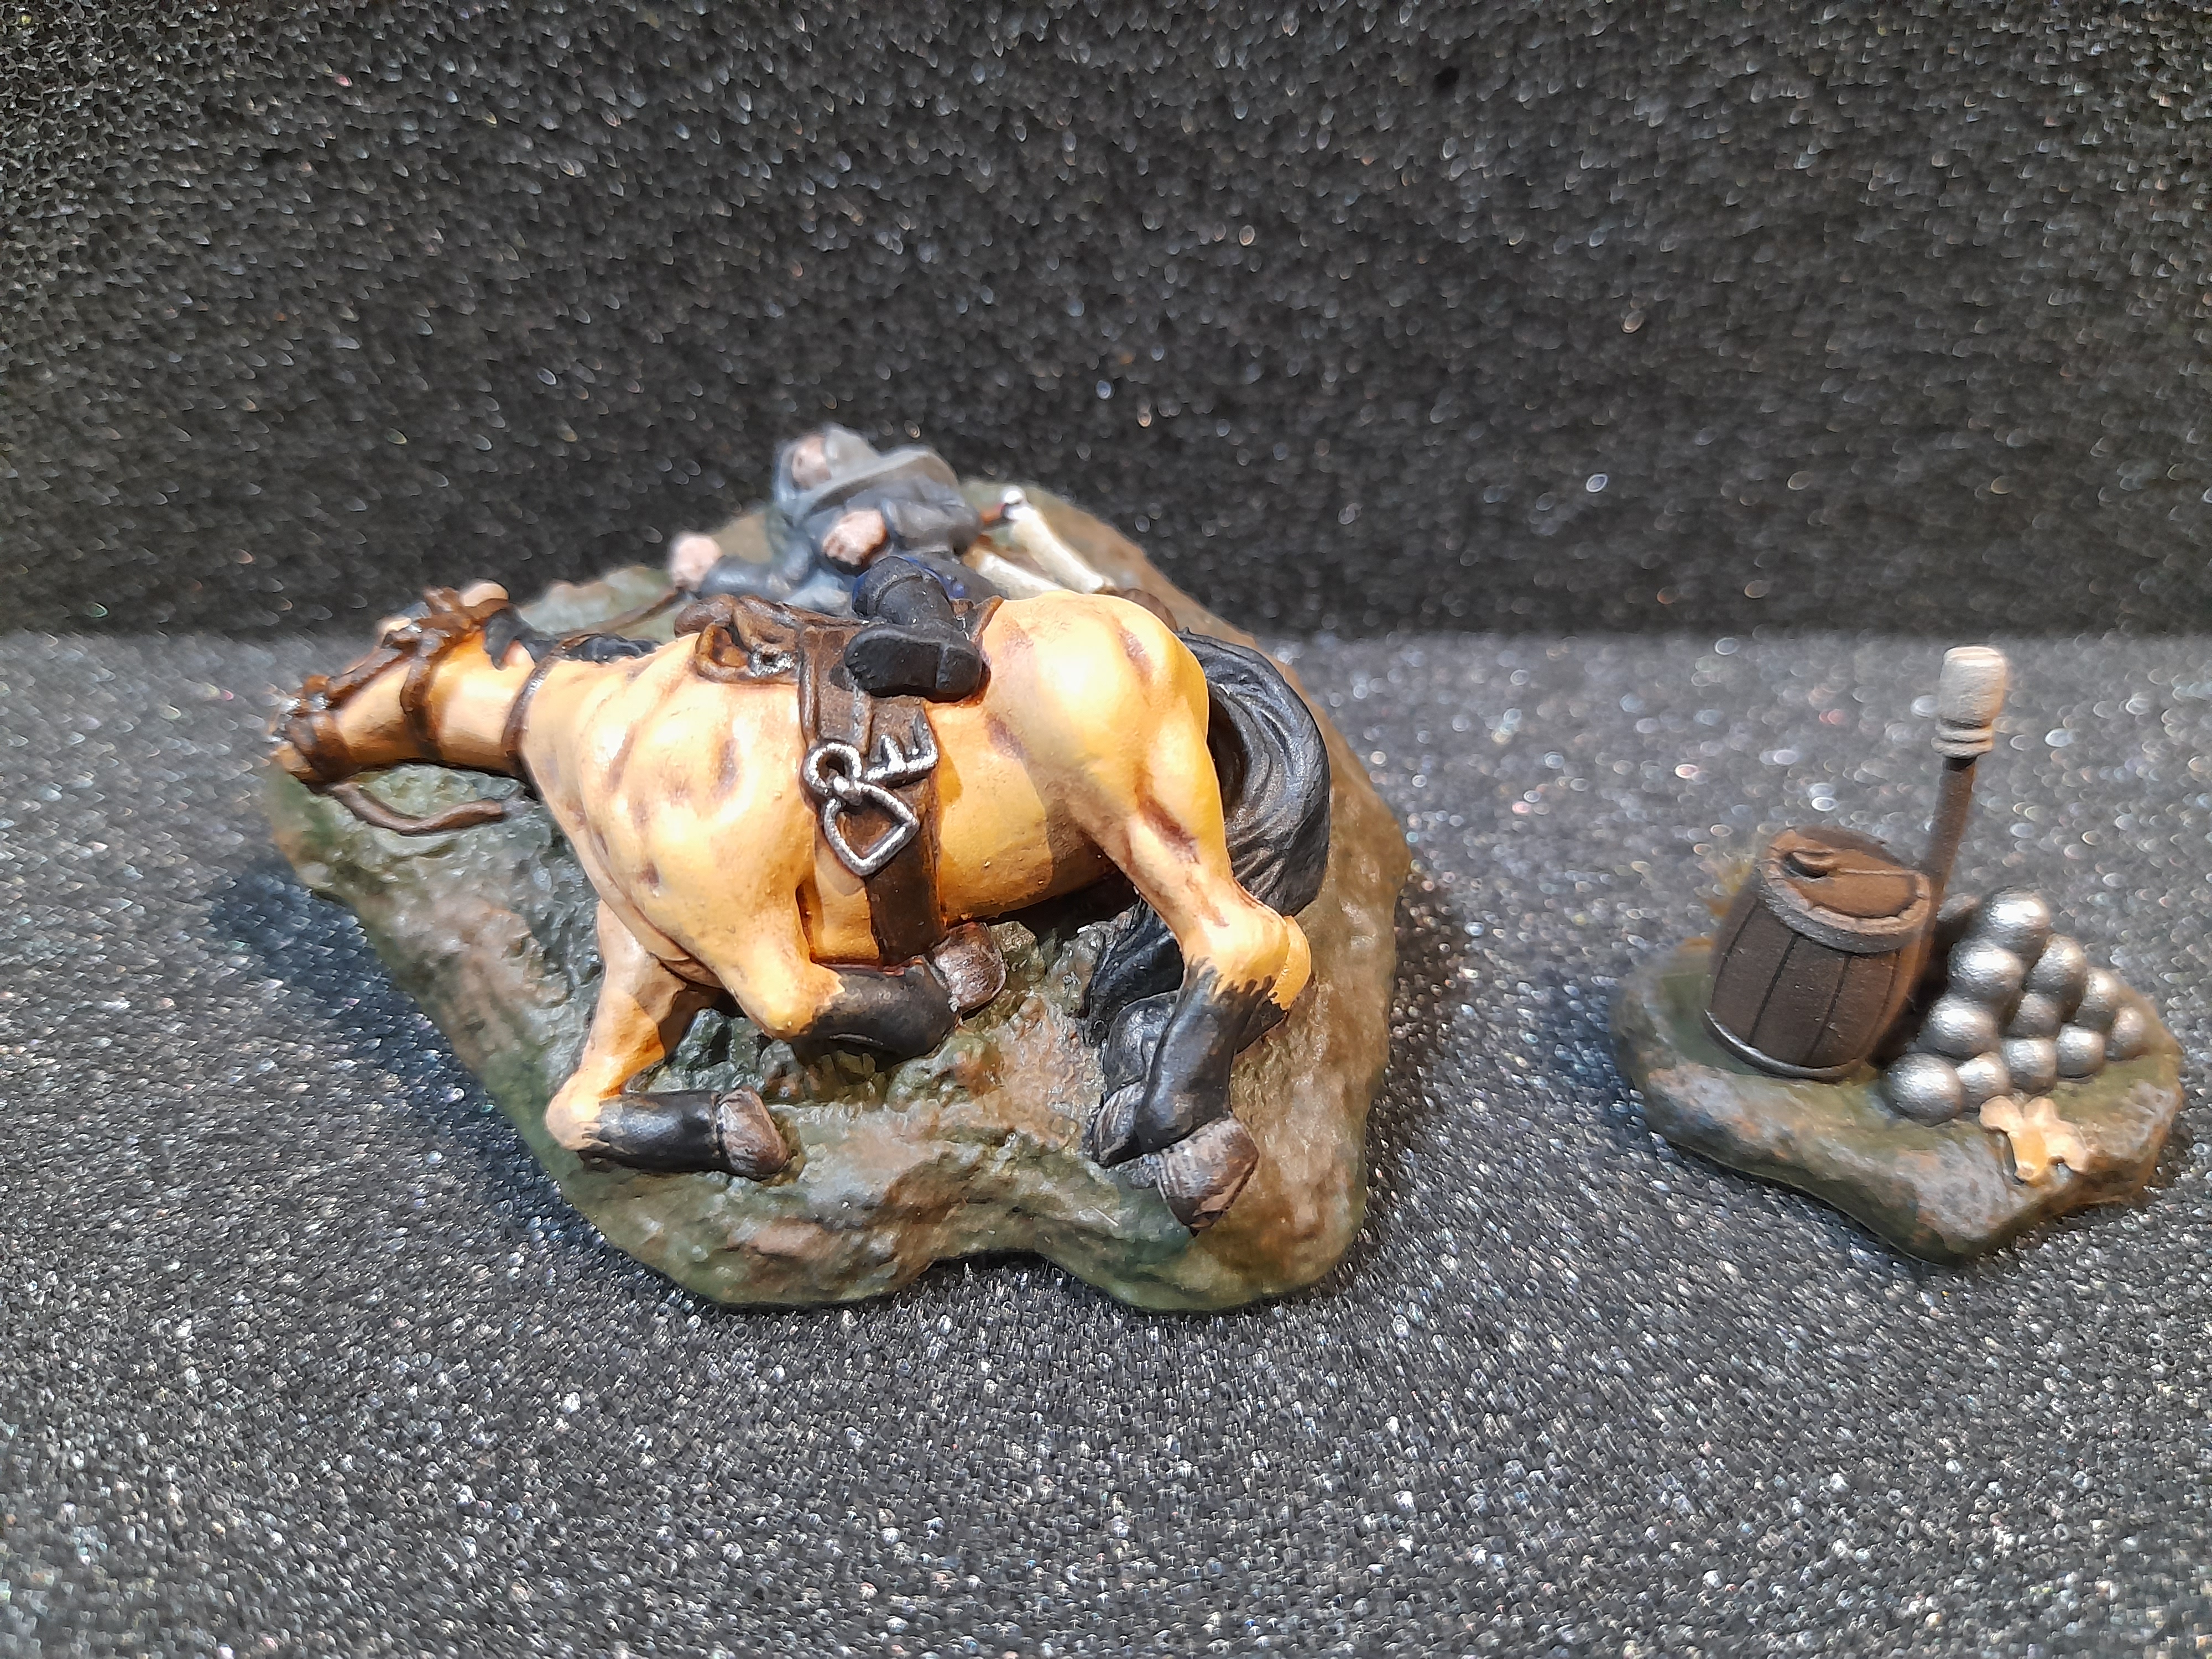
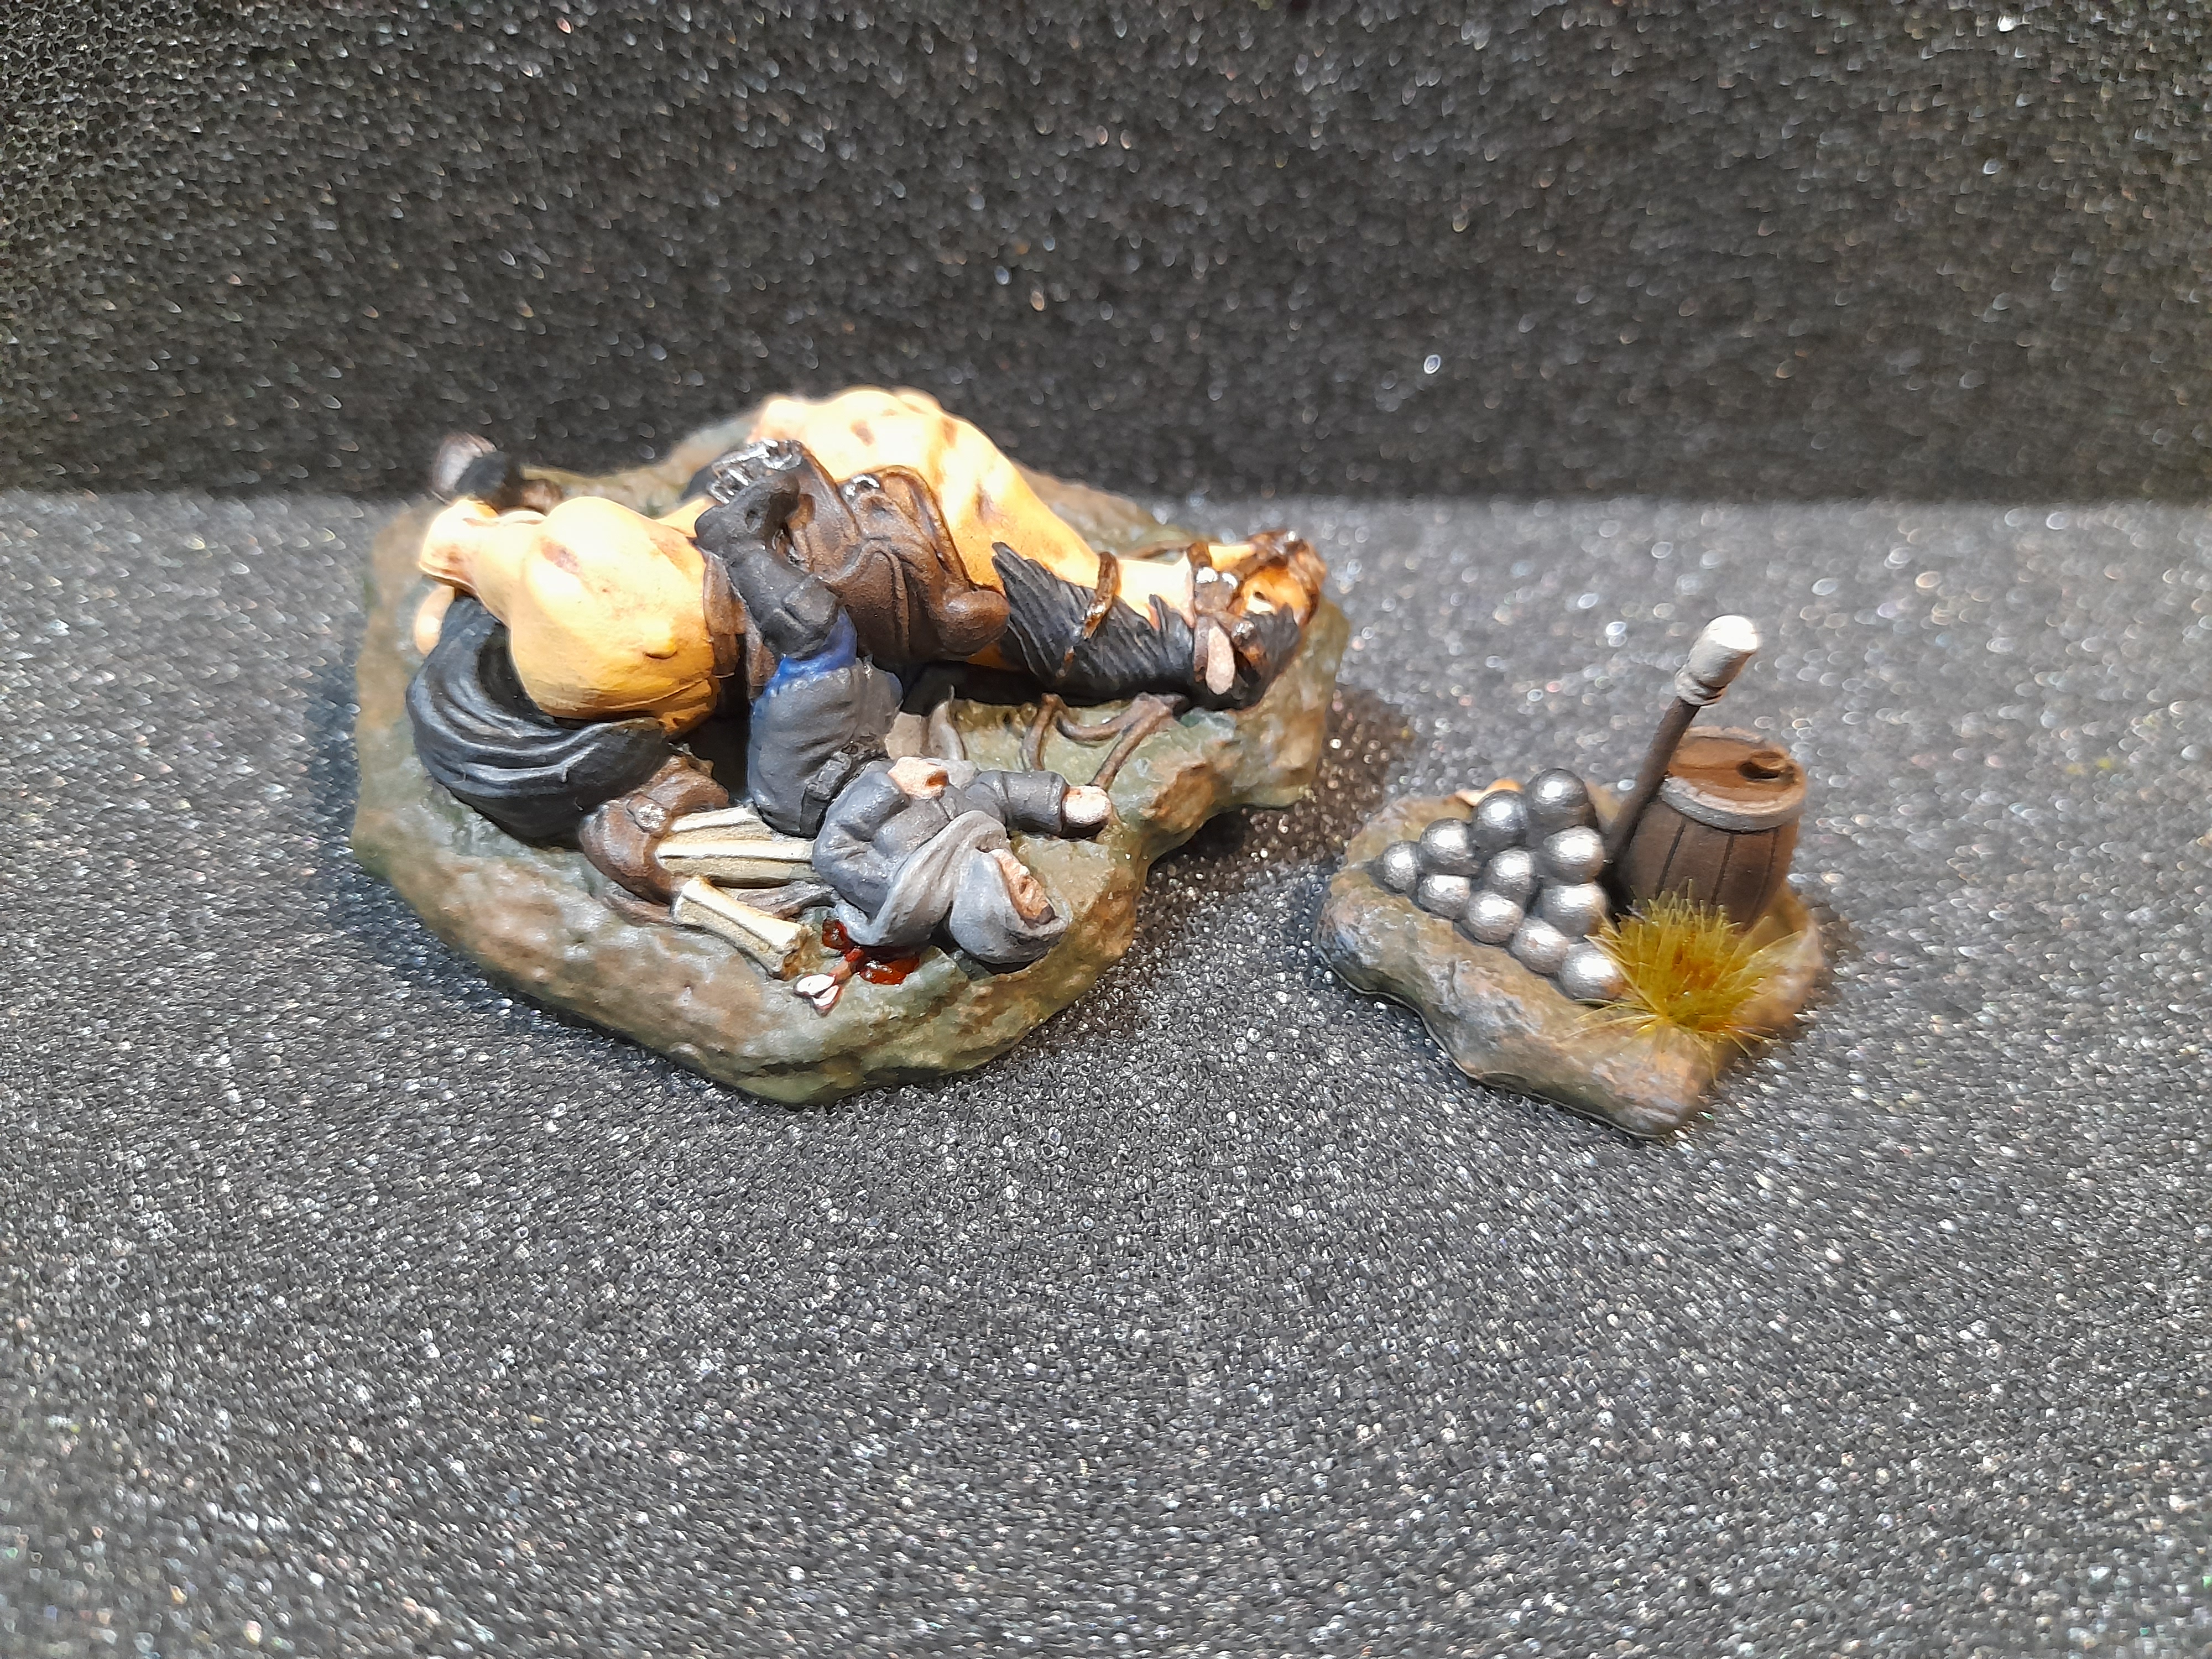
But for now I just wanted to share the painting stage pics of the flame (for going on top of the wood pyre) as I was pretty happy with how it came out.
I started off painting the whole thing with contrast yellow, then gave the upper flame parts a drybrush of red.
This was followed in smaller areas by grey, then black, then a touch of grey.
Finally I added white at the base of the flame to represent the hottest areas, and added a few touches of white elsewhere.
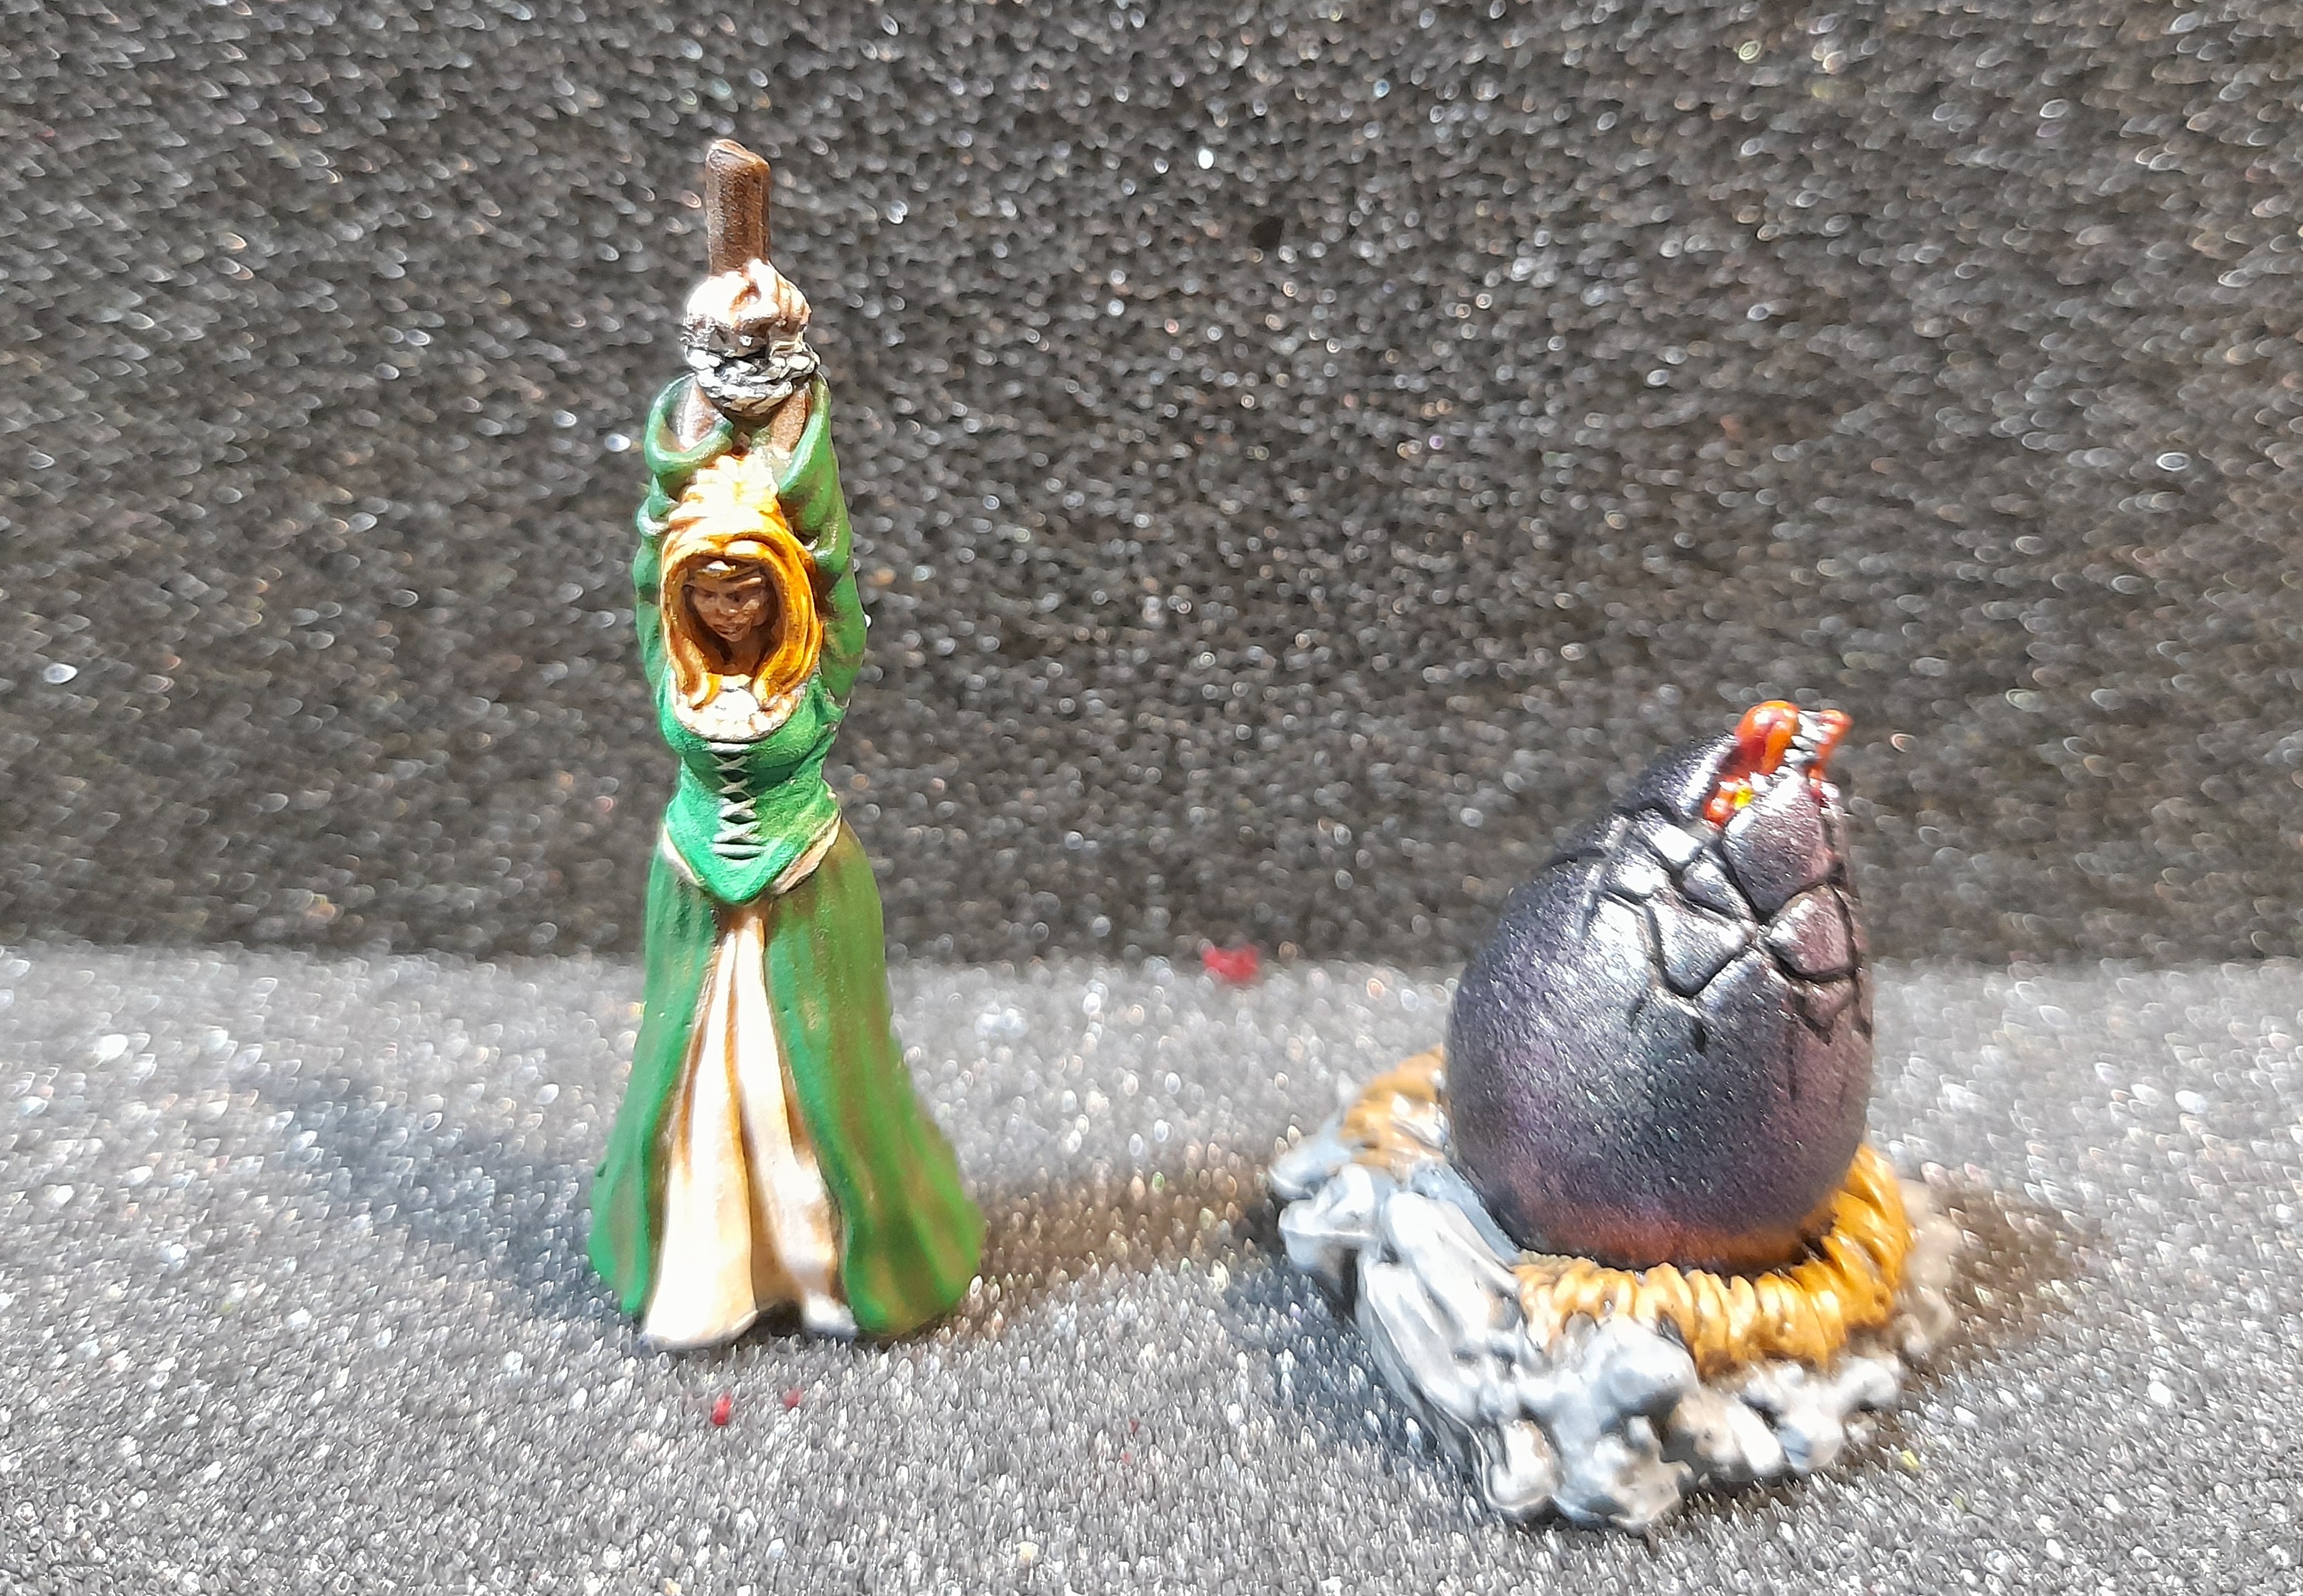
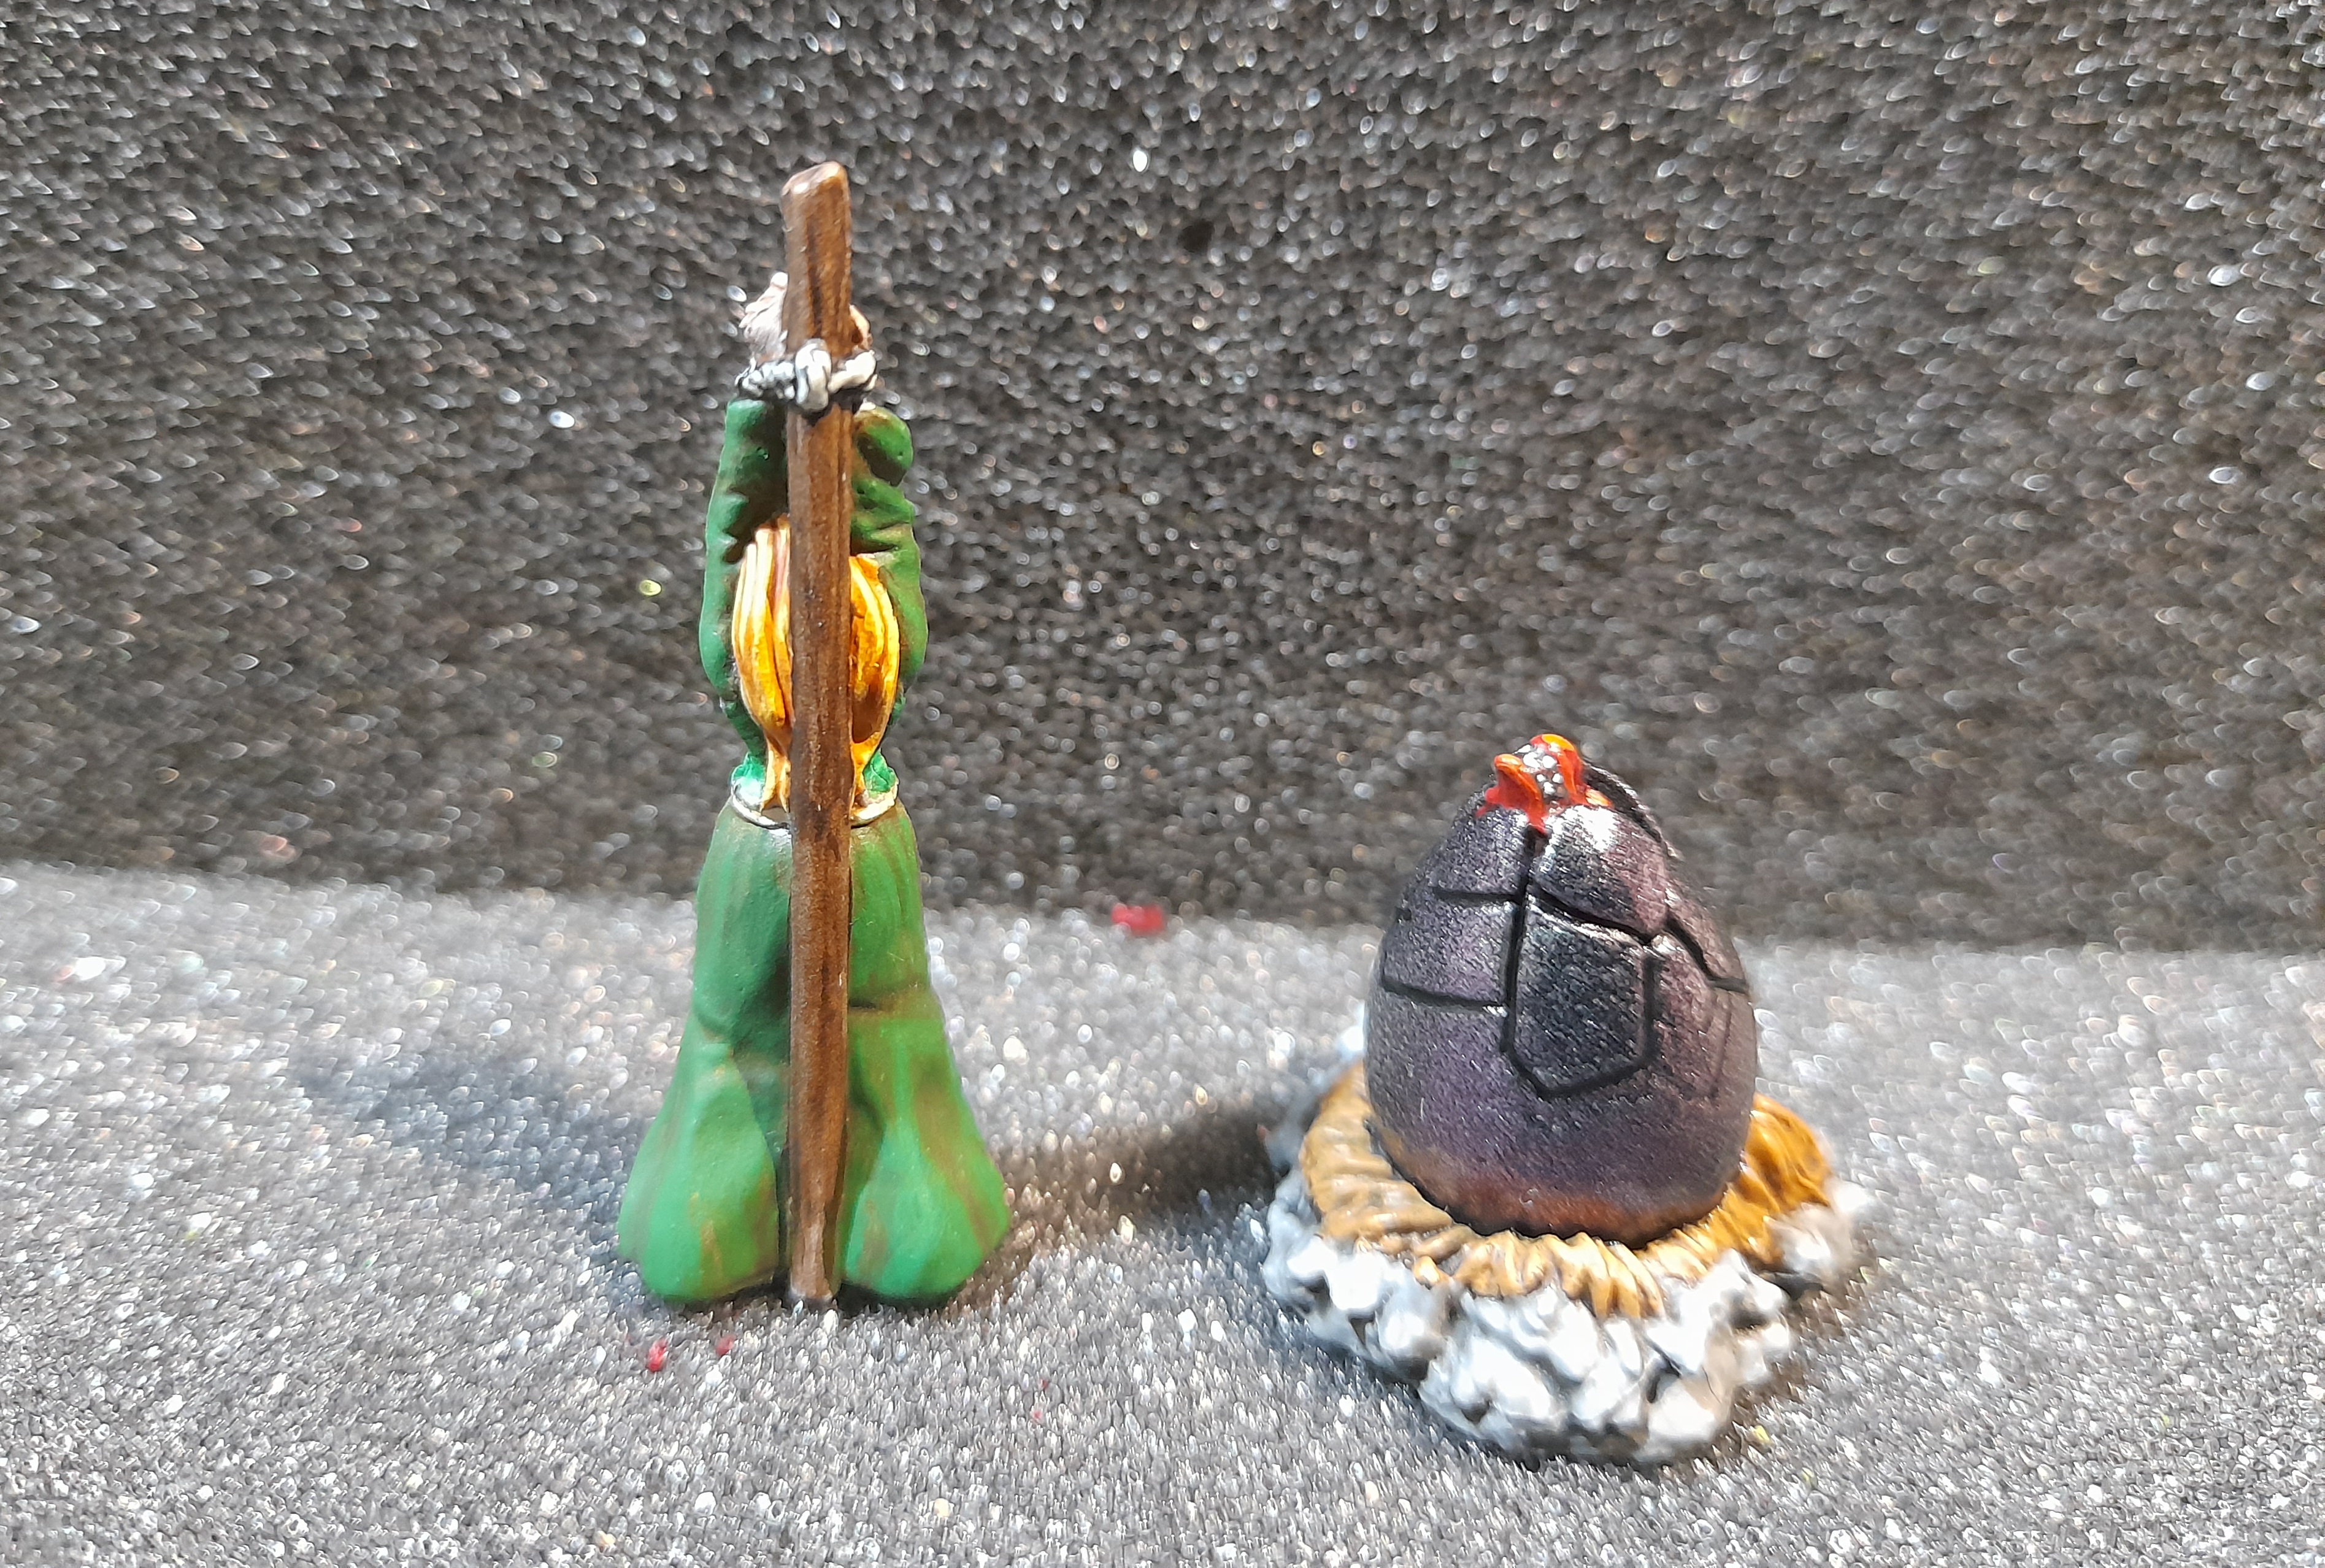
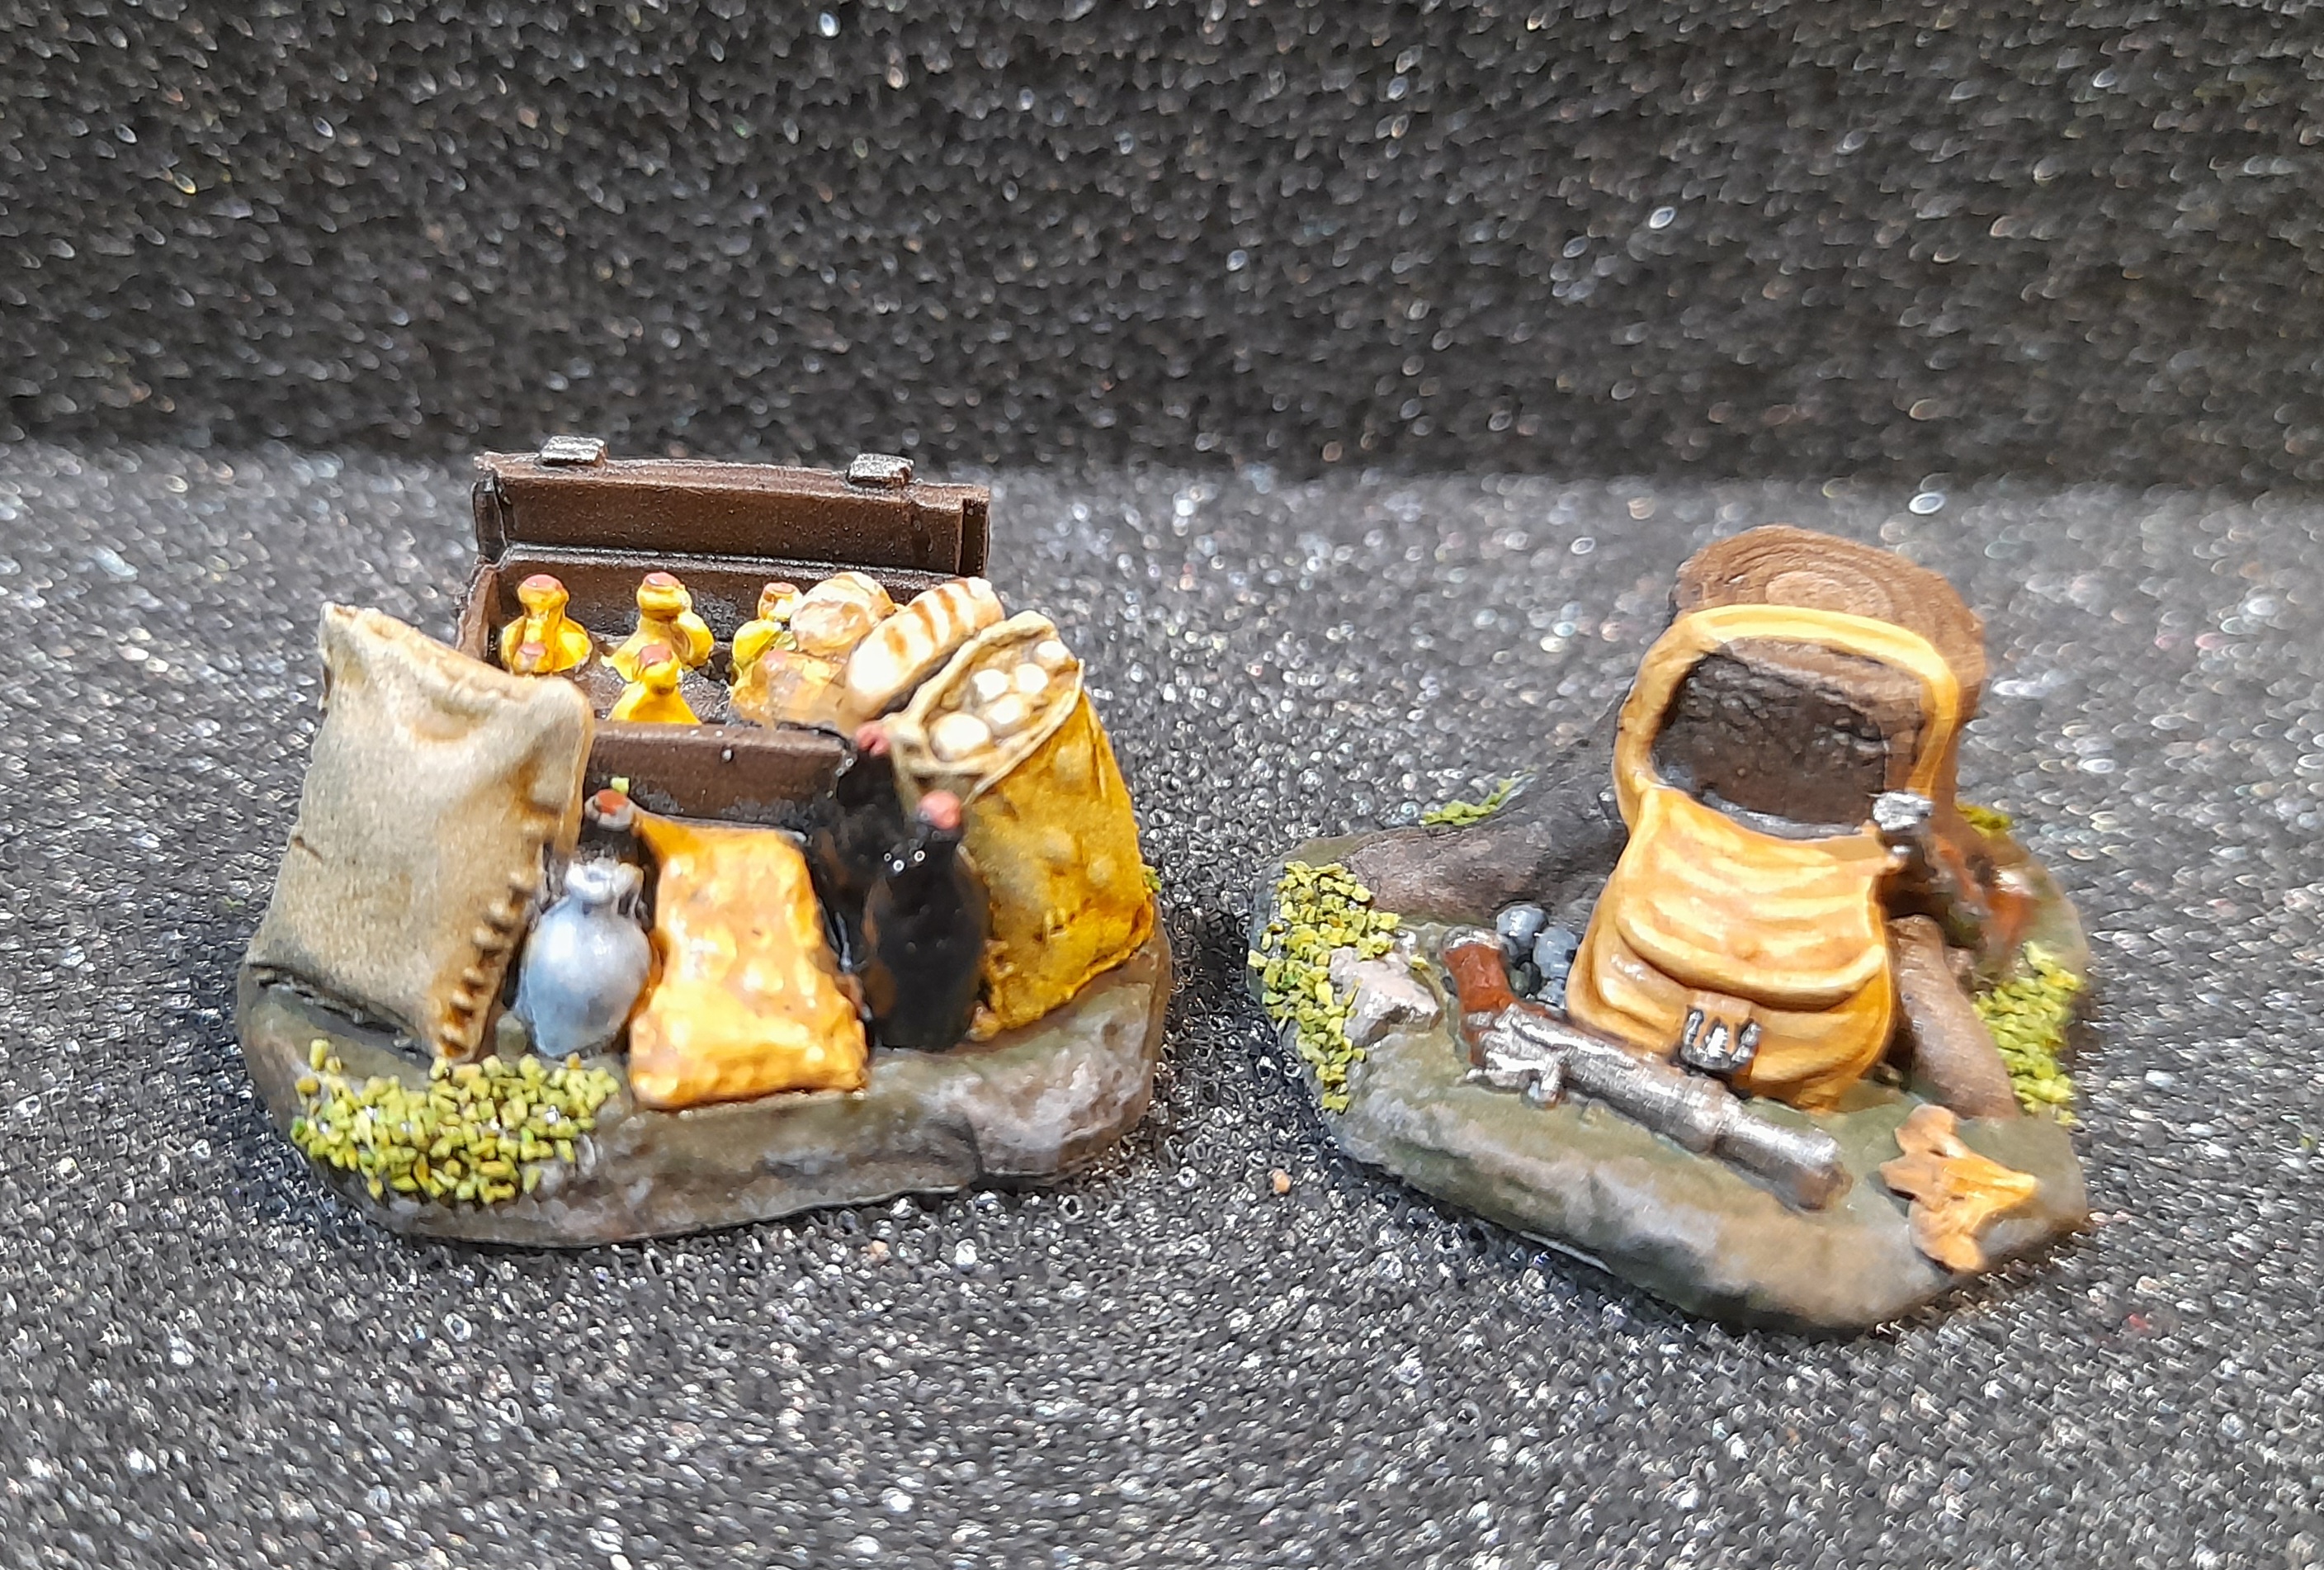
I also used my new colour change paint for the Dragon egg (and a Stormcast to test). The picture doesn’t show the colour-shifting effect overly well, but it goes from a green through to a purple (although the colour is called ‘pinky blue’ 😊 )
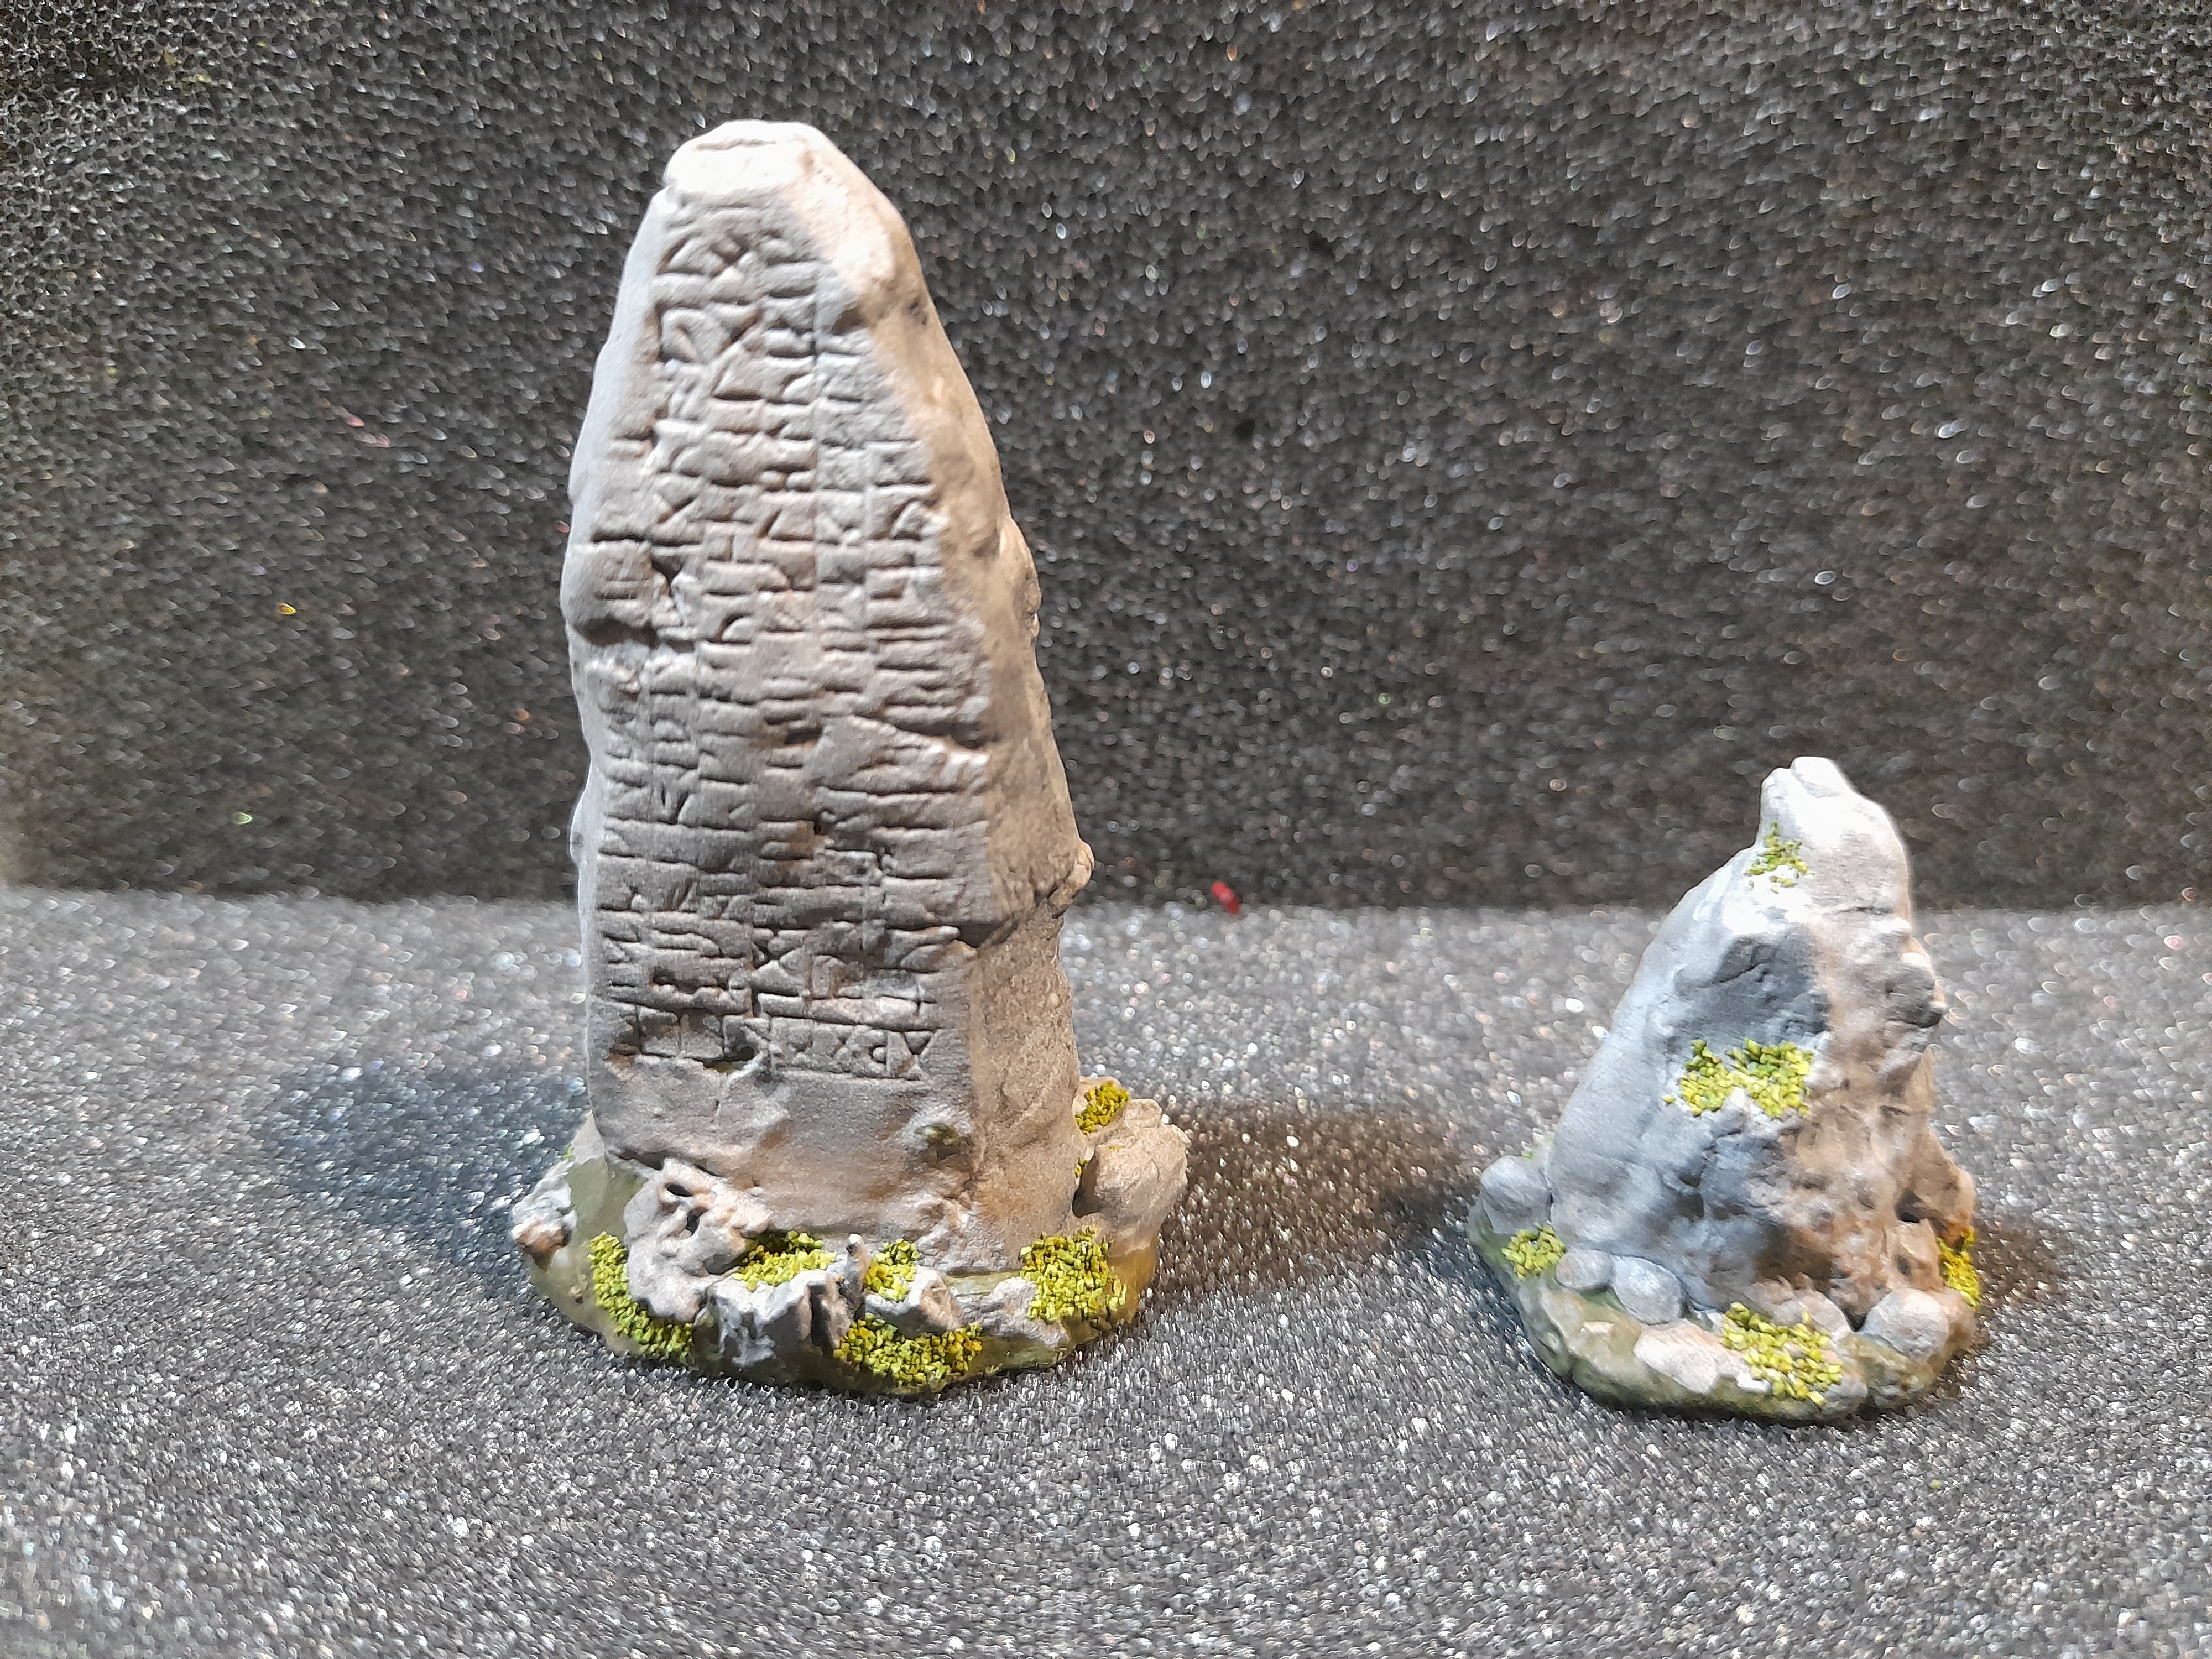
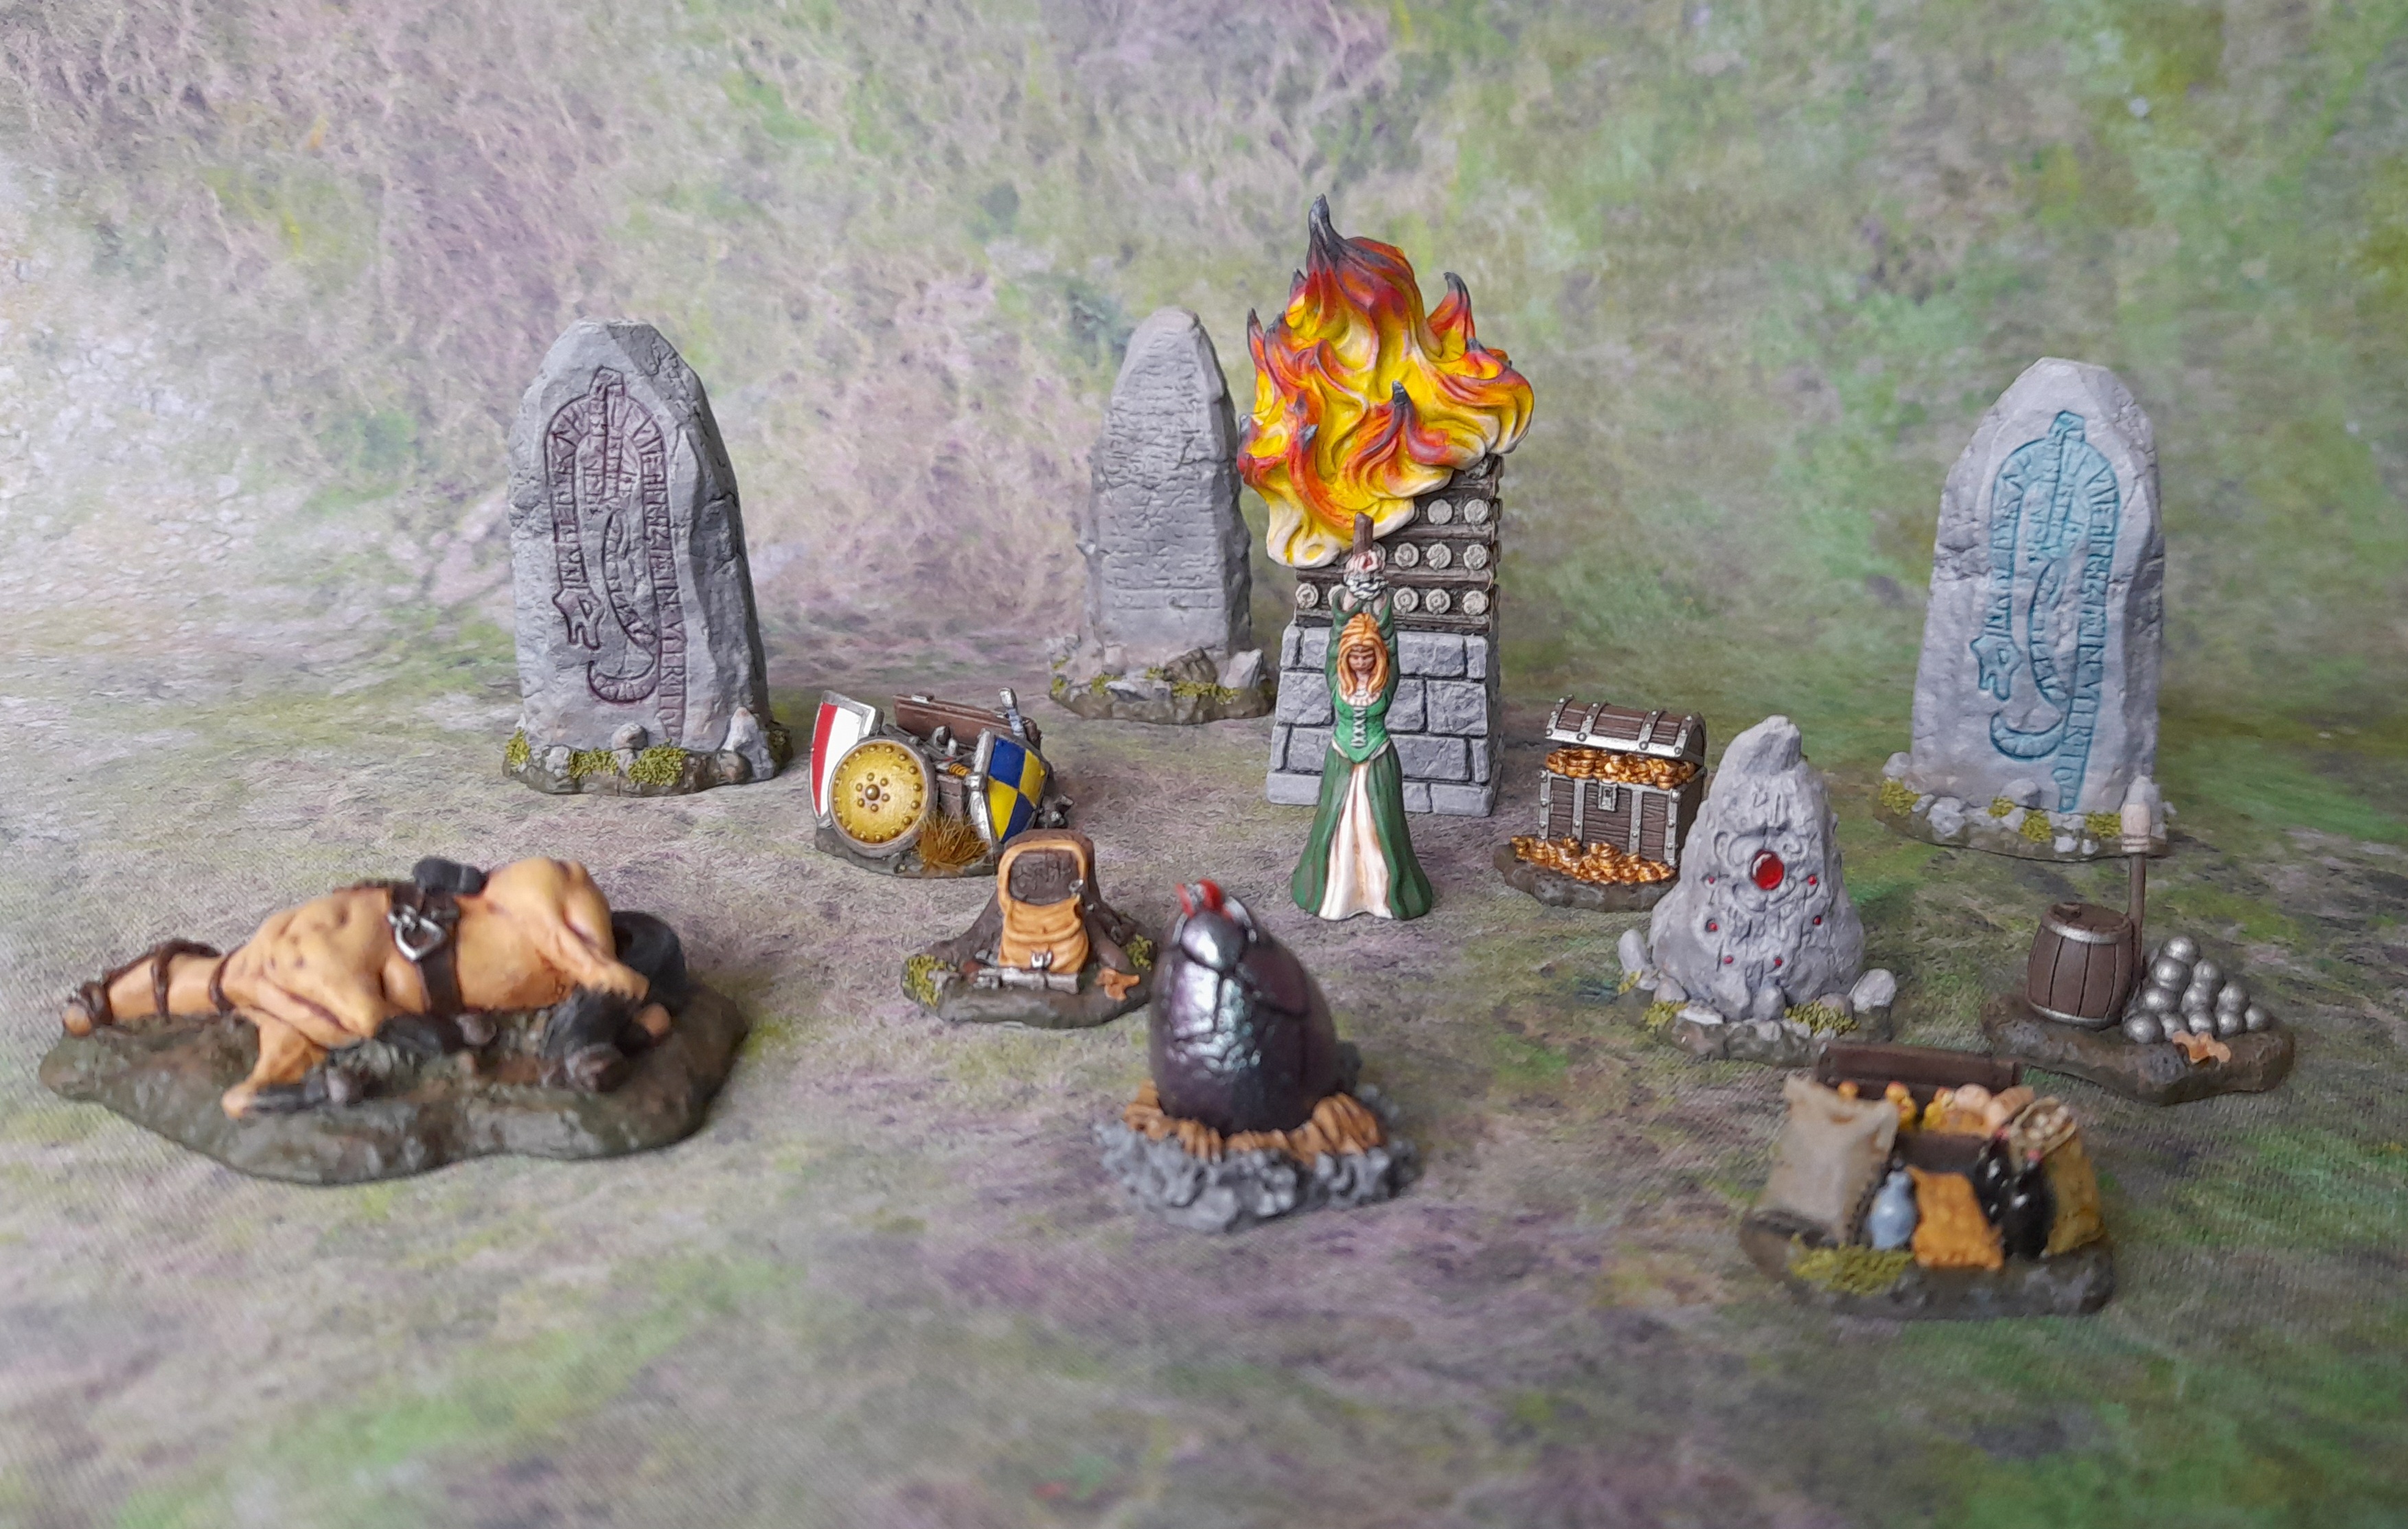
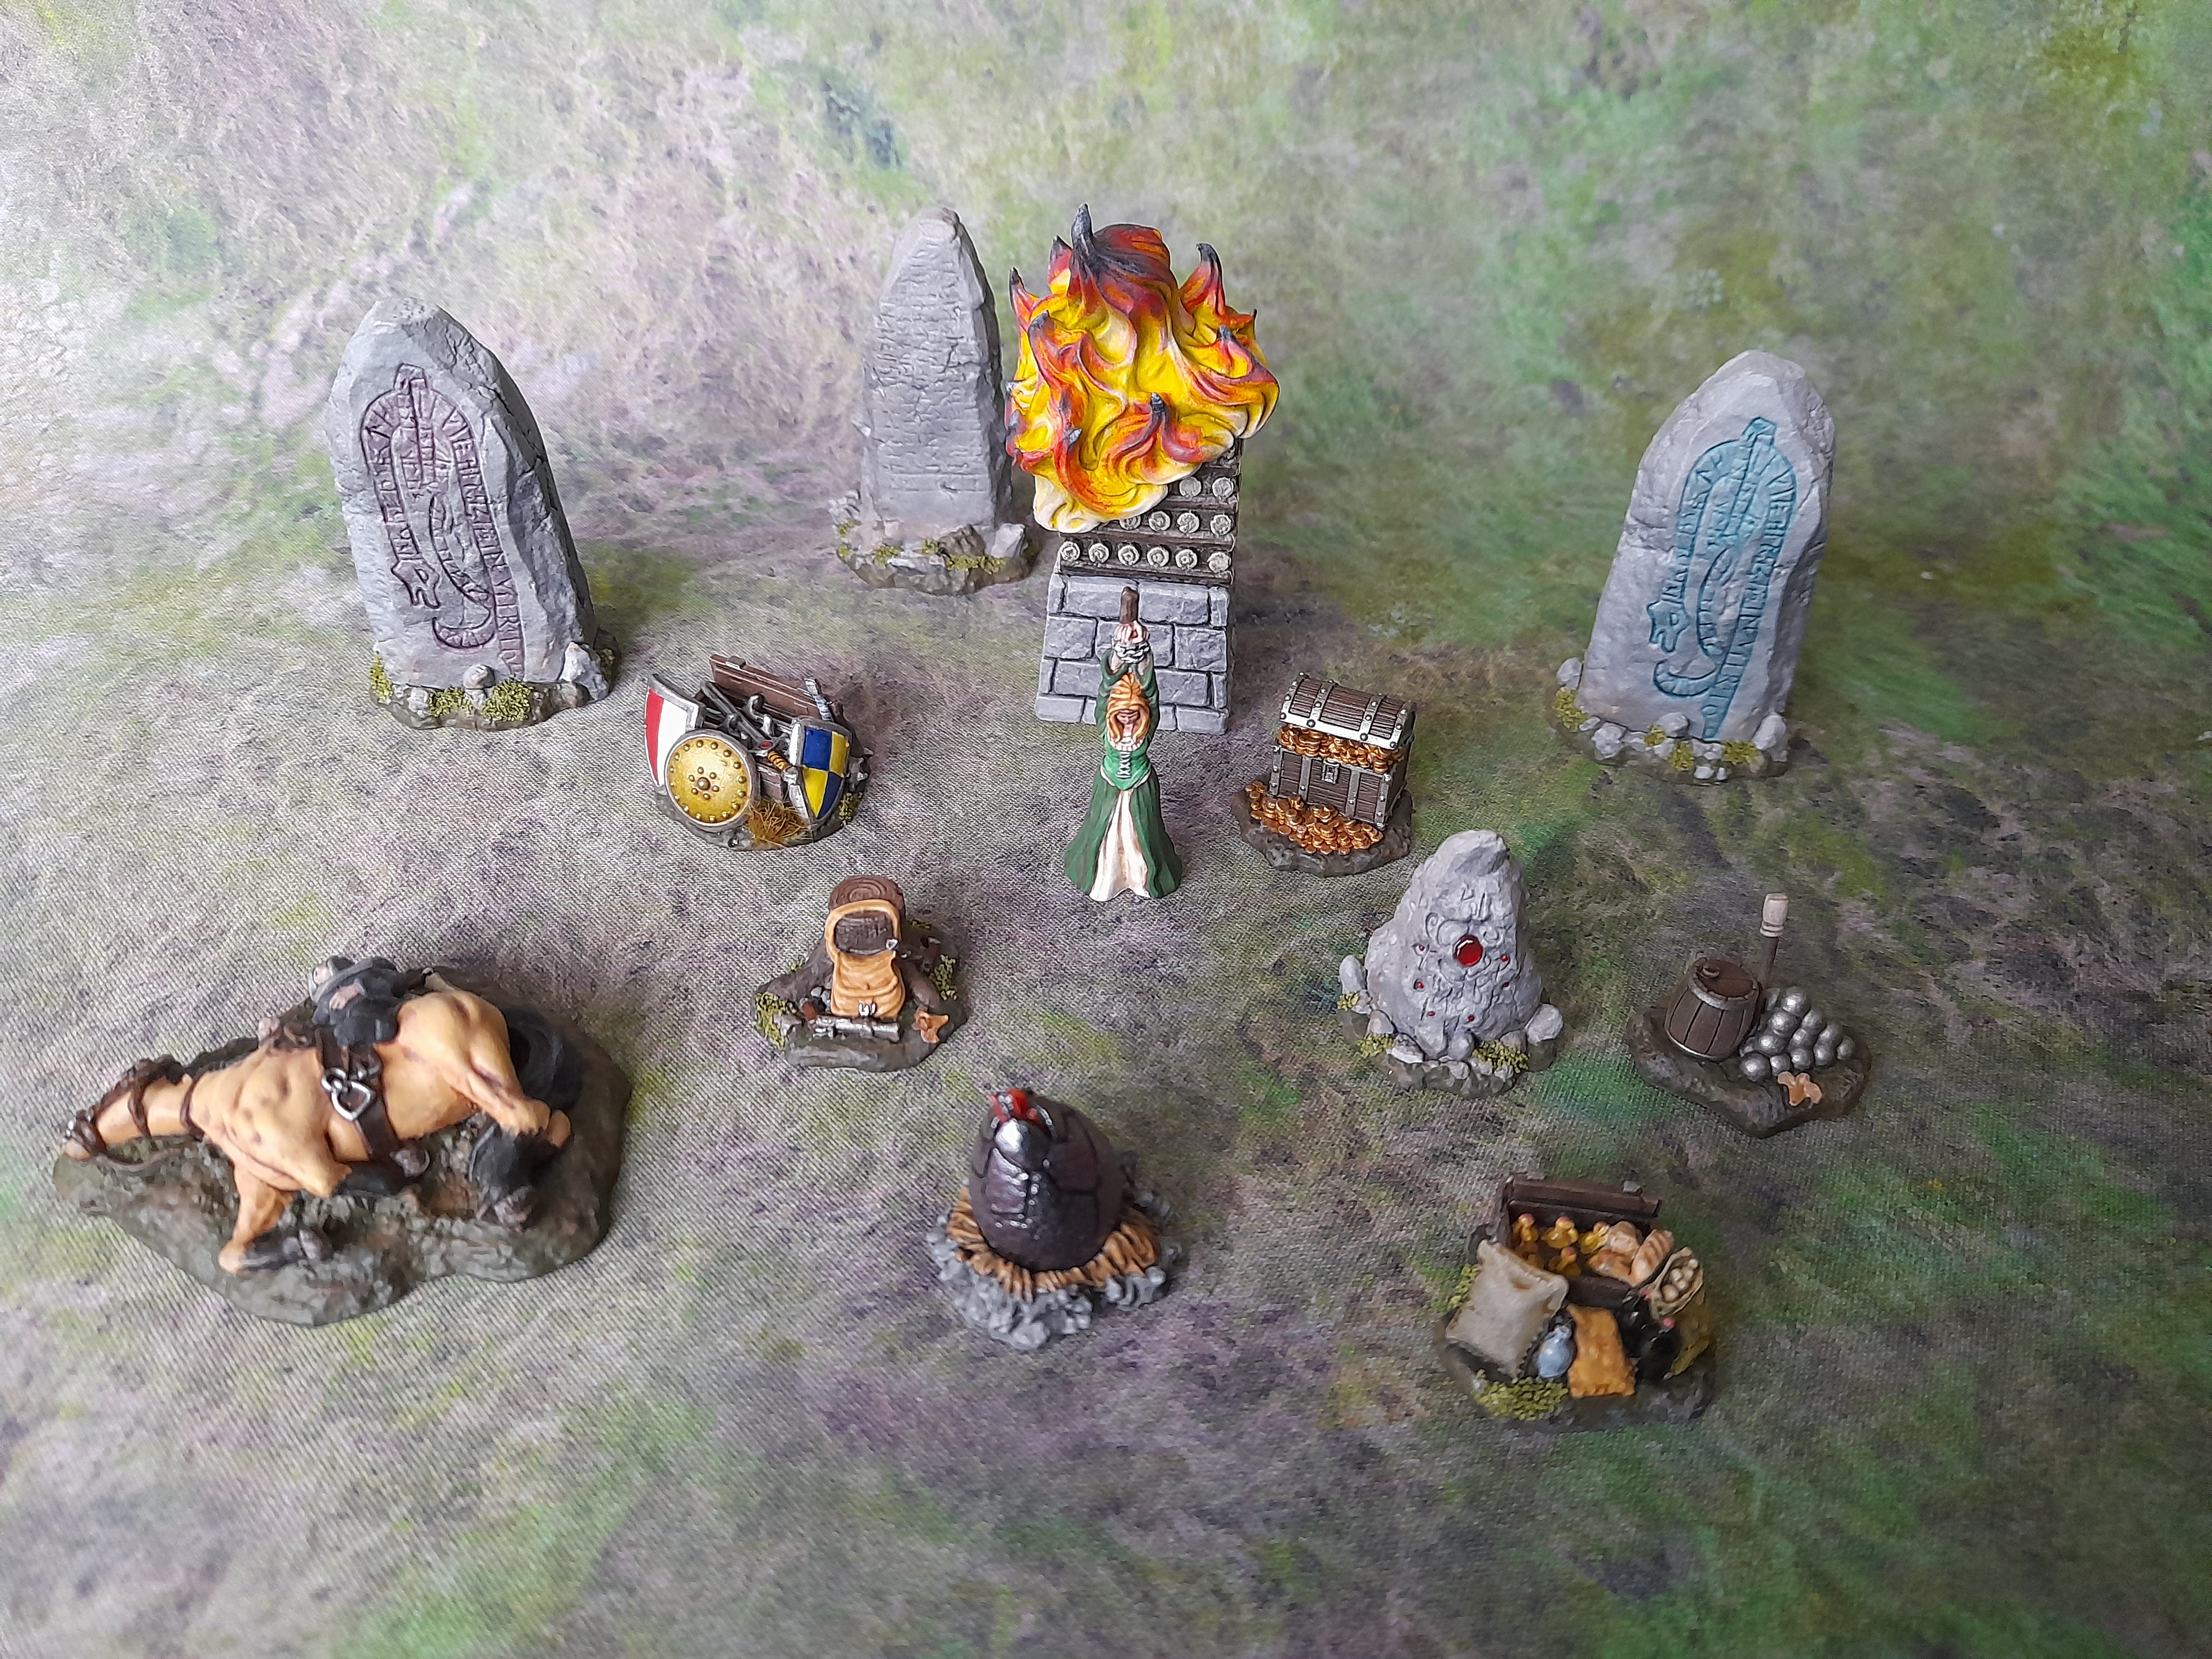
Vanguard Objectives Complete
28th October 2023
With some more work on a few details, including adding some patches of flock, grass tufts and leaves to some of the bases, the Kings of War Vanguard Battlefield Objective set is complete 😊
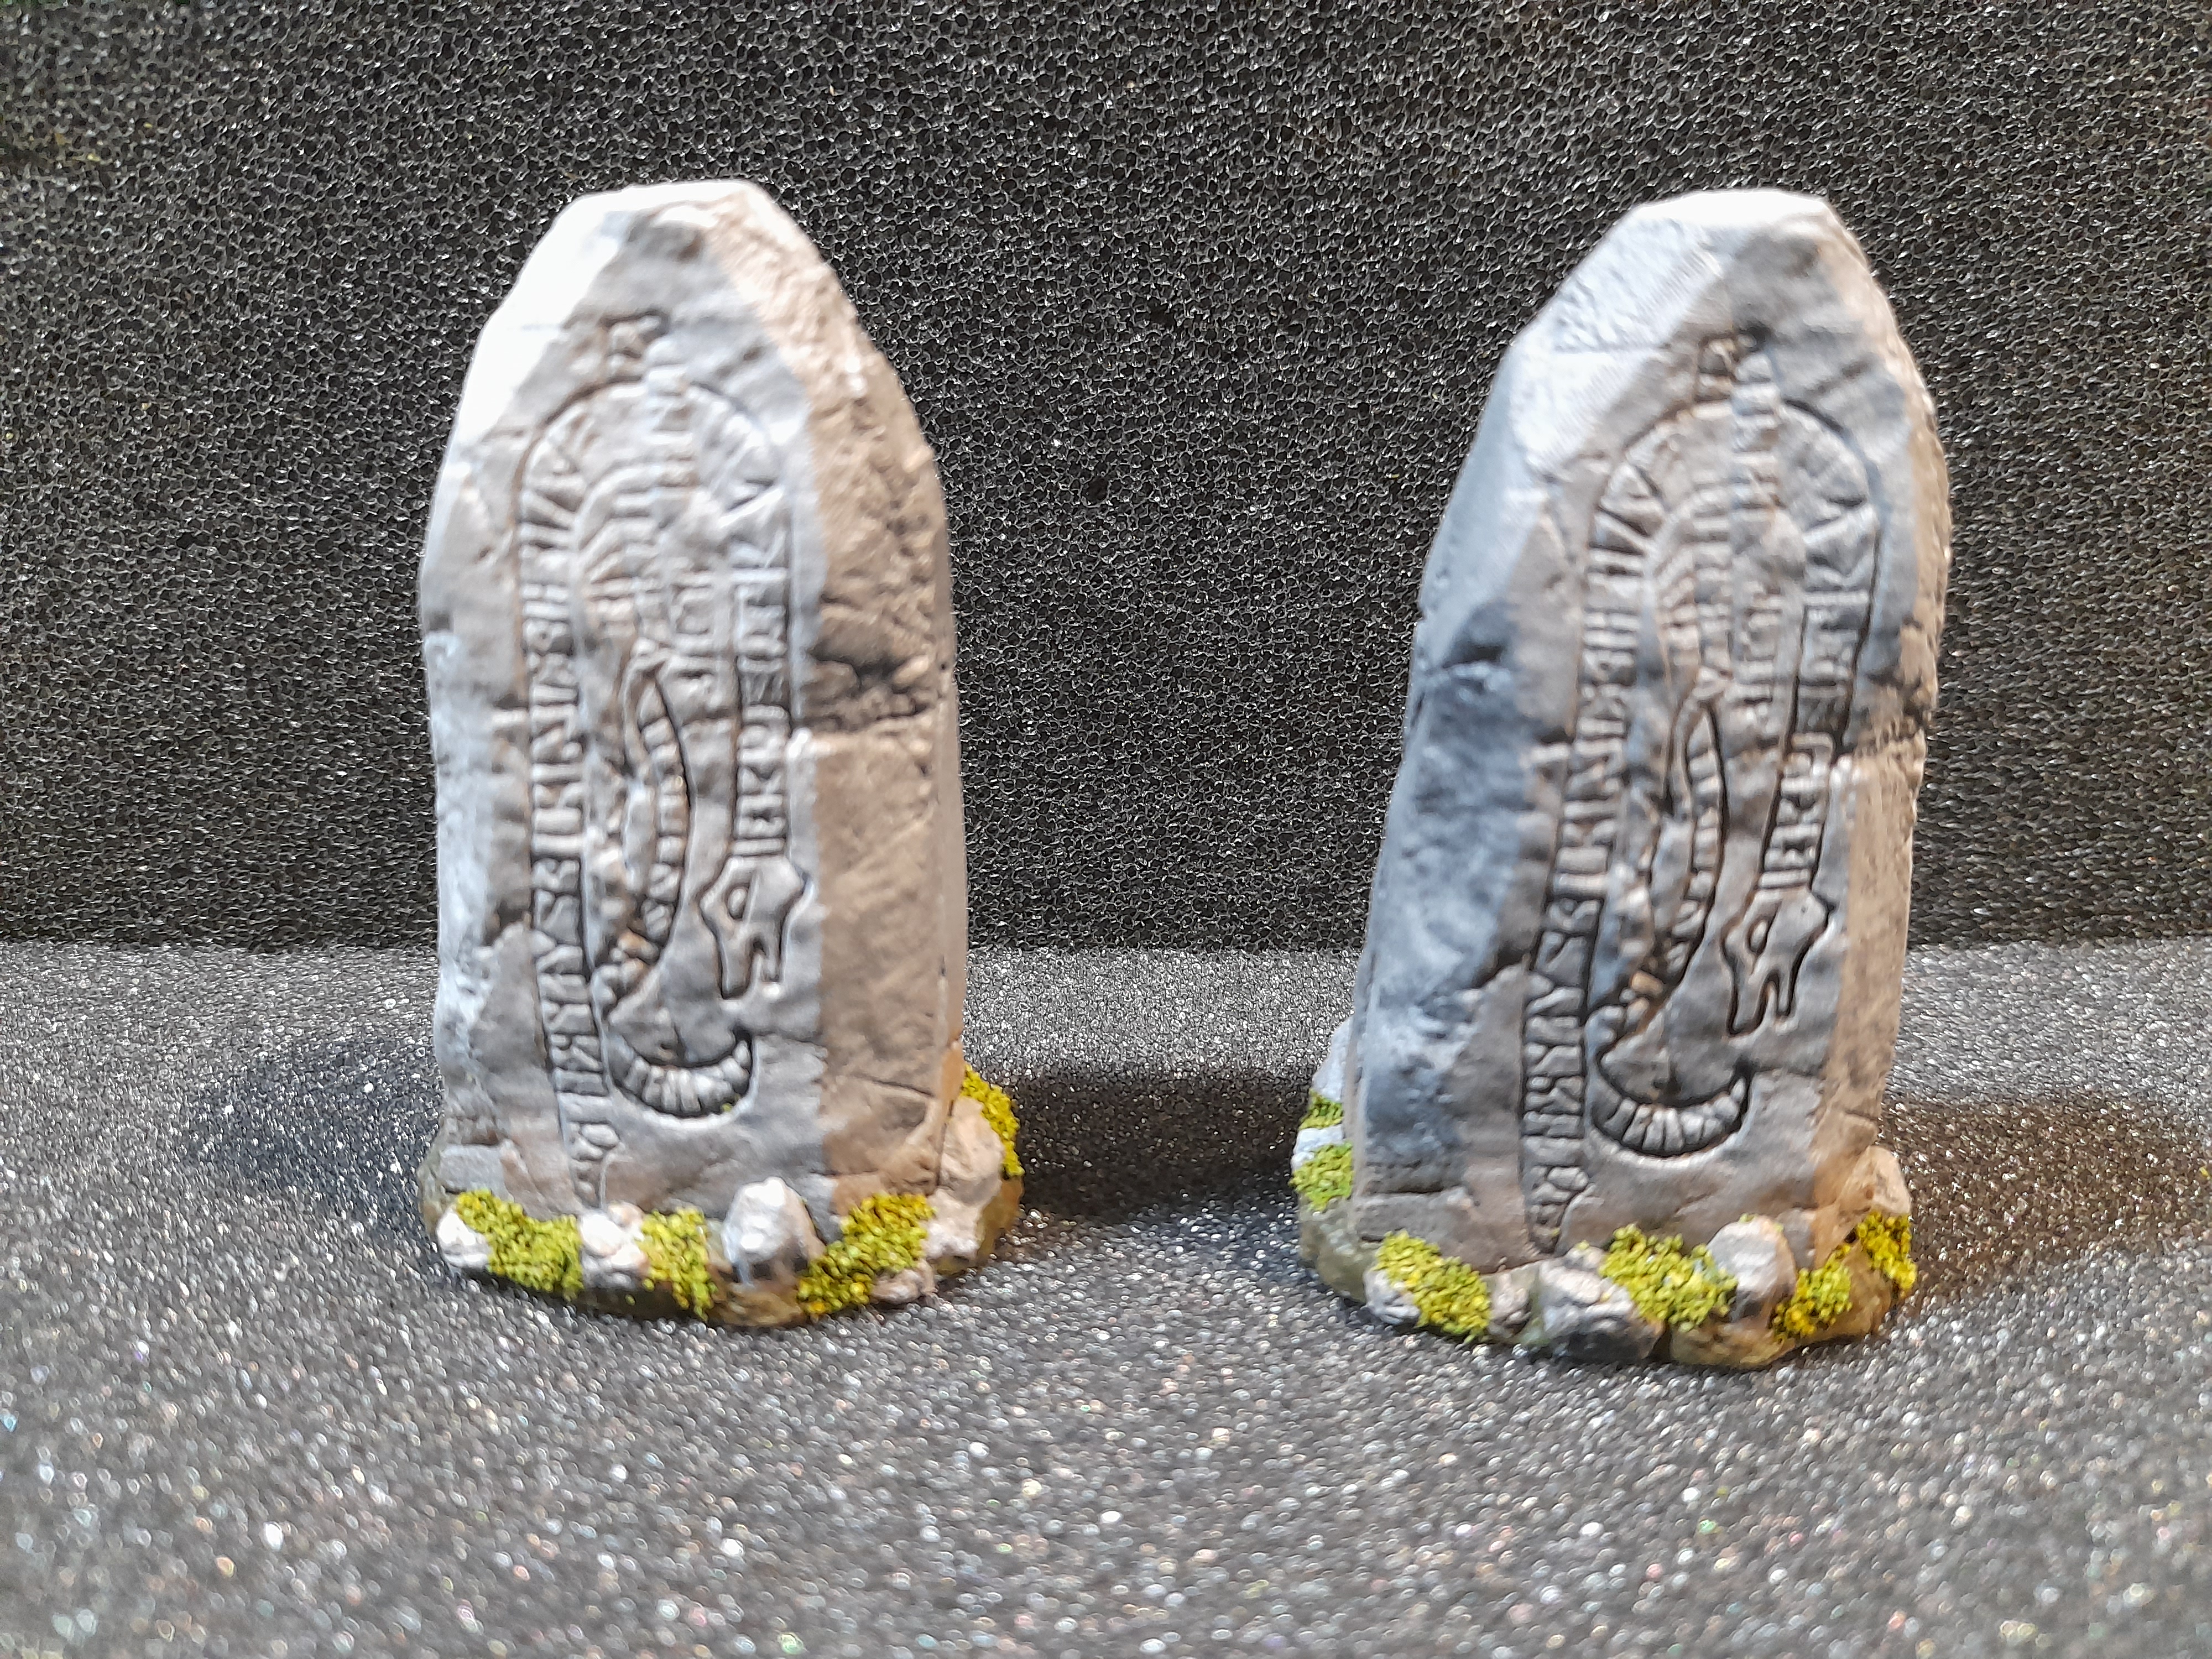


Some of them I enjoyed painting more than others.
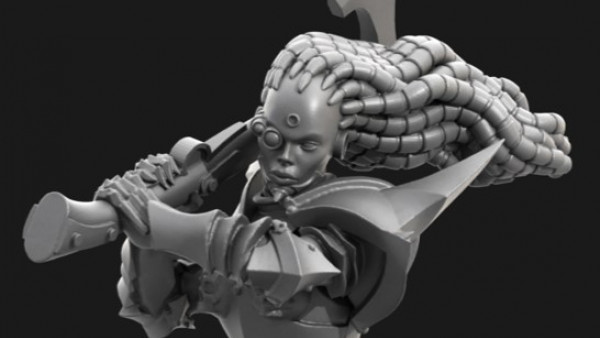
Some I also still missed mould lines on…… and some had a bit of detail loss – but since they are objectives I didn’t feel too bad about it (although I don’t have the skill level to recreate the female prisoner’s nose, which seems to have either gotten flattened or not quite cast properly).
Next up is some Mordheim buildings. I have got some work in on them in the background.
I may not finish them, but will push on and post up before the end of the month.
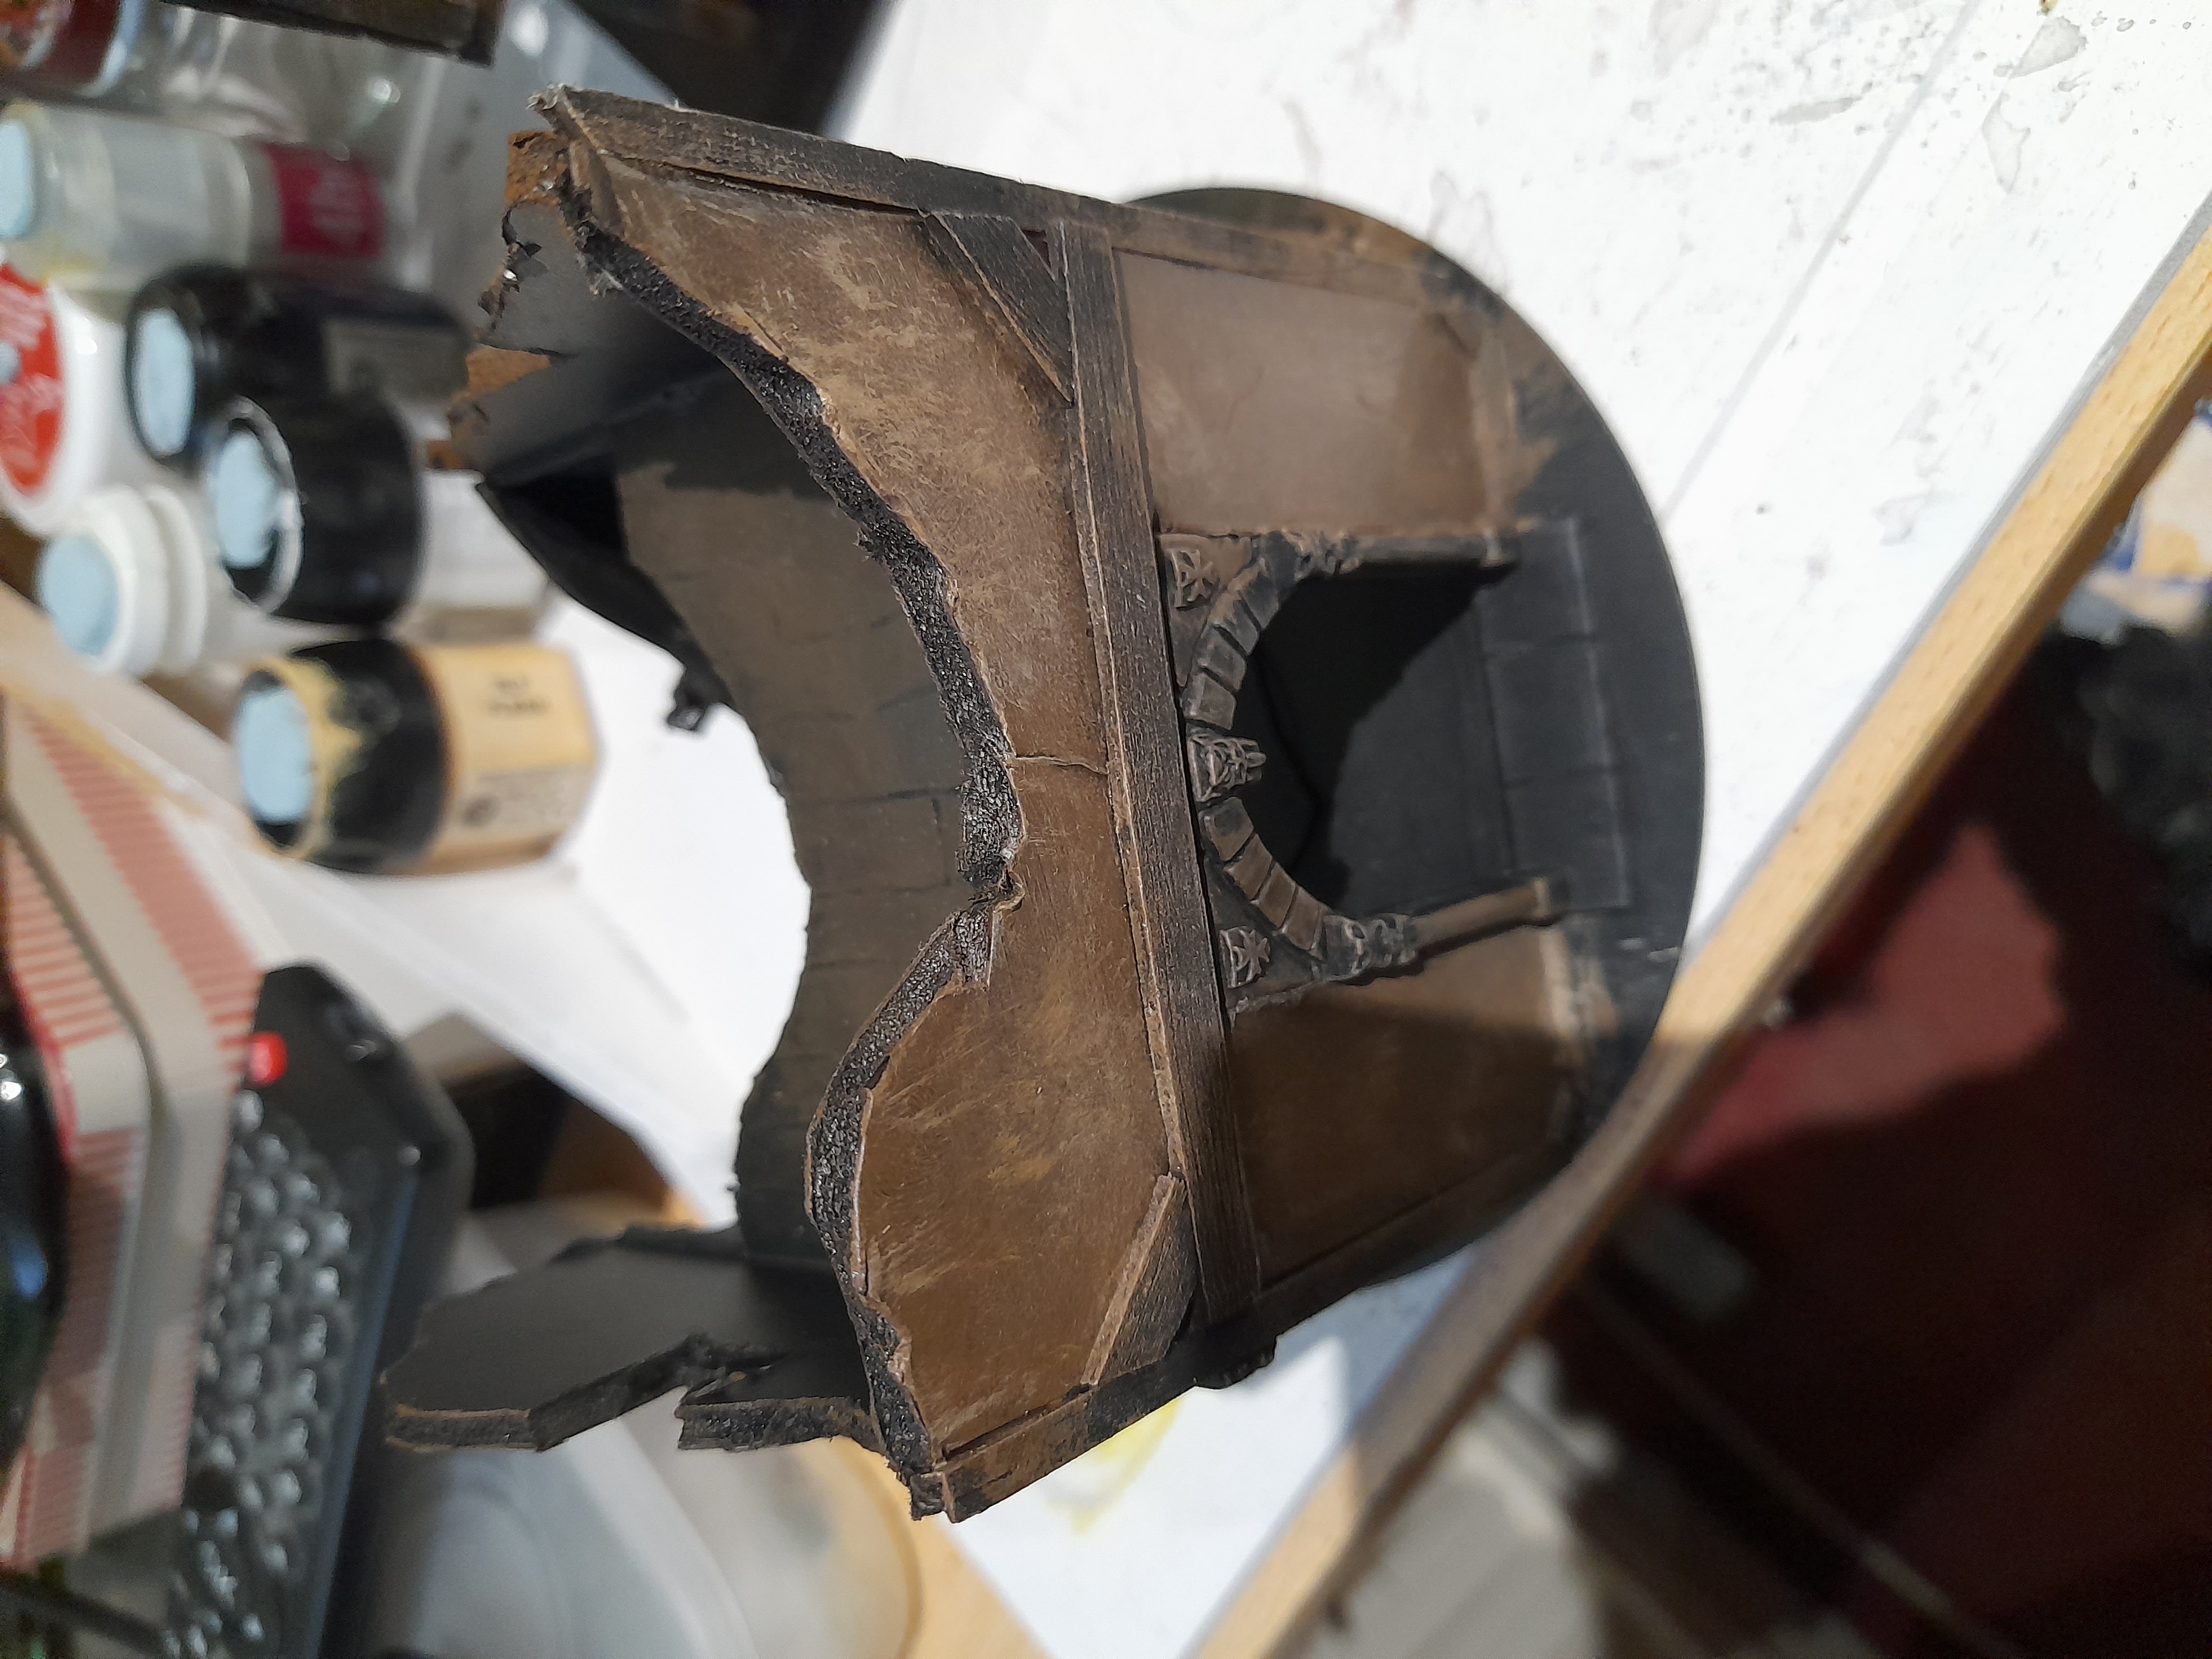
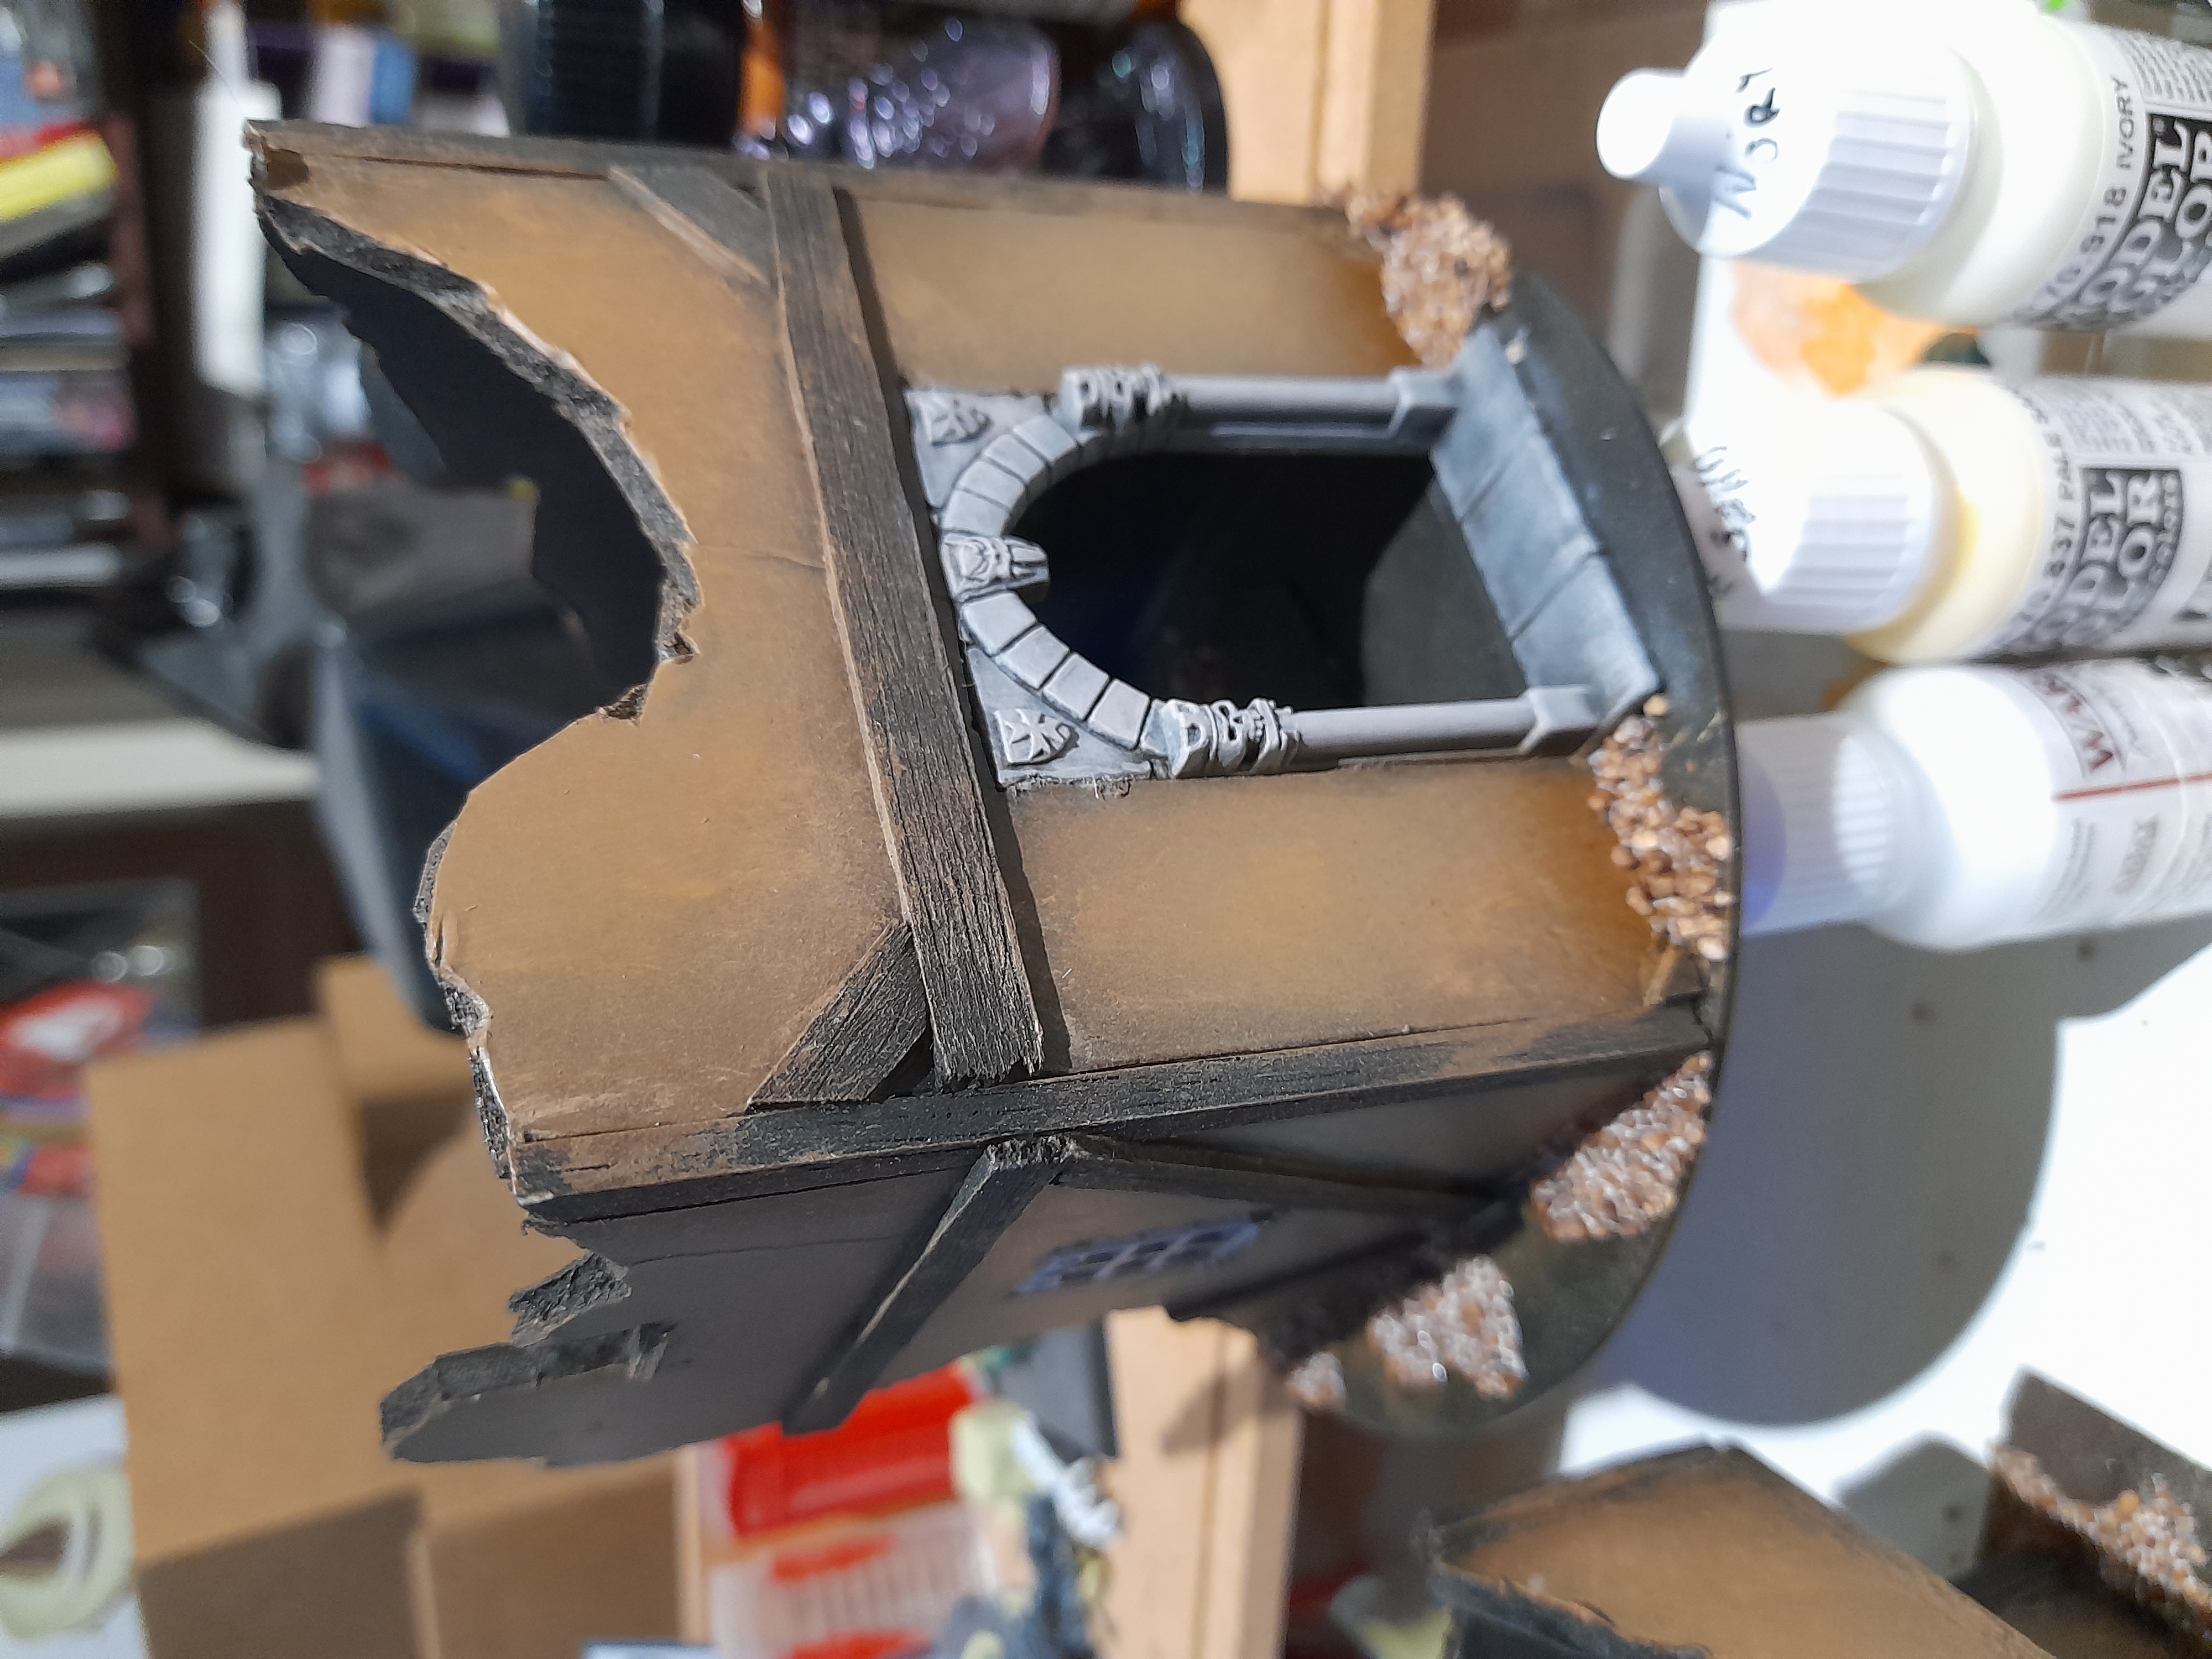
Mordheim Fantasy style buildings
30th October 2023
I carried out the early stages of these builds alongside the other work. Some may be pleased to know that I forgot to get pictures of these early stages….
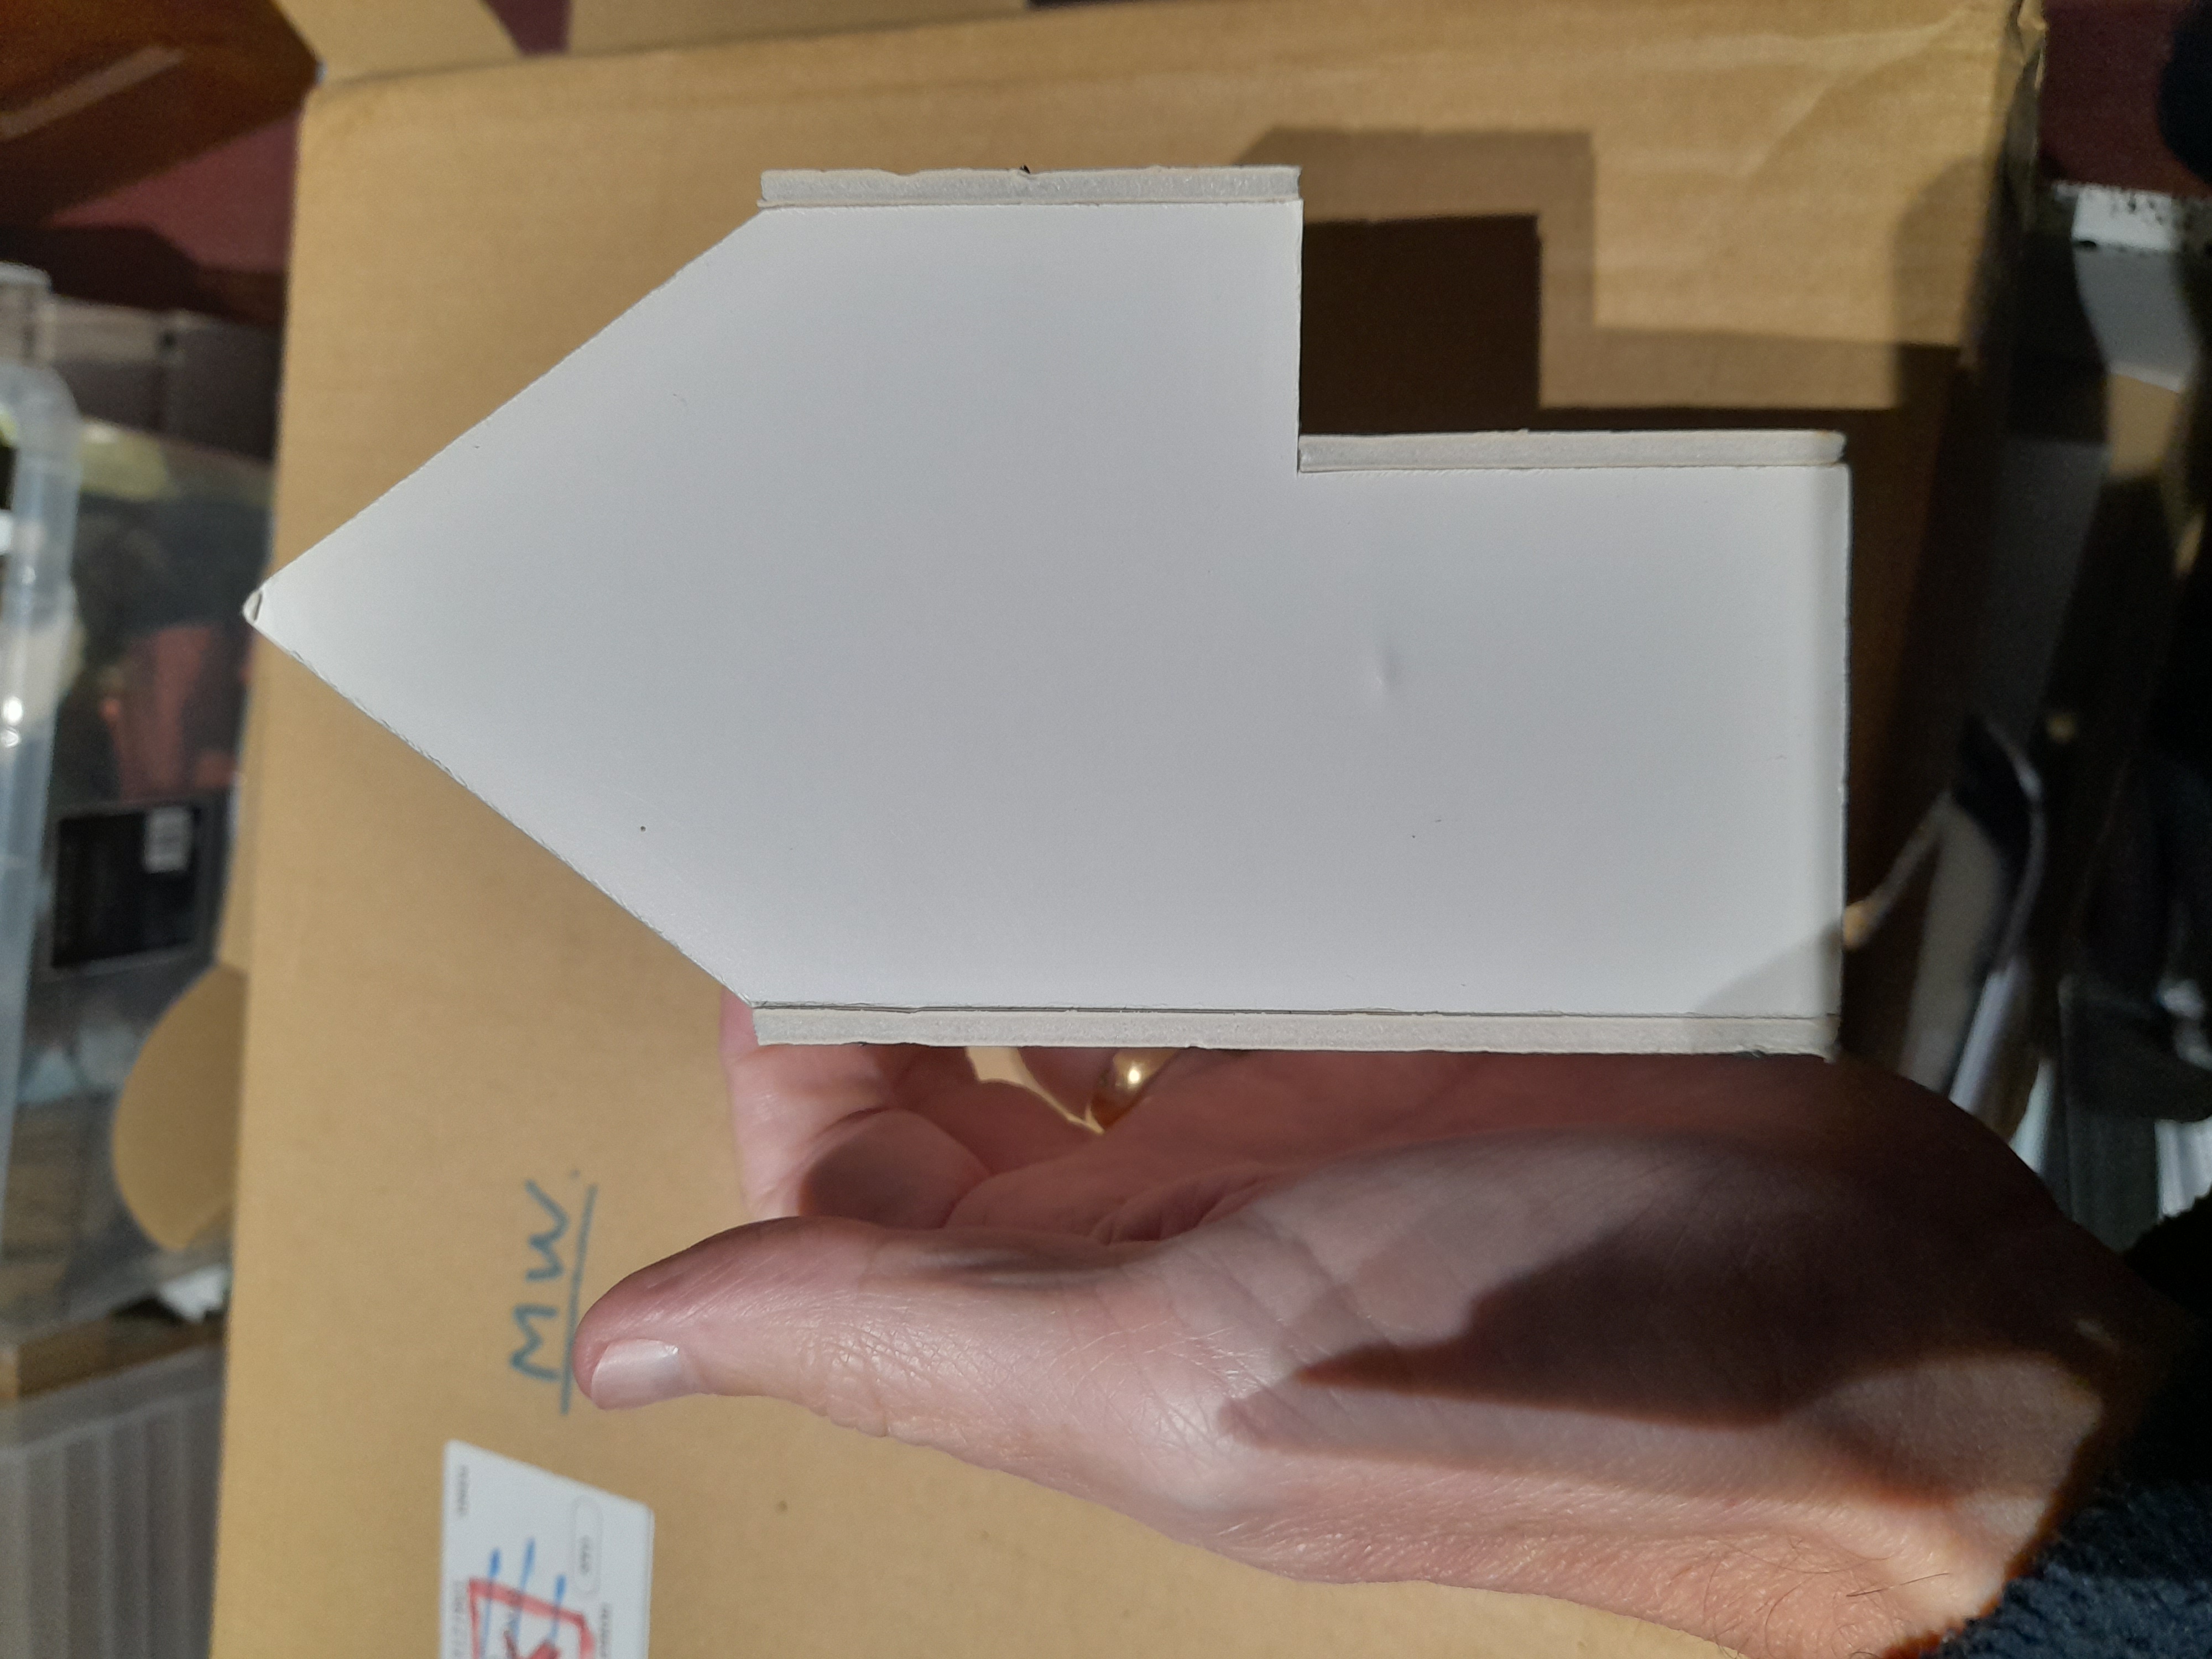
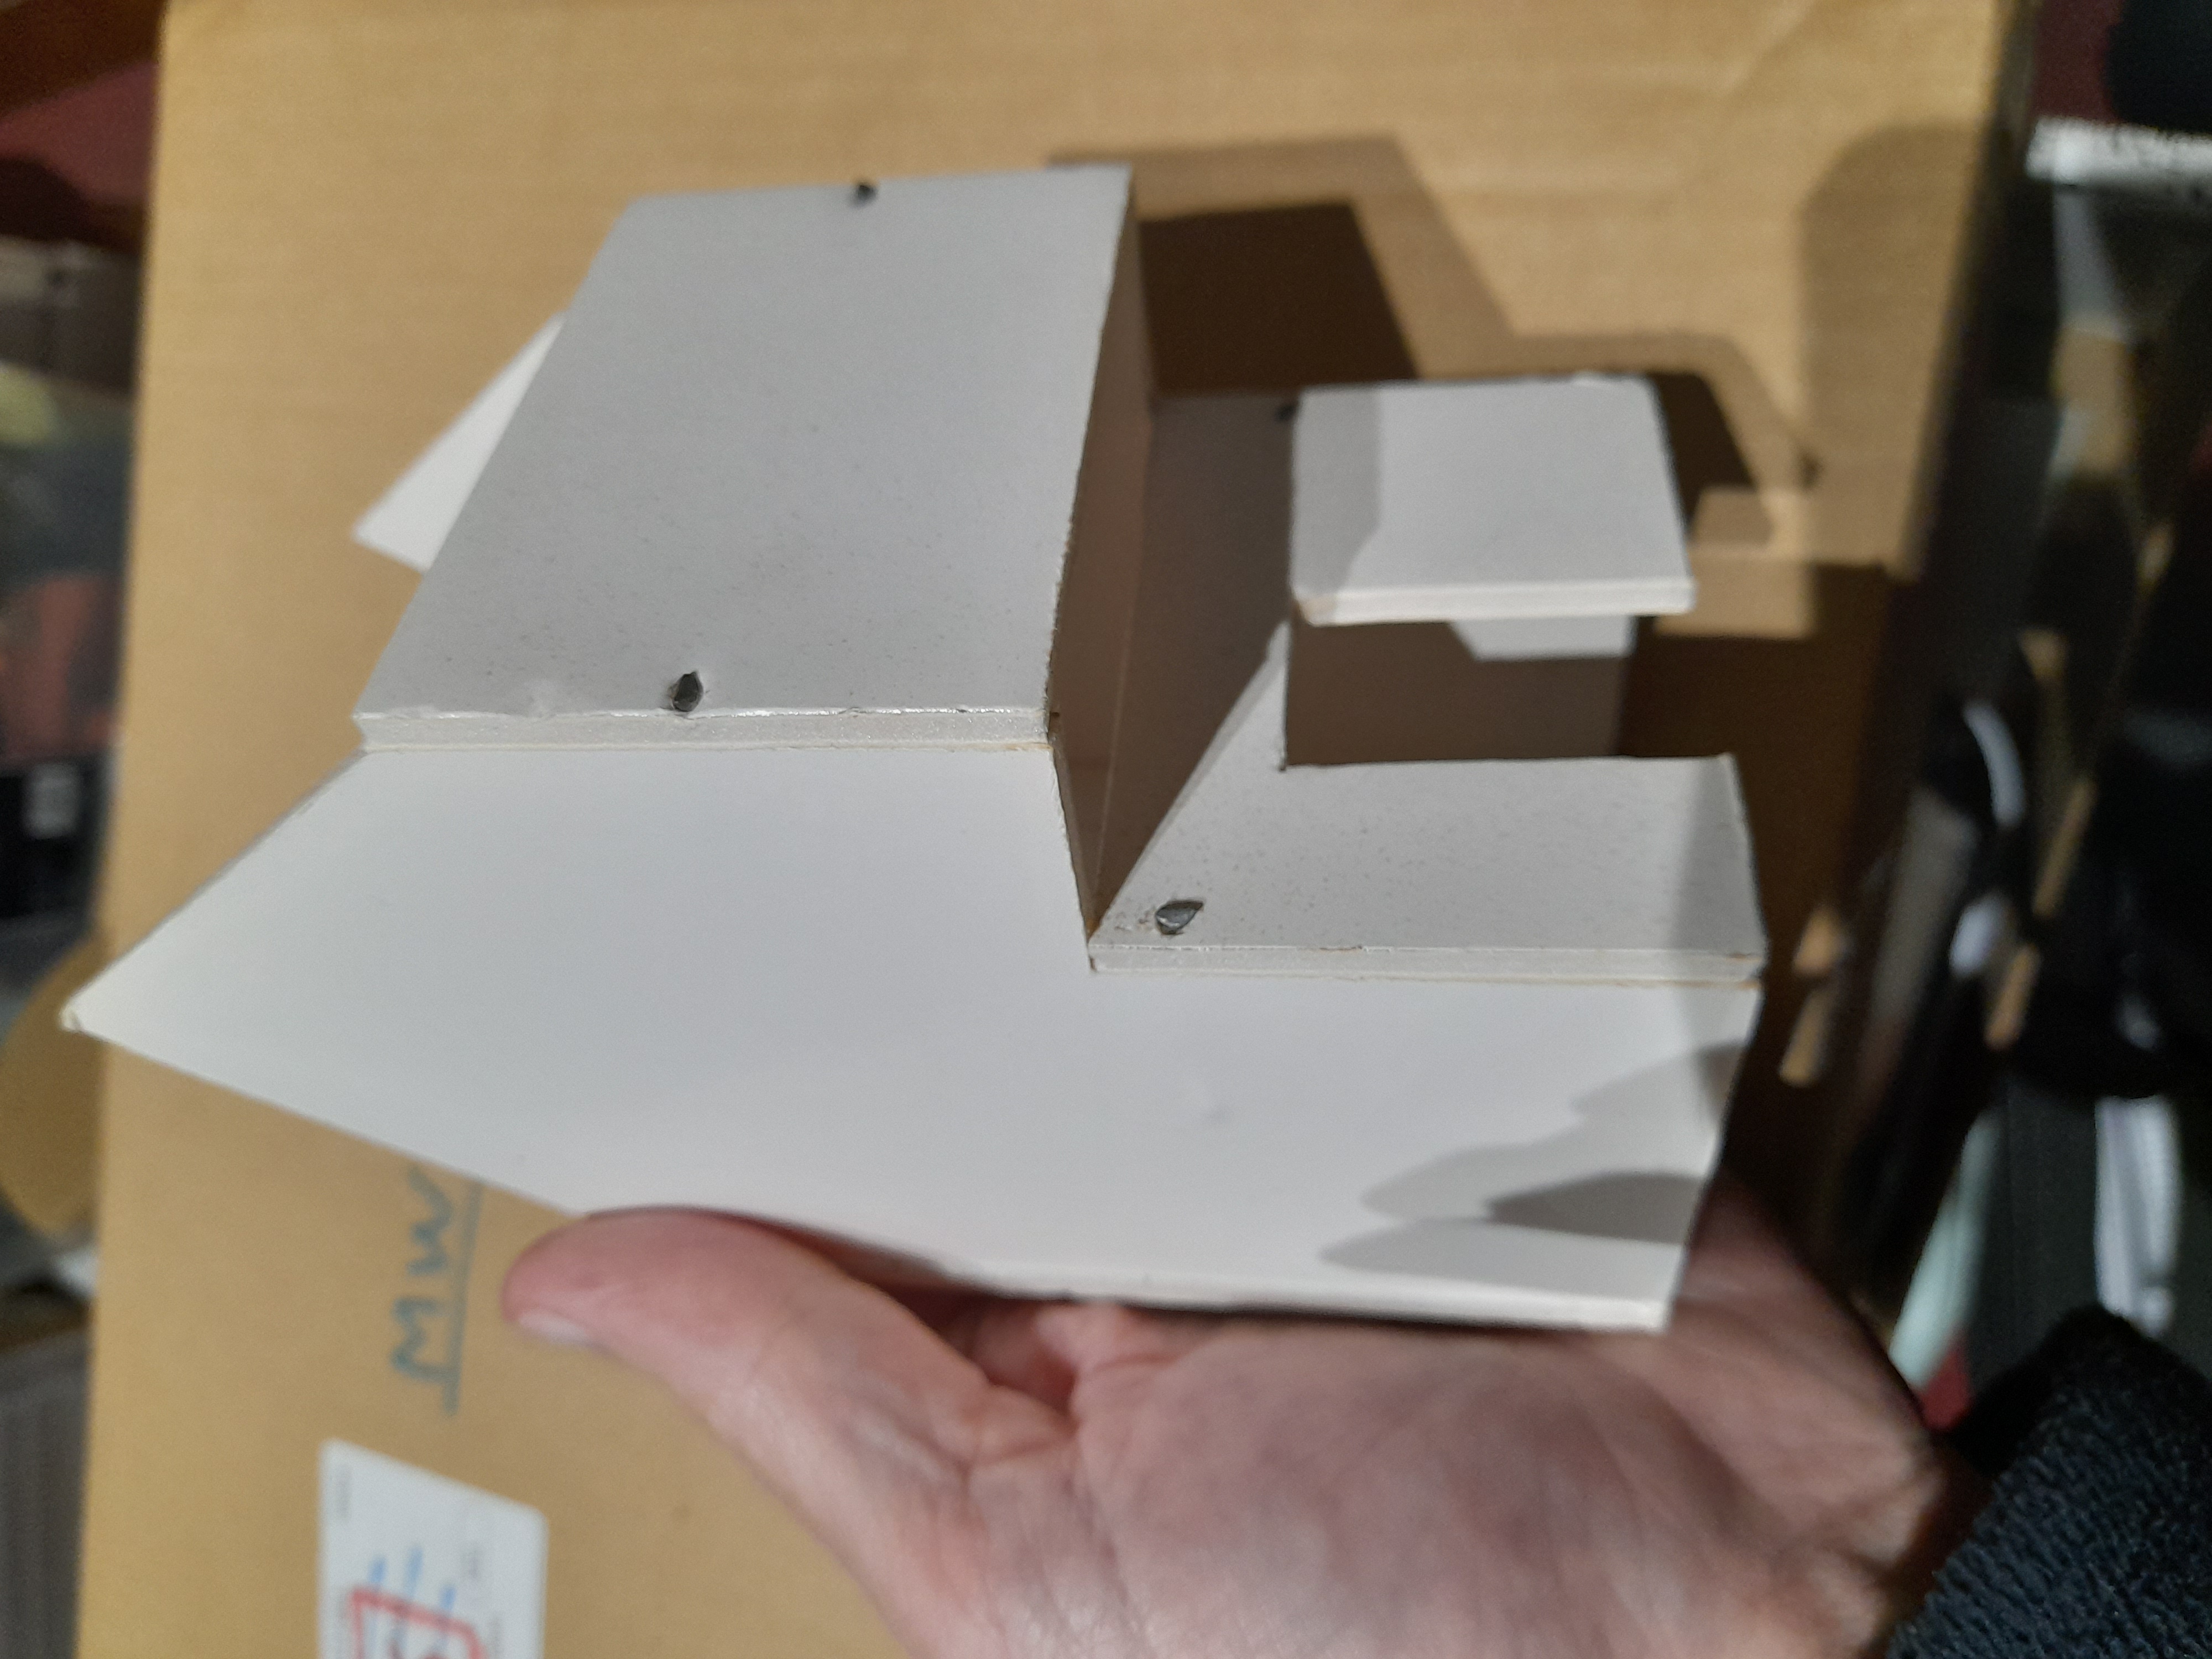
As such though I have knocked up a quick very basic building shell as an example of the process.
I first draw out the two side walls (with gable ends) and the front and rear walls on the foamcore, and cut them out.
I then join them together using small panel pins and pva glue. The pins give some extra strength and rigidity to it.
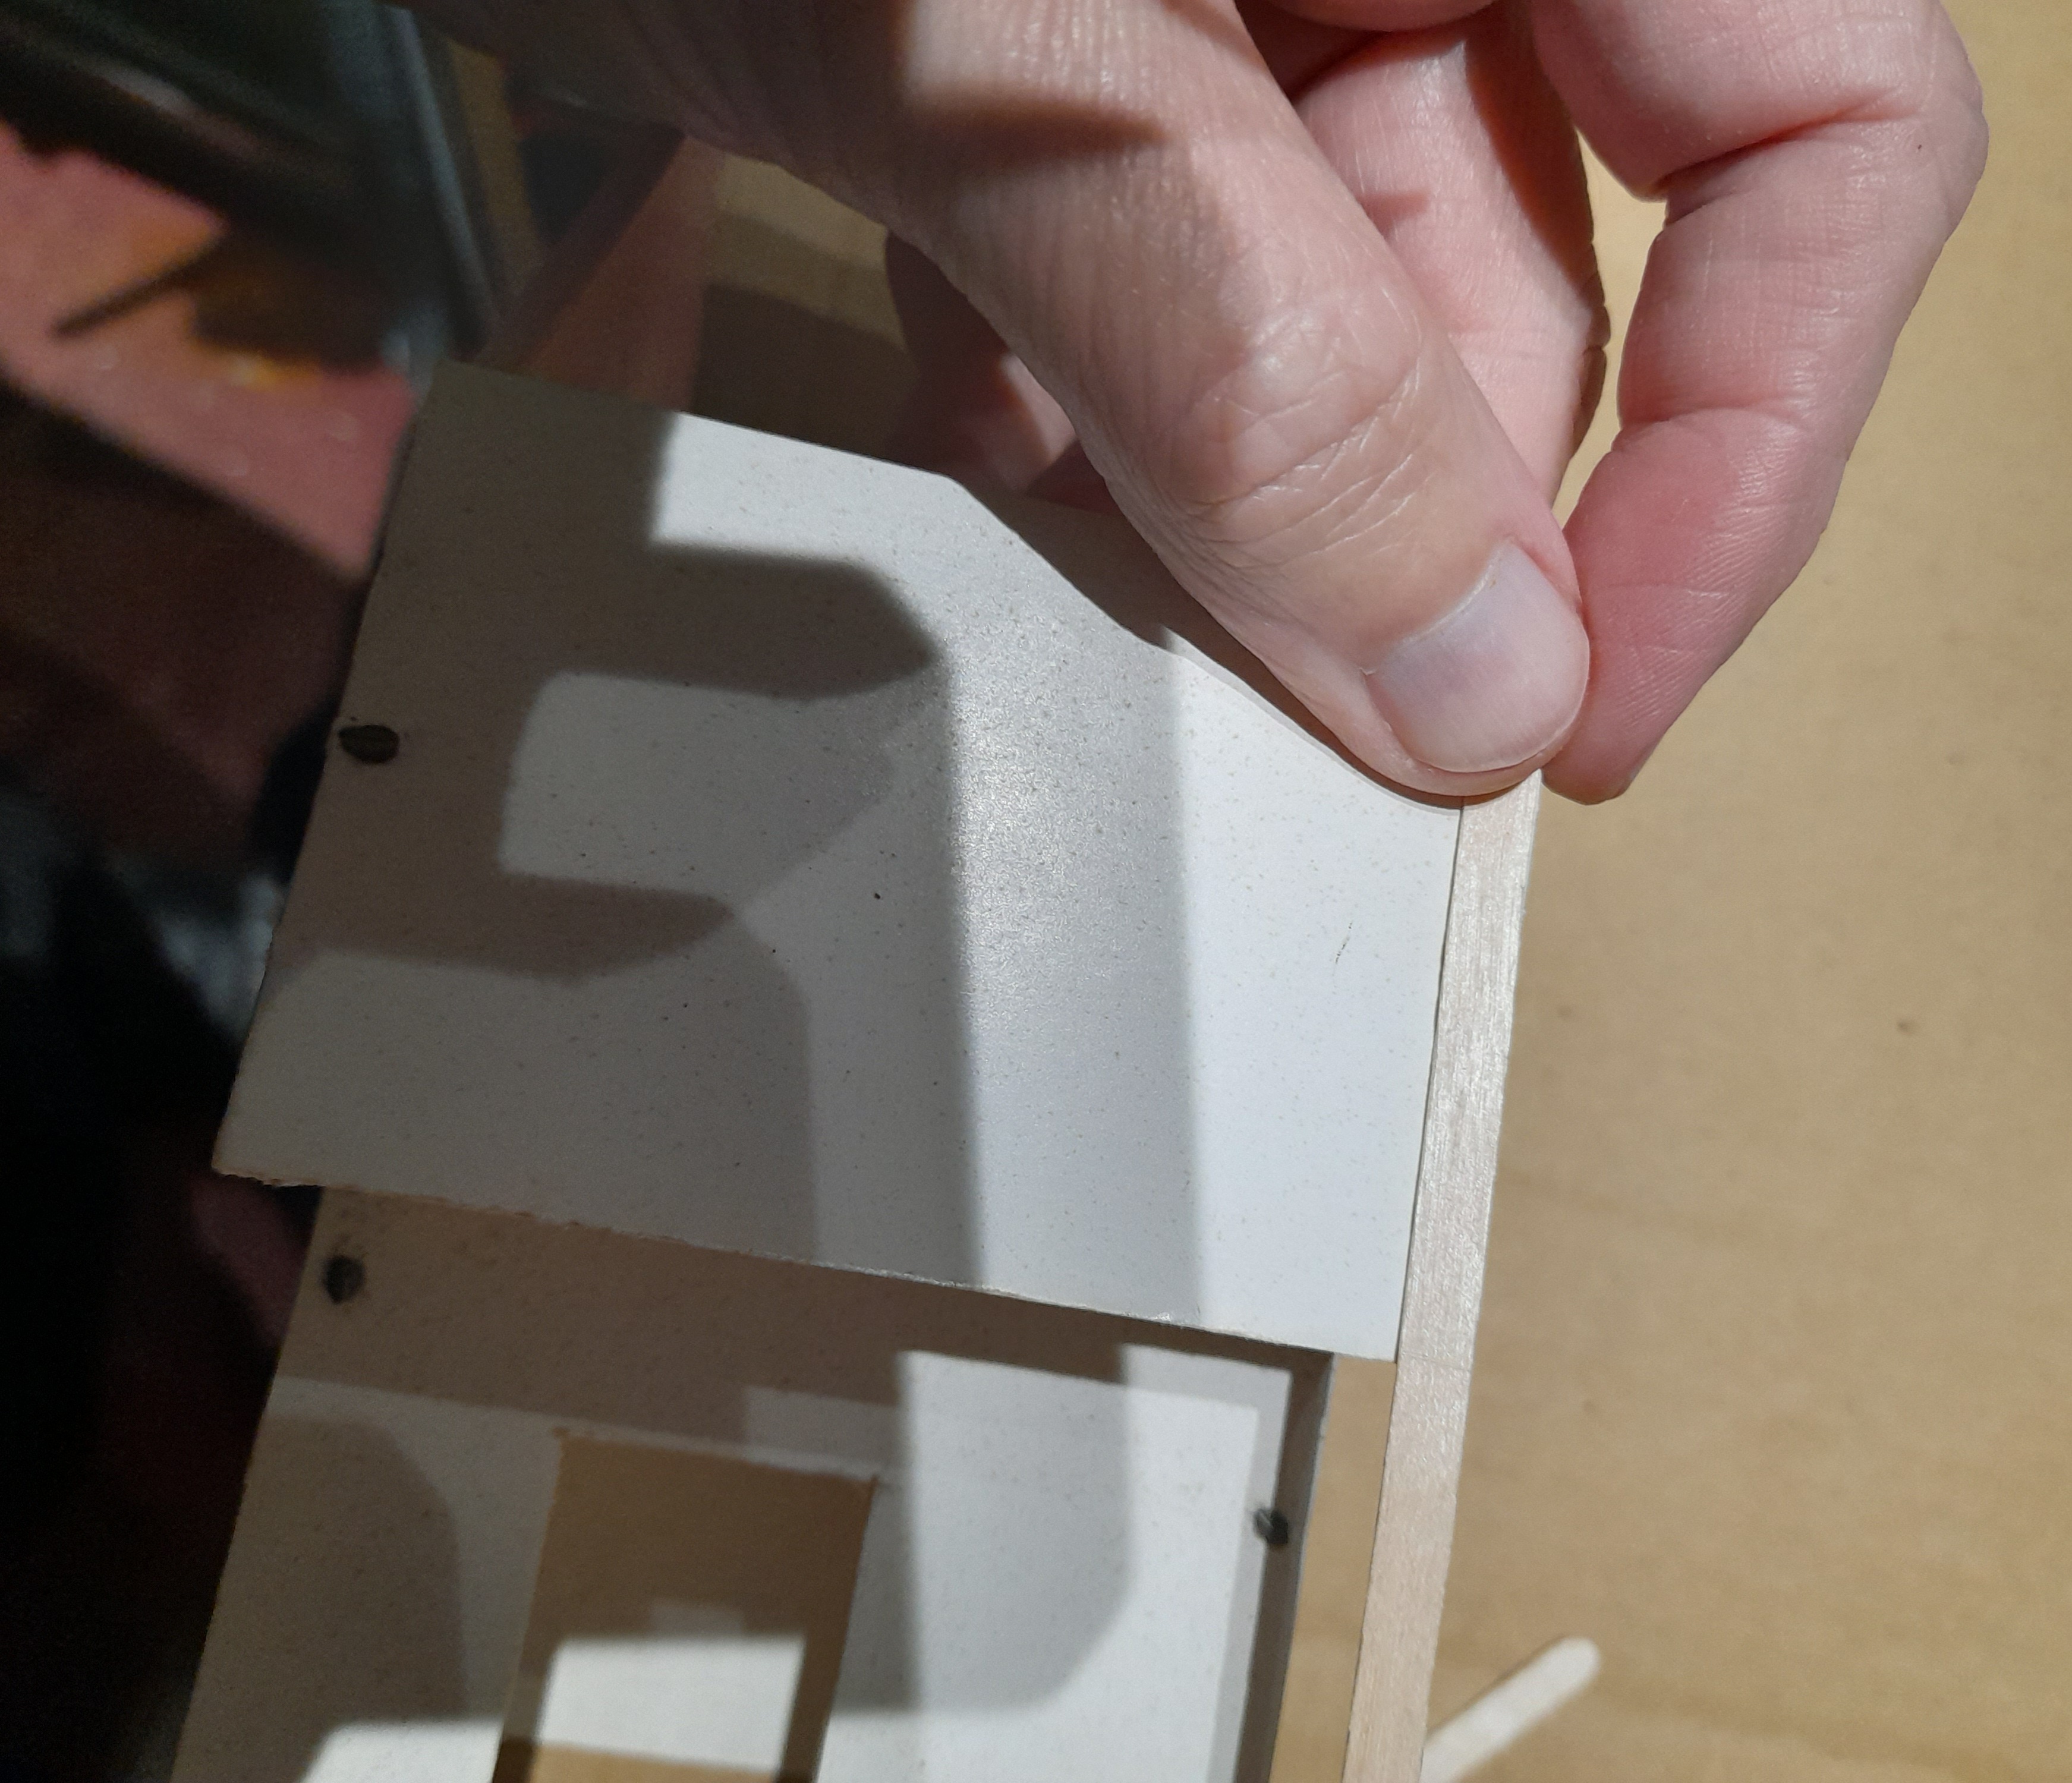
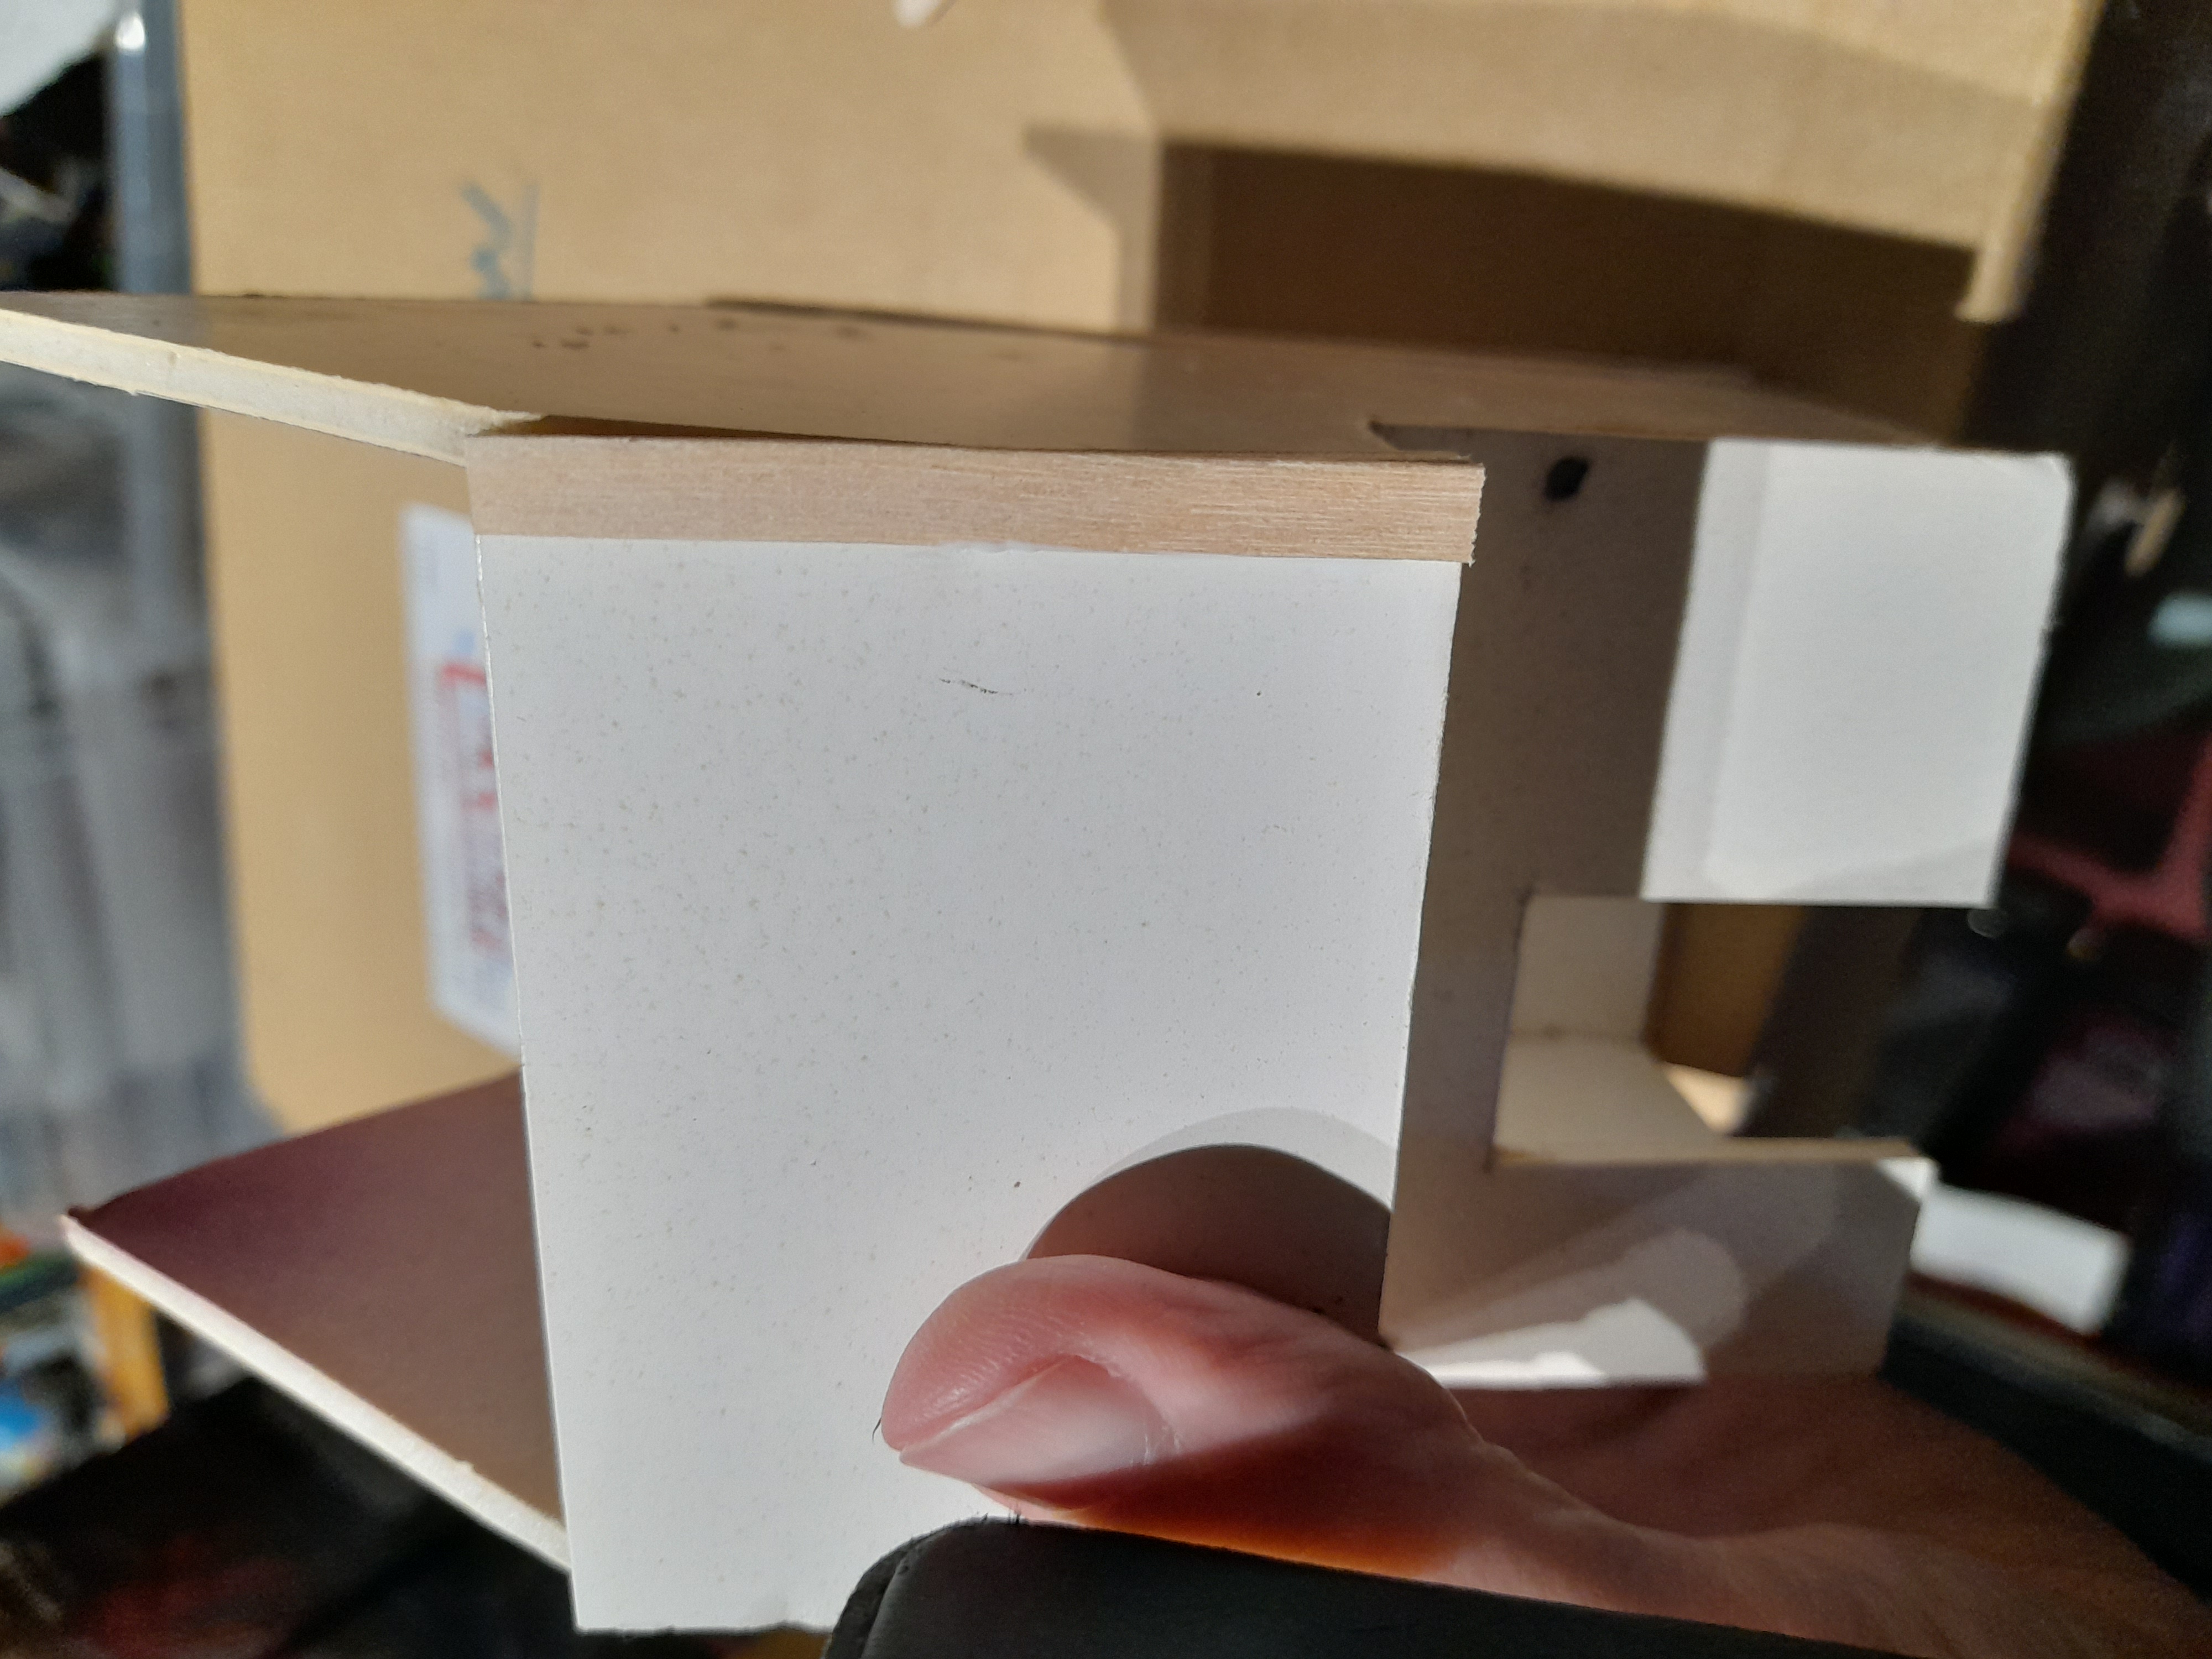
Then the wooden beams are added using coffee stirring sticks, balsa strips or other similar material – whatever you can get your hands on really. These are used to cover up the ends of the panel pins as well.
Then they were sprayed black – A good tip here would be to use black foamcore if you can – it saves so much time in the later stages…..
Following this I overbrushed them in several browns, then drybrushed on some lighter colours. This came out a little messy though.
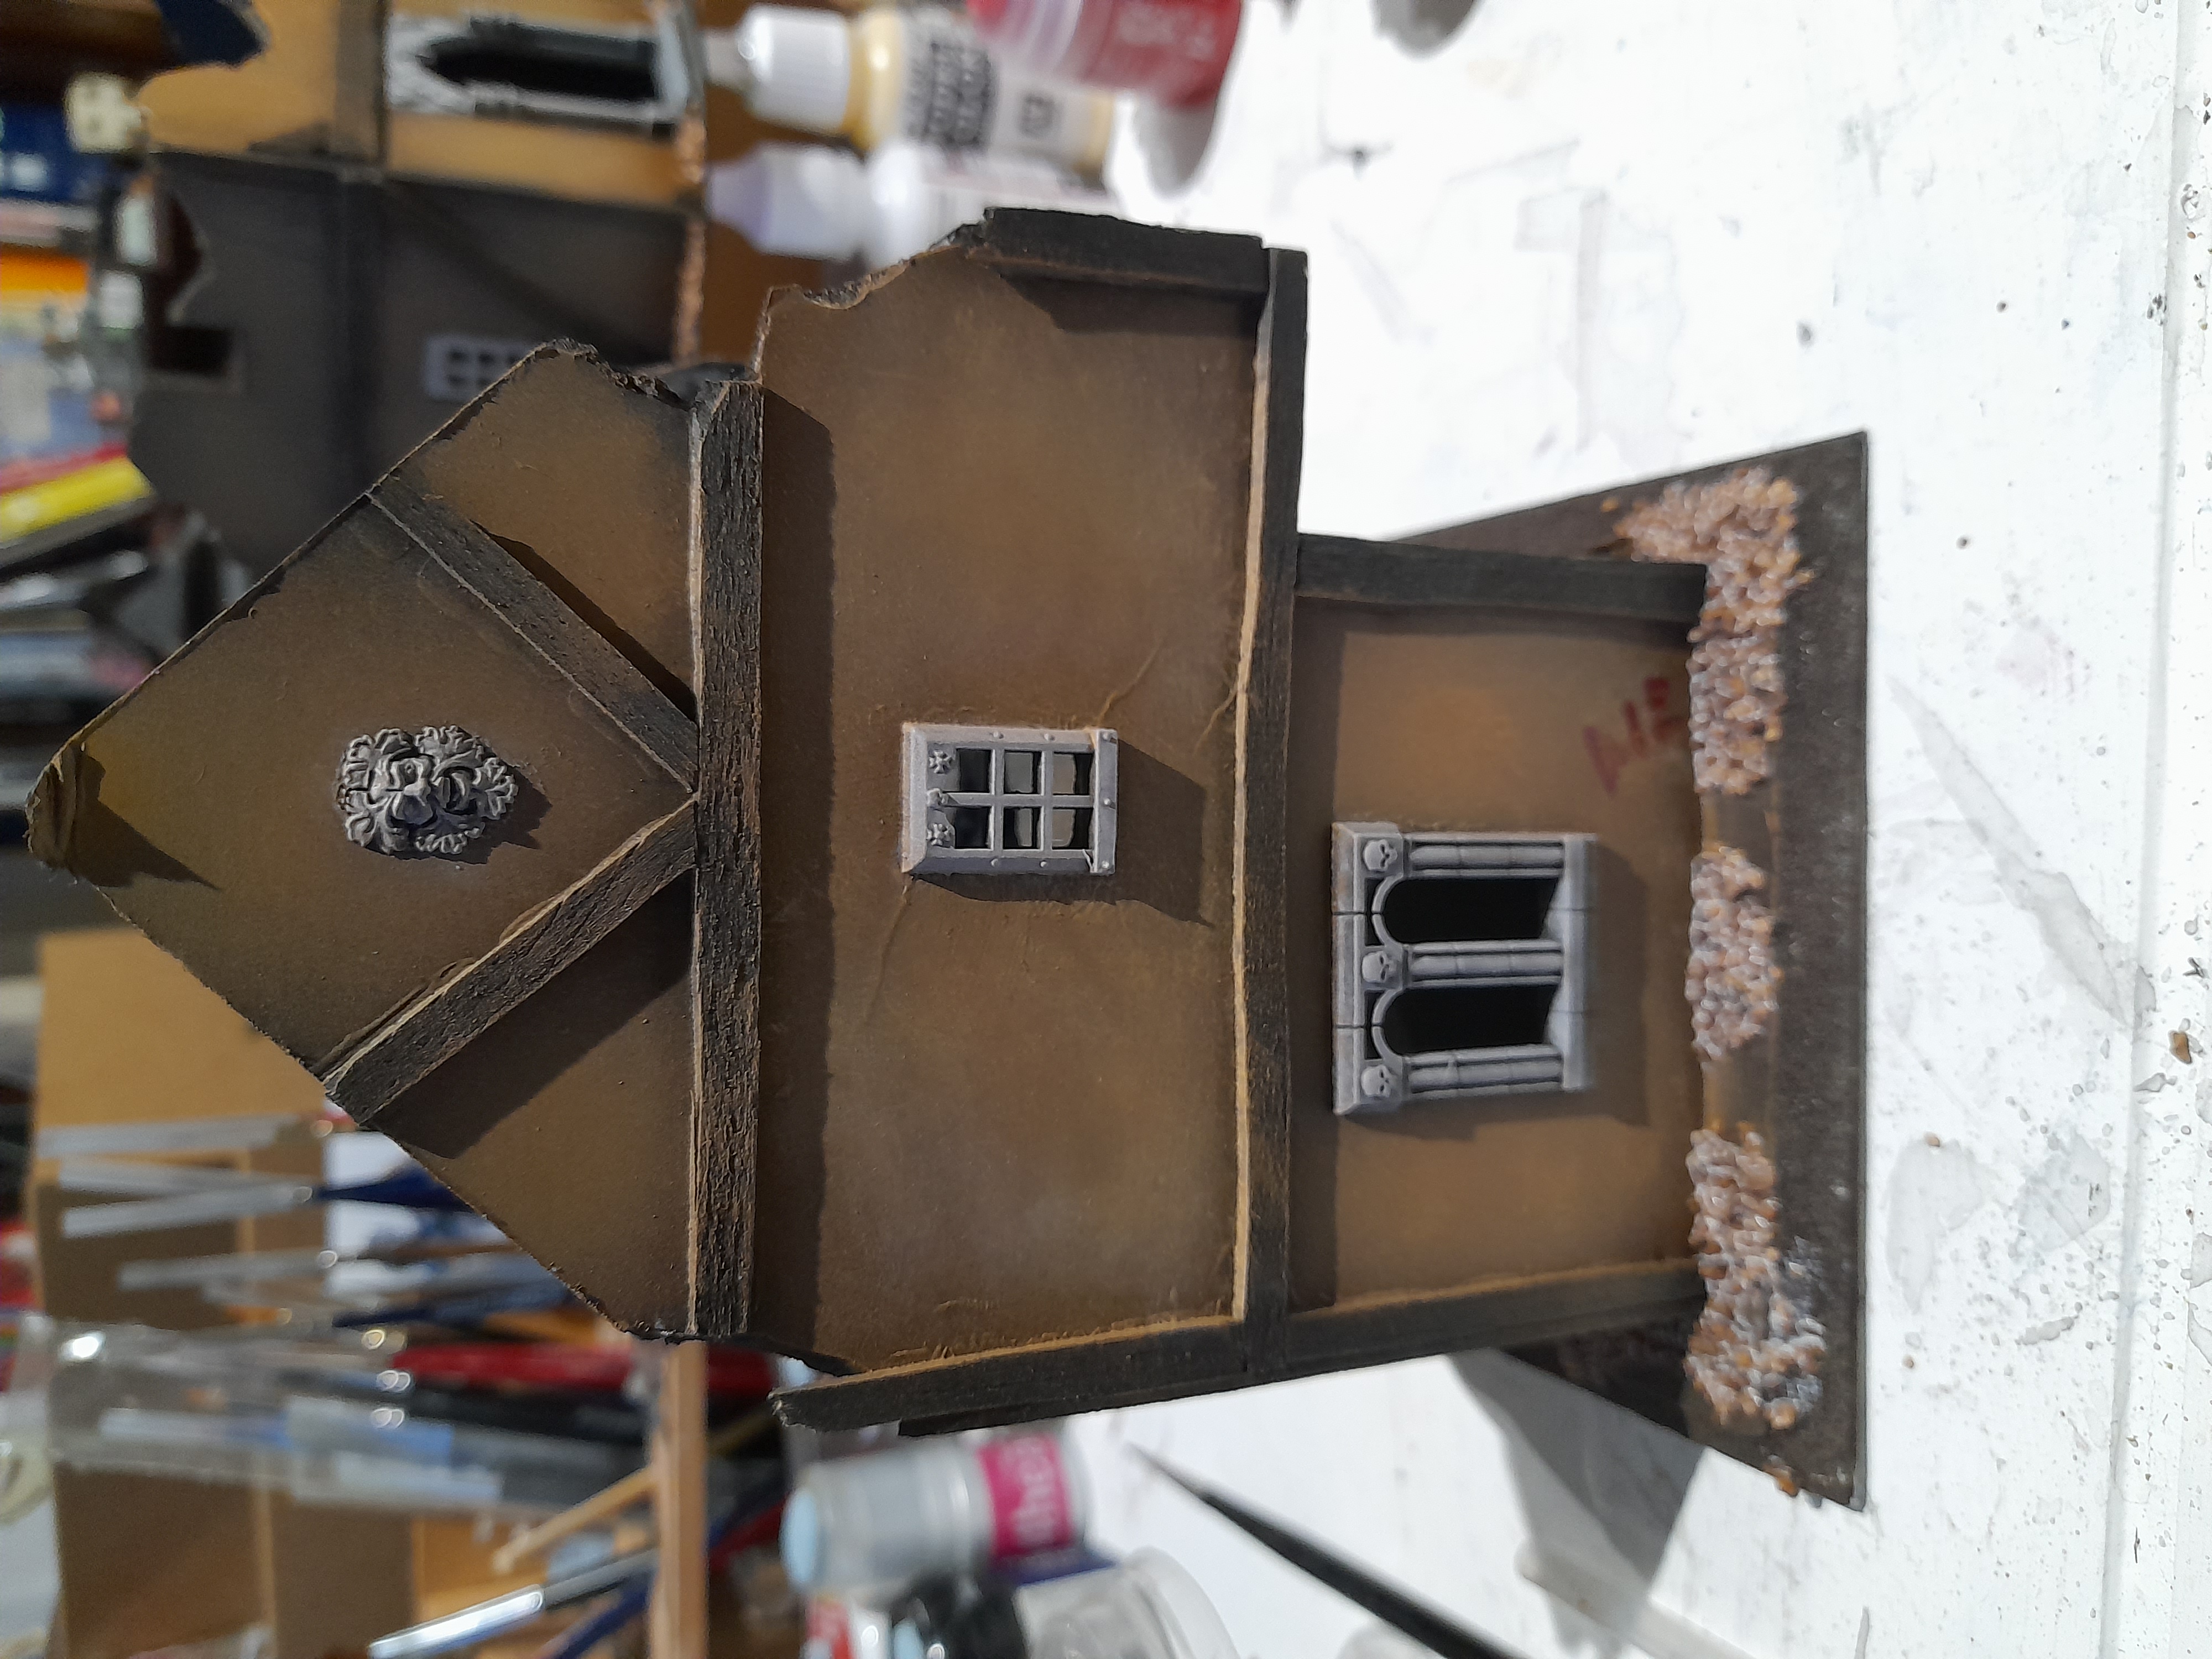
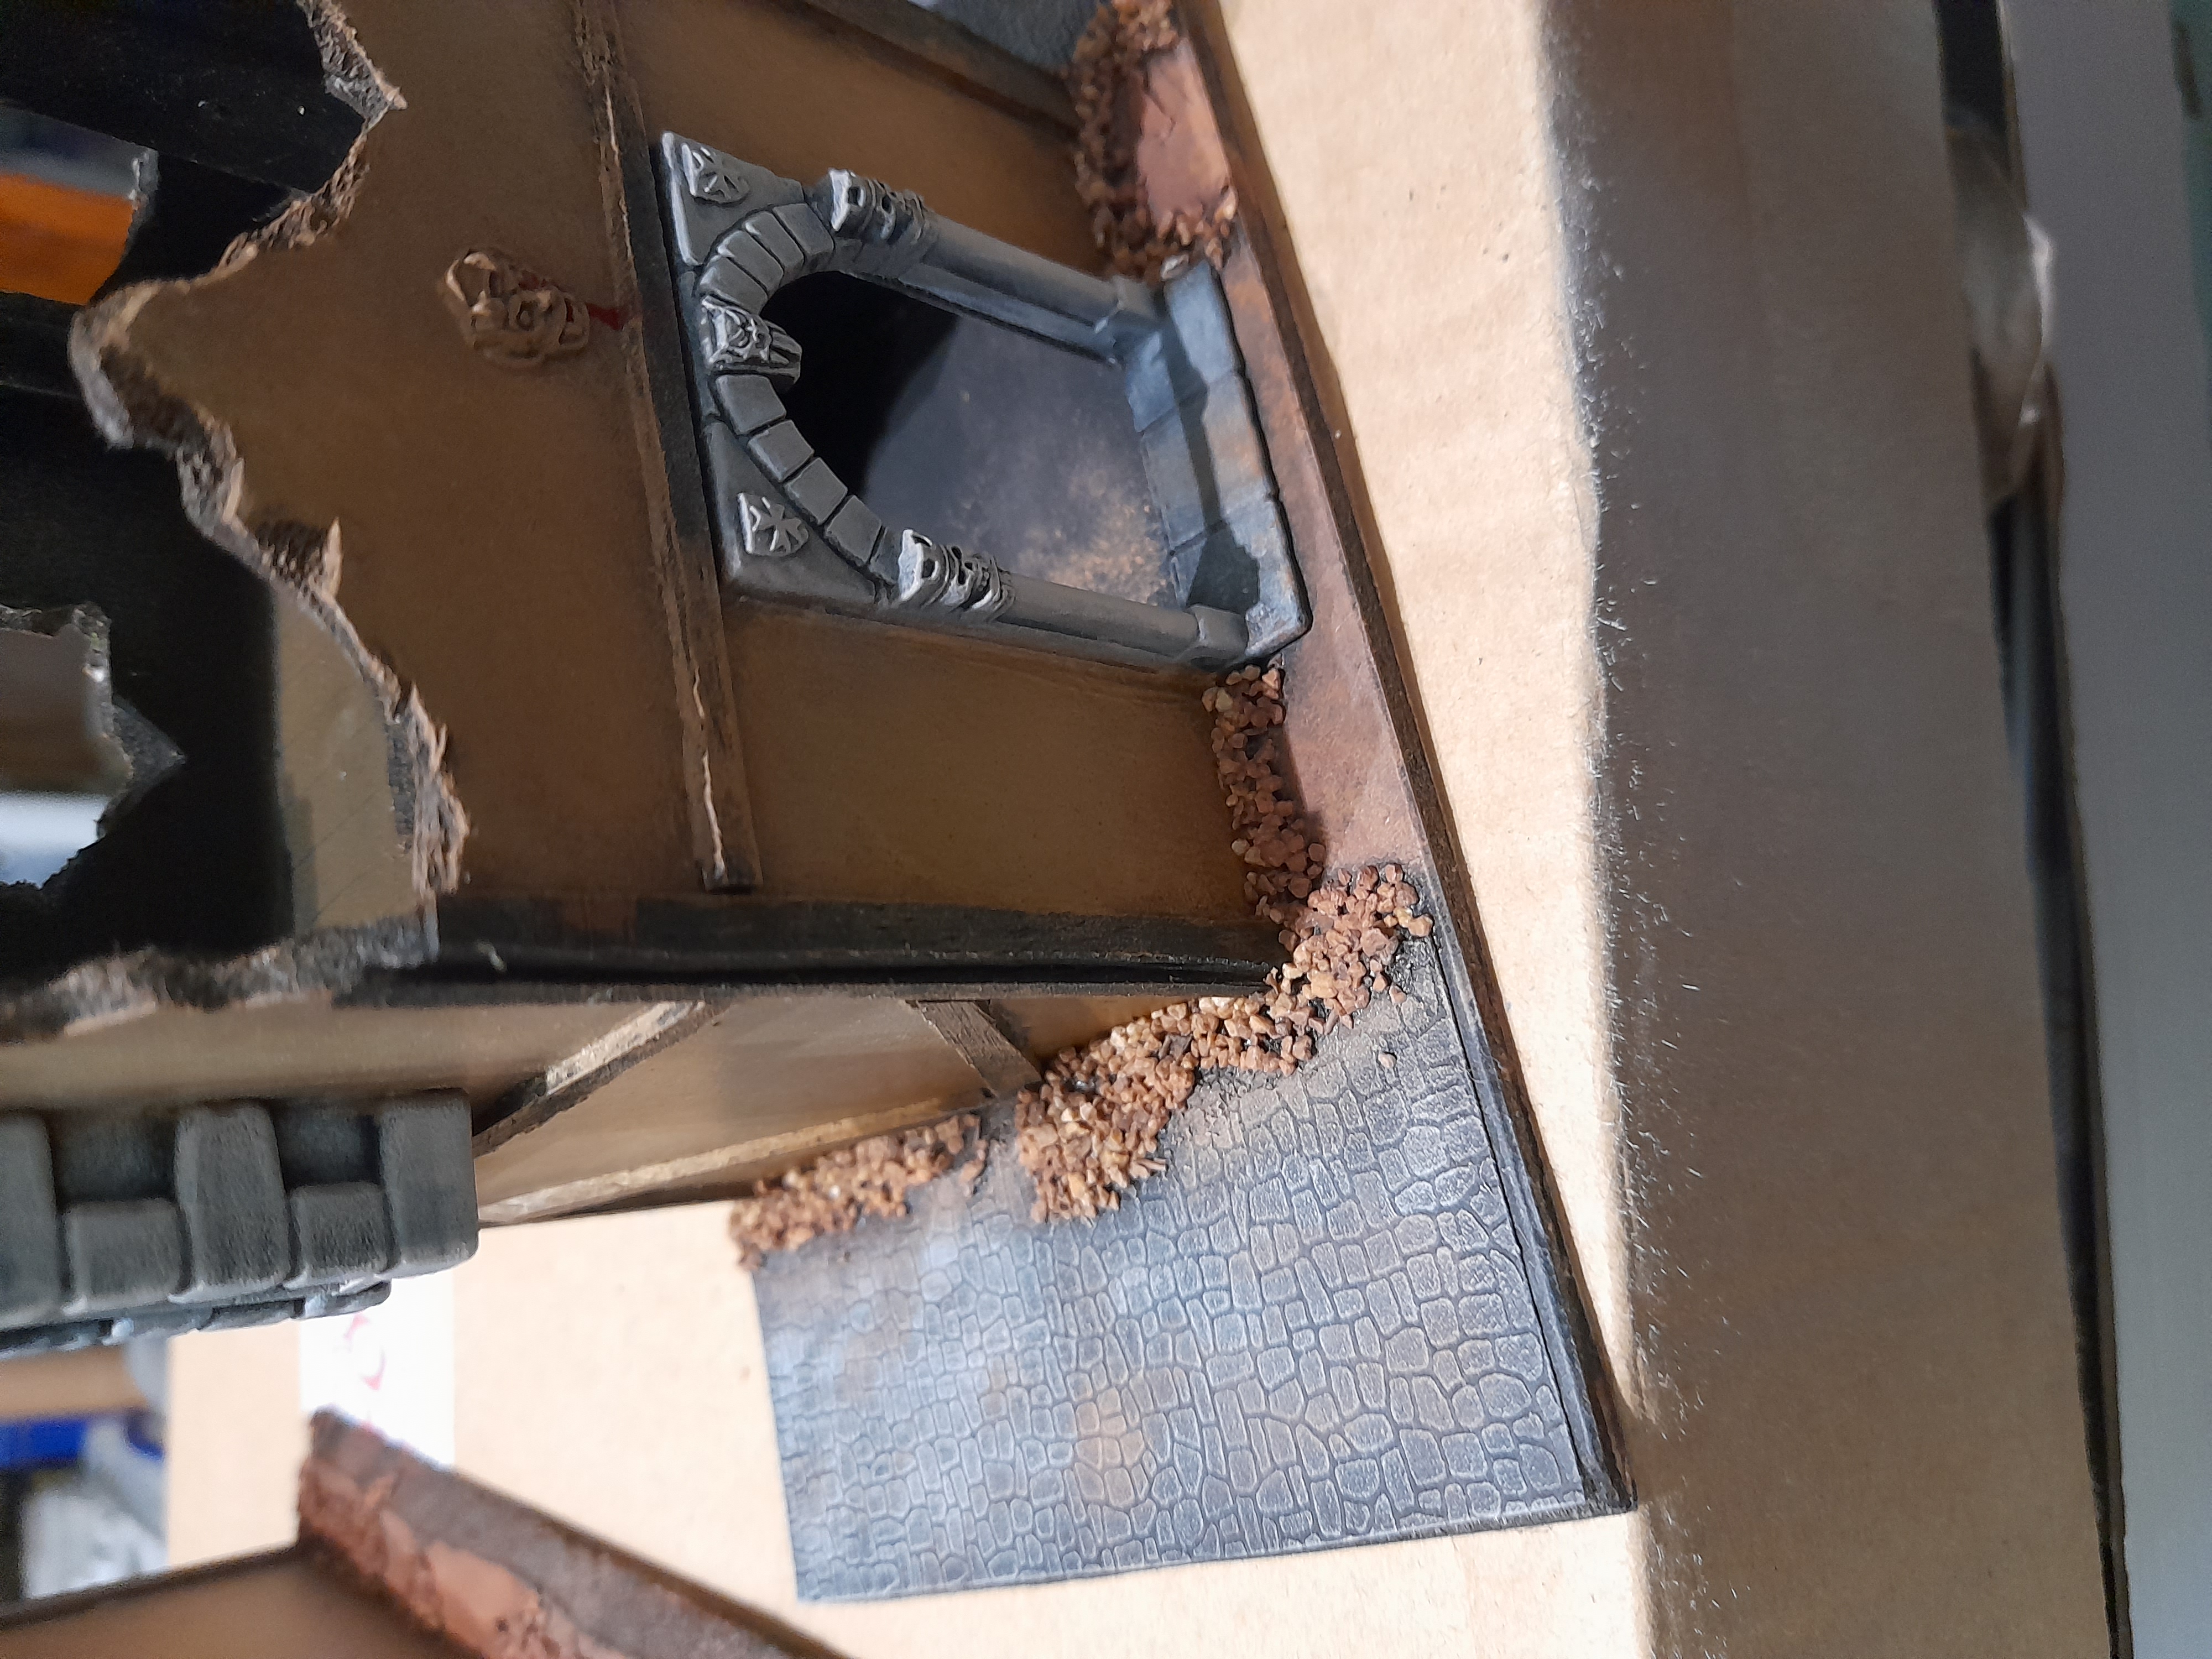
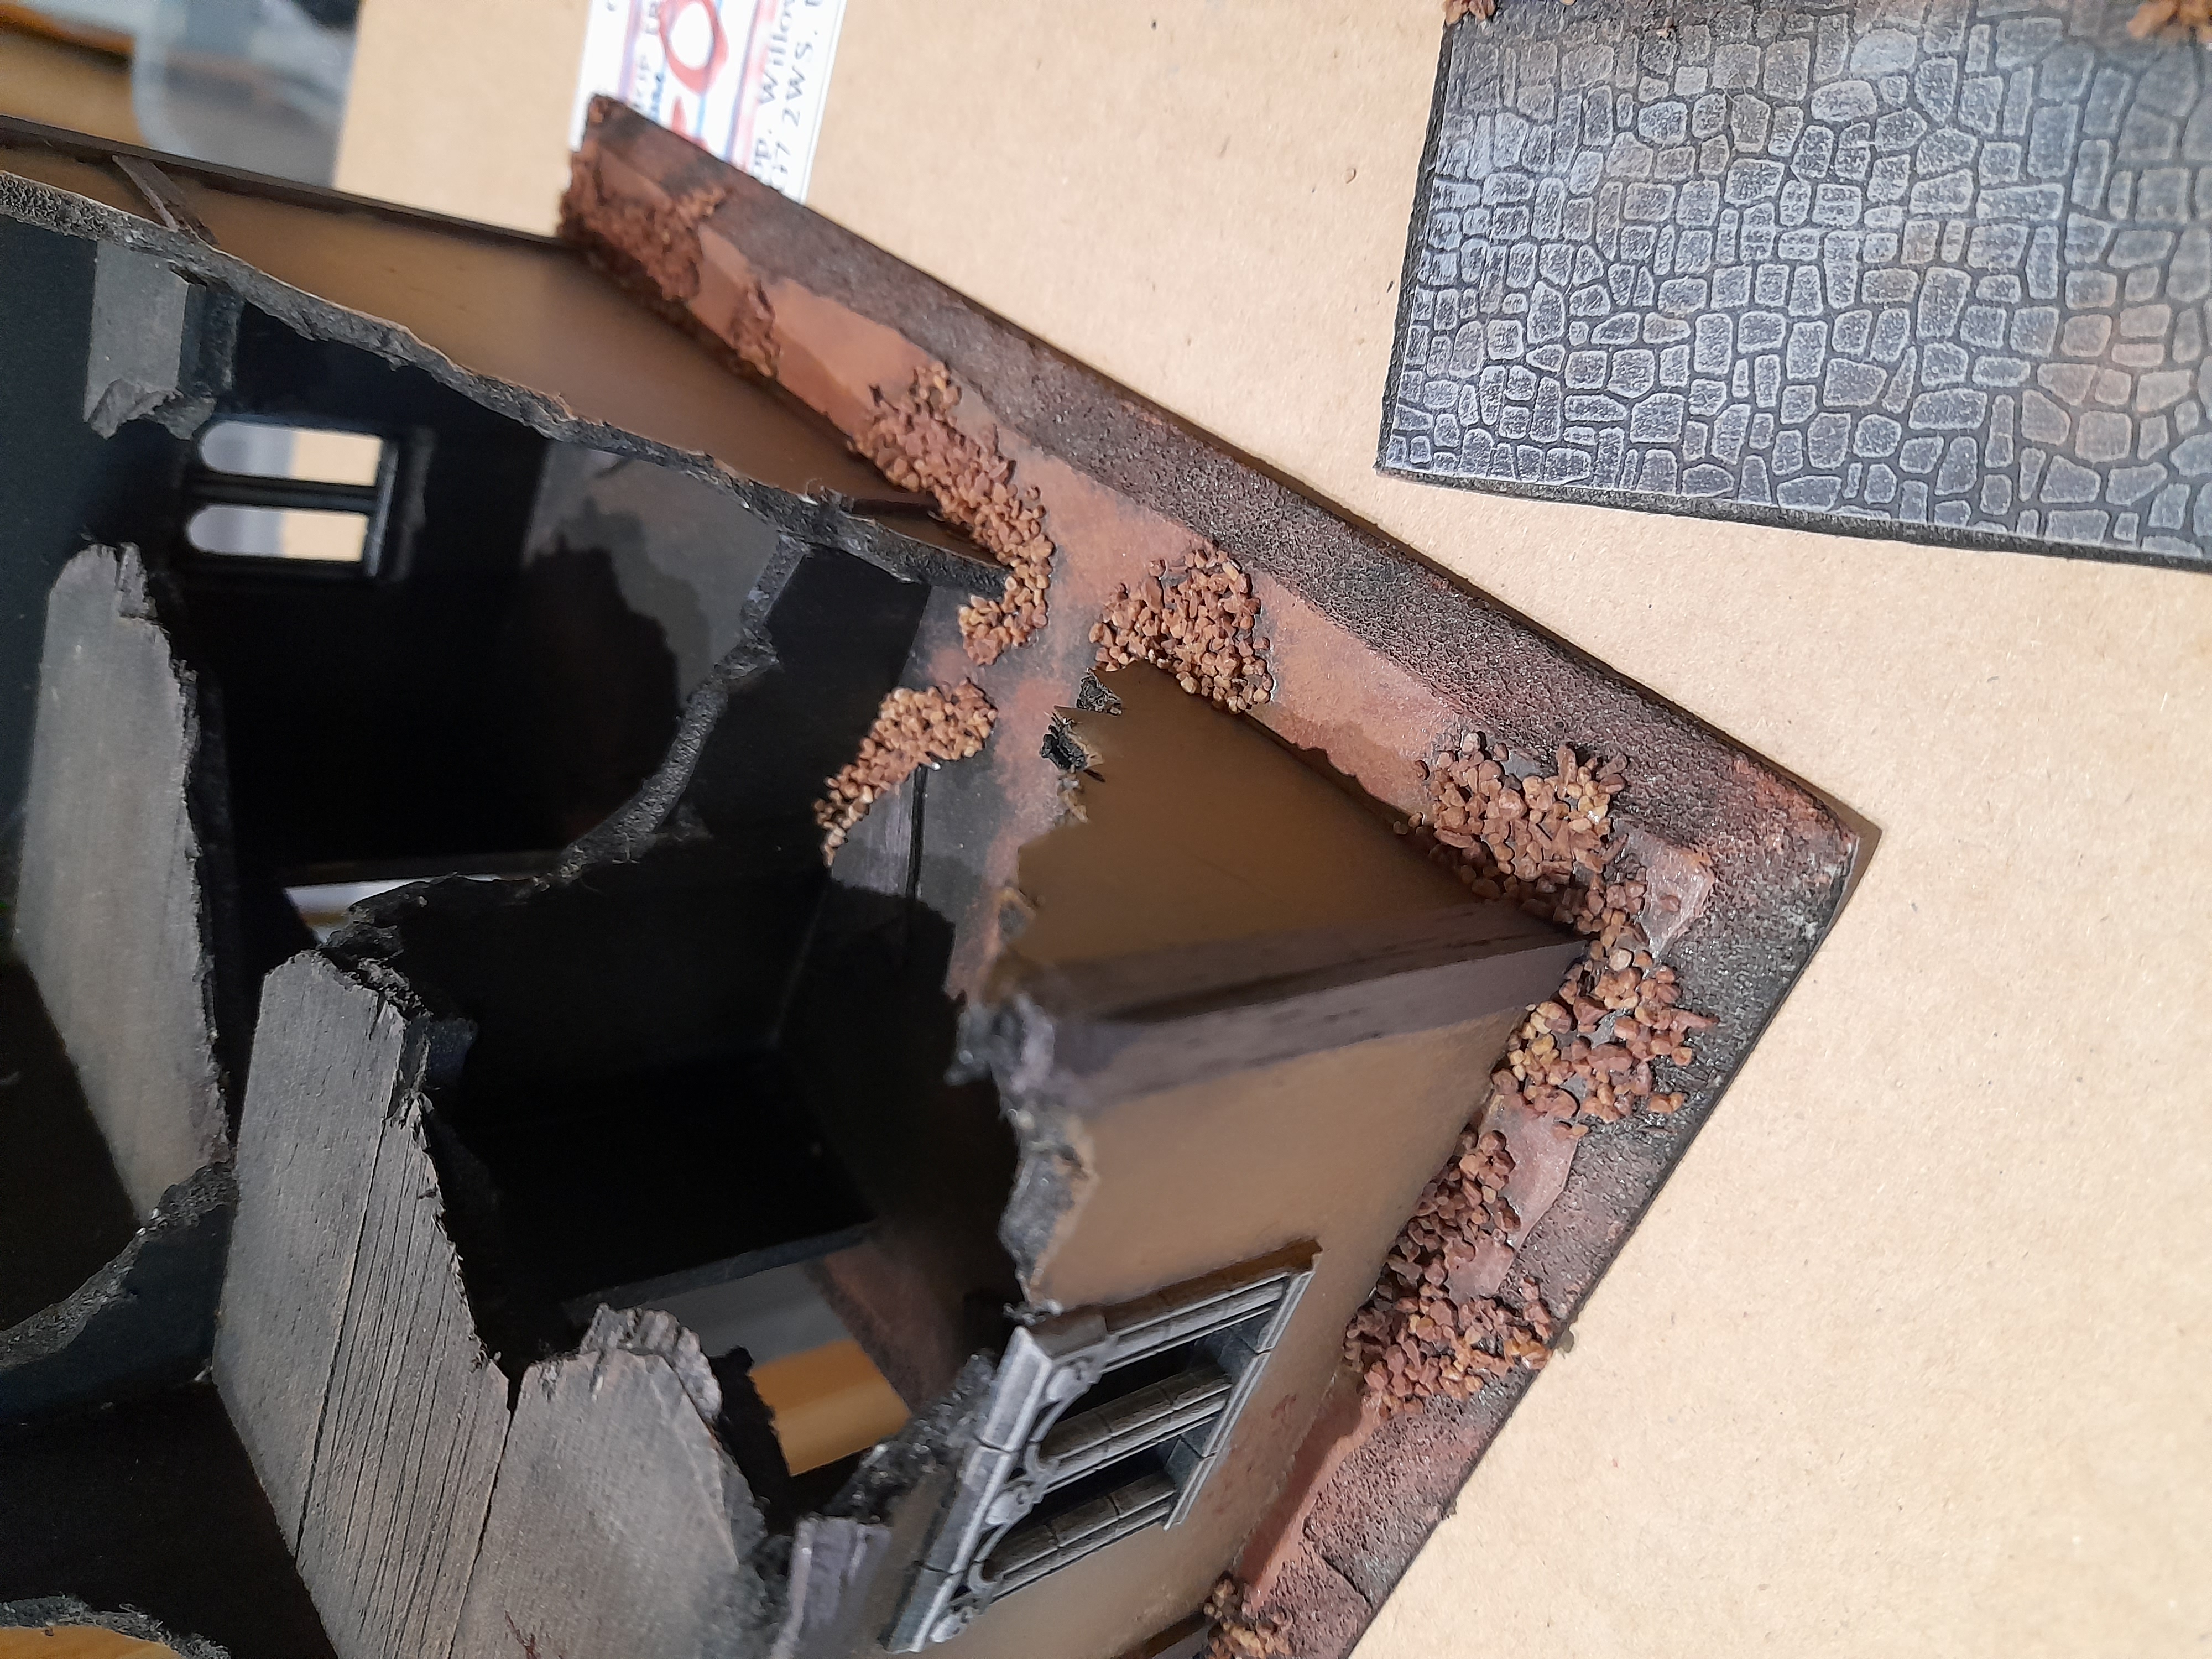
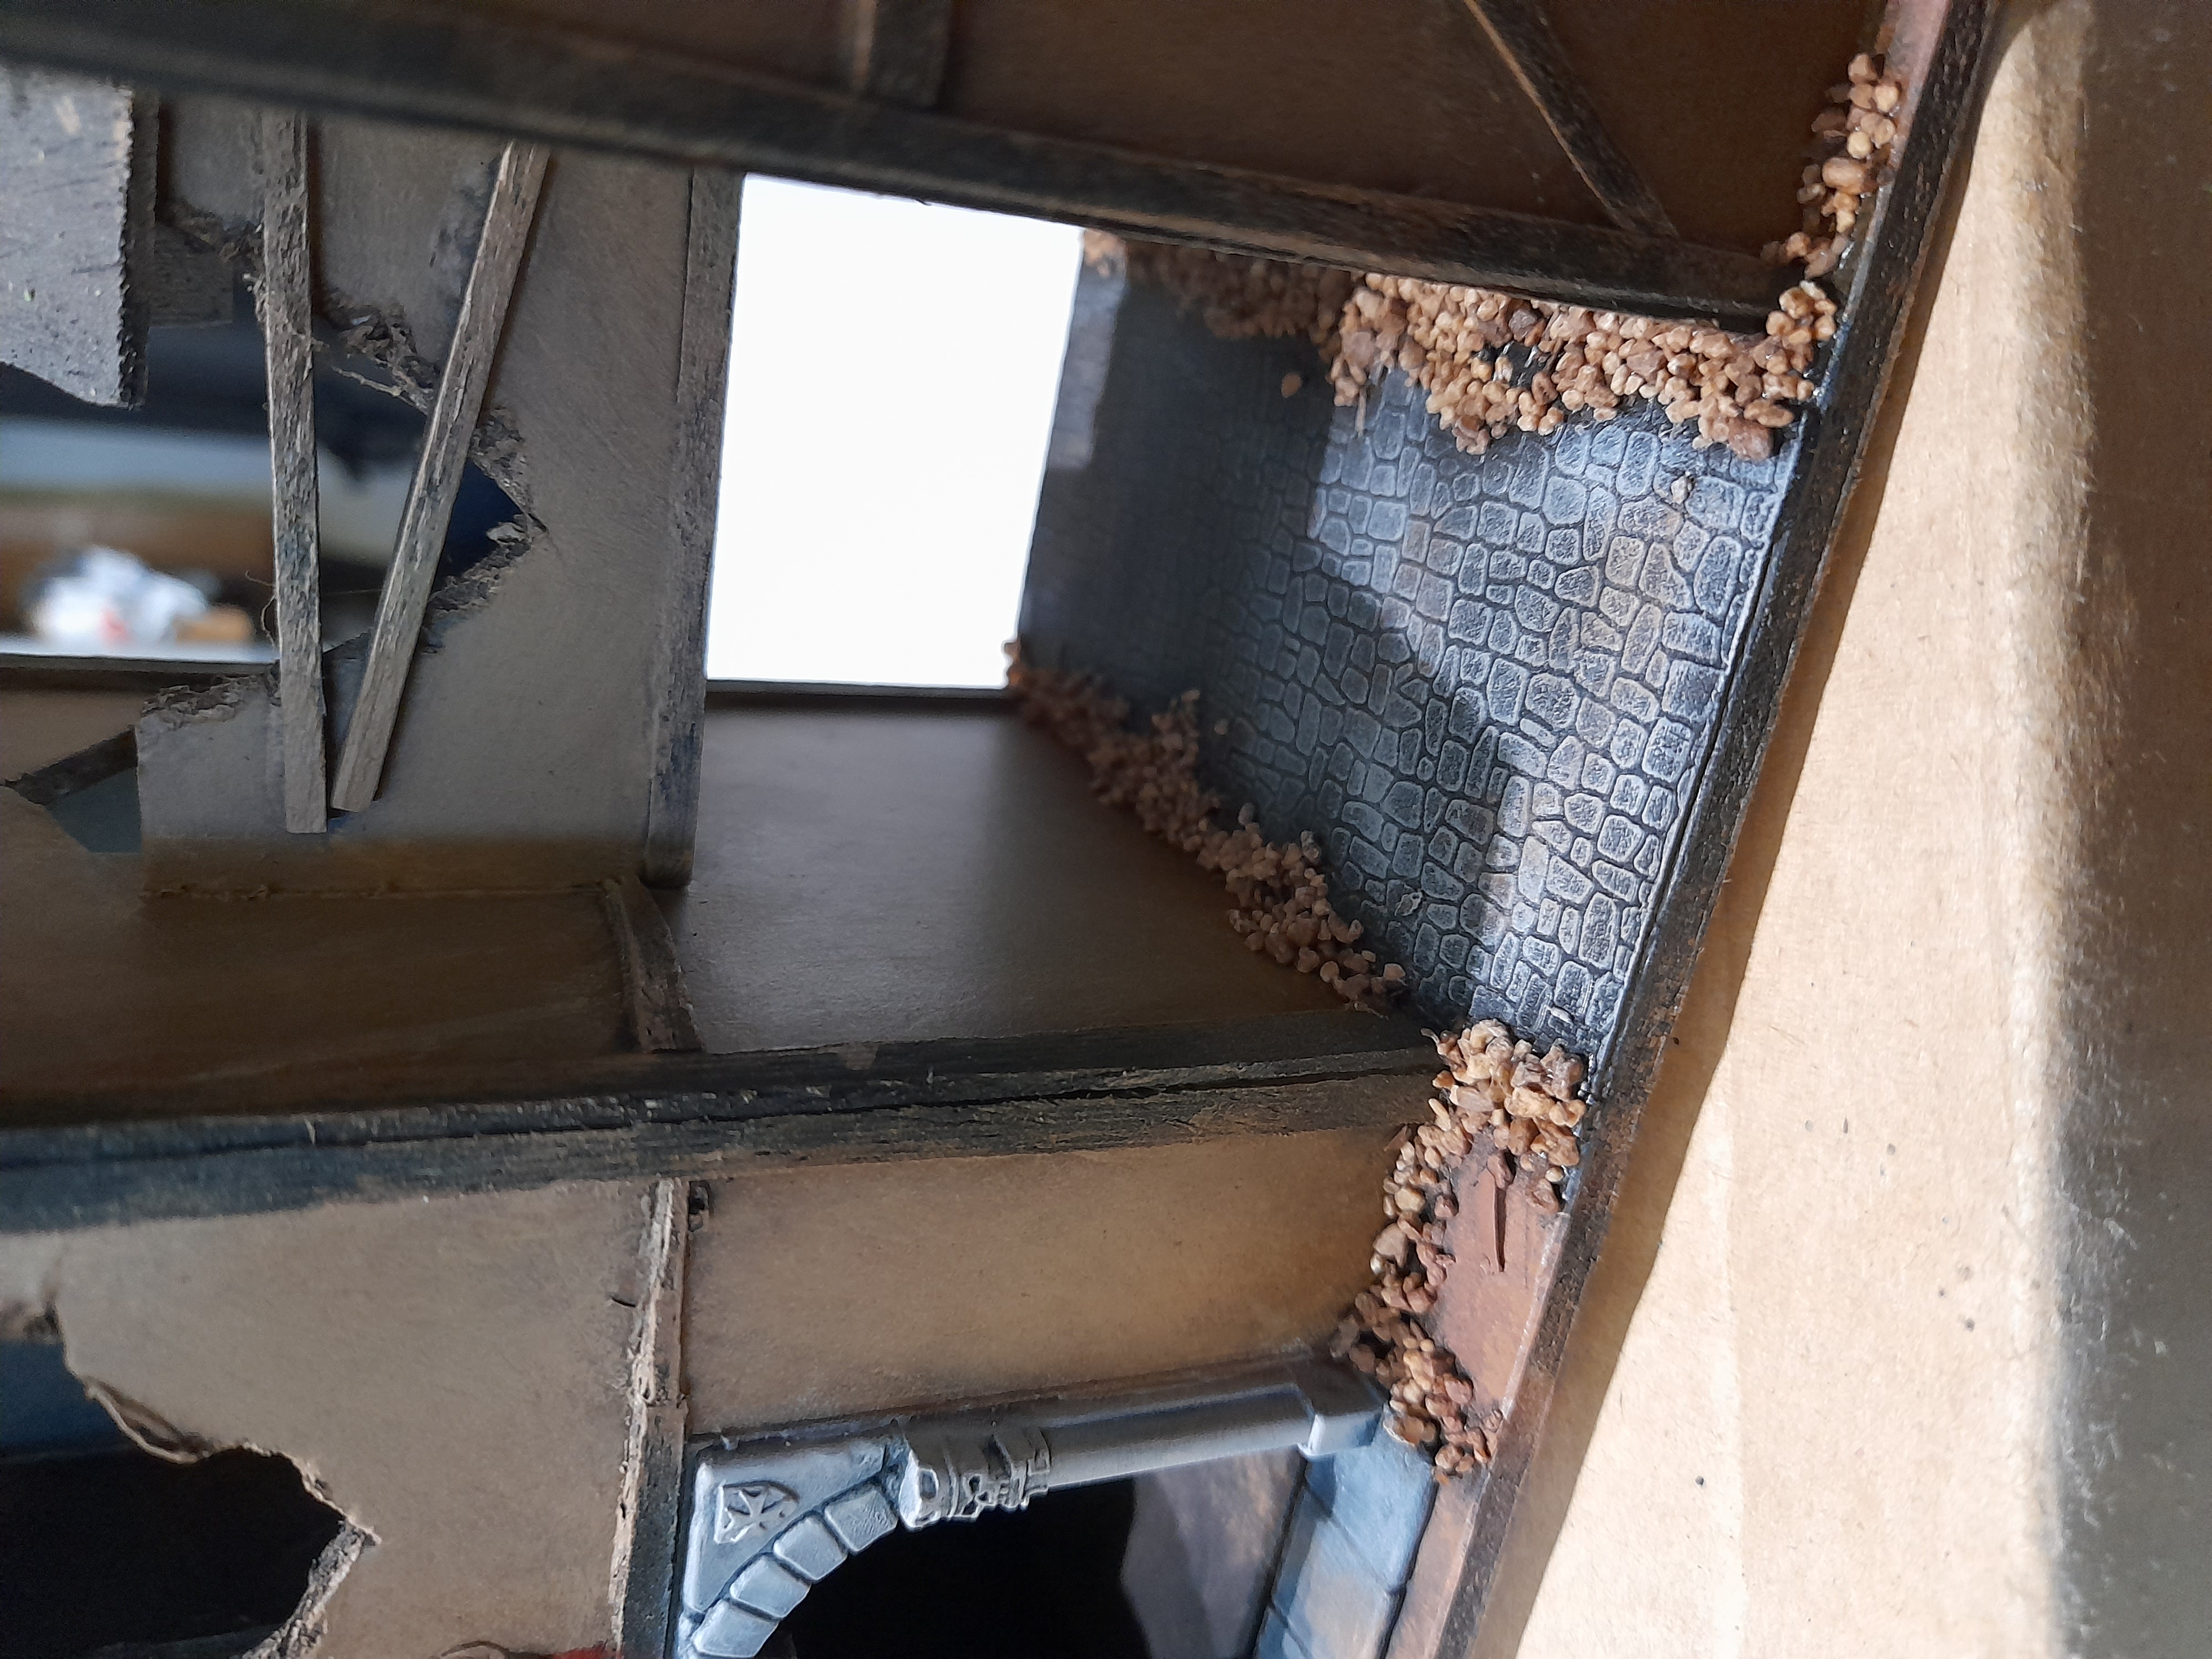
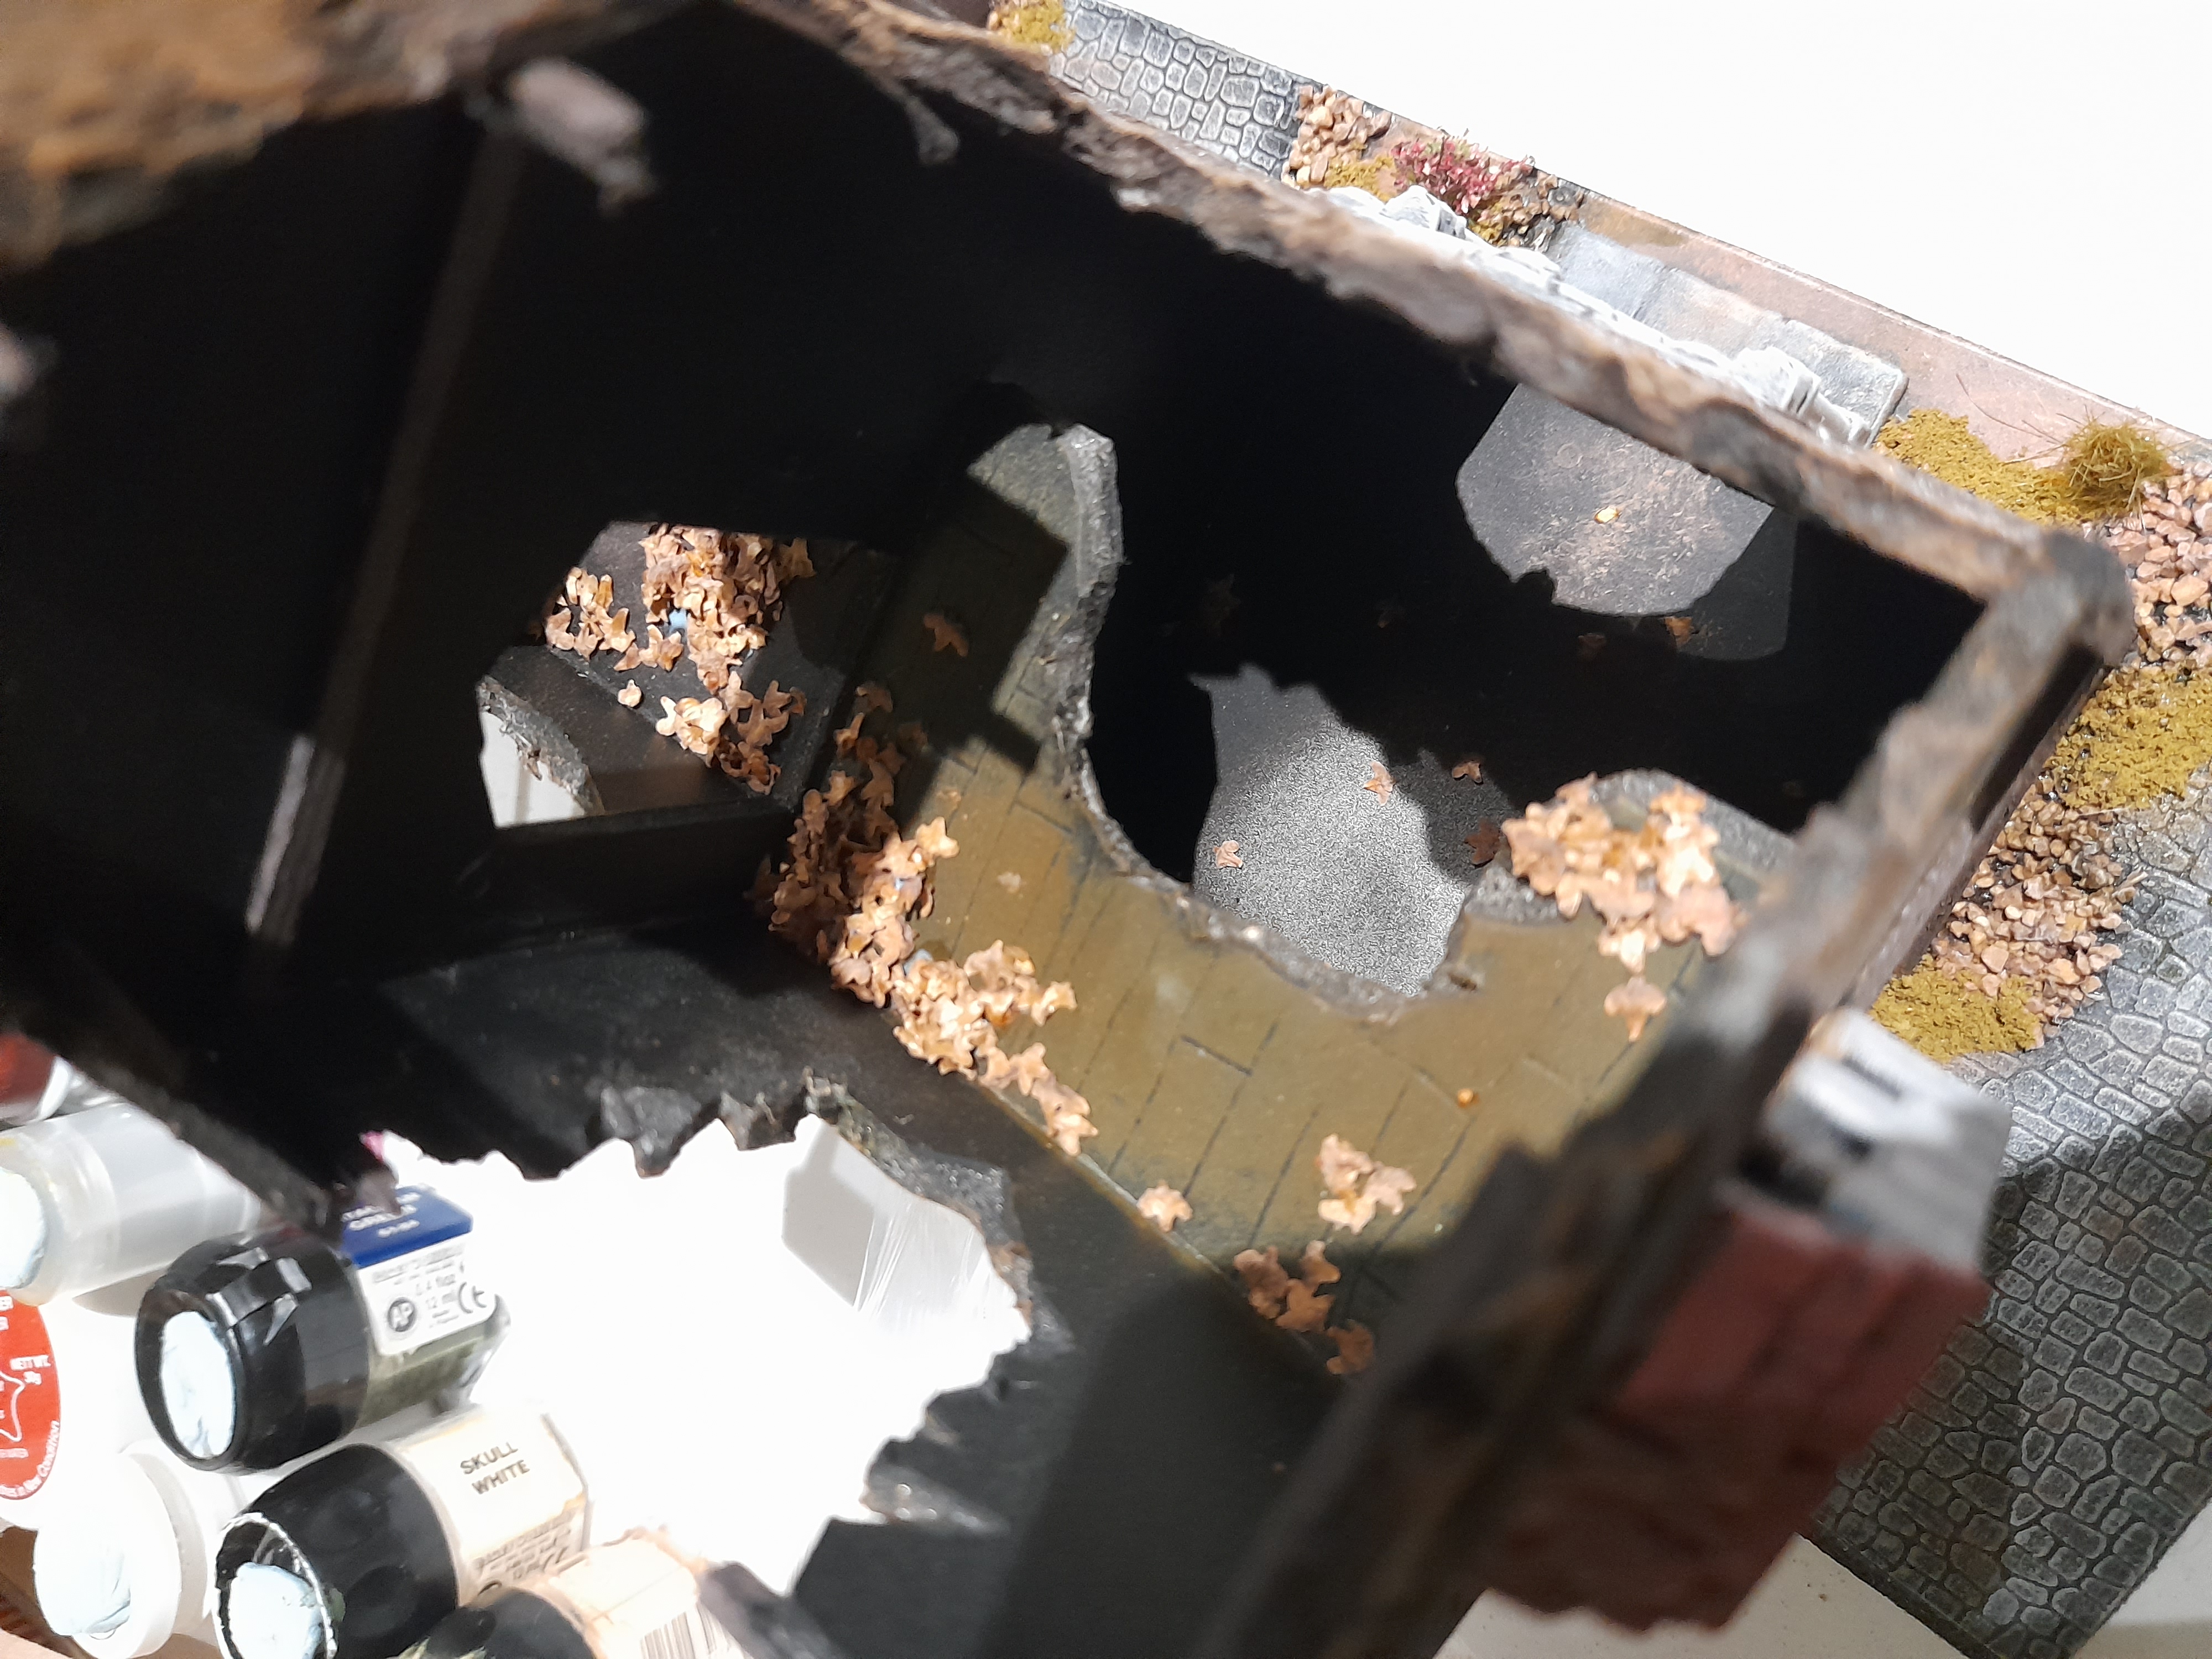
At this stage I also found a small piece of cobblestone plasticard, so decided to add that to my largest building.
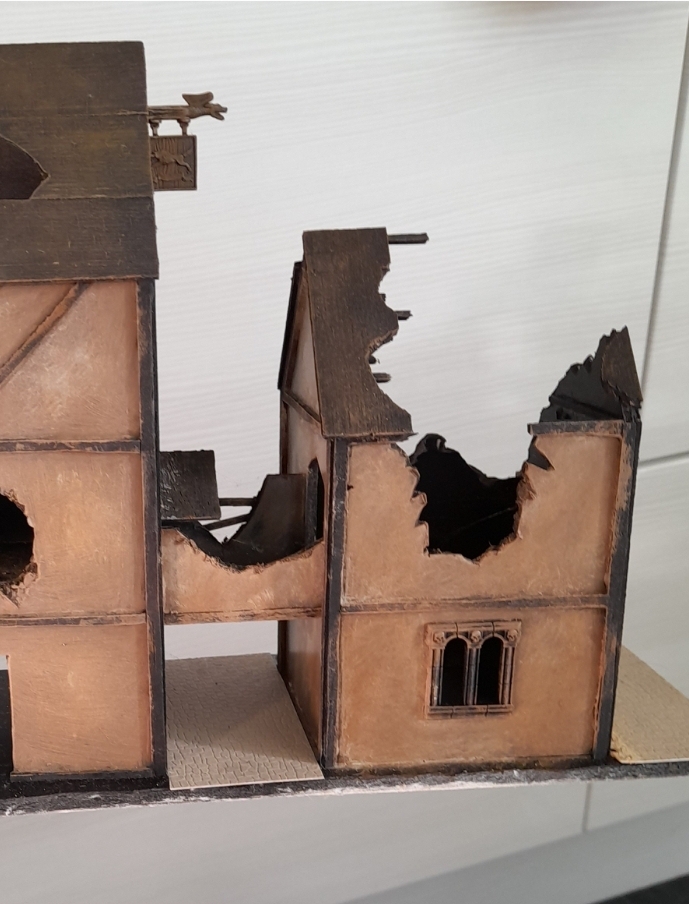

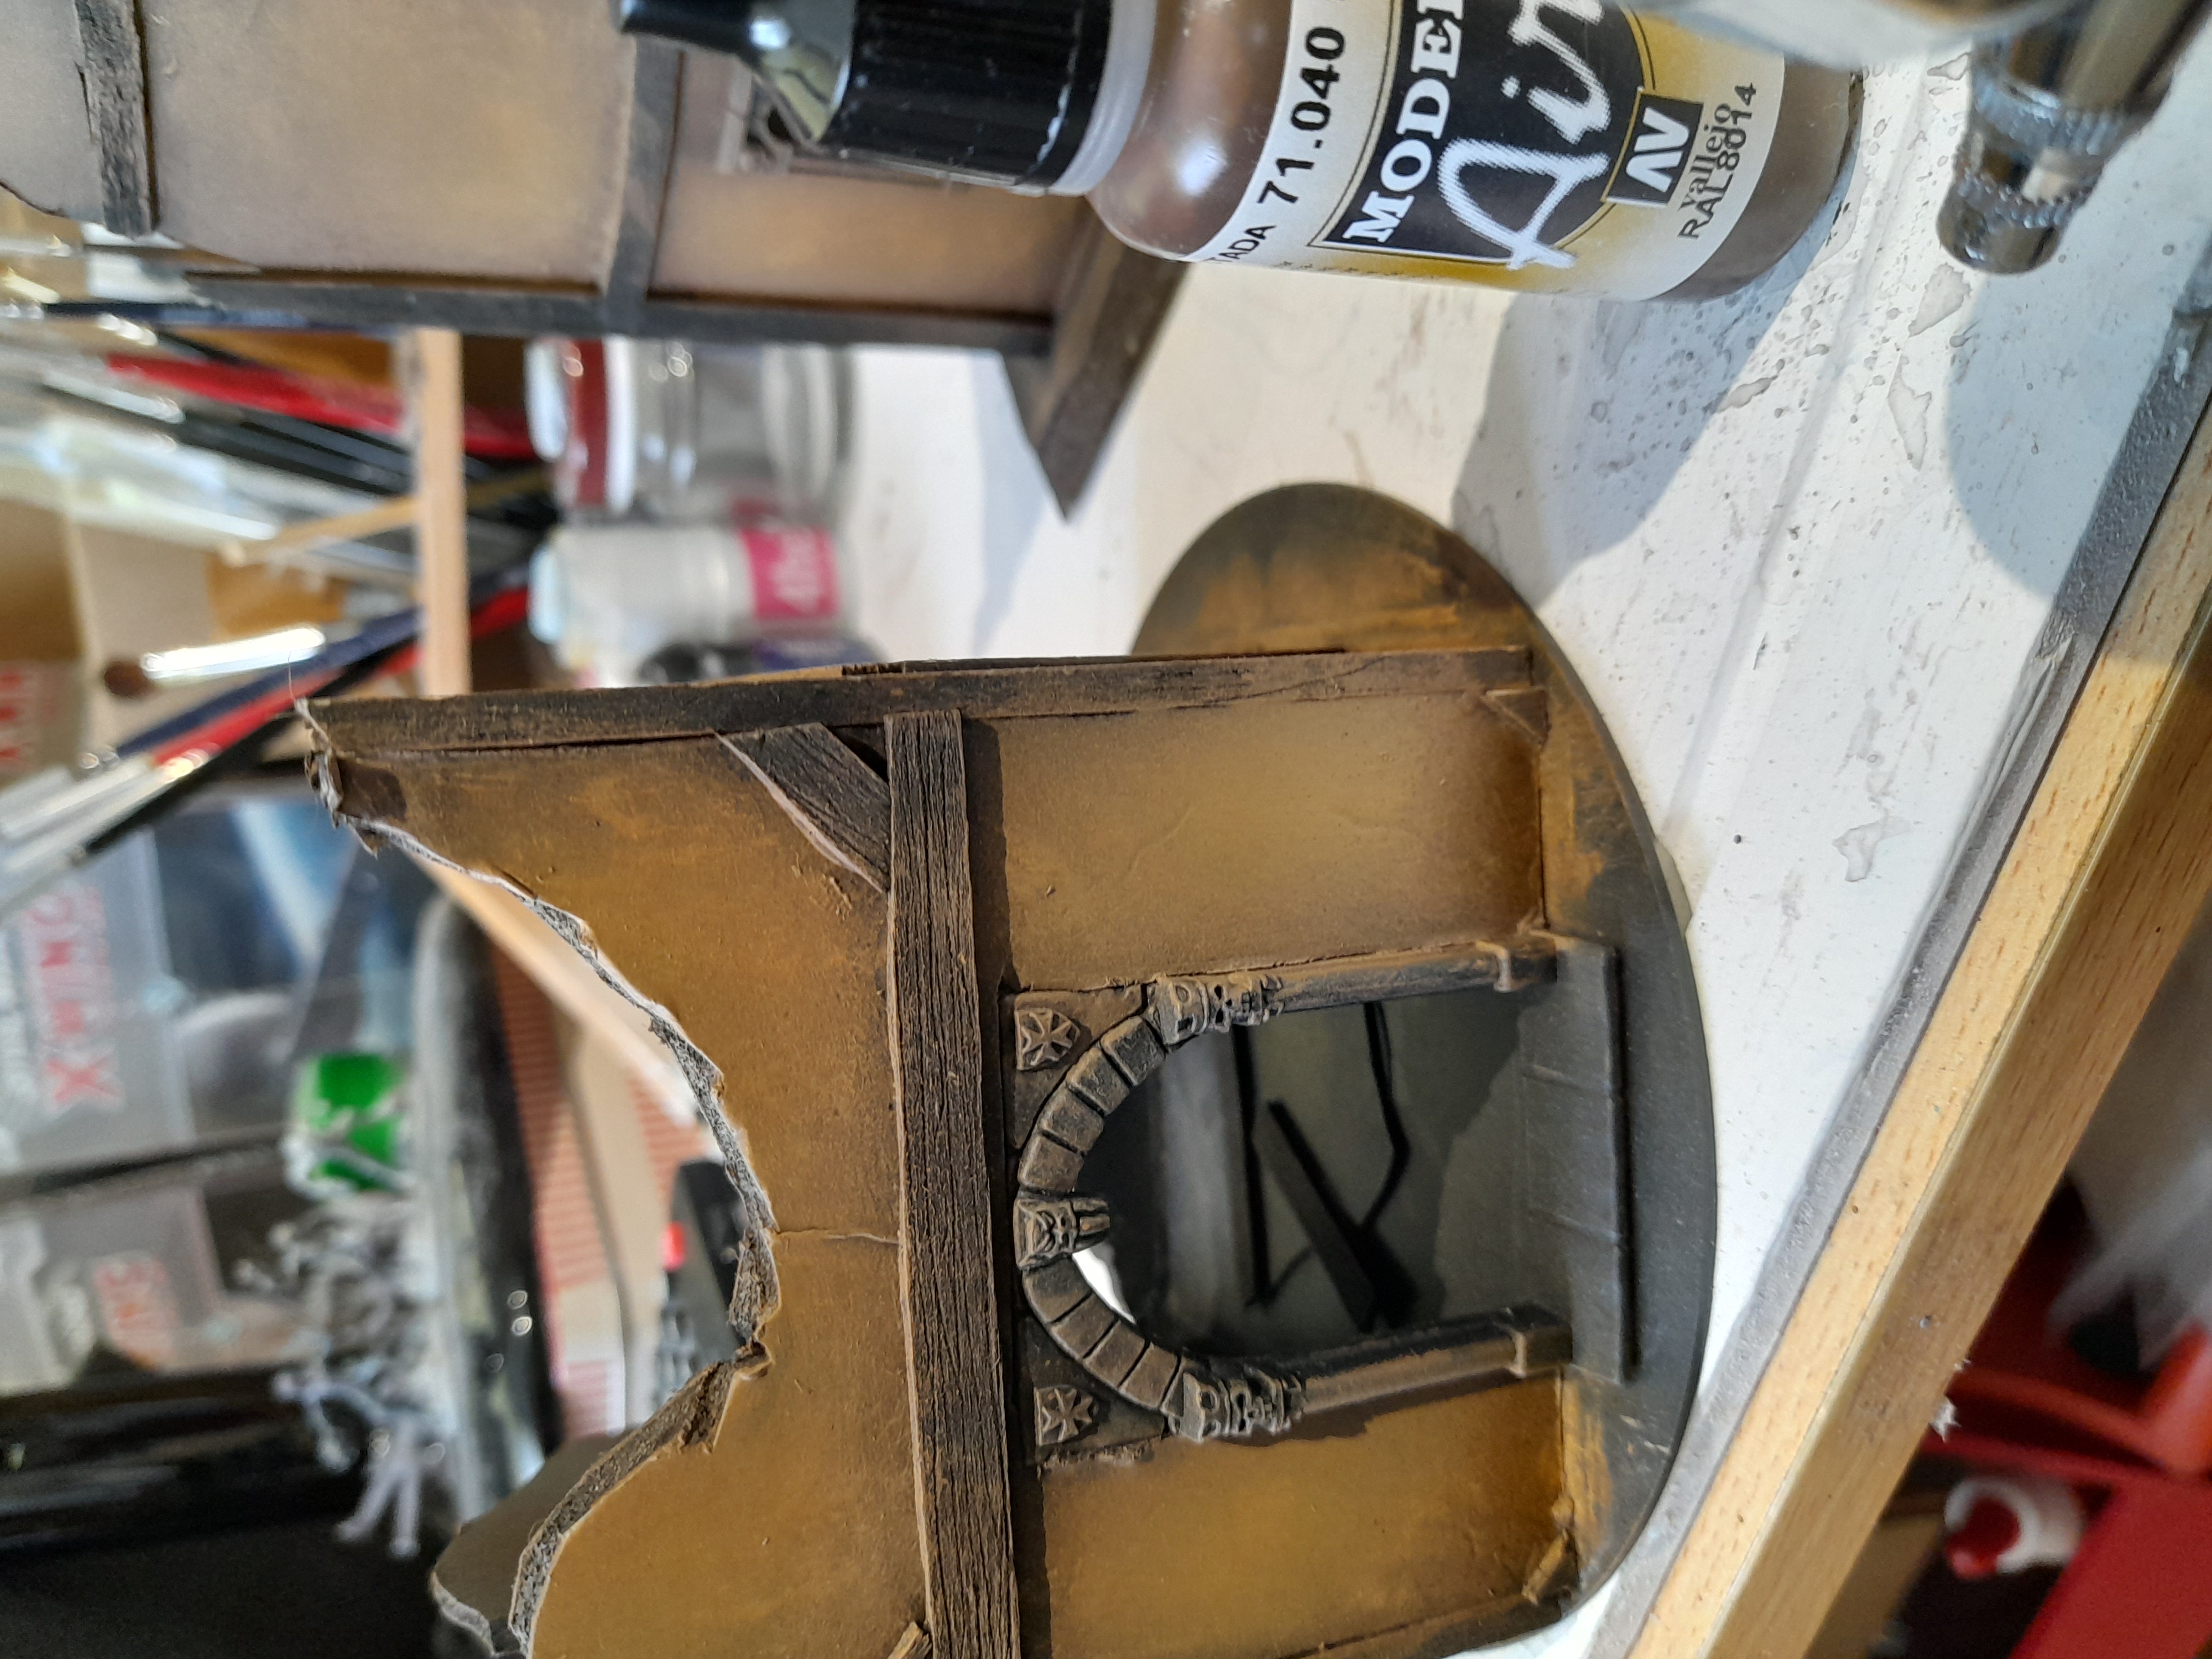
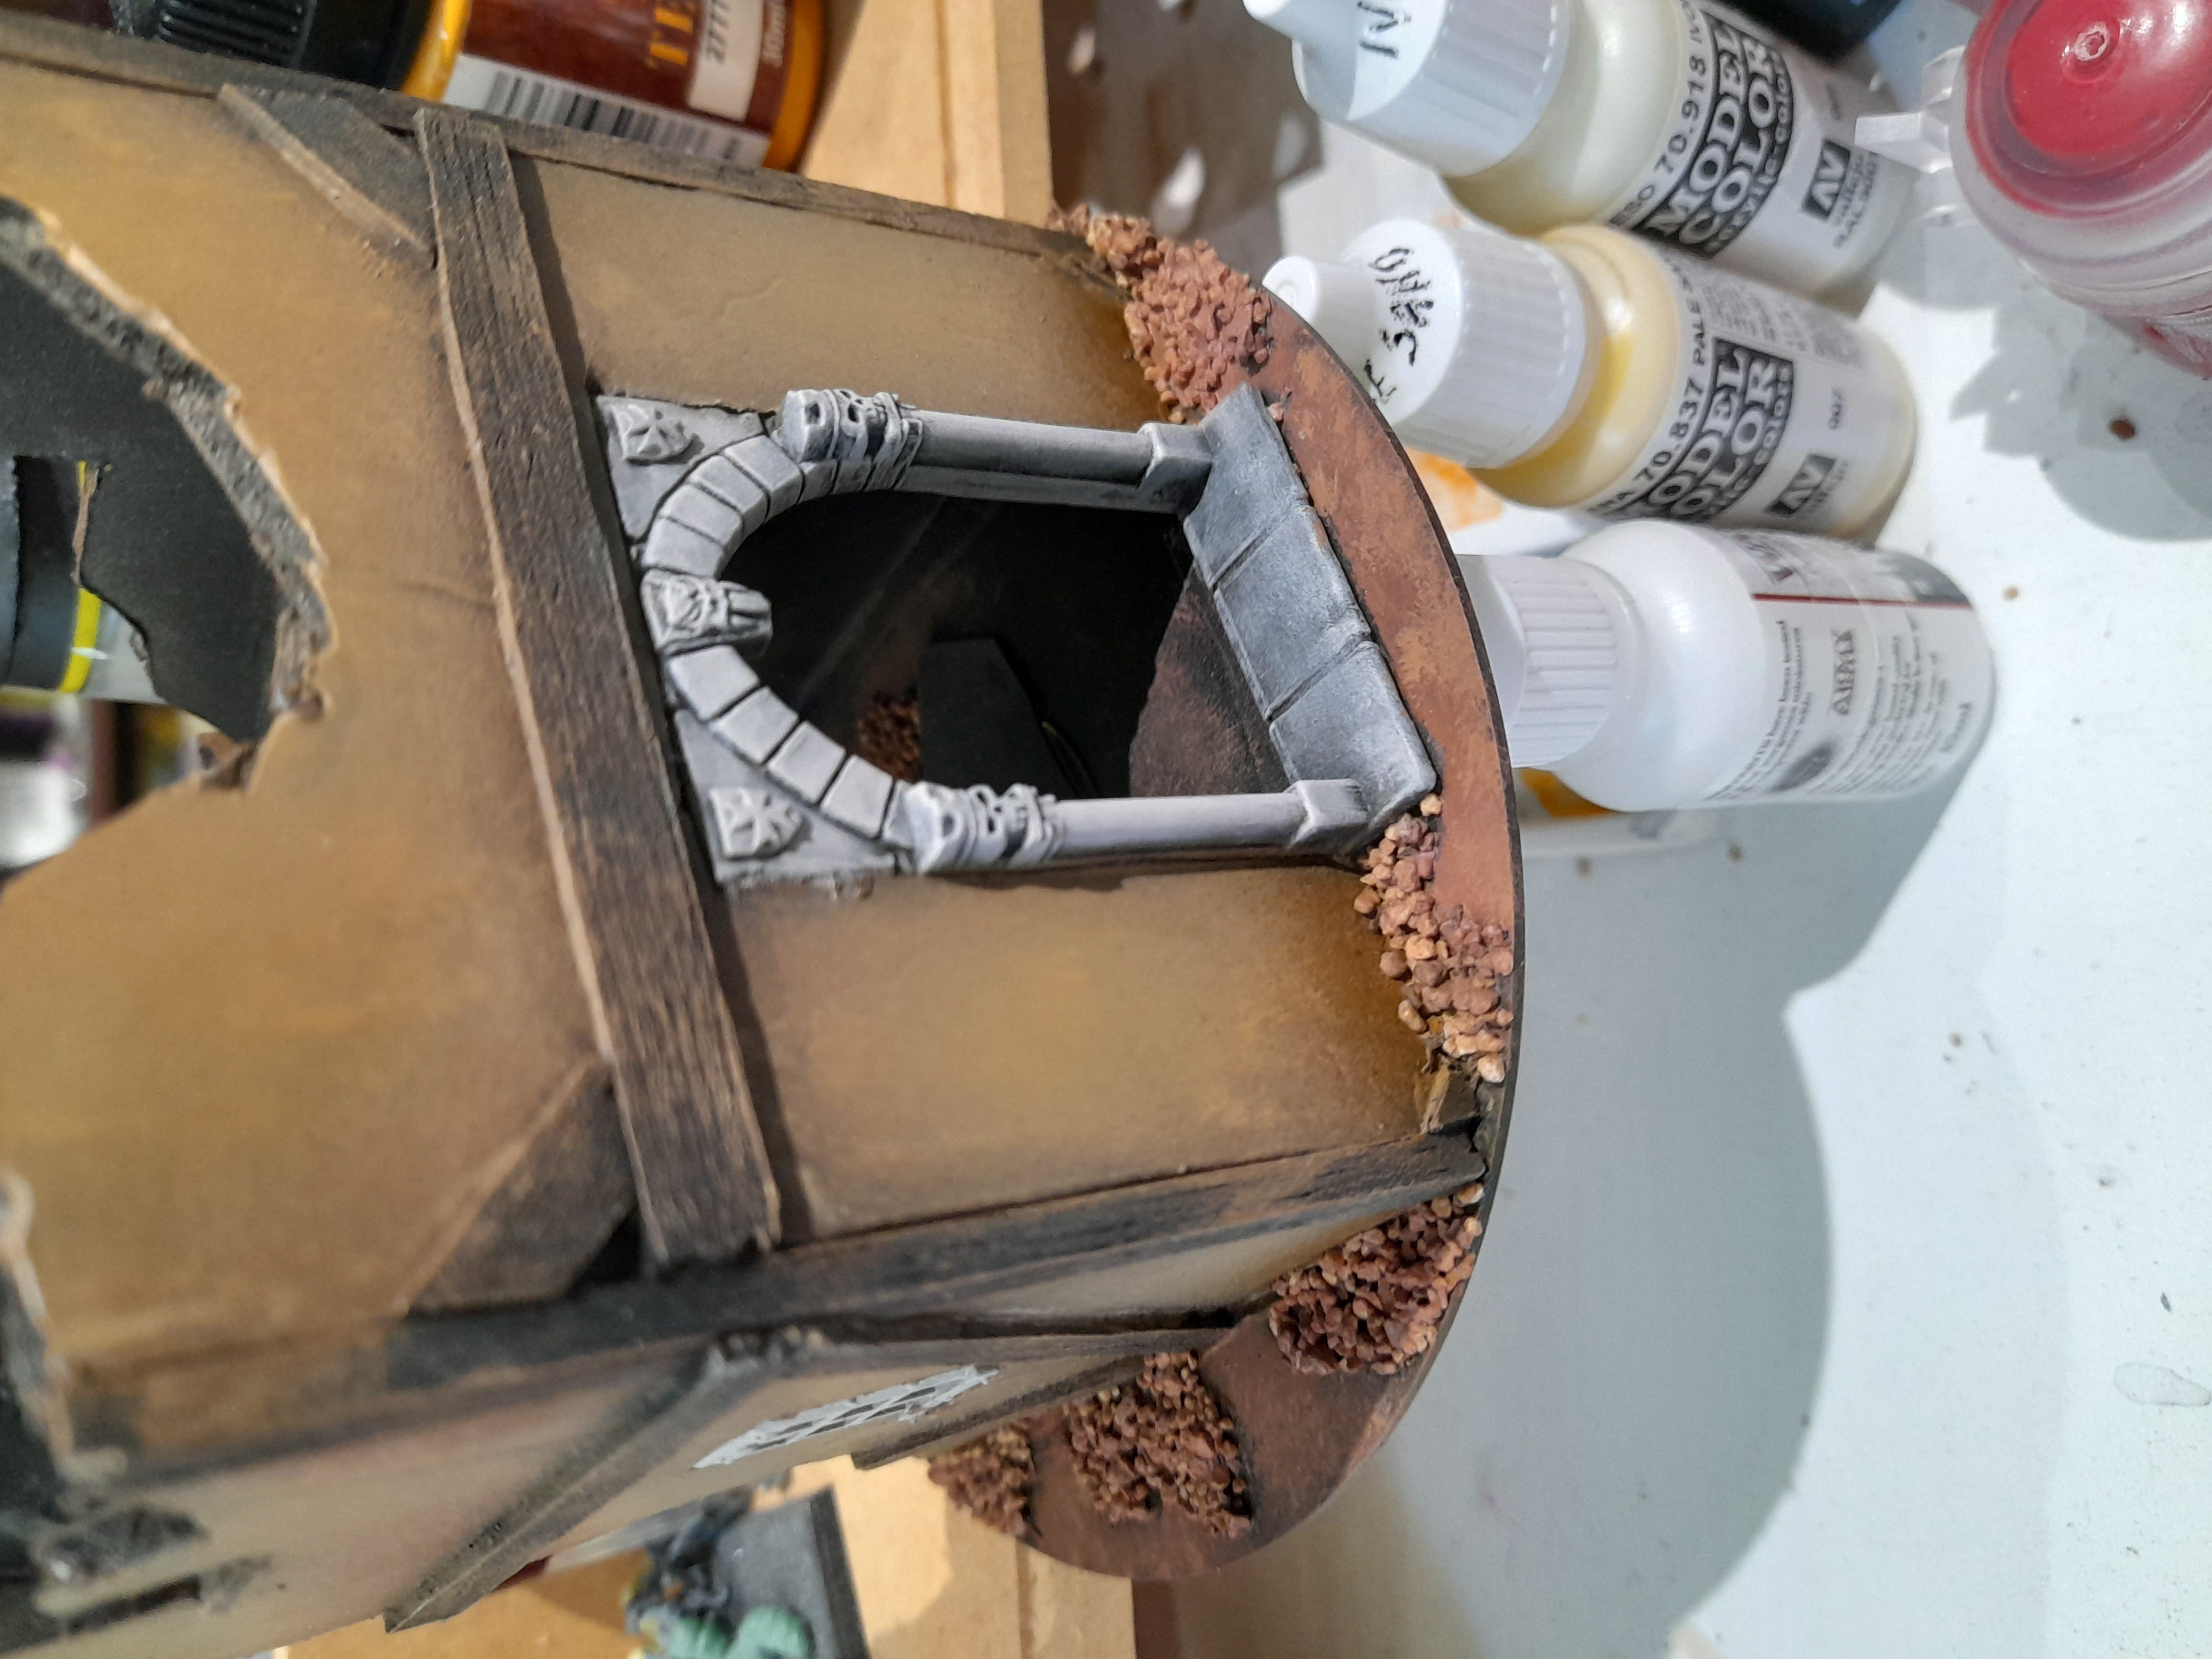
To even things up a little I pulled out my airbrush and sprayed on a few browns onto the wall panel areas, concentrating in the middle of each, and with some areas stronger than others to give a little variation (but smoother than my drybrush attempts). I also added a slightly darker tone to the base of the walls.

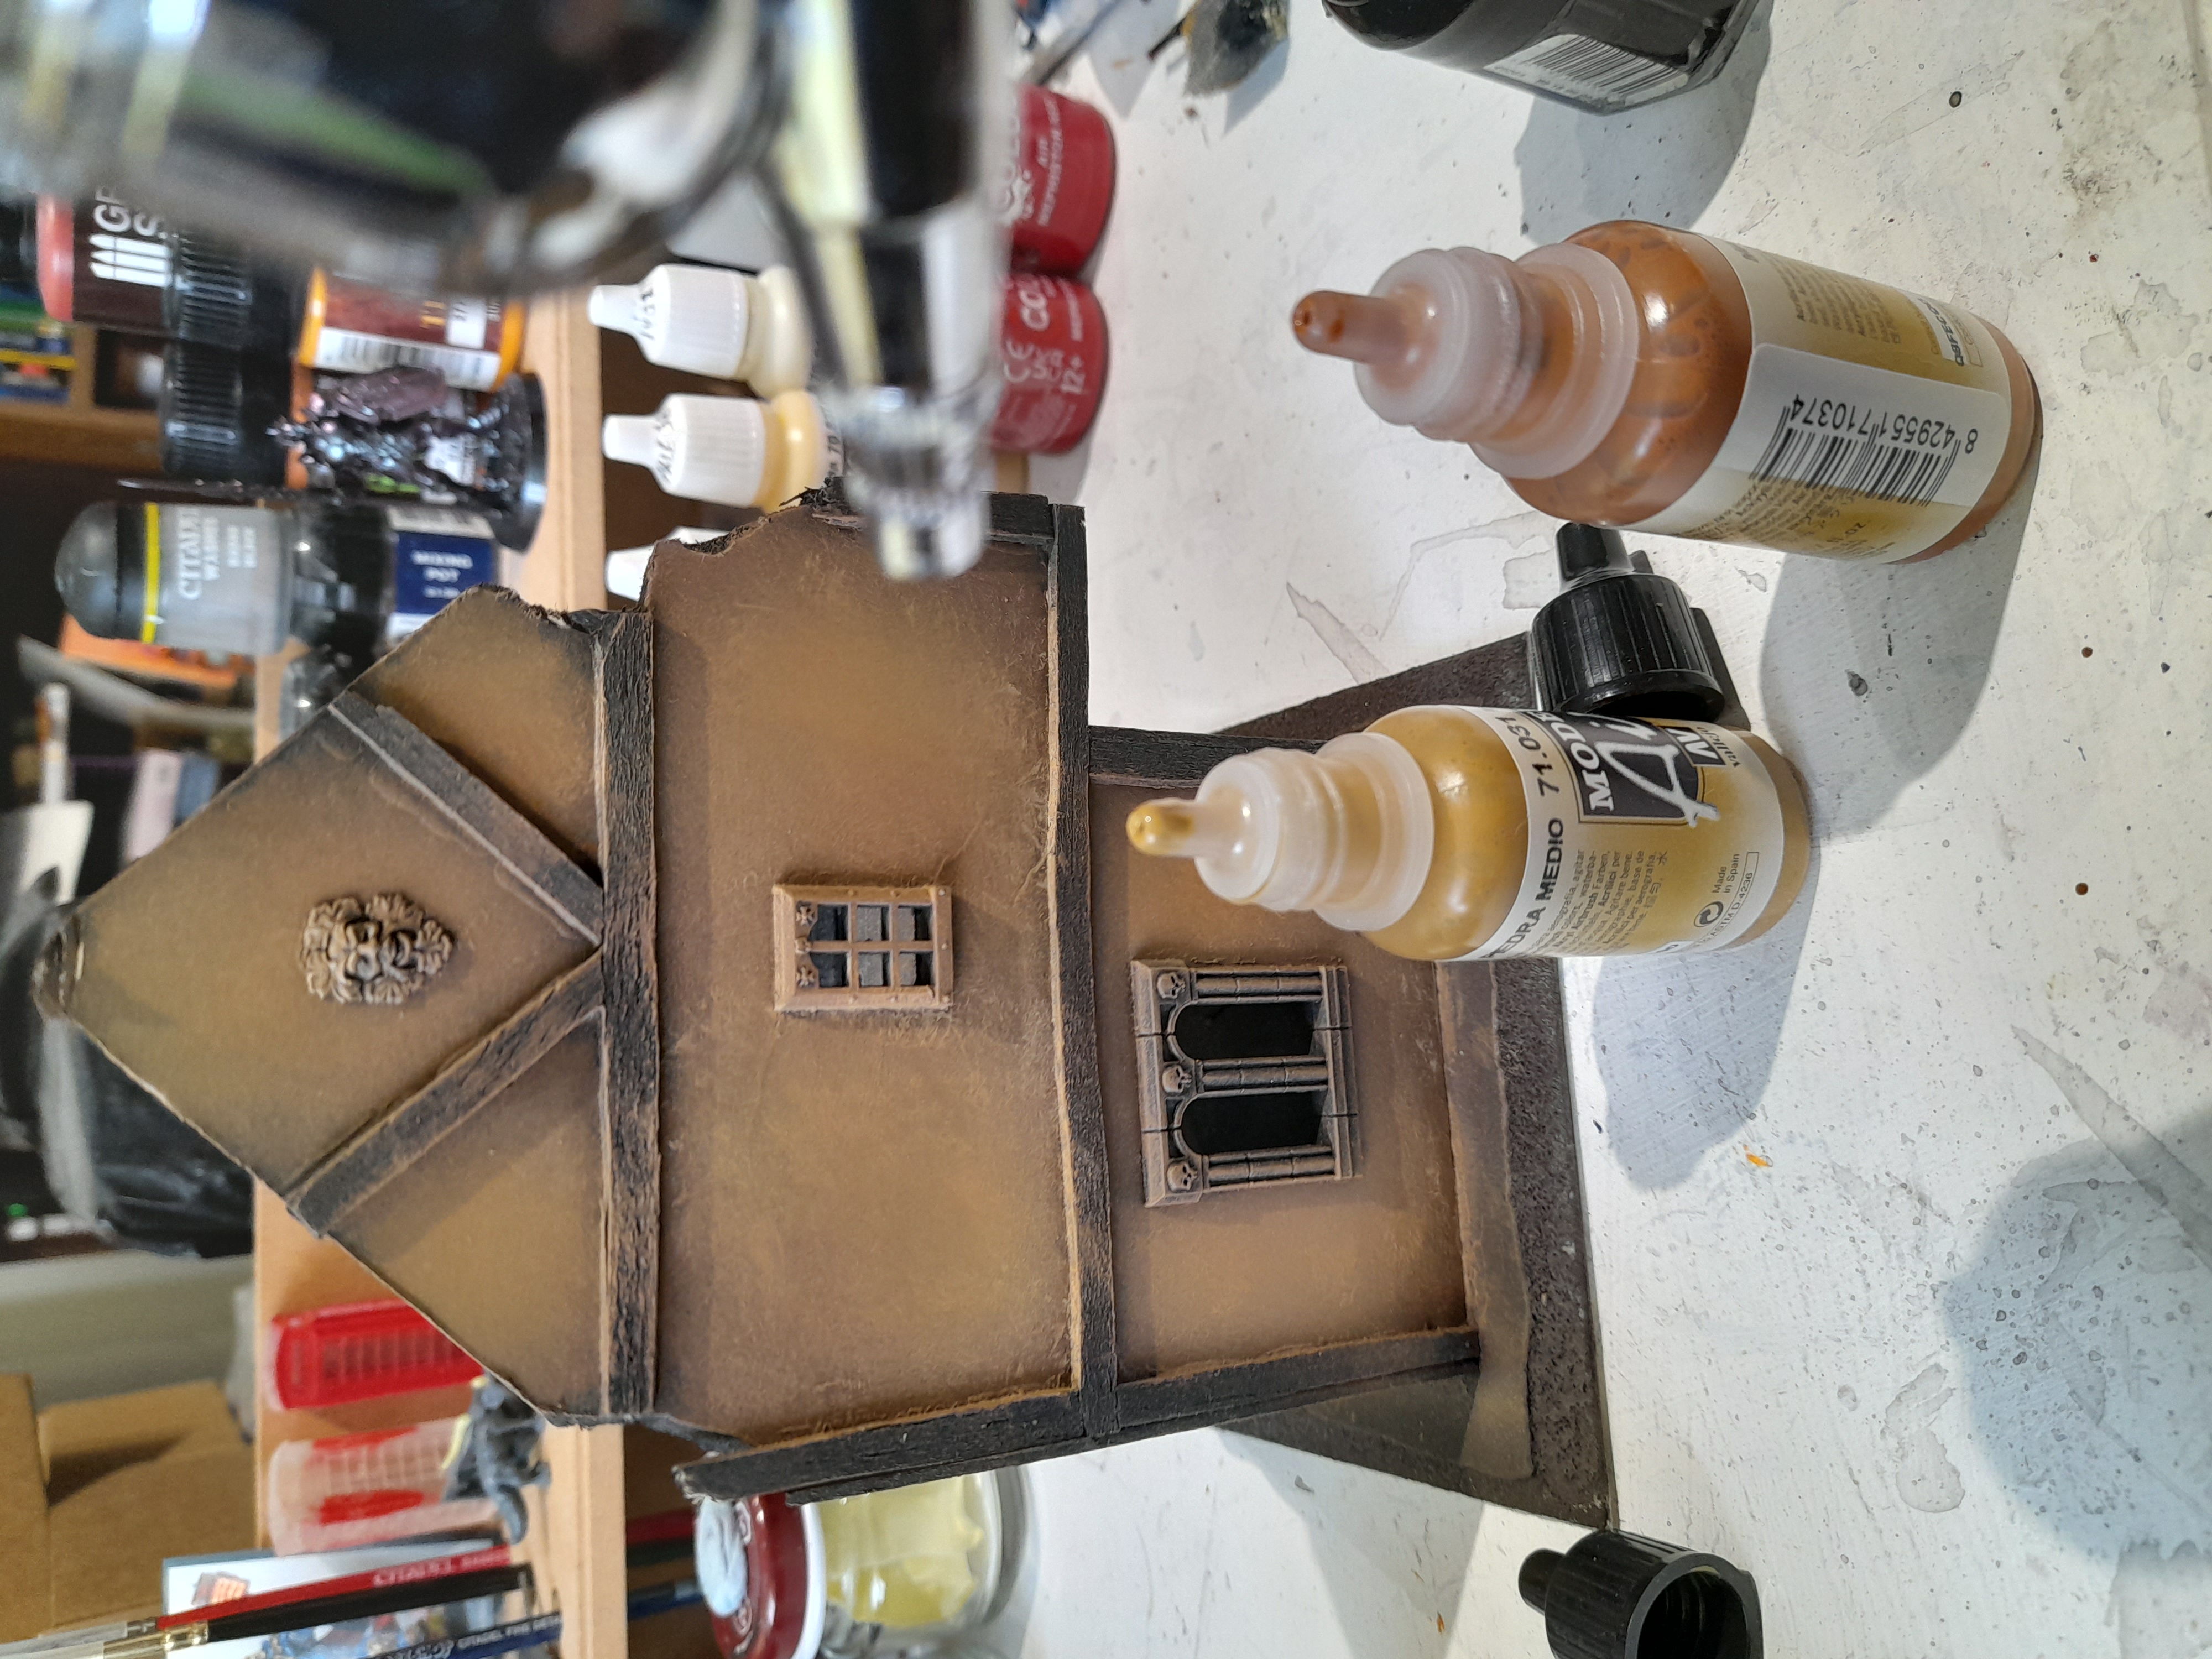
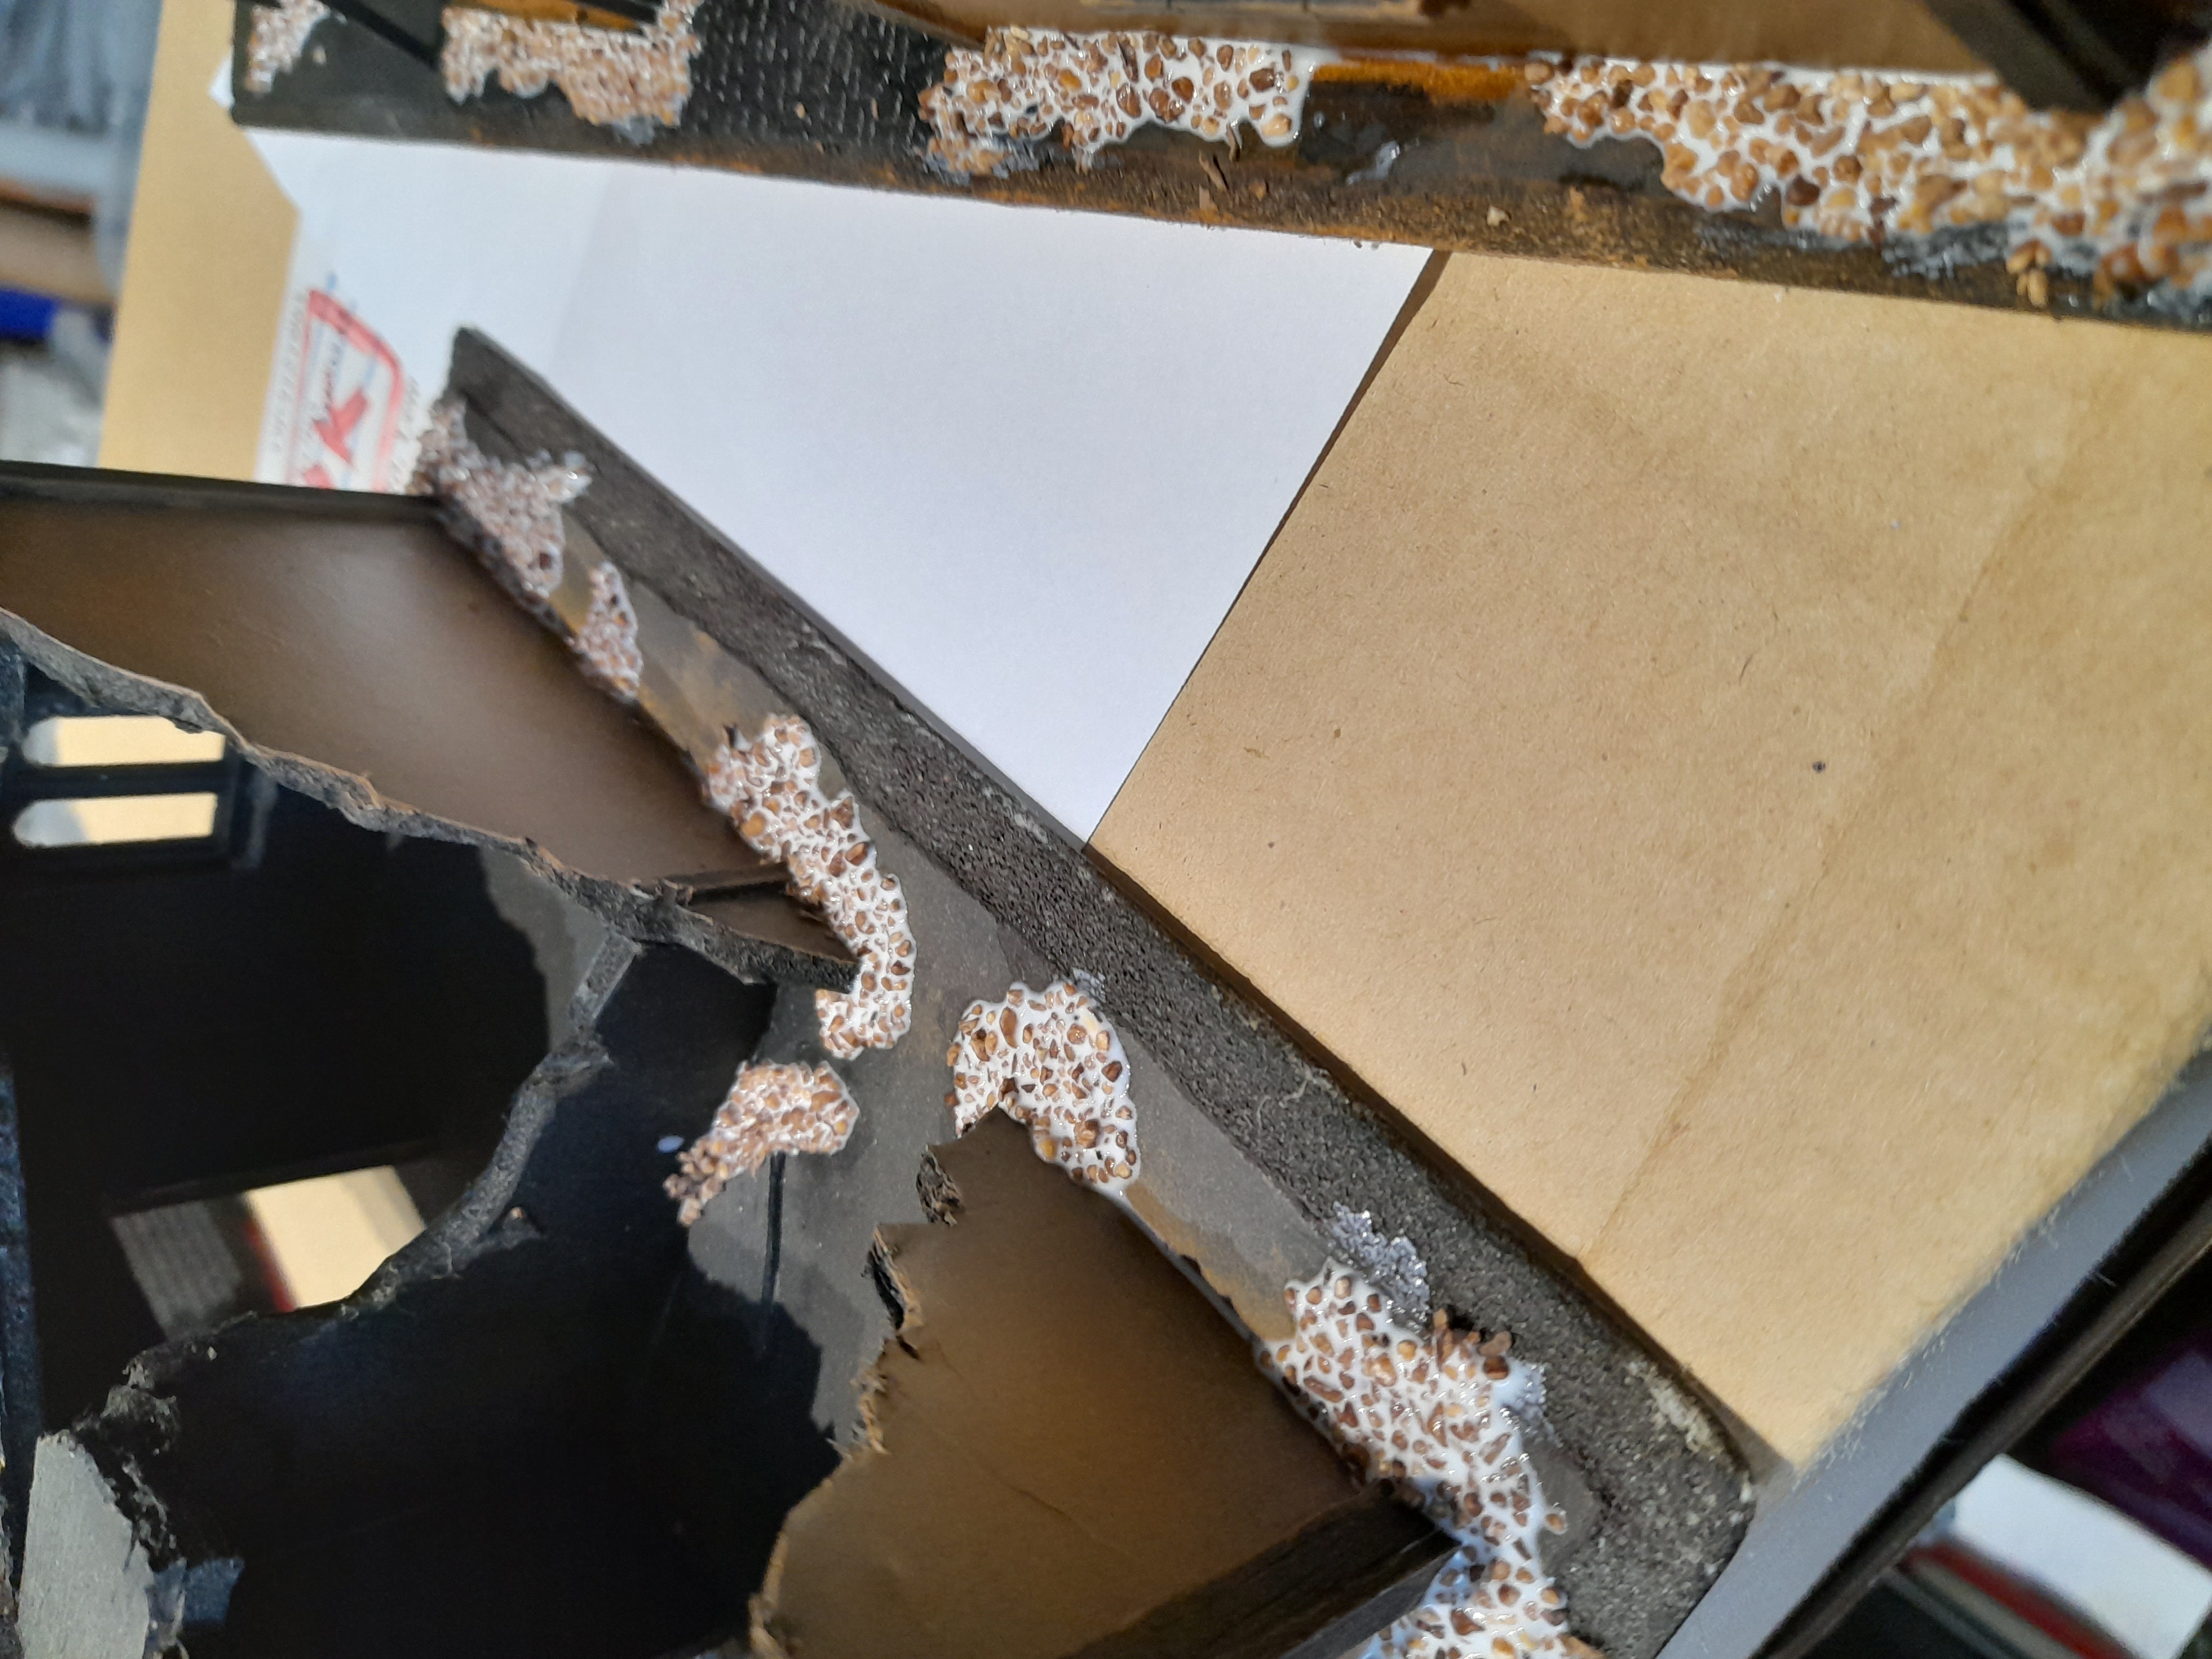
Next up I added some gravel to the bases, to break up the flat areas somewhat.
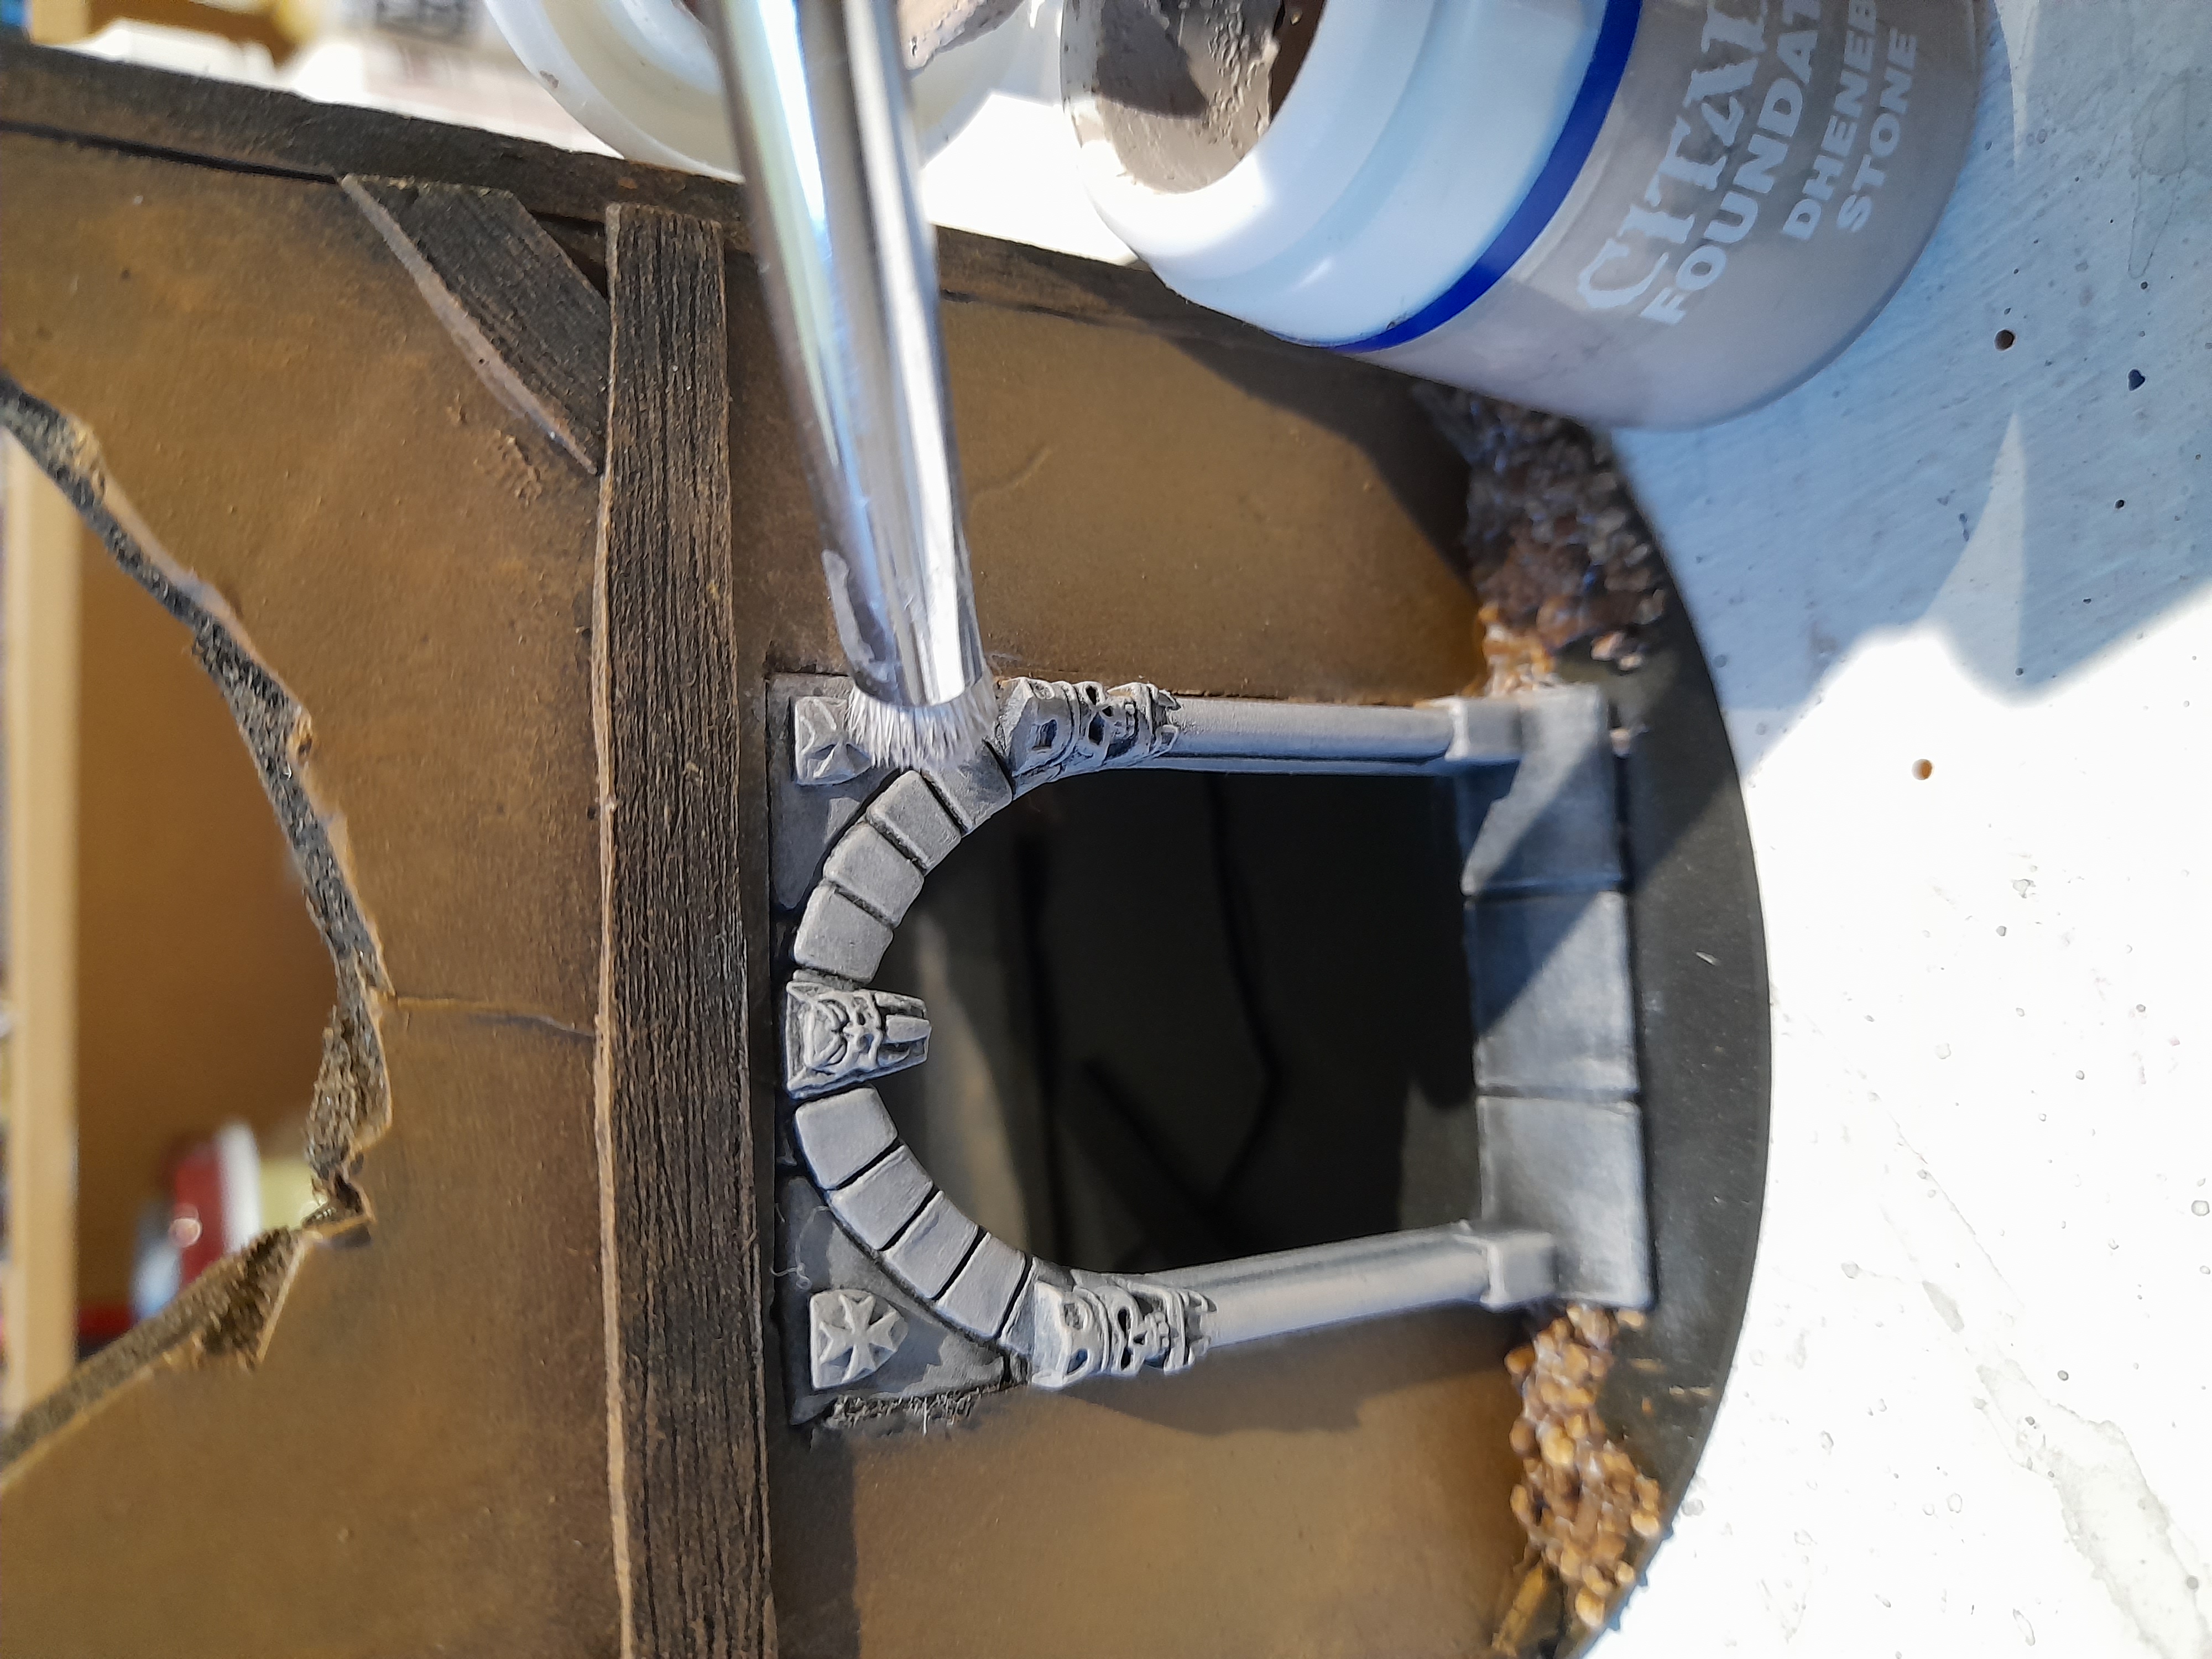
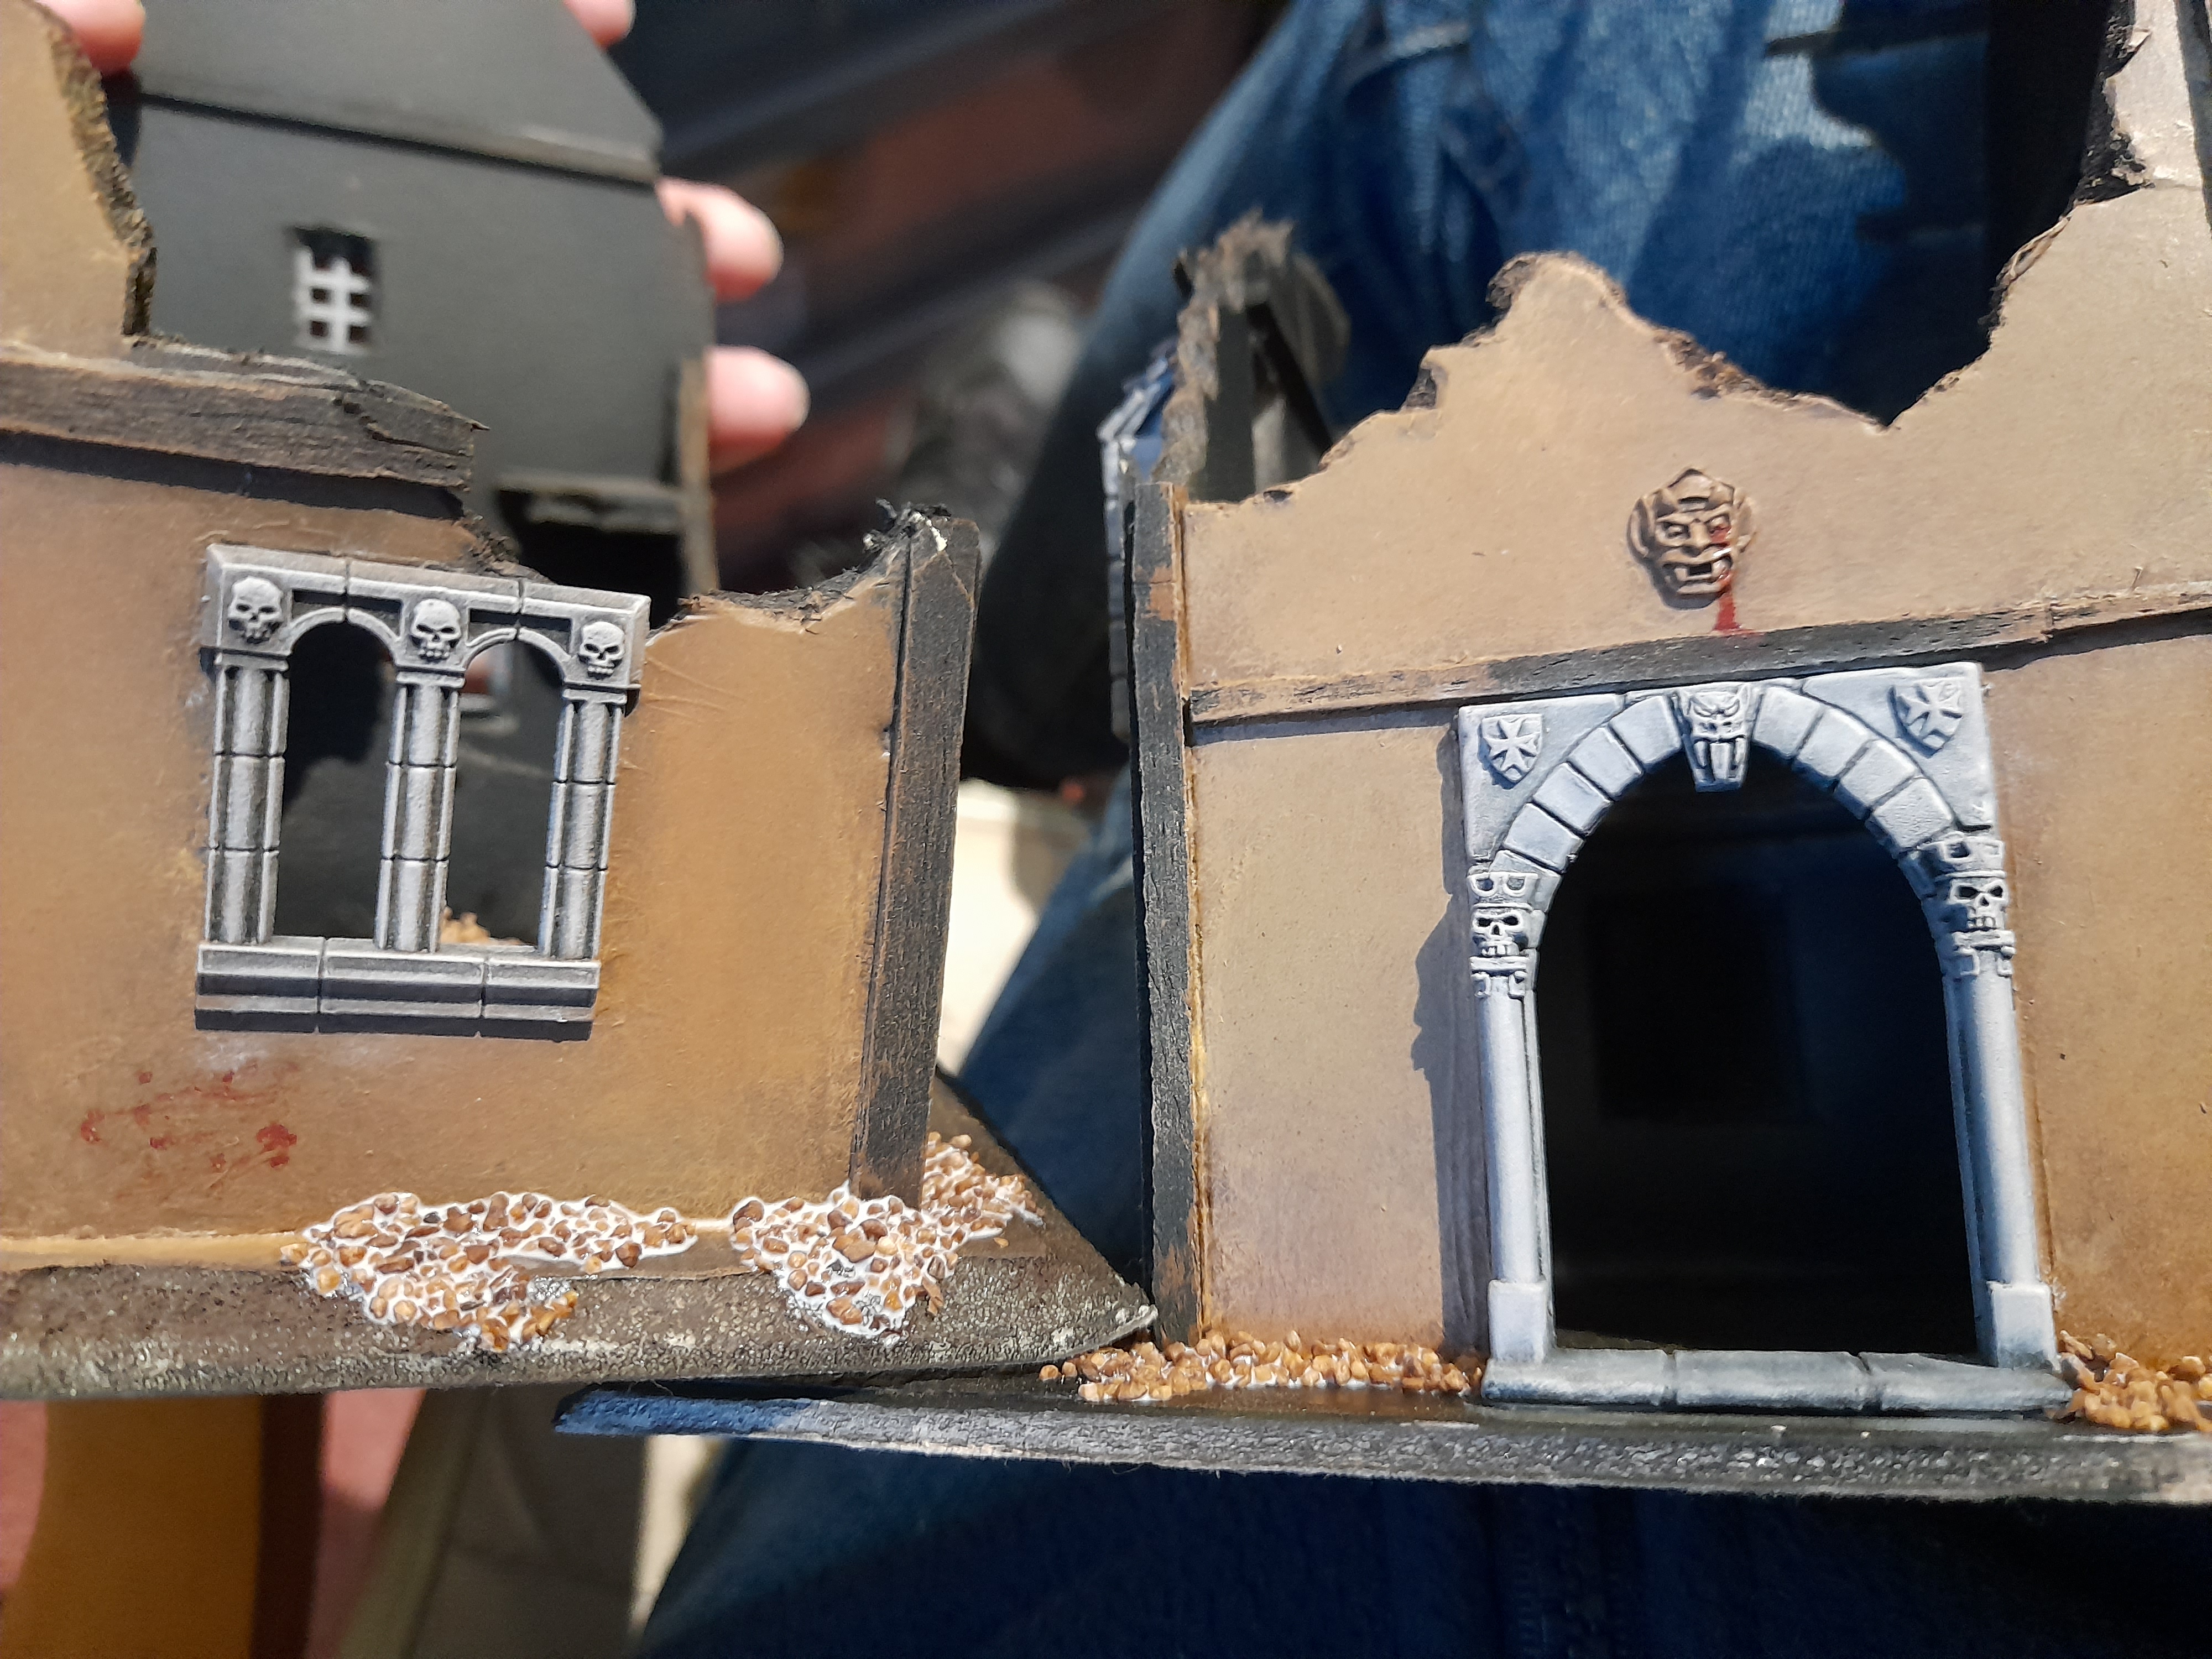
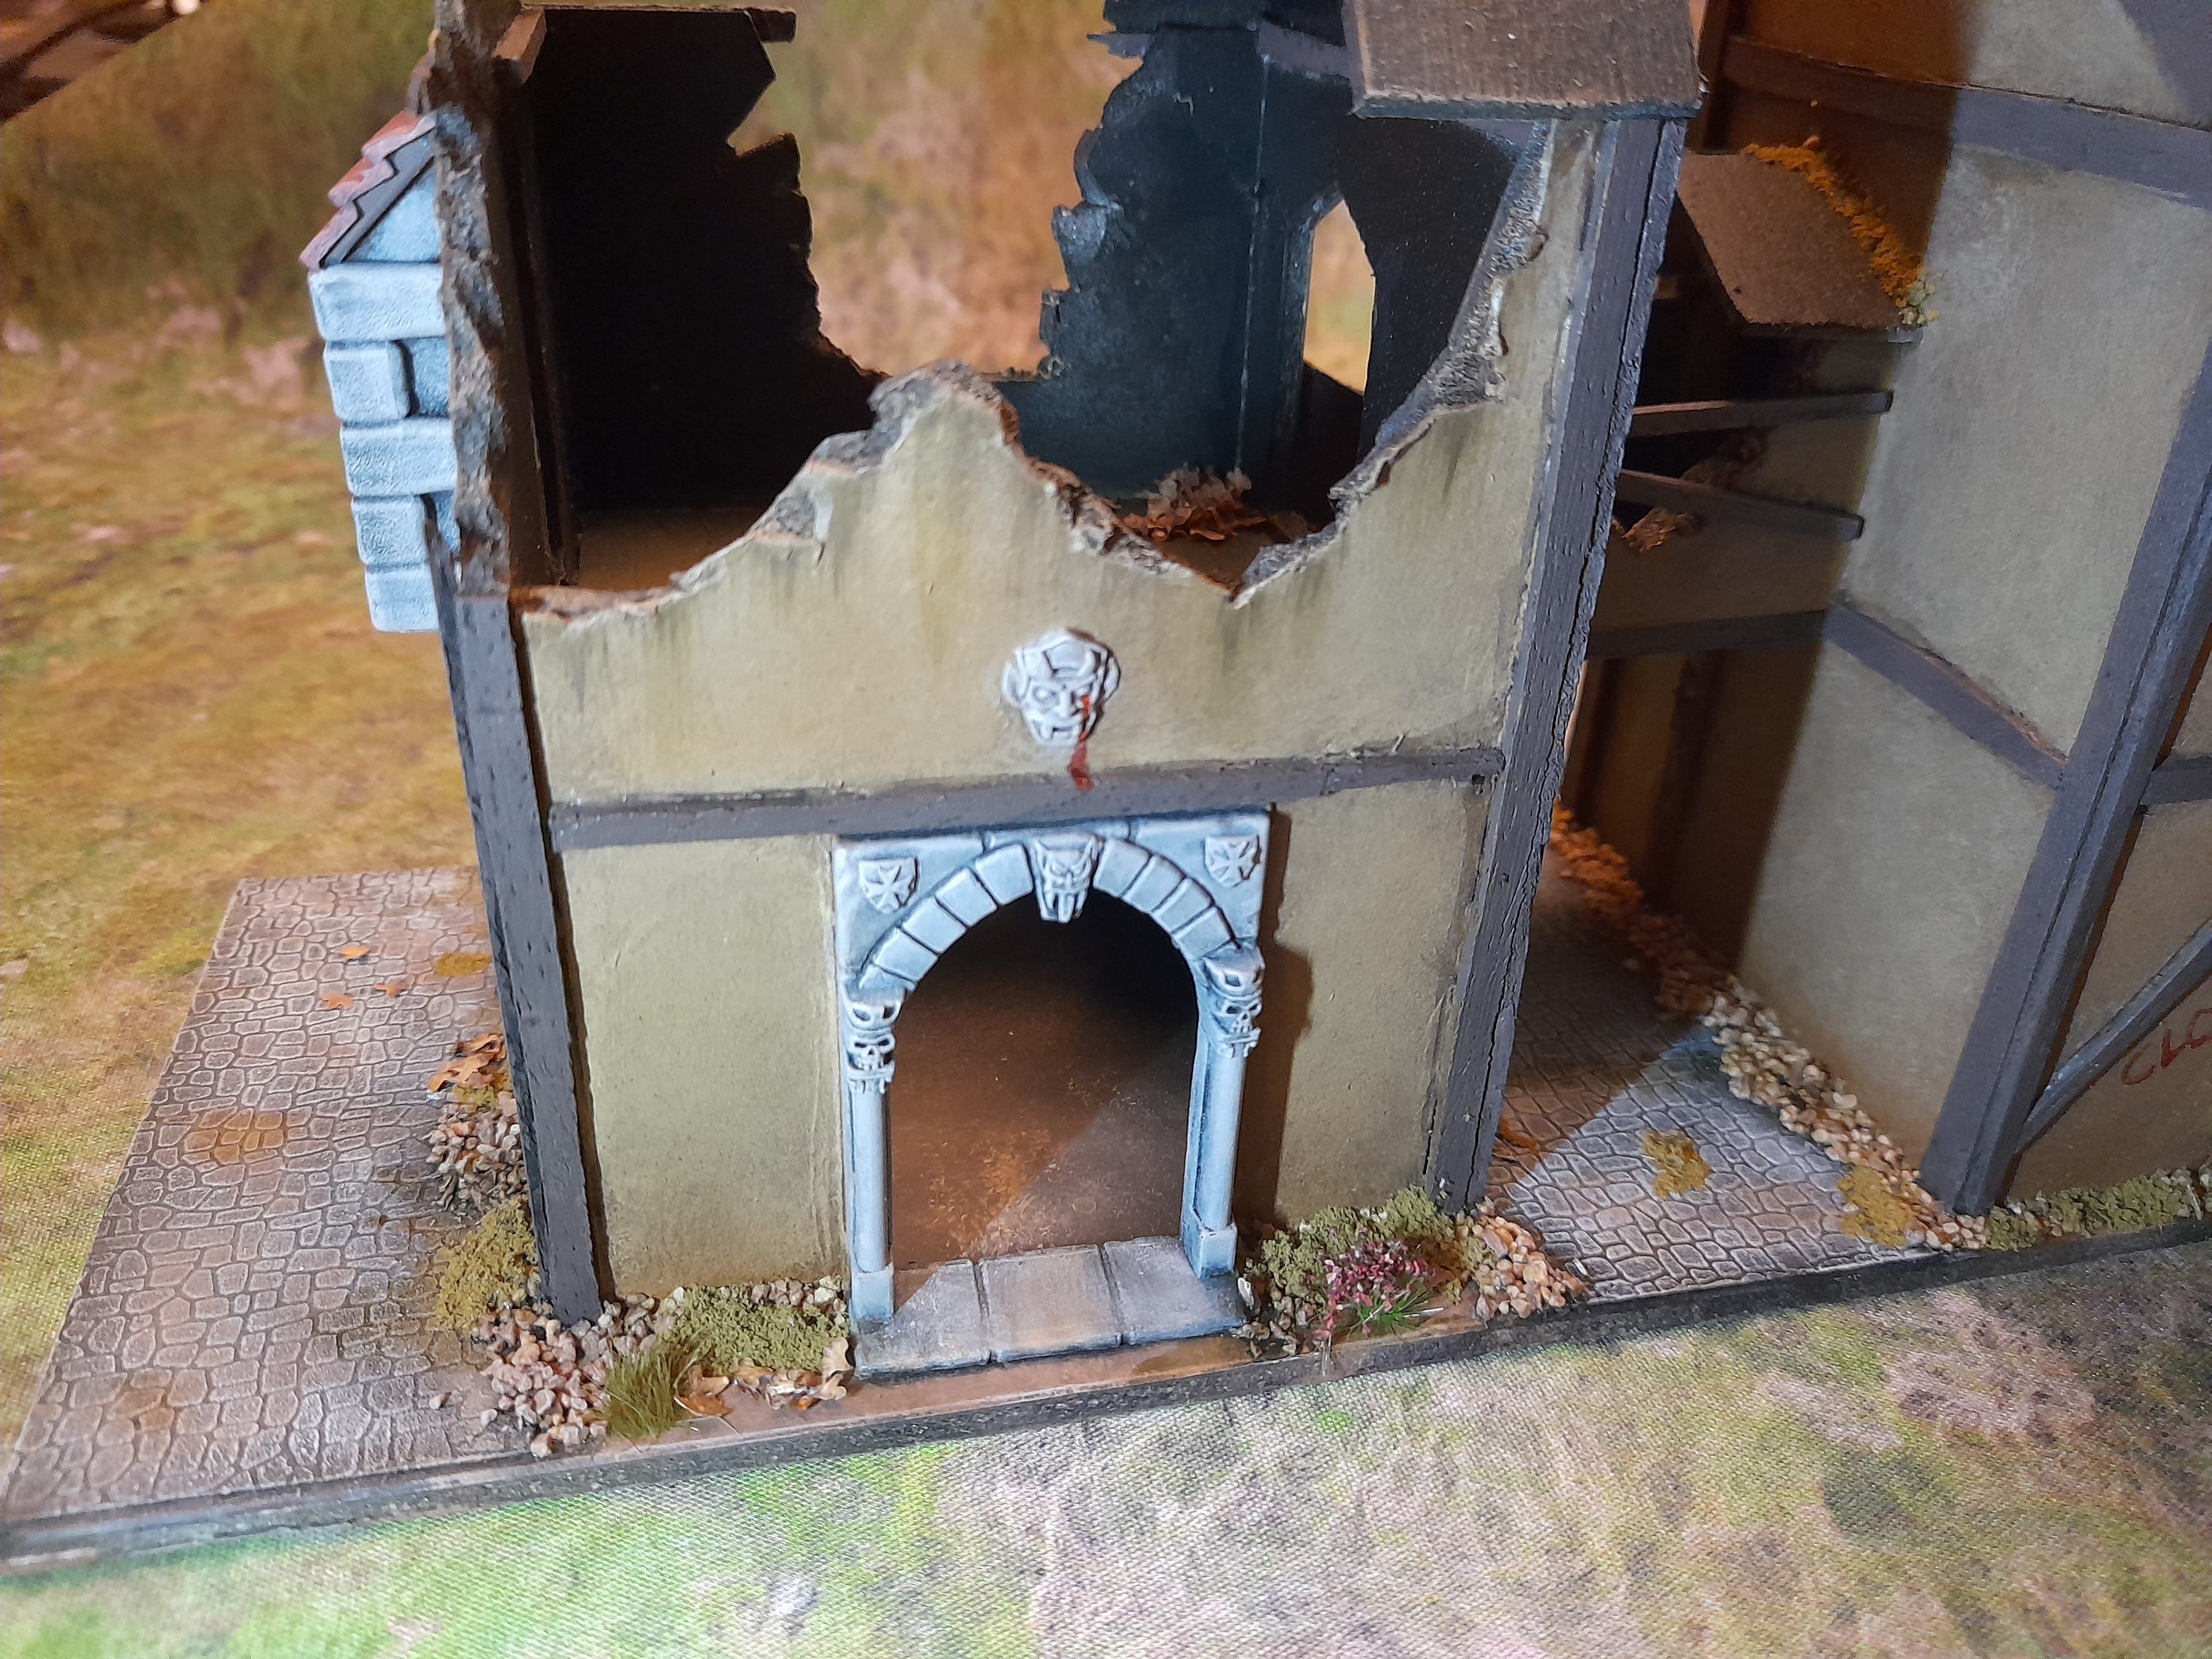
With that done it was time to start picking out some of the (albeit minimal) details.
The stonework was painted using Deneb stone, and old foundation paint.
Mordheim Buildings Completed
31st October 2023
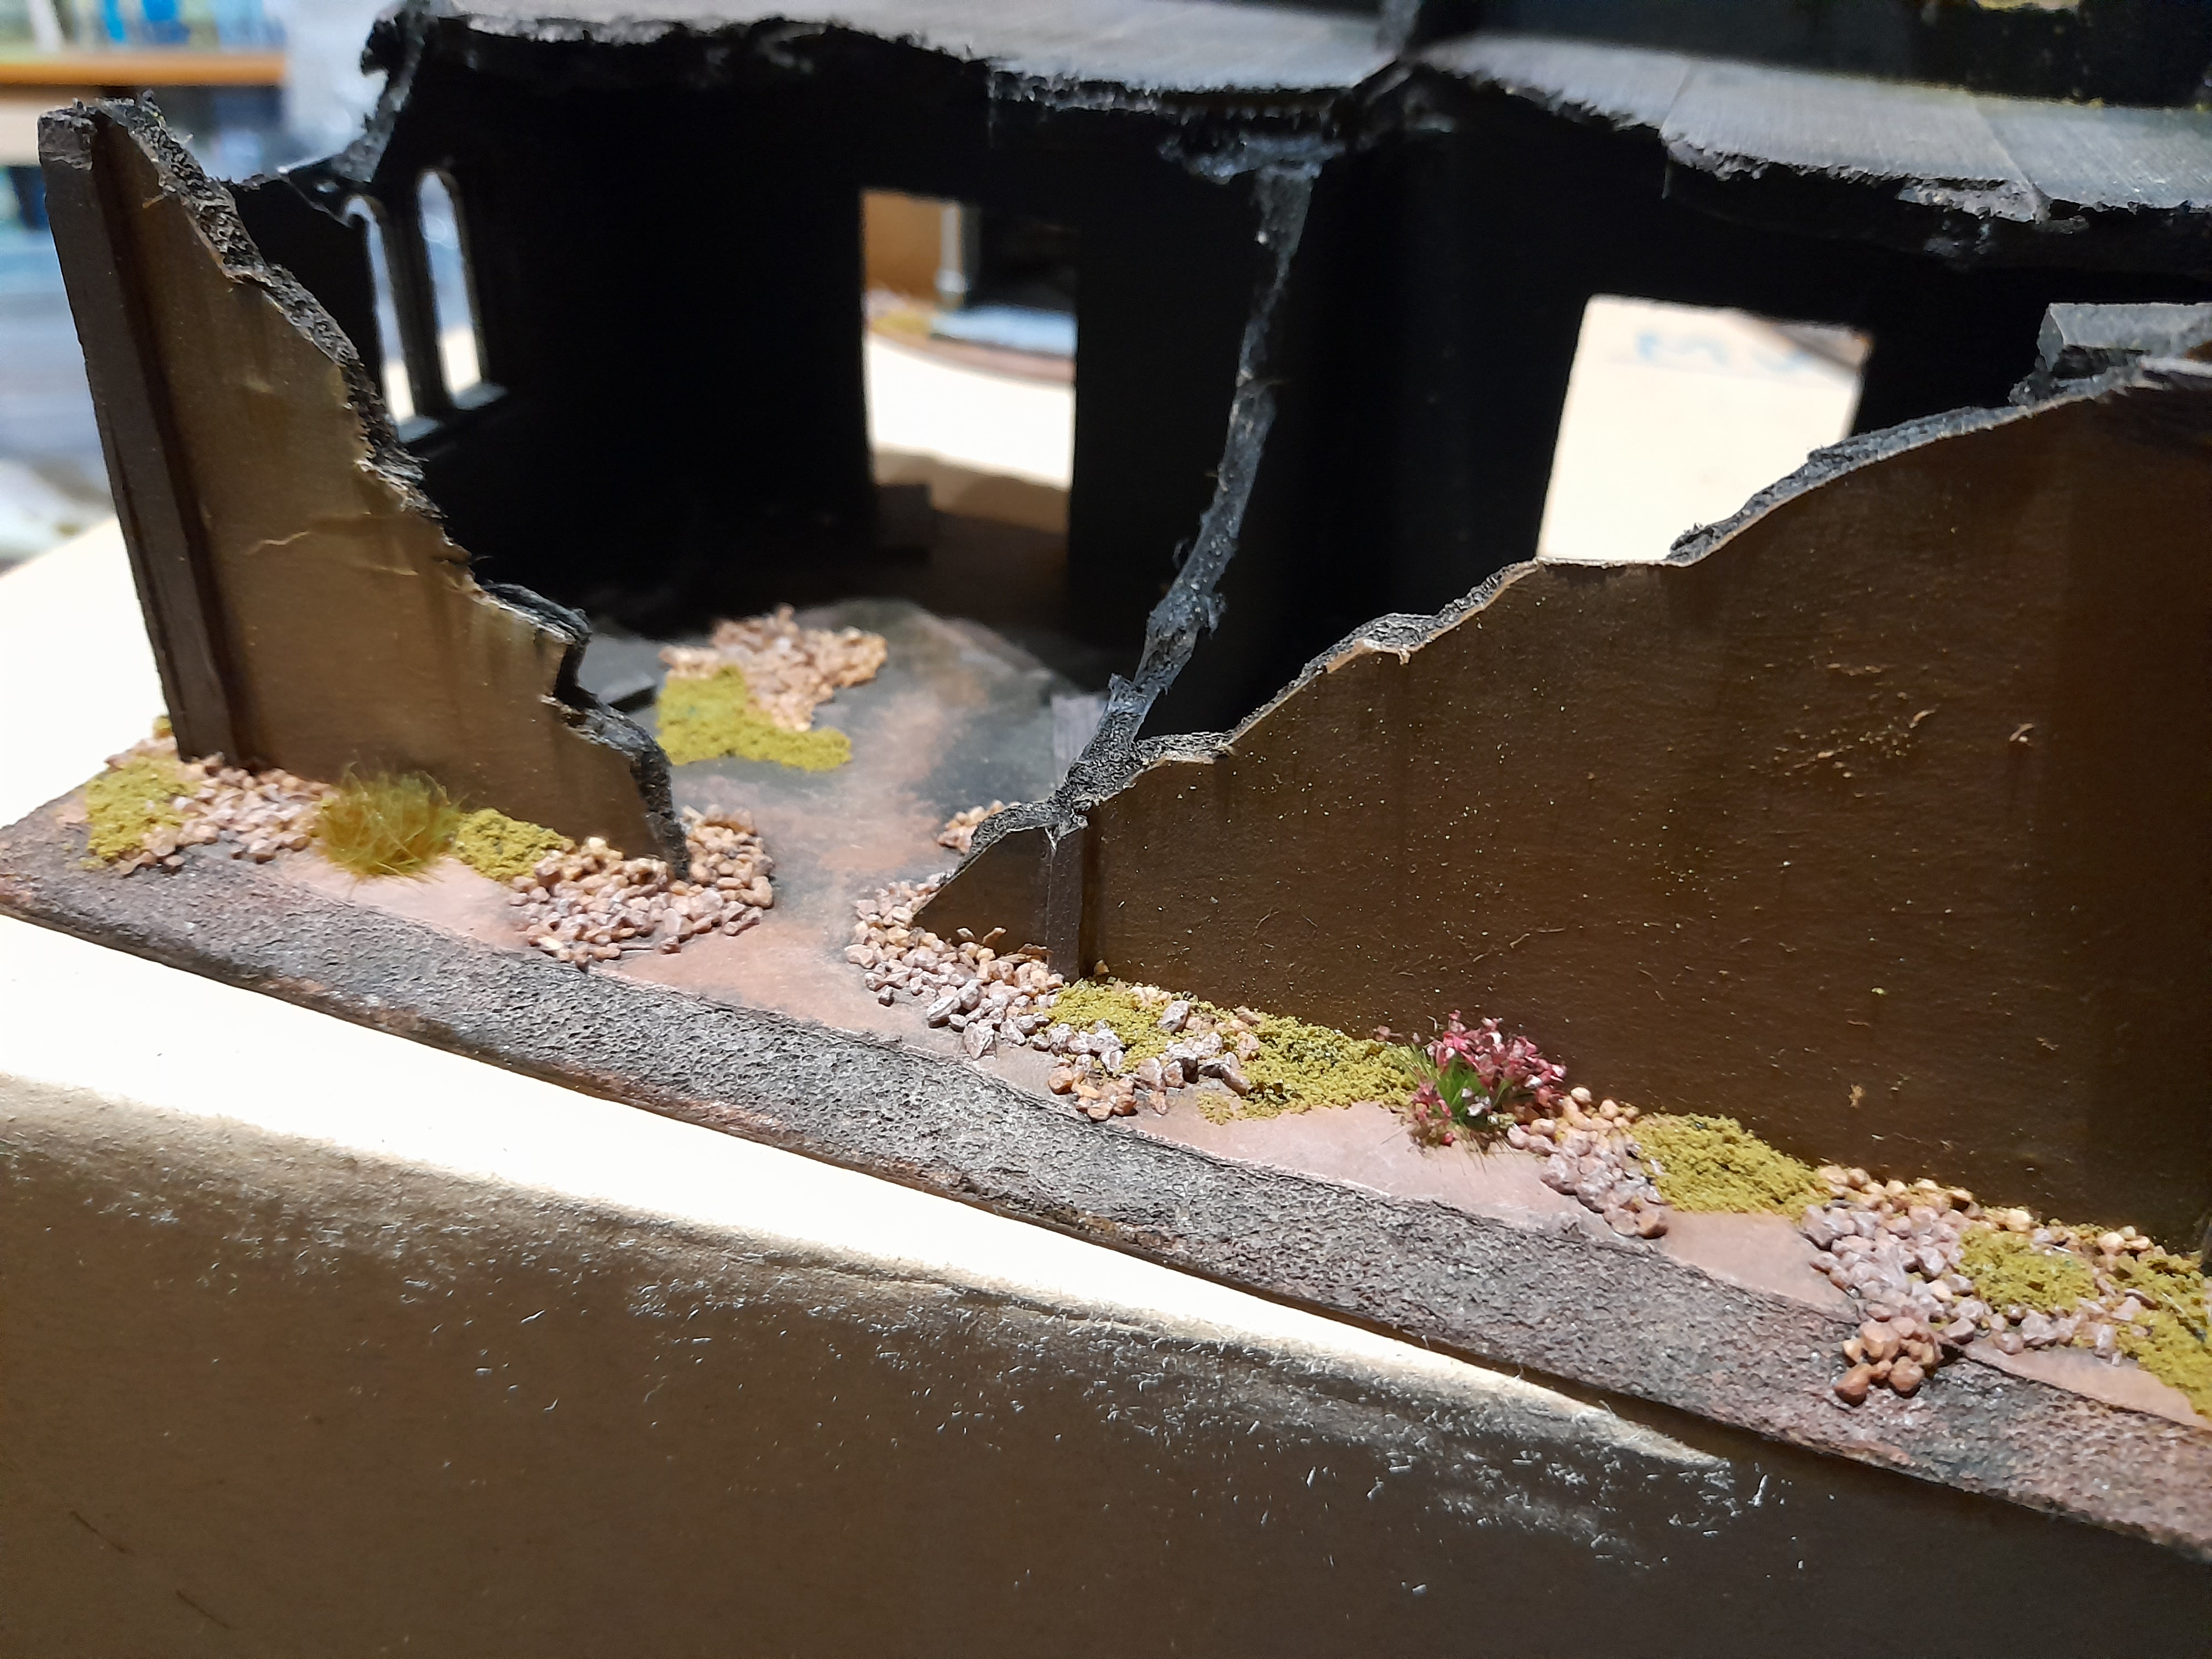
After the stonework I added some browns to the bases, to represent the soil and earth. I went for a slightly reddish tone, to represent a more clay soil. Not sure why though, just did 😊
Started out by stippling on the darkest colour, then stippled progressively smaller areas of lighter tones. I put some of this onto the gravels as well, to bring the colour palettes together.
To cover some of the flat gaps on the earth areas I added some flock, tufts and a couple of small bush tufts.
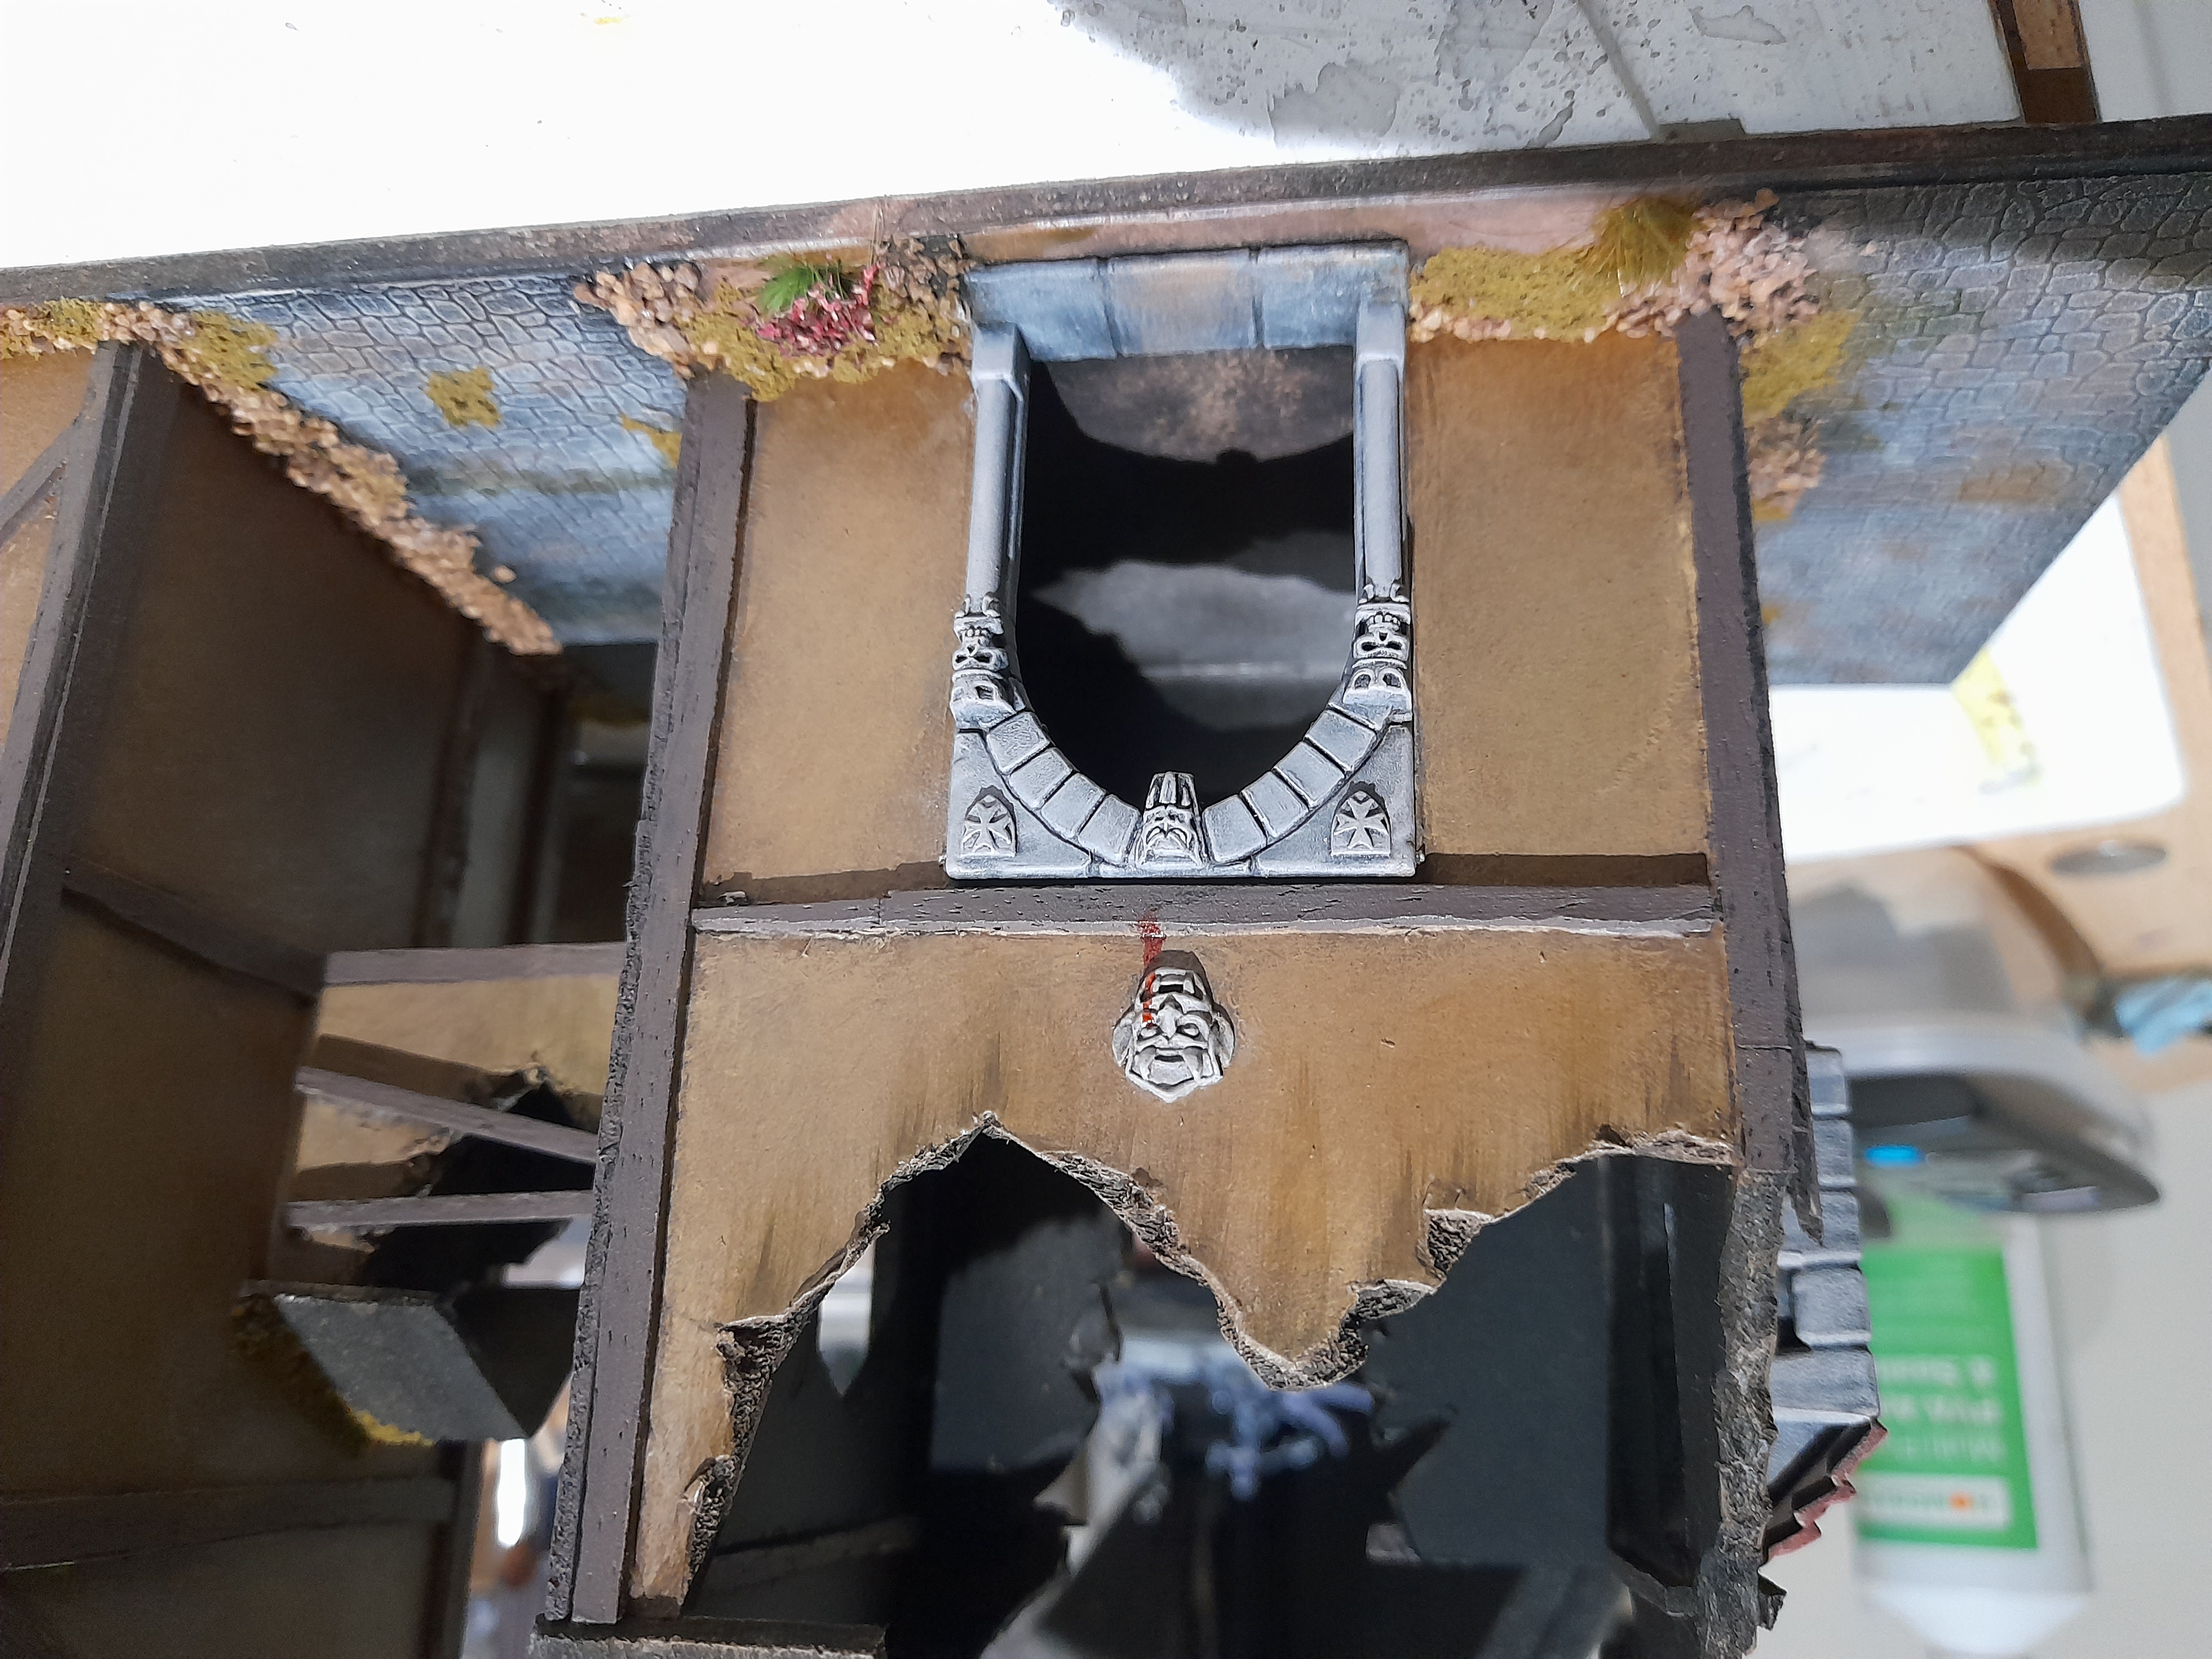
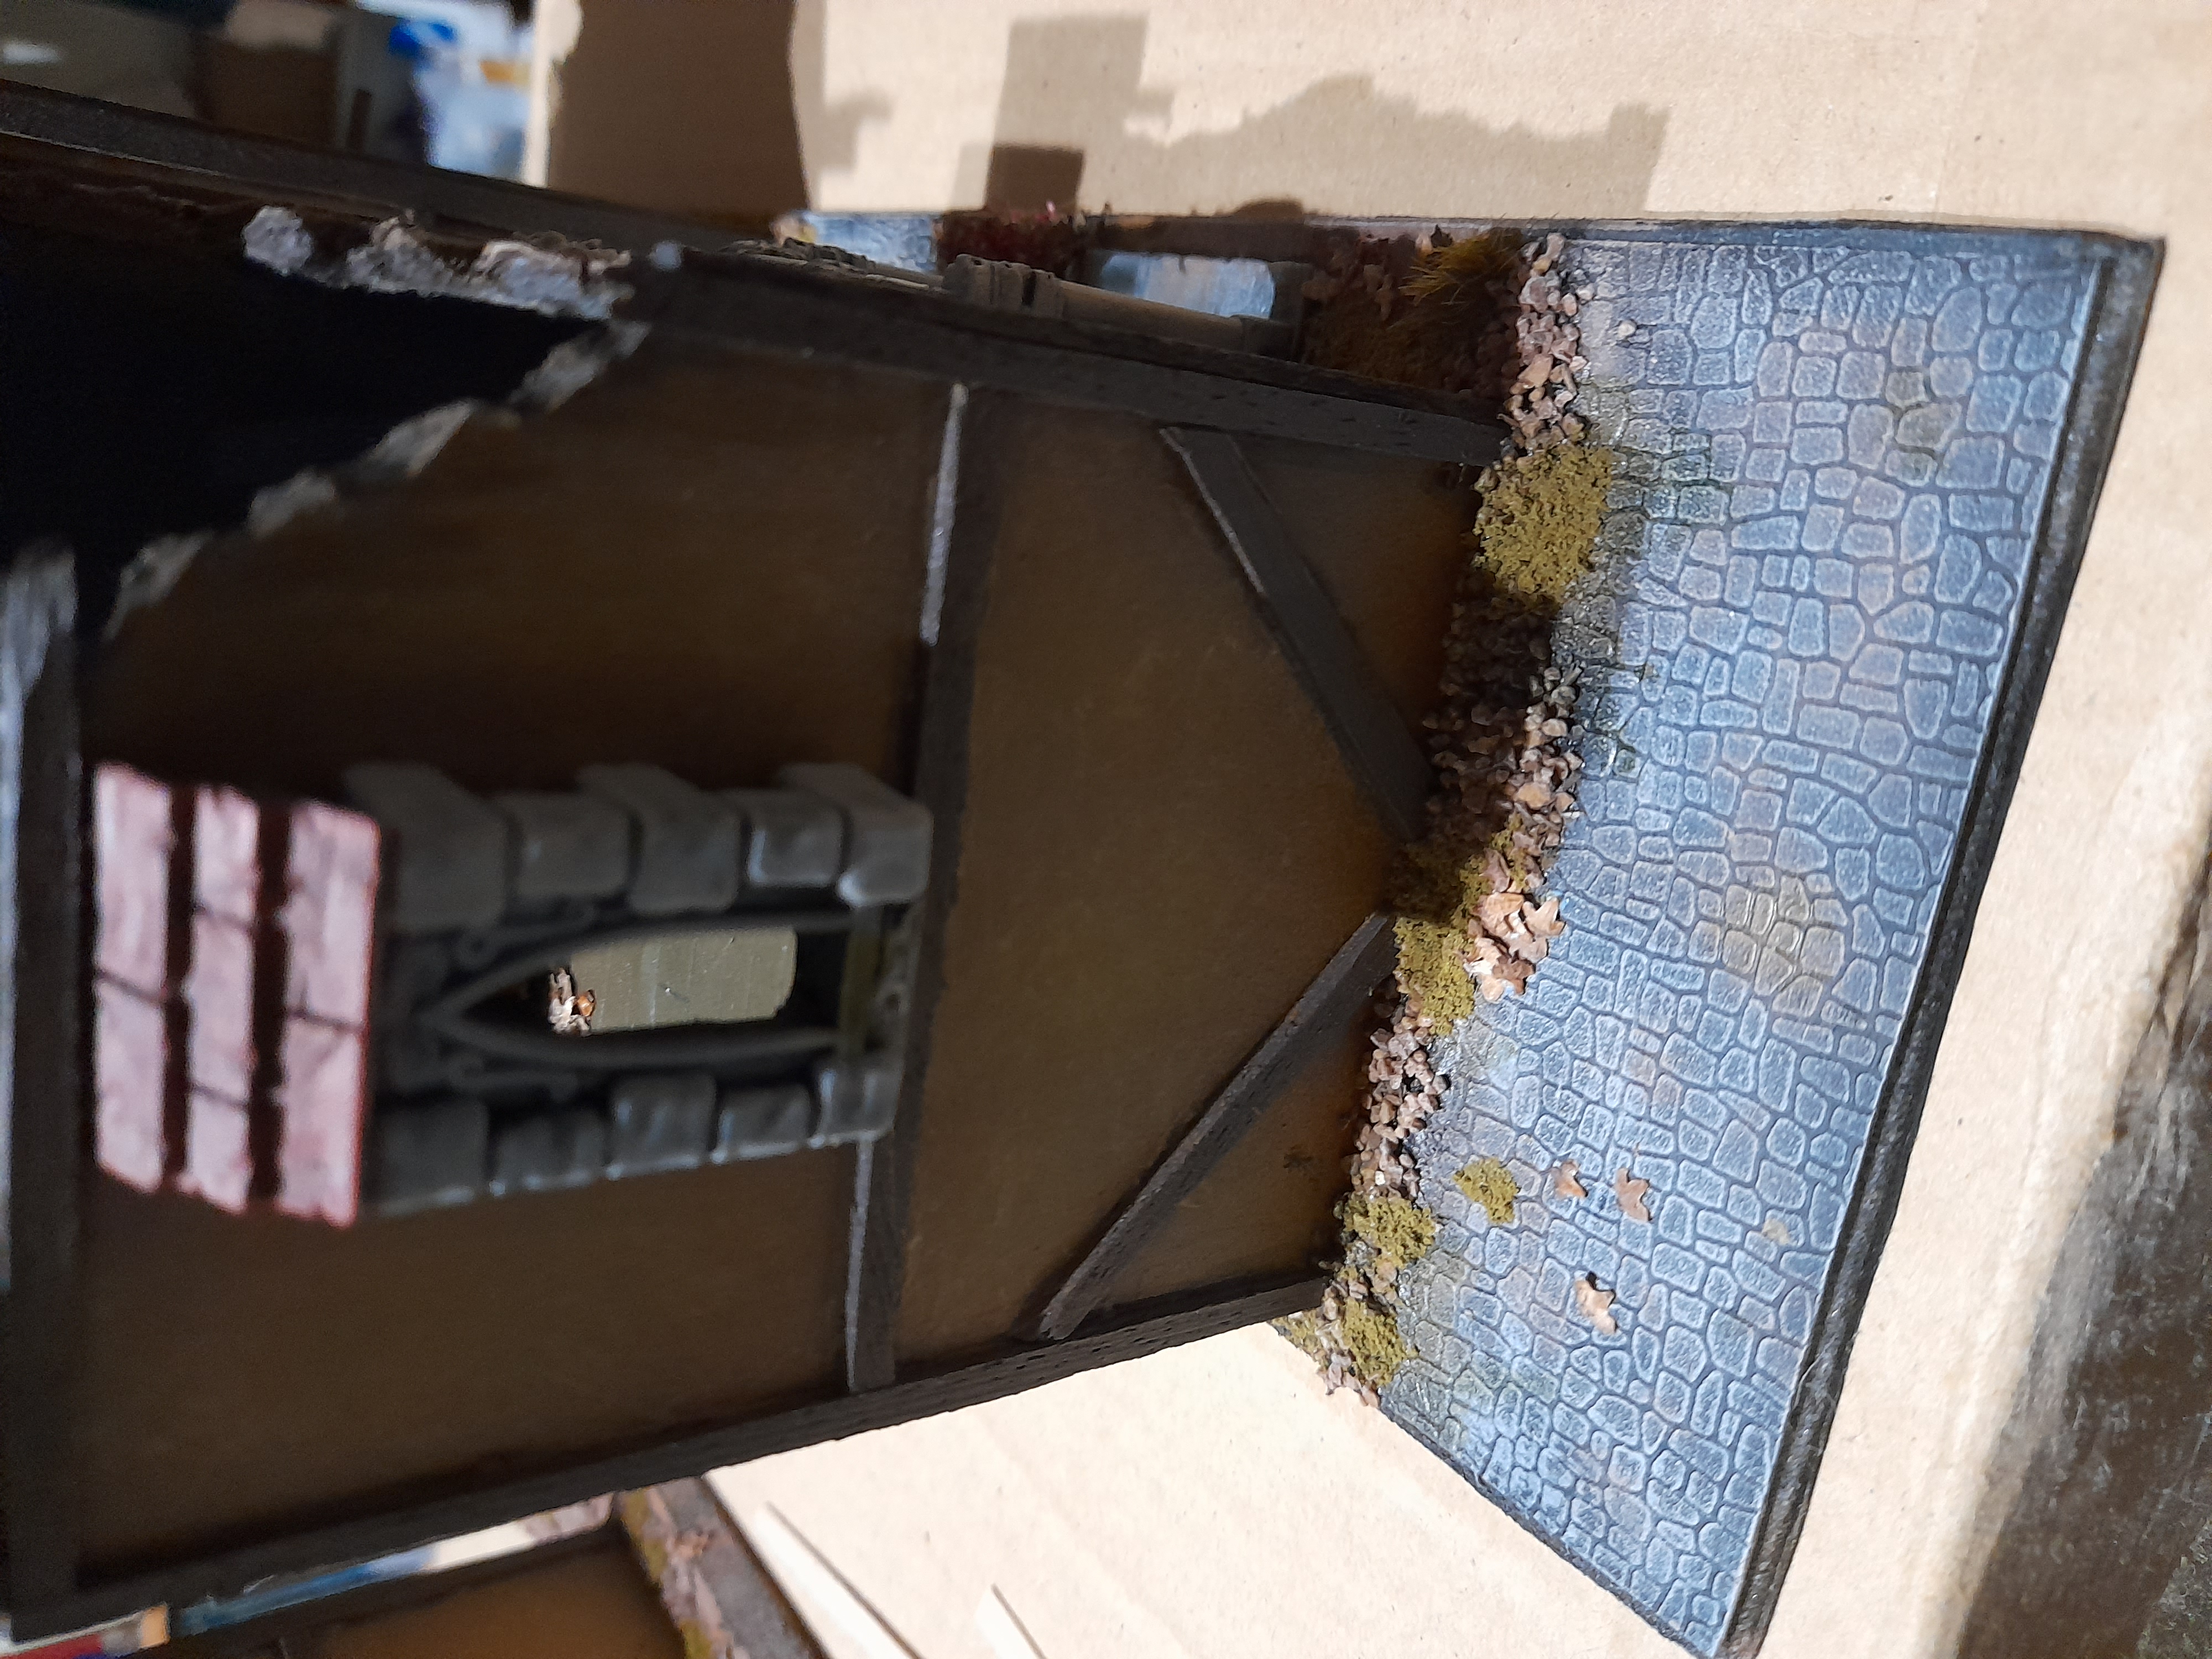
Getting near to the end now, it was time to paint the wooden beams in.
I used a dark peaty brown for these, followed with a wash of nuln oil.
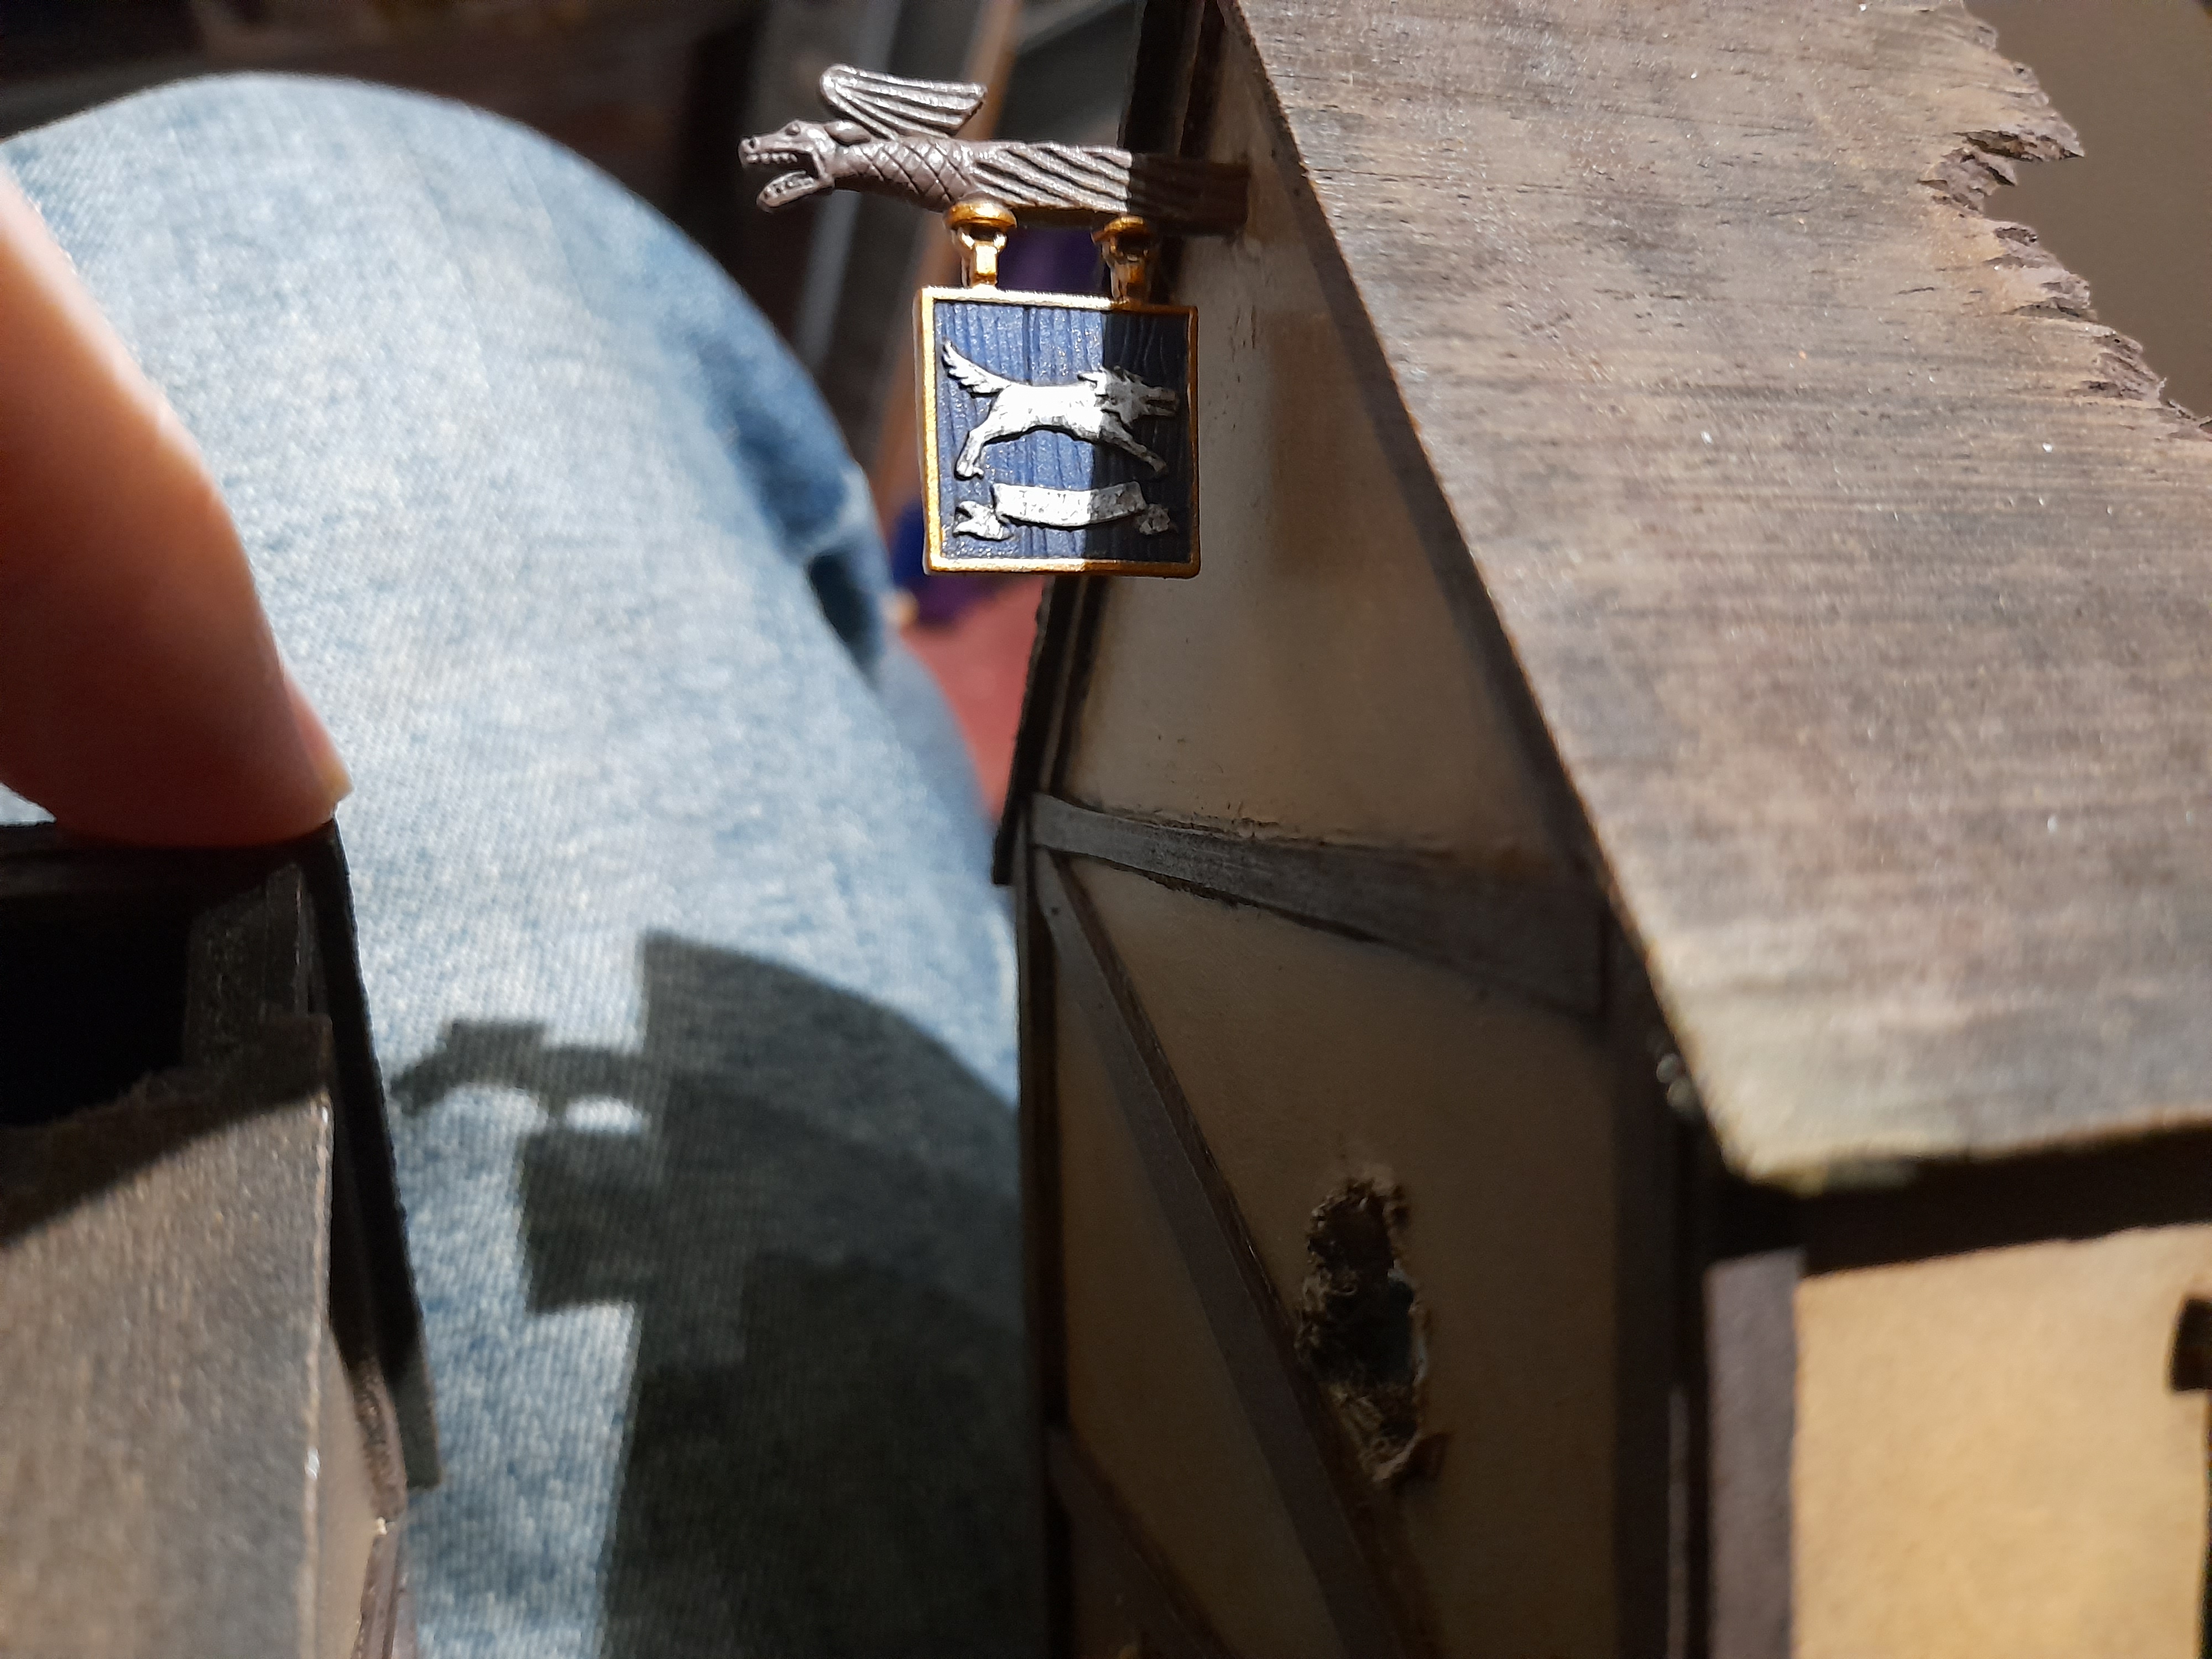
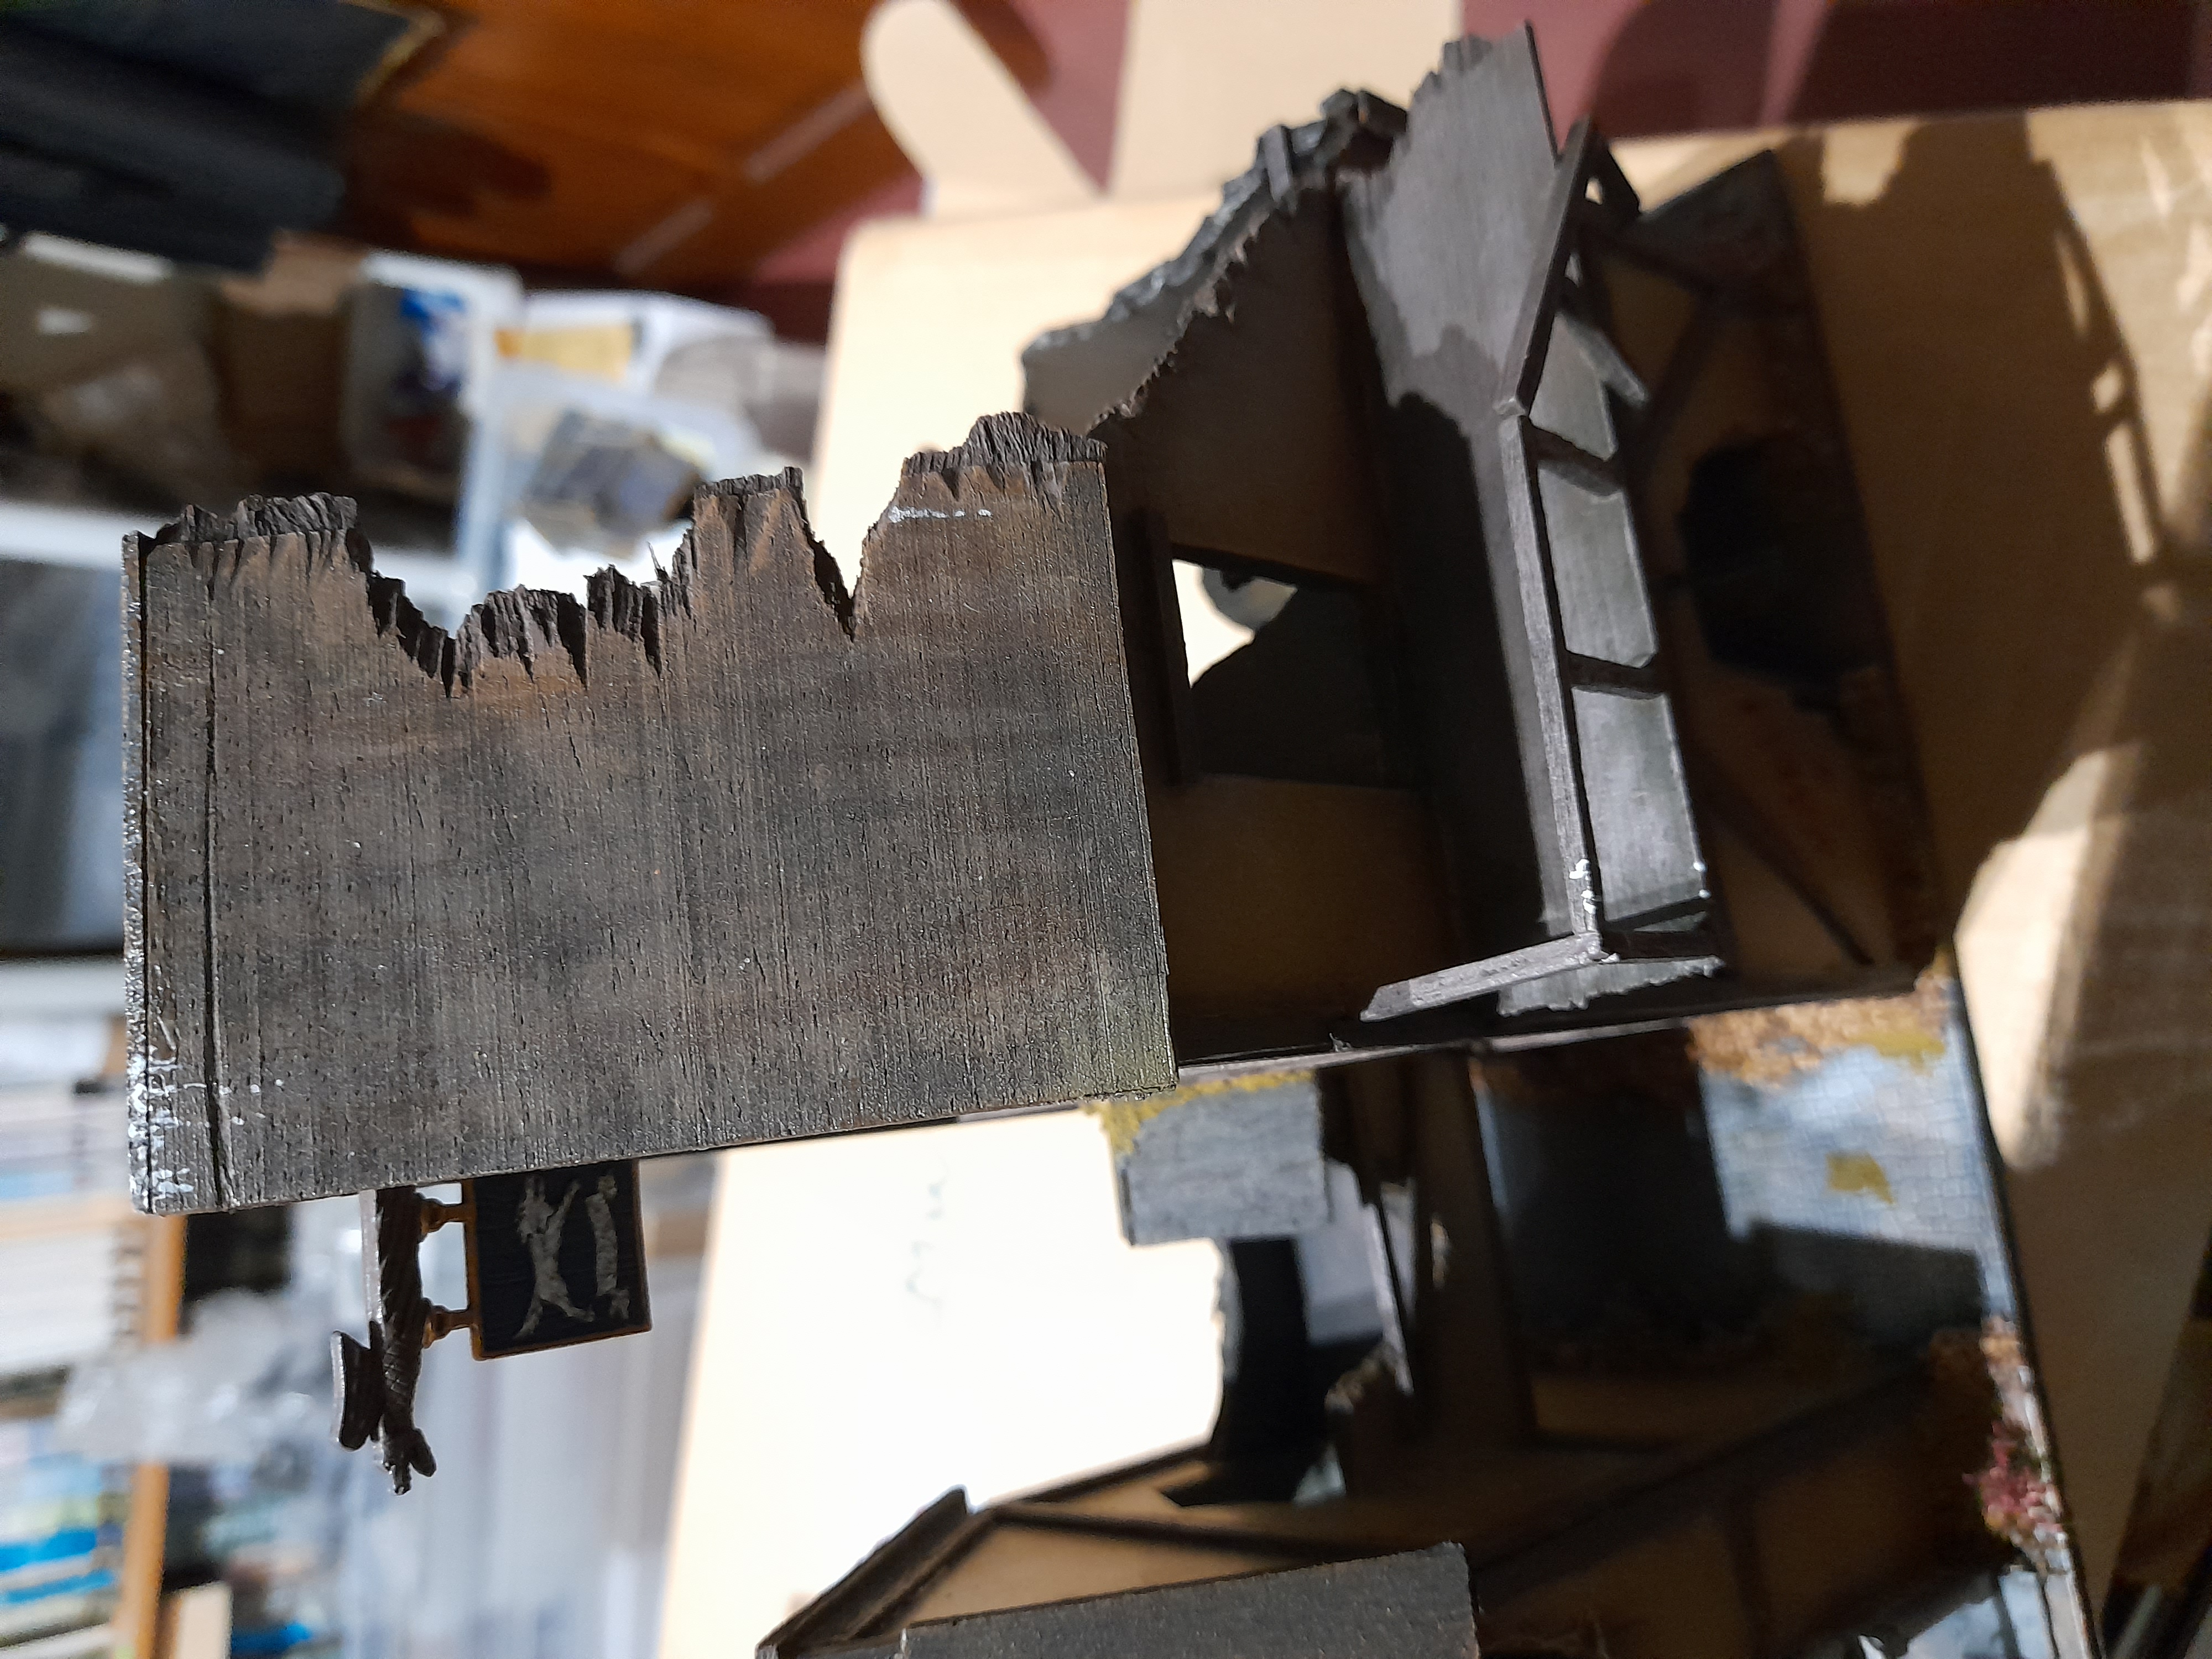
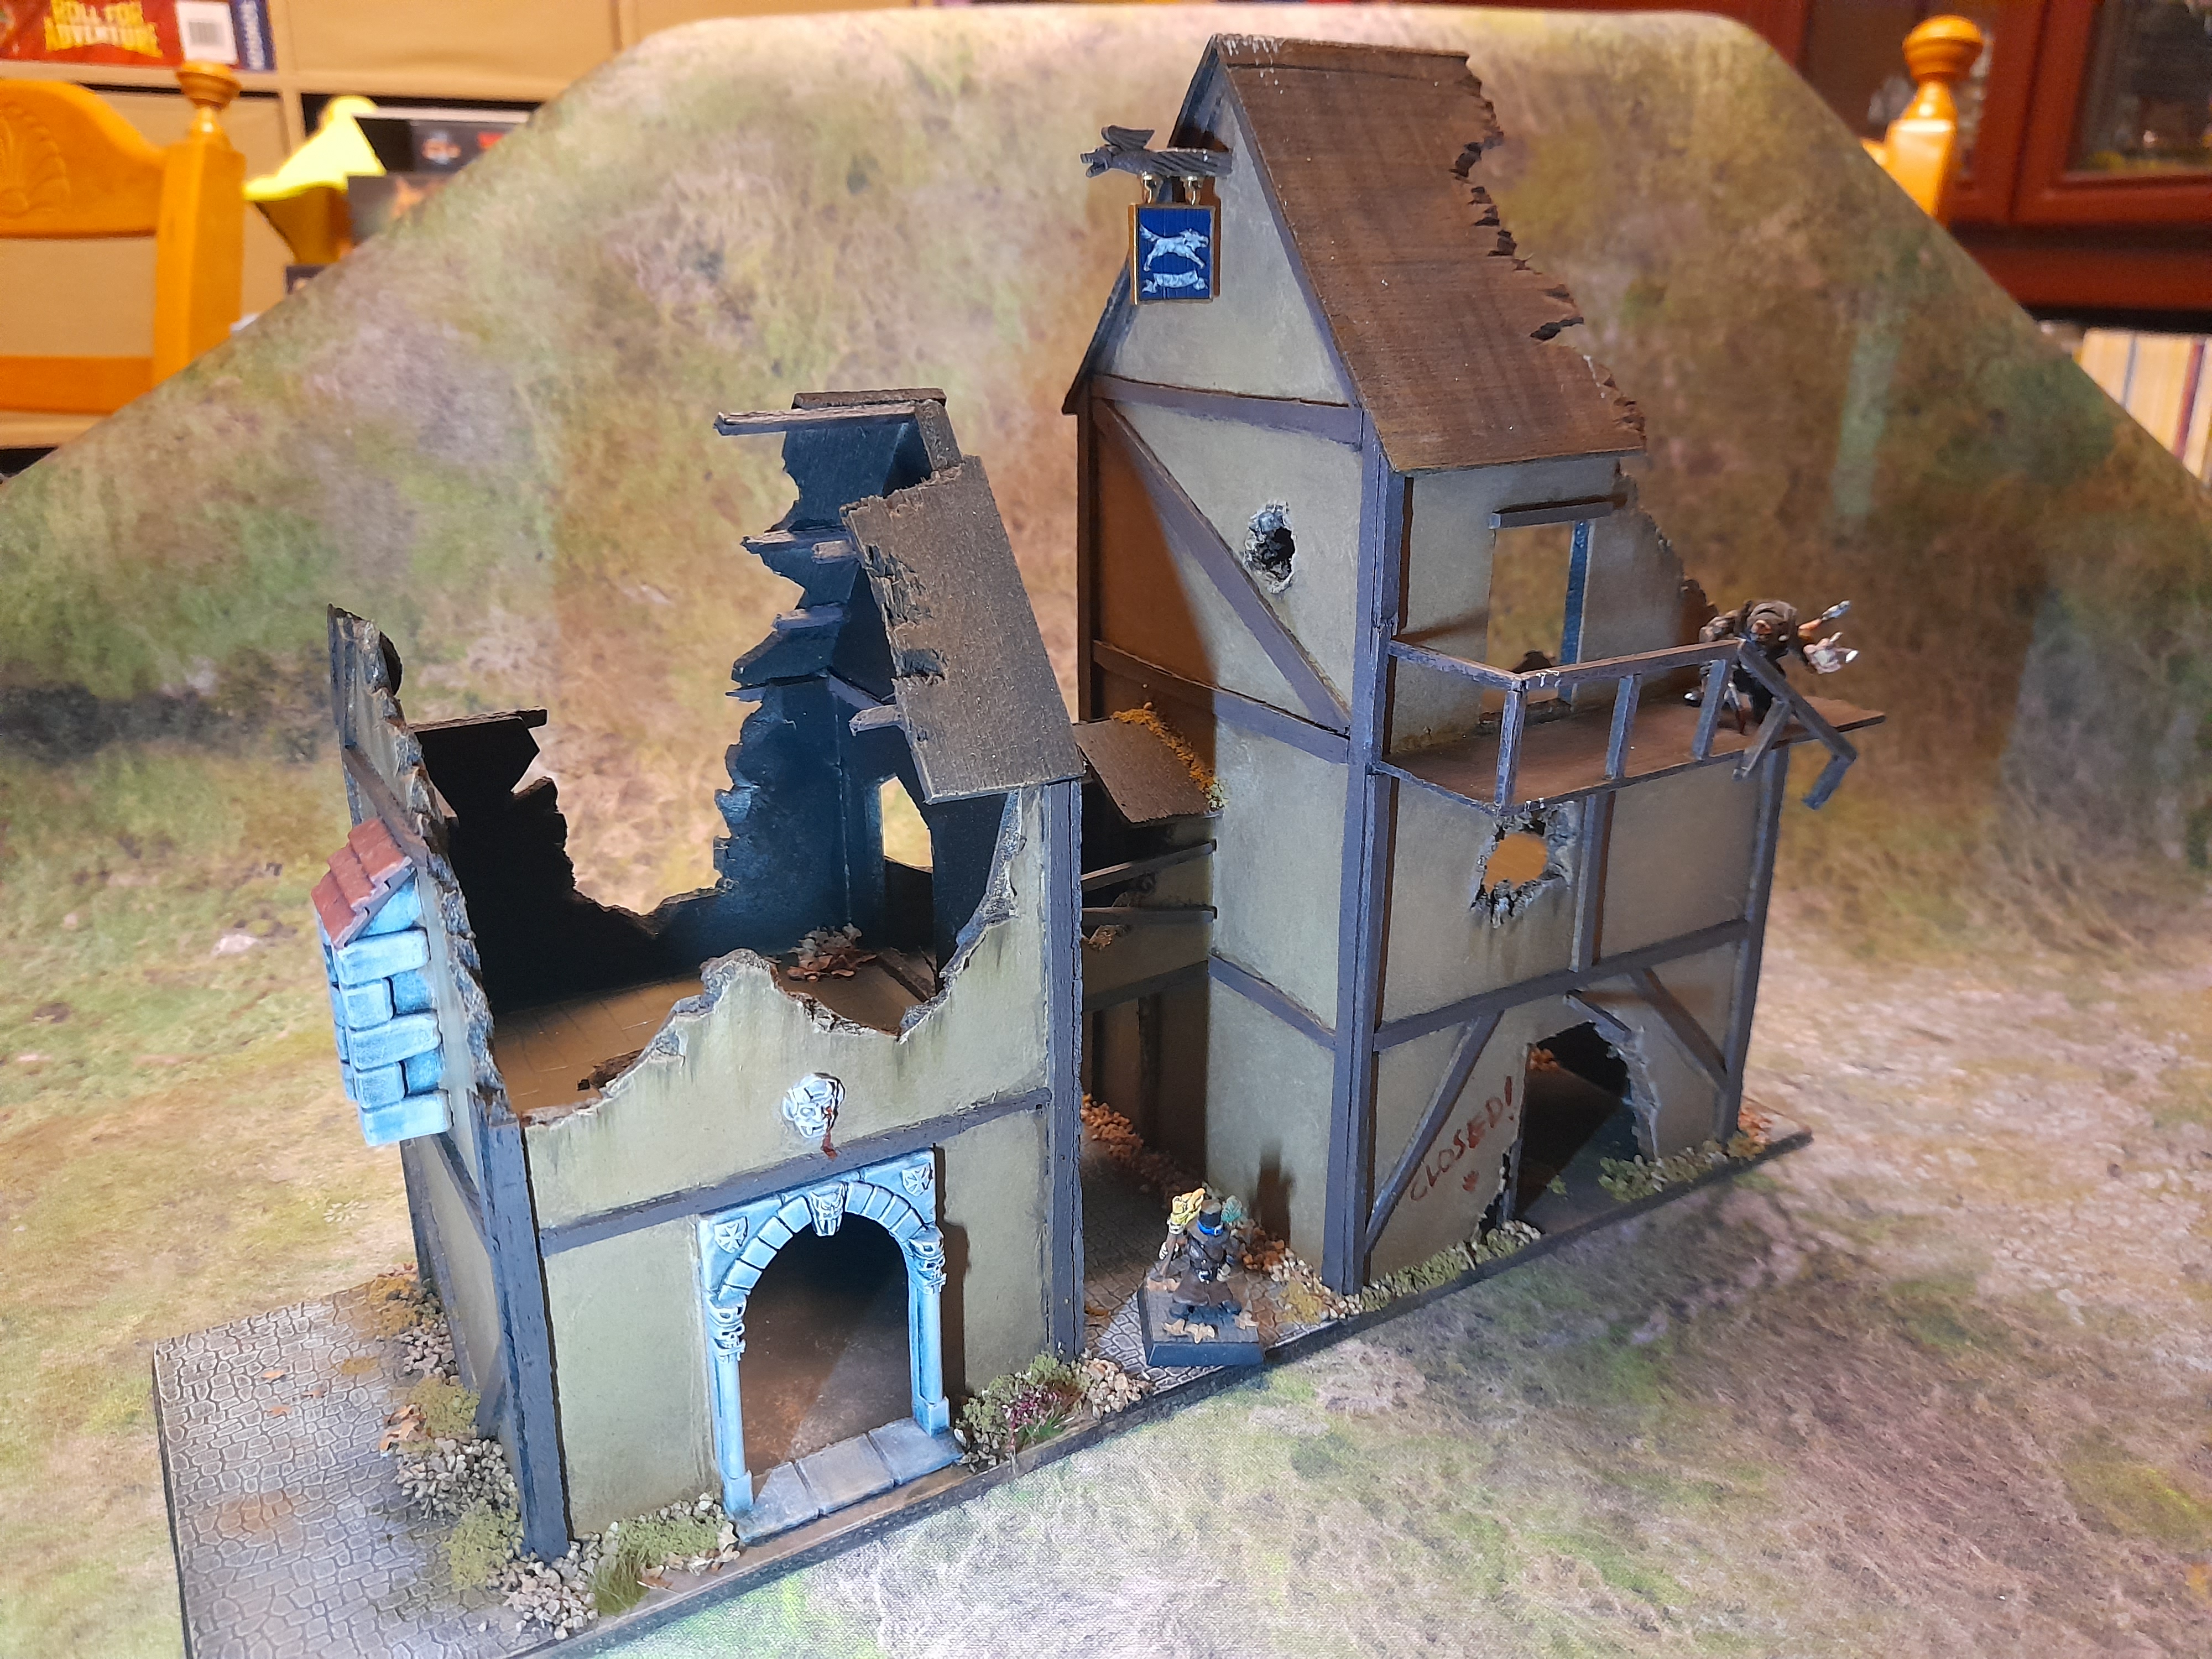
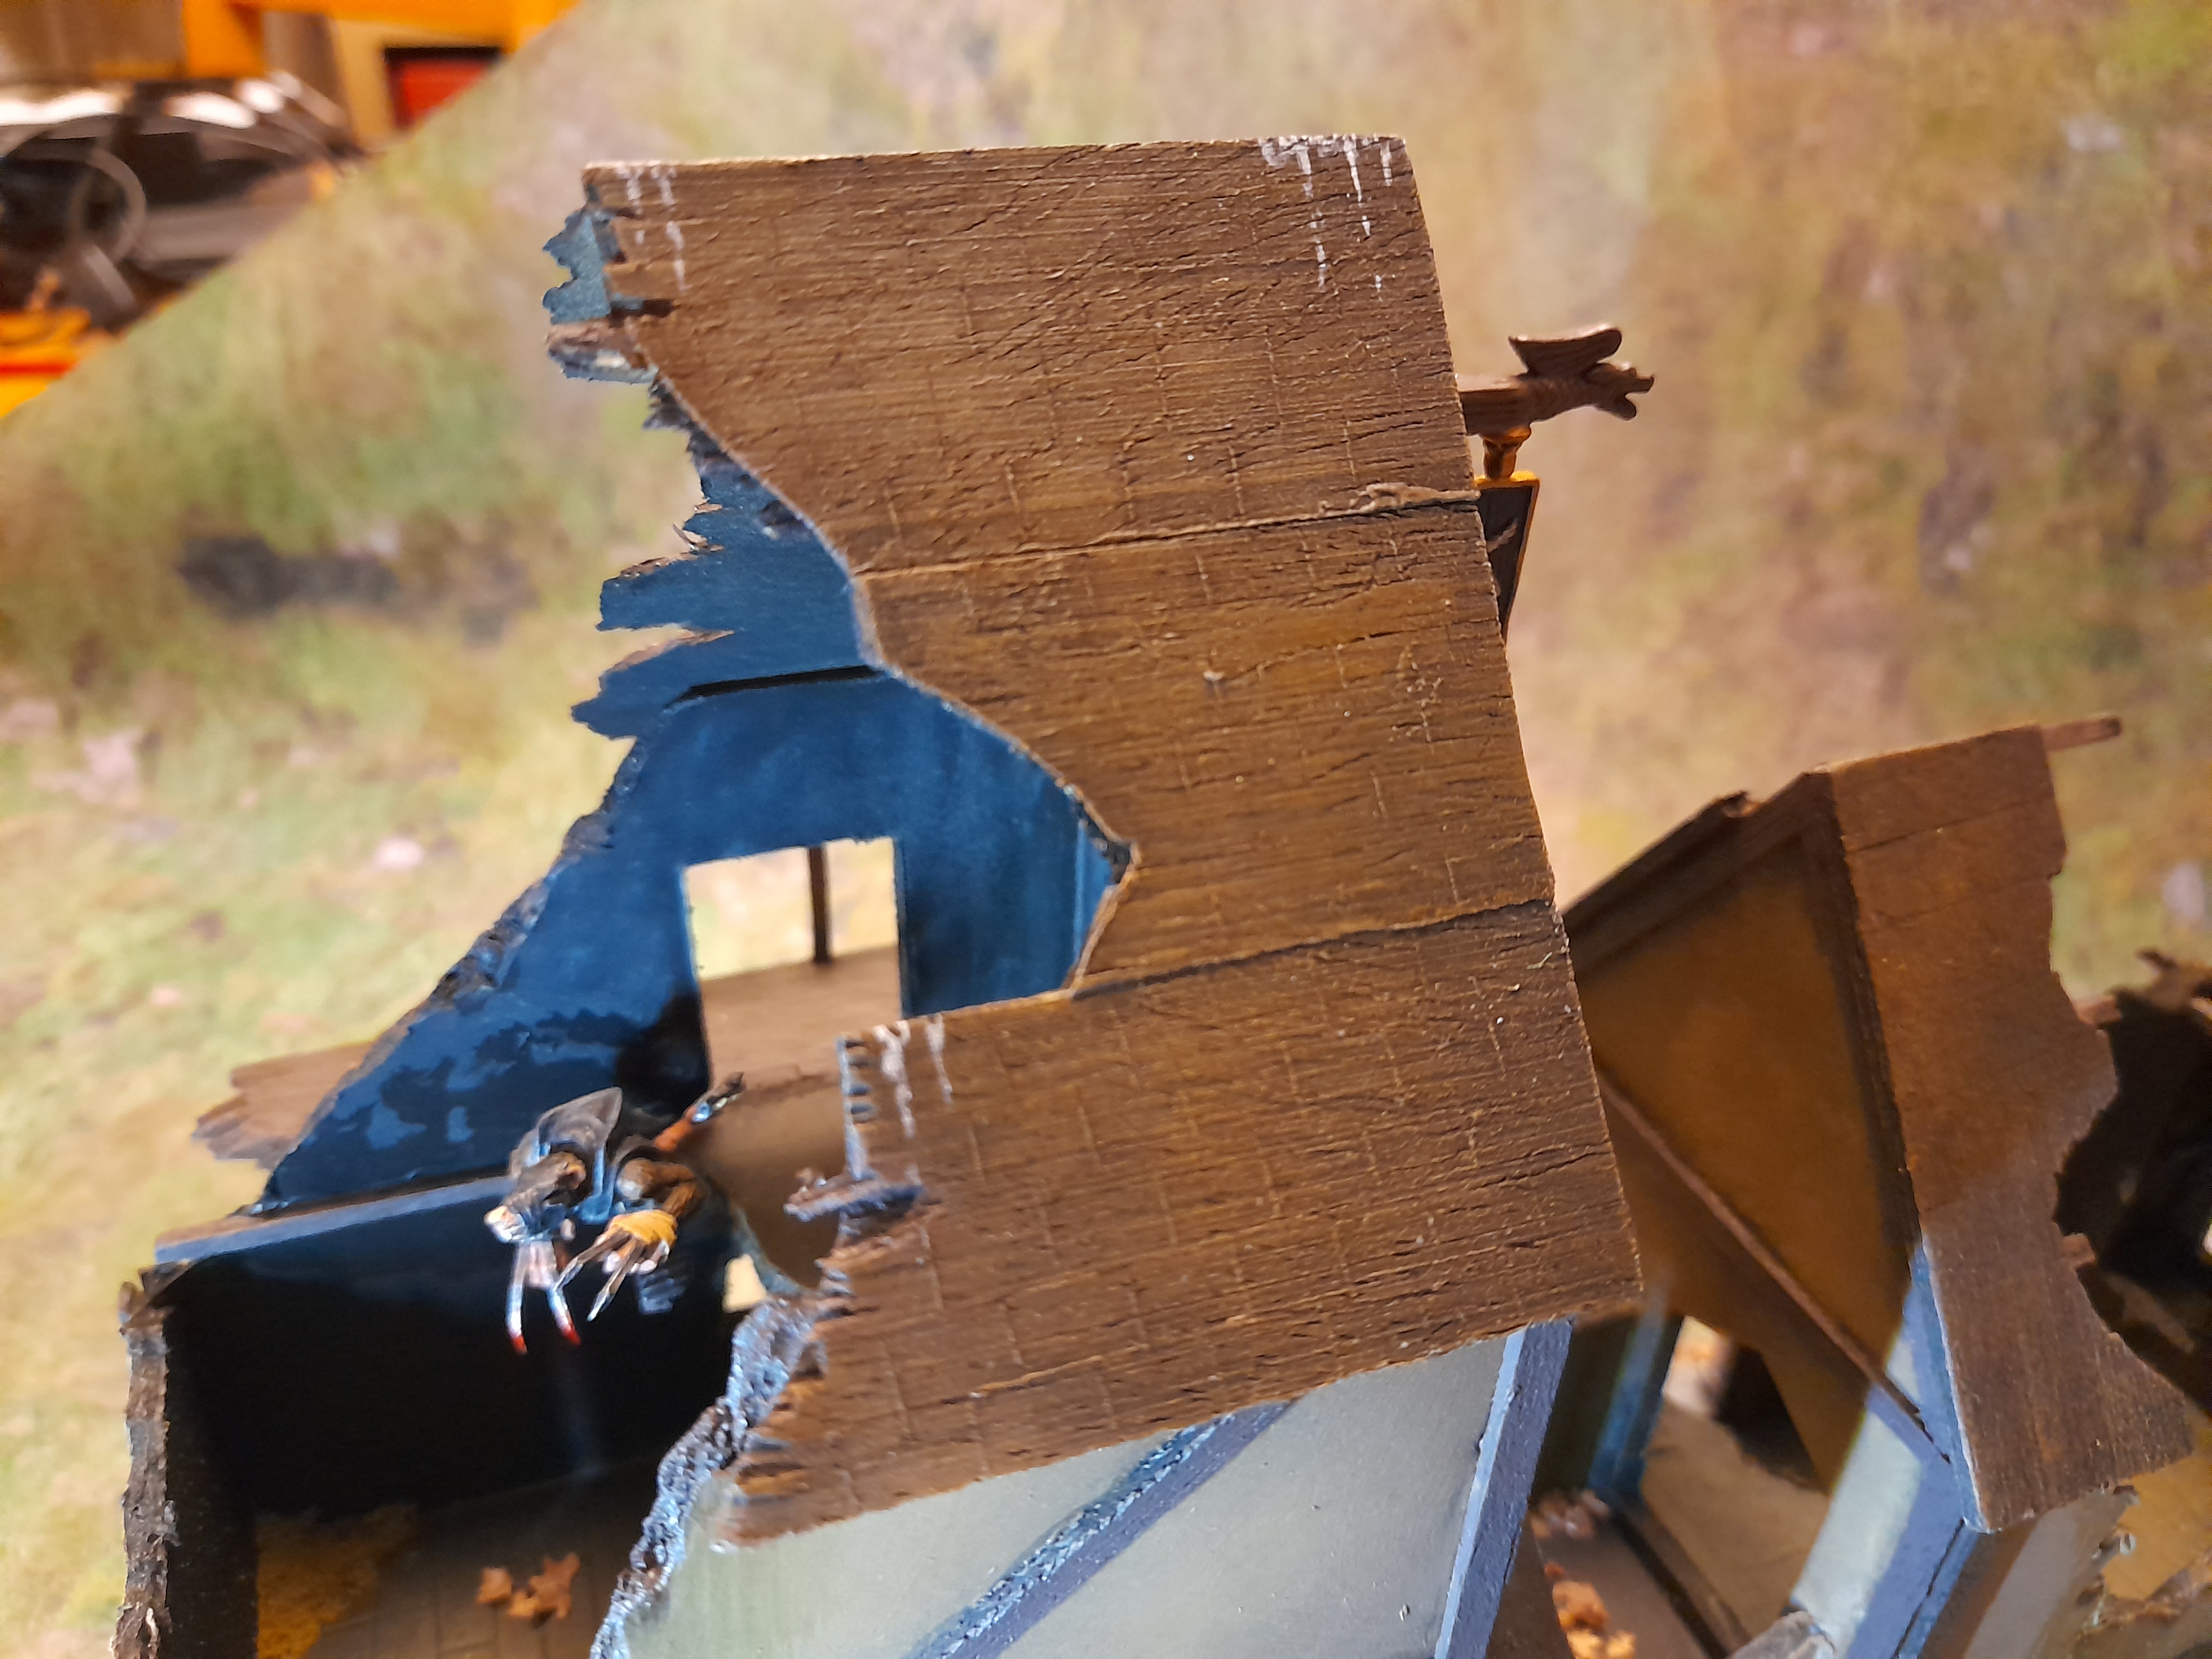
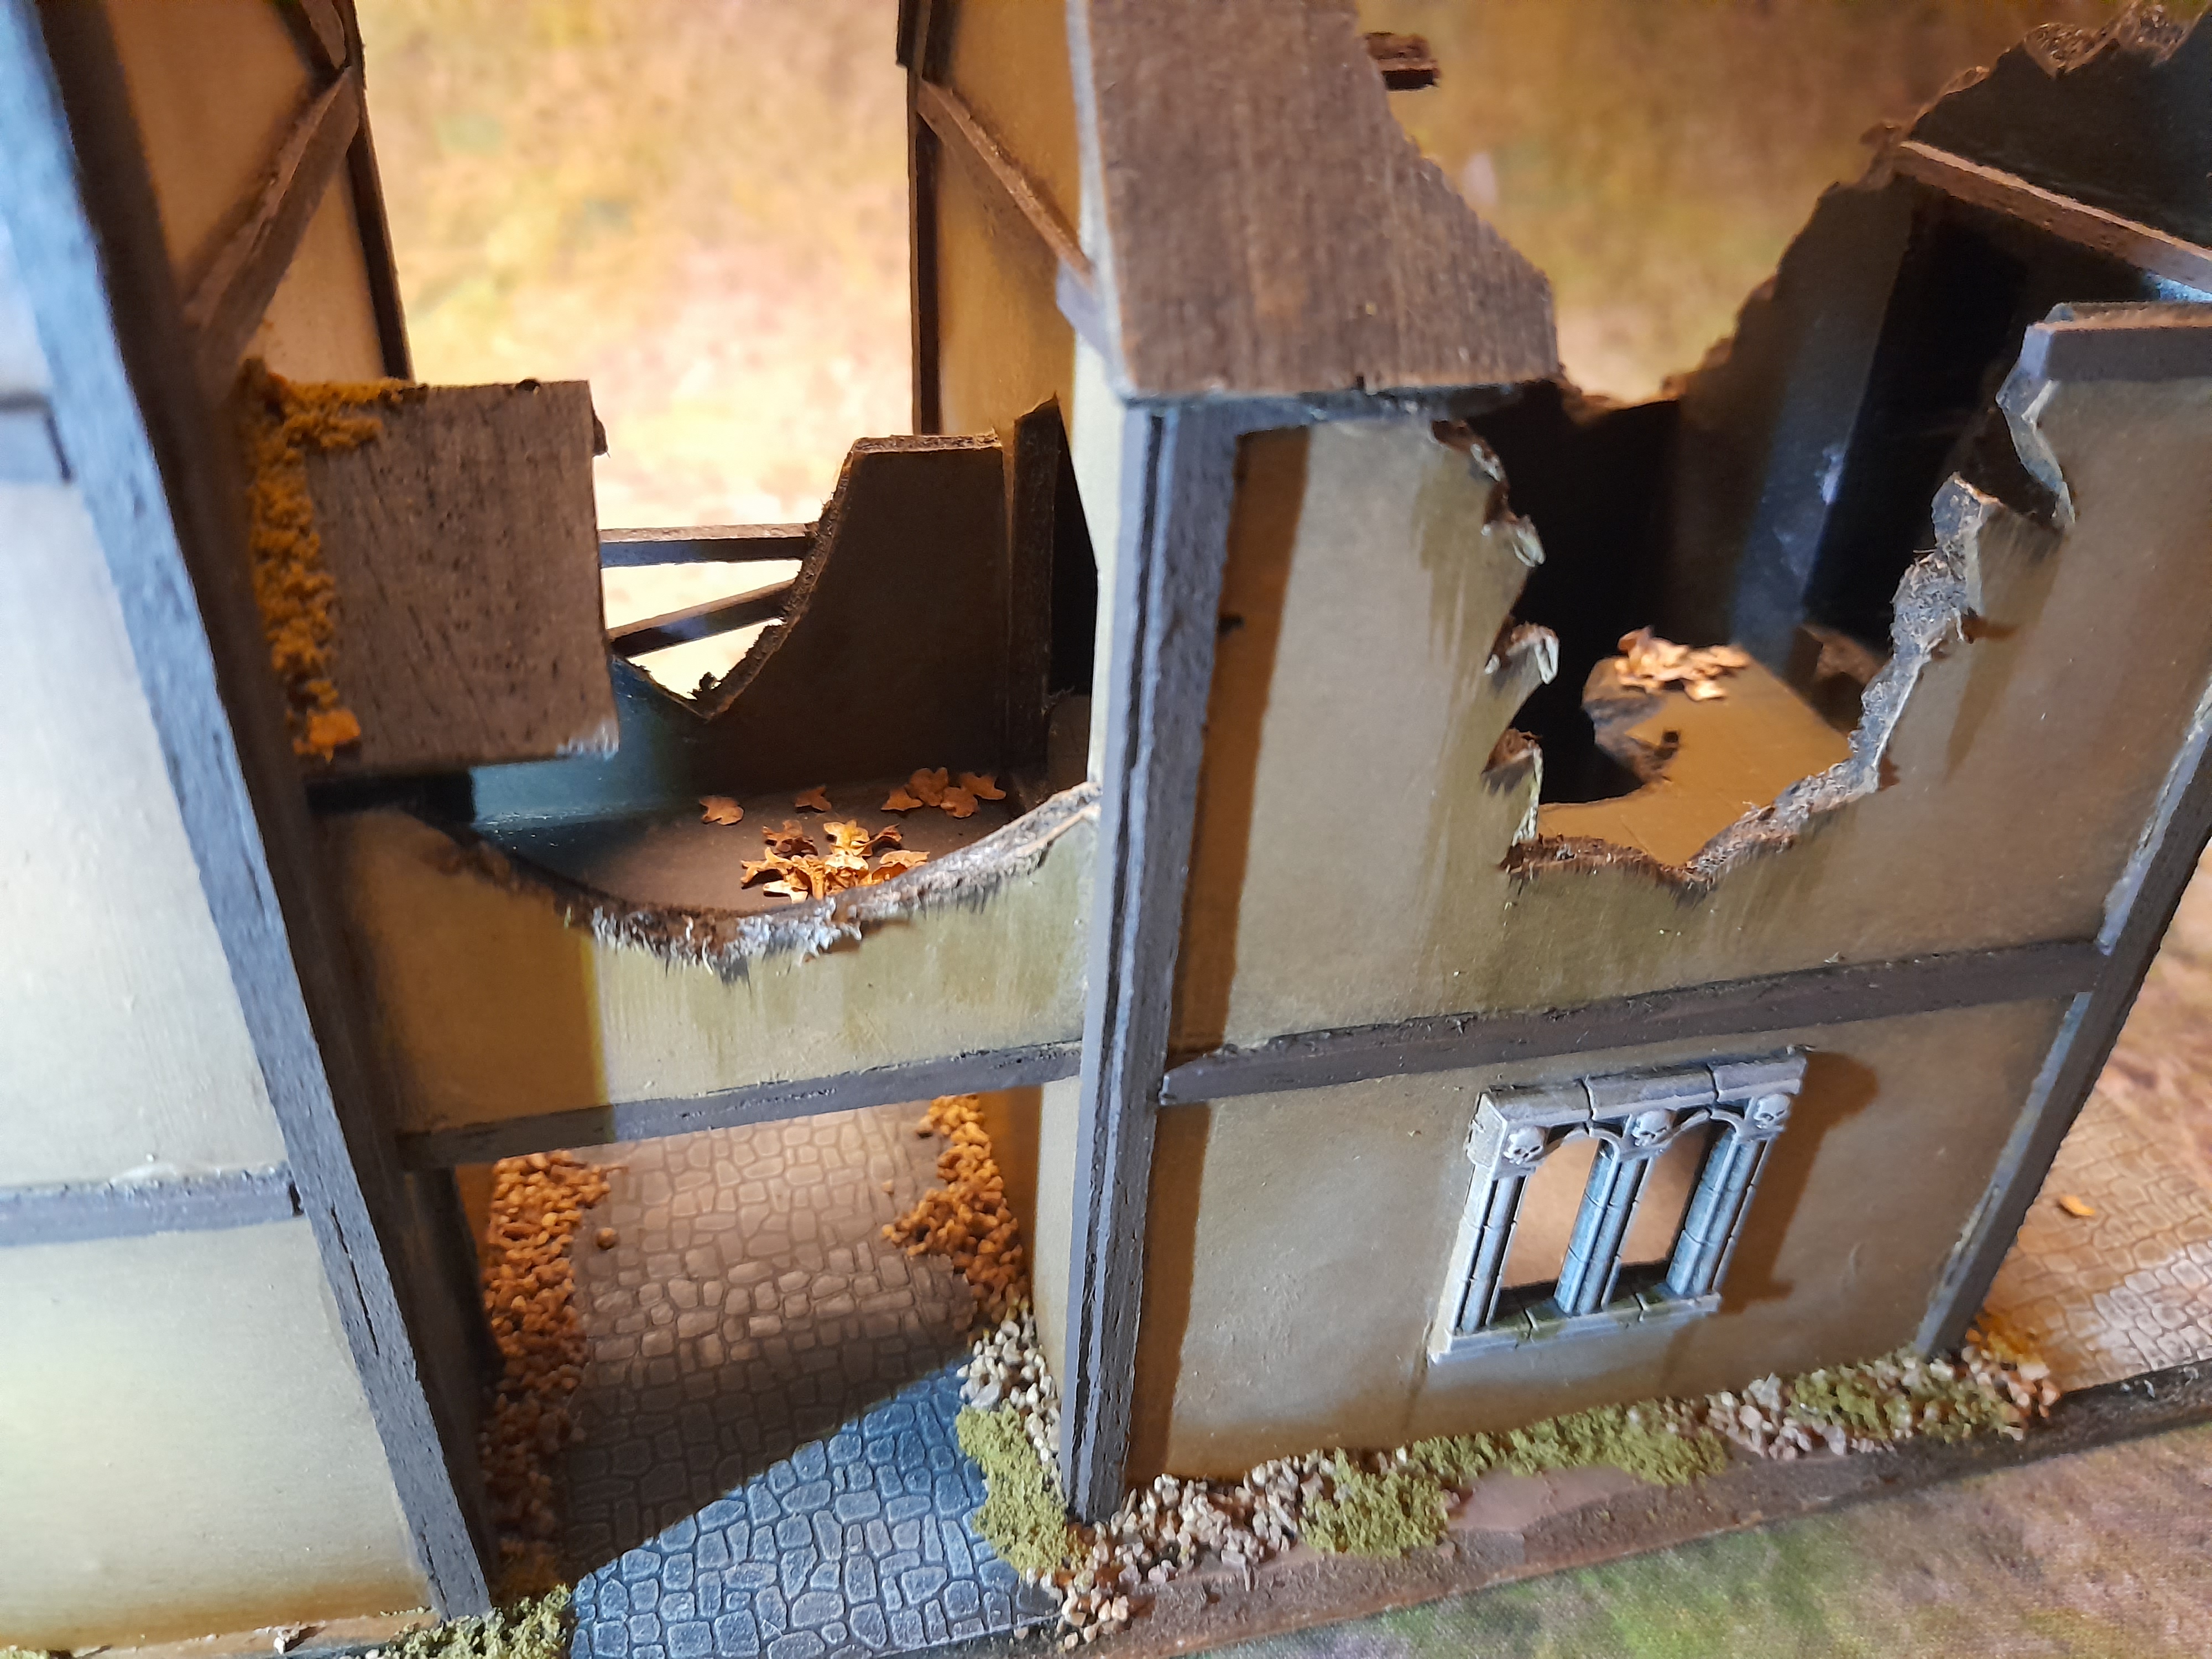
Then it was time to pick out some more details, like painting in the sign on the larger building and adding a wash of grime on the window areas and tops of walls.
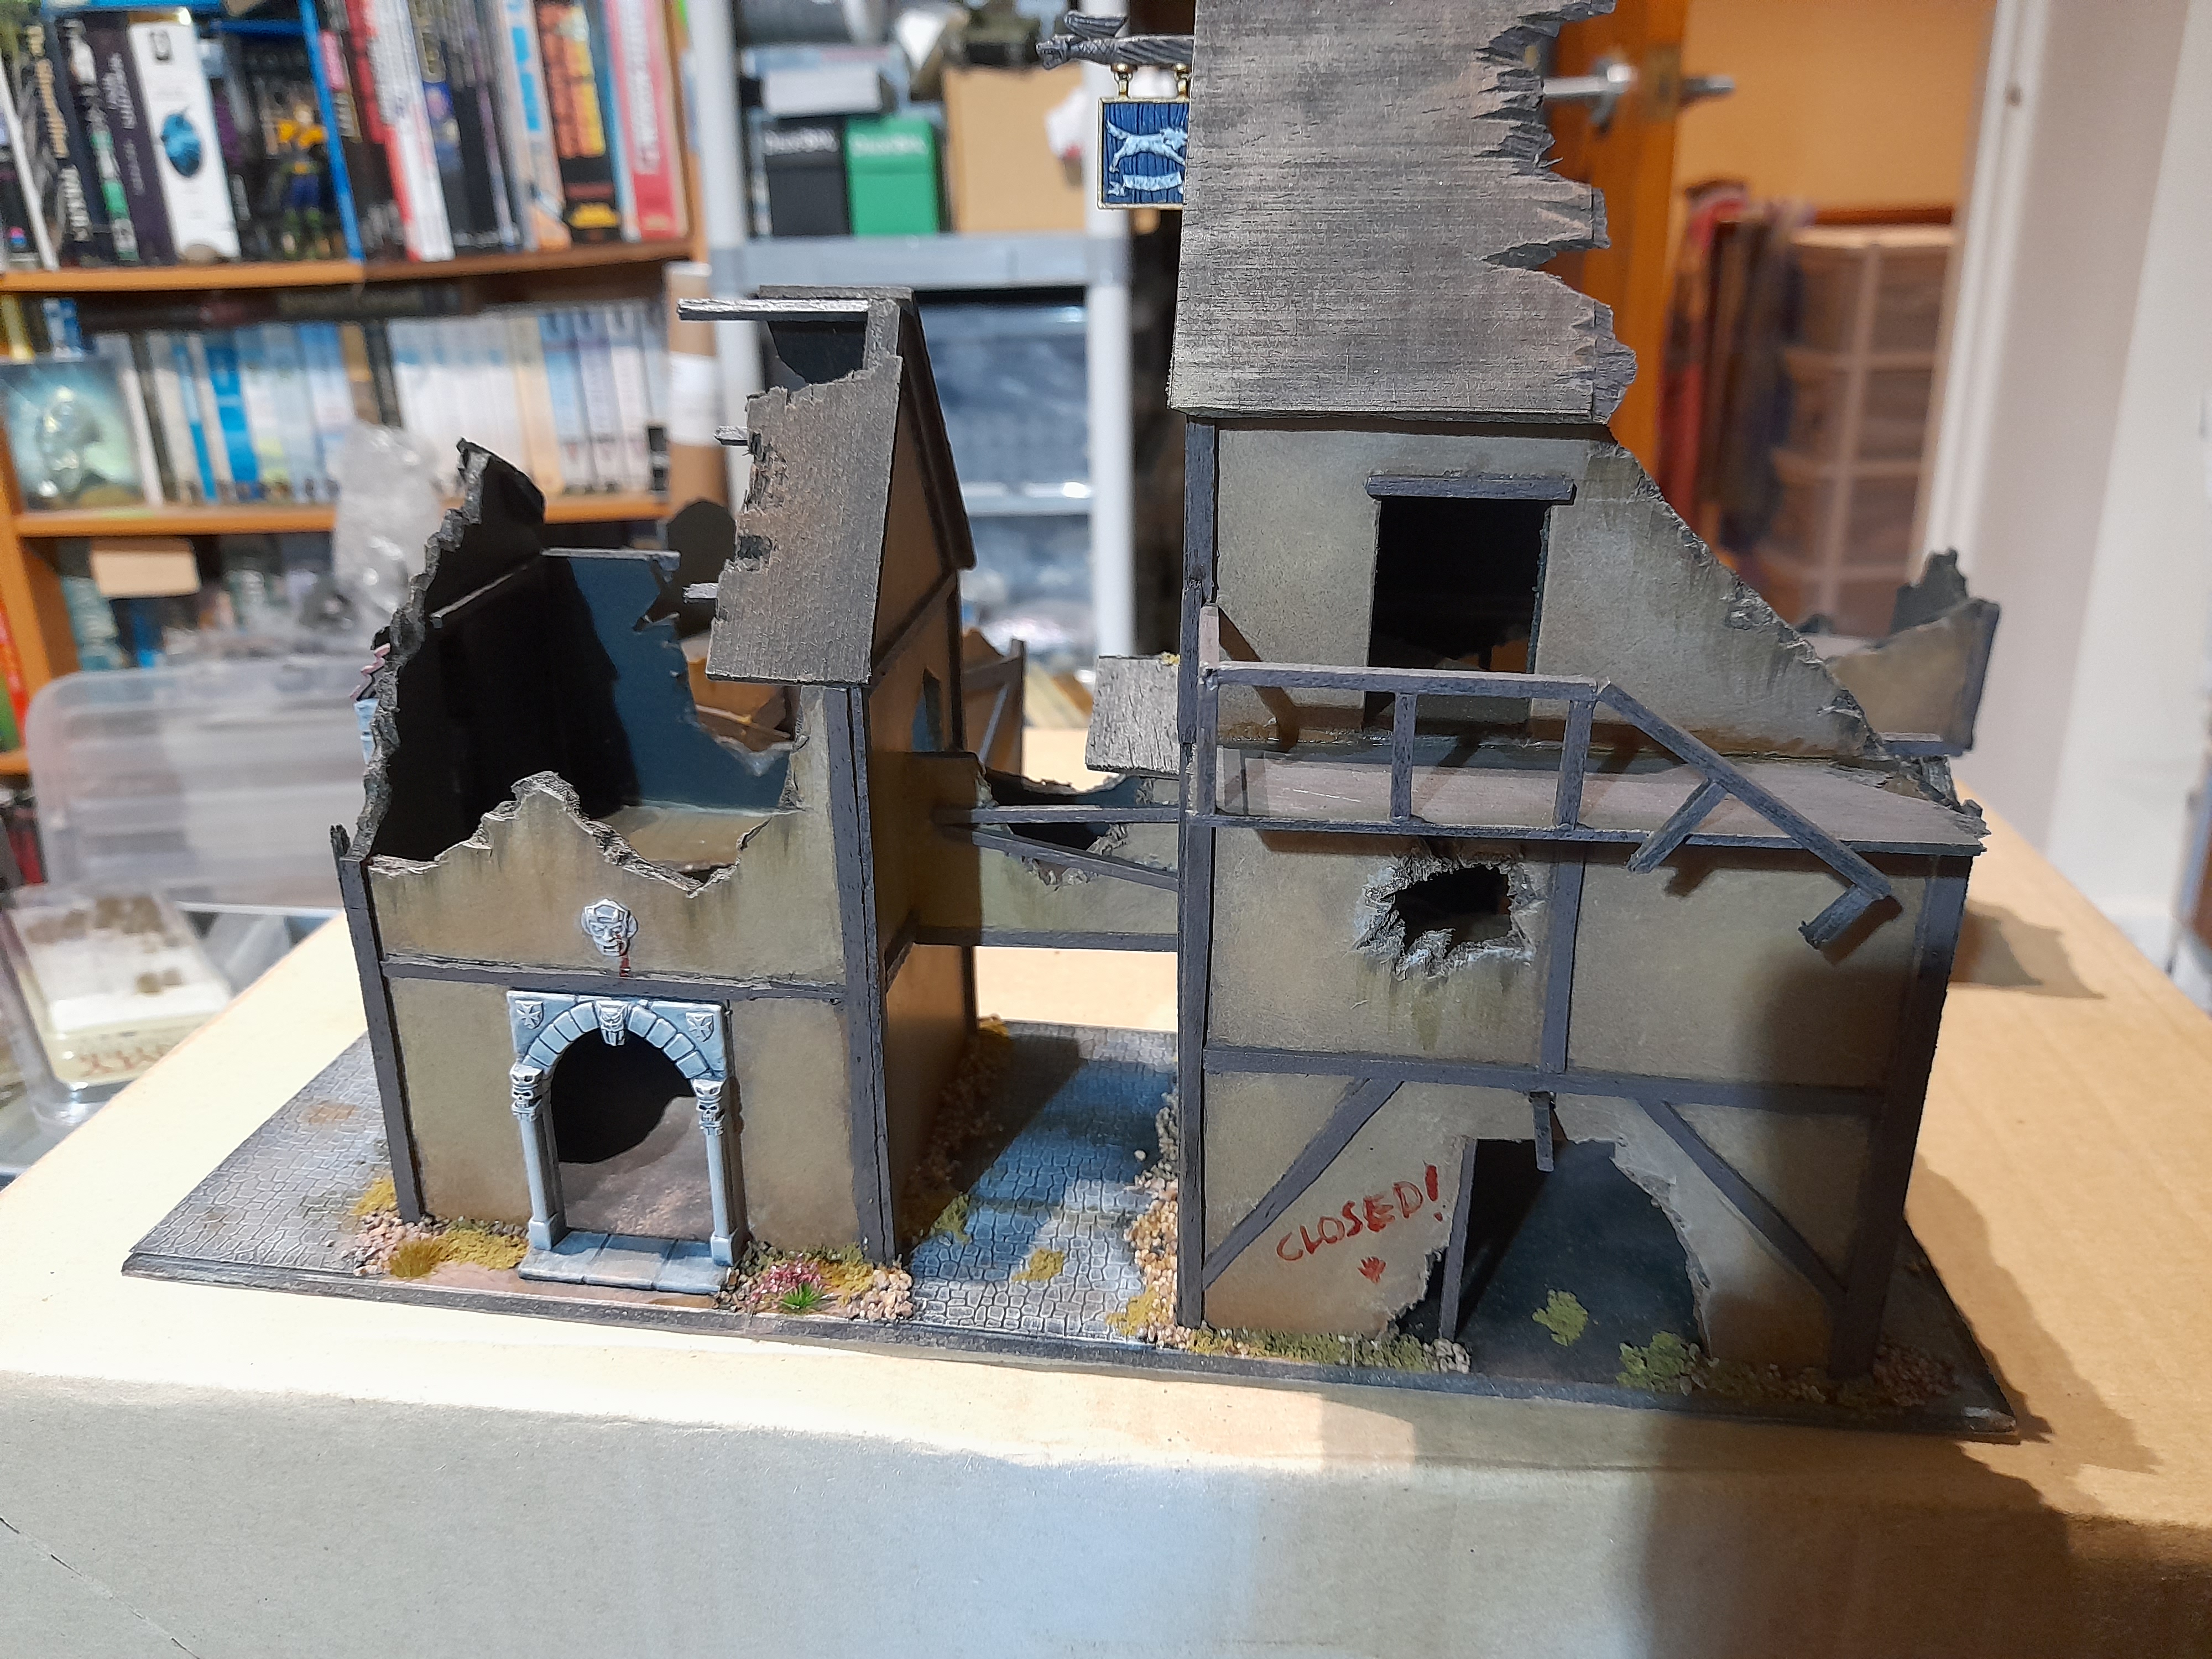
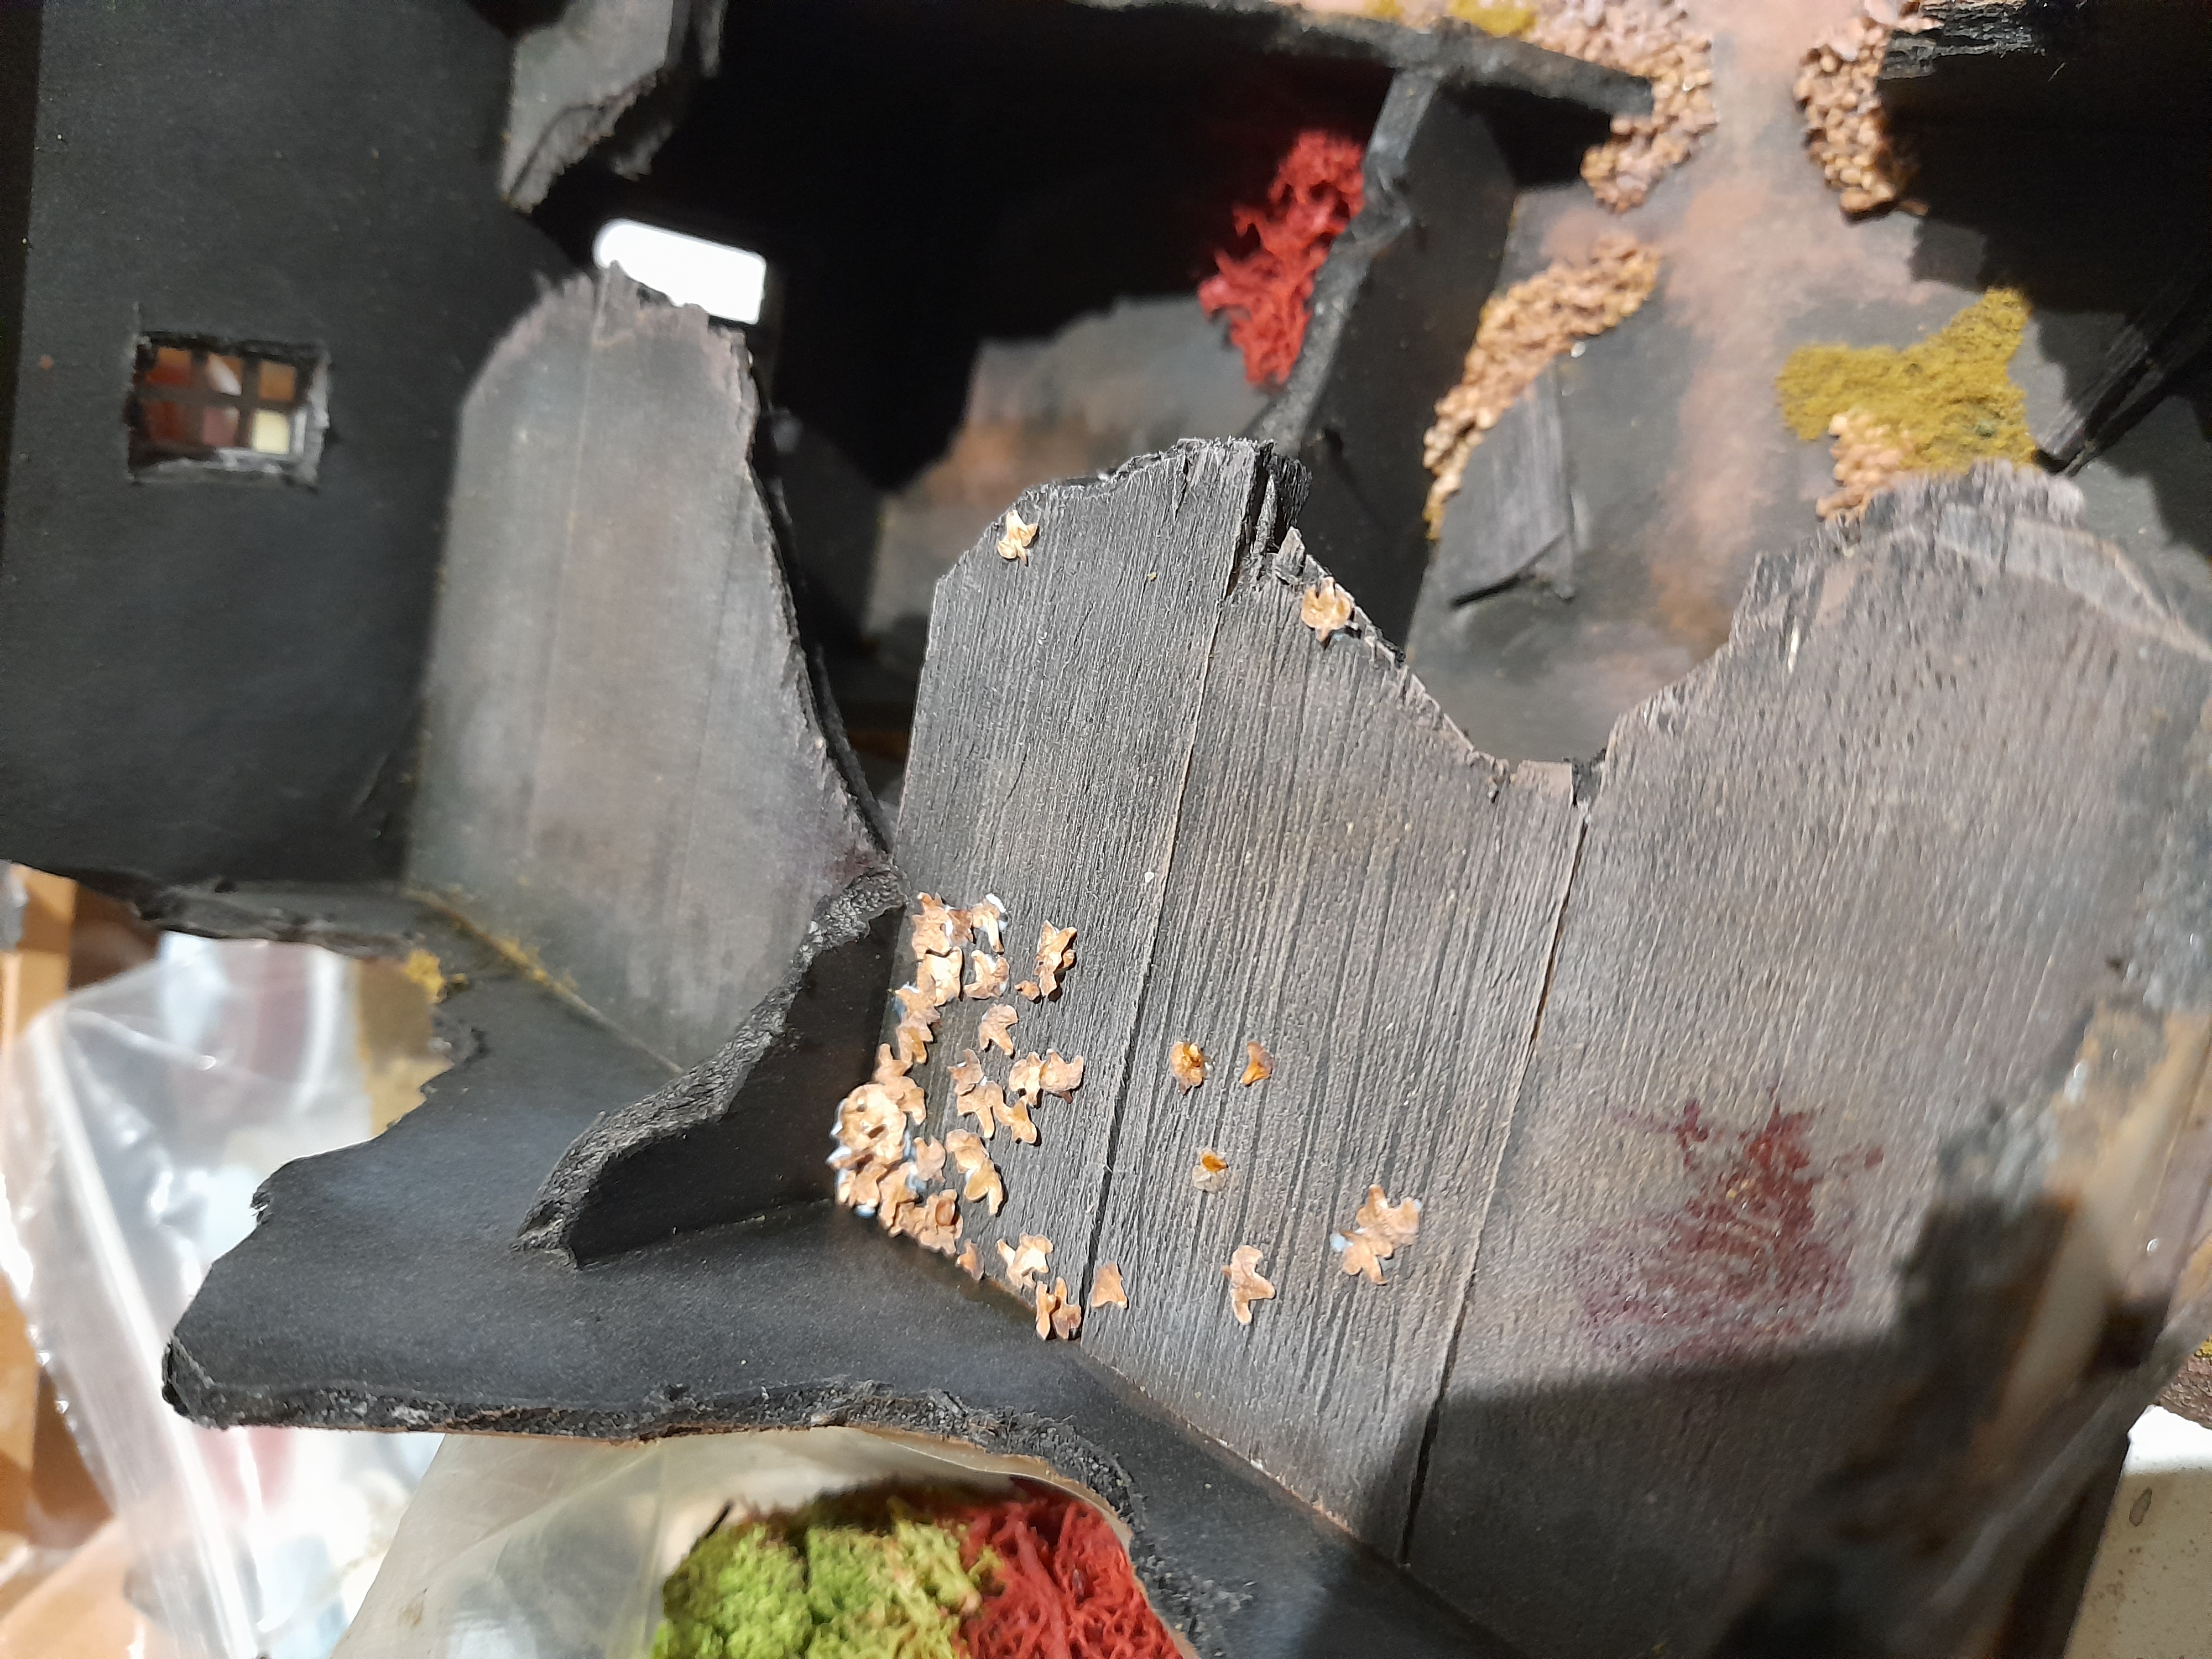
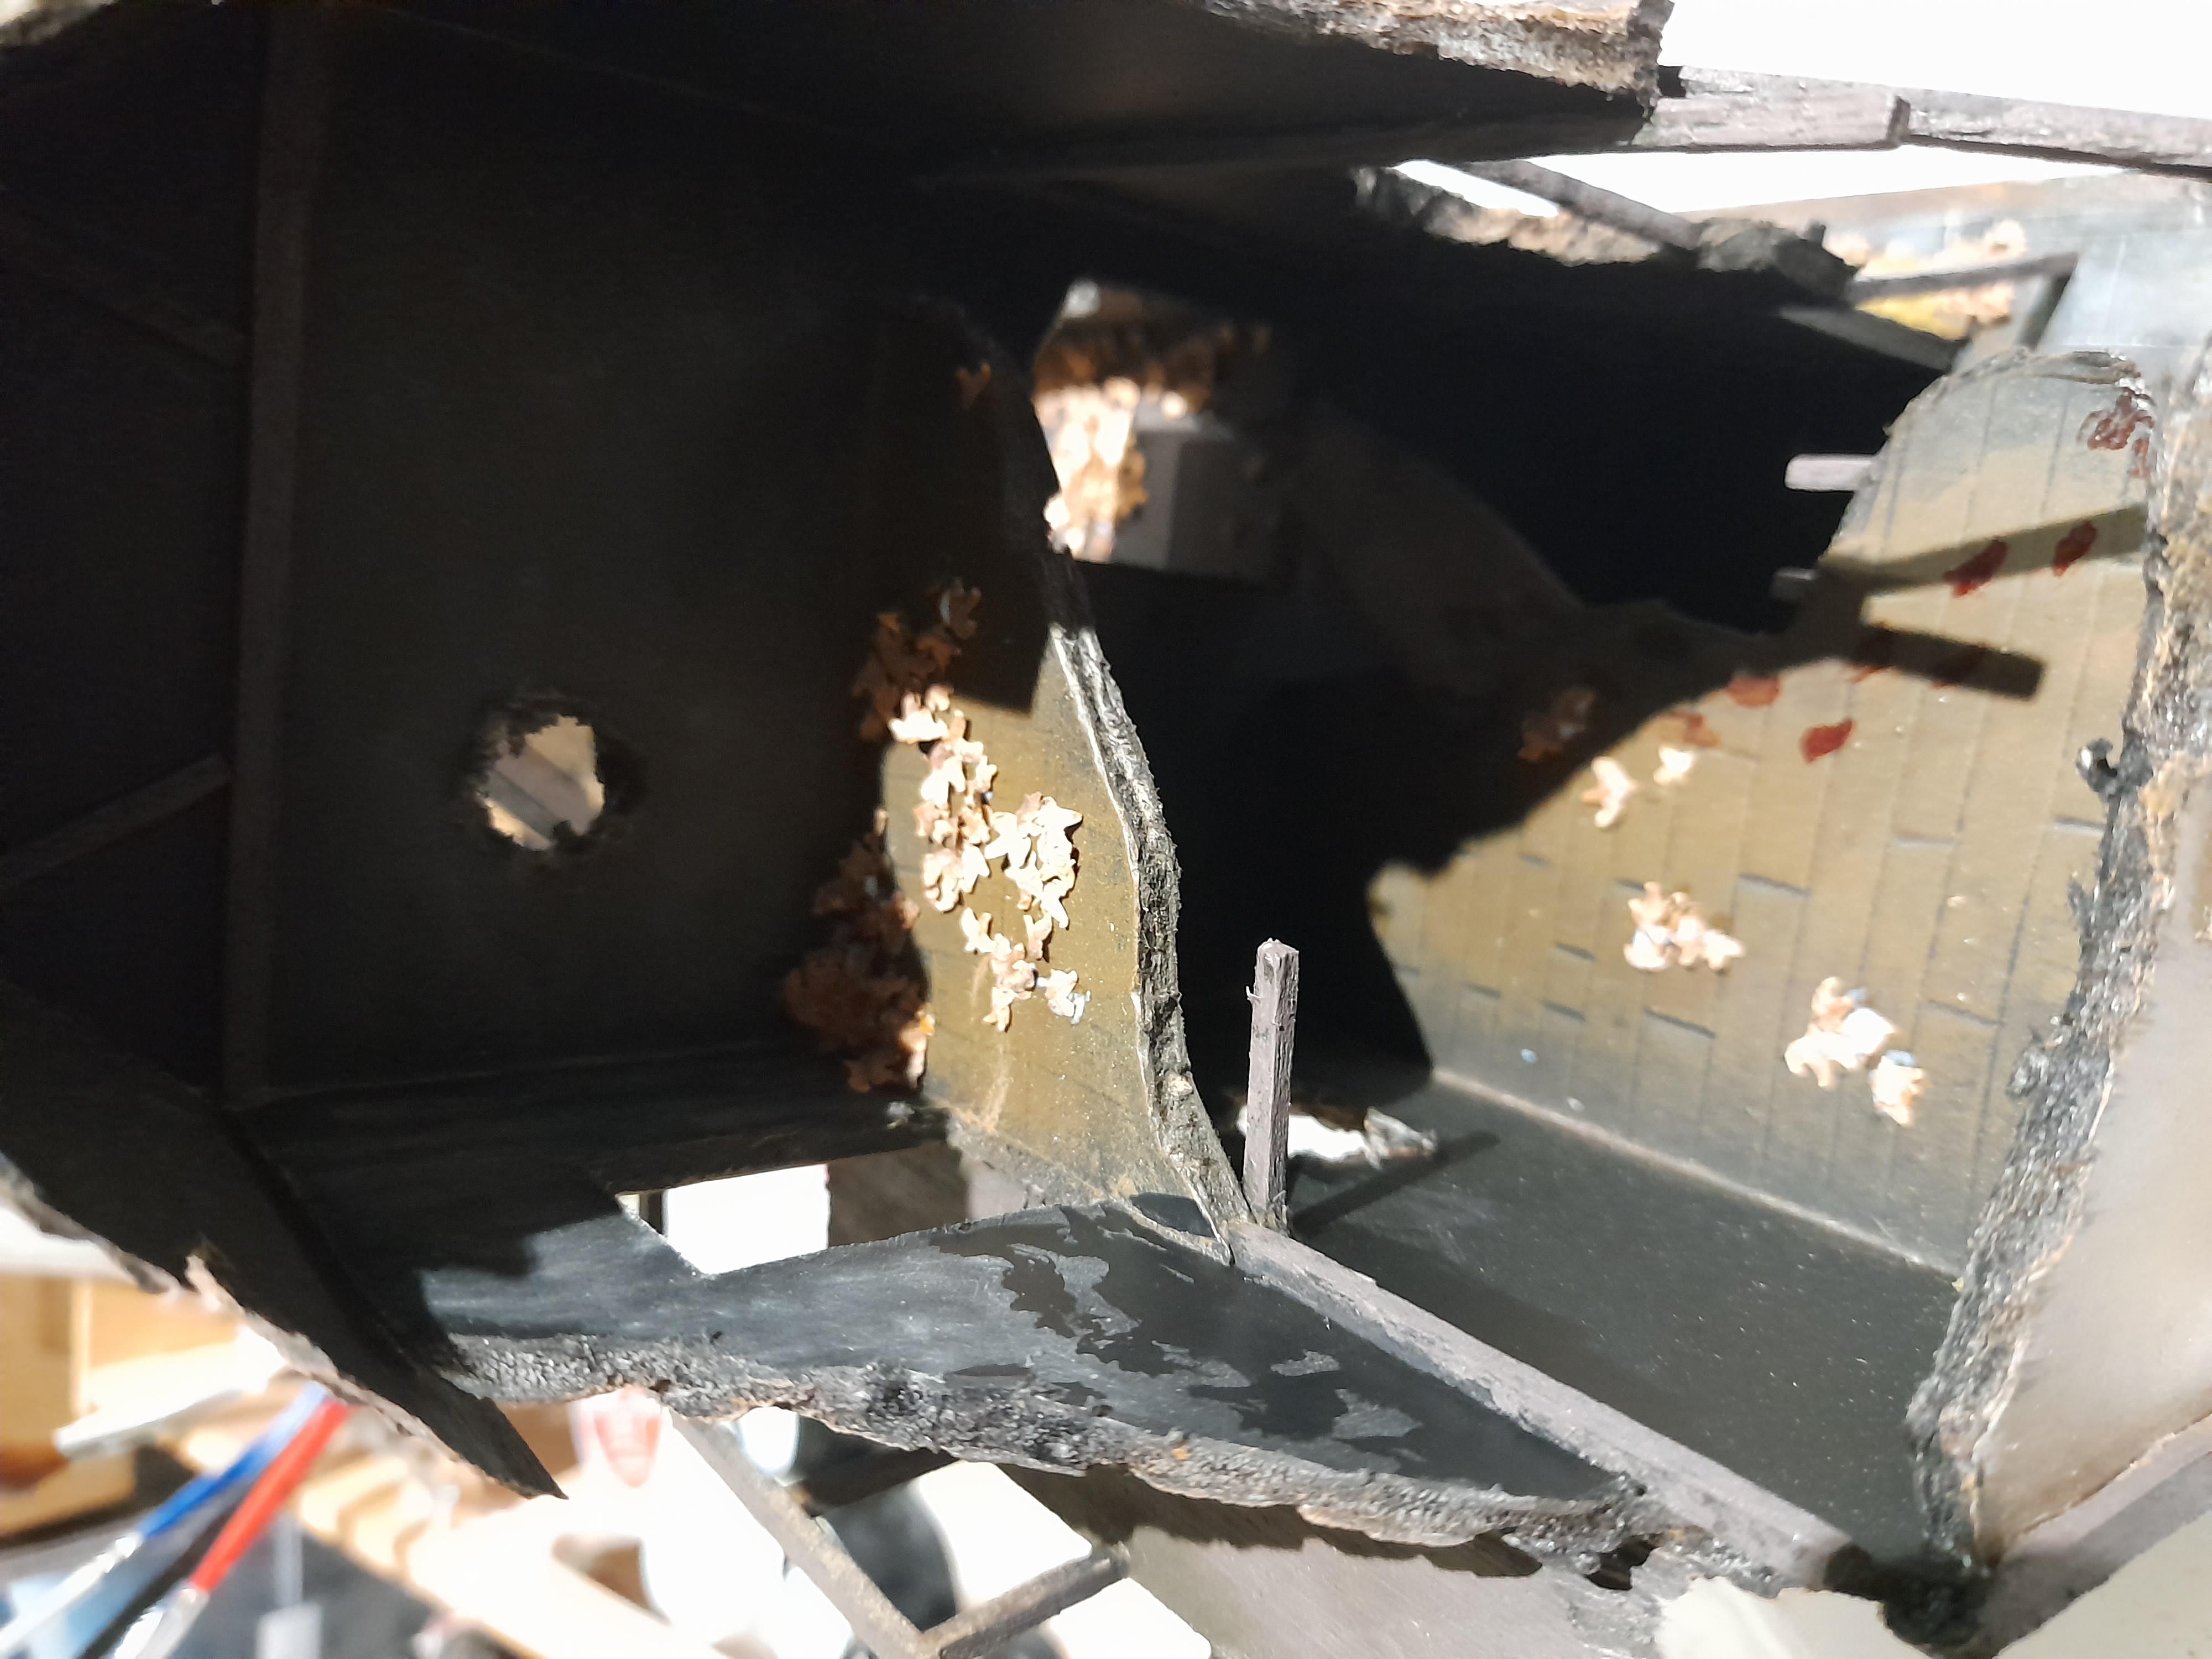
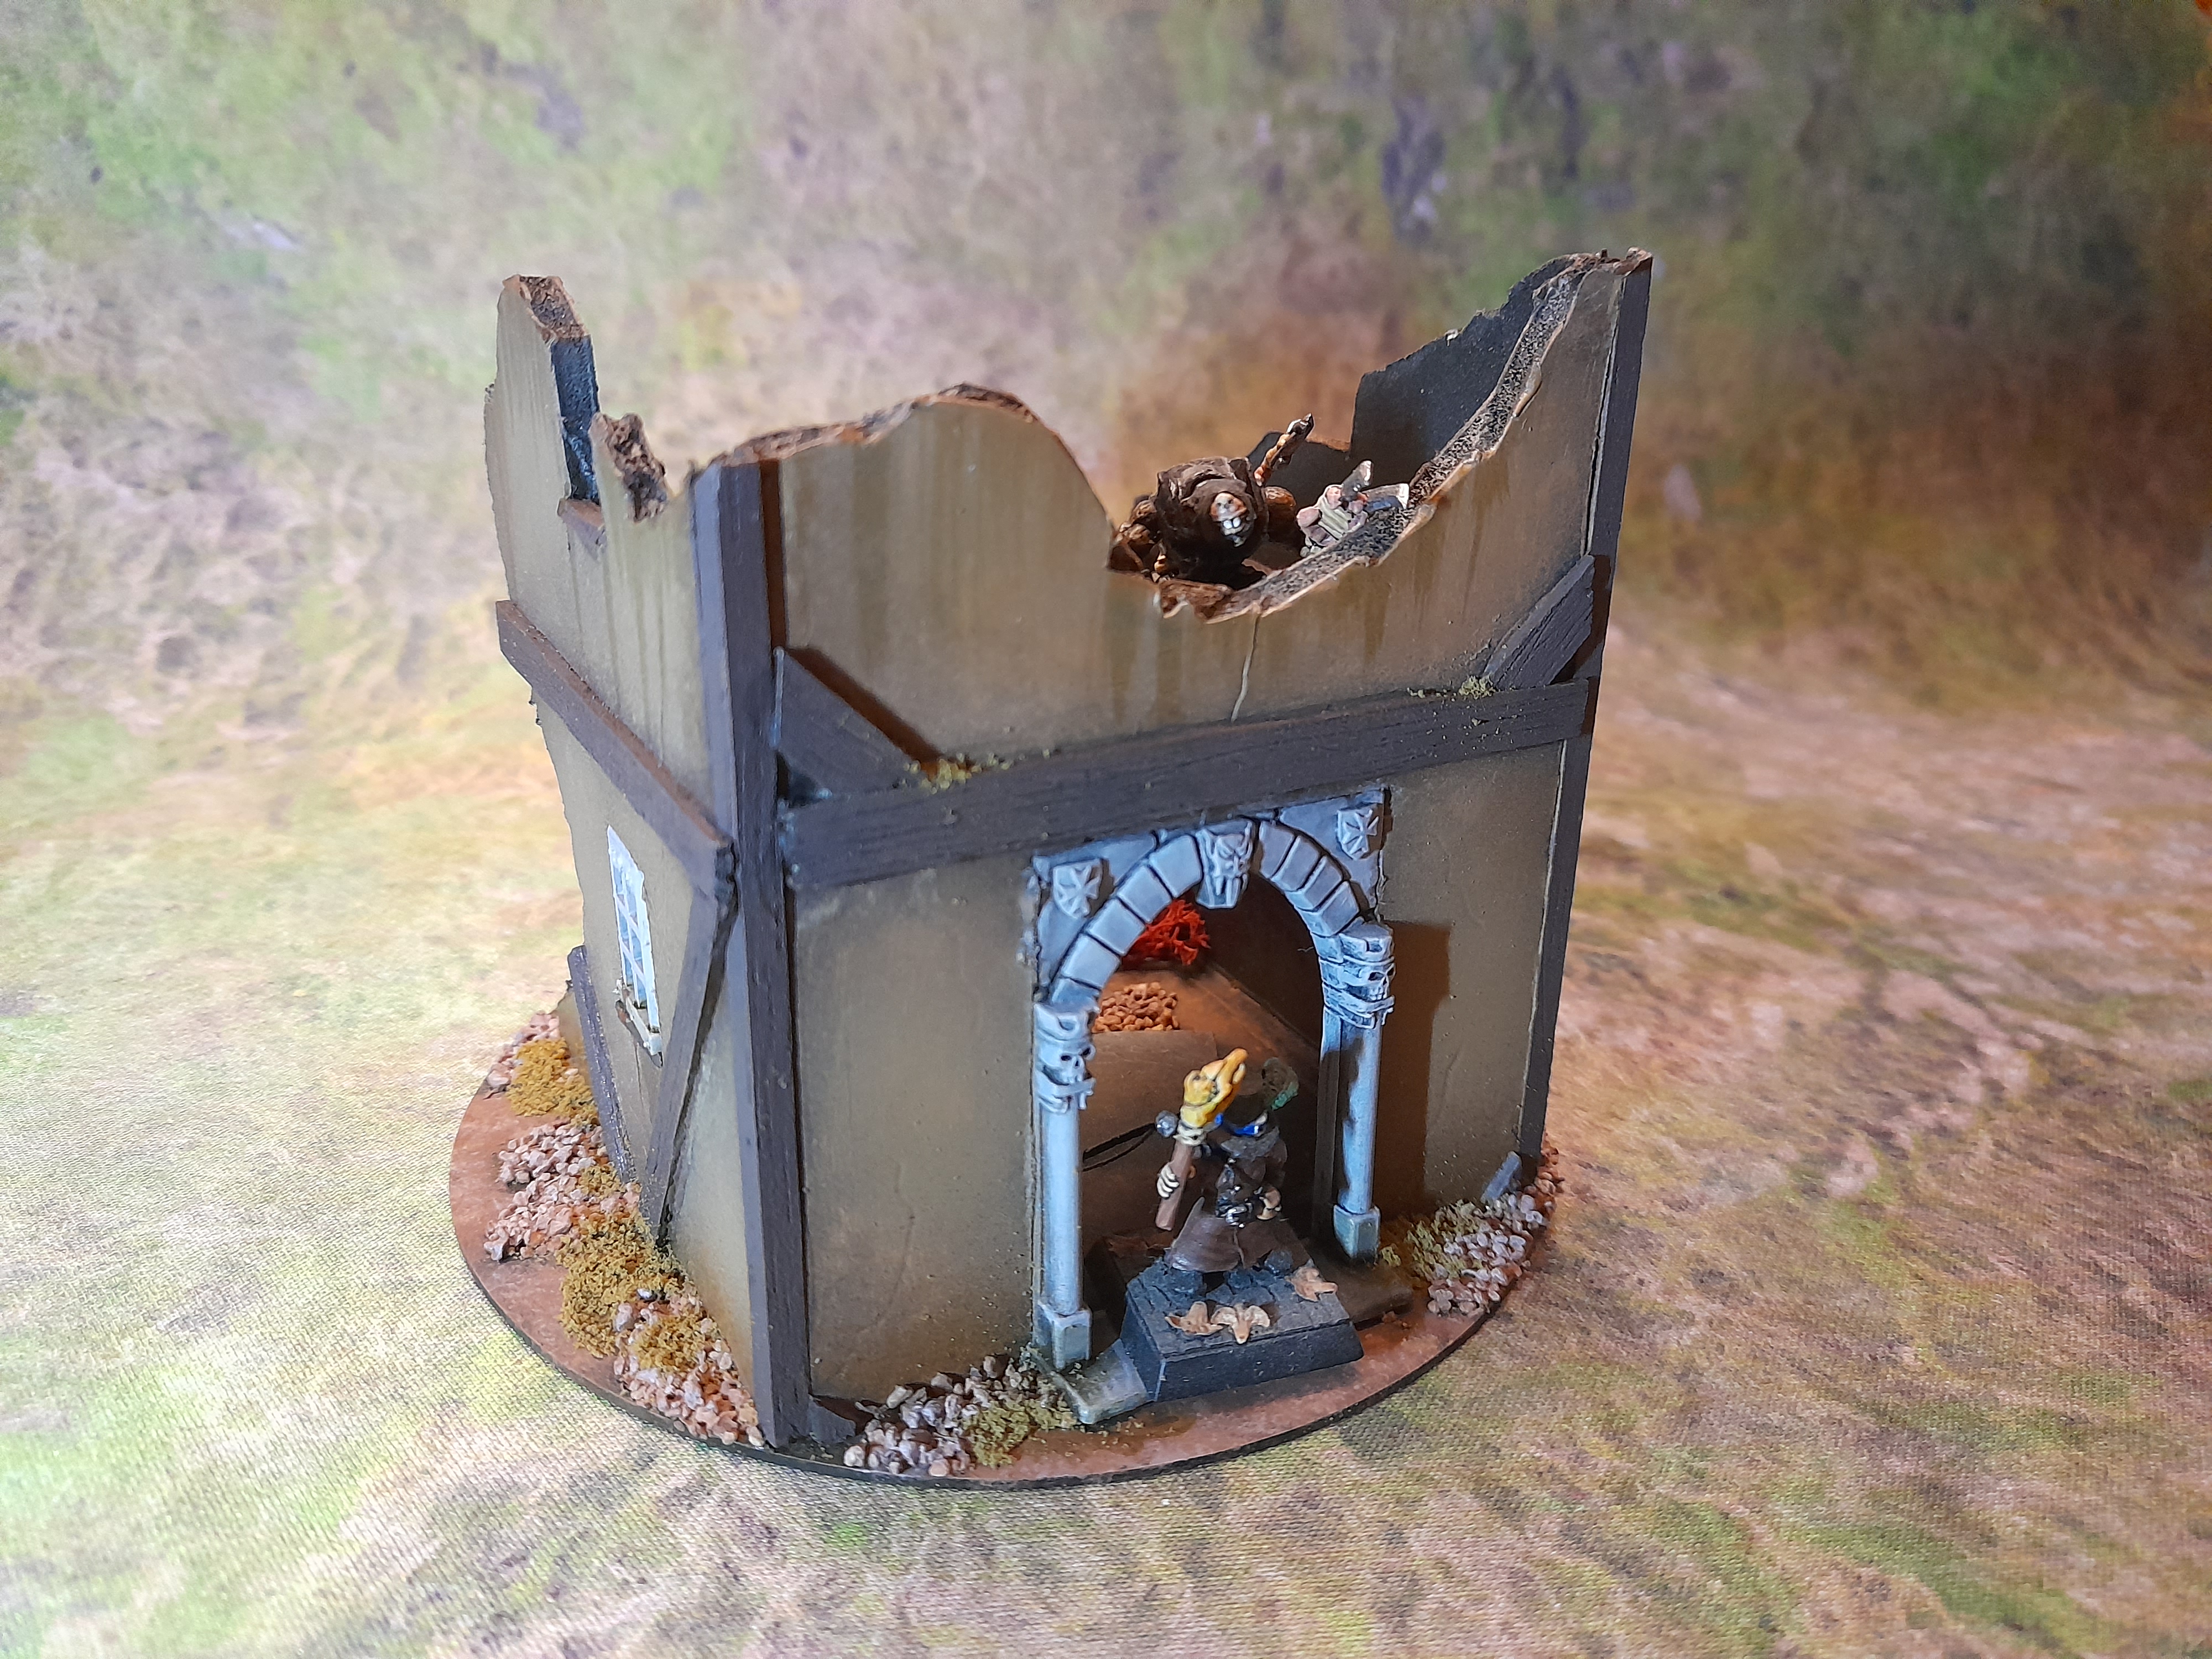
Next up I decided to try to add some bird droppings onto the roof of the largest building, and on to part of the balcony railing as well.
The final stage was to add some more base scatter such as a few leaf piles in some areas, and a couple of patches of lichen.
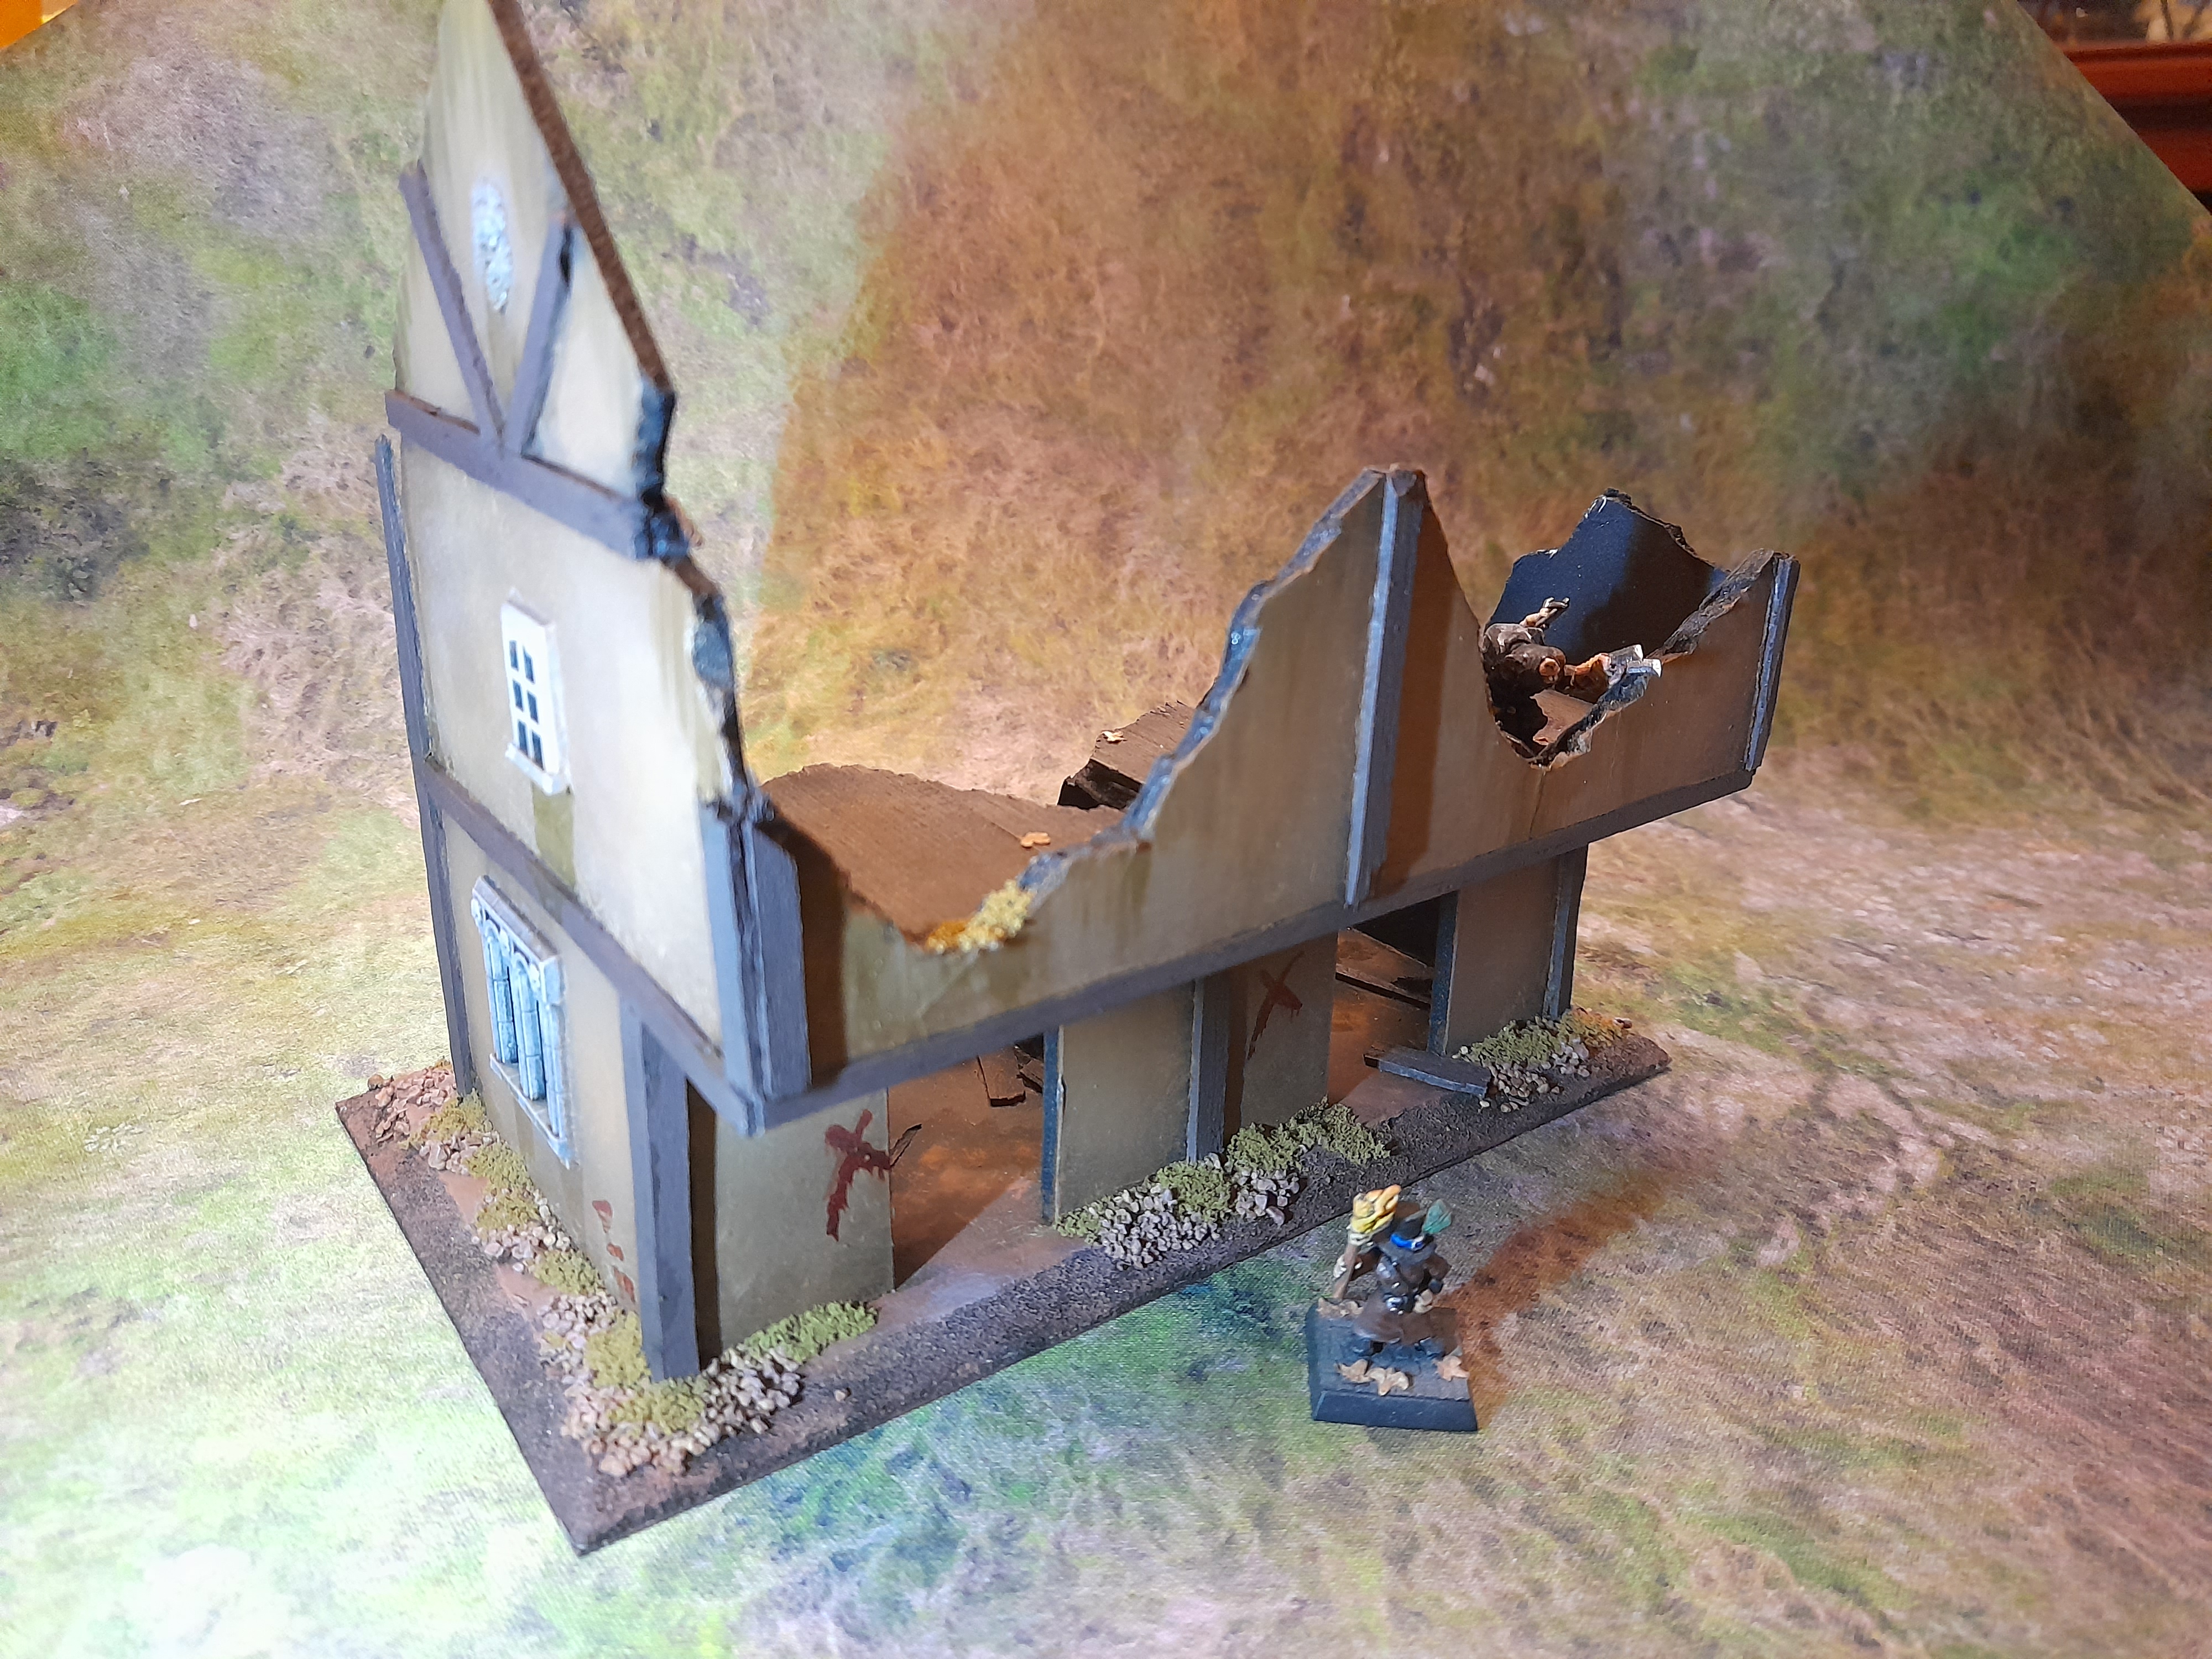
And with that done, the fantasy style ruined buildings, suitable for Mordheim, KoW Vanguard and other fantasy systems were finished.
Some thoughts on these:
I enjoyed adding the detailing like the bird poo, water staining and the leaves, flowering bushes and tufts.
The airbrushing helped get rid of some of my messy drybrushing.
The plasticard cobbles worked well – I need to get some more of this. Scoring lines into the foamcard to represent flagstones worked ok though.
It would be much easier to use black foamcore rather than white foamcore – especially when it comes to the cut edges.
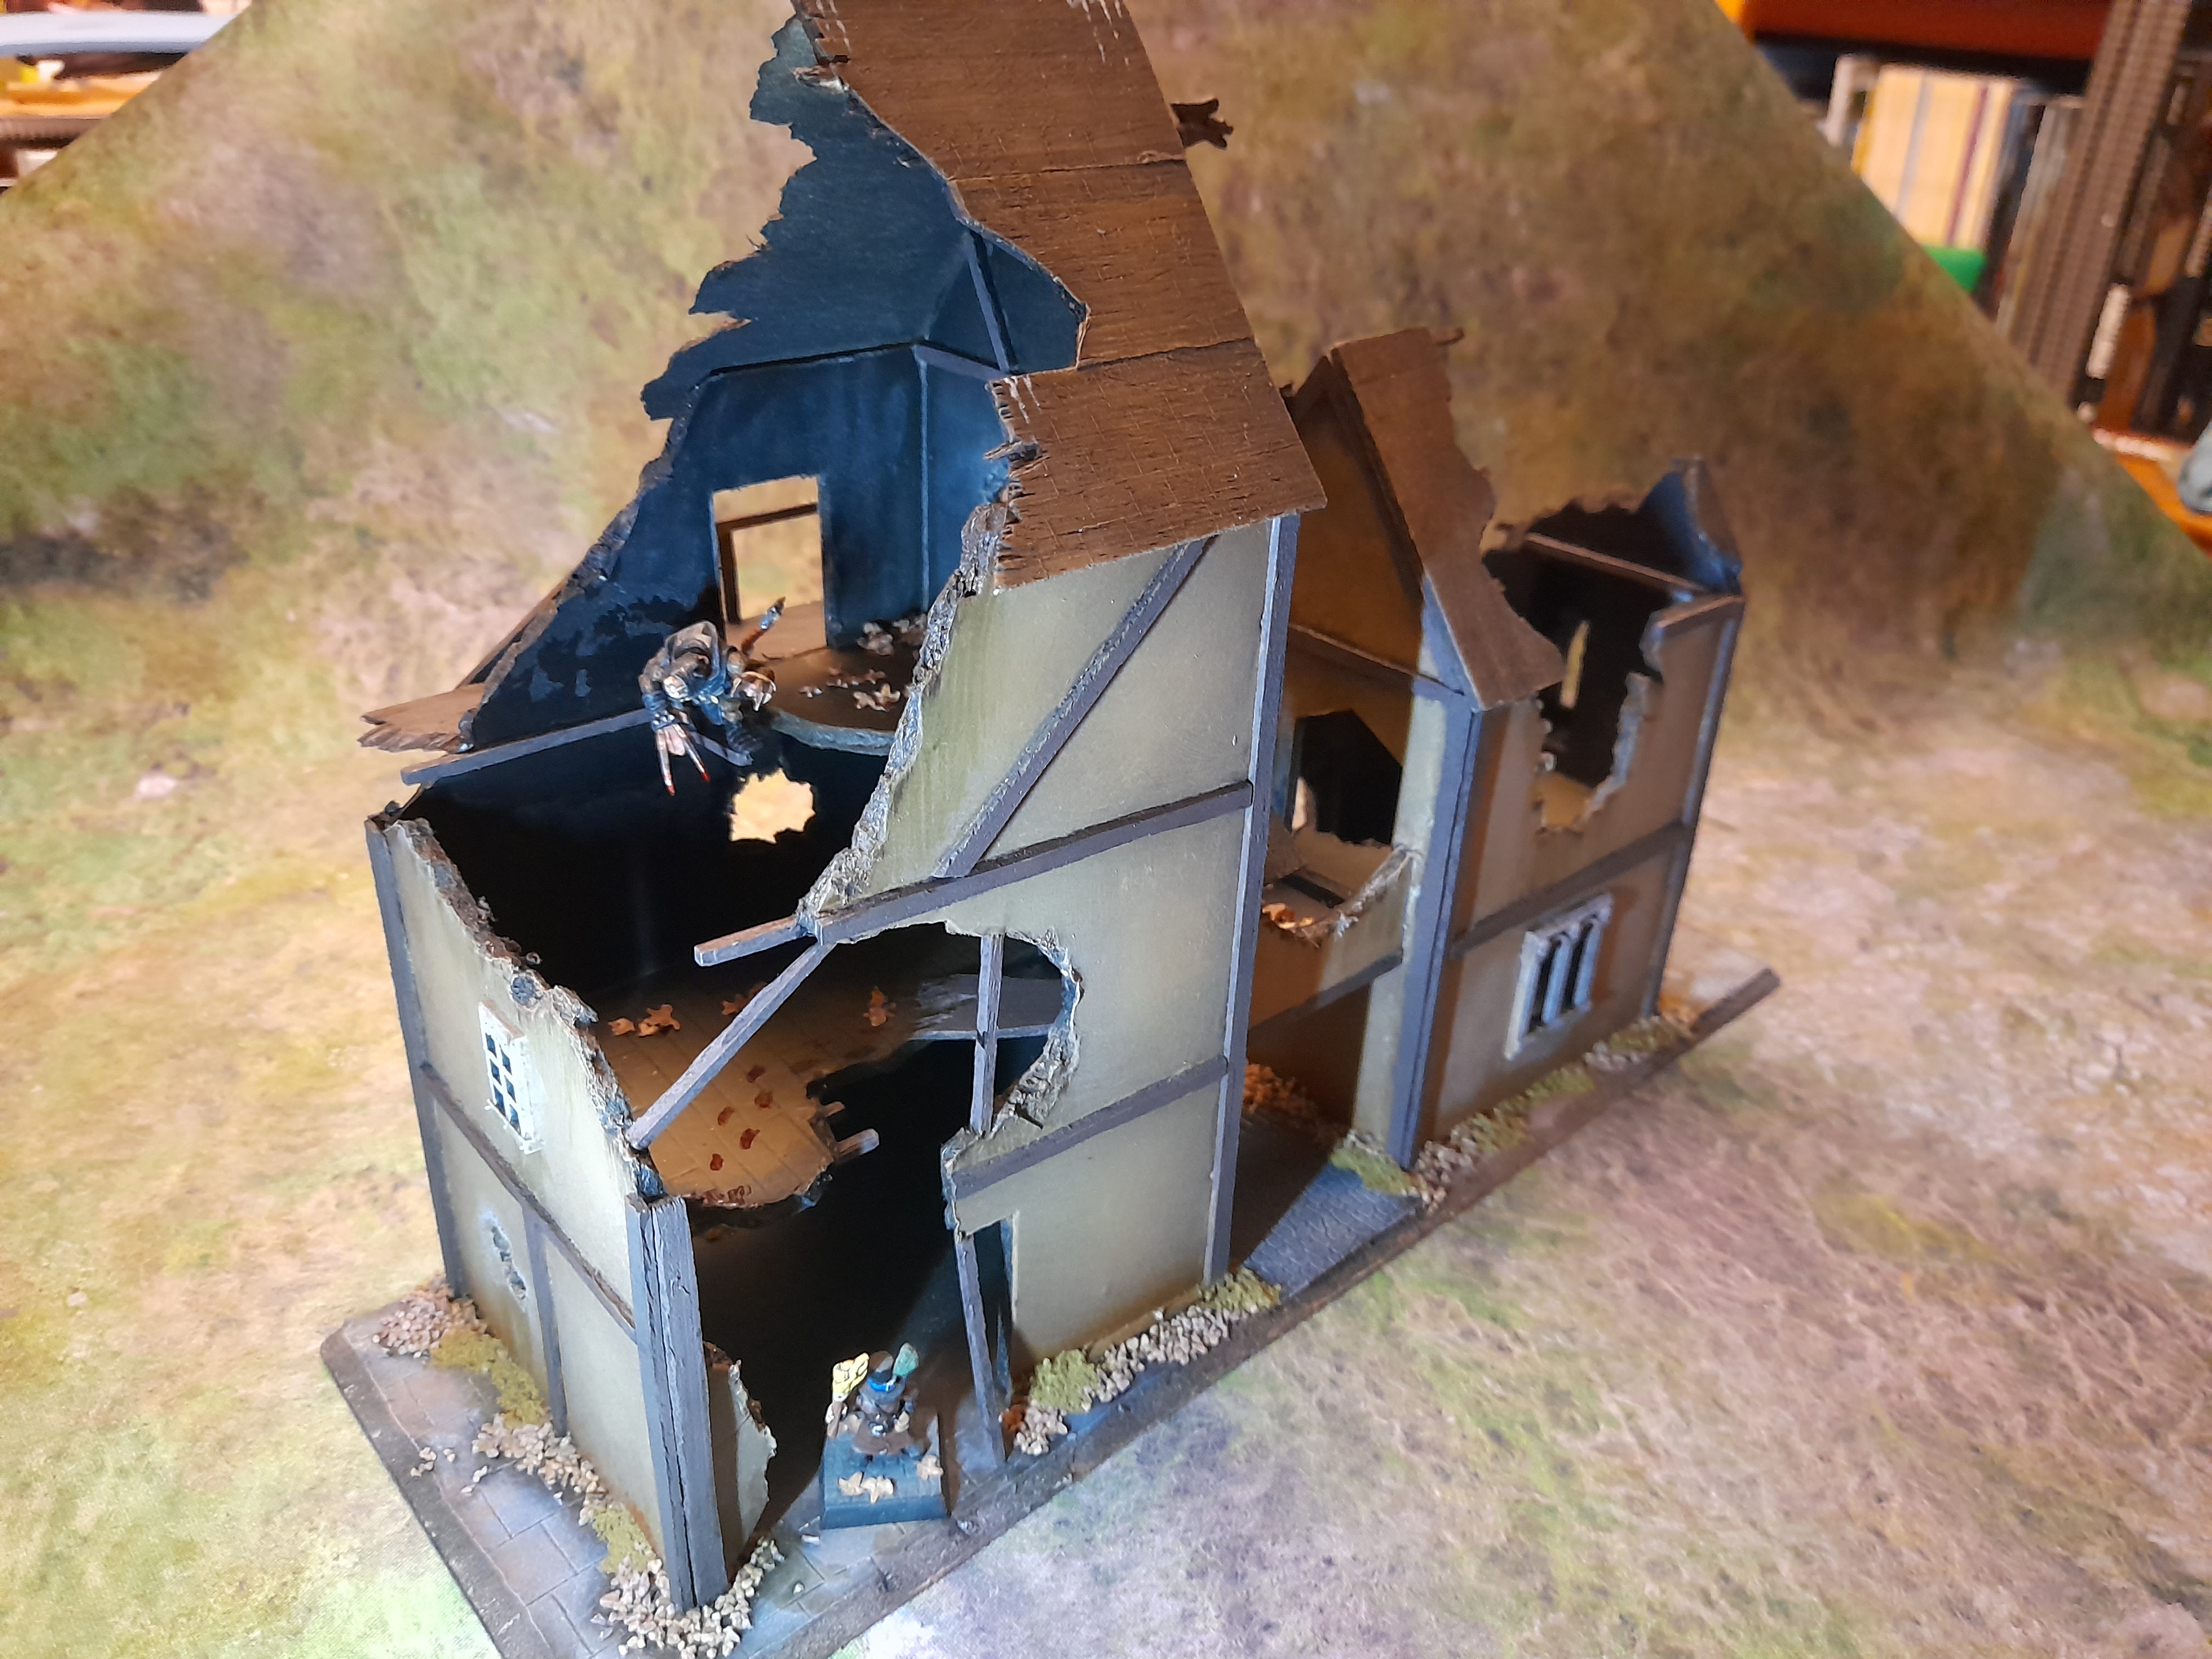
In hindsight I should have added coffee stirrer planks to the flooring for the upper floors, to add a bit more scale ‘realism’.
I could do with making the buildings slightly larger in footprint. Although it is good to have a mix of sizes I think the double width building gives more opportunity to have combat within a structure.
Mordheim / Fantasy buildings finished pics
 Uses an old cd for the base
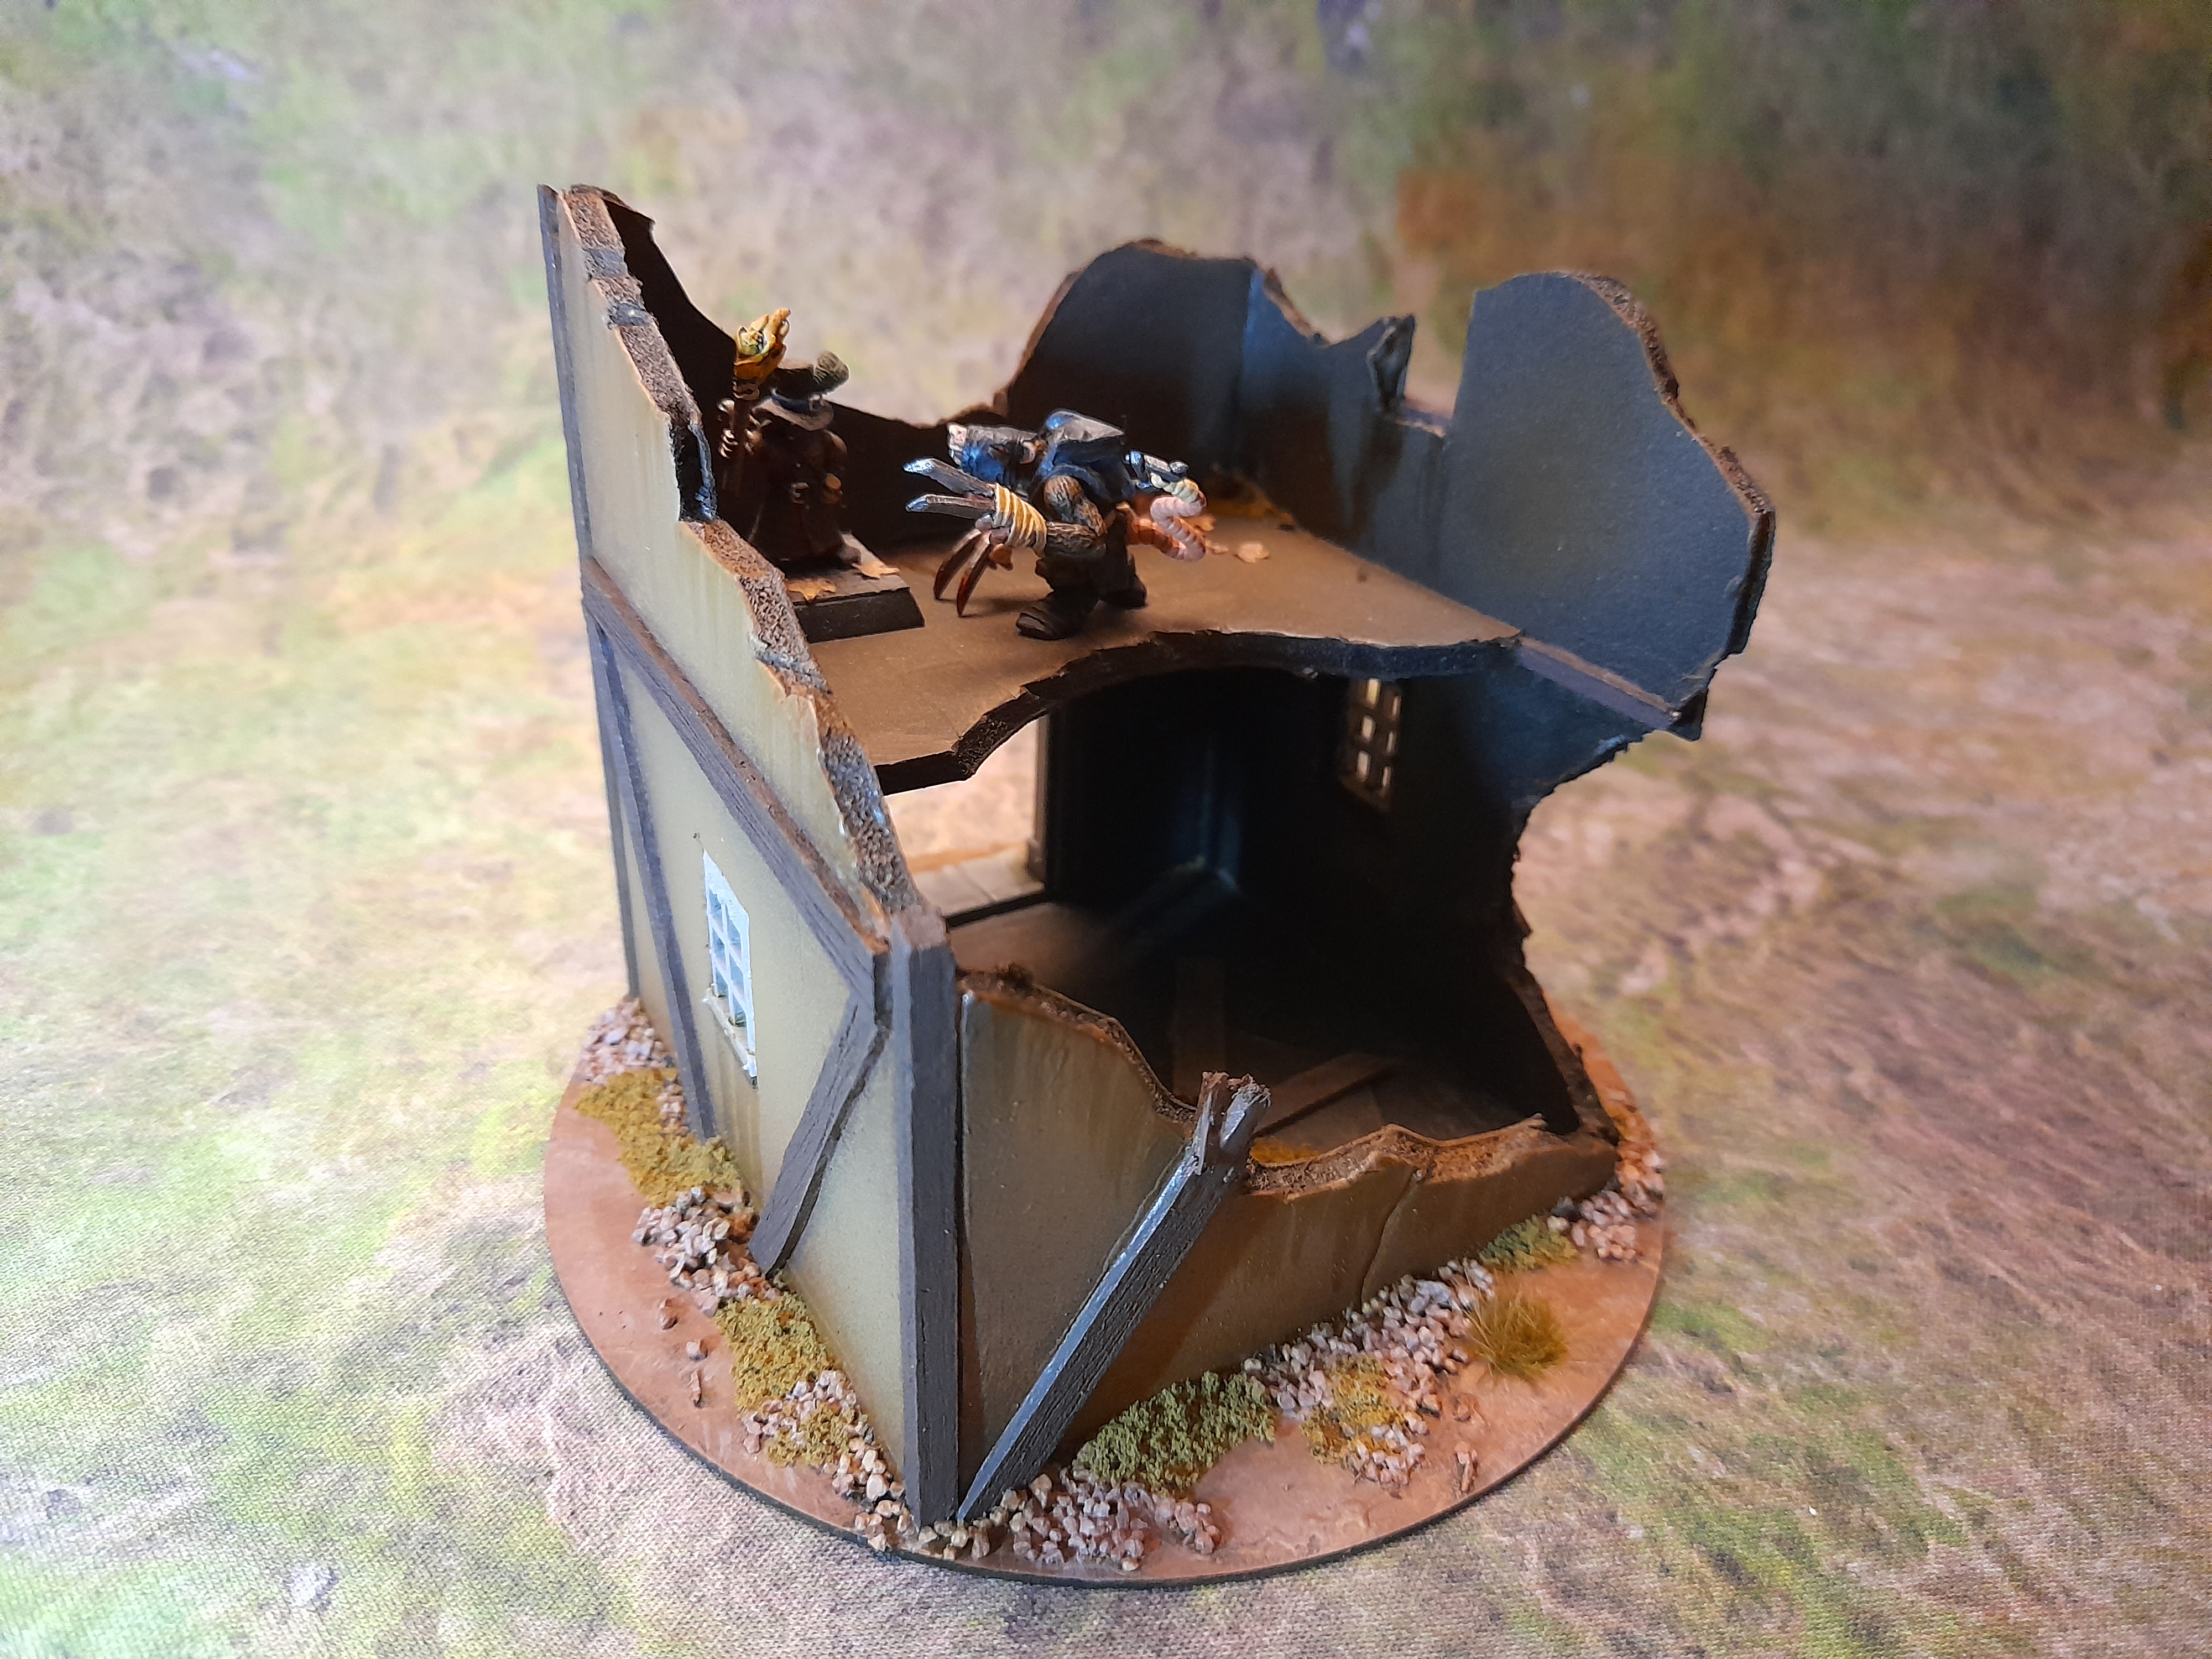

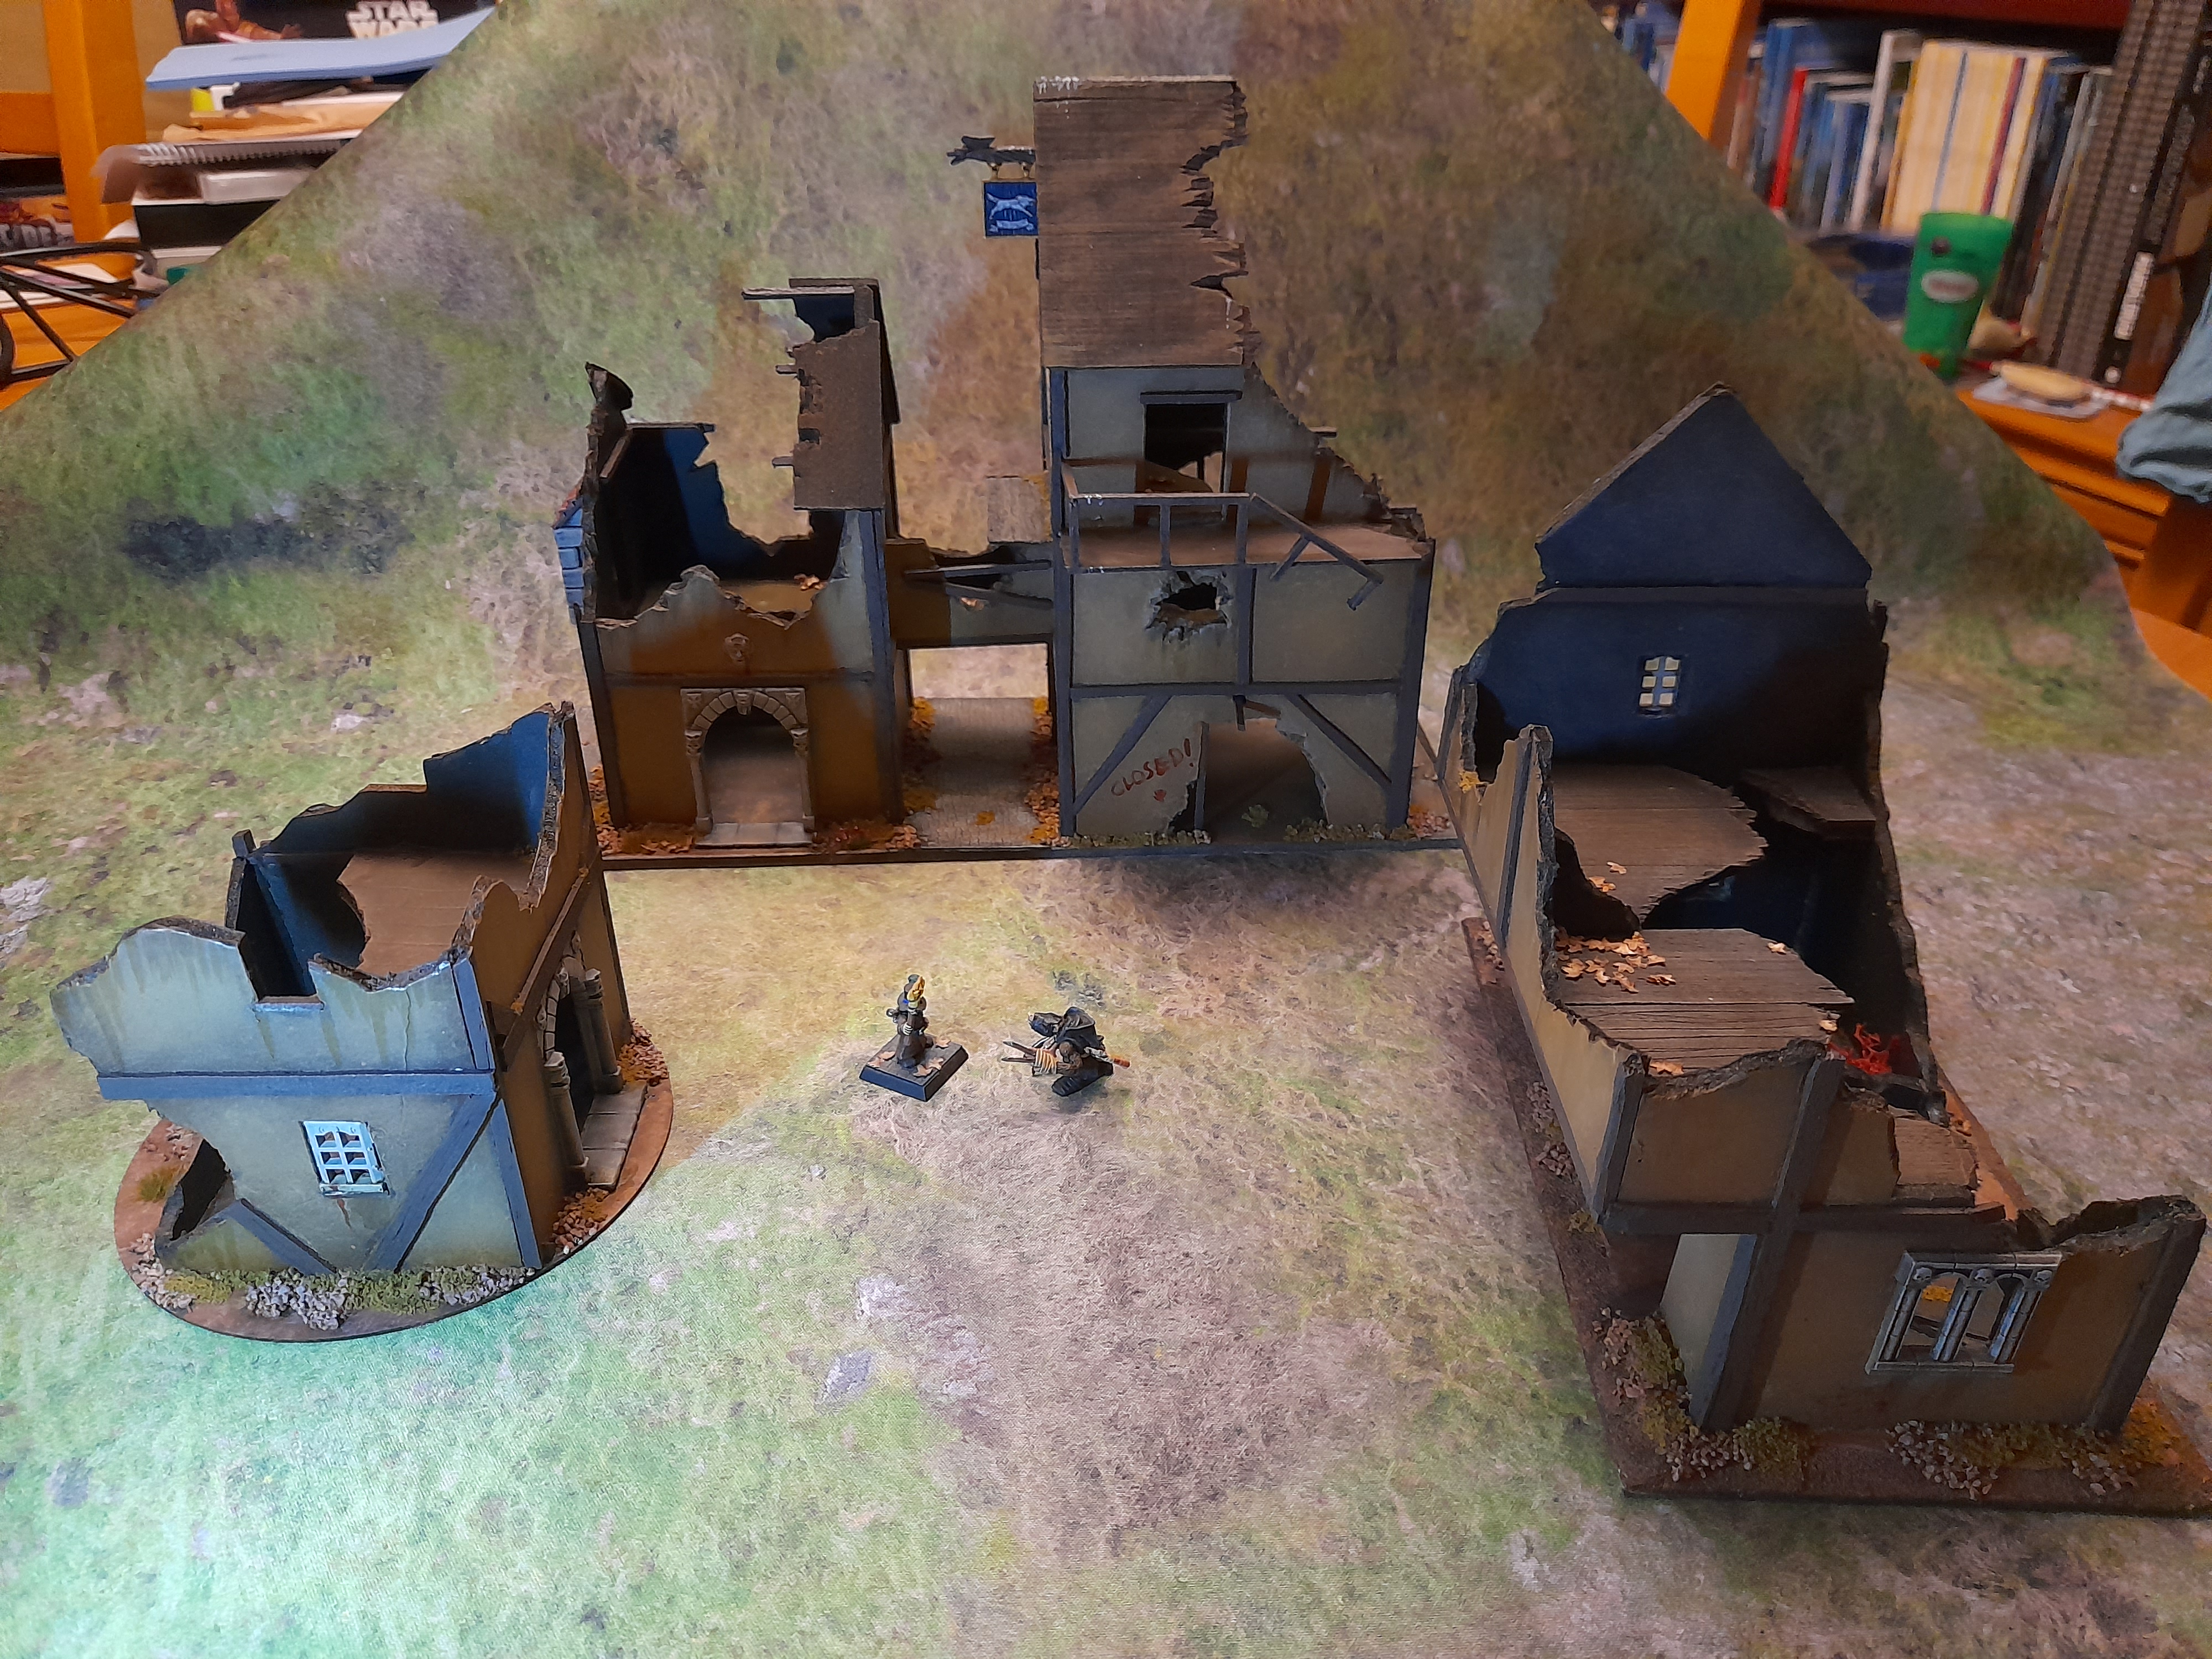
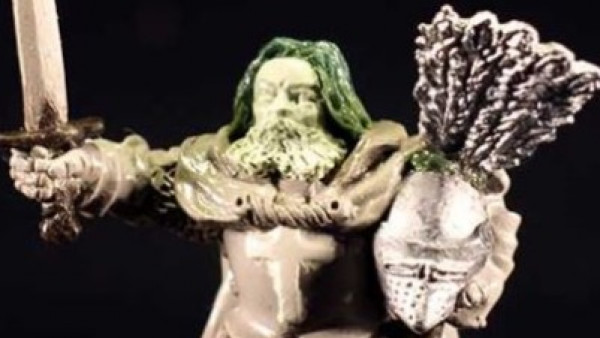
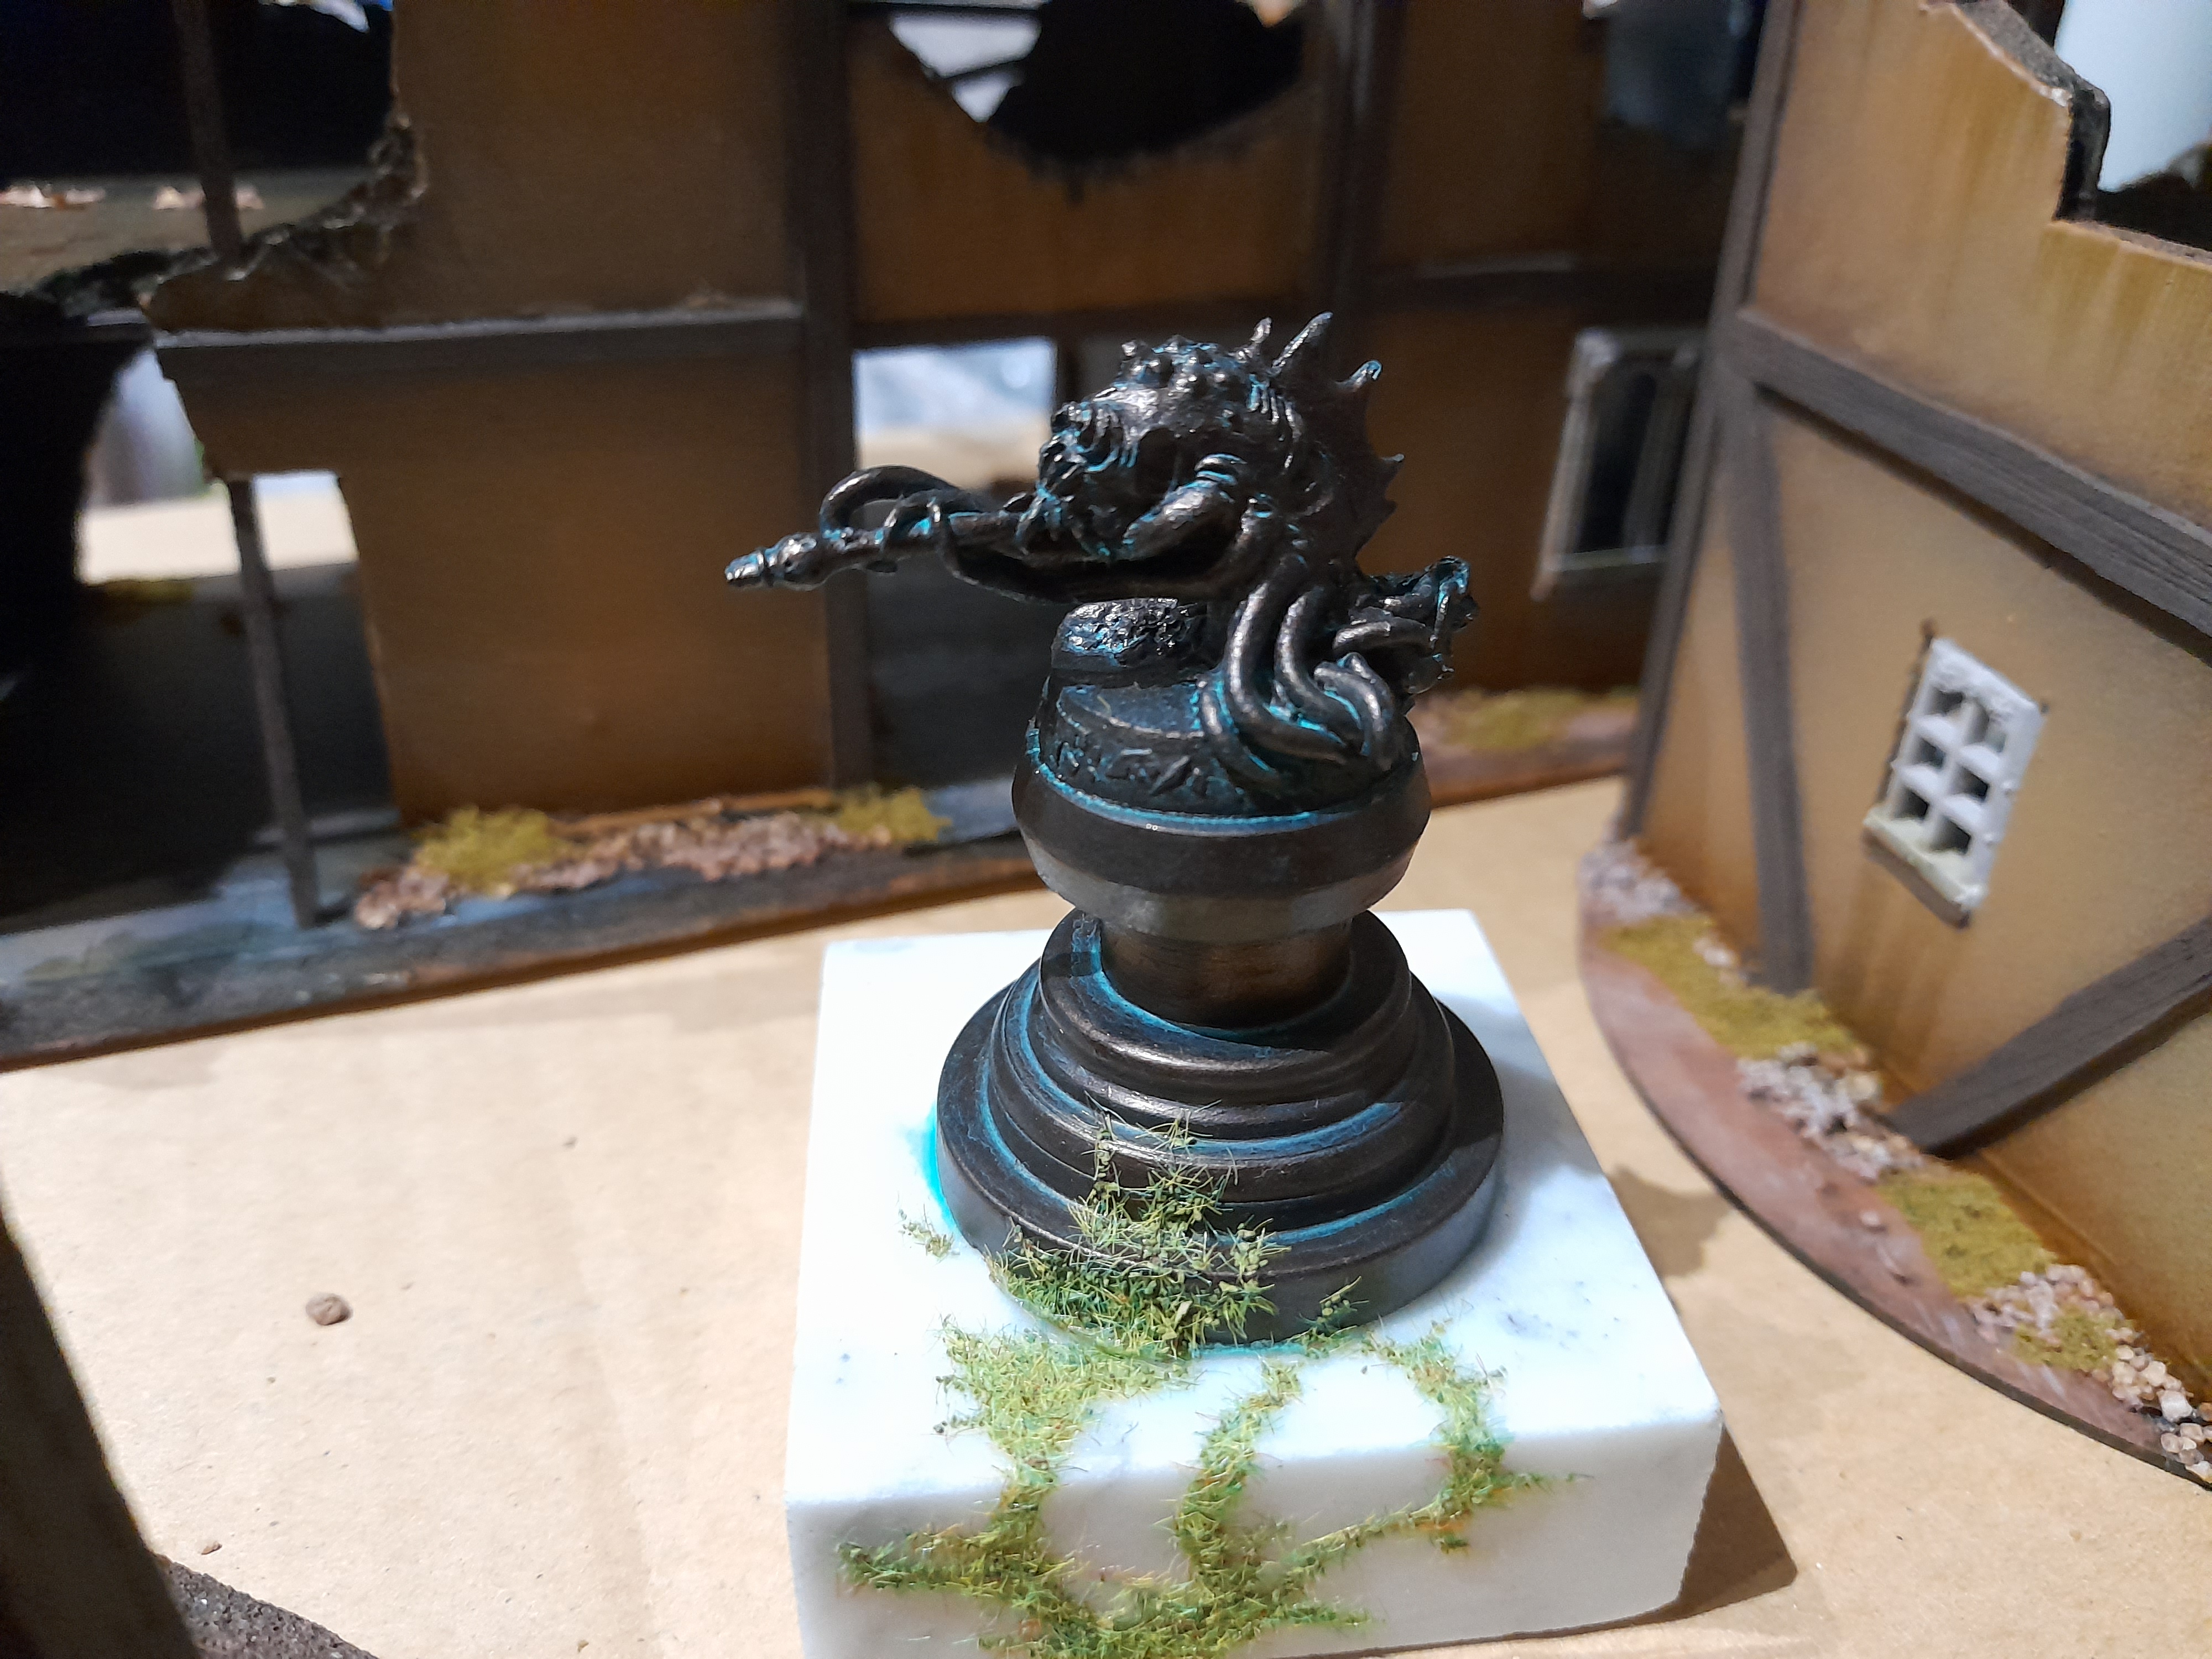 A completely safe and nice statue to go with the buildings...
Summary
31st October 2023
Just a quick summary.
I aimed to get Deadzone terrain, Vanguard objectives and some Mordheim buildings done for this TerrainFest project – and managed to achieve those.
The Star Wars Legion barricades were added when I was spraying the Deadzone terrain, but I haven’t had a chance to detail those. But, since they were an additional bunch of bits then I’m not too worried about those.
Overall I’m pretty happy with how things turned out 👍


 These will need some details and weathering added in the future
SW Legion Barricades
5th November 2023
These are just after the TerrainFest timeframe, but were an extra I added in when spraying the rest.
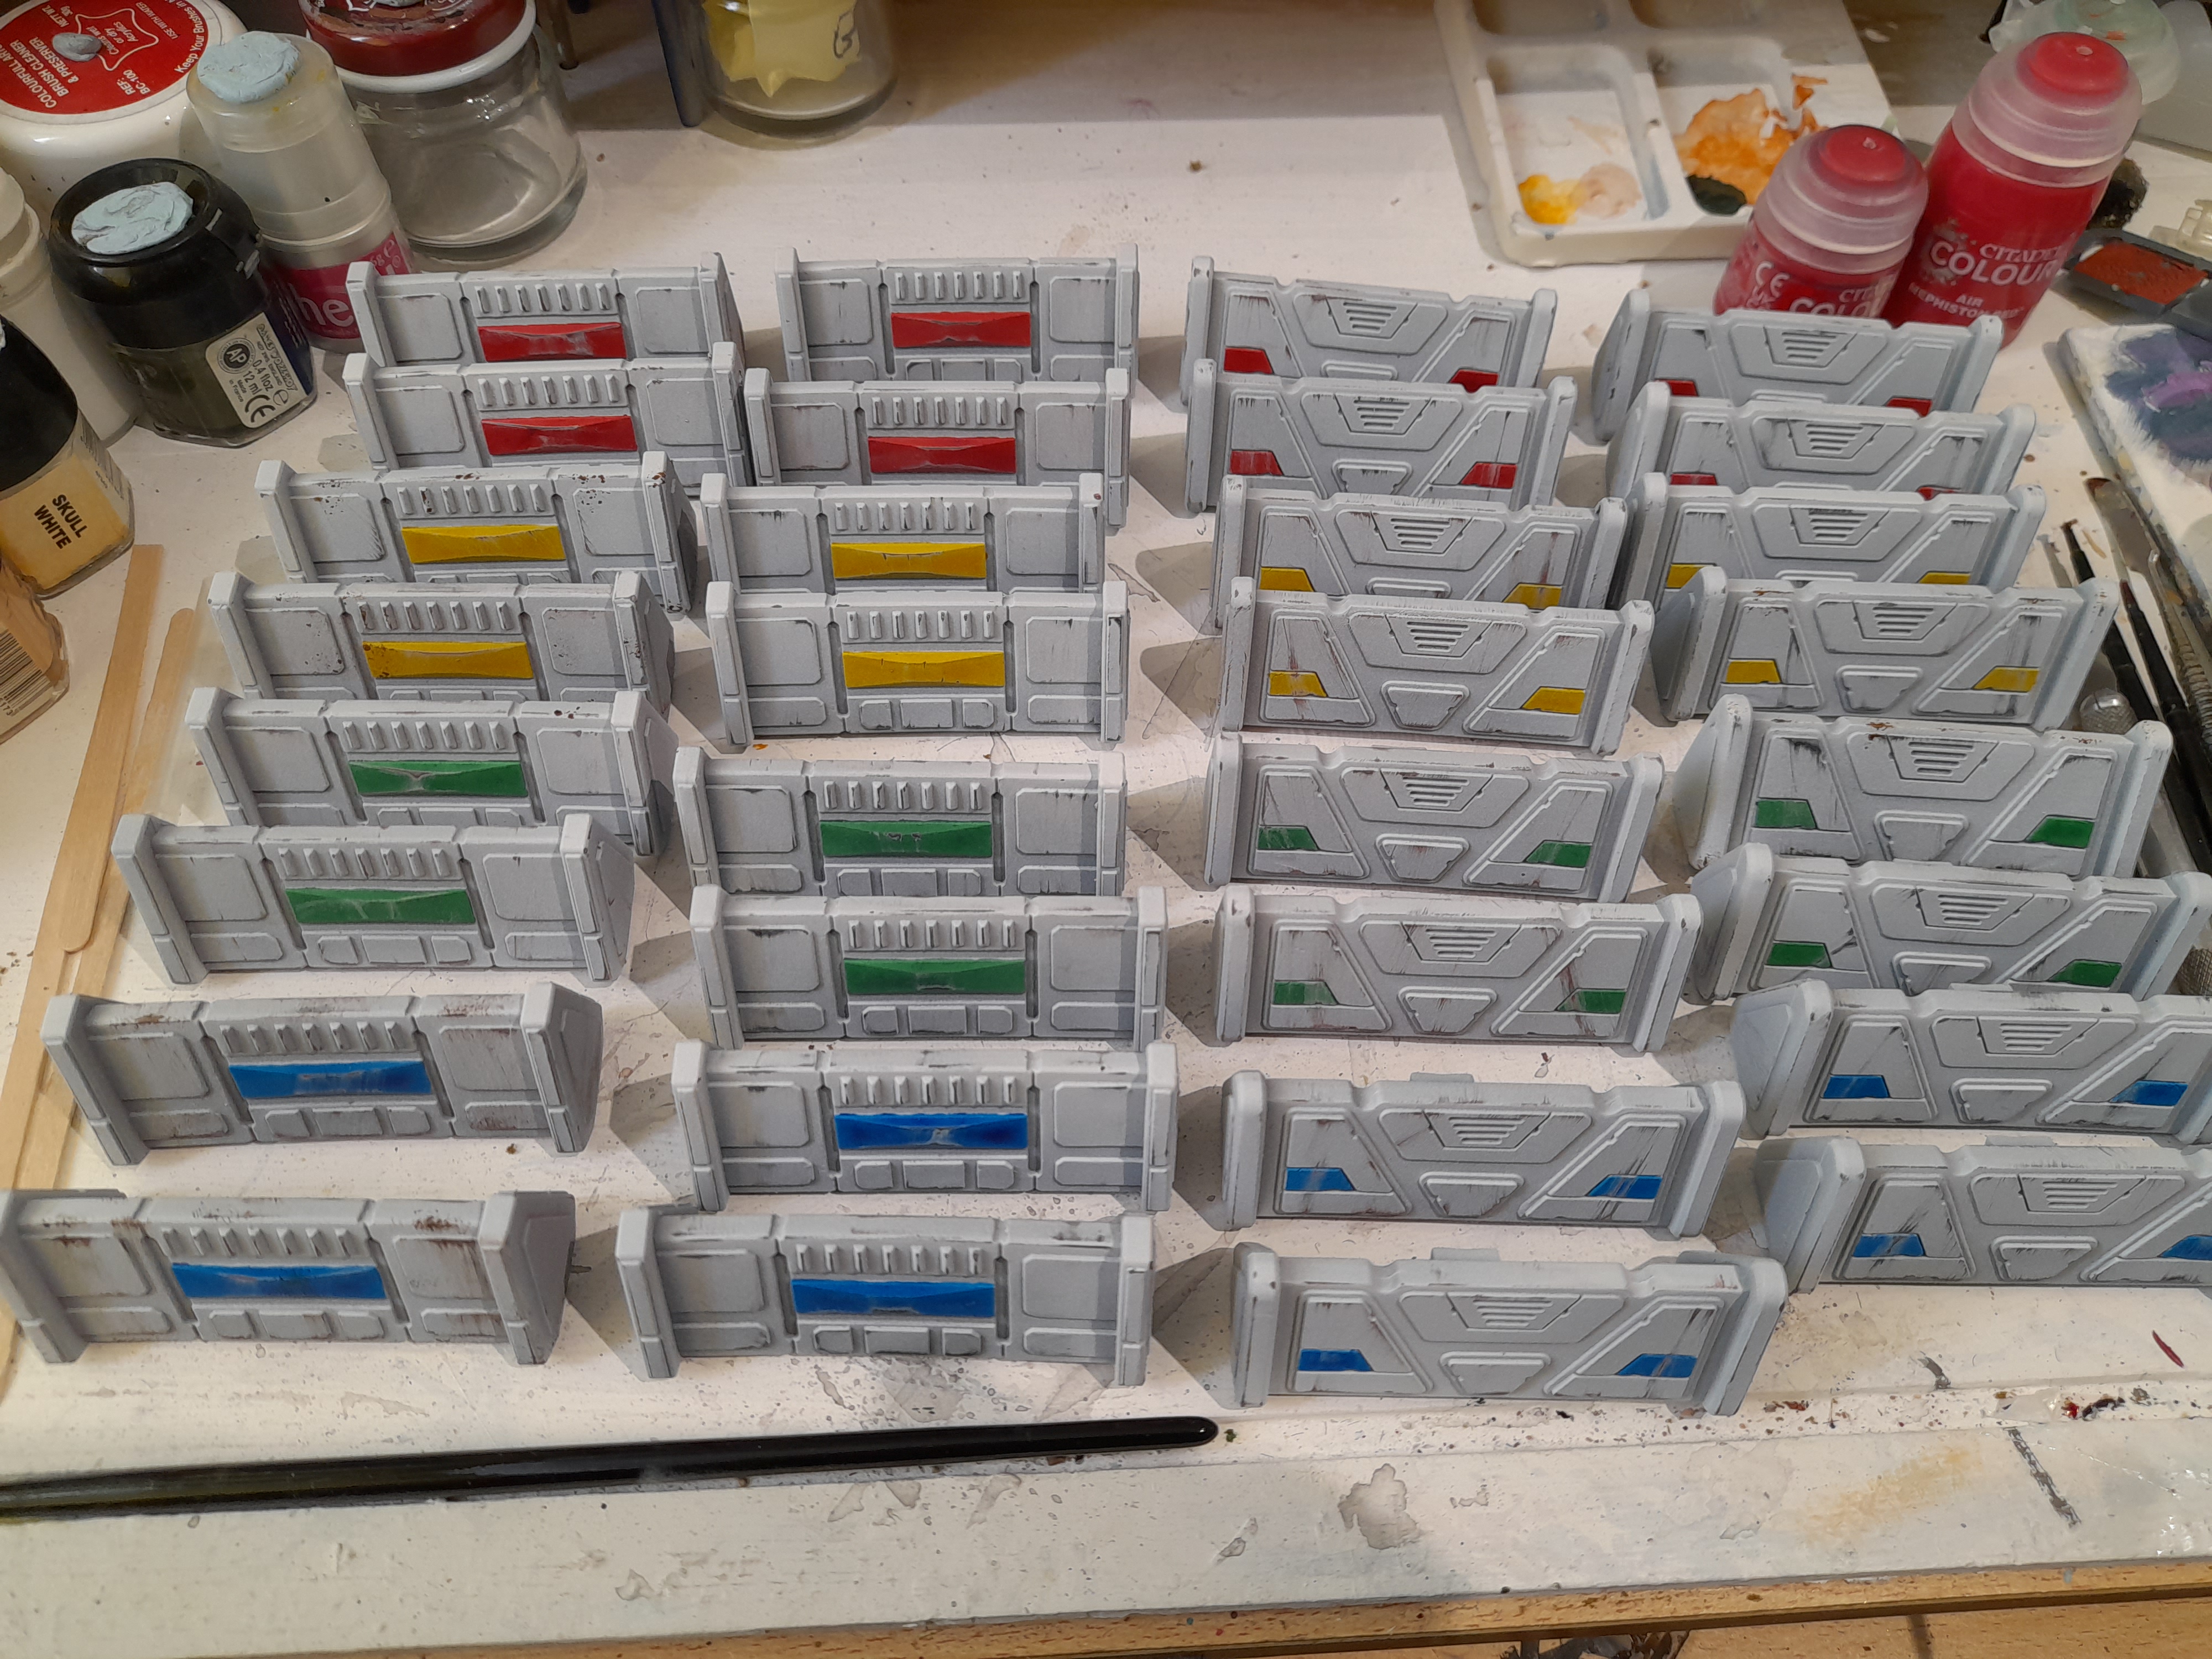
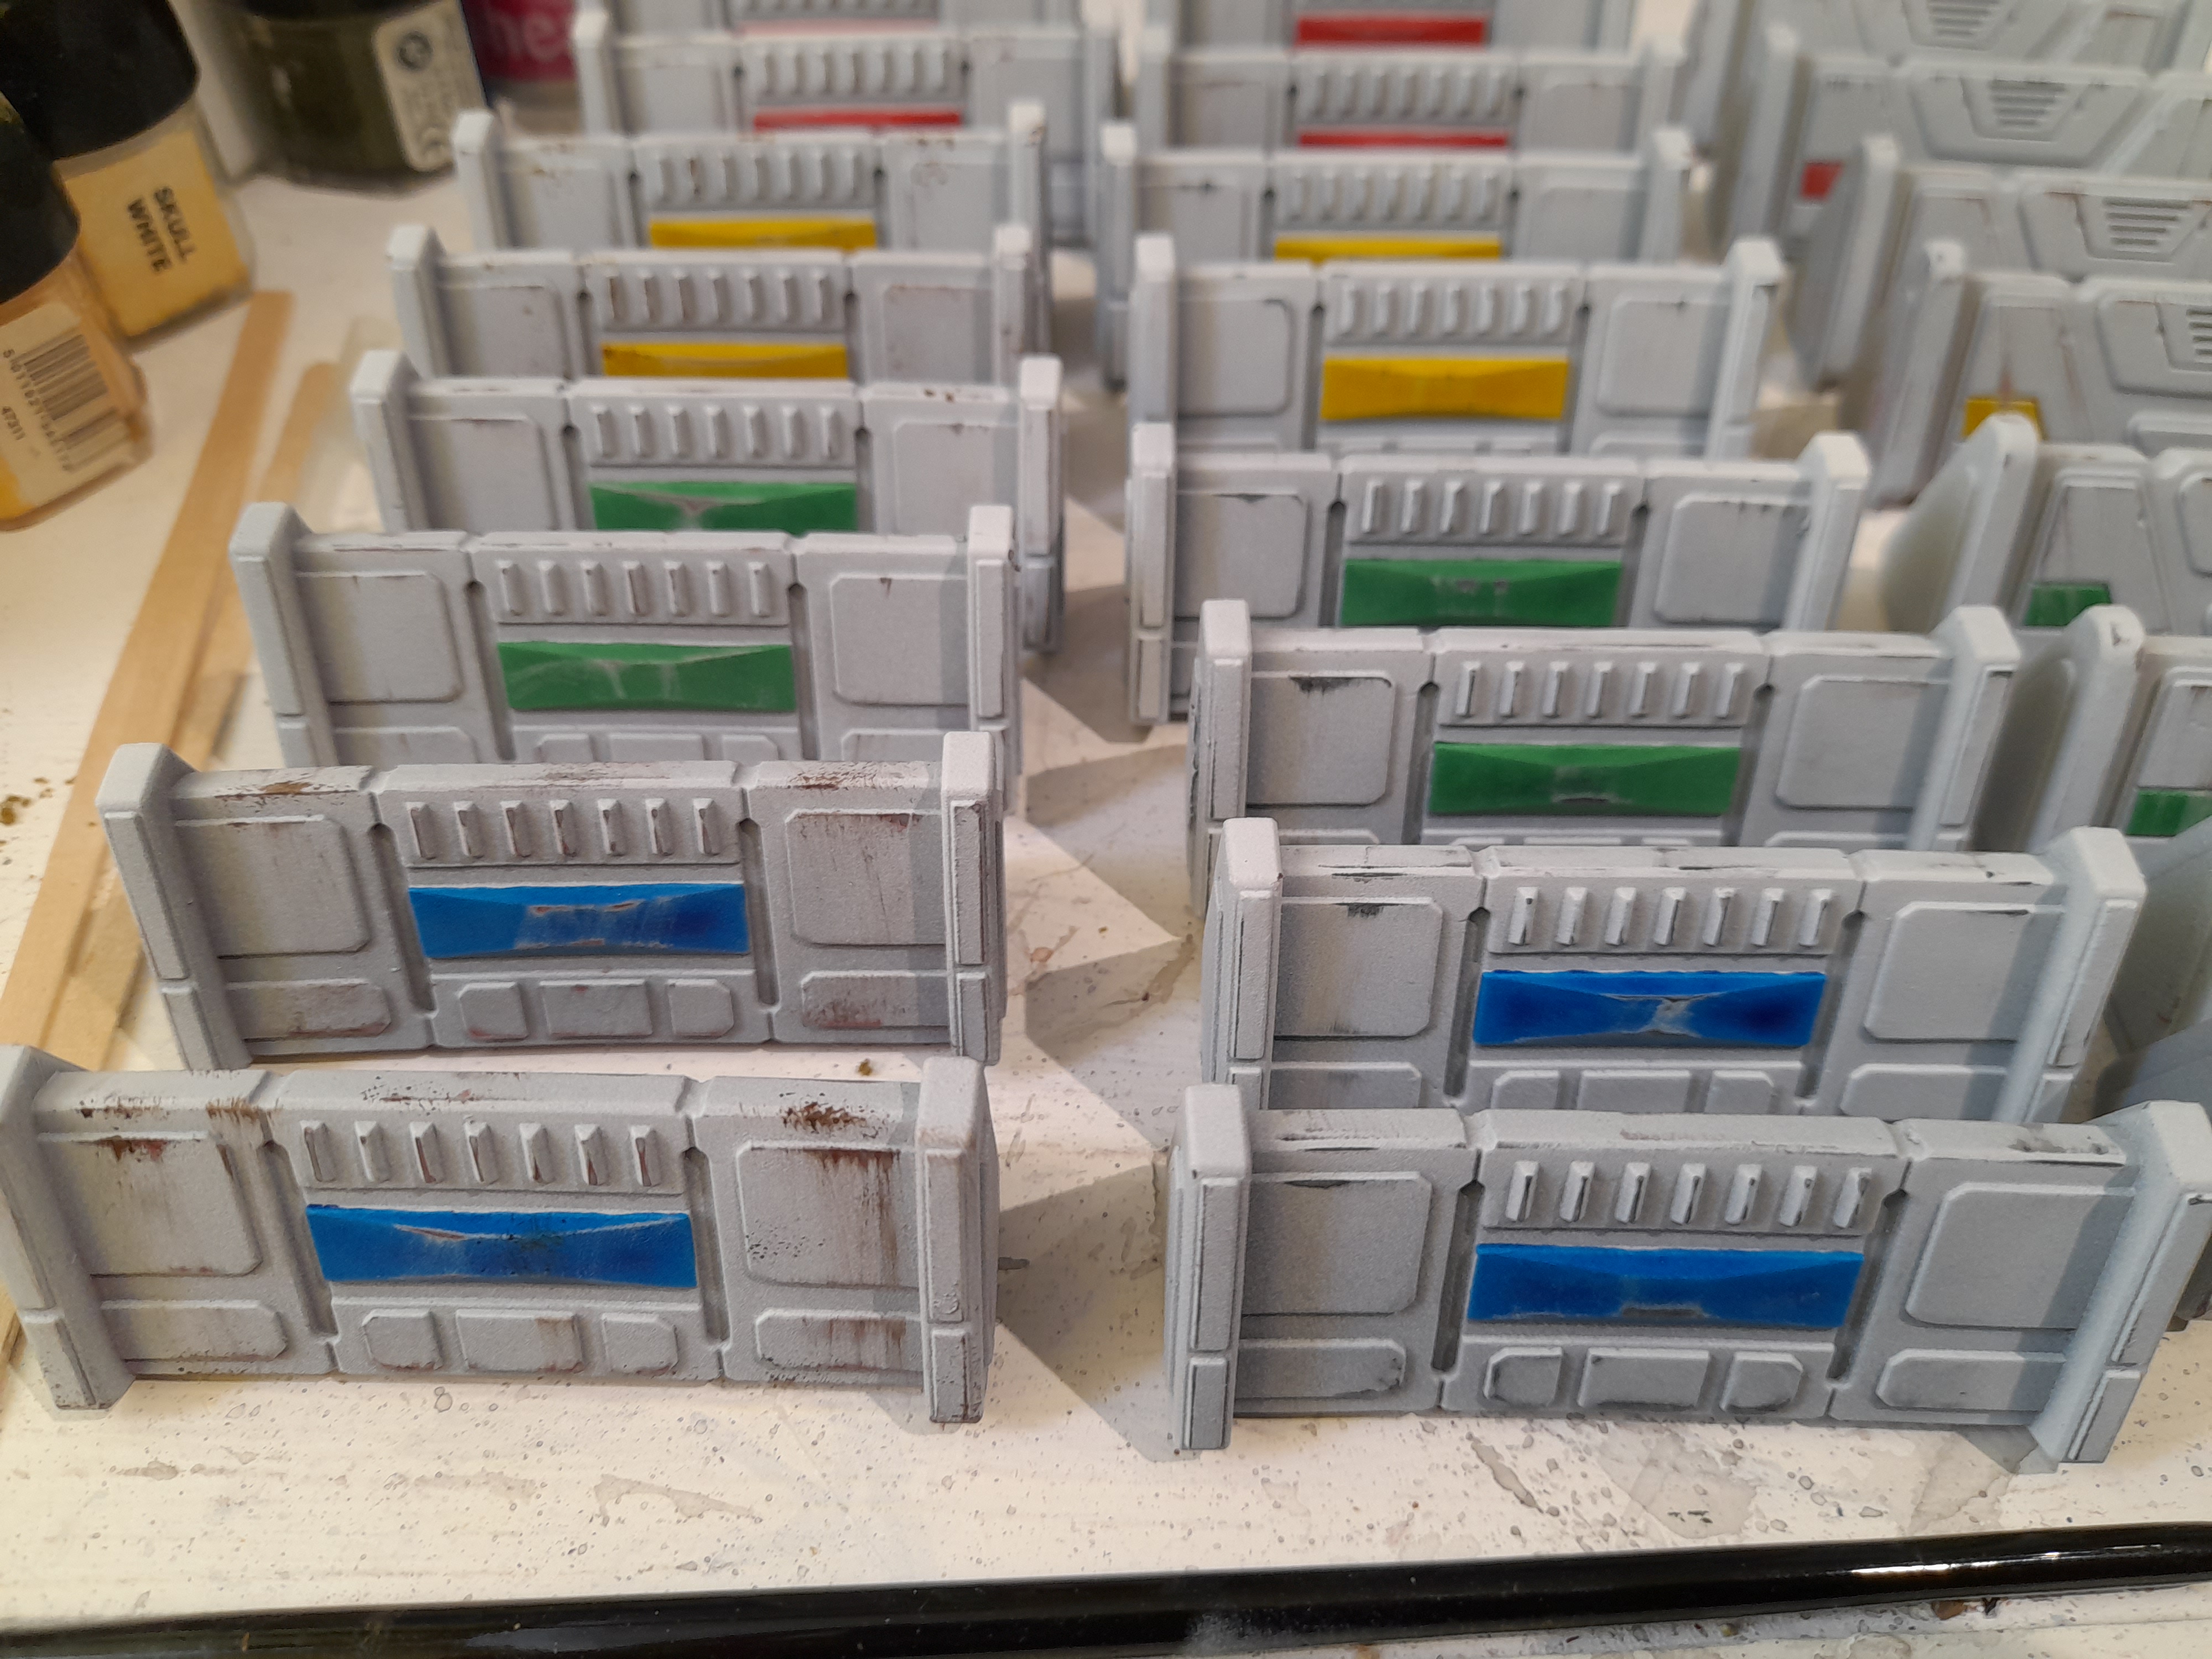
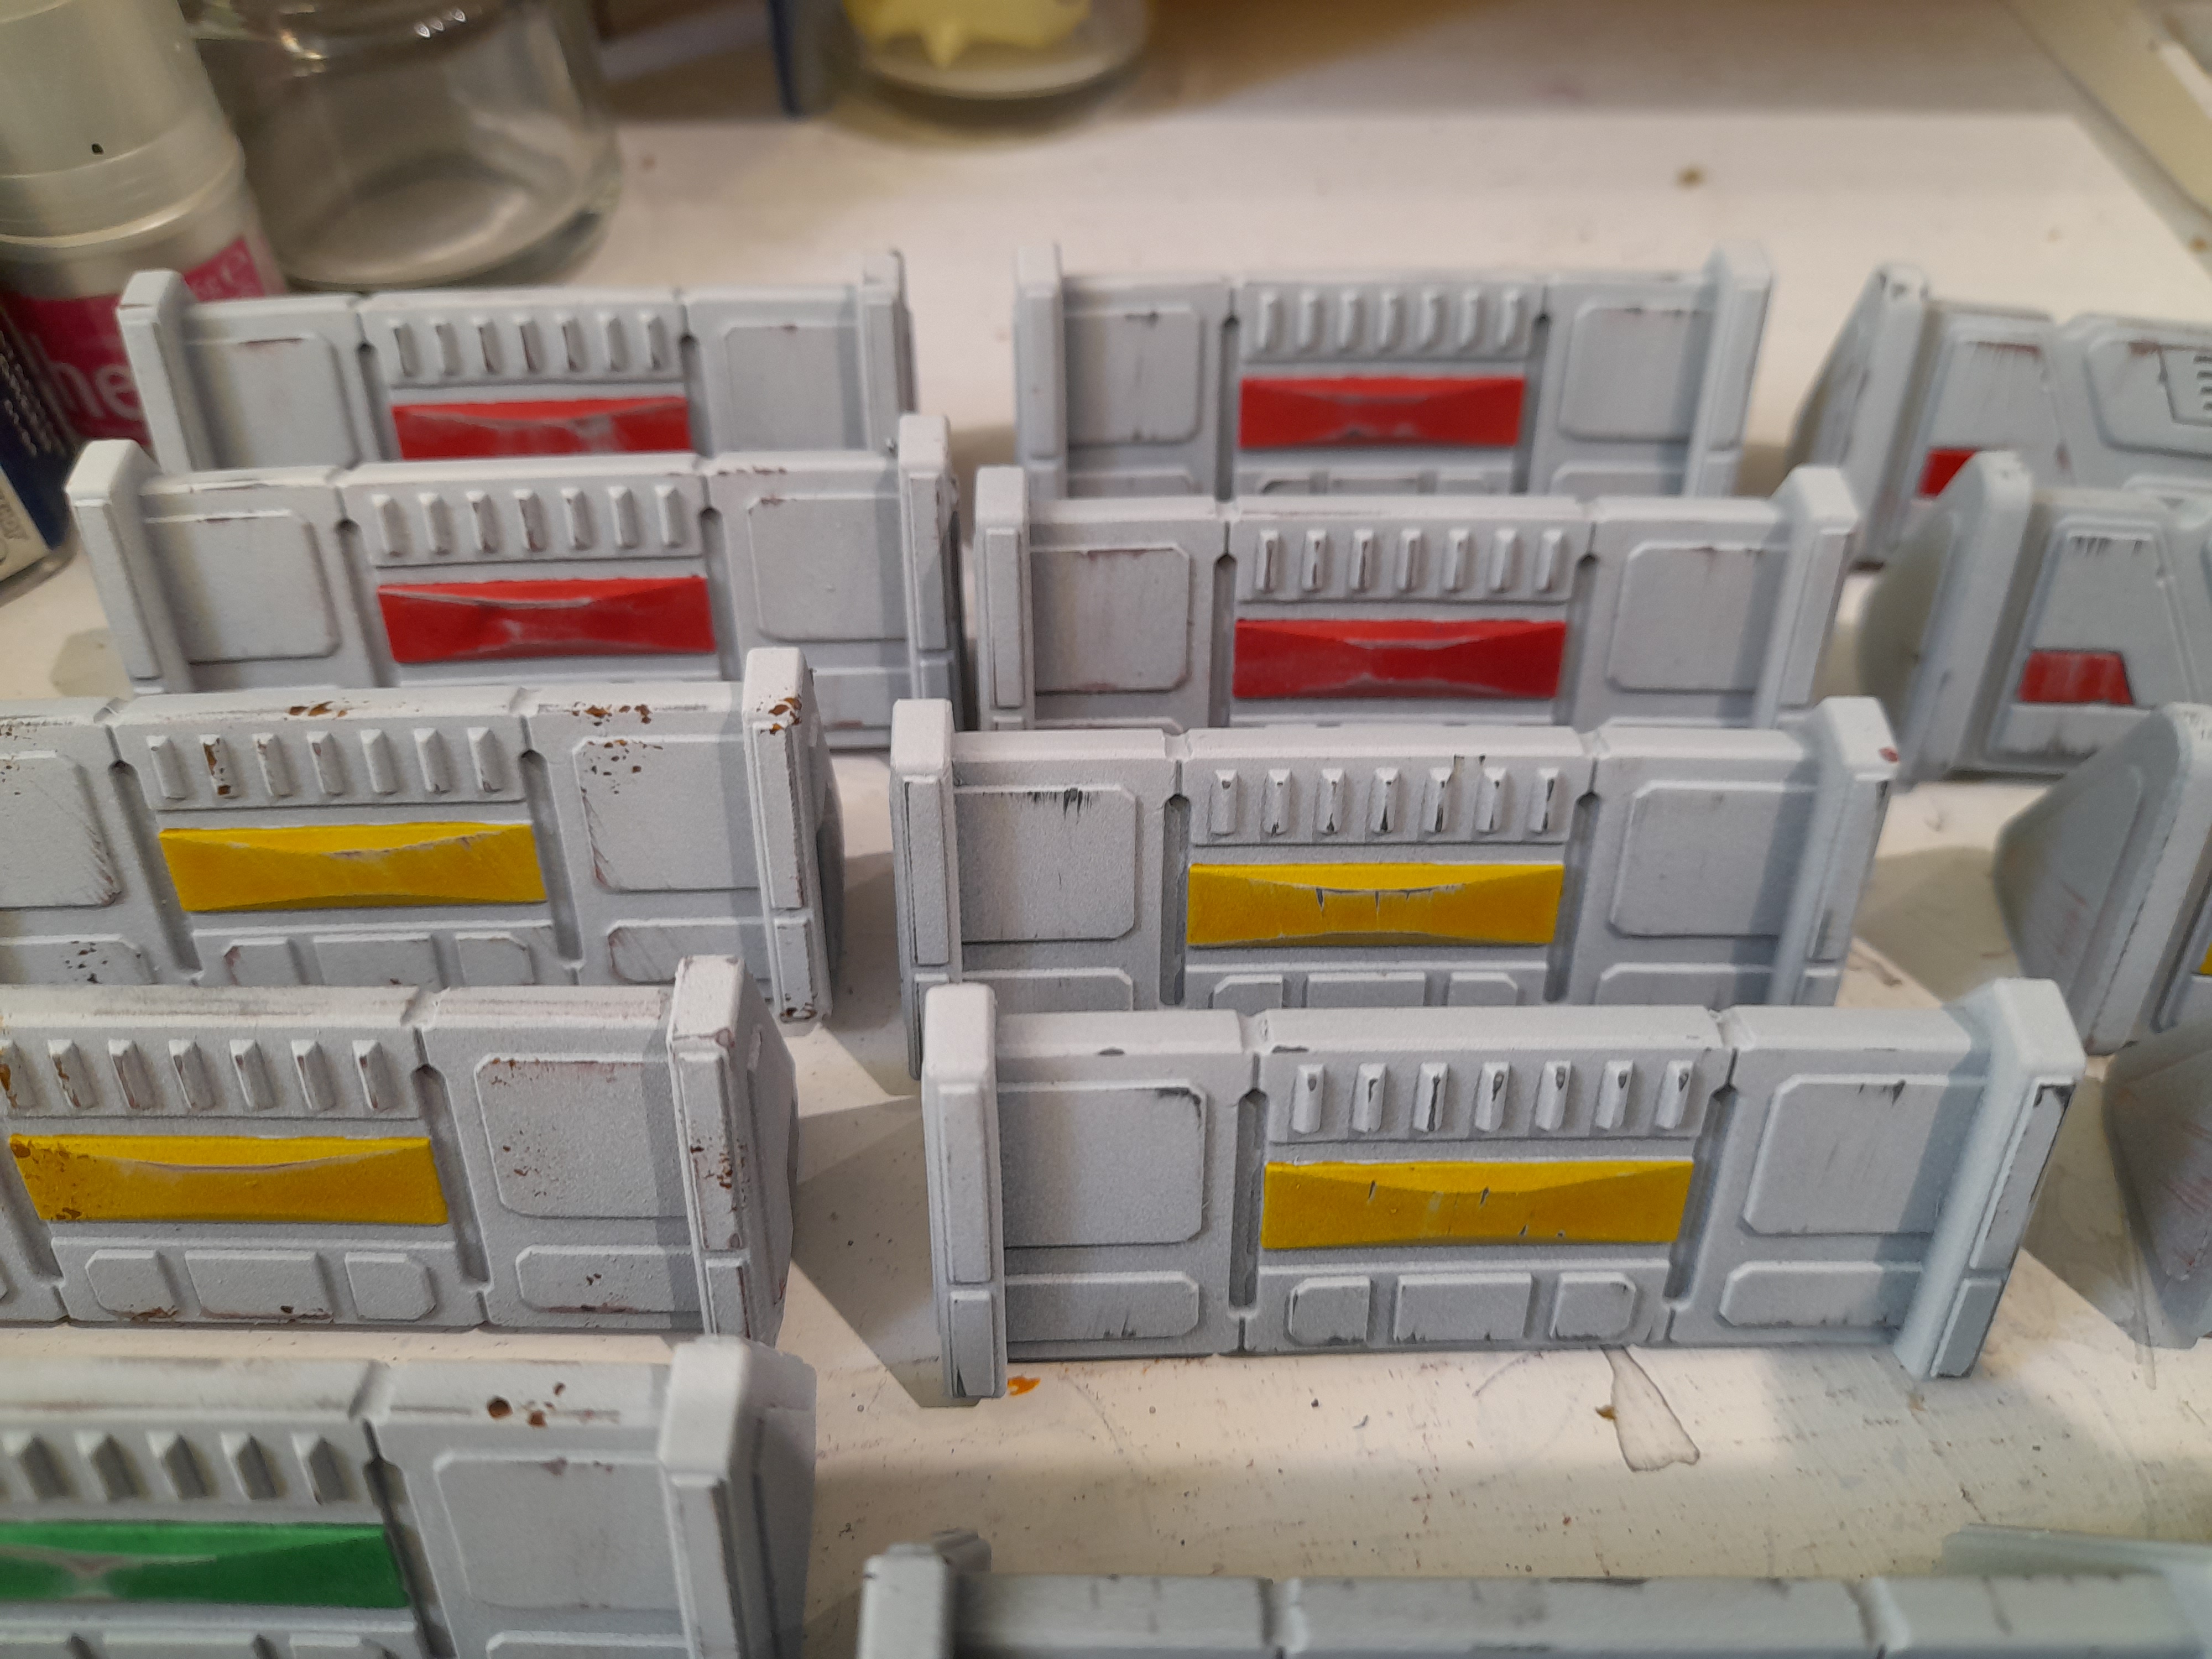
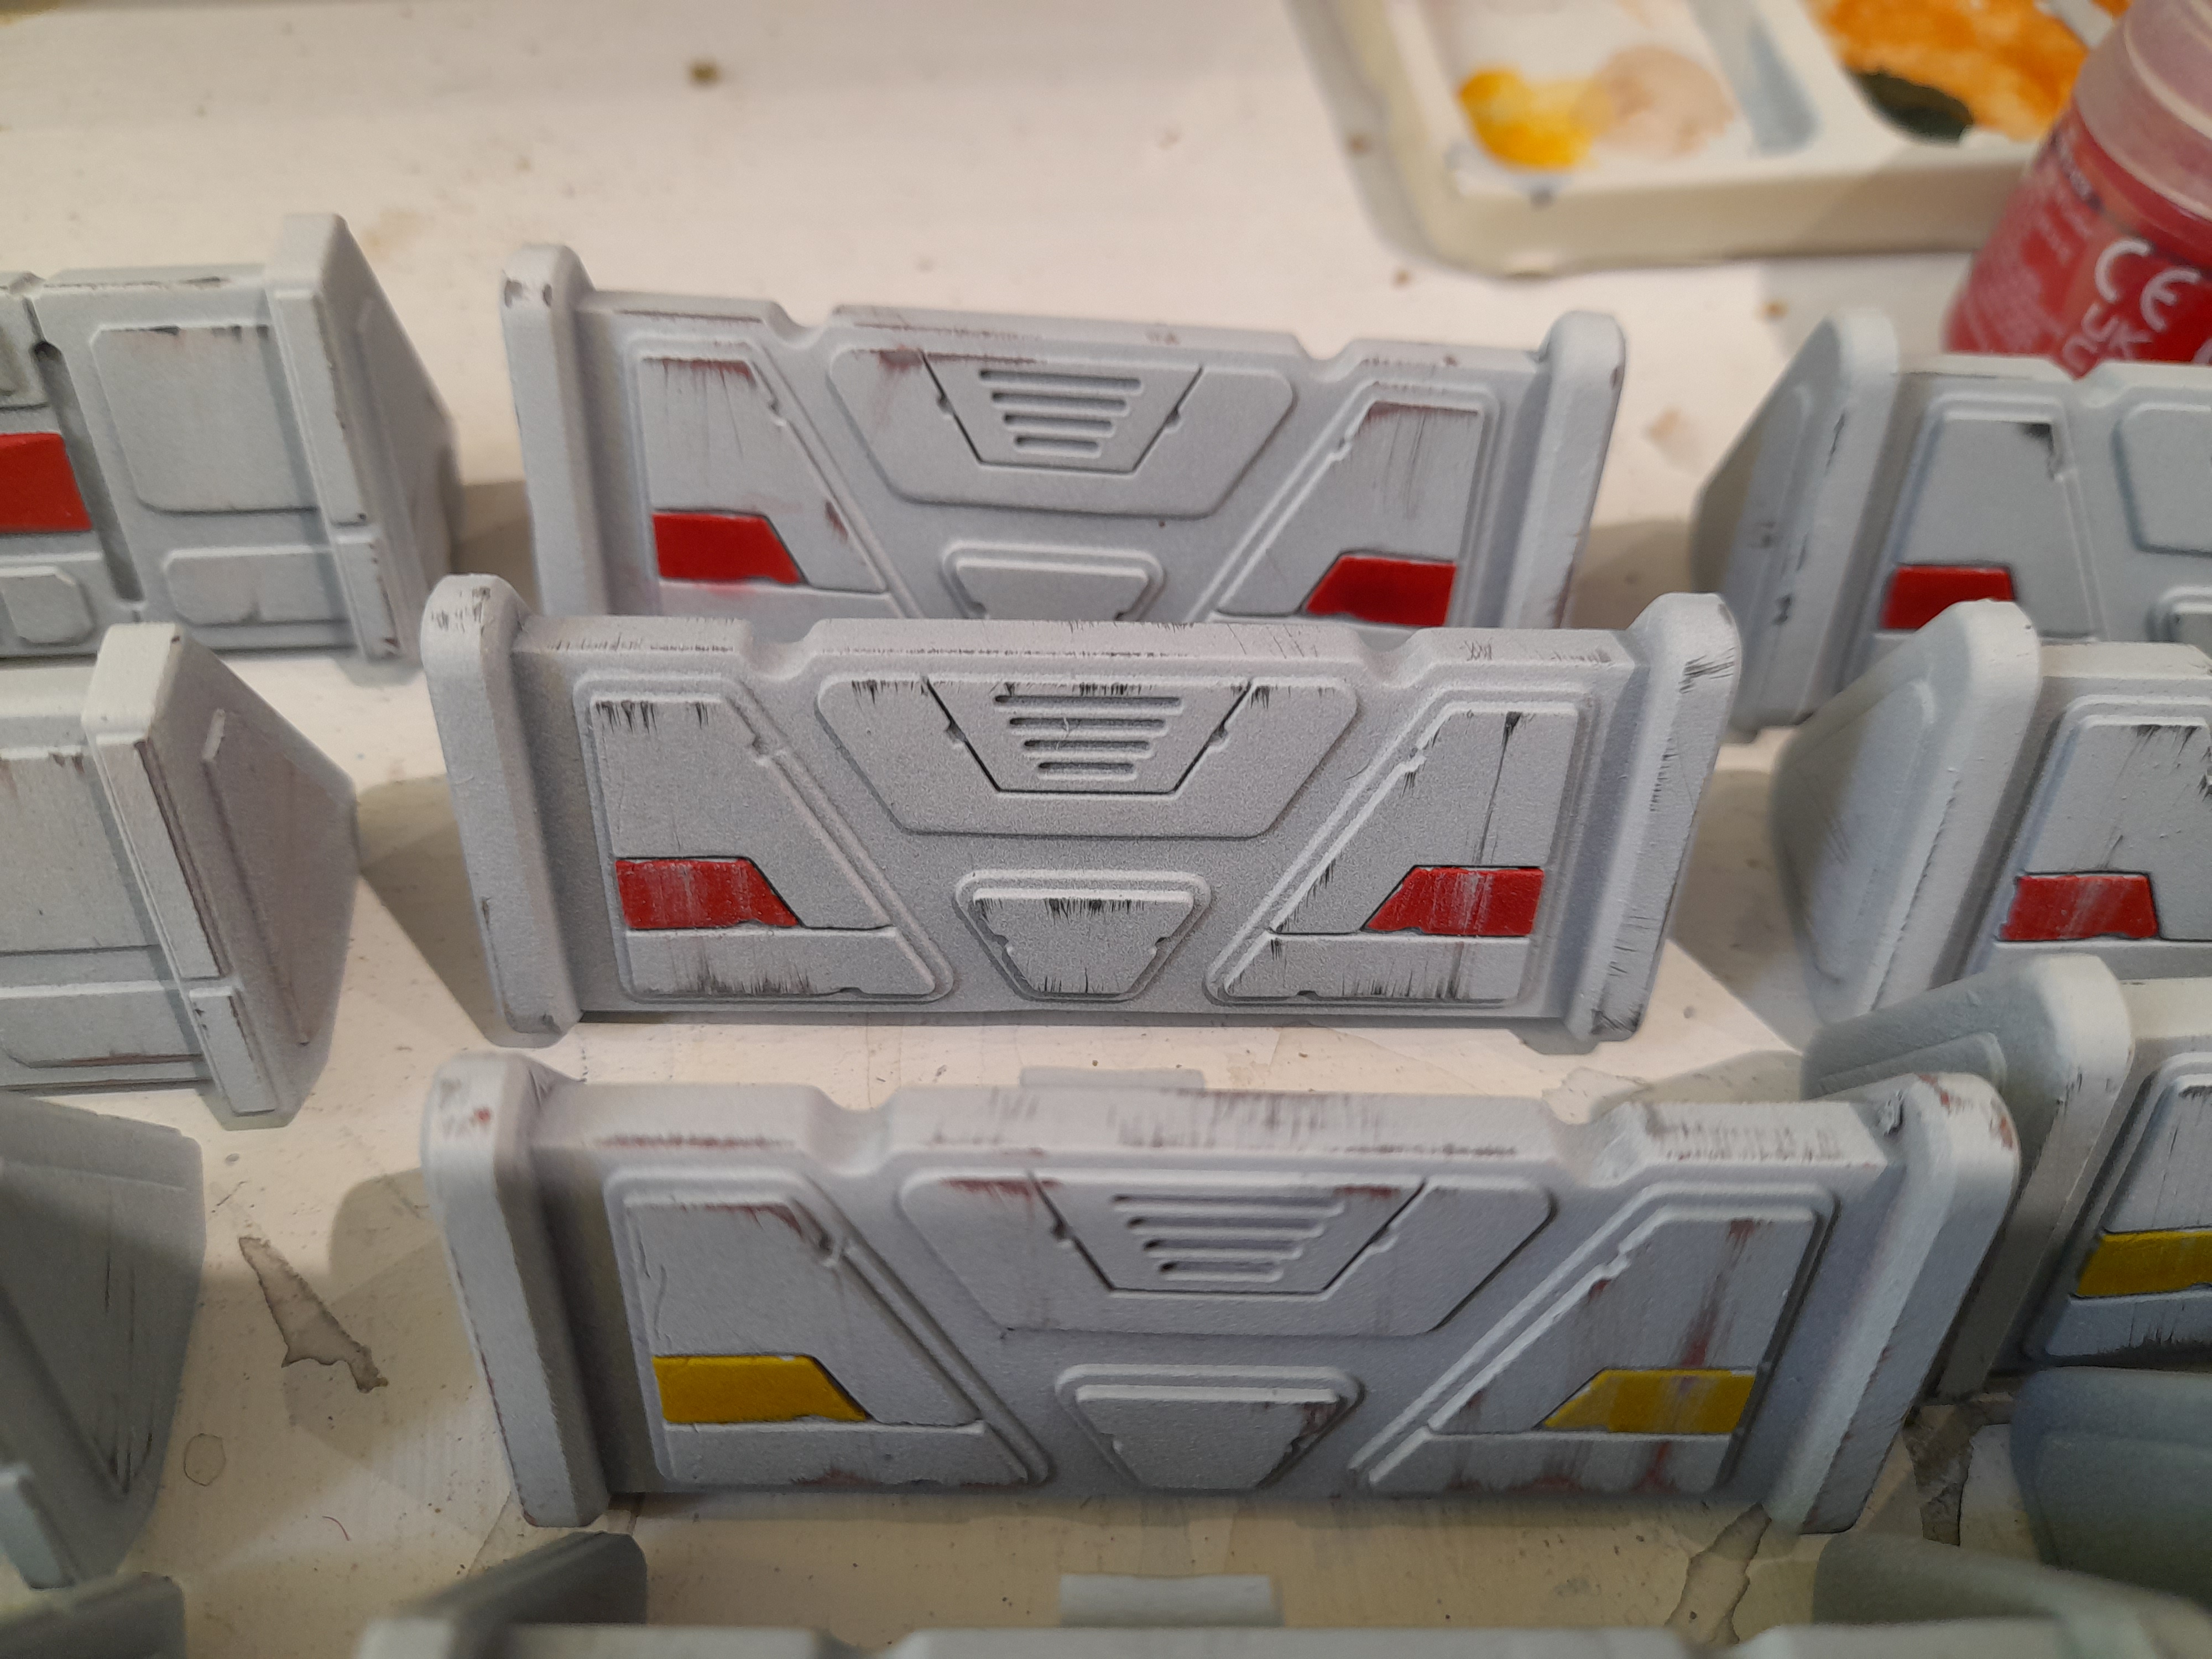
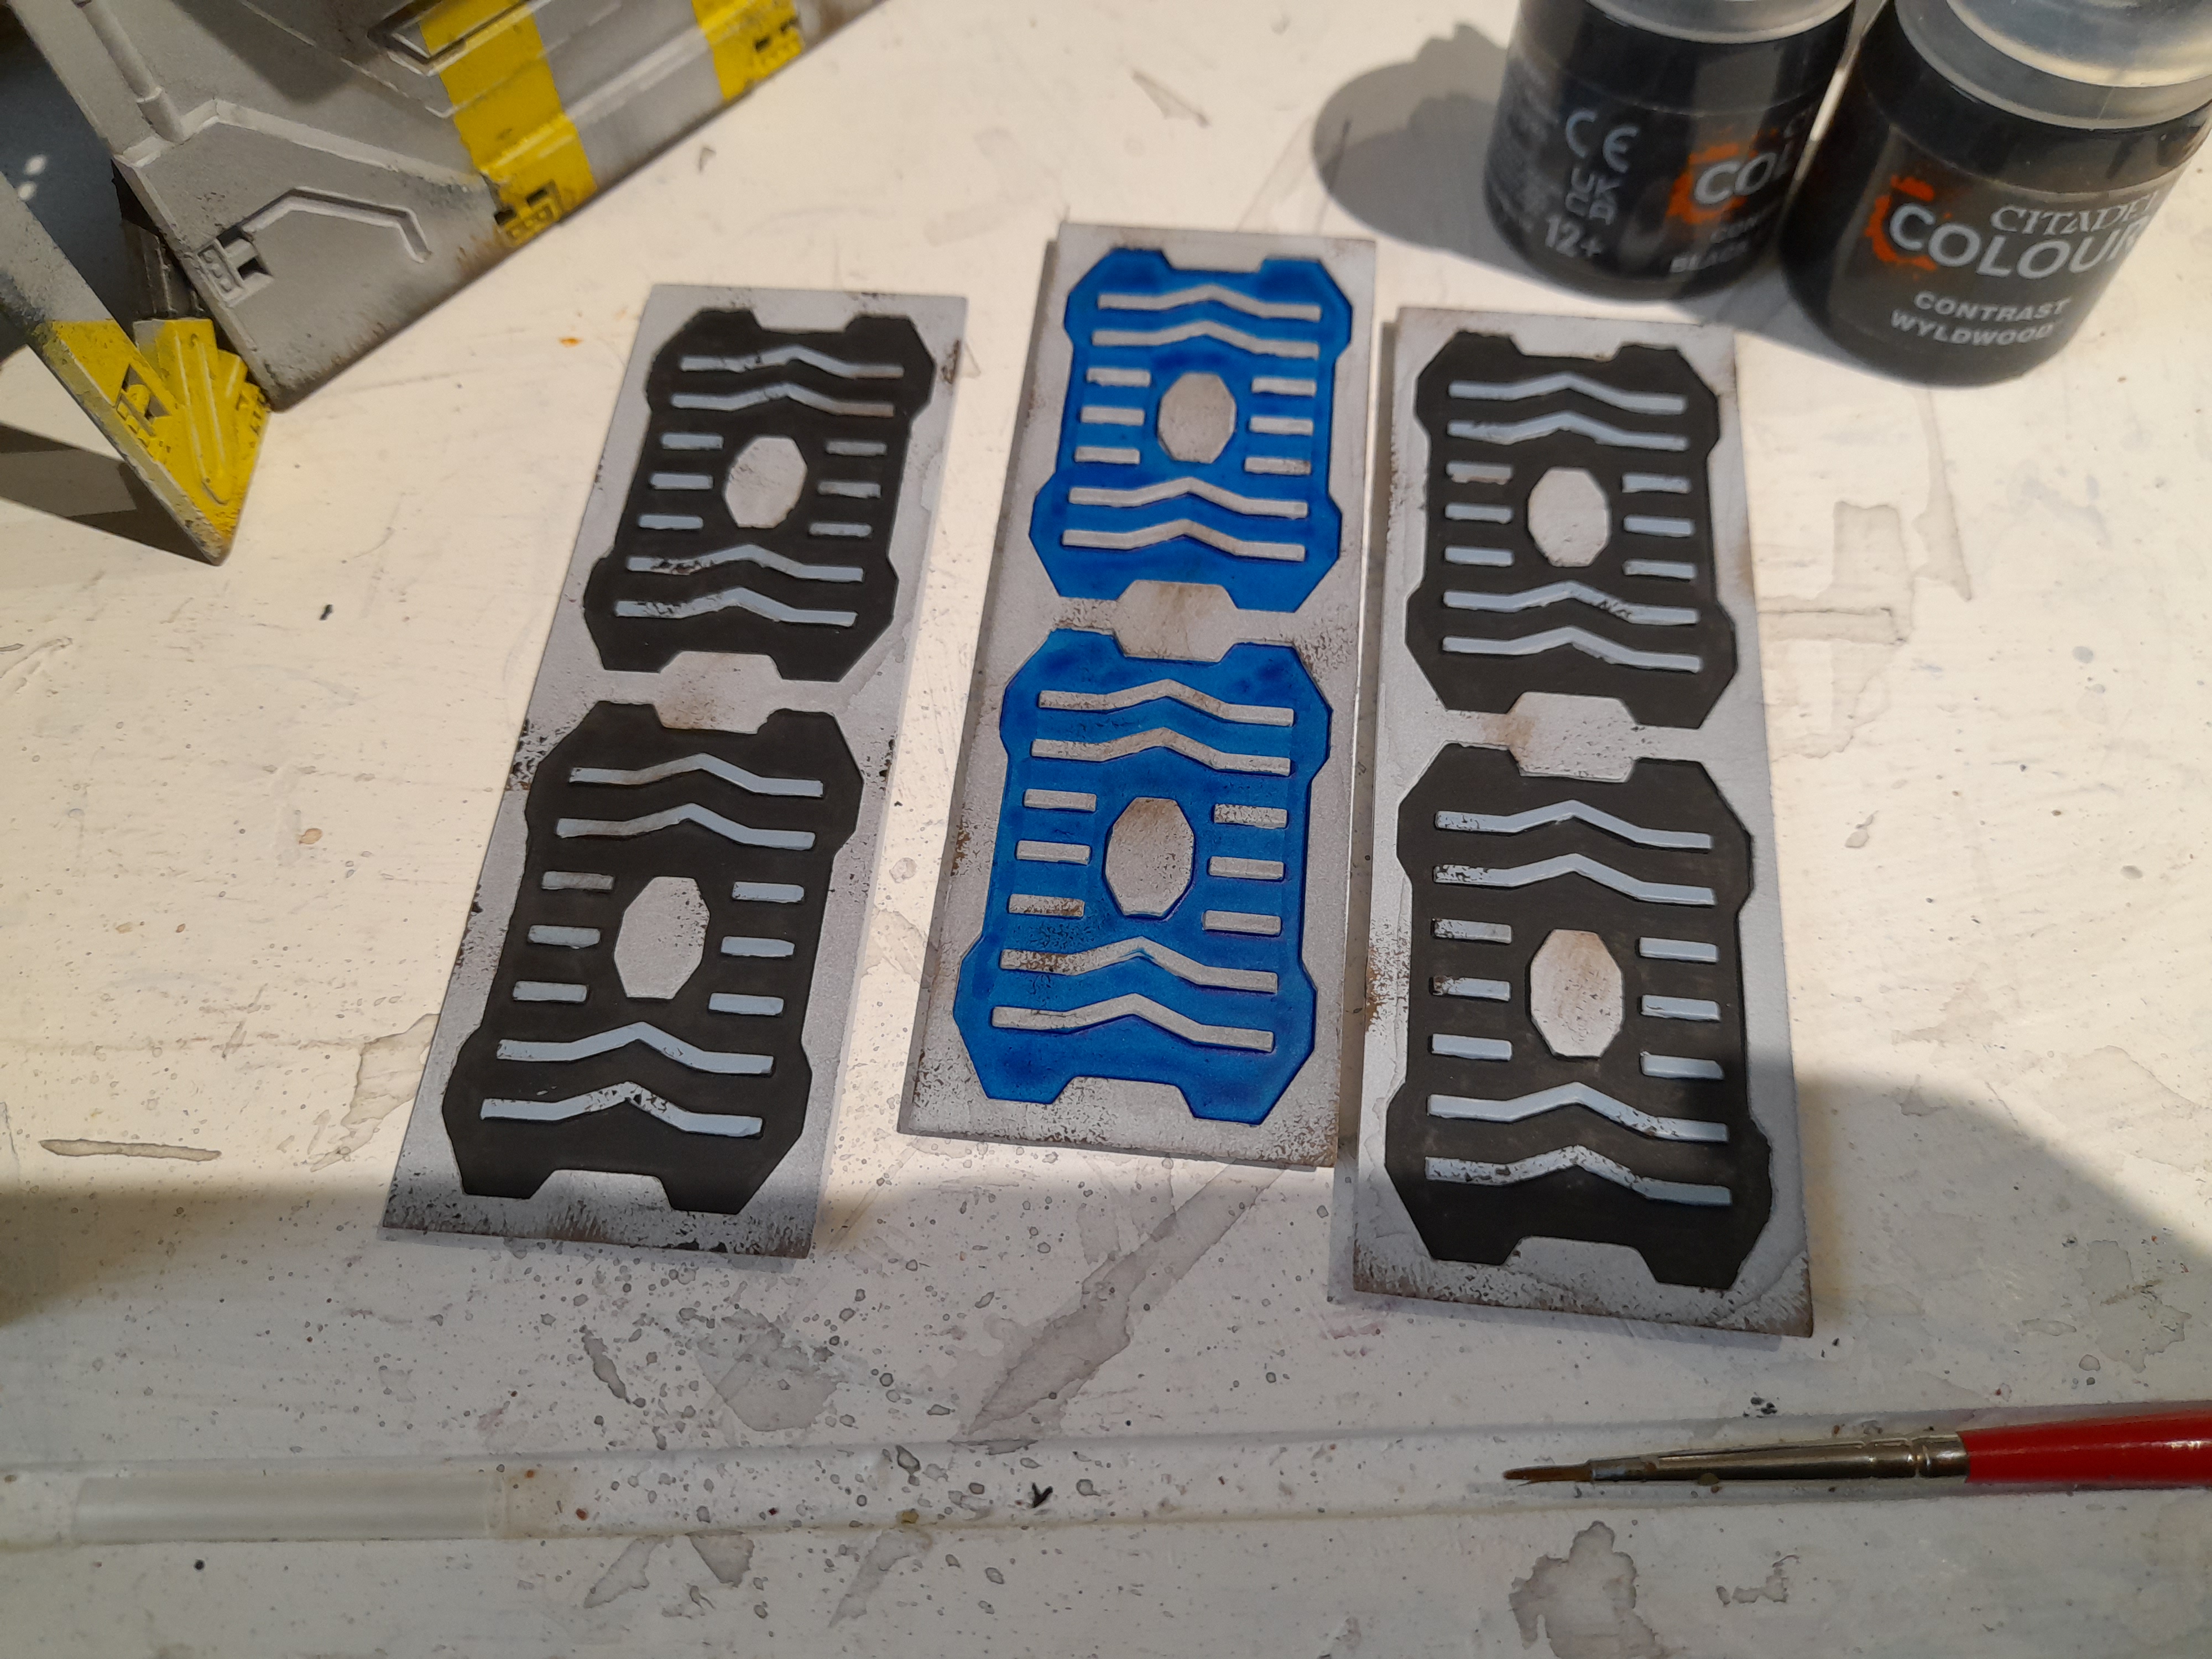
Decided to add some colour to the fronts of them. I was initially just going to use one colour, but finally went for four different just to add some variety.
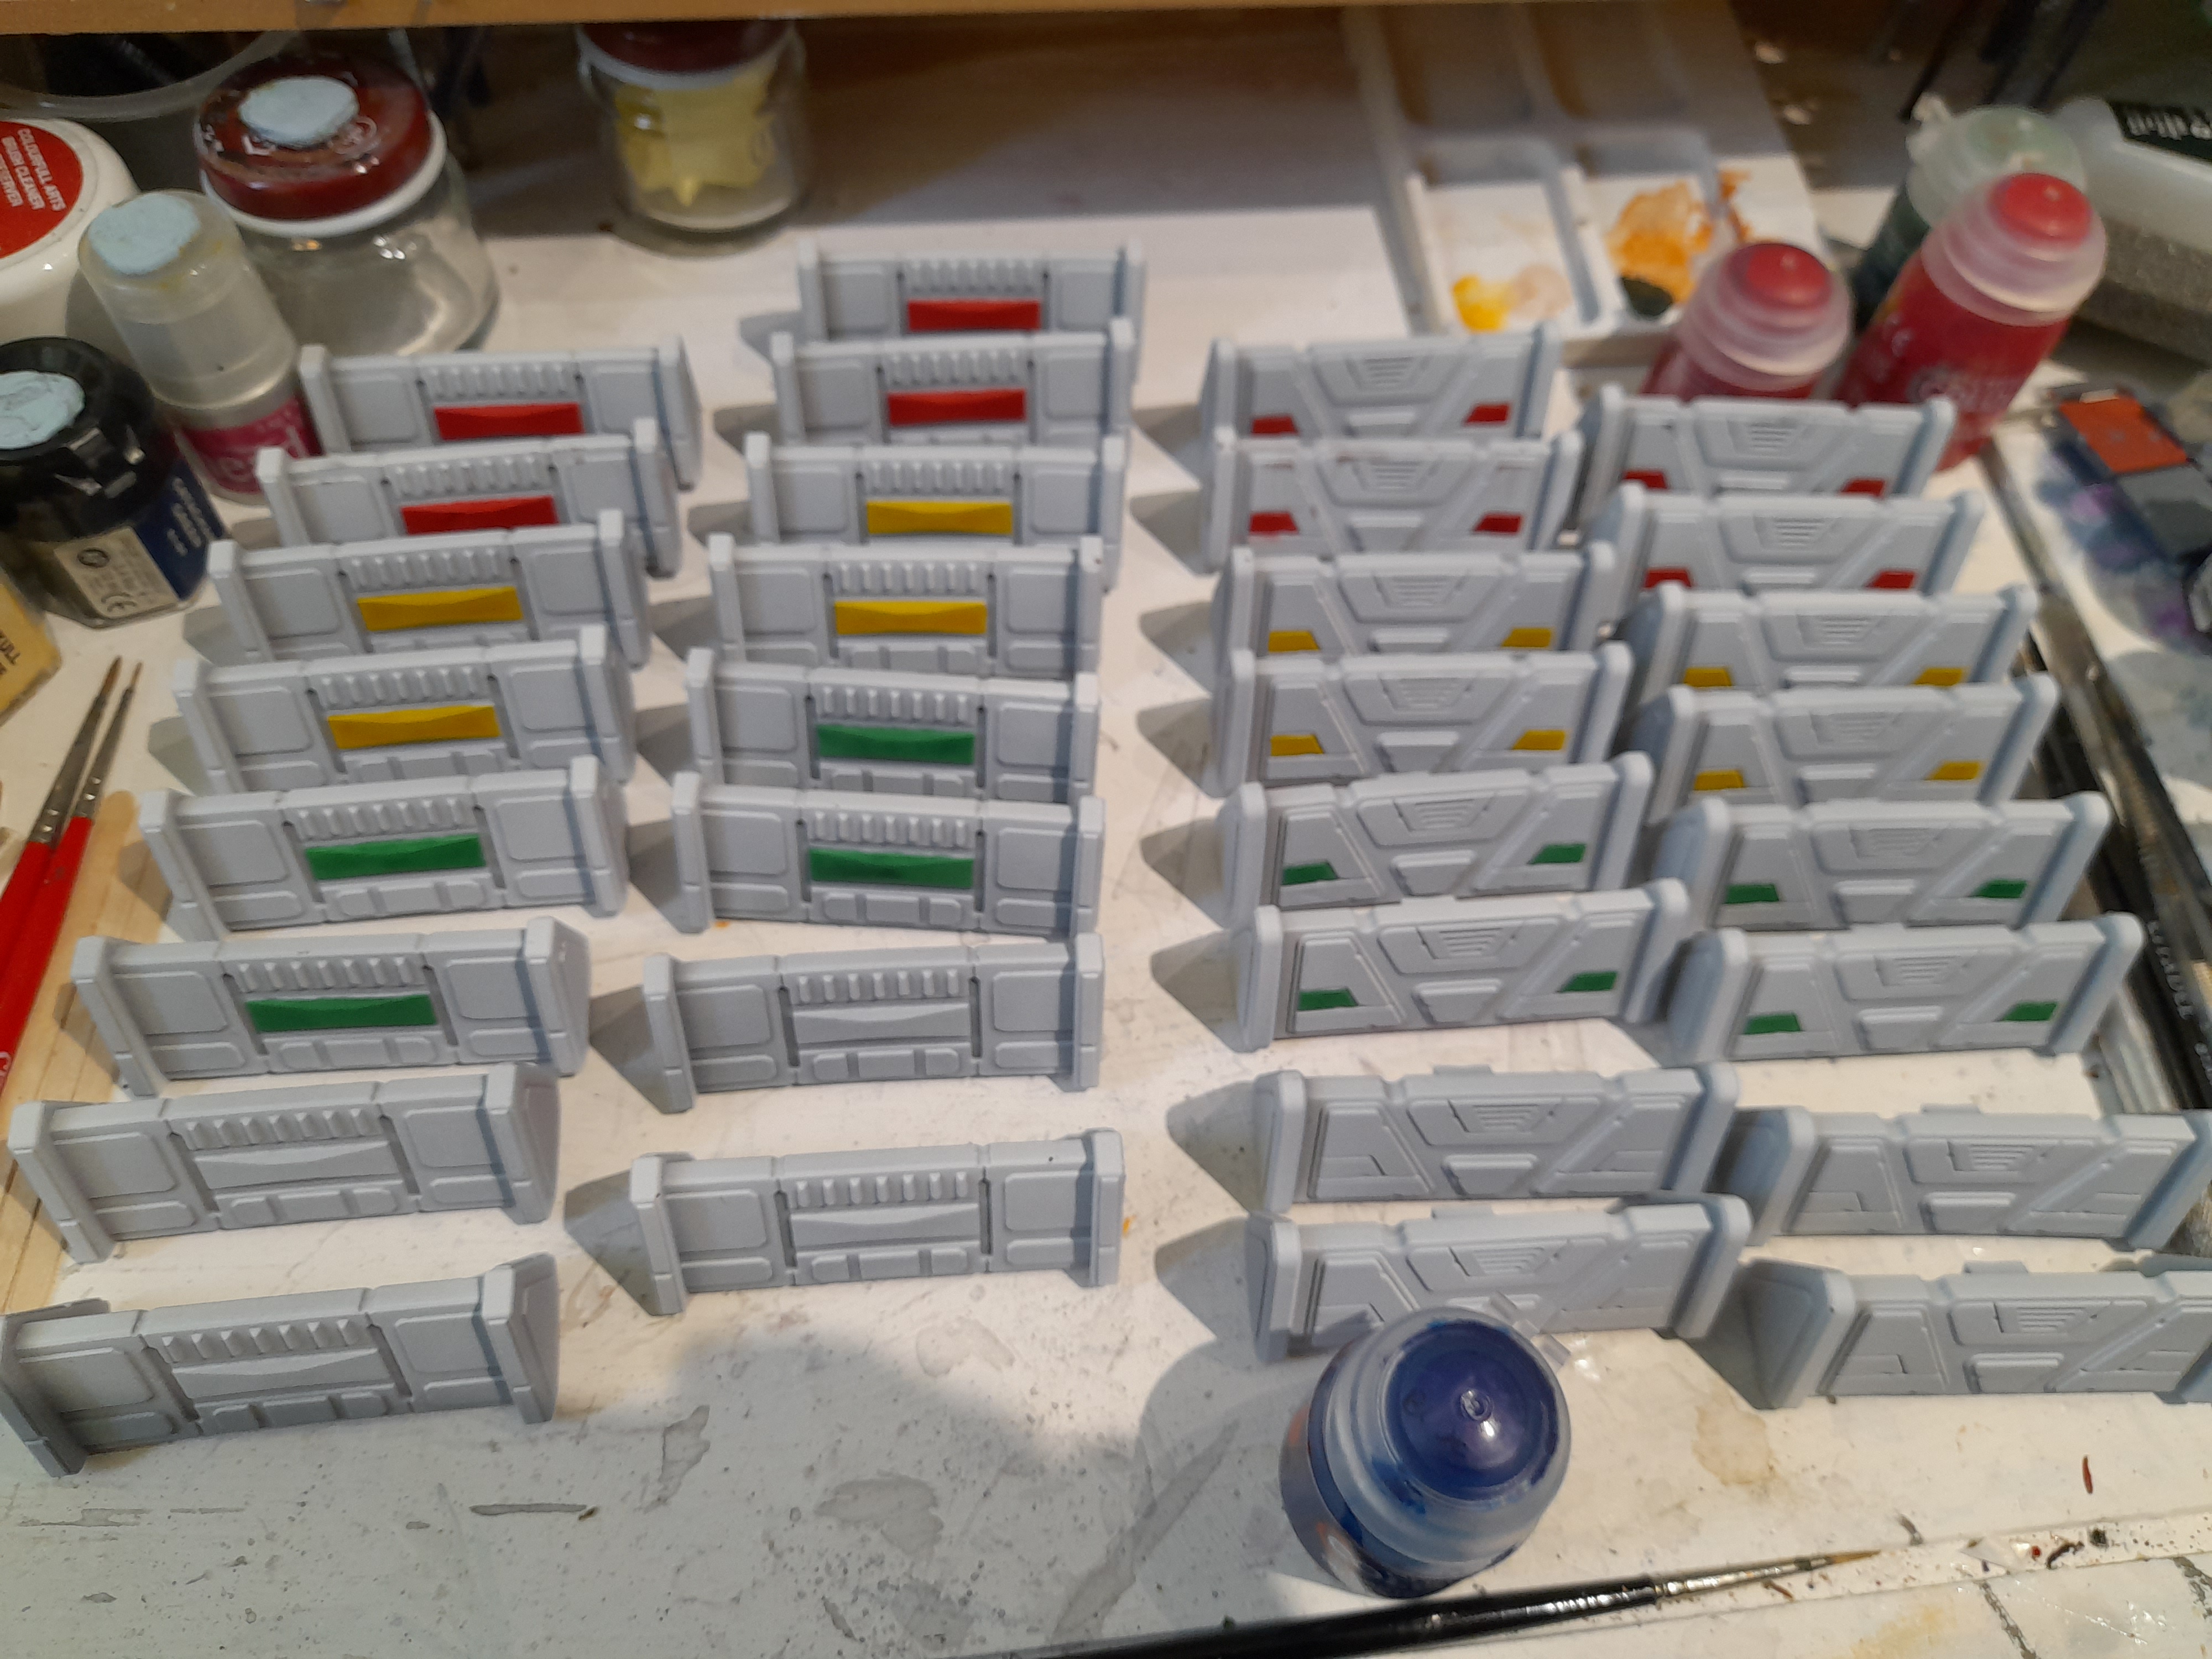 About to add blue to the final barricades
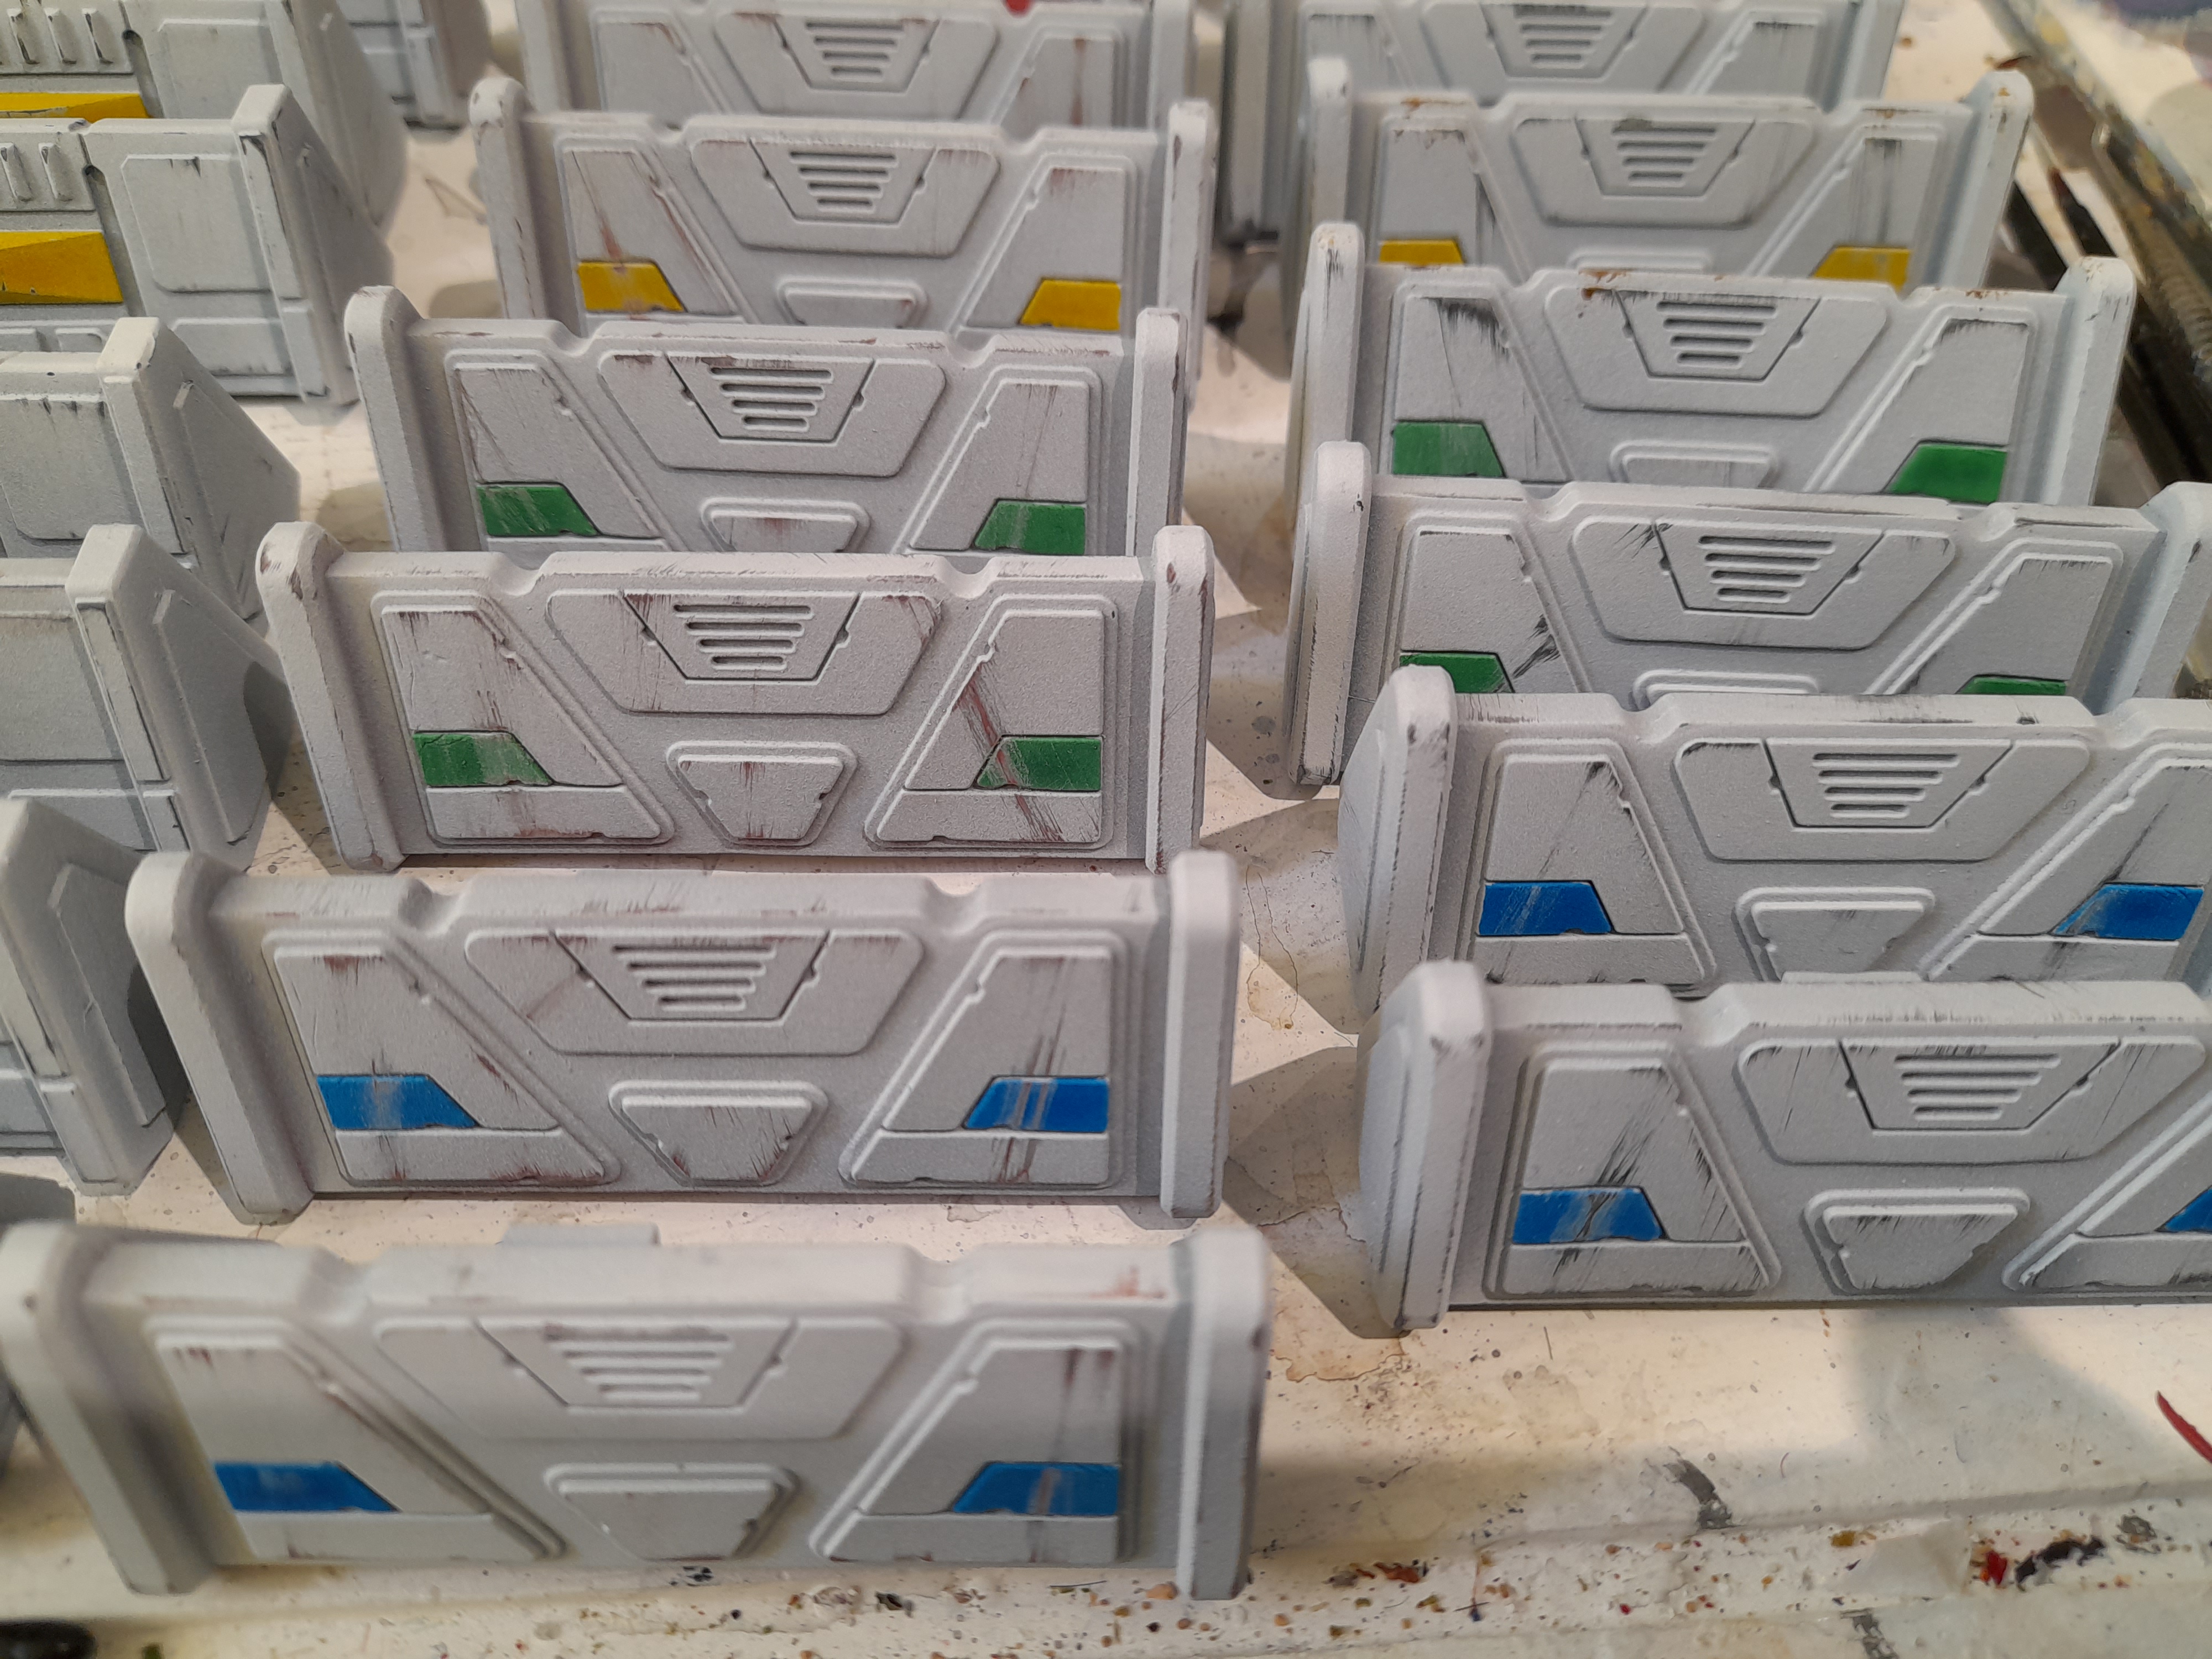
 Next up it was adding some weathering. For these pulled out some of my sanding sticks and went to work applying wear and scratches to different surfaces. This was actually pretty good fun. Because they were primed and painted with a few layers, it also showed these base layers through the scratches too.
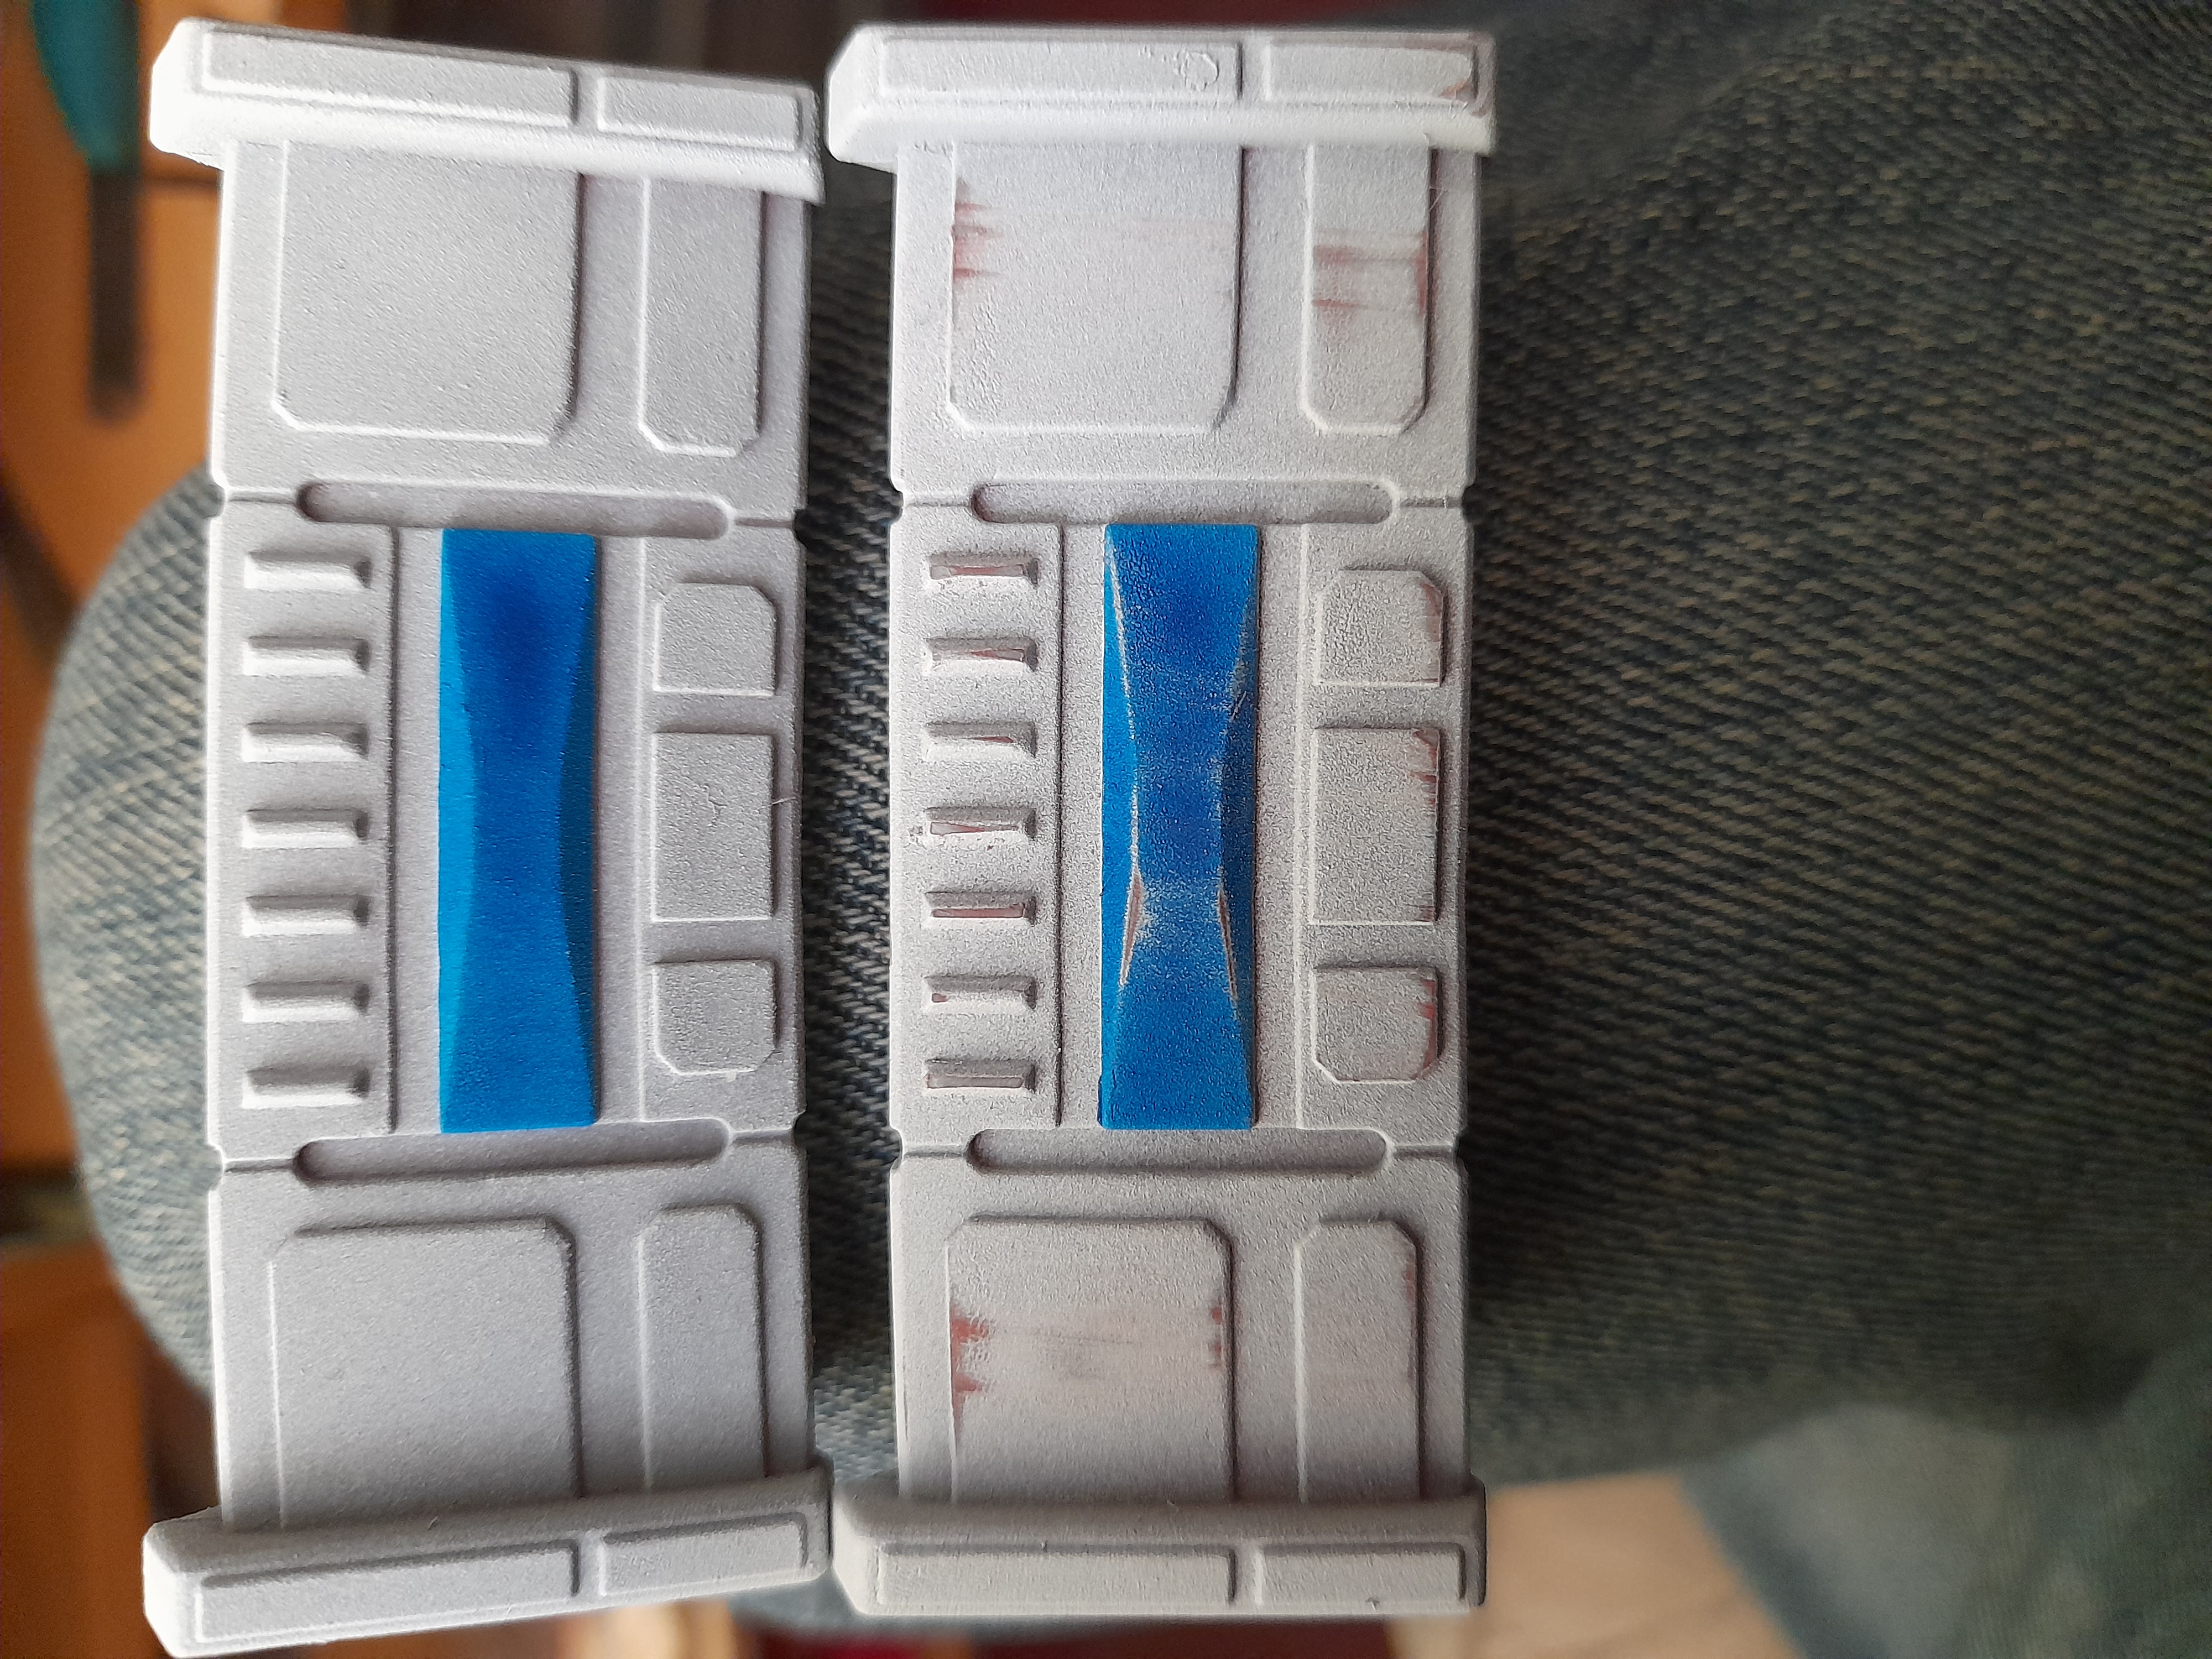
Then I added sponged on weathering to some of the barricades in varying amounts, to avoid them becoming too uniform in their look.
Finally I painted on some colouring to the buttons and screens on the rear of the barricades. For the buttons I went with the Star Wars button colours – red, white and blue 😊
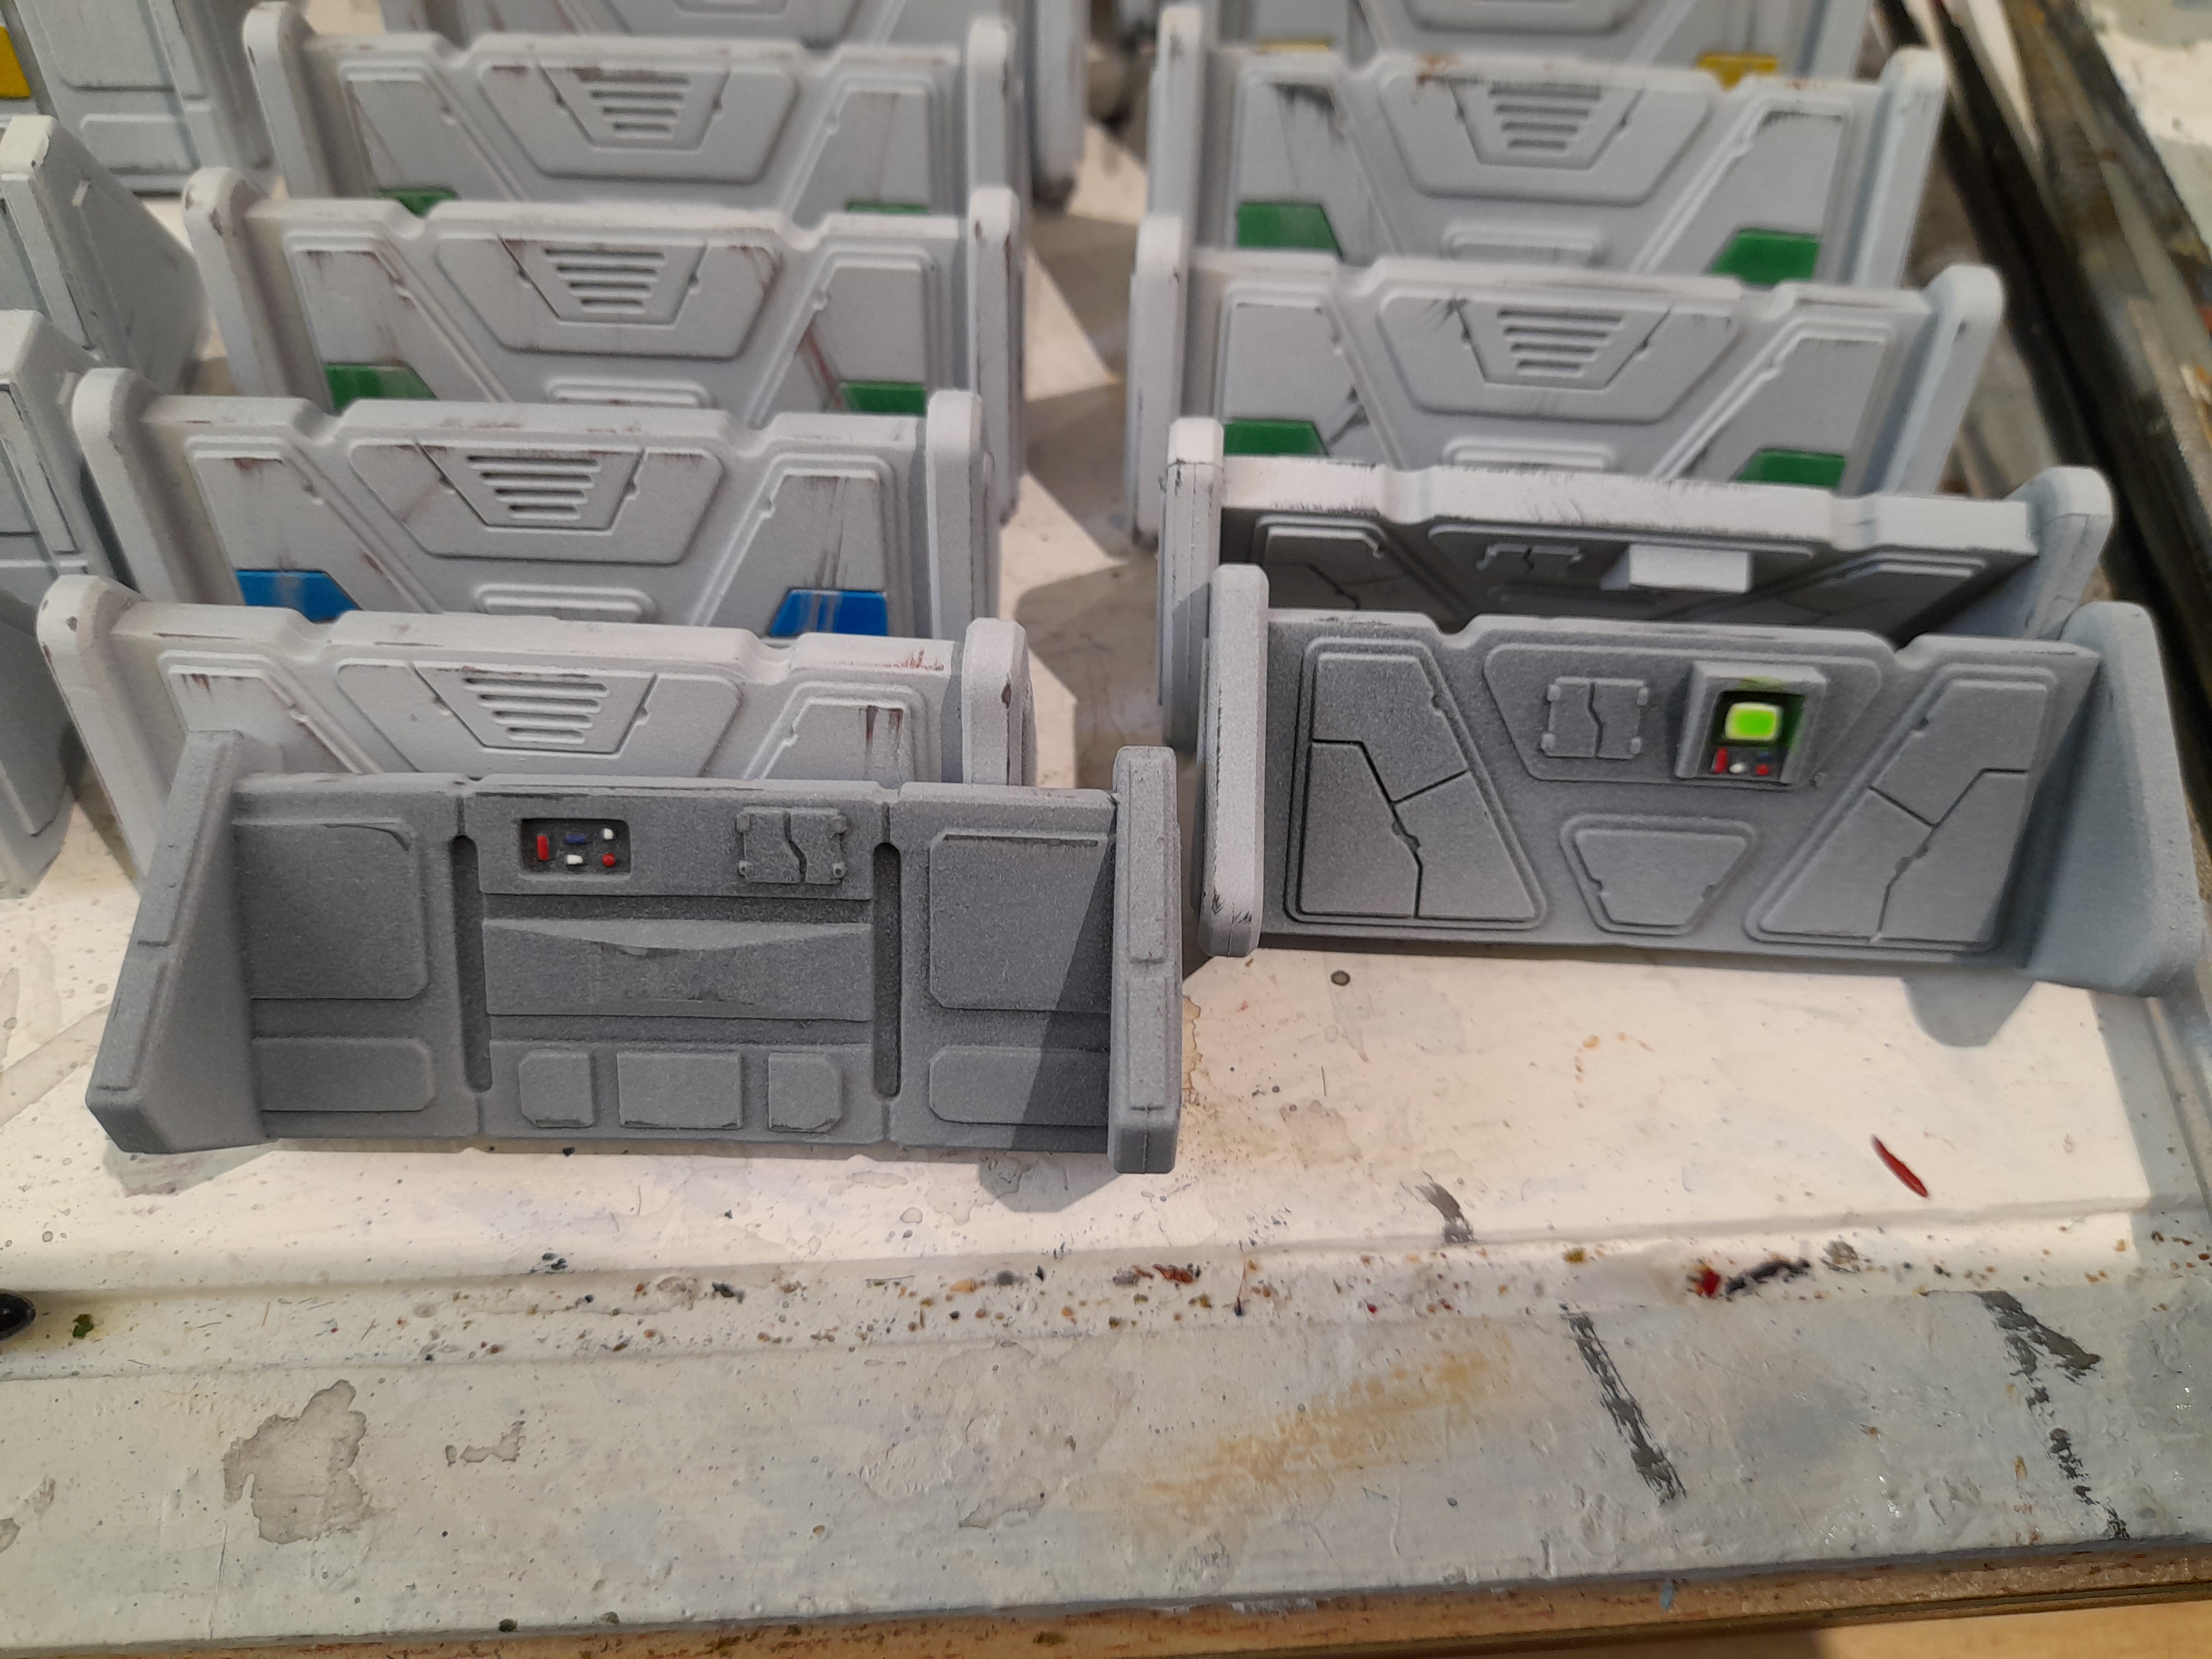
And here they all are: