


40k Space Wolves & Daemons Boot Sale Bargain – Help Lawnor identify and fix please (Spring Cleaning)


Recommendations: 372
About the Project
I was helping my karate club run a stand at a school fete that had a boot sale of 6 cars. While handing out leaflets at the boot sale I saw a box and some drawers with some GW in. I asked how much and they said £10. I assumed per tank, but then thay said, "for the lot, not just the box. You can tell we don't want to take it home again". I don't play 40K and don't know too much about it, but how could I say no? I don't know what all of this is, and I don't know what parts are mising. Please help me return this to fighting shape.
Related Game: Warhammer 40,000
Related Company: Games Workshop
Related Genre: Science Fiction
Related Contest: Spring Clean Hobby Challenge (Old)
This Project is Completed
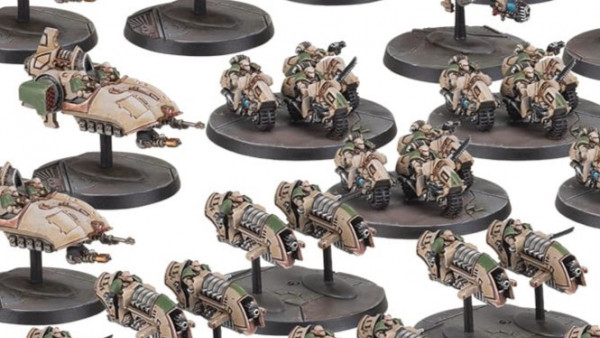
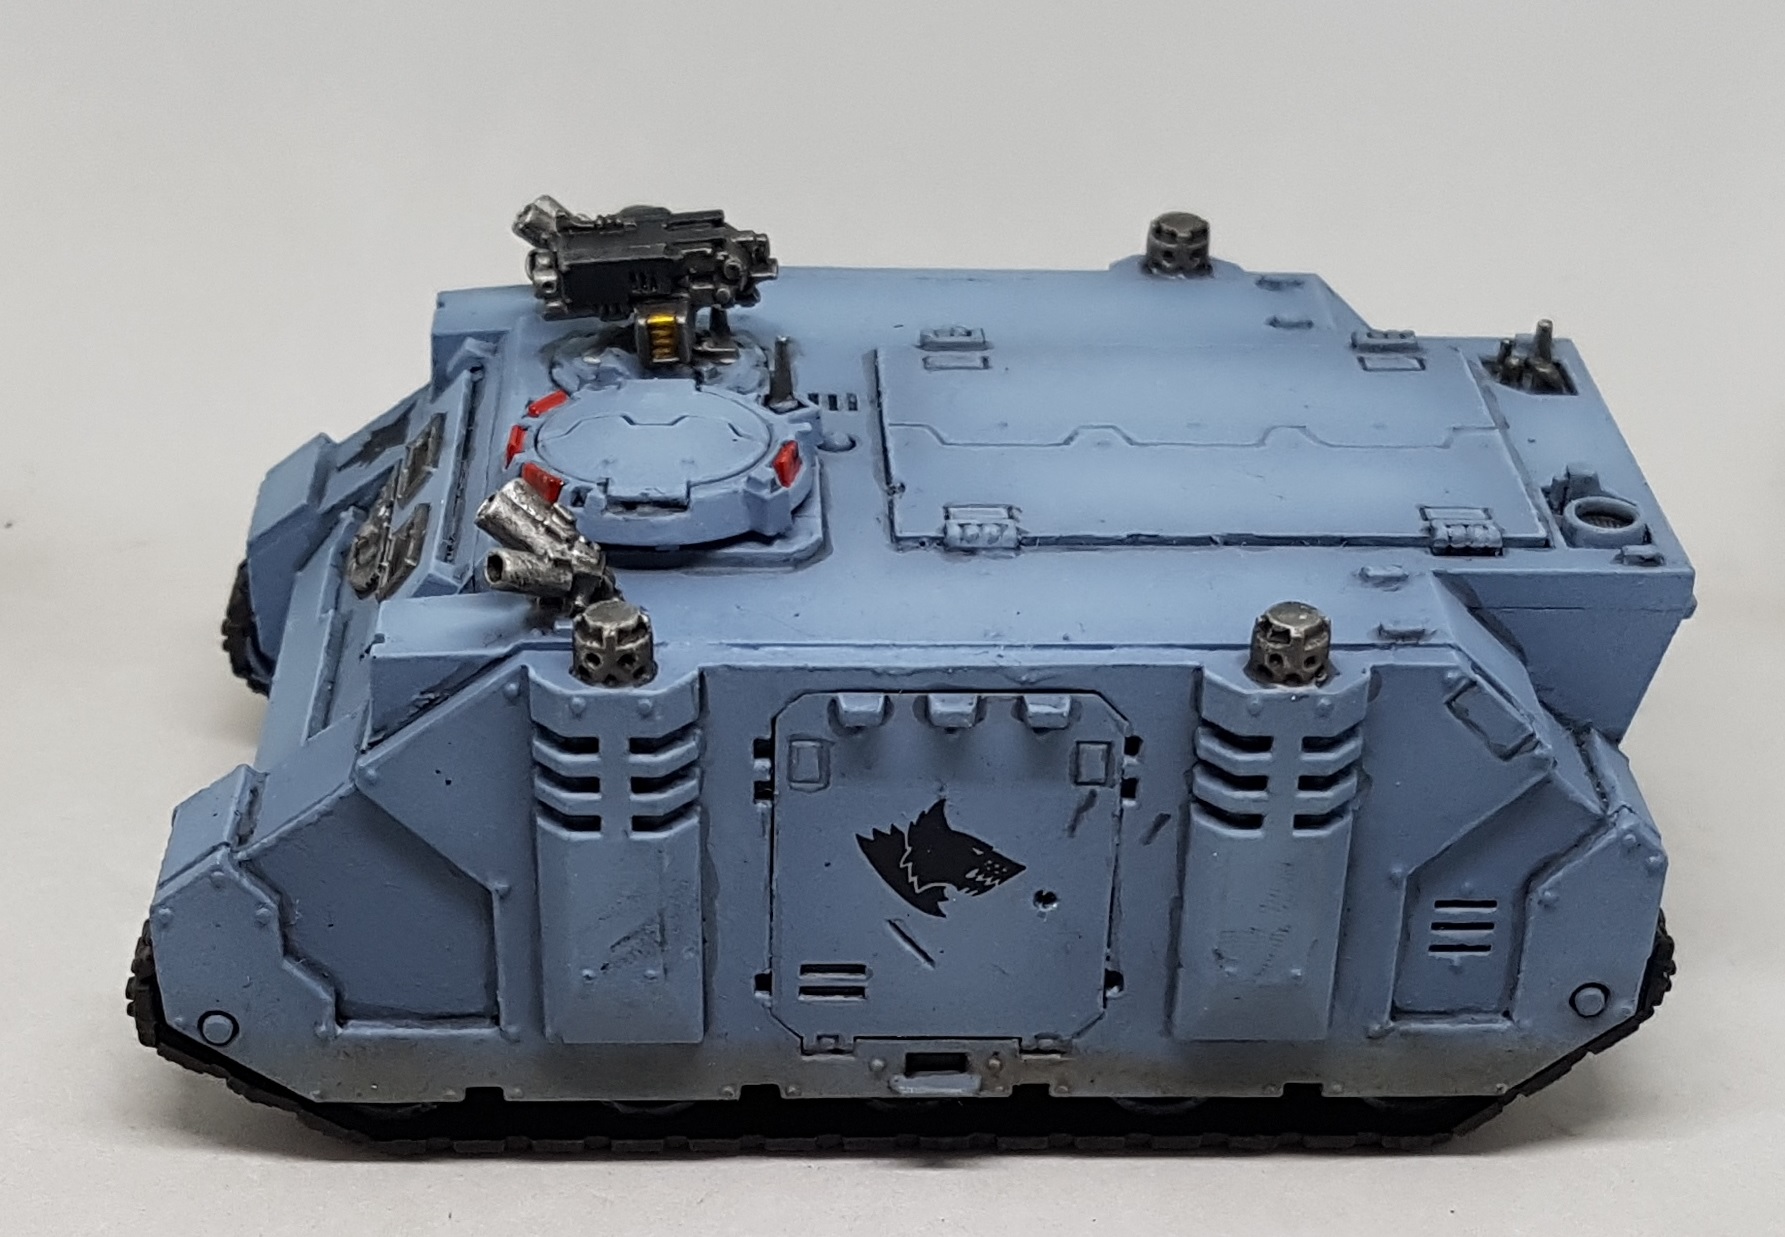
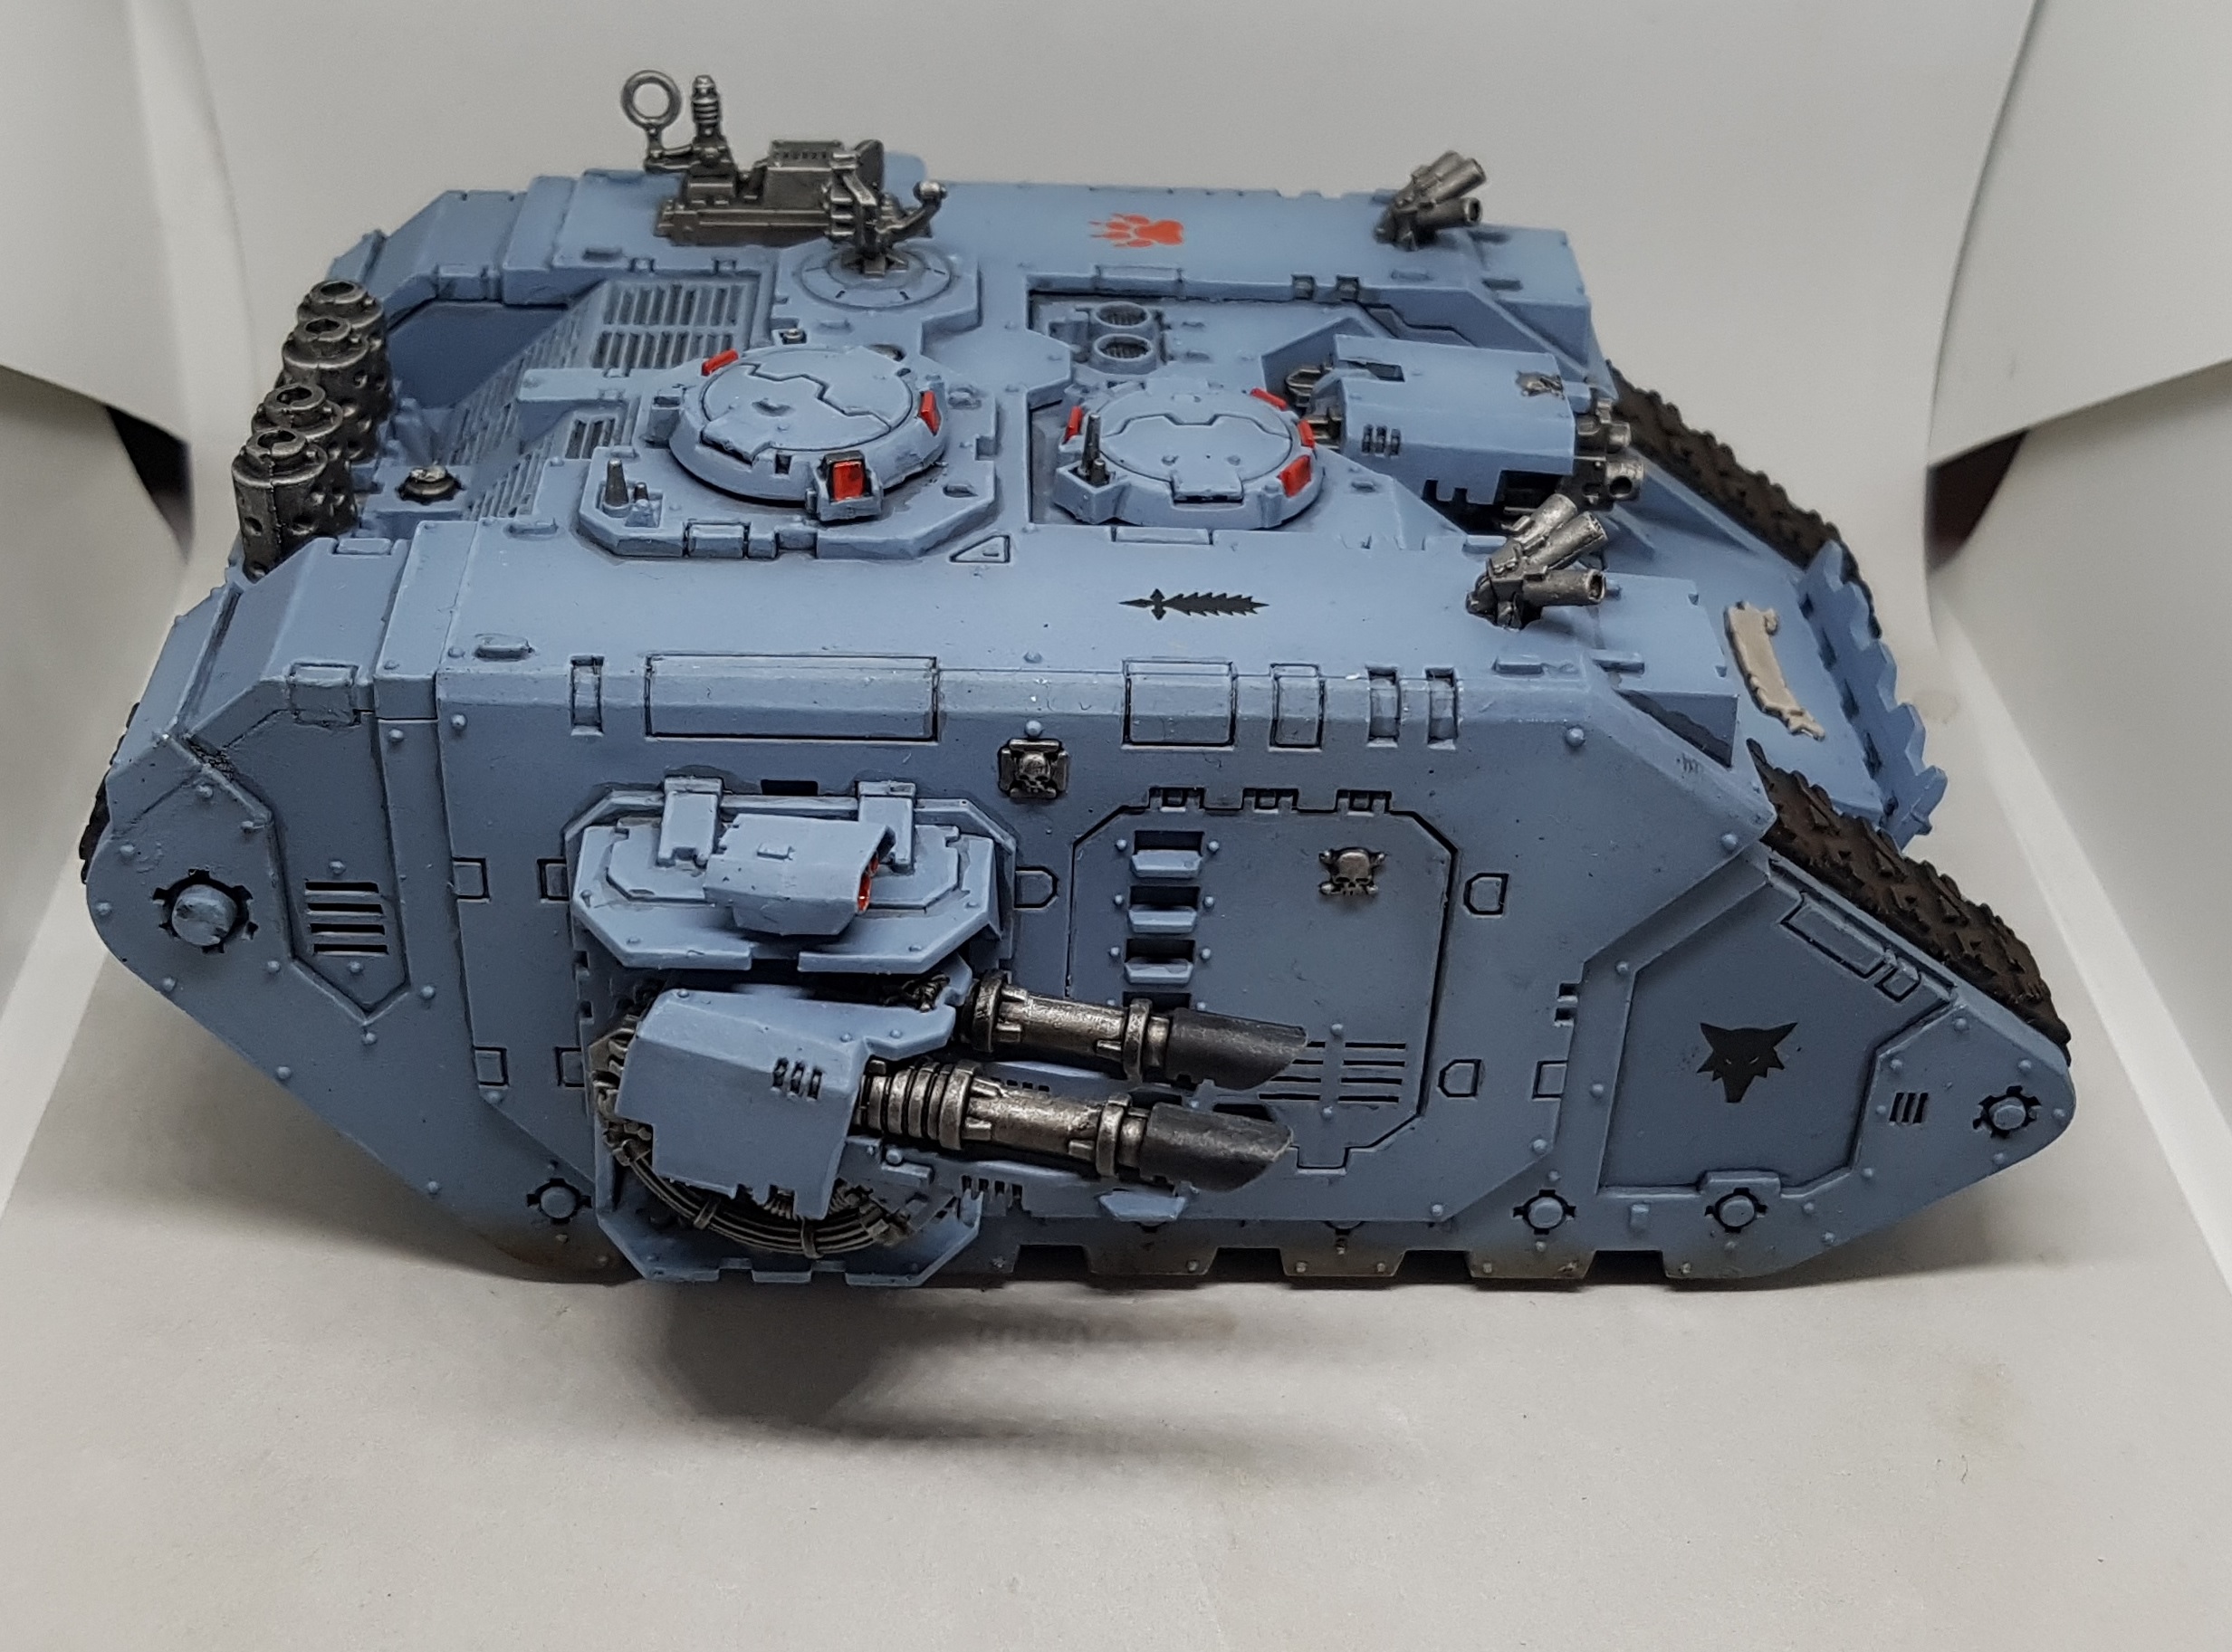
Tanks
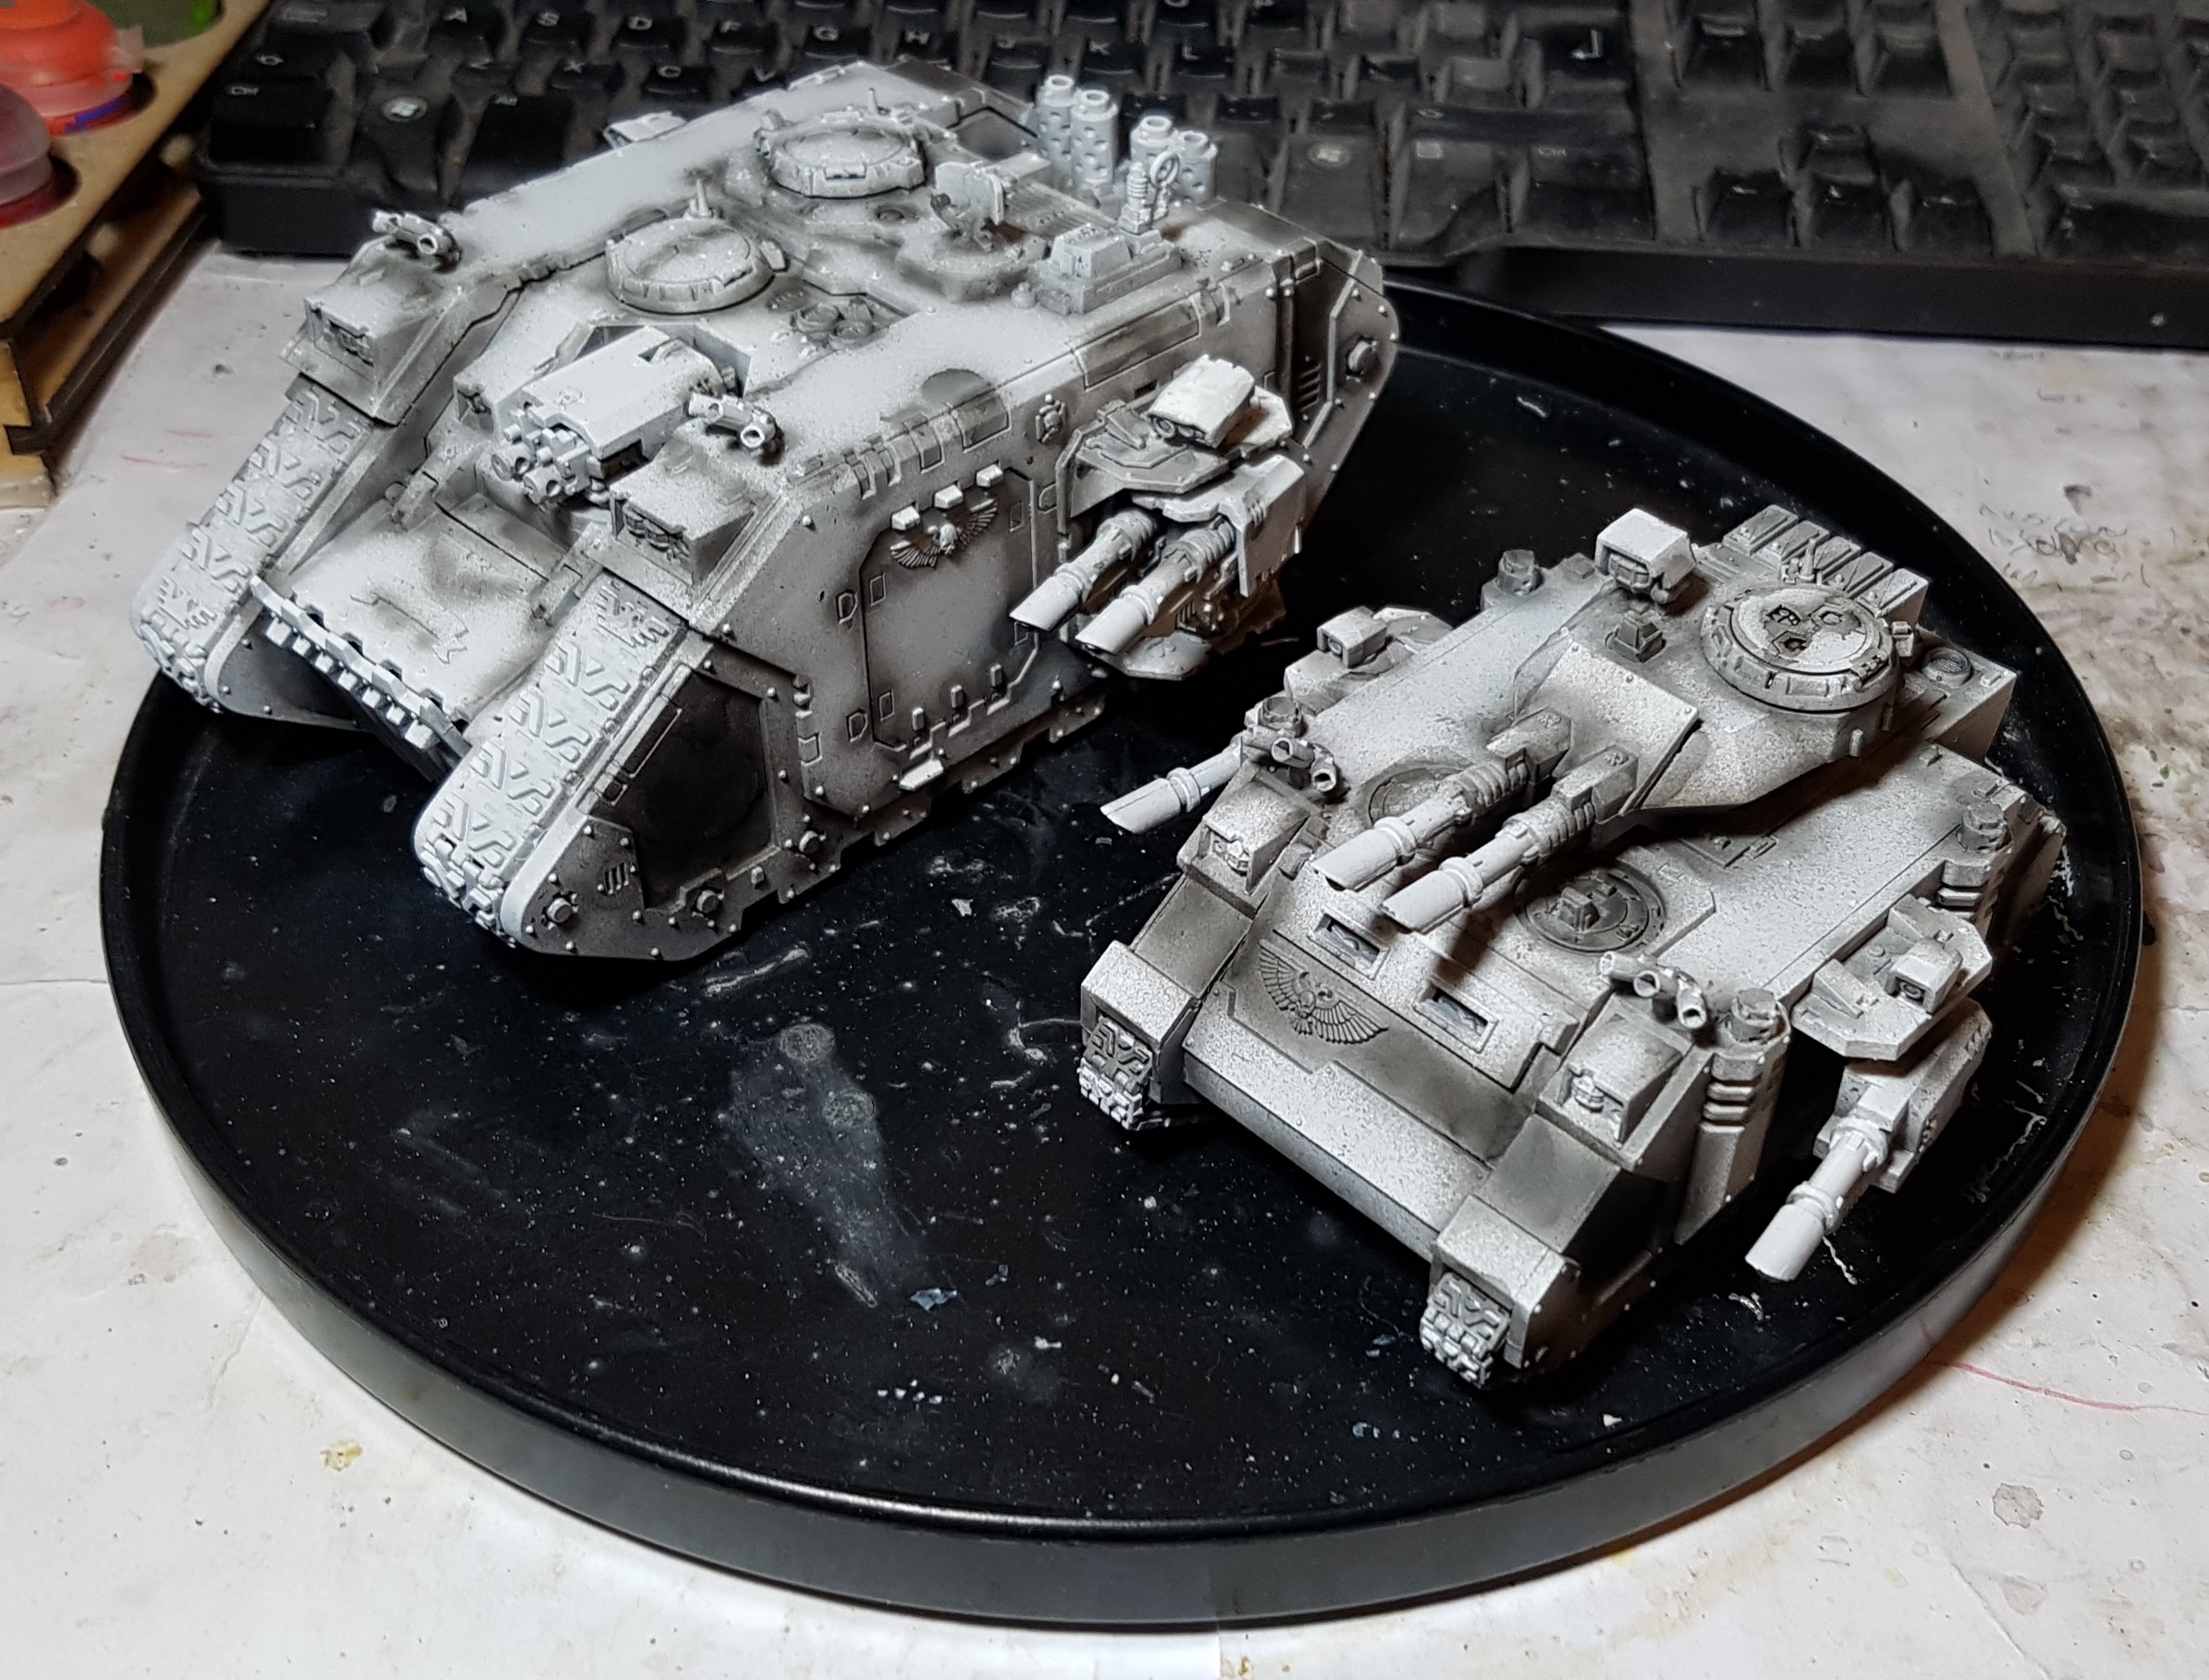
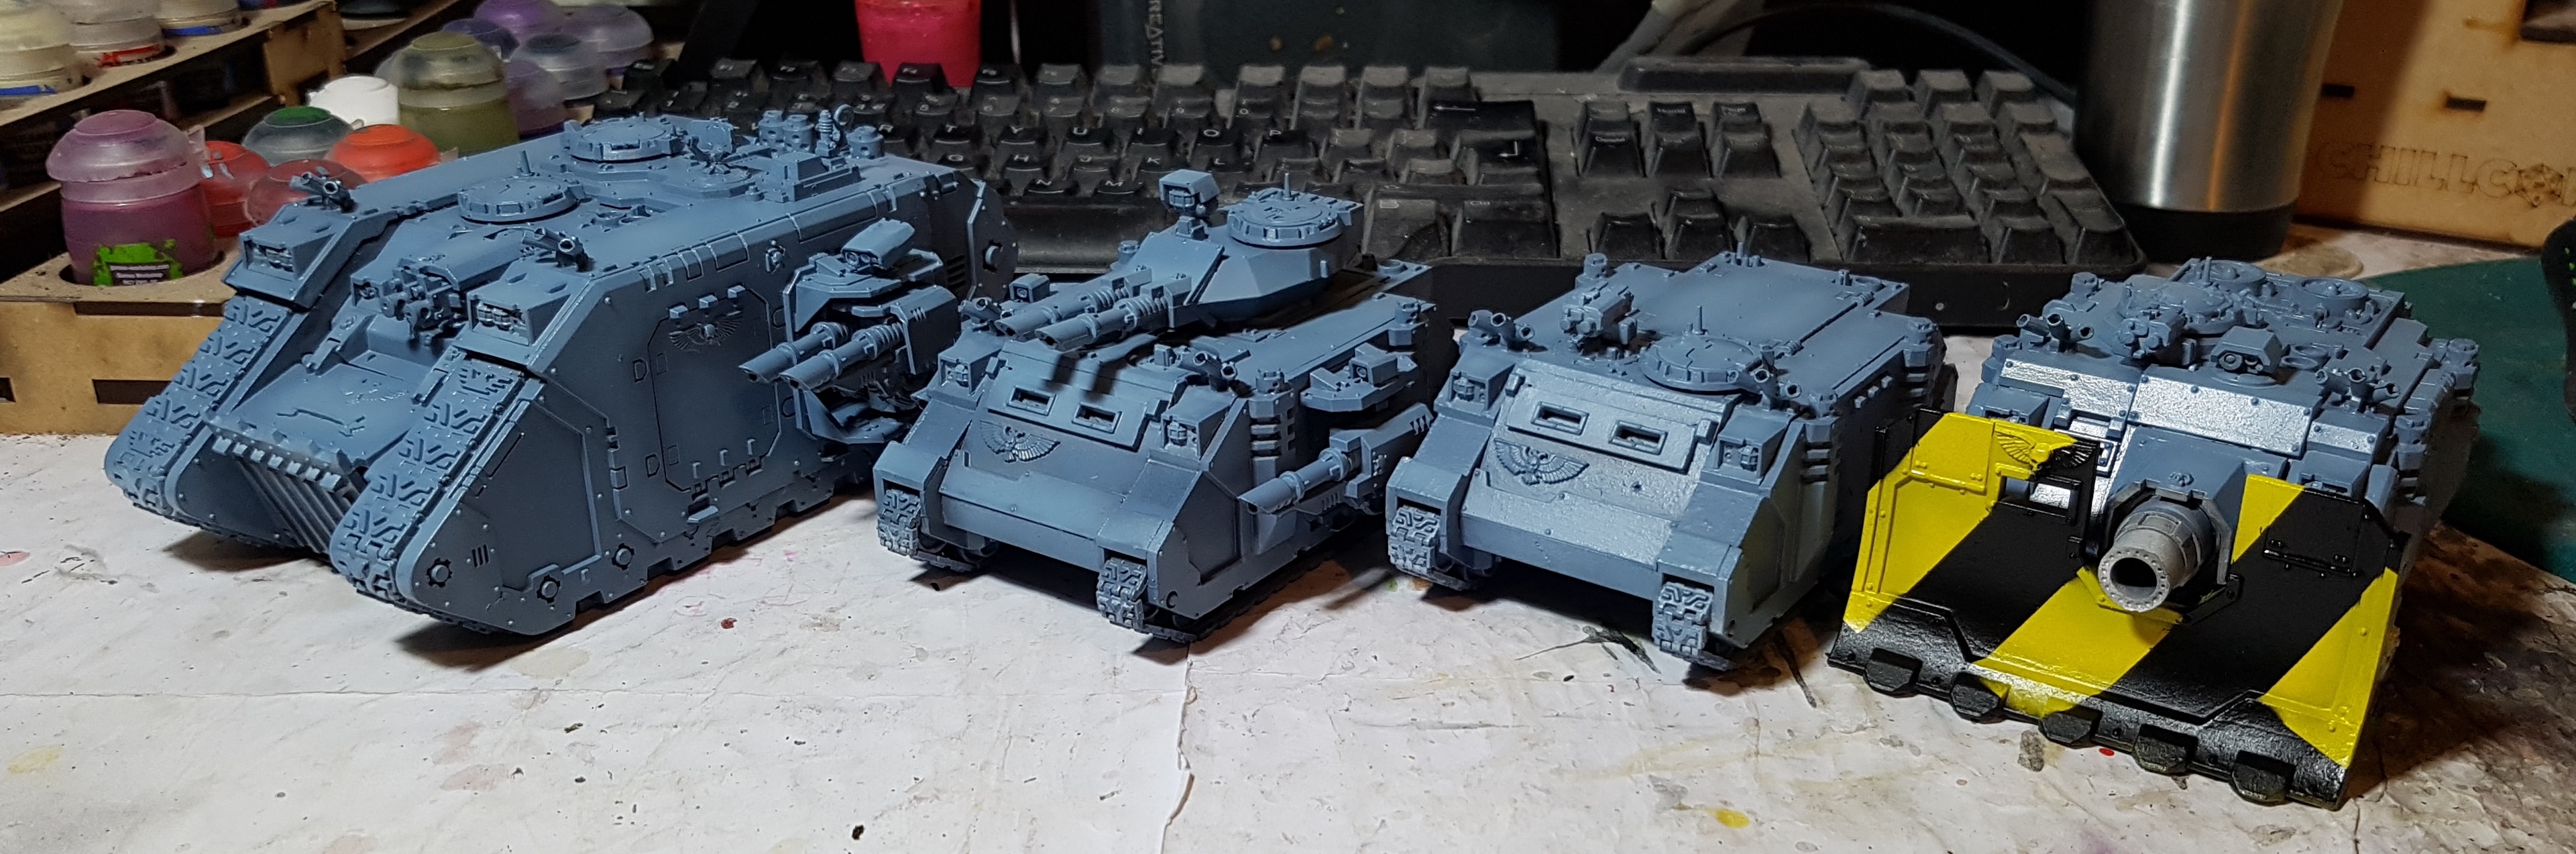
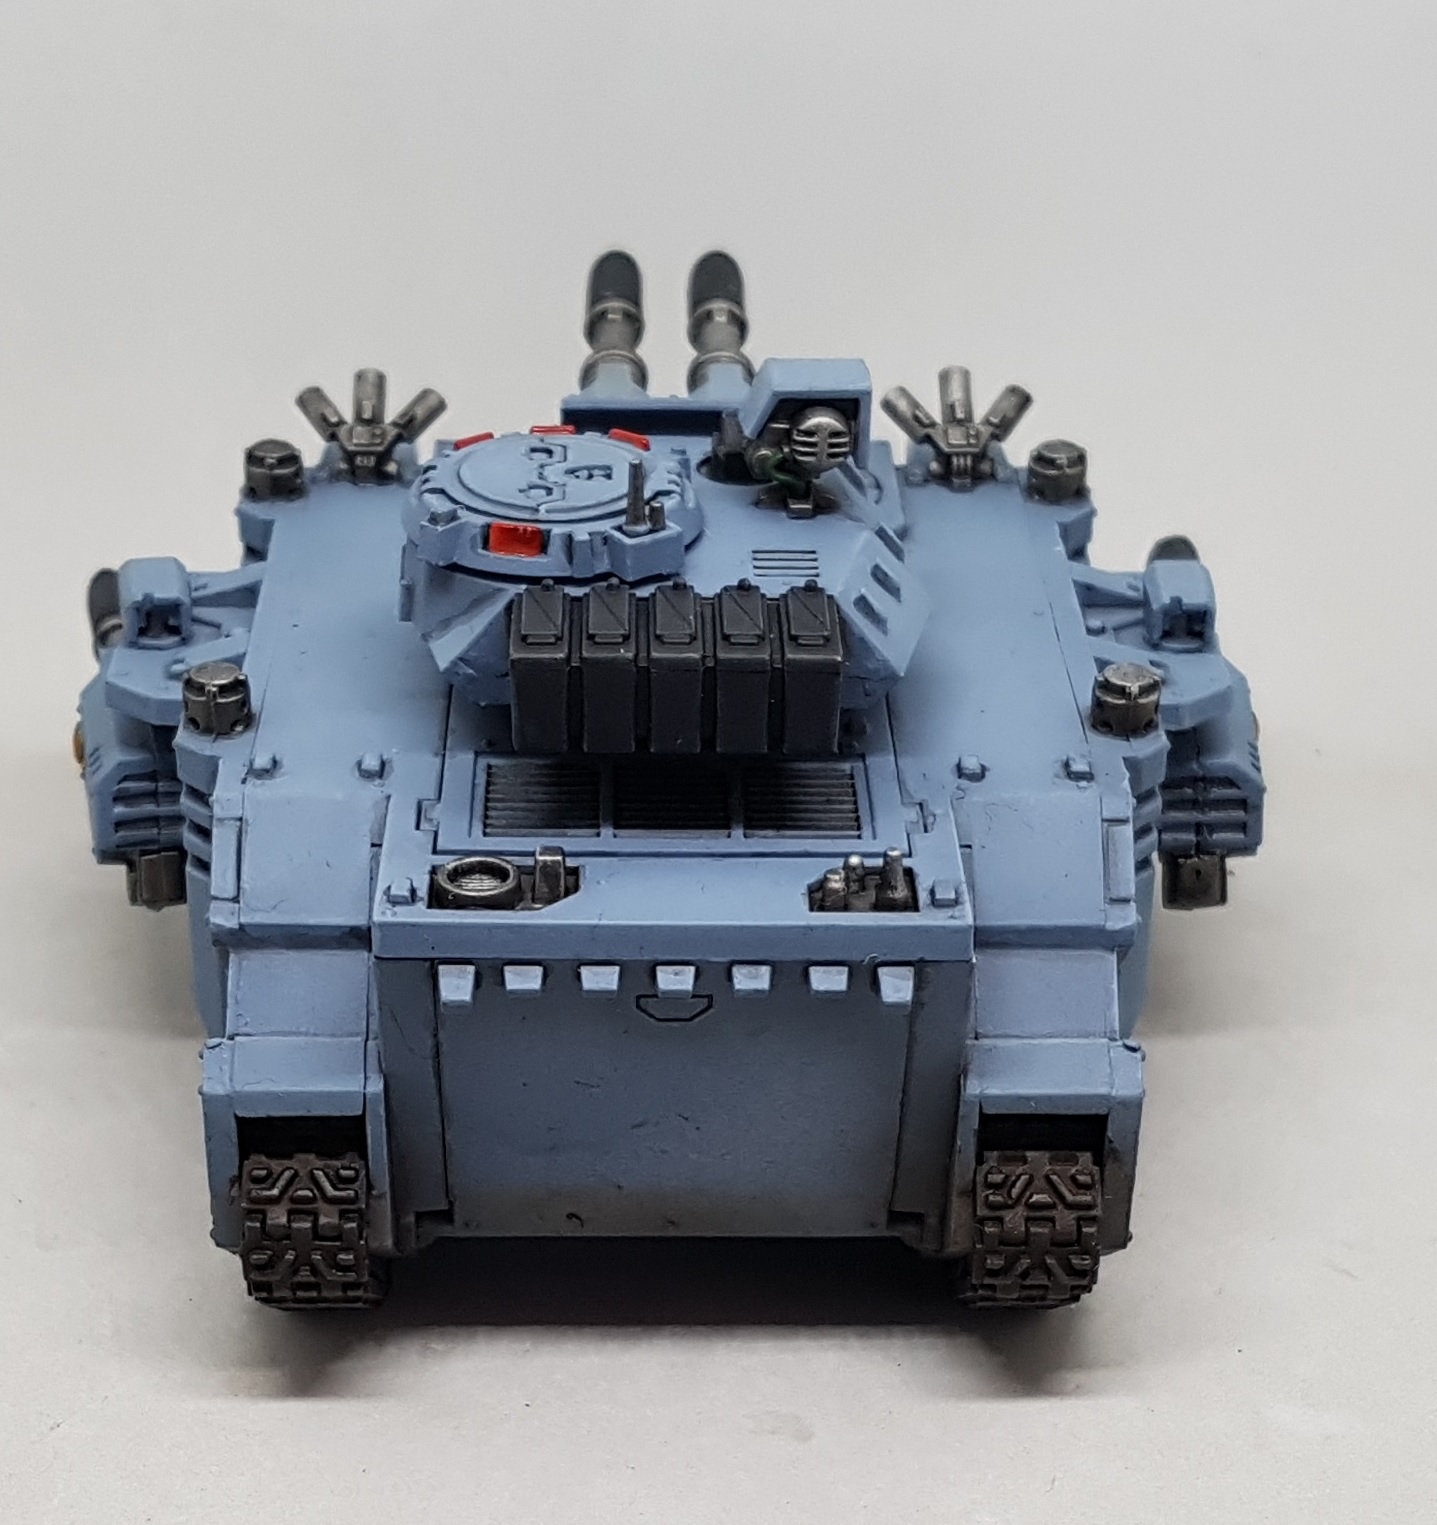
I normally paint Warmachine which is normally a game without tanks so this is my first time painting 28mm tanks since I got my airbrush many years ago and figured out preshading. As such I chose to look online for guidance and found this video. I based all my work on it. I started working on these guys the night before I put the snow on all my bases. I planned ahead and primed their bottoms black. This way they could sit upside overnight to dry thoroughly. The bottoms remained black throughout the priming, but otherwise I tried to follow the steps in the video.
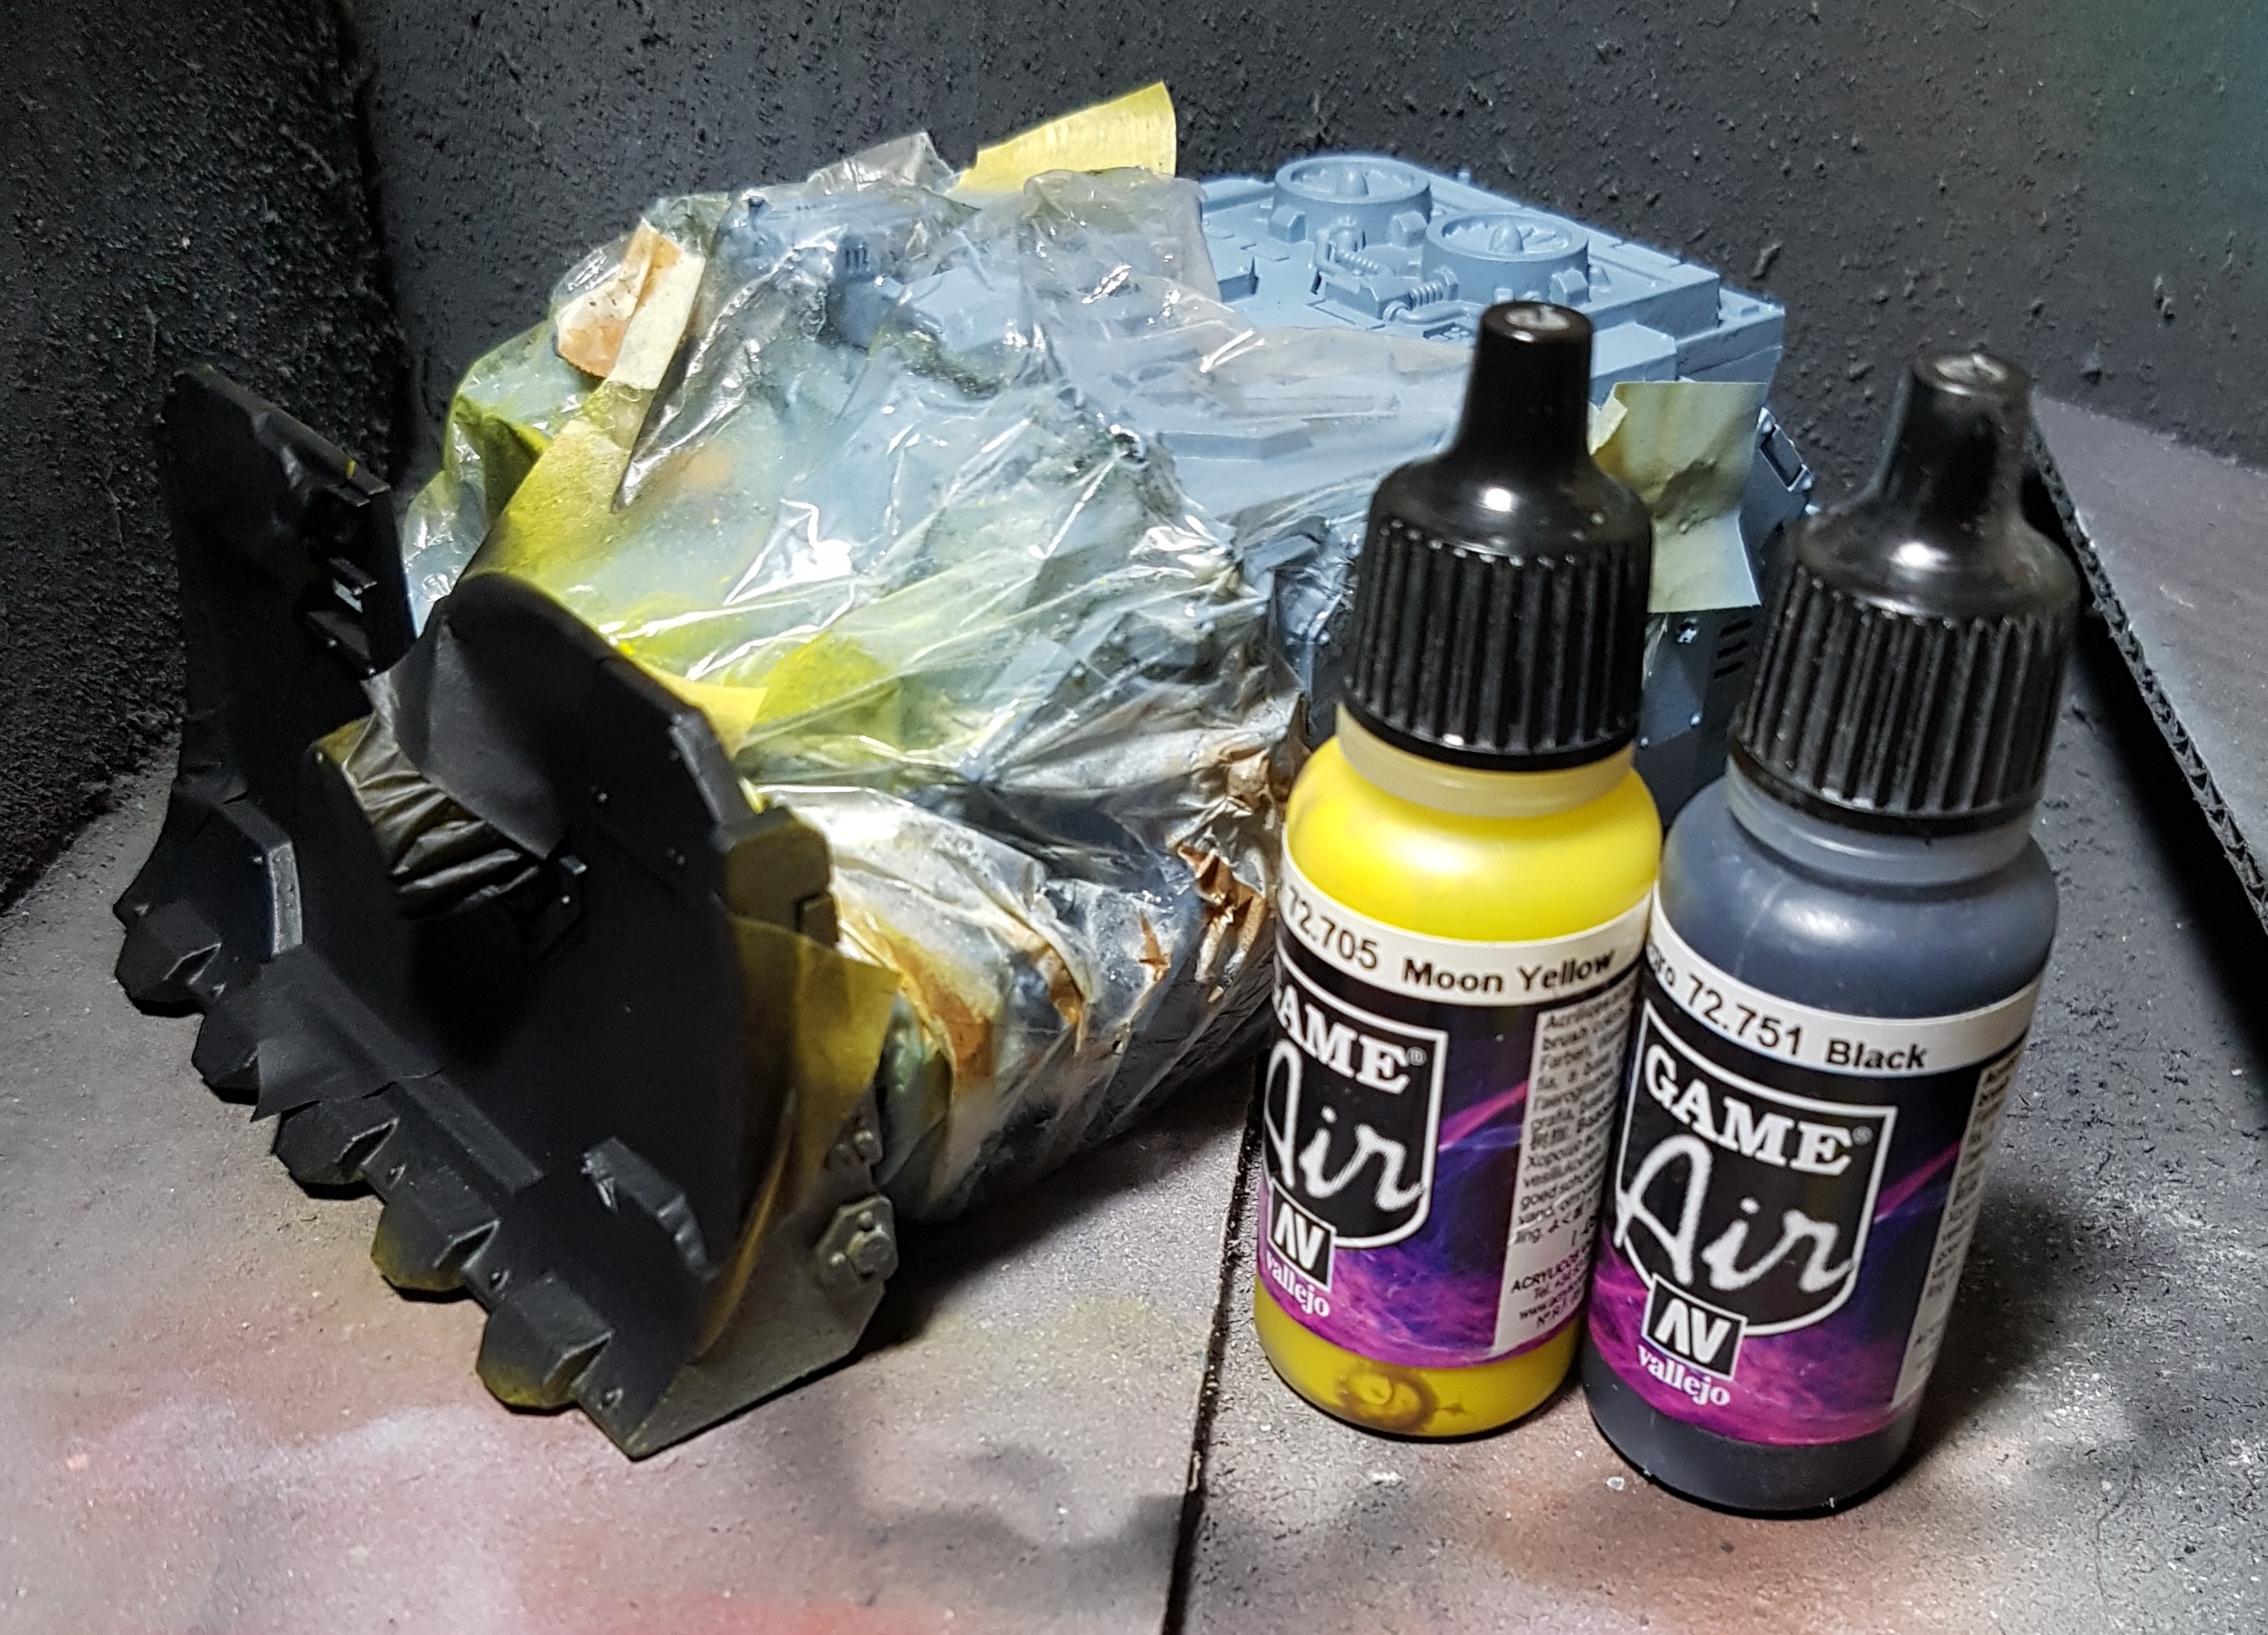
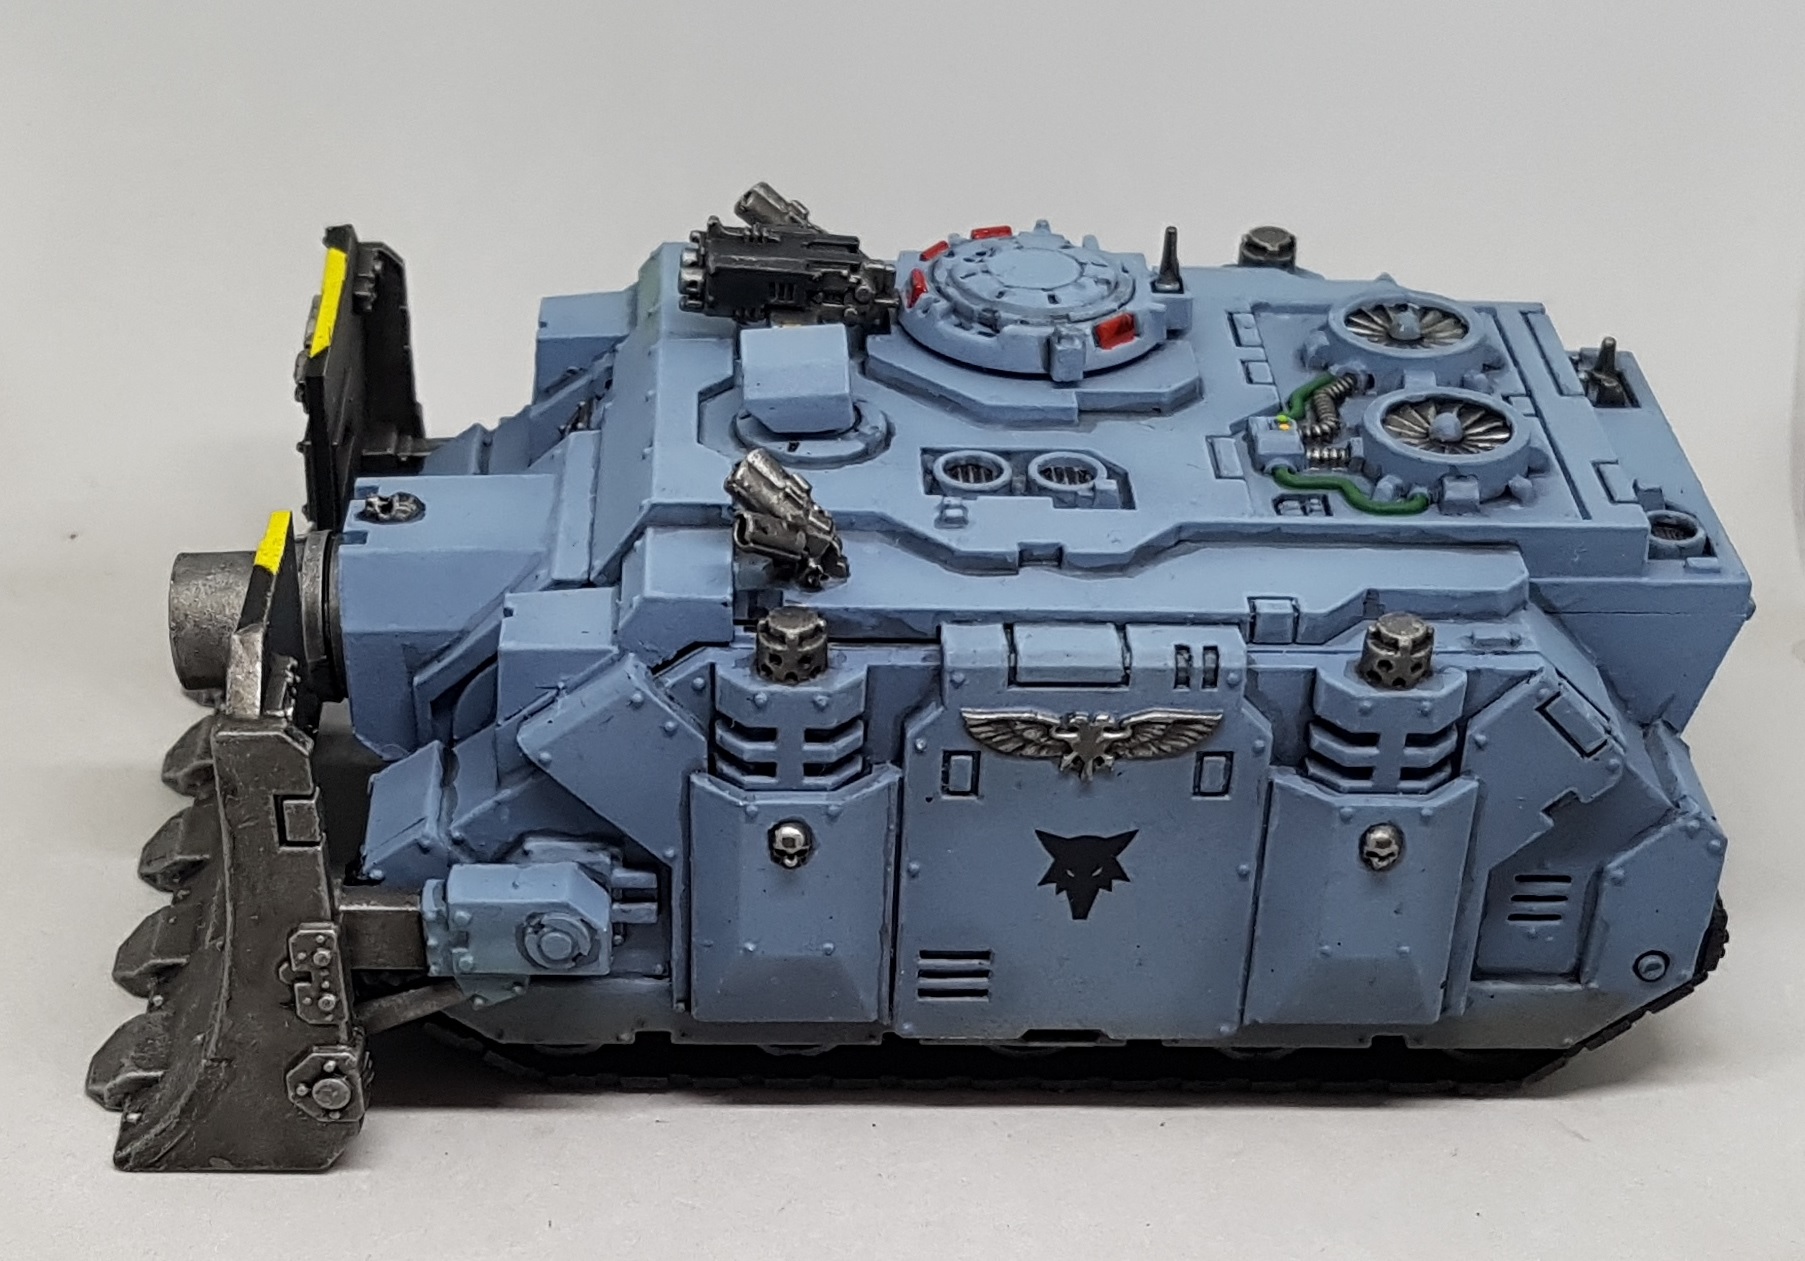
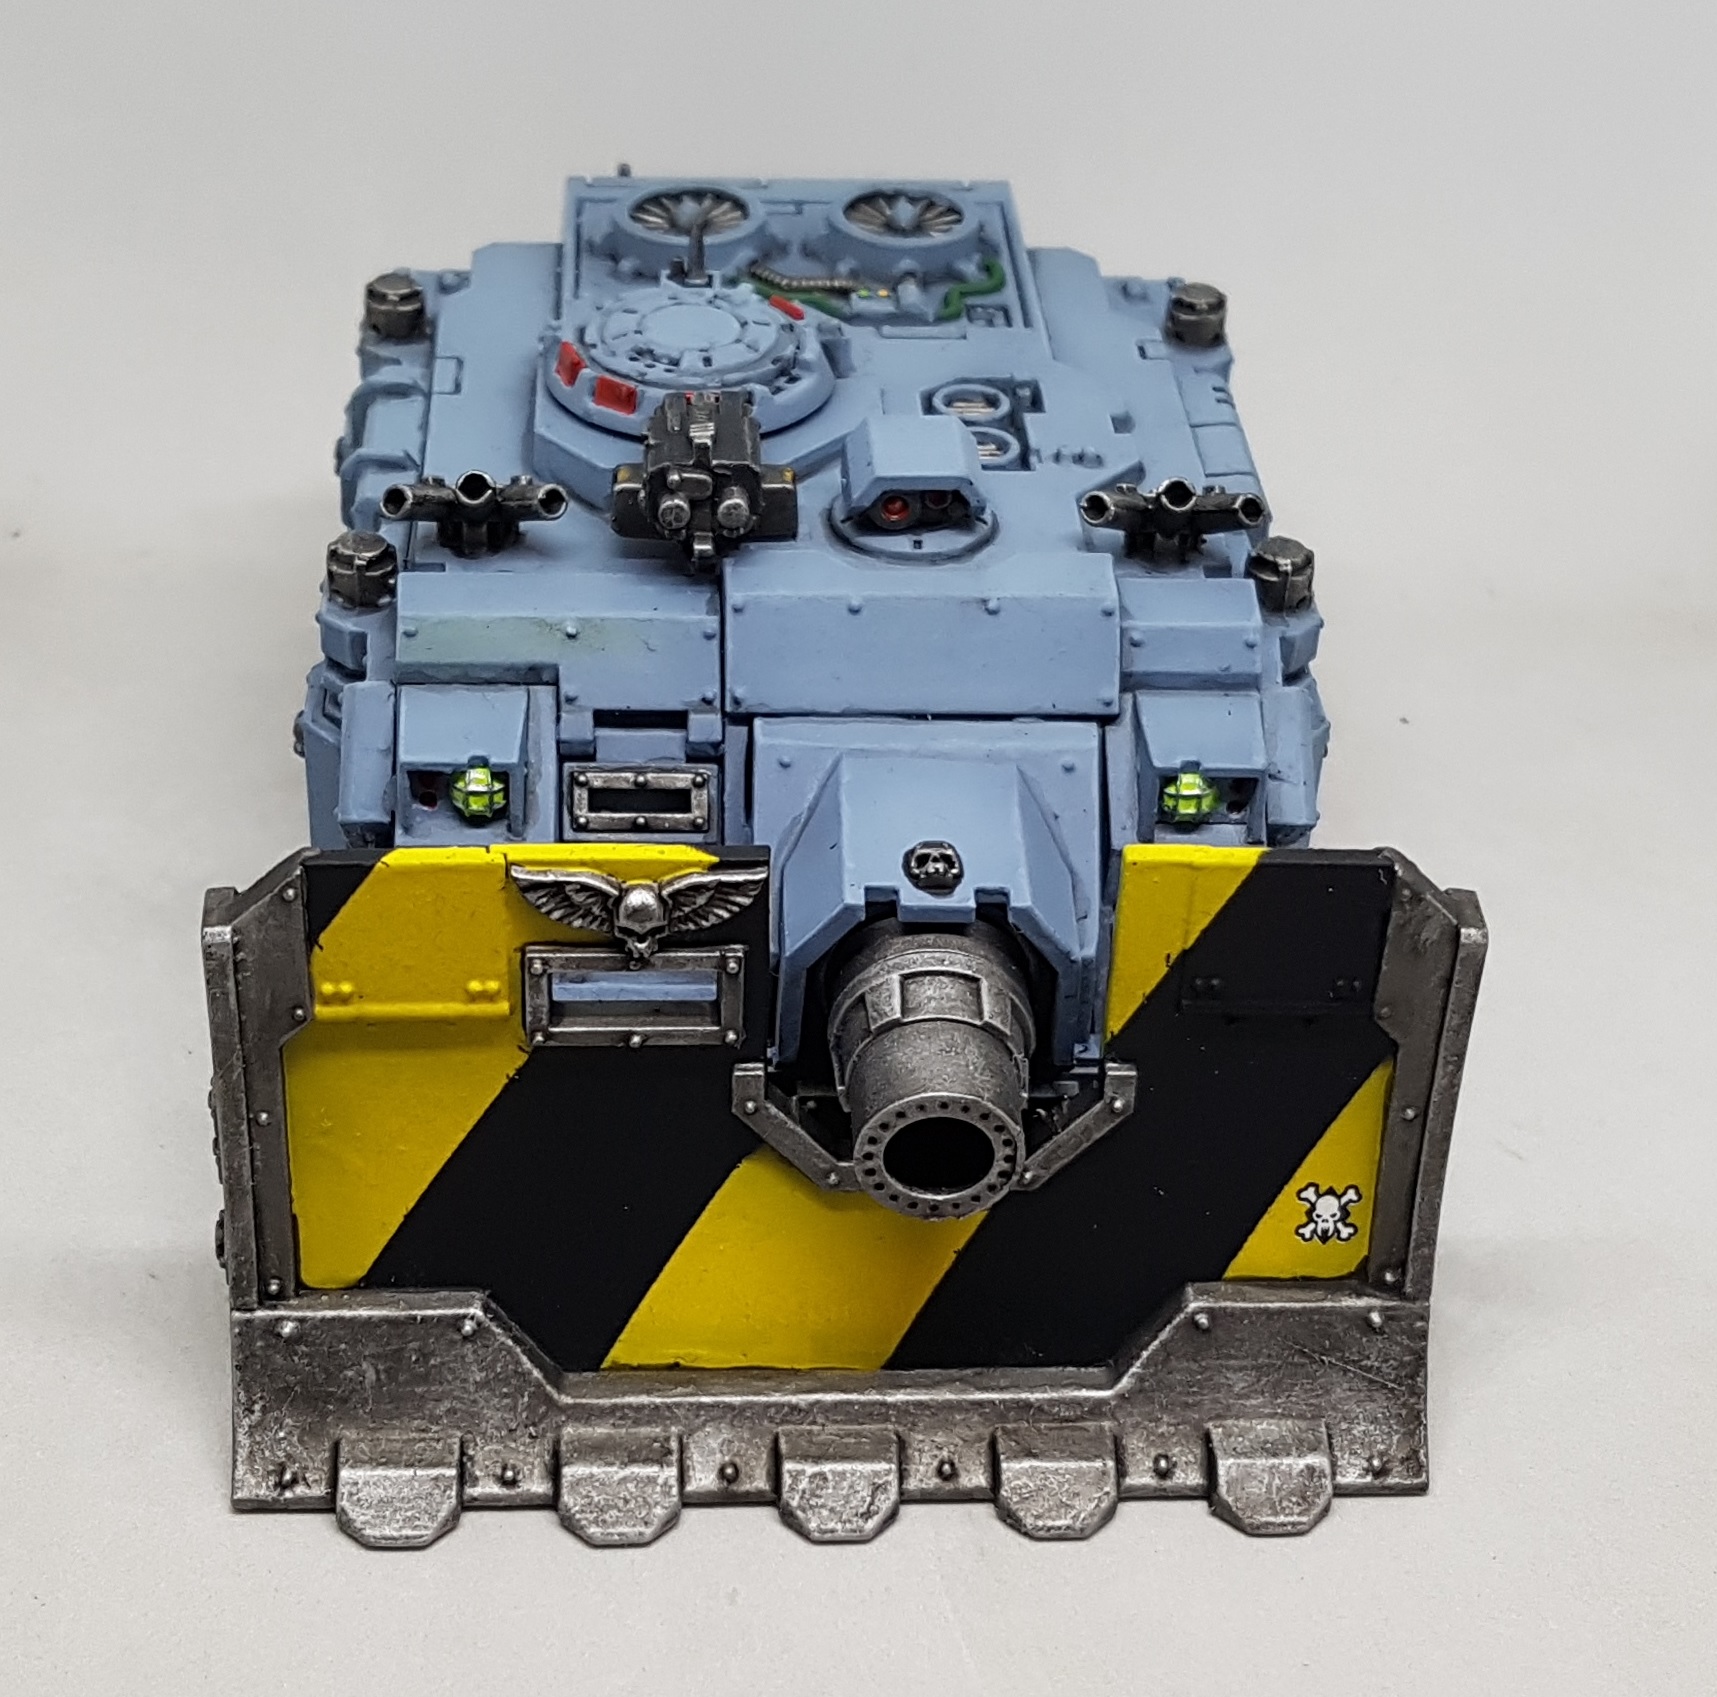
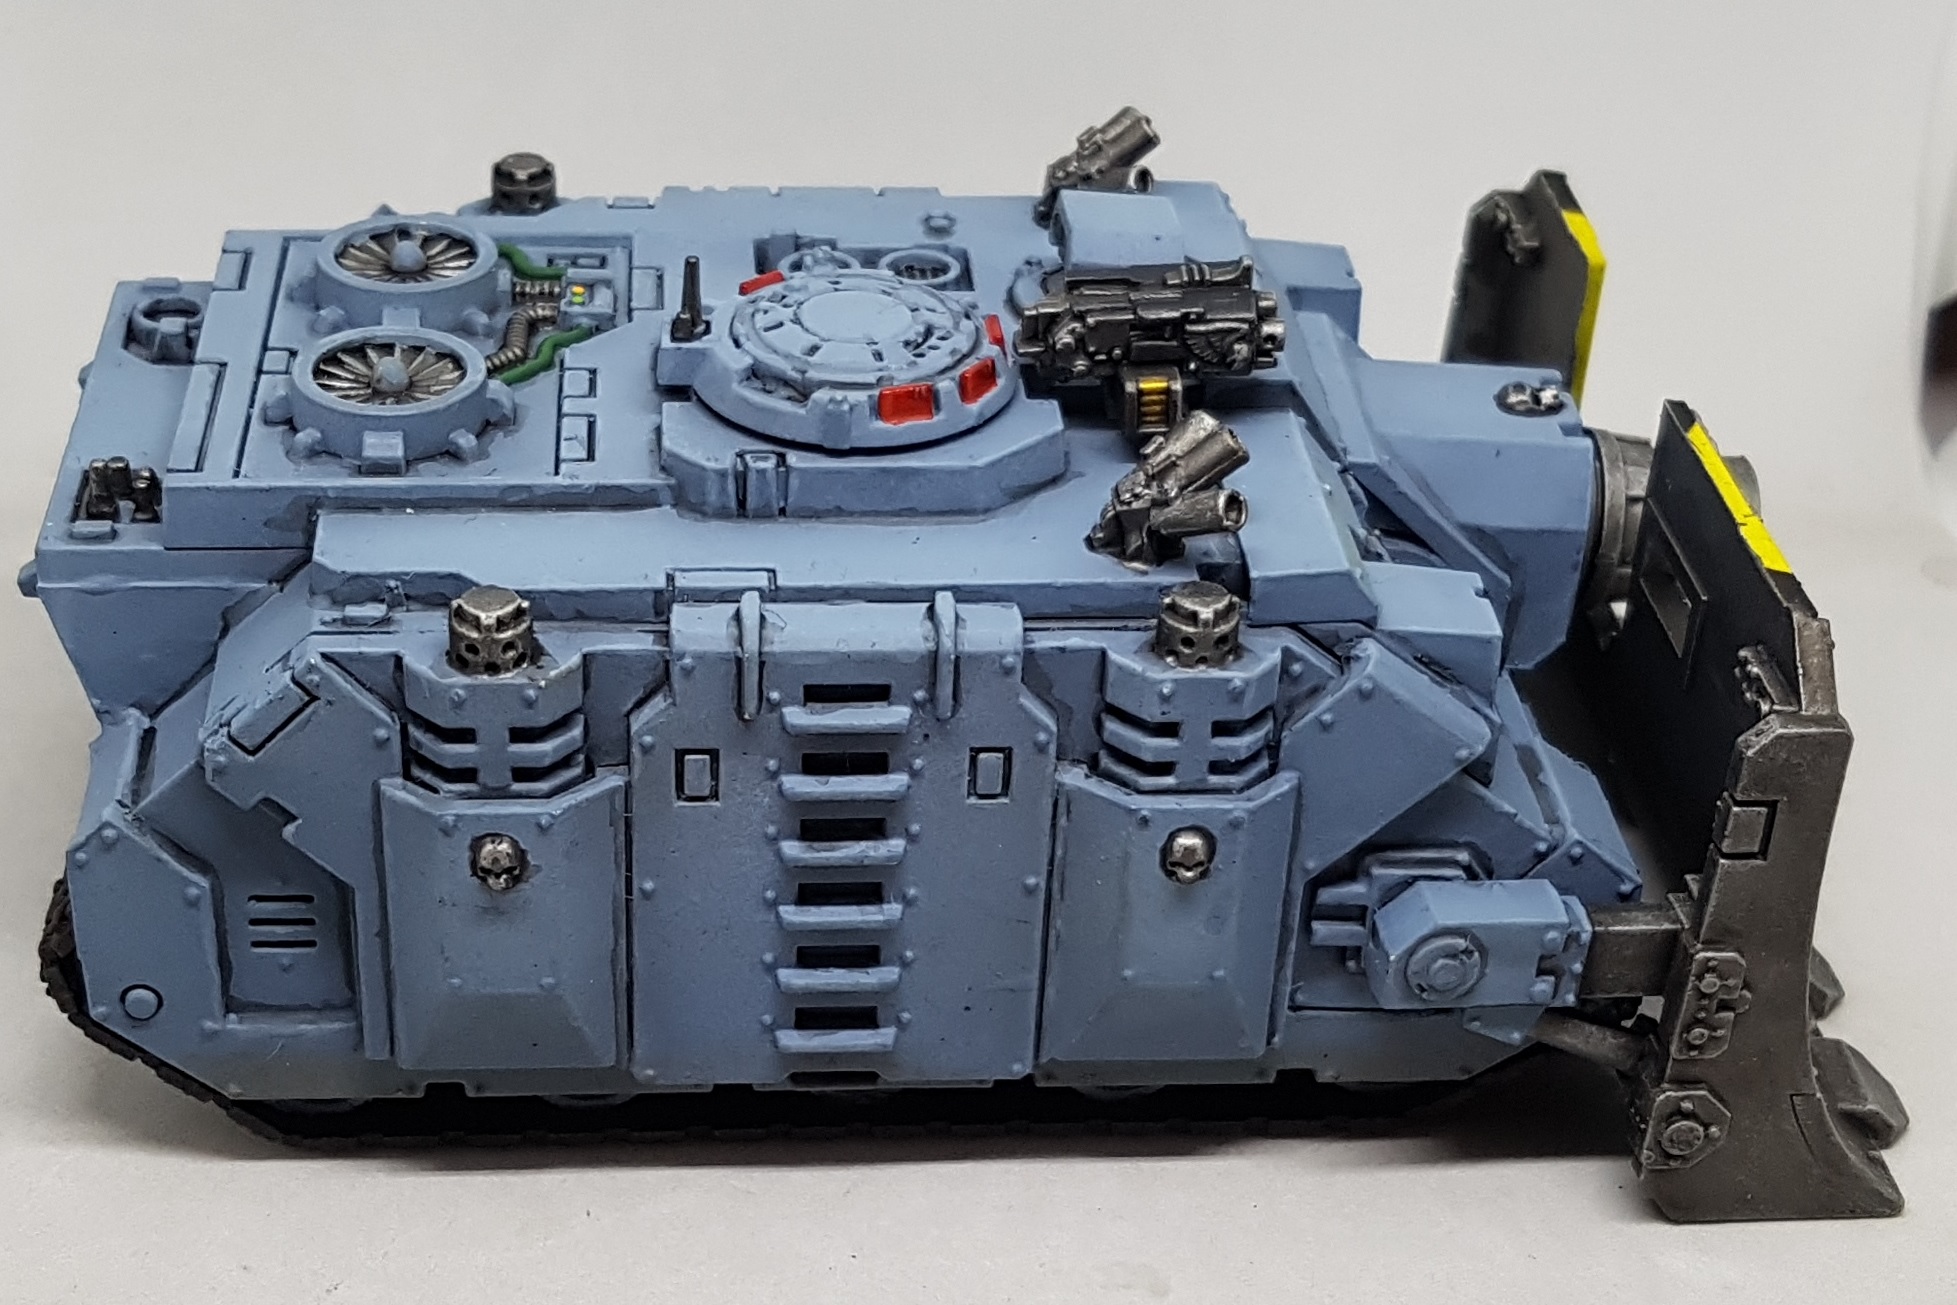
The dozer blade on the vindicator will have hazard stripes painted on it so I masked it with cling film before proceeding.
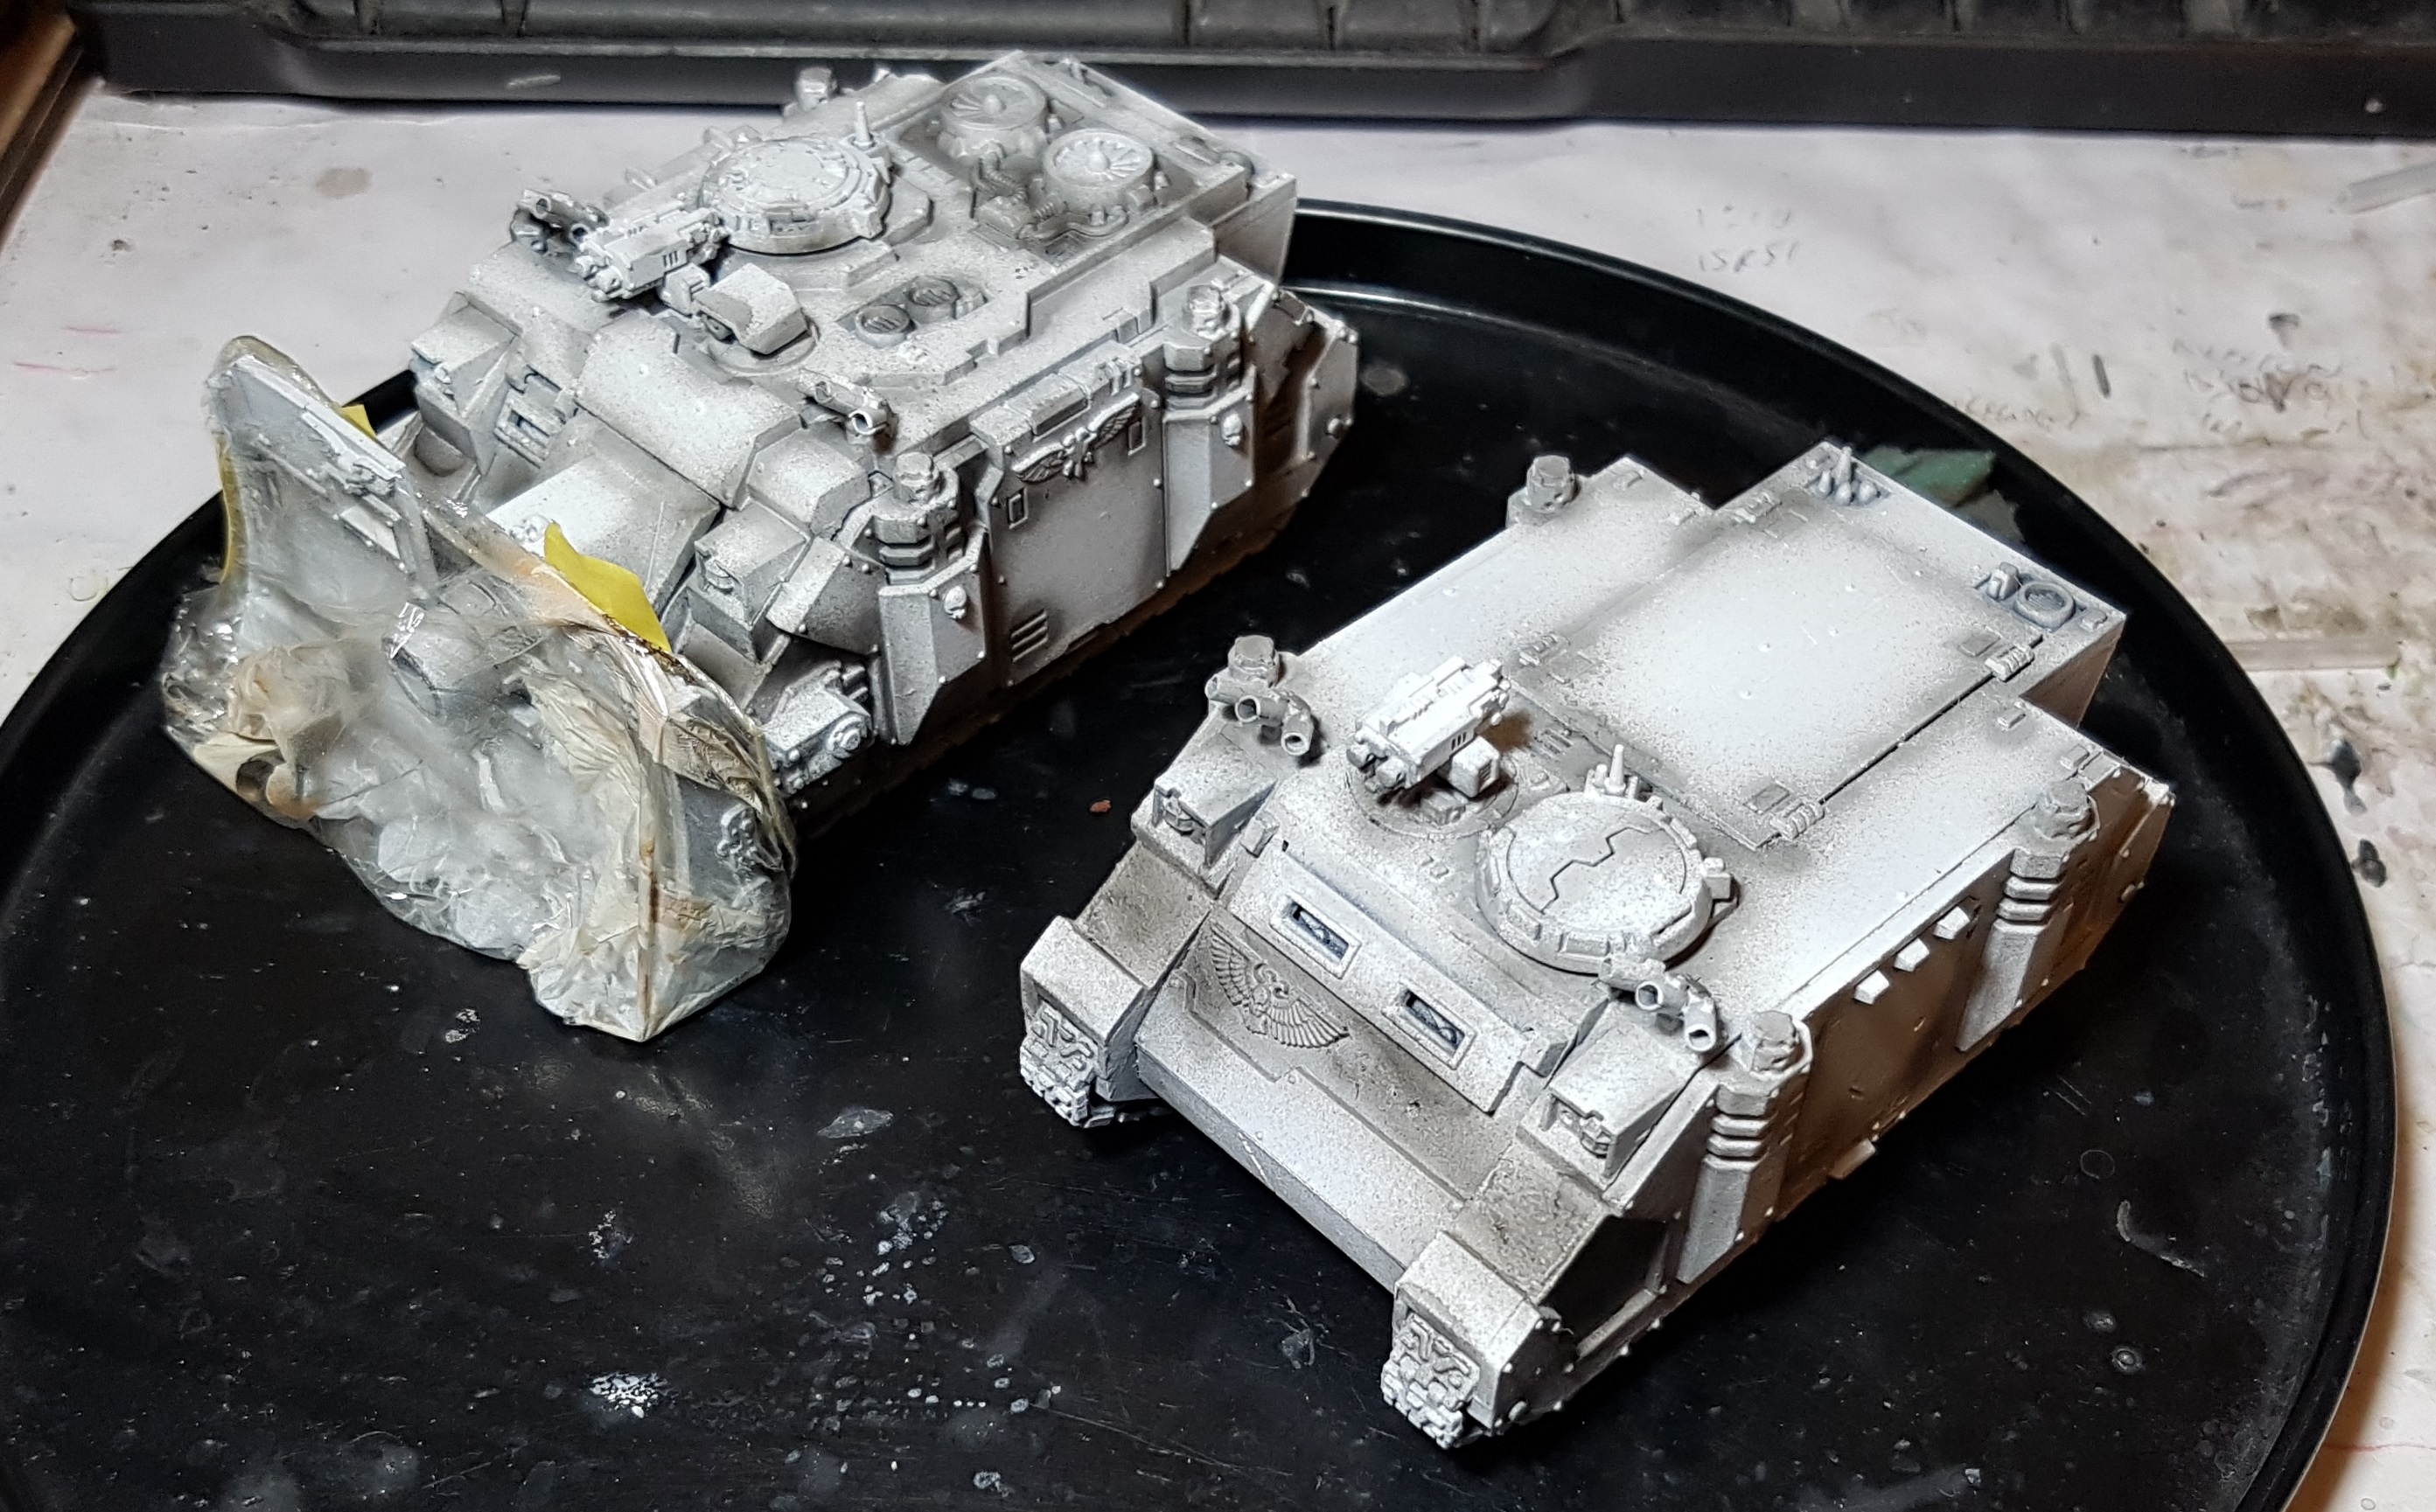
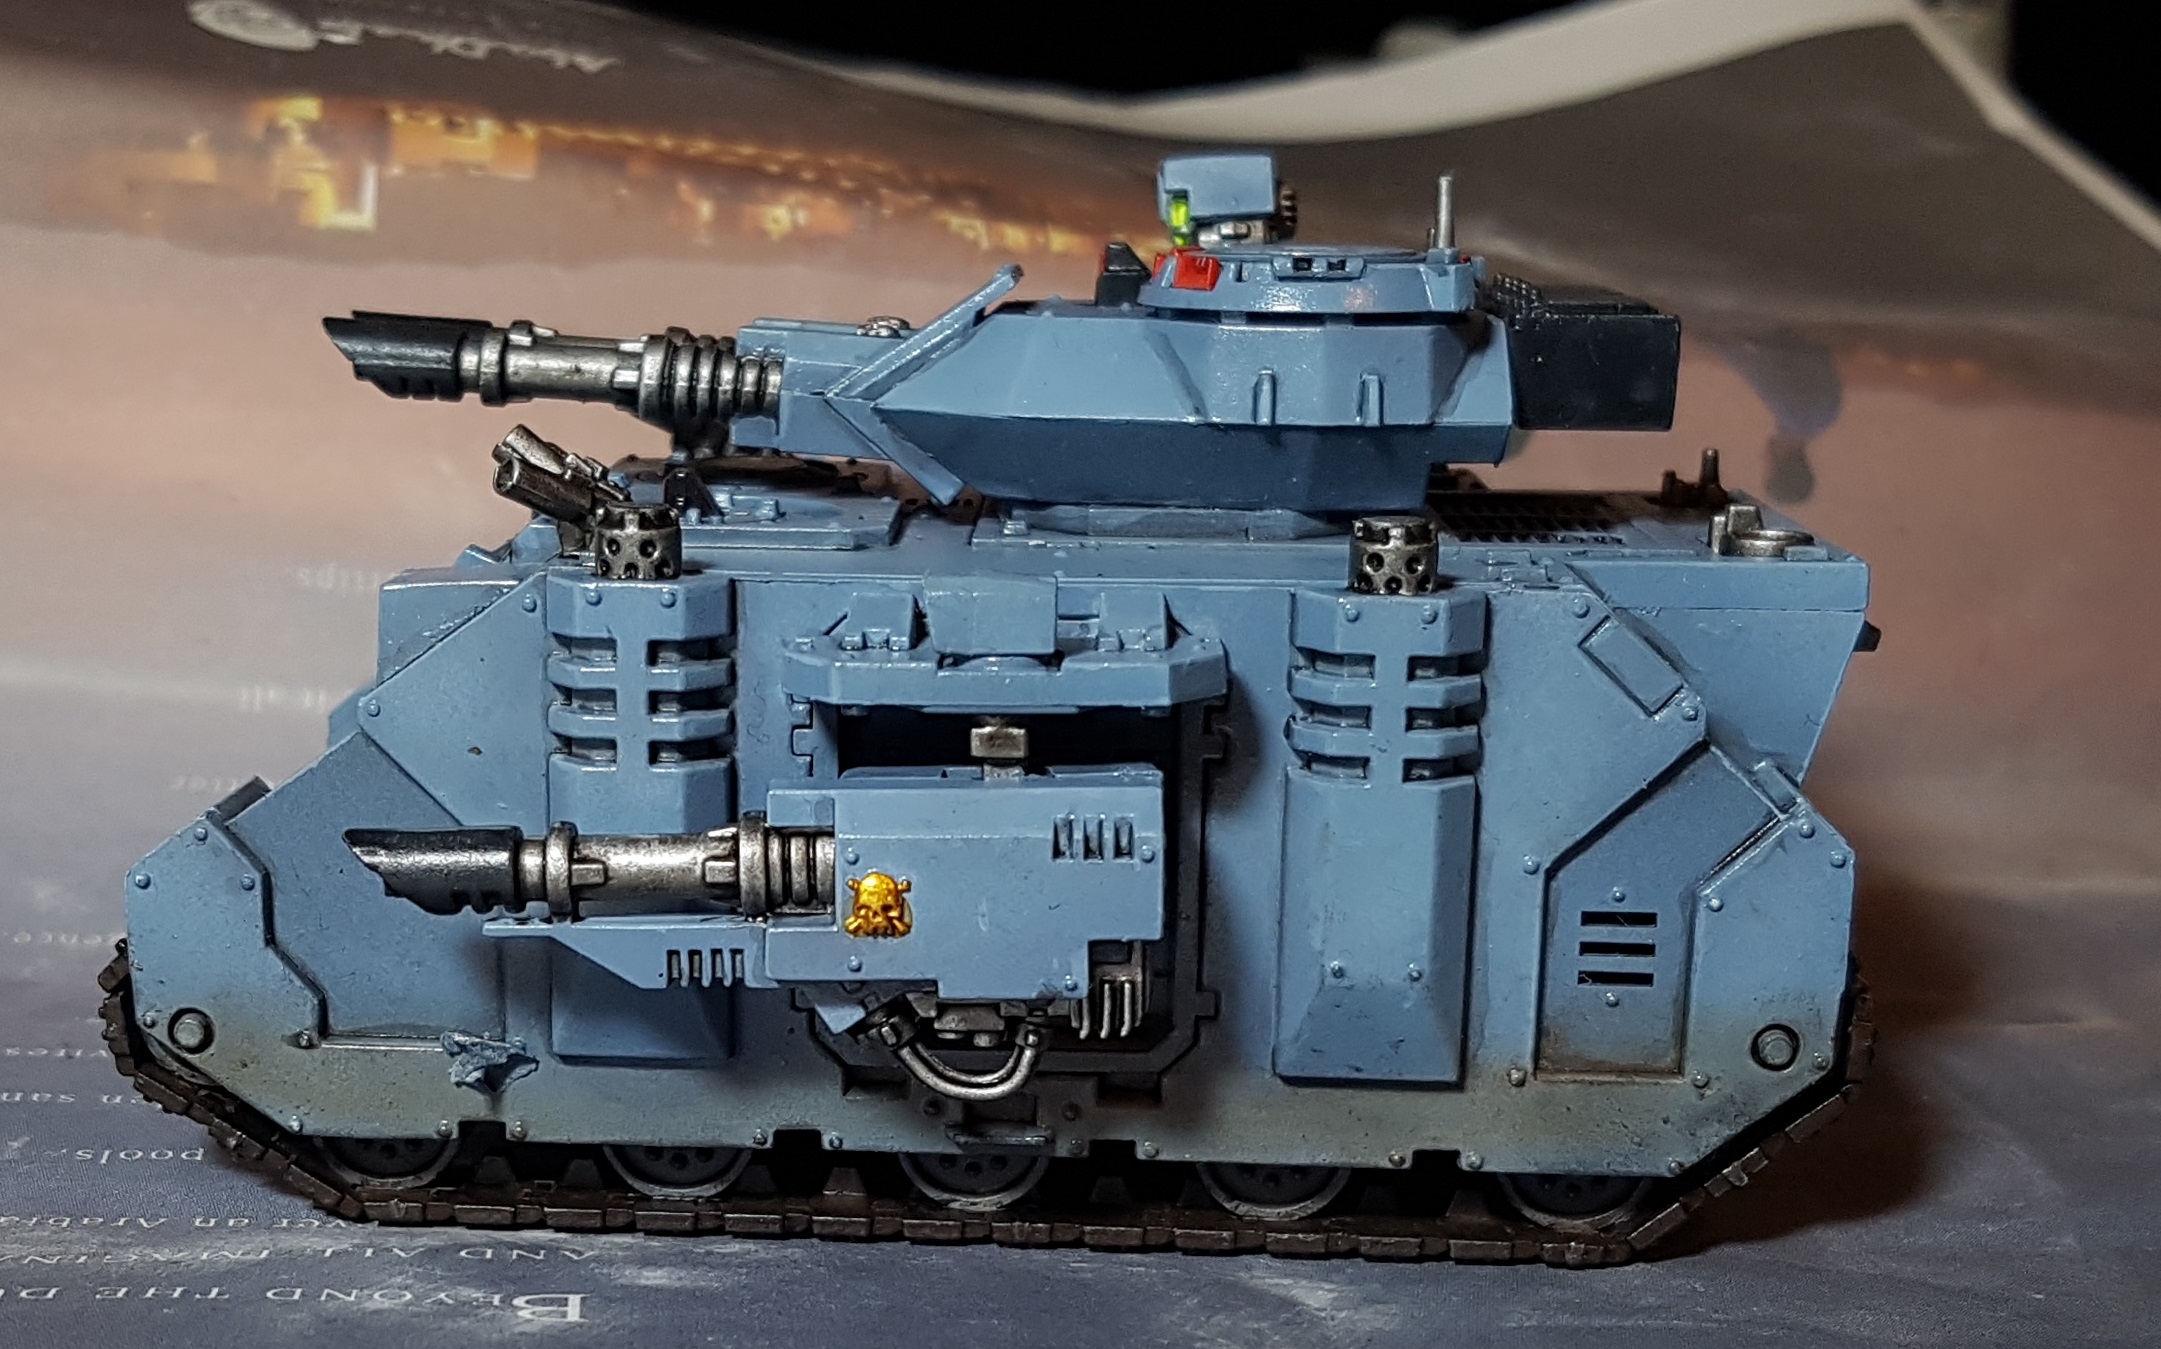
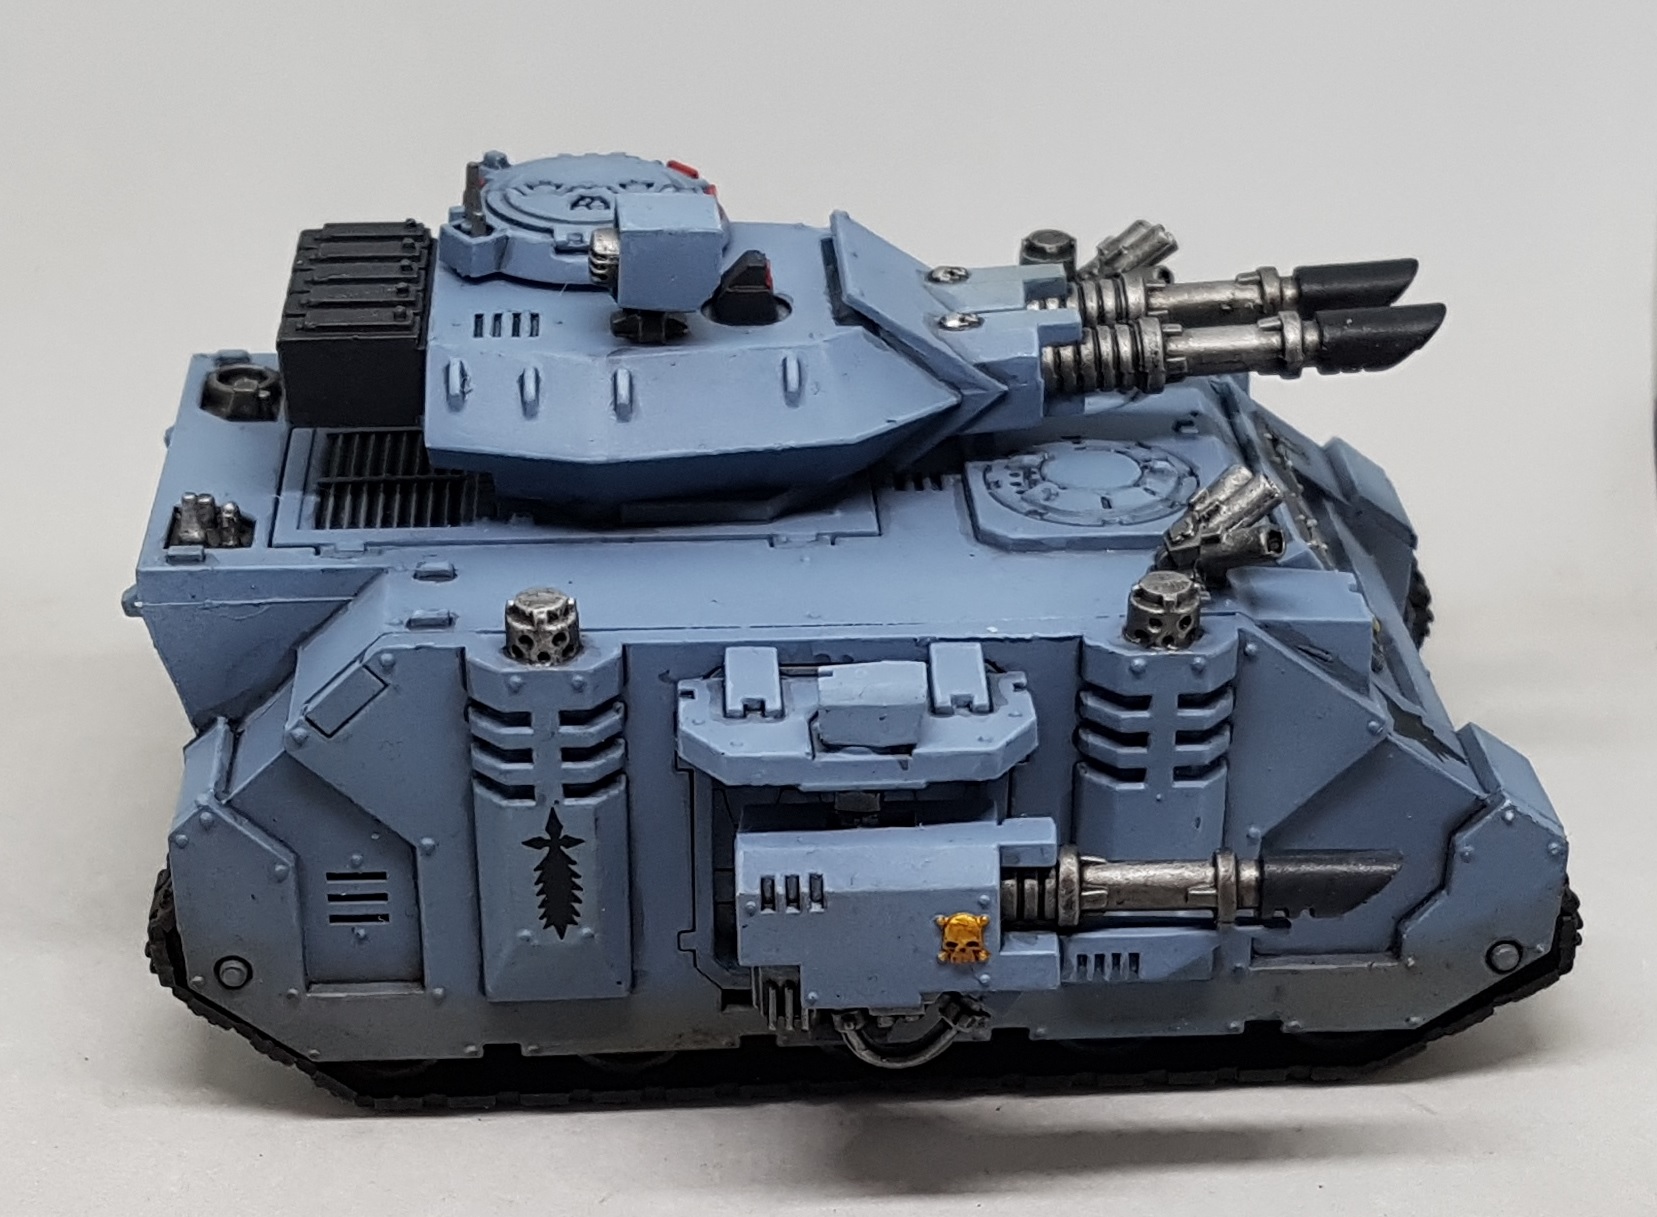
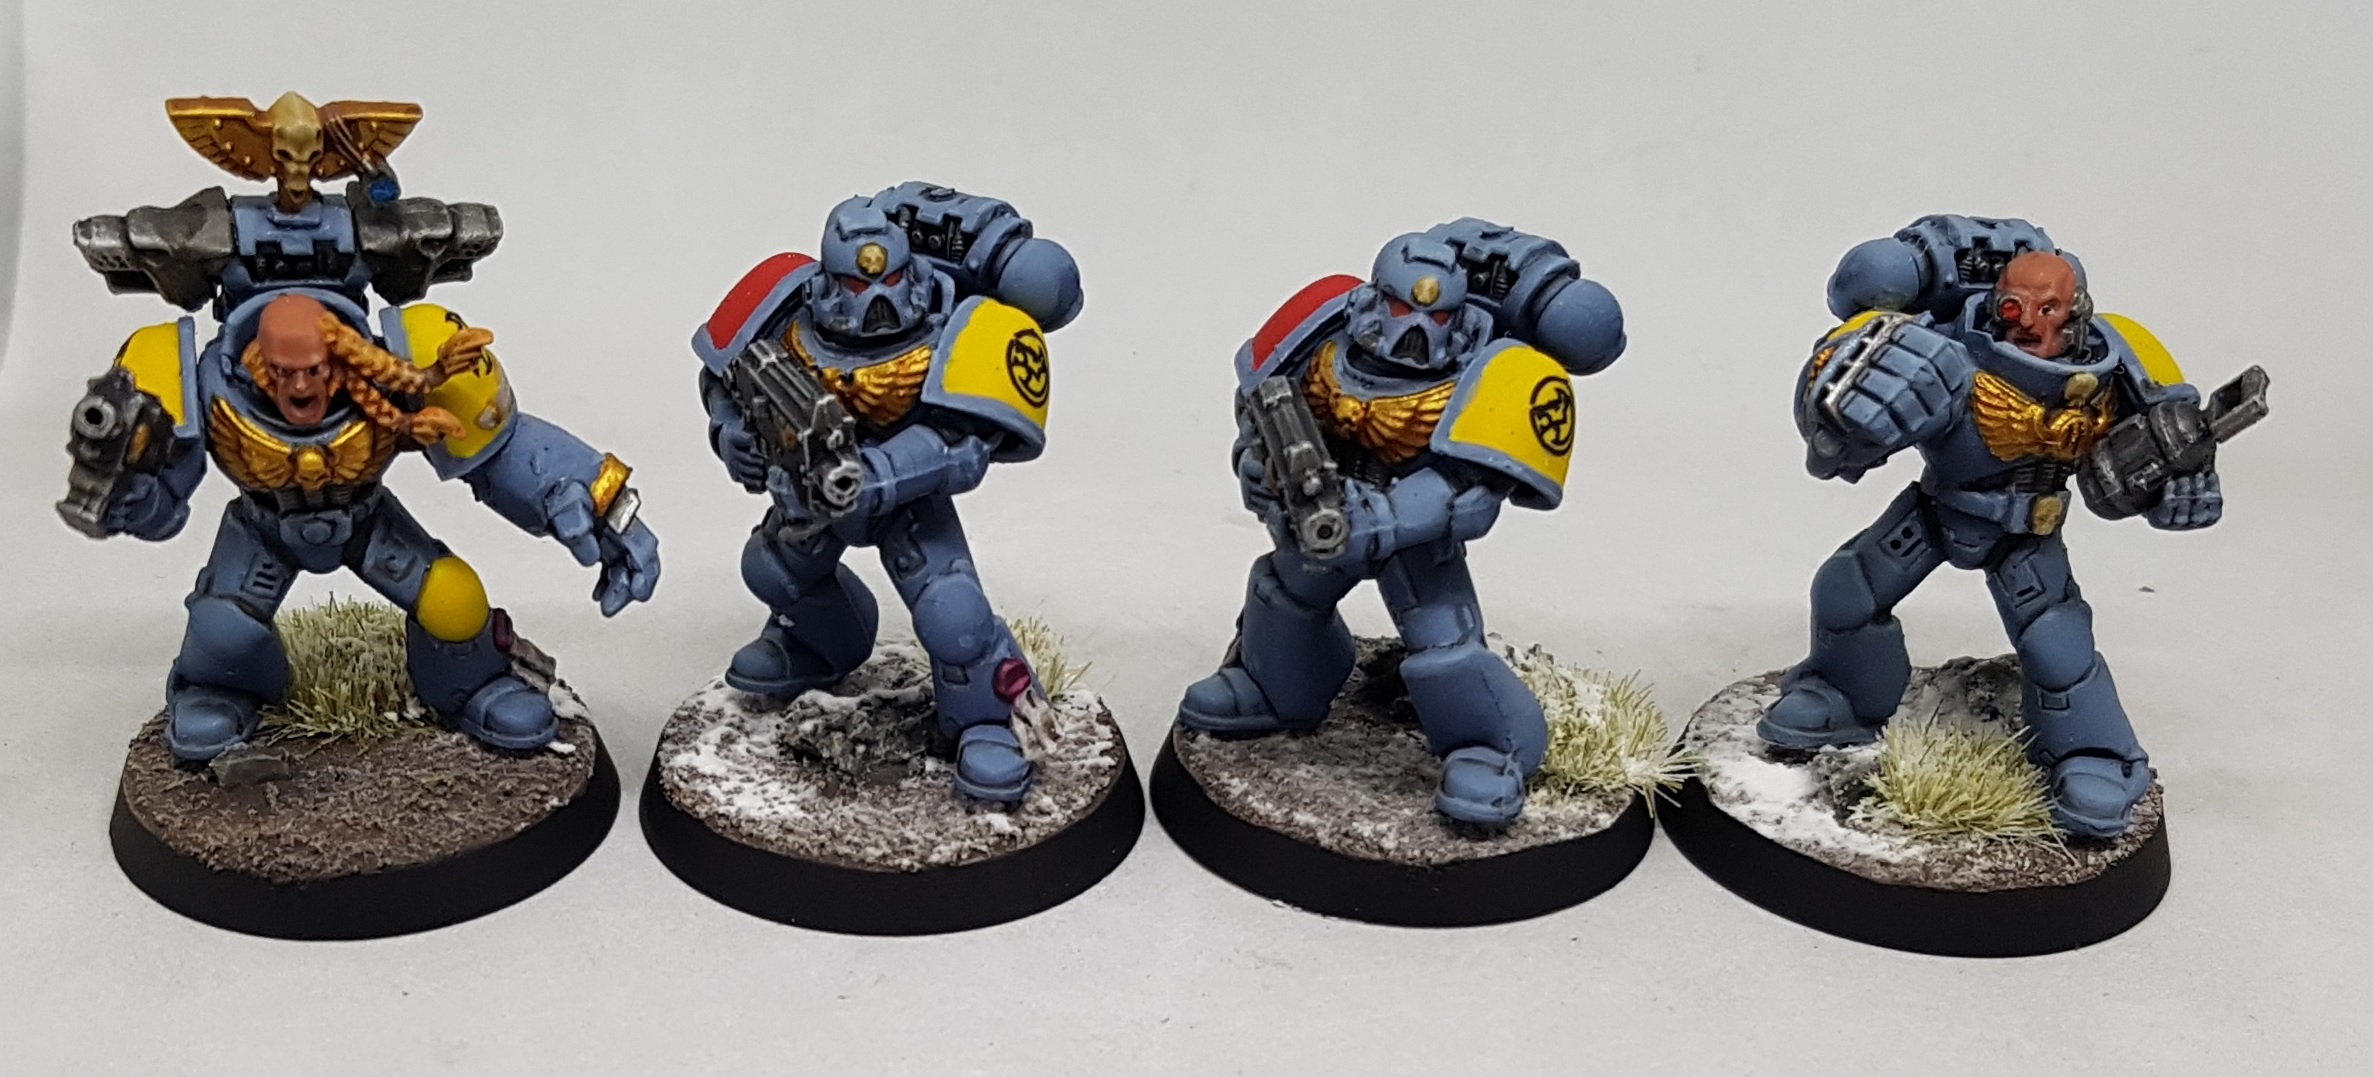
Once again, I started with the bottoms. They got 2 quick coats of GW The Fang and given a little time to dry so they would be safe to handle. I then used GW Russ Grey as my main tone across the body. Everything was given 2-3 thin coats as needed, as per the video. The final highlight colour was GW Fenrisian Grey. These are the paints used on the marines.
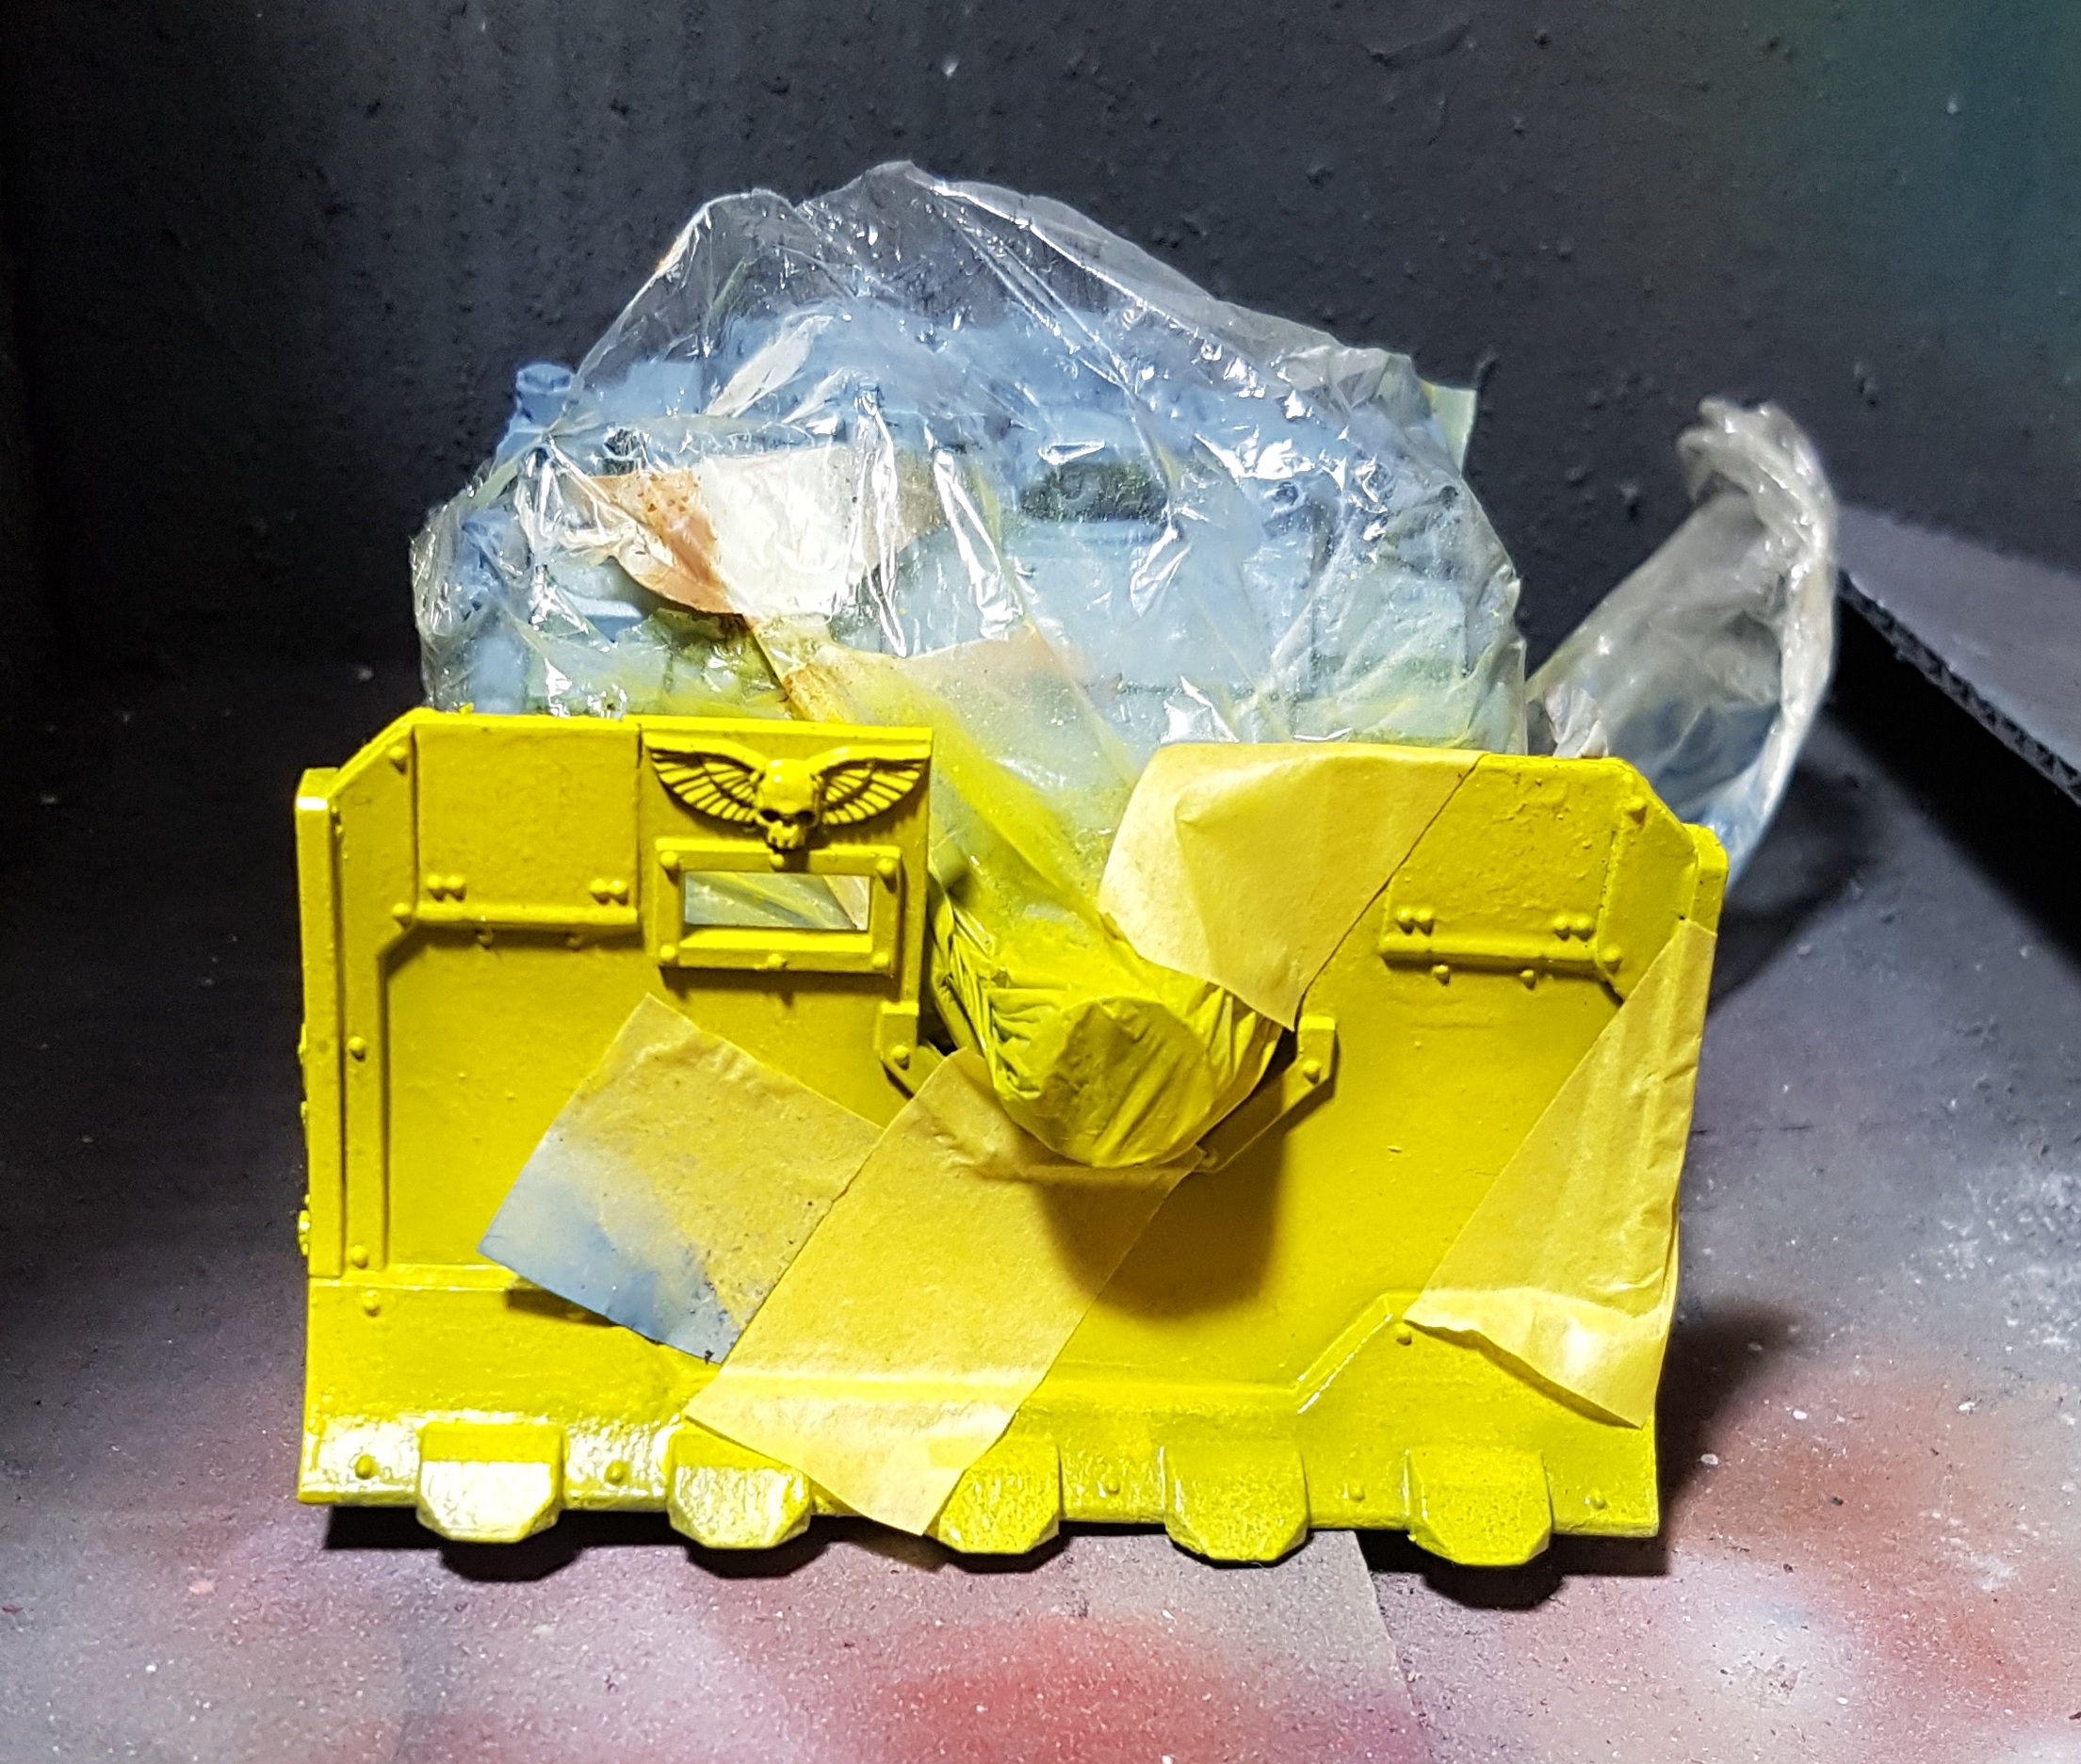
With the blues done, I put everything but the Vindicator on one side to day. I applied extra shielding with a piece of paper and then painted the blade yellow with 3-4 coats of VGA 72.705 Moon Yellow. Once dry I gave the blade and the top half of all the tanks a coat of gloss varnish to protect them, and because the next stage on the blue is a pin wash.
Once the varnish had dried I masked off diagonal lines on the blade. I used a small section of the tape to help space out the lines evenly and ensure they are as parallel as I could get. once I had worked the tape in to every corner and flattened as bast as I could I went over it once more with the yellow. I have heard this ensures the edges stick down flat. While this might be unnecessary for masking tape I saw no harm in playing it safe. Once dry the blade got a couple of coats of black. Once dry, the tape was removed and the blade and the remaining areas of all the tanks was gloss varnished.

I am focusing on the predator first and doing these one at a time. I need a break from bulk painting for the moment.
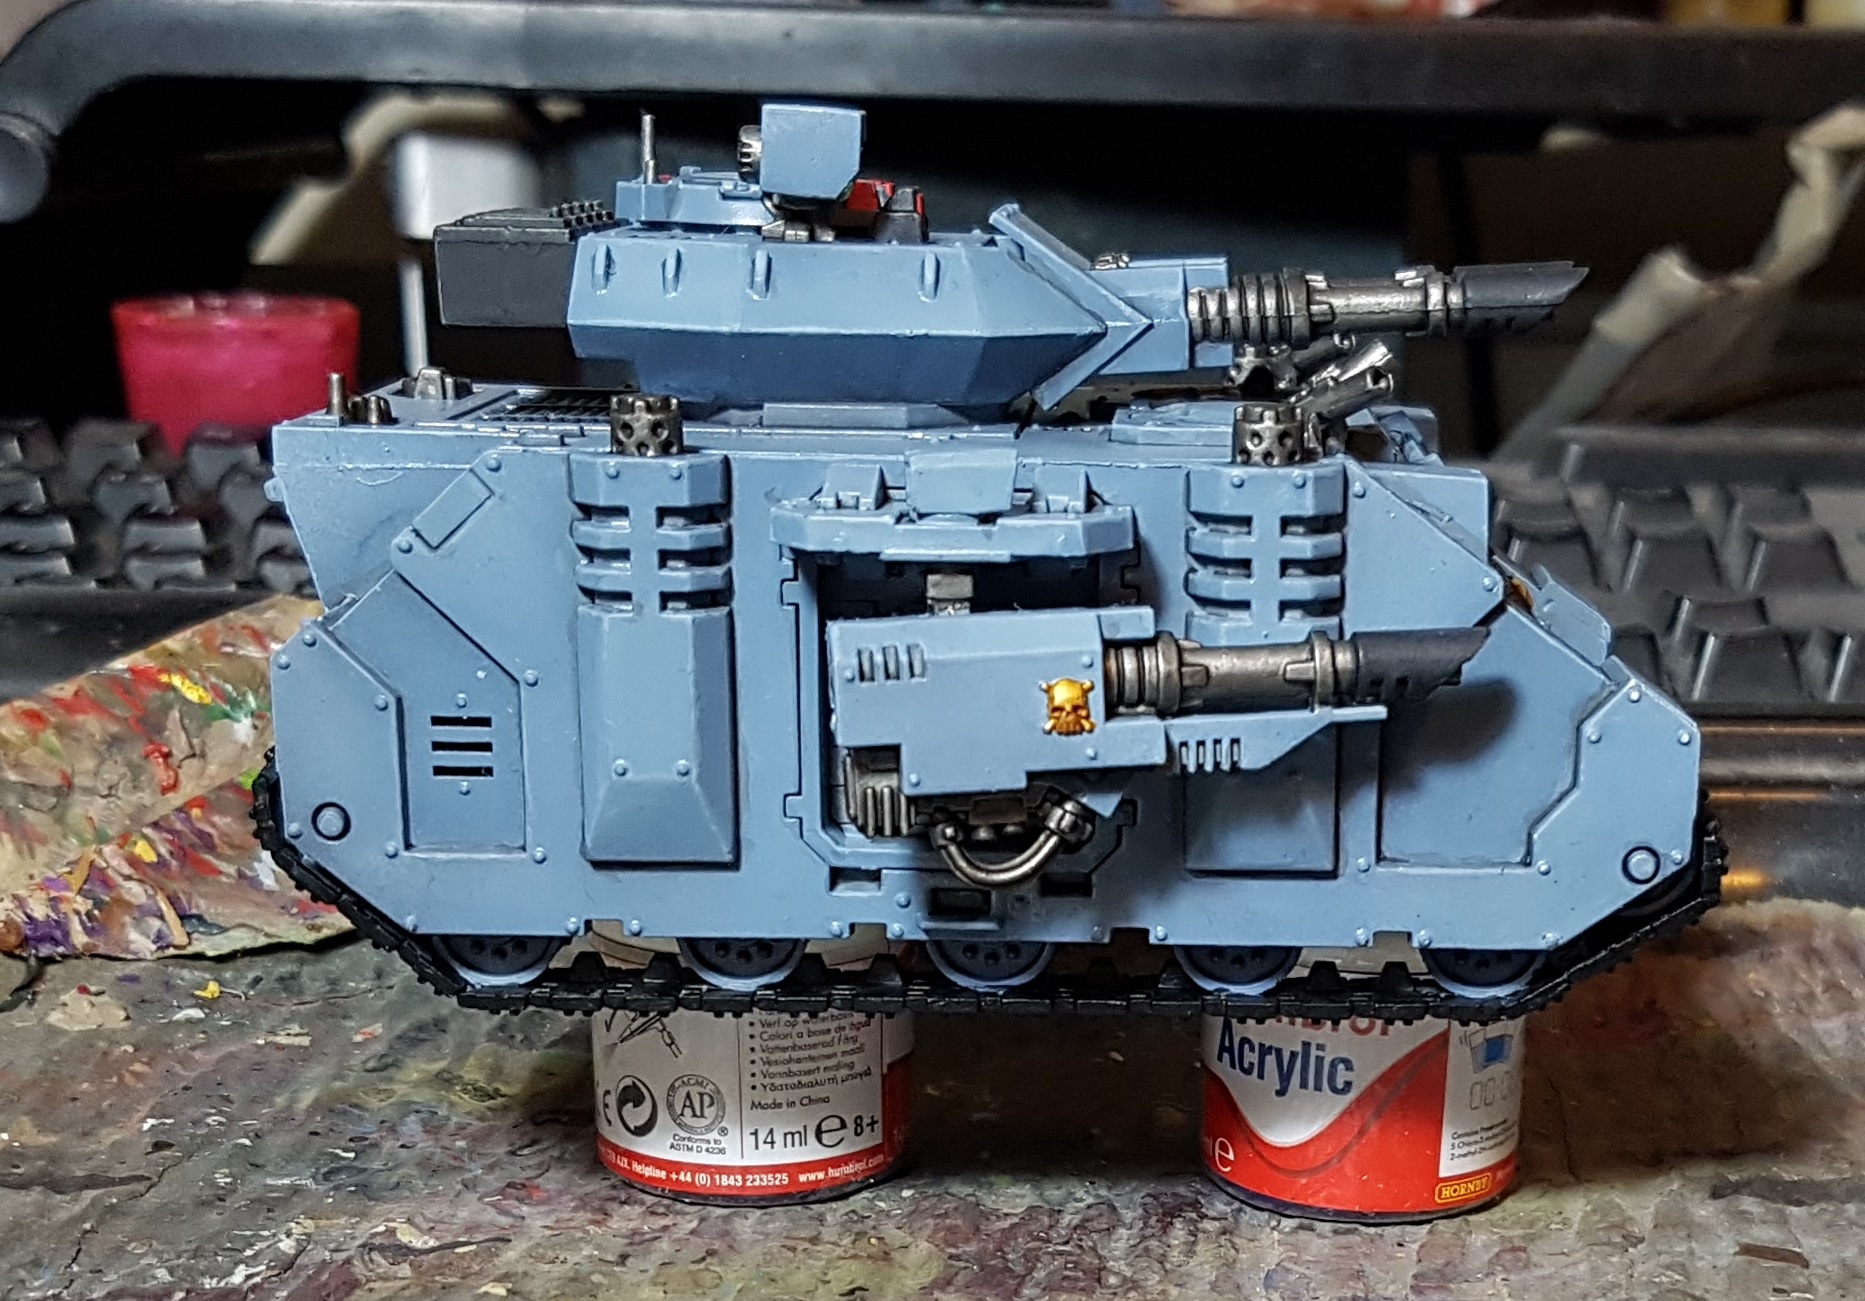
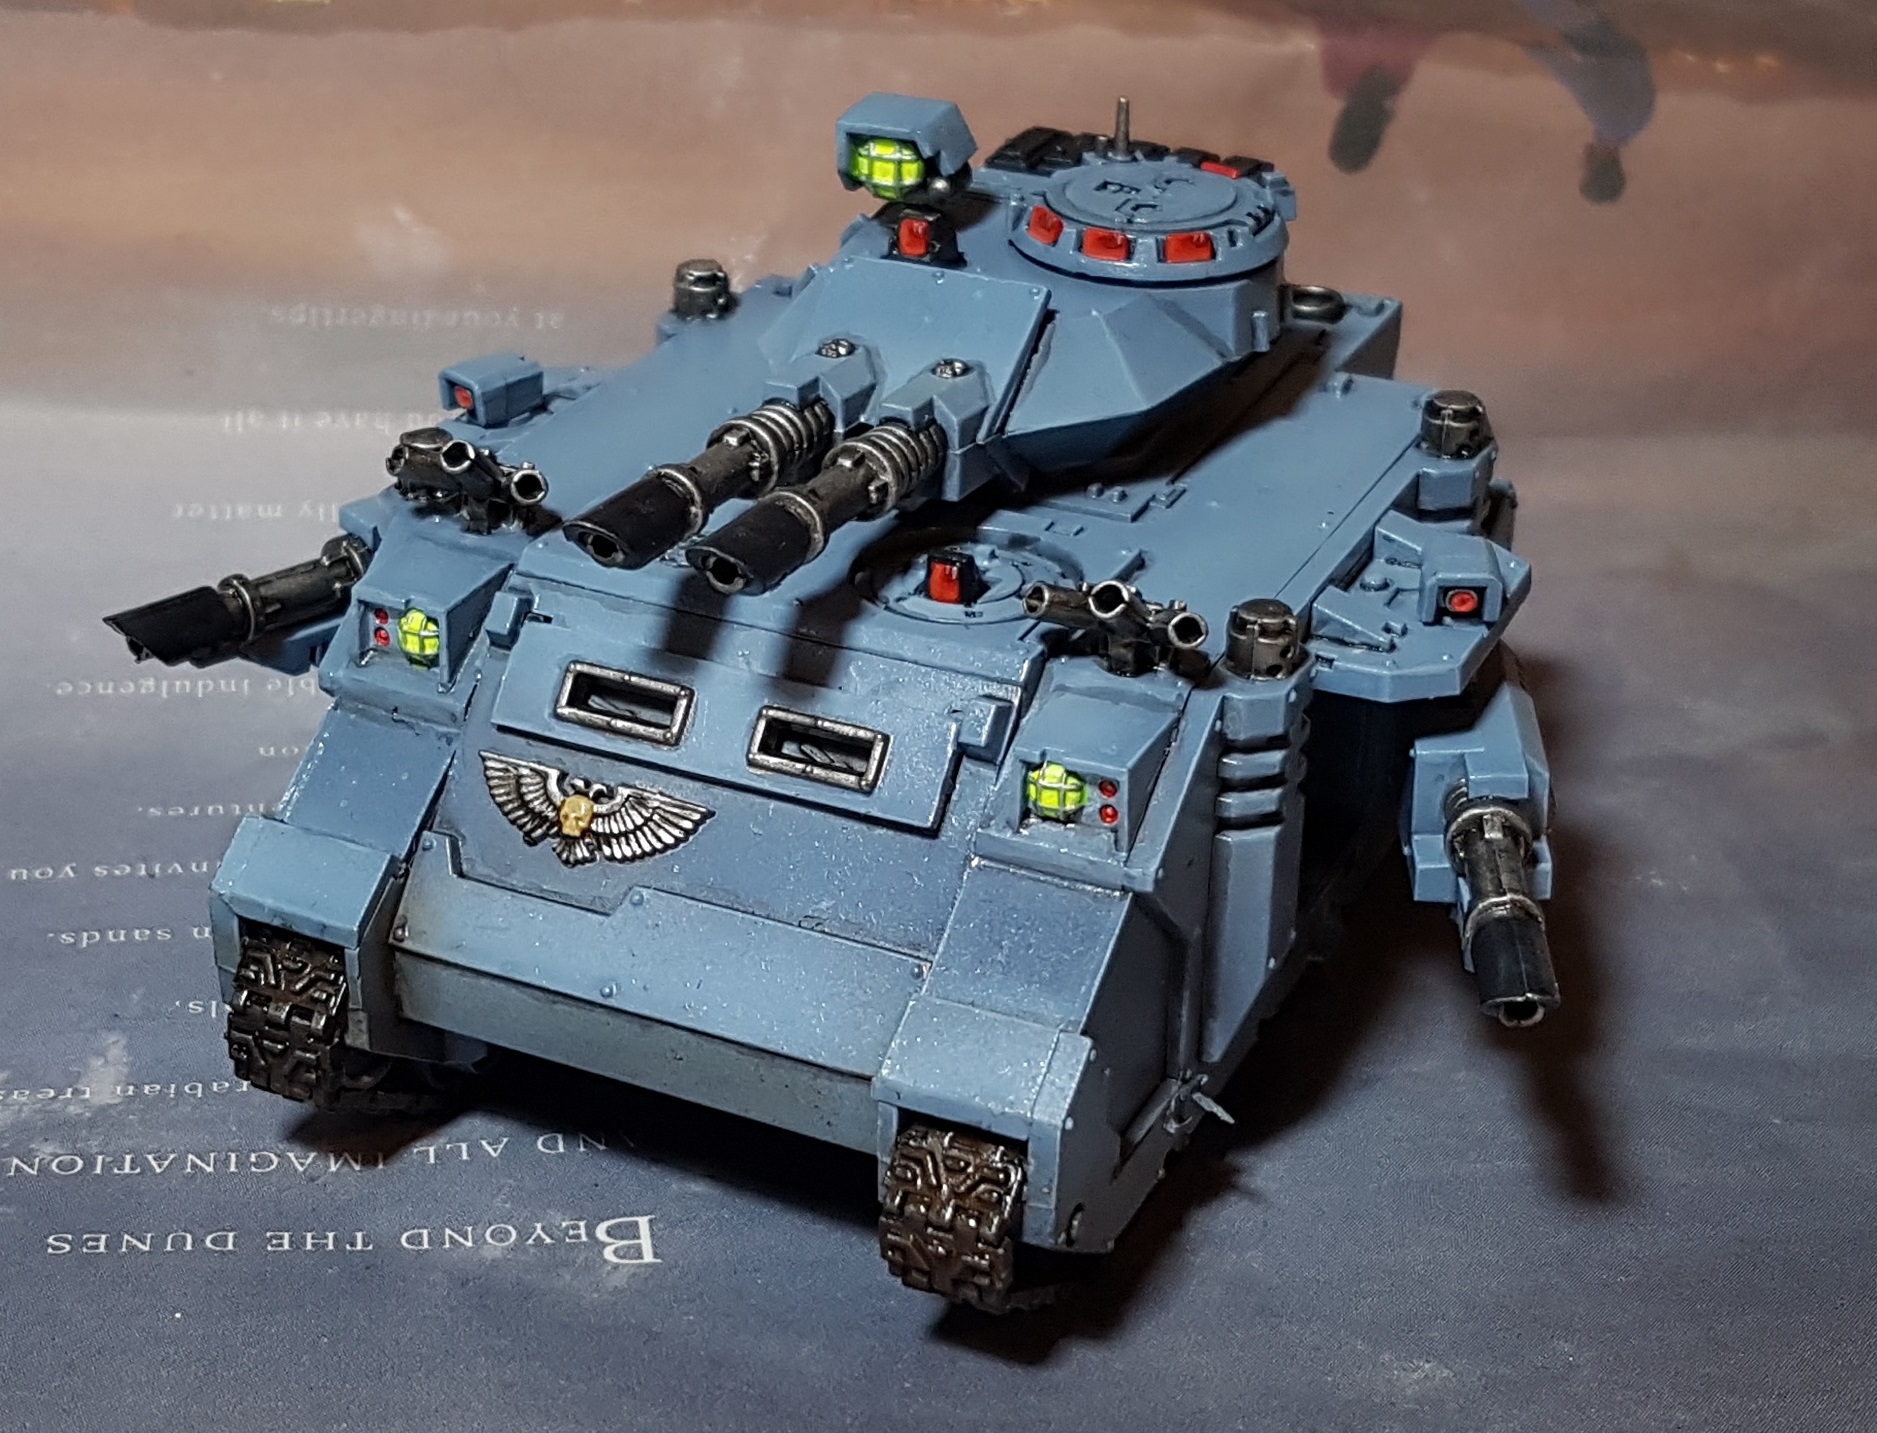
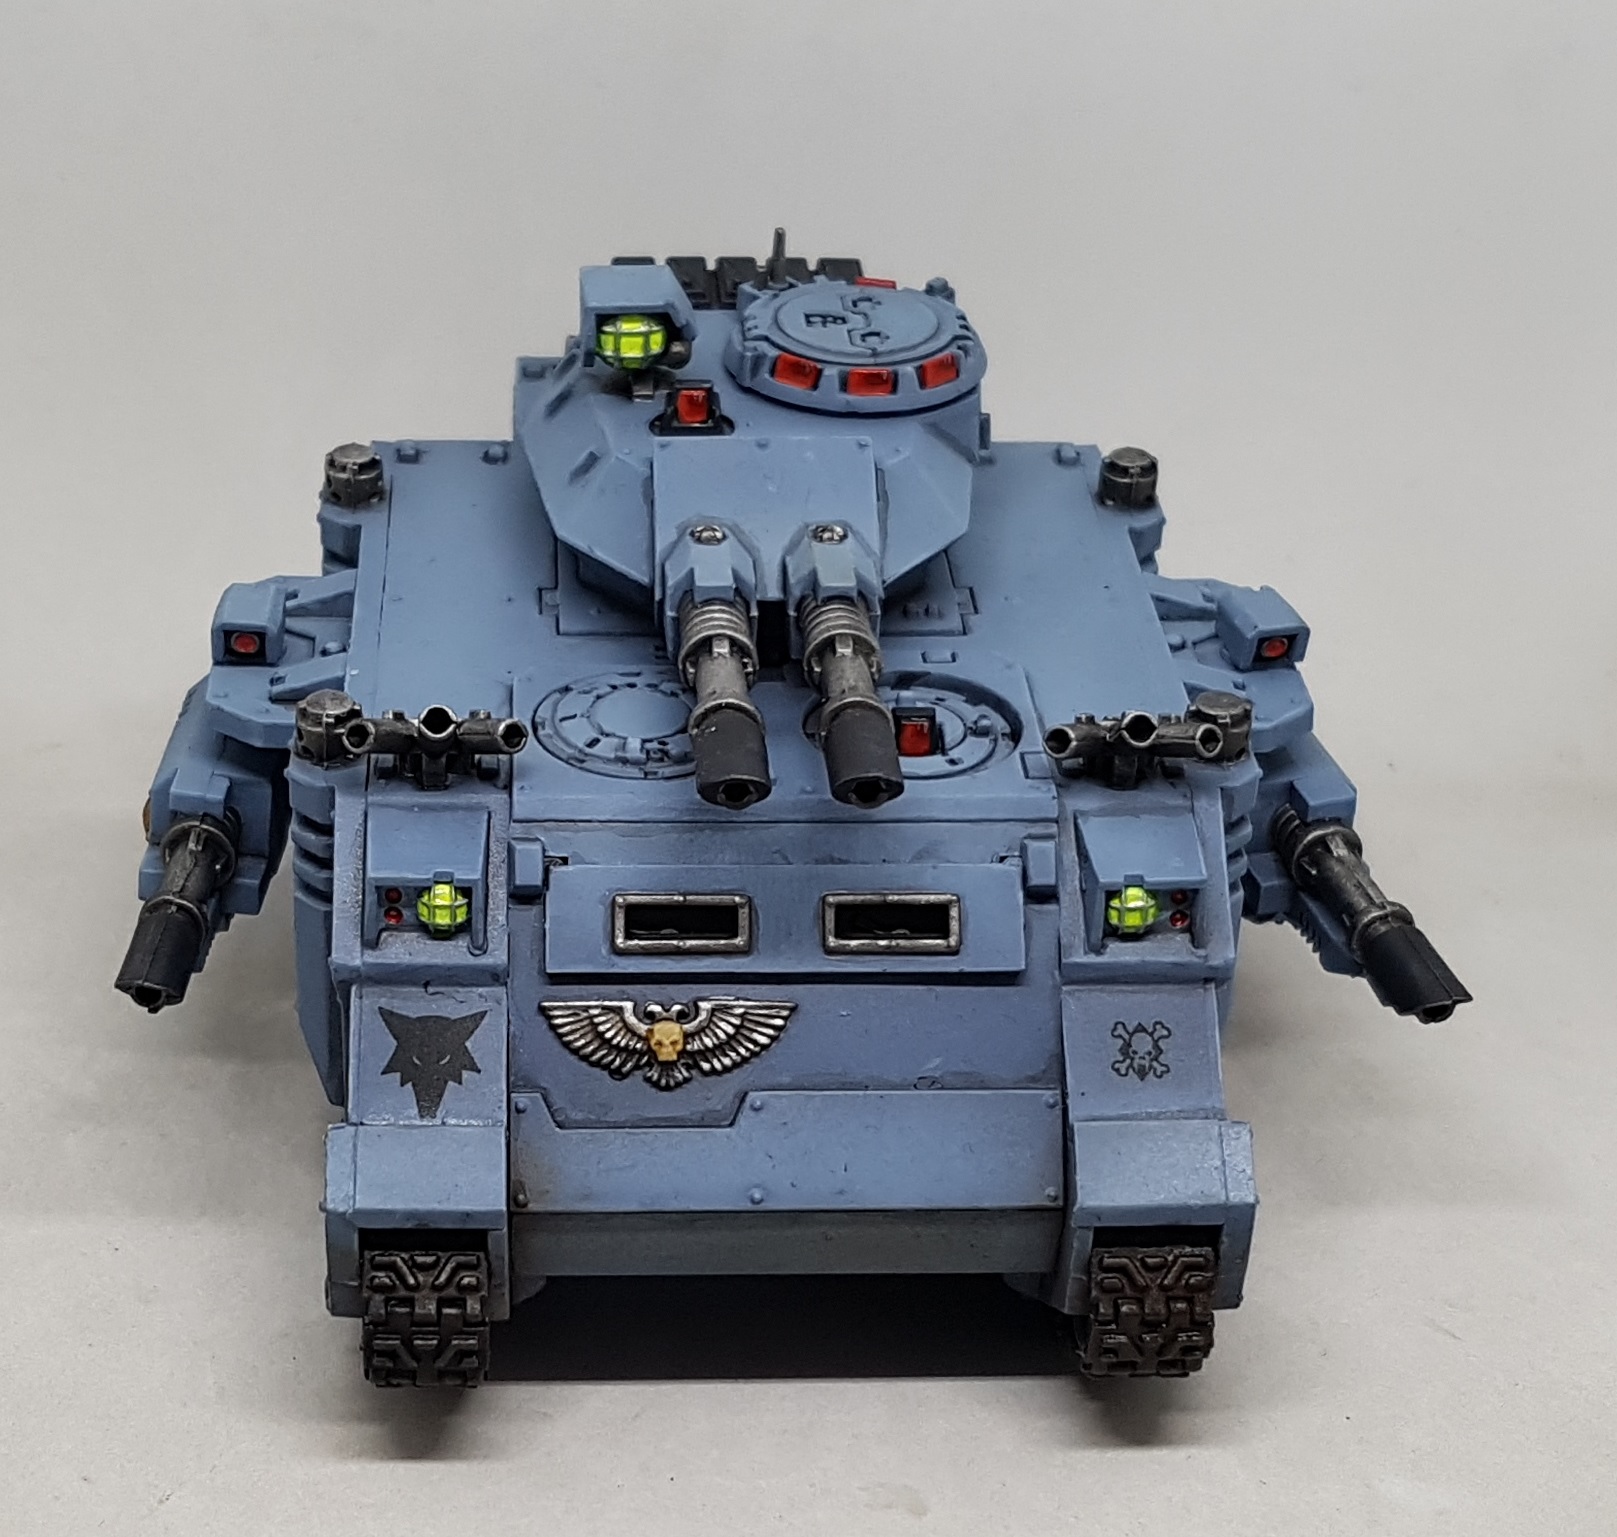
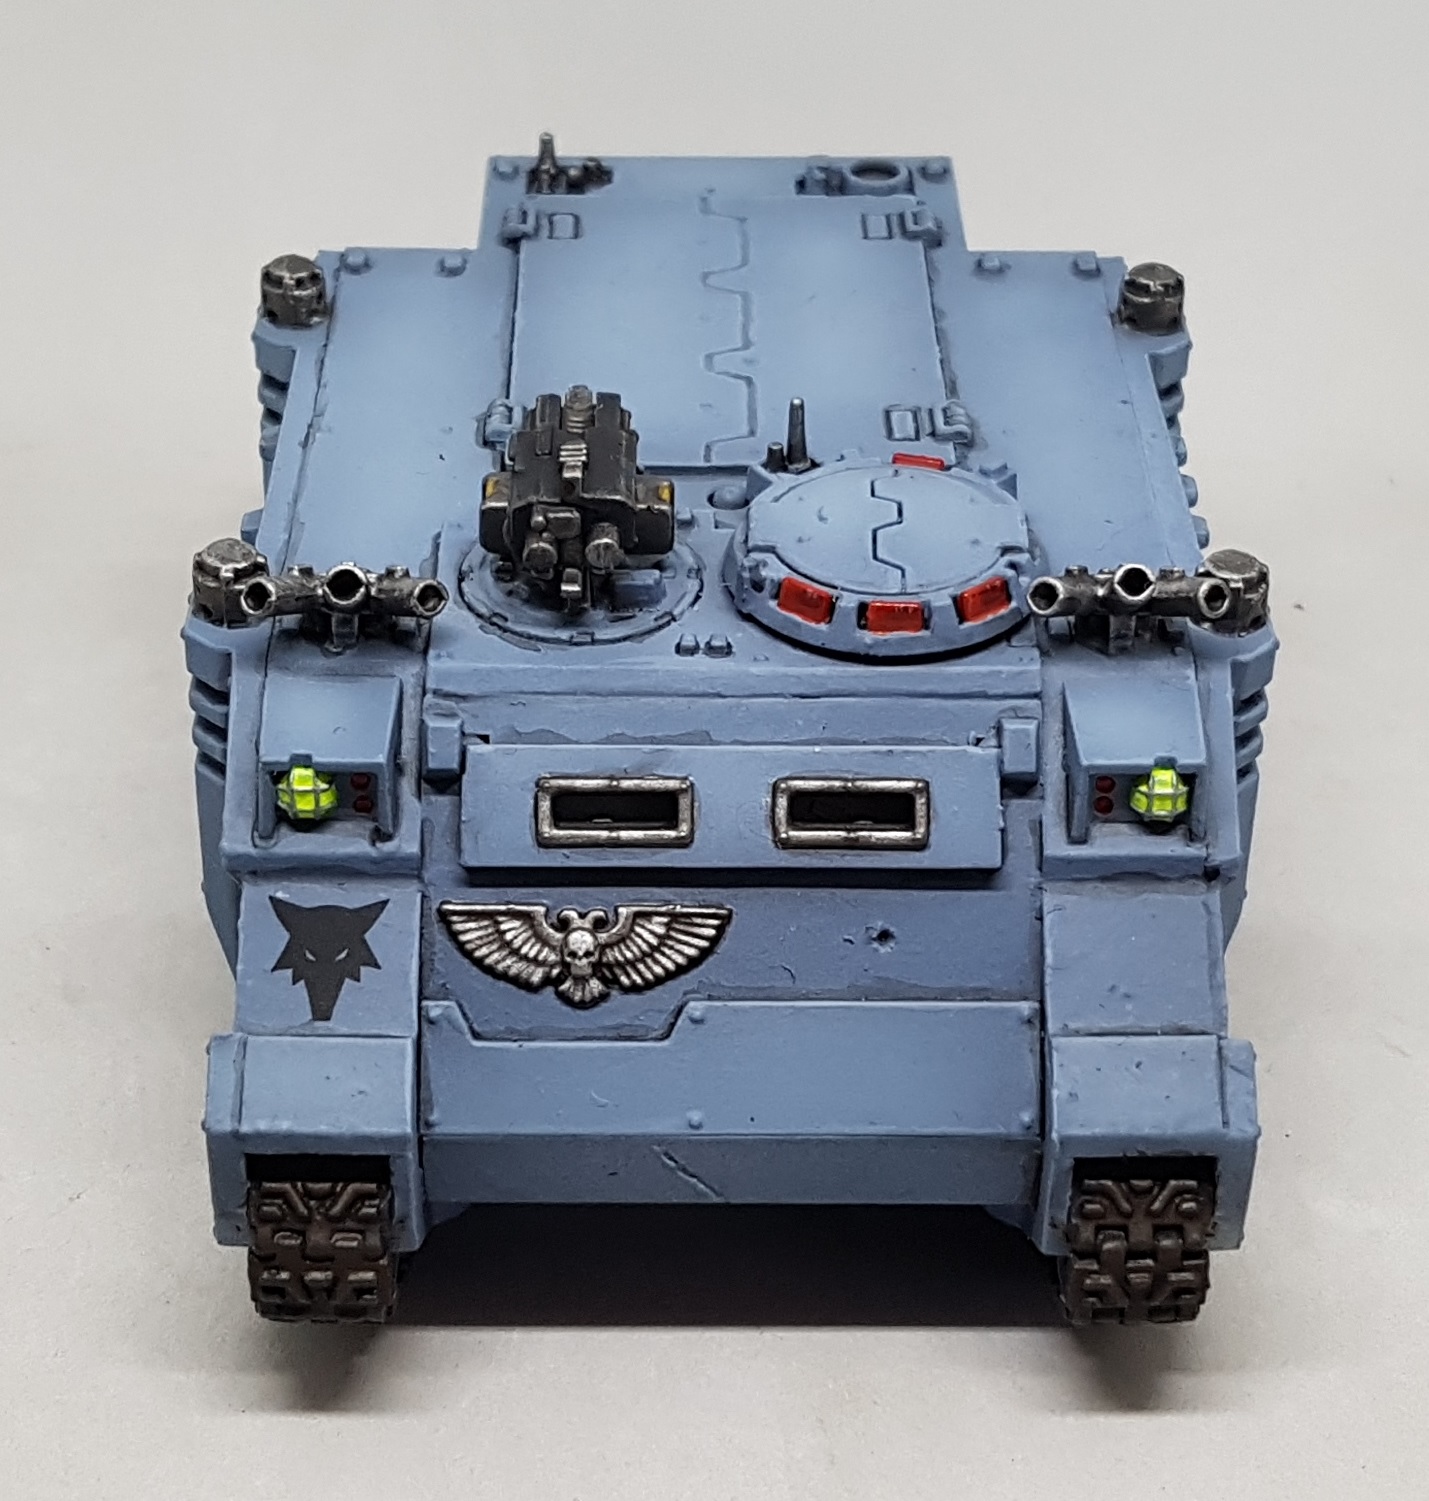
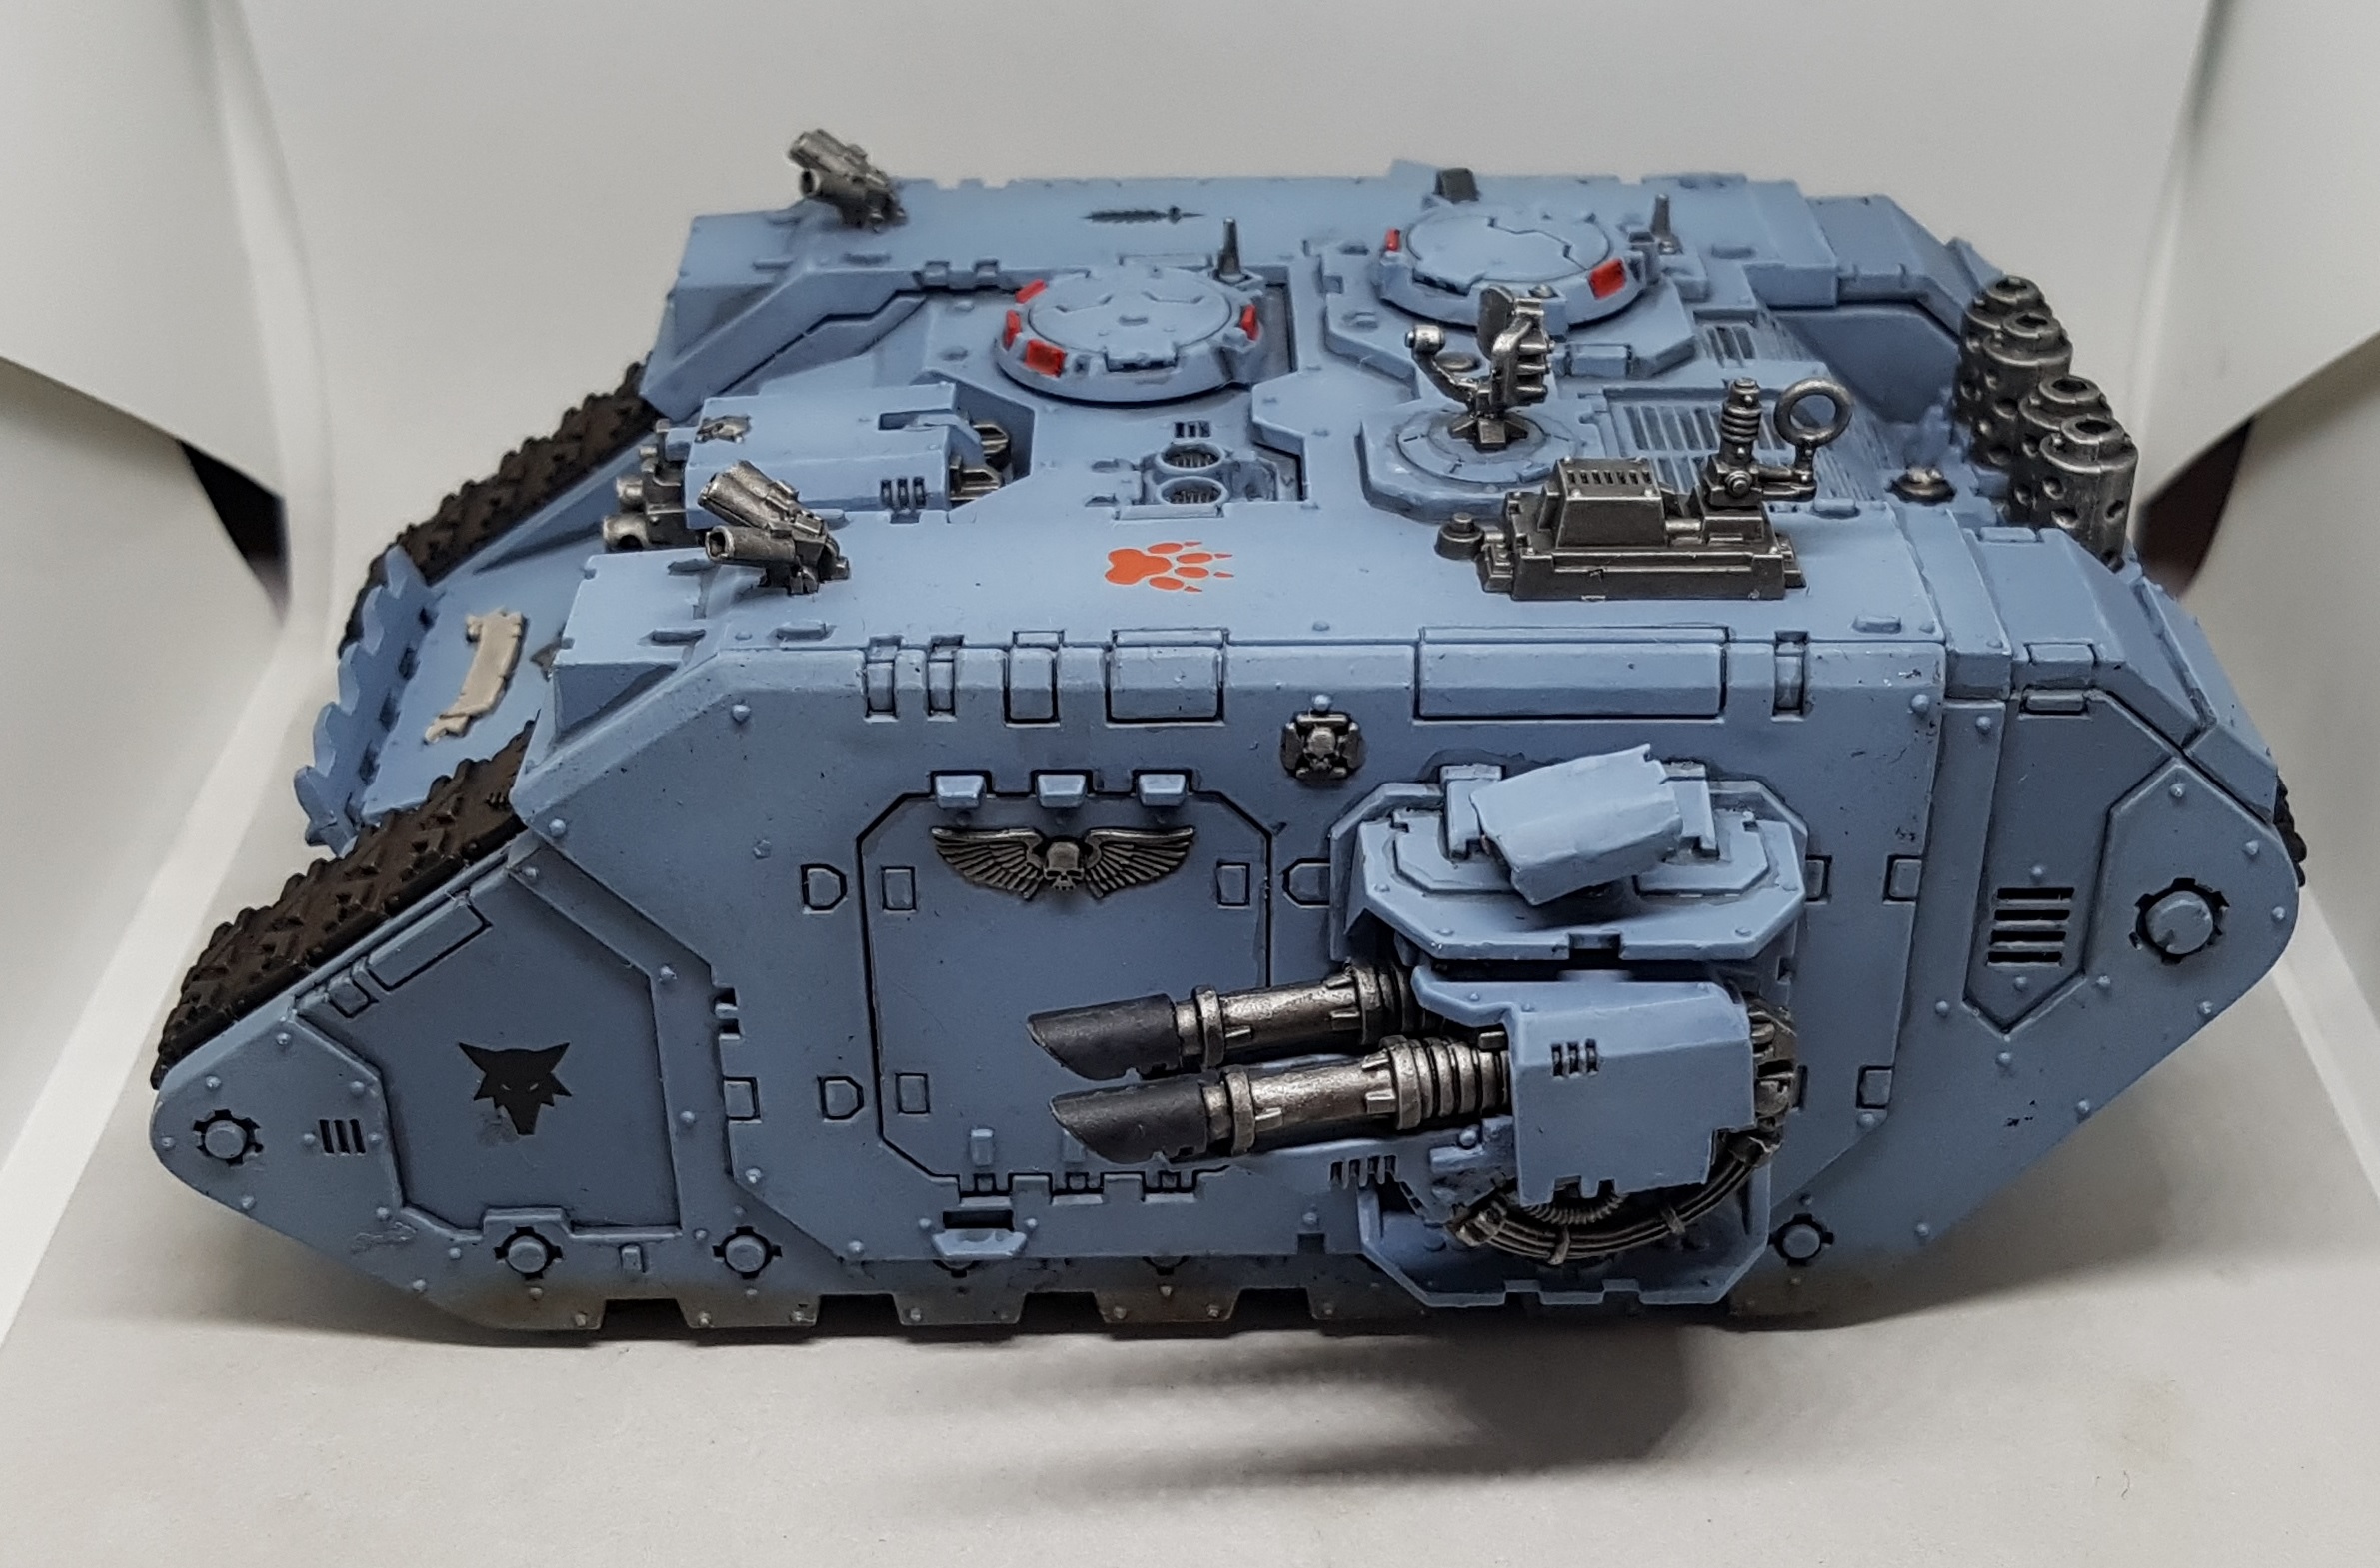
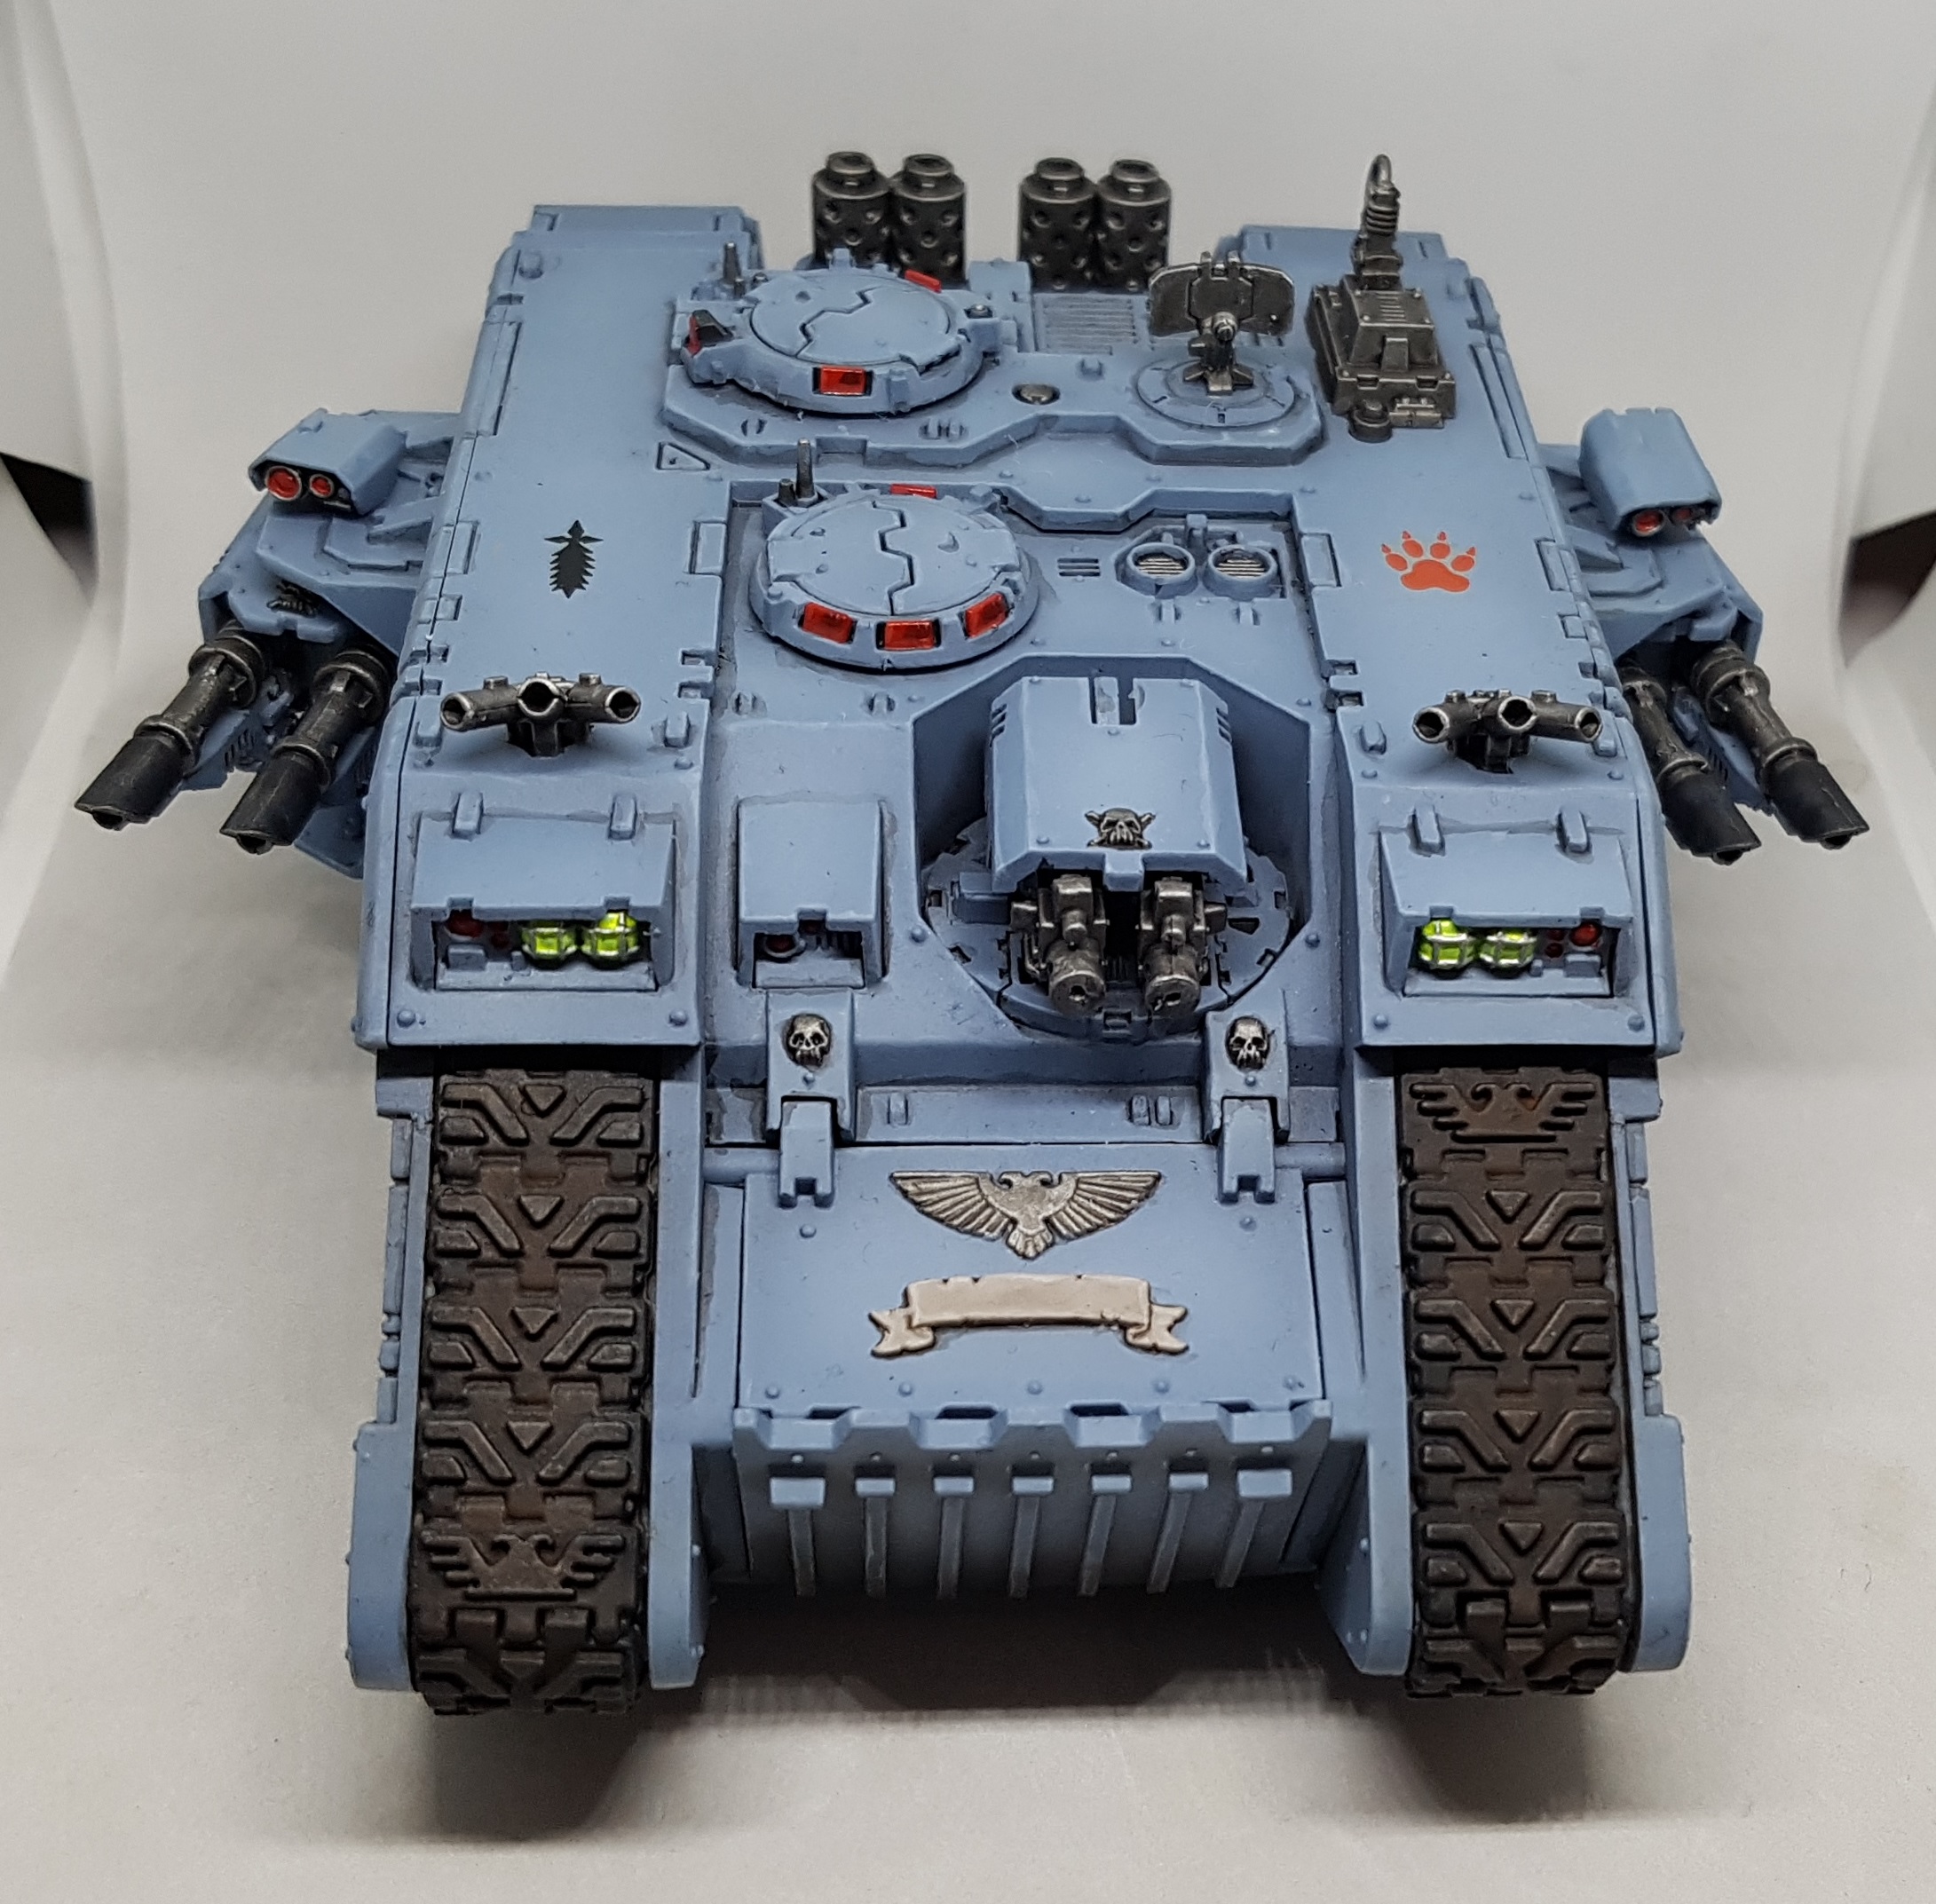
With the airbrushing finished, the next stage is to pin wash every edge, corner, and recess with GW Nuln Oil. Once dry, everything got an edge highlight with Fenrisian Grey. The rest of the tank was painted the same as the troops except the headlights, which I painted VMC Fluro Yellow because it is the brightest paint I own. The only other change as that the red “screens” or lenses were given an upwards glaze of Nuln oil once I had painted them.
The tracks have been picked out in black and I plan on working on them tonight. It is currently suspended off the ground on 2 pots of paint so the tracks can safely dry. Once the metal has been highlighted and the tracks are done, the tank will be complete, at least until the transfers are ready. It looks crisp and fresh from the factory right now. I am undecided if I should weather the tanks or not. What do you think?
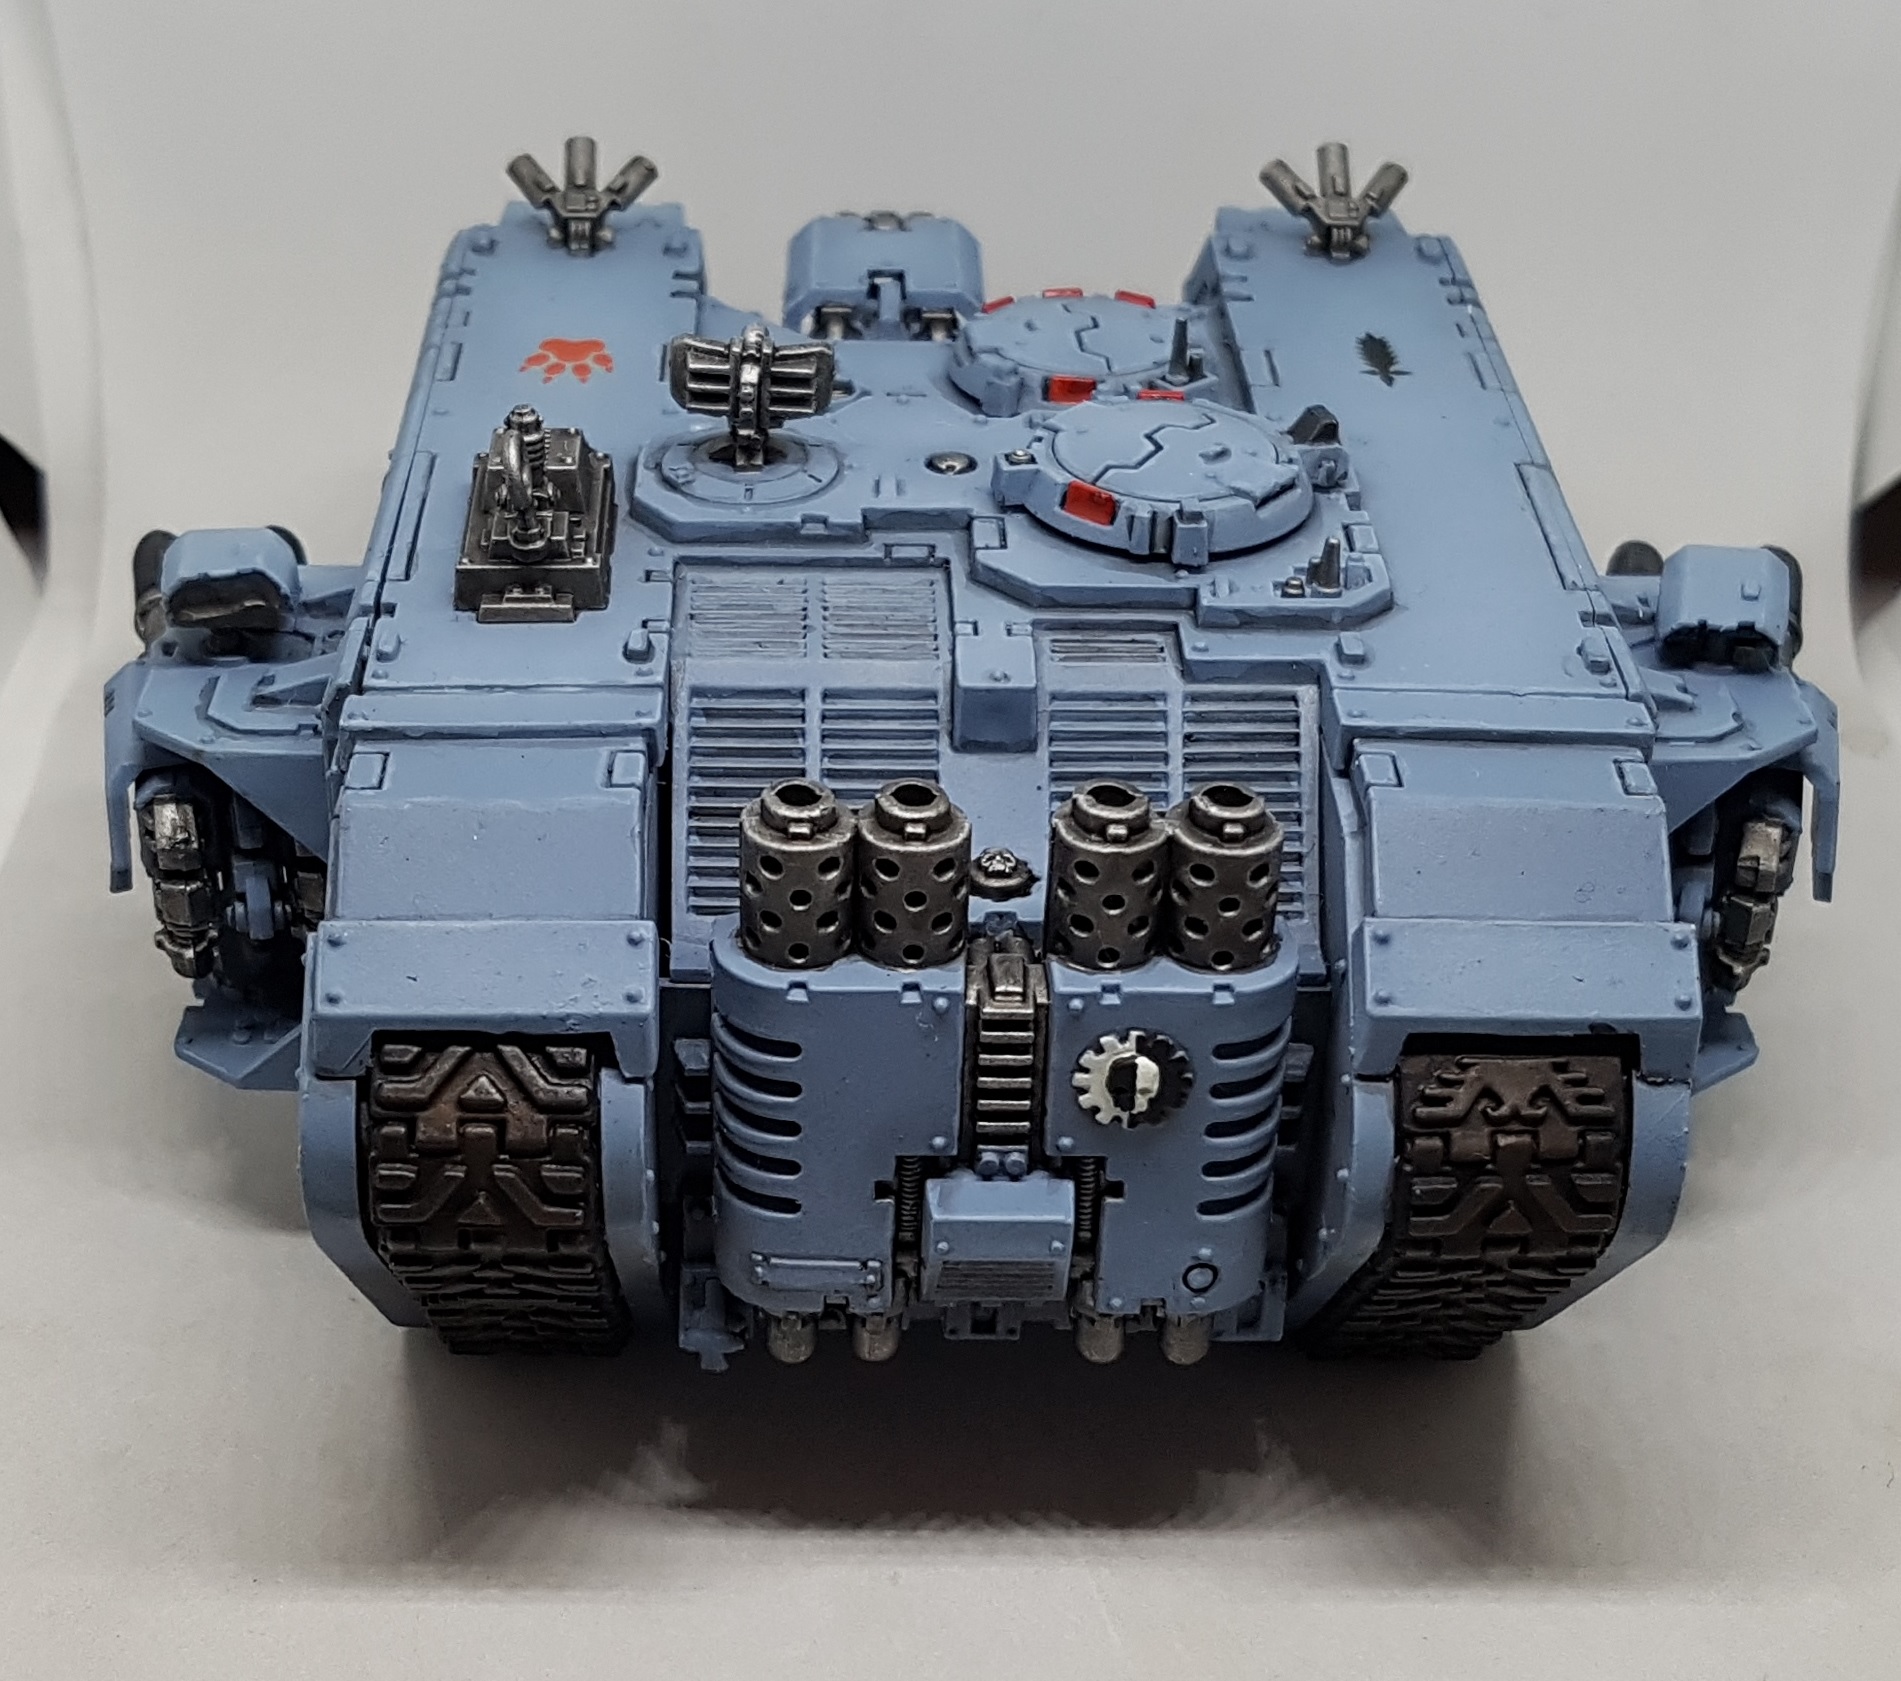
With the tracks undercoated black and the last of the highlighting finished, the next colour is Ammo Mig Jimenez Dark Tracks. This wasn’t painted on though. I got an old drybrush and blotted it all over the tracks, covering almost all of it but not worrying if a little black showed through. Next I mixed some Colours of War Motherland Earth into the Dark Tracks and put a single blot of this on to each section of track.
Once dry, I started work with Alcad II Warpigs Mud Pigment. I got a second drybrush and rubbed this on to the tracks and around the bottom edges of the tank body. This was applied dry straight from the pot. I worked over a fresh sheet of newspaper so I could recover the excess safely, and I was careful not to overload the brush.
Now comes the odd part. Applying Ammo Mig Jimenez Gun Metal pigment WITH MY FINGER. This was almost a drybrush. with a little on the end of my finger I gently rubbed along the tracks allowing the peaks to pick up a little shine. I was even able to rub over a few rivets on the blue body and get just the rivet somehow. I rubbed along a couple of blue edges where I thought it might get worn as well. This stuff is like graphite pencil dust. These paints and steps all came as part of September 2018’s AssetDrop box and work quite well.
Once I had finished working with the pigments and washed my finger I was sure to put a coat of Gloss Varnish over the whole tank, but especially the pigmented sections to hold the pigment in place. It previously had no fixative applied and would wear off or blow off. It was left raised off the ground overnight to safely dry, and currently awaits transfers while I start work on the next tank. With the dust and graphite effects applied I think I’m happy with its level of weathering and probably won’t proceed any further. let me know if you think otherwise.
Daemons
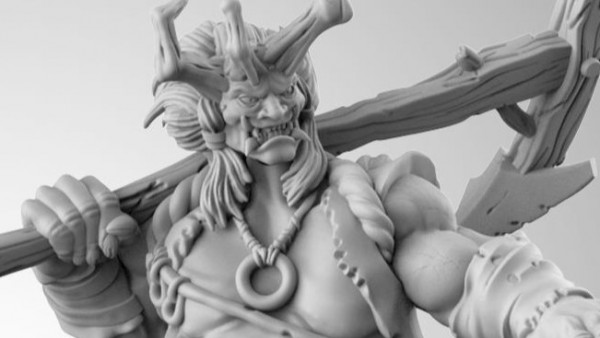
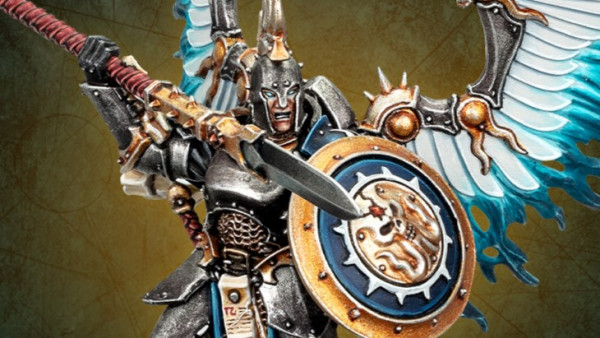
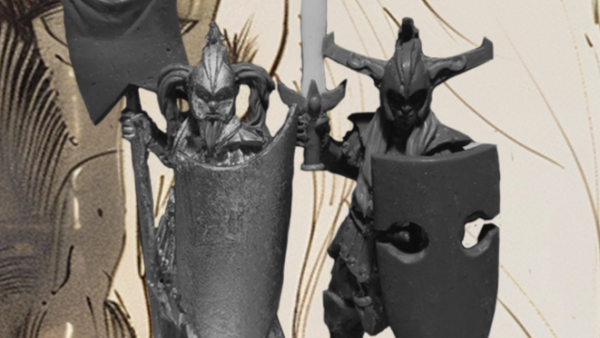
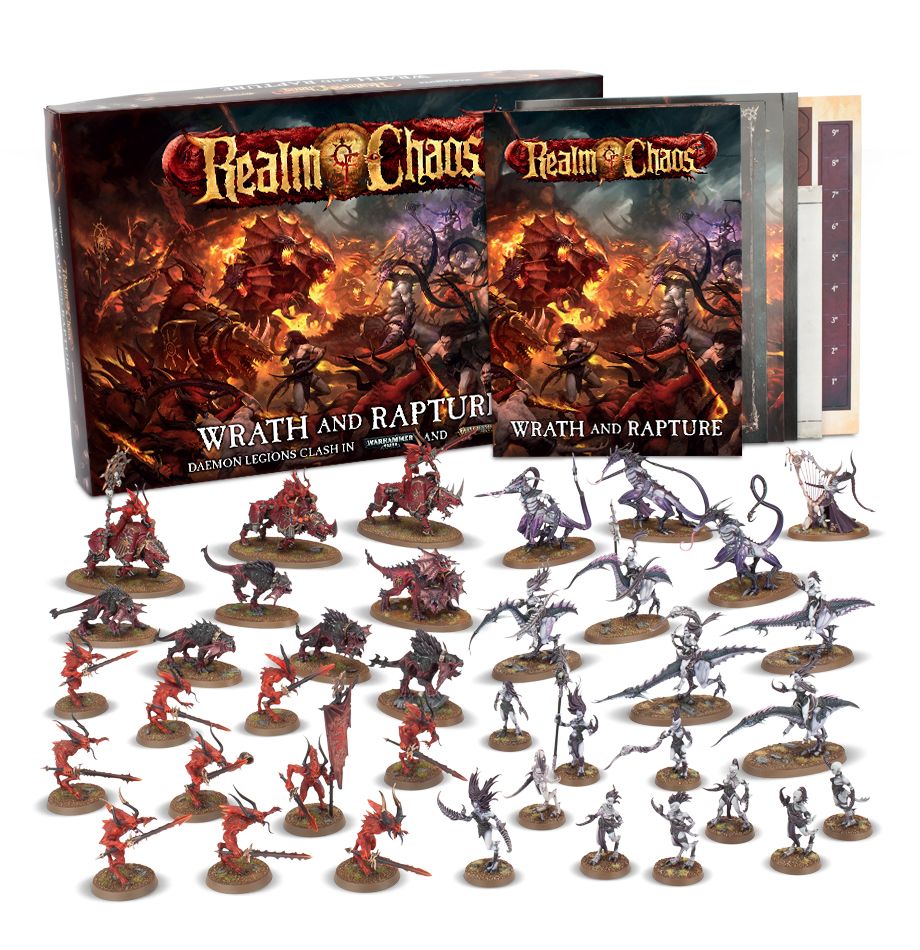
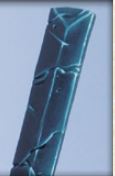
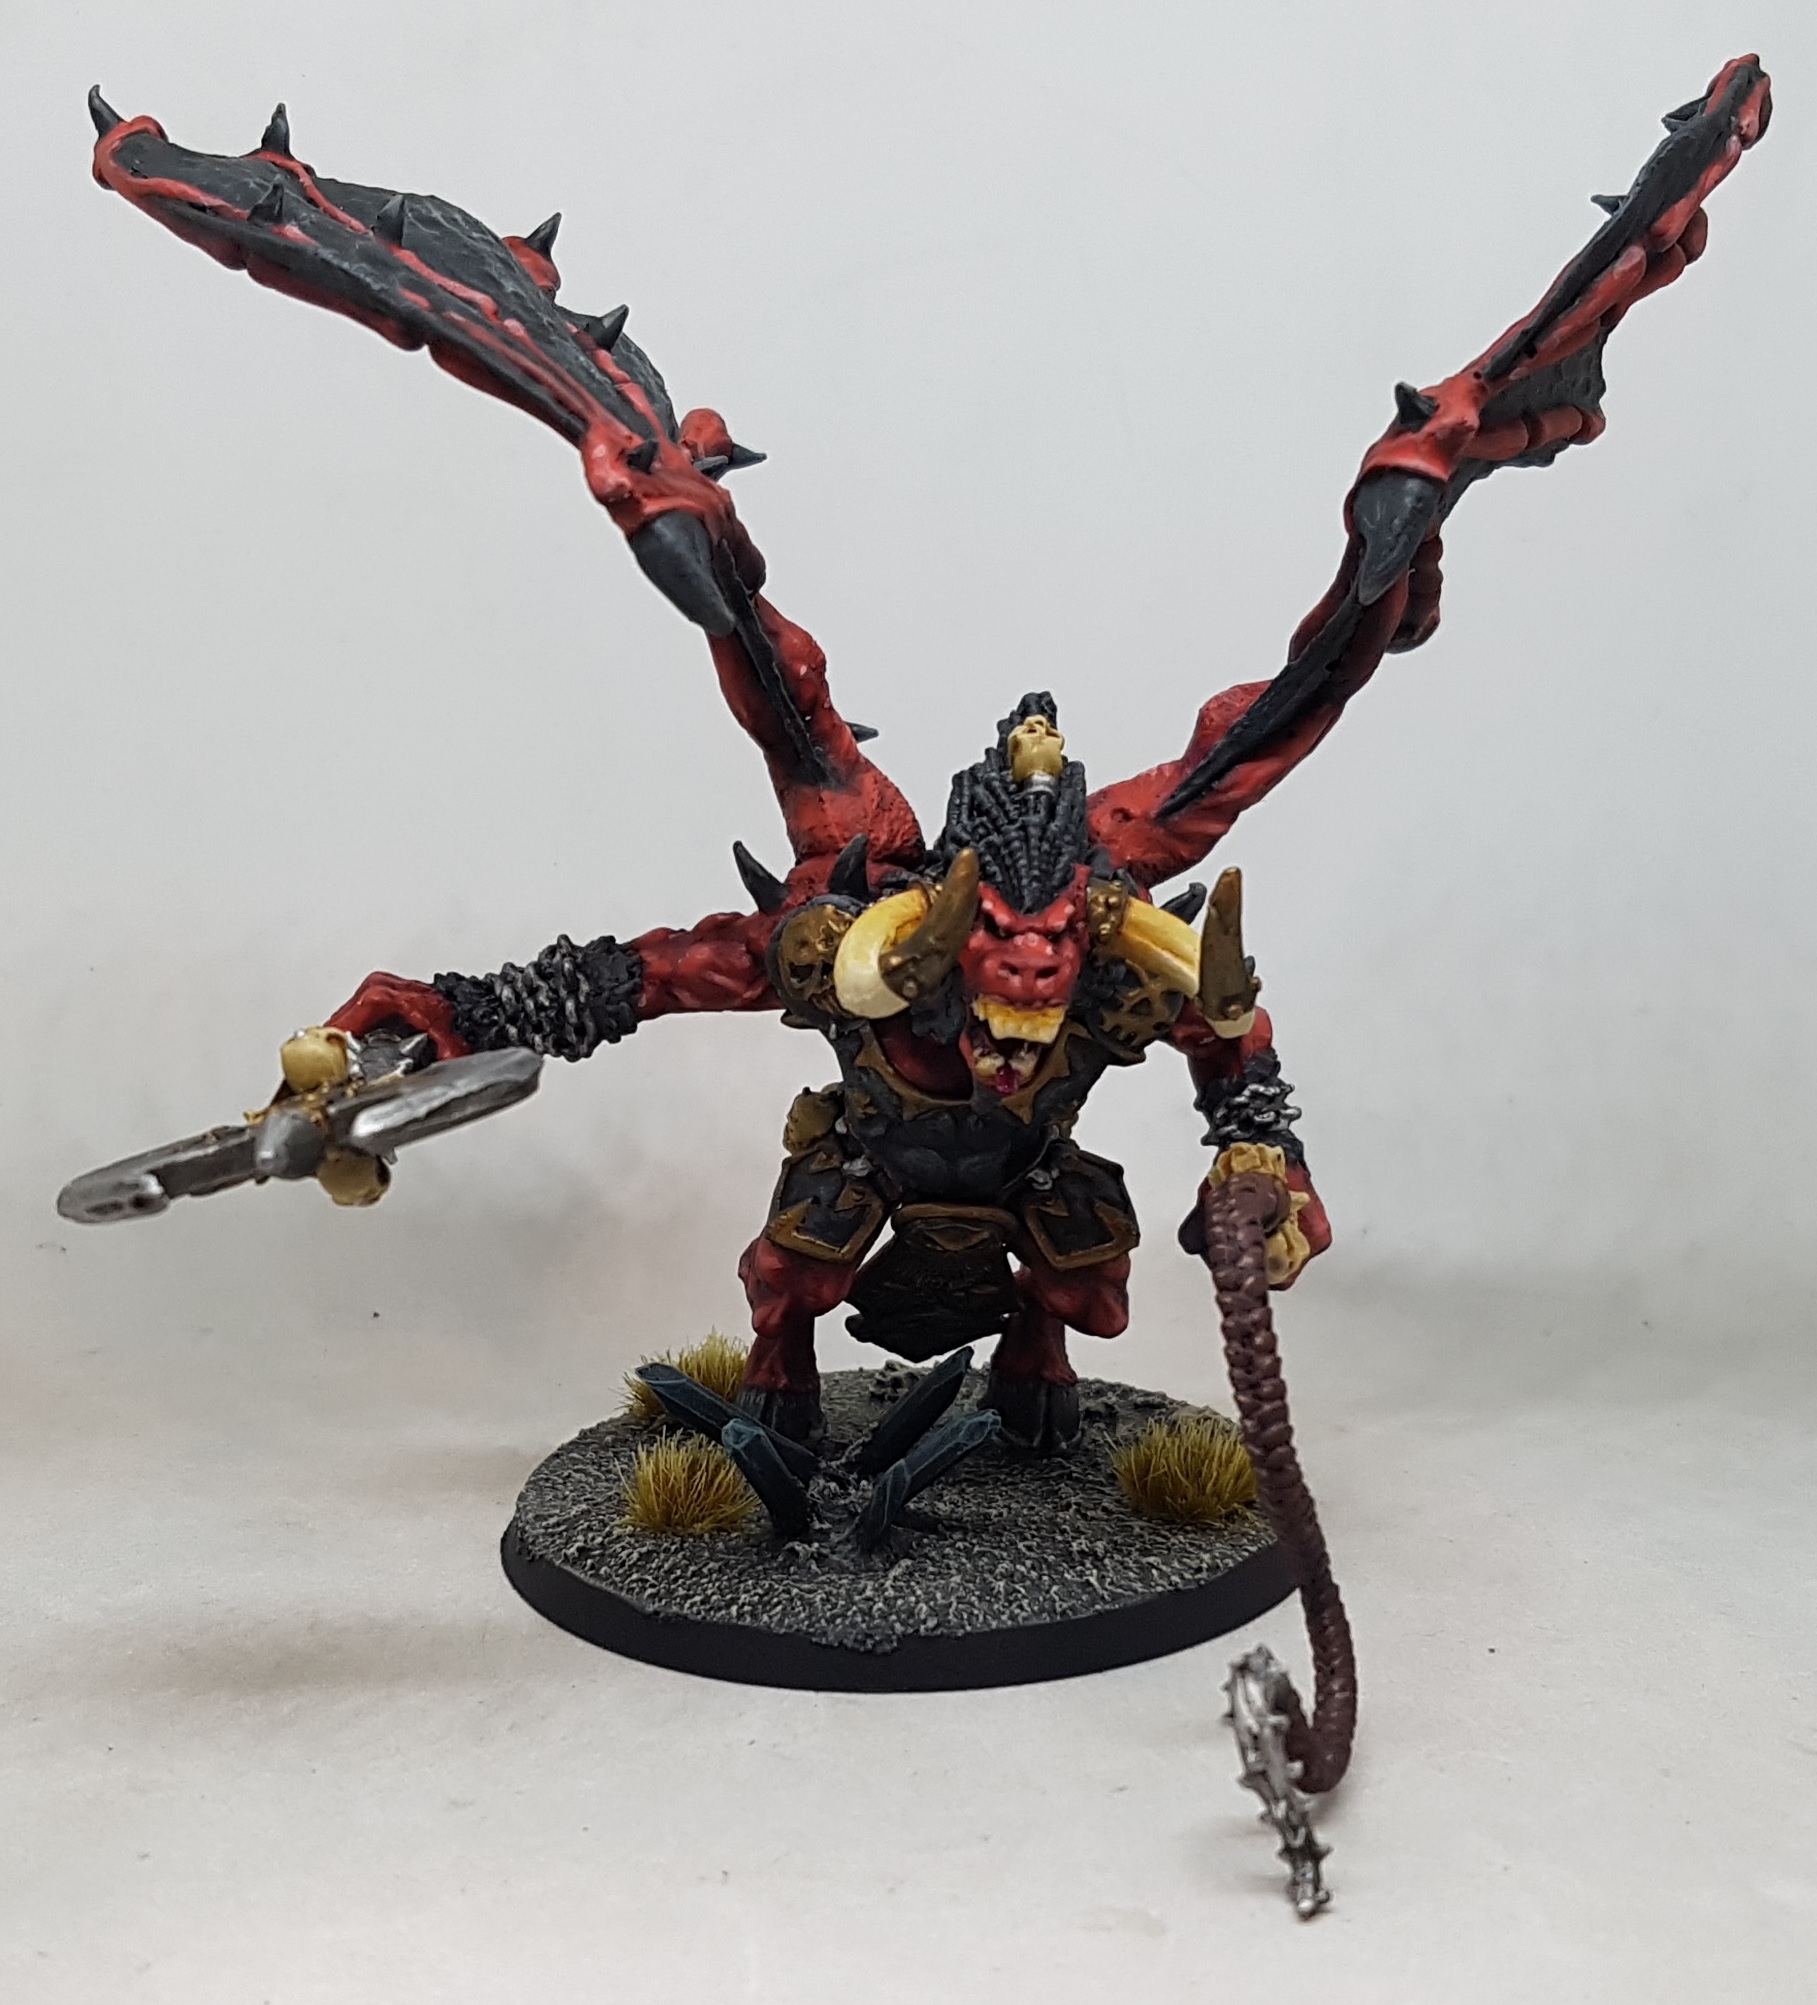
Along with the Space Wolves I also have 3 Daemons to paint (1 Daemon prince, 1 old school Bloodthirster, and one Soul Grinder). While at BonesCon I was lucky enough to win a copy of Wrath and Rapture with my arena points so I have a fair bit of Khorne and Slaanesh to paint now. While I like the Khorne models, I do not like that everything is red on red on red. I agree that his Daemons should have red skin, but I’m looking for ideas to break up the colour palette a bit otherwise all that red just blurs together.
Looking at the cavalry in the box, I’m considering a dark, near black, green/turquoise (P3 Coal black, or Secret Weapon Tyre Black, but perhaps darker?) for the inlaid sections. I am still looking to keep the red flesh tones.
Does anyone have any other suggestions for alternate colour schemes or ways to break up the red?
I was just going through the web store looking at close ups of these minis and it appears Flesh Hounds have been removed. Does this sort of thing mean the model has been removed from the game, or just that they are between print runs and perhaps changing the design of the sculpt?
I have the Companies of Fenris: Space Wolves Painting guide from 2014. Was there an equivalent book for Chaos or individual gods? If so, what was/were they called? My google-fu is failing me on identifying them.
Tanks - Finished
The tanks are all finished now. I found that despite being varnished along the way I kept wearing off paint through contact on the lower edges and rivets. Normally I’d have a models stuck to a handle to work with but tanks are just too big for this. What do poeple do to deal with this?
Each tank has a 3 way thing on each “shoulder”. It doesn’t look like a light or a weapon. What is it? Speakers? Countermeasure launcher? T-Shirt guns?


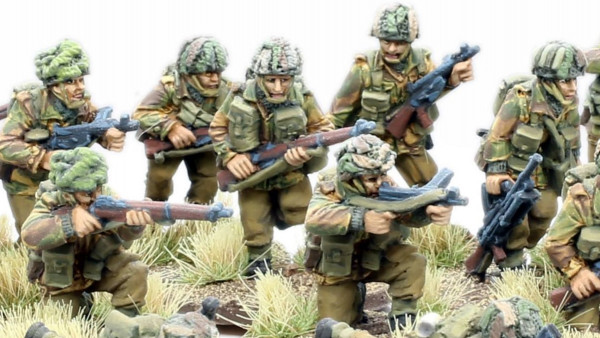
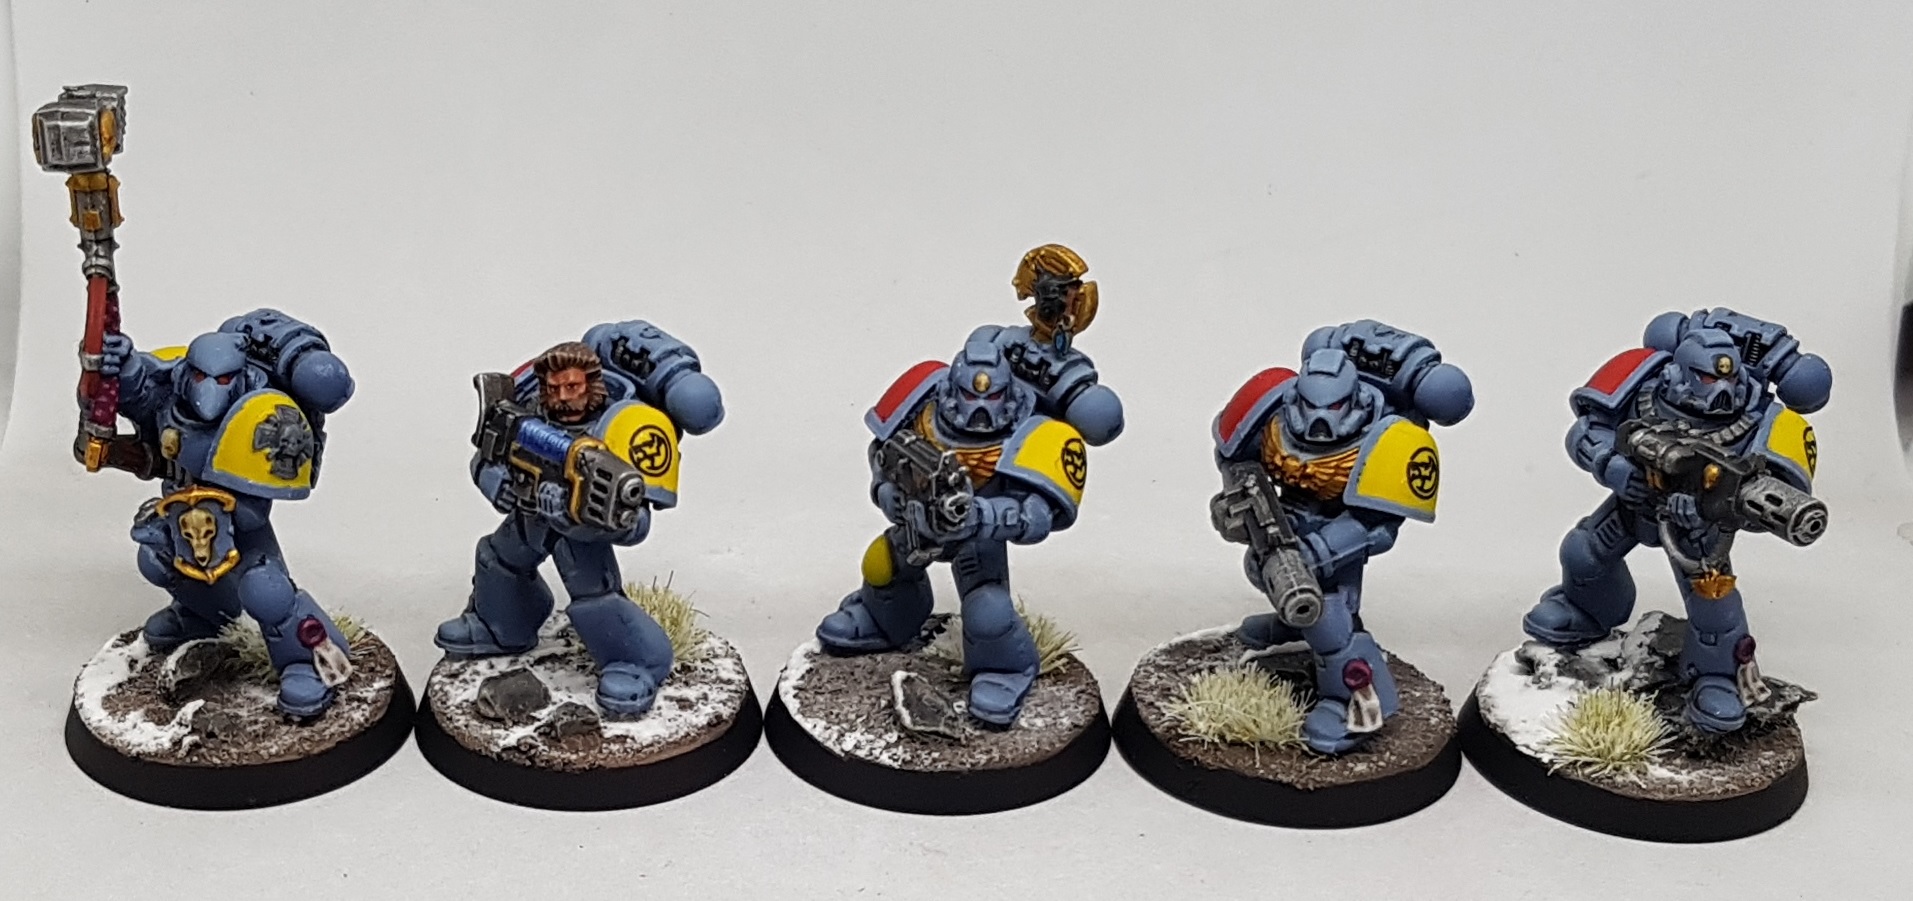
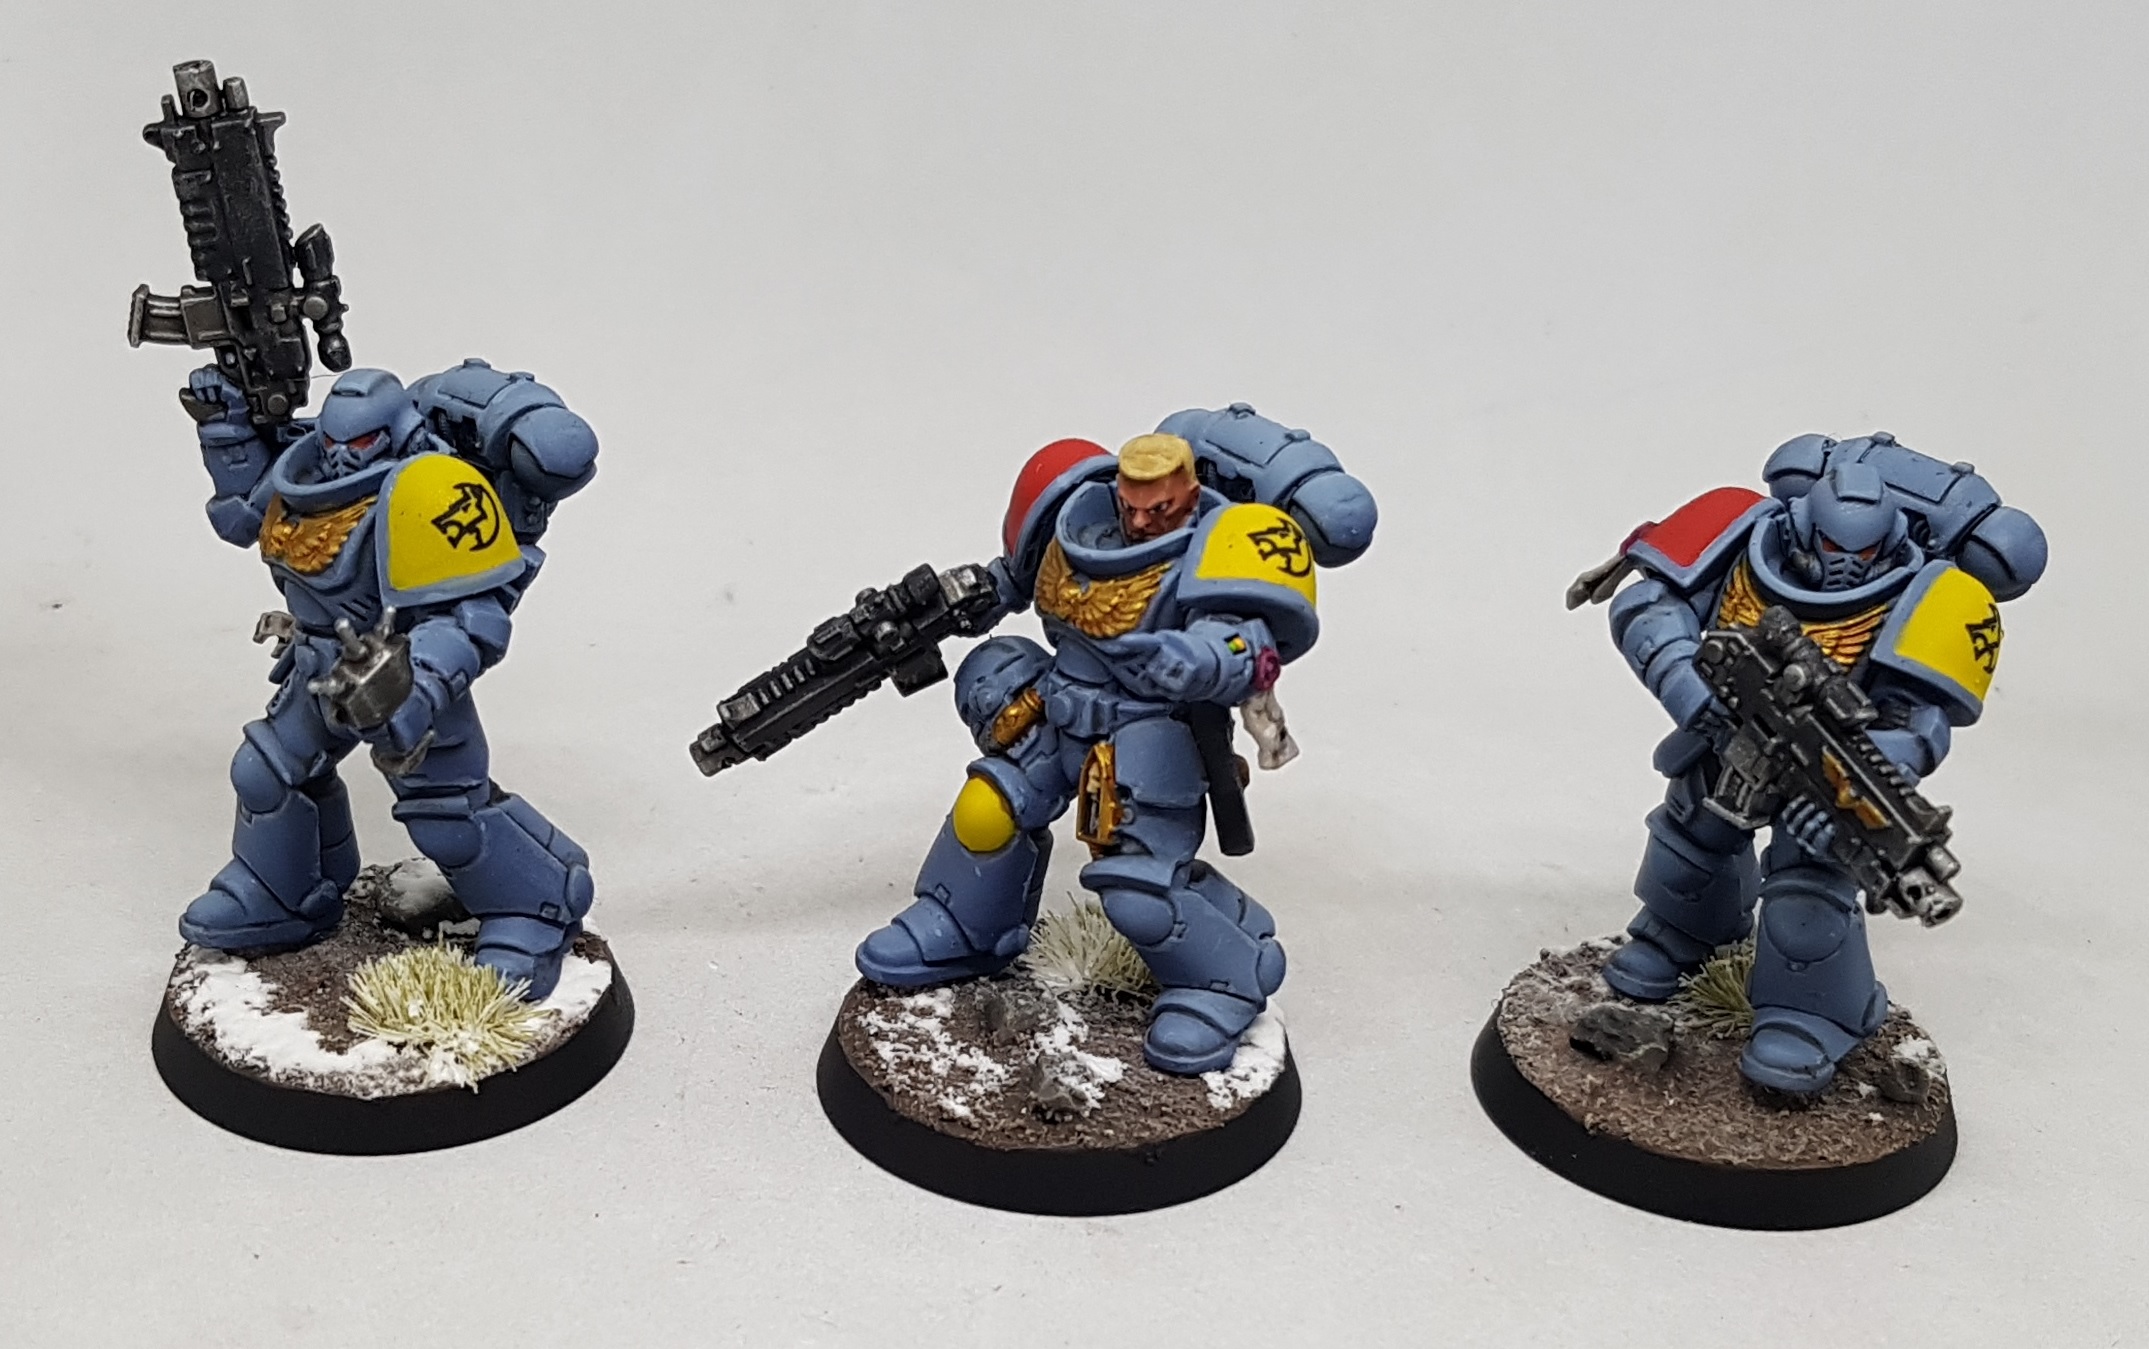
Iron Priest, Marines & Terminators Finished
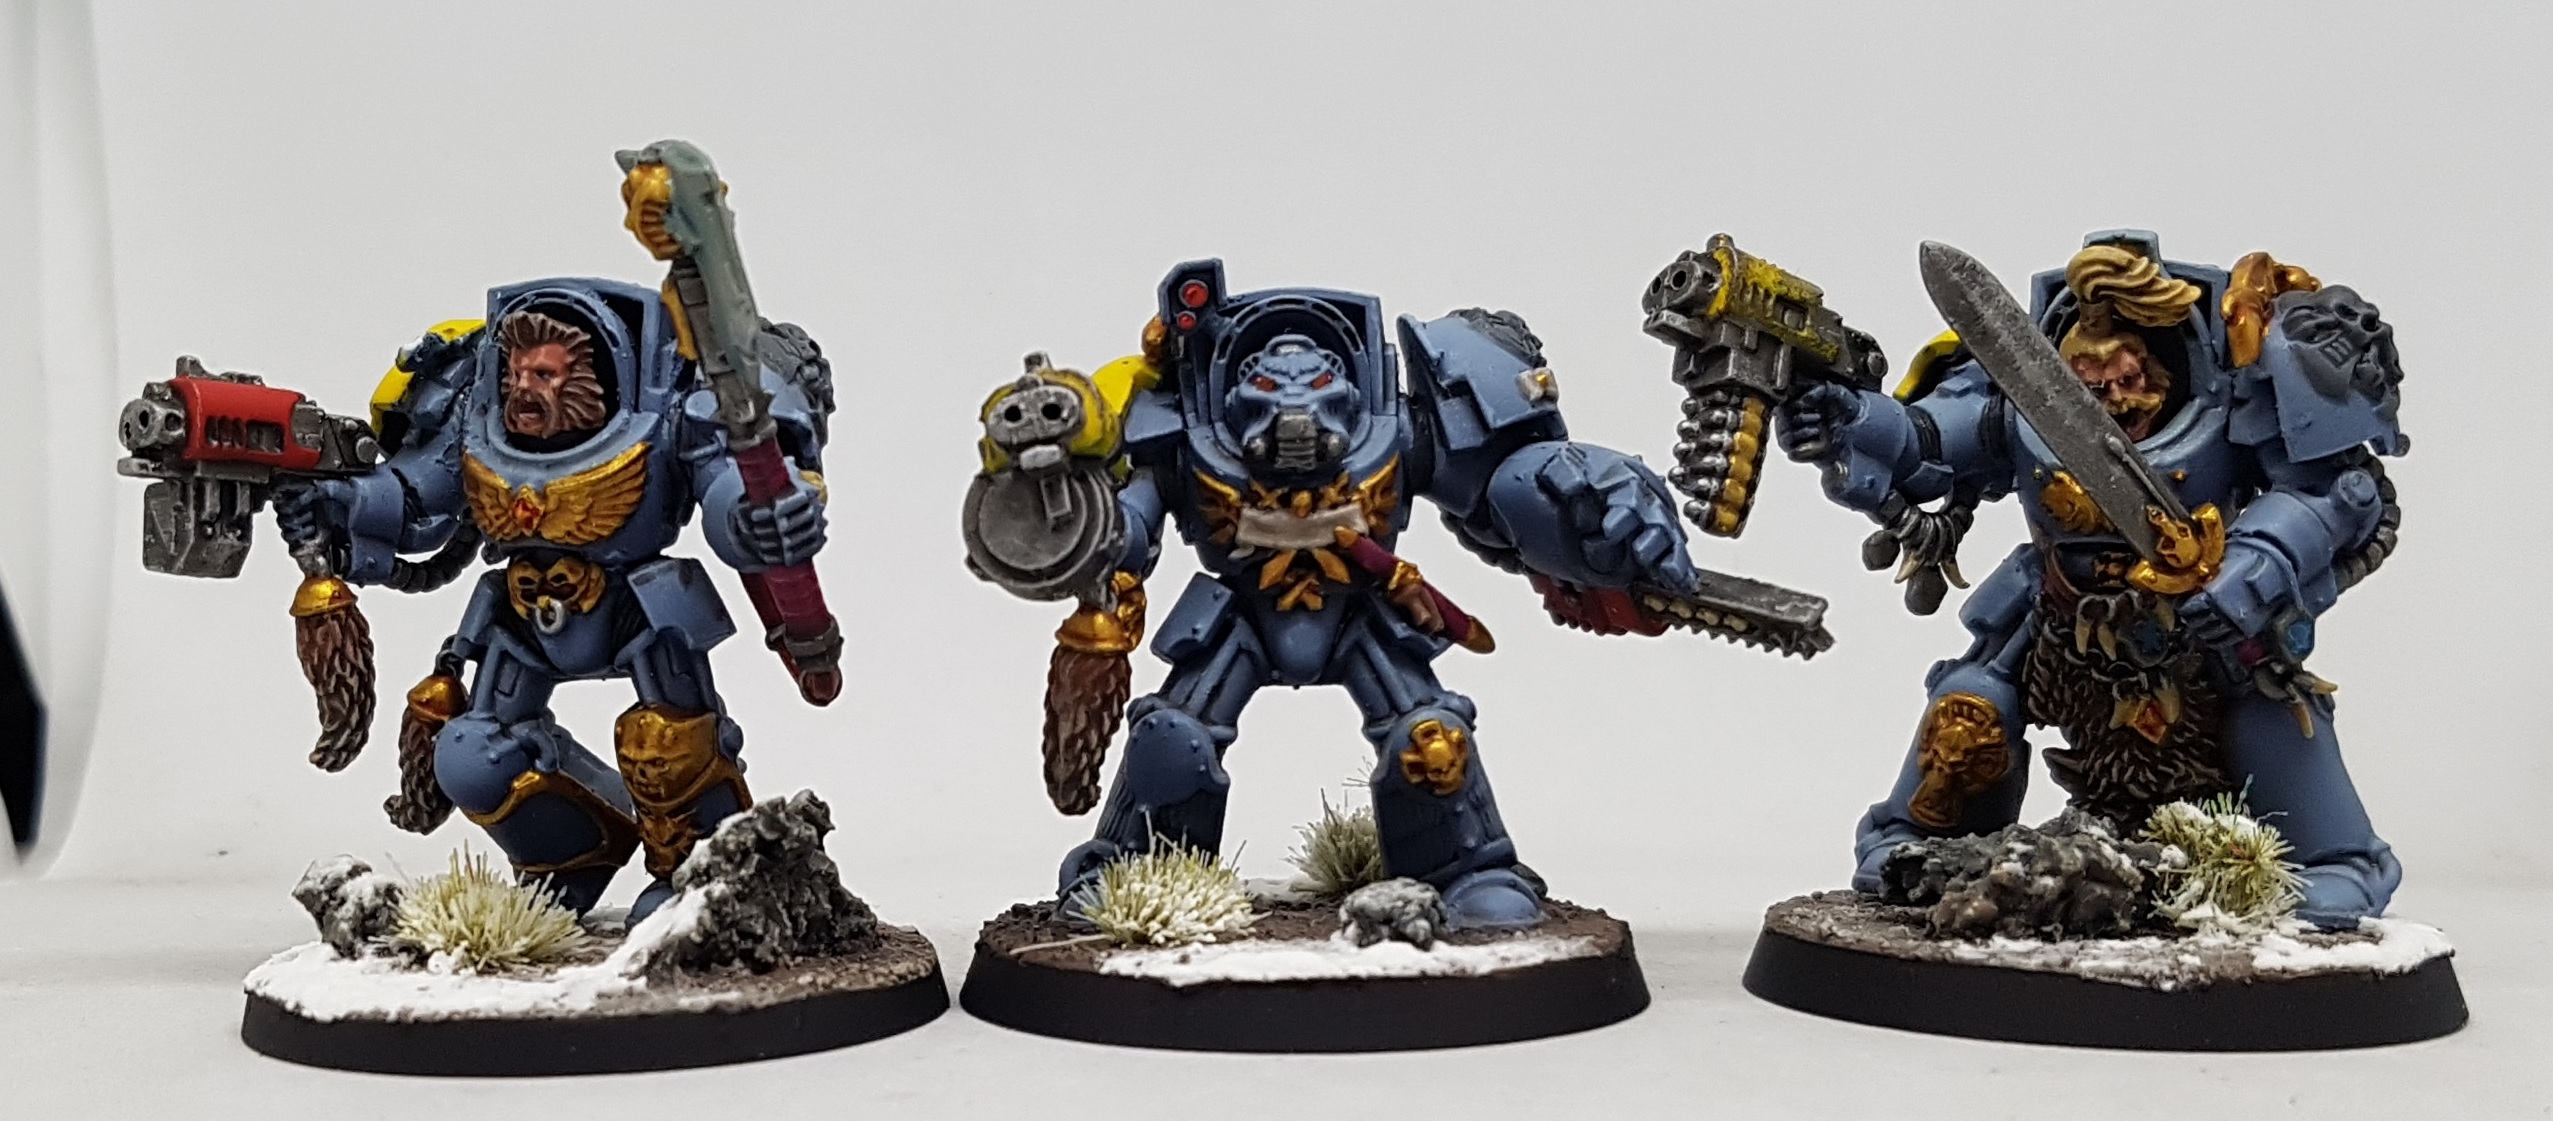
Where colours matched, everyone was painted the same as the Iron priest. The only change was that I edge highlighted the blue for everyone with GW Fenrisian Grey.
Once the armour was done I worke don the fur as that can be messy. it was base coated with P3 Bloodstone, and sections were painted over with GW Karak Stone. It was washed with Agrax Earthshade and then drybrushed with P3 jack Bone. The noses were picked out in black and then highlighted with Vallejo 70.995 German Grey. Finally they were given a tiny dot of white to act as glint.
The Cloth backs of the fur was base coated with P3 Sanguine Base and then washed with a mix of Sanguine Base and p3 Exile Blue. It then got a wash to the deep regions of the previous wash with a little P3 Coal Black added. It was highlighted with P3 Sanguine highlight, and eventually Sanguine Highlight with a touch of P3 Menoth White Base.
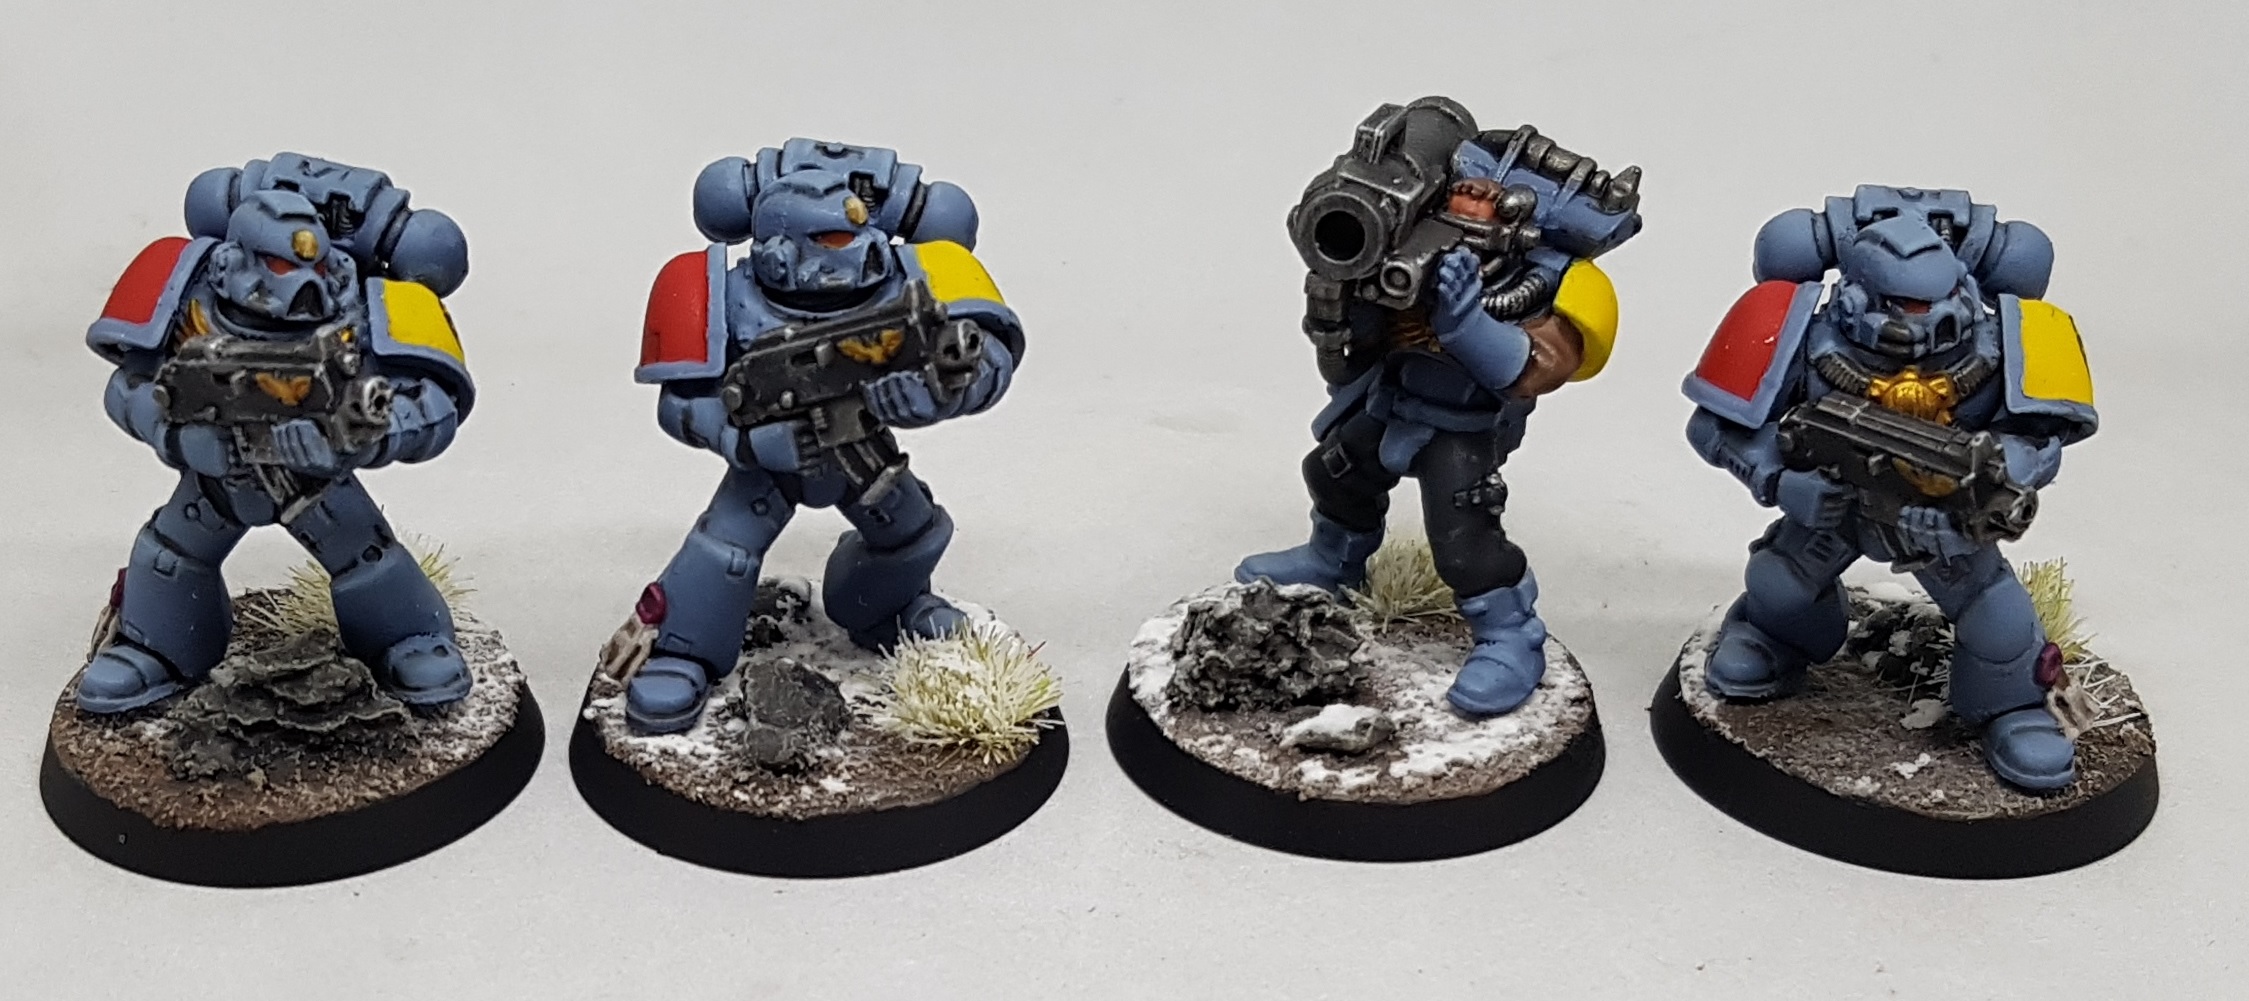
Flesh: P3 Khardic Flesh base. Washed with a mix of Khardic Flesh and P3 Thornwood Green. Then washed with Khardic Flesh and P3 Skorne Red. Then washed with Thornwood Green and Skorne Red. Highlighted with P3 Midlind Flesh.
Hair: Based with either P3 Idrian Flesh (brown), P3 Ember Orange (Ginger) or P3 Mouldy Ochre (blonde). Blonde and Ginger got a wash of GW Seraphim Sepia, and brown got a wash of Agrax. Brown was highlighted with GW Karak Stone, and ginger with the base colour. Then ginger and blonde were highlighted with P3 Menoth White base.
The red eyes were based with GW Khorne Red. 1/3rd of them was painted with VGA 72.709 Hot Orange, and then a dot of White was put inside that. Normal eyes were painted normally.
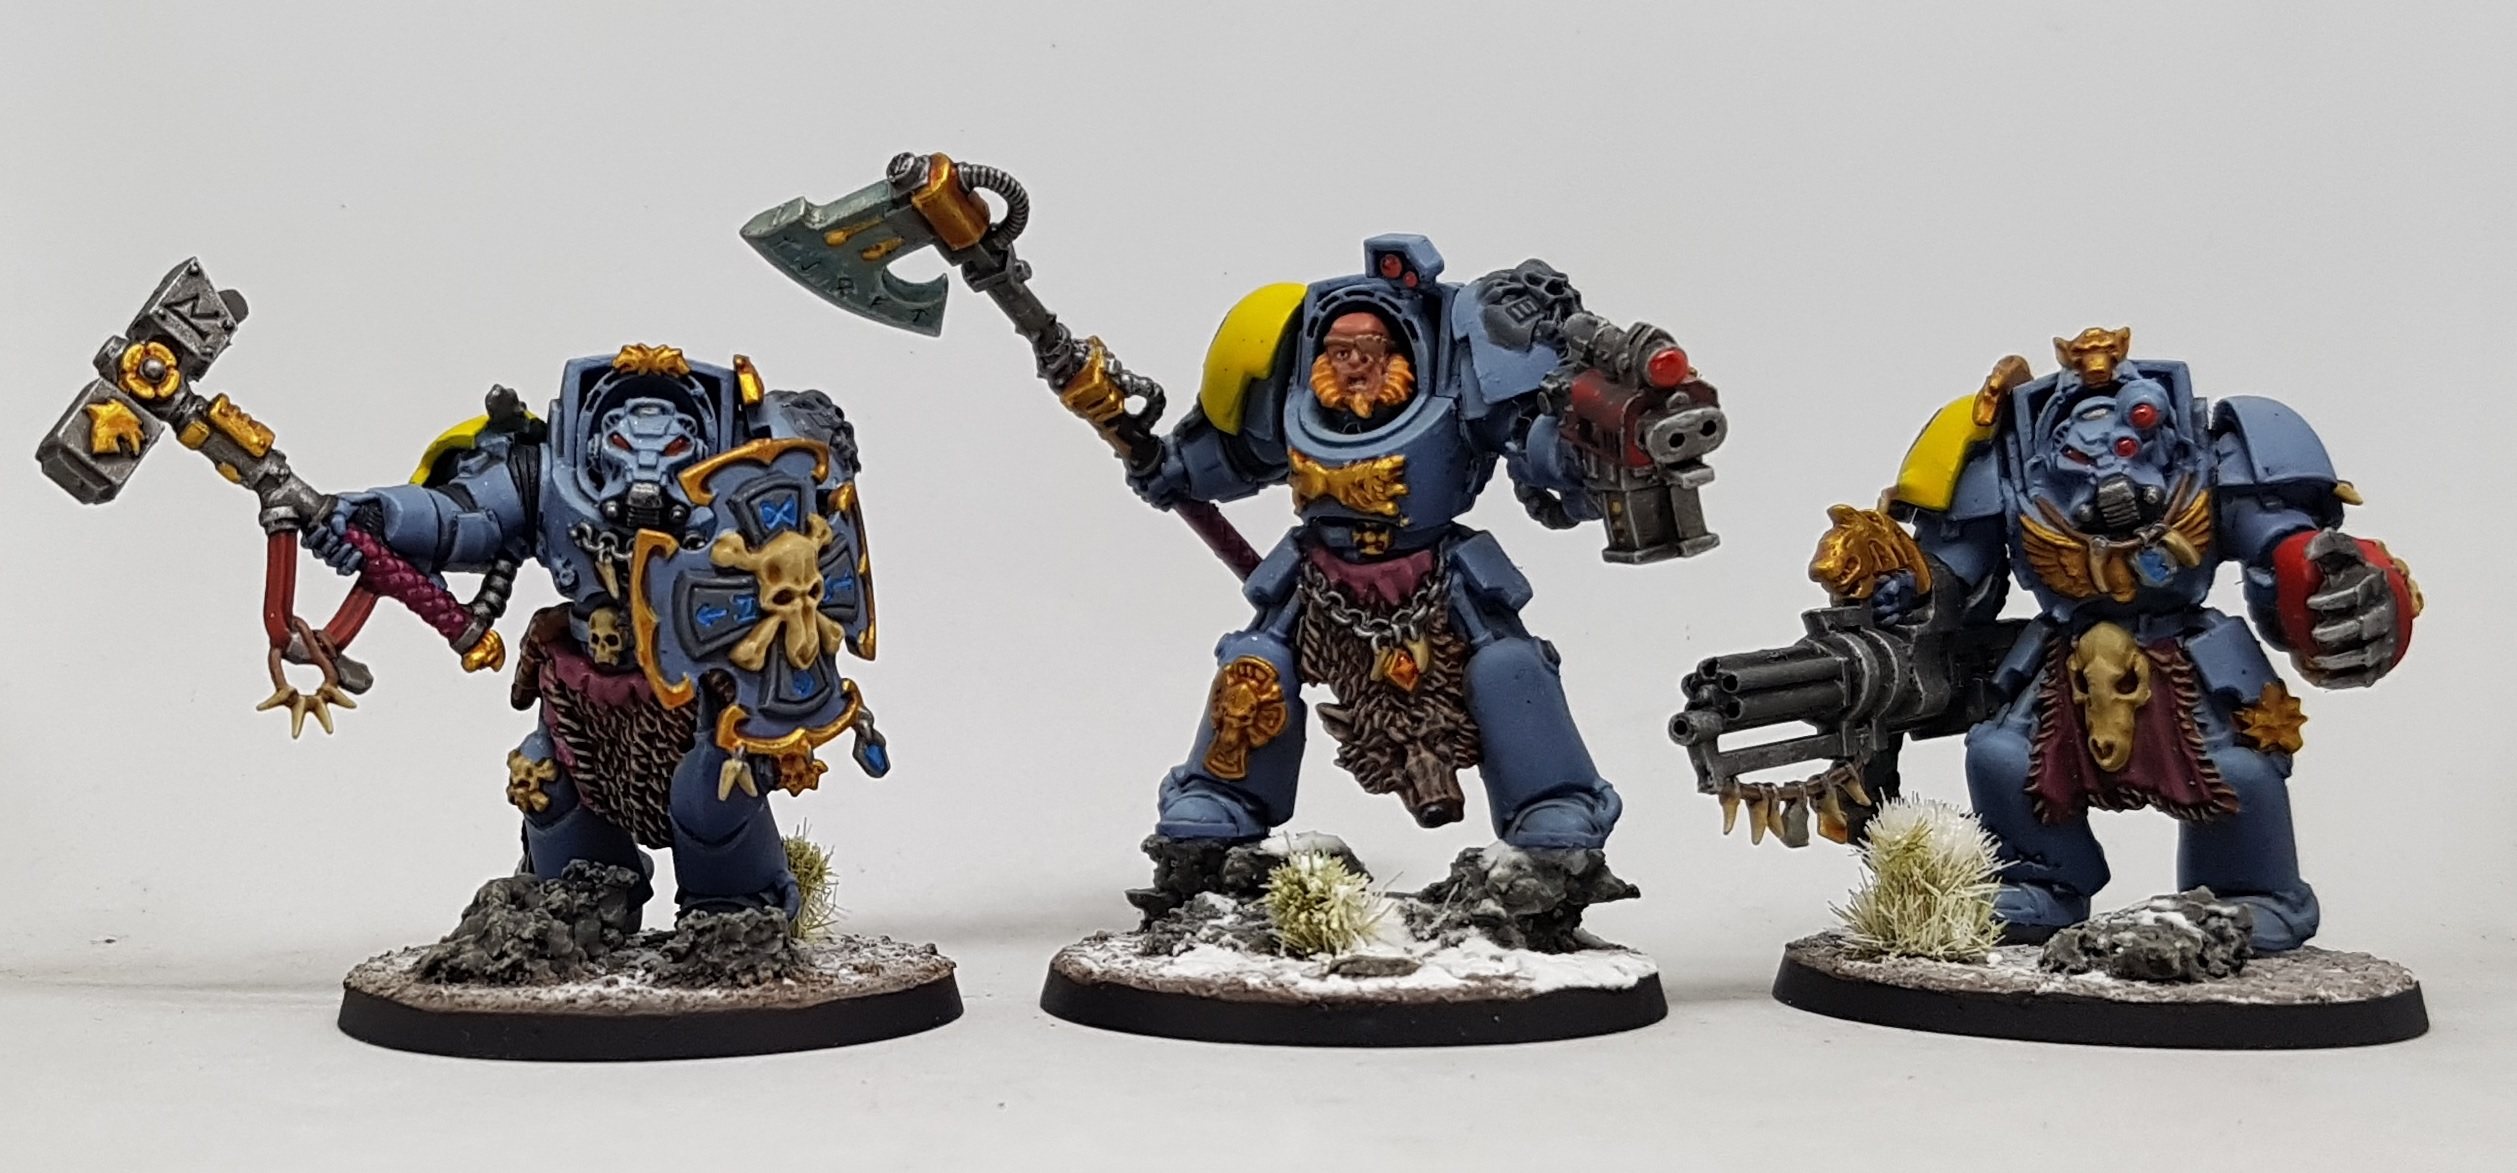
The iron was painted the same as for the Iron Priest, except for the gattling gun. Its darker sections were based the same, but then painted over with Mission Models Cold Rolled Steel. It was then washed and highlighted the same.
The Frost Axes were based with GW Runefang Steel, then washed with GW Coelea Greenshade. P3 Blue ink was then diluted and used to glaze the axe, especially the runes. Finally, it was drybrushed with P3 Radiant Platinum.
The Lightning Claws were based with VMC 70.808 Blue Green, washed with diluted P3 Blue Ink, encouraging it to remain lighter towards the tips. The tips were reclaimed with thinned Blue Green. A little VMC 70.918 Ivory was added to Blue Green to lighten it, and it was drybrushed over the claws. Theyw ere then edge highlighted with GW Pallid Wych Flesh, and then thin diagonal lines were paited over then with GW Geramite White.
The wires coming out of the weapons were painted P3 Skorne Red, washed with Nuln oil, and then highlighted with GW Evil Sunz Scarlet.
The Plasma Coil was based with P3 Cygnar Blue Base. The top half of the ridges were painted with Warcolours Marine 3. The top half of that was then painted over with Marine 1. Then the very corners of the ridges were painted with GW Pallid Wych Flesh. When everything was finished this was given a final coat of gloss varnish.
The Crux Terminatus (Grey skull thing on the shoulders) was based with P3 greatcoat Grey, washed with Nuln Oil, Highlighted with VMC 70.869 and finally given one last lesser highlight with VMC 70.992 Neutral Grey.
The black and white symbols on the shoulders were either painted VMC 70.918 Ivory or P3 thamar Black. The black was highlighted with VMC 70.995 German Grey.
The Parchment was painted GW Rakarth Flesh, eashed with Agrax Earthshade, reclaimed with thinned Rakarth Flesh and edge highlighted with Pallid Wych Flesh.
The Purity Seals were based with P3 Murderous Magenta mixed with Skorne Red, washed with nuln oil, and then reclaimed with the base colour. Increasing amounts of ivory were added to this mix for highlights.
The black icons and the occasional pouch and holster were based with VMC German Grey, drybrushed with P3 menoth White Base and then washed with Nuln Oil.
Stones were based with P3 bastion grey, washed with Nuln Oil and then drybrushed with P3 jack Bone. The runes were washed with Ivory as an undercoat and then painted with P3 Blue Ink.
the leather straps etc were based with P3 Bootstrap Leather, washed with Agrax Earthshade and then highlighted with Menoth White base.
The bullet casings were based with P3 Brass Balls, washed with Agrax Earthshade, and then highlighted with P3 Soild Gold.
The Gems were based with Khorne Red. The edges were painted with Evil Sunz Scarlet. P3 Khador Red Highlight was then painted over the top of that favouring towards the peak. Coat d’arms Sun Yellow was then paited over the highlights.
Lenses were painted with Evil Sunz Scarlet. A circle of GW Wild Rider Red was painted from about 5-10 on the clock and a dot of white was applied in the top around 1-2 on the clock. These would be varnished with gloss when everything else is finished.
The lights on the back of the terminators were painted with P3 Necrotite Glow and P3 Heartfire.
Bones and teeth were painted P3 Jack bone, washed with GW Seraphim Sepia, and then drybrsuhed with P3 menoth White Base.
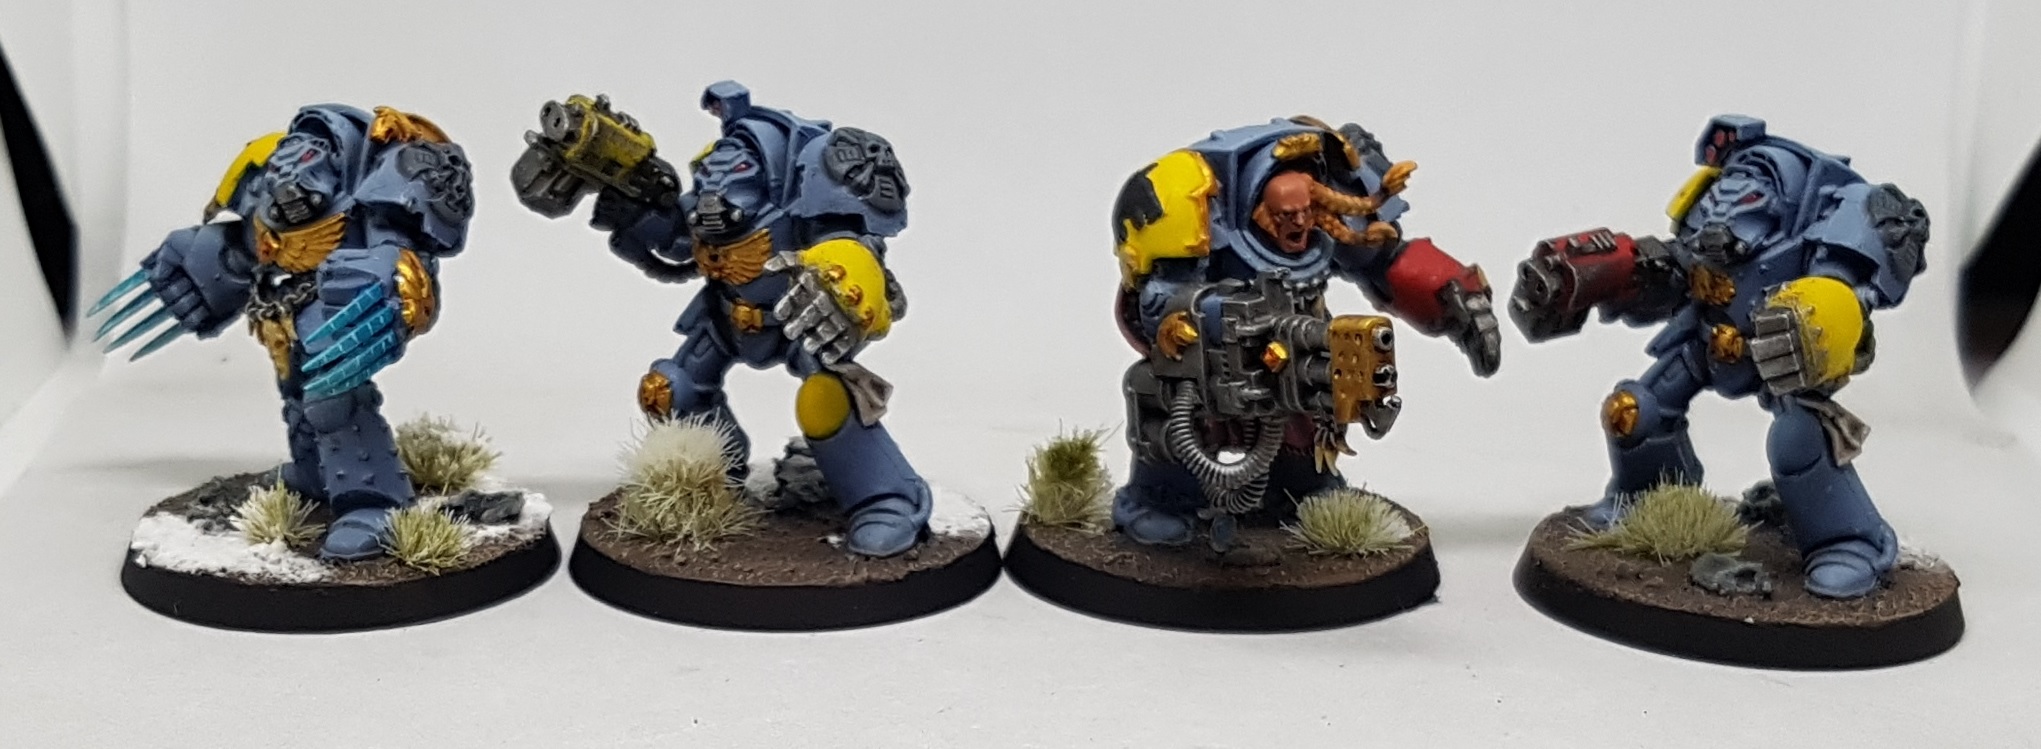
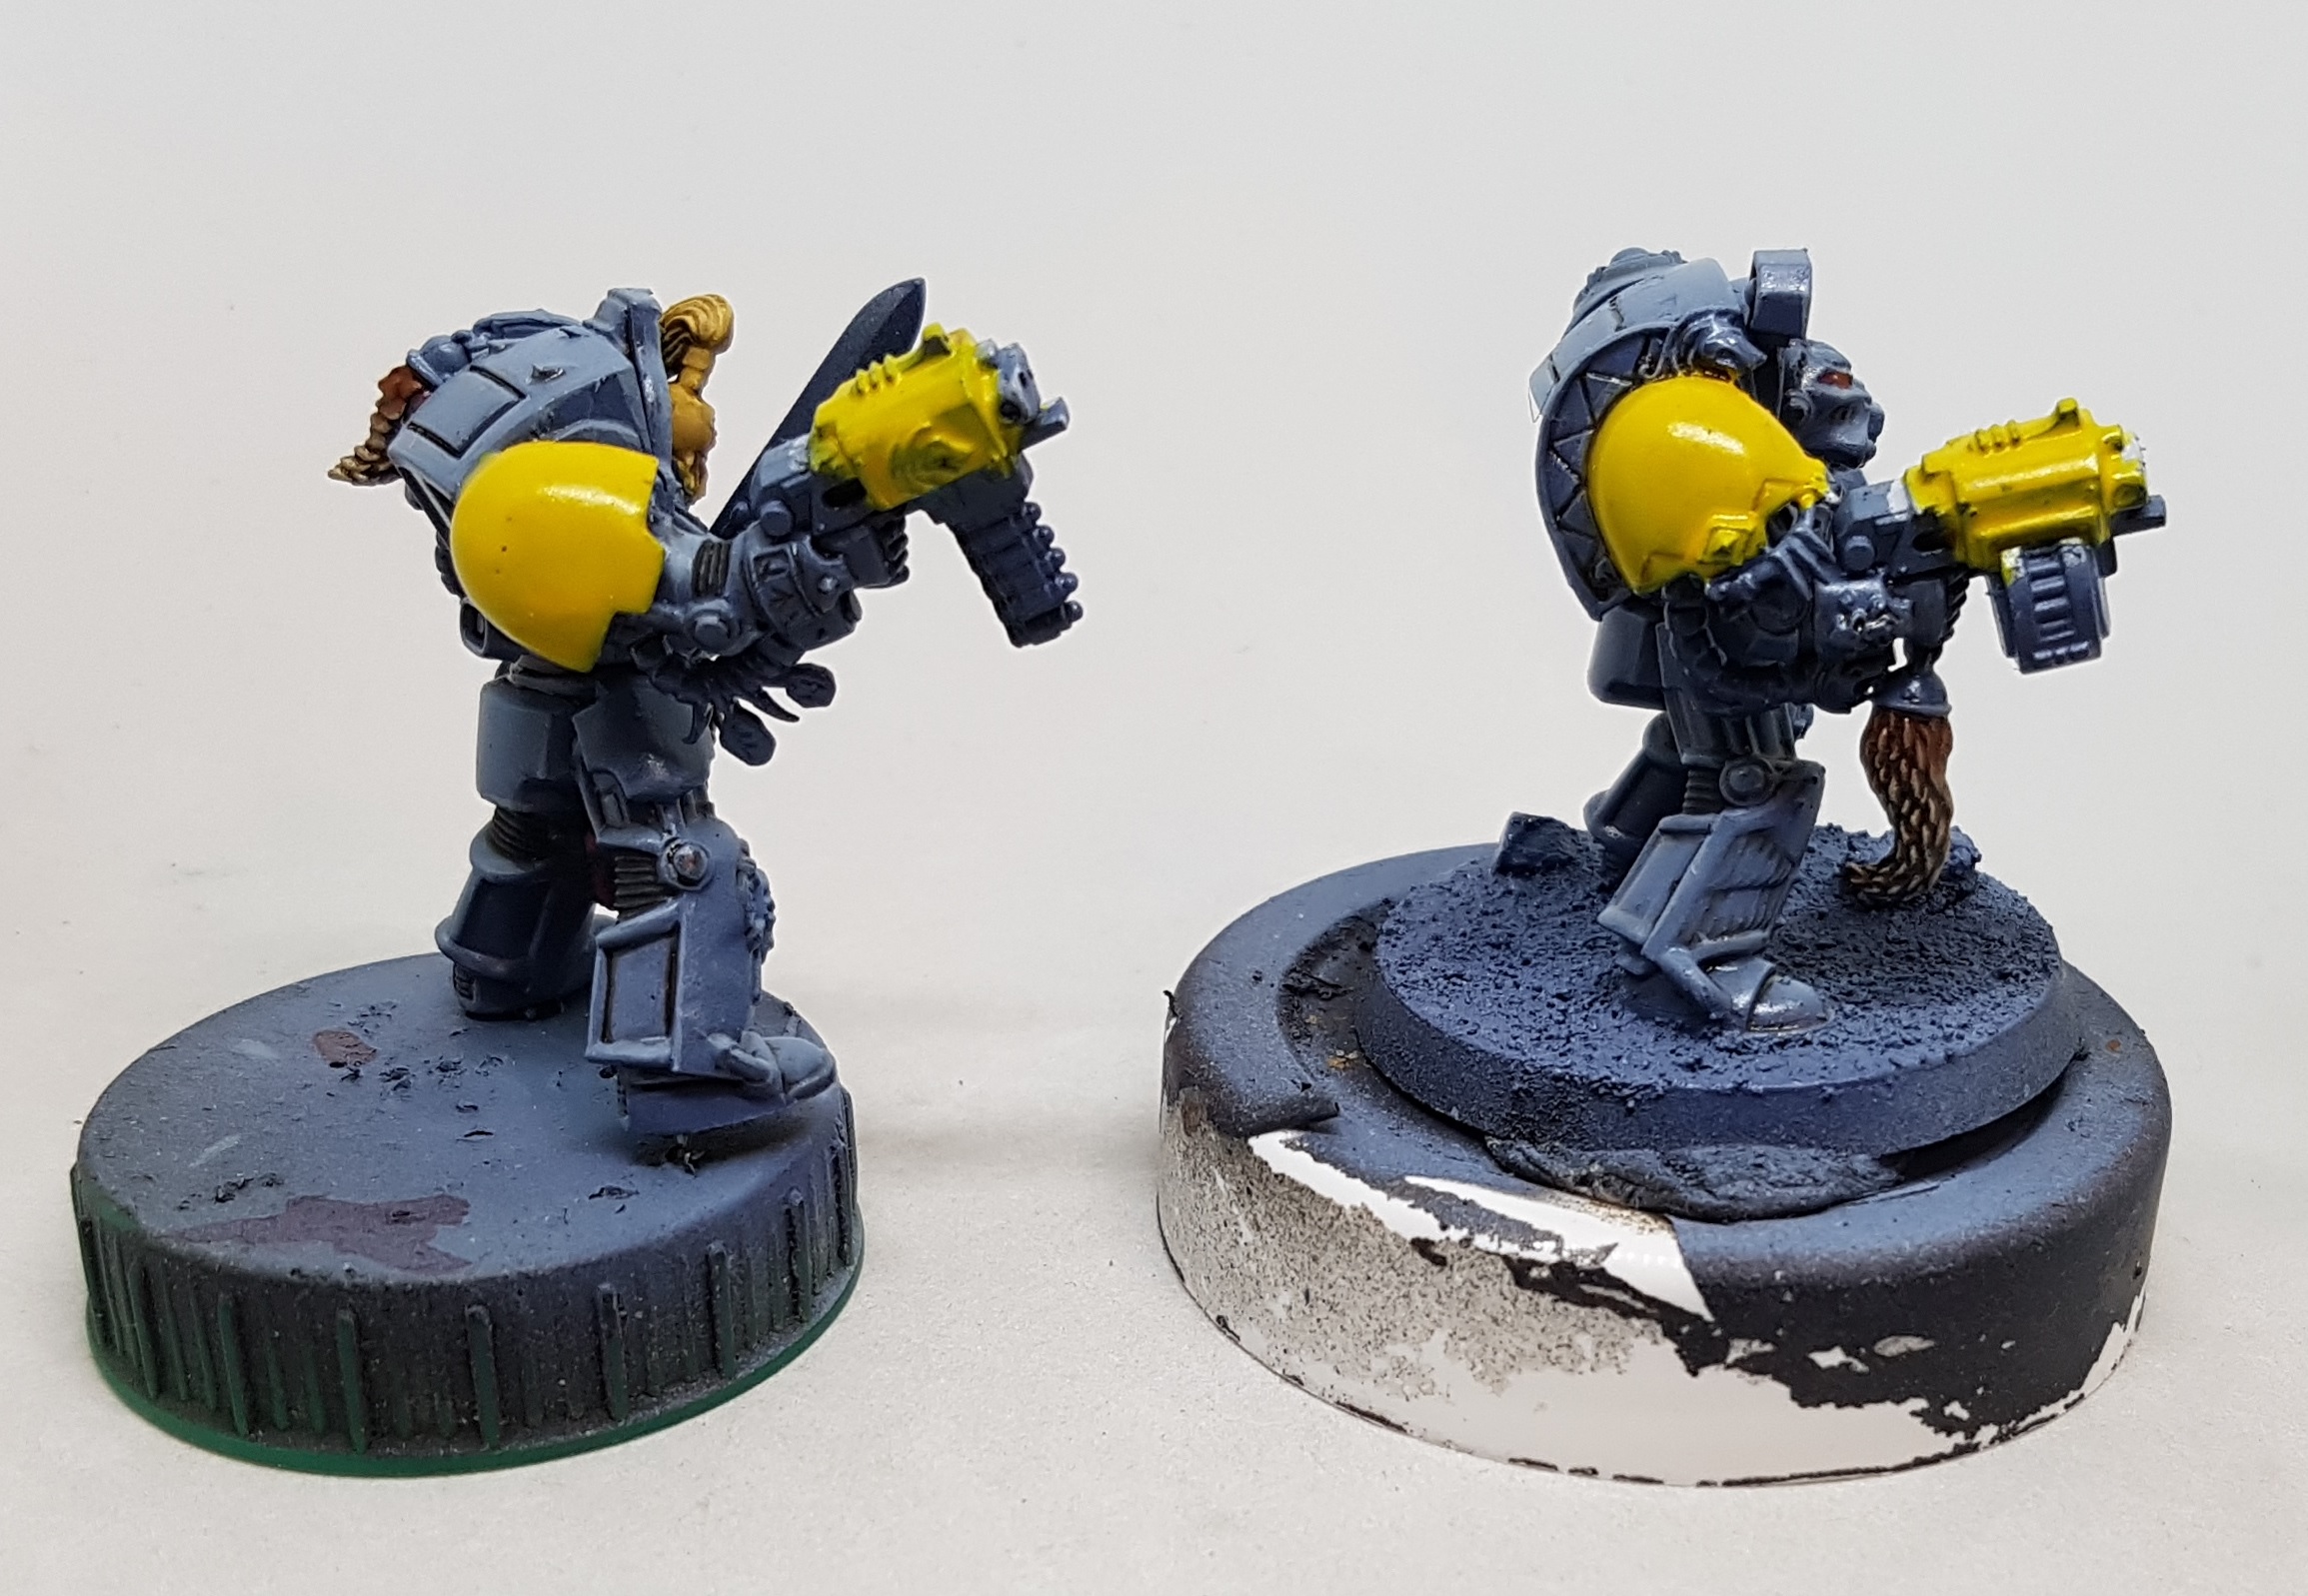
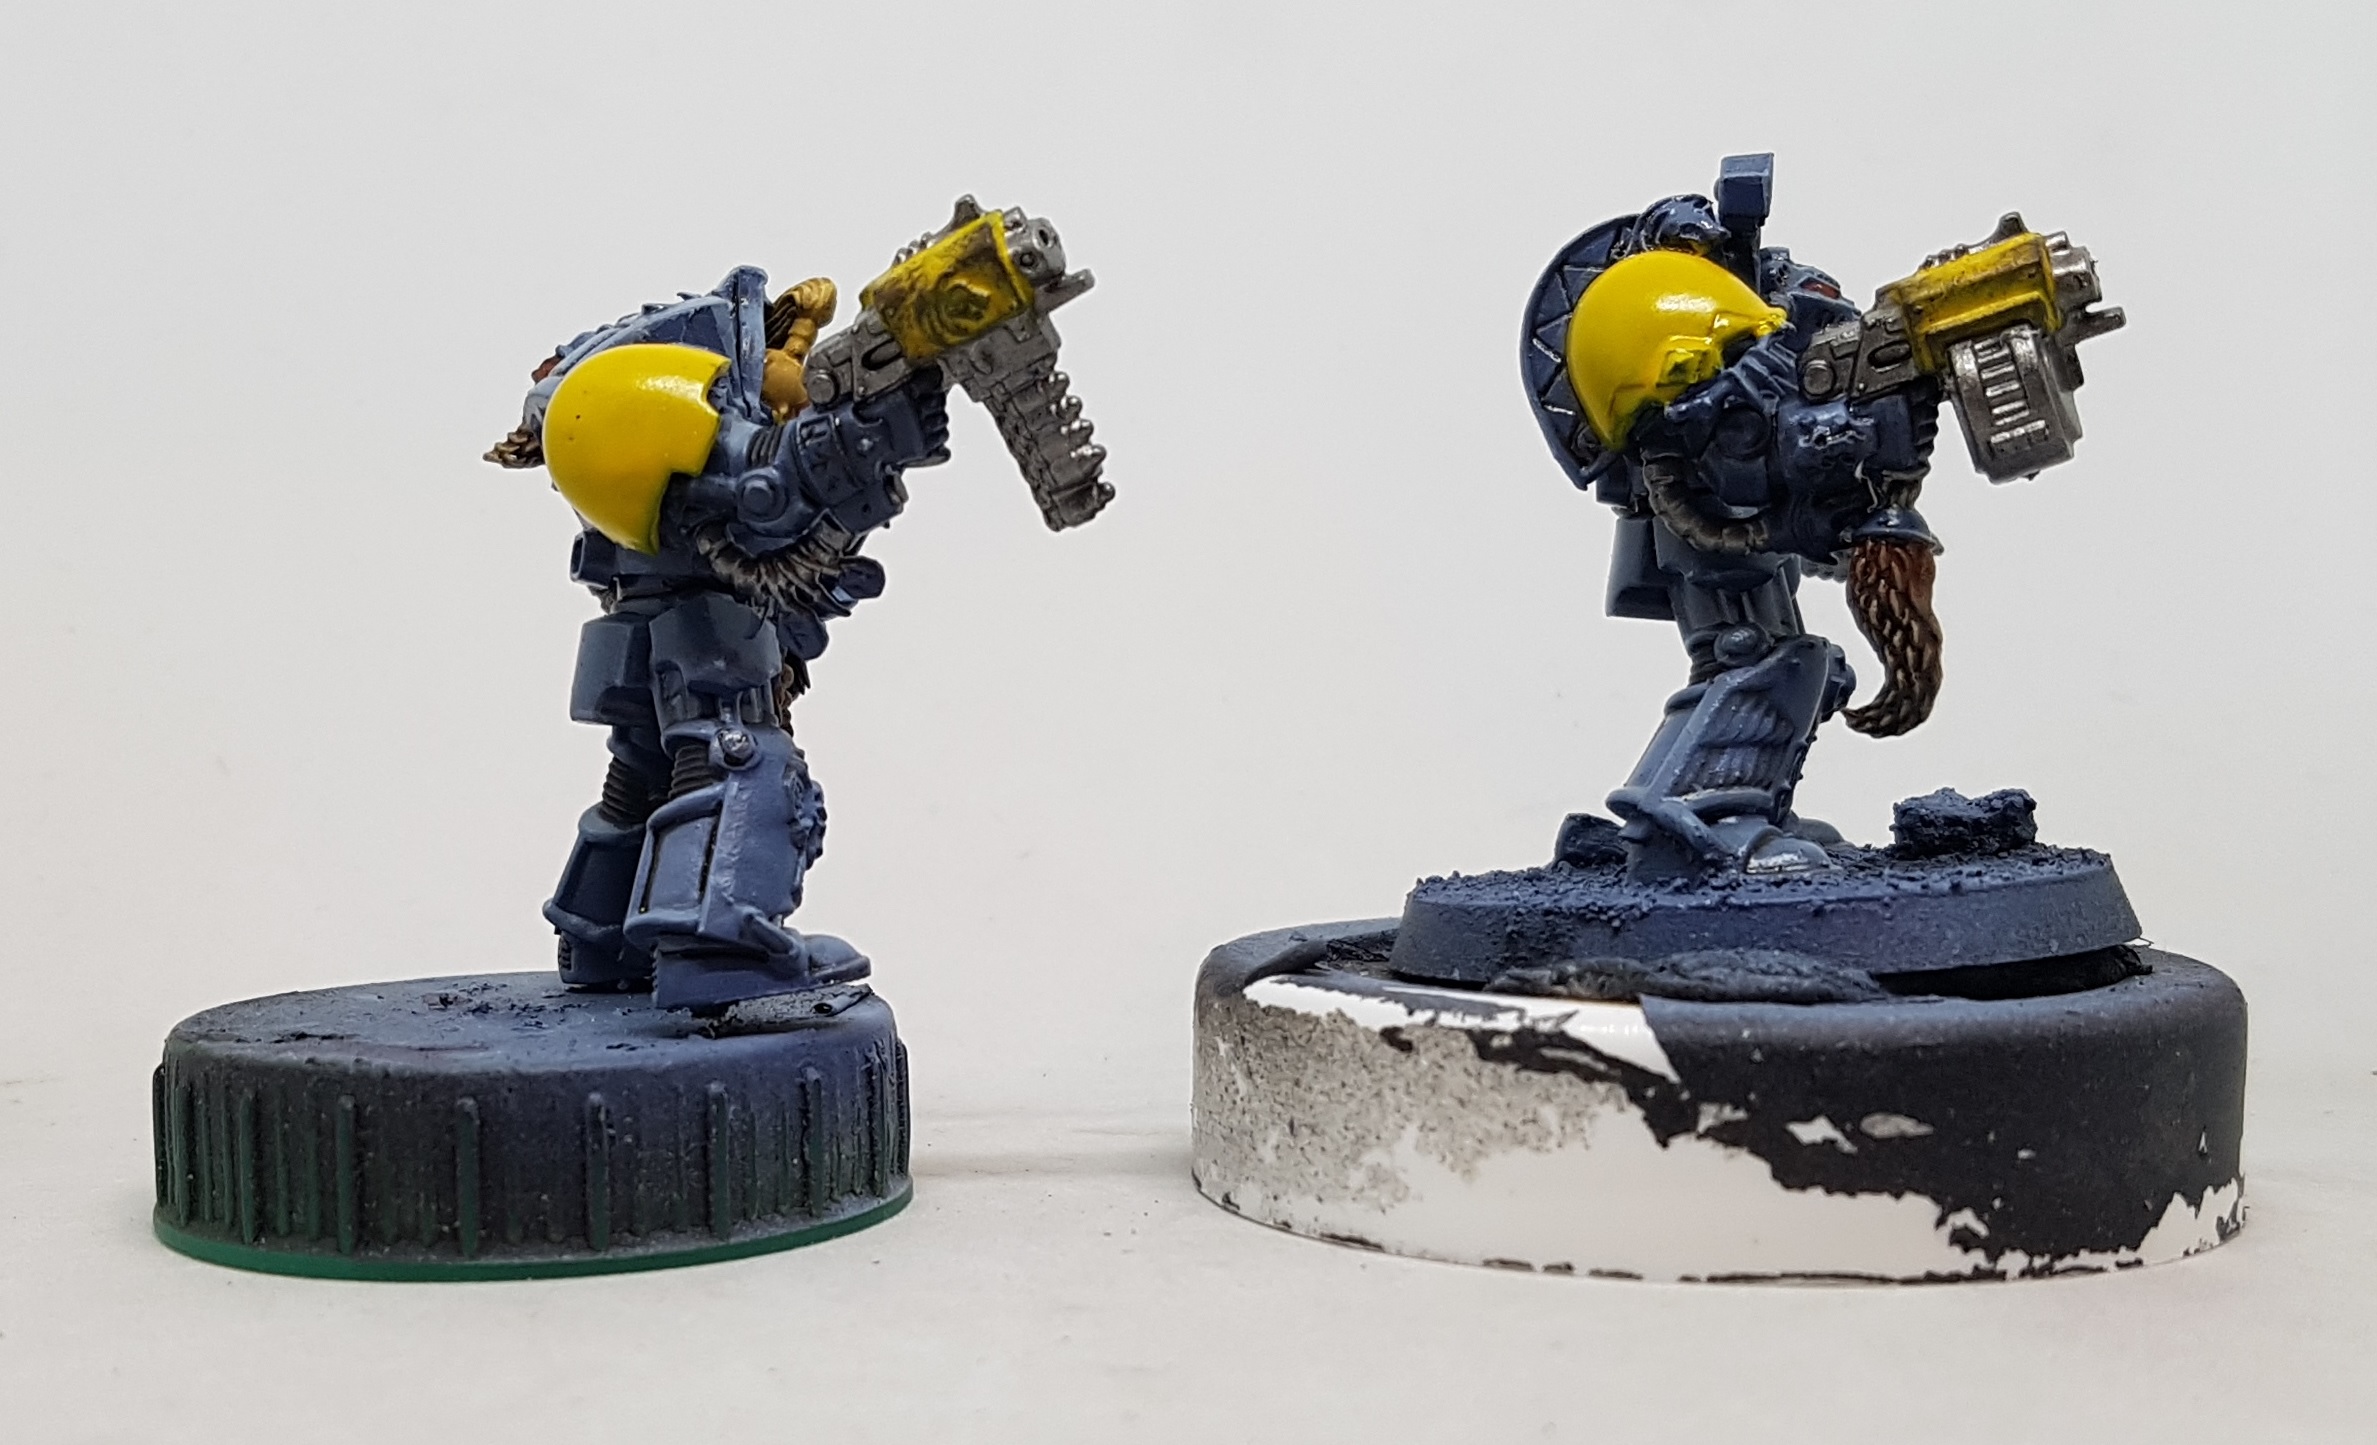
The Terminator guns are often coloured the same as the shoulder pads so I tried to paint them the same was I did with the shoulder. A wash/glaze/thin paint over zenithal preshade. However 300 coats in (I might be exaggerating) and the corners were not retaining any colour but the detail was starting to be burried. I had 2 choices here: Start again or find a way to fix it.
I thought I’d try John’s sponge weathering along the lines hoping that once that was there the black undercoat showing through would look like the paint had worn through and the undercoat was starting to show though. I sponged on a little VMC 302 Dark Rust and German Grey and it looked much better. Later on when highlighting the iron I also drybrushed these edges with a tiny amount of P3 Cold Steel in places.
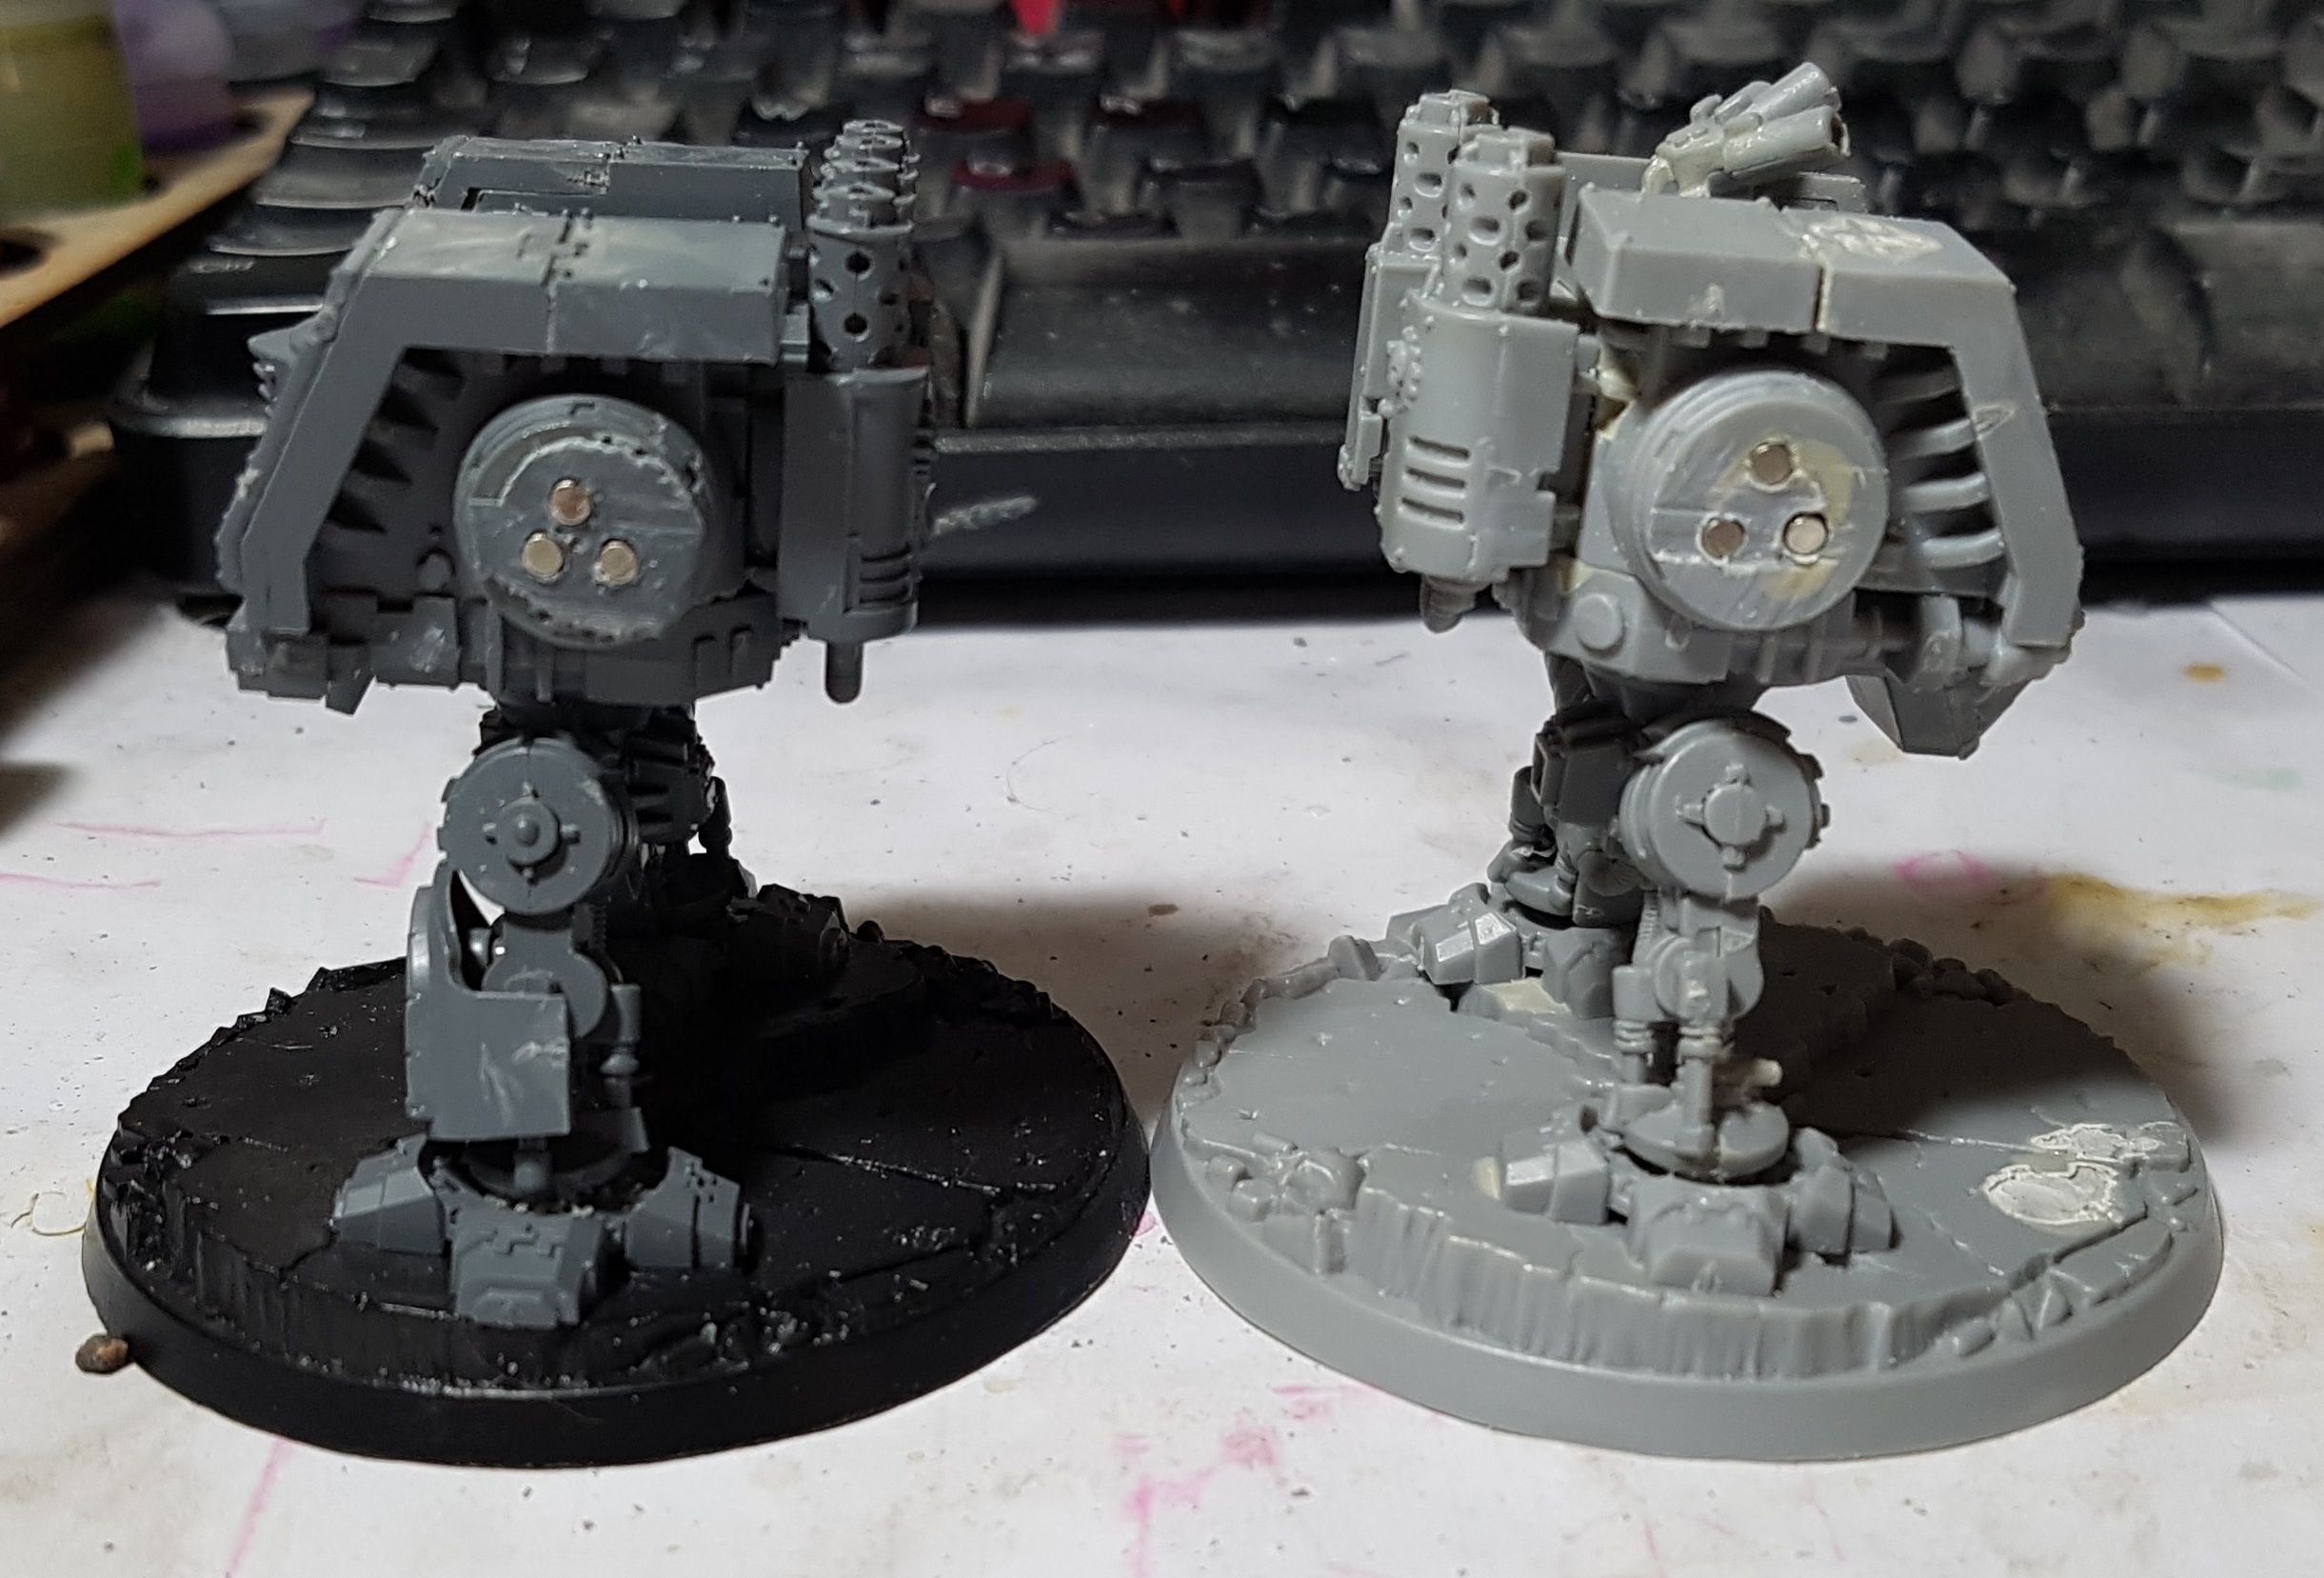
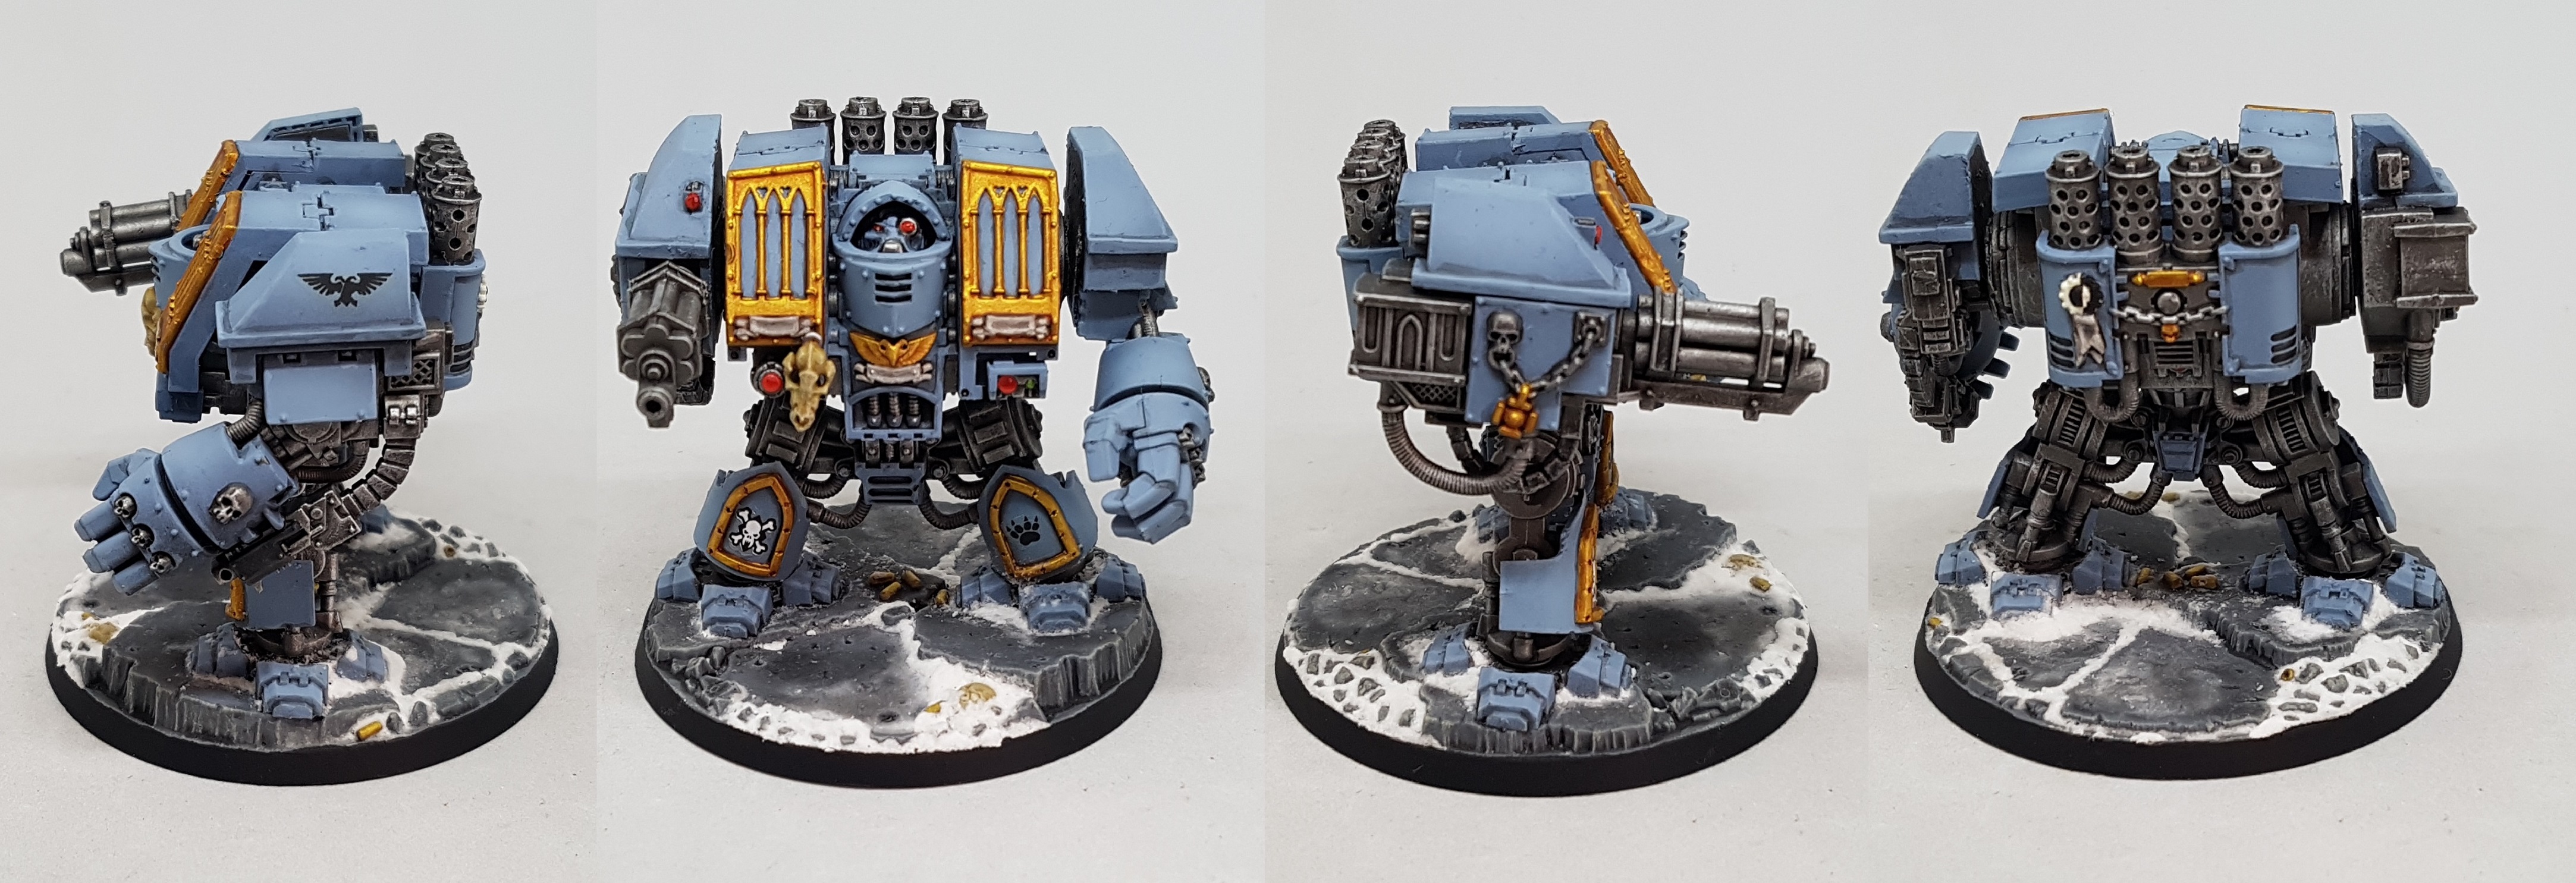
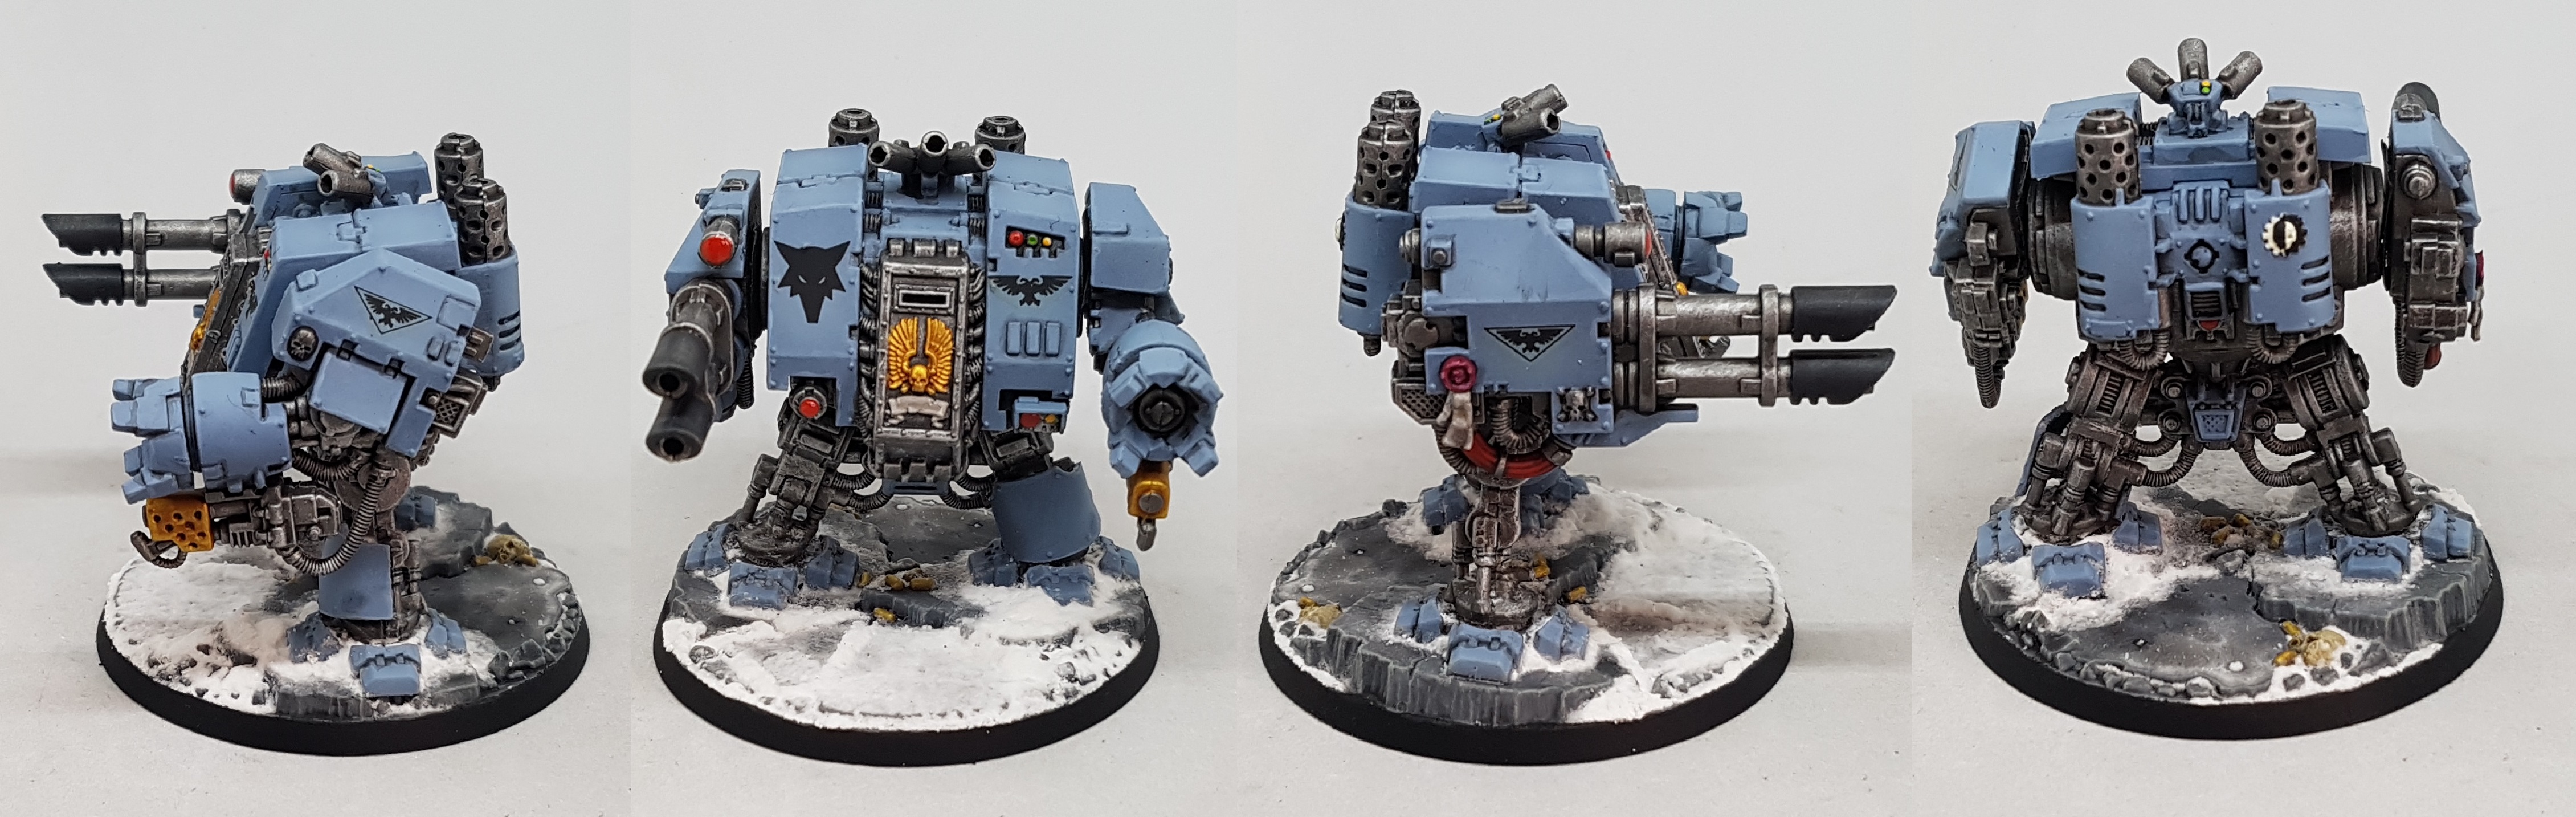
Dreadnaught Prep
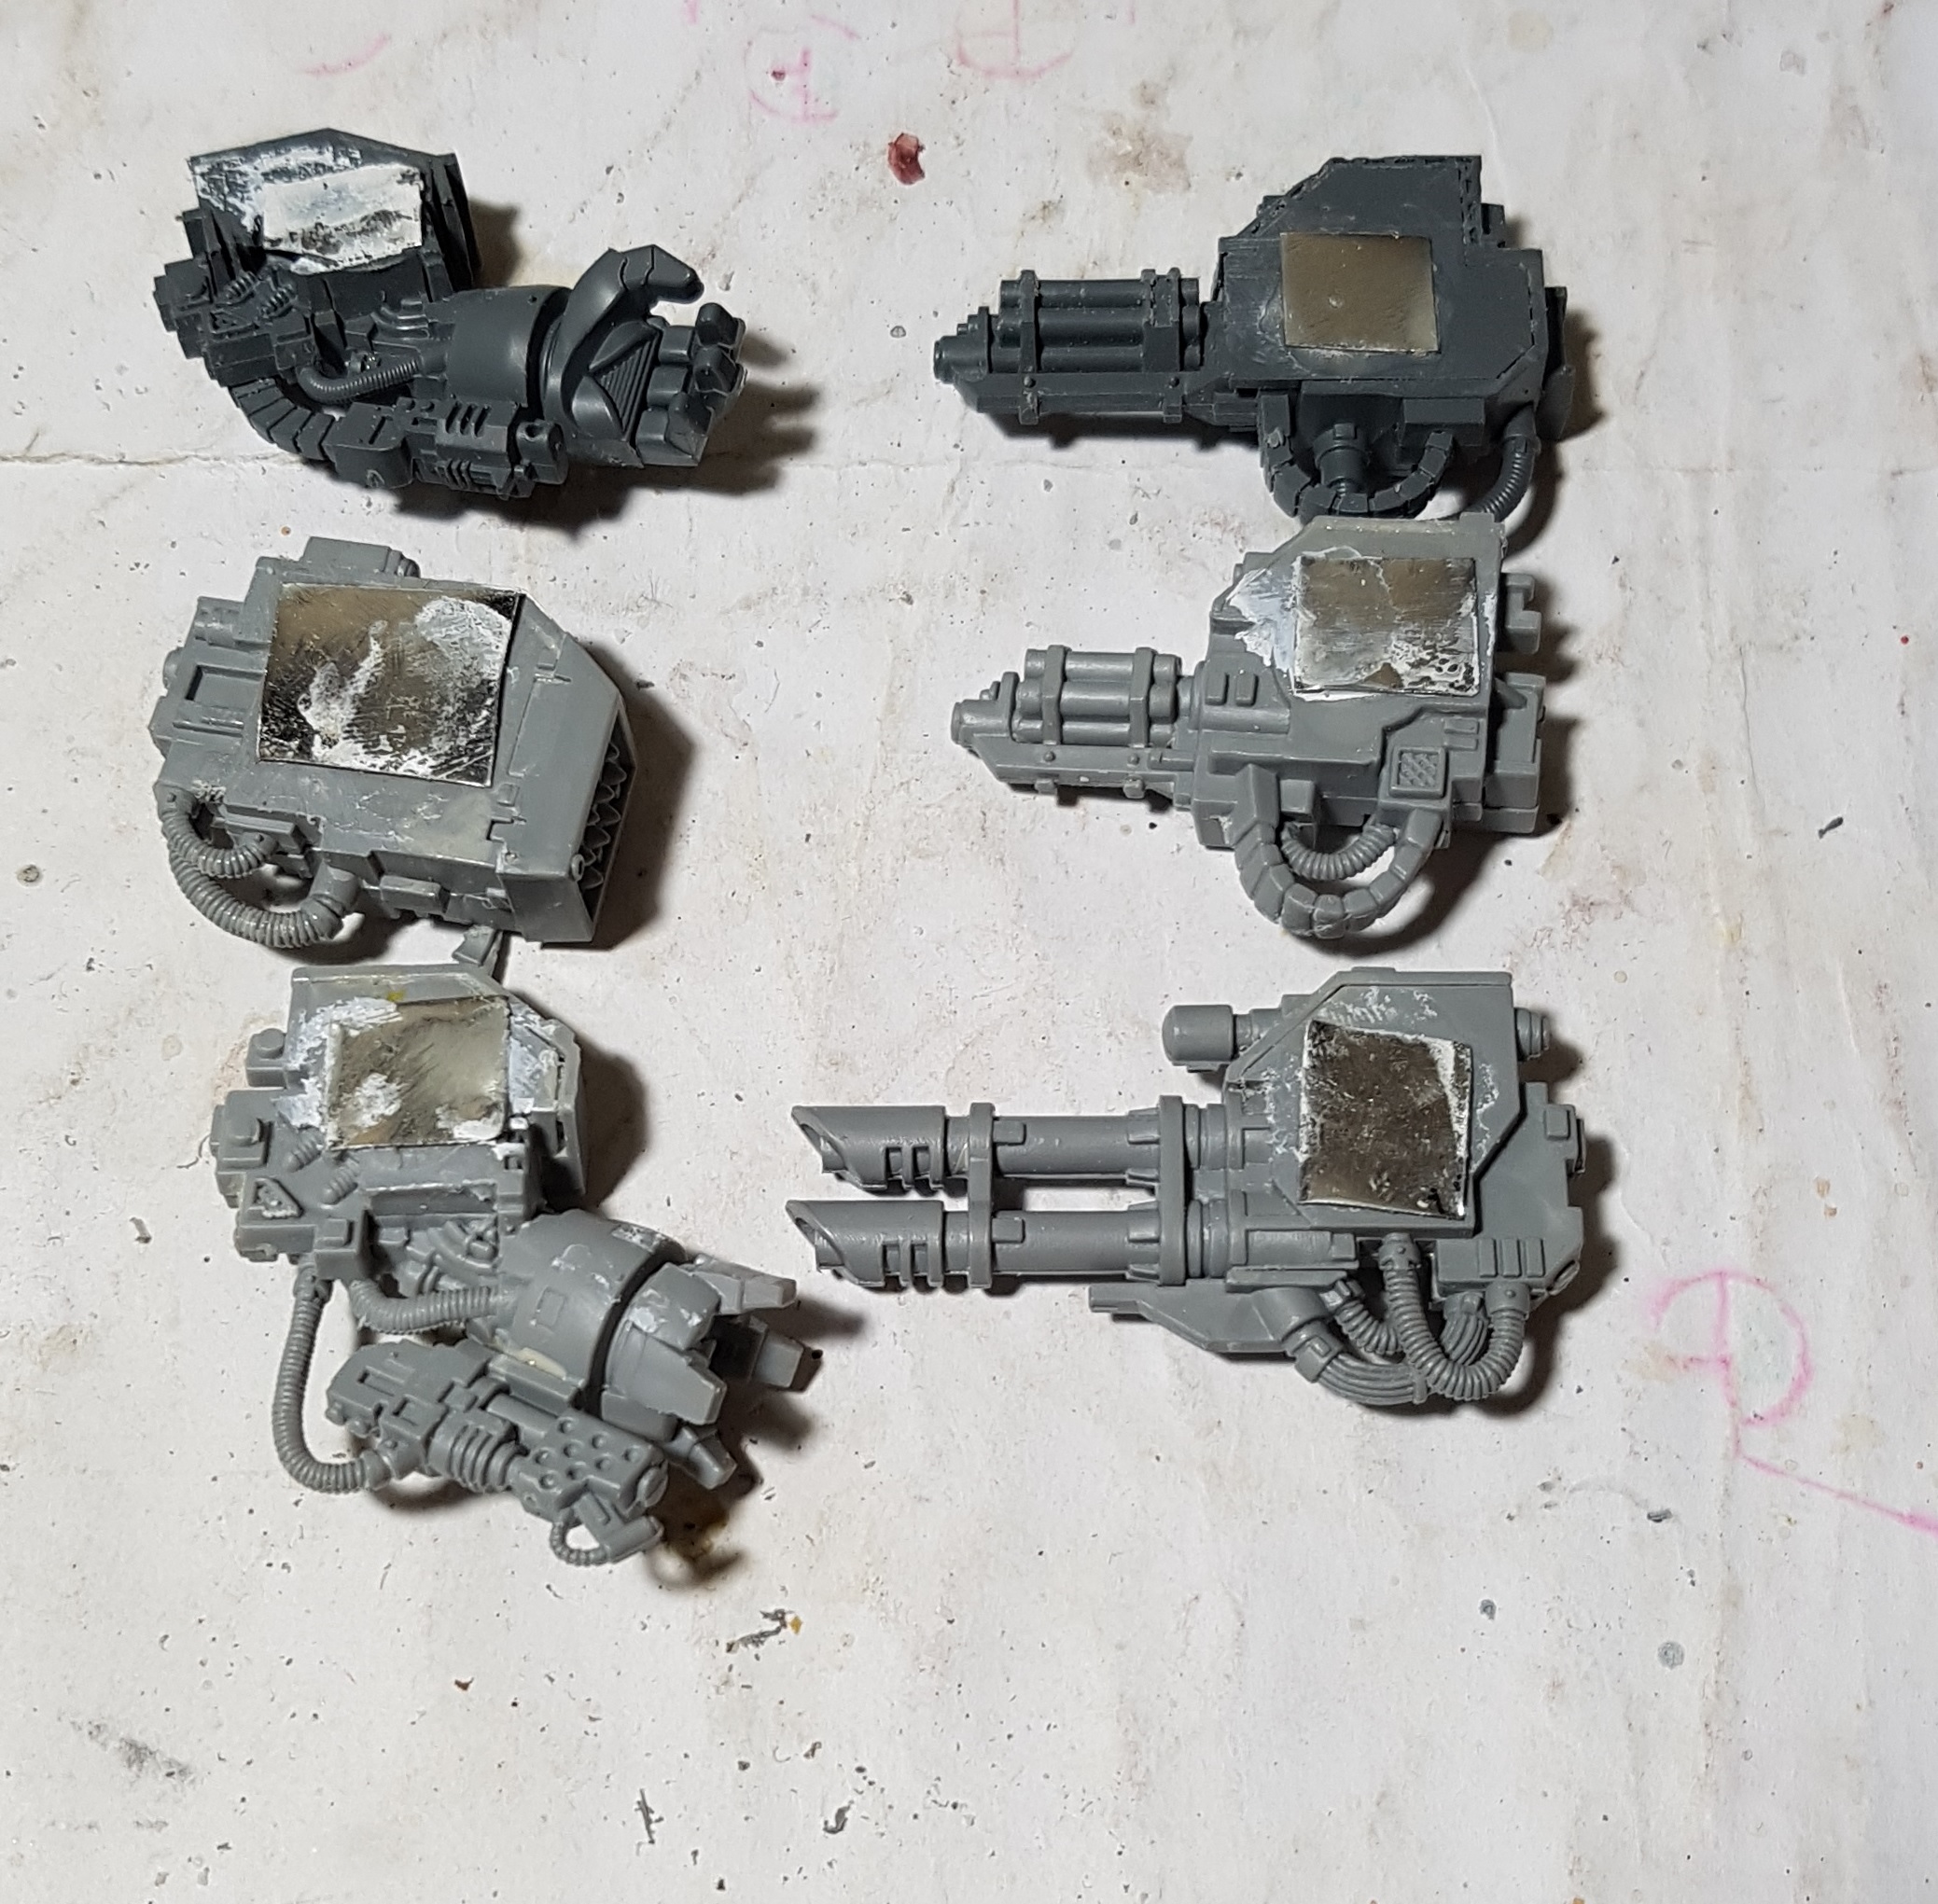
The box contained 2 dreadnaughts, but 6 limbs so I’ve decided to magnetise everything to allow options. I’ve had a look around online for advice on this and I saw someone use magnets on the body but metal plates on the limbs in order to save on magnets and to not worry about aligning everything perfectly. We had one last tub of Twiglets left after Christmas when I read that so I tested to see if the bottom was magnet friendly and it was so I ate the Twiglets and saved the metal.

I carefully removed the limbs from the bodies. By carefully I mean I pulled, prised and levered, and ended up getting a hacksaw for the last limb. I used some wire cutters to clip through the rim of the metal, but otherwise it was thin enough to cut through with a decent pair of scissors. Small squares were cut out and glued on the the limbs. Three holes were drilled in each shoulder in no particular arrangement and magnets were glued in to them. I tried to keep the polarity the same across all magnets in all shoulders in case of any future decisions.
Once the glue had dried I tested them out. They seem to hold very well and allow for rotation.
Next up is Priming. Anyone got any ideas how to hold the extra pair of limbs while I work on them? Sadly I don’t have any large magnets to hand.
——————————————————————————————-
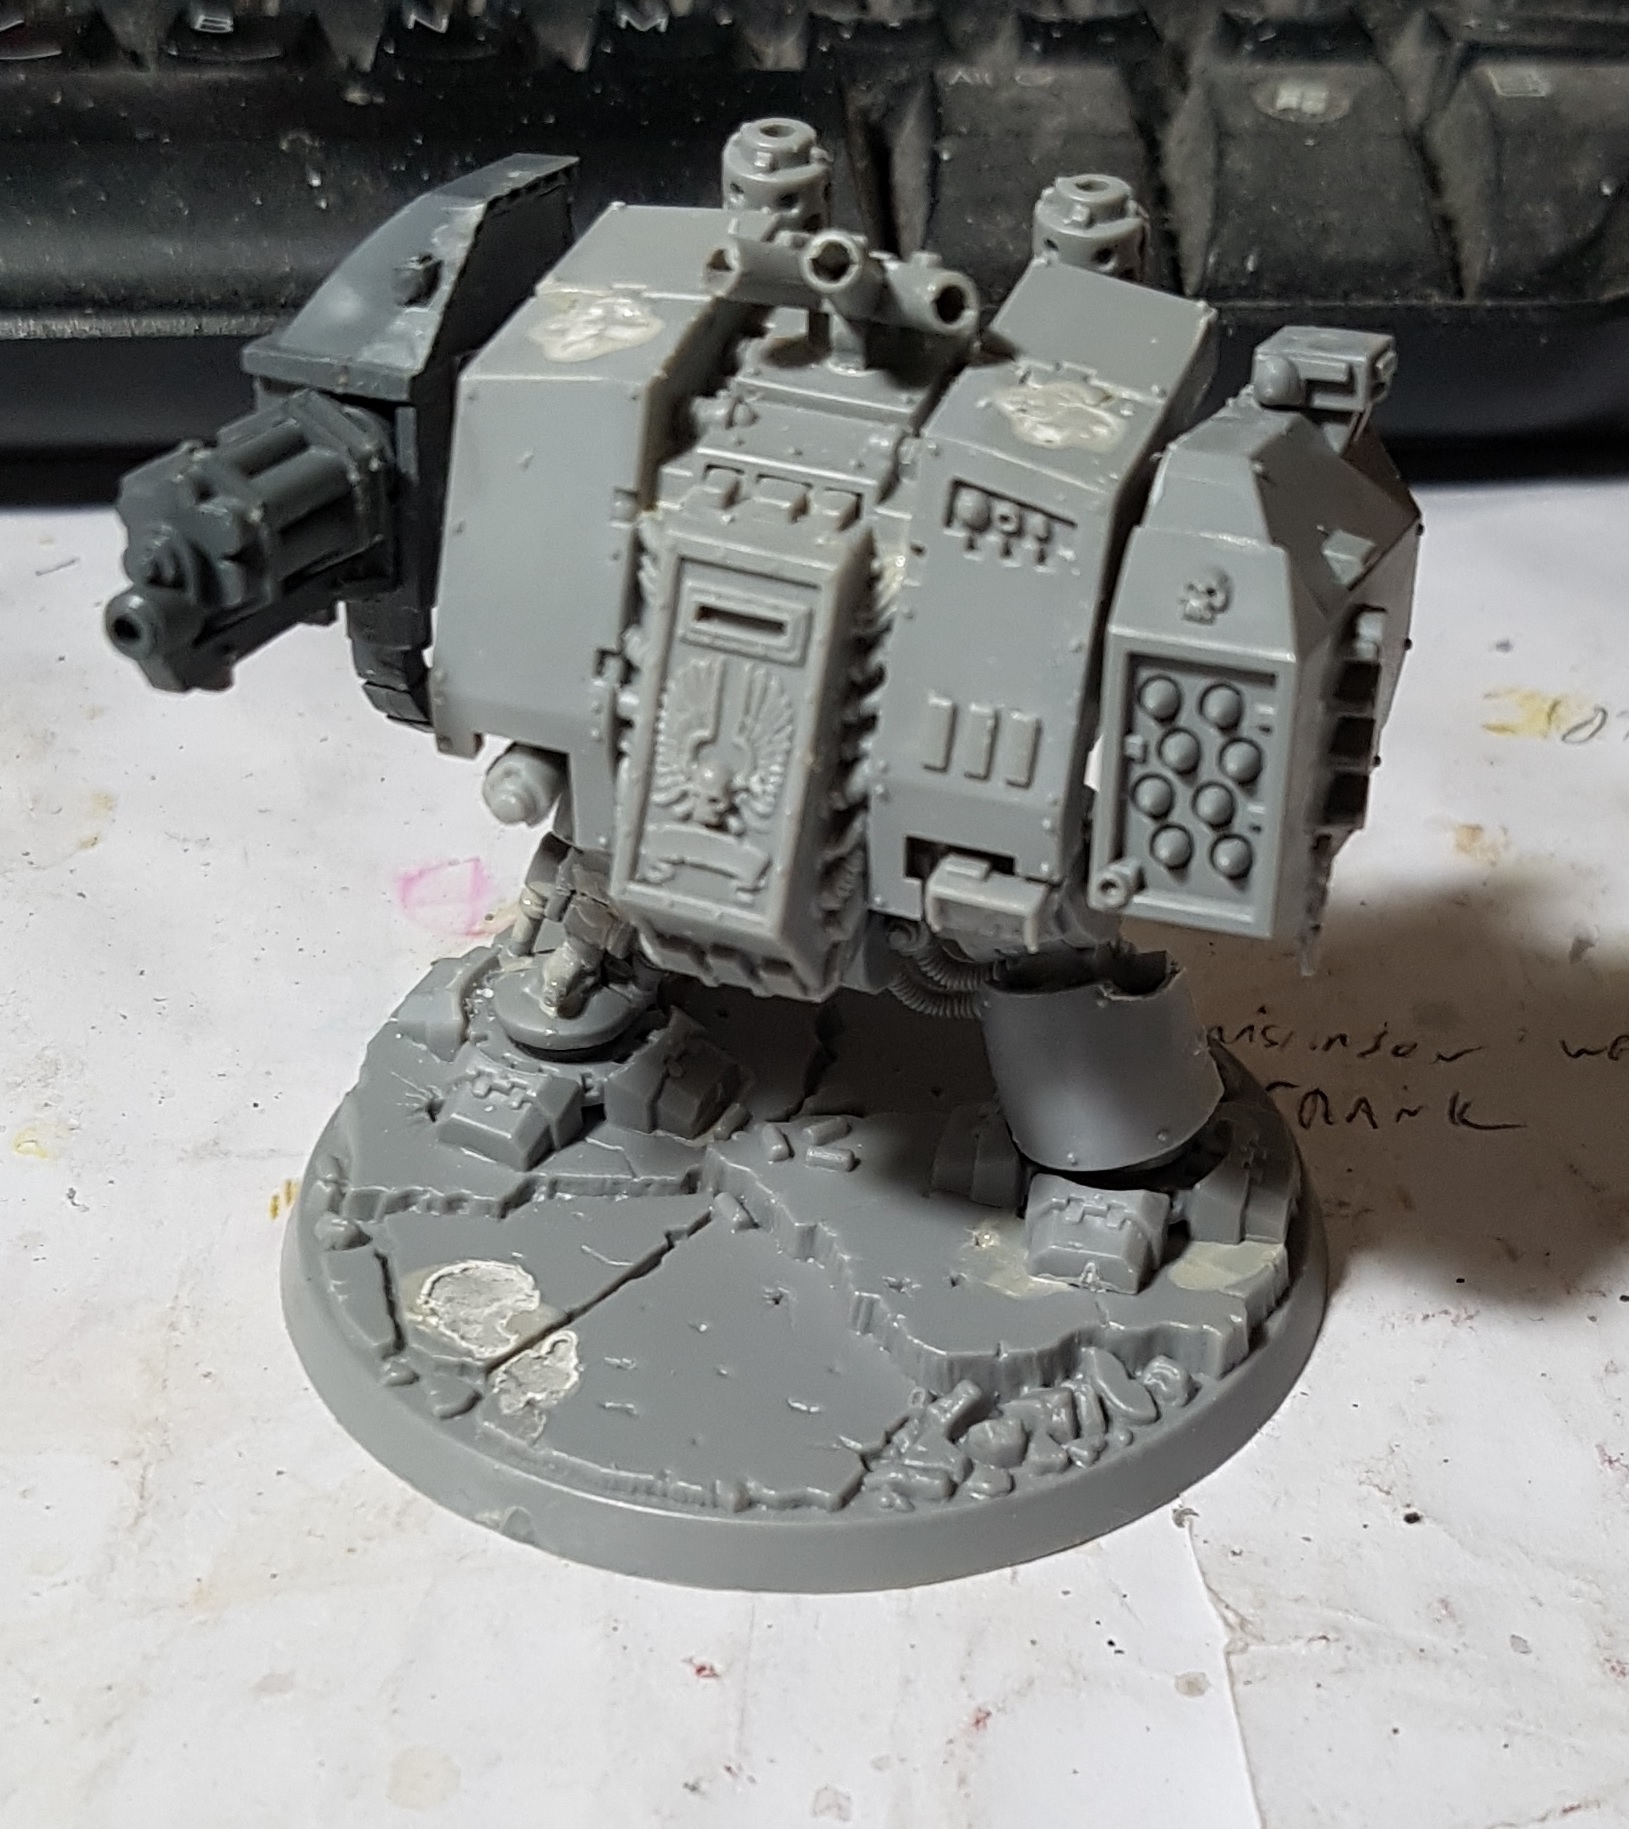
Priming is done. I’ve tried a mixed aproach. I started with a solid coat of black, and then went for a heavier than usual zenithal white. i then downed the pressure and tried to reclaim the shadow a little with some thinned black. I had less success this time around than with the tanks, but its all learning. We will see how it pans out.
I was hoping to have these guys finished by today, but I ended up doing a lot of babysitting over the weekend. With any luck they will be painted across the week and I can base and varnish this weekend. Tonight I highlight the gold and then perhaps work on the purity seals? I’ve noticed that there is a nub on the right breast of the venerable dreadnought where research says a purity seal was supposed to go. I don’t have that part. I’ve found a decorative wolf skull that should cover it nicely and help tie the Dreadnought better in to the army. I’m also considering the missing knee pad on the other one to be battle damage. Had I noticed before painting I might have had a go at crafting a replacement, but it’s too late now.
This just in: This has won me a Golden Button!
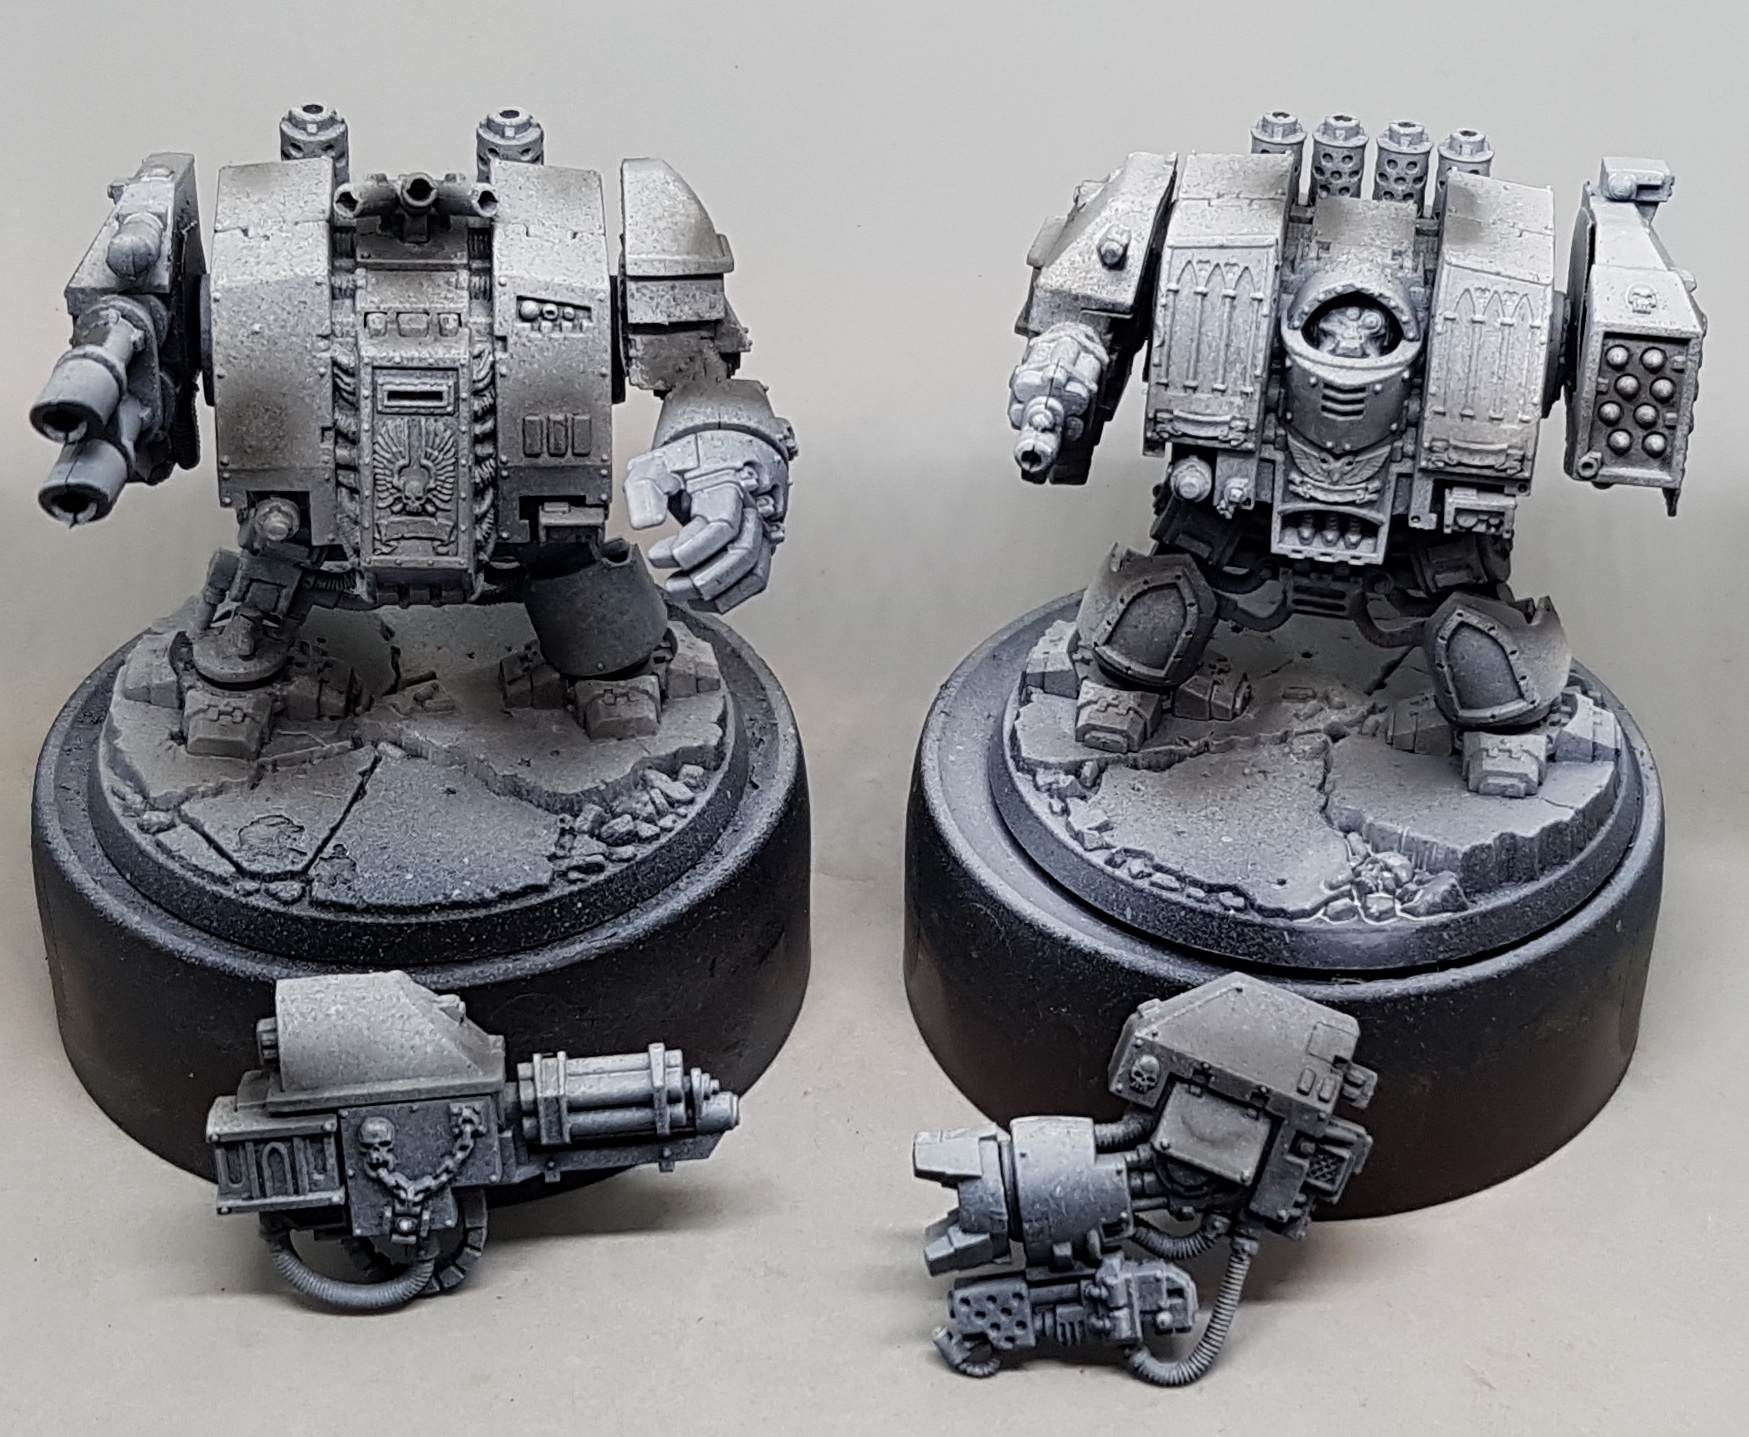
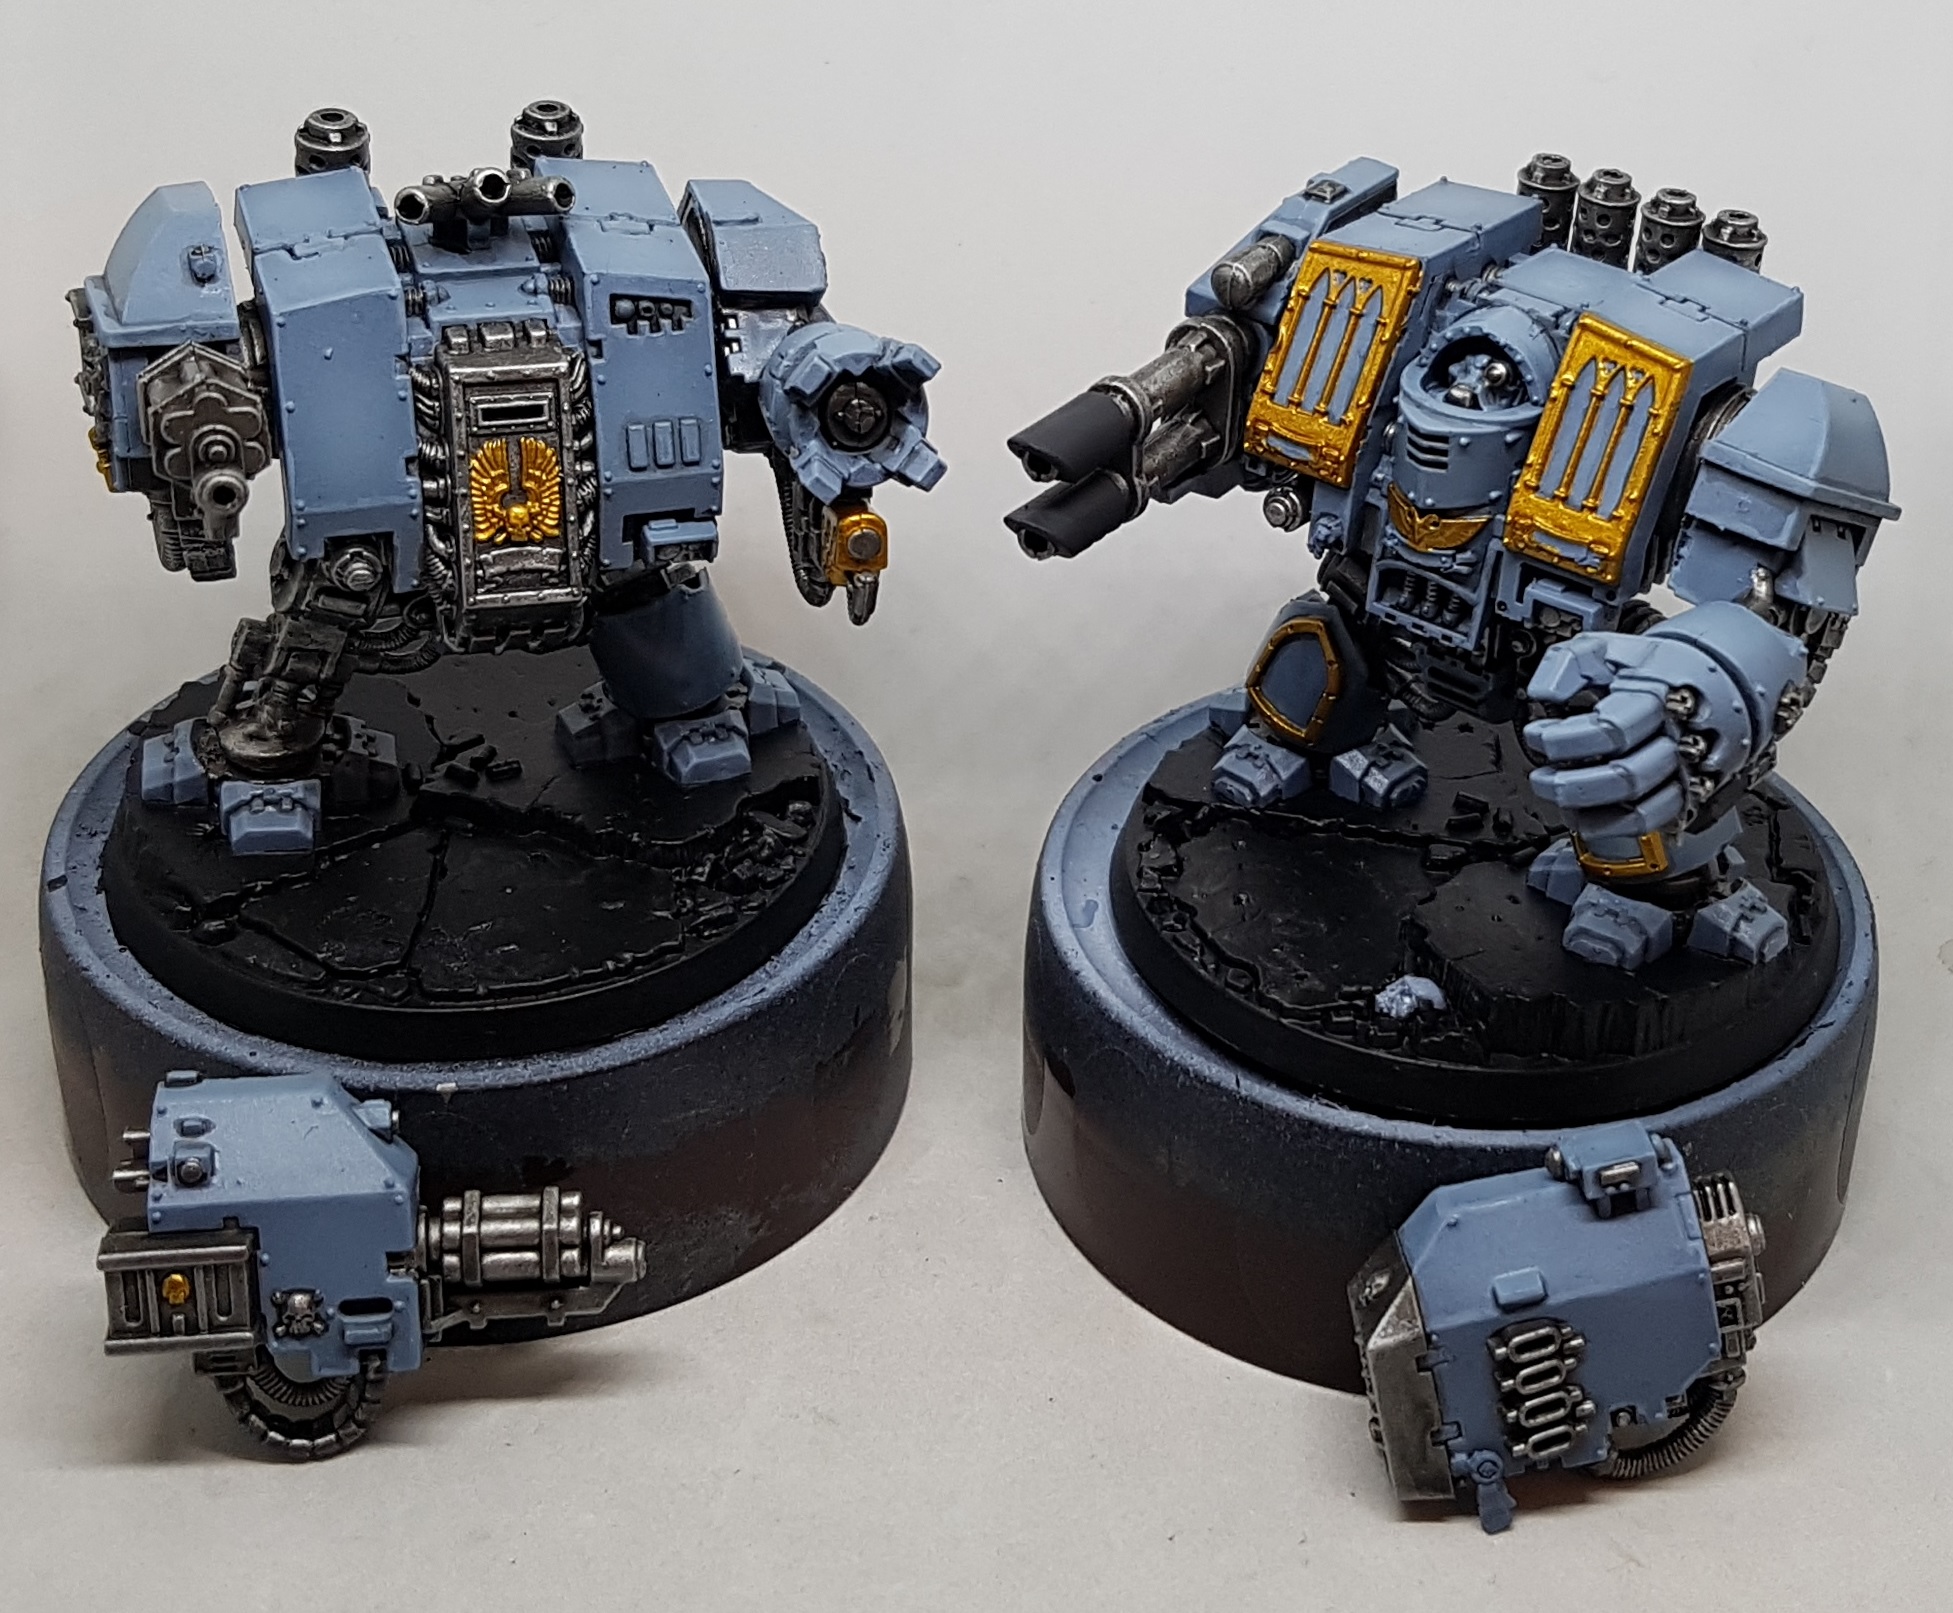
Community Spotlight: Dreadnought Magnetics, Old Trolls & Magical Goatmen
I have now finished both Dreadnoughts. The only new colour I added was for the warheads. I wanted a different shade of red for them so I went with a VGC 72.065 Terracota base for a darker flatter red. I highlighted the upper portions with some thinned P3 Skorne Red, and further highlighted the tip with a thinned mix of GW Evil Sunz Scarlet.

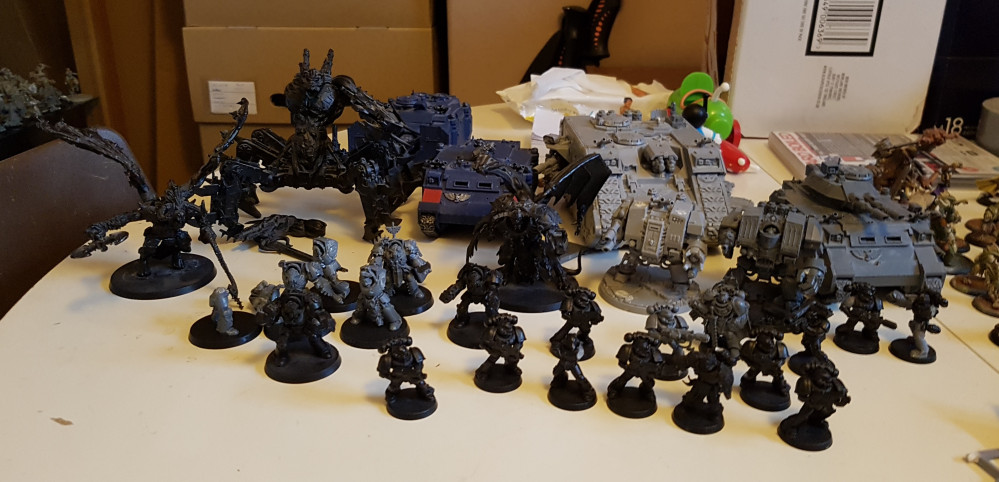
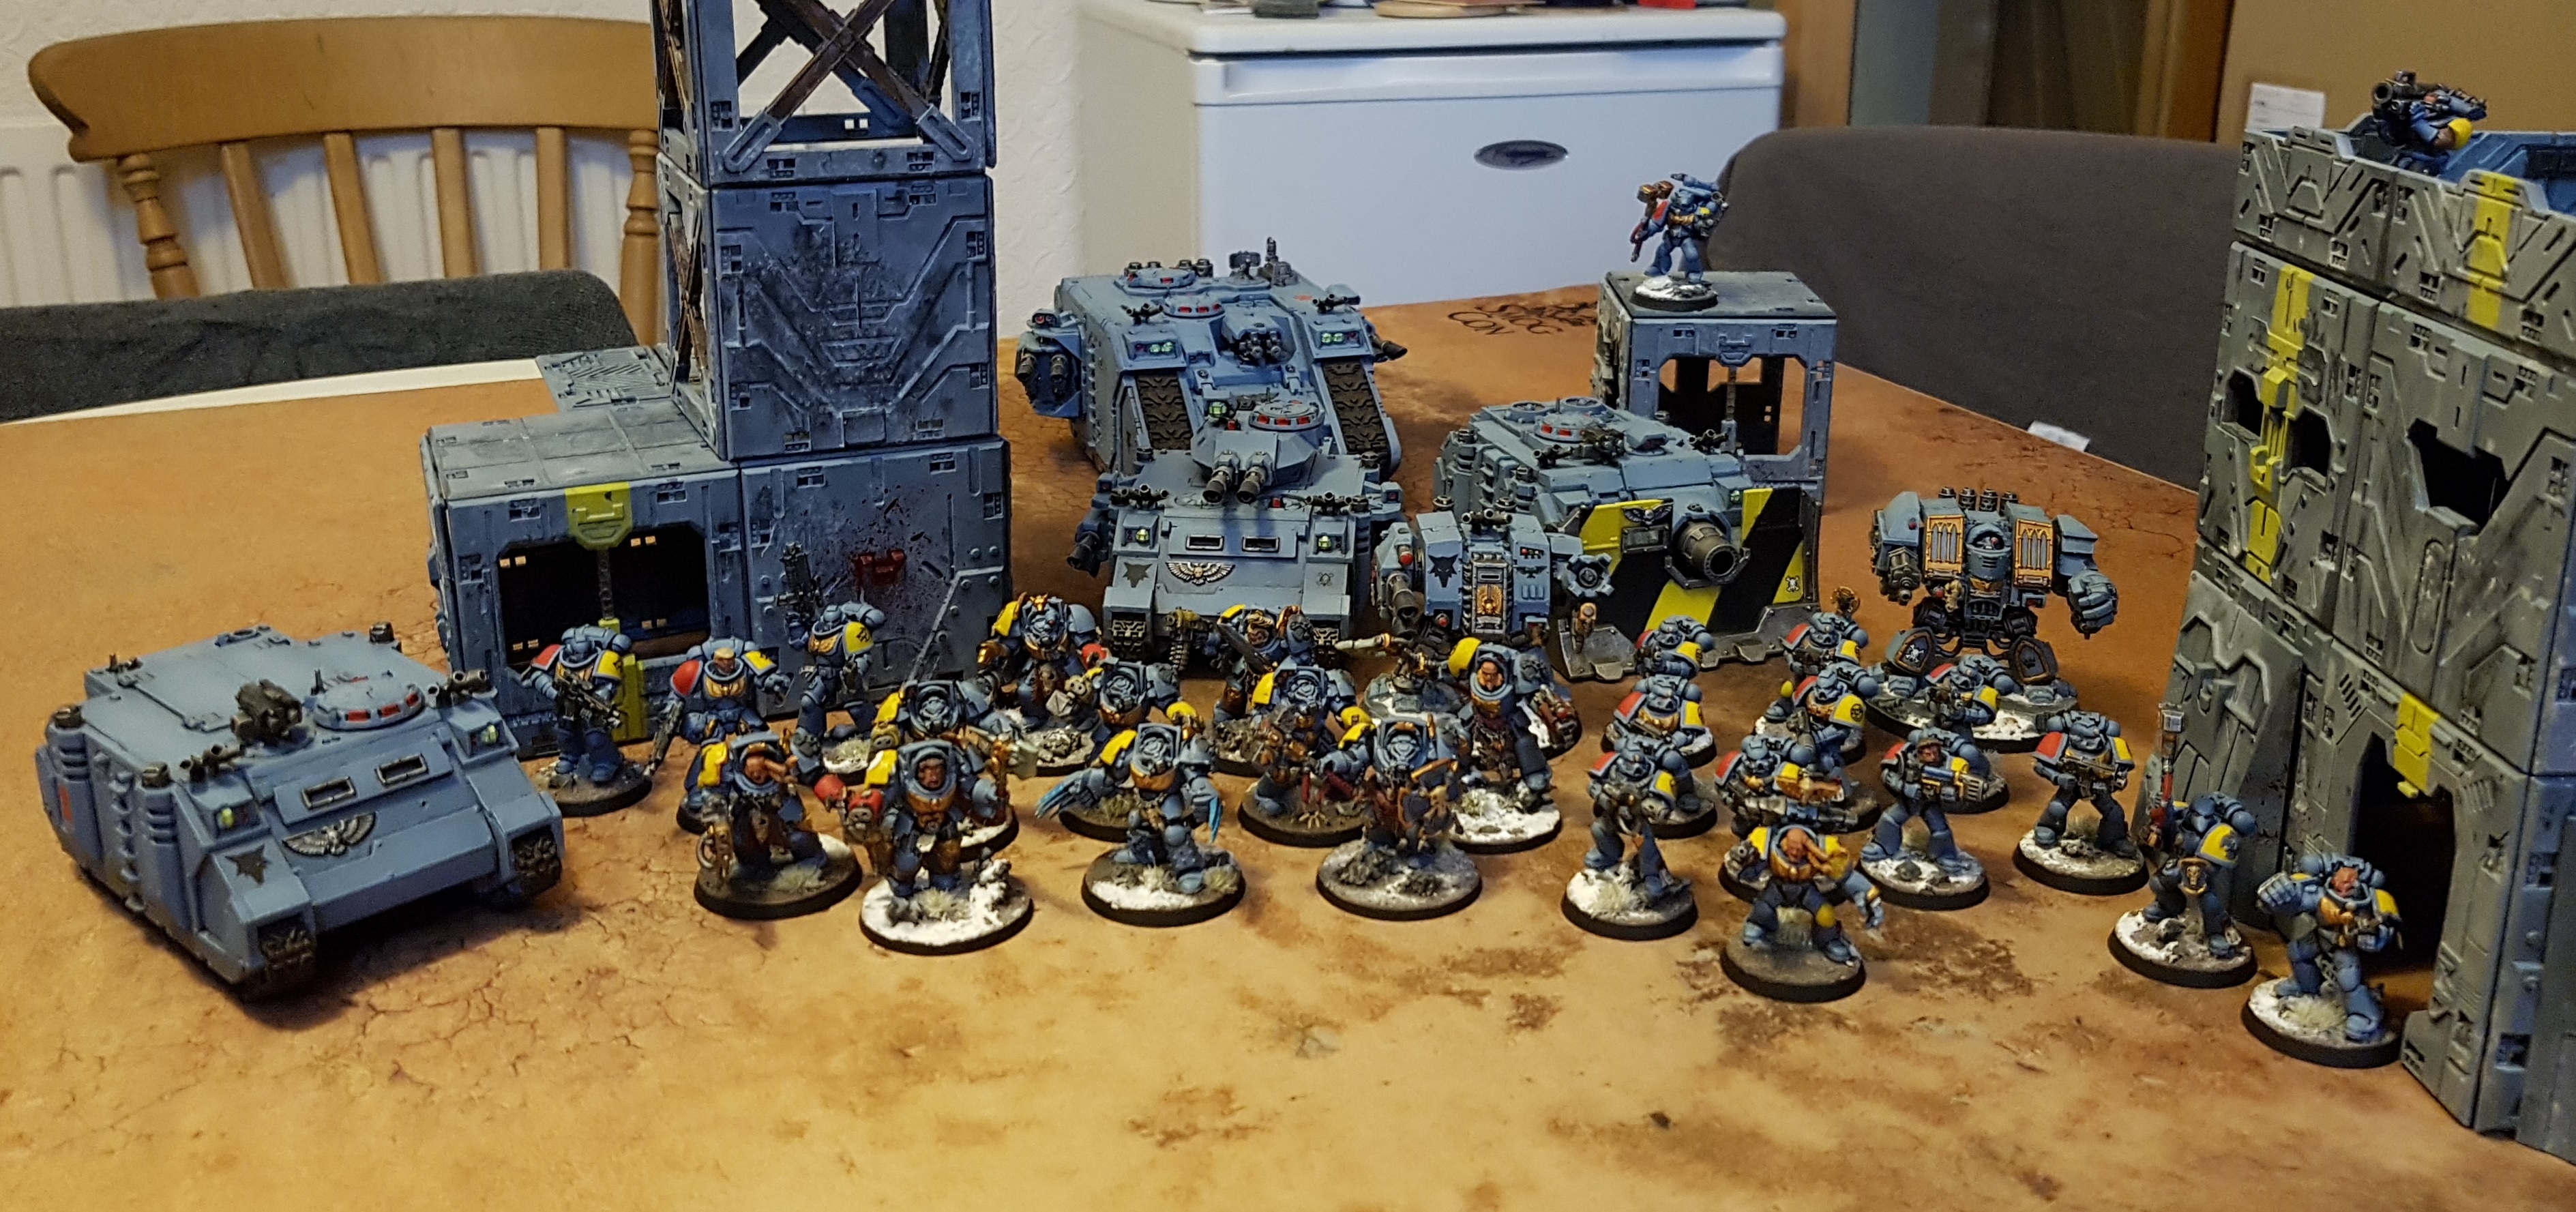
Space Wolves Finished
So that’s all the Space Wolf models from the box done. That leaves 3 big Daemons and a few odds and ends that might get sold or put on one side until they become relevant. Here is a picture of the army all painted up and advnacing on the enemy. The light in my games room isn’t brilliant so sadly the picture isn’t as good as I would have liked.
If you wish to see them in use I have a Battle Report/review type project log started up over here.
So far I have spent £10 on the box and about £15 on parts. I have sold Pedro Kantor and the Ltd Edition Captain for a £15 profit and I have something on Ebay right now that has a bidder and should make me at least £5 after Ebay and Paypal take their cut so I’m only down £5 overall!
Update: Just got about £5.50 profit from that sale, so I’ve only spent a net total of £4.50 on all these models and I’ve still got a Deathwing Terminator Sargent for sale.
Repairs to Damaged Daemons


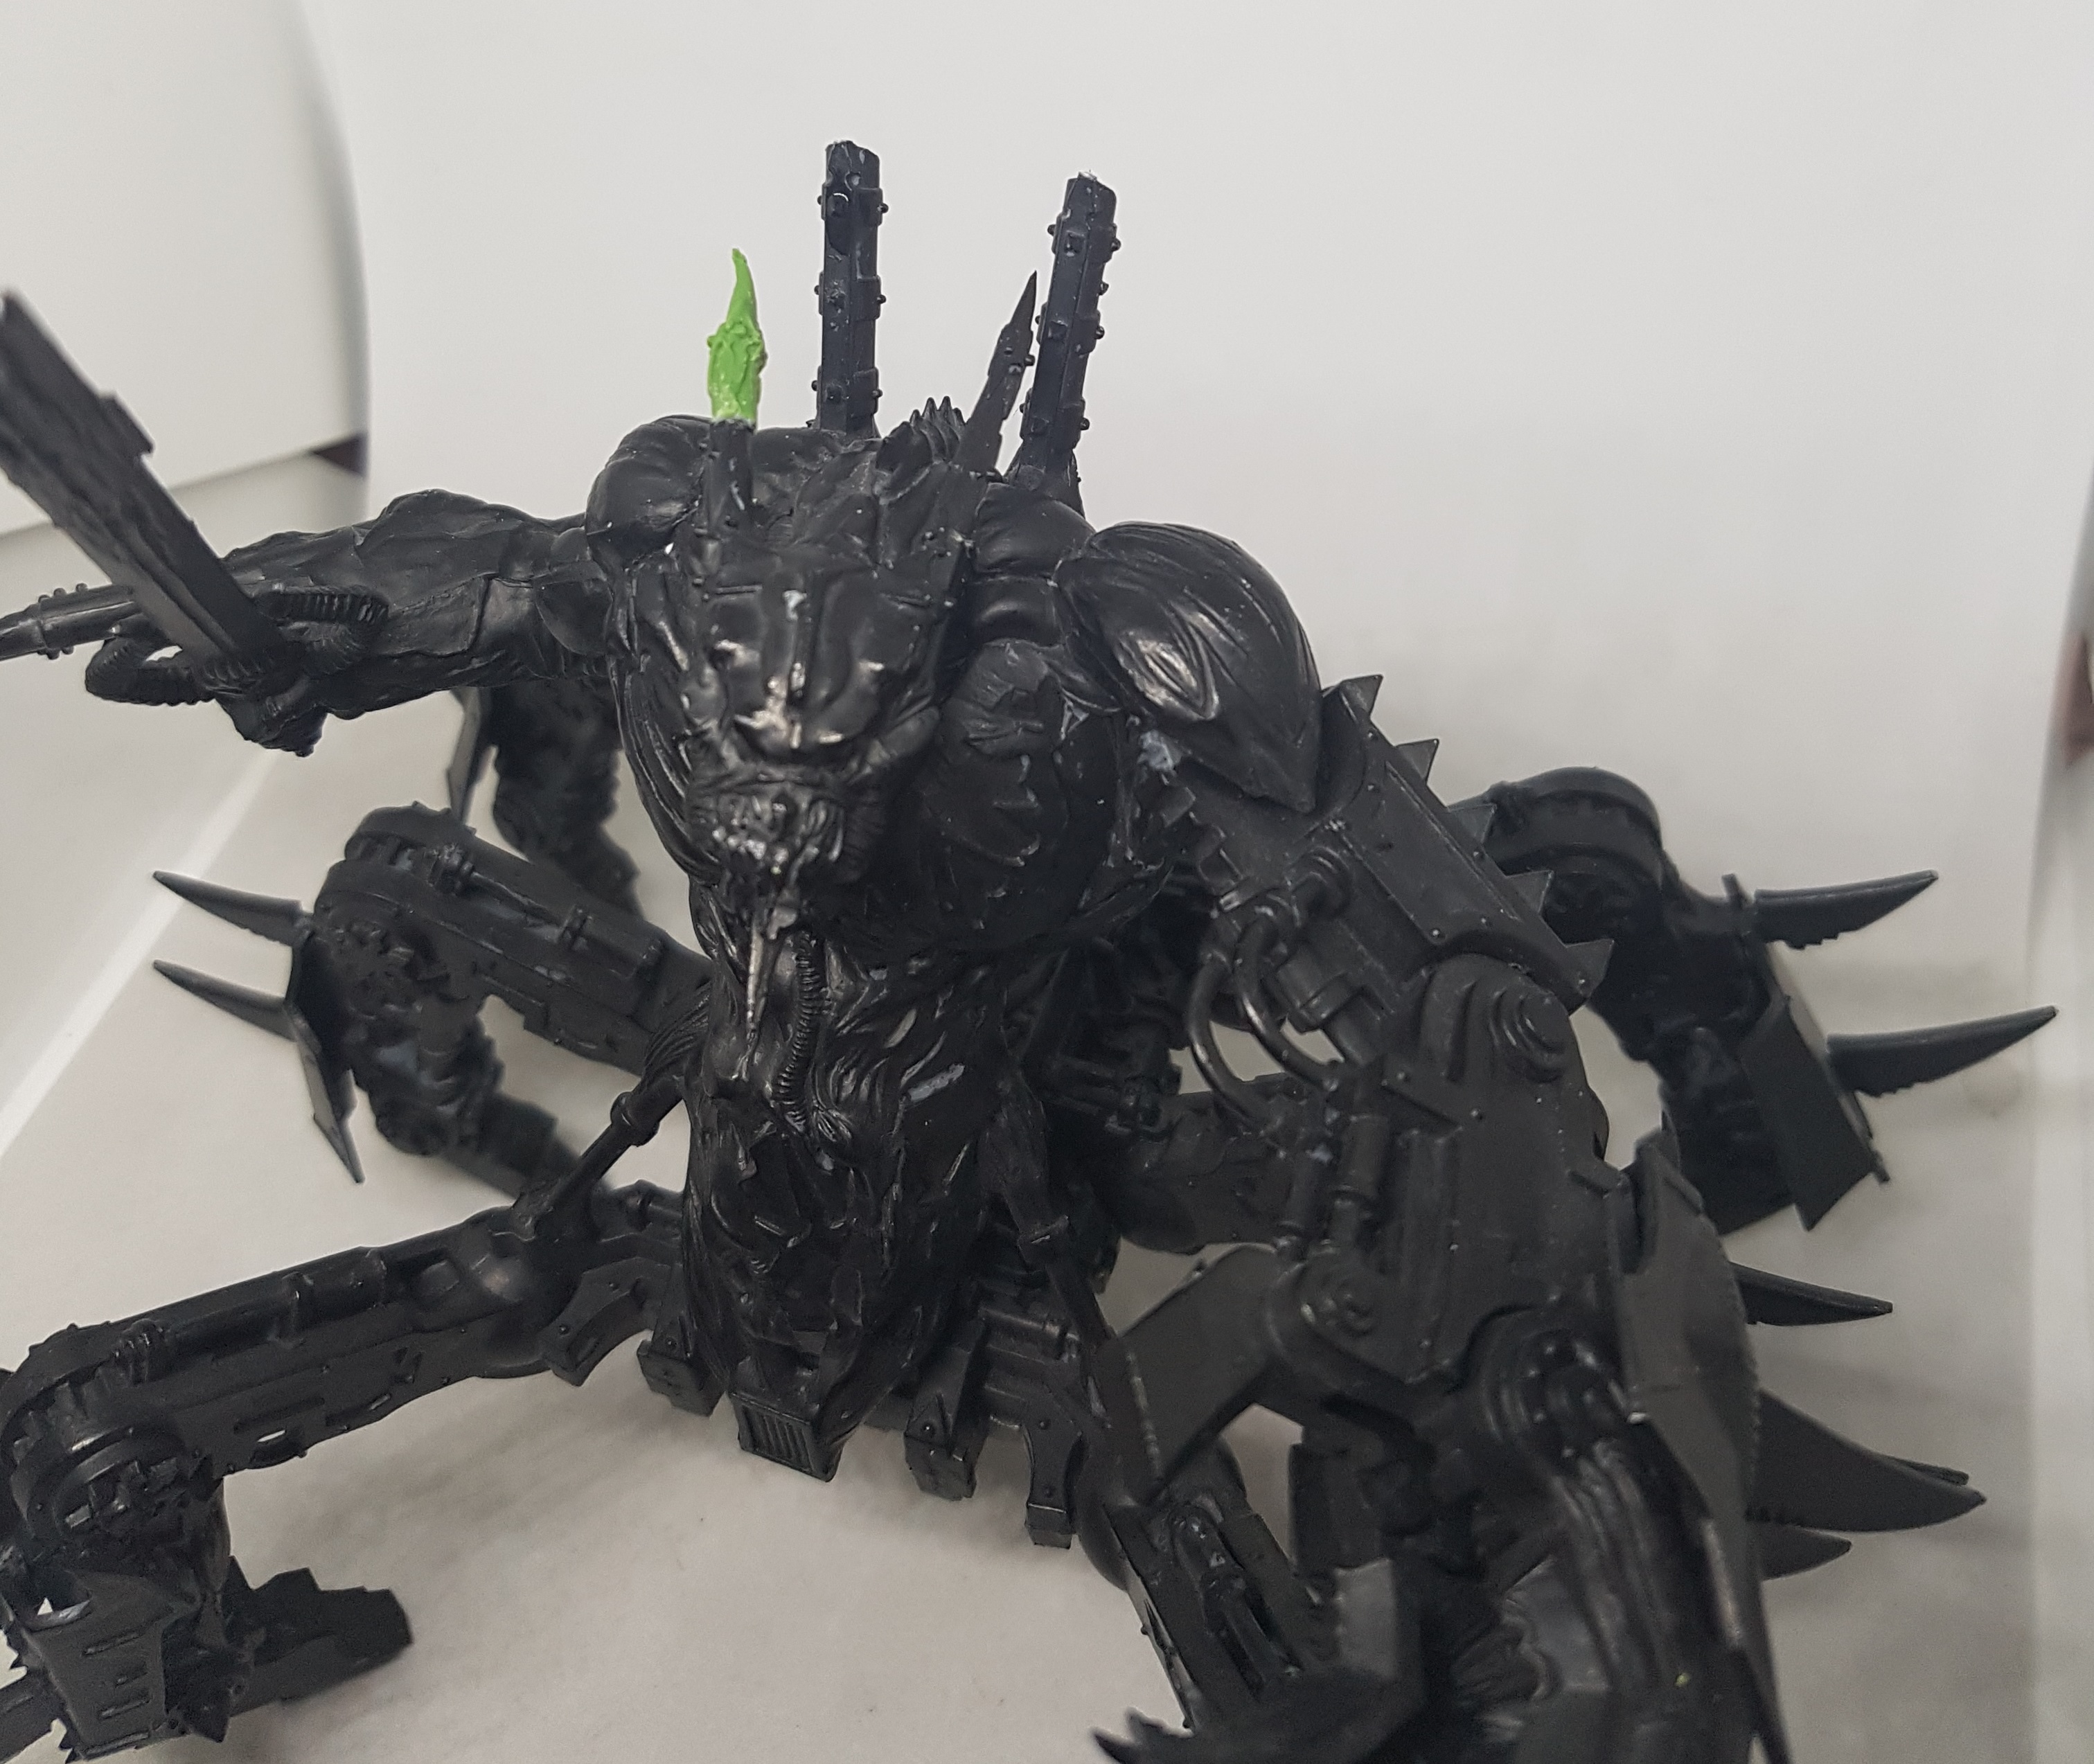
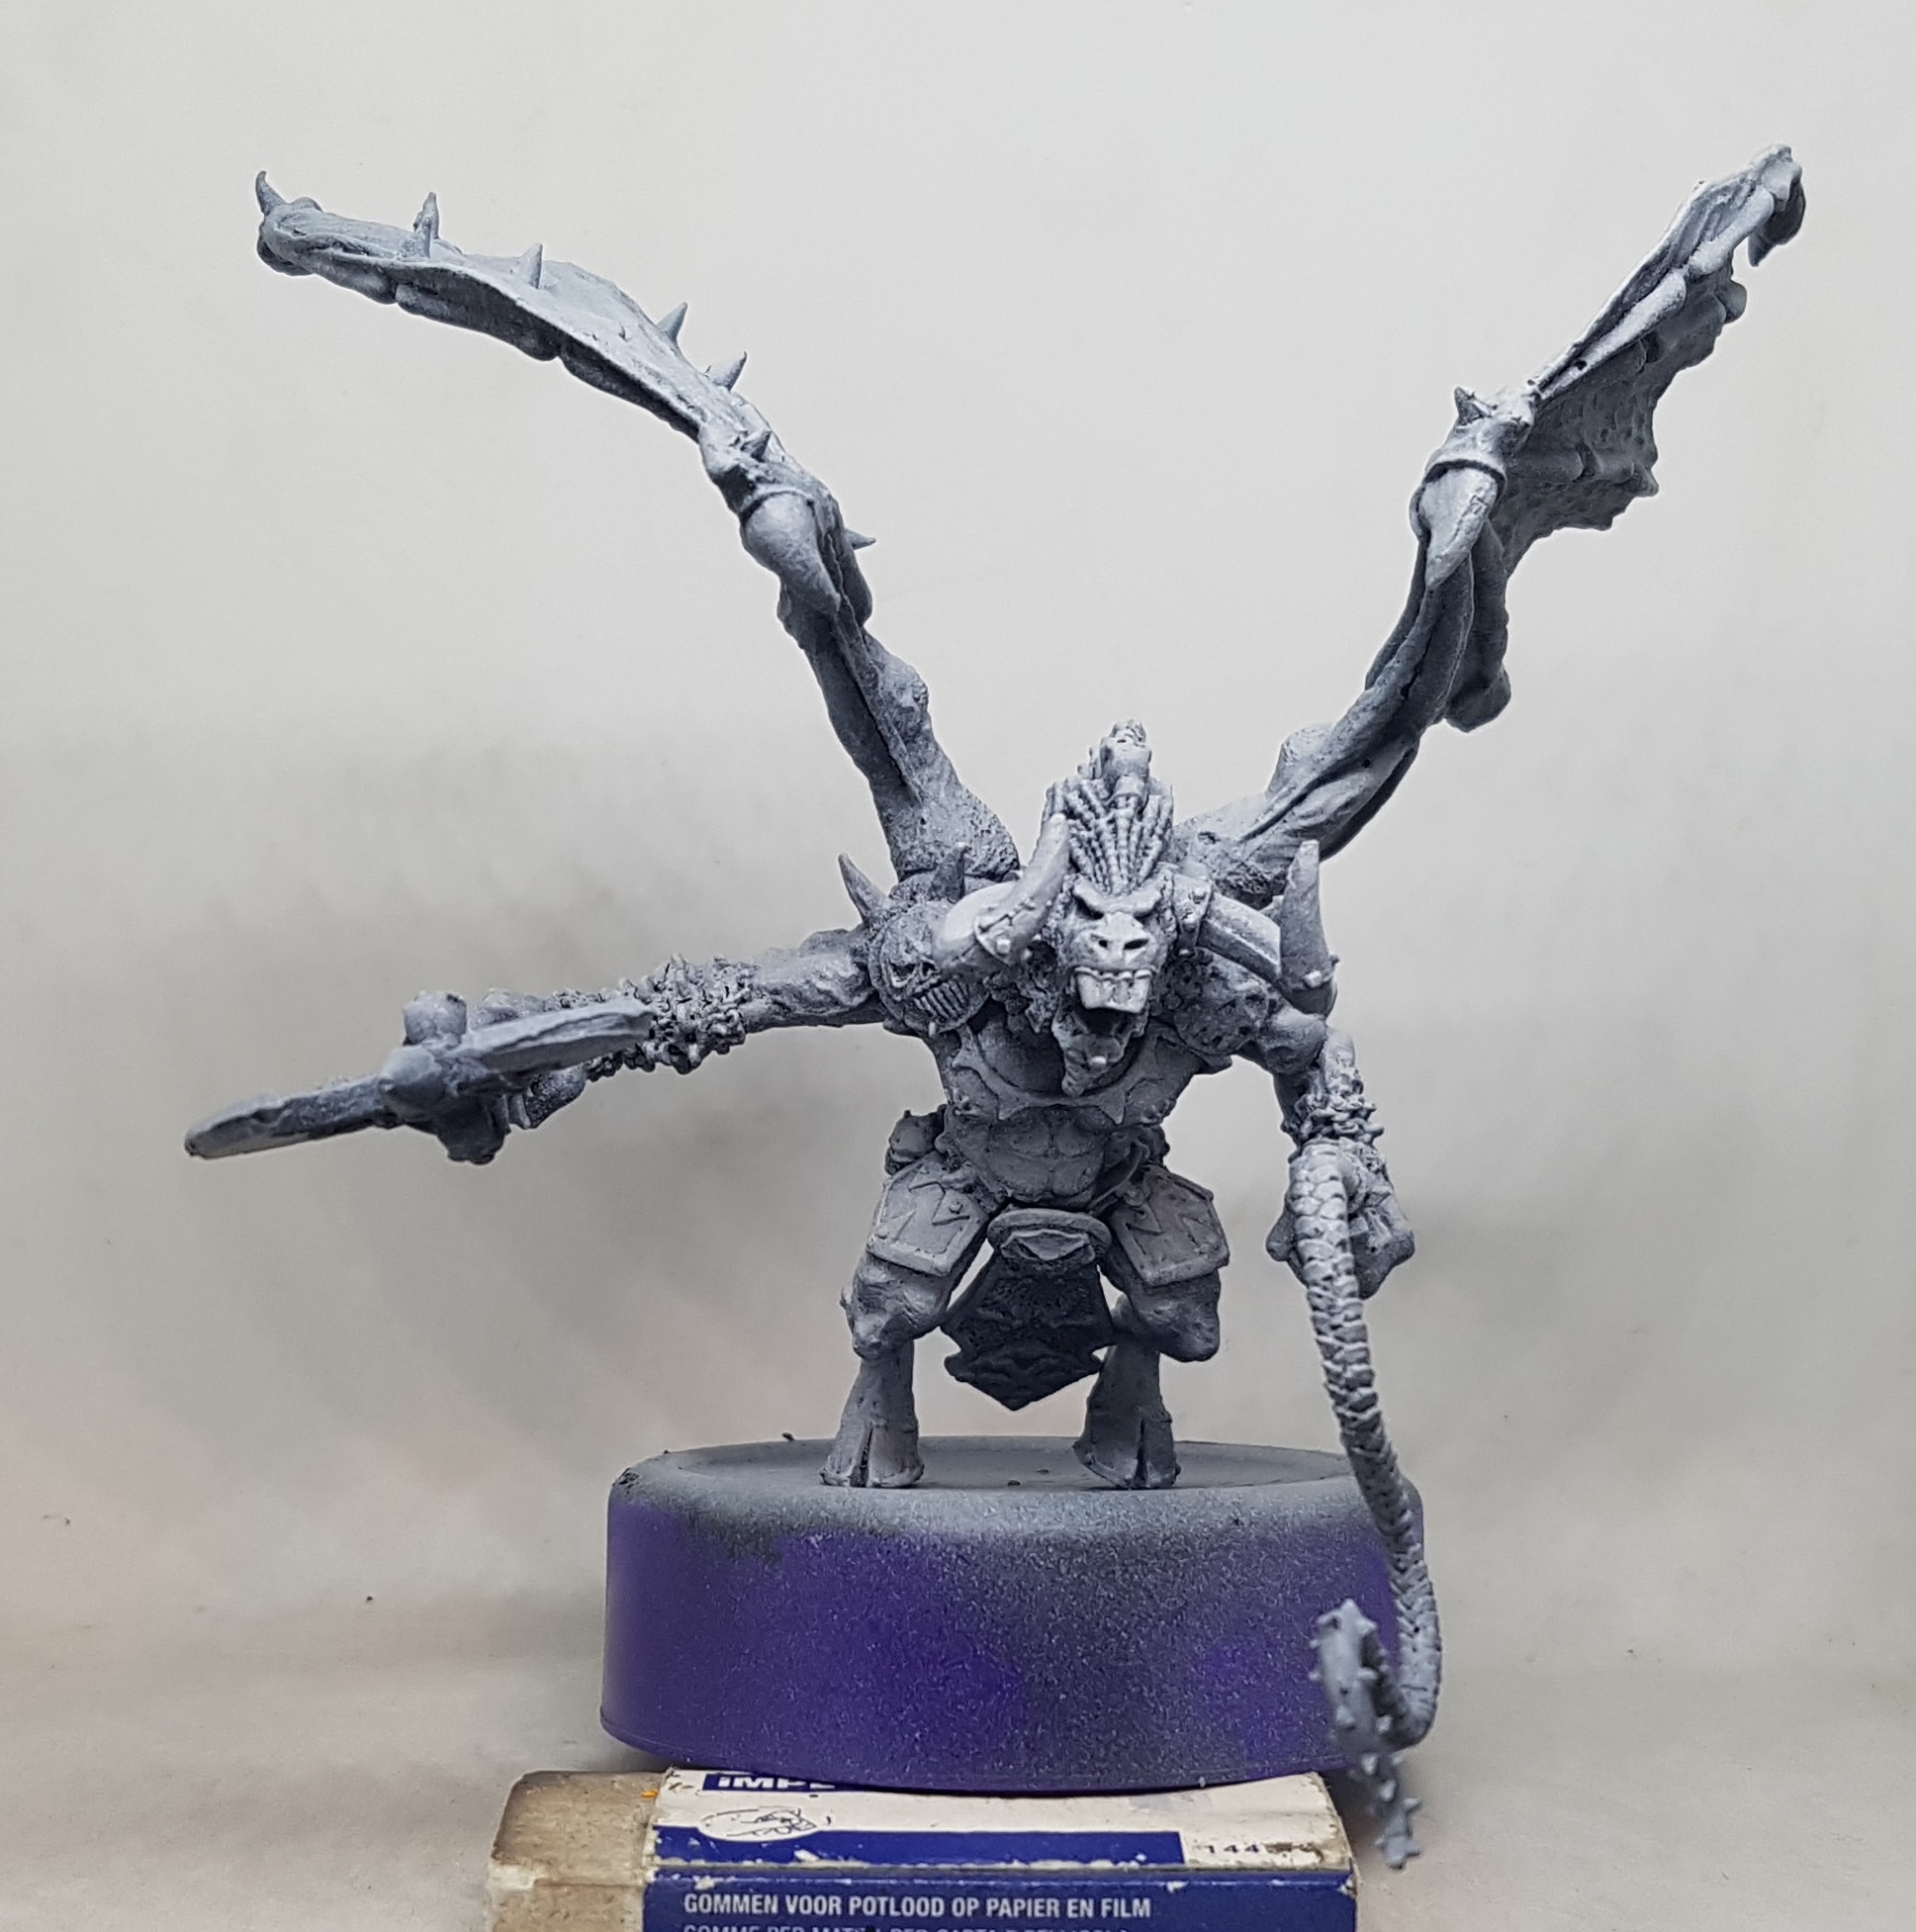
The wing of the Bloodthirster was damaged and one of the horns/antenna from the Soul Grinder were broken when I got them. I was considering just going with it and calling it battle damage, but I thought I’d try my hand at doing repairs. I found myself with some time to kill, but not enough to paint so I boiled the kettle and reached for the Oyumaro instant mould again. I melted down my previous castings, and wrapped the mould around the other horn, and the 2 neighbouring talons and left them to cool down to room temperature before removing them. They were given longer still before I cut a slit up the side of each where I hoped no one would see (without needing stitches this time!). I then stuffed them with green stuff as best as I could. They were then left for a week to set before popping them out of the moulds.
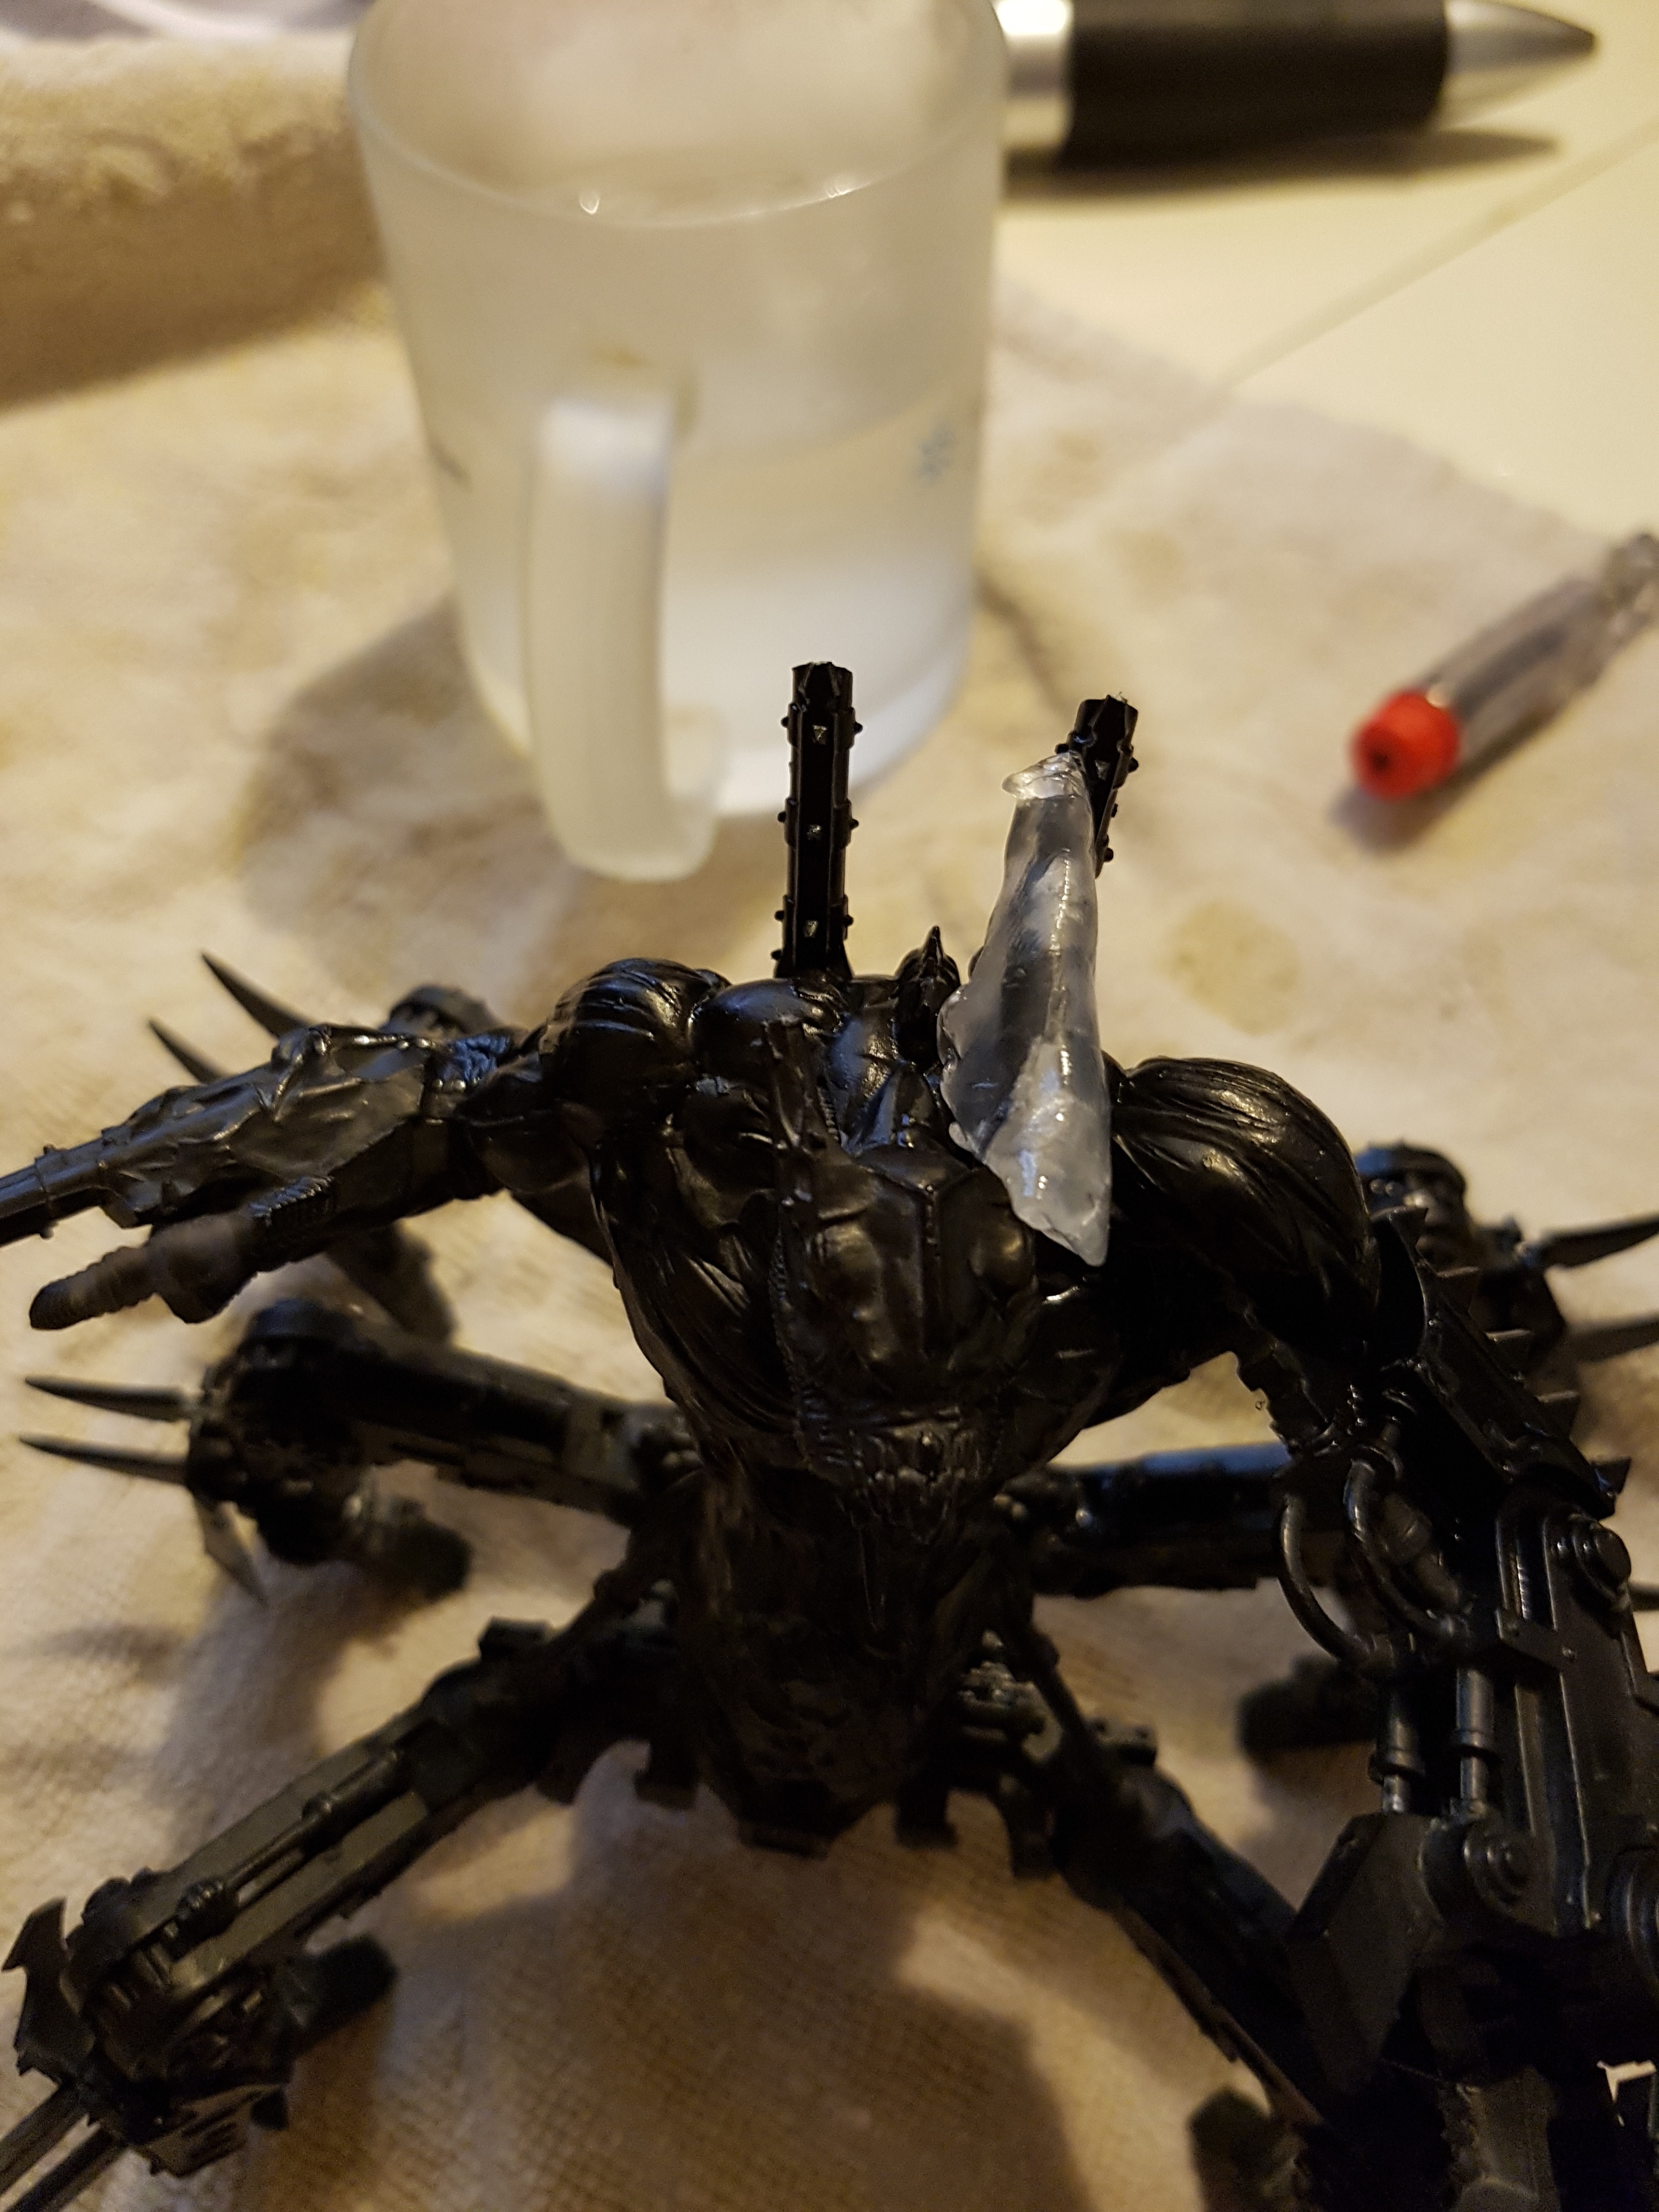

I then cleaned them up as best as I could and dry fit them to the models along the way to work out which talon to keep, and ensure the fit was the best I could get. Pin holes were drilled on both sides to strengthen the connection and reinforce the green stuff, and the parts were glued. A little Vallejo Plastic Putty was used to smooth over the connection for the talon. I’m hoping once primer is applied that these parts will blend in if you don’t look to closely. I might yet revisitn them with a hobby knife before then, but perhaps that’s just inviting mistakes? They are far from perfect, but I’m thinking they already look better than just the damage.
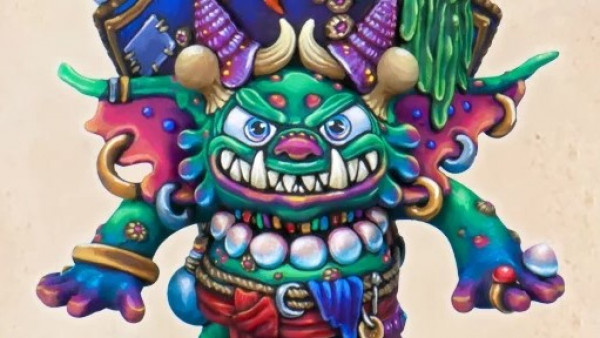
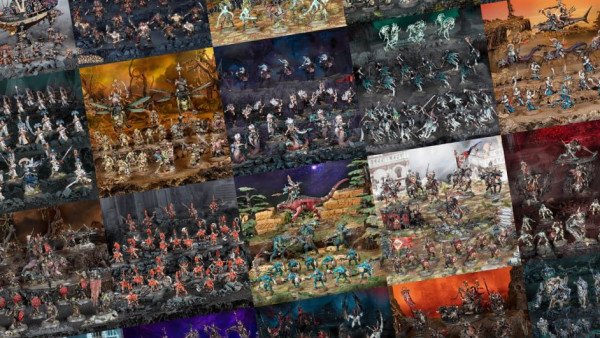
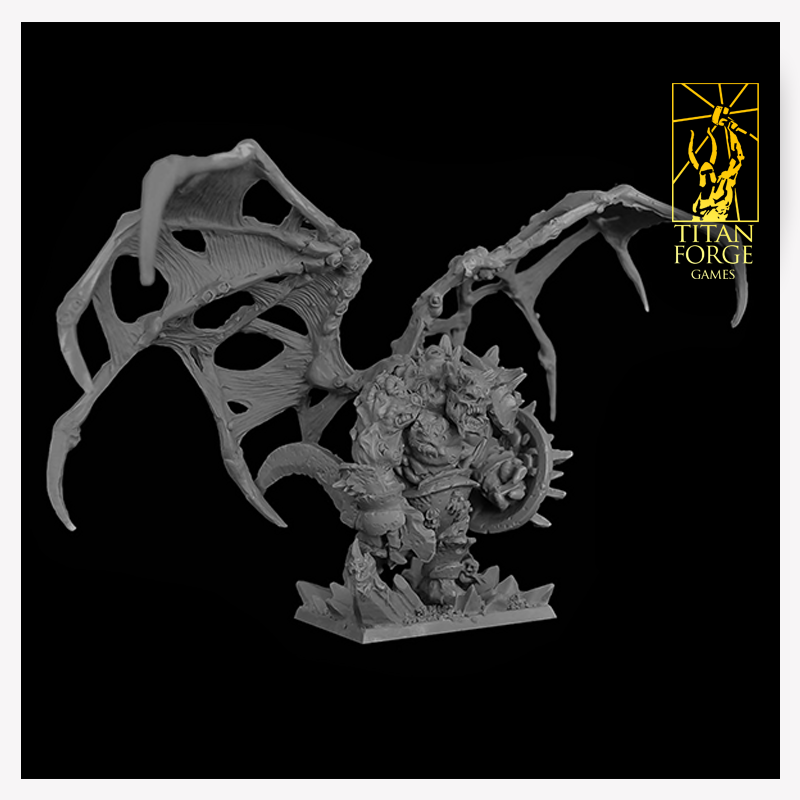
As for basing, I have the Behemoth of Decay from Titan Forge. I’m hoping to make him visually compatible with my Chaos Daemons. Take a look at his base. I’m thinking I can make similar spikes from old bits of sprue, even if I have to keep them smaller. I can then paint them up as obsidian. A dark grey, with a hint of blue/green to them, and edge them a brighter version of that blue/green. Something like the scheme in the second picture. Perhaps coat them with gloss varnish afterwards? I have the Realm of Chaos: Wrath and Rapture box unopened. What do people think of that for basing across both factions?
I prized the models from their bases using a hobby knife, a box cutter, and the small screwdriver I use to get lids off tiny pots of paint and only managed to stab myself the once, with the screwdriver thankfully. Turns out the feet on the Daemon Prince are tiny separate parts and one came off and broke so needed gluing back together. The models have had pins put in their feet so I can reconnect them to their bases, once I have painted and decorated them. I have marked out where the feet will go so I do not stick anything there that might get in the way.
The priming is now done, and I think it looks OK. It doesn’t quite have the definition of the original parts, but unless I’m looking directly at it, I don’t see whats real and whats home made. This may change when I come to actually paint them up.


I’m being a little cheeky and tagging this for the Spring Cleaning challenge. I started the project before that was announced, and I’ll be doing it long after it finishes so I suspect I don’t qualify, but I am continuing during the challenge so no harm in clicking a few buttons in the hopes of winning £50. I’m taking someone elses long abandoned project, fixing it up, painting it, and even getting some games in over here.
Making Daemon Bases
I’m trying something new with the bases for my Daemons. This is something I learned from AssetDrop for making crystal growths but I’ve never tried. I’ll be painting these up to look like obsidian, as detailed below.
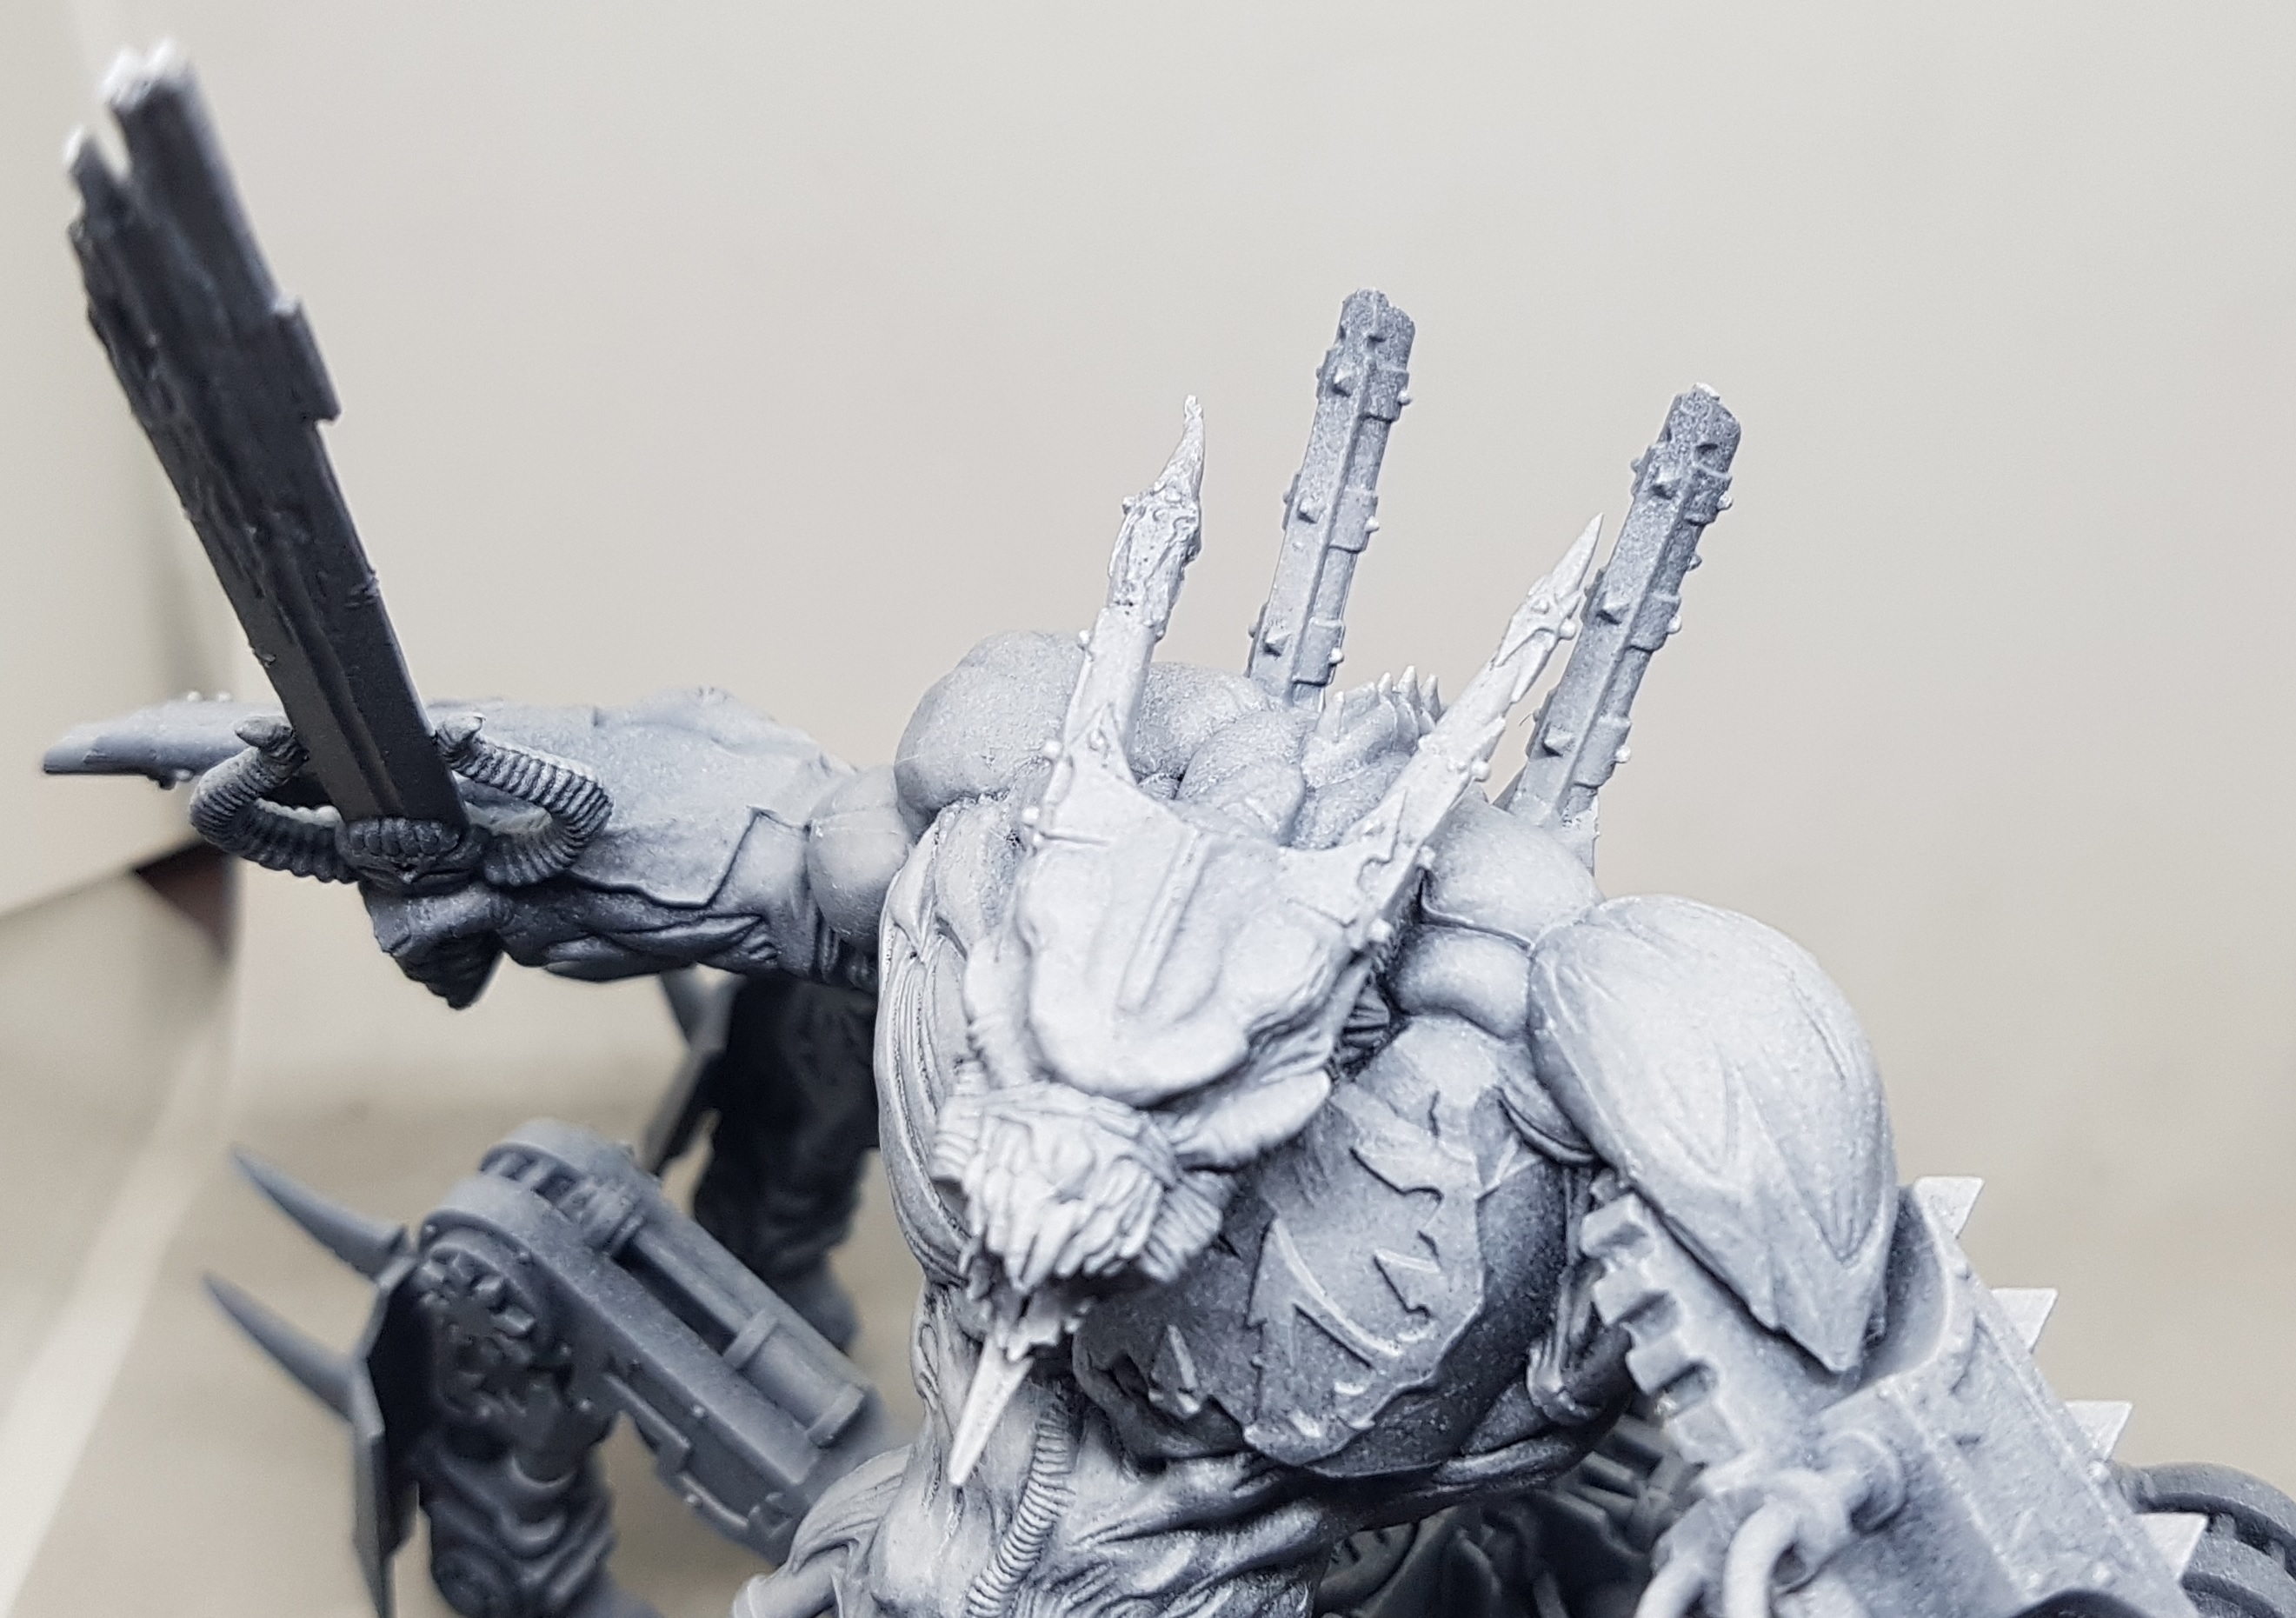
The first step was to save some sprue and cut out some straight sections, removing any writing or jutty outy bits. Then you take your hobby knife and shave off the corners so you have an irregular 8 sided shape. Then you bring one end to an irregular angular tip. I then cut a flat bottom on to it at the angle I want.
As you will see below, this gets very messy very fast. Plan for this, and for gods sake, don’t blow on anything like I did!
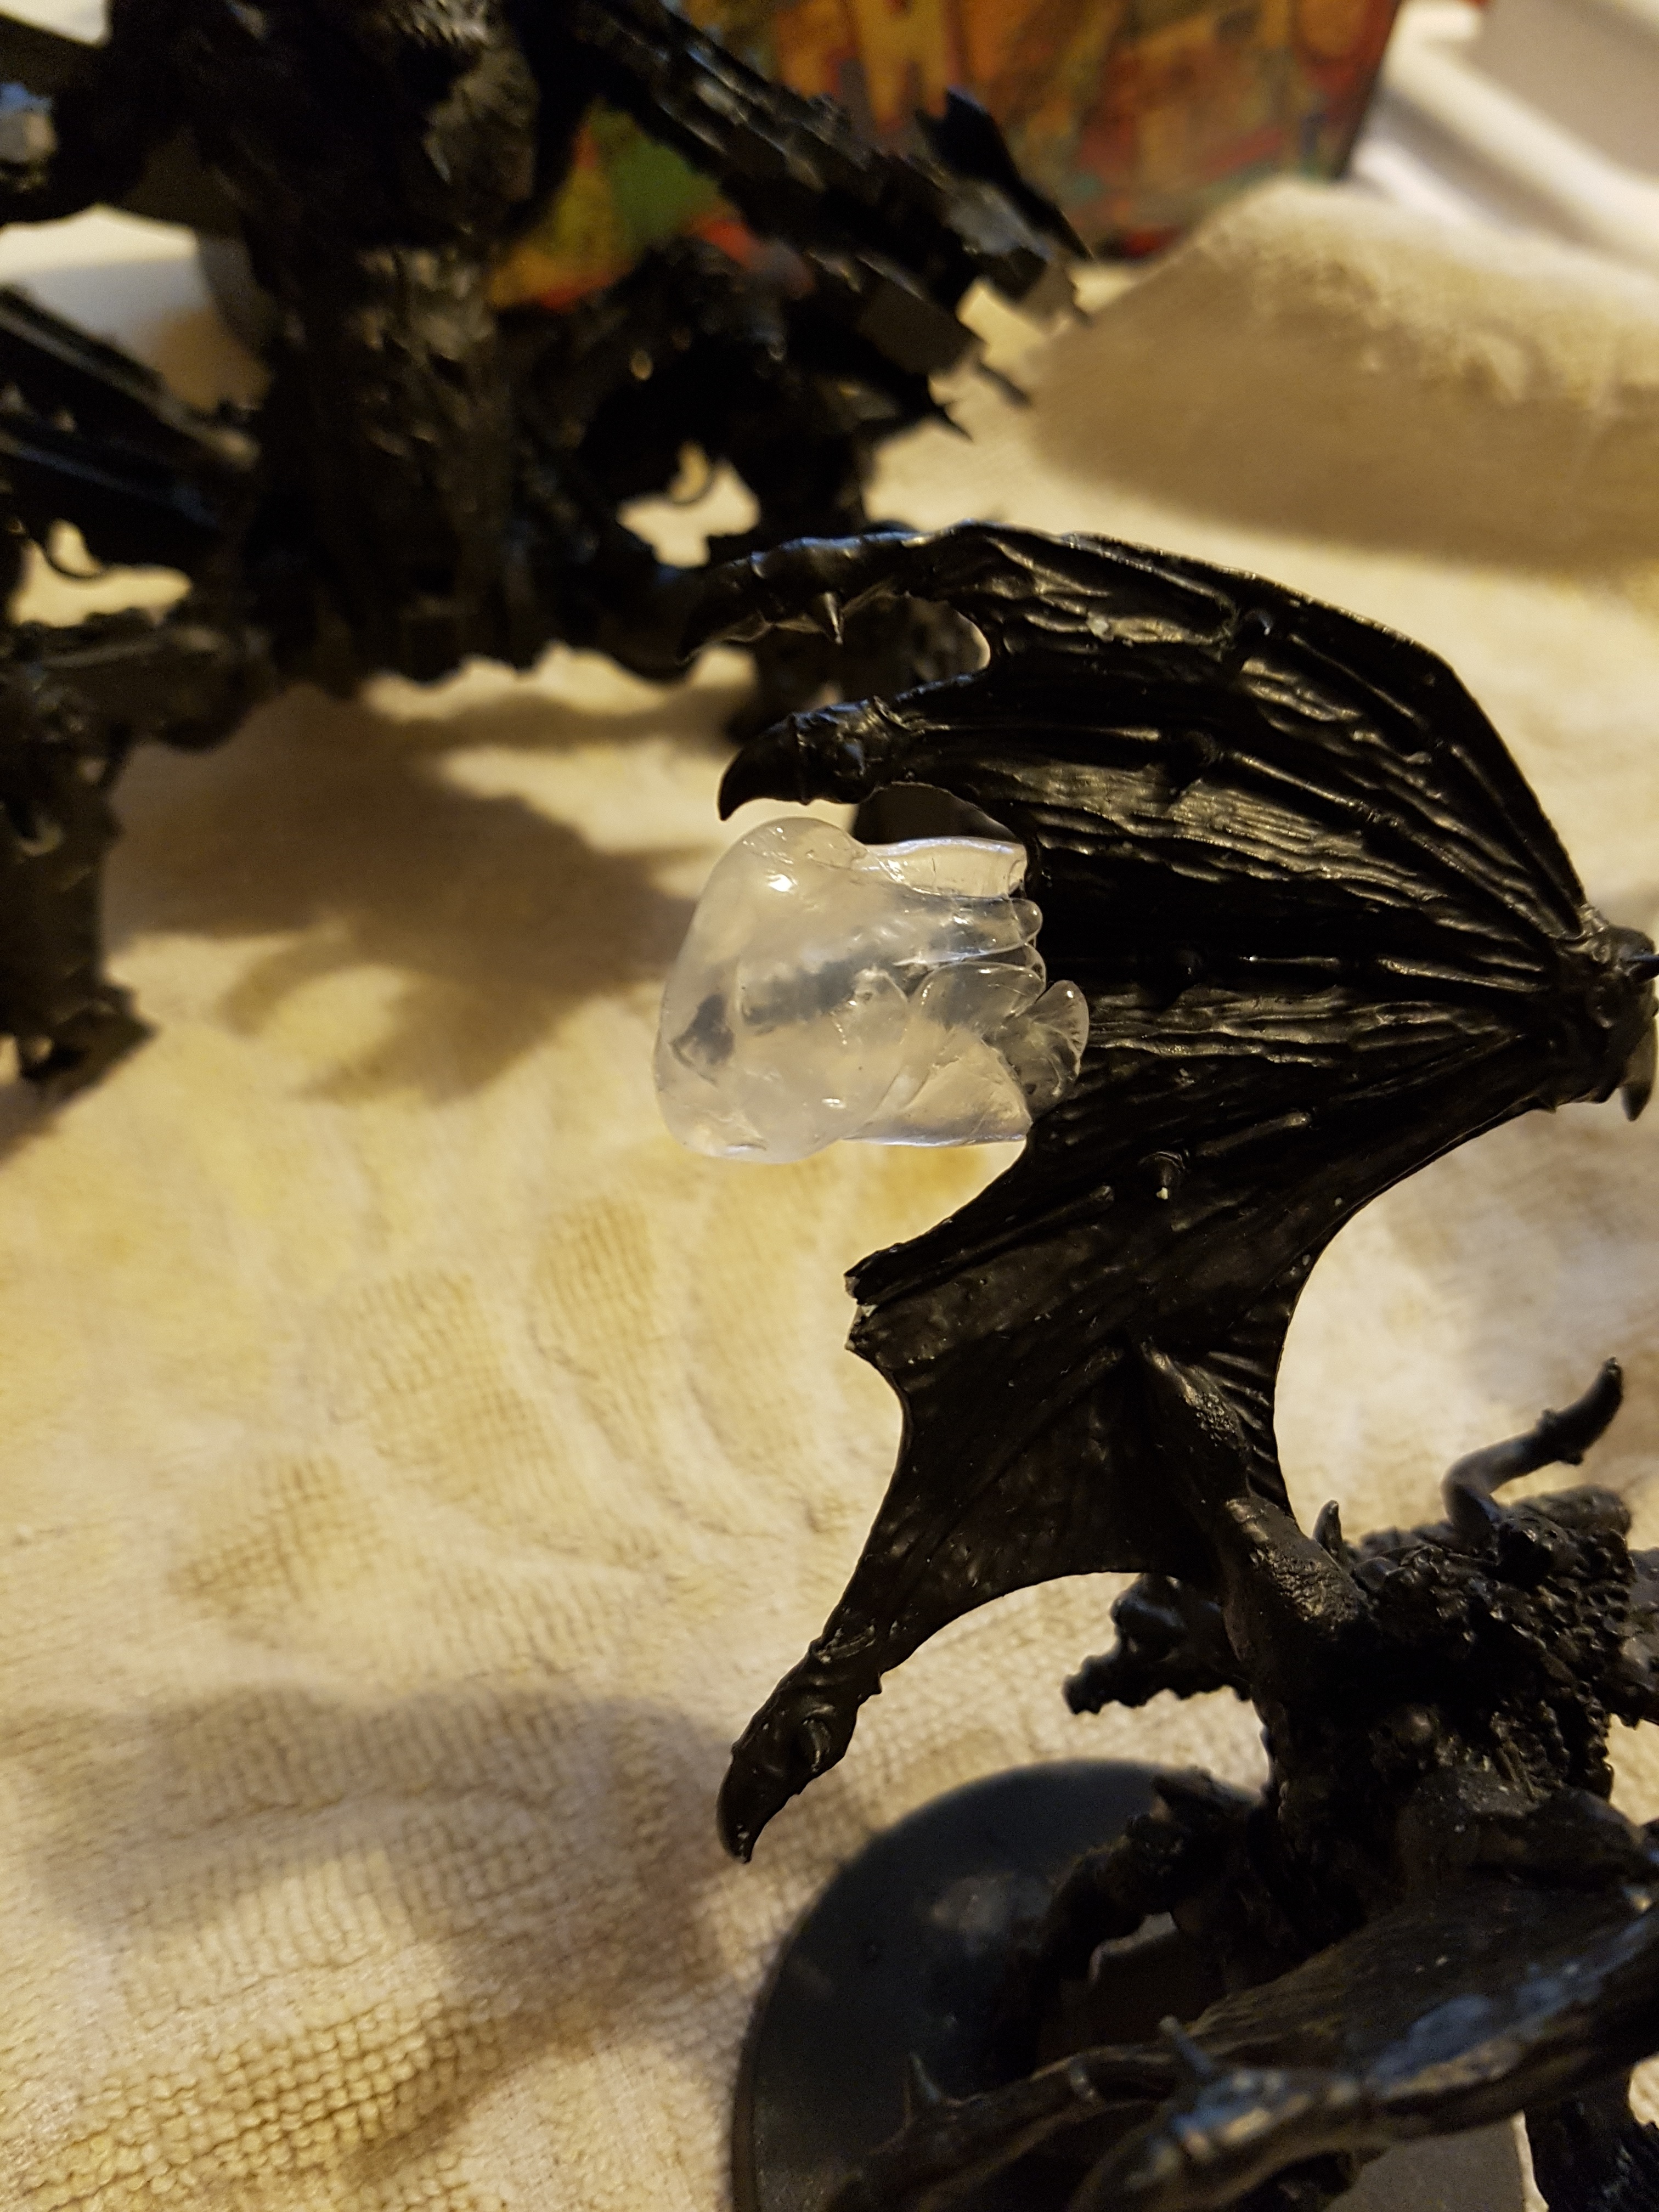
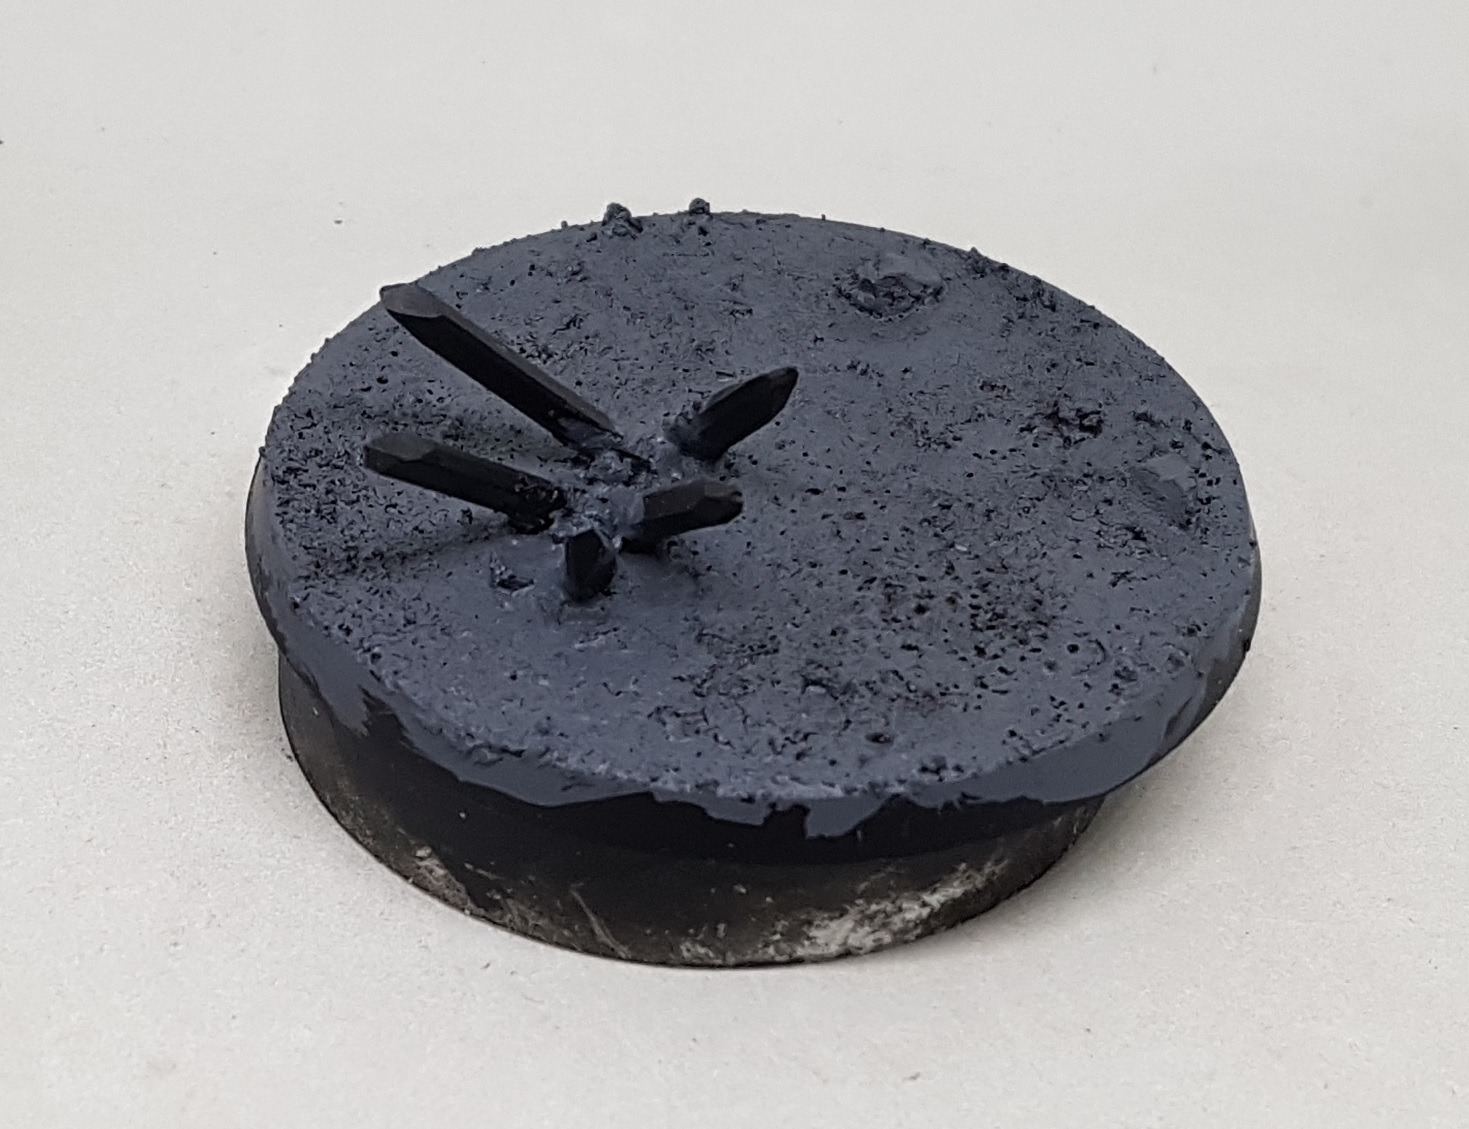
 My first crystal and the base. You can see I've marked out where the feet will go so I do not put anything in the way.
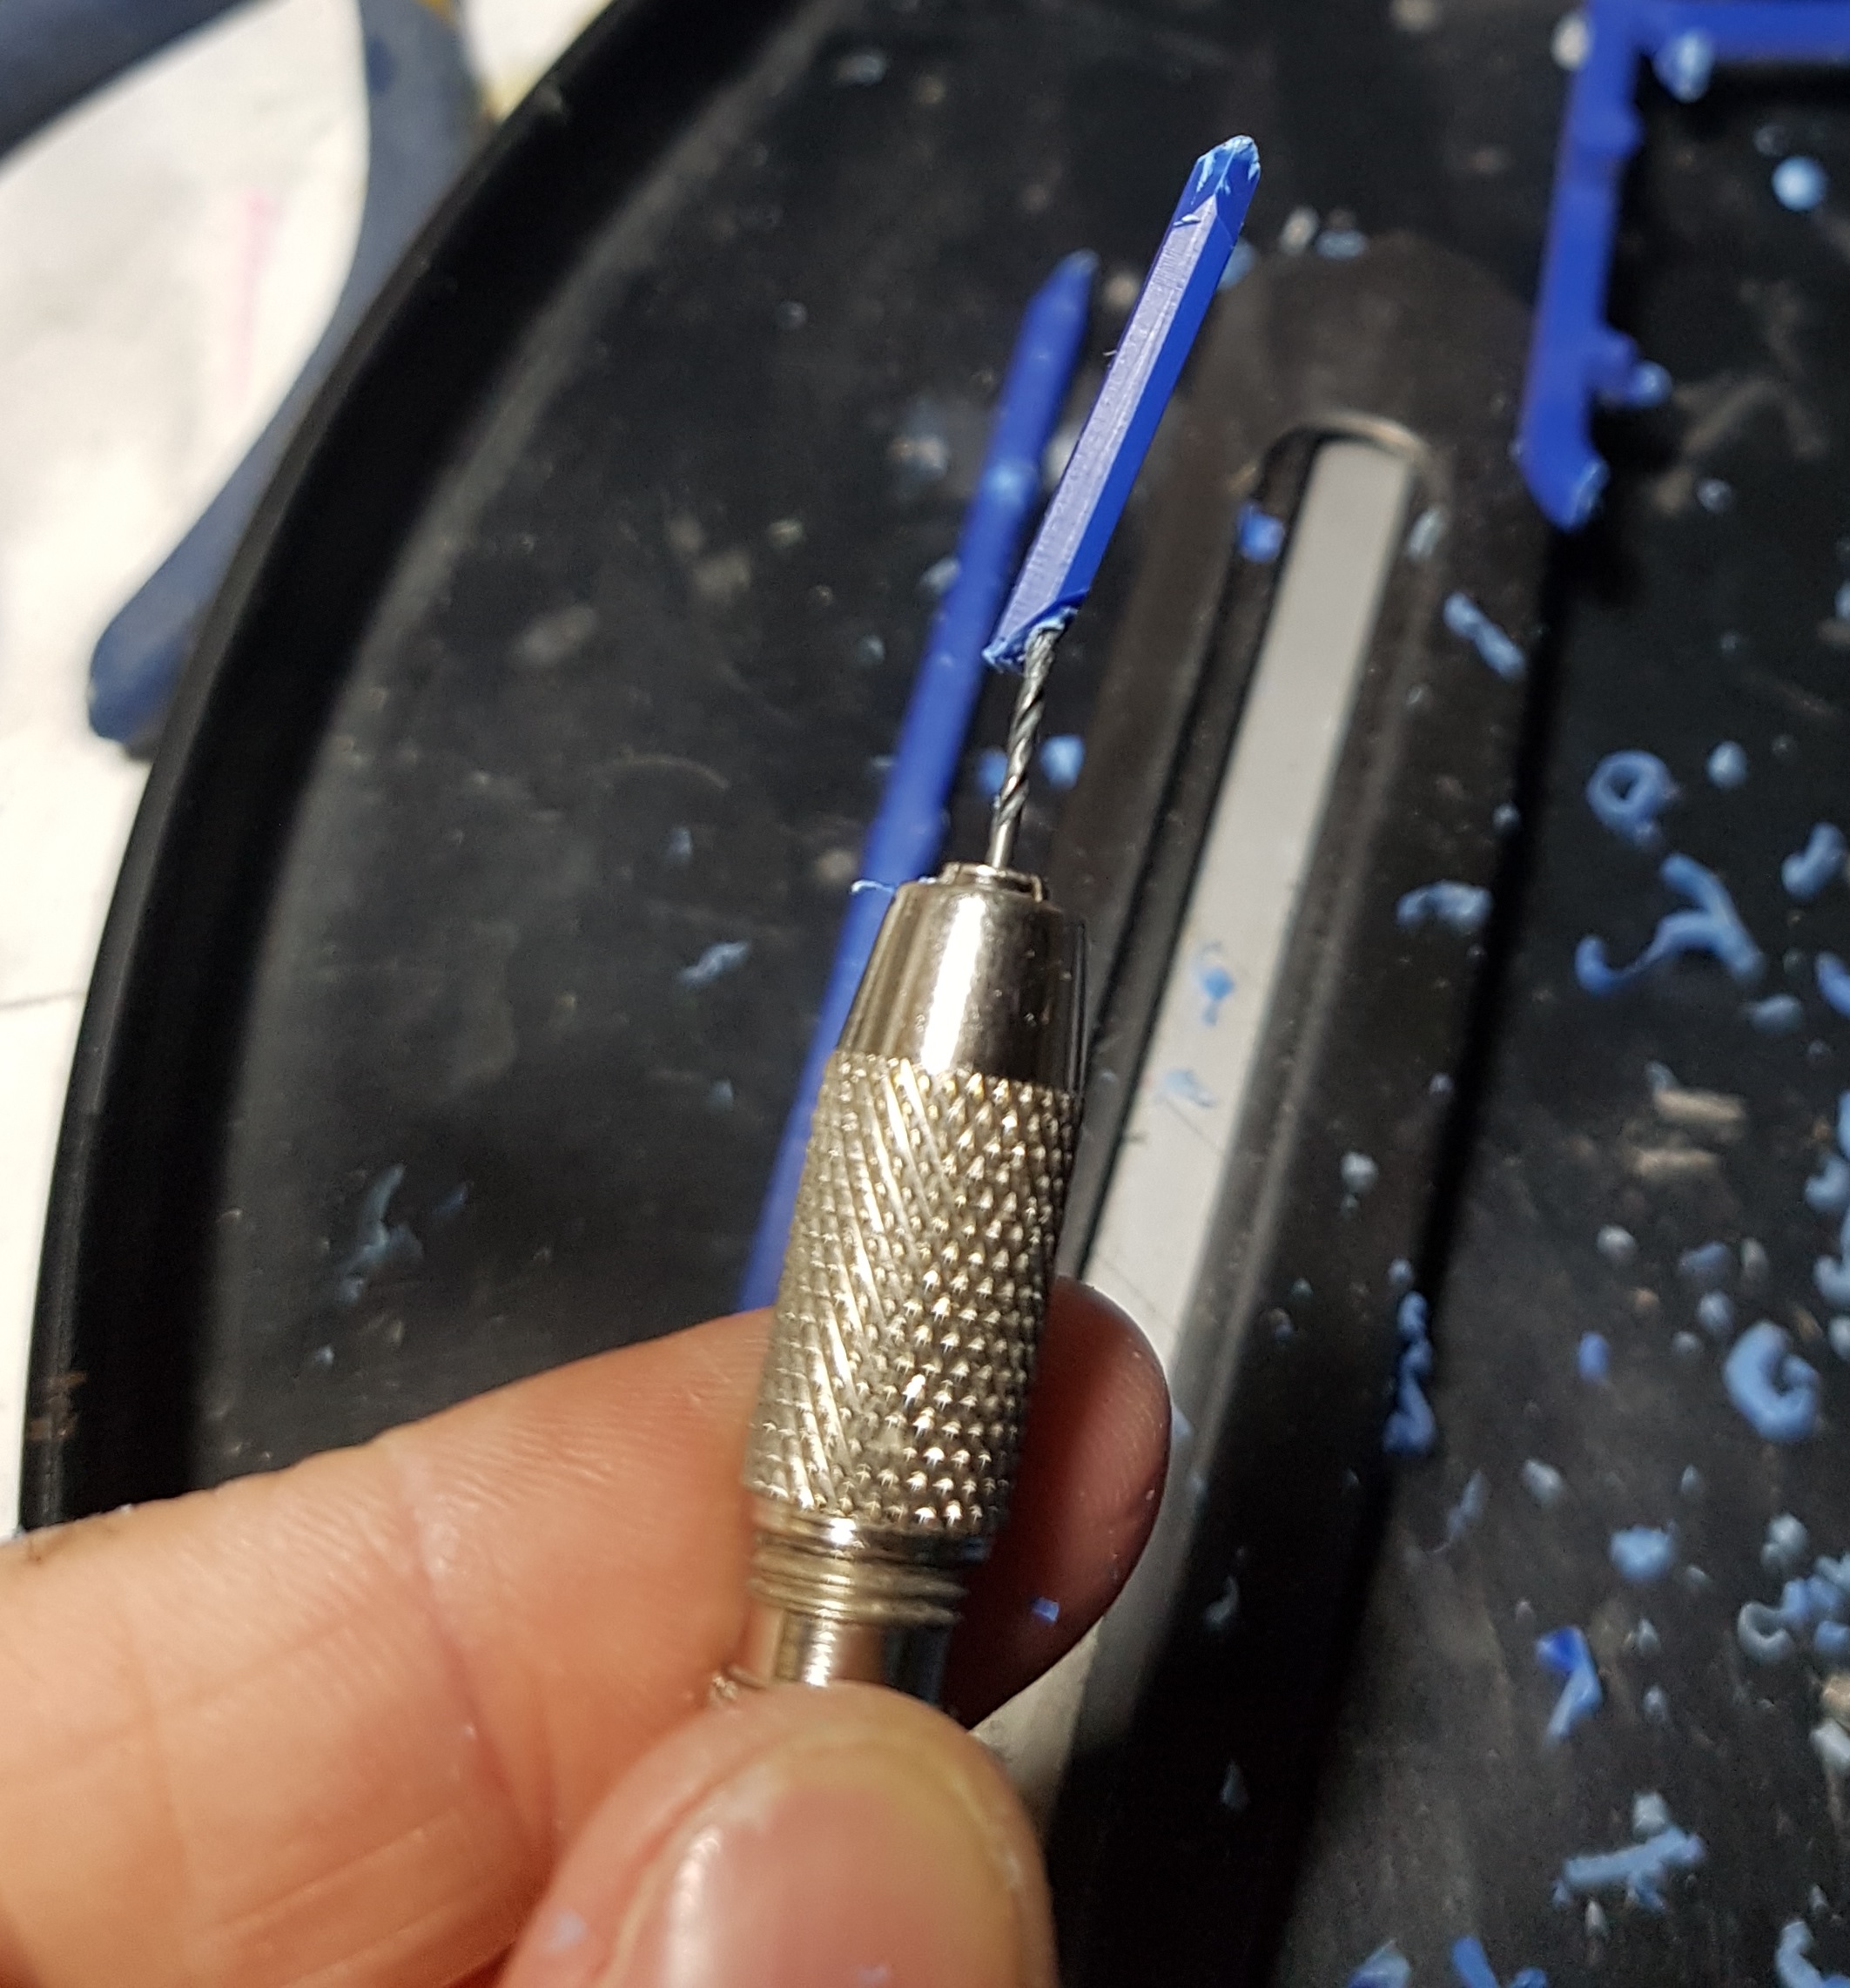 Then I drill a pin hole in the bottom of each. I drilled a guide hole perpendicular to the surface, but once I'm about 1mm in I angle the drill to go alone the middle of the crystal as best as I can.
 Glue some pins (Paperclips) in to the new holes
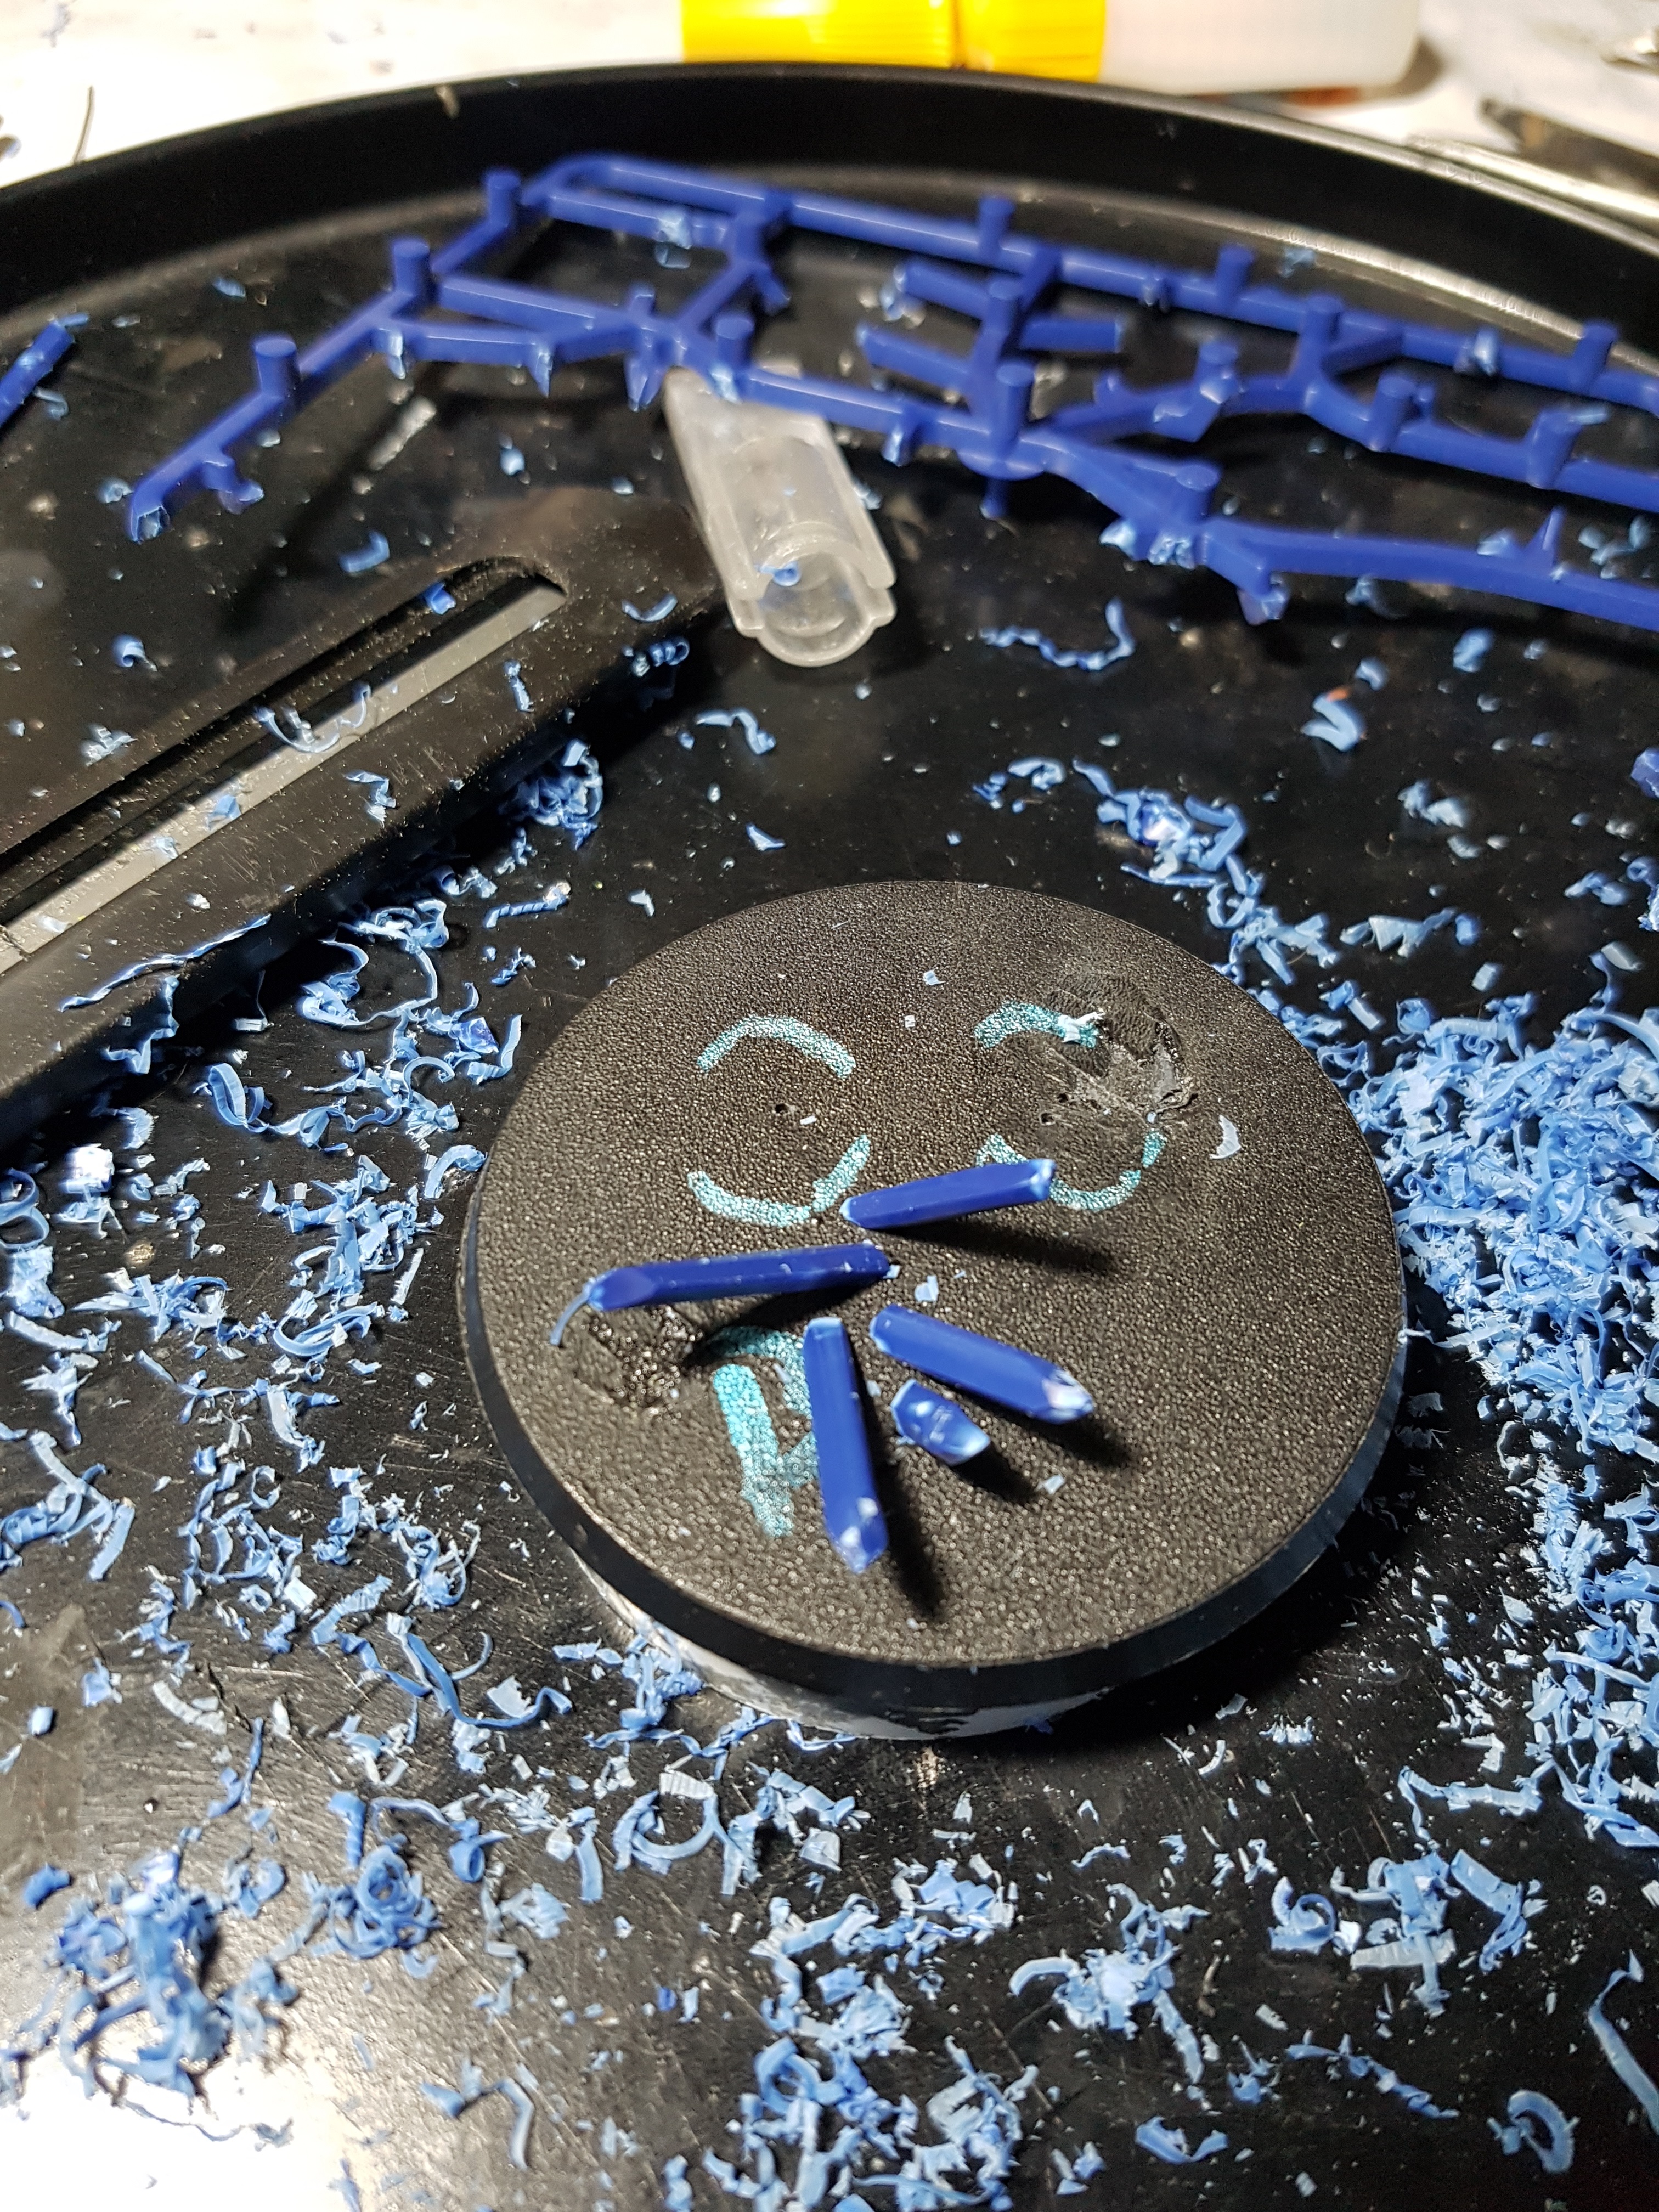 Drill holes in the base using the same method as before. Do this one at a time, dry-fitting crystals until you are happy with the arrangement
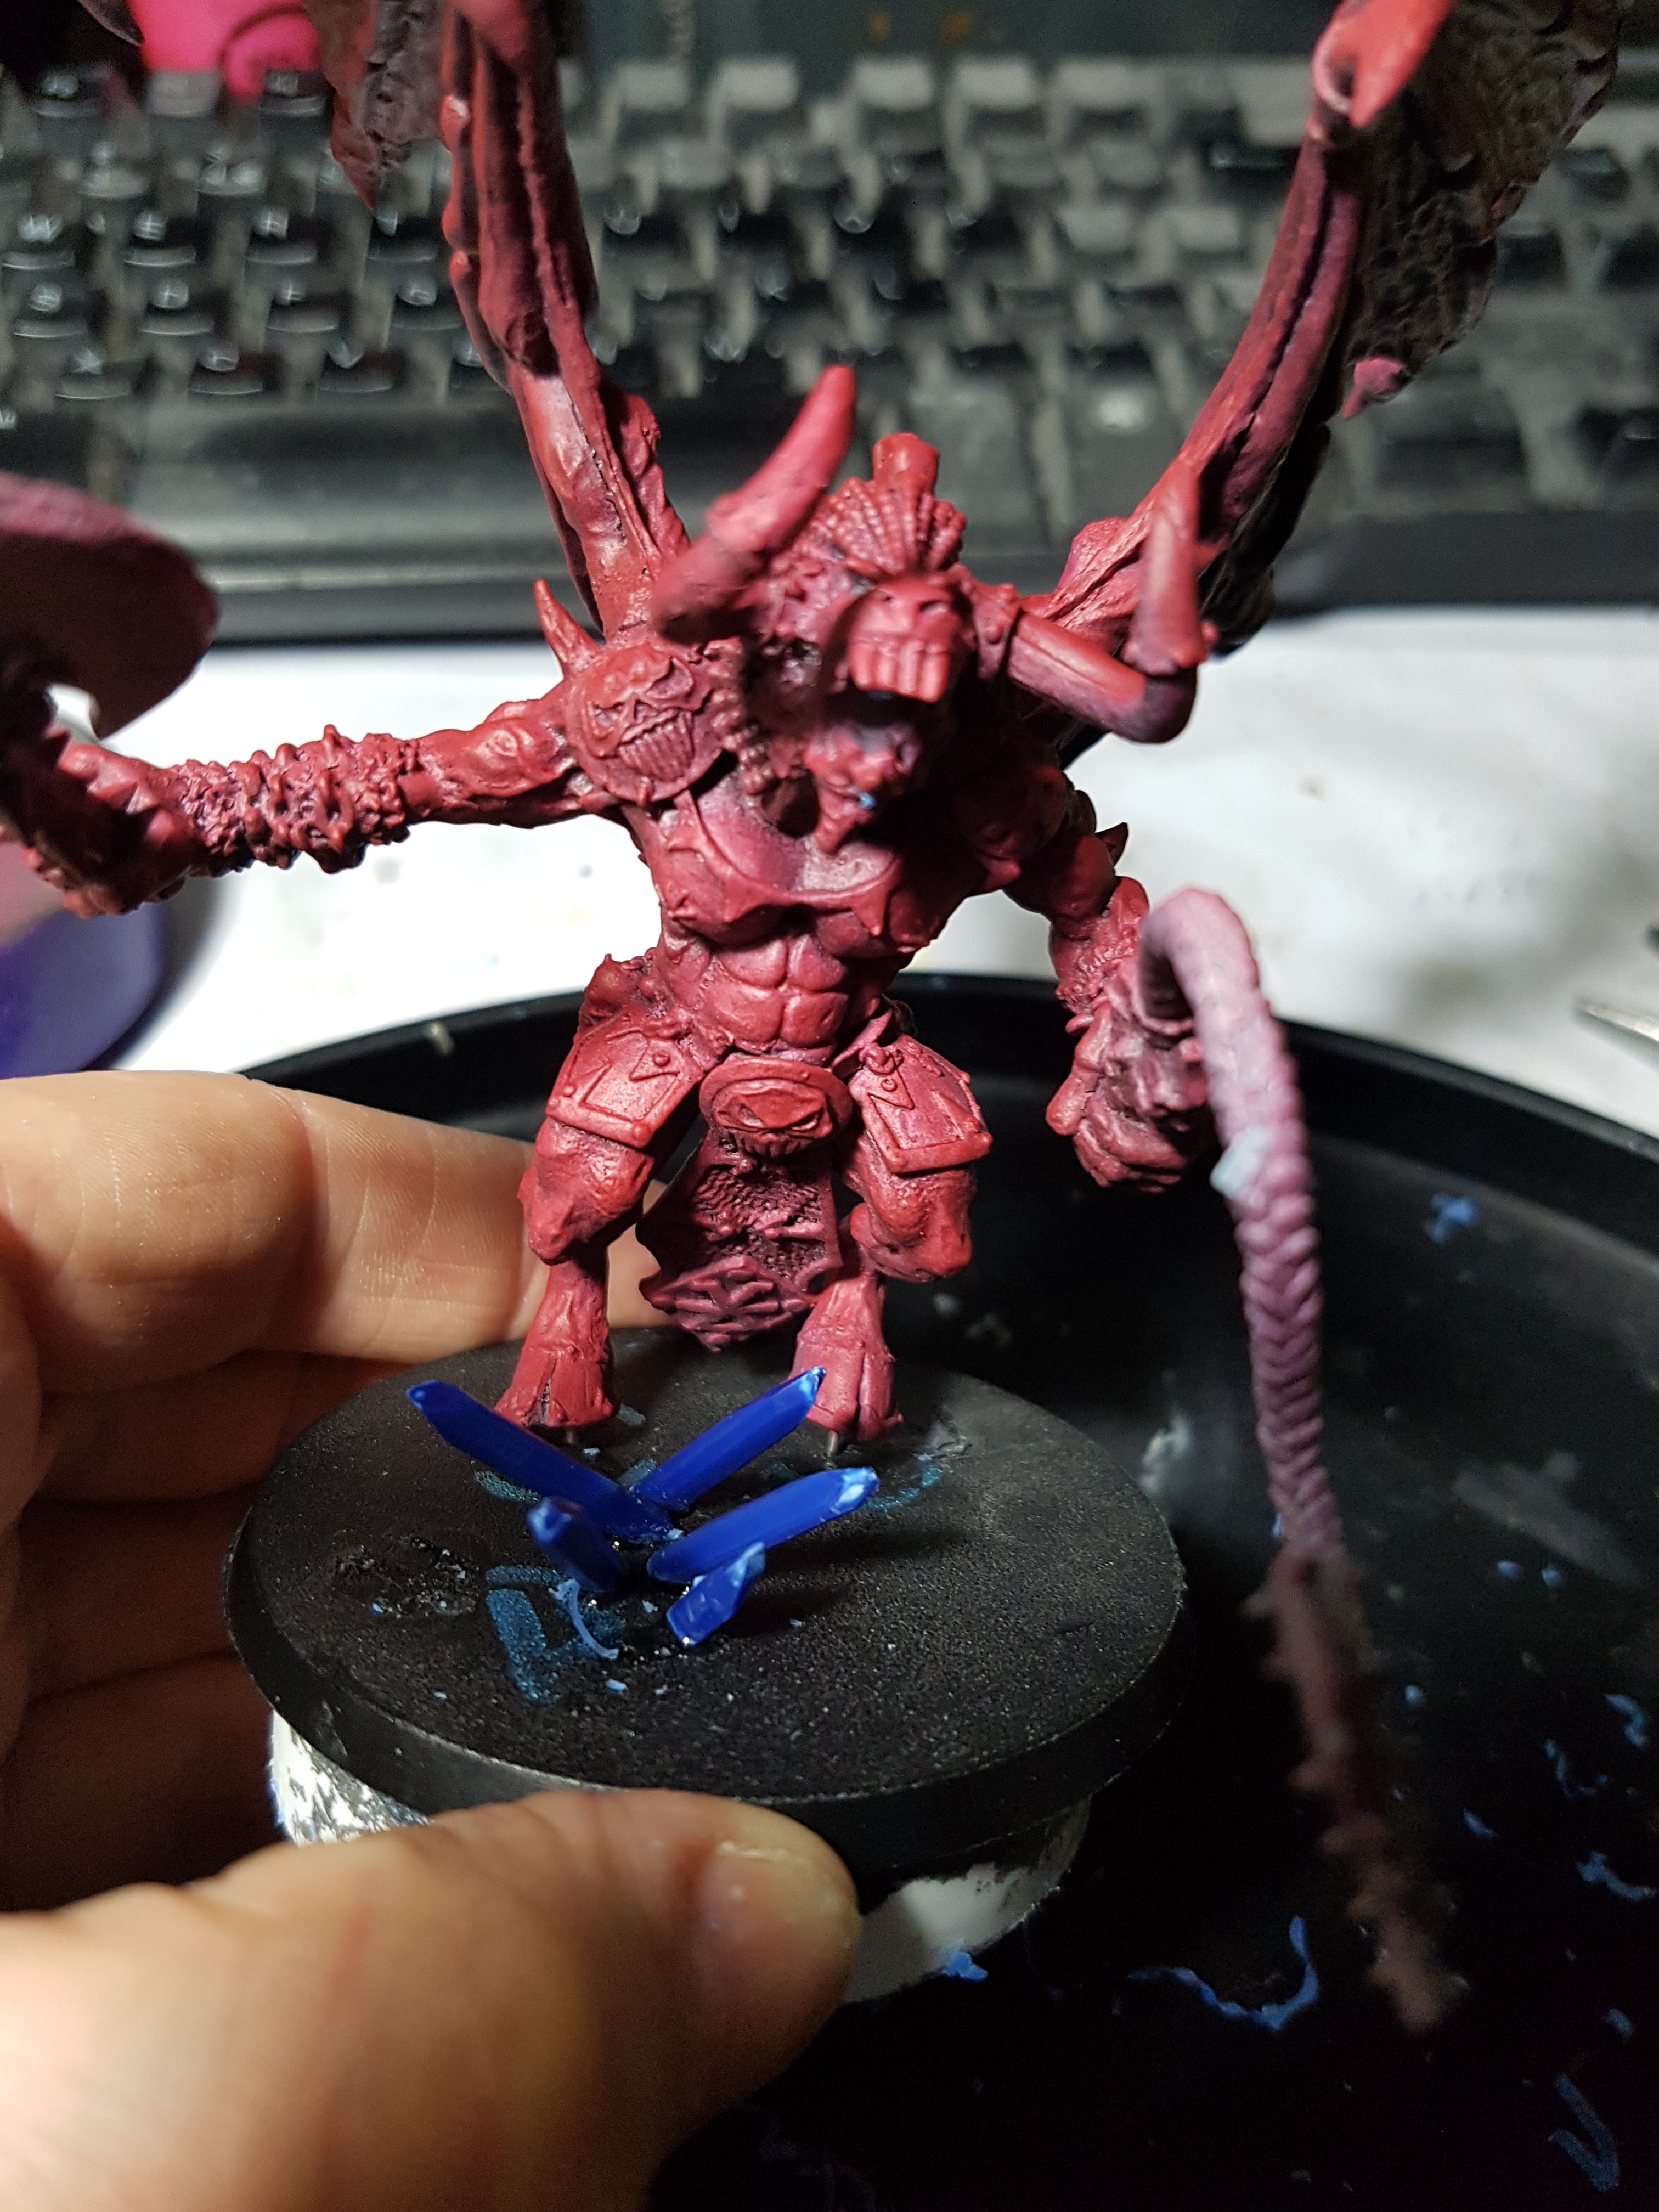 Here it is with the crystals glued on, and the Bloodthirster dry fitted for context
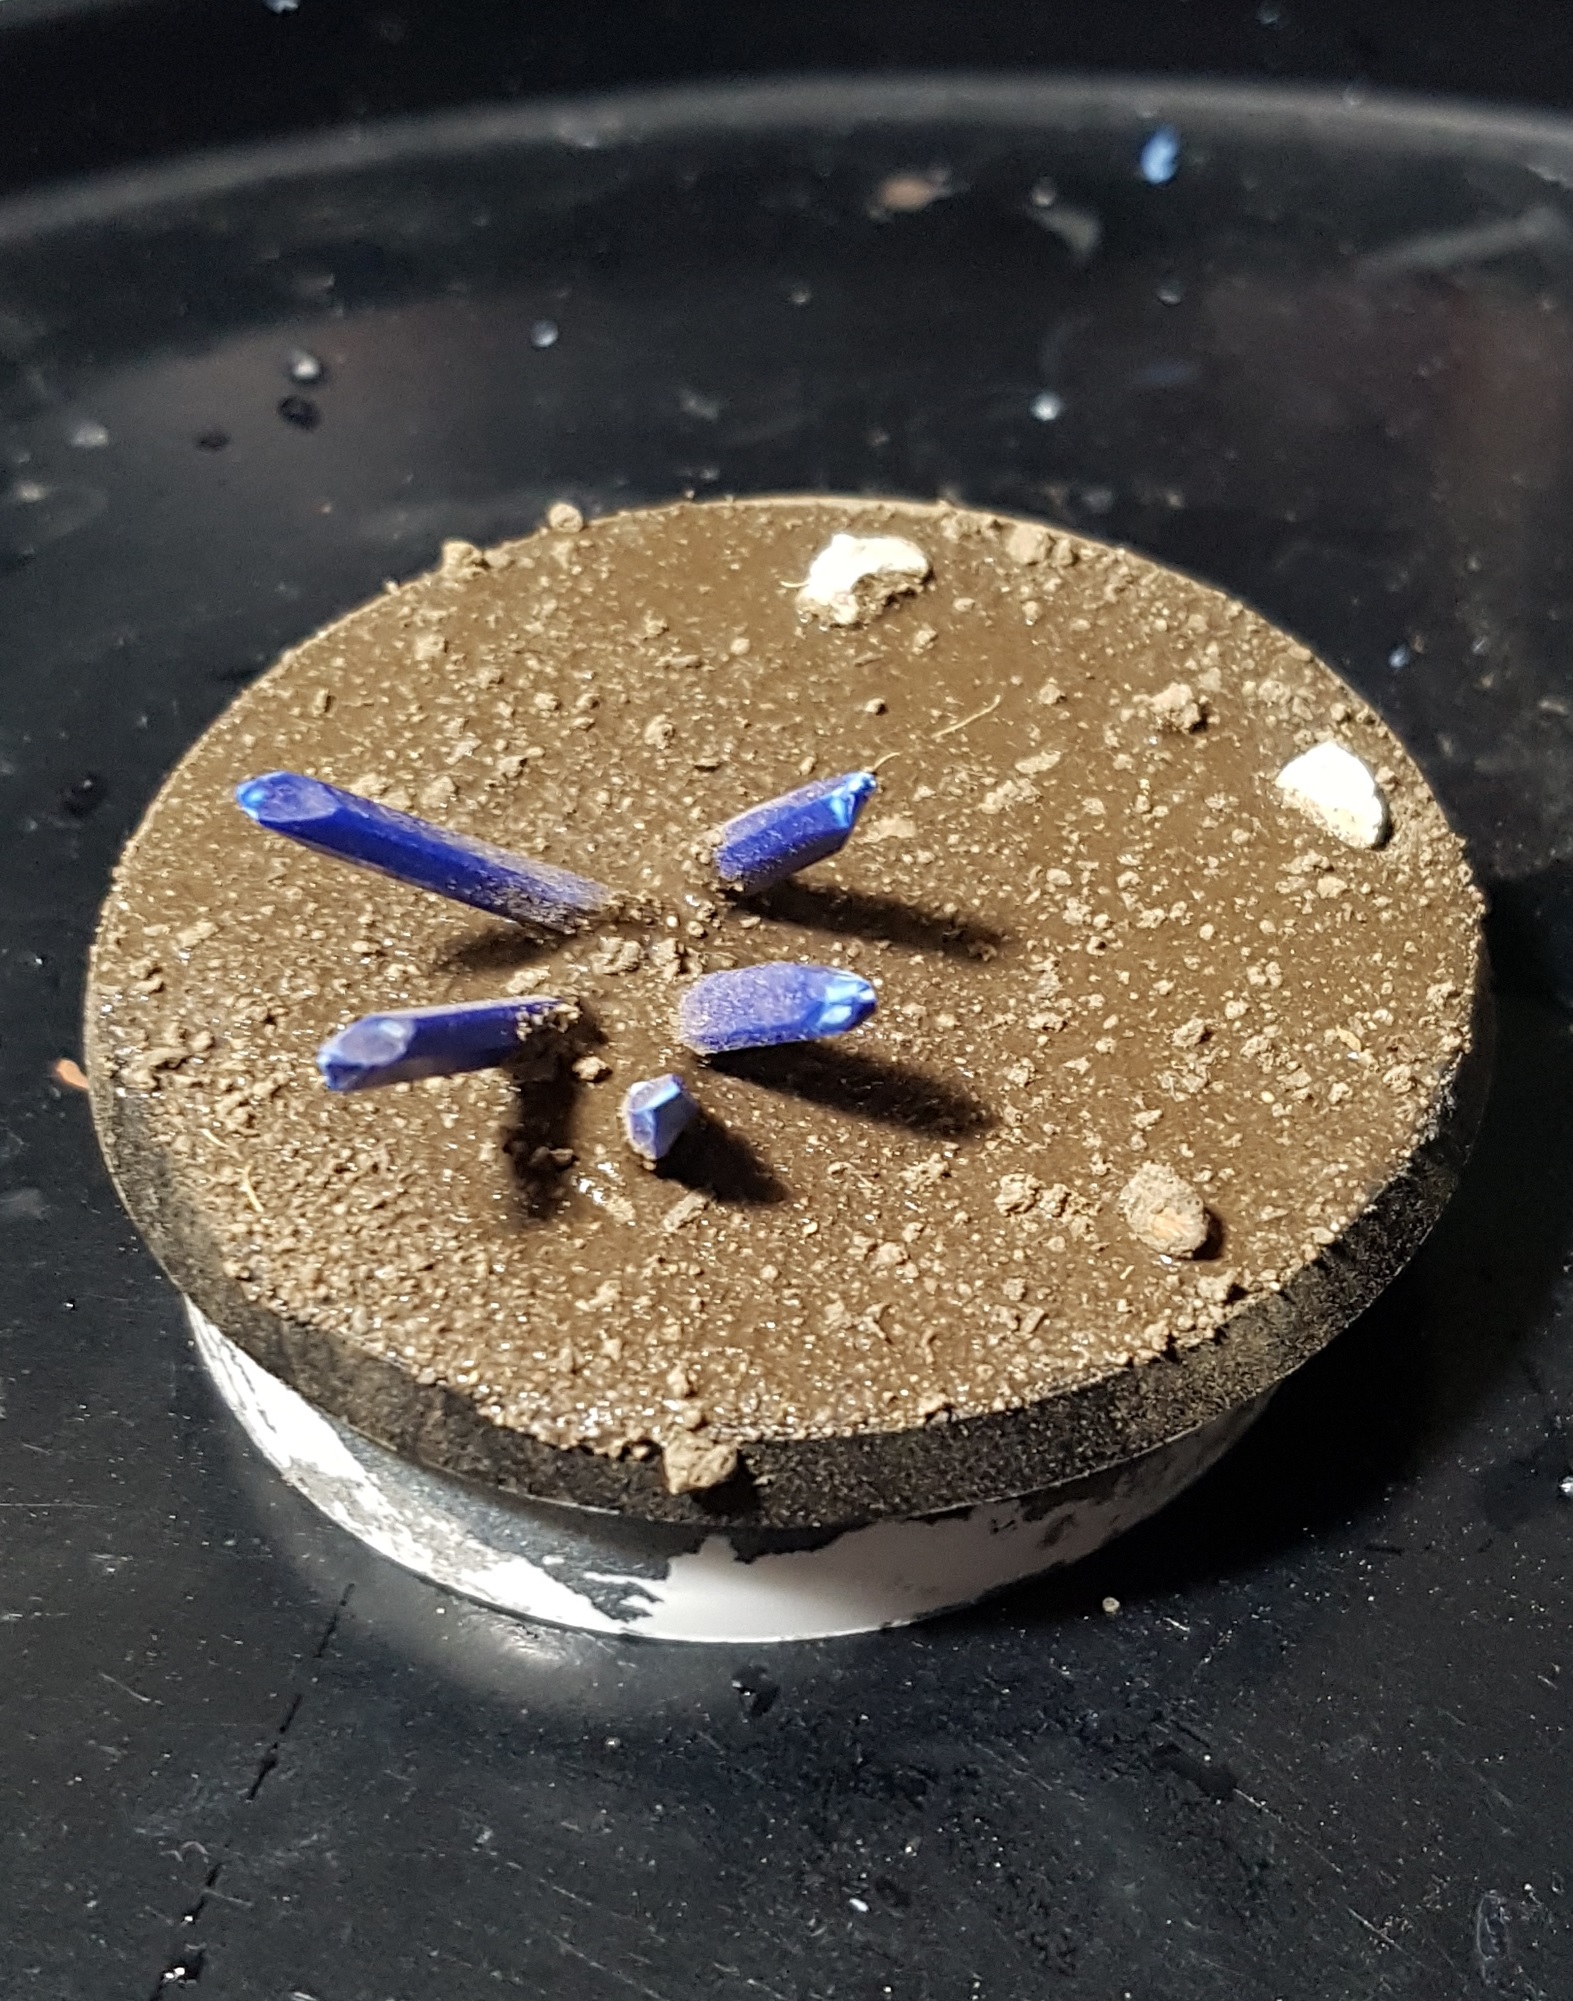 Some kitty litter was superglued down, and then some watery PVA was spread over the base and over the bottoms of the crystals. Fine garden dirt was then crumbled over everything. Once the glue is dry (8-24 hours) I'll go over it with even more watery PVA
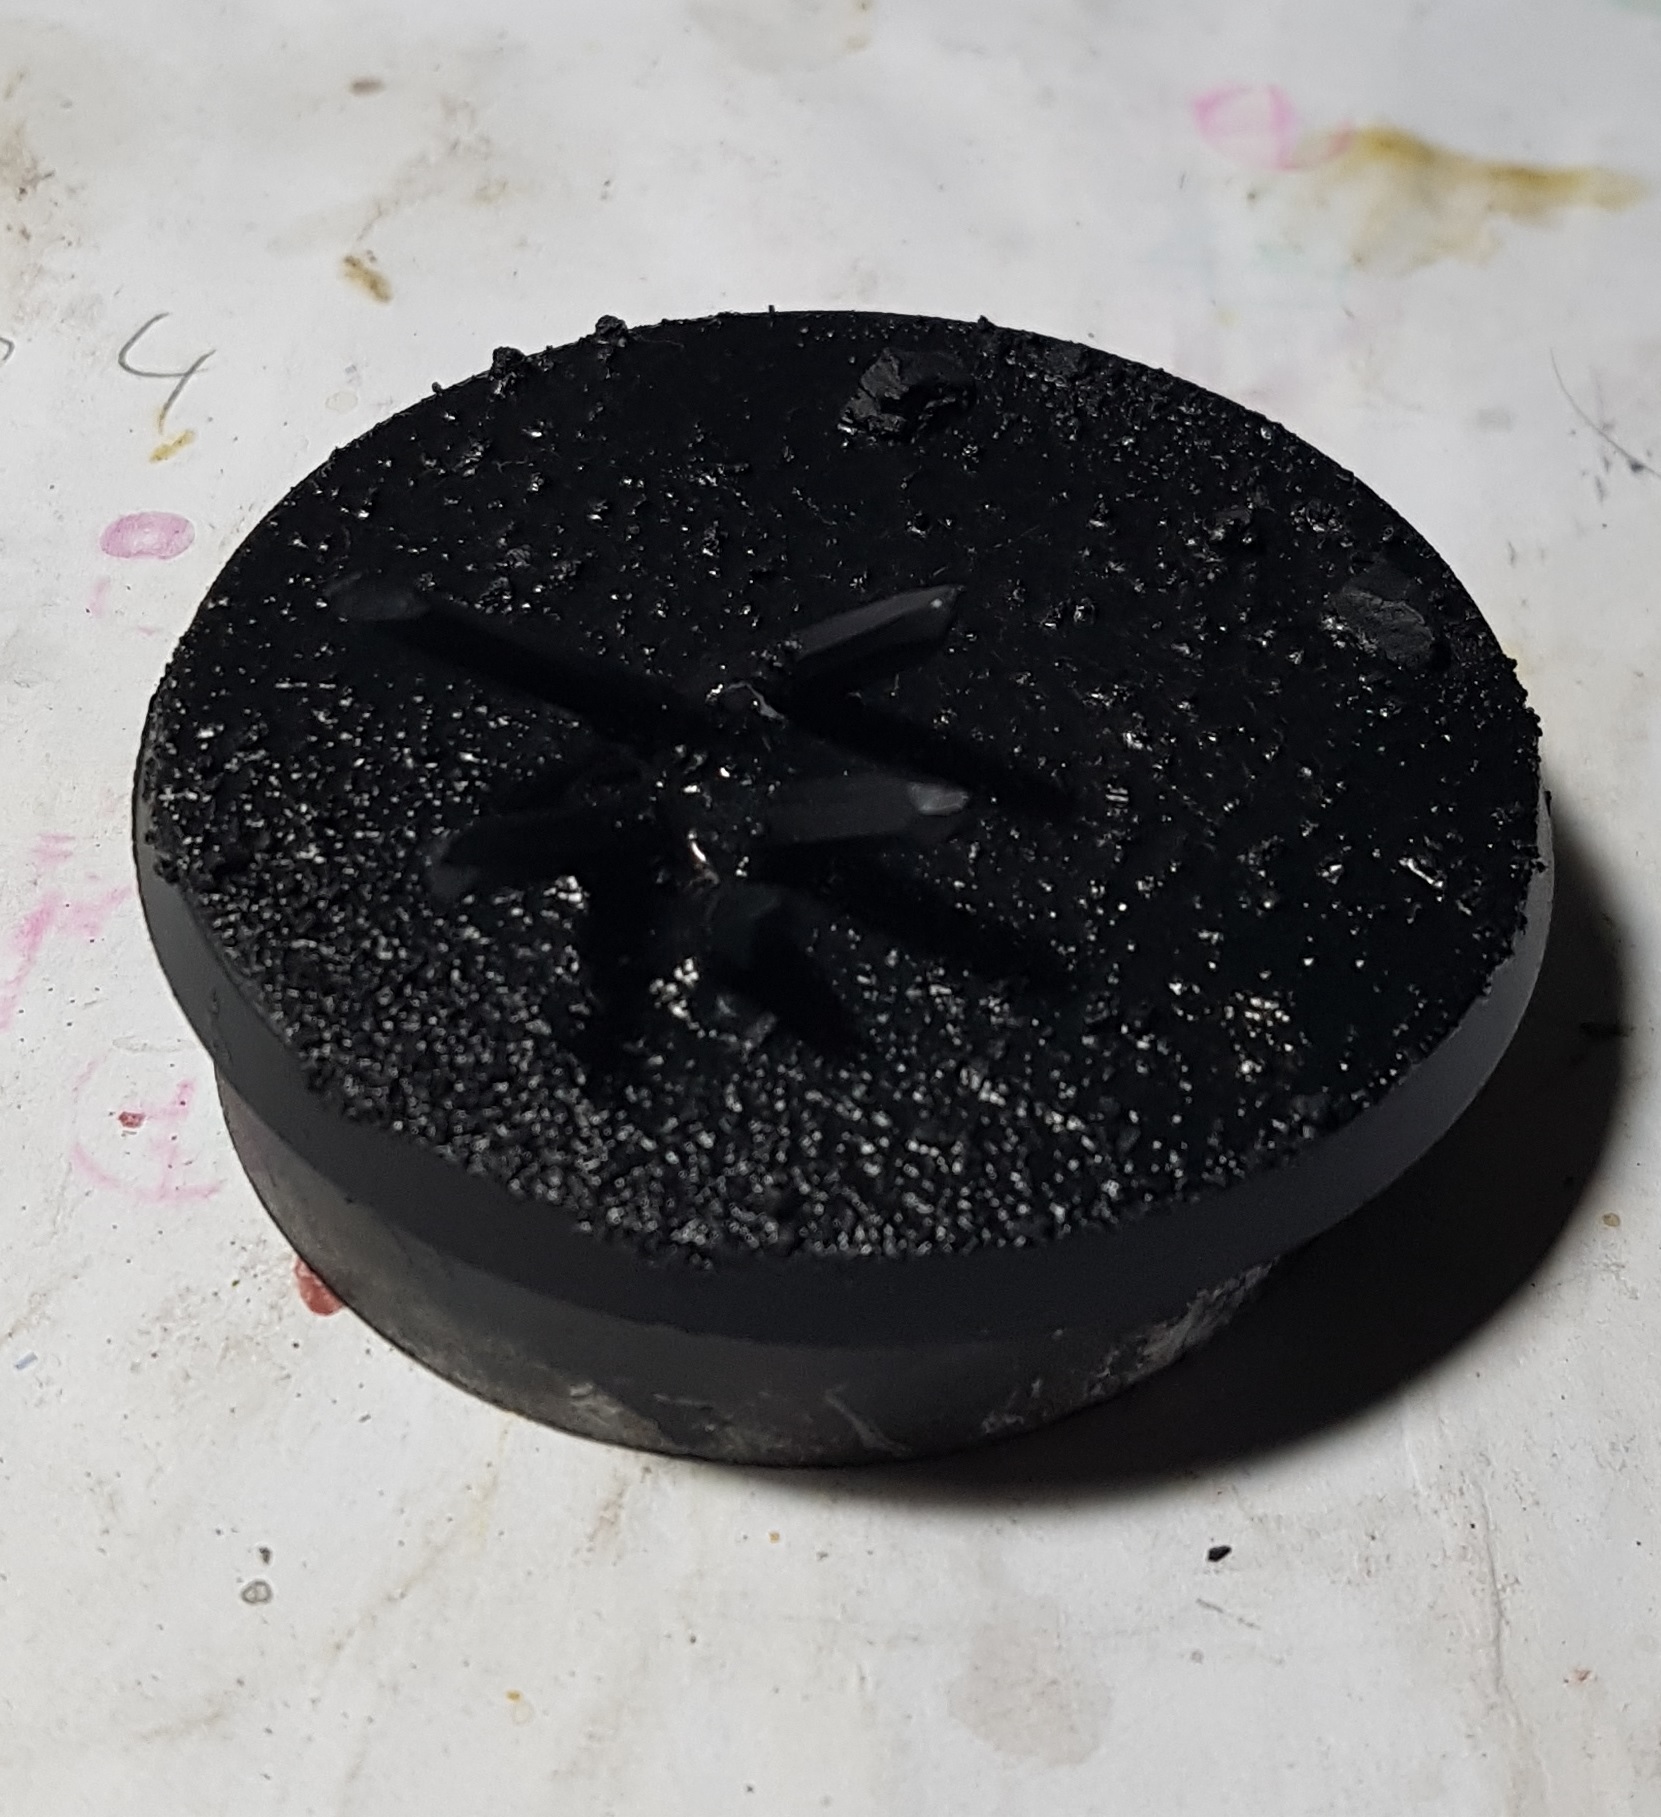 It has been primed to unify everything. At this time the first coat of PVA is still wet. More PVA and probably more priming will happen later before painting begins.
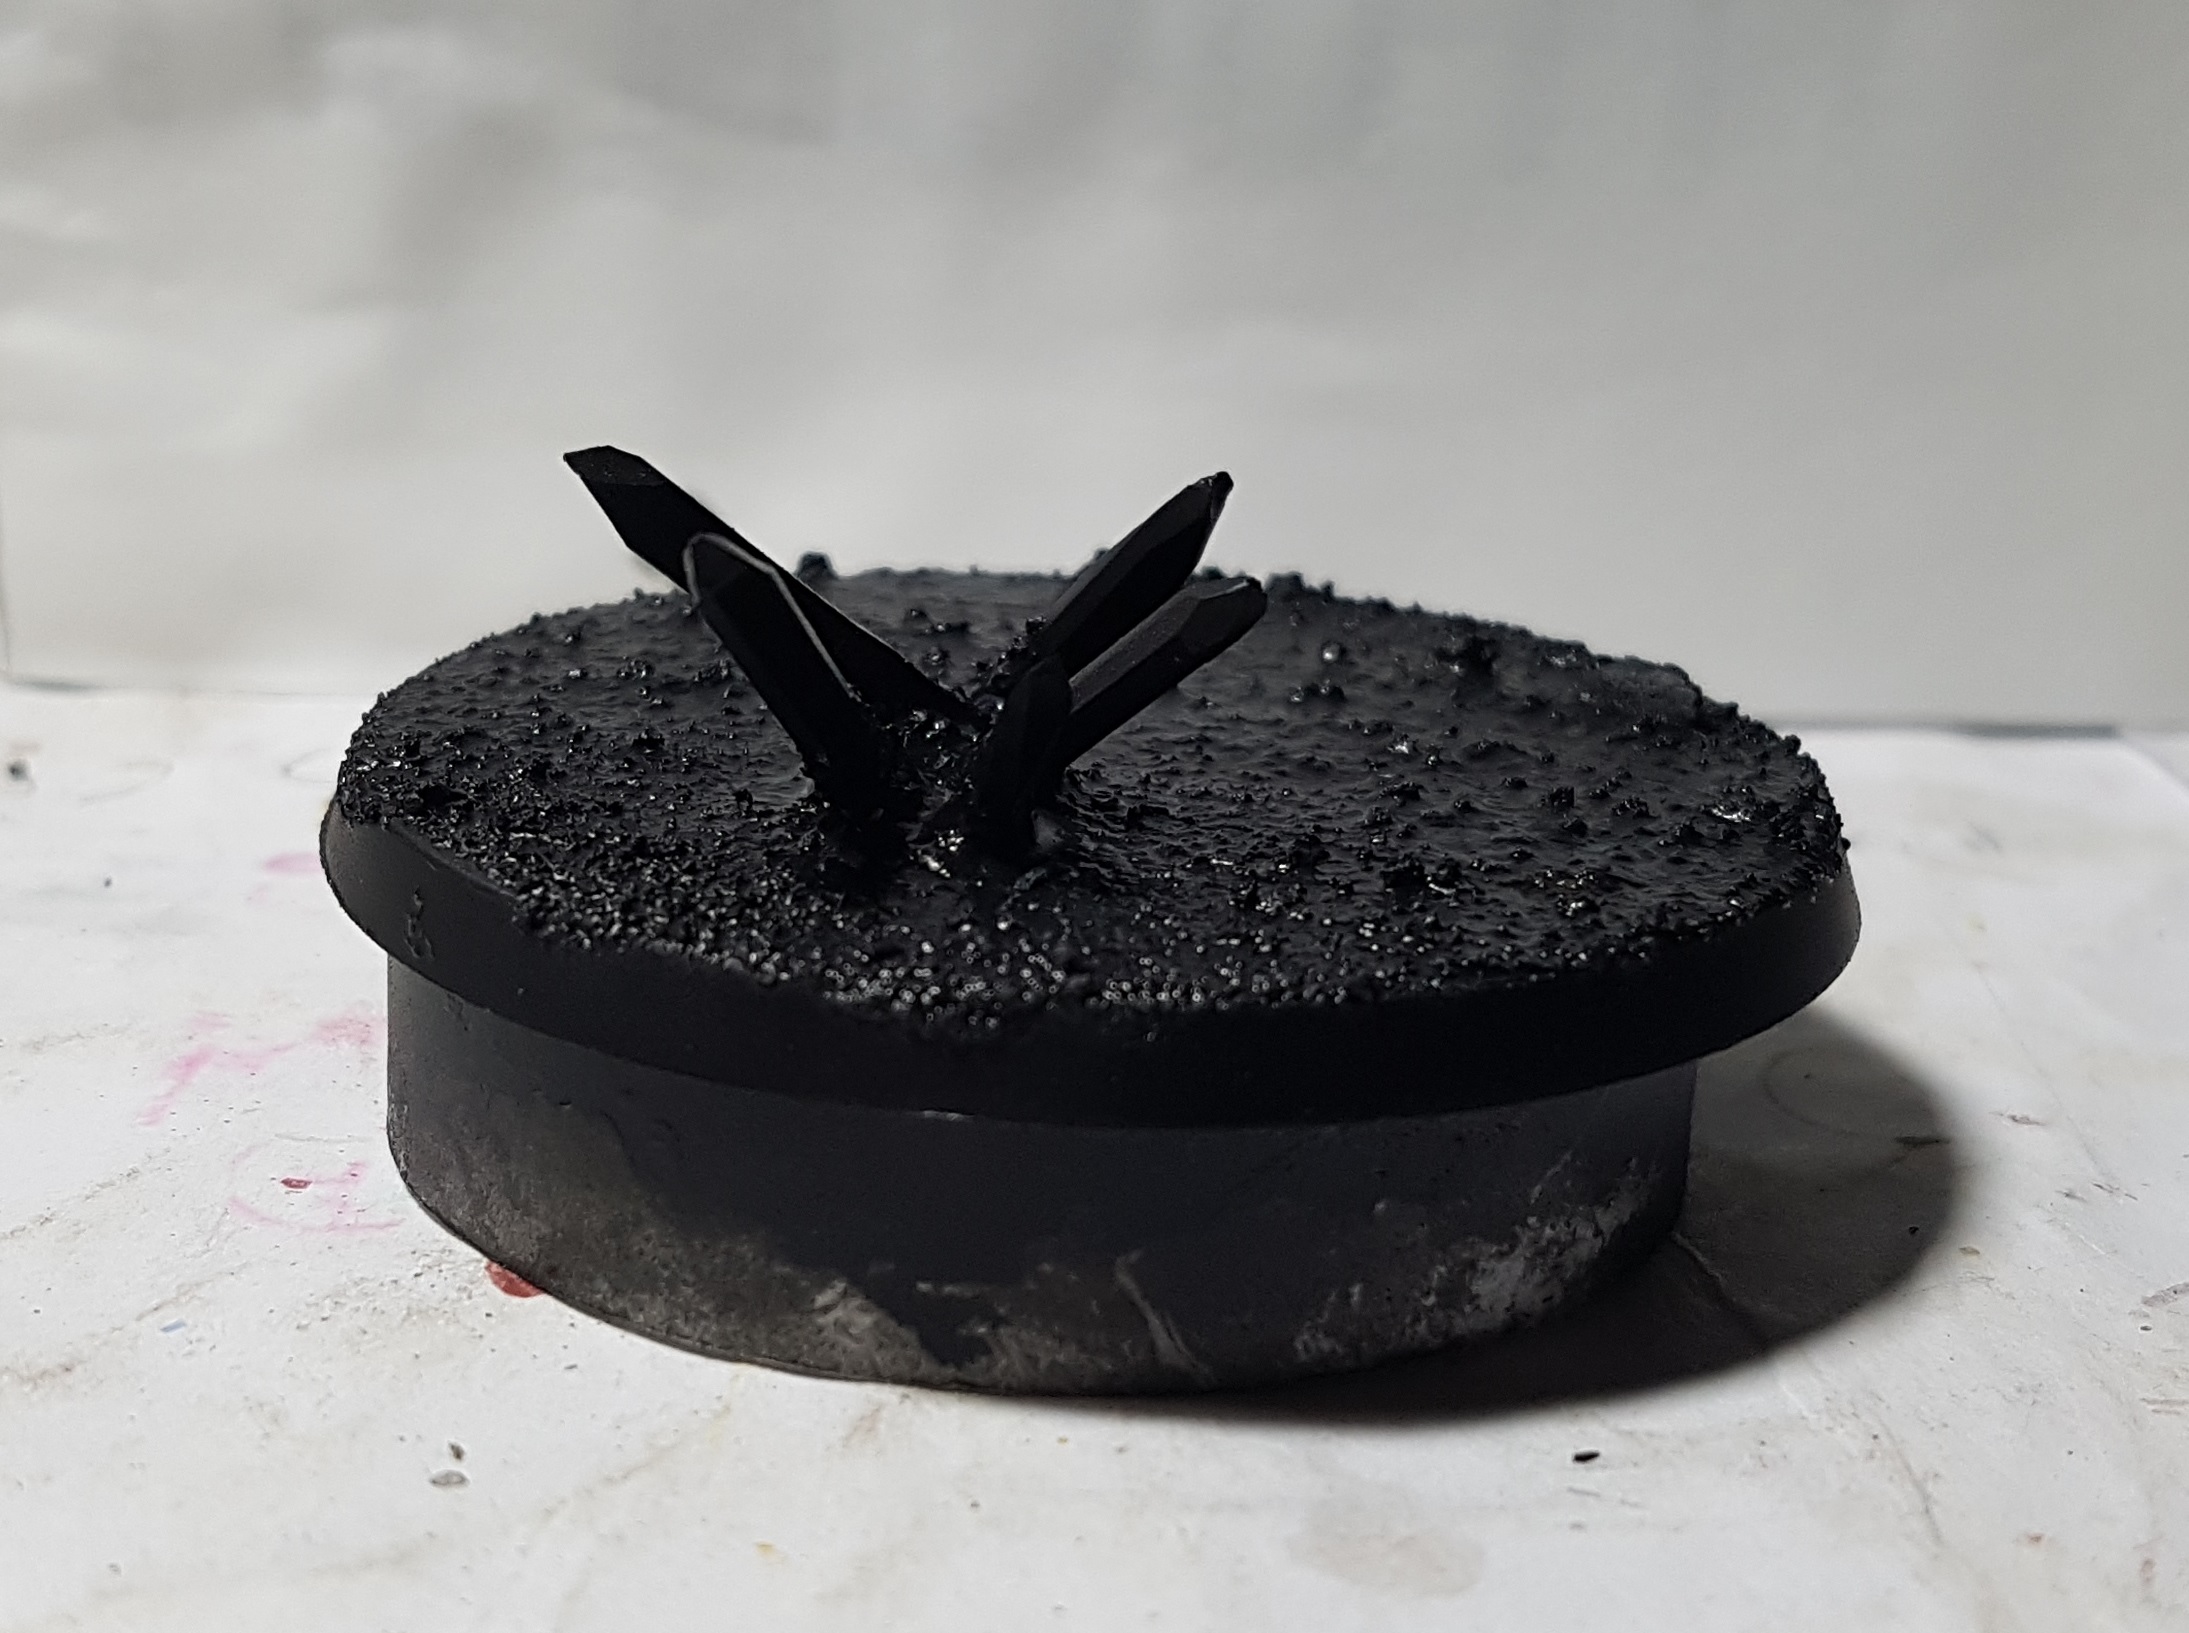 Here is a second angle. The black on black wasn't helping in the previous pic
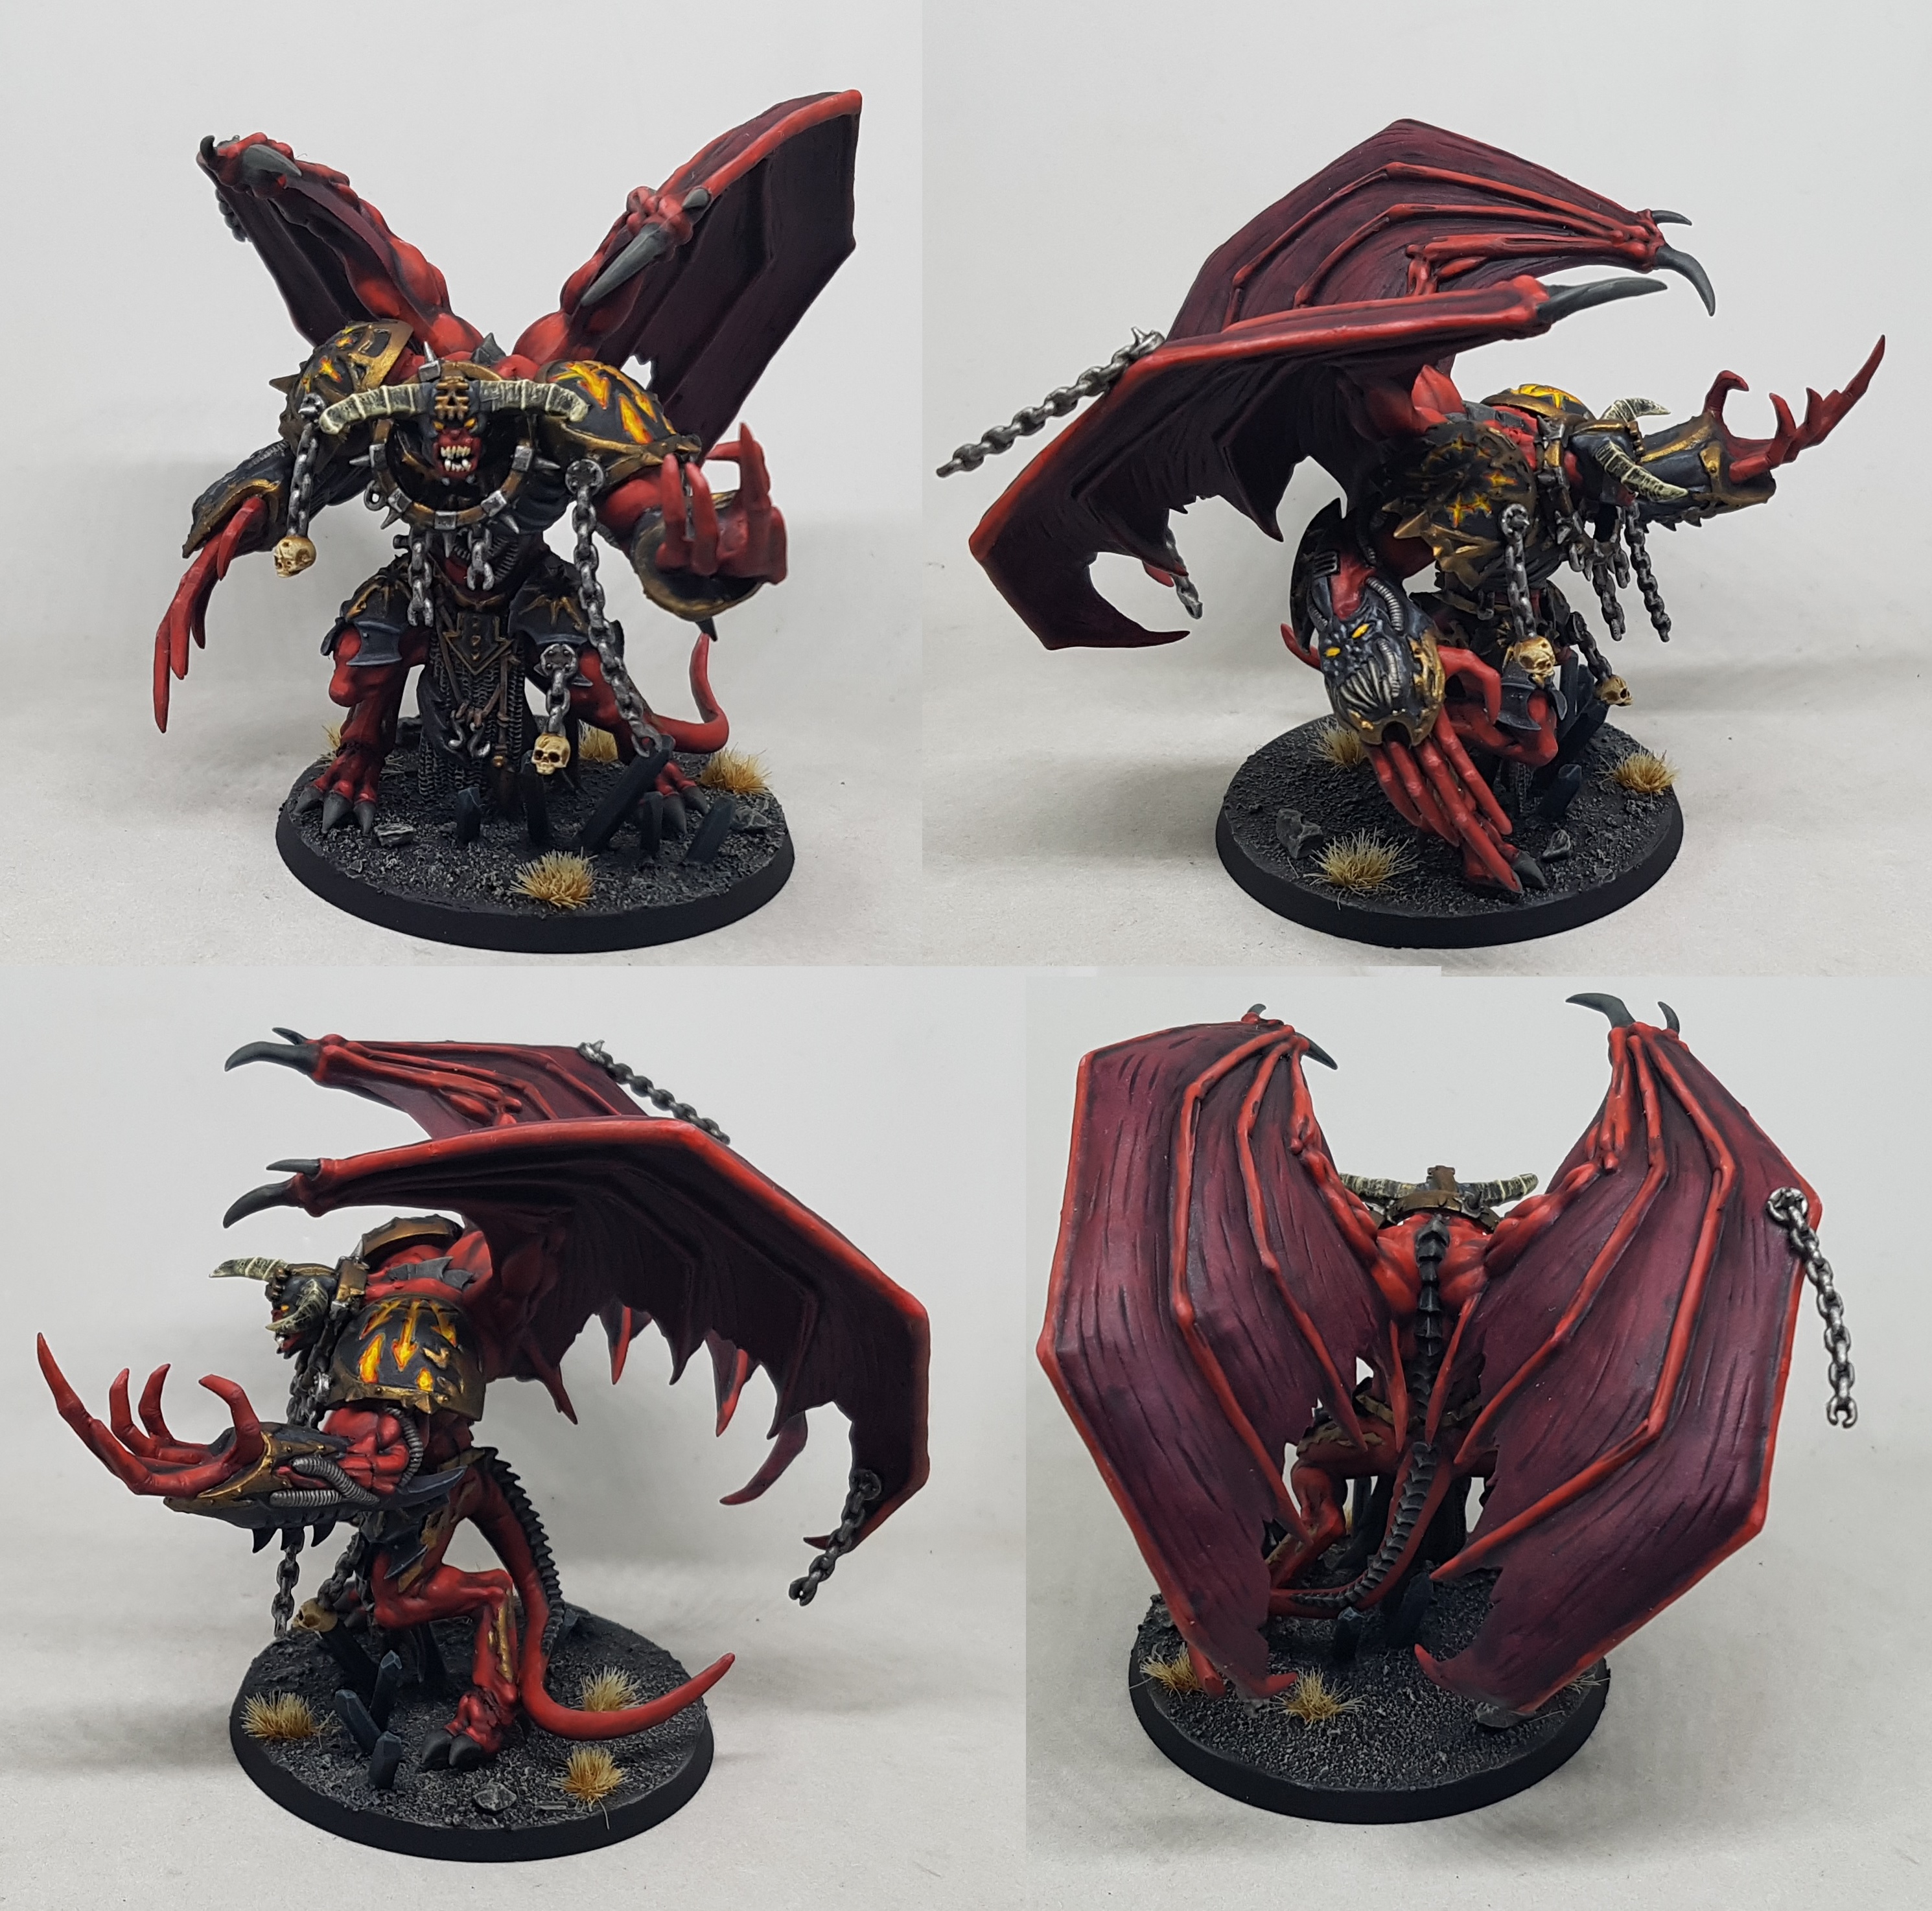
Red Daemon Flesh and Wings
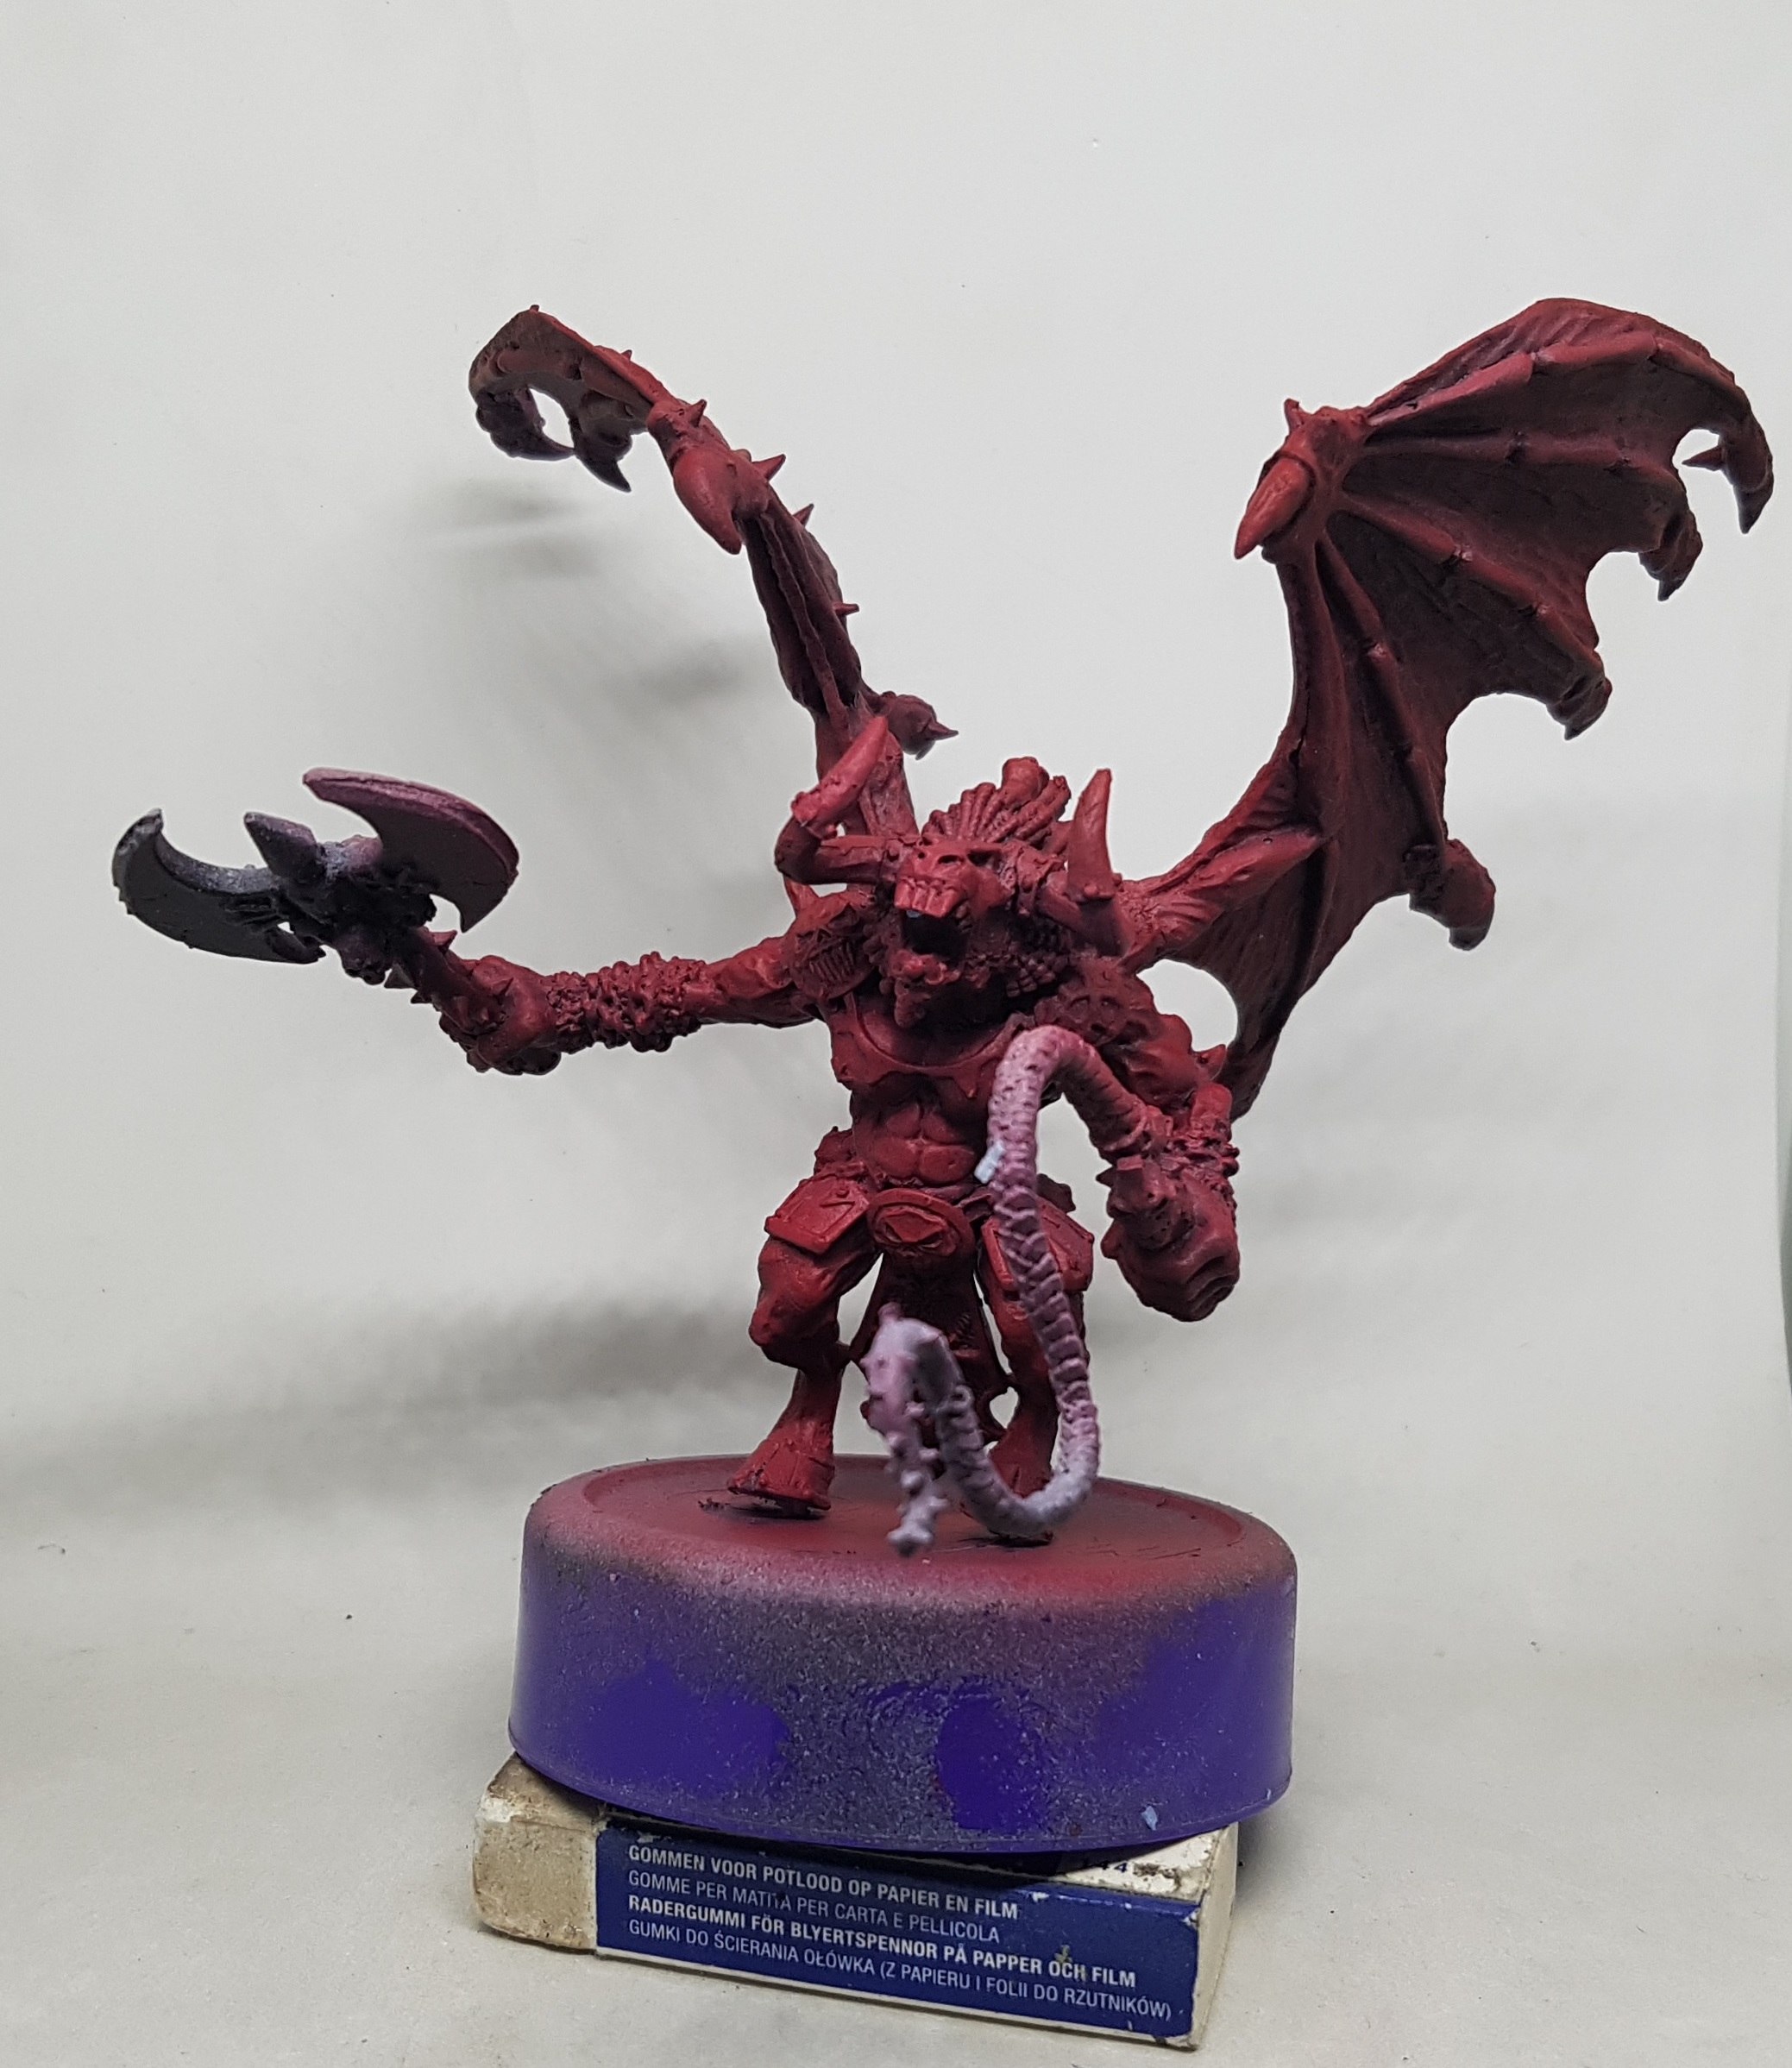 The Daemon was previously given a zenithal preshade and left overnight to dry. I then dropped my airbrush prssure down to around 15 and thinned my paints down much futher and put a coat of VGS 72.111 Gory Red over the model. This came out too pink for my tasts so I swapped it out for VGC 72.012 Scarlett Red. The underside got minimal attention but the side and top got progressively more, still allowing the preshade to influence the colours
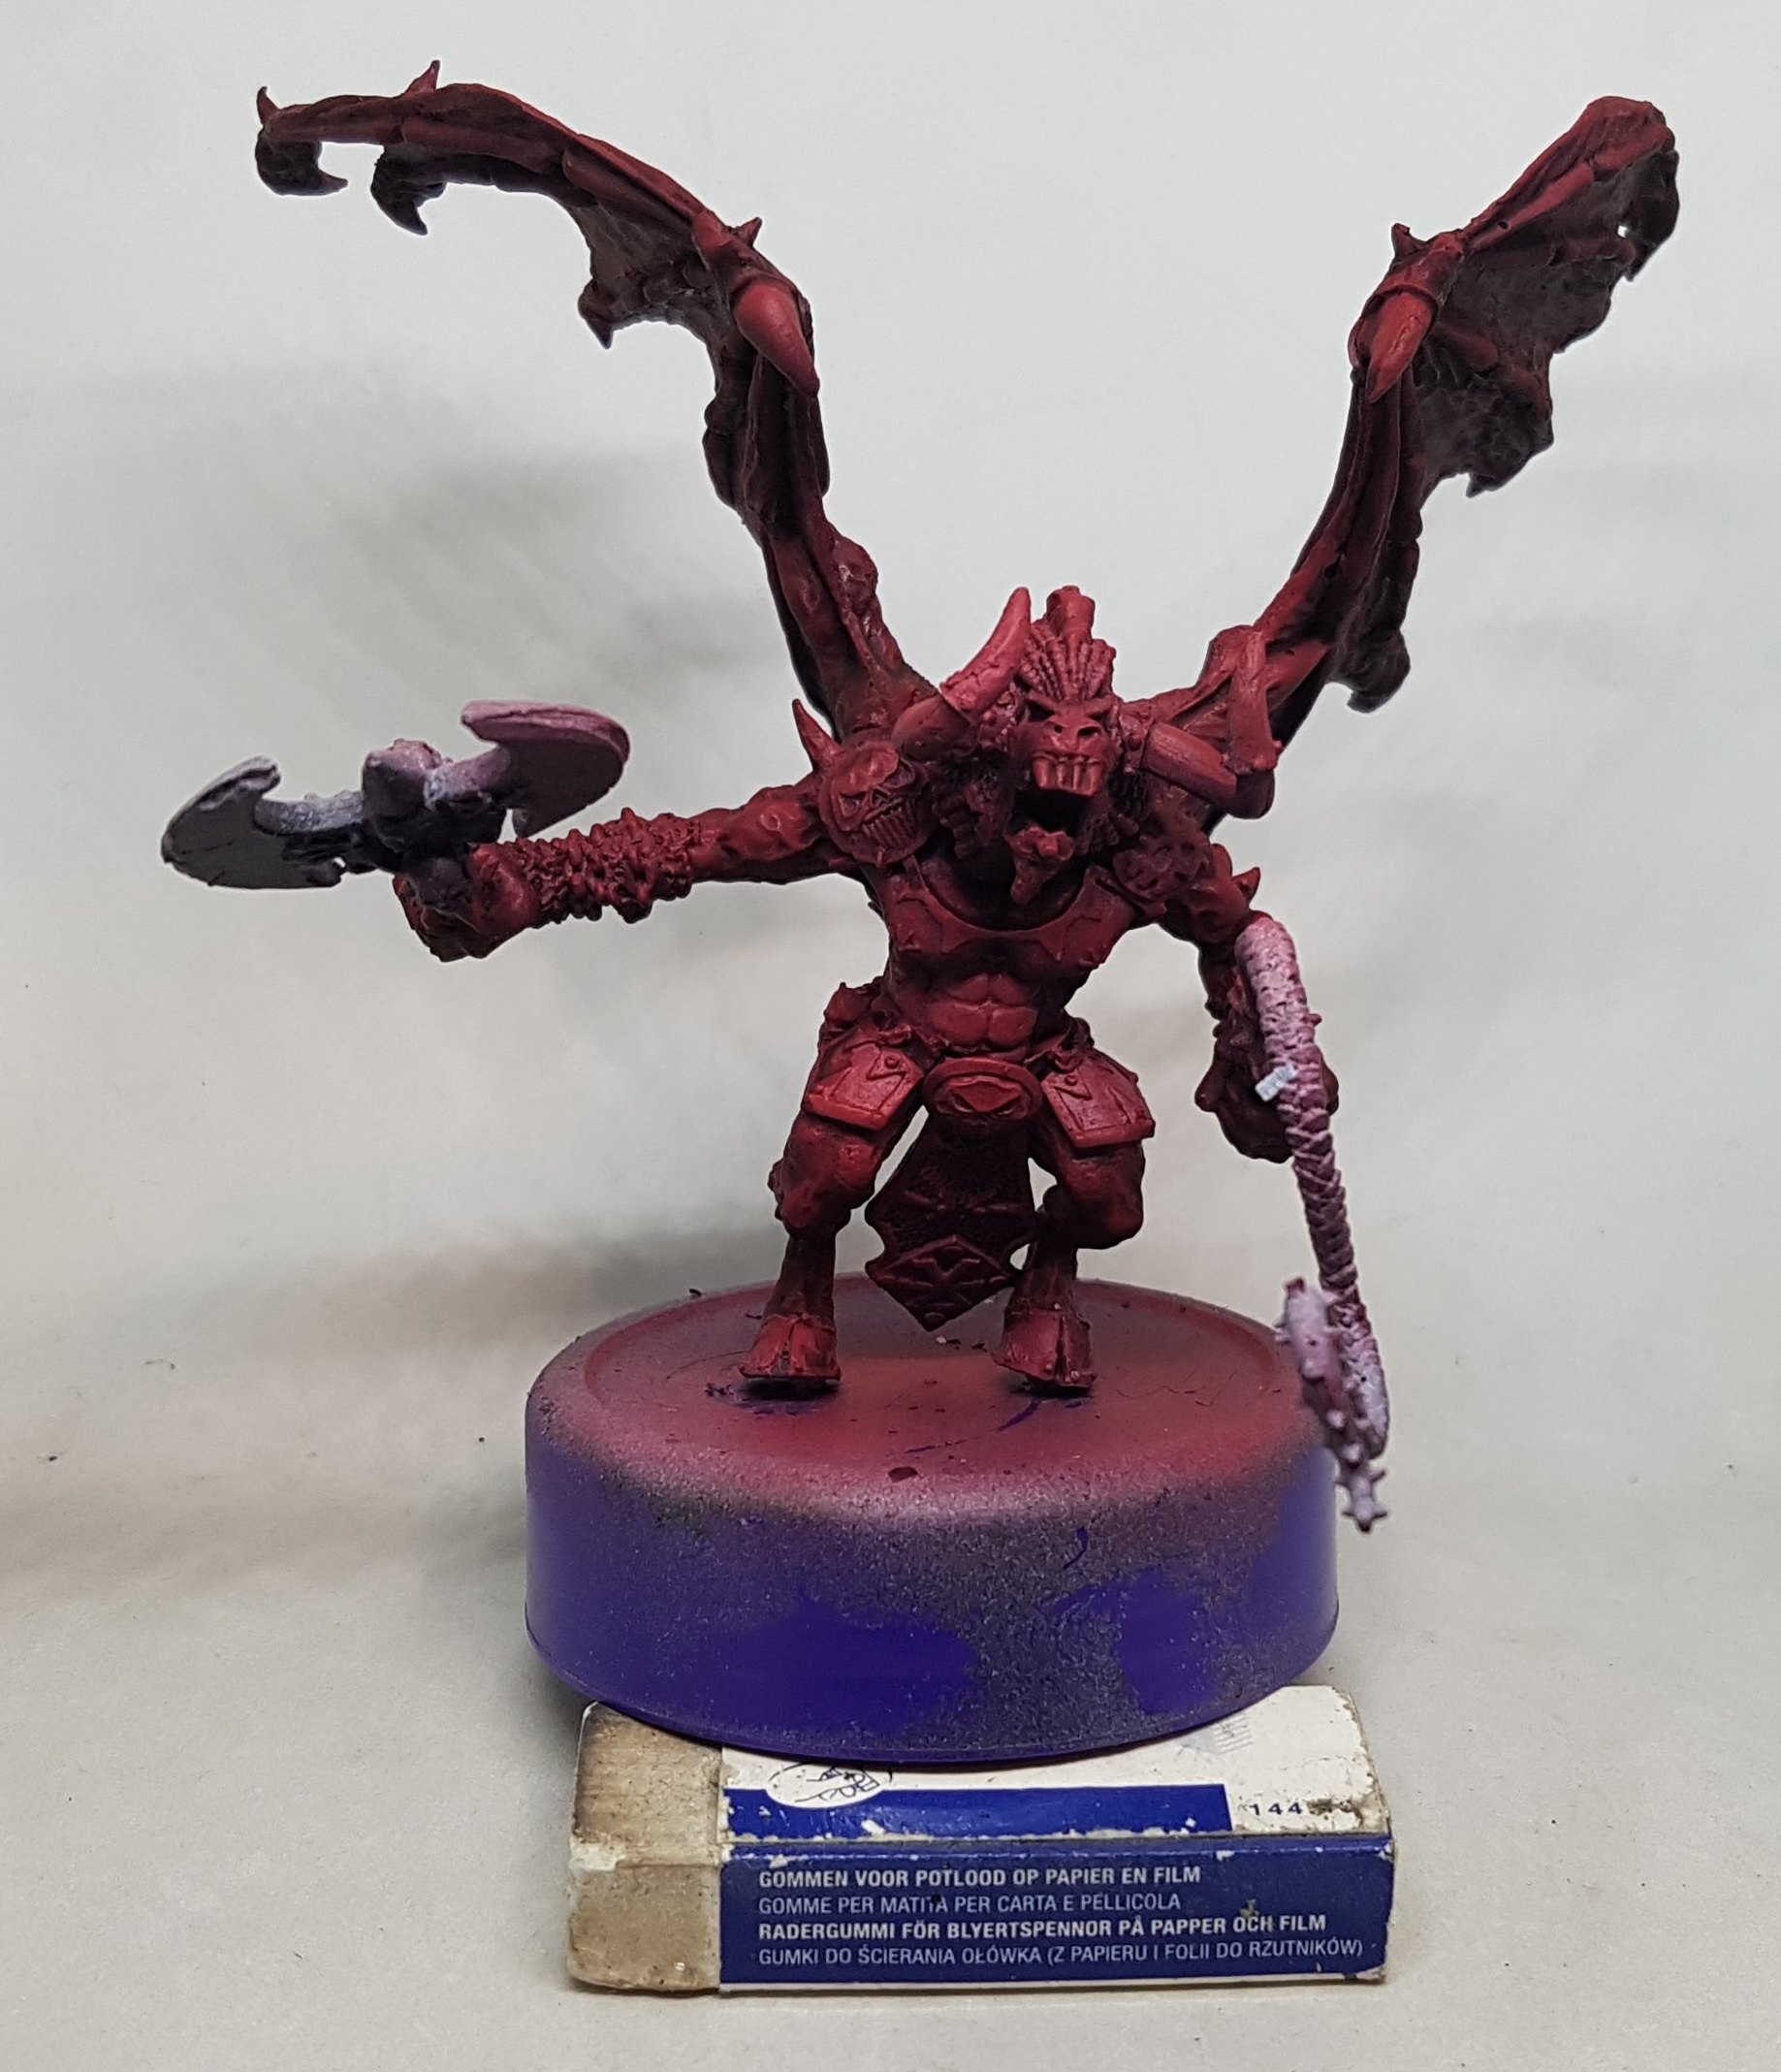 After it had had a few hours to dry, the model was given a wash of GW Carroburg Crimson
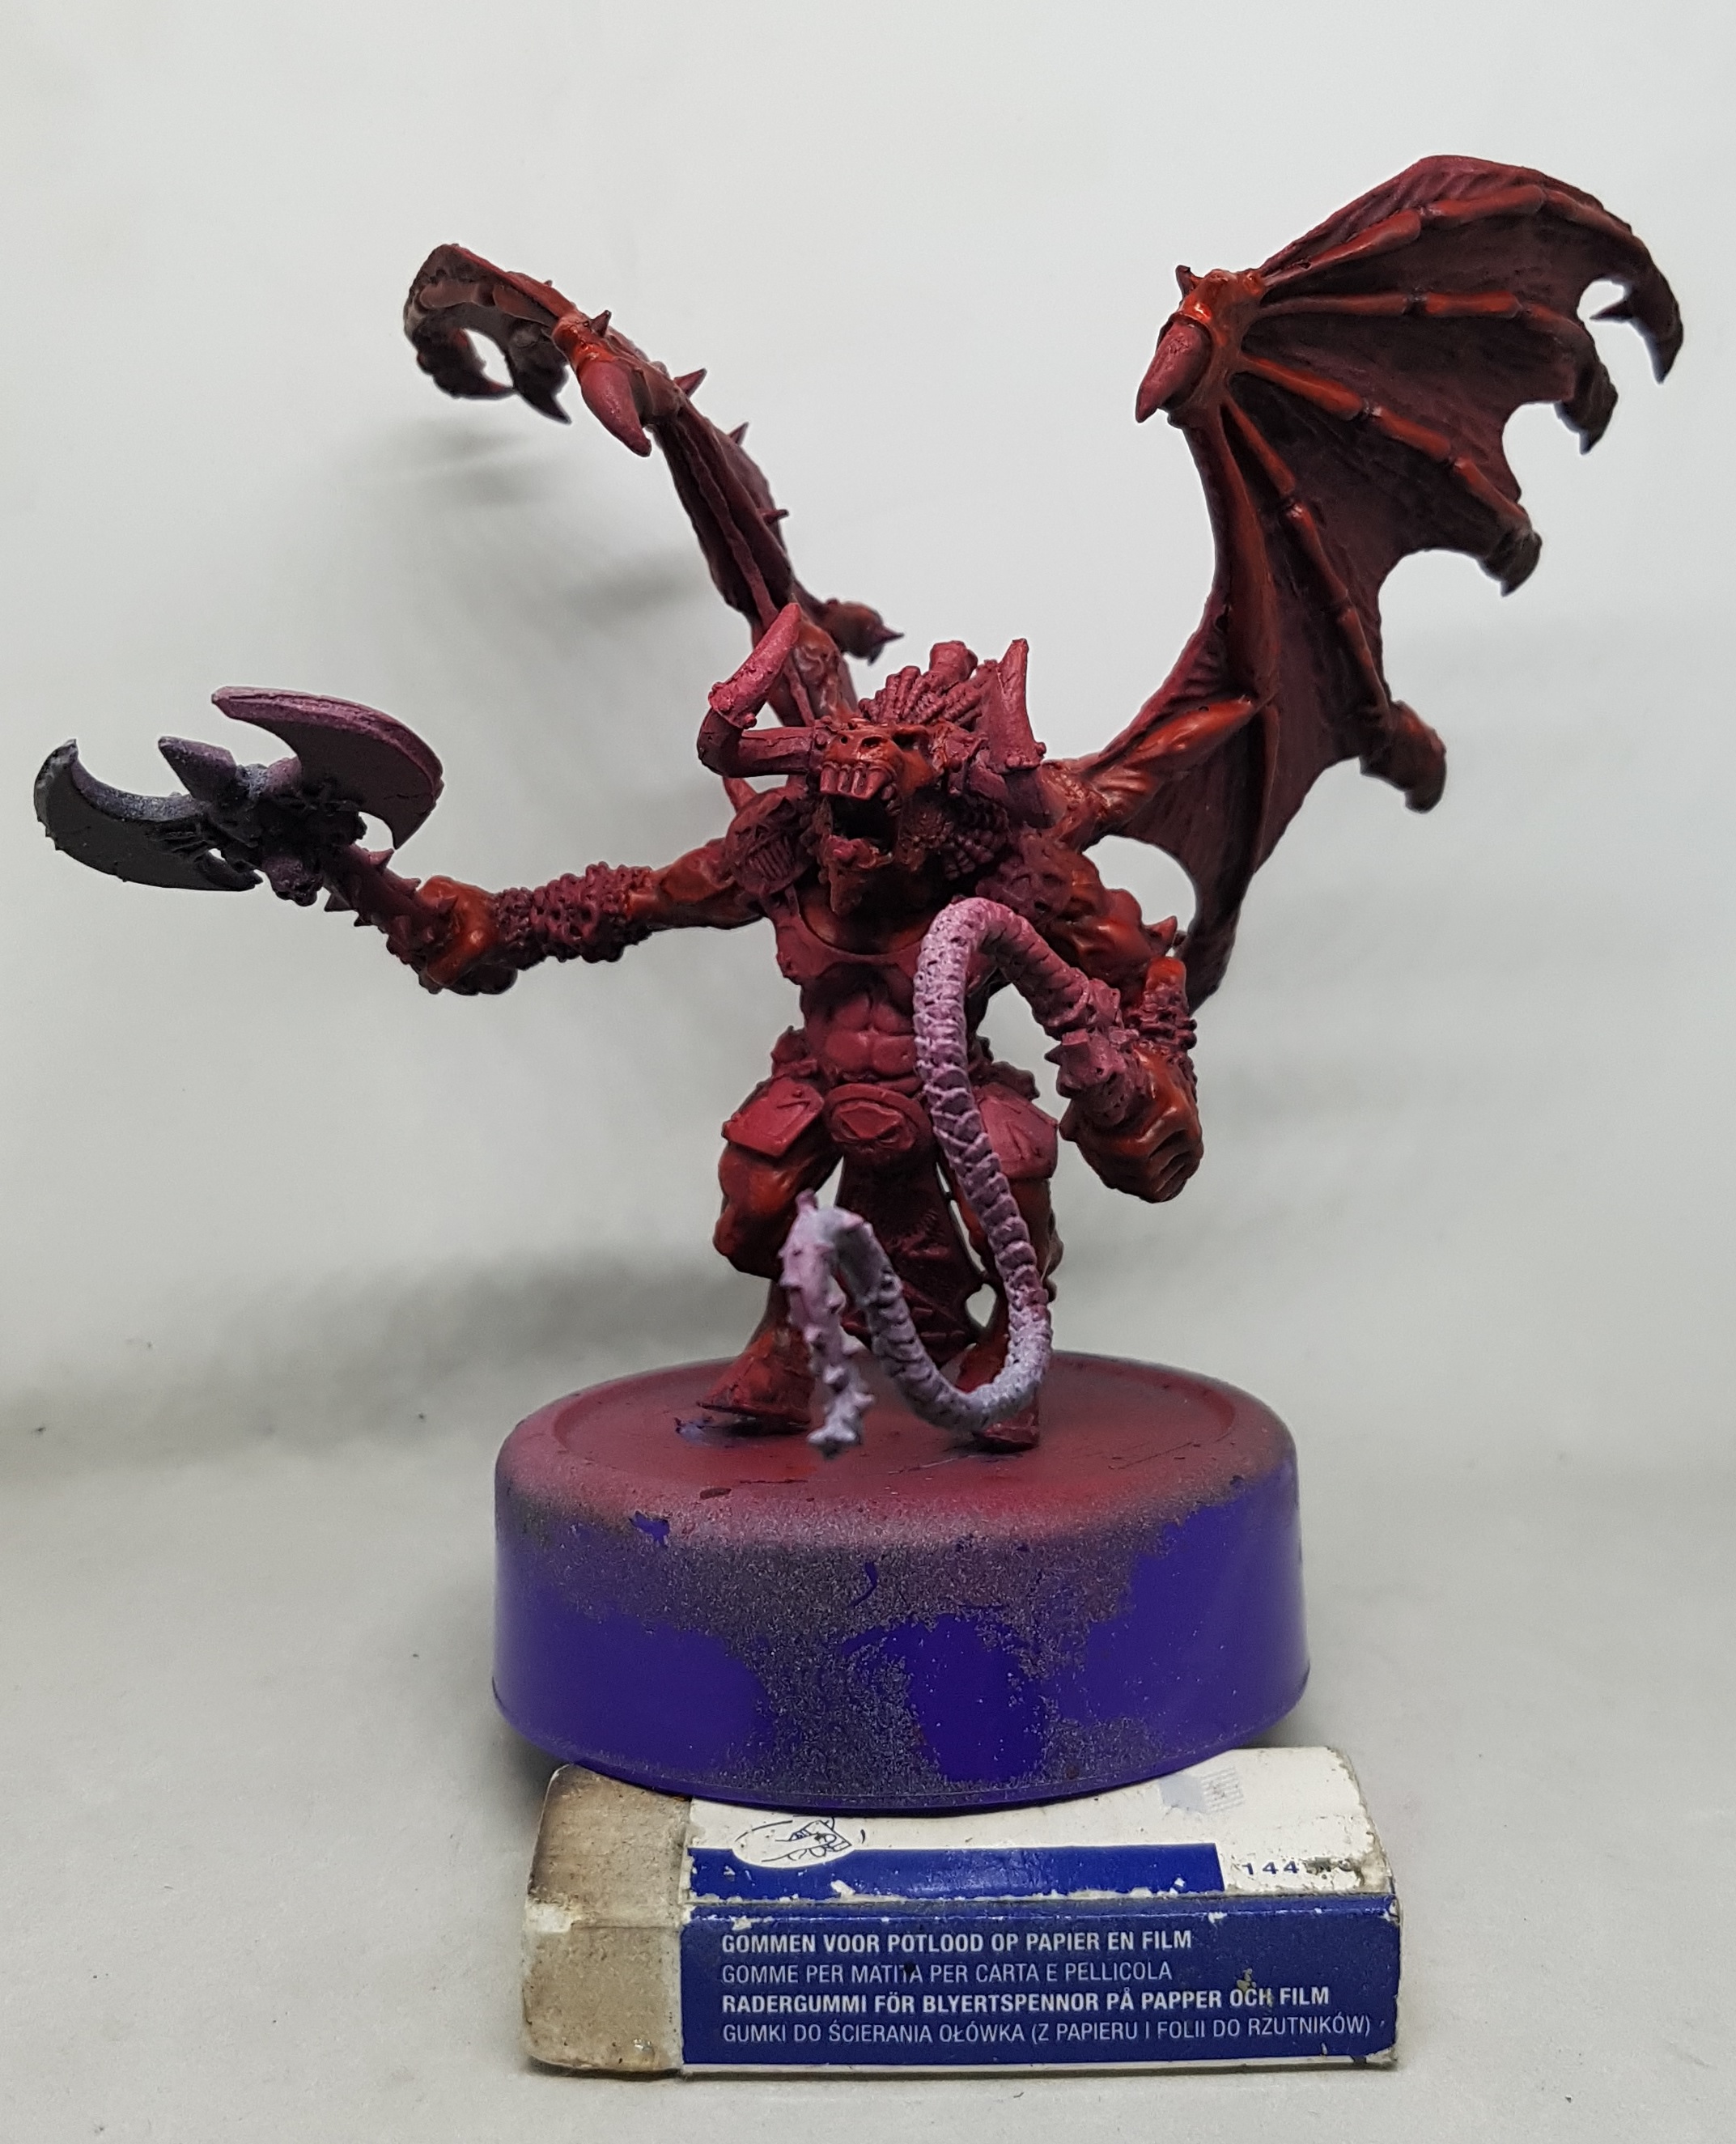 Once the wash had fully dried, I thinned down with water and GW Lahmium Medium some of the Scarlett Red and reclaimed everything but the recesses and undersides. Some GW Evil Sunz Scarlet was thinned and used to add highlights to the reclaimed areas. A few coats of each were used.
Then came the Foundry Nipple Pink system (Light, base and shade). I mixed 3 parts shade with 1 part Evil Sunz Scarlet, and thinned it down to apply the next highlight, covering most of the previus highlight. Then I did the same, but with pure Nipple Pink Shade. Then I highlighted edges and glints with thinned Nipple Pink Base, and finally just the glints and extreme highlights with Nipple Pink Highlight.
I am having a problem painting this model. Anywhere I want to put my hands theres a wing or a weapon in the pay. It means I often end up holding the brush a couple of inches higher up than is comfortable and I don’t have anywhere to balance my hands. As a result I am making more of a mess of this model than I might otherwise.
 The skin tones all finished
Once the rest of the model is done I am hoping the flesh will look better. if not, I might revisit it with an all over glaze or a thinned ink or something to unify the layers better. We will see when I get there.
 The wings got 2 coats of VMC 70.862 Black Grey. I got a couple of dots of this on the red skin, which I will tidy up once I'm done risking getting more mistakes to fix.
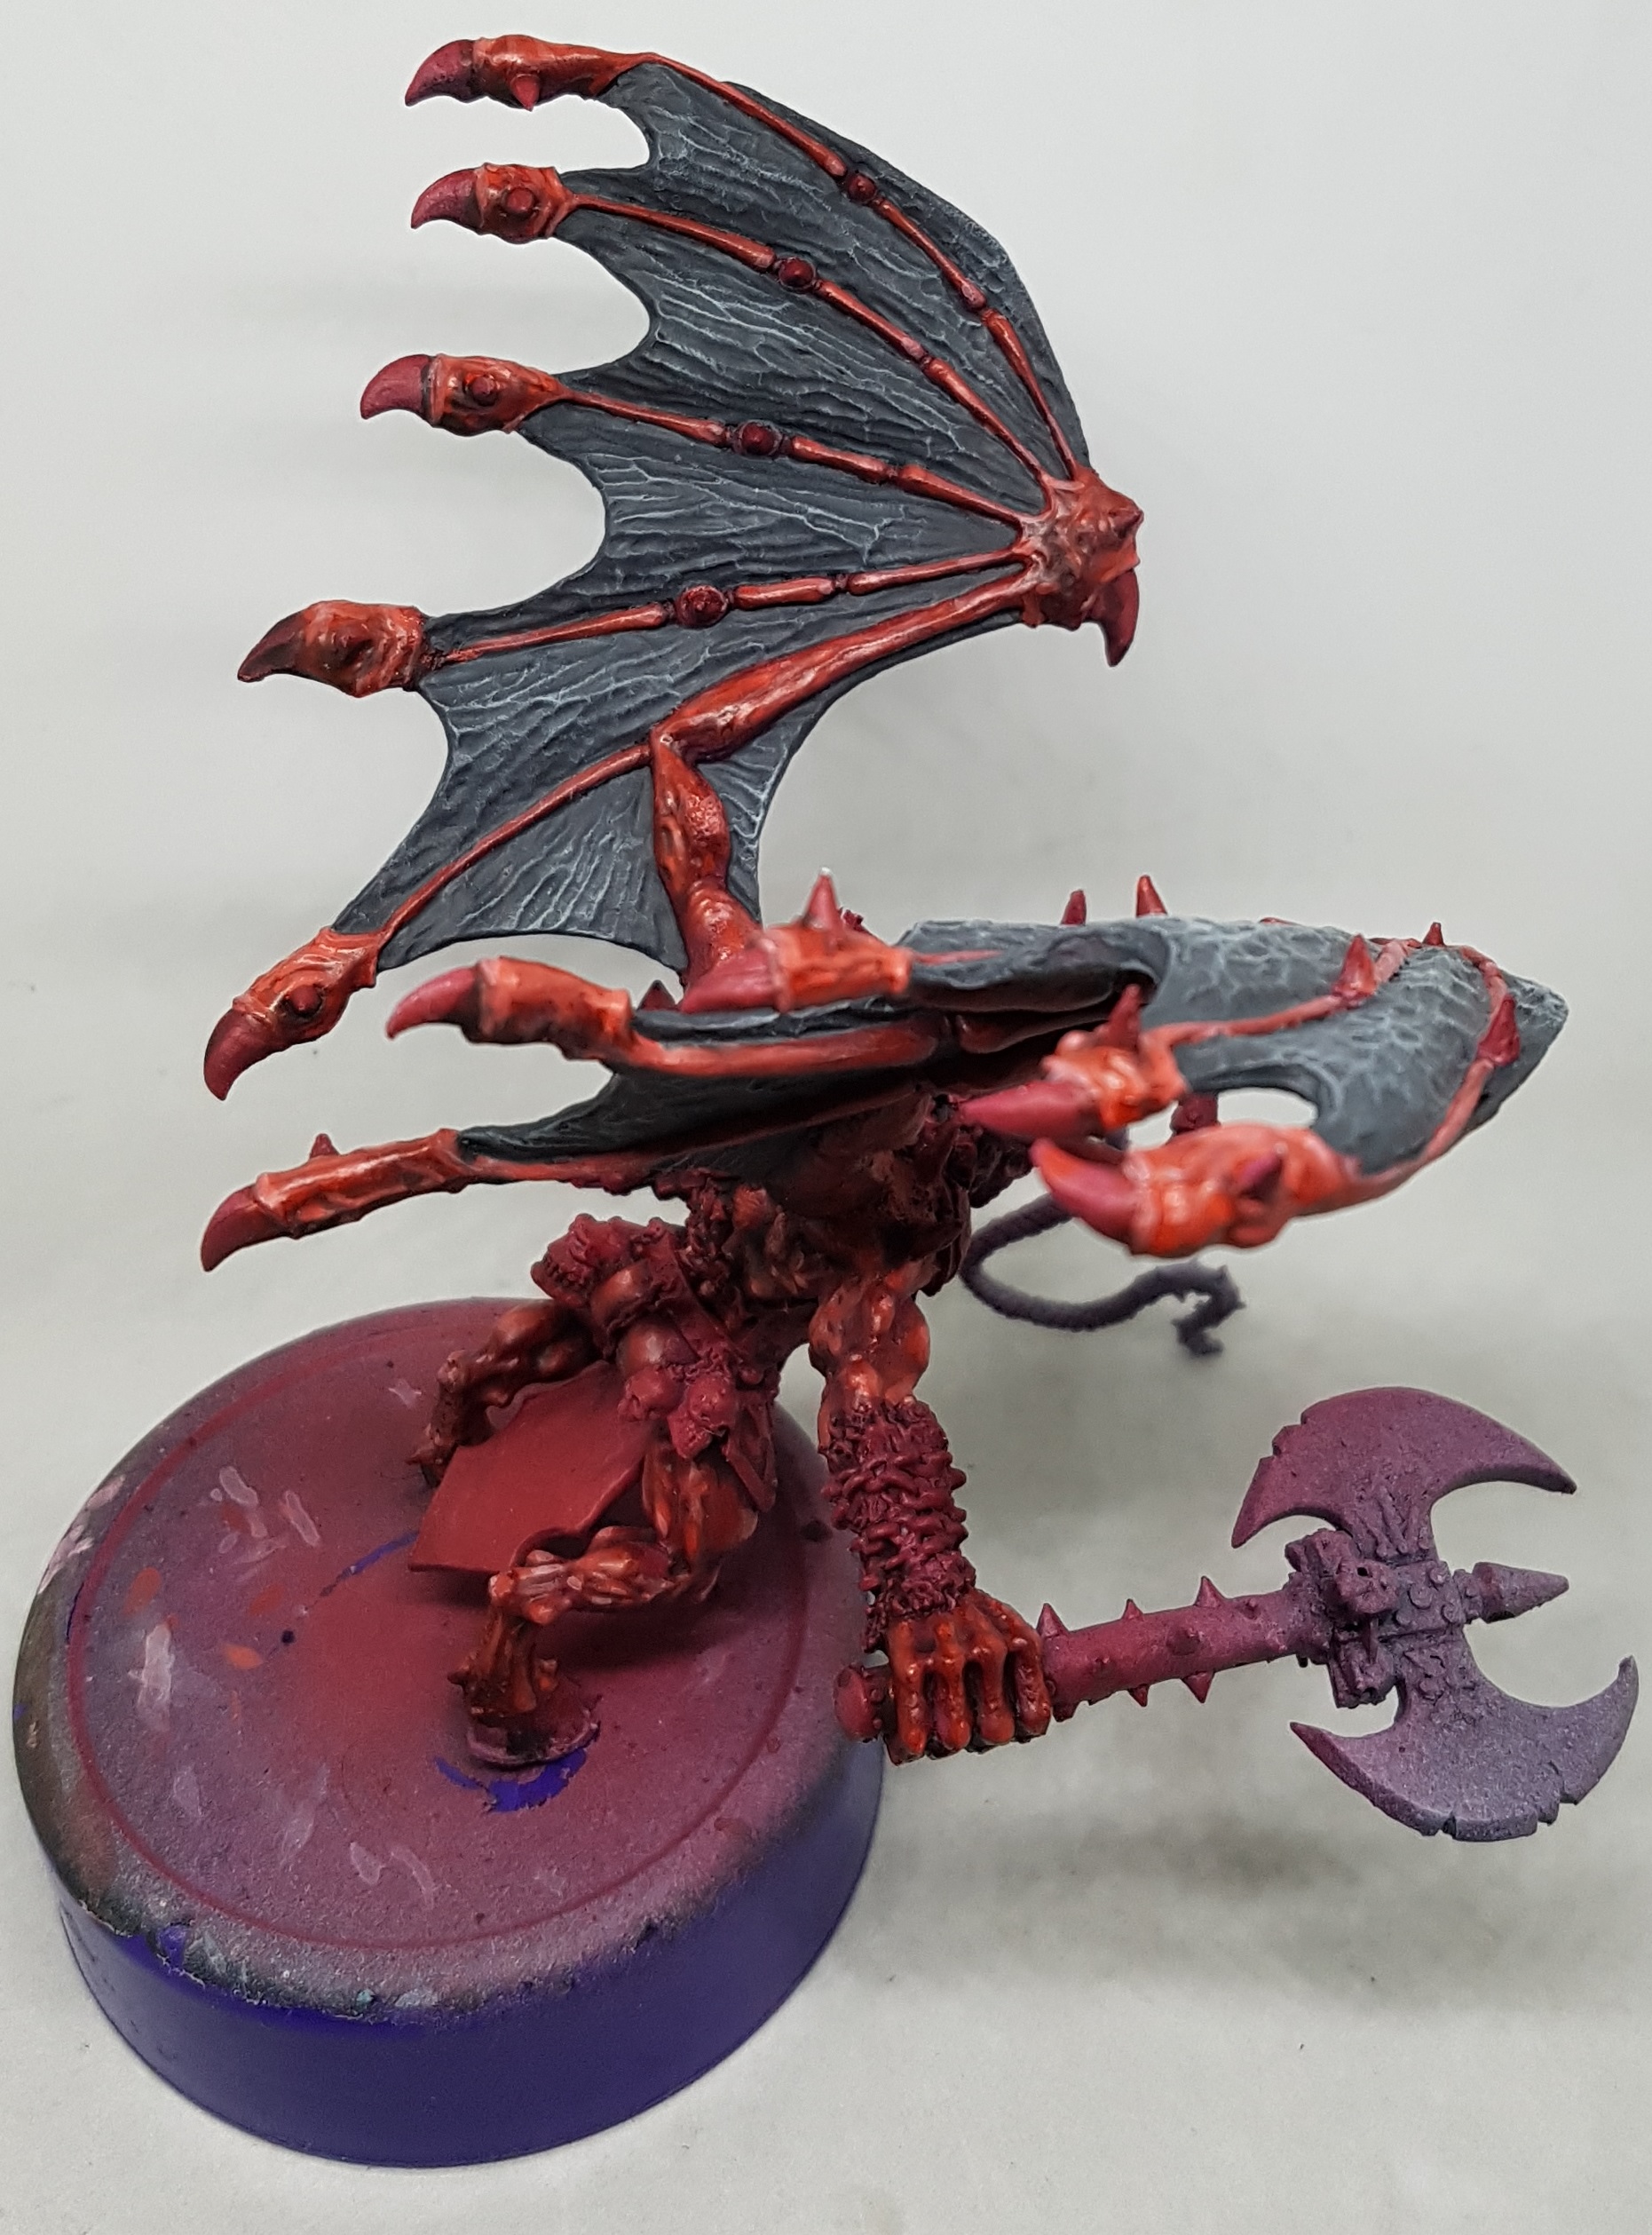 The wings were then drybrushed with VMC 70.905 Blue Grey Pale, and then any areas that were more raised got an extra drybush of VMC 70.906 Pale Blue in the hopes of adding a hint of colour to the end results.
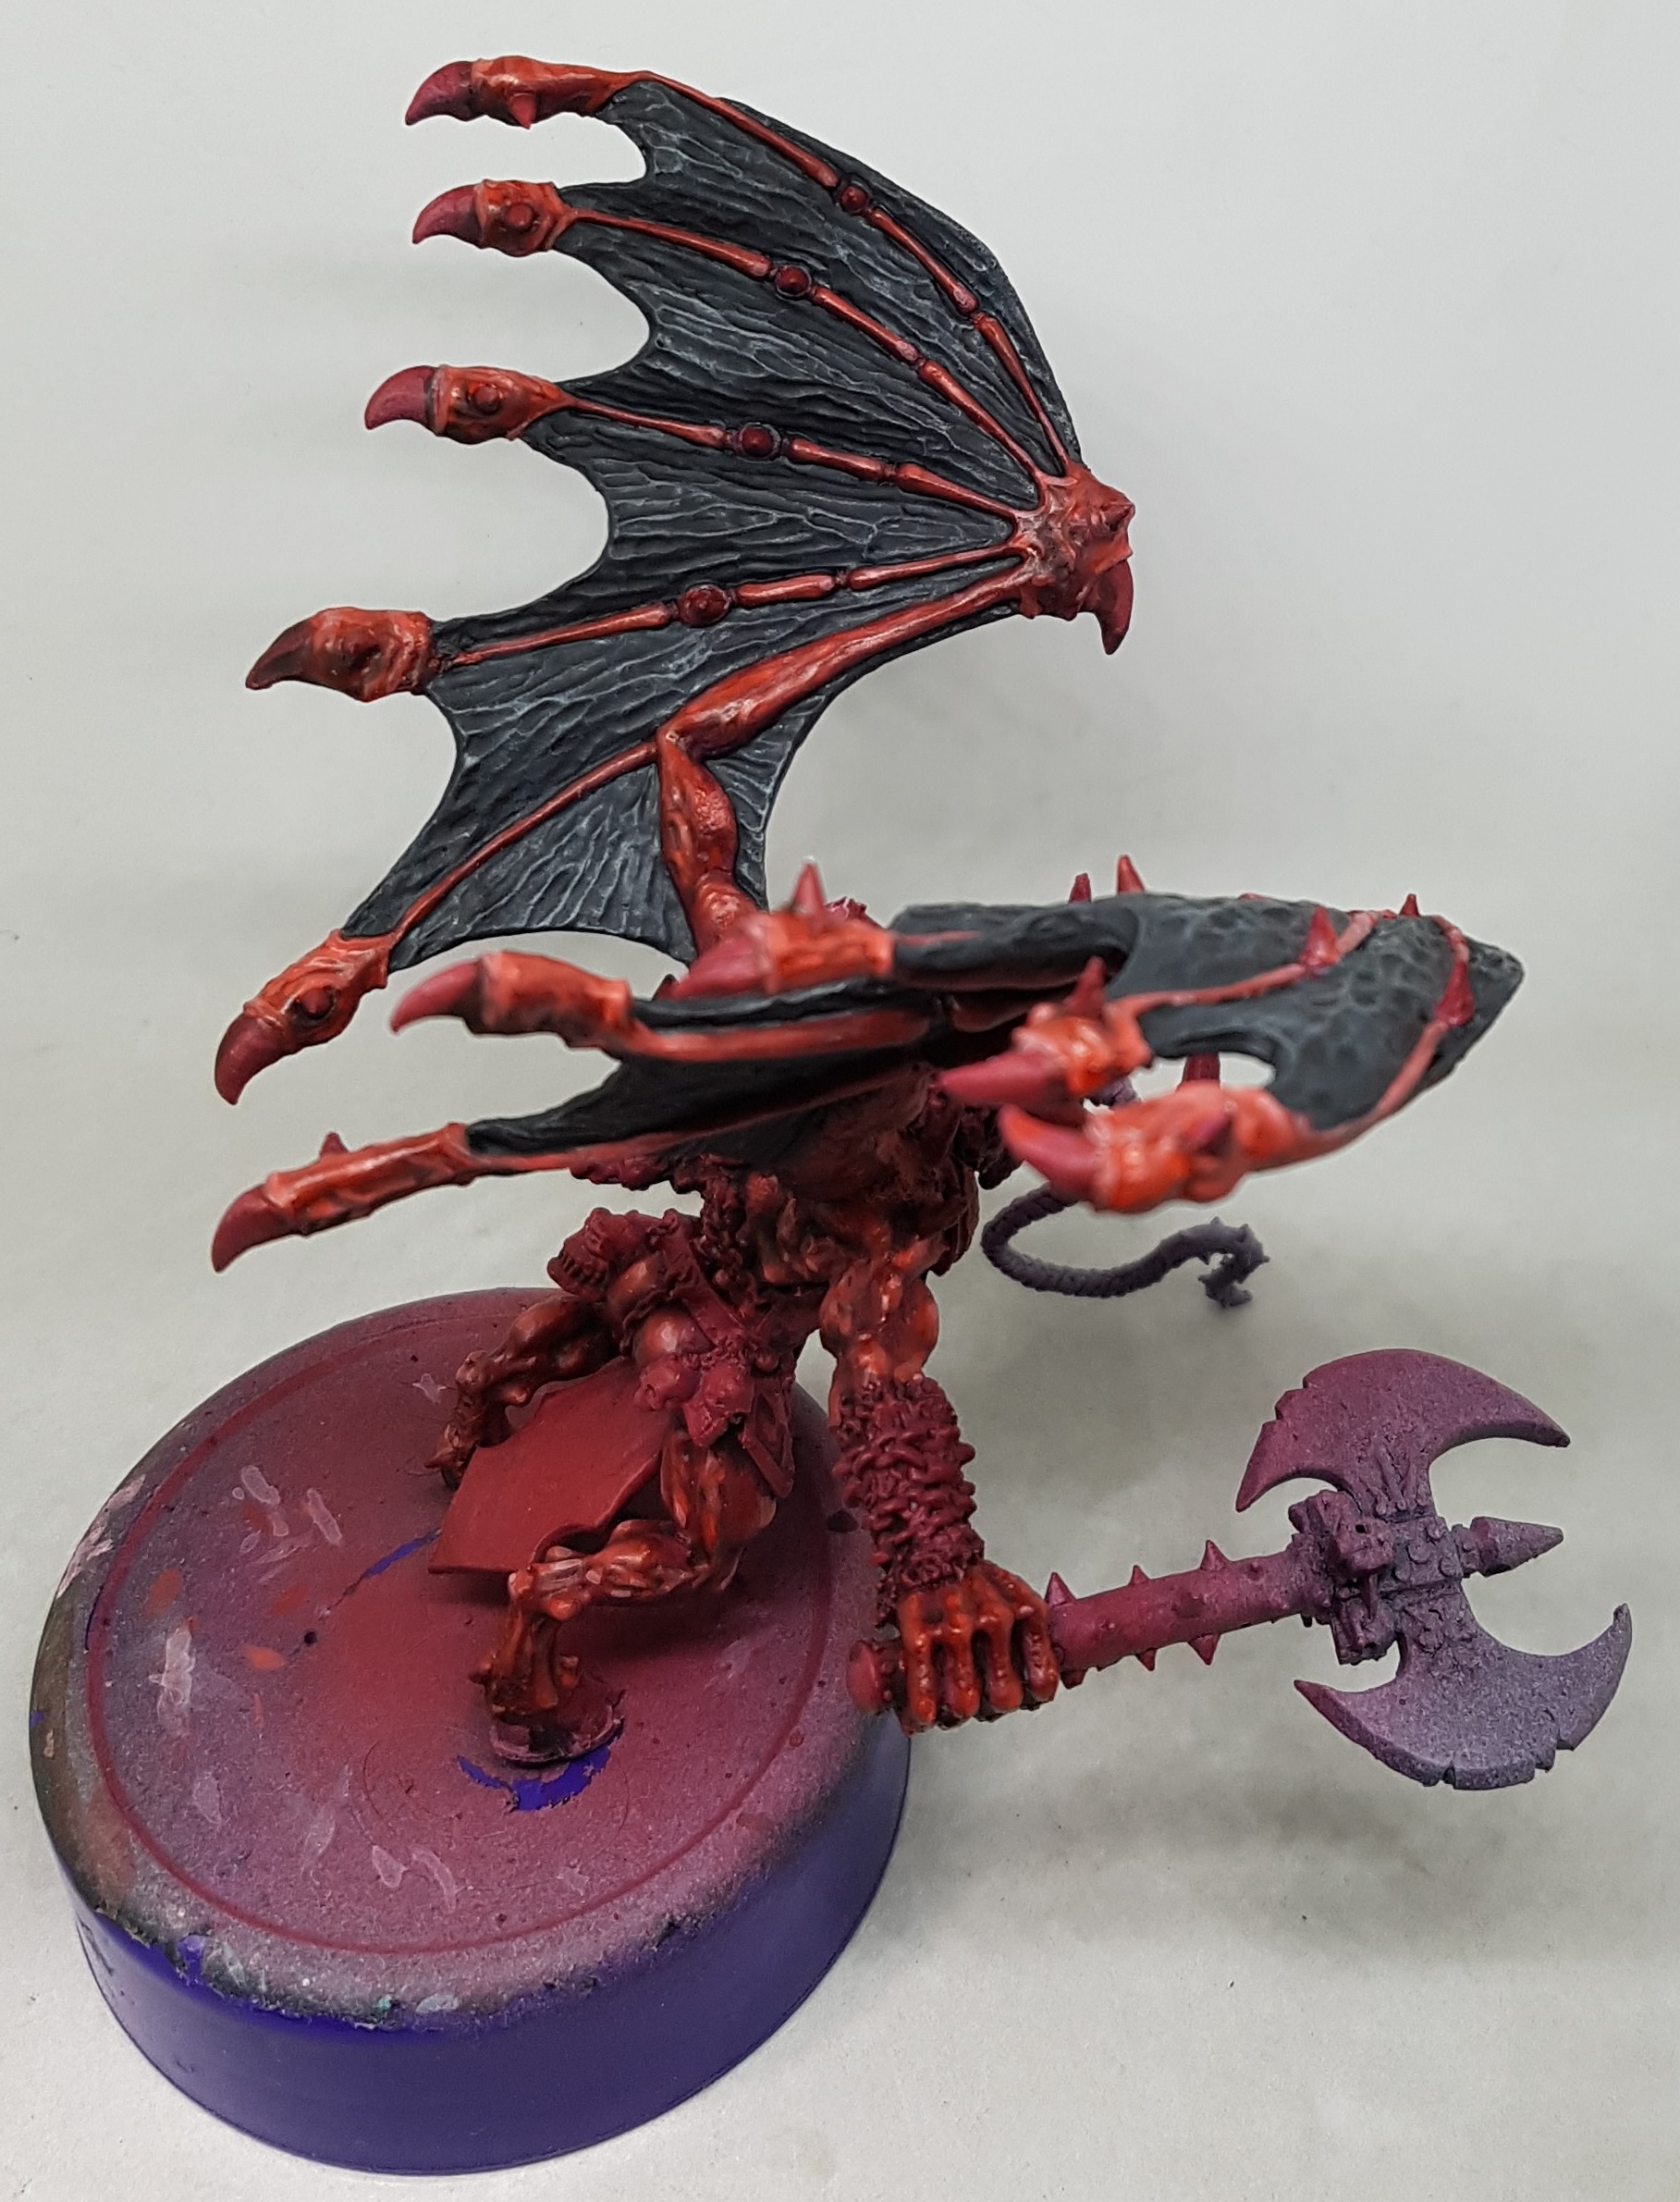 The wings were then washed with GW Nuln Oil and left to dry
Khorne Black Armour, Gold Trim, Teeth, Horns, Hair and Claws
 The armour was base coated with Revell Aqua Color 36106 Tar Black, and then highlighted with a mix of Tar Black and 36174 Gunship Grey, applied as normal in some areas, but as stippling over open surfaces that would catch the light. The highlights were further enhanced with a 1:2 mix before I remembered to take pictures, which don't really show what I've been doing unfortunately.
 Next highlight was pure Gunship Grey, and then that was mixed with 36176 Light Grey, and finally pure Light Grey
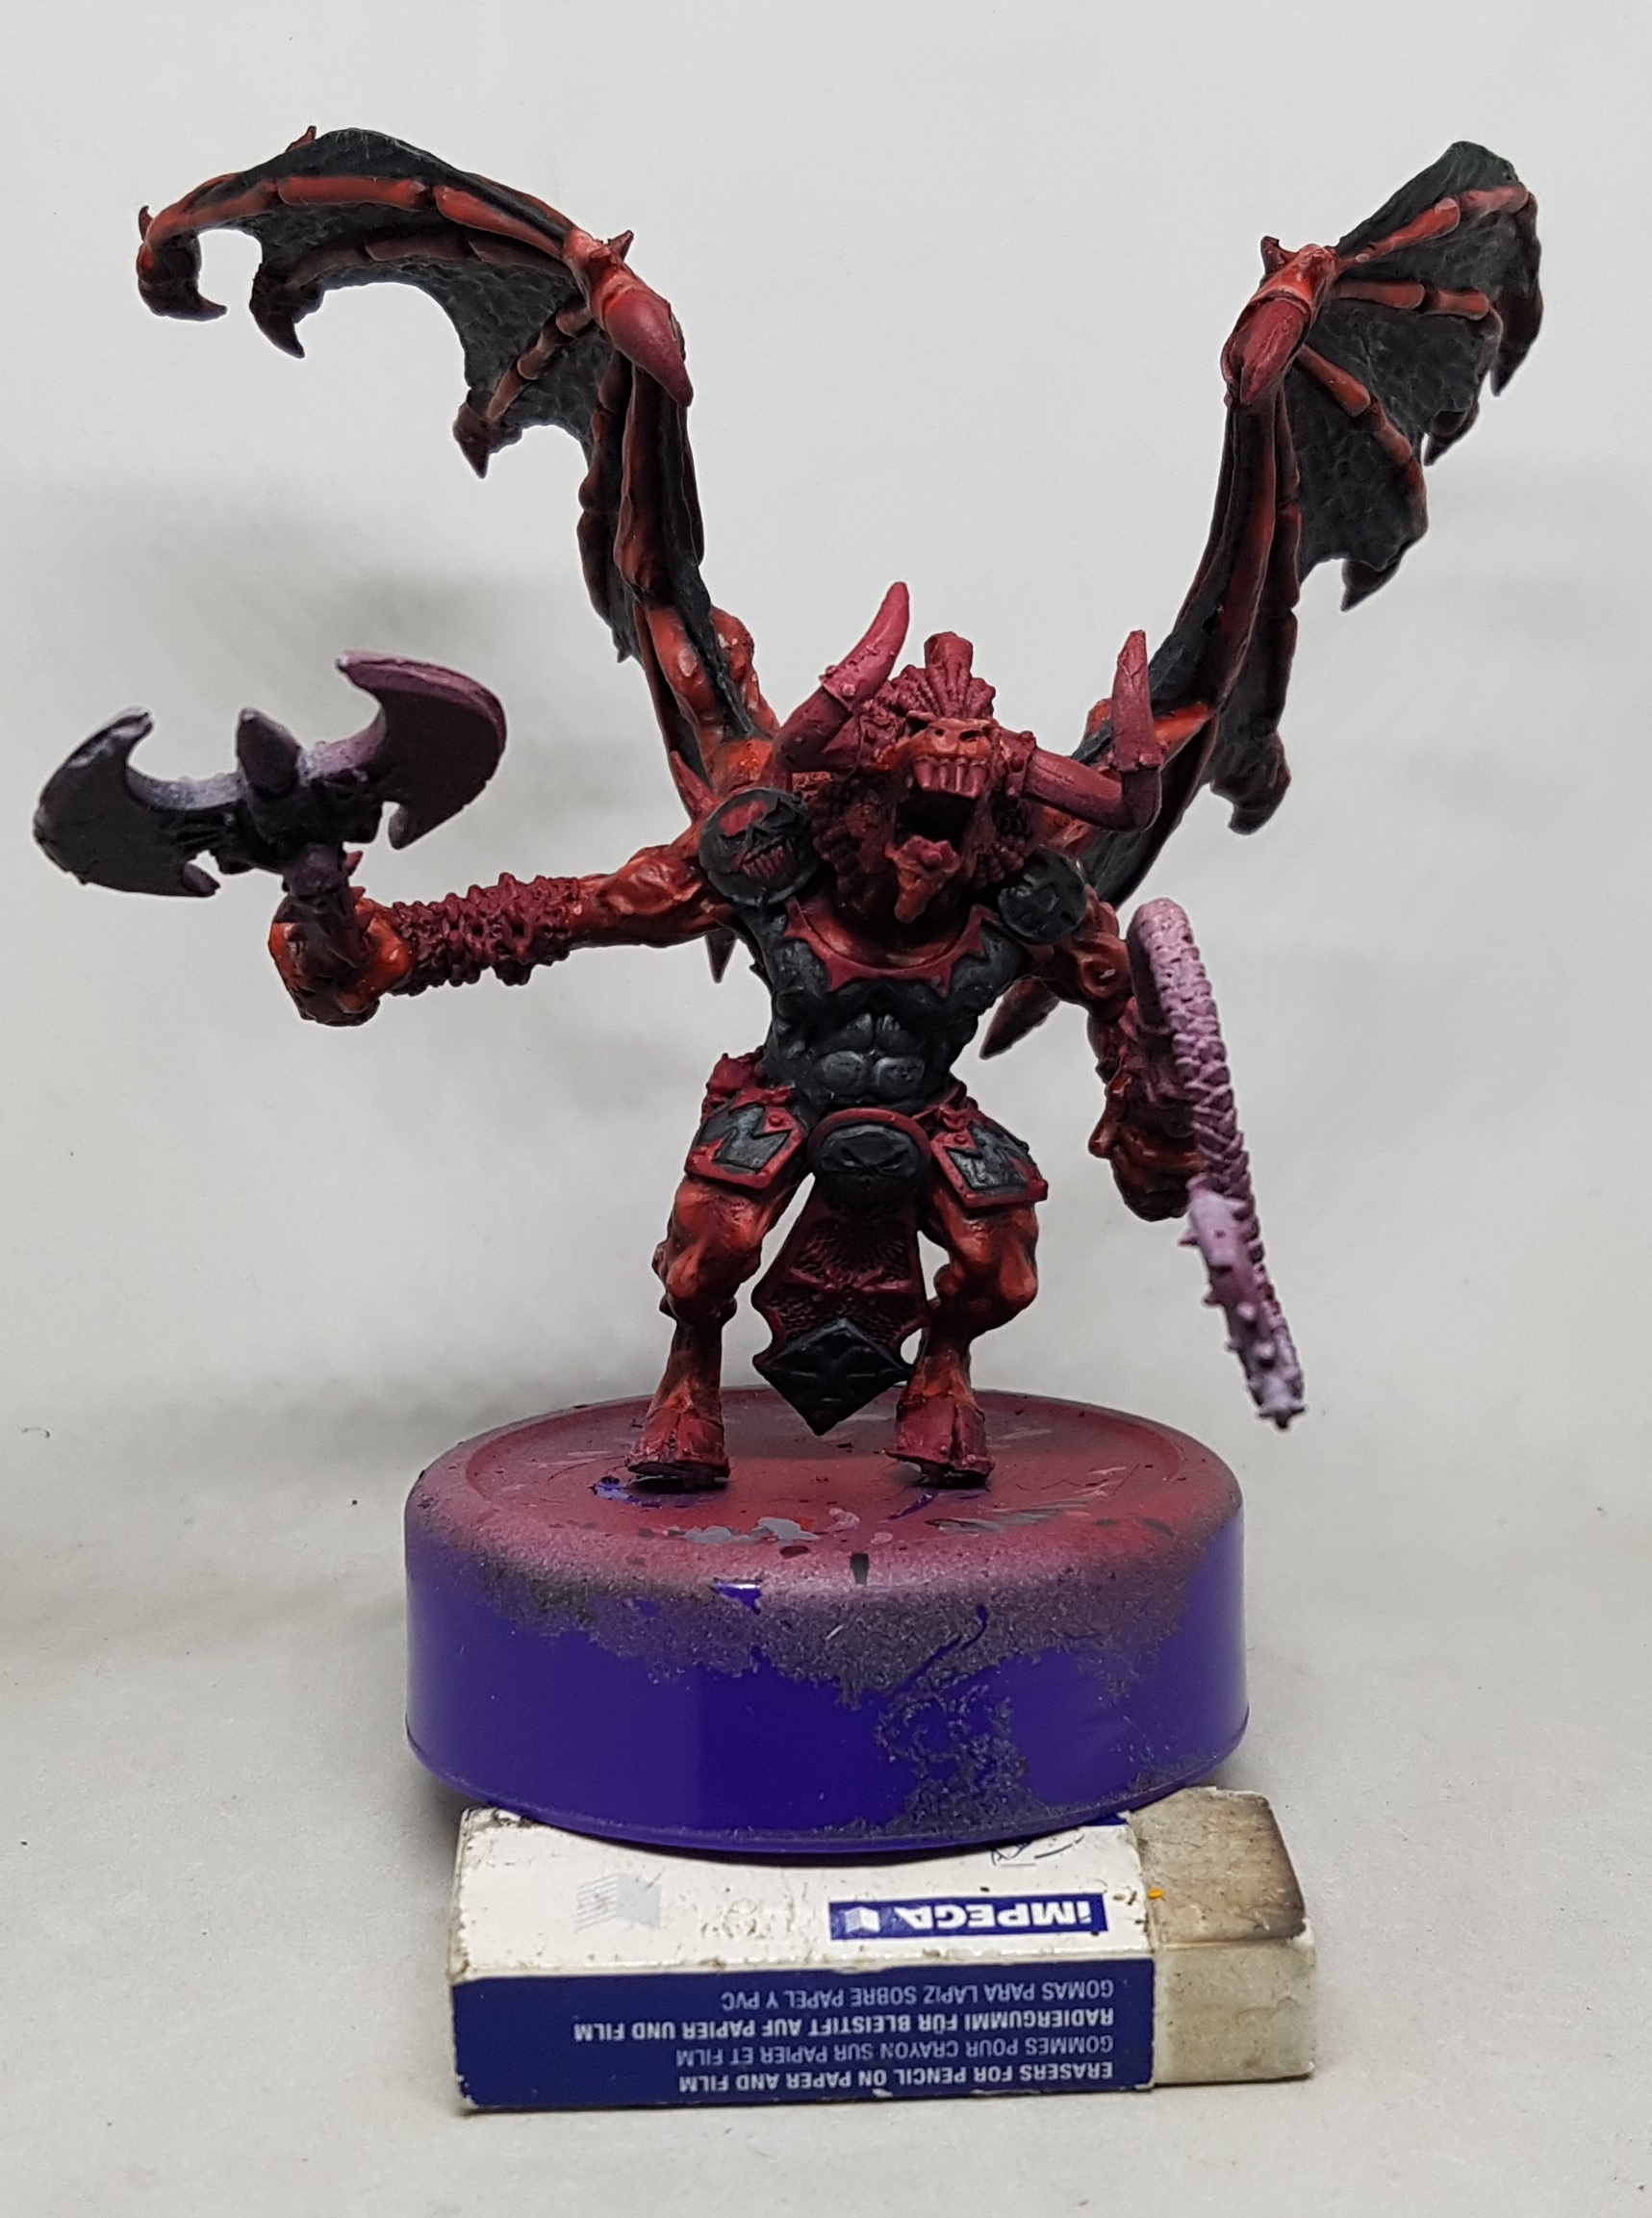 As the highlights looked a little too pronounced I glaized over them one or twice with the base colour to unify everything better
 All the soon to be iron and bronze areas have been undercoated black. The inlay on the skirt was painted P3 Pig Iron, washed GW Nuln Oil, and then drybrushed P3 Cold Steel
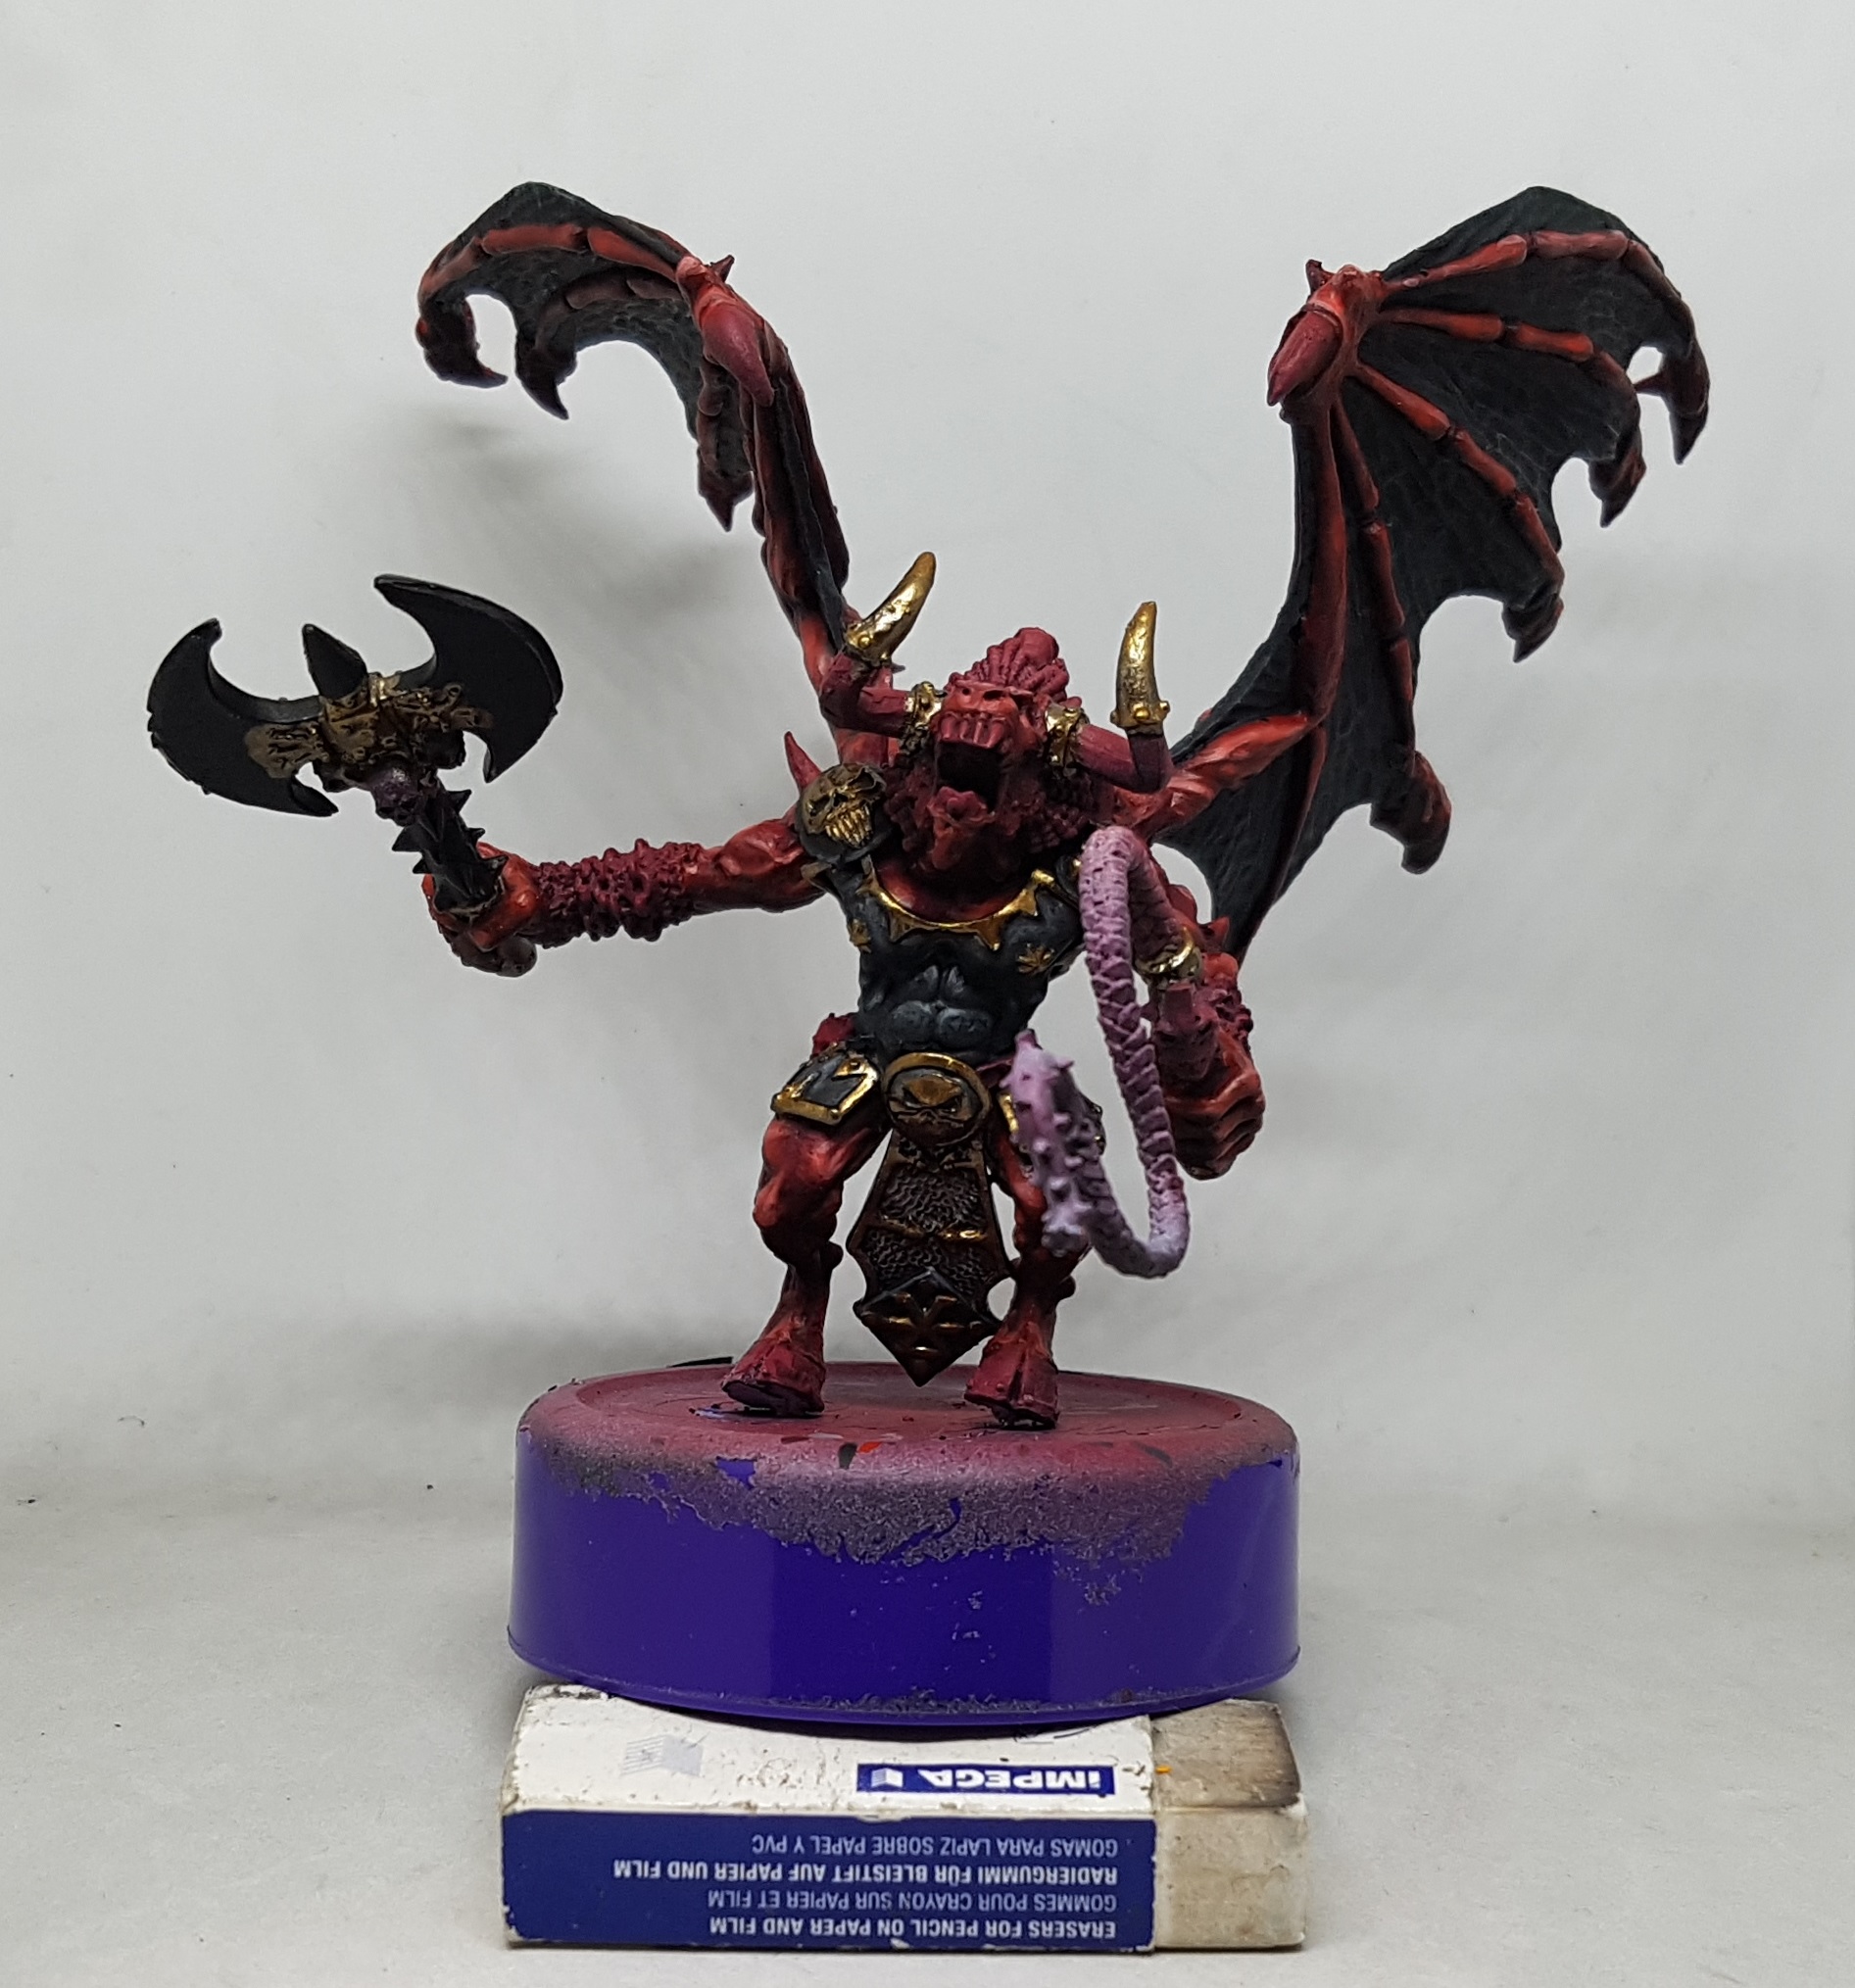 The gold was given 2-3 coats of Darkstar Blackened Bronze, and then highlighted with Darkstar Bronze
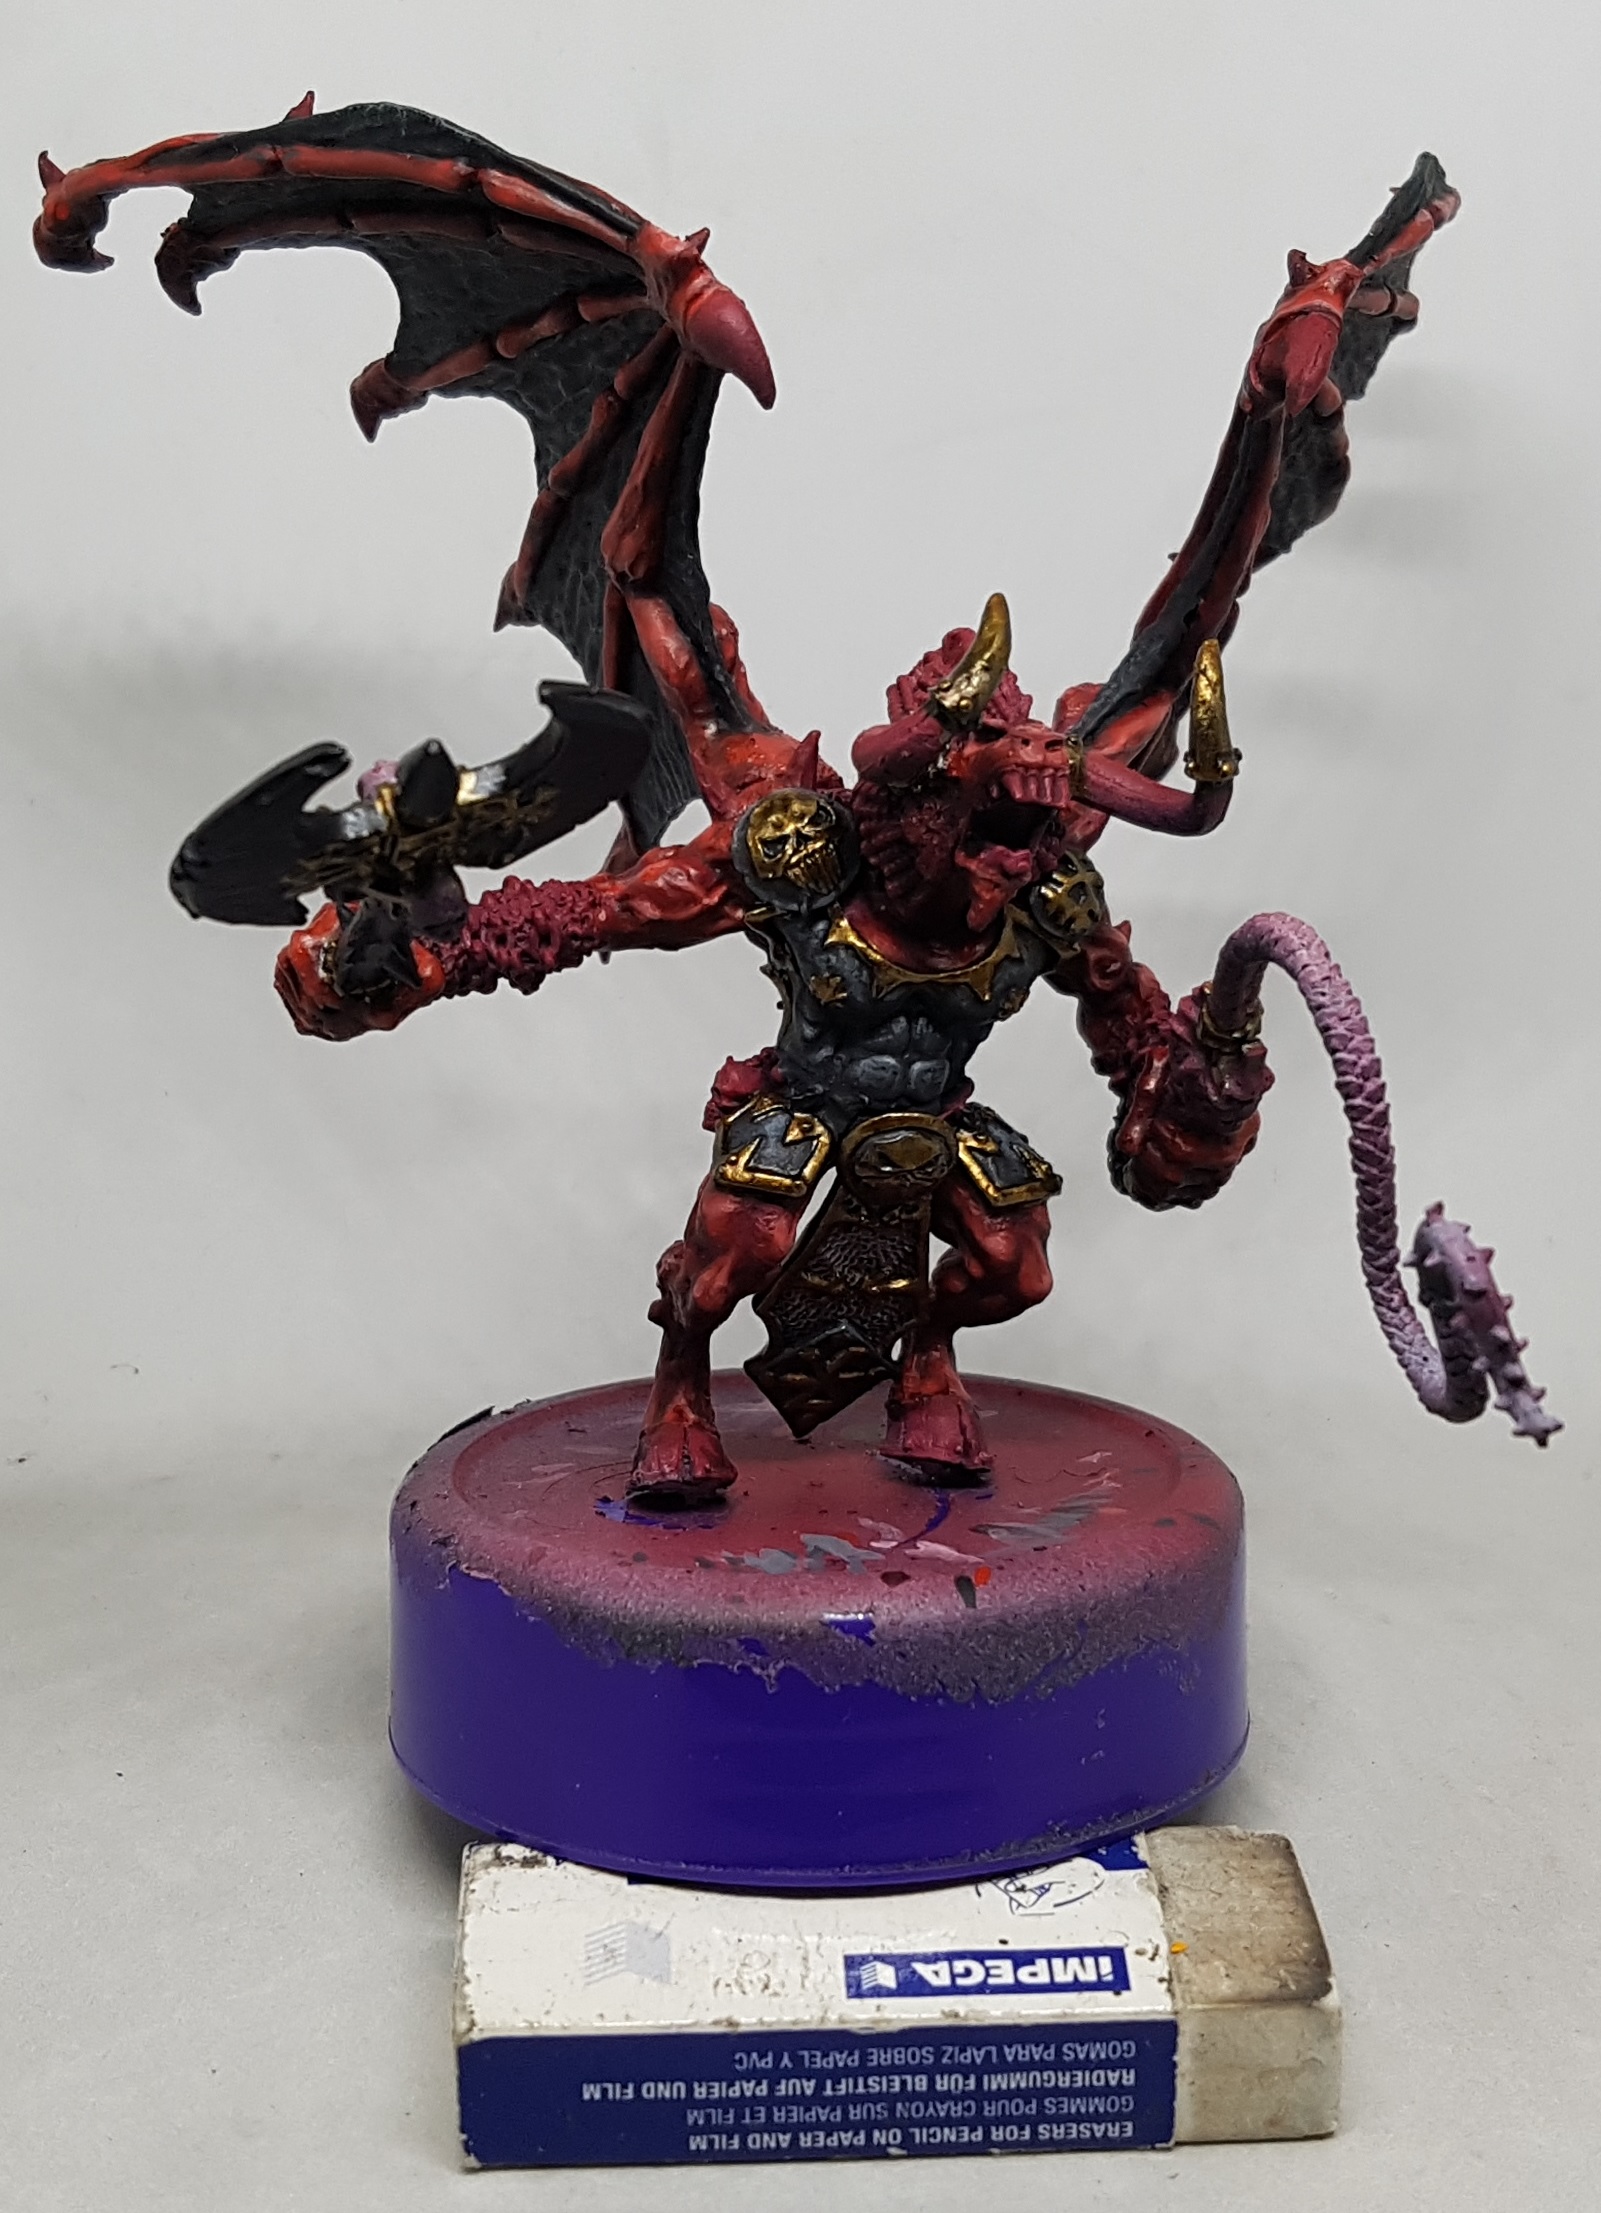 All the bronze was washed with 50/50 water/Secret Weapon Sewer Water
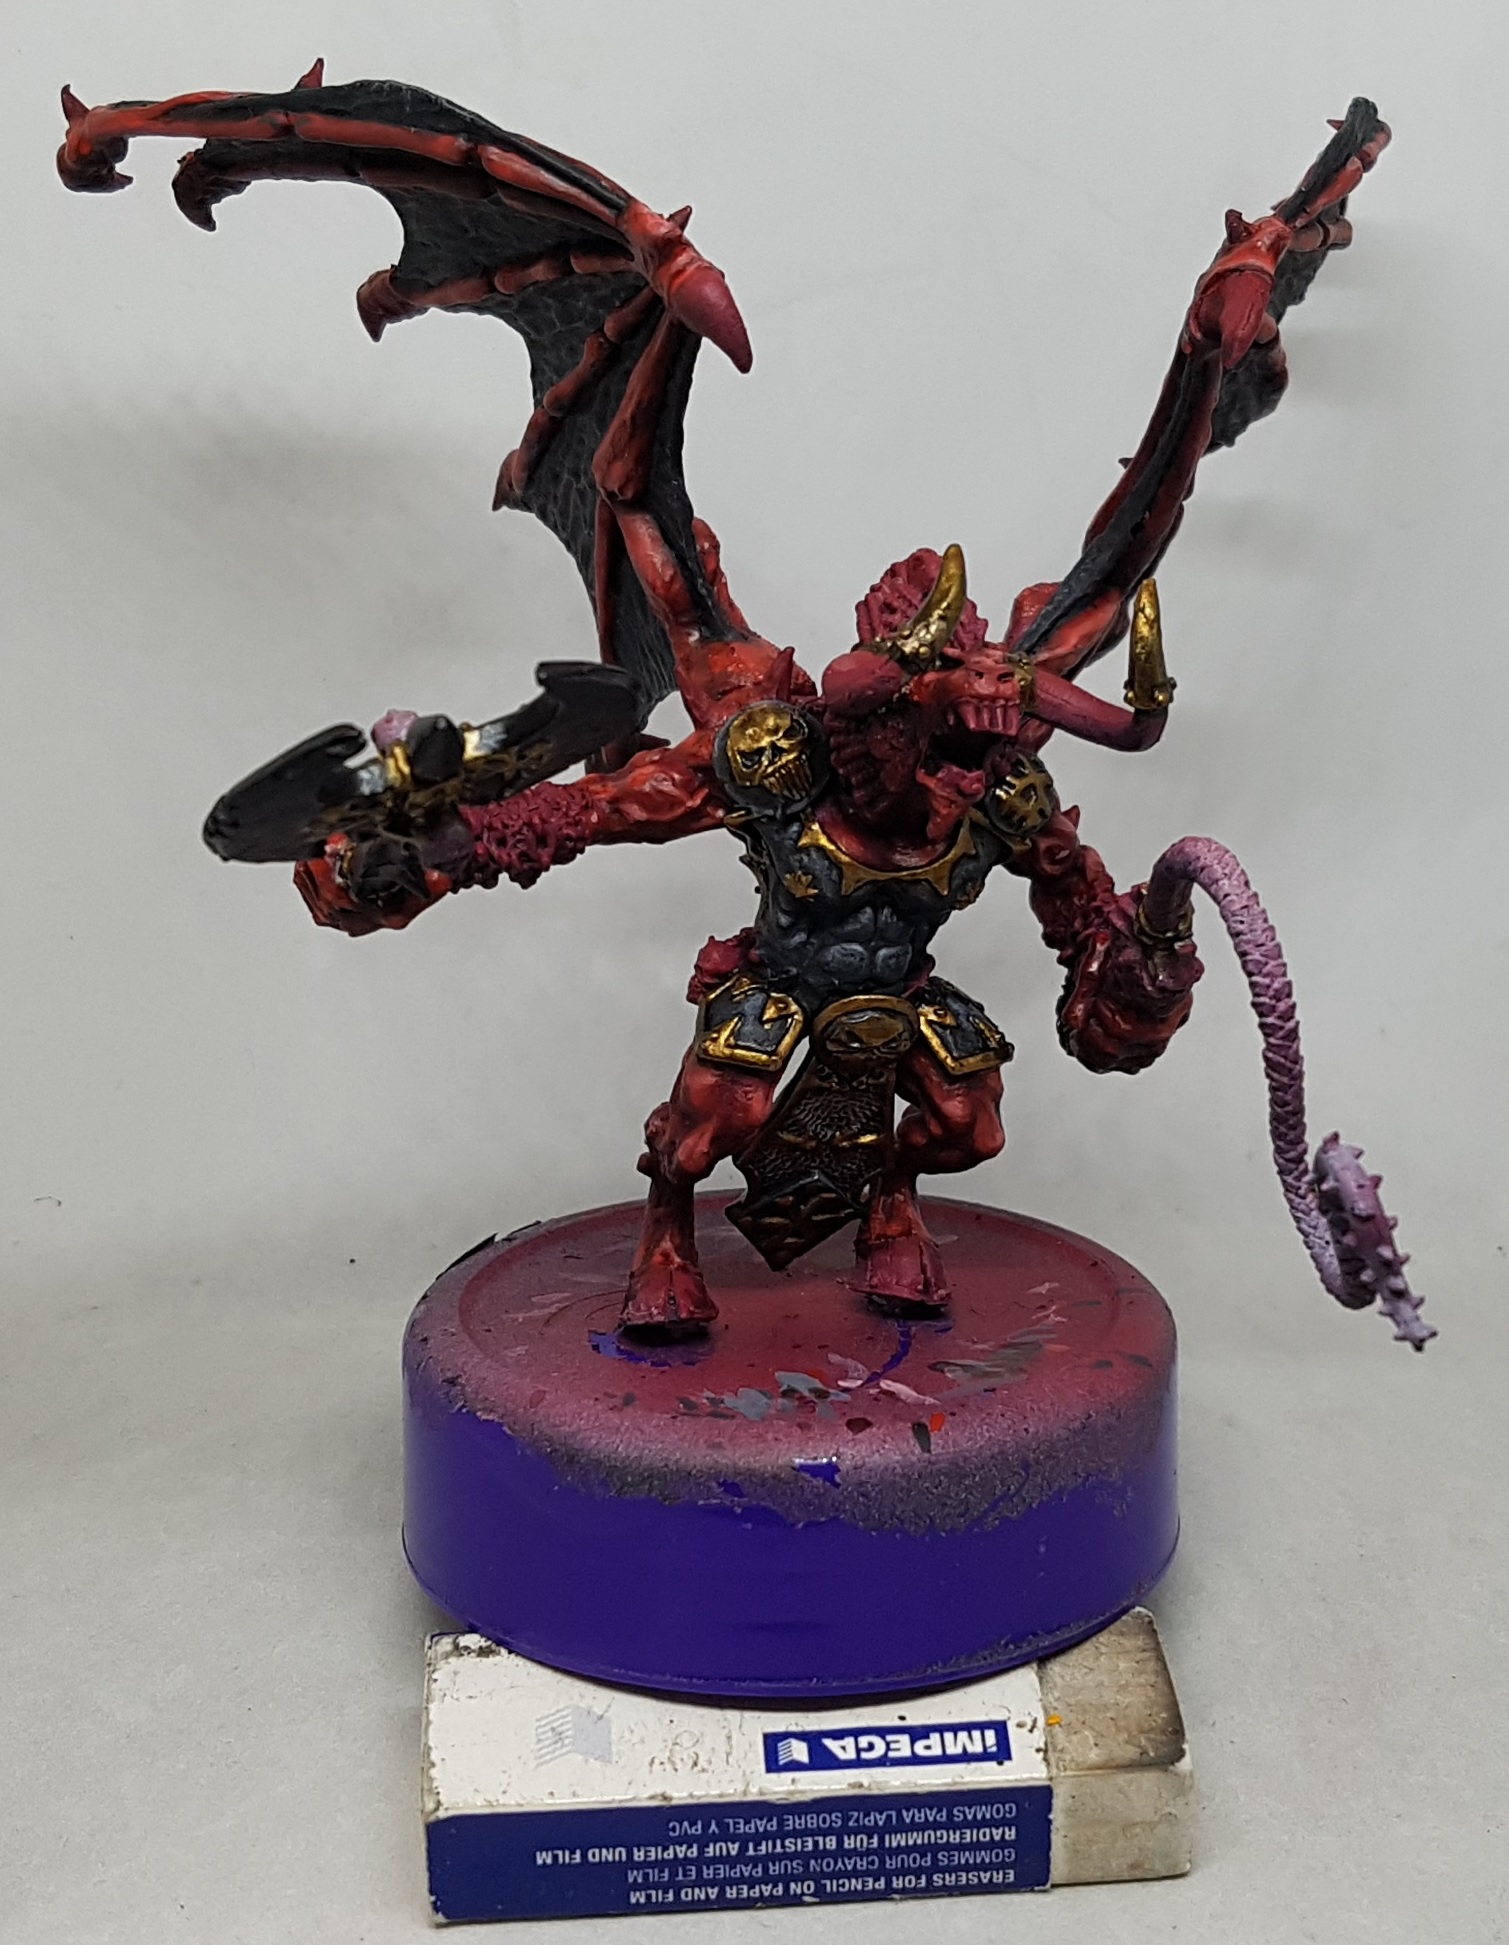 Finally, the highlights were applied with more Darkstar Bronze. For anyone thats curious, the rubber is there to rock him back on his pins otherwise you mostly see the top of his head
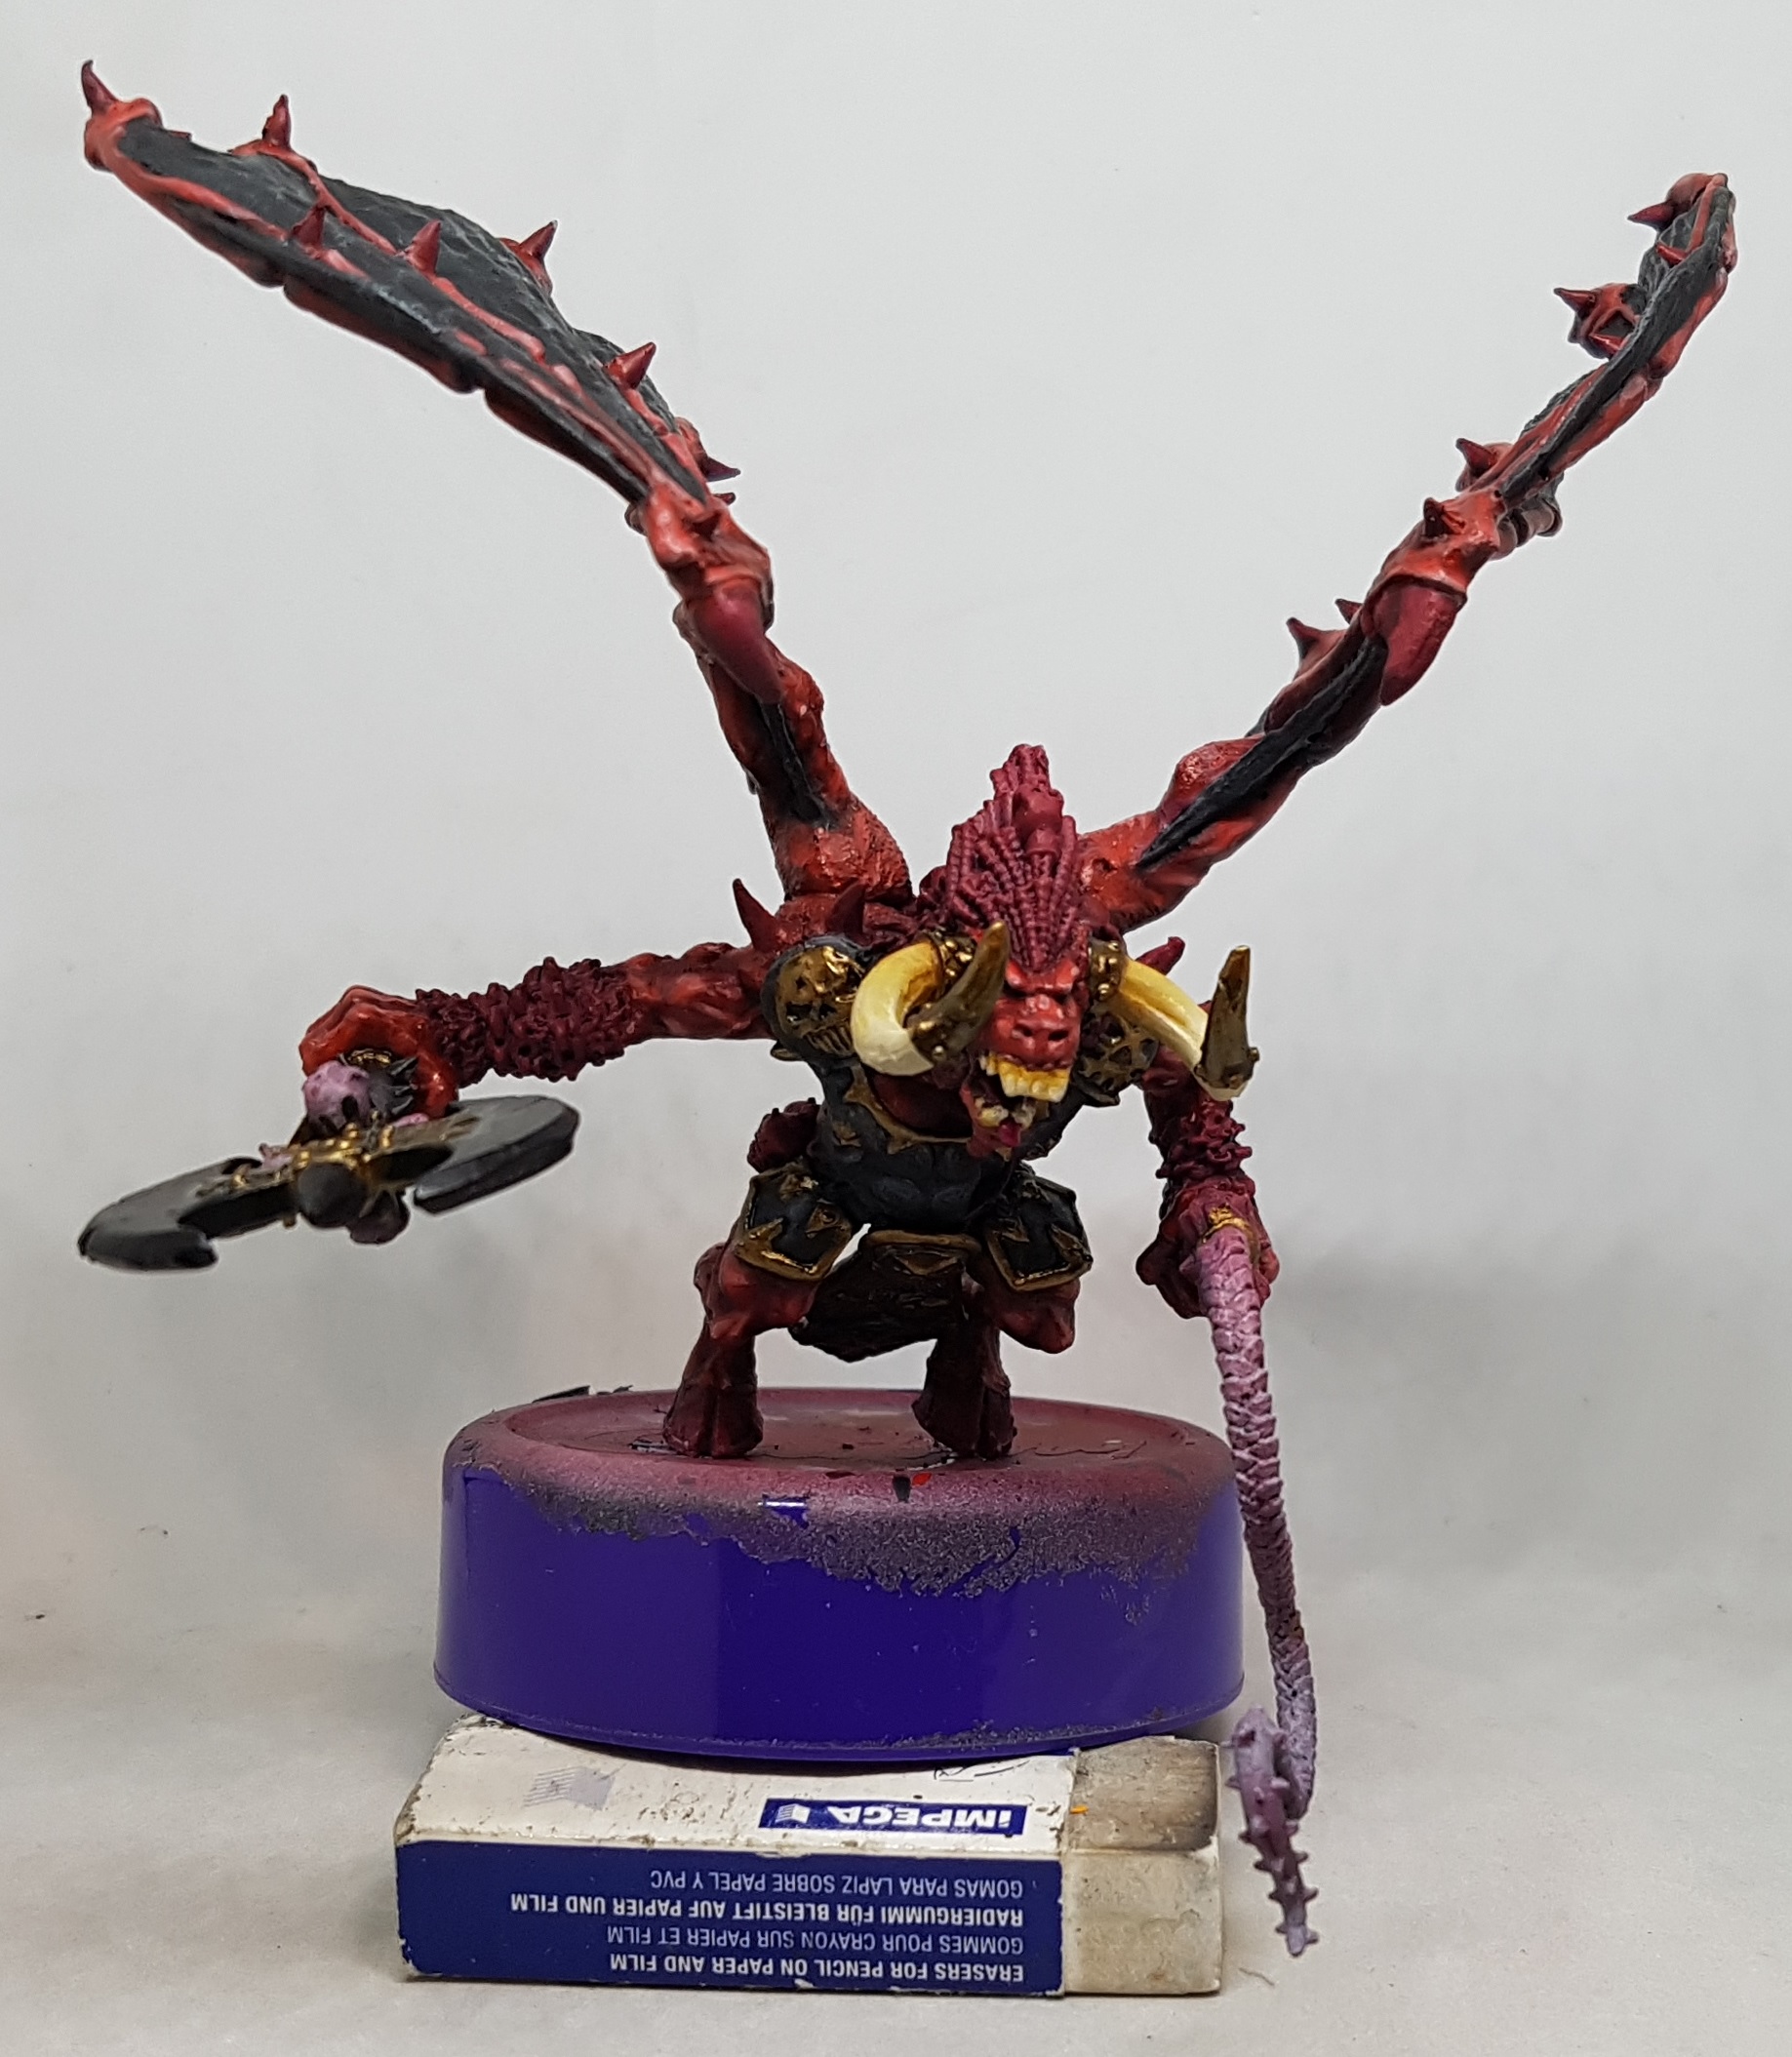 The Teeth and Horns were base coated with P3 Menoth White Base. The bottom 2/3rds were washed with P3 Ember Orange, and then the bottom 1/3rd was washed with P3 Bloodstone. The tops were highlighted with P3 menoth White Higlight and lines of this were drawn along the curve of the horns to varying lengths. The Tongue was picked out in P3Murderous Magenta
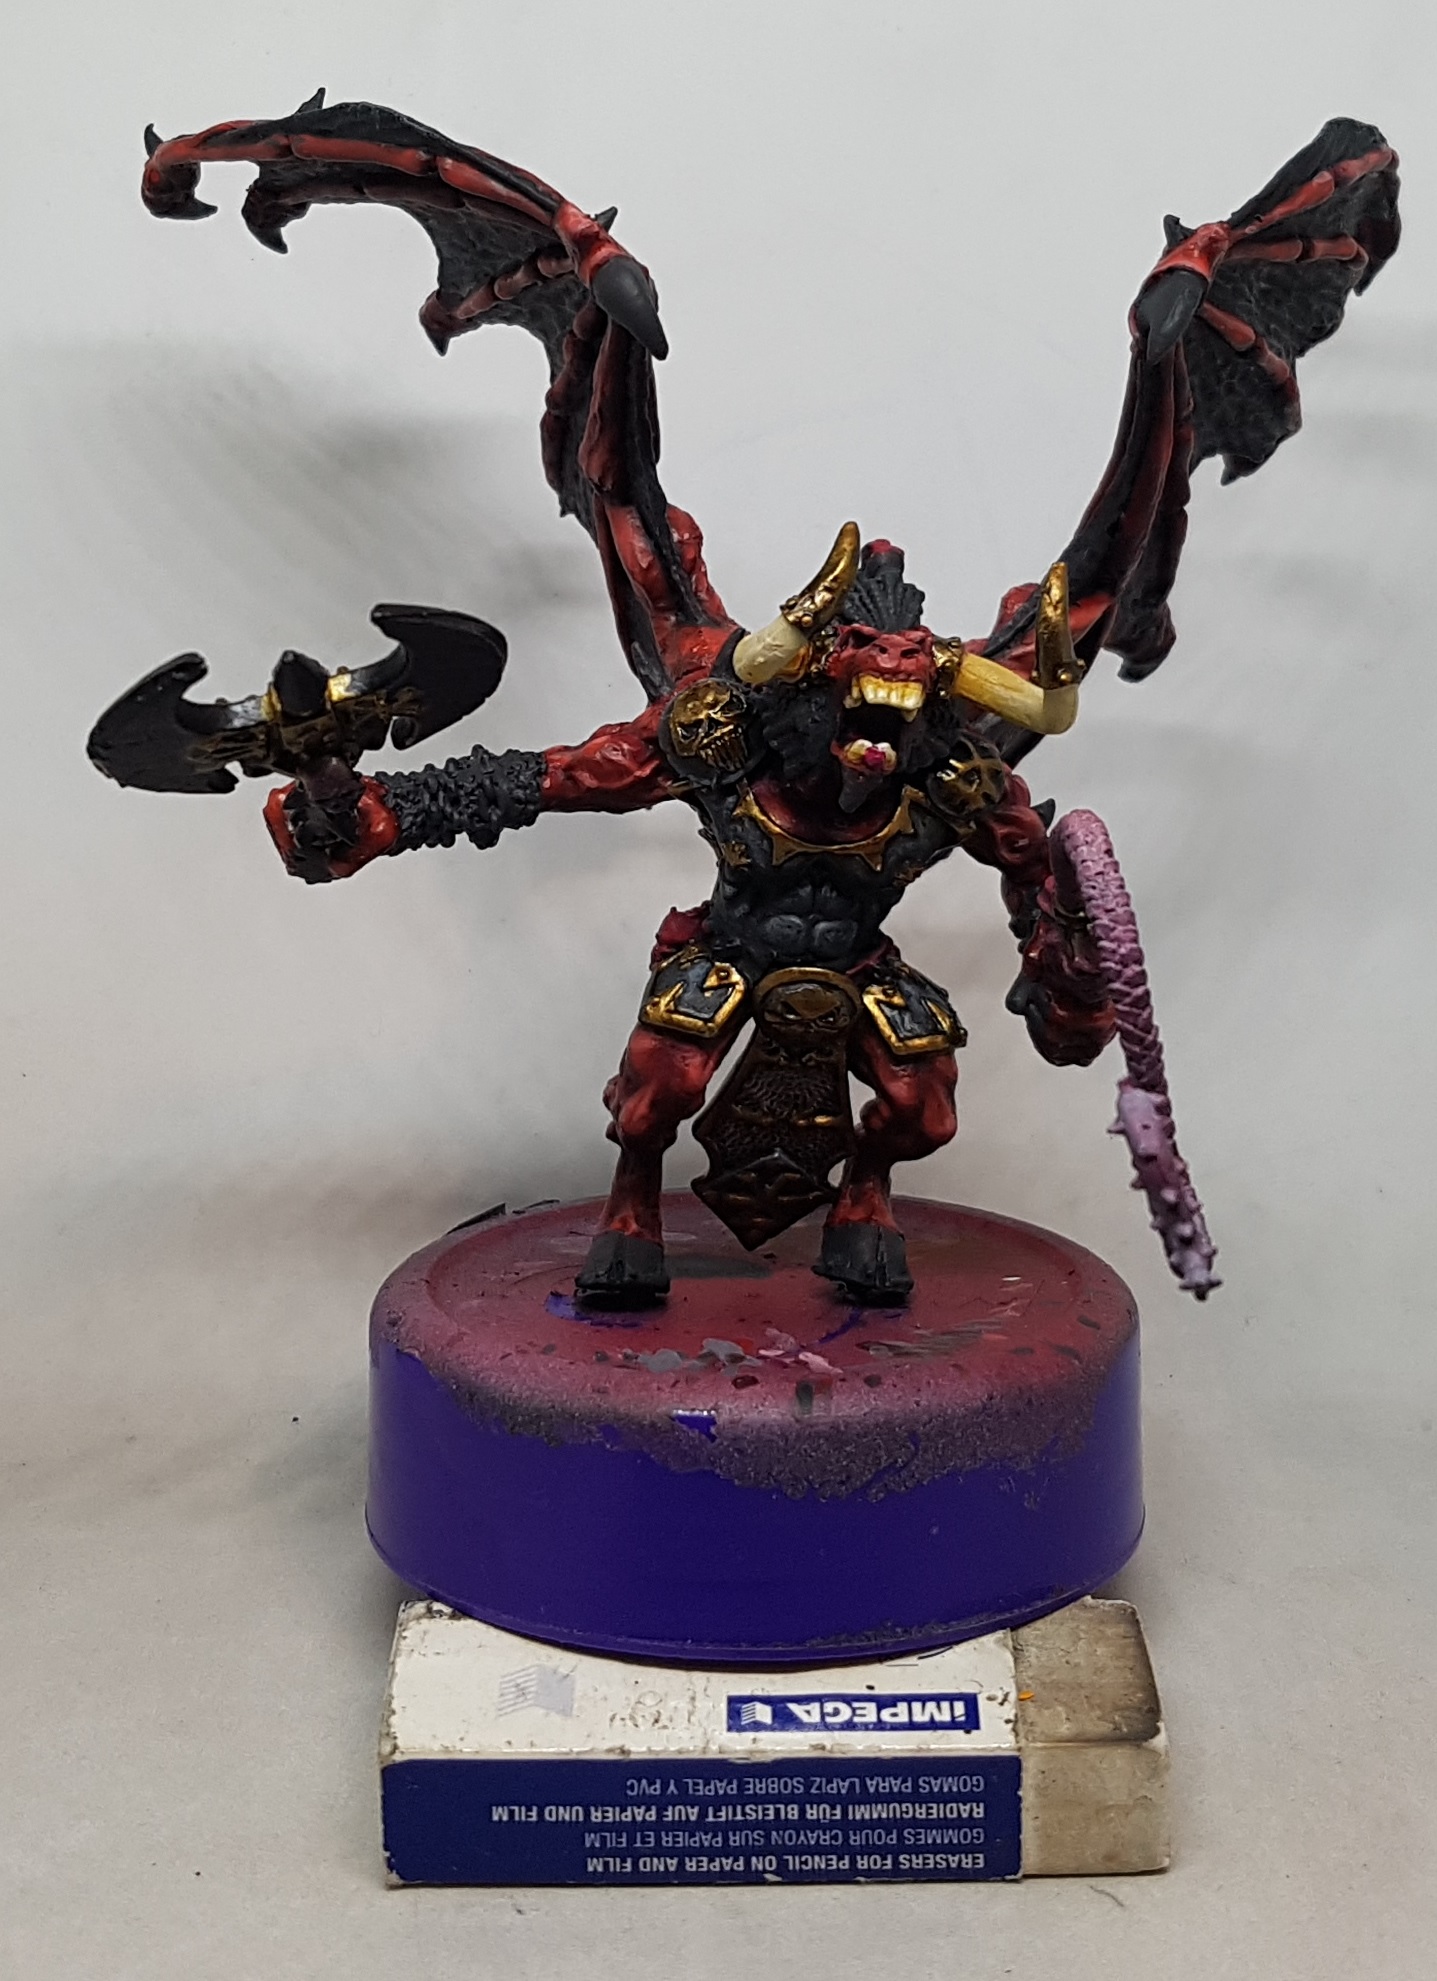 The hair, claws and hooves etc were base coated with a mix of VMC 70.995 German Grey and P3 Cryx Bane Base
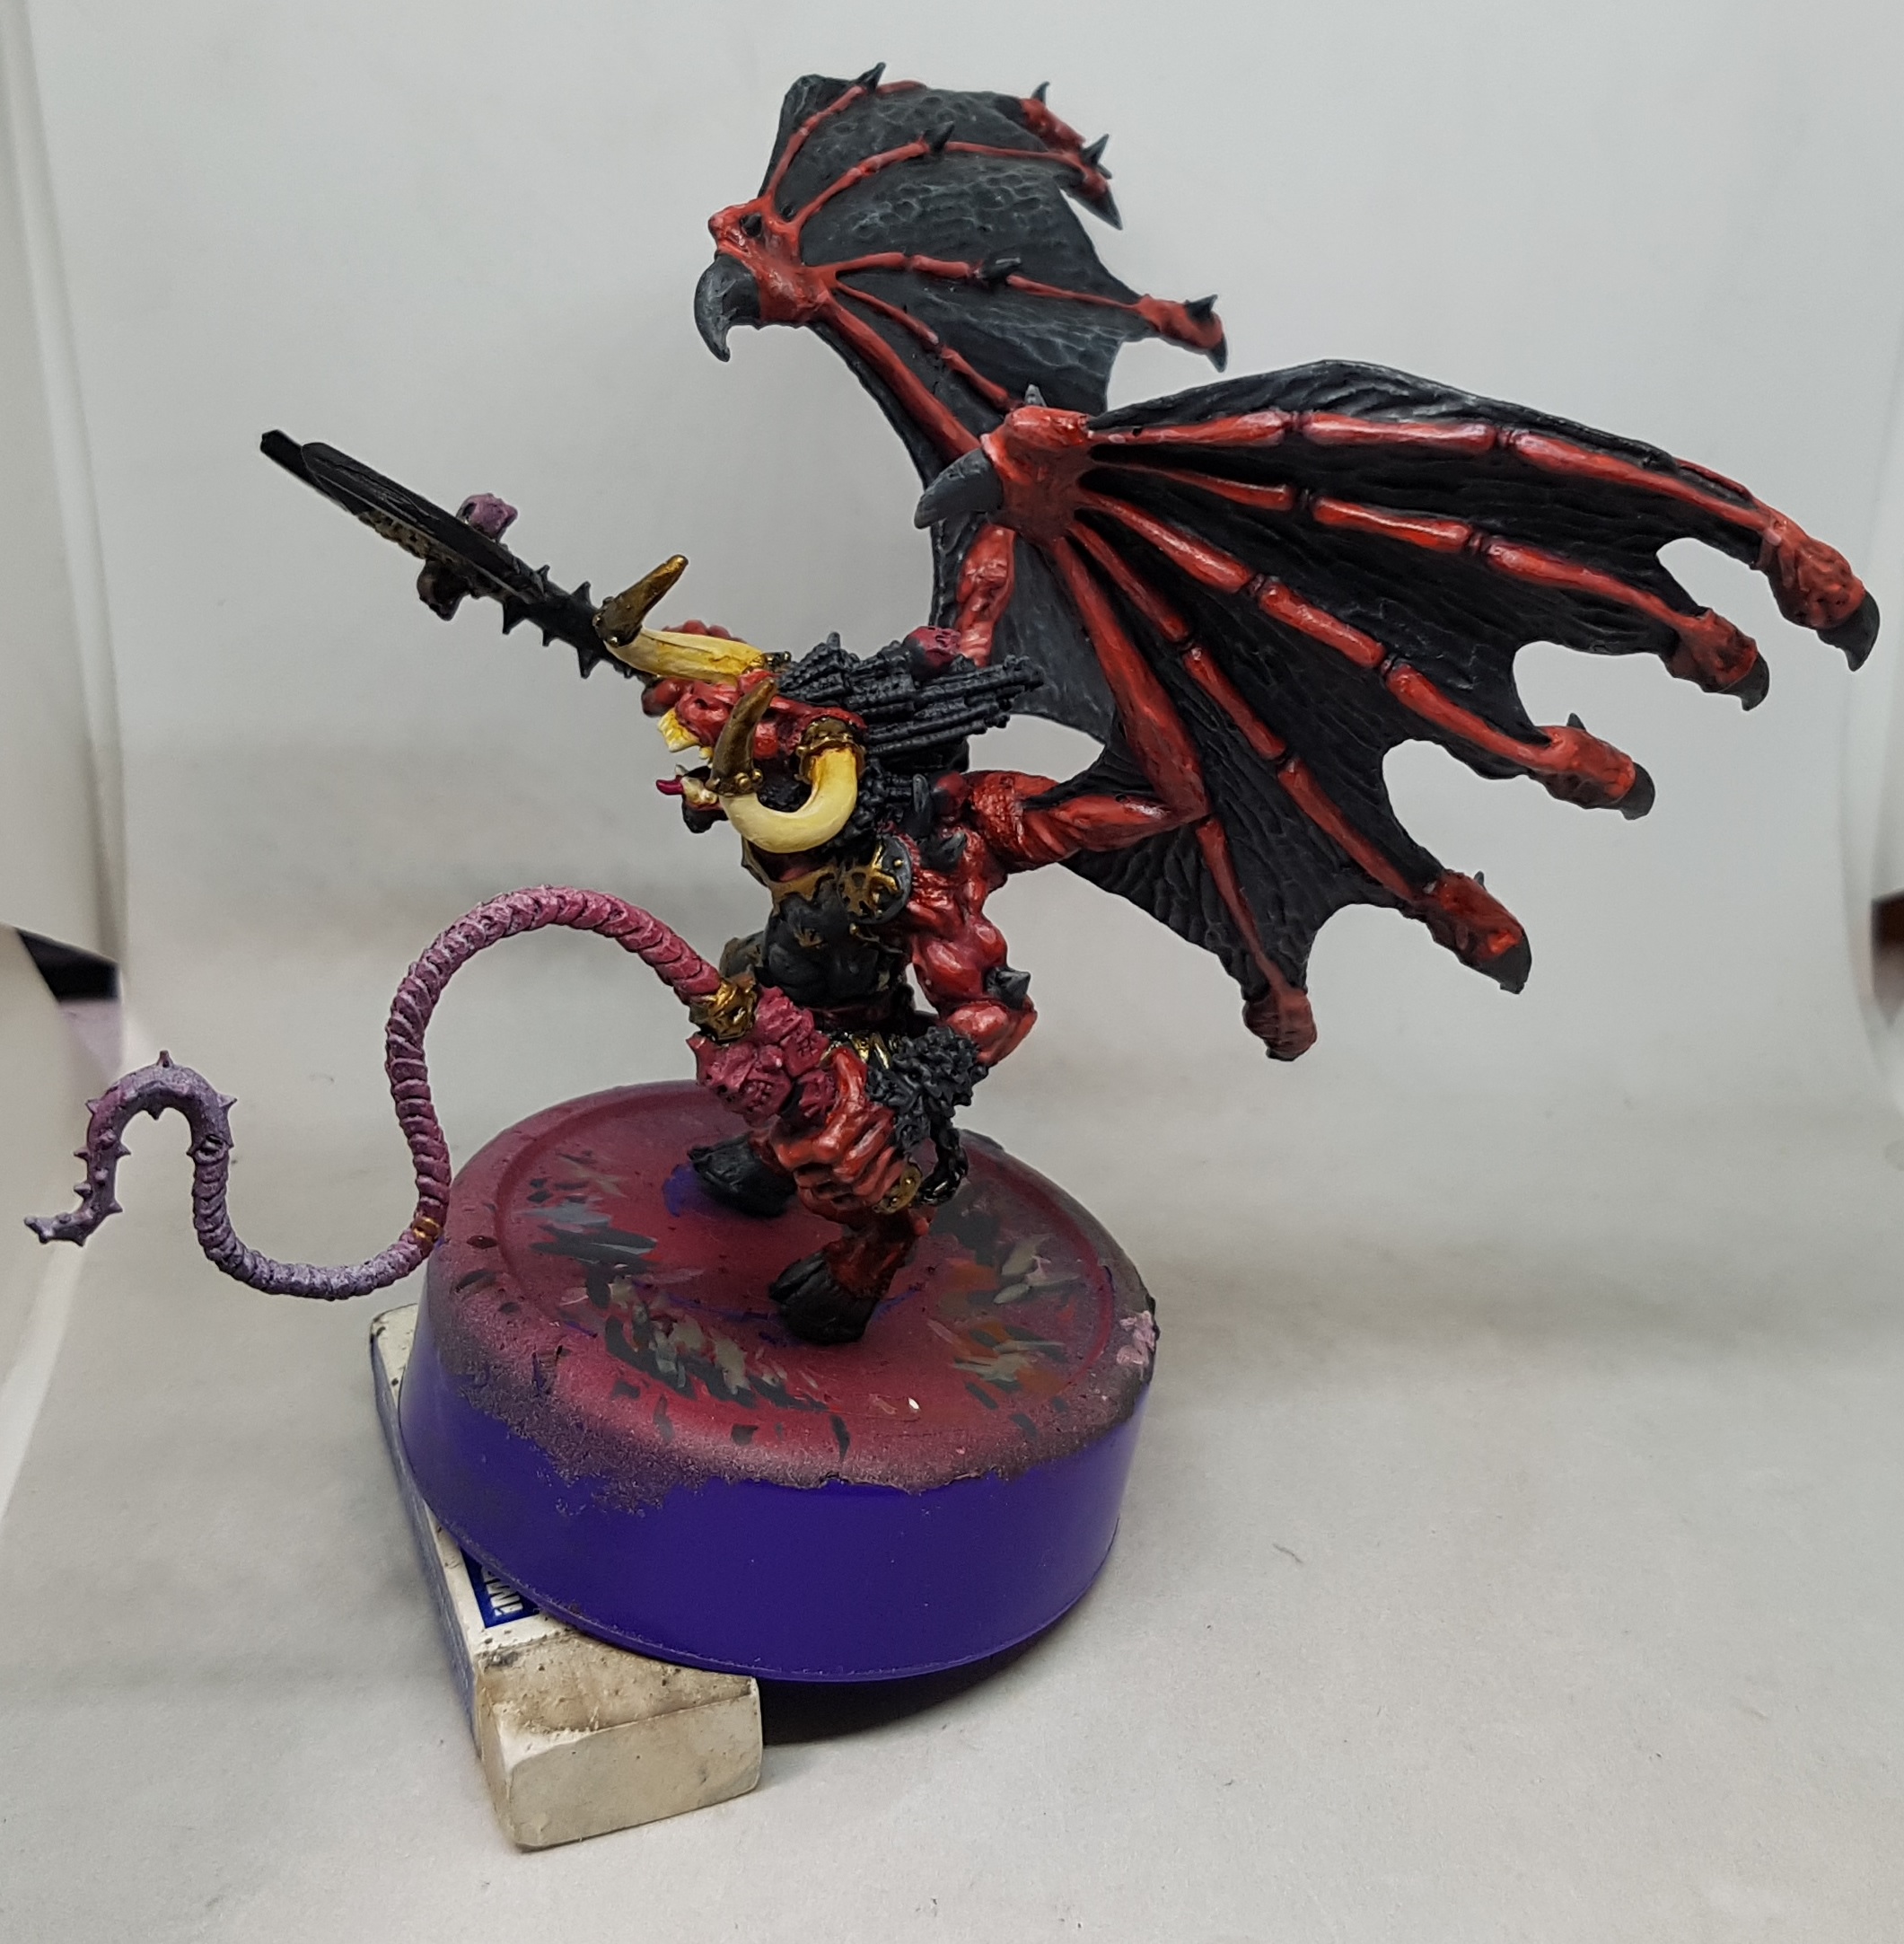 That was washed with Nuln Oil, then highlighted with a mix of German Grey and GW Karak Stone. Final highlights were applied to everything except the hair with a mix of Karak Stone and a tiny amount of the previous mix
This final colour is based loosely on Duncans Bloodthirster video but I switched the paints as best as I could for ones I owned. Once again I found the wings were in the way of everything. I rarely had anywhere to place my hands while painting the highlights so all brush control went out of the window, and I don’t have much to begin with. I have shaky hands at the best of times.
Leather, Steel, Eyes, and Skulls
 The whip and the belt were undercoated with Scalecolour Black Leather SC-32, and then given an even base coat of 50/50 Black Leather and ScaleColour Red Leather SC-30
 Everything but the recesses was painted with a 1:2 Black leather:Red Leather mix, and then the highlighting was started with pure Red Leather
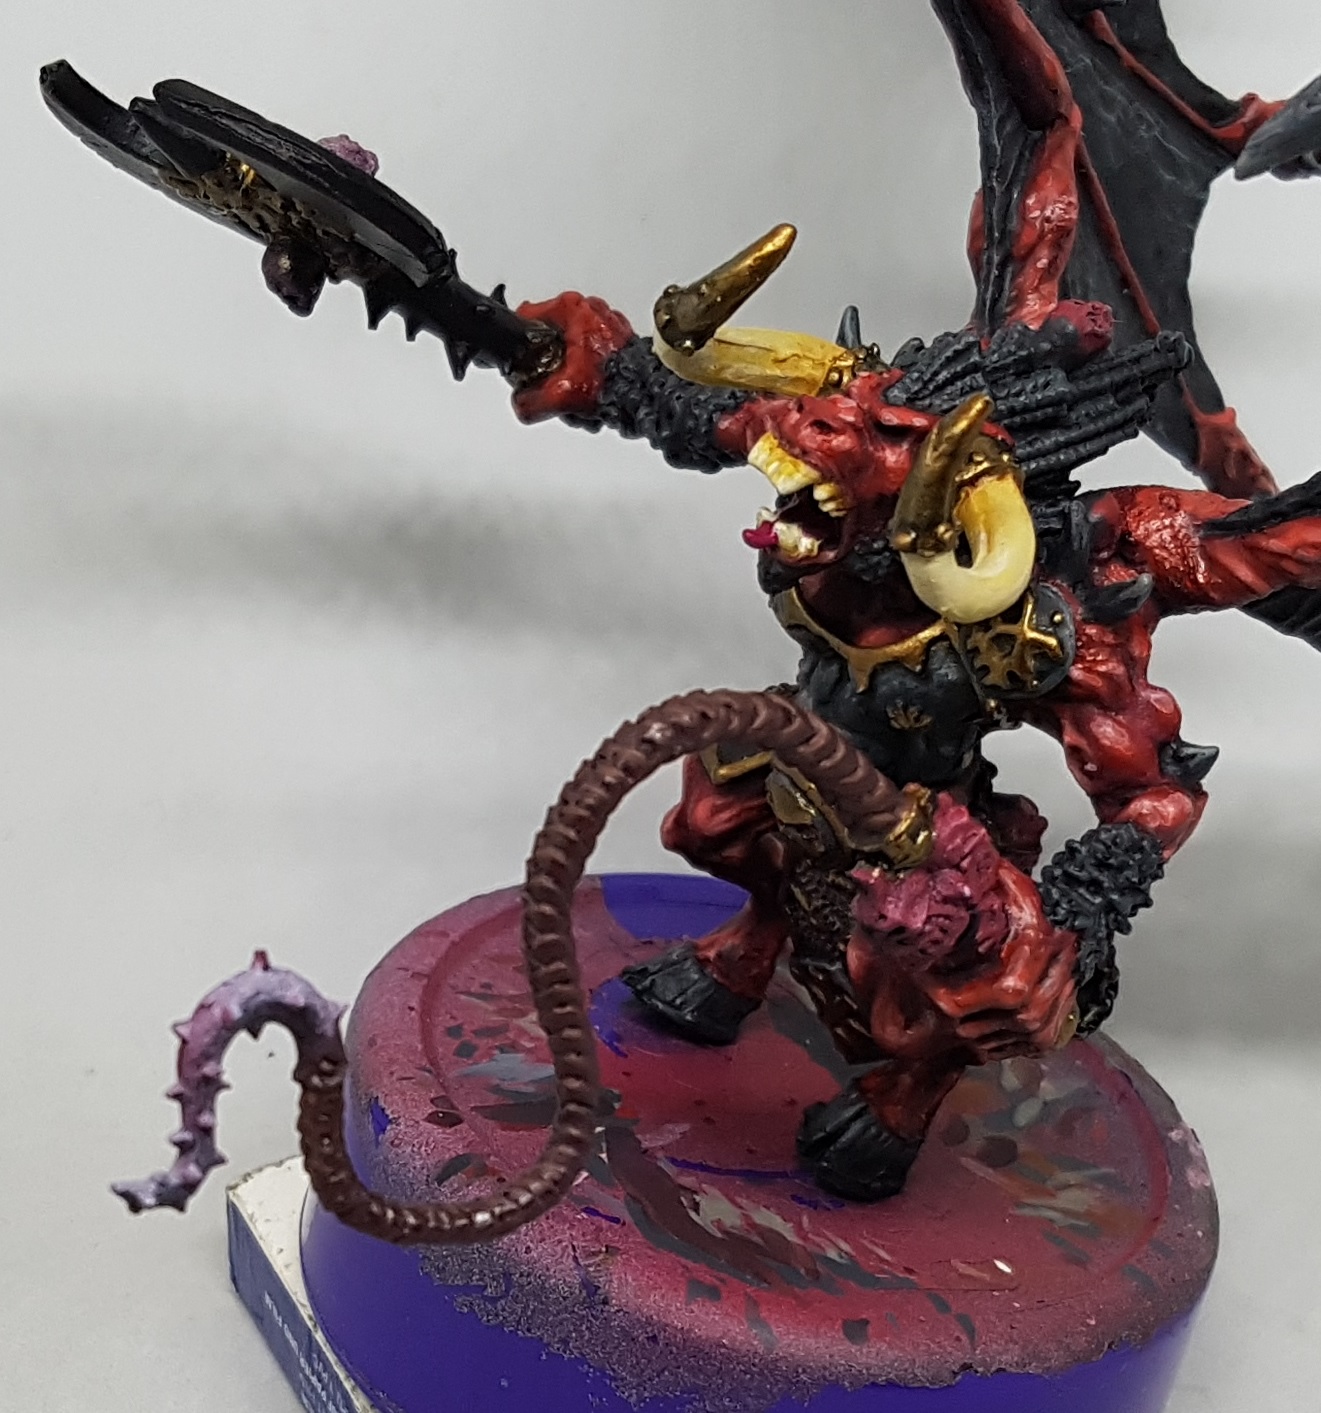 2:1 Red Leather and ScaleColour Orange Leather SC-28 were used to further highlight, covering less and less surface each time
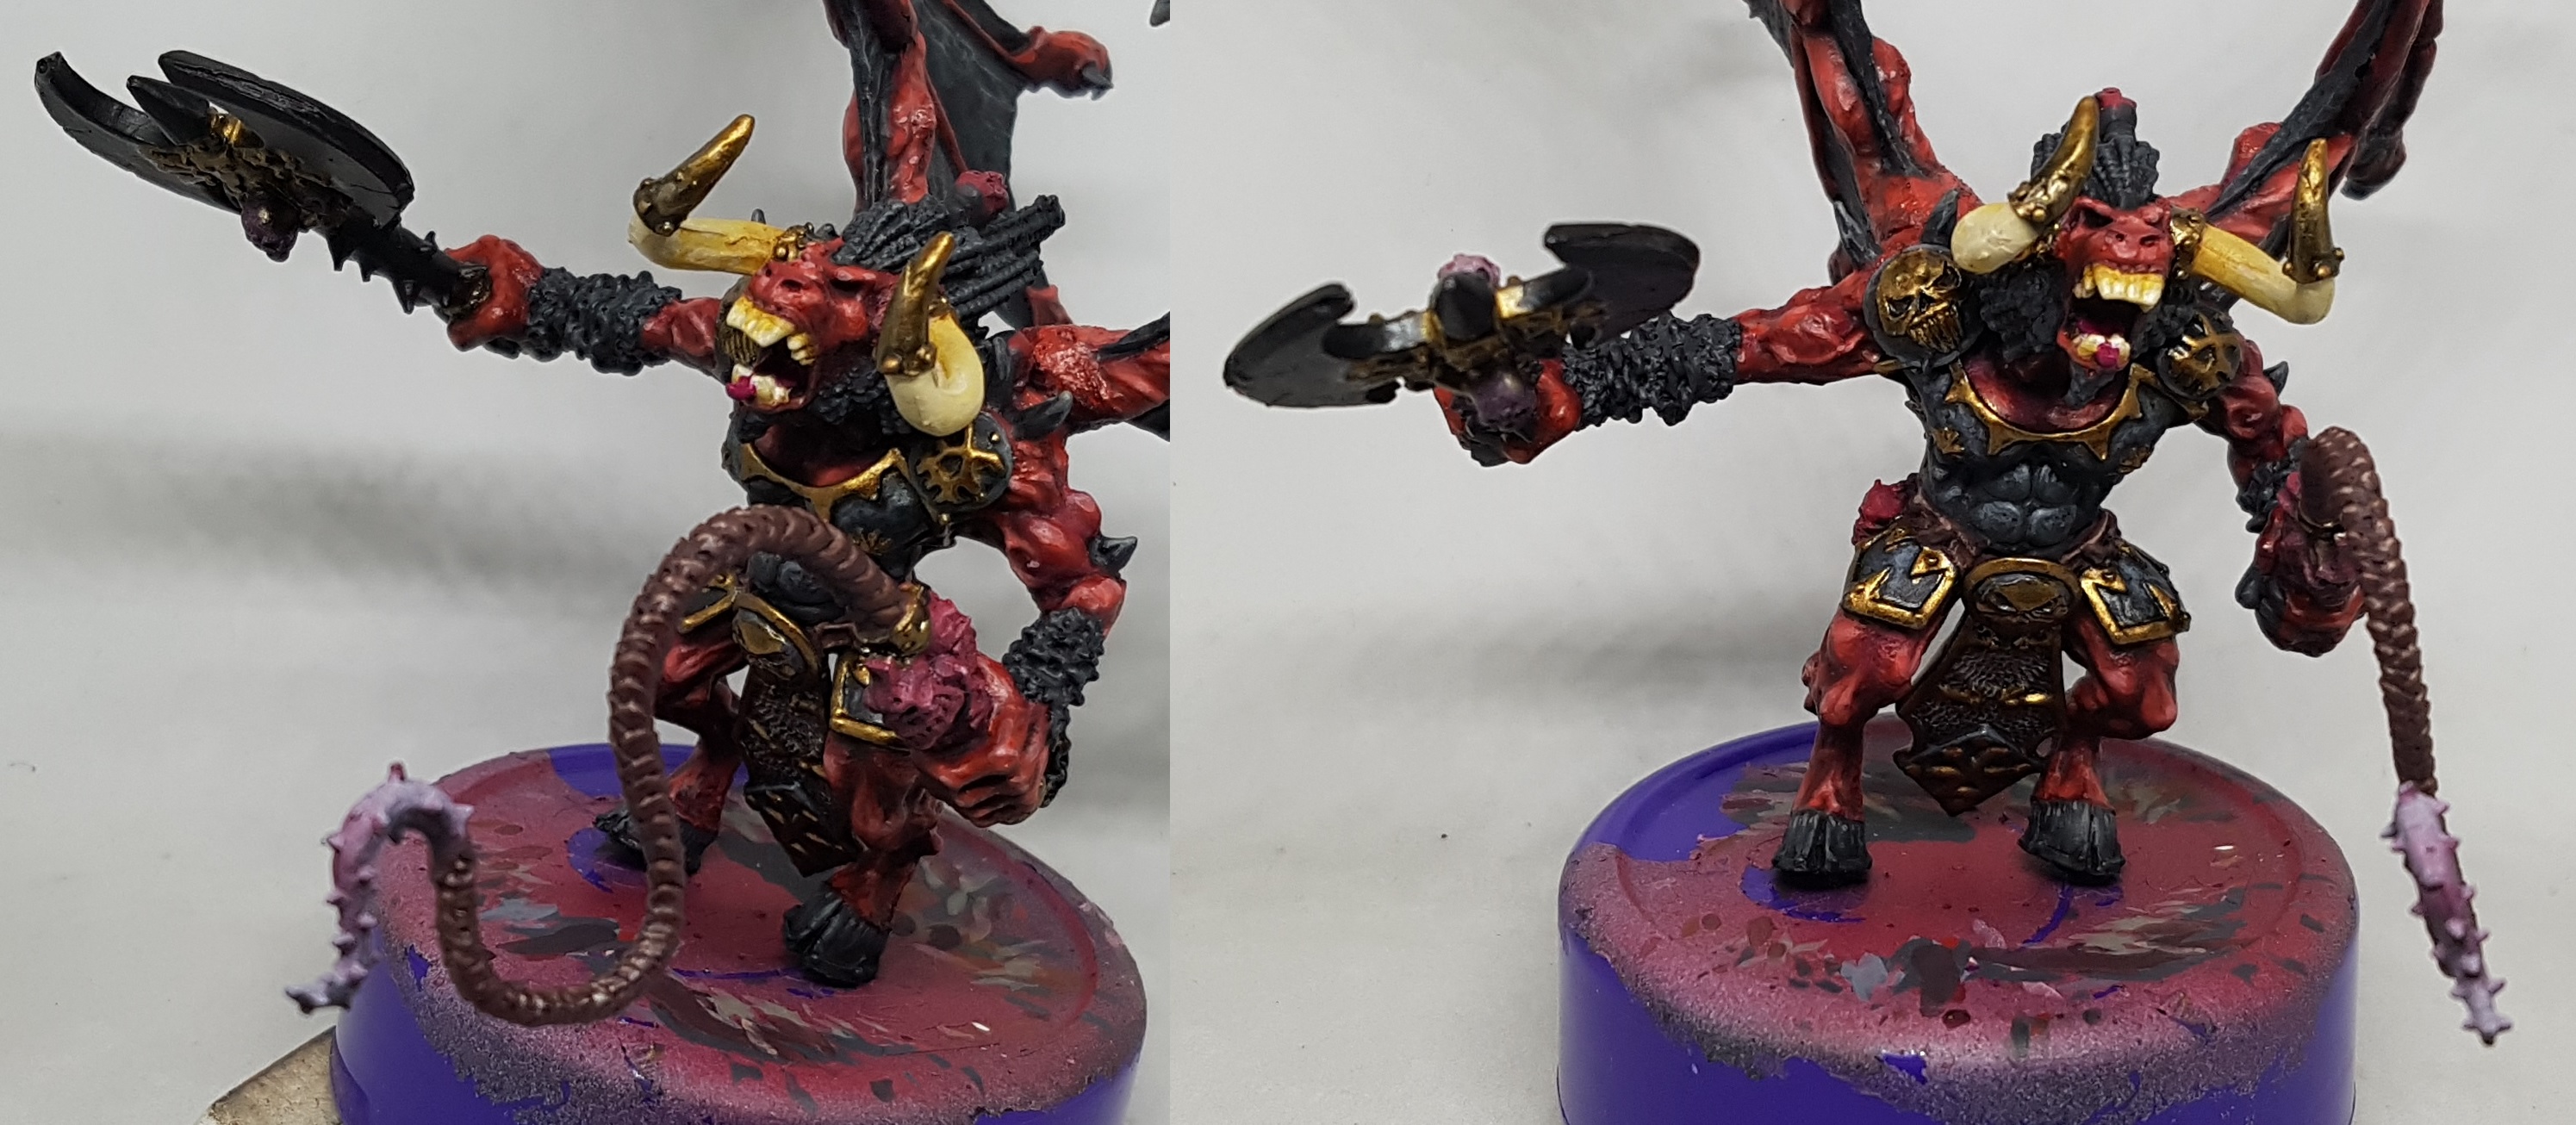 Next layer was 2:1 Orange Leather: Red leather. Then edge highlights were applied with 2:1 Orange Leather:VMC 70.918 Ivory, with final glints of 1: Orange leather:Ivory
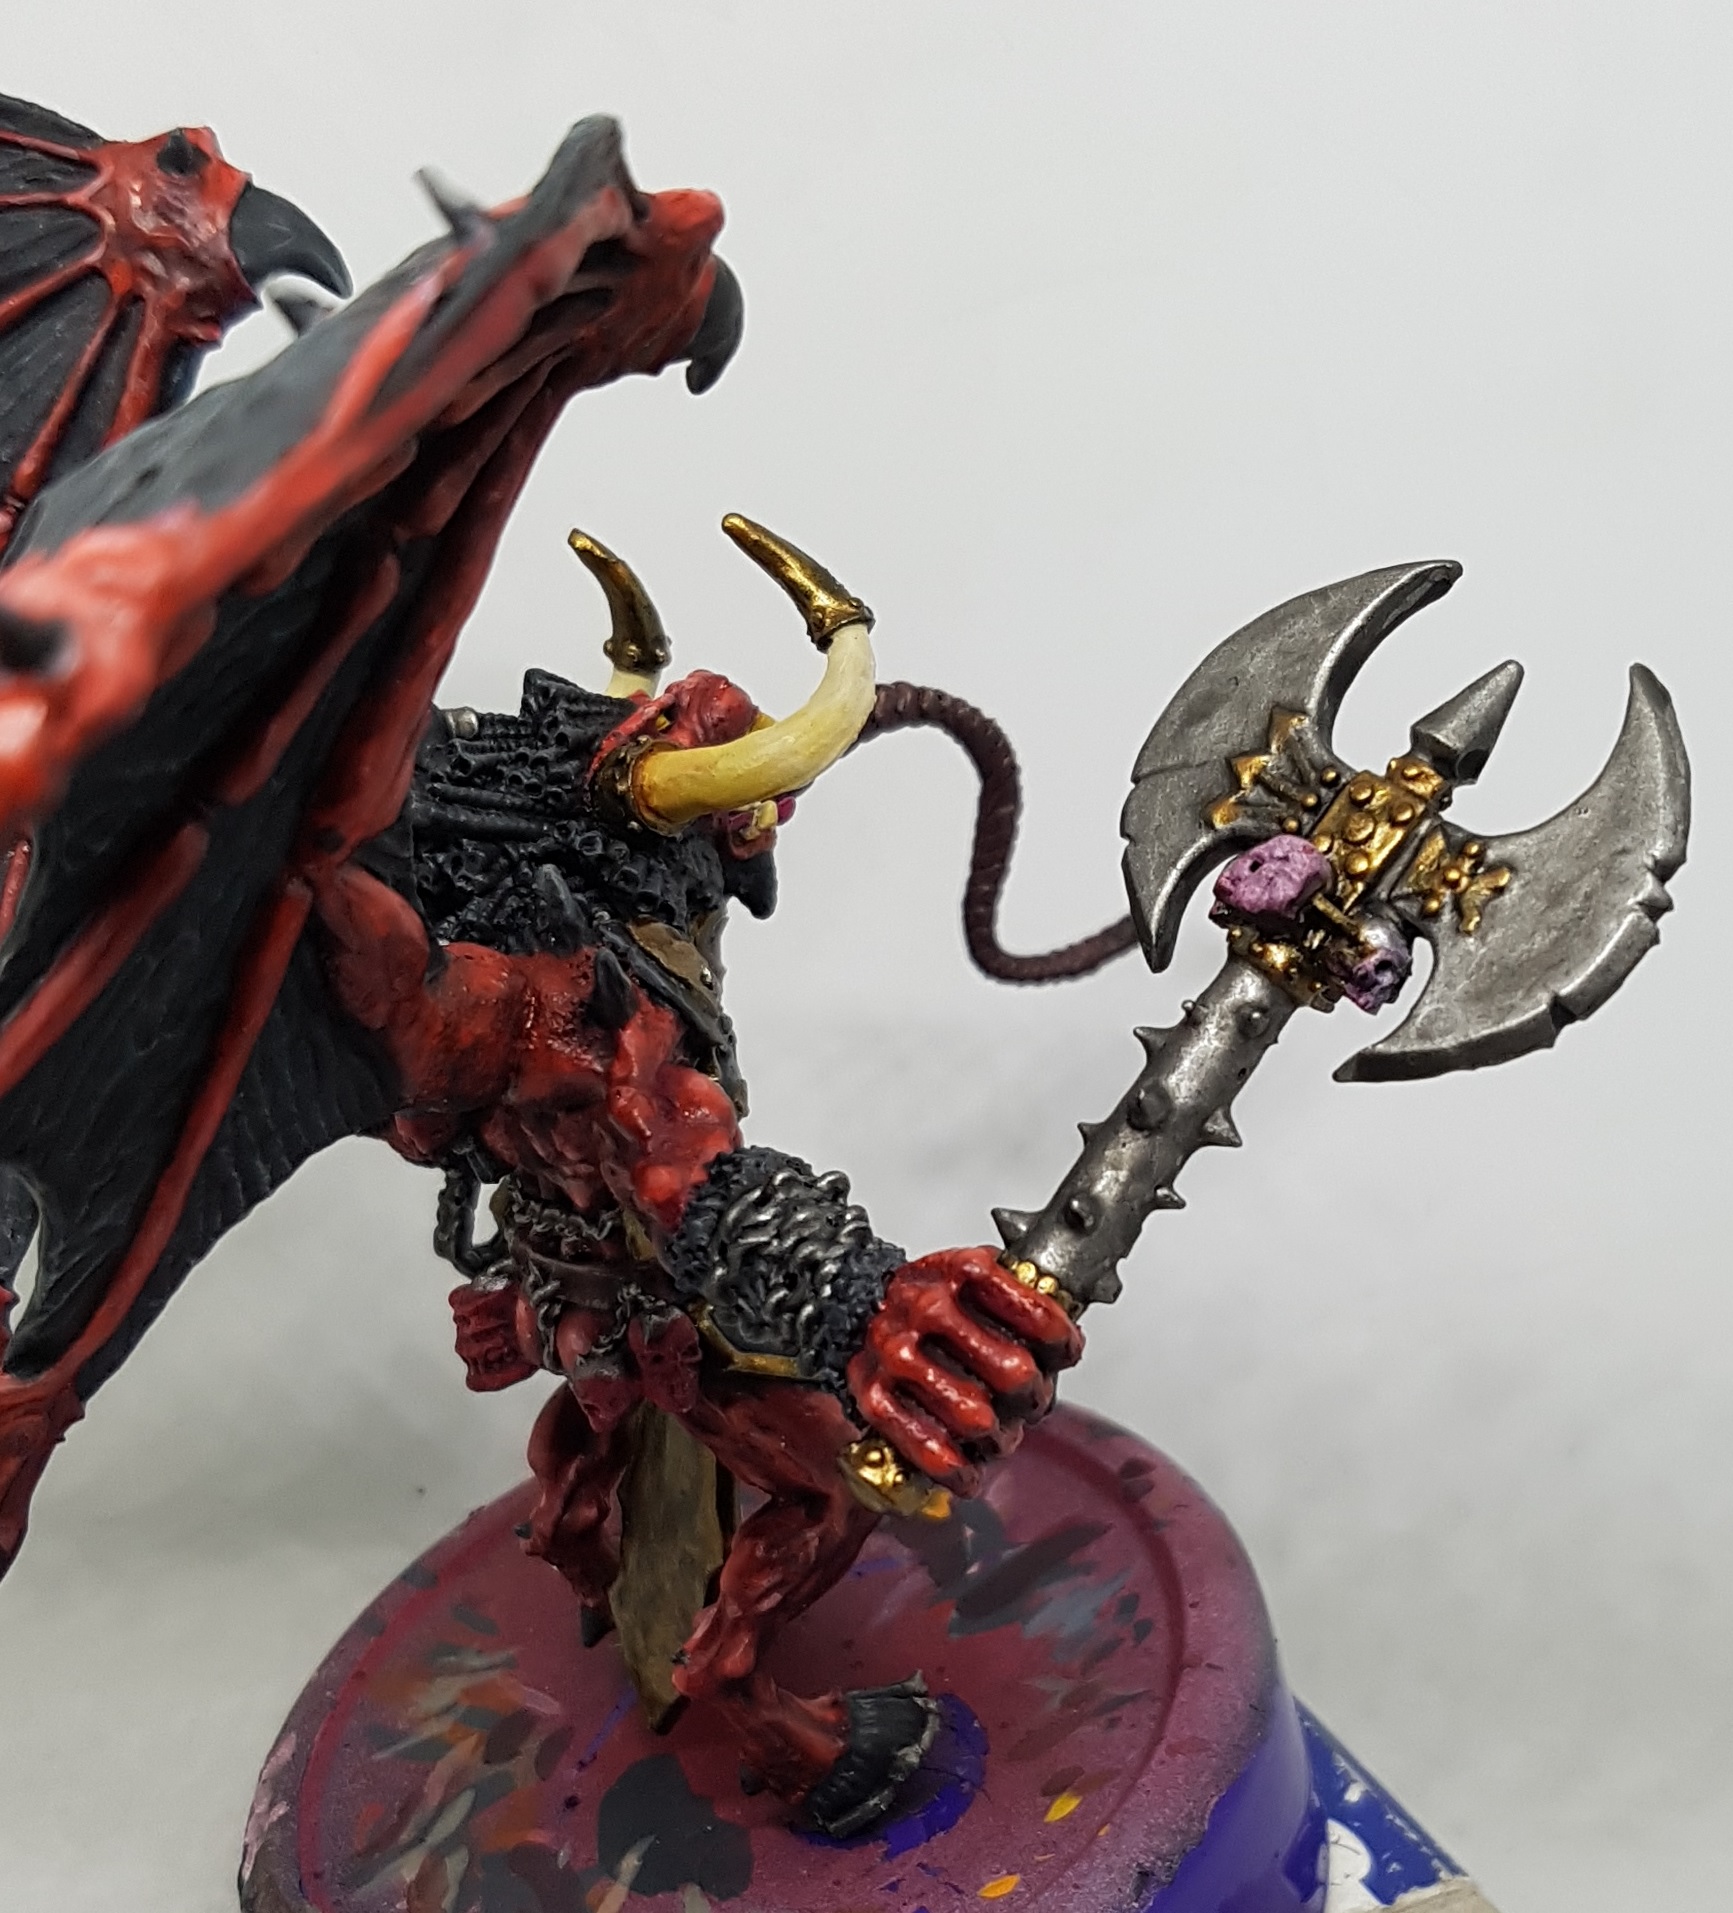 The steel was base coated with P3 Pig Iron. The eyes were based with P3 Ember Orange, and then highlighted with P3 Heartfire. All the steel was then washed with GW Nuln Oil.
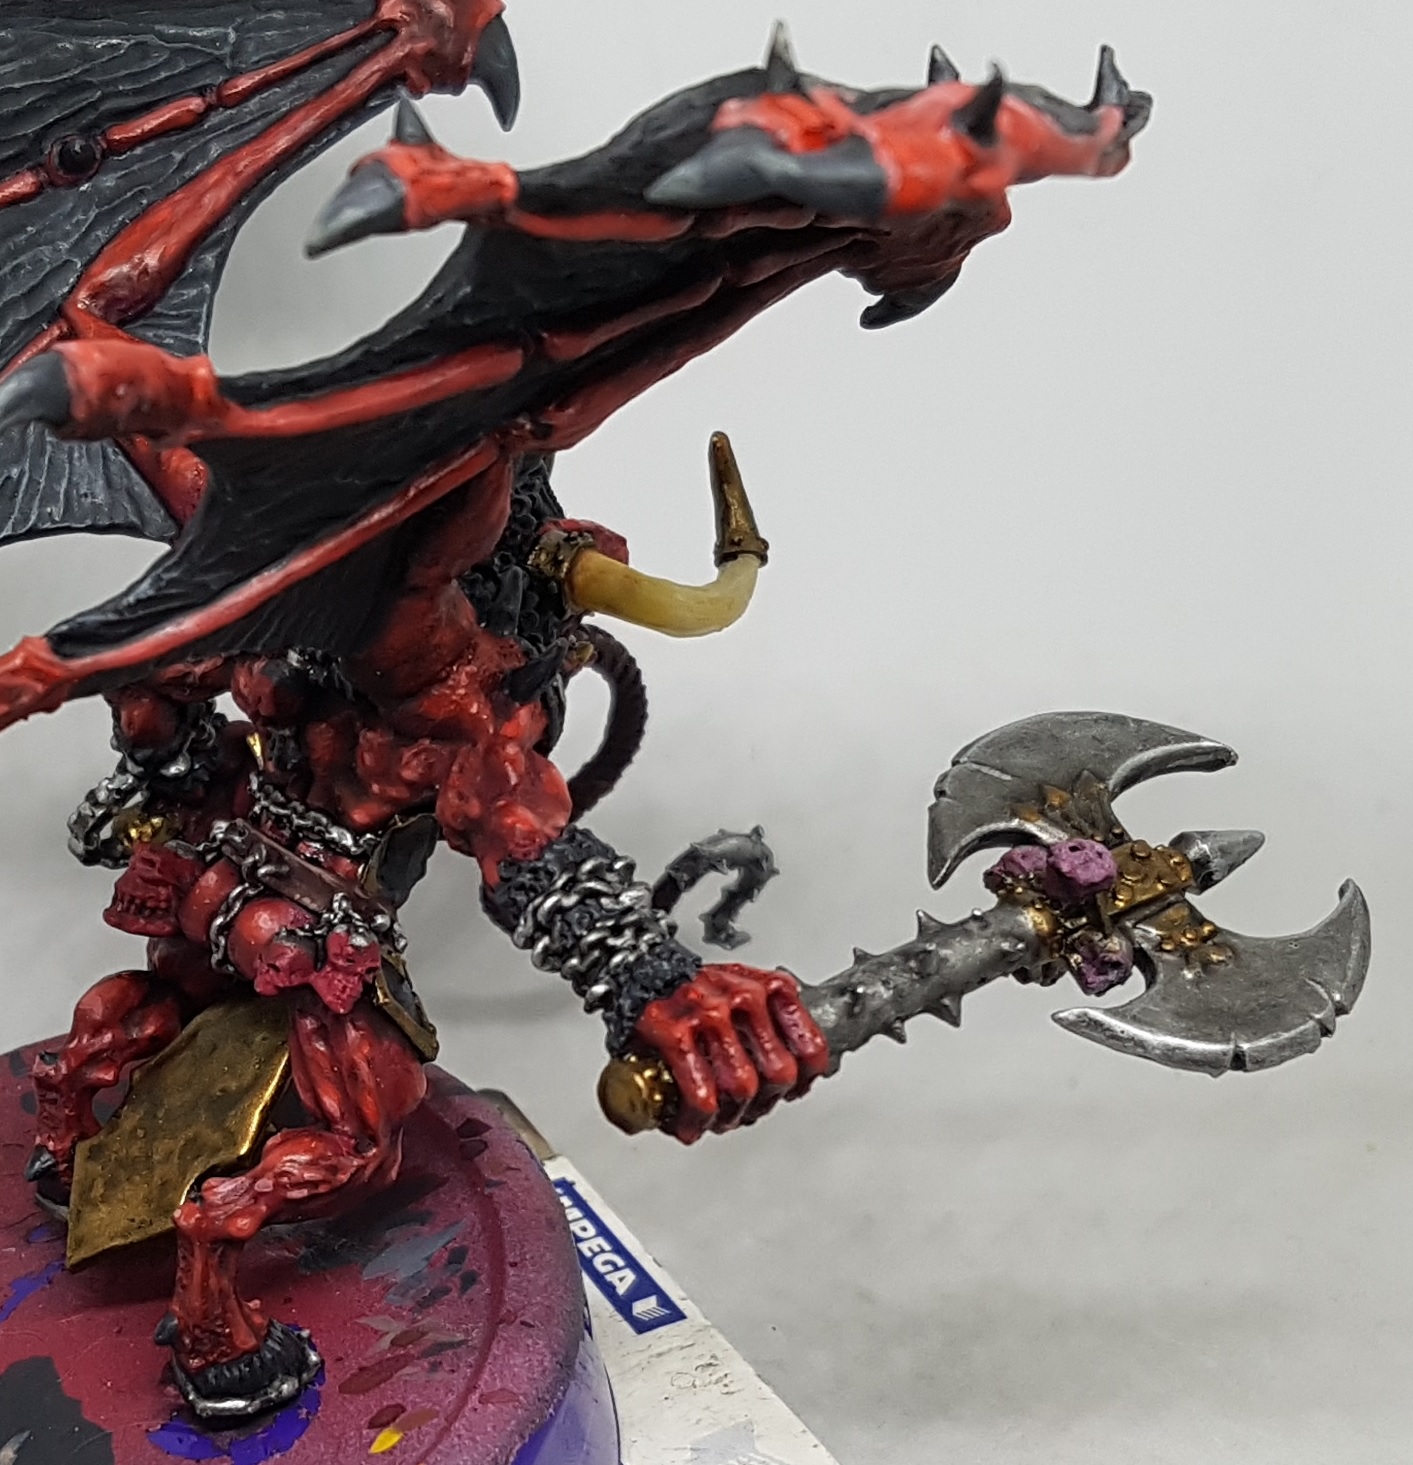 Finally, it was highlighted with P3 Cold Steel
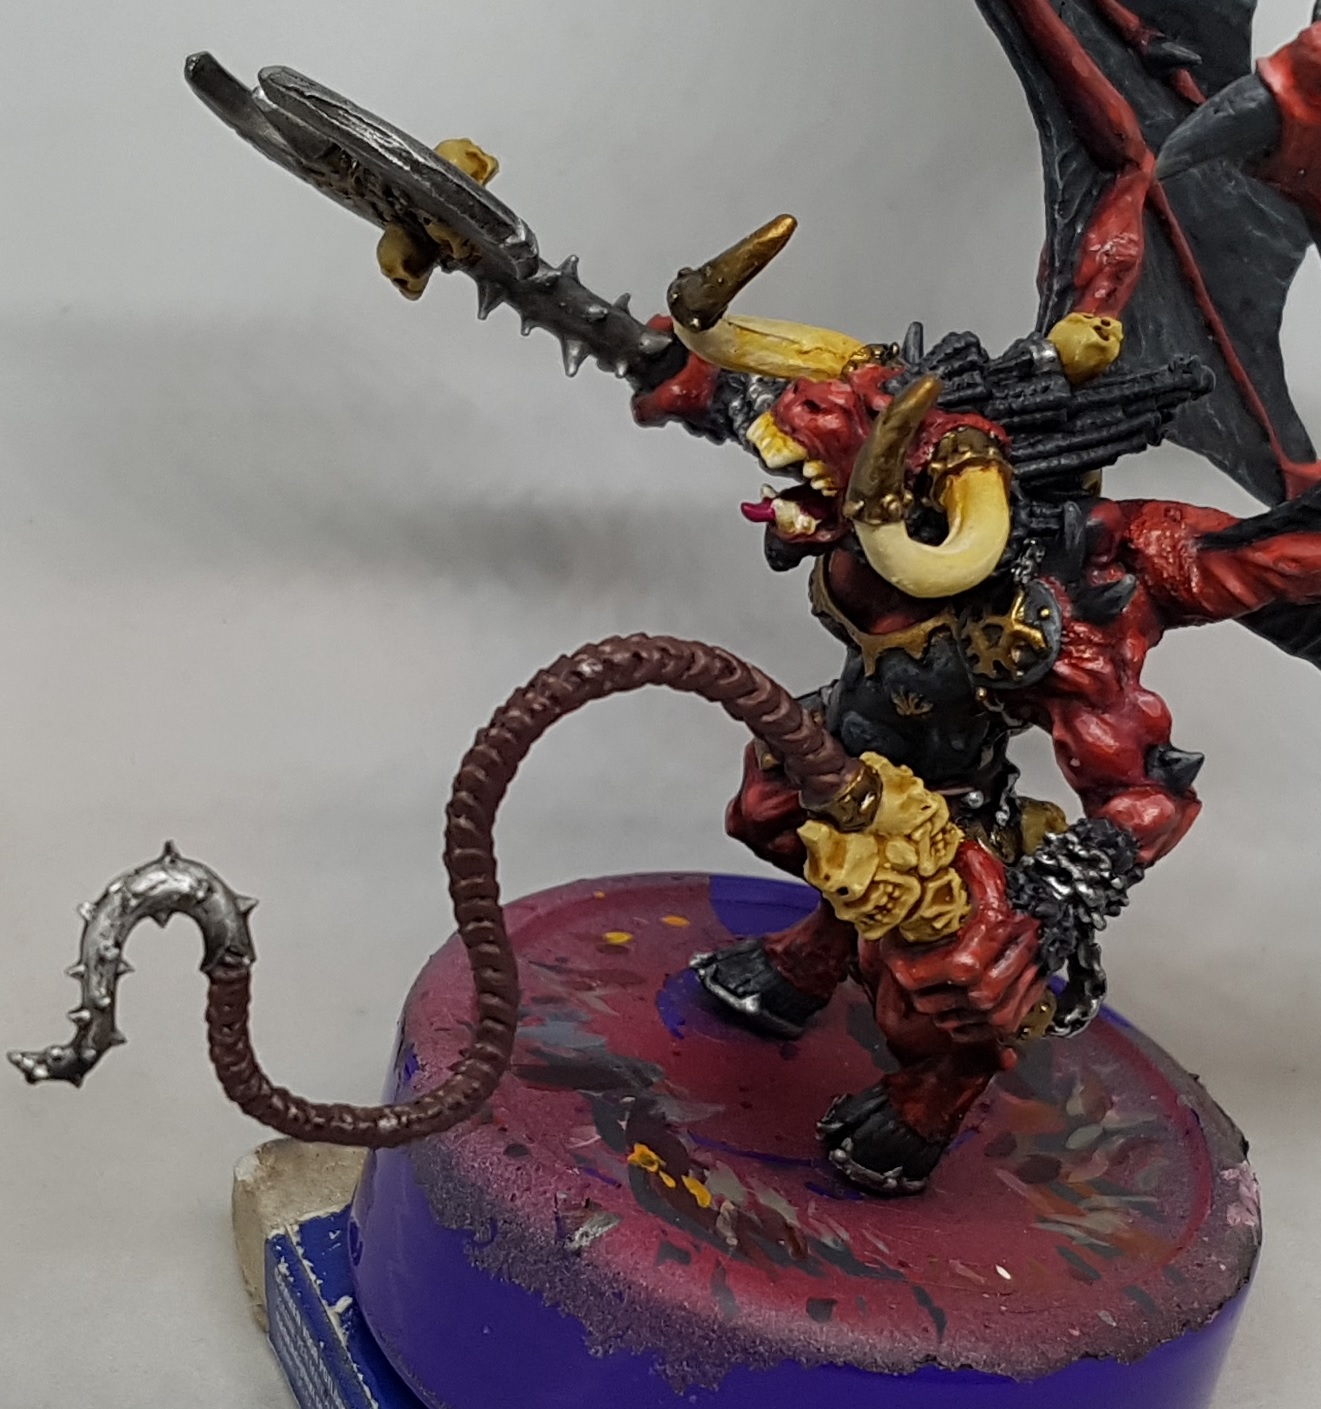 The skulls were undercoated with white primer as bone tends to not have the best coverage. They were then given a solid coat of P3 Jack Bone and washed with GW Seraphim Sepia.
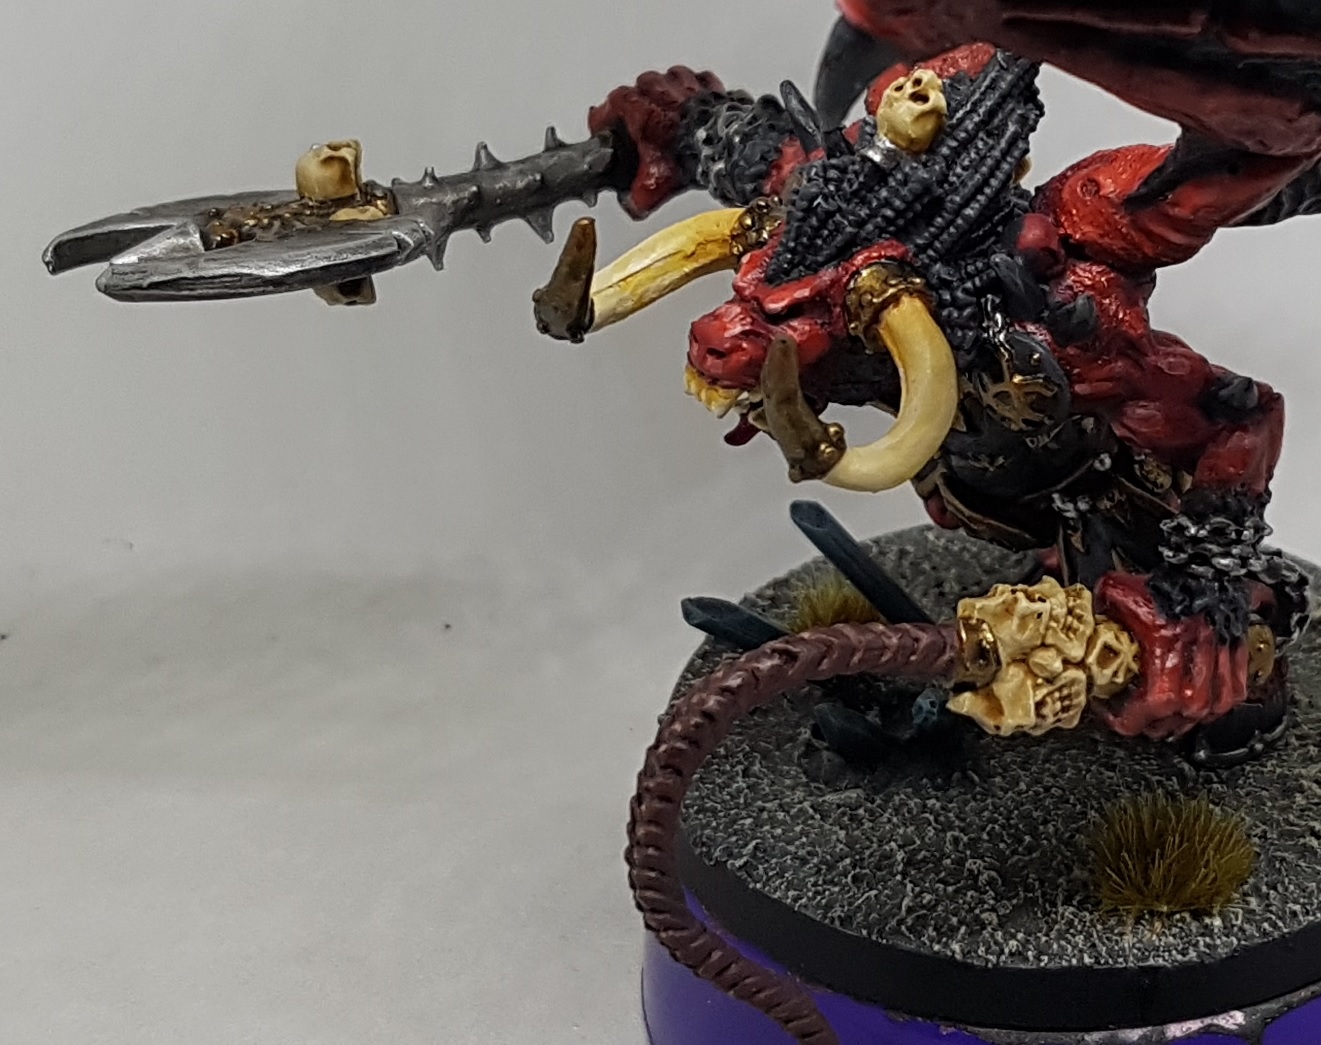 The bone was then drybrushed with P3 Menoth White Base.
Daemon Base Painting
 The base was primed black and then painted with P3 Great Coat Grey. This will be based on the book, "Warhammer: Age of Sigmar: Painting Guide" p120.
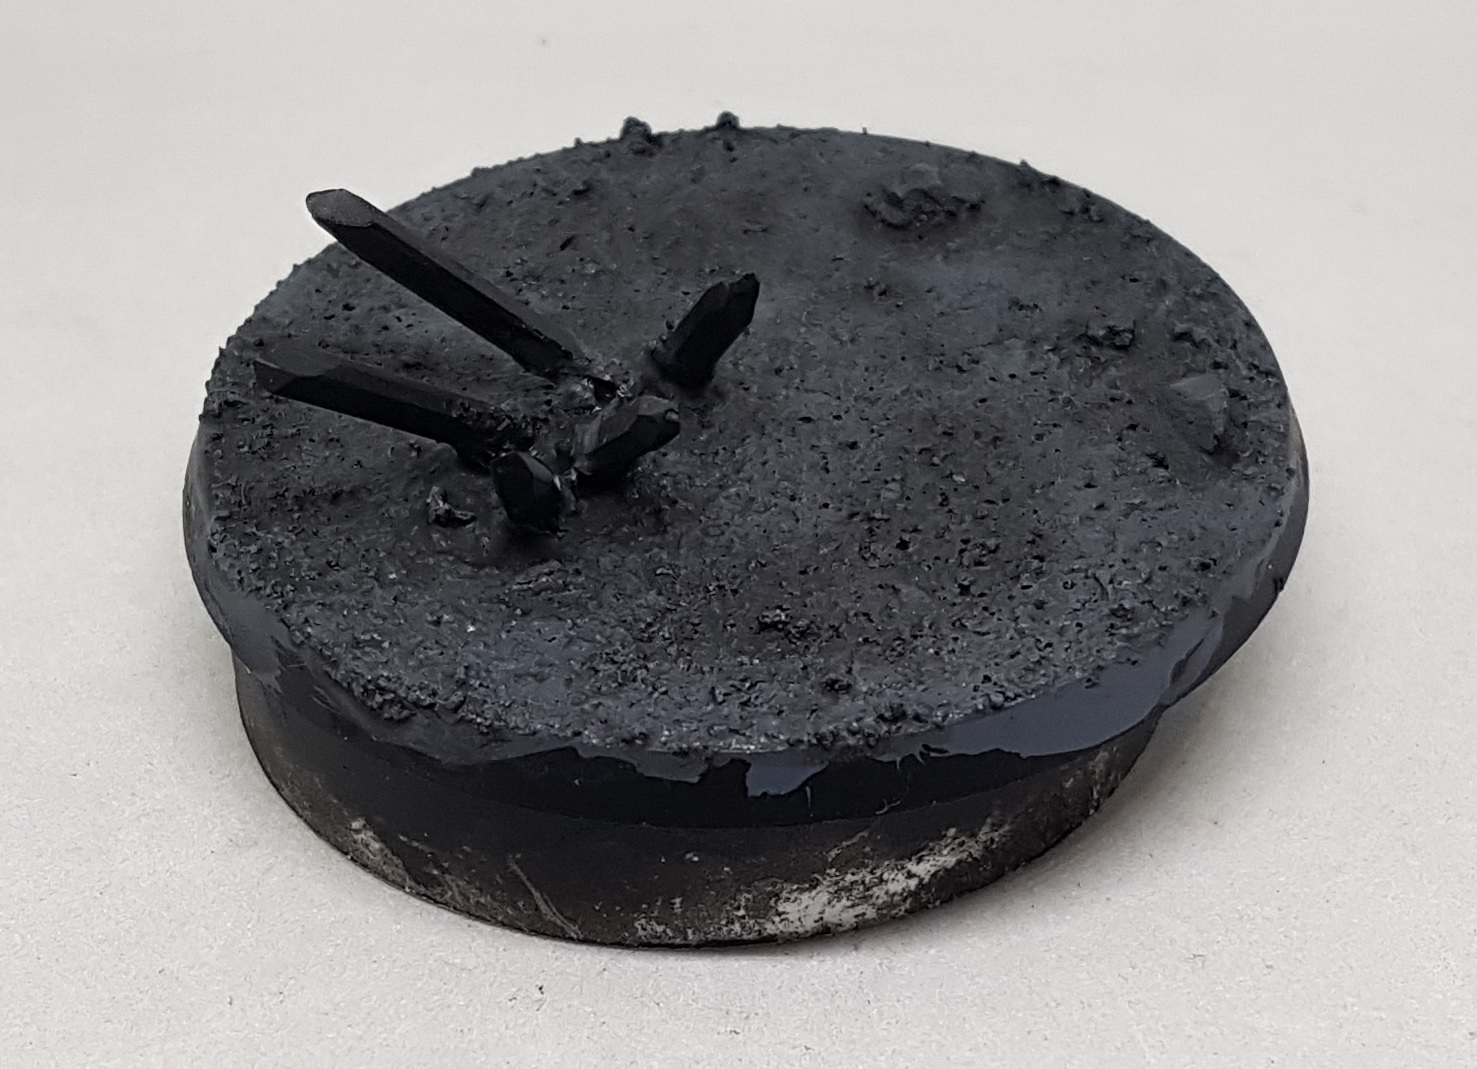 Then I mixed up some GW Nuln Oil with water and applied this in patches over the base, focusing on areas that would have more shadow. Once dry, more was then applied evenly all over the base, with the jppe that the hard edges around the first wash would be less clearly defined but some areas would still be darker than others.
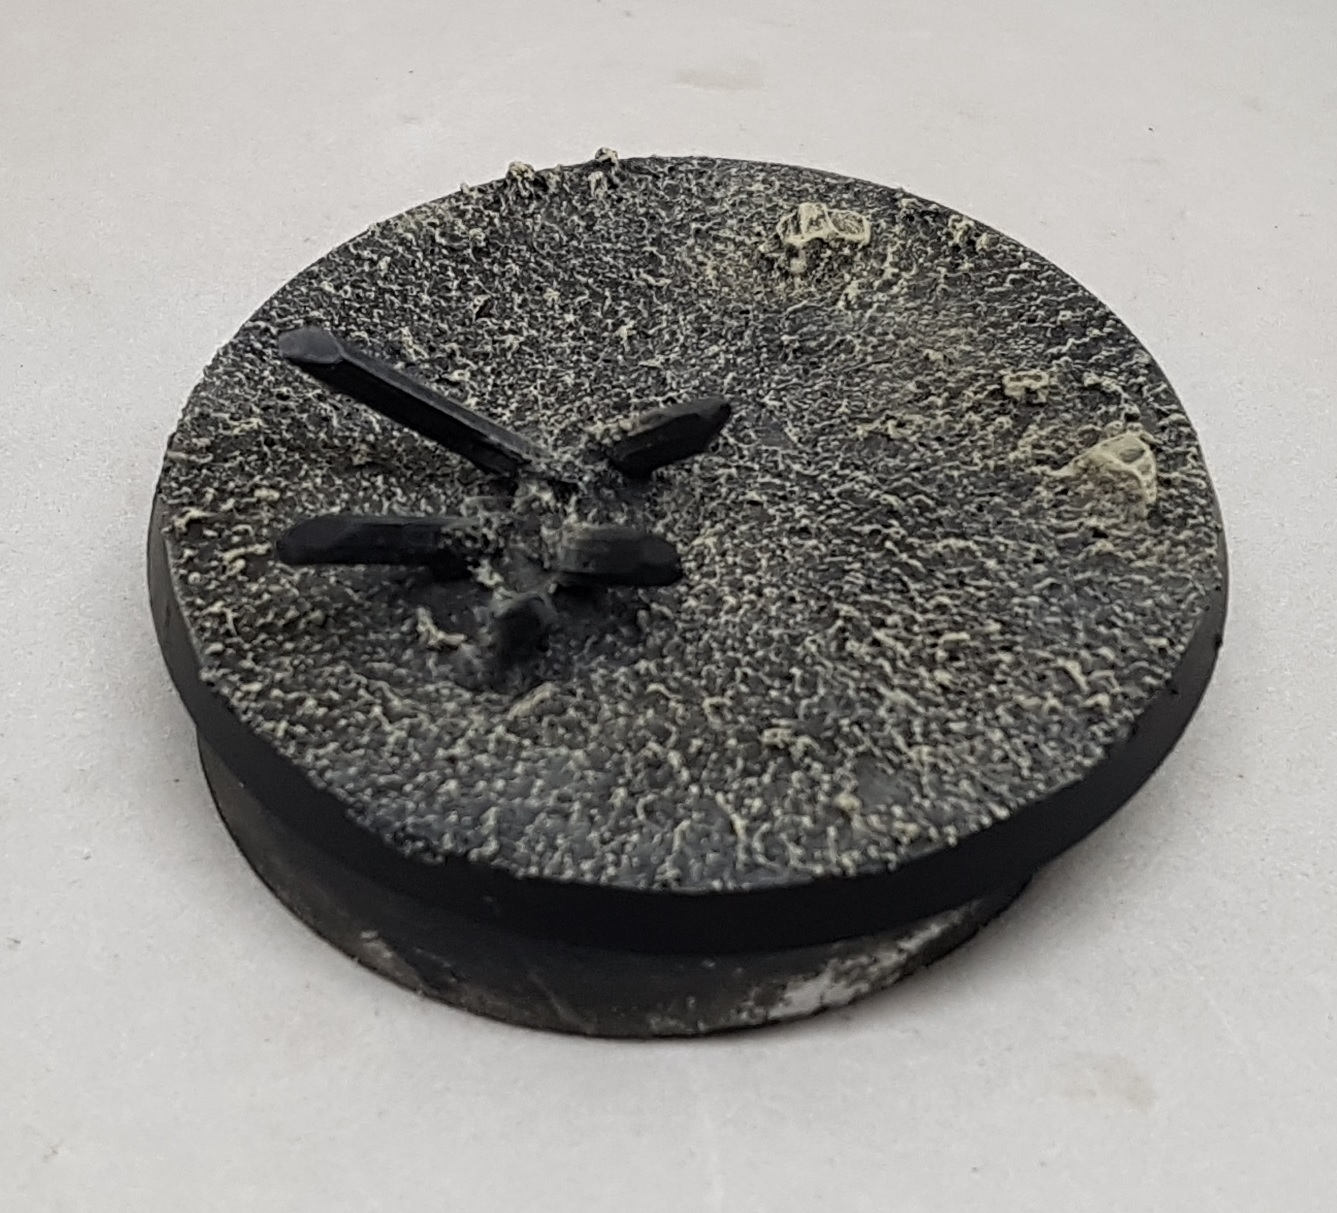 It was given a drybrush of GW Karak Stone and then GW Screaming Skull. The edges were then reclaimed with black.
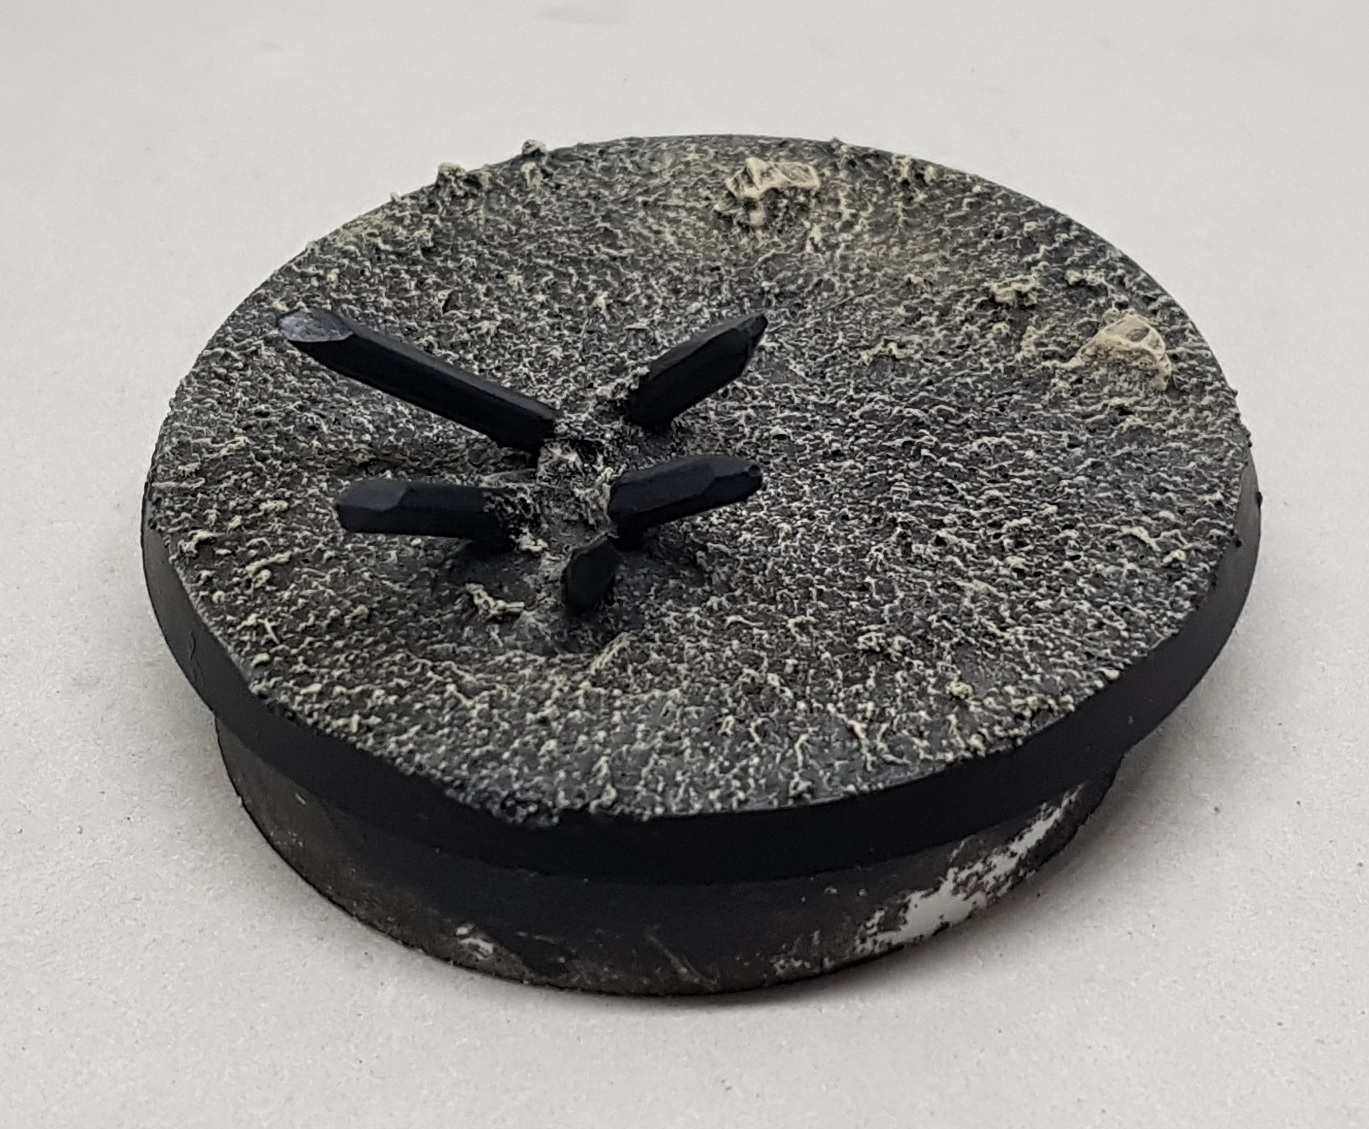 The shards were base coated black, and then the upper half of each surface was painted with a thinned mix of P3 Coal Black and P3 Thamar Black
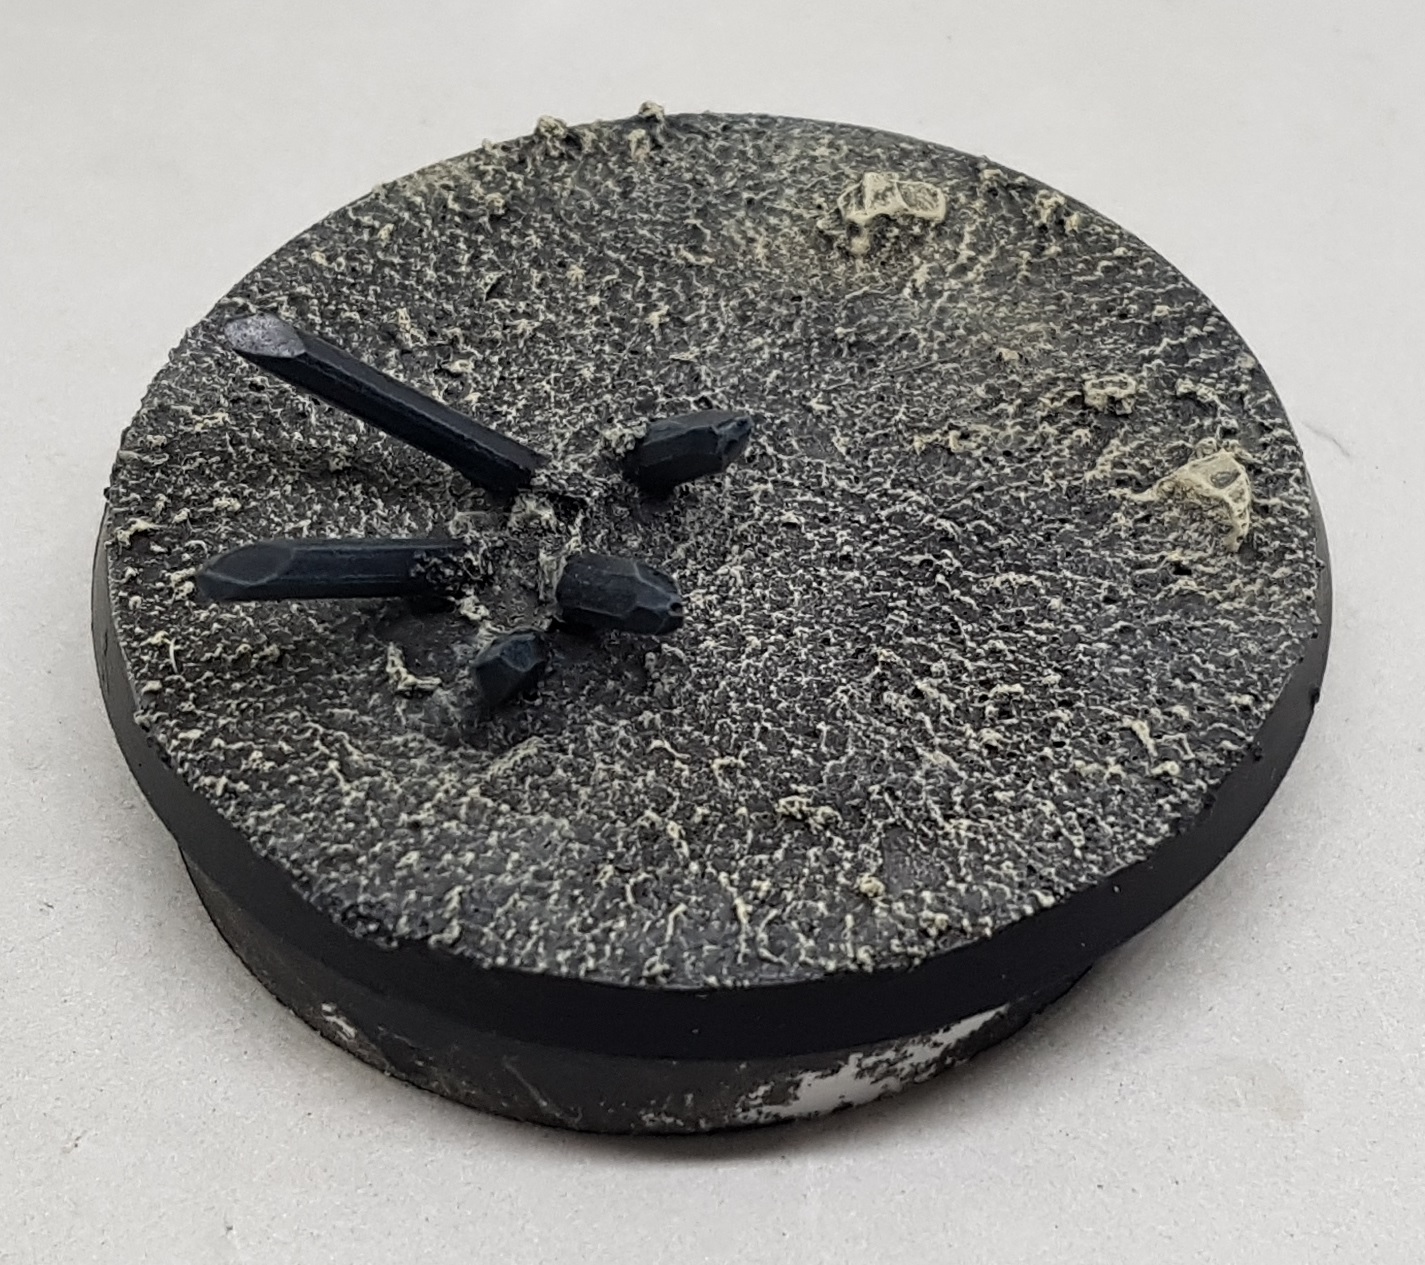 Add some P3 Menoth White Base to the previous colours. Using a drybrush you have removed every bit of paint from that you can, drybrush the shards in the directiin light would hit them. Clip the hard edges on the upper parts of the undersides too.
 Drybrush with a mix of Coal Black and Menoth White Base, on just the top sides on the shards
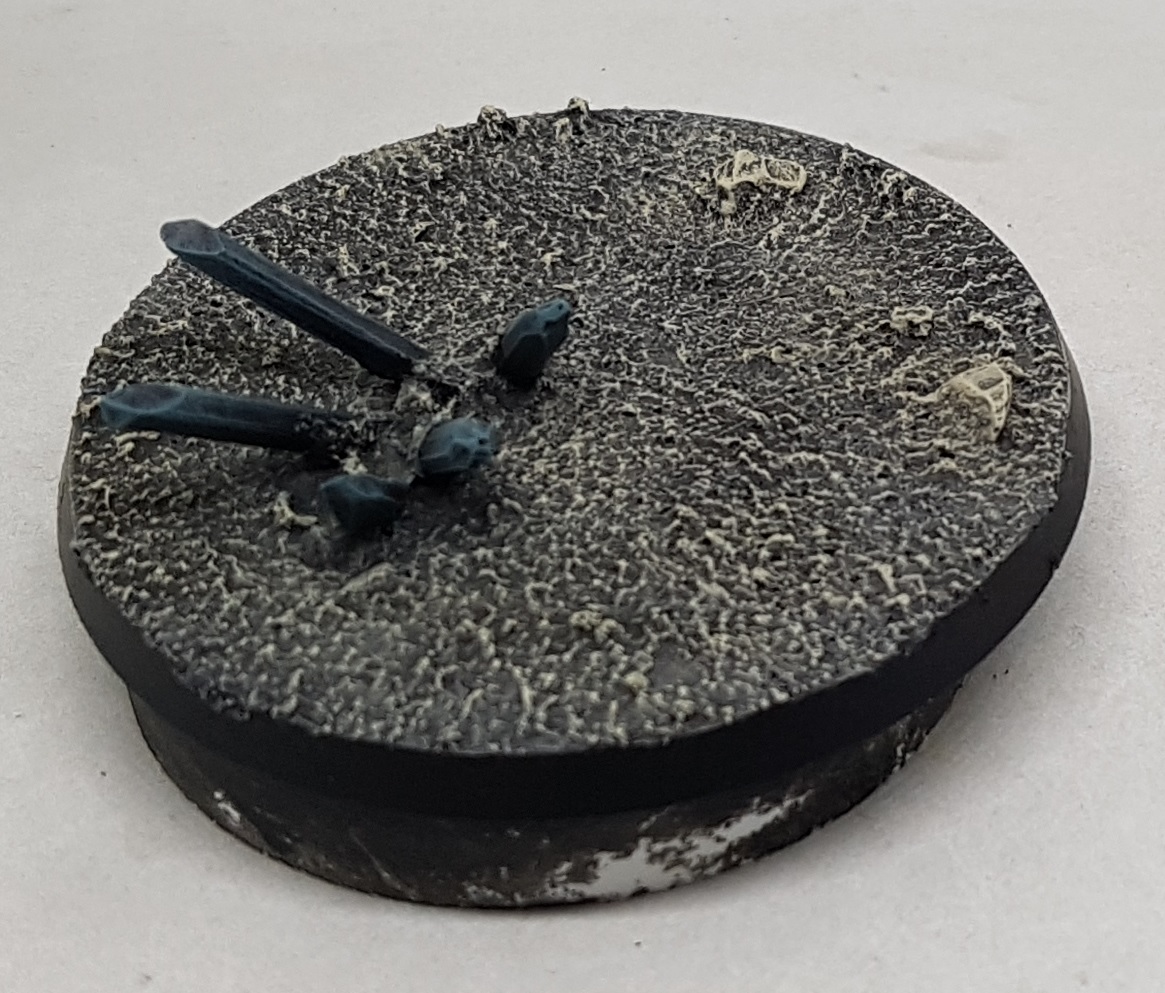 Coal Black was mixed with P3 Menthoh White Highlight and drybrushed to just the tips and the 1/3rd-ish of each shard leading up to the tip. Army Painter Highland Tufts were later added to the base.
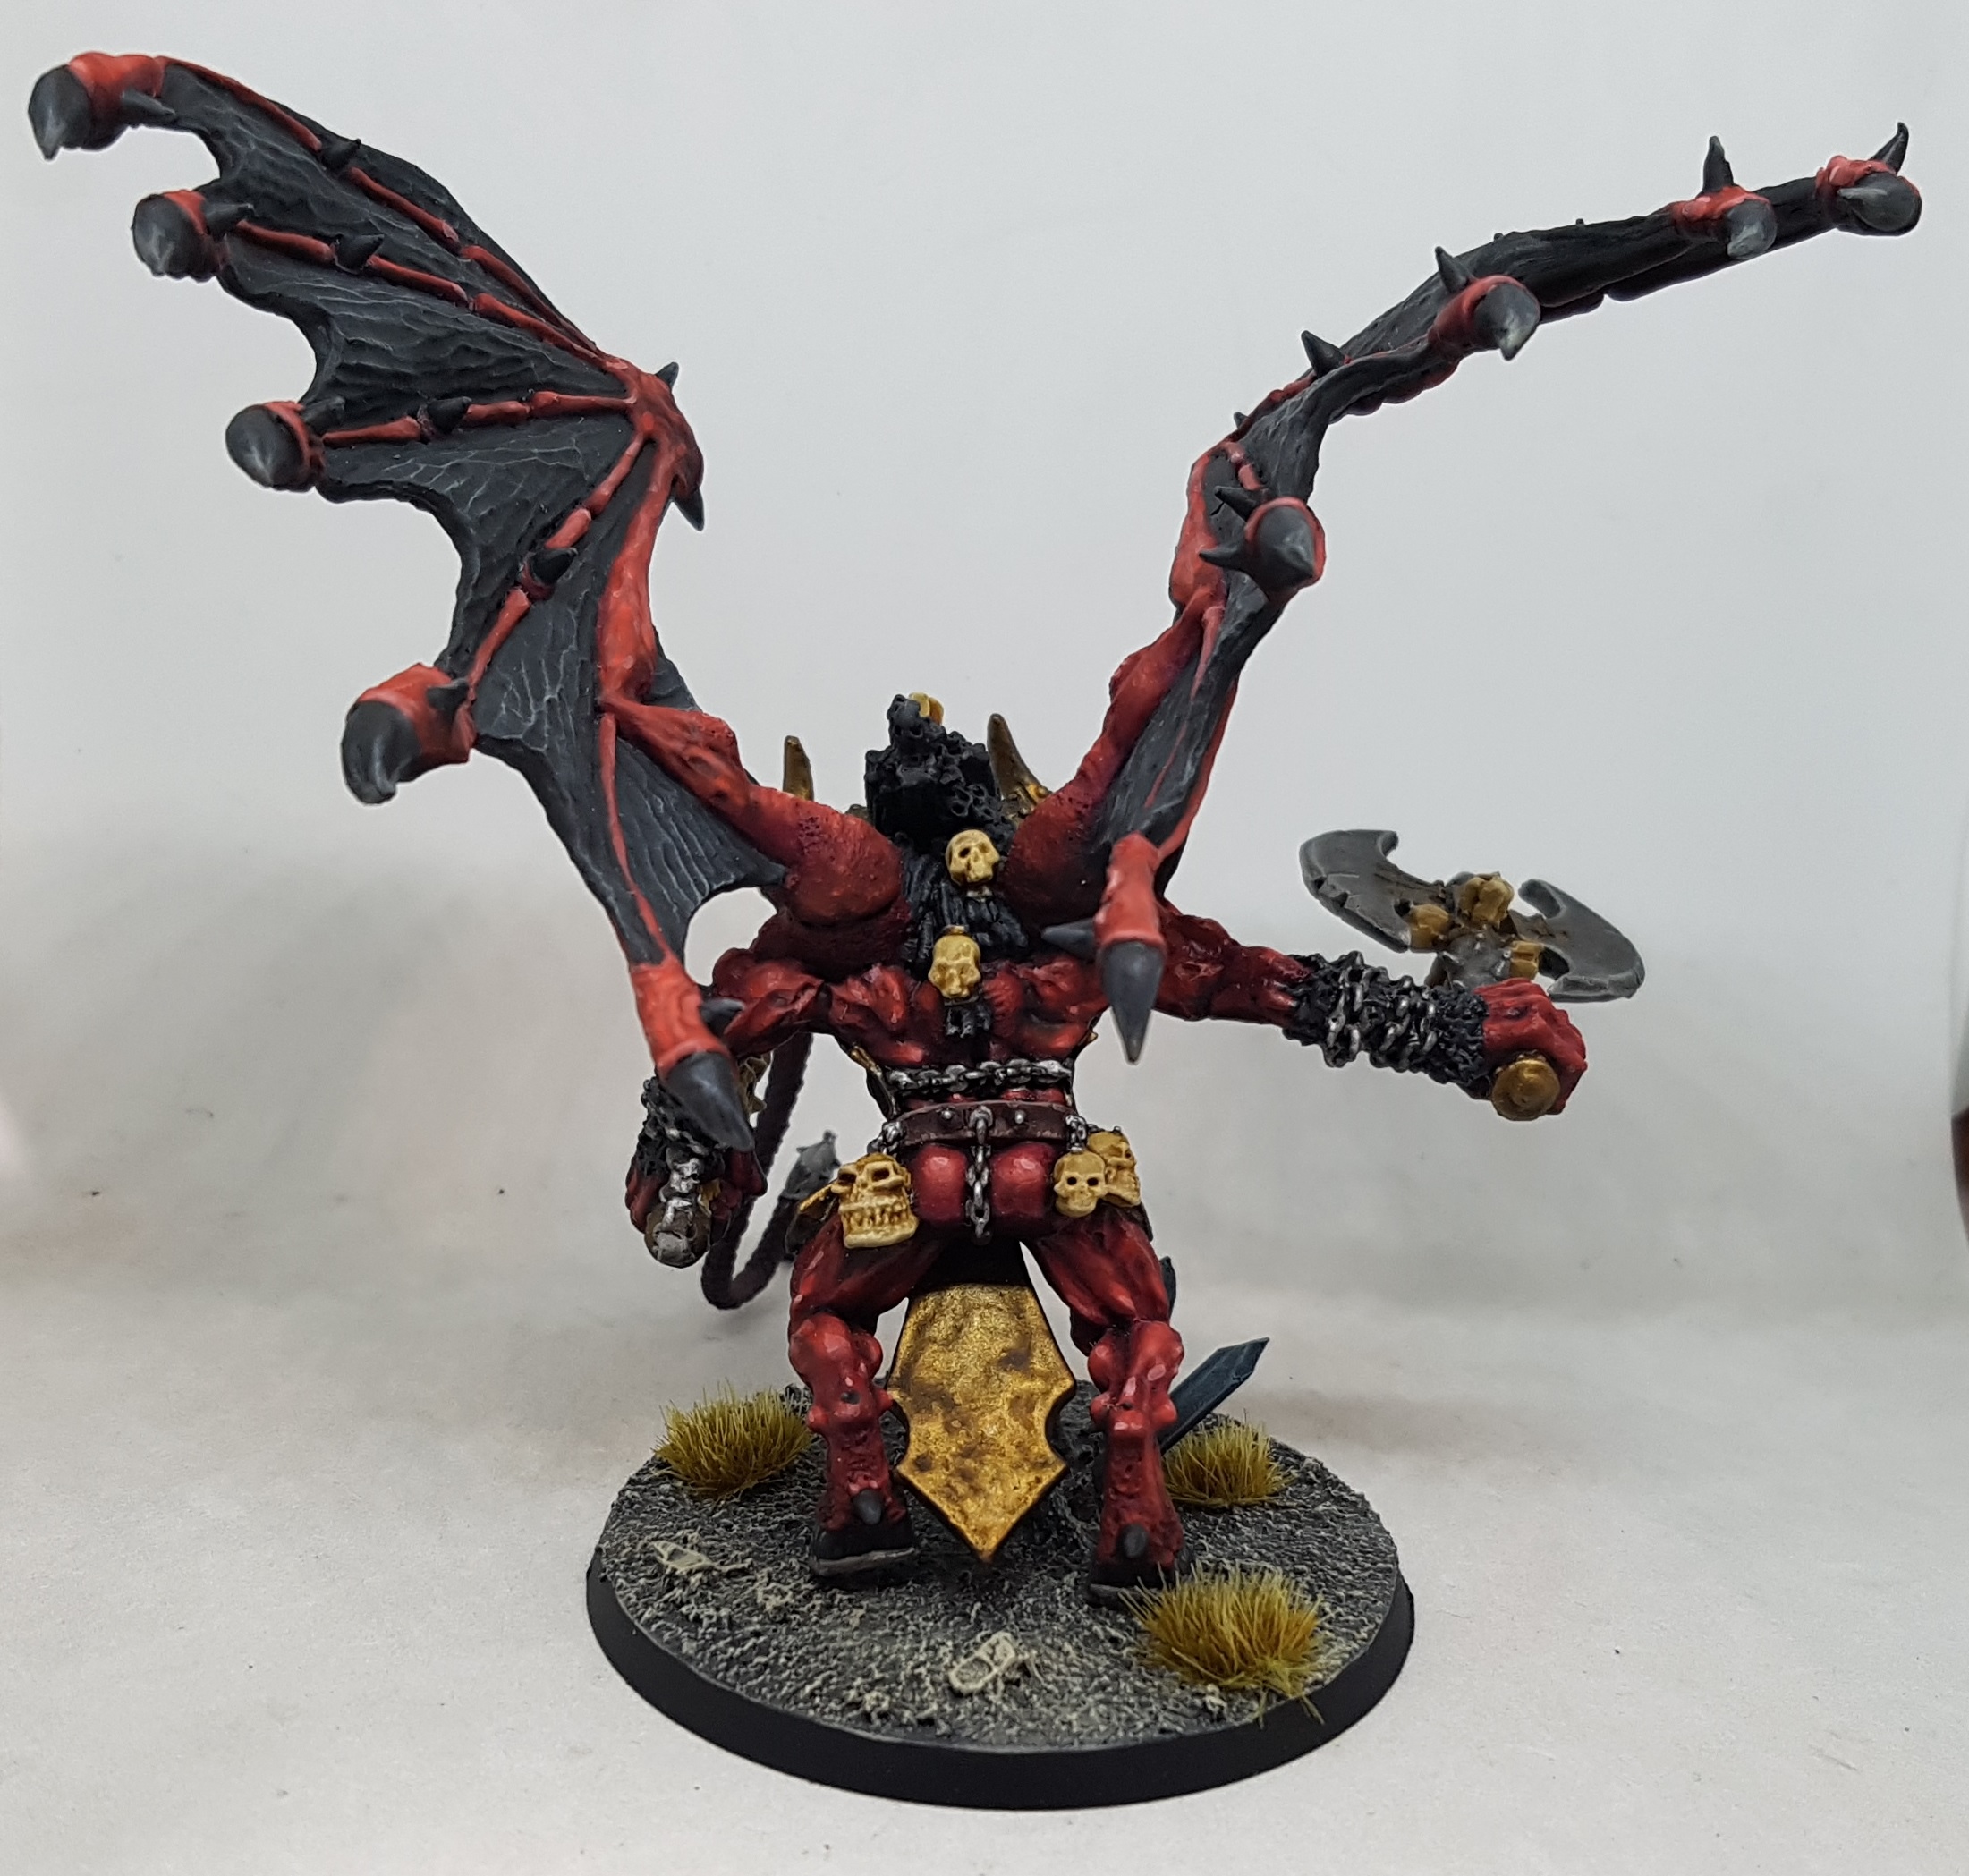
The Finished Bloodthirster
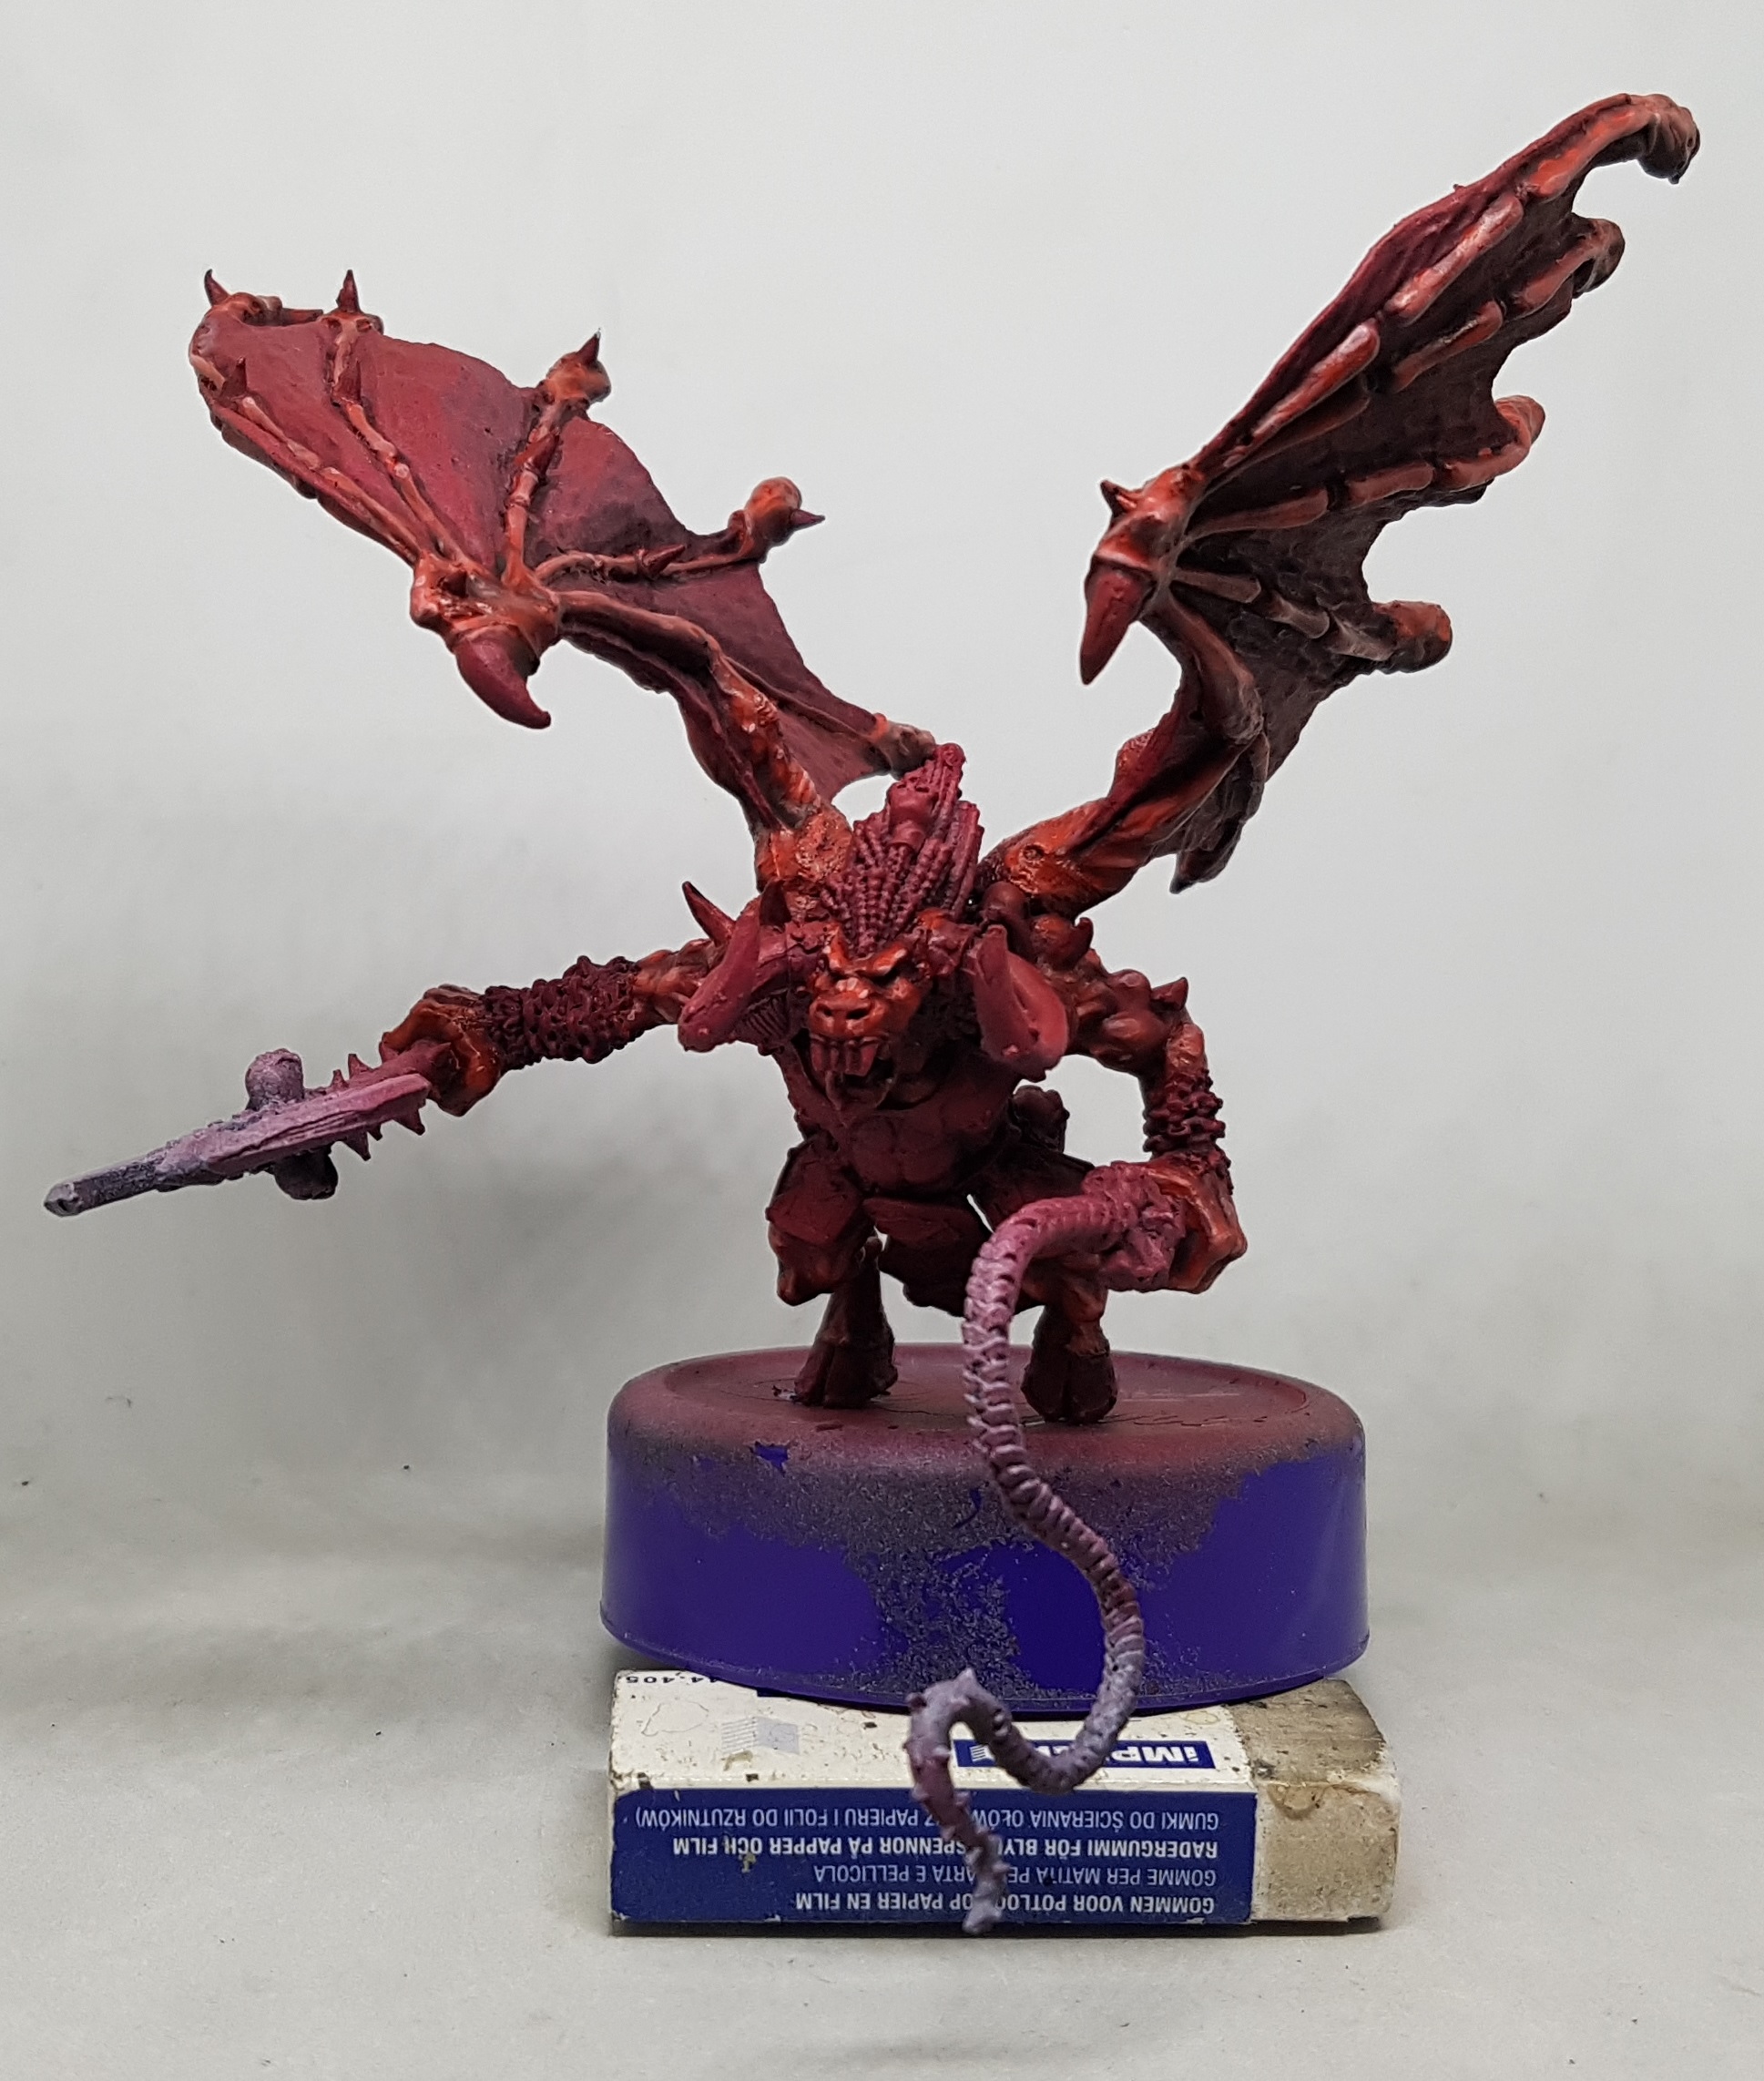
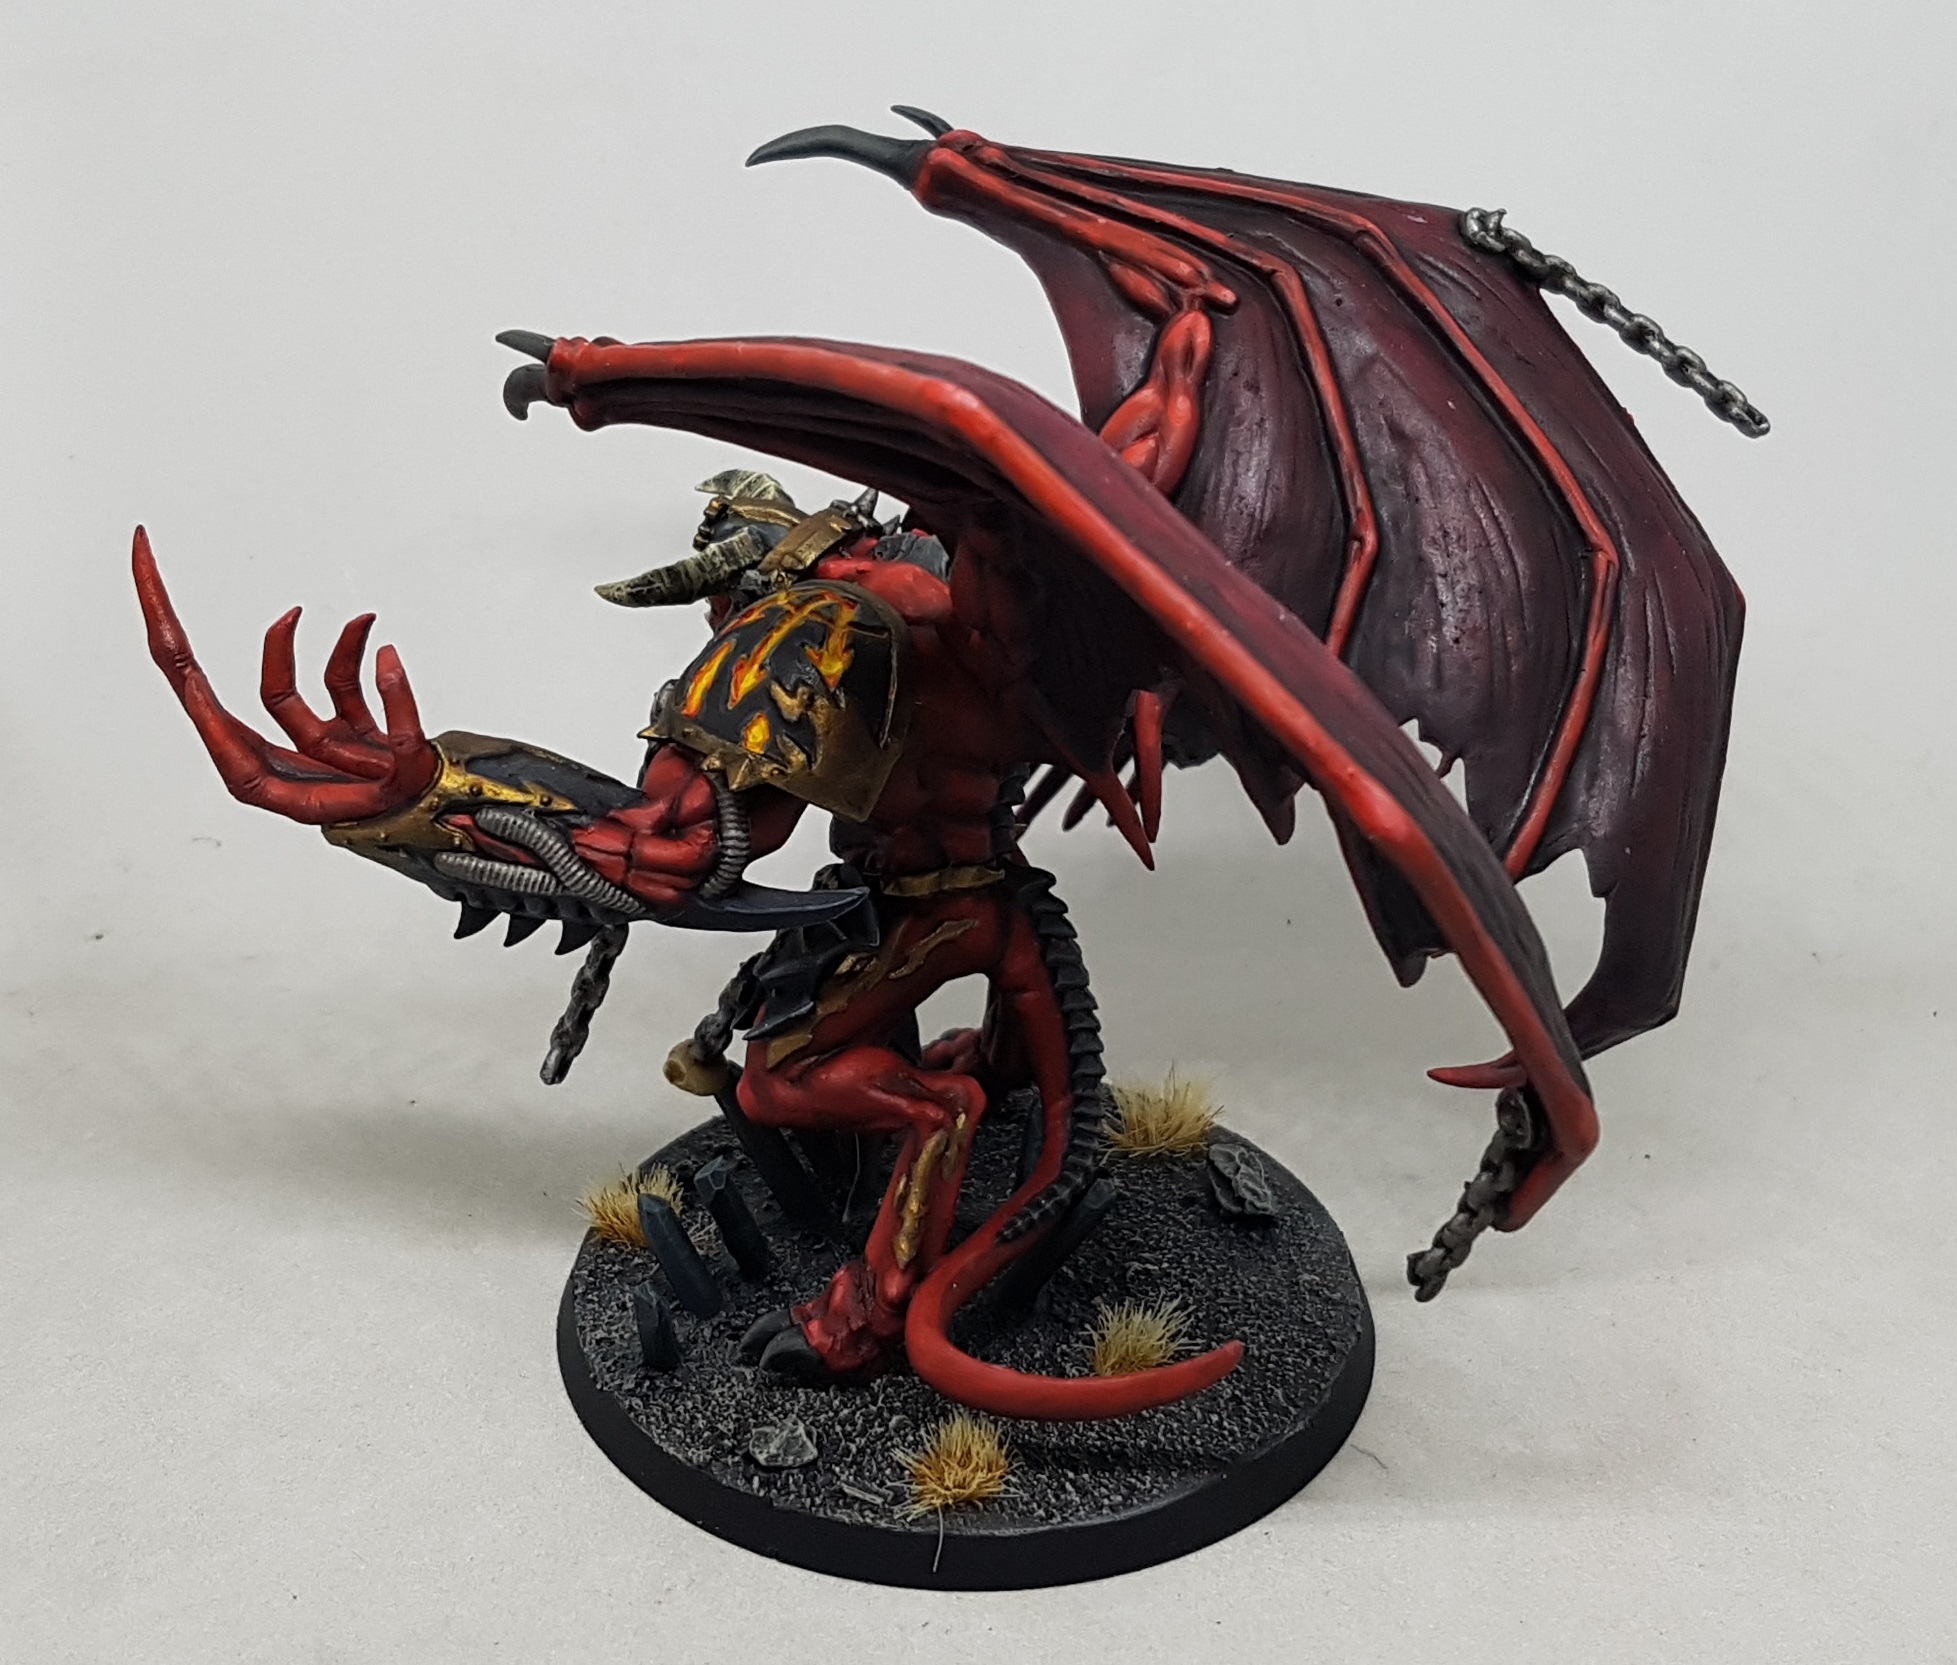
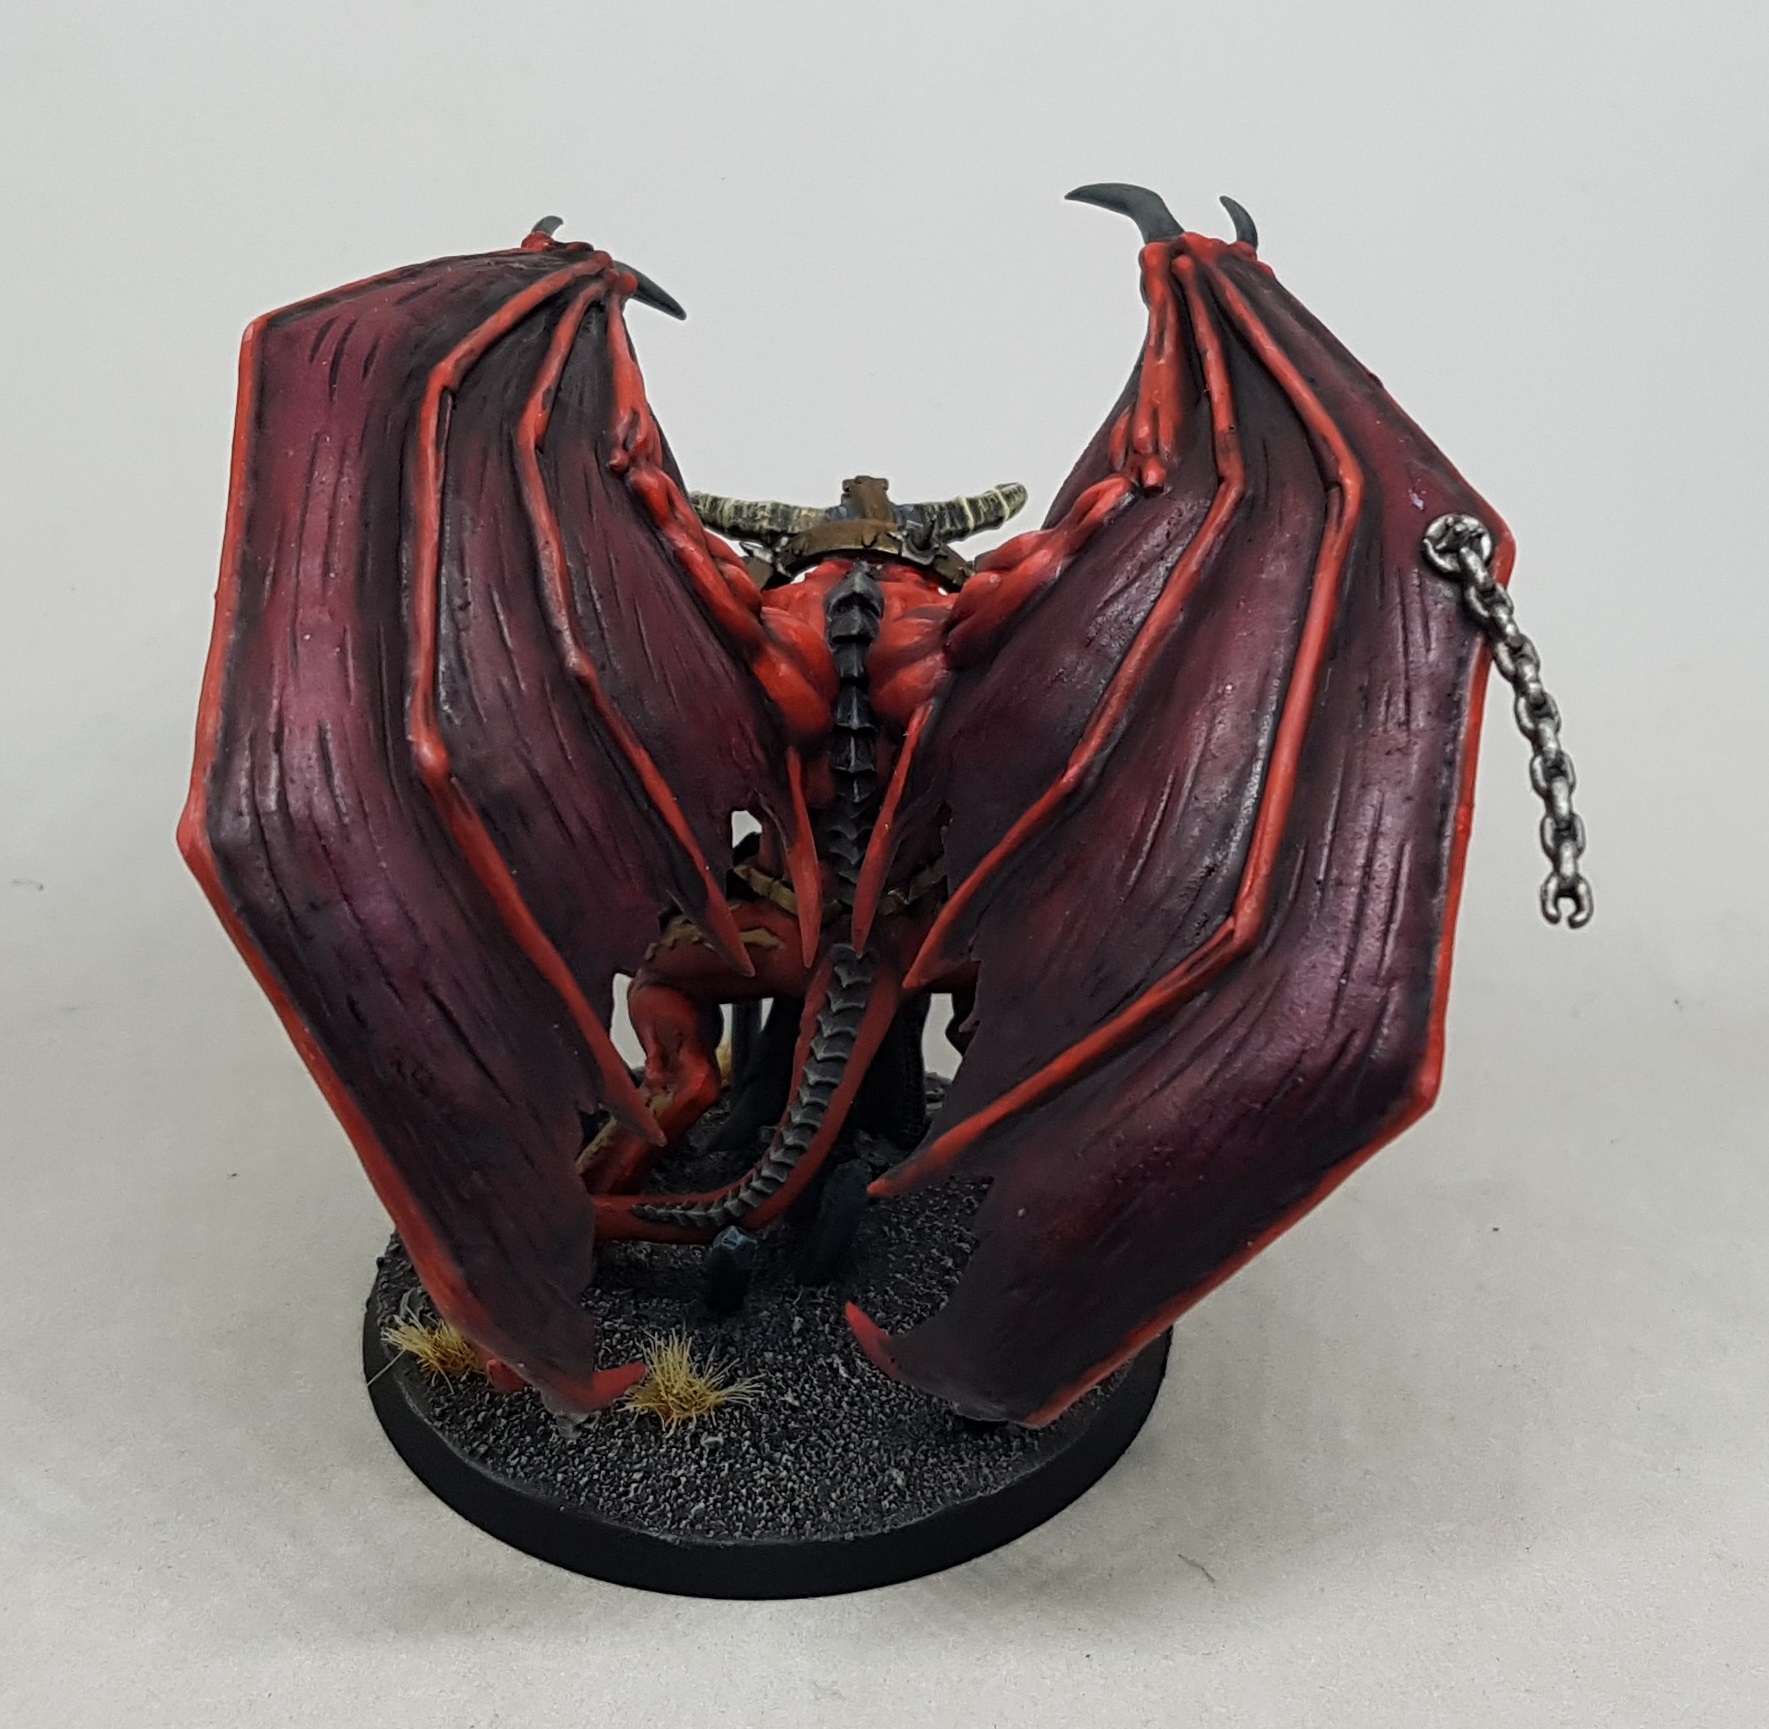
And here she is all done and finished. As I’ve said elsewhere the wings got in the way of everything. If I was building another I would paint them and the whip separately if possible. I could have done a better job that way.
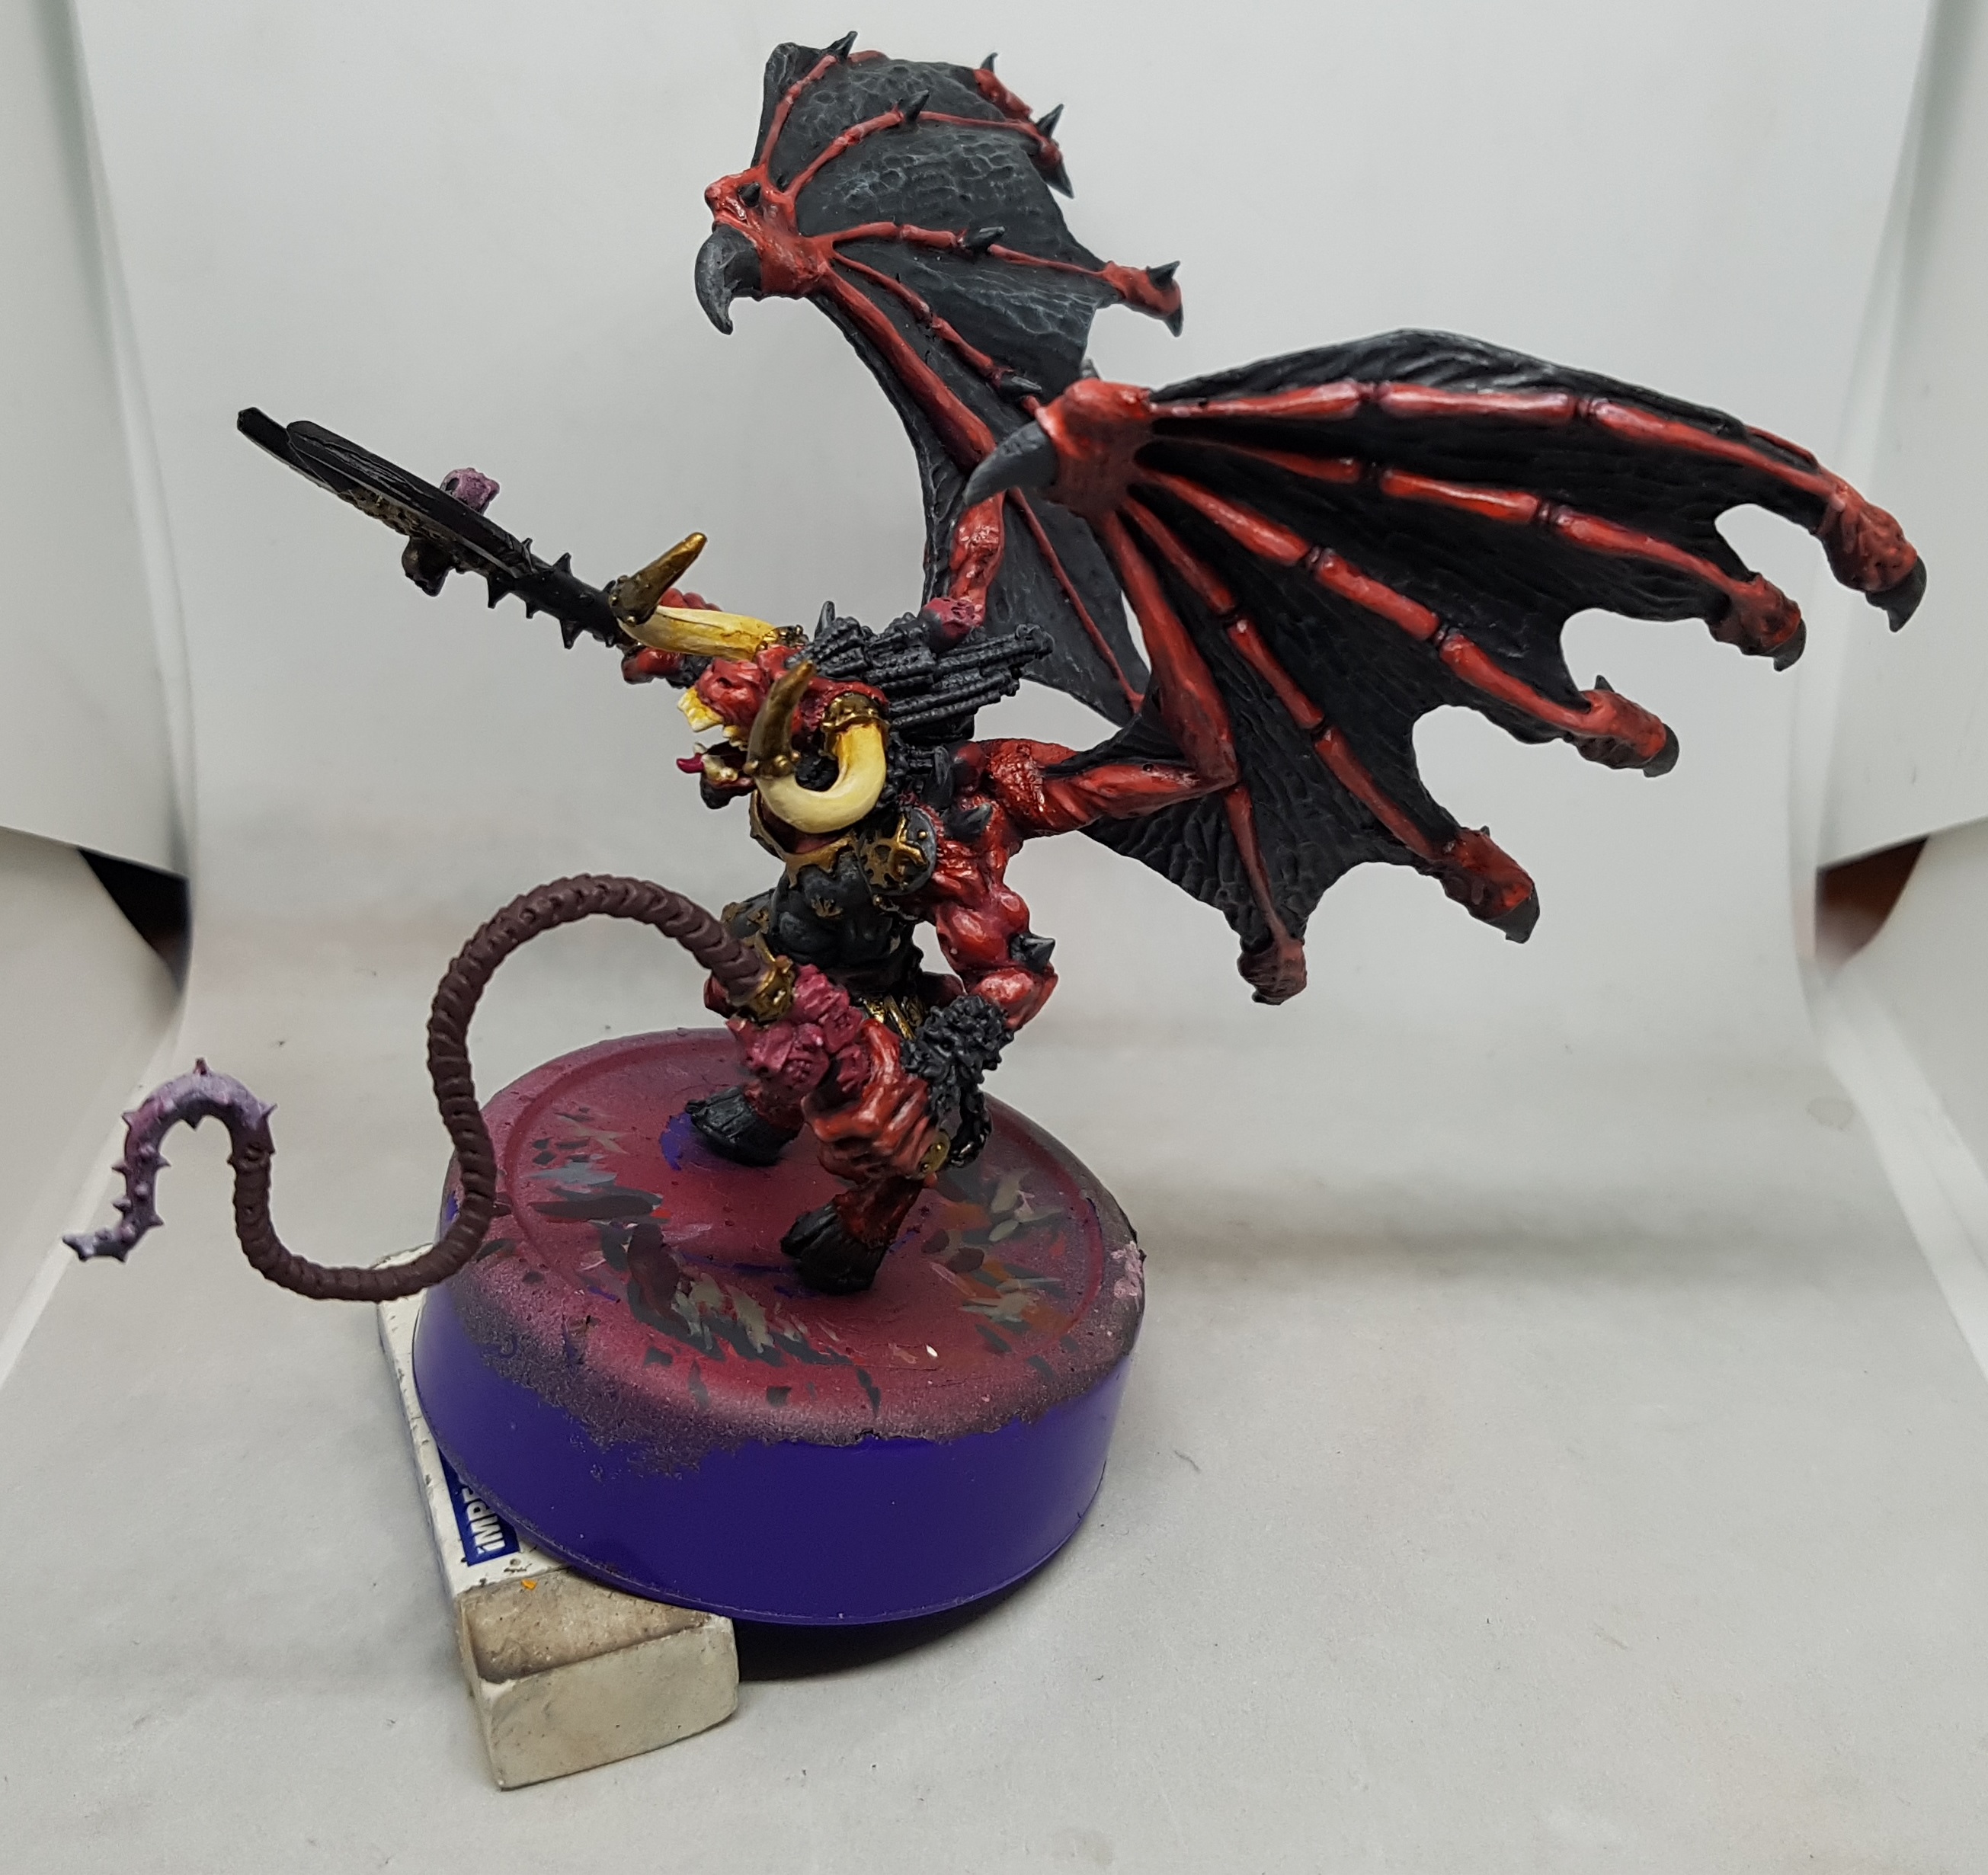
Another problem I have just discovered is that the whip dips down below the base in to the table. Any time it rests on a surface the whip is being bent upwards. I wish I had noticed this before decorating the base and not after gluing her on to it, as I would have built up the ground more to raise her up.
She’s not my finest work, but ultimately I am happy enough with her. The sculpt wasn’t the finest (how old is it anyway?), one wing was broken and missing a chunk, and I never had anywhere to rest my hands so never had any real brush control and still she came out ok. I hope to learn from this when I paint my next Khorne Daemon.
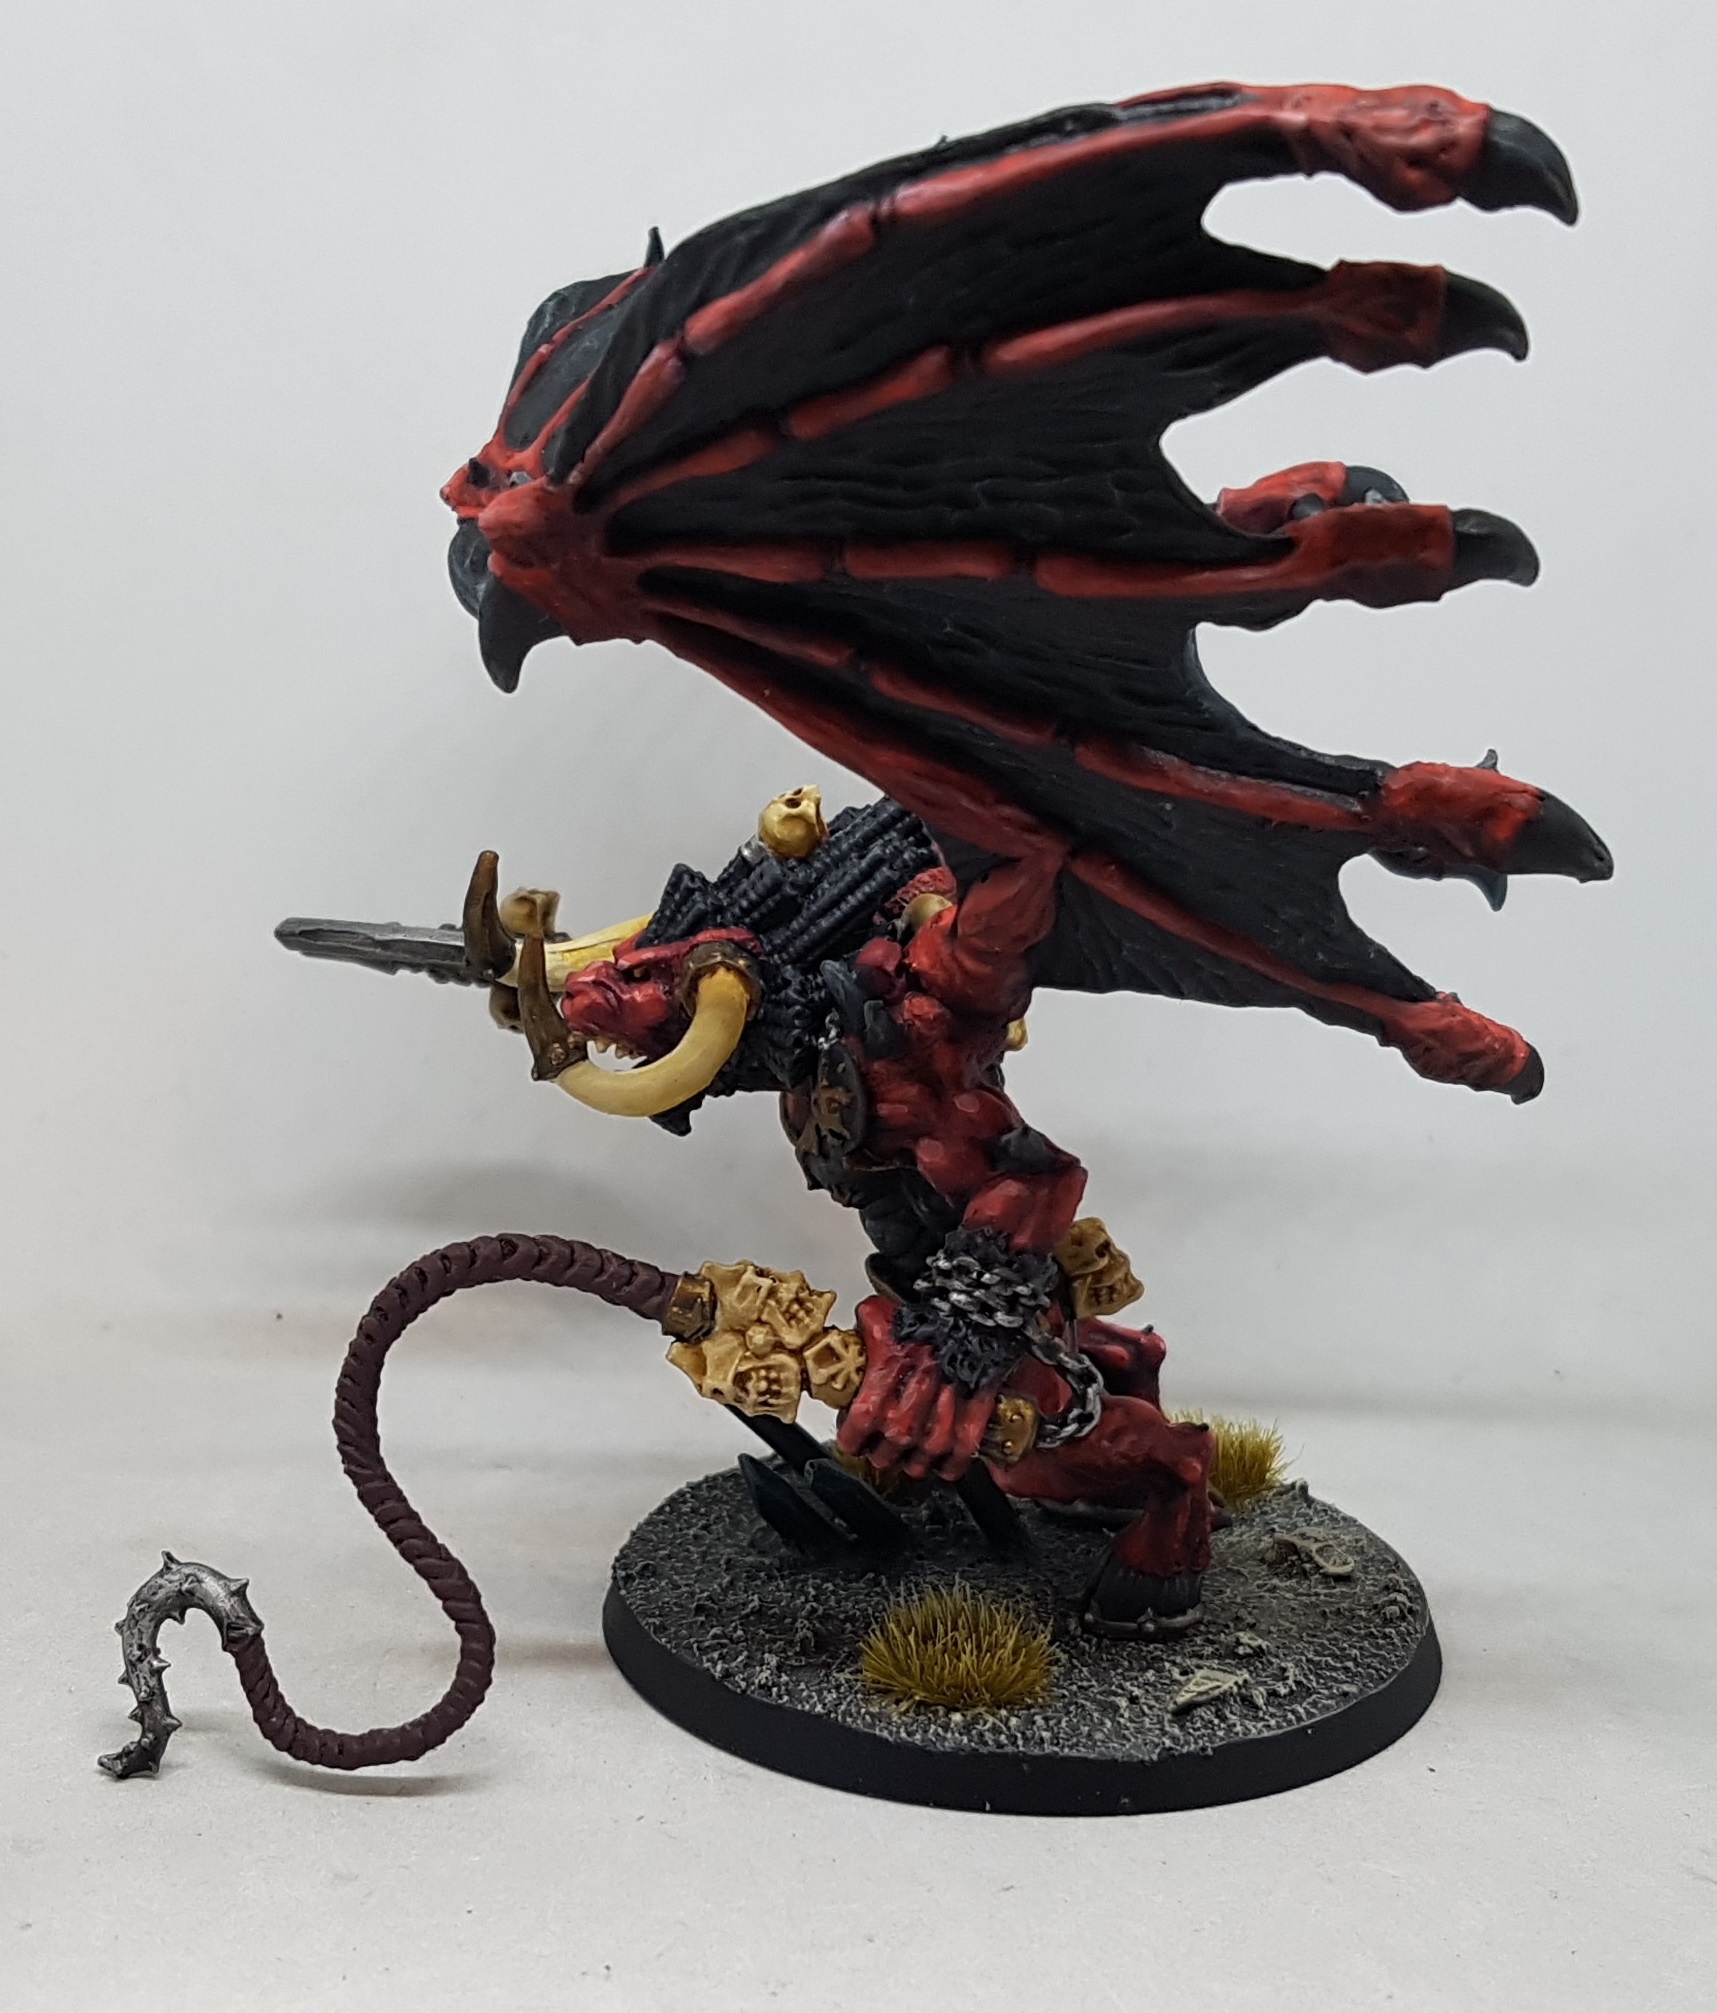

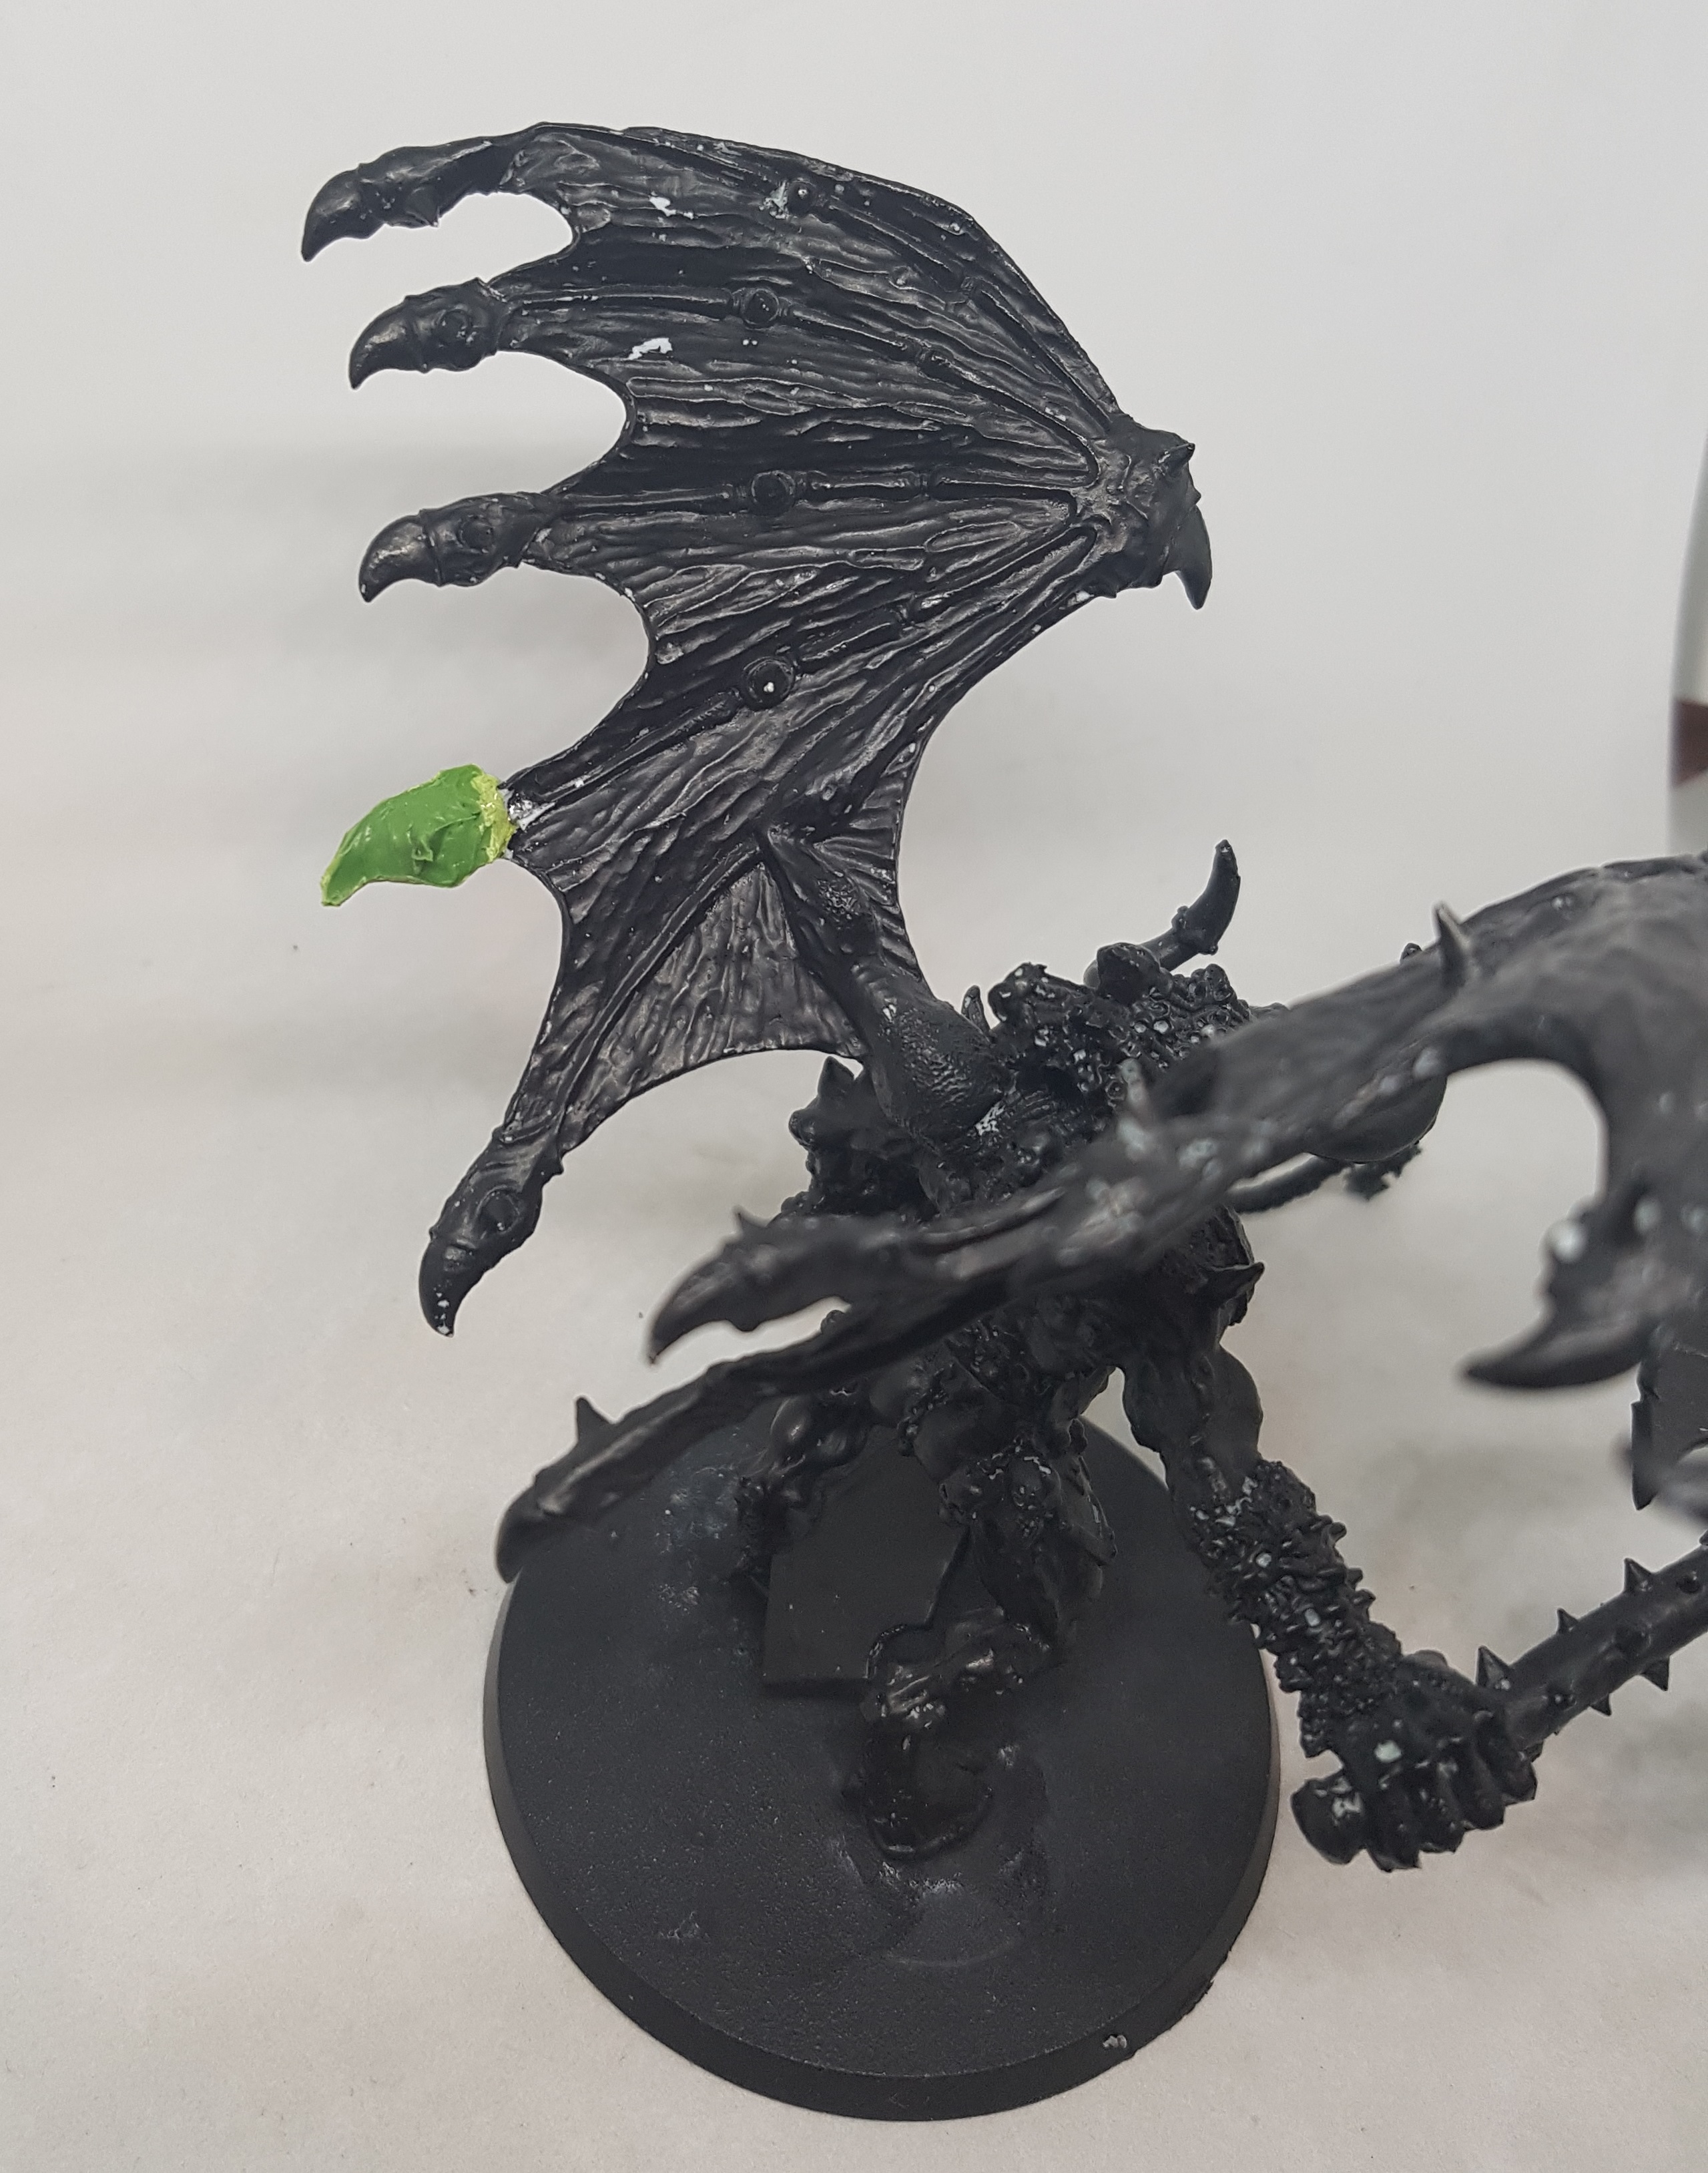
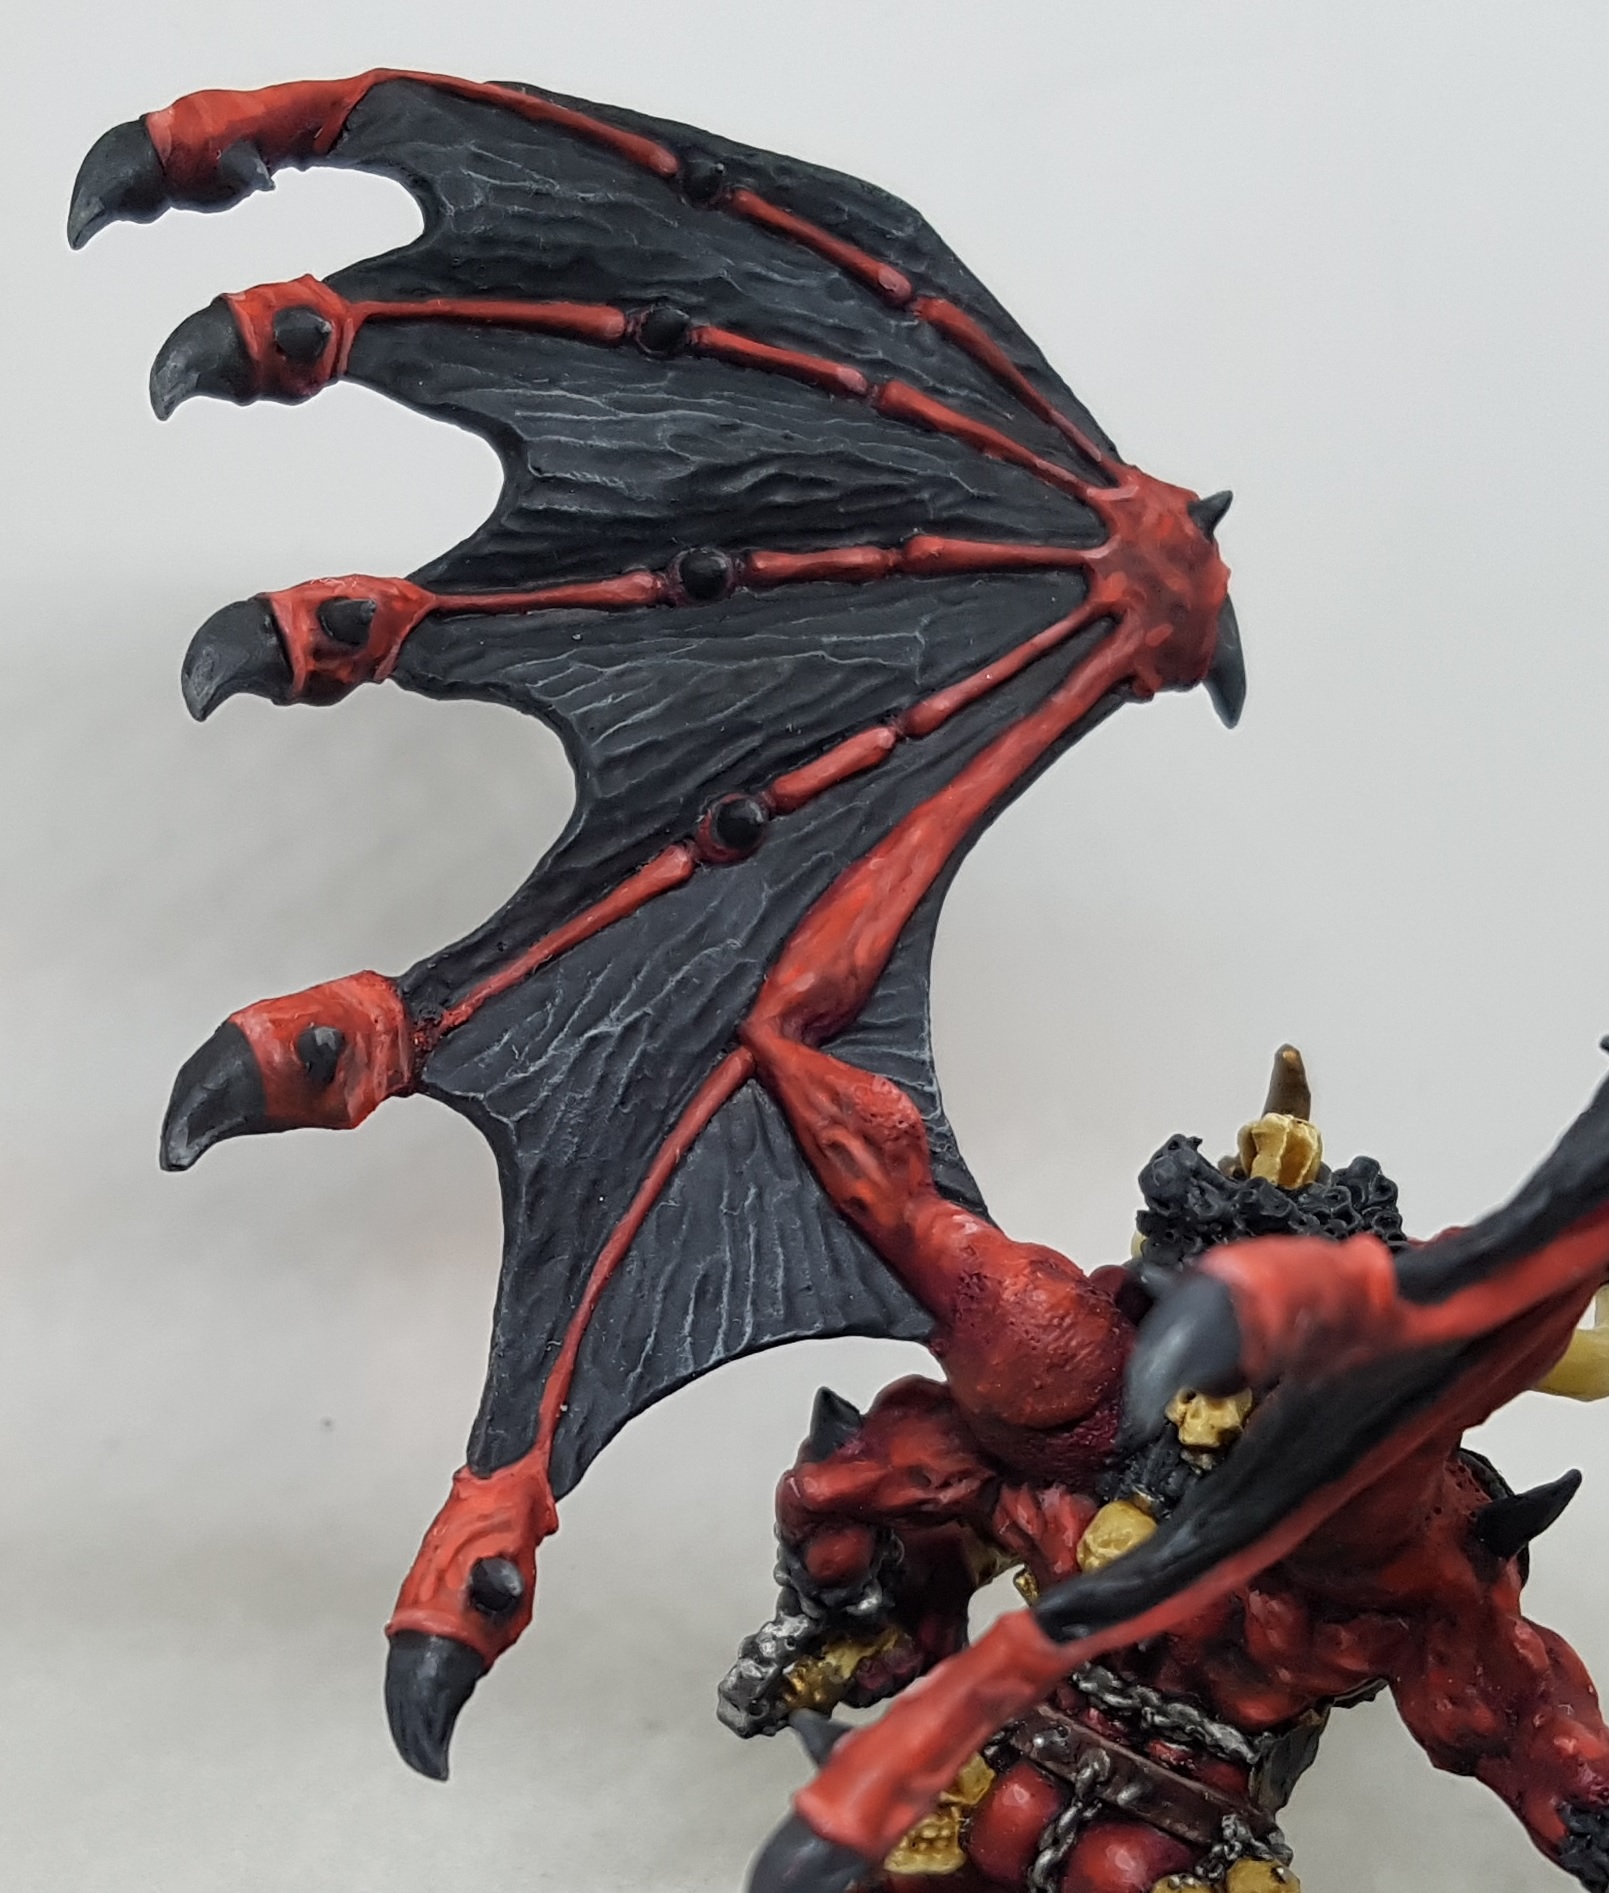 And here we have the wing that I had to resculpt one of the talons for. Would you notice if I didn't tell you? I know its not perfect.
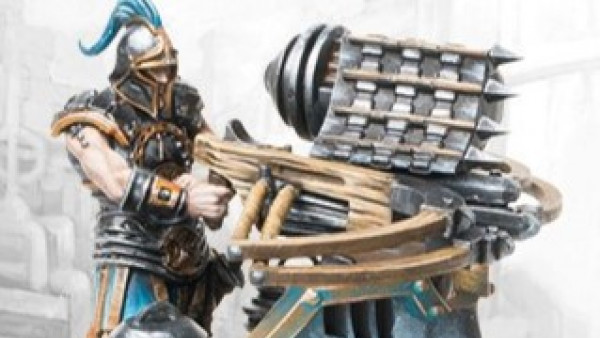
Soul Grinder - Beginning with the Warp Sword, Flesh, Horns, Eyes and Black Panels
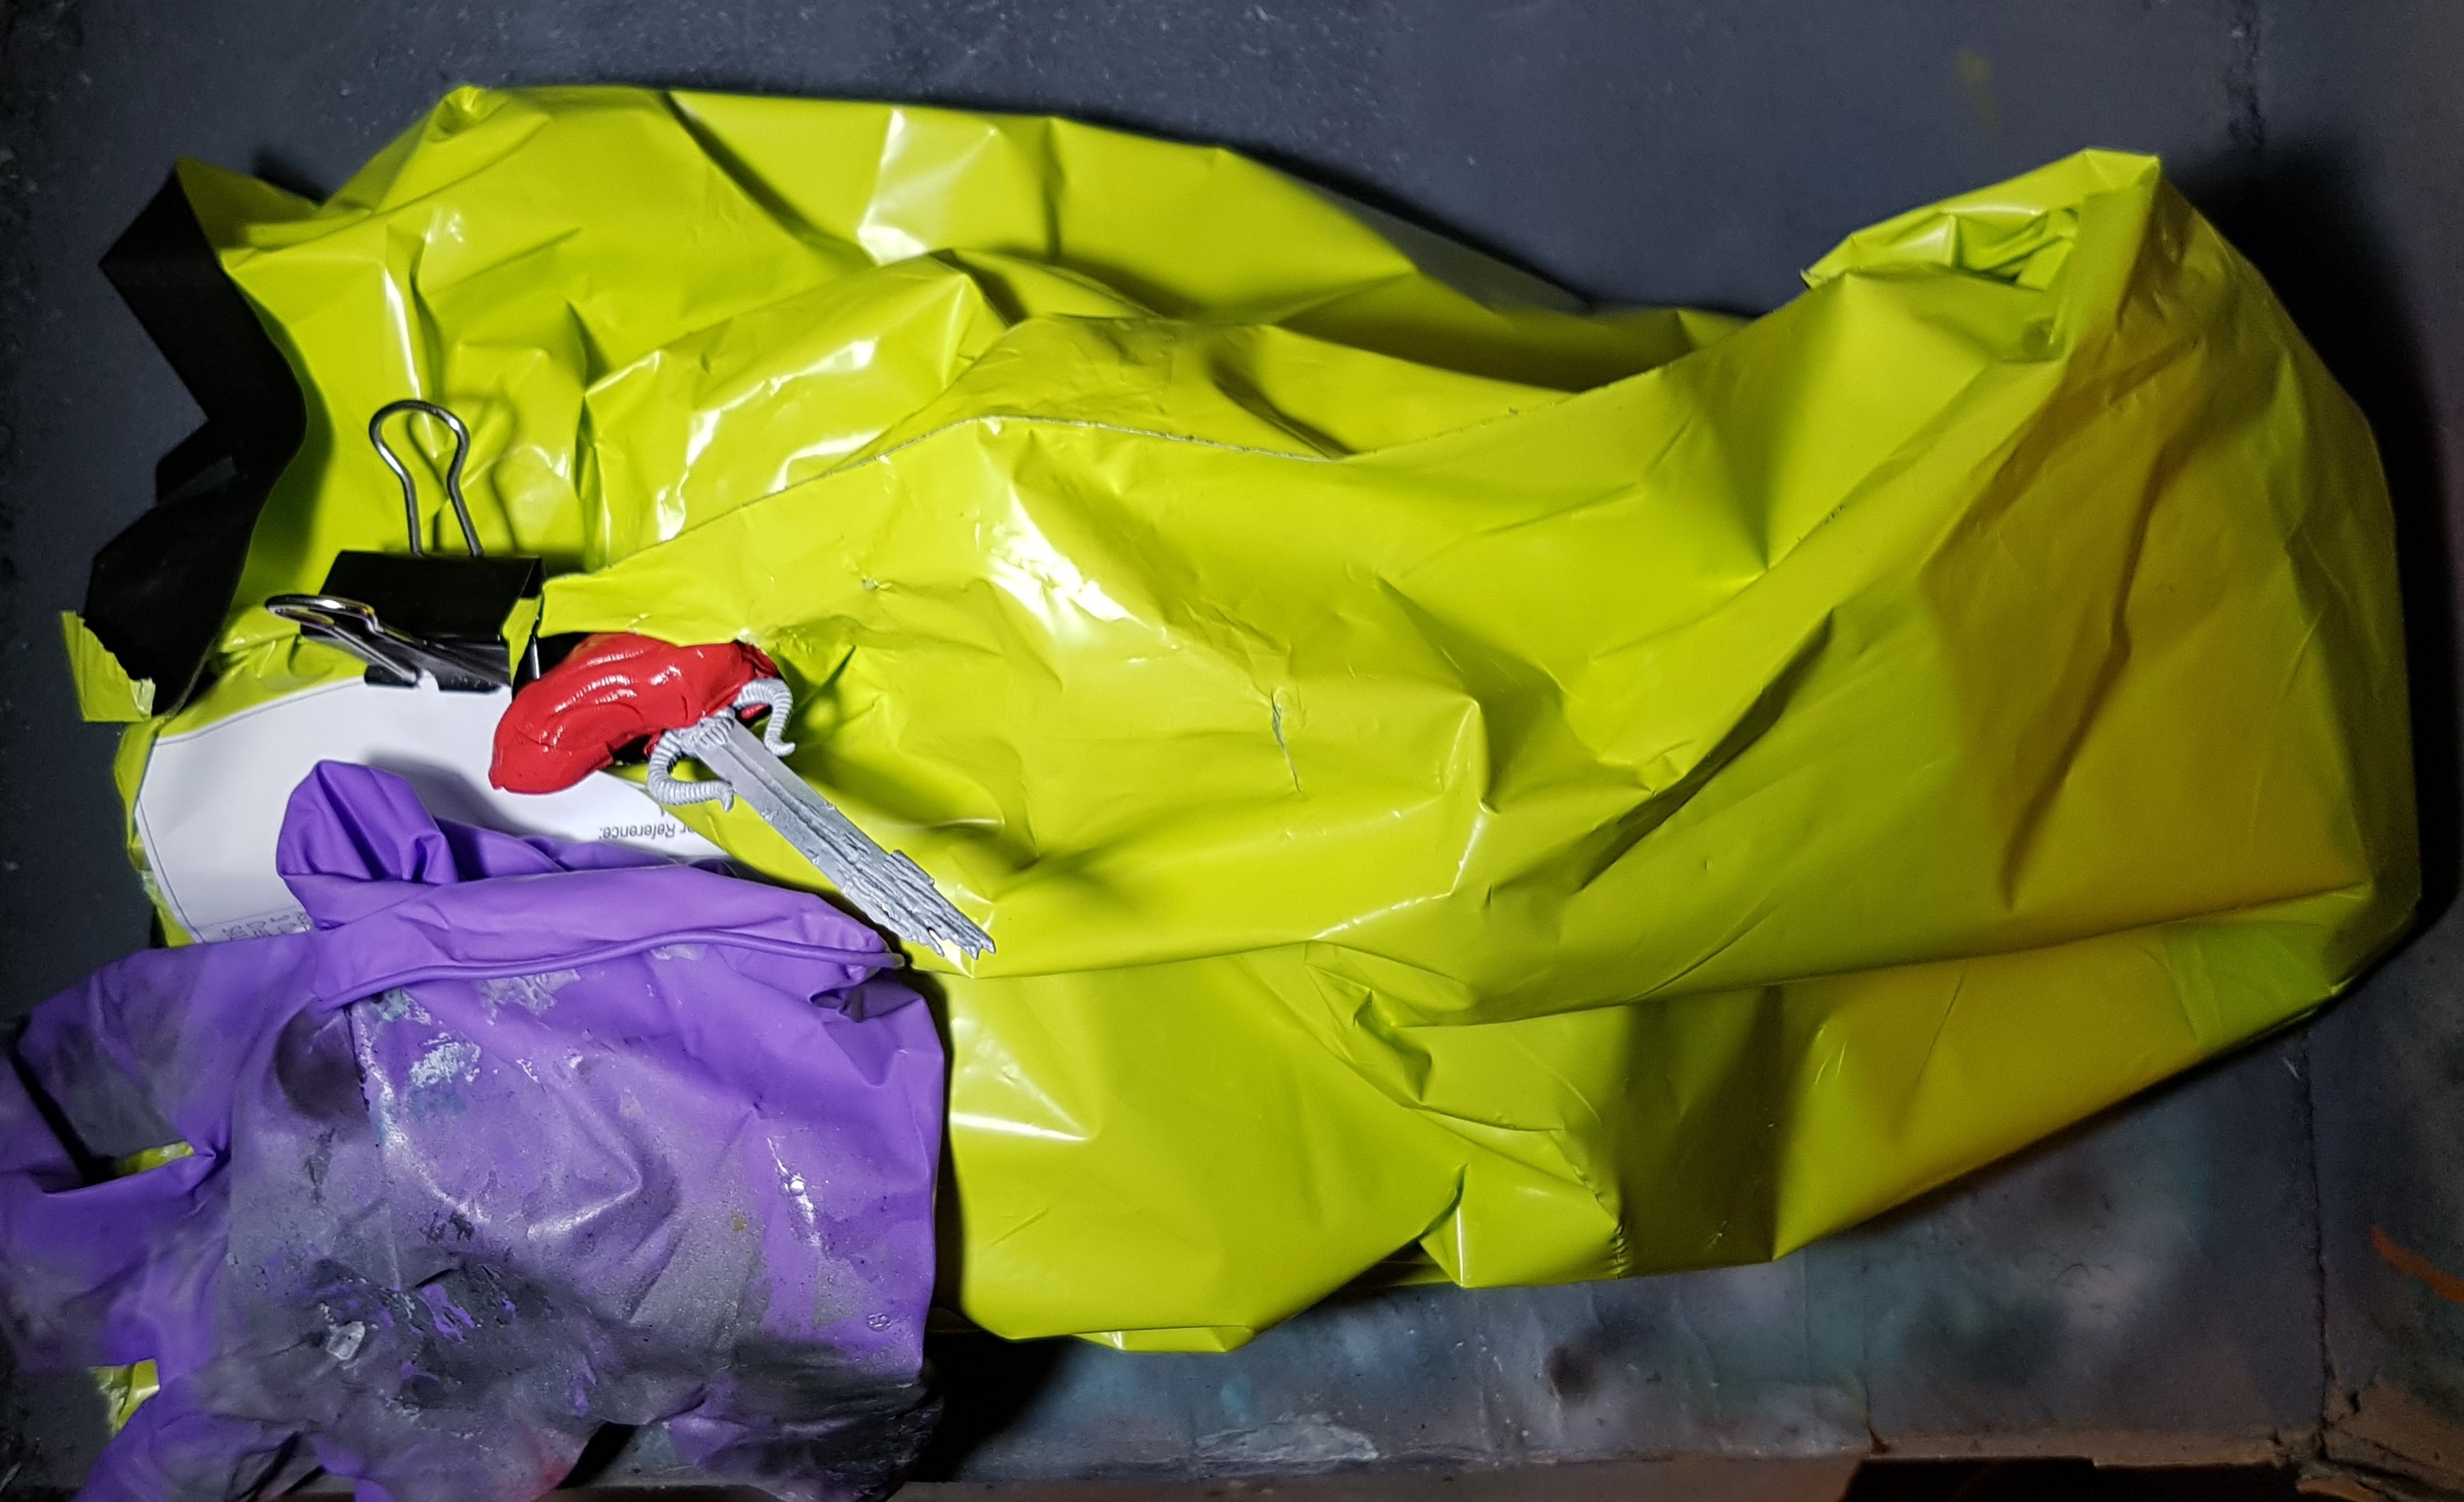 The model was zenithally primed and then everything except the blade was masked off using silly putty and a plastic bag
 The blade was then airbrushed with Turbo Dork Blue Raspberry colour shift paint. I tried applying this over the preshade as some of their colourshifts react differently with black or white undercoats. Blue Raspberry does not show up over white so I re-based it with black gloss before applying a few thin coats. I tried to apply more coats towards the end of the blade to give it a gradient. I may have done too many coats over it all though.
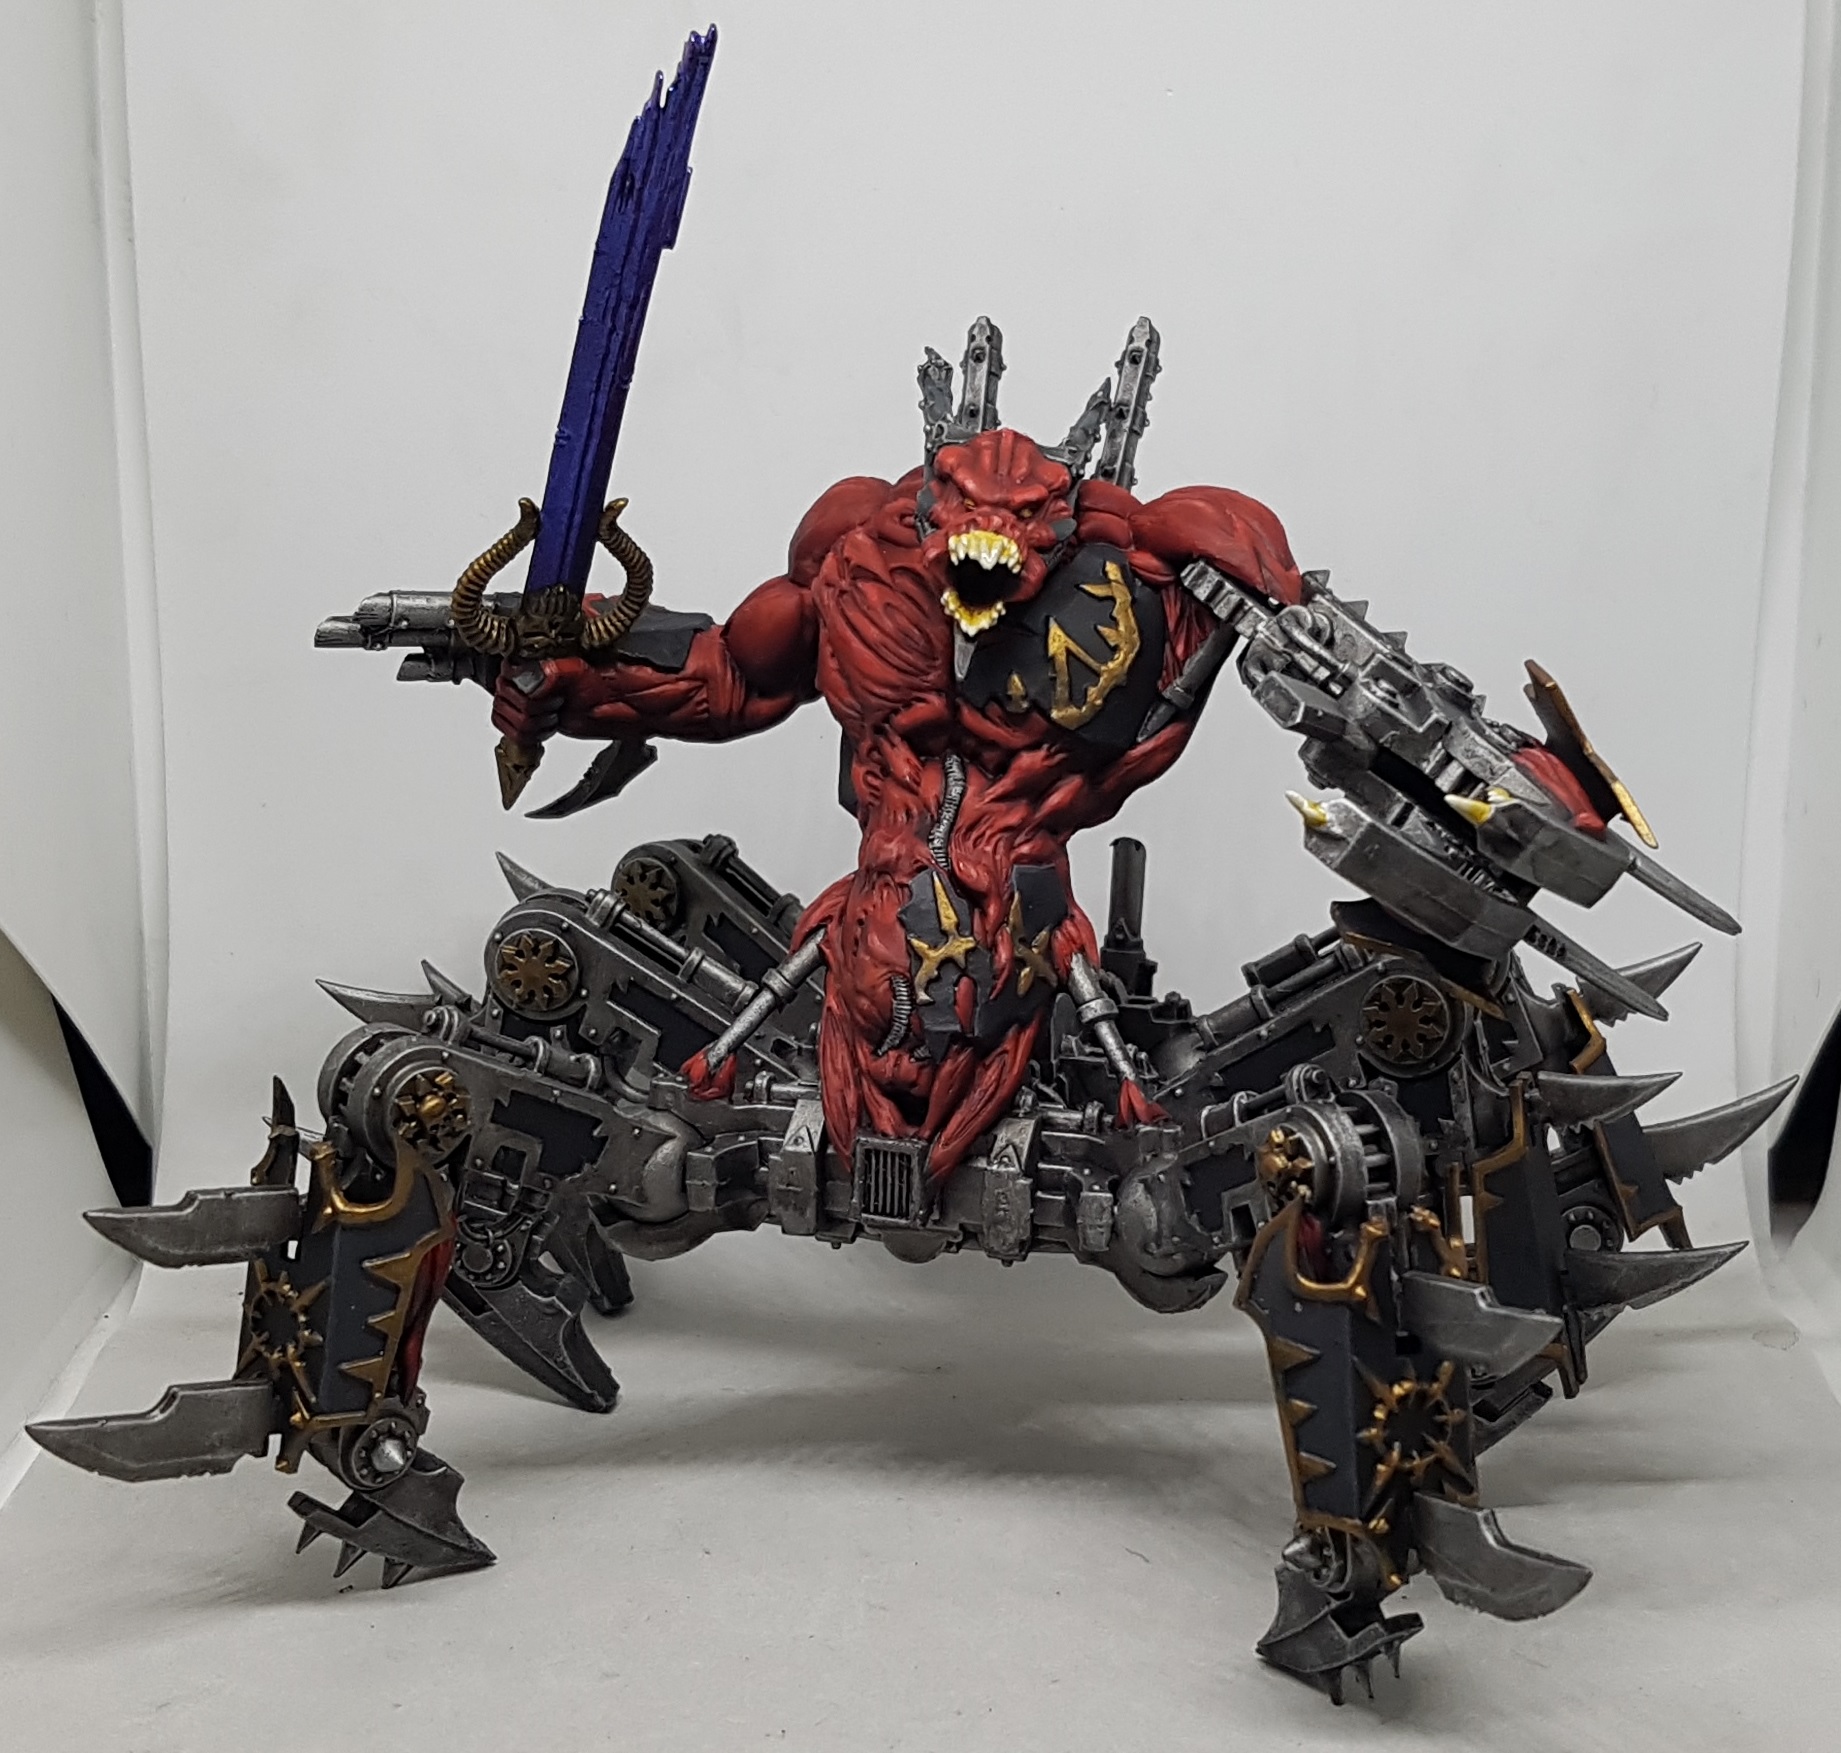
 After leaving it overnight to dry (and so I could sleep and go to work), the blade was carefully masked off with Silly Putty. Please note the stylish, high end Airbrushing Hood. Nothing but the finest for me!
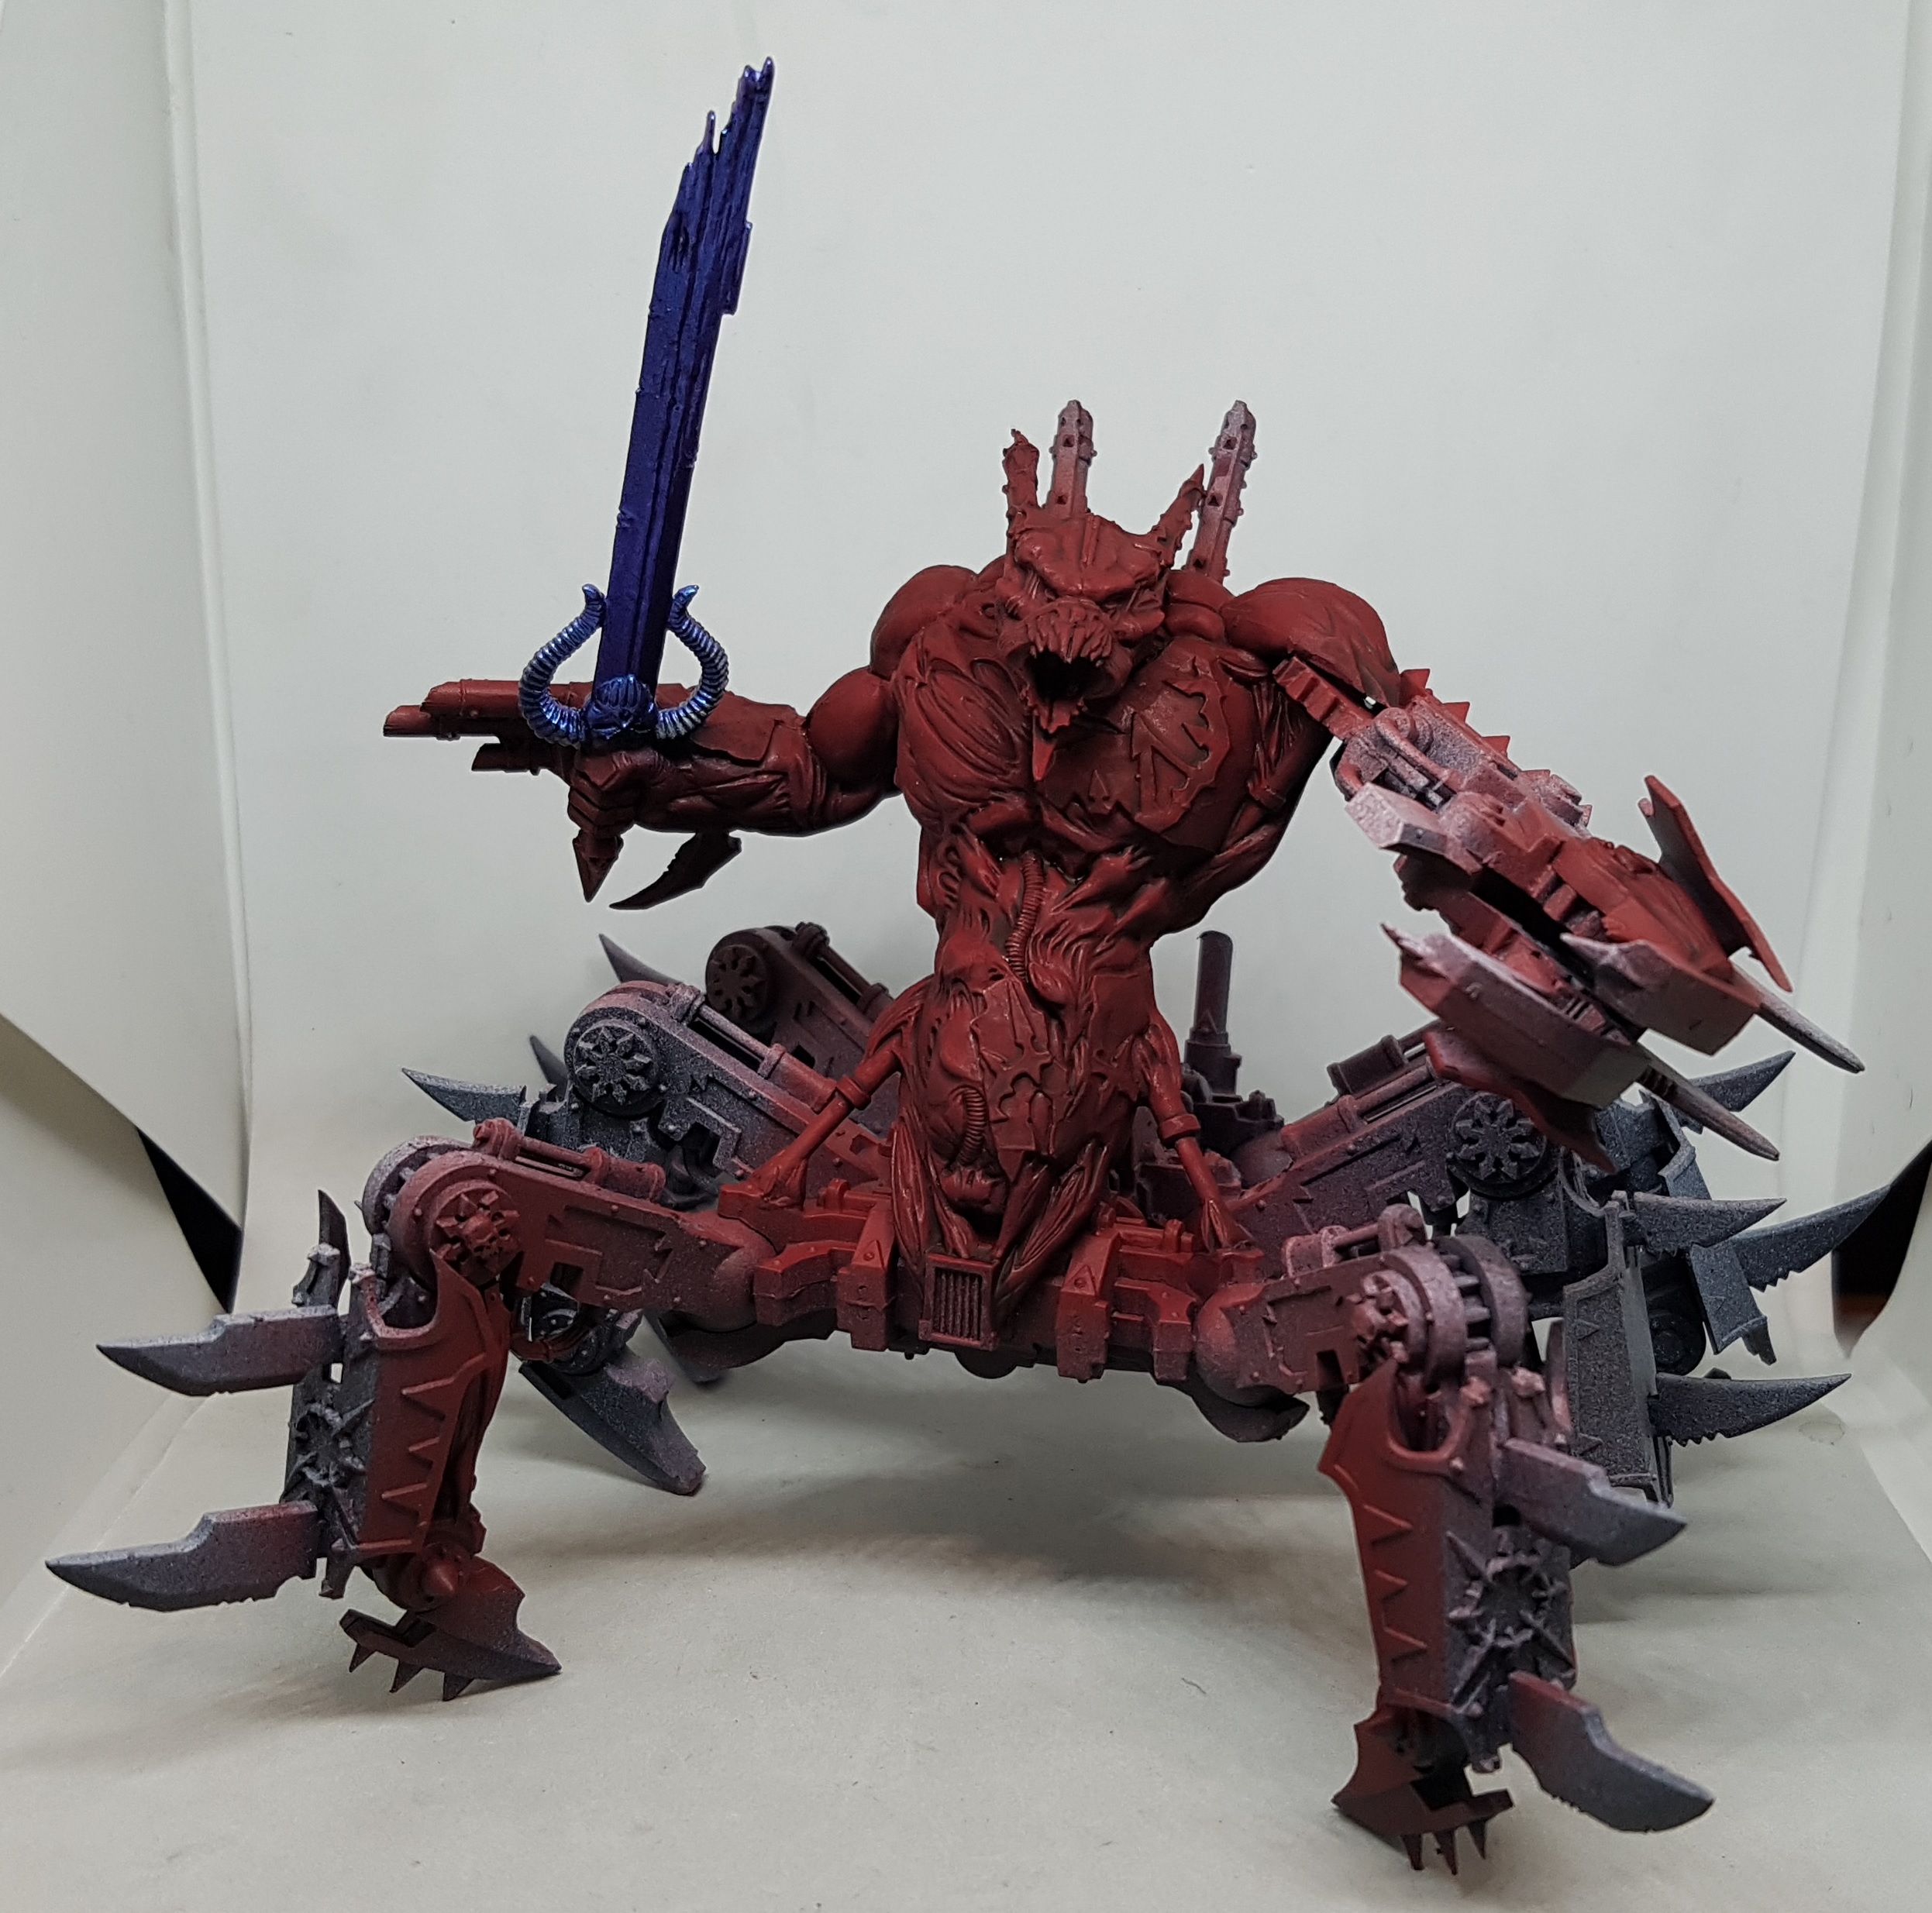 The Soul Grinder was then airbrushed and washed the same as the Bloodthirster, except I skipped the Gory Red paint as I never liked that colour for this work.
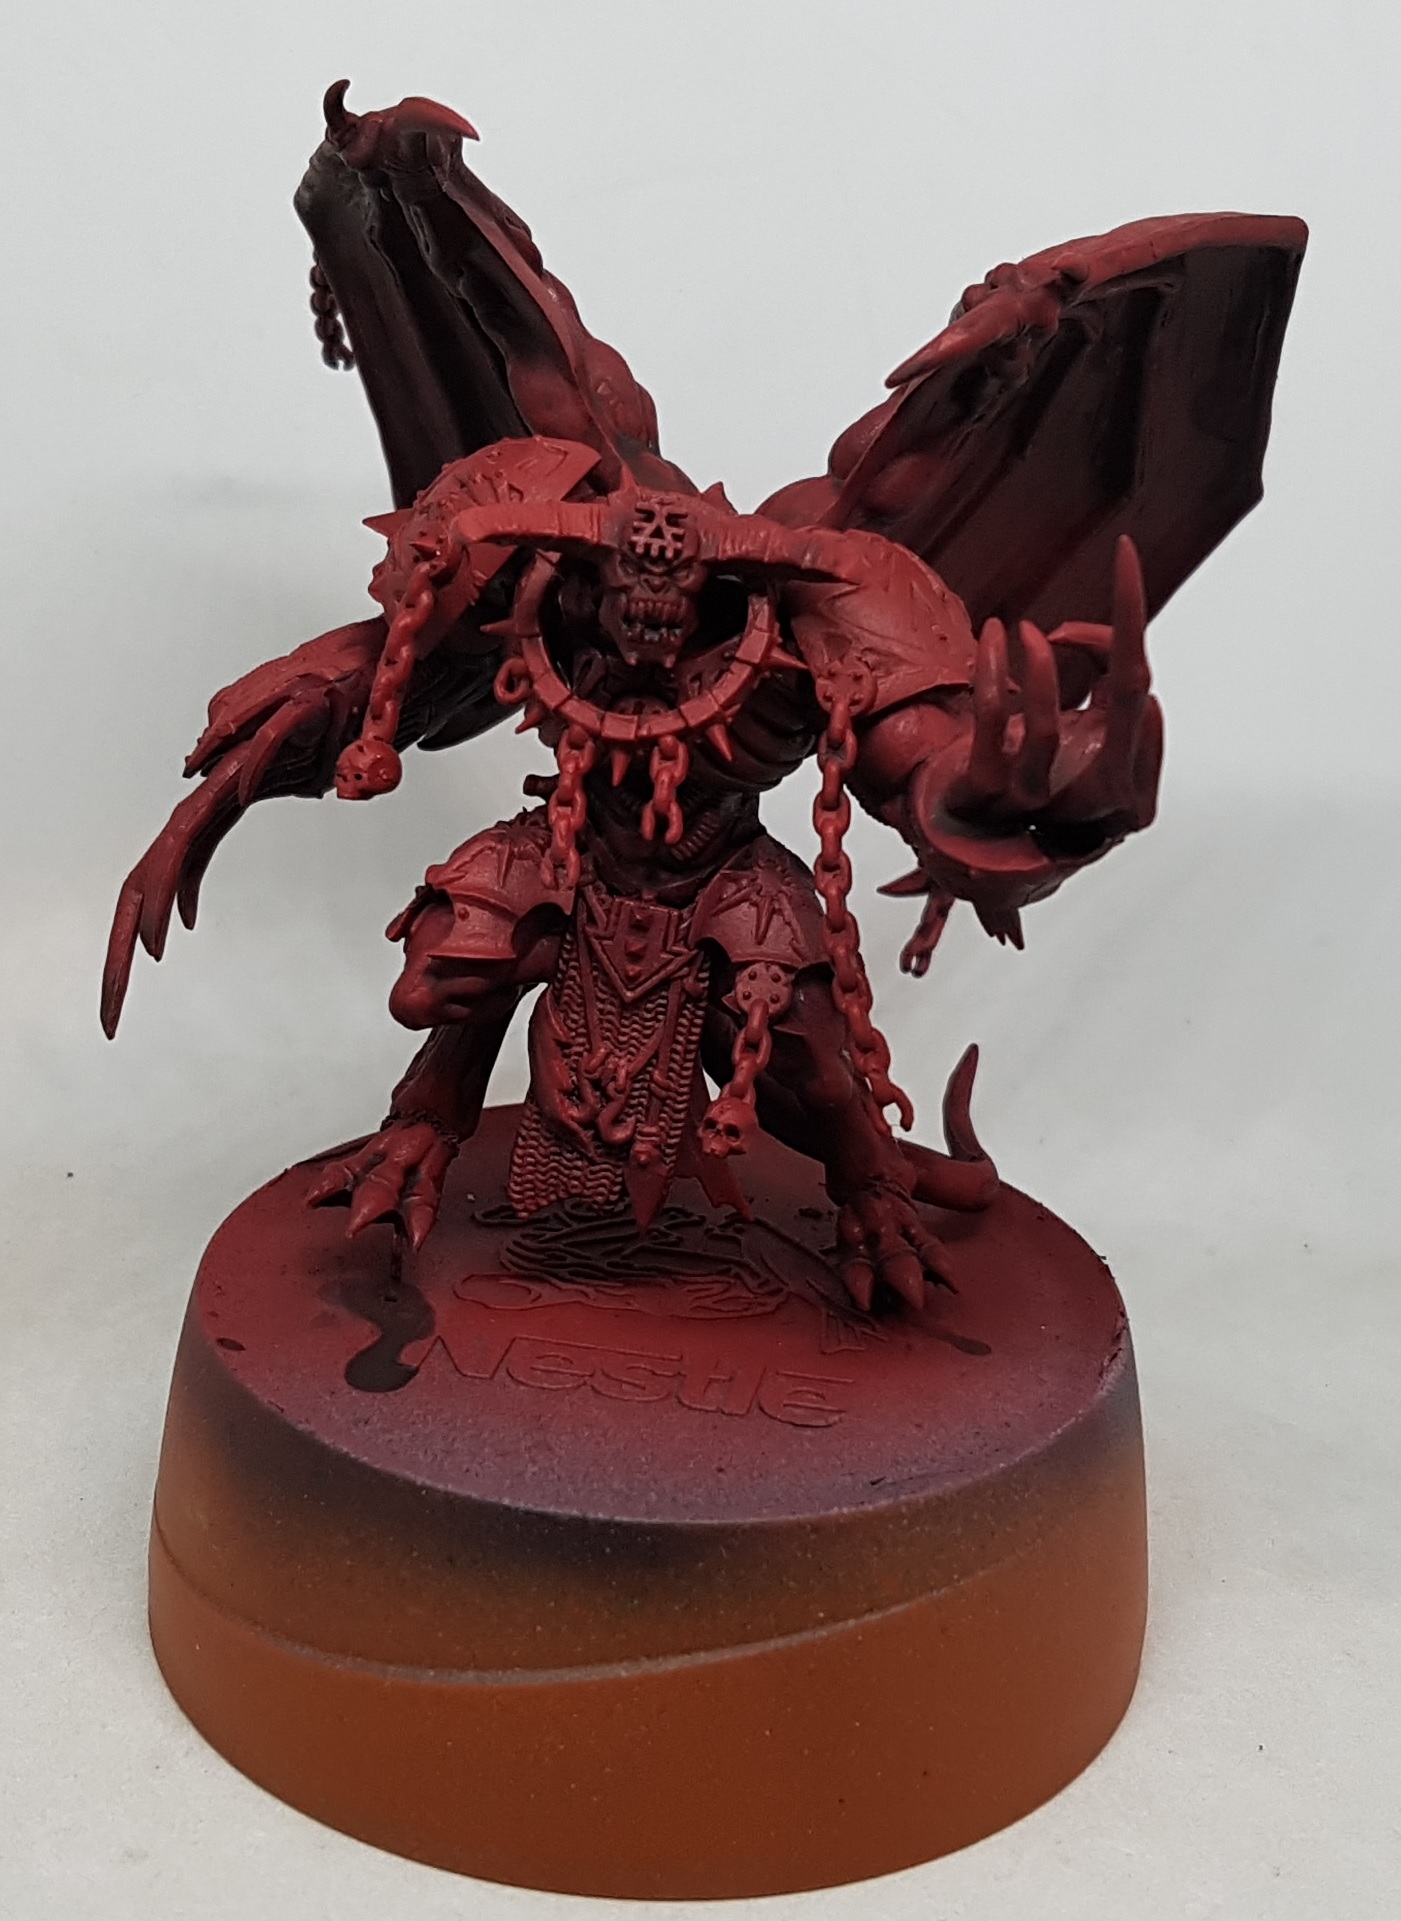 I didn't have enough time to do any more to the Soul Grinder, but had too much time to call it a night so I also based and washed the flesh on my Daemon prince at the same time.
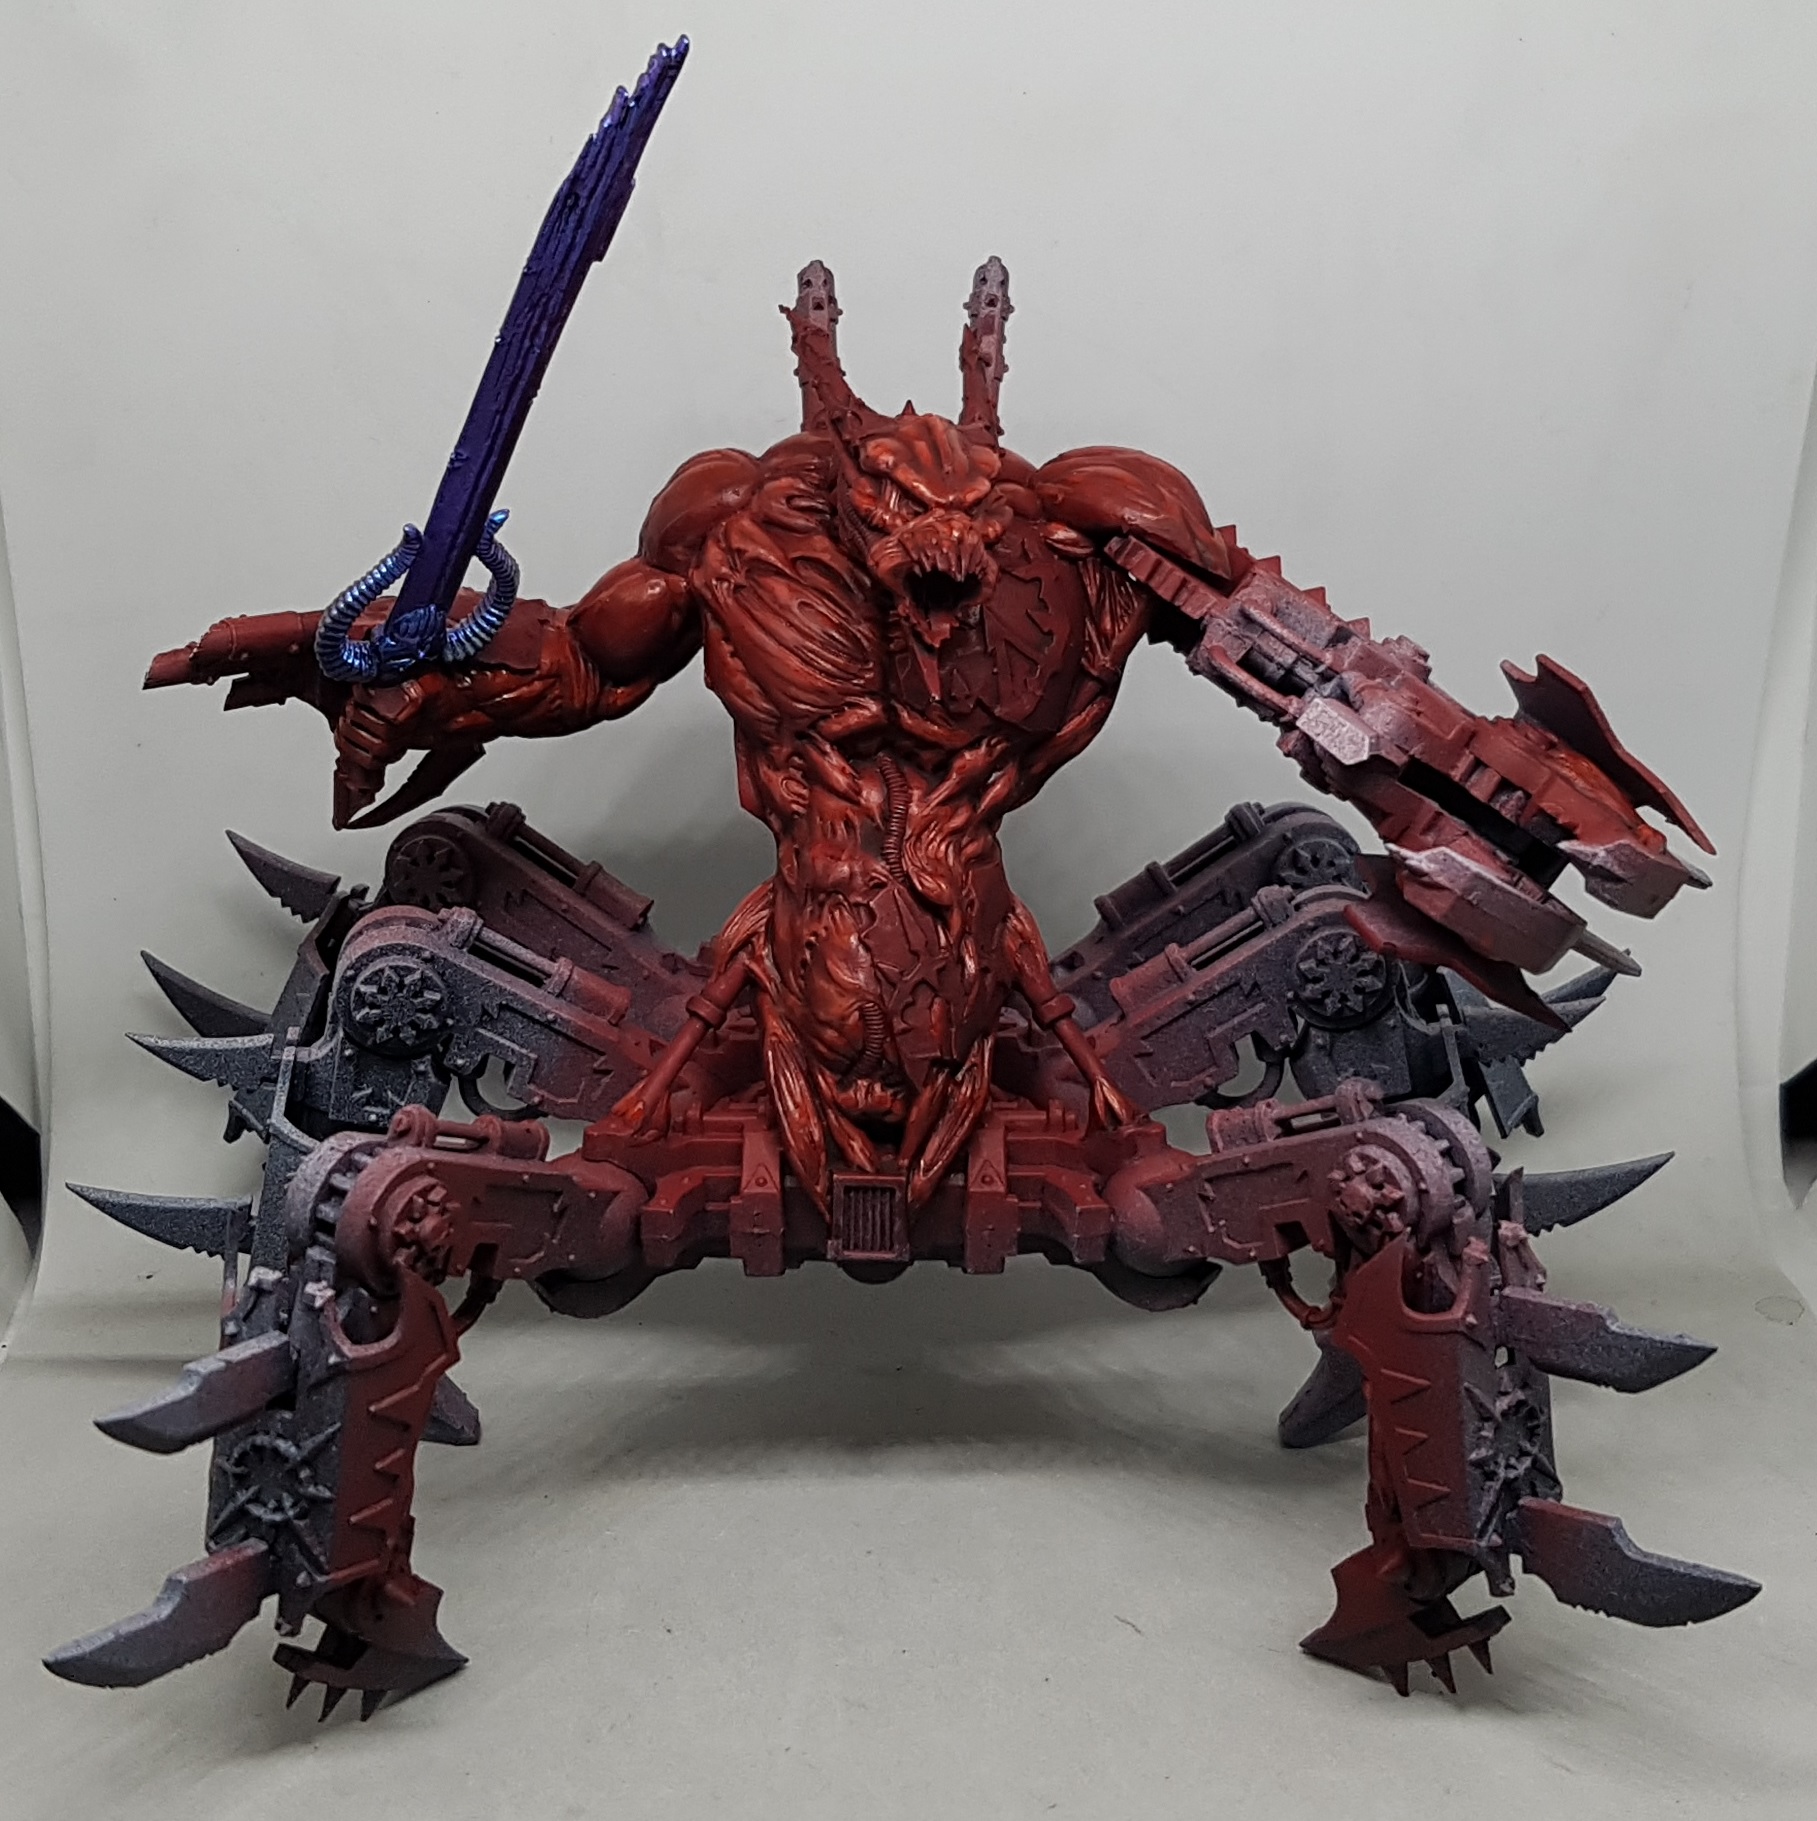 I've got the flesh as far as finishing with the Nipple Pink Shade following the same scheme as below. He looks good in my hand, but somehow rather rubbish in the photo. I hate when that happens.
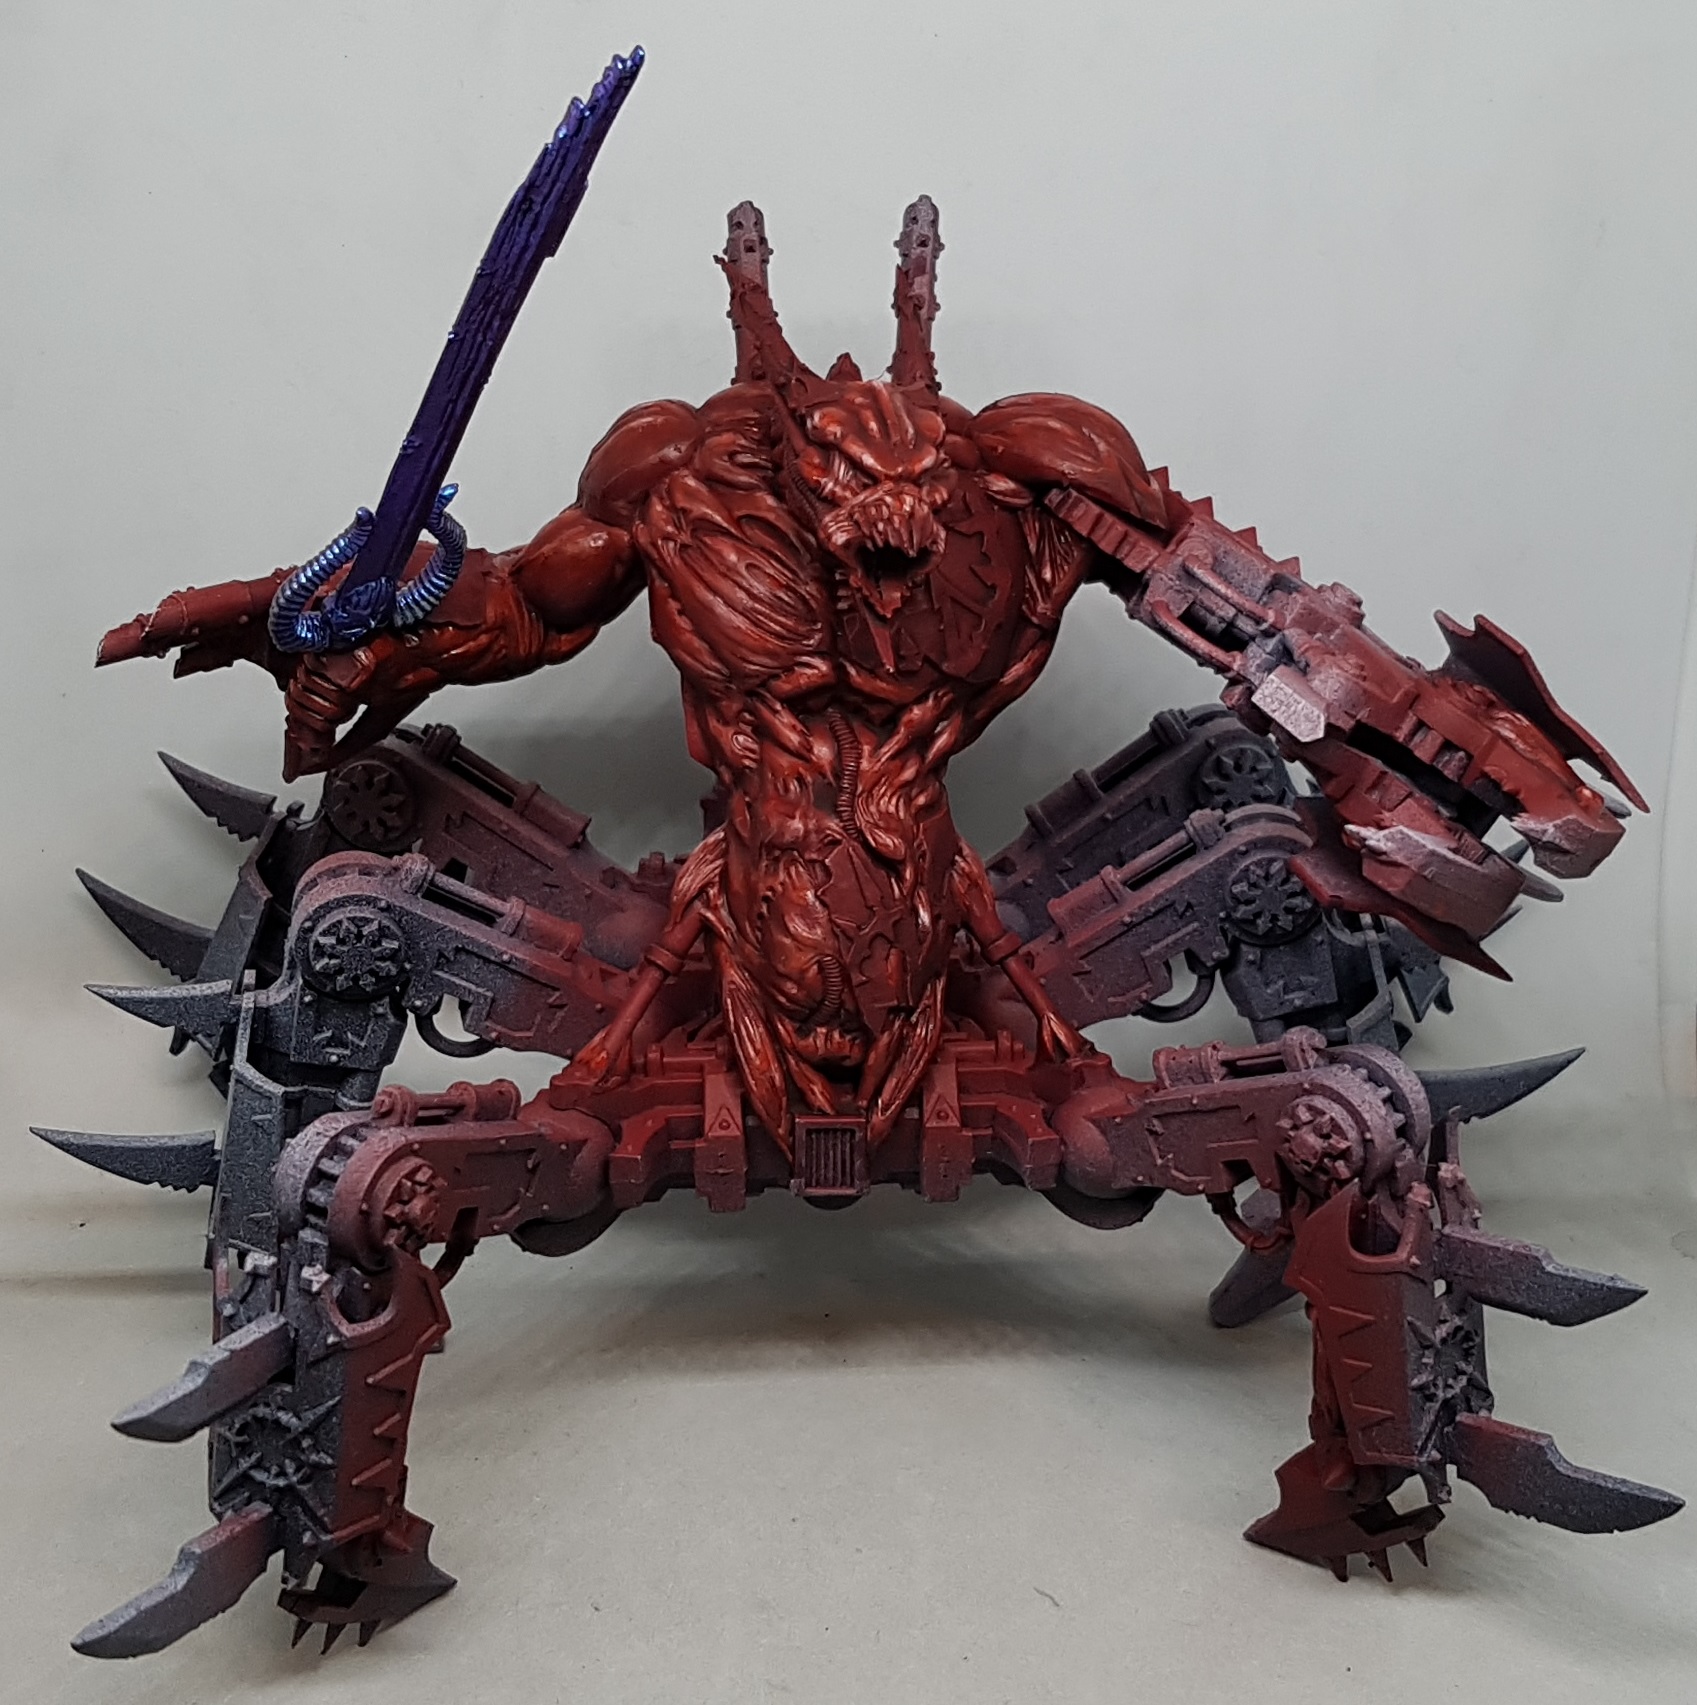 I've now taken the flesh tones to the same stage I left the Bloodthirster. I think in many ways I've done a better job, but the highest highlights are looking near white, and the boundaries between layers show up well under camera and up close. I think I am going to mix up a glaze from P3 Red Ink and apply a few layers over everything except the recesses to try to unify all the layers. Lets see if I regret it.
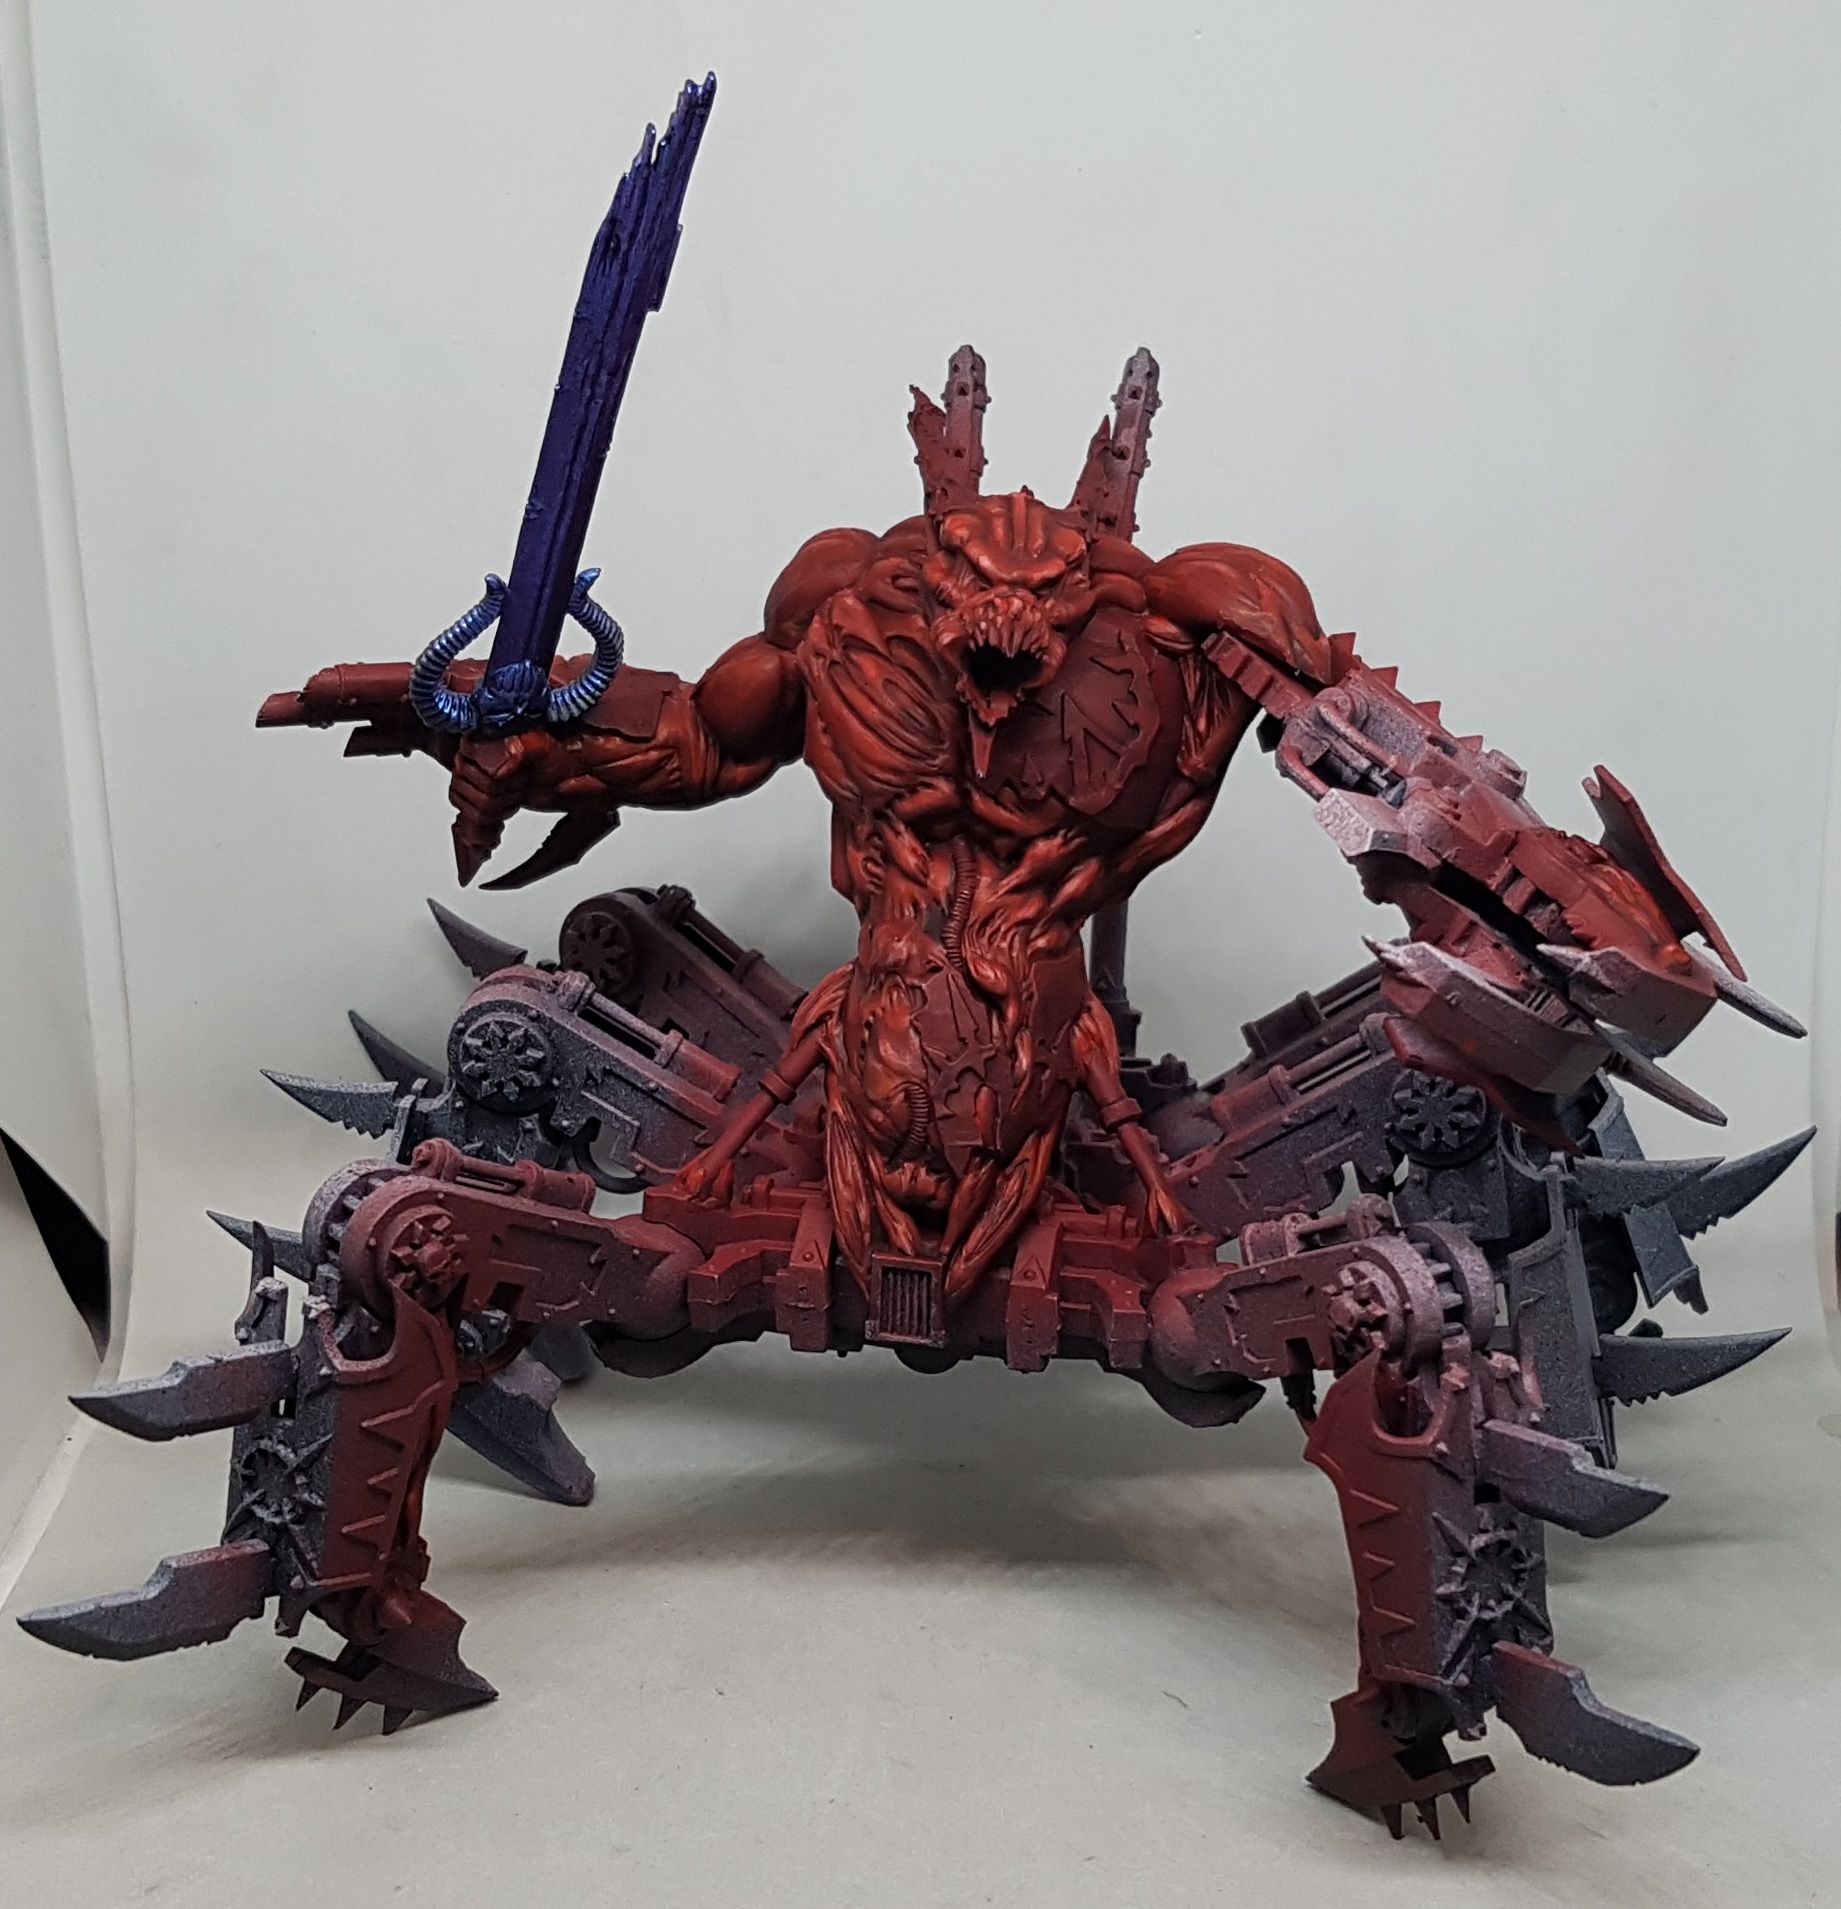 It has now had a few glazes of P3 Red Ink. I also cleaned up some of the recesses with a little GW Carroburg Crimson. I then mat varnished it because without a base I am going to be handling this all the time which will wear off paint. The varnish should also help bring the colours together a little.
 The horns and eyes were painted the same as before. Pretty much everything else needs a black undercoat now.
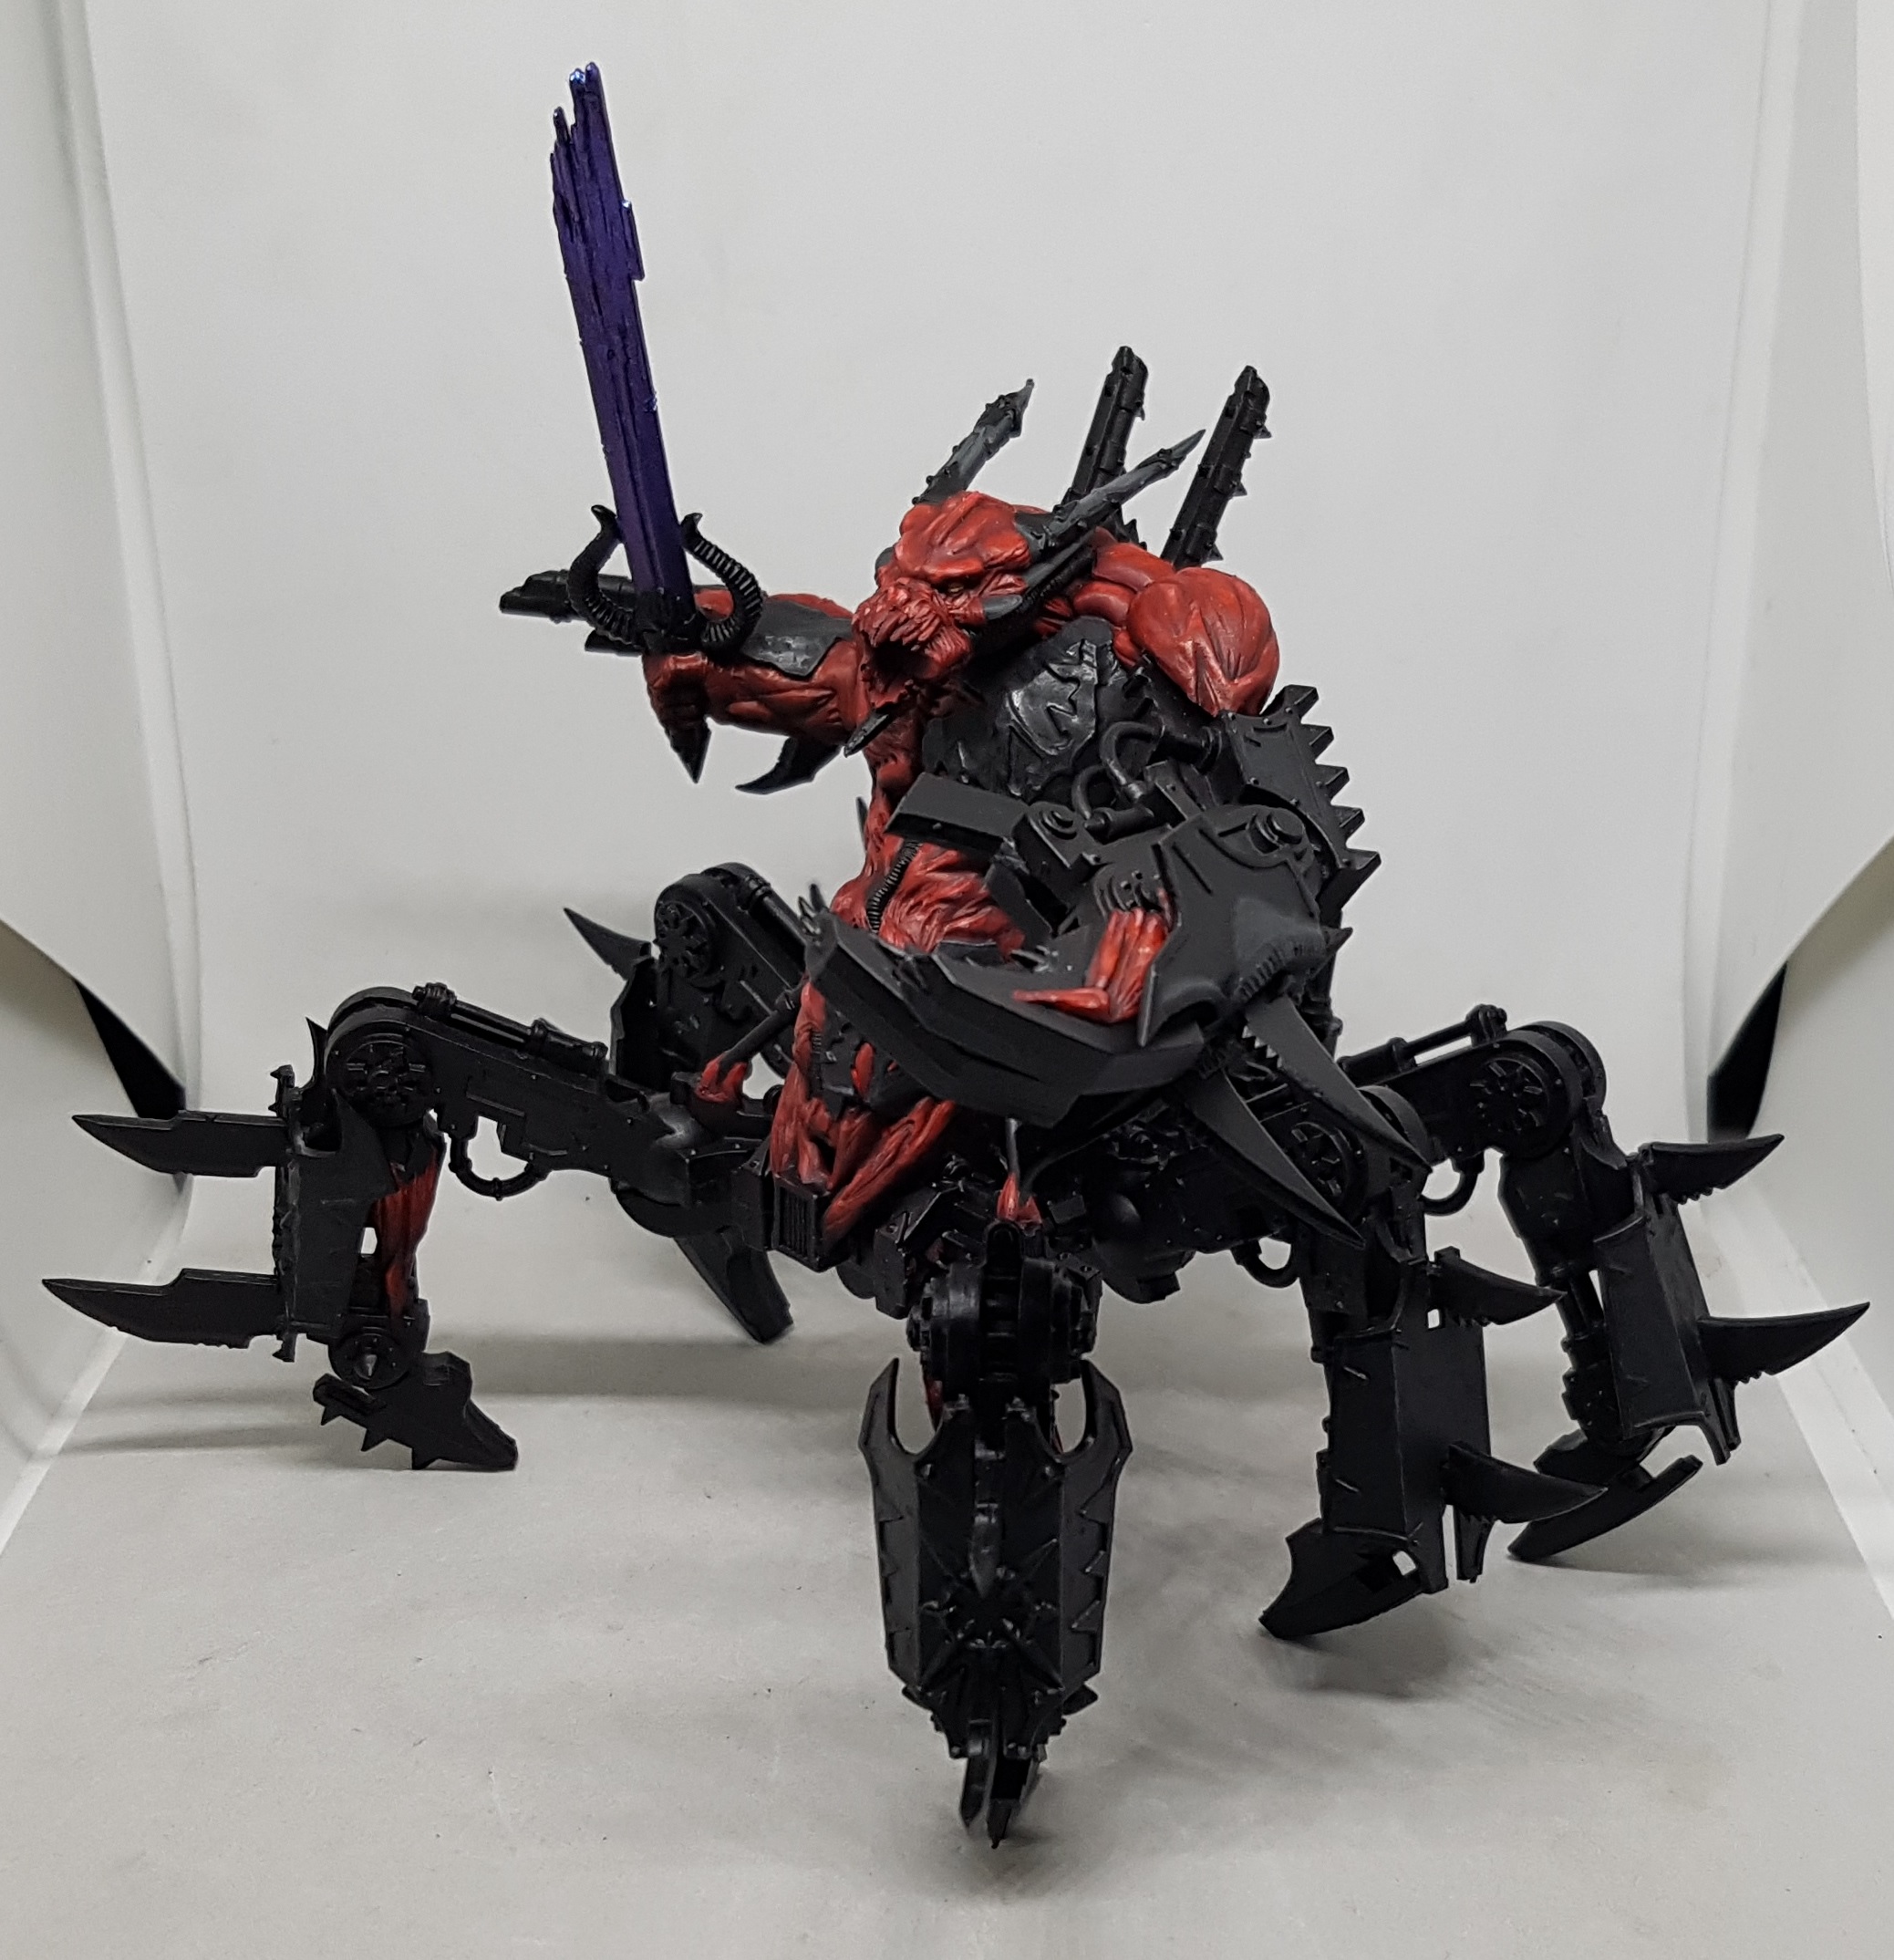 After spending what felt like years undercoating everything black, the black panels were base coated with Revell Aqua Colour Tar Black. I tried to follow the same scheme as with the Bloodthirsters black arounr, but the transitions seemed too extreme on the flat angular panels. I based with Tar Black, then added a little Gunship Grey to the Tar Black to highlight where needed. I then edge highlighted with Gunship Grey. Finally I lightly washed with GW Nuln Oil.
Soul Grinder - Metals
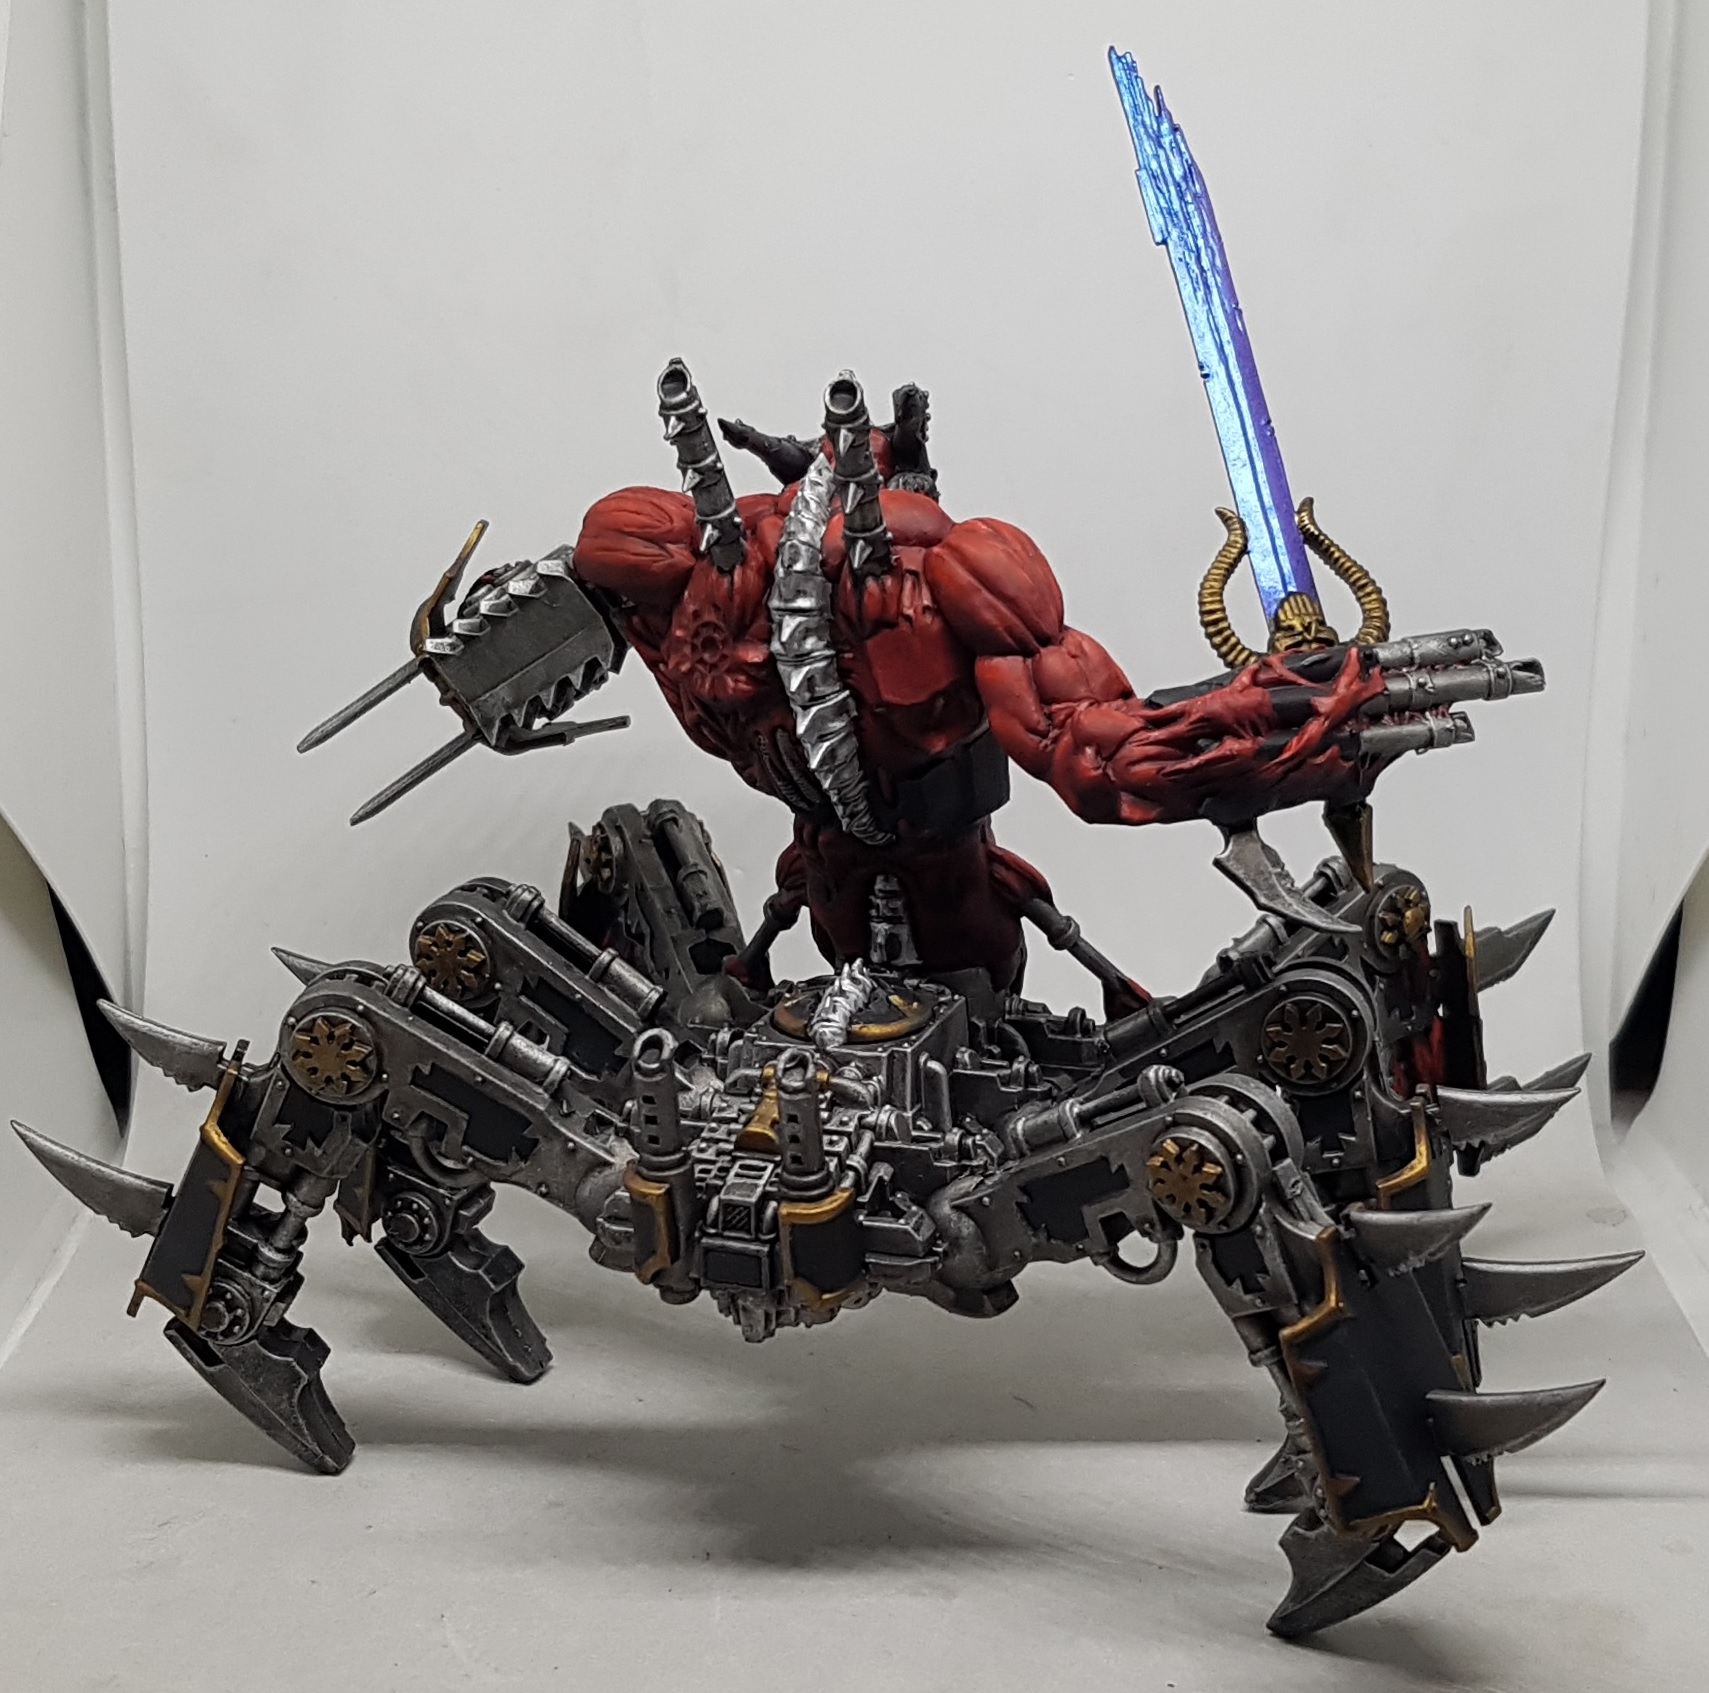
 After everything was undercoated with black, the bulk of the Iron was painted with P3 Pig Iron. The spine was painted with Vallejo Model Air 71.064 Chrome, and the feet and pistons were painted with Mission Models MMM-002 Cold Rolled Steel, for a darker iron.
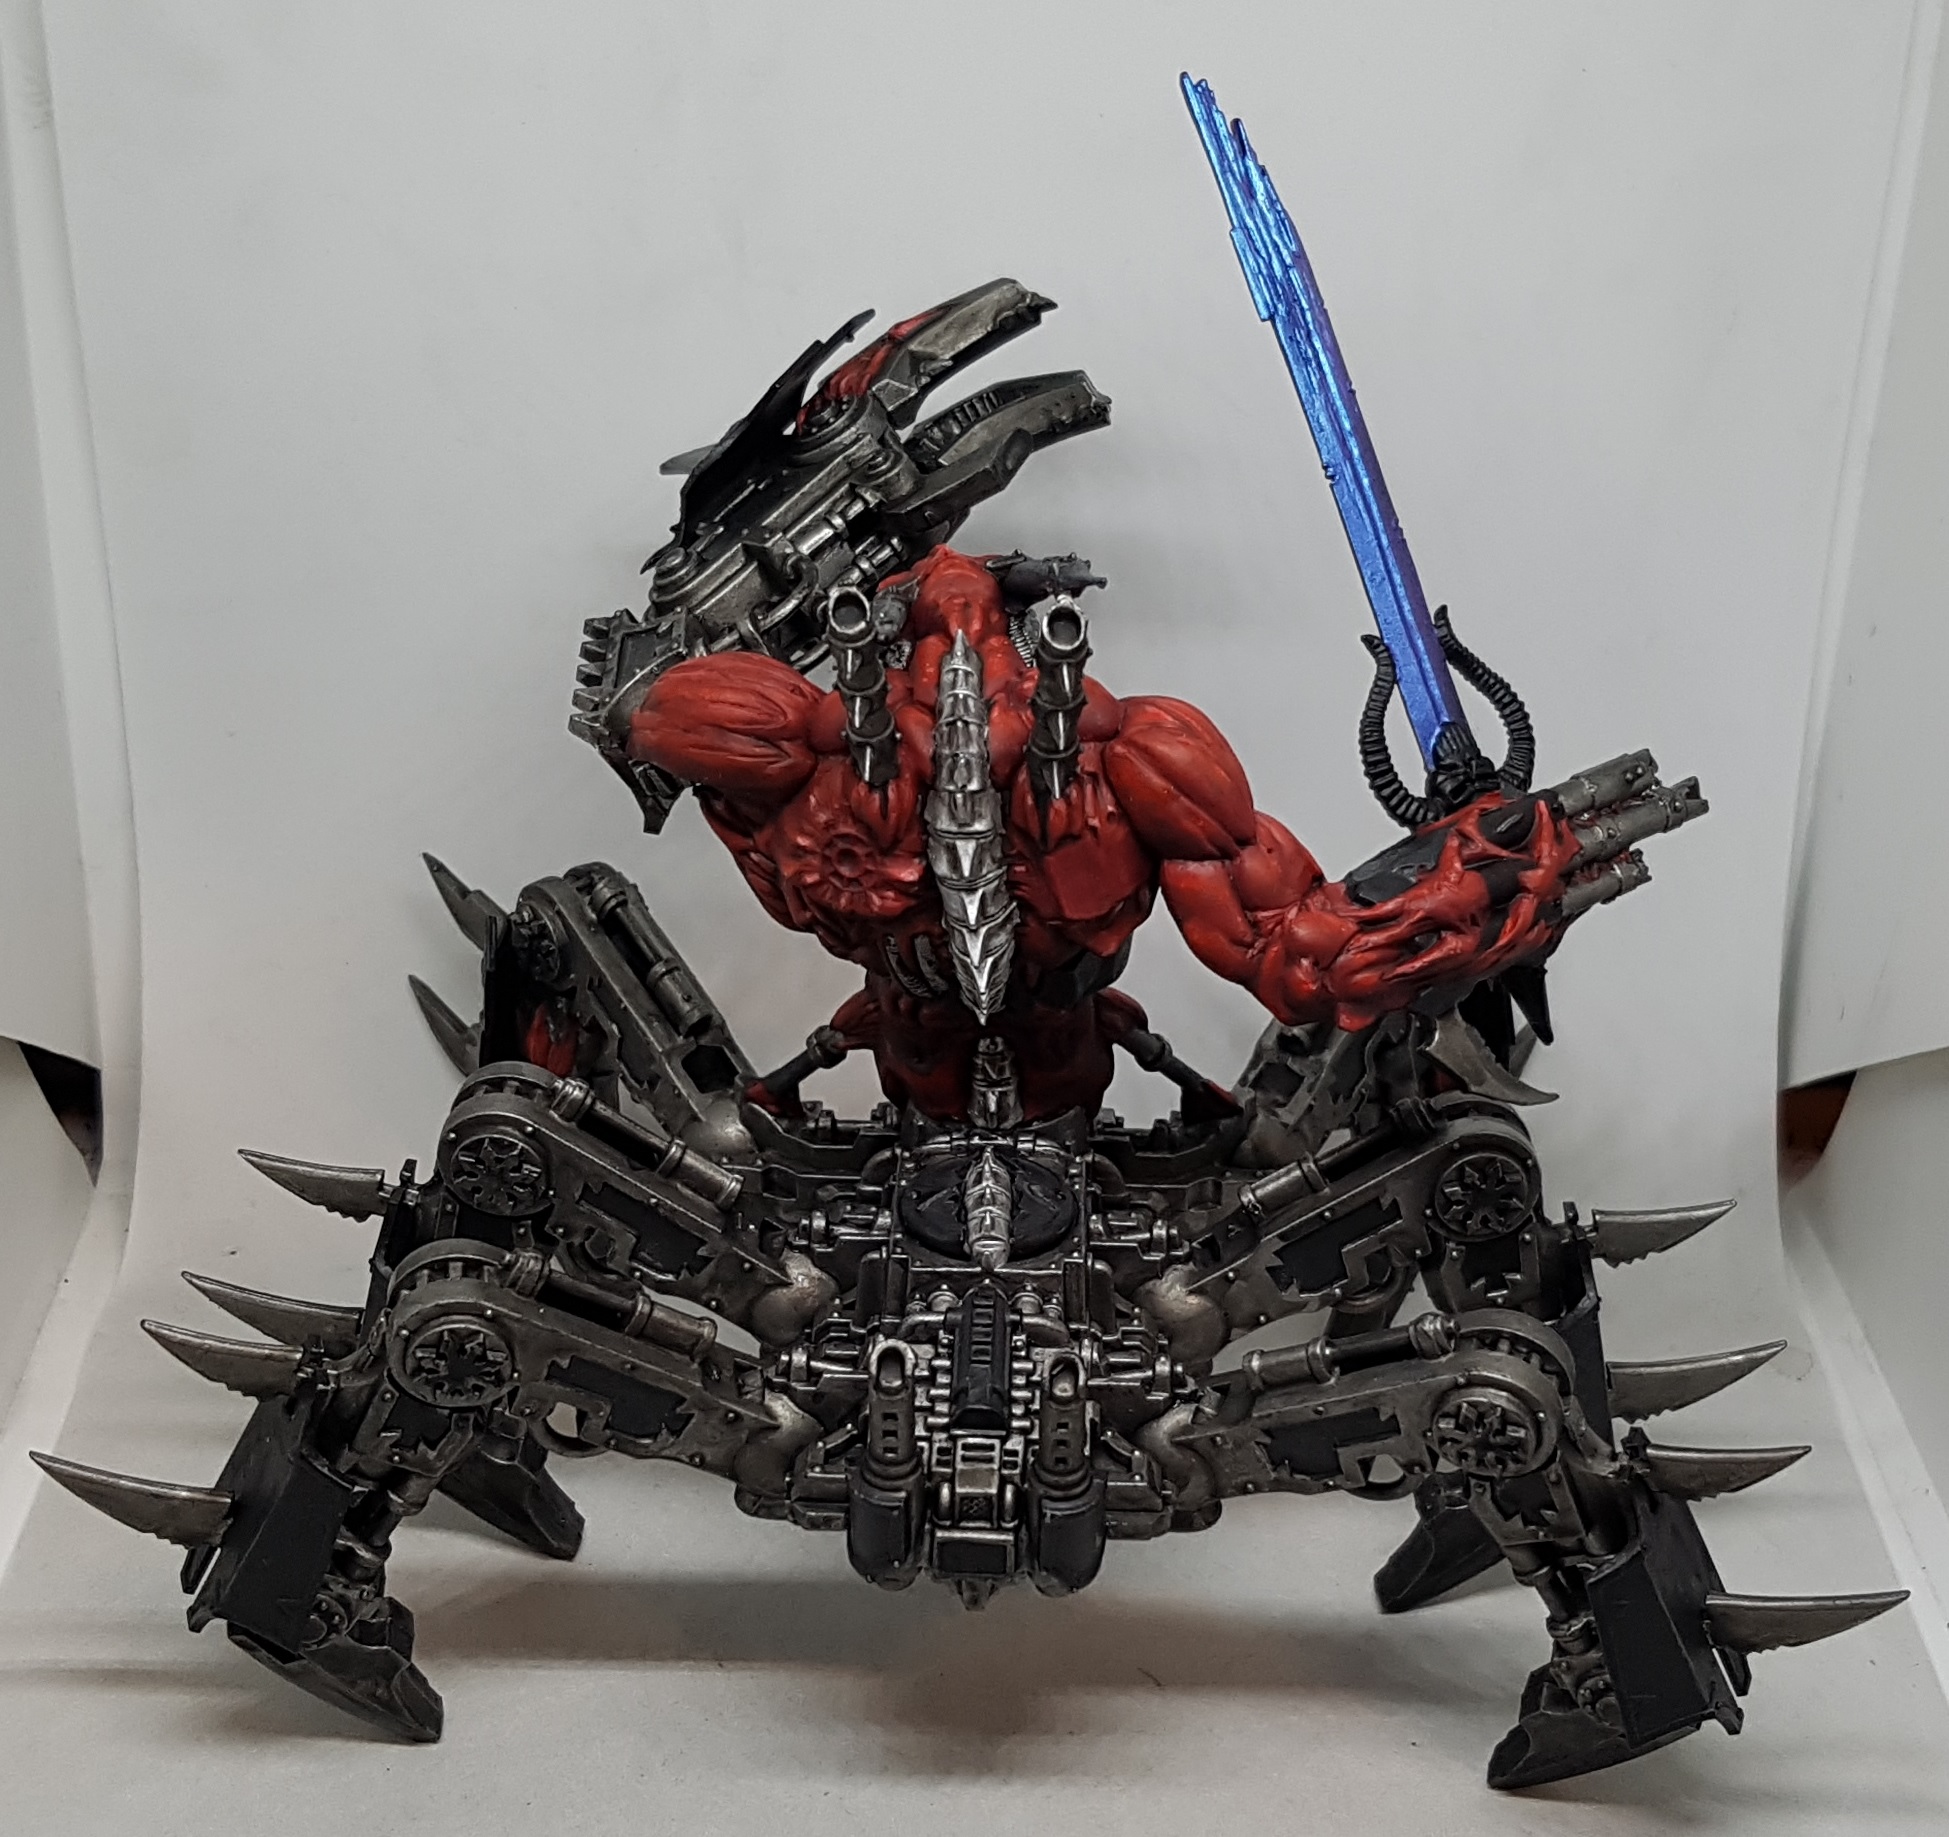 All the iron and steel was then washed with GW Nuln Oil
 The Spine was highlighted with more chrome, and everything else was highlighted with P3 Cold Steel. Some of the black panels will need redoing after this and some of the red might need another glaize of red ink before I am done. When my drybrush was as empty as I could get it, I gently rubbed the side of it against parts of the corners of the "knee pads" to make them look a little worn.
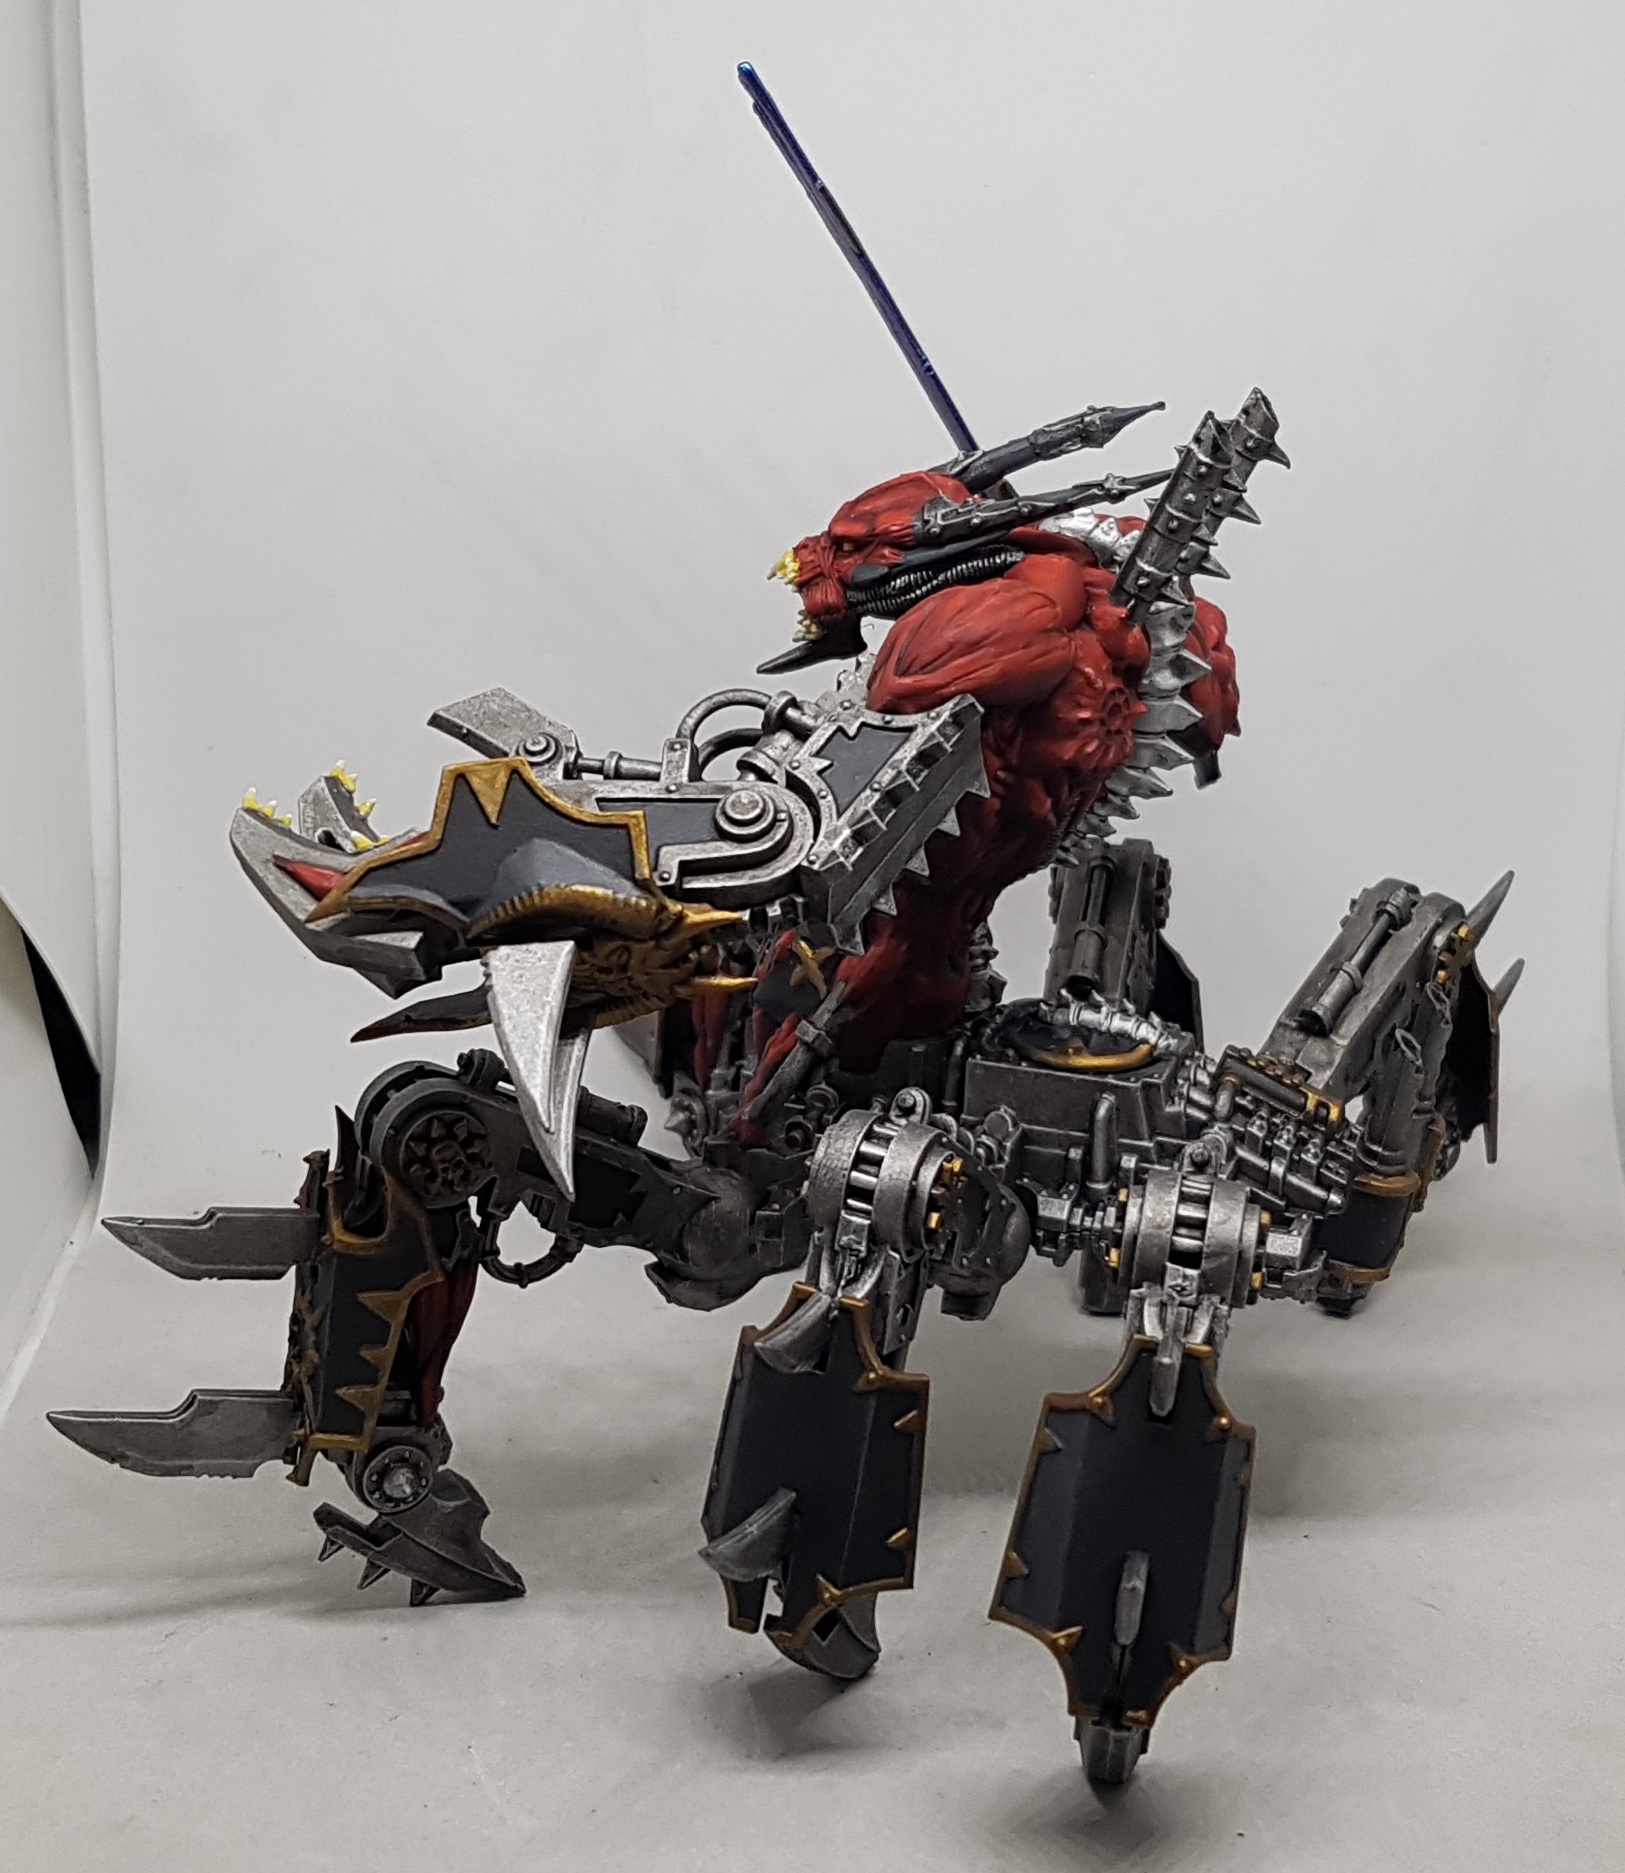
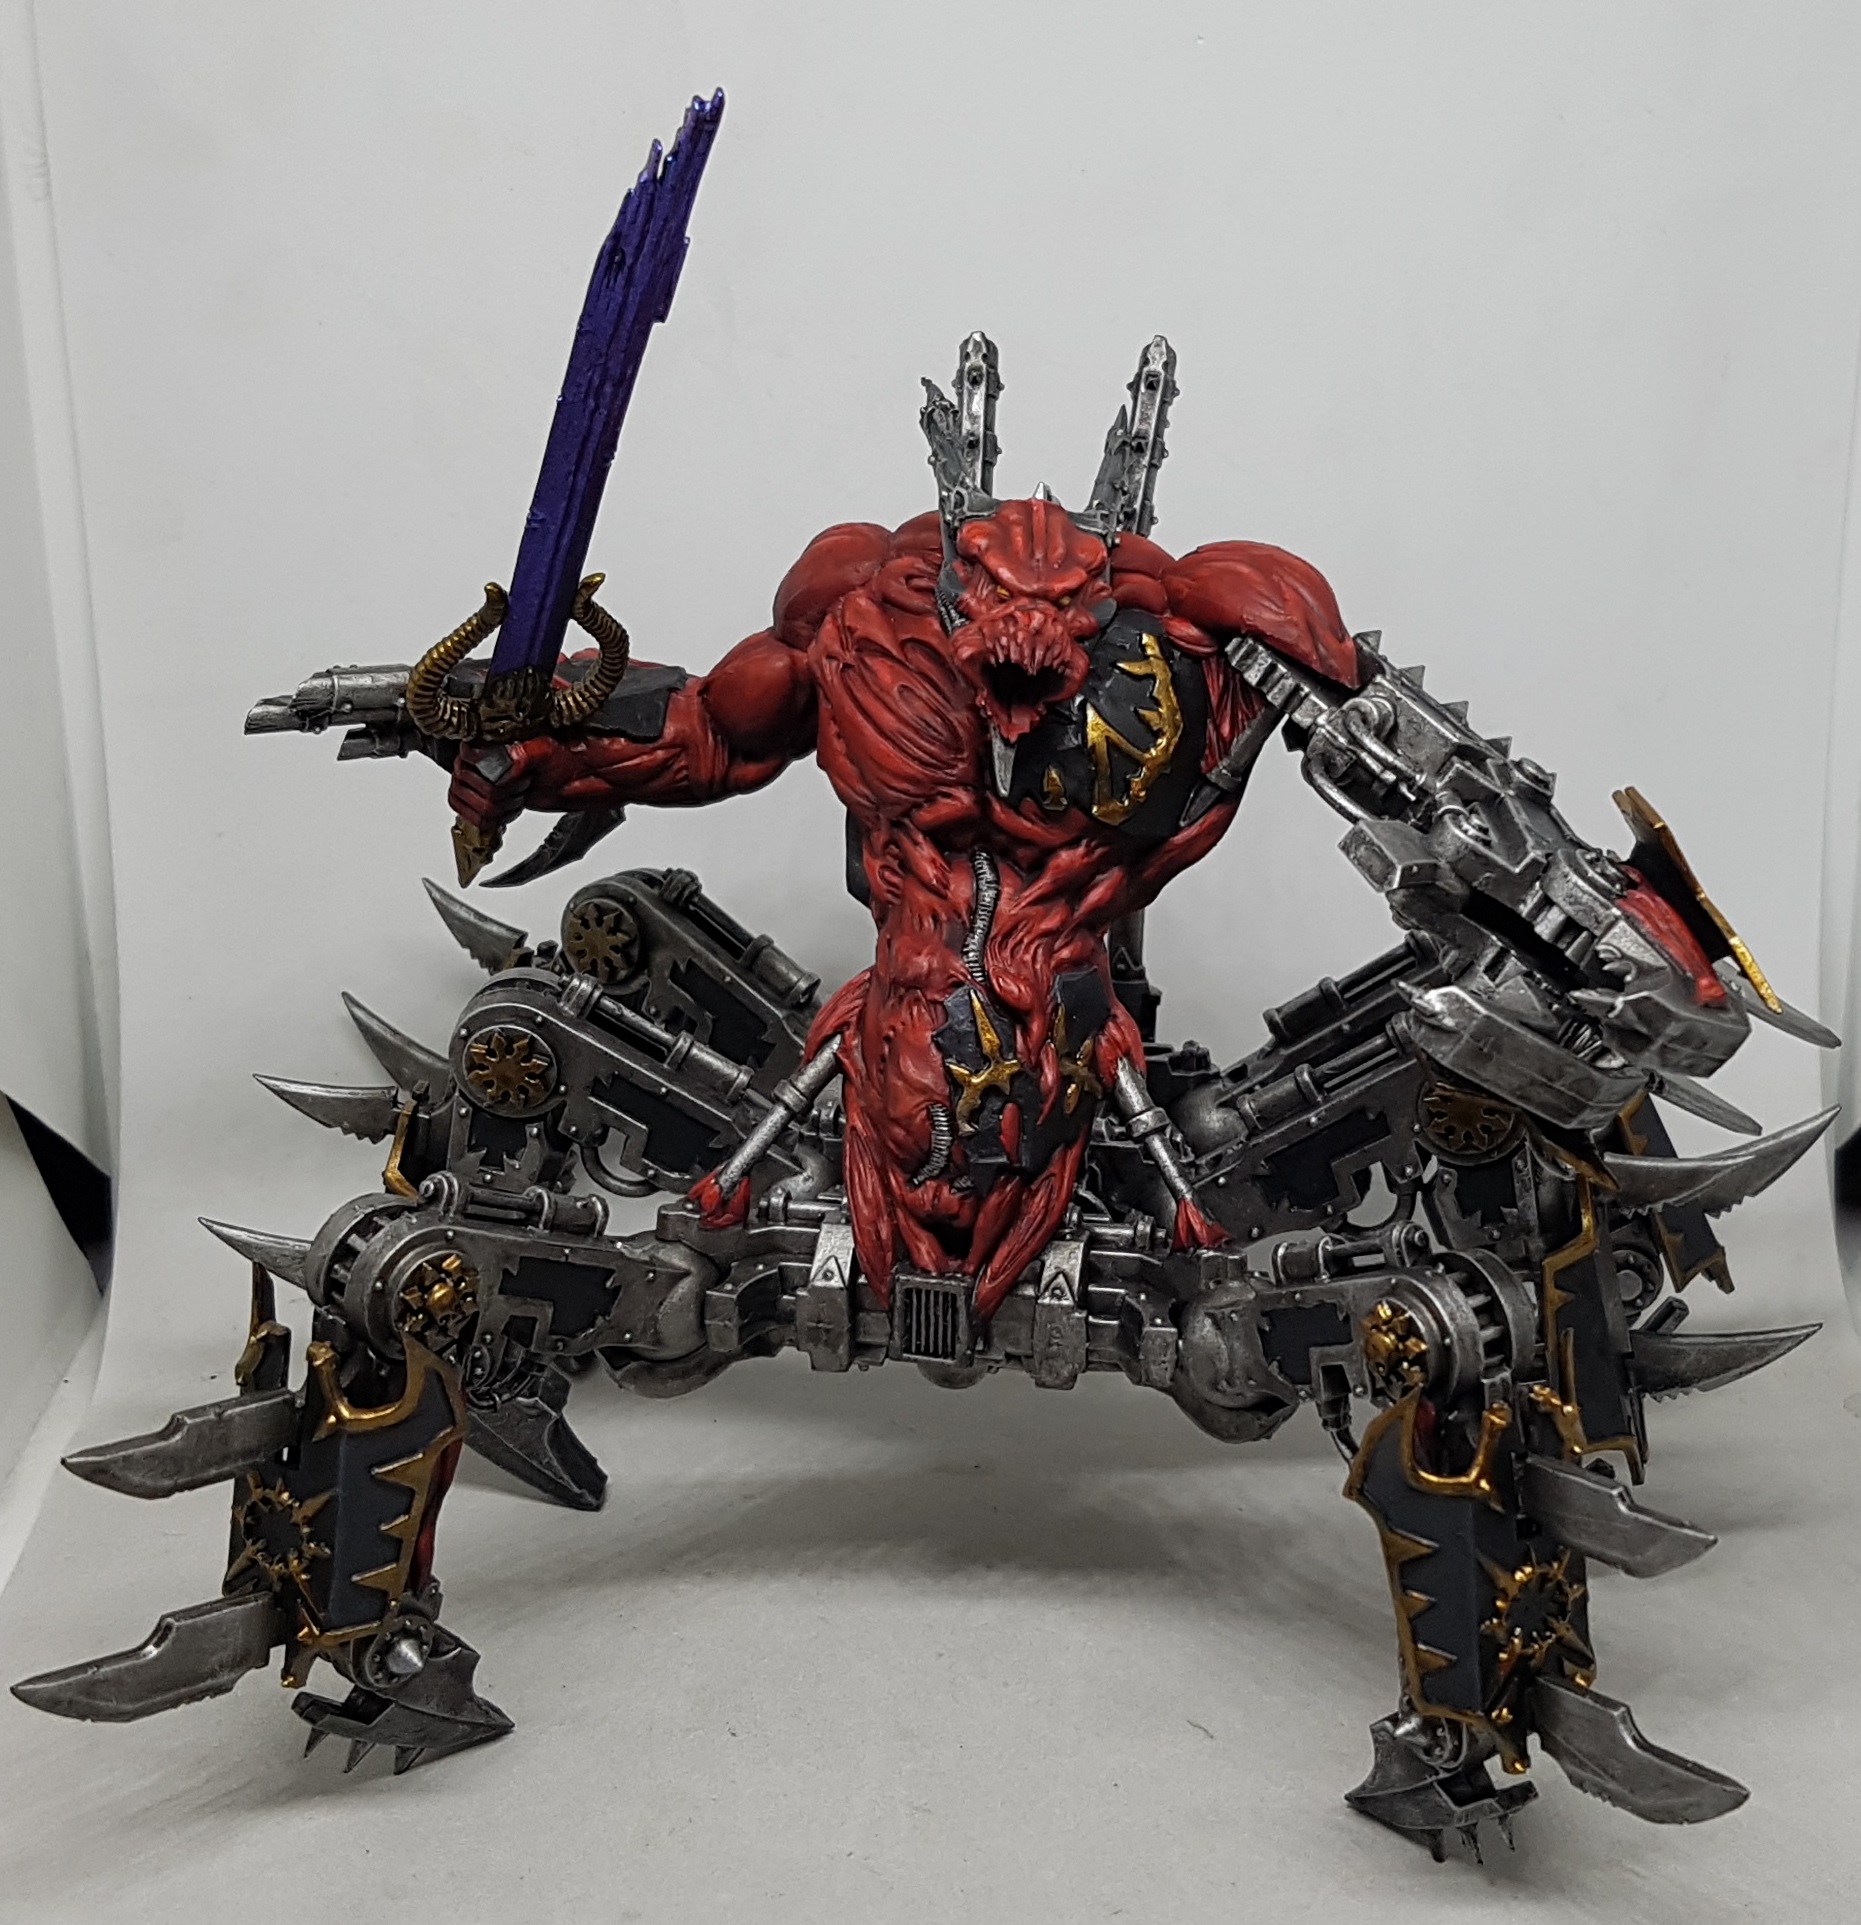 The bronze was then painted using the same methods as for the Bloodthirster. The black had to be redone afterwards. I also painted the finger nails as I missed them while doing the horns.
The teeth were then painted using the same methods as for the Bloodthirster. Everything was then airbrush varnished gloss. The blad was masked off and everythign was varnished matt. The teeth and eyes werre then brushed over again with gloss.

Daemon Prince
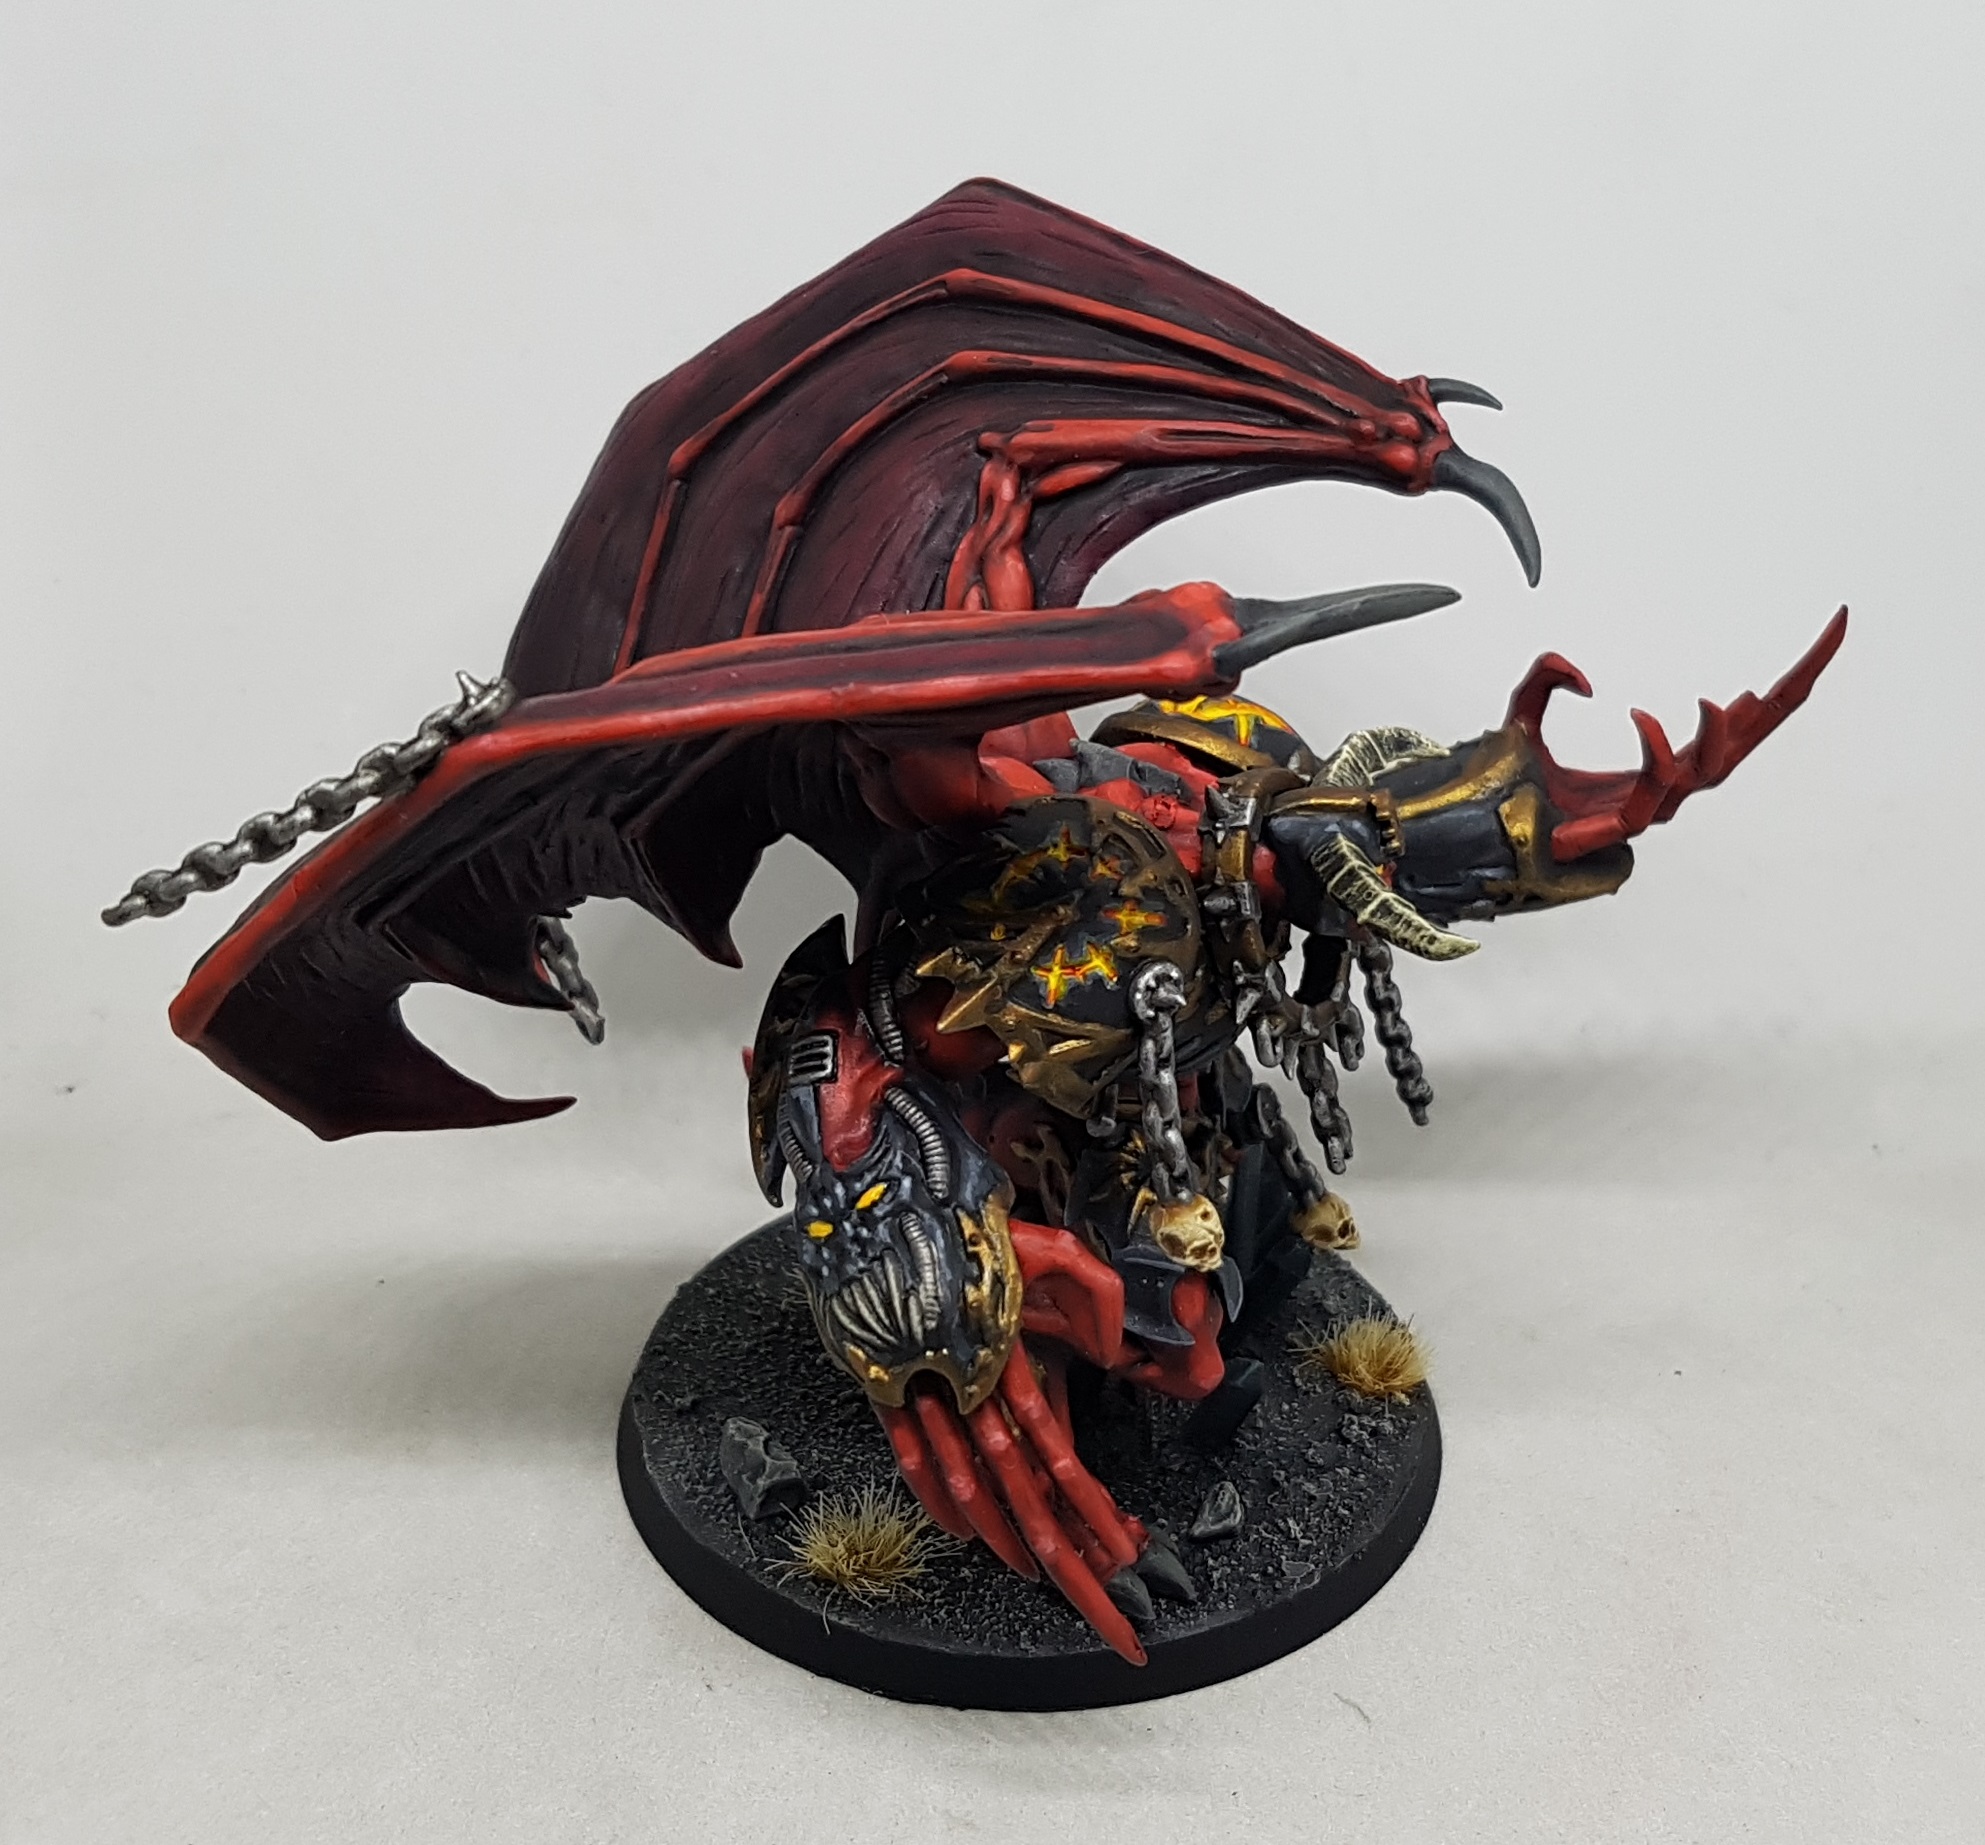
I’ve finished my Daemon prince. He was mostly painted the same as before, but with a few exceptions, detailed below:
Wings
They were sprayed up the same time as the red flesh, which left them with a nice gradient I wanted to preserve, so I experimented. I washed over them with GW Druchii Violet, trying to be a little heavier near the edges. Once dry, a Nuln Oil wash was applied into the recesses, along the edges, and over any sections that would be darker. I was careful to not let this pool over any of the open surfaces. I was considering going back for a second coat of Nuln oil targeting just the darker sections, but I chose not to this time. Perhaps next time?
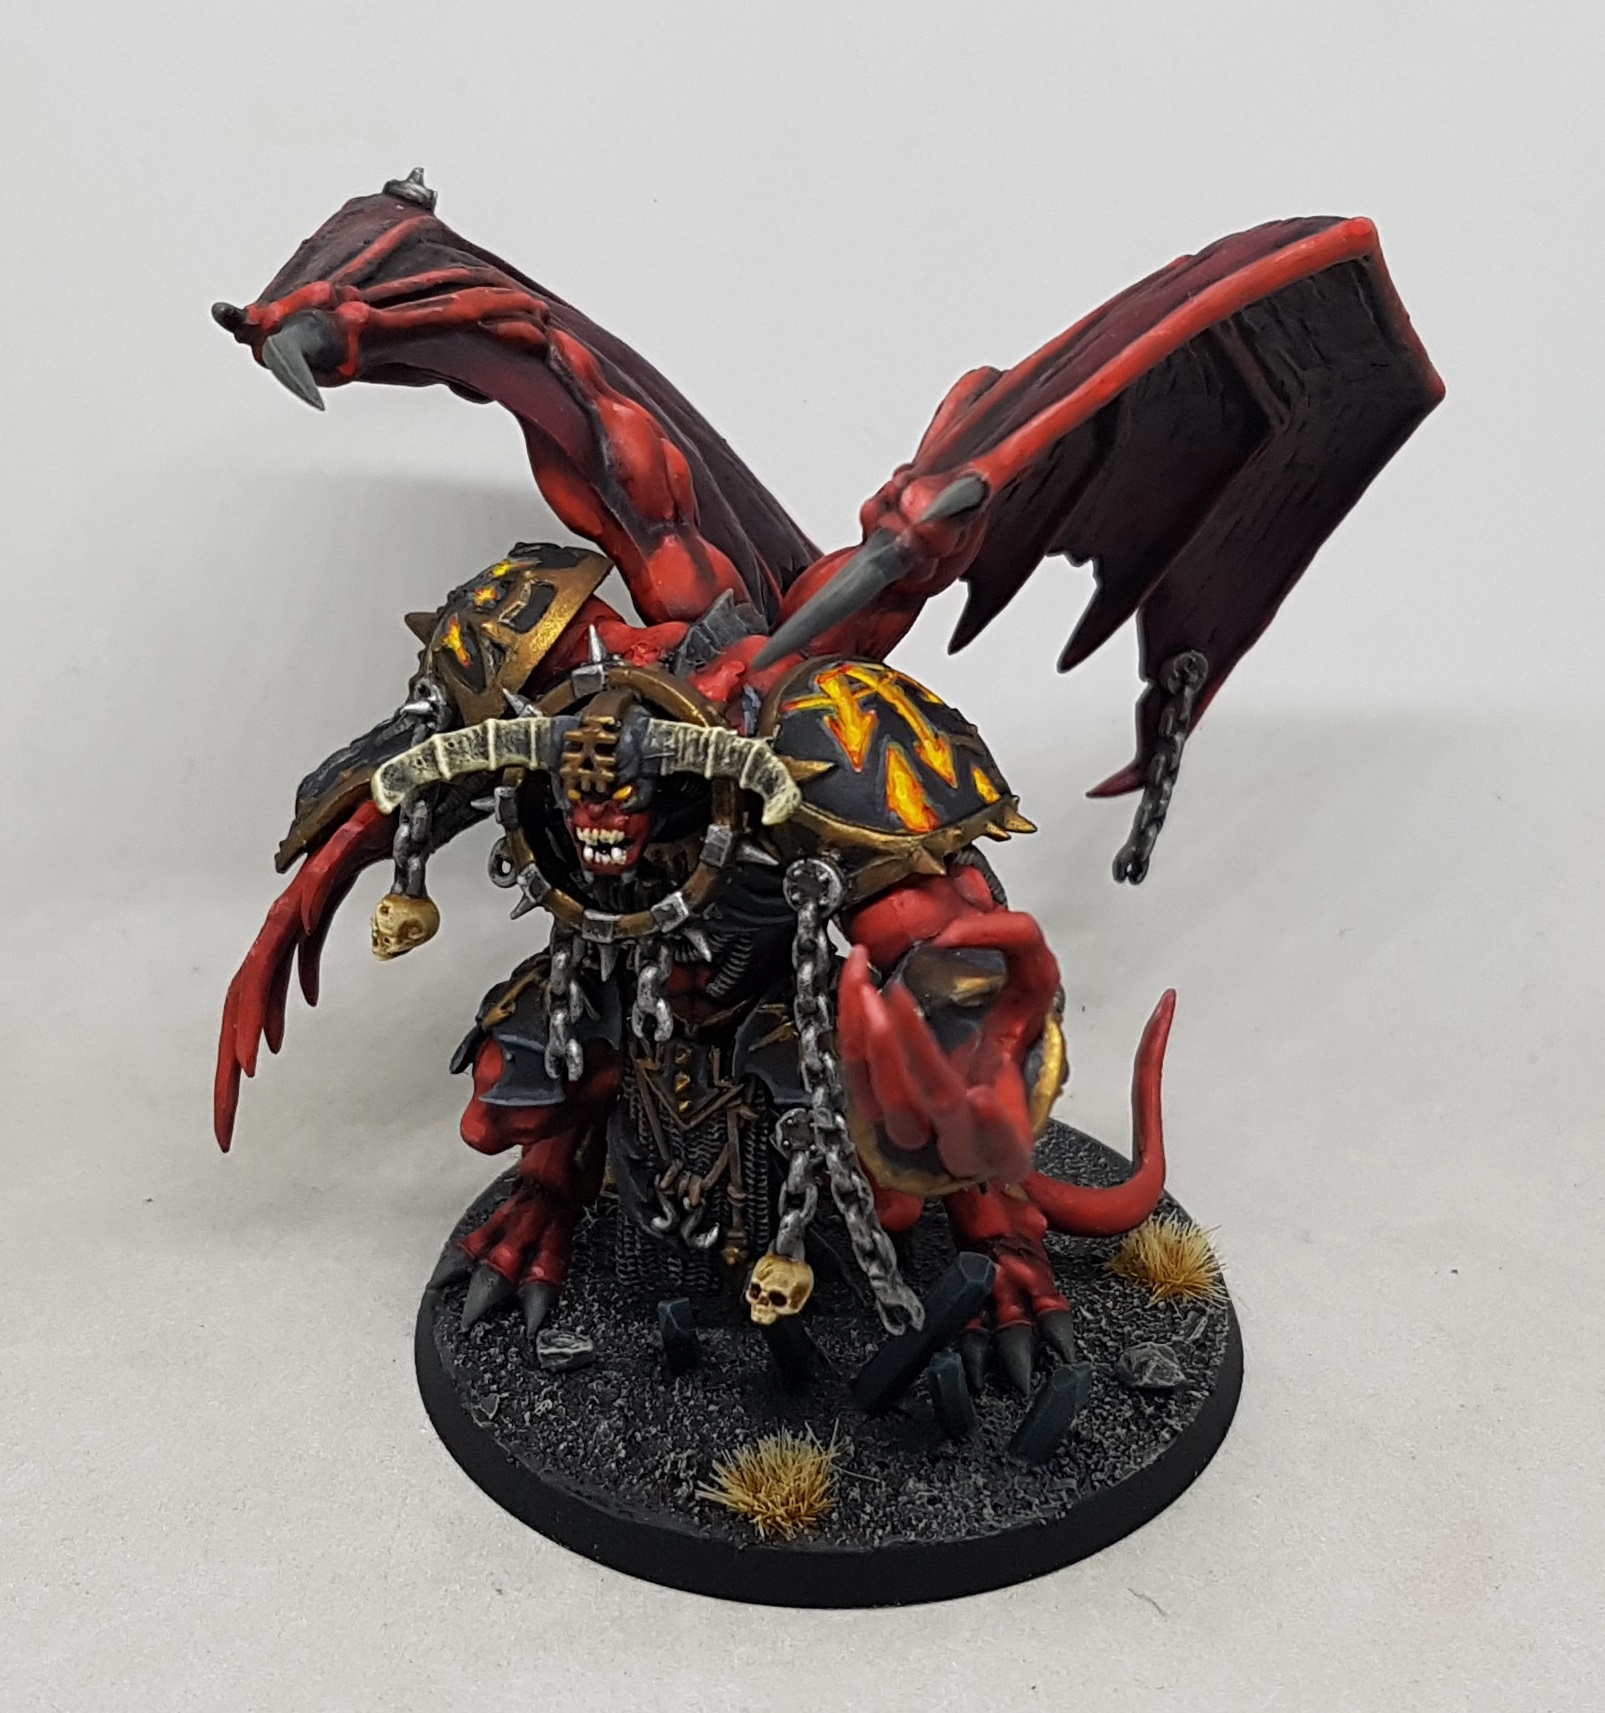
Fire
I mixed up some watery Ivory and let it run in to the recesses on the shoulders. Once dry I did this again. Then I painted it with Mr Paint Deep Yellow. A thinned mix, almost a wash of Mr Paint Fire Orange was used to go around the edges of this, trying to preserve a yellow middle. A thinner mix of Mr Paint Deep Red was then used to edge that. A little thinned ivory was added to the very middle of the bigger yellow patches. Everything was given a careful coat or two of Coat d’Arms Yellow ink, trying to cover the Ivory, but not dilute the red or orange too much.
Horns
Undercoat white. Wash with P3 Thornwood green. Wash with Nuln Oil. Wash with Thornwood Green. Wash with Nuln Oul. Drybrush with P3 Mouldy Ochre/P3 Menoth White Base mix. Drybrush lightly with White.
Claws
Basically the same as before, but in a different order and heavier handed with the highlights.
Based with a mix of P3 Cryx Bane Base and VMC German Grey, allowing the Bane to dominate. Add some GW Karak Stone to the mix and drybrush up. Extra drybrush of just Karak Stone on the hard edges. Wash with GW Nuln Oil, then drybrush again with the same 3 paint mix, favouring towards the tips.
Skulls
Painted the same as before (Jack Bone base, washed with Seraphim Sepia, and drybrushed with Menoth White Base), but given an extra final drybrush of Menoth White Highlight.
The tufts this time are Serious Play Scenics Burnt Grass 4mm
Update 23/7/19: After speaking with some people I decided to revisit the wings and apply a few targeted glaze layers of Nuln Oil to give them depth and darkness, while preserving some of the red. Here is what I ended up with afer around 4 coats.
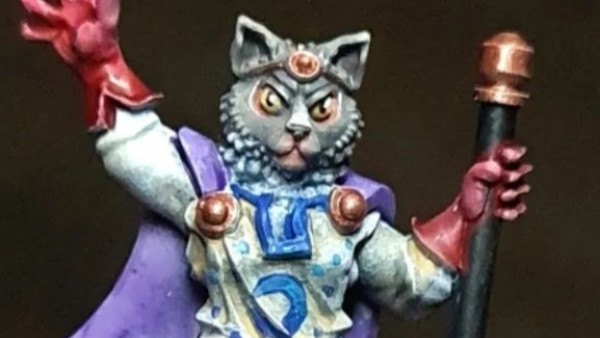
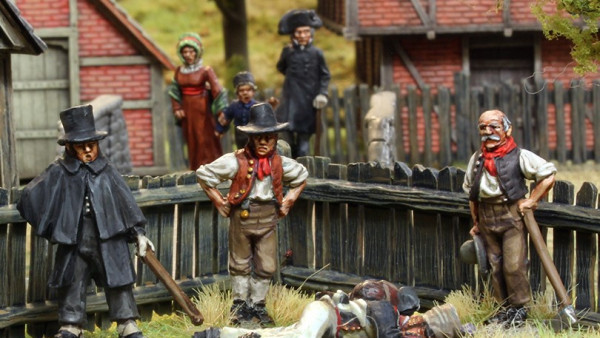
Random Unidentified Zombie
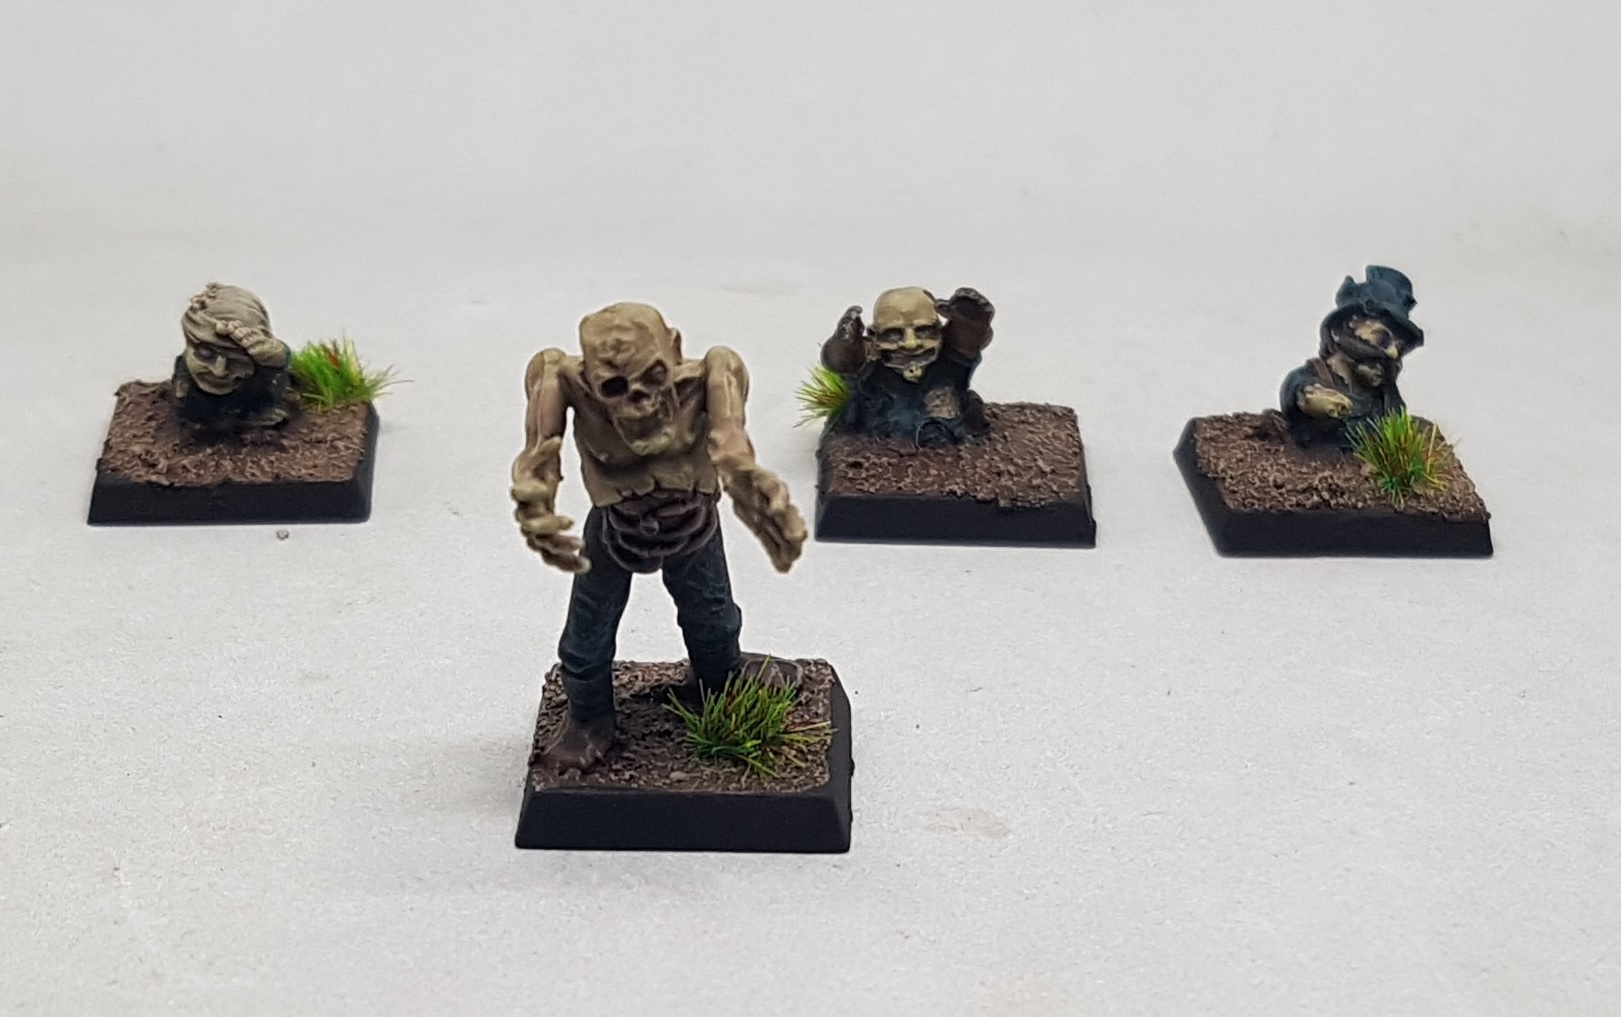
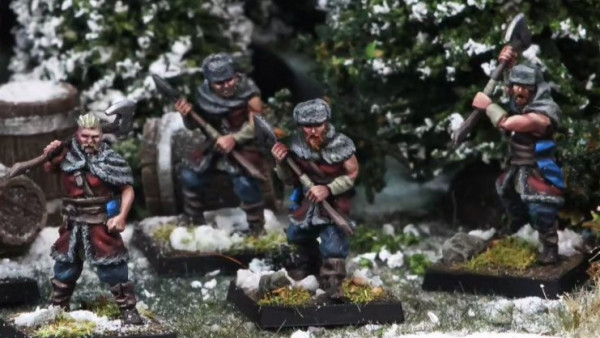
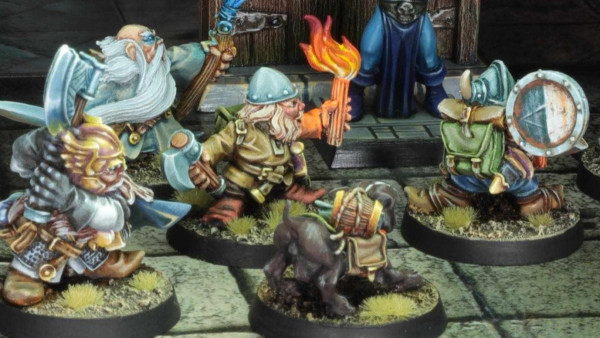
I received 3 random halfling zombies as a bonus when I bought the Cockatrice from the TTCombat Kickstarter. I have no use for them, but I do have a Kings of War army that has never seen the table so I thought I’d paint up these 4 guys to match their scheme then one day they might conceivably get used.
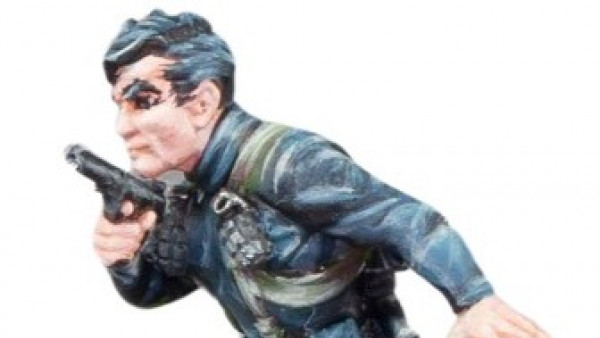
This human zombie was in the box. No idea what he is from. I would assume Warhammer Fantasy but he isn’t holding a weapon and something about his clothes suggest hes from a more modern setting not a fantasy? Anyone recognise him?
This just leaves a Genestealer, a (high?) Elf, and a Lizardman, some broken. I have no use for them. They may get turned in to statues and used as objective markers. Anyone know a suitable source of statue bases/plinths beyond cola bottle caps? Something I can mount on a base and put grass around.