The Brotherhood of Venice
Recommendations: 25
About the Project
Brotherhood of Venice is based on the Assassin's Creed videogame series, specifically it is a spin off of the second installment in the series featuring Ezio Auditore da Firenze as the main character. This game is set, as the name suggests, in Venice in sometime between 1507 and 1511 and follows the Venetian brotherhood as the look to thwart the Borgia and his agents in the city.
Related Game: Assassin's Creed: Brotherhood Of Venice
Related Company: Triton Noir
Related Genre: Weird
This Project is Active
Introduction
Being something of a fan of historic fiction, the Assassin’s Creed video games had me hooked from the moment I saw the first trailer for the original game. It would be fair to say that it wasn’t entirely what I expected, with all the modern day science fiction about genetic memories but even that captured my imagination. As a genre of science fiction I had never encountered anything like it – the idea of tapping into genetic memories of ancient and long dead ancestors seemed both unique and , while perhaps a little far fetched definitely very interesting. And it was also a great excuse to then get to play through numerous historical periods in rich and immersive worlds, uncovering plots, conspiracies and stories that span millennia. I have been like a kid in a sweet shop with the Assassin’s Creed games, probably up to the one set in Victorian London, which didn’t really do anything for me if I am honest. Since then they have been a little bit hit or miss (mostly miss), with Origins, set in Ptolemaic Egypt being a stand out but everything else sort of just not raising my interest.
But of all of the games released to date, Assassin’s Creed II was by far my favourite. I think Ubisoft knew they were onto something special because they actually released a short film in the run up to its release. I have linked it below, it’s definitely worth the 35 minutes it takes to watch.
I thought the story and the development of main character, Ezio, was excellent, the way it wove historical characters into the story was very clever and the attention to detail put into the cities of Renaissance Italy, notably Florence and Venice, was absolutely breathtaking – and having played it again recently they still look absolutely beautiful. I think it shows just how well received it was that they released a further two titles charting the course of Ezio’s career as an Assassin. Starting with his twenties in Assassin’s Creed II, moving to Rome and his forties in Assassin’s Creed Brotherhood, and finally finishing off in Byzantium during his fifties with Assassin’s Creed Revelations. The collectors edition of Revelations also came with a DVD which had a short animated film called Embers, which showed Ezio at the end of his life.
All in all, it just felt like the game (or games) was created with passion and that the developers and writers cared about the characters. That, coupled with being set in a period in history that fascinates me has placed this as probably my favourite video game of all time. And off the back of that I have developed a bit of a love affair with Italy – I now speak the language, have visited Venice (one of the primary locations) and I am hoping to get to Florence as well.
So it was highly improbable that when Triton Noir released their boardgame, with miniatures, of Assassin’s Creed Brotherhood of Venice that I wouldn’t back it. I absolutely love the renaissance aesthetic of the game; much like the other project I am working in right now for Anno Domini 1666 (please feel free to check that project out too), the setting has notes of the Old World about it, albeit without the grimness and darkness, but it also has some fantastic elements to it, generally in the borderline super human abilities of the assassins and some of the technologies within the game.
1. Guards
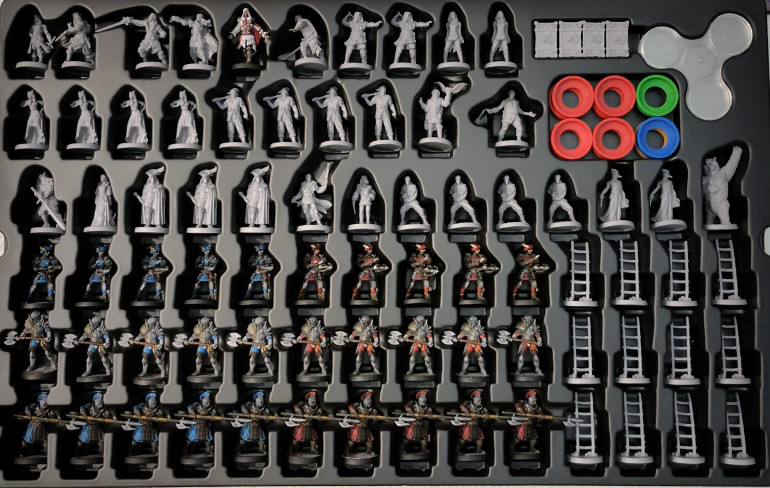
As with many boardgames, Assassin’s Creed comes with a metric tonne of PVC miniatures, of varying quality. Although in most cases the quality of these is reasonable, they’re not a patch on the sort of plastic or metal you would get from a dedicated miniatures range. That, combined with the sheer volume of plastic that requires painting, generally leads me down the speed painting route. If we look at just the dungers alone, there are:
- 30 Crossbowmen
- 10 Agile Guards
- 10 Seekers
- 10 Brutes
- 10 Cavalry
That’s before you start adding some of the recruitable elements that come in multiples of 4, such as rogues, courtesans and condottiere. In total the box has 145 miniatures, some of which are actually really nicely sculpted and posed characters, some of which are voluminous and repetitive nobodies. I am going to break the back of the project by doing the latter first and speed painting all of them, using the slapchop method which I have come to love. Slapchop, as well as having a silly name, actually takes a little while longer but it really does increase contrast on brightly colored areas. However I will also be using standard metallic Paint for any metallic areas. There’s a six step process for getting my miniatures ready to take the speed paint.
- Black basecoat
- Heavy grey drybrush
- Light white drybrush
- Recoat metal areas with black
- Paint metal areas with a light silver
- Wash the metal with a mix of black and blue wash
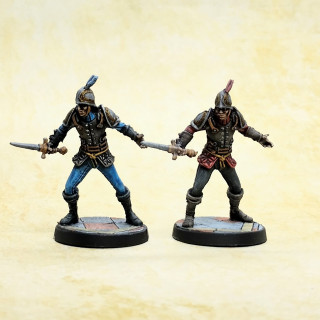
In this case, I also felt that the face and plume were a little dark so I painted them in pure white. What I have found in the past with other slapchop projects is that the speedpaint flesh tone doesn’t really work very well over anything other than white. Also, I wanted the plumage on the helmets to really stand out, so again, painting them with pure white, while reducing the contrast between high and low lights, massively increases brightness.
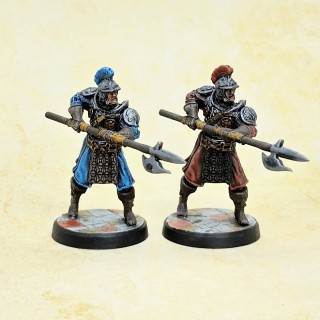
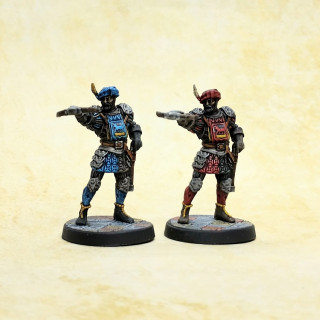
Once the basecoat was done, it’s a simple case of adding the speed paint over the top. I also added a little bit of dark yellow onto some of the armour areas to create the impression of detailing in either gold or brass. This was more to add a few spot colours than any other reason. Although the game seems to use red for the Guards’ uniforms, I have opted to split them 50/50 between the red uniforms of the Borgia and the blue uniforms of the city of Venice – this is as per the video game.
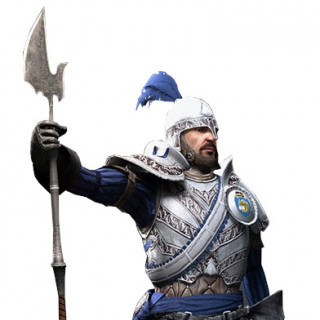
The first models I did were the seekers. In the game, if suspicious of the presence of an assassin, these guys will go searching, using their polearms to stab into potential hiding places.
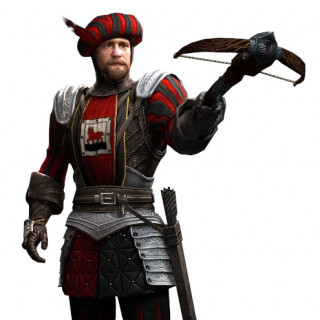
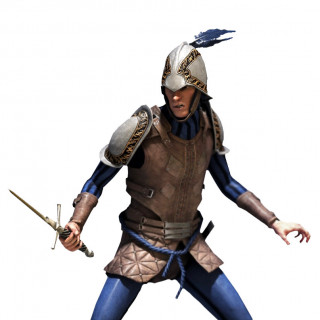
Following on from the seekers, I have also completed the Agile Guards and the Crossbowmen using the exact same technique. The Crossbowmen are relatively self explanatory – they will shoot at any Assassin they see, usually placed atop buildings to get a better vantage point. This makes fleeing somewhat more difficult as they will shoot you as you attempt to climb buildings. The Agile guards are lightly armoured and will chase fleeing assassins down, being able to run as fast and climb as well as the assassins. Their job is to force the assassin to stop and fight, slowing them down until reinforcements arrive
The next set of models will use a slightly different method as they are more heavily armoured and the predominant colour on them is silver, so it makes more sense to use a different method
2. Brutes
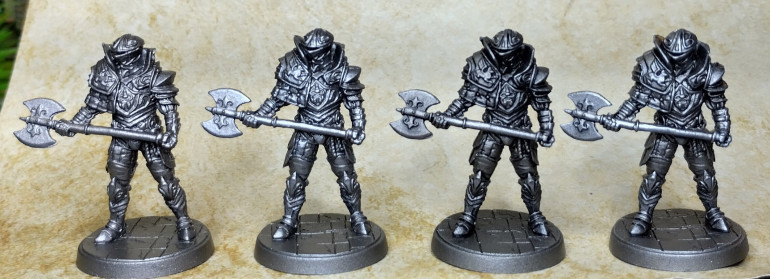
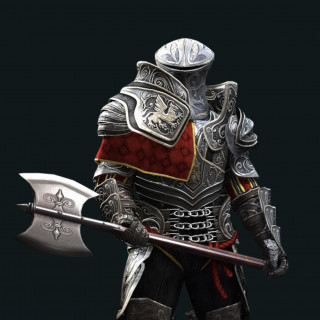
Progressing further along with the basic enemies, today it’s the Brutes. Brutes are pretty much what their name suggests; tall, very heavily built men in heavy armour wielding heavy weapons – in this case an axe. While not particularly nimble (you won’t find these guys following you up the side of a building as you flee), if they land a hit on you, you know about it. Even if your armour is enough to take the sting out of it, you will end up on your backside.
Because these guys have a much higher portion of metal armour compared to the previous models, these were painted differently with a focus on the metal and any colours being used almost as spot colours. One thing I have found with metallics is that they tend to respond very well to drybrusing and you can get some very nice results, very quickly, using washes and drybrushing
They were first primed using leadbelcher, which I am not really a fan of as it seems to have a slightly brown tinge to it out of the can. However it was the only silver spray I had available. Step two was to drybrush it with a light steel, I use Natural Steel from AK Interactive (if you haven’t tried them, AK Interactive metallics are very, very good). Then, to provide some shade, I mixed Nuln Oil with Drakenhof Nightshade roughly 50:50 and washed the entire model. The final step was to give it a final highlight, drybrushing a silver colour – again I used Silver from AK Interactive. And that was it, the bulk of the work was done
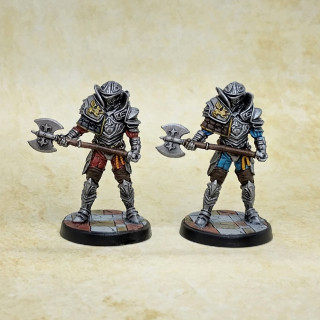
The next step was very simply to rebase all of the non-metal parts of the model so that I could use speed paints. To dull it down a little, I actually used a light grey rather than white – I went with Ash Grey from Army painter. As with the previous sets, I split these down the middle with half being painted as Venetians and half being painted as Borgia.
Up next are the cavalry, which were featured in Assassin’s Creed Brotherhood, a sequel to the ACII game. I have already started them but because I am trying to put in-progress shots into the project entries, it can sometimes take a bit longer to paint the models and get the photos together. They may be finished tonight or they may be finished tomorrow, watch this space
3. Cavalry
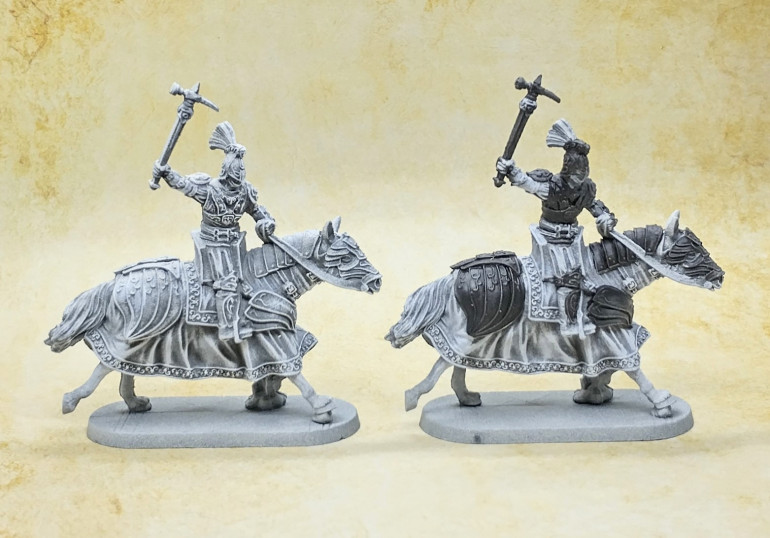
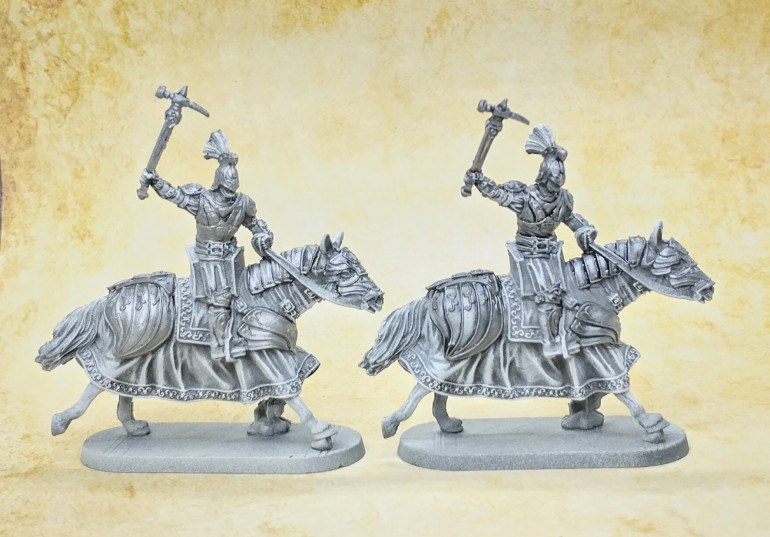
Last of the guards are the cavalry (I know right? cavalry in Venice…). I saved these until last because I thought they looked pretty cool and would be quite interesting to paint. Sort of like a treat for completing all the lowly guards. How wrong was I? They were awful and took absolutely ages. The details were really soft, in some cases just didn’t really exist at all, especially on the body armour. The size of them and the mix of metal armour plates and non-metal areas meant that they had to be painted separately. Overall these took about three times longer to paint than everything else.
Despite that, I have still included progress shots. As with everything else, the models were primed black and then given a mid grey drybrush followed by a white, that’s pretty much my standard now for using speed paint. Then I rebased the armour areas with black to complete the base layer
I painted the armour first, More on that in a bit. I painted it with Oily Steel, from AK Interactive and then, as with all my armour so far in this project it was given a 50/50 wash if Nuln Oil and Drakenhof Nightshade. In hindsight I should have done the gold drybrushing at this stage as well. Originally I wasn’t planning to highlight the ridges and detailing with anything other than silver, but I changed my mind at the end.
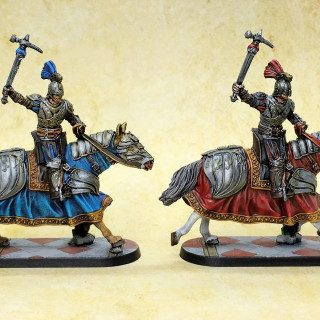
Once the armour was finished, everything else was painted using speed paints using the same colour palette as the rest of the models. Blue and Brown for Venice, Red and Black for borgia. I also started picking out some of the details on the armour with thinned, yellow speed paint, notably in the armour and it was then that I decided to try something slightly different. I decided to very lightly drybrush the armour with AK Interactive Brass and it actually turned out quite nicely. Unfortunately, the pictures have dulled the shade down so it’s quite hard to see it in the image. But holding them in my hand the brass looks really nice against the steel.
It's Called Progress...
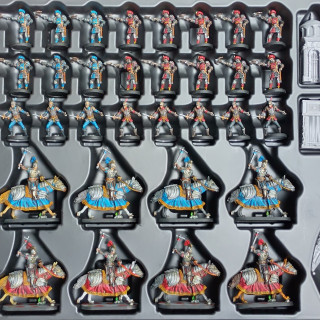
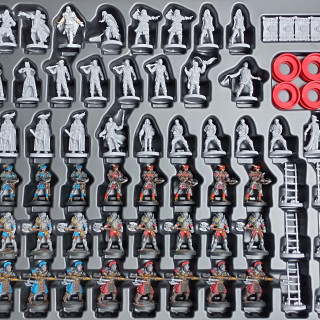
Following yesterday’s update, I thought I briefly share a progress shot. Honestly I wish I’d thought of doing this sooner. The miniatures trays in the game are very well laid out and very easy to photograph so it’s possible to take photos to show various miniatures turning from unpainted to painted. So here’s the first one, and honestly this looks way more impressive than I thought and is actually quite encouraging to see. However I expect progress to slow somewhat now because there aren’t really any large batches that can be painted together now. There are some small batches of miniatures, generally around 4 models, that I can probably paint as a batch, however I am also not planning on using speed paints from hereon in, so each batch will likely take around two evenings of work, and the character miniatures (of which there are many) will be a couple of days a piece. So while the trays are over 50% complete by volume, they’re way less than 50% by effort.
There is also a third tray but that’s full of secret miniatures that are in boxes so it’s a bit harder to show progress with that.
4. Ezio Auditore
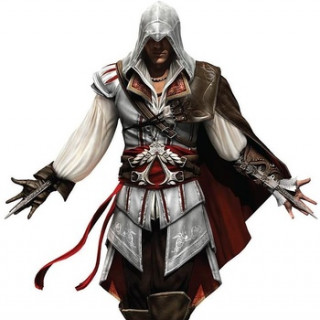
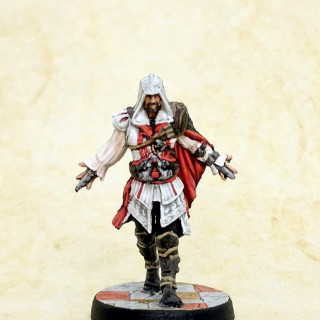
With all the guards out of the way I decided to have a go at one of the assassins, of which there are 10 in the box. 4 playable characters, 4 apprentice assassins and 2 variants of Ezio. One of the two Ezio variants is a dynamic, action pose and the other is styled off one of the iconic AC II images of Ezio. The latter is also by far the easiest to work with so I selected that to paint first as it would allow me to get in some practice with the Assassin’s colour scheme on a very open and easy to paint* miniature.
I used to find white quite difficult to work with but the recent addition of a white wash to the citadel range, which is actually a pale grey, has really made that task much easier. I also experimented with the Army Painter skin tone washes and I was really pleasantly surprised. To get the skin tone I selected Dorado skin to Start and washed it with a sepia wash. Highlights were worked up using the base coat mixed with increasing amounts of opel skin. The highlights were taken to quite a bright tone before it was eventually finishing with a wash using the light skin tone wash. I was aiming to get a bronzed look of someone who lives around the Mediterranean.
* By easy to paint, I mean that the pose doesn’t create any dead space whereby the models pose blocks access to parts of the miniature in terms of painting whilst not actually making it invisible. This is incredibly common on GW miniatures… However it was anything but easy to paint. As a PVC miniature, it had a lot of mold lines and flash all over it, much if which was impossible to remove. For example, you can see the problem on the hands with what I can only assume are mold lines running across the fingers. Generally speaking it requires a knife to scrape off mold lines from PVC and because of the size of the component (tiny fingers) I couldn’t apply enough pressure to remove the mold lines without risking also removing the fingers. Additionally, as with the guards, some of the details are very soft and not very clear, even after applying a wash – the embroidery on the lower parts of the robes for example.
Finally, a progress shot of the miniatures tray


