


Dipping my toes into Napoleonics


Recommendations: 150
About the Project
So, I've had this itch for Napoleonics for a few years now. I think you guys are to blame for this. And Tolstoy. Him too. All the ingredients were there and now Ridley Scott has put the pan into the flames, meaning that I should probably start cooking something up.
Related Genre: Historical
This Project is Active
The cannon are [sic]!
Reading into Napoleonics I’ve learned that ‘cannon’ as a plural is a thing and that using it makes you just better than the others, har har har <sips tea with pinky in the air>. So, there is the joke in the title. With that out of the way, I would like to cycle back to a handy comment all the way back to my first entry in this project.
![The cannon are [sic]!](https://images.beastsofwar.com/2024/04/63291766-tip.jpeg)
Back then I still optimistically replied that I wanted to try to build the 3D paper ones, where you have to fold the cut out gun barrel around a pin. The longer I thought on it, the more I came to the realisation that using a actual tiny cannon model might indeed be preferable.
Rather than riding out this wave of reason, I jumped on top of the shark and tried surfing onto the wave of 3D printing. Oh, not the still somewhat reasonable wave of resin printing. Oh noooo <waves hand and spills tea from cup>. The wave of FDM printing with a 0.2 nozzle.
So, I sat down, and looked up a chunky design on Thingiverse of which I felt that it could handle the scaling down to 10mm wargaming.
The scaling down went okay…? The spokes of the wheels disappeared at this size, so I made some new wheels myself in TinkerCad. Also, I had to fill up the cannon barrel to avoid a hole appearing in it. Lo and behold!
![The cannon are [sic]!](https://images.beastsofwar.com/2024/04/16004900-cannon-design.jpg)
![The cannon are [sic]!](https://images.beastsofwar.com/2024/04/48289506-tiny-cannon-parts.jpeg)
![The cannon are [sic]!](https://images.beastsofwar.com/2024/04/47130289-tiny-cannon-assembled.jpeg)
To assemble it, I slightly widened the holes in the wheels, so they connected snugly to the gun carriage. I also found that the rounded bottom side of the gun carriage came out a bit ugly, so I straightened that out in TinkerCad as well. This gave me a design that I felt could be repeated!
![The cannon are [sic]!](https://images.beastsofwar.com/2024/04/75817868-tiny-cannon-four.jpeg)
![The cannon are [sic]!](https://images.beastsofwar.com/2024/04/62993298-tiny-cannon-vs-tank.jpeg)
Limbers
Looking at the paper cut out model of the canon I noticed that Peter also supplied you with limbers. Now, I didn’t immediately find any (free) limbers designs that either scaled down well or matched my cannon, so I thought: maybe I can design one myself! I have to apologise to any specialists in the field. I just looked at these two pictures I found with DuckDuckGo and let myself get inspired to create something.
![The cannon are [sic]!](https://images.beastsofwar.com/2024/04/77248897-research1.jpg)
![The cannon are [sic]!](https://images.beastsofwar.com/2024/04/76718812-research2.jpeg)
![The cannon are [sic]!](https://images.beastsofwar.com/2024/04/85087725-limbers-design.jpg)
As you can see I just reused the wheels I’d created earlier. Once printed out, I found myself with the smallest lawn mower, which just happens to be perfect for mowing flock!
![The cannon are [sic]!](https://images.beastsofwar.com/2024/04/88253438-tiny-limbers-assembled.jpeg)
![The cannon are [sic]!](https://images.beastsofwar.com/2024/04/21140877-limbers-and-cannon.jpeg)
Together with the cannons, I found it worked well. The cannon (!) and the limbers did not fit very well on the base size suggested in Napoleonic Wargaming by Neil Thomas, which is 40mm x 40mm. I wasn’t going to give up my limbers though and just decided to increase the base size to 30mm x 60mm.
I’m quite happy with the end result and decided to bring my two bases of cannon out into the sun for a photoshoot. Coming soon to theaters near you: Honey, I shrunk the artillery devision!
![The cannon are [sic]!](https://images.beastsofwar.com/2024/04/99903599-cannon-done-1.jpeg)
![The cannon are [sic]!](https://images.beastsofwar.com/2024/04/65261318-cannon-done-2.jpeg)
![The cannon are [sic]!](https://images.beastsofwar.com/2024/04/66035317-cannon-done-3.jpeg)
![The cannon are [sic]!](https://images.beastsofwar.com/2024/04/38055287-cannon-done-4.jpeg)
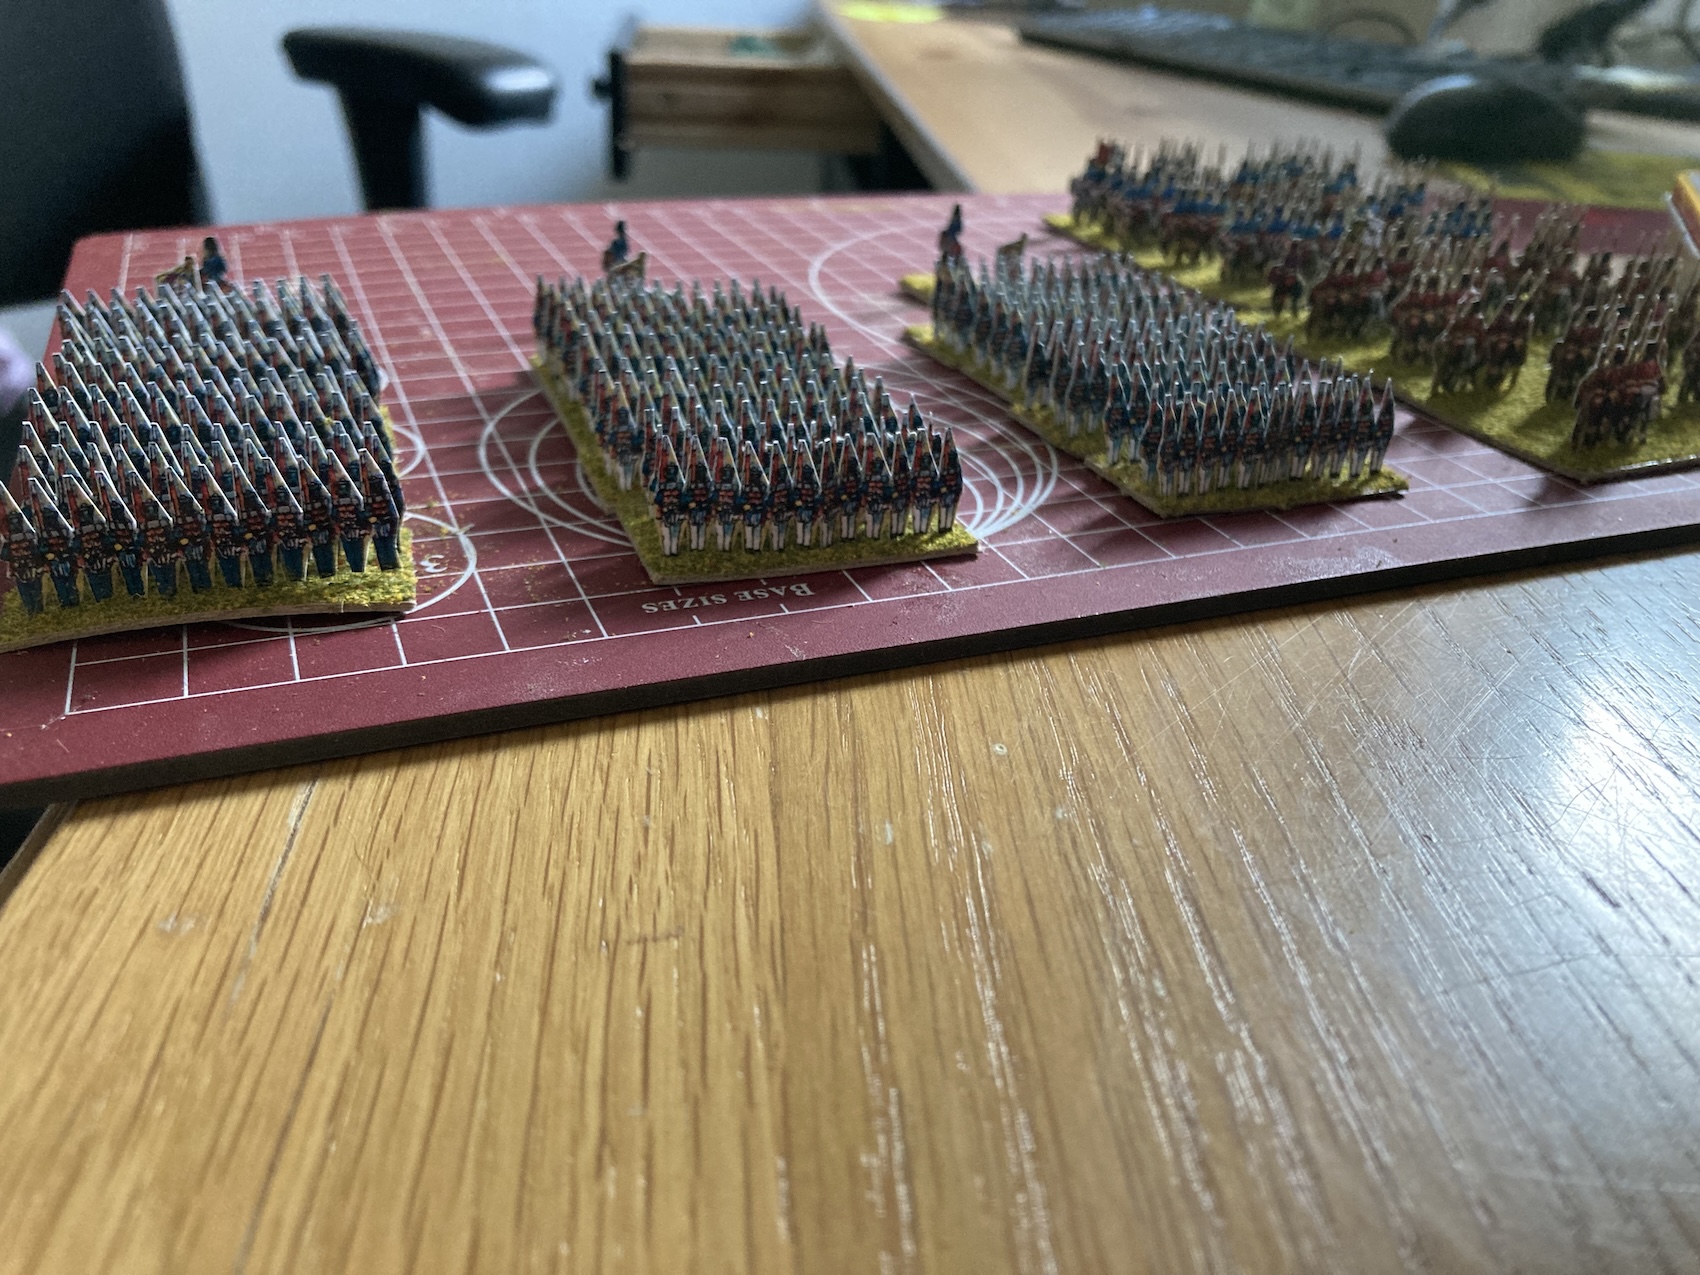
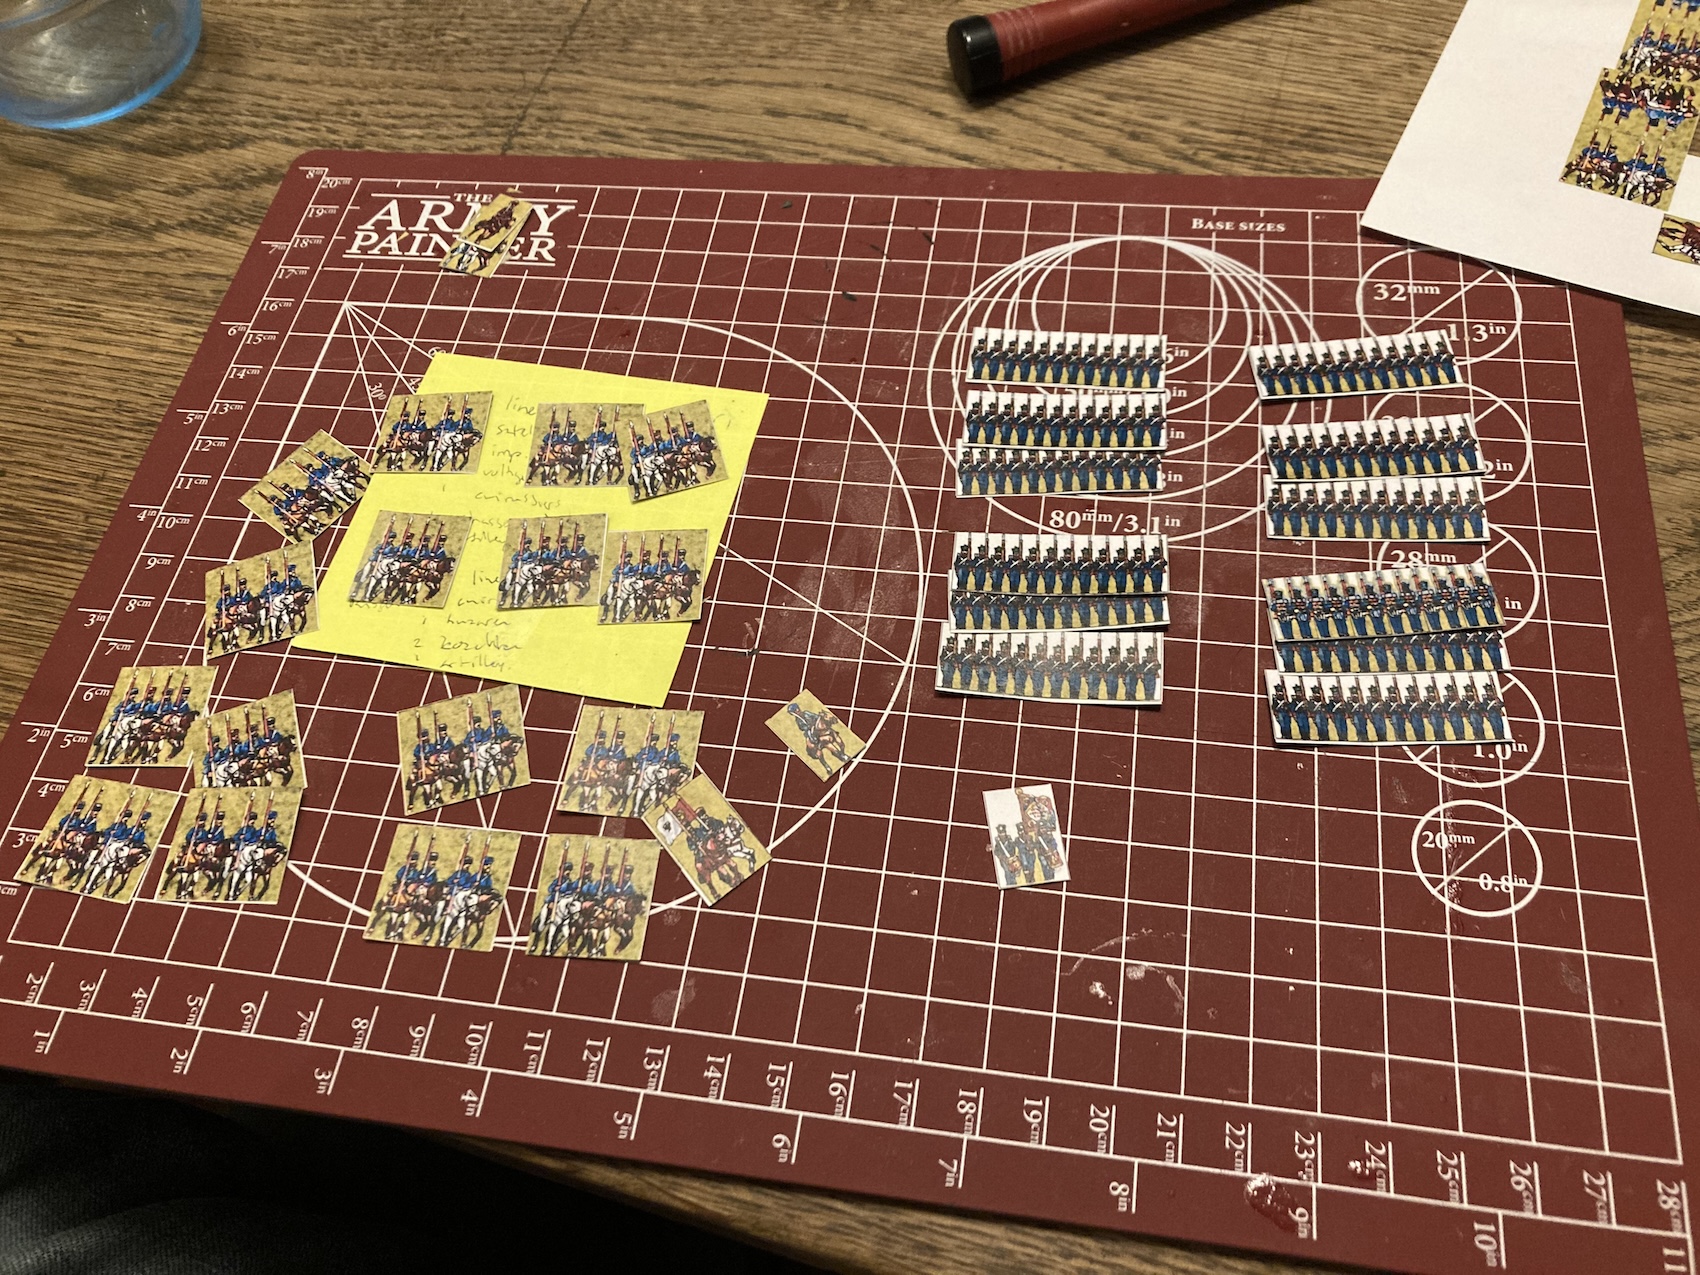
Cuirassiers and army lists
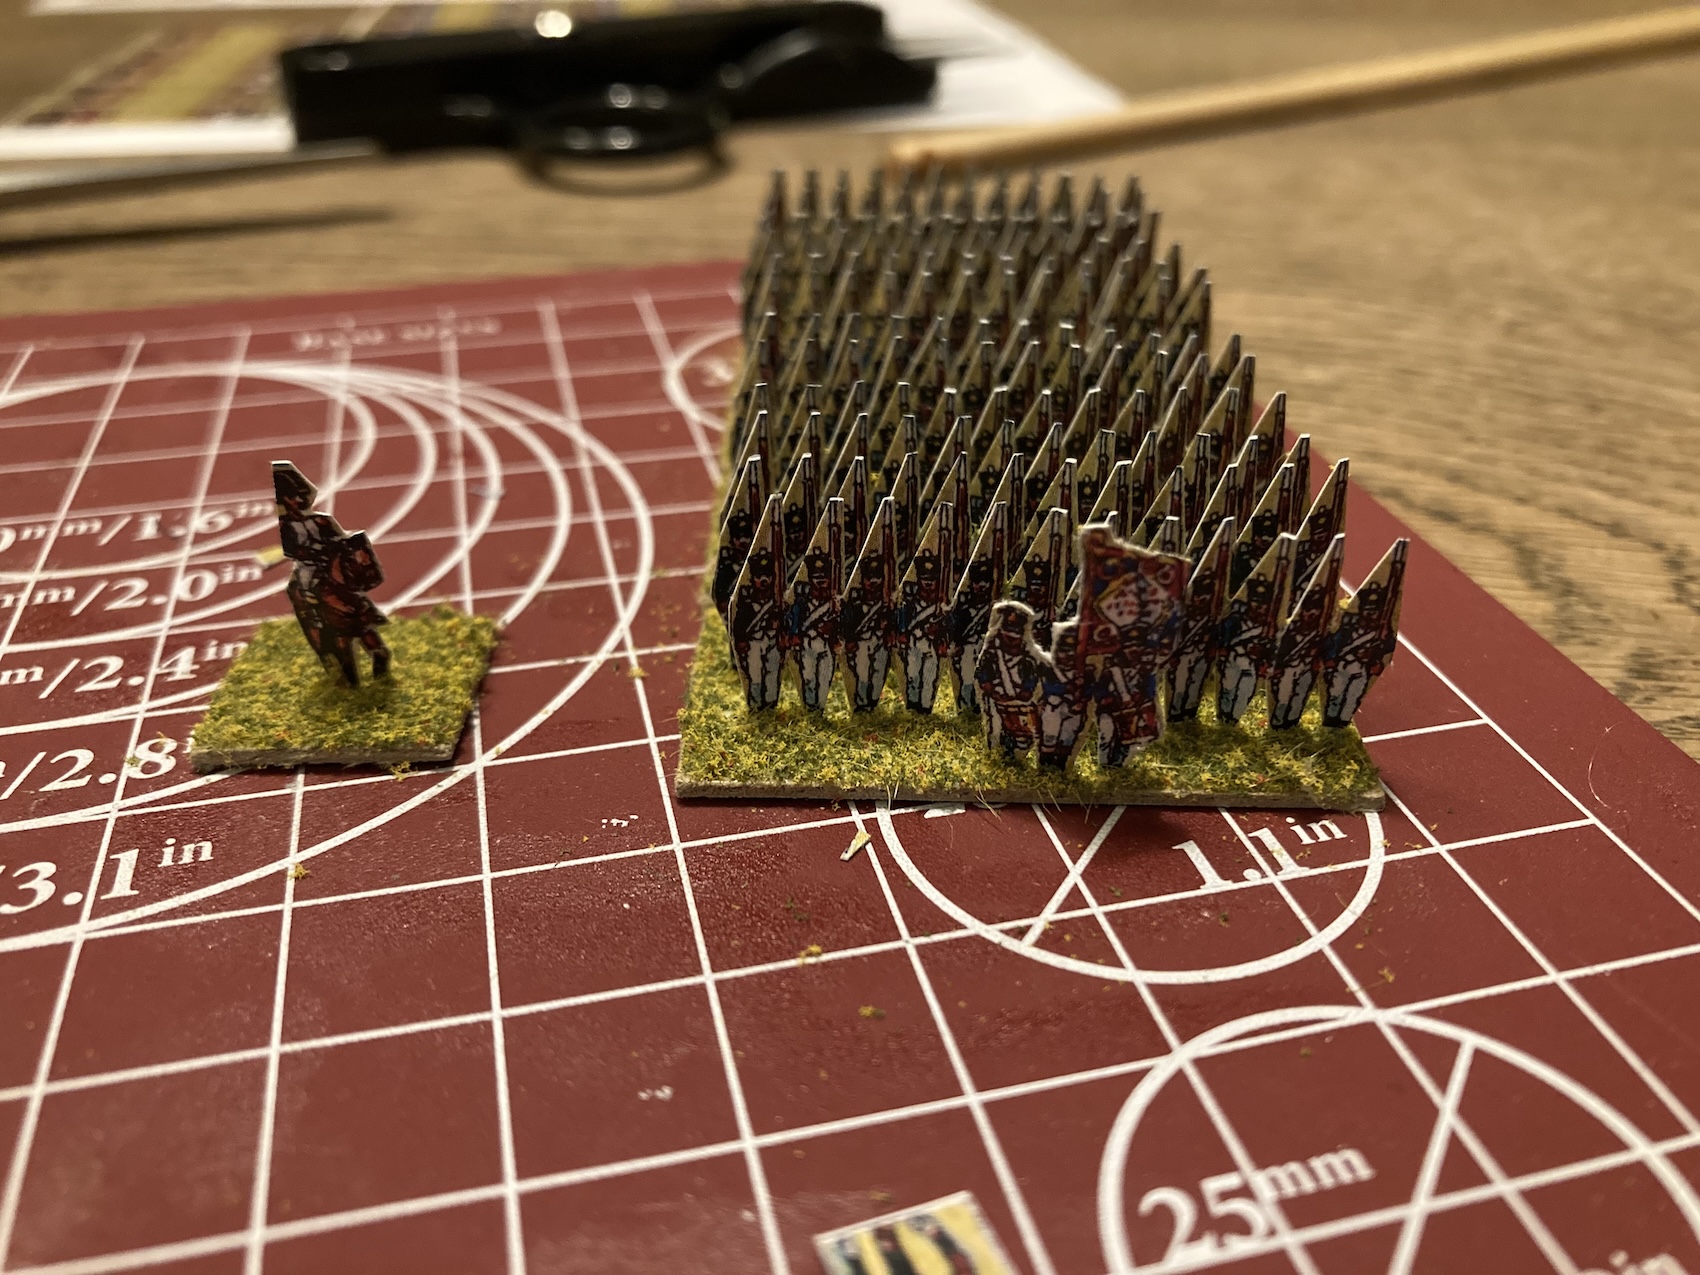
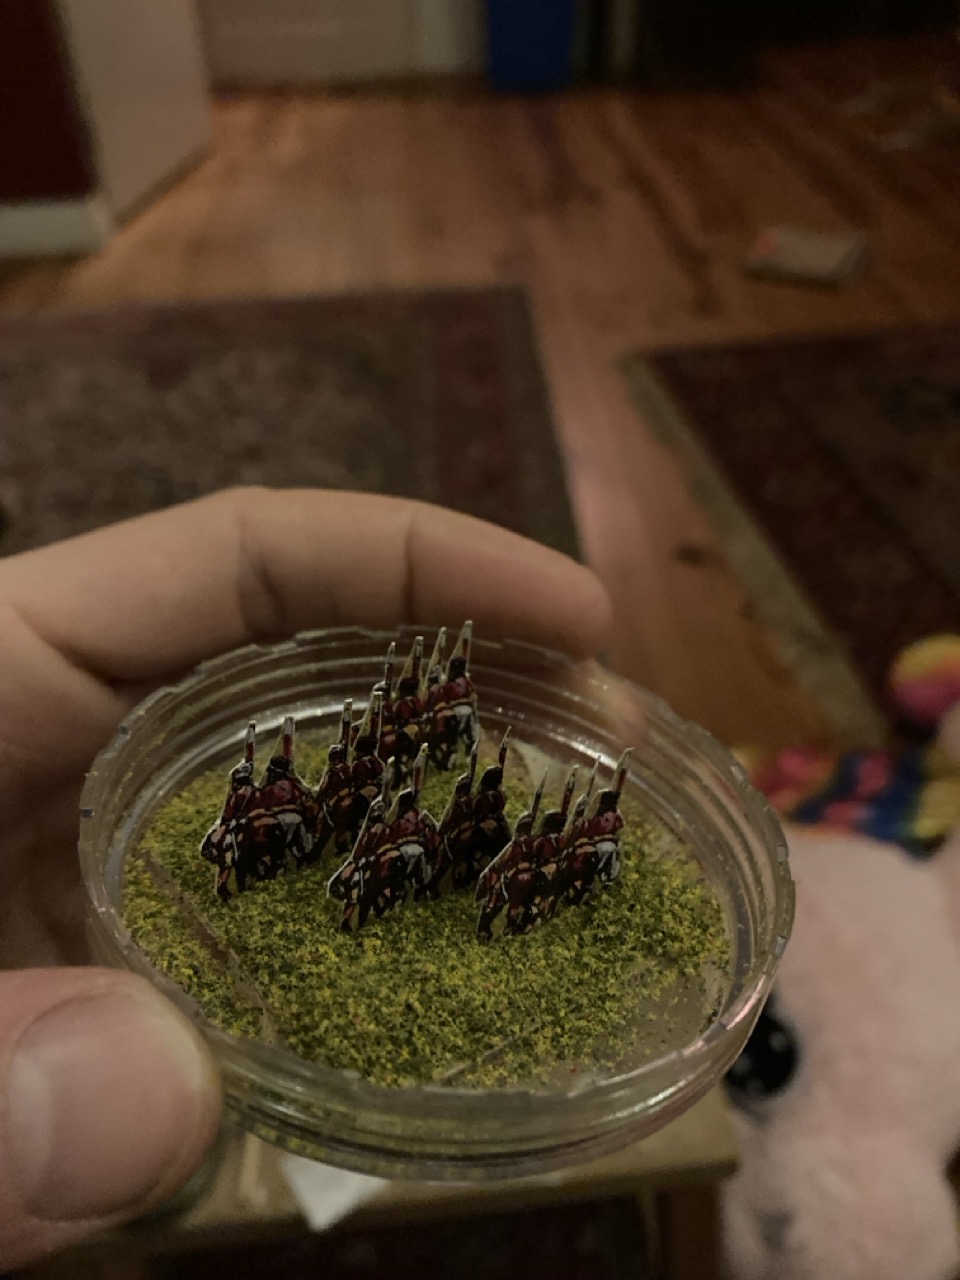
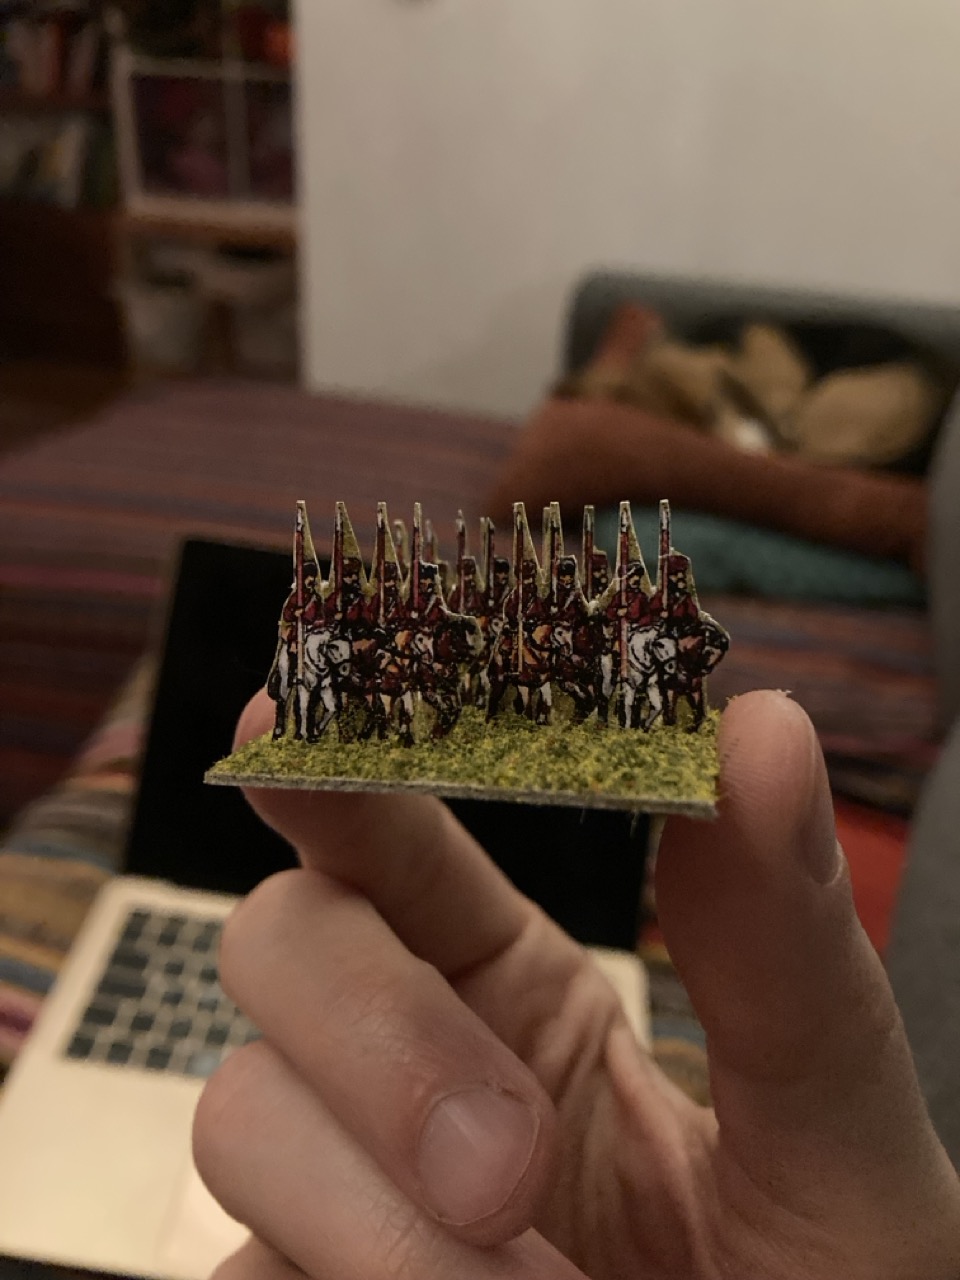
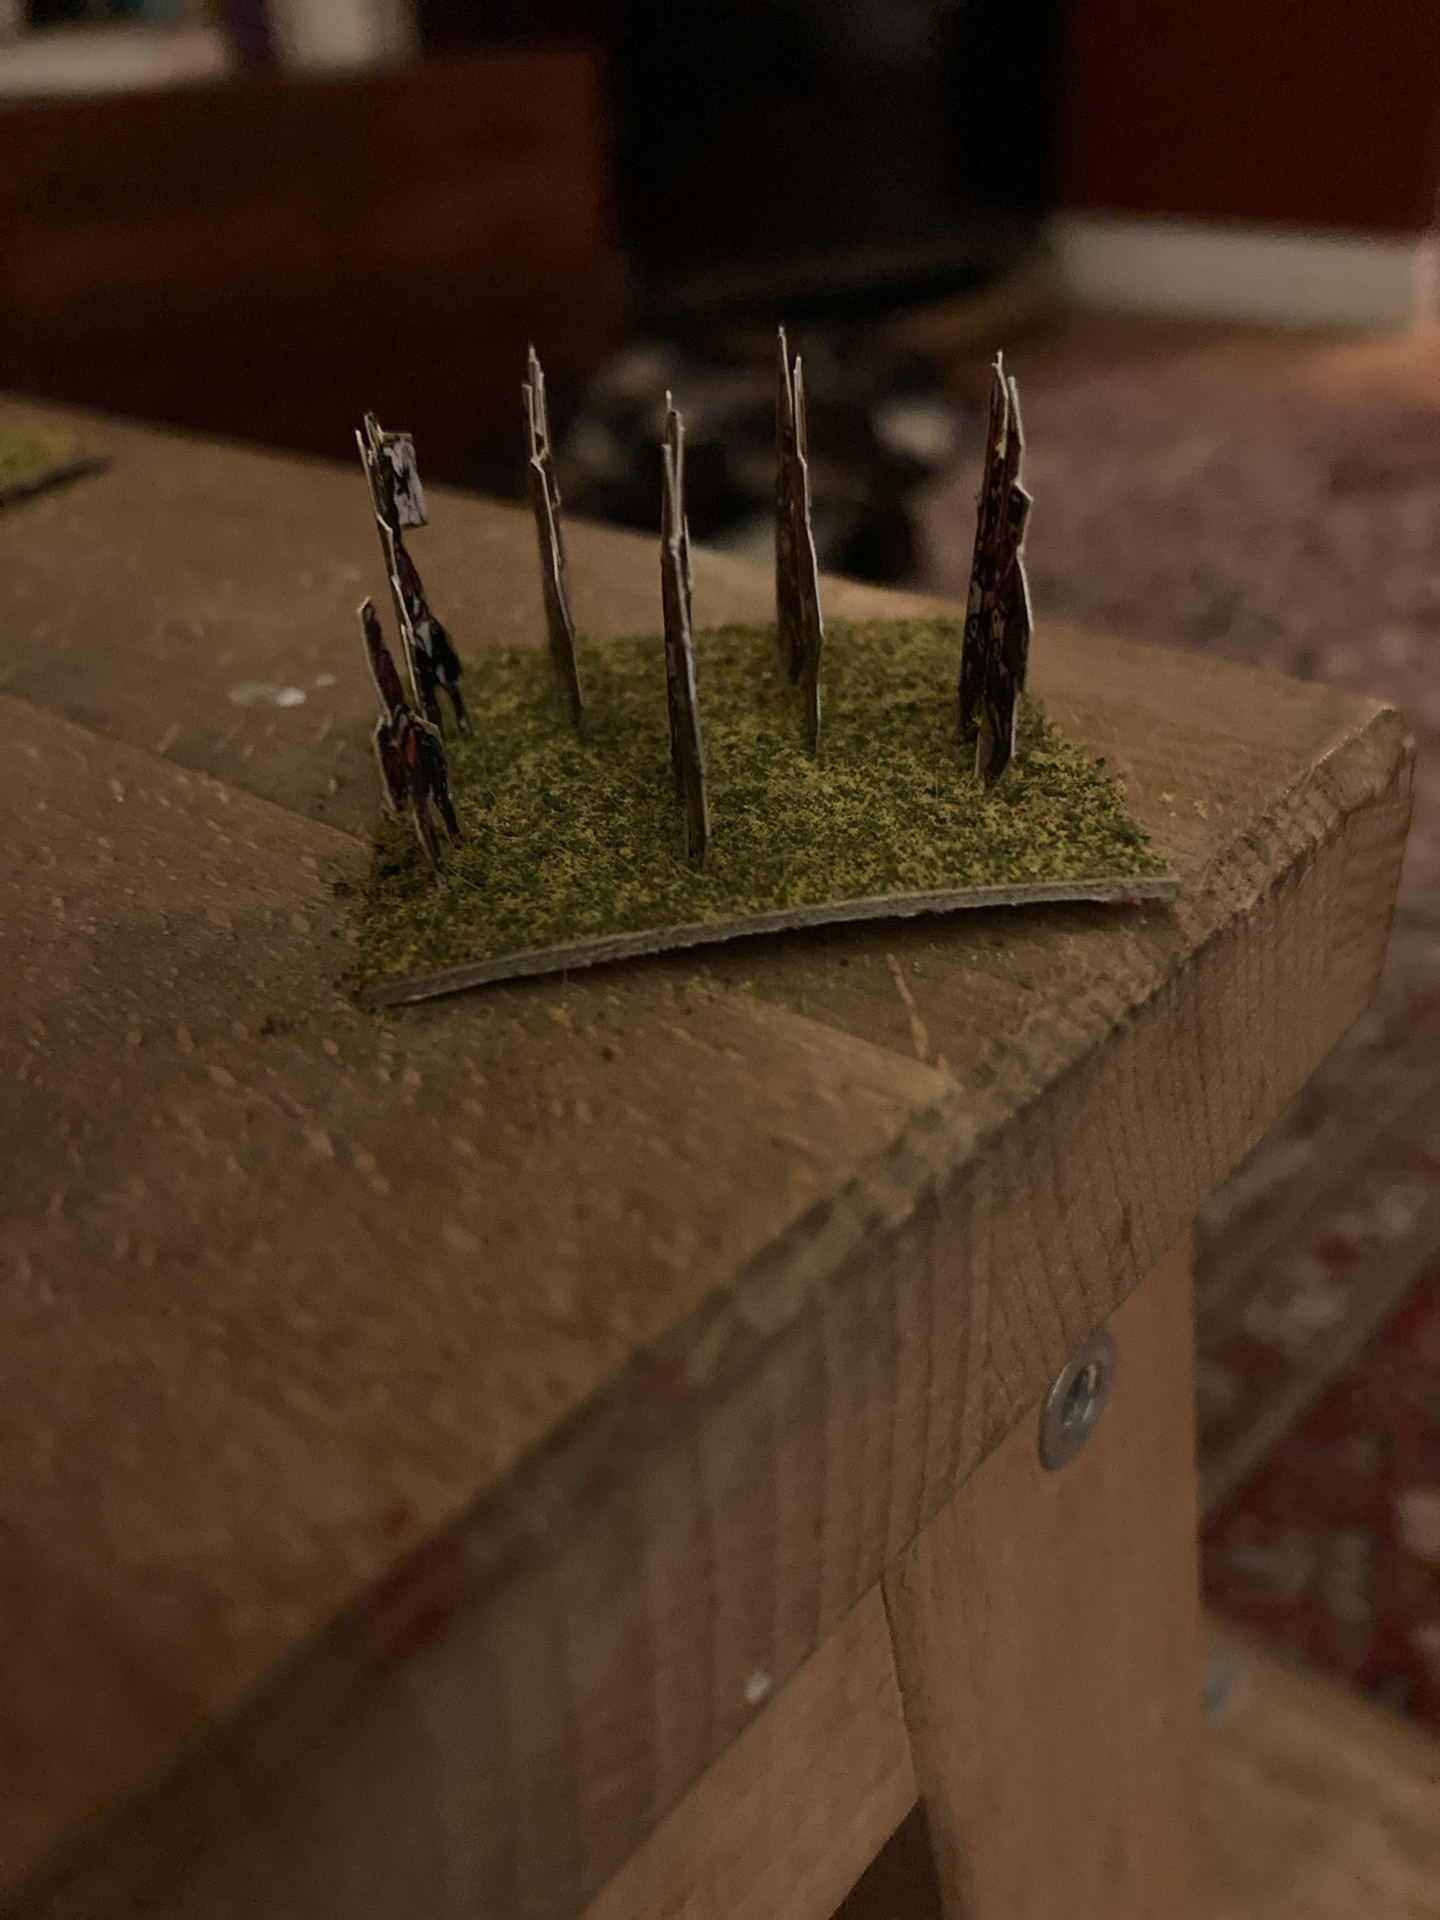
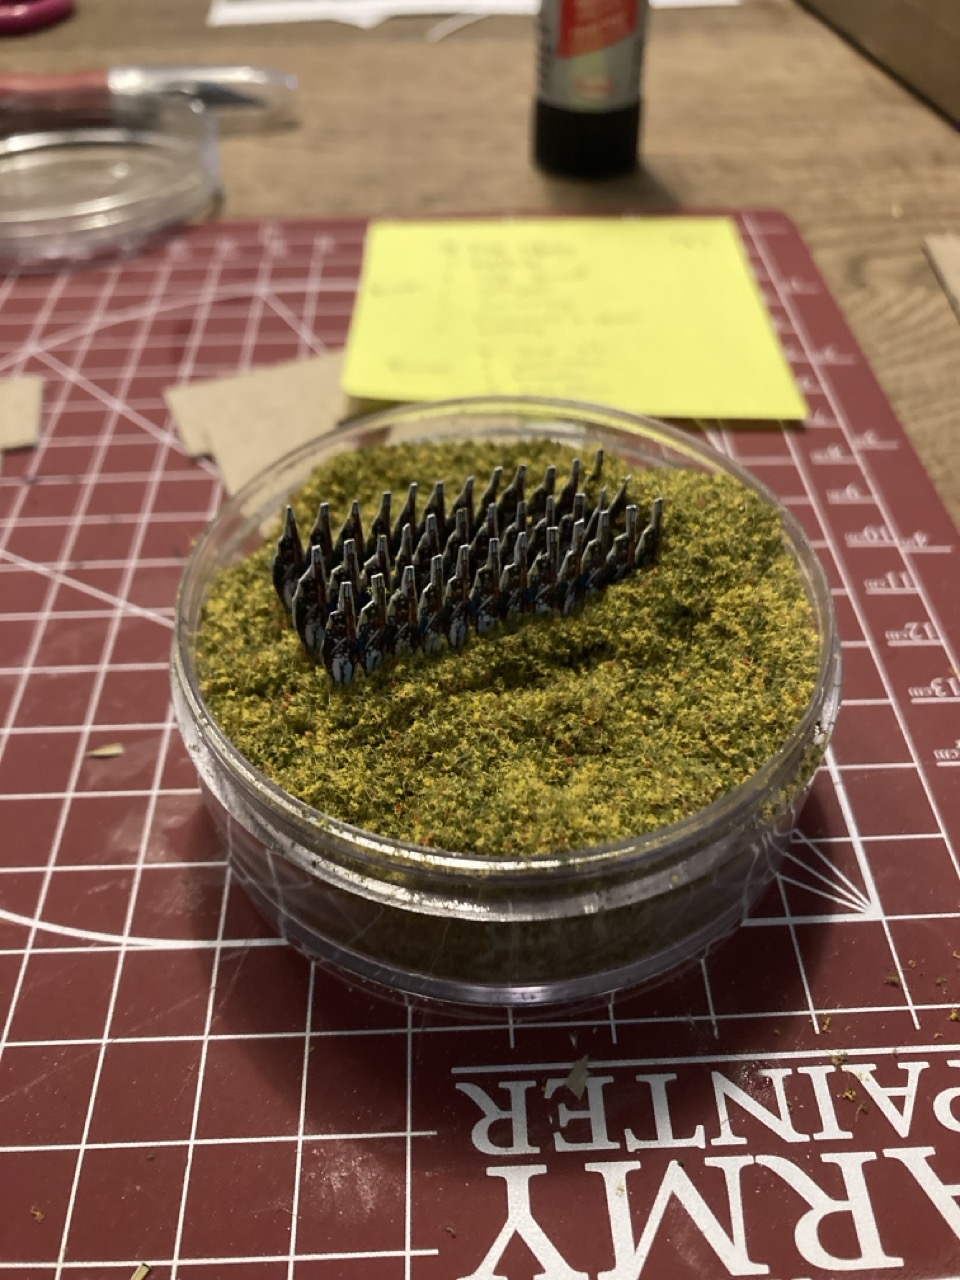
Another small update! I’ve cut and based the Russian cuirassiers, which is the last unit of Russian cavalry. Whereas I’ve only been working with irregular cavalry until now (the cossacks), these are regular, which means I ranked them up.
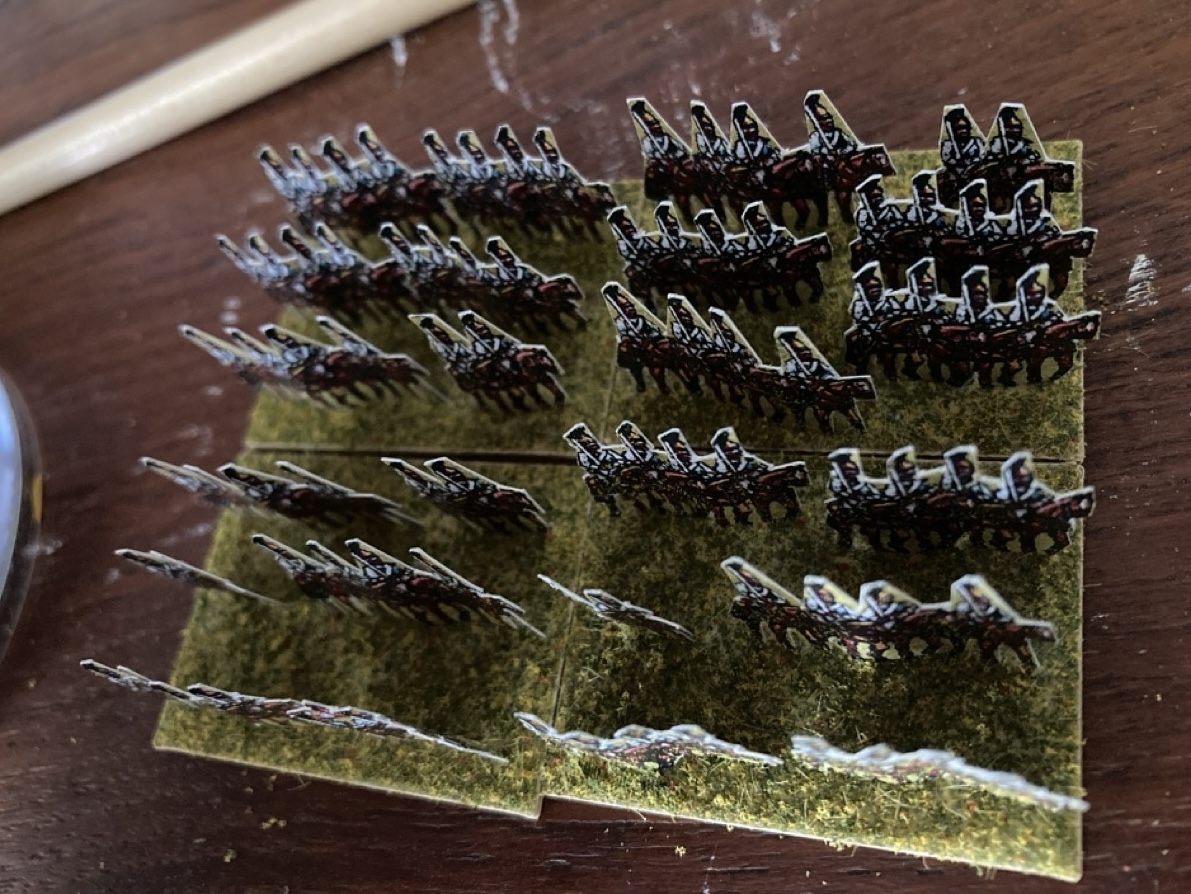
I’m not sure why, but a few of the cuirassiers fell over when I tried to glue them in place. I can’t remember this problem from the cossacks, so maybe I didn’t bend them as much? Or perhaps this is a difference between the old cardboard bases and the new plastic bases? That said, I find that the flock sticks better to the plastic bases. All in all, I’m very pleased with how these turned out.

About armylists
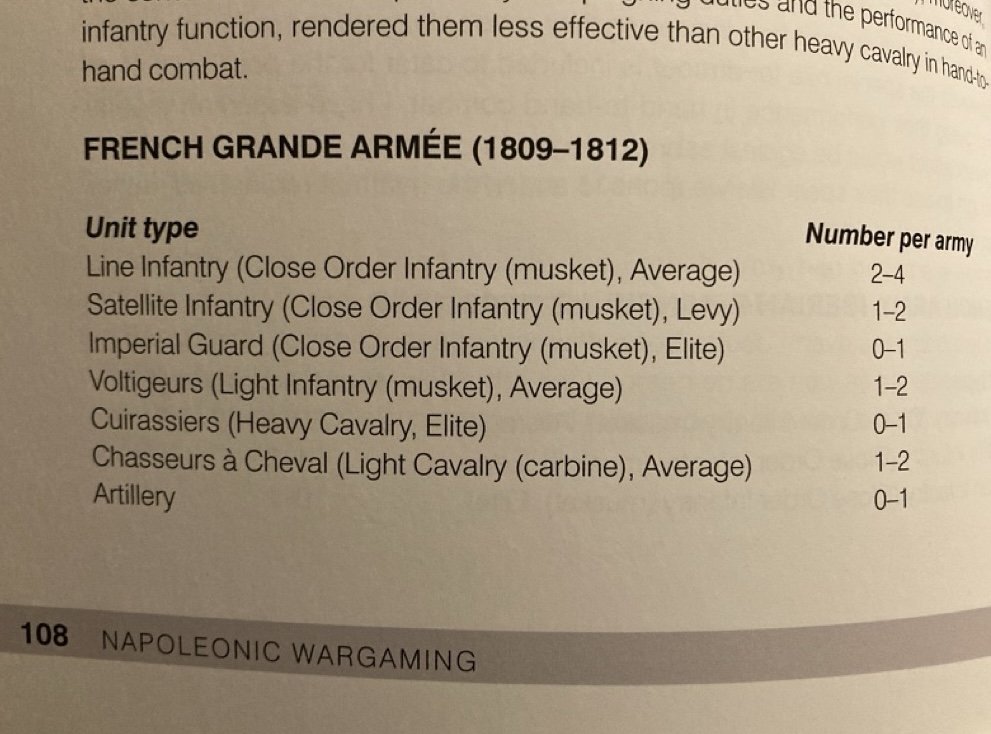
As a bonus, I’ll talk about the armies I’m assembling. Napoleonic Wargaming has a lot of different possible different army lists to pick from, especially for the French.
I may have mentioned it before, but there are no points in the rules laid out in Napoleonic Wargaming. Instead, you get to pick 8 units from a small collection of choices. The player may be allowed to pick up to 1 unit only for some rarer units, and has to pick a minimum of 2 in some units that are typical for the army (often types of line infantry). These unit types may be similar between armies, but the difference is then often in the training and/or experience of the unit, which varies from ‘levy’ up to ‘elite’ (e.g. French conscripts vs Old Guard Grenadiers), the formations they may assume and the number of lines they deploy in (2 or 3). Interestingly, all armies are allowed only 0-1 artillery unit, where the French and Russians have the best, and the Ottomans the worst. The aforementioned Old Style armies are considered more trained and professional and therefore smaller, which means that a player of those armies can only field up to 6 units.
For the French I went with the Grande Armée. For the Russians there is just the generic Old Style army, which is used for all early opponents of the French republic, or the later Russian army, which has the option to add Jaegers from 1812 onwards. I went with the later Russian army, but without the Jaegers.
In addition to these numbers there each list also has some special rules, which lend more flavour to it, for example in the case of the Russians there are rules for sluggish infantry and stubborn infantry.
To be honest, since this is my first taste of Napoleonic wargaming I wasn’t too sure what I was doing and just went the lists below. I felt that both needed artillery, since I cannot imagine a Napoleonic battle without!
French Army
- 2 Line infantry
- 1 Satellite infantry (Duchy of Warsaw)
- 1 Voltigeurs
- 1 Imperial guard
- 1 Cuirassiers
- 1 Chasseurs à cheval
- 1 Artillery
Russian army
- 3 Line infantry
- 1 Guard infantry
- 1 Cuirassiers
- 2 Cossacks
- 1 Artillery
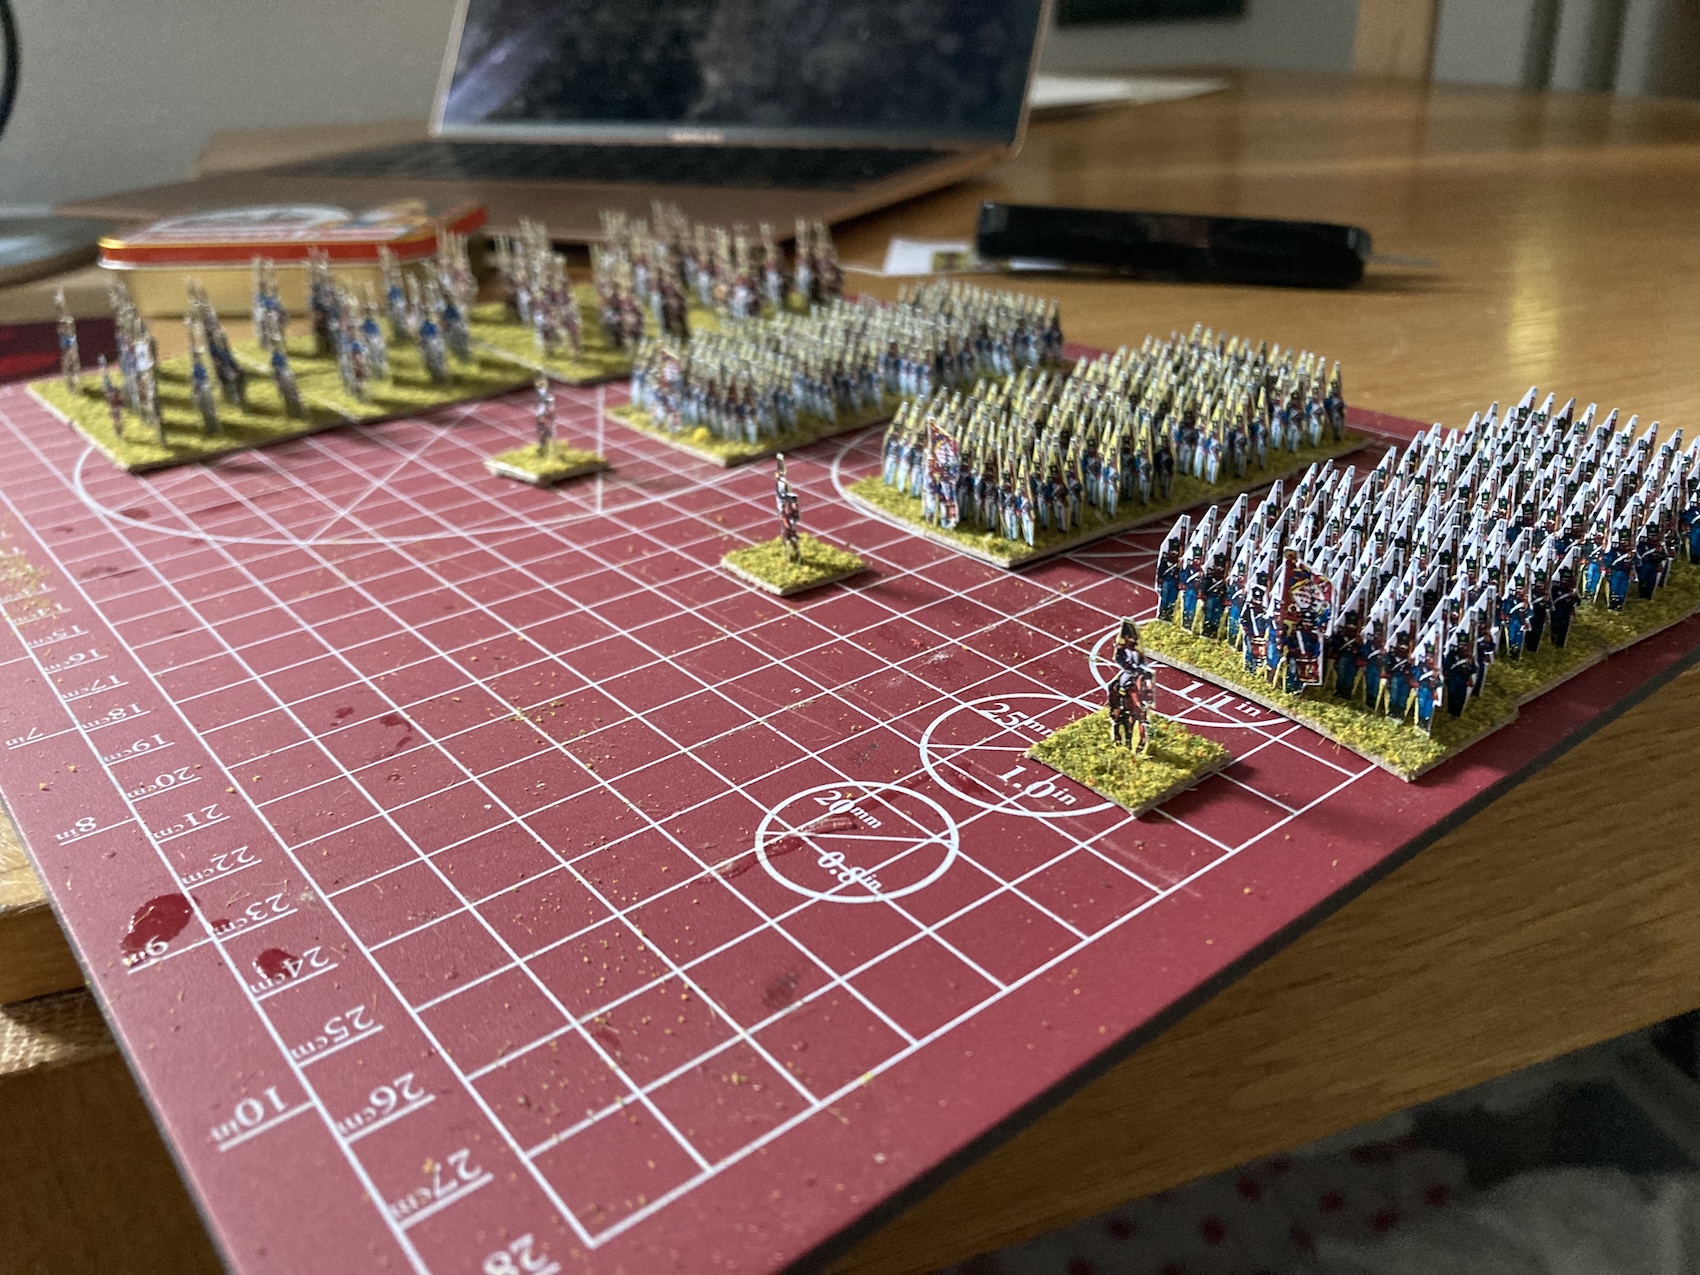
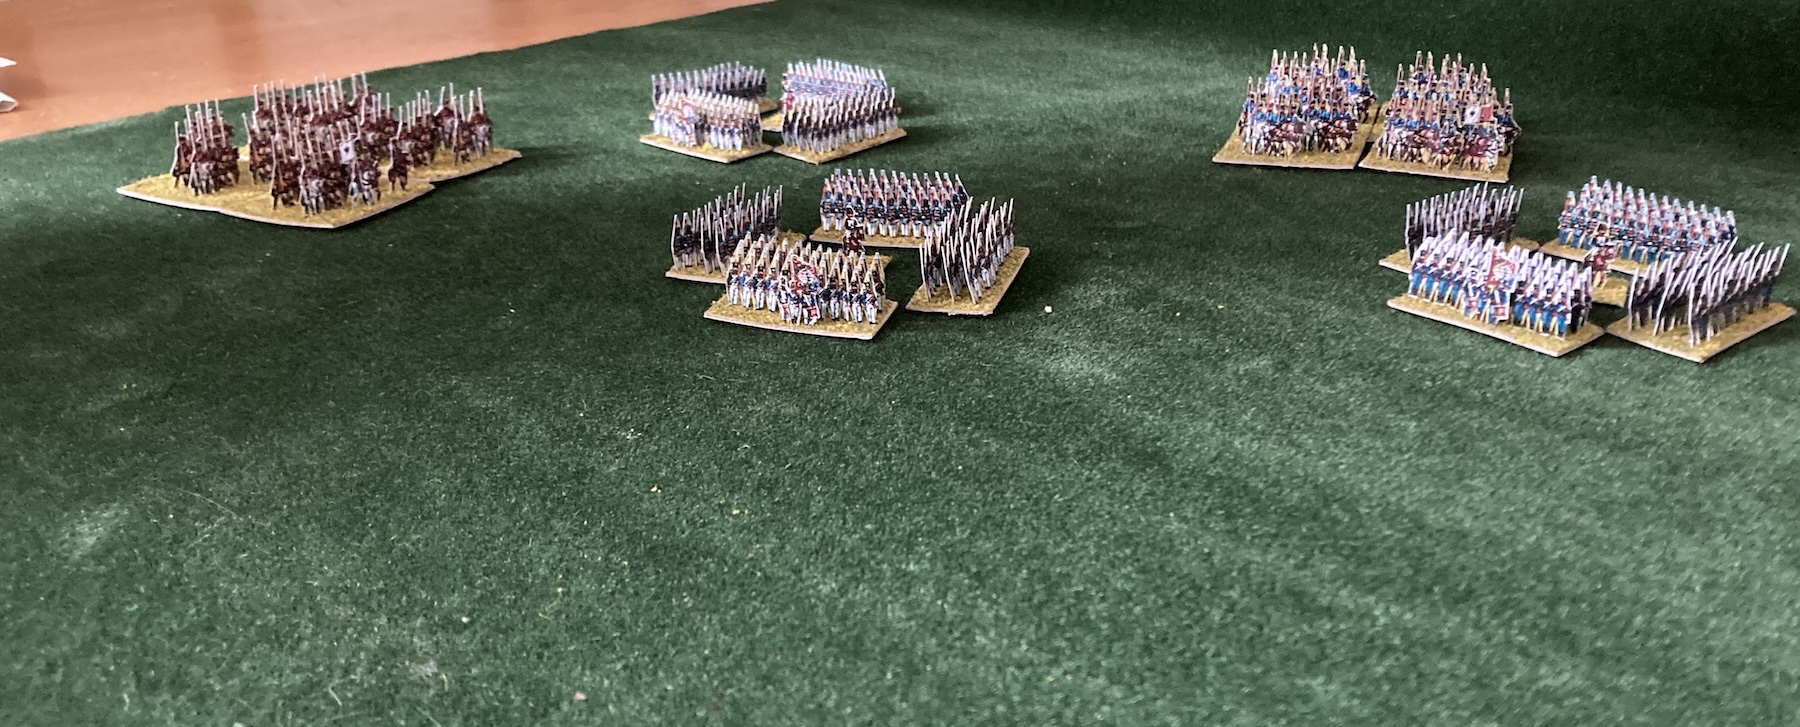
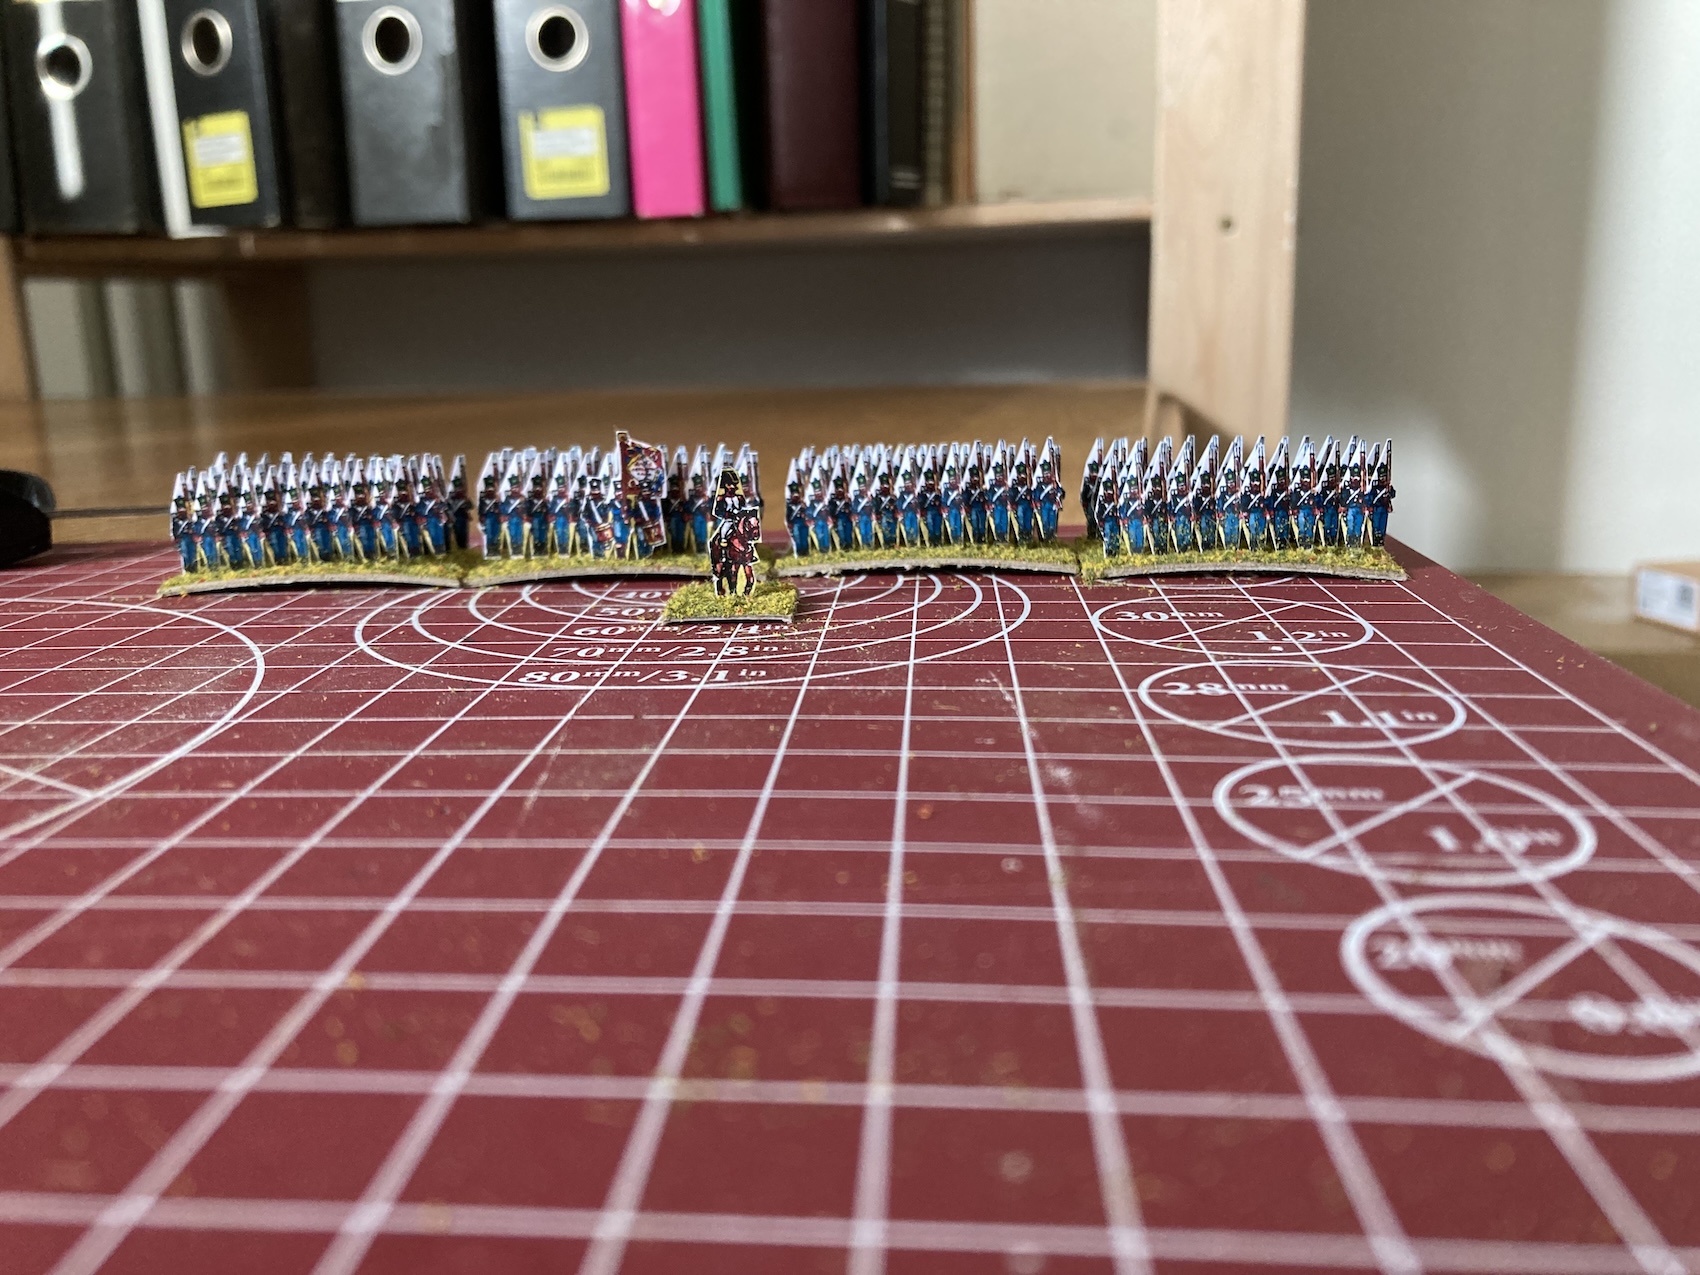
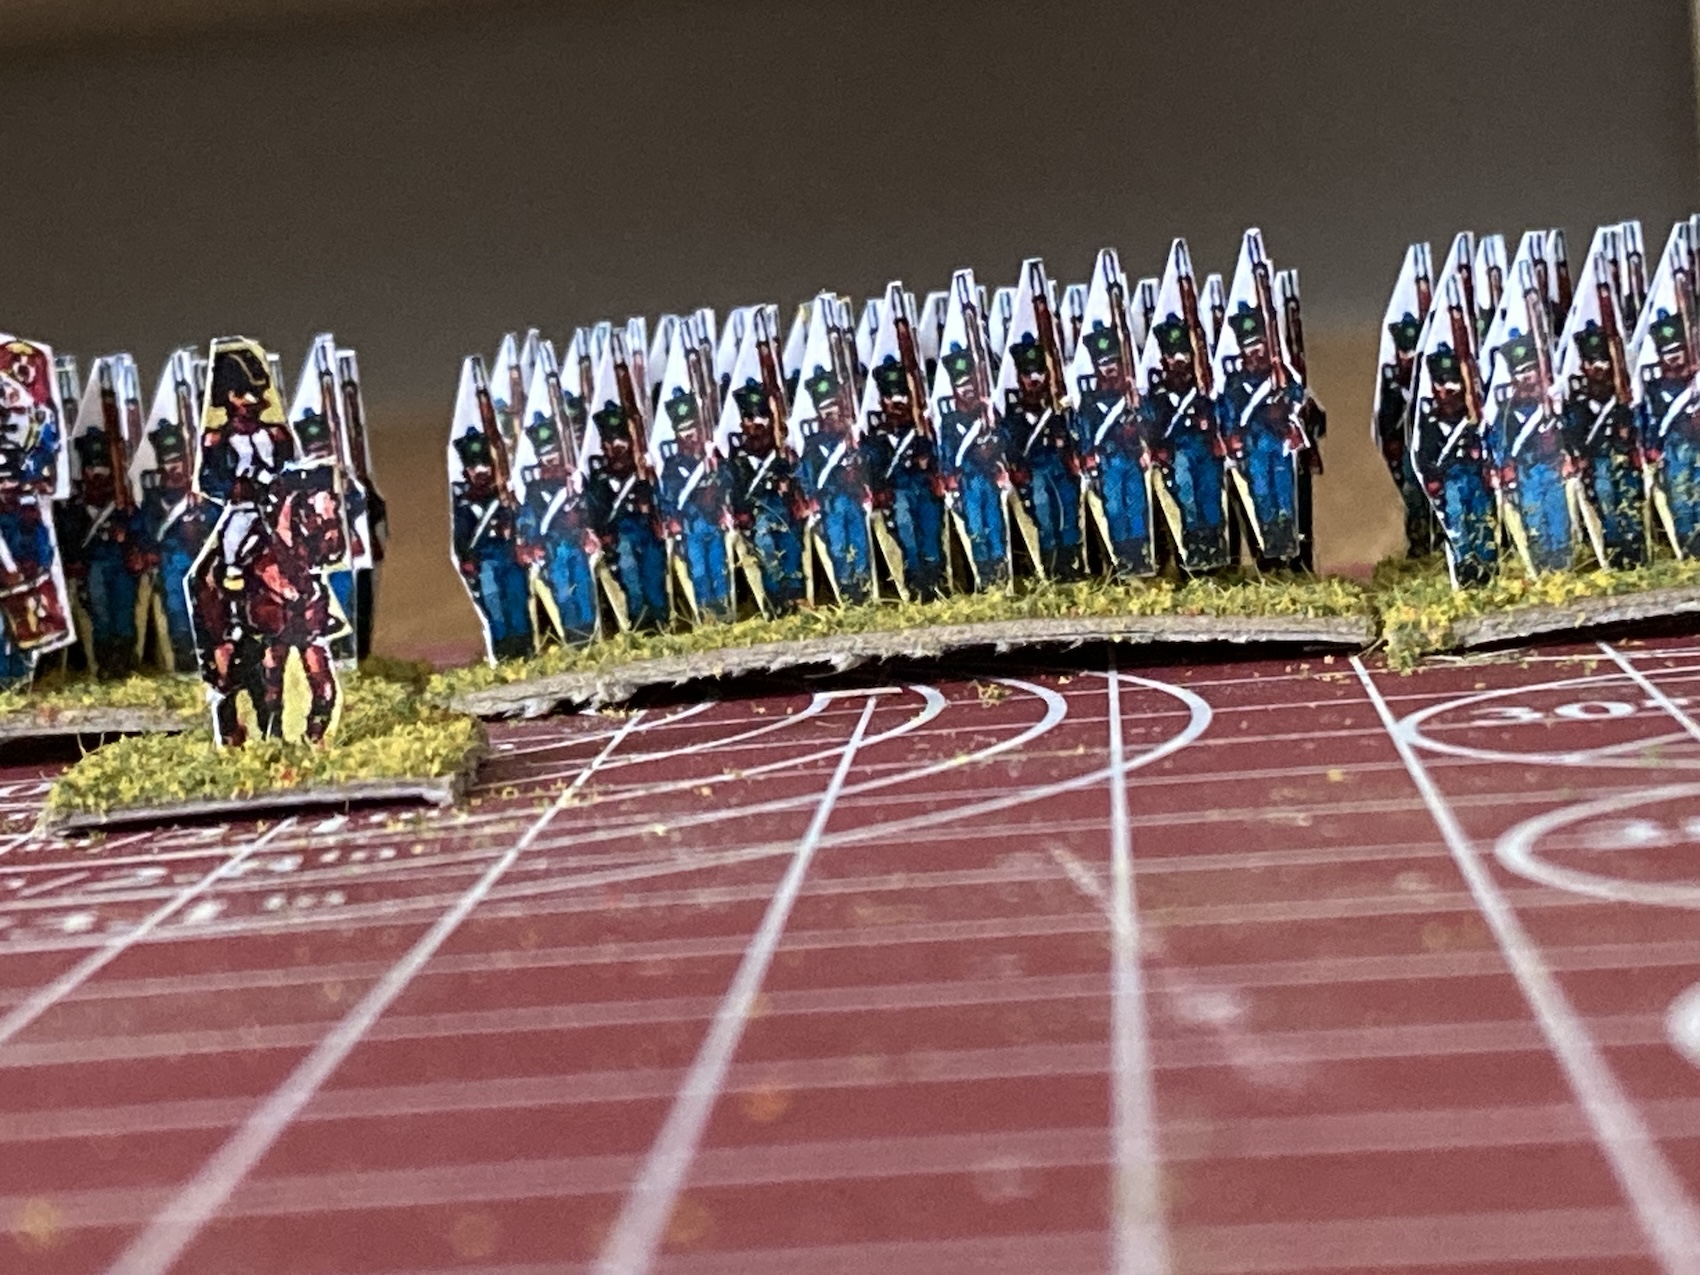
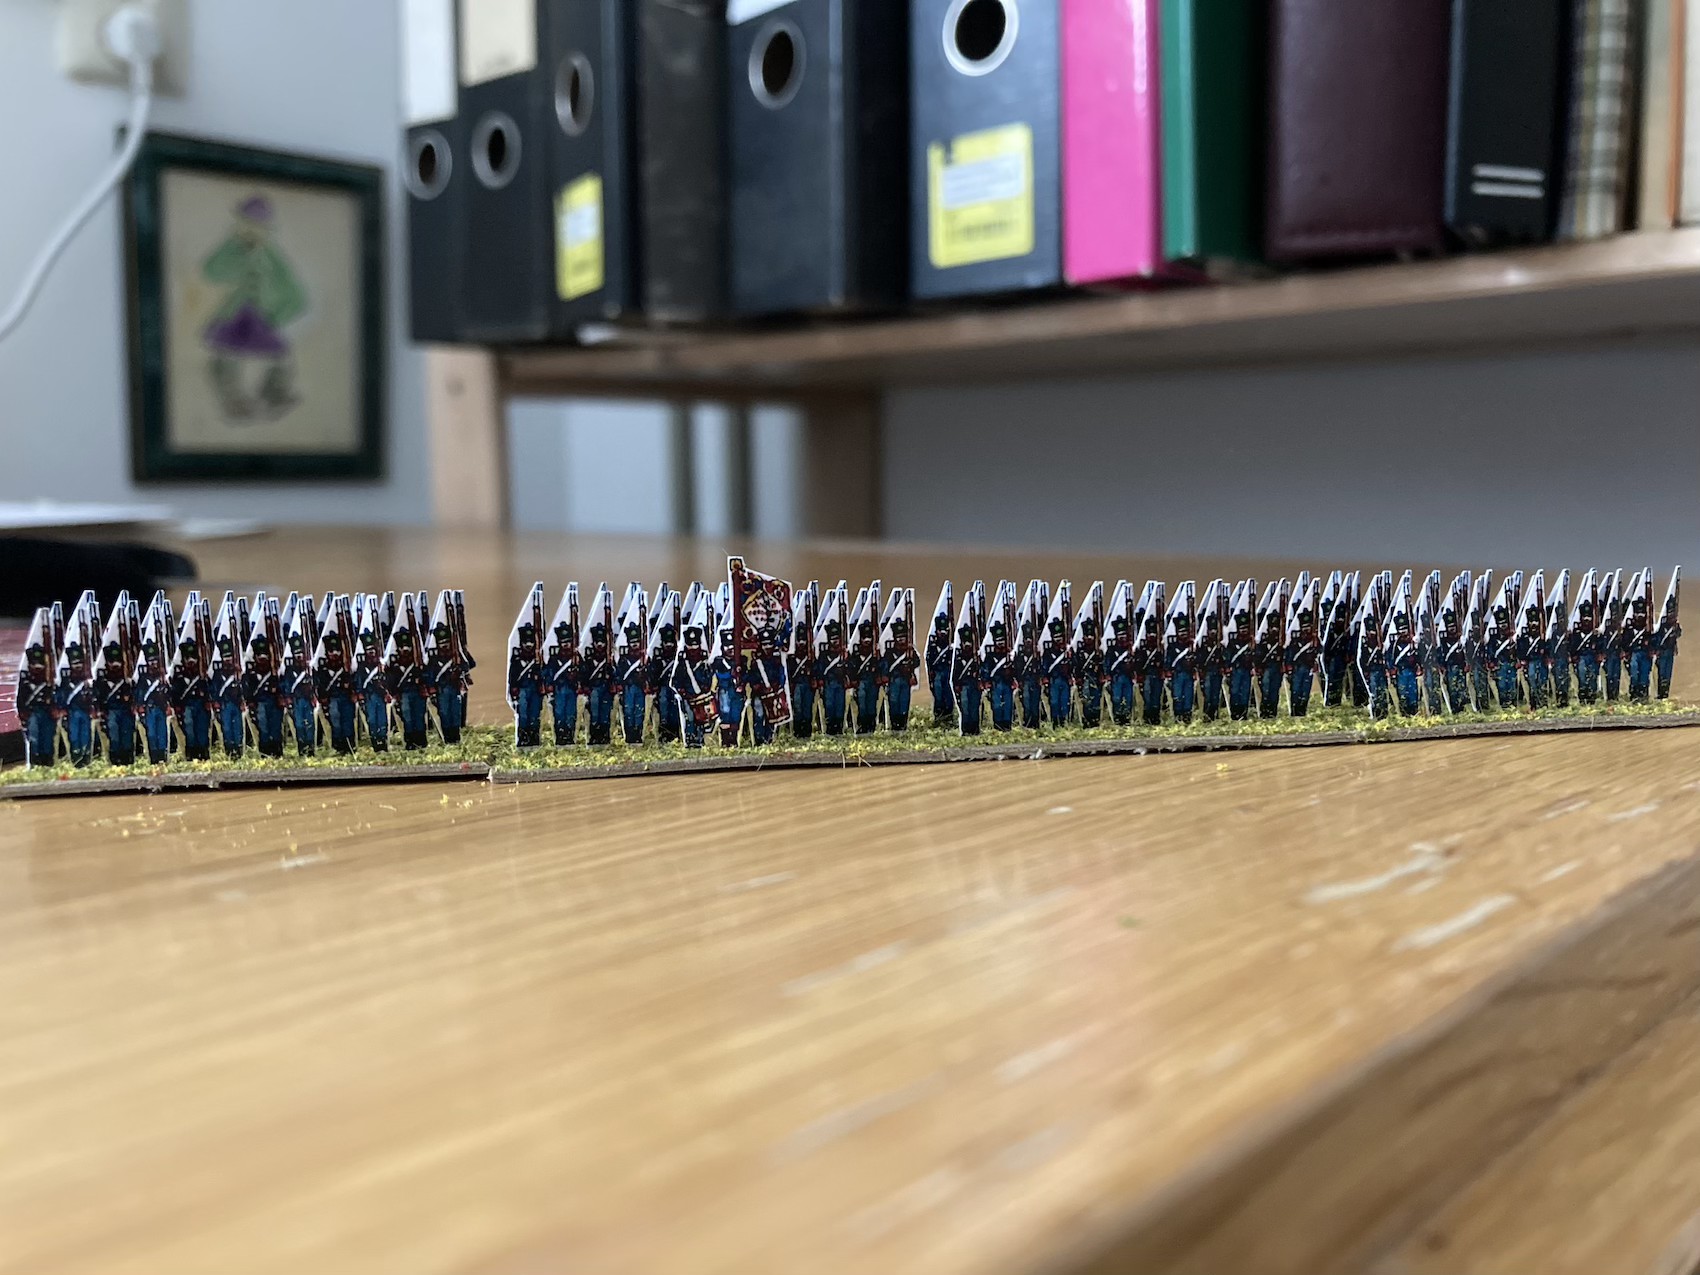
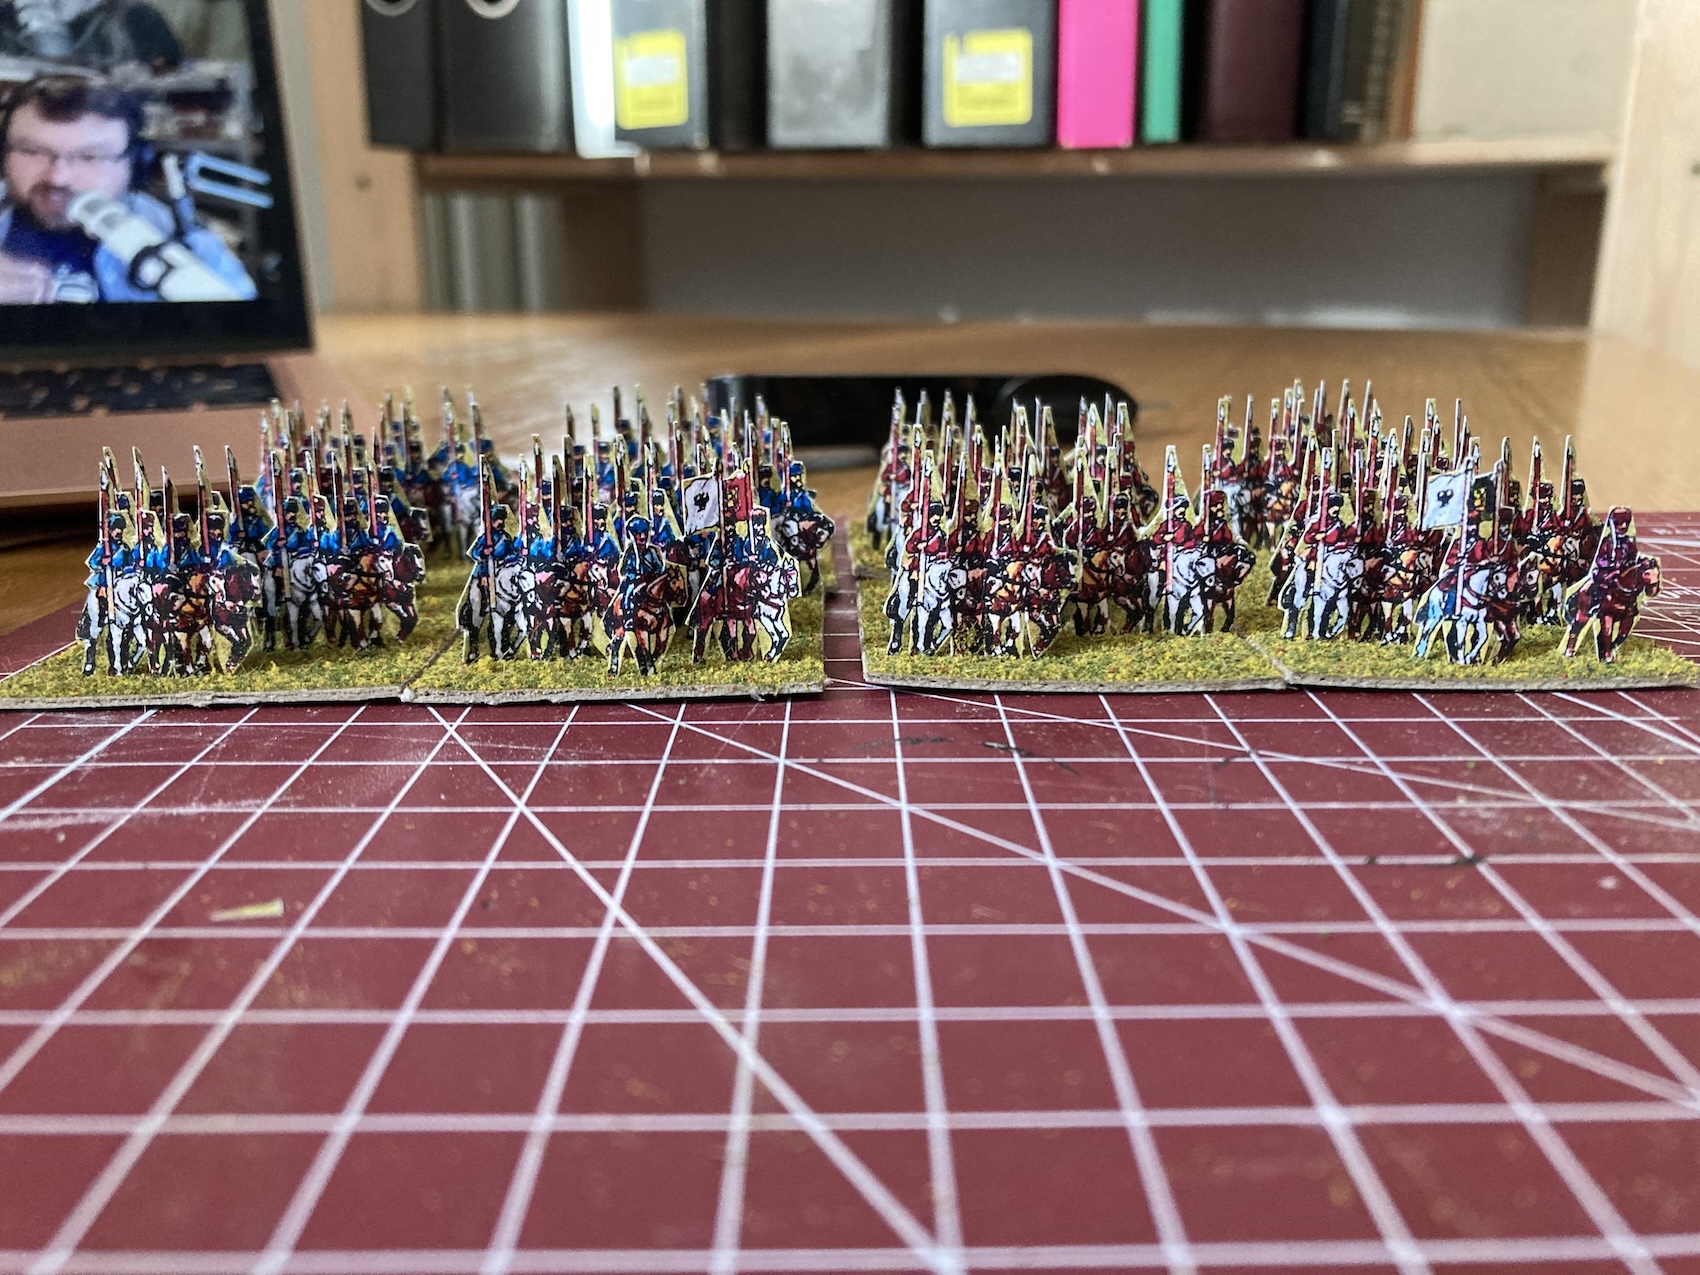
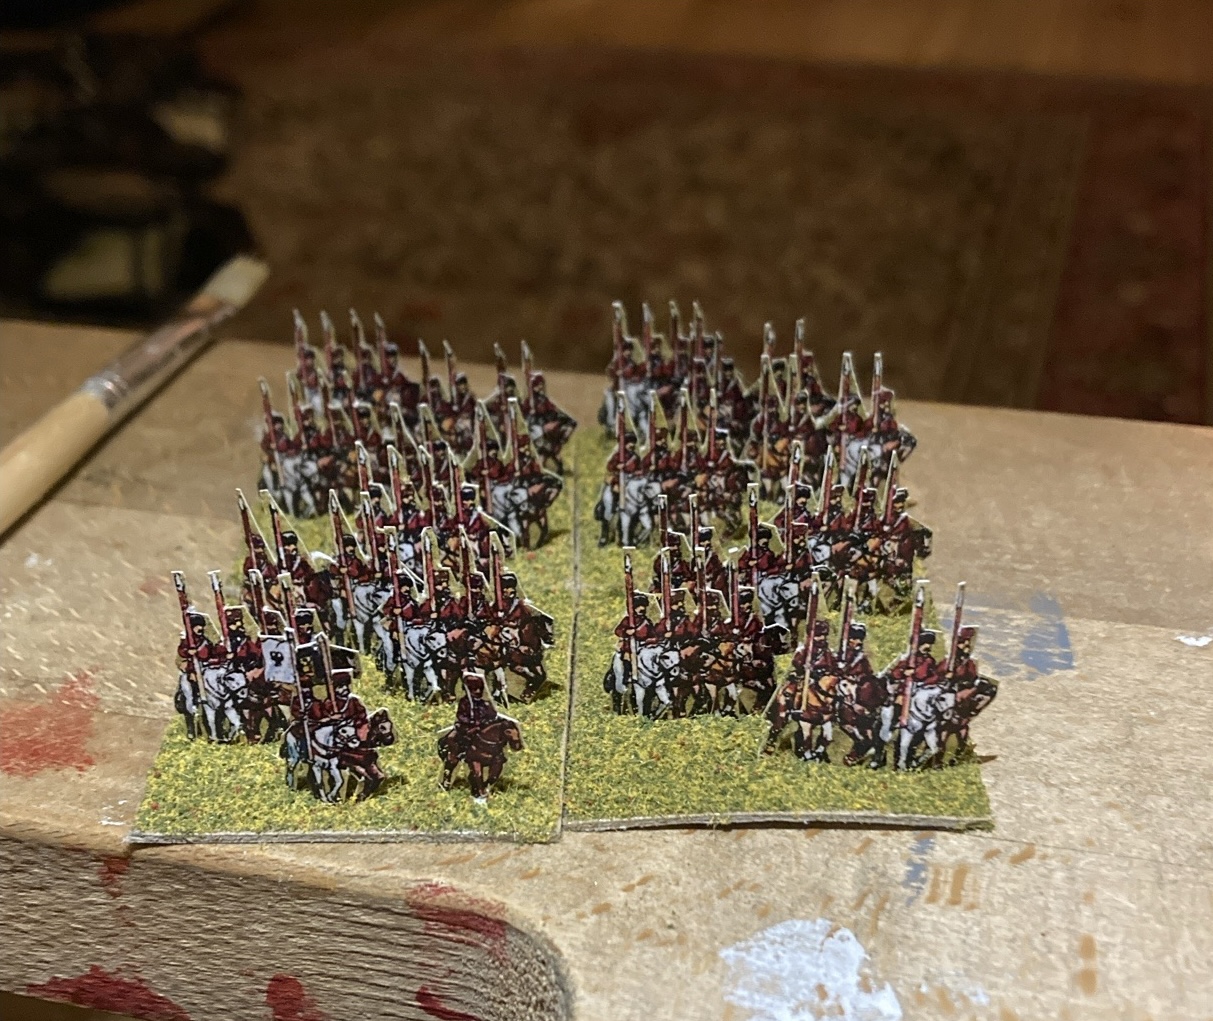
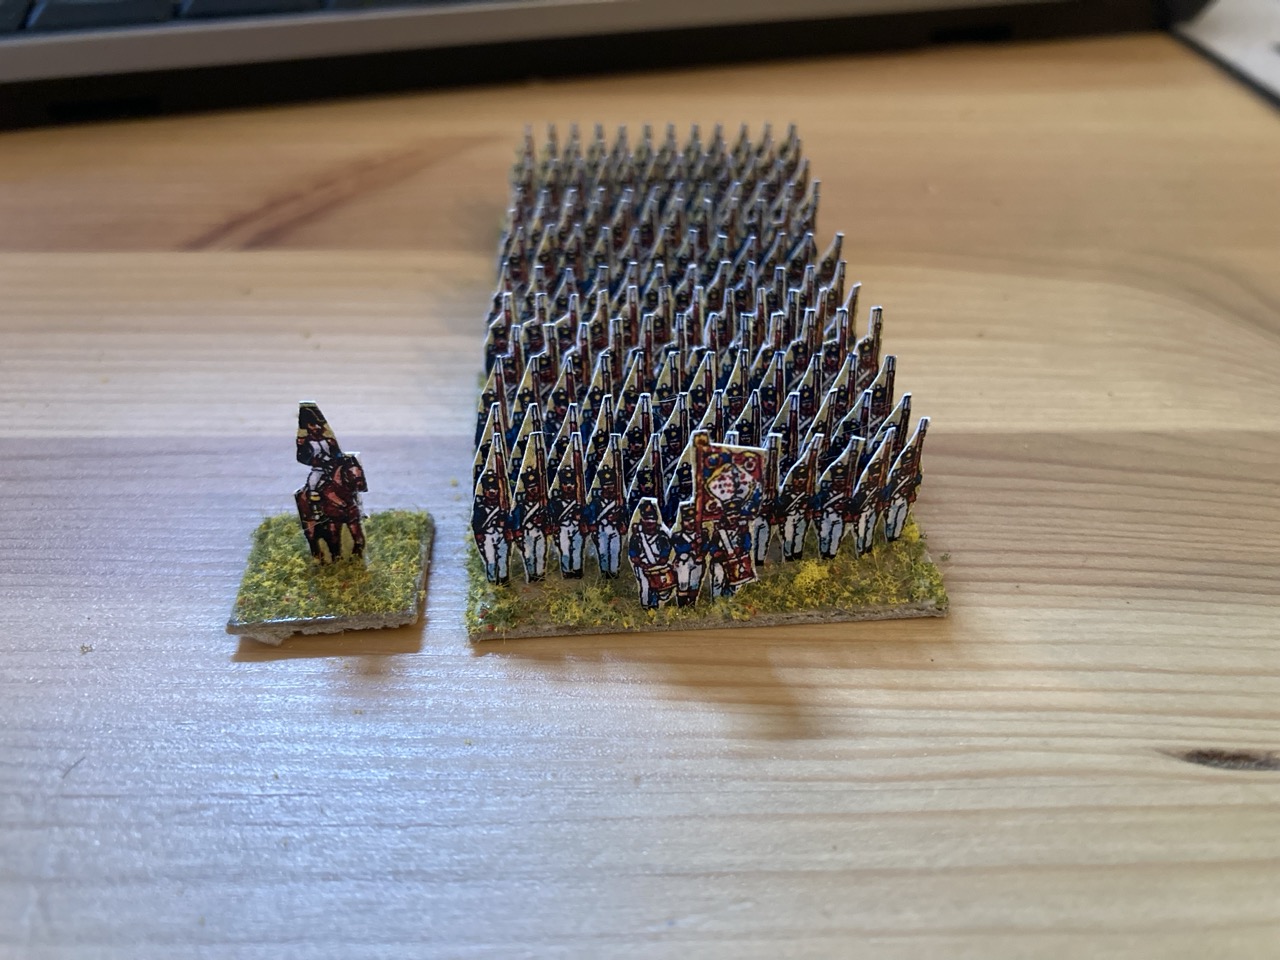
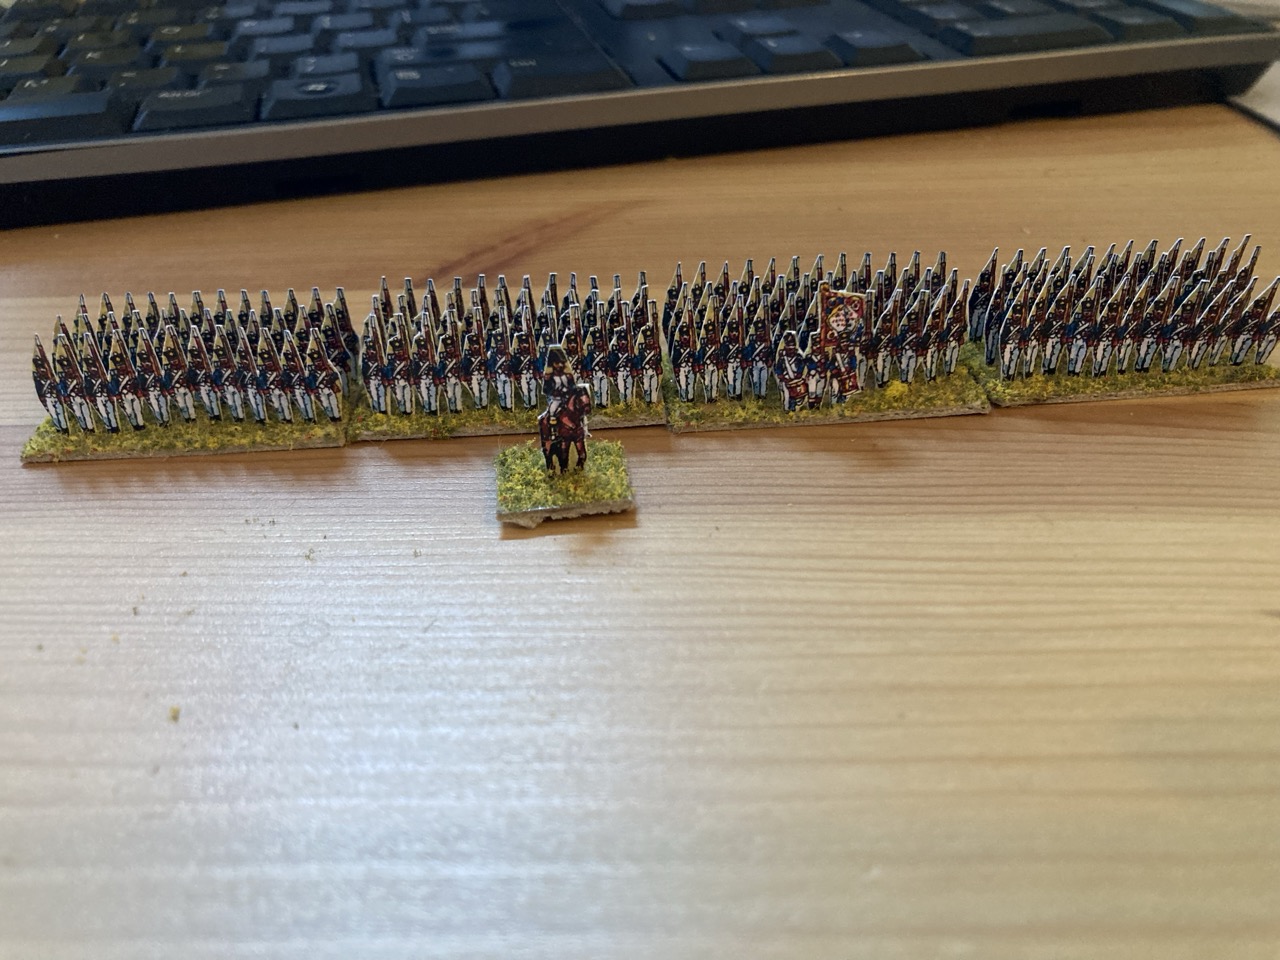
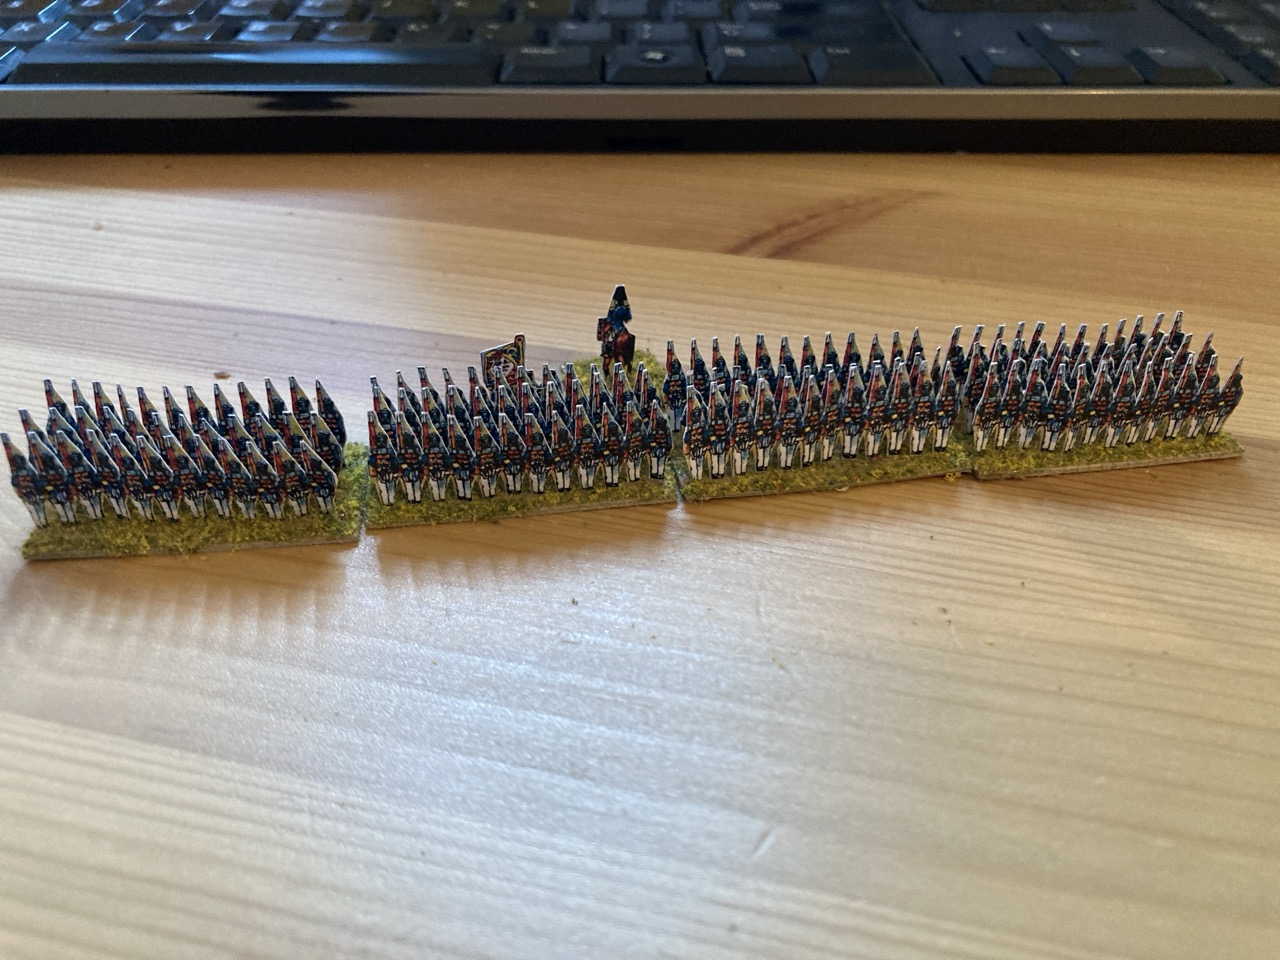
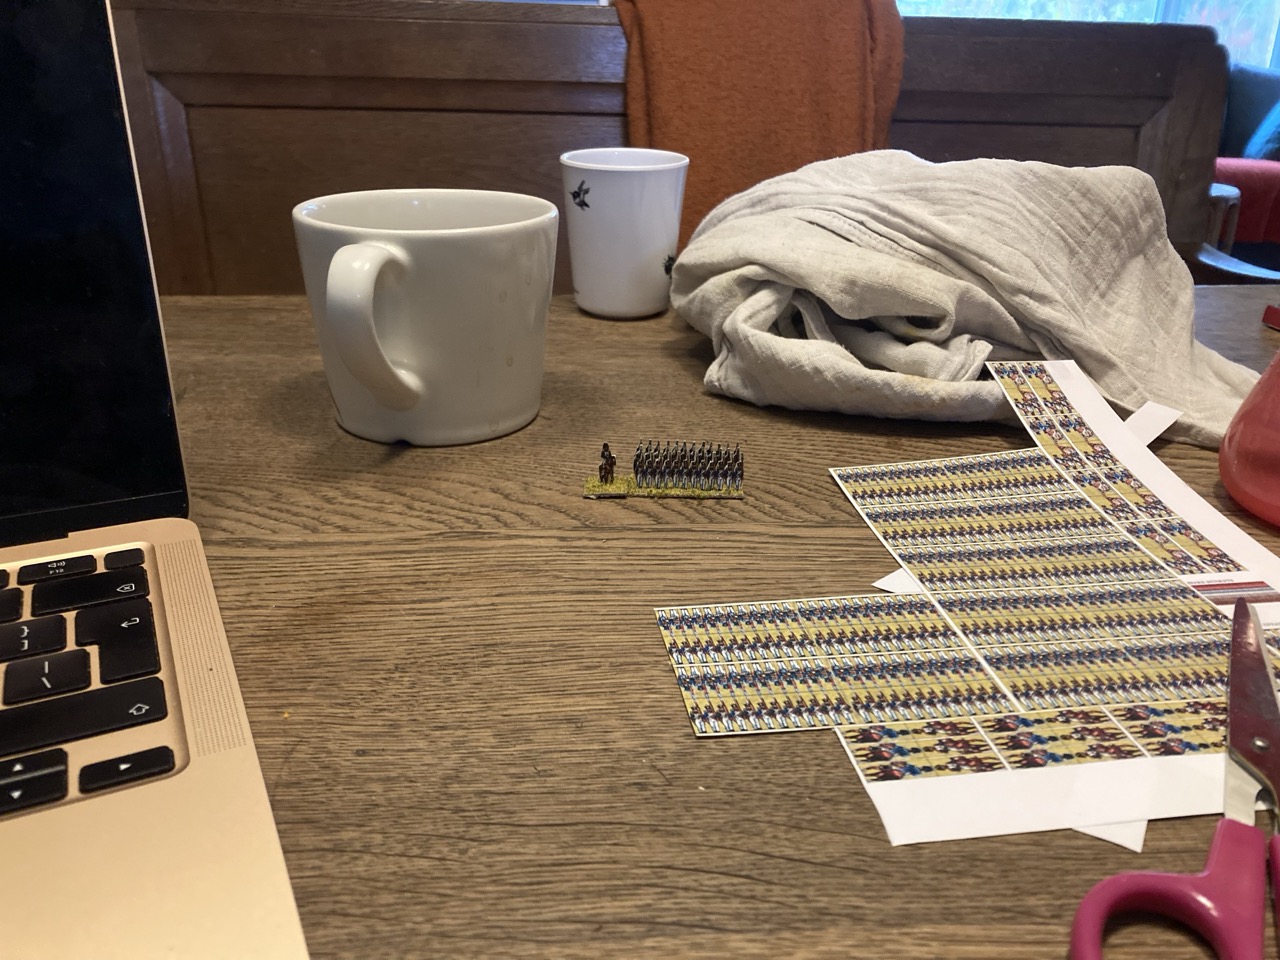
Of these lists I have now built all the French line infantry and all the Russian cavalry. This technically means I am halfway through!
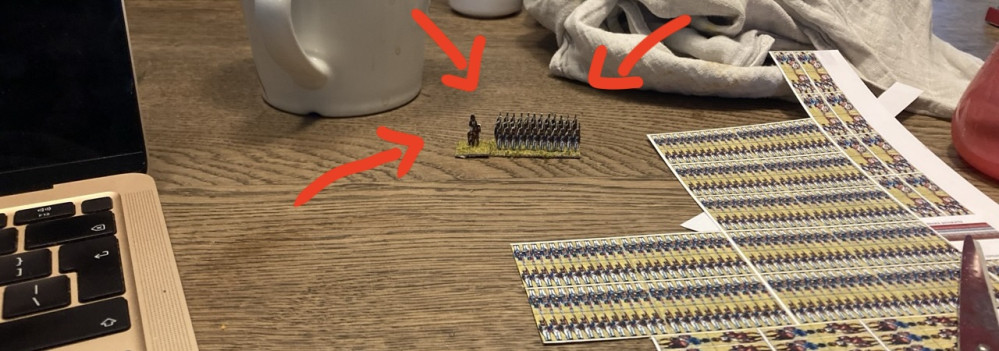
In the photo below you can see the size of one army (which consists in this case of French infantry and Russian cavalry), minus the artillery. I have to say that the paper boys do have a grand effect when lined up like this!

More about bases
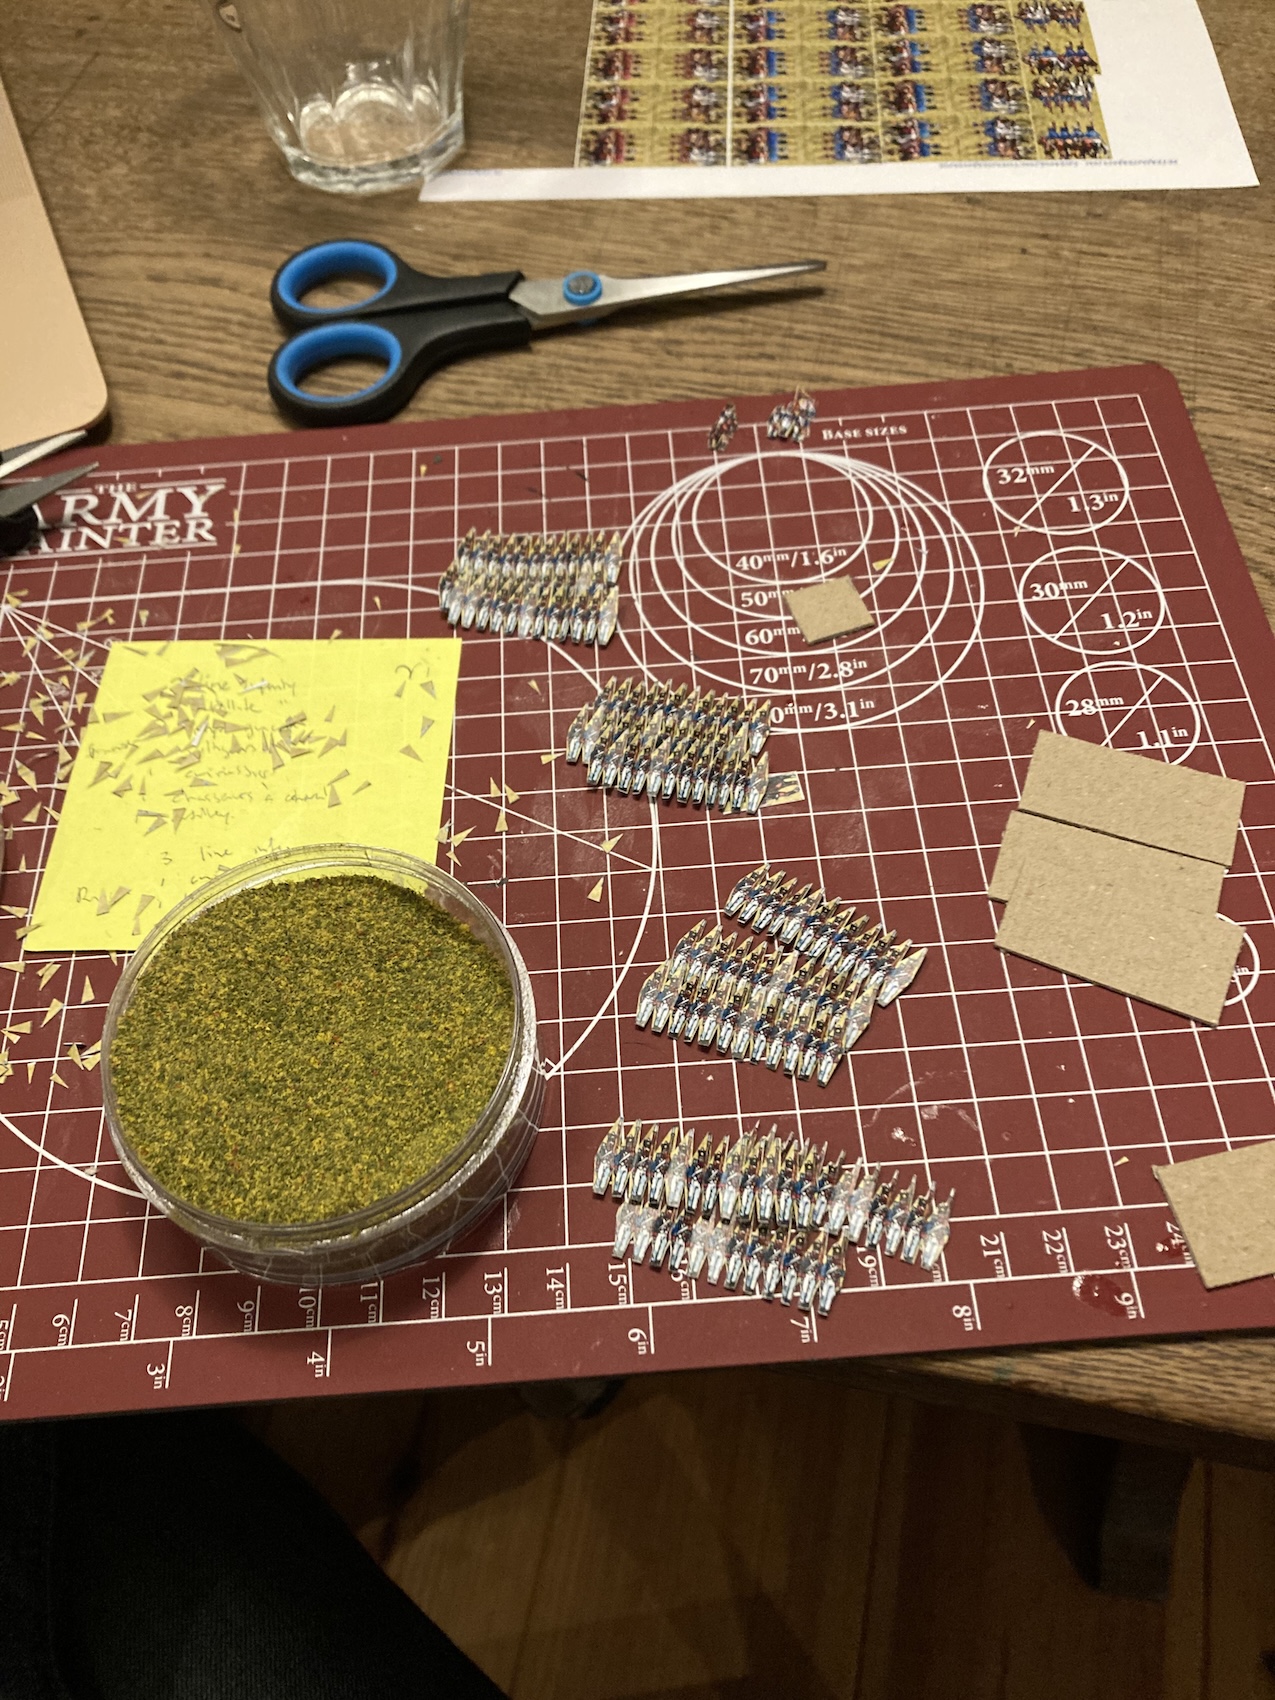
Oof, it’s been some itme since last update. It’d be unfair to blame it all on work being busy lately. As many may recognise, it is difficult to focus on one project. I’ve been planning a new Kill Team and … I’ve bought an FDM printer. So I’ve been messing about printing small terrain pieces and mainly tiny tanks for a ‘real life’ version of the classic GBA game Advance Wars. Now I’ve got the initial novelty of the thing out of my system, I noticed that I should get back to my paper Napoleonics.
Call me lazy, but I found cutting out the bases for the units from cardboard a boring chore. On top of that, the issue with the board bending after being applied with wood glue was still nagging on me. So, I though’t I’d use my 3D printer to fix this issue!
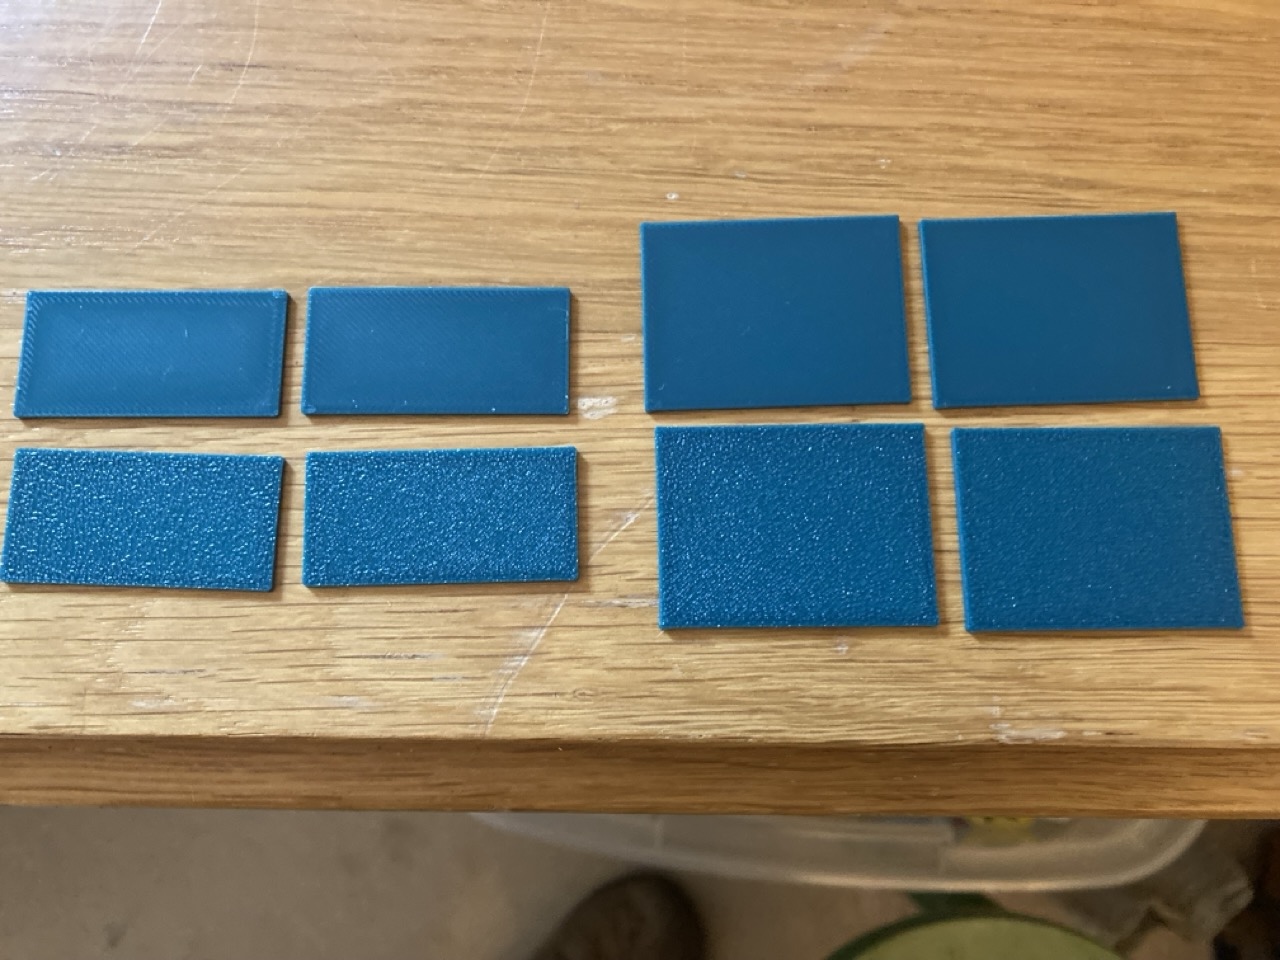 left regular infantry bases, right regular cavalry bases
Behold! Technically I designed these myself, but the work was so minimal that it cannot be called ‘design’ really. They are just 1mm high blocks with the right dimension with ever so slightly rounded corners. They print really fast and are churned out at the press of a button!
With my filament being dark green I thought it’d be even more awesome, until I noticed that the dark green border stands out too much when fielded next to the cardboard bases. Also, the dark green really gives the flock on top a darker hue. I am ashamed to say that I proceeded to the perverse art of trying to make the plastic look like cardboard…


This was easier to achieve than I thought, just a brainmatter beige base coat followed up with a sepia wash. All in all, still easier than cutting out the cardboard bases myself.
In the photos above you can see the unpainted and painted plastic bases in the first two, which you can compare to an old photo of my units on coardboard bases.
Not unimportant: the soldiers that got the first set of new bases are the French Grenadiers! Vive l’Empereur!
Hurrah! Golden Button!
Tiny update to celebrate the golden button! Very happy with this and a great motivator to continue the project. Big thanks to the OTT community for both the inspiration and the advice! To celebrate this I thought I’d share a few pictures of all the units I’ve assembled up to now.

And finally, the paperboys in action: the French infantry forms into squares as the cossacks have surprised them from the rear!
Snippathon '24
 480 snips
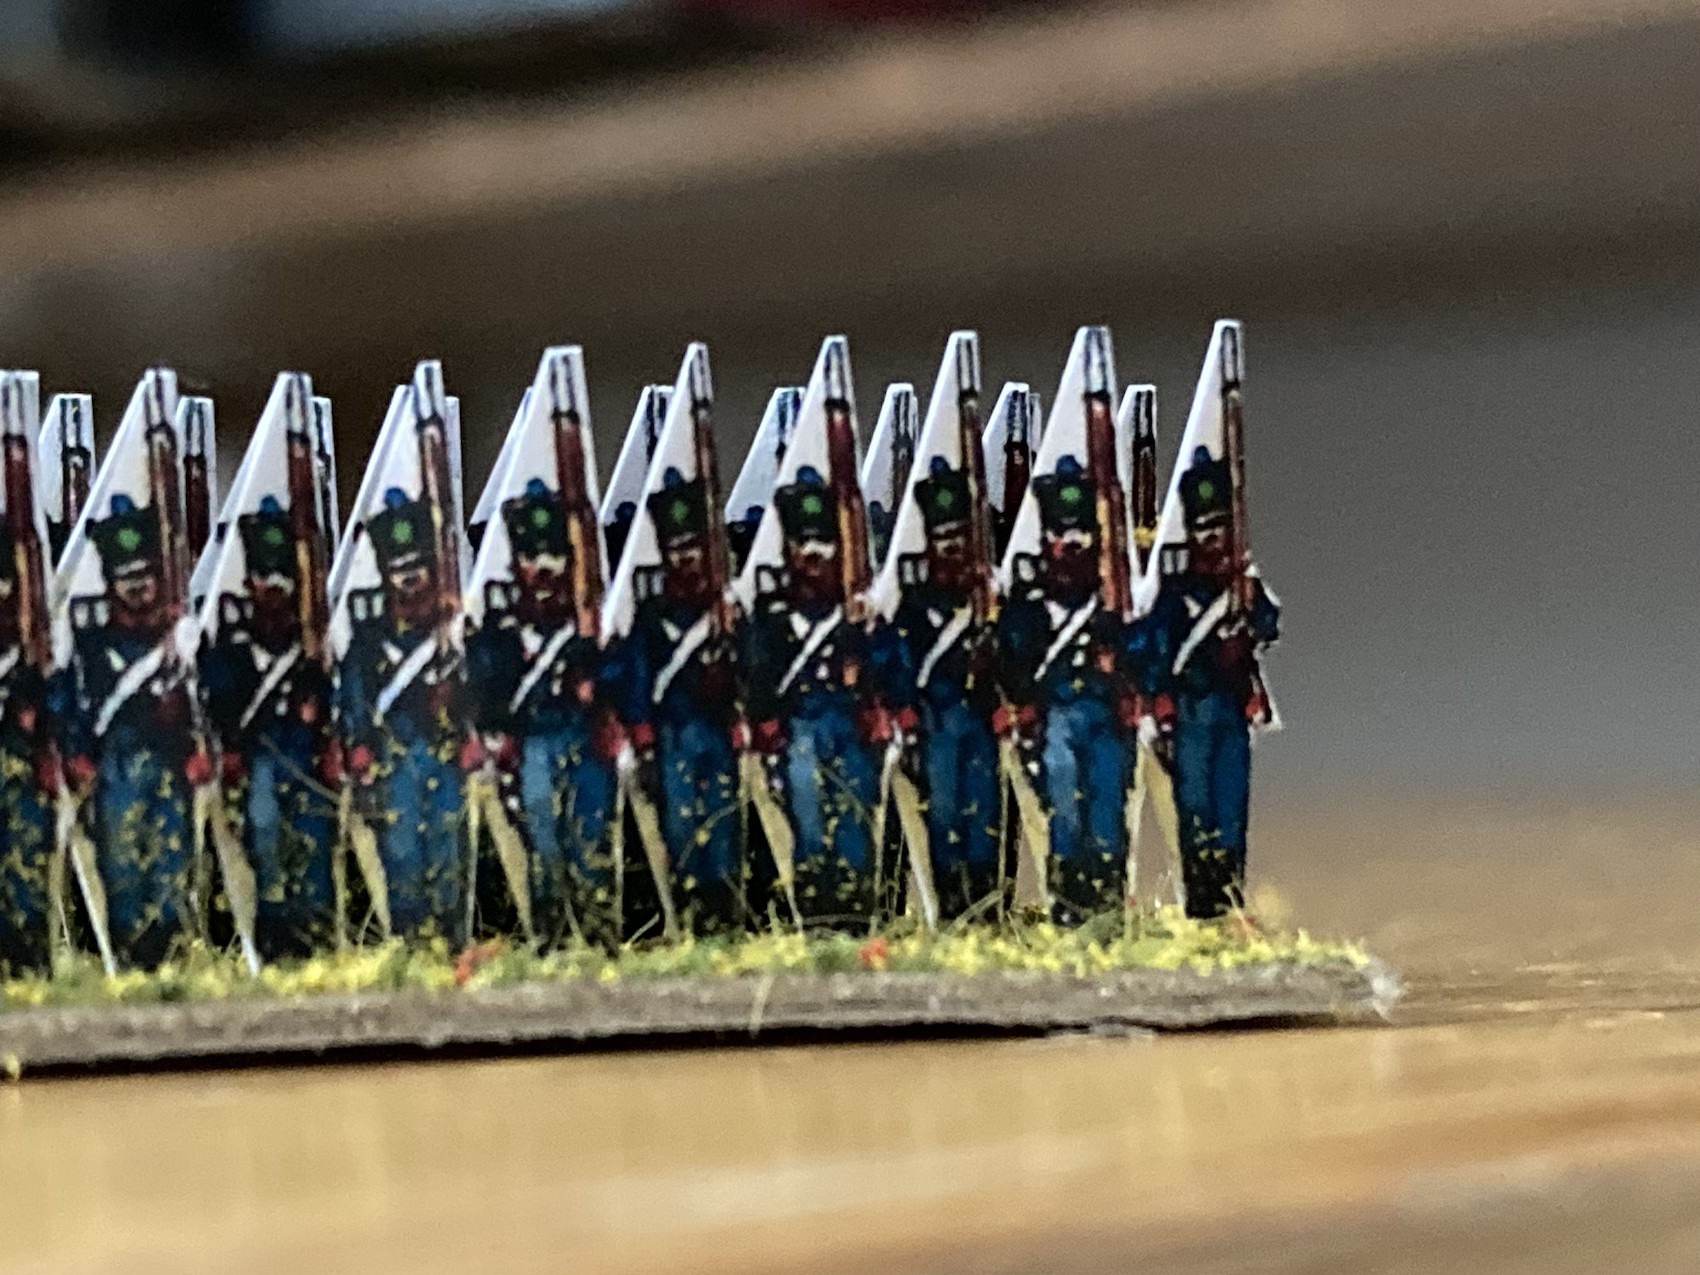
To create one unit of French line infantry, it takes a minimum of 480 snips, the way I’m doing it: 40 snips per line, times 3 per base times 4 bases is 480 snips for a unit, excluding those for the standard bearer, musician and commander. I’m not terribly interested in the Peninsular Campaign, but I do envy British players, who only have to make two lines per base… These half thousand snips did allow me to finish my second French unit!
Blue cossacks and light satellites

As promised previously I now went with the cossacks in blue. More or less in tandem, I worked on the third line unit for the French army: the so-called satellite infantry. By this the client states of the French are meant, e.g. the Duchy of Warsaw, Naples, various German states (not the Kingdom of Holland though; we were there, but by then annexed into France). I will discuss the army composition I’m going for in a future post, but for now it suffices that this is an obligatory choice in the French army for the 1812 invasion into Russia.
To differentiate these from the regular French line infantry, I chose the Light infantry, because Peter’s Paper Boys didn’t printout sheet for these specifically. In hindsight, I should perhaps have chosen the infantry in greatcoats, which may have been more historically accurate, but I’m going to cut myself some slack, since I’m just getting into this.
I think it is a bit of a pity that the background for the top half of the light infantry lines is white, rather than the green of the line infantry. This wouldn’t be a problem if I didn’t cut corners (well, I cut fewer of those), but it does make them more recognisable on the table.
I did run into a previously encountered problem, however. Do you remember the cossacks on hills? The cardboard base started bending because of the wet wood glue. In case of the cossacks, it bent front to back, meaning that it had no effect on the cossacks. I hadn’t noticed this with the second unit of line infantry, but the bend was very obvious with the light/satellite infantry and goes from side to side!
This means that some of the men seem to be taking off!
While in civil service I learned that “most problems, if left long enough, will fix themselves”, and this has proven true once again. In fact, the aforementioned cossacks that were afflicted by the same problem came to stand on flat bases again in the end as well.

And here are some images of the cossacks being fine.

 PS: I was asked why I didn't just do this. Wouldn't have been the same.
Cossacks!
With me being away for Christmas and New Year’s, I haven’t had much time to work on the paper boys. Today, however, I did find a moment to finish the first unit of cossacks!
With my shiny new precision scissors work progressed quickly. It is tempting to focus on cutting things out neatly, but with the amount of work I still have before me and the little time to do it, I keep reminding myself to keep it simple. You are going to notice very few details on this scale. And most of all: it is about the overall look!
 In the dark on a couch: best place for hobby
Wood glue
I’ve been experimenting with glue for the base in an earlier entry:
- General purpose glue dried a bit too quickly and shone through the flock.
- General purpose glue for attaching the minis and wood glue for the flock around it was too much of a faff.
So this time I tried it with just wood glue.
I was pleasantly surprised with how well the paper boys stay in place on top of the wet glue. I was afraid they’d fall over, but if you bend them a bit beforehand (as suggested by Peter himself) there is no issue with that. Other than that it went exactly as expected:
- You get a thicker layer of flock.
- The cardboard base starts to bend a bit. Tsk!
 Cossacks on hilly basing
Now, I think it’s not too bad with the bending and I’ll try to bend it back a bit once everything has dried. Let’s just hope it doesn’t get worse while I wait…
I really like the fulfillment I’m getting from working on these. The units are built very quickly (I’m just slow) and they look very pretty. I’m looking forward to the next unit of infantry!
 Ready to harass retreating Frenchmen!
About scissors
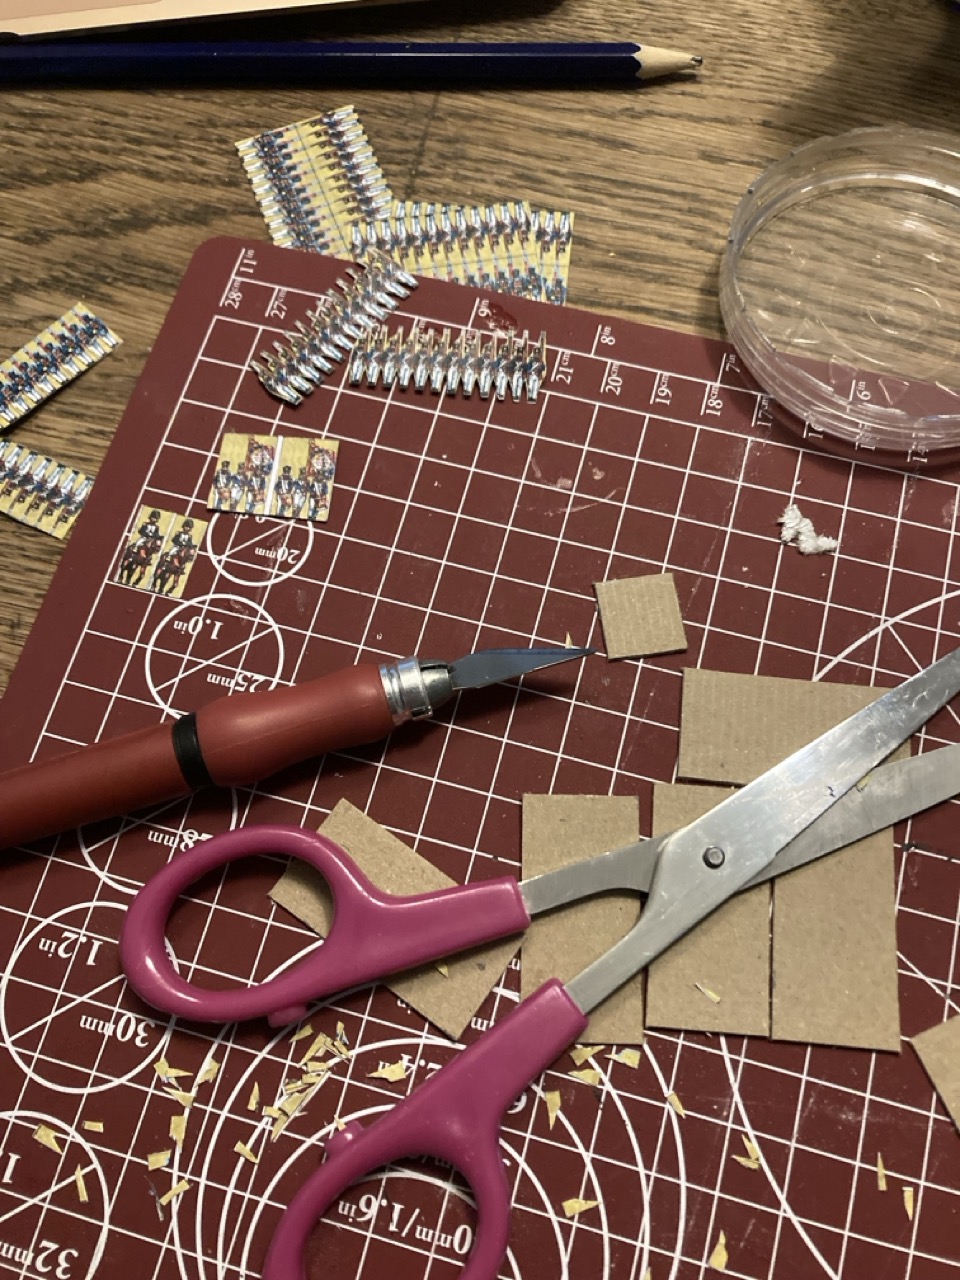
It has been pointed out to me in the Unofficial Hobby Hangout (UHH) that the pair of scissors I’ve been using is huge… So, I thought I’d talk a bit about scissors today! For this discussion I’ve made the following photo:

I started out using the smallest pair of scissors I’d found in our household, scissors nr. 2. Now, Peter from Peter’s Paper Boys did mention that one should get a pair of precision scissors. The video in which he said so didn’t have a clear image of them and, to be honest, I didn’t think to look up this up. I did know that scissors nr. 2 wasn’t going to cut it (…) in the long run, since after a hefty snipping session my hand would hurt and I lost feeling in my thumb (I guess a nerve got stuck or something).
So, on to scissors nr. 3! Now you may ask yourself what is special about them. Well, the label said that they were for precision cutting AND for left-handed fools like myself. I’ve never used left-handed scissors, so I thought that this might improve my snipping comfort. Well, it did to a degree. I never noticed that right-handed people using a regular pair of scissors don’t have to twist their hand to look on the outside where they’re cutting. What takes even more time to get used to, however, is that I unconsciously press the blades of the scissors in such a way that it gives you a finer cut. Or in the case of the left-handed pair, a sloppyer cut, since you push them away from each other.
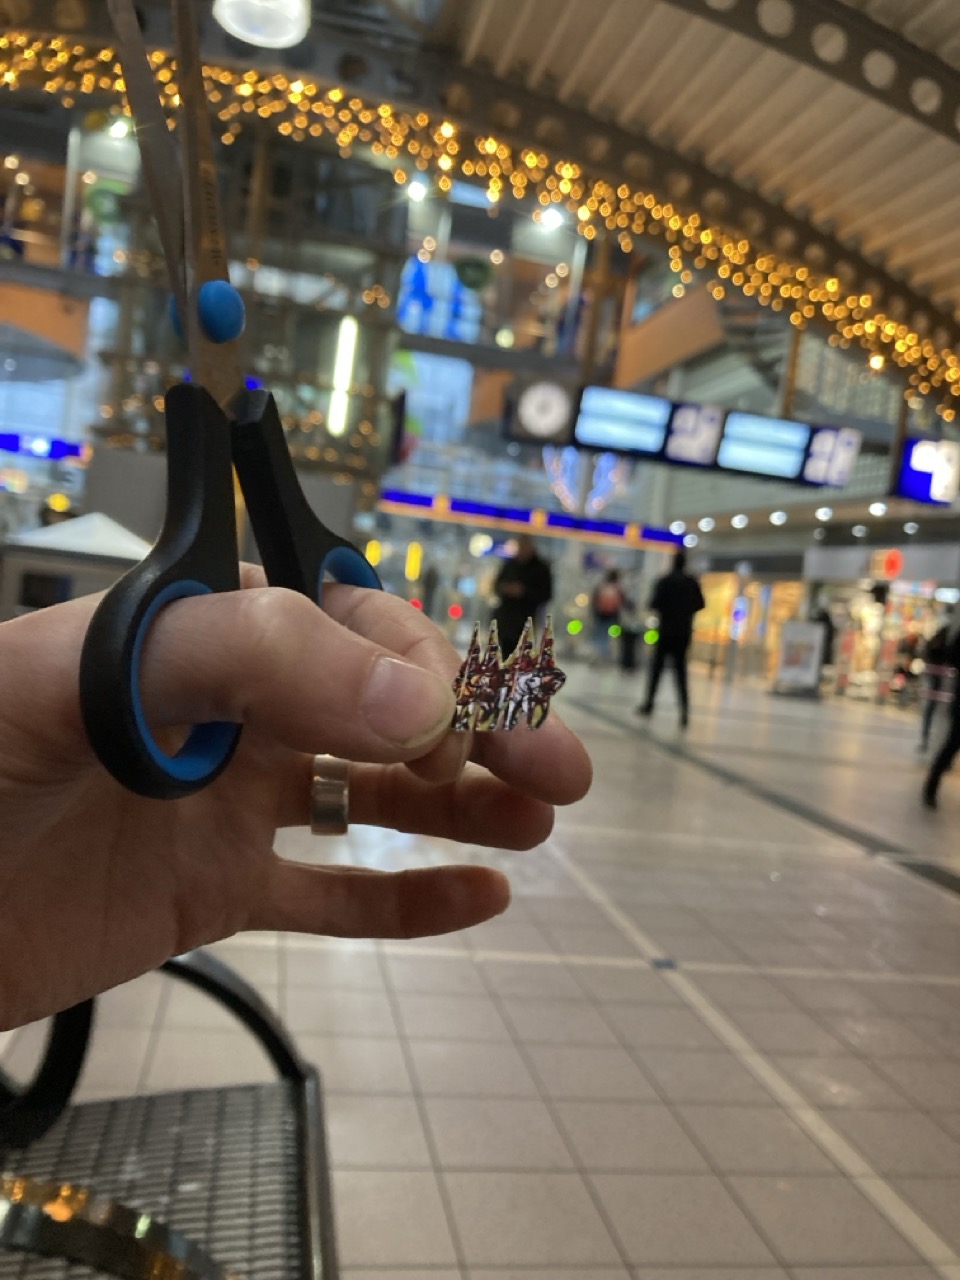 The left-handed ones in action, in the wild: never waste a moment!
After a bit I did get used to nr. 3, but to be honest, they actually seemed less precise than nr. 2! It was then that I stumbled across scissors nr. 4, while looking for something completely different. I had seen the UHH by now and thought to myself that these might actually be the scissors that @avernos was talking about. Now, these are actually more precise. I only have to watch out that I don’t close them completely, since that might rip a tiny bit of paper (which could be a tiny lance or rifle). I’m happy with these for now.

Now, why did I include scissors nr. 1 in the photo? Well, to point out that I actually could have used an even larger pair!
Formations and more snippy snips!
 Now that is an attack column
So, I attached enough of the strips of infantry I had remaining from last snip session to three more bases to complete my first unit of French line infantry. I have to say, all those tiny fighting men lined op look amazing: that is the feeling I was looking for at this scale!
I mentioned last time I wasn’t too happy with how the universal glue adhered to the flock and glimmered through. So this time, I used the universal glue just for the center of the base: to attach the strips of infantry and to flock the area between them. I then used wood glue on the edges to get a good amount of flock there.
The idea was nice, but in practice it just became a bit messy. I used a brush to put the wood glue on, but also managed to scrape of the flock that was on there already…
I think that flock density now looks a bit better, but I’m not sure whether this amount of faff is really worth it. I might try wood glue only next!
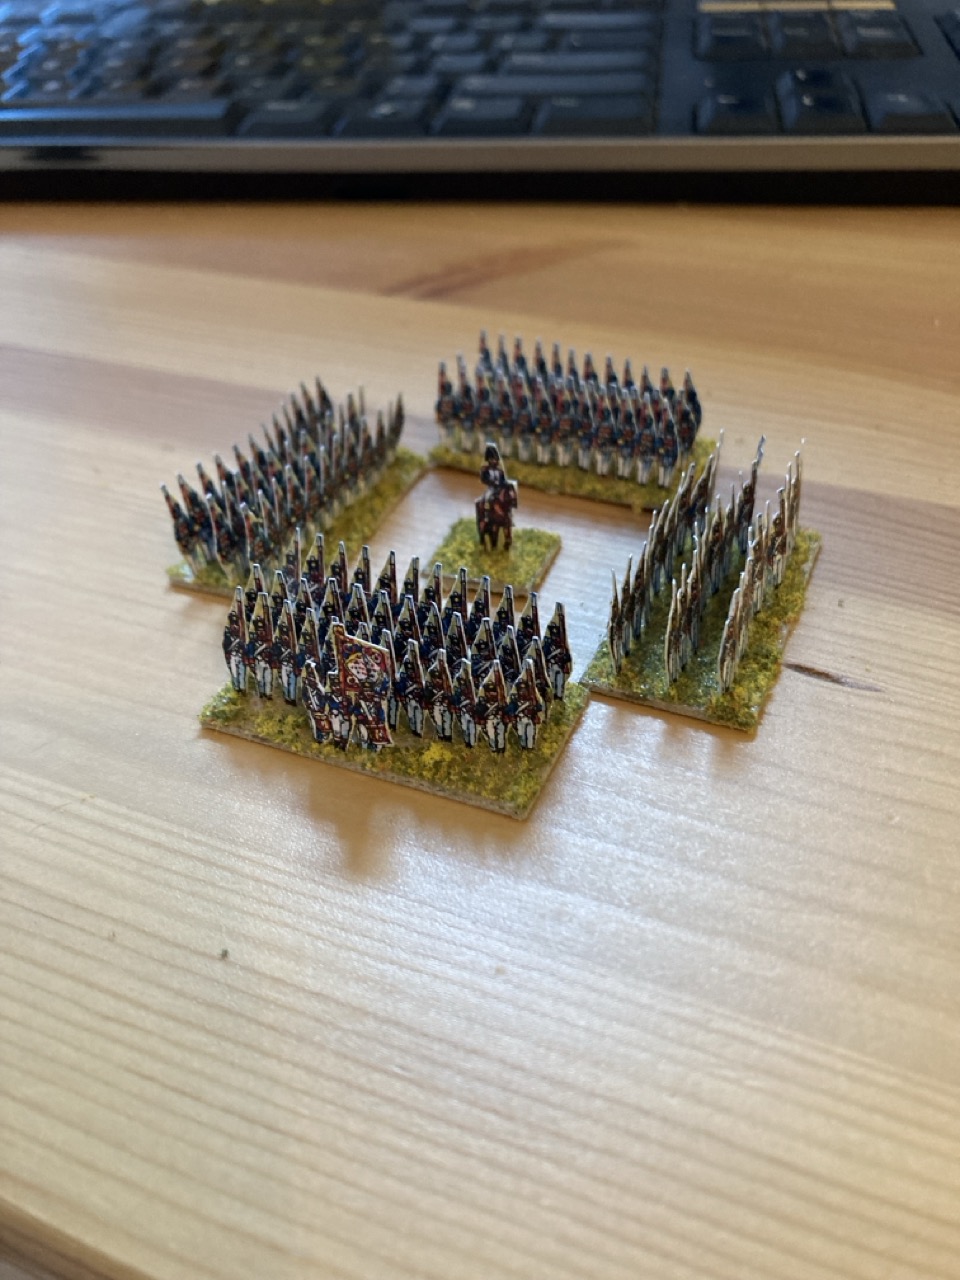
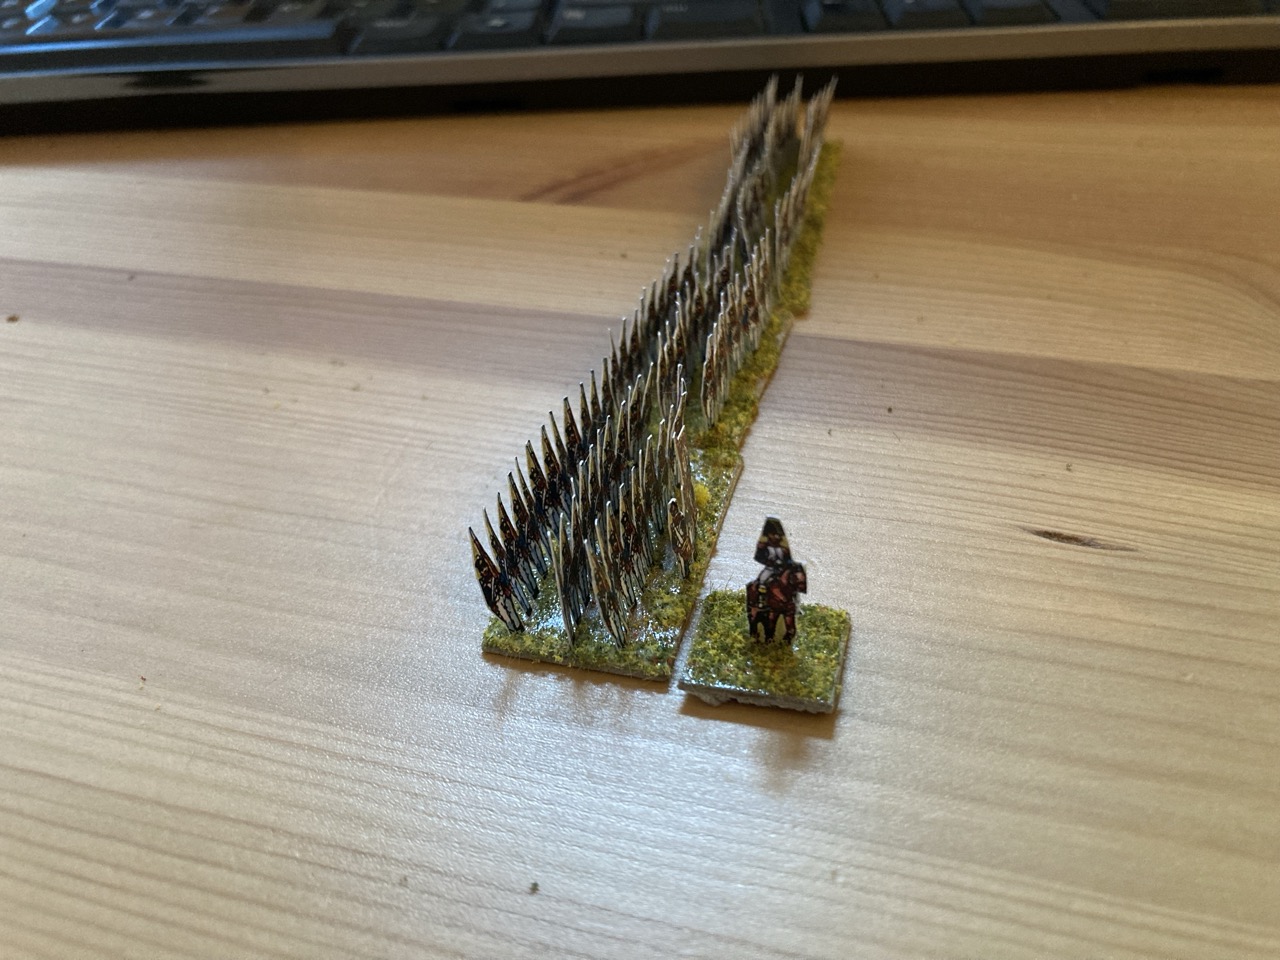
Here is the same unit in the other formations (in addition to column above) that the rules from Napoleonic Wargaming allow, respectively: line (+ line Lloyd), square and column of route. About the column of route: I called it ‘column of line’ last time because I didn’t have to book close. Oops. However, like I mentioned last time, you can see that the officer indicates the direction in which the unit is moving.
Up next: cossacks!
Now, up next are some cossacks. I decided that I’m going to alternate between line infantry and other units, so that I’m not endlessly snipping shoulder-to-shoulder infantrymen.
The cossacks that Peter’s Paper Boys supplies are either in red or in blue. This confused me, since I’m an utter novice in Napoleonic uniforming. A question to the COG/OTTer hivemind supplied me with:
- A handy link about cossacks during the Napoleonic wars. This informed me that there was a Lifeguard Cossack Regiment, which apparently wore red and was considered an elite unit.
- The knowledge that Peter’s Paper Boys “work on the red versus blue army principle where units and duplicates are concerned. For larger battles yellow. White and green are sometimes added.” (@avernos).
Now, the rules in Napoleonic Wargaming do not differentiate between different kinds of cossacks, but I do like the idea of a bit of variation. I will therefore include one unit of red and one of blue.
 Should be enough for a unit!
First steps
One of the things that stopped me from committing to the Napoleonic itch until now, was that I couldn’t decide on a scale. To be honest, I am mostly drawn to 10mm, since that will give me a proper feeling for the battles of the era. But I also thought I should wait to see what scale others play in my area. Well, I haven’t found any others yet, but I’m done waiting!
Some might wonder why not get into it using a small-scale system like Silver Bayonet or Chosen Men: well, however cool they seem, I’m a bit tired of skirmish games. For a change I’d like to build a proper army again!
So, how to try out Napoleonics, but at a large scale? YES: paper miniatures! I got a set of Russian and French tiny fighting men plus some terrain from Peter’s Paper Boys, which is not only dirt cheap, but also seems easier than assembling and painting figurines.
Looking at the pages upon pages of printed out miniatures I get excited, although I do feel like a lion staring at a herd of zebras: my head slightly hurts as it tries to figure out where one mini starts and the other ends. There are so many of them, with the same markings!
Peter (I assume that is his actual name) from Peter’s Paper Boys has a video on his website giving you tips on how to cut and glue the minis. That was very helpful and gave me enough courage to do a test unit.
After having cut out the individual ranks, I lightly ran a hobby knife through the middle, which gives you a very neat fold. I glued the two sides together using pritt stick, which worked very well. After drying, this gave a strong and thick piece of paper.
Having started cutting out the tiny men I noticed two things:
- It is easiest to cut them out using scissors (as per Peter’s suggestion). The hobby knife felt like a good choice, but took much longer. And boy, this is going to take loooooooong.
- My hand hurts from cutting. This is going to take loooooooooooo<ouch>oooong.
At this point I should perhaps indicate what ruleset I intend to use.

Napoleonic Wargaming by Neil Thomas was brought to my attention in a podcast episode on Napoleonic wargaming. (For those interested, the podcast series is called The Napoleonicist and even though it normally doesn’t deal with wargaming, it makes for a very interesting listen!)
The book feels like a complete introduction into – well – Napoleonic wargaming. The first part gives you the historic background: basically, how was war fought before the Napoleonic wars, what changed, why were they fought and where, etc.
The author then goes into Napoleonic wargame rules, a brief history, the pitfalls and ultimately what a ruleset should be like. This is where he presents a ruleset of his own. Before giving you the ruleset itself, he first explains why he made certain choices in creating these rules. The man seems to know his stuff!
Now, since this is my first forage into Napoleonic wargaming (and historical wargaming in general!), I have no comparison to make. Keeping in mind the discussion in the recent XLBS episode, the rules do seem to reflect the period: your units can assume various formations: line, attack column, square, and marching column. There are no points to buy your units. Instead, you are allowed to pick 8 units and some are obligatory, depending on the period and the army. I find this somewhat curious, but we’ll see how that works out!
In general, the rules are kept simple and seem easy to understand. I will find this out when I start playing. I’ll dive into them more once I get to that stage!
Enough writy writes. Some more pictures!

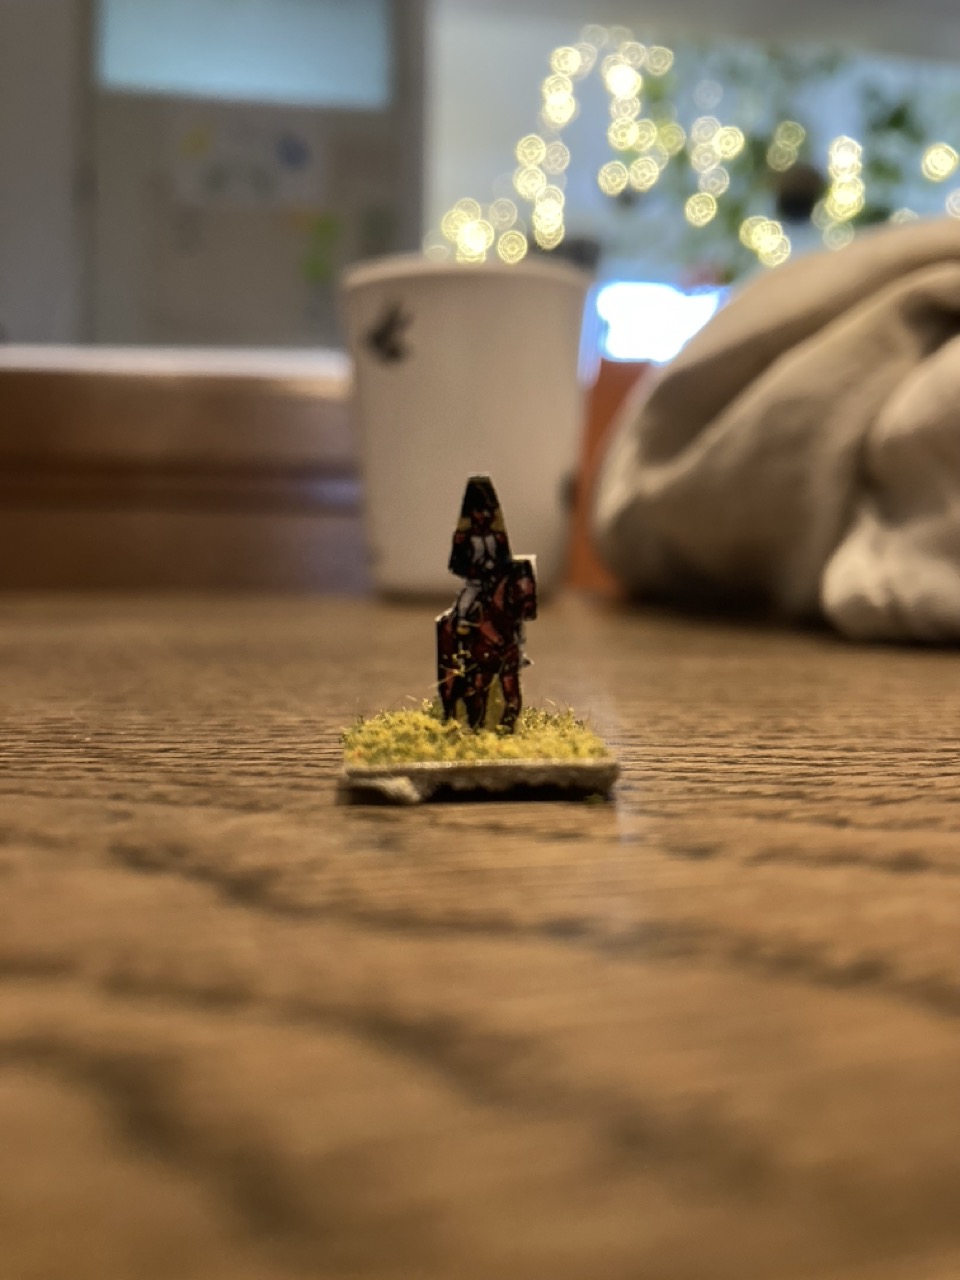

So, instead of using the printed grass, I thought: why not just base the cardboard with flock? The above is an officer, which I used to test this. He is so tiny!!
I was quite pleased with how it worked out, so I set out to assemble the first base of French line infantry.

I’m very pleased with the look of these. I need three more bases to complete my first unit of line infantry. Note that the officer has no effect on the battle: he is just there to show marching direction when your unit assumes column of line formation (which means they seem to move sideways), to differentiate them from a normal line formation.
I’m not sure about the glue that I used for the flock. Normally I’d use wood glue, but since I was using ‘universal hobby glue’ to attach the paper guys to the base anyway, I figured I’d use it for the flock as well. The glue dried unevenly, which meant that some parts of the base were already drying and didn’t stick to the flock. This means that you see shiny bits of glue coming through at certain angles.
I think I’ll try to stick the paper men down with the universal glue and use it to flock the space between the ranks. I’ll then glue the flock around it using wood glue. I’ll keep you posted with the results!
Now, to continue cutting out more men…
 Enough for three more bases and a bit. My scissor hand hurts...