


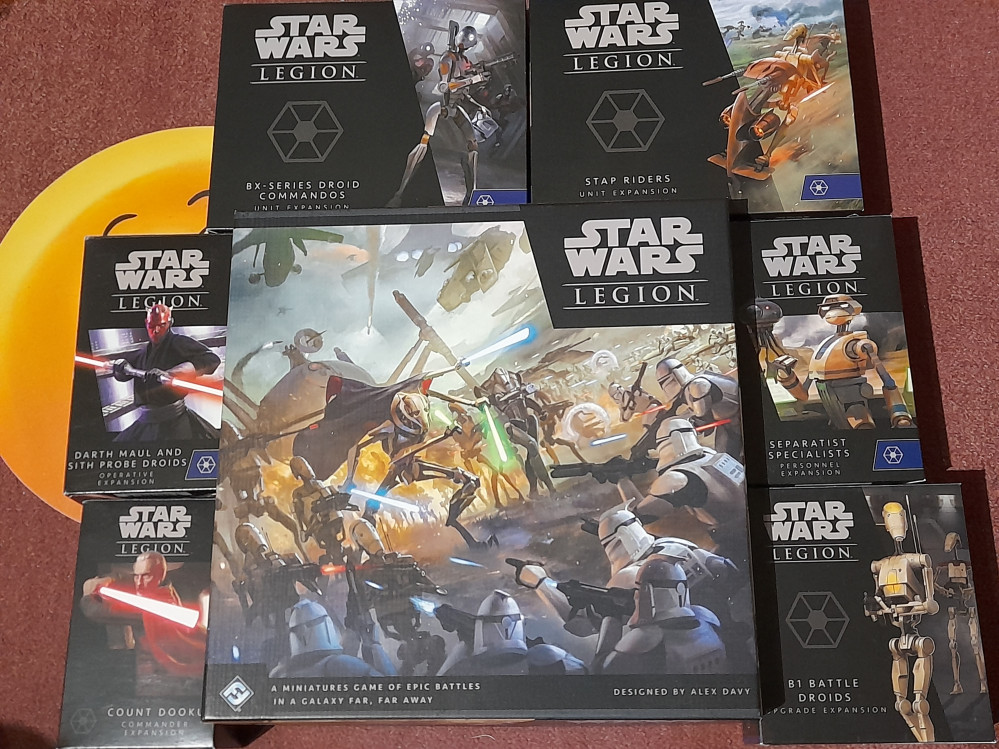
Draconis does…… Droids! Back to Star Wars Legion again.


Recommendations: 458
About the Project
Starting out the year with a return to Star Wars Legion. I have to be honest, I haven’t really played it much since doing my Clone force. However, the Droid forces of the Separatists still need to be done. This will be the contents of two core boxes (Droid side) and a number of expansion packs.
Related Game: Star Wars: Legion
Related Company: Atomic Mass Games
Related Genre: Science Fiction
This Project is Active
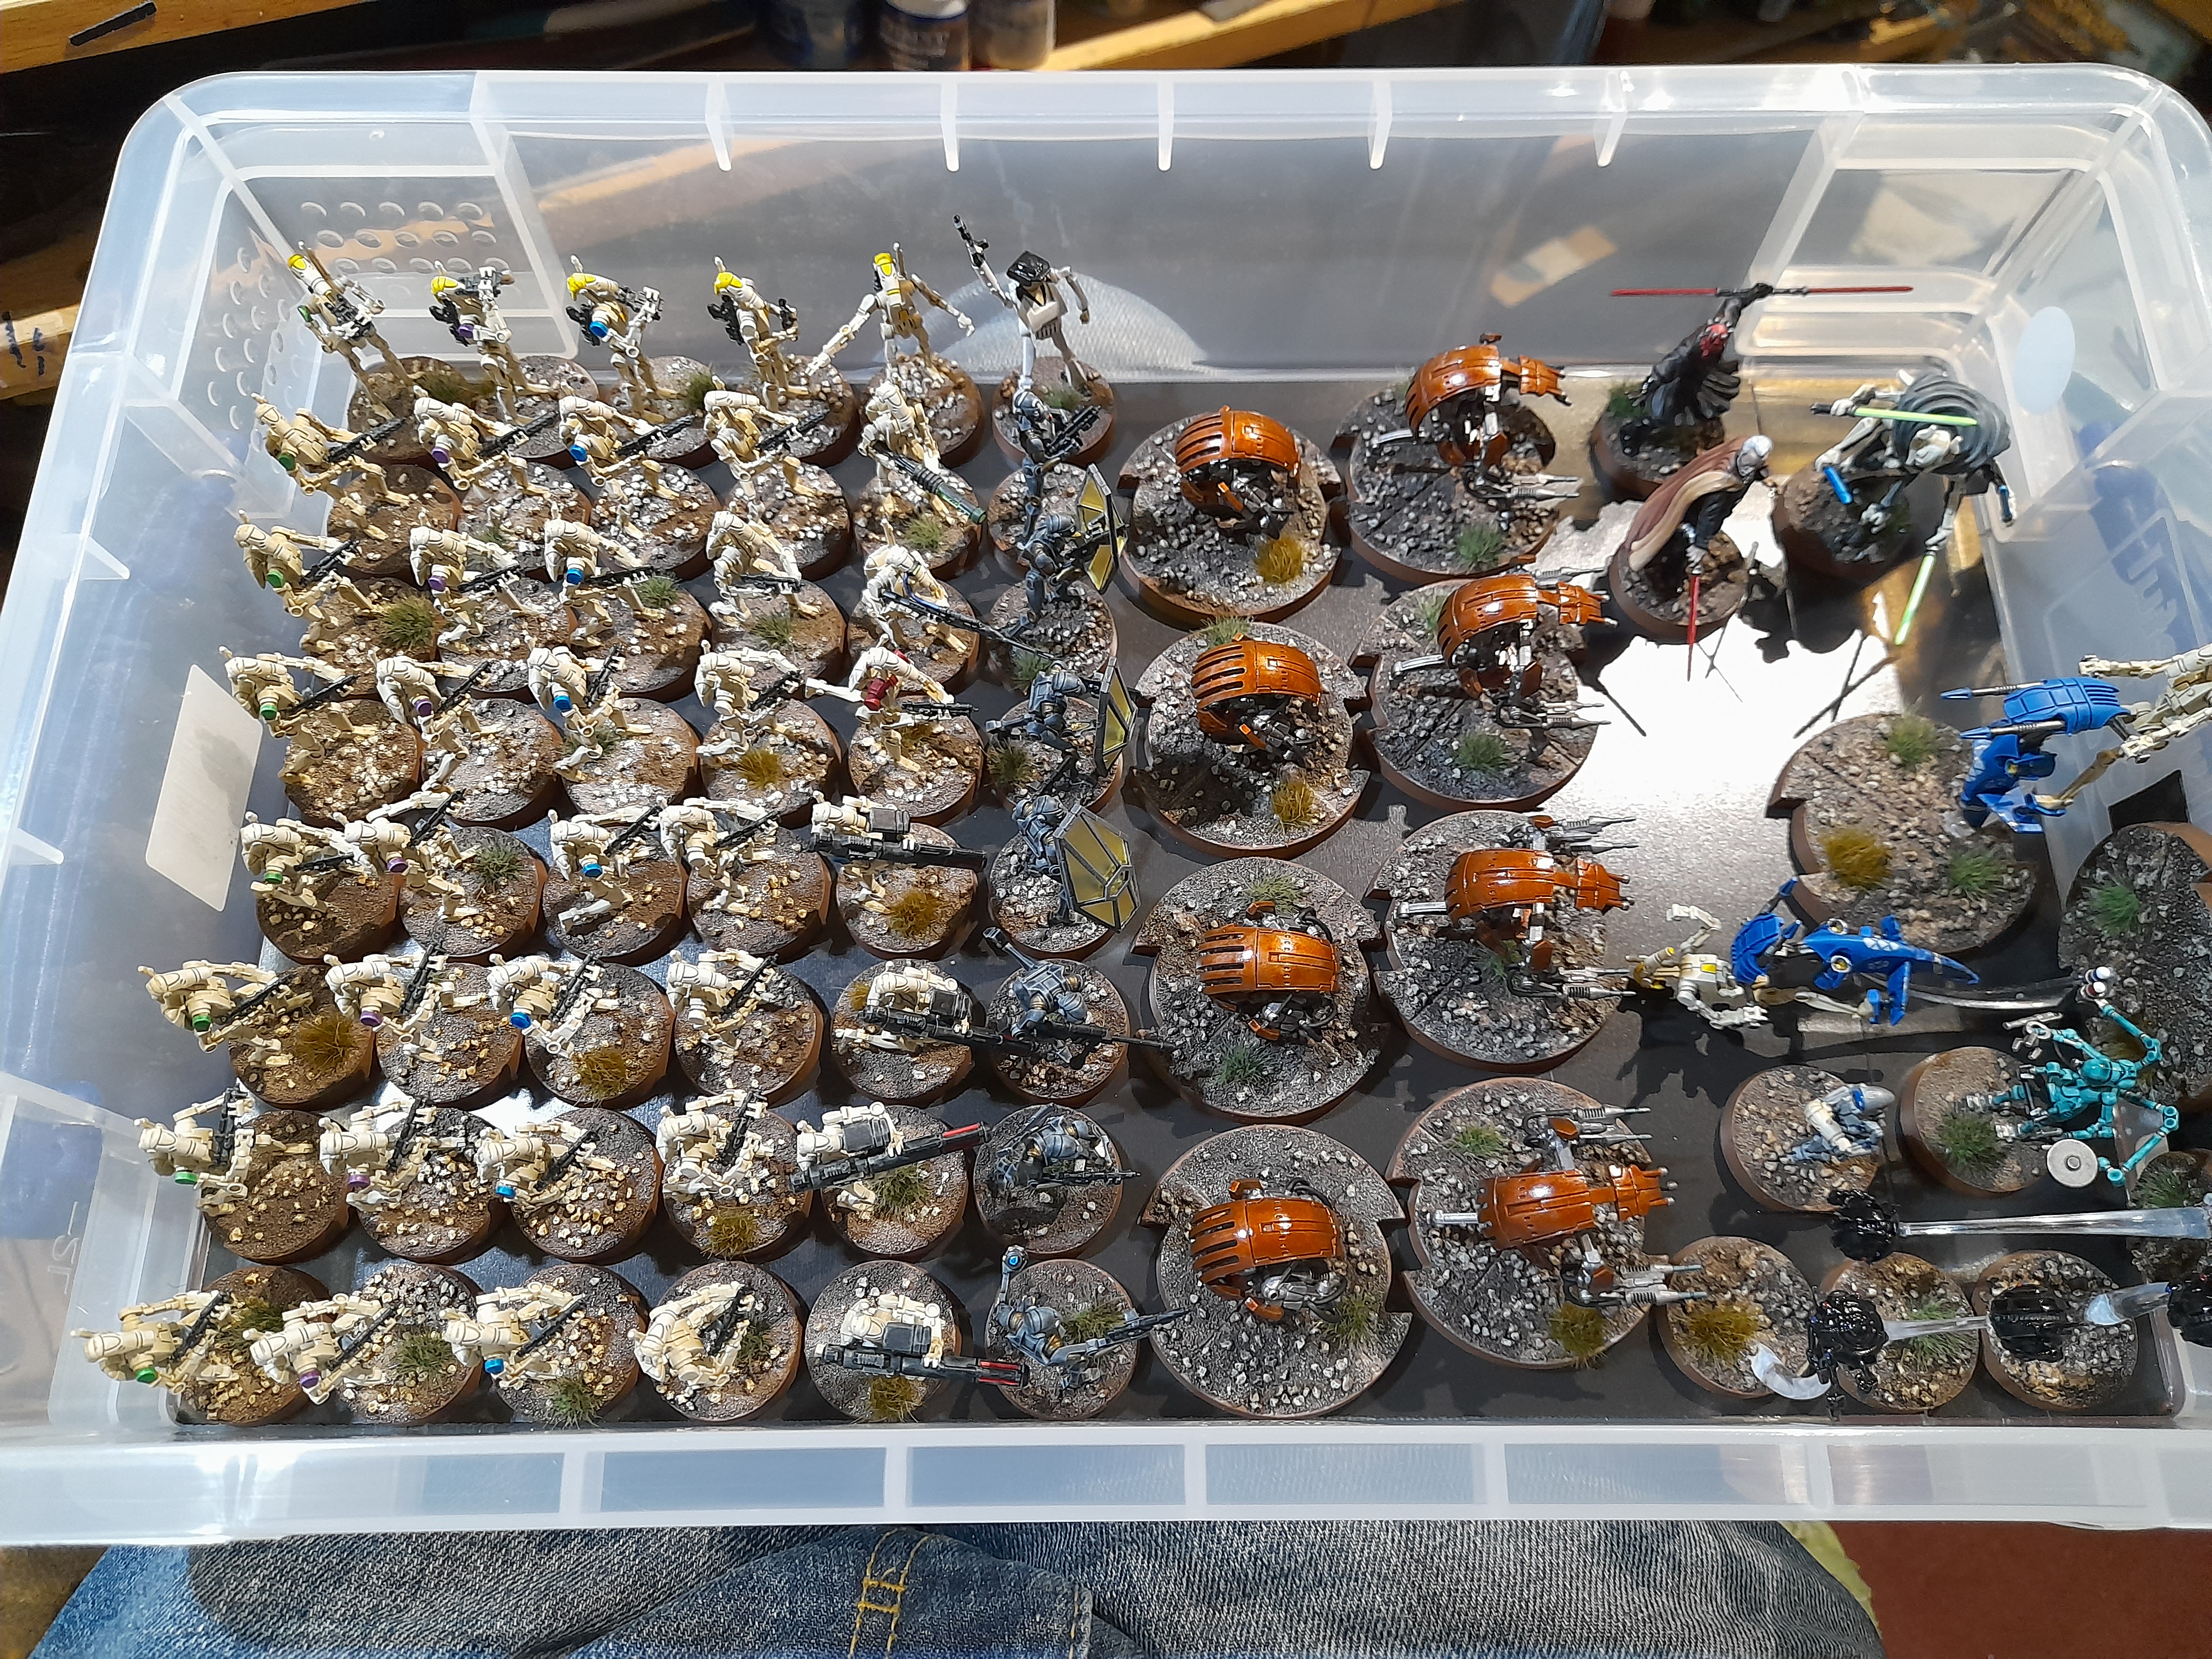
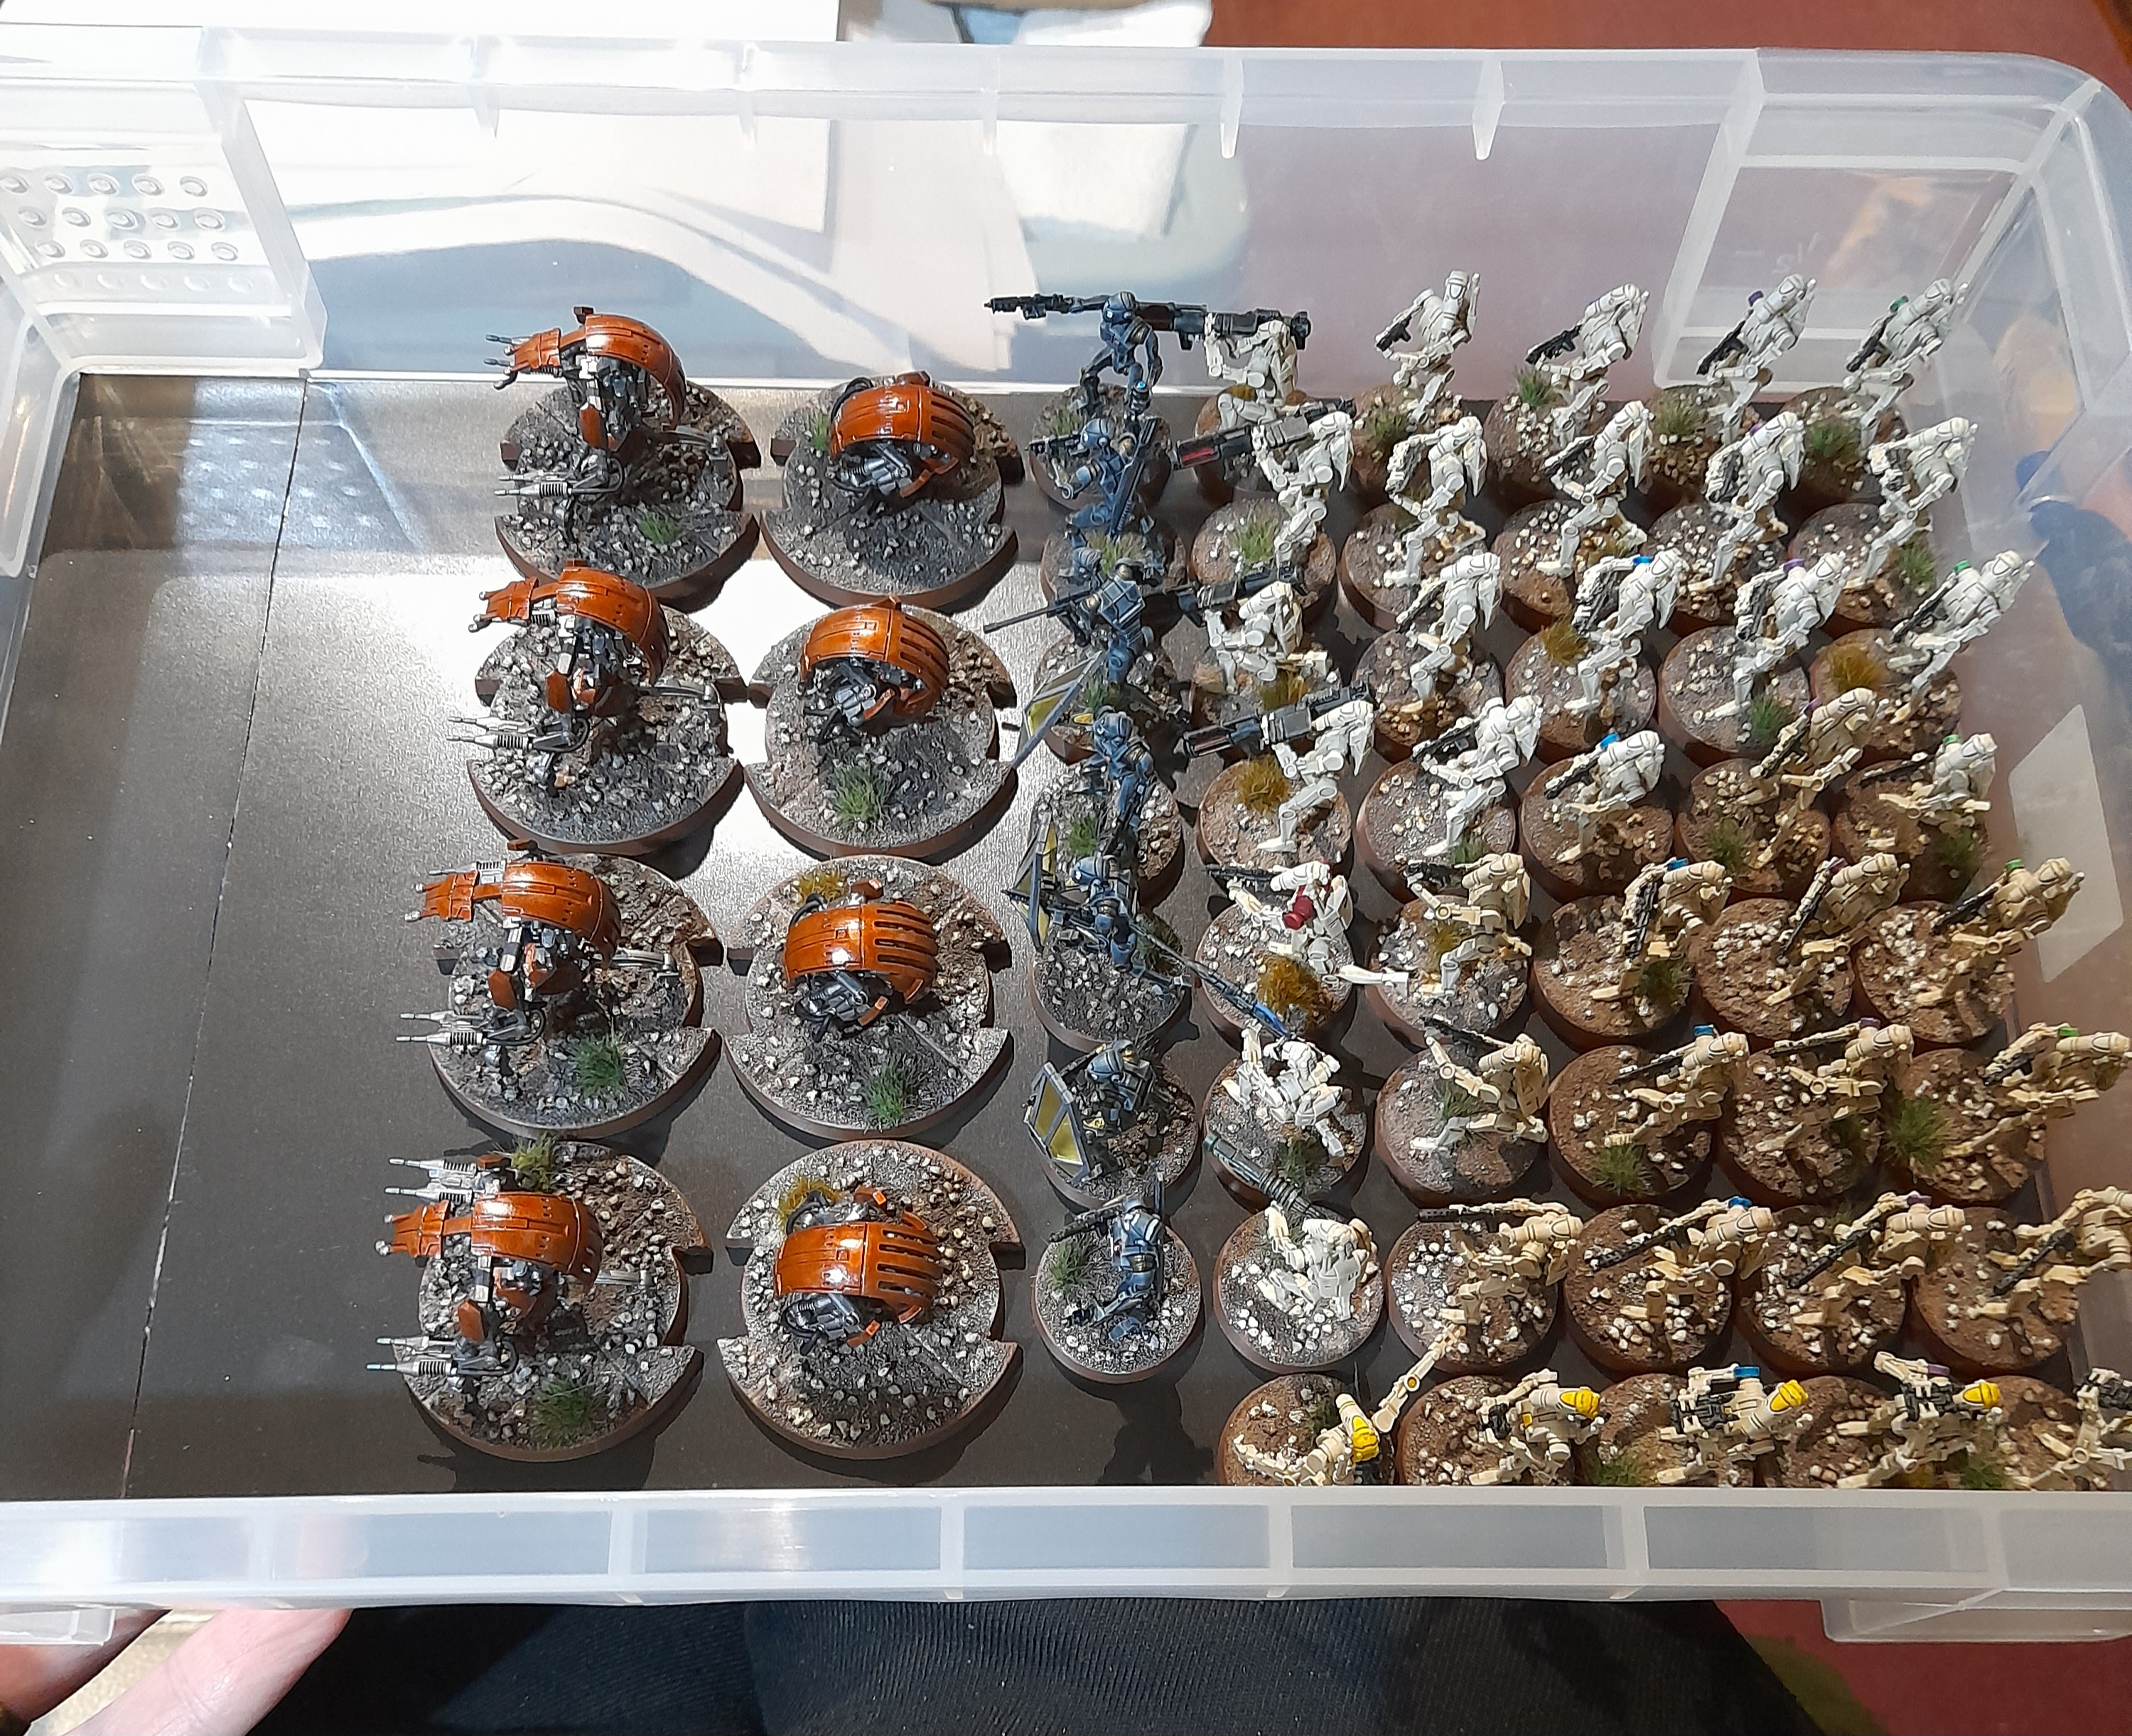
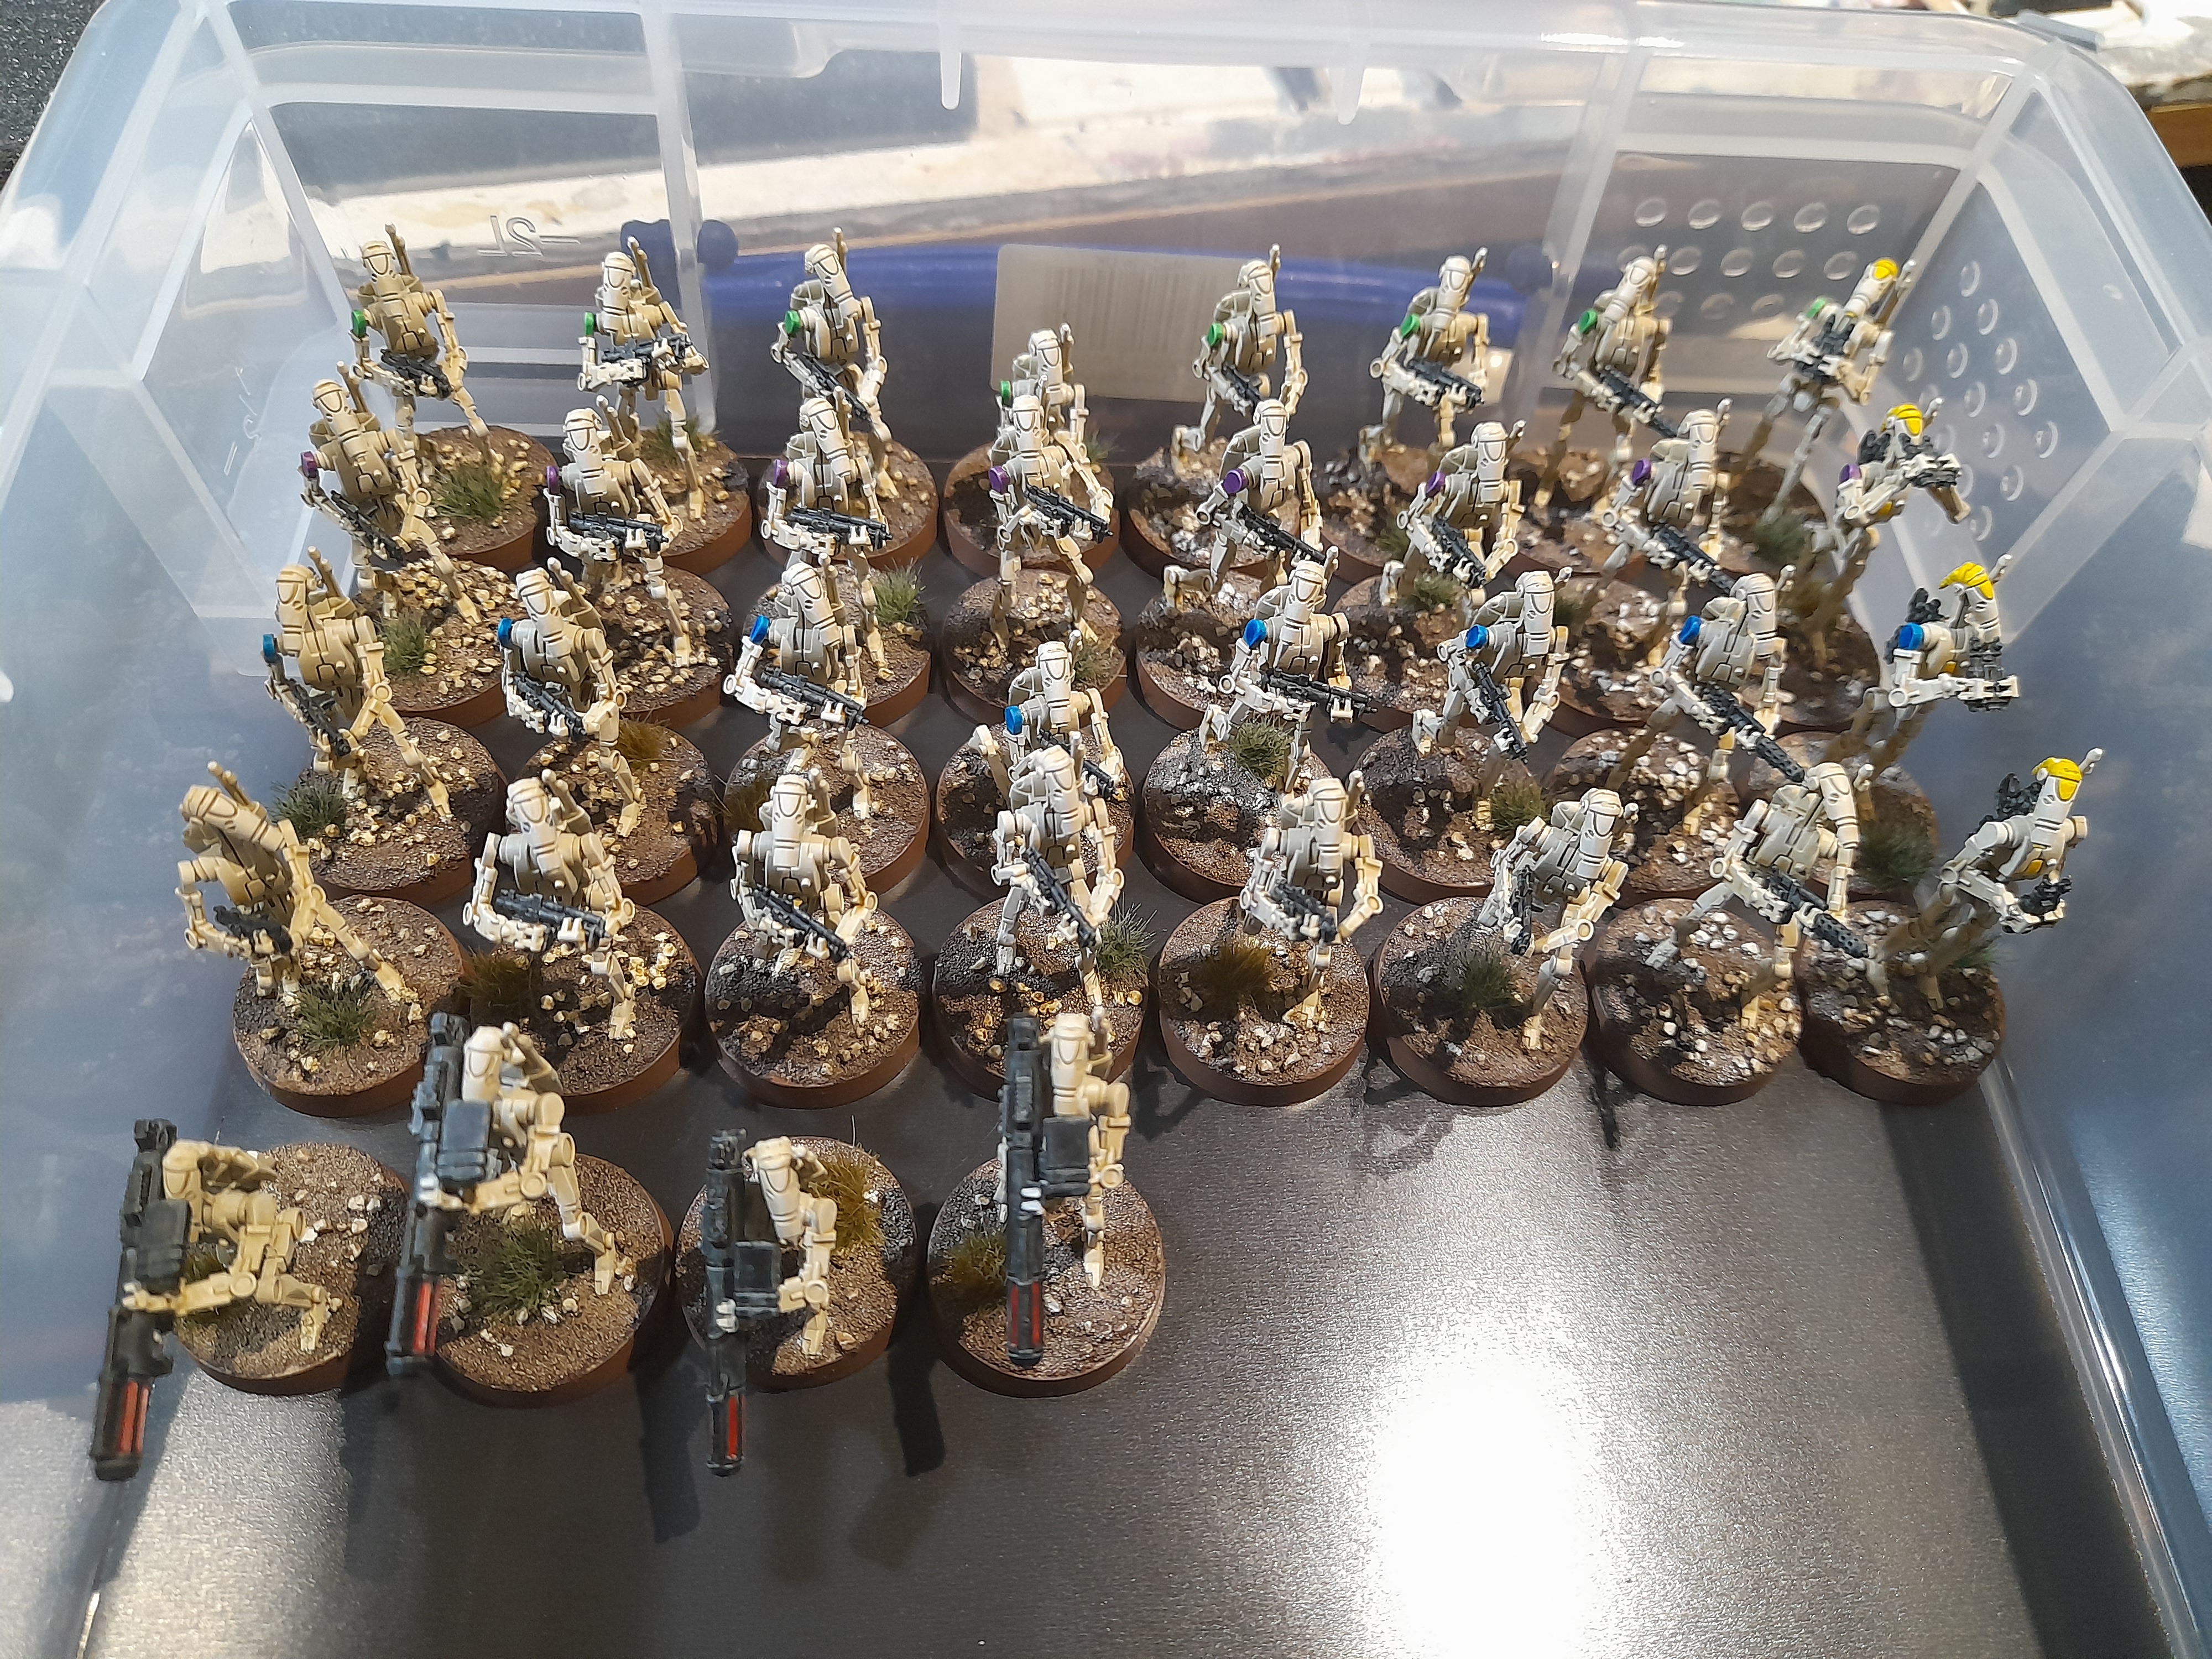
The gang together
24th March 2024
And here they are all together in their Really Useful storage box. I am going to keep the project open for the moment, as I want to have a 500pt battle with these against my Clone force, and add a (small) write up of it to finish off.
Since OTT have posted up this year’s Spring Clean Challenge I think that is next up for me – but I really don’t know what I will do yet. I think it will be an eclectic mix of things that have been languishing for some time…..
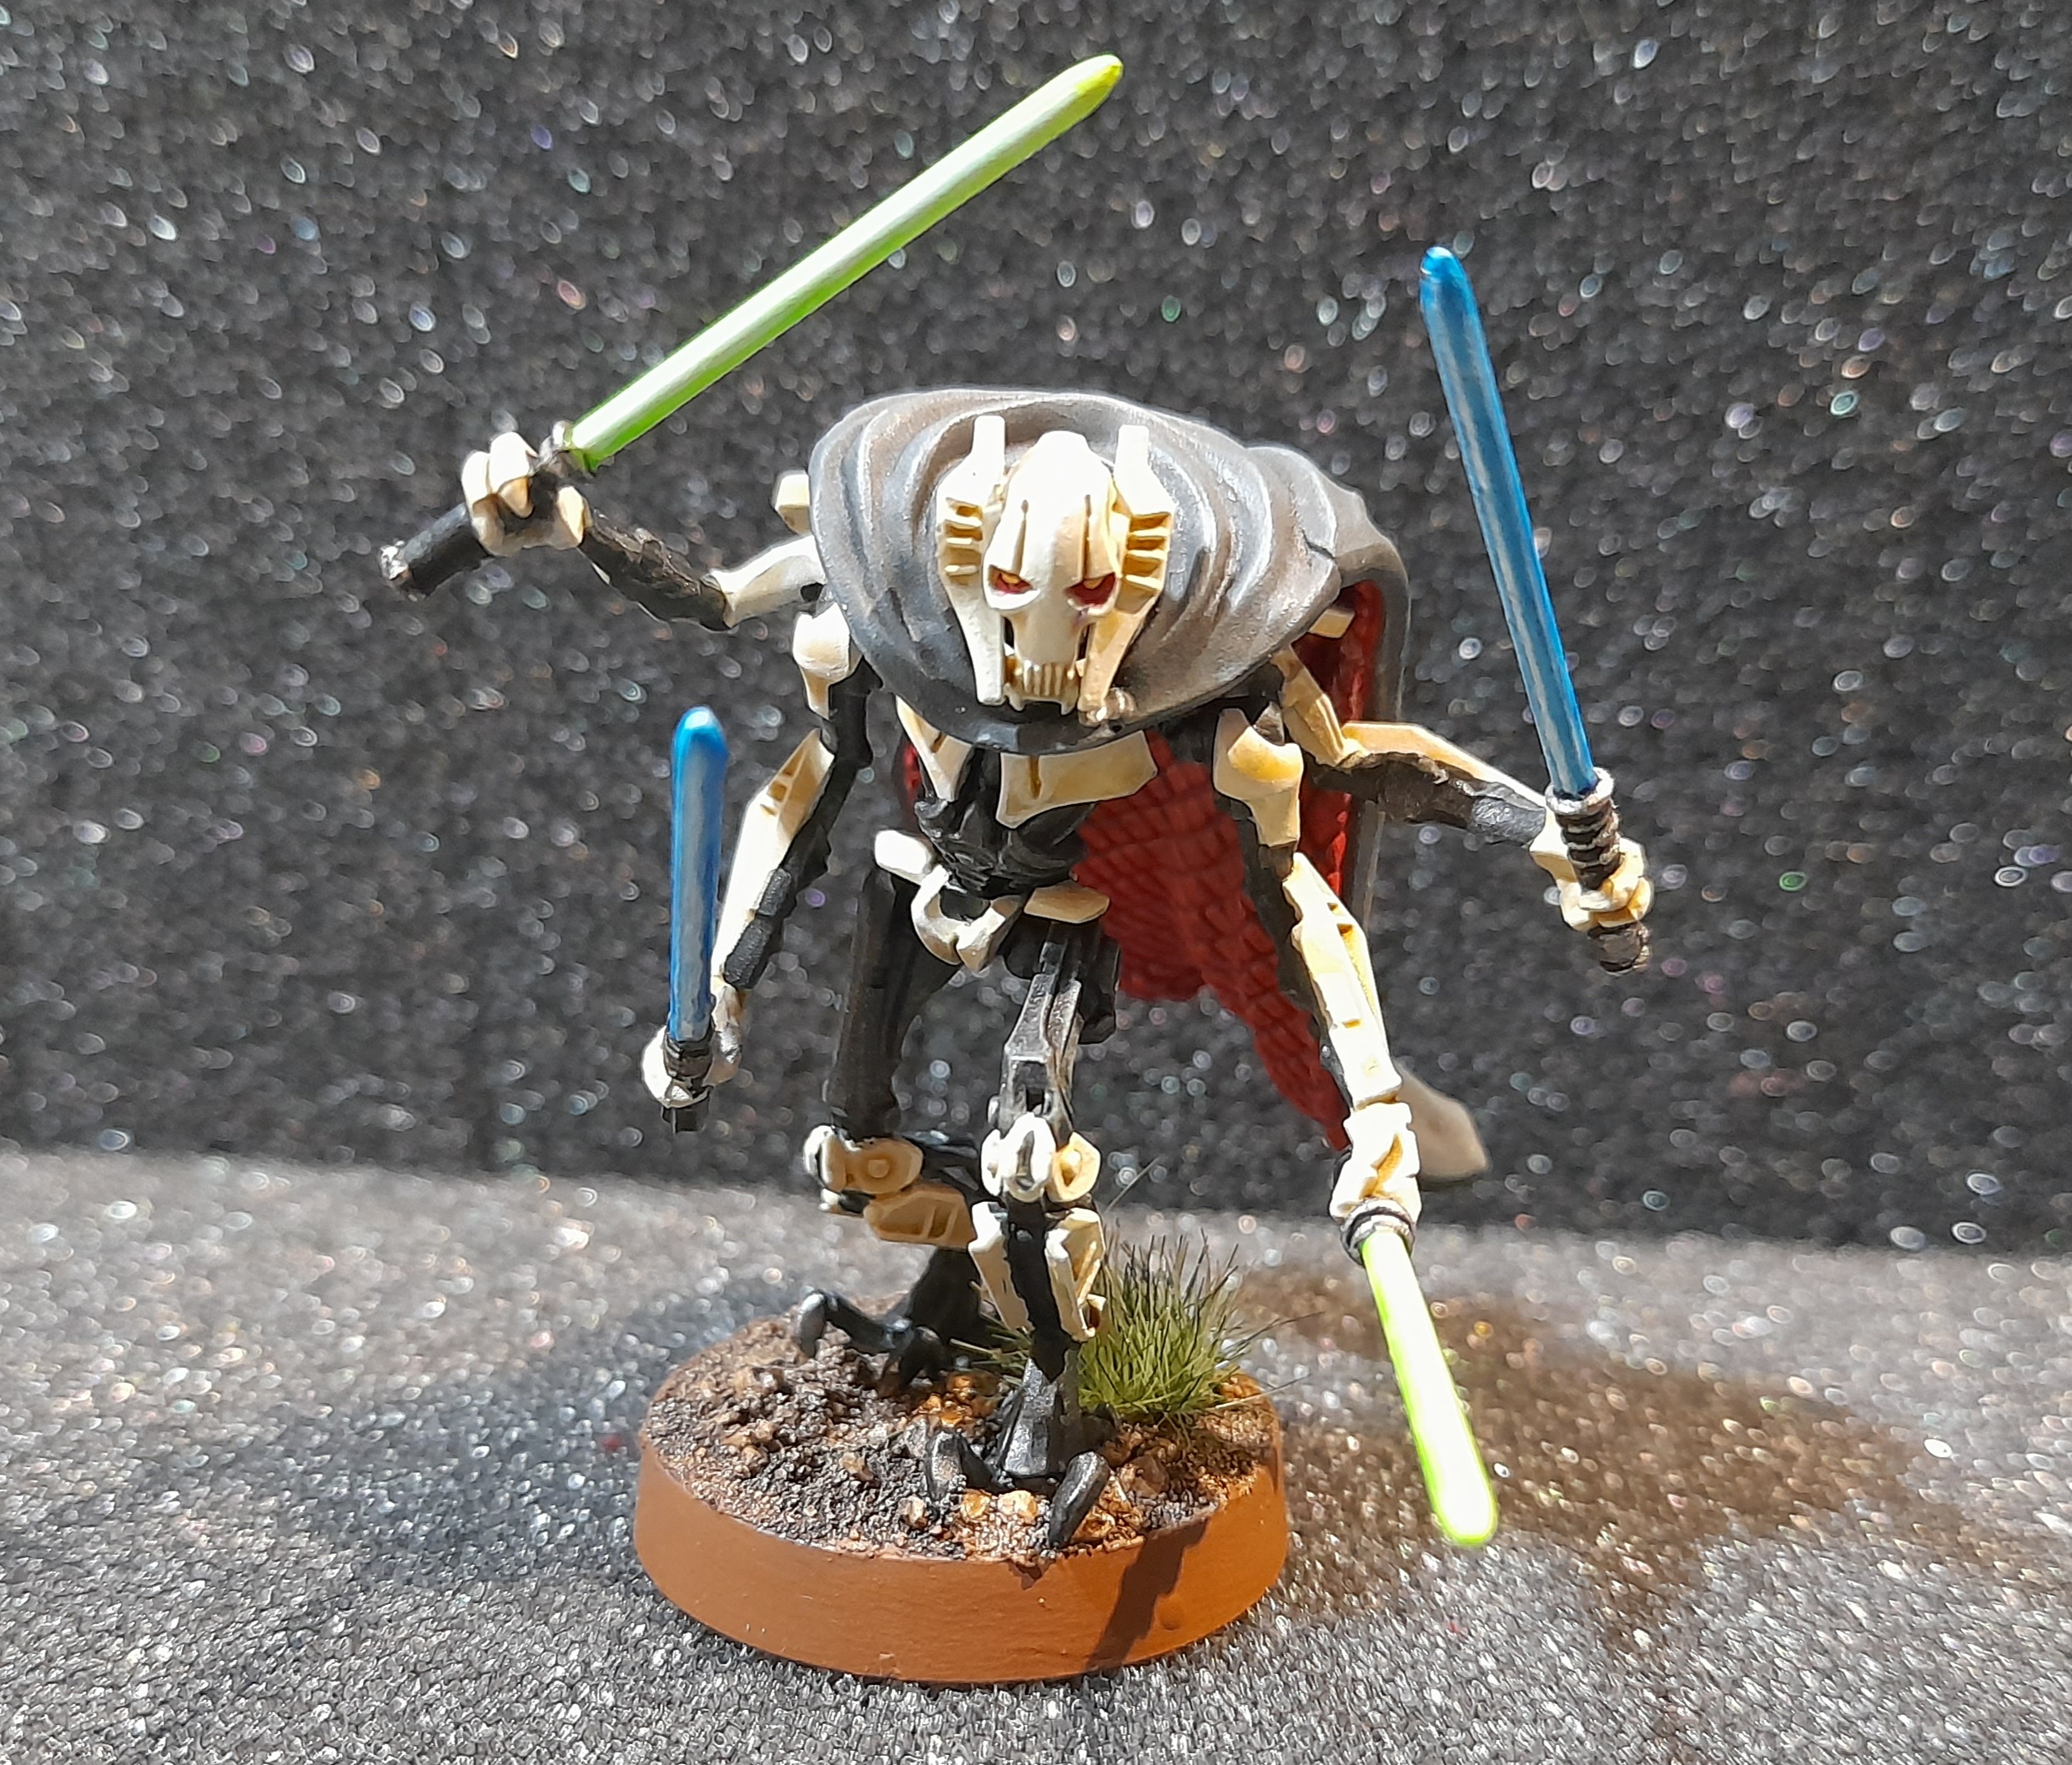
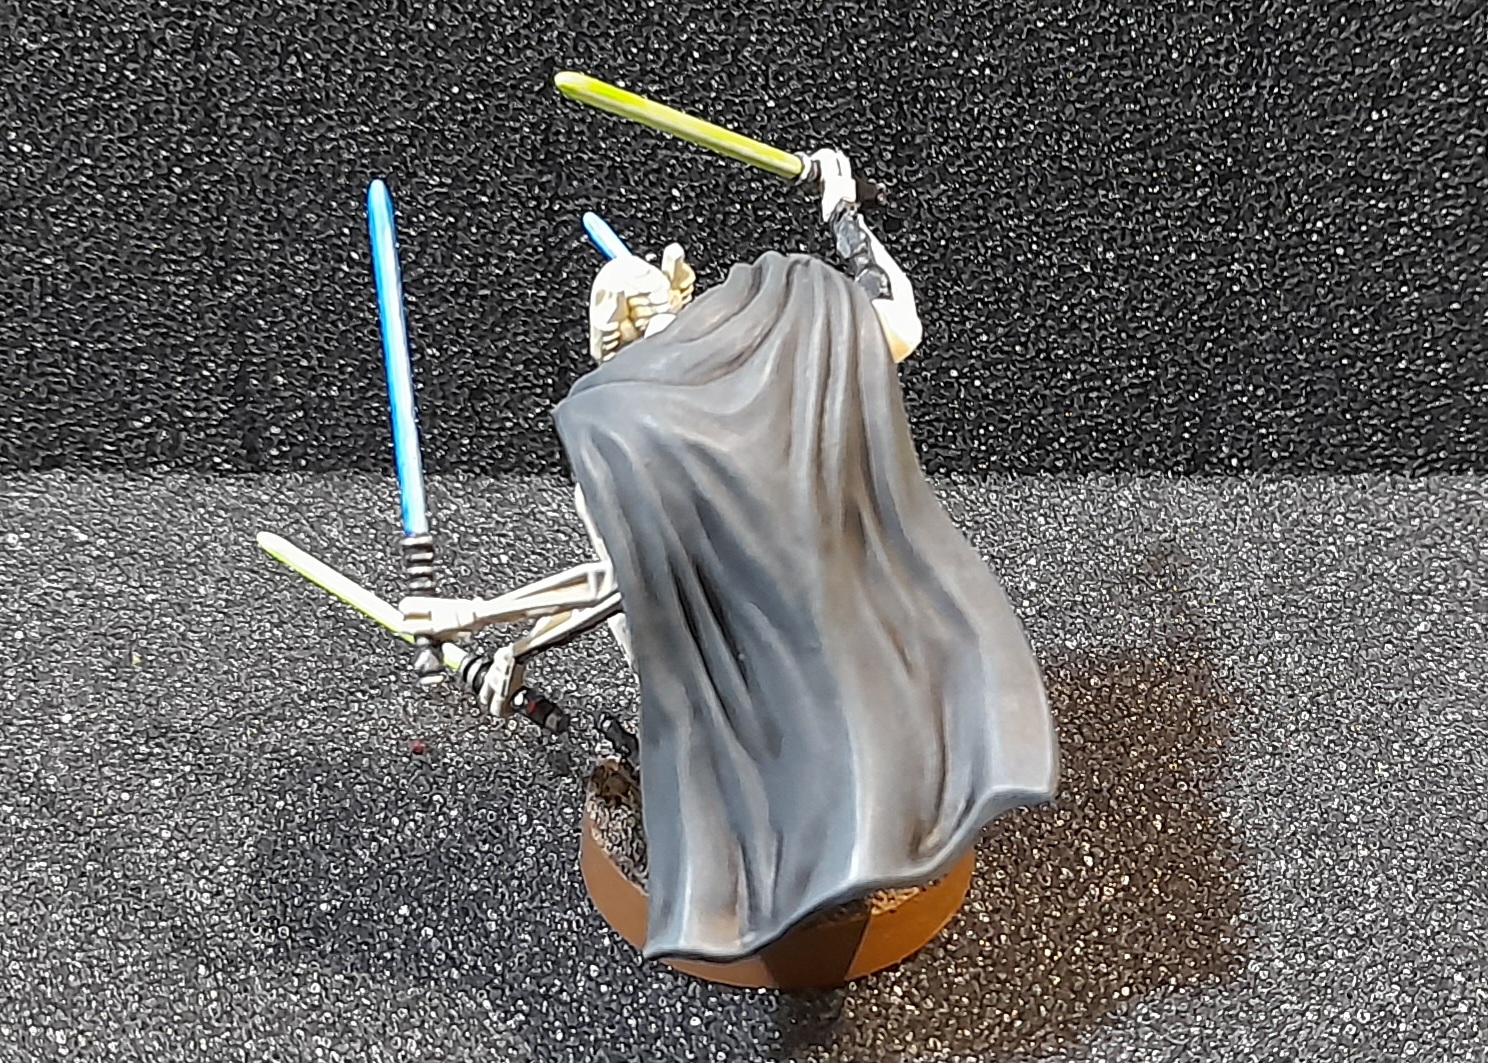
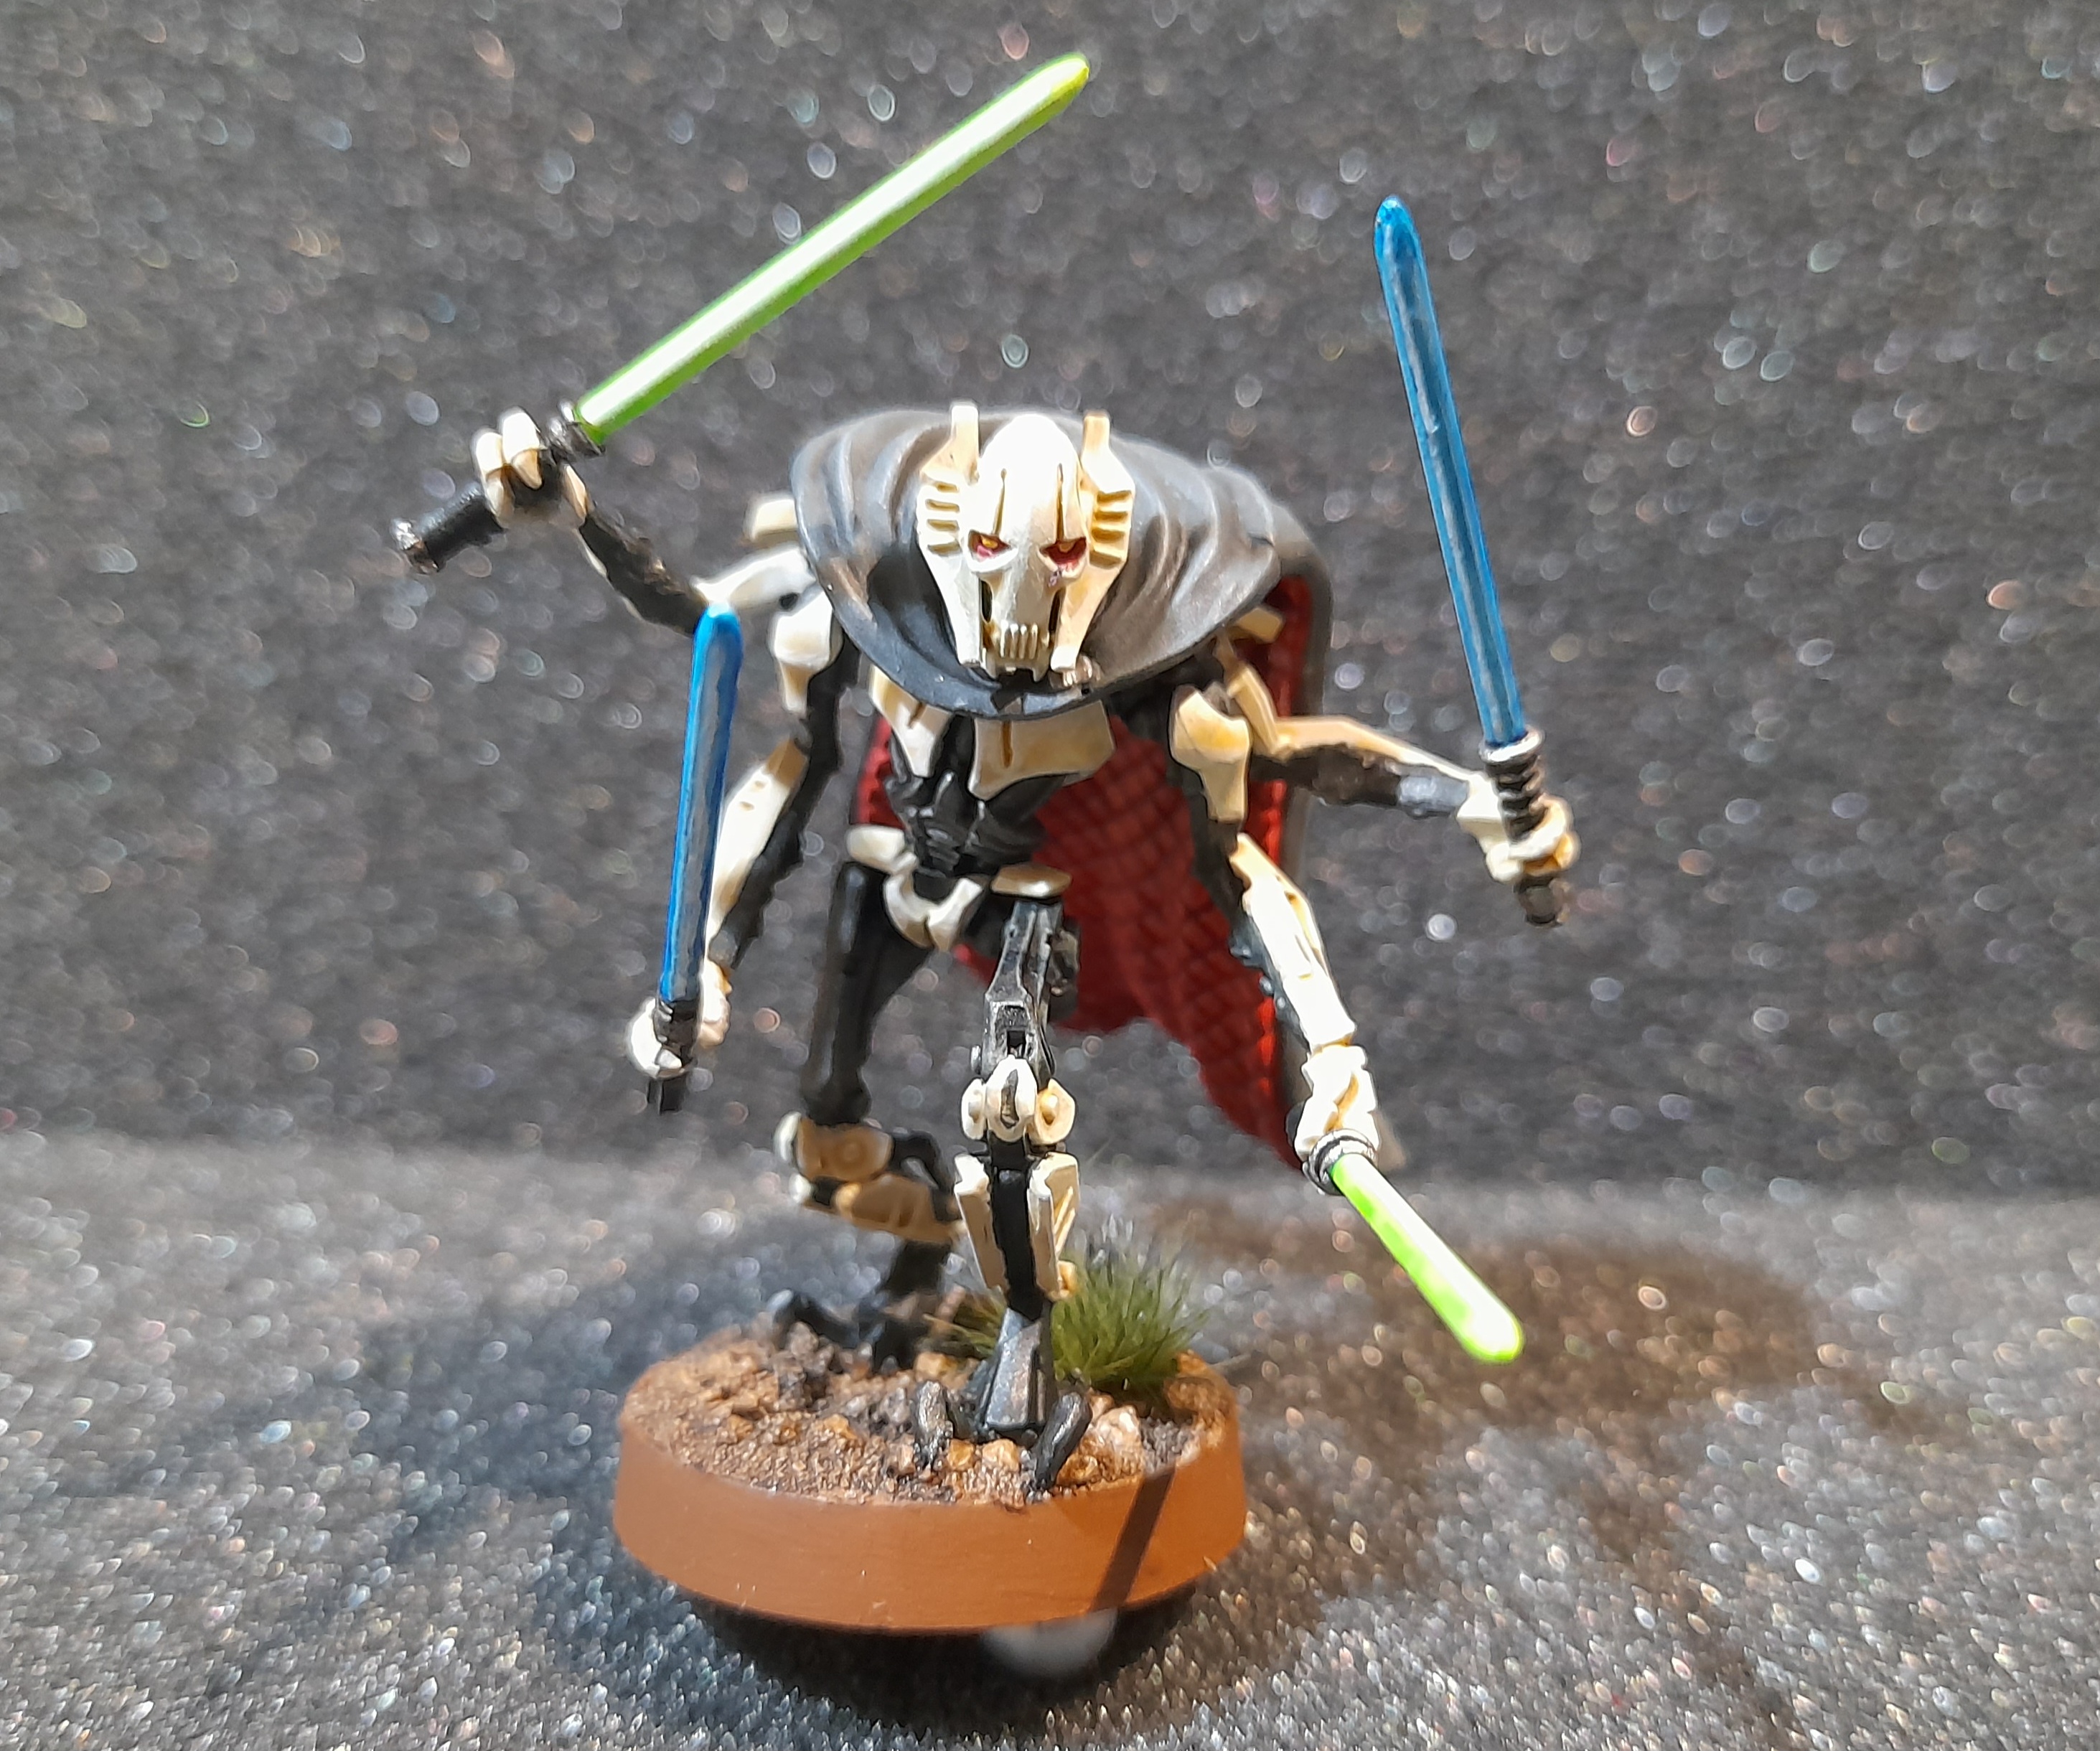
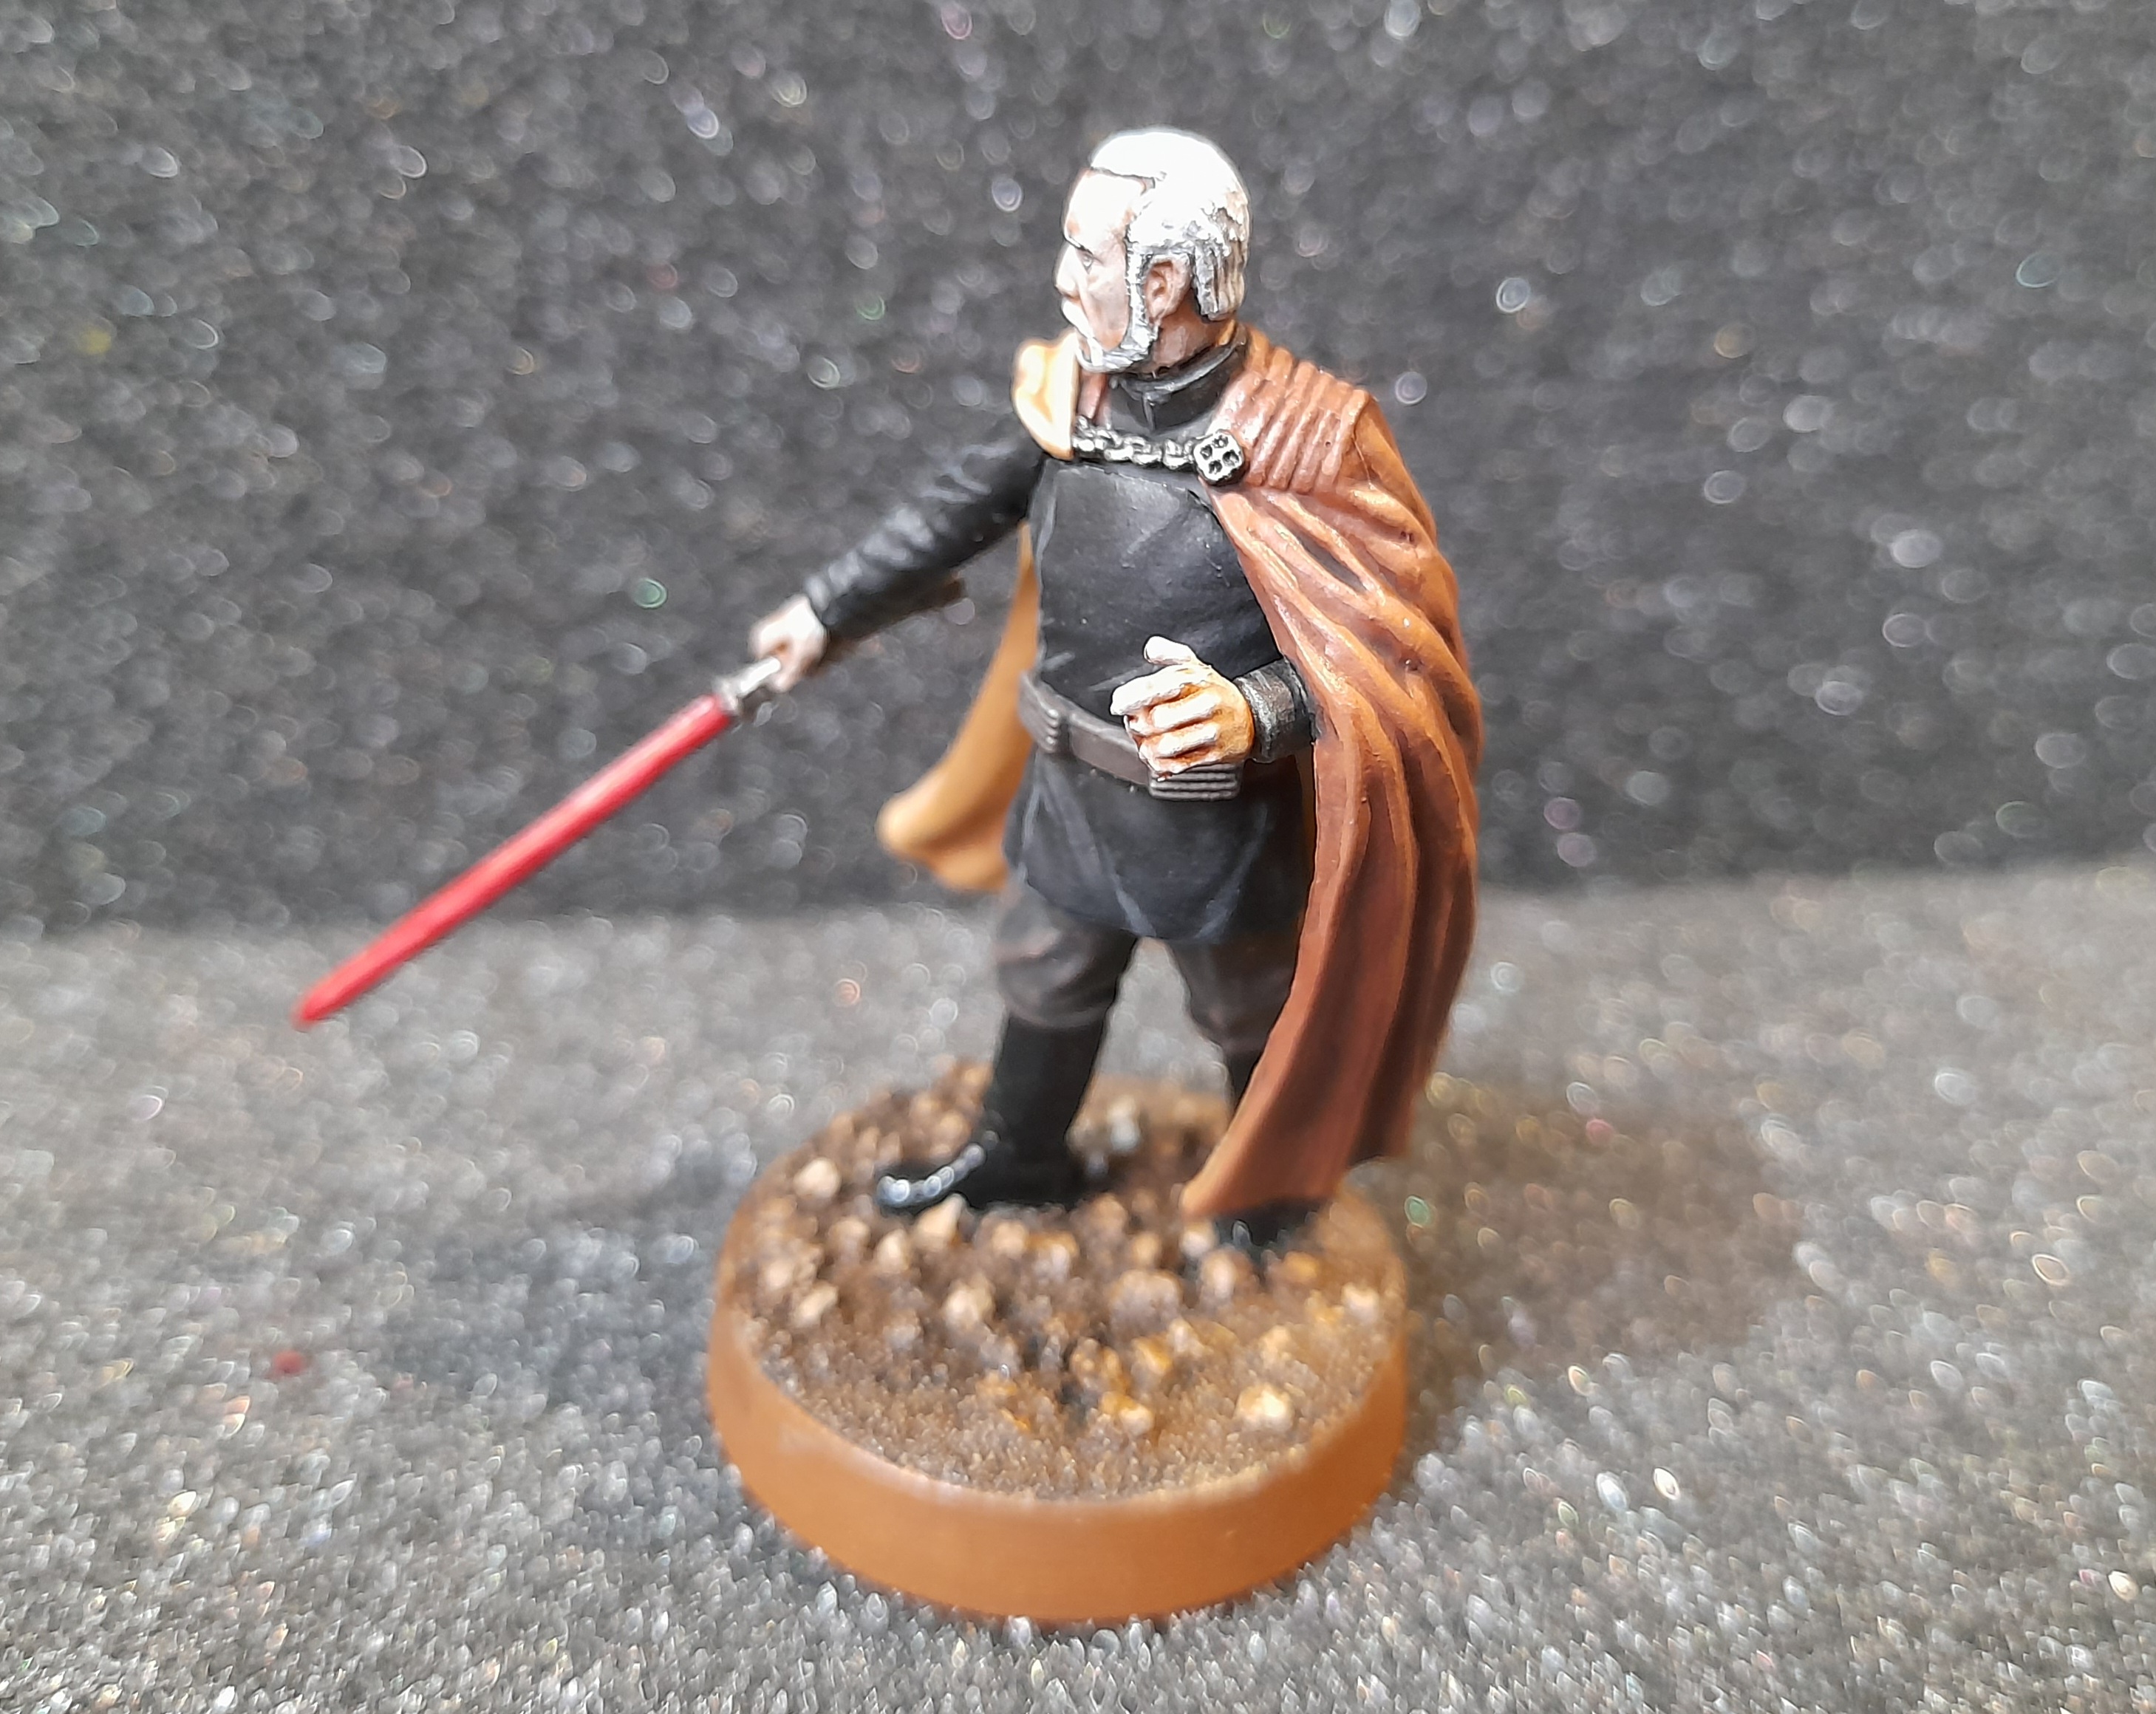
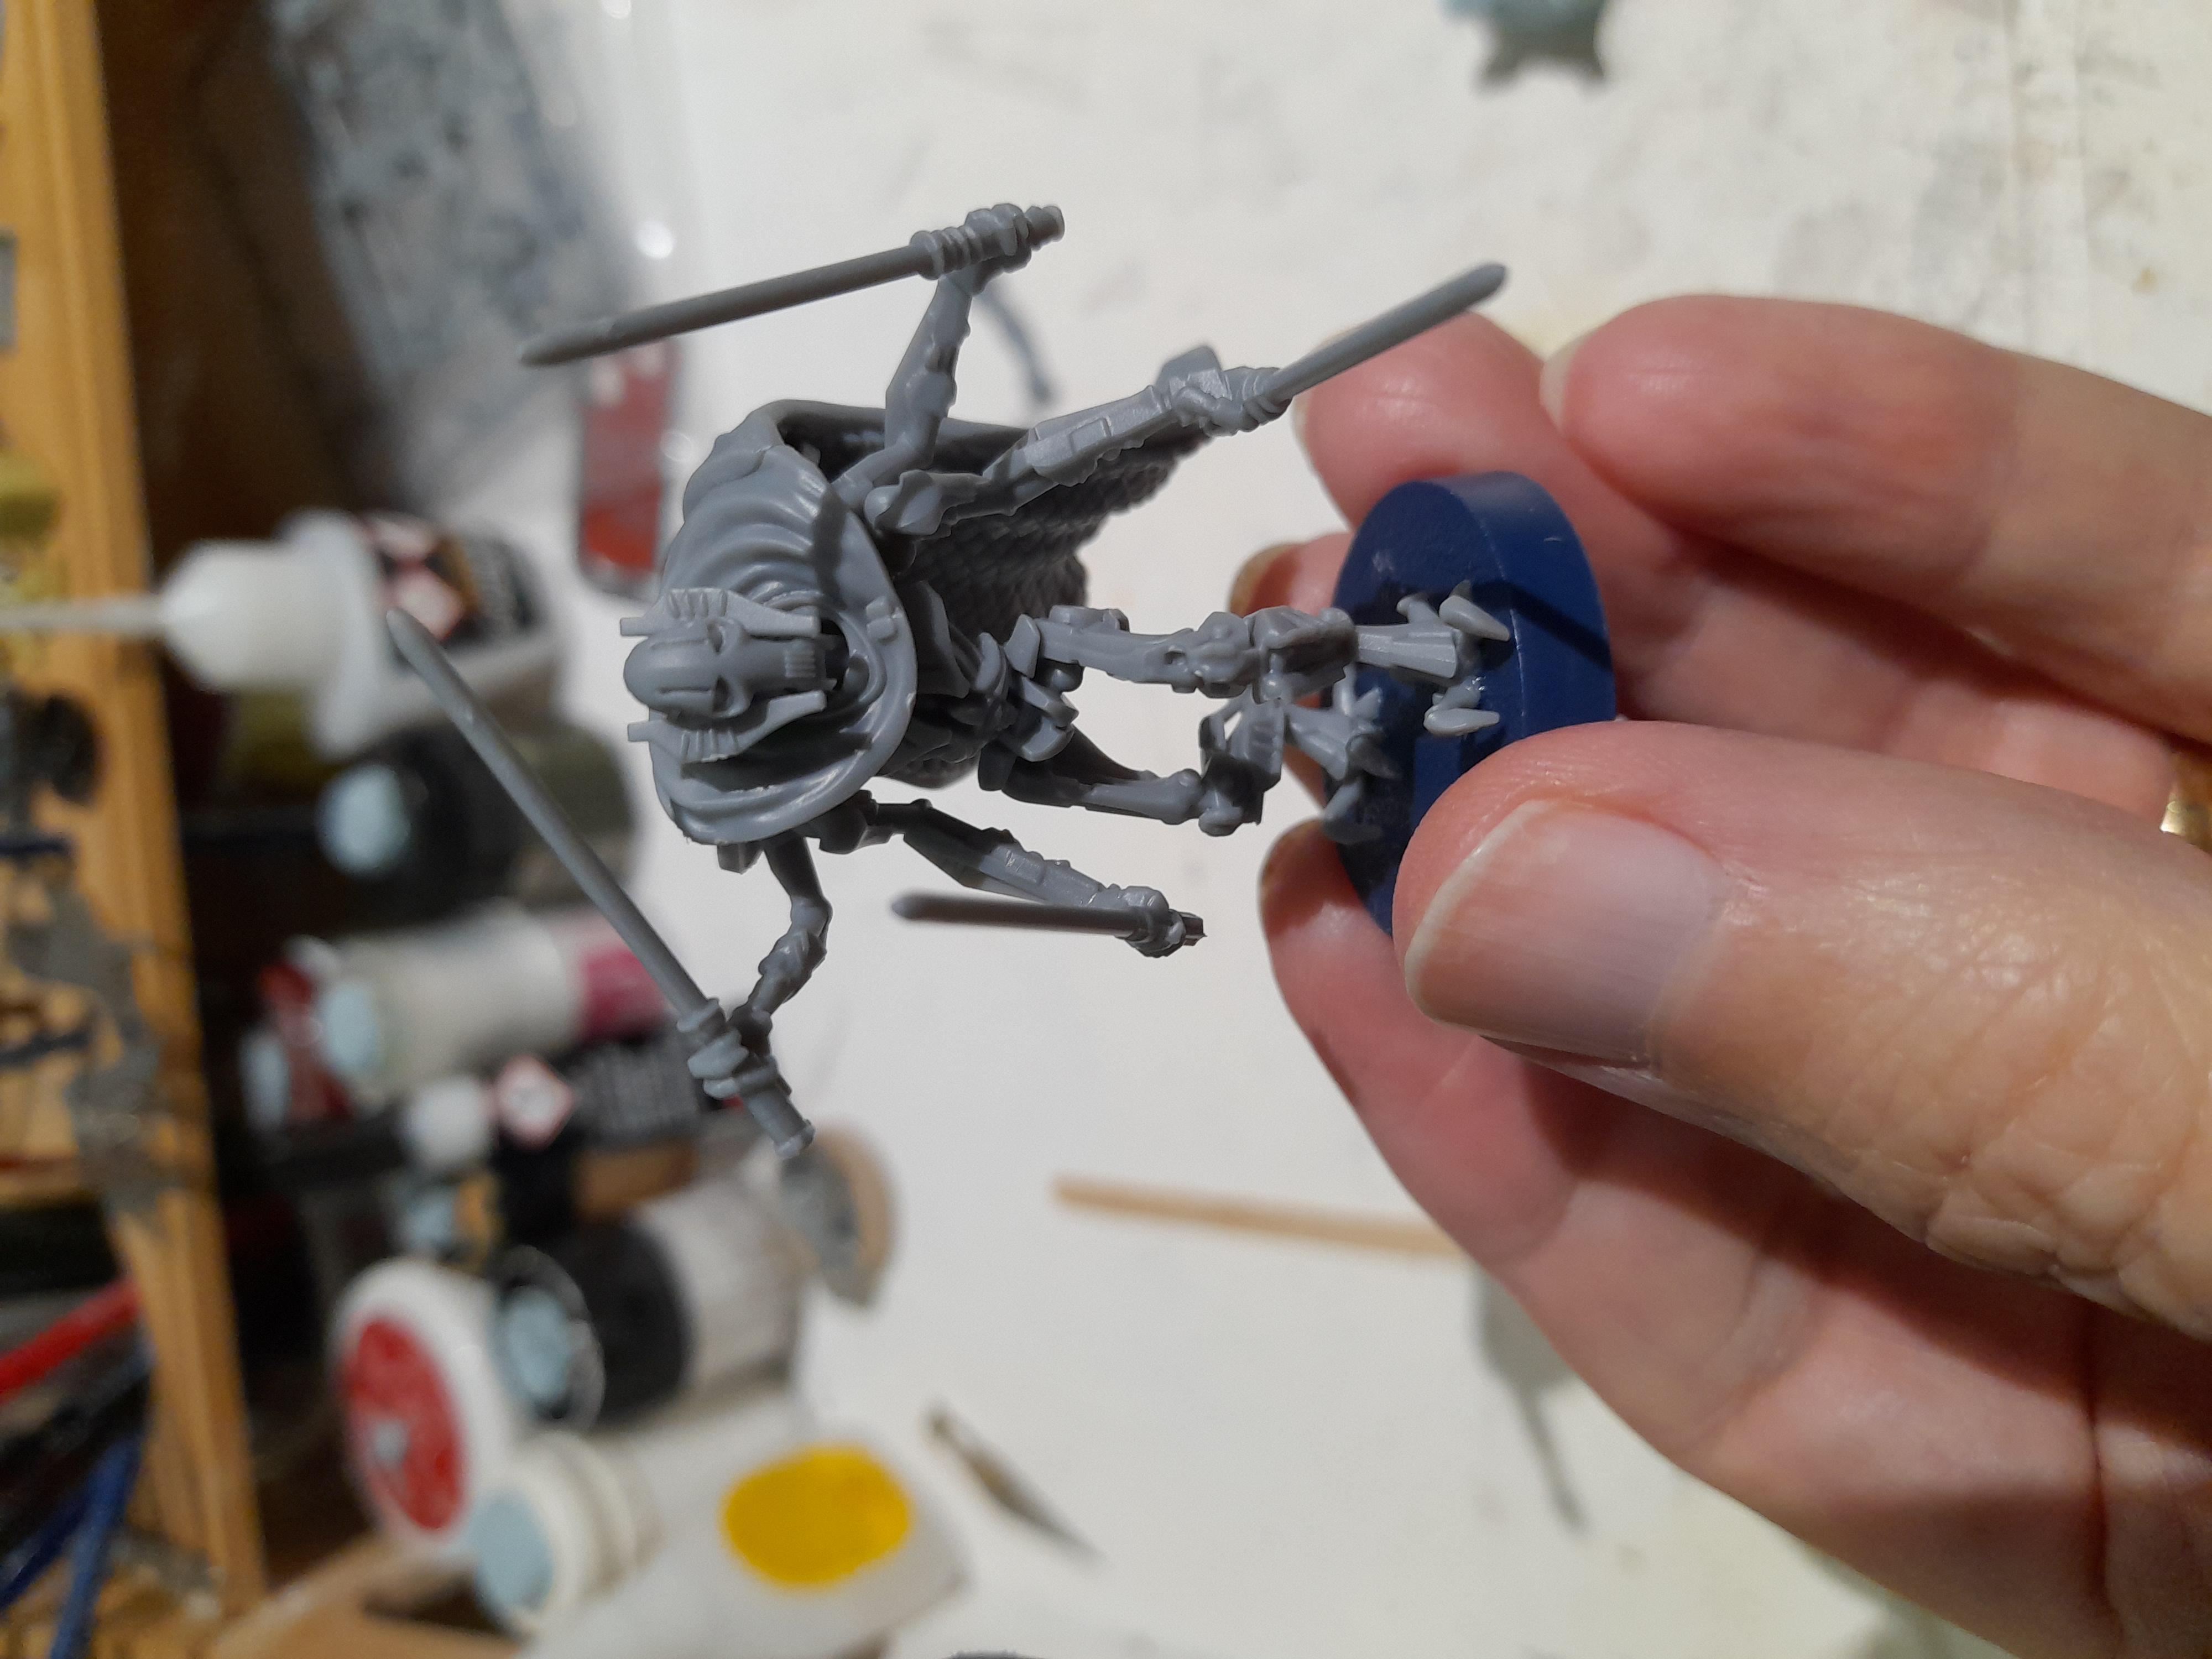
General Grievous – the end
At the end of the week I managed to finish off the minis by painting up General Grievous. Going to sound a bit like a broken record, but wasn’t too happy with how it went overall.
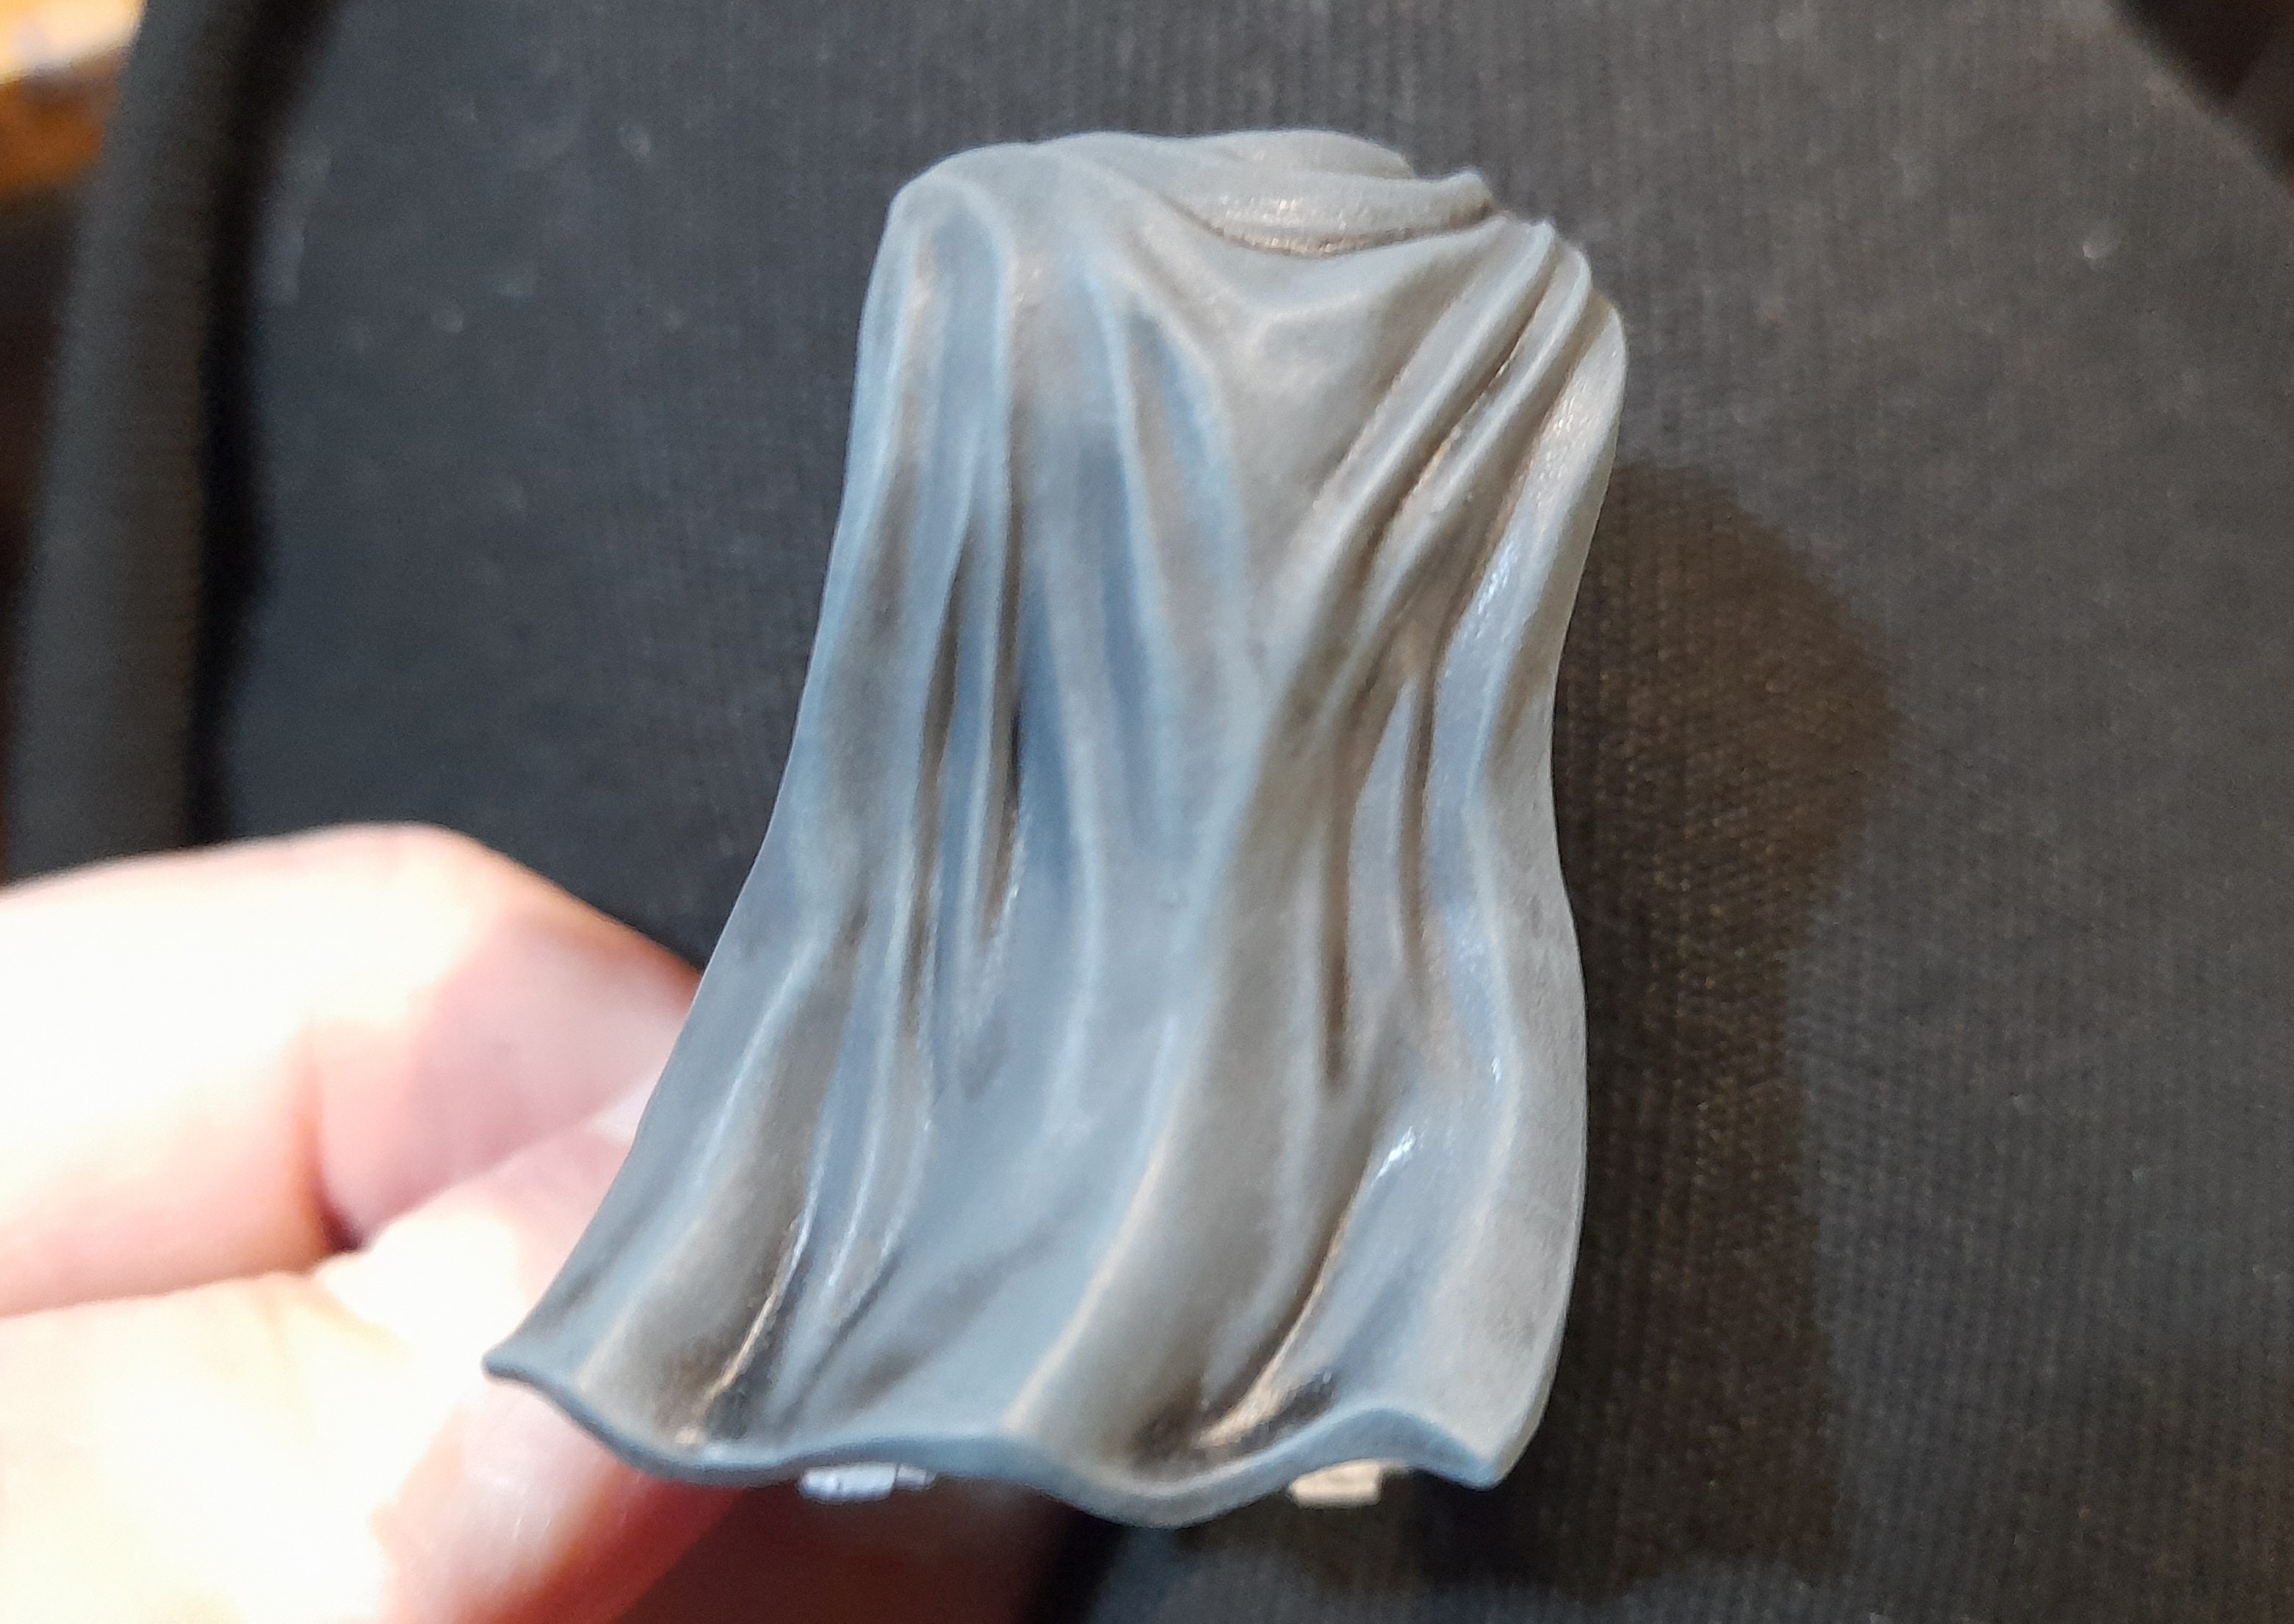
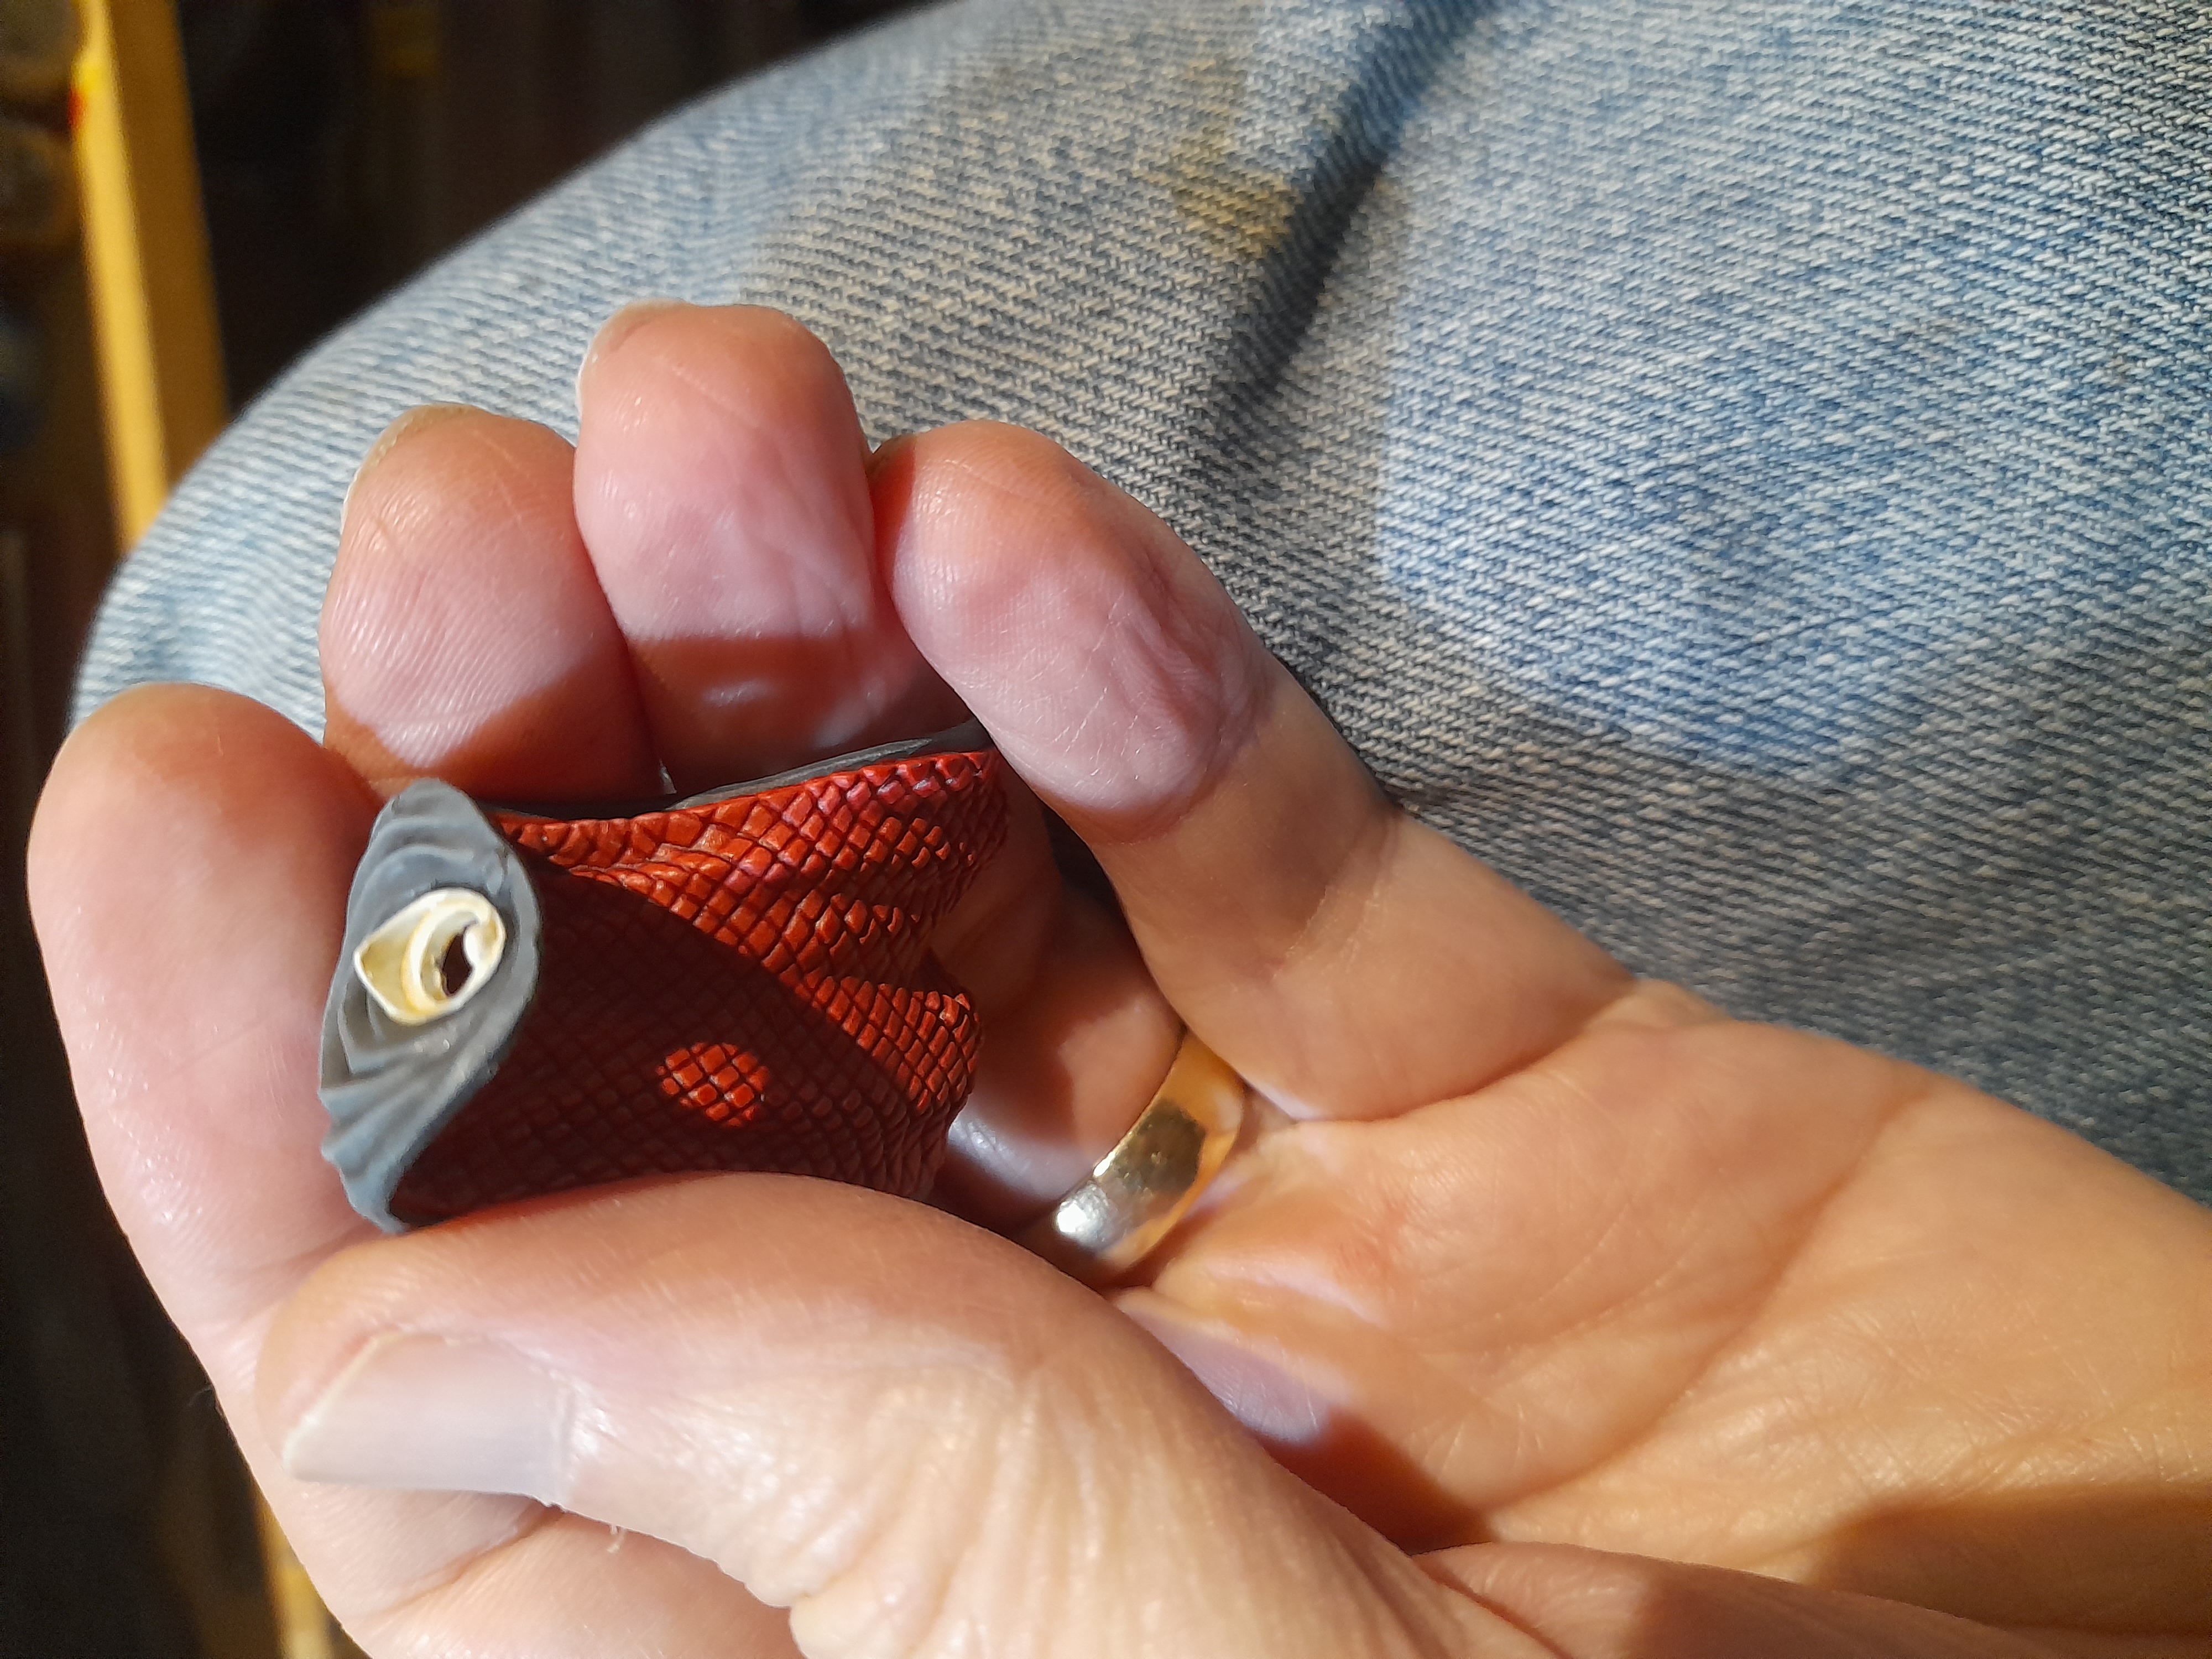
Started out by painting up the cloak. This was with a dark grey, followed by successive lighter drybrushing and a final thinned highlight of a mid grey. The inside of the cloak was first given a white drybrush, then painted with contrast red.
For Big G I painted all the black joint parts with contrast black that was then drybrushed lightly with silver. This was followed by tidying up all the armour areas from where I had overpainted them. Then I washed the armour plates with a thinned down version of the contrast used for the B1 droids, and re highlighted the edges etc.

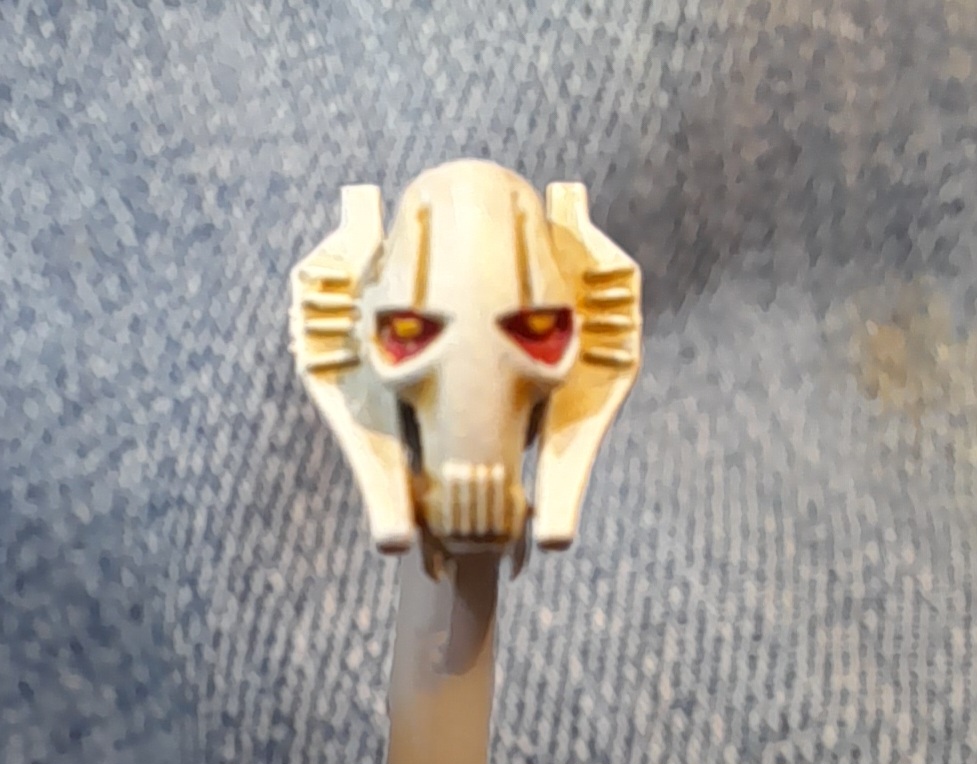
I painted in the red(ish) tone around his eyes, then picked out the yellow. I didn’t go for trying to add the pupils… but may do so in the future.
Next up I put all the pieces together and painted up the lightsabres. For the green I used a ‘Fluor’ Green from Green stuff world. The blue I tried a contrast. They then all had highlight stages of white mixed with the base colour (on opposite sides of the blades) followed by a thinned line of white.
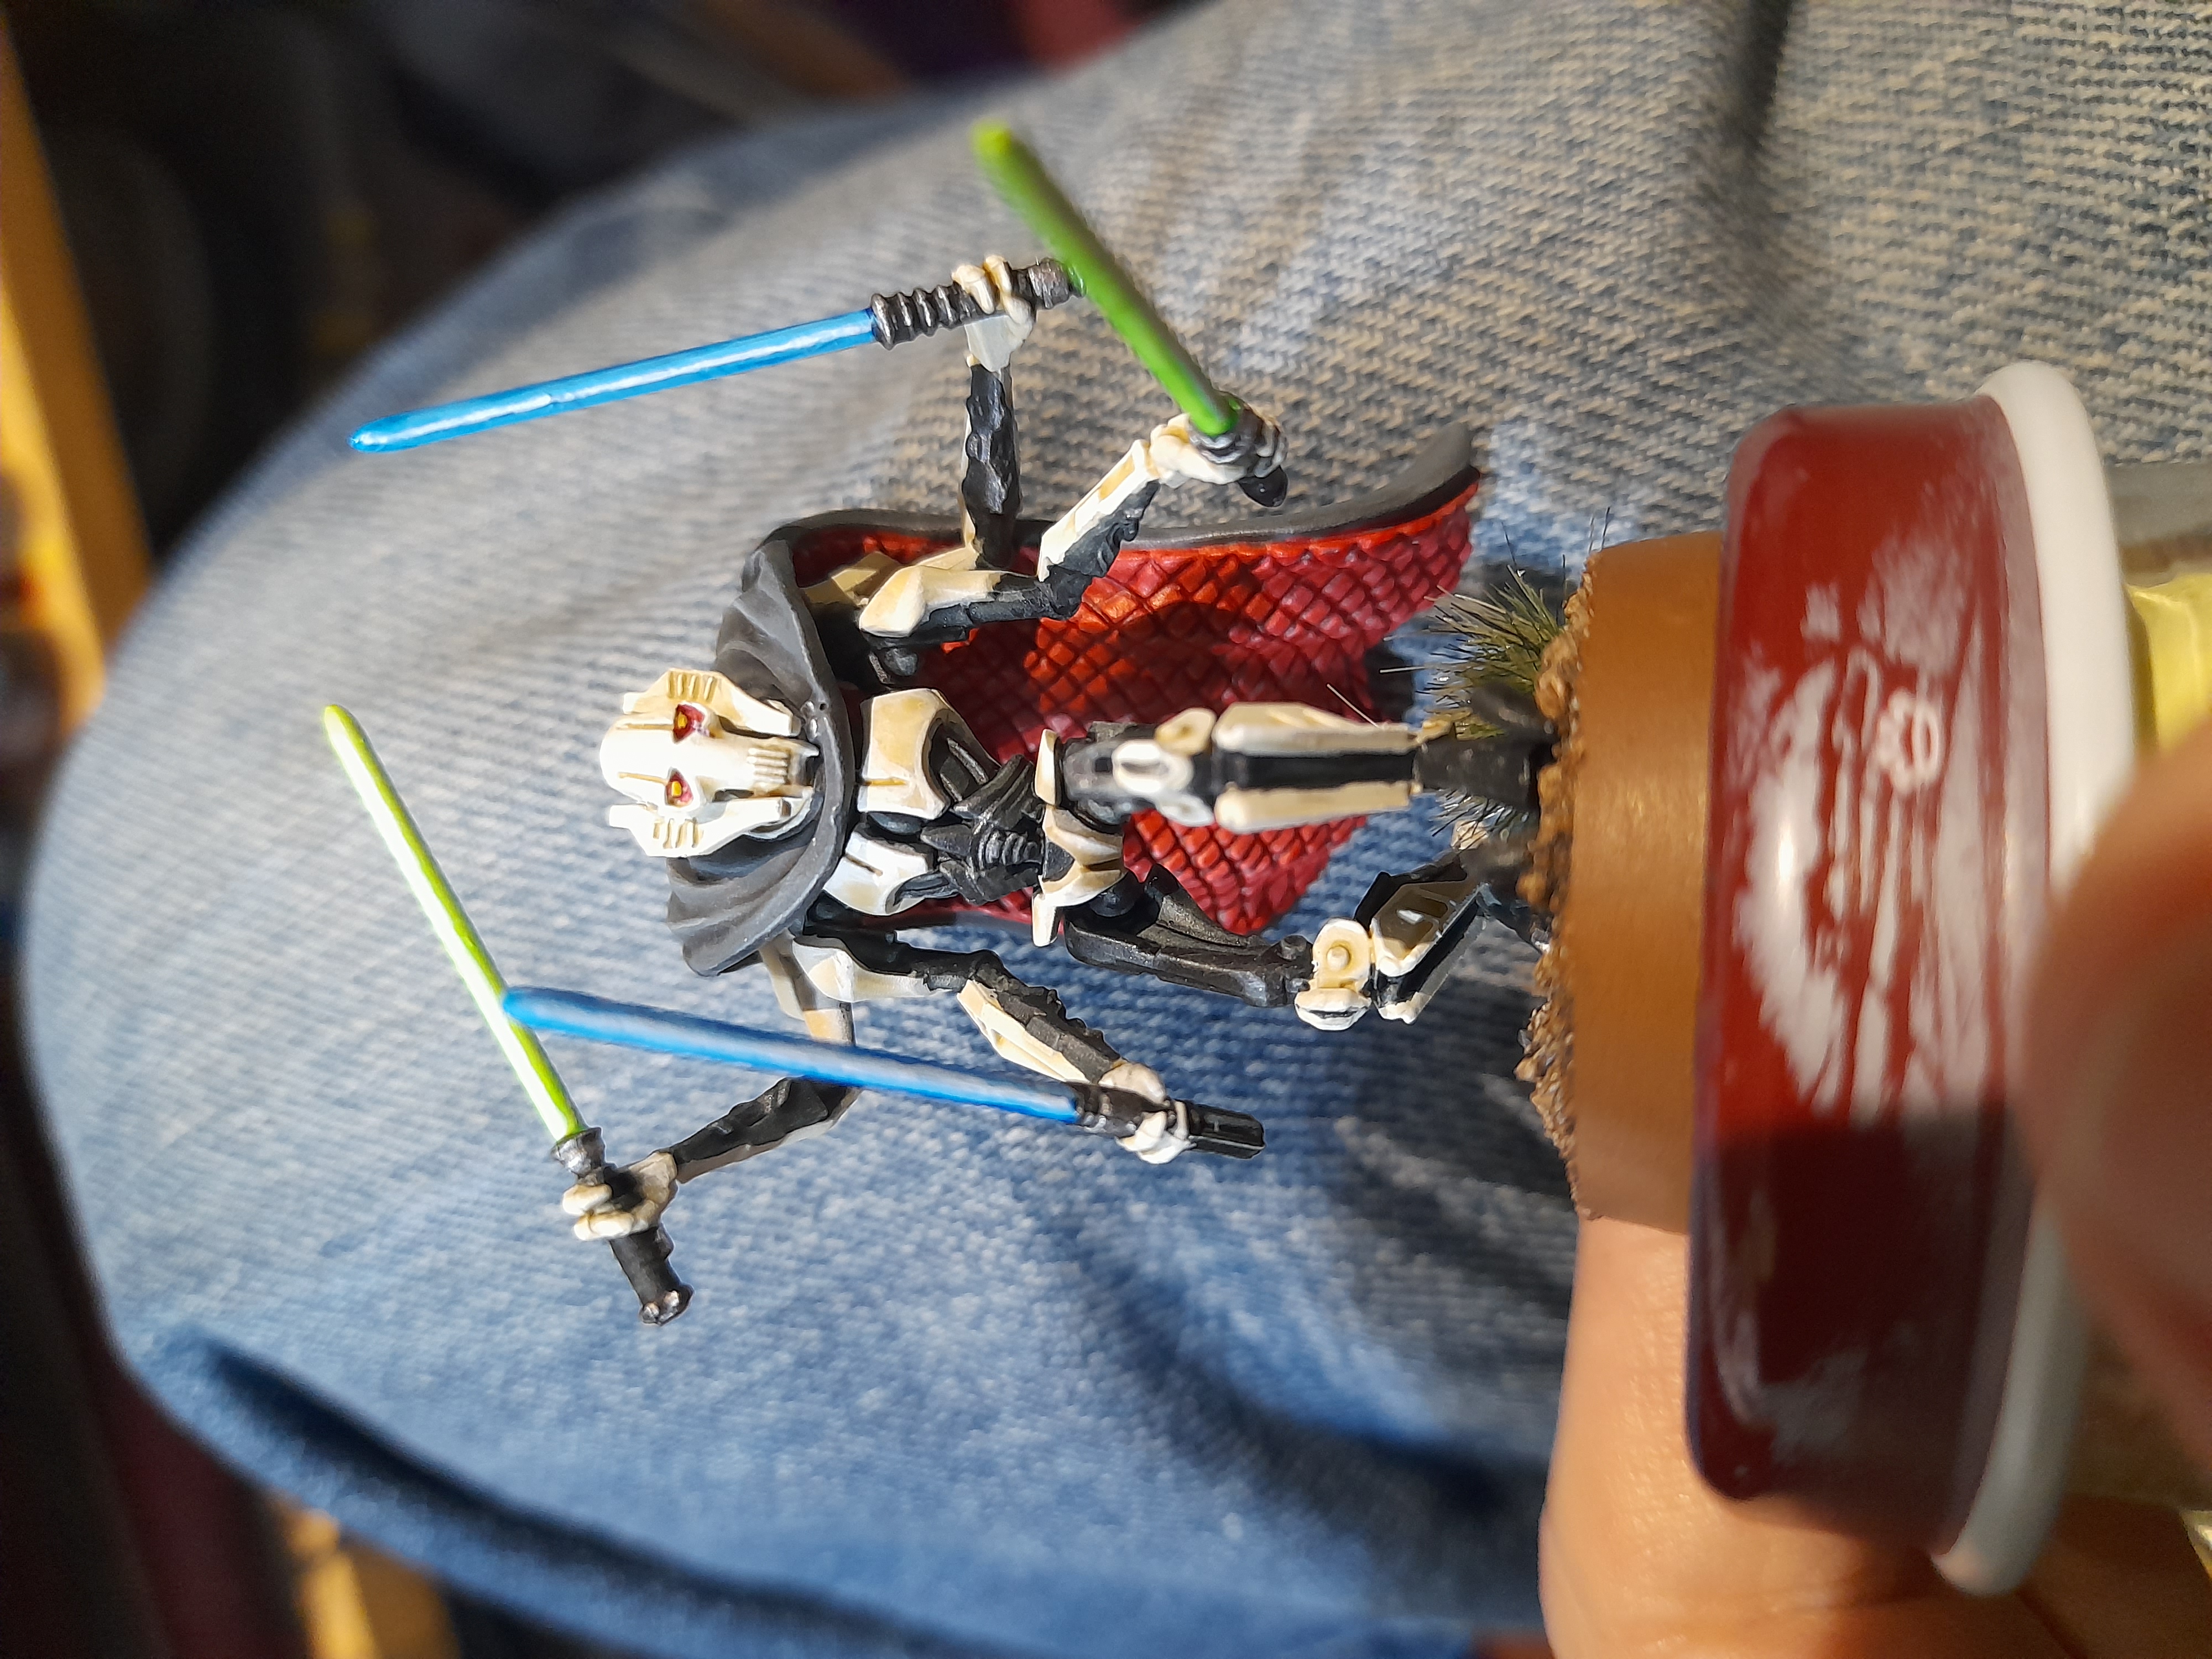
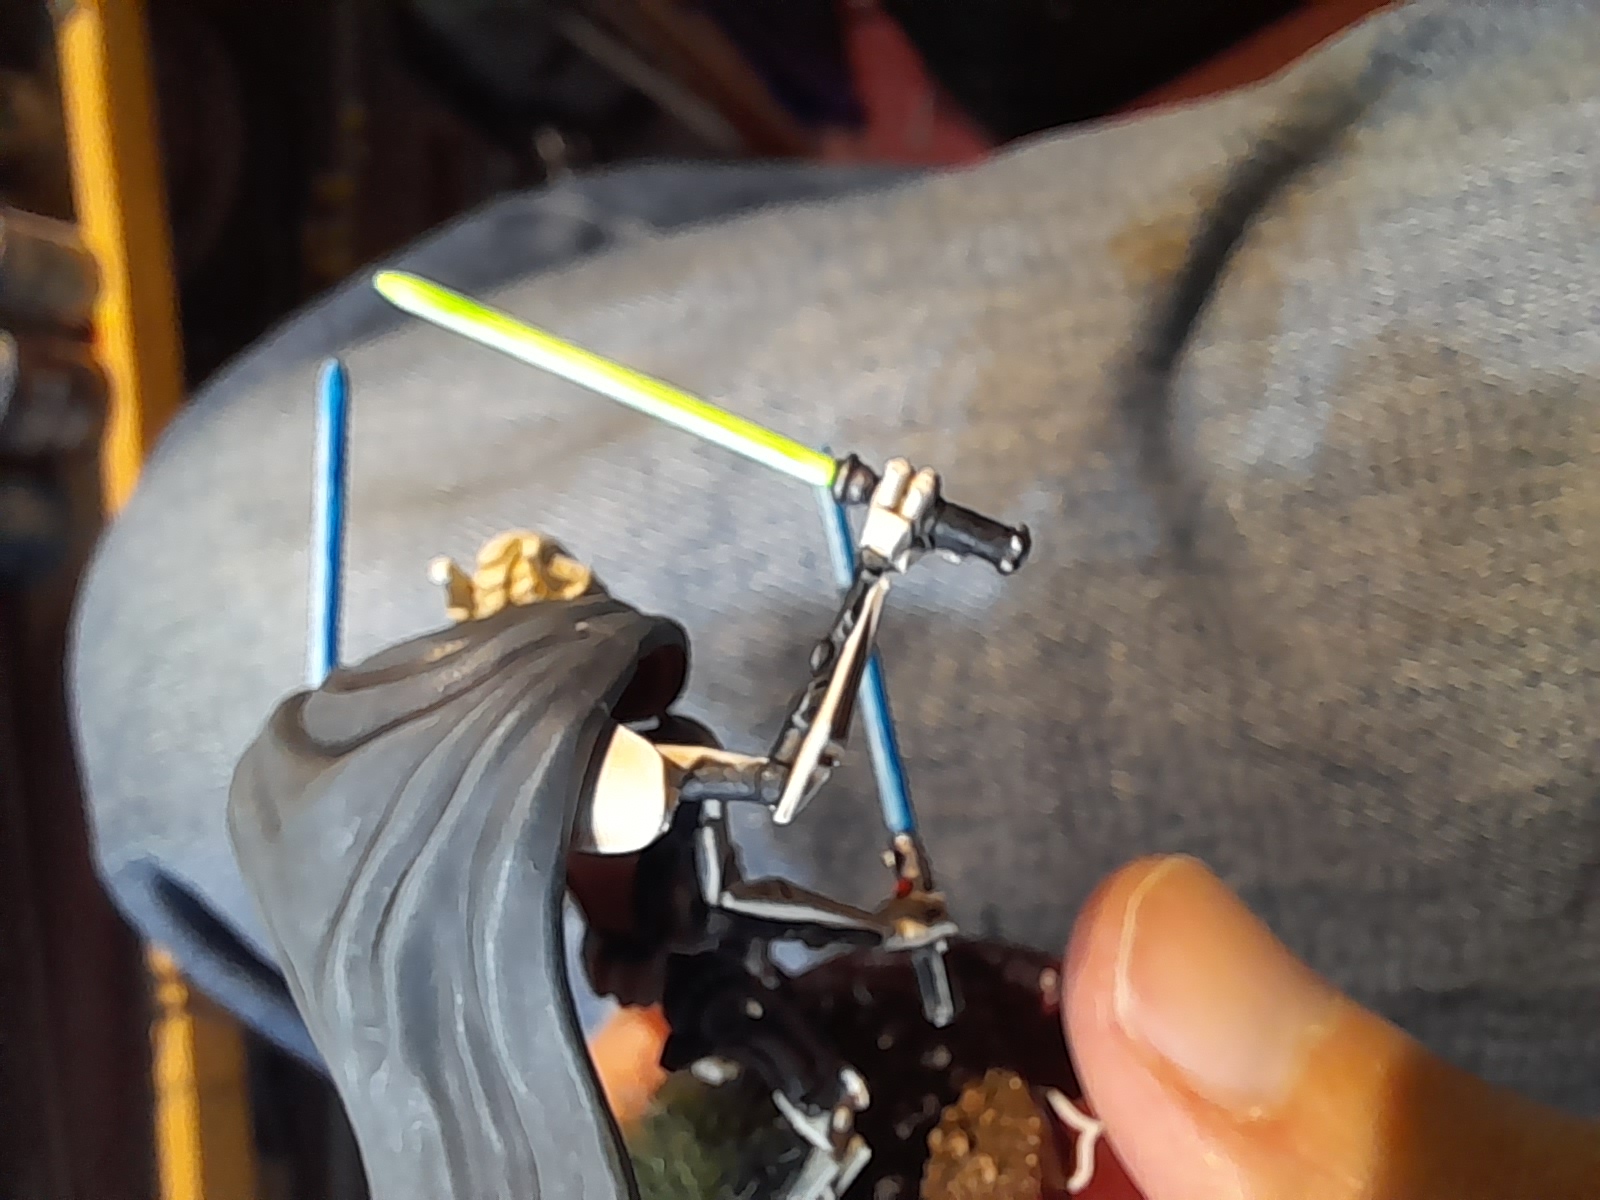
A few minor touches and he was done. Didn’t quite come out how I wanted, but it is done. The green sabres look pretty good irl though, and am happy with how they finished up.
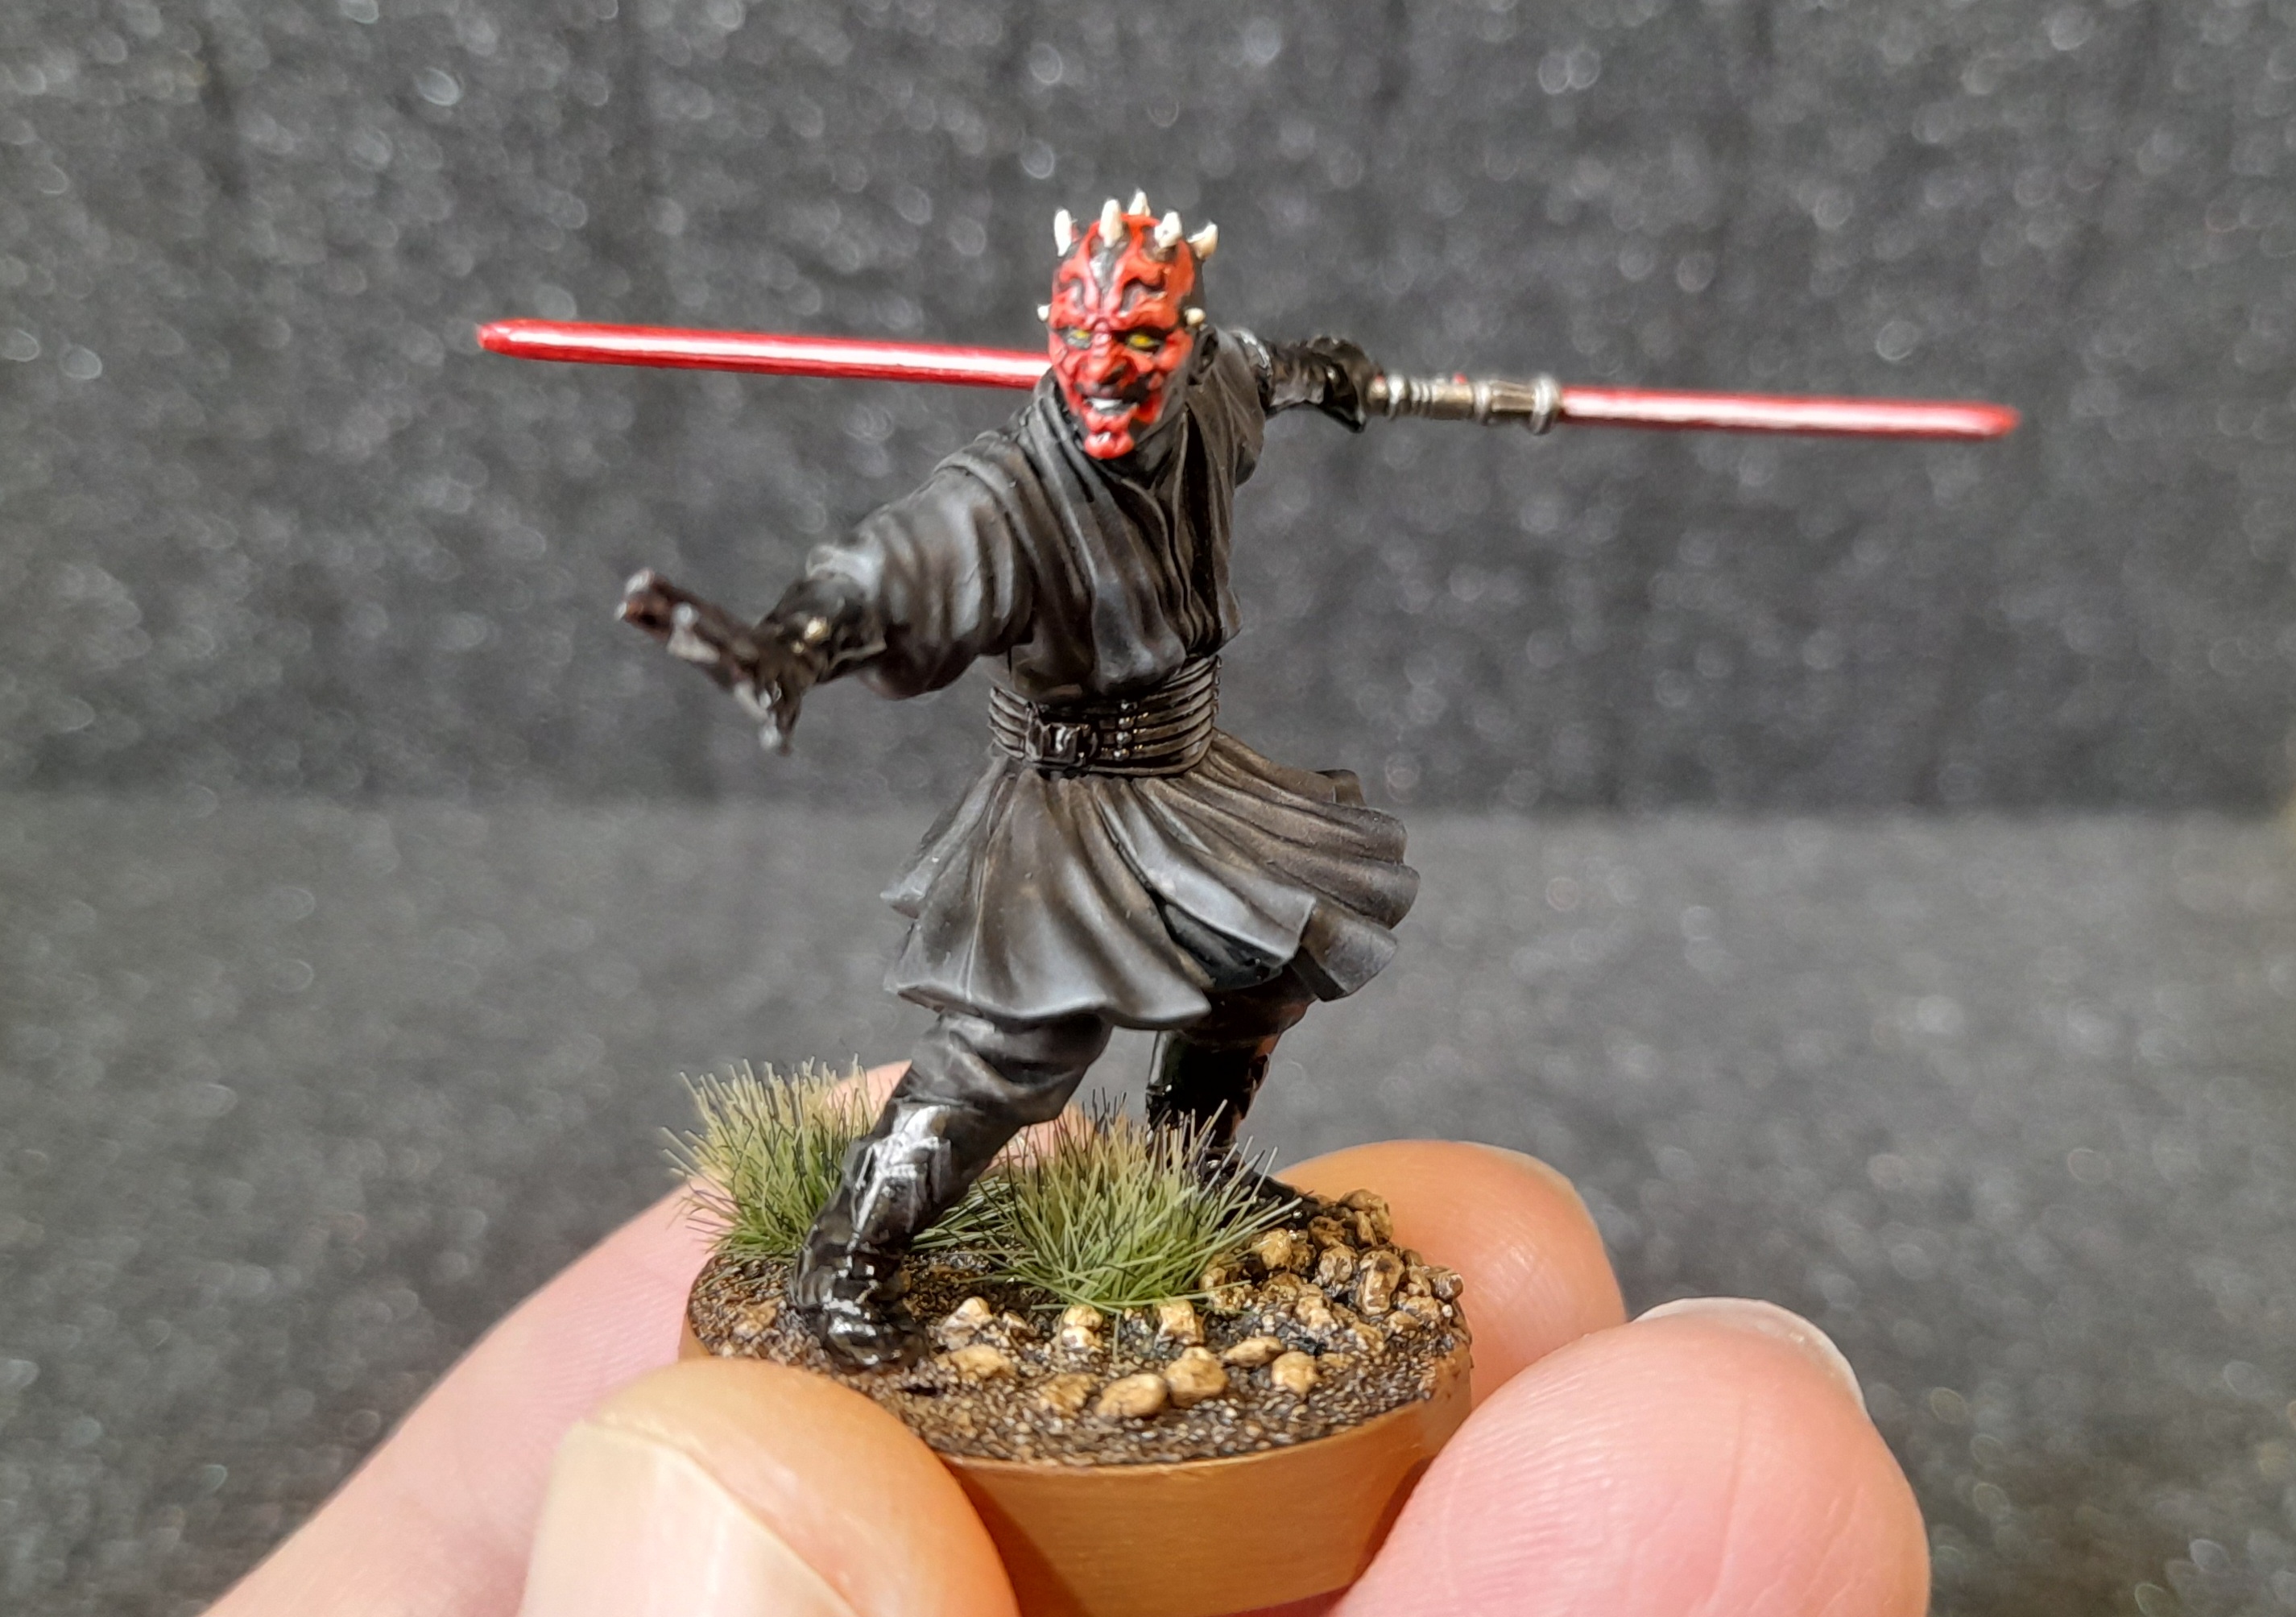
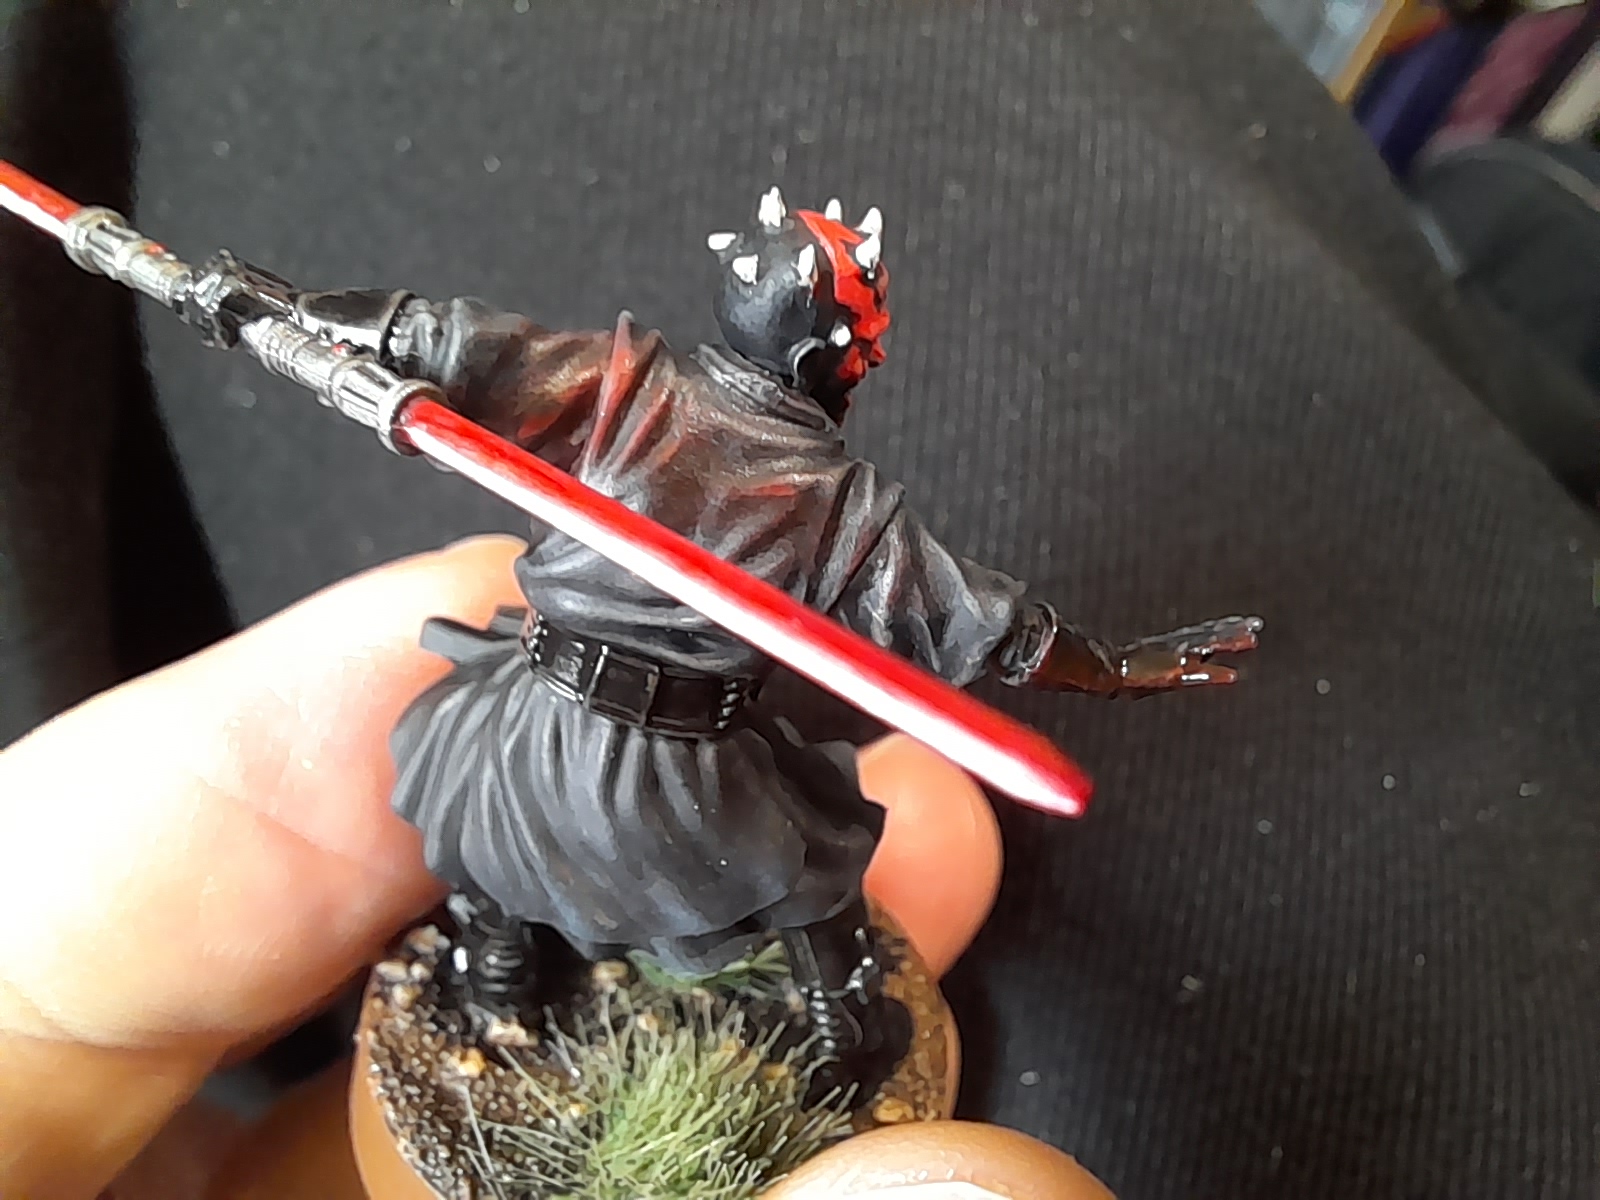
Darth Maul
19th March 2024
I started with a light prime as I didn’t have any black ☹
The first thing that I did was lay down some contrast red on his face. There is sculpted detail of his face markings, but tbh my eyes aren’t good enough to pick it all out. So I went with the contrast, followed by a slightly thinned Nuln oil that I tried to apply to where I could see the recesses.
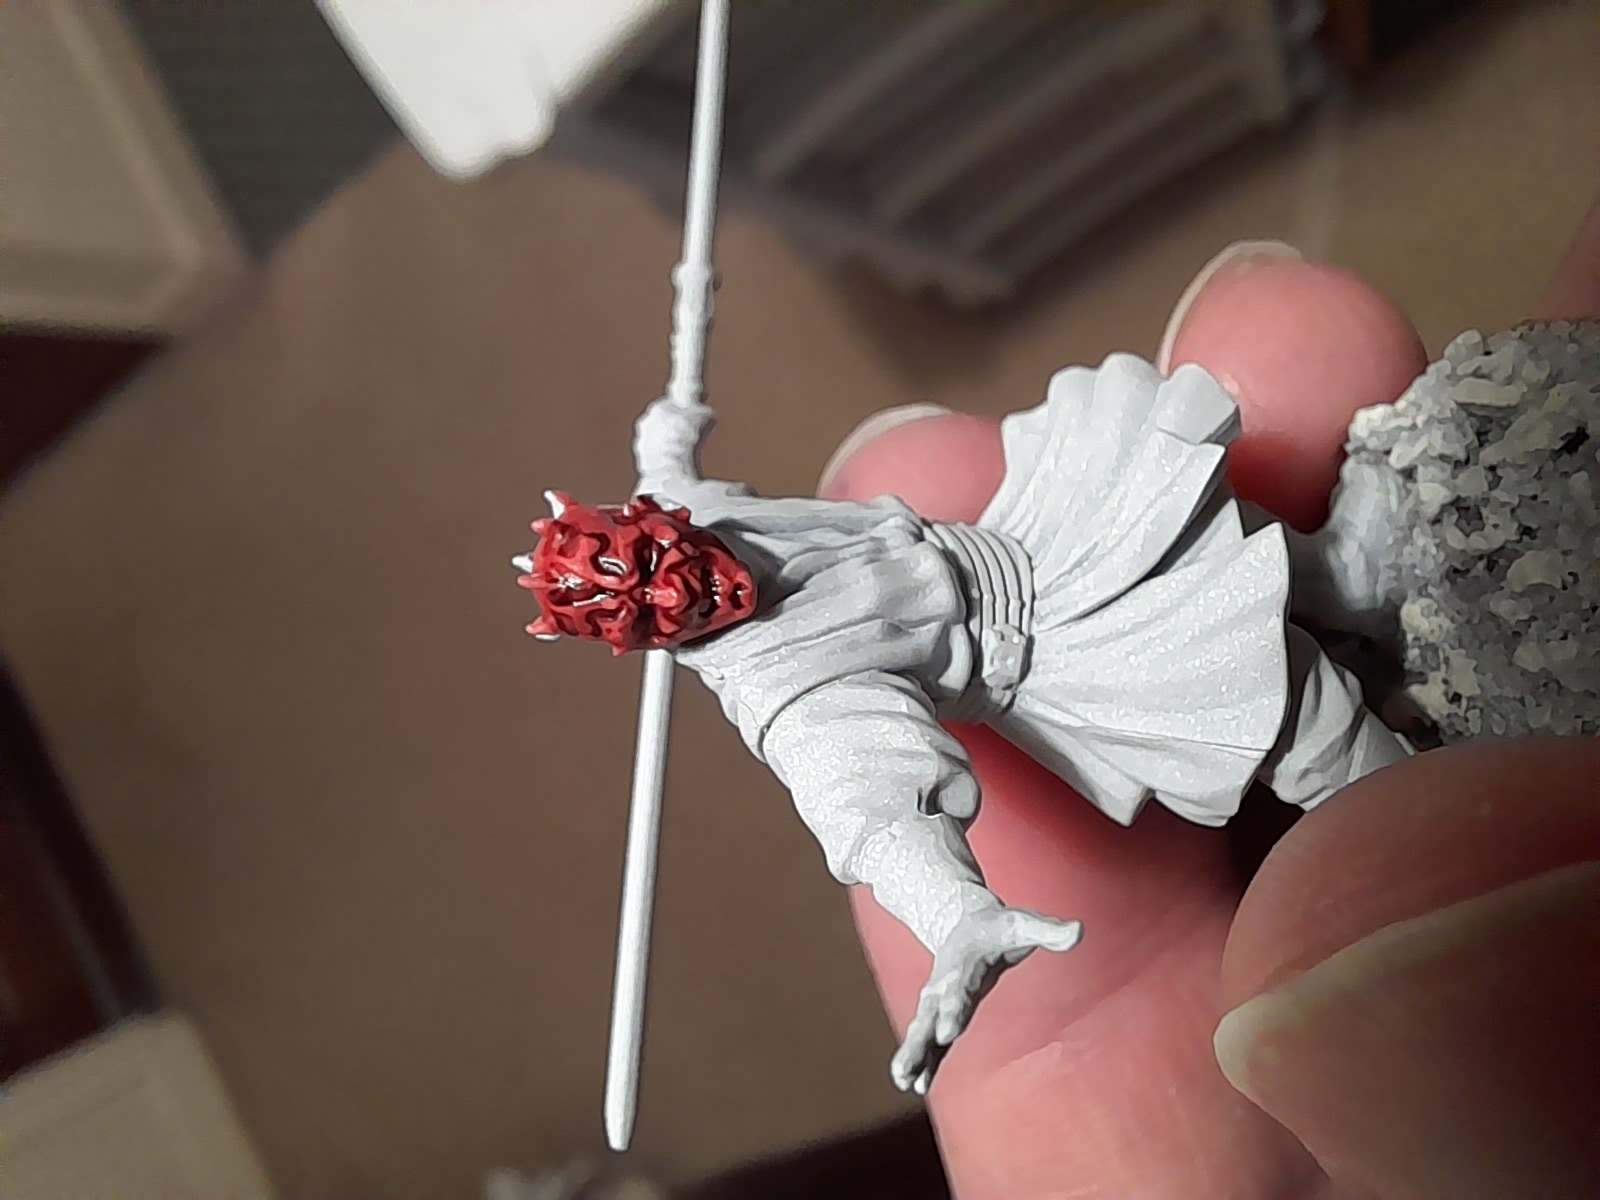
To get some head way I did the usual colour on the base, then painted all of his robes in black. I used a slightly thinned Black legion for this. At first I had it a little too thin, but then corrected. This was followed by a drybrush of a dark grey followed by a more gentle drybrush of a lighter grey and a thinned highlight on some of the more prominent robe edges.
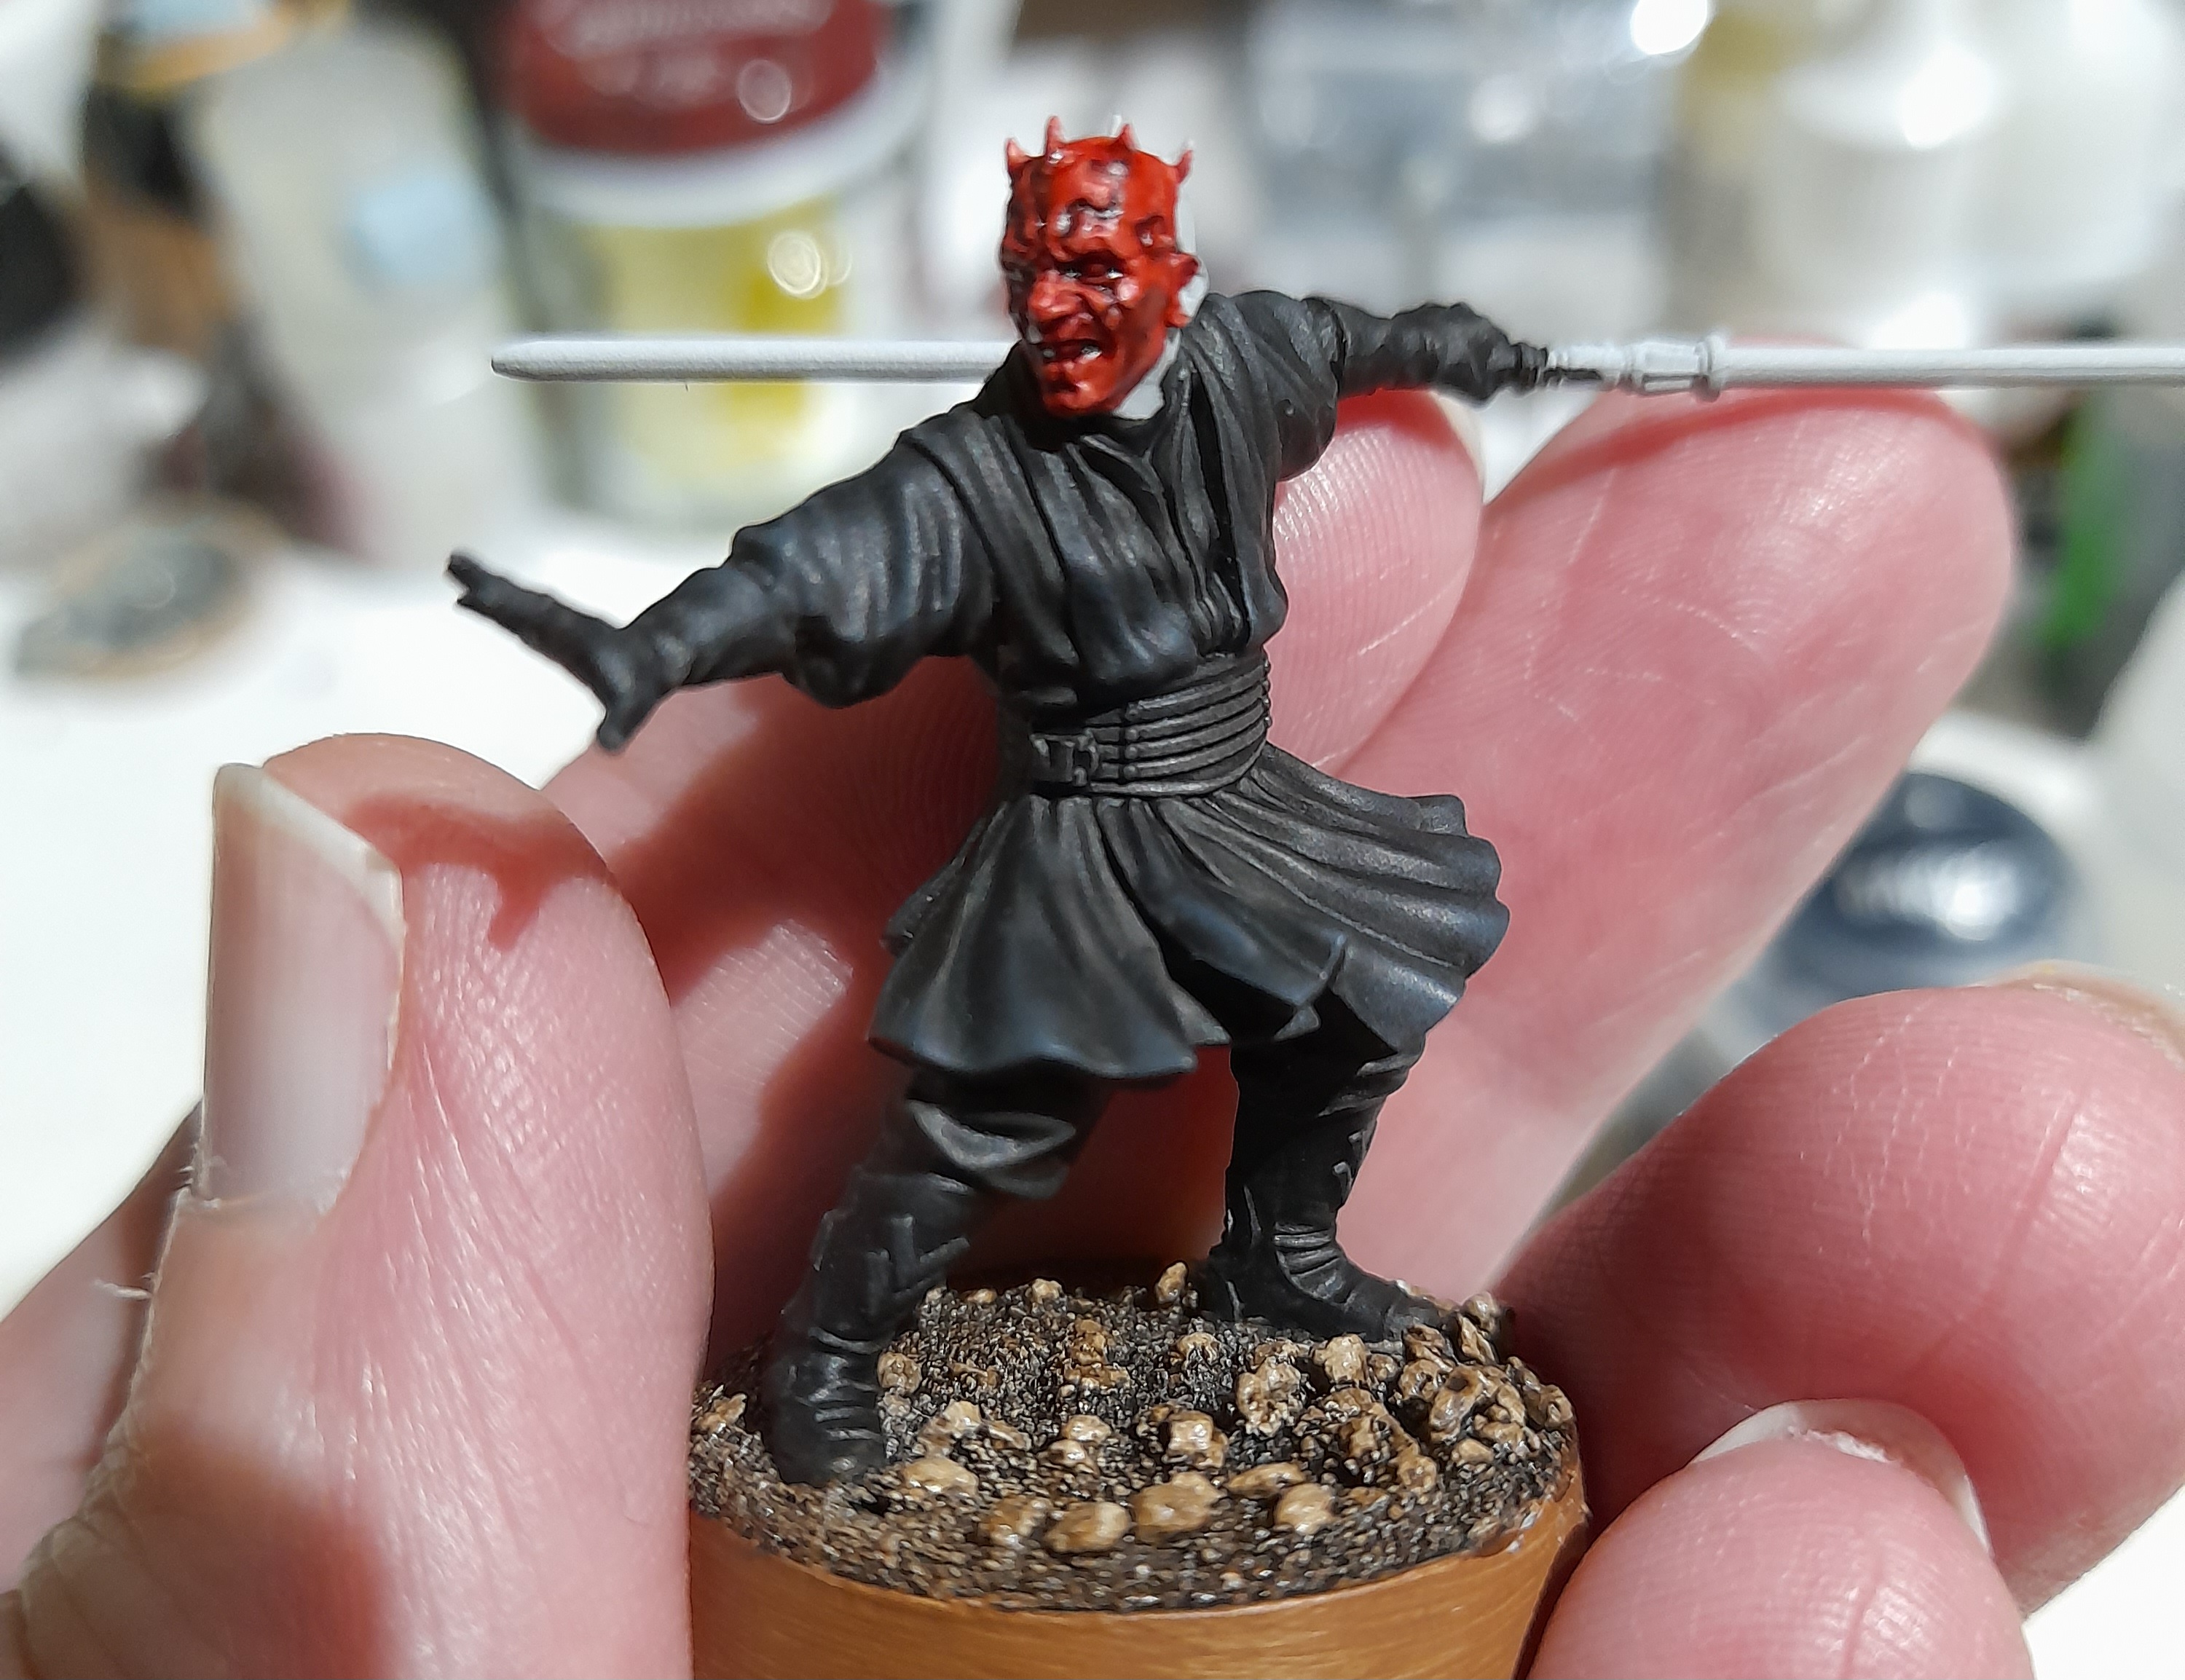
Next I laid down some red on the lightsabre, and then went back to Maul’s face and head. I looked up various sources online to get better images of the layout of his facial markings, and used that alongside the directed shading earlier to fill out his face in more detail.
I used black legion to paint in the black following my sourced images as much as possible. Then I picked out the eyes, teeth and horns, followed by highlighting the red parts. The black areas of the ears and jawline were highlighted later with grey.
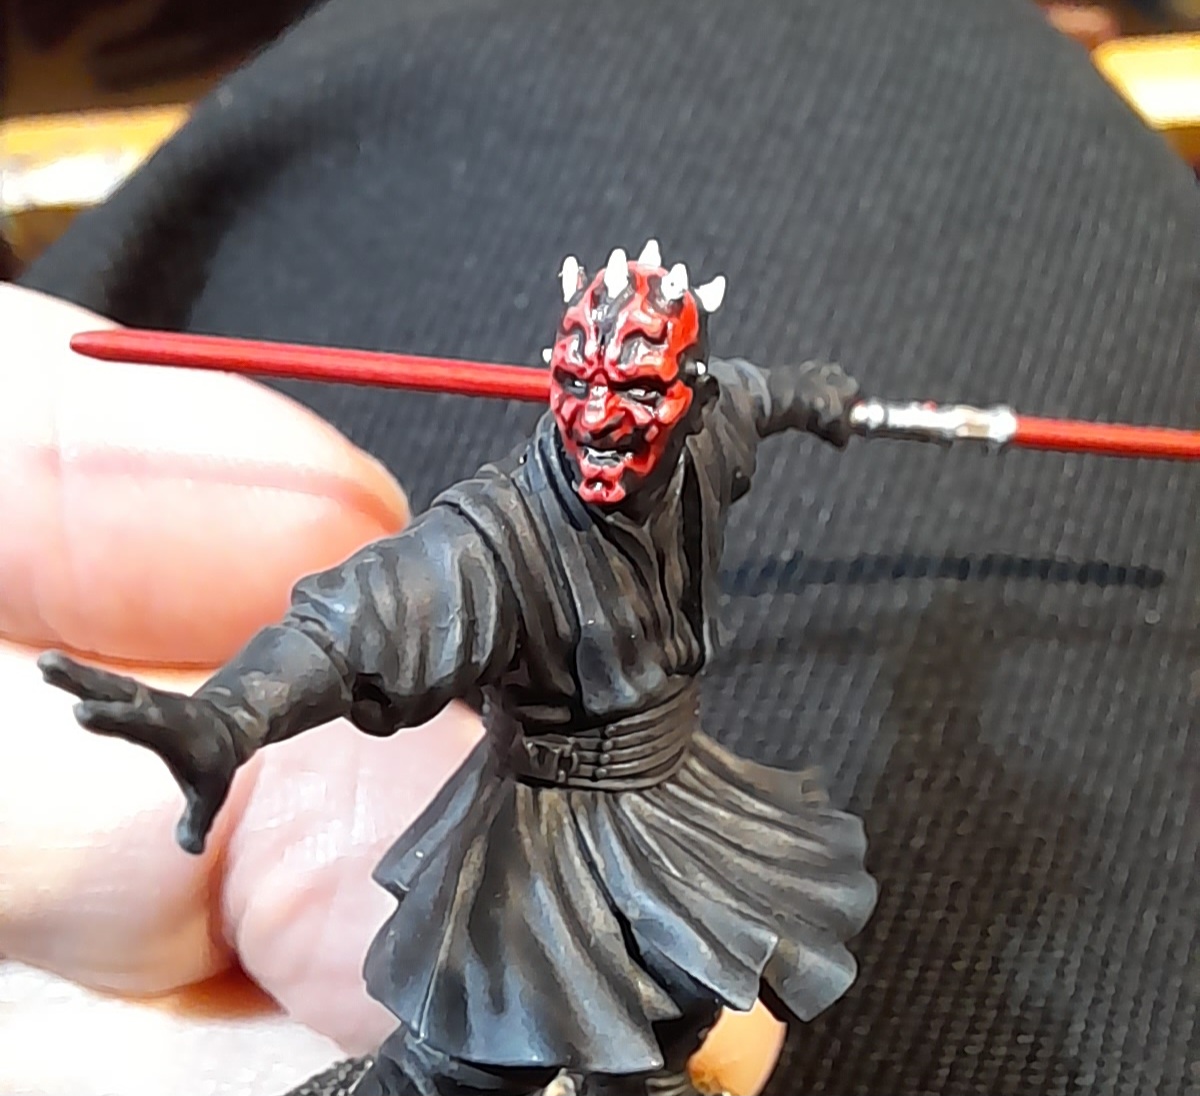
With the daunting face finished I then thought I would try some basic object source lighting from the lightsabre.
Applied some thin layers of contrast onto his back, followed by some thin highlights of Mephiston red.
I also decide to apply a little bit to the areas I thought would be more reflective (that I planned to gloss varnish) – the edge of his outstretched gloved hand, part of the belt area and the side of his left boot. Some were more subtle than others.
The final stage was to highlight the sabre blades and add a white line down them. Tidied up a few other bits, and he was done.
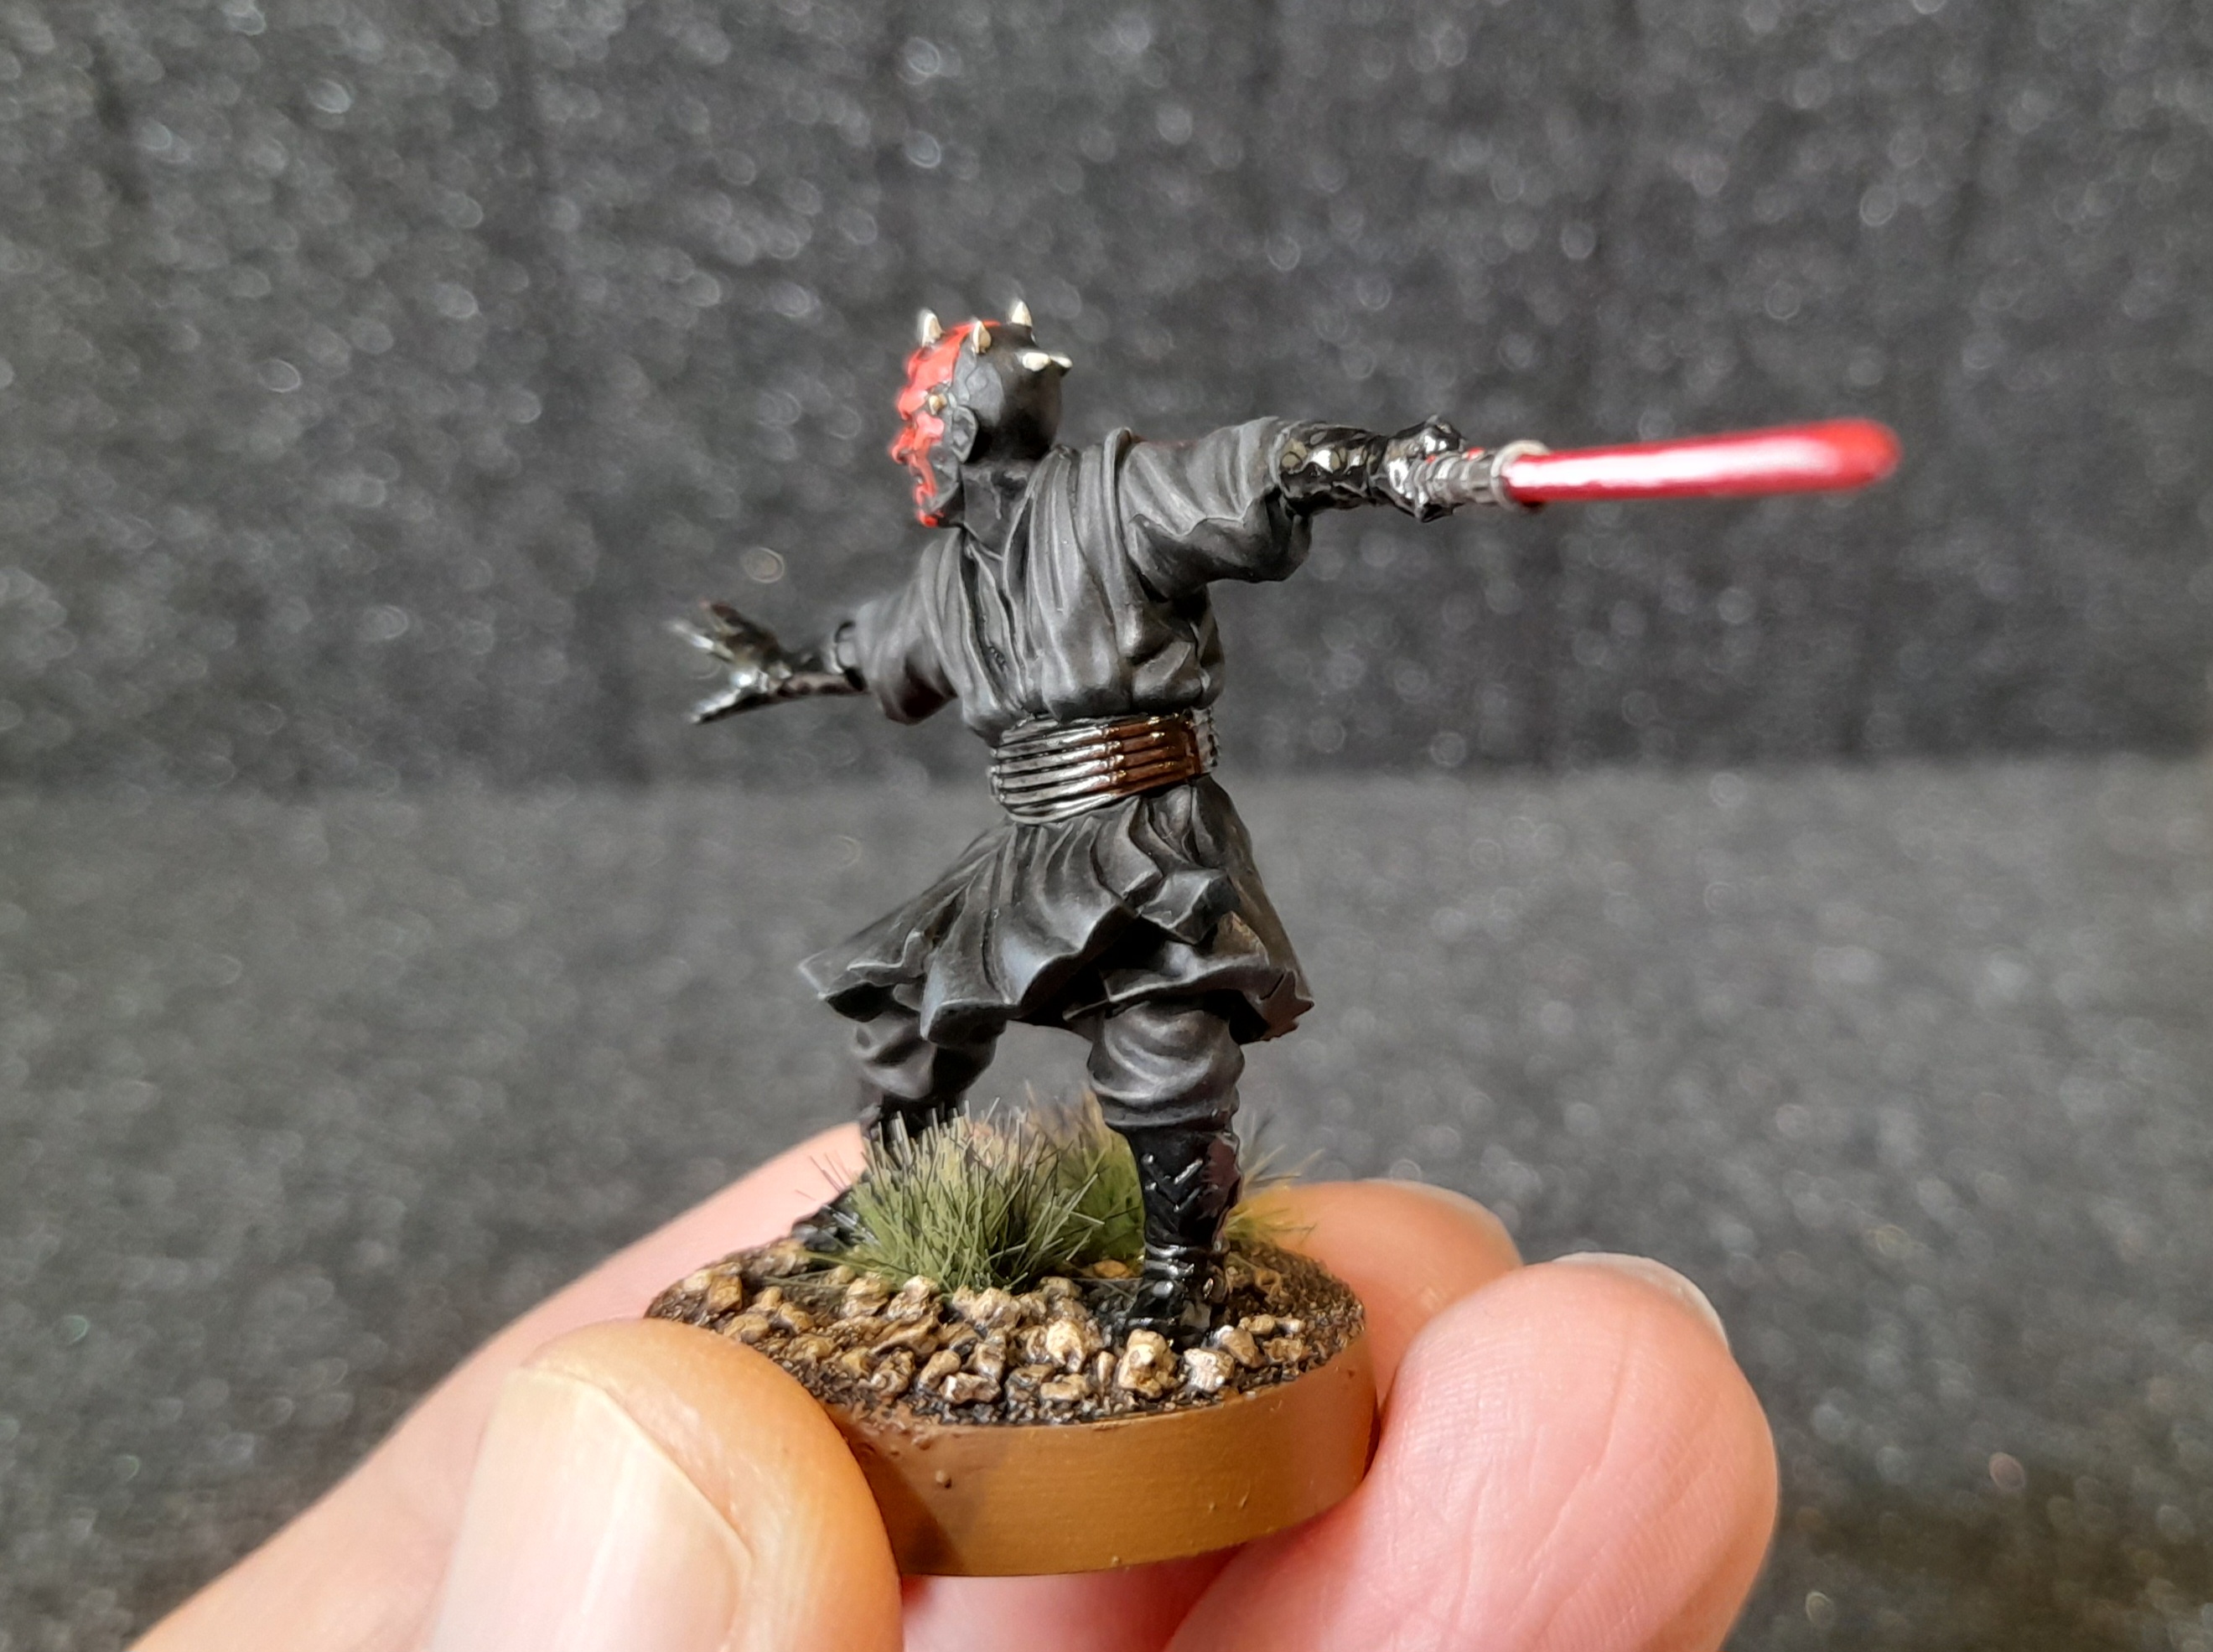
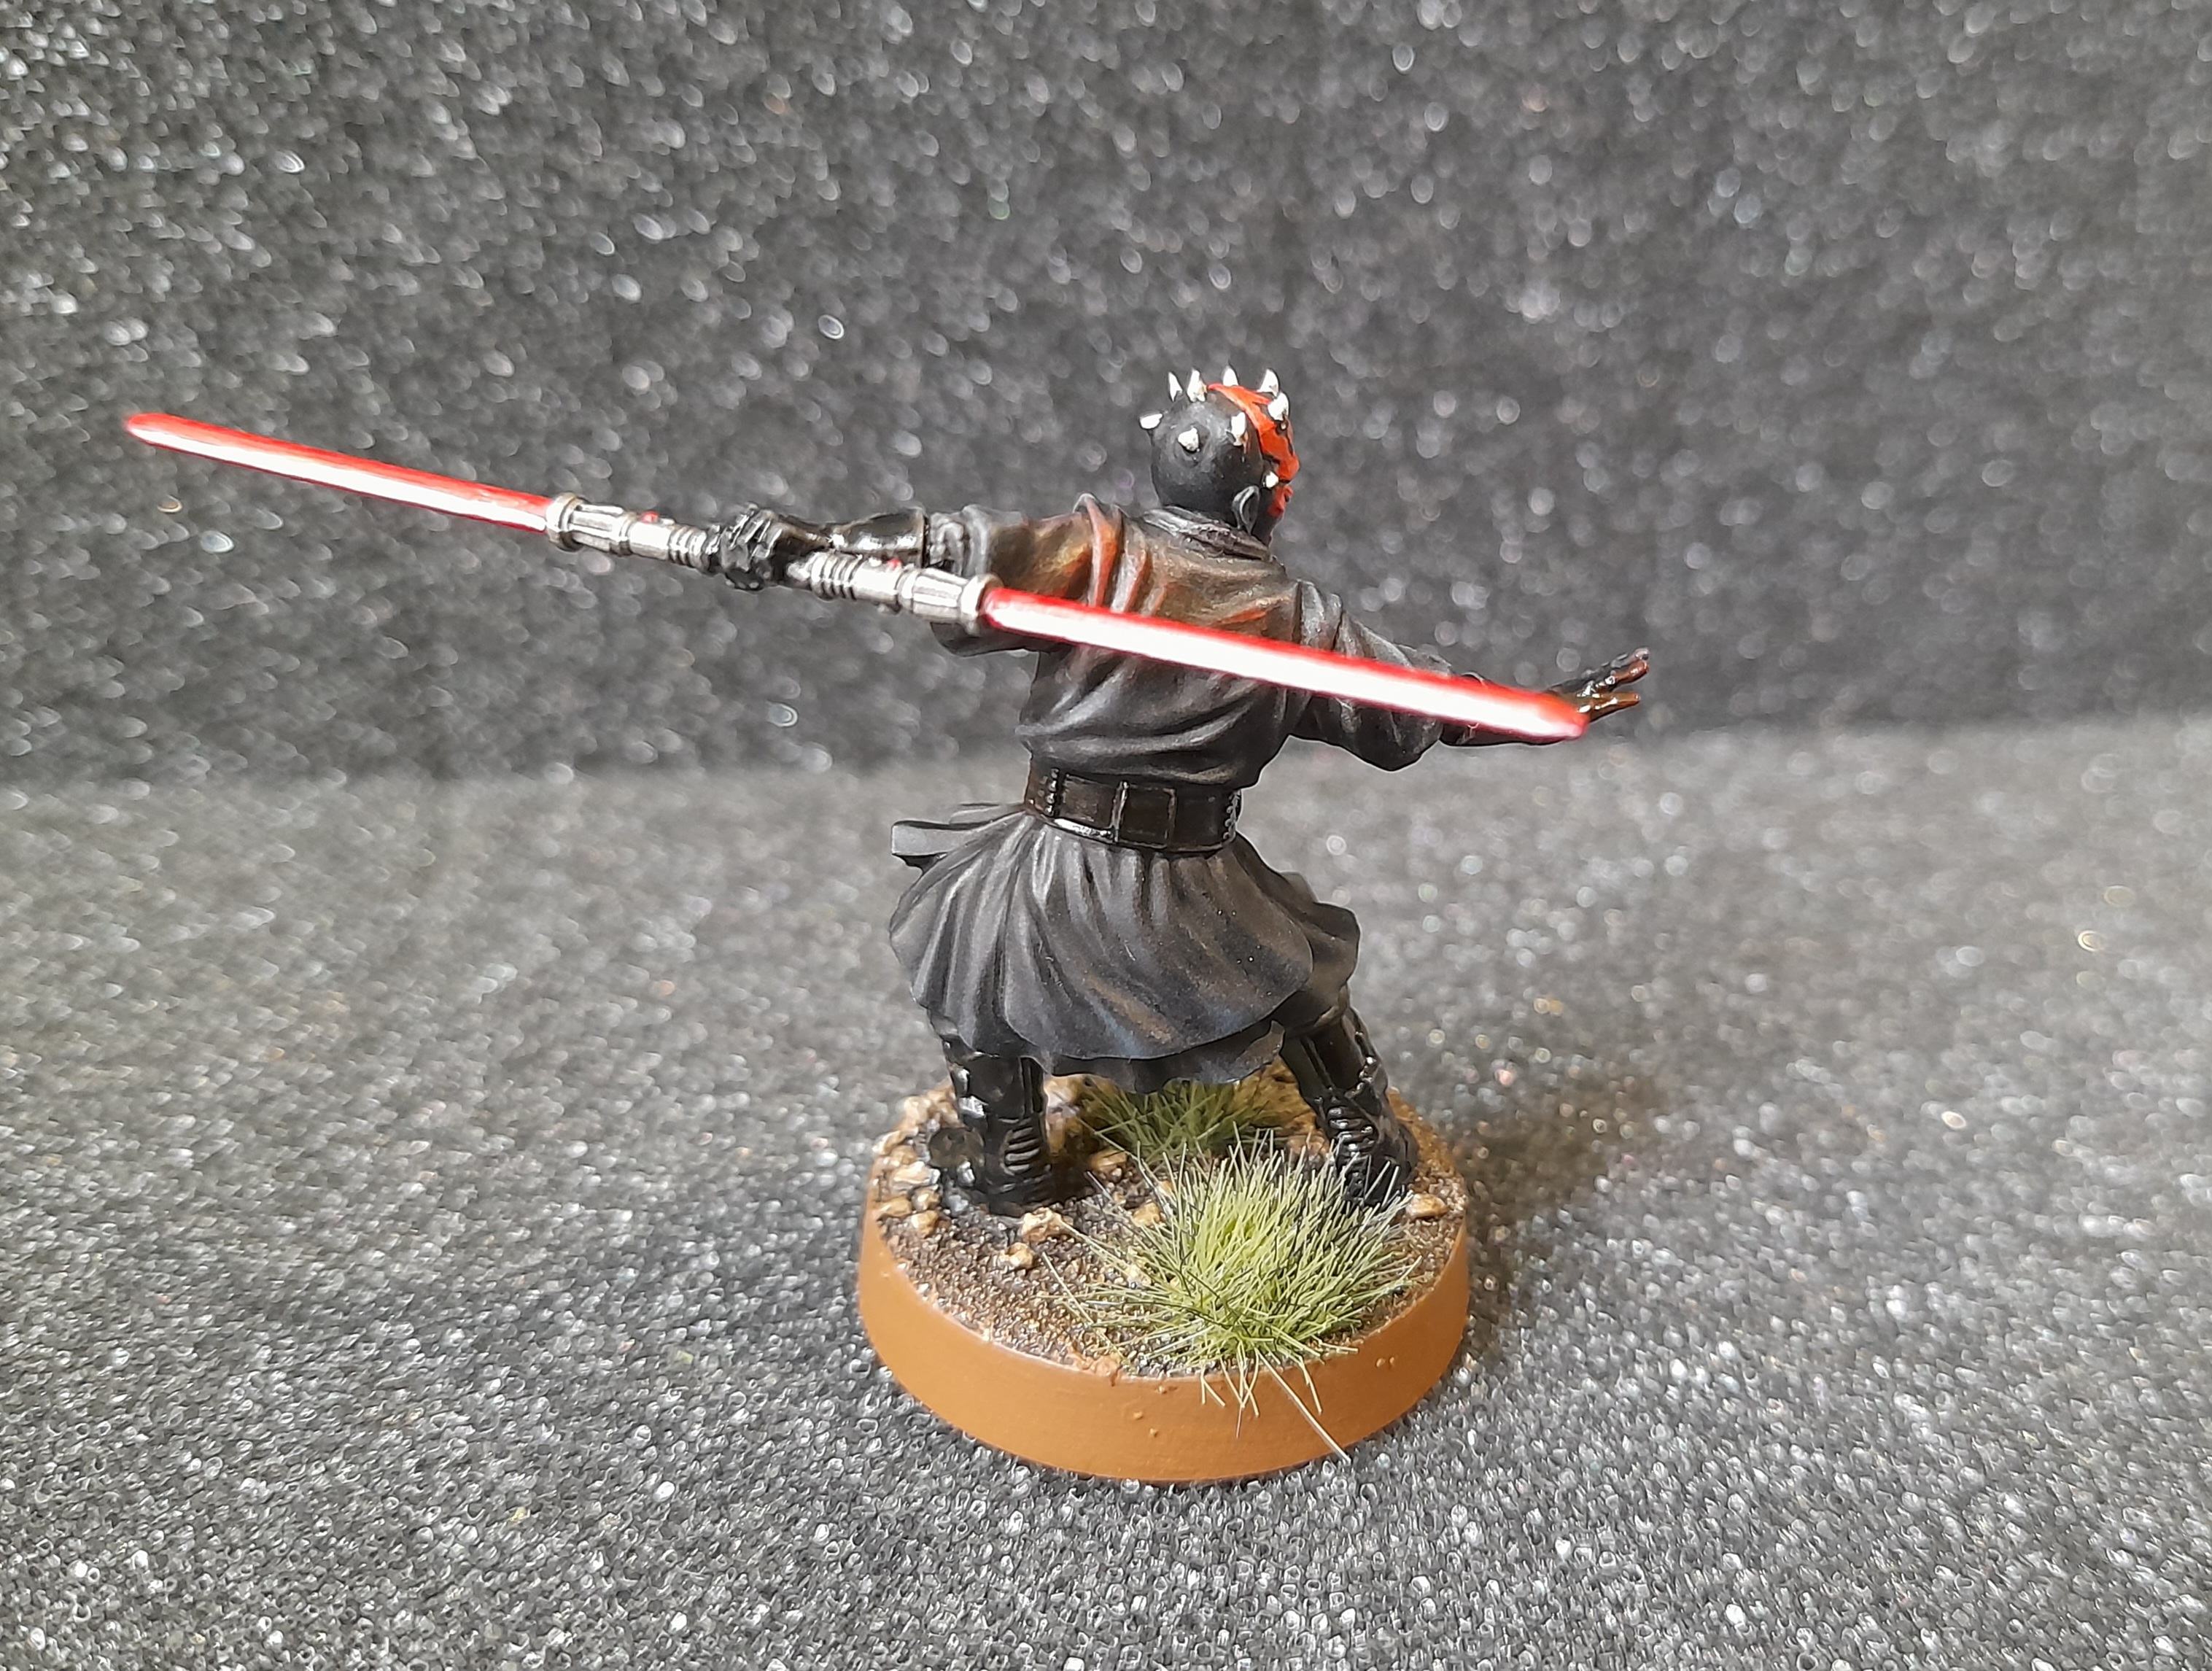
 OSL attempt on his back and hand
Count Dooku
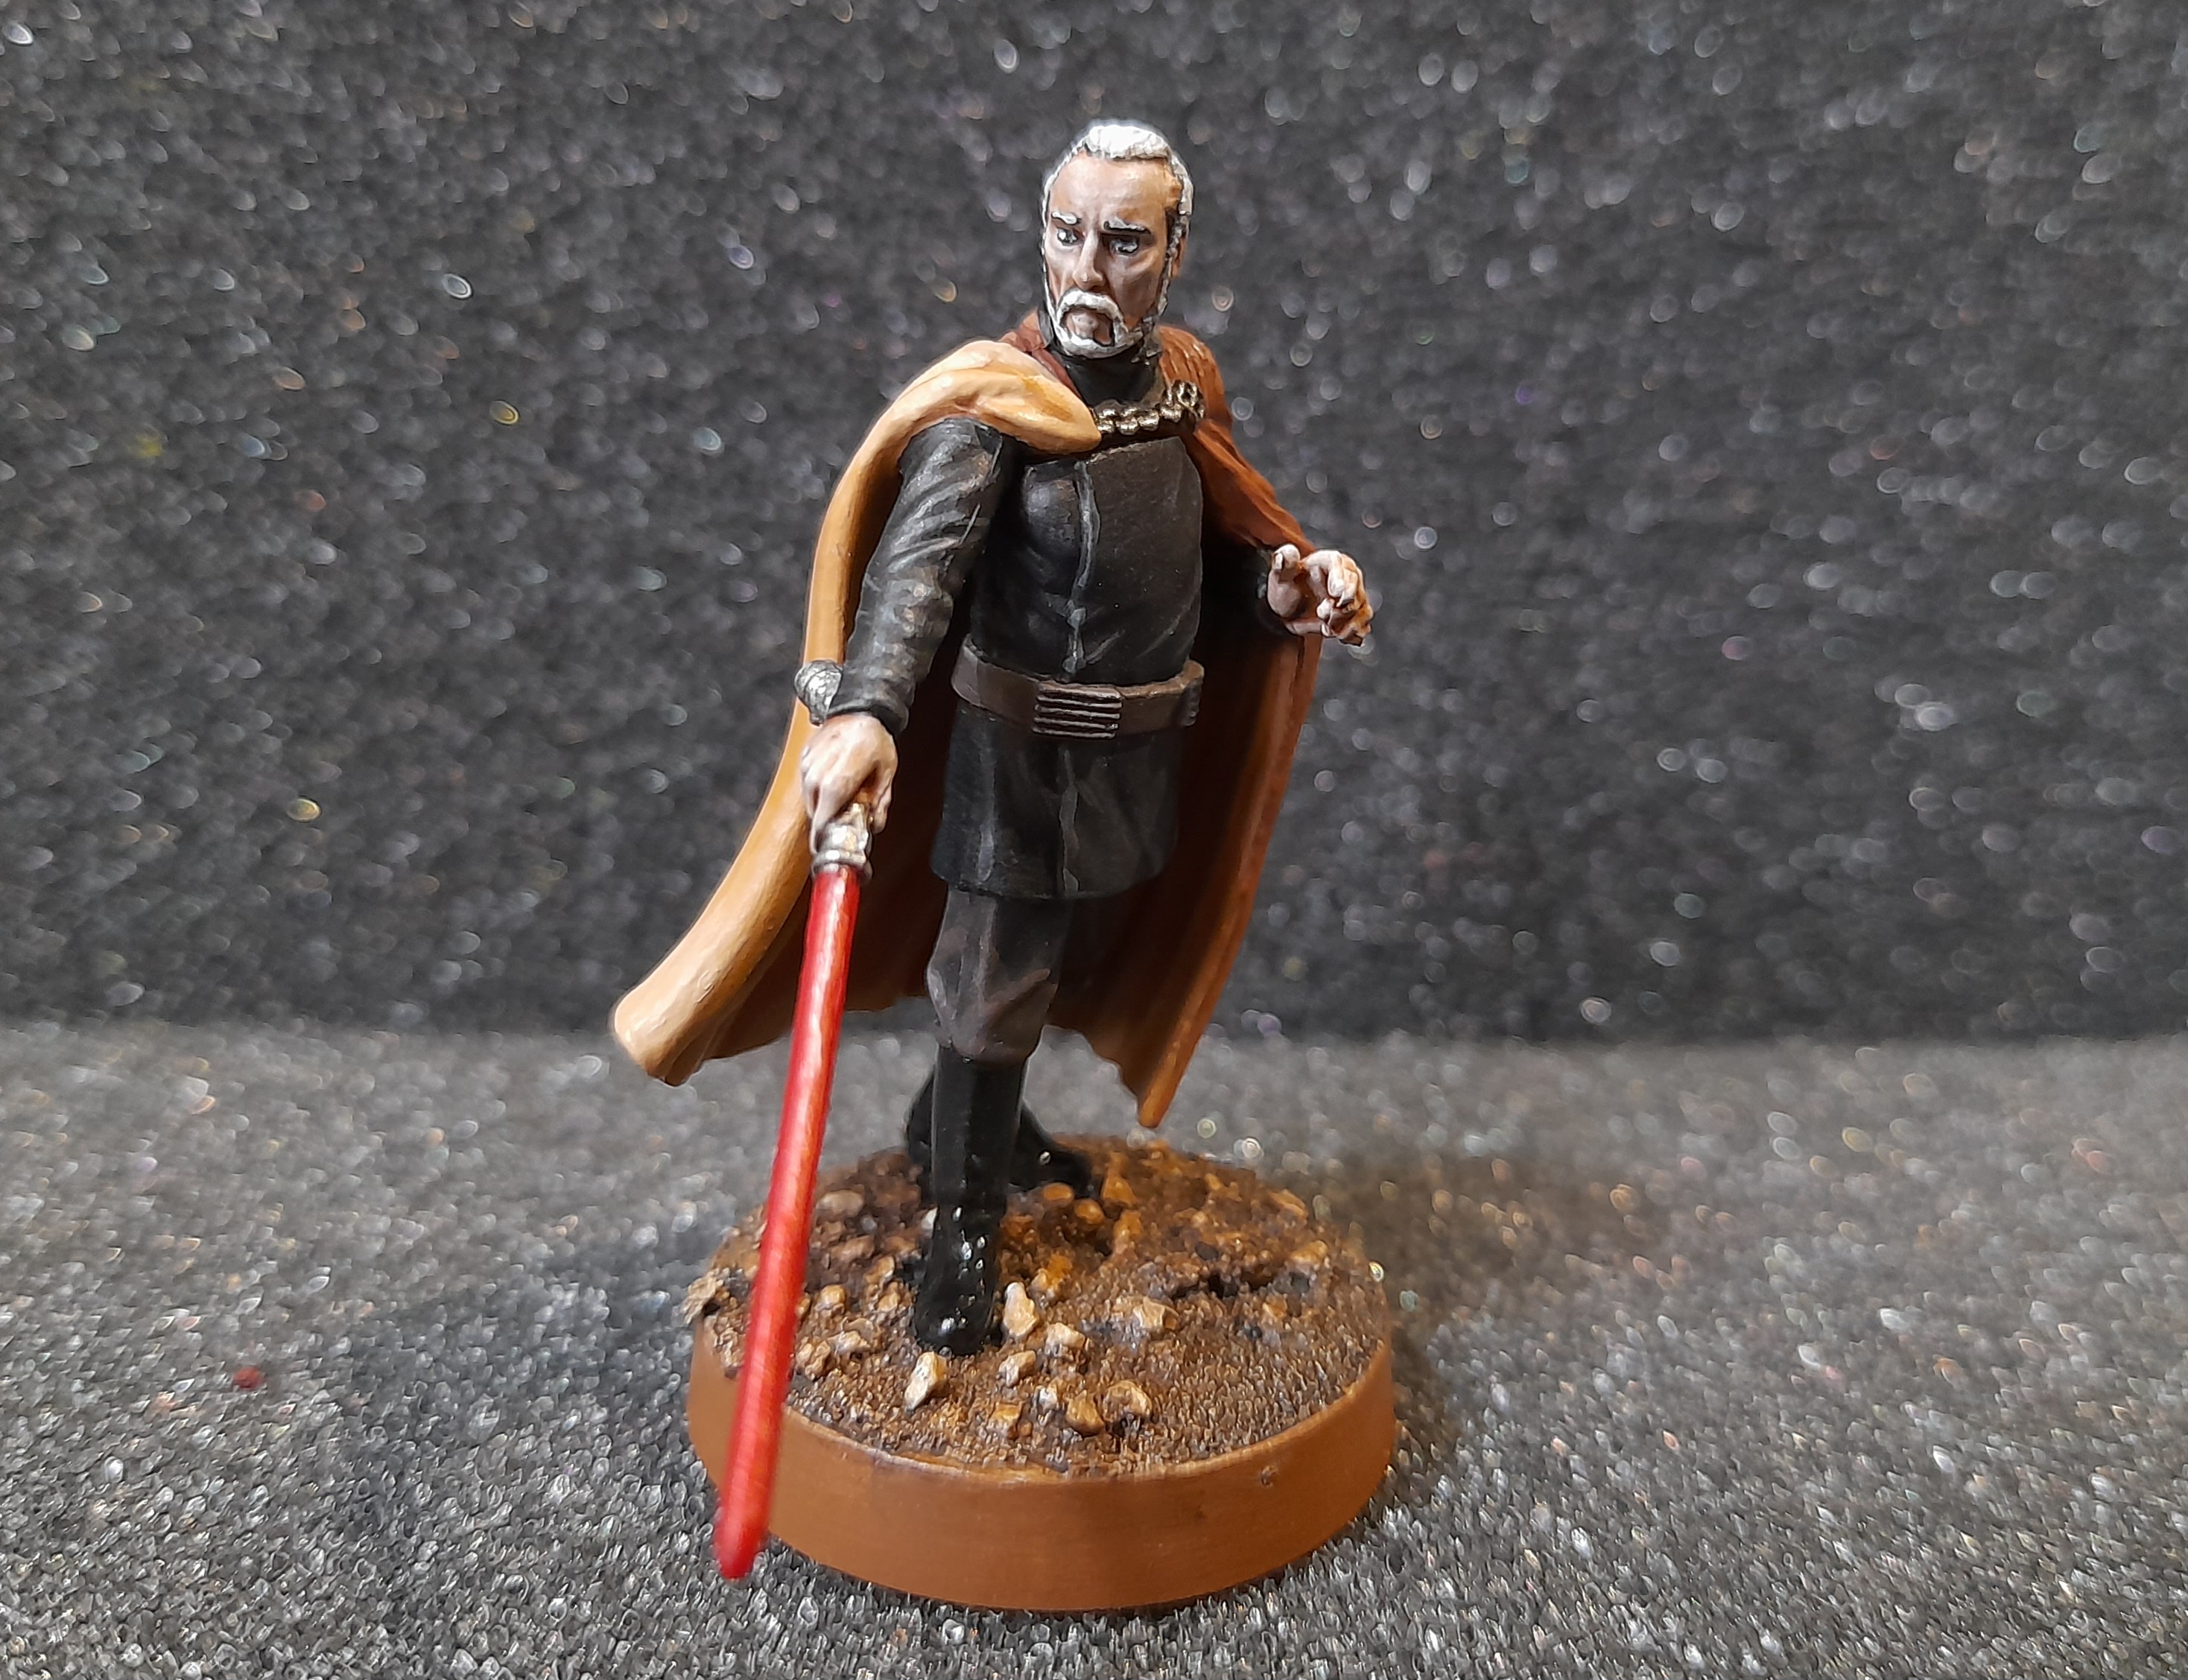
15th March 2024
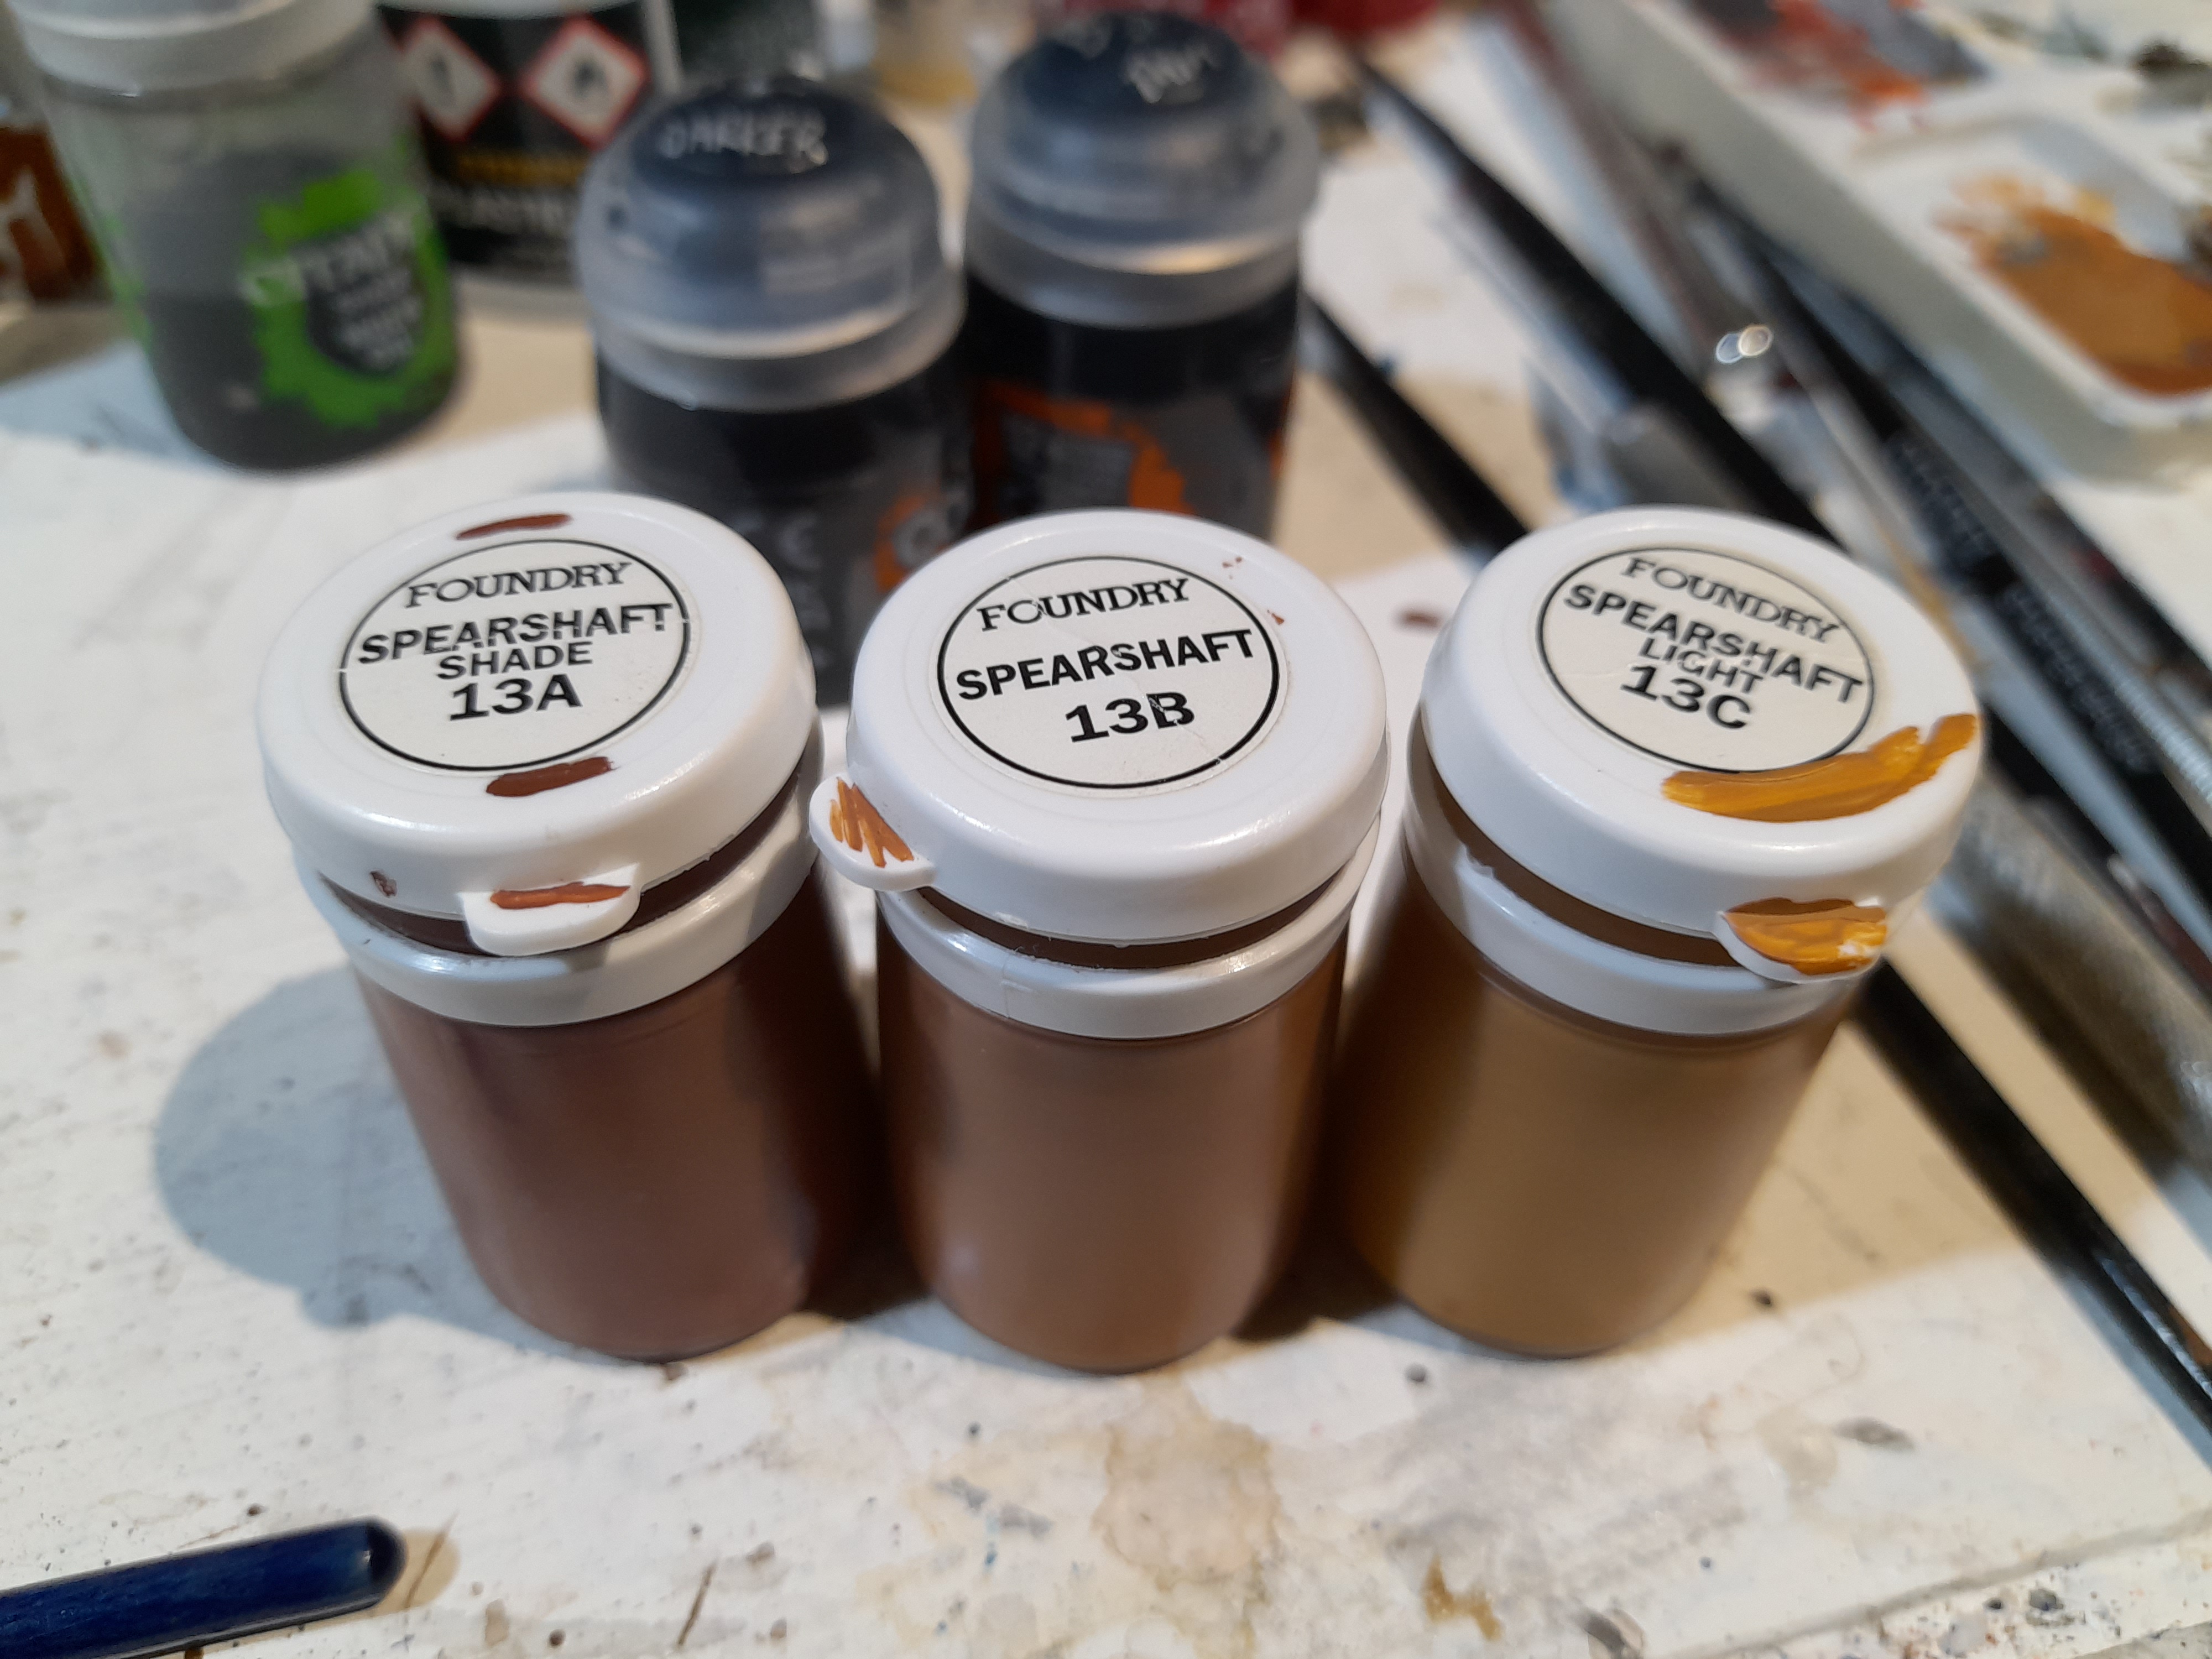
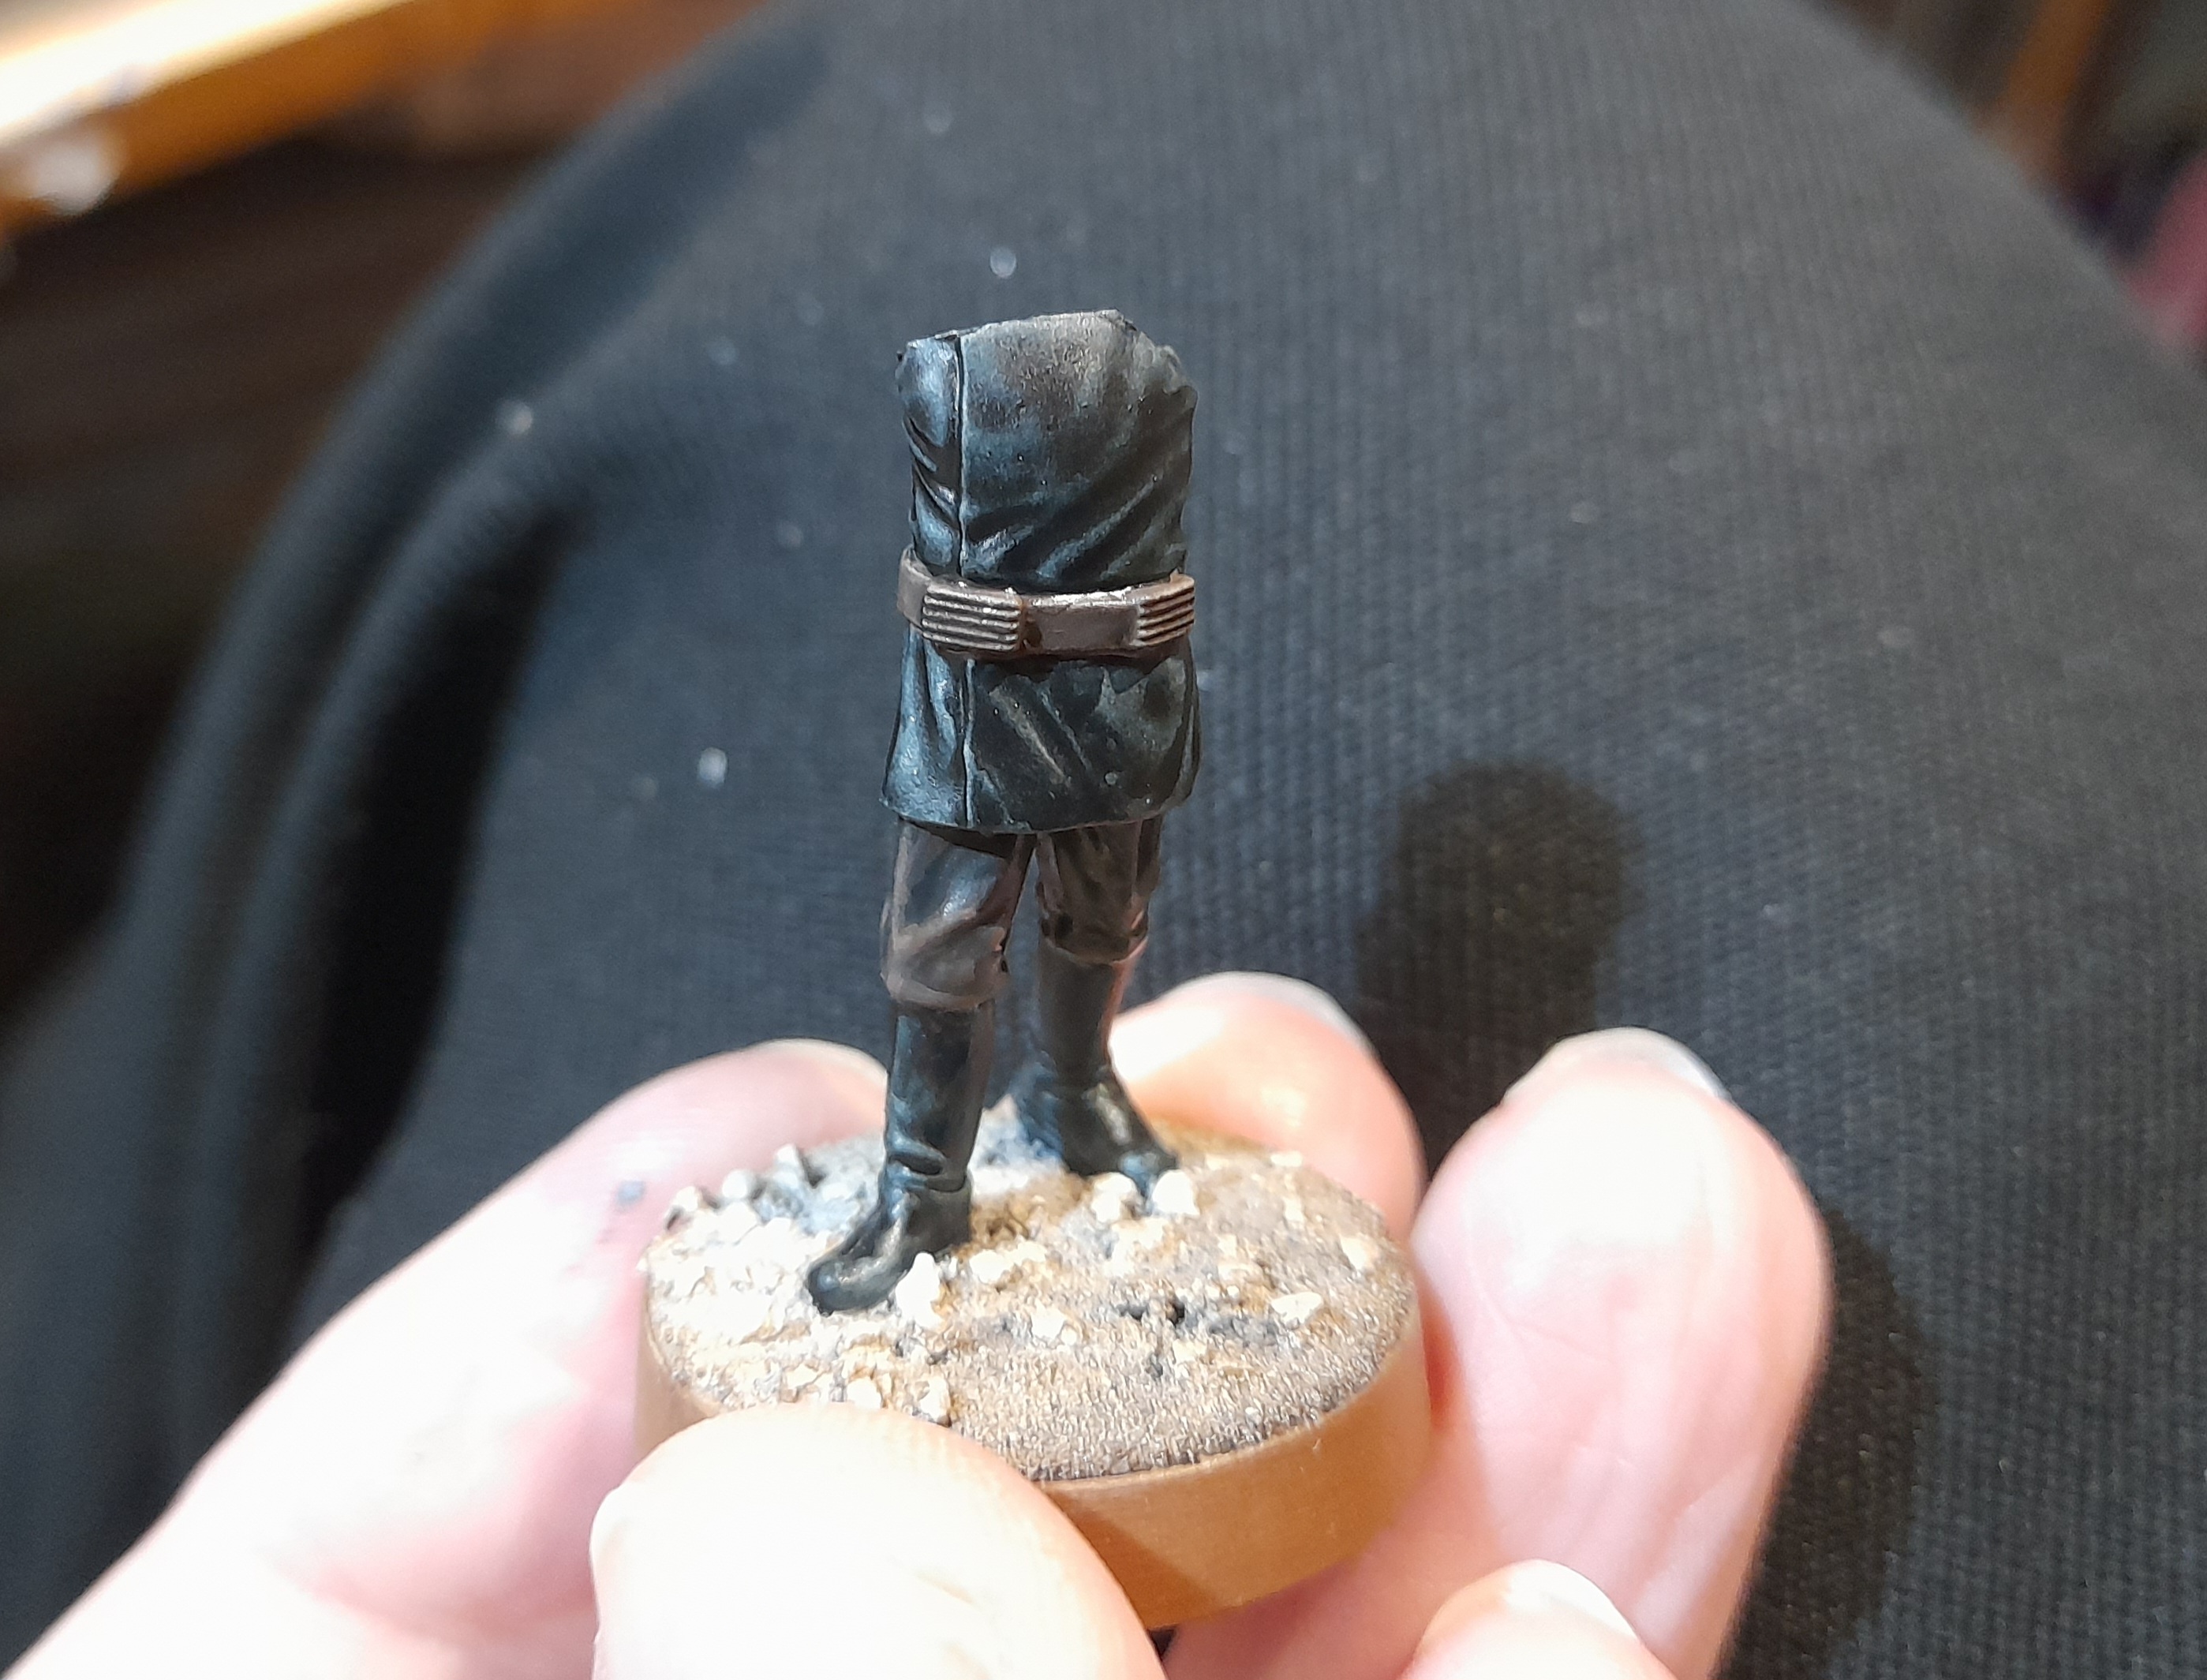
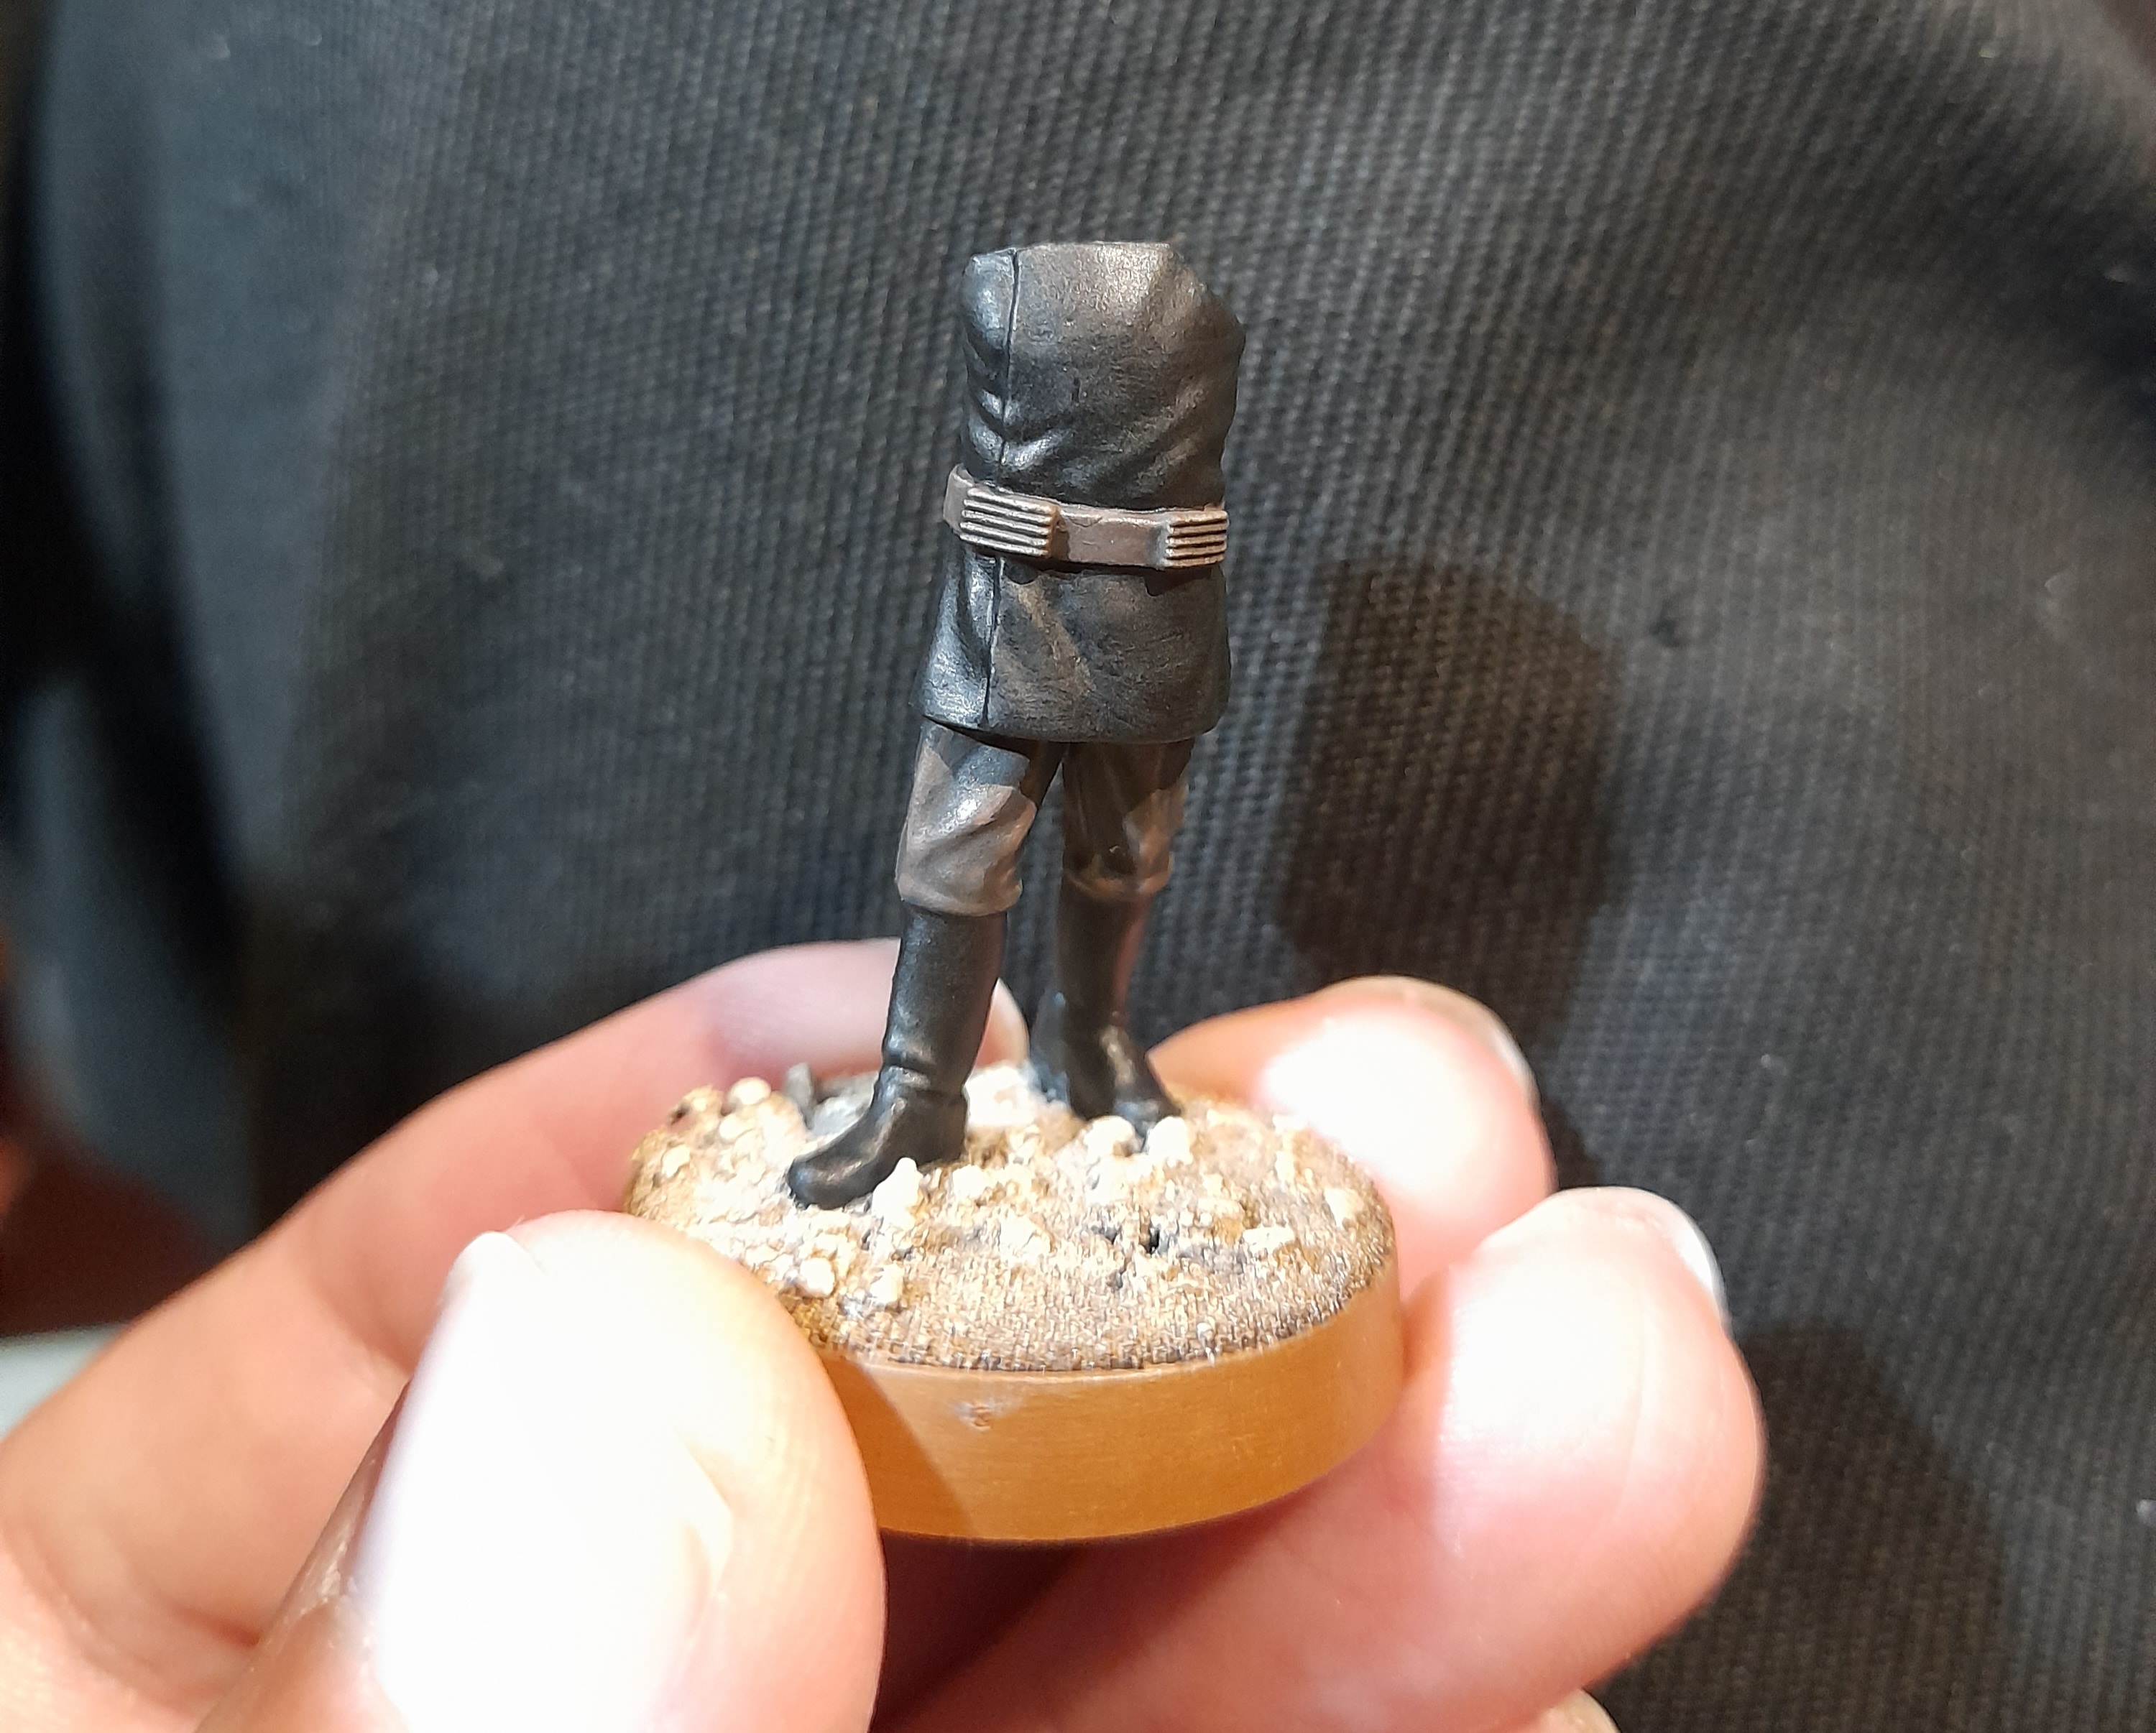
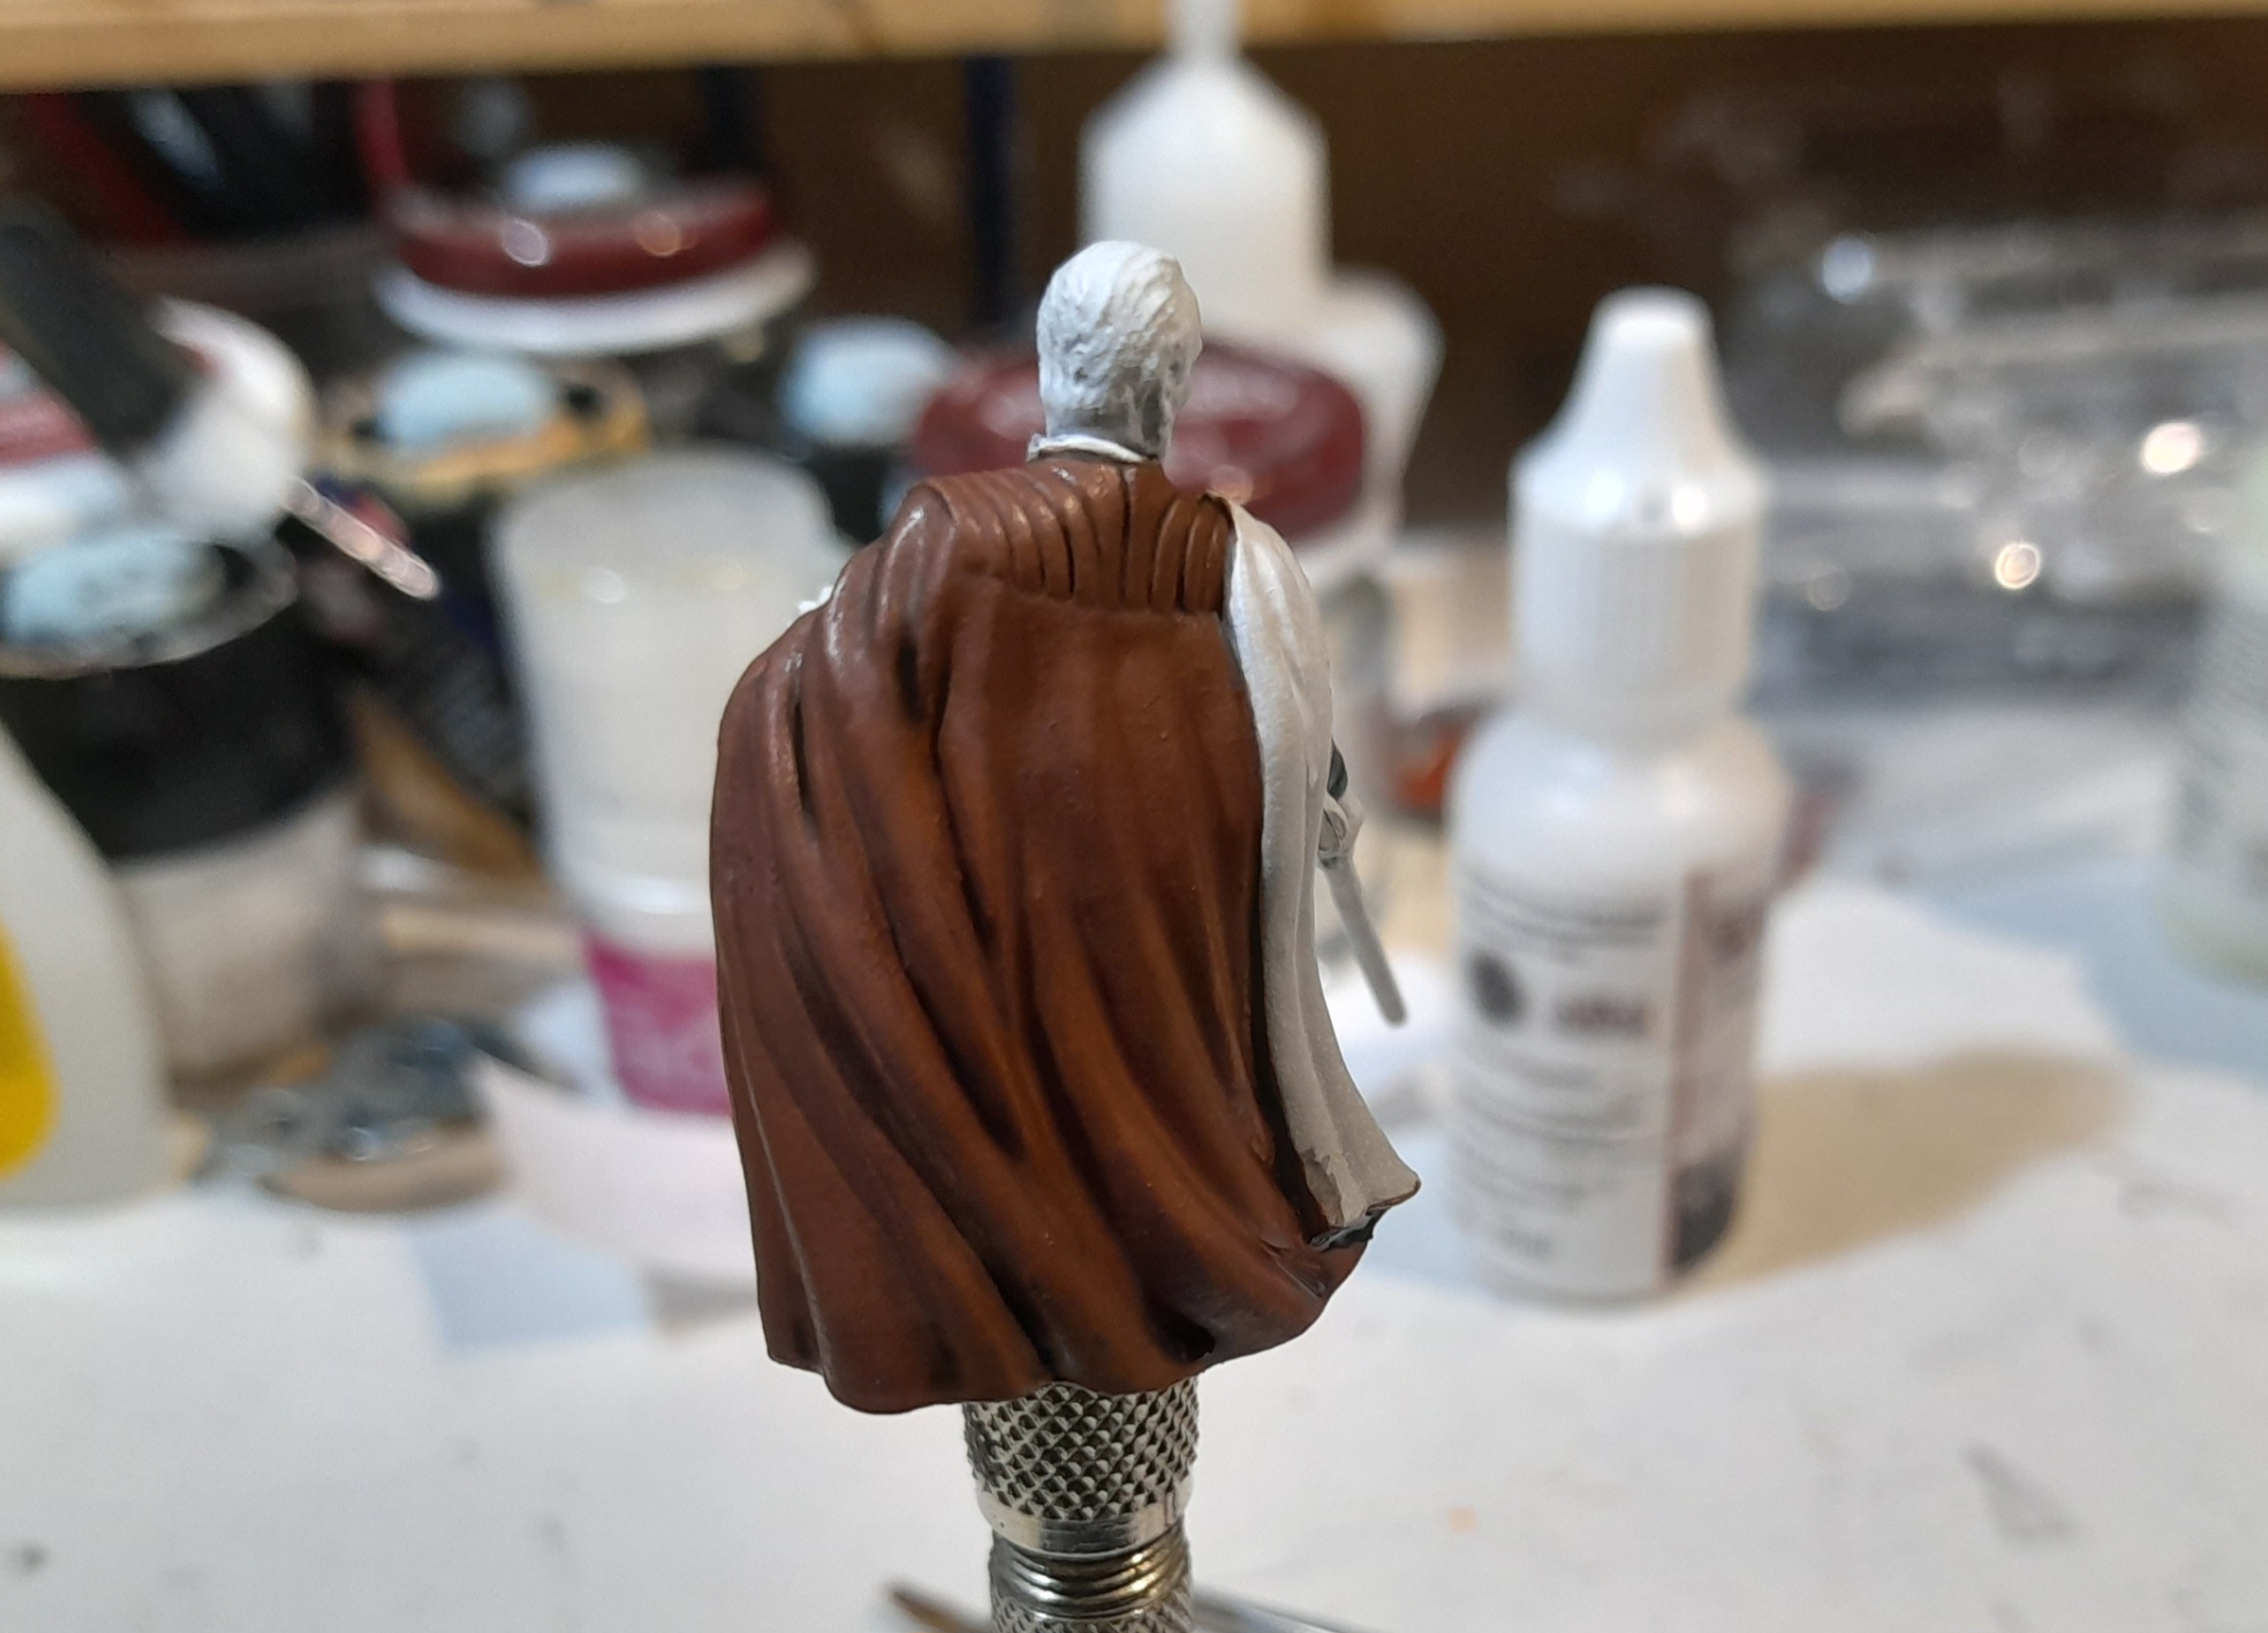
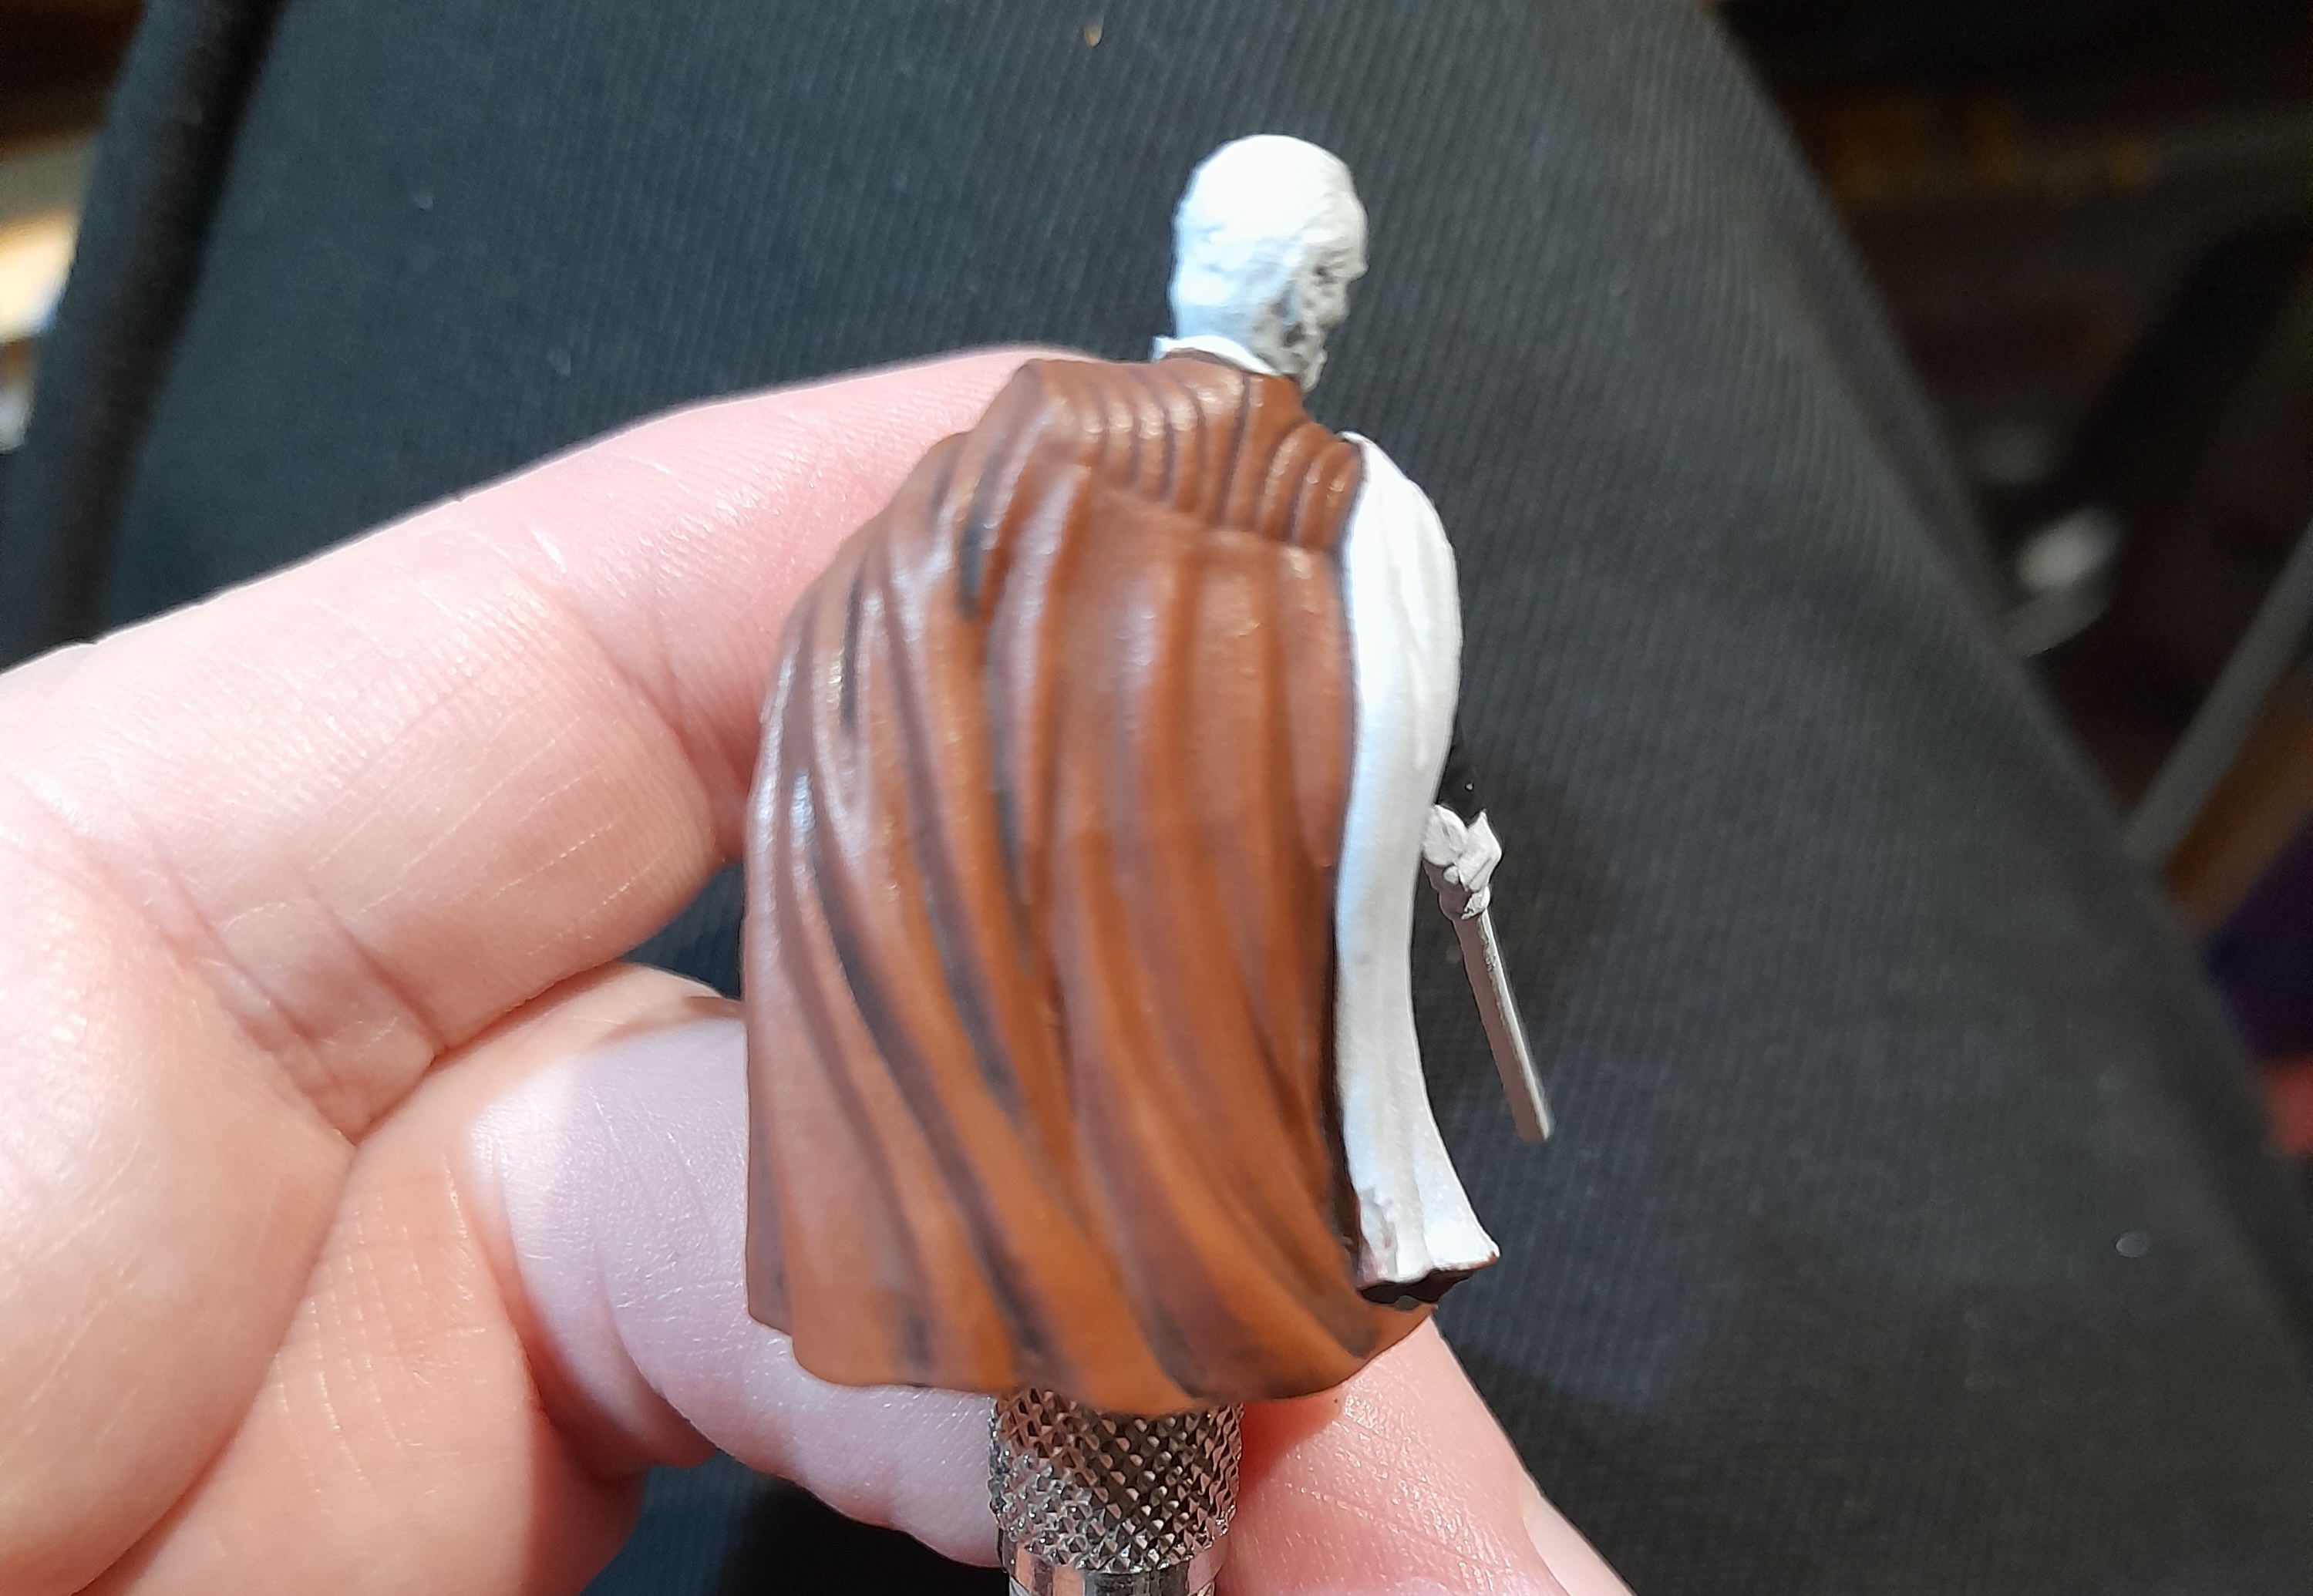
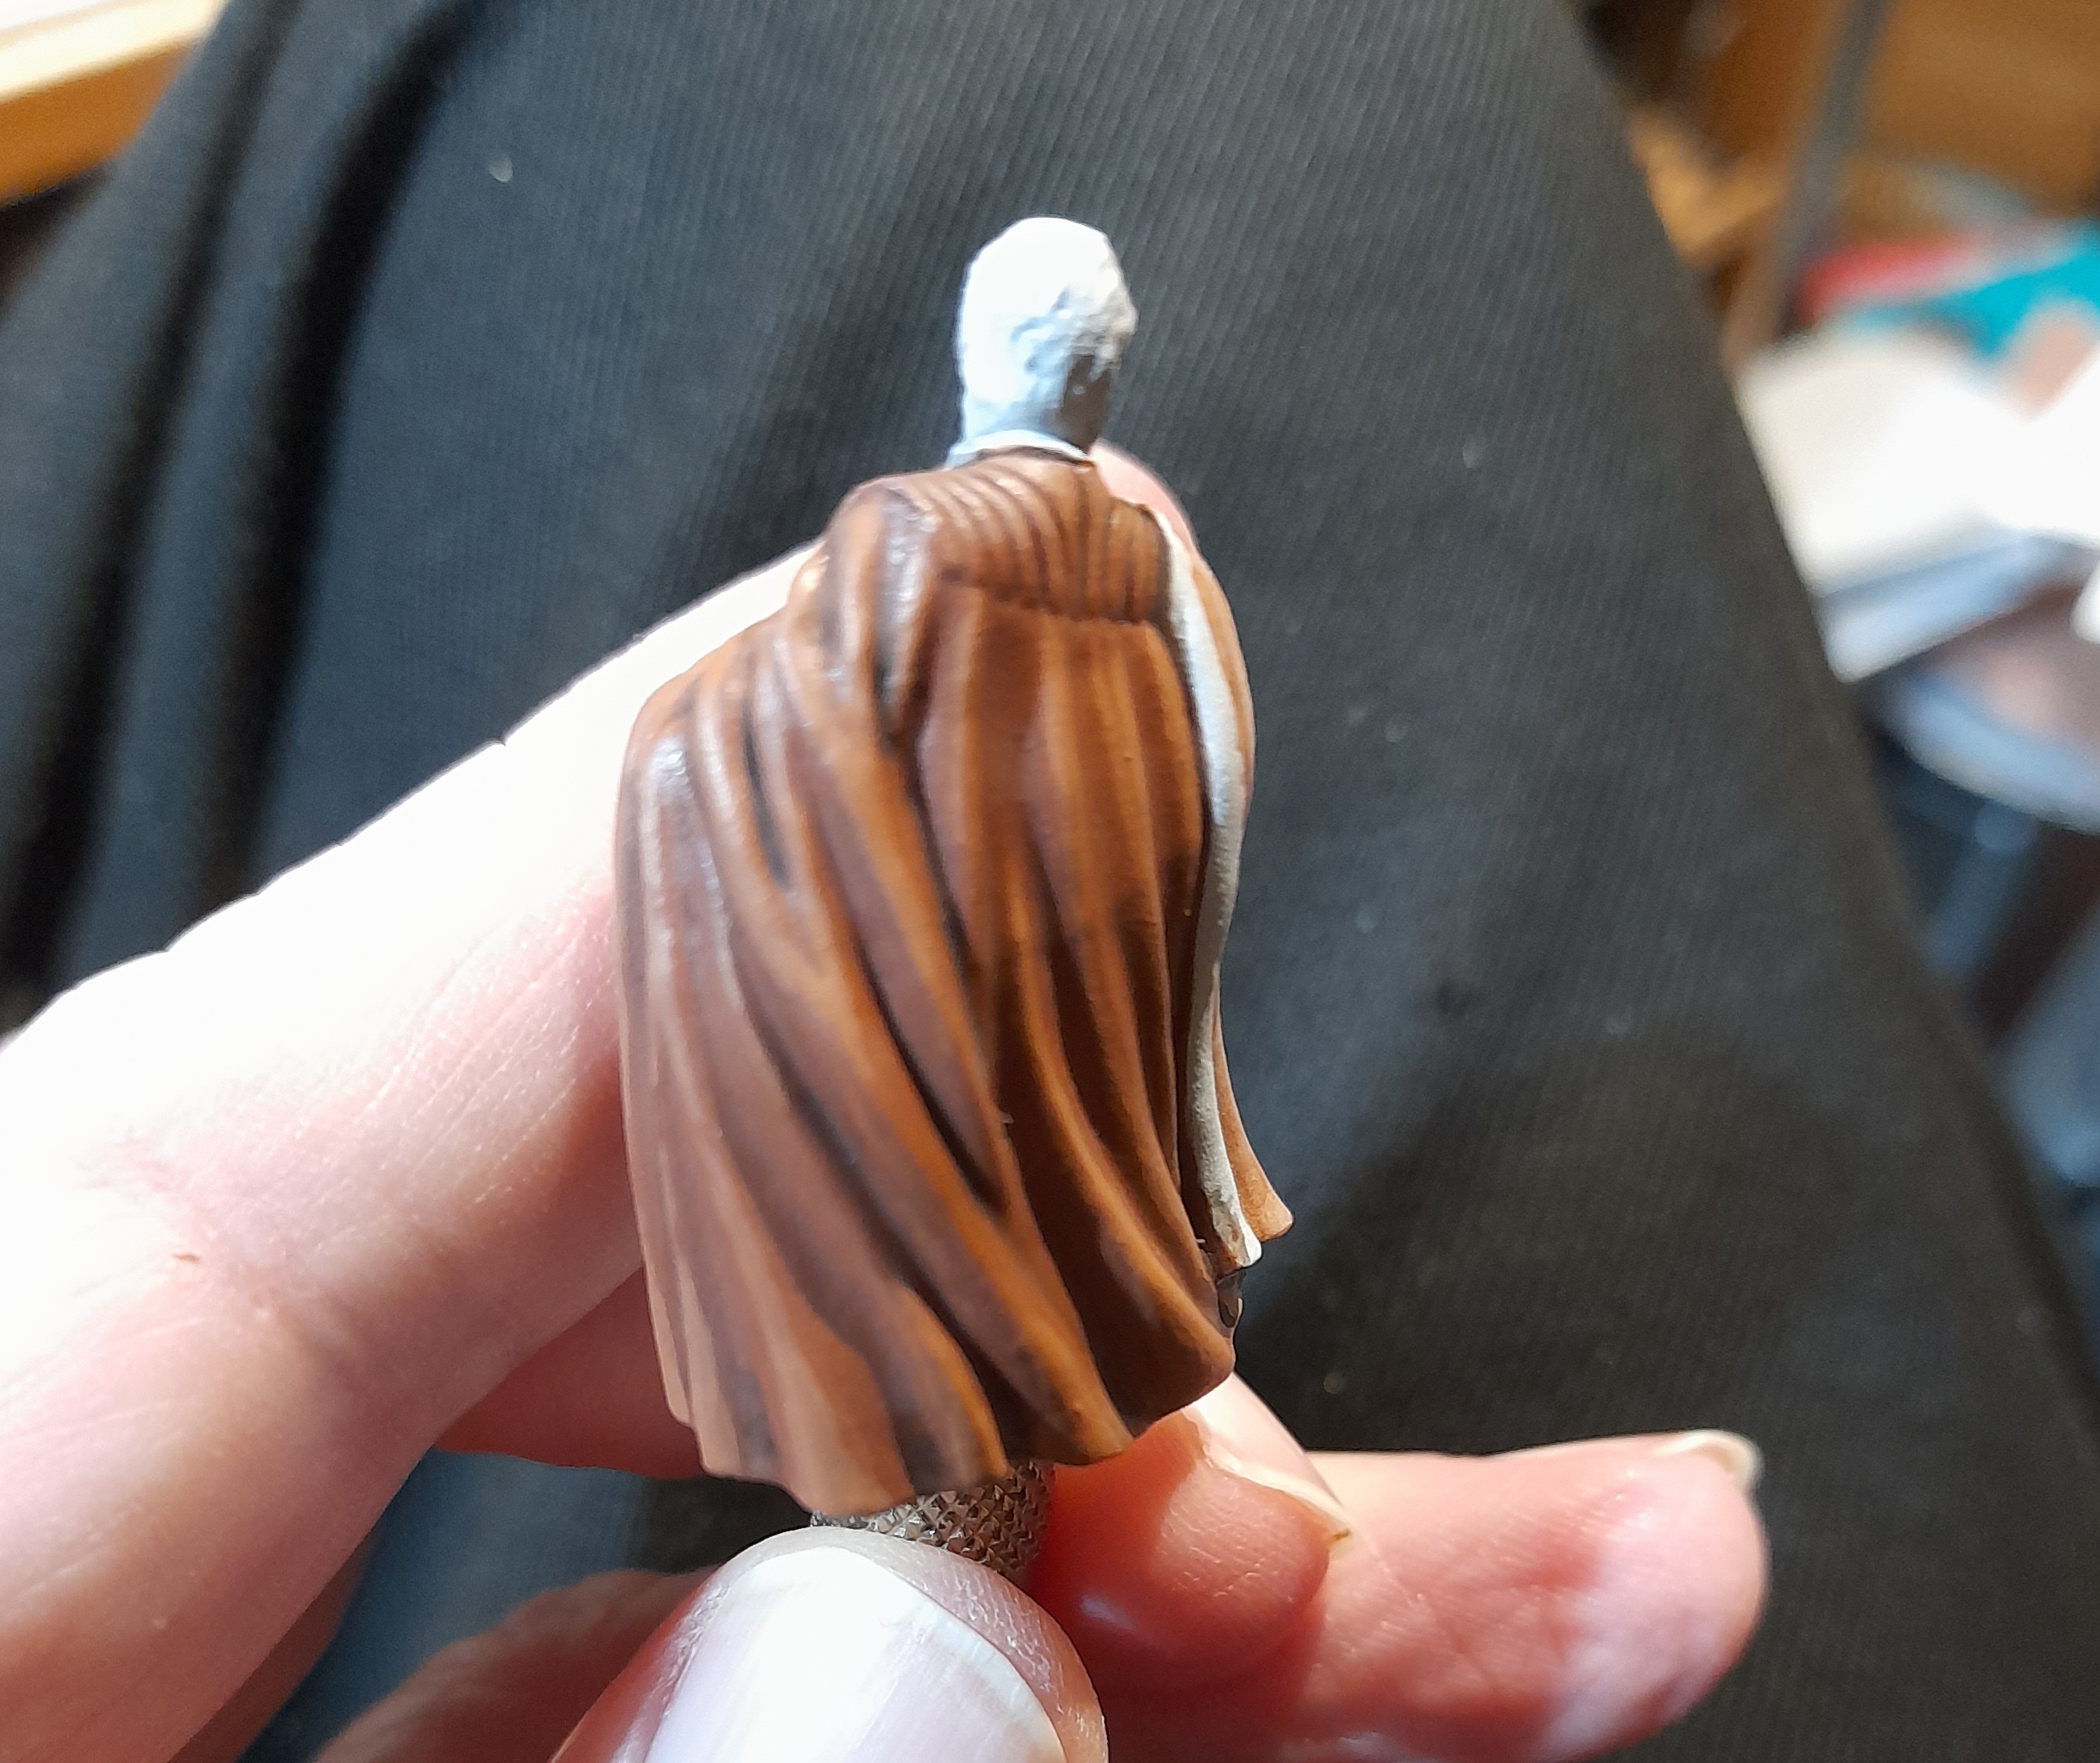
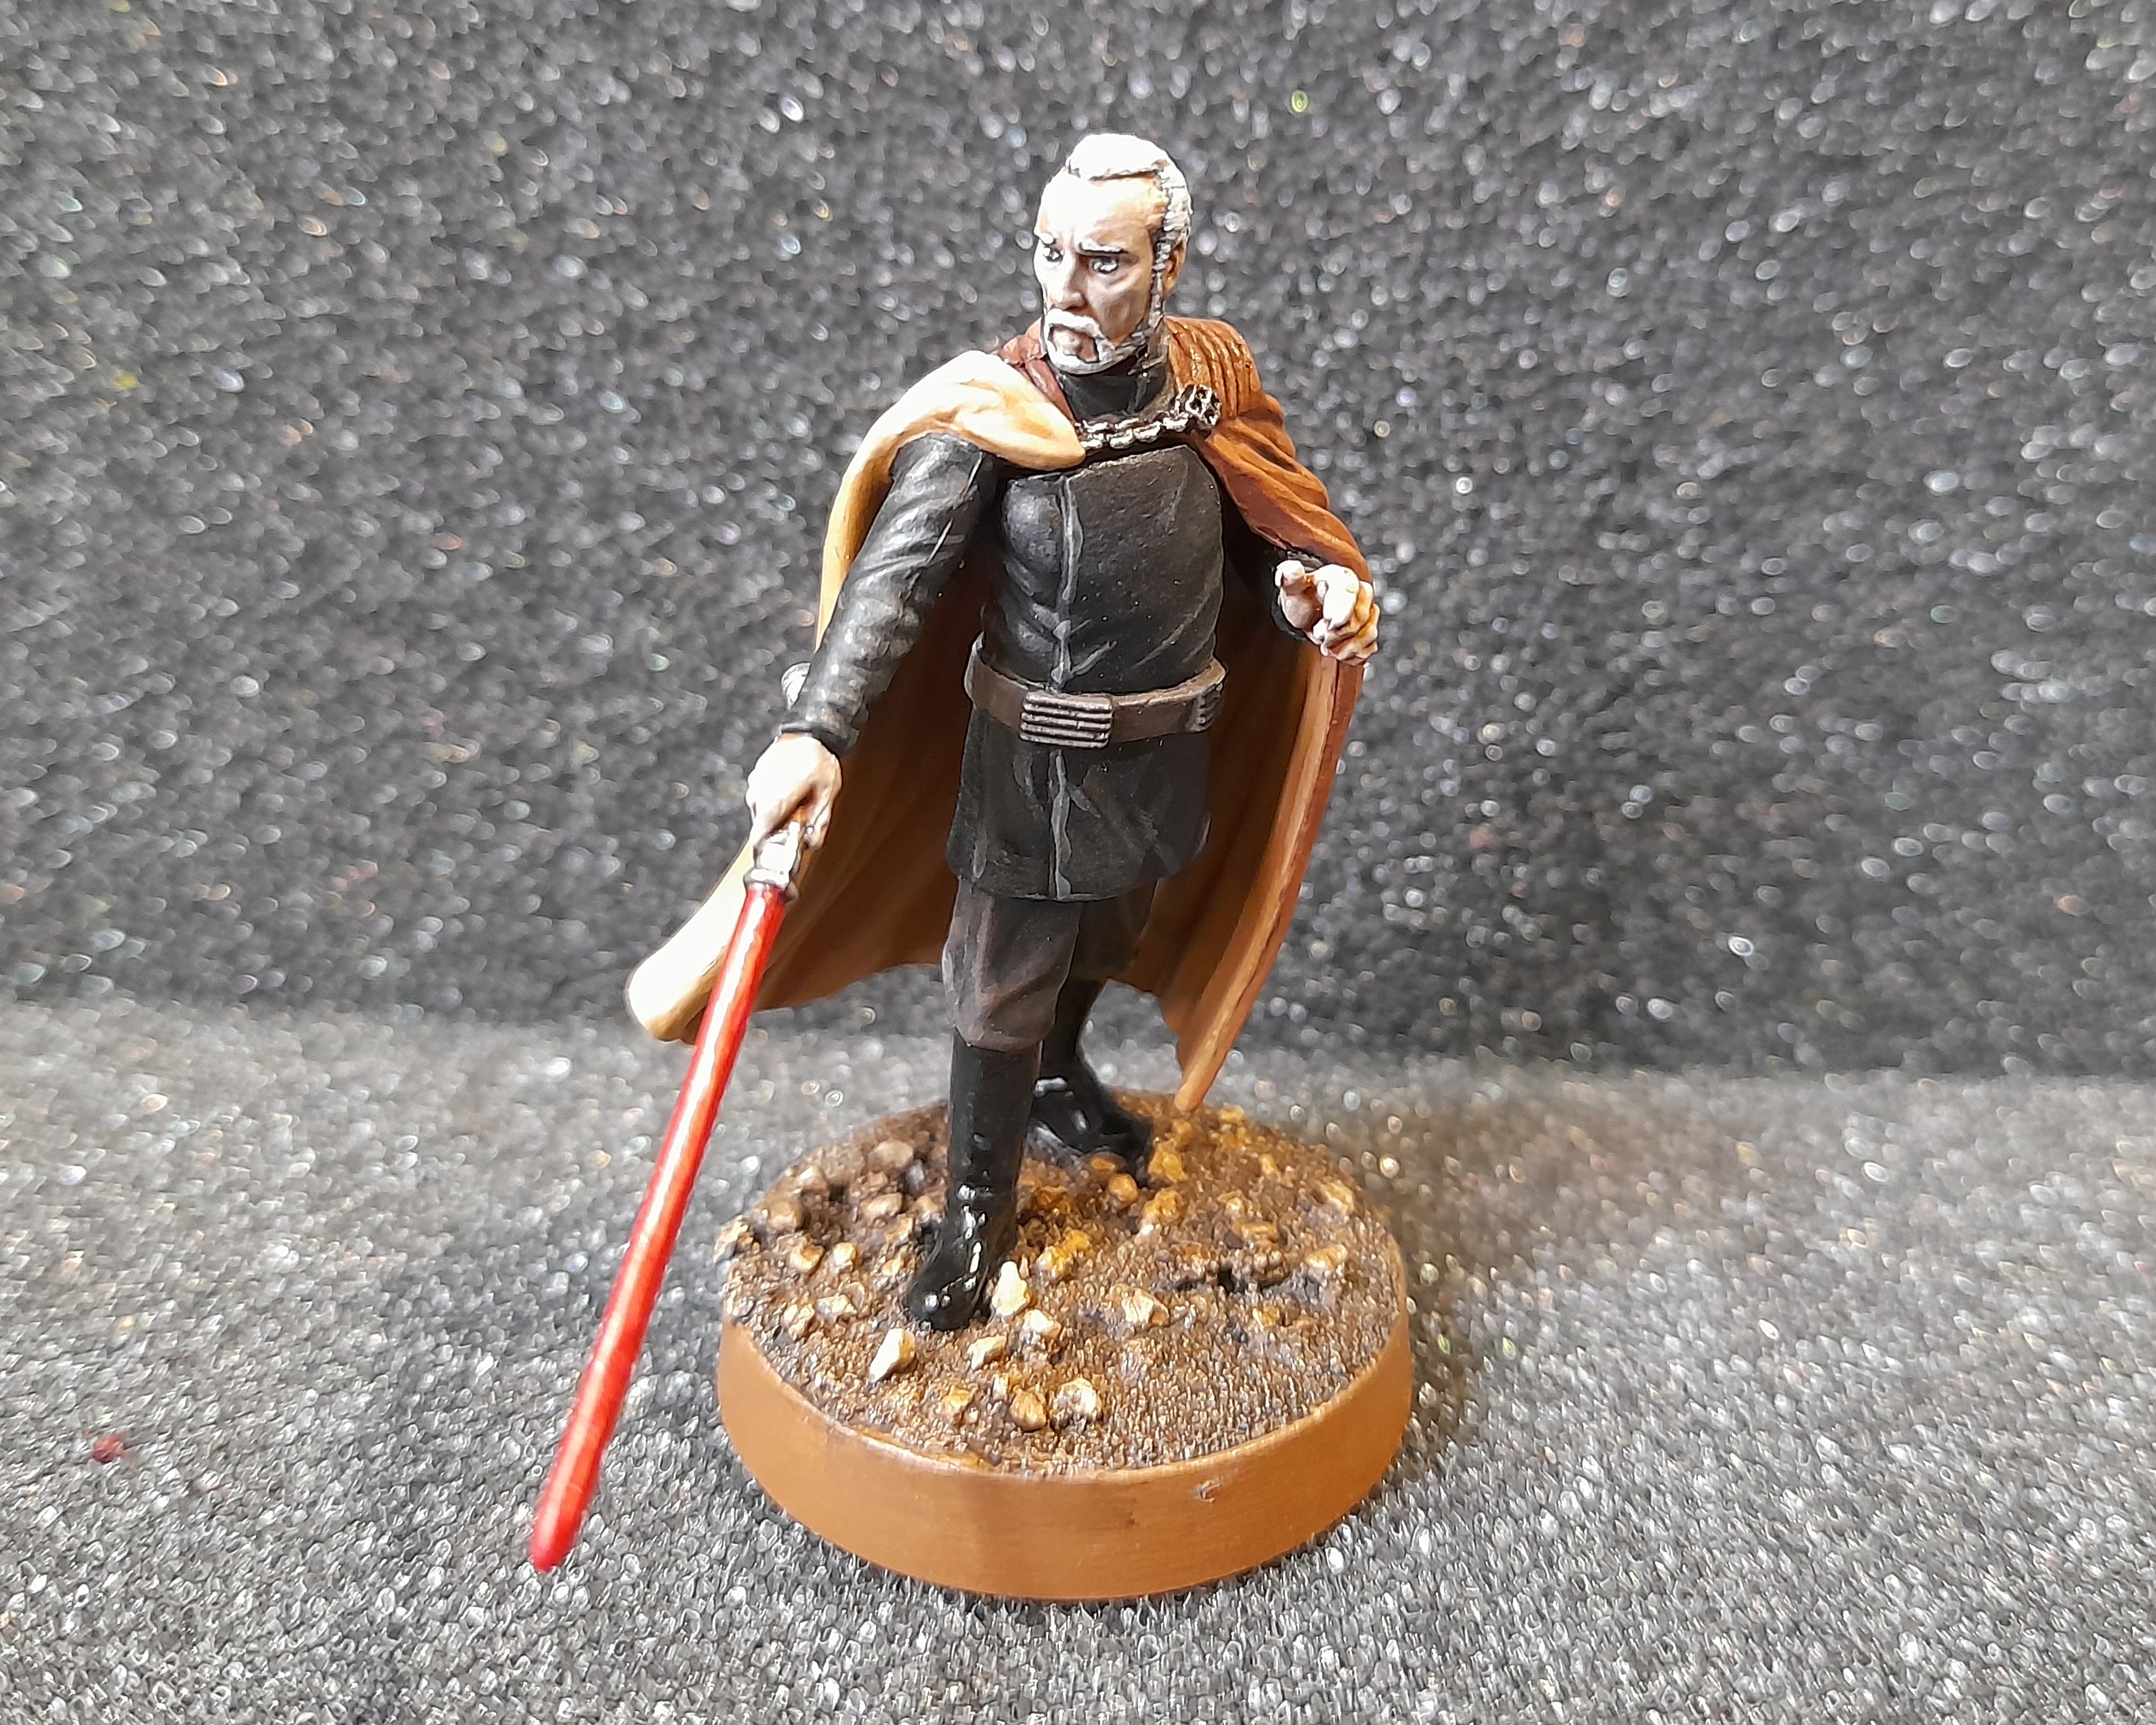
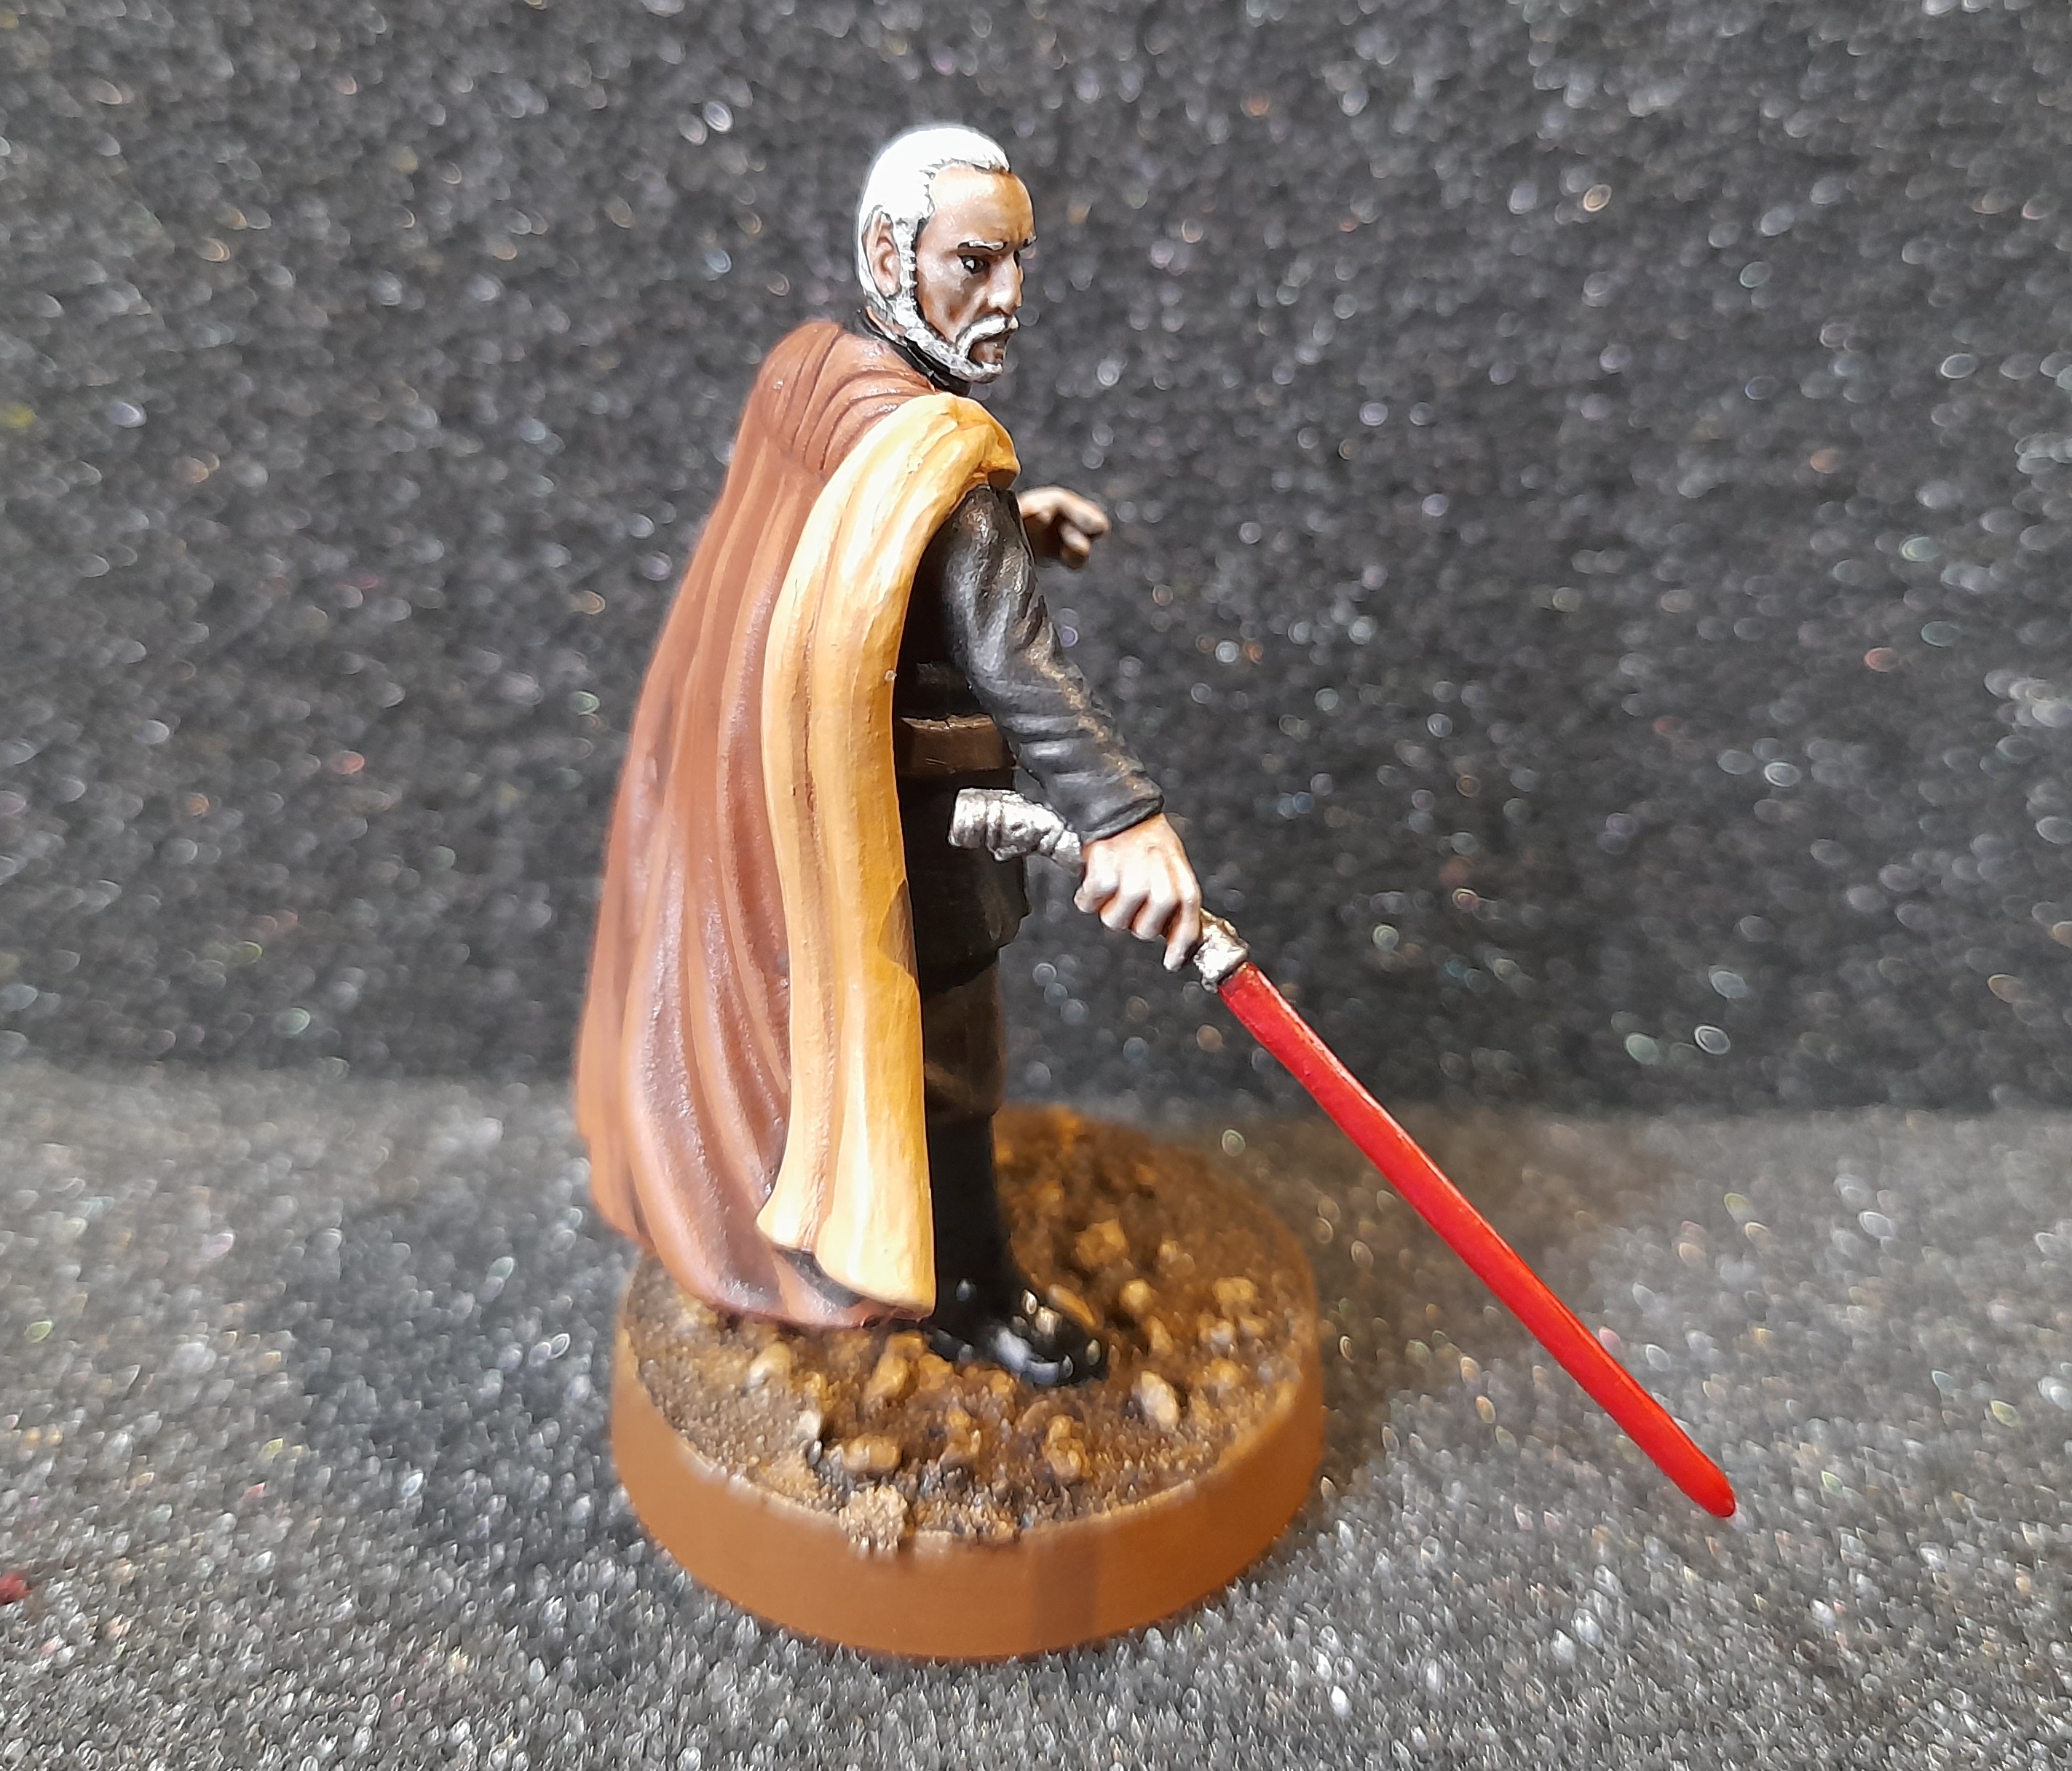
Onto the main three characters now. I initially thought that Count Dooku was all in black. However, some research indicated that his trousers were actually a dark brown, and his cloak was anything from dark brown to red (depending on sources) outside with a beige to yellowish inner. I tested out some browns and decided to go with my foundry Spearshaft triad.
I kept Dooku as two sub-assemblies, so that I could get to the cloak area that would be behind his torso. For the black tunic and boots I tried contrast Black Templar. However, I didn’t feel that it worked very well, so instead overpainted it with black legion, followed by a light drybrush of dark grey and some further highlighting with a slightly lighter grey. The trousers had a black/brown mix followed by highlights. And the boots had a gloss varnish.
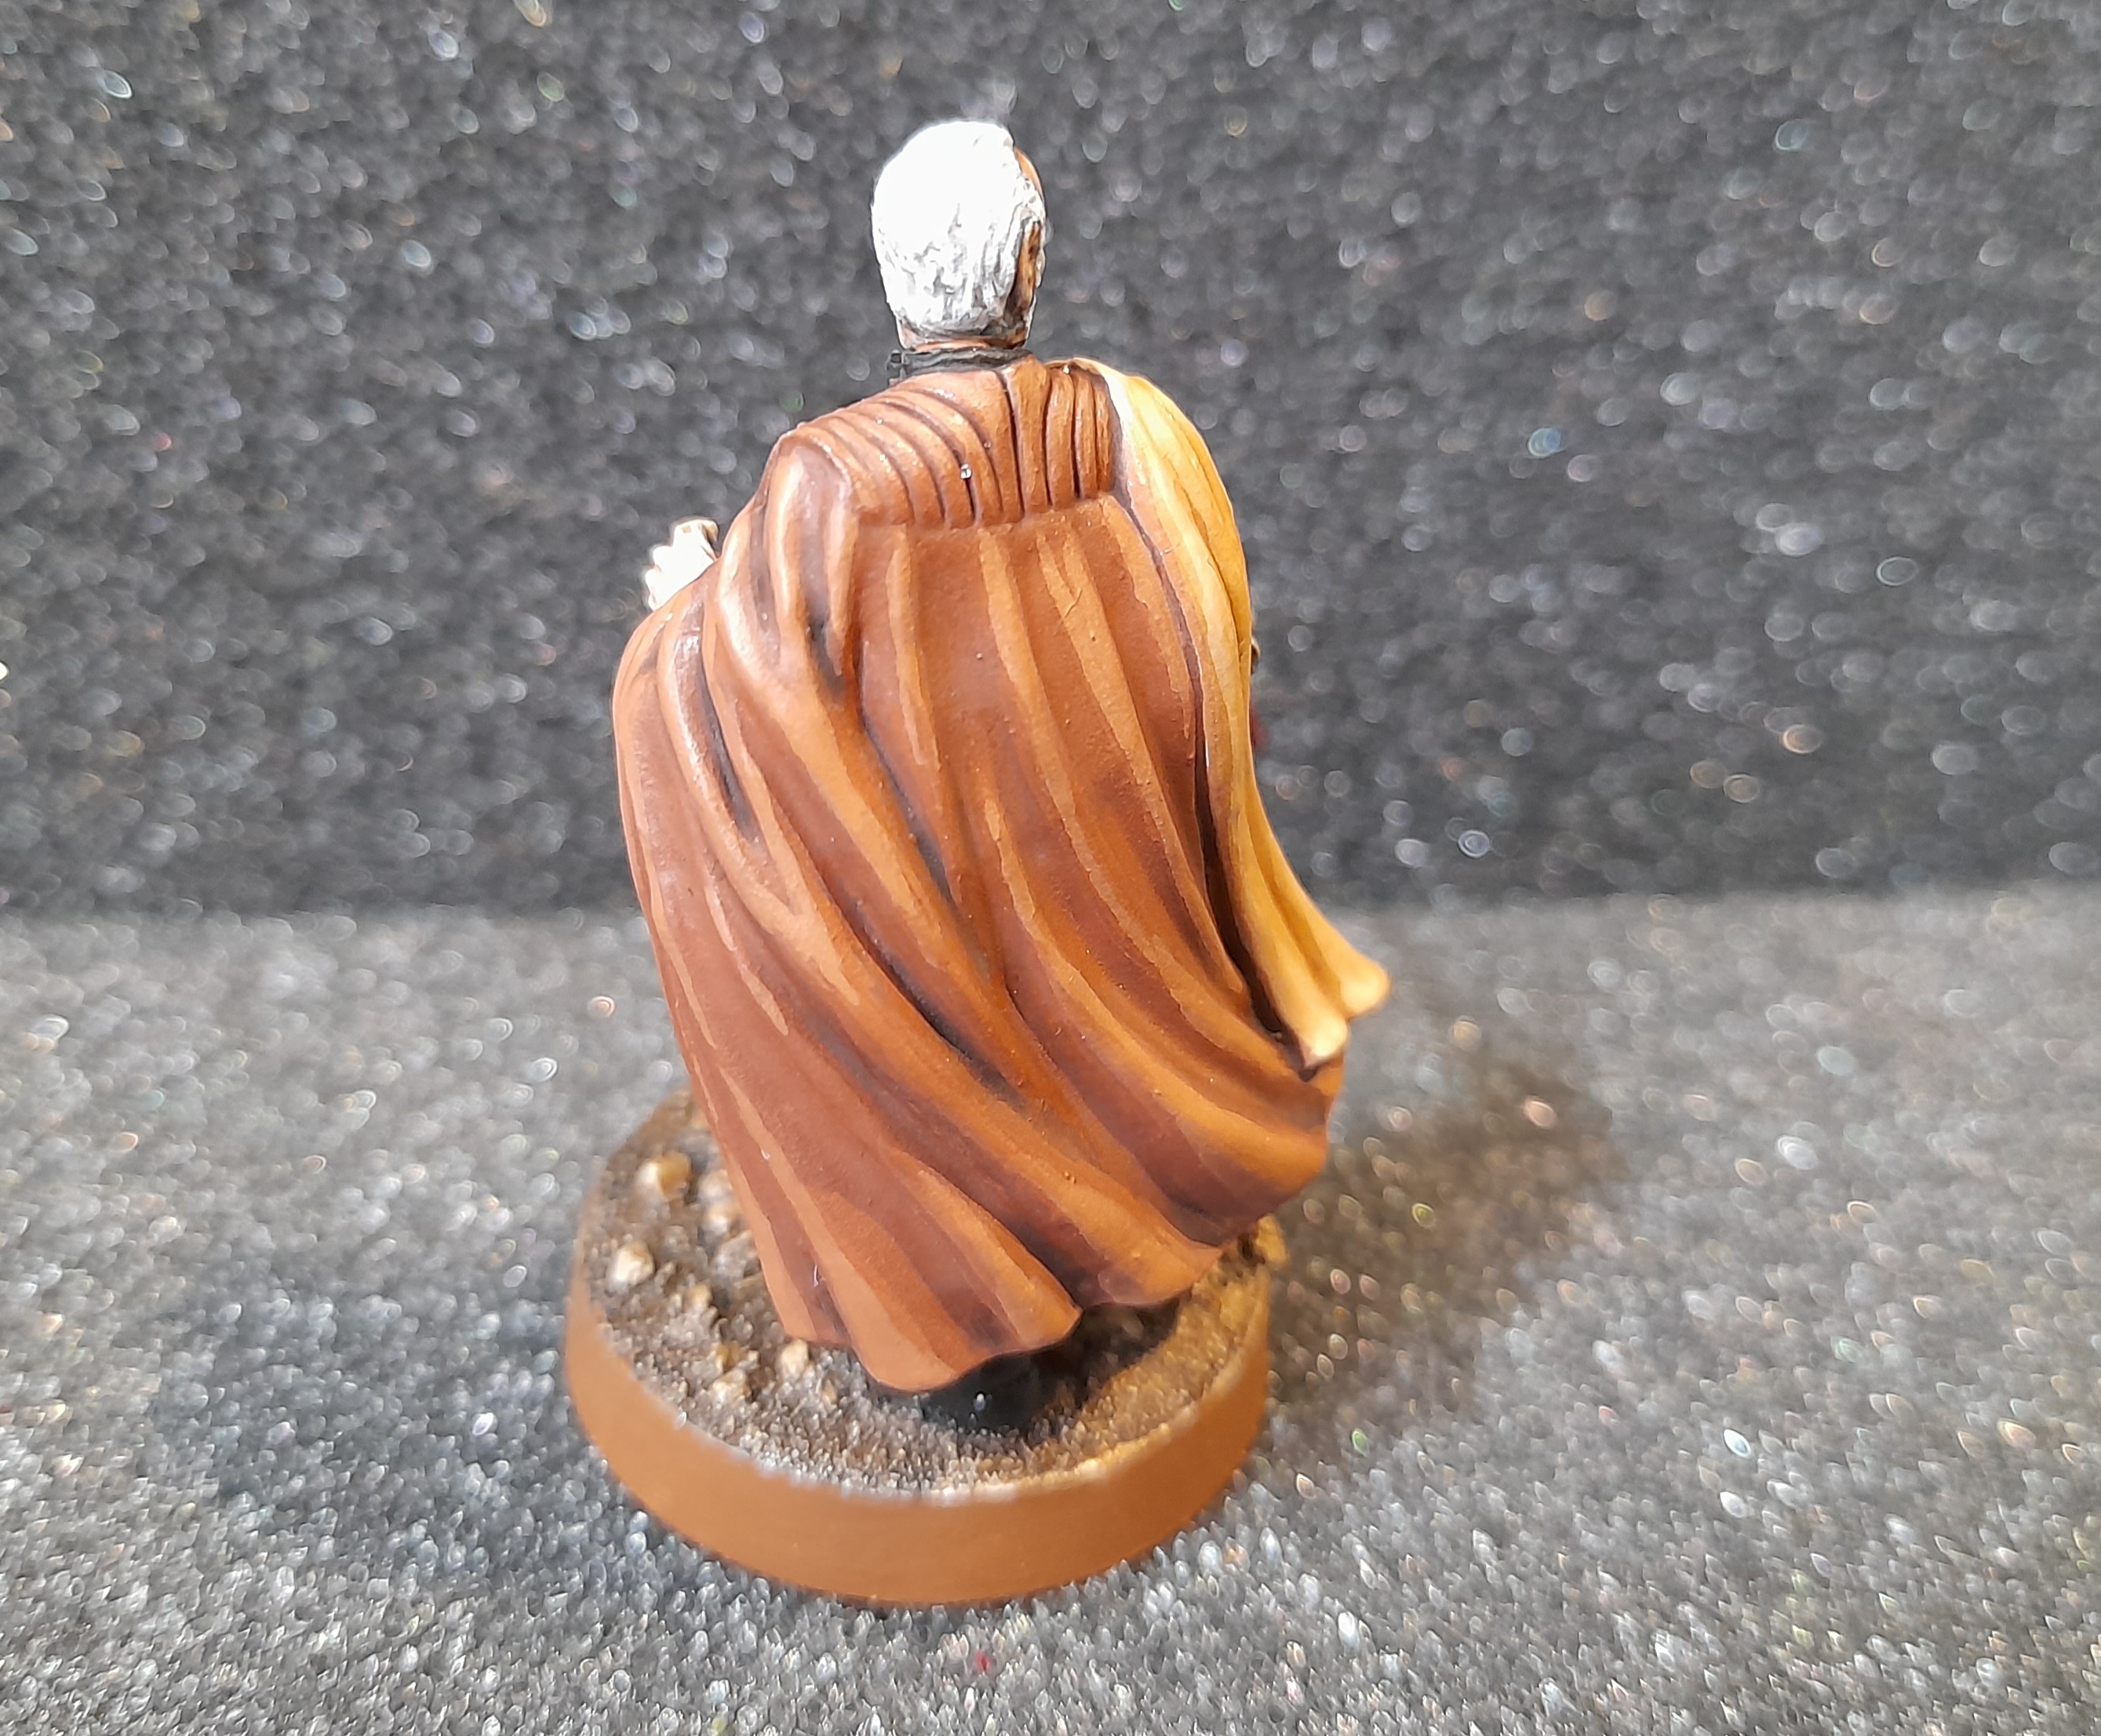
For the cloak I started out with the spearshaft shade washed with black. Then I worked it up through stages of thin highlights of the dark mixed with increasing amounts of the mid spearshaft, finishing with pure mid for the finals highlights.
The inner cloak was a similar process, working from shade/mid mix all the way up to light with just a touch of white.
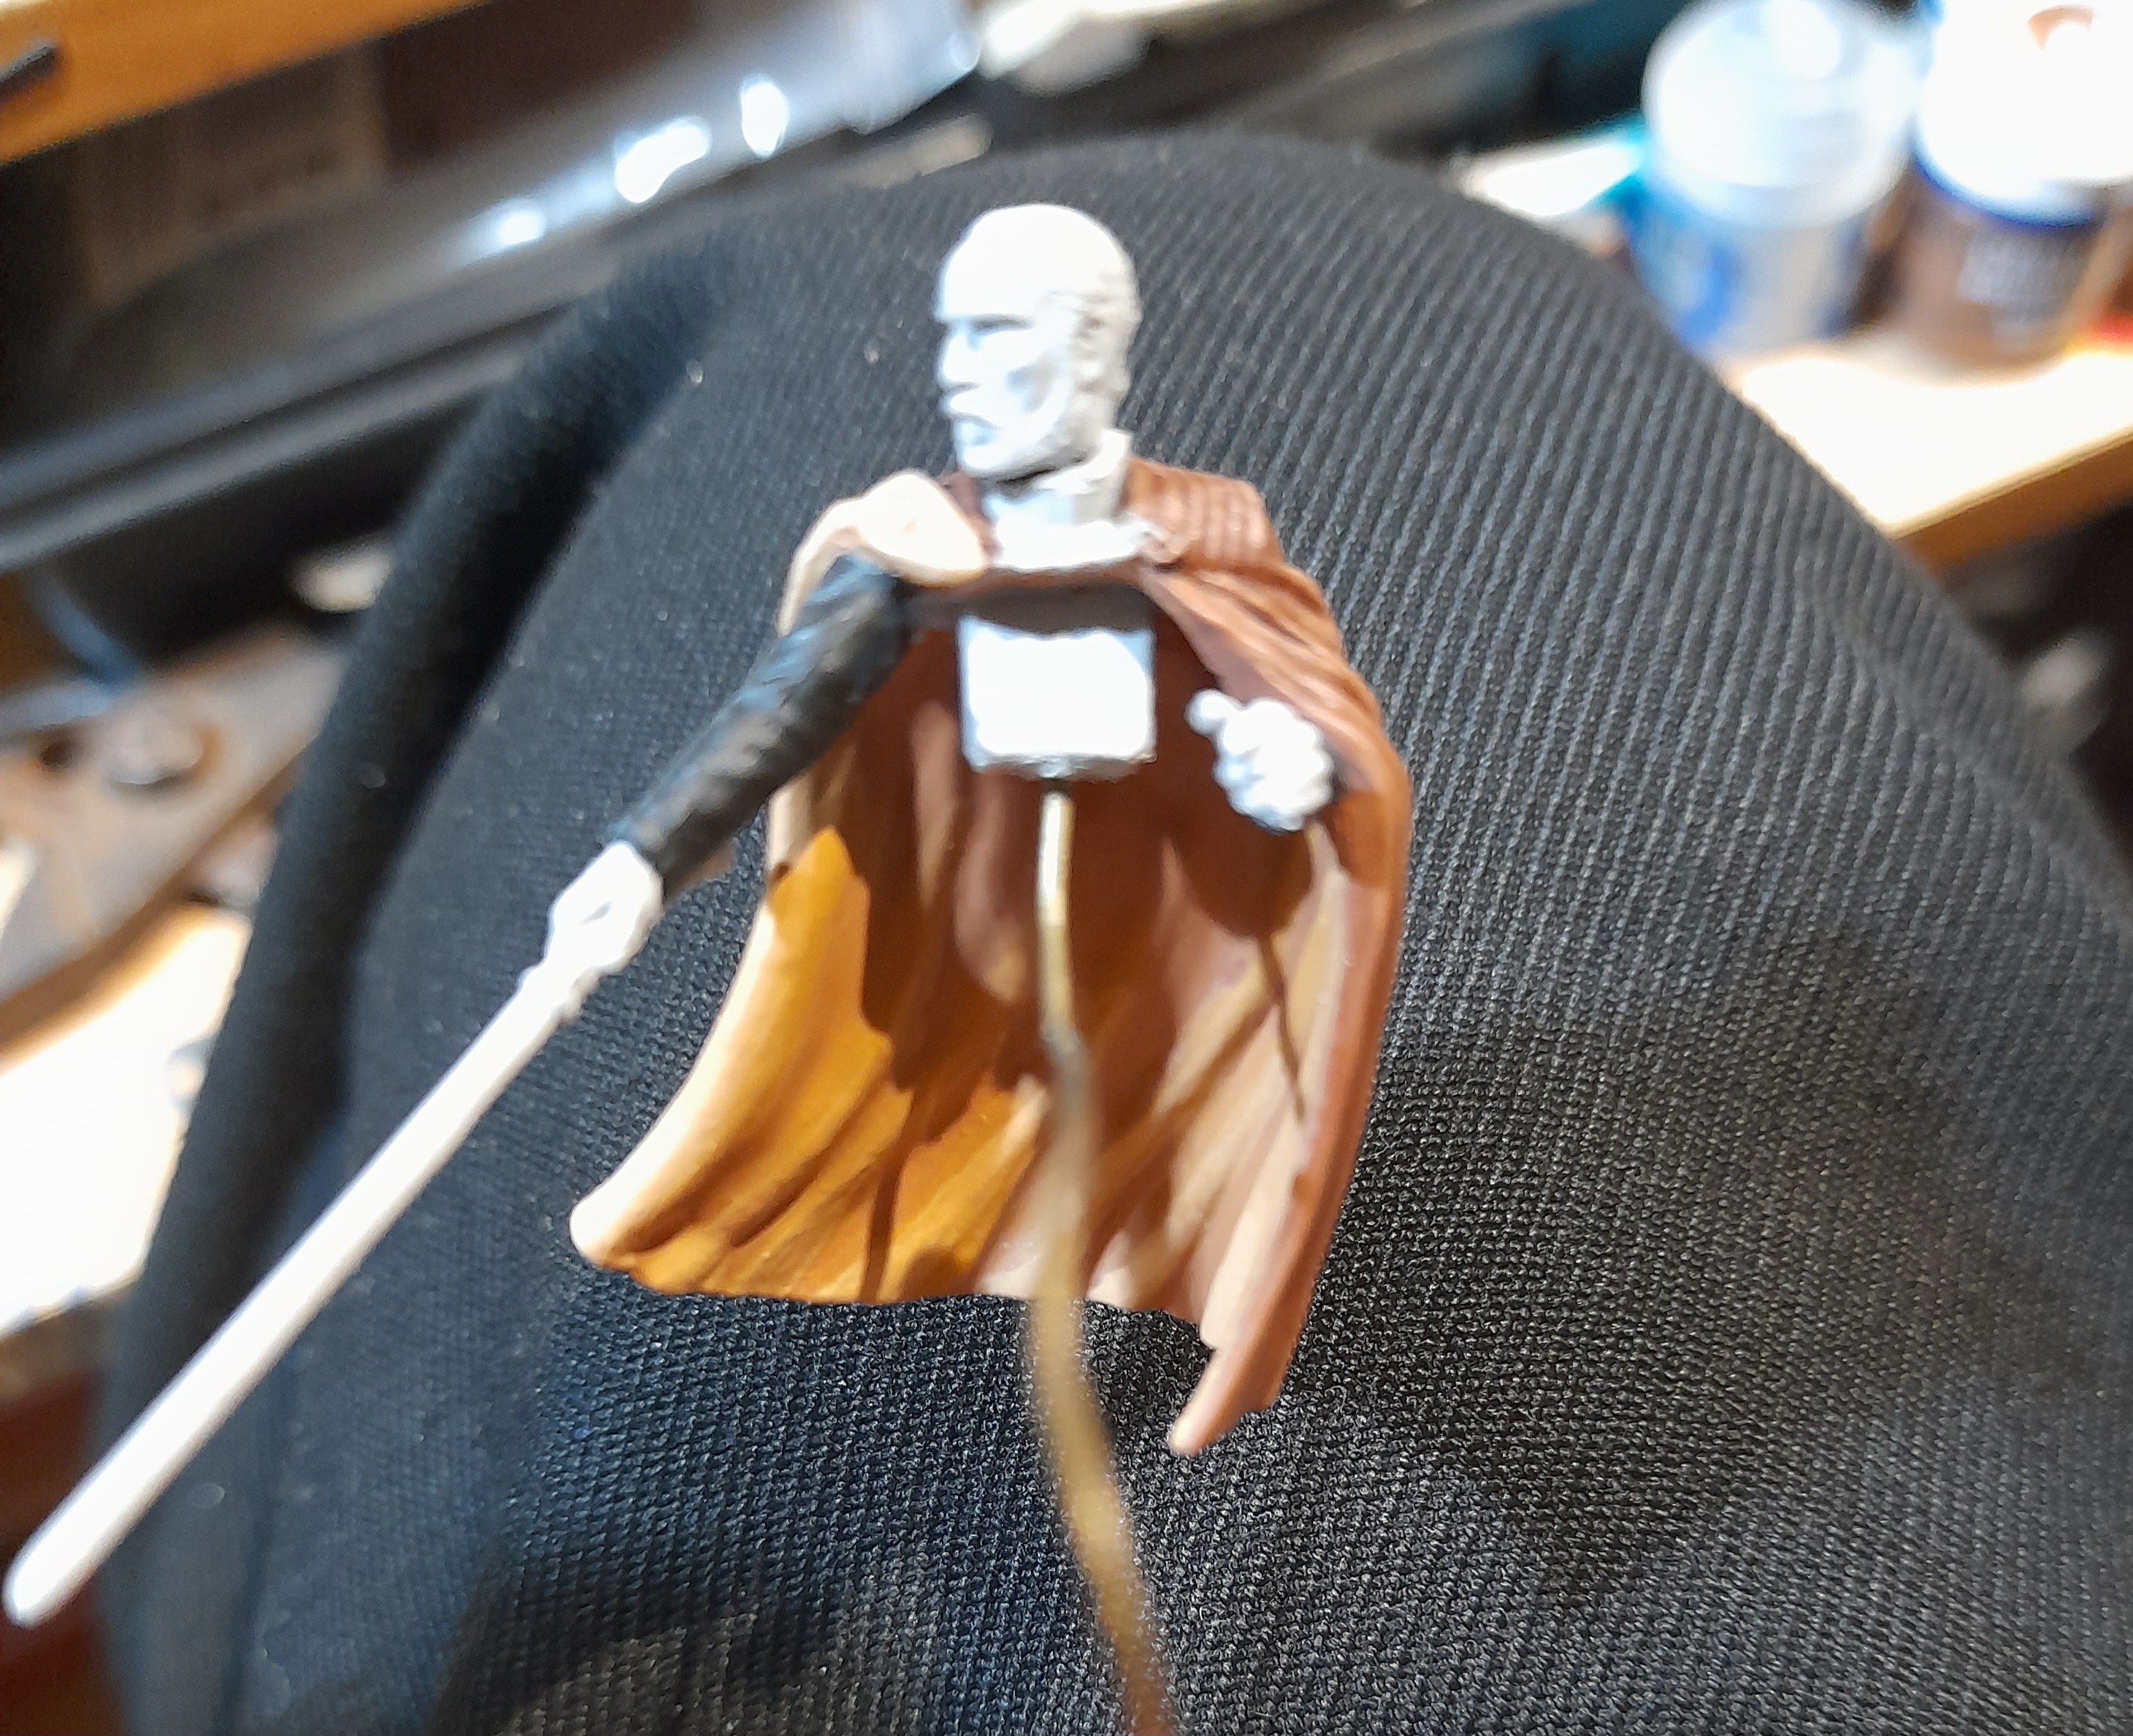
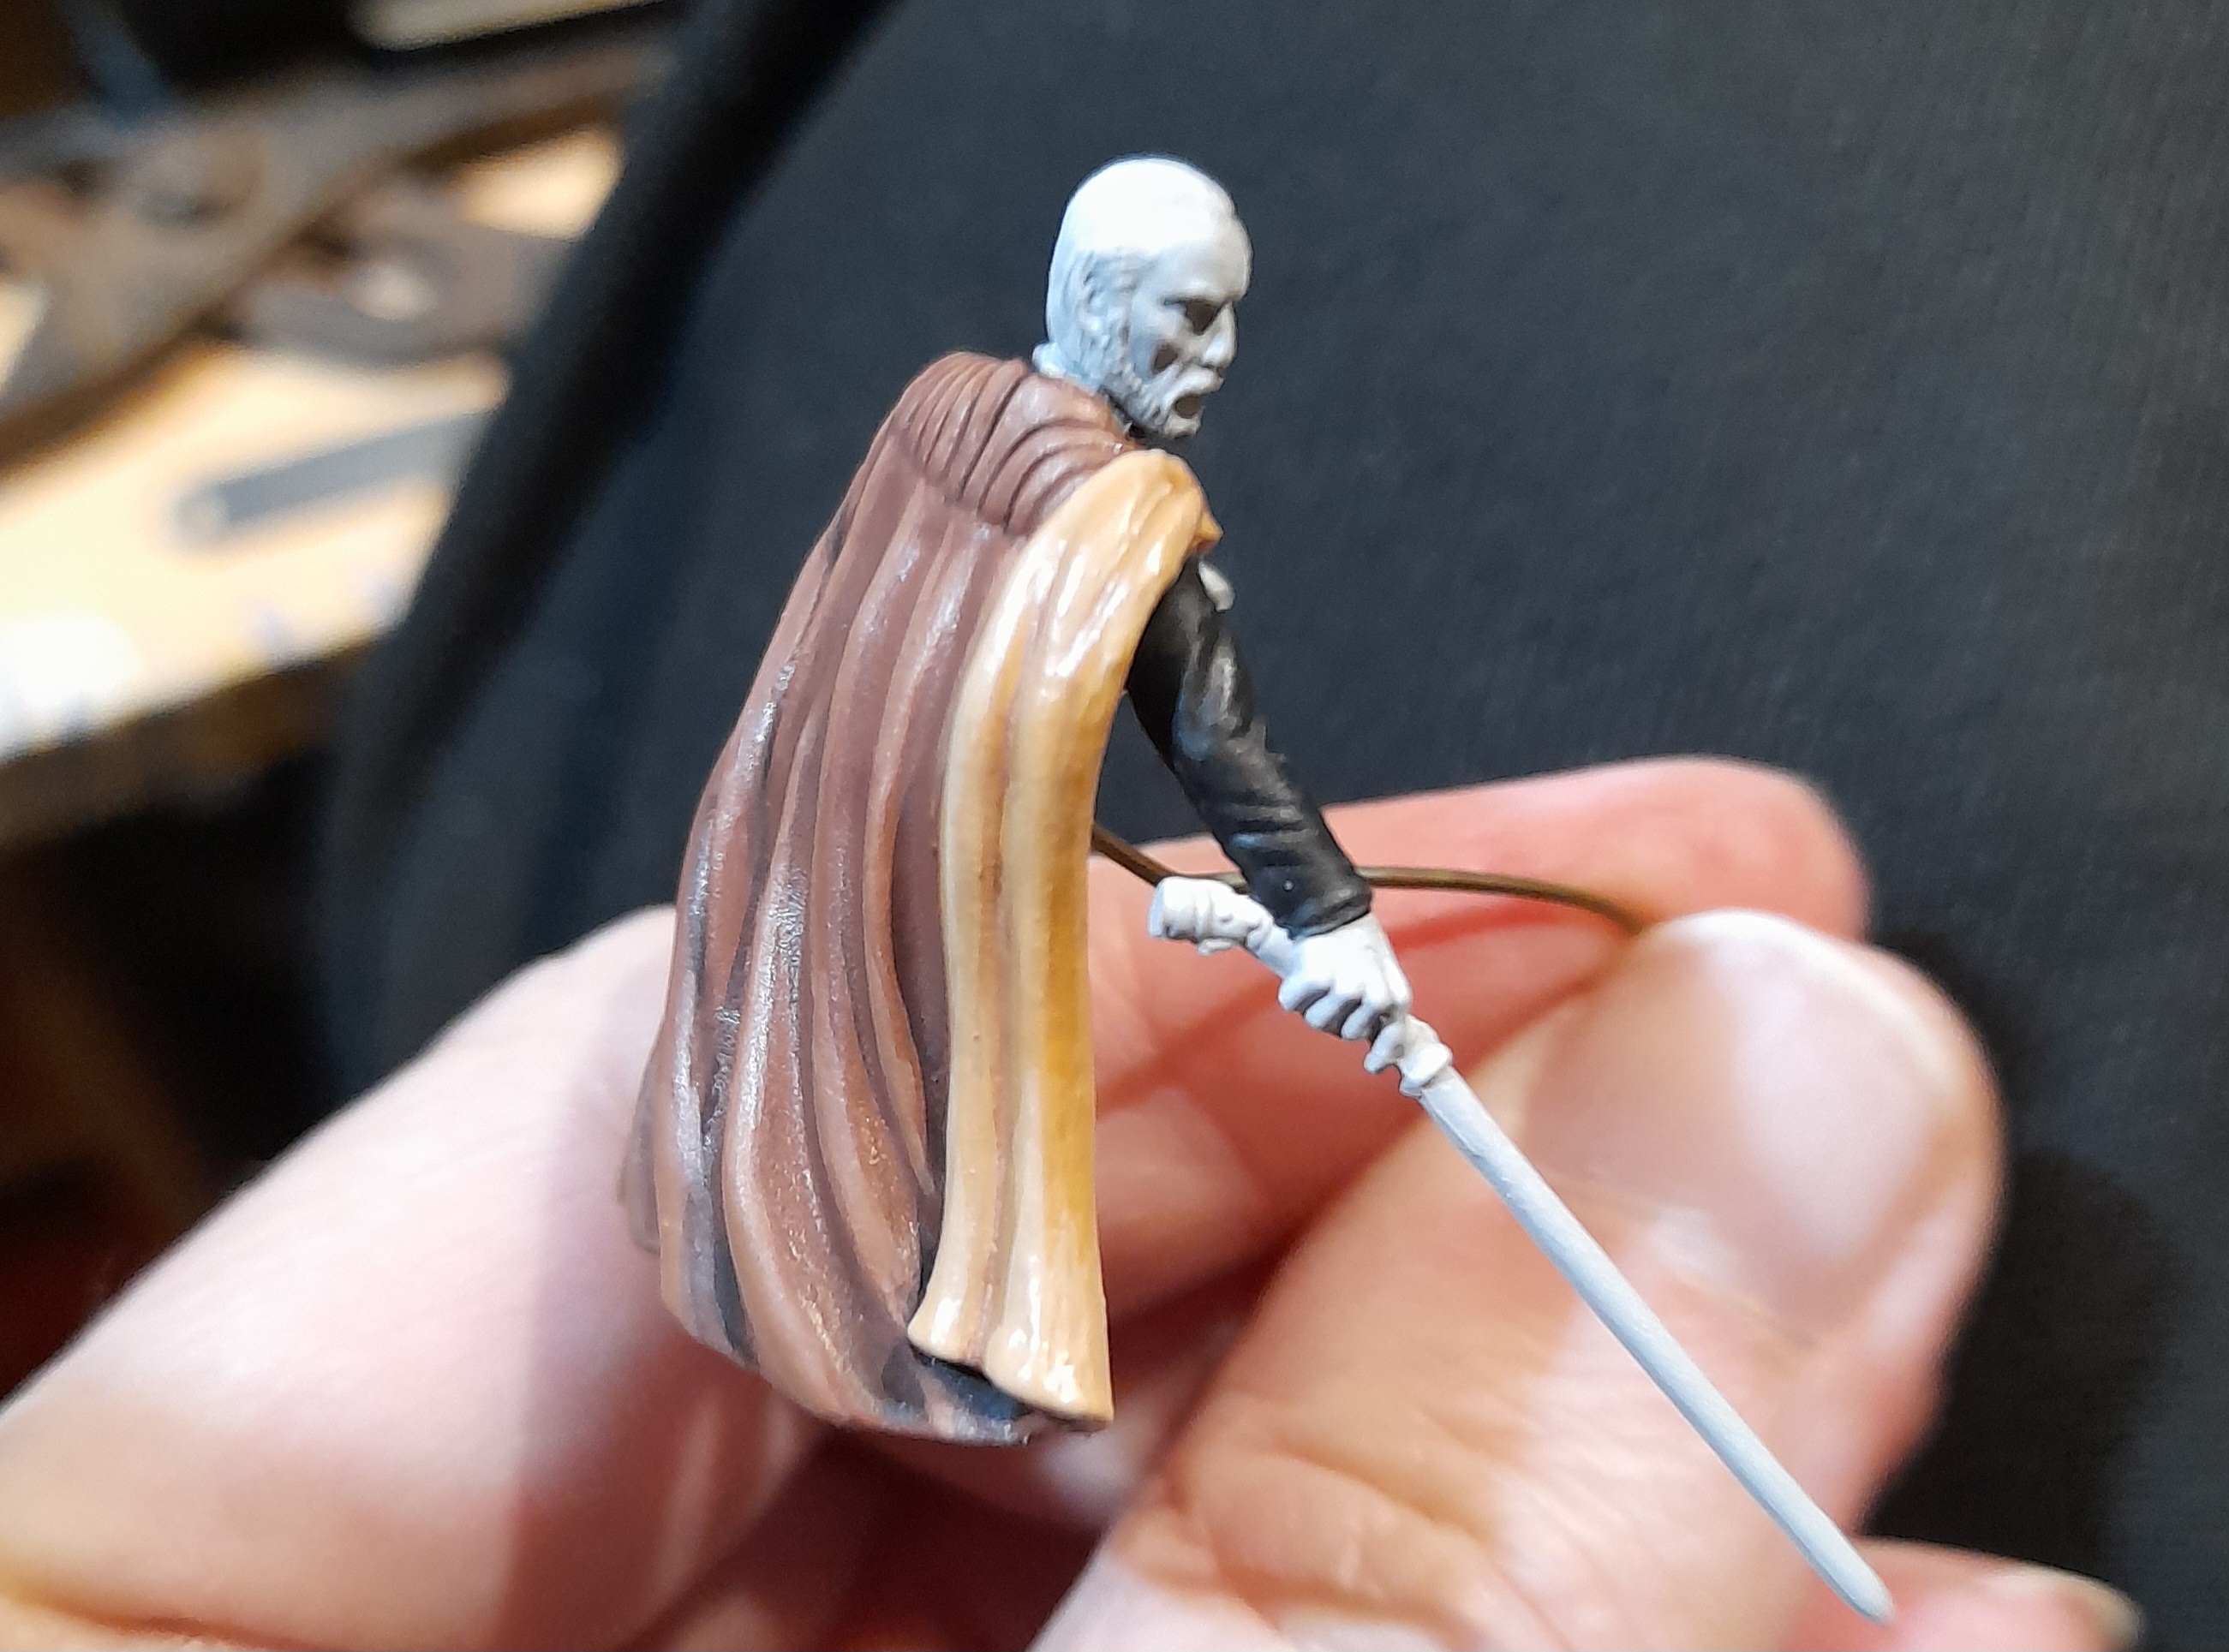
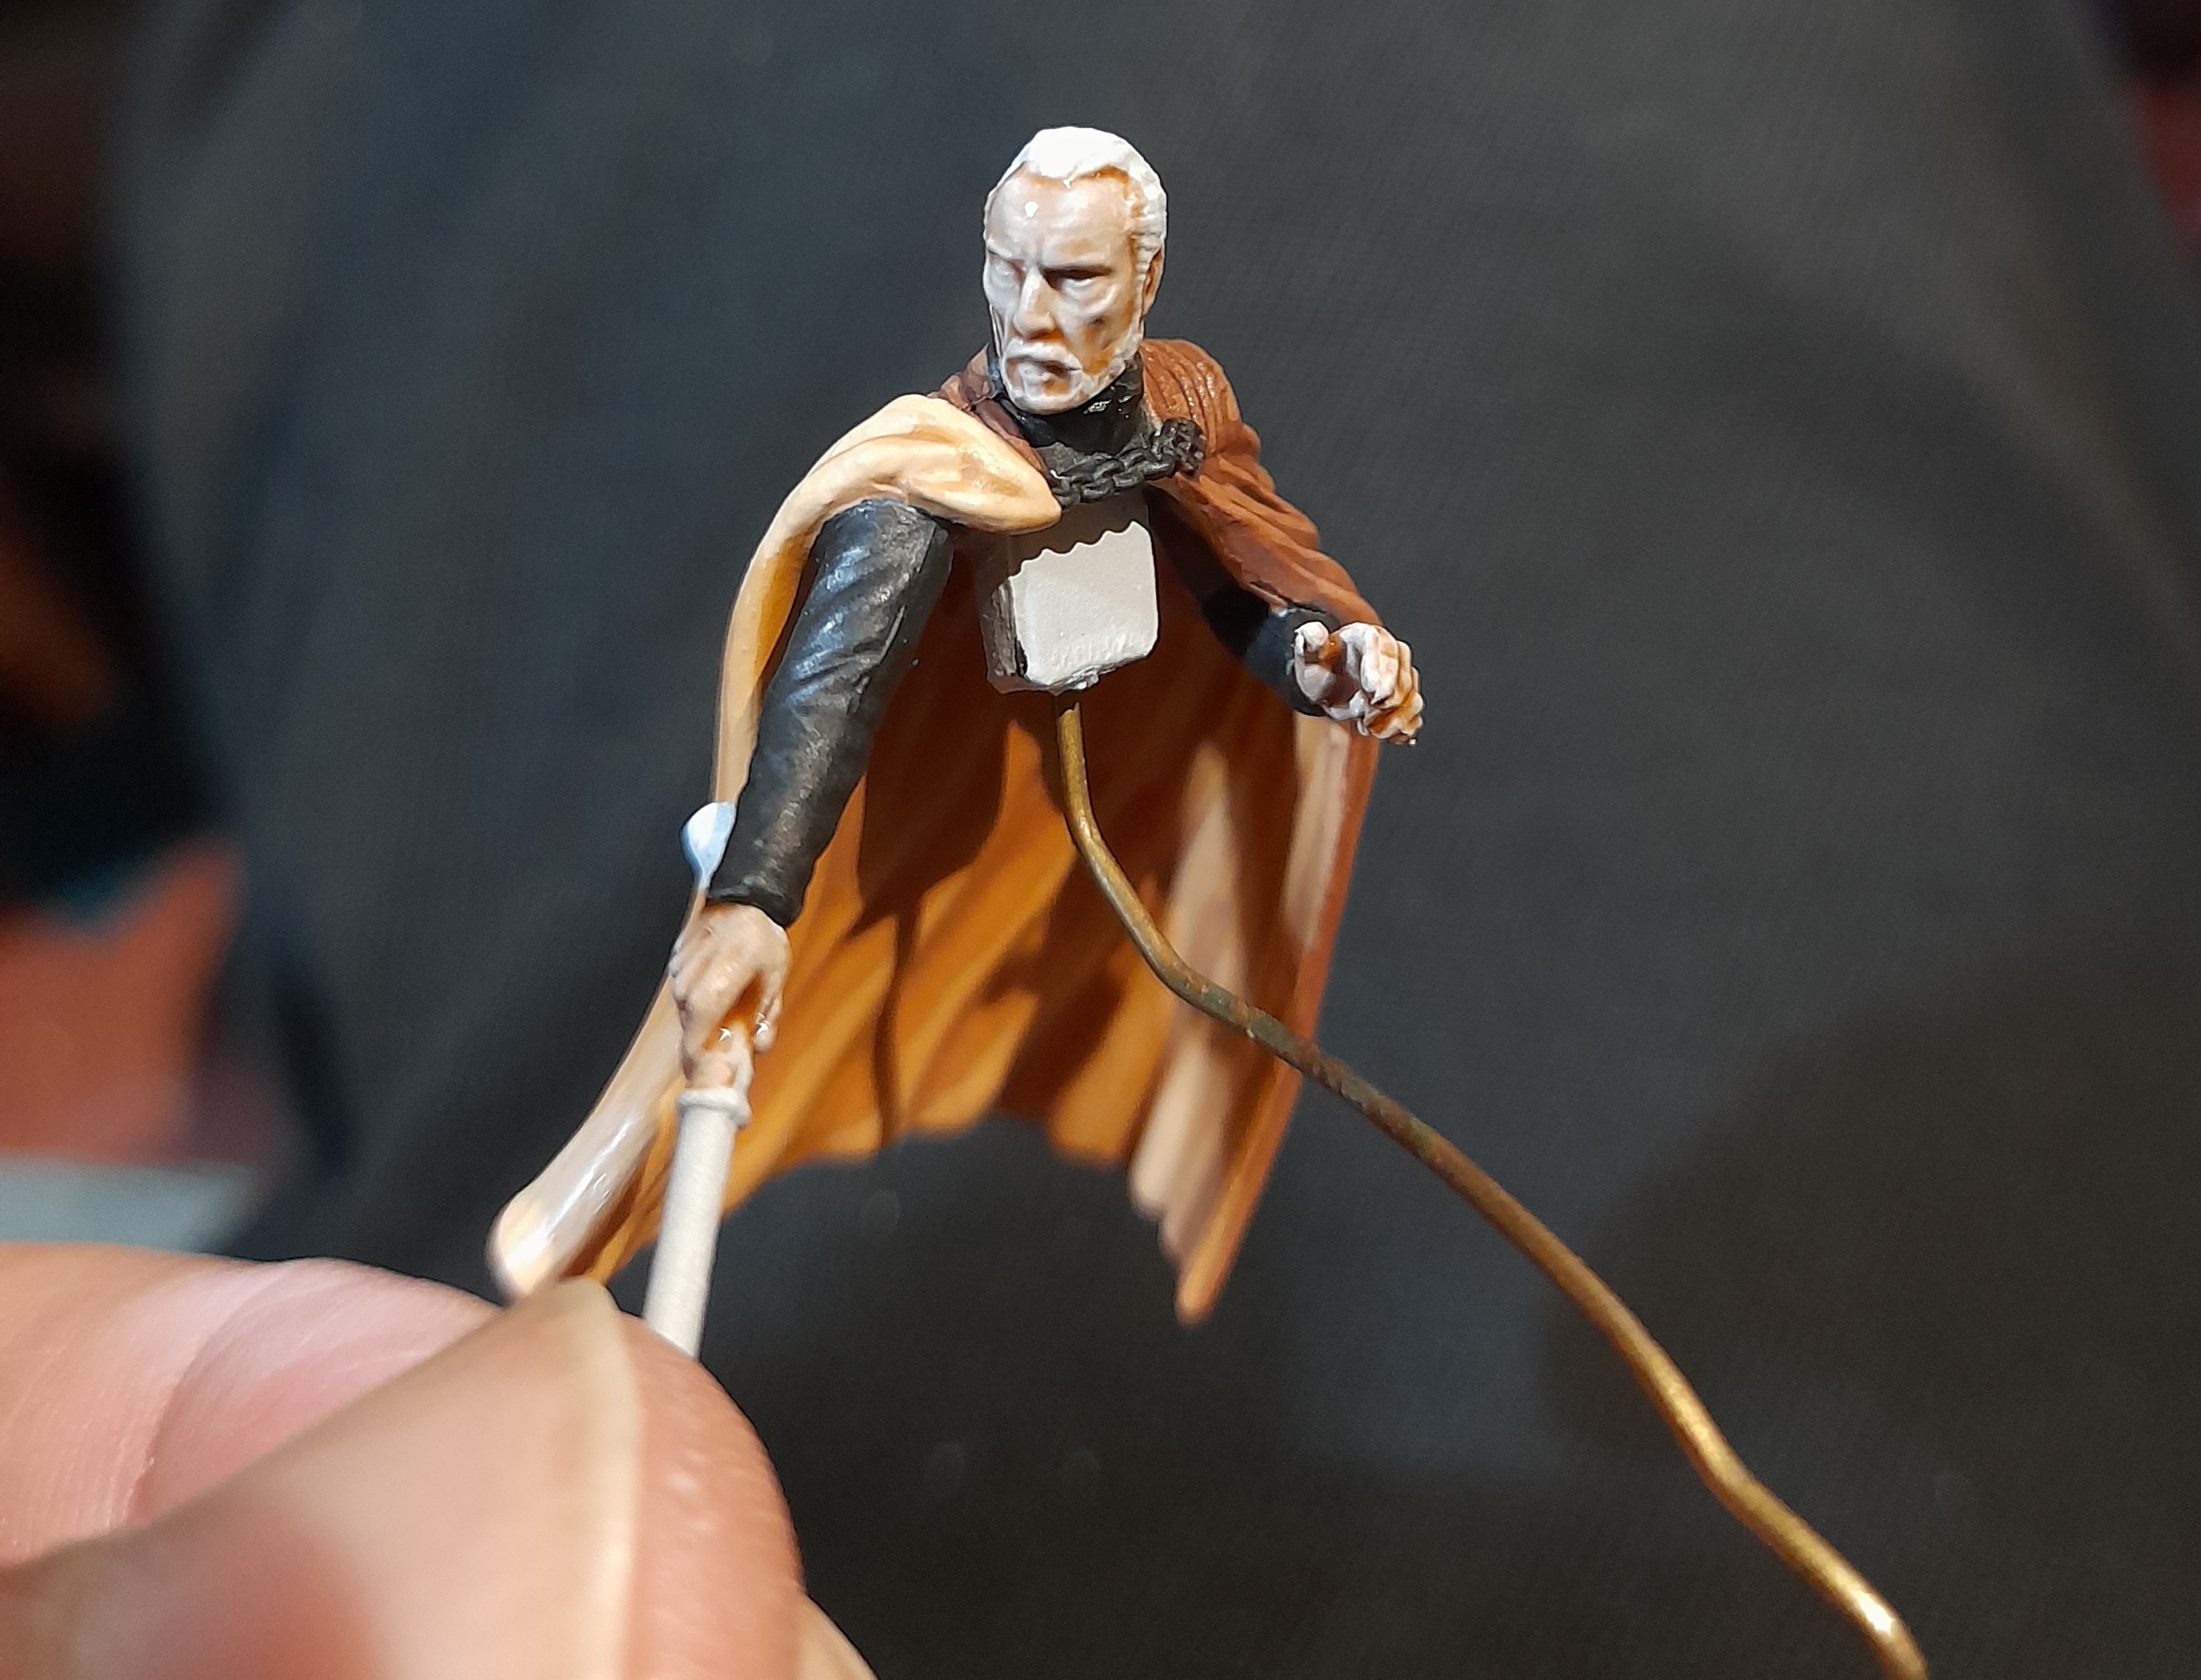
Then onto the face and hair. The face was thinned contrast flesh with a thin highlight. The hair was edged with black, then painted white, washed black and highlighted white again. I made an attempt at the eyes. However, my eyesight and hand stability are not what they used to be. His right eye came out ok, but the left less so. I tried to correct it, and just left it as ‘that’ll do’ in the end – rather than making more of a mess of it.
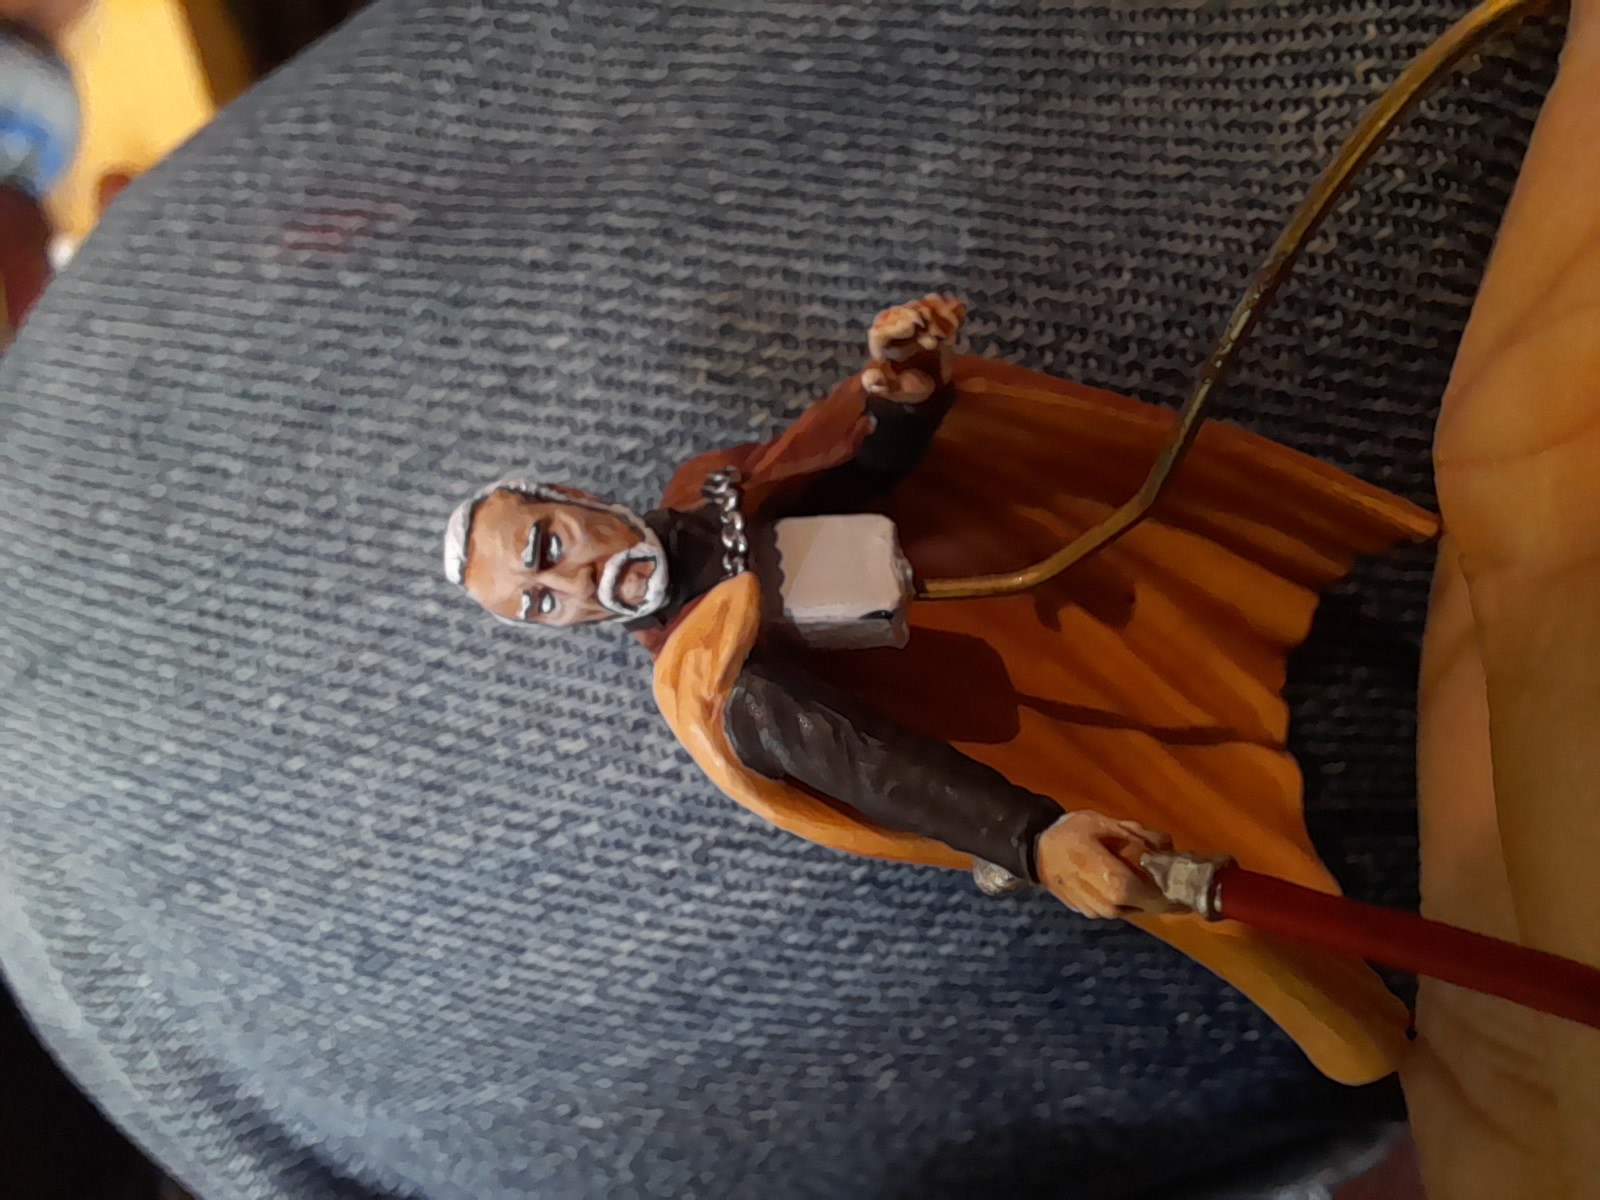
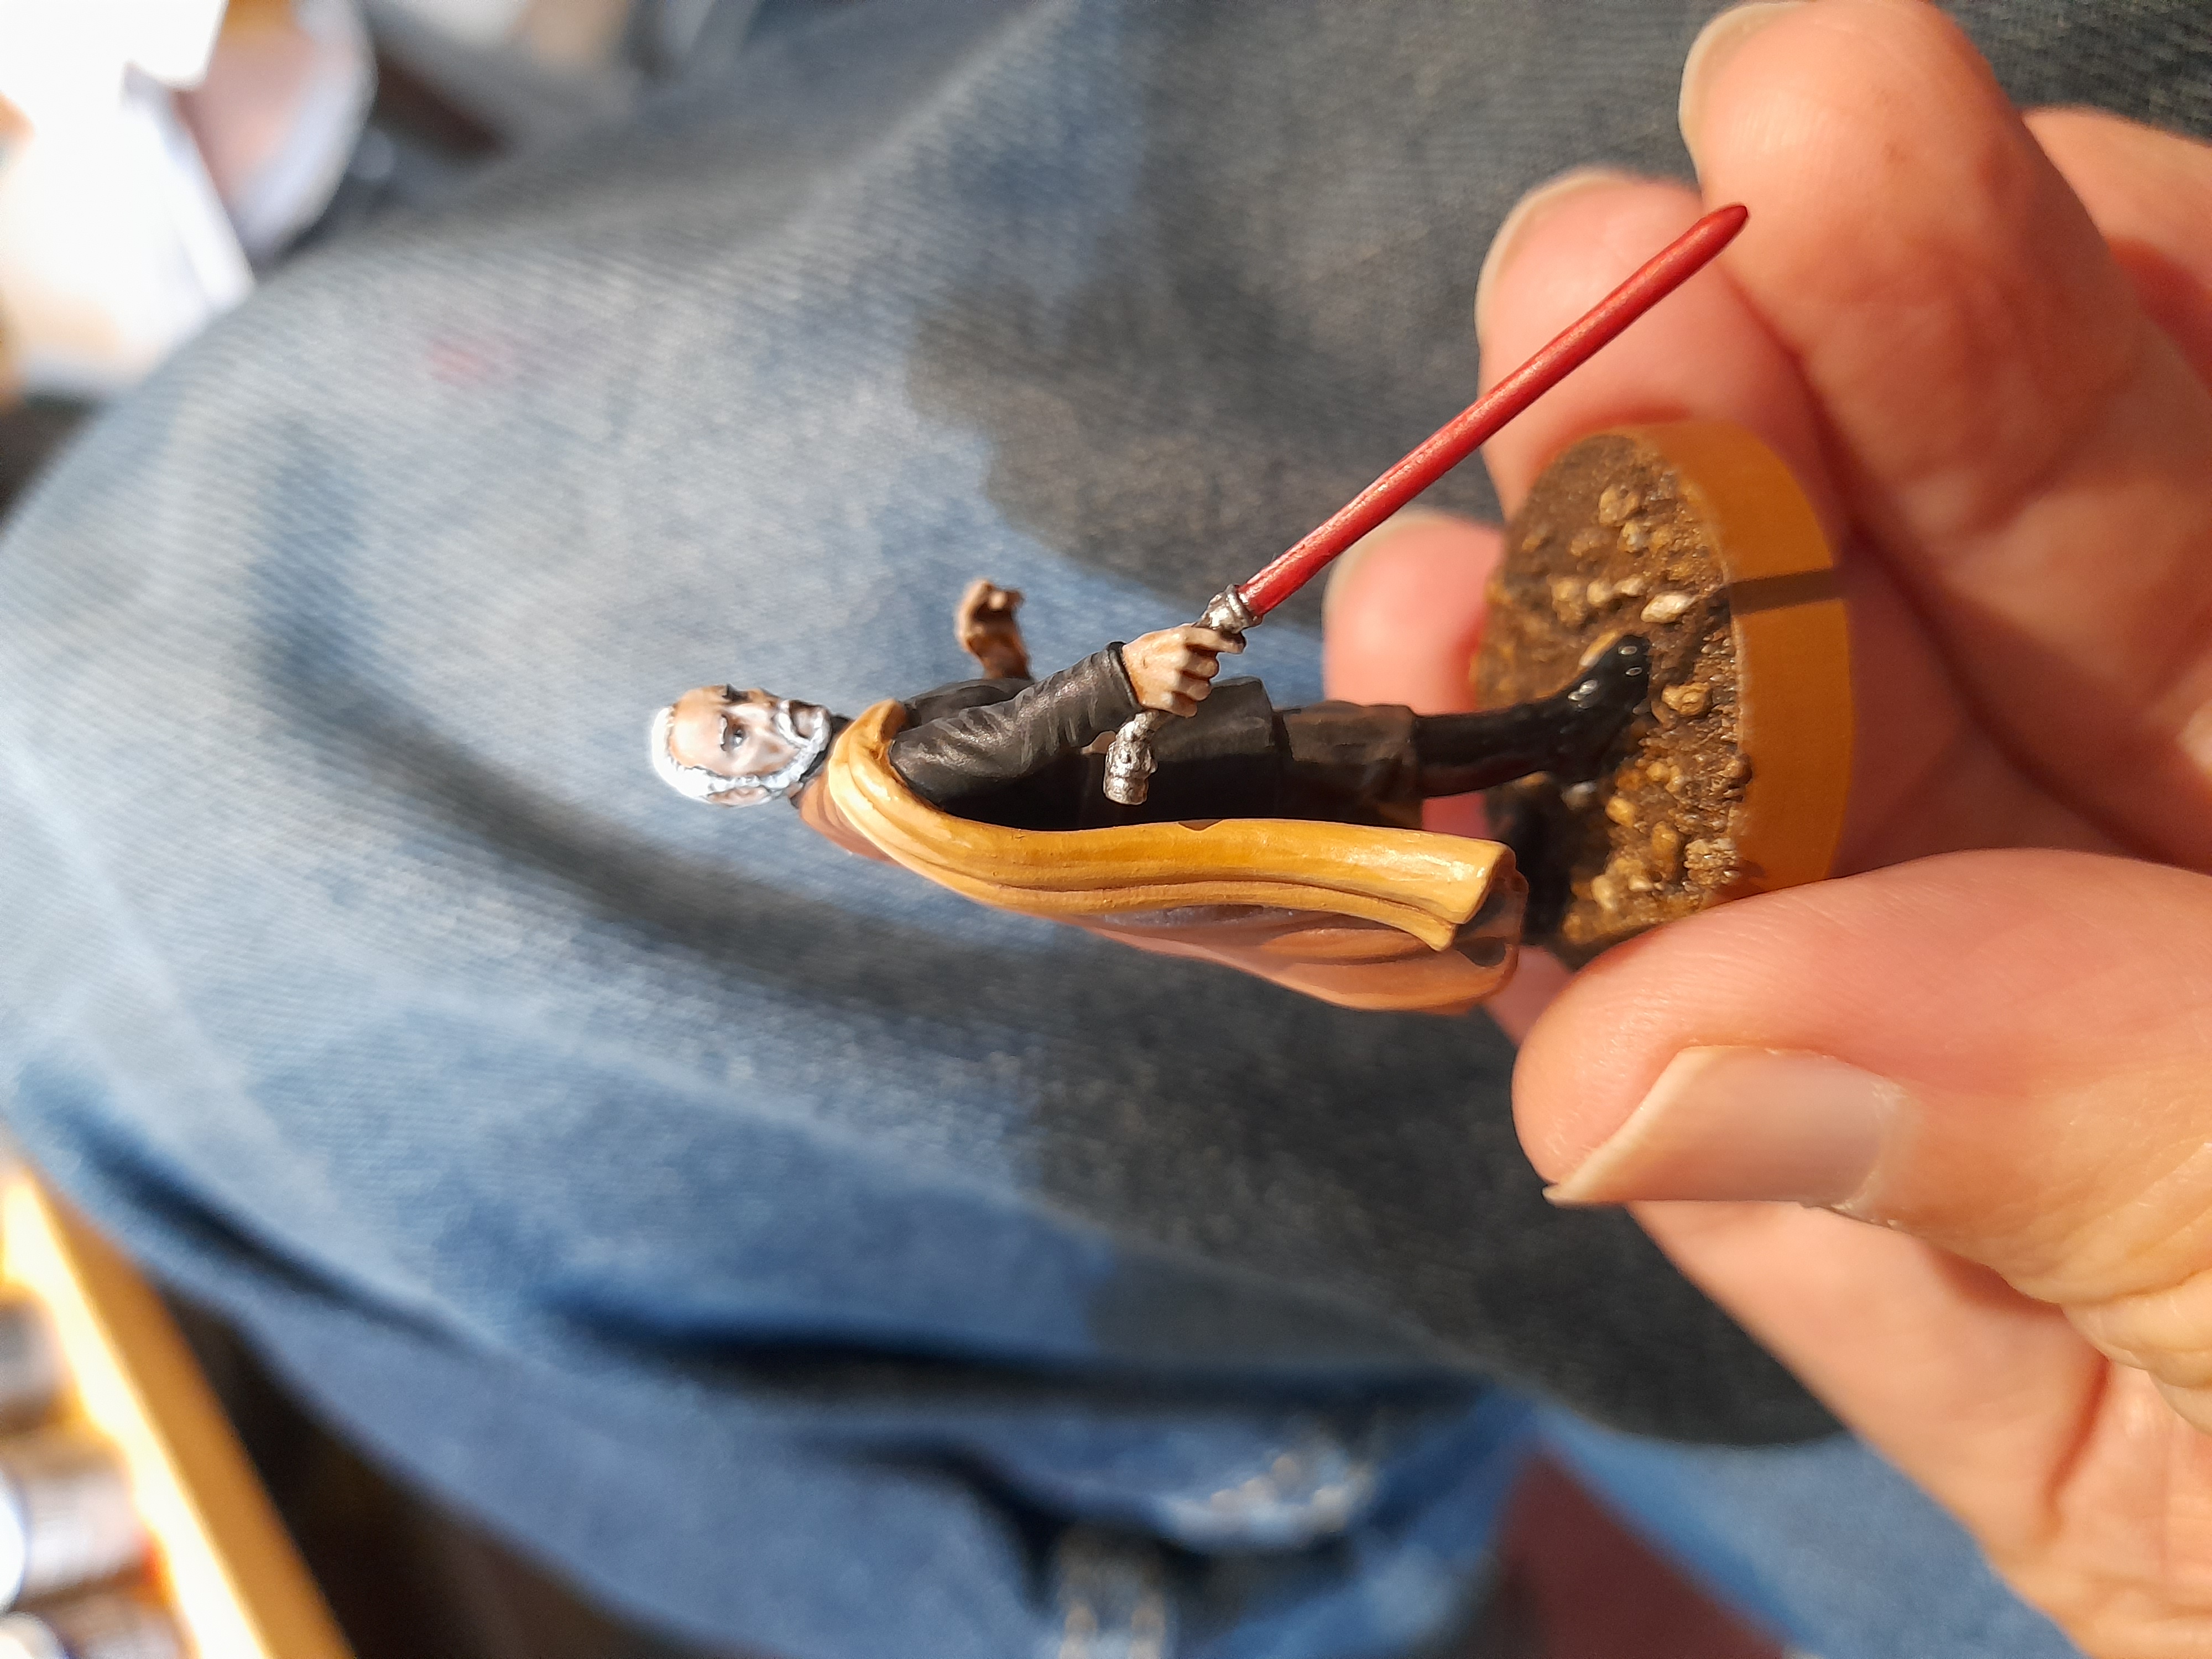
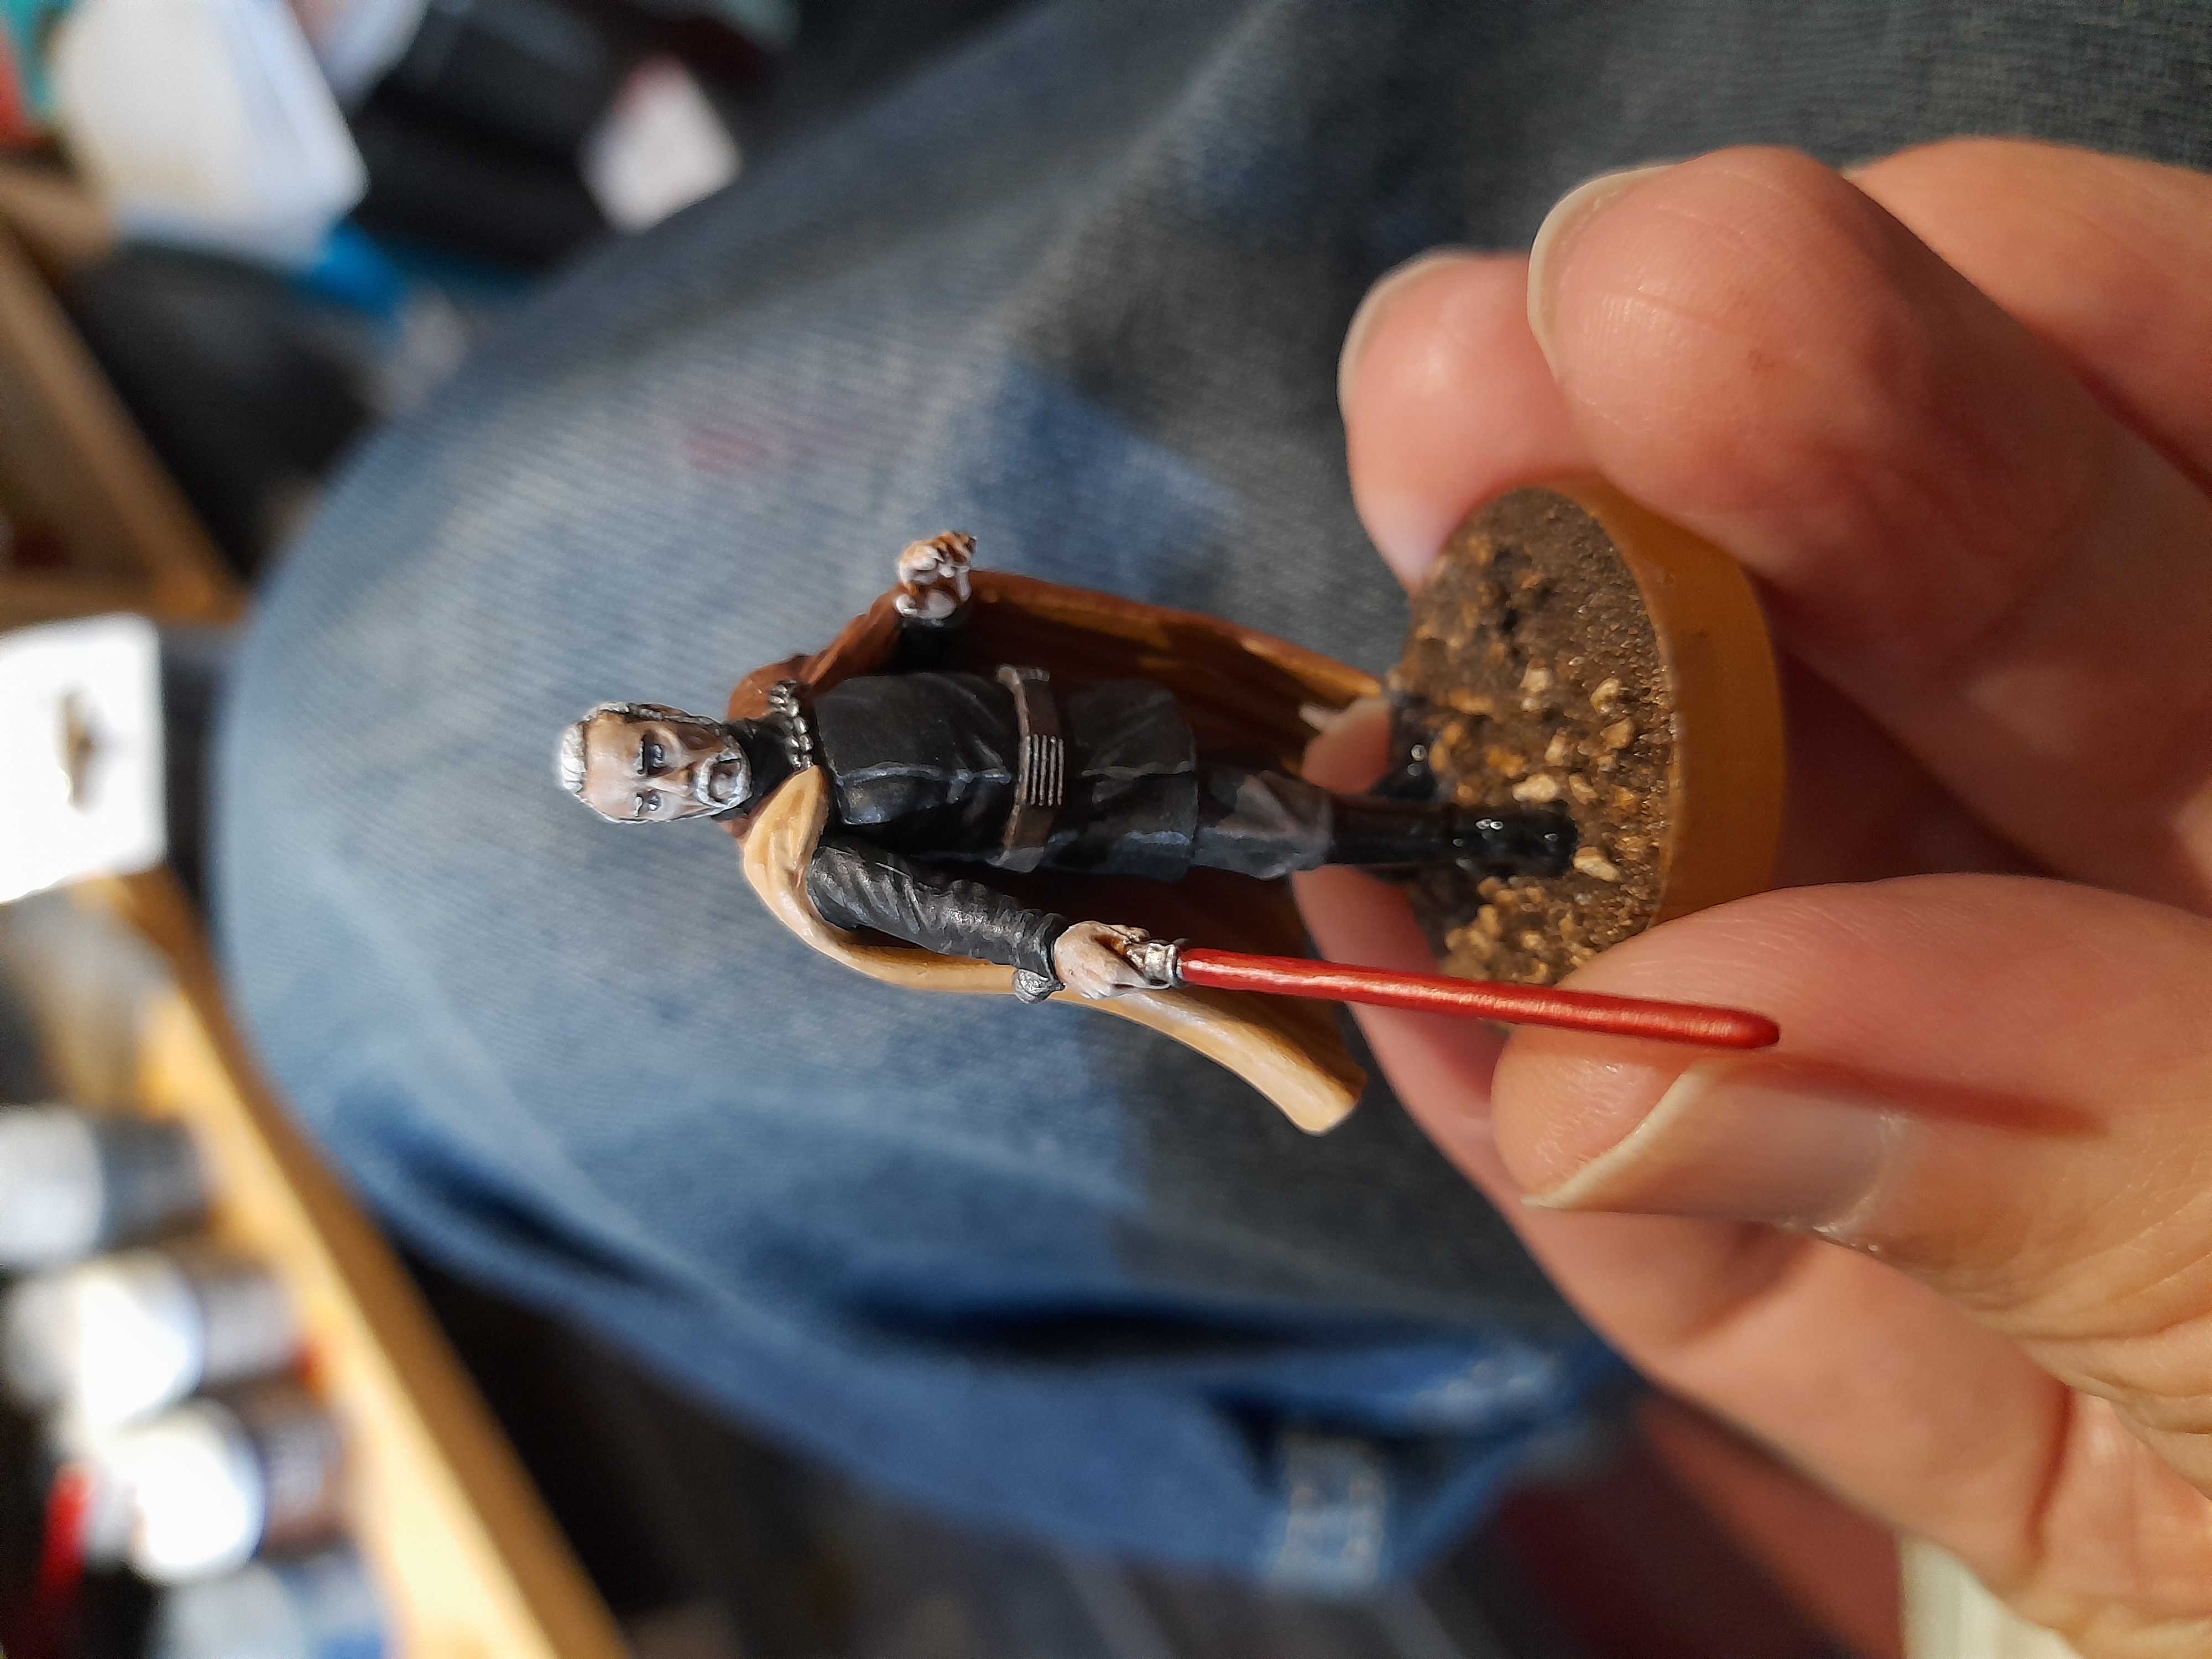
The lightsabre was red, a mixed highlight laid down in a line, then a white line laid down. Then I painted over a red contrast, wiping it away from the centre line for part of the blade closest to the hilt.
Medical Droid
12th March 2024
Again, another quick one. I made up a mix of Terradon Turquoise and Aethermatic Blue contrast as the base colour for the medical droid, trying to echo ‘scrubs’. Initially I wasn’t too happy with it, but a friend said they thought it looked good, so I stuck with it.
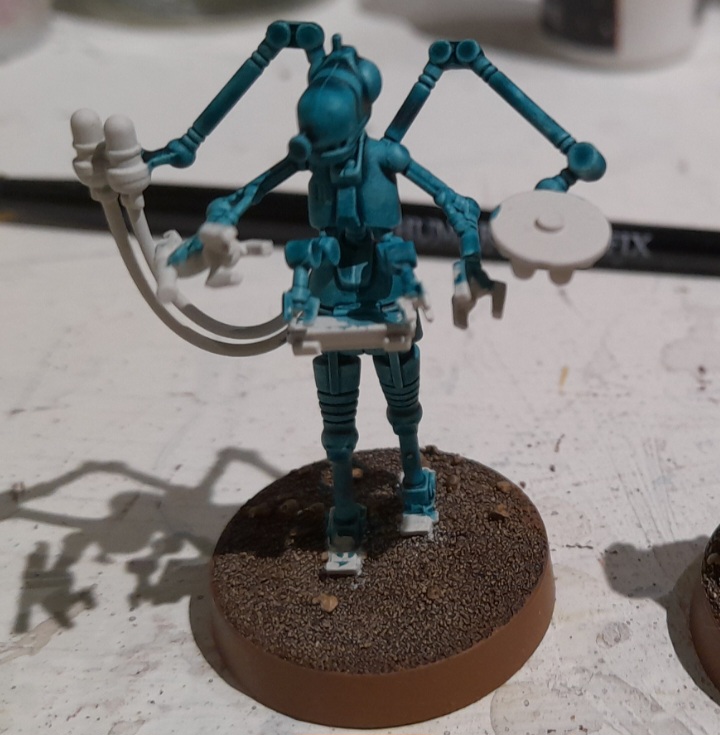
Adding silver to the tools and the joint rings, then a nuln wash over that silver, and it came together somewhat 😊
The tubes and tray were picked out in black and I edge highlighted the tray with dark grey.
The bottles were painted and then I used gloss varnish on them and on the droid head and torso.
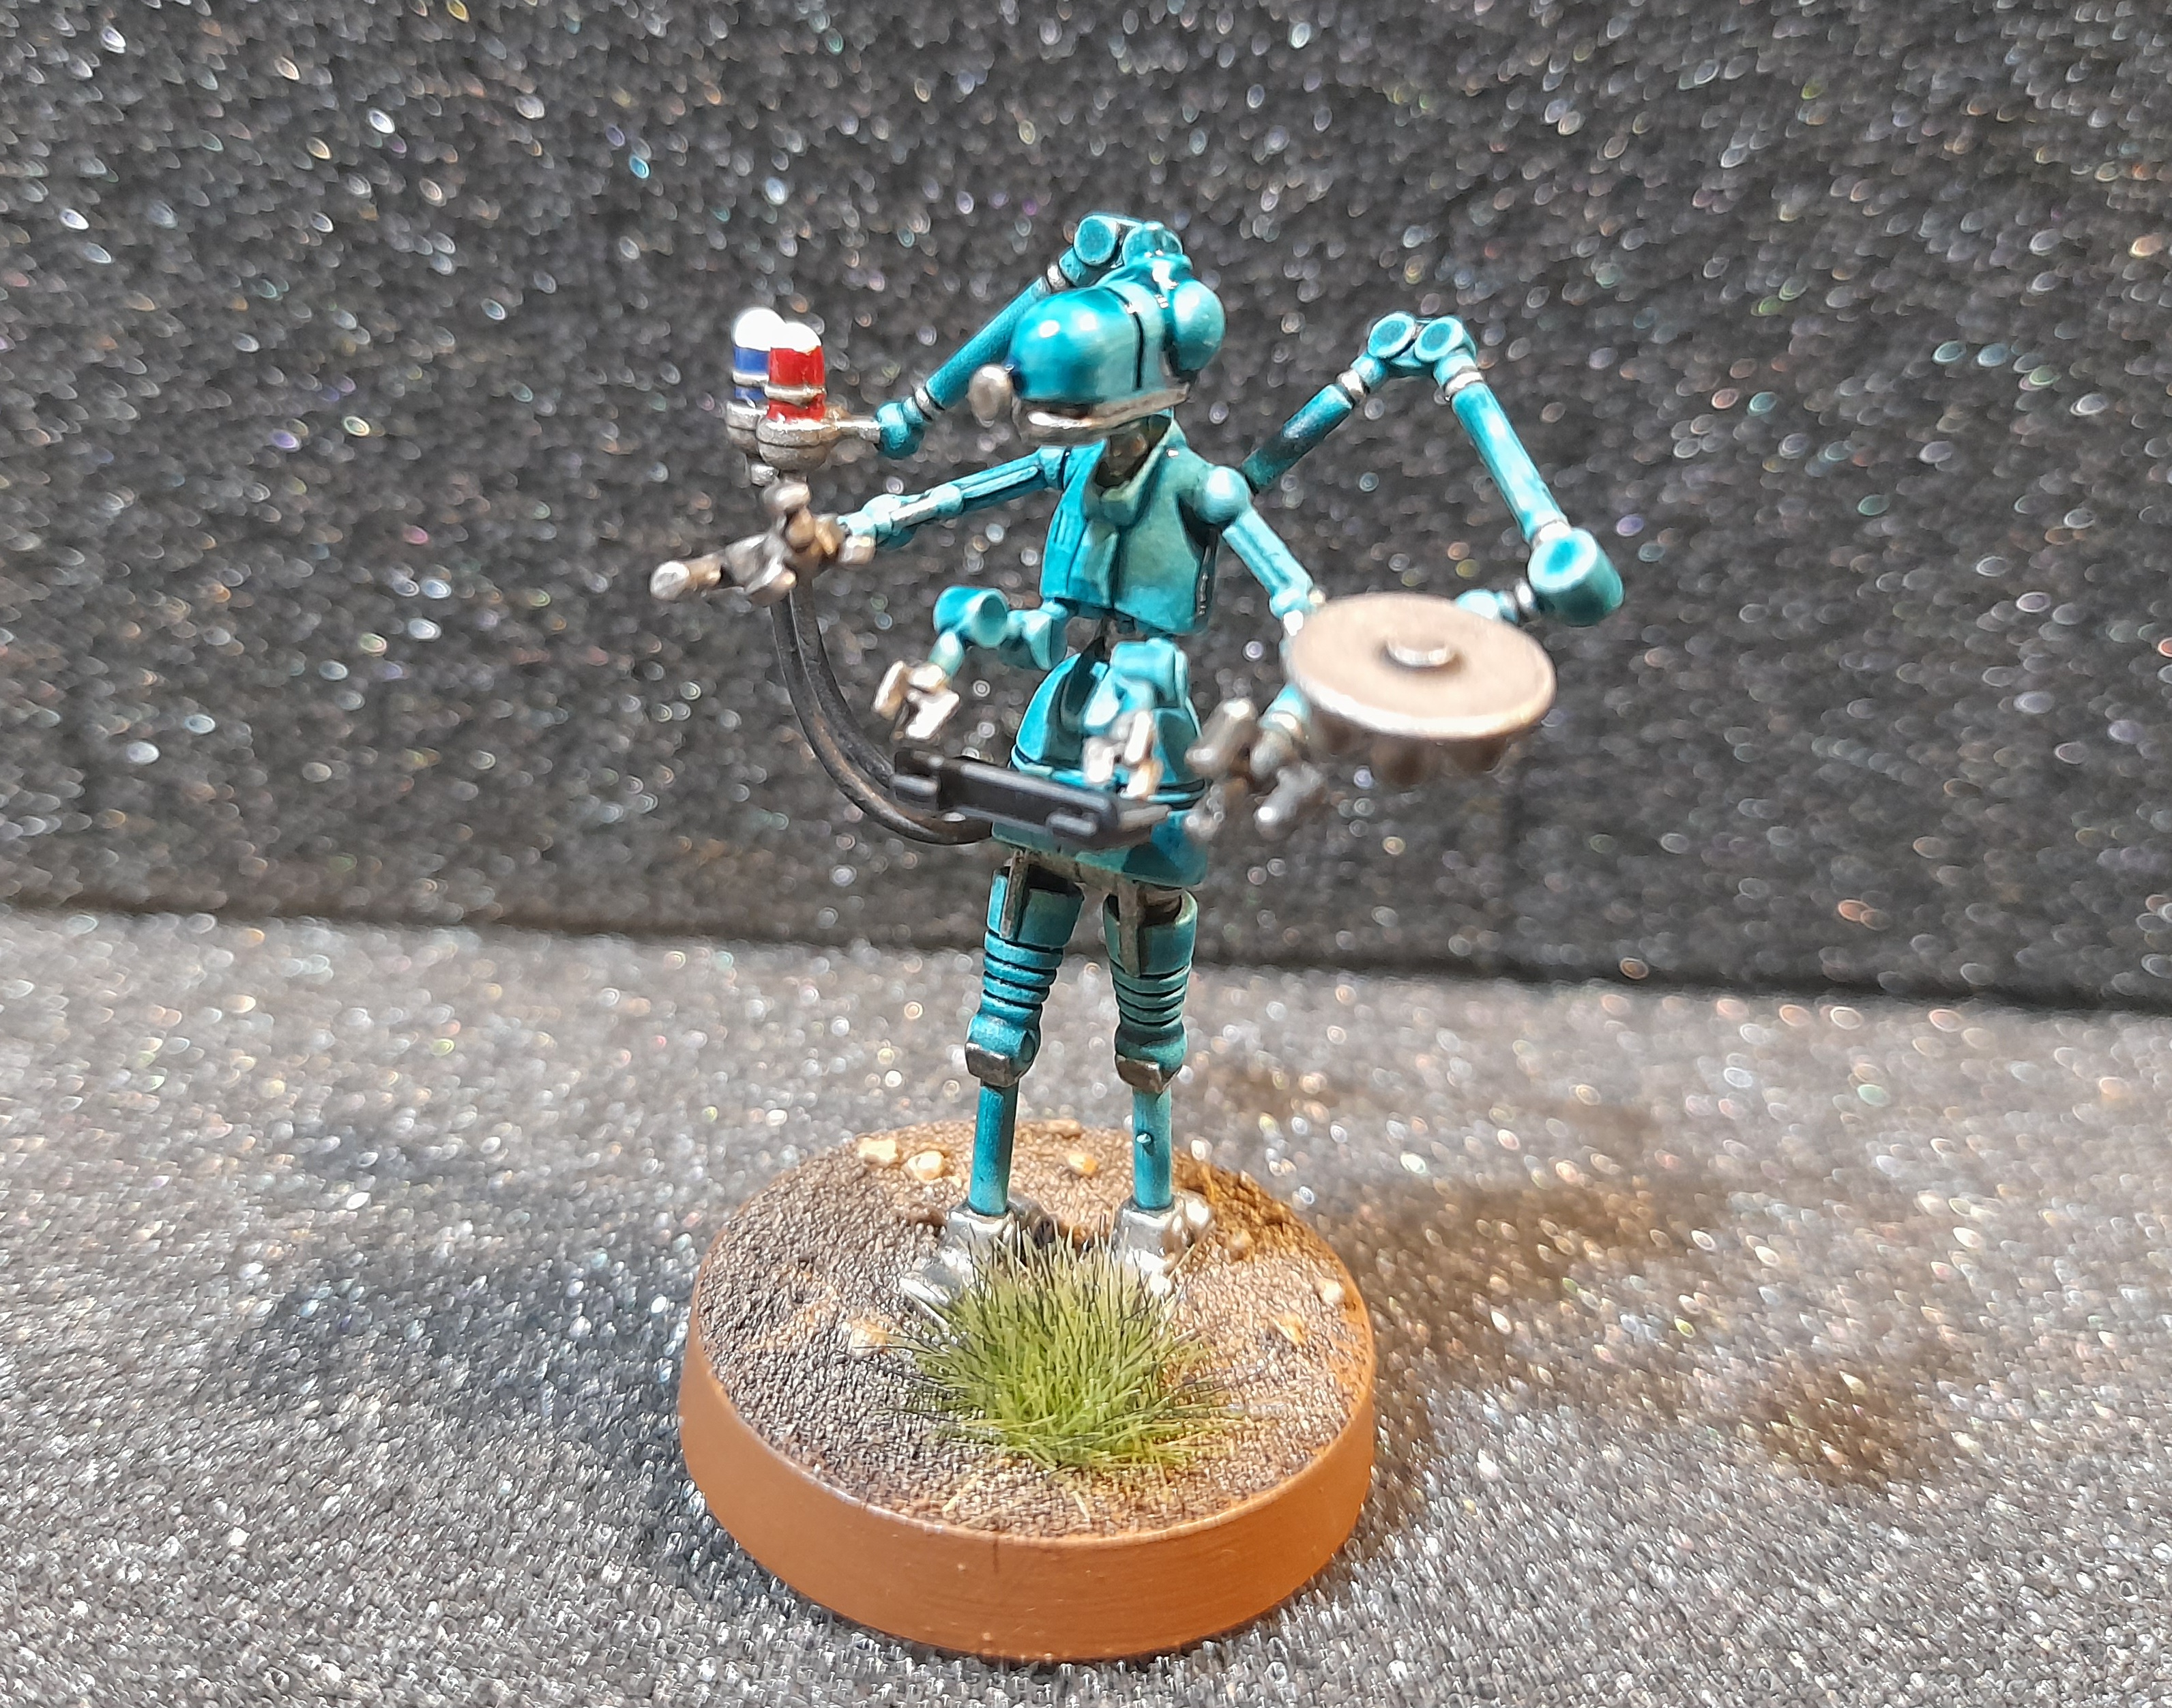
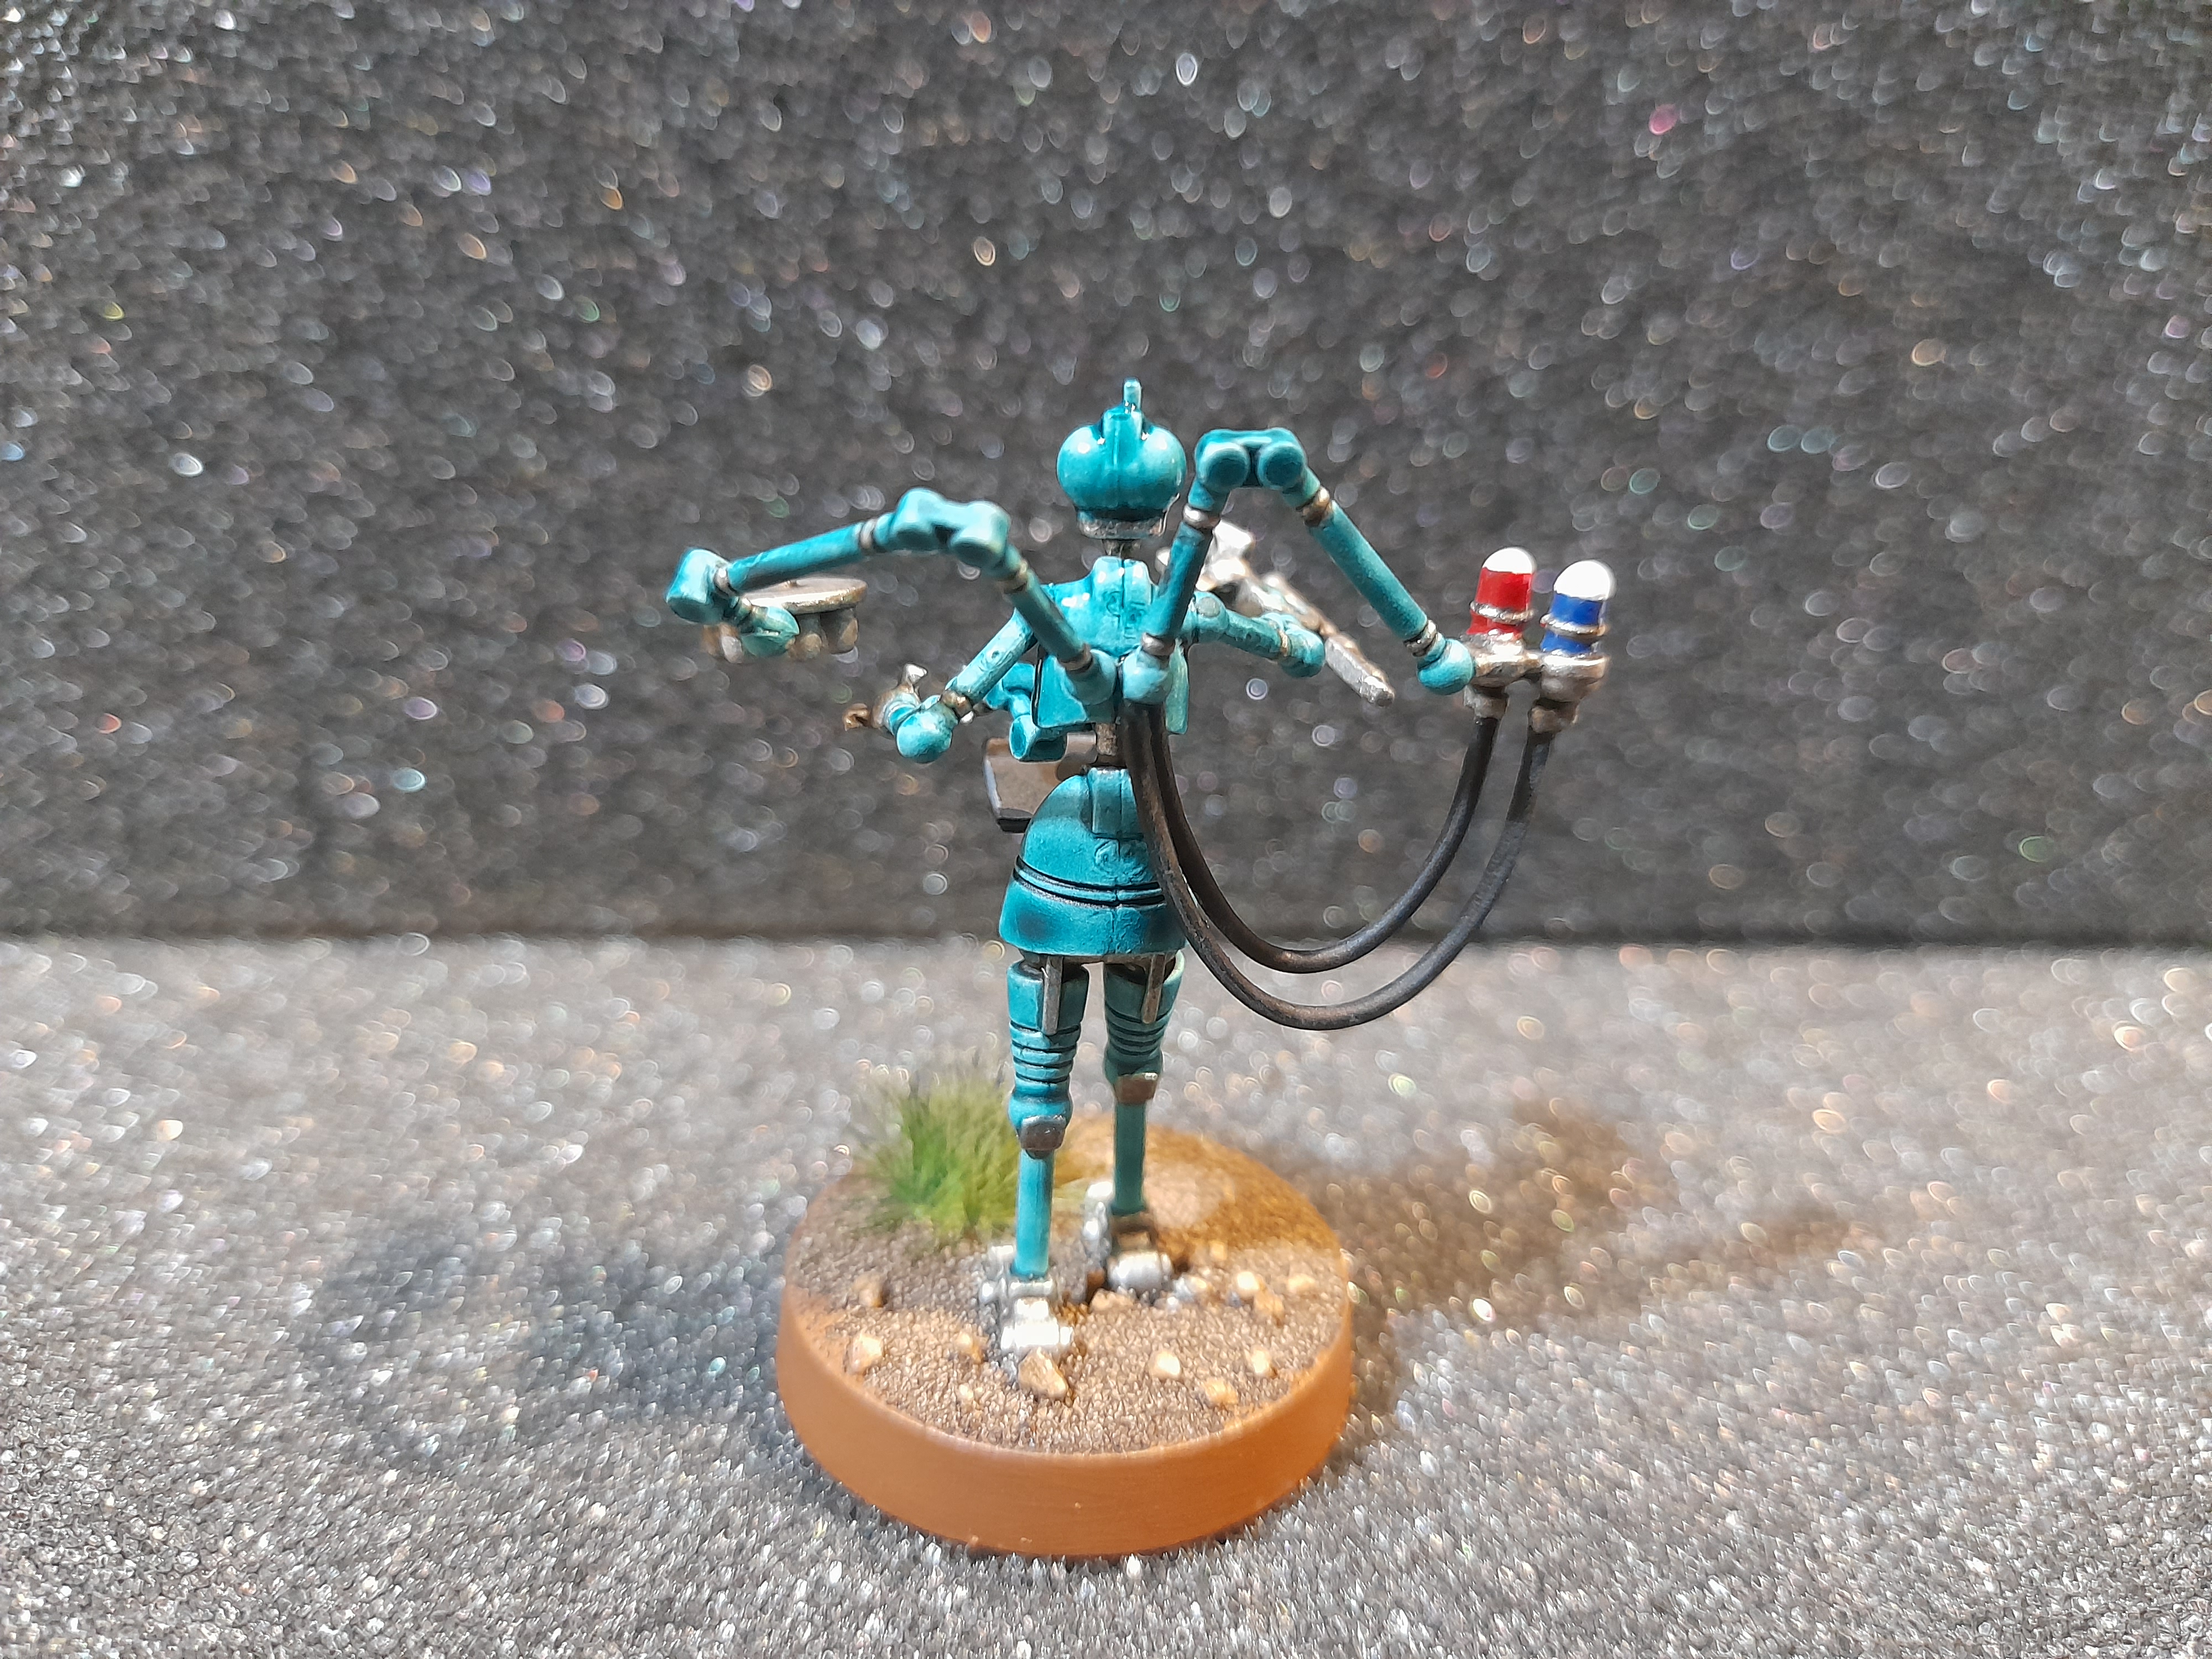
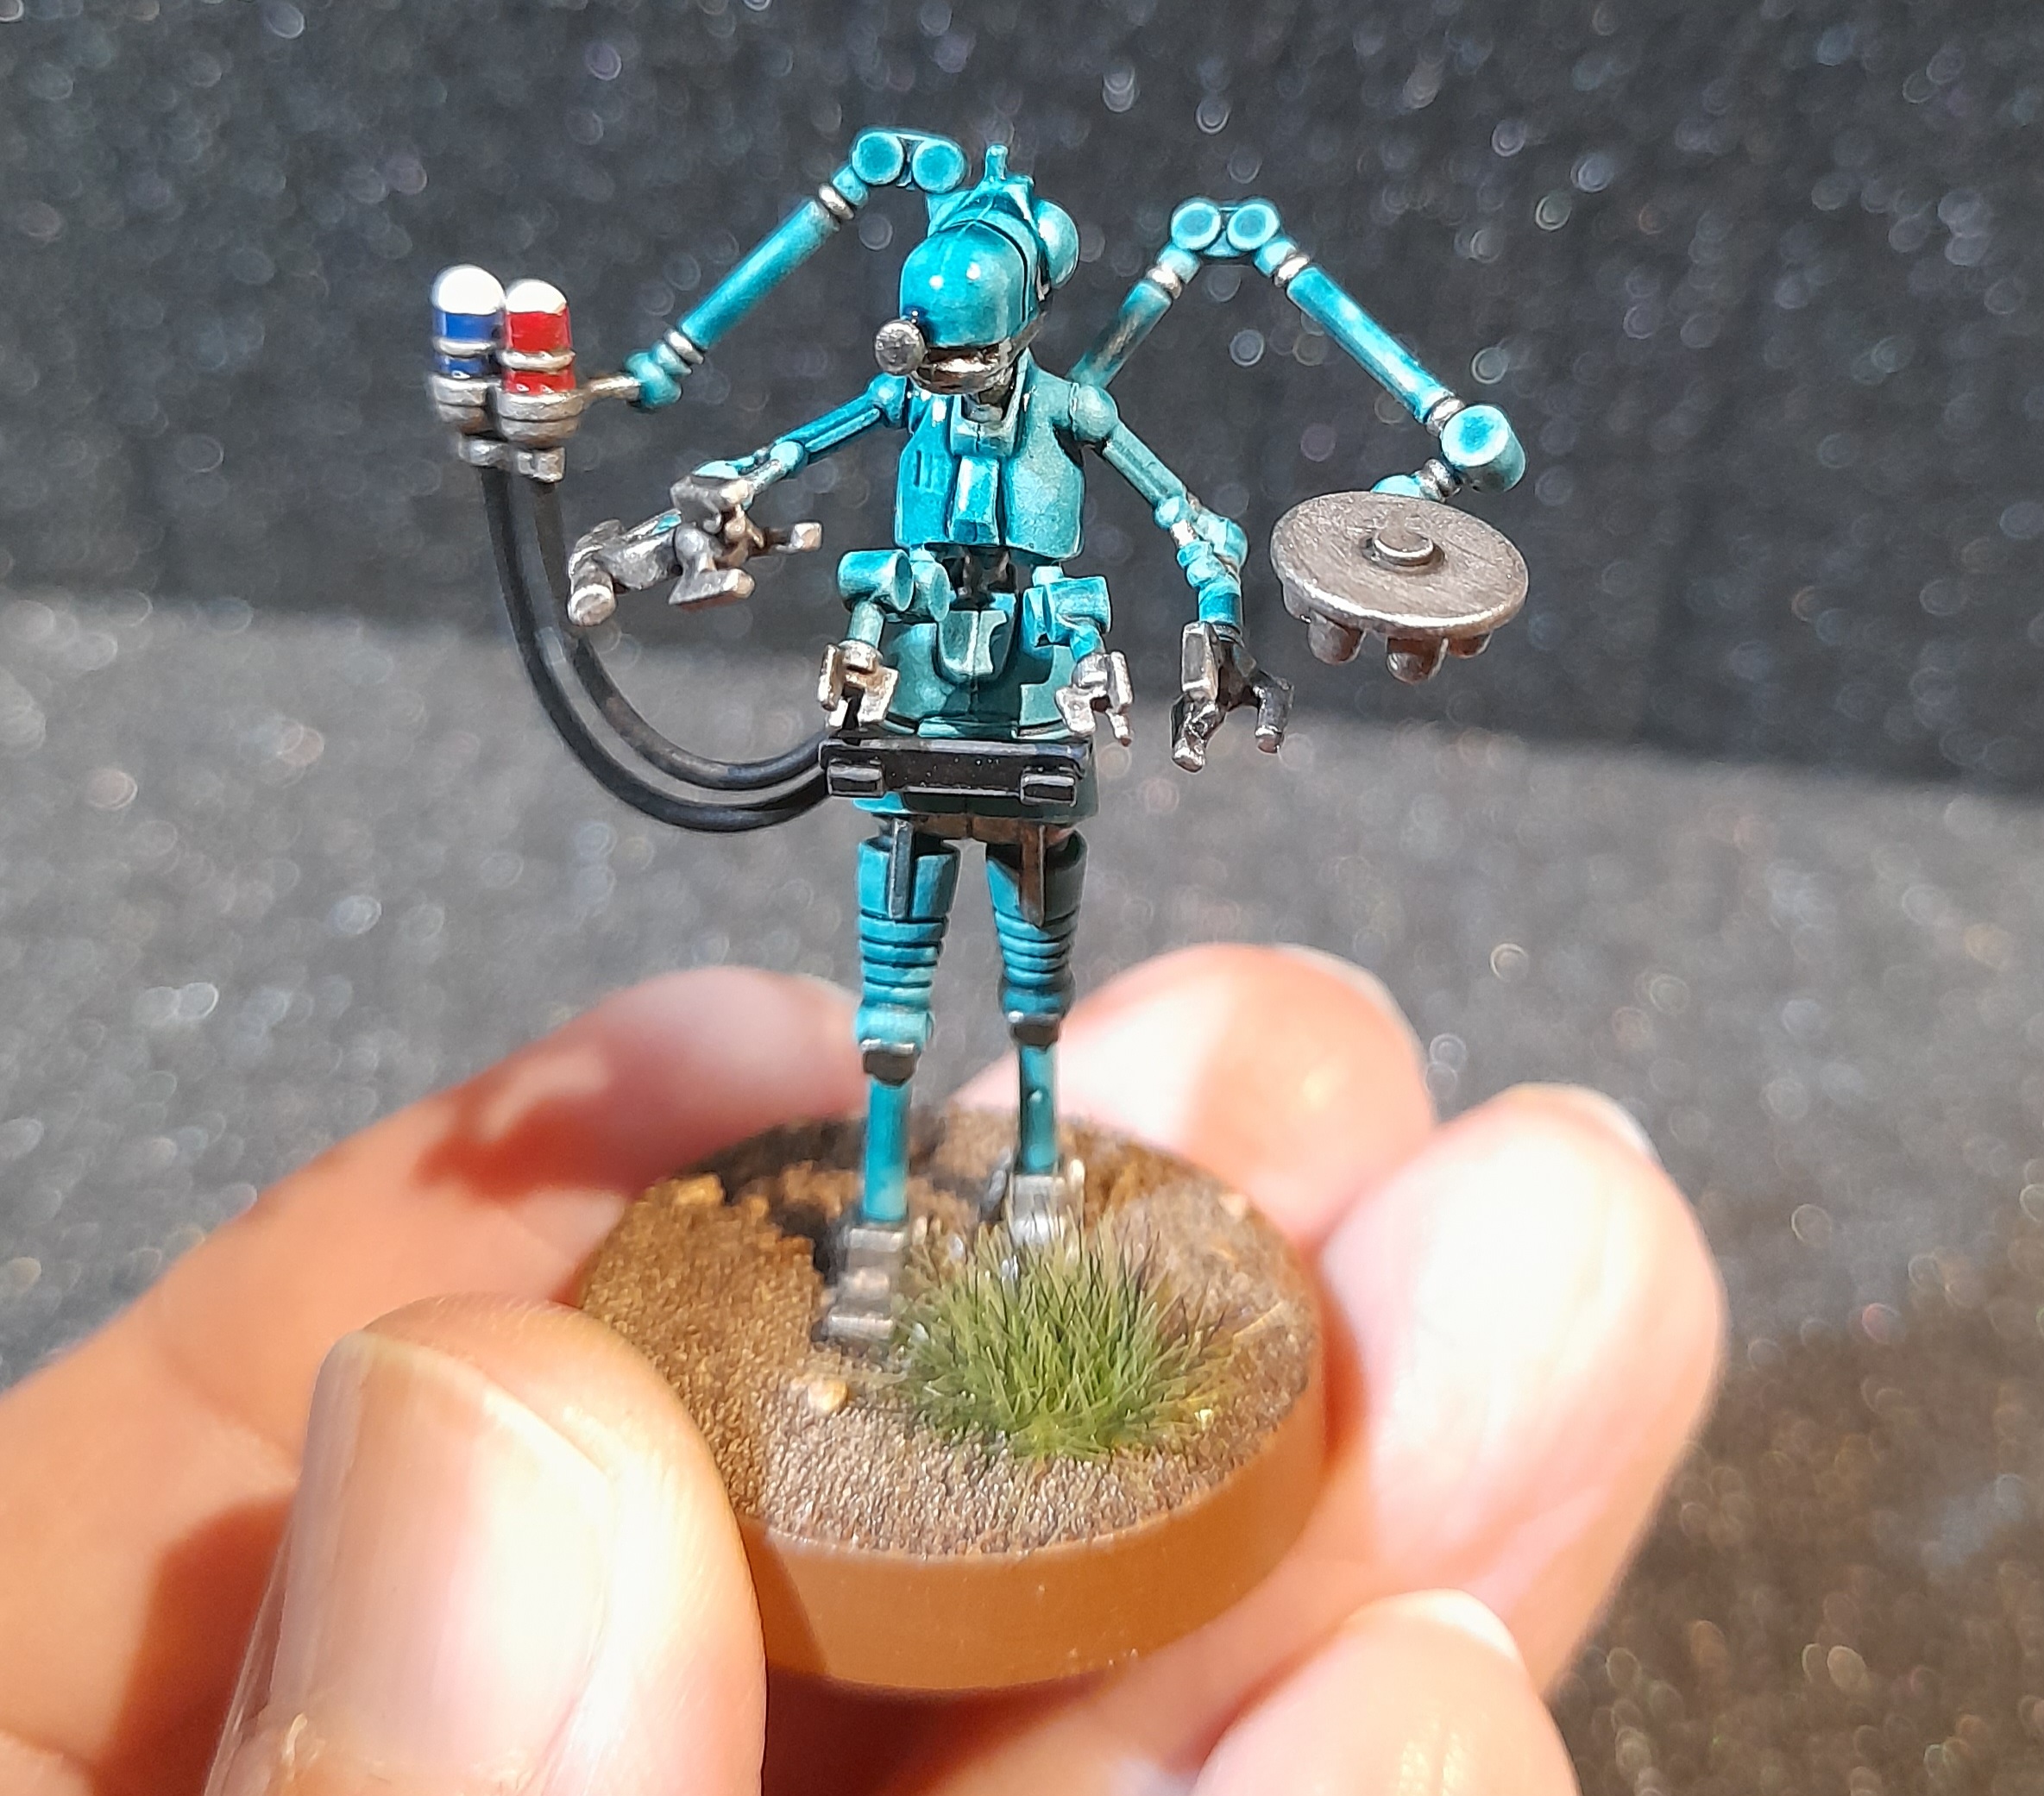
I may add some more gloss at a later date perhaps.
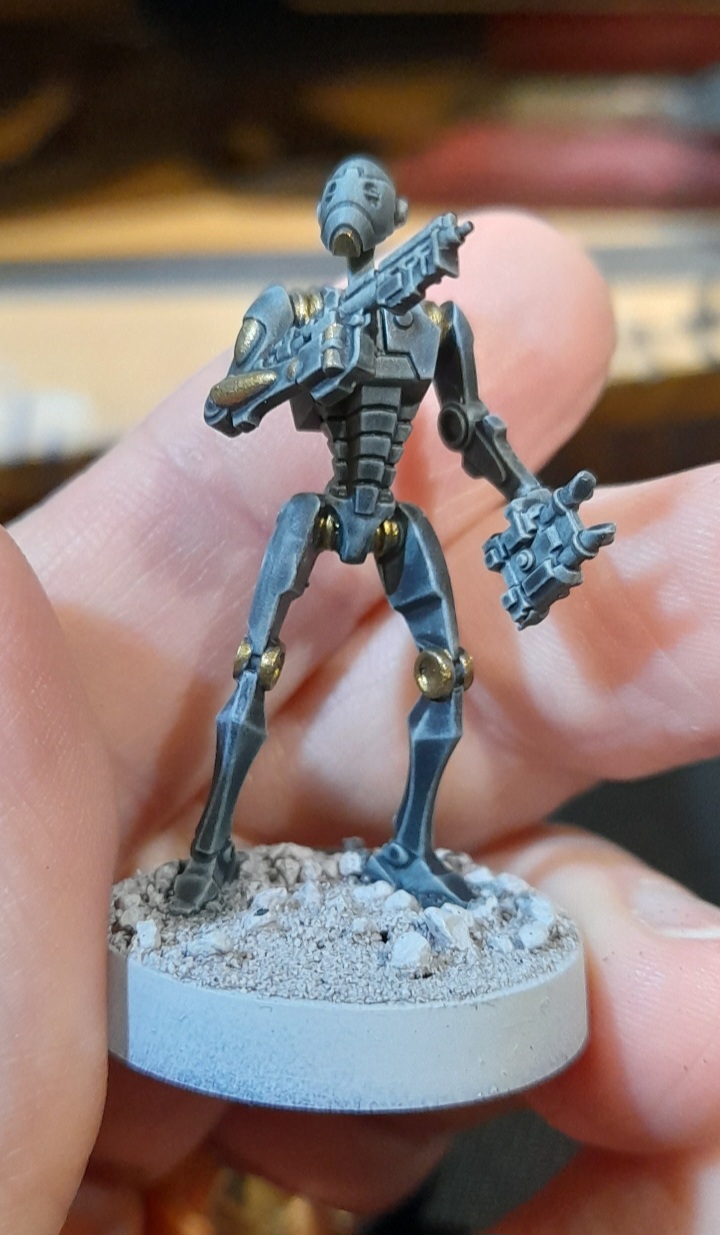
PK Series Worker Droid
12th March 2024
Just a quick post for this one. The B1 droid head had already been given a wash of the B1 contrast mix. From the wraithbone prime I gave the worker droid itself a light grey wash. This was followed by a light leadbelcher drybrush, to give it a metallic sheen without going too metallic on it.
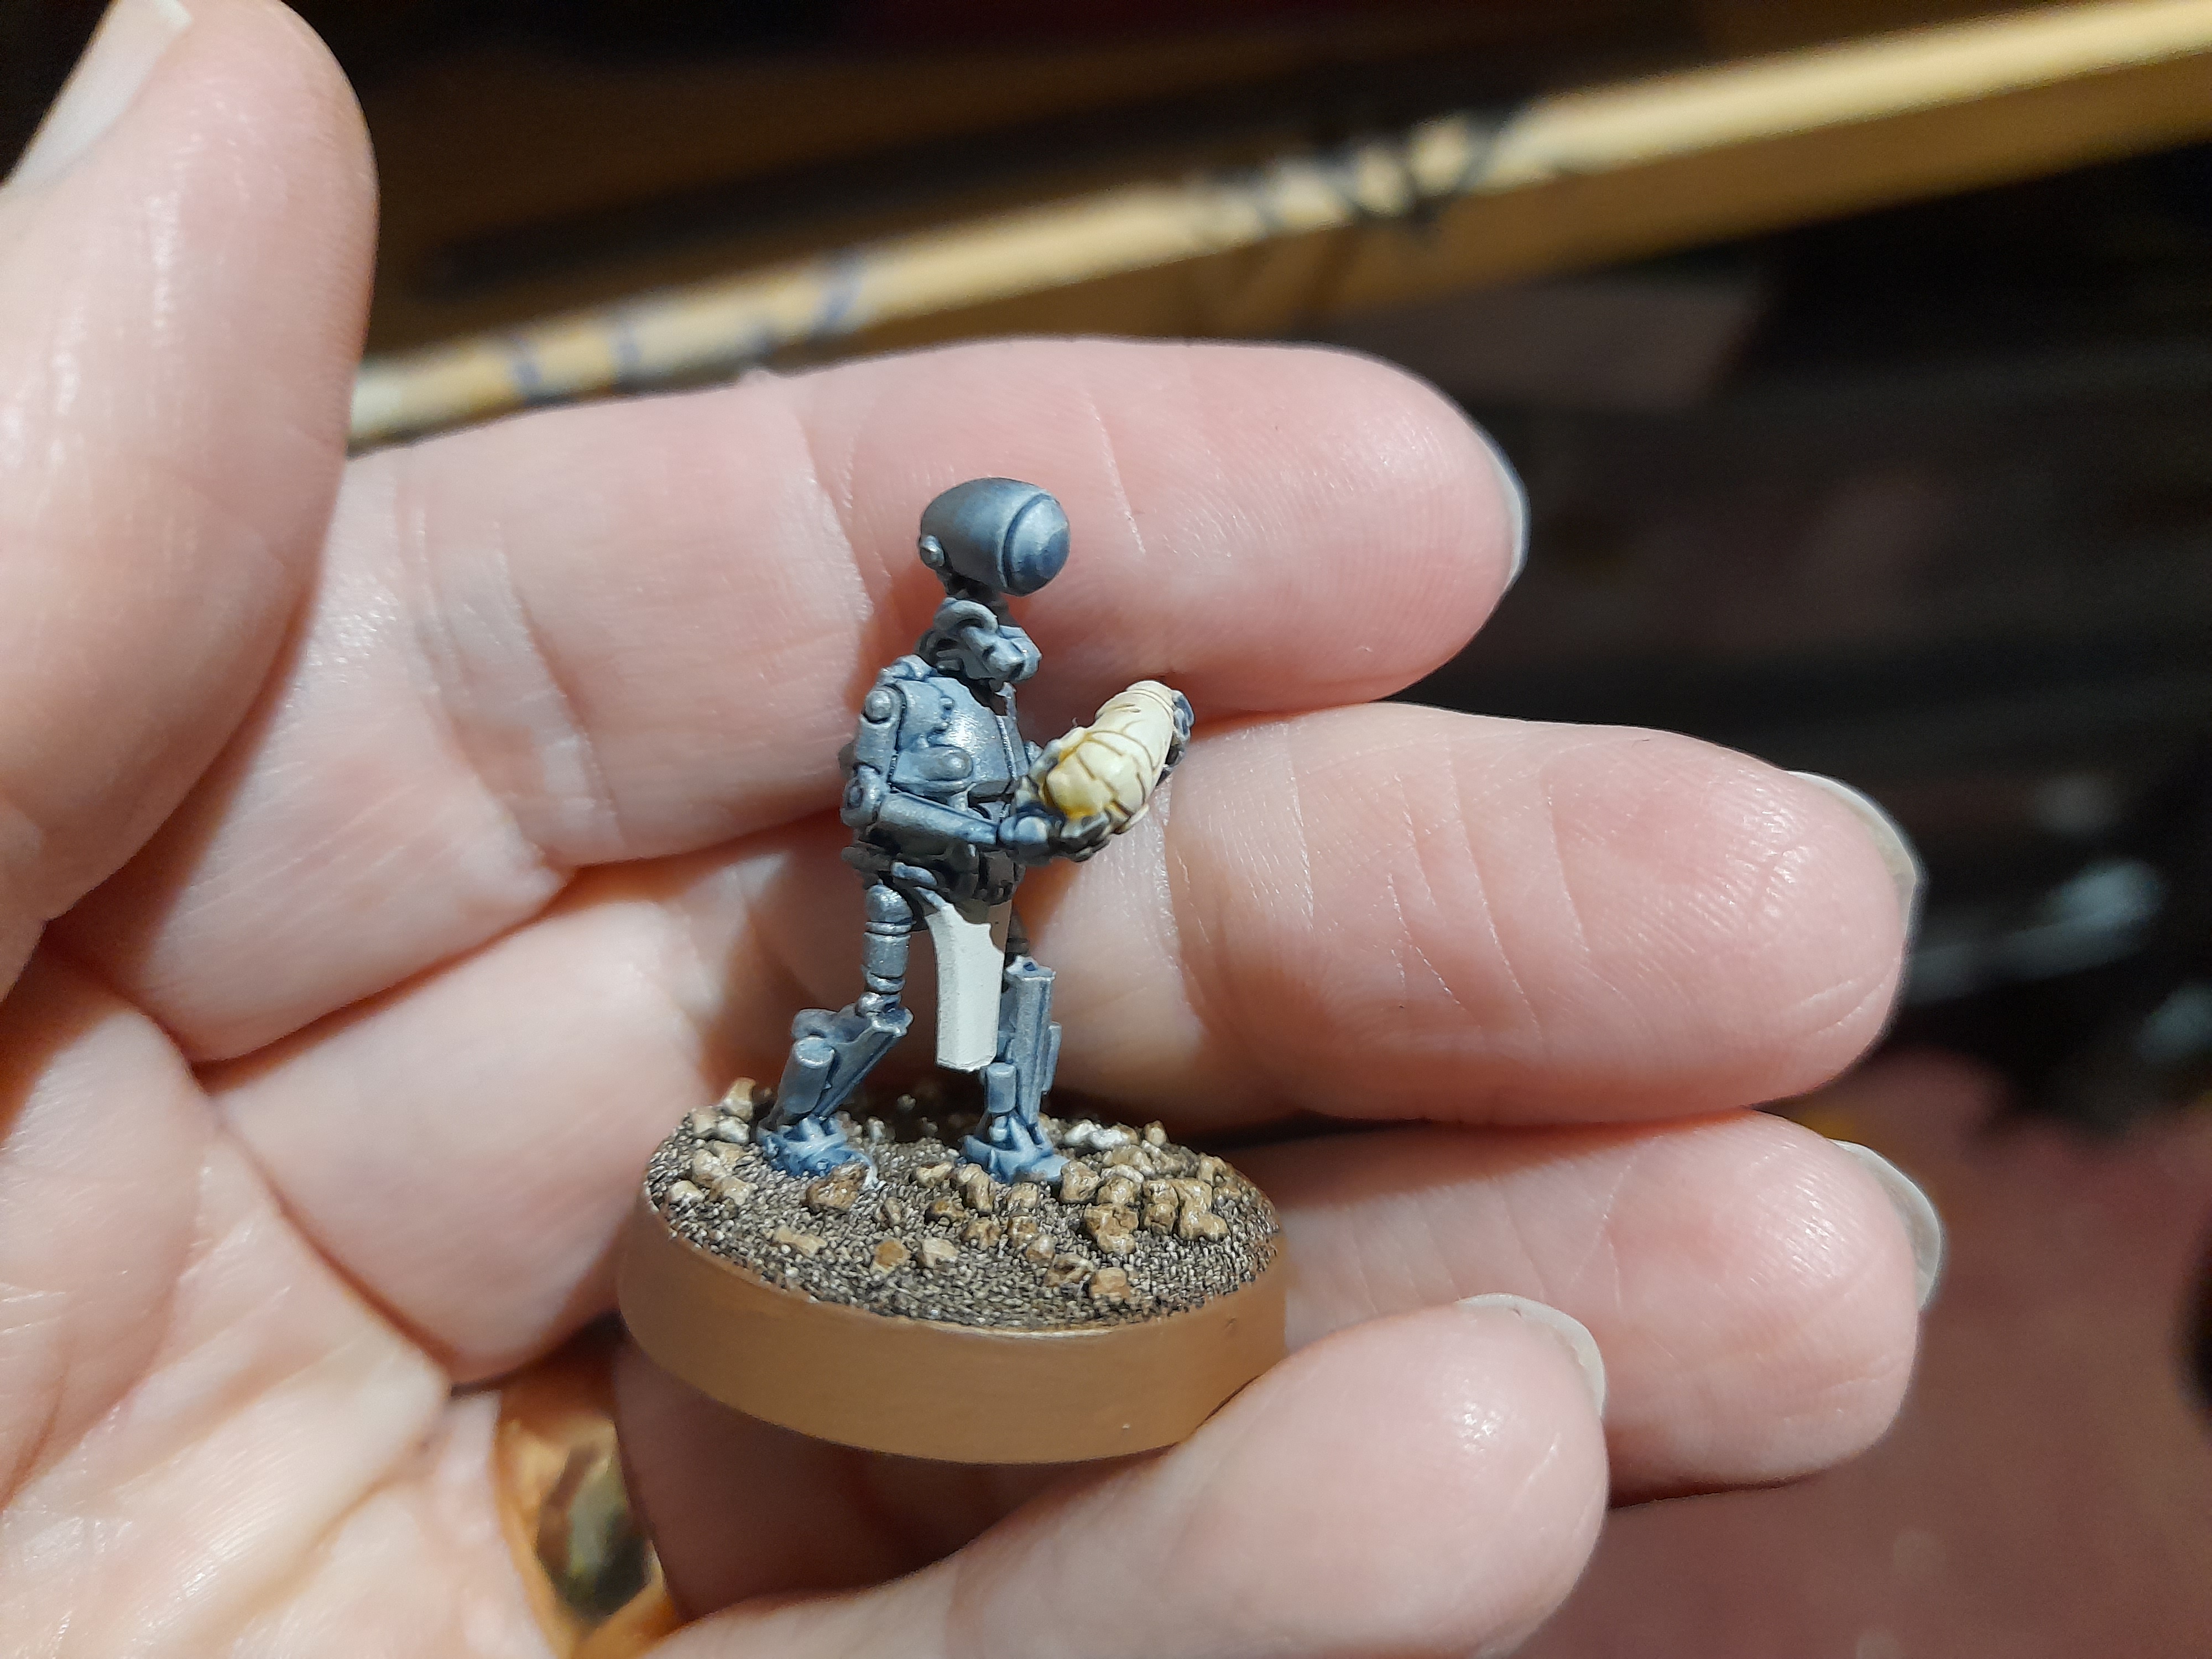
Then I painted the tabard in a blue to match the STAPs, and picked out the eye lens. I painted that in a gem style, by adding a white dot to the top right and a bottom highlight to the bottom left. Then I added the black pupil and gave that a little light dot. A gloss coat over that, a thin wash on the tabard and the worker droid was done.

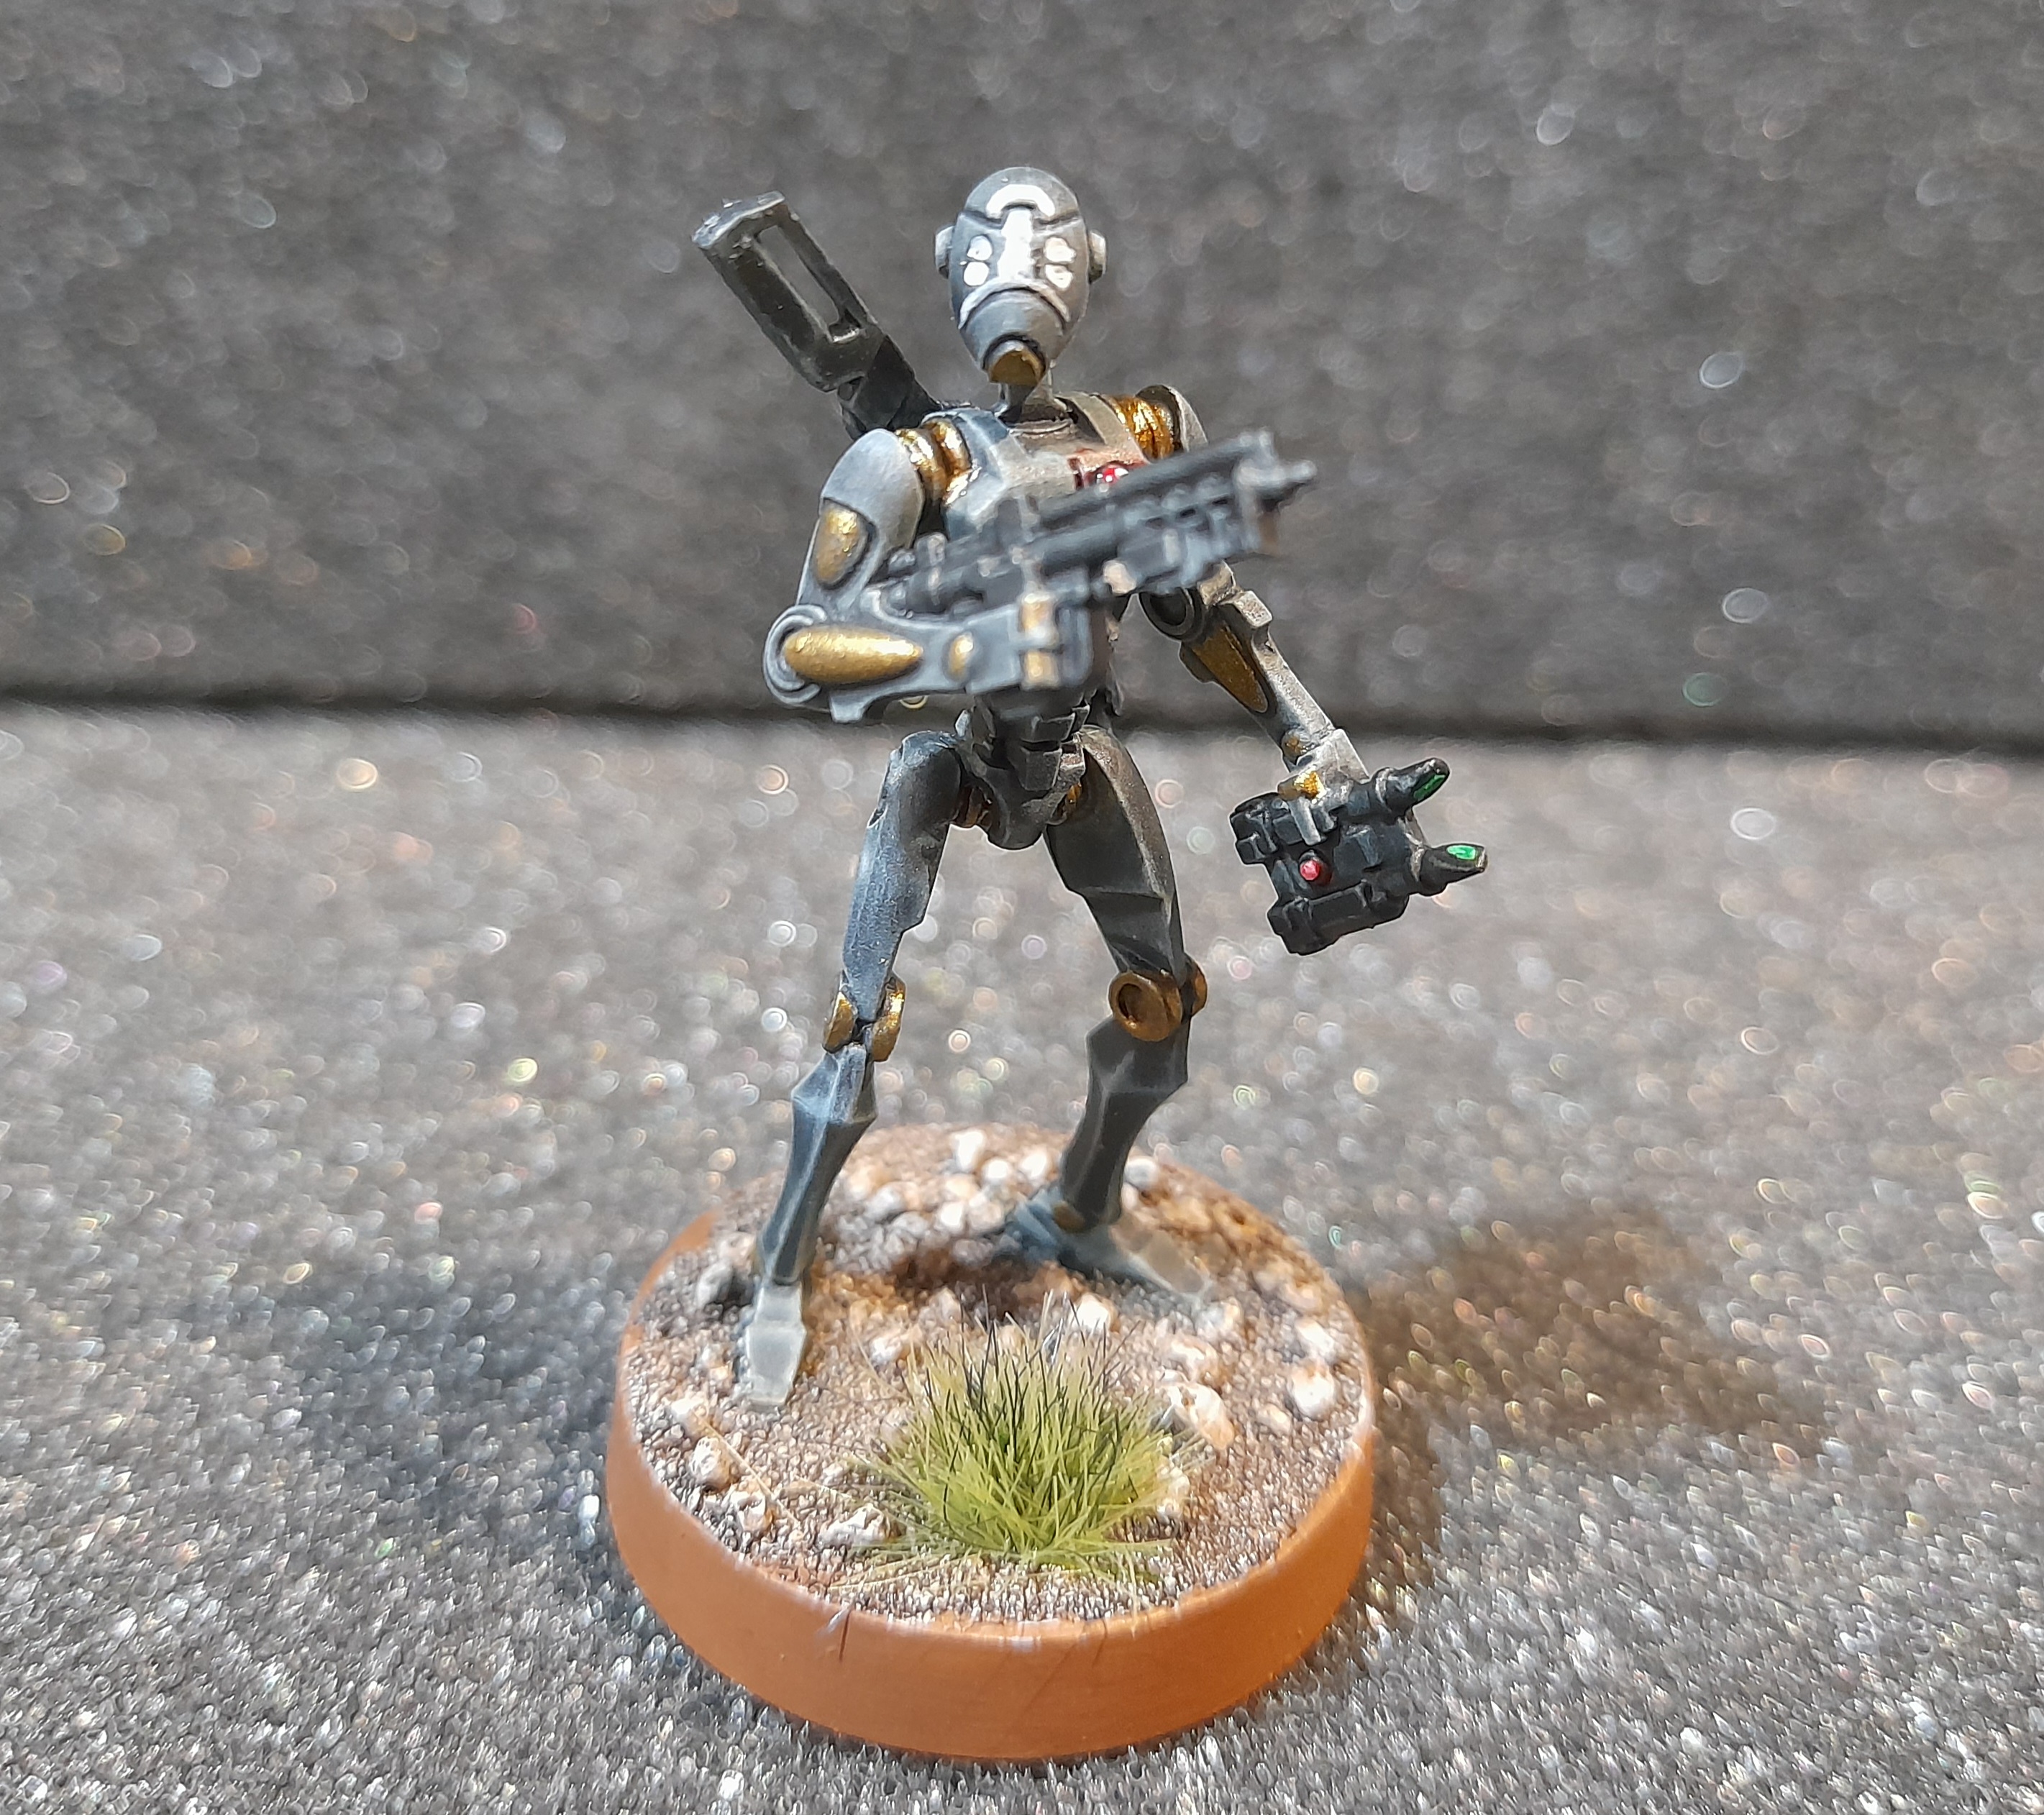
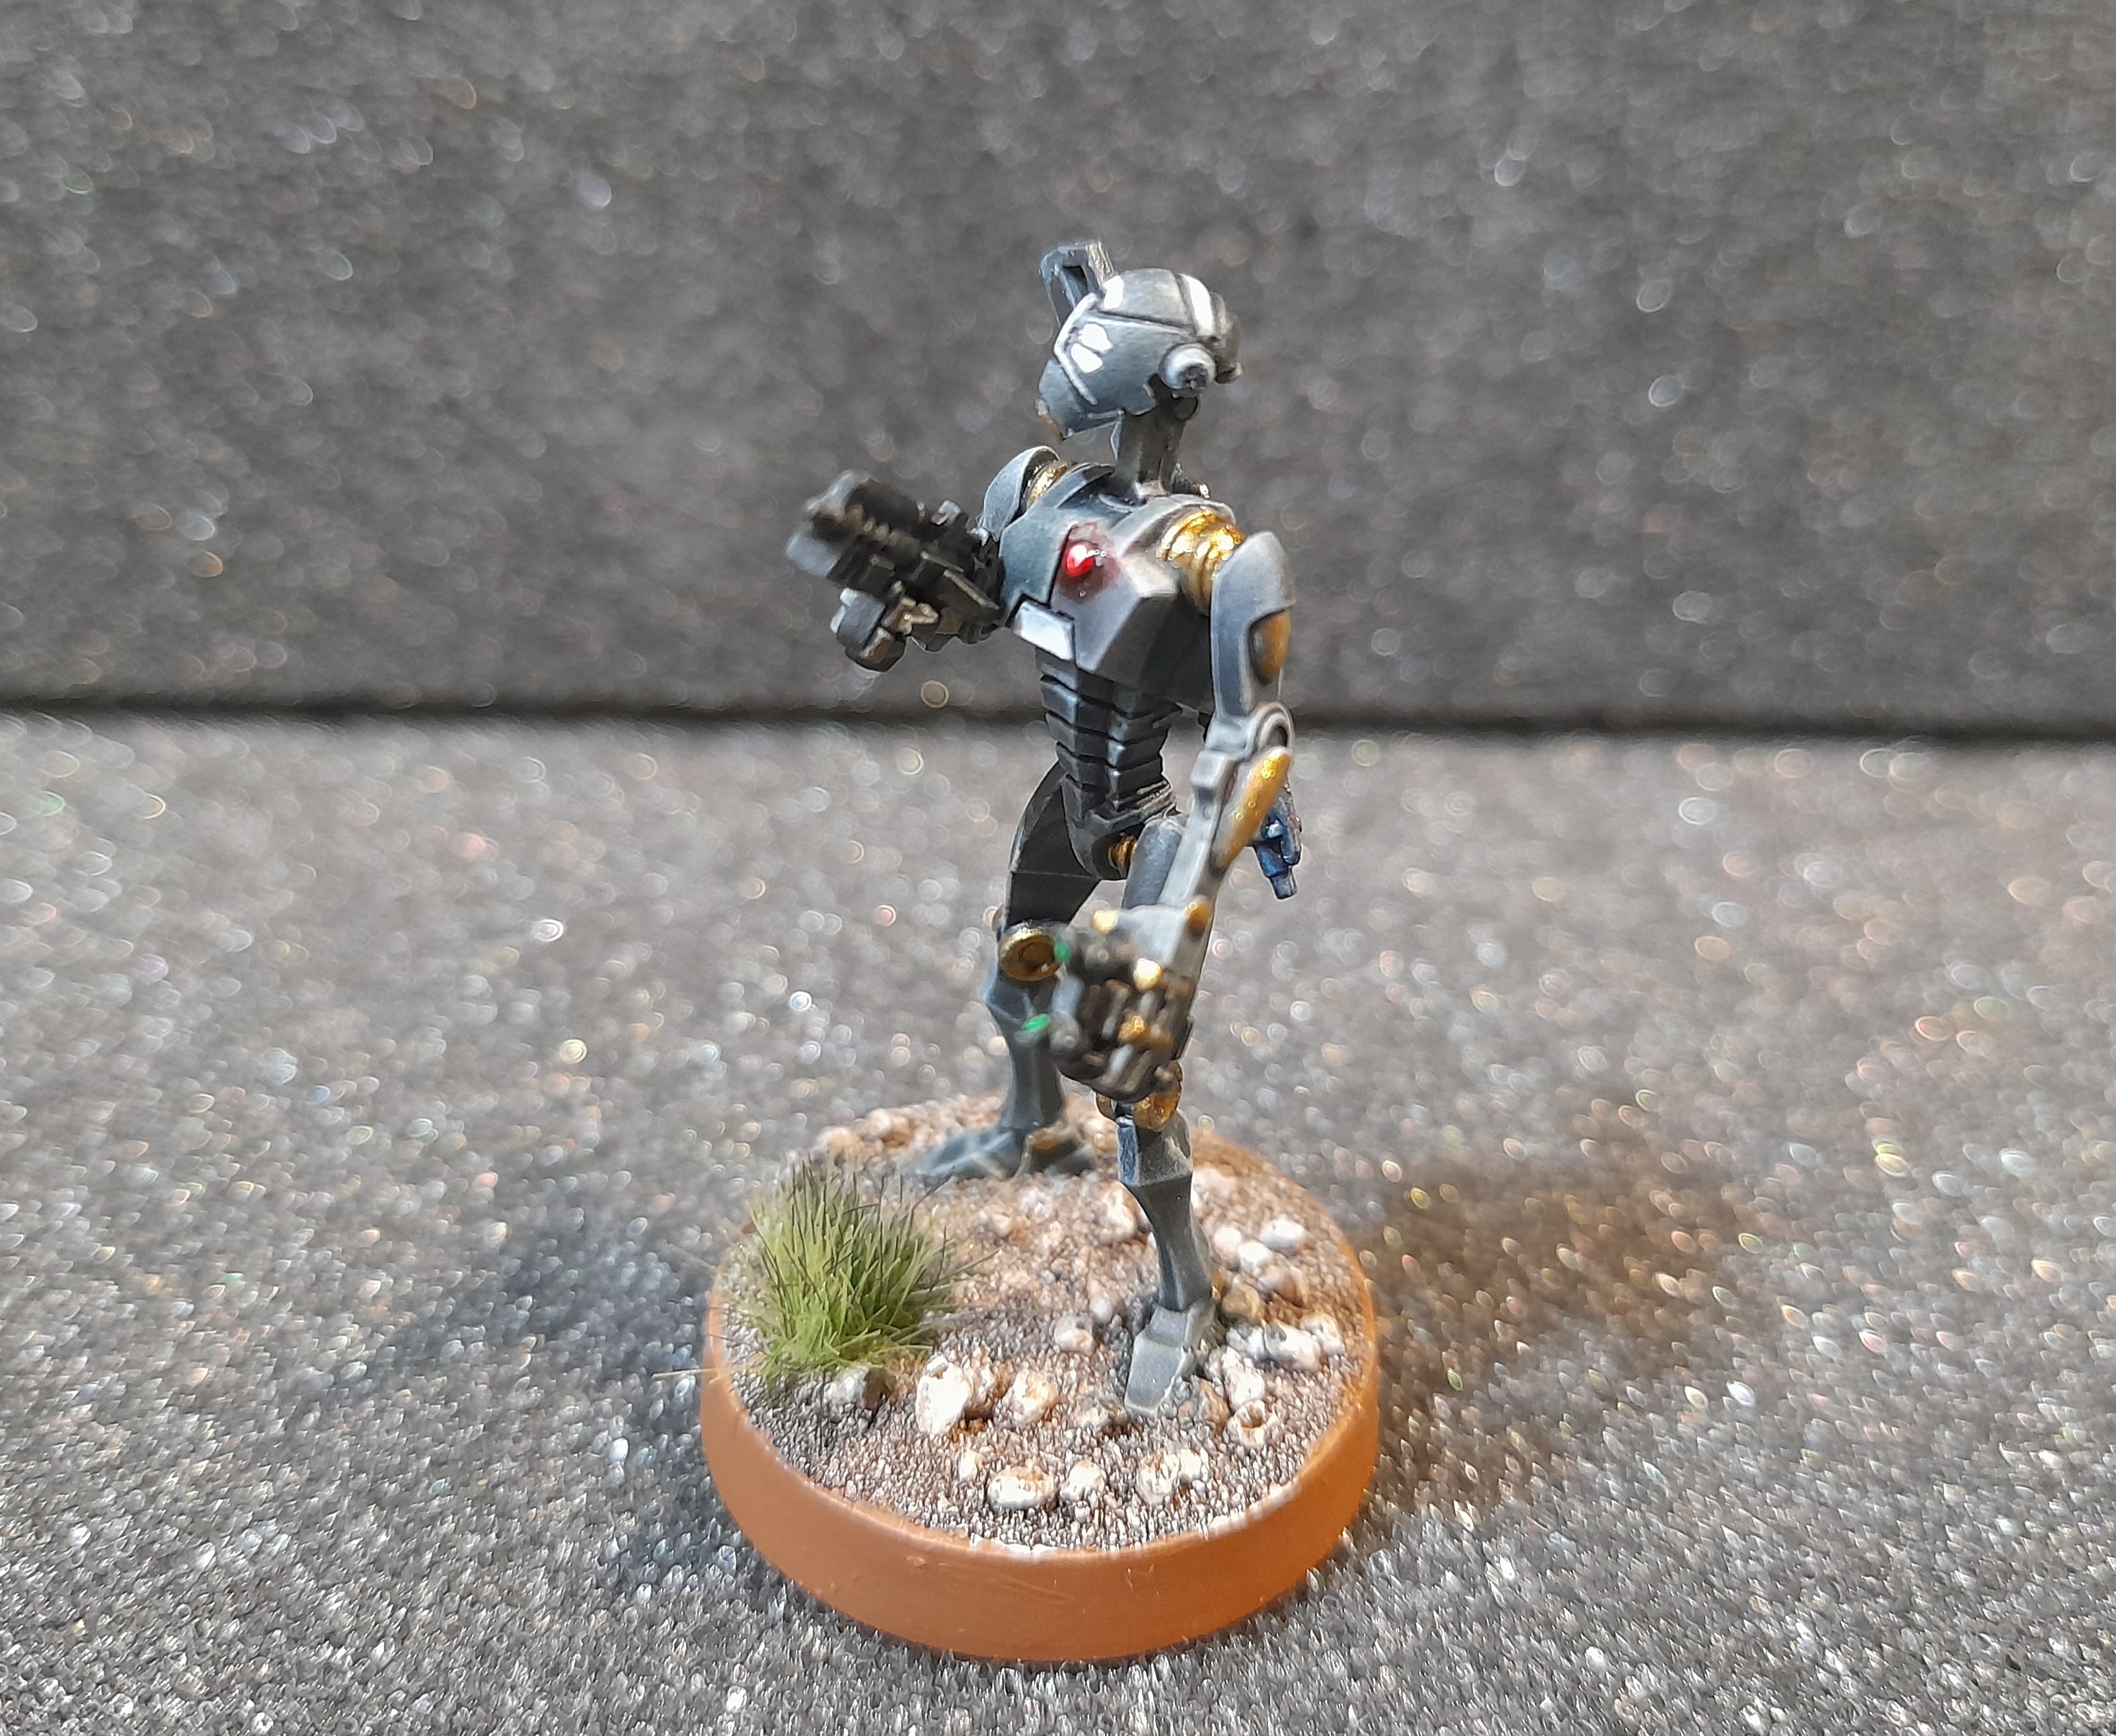
T Series Tactical Droid - 'Travolta Bot'
11th March 2024
The T in T Series stands for Travolta!
As I said in the build stage, when I saw the mini first I just felt I had to do this droid in the style of the iconic image of Travolta in Saturday Night Fever.
After priming with wraithbone I over-sprayed the droid with white. Then I used a thinned Soulblight Grey contrast, drybrushed it white and did some minor highlighting. I decided to paint the ‘flesh’ areas using the contrast mix that I made up for the B1 droids, to tie things in.
Then I attempted the black shirt, cuffs, shoes and hair. Followed by the gun and applying gloss to the shoes and hair. The eyes had some yellow added, but cant really be seen very well.
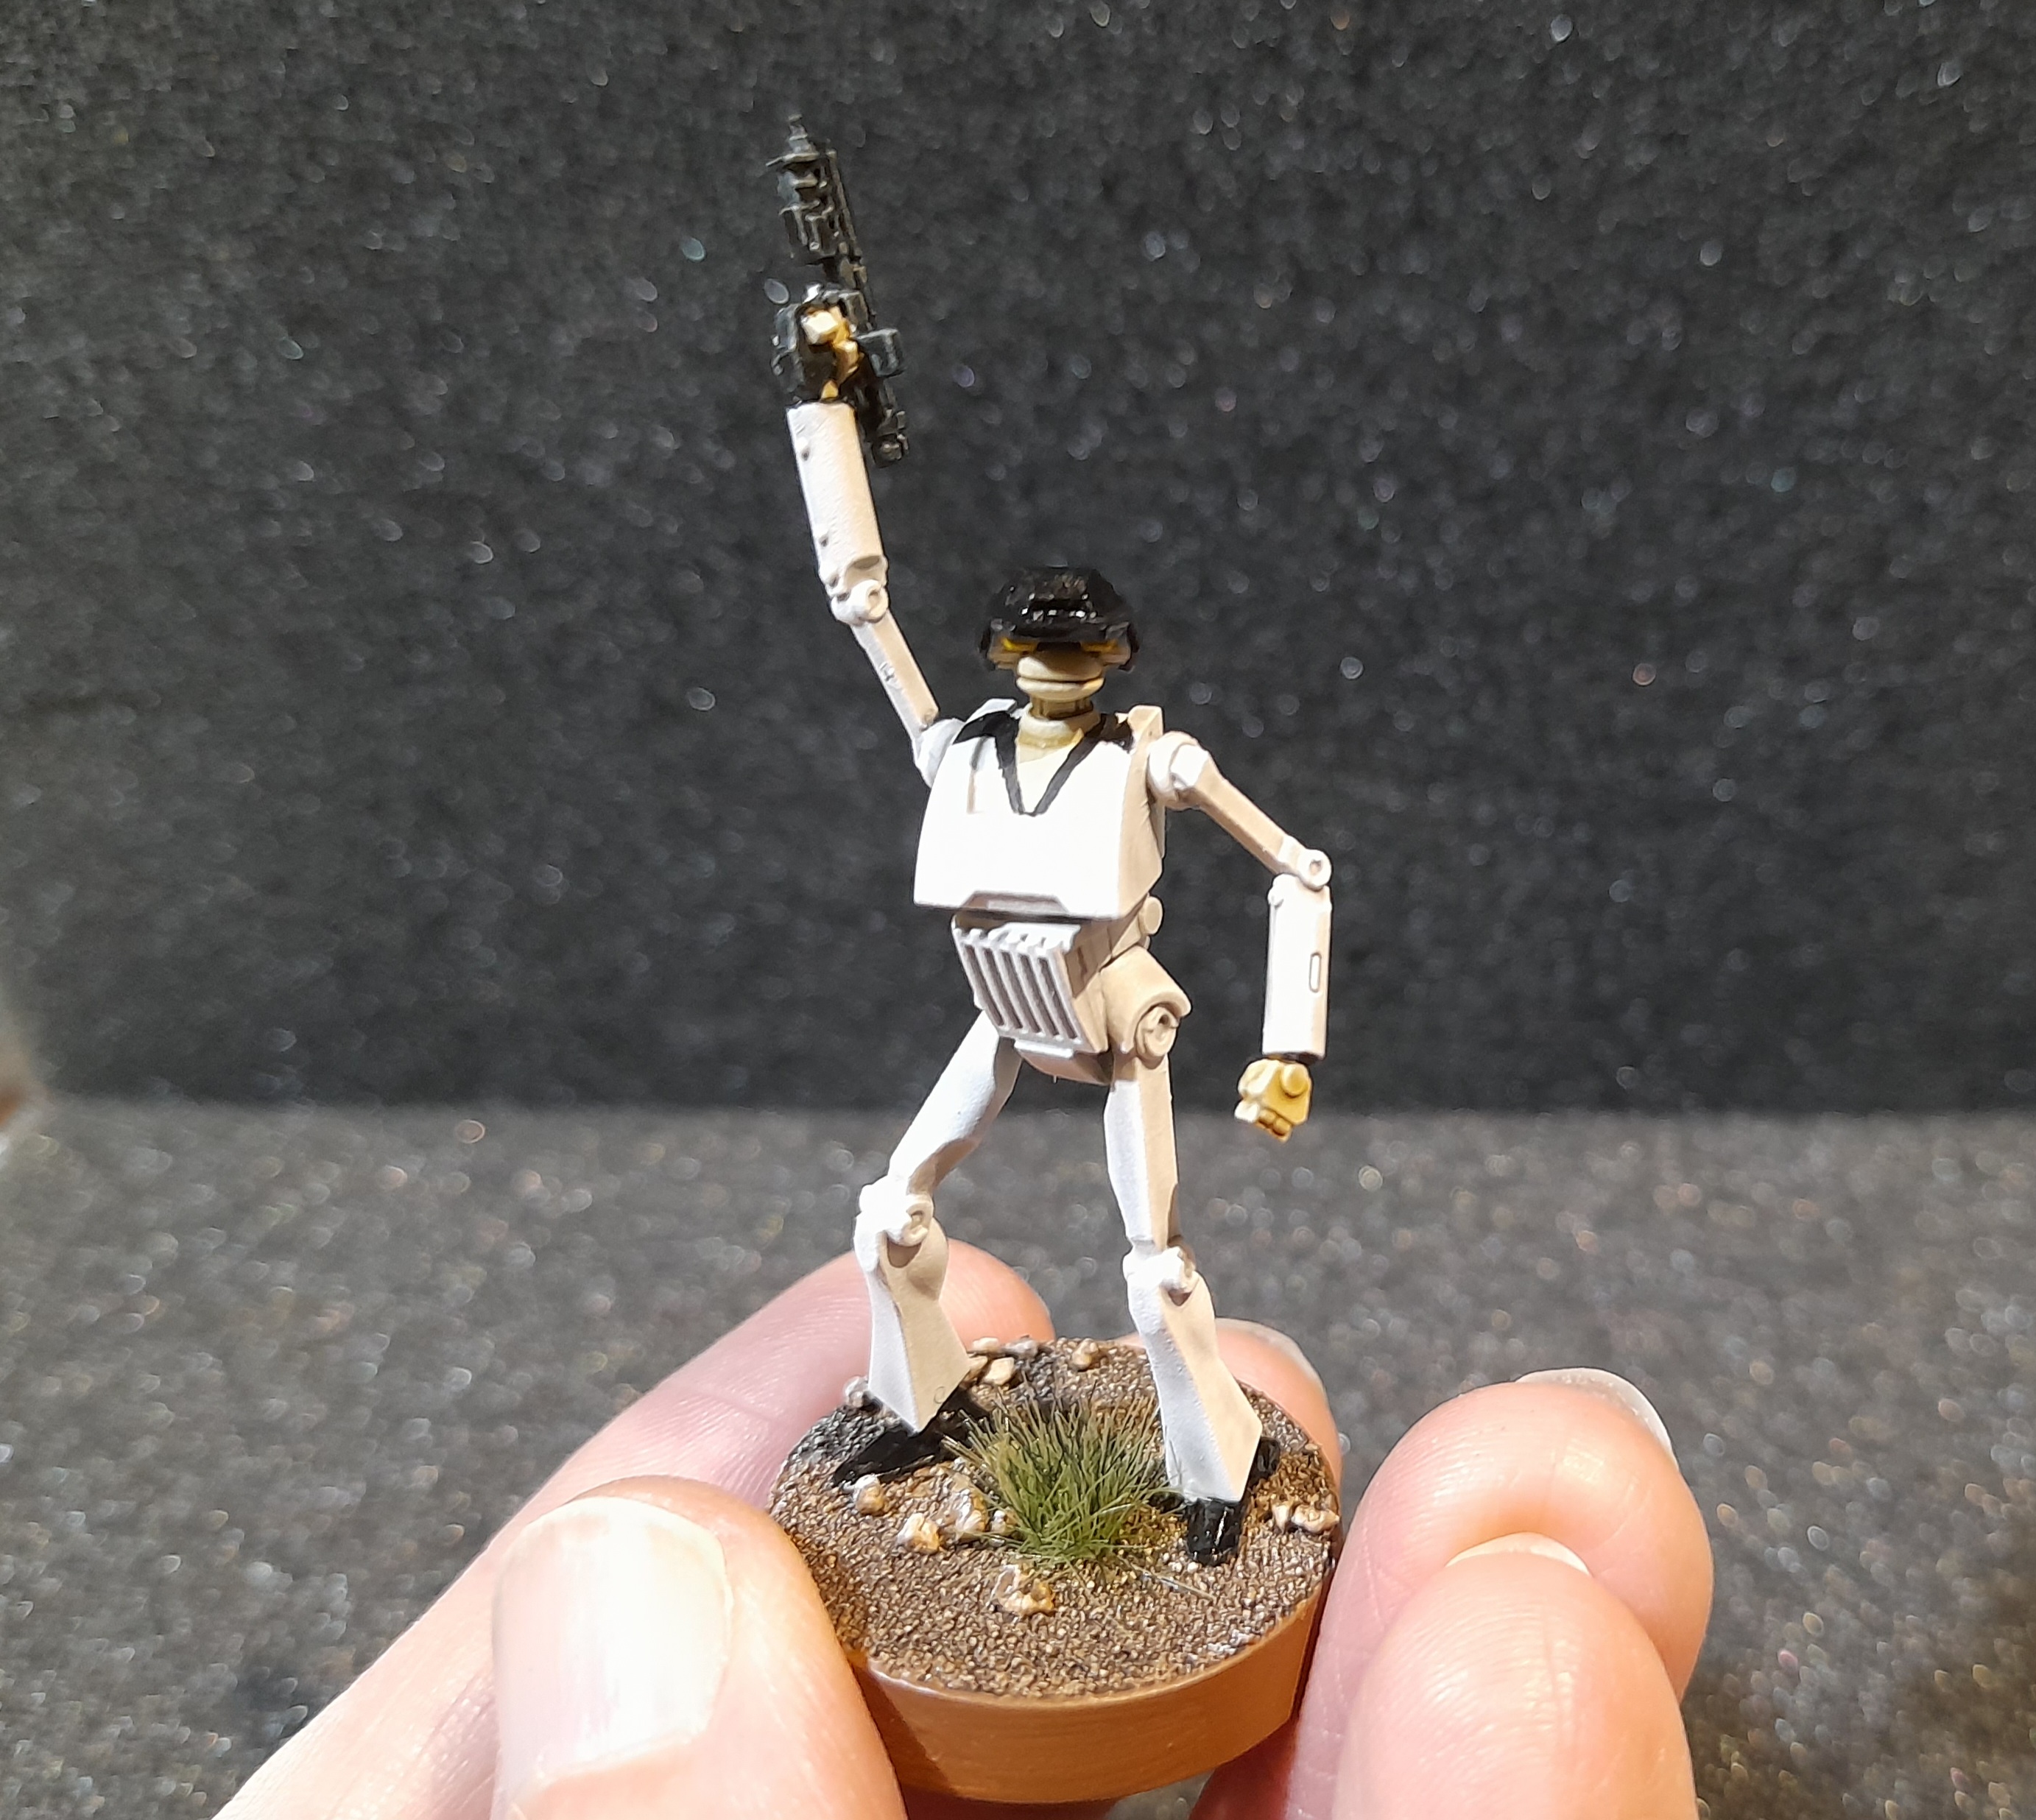

Hopefully it came out ok……
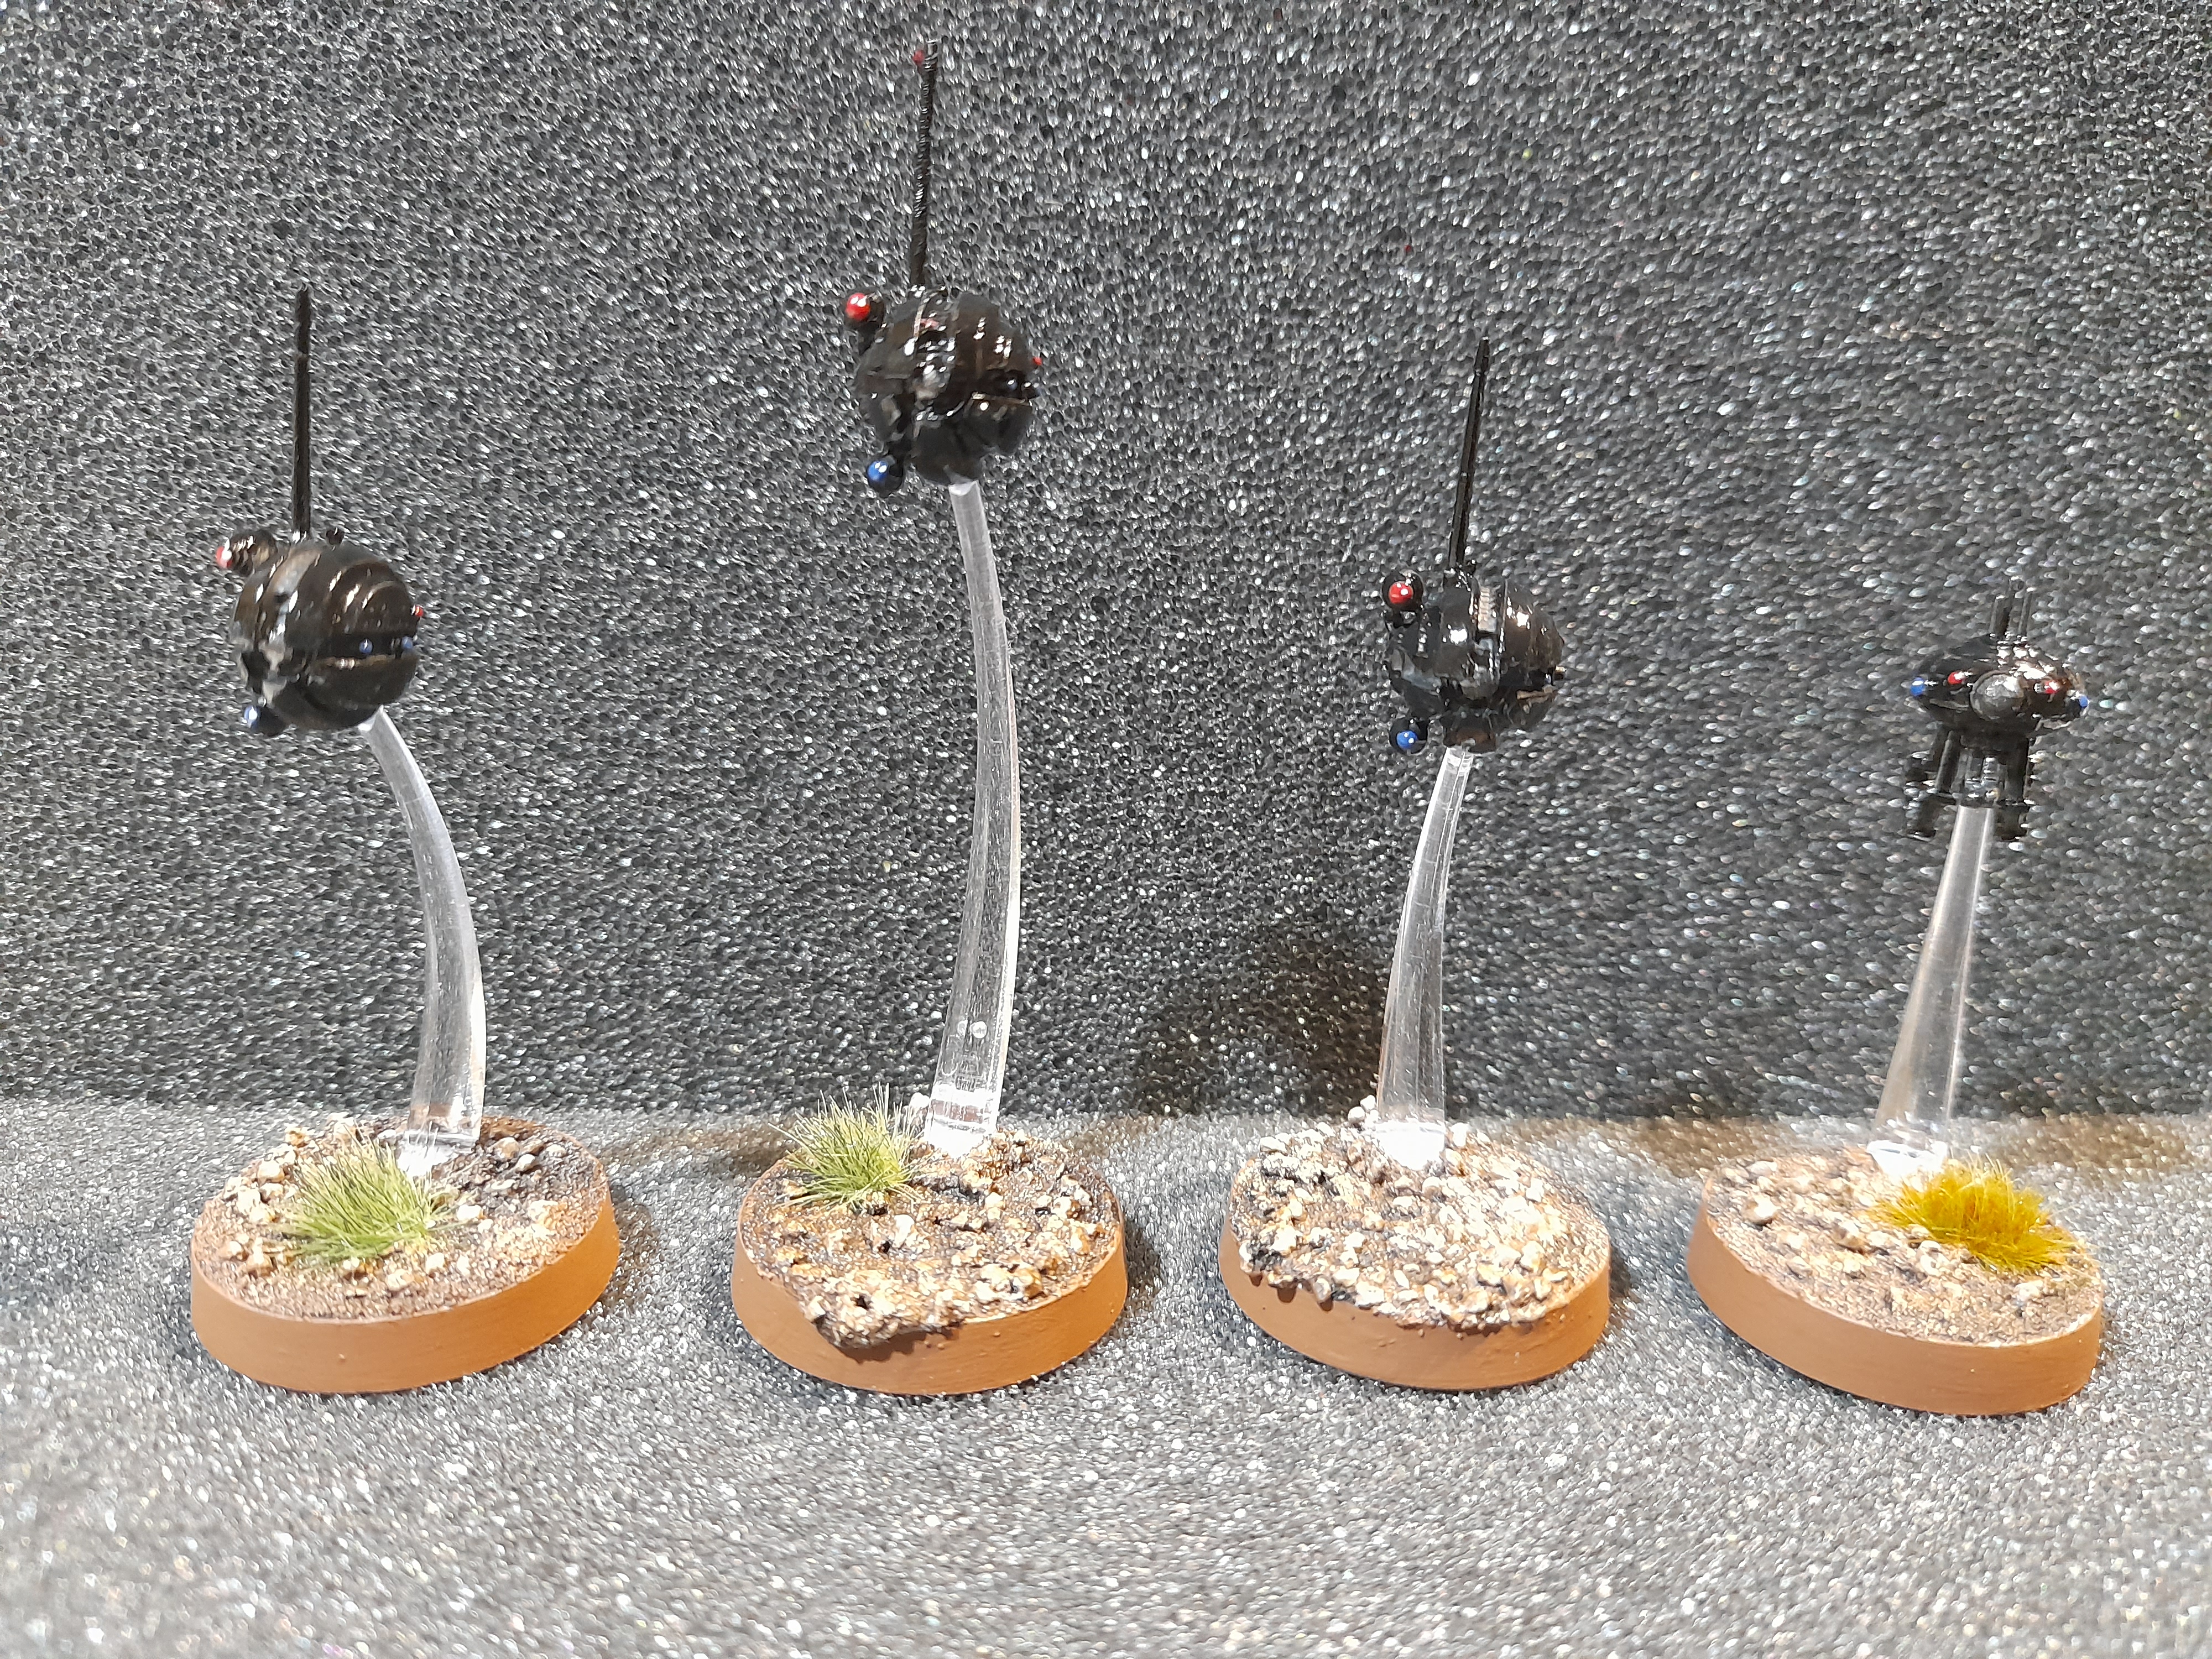
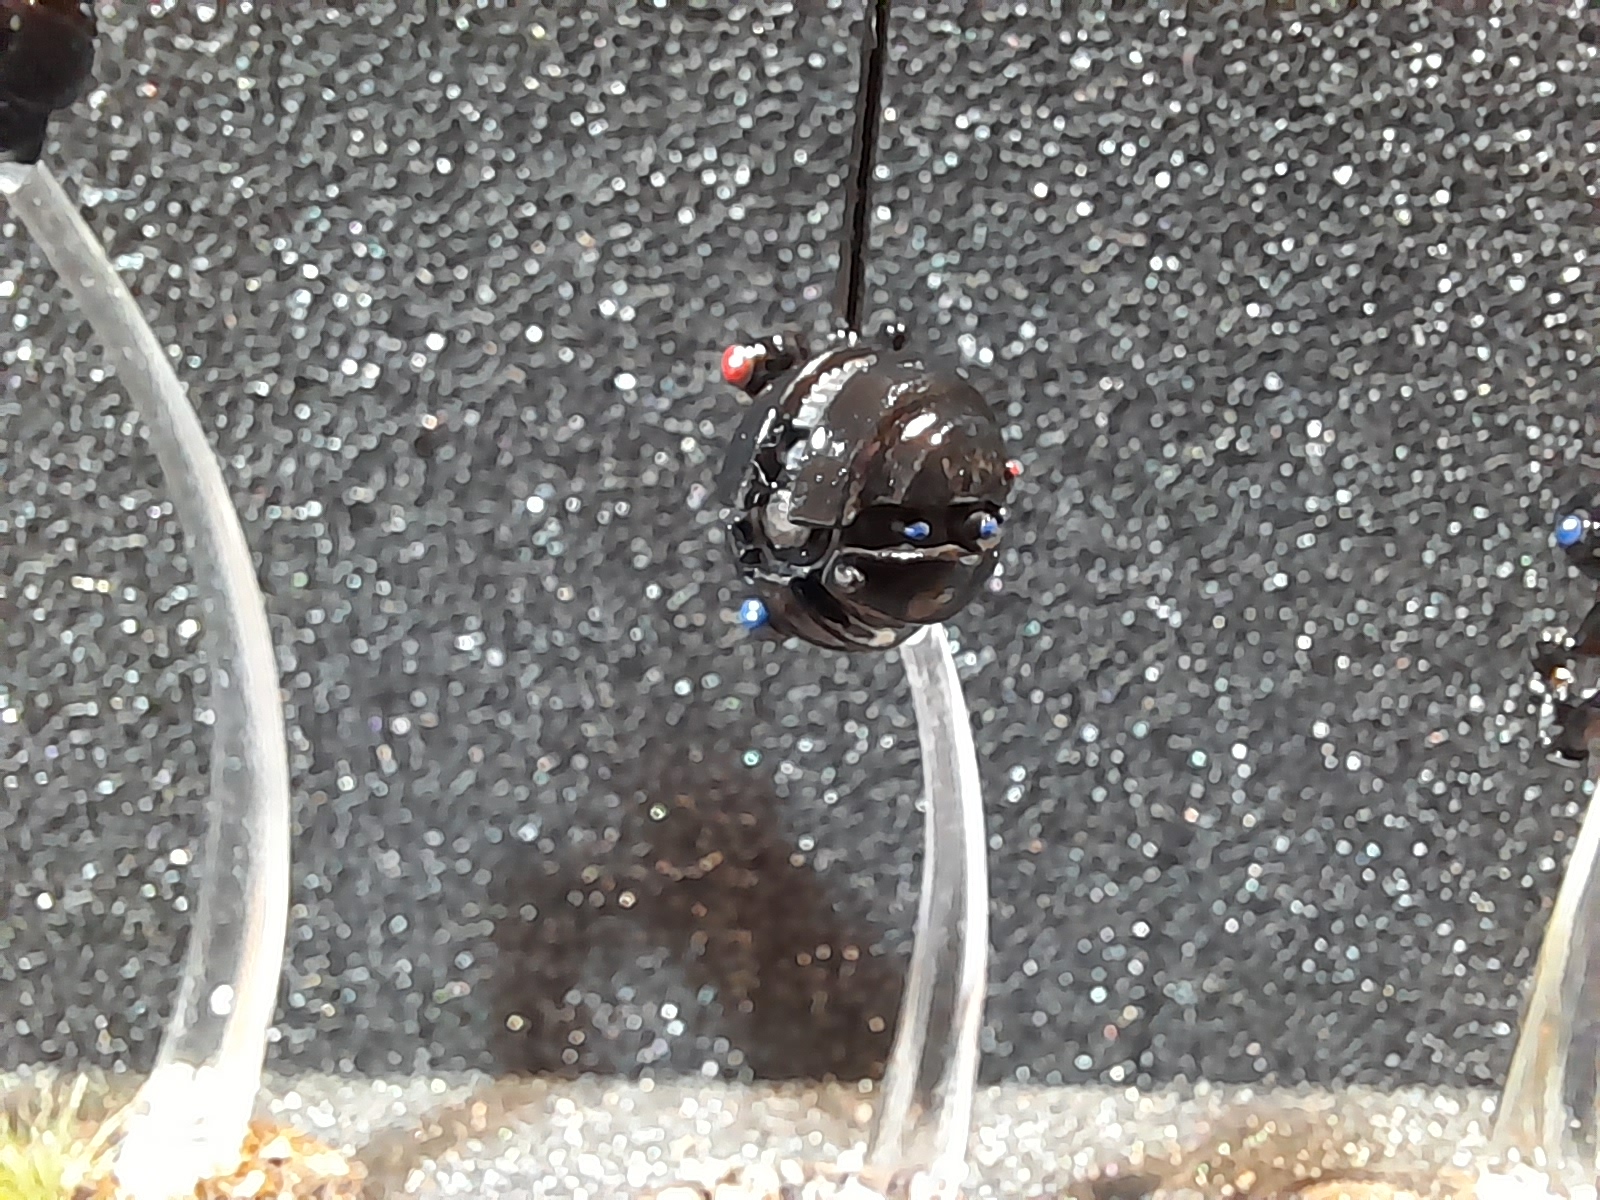
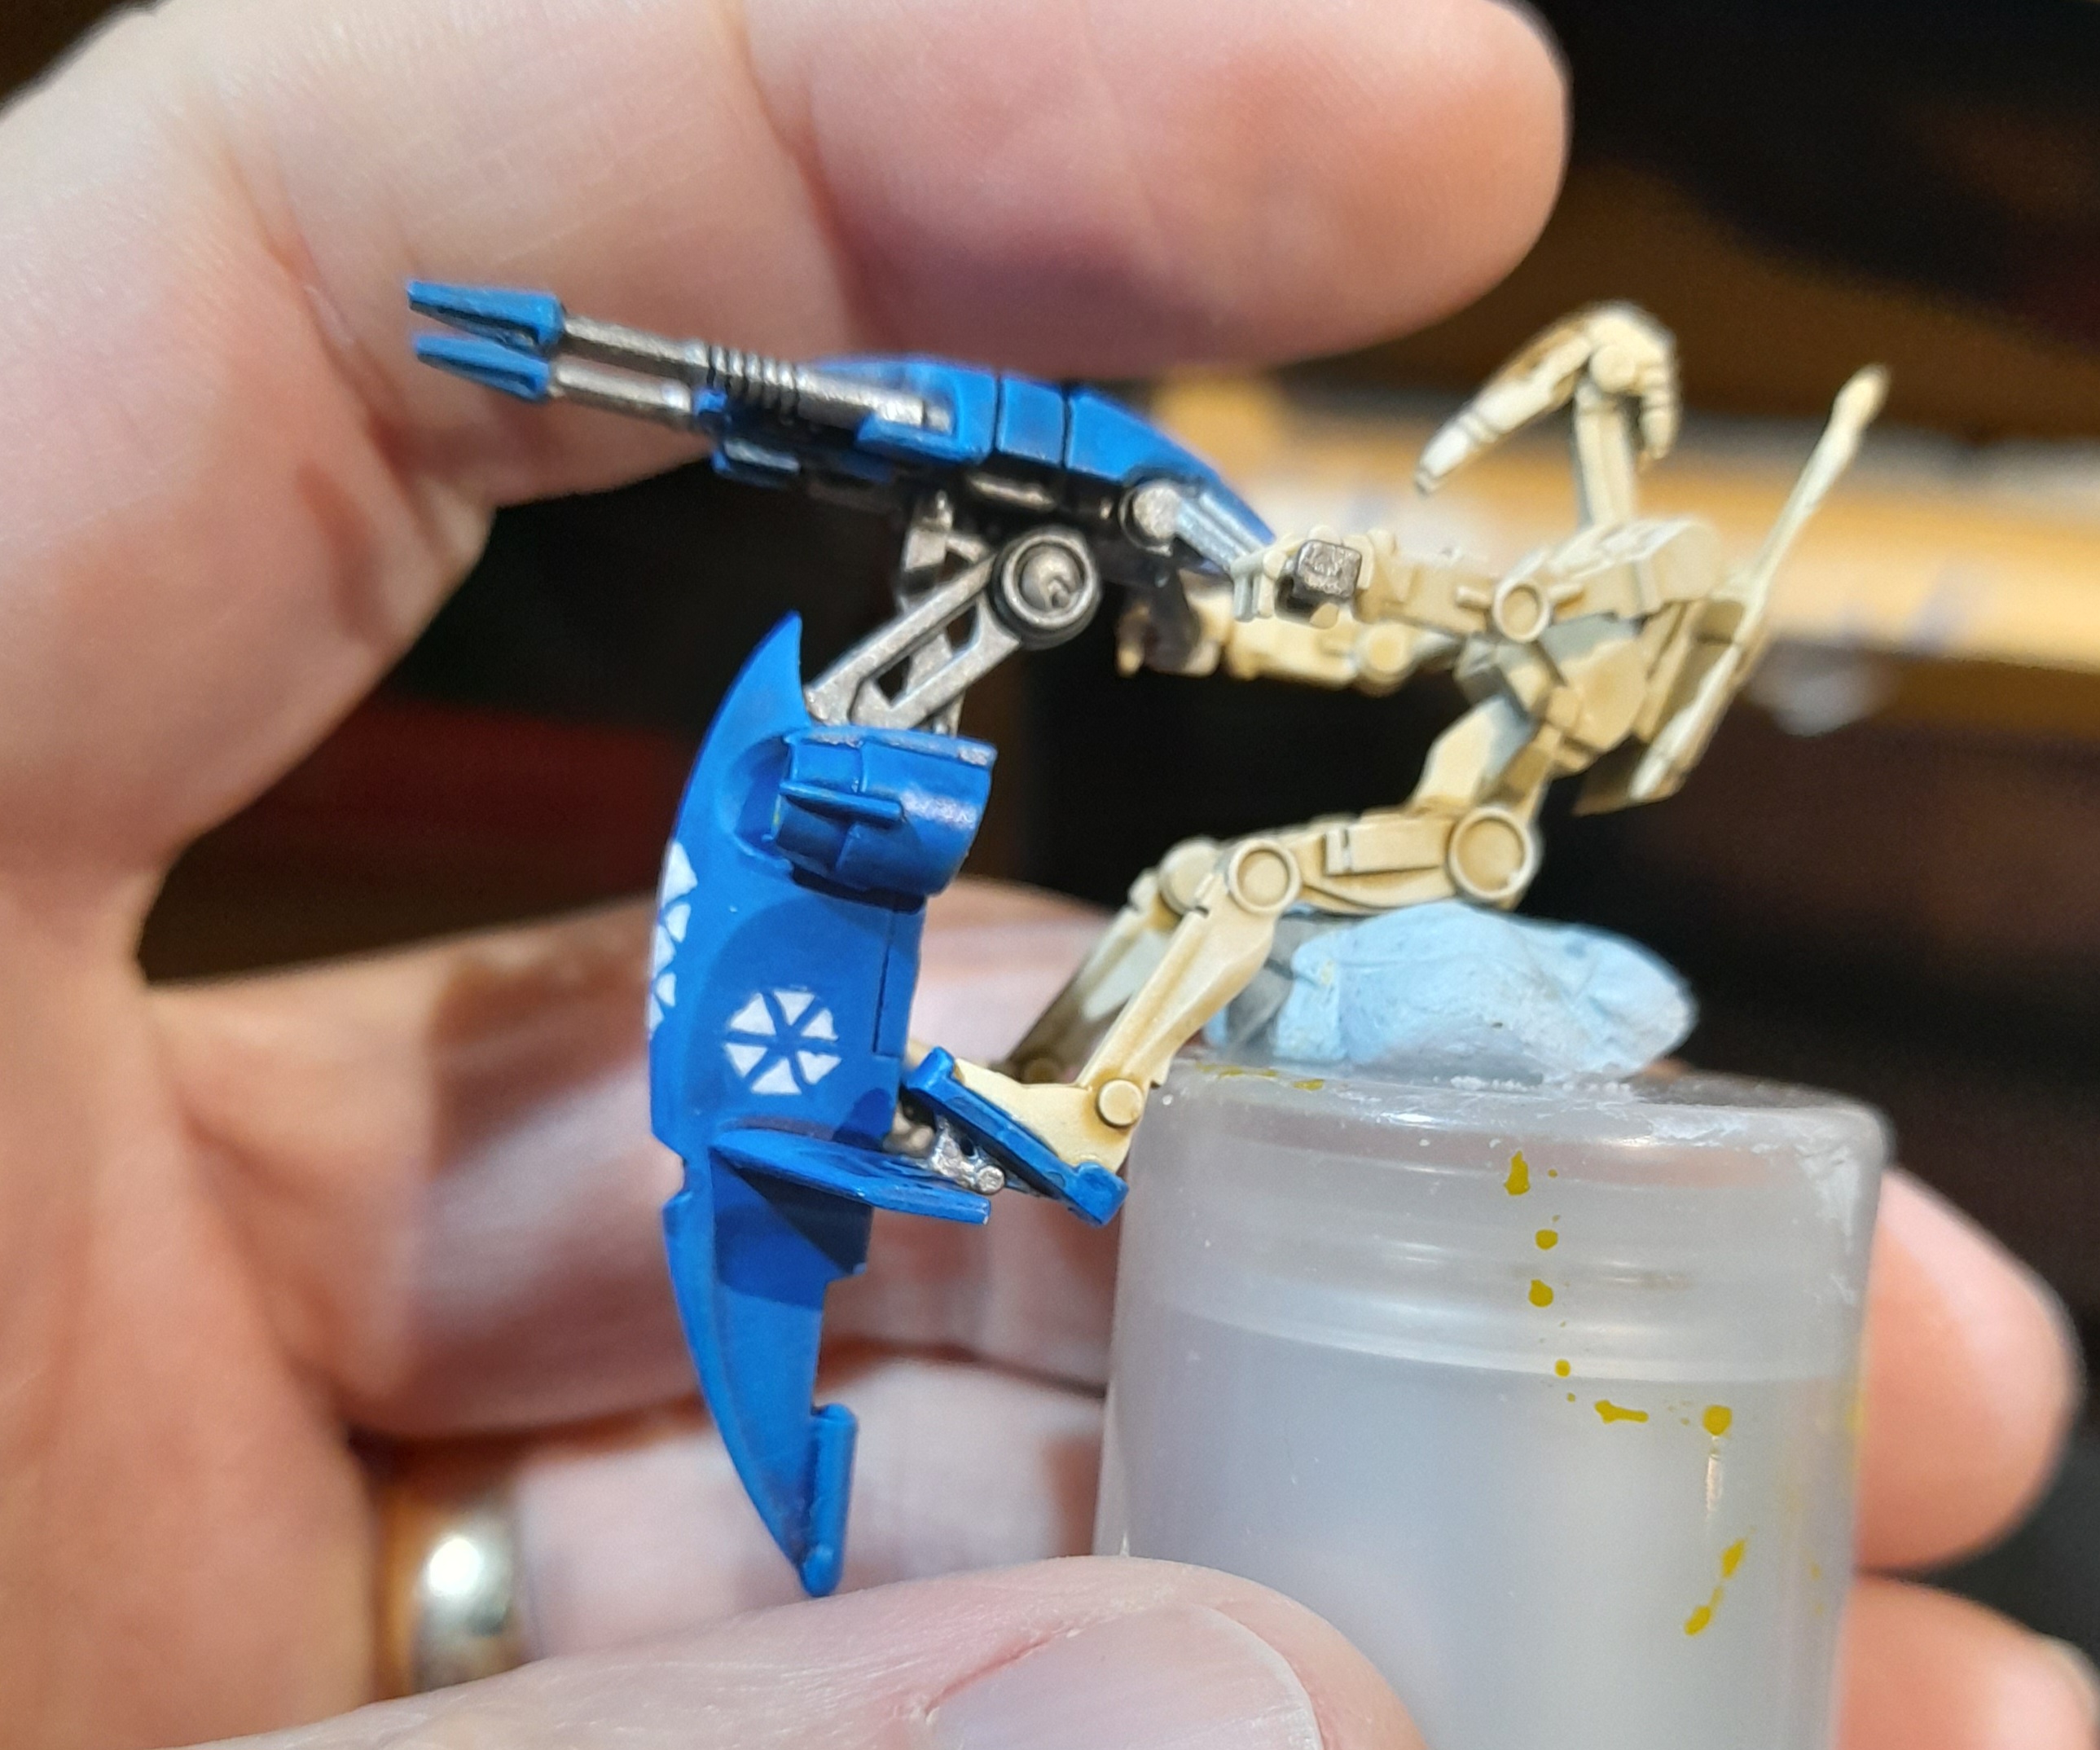
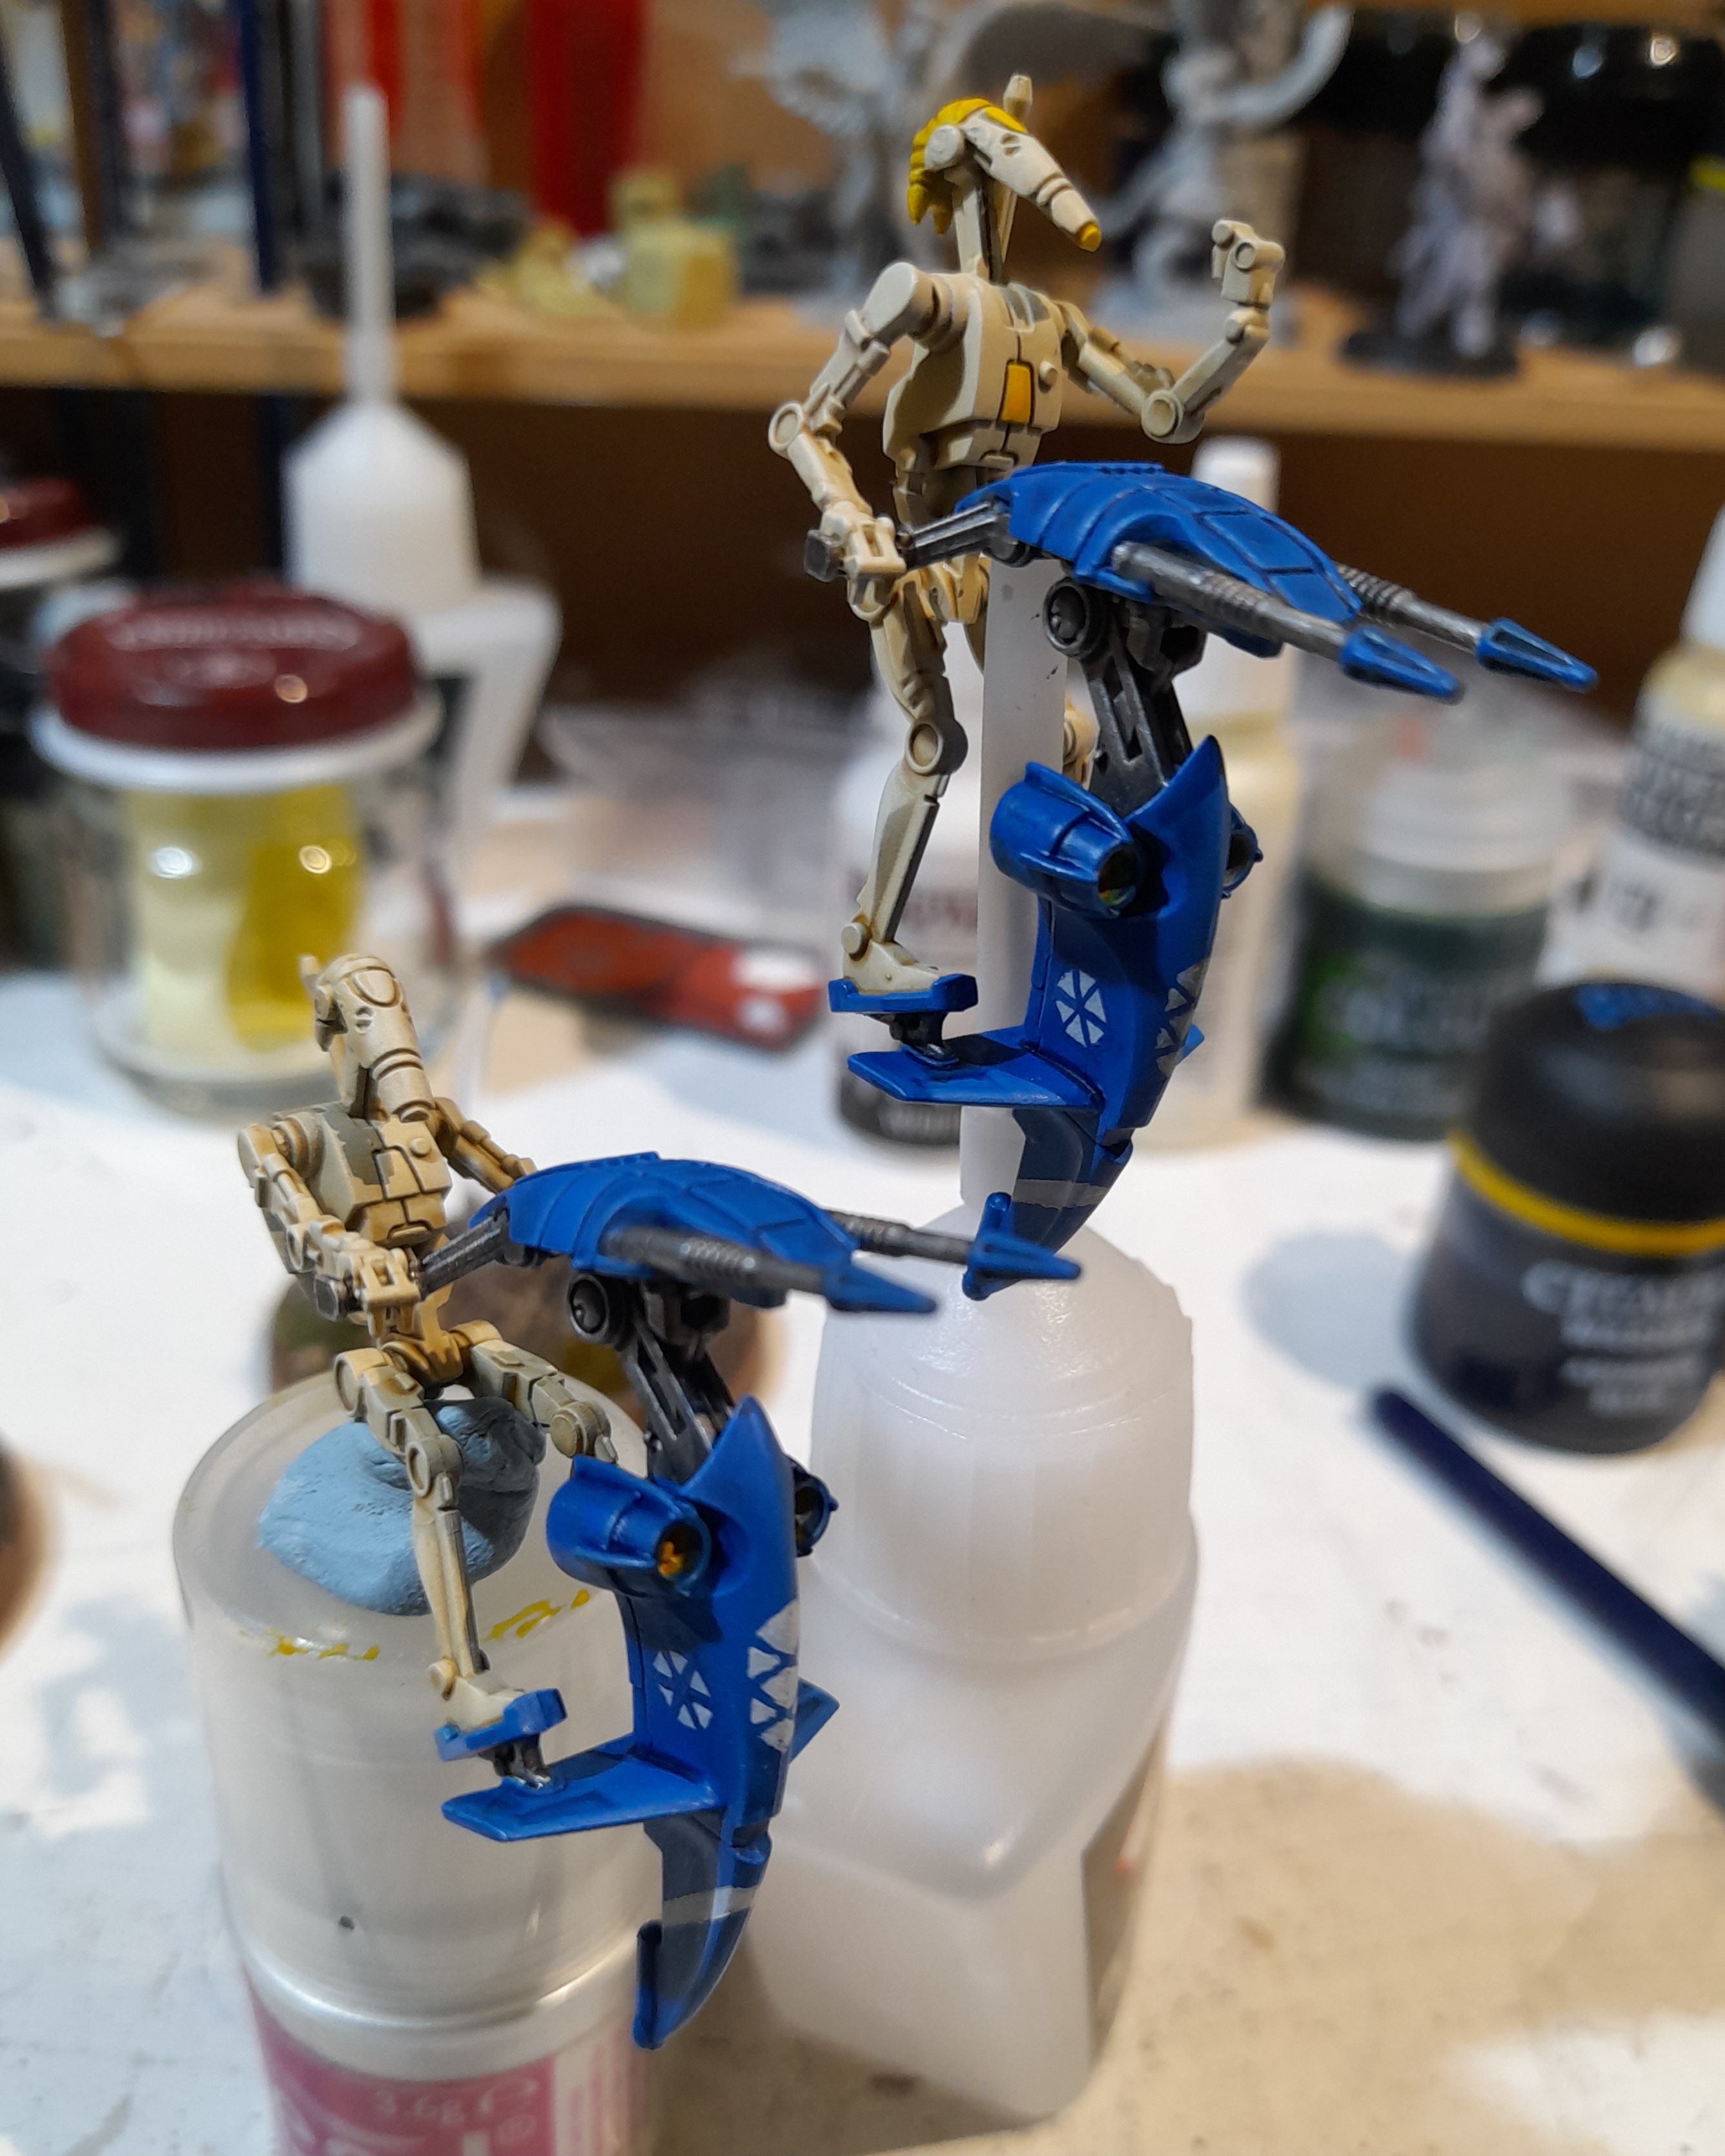
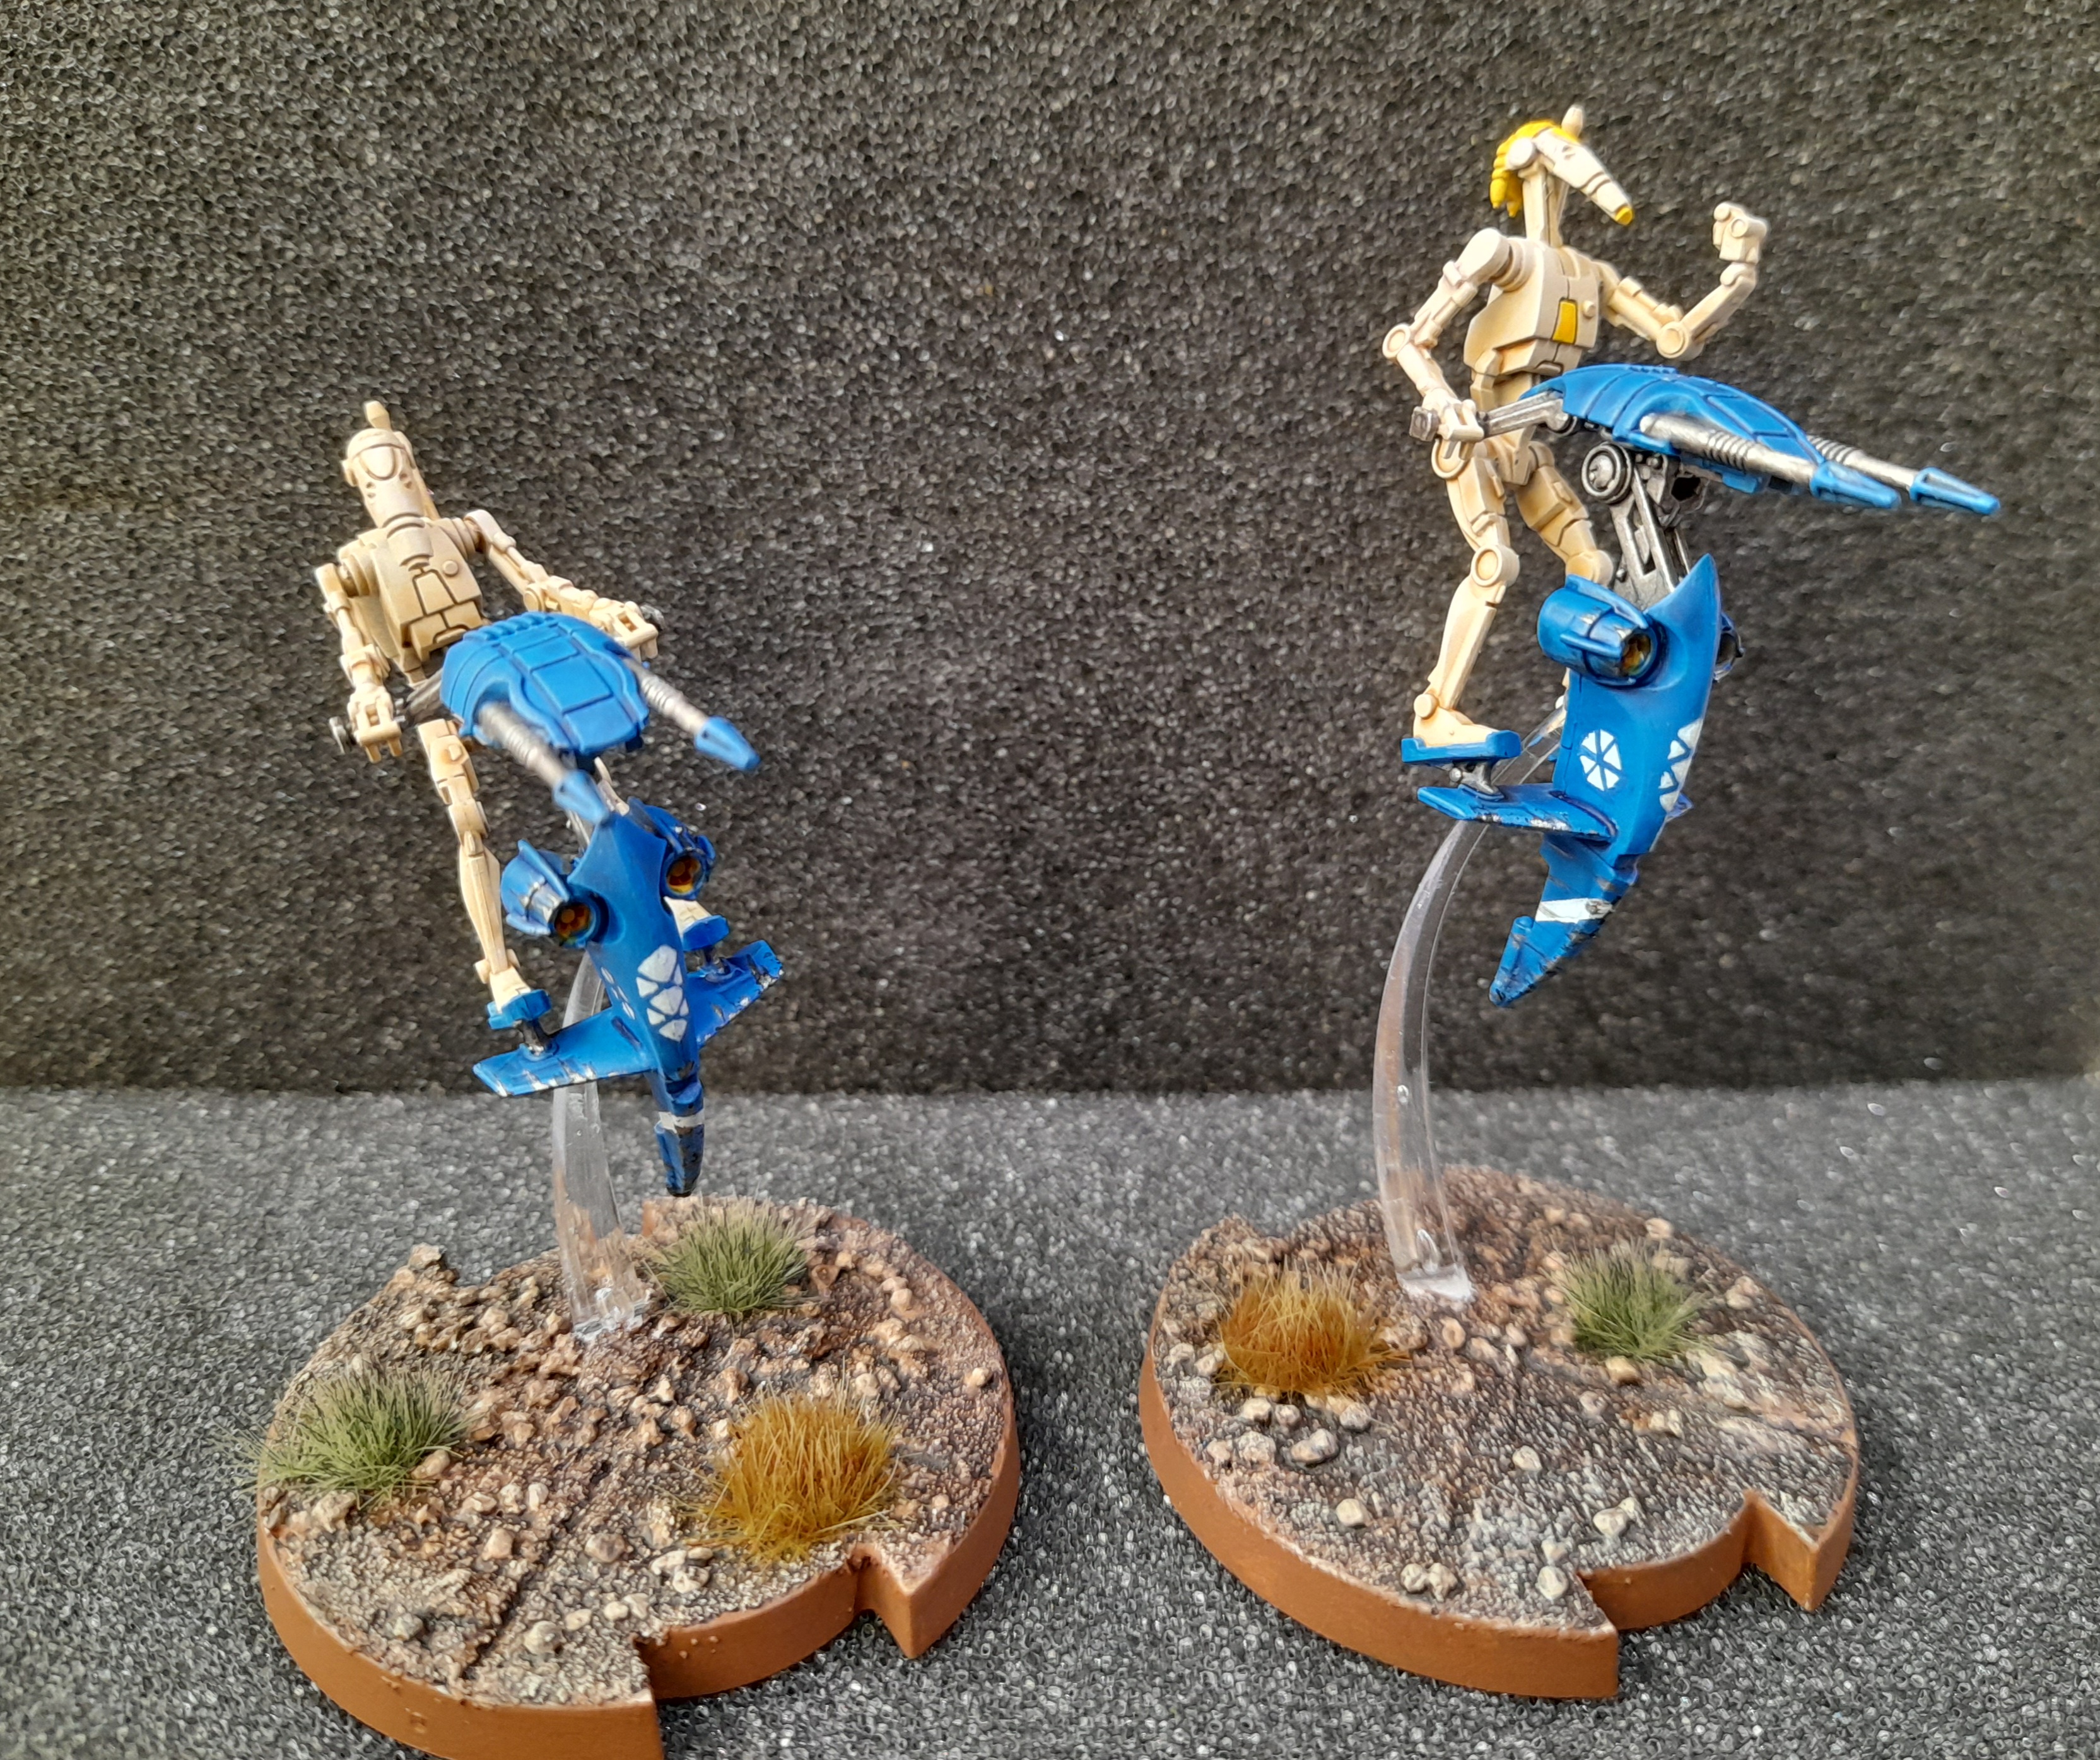
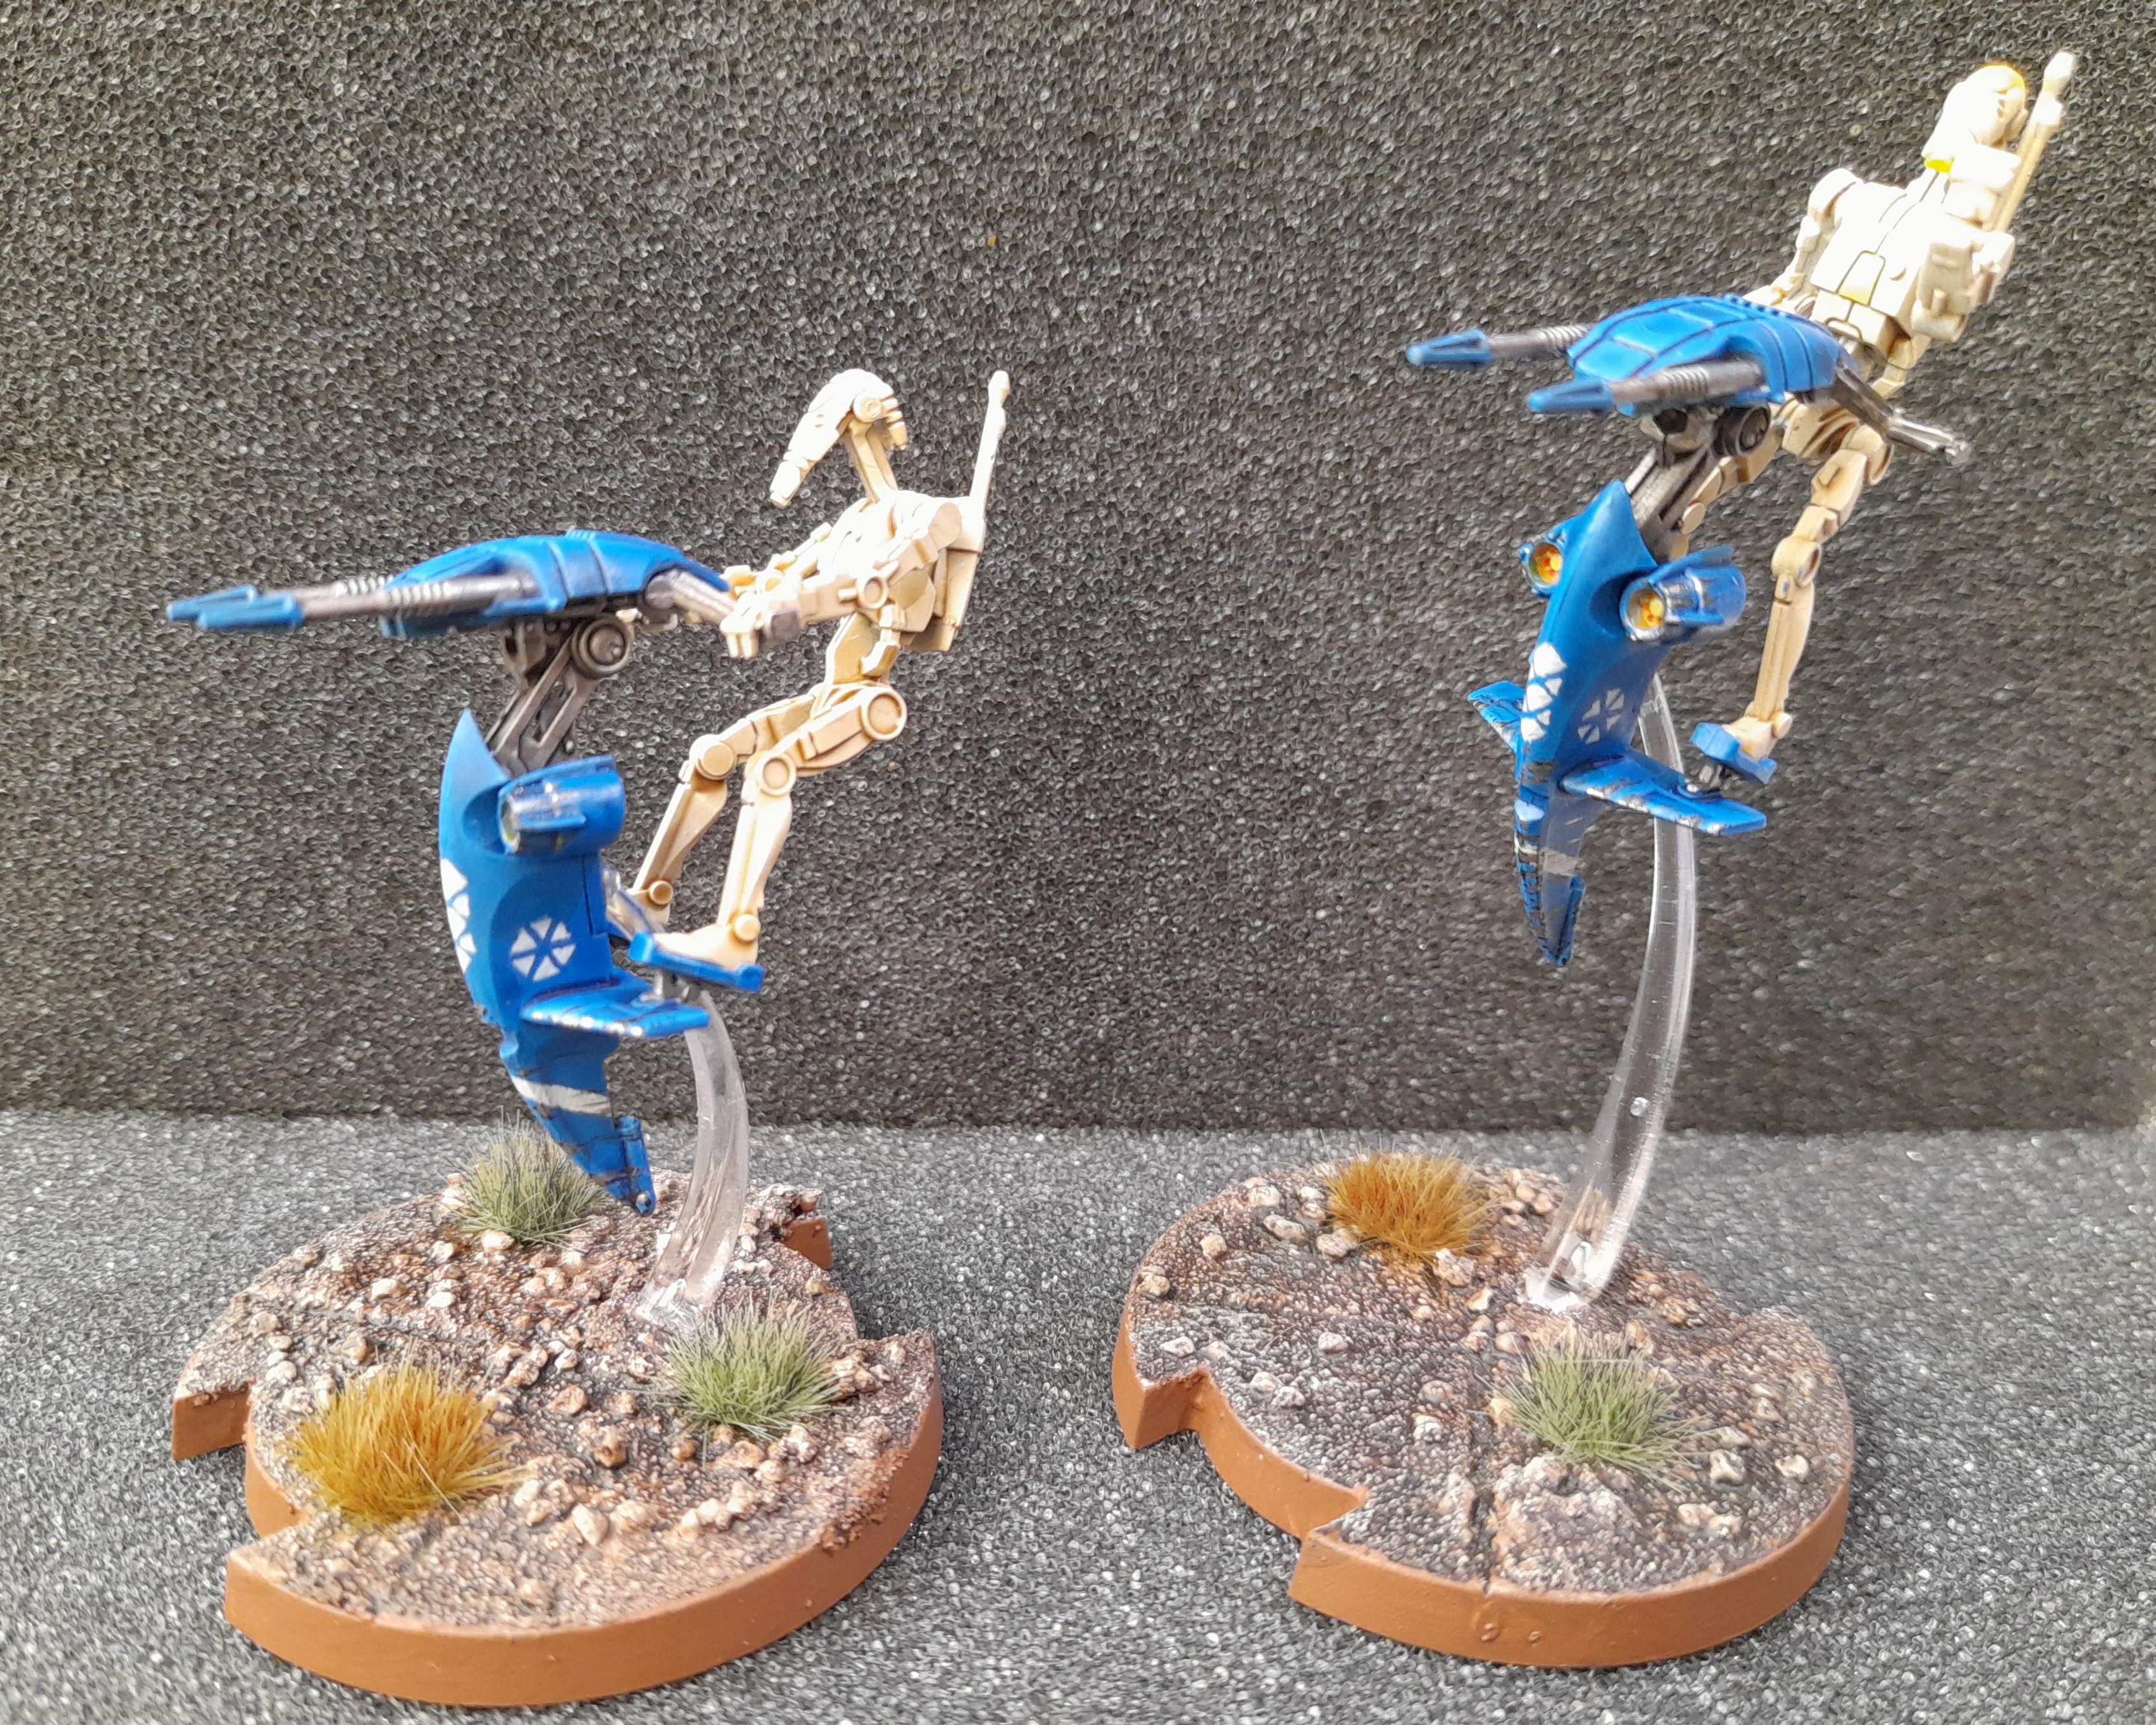
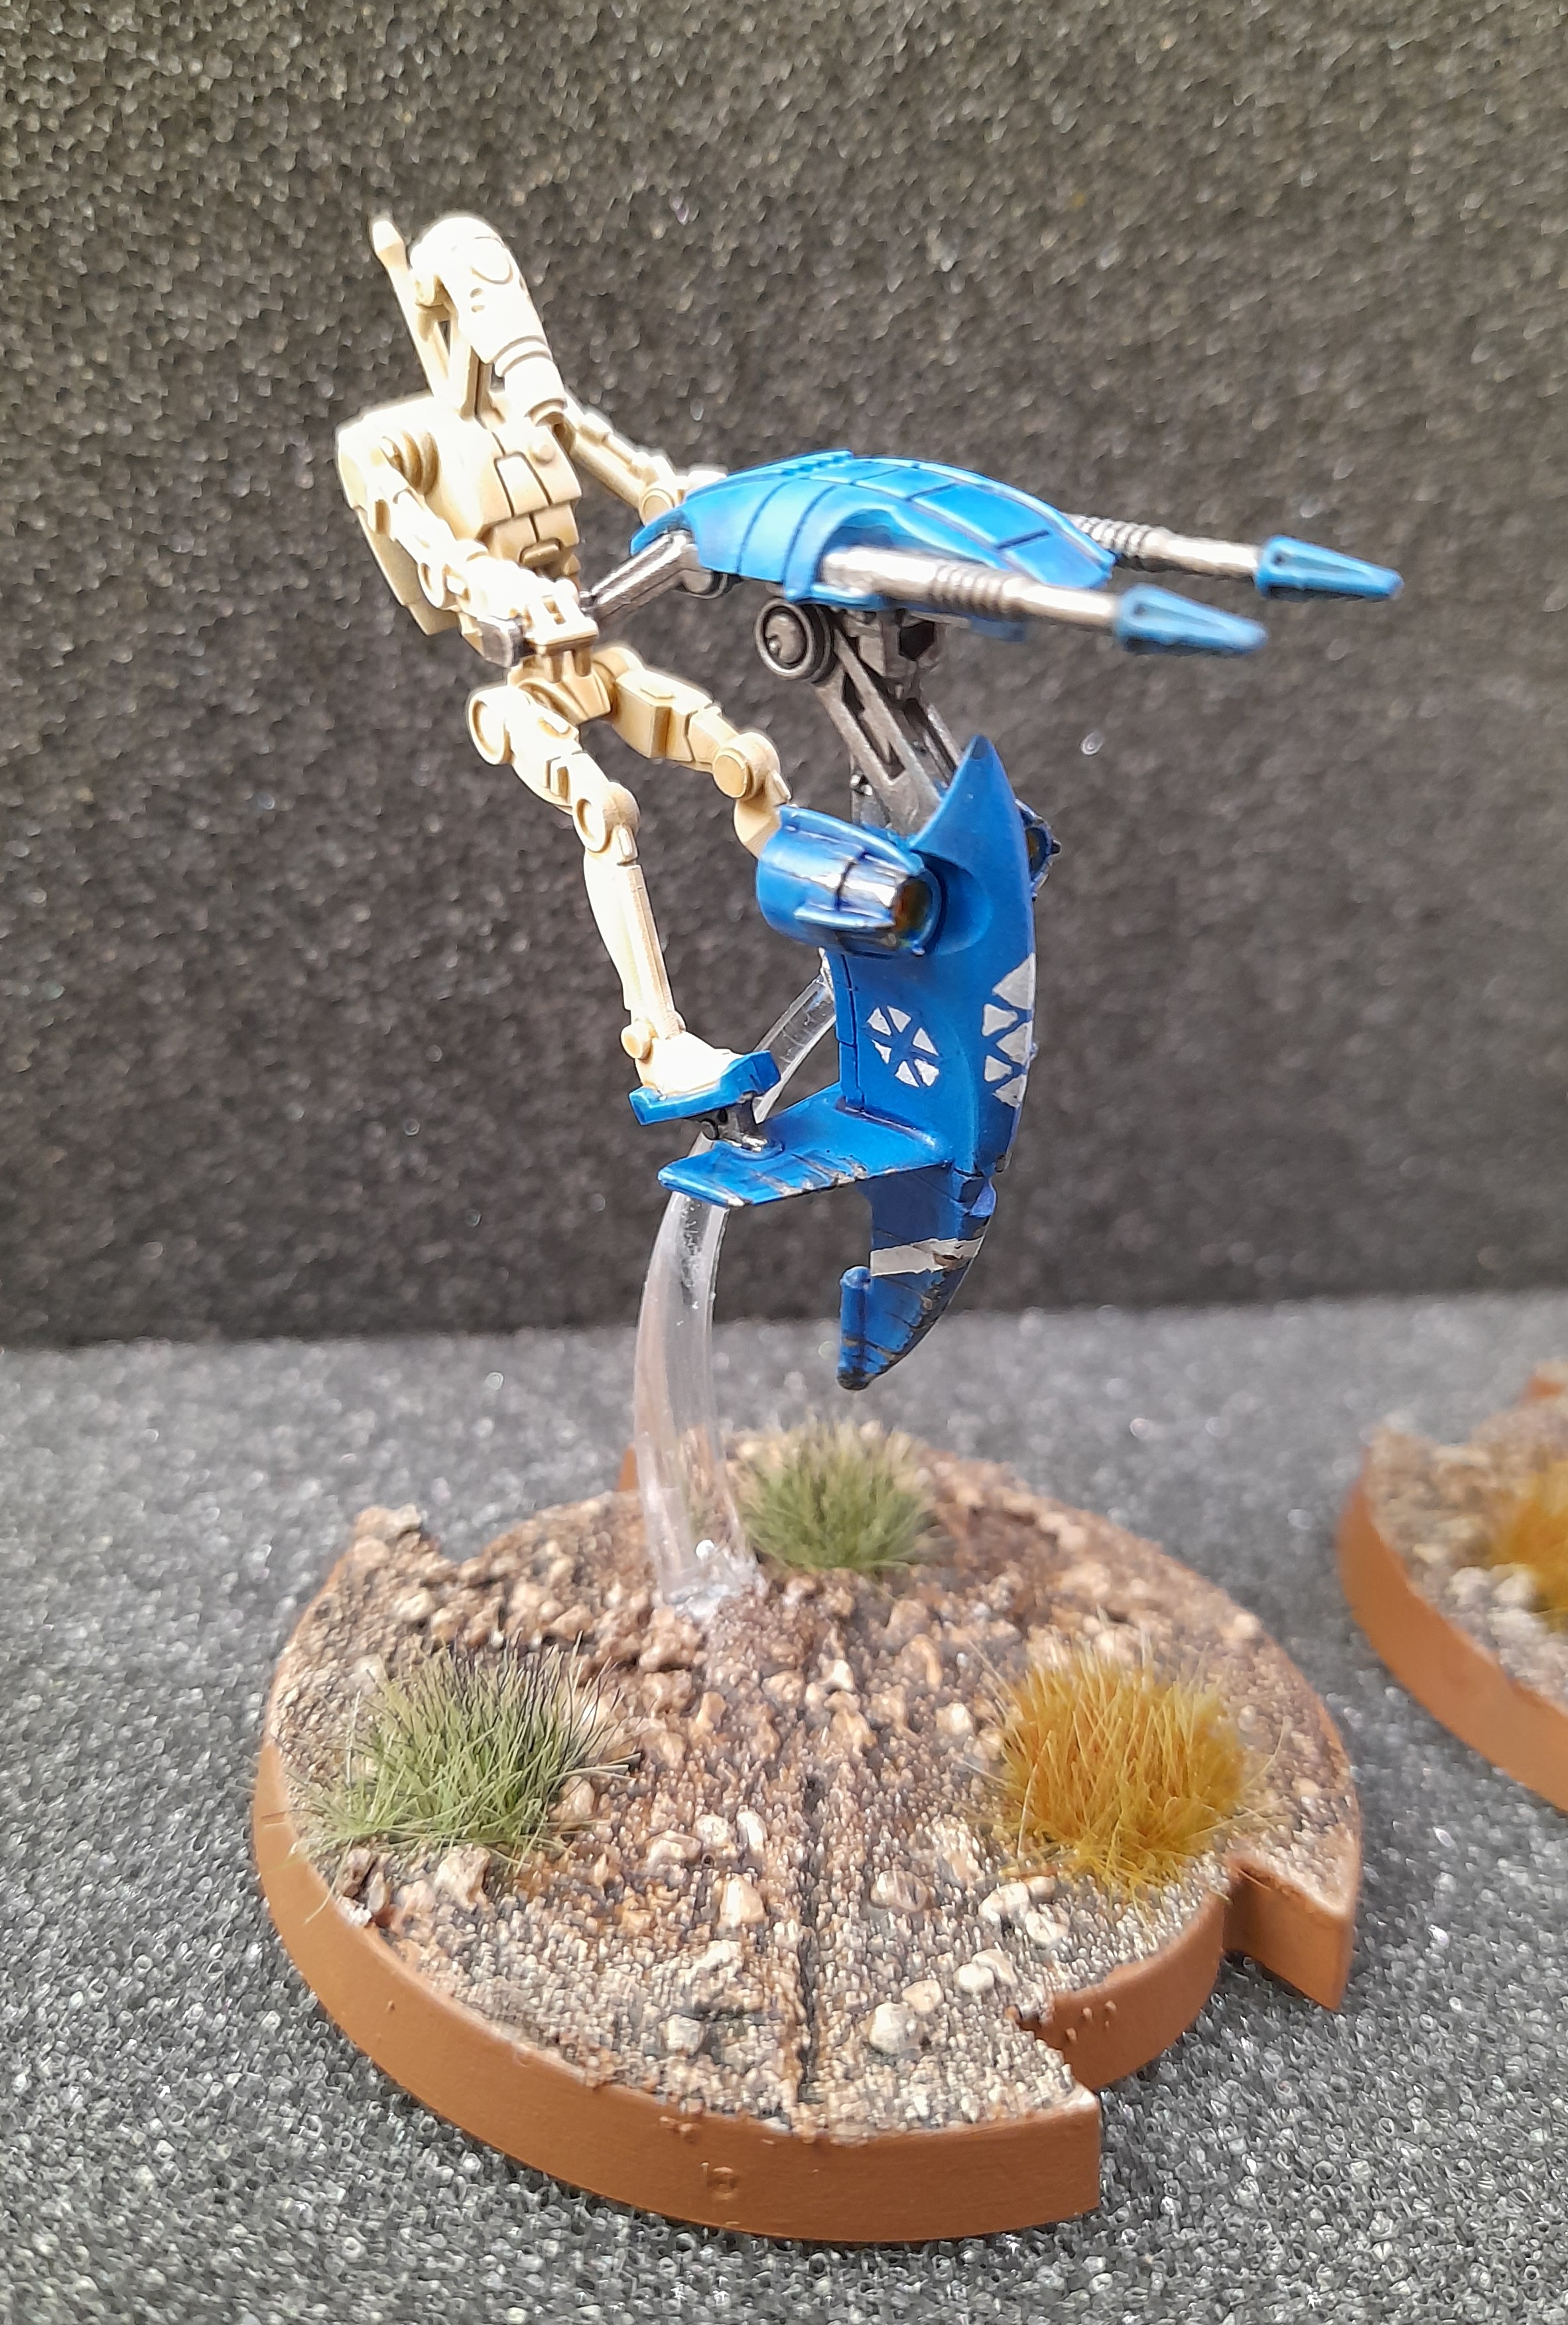
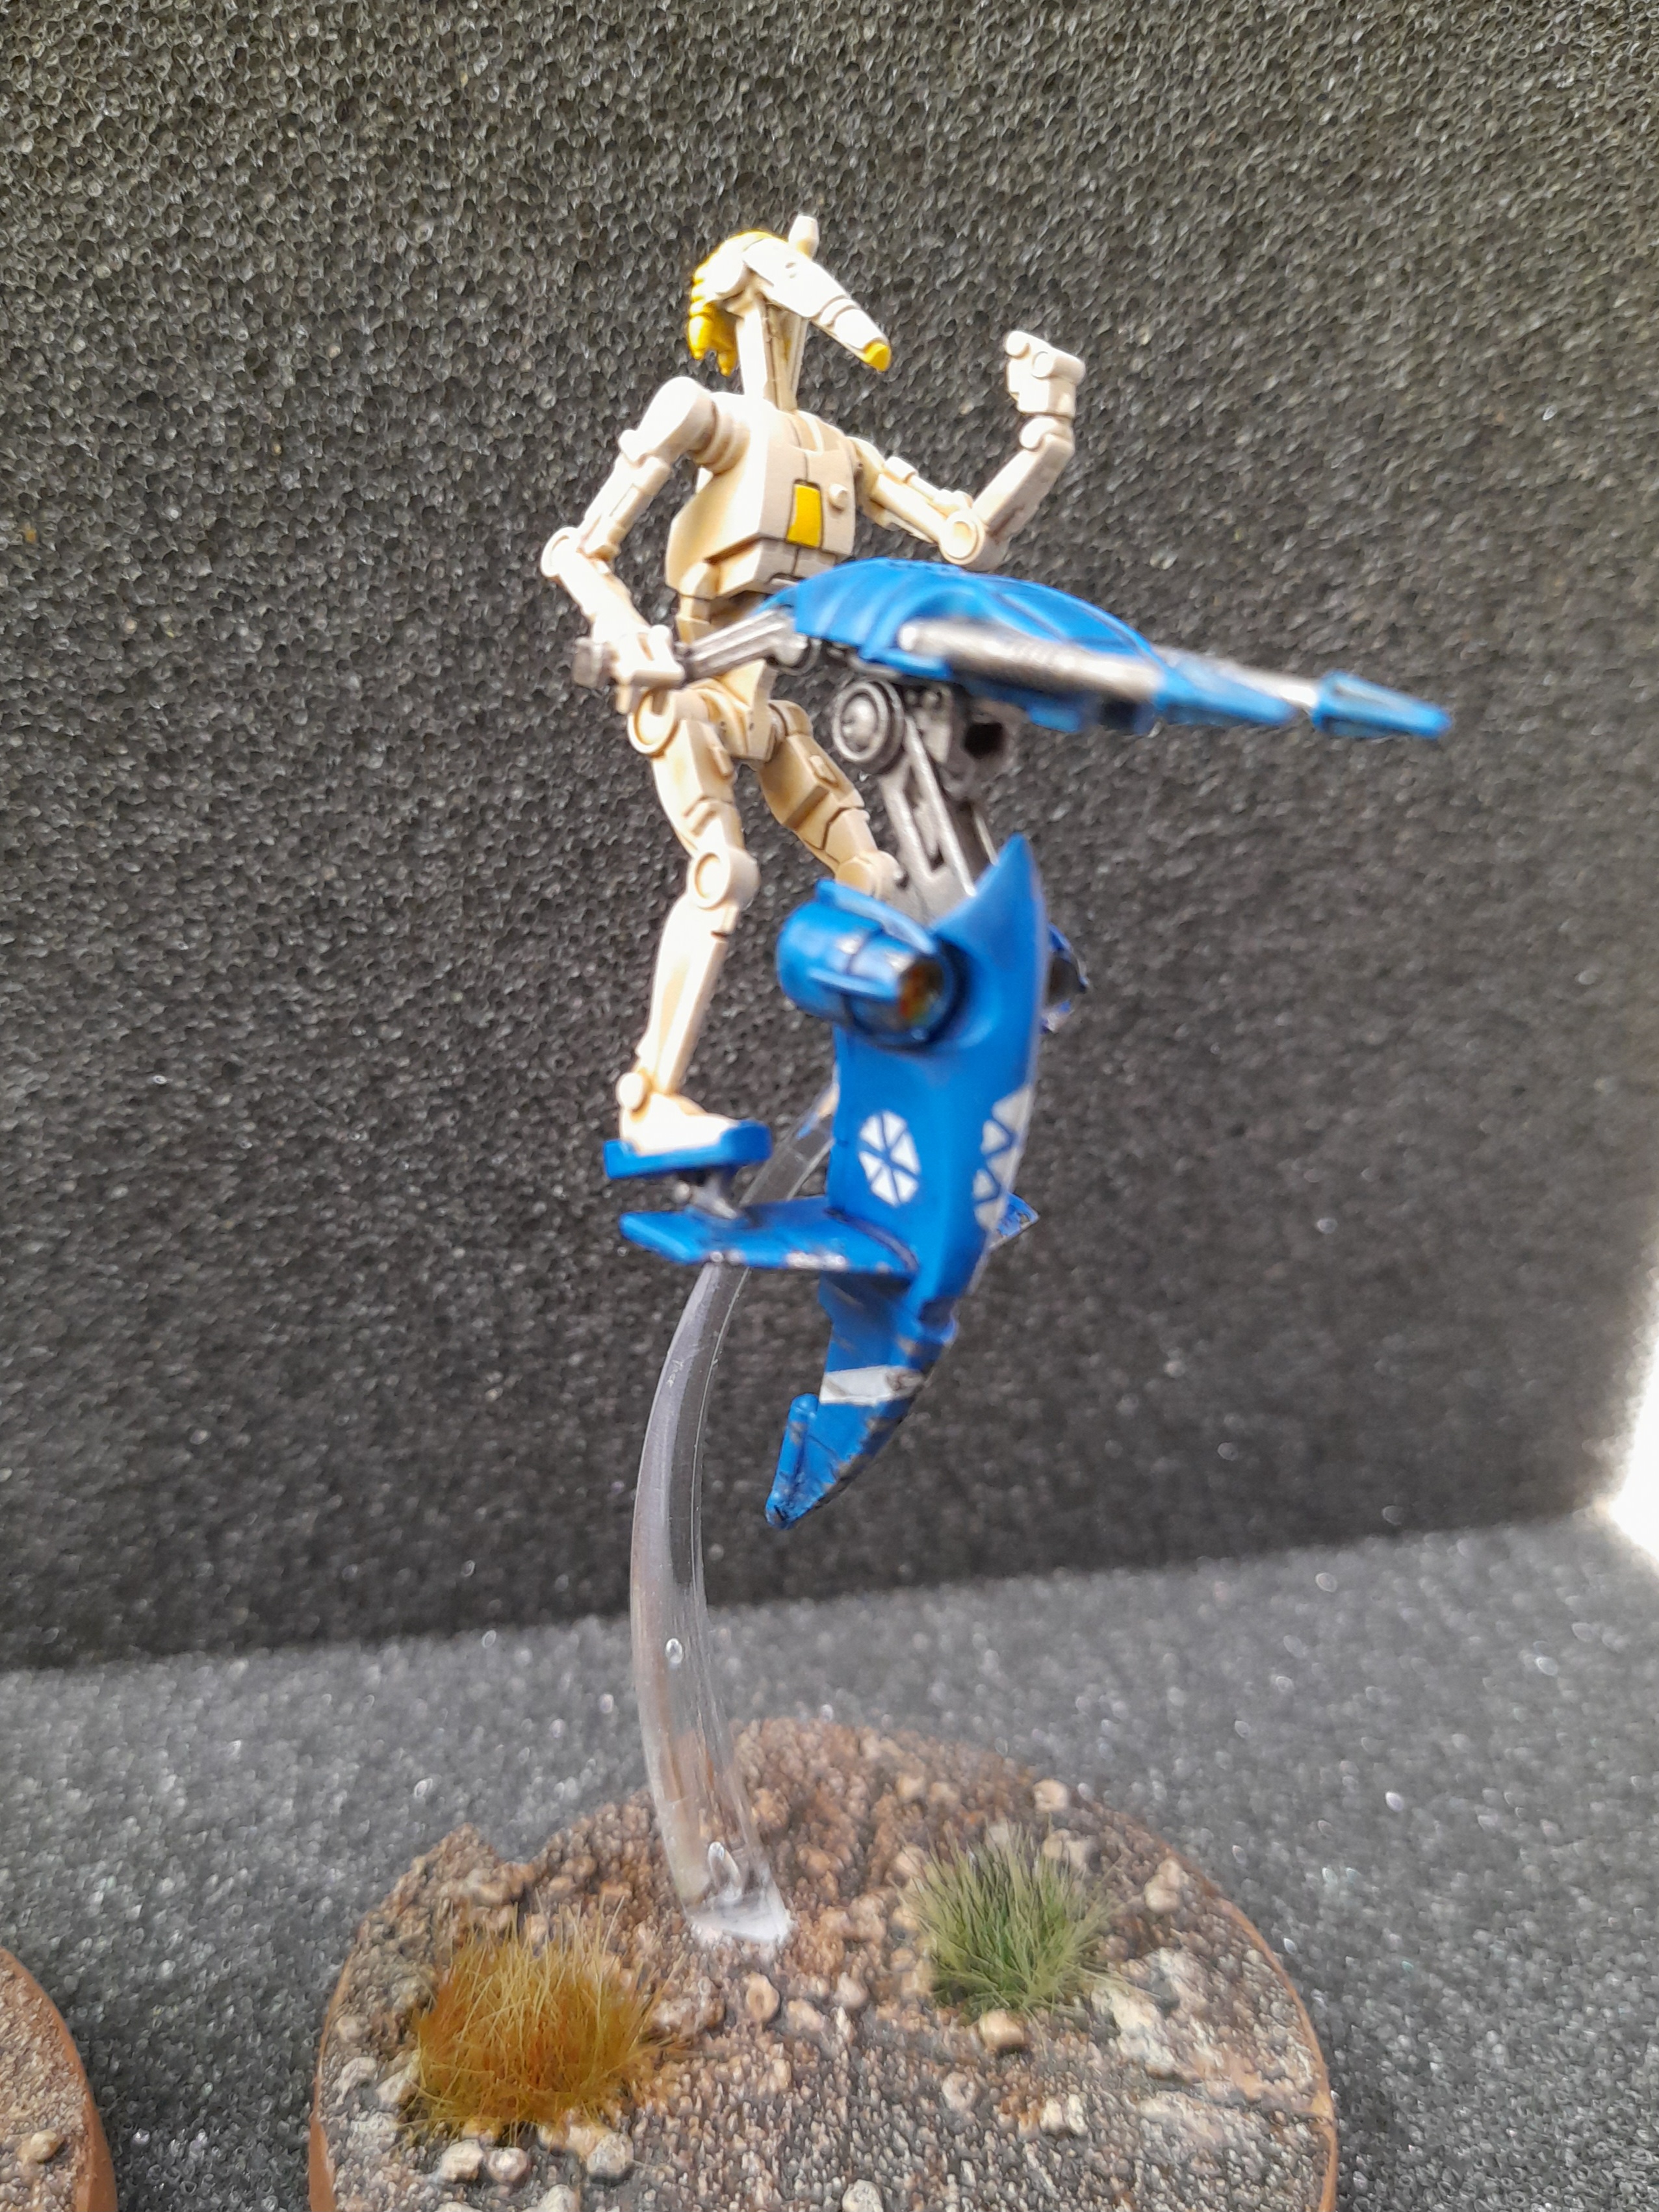
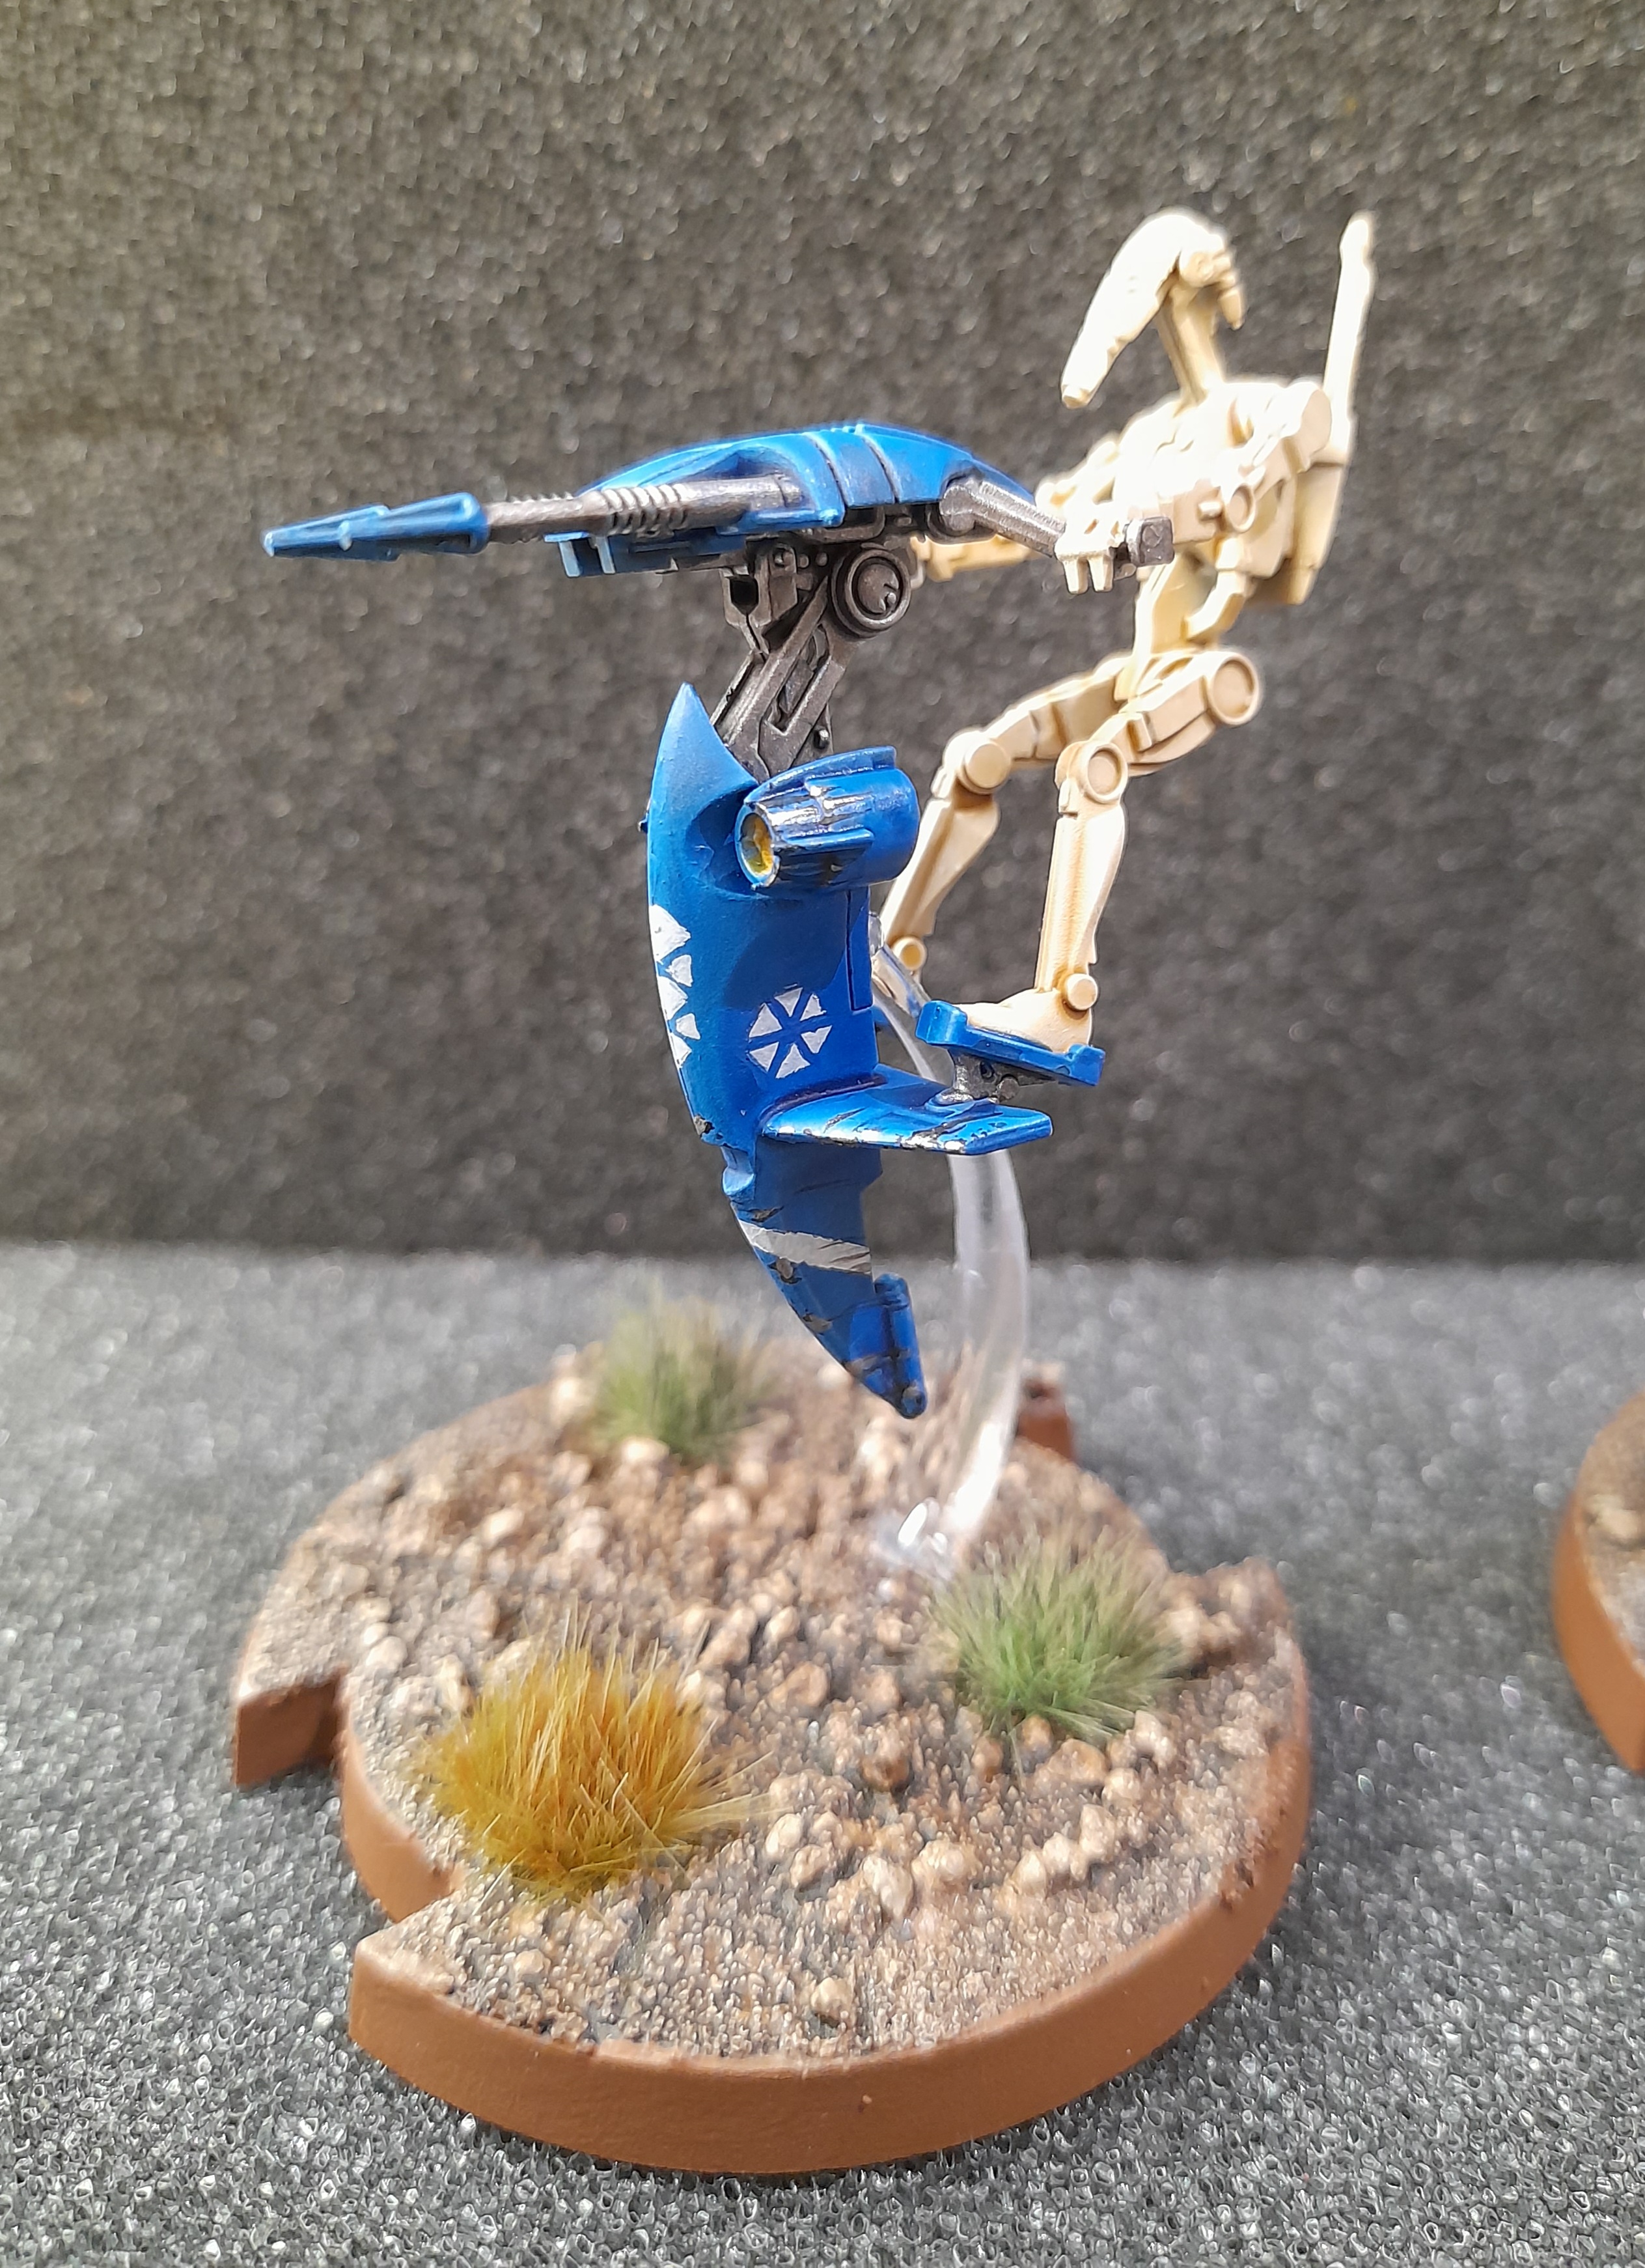
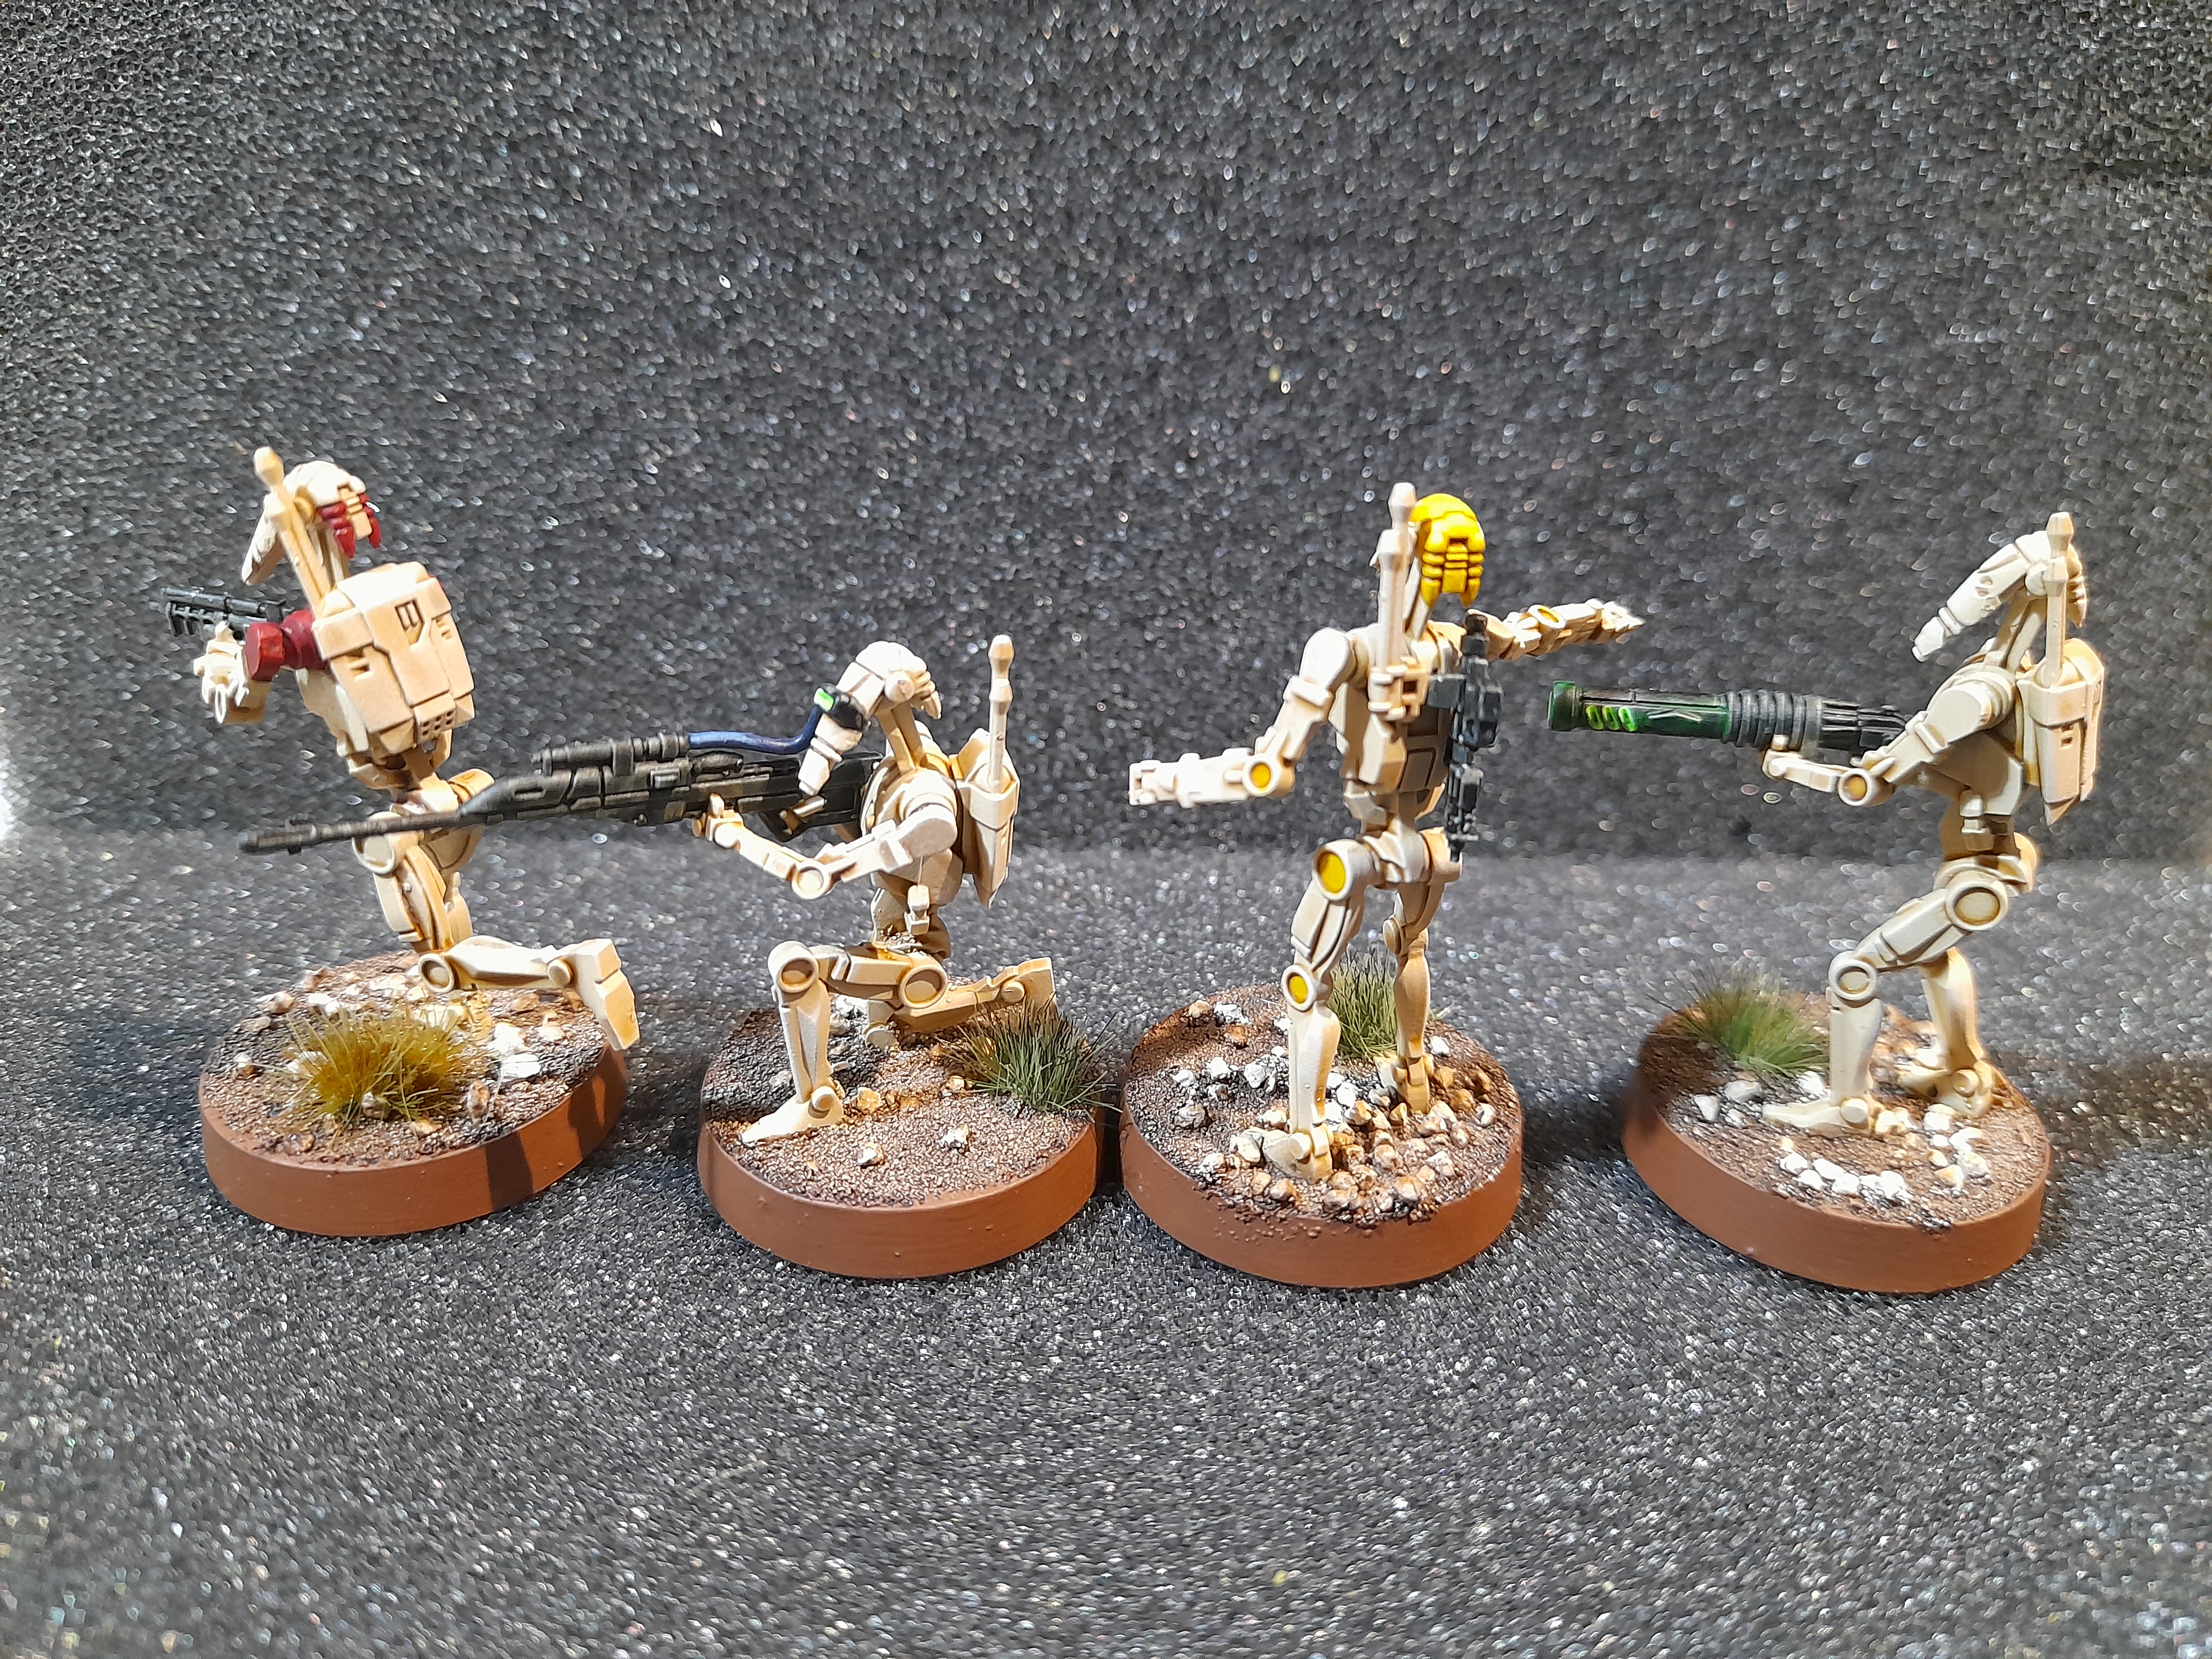
Probe Droids
11th March 2024
The probe droids (3 from Maul and 1 from the specialist expansion) were going to be black…. So I mounted them onto some old plastic sticks with superglue and sprayed them with my gloss black spray over their grey prime.
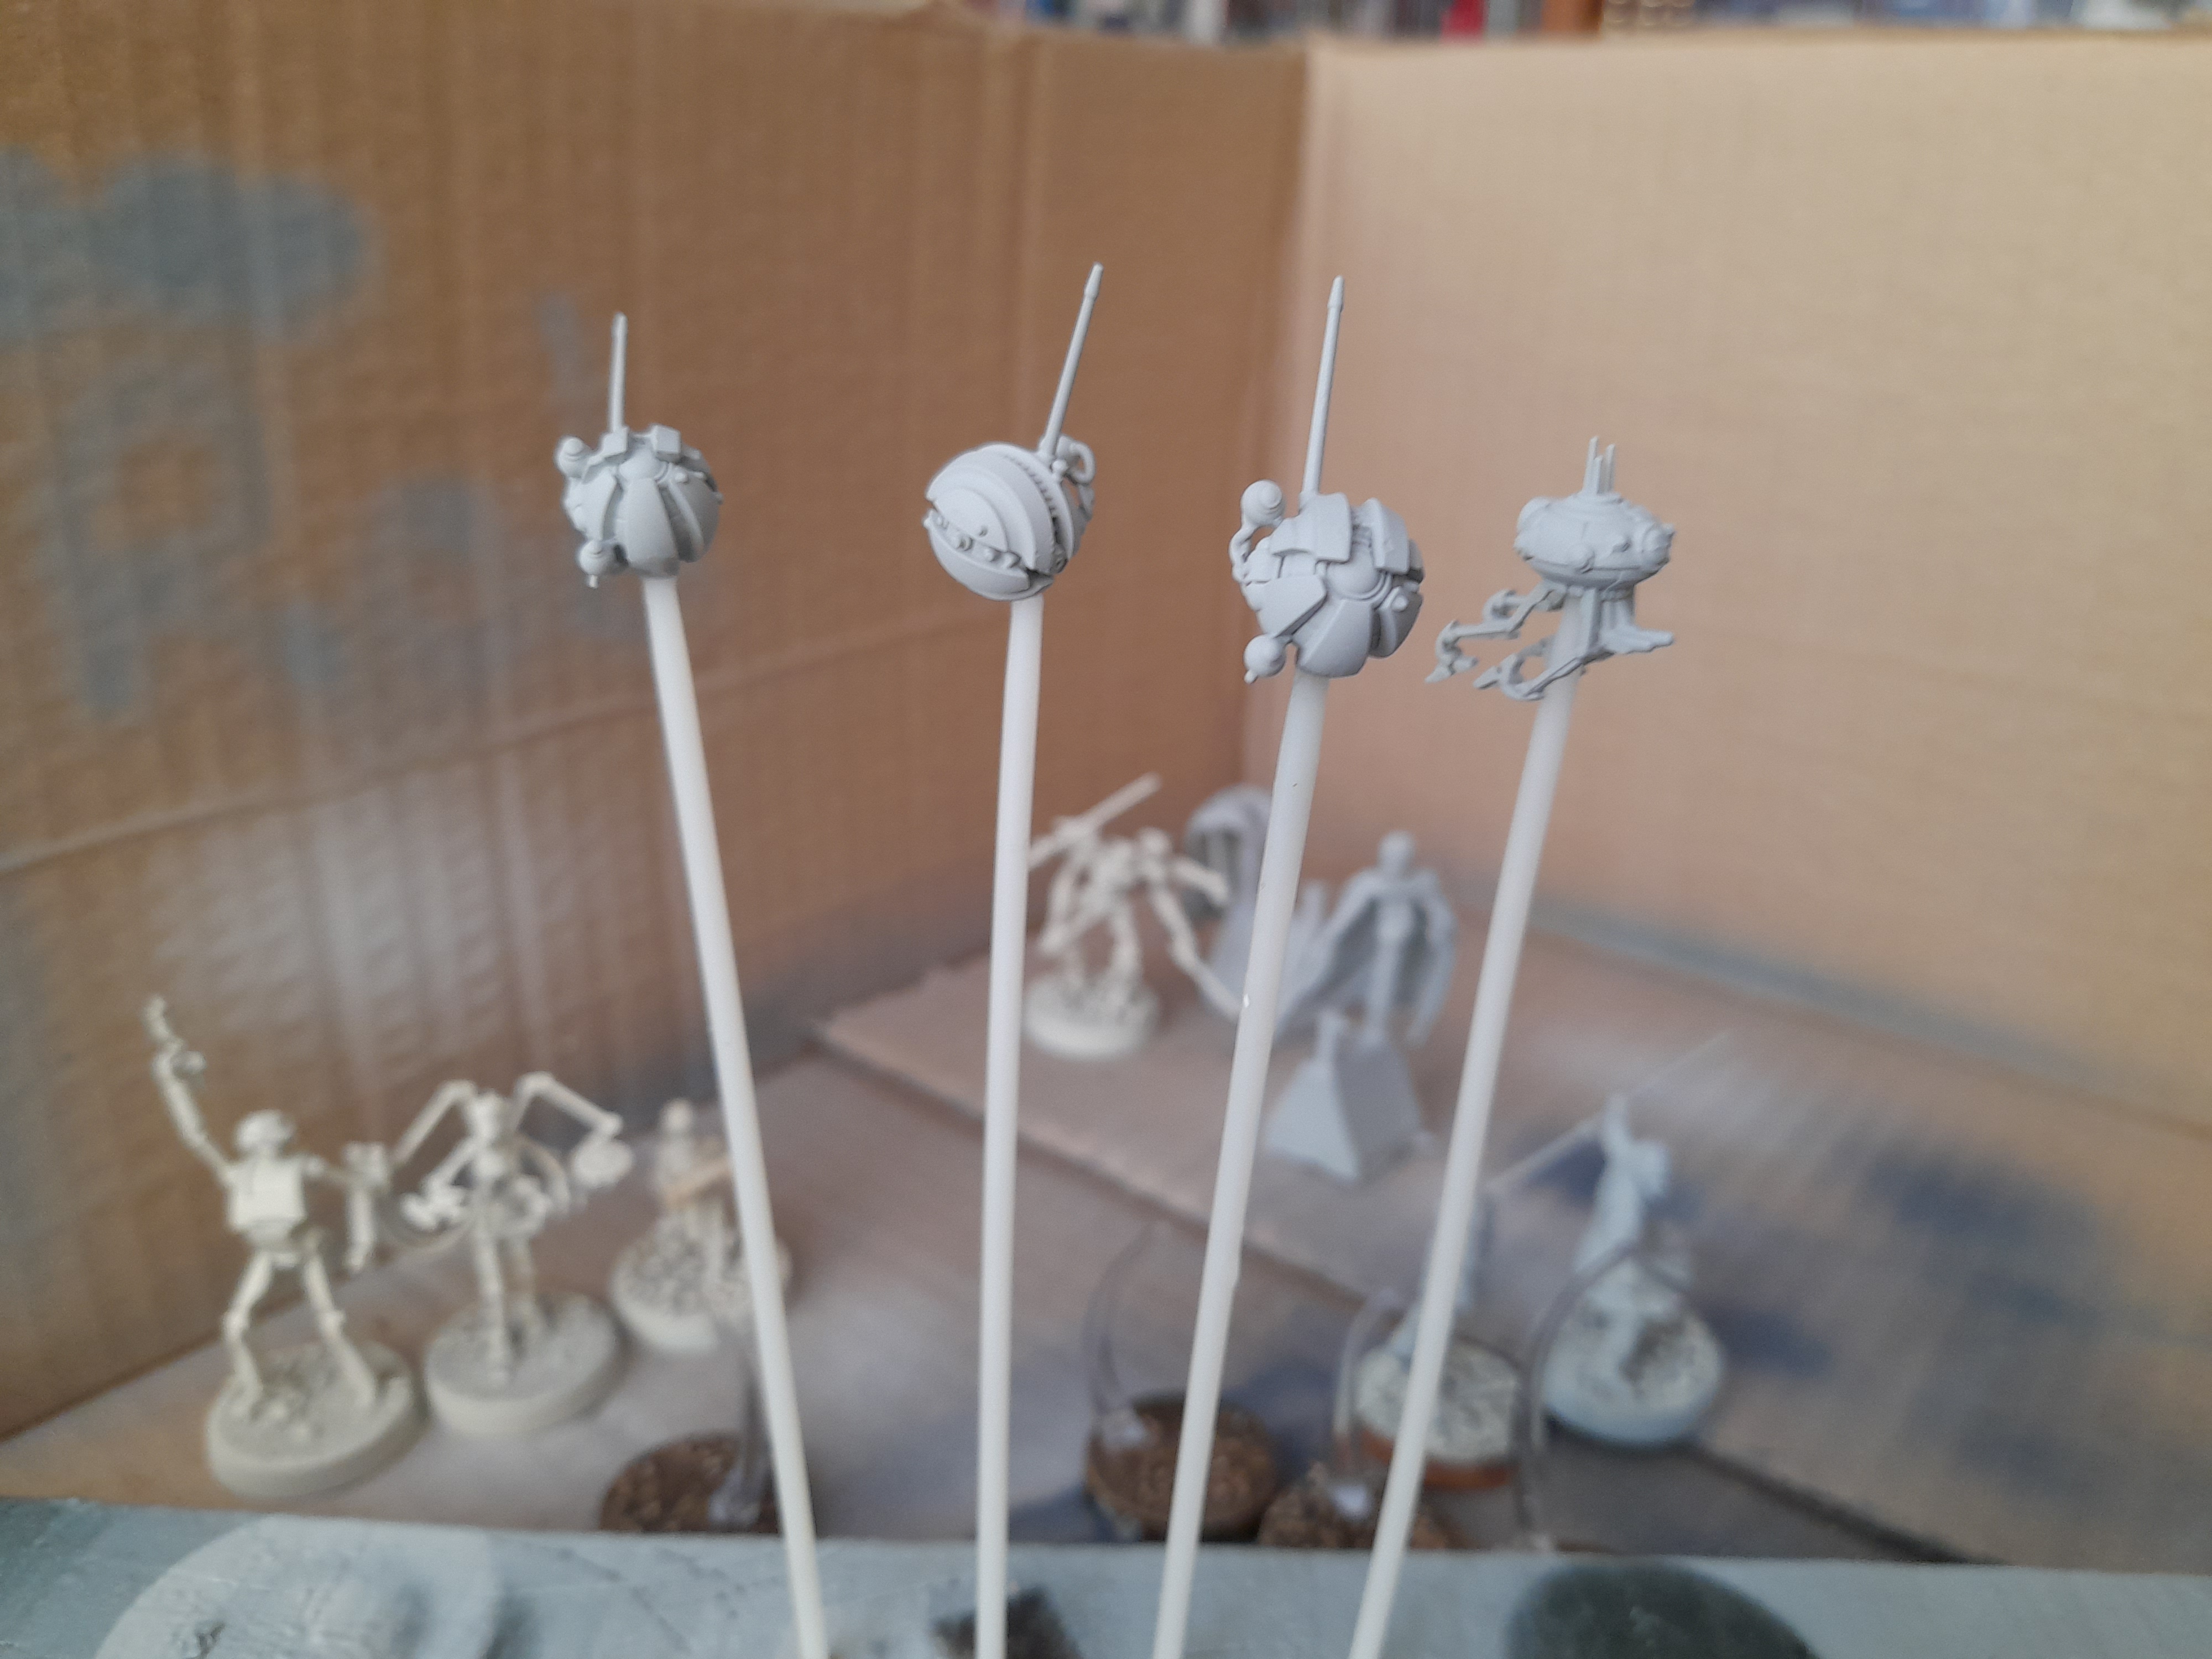
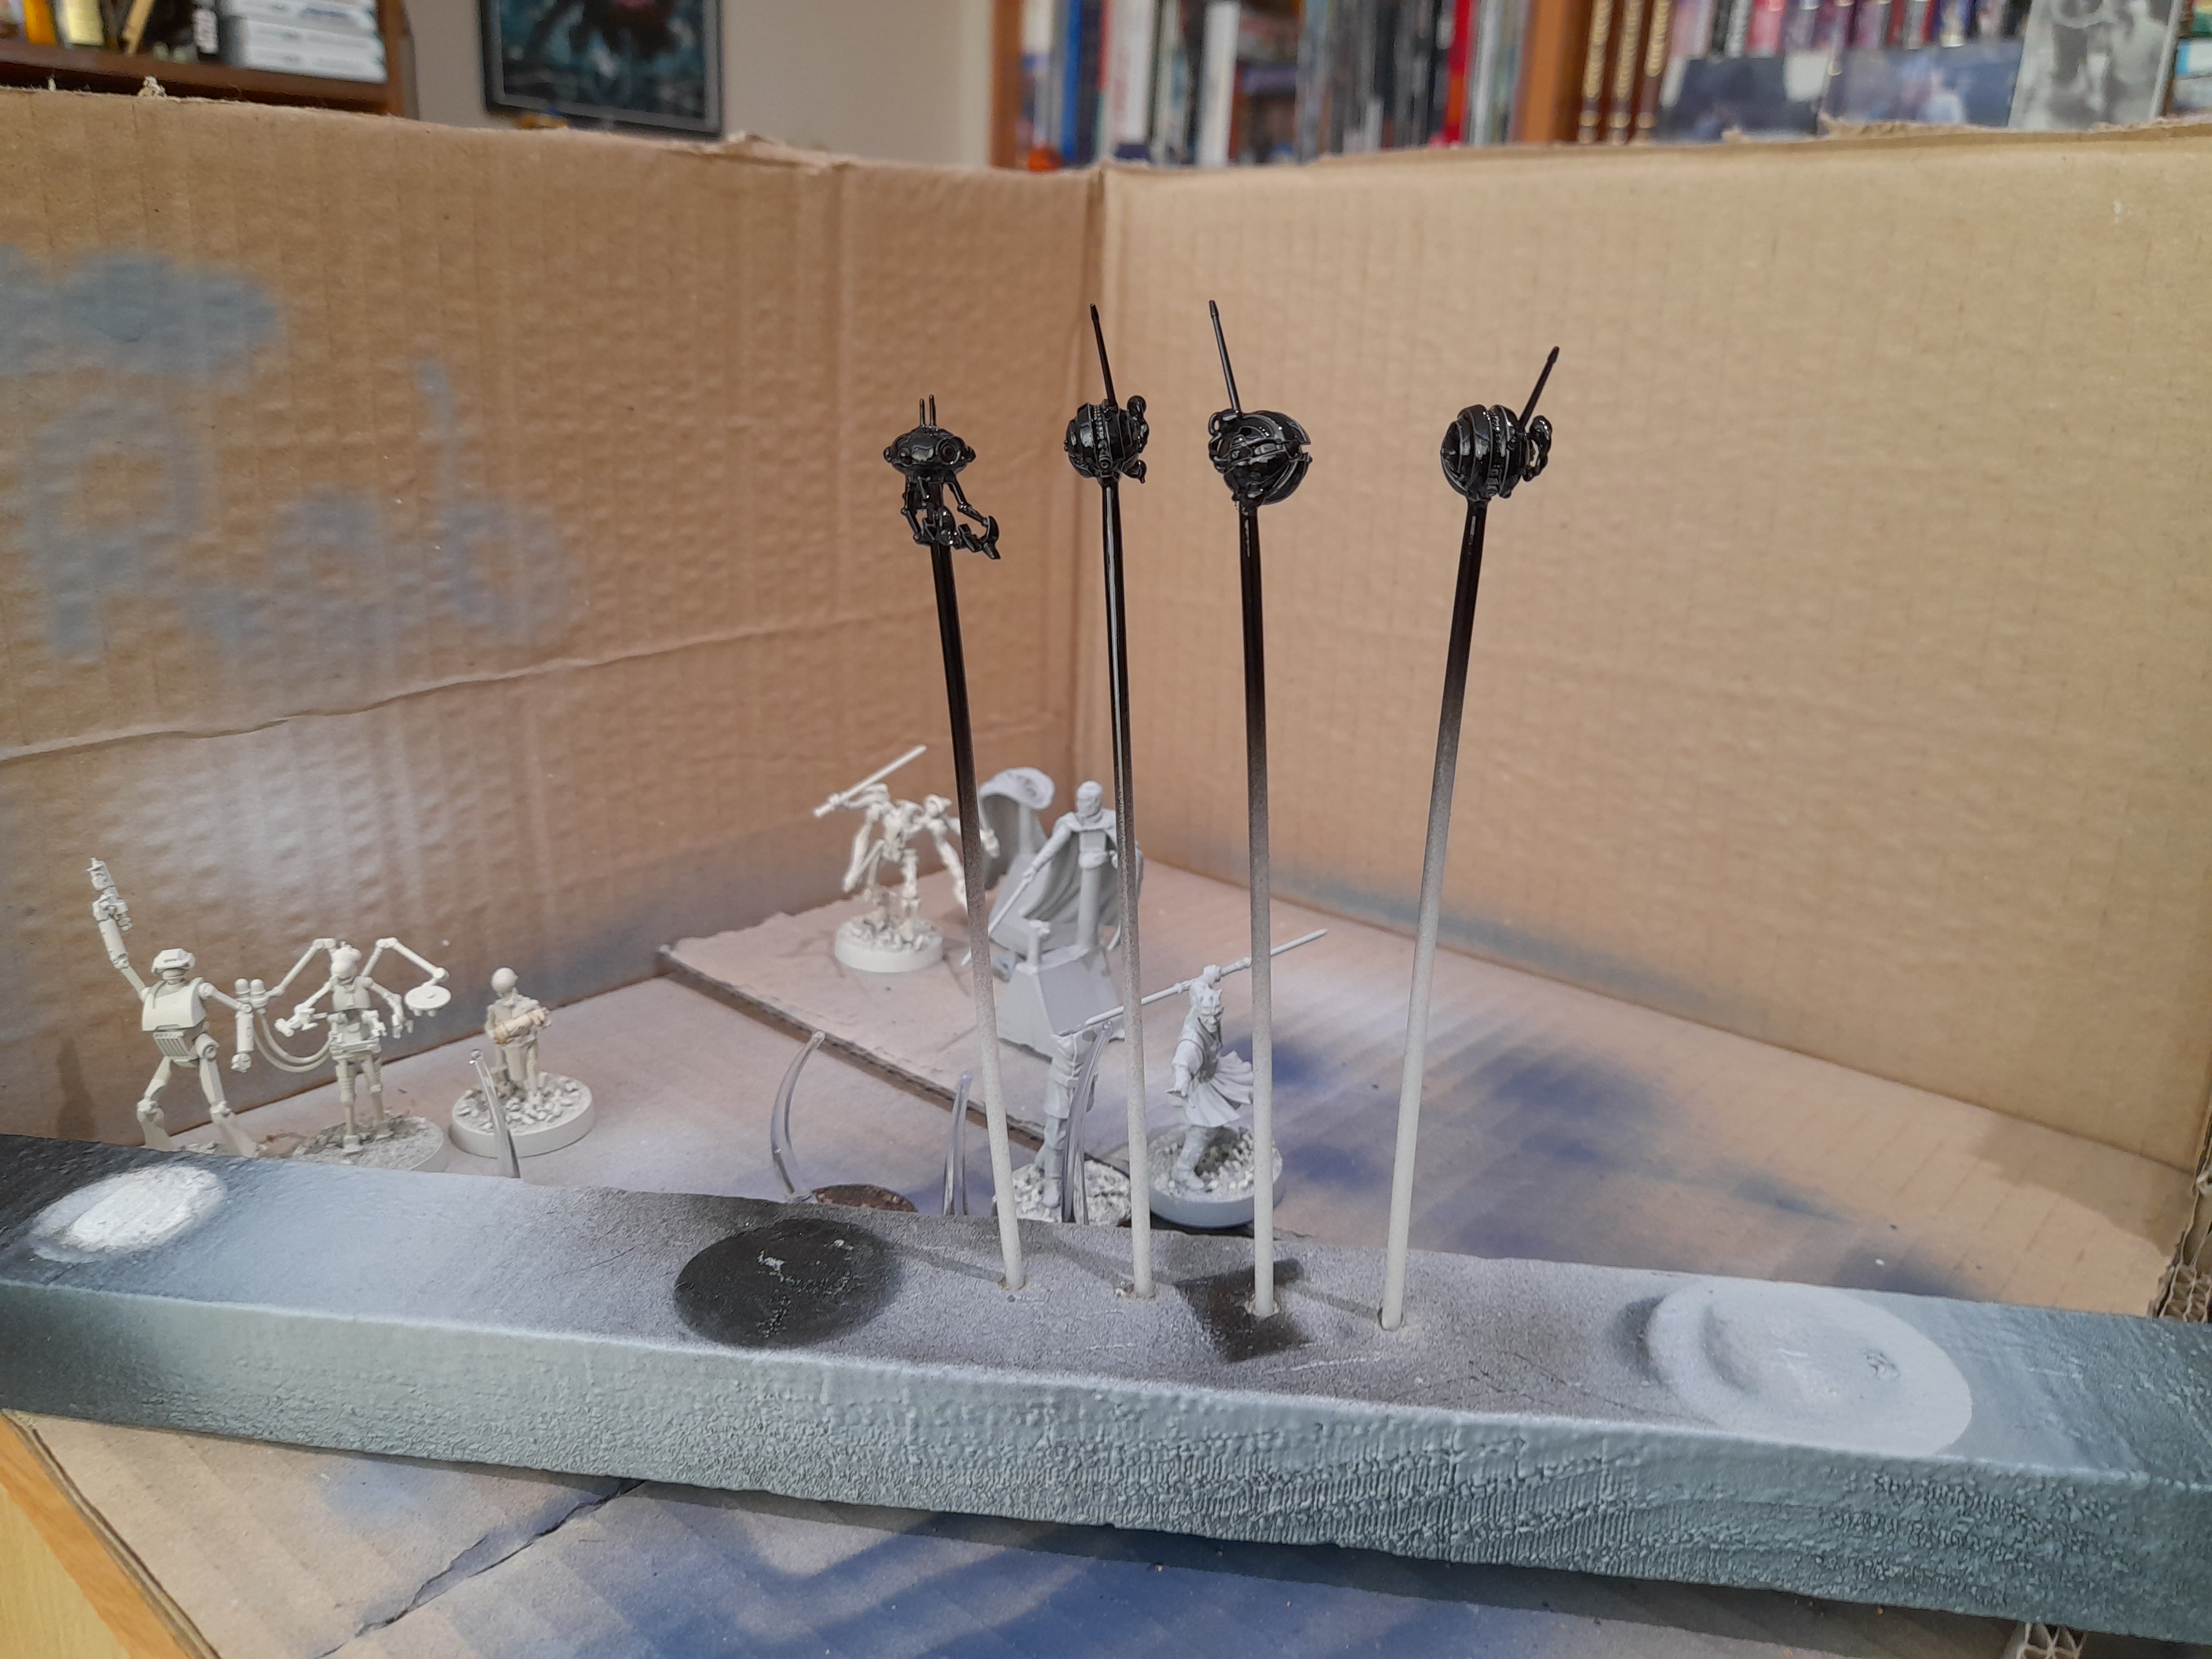
However, the gloss black didn’t go on well, and seemed to pull away from the recesses down the sides.
So, I touched them up with Black Legion – and then I wasn’t sure if I wanted to go with gloss or matt.
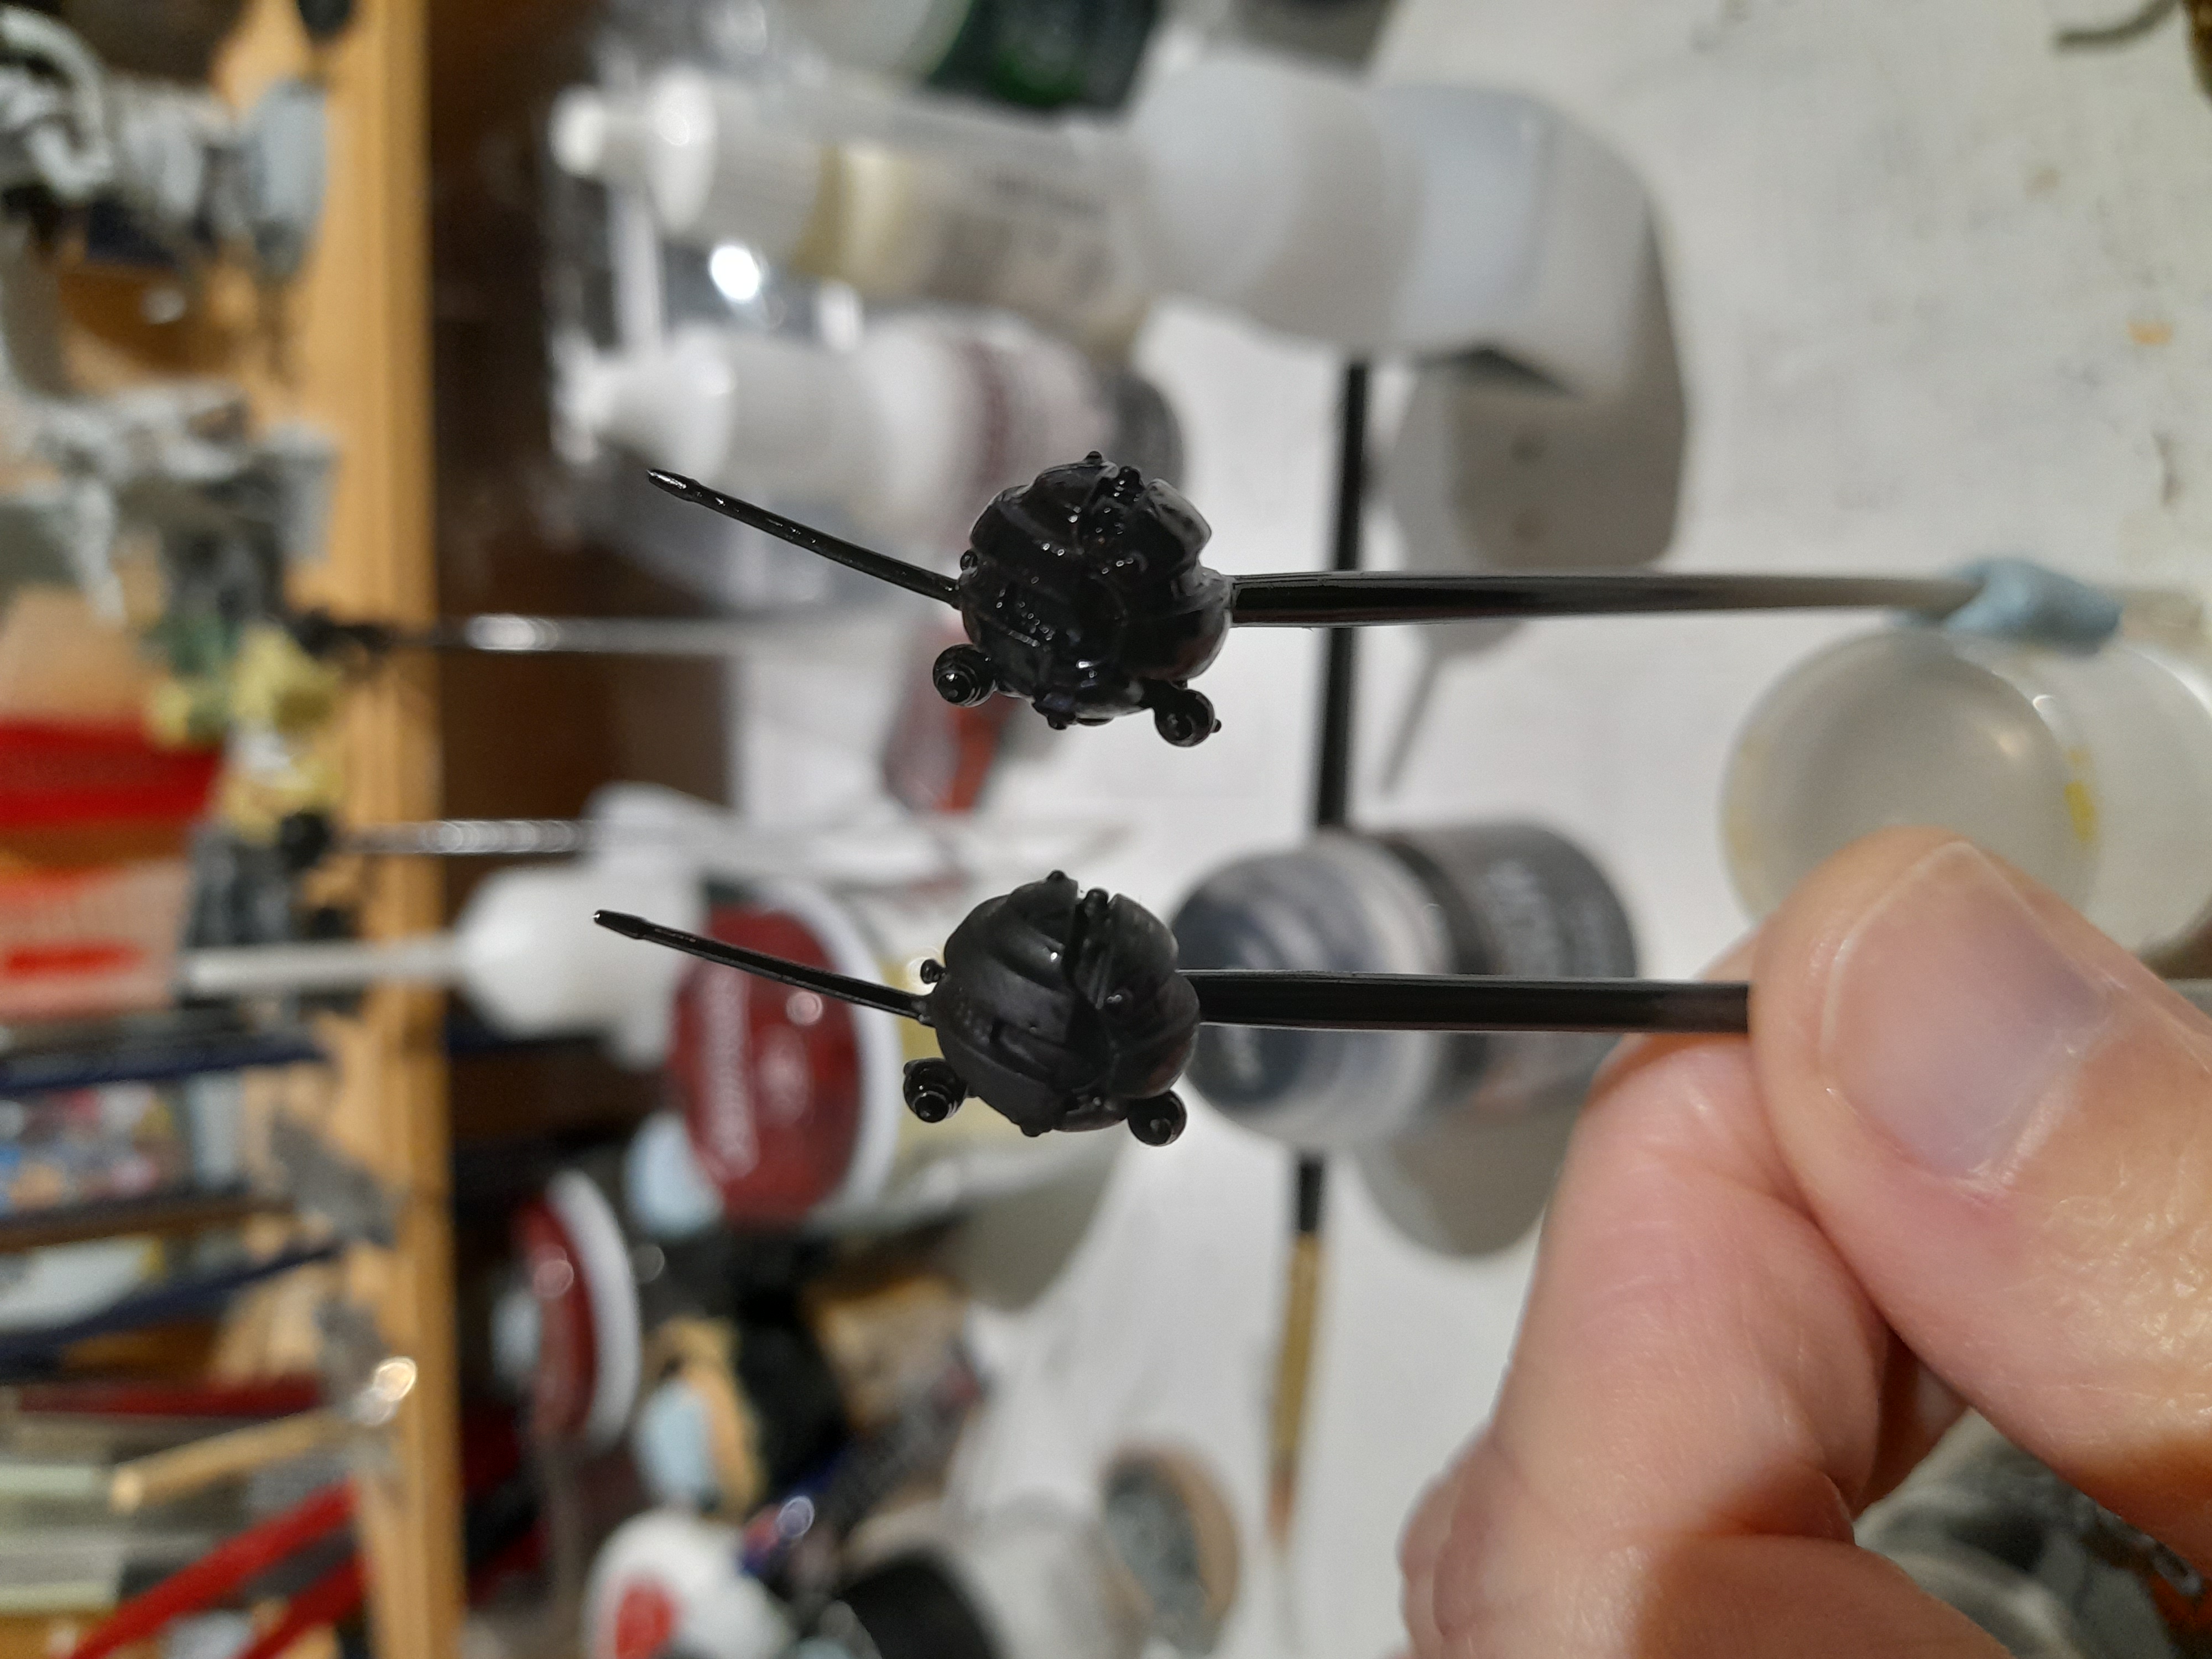
I asked some friends and they all said gloss, so gloss it was. I then added some colour by picking out some of the lenses around them, in blue, red and a dark silver, then glossed those as well. For the three sith probe droids I left some matt in the equatorial recessed channel, as a bit of a visual contrast.
STAPs finished
7th March 2024
The STAP riding droids were painted in the same way as the rest of the B1s. For the STAPs themselves I knew that I didn’t want to paint the usual brown colour, and knew that clone war era STAPs should be blue. So that’s what I went for. A couple of thin coats of blue over all the bodywork.

After that it was a thinned down blue wash followed by a drybrush to pick out the details and panel edges. Followed by picking out the guns, struts, engines etc in metallic.
However, I wasn’t overly happy with the engines, so decided to go back in and paint them in blue.
Happy with that change I then went on to attempt adding some markings in a very light grey. At first some markings on the front (didn’t manage to get them the same size on both…) then some rough CIS markings on each side of the body. I also added some yellow to the inside of the engines, and a further ‘go faster’ stripe to the lower body of each of the STAPs.
Finally it was a case of adding some battle damage and wear marks. I used wildwood contrast for some initial dark marks, scrapes and chips, then picked out some finer marks with silver metallic.
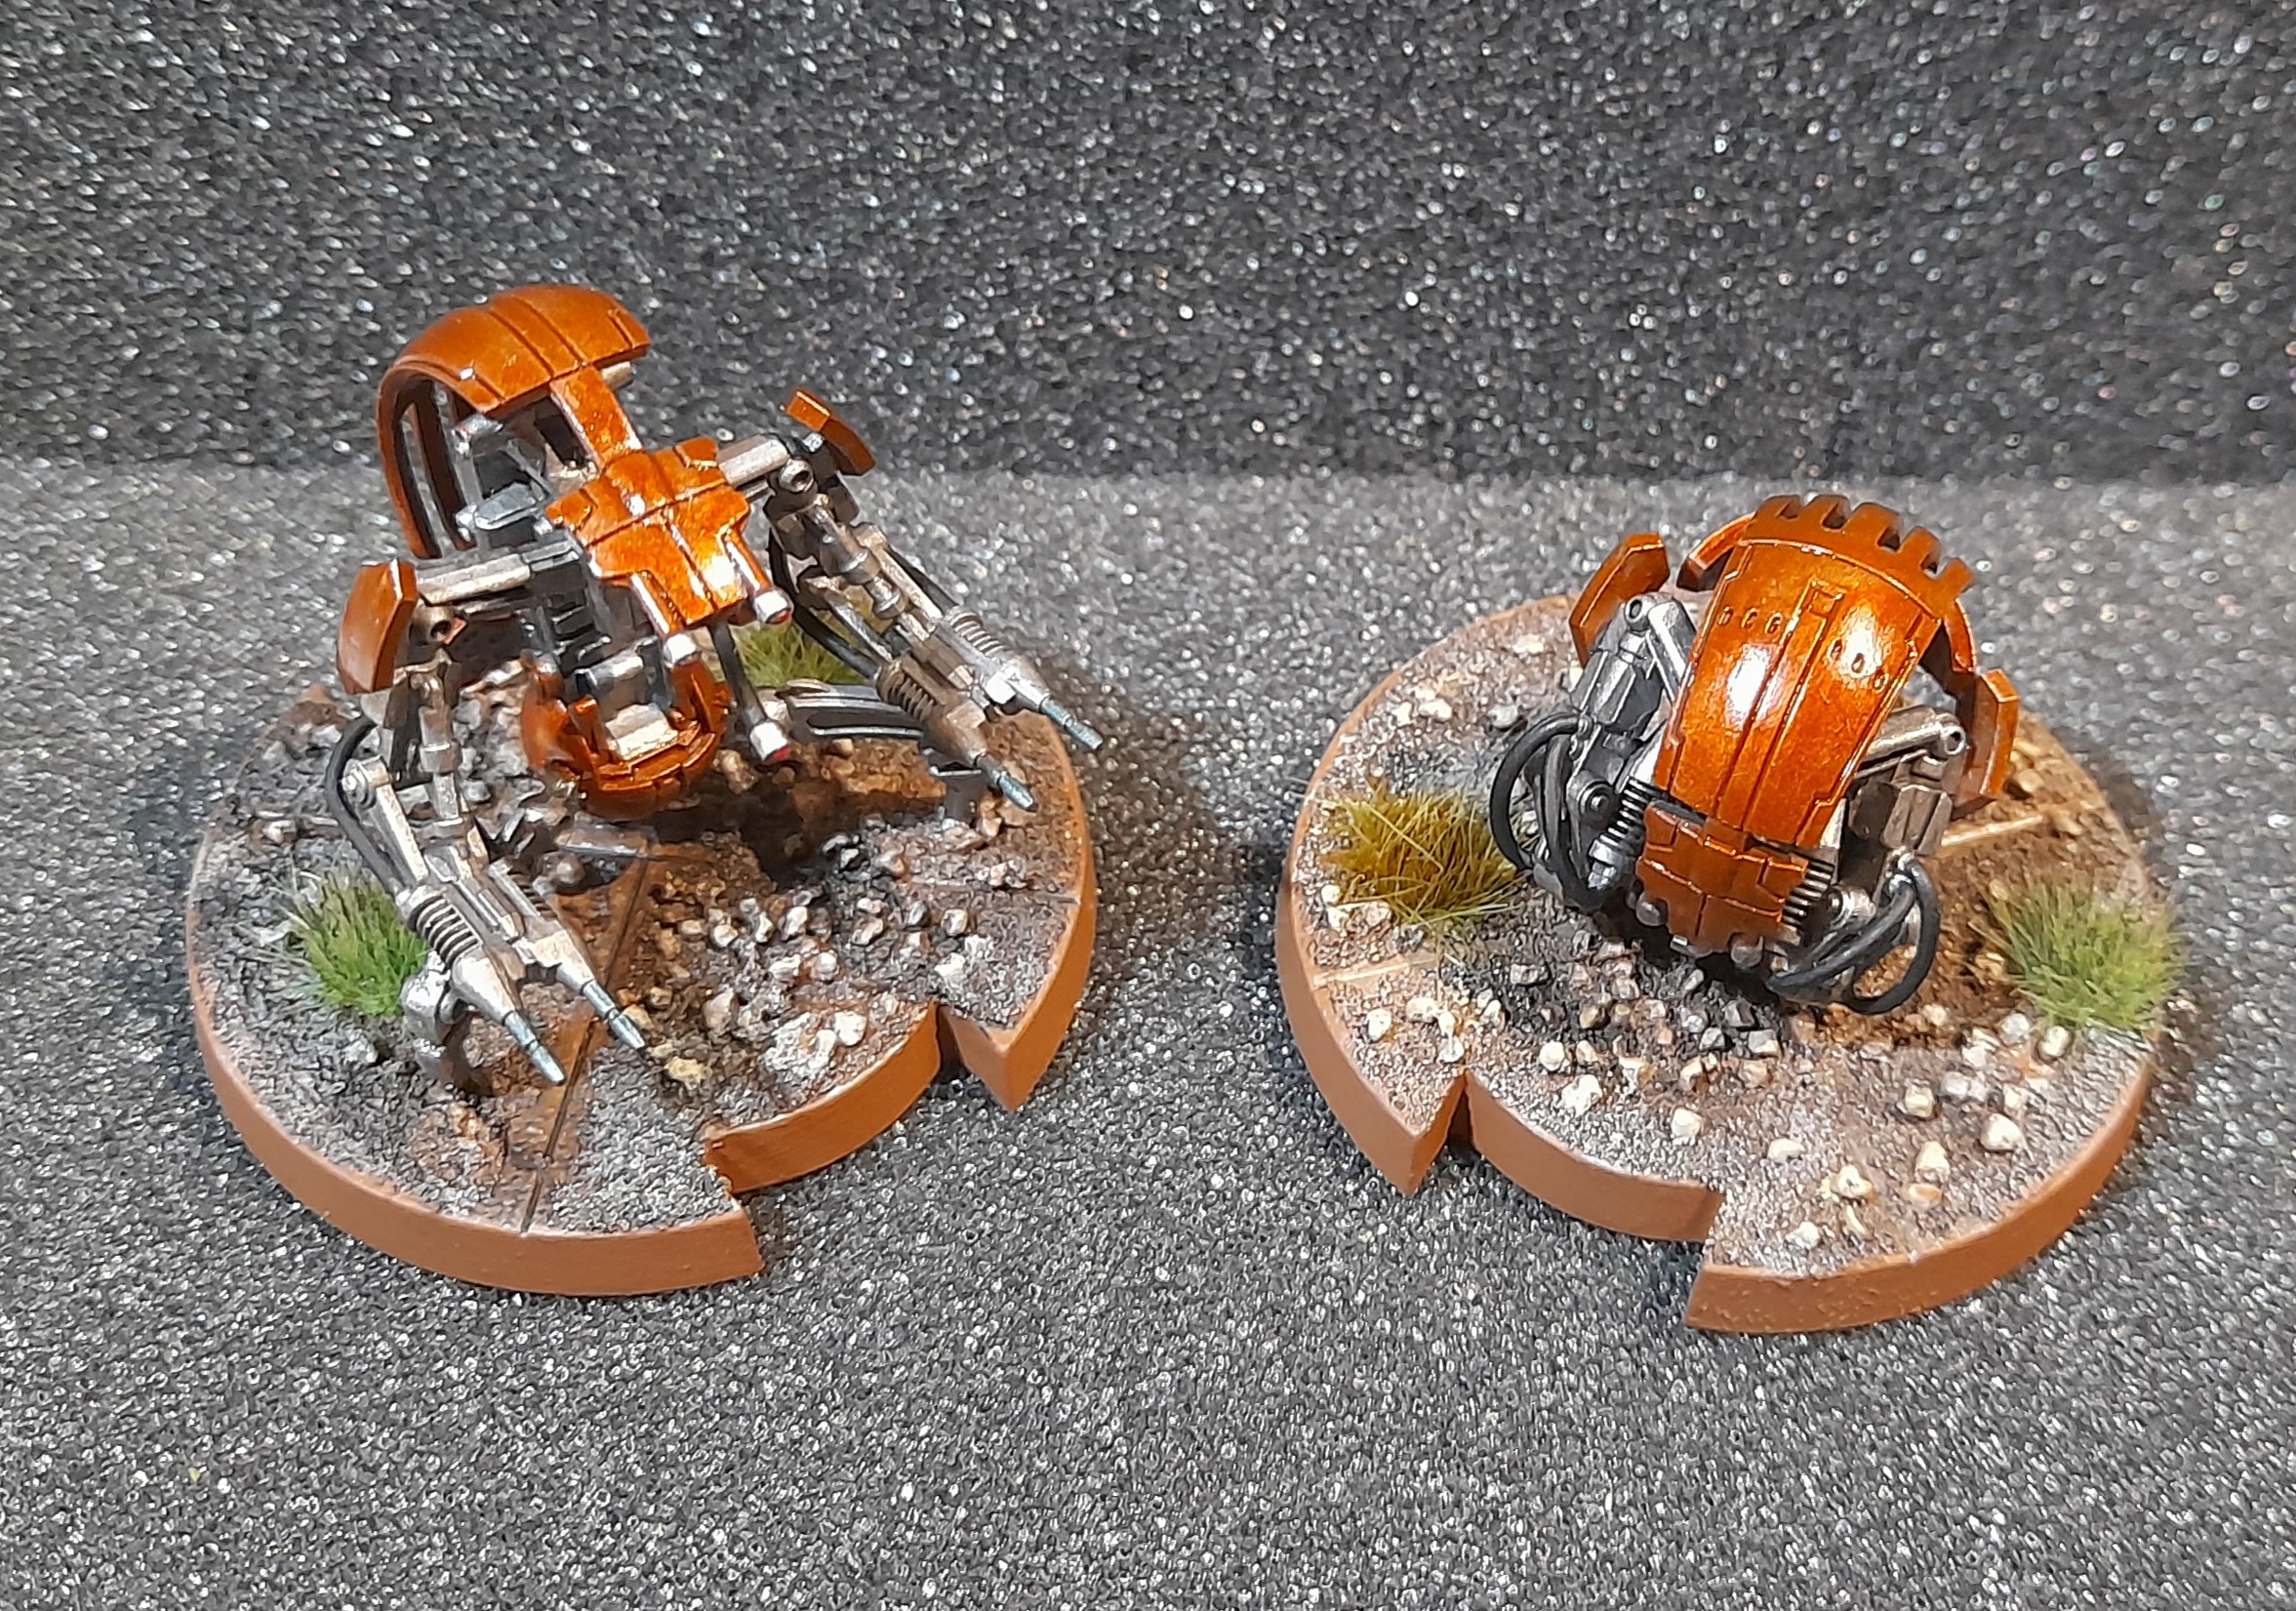
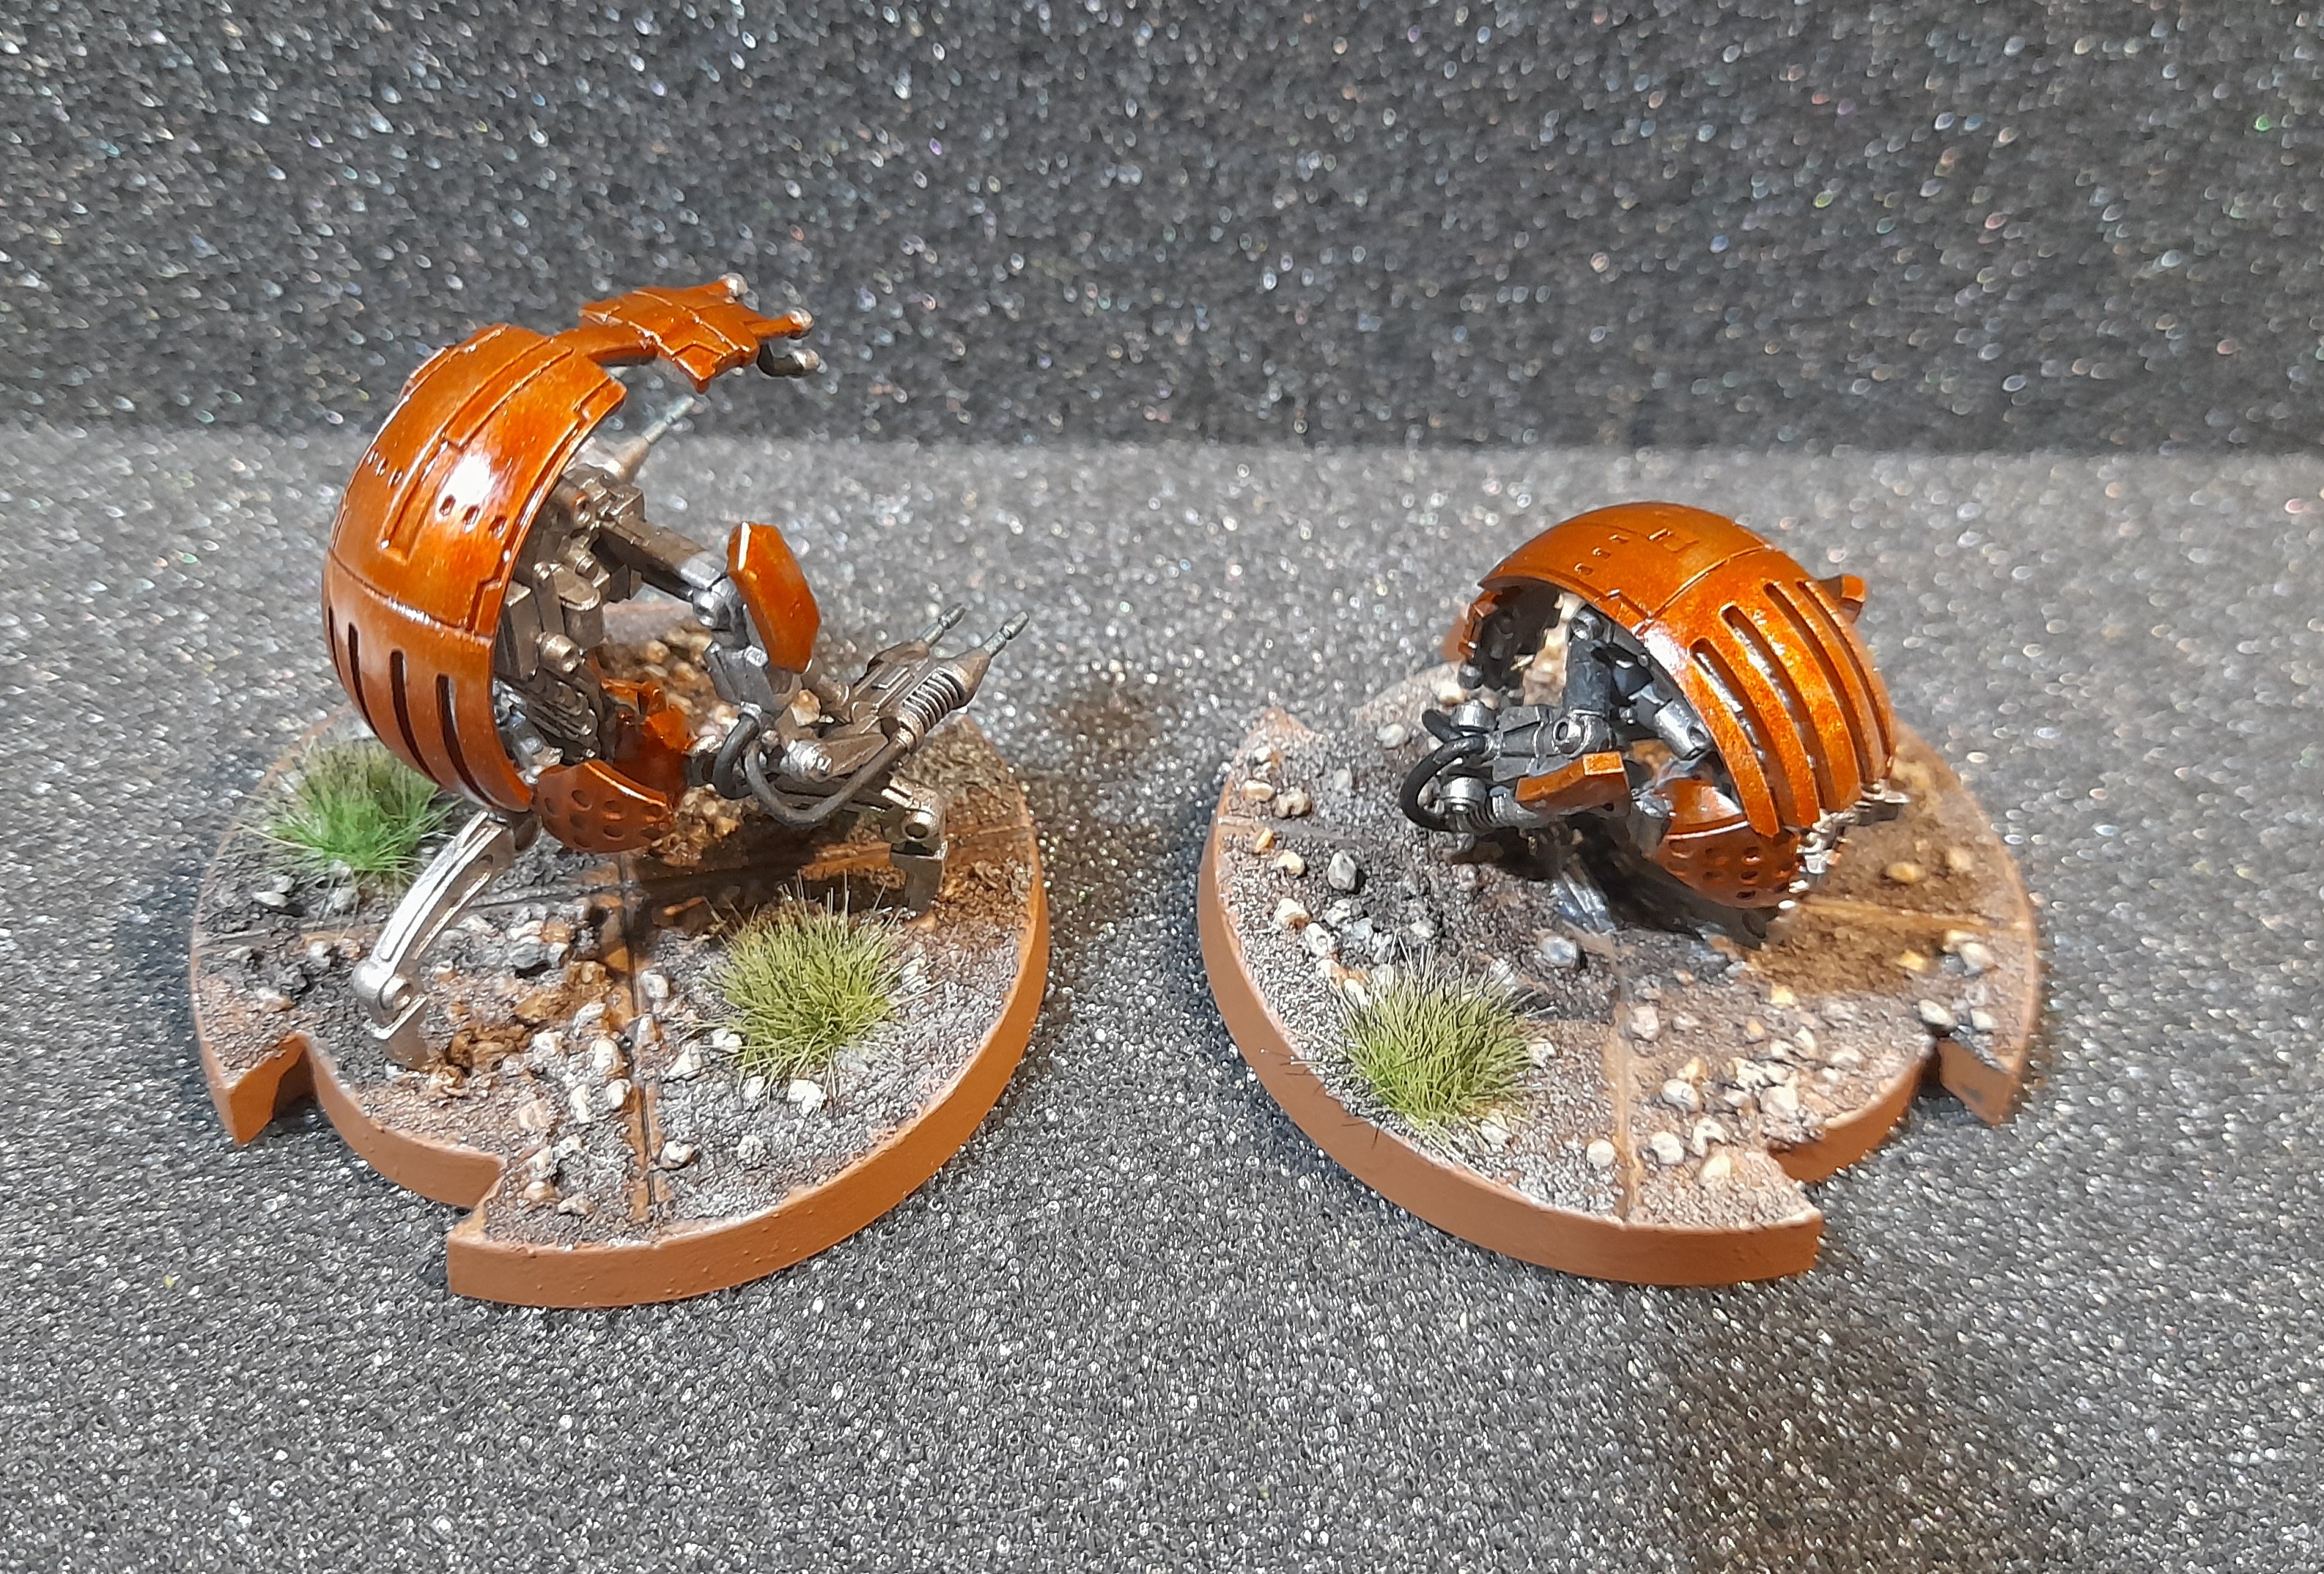
Droidekas roll out
2nd March 2024
For quite some time I wasn’t sure how to paint the Droidekas. I tried out a few different colours on the sprayed base rims, trying to come up with a bronze that looked good – without going for a brush on metallic that I wouldn’t get a smooth finish on.
Ended up going with Gryph Hound orange over the leadbelcher prime.
There was still something not grabbing me. So, while working on the bases a bit I decided to try a gloss coat over the carapace, hoping it would make them look more mechanical (or like a car with its coat of lacquer) – and I feel it worked.
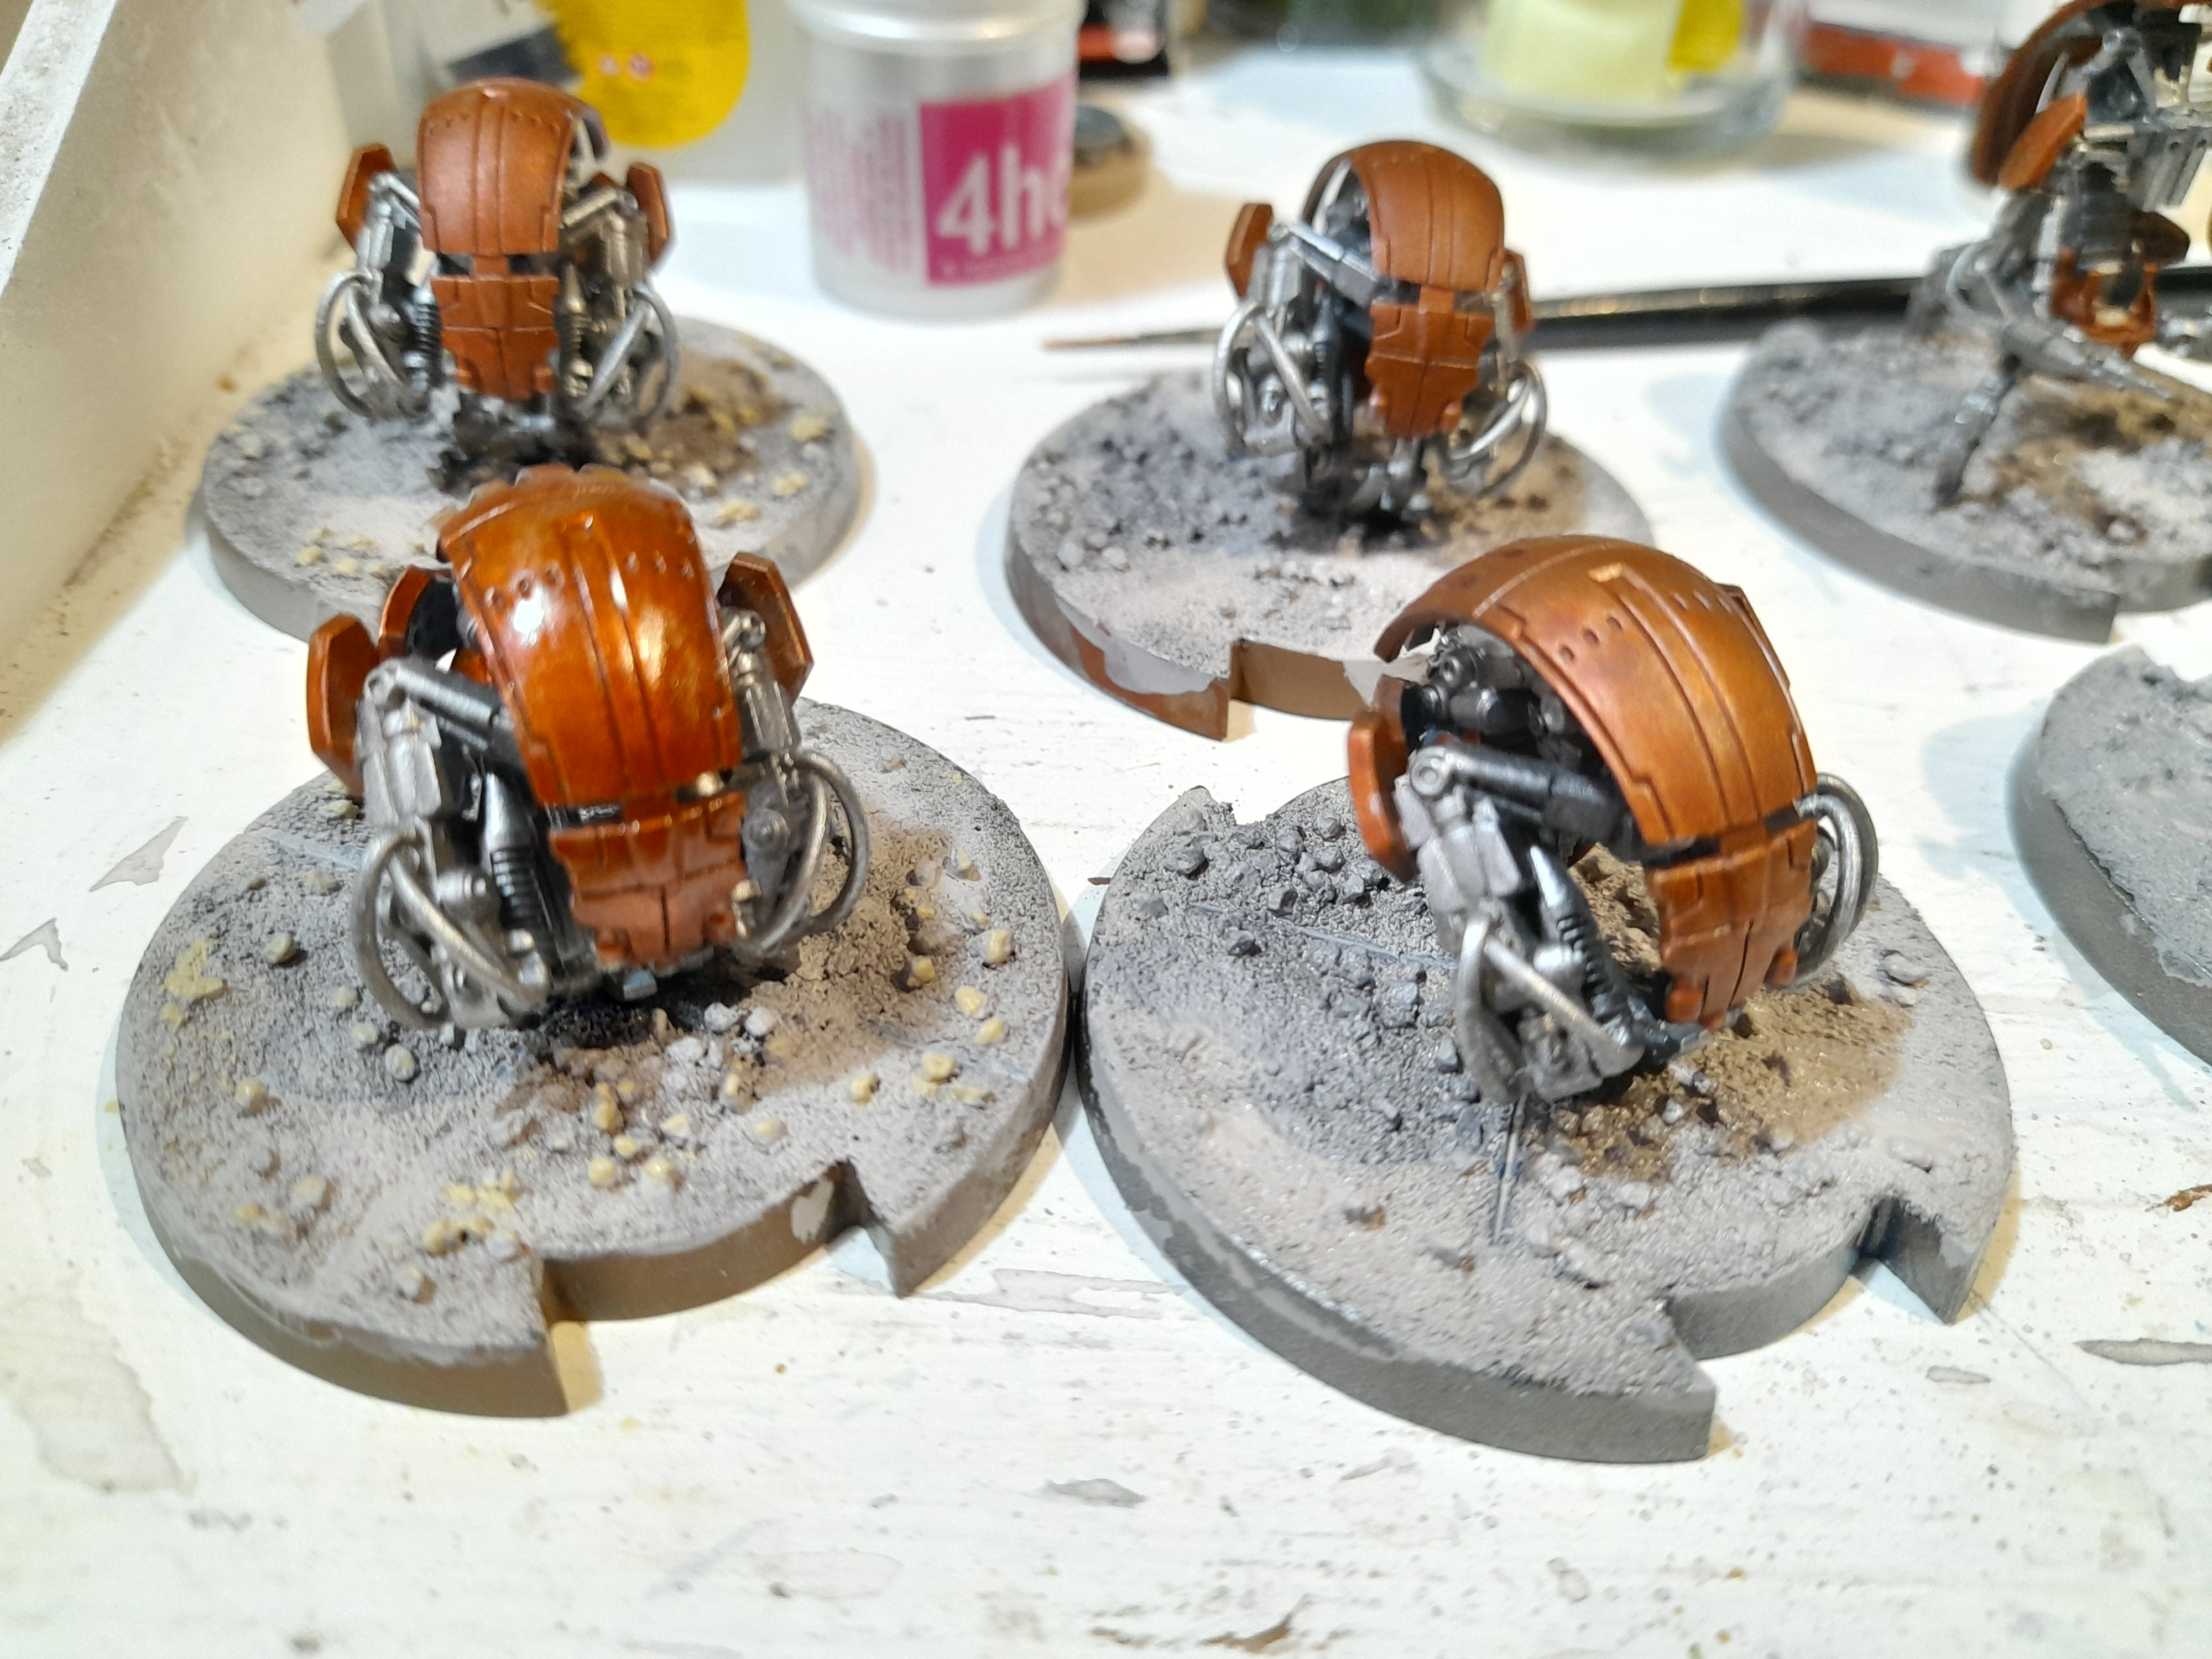 Gloss on the left
With that positive change achieved it was then:
Bases washed, drybrushed and tufts added.
Pipes picked out in black.
Metal washed, gun tips given a thin blue wash.
Eyes picked out in red.
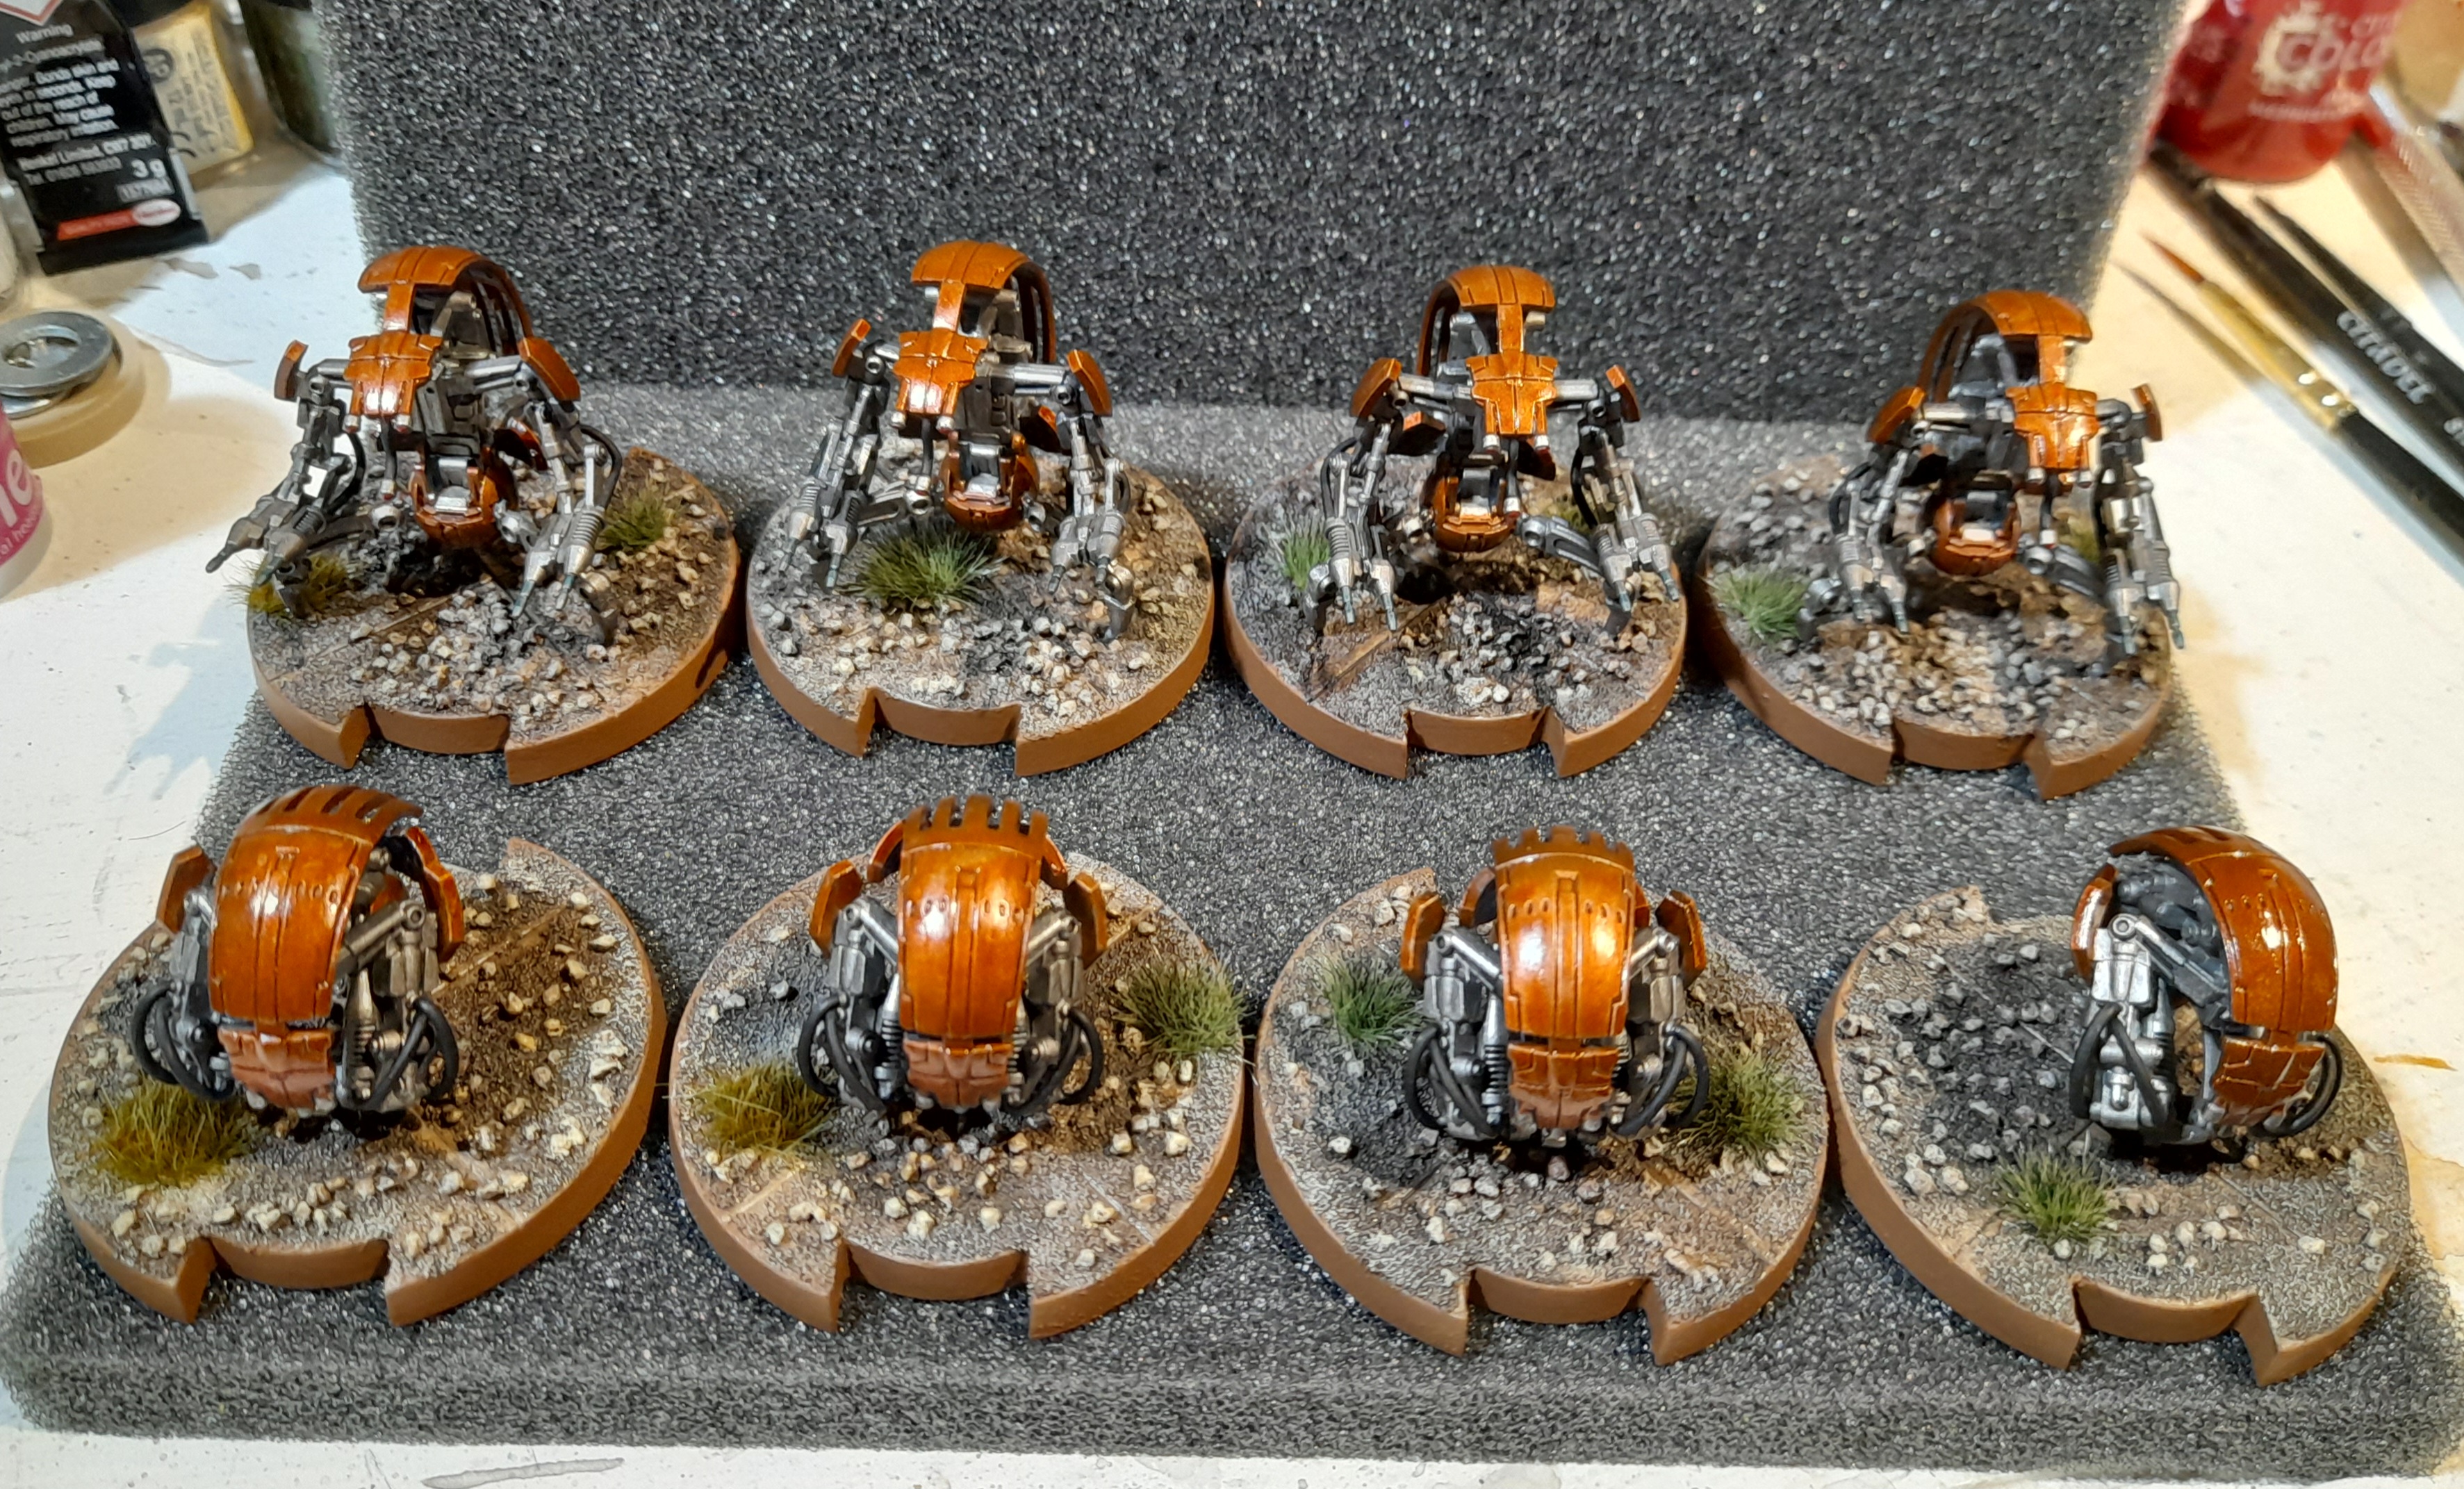
 Case is filling up....
Commando Droids
29th February 2024
The Commando Droids had been primed in grey. I knew I wanted them to be a dark grey, so I made up a mix of Black Templar and Apothecary White (to give it a slight blue accent). When they were all done I gave them a light drybrush with Fenrisian Grey to emphasise the blue tint.
Next up it was picking out the various panels and joints in a Vallejo Model Colour Bronze, which has a more gold tinge I’d say.
Finishing them off it was picking out the guns with black, followed by a light drybrush of grey. Then the chest light in red and the eyes in white. For the leader I also did some white markings on the head and chest. I did the leader first, then once happy I rolled out the steps on to all the rest.
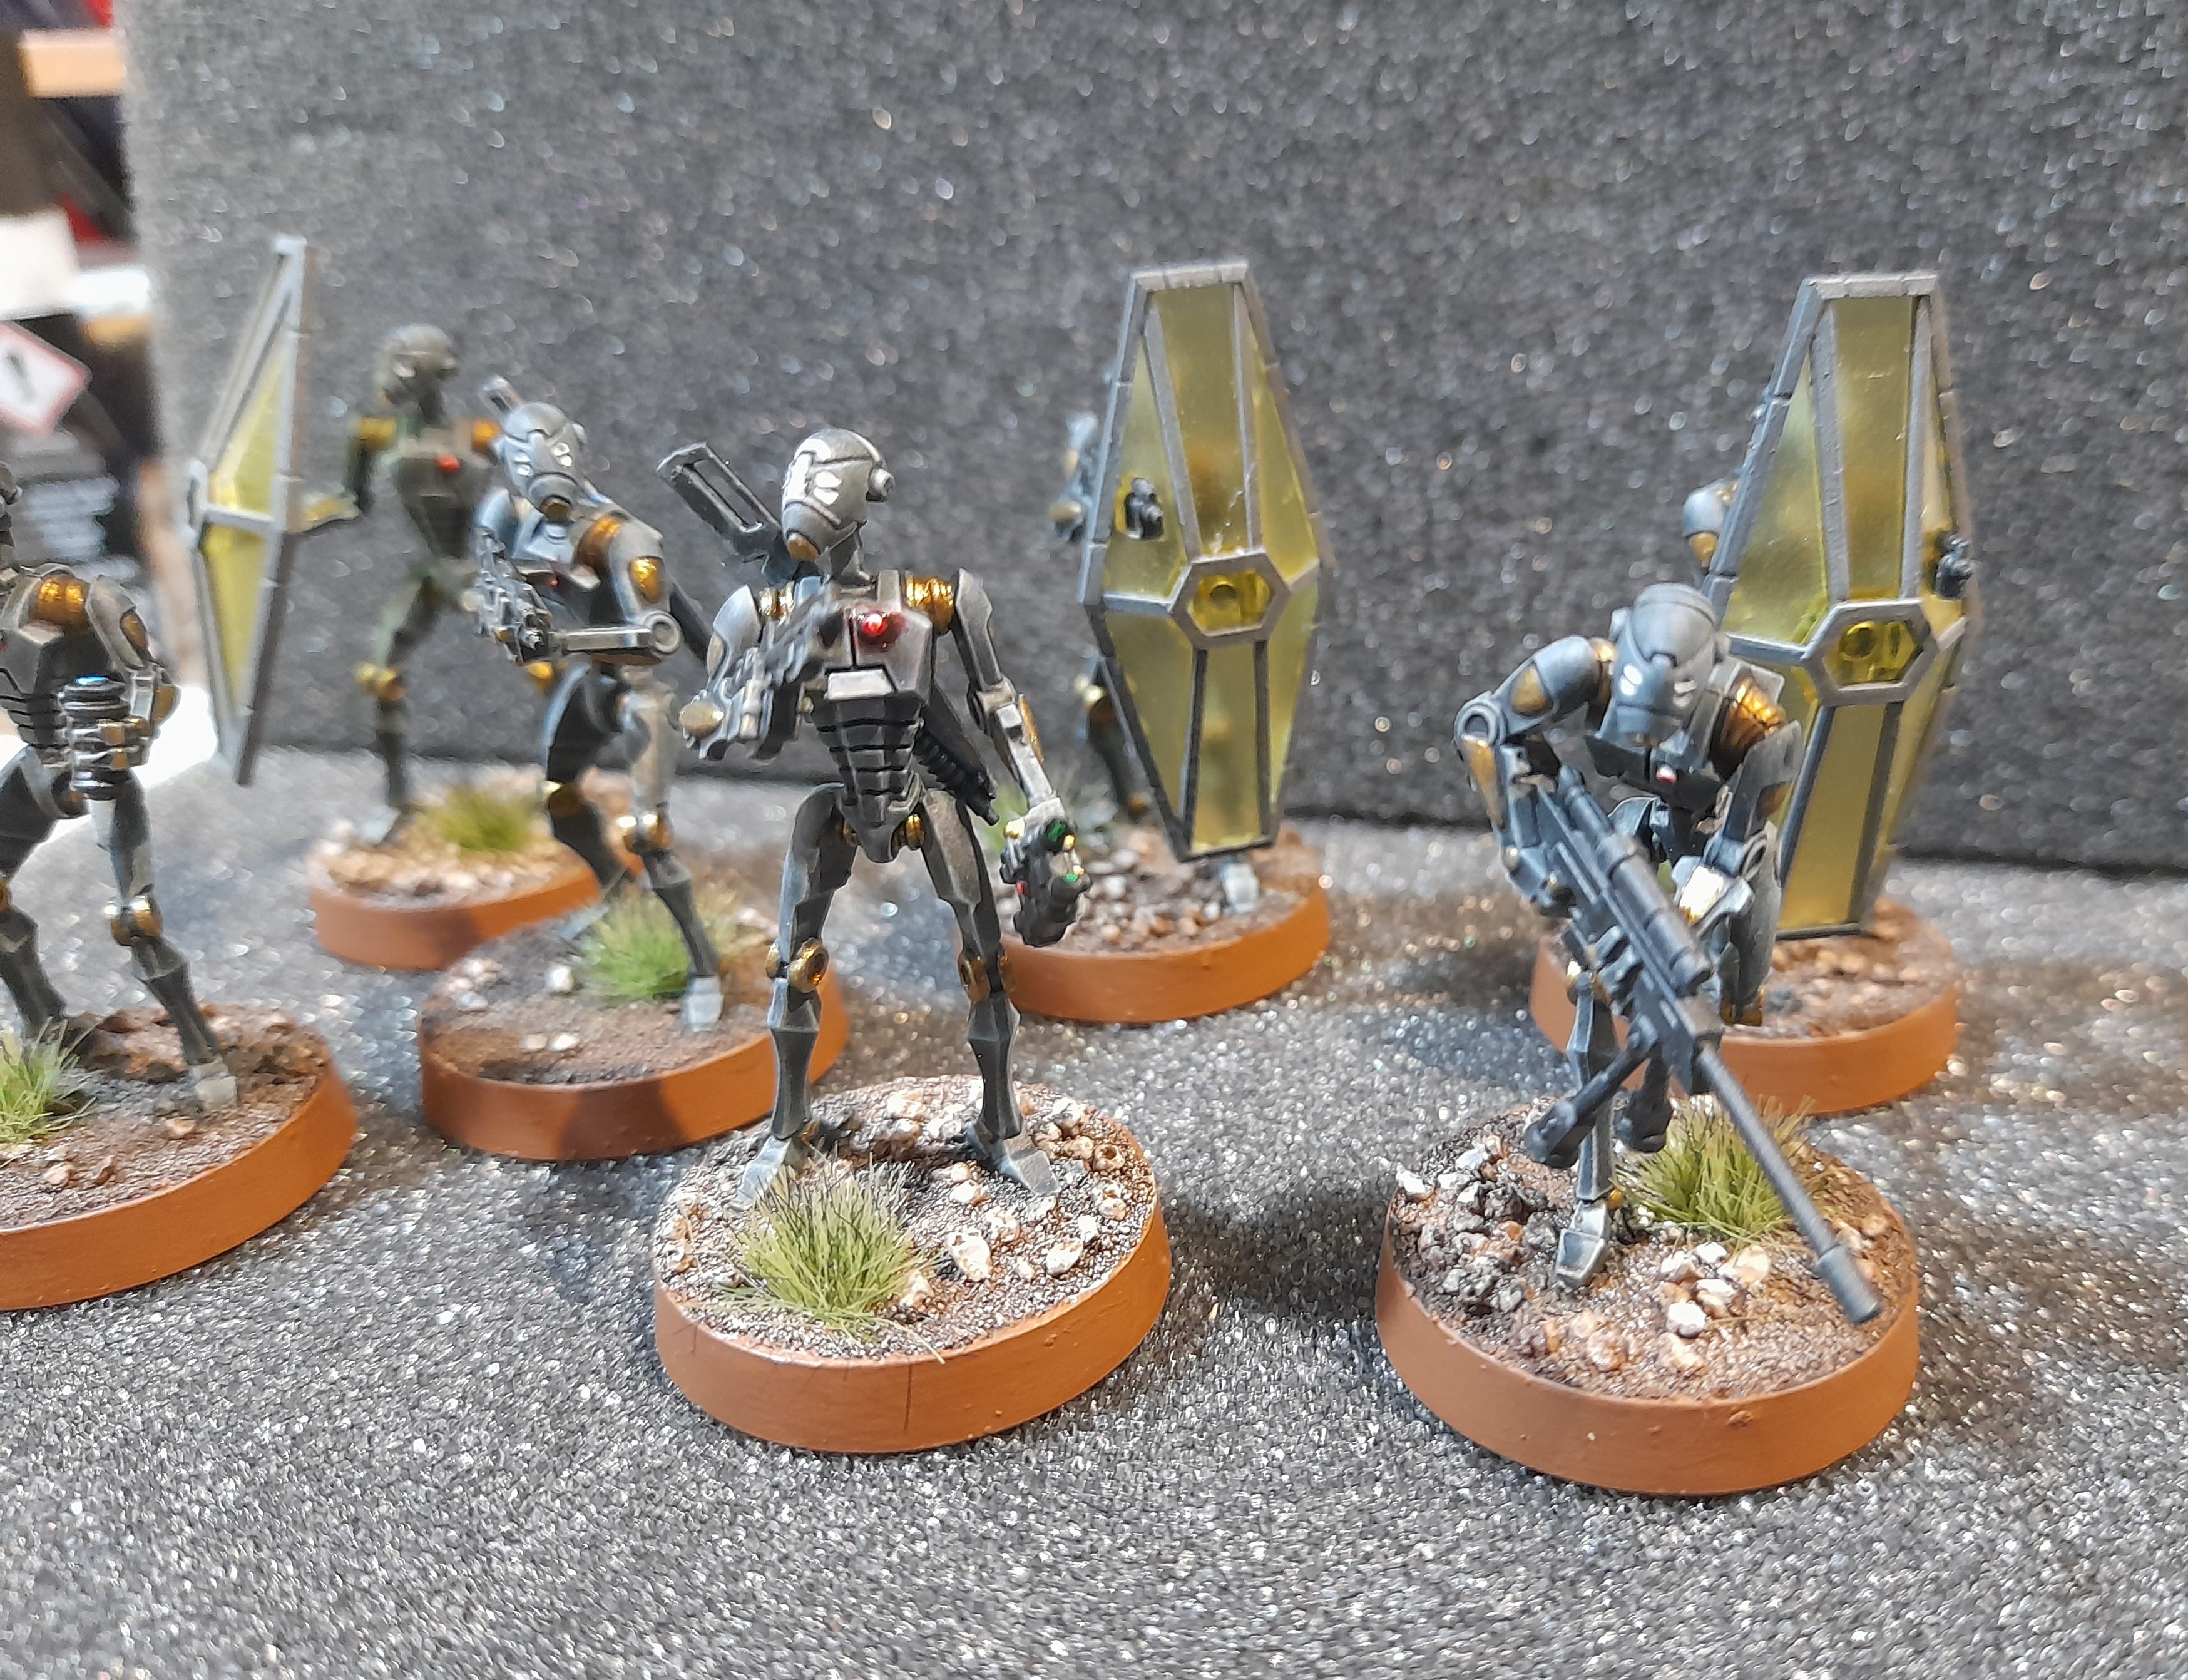
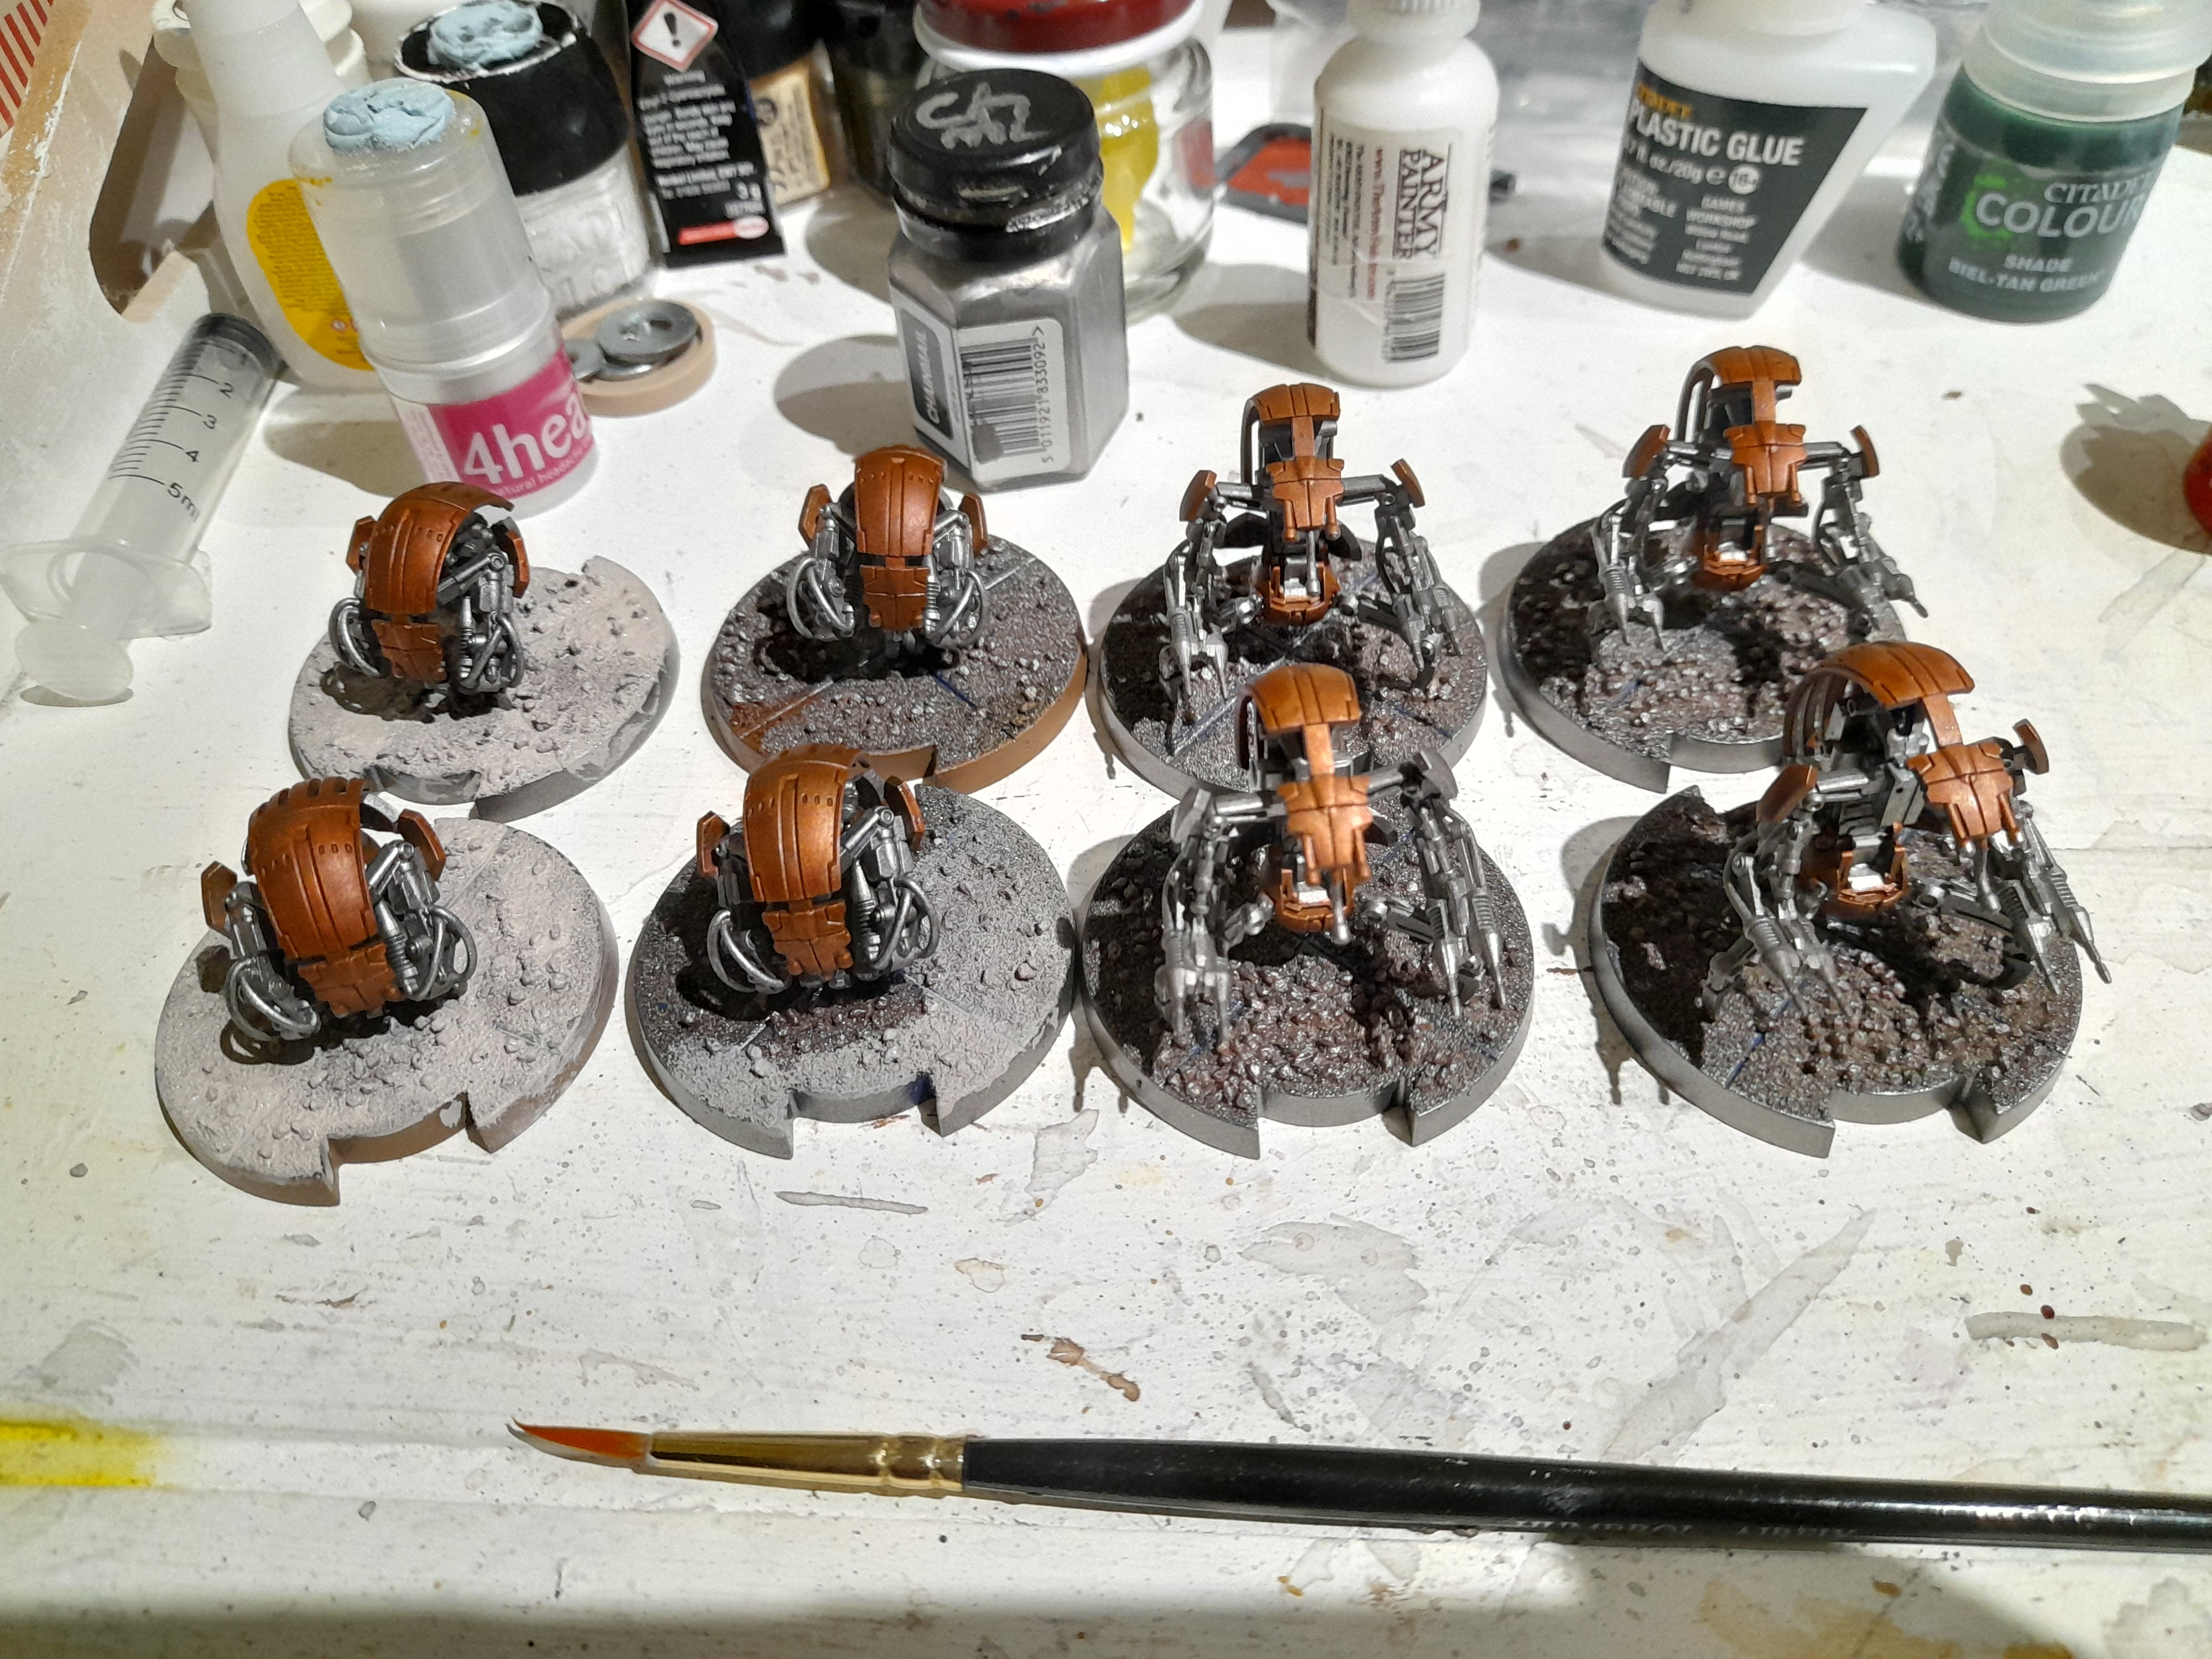
B1 Upgrade unit
24th February 2024
The four droids of the upgrade unit already had their base colour down. So, it was just a case of picking out the weapons and adding yellow marking for the command droid and red markings for the security droid.
For the radiation cannon I went for a fluo green wash over the business end of the gun.
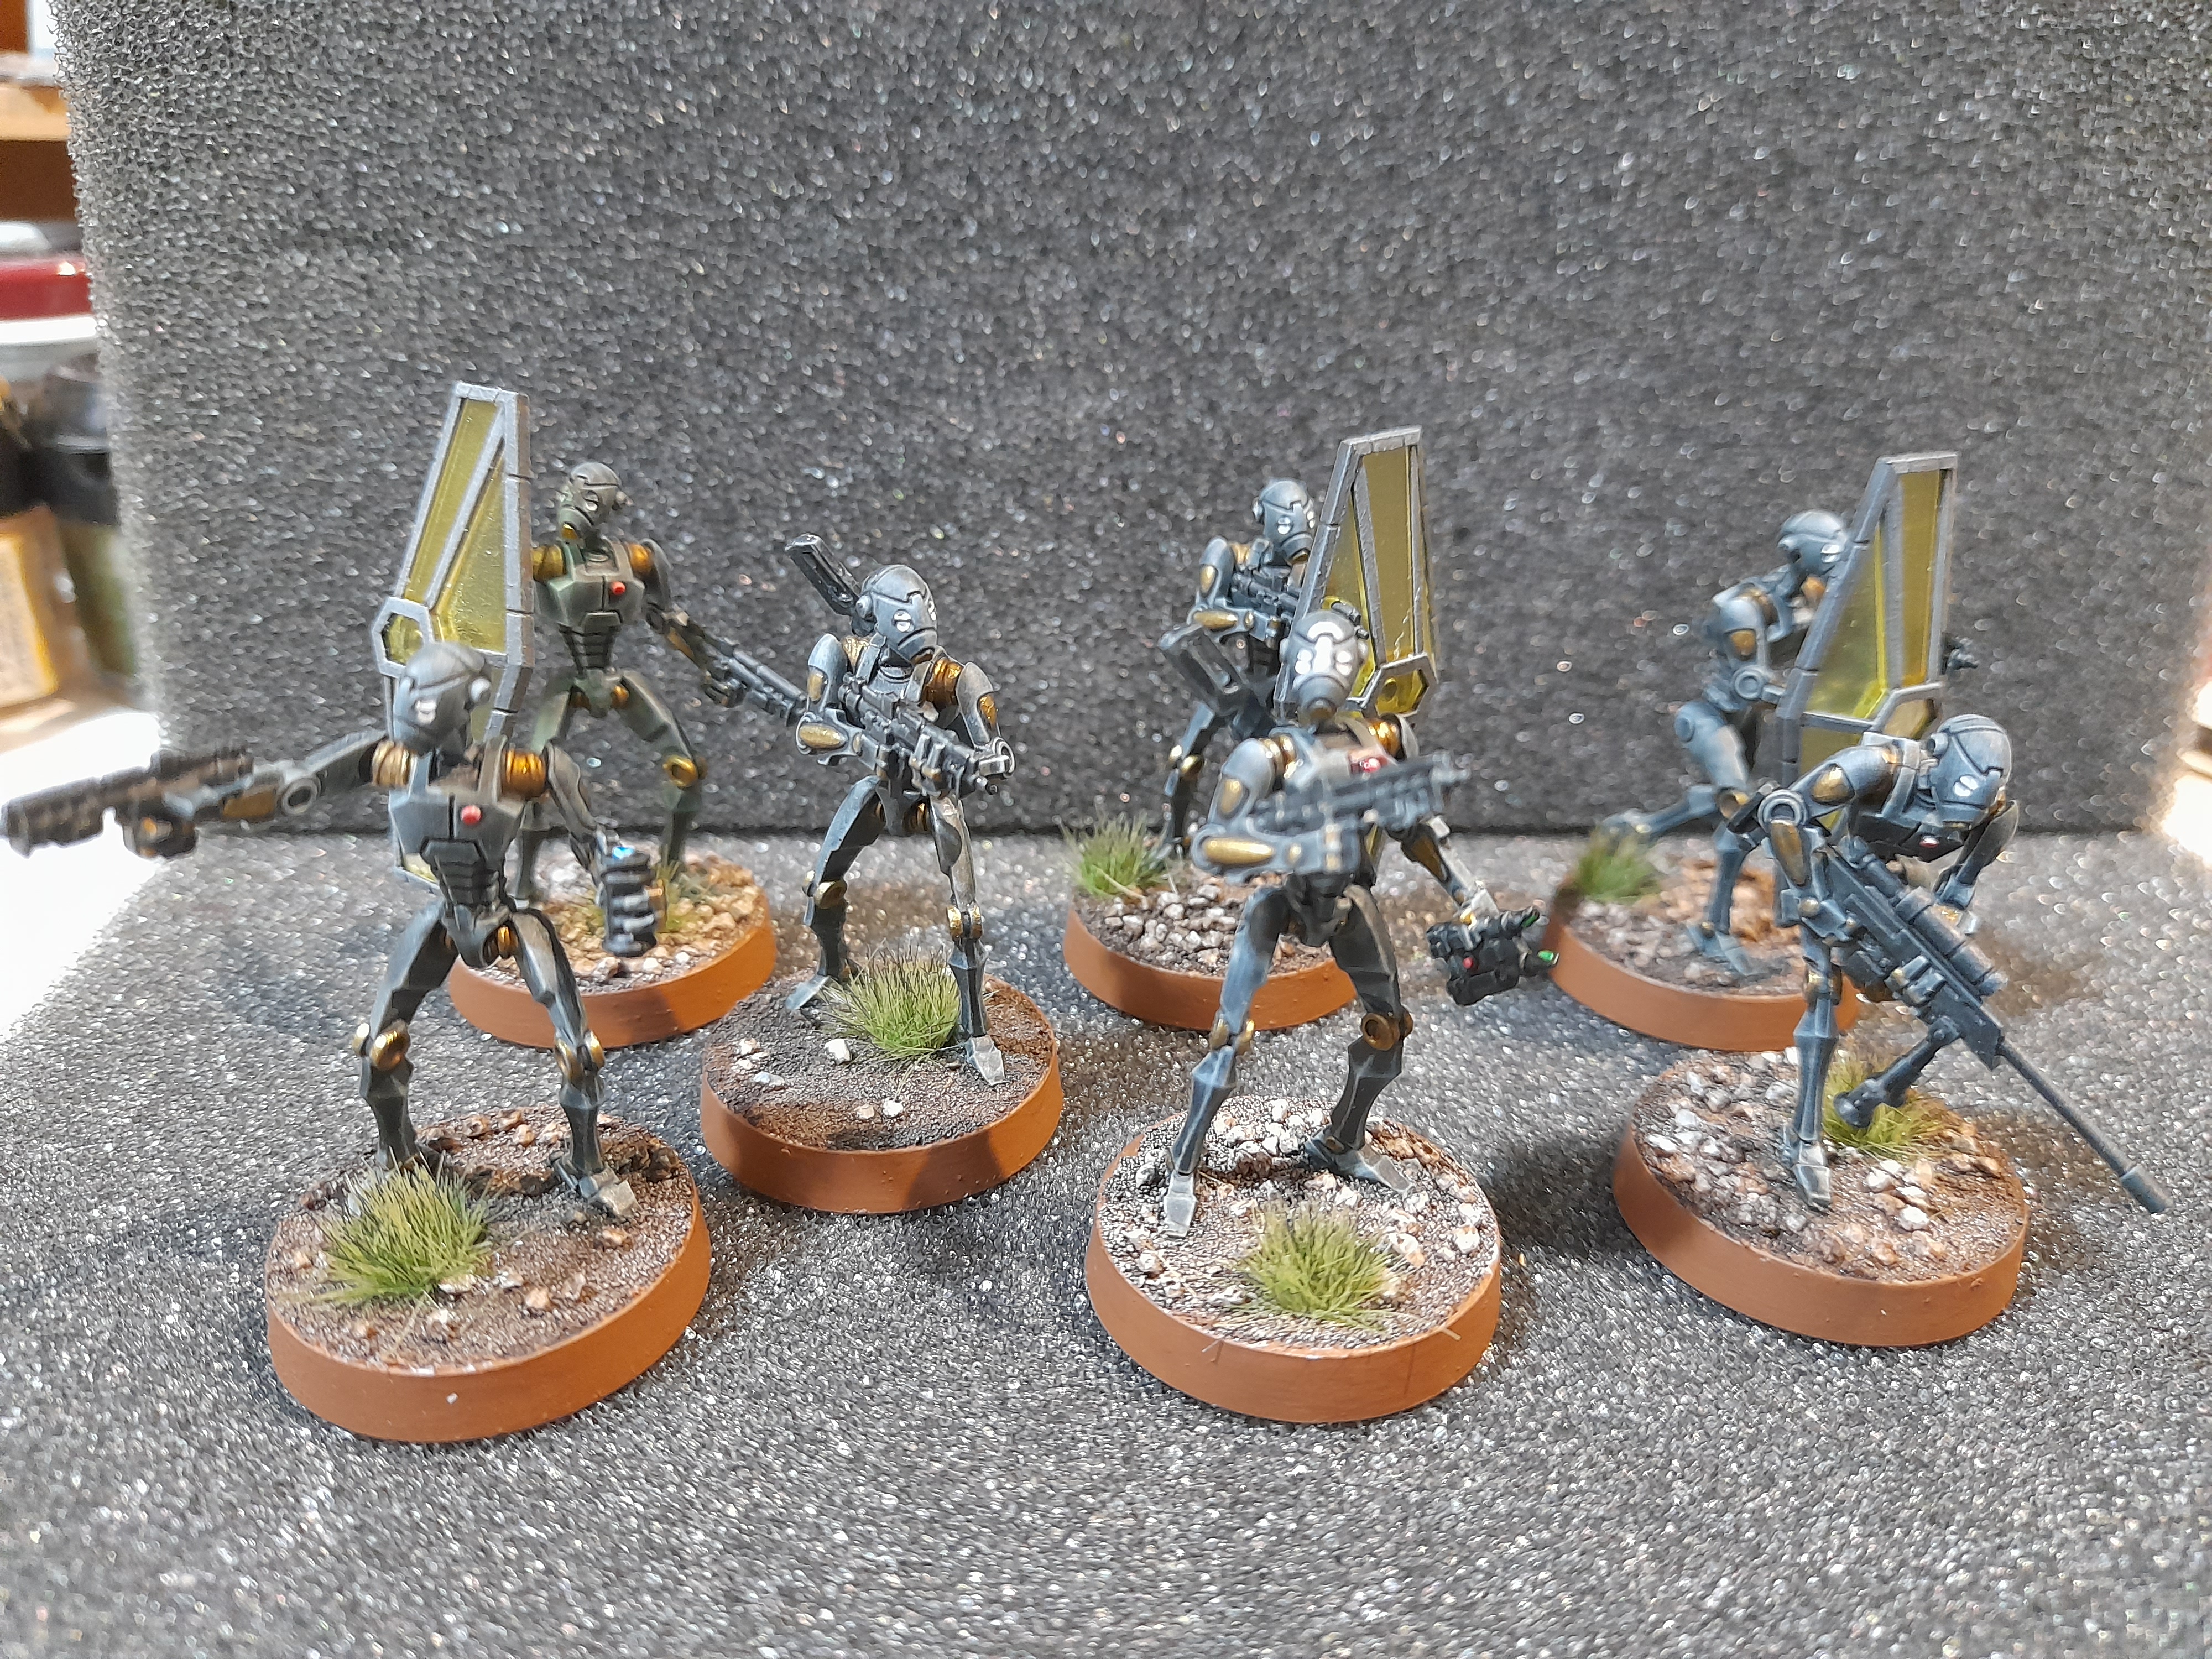
Roger! Roger!
23rd February 2024
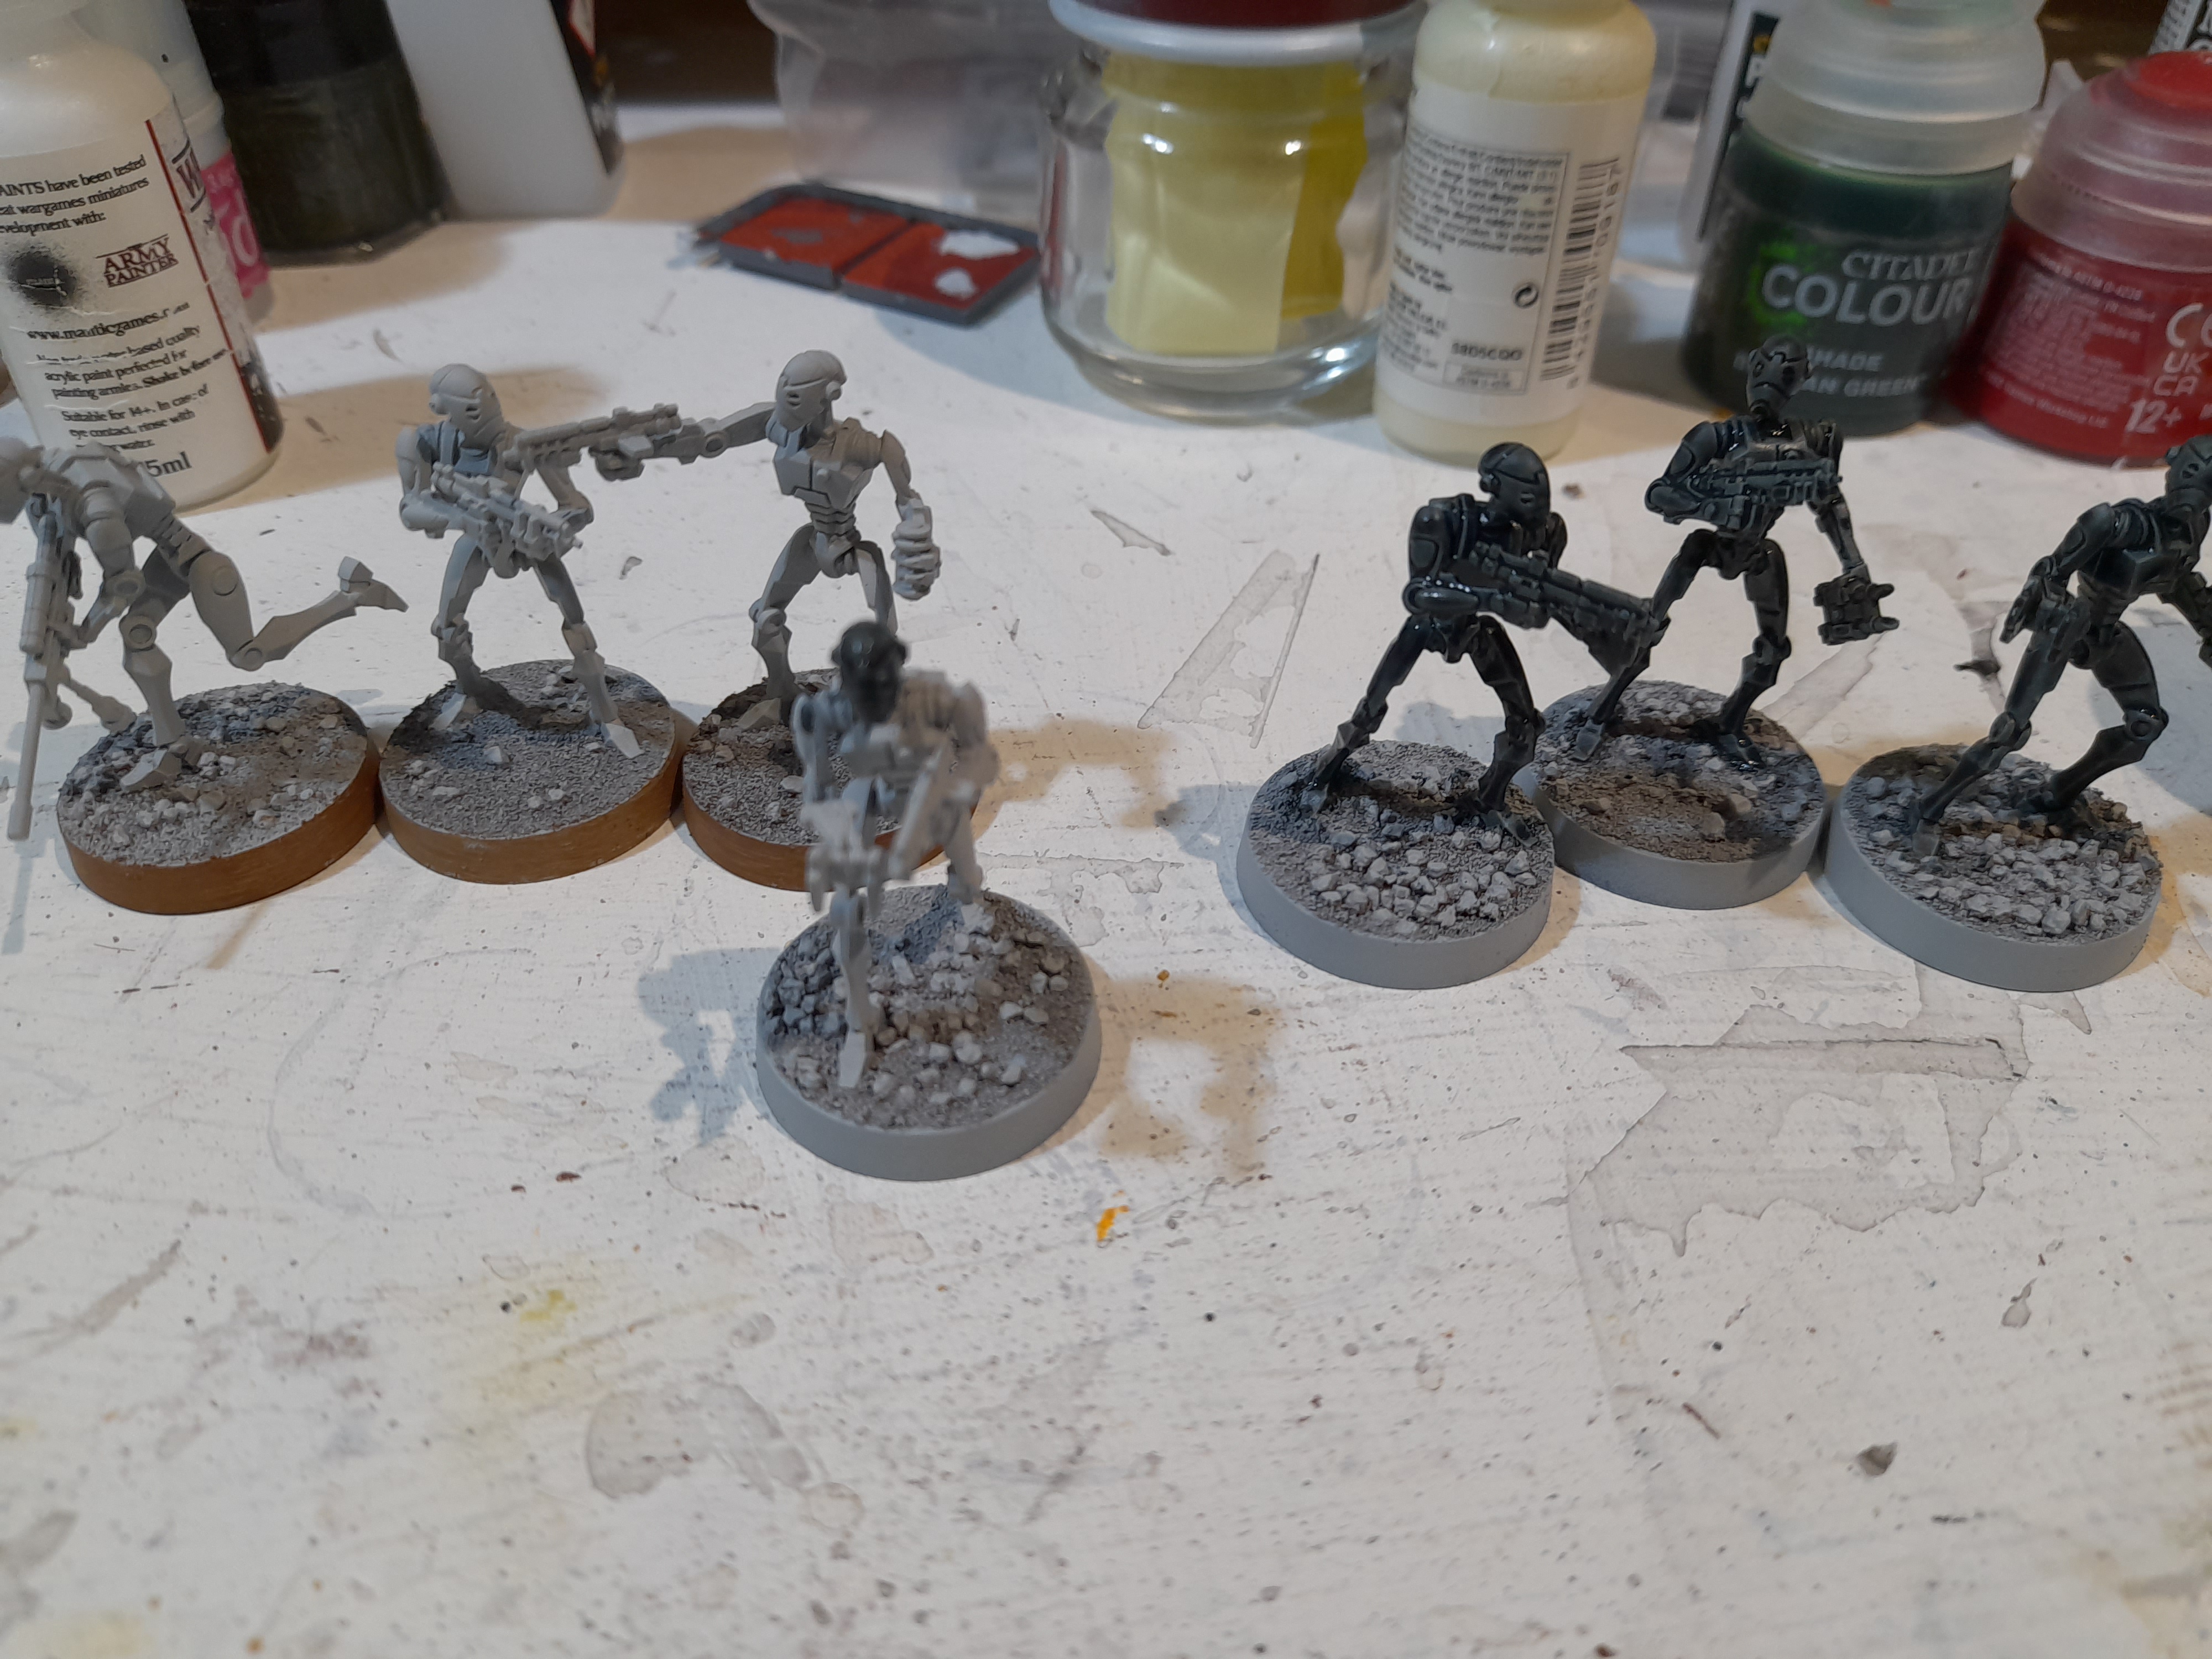
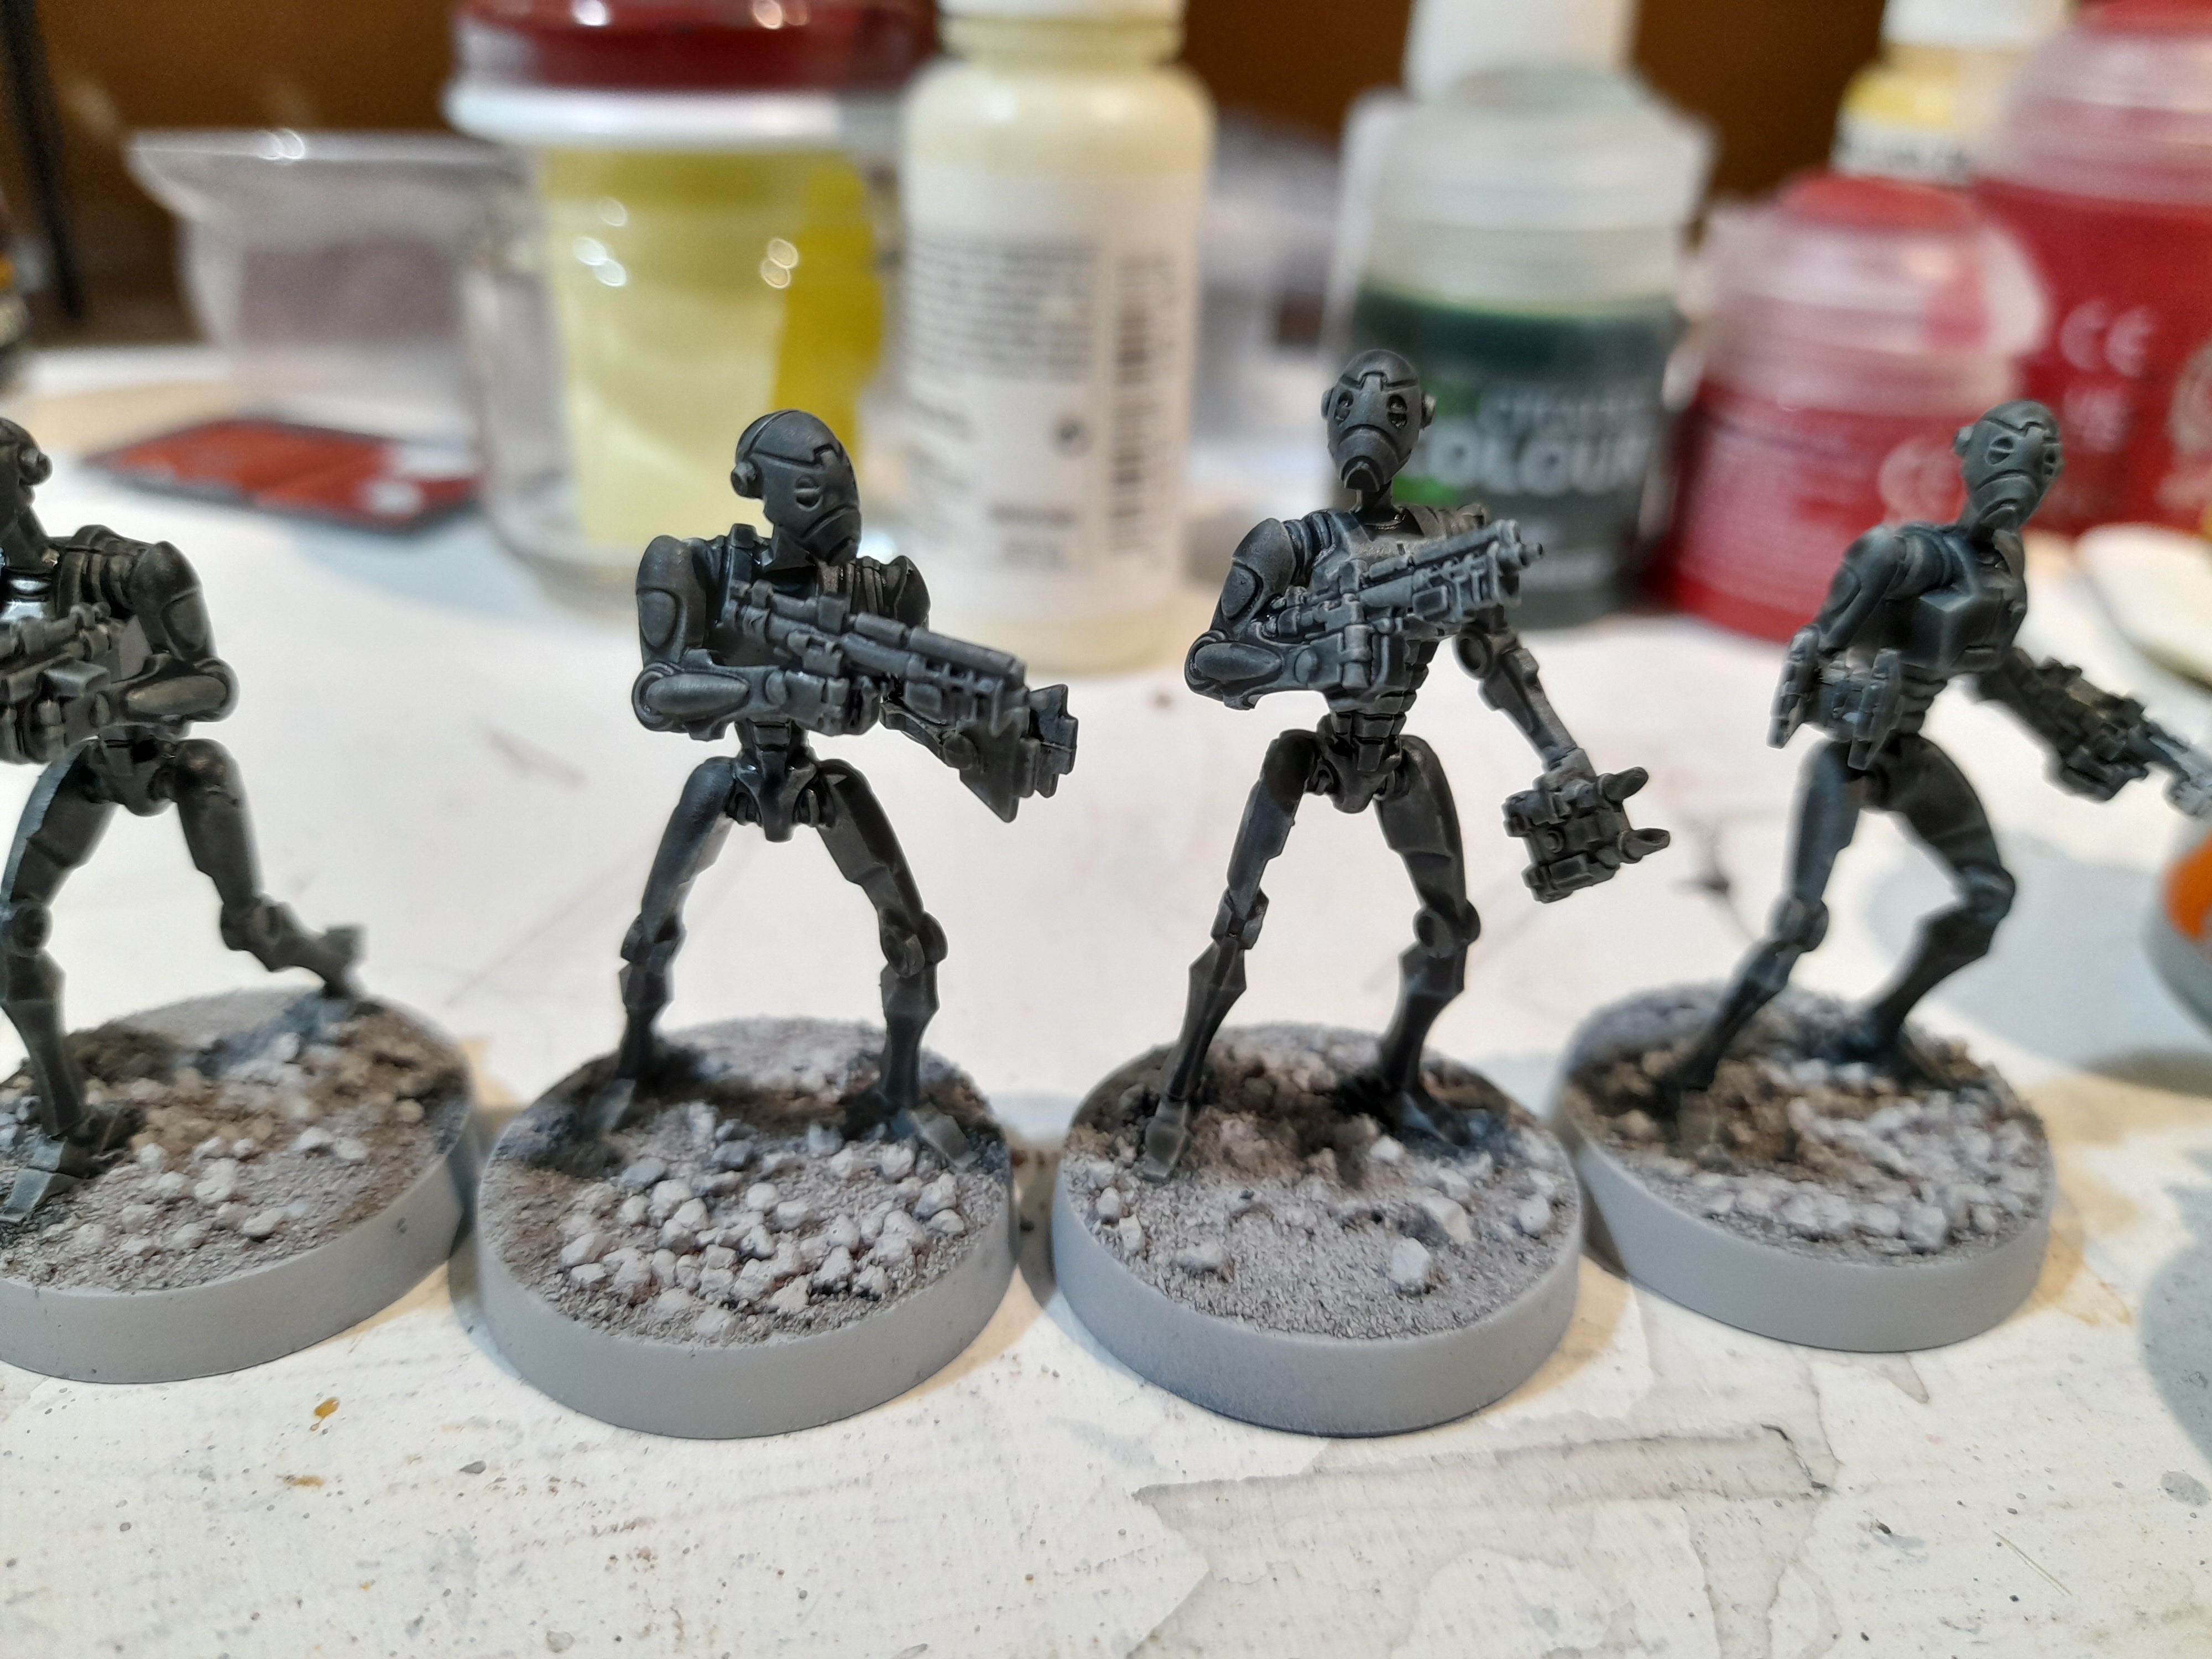
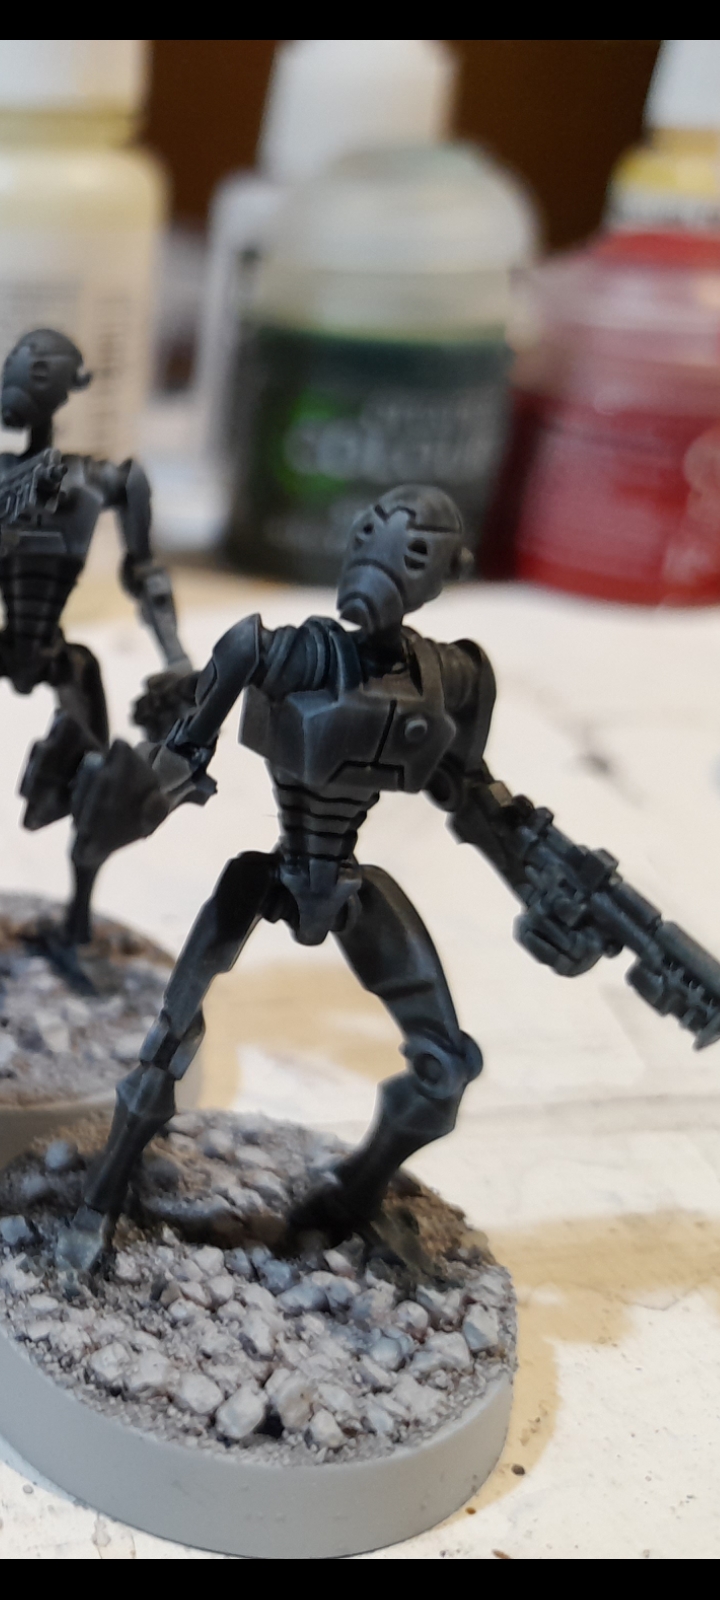
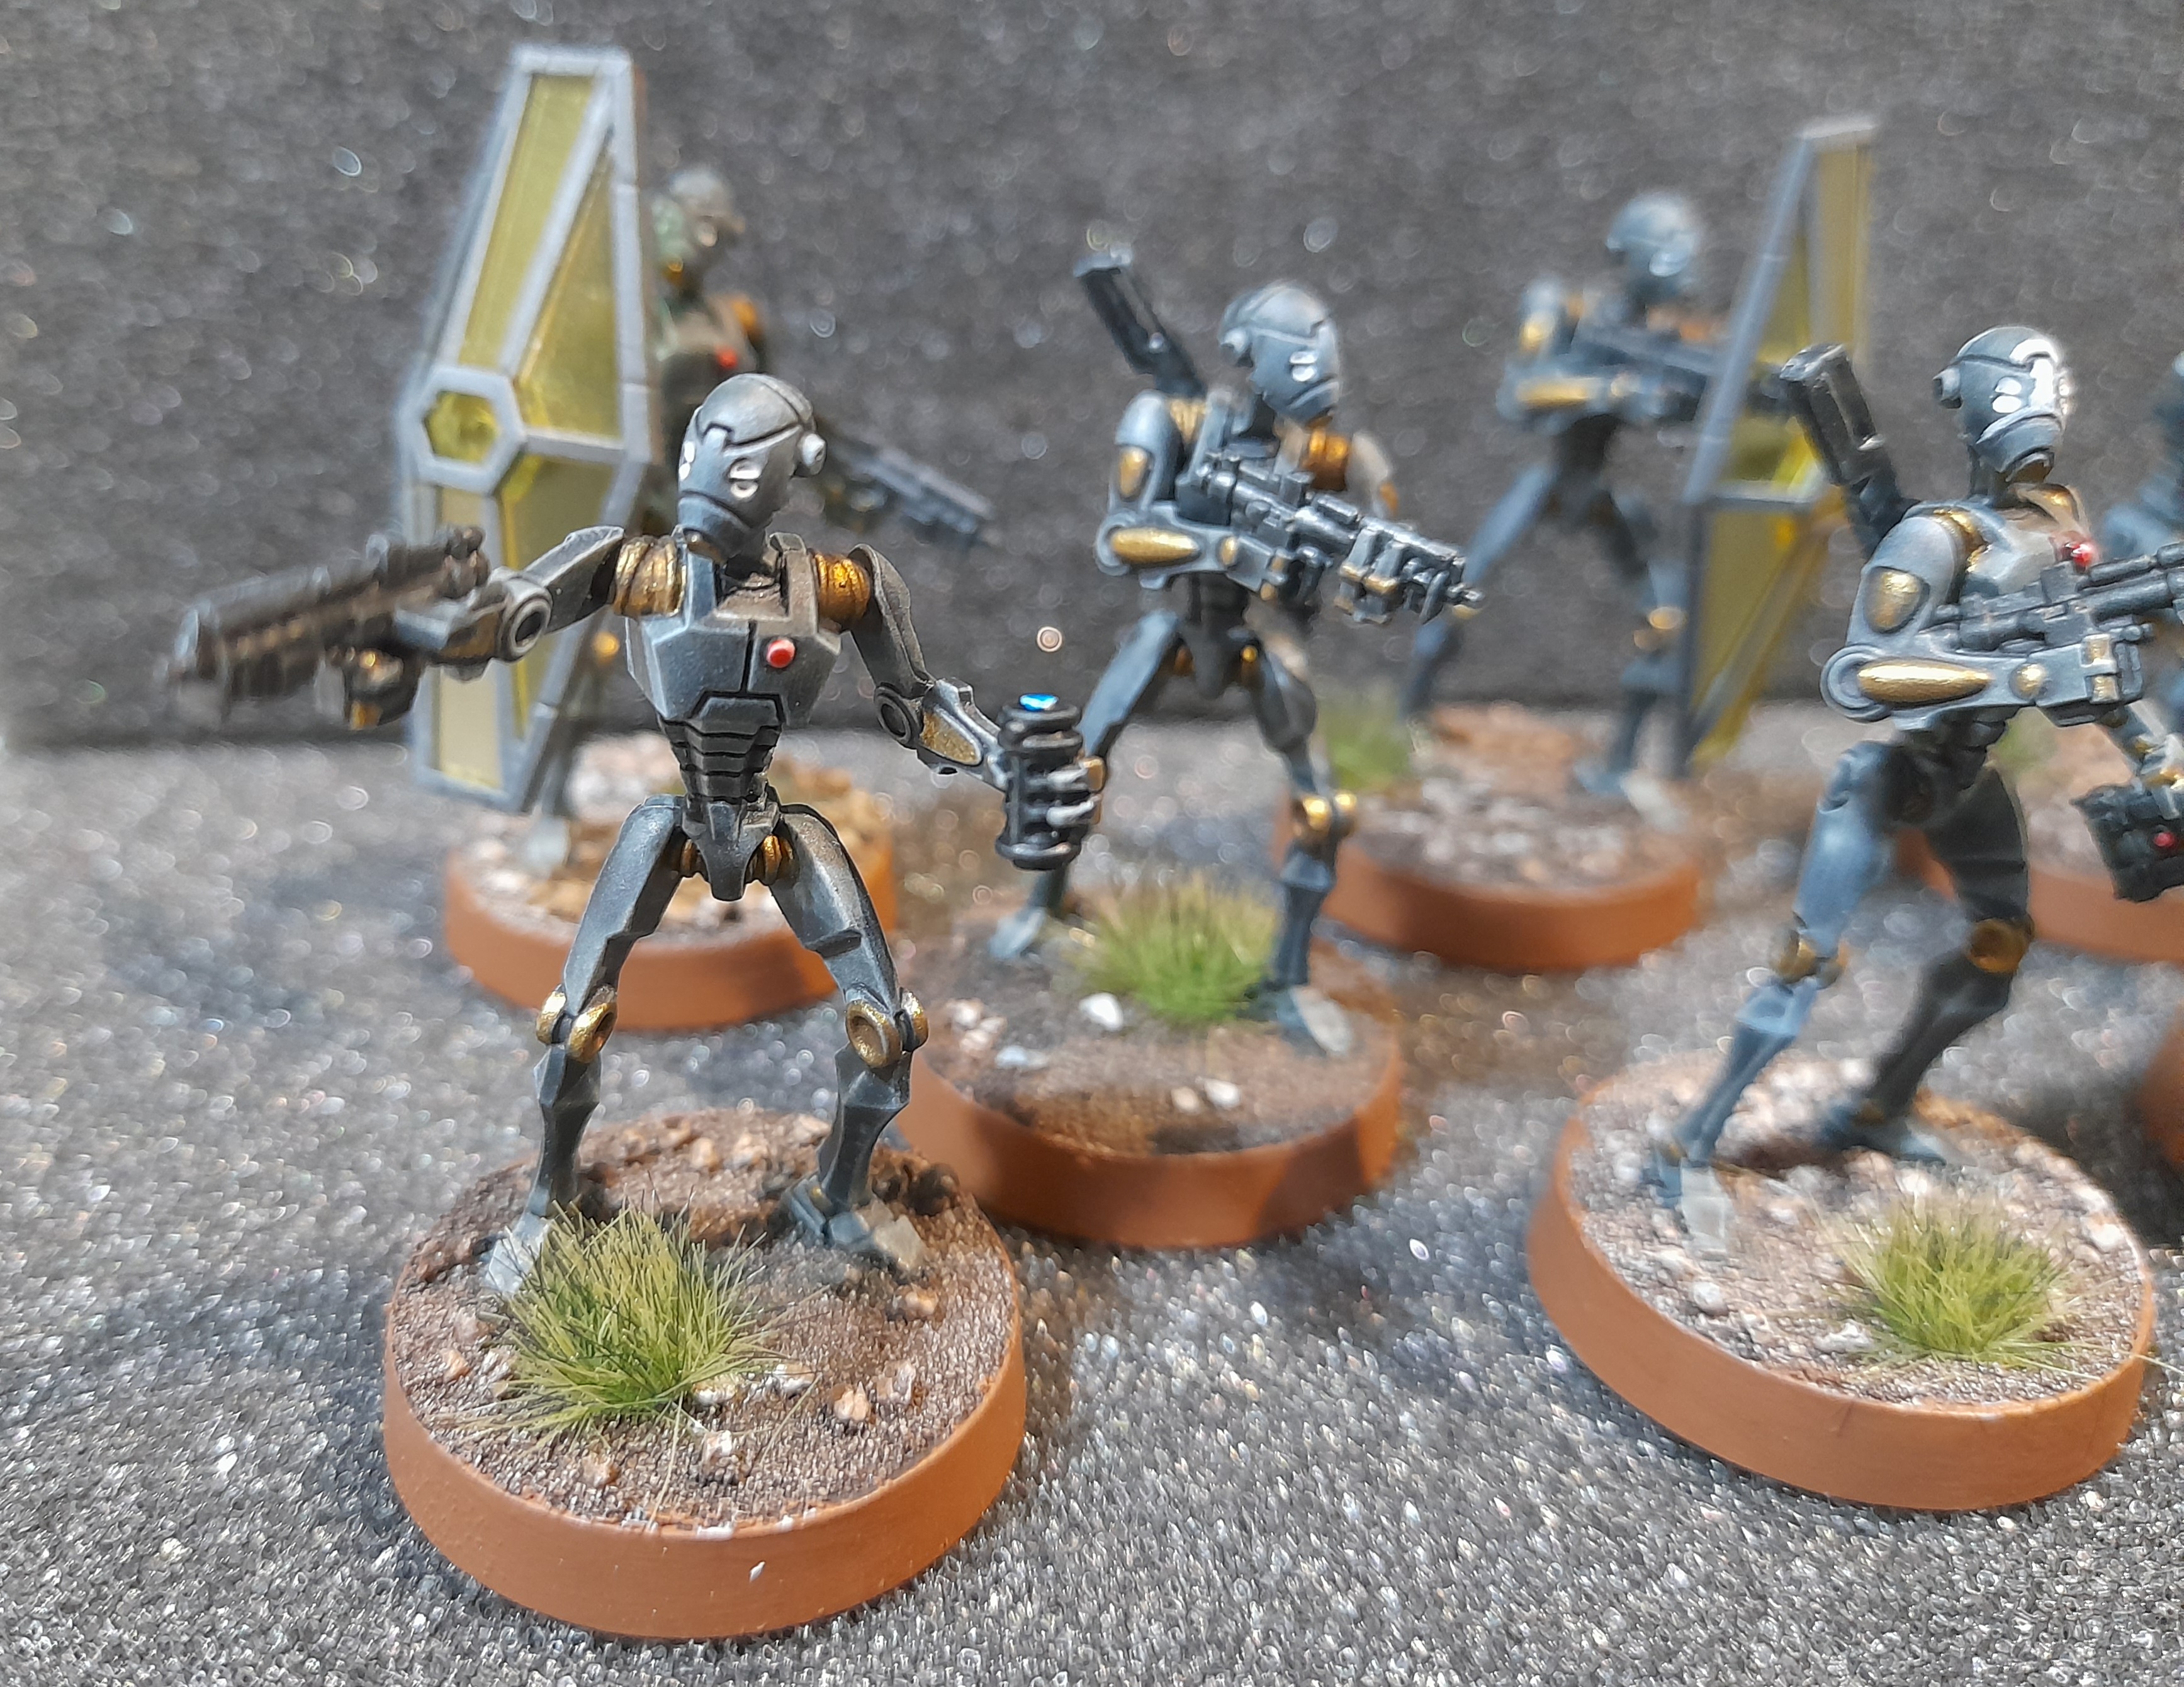
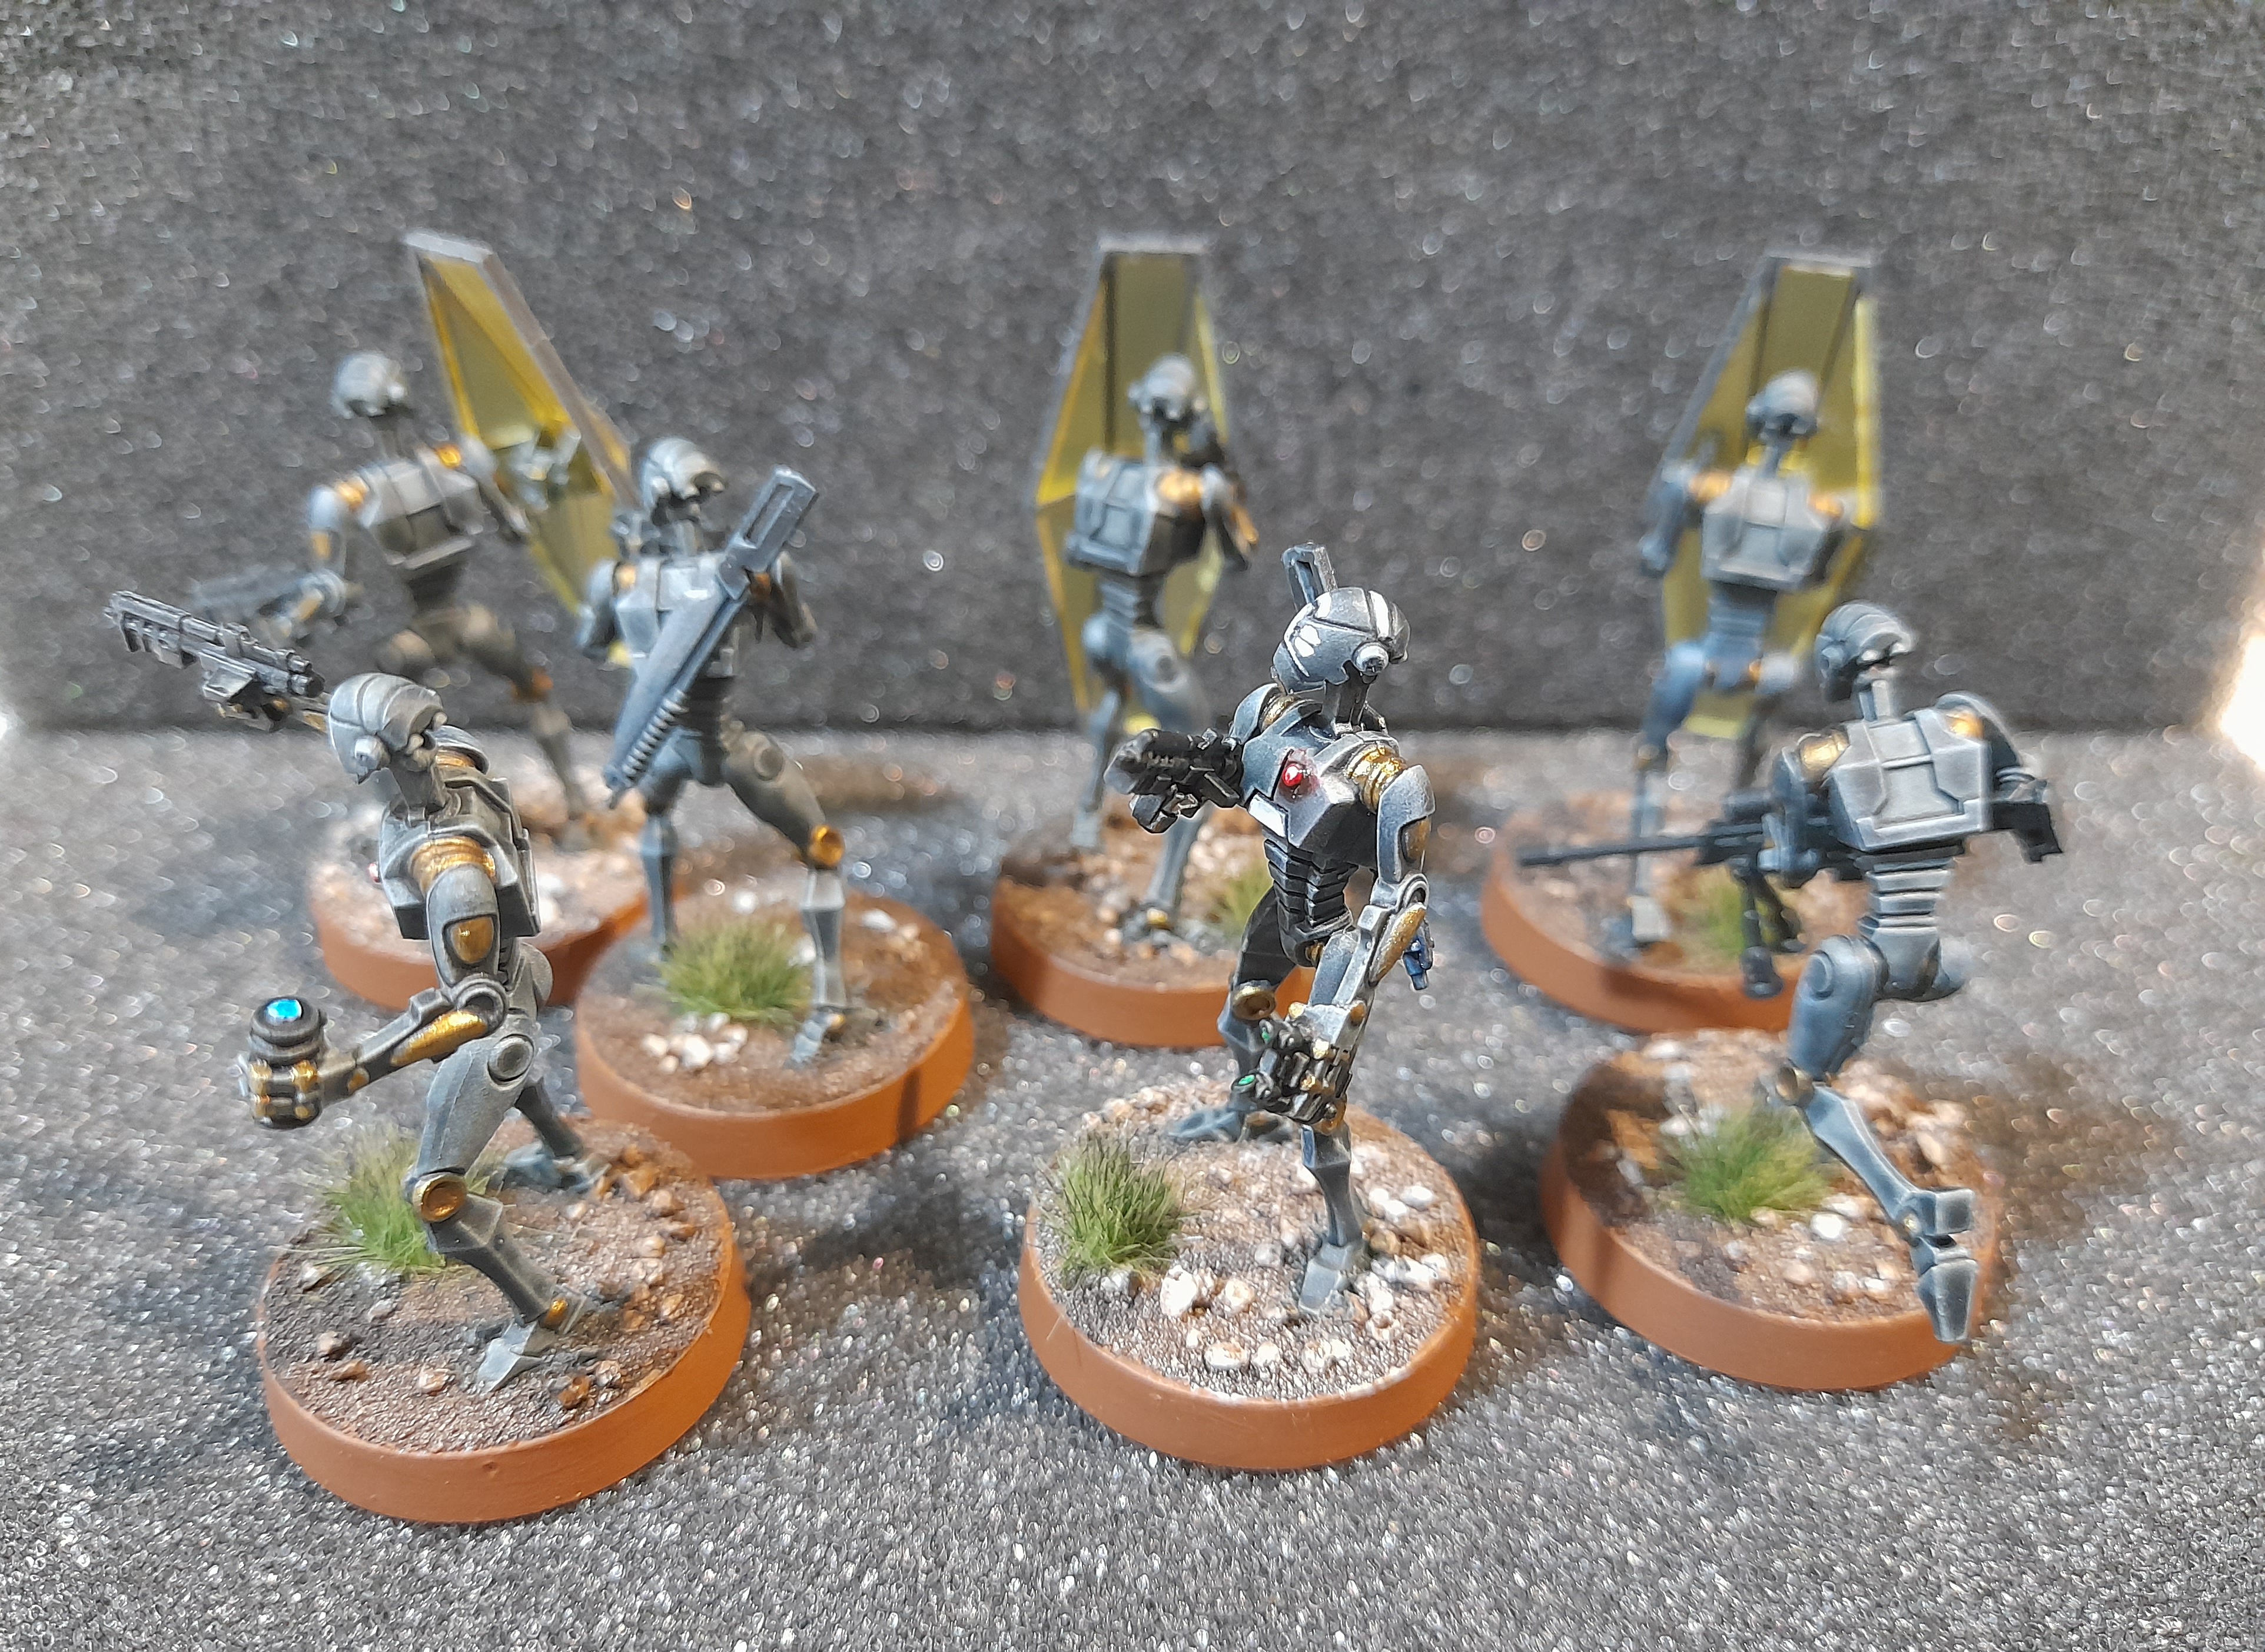
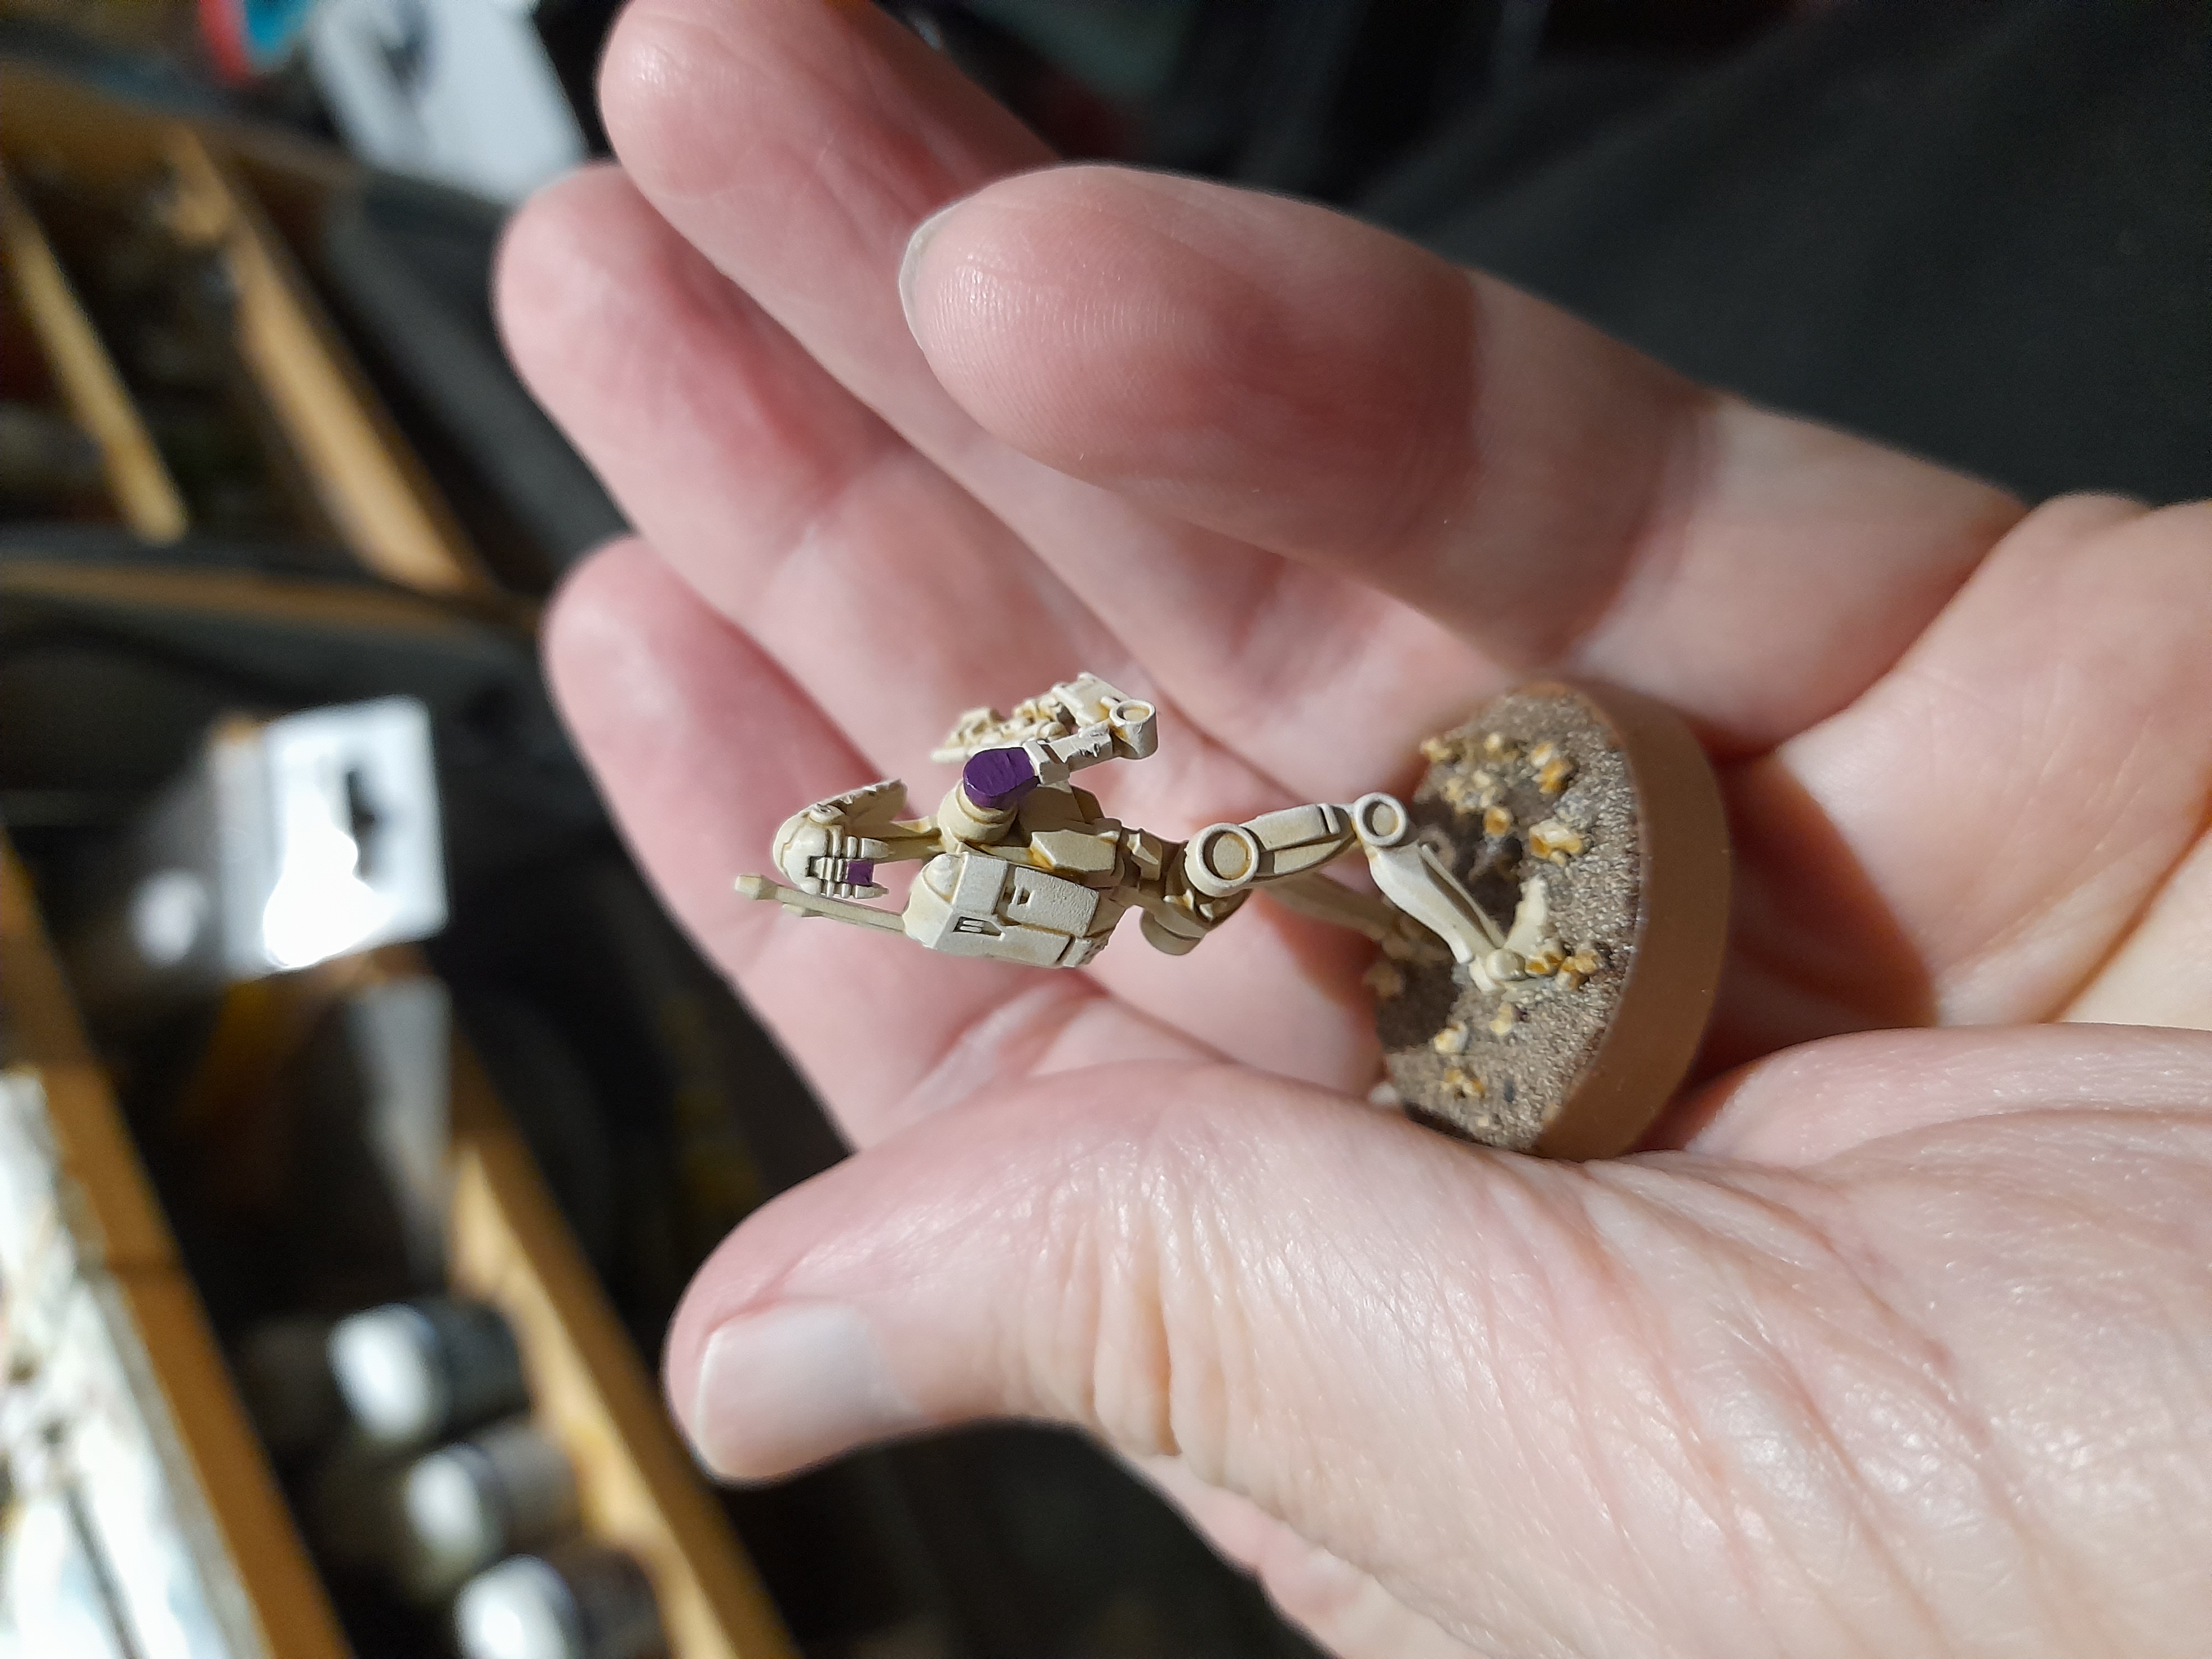
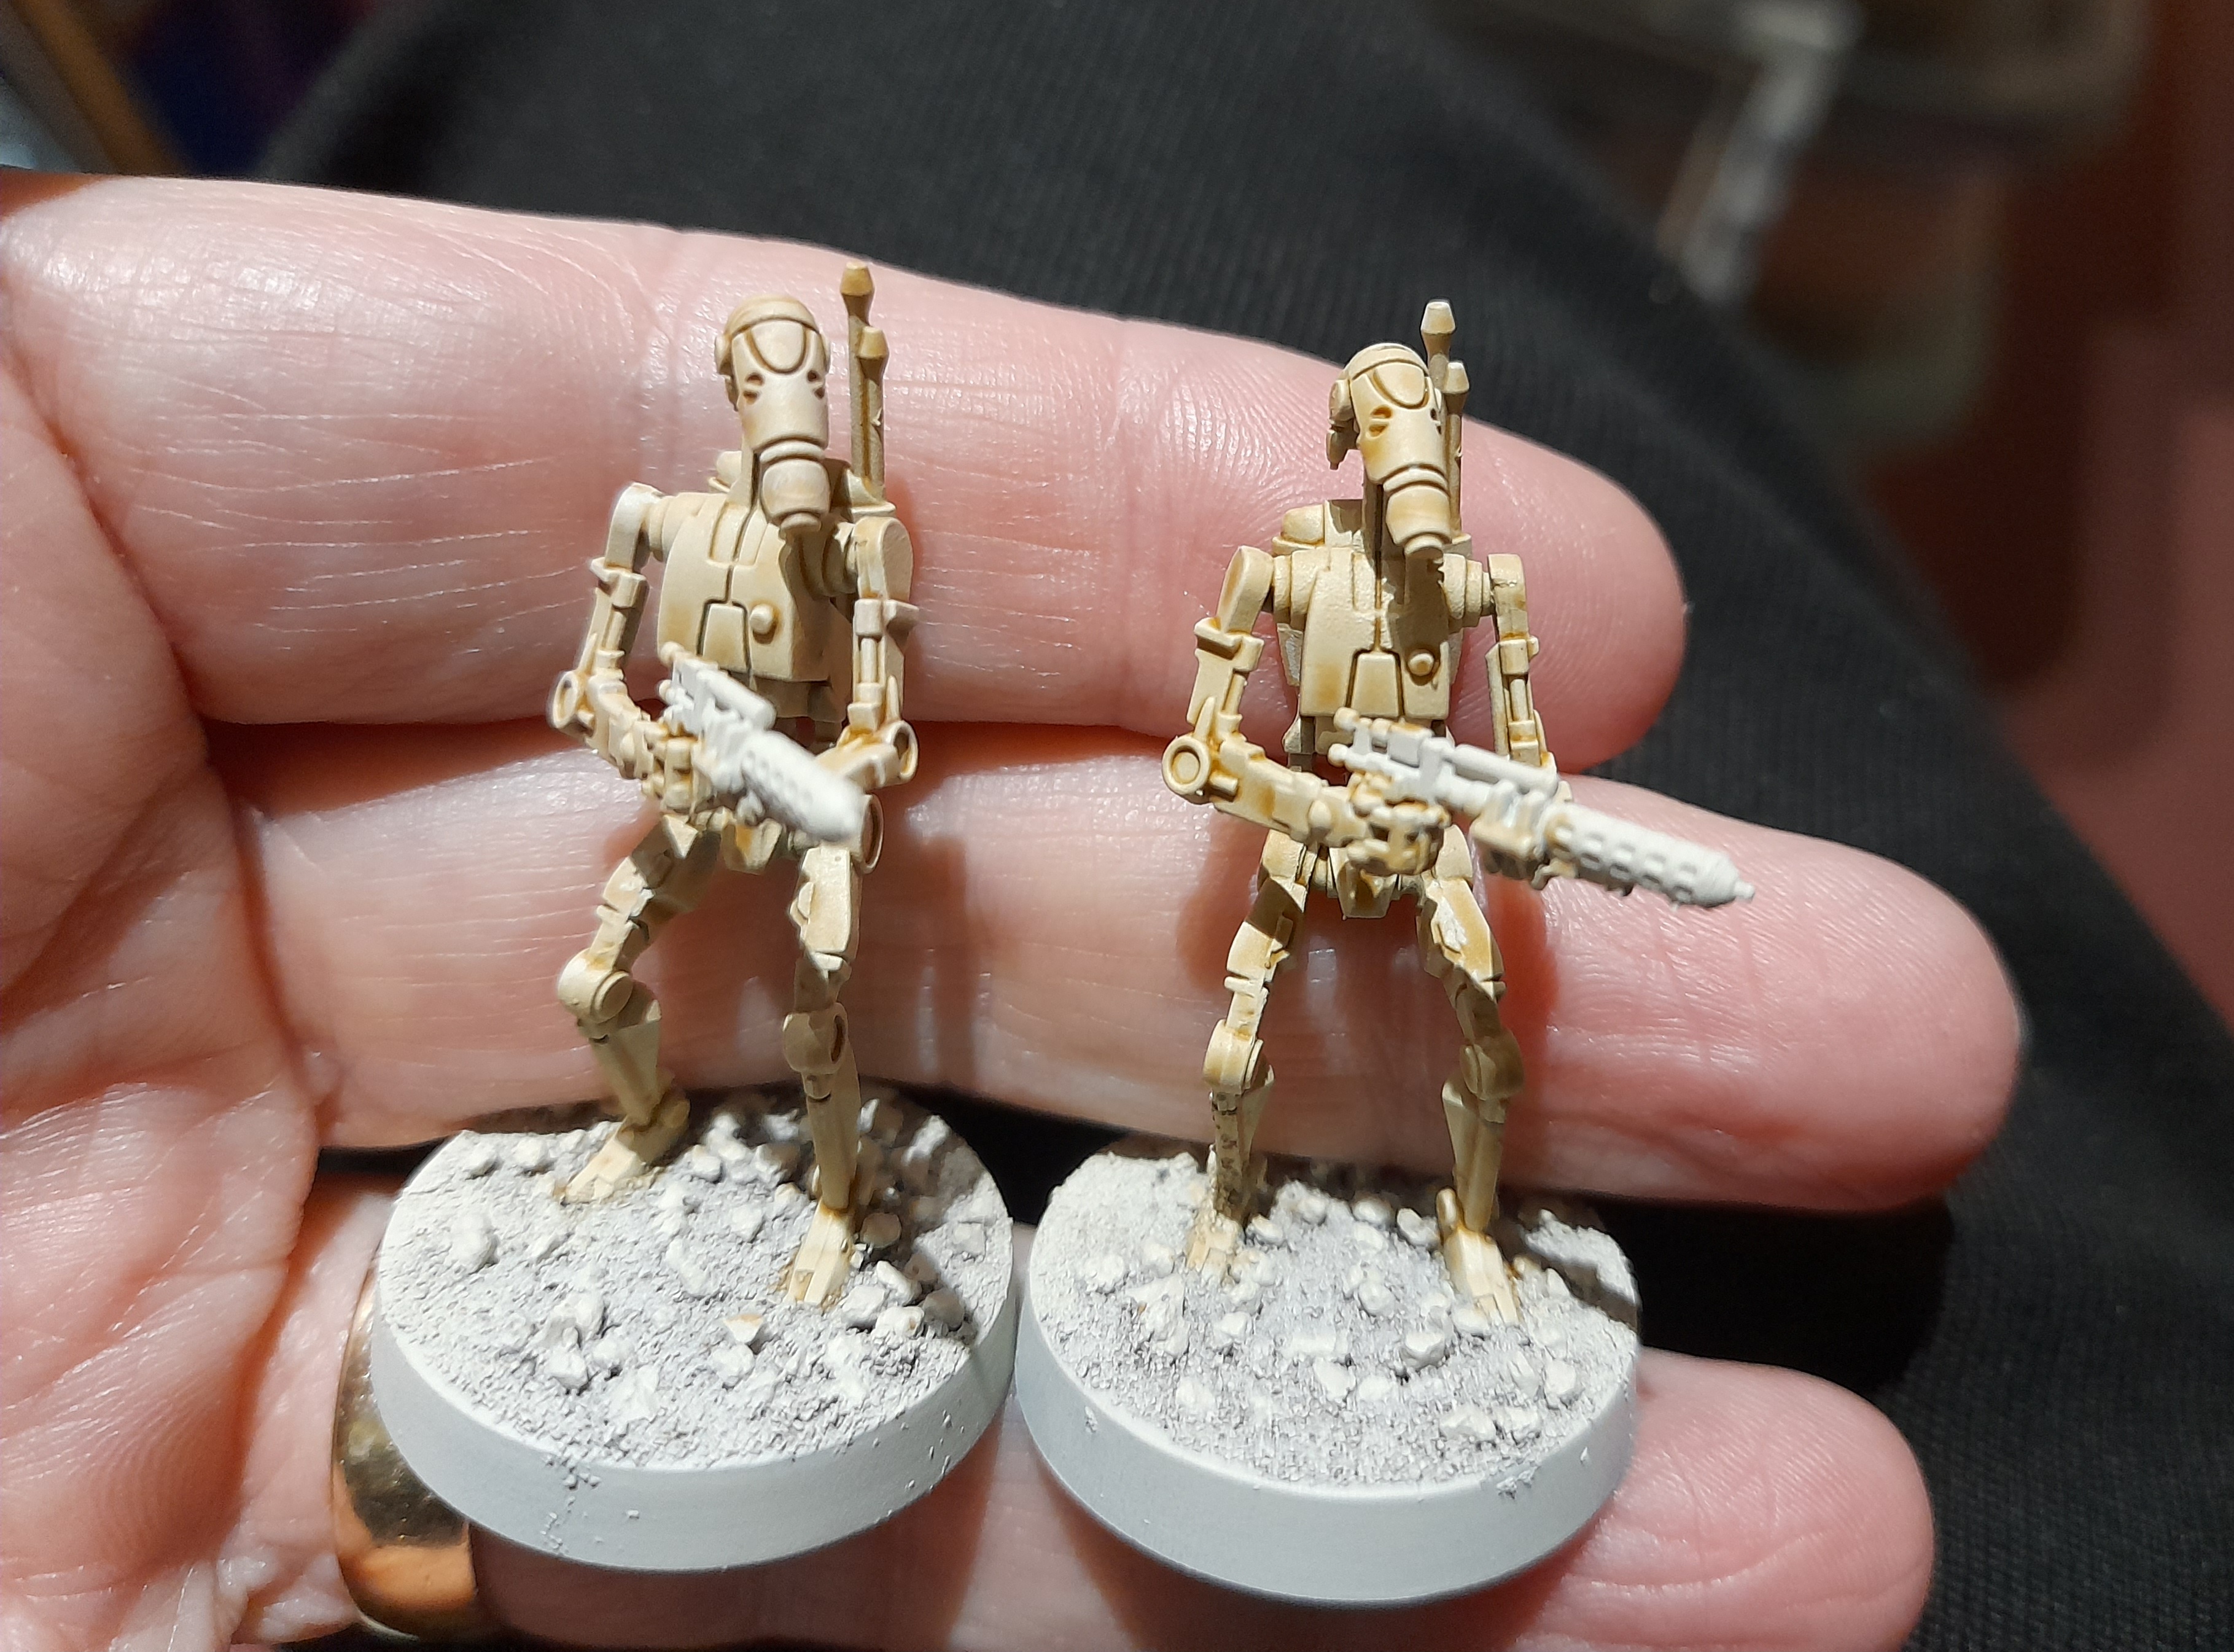
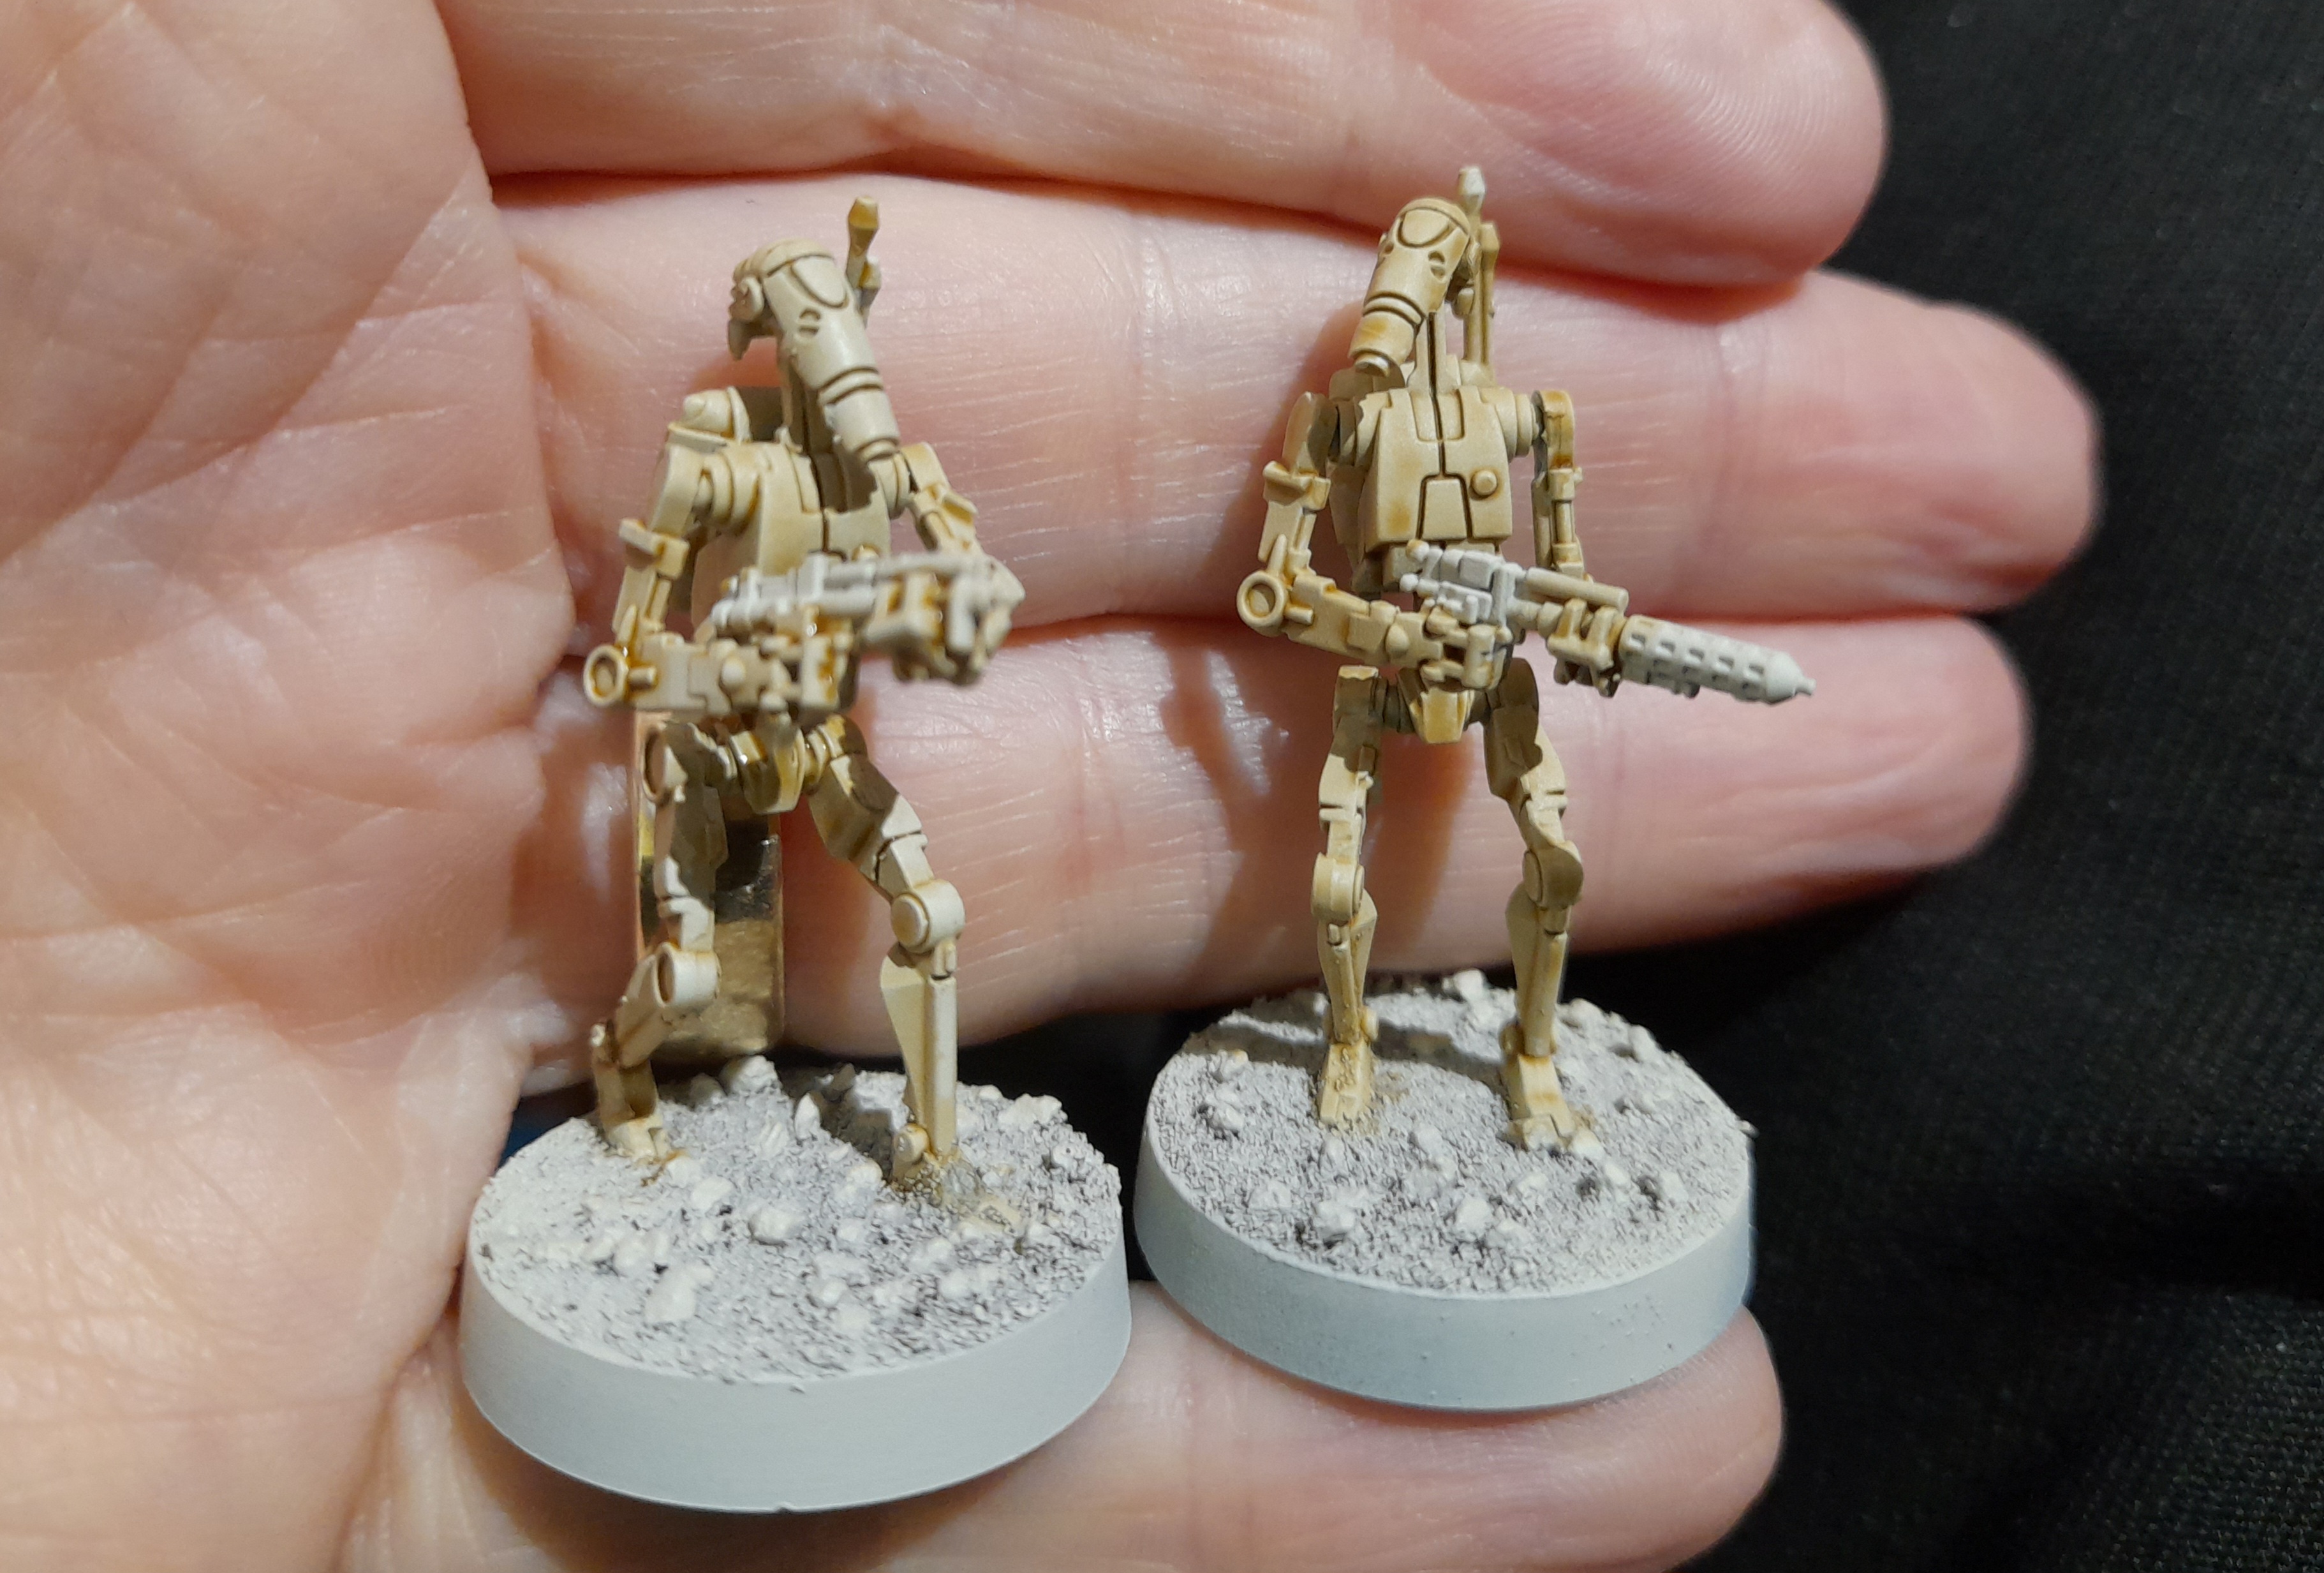
After finishing off one droid to a level I was satisfied with it was then on to the other 35 of the core B1’s.
Picking out the guns, painting the yellow markings on the squad leaders, adding squad colour to shoulder pads and then adding some base tufts for a bit of interest (and to fit in with my clones).
And here they are:
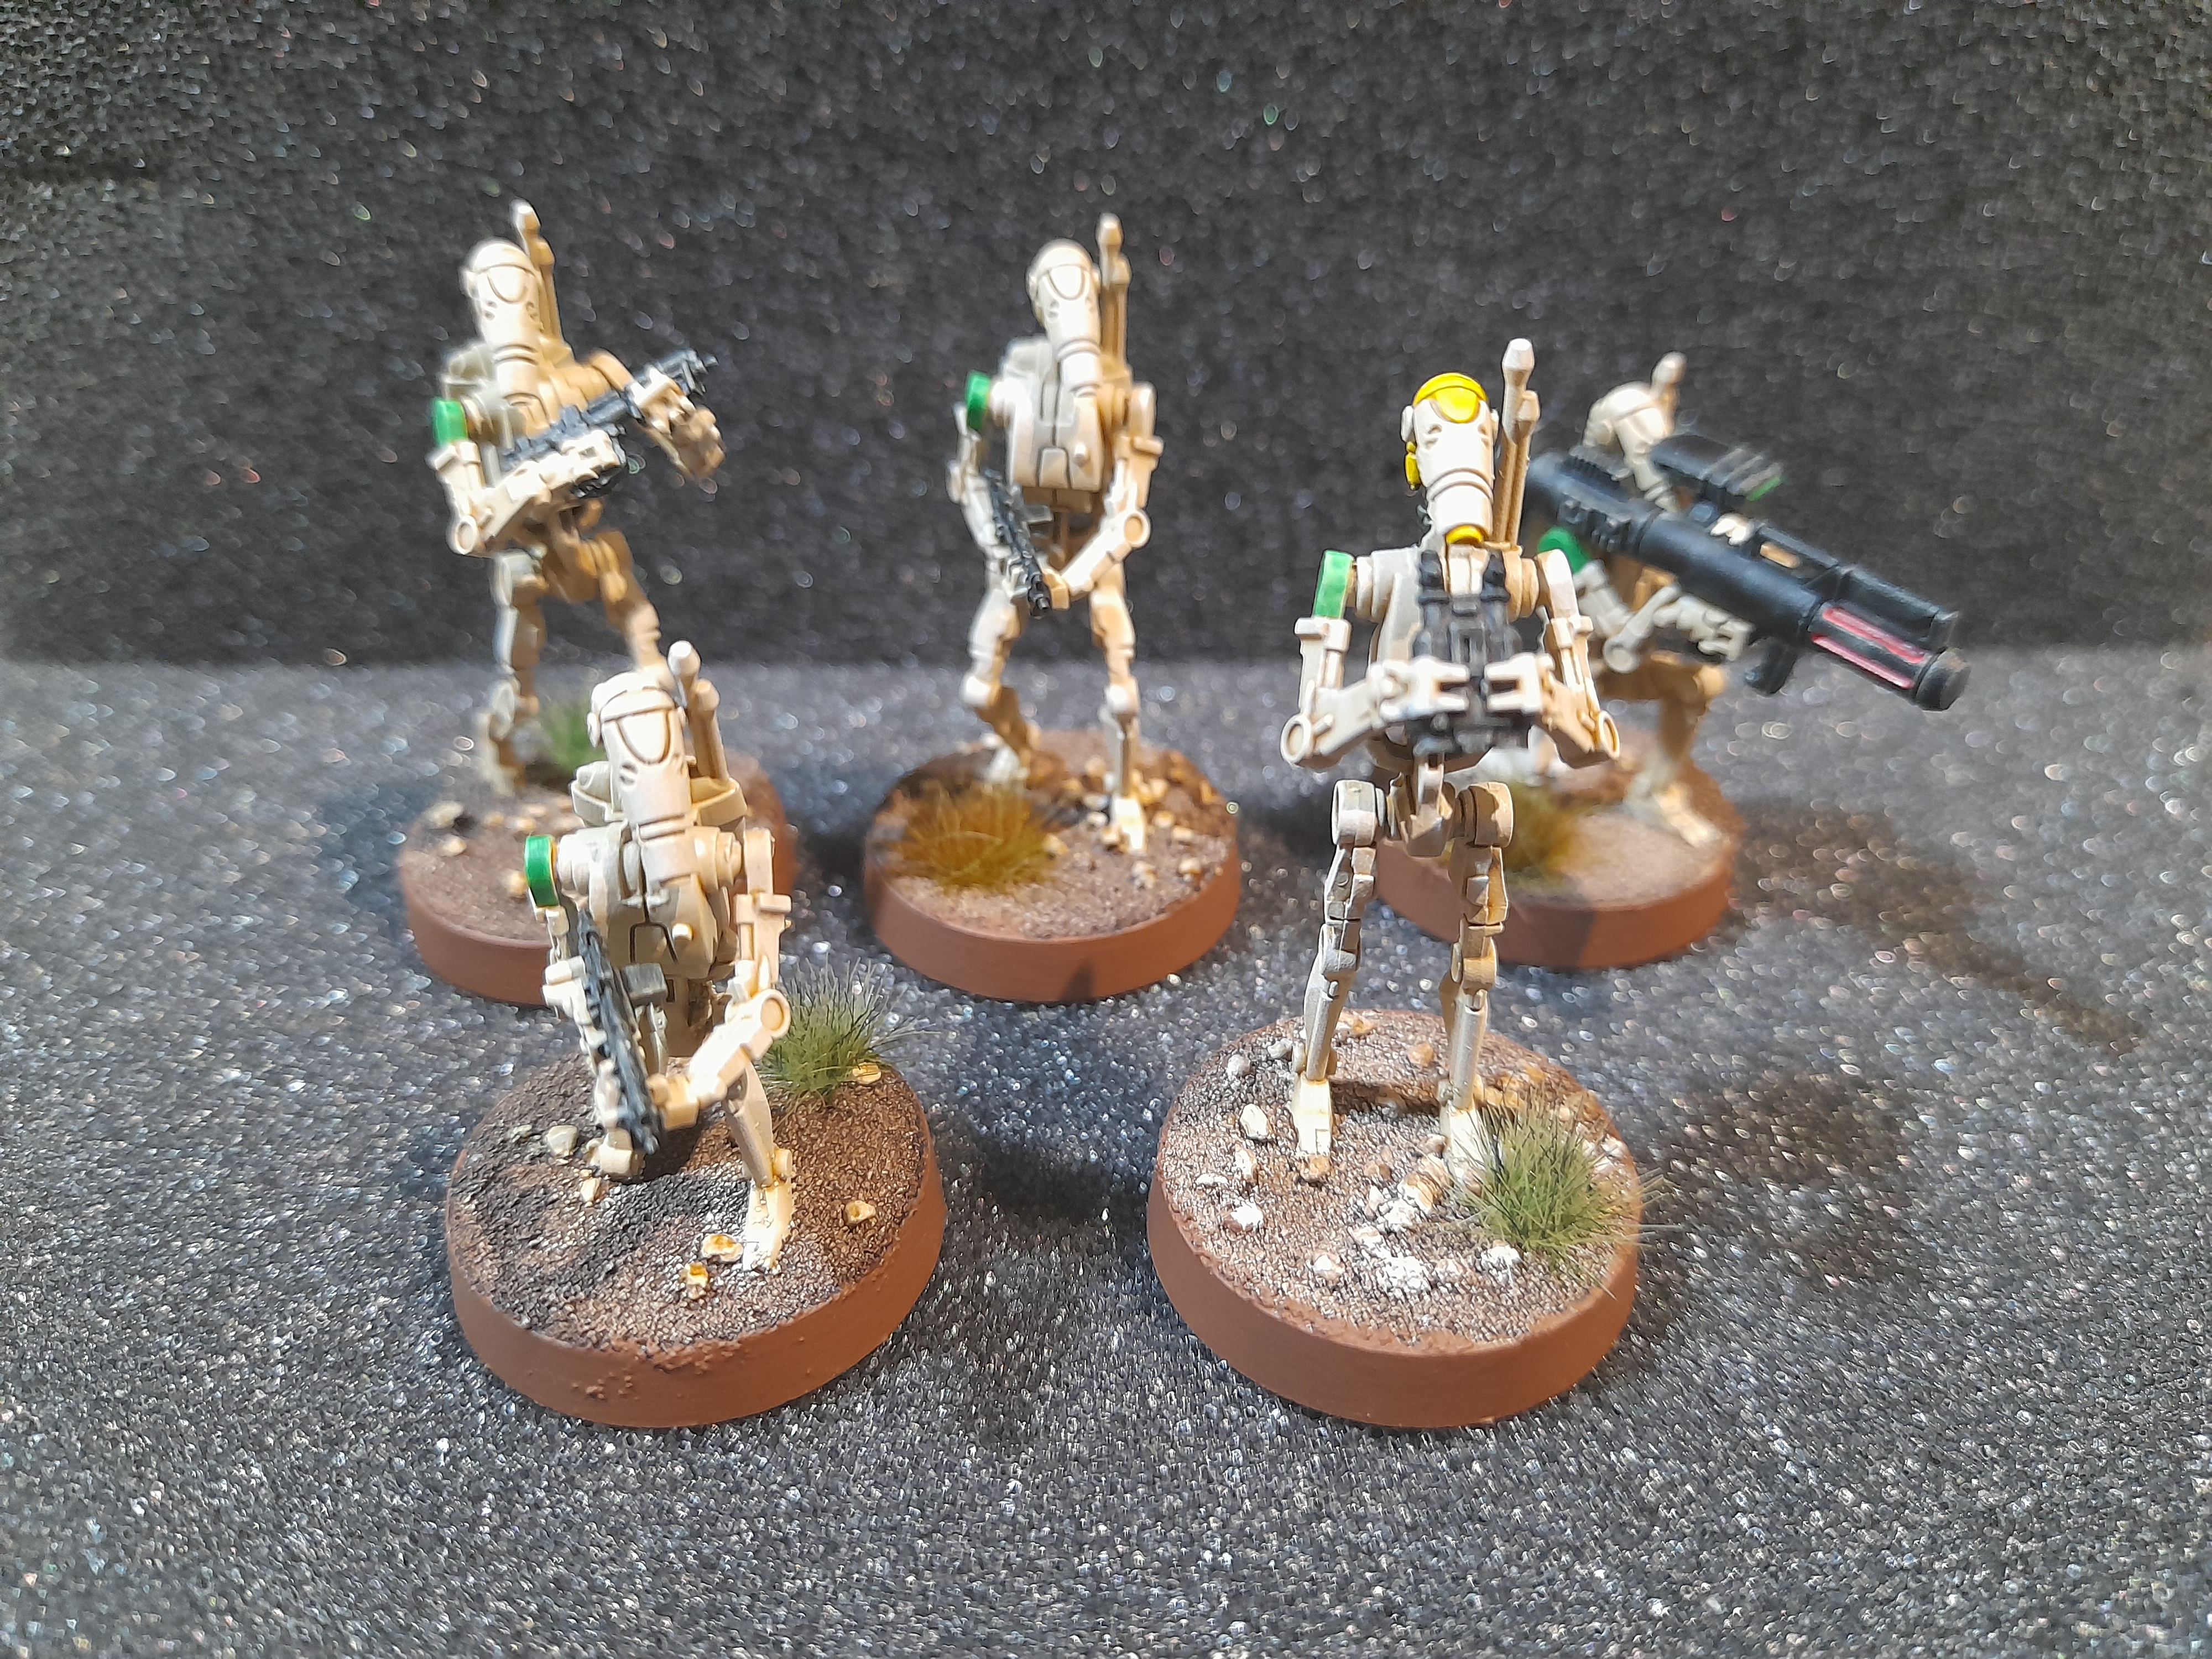 Some of Green squad
 Some of Purple squad
 Some of Blue squad
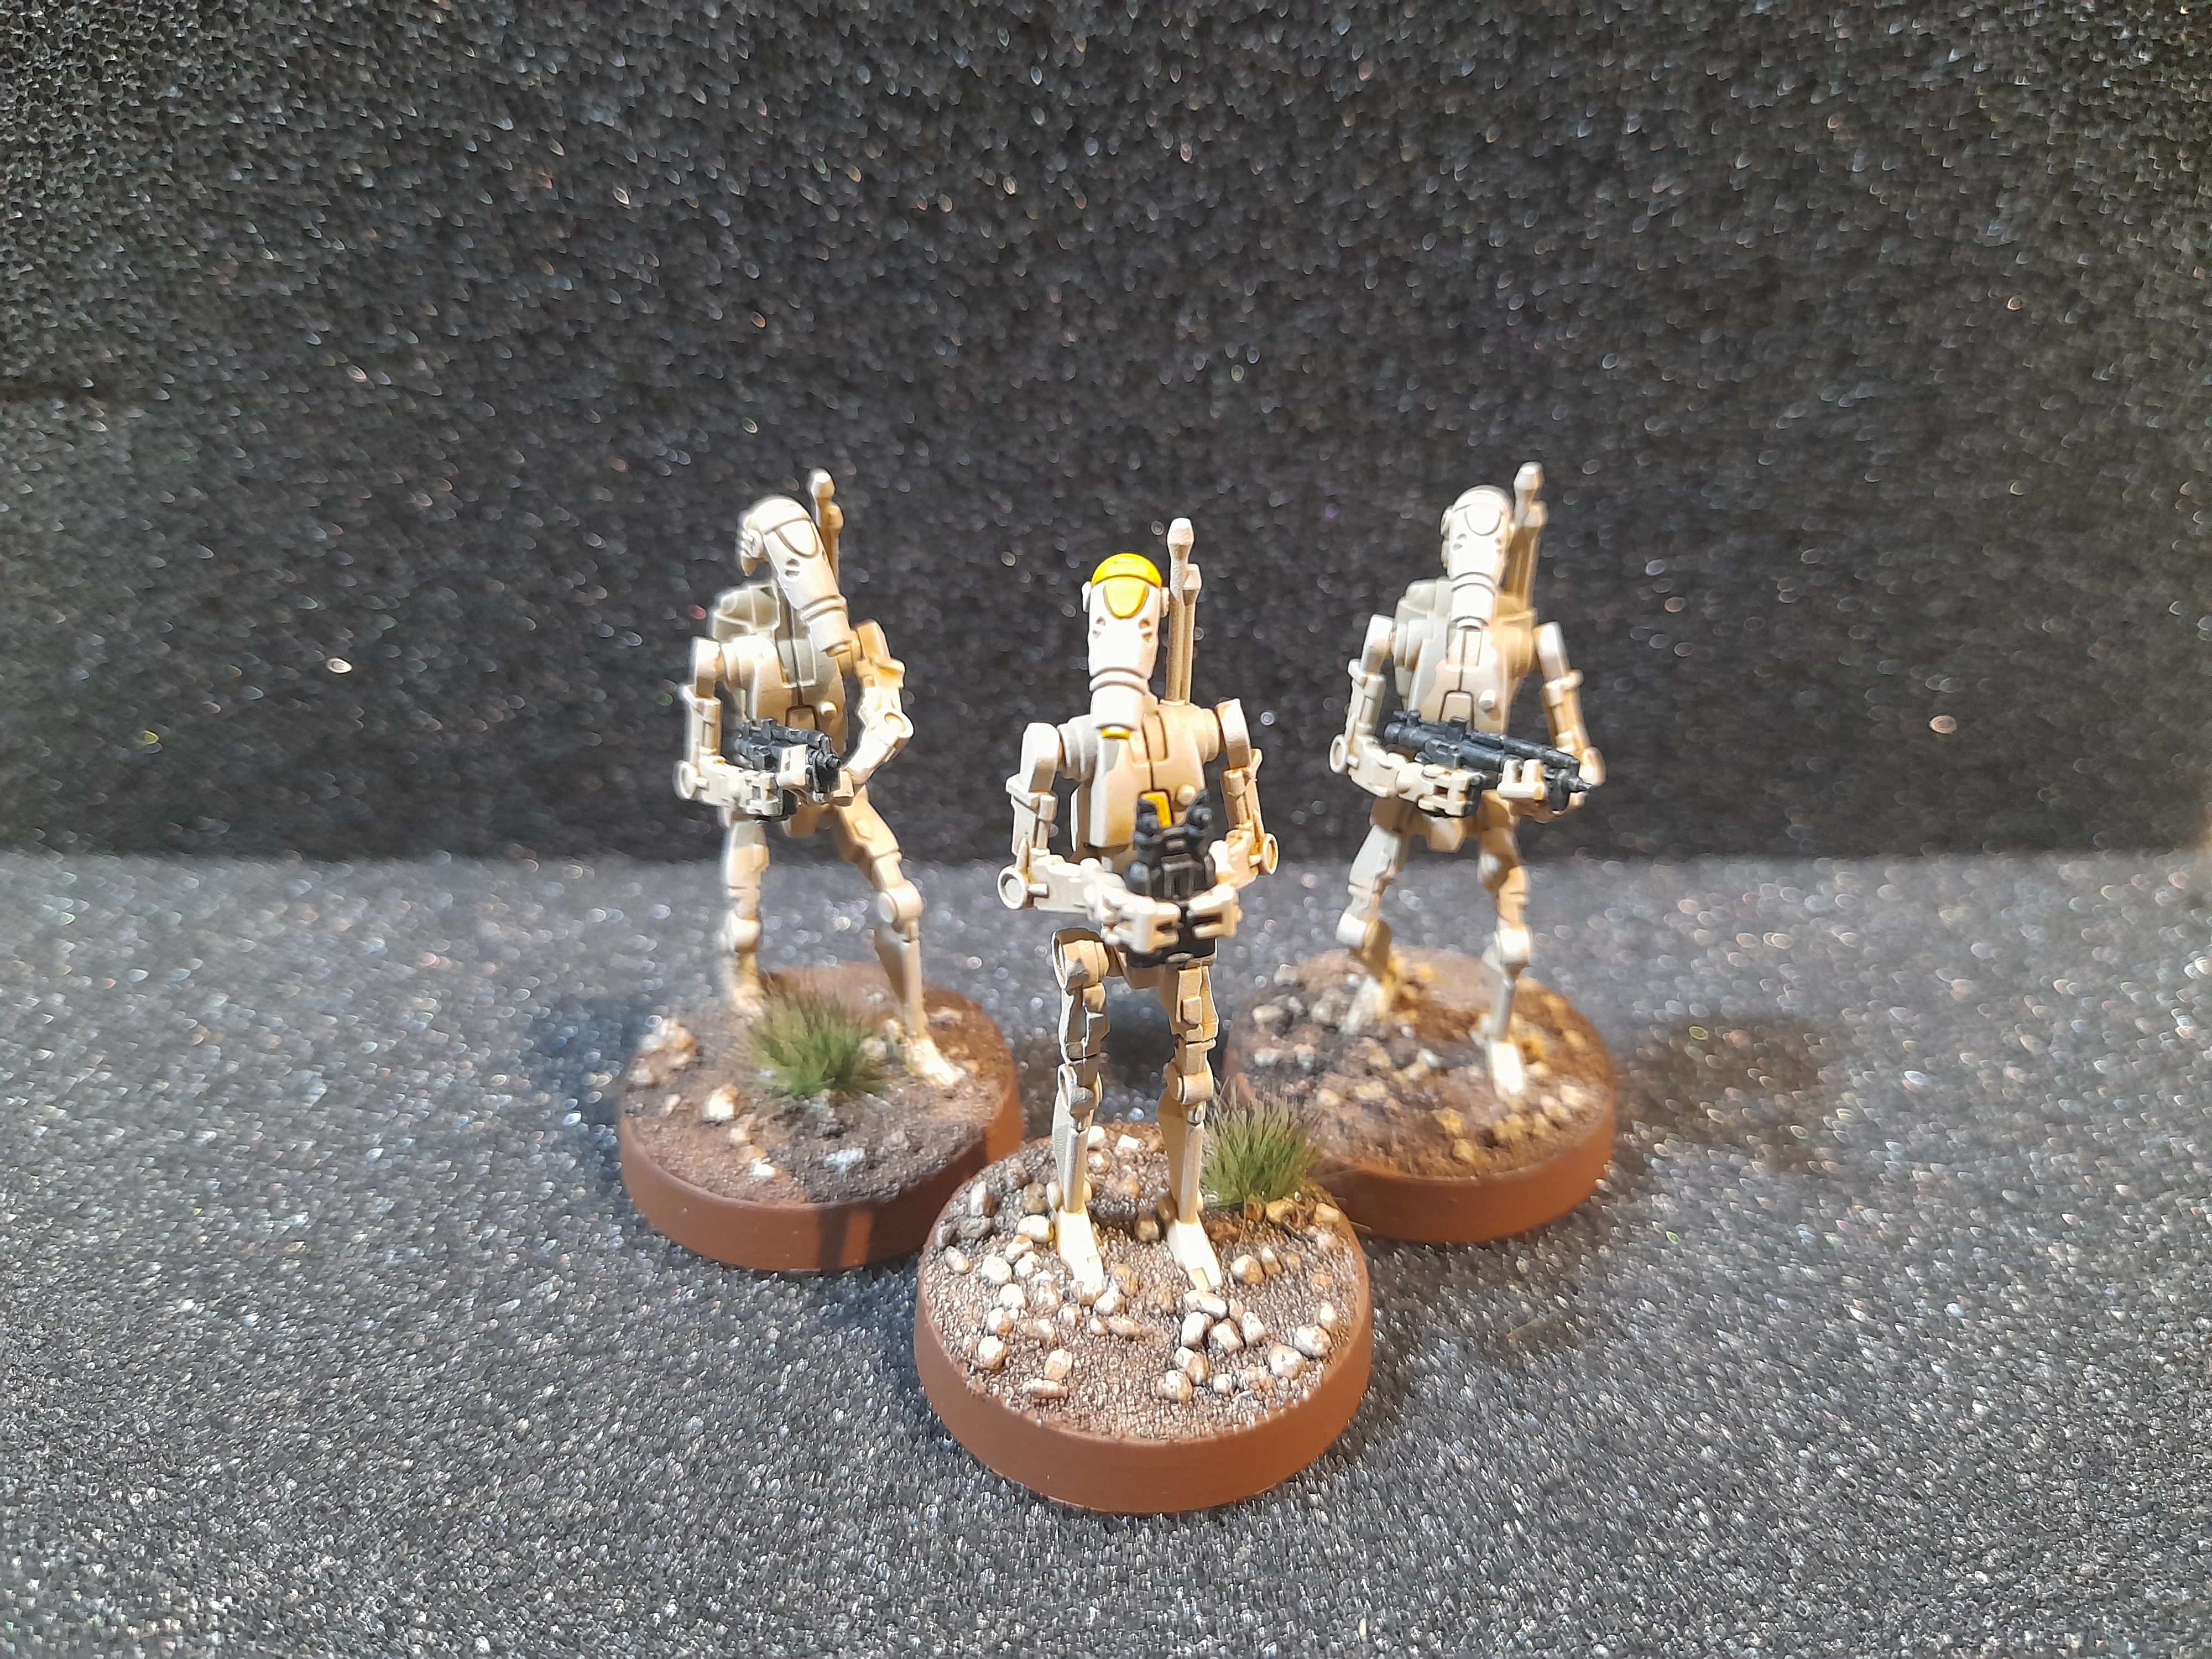 Some of base squad
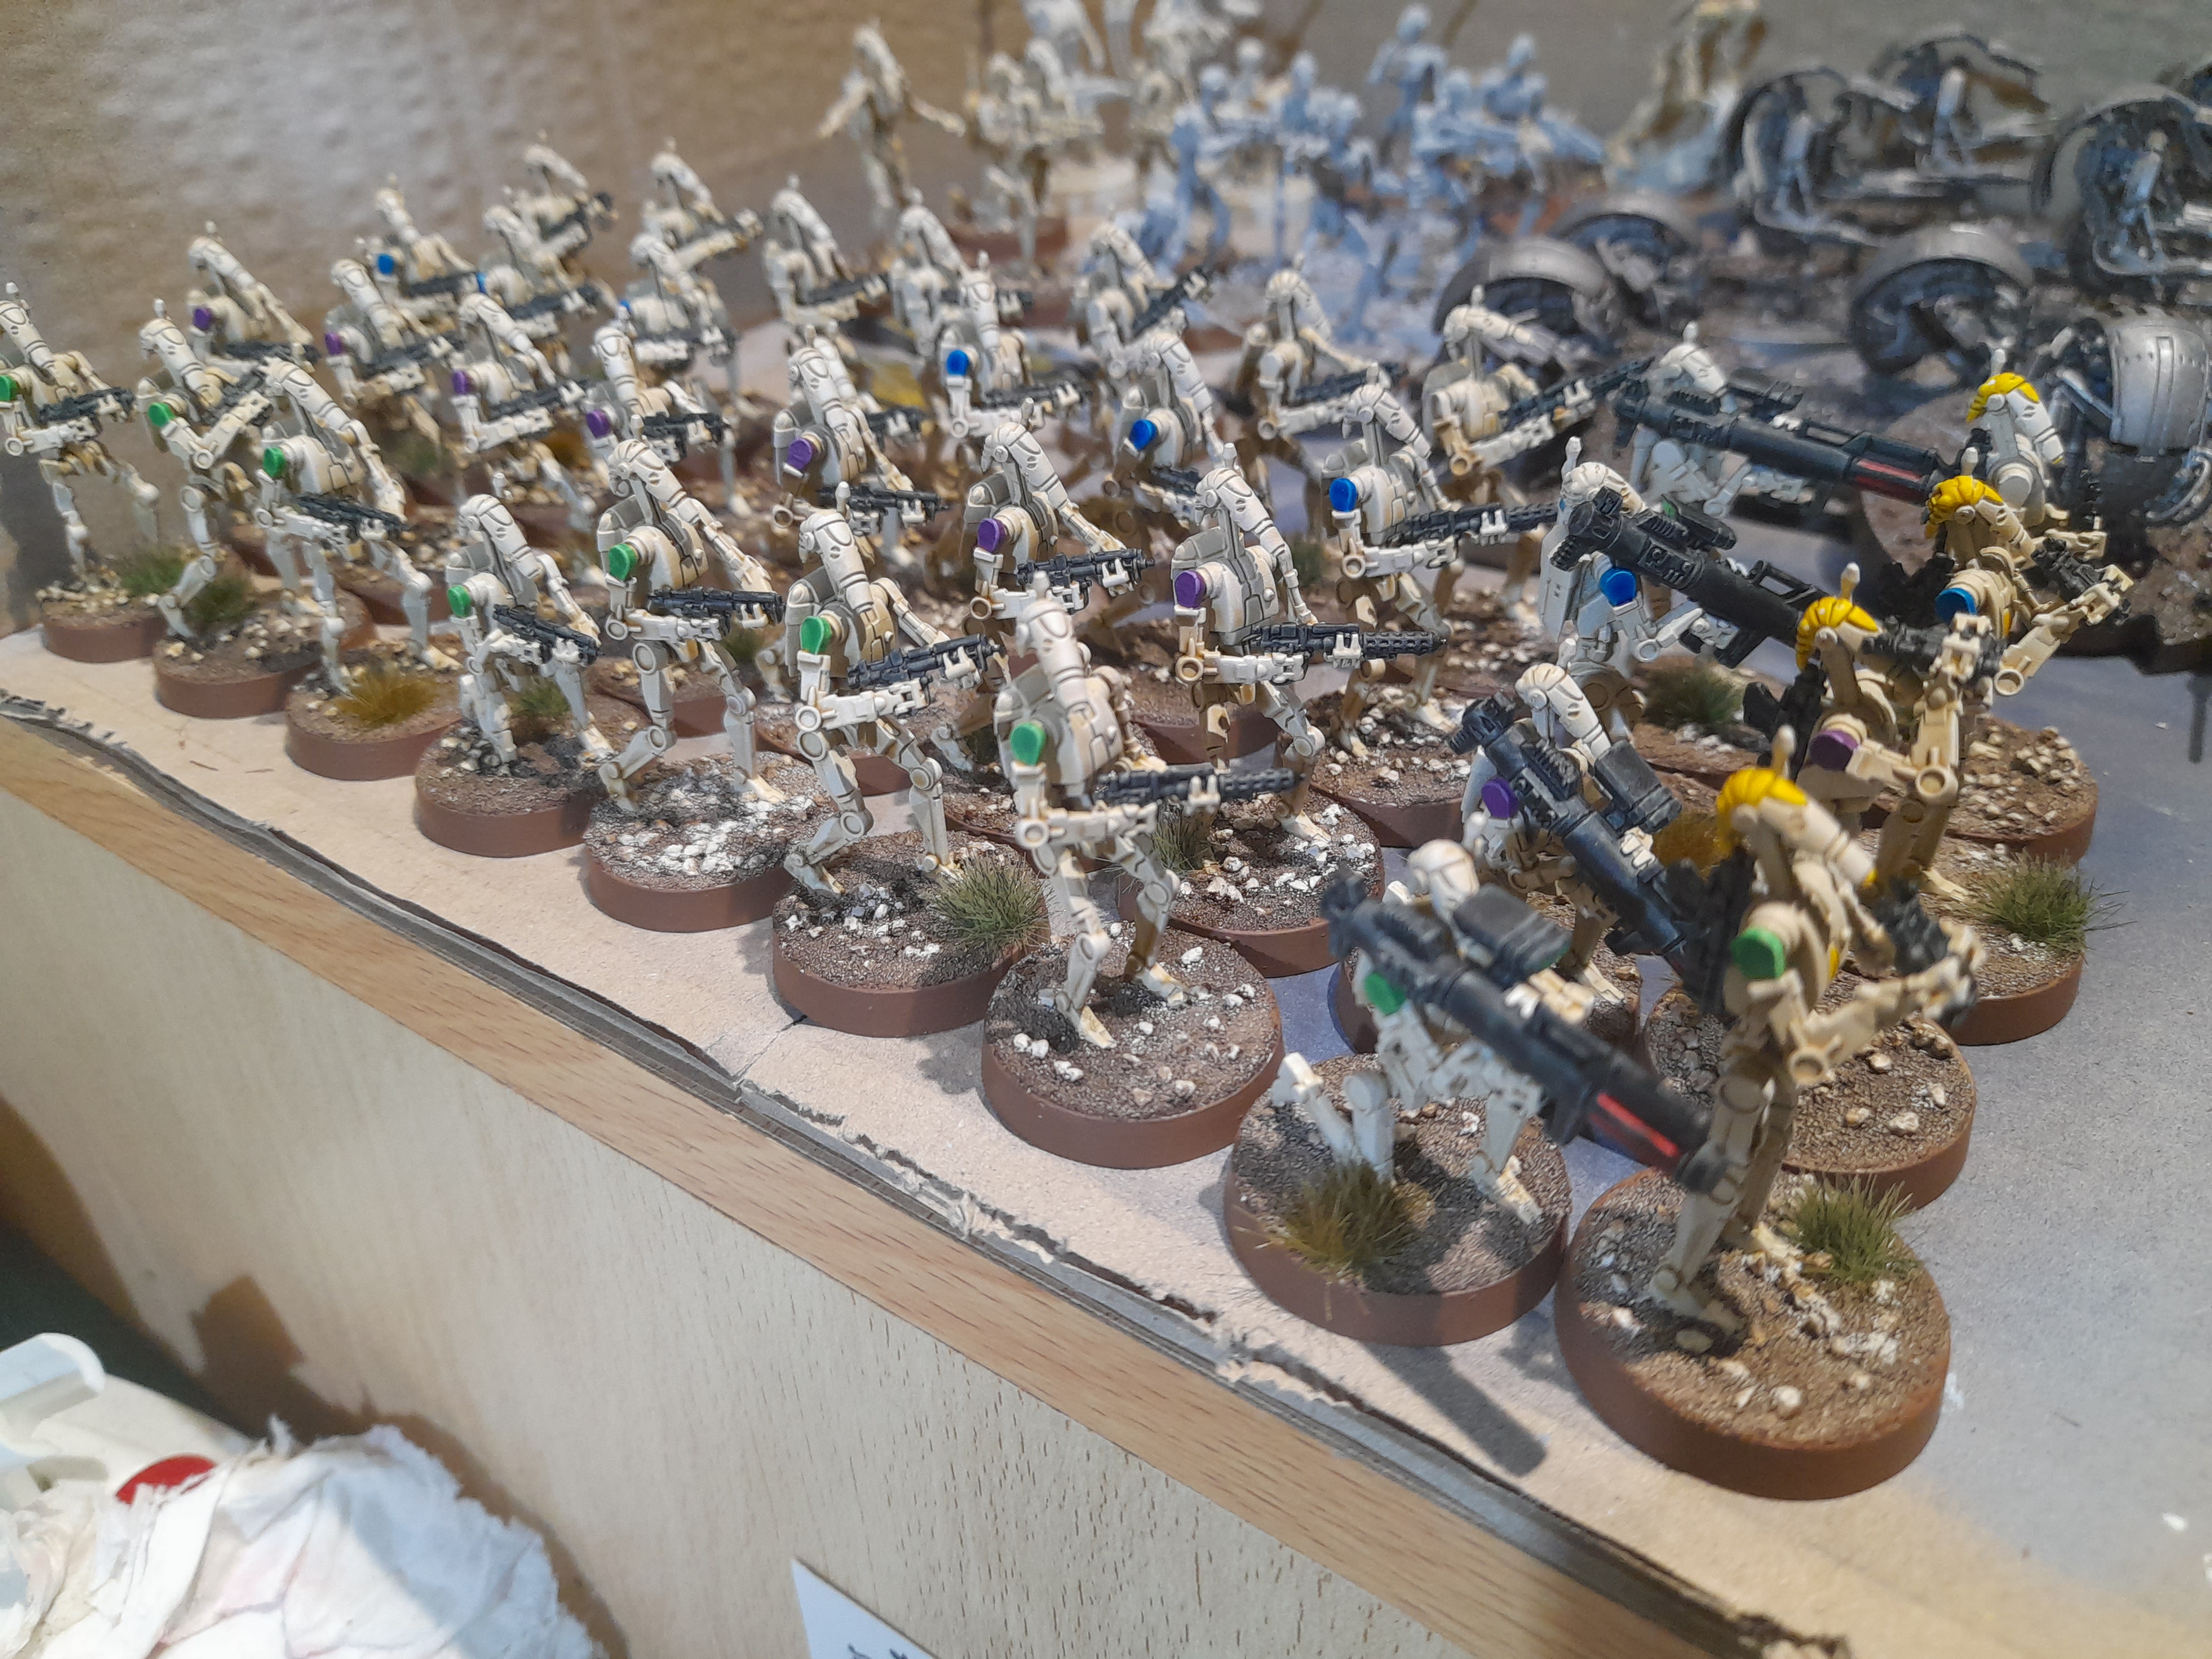
 Ready for deployment
 Next will be the B1 upgrade unit, who have the basic colour down already.
Basing and One droid down
22nd February 2024
Forgot to post this one up, so a bit late with it…
Since the last post I have worked on painting all of the bases for the 40 B1’s. I kept with the same basic basing design as I did for the clones. Although the mix for these seems to have a few more stoney bits. The bases were painted with Wyldwood contrast, then the stones were picked out and shaded.
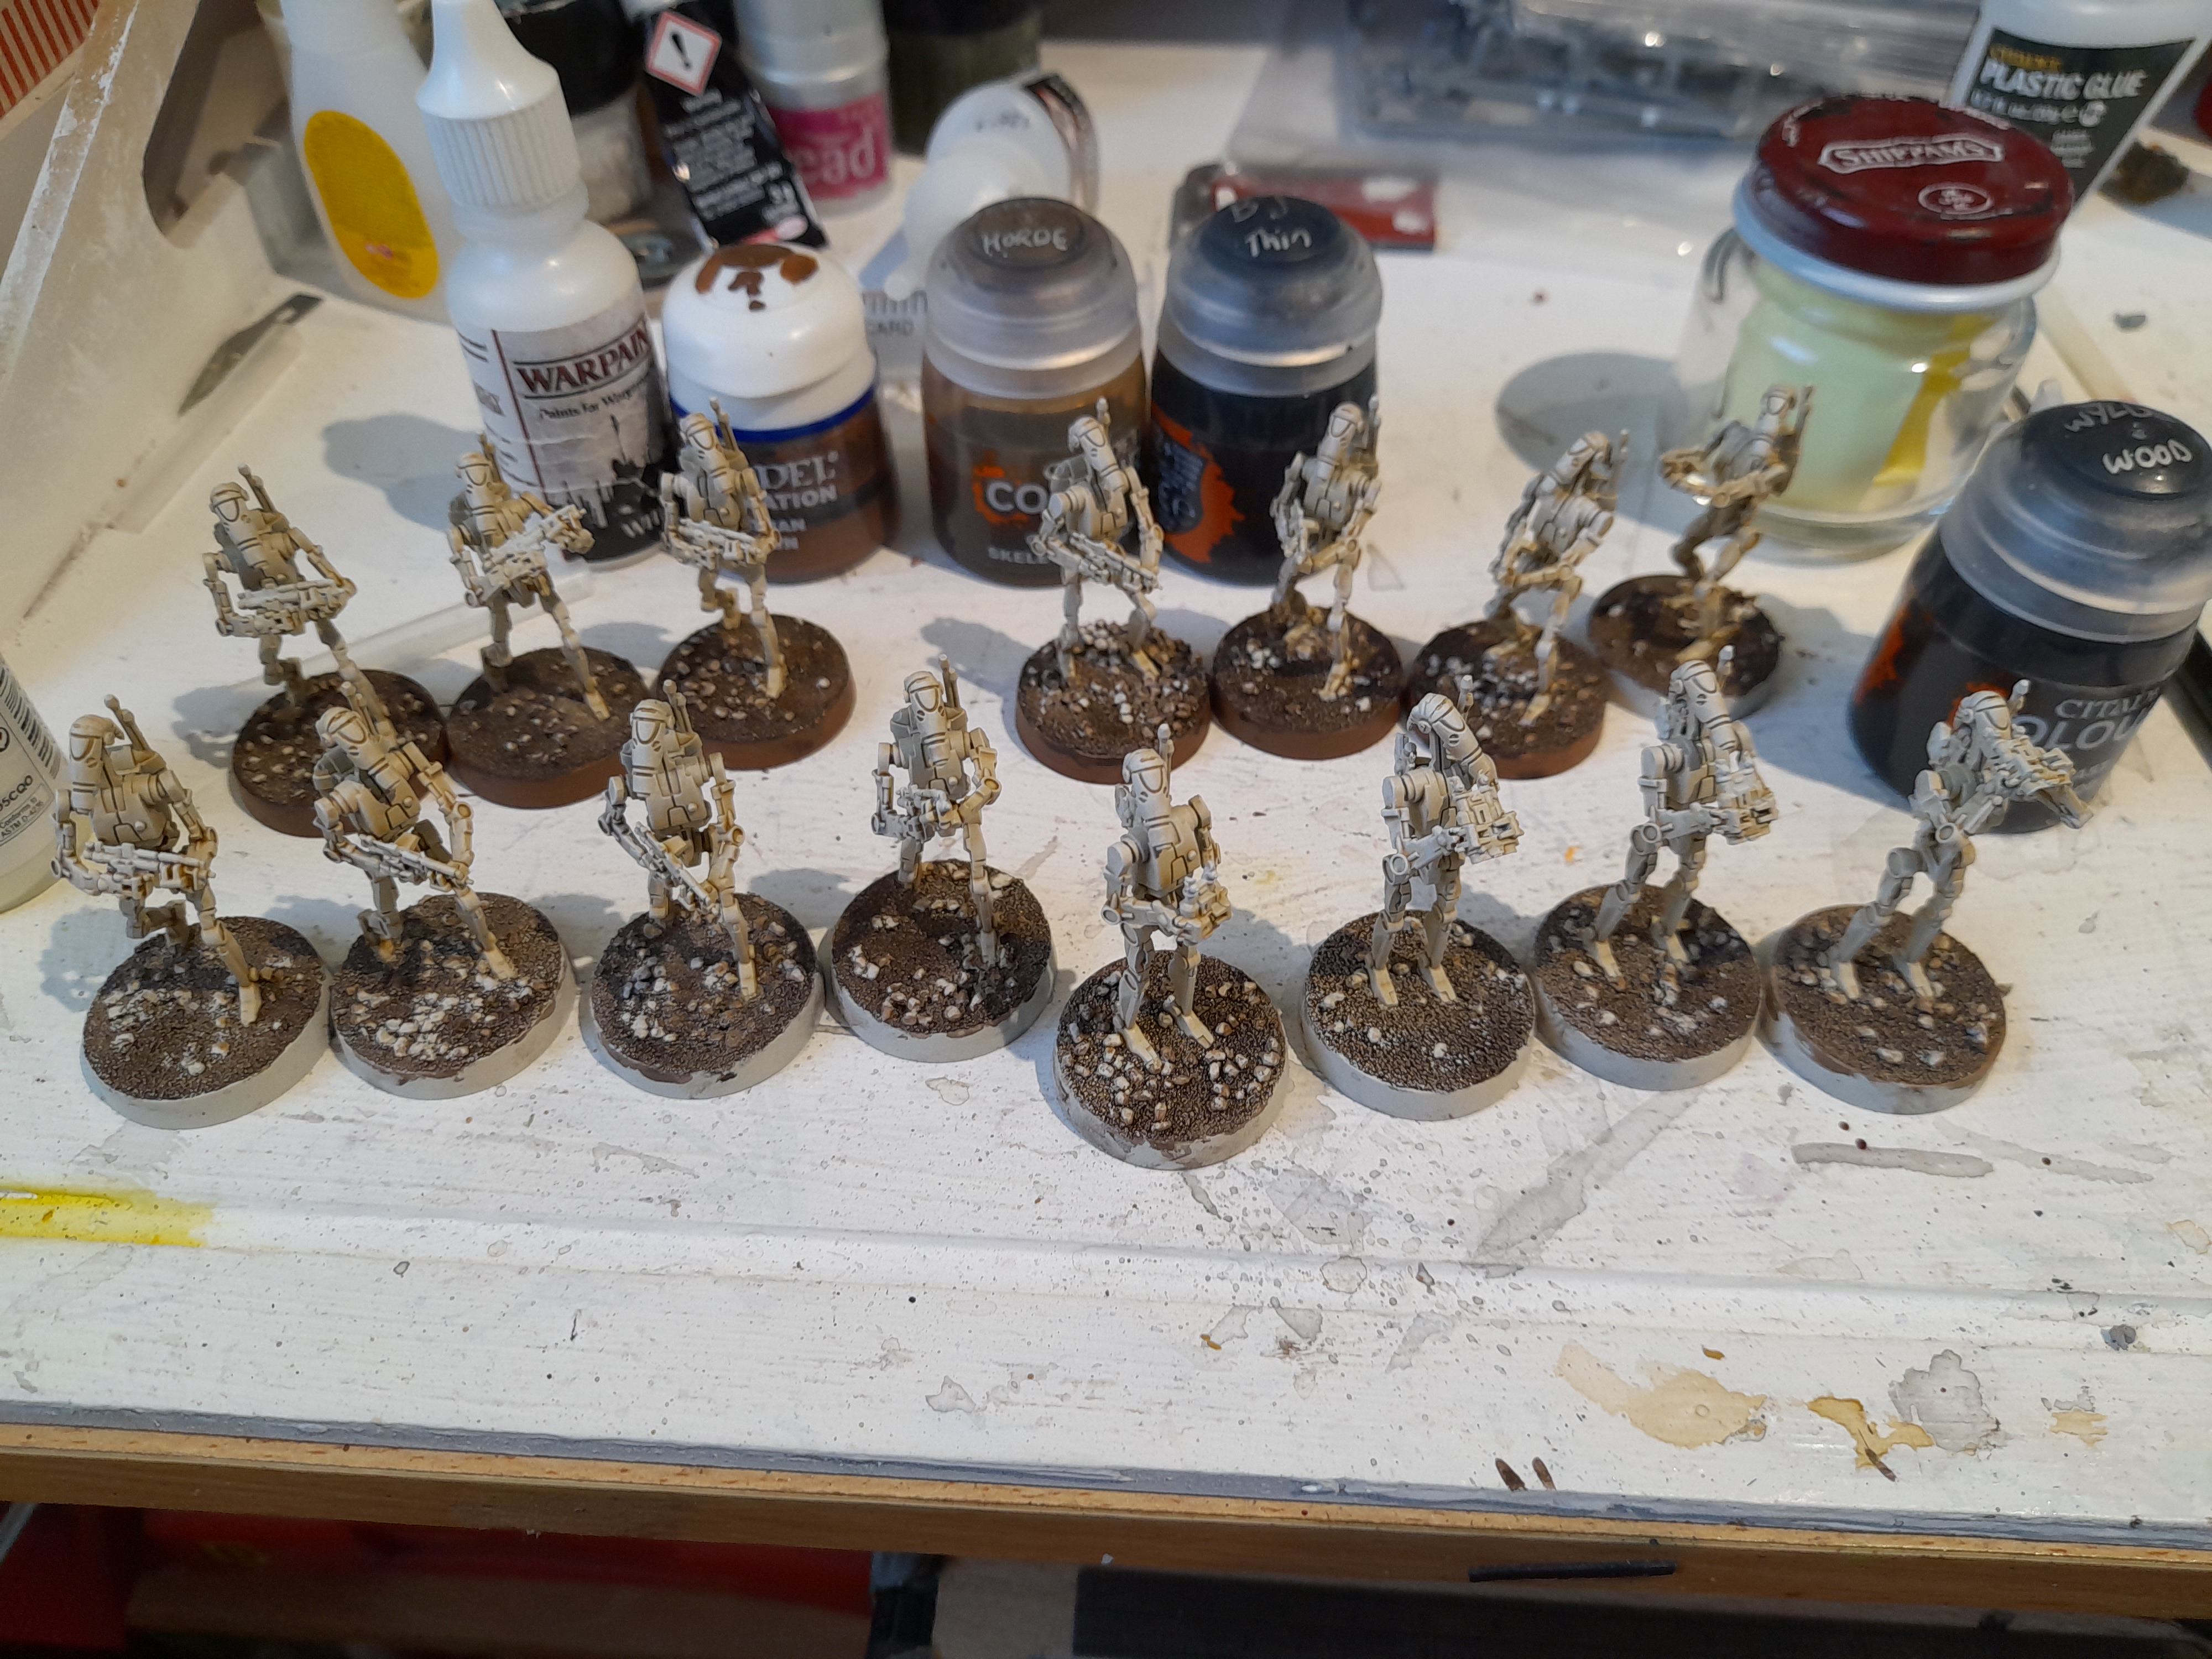 Working on bases
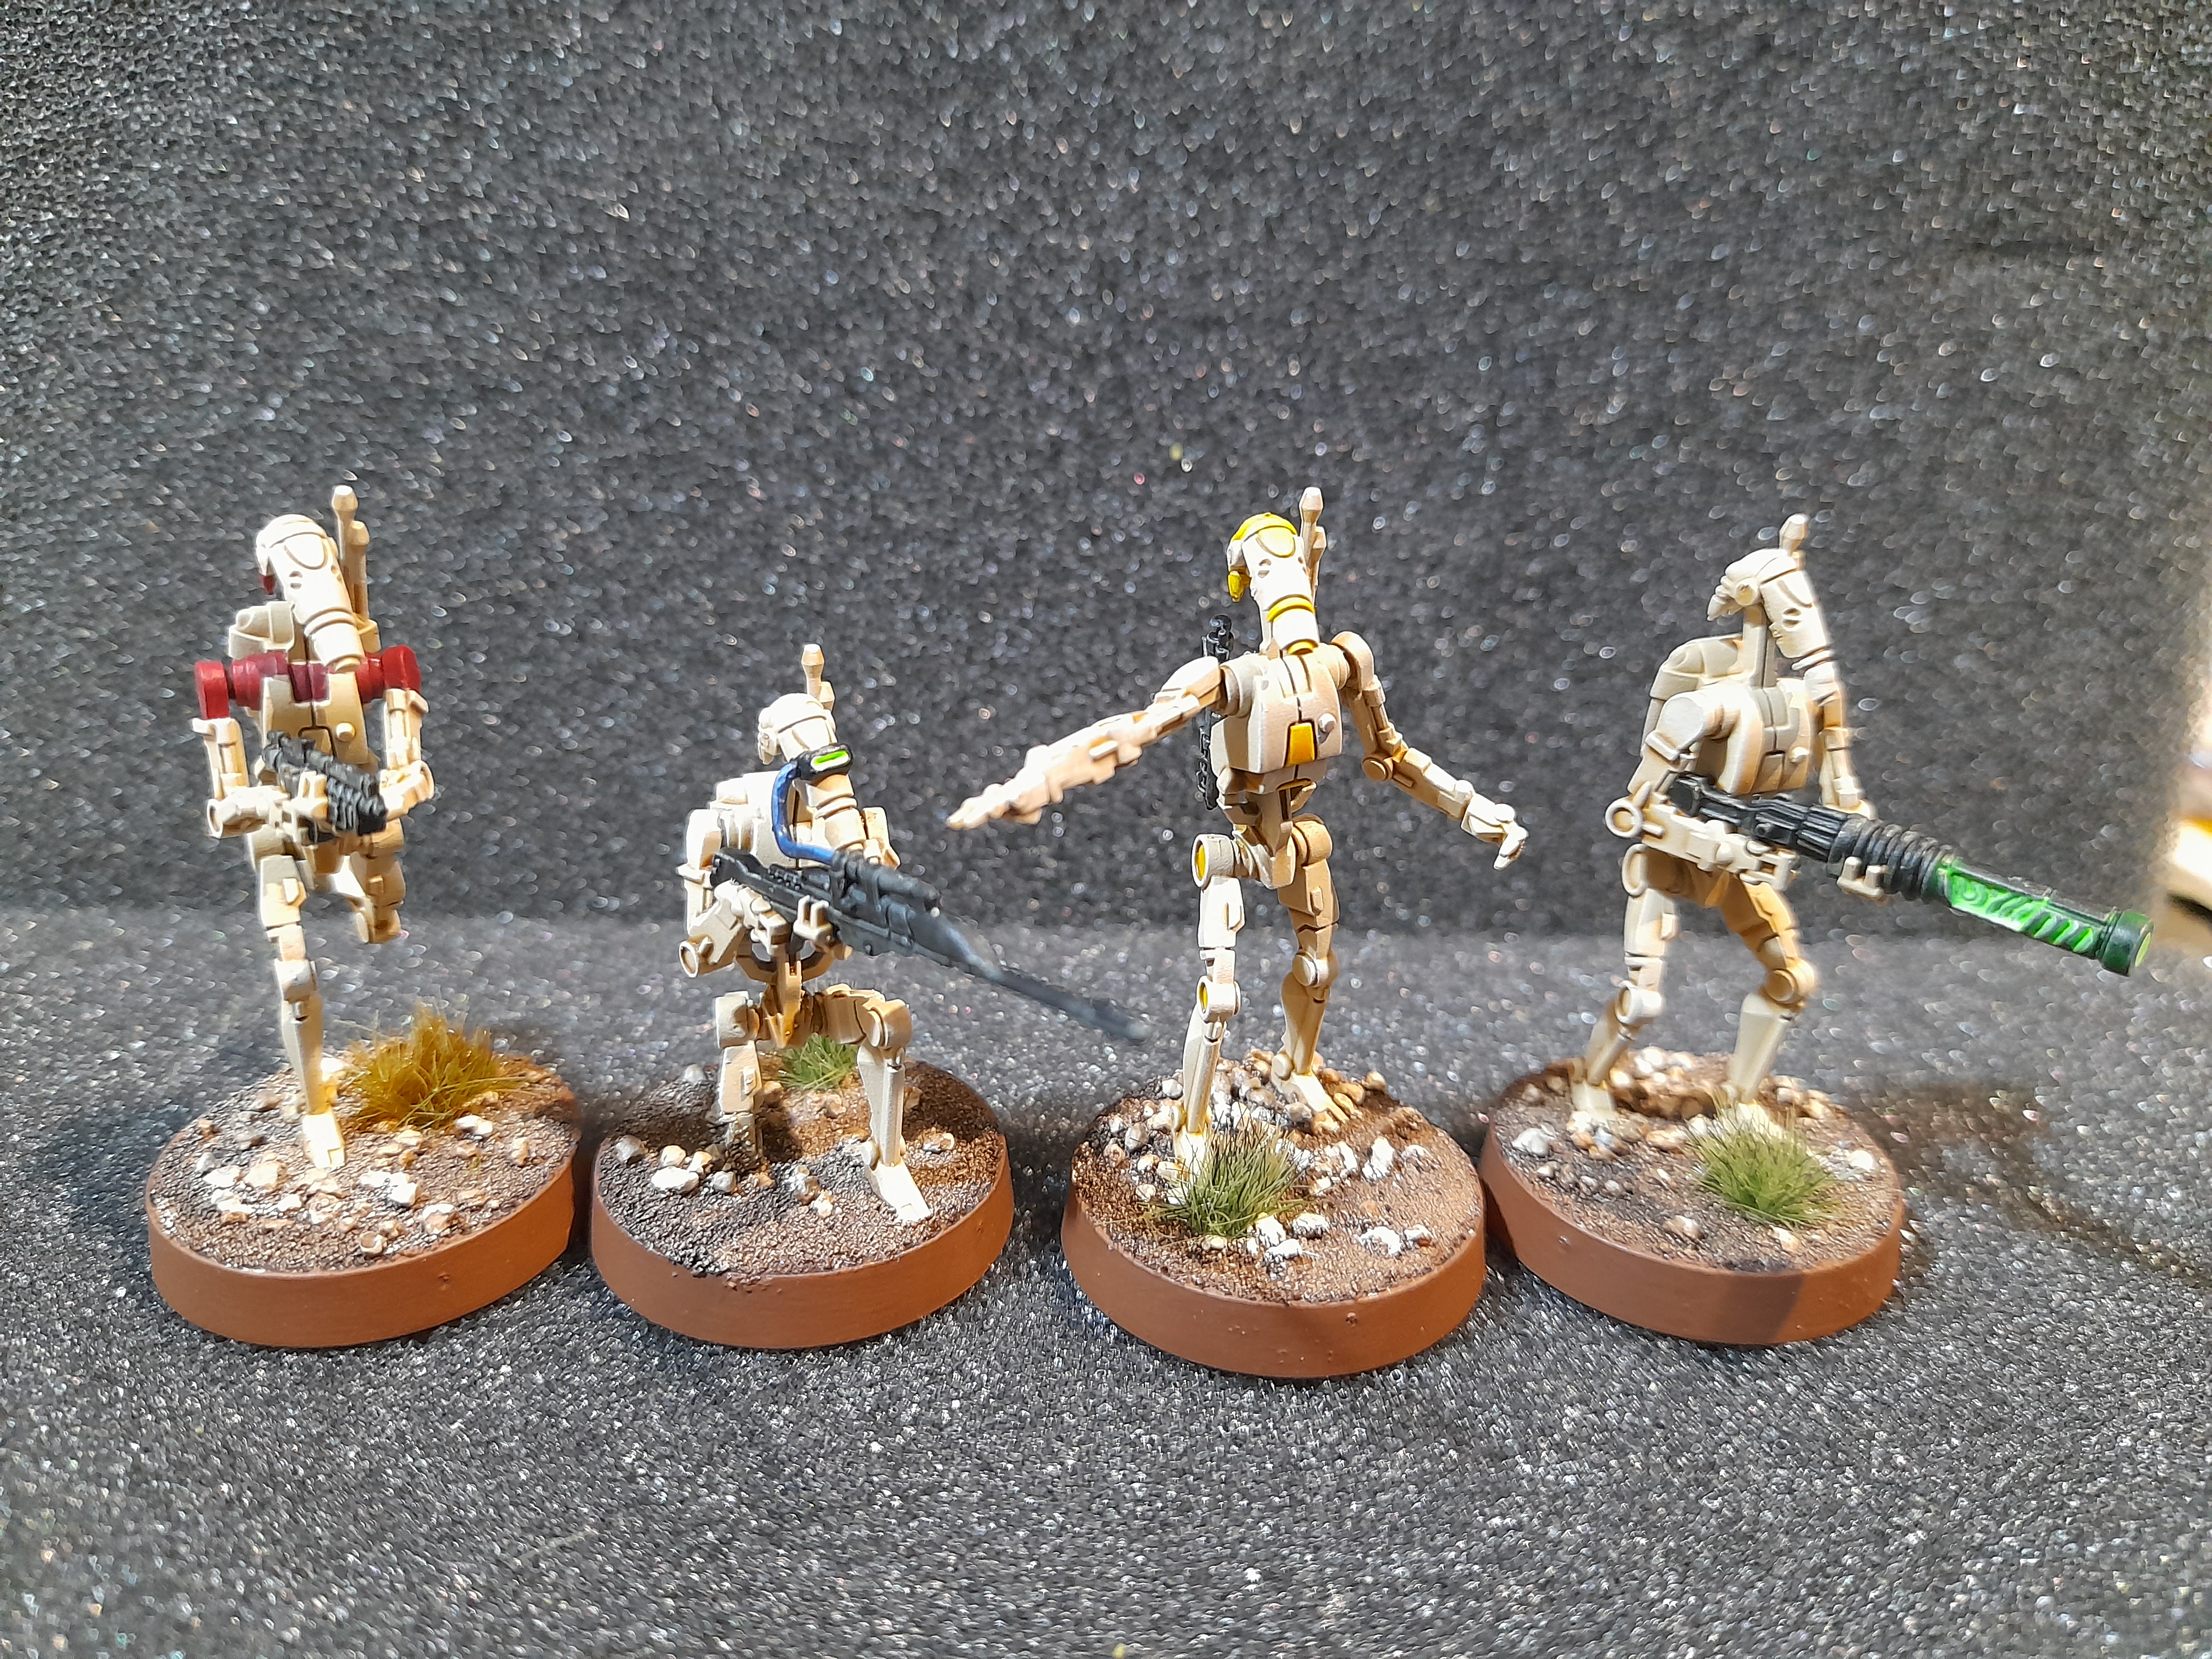
Next up I quickly finished off one battle droid, just to make sure that the pretty basic paint job would do the trick for them.
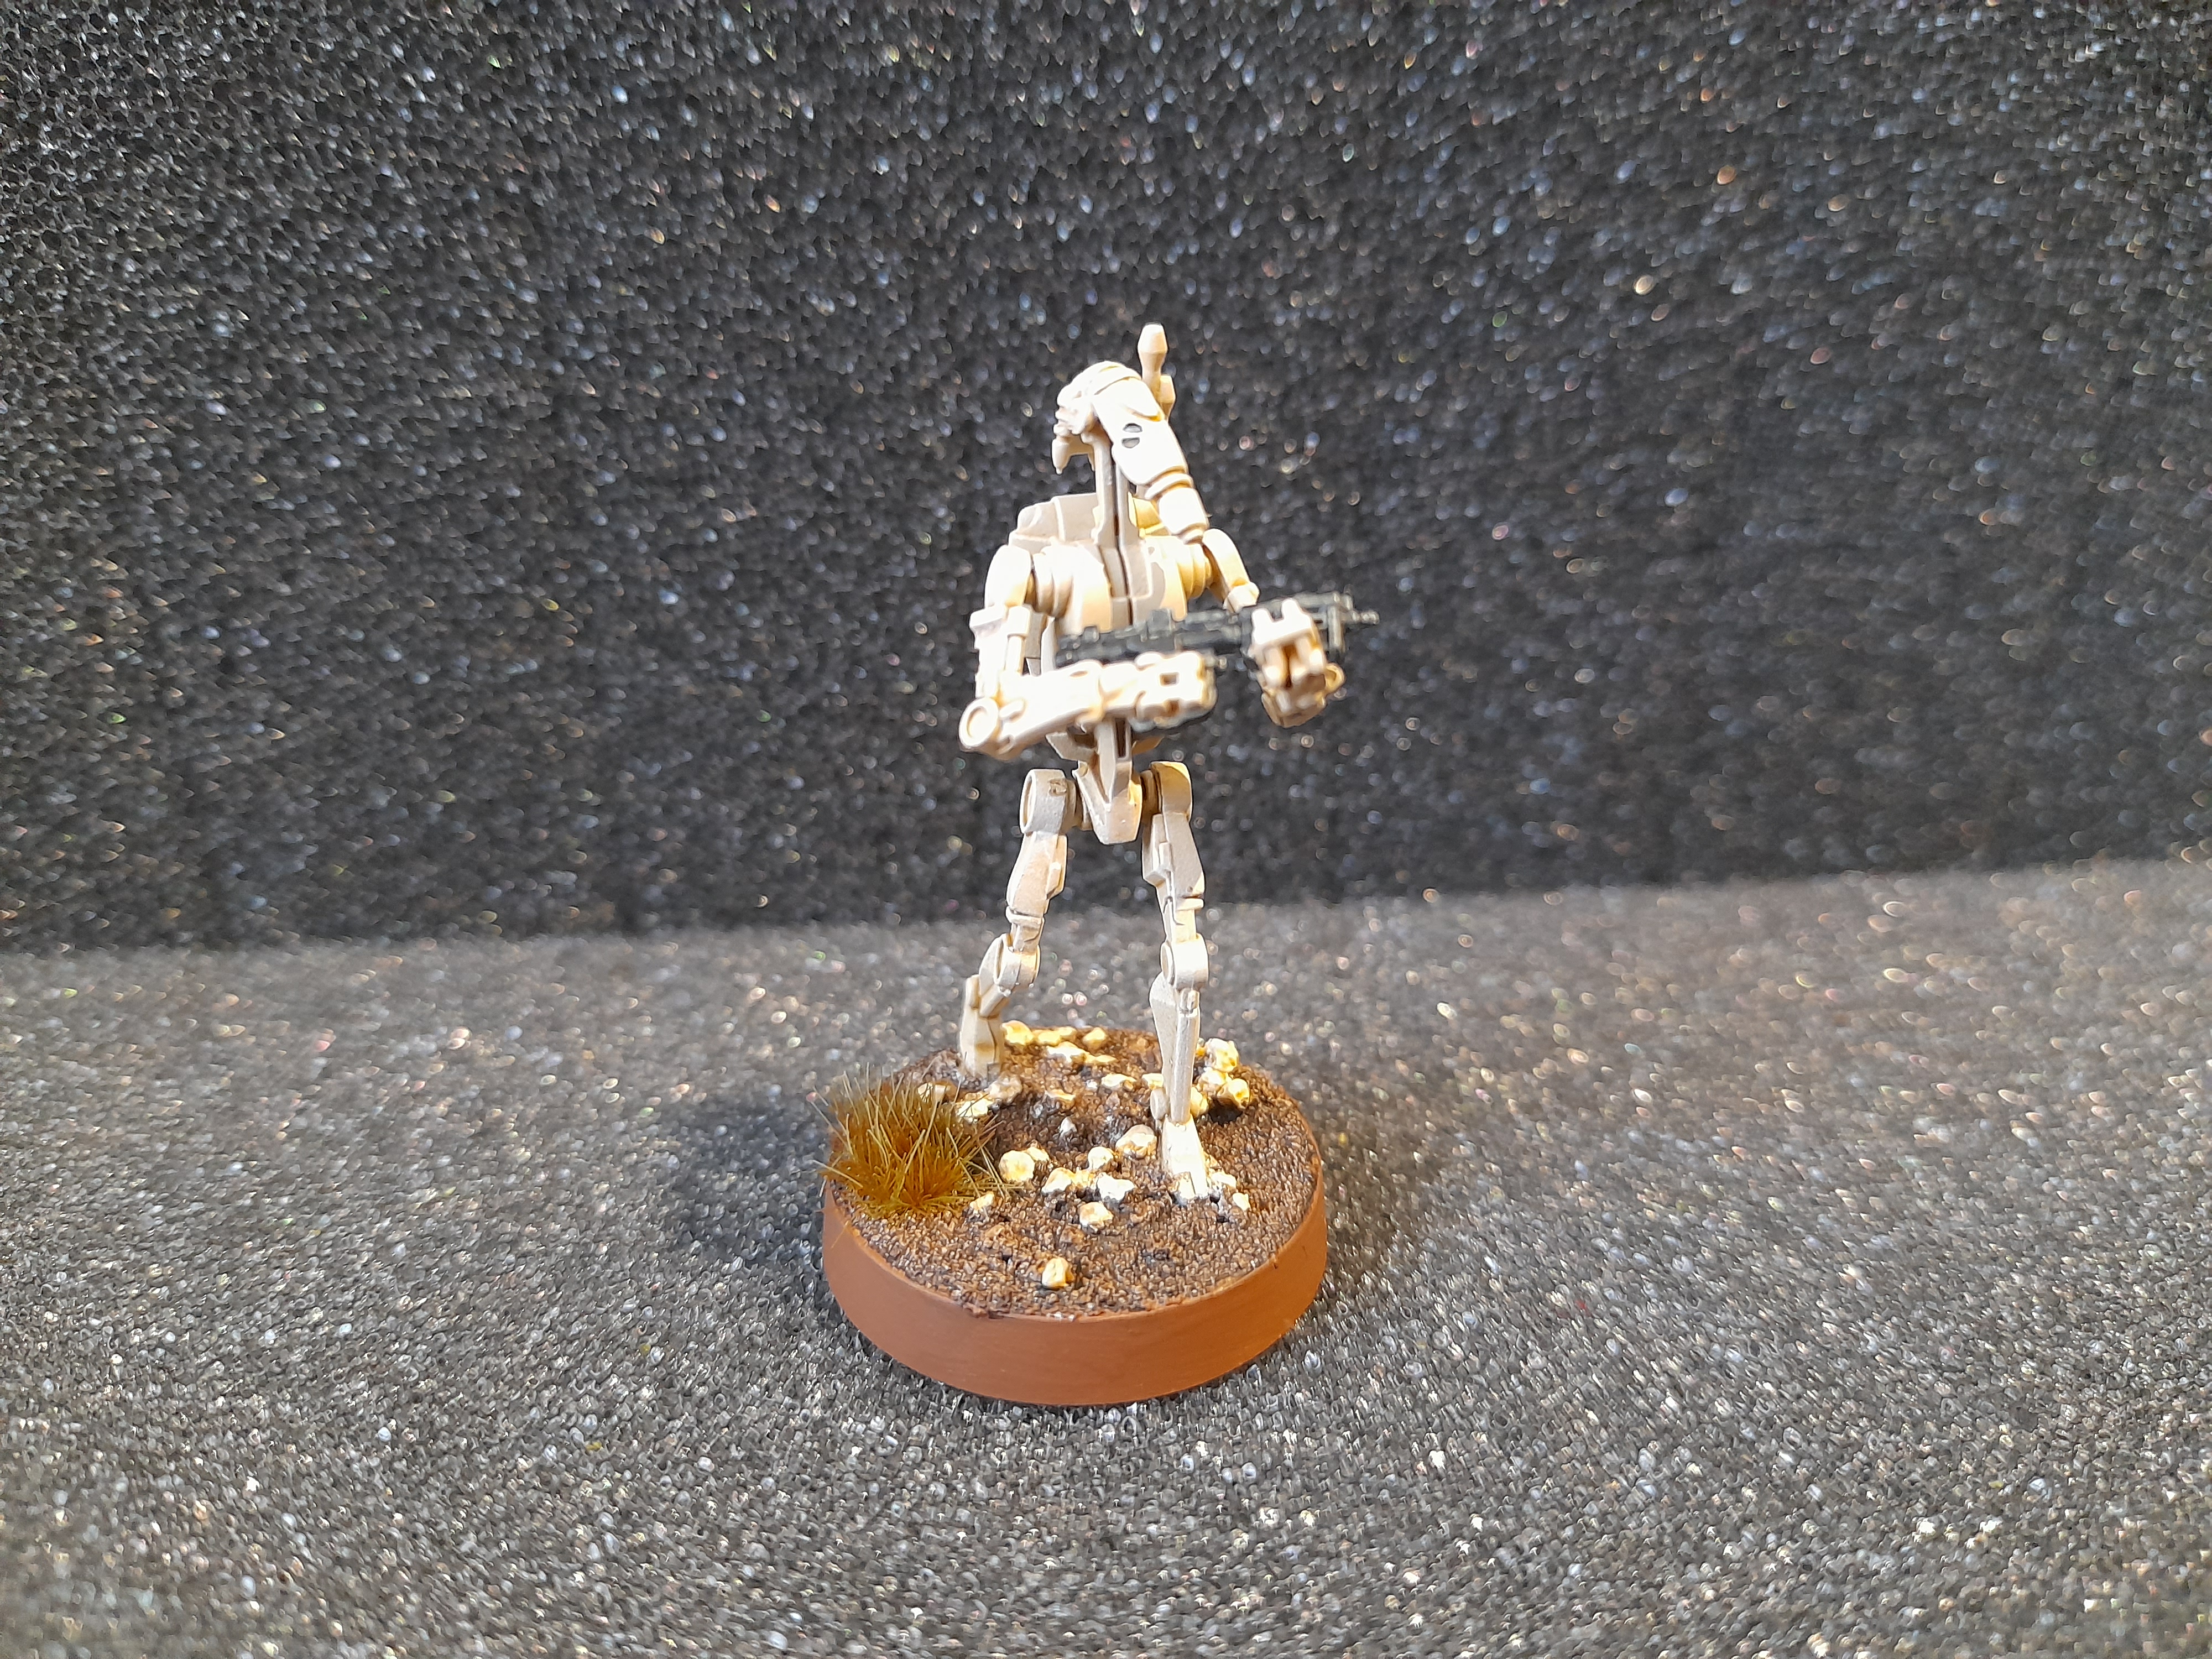
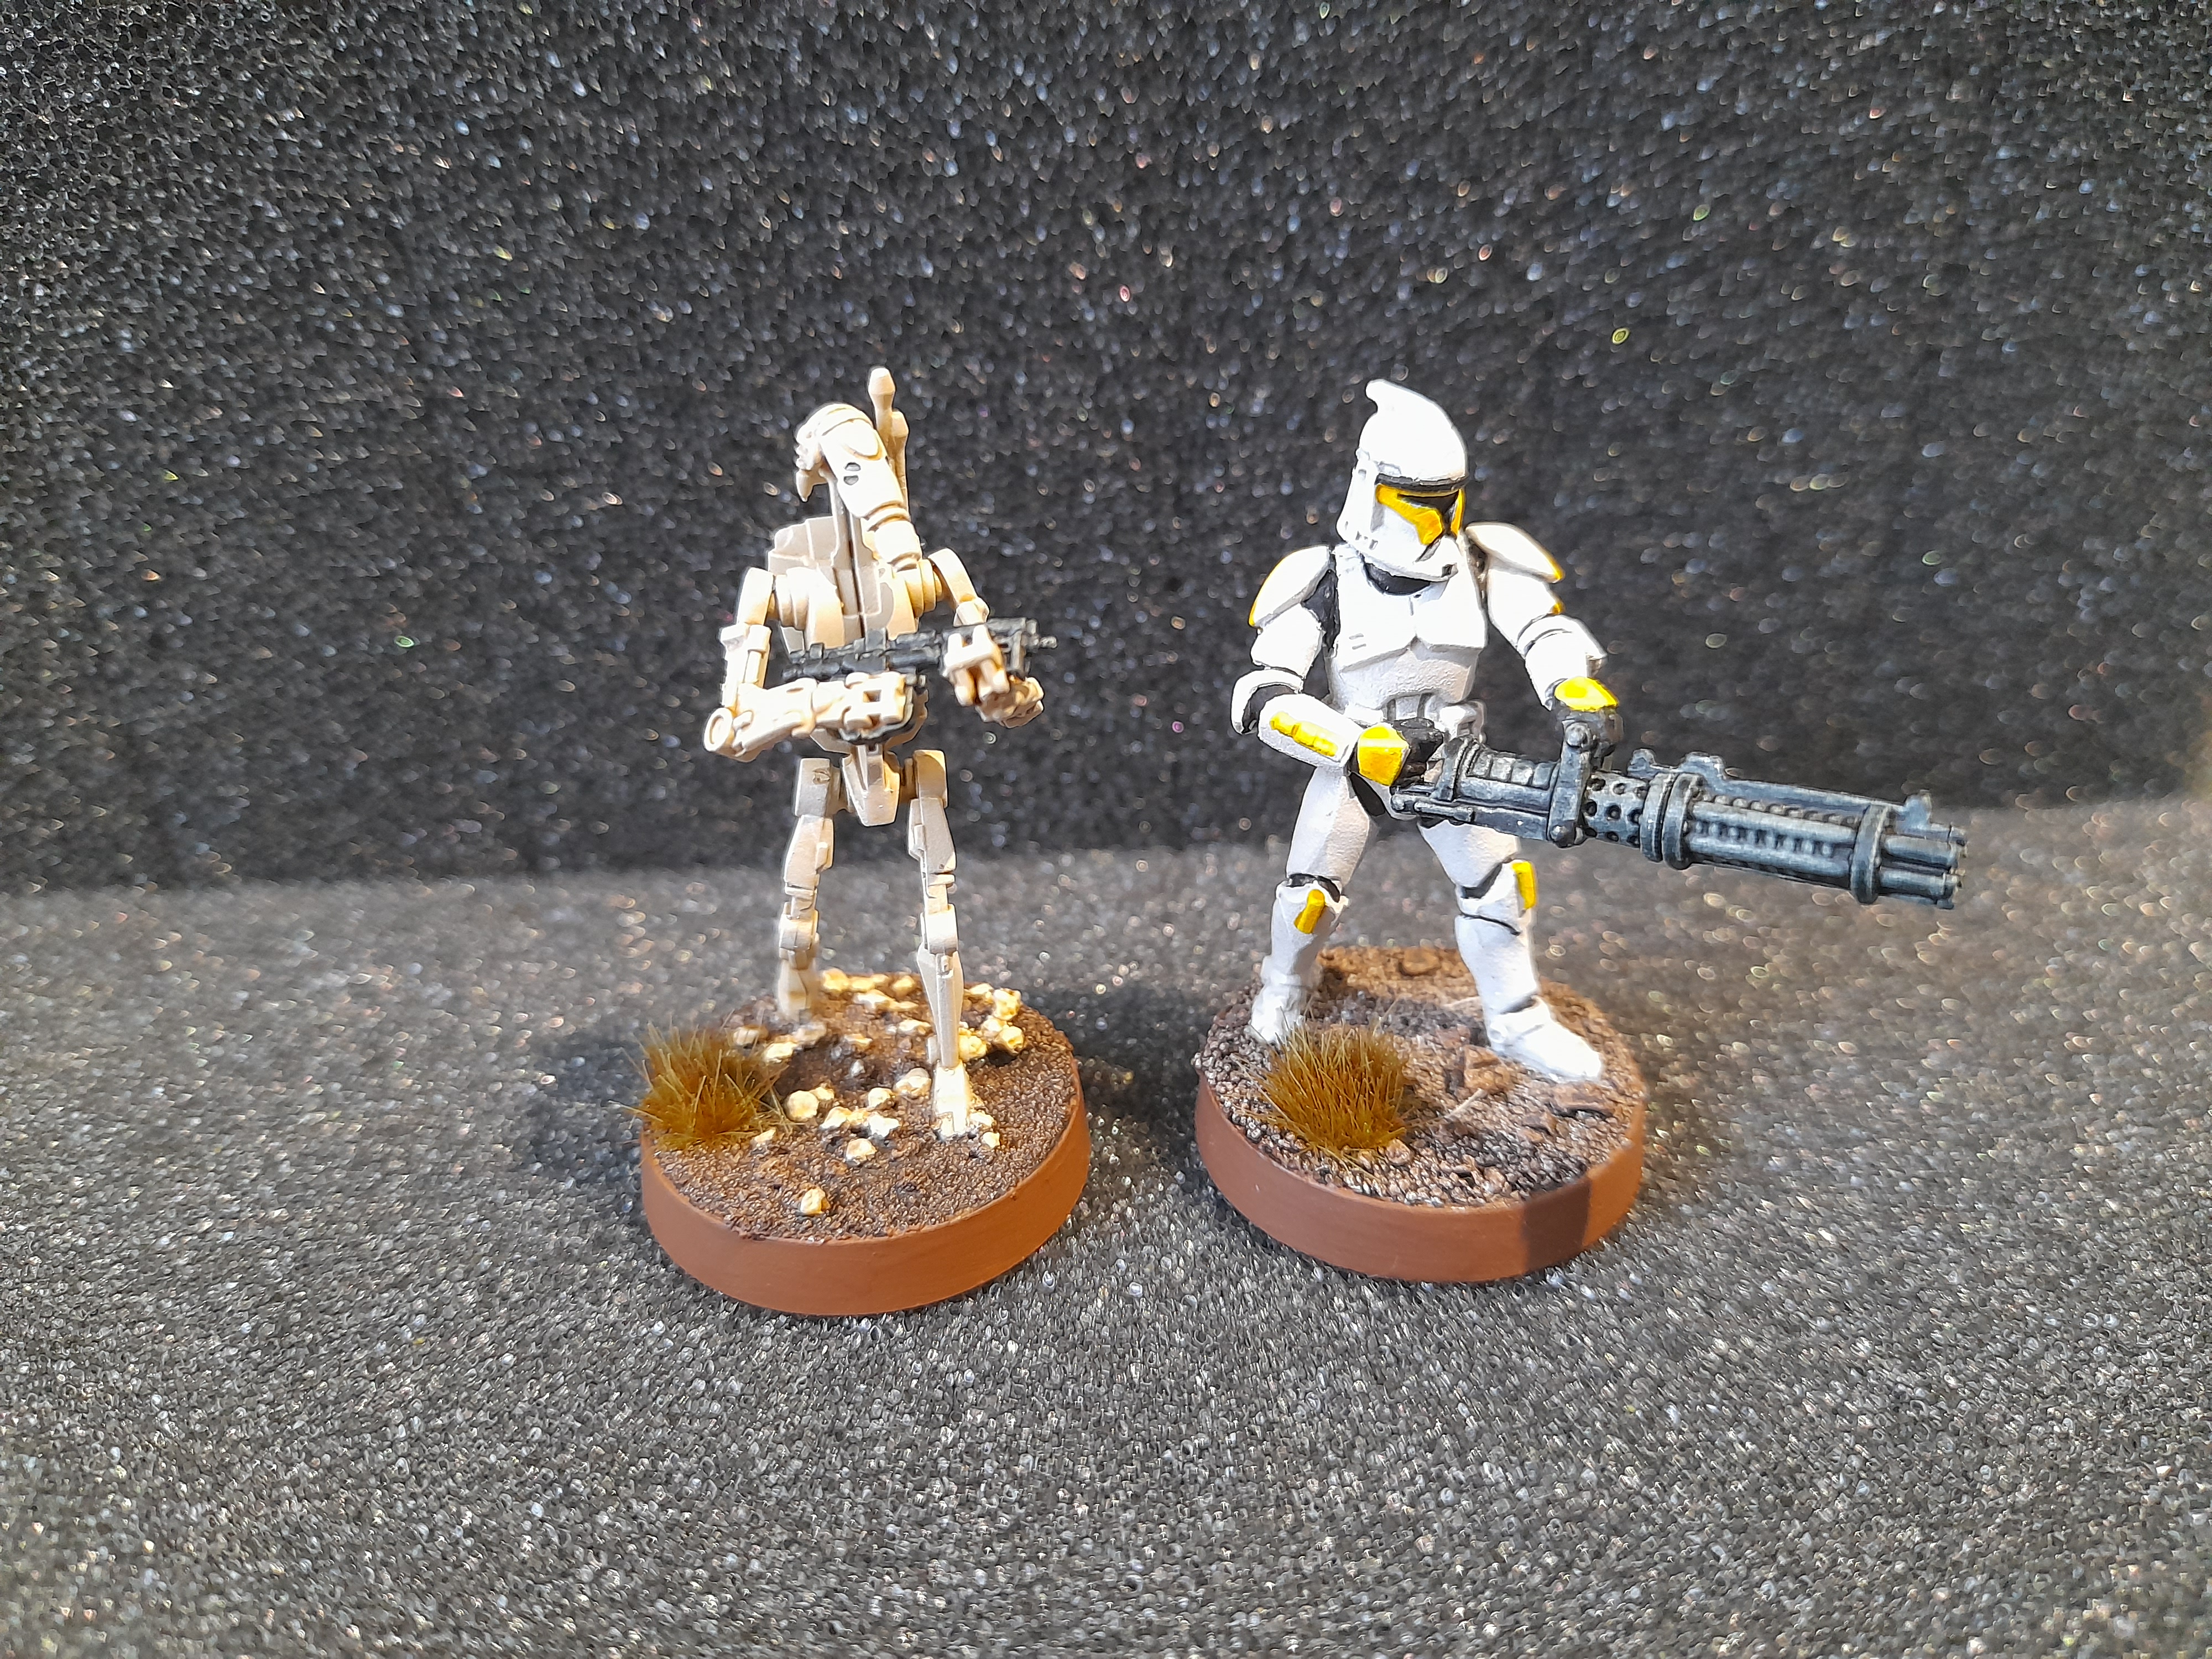
Looks reasonable overall, and works next to a clone.
As with the Clones I needed a way to differentiate the squads on the battlefield. However, the droid already have specific colour markings for command, security etc, so I needed to avoid those colours and designs. My choice was to go for one ‘as is’ squad, then the other three would use blue, green and purple as their colours. With the markings being on the right shoulder and one panel on the back of the head.

Time to roll out the rest of the droids……
Wash and Dry(brushed)
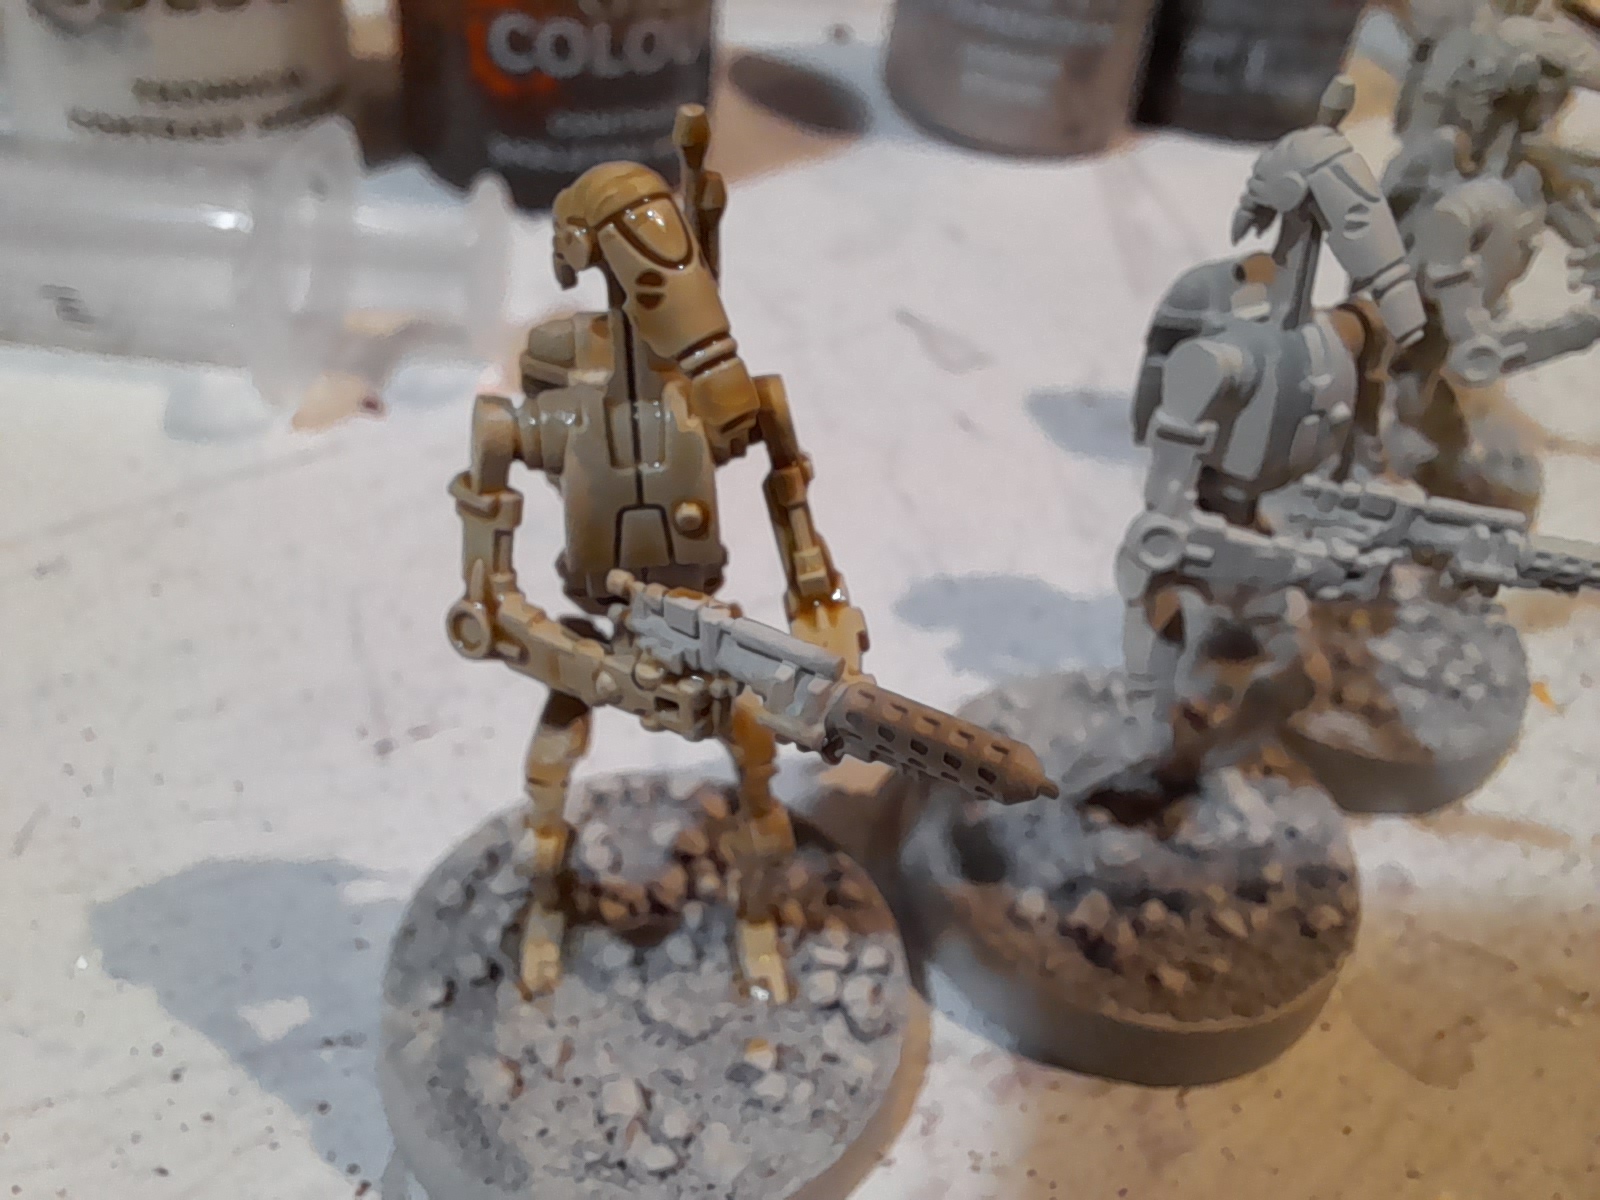
17th February 2024
The remaining 32 B1 Battle Droids had the same wash treatment, with me trying to wipe some of it away from the head and raised areas. They then were all treated to a drybrush with Vallejo Ivory.
 The picture makes it look a little washed out, but it isn’t as stark in real life.
I also washed and drybrushed the STAP riders, and the B1 droid head that the repair droid is carrying.
It seems that I made up too much of the wash mix for the droids….
I’m sure it will come in useful though.
Next up, basic painting for the bases.
Starting on the B1’s
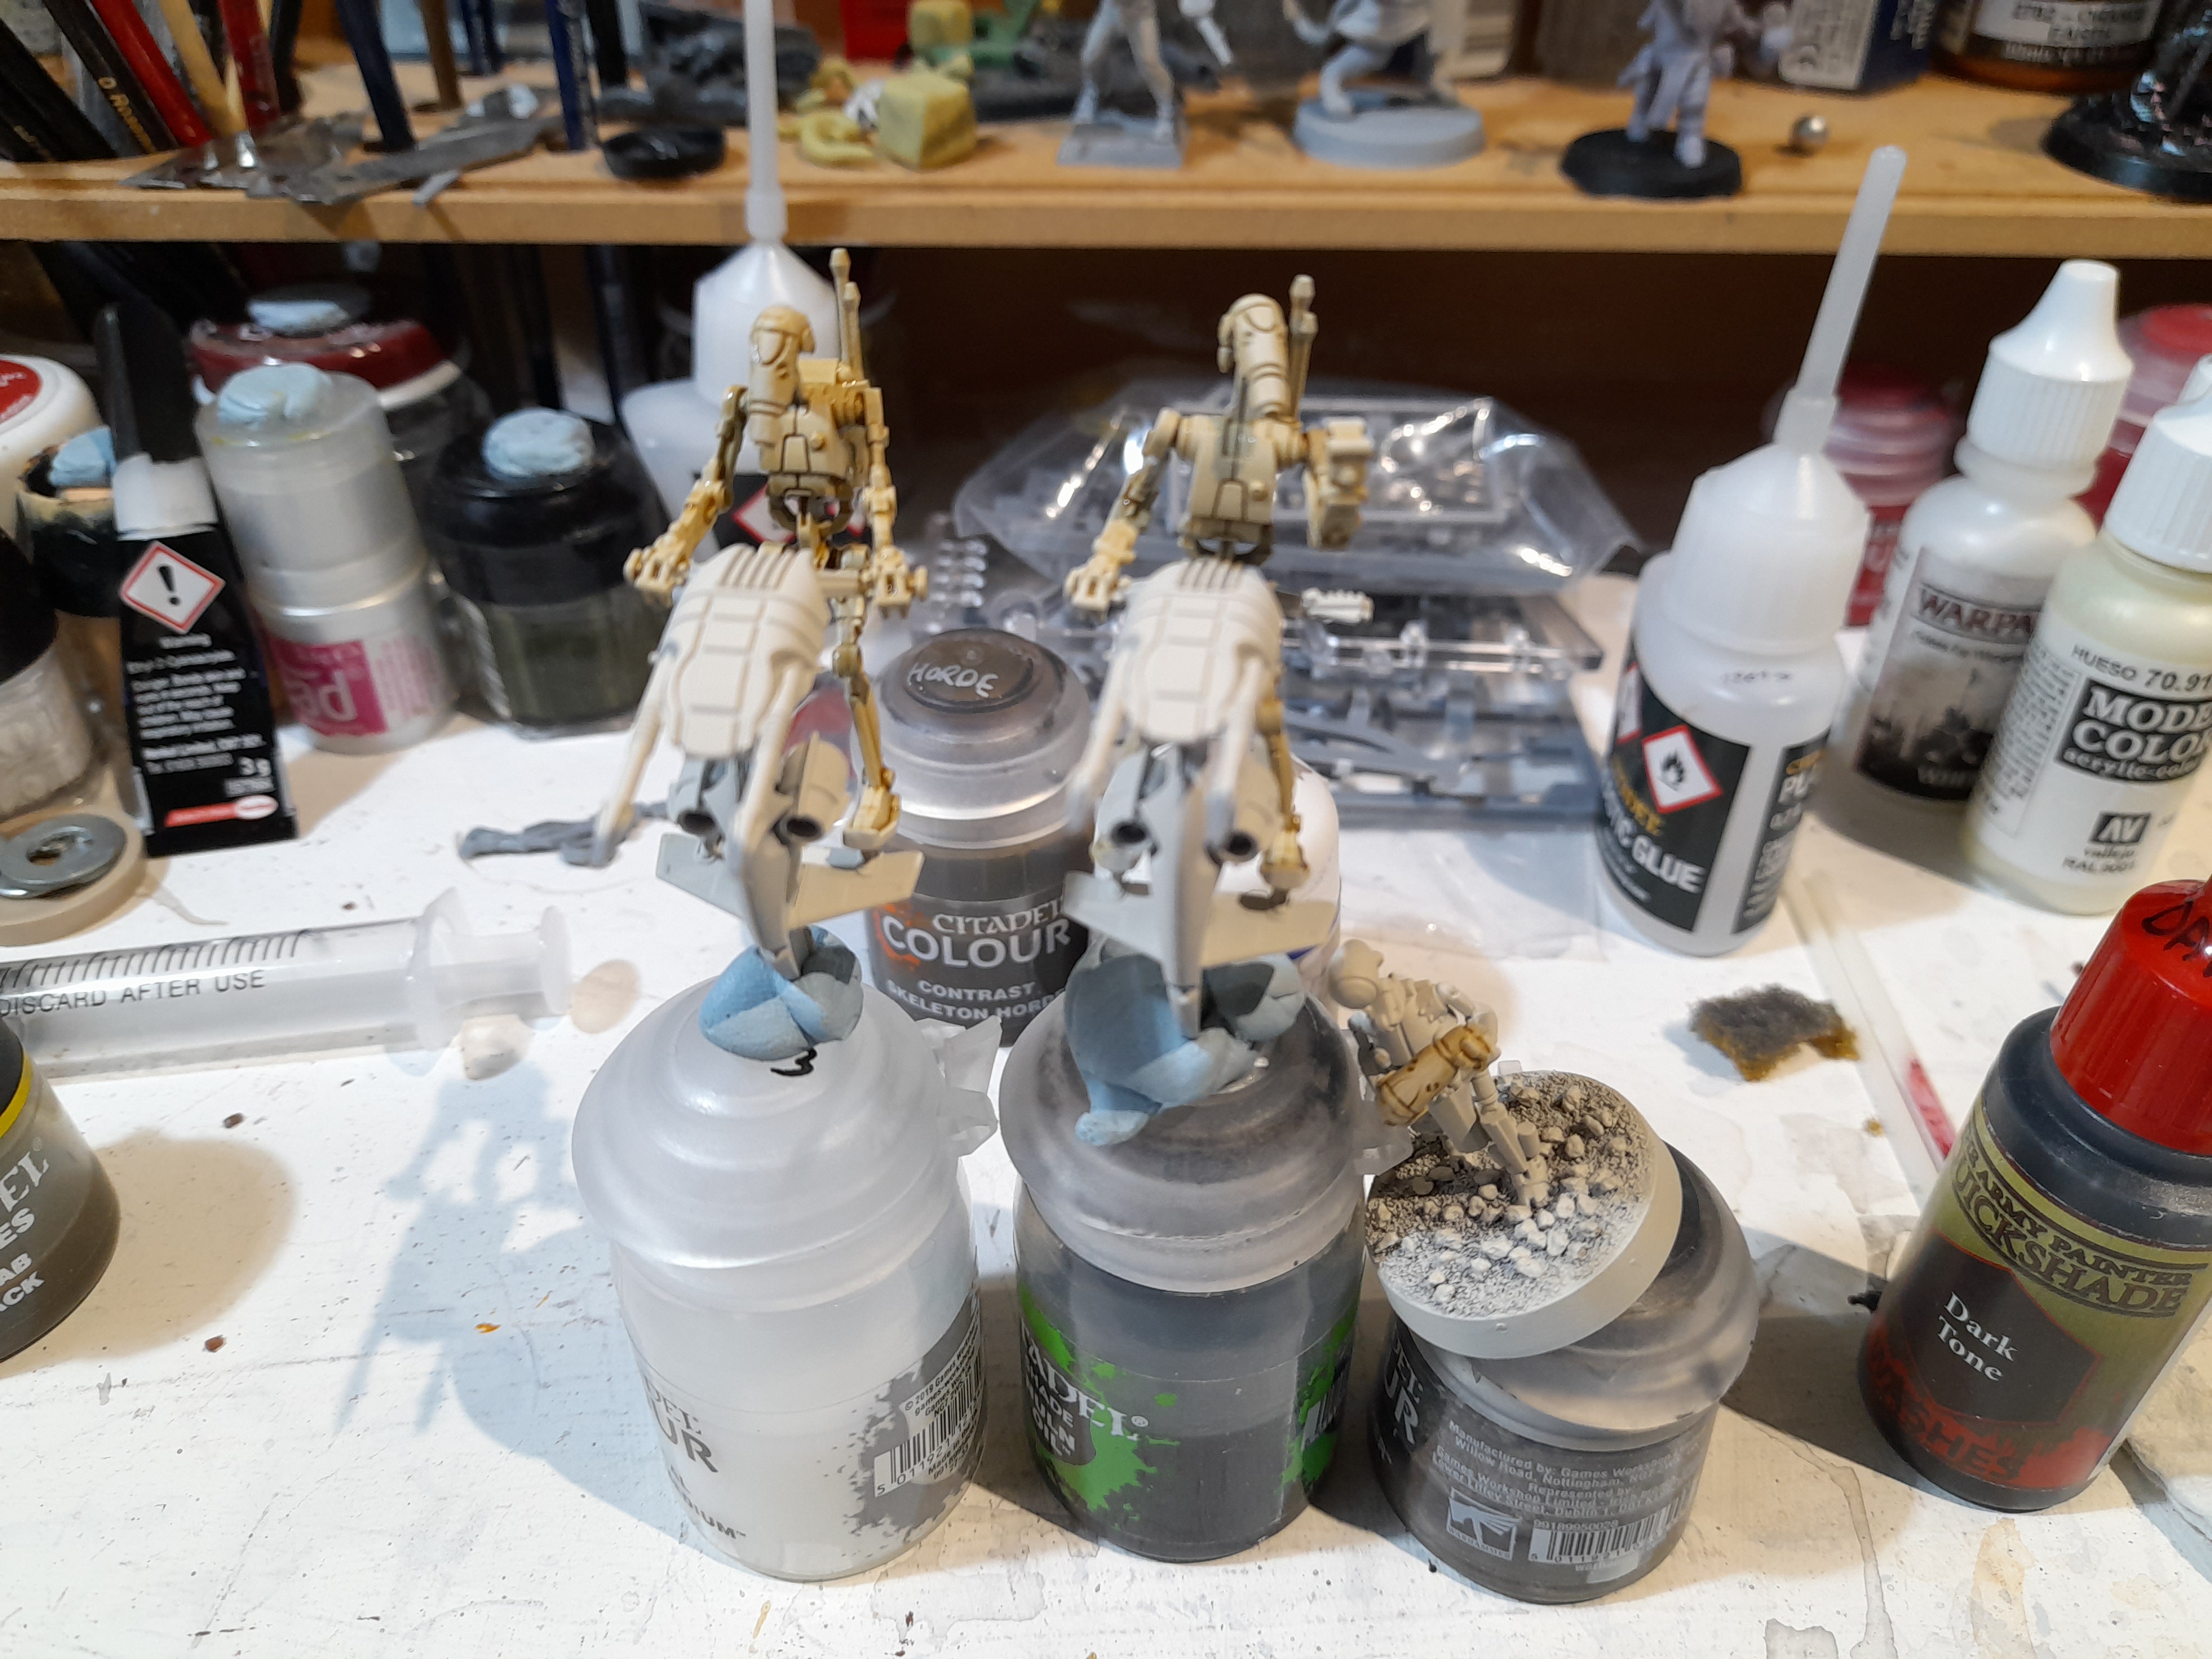
14th February 2024
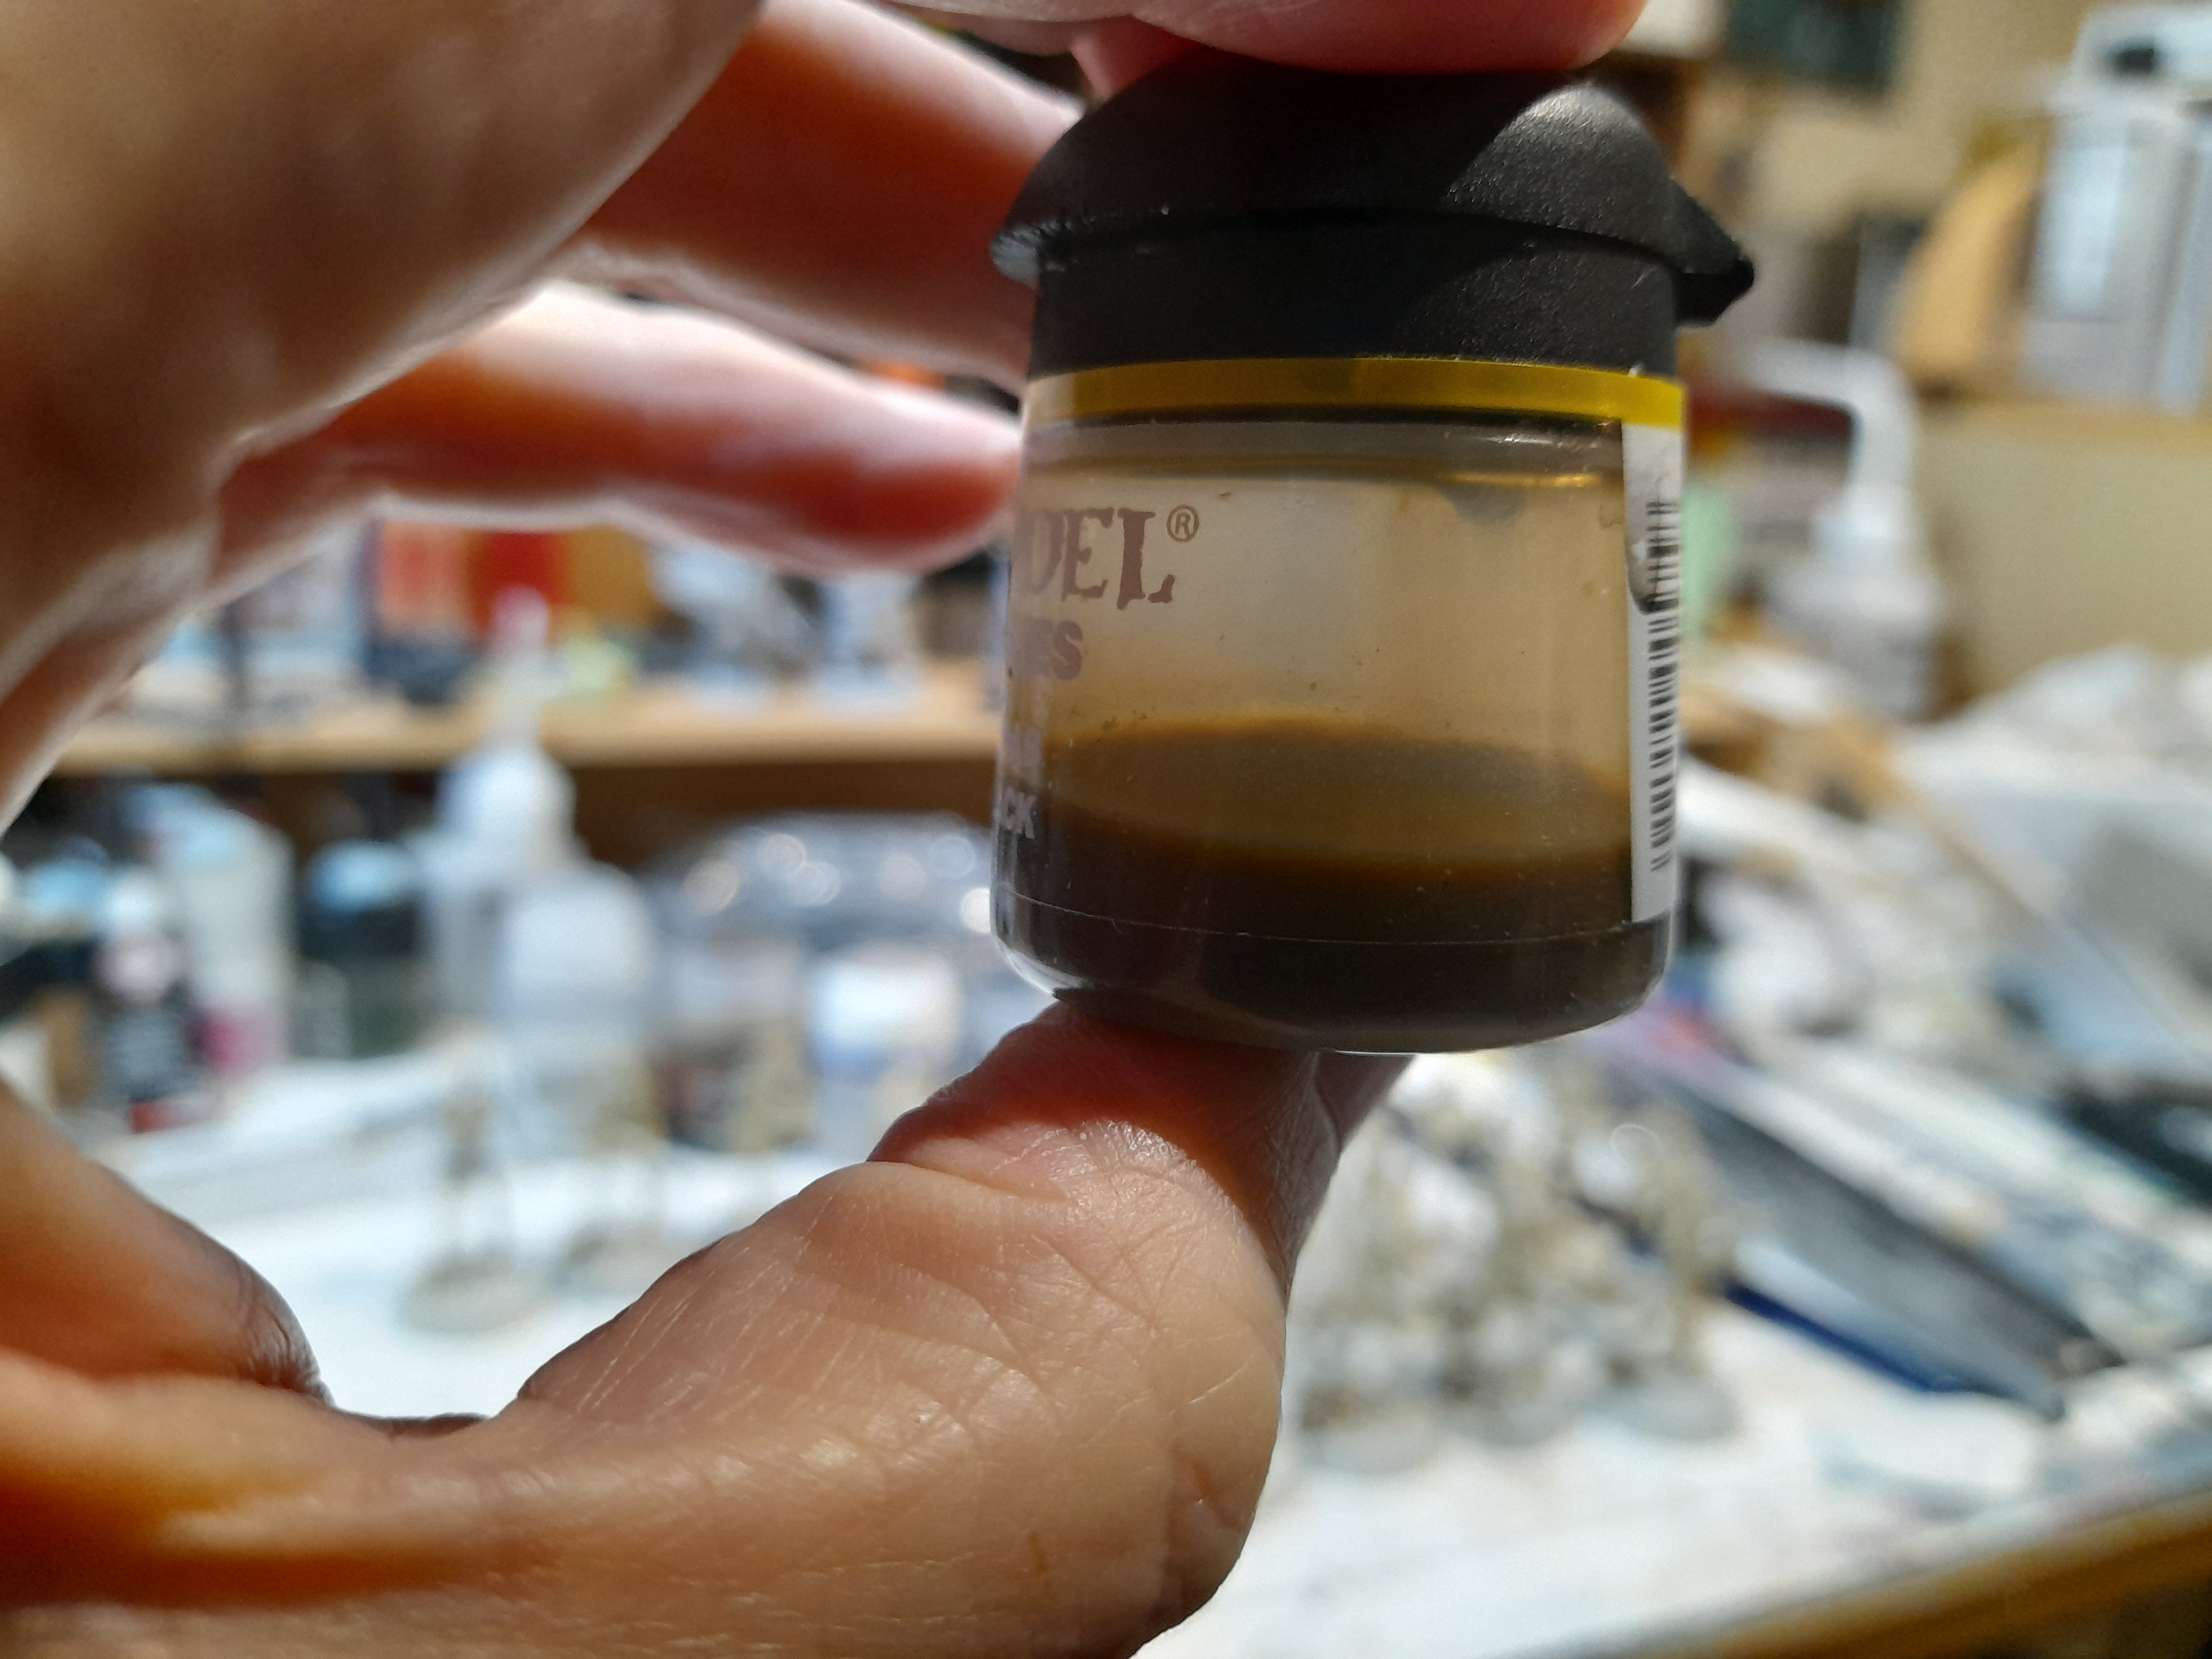
For the B1’s I knew that I wanted to try using contrast, in the hope that it would give an acceptable finish in reasonable time. However, I felt that using pure Skeleton Horde would be a bit too dark.
So, I planned to use a 50:50 mix of Skeleton Horde and Contrast Medium. Quick visit to an online retailer and some 5ml plastic syringes came in the post…
This allowed me to accurately measure out a mix of the paints, so that it would be repeatable for the future (in case I didn’t make enough to start with, or needed to paint more droids at a later date).
Started out on a test model, and it looked ok.
Rolled out to three more.
After they were dry I tried a quick drybrush with ivory, and I think it made an improvement.
 Drybrushed one on the left
For the next four I decided to try wiping some of the contrast mix off from the droid’s high points before it dried – as a rough highlight stage.
 'Wiped' one on the left
I feel that works quite well, so will go with that technique for the rest of the B1 droids, with some light drybrushing afterwards where needed. Interestingly they still take quite a while to do each one at this stage – I will try out some different brushes to see if any ‘load up’ better.
Primed
10th February 2024
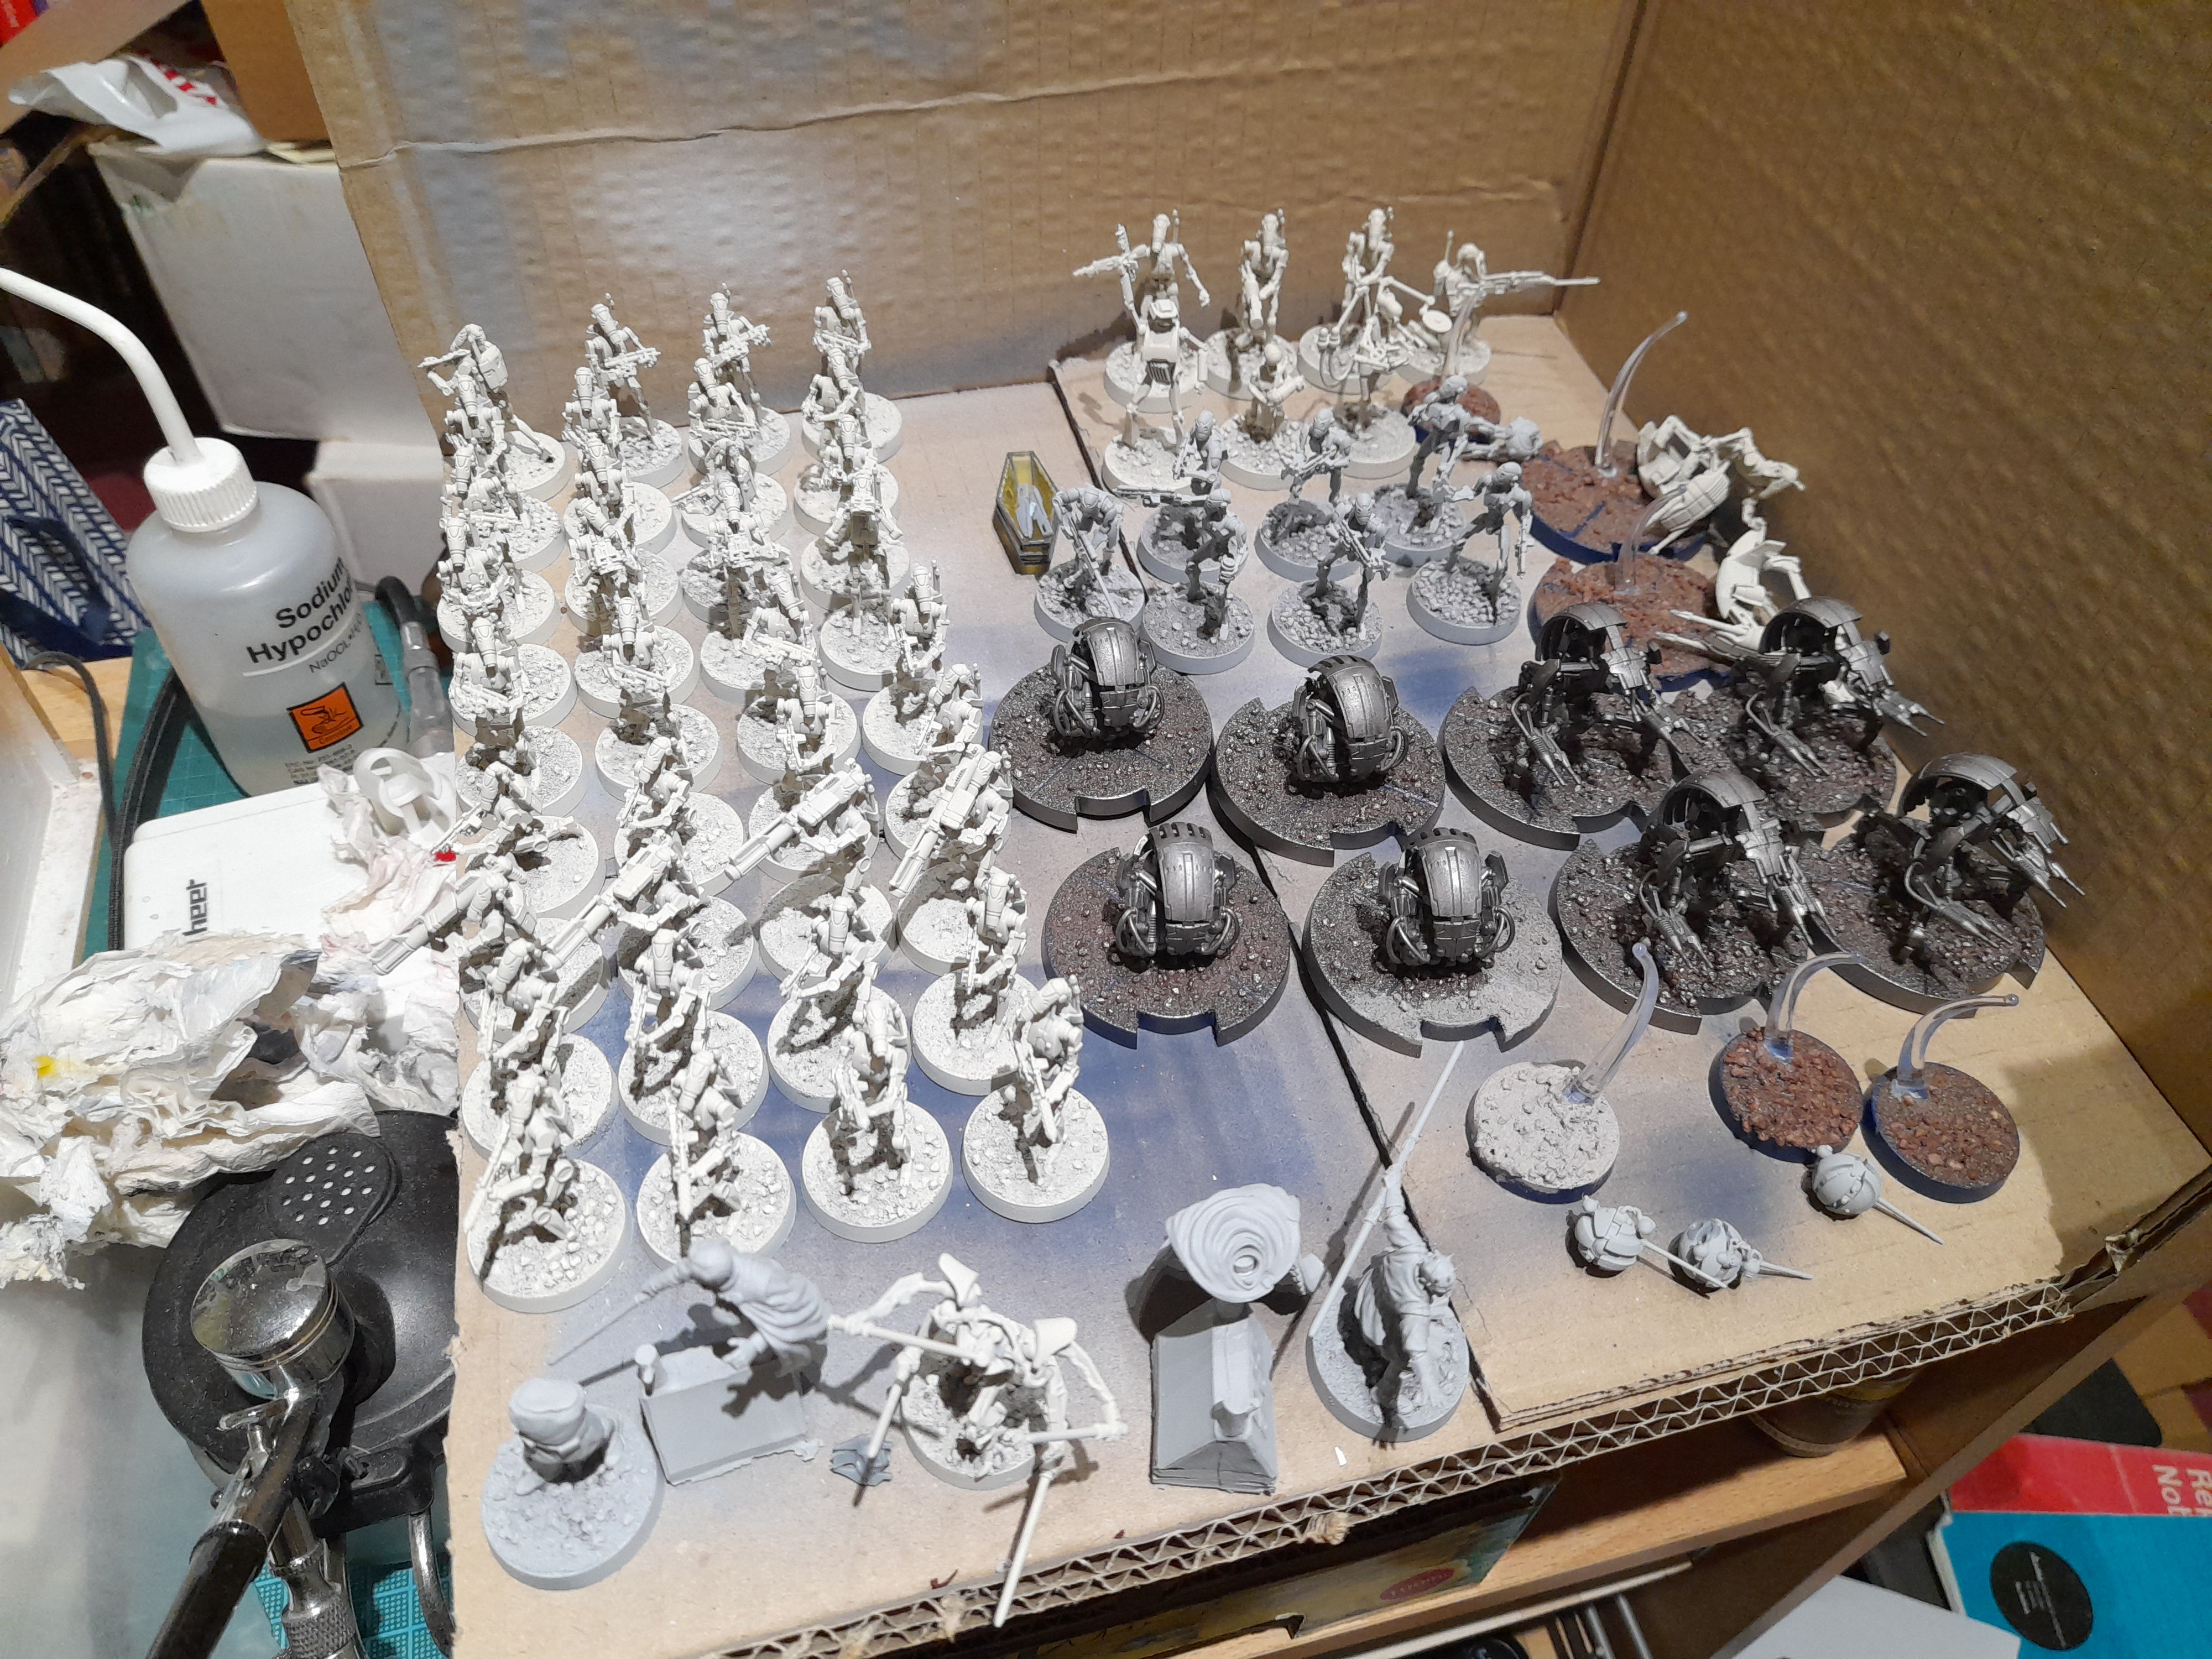
Haven’t really had much hobby time, but I have managed to get the minis primed.
The majority of the droids are in wraithbone. The Droidekas are leadbelcher and the rest are grey (couldn’t find black for the sith).

Not sure when I will get the painting underway, but hopefully soon…
Primed
10th February 2024
Haven’t really had much hobby time, but I have managed to get the minis primed.
The majority of the droids are in wraithbone. The Droidekas are leadbelcher and the rest are grey (couldn’t find black for the sith).
Not sure when I will get the painting underway, but hopefully soon…
Basing Time
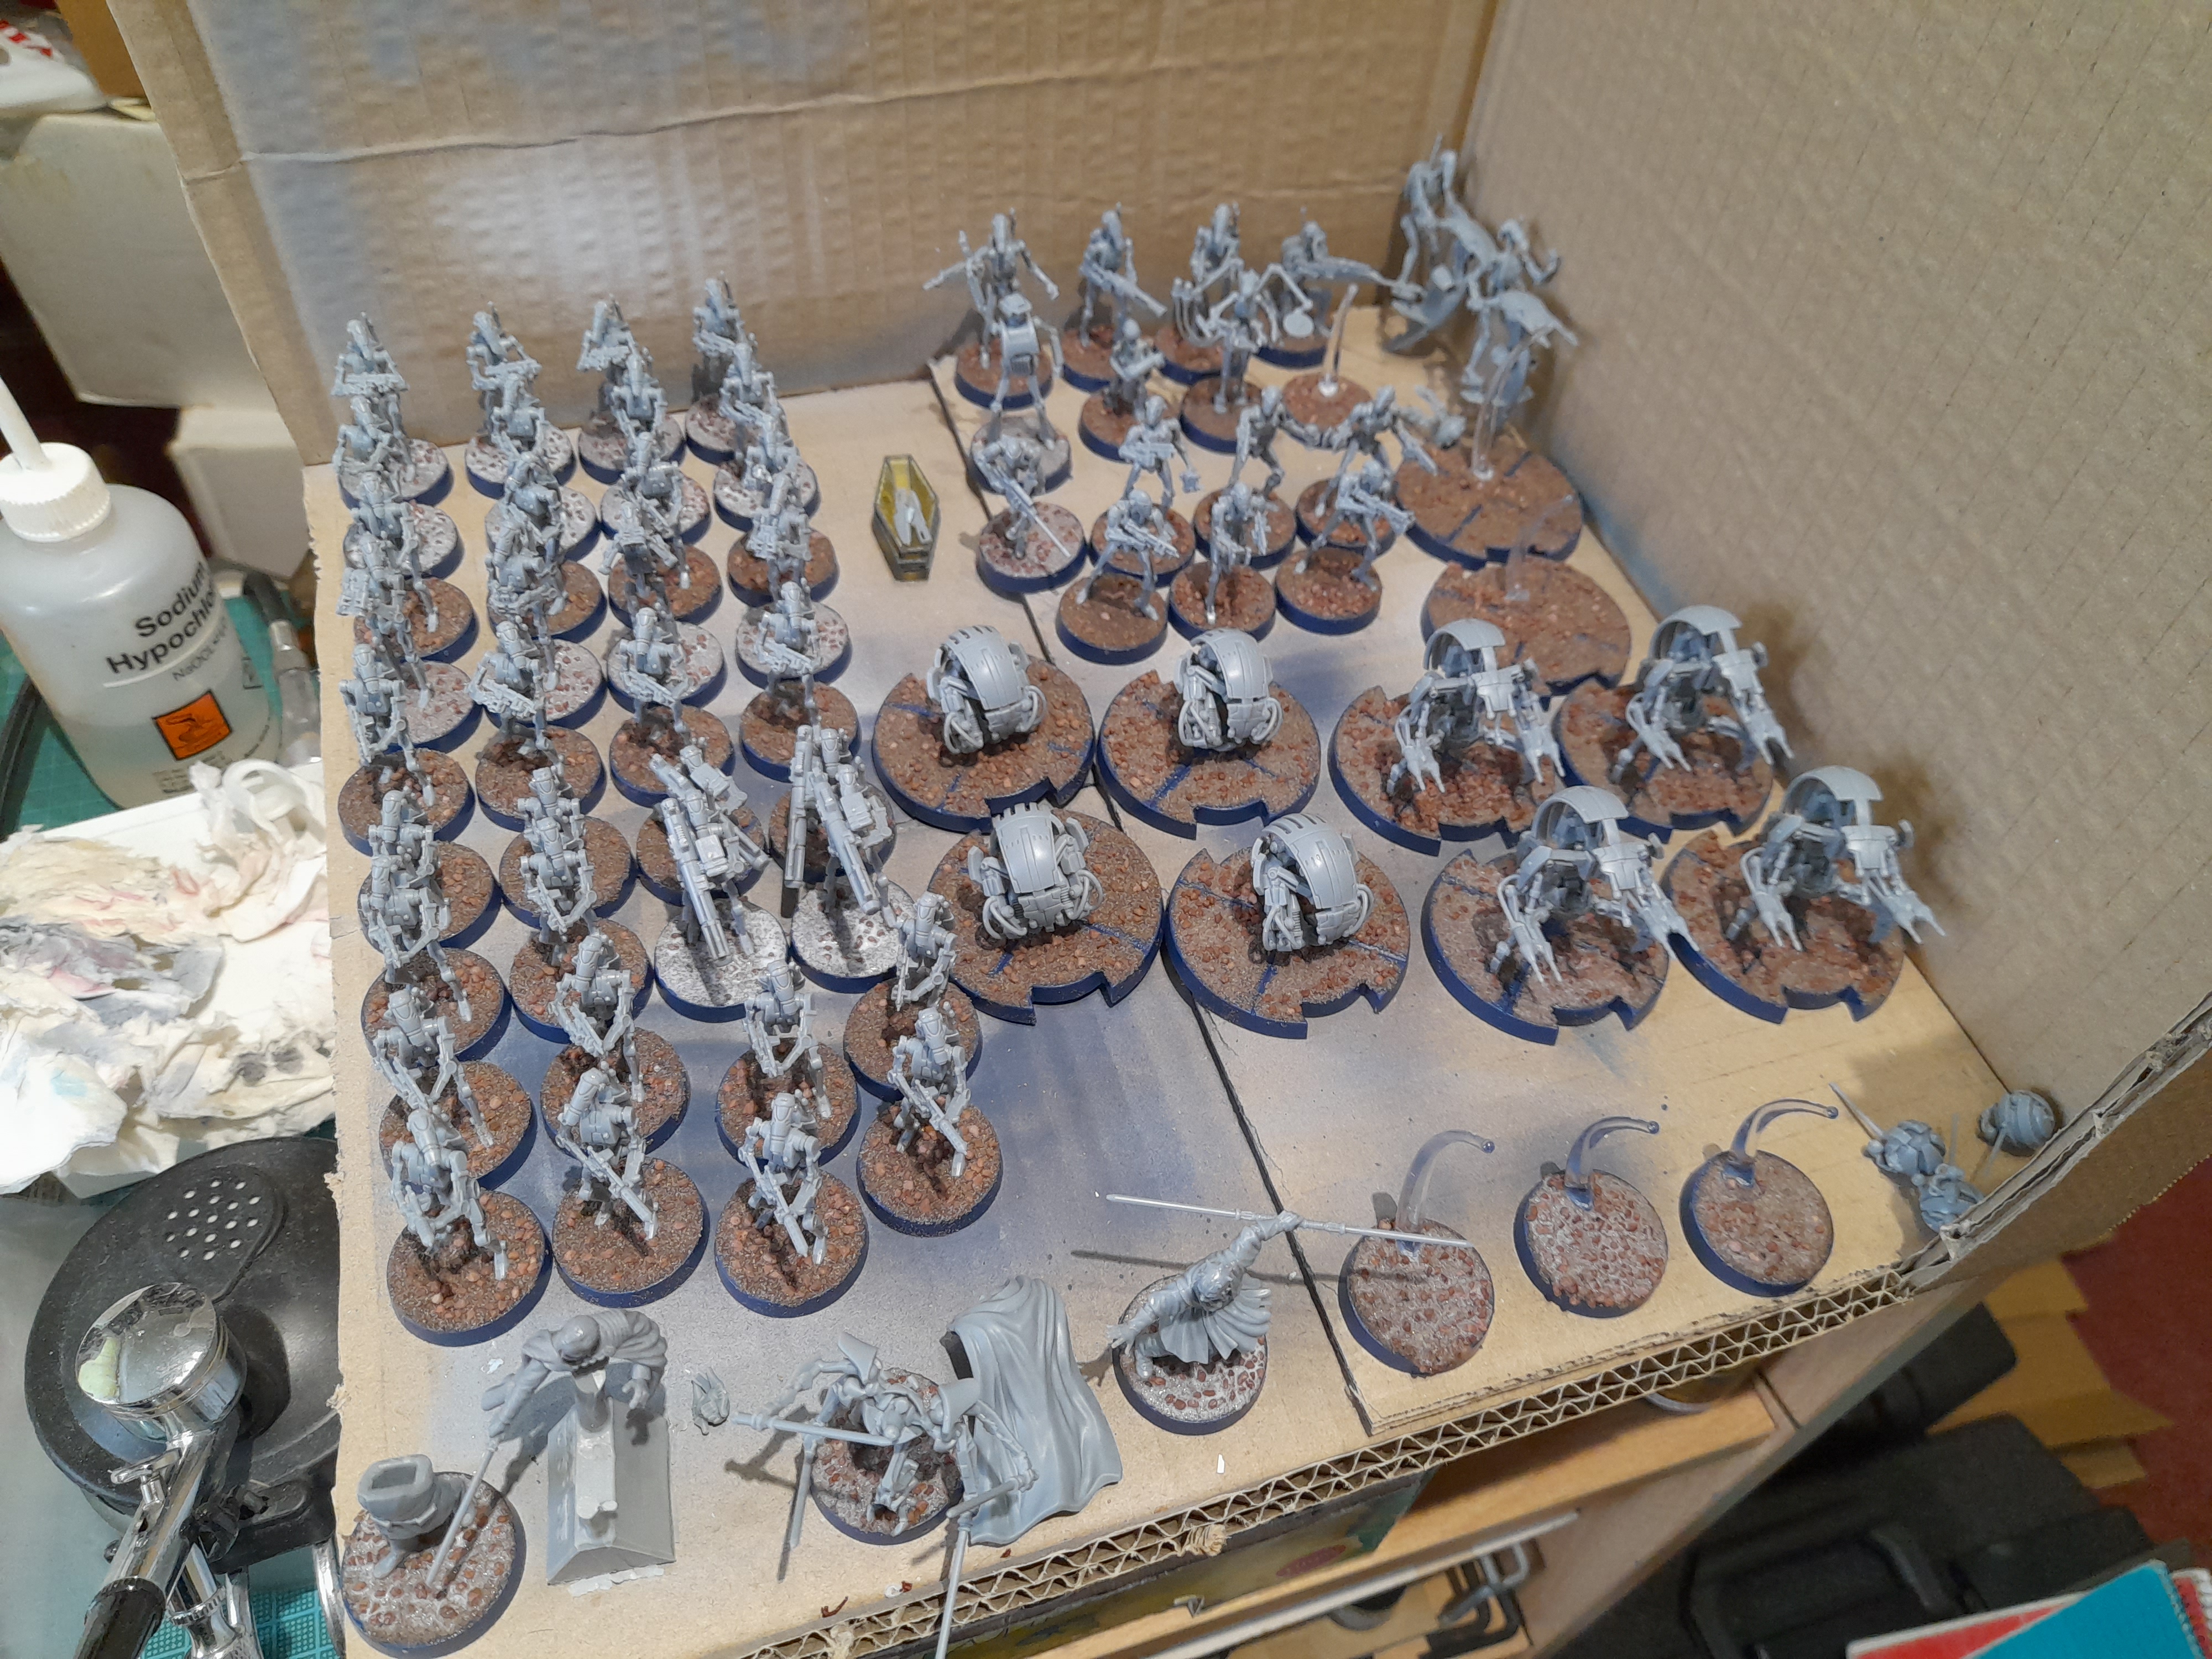
4th February 2024
Now came the basing chore…. ☹
Whenever I can’t decide on a specific basing method I fall back on the standard sand and gravel mix. This will match my Clones anyway, so is probably for the best. I couldn’t find my usual mix, so had to knock up a new one.
Then it was onto the slow laborious process of basing all of the models. For the large bases I left the marking lines clear for in game use.
General Grievous
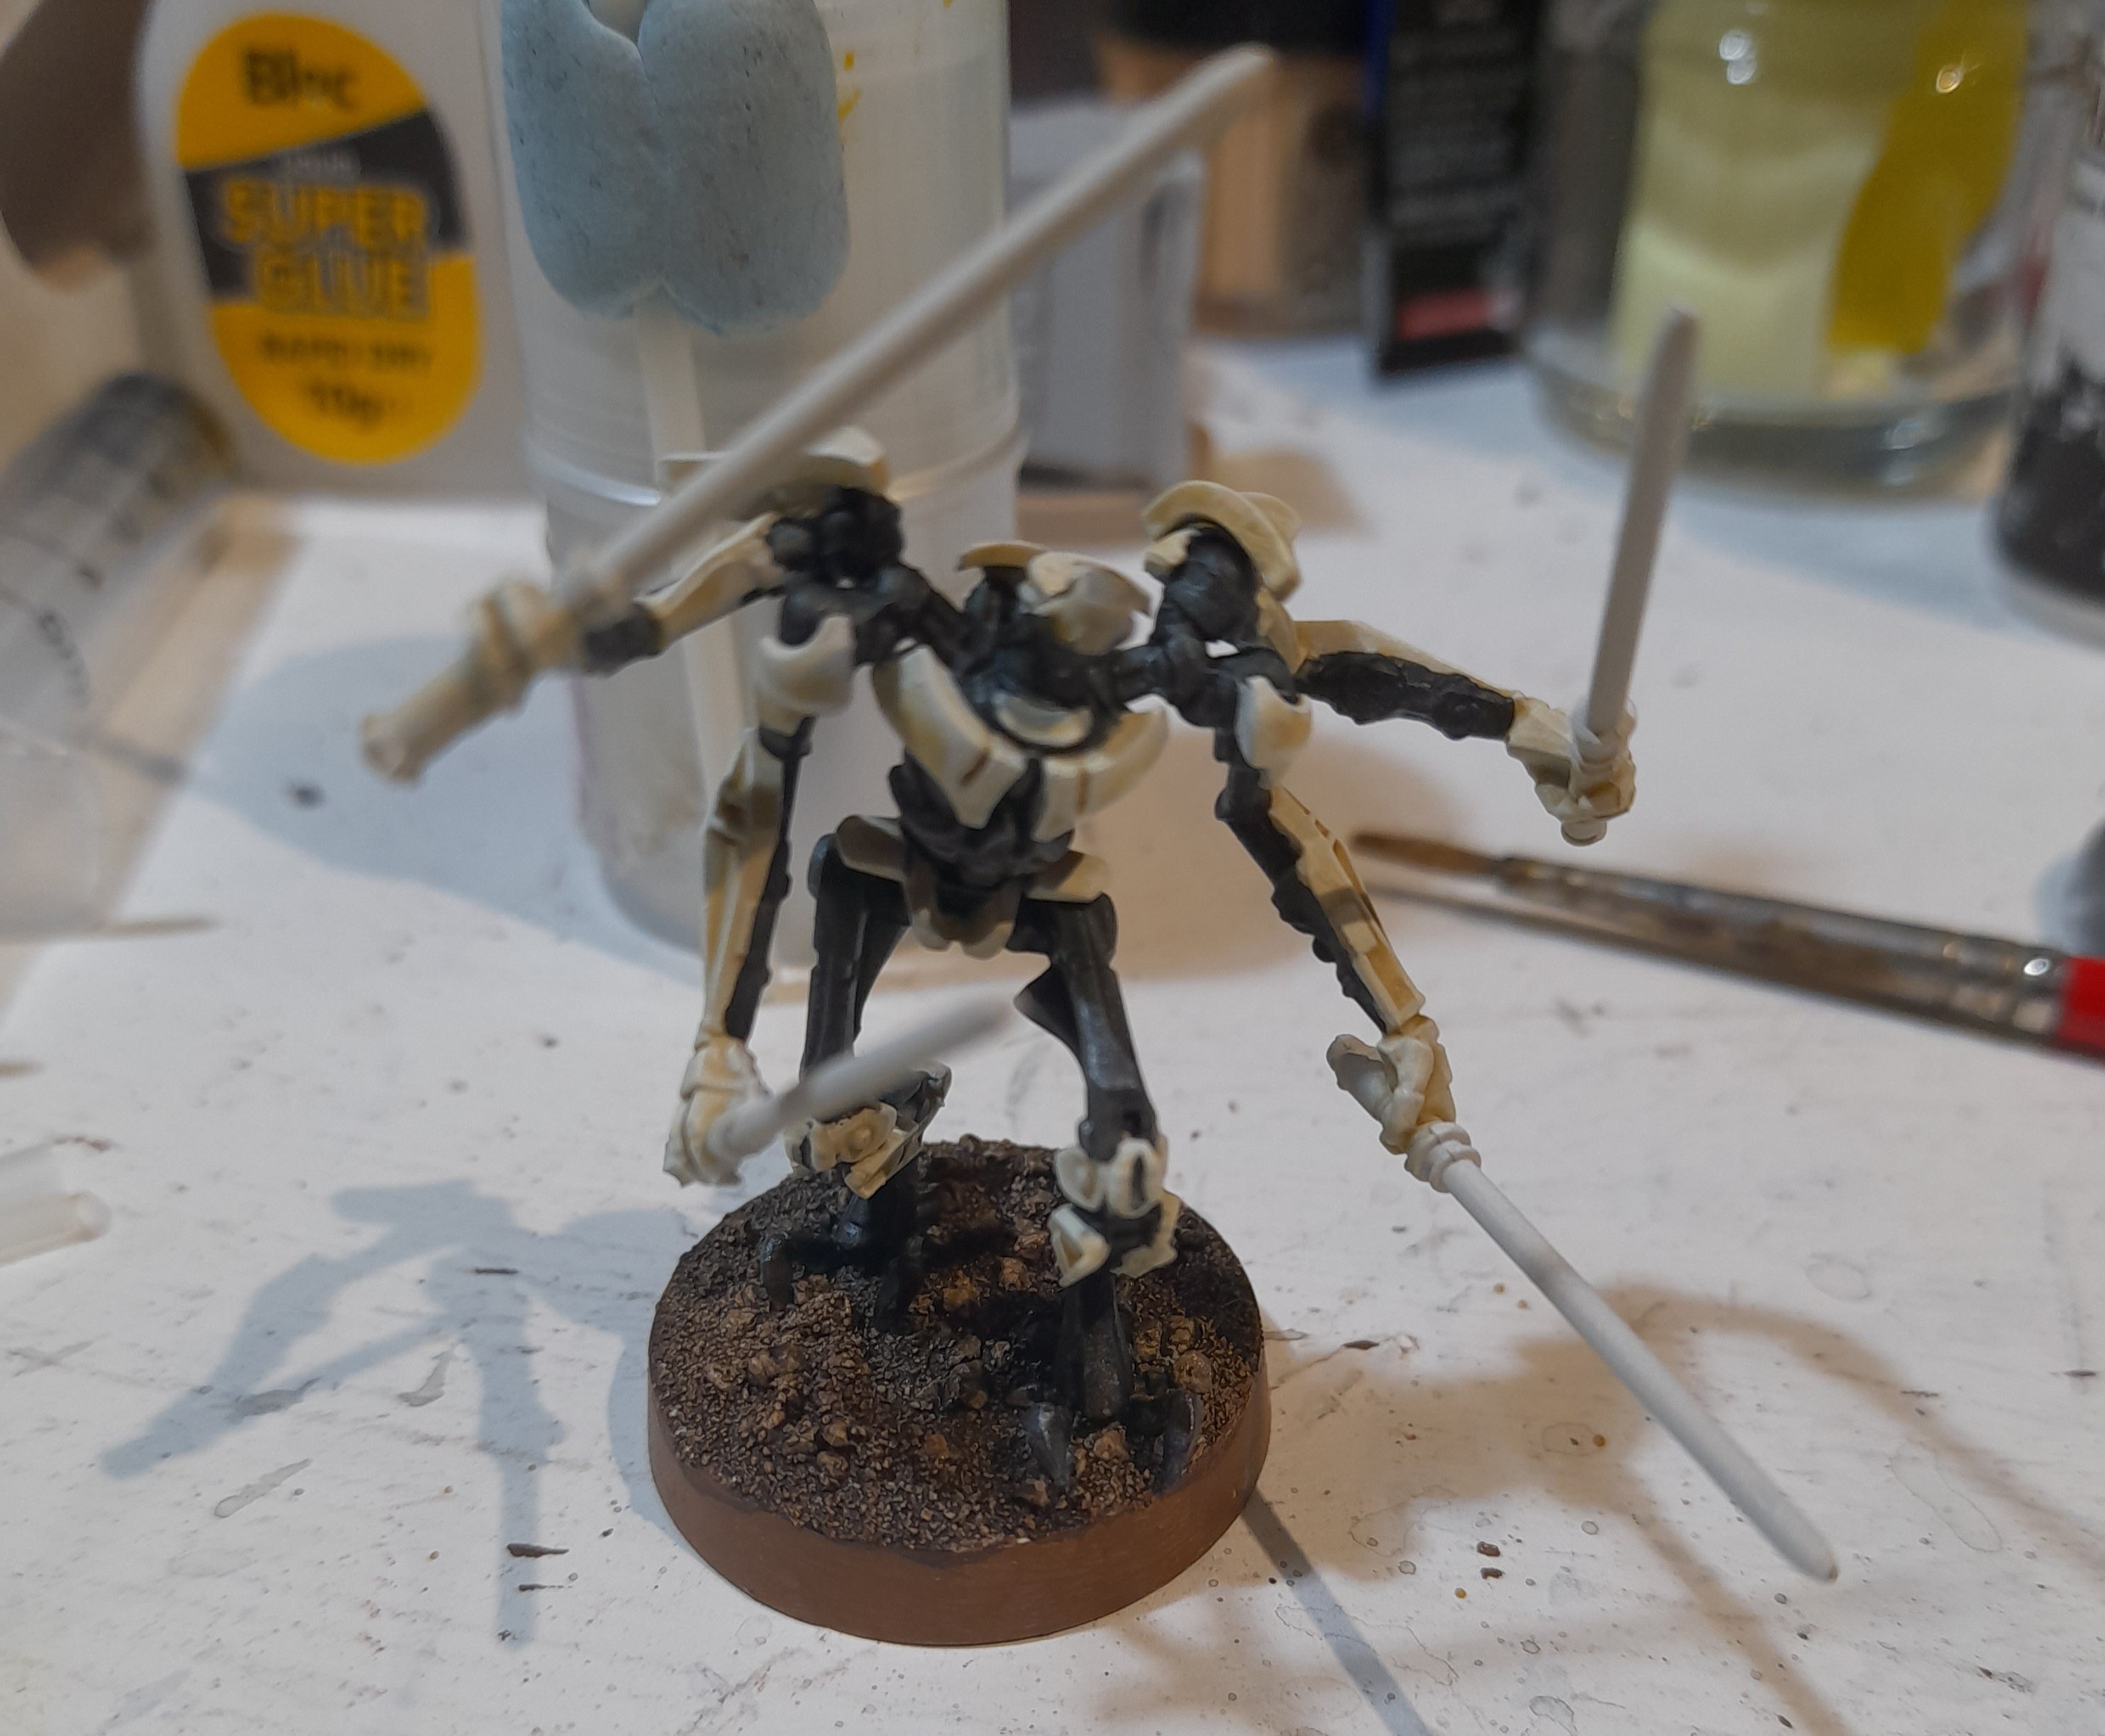
Grievous also had a few build options.
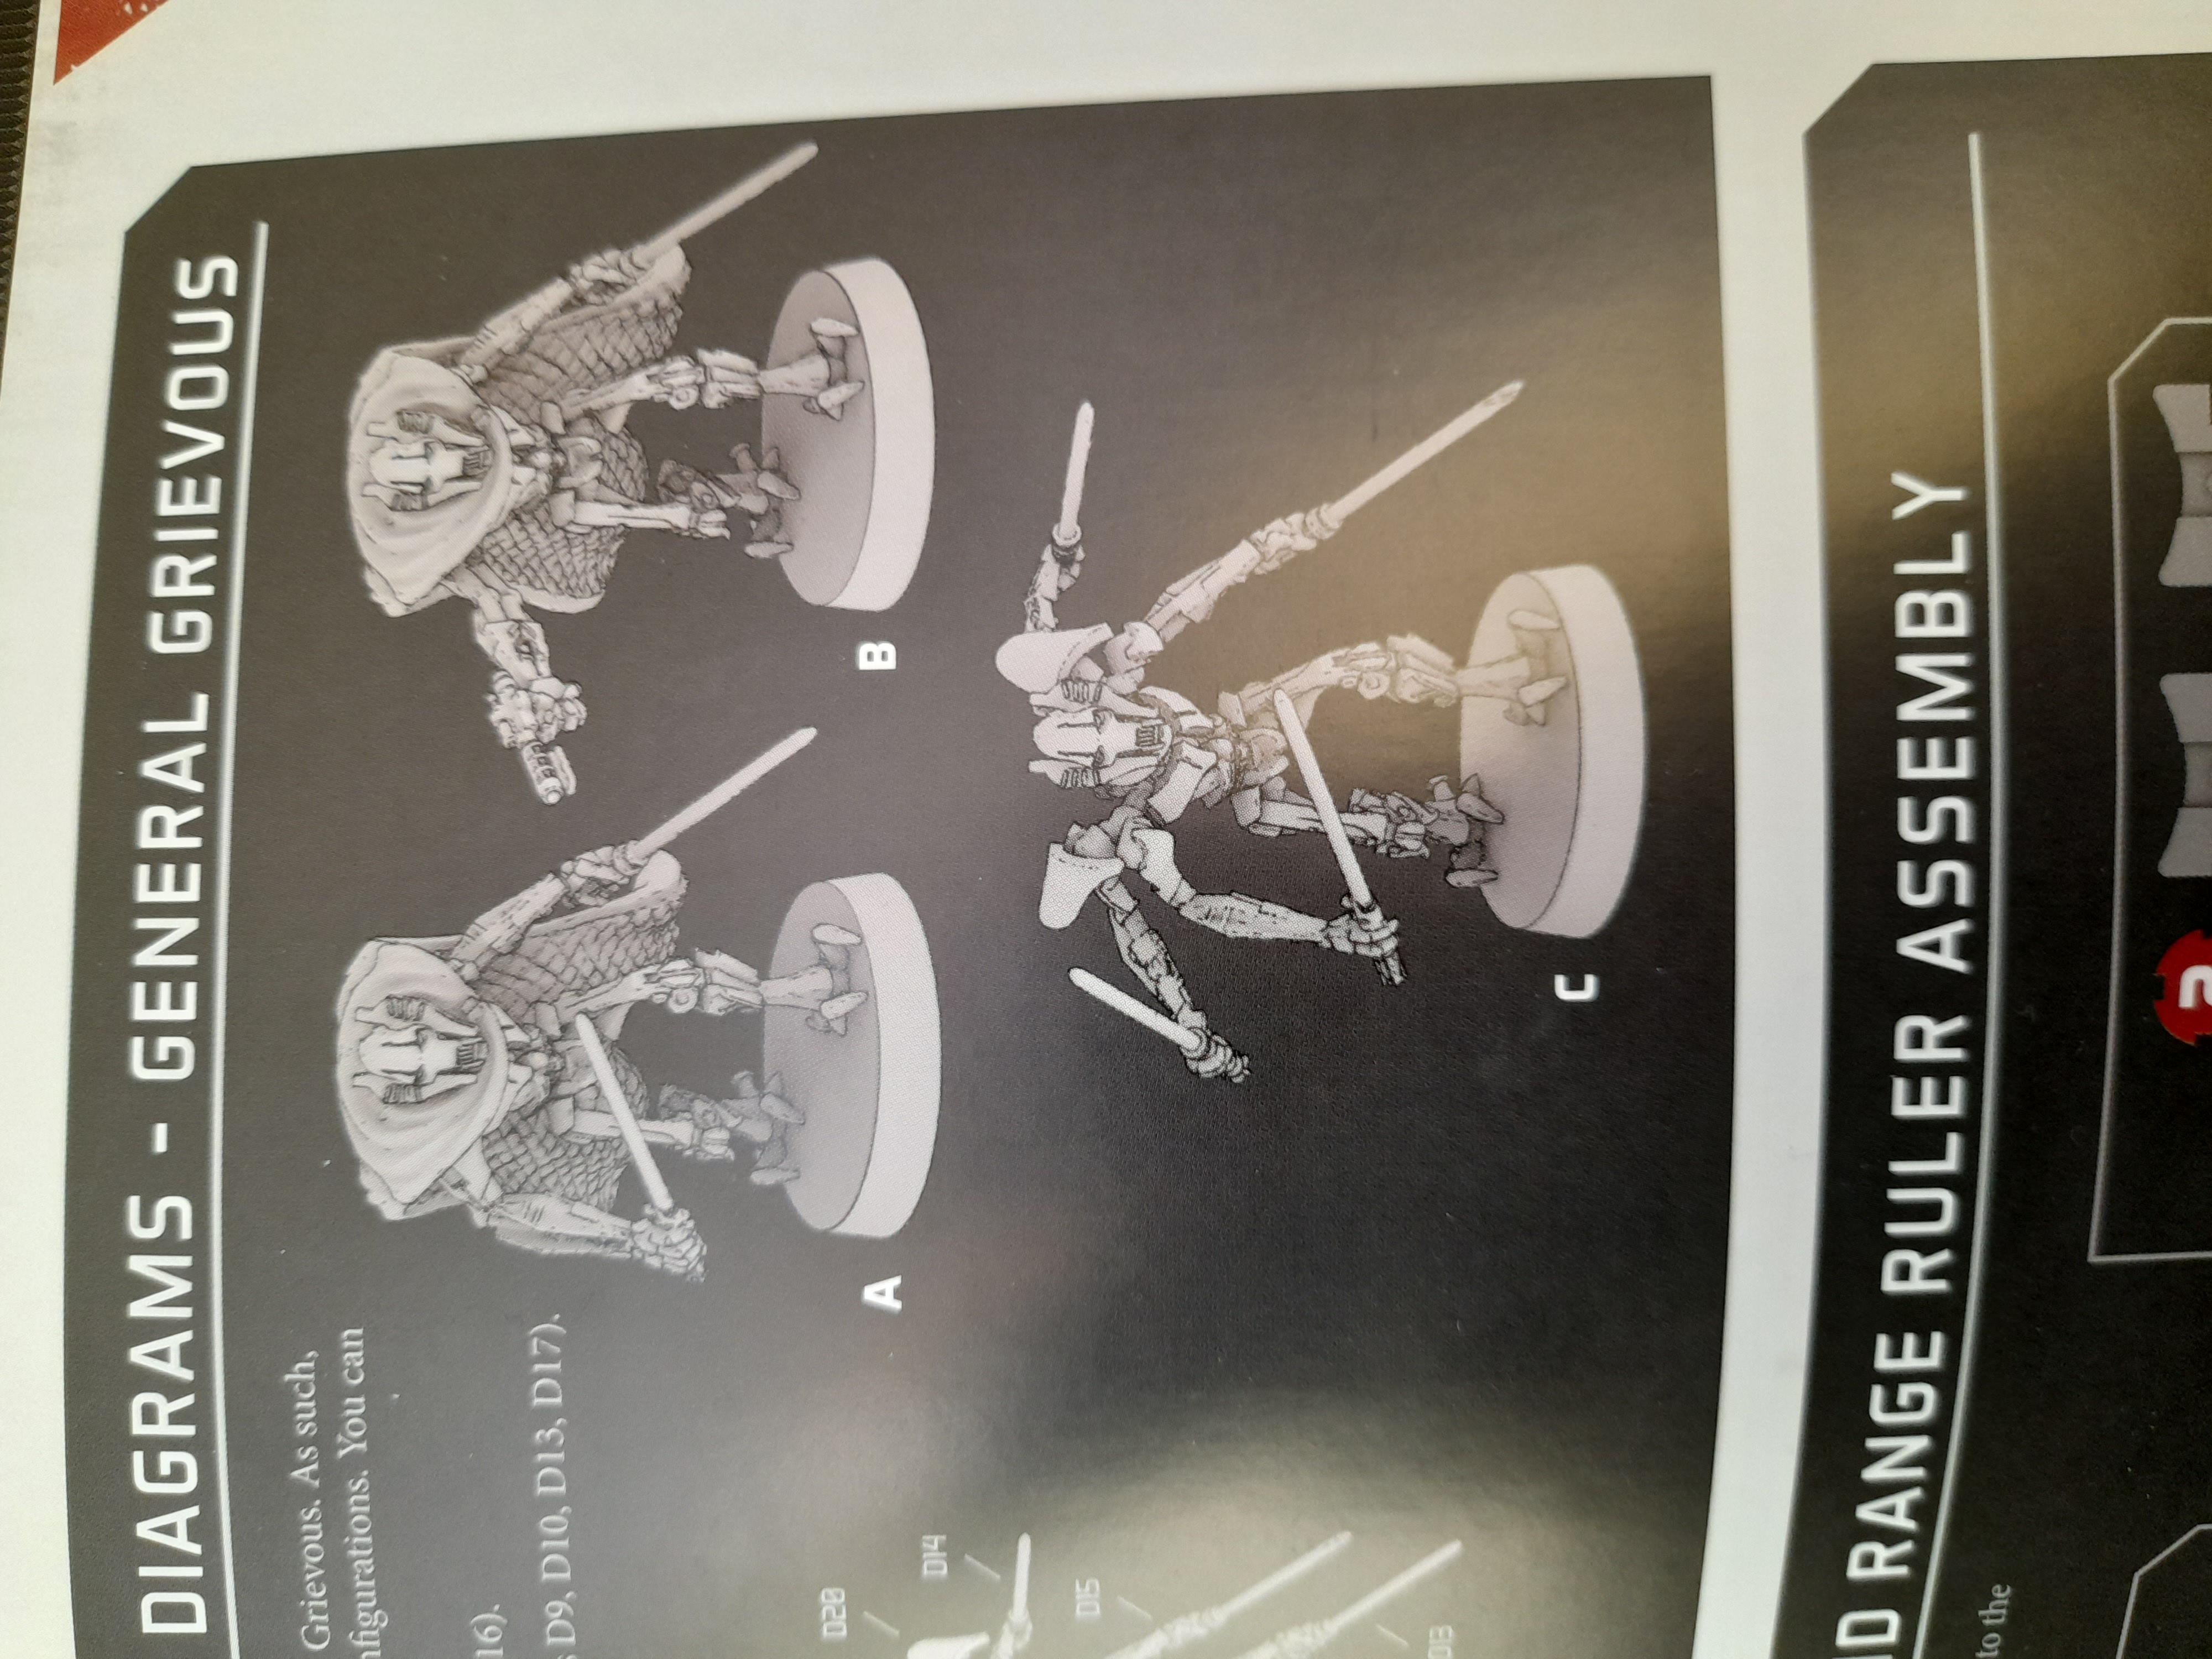
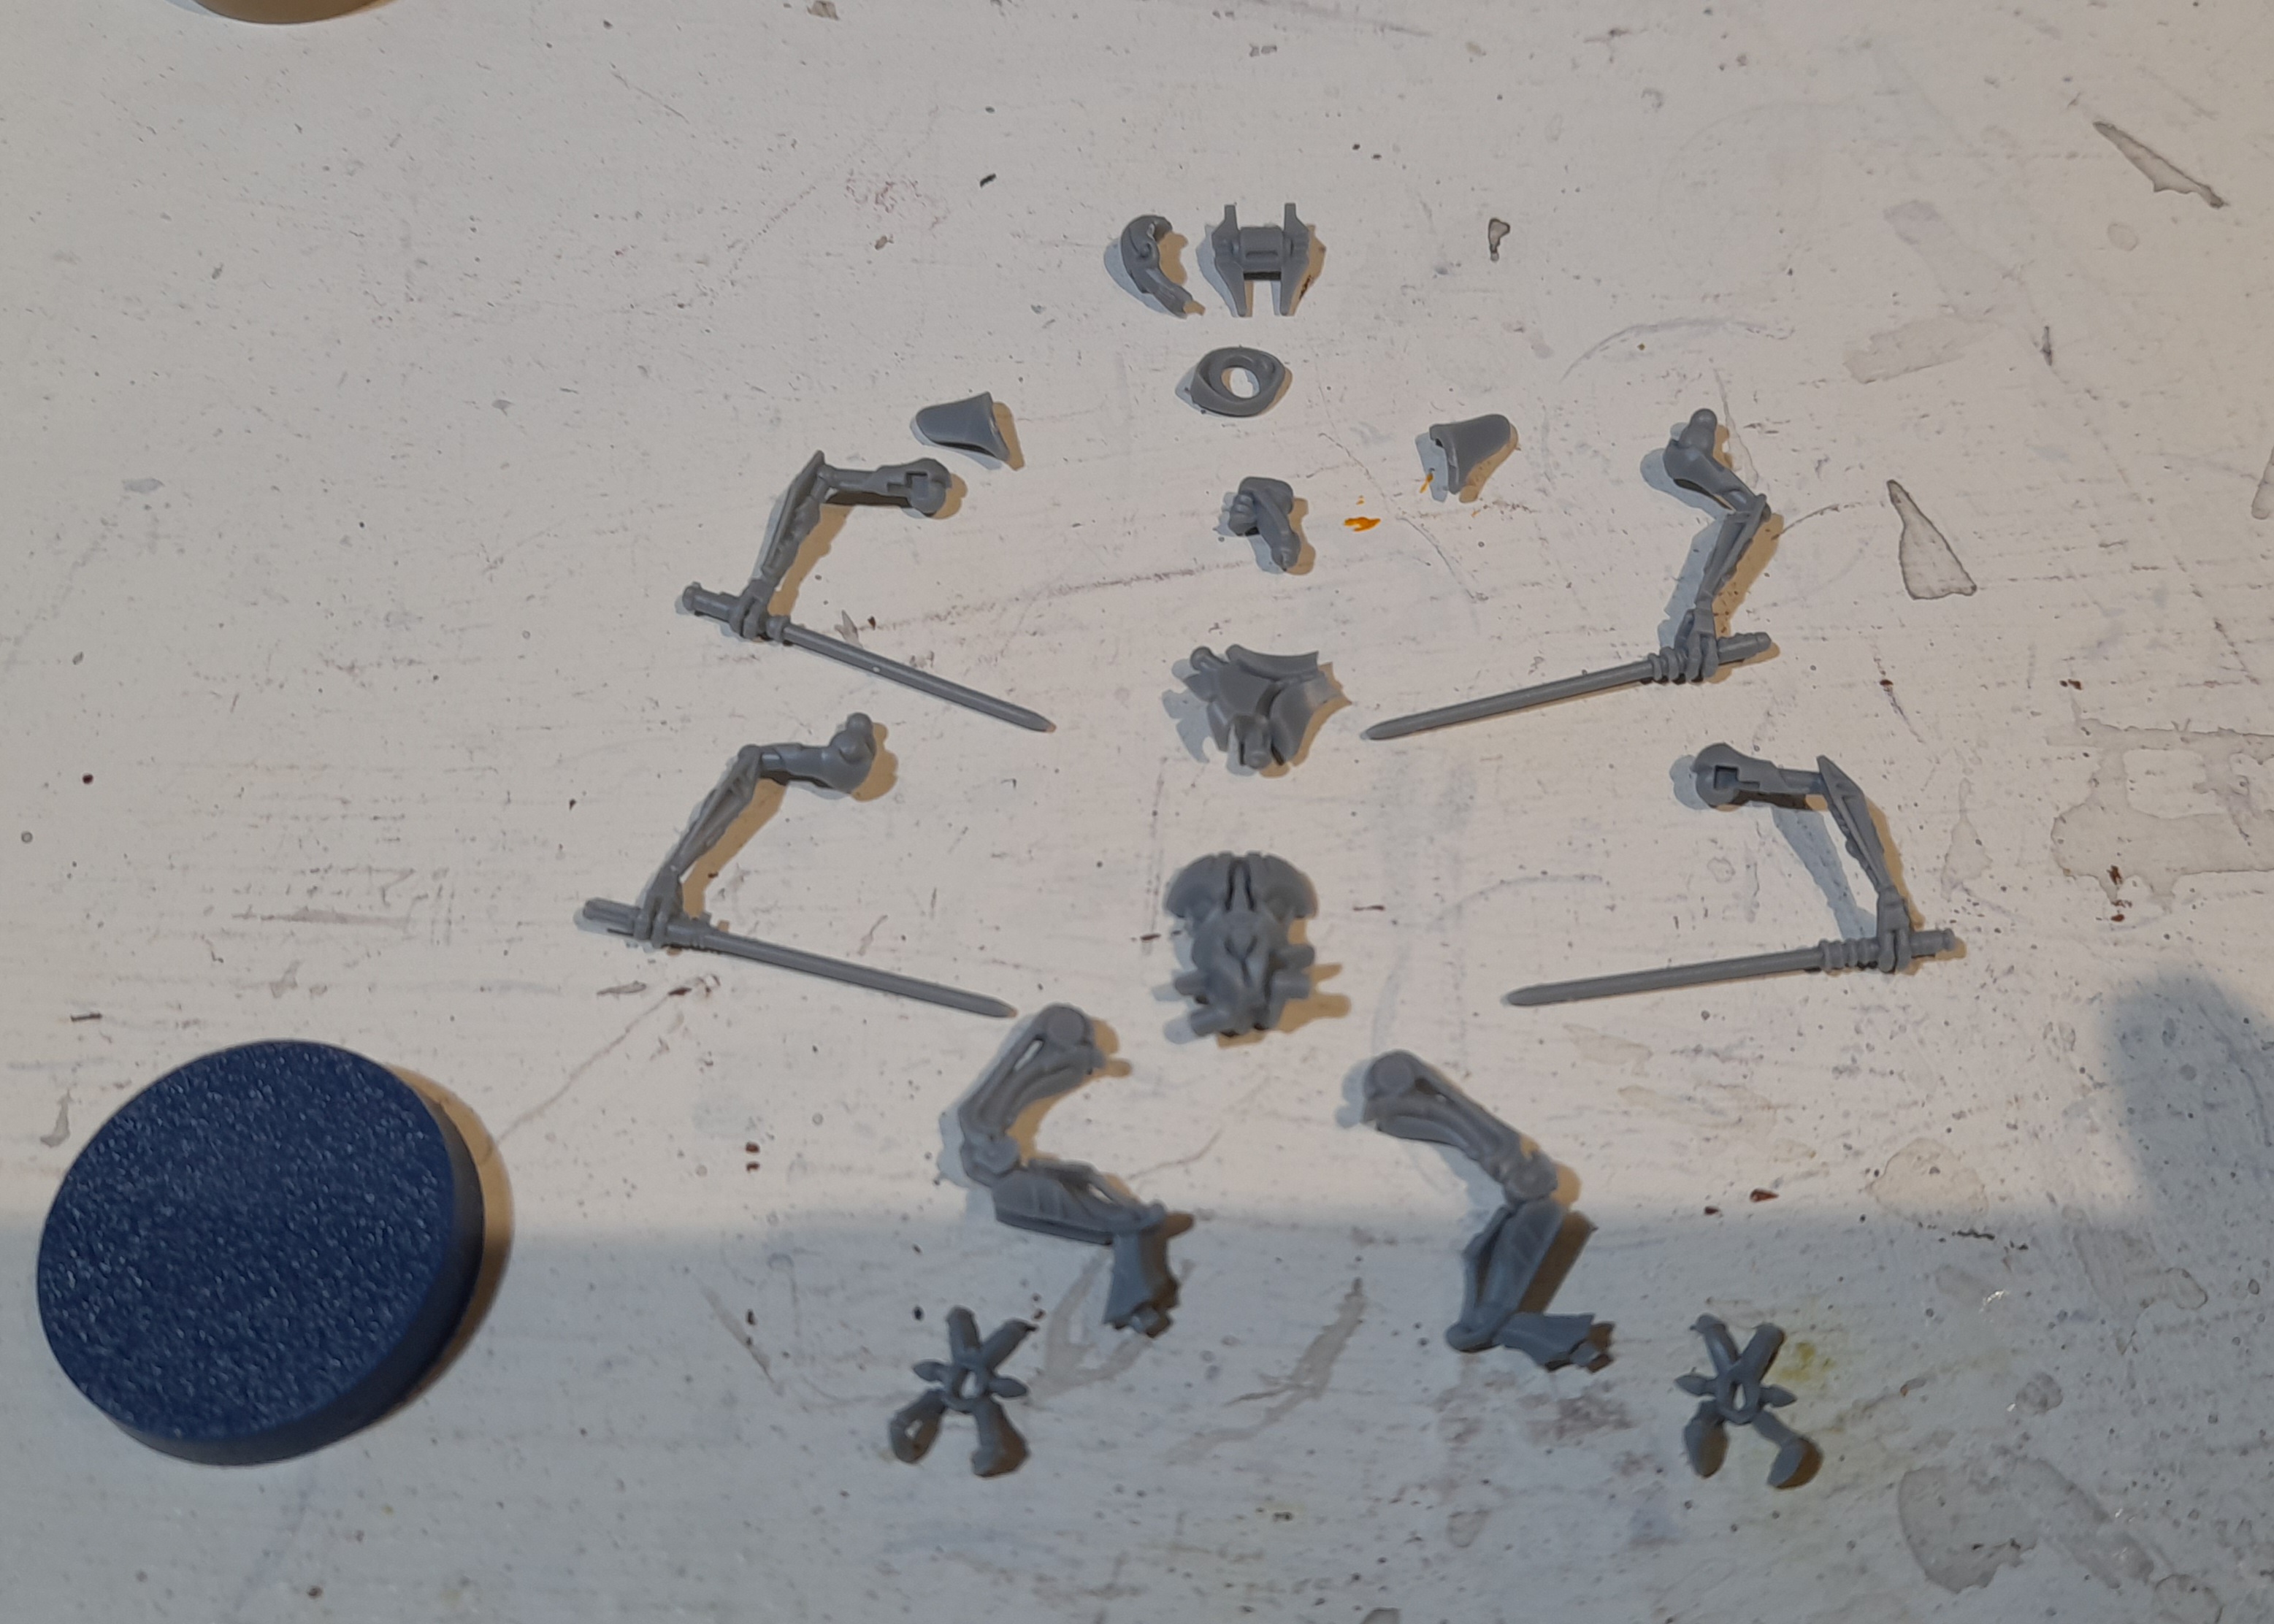
The version with four lightsabres grabbed me, but I also wanted to try it with the cloak.
Had a bit on an issue getting the feet to position correctly, and then came the arms 😊 These are a ball joint onto another ball joint, so kept moving on me. Additionally, since I wanted to fit the cloak I had to be careful about the shoulder positioning and suchlike.
After much prodding, moving around and blu tac to keep arms in place I finally got something that worked for me.
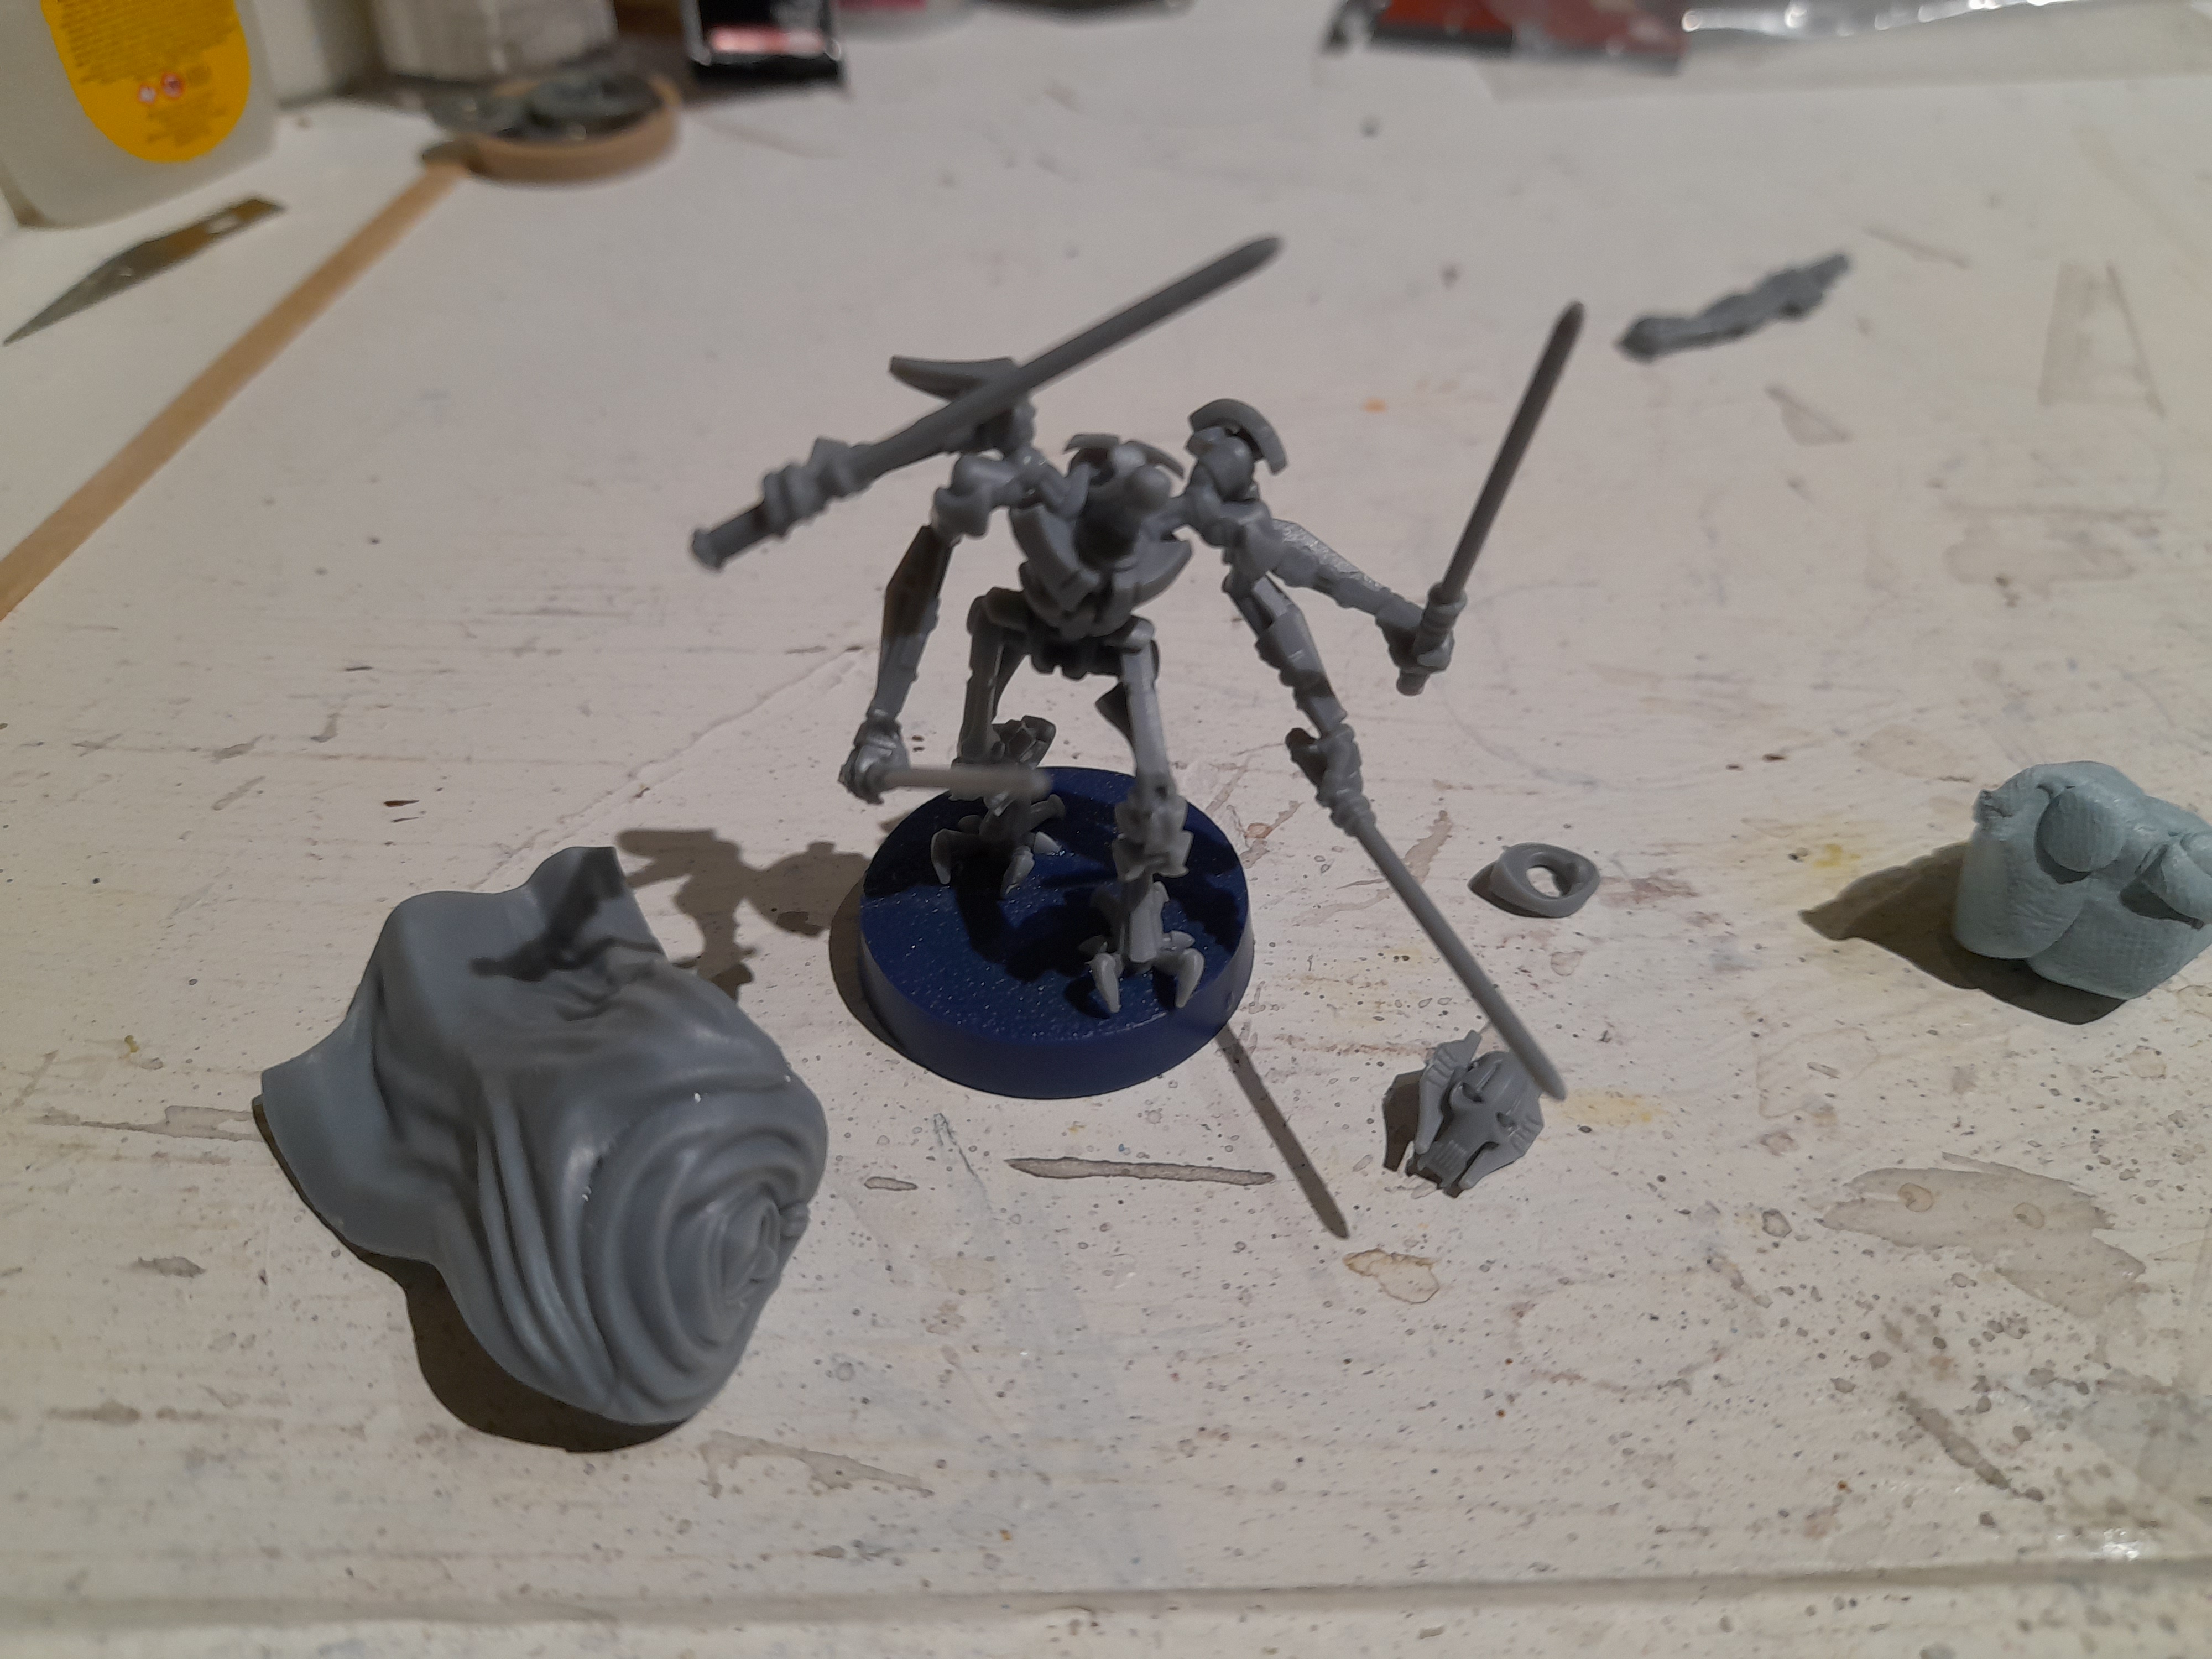

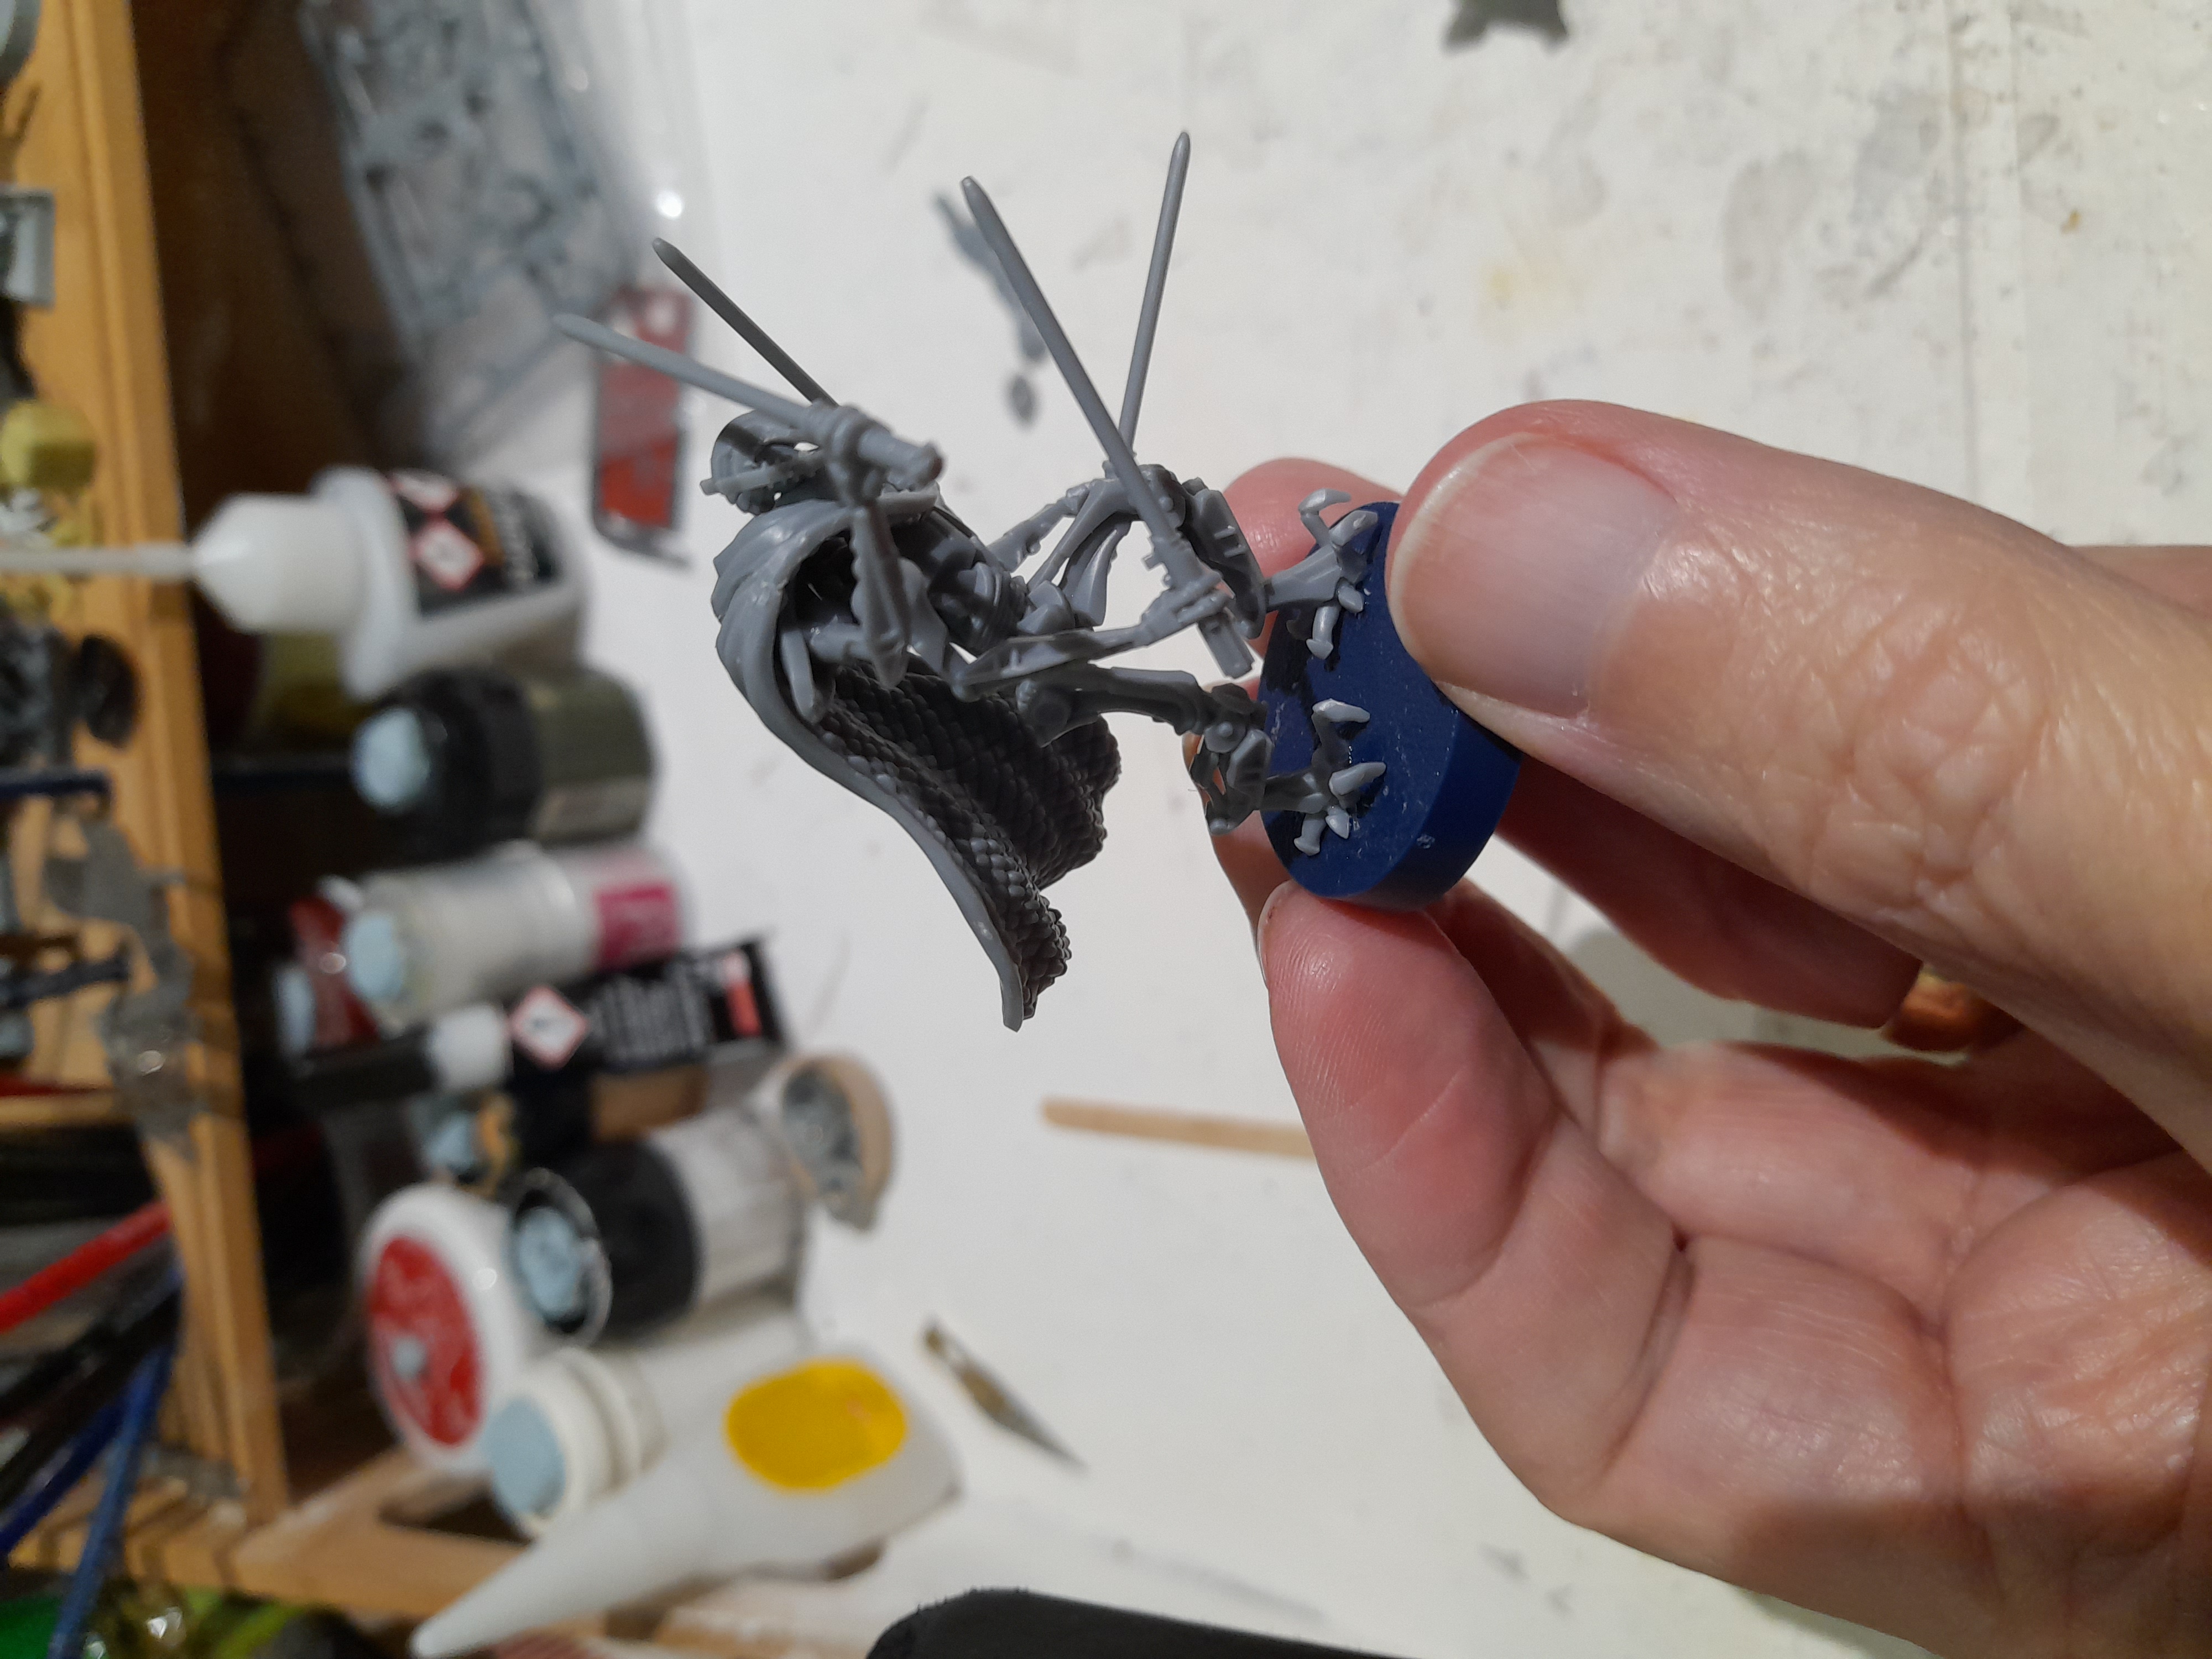
For painting though I will keep it with the cloak (and therefore head as well) off.