


Painting Armiger Helverins for my Ultramarines


Recommendations: 22
About the Project
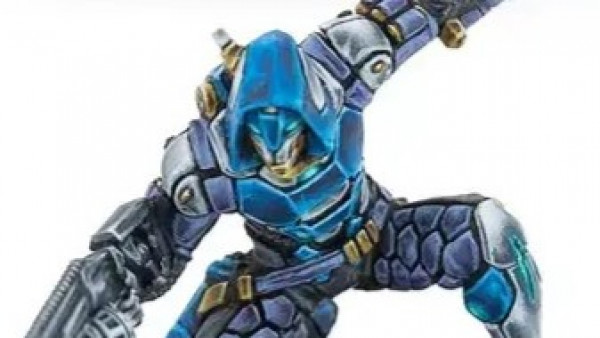
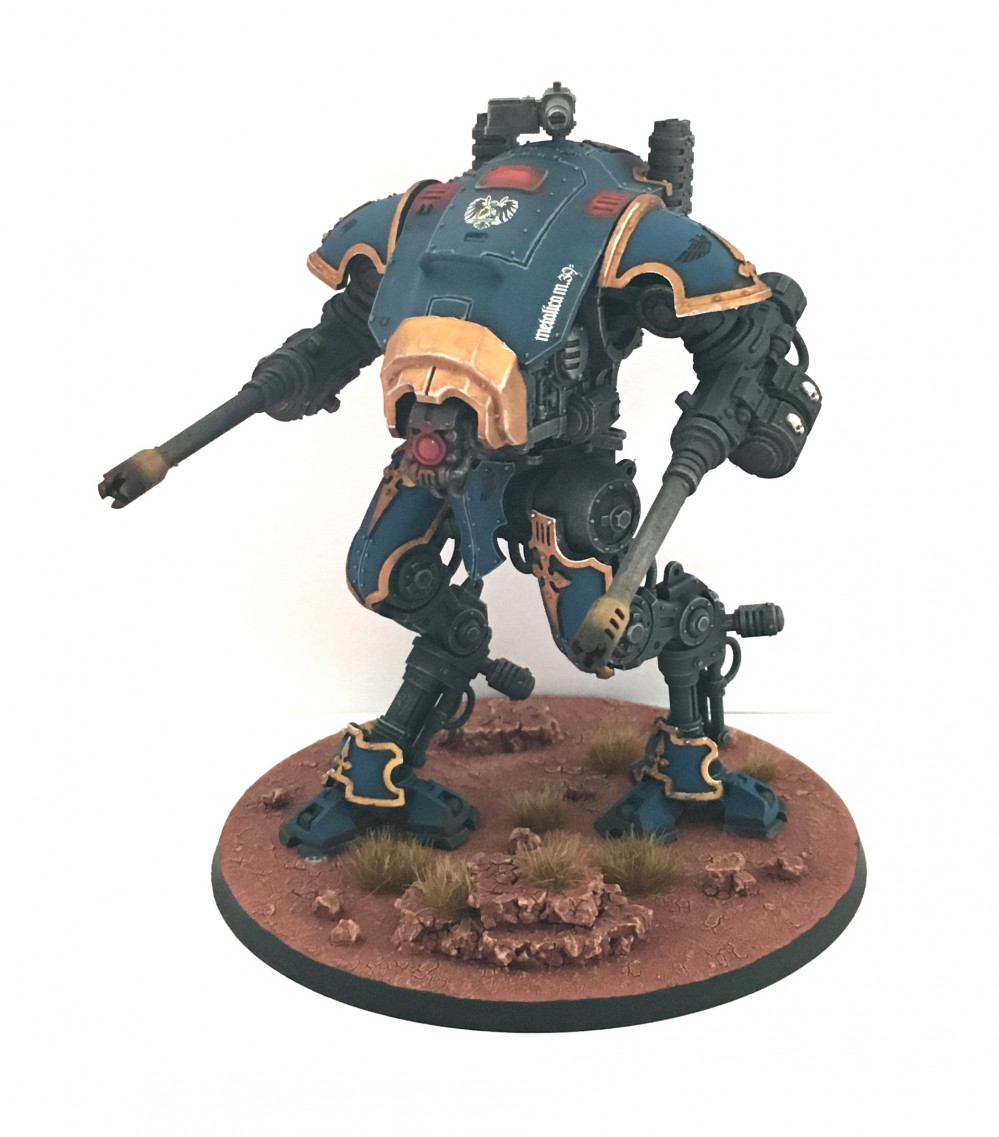
This is my first project and I decided to show off, how I painted the Armiger Helverins to become a part of my Space Marines. The models will be painted blue to match the main color of my army. I want them to be seen as a part of that army.
Related Game: Warhammer 40,000
Related Genre: Science Fiction
This Project is Completed
This is my first project and I decided to show off, how I painted the Armiger Helverins to become a part of my Space Marines. The models will be painted blue to match the main color of my army. I want them to be seen as a part of that army. So here is what I am going for:

About the tools
Airbrush
-
Iwata Neo CN
-
Wiltec AS189
-
Cleaner
-
Flow Improver
-
Thinner
-
Water
My airbrush setup is cheap but exactly what I need. I am using this set since a year now and it does all I need so far.
Brushes
-
Winsor & Newton Series7 in 2, 3 and 4
-
Da Vinci Harbin Kolinsky in 1
-
Any drybrush
The Winsor & Newton Brushes I use are more expensive then the typical Army Painter and Citadel ones. But it turned out to be a good investment if one can take care. For the this project, I mainly use number 2. I switch to number 4 when it comes to the base and large areas on the model are painted with a number 3.
Tool specific settings
-
The pressure I use with all my paints while brushing is about 20 psi
-
The needle of the Iwata Neo CN has 0.35 mm
Colors and Techniques
About the Paints
Vallejo
-
Prussian Blue
-
Brassy Brass
-
Glorious Gold
-
Elf Skintone
-
Scarlet Red
-
Bonewhite
-
Khaki
-
Decal Fix
-
Decal Softener
Vallejo Air
-
Black Surface Primer
-
Gunmetal
-
Glorious Gold
-
Mecha Varnish
-
Bloody Red
Citadel
-
Martian Ironearth
-
Reikland Fleshshade
-
Agrax Earthshade
-
Stormhost Silver
-
Fenrisian Grey
-
White Scar
Army Painter
-
Anti Shine
Techniques I am using in this project
-
Airbrushing
-
Blending
-
Layering
-
Drybrushing
-
Edge Highlighting
Remember to thin your paints and keep them flowy for a better result when painting.
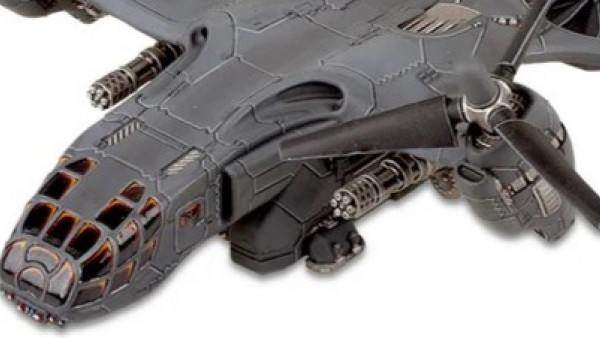
Project start - building and priming the model
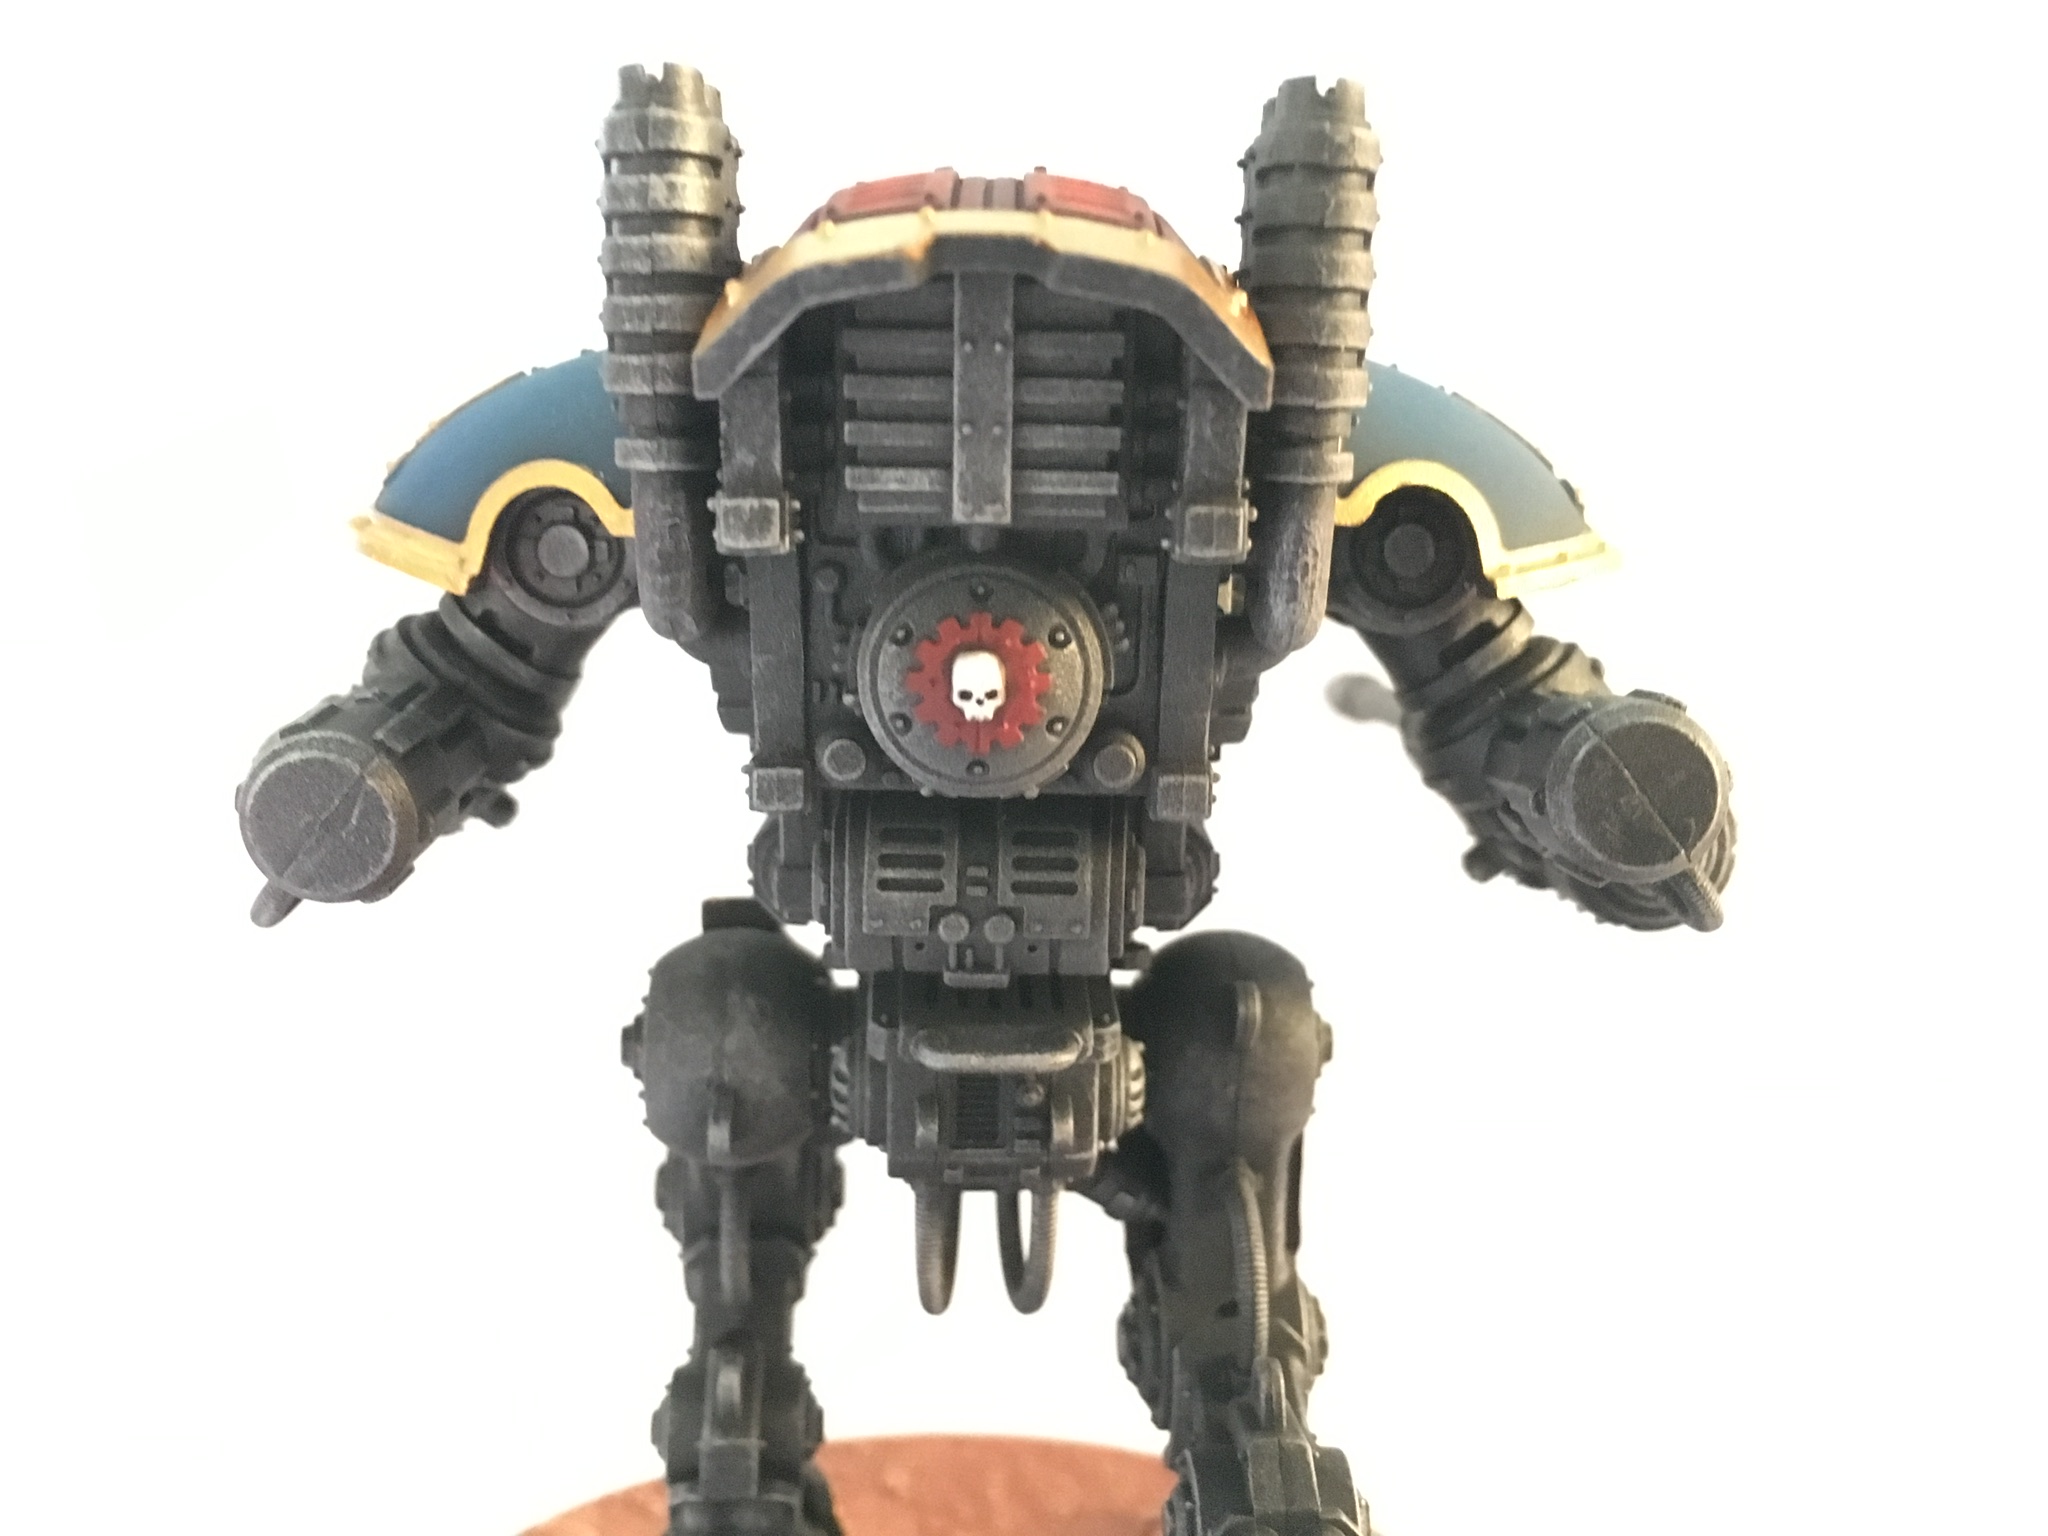
To start with, first of all I assembled and primed the model with Vallejo Black Surface Primer. I decided to paint the model in parts. For me, it is more easy to handle the modell while airbrushing. It guaranteed better control, to not color a part by accident which I did not want to or which I painted already.

Getting down the first color
After priming, I continued airbrushing. This time, I used Vallejo Gunmetal for all metallic parts of the model like the feet, parts of the bodey and all weapons. I tried to keep it dark, not applying too much of the color. One layer was enough for me.

Next, I gave all the parts a quick drybrush wit Citadel Stormhost Silver, before I continued with the airbrush. This picked out all the details and edges of the model nicely.

Some more airbrushing
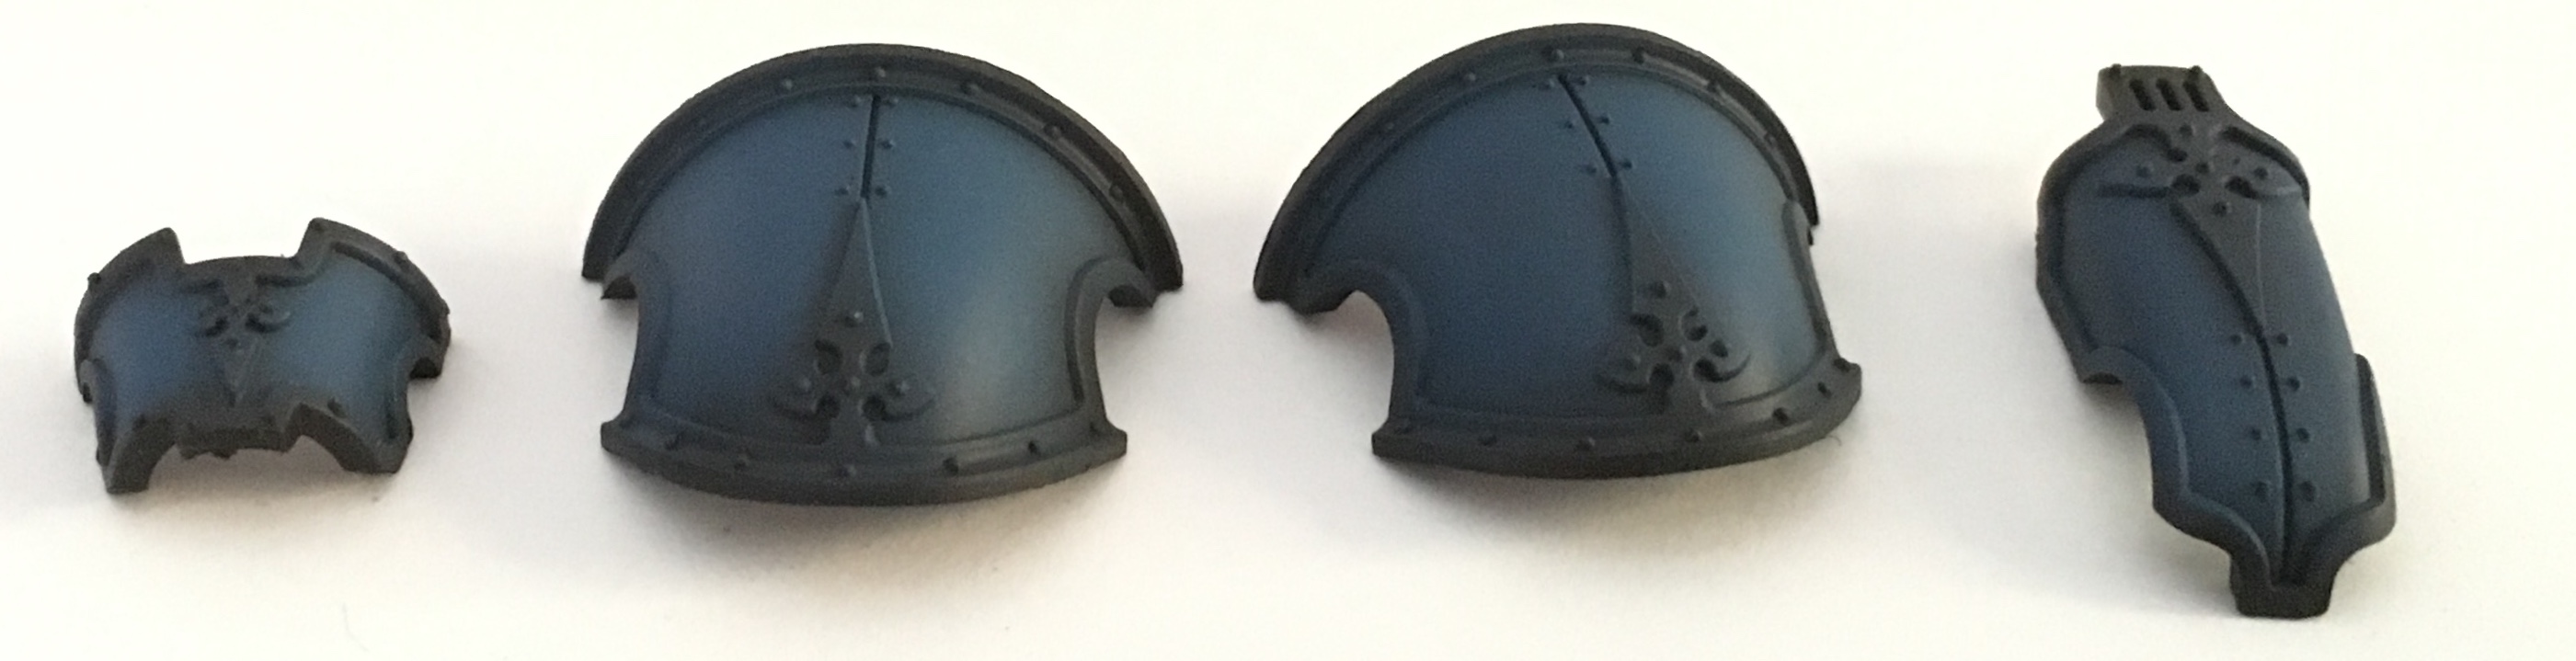
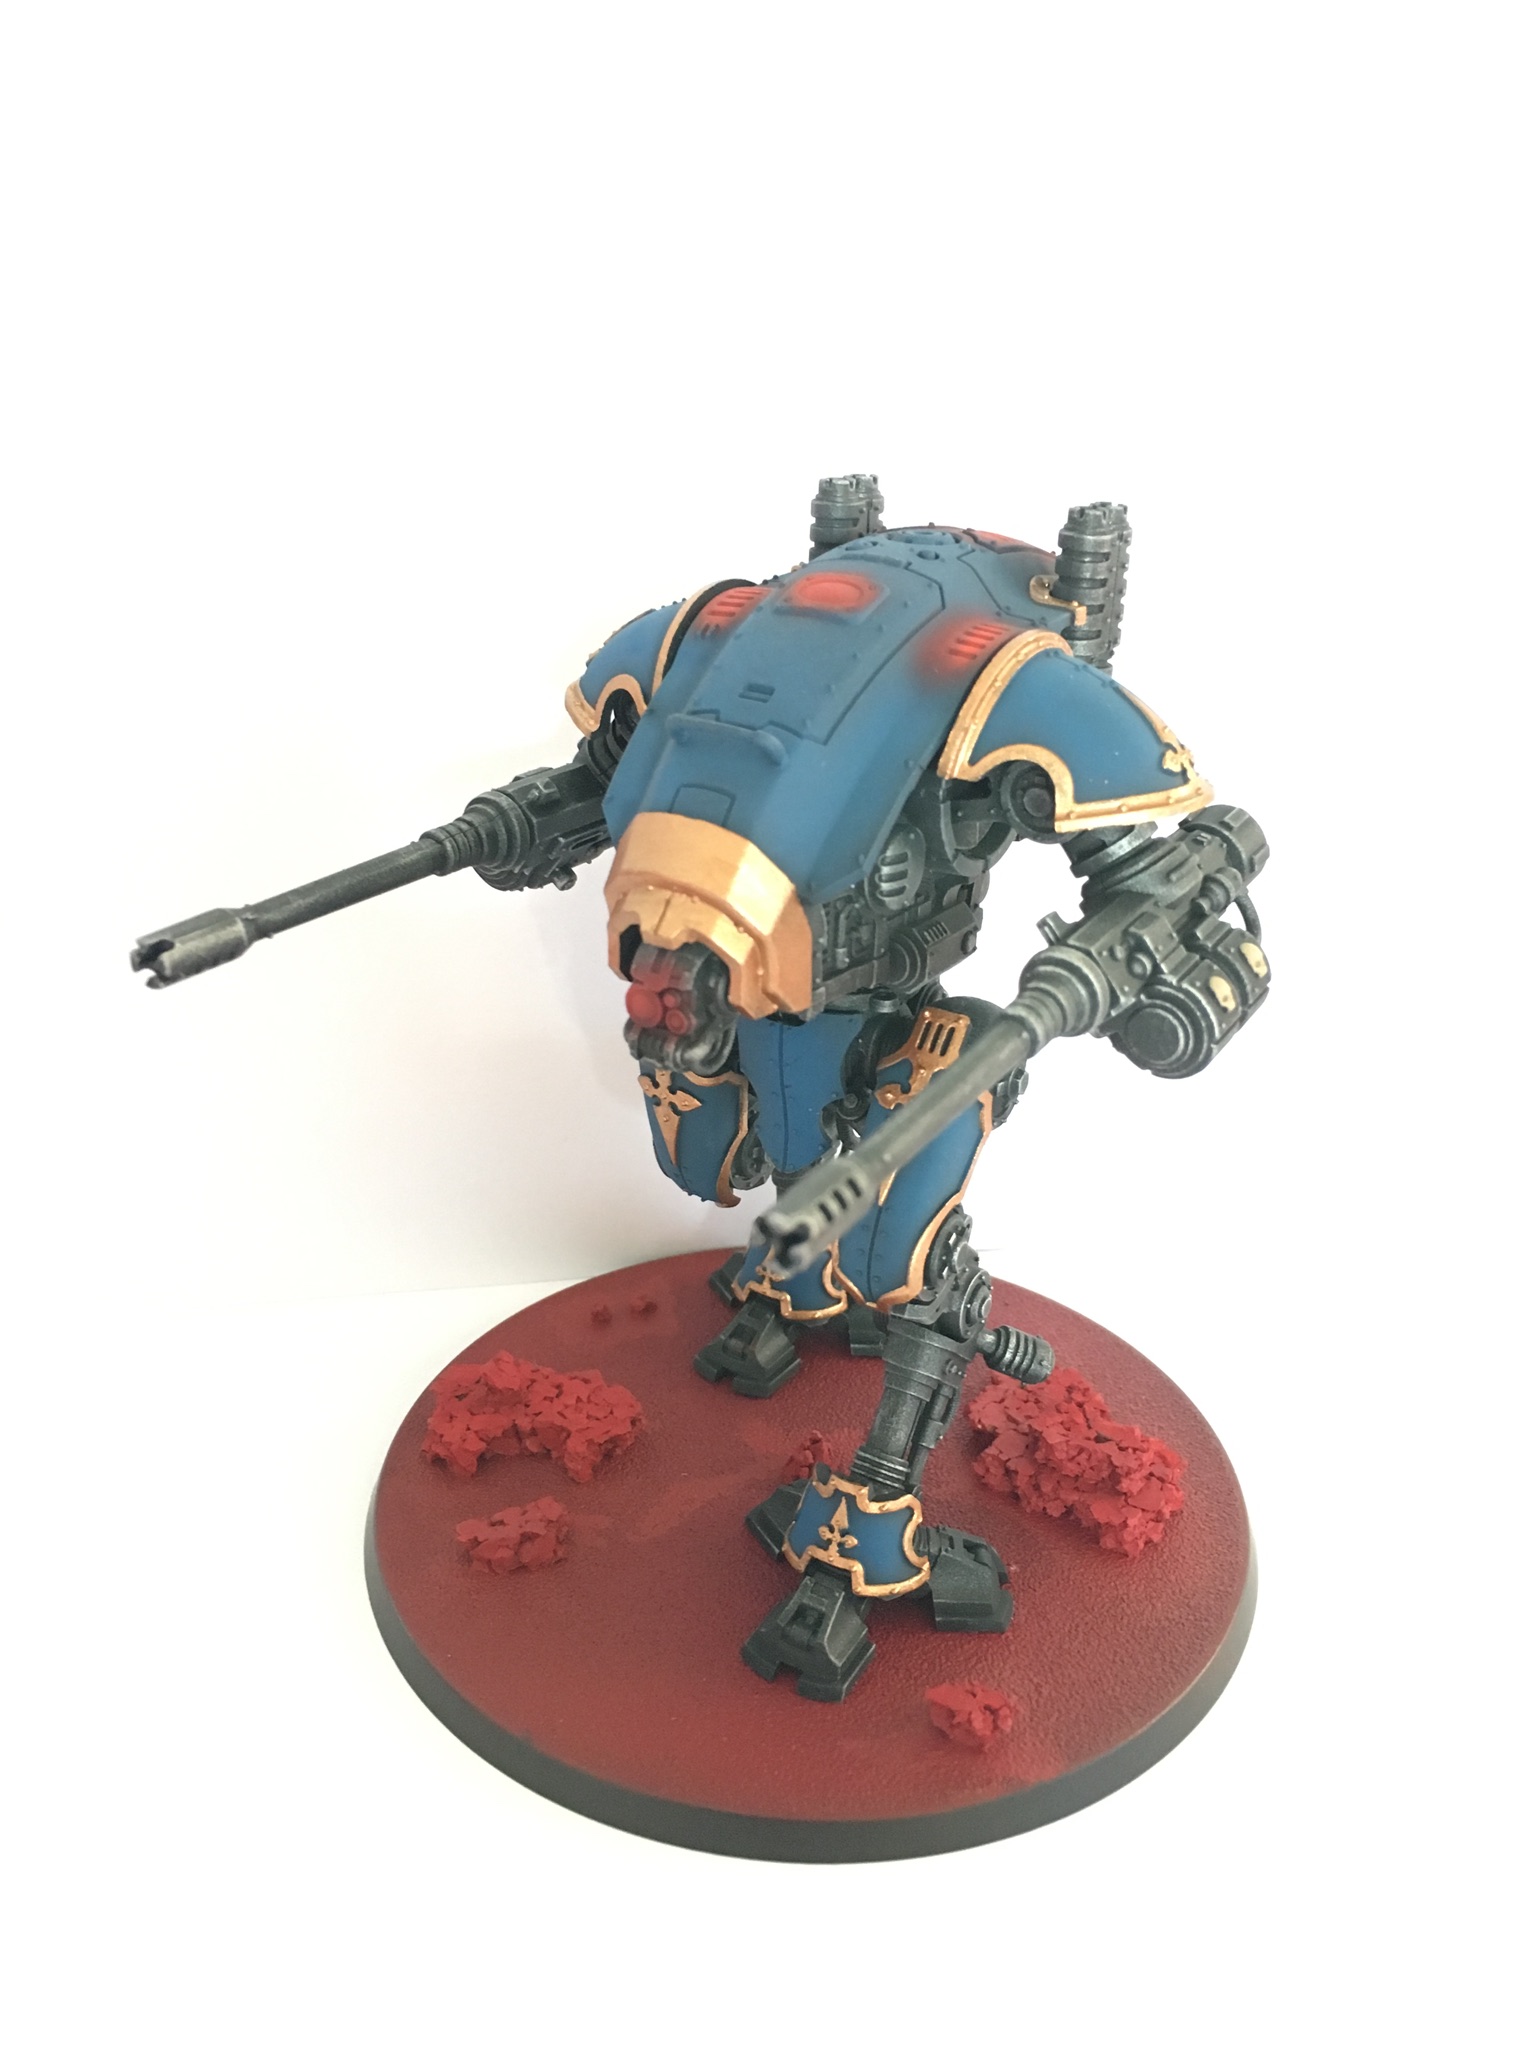
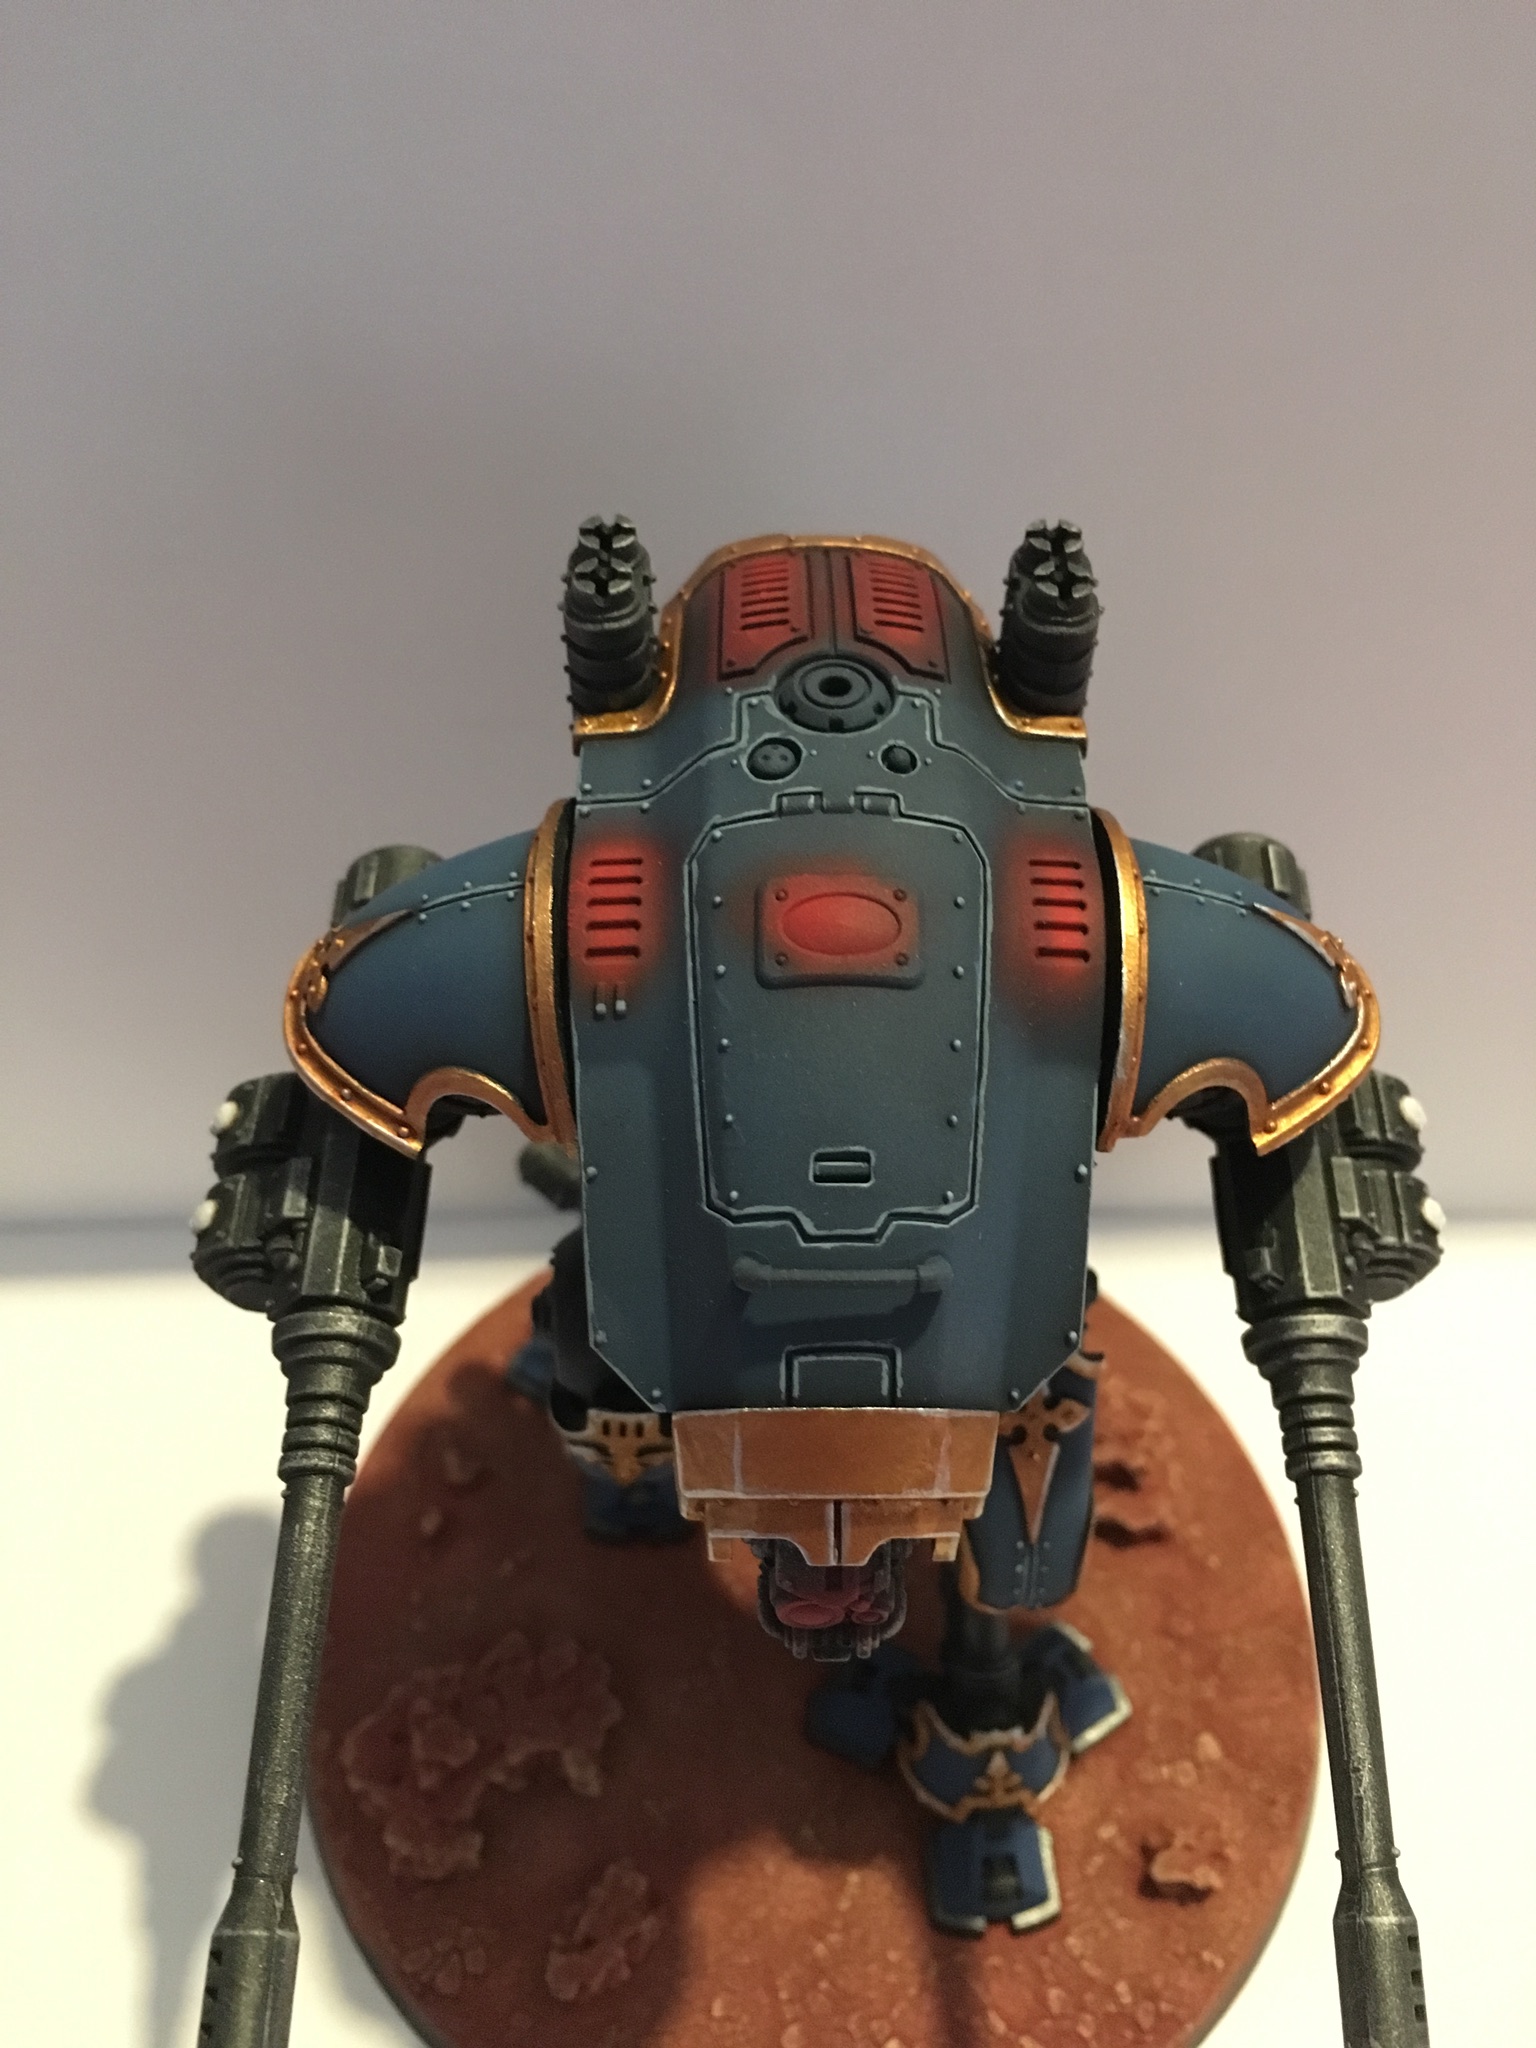
Back to my airbrush, I used Vallejo Prussian Blue and tried to blend it into the edges, so that the color is darker towards the rim.
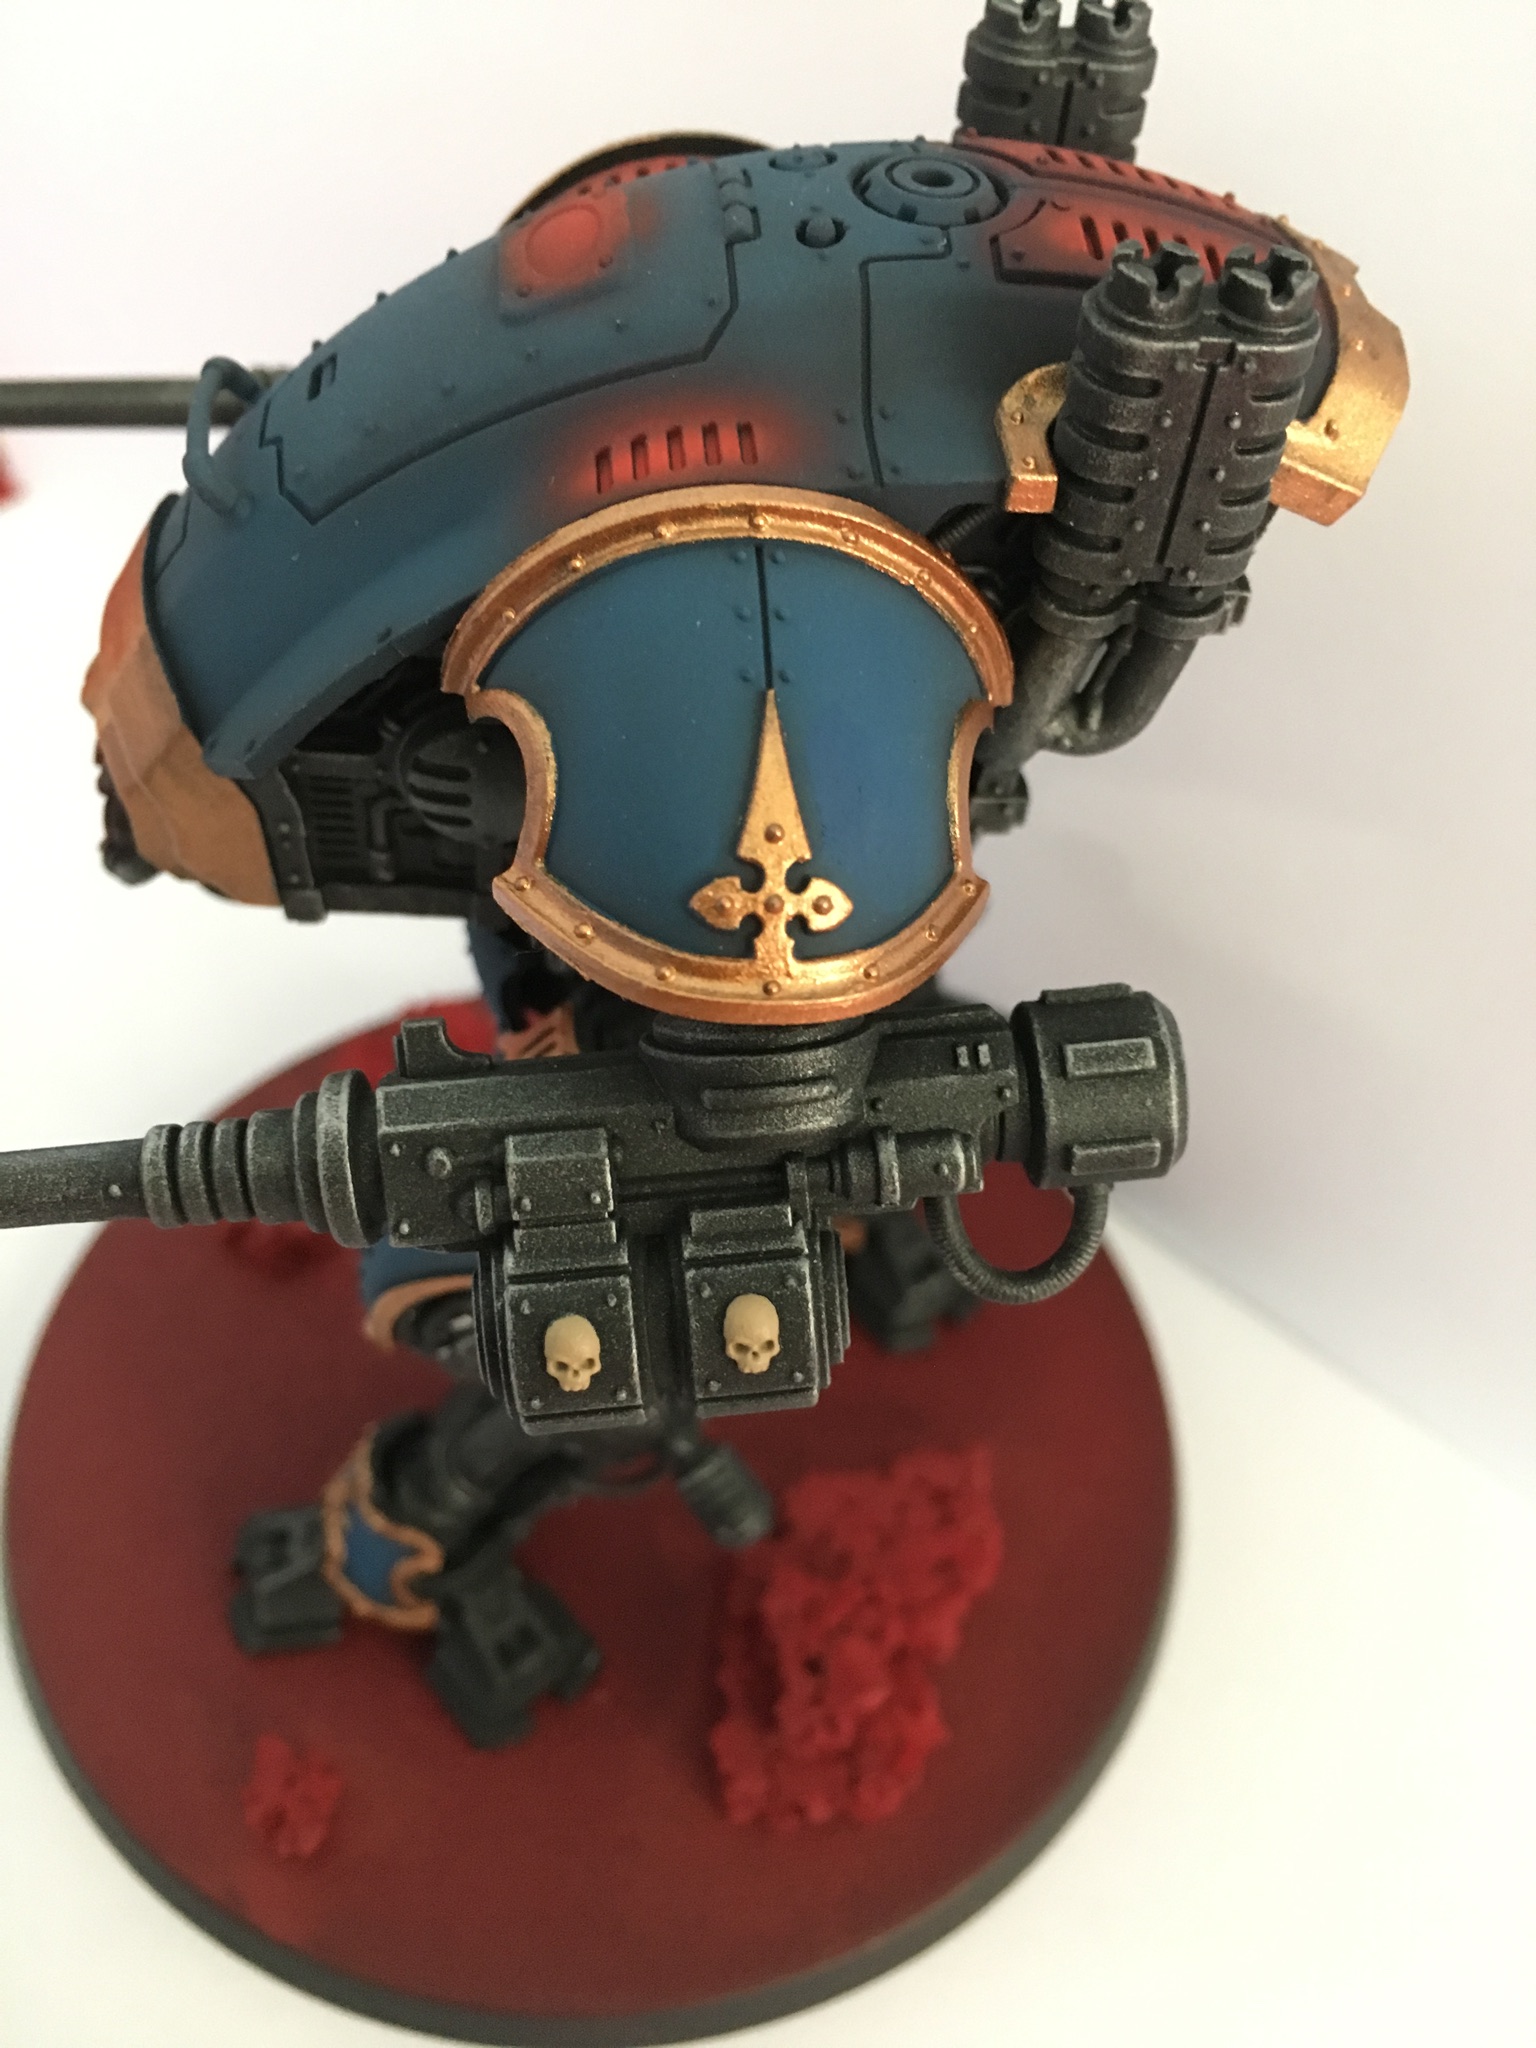
I sprayed an effect with Vellejo Scarlet Red and Bloody Red onto the vents of the body and also the lenses of the head.
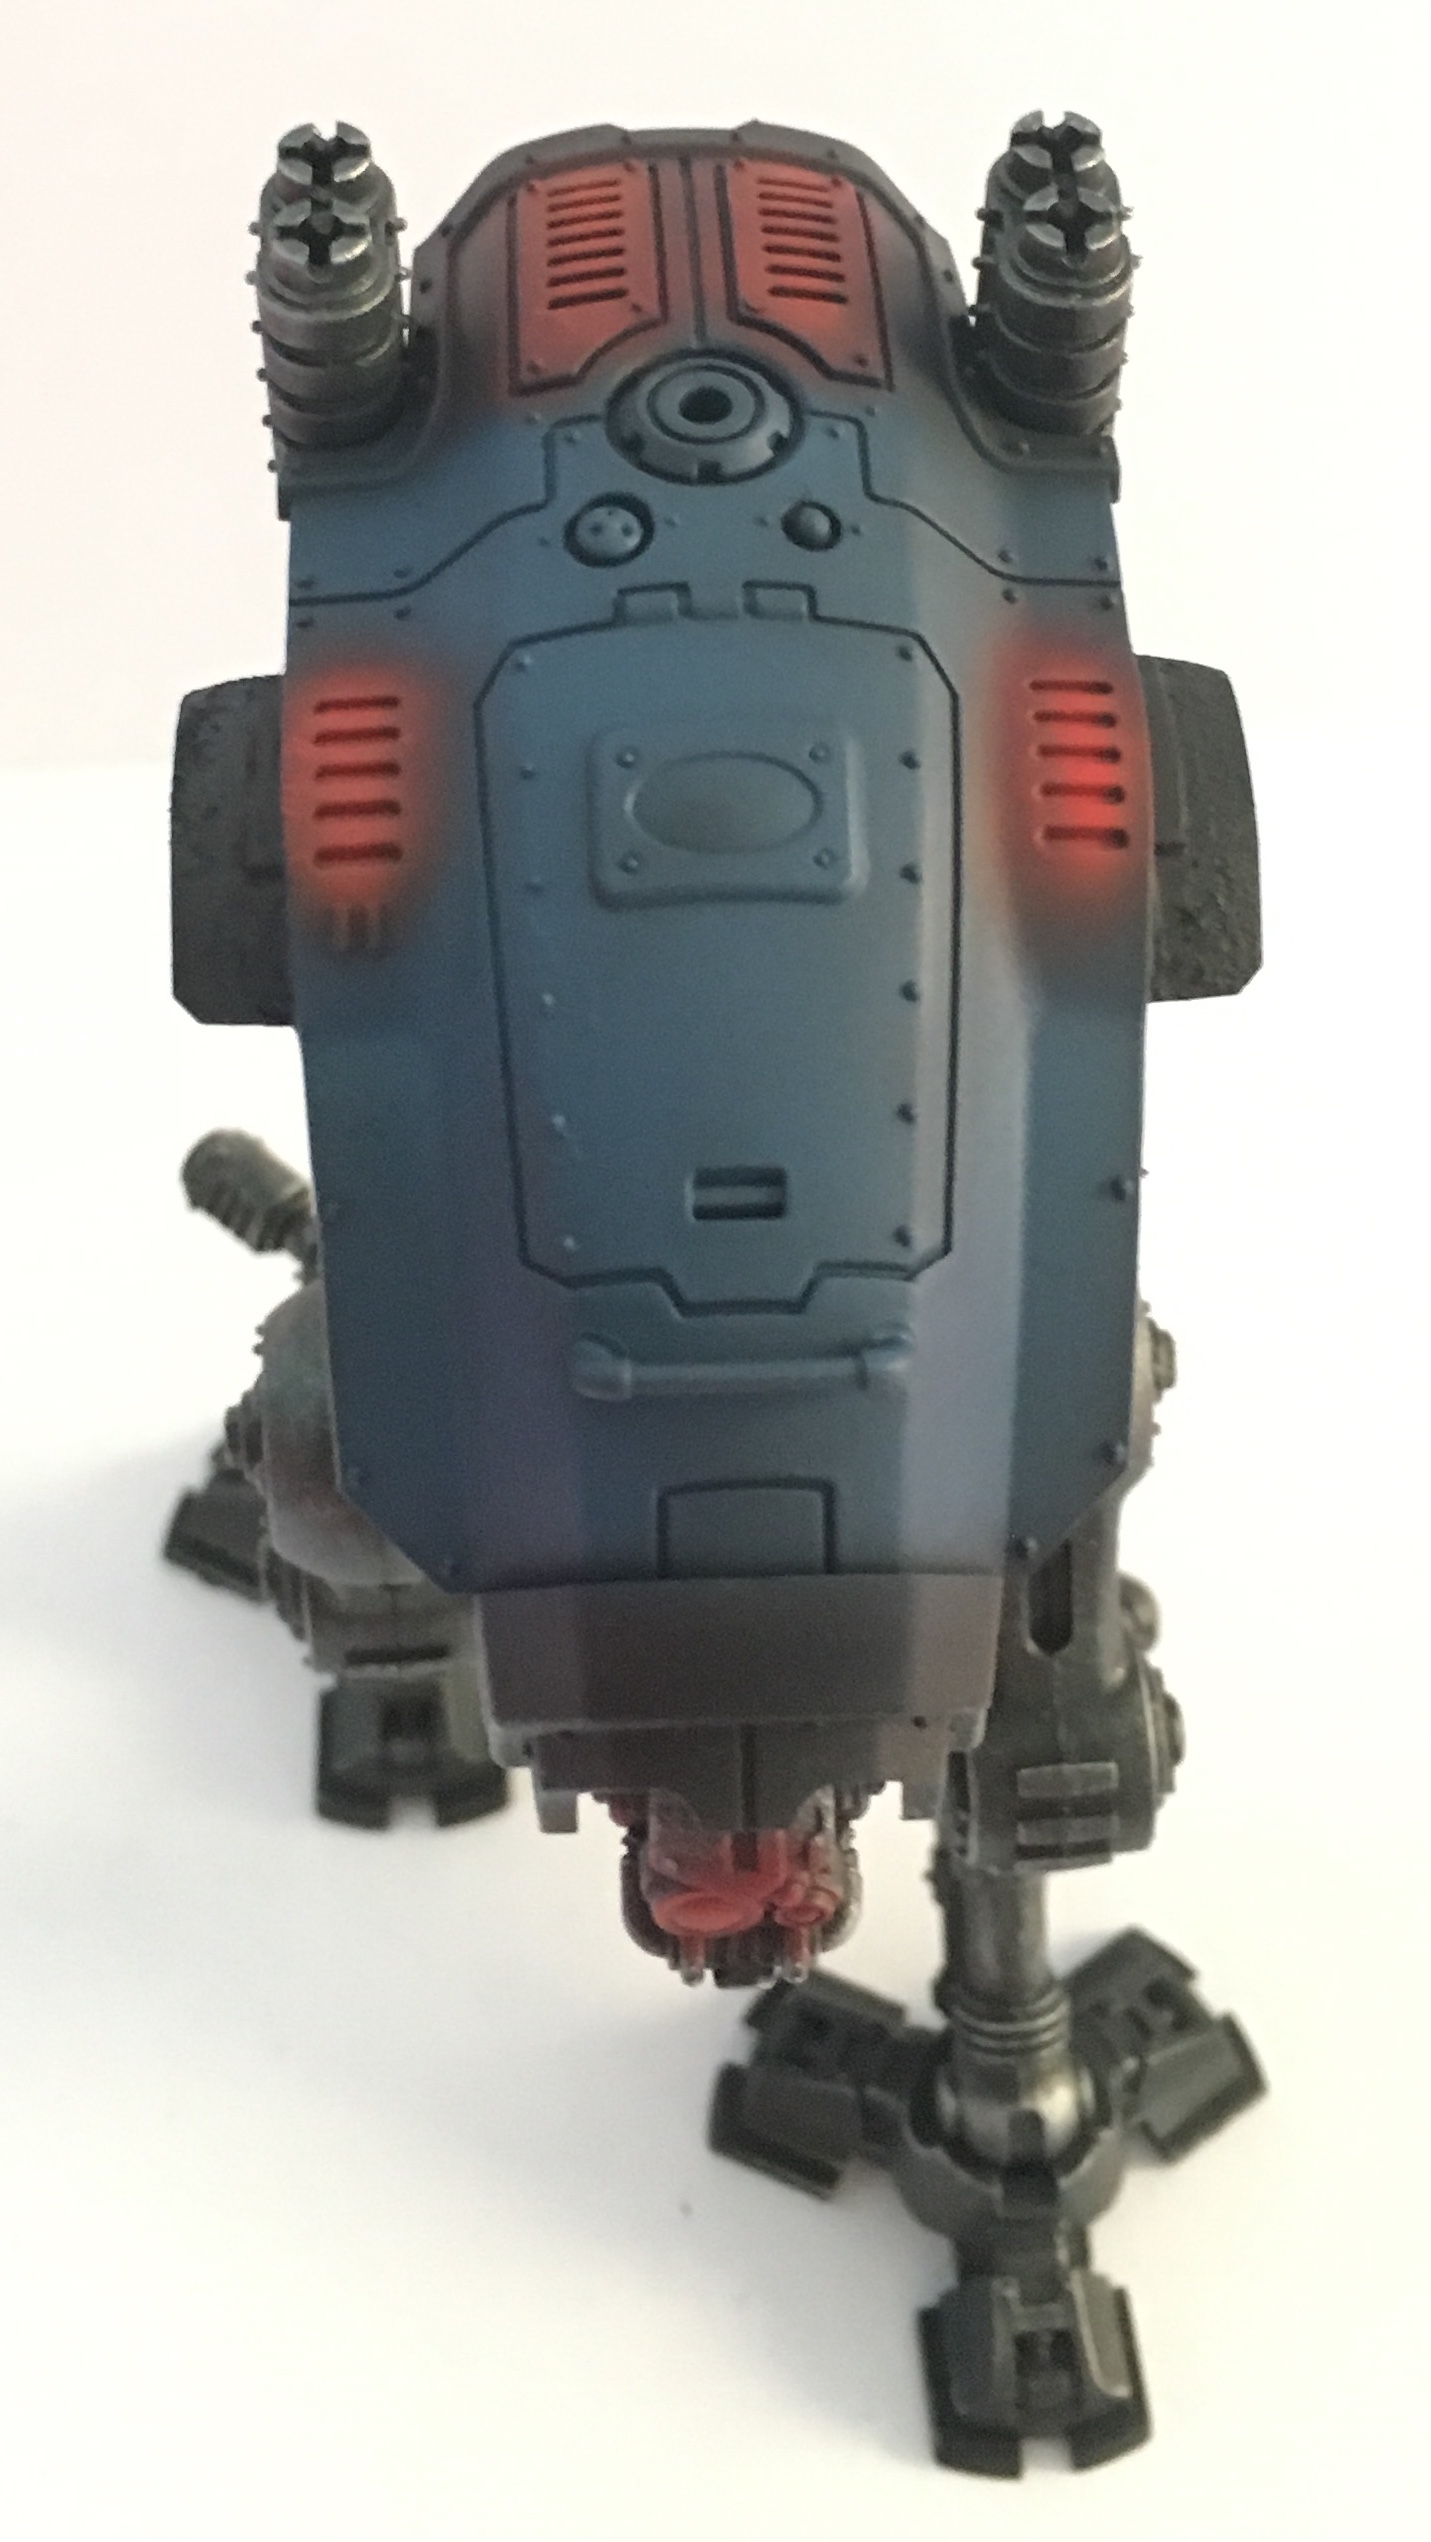
With that, airbrushing is done for now. This is where I applied one coat of Vallejo Mecha Varnish to protect what I have done so far.
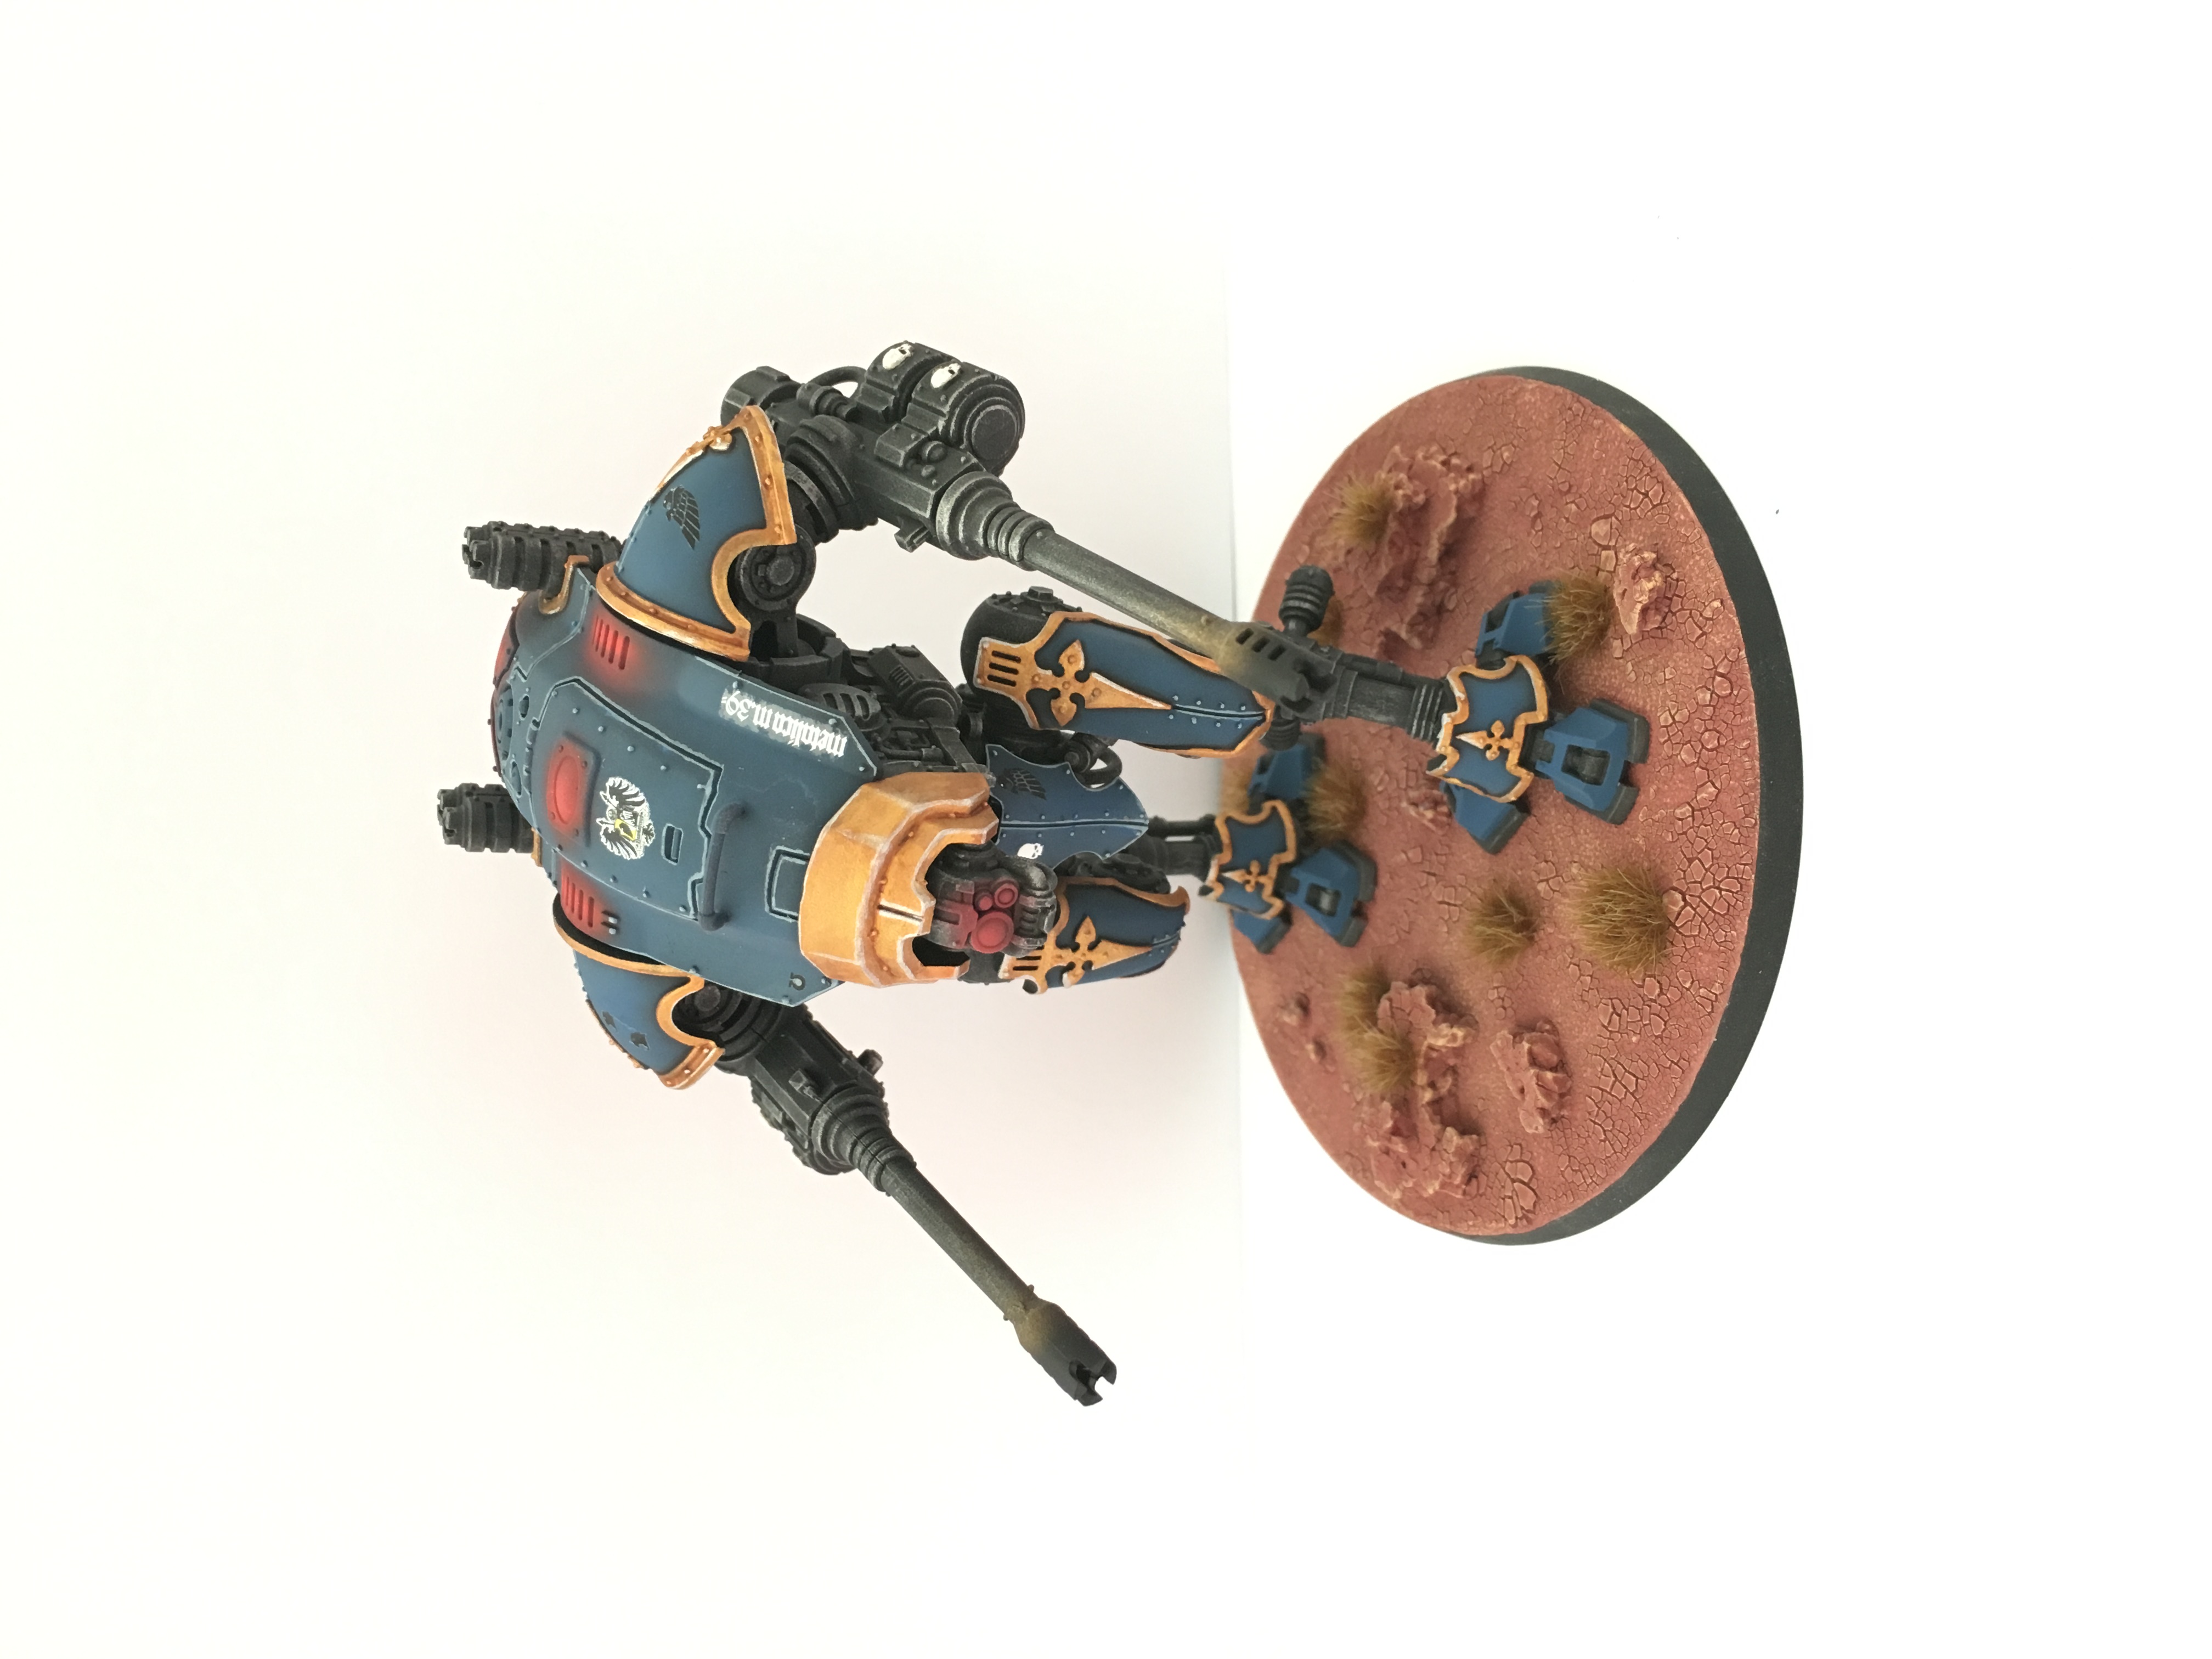
Start Basing
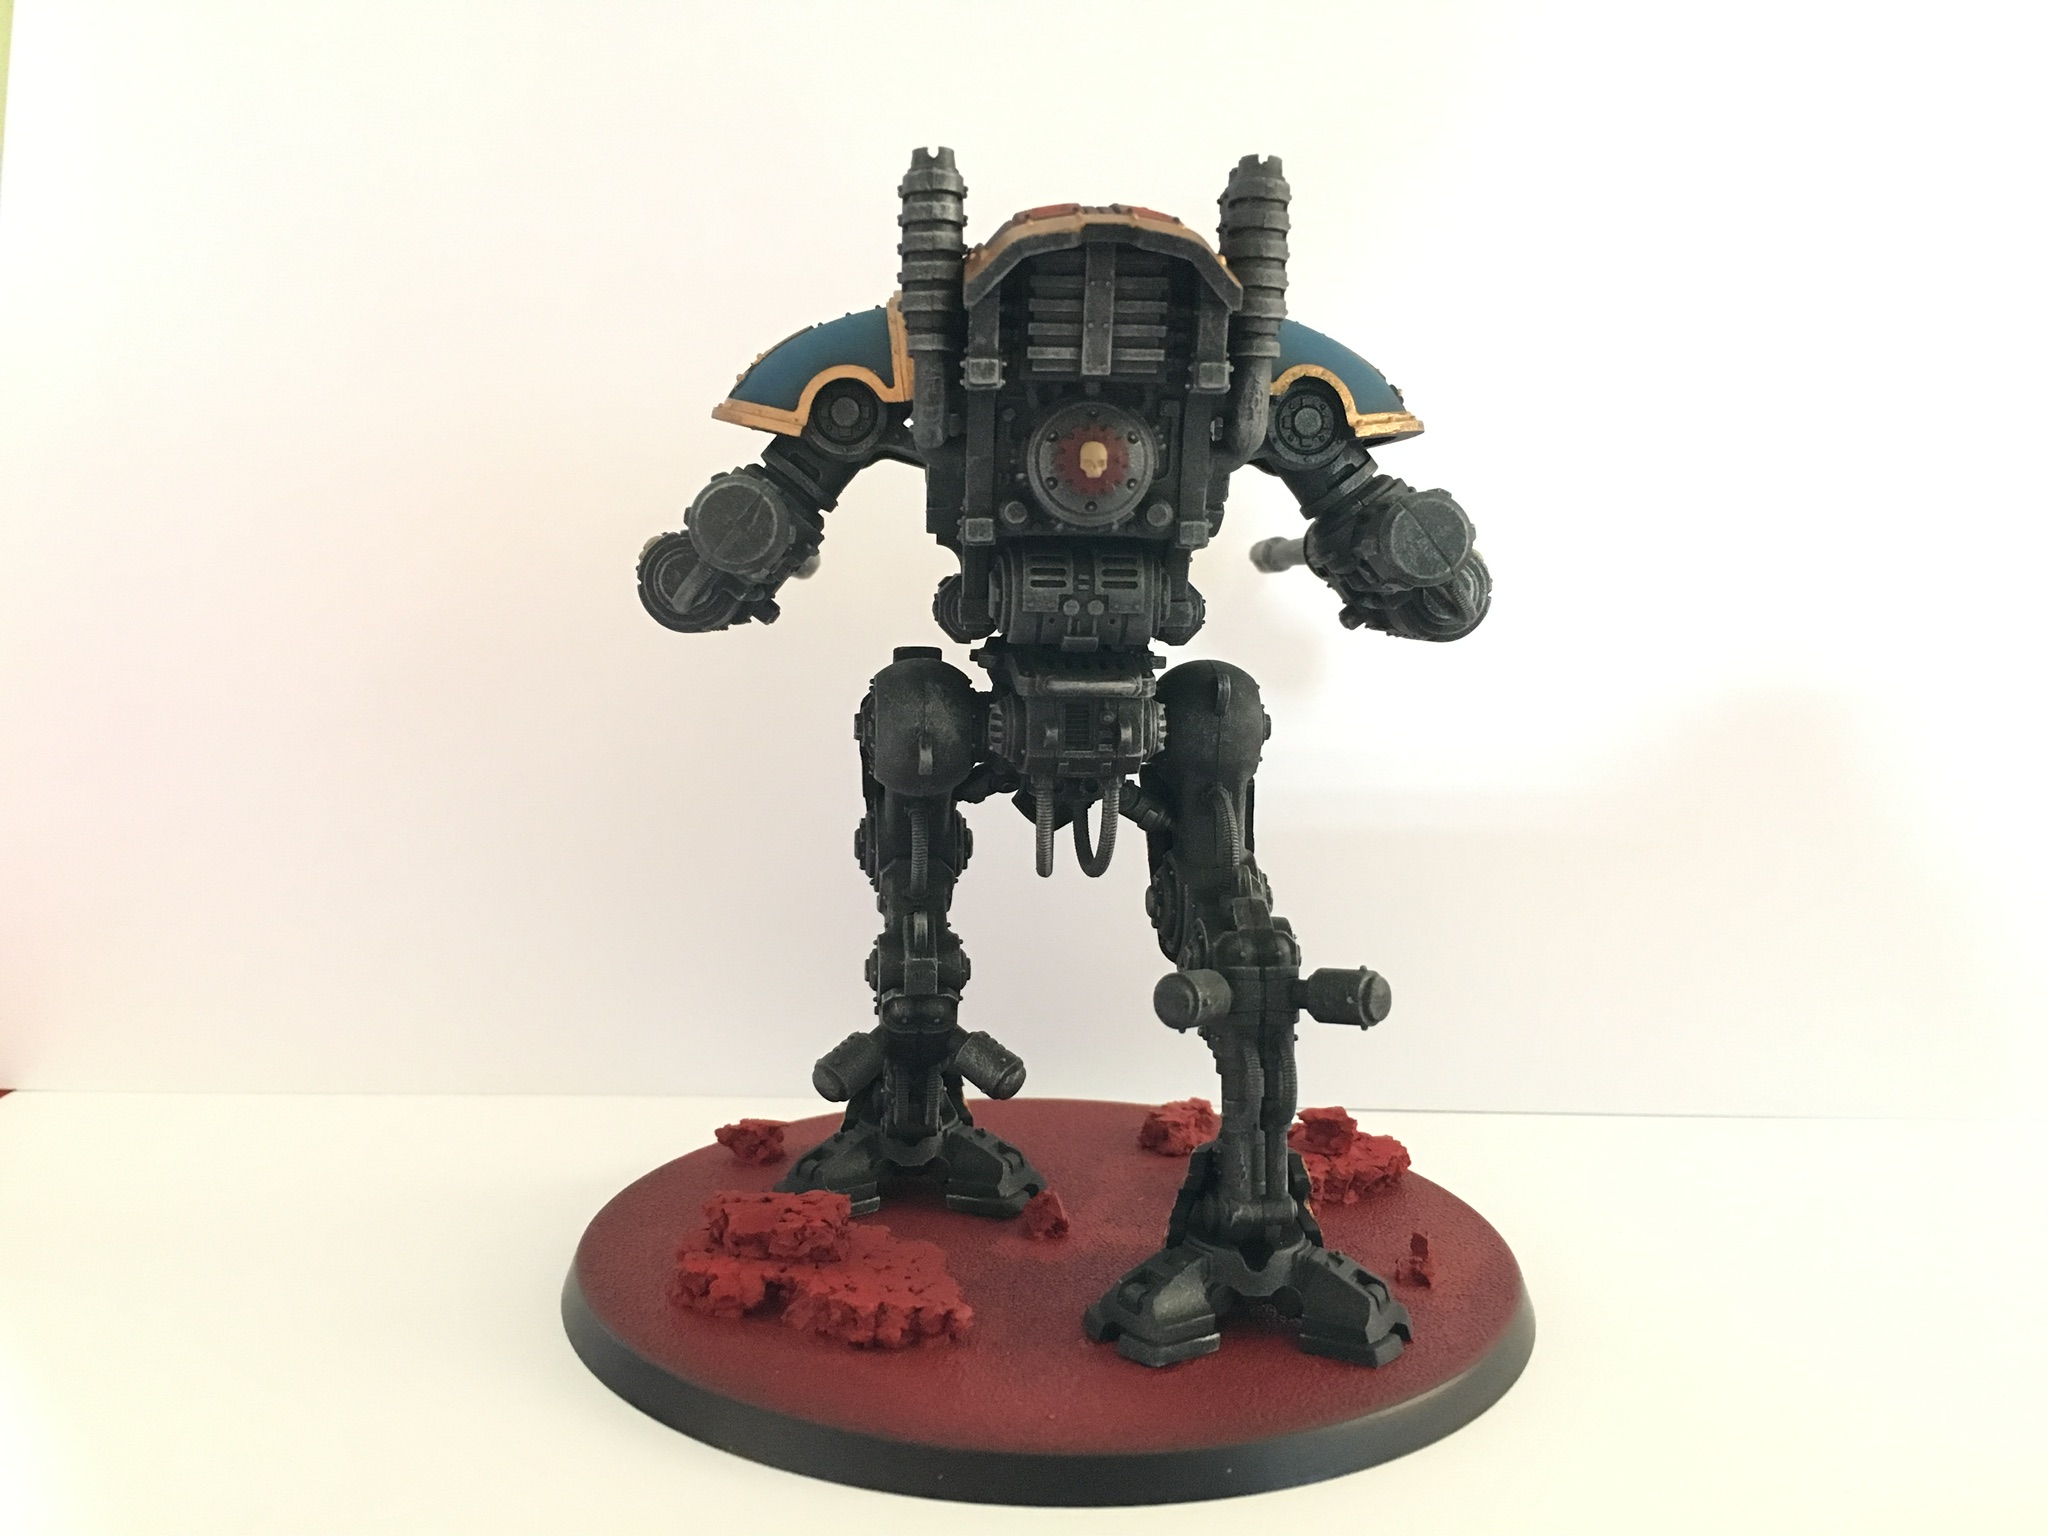
With all the modell in one piece now and glued down to its base, I started applying Citadel Martian Ironearth. Remember to apply this very thick to get this nice effect of crackled martian earth. When the base has tried (I gave it about 12hrs), I applied a drybrush of Vallejo Elf Skintone to highlight the details and cracks on the base.

Getting to the details
Then I applied the other layers of paint. Vallejo Bonewhite and Citadel White Scar on the skulls, Vallejo Glorious Gold onto the rims.
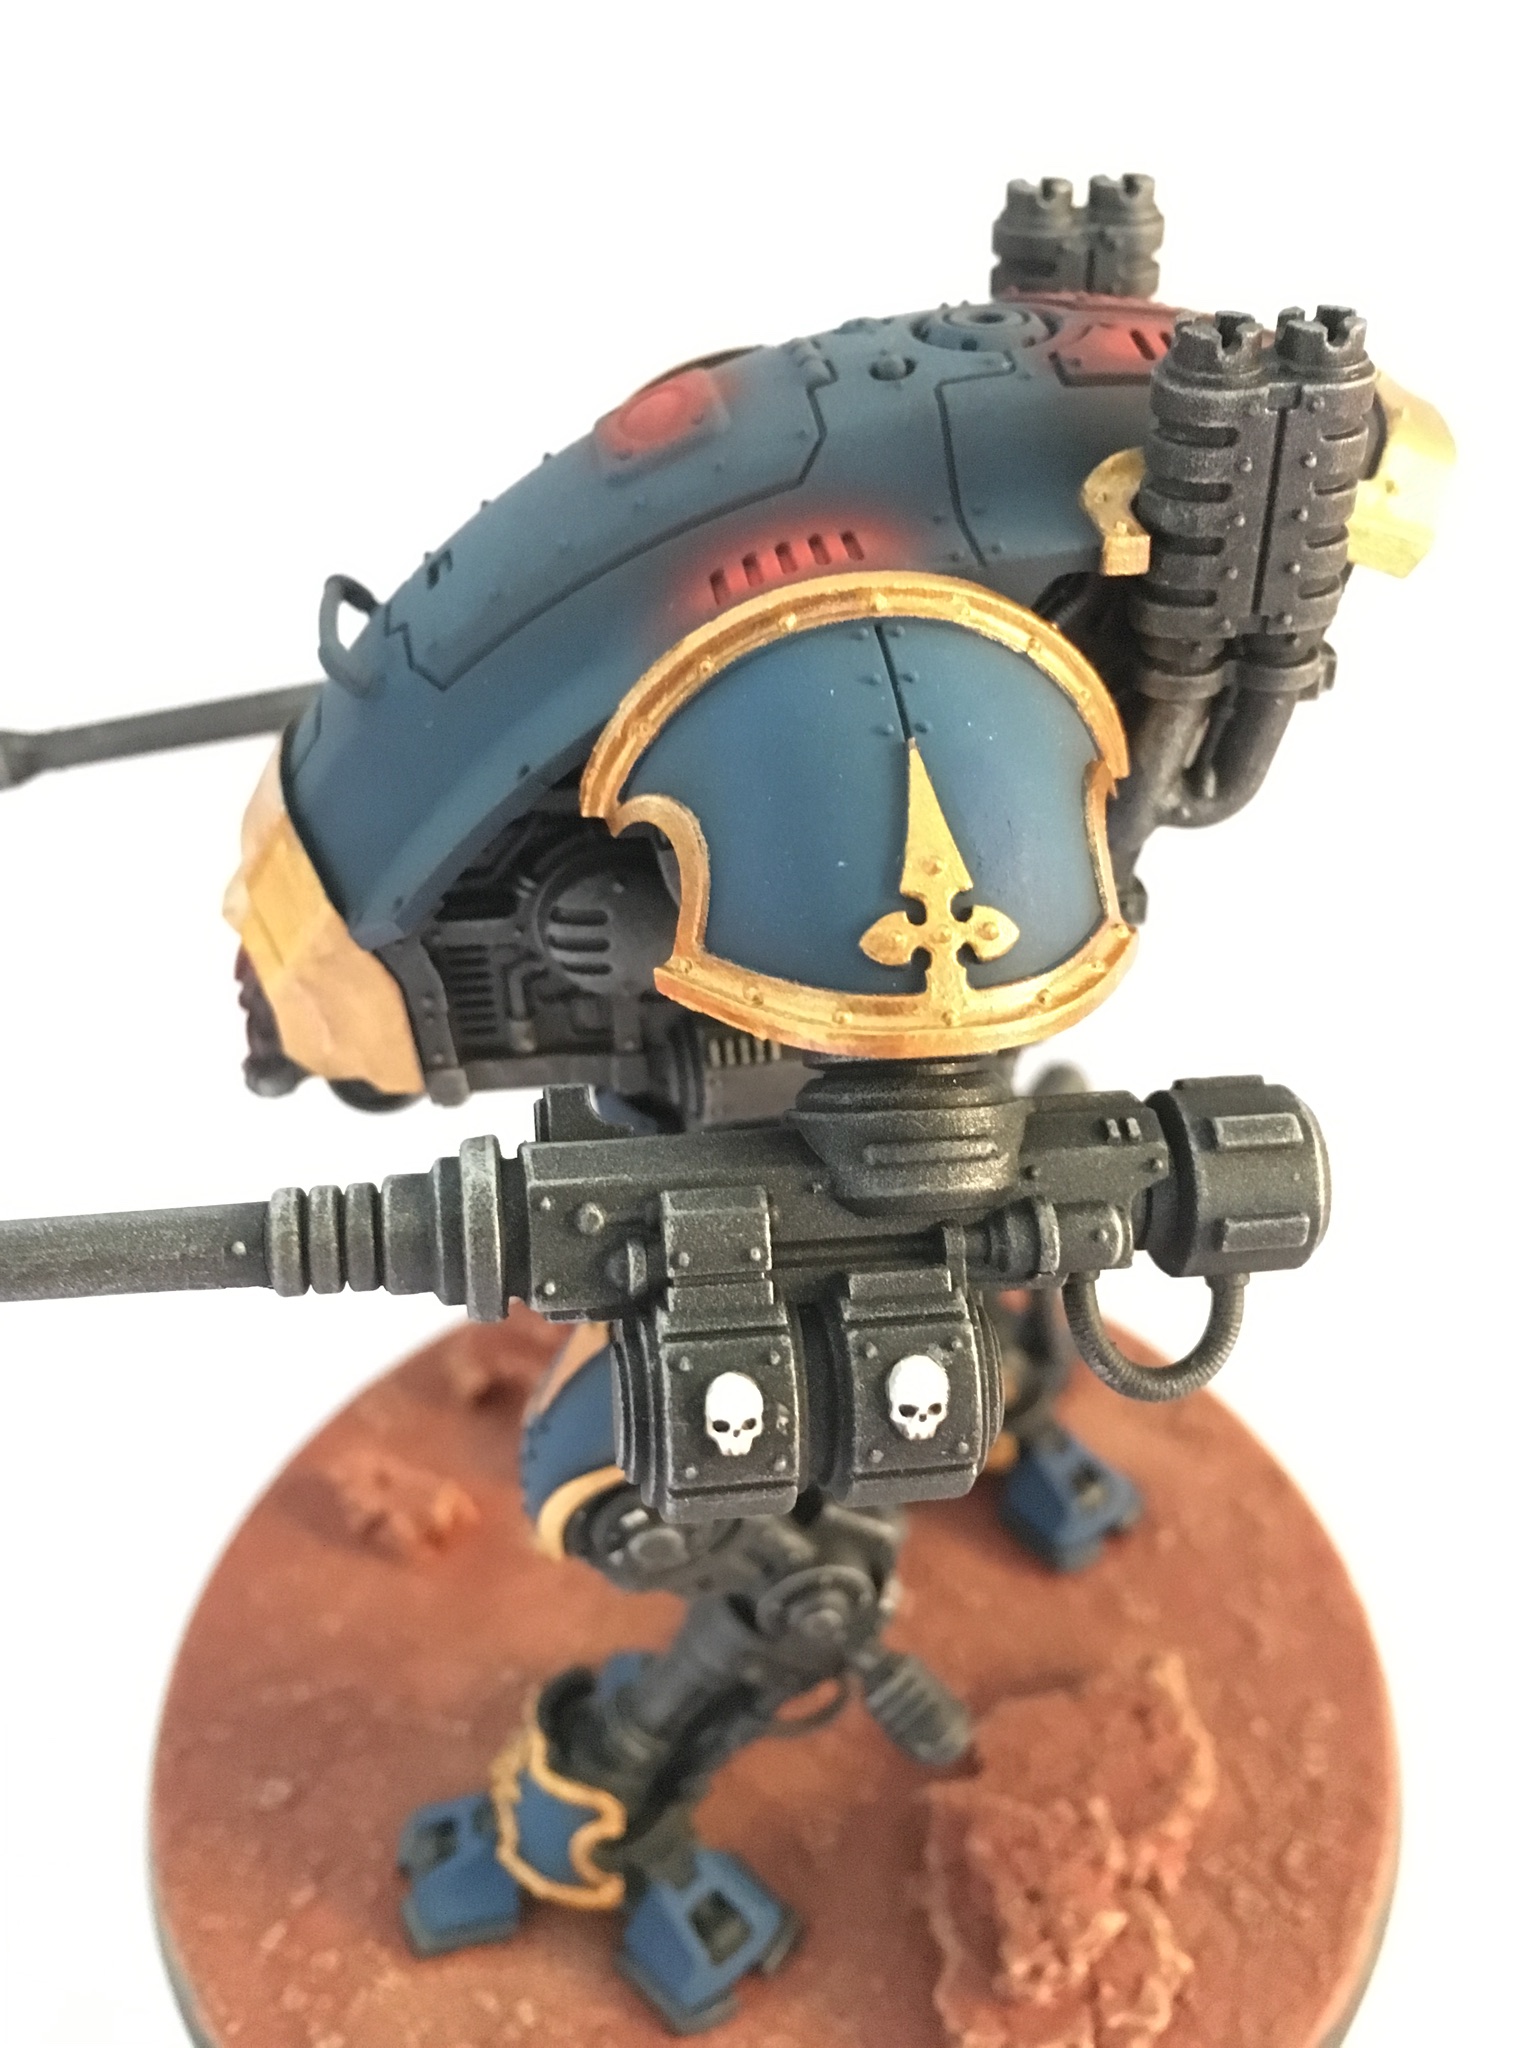


Coming closer to the end, I started edge highlighting wit Citadel Fenrisian Grey for all the blue parts and Citadel Stormhost Siver for all the golden parts.

Getting to the details
Then I applied the other layers of paint. Vallejo Bonewhite and Citadel White Scar on the skulls, Vallejo Glorious Gold onto the rims.


Coming closer to the end, I started edge highlighting wit Citadel Fenrisian Grey for all the blue parts and Citadel Stormhost Siver for all the golden parts.
Finishing steps
Finally the decals which will enhance this model significantly. Apply the Vallejo Decal Fix first, wherever you plan to have a decal later. I cut out all the decals I wanted and put then into some water. Placing them is very easy on this model as it does not have extremely curvy surfaces. However, to make sure the decal sits nicely, I applied some Vallejo Decal Softener on top of every decal.

As soon as the decals are dry, I gave them some Army Painter Antishine to surpress their shininess. With that done, I did the final steps on this modell. I painted the rim of the base with Vallejo Black Surface Primer using a brush, applied some highlight on the main guns with Vallejo Glorious Gold and Vallejo Black Surface Primer to give the guns a used look and I glued down all the tufts. Last, I applied a matt coat of varnish wit Vallejo Mecha Varnish.
Done. Hope you enjoyed reading!