


Resolution 2020: Tainted Grail The Fall of Avalon play through


Chapter 2
 This chapter did not end well...
With the menhir lit Beor had to decide what to do next. Either head west to follow the first band of adventurer’s, head east to Kamelot, or explore the island. Since Beor had already found a lead as to the previous adventuring party’s fate, he chose to follow that up. He just had to gather enough wealth to bribe the old man in the Warrior’s Fair.
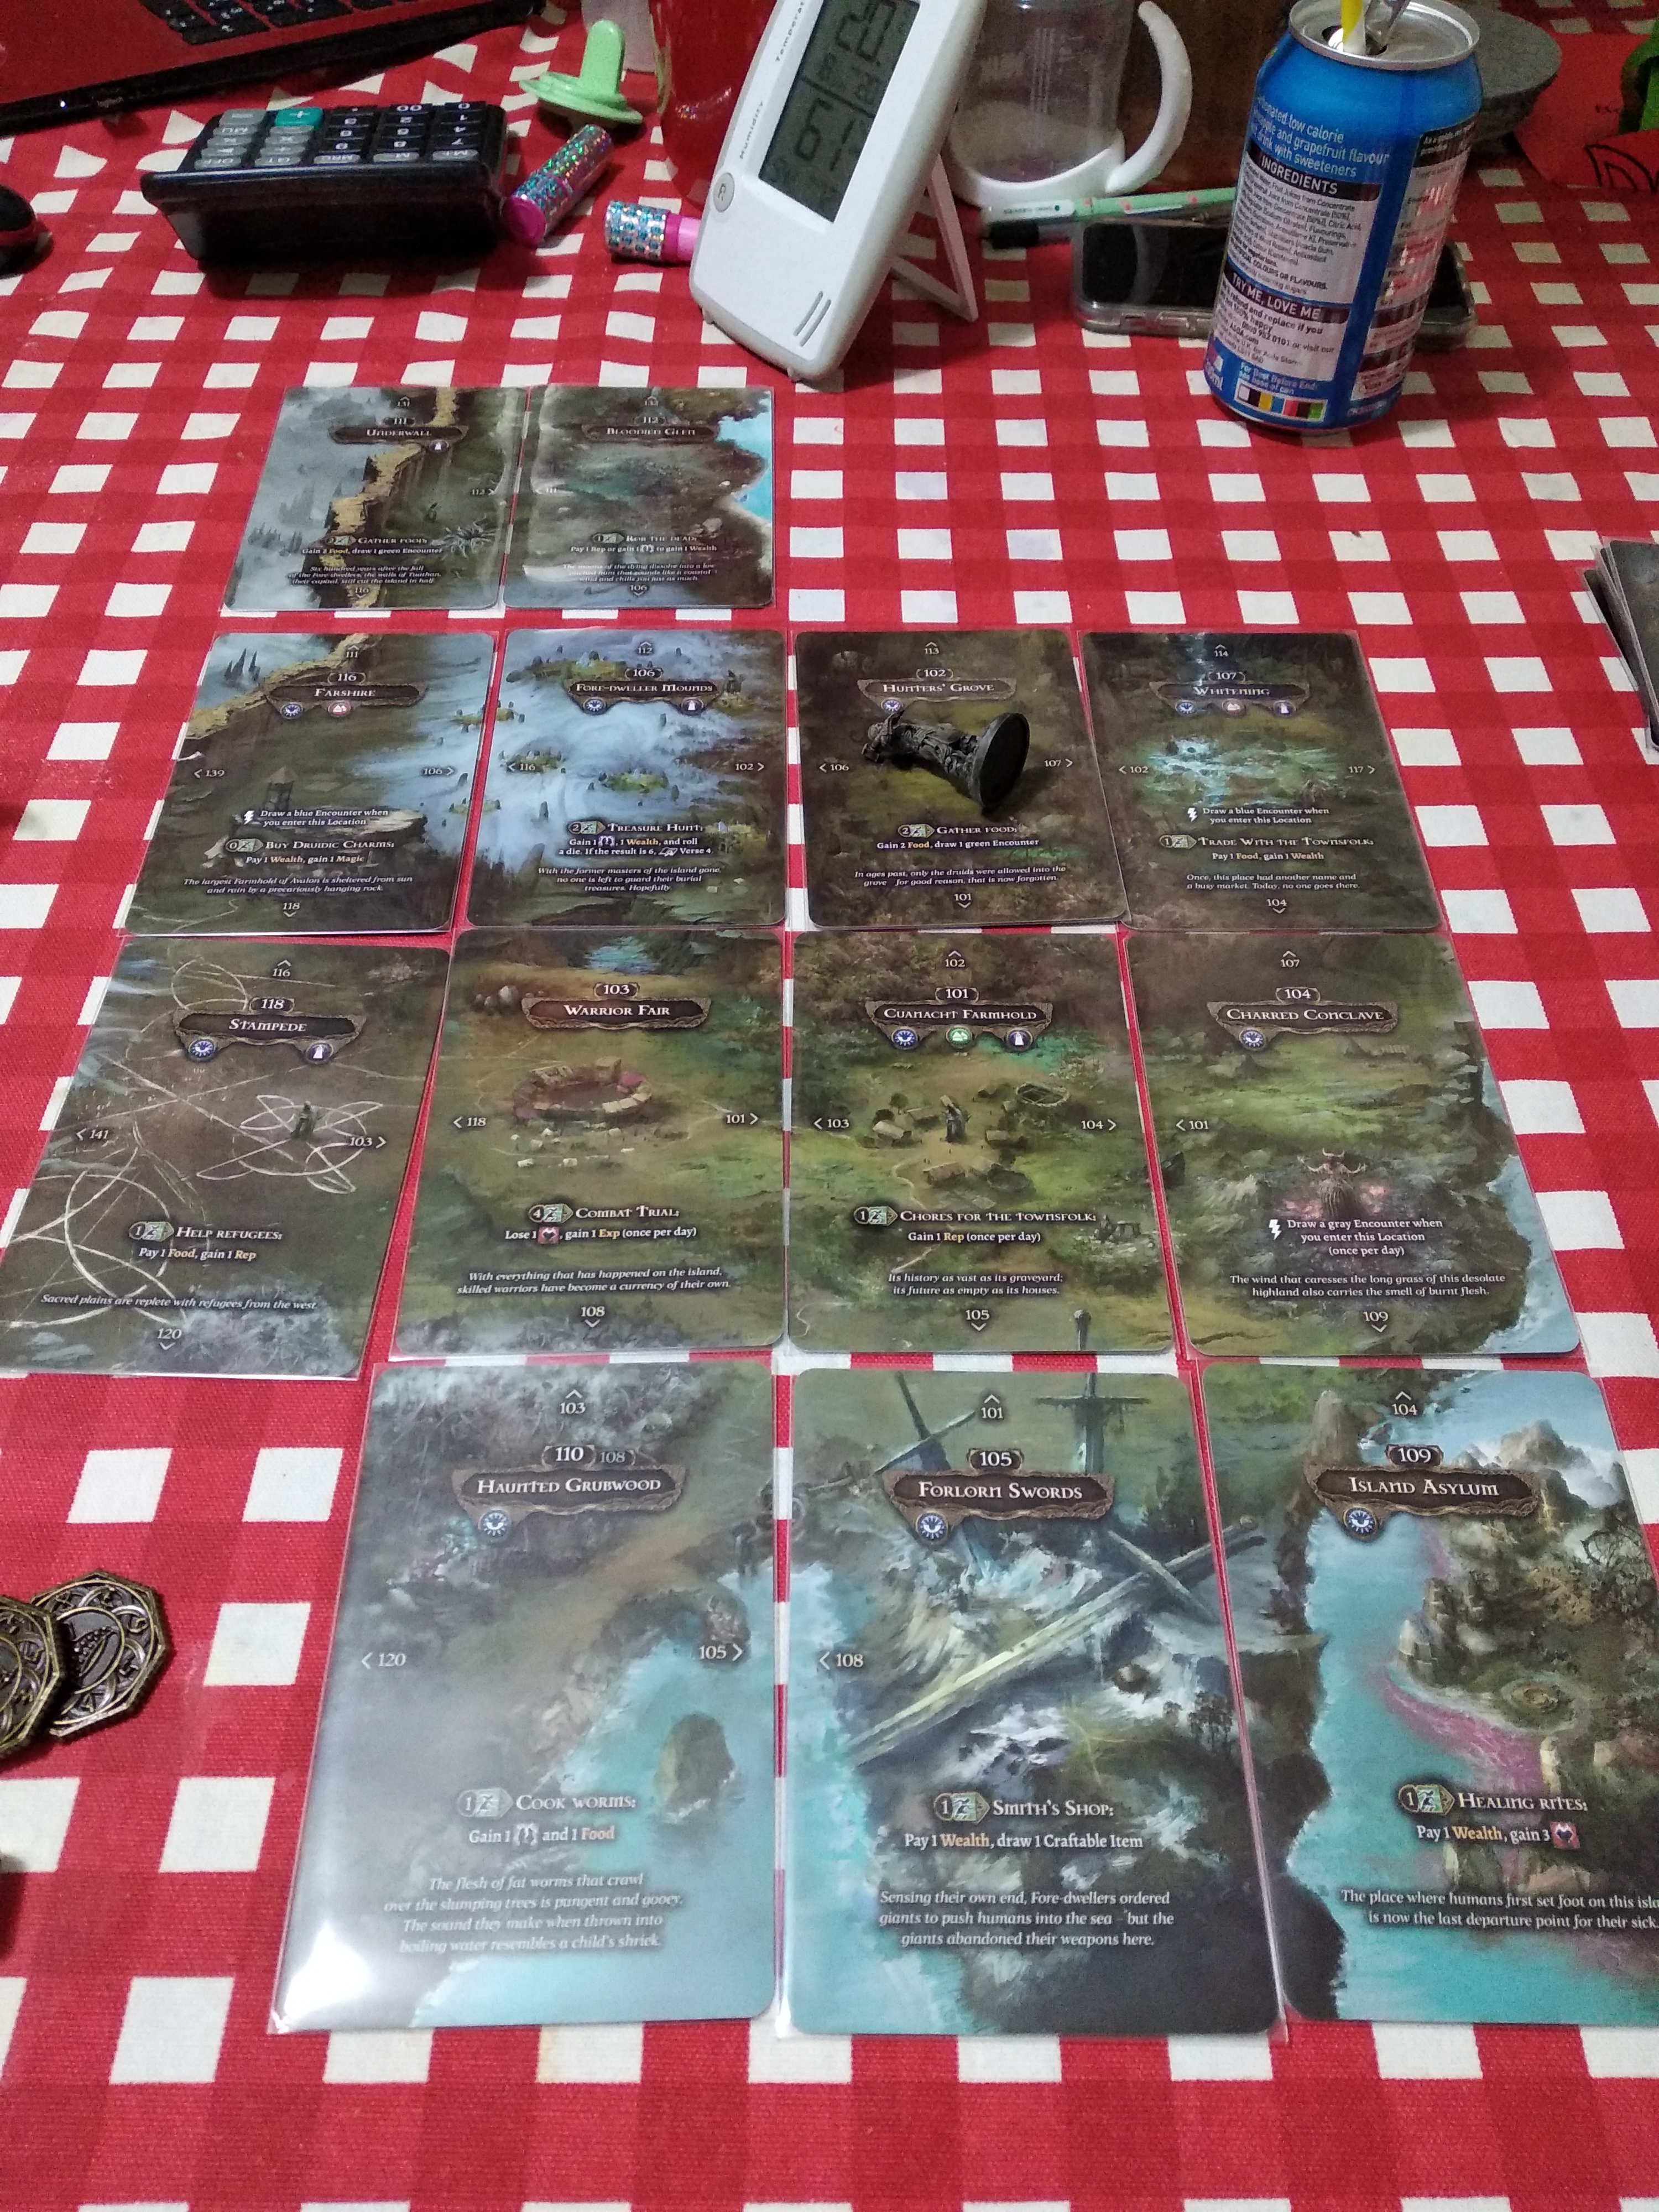
Beor travelled west to Farshire and was immediately confronted by a swindler out to trick Beor out of his wealth. Luckily Beor came out on top. Exploring Farshire’s market Beor stocked up on food and then an old hag offered to sell him useful trinkets. Intrigued, Beor followed her to her hovel where he found she had hammer and chisels made of the same mysterious substance that the smith at the Forlorn Swords had had. Beor had to buy them, but was now broke.
Beor wasn’t too concerned, he could just search the Fore-dweller Mounds again to amass more wealth, so back to the East he travelled. With enough wealth to bribe the old man in hand, Beor thought it best to relight Caumacht’s menhir while he passed by. But when Beor tried, he found he required yet more wealth.
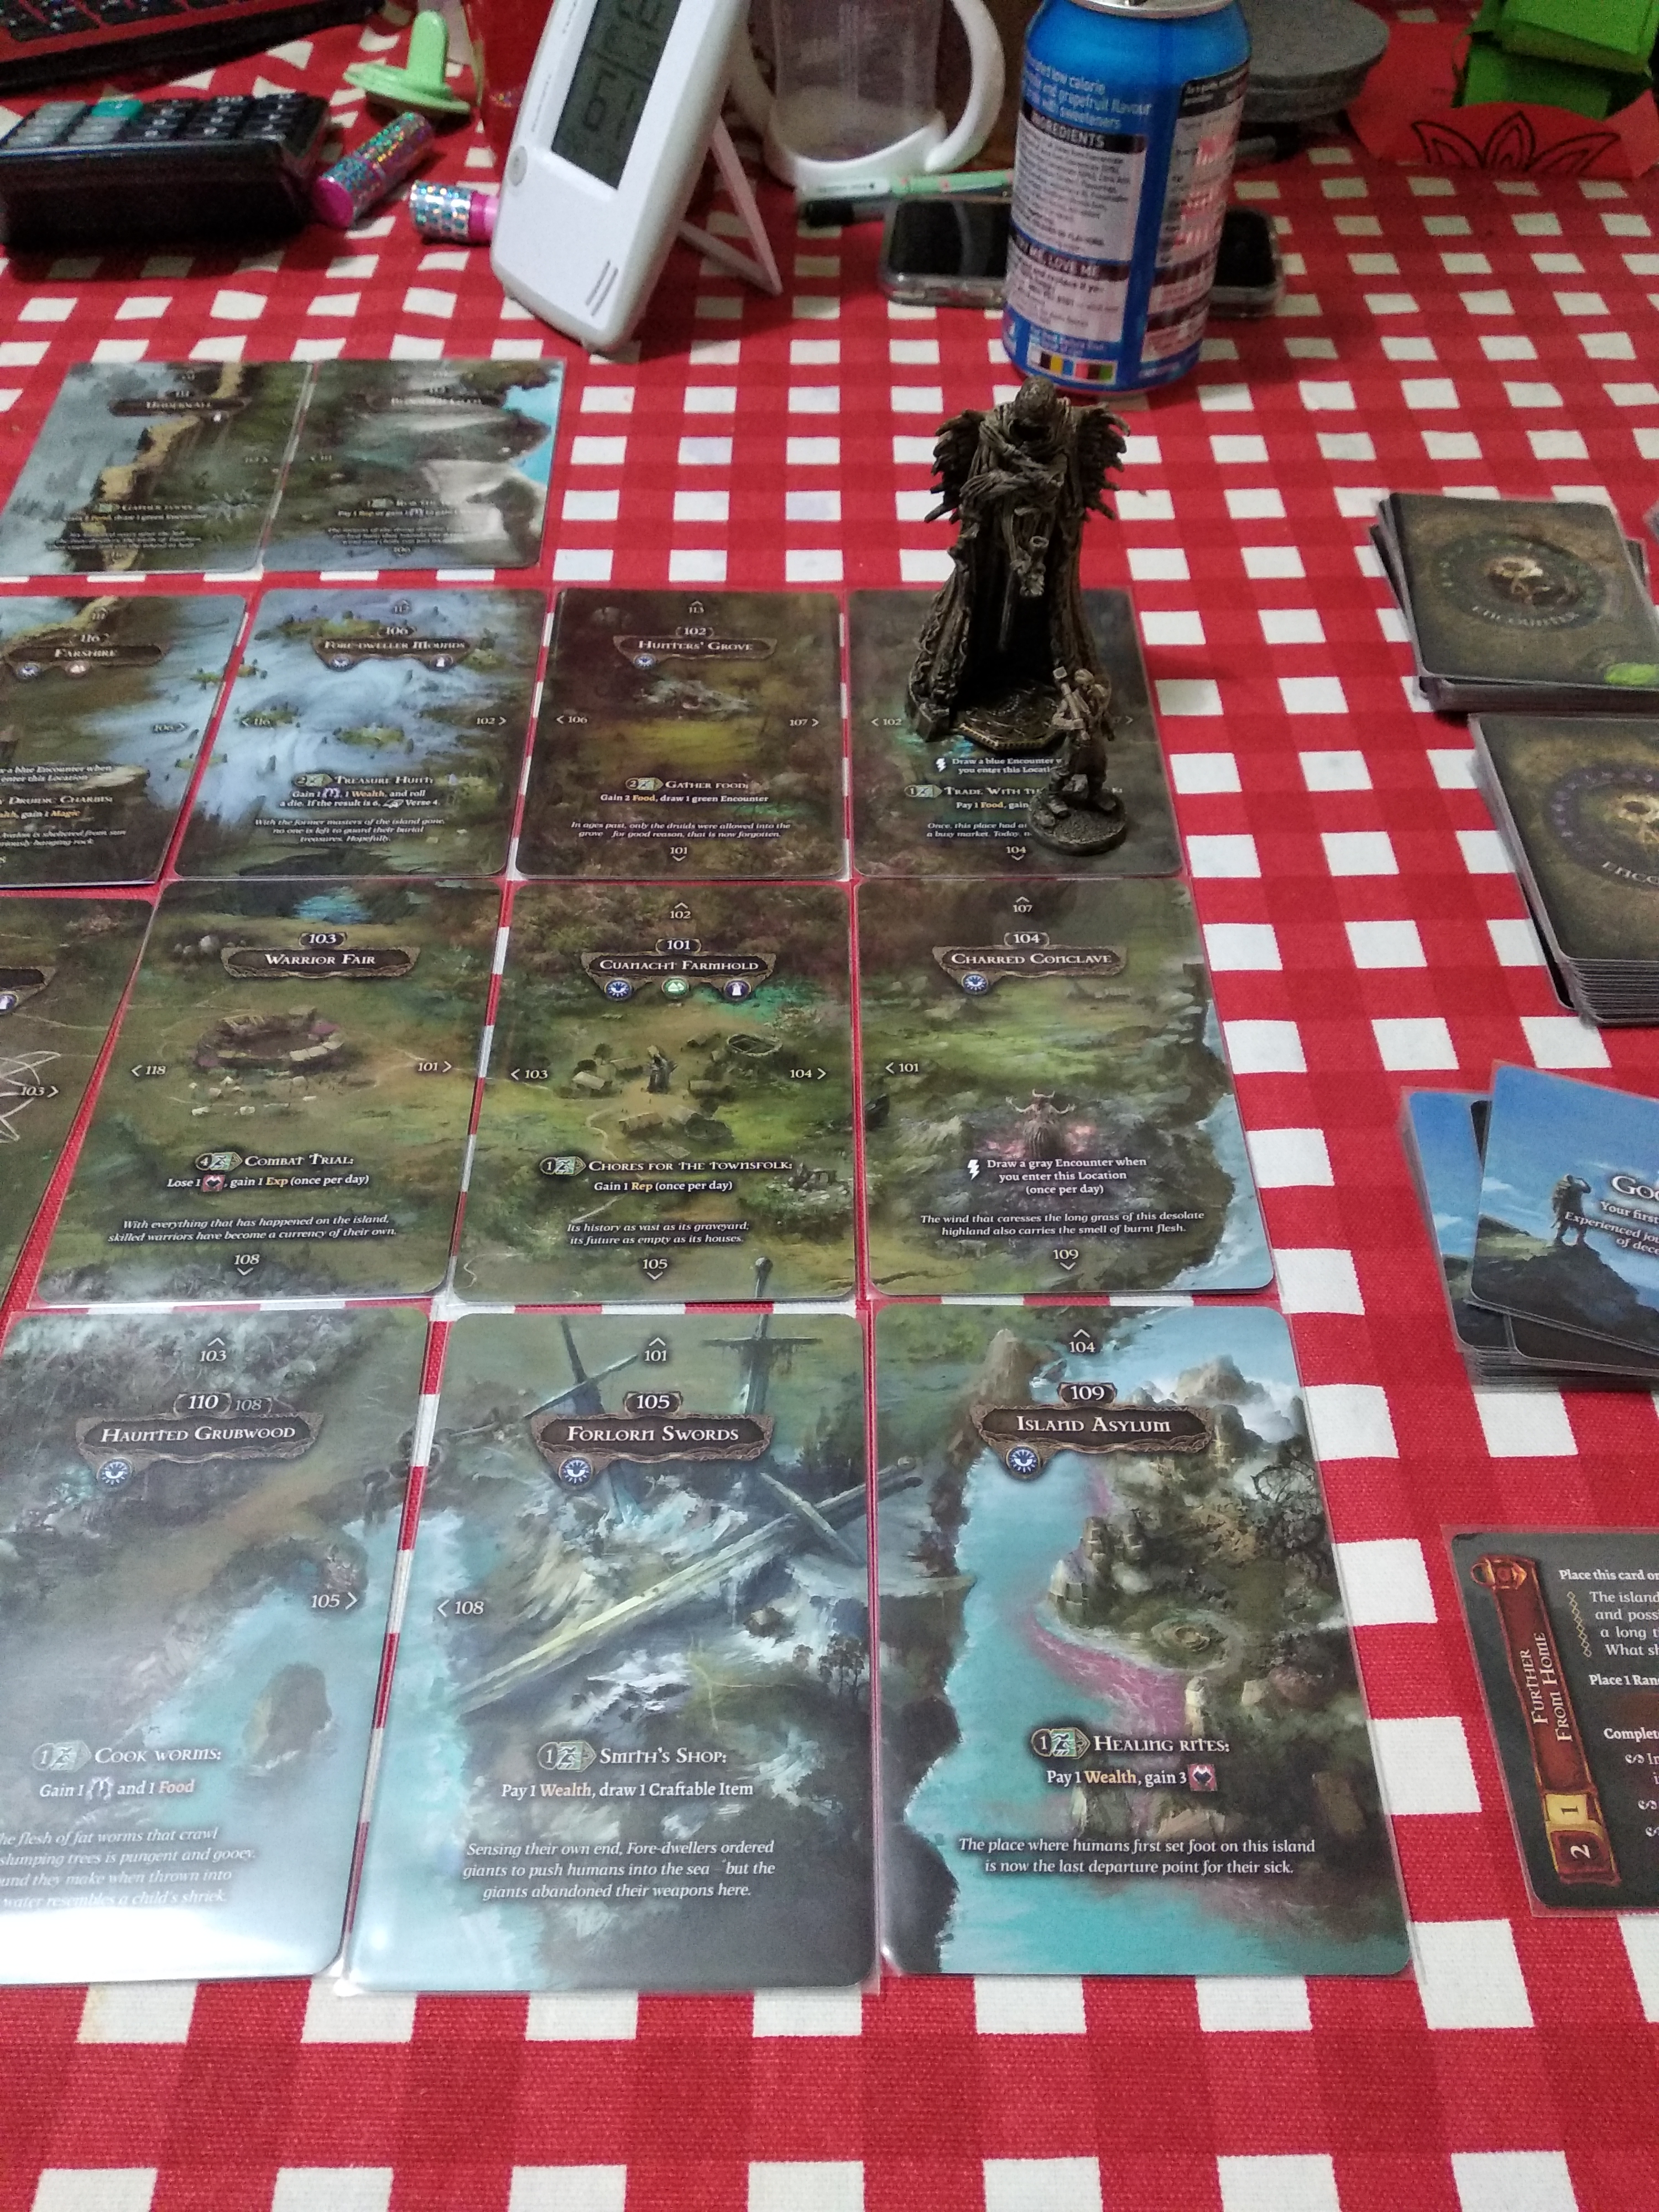
So Beor back-tracked again, doing some hunting in the Hunter’s Grove and raiding the Fore-dweller Mounds for yet more wealth. The hunt didn’t go too well and Beor was slightly injured. After relighting Caumacht’s menhir he had to spend a day their recuperating.
Finally Beor reached the Warrior’s Fair and bribed the old man. Disappointingly all Beor learned was that one of the adventurer’s had died and that the others could be found to the west, being pursued by the spirit of a Fore-dweller. Beor travelled west, but was attacked by a wild animal that severely injured him and broke his hunter’s spear to boot.
Beor once again retreated to Caumacht to try and recuperate, but once there found he was running low on food. As he travelled north to the Hunter’s Grove the menhir at the Fore-dweller’s mound went out, and the lands to the west were cut off from Beor once more.
Misfortune left Beor trapped in the Hunter’s Grove gravely wounded, without the food to recover his health from resting and without the energy to go hunting. Beor laid there for two days slowly starving, until the menhir in Caumacht also went out.
Beor was consumed by the wyrdness…
Yikes that proved a lot harder than I was expecting for chapter two!
I got off to a good start early on coming out on top with my first blue encounter (not Beor’s strong point) and then finding the magic hammer and chisels that allows me to relight Caumacht’s menhir.
I soon started to get a sinking feeling though when I realised I was caught in a loop of seeking wealth and hunting for food, all the while slowly loosing health due to combats, violent storms, and Beor’s special rule where he loses one health if he exhausts himself. I also seemed to suffer from bad weather hampering movement whenever I needed to travel far in a turn.
The game has a mechanic whereby if you fail a chapter the All-mother bends time to allow you to restart the chapter with pre-defined resources, but at the cost of any unspent xp and that events already passed in the chapter remain in effect (so the time wasted running in circles will still count against me when I try again).
For attempt two I will start with the menhir in Whitening lit and try to head East to Kamelot. I also noticed the Whitening is an easier place to gain wealth than the Fore-dweller Mounds (hunt for food in the Hunter’s Grove then exchange on a 1:1 basis for wealth in Whitening).
Even with the game going so badly I really enjoyed it. The depth of the game is immense.
 This is how chapter two take two will start.


Leave a Reply