


Helm deep from the lord of the ring


the first brick
Welcome back to a new update on making Helm’s Deep.
In the second chapter of this adventure I had published how the map of helm’s Deep would be composed, not realizing that I had forgotten to consider that the internal circular masonry should also have been double. Fortunately, during the construction of the wall, as you will see from the photos, I had time to draw the section of the internal wall as well.
The diameter of the new wall I added measures 20 cm.
I give you a little advice for the construction of the wall. Start by gluing the first layer of bricks with pva (as I did with the curved wall) and let the glue dry completely. At this point, continue the construction of the wall by adding three to four layers of bricks at a time, and each time let the glue dry well. In this way, in adjusting the position of the bricks you do not risk moving the underlying layers creating a crooked wall.
In other words, if you can, have patience in building the wall and dedicate time to it every day, it is an activity that will take you little time at a time and will guarantee a good result.
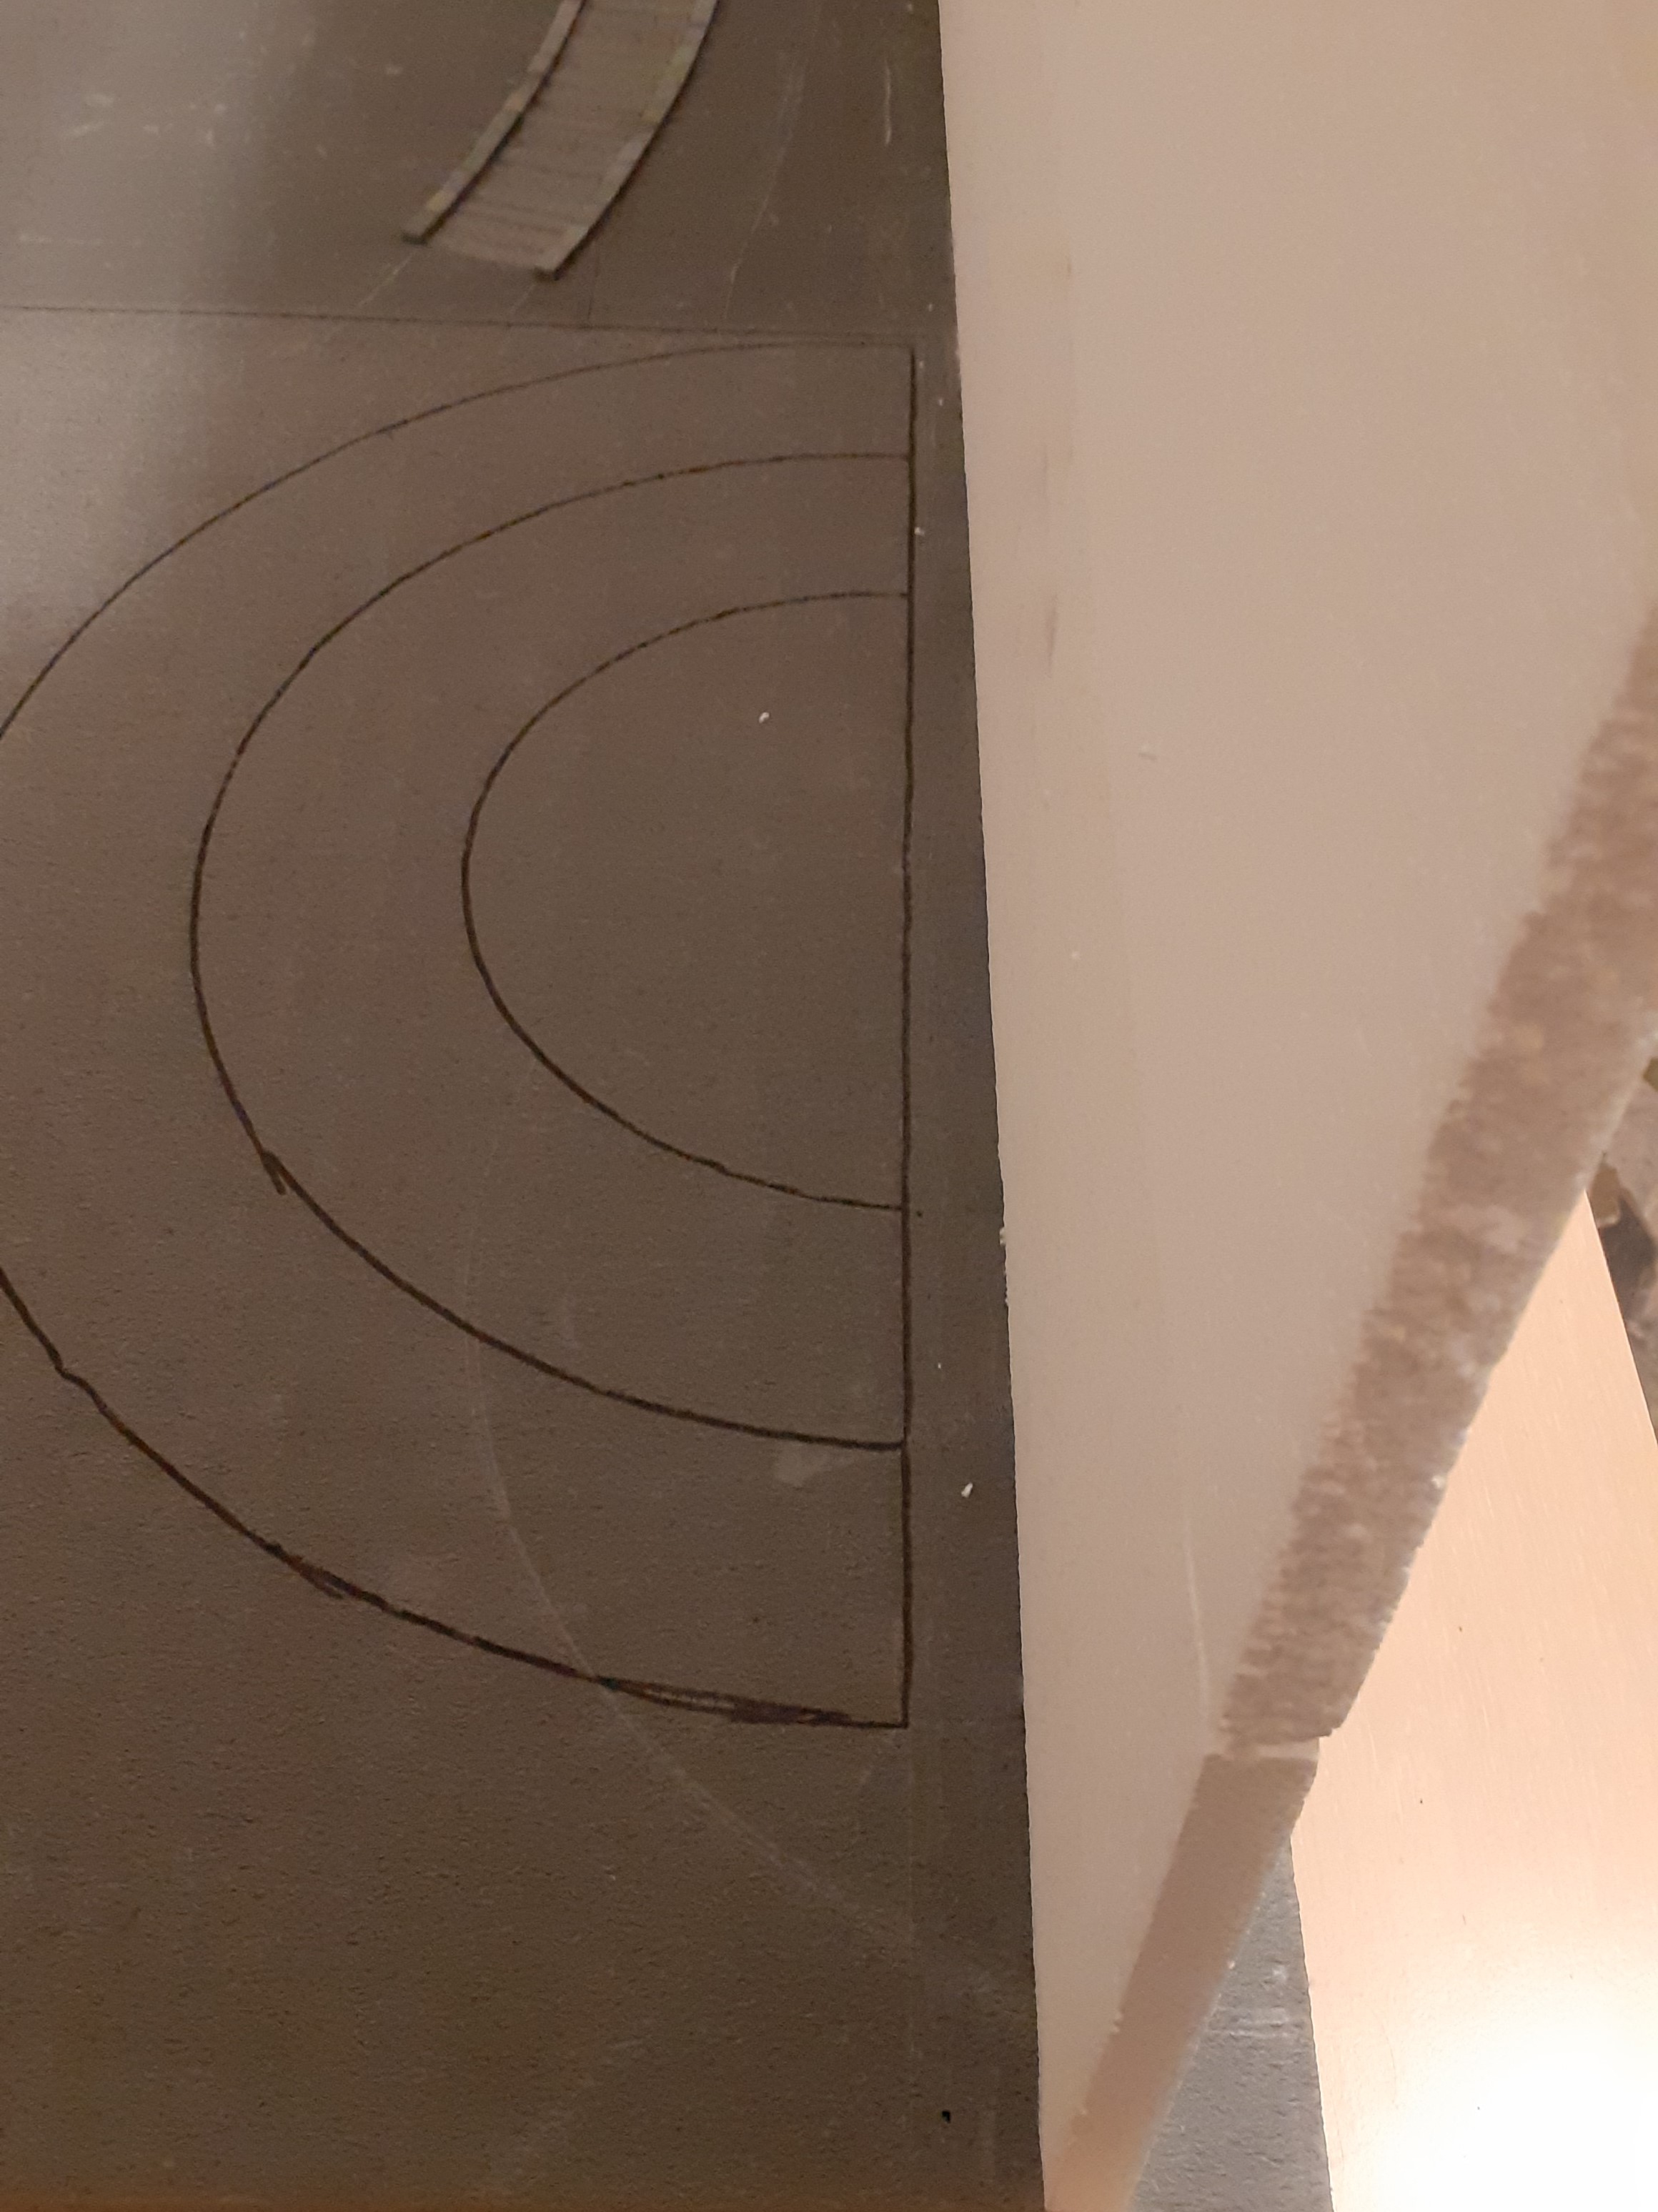


Since the innermost curved wall (the one of 20 cm in diameter) will be mostly hidden, I decided to glue some pieces of polystyrene panel that will act as a support for the highest square, in this way I avoid using bricks unnecessarily. (MY PRECIOUS!)
The panels measure 45 cm in height, the other measures are not important, as long as they are sufficient to create a solid structure that will support what will be built later and that they do not interfere with the construction of the wall. I am attaching a handmade scheme.


See you next update!


Leave a Reply